This tutorial will give you many useful survival tips when going to the Nether.
Introduction
The nether can be a dangerous hellscape for ill-prepared players. It is filled with a host of exclusive enemies not found in the overworld: ghasts, magma cubes, and the neutral zombie pigmen. The terrain is much harsher to navigate than in the overworld, with one false step potentially plunging you into an ocean of lava. It is also where nether fortresses can be found, housing other threats such as blazes and wither skeletons. This guide is intended to help you increase your chances of survival in the nether, opening up a lot of gameplay such as brewing, nether hubs, the wither boss, and even lucrative mob farms.
Making a nether portal
"No diamond" portal making.
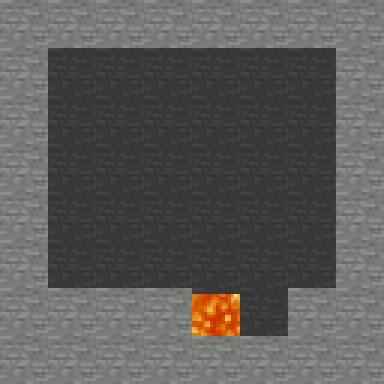
To make a nether portal, the player will need 10 obsidian blocks (the corners do not have to be obsidian), plus flint and steel. Although quite expensive, a fire charge can also be used as a one-use portal lighter. However, the player will need to go to the Nether to get the material to make a fire charge.
Place the obsidian to make a hollow upright rectangle, with the inside measures being two wide by three high (each at least, more are possible as well) and one block thick. Use something other than obsidian for the corners unless you have an abundant supply of obsidian. Once the player has made the frame of the portal, they can use the flint-and-steel to light one of the bottom pieces of obsidian. The inside of the frame should light up with an eerie purple glow, meaning that the portal is now active and ready for use.
Using lava and water
If the player does not have any obsidian, but has buckets and available lava (a small lake or many flows), it is possible to "cast" a portal in place. Note that this process will not work if the player is already in the Nether - as if this is the case, the player will have plenty of lava, but no water. The only way to place water in the Nether is by putting it in a cauldron, using commands, placing a pure water block (accessible with cheats) or custom structures.
- The player will need at least 10 lava source blocks (carried in buckets), and a bucket of water. The lava will not be needed all at once, but having at least 2 lava buckets at a time will speed up this task.
- Build a mold out of dirt for the bottom: a trench 1 wide and 2 or 4 long.
- Fill each block of the trench from a lava bucket, then place the water on a mold block to flood the lava and turn it into obsidian (if it turns into stone or cobblestone instead, then the player may have misplaced a source block. One can fix this problem by mining out the stone or cobblestone and trying again).
- Extend your frame upwards and repeat the process to mold the next layers: three levels of two separated pits for the portal sides, then another trench for the top.
- Dig away the dirt frame, and light the new portal!
- If for some reason the player needs to come back, keep the portal housed in a lit building, but do not use beds because beds blow up in the Nether when the player tries to sleep in them.
Preparing for the Nether
A well prepared inventory
Being well-equipped is essential for survival in the nether. Lacking a certain item in an unfortunate circumstance can lead to death. However, be sure not to bring any items that have little or no use for your objective, so as to reduce the number of items you will lose should you die.
Tools
One of the most important tools in the nether, especially in a fortress, is your weapon. A melee weapon of iron or better is almost essential. A bow or crossbow, along with 32-64 arrows, is enough to dispose of any enemy. While melee weapons will do you well in close quarters combat, you should consider bringing a crossbow or a bow in addition to your melee weapon, as ghasts can be troublesome without them. However, ghasts can still be dealt with even without a bow and arrow; punching their fireball to deflect it back to them can be an acceptable way to deal with them if bringing a ranged weapon is not an option.
Armor is also very important. Even if you are not planning on doing much fighting, armor reduces the amount of damage you take from being submerged in lava, making it a potential life-saver should you accidentally fall in lava. A full set of iron armor should be enough to boost your chance of survival. You should only consider bringing diamond armor if you are confident enough in your ability to survive, or else you may die and lose it. Shields can be very useful for fighting the skeletons present in nether fortresses.
An iron pickaxe or two (or a single diamond pickaxe) can be very useful, as you can use it to clear a path, or to gather some blocks if you have run out. It can also be used to carve a staircase into the side of a nether fortress to gain access to it.
Enchantments offer huge advantages for surviving in the nether, if you have access to an enchanting table with bookshelves. For your weaponry, you should consider damage-boosting enchantments on your weapons (e.g. Sharpness and Power). Be aware that all mobs in the nether (except for regular skeletons found in fortresses) are immune to fire damage, so enchantments like Fire Aspect should not be considered. For your armor, a combination of both Protection and Fire Protection will be very useful - although enchantments such as Aqua Affinity offer little to no use in the nether. Enchanting your boots with Feather Falling can save your life, and allow you to drop down onto low terrain safely. Enchanting your pickaxe with Efficiency is not too useful, since most of the blocks you will be using it on is netherrack, which already mines quickly with even an un-enchanted iron pickaxe. The only pickaxe enchantment with a real advantage in the nether is Unbreaking, as it can save you bringing multiple pickaxes.
It may be prudent to bring along a flint and steel. Even if you opt not to bring extra obsidian for an emergency exit portal, a flint and steel can still be useful, as there is a chance a ghast can smash the portal, potentially trapping you in the nether if you do not have a flint and steel to relight it.
Ensure your tools have enough durability to last long enough for you to achieve your goal.
Blocks
In general, blocks are very handy to bring along with you in the nether. They can allow you to pillar jump to reach high places, block off mobs from reaching you, and allow you to bridge across to different masses of land over the lava oceans. Two or three stacks of cheap, non-flammable blocks (e.g. cobblestone) should be enough for a normal trip in the nether. Blocks that are affected by gravity (e.g. sand or gravel) can be useful to get down from a high place; for example, from the top of a nether fortress bridge. The nether's terrain is tough to navigate, so bringing these blocks can prove highly useful. A pickaxe can be useful in the event you run out of blocks, as it can be used to mine some of the abundant netherrack.
Bringing 10-14 obsidian is a good idea too, in the event you get lost and lose your portal home. Bear in mind that you will also need your flint and steel to light this emergency portal.
General supplies
Food is as important in the nether as it is anywhere else in the game. If you run out of food, you lose your ability to sprint, and, more importantly, regenerate health. Running out of it can be fatal. Think about how long you are planning to be in the nether, and how much fighting you might do, and bring an appropriate amount of food for it. Keep in mind that different foods provide different amounts of saturation, which is the most important thing for healing. The more saturation a food has, the more health you will regenerate from eating it. Steak and porkchops are among the best foods for early gameplay, with bread being an acceptable alternative.
Suspicious stew is a niche, often overlooked, food item. It is also relatively cheap, requiring only a bowl, two mushrooms, and a flower of your choice. Suspicious stew crafted from oxeye daisies provides 7 seconds of Regeneration, which can save your life if you are low on health with enemies nearby, or if you have been afflicted with Wither from a fight with a wither skeleton. Suspicious stew crafted from dandelions or blue orchids provides much more saturation than regular foods, which can also be used to heal a lot of health in a very short amount of time. However, it is worth noting that stew cannot be stacked, so bringing a lot of it will quickly fill up your inventory. Consider bringing around half a stack of "regular" food, in addition to a handful of suspicious stew crafted with the aforementioned ingredients. Use the regular food for maintaining your hunger, and the stew as a method of quickly regenerating health in dangerous situations.
If you have already explored the nether and gotten some blaze rods, and can thus brew potions, you should do so. Fire Resistance potions are extra valuable in the nether, as falling into lava is always a possibility. Splash potions of Healing can also save your life if you find yourself low on health in combat, like the suspicious stew (mentioned above).
A few stacks of torches can provide a means of leaving a trail, allowing you to find your portal again if you lose it. (Although, in this case, the use of coordinates is often a more practical solution.) Remember that compasses do not work in the nether, so do not bring one intending to use it to find a home after your adventure. Torches are also useful for marking which parts of a nether fortress you have already visited, so less time is wasted exploring areas of the fortress you have already exhausted.
A small handful of empty buckets can be useful for removing lava in awkward places. They can also save your life if you run into one of the many single blocks of lava while digging through the netherrack.
Ender pearls can be extremely useful should you fall into lava. They are also useful for crossing lava pits, or reaching otherwise hard-to-access areas. However, you should consider that ender pearls are relatively hard to get, and you may want to save them for activating the end portal later (if you have not already done so).
Enter The Nether
When the player first enters the Nether, they may be struck by the amazing structure of it. Don't get too caught up in the scenery, though, as the Nether is a dangerous place. For the player's first visit, the main threats will be falling, fire, getting lost, and ghasts. The falling and fire can be handled in the usual ways, but the most urgent threat will most likely be ghasts, on account of the fact that the other hazards don't move or shoot at the player. That said, don't be careless; sudden drops and holes can be hard to spot in the confusing netherrack landscape. The player may want to use a resource pack to replace the eye-hurting default texture for netherrack. Fire is more dangerous when there's no water to put yourself out with! The player may meet some magma cubes, but those are straightforward to kill. Do not mess with the zombie pigmen just yet!
When you first arrive at the Nether, stay in the portal until the chunks around you load so that you can see what the immediate surrounding area looks like. Often, a nether portal will generate right next to a giant lake of lava or a very high drop-off. If this is the case, then walking out of the nether portal upon arrival will likely result in the player's death.
Lag
With a slower computer, the player may encounter a massive lag spike upon entering the Nether. The workaround involves doing the following: after the player steps out of the portal, turn on the F3 debug info, then Esc to pause the game. Note the "Chunks Updated" line—even while paused, the game is continuing to load chunks and update them. It is wise to also note down the coordinates of the portal. The player can then wait for the chunk updates drop to zero, meaning the game has finished loading the region around them. Then the player can resume play. This trick is also useful when the player increases their render distance to scan for nether fortresses, as well as when the player decreases the render distance.
Protecting your Portal
Even though hunting, exploring, and mining may sound fun, it is unwise to start doing this as soon as the player steps into the Nether for the first time. The player's first order of business is to build a cobblestone shelter around their portal. Brick, stone, and other blast-resistant blocks will all suffice, but cobblestone is cheapest in the Overworld. Take the quickest possible look around, just enough to see what kind of ground the player is building on, then start placing down cobblestone for your shelter. Unfortunately, a first portal has a disproportionate chance of coming out next to an abyss, lava lake, or netherrack wall and even if it spawns in the open, there may be multiple ghasts in view.
- If the situation is clearly impossible, abandon the original portal, find someplace safer, and build a return portal! Lava flooding the portal or multiple ghasts waiting for you can force this. You also need to get the coordinates of your portal, the same as described for "Lag" above.
- Firstly, if your portal spawned on soul sand, you have the immediate need for a floor that doesn't hobble you! Depending how much stone you brought, you may need to scant the walls, filling in with wooden fences which at least block mob vision.
- Otherwise, you should start with the walls, throwing up enough stone to block ghast fireballs.
- The player may find themselves under fire from ghasts immediately upon entering the Nether. Don't panic, just concentrate on building a wall between the player and the ghast, bouncing fireballs back to prevent too much damage. After you finish the fight or at least get a bit of shelter, relight the portal as needed, and then extend the wall around the portal.
- If you are next to a sudden drop or lava, start with the wall protecting you from that.
- If you are next to a netherrack wall, you can build an initial shelter against it, but expect to put cobblestone there too -- hopefully at a later visit, but if ghast fireballs get in, some of that wall may go away (not to mention being on fire).
- If by ill chance the player wound up with a portal floating over lava, attach the bottom layer to the outside of the ledge blocks, and do just enough to shelter the player while they're starting a bridge to land where the player can make a return portal.
- You will need at least two stacks of cobblestone for the walls and ceiling, and the floor and other trimmings may well cost another stack. Since the player will be right next to their portal, feel free to go back to the Overworld for more cobblestone as needed.
- If your portal gets blown out, don't panic, that's why you brought flint-and-steel, and even obsidian for an escape portal.
- If the player's initial portal spawn in a Nether fortress, it may seem awesome, but a Nether Fortress is not a safe place for a portal, especially if it came out on a walkway or otherwise in the open. The player should find a more suitable spot outside the Fortress to build a return portal. If the player feels obliged to leave the portal in the fortress, or cannot find a better place to put it, then the player can fortify an empty room, place a door or fence gate to control entry, and leave an iron golem in the room to deal with any spawns (make sure the golem does not accidentally wander into the portal).
Your shelter needs to be at least 5 blocks high, but the portal itself can be part of the roof. While it's tempting to do the same with a wall, it's probably safer to be able to walk around the portal on both sides. Use iron bars for windows. Make sure to leave enough space for a crafting table and a chest or two. The chests are important if the player does not want to lose too many of your items whenever you happen to die. Don't forget the door, either - wood will do until you figure out where an outside button or lever could be placed where it will not be vulnerable to fireballs. Note that if the player is building against a netherrack wall, you will need a cobblestone back wall in front of that. If you want to dig there later, you can always put a door in. Once the player got the walls and ceiling up, likewise cover or replace the floor with cobblestone, extending it to under the walls. The walls should extend a block below floor level, and a little further under the doors. The shelter will also need a few blocks of cobblestone floor outside the doors, in case a ghast shoots the player while they're entering or leaving. You should end up with a space completely enclosed by cobblestone, iron, and perhaps a bit of obsidian.
Later on, you can start to make nice houses and bigger bases in the Nether, but for now, a cobble shelter with the portal, a chest, and a crafting table is sufficient. The only necessities are iron armor, a pickaxe, sword, and shovel (all iron), food, bow and arrows, cobblestone for making quick shelters, dirt or gravel for pillar-jumping or stopping lava, and your trusty flint and steel. The rest of the items or extra supplies can be stored in the chests. If the player is going any distance, bring enough obsidian to make an emergency portal.)
To prevent mobs from spawning in the player's Nether home/base, one can use transparent items or half-blocks as the floor. However, be warned that mobs can spawn on the nether portal itself. Now that your nether portal is safe, the player can start doing what they came to the Nether for!
Special cases
- If the player's portal emerges floating over a lava lake, the portal will generate a few extra blocks of ledge at the bottom, but it is still recommended to build that out into a platform, then continue building a path to safety. Upon reaching a safer location, the player can build a shelter there, and a new return portal within it. Deactivate the old portal before the player starts using the new one so that the portal in the Overworld will link to the new one.
- If you face an impossible situation and die without being able to deactivate the old portal or make a new one, you may need to go back and fix things the hard way.
- Hopefully, you got the coordinates of the nether side of the portal. If your portal was in mid-air, against a cliff, or in some other awkward situation, it is likely that the coordinates that your original portal "should" have gone to was blocked by lava and/or large masses of netherrack. Multiply the coordinates of the Nether portal by 8 to see where its "natural" matching location in the Overworld is, and compare that to the actual coordinates of your original portal in the Overworld. If they're dramatically different, the space between probably represents the hazard that blocked you.
- To get a portal to a new place in the Nether, you need to travel at least 1000 blocks from the matching location of where the portal actually came out, and make your new portal there. The next question is, which direction? If you go back towards and past your original portal, your new portal will probably come out on the other side of the hazard that blocked the original portal, and you need to get back there to decommission that. So, you're better off going away from your original portal, and 1000-plus blocks past where the Nether portal you got would have matched. With luck, that will get you to a better location in the Nether. Aside from replacing your old equipment, this jaunt will require much the same preparation as the first, including cobblestone and obsidian.
- Once you're back in the Nether at a safer location: First, see if you can do a quick run to retrieve any surviving items, shuttling them back to your new portal if needed (If that looks dangerous or everything's gone into the lava, just forget that and start anew). Build a shelter for your new portal, go back to restock on cobblestone and then go back to where the old portal was. If the location turns out to be salvageable, you may be able to just build a shelter and continue, otherwise:
- If the old portal hasn't been broken by ghasts, decommission it by mining a block. Now, scout out a Nether location which will come out someplace more reasonable, as close as possible to your base. You may even be able to make a better location, by building a platform over lava or tunneling into a netherrack mass to get within 16 blocks of your base portal's "natural" coordinates. Now, you can build your new shelter first, then put your return portal inside.
- Hopefully, you got the coordinates of the nether side of the portal. If your portal was in mid-air, against a cliff, or in some other awkward situation, it is likely that the coordinates that your original portal "should" have gone to was blocked by lava and/or large masses of netherrack. Multiply the coordinates of the Nether portal by 8 to see where its "natural" matching location in the Overworld is, and compare that to the actual coordinates of your original portal in the Overworld. If they're dramatically different, the space between probably represents the hazard that blocked you.
If the portal gets blasted
The player's first resource should be their flint and steel. If for some reason the player does not have one, relighting the obsidian portal frame becomes much more difficult. If the portal was exposed enough to get hit by a ghast fireball, the player could persuade a ghast to hit it with another fireball by getting into the line-of-sight long enough to shoot the fireball. If the player dodges the fireball quickly enough and it hits the obsidian of the portal, the portal will be re-lit.
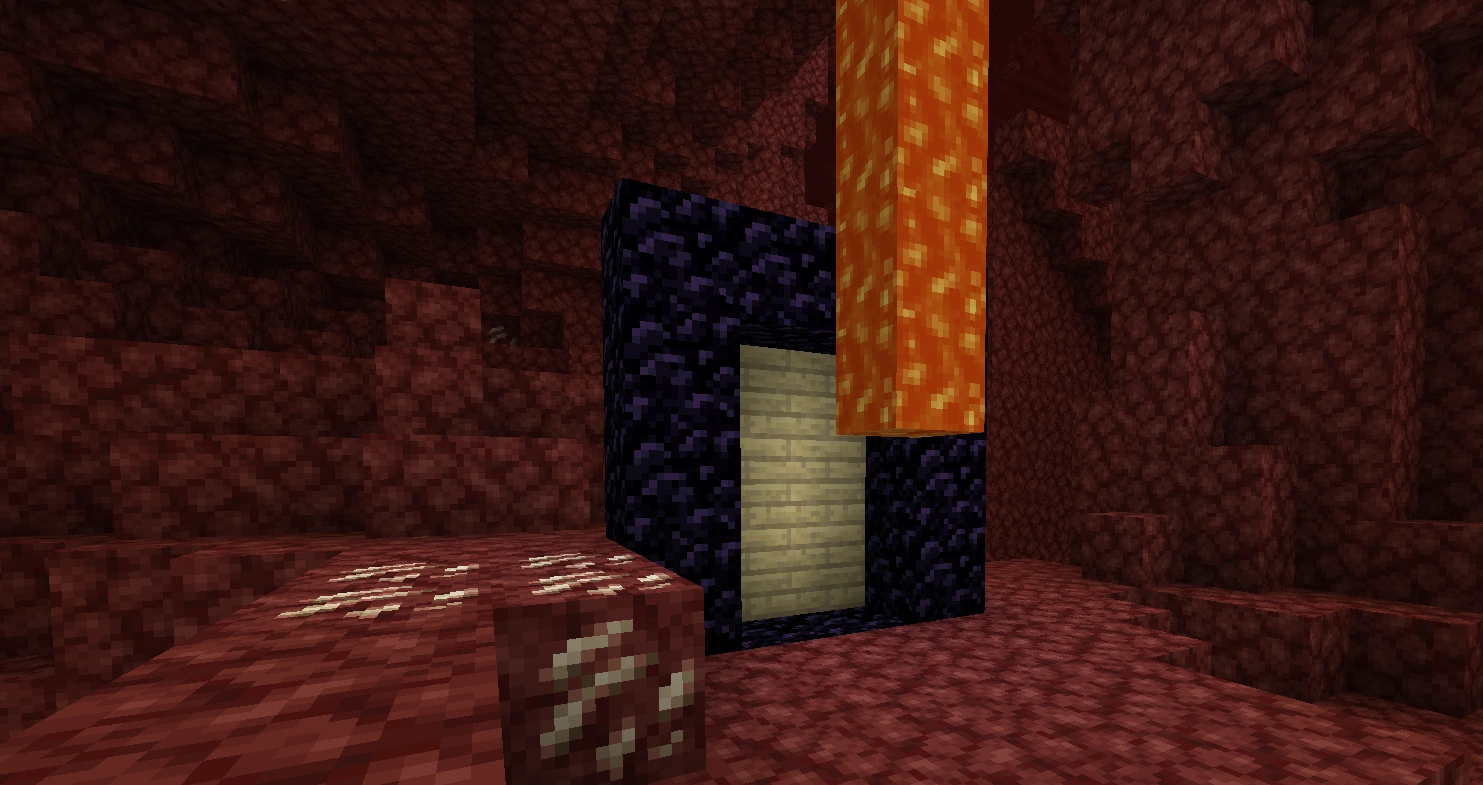
Using wood and lava to light a portal.
Another possible method is to take any flammable block and place it on one side of the block. By getting lava close to the flammable blocks, the lava can eventually light the wood, thus lighting the portal frame. Having the lava right on the opposite side of the frame of the flammable block is the fastest method. Also, the higher the difficulty, the faster the blocks will catch on fire, so this method is more difficult in Easy or Peaceful difficulties. If the player also lacks a bucket, one can channel lava past the portal, or even build a trail of flammable blocks (planks are cheap, but wooden slabs are cheaper) to the nearest fire. That last method will be especially tricky, as fire doesn't always catch. If this happens, try making it wider than one block.
A new set of flint and steel can be acquired. Looking in nether fortresses, there is a chance of finding a flint and steel in a chest. Also, gravel occurs naturally in the Nether, so a player can collect flint from there. Iron nuggets can be then created by smelting down iron horse armor, armor, and tools that the player has. This process requires having a furnace and fuel source (such as a bucket of lava).
Another option is to create a fire charge. This is trickier as it requires gunpowder, coal, and blaze powder, so the player may have to kill a ghast, wither skeleton, and blaze to collect all three of these items. Fire charges work just like flint and steel, except each use uses up one item.
As a last resort, if the player has (or can make) a chest or two (they appear in fortresses, so you might be able to locate one), the player can stuff all their equipment into the chests (not forgetting armor), and then commit suicide. Assuming the player is not playing on hardcore, they will respawn in the Overworld, and can re-equip themselves at leisure (this time, not forgetting the flint and steel) before going back through the portal to collect their items. Note that this is more difficult on a multiplayer server because another player can come by and steal your items.
Fending off Ghasts
Ghasts are one of the hardest mobs to fight in Minecraft, mainly because of their floating ability and their long-ranged fireball, which does considerable damage to both players and the landscape. (One direct hit can kill an unarmored player.) That said, they do have several weaknesses:
- They do not actually chase the player (nor flee), even after being attacked. They just move randomly around the landscape, firing at any player who comes into the line of sight (and range).
- Also, ghasts have 10 points of health (two fully charged shots with an unenchanted bow), so sniping them is not too difficult. A heavily-enchanted bow and a critical hit can one-shot them.
- The fireballs are fairly easy to dodge, but they also tear up the landscape, not to mention setting it afire. However, the player can also bounce a fireball away by hitting it (fist, weapon, tool, anything will do) as comes near. The fireball will usually go in the direction of the player's gaze. If the player manages to hit the ghast with its own fireball, it will be killed, and the player will get the "Return to Sender" achievement. Be forewarned that this takes practice, so don't expect to use this method as the sole defense against ghasts. The player can also deflect the fireball by hitting it with an arrow, a snowball or even an egg.
- The classic defense is to build a mini-shelter out of cobblestone, 3 blocks high with a ladder to let the player poke their head (and bow) over the top, and preferably a 3×3 roof two squares above that for protection. Note that if the ghast can't see you, they won't fire.
- If a ghast does come into reach the player can also hit them with a sword. This can happen when they spawn in a cave, or just randomly fly into one, or happen to fly close to the ground. Besides this being a rare opportunity, you may also need to dodge or bounce fireballs at close range.
- If there is more than one ghast attacking the player, the best option is to run and/or hide. If the player sprints, fireballs will not hit the player. If they can get out of sight from all but one, they can then focus on shooting down that one.
Resources found in the Nether
- Netherrack, soul sand, gravel, lava, magma block, glowstone and nether quartz ore are all freely available. Note that while the player can pillar-jump to mine a high glowstone formation, a little exploration will find the player more accessible veins of the stuff (look for places with low ceilings).
- Red and brown mushrooms are likewise found scattered about.
- Ghasts sometimes drop ghast tears and/or gunpowder.
- Magma cubes can drop magma cream.
- Zombie pigmen sometimes drop rotten flesh and gold nuggets. They can drop golden swords and gold ingots. However, attacking these is unwise until the player is prepared to handle a lot of them.
- The player can also mine nether quartz, used for advanced redstone components, and decorative purposes as well.
- Obsidian can be farmed with Nether portals. View the nether portal page for more details (the diamond pickaxes needed to mine these can rarely be traded for emeralds by some villagers, making them renewable).
Once the player finds a nether fortress, they can obtain several other resources:
- Nether bricks, nether brick fences, and nether brick stairs. These are ghast-resistant building materials. They can also be crafted from smelted netherrack, but that takes some time and effort. The fortress is made of nether brick, including those massive support pillars and all the decorative fencing.
- Nether wart, which the player can grow on soul sand. The player can also grow it back in the Overworld, provided they brought back some soul sand.
- Blazes drop blaze rods, and are the only source of them.
- Wither skeletons occasionally drop their skulls, which can eventually be used to spawn the wither. They also provide coal, and bones (bone meal for plants).
Exploring The Nether
When exploring the Nether, there are a few things to remember:
- Hostile mobs are common, and can spawn anywhere there is space. Luckily, what are perhaps the two most dangerous Nether mobs - ghasts and blazes - have special spawning needs. Ghasts require a 4*4*4 space to spawn, free of transparent blocks and slabs. Blazes spawn only in nether fortresses, and only below light level 12. Zombie pigmen are common as well—while they start out neutral, they can easily get in the player's way so that they accidentally attack them.
- Be generous about laying down cobblestone paths and putting up ghast shelters preemptively. If you need more cobblestone, go back to the overworld and get more.
- You can actually use the netherrack you mined to make nether bricks, smelt it with lava which is very plentiful. This WILL take time, but nether bricks are as good building material as cobblestone, and it's plentiful. You could actually make an automatic smelting facility to cook your netherrack.
- If you die in the Nether, you will respawn back in the Overworld (beds in the Nether explode when you try to sleep in them). As long as you stay in the Overworld, Nether time is frozen. In particular, you can take all the time you want to re-equip yourself and plan; when you do go back, if you can get from the portal to your death site within 5 minutes, you may well be able to retrieve anything not lost to fire, lava, explosions and (your own) cacti. If you're playing in multiplayer, this may not apply - if there are other players nearby in the Nether, they can keep the chunk loaded and the clock running. Also, they might save and/or steal your items!
- Navigation is tough. Where the in-game methods below fail, the debug screen may be helpful, as it provides your coordinates and direction.
- Compasses and clocks will spin wildly, (although the day/night cycle continues while in the Nether), and maps made in the overworld don't work either.
- You can activate a blank map in the Nether, and use a crafting table to zoom it out a bit. However, such a map will only show the bedrock "roof", and the direction indicator spins randomly, so it's not nearly as useful as an overworld map. On the other hand, it does give some idea of where you've explored, and the marker is in the correct location on the map. While maps are no longer centered exactly at their creation, you can put framed clones of the map on your portals, and those green markers will also be in the correct locations.
- When exploring, try to keep going in one direction until you reach an impassable obstacle (wall, cliff, lava lake), and leave a trail of markers along the path from your base, so you can easily find your way back. Dirt and torches are recognizable, but jack o'lanterns let you point the direction to your base (all the above are vulnerable to ghast fireballs, but unlike torches, Jack o'lanterns will remain if the netherrack supporting them is blown away.) Cobblestone arches (as well as any paths you've made) also work well as they resist Ghast fireballs, are easily distinguishable from surrounding Netherrack, and can be positioned so that passing through them orients you to the direction you came.
- Tunneling through Netherrack: Making a 1×2 tunnel is a sure way to get killed by lava. Instead dig a 2-wide tunnel with the floor of the left side one block lower than the right, or vice-versa. This makes a trench for the lava, and if you're standing on the high ground, the lava will miss you. Staircases are trickier: When digging down, lava will appear below or in front of you and can be bucketed or blocked off. However, be wary in case you dig down into a void! When digging up, dig 2-wide, and regularly put 2-long areas with a one-block pit in front of the next step. This gives you someplace to dodge flowing lava, and the pits will capture the flow. Also, watch out for lava "drips" when mining upward. Ladders or signs can also help block lava until you have a chance to do something about it.
- And again, the debug screen provides your coordinates and facing—this is also helpful for choosing where to place a new gate back to the overworld.
- This cannot be restated enough: be sure to build a base. This way, if you accidentally attack a mob of zombie pigman or have a ghast on your trail, you won't run back to your base only to realize that it consists of an exposed Nether Portal and nothing else. Again, as ghast fireballs can blow large holes in Netherrack walls, you should construct your base out of cobblestone, stone, or, for a decorative look, stone bricks. Not only do these blocks have the necessary blast resistance to withstand a ghast fireball, they also are not found naturally in the Nether. This makes it much easier to identify your base from a distance.
Nether Fortresses
One of your main objectives in the Nether will be to locate a fortress. To see all the features of the Nether fortresses visually, try this video "here". Basically, their straight walkways and tall pillars are unmistakable, but may be dimmed by distance. Be sure to look carefully into the abyss beyond the edges of the areas you explore; if you're not using Far render distance already, you can occasionally switch to it so as to see farther. If you do not see any, remember that fortresses occur in strips running north and south. If you travel east or west, you should only have to travel a couple hundred blocks.
Even after spotting one, you may well need to find a way to get to it, or even build a bridge to it. (Suggestion: three-wide cobblestone, with two-high iron bars or nether brick fences for railings, and a roof. Those ghasts get really annoying when you're out on a bridge… you might even put in a couple of turrets for sniping at them, too.)
Once you do find one, it is a good idea to make sure you have the necessary supplies to gather its many resources. So, head back to your base, or even back to the Overworld, and get, at a minimum, a stone pickaxe, an iron sword and lots and lots of food. An enchanted golden apple will be very handy when it's time to take on a blaze spawner, but you may want to stash that nearby and go back for it when you actually find the spawner. Lots of iron bars, cobblestone walls, and/or nether brick fences will be handy too: safety railings on the walkways are really nice when a ghast starts taking potshots at you, and blocking off unused areas and broken bridges will cut down on fights.
There are a few things that are of the utmost importance when exploring a nether fortress:
- Explore the nether fortress thoroughly. You might not find much, but every once in a while, there will be a nether wart plantation or a blaze spawner. These are your key prizes, as the only place you can find these is in the fortress. Details on nether wart farms can be found on the nether wart farming page.
- Wither skeletons are scary, but slow and they can't go through a 2-block high passage.
- When exploring a nether fortress, always place torches to your right - that way when you want to get out you just make sure that the torches are on your left. Jack o'lanterns make this even simpler — always face them toward the exit (or where you need to go to reach said exit).
- If you come across a nether wart plantation, collect as many (if not all) of them as you can, then replant the plot (you'll have plenty leftover). Then go back to your base and create a nether wart farm by planting it on soul sand. Nether wart doesn't care about light or water and grows in the Overworld and The End, so you can take the farm back to your overworld base. Note that you don't use all that much, so four to six blocks of soul sand will support a brewery and then some.
- You may well want to build a portal leading back to the overworld from the fortress. Having an Overworld base handy will provide all the supplies you need.
- When you find a blaze spawner, you have a choice: turn it off, or farm it. There will usually be at least two blaze spawners per fortress, and if several fortresses have joined together there may be more. So, don't assume the first one you find is your only option, but you will need to fight blazes at least once "the hard way" (enchanted golden apple notwithstanding). That first fight may be fairly tough, but together with the nether wart, it will give you the means to make potions, including potions of fire resistance. Those will make return engagements much easier.
The way to navigate through a Nether Fortress needs torches. When you finish a part of the Nether Fortress, put a torch at the entrance of the room. That will help you explore the Nether Fortress easily. Or you could block off the entrance with a certain block (like cobble).
Closing a blaze spawner
While a blaze spawner can be destroyed as usual with a pickaxe, you probably shouldn't do that unless you're absolutely sure you'll never, ever, want to hunt there. Blazes can spawn up to light level 11, up to 4 blocks away from the spawner (and a block above or below it), so simply placing torches on the spawner won't stop them from spawning—you'll need to plaster the area with a mix of jack-o-lanterns (or glowstone).
This lighting pattern should suffice to squelch a Blaze spawner: (Top view, all on the same level.)
Farming a blaze spawner
There are many hints for fighting blazes on their page. Here are some useful ideas:
- For your first fight, kill blazes that are not in the spawner room. There will not be nearly as many blazes, so they will be easier to fight when you don't have a potion of fire resistance.
- If you haven't brought out the enchanted armor, now's the time. Fire Protection and Protection are both helpful.
- An iron golem may be helpful, especially once you've got the spawner contained. One big disadvantage is the golem's huge knockback, which can throw Blazes and their drops out of reach. The golem's distractability is also an issue — between spawnings, they're liable to wander off after zombie pigman and wither skeletons. The pigman won't mob you or the golem for the golem's attacks, but the repeated fights will wear down the golem. (A splash potion of regeneration can help with that.)
- A creative option is to mine under their platform to make a bolthole with a narrow opening up to their platform, perhaps 1×3. As they descend into the hole to reach you, you'll be able to get in several hits before they can respond. Fortress stairways (the narrow sort, not like the one leading to the Blazes) can provide a similar bolthole.
- A fishing rod can be useful for pulling blazes into melee range so their drops aren't lost.
- Create a "ceiling" above the spawner-this will keep blazes from flying out of reach & making it easier to obtain their rods
- It takes 7 snowballs to kill a Blaze. Water can't be used in the Nether, as it will just fizz & vanish. You can try making a Snow Golem, but they'll quickly "melt" due to the Nether heat. (Again, splash potions of fire resistance can help.)
- With fire resistance assured, you may want to seal yourself in the spawner room, so that wither skeletons, magma cubes, or other Blazes can't ambush you from behind.
Living In a Nether Fortress
If you've mastered the Nether, you can go in and start making a nether fortress more habitable. If you can have control of a Nether fortress on a multiplayer server, you can control who enters the area, and also control who gets blaze rods (as blazes only spawn in Nether fortresses). With the addition of nether quartz, the one who controls a fort can also control who gets nether quartz from the area.
First, you should repair any bridges, as this can prevent falling deaths in the nether, though it gives mobs more access to the fortress. In many places, lava may be leaking in, so it is advisable to close off the area.
Almost all forts have a single roofed, large building, which you can use as the main building, where you can store all the necessities. You should put doors on the building, to prevent destructive mobs from entering.
DO NOT make a bed, beds explode in the nether and the end if you sleep on them, though all crafting benches are needed, and an ender chest might be useful (if one leaves the Nether in a hurry, they can get their items via another chest).
You should disable blaze spawners, so you can use them for mob grinding purposes later on, but also prevent blazes from overrunning the fortress, as they are extremely hazardous.
Some parts of a fortress have been filled in with netherrack and it can be a pain to dig it out. TNT is useful, though this risks damaging the fort, creating more hassle for the user.
Nether Wart plantations are in most fortresses, with many warts in one plantation. For more about Nether Wart, see Tutorials/Nether Wart Farming.
If one finds a nearby fort that is not attached to the first one, nether bricks can be looted to repair the fortress if in survival.
Killing the various mobs that spawn there is tricky. Blazes, zombie pigmen, and ghasts pose a threat, though wither skeletons are a minor annoyance. Mobs spawn at a faster rate in a Nether Fortress, and trying to kill all the zombie pigmen is impractical, so it is best to just leave them alone, as a large pack of pigmen could knock you off into the lava ocean.
If imported farming does not work, you should use the naturally growing mushrooms to make soup, so you have a bit to eat, though it is preferable to make better food, such as bread, with imported dirt and wheat seeds. This, however, may prove difficult, due to the inability to hydrate farmland in the Nether.
The Hazards
Lava
Lava is common in the Nether, in huge lakes (a sea of lava is near the bottom) rivers, and falling from the ceiling. You must be very careful around lava as water buckets will not work in the Nether, and ice will disappear instead of melting into water. Also, lava spreads much faster and farther in the Nether than in the Overworld (7 blocks instead of 3). Two good ways of crossing lava are to make a potion of Fire Resistance or eat an enchanted golden apple; while this effect is active, you will be able to swim through lava without taking damage. Fire Protection on your armor can at least reduce the damage from a brief contact.
If you can find and reach a lava flow's source block, you can bucket it just like in the Overworld. Unfortunately, in the Nether, much of the lava is pouring down from great heights. Normally, use cobblestone, or iron bars to contain lava or direct it away from you (if you use flimsy blocks like dirt or netherrack, a ghast fireball can undo your work in a moment!) As always, if you mine upwards, then watch for dripping red (if you have particles turned on). The drip itself will not damage you, but if you mine a dripping block, lava will come down. If you wish to get rid of lava flowing from the ceiling (in your way, or immediate hazard), you will have to block jump up to the source (or simply aim at the ceiling), and cover the hole with any non-flammable block (if it's flowing straight down from a flat ceiling, you may need an extra block next to the flow to place the dam). One must be extremely careful about the placement of the block, however—if misplaced, the block can just spread the lava wider.
Zombie Pigman
See Zombie Pigman
Zombie pigmen are very common in the Nether and roam in packs of 4-10. They are neutral mobs, meaning that they won't attack unless you attack them. However, if you attack one zombie pigman in a group, like wolves, the whole group (and any others in a wide range) will swarm you, which will easily kill any unprepared player. When a Zombie Pigman is attacked, all others in a wide range (33 to 55 blocks horizontally and 10 blocks vertically) of the victim will become hostile and will give chase if you are within 40 blocks of them. This can be avoided if you kill the pigman in one blow, but that's easier said than done. Do this by using an enchanted diamond sword and a critical hit. Note that they can only see you in a 40-block radius — any pigman between those distances will be turned hostile, but will not move toward you (instead of wandering as normal) until you come into sight. This can be a nasty gotcha: When you defend yourself, any pigman within a new 33 to 55 block range will be enraged. As of version 1.8, zombie pigmen will now forgive you over time, if you leave them alone for 20 to 39.95 seconds, though if you are still within their 40 block pursuit radius, they will continue to attack.
It is usually better to leave these creatures alone, but if you want gold nuggets, or to increase your level (killing many zombie pigman will give you a lot of experience), you can attack the pigman in various, safe ways. Also, if you have to fight zombie pigman, make sure there isn't much (or even better, no) lava or fire surrounding you. You will probably have to move around a lot to fight all of them at once, and distractions will only make it worse (also, you may need to collect your stuff after getting killed).
NOTE, Zombie pigmen wield and carry golden swords, but they usually only drop rotten flesh and gold nuggets, and rarely, gold ingots and their swords). Their swords can sometimes be enchanted, with the level of the enchantment varying depending on the difficulty.
- Build a killing ground- Near a large group, fence/wall off a controlled area, and set up gates, one-way doors, and suchlike so that you can limit them to approaching one or two at a time, and block them off altogether when needed. Don't forget an escape route! Note that this can be much more difficult as of 1.8 as they now have path-finding AI.
- Bow and arrows- Using a bow, you can pick off zombie pigman one at a time at a safe distance.
- Separation- Isolate the pigman and kill them, but make sure they are far away from any other pigman, or else they will attack you. Time-consuming, but safer than the bow-method. This is no longer as effective as of 1.8 since their anger radius has been vastly increased, though if you stay away long enough they will forgive you.
- Nether Portal -- Mobs can travel through portals. So, if you can push or lead them into a portal, you can follow and deal with one or two at a time in the Overworld.
- Diamond sword, diamond (or iron) armor, and full hunger bar- If you have a diamond sword (preferably enchanted with something like Knockback, which will help for fighting groups), a full set of diamond or iron armor, and you are regenerating, you may be able to beat the whole group. NOTE, this is not recommended as, if you die, you could lose a diamond sword and a full set of armor. It helps if you staged the fight somewhere away from lava and close to your spawn portal.
- Healing splash potions - Saw a large group of pigman? Feel lucky? Throw some potions in the crowd! One splash potion can heal you for 6
 HP, and also damage the Zombie Pigman by the same amount. So you need 3 potions to reduce them to 2 HP, or 4 potions to kill them.
 - Cacti- It is possible to create a cacti fence in the nether by placing some sand and cacti blocks. You can then bump into zombie pigman to push them into the cacti until they die and drop items. If you are careful not to actually attack them (no clicking!), the nearby pigman will stay neutral.
- Iron Golems- When an iron golem attacks a pigman, that pigman will not strike back. Also, they kill the pigman in 2-3 hits and usually aren't hurt at all. This tactic works better if you have a lead. If your Overworld portal is in a village, then you can very easily drag golems into the Nether when need be.
- Or, just build a two-block high tower to stand on, and the pigmen won't be able to reach you. NOTE: Don't do this near ghasts, they will blow you off your tower.
Ghasts
See Ghast
As mentioned earlier, Ghasts shoot deadly fireballs at you when you're in their sight of 100 blocks, so stay alert for incoming fire any time you're in the open, or exposed to open space. Their noises can give some warning, but their sound travels even farther than their fireballs, so this isn't a reliable warning. Cobblestone will resist the fireballs, which is why you should bring a lot.
However, Ghasts can give you trouble with zombie pigmen are around! If you bounce back one of their fireballs, the fireball will now count as your attack, and if a zombie pigman so much as gets touched by the blast, it will be provoked (along with all its buddies in and out of sight).
Pro tip: when the fireball is within the player's reach, aim at the Ghast and punch. As long as the fireball is in your FOV you can hit the ghast. NOTE: If surrounded by multiple ghasts, constantly hitting attack whilst aiming at a Ghast will throw all fireballs in that direction, regardless of which direction they are coming from (they still need to be within reach). Do be careful, however, with bouncing fireballs back at Ghasts on the ground, as the explosion from the fireball can not only damage the vicinity, but provoke zombie pigmen as above.
Blazes
See Blaze
Although they cannot be found in the "general" Nether, blazes can spawn in nether fortresses, both naturally and through spawners. For the first run, it is strongly recommended to find an enchanted golden apple. As of Minecraft 1.9, these can no longer be crafted but can be found in chests in various locations: dungeons, desert temples, abandoned mineshafts, and woodland mansions. Failing that, loading your armor up with Fire Protection and Protection enchantments can help; maximum protection comes with 10 levels total of Fire Protection, with each two levels of regular Protection counting as one of Fire Protection.
After that first run, your first two blaze rods (and some nether wart) will let you brew potions of fire resistance; use the first one to make a brewing stand, then craft the second into blaze powder. The first piece of blaze powder will fuel the brewing, the second can make magma cream if you haven't picked any up yet (with a bit of redstone your potions will last even longer). At this point, you can run away and come back with potions of Fire Resistance. This will make you completely immune to their fireballs, and if you keep a block or so distance, you can avoid their melee attack.
Once you've gotten more comfortable with the blazes, you can build one of the spawners into a farm, by casing over the spawner area with Nether Brick Fence, and digging a hole underneath for the blazes to slowly descend into.
Magma Cubes
See Magma Cube
Magma cubes are cube-like mobs that spawn in the Nether, generally near lava (hence the name magma cube). They look like burnt slimes with yellow eyes, and seem to have springs under them (they jump fairly high and the "springing" is visible). Their properties are much like slimes, as killing a large one results in 4 medium-sized ones, once killed yield 4 small ones. The large and medium Magma cubes have a chance of dropping magma cream and experience when killed. You can prevent magma cubes from spawning in your base by making the floor out of transparent blocks.
Wither Skeletons
See Wither skeleton
Wither skeletons are tall, darkened skeletons, wielding stone swords. They can inflict the wither effect briefly with a hit. They walk when idle, but will sprint towards a player when they see one. However, they can't pass through a two-block-high space, which makes them somewhat easy to deal with. They drop bones, coal, and rarely a wither skeleton skull and/or a stone sword. These types of skeletons are only found in nether fortresses.
Brewing
See Brewing
Many resources in the Nether are essential for brewing potions:
- Blaze rods, from killing blazes, are needed to make a brewing stand, where all potions are brewed. They are also required for making an eye of ender (making the rod into powder), which can locate an End portal.
- Nether wart can be found in nether fortresses and is used to brew the awkward potion, the base for most potions.
- Blaze rods can also be crafted into blaze powder, for strength potions, and fuel for the brewing stand.
- Magma cream is dropped from killed magma cubes, and can also be crafted from blaze powder and slimeballs. It can be used to brew fire resistance potions.
- Gold nuggets, dropped by zombie pigmen, can be used to make glistering melons, for healing potions, and golden carrots, for night vision and invisibility potions.
- Ghast tears drop from killed ghasts, and are used to brew regeneration potions.
- Glowstone dust is mined in the nether, and used to increase potion potency (e.g., from poison to poison II).
- Gunpowder used for creating splash potions.
Settlement
Turns out it wasn't enough for you to explore the Nether. You've decided it looks like a nice place to live (or if you're in a multiplayer world, perhaps you seek strategic control of the rapid-travel capability). So, what do you need to survive here?
You can start by importing some dirt to grow plants. You can even use a hoe to till it into farmland, but there's a catch: With no water available, you need to till the ground, then plant your seed immediately, before the farmland reverts to dirt. Likewise when harvesting wheat, replant immediately and keep the hoe on your hotbar. This will work for all the farmland crops: wheat, melons, pumpkins, carrots and potatoes and beetroot. Melons would be the most reliable as after the stem is fully grown, hydration does not affect the rate at which melons grow. Wither skeletons can provide bones for bone meal to speed this process. Cocoa plants are farmable on jungle logs as usual, so that gives you cookies too. You can also farm sweet berries. While you're at it, you can layout a few blocks of soul sand for a nether wart farm.
It is also possible to build an 8 by 8 platform, plant mushrooms on two opposite edges, and then use bone meal. This can provide you with a steady source of Mushroom Stew, and you can put torches or saplings in the other corners.
Once you've gotten used to nether dangers, you can invade and repair a nether fortress, as it provides many Nether commodities, such as blazes and nether wart. However, falling is a real danger, as there is always a lava ocean below you. If you're in survival, and you've found multiple nether fortresses (not connected but nearby) you can loot nether bricks to repair your favorite fortress. You can smelt netherrack into individual nether bricks, then craft your own walls, stairs, and fences.
You'll want wood for tools and torches (and perhaps to smelt into charcoal), so make a tree farm as well. Wood will also provide charcoal for torches and smelting. Oak trees will also provide the occasional apple for gilding, but that's not really a food supply.
Another catch: Trees need space to grow - and ghasts need space to spawn. Happily (and contrary to popular belief), ghasts do spawn on blocks, and they need a 5×5 space free of transparent blocks and slabs. You can scatter slabs, glass and glowstone around the floor of your tree farm. You can plant saplings with glowstone adjacent, and slabs on top of the diagonal blocks. You can do this in rows for max efficiency. If you're low on glowstone, jack o'lanterns and torches will do. You also need at least 4 blocks of air above the sapling. Using this method of tree farming, you can have a large enclosure for mass wood farming without ghasts! If not too densely lit, your tree farm will also serve for bone-meal assisted huge mushrooms, which is useful for soup. The most basic way to safely farm trees is to have a 5×5×7 room with a floor made out of glowstone or glass (if you are using glass, make sure to put torches next to the sapling) and have 1 dirt in the middle of the floor.
Chickens can also be farmed in the Nether (by bringing in eggs), but likewise, take space, and warrant anti-ghast measures. There is gravel around for flint, so with the chickens for feathers, you can make arrows (if you have sticks).
Cows, pigs and sheep can be brought through the portal, which can provide you with wool, leather, and a variety of meats. Sheep will require special measures: You'll need to get a grass block with a Silk touch tool and use that to start grass on a well-lit dirt floor, so they can regrow their wool. You can also just breed the sheep until you have a lot, and then shear some of them and kill the sheared ones. However, the sheep will not re-grow their wool.
Some things can't be produced in the Nether, and need to be brought in from the Overworld: There are no ores, besides nether quartz, so no iron or diamond (you can make a furnace and smelt wood into charcoal, or kill wither skeletons for coal). There is no cobblestone to be found -- nether bricks may be acceptable for building, but you can't make tools out of it. You can use your wood to make wooden tools or you can use gold from zombie pigmen to make golden tools, but, neither of them are good. Paper and sugar need sugarcane, which can't grow without water. You cannot get string for bows or fishing rods, either. The same applies to some ingredients for brewing: Besides sugar, there's no spider eyes, nor redstone. Gold can be obtained from zombie pigman, but mining it in the Overworld is an easier alternative until the player builds a gold farm. And of course, water for brewing must be brought in from the Overworld and stocked in buckets and cauldrons.
Tips
- A player can crouch when near lava as a safeguard to avoid falling in.
- Mobs such as the ghast can surprise the player, so the player should be watchful of their environment, especially when in bad positions, such as bridging a gap.
- A zombie pigman farm can be created by walling the player off, then killing the pigmen through a small hole.
- Killing magma cubes can help the player collect magma cream, which is used for brewing potion of fire resistance, an extremely useful potion in the nether.
- Avoid getting lost in the Nether's low visibility by placing markers, such as torches or jack o'lanterns.
- The player should be careful on gravel, as gravel can generate with no supporting blocks, making it fall when it receives an update.
- Glass and string block a ghast's vision, allowing the player to see ghast filled areas without being shot at. This is useful for bases in the Nether.
- Bringing 10 obsidian, a flint and steel (or fire charge), and compass will allow the player to return to the Overworld if they become lost. The compass adds an easy way in the overworld to find the player's spawn.
- Bring a pumpkin or a jack o'lantern. They can help you find your direction, as the stem on the top of the pumpkin will always face Northwest even in the Nether, no matter what direction the Pumpkin itself is facing.
- As long as there are no ghasts or blazes present, traversing the Nether by mining along the edge of a wall is fast, safe, and efficient, unlike tunneling through said wall, which requires a fast reaction time and/or the constant digging of pits for lava to drain to.