This tutorial covers basic minecart stations and systems and is designed for those without significant redstone knowledge and only minor experience with minecarts and rails. This tutorial doesn't touch on furnace or storage minecarts. Images below do not always show a space saving design, but rather one that makes all components immediately visible.
An empty hopper or chest minecart will travel 165m from full speed.
A chest minecart carrying 320 (5 stacks of) items will travel 101m from full speed.
Activated powered rails, down slopes, and being pushed by players or mobs add momentum to a cart, thus increasing its speed.
A player riding in a cart may add momentum by "pushing" it using the <move fwd> control, which is set at the "W" key by default.
A stretch of unactivated powered rail of at least two blocks length will bring even a loaded cart at full speed to a complete halt.
A long stretch of rail or an up-slope will reduce a cart's momentum and thus its speed, eventually stopping it unless the forward key is held throughout by a player riding the cart.
Minecarts "bounce" off of obstructions on the track. Running into a player, mob, or a stopped cart will cause it to reverse direction, even on powered track.
Rails
Please see the individual pages for each type of rail for information on their properties and basic usage:
Rails always have to sit on another solid block and are the only rail type that can curve.
Detector rails give off a redstone signal when a cart passes over them, otherwise they act like a regular rail.
Powered rails add momentum to a cart passing over them when powered, when unpowered they have a braking action and will slow or even stop a cart.
Activator rails trigger an action on a cart passing above them when powered: TNT mine carts will be set off, a hopper cart will be deactivated, and players/mobs riding in one will be pushed out of it.
The rest of this page discusses the use of these components in building tracks and rail transport systems.
Best practices for laying tracks
The performance of a rail line is affected by the way the track is placed. Running track next to a wall or having hills to climb will adversely affect the speed of a cart, and so its distance traveled.
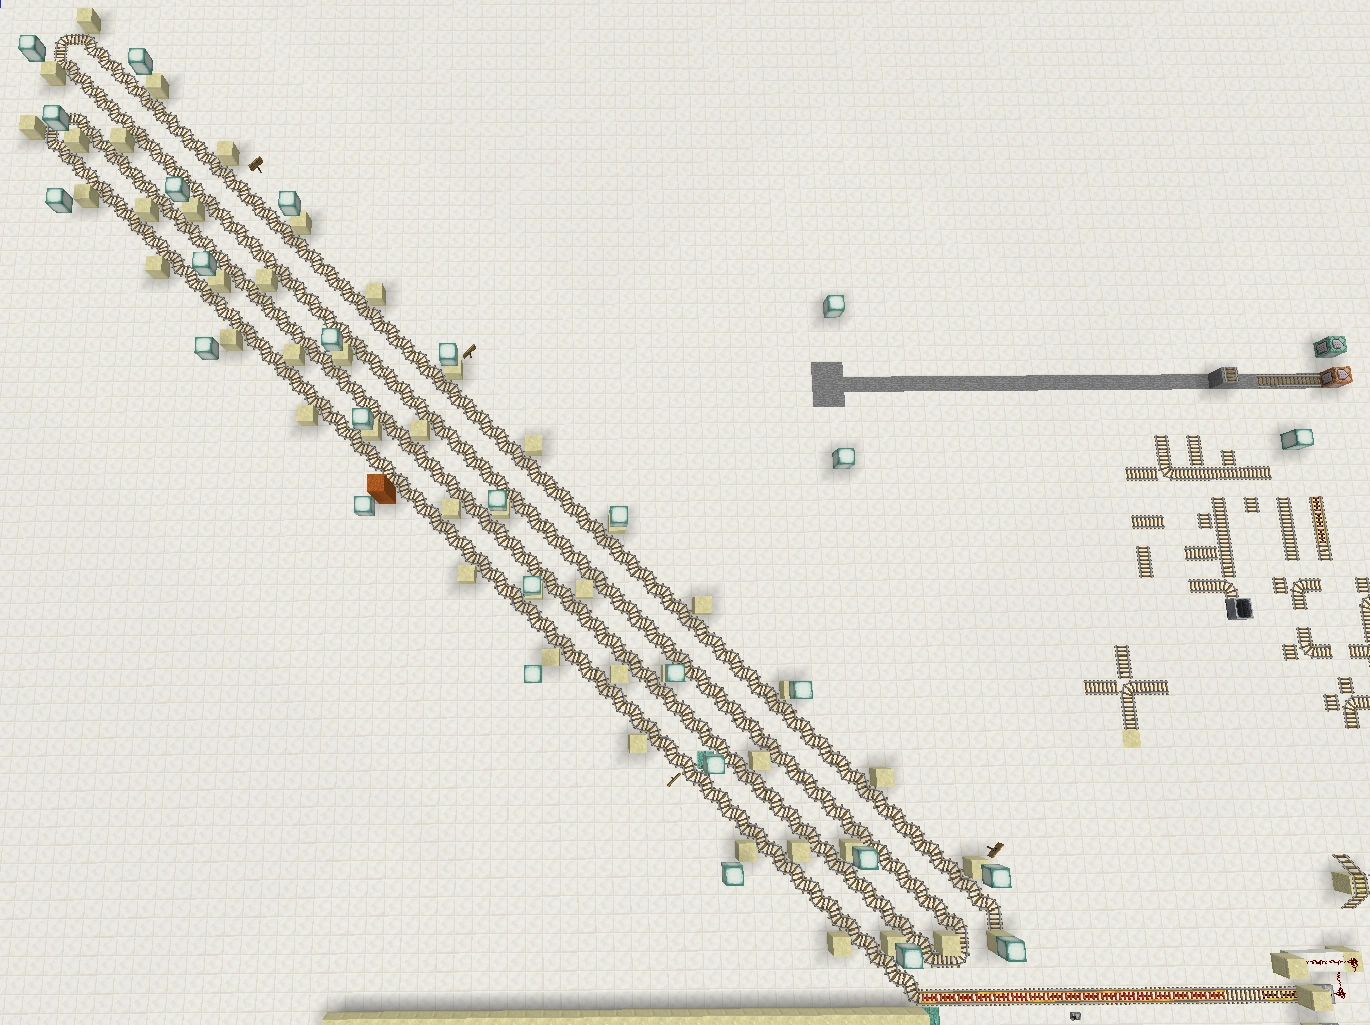
Some Youtube videos suggested that diagonal track might offer better performance than straight runs, this has not been proven to be the case. Another distance trial track was constructed with a length of 300 blocks. Carts with no rider travel the same distance as on the straight track, about 18 blocks before they stop, and a cart with a player riding can make it to the end of the track. The interaction with blocks next to the track seems to be a little stronger with carts on diagonal track. With lampposts placed only every 10 blocks along the track an unmanned cart could only cover 12 blocks, and with a player riding just over 180 blocks, a significant reduction.
What the tests have confirmed is the increase in speed. On each curved track a cart effectively moves 2 blocks, thus its maximum speed is 11.314 m/s, an improvement over the maximum of 8 m/s on a straight track.
A minecart with no rider, at full speed can climb 10 blocks on unpowered, upward sloping rail. This suggests that powered track is only needed at this height to keep a cart climbing. However, the cart slows so much that it can only reach another 5 blocks high with 2 lengths of powered track starting at 9 blocks high. Further testing showed the minimum number of powered blocks to keep the cart climbing well is 3 powered rails every 6 blocks starting at 9 blocks high, at the cost of a strong reduction in speed. To maintain speed in a climb a ratio of 5:4, powered versus regular rail segments, is a good compromise for decent speed at a reasonable cost, starting with 2 powered rails on the flat before the upward slope to be sure the cart starts the climb at maximum speed.
If construction cost is no object one can of course use powered rails all the way to the top to get the best possible performance.
Carts with a rider, or chest carts, have more momentum and so climb higher than one that is unloaded. With a rider a cart can climb at least 24 blocks before needed powered rails to go higher.
Powered rails
Behavior
Powered rails may be activated by redstone to turn them "on" which makes them able to add momentum to carts already moving over them. When unpowered they are "off" and strongly reduce the momentum of a cart passing over them.
Note that a minecart placed on an active powered rail will not move as it has no motion for the powered rail to add to. Once the cart is pushed, its rider uses a forward or backwards move, or a block placed at one of its ends, the cart's direction of motion is set and the powered rail can affect it.
If a cart is placed on an inactive powered rail that is sloped the braking effect is strong enough to keep it stationary against "gravity". if the powered rail is then turned on gravity is enough to start the cart rolling downhill, which will then cause the rail to affect the cart's momentum.
When one end of a powered rail has a solid block placed next to it a stationary cart on it will be accelerated away from the block.
There are two common ways to exploit this behavior:
Unpowered rail at the start of a rail line with a non-transparent block next to it. Place a cart on it and apply a redstone signal to the block. The cart will be launched.
Powered rail at the start of a rail line with a block flush to the ground next to it, and an upward facing piston under the block. When a cart is placed on on the track a redstone signal to the piston will raise the block and so provide the initial push to start the cart moving.
A rail that is "off" slows carts passing over it as if by friction. A single inactive rail is enough to completely halt a cart in most cases. Carts that are loaded and/or at full speed will not be stopped by just one block, but two "off" rails will do it. On a very long downslope, it will take a stretch of three inactive rails to be sure of halting a speeding, loaded cart.
Powering
Power can be transmitted to the rail from any of the six adjacent positions (above, below, or any side) in the same way redstone is powered.
Powered rails will propagate power to each other if they are adjacent and part of the same track, for up to 9 blocks from the power source (1 being powered directly which is propagated to 8 adjacent rails). They will also receive power from any adjacent detector rails (when a cart passes over it), even if they are not part of the same track (which follows from the rules above).
Because the detector rail powers attached rails, it could be used to activate power rails only when necessary:
For one-way travel, place a detector rail before the powered rail
For two-way travel, place a detector rail on both sides of the powered rail
In practice it is far more efficient to have powered rails constantly active using other means:
Place a redstone torch either next to the powered rail or two blocks underneath it or use powered redstone wiring to achieve the same effect
Place an activated lever on the bottom side of the block the powered rail is on (cheapest, only requires a stick and a cobblestone to make)
The speed of a cart which is boosted using Powered Rails is calculated to be at the maximum of 8 m/s, however the cart maintains an internal "momentum" value that keeps the cart at the maximum speed of 8 m/s until the excess momentum is depleted.
A single powered rail on flat ground against a stop block gives an occupied cart enough momentum to travel 80 rail tiles on a flat surface, or 8 tiles for an unoccupied cart (in Beta 1.5, this was 64 blocks and 8 blocks respectively). Tests show that putting several powered rails in a row has observable diminishing returns with each additional powered rail on how much farther a cart will travel.[1] This implies that the momentum gained is smaller if the cart's speed is faster and vice versa.
Tests show that climbing slopes impact momentum severely, thus the cart speed plummets fast. However, if there is enough surplus momentum, carts will travel up slopes with ease. Conversely, carts traveling down slopes gain momentum. Downward sloped powered rails will add both the momentum from the rails and the momentum from going downhill to your cart.
Climbing slopes
6 blocks up without additional boosting in Beta 1.5, 10 in Beta 1.6
Launching from rest via four powered rails, an occupied cart has enough momentum to climb a 1/1 slope 10 blocks high without further boosting and then travel horizontally at a very slow speed for at least a dozen blocks before coming to a stop. Such a cart does not have enough momentum to climb an 11 block high slope. An empty cart in a similar setup will only climb 5 blocks and then travel a few blocks horizontally.
When minecarts travel upslope without having sufficient stored momentum, a powered rail is needed 1 every 4 blocks to sustain movement all the way to the top of the slope, Alternatively, 2 every 8 blocks are somewhat easier to supply power to. However note this is a worst-case scenario where there is no momentum to start with.
If working with empty carts (for instance, a storage cart transport system), 1 powered every 2 blocks is necessary to sustain movement. To minimize powering requirements, 2 powered followed by 2 unpowered can also be used (analogous to loaded player-carrying carts).
When traveling up a slope at full speed (8 m/s) one powered rail will maintain full speed for two blocks high, meaning that alternating between powered and unpowered rails will maintain full speed up a slope. Consecutive powered rails on a slope will add more momentum, so eight powered rails can be followed by 8 normal rails, and full speed will be maintained while traveling up the slope. Less momentum is gained by each consecutive rail as the strip gets longer.
Optimal Use
A test was conducted by building straight tracks 2000 blocks long on level ground with different intervals of powered rails. The time to travel the full 2 km length on an occupied minecart was recorded with each interval. The following table lists the results:[2]
Powered rail spacing
Time to travel 2 km
Speed
% Slowdown
1 every 32 or fewer meters
250 seconds
8 m/s
0%
1 every 33 meters
252 seconds
7.94 m/s
0.8%
1 every 34 meters
250 seconds
8 m/s
0%
1 every 35 meters
253 seconds
7.91 m/s
1.2%
1 every 36 meters
251 seconds
7.97 m/s
0.4%
1 every 37 meters
252 seconds
7.94 m/s
0.8%
1 every 38 meters
251 seconds
7.97 m/s
0.4%
1 every 39 meters
258 seconds
7.75 m/s
3.1%
1 every 40 meters
259 seconds
7.72 m/s
3.5%
1 every 41 meters
263 seconds
7.6 m/s
4.9%
1 every 42 meters
267 seconds
7.49 m/s
6.4%
1 every 43 meters
270 seconds
7.41 m/s
7.4%
1 every 44 meters
271 seconds
7.38 m/s
7.7%
1 every 45 meters
281 seconds
7.12 m/s
11%
Powered rail spacing
Time to travel 2 km
Speed
% Slowdown
1 every 46 meters
281 seconds
7.12 m/s
11%
1 every 47 meters
290 seconds
6.9 m/s
13.8%
1 every 48 meters
301 seconds
6.64 m/s
16.9%
1 every 49 meters
306 seconds
6.54 m/s
18.3%
1 every 50 meters
308 seconds
6.49 m/s
18.8%
1 every 51 meters
306 seconds
6.54 m/s
18.3%
1 every 52 meters
314 seconds
6.37 m/s
20.4%
1 every 53 meters
311 seconds
6.43 m/s
19.6%
1 every 54 meters
319 seconds
6.27 m/s
21.6%
1 every 55 meters
322 seconds
6.21 m/s
22.4%
1 every 56 meters
319 seconds
6.27 m/s
21.6%
1 every 57 meters
333 seconds
6.01 m/s
24.9%
1 every 58 meters
339 seconds
5.9 m/s
26.3%
1 every 59 meters
345 seconds
5.8 m/s
27.5%
The time to travel the full 2 km length is different for all the other minecart type, requiring more powered rails to reach the top speed of 8 m/s. The following table lists the data collected: [3]. Note that the optimal rail spacing for a fully loaded cart differs, see the original reference for details.
Powered rail spacing
Time to travel 2 km
Speed
% Slowdown
1 every 27 or fewer meters
250 seconds
8 m/s
0%
1 every 28 meters
256 seconds
7.82 m/s
2.3%
1 every 29 meters
260 seconds
7.71 m/s
3.6%
1 every 30 meters
262 seconds
7.64 m/s
4.5%
1 every 31 meters
262 seconds
7.65 m/s
4.4%
1 every 32 meters
266 seconds
7.54 m/s
5.8%
1 every 33 meters
270 seconds
7.41 m/s
7.4%
1 every 34 meters
275 seconds
7.28 m/s
9%
3 powered rails in a row on flat terrain is sufficient to boost all minecart types from rest to the maximum speed of 8 m/s.
Thereafter, the optimal spacing of powered rails on a level track is to use 1 every 38 blocks for occupied carts (that is, a repeating pattern of 1 powered rail followed by 37 normal rails, then another powered rail, and so on) which maintains a constant minecart speed of 7.97 m/s. If gold is in short supply, it is possible to use powered rails with more space between them at the cost of reduced overall speed. If you definitely must have the full 8 m/s you should place a powered rail on a level track 1 every 34 blocks for occupied carts
For all other minecart types, the optimal spacing of powered rails on a level track is to use 1 every 27 blocks for utility carts (1 powered rail followed by 26 normal rails).
However, the optimal spacing of torches is 1 every 13 blocks in order to keep the entire track lit at light level 8 and above. So for aesthetic purposes, it might also be desirable to space out powered rails every 39 blocks with 3.1% speed losses for occupied carts, or to space them out at 1 every 36 blocks with torches 1 every 12 blocks for the same speed loss as 1 every 38 blocks.
An optimal use requires the synchronization of minecart movement and powered rail placement; moving a powered rail a single block forward or back along a track can make a significant difference. This is because the momentum of a minecart is increased per tick (=1/20 of a second) the cart spends on a powered rail (by 0.9 m/s for occupied carts). When a cart travels at the maximum 8 m/s on a straight track, it alternately spends either 2 or 3 ticks on each block. For an optimal placement, the powered rail must be put where the cart spends 3 ticks, otherwise one third of the boost is wasted.
A diagonal track is a track that consists of the pattern 'left corner' attached to a 'right corner' attached to a 'left corner' ... and so on. When minecarts travel on a diagonal track, the camera is held steady in the diagonal direction and the minecart visually travels diagonally along the track as well. The speed limit of minecarts is actually 8 m/s per cardinal axis, thus when traveling on 2D tracks, the cart will travel 8 m/s in both cardinal directions of travel to result in a net vector of about 11.3 m/s or the square root of 128. With a 3D track you travel as fast as 13.85 m/s or the square root of 192.
Because of this difference, there is also a difference between the optimal spacing of powered rails when used on a 2D track when compared to straight travel on flat terrain. This is currently undetermined to high accuracy but is roughly 1 every 52 blocks.[4]
There is also a difference in unmanned or storage mine carts so it is advisable to use a shorter interval if these carts will be used on the track.
It seems as if the optimal powered rail placing interval to make storage mine carts move is 4 (1 Powered Rail every 4th block). Compared to shorter intervals the reduction in speed is minimal. The maximal possible interval seems to be 9 as the minecart will not reliably reach its destination when using higher intervals.
A detector rail will power 4 adjacent blocks and 2 blocks below it when a minecart, occupied or empty, is on it. This makes it possible to activate powered rails inline without redstone torches or wiring.
A detector can be used to activate adjacent powered rails. However, if the detector is used to activate more than two or three (depending on approach speed) powered rails, the rails will deactivate before the minecart reaches them, bringing the cart to an immediate stop.
One-way powered rail lines can be created by placing a detector rail before a powered rail. This way, occupied carts will only be boosted if they are traveling the proper direction. Carts going the "wrong" way will be brought to a stop because the powered rail is inactive.
Although inefficient, A two-way rail line can be created by placing detector rails on either side of the powered rail.
Alternately, placing powered and detector rails on a 1×1 slope will not propel a cart more than 3 blocks upward if there is not enough initial momentum. The cart will lose too much speed on the incline, meaning it can't make it from the detector rail to the powered rail before the powered rail returns to the "off" state. If the cart is in a train of two or more carts, the last car in the train will become stuck instead.
A detector rail could also be used to activate an event based on a cart's location. For example, a fail-safe can be created to release a stopped cart in order to prevent a collision with an arriving cart. The arriving cart passes over a detector rail, activating a powered rail that boosts the resting cart away.
Additional properties
Powered rails do not curve like other rails.
Curved power rails only exist in the case where the final direction is towards the east (with the powered rail appearing in the north-south orientation), or in a T-junction where one path faces east along a north/south track.[5][6] It is possible to make a one-way curved railway using power rails, but not a bi-directional one.
When placing rails, regular rails prefer to curve towards the powered rail. In cases such as these, the south-west rule applies.
A cart traveling on a powered rail that collides with an object (wall, single block, player, other cart) will reverse direction. It will not reverse direction if it collides with a translucent block, such as Stone Slabs or Glass. If a track including powered rails is bordered by blocks acting as "buffers", the cart will indefinitely continue back and forth along the track. Having carts interact with each other on a short track designed this way can be used to chain multiple carts together as a "train". Once aligned, they will all move together at relatively the same speed.
How far the charge passes down adjacent rails is independent of the length of redstone wire. Even if the rails are connected to a redstone torch by 15 blocks of redstone dust, the 8 adjacent rails will still be powered normally despite the fact that they should be out of range for the torch.
Powered Rail Mechanisms
Stop points
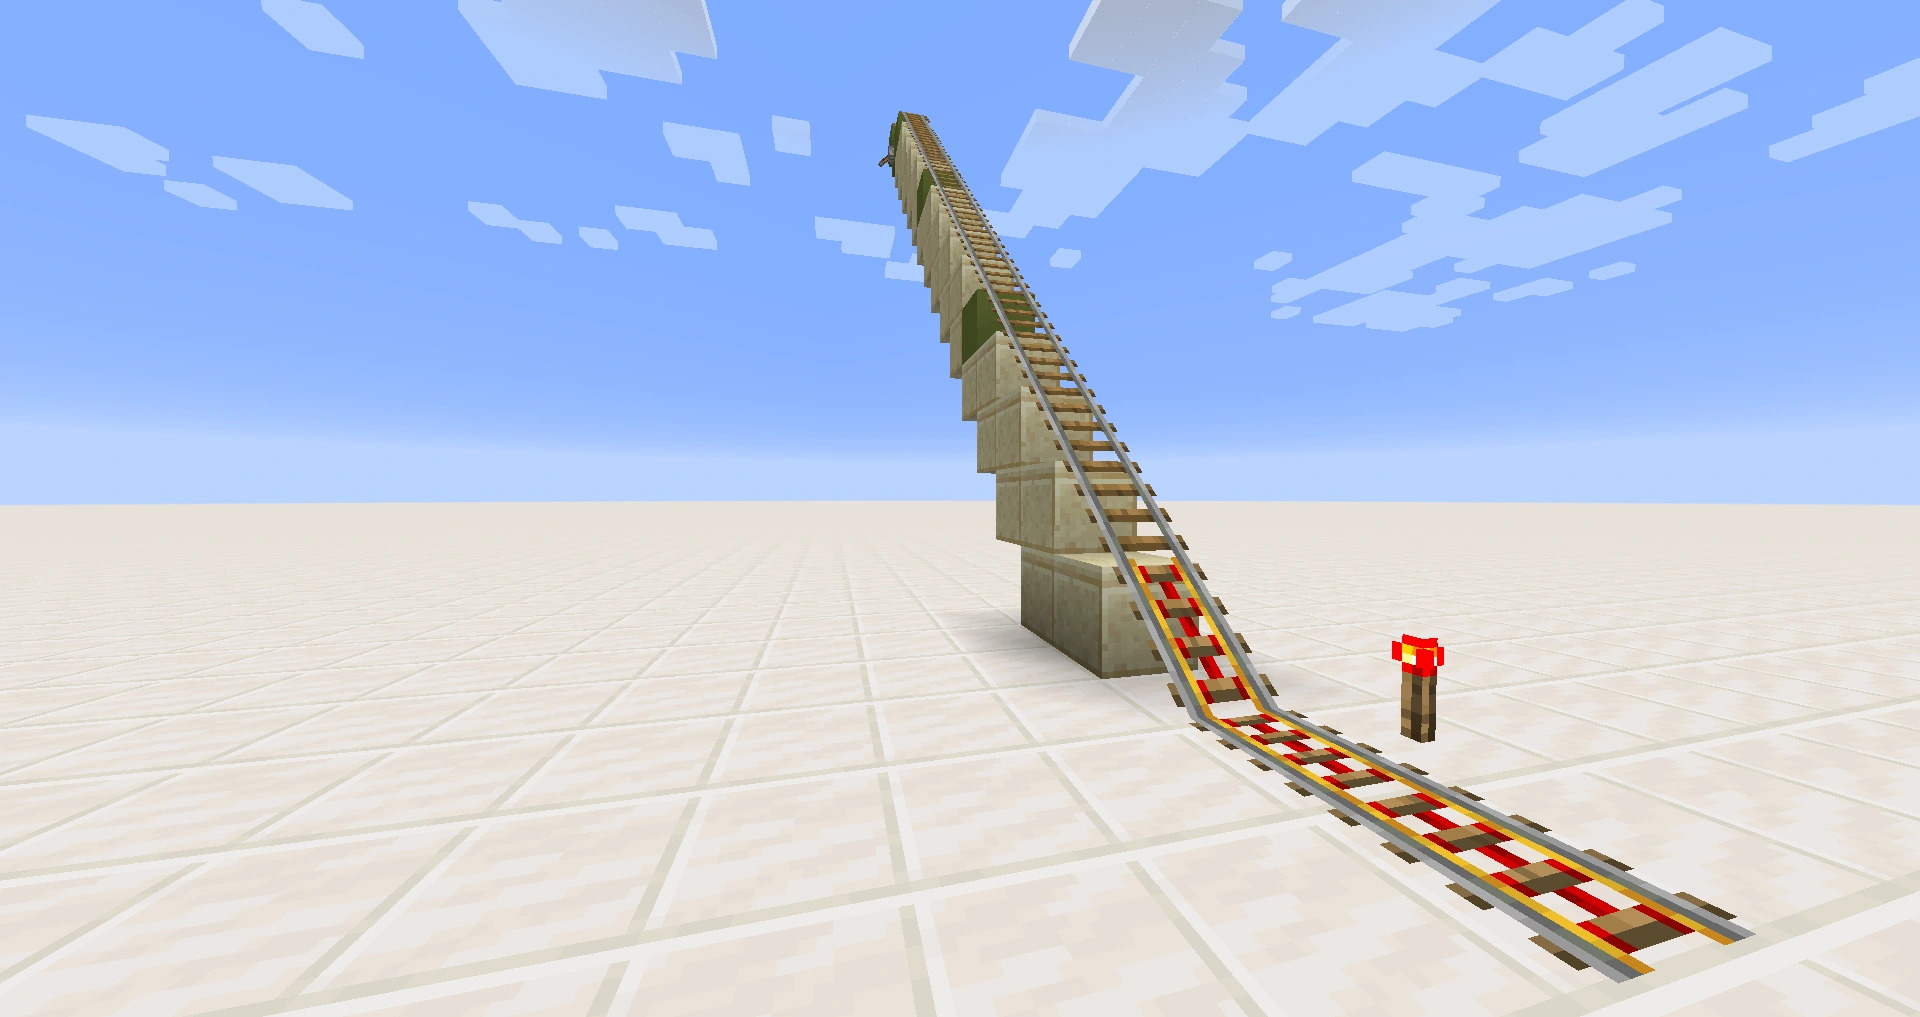
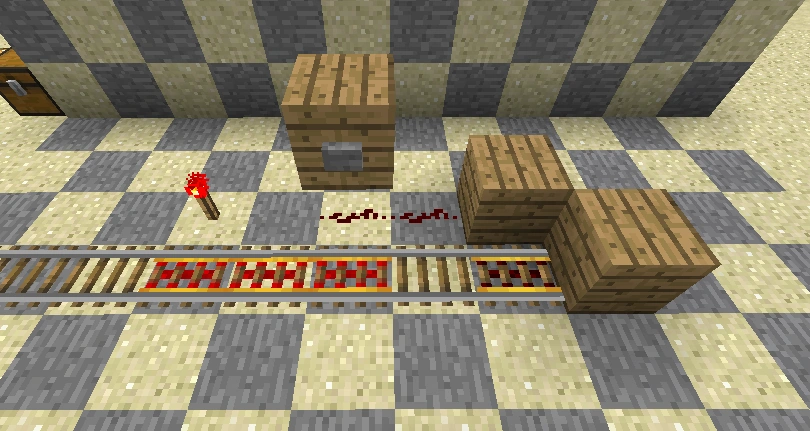
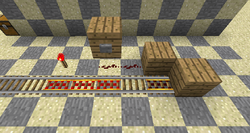
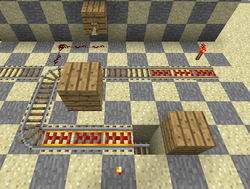
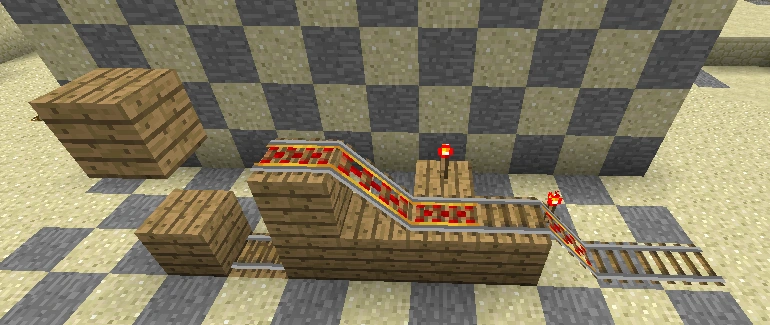
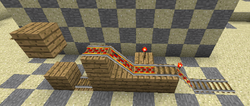
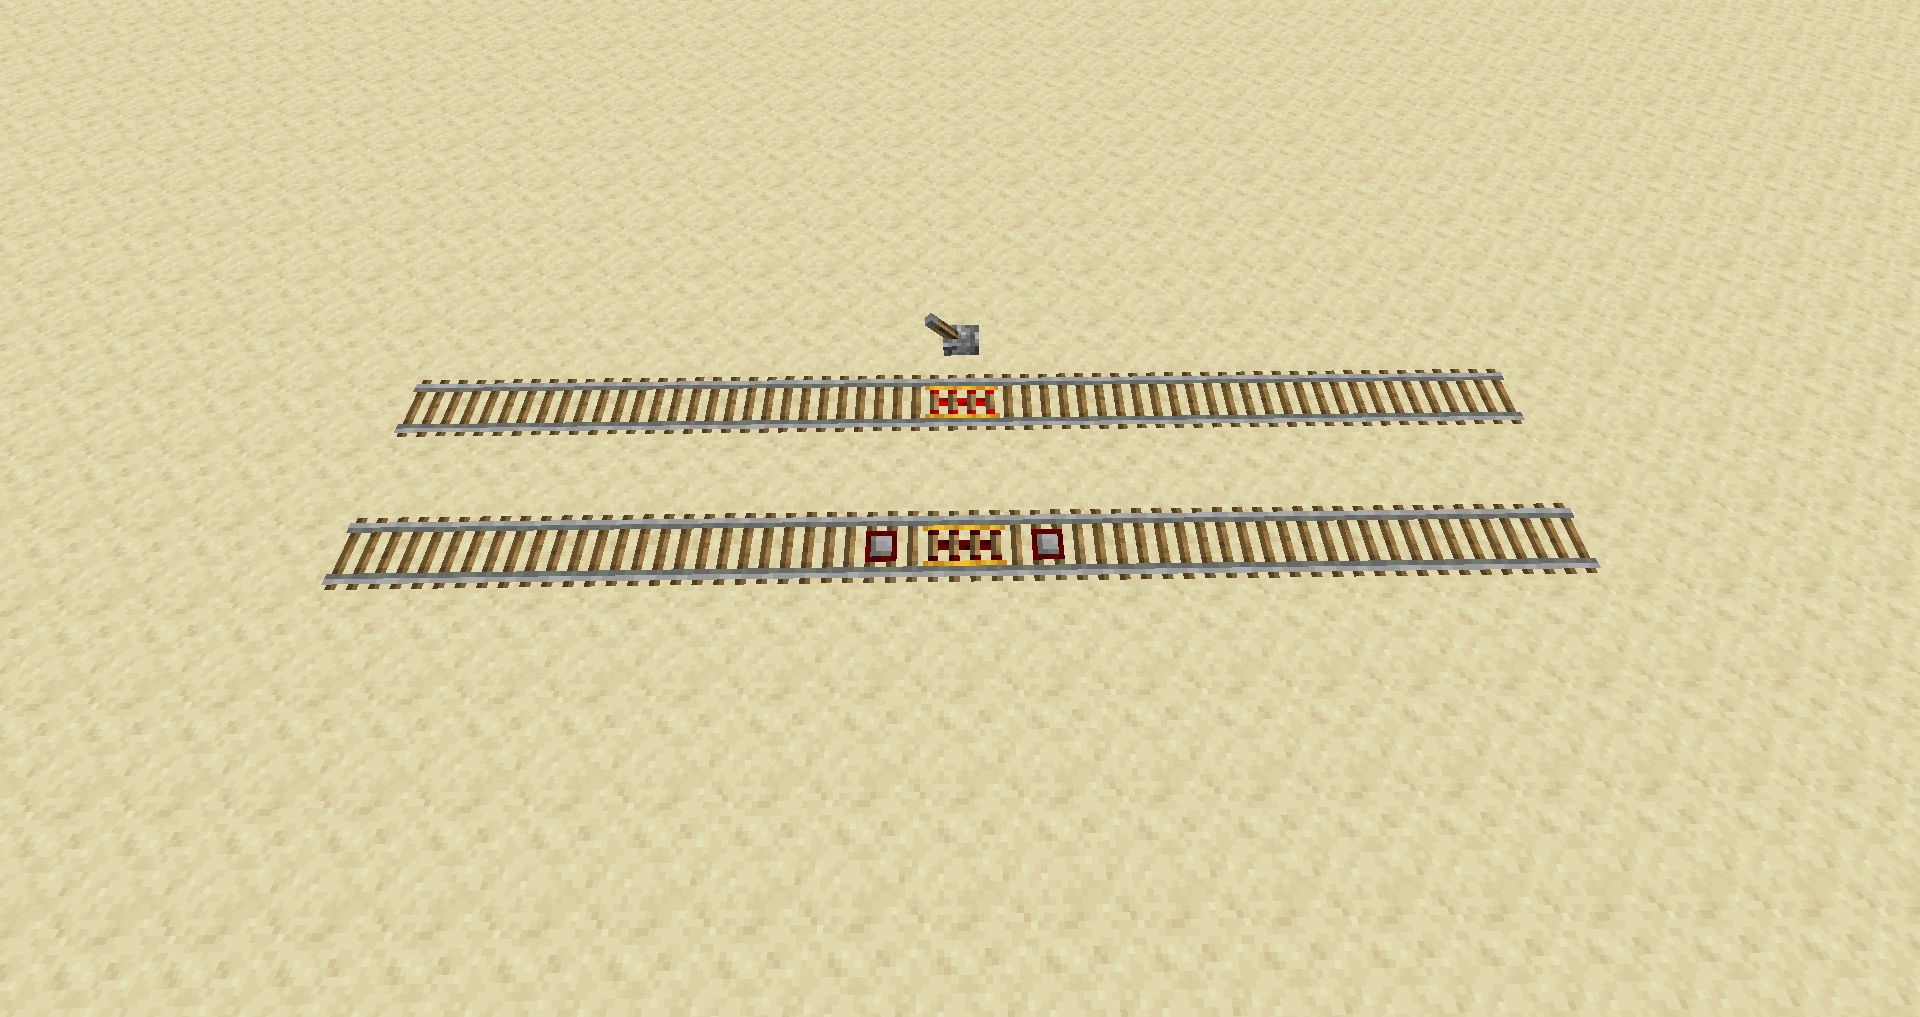
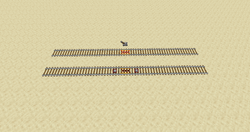
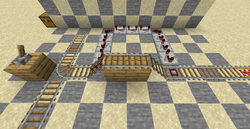
It is possible to make points in your track where a cart is stopped and then jumpstarted again by player input. This can be useful for creating checkpoints to certain sites of interest in your world. This can be done by using two powered track pieces on a one block incline, by having the first powered track piece going down, with the second powered track piece at the bottom and a button placed alongside the second powered track piece, so that the button is directly above the track. You can see an animated example of this stop point if you click on the image to the right.
Animated Gif of a stop point. Click for the animated version
When the cart comes to this point it will stop On the incline, allowing the cart to use gravity to start the boost when the button is pushed. Players can then either stay in the cart and carry on to the next stop, or leave the cart at the station for themselves/other players to use later.
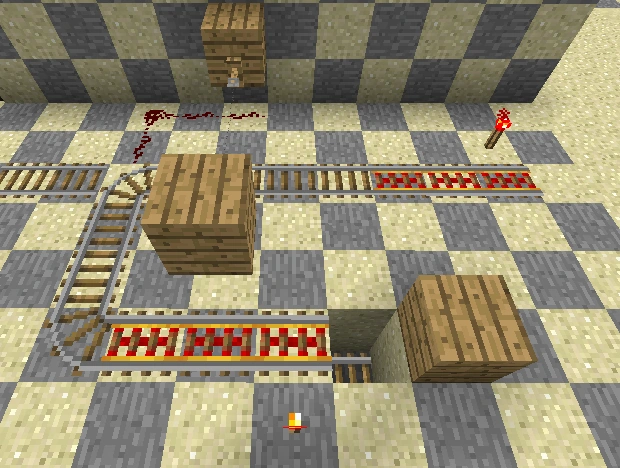
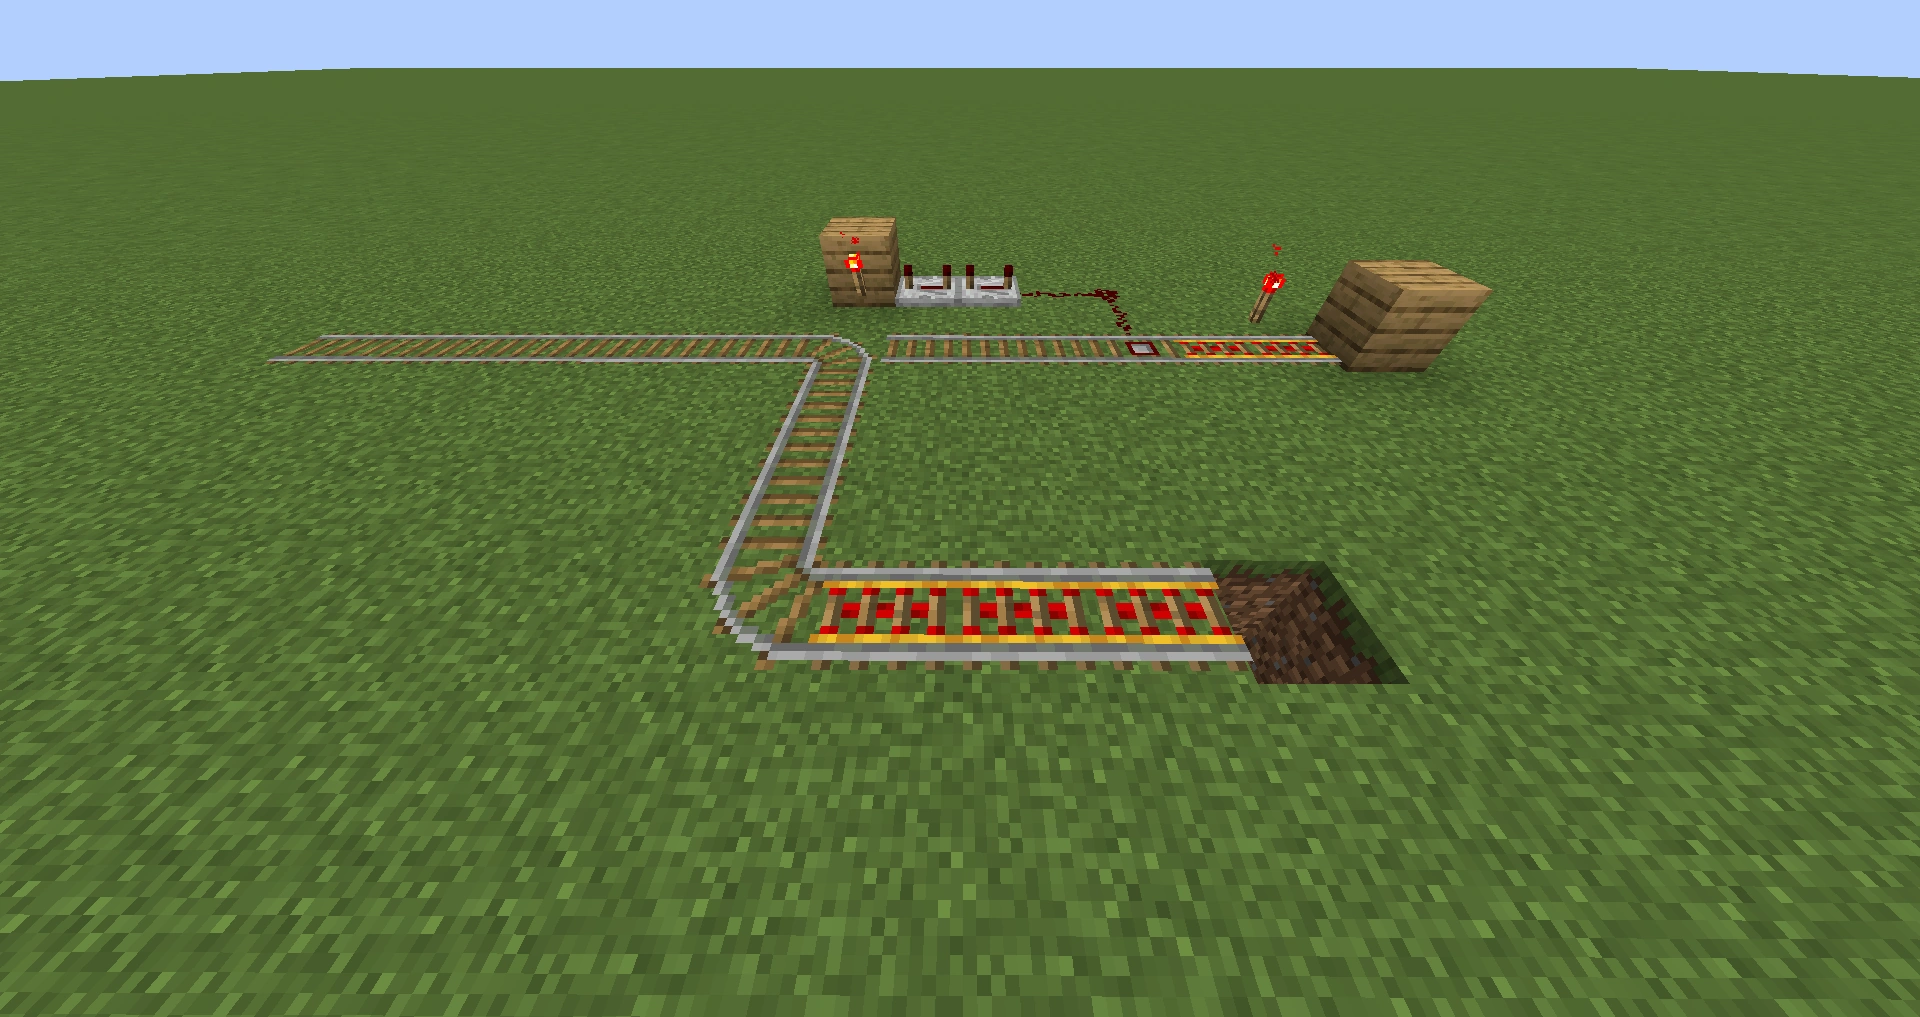
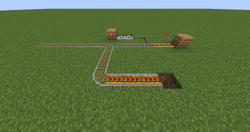
A "two-way" stop can be made by combining two of the normal stops with a detector rail in between. This will pause a minecart travelling in either direction and allow them to be restarted by pressing a button.
Two-way minecart stop, click for larger
Starting boost
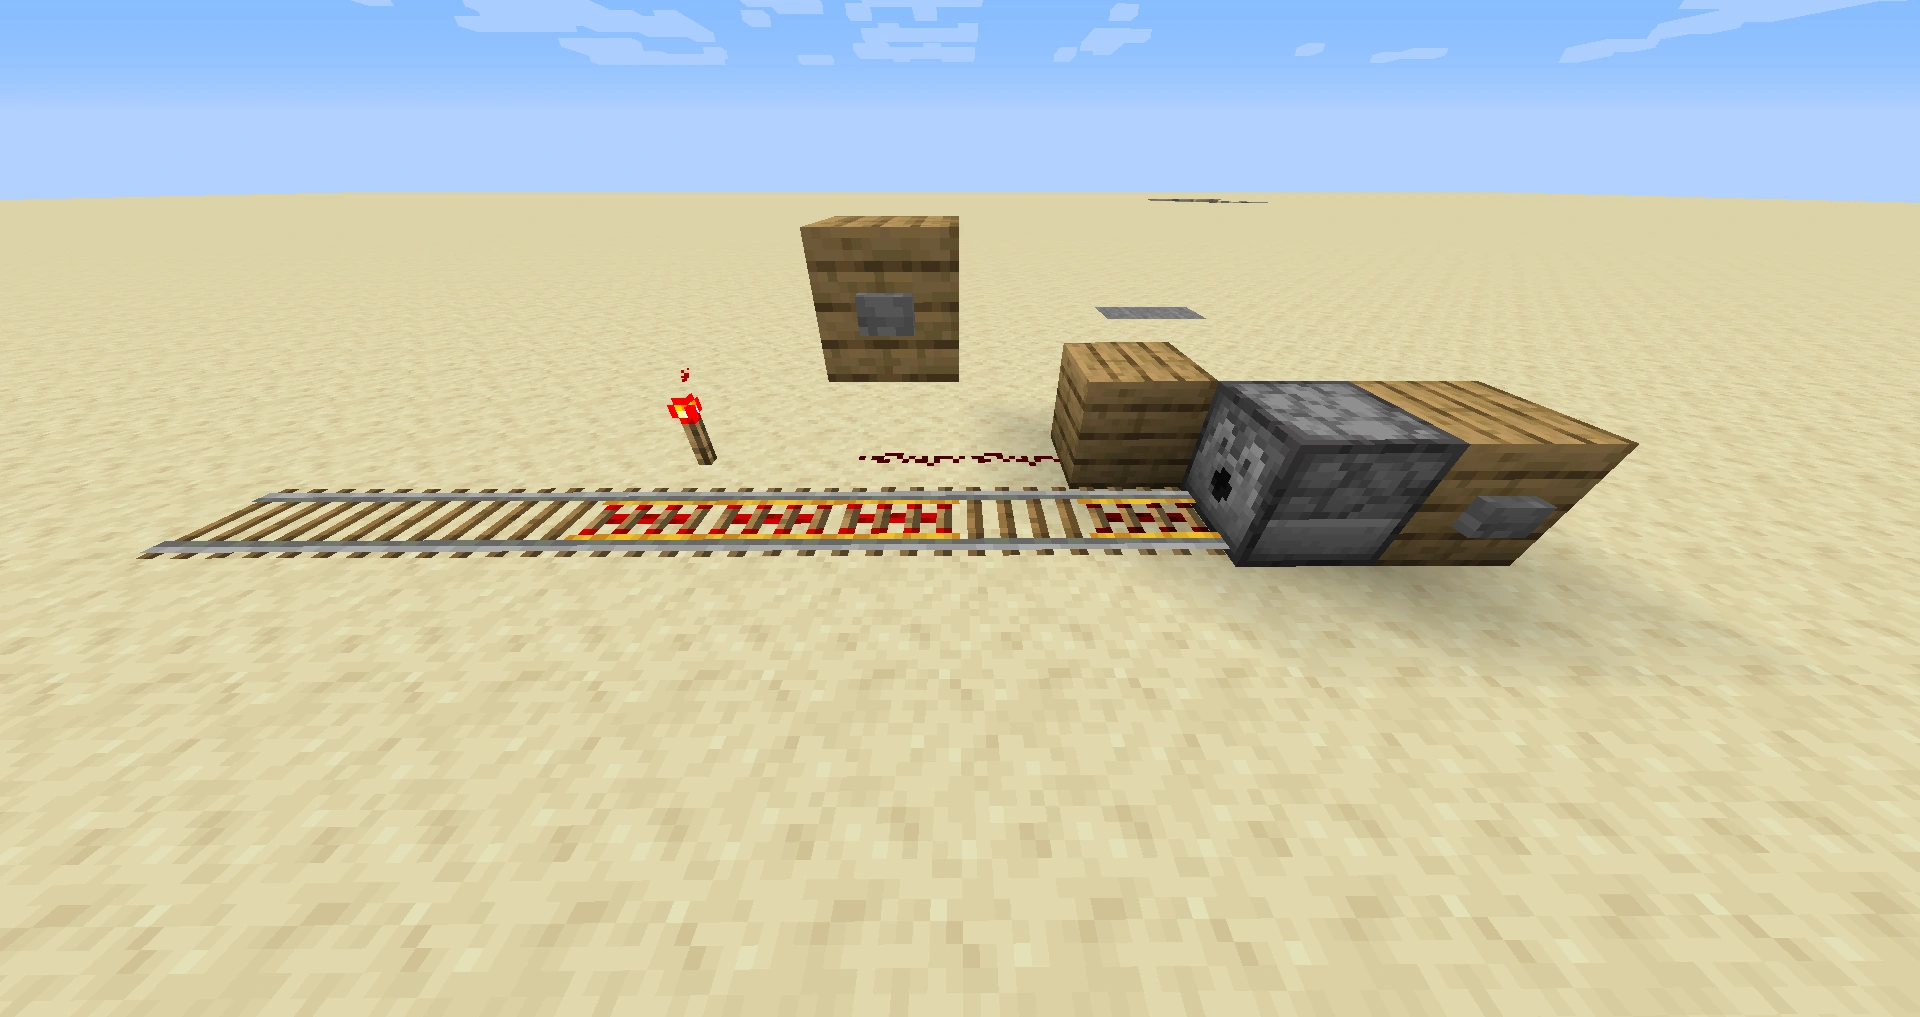
To create a simple initial boost device using 2 powered rails, dig a hole 1 block deep and 2 blocks long. Place the powered rails inside the trench, connect one end to the track that you wish the mine cart to exit. Finally place the mine cart on the powered rail. Once power is applied to the rail the minecart will be boosted out.
"Whirlijig" Cyclical Minecart Accelerator
With simple switching, a minecart can be temporarily diverted into a small loop of powered rails and left there to accelerate. After a delay, which can be achieved with either repeaters or a hopper timer, a second switch can be activated to set the mine cart loose down the track. Using this method, with fairly modest delays (in the range of 10-20 seconds) a set of four powered rails can be used to propel a minecart at full speed for several hundred blocks, thus vastly exceeding the efficiency of placing powered rails along the track.
Parts of a simple system
Launcher
Launchers, stations or exits all refer to a point in the system where a rider can safely enter or exit a minecart. They generally use a button to launch the cart.
A simple minecart launcher
This first design uses a button, a few powered rails, a bit of redstone wire, and a redstone torch. The button powers the powered rail which launches the cart away from the solid block behind it. In this style of launcher, it is important for an incoming minecart to make it all the way up to the back block so it can easily be launched again.
A launcher with cart dispenser
This second design is essentially the same as the first. A dispenser replaces the solid block behind the last powered rail. The dispenser will launch the minecart just like the solid block, but creates a convenient place to store extra minecarts. To activate, use the button behind the dispenser and a minecart will pop onto the rail and be ready for use.
See also: Tutorials/Minecart start booster
Rider Detection
Players will tend to want to detect whether a cart has a player in it or not as empty carts will clog a rail system. This is referred to as rider detection.
Trip wire based design
A trip wire based design is quick to set up and will reliably detect a player. However, it won't detect some non-player mobs, specifically 'short' mobs (wolves, spiders, pigs, etc.).
To build, a trip wire is attached to hooks one block above the track. Two blocks further is a junction which is set by default to turn empty carts back to the station. An empty minecart will not trigger the trip wire and be sent back, while an occupied minecart will send a short pulse to the junction and continue along the rest of the track.
Depending on orientation, the signal may need to be inverted with a redstone torch. Although the torch will add delay, it is minor and shouldn't affect the results. This design assumes the minecart is moving at top speed. If your minecart is moving slower than that, you can either add delay to the wire using repeaters or increase the speed of the minecart with a booster just before the trip wire.
A momentum based design
Another method to check for a rider is to take advantage of the change in speed of the cart, as an empty cart slows down more quickly. In this design, a minecart will create a pulse when it passes the detector rail. If the minecart is empty, it will get to the turn just as the signal does and be sent back. If the minecart has a rider, it will get to the turn before the signal and be able to continue on. This design requires the track to be set by default to let the cart through.
Empty Carts
An overflow pile for empty carts
When an empty cart is detected, generally it's a good idea to send it into an overflow pile. An overflow pile is a drop of two or more blocks with a rail at the bottom. When carts are boosted into the hole, they will snap to the track, regardless of how many carts are already on the track. This pile should be placed where the carts can be collected, either close to a station or in a maintenance area. It is important to boost carts to full speed just before they are dropped to ensure they don't become stuck on the end of the track and eventually back up the system.
Another variant of this method is to replace the rail at the bottom with a cactus, thus destroying minecarts that fall in. Placement of a hopper next to the sand on which the cactus is placed then allows saving of at least some of the carts.
A dispenser loaded with fire charges will break minecart entities, dropping them as items. Placing a detector rail above a hopper, with the dispenser facing the detector rail, will collect minecarts as items, which can then be stored in a chest or routed to a cart dispenser.
Boosters
Two styles of speed boosters
Boosters are a method used to prevent carts from slowing to a stop on a track. Because carts will eventually slow to a halt on level track, and very quickly turn around on regular rail track whilst uphill-bound, boosters are a method of assuring one's cart keeps moving. Boosters accelerate carts to a terminal velocity of 8 m/s, as they use powered rails, and help effectively counter the forces of friction and gravity on the acceleration of the cart.
Boosters are simply a single powered segment of powered rail, powered through detector rails, redstone torches or levers next to them. Refer to the diagrams to the right.
Players generally keep the distance between boosters uniform, although these distances vary by player. One common, and according to many the most efficient, distribution of powered rails is to place powered rail every 38 blocks on level ground. An easy way to place a lot of track using this count without needing to keep track of each rail is by dividing the rails into stacks of 37, as shown on the right. Approximately 1 out of every 3 rails will need to be powered to travel uphill due to gravity.
Junction
Stations often have one line leading to one destination. Multiple destinations require multiple lines. A junction is a fork in the track where the rider can select which destination he wishes to visit.
Two-way junction
This design uses a lever to switch the track and the powered rail will become powered after a preset delay. The detector rail starts the delay. In this design, the lever will always point towards the selected destination regardless of direction.
Four-way junction
A junction that has multiple destinations can be set up by expanding the junctions. In the design to the right, the rider is given much more time to select his destination than a two-way junction. He can select any destination by first selecting left or right, then forward or backward. This design doesn't scale well but can be used in sequence to create any number of destinations.
Multiple Destination Selector
There are many, many styles of minecart destination selectors. Most are modular, meaning they can be extended to include more destinations. An RS-NOR latch array is often used to select a destination as these latches have a designated reset line (as opposed to a t-flip flop which only has one input).
This design was selected for its simplicity and for its ability to be expanded with relative ease. One of the buttons on the selection panel is a designated reset line since additional input doesn't clear the previous selection; that is to say, a player can select more than one destination with this design (although a launched minecart will take the left-most of the selected destinations).
The following design is heavily influenced by the previous but uses a different RS-NOR latch design involving pistons. It has a reset integrated in the selection such that a new input will clear a previous one. By removing the designated reset line of the previous version, it allows for an additional station in a similar amount of space.
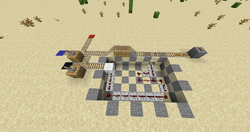
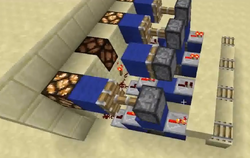
Example Of A System Incorporating Some of the Basic Parts
This system consist of a "launcher", a different mechanism for "empty carts", a "junction" and a "booster"
System works on tripwire.
The empty minecart is always moving in circles awaiting a passenger. (Empty cart compenent is not needed any longer)
When a passenger is present, tripwire will activate and the rails will switch routes for a few seconds and cart will move away from the station. (Launcher, booster and junction all infused into a simple redstone circuit.)
Troubleshooting
When a track system isn't working properly, it can be difficult to fix for someone unfamiliar with redstone and rails.
Common solutions include:
Changing the delay of circuit by adding a repeater or moving a detector rail to trigger earlier.
Changing the speed of the minecart by adding powered rails or moving the current ones further away.
Checking that powered rails are powered properly.
Turn the design around, as direction can affect how it works. Generally this isn't the issue, but it's good to rule it out.
Searching on the minecraft forums can help. If you need to create a new post, be sure to include the direction you're working (the F number), as directionality can be a factor in the design.
Diagonals
Curved/diagonal rails move the minecart 1.414 (the square root of 2) times faster. Because of this, you can use diagonal rails for speed. Note that you will not be able to to do this for powered rails.


