BDJP007301 (talk | contribs) (Undo revision 822169 by 73.221.127.215 (talk) Unexplained change.) |
(→Designs by Tango Tek: Corected incorrect information) |
||
| Line 54: | Line 54: | ||
'''Iron per hour''': 2600<br> |
'''Iron per hour''': 2600<br> |
||
'''Scalable''': yes (watch video)<br> |
'''Scalable''': yes (watch video)<br> |
||
| − | '''Description''': Tango Tek has discovered a bug in Minecraft that enables the placing of directly adjacent villages (only works |
+ | '''Description''': Tango Tek has discovered a bug in Minecraft that enables the placing of directly adjacent villages (only works after 1.8.1). All of his designs utilize this principle to layer 32, 64, or even 128 villages into a single iron farm, producing the most efficient iron farms ever created. His latest and greatest design, the Iron Titan, is modular, and can be easily scaled up in increments of 32 villages. Tango's recommended design has 64 villages which produces a whopping 2600 iron every hour. It can theoretically be stacked on top of itself to the sky limit, but that would obviously be very expensive and quite unnecessary (unless you are insane or running an ultra-large server). |
{{yt|STs4wDJewNw}} |
{{yt|STs4wDJewNw}} |
||
Revision as of 17:33, 13 April 2015
An Iron Golem farm is an easy way to acquire many iron ingots (and less useful poppies) with minimal effort after the initial setup. It is an artificial village (or several of them, spaced far enough apart to remain separate) in which golems are spawned and then either killed immediately, or moved to a holding cell (outside the village boundary, so that new ones can spawn in their place) for later killing. If you opt for the first method, you will either need to go AFK while camping out at the collection point, have a hopper collecting your items, or else check back periodically to collect your items before they despawn. This necessity can be avoided by using the holding cell method, which allows the golems to collect while you are working nearby, and then you can harvest them all at once when you are ready so that you don't miss any drops.
General requirements
Iron golems spawn naturally in villages (natural or player-made), provided there are 10 villagers and at least 21 houses (counted as doors). The chance of spawning is 1 in 7000 per tick, which averages around one every six minutes.
There are several ways to build an iron farm, but the decent versions seem to be the ones that use two floors in the golem-spawning zone(16 by 16 by 6), and keep all doors and villagers outside the zone, either above and below the center or in an outer "ring" on the same level. This is in order to maximize the number of available spaces for the golems to spawn in, which in turn will reduce the number of failed attempts, and keep the spawning rate as high as possible. This is much more effective than simply increasing the villager count to raise the golem cap, which only matters for the few seconds between the time when a golem spawns and when it is flushed out and killed. To further increase your output rate, you can build several separate iron farms as long as they are 64 blocks apart, and bring the golems or their drops to a central collection area. The most powerful iron farms are ones that overlap many villages. Tango Tek is the user who discovered the process himself. Since golems are immune to falling or drowning damage, the available killing methods are lava or suffocation (or both like docm77's video.)
Odds of a missed spawn occurring: The previous section is generally true but contains an invalid assumption about the odds. There are 512 valid spawn points in the 16×16×6 block spawn area. Making a farm with only ½ of the valid spawn points (256) does not reduce your chance of spawn by ½. This is because the game randomly "tries" to find a valid place to put a golem 10 times each time an opportunity to spawn a golem comes up. So, your chances become 0.5 for each of the ten tries. Missing a spawn in this case is equivalent to flipping a coin ten times and have all ten come out tails. It is .5^10 or .00098 which is just about one in a thousand odds. A better suggestion would be to use some of the area of the zone to rapidly move golems out of the interference zone so they do not halt further spawning. This is a much more likely occurrence than missed spawns if the golems can’t move out of the area quickly. This is not as rare of an occurrence as has been suggested.
Chances of a missed spawn are calculated as follows:
( 1 - ( valid_spawn_points / (16*16*6) ) )^10 * 100%
So with 256 valid spawn points you will miss 16.2% of the spawns whereas 512 valid spawn points will only result in a loss of 1.7%.
Video
Tutorials/Door-based iron golem farming/video
Design by trunkz
Requires spawn chunks: no
Iron per hour: 40
Scalable: yes
Description: This is an older design by trunkz and one of the earliest to feature two spawning floors for greater efficiency. It uses several villager baskets and door pads and is a little outdated, but quite a good and efficient design for the time it takes to build.
This farm has been tested in Spigot 1.8. Extra care must be taken with breeding villagers as they no longer breed as easily as they did in earlier version. For testing in 1.8 the villagers were bred to a population of 20 on the ground before being transported to their cells (the individual villagers were transported to their cell by minecart, the other 18 went to their cell on a dirt ramp). The method given in the video will probably work if the breeding villagers are provided an ample supply of suitable food, e.g. carrots or bread.
Design by JL2579 (tutorial by docm77)
Requires spawn chunks: no
Iron per hour: 160
Scalable: yes
Description: This design, originally created by JL2579, uses 4 spawning modules, with 2 modules per level, with doors surrounding the modules. This pattern could be repeated to fill a very large area with iron farms. The farm also features a lava system to damage the iron golems so that the piston suffocator works more quickly. Youtuber docm77 made this tutorial for the design.
Design by Nims
Requires spawn chunks: no
Iron per hour: 38
Scalable: yes (you can build a second farm 80 blocks overhead to increase the spawning rates)
Description: This design, by NimsTV, is slightly less efficient then JL2579's design. However, it is much simpler and easier to build, because the water streams are easier to configure and there is only one villager basket. The golem spawning area is larger than the farm, which is why JL2579 did not build his farm in this way. You have to block spawning anywhere outside the farm, if you intend to build several duplicate farms in an array.
Designs by Tango Tek
The Iron Titan
Requires spawn chunks: yes
Iron per hour: 2600
Scalable: yes (watch video)
Description: Tango Tek has discovered a bug in Minecraft that enables the placing of directly adjacent villages (only works after 1.8.1). All of his designs utilize this principle to layer 32, 64, or even 128 villages into a single iron farm, producing the most efficient iron farms ever created. His latest and greatest design, the Iron Titan, is modular, and can be easily scaled up in increments of 32 villages. Tango's recommended design has 64 villages which produces a whopping 2600 iron every hour. It can theoretically be stacked on top of itself to the sky limit, but that would obviously be very expensive and quite unnecessary (unless you are insane or running an ultra-large server).
Designs by DanielKotes
The Iron Towers
Requires spawn chunks: no
Iron per hour: 1300
Scalable: no
Description: Very similar to the Iron Trench, the Iron towers design layers villages one over each other to produce 32 villages. Villages will re-build if they are broken, not requiring any player intervention. At the moment it can only be built up to 32 villages in size, thus producing at most 1300 iron per hour if the full 32 village farm is built. Fortunately, the redstone in this design is much simpler than the older iron trench builds due to the village building process being done in one phase instead of two.
Showcase:
Tutorial:
Design by Panda
The most important part of any farm is its spawning floor, both in regards to maximising spawning area and the speed at which it can remove spawned entities to be replaced. In the following video, Panda describes a unique spawn floor design that drastically increases both of these, to the point where small servers could just use a standard un-chained single village iron farm with this spawn floor to provide ample amounts of iron for the players. Combine this spawn floor with any of the other designs to drastically improve its output. (Spawnpads still work in 1.8).
Showcase:
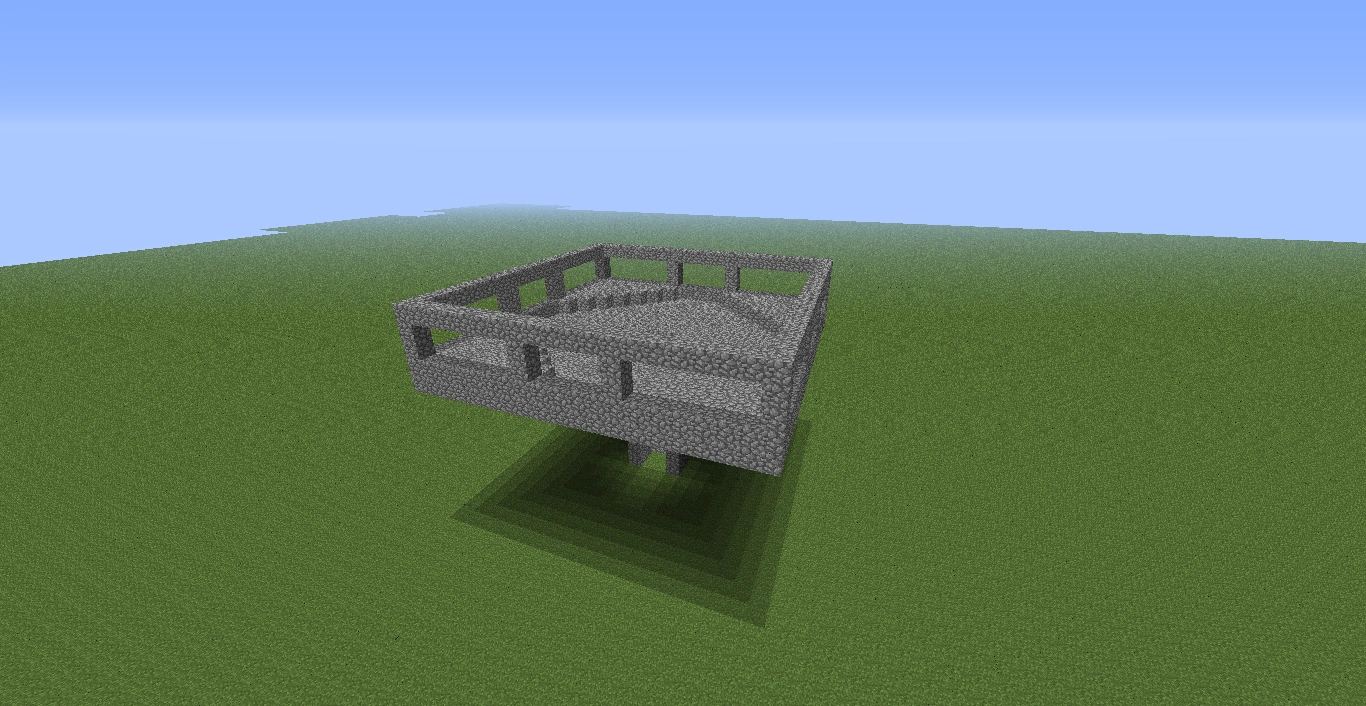
Tower design
This design is good especially for survival. It will get you about a stack every 2 hours. It's pretty efficient, but for faster farms, use one of the above.
Step zero - resources
To build an iron golem farm, you should have a fair amount of resources, such as cobblestone and wood, as well as a way to get villagers into it.
You will need:
- at least 1100 cobblestone (about 18 stacks)
- 64 doors (6 wood per 3 doors=128 wood planks or 2 stacks)
- 18 water buckets
- 1 lava bucket
- 4 signs
- 2 hoppers and 2 chests (This is for the option to use hoppers to collect items when you are away from the farm)
Step one - Building location
To build the Iron Golem farm you should:
- Choose a good location. Don't build it far from your home or main base, because you want the golems to spawn even when you are not at the farm. An ideal spot is on top of your existing home or close to it.
- Gather the resources listed above.
- Follow the instructions below to begin building the base.
Step two - Building instructions
- 1.
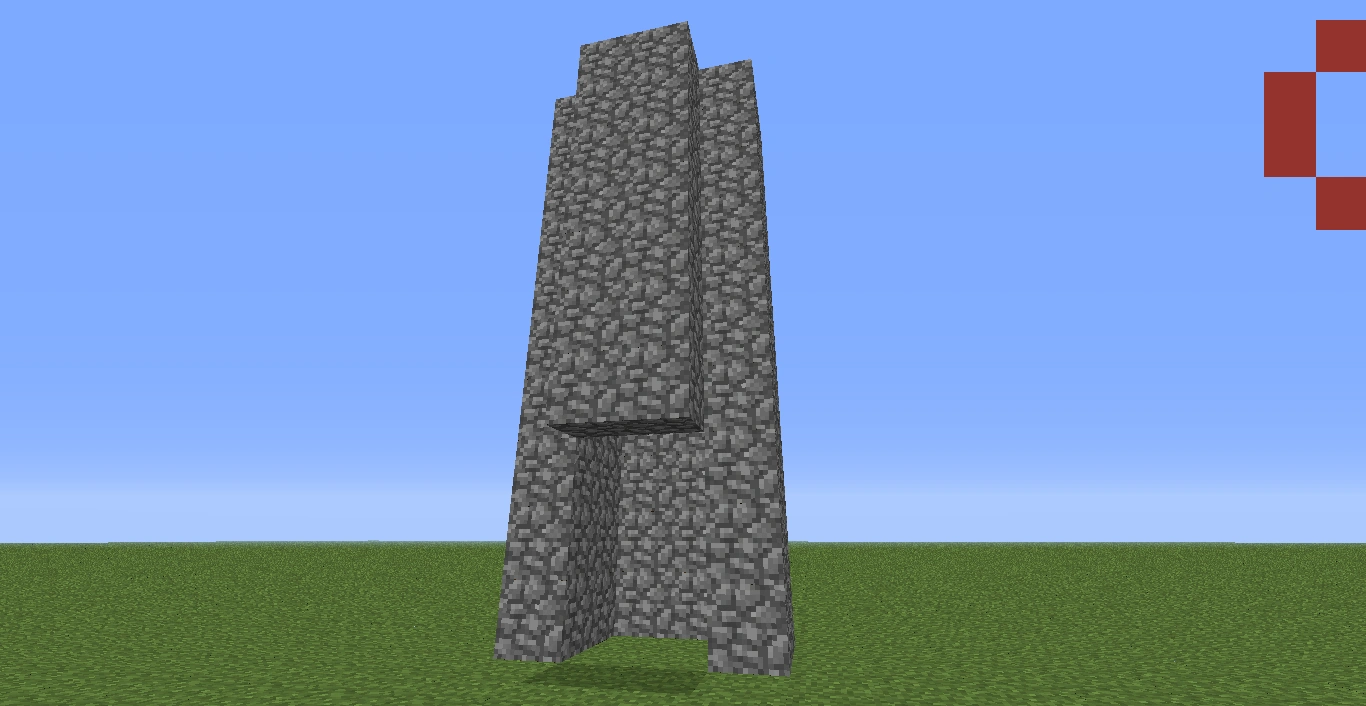
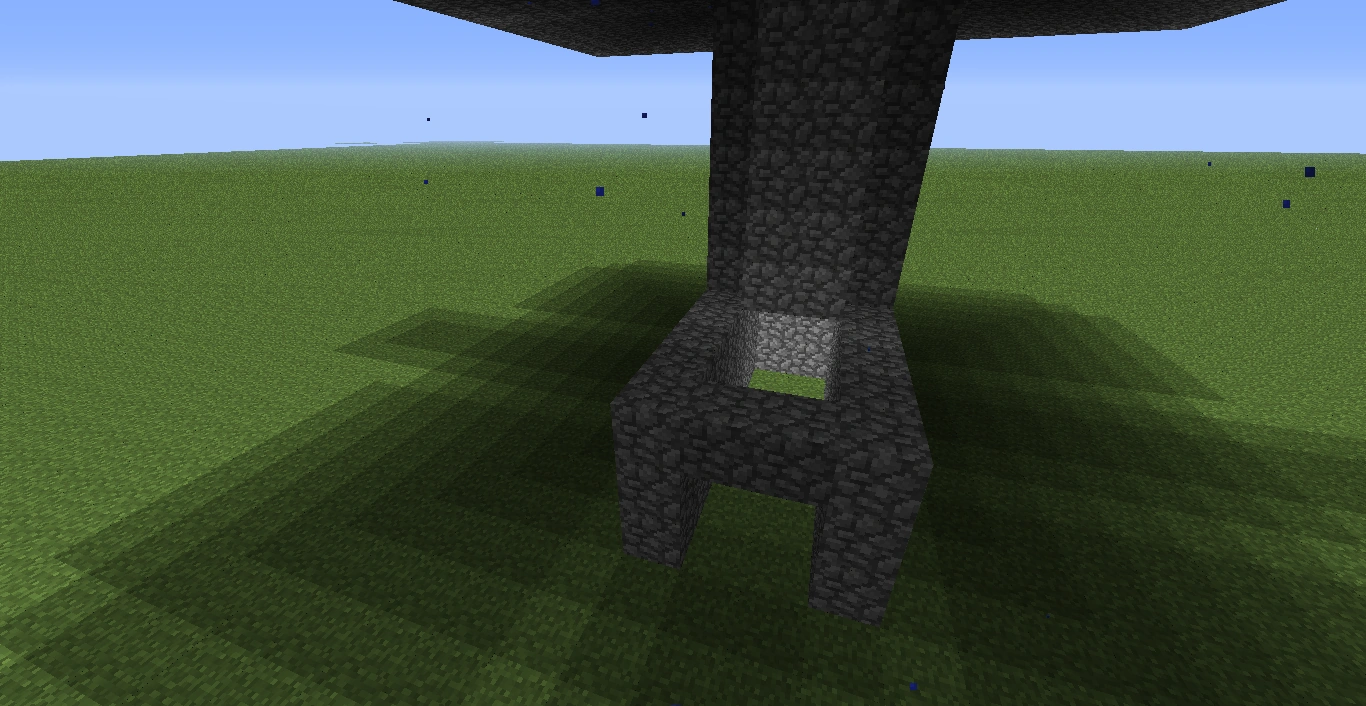
Start by building a 4×4 cobble base.
- 2.
Continue this until you have a tower that is 10 blocks tall. Next, break a 2×3 hole in the bottom so the golems will be able to go through.
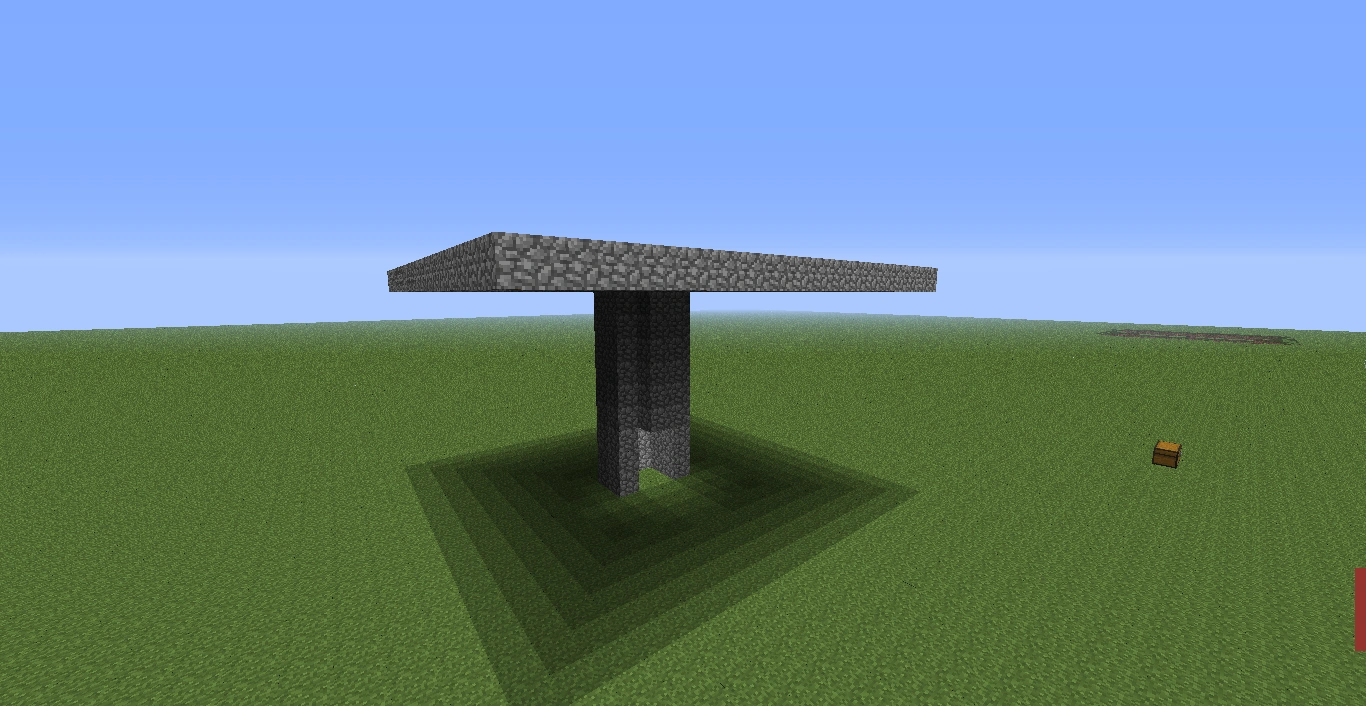
- 3.
Build out 7 blocks from the top of this tower to form an 18×18 platform with a 2×2 hole in the middle.
- 4.
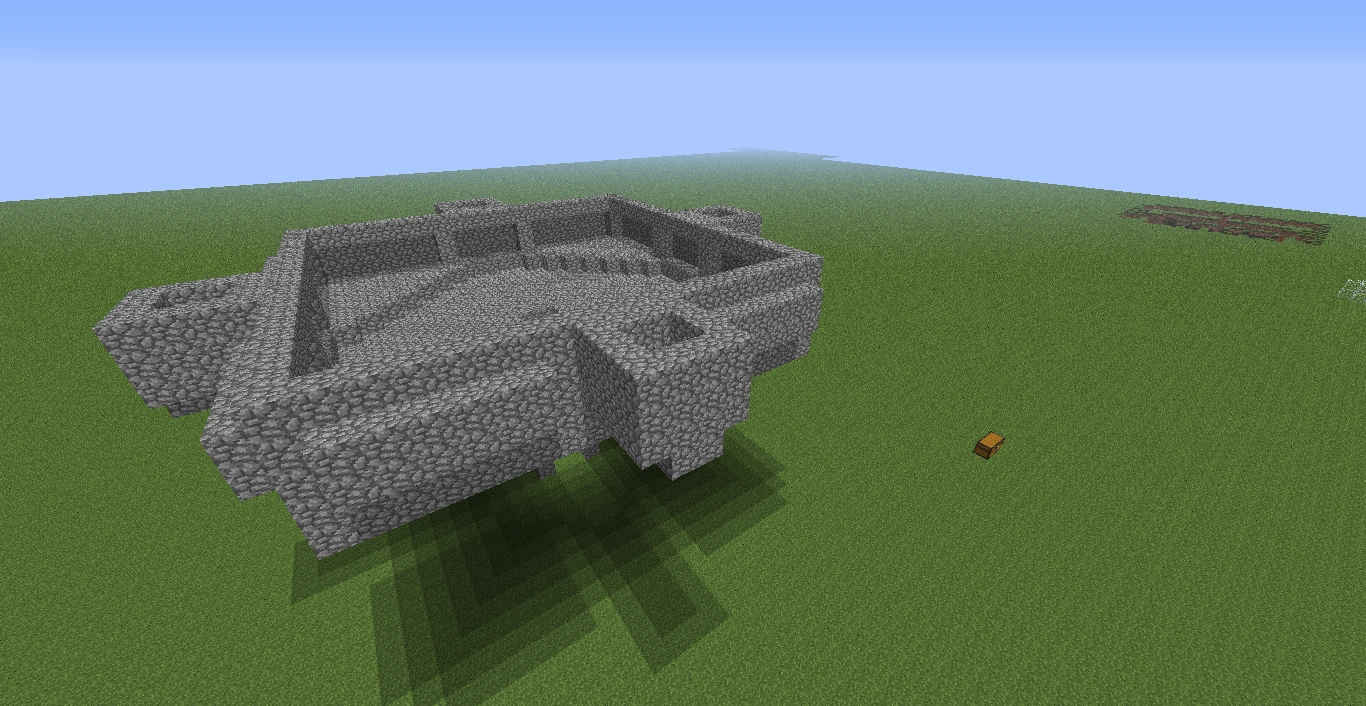
Build in 4 blocks from each corner, then 3 blocks diagonal in both directions to build a triangle.
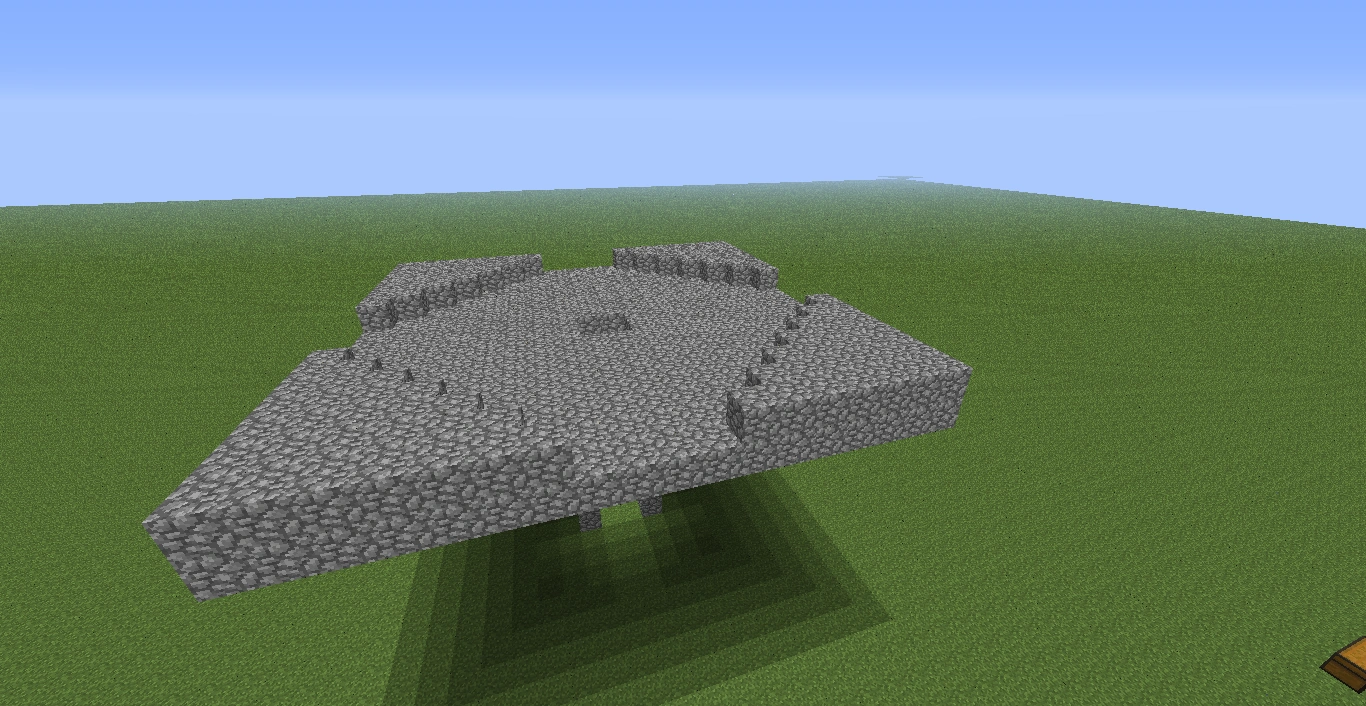
- 5.
Next build a 1 block wide platform around this so the platform is now 20×20.
- 6.
Now build a wall with windows in it as show below.
This is how wide each of the holes in the wall should be:
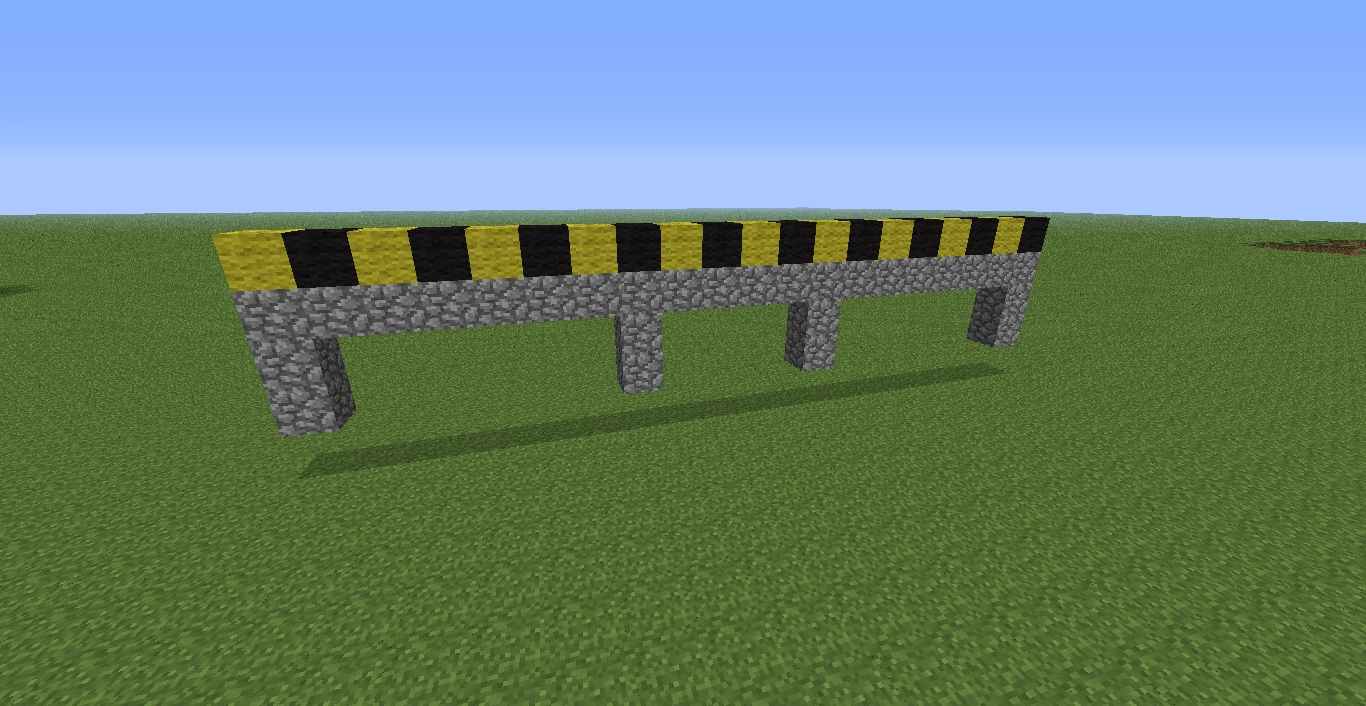
- 7.
Seal off the backs of the windows, and build some small cups to hold the villagers. The cups should be 4×4 on the outside, so there is 2×2×3 of air on the inside. Make sure that there are at least 10 villagers altogether.
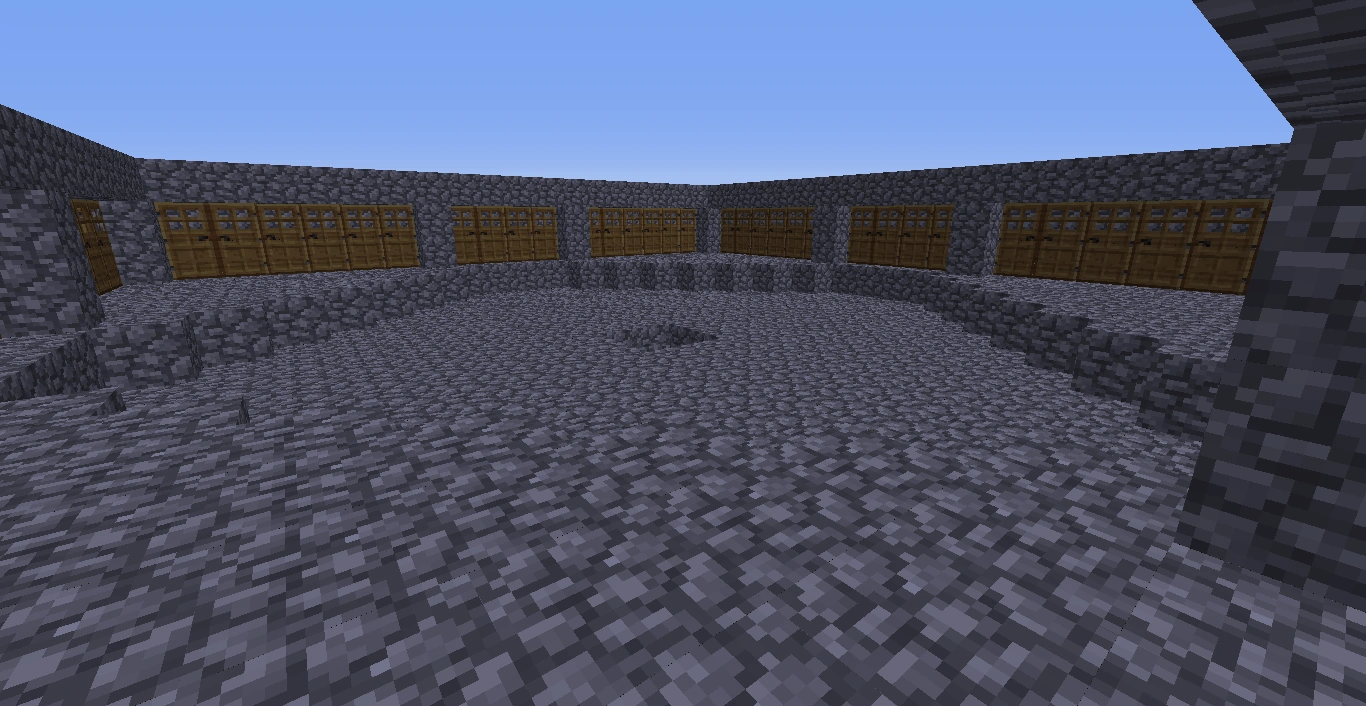
- 8.
Place doors against the back of the indents. This is to make the villagers think these are homes.
Note: To place doors against the inside wall as shown, stand inside the indent, face the spawning area, look down and "place" the door on the block directly under your feet (works on PC up to at least 1.8.3). Don't place them sideways; this can cause them to be not counted as homes.
it should look like this:
- 9.
Then place down 1 water in each of the 4 villager cups, and 2 water down in between each of the raised triangles to form this pattern: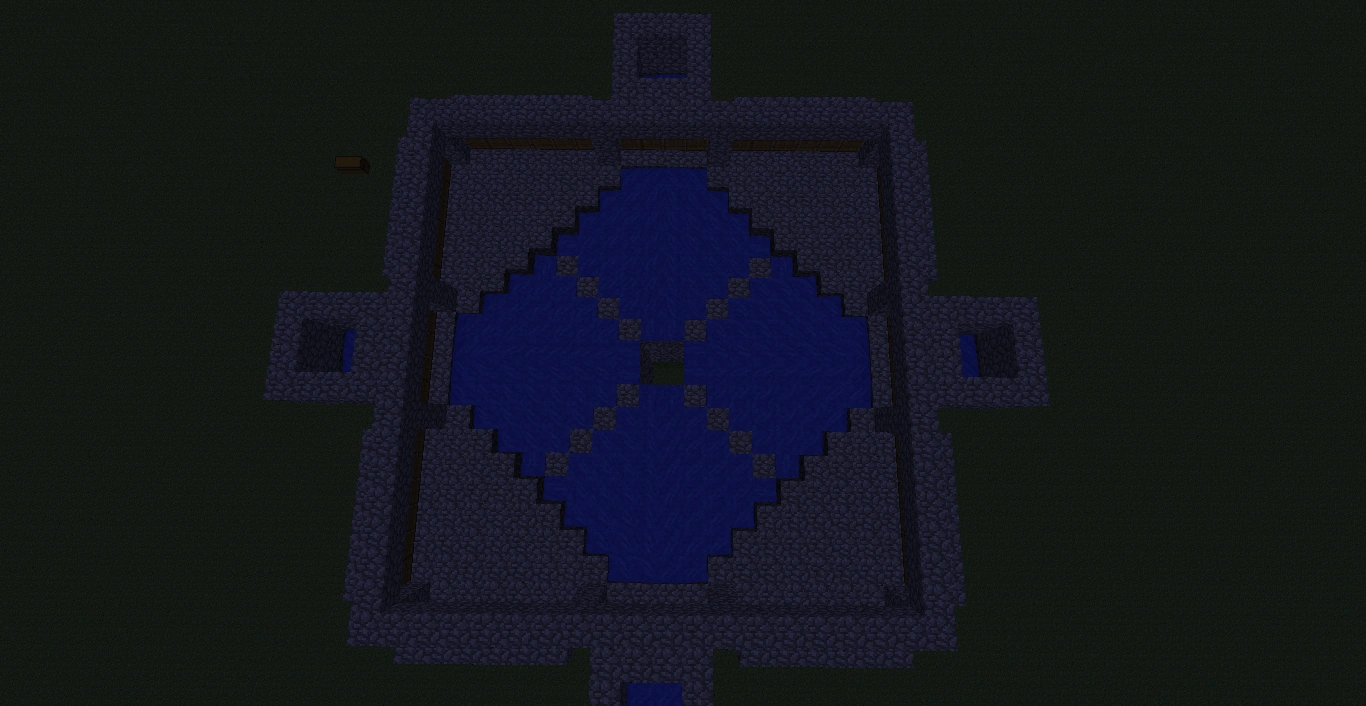
- 10.
Place 1 water on each of the triangles in the very back corner of the wall.

Now the top part is finished, the golems will spawn once there are 3 villagers in each of the holding cups.
The next step is to build the golem grinder.
- 11.
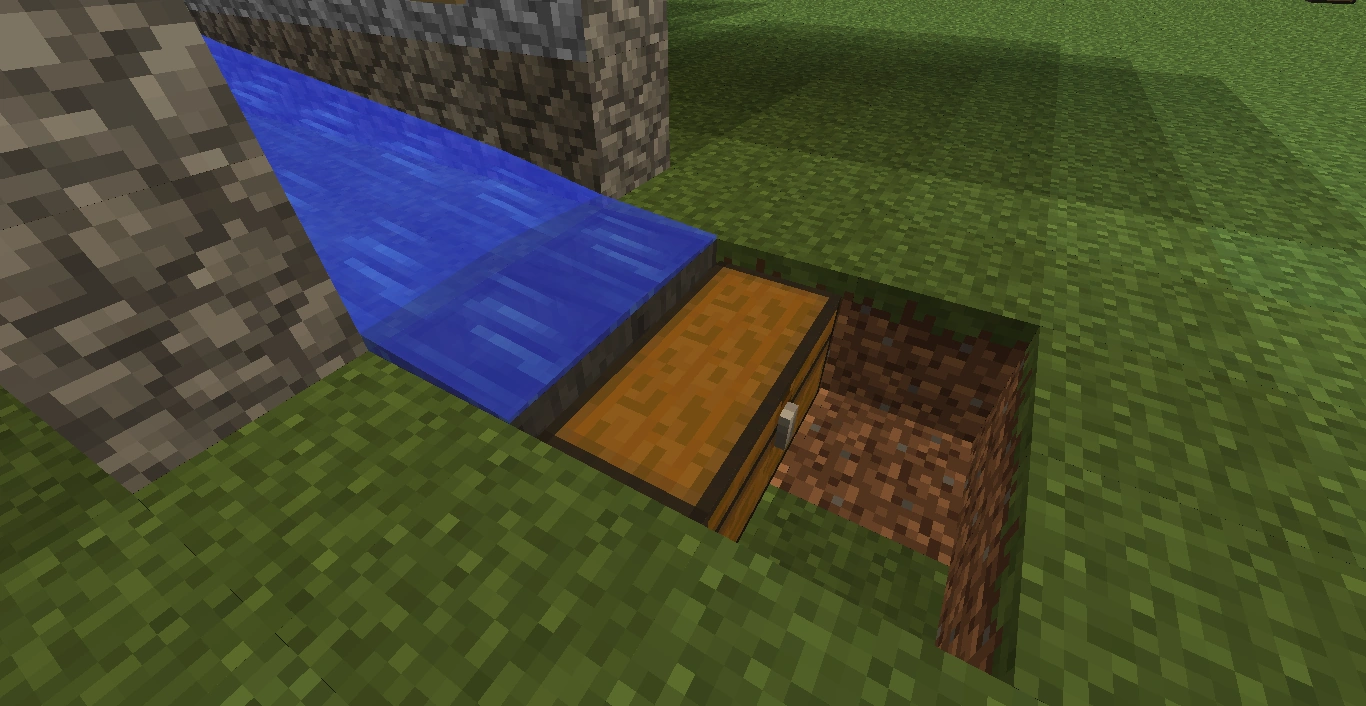
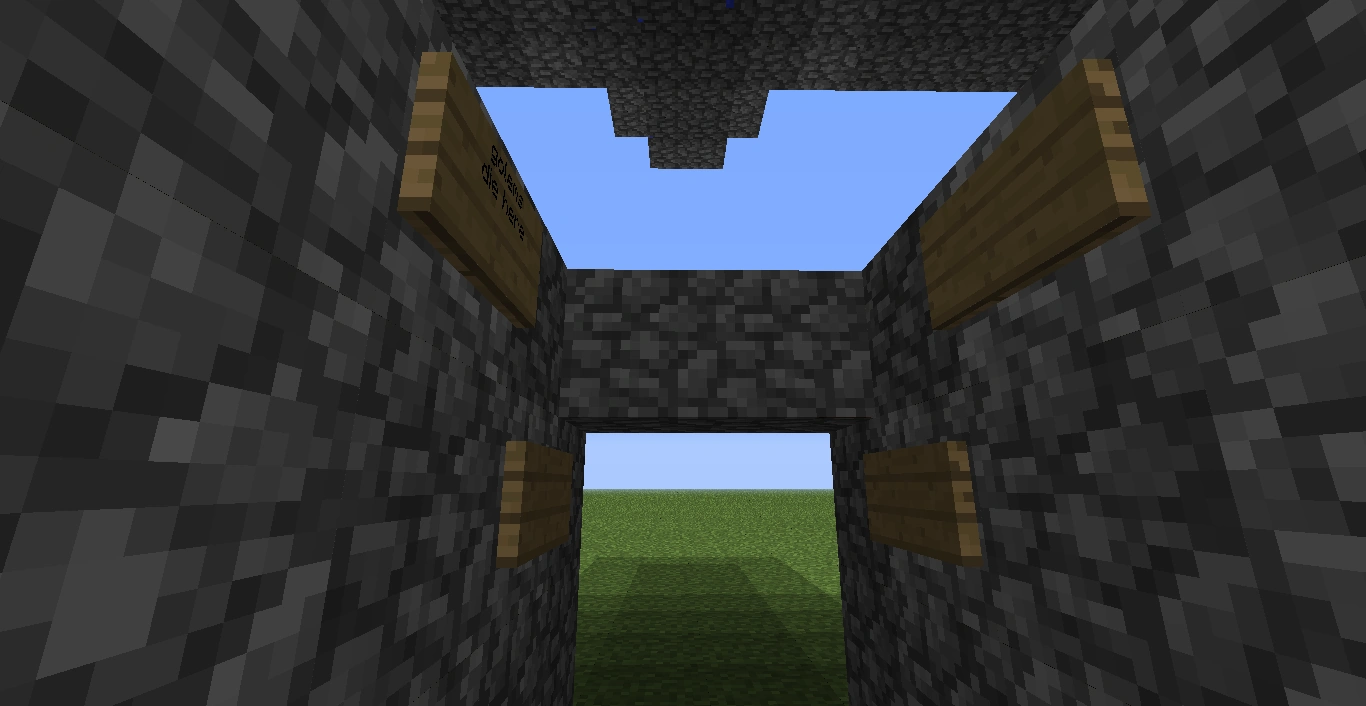
Build 4 blocks out from the bottom of the tower and 3 blocks up on each side, then place 2 blocks at the end of it to keep the golems from escaping.
- 12.
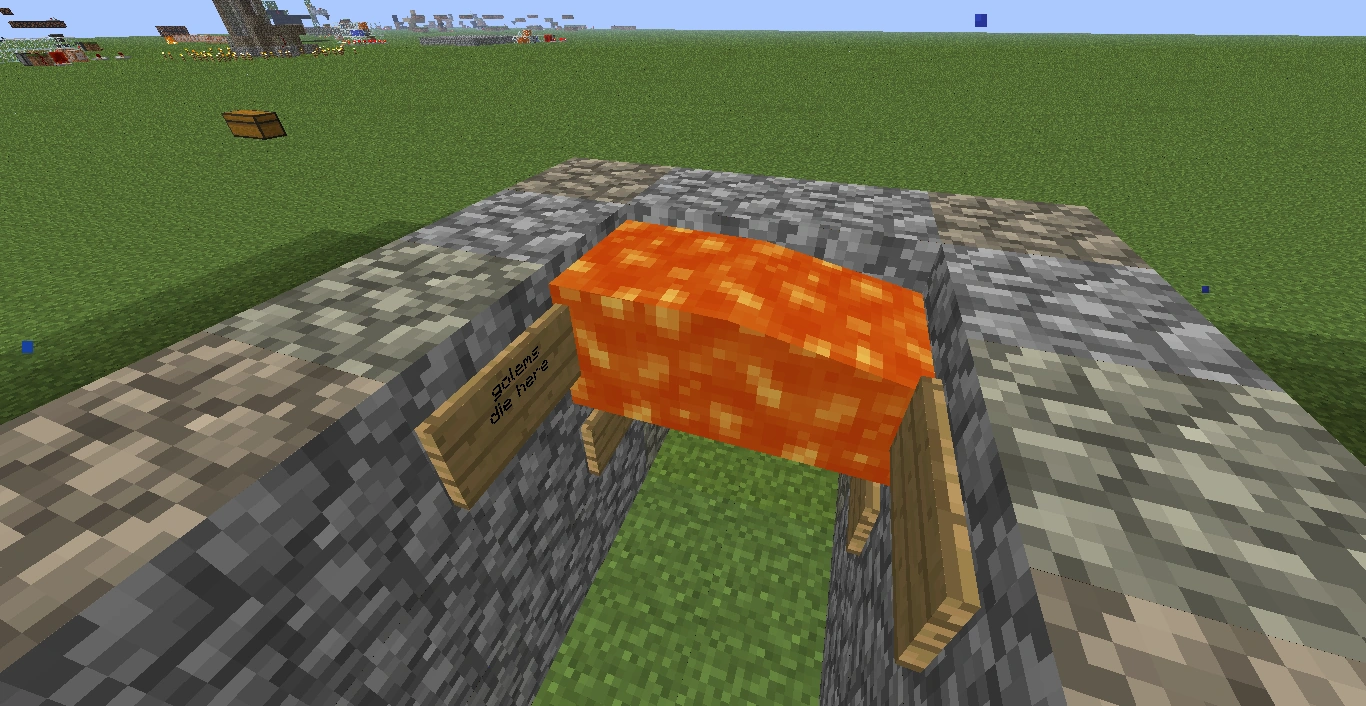
Next, place 4 signs in a cup shape to hold the lava that kills the golems.
- 13.
Now place the lava in the signs.
- 14.
Place the last 2 water in the very back of the base, so the golems will get pushed into the lava.
- 15.
Put down 2 hoppers going into a large chest for automatic resource collection (this is not required, but it is a good idea so you don't let any of the items despawn.)