Tag: Mobile edit |
No edit summary Tag: Mobile edit |
||
| Line 19: | Line 19: | ||
{{layered blueprint|name=Fountain Design 1|default=Layer 1|B=stone-bricks|W=water-top |
{{layered blueprint|name=Fountain Design 1|default=Layer 1|B=stone-bricks|W=water-top |
||
|----Layer 1| |
|----Layer 1| |
||
| + | BBB |
||
| − | BBBB |
||
B B |
B B |
||
B B |
B B |
||
B B |
B B |
||
| + | BBB |
||
| − | BBBB |
||
|----Layers 2-4| |
|----Layers 2-4| |
||
Revision as of 13:33, 2 January 2019
This is a tutorial on how to build certain water/lava features, for the purpose of either aiding the player, decoration, or to keep the player from becoming bored.
Designs
Here are examples of designs for several water and lava features, including fountains, waterfalls, water walls, a lava incinerator, and a swimming pool.
Fountain
Fountains look great in large gardens, or as the center of attention in a yard. Also, they look great in the middle of a park, city, or amusement park.
Design 1
This design is a simple yet effective fountain design. It has a square look to fit the theme of Minecraft, and it does not require any materials that are hard to acquire. You will need a building block to start off with, preferably something that looks nice, as well as a bucket and a nearby water source.
To build this fountain, start off by constructing a 5X5 frame of any material you wish, but only place blocks on the edges, so that the water has a place to flow into. Then, build a 3 block high column in the middle of the frame. Just pour a water bucket on the top of the central column to finish it off, and the water should flow down all sides. You are done!
Design 2
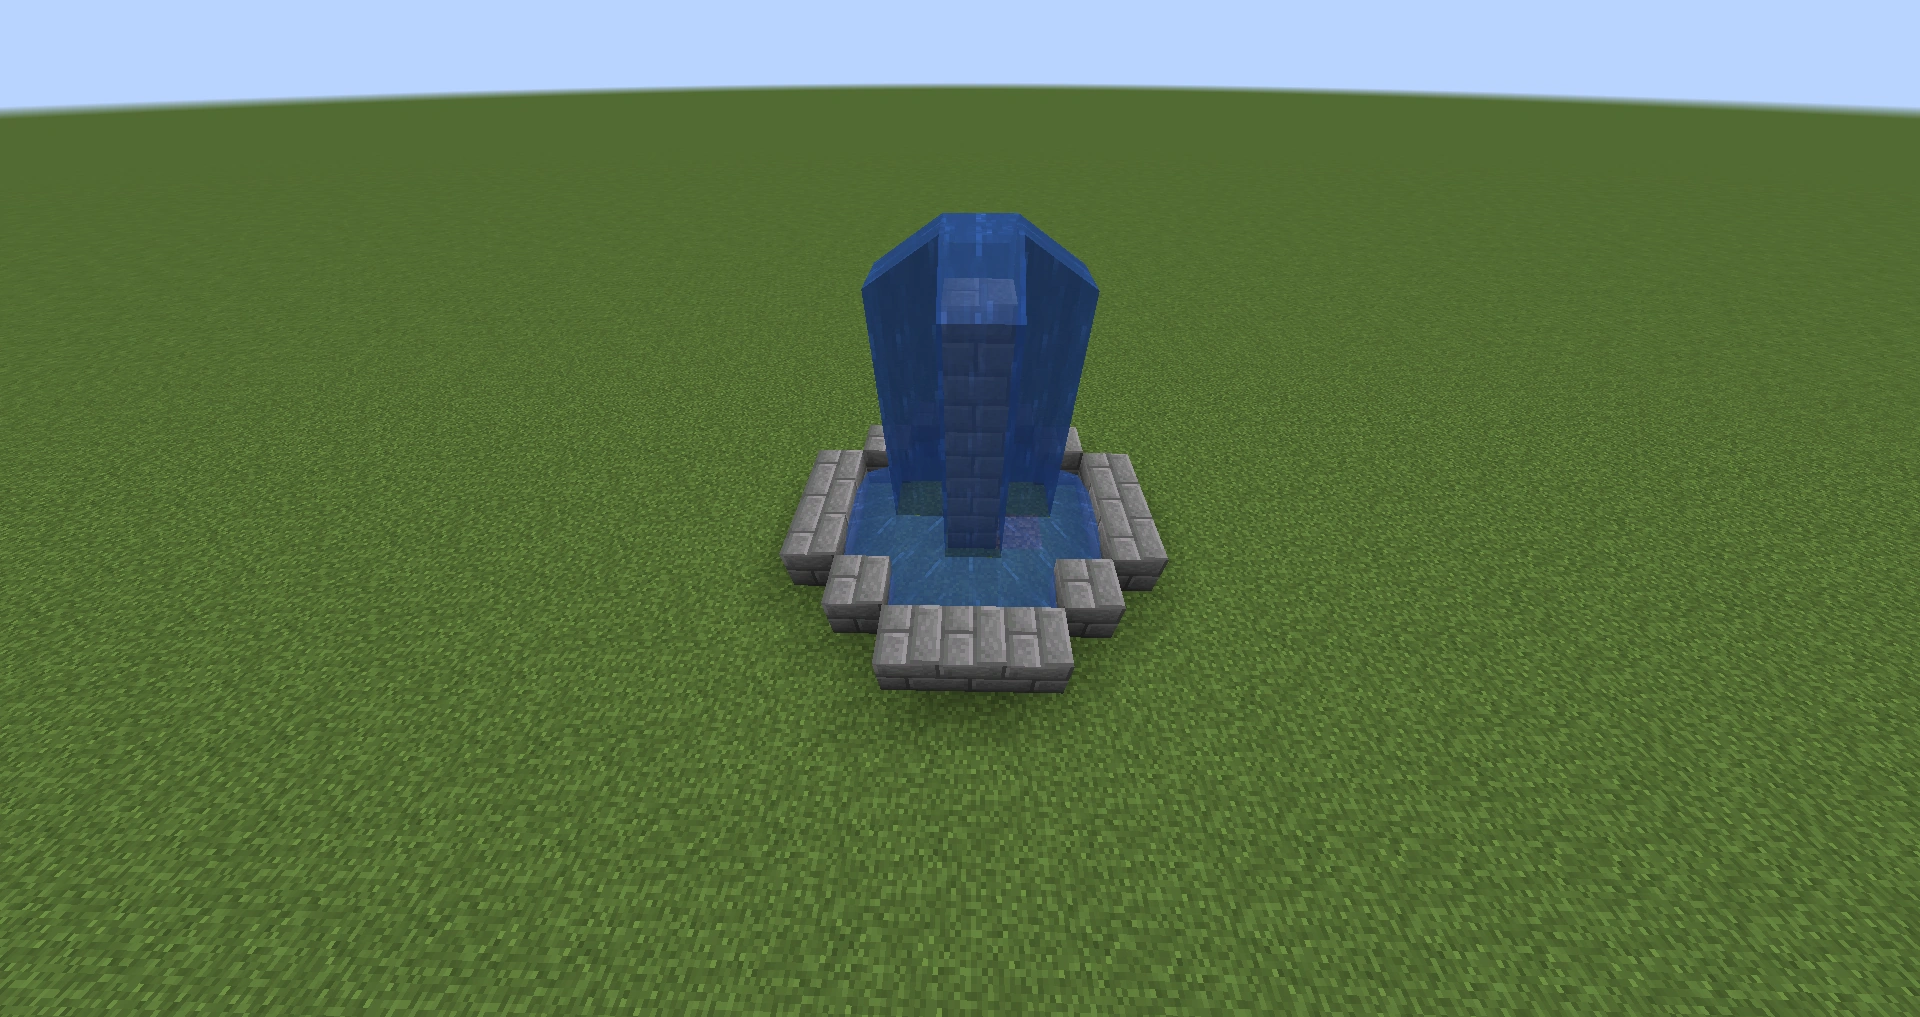
To build a fountain just like Design 1 but for a little more complex, polished, and round look, try placing a row of three blocks 2 blocks from the center of the fountain, on every side, and then connect them with one diagonal block. See the following picture for a demonstration. This picture uses stone bricks as the building block.
Fountain expansions
There are many things you can play around with to make your fountain even better and bigger.
You can make the central column is high as you want. No matter how high it is, the water will always flow into the trench at the bottom and will not spill out, if you have done it correctly. If you want a very tall fountain, consider making a 10 block tall column, or more. You can also expand the width as well as the height. Instead of making the frame 5 x 5, make it as big as you'd like. However, make sure that it is not any smaller than 5 x 5, or the water will flow onto the frame, and spill out.
Another option to make your fountain bigger is to make the column in the middle bigger than one block. Consider using the center 3 x 3 area for the column. However, the frame must always be at least 4 blocks bigger in both length and width than the column. For example, if you had a 3 x 3 column, you must have at least a 7 x 7 frame. If you want a really giant fountain, make it with a 25 x 25 frame and a 3 x 3 column 25 blocks high. That should really get people's attention.
For a more complex and round feel, make the shape of your fountain frame in a circle. This is rather difficult in the blocky world of Minecraft, but it is still possible (see "Tutorials/Creating shapes"). This will make your fountain look even better. The fountain design 2 is an example of a fountain with a very small circle frame.
Consider decorating your fountain. Make the fountain floor where the water flows stone brick, instead of dirt. Surround the bottom layer of the fountain with leaves, to give it a great-looking blend with nature. You can also grow trees around the fountain, but don't make them so tall or so close that they cover up the fountain.
Waterfall
Build a 1 deep, at least 3 wide all, however high you would like, to start. Then, build a barrier 1 block above the top of the wall, to prevent the water from flowing out the wrong way. Finally, add water on the top of the wall. Also, if you would like, you can build a 1 block deep trench at the bottom of the waterfall, so that the water goes straight down instead of all over the place.
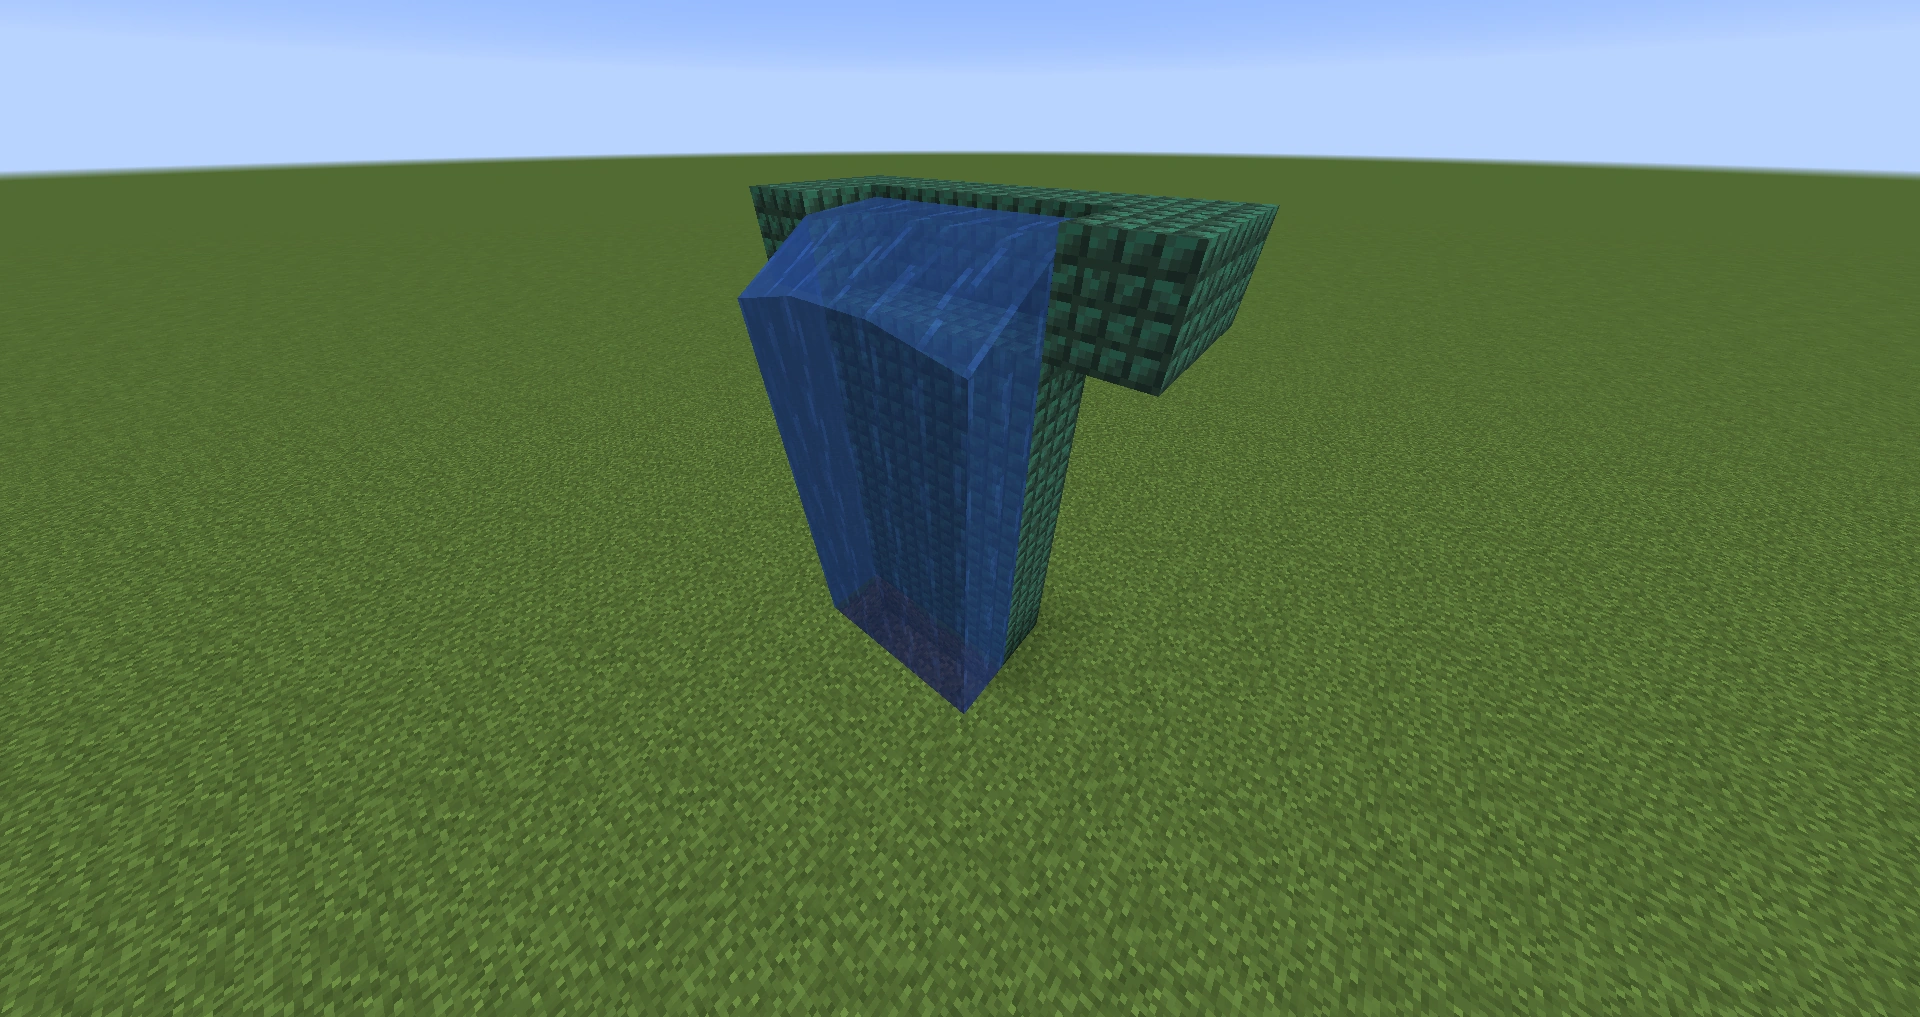
This is an example of a 3 wide waterfall with a 4 block high wall, resulting in a 5 block high waterfall. You can see the trench at the bottom to prevent the water from going all over the place.
Usage
Waterfalls can look nice in many circumstances. You can make it natural and abstract, or perfect and polished. Both types fit in great in yards for houses. For a more natural and abstract look, make your frame out of dirt or stone, with a hill behind it so that it blends in better with the terrain. For a polished look, use stone bricks or dark prismarine. A trench at the bottom to hold the water in place looks great for a polished feel, but it looks more natural if you do have the water run freely.
Water or Lava Wall
Build a frame for your wall, however big you like. Build two more frames, all touching. The middle one should be 1 block bigger on the top and bottom. Then, add water in the top gaps! The water should flow straight down into the trench at the bottom. If it does, you did it correctly!
Tip: To build an incinerator, make a wall, but use lava. You can use this as a trash can, to throw in any items you don't want.
Swimming Pool
Swimming pools come in all shapes and sizes, so a lot of what a swimming pool looks like is up to you. One trick that is necessary when building 2, 3, and 4 block deep swimming pools, is in order to put water sources in every empty space, start by digging only 1 down for every block, and put the water layer there. Then, for the deeper parts, dig however many blocks down you want that part of the pool to be, and the water should flow down.
Here is an example of how to build a swimming pool. This one has an L shape to it.
- Build a 10 x 5 hole in the ground. Make it only 1 block deep.
- Build a 5 x 5 hole in front of the previous hole you made, connecting to it. You should now have an L-shaped hole.
- Fill all of the empty pool with buckets of water.
- Dig down 2 blocks for the 5 x 5 hole you made. Now you should have a 3-block deep pool in that section. This is the deep end of your pool (3 meters, or 10 feet deep).
- For the half of the 10 x 5 hole that's closest to the 5 x 5, dig down 1, to make a 2-block deep section. This is the medium end of your pool (2 meters, or 6 1/2 feet deep).


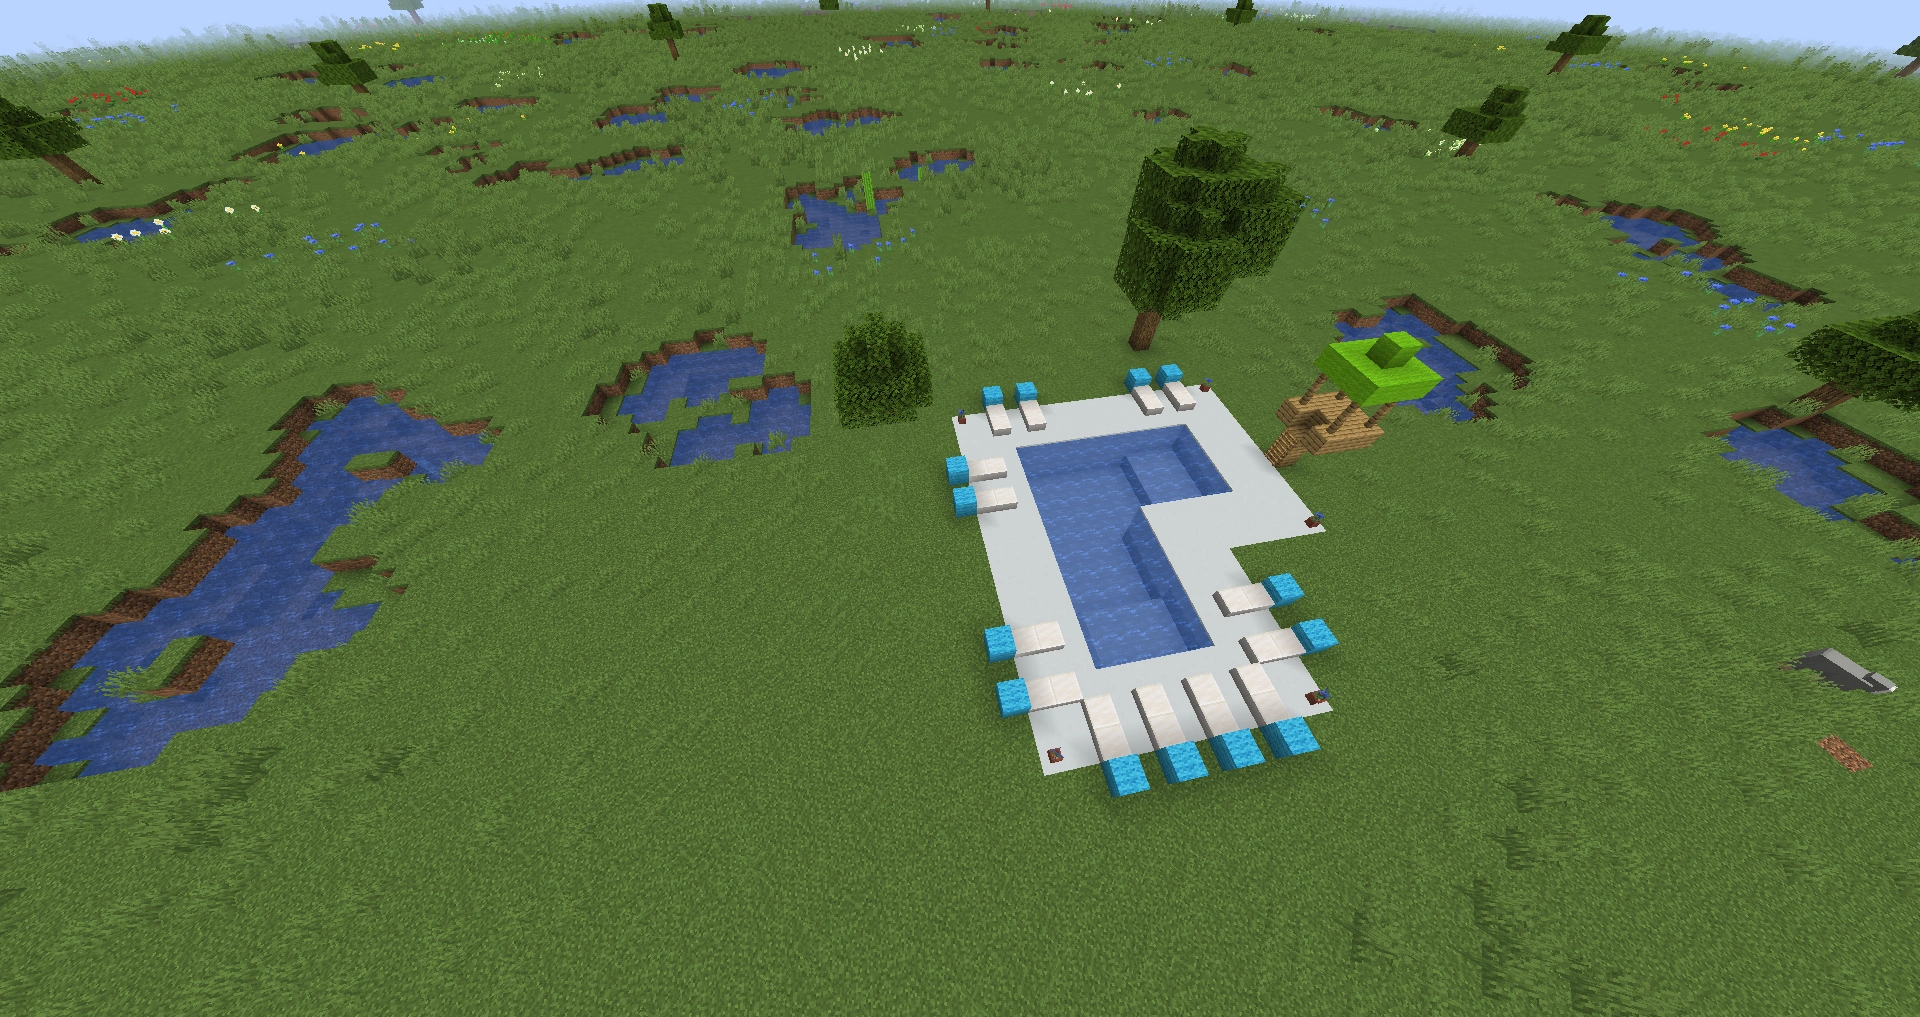
This picture is an example of an L-shaped swimming pool. It also has many decorations and accessories, including 3 diving boards.
- For the other half of the 10 x 5 hole, leave it how it is, to make a 1-block deep section. (1 meter, or 3 feet deep)
- You have finished the basic outline of your pool. Now add some decoration and accessories.
Decorating and Accessories
A pool can have many accessories added to it to make it more decorated and more fun. Here are some tips to make your pool better:
- Make the bottom of the floor concrete.
- Build a 3 wide concrete path around the perimeter of the pool and make it concrete.
- Make diving boards out of quartz, quartz slabs, and ladders. You can make them 1, 2, and 4 blocks high for low, medium, and high dives.
- Put potted flowers in each of the corners of the pool.
- Use wood planks and ladders to make the base of a lifeguard chair. For the chair, use a wood stair with item frames beside it. If you want a roof to the lifeguard chair, use lime wool, using fence posts to connect the chair to the roof.
- Use quartz slabs and light blue wool to make lounge chairs.
- Plant saplings around the perimeter of the pool, and grow them into trees. Make sure you place them far apart from each other and not too close to the pool, because trees can grow very big sometimes.
- Use glowstone for underwater lights (not shown in picture).