For players who do not know how to begin their Minecraft journey, the Beginner's Guide is a tutorial made to provide a list full of good ways to start! Here, the player can learn how to survive the first night in two different formats: in an overview with goals or in a step-by-step instruction. The player can choose which one they want to use, but both will help the player accomplish the same goal.
In the Java edition, when the player starts the game for the first time, there will be a short in-game tutorial which explains the very basics on how to move and look around. The Controls page will give the player a complete overview of all the controls.
Before reading this page, it's expected for players to have already bought and downloaded the game. The player will need to create a new world before starting the tutorial. For the Java Edition of Minecraft, this page can help with that: Tutorials/Menu screen.
Overview
First day
As the first day begins, the player will need to collect wood. First, the player should look around then go towards any trees. The player needs to collect at least 5-8 blocks of wood logs from trees by holding down the left mouse button while their cursor is on the block. This is enough wood to craft the basic tools and items the player needs immediately, though you'll certainly want more a little later.
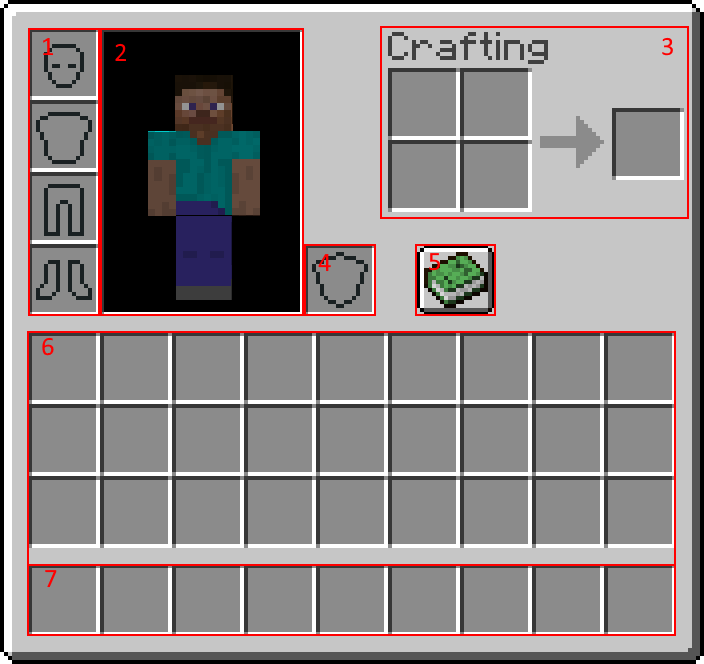
When the player opens up their inventory (E by default), they will see the inventory window, depicted to the right.
1. Player's armor. 2. Character. 3. Personal crafting area. 4. Offhand slot. 5. Recipe book. 6. Inventory. 7. Hotbar (part of inventory)
The player's avatar takes up most of the upper portion of the GUI, and the inventory below is the space for the player's items. The bottom 9 slots are the usable slots, called a hot bar. Four armor slots are to the left of the player's character (ignore those for now, they don't become useful until much later on), and a 2x2 square to the right of the character as the player's personal crafting grid, which can be used to craft a few basic items. By clicking the recipe book (5) the player can easily craft items in this grid. Place the wood logs into any space in the crafting grid, and wooden planks will appear to the right of your wood. Left-clicking the planks will cause the wood to disappear and planks to appear as a newly crafted item. Once you have the planks in your hand, you can drag them down to your inventory, and place using the left click.
Four wooden planks can in turn make a crafting table (place 4 wooden planks in a 2x2 square) and place the crafting table to use it. Right click your crafting table to access it, this crafting grid is a 3x3 square, big enough for all of the craftable items in Minecraft. The first tools the player should craft are a wooden pickaxe (3 planks on the top 3 slots and 2 sticks from the middle plank) and a wooden sword. If any stone blocks are exposed close by, the player can mine them with a wooden pickaxe for 19 blocks of cobblestone. This is the amount the player needs to create every basic tool they'll need for this tutorial: a sword, a pickaxe (you'll need the upgraded pickaxe for iron and other blocks), an axe, a shovel, a hoe, and a furnace. You'll need the furnace to cook meat for food and smelt any ore you mine with your pickaxe. Once the player has a stone axe, they should try to get more wood as time allows; extra wood is useful in many ways, from securing and equipping your base to making charcoal, or simply crafting into planks for quadruple the number of building blocks.
If all goes well, the player can obtain coal quickly. With the sticks they made from their wooden planks and some coal, they will be able to make torches (coal above a stick on the crafting grid). With torches in hand, you can make for the nearest cave, because iron ore is your next goal. Underground will actually be safer than the surface when night falls, so mining the first night away is not a bad idea at all. On the other hand, if night is falling and you haven't found coal, use to furnace to smelt more wood ("logs", not planks) to create charcoal, a substitute. (Additionally, you can gather 3 blocks of wool from sheep and combine it with three planks to make a bed. With this you can sleep through the night without the worry of monsters killing you. The downside of this is wasting sunlight the next day mining, or working indoors.)
Night time
For night time, the primary danger will be hostile mobs (monsters) that only spawn in the dark. These include zombies, skeletons, and spiders. It is a good idea to stay in a well-lit lit shelter (see below).
If you're really seeking adventure you could always arm yourself with a stone sword and go fight some mobs; you might be able to get some materials for further crafting and some early experience levels, which will come in handy later on. However, all of these monsters will either die (zombies and skeletons) or become less dangerous (spiders) when morning comes, and it will be much easier to fight them later when you have better equipment. If you must fight monsters this early, be especially wary of skeletons; in the open their arrows can kill you at a distance, and if they're in the water or on higher ground, it's unlikely you'll be able to reach them before they turn you into a (dead) pincushion. If you happen to see any of the more powerful monsters, keep well away from them: At this point an enderman, witch, or even a creeper can kill you easily.
If you are repeatedly getting killed (perhaps you got too ambitious, a monster got into your shelter, or you didn't manage to make a shelter), one desperate response is to go into "peaceful difficulty" (see "changing the rules", below), but if you don't want to change your difficulty you can always dig a three block hole cover it up and hide there. However, consider this: This being your first day, you aren't actually losing much until the deaths (at least not after what stuff you've gathered is lost), so you can just tough it out until dawn and start again. Keep on practicing killing mobs until you get the hang of it.
Shelter
As noted above, you really want to find or make some kind of shelter before your first night, because you won't want to be killed. The "Shelters" article above gives a lot of emergency shelters and then more advanced ideas, but it only takes a little thinking ahead to manage a decent shelter for your first night. As you move around collecting wood and so on, look at the landscape for potential homes. Easiest (if you can find it) is a small cave with a single entrance that you can wall or fence off. If it's not quite ideal, consider if you can fix it quickly -- say, fencing off a back door to deeper caves. If you don't have a cave, you may be able to make one, by simply digging into a mountainside or even roofing over a small valley. If instead you have wide, flat space, then go ahead and build a small house. In all cases:
- Don't be too ambitious the first night, because you want it safe before dark, and you also want to light up the space you claim. You can always expand and decorate your home later, or even rearrange the landscape around it.
- When picking your location, it's good to have a view of the landscape so you can see if any monsters are waiting for you in the morning.
- Learn about the awesome powers of wood: Fences can be used not only in the obvious way, but as windows or transparent walls, with fence gates to get in and out. Doors provide a full-height option, but you'll want to surround them with solid blocks (planks, stone, even dirt, but not fences). A few properly-placed ladders can make it a lot easier to get up to your roof or up a hill. A chest will also be useful -- stash anything you're not going to use soon, so you don't have to worry about it if you happen to get killed.
- If you can manage to make a bed early on, place that in your shelter and use it the first night you have it. Getting killed is much less painful when you respawn into a safe place! After the first night, you may well want to spend the nights crafting and mining.
Light
Monsters can't spawn within 24 blocks of you, but huddling in the dark is no fun -- and when you do leave your home, you don't want to come back to find a monster has moved in. So, you need to light up your space, and at this point, the light you have is torches. A single torch gives enough light to prevent monster spawns completely within a 7 block range (barring obstructions), and reduce them for about the same distance past that. That includes horizontal and vertical steps, so the safe zone only runs 3 spaces or so diagonally. Even outside the safe zone, having some light will sharply reduce the chance of monsters spawning (depending on how much light), but it's better to use enough torches to keep your whole home well-lit. If you have extra torches after that, try to light some space outside your home (or at least the entrance) too, to push back the area where monsters are likely to spawn.
Food and hunger
Once you have tools and shelter, your next priority will be food. Hunger will take a while to hit, so it shouldn't be a problem on your first day, but you should try to pick up some food for when it does. However, after you've been moving around for a while, your food bar will begin rippling and start to decrease. If your food bar drops below 90% (![]()
![]()
![]()
![]()
![]()
![]()
![]()
![]()
![]() ), you will not regenerate health, and if it gets to 30% (
), you will not regenerate health, and if it gets to 30% (![]()
![]()
![]() ), you can't sprint. If the hunger bar goes down to empty, you will begin losing health. Unless you're in Hard mode (and a beginning player shouldn't be), you can't actually starve to death, but you will go down to 1 health point (
), you can't sprint. If the hunger bar goes down to empty, you will begin losing health. Unless you're in Hard mode (and a beginning player shouldn't be), you can't actually starve to death, but you will go down to 1 health point (![]() ) in Normal mode or half your health (
) in Normal mode or half your health (![]()
![]()
![]()
![]()
![]() ) in Easy mode, and that leaves you quite vulnerable. You don't lose hunger in Peaceful mode, so you don't have to worry about that.
) in Easy mode, and that leaves you quite vulnerable. You don't lose hunger in Peaceful mode, so you don't have to worry about that.
In recent versions of Minecraft, the primary drain on your hunger is from healing damage. You will have a little grace period (see "saturation" on the Hunger page) when starting the game and after eating, but when that's exhausted, healing a single point of damage (![]() ) costs the equivalent of 1.5 hunger points (that's 3/4 of a visible "shank"). Avoid taking falls of more than 3 blocks, drowning or burning yourself, or otherwise taking damage that you will need to heal.
) costs the equivalent of 1.5 hunger points (that's 3/4 of a visible "shank"). Avoid taking falls of more than 3 blocks, drowning or burning yourself, or otherwise taking damage that you will need to heal.
A few other activities also cause hunger, though more slowly.:
- Fighting: Both attacking mobs and receiving damage cost hunger, even before you start trying to heal damage. (60 blows either way, matches healing
 .) You will need to slaughter a few animals but pick your fights carefully. Taking damage in other ways counts for this too, but each time you take damage it counts as one "blow" no matter how much damage you took.
 - Sprinting. If you double-tap the forward movement key (W by default), or press your sprint key (Left Ctrl by default), you will sprint. This moves somewhat faster, but it also uses up food. (60 meters matches healing .) However, if you happen to have a sufficient amount of food in your inventory, you can always do it your way.
- Jumping. Obviously, you'll need to jump some just to get around, but don't bounce around randomly or unnecessarily. (120 jumps matches healing .) Sprinting jumps are especially costly, 4 times as much as a regular jump, although they are the fastest mode of transportation early in the game.
- Swimming and mining blocks cost a little hunger, but those are minimal compared to the items above.
Note that if you're (staying) at full health, and not fighting, sprinting and/or jumping, or mining blocks, then you will use no food. Thus, if your character has a secure place to stay, you can just stay put to conserve food while waiting out the night, a storm, or crop/animal growth.
Consider making a basic crop farm immediately after you have settled in a place. Wheat is where you'll begin:
- You can use harvested wheat to make bread.
- You can obtain it easily using seeds collected by breaking grass.
- When harvesting wheat, you can use the wheat/seeds to breed cows and chickens, thus having a better food source.
Play-by-play
= Starting the game
When the player begins the game, they will be standing in a landscape somewhere. They may want a moment to look around. The general area the player first starts is where they will reappear (also known as respawn) if they die in the game. This is the start of a new Minecraft world. This tutorial is designed to allow the player to learn the skills needed to survive in this world and eventually be able to do just about anything they desire. The player can do the different sections below in any order they desire, but many sections require the player to first complete other tasks first. The tasks listed on this page should all be completed before truly moving on to the second day page, even if it takes the player multiple days to complete all of the tutorial. No matter what, the player's goal for the first day should be creating a bed or shelter so they can survive the night. The other tasks are also very important and can all be completed along with the main objectives while leaving the player with extra time.
Movement
To properly play the game, the player will need to be able to move. The controls page is best at describing controls between different systems and can be left open on a computer while first playing the game to check controls. To start, the player most needs to be able to look and move around. After this, the player can also test out jumping (which will be done automatically by the game on most versions).
There are three more important actions for the beginning player, and they are all closely related : attacking, mining, and using. Each requires targeting a spot on the screen. Many versions of the game will have a cursor in the center of the screen used for targeting, but touchscreens will allow the player to click on the screen to act as the targeting spot. Only blocks near the player can be targeted, and they player can tell a block is targeted by it having a box around it. This selected area or block affects the way the player uses these actions. For example, Using is based on what the player is looking at and what is in their hand. Less obviously, the player actions of attacking and mining also use this cursor or selector method. The buttons for both attacking and mining is always the same, but attacking is only a tap of the control while mining requires holding down the control. These actions may use up blocks and change tools that the player is holding and also change depending on the player's held item. Any time this tutorial mentions verbs describing in-game actions, the player may want to test out that action using the controls page as a reference.
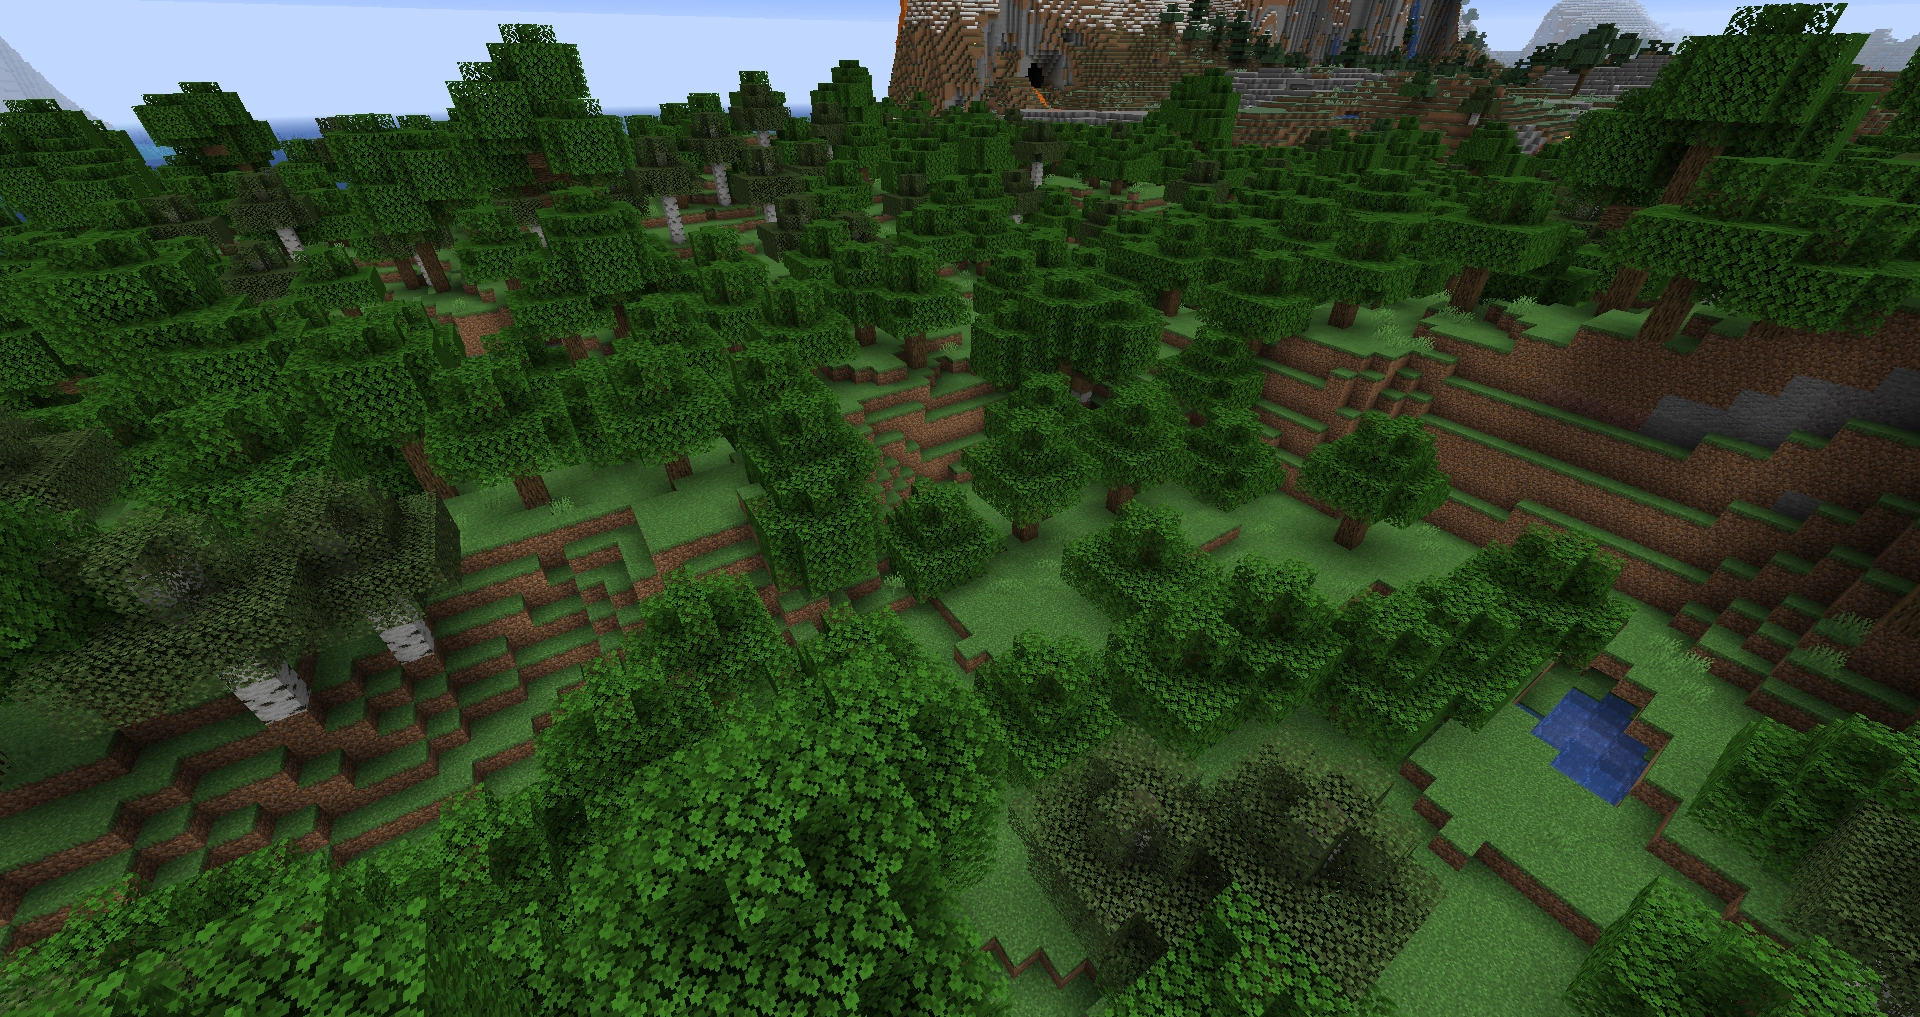
Biomes
The Minecraft world is divided into different areas called "biomes". Different biomes will contain different blocks and plants. The biome also changes the landscape and how the land is shaped. Biomes will affect the player, especially at the beginning of the game, but the player has little need to worry about specific biomes until they have learned to play the game. If the player is curious, they may want to read more about biomes on the biomes page.
An oak tree.
Wood
Prerequisites: Movement
To progress in Minecraft, it is important for the player to collect wood. The most plentiful wood source are trees which are available in most biomes. Wood is one of many items the player can collect without the use of a tool. All the player has to do is mine any block of the tree with their hand or any item. Each block will drop as an item which the player can pick up by approaching it. Items automatically enter into the player's inventory. The player may want to collect a couple blocks of wood for later use.

1. Player's armor. 2. Character. 3. Personal crafting area. 4. Offhand slot. 5. Recipe book. 6. Inventory. 7. Hotbar (part of inventory)
Inventory
To manage all the items they may gather, the player needs to understand their inventory. Parts of the inventory are always accessible, while others require that the player open their inventory. The player always has immediate access to the items in their hotbar, which is represented by the 9 slots at the bottom of the inventory screen. To access any other items, the player must move items around in their inventory to be in the hotbar slots. This system allows players to carry 36 slots worth of items while not overloading the player with too many accessible items at a time. Each slot allows up to 64 of the same item depending on the item type. This is called a stack of items. The player has options to use the cursor to pick up stacks of items from a slot, swap item locations, only pick up or place one item, or spread items out evenly between spaces. If the player wants items dropped on the ground, most versions allow clicking to place items outside the inventory screen or closing the inventory while the cursor is holding the items the player wants to drop. These different inventory management systems can be experimented with and looked at on the controls and inventory pages for specific editions.
There are more slots than the 36 on the bottom half of the screen. For Java Edition players, there are a few more slots which are important at this point. First off, the offhand slot which appears with a shield outline allows players a tenth hotbar slot which doesn't change constantly. This offhand slot allows players to use that item when the player presses the use button if their main hand can't use its item first. The second slot is the recipe book which will help the beginning player learn the recipes for crafting all types of items. Finally, there is also the crafting area. Players can place items in the crafting area but cannot store items there. This area allows crafting to occur only while the inventory is open and is limited to a two-by-two grid.
Crafting
Prerequisites: Wood, Inventory
As the game's name suggests, crafting is core to Minecraft. While there are a small number of items that can be crafted directly from the inventory, a crafting table is required to craft tools and most other items in the game. The crafting table will be the player's main asset throughout the game.
To make a crafting table, the player needs to open their inventory and pick up the logs they collected. Placing one log into the crafting area allows the player to obtain 4 wooden planks.
Template:Grid/Inventory Table
The planks will be different colors depending on the wood the player crafts with. Different types of wood don't stack together in the same slot but all work the same. With a couple of exceptions, the player can mix and match different planks when crafting.
As the player converts their first logs to planks, they may want to consider saving some logs for later. The player can use wood logs in other parts of gameplay but cannot turn planks back into logs.
The player can now create a crafting table. By placing and using a crafting table, the player is opened to a three-by-three crafting grid which allows for more items to be crafted. Players will need to use this item a lot, so it is best for the player to keep one handy.
A crafting table is made of four planks of wood in this pattern:
Template:Grid/Inventory Table
- Tip: Anything that can be crafted in the inventory's crafting space can also be crafted in the crafting table.
Tools
Prerequisites: Crafting
In order to better materials at faster speeds, the player needs tools. Tools are items which allow the player to complete tasks other than placing blocks at faster speeds than normal. Most tools can be made out of different materials each better than the last. Using a tool to mine the blocks it is intended to will mine the blocks quicker than normal. Tools lose durability upon each use, even if the use was to hit an entity. Enough damage to a tool will eventually cause the tool to break. Different tools have different properties.
First, to craft any basic tool, the player needs to know how to craft sticks.
The basic tools the player can acquire come in multiple tiers and are such:
| Name | Ingredients | Crafting recipe | Description |
|---|---|---|---|
| Axe | Sticks + Wood Planks or Cobblestone or Iron Ingots or Gold Ingots or Diamonds |
Mines wood type blocks faster and is a decent melee weapon | |
| Hoe | Sticks + Wood Planks or Cobblestone or Iron Ingots or Gold Ingots or Diamonds |
Changes dirt to farmland | |
| Pickaxe | Sticks + Wood Planks or Cobblestone or Iron Ingots or Gold Ingots or Diamonds |
Mines stone type blocks faster | |
| Shovel | Sticks + Wood Planks or Cobblestone or Iron Ingots or Gold Ingots or Diamonds |
Mines soil type blocks faster | |
| Sword | Sticks + Wood Planks or Cobblestone or Iron Ingots or Gold Ingots or Diamonds |
Quick weapon with decent damage |
The wood planks required for a wooden tool can be any combination of wood planks, as shown here:
| Ingredients | Crafting recipe |
|---|---|
| Any Wood Planks + Stick |
The simplest way to gather materials for any basic tool better than wooden tools requires the use of a pickaxe. Most players don't craft any tool other than a pickaxe out of wood as the wooden pickaxe is the only tool the player needs to craft before they can build better versions of all the basic tools. To craft a pickaxe, the player must first craft sticks. This is done with the following recipe.
The player may have noticed that in order to craft a basic tool, they more or less draw it with its components in the crafting square. Other items are crafted in a similar fashion.
Stone
Prerequisites: Tools
Once the player has crafted a pickaxe, they can successfully acquire cobblestone to make better tools. Cobblestone is collected by finding stone then mining it with any pickaxe. Any stone mined with any pickaxe will drop as a cobblestone item.
If no stone appears above ground near the player, stone can also be found within 5 blocks under dirt and grass blocks or within 8 blocks under sand and sandstone. The player should remember to never mine out the block they are standing on unless they know if there is a drop below that block.
Most players would want to gather about 18 cobblestone in total, which is enough to upgrade all the basic tools except for the hoe and to create a furnace. The hoe is usually skipped at this stage as it's usually unused in the first day..
More resources
Now, with your shiny new stone axe, you should chop down some more trees for wood. Although some trees may look different than others, all wood functions the same. However, different kinds of wood don't stack together. While you cut down trees, try to gather the saplings that fall. If you are cutting down oak trees, apples will also drop (see the trees page for more info.)
If the sun is still in the sky, explore the immediate area (making sure you don't get lost), to try and find some coal. Coal has all the same properties as charcoal (and can also be crafted into coal blocks).
If you happen across a coal-like ore with tan specks in place of the black, you have found some iron. This material will be extremely useful for most of your Minecraft career, and if it's within easy reach, go ahead and gather it (you will need to mine it with a stone pickaxe). However, If it's in a difficult-to-reach place, just note its location and save it for later.
Animals
Prerequisites: Tools, Combat
Some creatures in Minecraft are not immediately hostile to the player. These are known as passive and neutral mobs. Many passive mobs can act as important food sources.
Passive mobs will never attempt to harm the player. The majority of passive mobs are traditional domesticated farm animals which will usually ignore the player. If harmed, they will quickly run around in circles for a short time. Some animals will run straight away from players who get to near. If a passive animal is killed, it may drop animal specific resources such as raw meat. Most passive mobs drop experience orbs if killed by the player.
Neutral mobs act similarly to passive mobs except that they will harm the player if provoked. Wolves, polar bears, iron golems and llamas will attack the player if the player harms them. These creatures will also attack other creatures that hurt them. Polar bears will turn hostile to the player if it has a polar bear cub with it.
Animals can be bred by the player. If the player holds certain food items (wheat for cows, sheep, and mooshrooms; seeds for chickens and parrots; carrots, potatoes, and beetroots for pigs) then specific animals will start following the player. Right clicking an animal with their specific food item will create heart particles around the animal and enter it into love mode. When two animals of the same species are near each other and are both in love mode, they will run to each other, creating a baby animal at their location and dropping a few experience orbs. Animals do not have genders, so any two animals of the same species can be used in breeding. There is also a 5 minute wait an animal goes through before it can enter love mode after having been in love mode. Because of this mechanic, it is advised to keep alive at least two of any animal the player wants available at their home.
Taming animals
Prerequisites: Movement
Some animals can be tamed as pets. By feeding a specific animal its taming item (by clicking on the animal with the item in hand), the animal has a chance with each item to become the player's pet. This works with ocelots when using fish, parrots when using seeds, and wolves when using bones. Some animals change their look when they become a pet. Pets will follow a player unless the player has them sit, an action which is caused by the pet's owner clicking on the pet. If a pet which isn't sitting gets too far from its owner, it will teleport to the owner's location.
Horses, donkeys, mules, and llamas are tamed by the player clicking on them with an empty hand to ride that animal. The animal may kick the player off a few times. After enough attempts at riding the animal, the animal will become tamed and stop kicking the player off of them.
Smelting
Next, you need to cook your meat before you get hungry, and also make torches to light up your shelter at night. To do this, you will need to craft a furnace: Template:Grid/Crafting Table
Place it somewhere (generally next to your crafting table) so you can work with it. As it is made of cobblestone, you will have to use your pickaxe to collect it if you wish to relocate your furnace. If you haven't found coal, you will need to find an alternate heat source. Burning your wooden pickaxe (which is useless once you have stone) will smelt exactly one item. From this, you can make a piece of charcoal, which will then allow you to smelt eight more items.
To make charcoal, you have to smelt blocks (logs) of wood. In furnaces, the top slot is the item to be smelted, and the bottom slot is the fuel. Place a wooden log in the top slot and your wood pick in the bottom to smelt the charcoal. Then you can put the charcoal (or other fuel) in the fuel slot to smelt more items. It is generally advised to smelt more charcoal if you do not have a supply of coal. If you don't have spare wooden tools or charcoal, you can use planks, two planks for three items as below. Template:Grid/Furnace Once you have your first pieces of charcoal, use that as fuel anytime you have 8 or more items to smelt. Each piece will smelt 8 items (just like mined coal), and you have other uses for planks. If you have both coal and charcoal, use up the charcoal first and save the coal.
Now you can cook your food and make torches. Ration out a piece of coal/charcoal for the food, and cook the food just like smelting the wood above: food in the upper input box, fuel (coal) in the lower one. This being your first day, it's OK to “waste” some of a coal/charcoal lump if you have fewer than 8 pieces of meat.
Use the rest (up to 8 for now) of the coal or charcoal with some sticks to craft into torches. One log crafts into 8 sticks to match 8 pieces of coal or charcoal, producing 32 torches (half a stack.) Throughout the game, you will be crafting more and more torches as you need them, so always keep some coal or charcoal at hand. Template:Grid/Inventory Table
Now you're prepared to light up your shelter.
Bed and shelter
If you have the supplies, it is highly recommended to make a bed. For this, you will need three wood planks (you hopefully have those already), and three pieces of wool. Since you don't have shears, to get that wool, you will probably need to kill three sheep. Exception: If there are both wolves and sheep around, the wolves may kill some sheep for you, leaving the wool lying around for you to pick up. Template:Grid/Crafting Table If you have made a bed, nightfall is easy: As soon as sunset begins, place your bed on a flat area (solid blocks only, meaning no leaves), sleep in it, and continue with crafting and smelting the next day.
However, if you have no bed, and you didn't have time to build something secure, you will probably have to spend your first night in an emergency shelter. You want to be able to make torches and cook food overnight, but if the shelter is underground you really want to have some torches handy before you close yourself into the darkness.
- While you were gathering cobblestone, you most likely dug a small hole in the side of a surface cave, or a staircase down through the dirt. In either case, you can use that hole as a shelter. Dig a few more blocks into the hill or cave wall, then you can dig a small room, about 5 by 5. Relocate your crafting table and furnace in here, and make sure to light it up! If you have no door, simply cover your entrance with dirt or cobblestone when night falls, periodically breaking it to check for day (watch out for mobs, though!). A similar shelter can also be created in a small cave, just remember to close off any back openings of the cave, or monsters can come at you from below.
- If you don't want to live in a hole, there are other options: The simplest is to build a three block high hut from any material, for example, cobblestone, wood or dirt. Add a roof to protect against endermen and spiders. This being your first night, your shelter can be tiny, even just four stacks of three blocks each, surrounding a space for you to stand. Note that you can use your crafting table and/or furnace as part of the walls.
- If you were caught away from potential shelter, you can spend the night atop a pillar by pillar jumping up until you're atop a tal column. Pillar 20 or 30 blocks upwards to avoid getting shot off by a skeleton or having the bottom blown up by a creeper. You can also use crouching (holding ⇧ Shift) to add a ledge to your pillar. (Perhaps you should practice this during the day on a low hill, before you try it on a high pillar with monsters below you.) If you do not have a ledge, watch out for climbing spiders. Keep your stone sword in hand and whack them as soon as they come into reach, before they get up to you - attacking them will knock them back down.
- If there is a large tree nearby, you can spend the night on top of the tree -- you can get up there with a pillar as above, or with a bit more wood, you can put ladders up the trunk and break a hole through the leaves to reach the top. Make sure that other trees and hills don't provide a path to your treetop! Again, watch out for skeletons; spiders won't be able to get past the overhanging leaves, but when you go back down, make sure they (or other monsters) aren't hiding underneath your tree.
- If you have a boat, you can spend the night in the middle of the sea as monsters do not spawn in water. Warning: If you can see a lighted structure beneath the ocean, stay far away from it, or you may be attacked by the powerful Guardians.)
- Remember the golden rule we talked about before? Well, when you're desperate, you can break it a little. Dig three blocks down, and put a block above you that is not sand/gravel to make the fastest shelter in Minecraft possible. You may want to use a real-world clock to time the night (7 minutes, with up to 3 more to allow for dawn/dusk). You can dig out a couple of the blocks around you and place your crafting table and furnace. A torch will make your little hideyhole feel a little less like a tomb....
- Finally, if you're really desperate, you can press the Escape key to pause the game, go to the Options menu, and change the difficulty to "peaceful". Though many players consider it cheating, it's a sure-fire way to make sure mobs don't spawn. If you have cheats allowed, you can simply type in
/time set daywhich will change the current time to day. (Cheating is not recommended)
If you have wood to spare, you can craft a wooden door for your hut or the front wall of your cave:Template:Grid/Crafting Table You can place this door across the entrance to your shelter to protect you from mobs, while still giving you access. It is generally recommended to place it from the outside (go outside your shelter and place it looking inside), so that the door will be flush with your outside wall. Note that overnight, zombies may come and knock on the door, but unless you're in Hard difficulty (and a first-time player shouldn't be), they can't actually break it down. That said, avoid leaving an overhang outside your front door -- a zombie or skeleton can find shelter there from the morning sun, and block your exit or ambush you.
For more information about the different types of shelters, see the guide to shelters.
At Dusk
Make sure you are in (or on) a suitable shelter or hideout with at least some wood, a crafting table, a furnace, a sword (any type will do), some food (probably uncooked meat at this point), and at least 1 torch. If you do have a bed, definitely sleep in it and cook your food the next morning—if monsters show up, you may not be able to sleep later.
It might get boring, but try to limit jumping and sprinting in your shelter, which will conserve your hunger. If you haven't yet found coal or made charcoal (but you have some spare logs), you should make some charcoal as above. Then, if you haven't already, go on to cook your food. If you've only got 3 or 4 food or you have no coal/charcoal, use planks, otherwise use coal or charcoal:
Template:Grid/Furnace Template:Grid/Furnace
Again, on your first night, it's OK to waste a little fuel to cook your first food, such as using a whole lump of charcoal for only 5 or 6 items.
If you have a couple of logs (or 8 planks) left over after making torches and a bed, you can also make a chest to stash items you don't want to carry around. If you get killed, anything in the chest will be waiting for you rather than scattered around your death site.
Template:Grid/Crafting Table
A chest isn't really necessary for your first night, but it will become very helpful over the next day or few.
Dawn
Wait for full light, wield your sword, and carefully leave your shelter. Hopefully, it will be sunny, but even so, watch out for any remaining monsters—this may well be your first fight. If you see spiders, don't panic, they will hopefully have become peaceful in the sun (you can try to kill them for their string). If you see a creeper, your best bet at this point is to run at least 16 blocks away from it, and wait for it to go away (or explode, if it got too close before you got away). If you see any skeletons or zombies (hiding under trees or in water), stay away from them—skeletons can still shoot at you if you are too close (16 blocks or so), and either skeletons or zombies may come out from shade to attack you even as they burn. WARNING: If a burning zombie attacks you, you will be set on fire! If this happens, flee and jump into any nearby (monster-free) water. Once you're out and clear of monsters, look around for and collect bones, arrows, or rotten flesh which may have been dropped by burning skeletons and zombies.
If it is not sunny, you may have worse problems: You may need to kill zombies or even skeletons (or just retreat back in your shelter until the sun comes out). Zombies can be easy to kill by themselves, but if in a pack they can overrun you. However, if a zombie is attacked, it alerts all nearby zombies that you are there, and also some more zombies spawn out of sight to attack you. So even if there's only one zombie, you'll soon find yourself facing a horde.
Skeletons would be easy, but they are pretty accurate with the bow. It can be difficult to dodge their arrows. Also, the closer you get, the more likely the skeleton will hit you. If you get too close, it would only take a couple of shots to kill you. It's best to have a bow (or at least a shield) of your own before facing these undead creatures. If you don't have a bow or shield and they see you, try to run up to them and get in a few hits with your sword before you get shot too many times (at a distance, you can dodge the arrows).
Assuming you made it out of the shelter, congratulations! You've survived your first night in Minecraft! Within the next day or two, you should have acquired some iron armor and better weapons, which will take a lot of the terror out of nighttime. You can also make a more secure shelter, and hopefully a bed.
After the first Day
A tutorial for your next day is available here: the Second Day. Following are some general tips:
Home safety

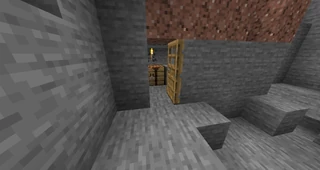
A 3×3×2 chamber in stone, filled with 1 bed, 1 furnace, 1 crafting table and 1 torch. Sealed with door and defended by dry moat.
By the end of the first day, the shelter will likely be primitive and small. In the days afterwards, you will be able to build a better home, in any of various forms. Some natural extensions include a back door, windows, a surrounding fence, and even traps for monsters. Remember that any time you pick up your bed, your spawn point will revert to the default (that is, random within 20 blocks of the world spawn point), until you not only place, but sleep in a bed again. For this reason, if your home is not very near the world spawn point, you should eventually use a compass to locate the exact point, and build a shelter there.
Mining
Eventually, you will need to venture below ground to gather iron and other resources. While there are much more advanced mining techniques, the most basic way to find ores is by entering a cave and exploring. Remember, if mining, never ever dig straight down as you might fall in lava or in a group of monsters. You can, however, dig straight down in a 2x1 pattern, standing in the middle of the 2 blocks. This will allow you to have a "safe block" in case there is lava beneath you.
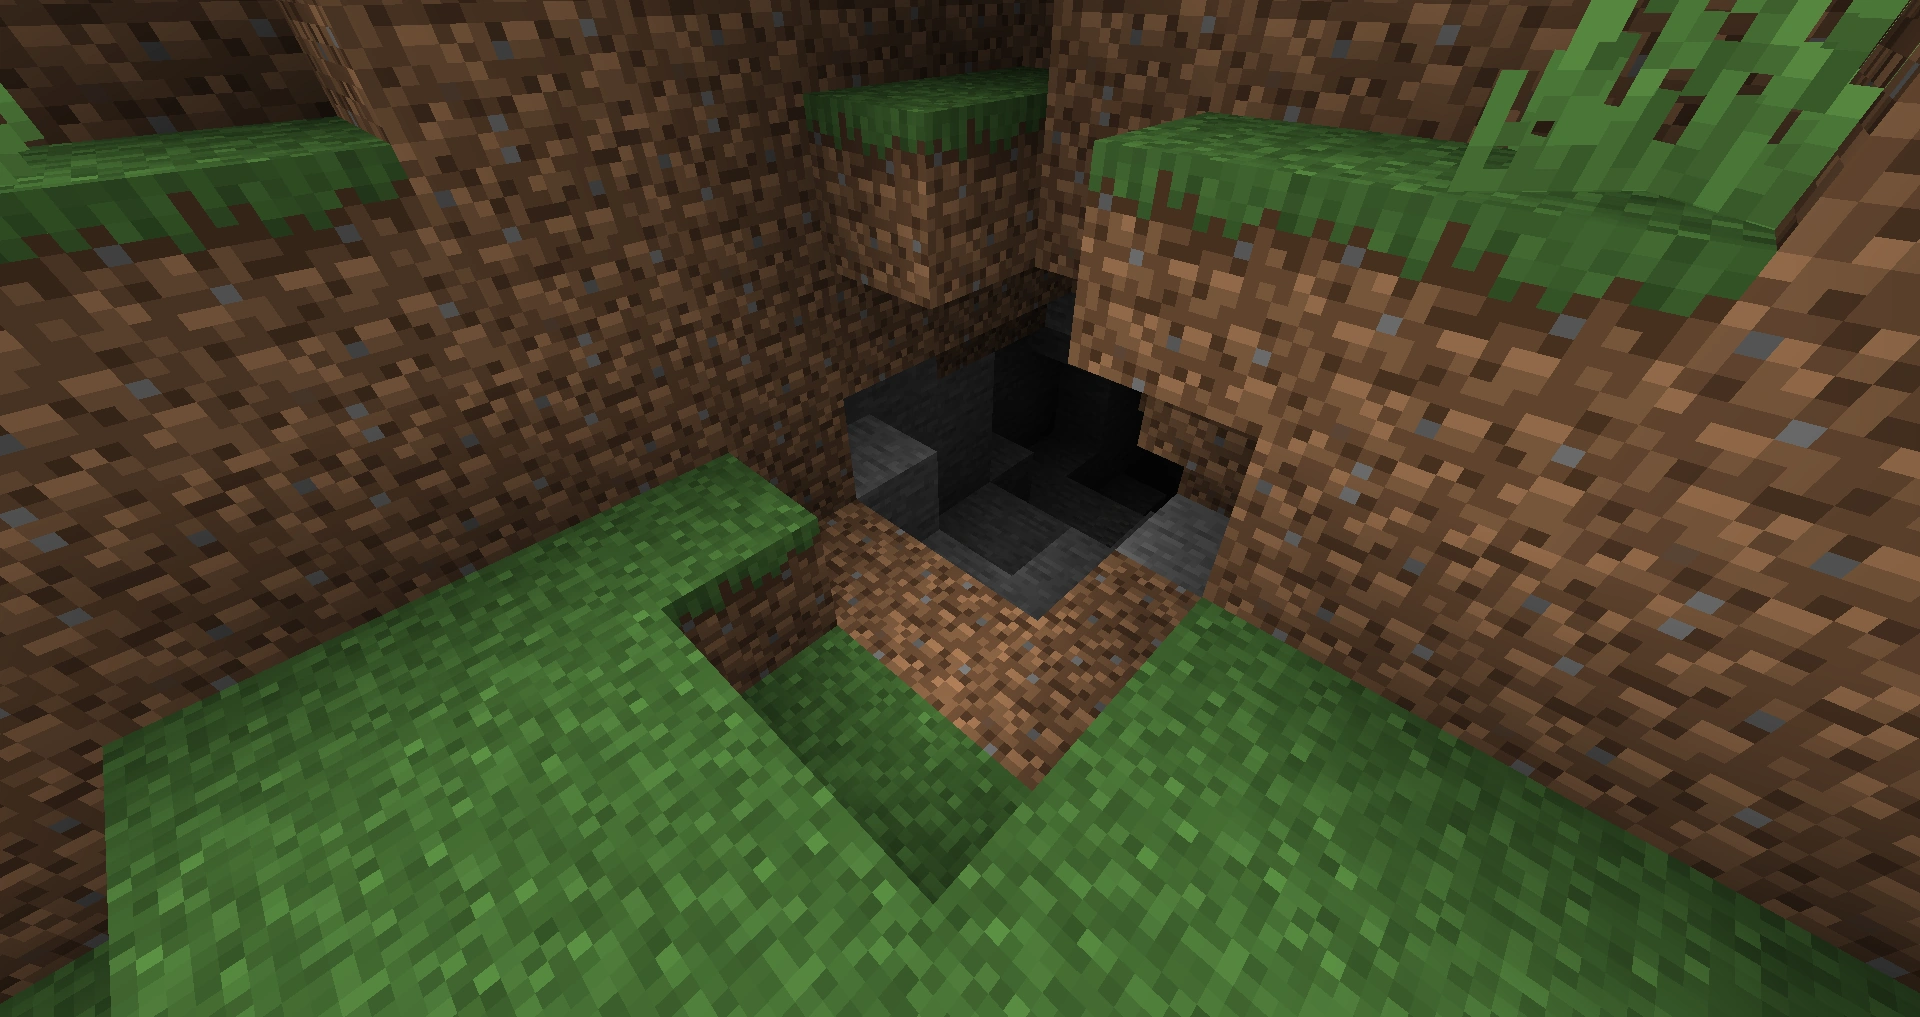
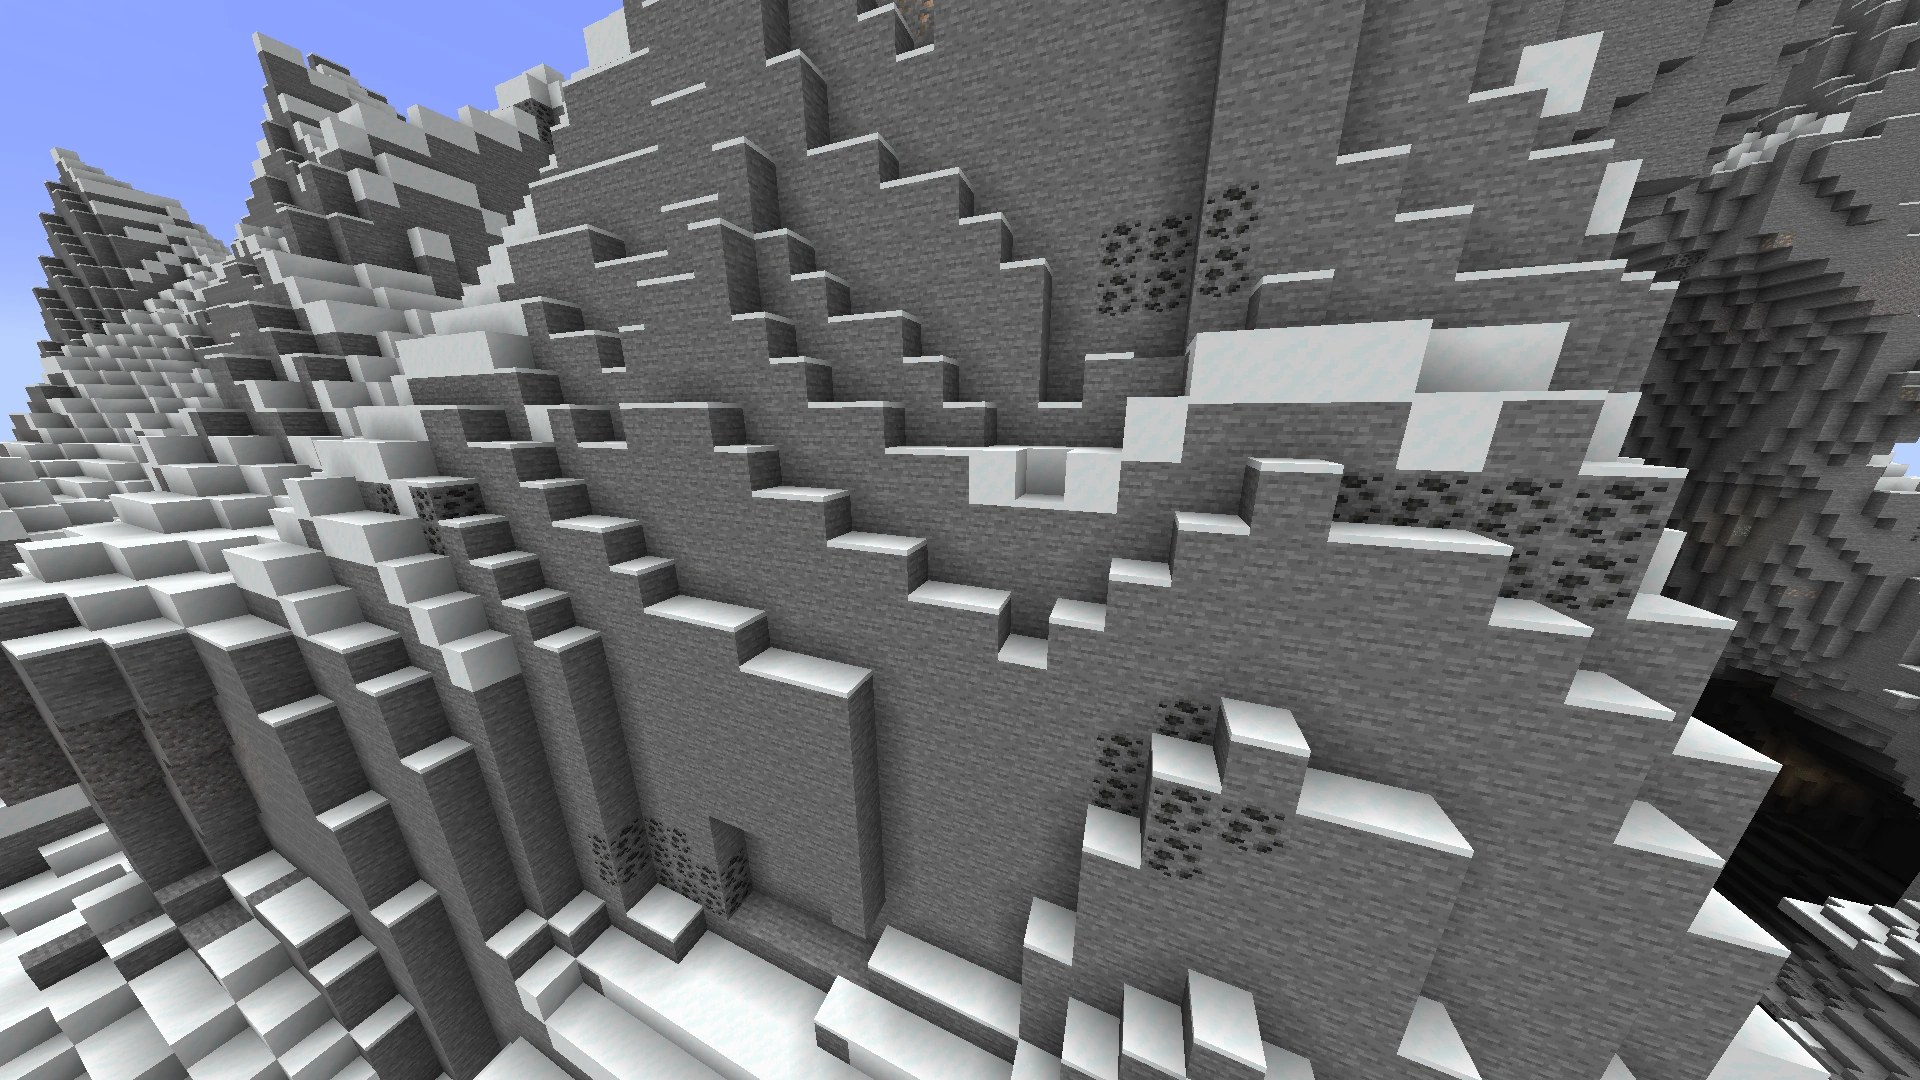
Finding a cave
You have no problems if you have just spent your night in a cave. If you haven't, the easiest way to do so is to roam the Overworld a little and look out for exposed cave entrances. Extreme Hills biomes will have caves inside mountains, but these are generally not what you want, because only coal ore will appear above sea level (Y=64). For iron and better ores, you'll want to find a cave opening into the ground (these are quite common) and head downwards. Sometimes such caves end immediately, but often they continue into big cave systems. If they seem to end right away sometimes there will be a continuation about 2-8 blocks farther back and below the cave's end; mining in these directions (8 blocks back and down, exploring somewhat to the sides) will reveal this if it is the case. Digging away gravel or dirt can also expose cave extensions, but you may go through a few shovels that way. If you can't find any all day, just sleep away the night, replenishing your resources like wood and food as you use them. If you hear suspicious, hostile noises, just try to listen and follow them.
Cave exploration
Cave exploration is pretty straight forward: you light up your way with torches, mine up ores as you see them (check ores and minerals) and kill enemies as you encounter them (see Tutorials/Combat for details). There are also some important techniques that might not be obvious to a new player, such as using waterfalls to descend into shafts, and/or swim back up from them. There are also many options for marking your trail and not getting lost. Also, note that sneaking (on PCs, the ⇧ Left Shift key by default) prevents you from falling over the edge of a block and as such it is useful if you are caving near a long drop, especially a drop into lava.
Tutorial videos
Beginner's Guide/video
- "Most efficient First day tutorial 1.6.2 (tnthost)"
- The First Day in Minecraft 1.0.0 (SecretRevelation)
- "The First Day (Beginners' Essentials) (Minecraft Tutorial)"
- "Minecraft The First 10 Minutes (Minecraft Tutorial)"
- Your First Shelter in Minecraft (Tutorial Machinima)
- Minecraft: Building a Starting House (Minecraft Tutorial)
- "Minecraft Efficient Farm (Minecraft Tutorial)"
- Getting Used To The Minecraft Crafting List 101
- "Basic first day tutorial (Macdeezy1996)"
cs:Návody/Začátečnická příručka de:Anleitungen/Die Grundlagen fr:Tutoriels/Guide de survie it:Guide/Guida_per_principianti hu:Útmutatók/A kezdők útmutatója ko:튜토리얼/초보자를 위한 가이드 nl:Lessen/Beginnersgids pt-br:Tutoriais/Guia para iniciantes pl:Poradniki/Pierwsza noc ru:Гид для начинающих zh:教程/菜鸟手册