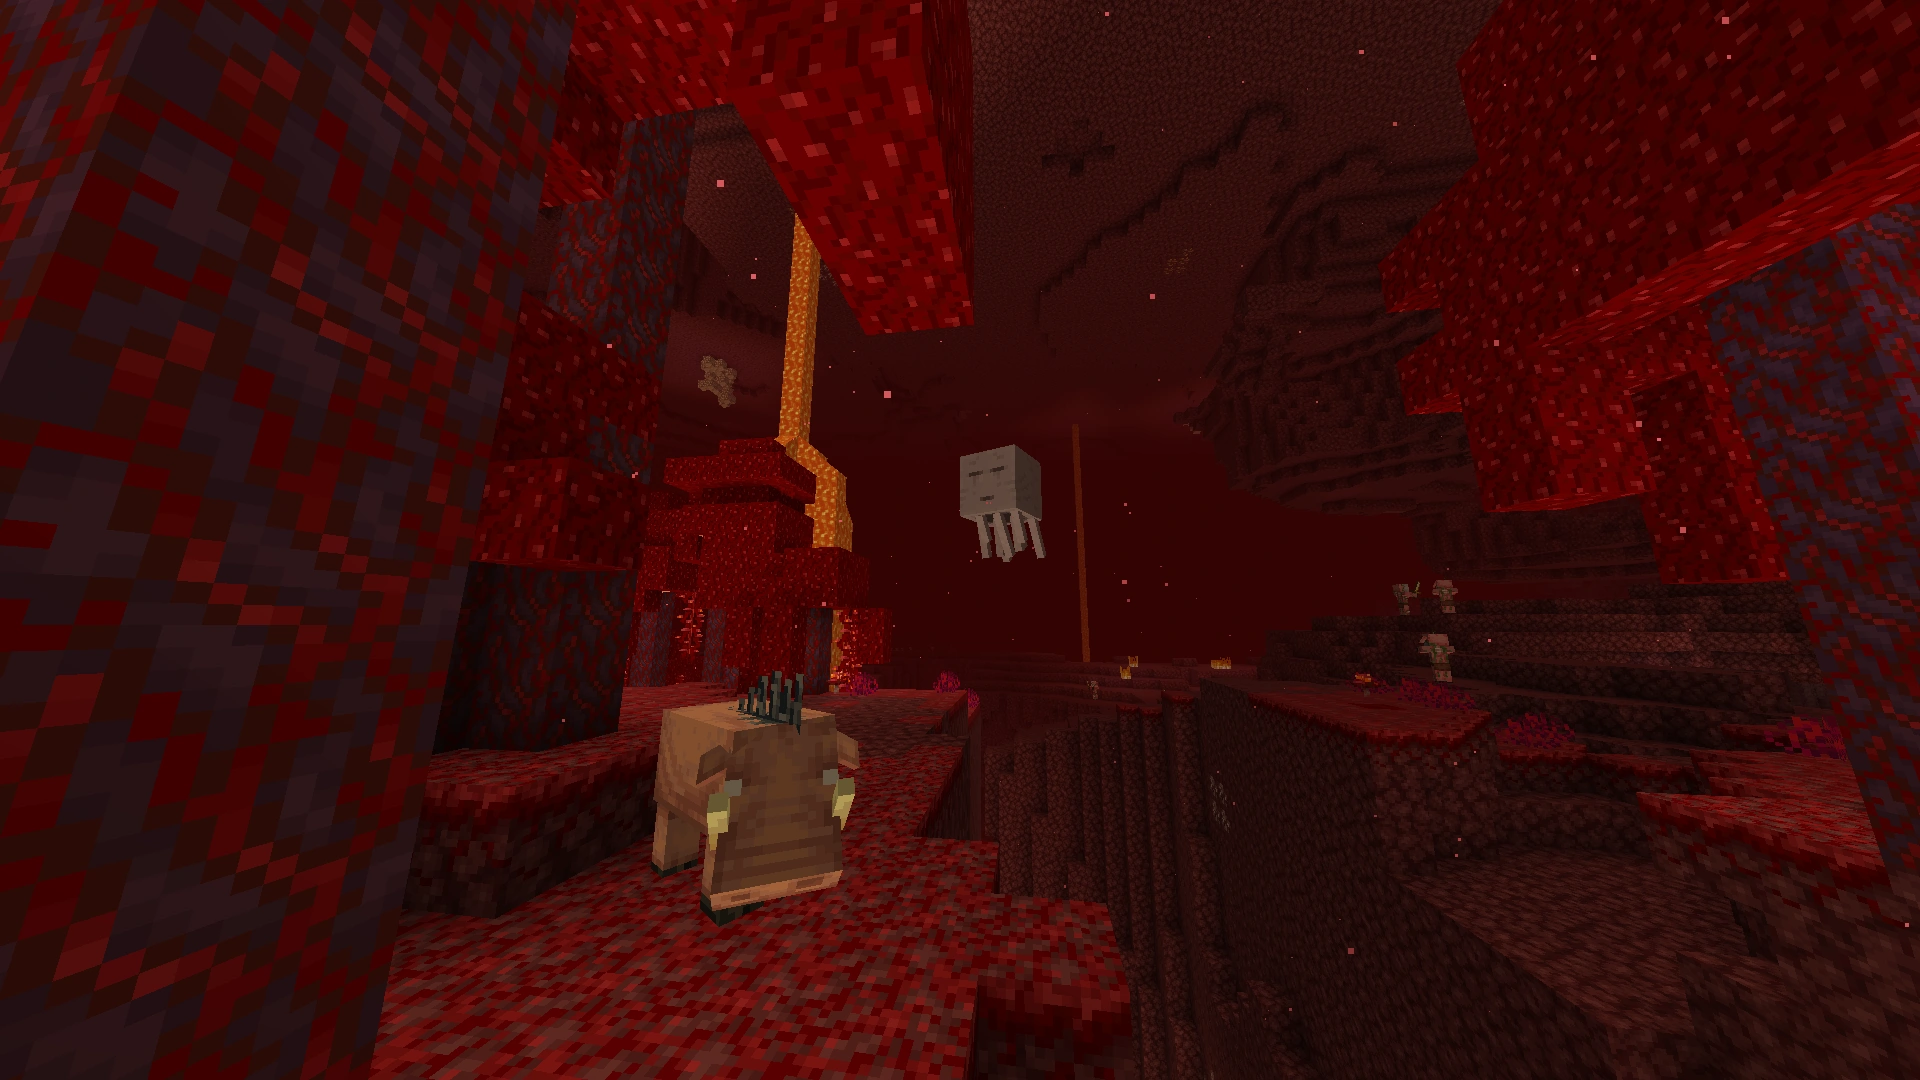

A view of the Nether.
The Nether is a hell-like dimension, filled with fire, lava, and dangerous mobs.
Accessing
Budget version (left), Full portal (right)
To access the Nether, the Player must construct a Nether portal in the Overworld (portals created in the End will not activate). To create the portal, one must first construct a rectangular obsidian frame, ranging in size from a minimum of 4x5 to a maximum of 23x23. Once the frame is constructed, it can then be activated by placing fire within the frame.
An activated portal will allow most entities (with the exception of the wither, the ender dragon, and entities riding or being ridden by another entity) to be transported to a corresponding portal in the Nether. A new portal will be created in the Nether if necessary. The portal can be destroyed by breaking the obsidian frame, by a nearby explosion, or by placing water or lava into it with a bucket or dispenser.
Environment
The terrain is largely composed of netherrack that forms complex platforms and niches, with frequent lava oceans, "lavafalls", and rivers of lava. Lava sources hidden in the netherrack are also common, making large mining projects dangerous. Random fires across the netherrack are yet another hazard to the unwary player. The Nether is horizontally infinite.
Bedrock comprises the top (below y=127) and bottom 4 layers in a rough pattern (in the console edition, it can also be found at the sides of the Nether, as world sizes are limited). Glowstone clusters hang from ceilings, and mushrooms grow abundantly on the ground. There are patches of floating gravel and soul sand. Small caverns form in the netherrack, which contain random nether quartz deposits. Near the level of the lava oceans, patches of magma blocks generate within the netherrack, making travel difficult and potentially damaging to armor.
Nether fortresses, the Nether's only naturally occurring structures, provide valuable loot, and are the only places where blazes and wither skeletons will naturally spawn. Nether fortresses are also the only place where nether wart naturally generates (in the console edition, nether wart will naturally generate anywhere on soul sand).
The Nether has no day-night cycle and no weather. The only natural sources of light are fire, lava, portals, and glowstone. Even with a light level of 0, the Nether has a dim ambient light (roughly equivalent to light level 8 in the Overworld). Light otherwise functions exactly the same as it does in the Overworld and the End.
If the player dies in the Nether, they will respawn in the Overworld; any surviving inventory items will remain in the Nether.
Locations in the Nether correlate to Overworld coordinates, but horizontal Overworld distances are scaled down by a ratio of 8:1 for travel in the Nether. Therefore, traveling one block in the Nether means traveling eight blocks in the Overworld.
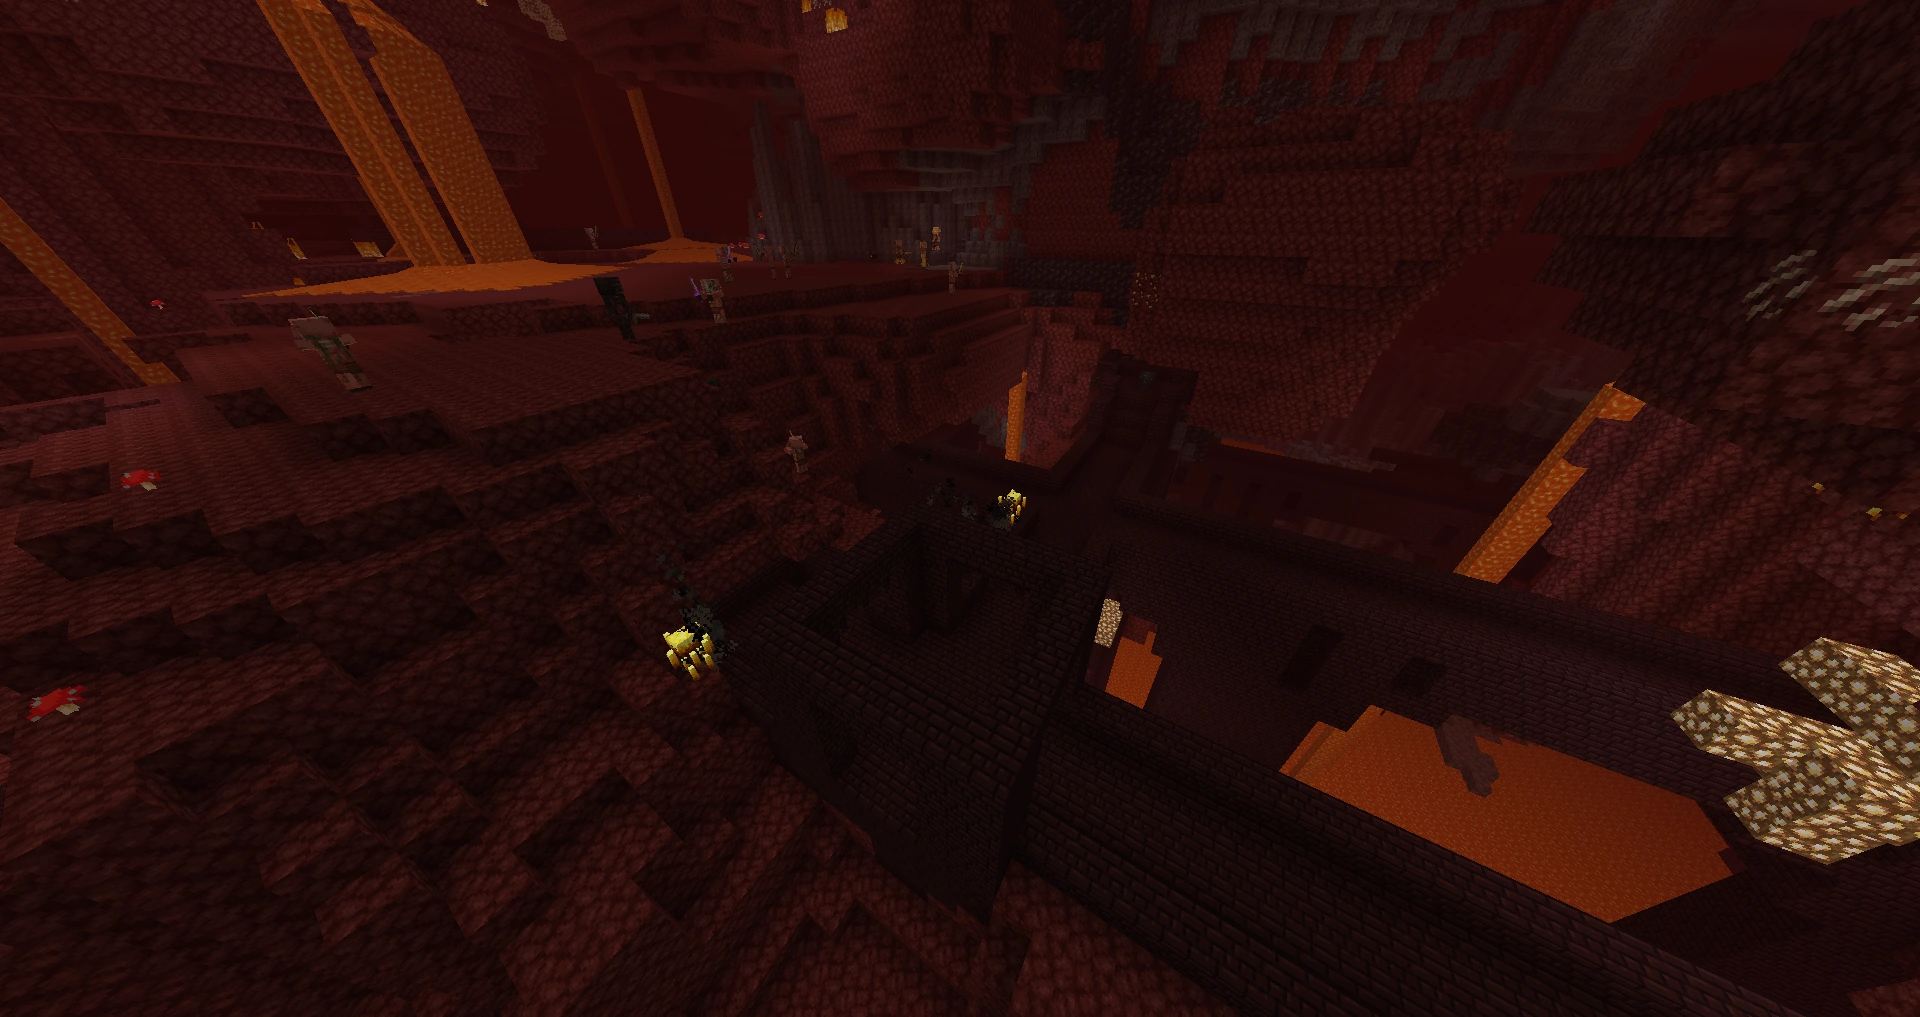

An image of the Nether with a nether fortress.
Most items and blocks in the Nether function the same as they do in the Overworld, with a few notable exceptions:
- Beds will explode and cause fires when a player attempts to sleep in one.
- The explosion is larger than that of TNT.
- There is no way to place liquid water in the Nether in a Survival game without cheats, besides the usage of a cauldron.
- Using water buckets will produce steam and an empty bucket.
- Ice that is melted or smashed in the Nether will also not produce water.
- Lava flows twice as far (8 blocks) and much faster in the Nether than in the Overworld.
- Grass blocks and leaves take a dead-looking brownish color, since the Nether is considered a warm biome.
- Maps will only generate a brown-gray static pattern.
- The player's direction indicator will spin randomly, although its location is still relative to the players location in the Nether.
- Compasses are unable to find the original spawn point, as it cannot be set to a single point within the Nether.
- Clocks are unable to determine the position of the Sun and Moon.
- Building snow golems is essentially useless, as they will rapidly take fire damage and die, due to the Nether being a warm biome.
Mobs
The Nether is home to its own share of mobs, most of which are completely fire- and lava-proof. Skeletons, chickens, and endermen are the only Overworld mobs that can naturally spawn in the Nether; wither skeletons have a 20% chance of spawning as a regular skeleton instead, and baby zombie pigmen may spawn as chicken jockeys. Other Overworld mobs do not naturally spawn in the Nether, but can be teleported through portals.

|

|

|

|

|

|

|

|
| Zombie Pigman | Ghast | Magma Cube | Blaze | Wither Skeleton | Skeleton | Chicken Jockey | Enderman |
Generation
Template:ID table/key
Naturally generated
Naturally generated blocks includes those that are created through the world seed.
| Name | Identifier |
|---|---|
| ? | ? |
| ? | ? |
| ? | ? |
| ? | ? |
| ? | ? |
| ? | ? |
| ? | ? |
| ? | ? |
| ? | ? |
| ? | ? |
| ? | quartz_ore |
| ? | ? |
Naturally created
Naturally created blocks are created through a combination of events that lead these blocks to be placed by natural causes, not by the player.
| Name | Identifier |
|---|---|
| ? | ? |
| ? | flowing_lava |
| ? | ? |
| ? | ? |
| ? | ? |
| ? | ? |
Structures
These blocks are generated as part of nether fortresses, but only when the "generated structures" option is on.
| Name | Identifier |
|---|---|
| ? | ? |
| ? | mob_spawner |
| ? | ? |
| ? | ? |
| ? | ? |
| ? | ? |
| ? | ? |
| ? | ? |
Technical information
The Nether is saved in the same way normal worlds are, in the following locations by default:
Windows:
%appdata%\.minecraft\saves\worldname\DIM-1
Mac:
~/Library/Application Support/minecraft/saves/worldname/DIM-1
Note: This Library folder is not the one in Macintosh HD, but the one inside your home folder. The only way to access this is to go to the Go menu, and select Go To..., and type ~/Library, or to go to the Go menu, hold the Option key, and select the "Library" option.
Linux:
~/.minecraft/saves/worldname/DIM-1
On all systems, be sure to replace "worldname" with the name of your world.
Note that DIM-1 does not contain its own level.dat; the level.dat in the parent folder is used for all dimensions. This means that even if a player changes the level data in the /world folder for a particular save, Nether portals will still take the player to the Nether world originally generated for that save and vice versa.
Deleting the DIM-1 file will reset the Nether, so that all player-made changes and buildings in that dimension will be undone.
Video
- Note: This video is outdated, as wither skeletons, nether brick slabs, nether quartz ore, and magma blocks were added in 1.4.2, 1.4.6, 1.5, and 1.10, respectively.
The Nether/video
Achievements
Template:Load achievements: Unknown achievement. Achievement title not found on page Achievement
History
| indev | ||||||||||||||||||||||||||||||||||||||||||||||||||||||||||||||||||||||||||||||||||||||||||||||||||||||||||||||
|---|---|---|---|---|---|---|---|---|---|---|---|---|---|---|---|---|---|---|---|---|---|---|---|---|---|---|---|---|---|---|---|---|---|---|---|---|---|---|---|---|---|---|---|---|---|---|---|---|---|---|---|---|---|---|---|---|---|---|---|---|---|---|---|---|---|---|---|---|---|---|---|---|---|---|---|---|---|---|---|---|---|---|---|---|---|---|---|---|---|---|---|---|---|---|---|---|---|---|---|---|---|---|---|---|---|---|---|---|---|---|
0.31{{Extension DPL}}<ul><li>[[Written Book|Written Book]]<br/>{{Item
| title = Written Book
| image = Written Book.gif
| renewable = Yes
| stackable = Yes (16)
}}
A '''written book''' is an [[item]] created after a [[book and quill]] is signed.
== Obtaining ==
=== Signing a book and quill ===
Written books can be obtained by signing a [[book and quill]]. After it has been signed, it cannot be edited again. The label does not say "Written Book", but whatever the [[player]] titles it. The title appears on the top line of the label, and "by <''player''>" (the player's username) on the bottom. {{IN|bedrock}}, this is customizable without [[commands]].
=== Copying ===
{{crafting
|name=Written Book
|showdescription=1
|;;;Book and Quill;Book and Quill;Book and Quill;Book and Quill;Book and Quill
|;;;;Book and Quill;Book and Quill;Book and Quill;Book and Quill
|;;;;;Book and Quill;Book and Quill;Book and Quill
|Book and Quill
|Written Book
|;;;;;;Book and Quill;Book and Quill
|;Book and Quill;Book and Quill;Book and Quill;Book and Quill;Book and Quill;Book and Quill;Book and Quill
|;;Book and Quill;Book and Quill;Book and Quill;Book and Quill;Book and Quill;Book and Quill
|;;;;;;;Book and Quill
|Output= Written Book; Written Book,2; Written Book,3; Written Book,4; Written Book,5; Written Book,6; Written Book,7; Written Book,8
|description=The input written book is not consumed.<br>The new copies are "Copy of Original" or "Copy of Copy", depending on whether the input written book is "Original" or "Copy of Original".<br>Copies of copies cannot be copied.<br>Copied books of the same generation ("Original", "Copy of Original", "Copy of Copy", or "Tattered") stack.
|type=Miscellaneous
}}
== Usage ==
Written books can be opened by right-clicking (or holding down on the screen {{in|bedrock}}), and display a GUI allowing the [[player]] to read it or turn the page.
The contents of a book are an extra set of data attached to the item. This means that when a book is destroyed, its contents are lost with it.
=== Lecterns ===
One can place a [[written book]] on an empty [[lectern]].
The lectern then emits a redstone signal depending on the displayed page in the book. On the last page, the lectern emits a signal strength of 15.
=== Chiseled bookshelf ===
{{control|Use|text=Using}} the [[chiseled bookshelf]] while having a written book in the main hand will put the book inside the chiseled bookshelf.
== Sounds ==
{{edition|java}}:
{{Sound table
|sound=Page turn1.ogg
|sound2=Page turn2.ogg
|sound3=Page turn3.ogg
|subtitle=Page rustles
|source=master
|description=When the page of a book is turned
|id=item.book.page_turn
|translationkey=subtitles.item.book.page_turn
|volume=2.0
|pitch=1.0
|distance=16}}
{{Sound table
|sound=Page turn1.ogg
|sound2=Page turn2.ogg
|sound3=Page turn3.ogg
|subtitle=Page rustles
|source=block
|description=When the page of a book is turned on a lectern
|id=item.book.page_turn
|translationkey=subtitles.item.book.page_turn
|volume=2.0
|pitch=0.9-1.0
|distance=16}}
{{Sound table
|sound=Book thump1.ogg
|sound2=Book thump2.ogg
|subtitle=Book thumps
|source=block
|description=When a book is placed on a lectern
|id=item.book.put
|translationkey=subtitles.item.book.put
|volume=1.0
|pitch=1.0
|distance=16}}
{{Sound table
|sound=Chiseled bookshelf insert1.ogg
|sound2=Chiseled bookshelf insert2.ogg
|sound3=Chiseled bookshelf insert3.ogg
|sound4=Chiseled bookshelf insert4.ogg
|subtitle=Book placed
|source=block
|description=When a written book is placed in a chiseled bookshelf
|id=block.chiseled_bookshelf.insert
|translationkey=subtitles.chiseled_bookshelf.insert
|volume=0.8
|pitch=''varies'' <ref group=sound>Can be 1.0, 0.85, or 1.1 for each sound</ref>
|distance=16}}
{{Sound table
|sound=Chiseled bookshelf pickup1.ogg
|sound2=Chiseled bookshelf pickup2.ogg
|sound3=Chiseled bookshelf pickup3.ogg
|subtitle=Book taken
|source=block
|description=When a written book is removed from a chiseled bookshelf
|id=block.chiseled_bookshelf.pickup
|translationkey=subtitles.chiseled_bookshelf.take
|volume=0.8
|pitch=''varies'' <ref group=sound>Can be 1.0, 0.8, or 1.1 for each sound</ref>
|distance=16
|foot=1}}
{{edition|bedrock}}:
{{Sound table
|type=bedrock
|sound=Page turn1.ogg
|sound2=Page turn2.ogg
|sound3=Page turn3.ogg
|source=sound
|description=When the page of a book is turned
|id=item.book.page_turn
|volume=2.0
|pitch=1.0}}
{{Sound table
|sound=Book thump1.ogg
|sound2=Book thump2.ogg
|source=block
|description=When a book is placed on a lectern
|id=item.book.put
|volume=4.8
|pitch=1.0}}
{{Sound table
|type=bedrock
|sound=Chiseled bookshelf insert1.ogg
|sound2=Chiseled bookshelf insert2.ogg
|sound3=Chiseled bookshelf insert3.ogg
|sound4=Chiseled bookshelf insert4.ogg
|source=block
|description=When a written book is placed in a chiseled bookshelf
|id=insert.chiseled_bookshelf
|volume=0.8
|pitch=''varies'' <ref group=sound>Can be 1.0, 0.85, or 1.1 for each sound</ref>}}
{{Sound table
|sound=Chiseled bookshelf pickup1.ogg
|sound2=Chiseled bookshelf pickup2.ogg
|sound3=Chiseled bookshelf pickup3.ogg
|source=block
|description=When a written book is removed from a chiseled bookshelf
|id=pickup.chiseled_bookshelf
|volume=0.8
|pitch=''varies'' <ref group=sound>Can be 1.0, 0.8, or 1.1 for each sound</ref>
|foot=1}}
== Data values ==
=== ID ===
{{JE}}:
{{ID table
|edition=java
|showitemtags=y
|showforms=y
|generatetranslationkeys=y
|displayname=Written Book
|spritetype=item
|nameid=written_book
|itemtags=bookshelf_books, lectern_books
|form=item
|foot=1}}
{{BE}}:
{{ID table
|edition=bedrock
|showitemtags=y
|shownumericids=y
|showforms=y
|notshowbeitemforms=y
|generatetranslationkeys=y
|displayname=Written Book
|spritetype=item
|nameid=written_book
|id=511
|itemtags=minecraft:bookshelf_books, minecraft:lectern_books
|form=item
|foot=1}}
=== Item data ===
{{el|java}}:
{{main|Player.dat format}}
<div class="treeview">
* {{nbt|compound|tag}}: The item's '''tag''' tag.
{{:Player.dat_format/Written Books}}
</div>
{{el|bedrock}}:
: See [[Bedrock Edition level format/Item format]].
== History ==
{{History|java}}
{{History||1.3.1|snap=12w17a|[[File:Written Book JE1 BE1.png|32px]] Added written books.}}
{{History|||snap=12w21a|Written books can now be [[trading|sold]] to librarian [[villager]]s, at 1 written book for 1 [[emerald]].}}
{{History||1.7.2|snap=13w36a|Written books can now be cloned the same way [[map]]s can, but by using [[book and quill|books and quills]] instead of Empty Maps. Multiple copies of the same written book can be cloned by putting more book and quills in the crafting grid.
|Written books can now be stacked (up to 16 per stack).}}
{{History||1.8|snap=14w02a|[[Trading]] has been changed: librarian [[villager]]s now [[trading|buy]] 2 written books for 1 [[emerald]].}}
{{History|||snap=14w05a|Copying written books now mark them as "Copy of Original" or "Copy of Copy". The copying status of a book is denoted in a separate line in the tooltip, beneath the author's name. Copies of copies cannot be copied.}}
{{History||1.9|snap=15w33c|A written book titled "Work in Progress" now generates within a [[hopper]] as a part of the [[end ship]] in the [[end cities]]. It reads: "We will have something else here soon..." and is signed by [[Searge]].}}
{{History|||snap=15w41a|End ships no longer contain a written book.}}
{{History||1.13|snap=17w47a|Prior to [[1.13/Flattening|''The Flattening'']], this [[item]]'s numeral ID was 387.}}
{{History||1.14|snap=18w43a|[[File:Written Book JE2 BE2.png|32px]] The texture of written books has been changed.}}
{{History|||snap=19w02a|Written books can now be held on [[lectern]]s.}}
{{History|||snap=19w11a|Librarian [[villager]]s no longer [[trading|buy]] written books.}}
{{History||1.20<br>(Experimental)|link=1.19.3|snap=22w42a|Written books can now interact with [[chiseled bookshelves]].}}
{{History|bedrock}}
{{History||1.2.0|snap=beta 1.2.0.2|[[File:Written Book JE1 BE1.png|32px]] Added written books.}}
{{History||1.10.0|snap=beta 1.10.0.3|[[File:Written Book JE2 BE2.png|32px]] The texture of written books has been changed.
|Written books can now be held on [[lectern]]s.}}
{{History|console}}
{{History||xbox=TU25|xbone=CU14|ps=1.17|wiiu=Patch 1|[[File:Written Book JE1 BE1.png|32px]] Added written books.}}
{{History|PS4}}
{{History||1.90|[[File:Written Book JE2 BE2.png|32px]] The texture of written books has been changed.}}
{{History|foot}}
== Issues ==
{{issue list}}
== Trivia ==
*When written books are obtained with [[commands]] (without the correct [[Player.dat format#Written Books|data tag]]), the label shows "Written Book" and has the text "*Invalid book tag*" when opened. The book is signed and cannot be edited without commands.
*Commands that were added to a written book using serialized JSON objects are executed through the chat system. This means that any command added to a written book can't be longer than 256 characters, which is the maximum chat line limit.
*During the 2020 April Fools Update [[Java Edition 20w14∞]], throwing a written book into a lit [[Nether Portal (block)|nether portal]] would create a portal to one of the 2,147,483,645 new dimensions.
== Gallery ==
<gallery>
Written Book tooltip.png|A signed book.
Test by Dinnerbone.png|Copying a signed book.
BookandQuillOperators12w17a.png|Different types of characters can be used to simulate a different font.
JSON Book.png|First image of a book using JSON text.
No NBT written book GUI.png|A no NBT written book using commands.
Book Background (JE).png|Java Edition book background texture.
Book Background (BE).png|Bedrock Edition book background texture.
Book Arrowleft (JE).png|Java Edition left arrow texture.
Book Arrowright (JE).png|Java Edition right arrow texture.
Book Arrowleft (BE).png|Bedrock Edition left arrow texture.
Book Arrowright (BE).png|Bedrock Edition Right arrow texture.
</gallery>
== See also ==
*[[Book]]
*[[Bookshelf]]
*[[Book and Quill]]
{{Items}}
[[Category:Renewable resources]]
[[cs:Napsaná kniha]]
[[es:Libro escrito]]
[[fr:Livre édité]]
[[hu:Megírt könyv]]
[[it:Libro]]
[[ja:記入済みの本]]
[[ko:글이 쓰인 책]]
[[nl:Geschreven boek]]
[[pl:Zapisana książka]]
[[pt:Livro escrito]]
[[ru:Написанная книга]]
[[uk:Написана книга]]
[[zh:成书]]</li><li>[[Bookshelf|Bookshelf]]<br/>{{About|the bookshelf used with an enchanting table|the bookshelf that can hold books|Chiseled Bookshelf}}
{{Block
|image=Bookshelf.png
|transparent=No
|light=No
|tool=Axe
|renewable=Yes
|stackable=Yes (64)
|flammable=Yes (30)
|lavasusceptible=Yes
}}
'''Bookshelves''' are [[blocks]] that improve [[enchanting|enchantments]] applied with an [[enchanting table]] when placed around one, up to a maximum of fifteen bookshelves, at the expense of [[Enchanting/Levels|level]] requirement.
== Obtaining ==
=== Natural generation ===
Bookshelves can generate in village libraries and sometimes village houses.
[[Stronghold]]s may contain up to two libraries, each of which may be single-level or have an upper balcony. These feature some bookshelves arranged in pillars, and more bookshelves arranged in pillars in the walls. Single-level libraries contain 161 bookshelves, while libraries with balconies contain 233.
Bookshelves also naturally generate in certain [[woodland mansion]] rooms.
=== Breaking ===
Bookshelves can be broken fairly easily by hand, but can be broken faster by using an [[axe]]. In either case, they drop 3 books when broken, allowing the reconstruction of the bookshelf with the addition of six wood planks. When broken by an item that is [[enchanted]] with [[Silk Touch]], a bookshelf drops itself.
{{breaking row|horizontal=1|Bookshelf|Axe}}
=== Crafting ===
{{Crafting
|A1=Any Planks
|B1=Any Planks
|C1=Any Planks
|A2=Book
|B2=Book
|C2=Book
|A3=Any Planks
|B3=Any Planks
|C3=Any Planks
|Output=Bookshelf
|type=Building block
}}
=== Trading ===
Novice-level librarian [[Villager|villagers]] have a 50% chance to sell 1 bookshelf for 9 [[Emerald|emeralds]] as part of their trades.{{only|bedrock}}
Novice-level librarian villagers have a {{frac|2|3}} chance to sell 1 bookshelf for 9 emeralds.{{only|java}}
== Usage ==
=== Enchanting ===
{{main|Enchantment mechanics#Bookshelf placement}}
If an [[enchanting table]] is placed near a bookshelf, glyph [[particles]] fly from the bookshelf toward the enchanting table. Having bookshelves in the proper position near the table allows the table to apply higher-level enchantments.
=== Crafting ingredient ===
{{crafting usage}}
=== Fuel ===
Bookshelves can be used as a [[fuel]] in [[furnace]]s, smelting 1.5 items per block.
=== Villager ===
Librarian [[villager]]s can interact with bookshelves.
=== Note Blocks ===
Bookshelf can be placed under [[note block]]s to produce "bass" sounds.
== Sounds ==
{{Sound table/Block/Wood}}
== Data values ==
=== ID ===
{{edition|java}}:
{{ID table
|edition=java
|showforms=y
|generatetranslationkeys=y
|displayname=Bookshelf
|spritetype=block
|nameid=bookshelf
|showblocktags=y|blocktags=mineable/axe
|foot=1}}
{{edition|bedrock}}:
{{ID table
|edition=bedrock
|shownumericids=y
|showforms=y
|generatetranslationkeys=y
|displayname=Bookshelf
|spritetype=block
|nameid=bookshelf
|id=47
|foot=1}}
== Achievements ==
{{load achievements|Librarian}}
== History ==
{{History|java classic}}
{{History||October 24, 2009|link=https://notch.tumblr.com/post/221308991/the-new-block-types-and-new-graphics-for-the-gold|Bookshelves were teased by [[Notch]].}}
{{History||0.26 SURVIVAL TEST|[[File:Bookshelf JE1.png|32px]] Added bookshelves.
|Bookshelves are currently impossible to obtain without loading a pre-edited map.
|Bookshelves are currently destroyed in [[explosion]]s.
|When bookshelves are broken, they currently do not drop anything.}}
{{History||0.28|Bookshelves can now be freely placed.}}
{{History|java alpha}}
{{History||v1.0.11|Bookshelves can now be [[crafting|crafted]] from 3 [[book]]s and 6 [[planks]].}}
{{History|java beta}}
{{History||1.8|snap=Pre-release|Bookshelves can now be found generated in libraries in [[village]]s, and libraries in [[stronghold]]s.}}
{{History|java}}
{{History||1.0.0|snap=Beta 1.9 Prerelease 3|Bookshelves now drop 3 [[book]]s when broken by a non-[[Silk Touch]] [[item]].
|They are now necessary to [[enchanting|enchant]] with higher levels for better enchanted items.
|The number of bookshelves required to reach the maximum enchantment level is 30.}}
{{History|||snap=Beta 1.9 Prerelease 5|[[File:Bookshelf JE2 BE1.png|32px]] The top texture of bookshelves have now been updated as a result of the [[planks]] texture update.}}
{{History||1.2.4|snap=release|[[Spruce planks]], [[birch planks]], and [[jungle planks]] can now be used to craft bookshelves.}}
{{History||1.3.1|snap=12w21a|Librarian [[villager]]s now [[trading|sell]] 1 bookshelf for 3 [[emerald]]s.}}
{{History|||snap=12w22a|The number of bookshelves required to reach the maximum enchantment level has been now decreased to 15.}}
{{History||1.7.2|snap=1.7.1|[[Acacia planks]] and [[dark oak planks]] can now be used to craft bookshelves.}}
{{History||1.8|snap=14w02a|Librarian villagers now sell 1 bookshelf for 3–4 [[emerald]]s.}}
{{History||1.11|snap=16w39a|Bookshelves now generate in [[woodland mansion]]s.}}
{{History||1.13|snap=17w47a|Prior to [[1.13/Flattening|''The Flattening'']], this [[block]]'s numeral ID was 47.}}
{{History||1.14|snap=18w43a|[[File:Bookshelf JE3.png|32px]] The texture of bookshelves has now been changed.}}
{{History|||snap=18w47a|[[File:Bookshelf JE4 BE2.png|32px]] The texture of bookshelves has now been changed, once again.}}
{{History|||snap=19w02a|Bookshelves can now be used to craft [[lectern]]s.}}
{{History||1.16|snap=20w06a|[[Crimson planks]] and [[warped planks]] can now be used to craft bookshelves.}}
{{History||1.19|snap=22w11a|[[Mangrove planks]] can now be used to craft bookshelves.}}
{{History|pocket alpha}}
{{History||v0.2.1|[[File:Bookshelf JE2 BE1.png|32px]] Added bookshelves.|Bookshelves are currently obtainable only in [[Creative]] mode.}}
{{History||v0.3.0|Bookshelves are now obtainable in [[Survival]] mode.}}
{{History||v0.9.0|snap=build 1|Bookshelves now naturally spawn in [[stronghold]]s and [[village]]s.}}
{{History||v0.12.1|snap=build 1|Bookshelves can now be used to increase [[enchantment table]] levels.|Bookshelves can now be obtained by using a [[tool]] with the [[Silk Touch]] enchantment.}}
{{History|pocket}}
{{History||1.0.4|snap=alpha 1.0.4.0|Librarian [[villager]]s now [[trading|sell]] 1 bookshelf for 3-4 [[emerald]]s as their second tier trade.}}
{{History||1.1.0|snap=alpha 1.1.0.0|Bookshelves now generate in [[woodland mansion]]s.}}
{{History|bedrock}}
{{History||1.10.0|snap=beta 1.10.0.3|Bookshelves can now be used to craft [[lectern]]s.|Bookshelves now get inspected by librarian [[villager]]s.|[[File:Bookshelf JE4 BE2.png|32px]] The texture of bookshelves has been changed.}}
{{History||1.11.0|snap=beta 1.11.0.4|[[Trading]] has now been changed, librarian villagers now have a 50% chance to sell a bookshelf for 6 [[emerald]]s as part of their first trade.}}
{{History|console}}
{{History||xbox=TU1|xbone=CU1|ps=1.00|wiiu=Patch 1|switch=1.0.1|[[File:Bookshelf JE2 BE1.png|32px]] Added bookshelves. Whether they actually used this texture is unknown.}}
{{History||xbox=none|xbone=none|ps=1.90|wiiu=none|switch=none|[[File:Bookshelf JE4 BE2.png|32px]] The texture of bookshelves has been changed.}}
{{History|new 3ds}}
{{History||0.1.0|[[File:Bookshelf JE2 BE1.png|32px]] Added bookshelves.}}
{{History|foot}}
== Issues ==
{{Issue list}}
== Trivia ==
* Bookshelves' top and bottom textures by default use the same texture as [[oak planks]].
* It takes 90 planks, 45 [[leather]] and 135 [[paper]] to make 15 bookshelves in order to get a level 30 [[enchantment]].
* A bookshelf is the icon for [[Education Edition]].
== Gallery ==
<gallery>
File:Library in Village.png|Naturally occurring bookshelves in a [[village]]. (Before Village & Pillage).
File:Large Stronghold Library.png|Naturally occurring bookshelves in a [[stronghold]].
File:Achievement get! Trading emeralds for bookshelves.png|Bookshelves obtained by [[trading]] with a [[villager]].
File:Enchanting-Table.png|Bookshelves powering an [[enchanting table]].
</gallery>
== References ==
{{Reflist}}
== External Links ==
*[https://www.minecraft.net/en-us/article/block-week-bookshelf Block of the Week: Bookshelf] – Minecraft.net on December 16, 2016
{{Blocks|Building}}
[[Category:Manufactured blocks]]
[[Category:Natural blocks]]
[[Category:Generated structure blocks]]
[[Category:Utility blocks]]
[[Category:Bedrock Edition]]
[[Category:Java Edition]]
[[Category:Items]]
[[Category:Flammable blocks]]
[[cs:Knihovna]]
[[de:Bücherregal]]
[[es:Librería]]
[[fr:Bibliothèque]]
[[hu:Könyvespolc]]
[[it:Libreria]]
[[ja:本棚]]
[[ko:책장]]
[[nl:Boekenkast]]
[[pl:Biblioteczka]]
[[pt:Estante de livros]]
[[ru:Книжные полки]]
[[th:ชั้นหนังสือ]]
[[uk:Книжкова полиця]]
[[zh:书架]]</li></ul> | January 6, 2010 |  | ||||||||||||||||||||||||||||||||||||||||||||||||||||||||||||||||||||||||||||||||||||||||||||||||||||||||||||
| alpha | ||||||||||||||||||||||||||||||||||||||||||||||||||||||||||||||||||||||||||||||||||||||||||||||||||||||||||||||
1.1.1{{Extension DPL}}<ul><li>[[Dragon's Breath|Dragon's Breath]]<br/>{{Item
| image = Dragon's Breath.png
| renewable = Yes
| stackable = Yes (64)
| rarity = Uncommon
}}
The '''dragon's breath''' is a [[brewing]] item that is used solely to make [[lingering potion]]s.
== Obtaining ==
The dragon's breath can be obtained by scooping up the [[ender dragon]]'s breath attack or the purple [[area effect cloud|effect clouds]] caused by [[dragon fireball]]s in an empty [[glass bottle]].
== Usage ==
=== Brewing ingredient ===
Dragon's breath may be added to any splash potion to upgrade it to a lingering potion, which can be used to create a lasting [[Lingering Potion#Area Effect Cloud|area effect cloud]], or to craft [[Arrow#Tipped arrows|tipped arrows]].
{{brewing
|name=[[Lingering Potion]]
|showname=1
|Dragon's Breath
|Any Lingering Potion
|base=Any Splash Potion}}
When put 2 or more dragon's breath in the brewing stand, after the brewing process, a glass bottle will drop as an [[Item (entity)|entity]]. However, if put only 1 dragon's breath in the brewing stand, after the brewing process, the glass bottle is consumed and cannot be retrieved.<ref>{{bug|MC-259583}}</ref>
== Sounds ==
{{Edition|Java}}:
{{Sound table
|sound=Bottle fill dragon breath1.ogg
|sound2=Bottle fill dragon breath2.ogg
|subtitle=Bottle fills
|source=neutral
|description=Filling a glass bottle with dragon's breath
|id=item.bottle.fill_dragonbreath
|translationkey=subtitles.item.bottle.fill
|volume=1.0
|pitch=1.0
|distance=16
|foot=1}}
{{Edition|Bedrock}}:
{{Sound table
|type=bedrock
|sound=Bottle fill dragon breath1.ogg
|sound2=Bottle fill dragon breath2.ogg
|source=sound
|description=When a bottle is filled with dragon's breath
|id=bottle.dragonbreath
|volume=0.7<wbr>{{Until|BE 1.20.40}}<br>1.0<wbr>{{Upcoming|BE 1.20.40}}
|pitch=1.0
|foot=1}}
== Achievements ==
{{Load achievements|You Need a Mint}}
== Advancements ==
{{load advancements|You Need a Mint}}
== Data values ==
=== ID ===
{{edition|java}}:
{{ID table
|edition=java
|showforms=y
|generatetranslationkeys=y
|displayname=Dragon's Breath
|spritetype=item
|nameid=dragon_breath
|form=item
|foot=1}}
{{edition|bedrock}}:
{{ID table
|edition=bedrock
|shownumericids=y
|showforms=y
|notshowbeitemforms=y
|generatetranslationkeys=y
|displayname=Dragon's Breath
|spritetype=item
|nameid=dragon_breath
|id=560
|form=item
|foot=1}}
== History ==
{{History|java}}
{{History||1.9|snap=15w33a|[[File:Dragon's Breath JE1 BE1.png|32px]] Added dragon's breath.}}
{{History||1.13|snap=17w47a|Prior to [[1.13/Flattening|''The Flattening'']], this [[item]]'s numeral ID was 437.}}
{{History||1.14|snap=18w43a|[[File:Dragon's Breath JE2 BE2.png|32px]] The texture of dragon's breath has been changed.}}
{{History|pocket}}
{{History||1.0.0|snap=alpha 0.17.0.1|[[File:Dragon's Breath JE1 BE1.png|32px]] Added dragon's breath.}}
{{History|bedrock}}
{{History||1.10.0|snap=beta 1.10.0.3|[[File:Dragon's Breath JE2 BE2.png|32px]] The texture of dragon's breath has been changed.}}
{{History|console}}
{{History||xbox=TU46|xbone=CU36|ps=1.38|wiiu=Patch 15|switch=1.0.1|[[File:Dragon's Breath JE1 BE1.png|32px]] Added dragon's breath.}}
{{History||xbox=none|xbone=none|ps=1.90|wiiu=none|switch=none|[[File:Dragon's Breath JE2 BE2.png|32px]] The texture of dragon's breath has been changed.}}
{{History|3ds}}
{{History||1.7.10|[[File:Dragon's Breath JE1 BE1.png|32px]] Added dragon's breath.}}
{{History|foot}}
== Issues ==
{{issue list}}
== Trivia ==
* If the dragon's breath is used in a [[crafting]] recipe (using a [[mod]] or a [[data pack]]), it becomes an empty bottle instead of being entirely consumed.
== References ==
{{reflist}}
==External Links==
*[https://www.minecraft.net/en-us/article/dragon-s-breath Taking Inventory: Dragon's Breath] – Minecraft.net on June 9, 2023
{{Items}}
[[Category:Renewable resources]]
[[de:Drachenatem]]
[[fr:Souffle de dragon]]
[[it:Soffio di drago]]
[[ja:ドラゴンブレス]]
[[ko:드래곤의 숨결]]
[[nl:Drakenadem]]
[[pl:Oddech smoka]]
[[pt:Bafo do dragão]]
[[ru:Драконье дыхание]]
[[zh:龙息]]
[[Category:Brewing recipe]]</li><li>[[Pumpkin Seeds|Pumpkin Seeds]]<br/>{{Block
| image = <gallery>
Pumpkin Stem Age 0.png | Age 0
Pumpkin Stem Age 1.png | Age 1
Pumpkin Stem Age 2.png | Age 2
Pumpkin Stem Age 3.png | Age 3
Pumpkin Stem Age 4.png | Age 4
Pumpkin Stem Age 5.png | Age 5
Pumpkin Stem Age 6.png | Age 6
Pumpkin Stem Age 7.png | Age 7
</gallery>
|image2 = <gallery>
Attached Pumpkin Stem (N).png | North
Attached Pumpkin Stem (E).png | East
Attached Pumpkin Stem (S).png | South
Attached Pumpkin Stem (W).png | West
</gallery>
| transparent = Yes
| light = No
| tool = none
| renewable = Yes
| stackable = Yes (64)
| flammable = No
| lavasusceptible = No
}}
'''Pumpkin seeds''' are items obtained from pumpkins that can be used to grow pumpkin stems.
'''Pumpkin stems''' are plants grown on [[farmland]] that, over time, grow [[pumpkin]]s on dirt, mud and moss blocks adjacent to them.
== Obtaining ==
=== Breaking ===
When broken, a pumpkin stem drops 0–3 pumpkin seeds. The chance for pumpkin seeds to drop increases with the stem's age.
{| class="wikitable"
! rowspan="3" |[[Resource location]]
! rowspan="3" | Source
! colspan="4" | Default
|-
| colspan="1" rowspan="2" style="text-align:center" | Nothing || colspan="3" style="text-align:center" |{{ItemLink|Pumpkin Seeds|Pumpkin seeds}}
|-
| style="text-align:center" | 1 || style="text-align:center" | 2 || style="text-align:center" | 3
|-
| rowspan="8" |<code>blocks/pumpkin_stem</code>
|{{BlockLink|Pumpkin Stem|Pumpkin stem}} <code>age = 0</code>
| style="text-align:center" |81.3%|| style="text-align:center" |17.42%|| style="text-align:center" |1.24%|| style="text-align:center" |0.03%
|-
|{{BlockLink|Pumpkin Stem|Pumpkin stem}} <code>age = 1</code>
| style="text-align:center" |65.1%|| style="text-align:center" |30.04%|| style="text-align:center" |4.62%|| style="text-align:center" |0.24%
|-
|{{BlockLink|Pumpkin Stem|Pumpkin stem}} <code>age = 2</code>
| style="text-align:center" |51.2%|| style="text-align:center" |38.4%|| style="text-align:center" |9.6%|| style="text-align:center" |0.8%
|-
|{{BlockLink|Pumpkin Stem|Pumpkin stem}} <code>age = 3</code>
| style="text-align:center" |39.44%|| style="text-align:center" |43.02%|| style="text-align:center" |15.64%|| style="text-align:center" |1.9%
|-
|{{BlockLink|Pumpkin Stem|Pumpkin stem}} <code>age = 4</code>
| style="text-align:center" |29.13%|| style="text-align:center" |44.44%|| style="text-align:center" |22.22%|| style="text-align:center" |3.7%
|-
|{{BlockLink|Pumpkin Stem|Pumpkin stem}} <code>age = 5</code>
| style="text-align:center" |21.6%|| style="text-align:center" |43.2%|| style="text-align:center" |28.8%|| style="text-align:center" |6.4%
|-
|{{BlockLink|Pumpkin Stem|Pumpkin stem}} <code>age = 6</code>
| style="text-align:center" |15.17%|| style="text-align:center" |39.82%|| style="text-align:center" |34.84%|| style="text-align:center" |10.16%
|-
|{{BlockLink|Pumpkin Stem|Pumpkin stem}} <code>age = 7</code>
| style="text-align:center" |10.16%|| style="text-align:center" |34.84%|| style="text-align:center" |39.82%|| style="text-align:center" |15.17%
|-
| rowspan="1" |<code>blocks/attached_pumpkin_stem</code>
|{{BlockLink|Attached Pumpkin Stem|Attached Pumpkin stem}}
| style="text-align:center" |10.16%|| style="text-align:center" |34.84%|| style="text-align:center" |39.82%|| style="text-align:center" |15.17%
|}
=== Natural generation ===
Pumpkin stems generate naturally in stem farm rooms in [[woodland mansion]]s.
Pumpkin stems generate in [[taiga]] and [[snowy taiga]]{{only|be|short=1}} [[village]] farms.
=== Chest loot ===
{{LootChestItem|pumpkin-seeds}}
=== Crafting ===
{{Crafting
|Pumpkin
|Output= Pumpkin Seeds,4
|type= Material
}}
=== Trading ===
[[Wandering trader]]s sell pumpkin seeds for 1 [[emerald]].
=== Post-generation ===
Shearing an uncarved pumpkin yields 4 pumpkin seeds.
== Usage ==
=== Farming ===
{{see also|Tutorials/Pumpkin and melon farming}}
Pumpkin seeds can be planted only on [[farmland]], as stems. Over time, a stem grows through several stages{{Needs testing}} and, at its final growth stage, will produce [[pumpkin]]s on any adjacent [[dirt]], [[Coarse Dirt|coarse dirt]], [[Rooted Dirt|rooted dirt]], [[Grass Block|grass block]], [[farmland]], [[podzol]], [[mycelium]], [[Moss Block|moss block]], [[mud]] or [[Muddy Mangrove Roots|muddy mangrove roots]]. If a pumpkin is already occupying a spot adjacent to a stem it does not grow more pumpkins until the pumpkin is removed. A single stem can grow an unlimited number of pumpkins. Pumpkin stems need a minimum light level of 10 in the block above the stem to grow and give pumpkins. Pumpkin seeds are affected by [[bone meal]] only with respect to stem growth; bone meal does not help produce the actual pumpkins.
=== Breeding ===
Like other seeds, pumpkin seeds can be used to [[breed]] [[chicken]]s, lead chickens around, and make baby chickens grow up faster by 10% of the remaining time.
=== Taming ===
Like other seeds, pumpkin seeds can be used to tame [[parrot]]s.
=== Composting ===
Placing pumpkin seeds into a [[composter]] has a 30% chance of raising the compost level by 1.
== Pumpkin stem ==
A '''pumpkin stem''' is the block that is planted on [[farmland]] when pumpkin seeds are used on it. It starts underground, and rises up as the plant grows. The stem is colored green when young, and then yellow once fully grown.
The stem curves once a pumpkin has grown from it. A fully-grown single stem connects to any [[pumpkin]] in an adjacent square, thus there are 5 possible appearances to a stem. If there are multiple pumpkins it can connect to, it favors the east, then west, north, and south. When the pumpkin is removed, the stem returns to its straight shape.
== Sounds ==
{{Sound table/Block/Hard crop}}
== Data values ==
=== ID ===
{{edition|java}}:
{{ID table
|edition=java
|showblocktags=y
|showforms=y
|generatetranslationkeys=y
|displayname=Pumpkin Stem
|spritetype=block
|nameid=pumpkin_stem
|blocktags=bee_growables, crops
|form=block}}
{{ID table
|displayname=Attached Pumpkin Stem
|spritetype=block
|nameid=attached_pumpkin_stem
|form=block}}
{{ID table
|displayname=Pumpkin Seeds
|spritetype=item
|nameid=pumpkin_seeds
|form=item
|foot=1}}
{{edition|bedrock}}:
{{ID table
|edition=bedrock
|shownumericids=y
|showforms=y
|generatetranslationkeys=y
|displayname=Pumpkin Stem
|spritetype=block
|nameid=pumpkin_stem
|id=104
|form=block}}
{{ID table
|displayname=Pumpkin Seeds
|spritetype=item
|nameid=pumpkin_seeds
|id=292
|form=item
|foot=1}}
=== Block states ===
{{see also|Block states}}
{{/BS}}
== Advancements ==
{{load advancements|A Seedy Place}}
== History ==
{{info needed section|check if stems floated above farmland upon initial implementation}}
{{History|java beta}}
{{History||1.8|snap=Pre-release|[[File:Pumpkin Seeds JE1 BE1.png|32px]] Added pumpkin seeds.
|[[File:Pumpkin Stem Age 0 JE1.png|32px]] [[File:Pumpkin Stem Age 1 JE1.png|32px]] [[File:Pumpkin Stem Age 2 JE1.png|32px]] [[File:Pumpkin Stem Age 3 JE1.png|32px]] [[File:Pumpkin Stem Age 4 JE1.png|32px]] [[File:Pumpkin Stem Age 5 JE1.png|32px]] [[File:Pumpkin Stem Age 6 JE1.png|32px]] [[File:Pumpkin Stem Age 7 JE1.png|32px]] Added the pumpkin stem, with seven stages of growth.
|Pumpkin seeds can be found in the new [[mineshaft]] [[chest]]s.
|[[File:Attached Pumpkin Stem (N) JE1.png|32px]] [[File:Attached Pumpkin Stem (E) JE1.png|32px]] [[File:Attached Pumpkin Stem (S) JE1.png|32px]] [[File:Attached Pumpkin Stem (W) JE1.png|32px]] The pumpkin stem has four slightly visually distinct appearances for each facing direction - the bent part of the stem rotates, but the other two planes do not.
|[[File:Pumpkin Stem Age 8 JE1.png|32px]] [[File:Pumpkin Stem Age 9 JE1.png|32px]] [[File:Pumpkin Stem Age 10 JE1.png|32px]] [[File:Pumpkin Stem Age 11 JE1.png|32px]] [[File:Pumpkin Stem Age 12 JE1.png|32px]] [[File:Pumpkin Stem Age 13 JE1.png|32px]] [[File:Pumpkin Stem Age 14 JE1.png|32px]] [[File:Pumpkin Stem Age 15 JE1.png|32px]] Pumpkin stem data values from 8 through 15 now show a glitched formation, with a floating stem with an attached stem cross eventually emerging below.
|[[File:Attached Stem Age 8 JE1.png|32px]] [[File:Attached Stem Age 9 JE1.png|32px]] [[File:Attached Stem Age 10 JE1.png|32px]] [[File:Attached Stem Age 11 JE1.png|32px]] [[File:Attached Stem Age 12 JE1.png|32px]] [[File:Attached Stem Age 13 JE1.png|32px]] [[File:Attached Stem Age 14 JE1.png|32px]] [[File:Attached Stem Age 15 JE1.png|32px]] Pumpkin stem blocks with data values higher than 7 can attach to adjacent fruits, which results in buggy stem textures with [[vines]] in the mix due to vines being below attached stems in [[terrain.png]].}}
{{History|||snap=Pre-release 2 ;)|Pumpkin stems can now be grown faster using [[bone meal]].}}
{{History|java}}
{{History||1.0.0|snap=Beta 1.9 Prerelease 2|Pumpkins can now be [[crafting|crafted]] into [[pumpkin seeds]].}}
{{History||1.3.1|snap=1.3|The texture of pumpkin stems has been moved one pixel to the left in [[terrain.png]].
|[[File:Pumpkin Stem Age 0 JE2.png|32px]] [[File:Pumpkin Stem Age 1 JE2.png|32px]] [[File:Pumpkin Stem Age 2 JE2.png|32px]] [[File:Pumpkin Stem Age 3 JE2.png|32px]] [[File:Pumpkin Stem Age 4 JE2.png|32px]] [[File:Pumpkin Stem Age 5 JE2.png|32px]] [[File:Pumpkin Stem Age 6 JE2.png|32px]] [[File:Pumpkin Stem Age 7 JE2.png|32px]] Stems now appear slightly different.
|[[File:Pumpkin Stem Age 8 JE2.png|32px]] [[File:Pumpkin Stem Age 9 JE2.png|32px]] [[File:Pumpkin Stem Age 10 JE2.png|32px]] [[File:Pumpkin Stem Age 11 JE2.png|32px]] [[File:Pumpkin Stem Age 12 JE2.png|32px]] [[File:Pumpkin Stem Age 13 JE2.png|32px]] [[File:Pumpkin Stem Age 14 JE2.png|32px]] [[File:Pumpkin Stem Age 15 JE2.png|32px]] Overgrown attached pumpkin stems now appear slightly different.
|[[File:Attached Pumpkin Stem (N) JE2.png|32px]] [[File:Attached Pumpkin Stem (E) JE2.png|32px]] [[File:Attached Pumpkin Stem (S) JE2.png|32px]] [[File:Attached Pumpkin Stem (W) JE2.png|32px]] Attached pumpkin stems now appear slightly different.
|[[File:Attached Stem Age 8 JE2.png|32px]] [[File:Attached Stem Age 9 JE2.png|32px]] [[File:Attached Stem Age 10 JE2.png|32px]] [[File:Attached Stem Age 11 JE2.png|32px]] [[File:Attached Stem Age 12 JE2.png|32px]] [[File:Attached Stem Age 13 JE2.png|32px]] [[File:Attached Stem Age 14 JE2.png|32px]] [[File:Attached Stem Age 15 JE2.png|32px]] Overgrown attached pumpkin stems now appear slightly different.}}
{{History||1.4.2|snap=12w36a|[[Chicken]]s now use [[wheat seeds]], [[melon seeds]] and pumpkin seeds, instead of [[wheat]] to [[breeding|breed]].}}
{{History||1.5|snap=13w02a|[[File:Pumpkin Stem Age 0 JE3.png|32px]] [[File:Pumpkin Stem Age 1 JE3.png|32px]] [[File:Pumpkin Stem Age 2 JE3.png|32px]] [[File:Pumpkin Stem Age 3 JE3.png|32px]] [[File:Pumpkin Stem Age 4 JE3.png|32px]] [[File:Pumpkin Stem Age 5 JE3.png|32px]] [[File:Pumpkin Stem Age 6 JE3.png|32px]] Pumpkin stems now use a squished version of their texture for immature stems, depending on age.
|[[File:Pumpkin Stem Age 8 JE3.png|32px]] [[File:Pumpkin Stem Age 9 JE3.png|32px]] [[File:Pumpkin Stem Age 10 JE3.png|32px]] [[File:Pumpkin Stem Age 11 JE3.png|32px]] [[File:Pumpkin Stem Age 12 JE3.png|32px]] [[File:Pumpkin Stem Age 13 JE3.png|32px]] [[File:Pumpkin Stem Age 14 JE3.png|32px]] [[File:Pumpkin Stem Age 15 JE3.png|32px]] This also affects pumpkin stems of ages 8-15, which are likewise stretched to accommodate its predicted size.
|[[File:Attached Stem Age 8 JE3.png|32px]] [[File:Attached Stem Age 9 JE3.png|32px]] [[File:Attached Stem Age 10 JE3.png|32px]] [[File:Attached Stem Age 11 JE3.png|32px]] [[File:Attached Stem Age 12 JE3.png|32px]] [[File:Attached Stem Age 13 JE3.png|32px]] [[File:Attached Stem Age 14 JE3.png|32px]] [[File:Attached Stem Age 15 JE3.png|32px]] Pumpkin stems of extreme ages, which are attached to adjacent fruits, now show a stretched and tinted stem appearance.}}
{{History|||snap=13w03a|[[File:Pumpkin Stem Age 0 JE4.png|32px]] [[File:Pumpkin Stem Age 1 JE4.png|32px]] [[File:Pumpkin Stem Age 2 JE4.png|32px]] [[File:Pumpkin Stem Age 3 JE4.png|32px]] [[File:Pumpkin Stem Age 4 JE4.png|32px]] [[File:Pumpkin Stem Age 5 JE4.png|32px]] [[File:Pumpkin Stem Age 6 JE4.png|32px]] [[File:Pumpkin Stem Age 7 JE4.png|32px]] Pumpkin stems are no longer squished or stretched to account for age.<ref>{{bug|MC-7111}}</ref>
|[[File:Pumpkin Stem Age 8 JE4.png|32px]] [[File:Pumpkin Stem Age 9 JE4.png|32px]] [[File:Pumpkin Stem Age 10 JE4.png|32px]] [[File:Pumpkin Stem Age 11 JE4.png|32px]] [[File:Pumpkin Stem Age 12 JE4.png|32px]] [[File:Pumpkin Stem Age 13 JE4.png|32px]] [[File:Pumpkin Stem Age 14 JE4.png|32px]] [[File:Pumpkin Stem Age 15 JE4.png|32px]] Pumpkin stems with age values 8 through 15 now show a tinted [[trapdoor]] texture.
|From this version up until 14w08a, overgrown pumpkin stems start to draw from the texture below them on the [[texture atlas]], in much the same way they previously did with terrain.png. However, as texture atlases are unstable and textures tend to change positions as new blocks and textures are added, overgrown stems change the texture they draw from every time new textures are added, which includes when textures added by [[mods]].}}
{{History|||snap=13w09a|[[File:Pumpkin Stem Age 8 JE5.png|32px]] [[File:Pumpkin Stem Age 9 JE5.png|32px]] [[File:Pumpkin Stem Age 10 JE5.png|32px]] [[File:Pumpkin Stem Age 11 JE5.png|32px]] [[File:Pumpkin Stem Age 12 JE5.png|32px]] [[File:Pumpkin Stem Age 13 JE5.png|32px]] [[File:Pumpkin Stem Age 14 JE5.png|32px]] [[File:Pumpkin Stem Age 15 JE5.png|32px]] Pumpkin stems with age values 8 through 15 now show a tinted [[birch wood]] texture.}}
{{History||1.6.1|snap=13w24a|Melon and pumpkin stems have now been assigned separate textures.
|[[File:Pumpkin Stem Age 8 JE6.png|32px]] [[File:Pumpkin Stem Age 9 JE6.png|32px]] [[File:Pumpkin Stem Age 10 JE6.png|32px]] [[File:Pumpkin Stem Age 11 JE6.png|32px]] [[File:Pumpkin Stem Age 12 JE6.png|32px]] [[File:Pumpkin Stem Age 13 JE6.png|32px]] [[File:Pumpkin Stem Age 14 JE6.png|32px]] [[File:Pumpkin Stem Age 15 JE6.png|32px]] Pumpkin stems with age values 8 through 15 now show a tinted curving [[rail]] texture.}}
{{History||1.7.2|snap=13w37a|Added the {{cmd|setblock}} command, allowing for invalid pumpkin stem ages to be placed in the world without using external editors. This also allows them to be obtained in earlier versions via backdating.}}
{{History|||snap=13w41a|[[File:Pumpkin Stem Age 8 JE7.png|32px]] [[File:Pumpkin Stem Age 9 JE7.png|32px]] [[File:Pumpkin Stem Age 10 JE7.png|32px]] [[File:Pumpkin Stem Age 11 JE7.png|32px]] [[File:Pumpkin Stem Age 12 JE7.png|32px]] [[File:Pumpkin Stem Age 13 JE7.png|32px]] [[File:Pumpkin Stem Age 14 JE7.png|32px]] [[File:Pumpkin Stem Age 15 JE7.png|32px]] Pumpkin stems with age values 8 through 15 now show a tinted lit [[furnace]] texture.}}
{{History|||snap=13w43a|[[File:Pumpkin Stem Age 8 JE8.png|32px]] [[File:Pumpkin Stem Age 9 JE8.png|32px]] [[File:Pumpkin Stem Age 10 JE8.png|32px]] [[File:Pumpkin Stem Age 11 JE8.png|32px]] [[File:Pumpkin Stem Age 12 JE8.png|32px]] [[File:Pumpkin Stem Age 13 JE8.png|32px]] [[File:Pumpkin Stem Age 14 JE8.png|32px]] [[File:Pumpkin Stem Age 15 JE8.png|32px]] Pumpkin stems with age values 8 through 15 now show a tinted [[pumpkin]] top texture.}}
{{History||1.8|snap=14w10a|[[File:Pumpkin Stem Age 8 JE9.png|32px]] [[File:Pumpkin Stem Age 9 JE9.png|32px]] [[File:Pumpkin Stem Age 10 JE9.png|32px]] [[File:Pumpkin Stem Age 11 JE9.png|32px]] Pumpkin stems with data values 8-11 now display a tinted attached stem, with 8 facing west, 9 facing east, 10 facing north and 11 facing south.
|Invalid pumpkin stems with data values 12-15 now crash the game.}}
{{History|||snap=14w25a|[[File:Pumpkin Stem Age 0 JE5.png|32px]] [[File:Pumpkin Stem Age 1 JE5.png|32px]] [[File:Pumpkin Stem Age 2 JE5.png|32px]] [[File:Pumpkin Stem Age 3 JE5.png|32px]] [[File:Pumpkin Stem Age 4 JE5.png|32px]] [[File:Pumpkin Stem Age 5 JE5.png|32px]] [[File:Pumpkin Stem Age 6 JE5.png|32px]] [[File:Pumpkin Stem Age 7 JE5.png|32px]] Pumpkin stems now render as a single diagonal plane, or, in the case of attached stems, a diagonal and orthogonal plane.
|[[File:Attached Pumpkin Stem (N) JE3.png|32px]] [[File:Attached Pumpkin Stem (E) JE3.png|32px]] [[File:Attached Pumpkin Stem (S) JE3.png|32px]] [[File:Attached Pumpkin Stem (W) JE3.png|32px]] The attached pumpkin stem [[model]] now fully rotates to the direction the stem points. Prior to this update, the base of the pumpkin stem would stay the same while the long attaching section would differ, resulting in four possible attached stem appearances.
|Invalid overgrown pumpkin stems have now effectively been removed from the game, as attempting to place an out of range stem via {{cmd|setblock}} creates a stem of age 0 and loading a world with existing such stems cause a game crash.}}
{{History|||snap=14w26a|[[File:Pumpkin Stem Age 0 JE6.png|32px]] [[File:Pumpkin Stem Age 1 JE6.png|32px]] [[File:Pumpkin Stem Age 2 JE6.png|32px]] [[File:Pumpkin Stem Age 3 JE6.png|32px]] [[File:Pumpkin Stem Age 4 JE6.png|32px]] [[File:Pumpkin Stem Age 5 JE6.png|32px]] [[File:Pumpkin Stem Age 6 JE6.png|32px]] [[File:Pumpkin Stem Age 7 JE6.png|32px]] [[File:Attached Pumpkin Stem (N) JE4.png|32px]] [[File:Attached Pumpkin Stem (E) JE4.png|32px]] [[File:Attached Pumpkin Stem (S) JE4.png|32px]] [[File:Attached Pumpkin Stem (W) JE4.png|32px]] Pumpkin stems now correctly render as crosses again.<ref>{{bug|MC-58136}}</ref>}}
{{History|||snap=14w27a|[[File:Attached Stem Age 0 14w27a.png|32px]] [[File:Attached Stem Age 1 14w27a.png|32px]] [[File:Attached Stem Age 2 14w27a.png|32px]] [[File:Attached Stem Age 3 14w27a.png|32px]] [[File:Attached Stem Age 4 14w27a.png|32px]] [[File:Attached Stem Age 5 14w27a.png|32px]] [[File:Attached Stem Age 6 14w27a.png|32px]] Due to a bug, all pumpkin stems now appear attached regardless of age or any actual attachment.<ref>{{bug|MC-60208}}</ref>}}
{{History|||snap=14w28a|All pumpkin stems appearing attached regardless of the age of any actual attachment has been fixed. However, pumpkin stems still appear attached to adjacent fruits regardless of age due to a similar bug.<ref>{{bug|MC-61716}}</ref>}}
{{History|||snap=14w34d|Pumpkin seeds no longer can be used to breed [[chicken]]s.}}
{{History||1.9|snap=15w31a|Chickens can now use pumpkin seeds to [[breeding|breed]] again.}}
{{History|||snap=15w44a|Pumpkin seeds have been added to [[dungeon]] [[chest]]s.
|The average yield of pumpkin seeds in [[mineshaft]] chests has been decreased.}}
{{History|||snap=15w45a|Pumpkin stems must now be fully grown again to attach.}}
{{History||1.11|snap=16w39a|Pumpkin seeds are now found in the new [[woodland mansion]] chests.
|Pumpkin stems now generate inside [[woodland mansion]]s.}}
{{History||1.13|snap=17w47a|The different [[block]] states for the <code>pumpkin_stem</code> ID have been split up into their own IDs.
|Pumpkin seeds can now be obtained by [[shear]]ing an uncarved pumpkin.
|Prior to [[1.13/Flattening|''The Flattening'']], this [[block]]'s numeral ID was 104, and the [[item]]'s 361.}}
{{History|||snap=17w48a|Attached pumpkin stems no longer [[drops|drop]] seeds.}}
{{History||1.14|snap=18w43a|[[File:Pumpkin Stem Age 0 JE7.png|32px]] [[File:Pumpkin Stem Age 1 JE7.png|32px]] [[File:Pumpkin Stem Age 2 JE7.png|32px]] [[File:Pumpkin Stem Age 3 JE7.png|32px]] [[File:Pumpkin Stem Age 4 JE7.png|32px]] [[File:Pumpkin Stem Age 5 JE7.png|32px]] [[File:Pumpkin Stem Age 6 JE7.png|32px]] [[File:Pumpkin Stem Age 7 JE7.png|32px]] The stem texture has changed.
|[[File:Attached Pumpkin Stem (N) JE5.png|32px]] [[File:Attached Pumpkin Stem (E) JE5.png|32px]] [[File:Attached Pumpkin Stem (S) JE5.png|32px]] [[File:Attached Pumpkin Stem (W) JE5.png|32px]] The pumpkin stem texture change also affects the base cross on pumpkin stems.}}
{{History|||snap=18w50a|Pumpkin stems now generate in the updated [[taiga]] [[village]] farms.
|Pumpkin seeds can now be found in [[chest]]s in taiga village houses.}}
{{History|||snap=19w03a|Placing pumpkin seeds into the new [[composter]] has a 10% chance of raising the compost level by 1.}}
{{History|||snap=19w05a|Pumpkin seeds now have a 30% chance of increasing the compost level in a composter by 1.
|Added [[Wandering Trader|wandering trader]]s, which sell pumpkin seeds.}}
{{History||1.15|snap=19w34a|[[Bee]]s can now pollinate pumpkin stems.}}
{{History|||snap=19w39a|Attached pumpkin stems now [[drops|drop]] seeds again.<ref>{{bug|MC-136360}}</ref>}}
{{History|pocket alpha}}
{{History||v0.8.0|snap=build 1|[[File:Pumpkin Seeds JE1 BE1.png|32px]] Added pumpkin seeds.
|[[File:Pumpkin Stem Age 0 JE1.png|32px]] [[File:Pumpkin Stem Age 1 JE1.png|32px]] [[File:Pumpkin Stem Age 2 JE1.png|32px]] [[File:Pumpkin Stem Age 3 JE1.png|32px]] [[File:Pumpkin Stem Age 4 JE1.png|32px]] [[File:Pumpkin Stem Age 5 JE1.png|32px]] [[File:Pumpkin Stem Age 6 JE1.png|32px]] [[File:Pumpkin Stem Age 7 JE1.png|32px]] [[File:Attached Pumpkin Stem (N) JE1.png|32px]] [[File:Attached Pumpkin Stem (E) JE1.png|32px]] [[File:Attached Pumpkin Stem (S) JE1.png|32px]] [[File:Attached Pumpkin Stem (W) JE1.png|32px]]{{verify|Were these the models used by this edition?}} Added pumpkin stems.
|Pumpkin seeds are obtainable from the [[Nether reactor]].}}
{{History||v0.12.1|snap=build 1|Pumpkin seeds are no longer available from the Nether reactor.}}
{{History||v0.14.0|snap=build 1|Pumpkin seeds can now be found in [[minecart with chest]]s inside [[mineshaft]]s.}}
{{History|pocket}}
{{History||1.1.0|snap=alpha 1.1.0.0|Pumpkin stems now generate inside [[woodland mansion]]s.}}
{{History|bedrock}}
{{History||1.2.0|snap=beta 1.2.0.2|Pumpkin seeds are now used to tame [[parrot]]s.}}
{{History||1.4.0|snap=beta 1.2.13.8|Pumpkin seeds can now be obtained by [[shear]]ing an uncarved [[pumpkin]].}}
{{History||1.10.0|snap=beta 1.10.0.3|[[File:Attached Pumpkin Stem (W) JE5.png|32px]]{{info needed|More accurate image}} The texture of attached pumpkin stems has been changed.
|Pumpkin seeds can now be [[trading|bought]] from [[wandering trader]]s.
|A single pumpkin crop now generates in the new [[taiga]] and [[snowy taiga]] [[village]]s.}}
{{History||1.11.0|snap=beta 1.11.0.1|A single pumpkin seed can now be used to fill the [[composter]].
|Pumpkin seeds can now be found in [[taiga]] and [[snowy taiga]] [[village]] house [[chest]]s.}}
{{History|console}}
{{History||xbox=TU5|xbone=CU1|ps=1.0|wiiu=Patch 1|[[File:Pumpkin Seeds JE1 BE1.png|32px]] Added pumpkin seeds.
|[[File:Pumpkin Stem Age 0 JE1.png|32px]] [[File:Pumpkin Stem Age 1 JE1.png|32px]] [[File:Pumpkin Stem Age 2 JE1.png|32px]] [[File:Pumpkin Stem Age 3 JE1.png|32px]] [[File:Pumpkin Stem Age 4 JE1.png|32px]] [[File:Pumpkin Stem Age 5 JE1.png|32px]] [[File:Pumpkin Stem Age 6 JE1.png|32px]] [[File:Pumpkin Stem Age 7 JE1.png|32px]] [[File:Attached Pumpkin Stem (N) JE1.png|32px]] [[File:Attached Pumpkin Stem (E) JE1.png|32px]] [[File:Attached Pumpkin Stem (S) JE1.png|32px]] [[File:Attached Pumpkin Stem (W) JE1.png|32px]]{{verify|Were these the models used by this edition?}} Added pumpkin stems.}}
{{History||xbox=TU69|ps=1.76|wiiu=Patch 38|Pumpkin seeds can now be obtained by [[shear]]ing an uncarved [[pumpkin]].}}
{{History||xbox=none|xbone=none|ps=1.90|wiiu=none|switch=none|[[File:Attached Pumpkin Stem (W) JE5.png|32px]]{{info needed|More accurate image}} The texture of attached pumpkin stems has been changed.}}
{{History|New 3DS}}
{{History||0.1.0|[[File:Pumpkin Stem Age 0 JE1.png|32px]] [[File:Pumpkin Stem Age 1 JE1.png|32px]] [[File:Pumpkin Stem Age 2 JE1.png|32px]] [[File:Pumpkin Stem Age 3 JE1.png|32px]] [[File:Pumpkin Stem Age 4 JE1.png|32px]] [[File:Pumpkin Stem Age 5 JE1.png|32px]] [[File:Pumpkin Stem Age 6 JE1.png|32px]] [[File:Pumpkin Stem Age 7 JE1.png|32px]] [[File:Attached Pumpkin Stem (N) JE1.png|32px]] [[File:Attached Pumpkin Stem (E) JE1.png|32px]] [[File:Attached Pumpkin Stem (S) JE1.png|32px]] [[File:Attached Pumpkin Stem (W) JE1.png|32px]]{{verify|Were these the models used by this edition?}} Added pumpkin stems.}}
{{History|foot}}
<gallery>
Pumpkin Stem with data value 15.png|The final version of the pumpkin stem with age 15, as seen in-game.
Pumpkinstems.png|Pumpkin stems of ages 1 to 15 on a modded version of [[Java Edition 1.7.2|1.7.2]], hence the nearby melon stems using the melon top texture.
Stems of 13w02a.png|All 16 stem sizes in [[Java Edition 13w02a|13w02a]], with accompanying data values.
</gallery>
=== Pumpkin stem "item" ===
{{:Technical blocks/Pumpkin Stem}}
== Issues ==
{{issue list}}
== Gallery ==
<gallery>
Stem All Ages.png|All stages of growth.
AllSeeds.png|All the [[seeds]] that exist in the game.
</gallery>
== References ==
{{reflist}}
{{Blocks|vegetation}}
{{Items}}
[[Category:Plants]]
[[Category:Food]]
[[Category:Non-solid blocks]]
[[Category:Generated structure blocks]]
[[cs:Dýňová semínka]]
[[de:Kürbiskerne]]
[[es:Semillas de calabaza]]
[[fr:Graines de citrouille]]
[[hu:Tökmagok]]
[[ja:カボチャの種]]
[[ko:호박씨]]
[[nl:Pompoenpitten]]
[[pl:Nasiona dyni]]
[[pt:Sementes de abóbora]]
[[ru:Семена тыквы]]
[[th:เมล็ดฝักทอง]]
[[zh:南瓜种子]]</li></ul> | September 18, 2010 | Notch mentions the return of the hell biome, and that it will be used for fast travel, based on a transportation method used in the novel series The Wheel of Time by Robert Jordan. Within a dangerous transportation system, "the Ways", people could travel a massive amount of distance in a few days instead of weeks. | ||||||||||||||||||||||||||||||||||||||||||||||||||||||||||||||||||||||||||||||||||||||||||||||||||||||||||||
1.2.0{{Extension DPL}}<ul><li>[[Bleach|Bleach]]<br/>{{education feature}}
{{exclusive|bedrock|education}}
{{Item
| image = Bleach.png
| renewable = No
| stackable = Yes (64)
}}
'''Bleach''' is an [[item]] used to [[dye]] things white. It is a [[compound]], as it is made using a [[lab table]].
== Obtaining ==
=== Lab Table ===
Bleach is not obtainable in the [[creative inventory]] or {{cmd|give}}. The only way to obtain it is using a [[lab table]].
{| class="wikitable"
! Result
! Materials Needed
|-
!rowspan=2|{{slot|Bleach}}<br>[[Bleach]]
|{{slot|Water (compound)|link=Compound}}{{slot|Water (compound)|link=Compound}}{{slot|Water (compound)|link=Compound}}{{slot|Sodium Hypochlorite|link=Compound}}{{slot|Sodium Hypochlorite|link=Compound}}{{slot|Sodium Hypochlorite|link=Compound}}
|-
|<center>[[Water (compound)|Water]] x3, [[Compound|Sodium Hypochlorite]] x3</center>
|}
== Usage ==
=== Crafting ingredient ===
{{crafting usage}}
== Sounds ==
{{Sound table
|type=bedrock
|sound=Fire.ogg
|source=sound
|description=When bleach is created by a lab table
|id=lt.reaction.fire
|volume=6.0
|pitch=0.7/0.9
|foot=1}}
== Data values ==
=== ID ===
{{ID table
|edition=bedrock
|shownumericids=y
|showforms=y
|notshowbeitemforms=y
|generatetranslationkeys=y
|displayname=Bleach
|spritetype=item
|nameid=bleach
|id=596
|form=item
|foot=1}}
== History ==
{{History|bedrock}}
{{History||1.4.0|snap=beta 1.2.20.1|[[File:Bleach BE1.png|32px]] Added bleach.}}
{{History|education}}
{{History||1.0.27|[[File:Bleach BE1.png|32px]] Added bleach.}}
{{History|foot}}
== Trivia ==
*[[File:Bleach (compound).png|32px]] There is an [[History of textures/Unused textures#Unused compounds|unused bleach texture]] in the compounds folder of the chemistry resource pack, which is slightly different from the one used in the game.
== Issues ==
{{issue list}}
{{Items}}
{{Education Edition}}
[[Category:Dyes]]
[[Category:Non-renewable resources]]
[[Category:Education Edition items]]
[[de:Bleichmittel]]
[[es:Lejía]]
[[ja:漂白剤]]
[[ko:표백제]]
[[pl:Wybielacz]]
[[pt:Alvejante]]
[[zh:漂白剂]]
[[lzh:素精]]</li><li>[[La Baguette|La Baguette]]<br/>{{Exclusive|Java}}
{{Joke feature}}
{{WIP}}
{{Item
| rarity = Common
| renewable = Yes
| durability = 59
| stackable = No
}}
'''La Baguette''' is a joke weapon from [[Java Edition 23w13a_or_b]]. Its stats are identical to a wooden [[sword]], though La Baguette cannot be used to fuel furnaces.
== Obtaining ==
One [[Le Tricolore|tricolore]] and one baguette is given to all players when [[French mode]] gets activated.
=== Repairing ===
==== Grinding ====
{{Grinding
|showdescription=1
|ingredients=2x La Baguette
|La Baguette
|La Baguette
|La Baguette
|description=The durability of the two baguettes is added together, plus an extra 5% durability. Any enchantments, besides curses, would be removed.
}}
====Unit repair====
Strangely, La Baguette can be repaired using planks rather than bread, just like a wooden sword.
{{Anvil|Input1=Damaged La Baguette|Input2=Damaged La Baguette; Any Planks|Output=La Baguette}}
==Usage==
La Baguette functions identically to a wooden sword.
===Attacking===
It can be used to damage mobs for {{hp|4}} health points. La Baguette has an attack speed of 1.6 and takes 0.625 seconds to [[Damage#Attack cooldown|recover]].
=== Breaking ===
La Baguette, just like other swords, can be used to break certain blocks 50% faster. See [[Sword#Sword breaking times]] for more.
=== Enchantments ===
La Baguette, like other swords, can receive the following [[enchantment]]s:
{| class="wikitable sortable col-2-center col-3-right"
|+
!Name
!Max Level
![[Enchanting|Method]]
!Weight
|-
|[[Fire Aspect]]
|II
|{{Inventory slot|Enchanting Table}}{{Inventory slot|Anvil}}
|2
|-
|[[Looting]]
|III
|{{Inventory slot|Enchanting Table}}{{Inventory slot|Anvil}}
|2
|-
|[[Unbreaking]]
|III
|{{Inventory slot|Enchanting Table}}{{Inventory slot|Anvil}}
|5
|-
|[[Sharpness]]<ref group=note name=note1>Sharpness, Smite, and Bane of Arthropods are mutually exclusive.</ref>
|V
|{{Inventory slot|Enchanting Table}}{{Inventory slot|Anvil}}
|10
|-
|[[Smite]]<ref group=note name=note1/>
|V
|{{Inventory slot|Enchanting Table}}{{Inventory slot|Anvil}}
|5
|-
|[[Bane of Arthropods]]<ref group="note" name=note1/>
|V
|{{Inventory slot|Enchanting Table}}{{Inventory slot|Anvil}}
|5
|-
|[[Knockback]]
|II
|{{Inventory slot|Enchanting Table}}{{Inventory slot|Anvil}}
|5
|-
|[[Mending]]
|I
|{{Inventory slot|Anvil}}
|2
|-
|[[Curse of Vanishing]]
|I
|{{Inventory slot|Anvil}}
|1
|-
|[[Sweeping Edge]]{{Only|java|short=1}}
|III
|{{Inventory slot|Enchanting Table}}{{Inventory slot|Anvil}}
|2
|}
{{Notelist}}
==Trivia==
This item is simply called "Baguette" in the official French translation, without an article.
{{Items}}
{{Jokes}}
[[Category:Tools]]
[[Category:Combat]]
[[ja:La Baguette]]
[[pt:La Baguette]]
[[Category:Joke items]]</li></ul> | October 4, 2010 | This announcement poster hinted that the hell world would utilize portals and that distance traveled inside the hell world would be multiplied greatly on the map above ground. | ||||||||||||||||||||||||||||||||||||||||||||||||||||||||||||||||||||||||||||||||||||||||||||||||||||||||||||
| October 8, 2010 | Notch reveals a new block type, now known as soul sand, that would be included in the new dimension. | |||||||||||||||||||||||||||||||||||||||||||||||||||||||||||||||||||||||||||||||||||||||||||||||||||||||||||||
| October 10, 2010 | A screenshot was released by Notch depicting what the Nether would look like. | |||||||||||||||||||||||||||||||||||||||||||||||||||||||||||||||||||||||||||||||||||||||||||||||||||||||||||||
| October 11, 2010 | Notch makes mention of the first mob to be added to the Nether, saying "You will hate the Ghast." | |||||||||||||||||||||||||||||||||||||||||||||||||||||||||||||||||||||||||||||||||||||||||||||||||||||||||||||
| October 25, 2010 | Notch tweets that he is working on the second new Nether mob, and says that they are less dangerous but are otherwise "pointless." | |||||||||||||||||||||||||||||||||||||||||||||||||||||||||||||||||||||||||||||||||||||||||||||||||||||||||||||
| October 29, 2010 | Notch was conflicted on naming the new dimension; he wanted to avoid "re-using existing religious names", and wanted to use a more creative and original name. He considered both "the Slip" and "the Nexus" but felt that neither felt "minecrafty enough." It was eventually changed to “the Nether” on the day of the Halloween Update release. | |||||||||||||||||||||||||||||||||||||||||||||||||||||||||||||||||||||||||||||||||||||||||||||||||||||||||||||
| A preview of the Halloween Update was sent out to two gaming websites later that day.[1] Interestingly, the name "the Slip" was used in this release. | ||||||||||||||||||||||||||||||||||||||||||||||||||||||||||||||||||||||||||||||||||||||||||||||||||||||||||||||
| Halloween Update | Added the Nether, including ghasts, zombie pigmen, netherrack, soul sand, glowstone, and nether portals. | |||||||||||||||||||||||||||||||||||||||||||||||||||||||||||||||||||||||||||||||||||||||||||||||||||||||||||||
1.2.2{{Extension DPL}}<ul><li>[[Gold Nugget|Gold Nugget]]<br/>{{About|the nugget|the block that can drop nuggets|Gilded Blackstone|the ore|Gold Ore|the ingot form|Gold Ingot|the mineral block|Block of Gold}}
{{Item
| image = Gold Nugget.png
| renewable = Yes
| stackable = Yes (64)
}}
'''Gold nuggets''' are items used to make [[gold ingot]]s and other various golden items. One gold nugget is effectively worth one-ninth of a gold ingot.
== Obtaining ==
=== Mob loot ===
[[Zombified Piglin|Zombified piglin]]s, when killed, may drop 0-1 gold nuggets. When killed using a weapon enchanted with [[Looting]], they may drop an additional gold nugget per level of Looting used, up to a maximum of 4.
=== Crafting ===
{{Crafting
|Gold Ingot
|Output= Gold Nugget, 9
|type= Material
}}
=== Smelting ===
{{Smelting
|Golden Sword; {Any golden tools}; {Any golden armor}; Golden Horse Armor
|Gold Nugget
|0,25
}}
=== Chest loot ===
{{LootChestItem|gold-nugget}}
=== Mining ===
[[Nether gold ore]] mined using a [[pickaxe]] drops 2-6 gold nuggets. If the pickaxe is enchanted with [[Fortune]], it has a 33.3% chance to multiply the drops by 2, Fortune II has a 25% chance to multiply the drops by 2 or 3 and Fortune III has a 20% chance each to multiply the drops by 2, 3, or 4 for a maximum possible drop of 24 golden nuggets. The average drop rate for a Fortune III pickaxe is 8.8, while the drop rate for a [[Silk Touch]] pickaxe is a single ingot, or a flat rate of 9. It is slightly more efficient to mine with a Silk Touch pickaxe.
[[Gilded Blackstone|Gilded blackstone]] mined using a pickaxe has a 10% chance to drop 2-5 gold nuggets. If the pickaxe is enchanted with Fortune I, the chance gold nuggets drop is increased 14.29%, Fortune II increases the drop chance to 25%, and Fortune III guarantees the drop.
== Usage ==
Gold nuggets can be used to craft a [[golden carrot]] or [[glistering melon]] for brewing. Also, gold nuggets can be combined with gunpowder and dye to create a [[firework star]] that bursts in a star-shaped explosion.
[[Piglin]]s instantly pick up any gold nuggets that are within 1 [[block]] of them. Unlike other gold-related items, they do not intentionally seek out gold nuggets to pick up and only pick them up if they walk near it. Unlike gold ingots, gold nuggets picked up are dropped upon the piglin's death.
=== Crafting ingredient ===
{{crafting usage}}
== Data values ==
=== ID ===
{{edition|java}}:
{{ID table
|edition=java
|showforms=y
|generatetranslationkeys=y
|displayname=Gold Nugget
|spritetype=item
|nameid=gold_nugget
|form=item
|foot=1}}
{{edition|bedrock}}:
{{ID table
|edition=bedrock
|shownumericids=y
|showforms=y
|notshowbeitemforms=y
|generatetranslationkeys=y
|displayname=Gold Nugget
|spritetype=item
|nameid=gold_nugget
|id=425
|form=item
|foot=1}}
== History ==
{{History|Java}}
{{History||1.0.0|snap=Beta 1.9 Prerelease|[[File:Gold Nugget JE1.png|32px]] Added gold nuggets.
|Gold nuggets are [[drops|dropped]] by [[zombie pigmen]].
|Gold nuggets can be used to craft [[gold ingot]]s.
|Gold nuggets currently do not have a mouseover name.}}
{{History|||snap=Beta 1.9 Prerelease 2|Gold nuggets now have a mouseover name.}}
{{History|||snap=Beta 1.9 Prerelease 4|Gold nuggets are now used to craft [[glistering melon]]s.
|Gold nuggets can now be [[crafting|crafted]] from a single [[gold ingot]].}}
{{History||1.1|snap=release|Normal [[golden apple]]s are now crafted with gold nuggets.}}
{{History||1.3.1|snap=1.3|[[File:Gold Nugget JE2 BE1.png|32px]] The texture of gold nuggets has been changed.}}
{{History||1.4.2|snap=12w34a|Gold nuggets are now used to craft [[golden carrot]]s.}}
{{History||1.4.6|snap=12w49a|Gold nuggets can now be used to craft a [[firework star]] for a star shaped effect on a [[firework rocket|firework]].}}
{{History||1.6.1|snap=13w23a|Gold nuggets can no longer be used to [[crafting|craft]] a [[golden apple]].}}
{{History||1.9|snap=15w43a|Gold nuggets may now be found among the loot in [[igloo]] basement [[chest]]s.}}
{{History||1.11.1|snap=16w50a|Gold nuggets can now be [[smelting|smelted]] from golden [[tool]]s and [[armor]].}}
{{History||1.13|snap=17w47a|Prior to [[1.13/Flattening|''The Flattening'']], this [[item]]'s numeral ID was 371.}}
{{History|||snap=18w09a|Gold nuggets can now be found in [[underwater ruins]] loot [[chest]]s.}}
{{History|||snap=18w11a|Gold nuggets now generate in the chests of [[shipwreck]]s.}}
{{History||1.14|snap=18w43a|[[File:Gold Nugget JE3 BE2.png|32px]] The texture of gold nuggets has been changed.}}
{{History|||snap=18w48a|Gold nuggets can now be found in chests in [[plains]] [[village]] houses.}}
{{History|||snap=18w49a|Gold nuggets can now be found in chests in [[savanna]] village houses.}}
{{History||1.16|snap=20w12a|[[Nether gold ore]] now [[drops]] 2-6 gold nuggets, affected by [[Fortune]].}}
{{History|||snap=20w15a|[[Gilded blackstone]] now has 10% chance to drop 2-5 gold nuggets. Only the drop chance is affected by [[Fortune]].}}
{{History|||snap=20w16a|Gold nuggets now generate in [[bastion remnant]]s and [[ruined portal]] chests.}}
{{History|||snap=Pre-release 1|Gold nuggets can now be used to distract [[piglin]]s.}}
{{History|||snap=Pre-release 3|Gold nuggets can no longer be used to distract [[piglin]]s.}}
{{History||1.20|snap=23w12a|Gold nuggets can now be found in [[suspicious gravel]] and [[suspicious sand]] in cold and warm [[ocean ruins]] and in [[trail ruins]].}}
{{History|||snap=23w16a|Gold nuggets no longer generate in [[suspicious sand]] in [[trail ruins]].|Due to the split of the archaeological loot tables for suspicious gravel within [[trail ruins]], gold nuggets are now common loot.}}
{{History|pocket alpha}}
{{History||v0.12.1|snap=build 1|[[File:Gold Nugget JE2 BE1.png|32px]] Added gold nuggets. |Gold nuggets can be used to craft [[glistering melon]]s, [[gold ingot]]s and [[golden carrot]]s.|[[Gold ingot]]s can now be [[crafting|crafted]] into 9 gold nuggets.|[[Zombie pigmen]] now [[drops|drop]] gold nuggets upon being killed.}}
{{History|pocket}}
{{History||1.0.0|snap=alpha 0.17.0.1|Gold nuggets can now be found inside [[igloo]] basement [[chest]]s.}}
{{History||1.1.0|snap=alpha 1.1.0.0|Gold nuggets can now be [[smelting|smelted]] from golden [[tool]]s and [[armor]].}}
{{History|bedrock}}
{{History||1.2.0|snap=beta 1.2.0.2|Gold nuggets can now be used to craft [[firework star]]s.}}
{{History||1.4.0|snap=beta 1.2.14.2|Gold nuggets can now be found in some [[shipwreck]] [[chest]]s.}}
{{History|||snap=beta 1.2.20.1|Gold nuggets can now be found in [[underwater ruins]] chests.}}
{{History||1.10.0|snap=beta 1.10.0.3|The gold nugget can now be found in [[plains]] [[village]] house chests.|[[File:Gold Nugget JE3 BE2.png|32px]] The texture of gold nuggets has been changed.}}
{{History||1.11.0|snap=beta 1.11.0.1|The gold nugget can now be found in [[savanna]] village house [[chest]]s.}}
{{History||1.16.0|snap=beta 1.16.0.57|[[Nether gold ore]] now [[drops]] 2-6 gold nuggets.|[[Gilded blackstone]] now has 10% chance to drop 2-5 gold nuggets.}}
{{History||1.16.100|snap=beta 1.16.100.50|Gold nuggets can now be used as fuel for a [[furnace]].<ref>{{bug|MCPE-114216}}</ref>}}
{{History||1.18.30|snap=beta 1.18.30.26|Gold nuggets can no longer be used as fuel for a furnace.}}
{{History|Legacy Console}}
{{History||xbox=TU7|xbone=CU1|ps=1.0|wiiu=Patch 1|switch=1.0.1|[[File:Gold Nugget JE2 BE1.png|32px]] Added gold nuggets.}}
{{History||xbox=TU53|xbone=CU43|ps=1.49|wiiu=Patch 23|switch=1.0.3|Gold nuggets can now be [[smelting|smelted]] from golden [[tool]]s and [[armor]].}}
{{History||xbox=none|xbone=none|ps=1.90|wiiu=none|switch=none|[[File:Gold Nugget JE3 BE2.png|32px]] The texture of gold nuggets has been changed.}}
{{History|3DS}}
{{History||0.1.0|[[File:Gold Nugget JE2 BE1.png|32px]] Added gold nuggets.}}
{{History||1.9.19|Gold nuggets can now be [[smelting|smelted]] from golden [[tool]]s and [[armor]].}}
{{History|foot}}
== Issues ==
{{issue list}}
== See also ==
* [[Iron Nugget]]
* [[Gold]]
{{Items}}
[[cs:Zlatý nuget]]
[[de:Goldklumpen]]
[[es:Pepita de oro]]
[[fr:Pépite d'or]]
[[hu:Aranyrög]]
[[it:Pepita d'oro]]
[[ja:金塊]]
[[ko:황금 조각]]
[[nl:Goudklompje]]
[[pl:Bryłka złota]]
[[pt:Pepita de ouro]]
[[ru:Кусочек золота]]
[[uk:Золотий самородок]]
[[zh:金粒]]
[[Category:Renewable resources]]</li><li>[[Ender Pearl|Ender Pearl]]<br/>
{{ItemEntity
|image=Ender Pearl.png
|renewable=Yes
|stackable=Yes (16)
|size=Height: 0.25 Blocks<br>Width: 0.25 Blocks
}}
An '''ender pearl''' is an [[item]] that can be thrown and [[teleport|teleports]] the thrower to where it lands, and used to craft [[eye of ender|eyes of ender]] which are required to access [[the End]].
== Obtaining ==
=== Mob loot ===
An [[enderman]] has a 50% chance to drop 1 ender pearl when killed. The drop is increased by 1 per level of [[Looting]], with a maximum of 4 with Looting III.
=== Chest loot ===
{{LootChestItem|ender-pearl}}
A [[trapped chest]] always containing 2 ender pearls can be found in the "fake end portal" room of [[woodland mansion]]s.
=== Trading ===
{{IN|java}}, expert-level [[Trading#Cleric|cleric villagers]] have a {{frac|2|3}} chance to sell an ender pearl for 5 [[emerald]]s.
{{IN|bedrock}}, expert-level cleric villagers sell one ender pearl for 5 emeralds.
=== Bartering ===
[[Piglin]]s have a {{frac|10|459}} (4.27) chance to [[barter]] 3-4 ender pearls when given a [[gold ingot]].
== Usage ==
Ender pearls can be thrown by pressing {{control|use}}. After it is thrown, the ender pearl is consumed, and the player teleports to where it lands, taking {{hp|5}} [[fall damage]]. Wearing armor enchanted with [[Protection]] and/or [[Feather Falling]] reduces the damage taken from the ender pearl.
Ender pearls have a small cone of travel; they do not all follow the same path when thrown in the same direction. The direction and velocity of ender pearl throws is slightly randomized. They can travel about 30 blocks when thrown straight up, and up to 54 blocks forward when thrown at an optimum launch angle of ~35° (on even ground).
The thrower's vertical velocity influences the throw. Hence timing a throw with a jump can increase the throwing range to 42 blocks when thrown straight up and 64 blocks forward at a 35° angle. Throwing while falling significantly decreases the range. Ender pearls collide with all [[minecart]] types, [[boat]]s, [[end crystal]]s and [[nether portal]]s, and travel through [[end portal]]s. Ender pearls that fall into the [[void]] disappear, and do not trigger the player to teleport. However, ender pearl entities (instead of dropped items) are ''not'' destroyed by lava and will teleport the player to the bottom of lava pools/lava oceans.
Ender pearls have a cooldown of one second before they can be used again. The cooldown is shown in the hotbar by a white overlay on the ender pearl that shrinks and must disappear before the player can use it again. If there are other inventory or hotbar slots containing ender pearls, they are covered with the white overlay as well.<ref>{{bug|MC-88236|||WAI}}</ref>
Ender pearls can be thrown into [[end gateway]]s to reach the outer islands of the End. They can also be thrown into the [[exit portal]] to reach the player's spawn point.
Ender pearl teleportation makes no sound ''itself''{{only|java}}, but does emit a "small fall" sound at the destination when applying teleportation damage to the player.
=== Stasis chamber ===
Ender pearls are affected by [[bubble column]]s. An ender pearl can remain afloat on top of an upward bubble column, allowing it to be stored indefinitely. A mechanism can then be triggered to make the ender pearl hit a solid surface (e.g. by closing a [[trapdoor]]), teleporting the thrower back to the setup wherever they are.
=== Spawning endermites ===
An ender pearl has a 10% chance to spawn an [[endermite]] when it lands. This is the only way through which endermites can spawn, without using cheats. The endermite spawns at ''the player's position'' when the pearl lands{{only|je}}, or at the pearl's landing site{{only|be}}.
=== Crafting ingredient ===
{{crafting usage}}
== Sounds ==
{{edition|java}}:<br>
Thrown ender pearls use the Friendly Creatures sound category for entity-dependent sound events.
{{Sound table
|sound=Bow shoot.ogg
|subtitle=Ender Pearl flies
|source=neutral
|description=When an ender pearl is thrown
|id=entity.ender_pearl.throw
|translationkey=subtitles.entity.ender_pearl.throw
|volume=0.5
|pitch={{frac|1|3}}-0.5
|distance=16
|foot=1}}
{{Edition|Bedrock}}:
{{Sound table
|type=bedrock
|sound=Bow shoot.ogg
|source=player
|description=When an ender pearl is thrown
|id=random.bow
|volume=0.5
|pitch=0.33-0.5
|foot=1}}
== Data values ==
=== ID ===
{{edition|java}}:
{{ID table
|edition=java
|firstcolumnname=Item
|showforms=y
|generatetranslationkeys=y
|displayname=Ender Pearl
|spritetype=item
|nameid=ender_pearl
|form=item
|foot=1}}
{{ID table
|edition=java
|firstcolumnname=Entity
|generatetranslationkeys=y
|displayname=Thrown Ender Pearl
|spritetype=entity
|spritename=Ender Pearl
|nameid=ender_pearl
|foot=1}}
{{edition|bedrock}}:
{{ID table
|edition=bedrock
|firstcolumnname=Item
|shownumericids=y
|showforms=y
|notshowbeitemforms=y
|generatetranslationkeys=y
|displayname=Ender Pearl
|spritetype=item
|nameid=ender_pearl
|id=422
|foot=1}}
{{ID table
|edition=bedrock
|firstcolumnname=Entity
|shownumericids=y
|generatetranslationkeys=y
|displayname=Ender Pearl
|spritetype=entity
|nameid=ender_pearl
|id=87
|foot=1}}
===Entity Data===
Thrown ender pearls have entity data that define various properties of the entity.
{{el|java}}:
{{main|Entity format}}
{{/ED}}
{{el|bedrock}}:
: See [[Bedrock Edition level format/Entity format]].
== Achievements ==
{{Load achievements|Beam Me Up}}
== Advancements ==
{{load advancements|Remote Getaway;Bullseye}}
== History ==
{{History|java beta}}
{{History||1.8|snap=Pre-release|[[File:Ender Pearl JE1.png|32px]] Added ender pearls along with [[endermen]].
|Ender pearls have no use, but can stack up to 64.}}
{{History|java}}
{{History||1.0.0|snap=Beta 1.9 Prerelease|Ender pearls are now less commonly found near bodies of [[water]] since [[endermen]] now teleport away when in contact with water. Before this version, endermen didn't attempt to teleport and were [[damage]]d/killed from water much more frequently, causing numerous ender pearls to occur around bodies of water.
|Later, on a suggestion from [[wikipedia:Reddit|Reddit]] user isJesus, [[Notch]] implemented the teleporting feature for ender pearls.<ref>http://www.reddit.com/r/Minecraft/comments/kpsay/eggsnowballender_pearl_suggestiongif/c2mabfj</ref><ref>{{Tweet|notch|118614580539826176}}</ref><ref>http://www.reddit.com/r/Minecraft/comments/kss7n/twitter_ender_pearls_have_a_unique_ability_now/c2mwldd</ref>}}
{{History|||snap=Beta 1.9 Prerelease 2|Added teleporting feature to ender pearls.
|Using an ender pearl to teleport resulted in being kicked from servers for "hacking". This is due to a check triggering that was supposed to prevent modified clients from moving too quickly.
|Ender pearls now only stack up to 16.}}
{{History|||snap=Beta 1.9 Prerelease 3|Ender pearls are now used to craft [[eyes of ender]].
|Ender pearls can now be found in the new [[stronghold]] altar [[chest]]s.}}
{{History||1.3.1|snap=12w24a|[[File:Ender Pearl JE2 BE1.png|32px]] The texture of ender pearls has been changed.}}
{{History||1.8|snap=14w02a|As part of the revamp of the trading system, cleric [[villager]]s now [[trading|buy]] ender pearls.}}
{{History|||snap=14w03a|Villager clerics no longer buy ender pearls.}}
{{History|||snap=14w11b|Ender pearls have a 5% chance to spawn [[endermite]]s when used.}}
{{History||1.9|snap=15w31a|Ender pearls can now be thrown in [[Creative]] mode.}}
{{History|||snap=15w34c|Ender pearls now have a cooldown after using them.}}
{{History|||snap=15w41a|[[Villager]] clerics now [[trading|sell]] ender pearls for 4–7 [[emerald]]s, as one of their tier III trades.}}
{{History|||snap=15w49a|Thrown ender pearls now take the user's motion into account. For example, an ender pearl thrown forward will land closer if the player is falling, and land farther if the player is ascending.}}
{{History||1.10|snap=16w21a|Ender pearls can now teleport riders off their mounts.}}
{{History||1.11|snap=16w32a|The entity ID of ender pearls has been changed from <code>ThrownEnderpearl</code> to <code>ender_pearl</code>.}}
{{History|||snap=16w39a|Ender pearls can now be found in [[woodland mansion]]s' fake portal room [[chest]]s.}}
{{History||1.13|snap=17w47a|Prior to [[1.13/Flattening|''The Flattening'']], this [[item]]'s numeral ID was 368.}}
{{History||1.14|snap=18w43a|[[File:Ender Pearl JE3 BE2.png|32px]] The texture of ender pearls has been changed.}}
{{History||1.16|snap=20w07a|Ender pearls have a {{frac|2|109}} (~1.83%) chance of being offered by [[piglin]]s when [[bartering]], in a stack size of 2–4.}}
{{History|||snap=20w09a|Ender pearls now have a {{frac|10|226}} (~4.42%) chance of being offered by piglins when bartering, in a stack size of 1–5.}}
{{History|||snap=20w10a|Ender pearls now have a {{frac|20|411}} (~4.87%) chance of being offered by piglins when bartering, in a stack size of 4–8.}}
{{History|||snap=20w20a|Ender pearls now have a {{frac|20|423}} (~4.73%) chance of being offered by piglins when bartering, in a stack size of 4–8.}}
{{History||1.16.2|snap=20w28a|Ender pearls now have a {{frac|10|459}} (~2.18%) chance of being offered by piglins when bartering, in a stack size of 2–4.}}
{{History|||snap=Pre-Release 1|Ender pearls are now affected by [[bubble column]]s.<ref>{{bug|MC-125758|||Fixed}}</ref>
|Ender pearls no longer get destroyed at contact with non-solid blocks.<ref>{{bug|MC-73884|||Fixed}}</ref>}}
{{History|pocket alpha}}
{{History||v0.14.0|snap=build 1|[[File:Ender Pearl JE2 BE1.png|32px]] Added ender pearls.
|While fully implemented, ender pearls currently have no assigned ID and are currently unobtainable in-game.}}
{{History|pocket}}
{{History||1.0.0|snap=alpha 0.17.0.1|Ender pearls are now obtainable in-game.
|Ender pearls can now be used to craft [[eyes of ender]].}}
{{History|||snap=alpha 1.0.0.0|Ender pearls now require a 1-second cooldown.}}
{{History|||snap=alpha 1.0.0.1|Ender pearl cooldown now has an animation.}}
{{History||1.0.4|snap=alpha 1.0.4.0|Ender pearls can now be [[trading|bought]] from cleric [[villager]]s for 4-7 [[emerald]]s.}}
{{History||1.1.0|snap=alpha 1.1.0.0|Ender pearls can now be found in [[woodland mansion]]s' [[chest]]s.}}
{{History|bedrock}}
{{History||1.10.0|snap=beta 1.10.0.3|[[File:Ender Pearl JE3 BE2.png|32px]] The texture of ender pearls has been changed.}}
{{History||1.11.0|snap=beta 1.11.0.4|[[Trading]] has been changed, expert-level cleric [[villager]]s now [[trading|sell]] an ender pearl for 5 [[emerald]]s as part of their trade.}}
{{History||1.16.0|snap=beta 1.16.0.57|Ender pearls can now be obtained from [[bartering]] with [[piglin]]s.}}
{{History||1.16.100|snap=beta 1.16.100.54|Ender pearls now have a {{frac|10|459}} (~2.18%) chance of being offered by piglins when bartering, in a stack size of 2–4.}}
{{History|console}}
{{History||xbox=TU5|xbone=CU1|ps=1.0|wiiu=Patch 1|switch=1.0.1|[[File:Ender Pearl JE2 BE1.png|32px]] Added ender pearls.}}
{{History||xbox=TU7|A teleporting feature has been added to ender pearls.}}
{{History||xbox=none|xbone=none|ps=1.90|wiiu=none|switch=none|[[File:Ender Pearl JE3 BE2.png|32px]] The texture of ender pearls has been changed.}}
{{History|new 3ds}}
{{History||1.7.10|[[File:Ender Pearl JE2 BE1.png|32px]] Added ender pearls.}}
{{History|foot}}
== Issues ==
{{issue list}}
== Trivia ==
*Ender pearls can be used to teleport/move through non-[[solid block]]s without suffocation and solid blocks by pressing against the blocks and using the ender pearl at the player's feet until the player goes through.<ref>{{bug|MC-2164}}</ref><ref>{{ytl|KA1UmxraeUg}}</ref>
*In ''Java Edition'', it is possible to spawn a thrown ender pearl using commands, but it does not teleport, unless it is assigned an owner.
*If the player throws an ender pearl and then dies before impact while the pearl is in a loaded chunk, the pearl disappears and the player is not teleported. Pearls in unloaded chunks do not disappear if their owner dies.
*If the player throws an ender pearl in Survival mode and changes to Creative mode before the pearl lands, the player is still teleported.
*The player is still teleported by throwing an ender pearl and entering [[the Nether]] before it lands. The pearl is not lost if an ender pearl is thrown into a [[nether portal]] and the player travels through the portal; the pearl lands and teleports the player as usual.
*If multiple ender pearls are thrown in succession, the player can be hurt only once from fall damage within about a one-second span.
*If a [[player]] dies from ender pearl teleportation, the [[death message]] says: "<player> hit the ground too hard".
*A thrown ender pearl faces toward the player in first-person view, while it appears rotated horizontal in [[third-person view]]. This is the case for all throwable items (ender pearl, [[egg]], [[snowball]], and all throwable [[potion]]s).
*Ender pearls and [[snowball]]s have the exact same range when fired. Therefore, snowballs can be used to predict the trajectory of ender pearls, or simply for practicing ender pearl throwing. This can be very helpful when the player has to throw ender pearls in dangerous environments, such as the Nether or the End.
*Despite the fact that ender pearls deal no damage to anything they're thrown at, provokable mobs (such as iron golems and piglins) will be provoked by the player if one is thrown at them.
== Gallery ==
<gallery>
Ender Pearl Suggestion.gif|The original suggestion image for teleporting with ender pearls.
Enderlake.png|Ender pearls were formerly found in [[water]], however endermen now teleport out to prevent damage.
</gallery>
== References ==
{{reflist}}
== See also ==
*[[End Dimension]]
*[[Ender Dragon]]
*[[Ender Portal]]
*[[Enderman]]
{{Items}}
{{entities}}
[[cs:Endová perla]]
[[de:Enderperle]]
[[es:Perla de ender]]
[[fr:Perle de l'Ender]]
[[hu:Véggyöngy]]
[[ja:エンダーパール]]
[[ko:엔더 진주]]
[[nl:Enderparel]]
[[pl:Enderperła]]
[[pt:Pérola de ender]]
[[ru:Жемчуг Края]]
[[th:ไข่มุกเอนเดอร์]]
[[tr:Ender İncisi]]
[[uk:Перлина Краю]]
[[zh:末影珍珠]]</li></ul> | Lava was made to flow farther than it did on the Overworld. | |||||||||||||||||||||||||||||||||||||||||||||||||||||||||||||||||||||||||||||||||||||||||||||||||||||||||||||
| beta | ||||||||||||||||||||||||||||||||||||||||||||||||||||||||||||||||||||||||||||||||||||||||||||||||||||||||||||||
1.6{{Extension DPL}}<ul><li>[[Redstone Comparator|Redstone Comparator]]<br/>{{Block
| image =
| image2 =
| transparent = Yes
| light = No
| tool = any
| renewable = Yes
| stackable = Yes (64)
| flammable = No
| lavasusceptible = No
| group = Redstone Comparator
| group2 = Subtracting
| group3 = Powered
| group4 = Powered+Subtracting
| 1-1 = Redstone Comparator.png
| 2-1 = Subtracting Redstone Comparator.png
| 3-1 = Powered Redstone Comparator.png
| 4-1 = Powered Subtracting Redstone Comparator.png
}}
{{Many images}}
A '''redstone comparator''' is a [[block]] that can produce an [[Redstone Dust|output signal]] from its front by reading [[chest]]s, [[lectern]]s, [[beehive]]s and similar blocks, or repeat a signal without changing its strength. It can also be set to either stop outputting a signal when its side input recieves a stronger one (front torch off), or subtract its side input's signal strength from its output (front torch on).
== Obtaining ==
=== Natural generation ===
Redstone comparators generate in [[Ancient City|ancient cities]].
=== Breaking ===
A redstone comparator can be broken instantly with any [[tool]], or by hand, and drops itself as an item.
{{Breaking row|Redstone Comparator|horizontal=y}}
A redstone comparator is removed and dropped as an item if:
* its attachment block is moved, removed, or destroyed;
* [[water]] flows into its space;{{only|java}}
* a [[piston]] tries to push it or moves a block into its space.
If [[lava]] flows into a redstone comparator's space, the redstone comparator is destroyed without dropping as an item.
=== Crafting ===
{{Crafting
|B1=Redstone Torch
|A2=Redstone Torch
|B2=Nether Quartz
|C2=Redstone Torch
|A3=Stone
|B3=Stone
|C3=Stone
|Output= Redstone Comparator
|type=Redstone
}}
== Usage ==
A redstone comparator can be placed on the top of any [[opaque]] block with a solid full-height top surface (including upside-down [[slab]]s and upside-down [[stairs]]). {{IN|be}}, a comparator can also be placed on [[wall]]s and fences. For more information about placement on transparent blocks, see [[Opacity/Placement]].
The redstone comparator has a front and a back — the arrow on the top of the comparator points to the front. When placed, the comparator faces away from the player. The comparator has two miniature redstone torches at the back and one at the front. The back torches turn on when the comparator's output is greater than zero (the arrow on top also turns red). The front torch has two states that can be toggled by {{control|using}} the comparator:
* Down and unpowered (indicating the comparator is in "comparison mode")
* Up and powered (indicating the comparator is in "subtraction mode")
The redstone comparator can take a signal strength input from its rear as well as from both sides. Side inputs are accepted only from [[redstone dust]], [[block of redstone]], [[redstone repeater]]s, other comparators, and [[observer]]s in specific scenarios. The redstone comparator's front is its output.
It takes 1 [[redstone tick]] (2 game ticks, or 0.1 seconds barring lag) for signals to move through a redstone comparator, either from the rear or from the sides. This applies to changing signal strengths as well as simply to turning on and off.
Redstone comparators check their power state before their scheduled ticks update. This results in redstone comparators not usually responding to 1-tick fluctuations of power or signal strength — for example, a [[clock circuit|1-clock]] input is treated as always off from the side, and always on from the rear. This happens because the signal changes back to its original state before the redstone comparator checks its input states. However, certain setups such as powering any input with two separate observer pulses at the same time will cause a redstone comparator to respond to 2 gametick pulses.
The redstone comparator has four functions: maintain signal strength, compare signal strength, subtract signal strength, and measure certain block states (primarily the fullness of containers).
=== Maintain signal strength ===
A redstone comparator with no powered sides outputs the same signal strength as its rear input.
=== Compare signal strength ===
[[File:Comparators Explained.png|Comparators in comparison mode.|thumb]]
A redstone comparator in comparison mode (front torch down and unpowered) compares its rear input to its two side inputs. If either side input is greater than the rear input, the comparator output turns off. If neither side input is greater than the rear input, the comparator outputs the same signal strength as its rear input.
The formula for calculating the output signal strength is as follows:
<code>output = rear × [[Wikipedia:Iverson bracket|[]]'''''left''''' ≤ '''''rear''''' AND '''''right''''' ≤ '''''rear'''''[[Wikipedia:Iverson bracket|<nowiki>]]]</code>
{{-}}
=== Subtract signal strength ===
[[File:Redstone comparator.png|thumb|The greatest of the side inputs A and C is subtracted from the rear input B, outputting 1. If either A or C were greater than B, it would output 0.]]
A redstone comparator in subtraction mode (front torch up and powered) subtracts the signal strength of the higher side input from the signal strength of the rear input.
<code>output = max('''''rear''''' − max('''''left''', '''right'''''), 0)</code>
For example: if the signal strength is 6 at the left input, 7 at the right input and 4 at the rear, the output signal has a strength of ''max(4 − max(6, 7), 0) = max(4−7, 0) = max(−3, 0) = 0''.
If the signal strength is 9 at the rear, 2 at the right input and 5 at the left input, the output signal has a strength of ''max(9 − max(2, 5), 0) = max(9−5, 0) = 4''.
=== Measure block state ===
{{Schematic | caption = A redstone comparator can measure the fullness of a chest, as well as other block states, even through an opaque block.
|rd-ew!|rc-w!|ch|SB|rc-e!|rd-ew!
}}
A redstone comparator treats certain blocks behind it as power sources and outputs a signal strength proportional to the block's state. The comparator may be separated from the measured block by an opaque block. However, {{in|je}}, if the opaque block is powered to signal strength 15, then the comparator outputs 15 no matter the fullness of the container.<ref>{{bug|MC-64394}} (resolved as "Works As Intended")</ref>
[[Category:Java Edition specific information]]
{{-}}
==== Fullness of containers ====
{| class="wikitable floatright" style="margin-left: 0.5em; margin-right: 0; text-align: center;"
|+ Minimum Items for Container Signal Strength
|-
!Containers
!{{BlockSprite|Furnace|link=Furnace}}<br>{{BlockSprite|Blast Furnace|link=Blast Furnace}}<br>{{BlockSprite|Smoker|link=Smoker}}
!{{BlockSprite|Hopper|link=Hopper}}<br>{{EntitySprite|Minecart with Hopper|link=Minecart with Hopper}}<br>{{BlockSprite|Brewing Stand|link=Brewing Stand}}
!{{BlockSprite|Dispenser|link=Dispenser}}<br>{{BlockSprite|Dropper|link=Dropper}}
!{{BlockSprite|Chest|link=Chest}}<br>{{EntitySprite|Minecart with Chest|link=Minecart with Chest}}<br>{{BlockSprite|Shulker Box|link=Shulker Box}}<br>{{BlockSprite|Barrel|link=Barrel}}
![[Double Chest|{{Schematic|size=16|ch-s|-|ch-n}}
]]
!{{BlockSprite|Jukebox|link=Jukebox}}
|-
!Total Slots
!3!!5!!9!!27!!54!!1
|-
!Power Level
! colspan="5" |Number of Items
!Music Disc
|-
|0||0||0||0||0||0||No disc
|-
|1||1||1||1||1||1||"13"
|-
|2||14||23||42||1s 60||3s 55||"cat"
|-
|3||28||46||1s 19||3s 55||7s 46||"blocks"
|-
|4||42||1s 5||1s 60||5s 51||11s 37||"chirp"
|-
|5||55||1s 28||2s 37||7s 46||15s 28||"far"
|-
|6||1s 5||1s 51||3s 14||9s 42||19s 19||"mall"
|-
|7||1s 19||2s 10||3s 55||11s 37||23s 10||"mellohi"
|-
|8||1s 32||2s 32||4s 32||13s 32||27s||"stal"
|-
|9||1s 46||2s 55||5s 10||15s 28||30s 55||"strad"
|-
|10||1s 60||3s 14||5s 51||17s 23||34s 46||"ward"
|-
|11||2s 10||3s 37||6s 28||19s 19||38s 37||"11"
|-
|12||2s 23||3s 60||7s 5||21s 14||42s 28||"wait"
|-
|13||2s 37||4s 19||7s 46||23s 10||46s 19||"Pigstep"
|-
|14||2s 51||4s 42||8s 23||25s 5||50s 10||"Otherside"<br>"Relic"
|-
|15||3s||5s||9s||27s||54s||"5"
|}
A redstone comparator can output a signal indicating how full a container is. (0 for empty, 15 for full, etc.) The table on the right is described more in detail, later in this section.
Containers that can be measured by a comparator include:
* {{BlockLink|Furnace}}
* {{BlockLink|Blast Furnace}}
* {{BlockLink|Smoker}}
* {{BlockLink|Brewing Stand}}
* {{BlockLink|Hopper}}
* {{ItemLink|Minecart with Hopper}} on top of a [[detector rail]]
* {{BlockLink|Dispenser}}
* {{BlockLink|Dropper}}
* {{BlockLink|Chest}}
* {{BlockLink|Trapped Chest}}
* {{ItemLink|Minecart with Chest}} on top of a [[detector rail]]
* {{BlockLink|Barrel}}
* {{SchematicSprite|size=16|ch-e}}{{SchematicSprite|size=16|ch-w}} Large chest
* {{SchematicSprite|size=16|ch-e}}{{SchematicSprite|size=16|ch-w}} Large trapped chest
* {{BlockLink|Shulker Box}} (any color)
Generally speaking, the comparator output signal strength represents the average fullness of the slots, based on how many of that item form a full stack (64, 16, or 1 for non-stackable items).
The ''Minimum Items for Container Signal Strength'' table (right) shows the minimum '''''full-stack-equivalent (FSE)''''' to produce different signal strengths from common containers. A '''''full-stack-equivalent''''' quantifies how many normal 64-stackable items are needed to output a corresponding signal strength. The 's' is a constant 64, with the additional amount needed following after.
One may also consider the terms: '''c''umulative-weight''''' or '''''weighted-sum''''' instead of '''''full-stack-equivalent'''''.
Items that stack to a max of 16 ([[snowball]]s, [[sign]]s, [[ender pearl]]s, etc.), contribute +4 to the ''full-stack-equivalent'' for each unity (count of 1 item). Similarly, items that stack to 1 ([[minecart]], [[boat]], etc.) contribute +64, and items that stack to 64 contribute +1.
Example 1: 3 ender pearls will contribute a 3 x 4 = 12 ''full-stack-equivalent''.
Example 2: 16 ender pearls and 60 redstone dust contributes a 16x4 + 60x1 = 124 ''full-stack-equivalent''.
Example 3: 1 minecart and 60 redstone dust contributes a 1x64 + 60x1 = 124 ''full-stack-equivalent''.
Example 4: To produce a signal strength of 10 from a hopper, one requires a ''full-stack-equivalent'' of at least 3s + 14 = 206 but strictly less than than 3s + 37 = 229. This can be done with 3 minecarts, and 14 dirt.
When a comparator measures a large chest or large trapped chest, it measures the entire large chest (54 slots), not just the half directly behind the comparator. A chest or trapped chest that cannot be opened (either because it has an opaque block, [[ocelot]], or [[cat]] above it) always produces an output of 0 no matter how many items are in the container — shulker boxes can always be measured, even if they cannot open.
;Calculating signal strength from items
:When a container is empty, the output is off.
:When it is not empty, the output signal strength is calculated as follows:
:<code>'''''signal strength''''' = floor(1 + (('''''sum of all slots' fullnesses''''') / ('''''number of slots in container''''')) × 14)</code>
:<code>fullness of a slot = '''''number of items in slot''''' / '''''max stack size for this type of item'''''</code>
:''Example:'' 300 blocks in a dispenser (which has 9 slots), where each block stacks to a maximum of 64 has a 300 ''full-stack-equivalent.'' This produces an output with a signal strength of 8:
<blockquote>
1 + ((300 items / 64 items per slot) / 9 slots) × 14 = 8.292, floored is 8
</blockquote>
;Calculating items from signal strength
:It can be useful in redstone circuits to use containers with comparators to create signals of a specific strength. The number of items required in a container to produce a signal of desired strength is calculated as follows:
:<code>items required = max('''''desired signal strength''''', roundup(('''''total slots in container''''' × 64 / 14) × (desired signal strength − 1)))</code>
:''Example:'' To use a furnace (which has 3 slots) to create a strength 9 signal, players need 110 items:
<blockquote>
max(9, (3×64/14) × (9−1)) = 109.714, rounded up is 110
</blockquote>
{{-}}
==== Miscellaneous ====
[[File:Comparator storage.png|Comparators used to measure containers.|thumb]]
Some non-container blocks can also be measured by a redstone comparator:
;{{BlockLink|Beehive}} and {{BlockLink|Bee nest}}
: A hive or nest outputs a signal strength equal to the amount of honey in the hive/nest.
;{{BlockLink|Cake}}
: A cake outputs a signal strength relative to the amount of cake remaining. Each slice is worth 2 signal strength, with 7 total slices, for an output of 14 for a full cake.
[[File:Cauldron Redstone Strength Values.png|Cauldron signal strength|thumb]]
;{{BlockLink|Cauldron}}
: A cauldron outputs different signal strengths depending on how much water or powdered snow is inside. From completely empty to completely full, the output values are 0, 1, 2, and 3. If lava or powder snow is inside, the strength is always 3.
[[File:Composter Redstone Strength Values.png|Composter signal strength|thumb]]
;{{BlockLink|Composter}}
: A composter outputs different signal strengths depending on the level inside. From completely empty to completely full, the output values are 0, 1, 2, 3, 4, 5, 6, 7 and 8.
;{{Anchor|CommandBlock}}{{BlockLink|Command Block}}
: A command block stores the "success count" of the last command executed, which represents the number of times the most recently used command of this command block succeeded. A "success" is defined by the [[command]]'s success conditions: if a red error message is returned in the chat, the command was not successful.
: Most commands can succeed once per execution, but certain commands (such as those that accept players as arguments) can succeed multiple times, and the comparator outputs the number of times it succeeded (maximum 15 when sent to redstone dust, but in the code it is able to go up to the 32-bit integer limit, and can be used in contraptions with no redstone dust with those values).
: A command block continues to store the success count of the last command executed until it executes its command again, thus the comparator continues to output the same signal strength even after the command block is no longer being activated (it doesn't turn off when the signal to the command block turns off).
;{{BlockLink|End Portal Frame}}
: An end portal frame outputs a full signal of 15 if it contains an [[eye of ender]] and zero otherwise.
[[File:Item frame and comparator.png|A comparator can measure the presence and rotation of an item frame's contents.|thumb]]
;{{EntityLink|Item Frame}}
: A comparator can measure the state of an [[item frame]]'s contents. An item frame comparator outputs 0 if the item frame is empty, or 1 to 8 for any item depending on its rotation: 1 at initial placement, plus 1 for each 45° of rotation for a maximum of 8.
: For an item frame that holds a map, a unit of rotation is 90° instead of 45°, but a comparator still outputs power levels 1 to 8. It takes two full rotations to cycle through all comparator outputs, and each orientation of the map corresponds to two output levels that differ by 4.
: The comparator must be placed behind the block the item frame is attached to, facing away from the item frame. The block must be a full block, and the item frame cannot be submerged in water. Having a sign in the same block as the item frame will prevent the frame from sending a signal as well.{{only|java}}
;{{BlockLink|Jukebox}}
: A jukebox outputs a signal strength indicating which music disc is currently playing. See the ''Minimum Items for Container Signal Strength'' table above.
;{{BlockLink|Lectern}}
: A lectern outputs a signal strength that depends on what page the player is currently on. The calculation used is:
:<code>'''''signal strength''''' = floor(1 + (('''''current page''''' - 1) / ('''''number of pages in book''''' - 1)) × 14)</code>
:This results in page 1 having a signal strength of 1, and the last page having a signal strength of 15. The exception is a single page book, which will output a signal strength of 15.
:For example, a book with 15 pages will output a signal equal to the current page number. A book with 5 pages will output signal strengths of 1, 4, 8, 11 and 15 for the different pages. A book with 100 pages will have the signal strength increase to the next level on pages 1, 9, 16, 23, 30, 37, 44, 51, 58, 65, 72, 79, 86, 93 and 100.
:
;{{BlockLink|Respawn Anchor}}
: A respawn anchor outputs a signal strength of 0, 3, 7, 11, or 15, depending on the "charged" value.
;{{BlockLink|Sculk Sensor}}
: A sculk sensor outputs a signal strength depending on the type of vibration that is detected.
;{{BlockLink|Chiseled Bookshelf}}
: A chisled bookshelf outputs a signal strength between 1 and 6 indicating the last slot interacted with. When no slot has been interacted with yet, it outputs 0.
{{-}}
== Sounds ==
=== Generic ===
{{Edition|Java}}:
{{Sound table/Block/Stone/JE}}
{{Edition|Bedrock}}:
{{Sound table/Block/Wood/BE}}
=== Unique ===
{{edition|java}}:
{{Sound table
|rowspan=2
|sound=Click.ogg
|subtitle=Comparator clicks
|source=block
|description=When a comparator is set to subtraction mode
|id=block.comparator.click
|translationkey=subtitles.block.comparator.click
|volume=0.3
|pitch=0.55
|distance=16}}
{{Sound table
|subtitle=Comparator clicks
|source=block
|description=When a comparator is set to comparison mode
|id=block.comparator.click
|translationkey=subtitles.block.comparator.click
|volume=0.3
|pitch=0.5
|distance=16
|foot=1}}
{{edition|bedrock}}:
{{Sound table
|type=bedrock
|rowspan=2
|sound=Click.ogg
|source=block
|description=When a comparator is set to subtraction mode
|id=block.click
|volume=0.2
|pitch=0.55}}
{{Sound table
|source=block
|description=When a comparator is set to comparison mode
|id=block.click
|volume=0.2
|pitch=0.5
|foot=1}}
== Data values ==
=== ID ===
{{edition|java}}:
{{ID table
|edition=java
|showforms=y
|generatetranslationkeys=y
|displayname=Redstone Comparator
|spritetype=block
|nameid=comparator
|foot=1}}
{{ID table
|displayname=Block entity
|spritename=redstone-comparator
|spritetype=block
|nameid=comparator
|foot=1}}
{{edition|bedrock}}:
{{ID table
|edition=bedrock
|firstcolumnname=Redstone Comparator
|shownumericids=y
|showforms=y
|generatetranslationkeys=y
|displayname=Unpowered block
|spritename=unpowered-comparator
|spritetype=block
|nameid=unpowered_comparator
|id=149
|form=block
|translationkey=-}}
{{ID table
|displayname=Powered block
|spritename=powered-comparator
|spritetype=block
|nameid=powered_comparator
|id=150
|form=block
|translationkey=-}}
{{ID table
|displayname=Item
|spritename=redstone-comparator
|spritetype=item
|nameid=comparator
|id=522
|form=item
|foot=1}}
{{ID table
|notnamespaced=y
|displayname=Block entity
|spritename=redstone-comparator
|spritetype=block
|nameid=Comparator
|foot=1}}
=== Block states ===
{{see also|Block states}}
{{/BS}}
=== Block data ===
A redstone comparator has a block entity associated with it that holds additional data about the block.
{{el|je}}:
{{see also|Block entity format}}
{{/BE}}
{{el|be}}:
: See [[Bedrock Edition level format/Block entity format]].
== Advancements ==
{{Load advancements|the power of books}}
== Video ==
<div style="text-align:center">{{yt|J7Z20Zzz3yU}}</div>
== History ==
{{info needed section|If {{bug|MC-50242}} also affected comparators?}}
''For a more in-depth breakdown of changes to repeater textures and models, including a set of renders for each state combination, see [[/Asset history]]''
{{History|java}}
{{History||November 24, 2012|link=https://youtube.com/watch?v=YG9RNyRhIow&t=6m56s|[[Jeb]] stated that there may be a "capacitor" in [[Minecraft]]. }}
{{History||December 27, 2012|link={{tweet|Dinnerbone|284388625595125760}}|[[Dinnerbone]] released [https://web.archive.org/web/20190710120115/https://imgur.com/a/FBKed pictures] of the first version of the "comparator", stating it was a replacement for the "capacitor" idea that has variable, alternate inputs.}}
{{History||January 2, 2013|link={{tweet|Dinnerbone|286428595423965184}}|Dinnerbone released one more [http://dinnerbone.com/media/uploads/2013-01/screenshots/2013-01-02_12.06.47.png picture] of the comparator. The picture itself showing a digital-to-analog converter, using the comparator as the main [[block]].}}
{{History||1.5|snap=13w01a|[[File:Redstone Comparator (S) JE1.png|32px]] [[File:Powered Redstone Comparator (S) JE1.png|32px]] [[File:Subtracting Redstone Comparator (S) JE1.png|32px]] [[File:Powered Subtracting Redstone Comparator (S) JE1.png|32px]] [[File:Redstone Comparator (item) JE1 BE1.png|32px]] Added redstone comparators.
|Redstone comparators have 0 delay.
At this point, block ID 149 was used for unpowered comparators, and block ID 150 for powered comparators.}}
{{History|||snap=13w01b|A delay of 1 game tick ({{frac|1|2}} redstone tick) has now been added to redstone comparators to fix bugs.
|The ability to measure containers to redstone comparators has now been added.}}
{{History|||snap=13w02a|[[File:Redstone Comparator (S) JE2.png|32px]] [[File:Powered Redstone Comparator (S) JE2.png|32px]] [[File:Subtracting Redstone Comparator (S) JE2.png|32px]] [[File:Powered Subtracting Redstone Comparator (S) JE2.png|32px]] The appearance of redstone comparators has now been changed - the top texture has changed to show [[quartz]] in the middle and the sides now use the [[smooth stone]] texture rather than the smooth stone slab side texture.
|The algorithm for measuring containers has now been changed so that redstone comparators output a signal with as few as 1 [[item]] in the container.}}
{{History|||snap=13w02b|Redstone comparators now treat large [[chest]]s as a single container.}}
{{History|||snap=13w03a|Redstone comparators now output success count of [[command block]]s.
|Redstone comparators now measure container [[minecart]]s on [[detector rail]]s.}}
{{History|||snap=13w04a|Redstone comparators now measure [[jukebox]]es.}}
{{History|||snap=13w05a|Redstone comparators no longer cause constant [[block]] updates. The delay has now been made consistent, and side input no longer causes a pulse output.
|Block 150 (later <code>powered_comparator</code>) is no longer used; powered state is now represented by the 8s bit on block 149 (later <code>unpowered_comparator</code>).}}
{{History|||snap=13w05b|Redstone comparator delay has now been changed from 1 game tick (1/2 [[redstone]] tick) to 2 game ticks (1 redstone tick).}}
{{History|||snap=13w09c|The redstone signal strength from a redstone comparator next to a [[brewing stand]] with 3 [[water bottle]]s in it is now the same as one with 3 water bottles and 1 ingredient in it.}}
{{History||1.6.1|snap=13w18a|Redstone comparators now measure [[cauldron]]s and [[end portal frame]]s.}}
{{History||1.8|snap=14w04a|Redstone comparators now measure [[item frame]]s.}}
{{History|||snap=14w10a|The torches under redstone comparators have now been shortened, which has changed the underside appearance from [[File:Redstone Comparator UNKVER1 (facing NWU).png|32px]] [[File:Powered Redstone Comparator UNKVER1 (facing NWU).png|32px]] [[File:Subtracting Redstone Comparator UNKVER1 (facing NWU).png|32px]] [[File:Powered Subtracting Redstone Comparator UNKVER1 (facing NWU).png|32px]] to [[File:Redstone Comparator UNKVER2 (facing NWU).png|32px]].}}
{{History|||snap=14w25a|[[File:Redstone Comparator (S) JE3.png|32px]] [[File:Powered Redstone Comparator (S) JE3.png|32px]] [[File:Subtracting Redstone Comparator (S) JE3.png|32px]] [[File:Powered Subtracting Redstone Comparator (S) JE3.png|32px]] The torches on comparators are now subject to ambient occlusion.
|Comparators set to subtract mode appear to be powered as well regardless of incoming power. The subtracting-only model still exists and can be achieved through {{cmd|setblock}}.}}
{{History|||snap=14w25b|[[File:Subtracting Redstone Comparator (S) JE4.png|32px]] [[File:Powered Subtracting Redstone Comparator (S) JE4.png|32px]] The powered front torch when in subtraction mode is now lower.
|Comparators set to subtract by hand now appear normally again.}}
{{History|||snap=14w28a|Redstone comparators now measure [[cake]]s.}}
{{History||1.9|snap=15w42a|With the addition of the [[blaze powder]] fuel slot, [[brewing stand]]s now have 5 slots instead of 4. Their original comparative power values from redstone comparators are listed below:
{{{!}} class{{=}}"wikitable collapsible collapsed" data-description{{=}}"Original values"
! Original values
{{!}}-
{{!}}
*0: 0
*1: 1
*2: 19
*3: 37
*4: 55
*5: 1s 10
*6: 1s 28
*7: 1s 46
*8: 2s
*9: 2s 19
*10: 2s 37
*11: 2s 55
*12: 3s 10
*13: 3s 28
*14: 3s 46
*15: 4s
{{!}}}
}}
{{History|||snap=15w47a|Redstone comparators' side inputs now take power from [[redstone block]]s.}}
{{History||1.13|snap=17w47a|All 3 IDs for the redstone comparator have now been merged into one ID: <code>comparator</code>.
|Redstone comparators now render their underside, which has changed their undersides from [[File:Redstone Comparator UNKVER2 (facing NWU).png|32px]] to [[File:Redstone Comparator UNKVER3 (facing NWU).png|32px]].
|Prior to [[1.13/Flattening|''The Flattening'']], these blocks' numeral IDs were 149 and 150, and the [[item]]'s 404.
|As a result, the formerly unused comparator ID is now technically used again, due to both unpowered and powered versions being merged into a single comparator block ID.}}
{{History||1.14|snap=18w43a|[[File:Redstone Comparator (S) JE4.png|32px]] [[File:Powered Redstone Comparator (S) JE4.png|32px]] [[File:Subtracting Redstone Comparator (S) JE5.png|32px]] [[File:Powered Subtracting Redstone Comparator (S) JE5.png|32px]] [[File:Redstone Comparator (item) JE2 BE2.png|32px]] The textures of redstone comparators have now been changed.}}
{{History|||snap=19w02a|Redstone comparators now measure [[lectern]]s.}}
{{History|||snap=19w03a|Redstone comparators now measure [[composter]]s.}}
{{History|||snap=19w12b|Redstone comparators can now be placed on [[glass]], [[ice]], [[glowstone]] and [[sea lantern]]s.}}
{{History||1.15|snap=19w34a|Redstone comparators now measure how much honey is inside [[beehive|bee hive]]s and [[bee nest]]s.}}
{{History||1.16|snap=20w06a|The way to calculate the input signals of redstone comparators has now been changed.}}
{{History|||snap=20w11a|The changes to the way of calculating the input signals of redstone comparators from [[Java Edition 20w06a|20w06a]] have now been reverted.}}
{{History|||snap=20w16a|Redstone comparators now measure [[Pigstep music disc]]s in [[jukebox]]es.}}
{{History||1.17|snap=20w45a|Redstone comparators now measure [[lava cauldron]]s.}}
{{History|||snap=20w46a|Redstone comparators now measure [[Cauldron#Holding powder snow|powder snow cauldron]]s.}}
{{History||1.18|snap=21w41a|[[File:Powered Redstone Comparator (S) JE5.png|32px]] [[File:Powered Subtracting Redstone Comparator (S) JE6.png|32px]] The texture of powered redstone comparator have now been changed.}}
{{History||1.19|snap=22w13a|Redstone comparators now generate as part of [[ancient cities]].}}
{{History||1.20<br>(Experimental)|link=1.19.3|snap=22w42a|Redstone comparators now measure [[chiseled bookshelves]].}}
{{History||1.20.2|snap=23w33a|Redstone comparators now use stone sounds instead of wood sounds.<ref>{{bug|MC-182820|||Fixed}}</ref>}}
{{History|pocket alpha}}
{{History||v0.14.0|snap=build 1|[[File:Redstone Comparator (S) JE2 BE1.png|32px]] [[File:Powered Redstone Comparator (S) JE2 BE1.png|32px]] [[File:Subtracting Redstone Comparator (S) JE2 BE1.png|32px]] [[File:Powered Subtracting Redstone Comparator (S) JE2 BE1.png|32px]]{{verify|Was this the model used?}} [[File:Redstone Comparator (item) JE1 BE1.png|32px]] Added redstone comparators.}}
{{History|pocket}}
{{History||1.0.0|snap=alpha 0.17.0.1|Redstone comparators now measure [[end portal frame]]s.}}
{{History||1.0.5|snap=alpha 1.0.5.0|Redstone comparators now output success count of [[command block]]s.}}
{{History||1.1.0|snap=alpha 1.1.0.0|Redstone comparators now measure [[shulker box]]es.}}
{{History|bedrock}}
{{History||1.2.0|snap=beta 1.2.0.2|Redstone comparators now measure [[jukebox]]es.
|Redstone comparators now render their underside, which has changed their undersides from [[File:Redstone Comparator UNKVER1 (facing NWU).png|32px]] to [[File:Redstone Comparator UNKVER3 (facing NWU).png|32px]]}}
{{History||1.10.0|snap=beta 1.10.0.3|[[File:Redstone Comparator (S) BE.png|32px]] [[File:Powered Redstone Comparator (S) BE.png|32px]] [[File:Subtracting Redstone Comparator (S) BE.png|32px]] [[File:Powered Subtracting Redstone Comparator (S) BE.png|32px]] [[File:Redstone Comparator (item) JE2 BE2.png|32px]] The textures of redstone comparators have now been changed.}}
{{History||1.11.0|snap=beta 1.11.0.1|Redstone comparators now measure [[smoker]]s, [[blast furnace]]s, [[lectern]]s and [[composter]]s.}}
{{History||1.18.10|snap=beta 1.18.10.20|[[File:Powered Redstone Comparator (S) JE5.png|32px]] [[File:Powered Subtracting Redstone Comparator (S) JE6.png|32px]] The texture of powered redstone comparator have now been changed.}}
{{History||1.20.30|snap=beta 1.20.30.20|Redstone comparators now use the <code>minecraft:cardinal_direction</code> [[block state]] instead of <code>direction</code>.}}
{{History|console}}
{{History||xbox=TU19|xbone=CU7|ps=1.12|wiiu=Patch 1|switch=1.0.1|[[File:Redstone Comparator (S) JE2 BE1.png|32px]] [[File:Powered Redstone Comparator (S) JE2 BE1.png|32px]] [[File:Subtracting Redstone Comparator (S) JE2 BE1.png|32px]] [[File:Powered Subtracting Redstone Comparator (S) JE2 BE1.png|32px]]{{verify|Was this the model used?}} [[File:Redstone Comparator (item) JE1 BE1.png|32px]] Added redstone comparators.}}
{{History||xbox=TU31|xbone=CU19|ps=1.22|wiiu=Patch 3|switch=1.0.1|Redstone comparators can now measure [[item frame]]s.}}
{{History||xbox=none|xbone=none|ps=1.90|wiiu=none|switch=none|[[File:Redstone Comparator (S) BE.png|32px]] [[File:Powered Redstone Comparator (S) BE.png|32px]] [[File:Subtracting Redstone Comparator (S) BE.png|32px]] [[File:Powered Subtracting Redstone Comparator (S) BE.png|32px]]{{verify|Was this the model used?}} [[File:Redstone Comparator (item) JE2 BE2.png|32px]] The textures of redstone comparators have now been changed.}}
{{History|3ds}}
{{History||0.1.0|[[File:Redstone Comparator (S) JE2 BE1.png|32px]] [[File:Powered Redstone Comparator (S) JE2 BE1.png|32px]] [[File:Subtracting Redstone Comparator (S) JE2 BE1.png|32px]] [[File:Powered Subtracting Redstone Comparator (S) JE2 BE1.png|32px]]{{verify|Was this the model used?}} [[File:Redstone Comparator (item) JE2 BE2.png|32px]] Added redstone comparators.}}
{{History|foot}}
=== Redstone comparator "items" ===
{{:Technical blocks/Redstone Comparator}}
== Issues ==
{{issue list}}
== Trivia ==
* Comparators do not emit redstone particles when powered, unlike redstone torches and repeaters.<ref>{{bug|MC-51692|||WAI}}</ref>
== Gallery ==
<gallery>
Dinnerbone Comparator 1.png|Dinnerbone showing how comparators work.
Dinnerbone Comparator 2.png|Dinnerbone showing how comparators work.
Dinnerbone Comparator 3.png|Dinnerbone showing how comparators work.
Dinnerbone Comparators 1.png|A contraption incorporating comparators.
Dinnerbone Comparators 2.png|Comparators in action.
Dinnerbone Comparators 3.png|Output specific signals.
Dinnerbone Comparator Thing.png|Another comparator in use.
Item Frame Comparator.png|Rotating the torch in the item frame adjusts the comparator's output.
</gallery>
== References ==
{{reflist}}
{{Redstone}}
{{Blocks|Utility}}
{{Items}}
[[Category:Mechanics]]
[[Category:Block entities]]
[[Category:Redstone mechanics]]
[[Category:Mechanisms]]
[[Category:Manufactured blocks]]
[[Category:Non-solid blocks]]
[[de:Redstone-Komparator]]
[[es:Comparador de redstone]]
[[fr:Comparateur de redstone]]
[[hu:Redstone-komparátor]]
[[ja:レッドストーンコンパレーター]]
[[ko:레드스톤 비교기]]
[[nl:Redstonevergelijker]]
[[pl:Komparator]]
[[pt:Comparador de redstone]]
[[ru:Компаратор]]
[[uk:Редстоуновий компаратор]]
[[zh:红石比较器]]</li><li>[[Sign|Sign]]<br/>{{Block
| image = <gallery>
Oak Sign.png|Sign
Oak Wall Sign.png|Wall Sign
Oak Hanging Sign.png|Hanging Sign
Oak Wall Hanging Sign.png|Wall Hanging Sign
</gallery>
| image2 = <gallery>
Oak Sign JE3.png|Sign
Oak Hanging Sign (item) JE1 BE1.png|Hanging Sign
</gallery>
| extratext = [[#Gallery|View all renders]]
| transparent = Yes
| light = No
| tool = axe
| renewable = Yes
| stackable = Yes (16)
| flammable = No
| lavasusceptible = No
}}
A '''sign''' is a non-solid [[block]] that displays text and can be placed on the top or side of other blocks. A '''hanging sign''' is a decorative block that also displays text, and can be placed underneath blocks or with a solid self-supporting bracket. The text of both types of signs can be customized with [[dye]]s and [[glow ink sac]]s.
== Obtaining ==
=== Breaking ===
Signs can be broken with any tool or without a tool, but an [[axe]] is fastest.
{{breaking row|horizontal=1|Sign|sprite=oak-sign|Axe|foot=1|item=1}}
A sign or a hanging sign also breaks and drops itself as an [[item]] if the block the sign is attached to is moved, removed or destroyed. However, a wall hanging sign will stay here if the block the hanging sign is attached to is removed.<ref>{{bug|MC-256501|||WAI}}</ref>
If a sign is broken while being edited, the player continues to edit the sign<ref>{{bug|MC-117815}}</ref>, although {{in|bedrock}} breaking the sign stops the editing operation.
=== Natural generation ===
An oak sign can be found in [[igloo]] basements. Spruce signs can be found in taiga [[village]] houses, as part of a chair.
=== Chest loot ===
{{LootChestItem|oak-sign,oak-hanging-sign,spruce-sign,spruce-hanging-sign}}
=== Crafting ===
[[The player]] can place six stripped [[log]] [[block]]s at the bottom half of the crafting table and place two [[chain]]s on the top-left and top-right slots to create hanging signs. This crafting recipe will create six hanging signs. Hanging signs can only be crafted with stripped logs or [[stem]]s; non-stripped wood cannot be used to craft hanging signs.
{{Crafting
|head=1
|showdescription=1
|nolink=1
|A1= Matching Planks
|B1= Matching Planks
|C1= Matching Planks
|A2= Matching Planks
|B2= Matching Planks
|C2= Matching Planks
|B3= Stick
|Output=Matching Sign,3
|type=Decoration block
}}
{{Crafting
|name= Hanging Sign
|A1= Chain
|C1= Chain
|A2= Matching Stripped Log or Stem; Block of Stripped Bamboo
|B2= Matching Stripped Log or Stem; Block of Stripped Bamboo
|C2= Matching Stripped Log or Stem; Block of Stripped Bamboo
|A3= Matching Stripped Log or Stem; Block of Stripped Bamboo
|B3= Matching Stripped Log or Stem; Block of Stripped Bamboo
|C3= Matching Stripped Log or Stem; Block of Stripped Bamboo
|Output= Matching Hanging Sign,6; Bamboo Hanging Sign,6
|type=Decoration block
|foot=1
}}
== Usage ==
Signs can be used to display text; they can be used to label storage, display information to other players or note areas of interest. Signs are also not destroyed by [[water]] or [[lava]] and therefore may be used to control the flow of these fluids.
=== Placement ===
==== Signs ====
Signs may be placed on the top or side of other [[block]]s (including semi-solid and non-solid blocks such as [[fence]]s, [[Trapdoor|trapdoors]] and other signs). To place a sign, {{control|use}} a sign [[item]] while pointing at the block the sign should be attached to, enter the desired text (or none), and click the "Done" button or press "escape" on a keyboard (or press × {{in|bedrock}}, {{xbtn|b}} on an Xbox controller, {{psbtn|o}} on a PlayStation controller, or {{nsbutton|B}} on a Nintendo Switch controller. Closing the virtual keyboard on a mobile device also exits the typing menu). To place a sign on a block that can be interacted with by the {{control|use}} control (for example, [[chest]]s, [[note block]]s, etc.), {{control|sneak}} while placing the sign.
Signs on the top of a block stand on a short post and face toward the player who placed it, in any of 16 different directions. Signs placed on the side of a block simply float there, even if the block doesn't make contact with the sign.
Even if placed on a vertical surface, a sign may not co-exist in the same block of air as any other item, despite not necessarily visibly obstructing eachother.
For more information about the blocks signs can be placed on, see [[Opacity/Placement]].
==== Hanging signs ====
Hanging signs can be placed in three different ways:
* Placing a hanging sign on the side of a block will result in it being placed with a self-supporting bracket, which allows it to float without any supporting block. This version can be placed in four different directions.
* Placing a hanging sign on the bottom of a block will result in the sign hanging below the block.
** If the block is wide enough, the chains holding the sign will be parallel. This version can be placed in four different directions.
** If the block is too narrow, the chains will meet together in a upwards arrow shape. This version is also placed if the player is {{control|sneaking}} when placing a hanging sign below a wide-enough block. This version can be placed in sixteen different directions.
=== Text ===
[[File:Oak Sign GUI.png|thumb|240px|Oak Sign editing.]]
Placing a sign opens an editor interface resembling a magnified view of the sign. Up to four lines of text can then be entered using a keyboard (hardware or on-screen). The editor supports limited editing, including moving the cursor and inserting and deleting characters. {{IN|bedrock}}, [[formatting codes]] can also be used to apply decorative effects such as color, bold, italic and underline to various bits of the text. Depending on the edition and platform in use, copy and paste operations may be supported and the editor may also support keyboard entry of Alt-codes for displaying Unicode characters.
Text can be added to the back side of a sign by interacting with the that side of the sign after placing it and editing the front.
Signs can be waxed by {{Control|use|text=using}} a [[honeycomb]] on it. Once waxed, a sign cannot be unwaxed or edited.
After placing and affixing text on a sign, a player can change the text color by {{control|using}} a [[dye]] on it. When colored with dye, the text color may differ from any color specified by formatting codes.{{Info needed|How does this work? Does the dye affect all the text? One line? One word? Does dye override all formatting codes, including font effects?}}
[[File:Glow Ink Sign with Orange Dye JE2.png|thumb|216px|Oak sign with glow ink and orange dye applied in {{JE}}.]]
A player can {{control|use}} a [[glow ink sac]] on a sign to make its text glow. The glowing text is not affected by lighting. The player can use a regular black [[ink sac]] on the sign to remove the glowing effect.
{| class="wikitable mw-collapsible mw-collapsed"
|+ class="nowrap" | Glow ink colors
!Name !! Main Color !! Edge Color
|-
! Black
| {{color|#000000}}
| {{color|#EDE8CA}}
|-
! Red
| {{color|#FC0000}}
| {{color|#650000}}
|-
! Green
| {{color|#00FC00}}
| {{color|#006500}}
|-
! Brown
| {{color|#894413}}
| {{color|#361B07}}
|-
! Blue
| {{color|#0000FC}}
| {{color|#000065}}
|-
! Purple
| {{color|#9E20ED}}
| {{color|#3F0C5F}}
|-
! Cyan
| {{color|#00D6D6}}
| {{color|#006565}}
|-
! Light Gray
| {{color|#D0D0D0}}
| {{color|#535353}}
|-
! Gray
| {{color|#7E7E7E}}
| {{color|#323232}}
|-
! Pink
| {{color|#FC68B2}}
| {{color|#652947}}
|-
! Lime
| {{color|#8DFC00}}
| {{color|#4B6500}}
|-
! Yellow
| {{color|#FCFC00}}
| {{color|#656500}}
|-
! Light Blue
| {{color|#98BECB}}
| {{color|#3C4B51}}
|-
! Magenta
| {{color|#FC00FC}}
| {{color|#650065}}
|-
! Orange
| {{color|#FC671F}}
| {{color|#65280C}}
|-
! White
| {{color|#FCFCFC}}
| {{color|#656565}}
|}
In [[Creative]] mode, the combination {{key|Ctrl}} + {{control|pick block}} on Windows/Linux, or {{key|cmd}} + {{control|pick block}} on macOS, can be used to copy an already-placed sign, including its text (with decorations), into the player's inventory.
A dyed sign facing east or west will have its text appear more saturated and bright than a sign facing north or south. However, it is actually the sign that is dimmer, because ''Minecraft'''s lighting engine uses side lighting to make the world appear less flat, but the text on signs is not affected by this.
{{IN|bedrock}}, inappropriate words or phrases in a sign's text are displayed as asterisks.
{{IN|java}}, signs can be created with [[Commands#Raw JSON Text|JSON text]], which allows complex formatting (colors, bold, italic, etc.), hover and click events, localized translation (for ''Minecraft'' technical terms, like "Redstone Repeater", otherwise translations must be provided in language files in resource packs), and the incorporation of scoreboard values into text. Use the {{cmd|data merge block}} command to create or alter JSON signs.
: Example: {{cmd|long=1|data merge block ~ ~1 ~ {front_text:{ color:"green", messages:[ '{"selector":"@p", "bold":false, "italic":false, "underlined":false, "strikethrough":false, "obfuscated":false}' , '{"text":"Second Line"}']}}}}
Signs can post the success count of JSON text hover and click events to [[scoreboard]] objectives. The objectives to be used can be specified by running the {{cmd|execute store}} command or by modifying the sign's NBT data directly with the {{cmd|data merge block}} command.
=== Interaction ===
Signs act as though they have a {{control|use}} action, so the [[player]] is unable to place [[block]]s or use [[item]]s while the cursor is pointed at them without {{control|sneaking}}.
Signs are destroyed and drop as an item when pushed by a [[piston]].{{Only|bedrock}}
Signs are non-solid and have no collision, so [[item]]s and [[mob]]s can move through sign blocks. Other [[block]]s (including other signs) can be placed on any edge of a sign.
[[Water]] and [[lava]] flow around signs. Lava can create [[fire]] in [[air]] blocks next to signs as if the signs were flammable, but the signs do not burn (and cannot be burned by other methods either, except {{in|be}}).
=== Fuel ===
Wooden signs can be used as a fuel in [[furnace]]s, smelting an [[item]] per sign.
=== Note Blocks ===
Signs can be placed under [[note block]]s to produce a "bass" sounds.
== Sounds ==
=== Generic ===
==== Normal wood ====
; Sign
{{Sound table/Block/Wood|forcecollapsed=1}}
; Hanging sign
{{Sound table/Block/Hanging sign|forcecollapsed=1}}
==== Cherry wood ====
; Sign
{{Sound table/Block/Cherry wood|forcecollapsed=1}}
; Hanging sign
{{Sound table/Block/Cherry wood hanging sign|forcecollapsed=1}}
==== Bamboo wood ====
; Sign
{{Sound table/Block/Bamboo wood|forcecollapsed=1}}
; Hanging sign
{{edition|java}}:
{{Sound table/Block/Bamboo wood hanging sign/JE|forcecollapsed=1}}
{{edition|bedrock}}:
{{Sound table/Block/Bamboo wood hanging sign/BE|forcecollapsed=1}}
==== Nether wood ====
; Sign
{{Sound table/Block/Nether wood|forcecollapsed=1}}
; Hanging sign
{{edition|java}}:
{{Sound table/Block/Nether wood hanging sign/JE|forcecollapsed=1}}
{{edition|bedrock}}:
{{Sound table/Block/Nether wood hanging sign/BE|forcecollapsed=1}}
=== Unique ===
{{edition|java}}:
{{Sound table|forcecollapsed=1
|rowspan=2
|sound=Ink sac1.ogg
|sound2=Ink sac2.ogg
|sound3=Ink sac3.ogg
|subtitle=Glow Ink Sac splotches
|source=block
|description=When a [[glow ink sac]] is used on a sign
|id=item.glow_ink_sac.use
|translationkey=subtitles.item.glow_ink_sac.use
|volume=1.0
|pitch=''varies'' <ref group=sound>Can be 1.0, 0.95, or 1.05 for each sound</ref>
|distance=16}}
{{Sound table
|subtitle=Ink Sac splotches
|source=block
|description=When an [[ink sac]] is used on a sign
|id=item.ink_sac.use
|translationkey=subtitles.item.ink_sac.use
|volume=1.0
|pitch=''varies'' <ref group=sound>Can be 0.85, 0.88, or 0.9 for each sound</ref>
|distance=16}}
{{Sound table
|sound=Dye.ogg
|subtitle=Dye stains
|source=block
|description=When [[dye]] is used on a sign
|id=item.dye.use
|translationkey=subtitles.item.dye.use
|volume=1.0
|pitch=''varies'' <ref group=sound>Can be 1.0, 0.9, 0.95, or 1.1</ref>
|distance=16}}
{{Sound table
|sound=Wax on1.ogg
|sound2=Wax on2.ogg
|sound3=Wax on3.ogg
|subtitle=Wax on
|source=block
|description=When a sign is waxed
|id=item.honeycomb.wax_on
|translationkey=subtitles.item.honeycomb.wax_on
|volume=1.0
|pitch=1.0/0.9/1.1
|distance=16}}
{{Sound table
|sound=Sign waxed interact fail1.ogg
|sound2=Sign waxed interact fail2.ogg
|sound3=Sign waxed interact fail3.ogg
|subtitle=Sign wobbles
|source=block
|description=When a player attempts to edit a waxed sign
|id=block.sign.waxed_interact_fail
|translationkey=subtitles.block.sign.waxed_interact_fail
|volume=1.0
|pitch=''varies''<ref group=sound>{{cd|fail1}} can be 1.0 or 0.9; {{cd|fail2}} and {{cd|fail3}} can be 0.8 or 0.9</ref>
|distance=16
|foot=1}}
{{edition|bedrock}}:
{{Sound table|forcecollapsed=1
|type=bedrock
|sound=Ink sac1.ogg
|sound2=Ink sac2.ogg
|sound3=Ink sac3.ogg
|source=sound
|description=When a glow ink sac or an ink sac is used on a sign
|id=sign.ink_sac.use
|volume=1.0
|pitch=1.0}}
{{Sound table
|type=bedrock
|sound=Dye.ogg
|source=sound
|description=When dye is used on a sign
|id=sign.dye.use
|volume=1.0
|pitch=1.0}}
{{Sound table
|sound=Wax on1.ogg
|sound2=Wax on2.ogg
|sound3=Wax on3.ogg
|source=neutral
|description=When a honeycomb waxes a sign
|id=copper.wax.on
|volume=1.0
|pitch=0.8-1.2}}
{{Sound table
|sound=Sign waxed interact fail1.ogg
|sound2=Sign waxed interact fail2.ogg
|sound3=Sign waxed interact fail3.ogg
|source=block
|description=When a player attempts to edit a waxed sign
|id=block.sign.waxed_interact_fail
|volume=1.0
|pitch=''varies'' <ref group=sound>Can be 1.0 or 0.9 for <code>waxed_interact_fail1</code>; can be 0.8 or 0.9 for <code>waxed_interact_fail2</code> and <code>waxed_interact_fail3</code></ref>
|foot=1}}
== Data values ==
=== ID ===
{{edition|java}}:
{{ID table
|edition=java
|showblocktags=y
|showitemtags=y
|showforms=y
|generatetranslationkeys=y
|displayname=Oak Sign
|spritetype=block
|nameid=oak_sign
|blocktags=signs, standing_signs, wall_post_override
|itemtags=signs}}
{{ID table
|displayname=Spruce Sign
|spritetype=block
|nameid=spruce_sign
|blocktags=signs, standing_signs, wall_post_override
|itemtags=signs}}
{{ID table
|displayname=Birch Sign
|spritetype=block
|nameid=birch_sign
|blocktags=signs, standing_signs, wall_post_override
|itemtags=signs}}
{{ID table
|displayname=Jungle Sign
|spritetype=block
|nameid=jungle_sign
|blocktags=signs, standing_signs, wall_post_override
|itemtags=signs}}
{{ID table
|displayname=Acacia Sign
|spritetype=block
|nameid=acacia_sign
|blocktags=signs, standing_signs, wall_post_override
|itemtags=signs}}
{{ID table
|displayname=Dark Oak Sign
|spritetype=block
|nameid=dark_oak_sign
|blocktags=signs, standing_signs, wall_post_override
|itemtags=signs}}
{{ID table
|displayname=Mangrove Sign
|spritetype=block
|nameid=mangrove_sign
|blocktags=signs, standing_signs, wall_post_override
|itemtags=signs}}
{{ID table
|displayname=Cherry Sign
|spritename=Cherry Sign
|spritetype=block
|nameid=cherry_sign
|blocktags=signs, standing_signs, wall_post_override
|itemtags=signs}}
{{ID table
|displayname=Bamboo Sign
|spritename=Bamboo Sign
|spritetype=block
|nameid=bamboo_sign
|blocktags=signs, standing_signs, wall_post_override
|itemtags=signs}}
{{ID table
|displayname=Crimson Sign
|spritetype=block
|nameid=crimson_sign
|blocktags= signs, standing_signs, wall_post_override
|itemtags=non_flammable_wood, signs}}
{{ID table
|displayname=Warped Sign
|spritetype=block
|nameid=warped_sign
|blocktags=signs, standing_signs, wall_post_override
|itemtags=non_flammable_wood, signs}}
{{ID table
|displayname=Oak Wall Sign
|spritetype=block
|nameid=oak_wall_sign
|blocktags=signs, wall_signs
|form=block}}
{{ID table
|displayname=Spruce Wall Sign
|spritetype=block
|nameid=spruce_wall_sign
|blocktags=signs, wall_signs
|form=block}}
{{ID table
|displayname=Birch Wall Sign
|spritetype=block
|nameid=birch_wall_sign
|blocktags=signs, wall_signs
|form=block}}
{{ID table
|displayname=Jungle Wall Sign
|spritetype=block
|nameid=jungle_wall_sign
|blocktags=signs, wall_signs
|form=block}}
{{ID table
|displayname=Acacia Wall Sign
|spritetype=block
|nameid=acacia_wall_sign
|blocktags=signs, wall_signs
|form=block}}
{{ID table
|displayname=Dark Oak Wall Sign
|spritetype=block
|nameid=dark_oak_wall_sign
|blocktags=signs, wall_signs
|form=block}}
{{ID table
|displayname=Mangrove Wall Sign
|spritetype=block
|nameid=mangrove_wall_sign
|blocktags=signs, wall_signs
|form=block}}
{{ID table
|displayname=Cherry Wall Sign
|spritename=Cherry Wall Sign
|spritetype=block
|nameid=cherry_wall_sign
|blocktags=signs, wall_signs
|form=block}}
{{ID table
|displayname=Bamboo Wall Sign
|spritename=Bamboo Wall Sign
|spritetype=block
|nameid=bamboo_wall_sign
|blocktags=signs, wall_signs
|form=block}}
{{ID table
|displayname=Crimson Wall Sign
|spritetype=block
|nameid=crimson_wall_sign
|blocktags=signs, wall_signs
|form=block}}
{{ID table
|displayname=Warped Wall Sign
|spritetype=block
|nameid=warped_wall_sign
|blocktags=signs, wall_signs
|form=block}}
{{ID table
|displayname=Oak Hanging Sign
|spritename=Oak Hanging Sign
|spritetype=block
|nameid=oak_hanging_sign
|blocktags=all_hanging_signs, ceiling_hanging_signs
|itemtags=hanging_signs}}
{{ID table
|displayname=Spruce Hanging Sign
|spritename=Spruce Hanging Sign
|spritetype=block
|nameid=spruce_hanging_sign
|blocktags=all_hanging_signs, ceiling_hanging_signs
|itemtags=hanging_signs}}
{{ID table
|displayname=Birch Hanging Sign
|spritename=Birch Hanging Sign
|spritetype=block
|nameid=birch_hanging_sign
|blocktags=all_hanging_signs, ceiling_hanging_signs
|itemtags=hanging_signs}}
{{ID table
|displayname=Jungle Hanging Sign
|spritename=Jungle Hanging Sign
|spritetype=block
|nameid=jungle_hanging_sign
|blocktags=all_hanging_signs, ceiling_hanging_signs
|itemtags=hanging_signs}}
{{ID table
|displayname=Acacia Hanging Sign
|spritename=Acacia Hanging Sign
|spritetype=block
|nameid=acacia_hanging_sign
|blocktags=all_hanging_signs, ceiling_hanging_signs
|itemtags=hanging_signs}}
{{ID table
|displayname=Dark Oak Hanging Sign
|spritename=Dark Oak Hanging Sign
|spritetype=block
|nameid=dark_oak_hanging_sign
|blocktags=all_hanging_signs, ceiling_hanging_signs
|itemtags=hanging_signs}}
{{ID table
|displayname=Mangrove Hanging Sign
|spritename=Mangrove Hanging Sign
|spritetype=block
|nameid=mangrove_hanging_sign
|blocktags=all_hanging_signs, ceiling_hanging_signs
|itemtags=hanging_signs}}
{{ID table
|displayname=Cherry Hanging Sign
|spritename=Cherry Hanging Sign
|spritetype=block
|nameid=cherry_hanging_sign
|blocktags=all_hanging_signs, ceiling_hanging_signs
|itemtags=hanging_signs}}
{{ID table
|displayname=Bamboo Hanging Sign
|spritename=Bamboo Hanging Sign
|spritetype=block
|nameid=bamboo_hanging_sign
|blocktags=all_hanging_signs, ceiling_hanging_signs
|itemtags=hanging_signs}}
{{ID table
|displayname=Crimson Hanging Sign
|spritename=Crimson Hanging Sign
|spritetype=block
|nameid=crimson_hanging_sign
|blocktags=all_hanging_signs, ceiling_hanging_signs
|itemtags=hanging_signs, non_flammable_wood}}
{{ID table
|displayname=Warped Hanging Sign
|spritename=Warped Hanging Sign
|spritetype=block
|nameid=warped_hanging_sign
|blocktags=all_hanging_signs, ceiling_hanging_signs
|itemtags=hanging_signs, non_flammable_wood}}
{{ID table
|displayname=Oak Wall Hanging Sign
|spritename=Oak Wall Hanging Sign
|spritetype=block
|nameid=oak_wall_hanging_sign
|blocktags=all_hanging_signs, wall_hanging_signs
|form=block}}
{{ID table
|displayname=Spruce Wall Hanging Sign
|spritename=Spruce Wall Hanging Sign
|spritetype=block
|nameid=spruce_wall_hanging_sign
|blocktags=all_hanging_signs, wall_hanging_signs
|form=block}}
{{ID table
|displayname=Birch Wall Hanging Sign
|spritename=Birch Wall Hanging Sign
|spritetype=block
|nameid=birch_wall_hanging_sign
|blocktags=all_hanging_signs, wall_hanging_signs
|form=block}}
{{ID table
|displayname=Jungle Wall Hanging Sign
|spritename=Jungle Wall Hanging Sign
|spritetype=block
|nameid=jungle_wall_hanging_sign
|blocktags=all_hanging_signs, wall_hanging_signs
|form=block}}
{{ID table
|displayname=Acacia Wall Hanging Sign
|spritename=Acacia Wall Hanging Sign
|spritetype=block
|nameid=acacia_wall_hanging_sign
|blocktags=all_hanging_signs, wall_hanging_signs
|form=block}}
{{ID table
|displayname=Dark Oak Wall Hanging Sign
|spritename=Dark Oak Wall Hanging Sign
|spritetype=block
|nameid=dark_oak_wall_hanging_sign
|blocktags=all_hanging_signs, wall_hanging_signs
|form=block}}
{{ID table
|displayname=Mangrove Wall Hanging Sign
|spritename=Mangrove Wall Hanging Sign
|spritetype=block
|nameid=mangrove_wall_hanging_sign
|blocktags=all_hanging_signs, wall_hanging_signs
|form=block}}
{{ID table
|displayname=Cherry Wall Hanging Sign
|spritename=Cherry Wall Hanging Sign
|spritetype=block
|nameid=cherry_wall_hanging_sign
|blocktags=all_hanging_signs, wall_hanging_signs
|form=block}}
{{ID table
|displayname=Bamboo Wall Hanging Sign
|spritename=Bamboo Wall Hanging Sign
|spritetype=block
|nameid=bamboo_wall_hanging_sign
|blocktags=all_hanging_signs, wall_hanging_signs
|form=block}}
{{ID table
|displayname=Crimson Wall Hanging Sign
|spritename=Crimson Wall Hanging Sign
|spritetype=block
|nameid=crimson_wall_hanging_sign
|blocktags=all_hanging_signs, wall_hanging_signs
|form=block}}
{{ID table
|displayname=Warped Wall Hanging Sign
|spritename=Warped Wall Hanging Sign
|spritetype=block
|nameid=warped_wall_hanging_sign
|blocktags=all_hanging_signs, wall_hanging_signs
|form=block
|foot=1}}
{{ID table
|displayname=Block entity
|spritename=signs
|spritetype=block
|nameid=sign}}
{{ID table
|displayname=Block entity
|spritename=hanging-signs
|spritetype=block
|nameid=hanging_sign
|foot=1}}
{{edition|bedrock}}:
{{ID table
|edition=bedrock
|firstcolumnname=Sign
|shownumericids=y
|showforms=y
|showaliasids=y
|showitemtags=y
|generatetranslationkeys=y
|displayname=Oak standing
|spritename=oak-sign
|spritetype=block
|nameid=standing_sign
|id=63
|form=block}}
{{ID table
|displayname=Spruce standing
|spritename=spruce-sign
|spritetype=block
|nameid=spruce_standing_sign
|id=436
|form=block}}
{{ID table
|displayname=Birch standing
|spritename=birch-sign
|spritetype=block
|nameid=birch_standing_sign
|id=441
|form=block}}
{{ID table
|displayname=Jungle standing
|spritename=jungle-sign
|spritetype=block
|nameid=jungle_standing_sign
|id=443
|form=block}}
{{ID table
|displayname=Acacia standing
|spritename=acacia-sign
|spritetype=block
|nameid=acacia_standing_sign
|id=445
|form=block}}
{{ID table
|displayname=Dark Oak standing
|spritename=dark-oak-sign
|spritetype=block
|nameid=darkoak_standing_sign
|id=447
|form=block}}
{{ID table
|displayname=Mangrove standing
|spritename=mangrove-sign
|spritetype=block
|nameid=mangrove_standing_sign
|id=-494
|form=block
|translationkey=-}}
{{ID table
|displayname=Cherry standing
|spritename=cherry-sign
|spritetype=block
|nameid=cherry_standing_sign
|id=-542
|form=block
|translationkey=-}}
{{ID table
|displayname=Bamboo standing
|spritename=bamboo-sign
|spritetype=block
|nameid=bamboo_standing_sign
|id=-518
|form=block
|translationkey=-}}
{{ID table
|displayname=Crimson standing
|spritename=crimson-sign
|spritetype=block
|nameid=crimson_standing_sign
|id=505
|form=block}}
{{ID table
|displayname=Warped standing
|spritename=warped-sign
|spritetype=block
|nameid=warped_standing_sign
|id=506
|form=block}}
{{ID table
|displayname=Oak wall
|spritename=oak-wall-sign
|spritetype=block
|nameid=wall_sign
|id=68
|form=block
|translationkey=-}}
{{ID table
|displayname=Spruce wall
|spritename=spruce-wall-sign
|spritetype=block
|nameid=spruce_wall_sign
|id=437
|form=block
|translationkey=-}}
{{ID table
|displayname=Birch wall
|spritename=birch-wall-sign
|spritetype=block
|nameid=birch_wall_sign
|id=442
|form=block
|translationkey=-}}
{{ID table
|displayname=Jungle wall
|spritename=jungle-wall-sign
|spritetype=block
|nameid=jungle_wall_sign
|id=444
|form=block
|translationkey=-}}
{{ID table
|displayname=Acacia wall
|spritename=acacia-wall-sign
|spritetype=block
|nameid=acacia_wall_sign
|id=446
|form=block
|translationkey=-}}
{{ID table
|displayname=Dark Oak wall
|spritename=dark-oak-wall-sign
|spritetype=block
|nameid=darkoak_wall_sign
|id=448
|form=block
|translationkey=-}}
{{ID table
|displayname=Mangrove wall
|spritename=mangrove-wall-sign
|spritetype=block
|nameid=mangrove_wall_sign
|id=-495
|form=block
|translationkey=-}}
{{ID table
|displayname=Cherry wall
|spritename=cherry-wall-sign
|spritetype=block
|nameid=cherry_wall_sign
|id=-544
|form=block
|translationkey=-}}
{{ID table
|displayname=Bamboo wall
|spritename=bamboo-wall-sign
|spritetype=block
|nameid=bamboo_wall_sign
|id=-519
|form=block
|translationkey=-}}
{{ID table
|displayname=Crimson wall
|spritename=crimson-wall-sign
|spritetype=block
|nameid=crimson_wall_sign
|id=507
|form=block}}
{{ID table
|displayname=Warped wall
|spritename=warped-wall-sign
|spritetype=block
|nameid=warped_wall_sign
|id=508
|form=block}}
{{ID table
|displayname=Oak item
|spritename=oak-sign
|spritetype=item
|nameid=oak_sign
|aliasid=sign
|id=360
|form=item
|itemtags=minecraft:sign
|translationkey=item.sign.name}}
{{ID table
|displayname=Spruce item
|spritename=spruce-sign
|spritetype=item
|nameid=spruce_sign
|id=576
|form=item
|itemtags=minecraft:sign}}
{{ID table
|displayname=Birch item
|spritename=birch-sign
|spritetype=item
|nameid=birch_sign
|id=577
|form=item
|itemtags=minecraft:sign}}
{{ID table
|displayname=Jungle item
|spritename=jungle-sign
|spritetype=item
|nameid=jungle_sign
|id=578
|form=item
|itemtags=minecraft:sign}}
{{ID table
|displayname=Acacia item
|spritename=acacia-sign
|spritetype=item
|nameid=acacia_sign
|id=579
|form=item
|itemtags=minecraft:sign}}
{{ID table
|displayname=Dark Oak item
|spritename=dark-oak-sign
|spritetype=item
|nameid=dark_oak_sign
|aliasid=darkoak_sign
|id=587
|form=item
|itemtags=minecraft:sign
|translationkey=item.darkoak_sign.name}}
{{ID table
|displayname=Mangrove item
|spritename=mangrove-sign
|spritetype=item
|nameid=mangrove_sign
|id=642
|form=item
|itemtags=minecraft:sign}}
{{ID table
|displayname=Cherry item
|spritename=cherry-sign
|spritetype=item
|nameid=cherry_sign
|id=659
|form=item
|itemtags=minecraft:sign}}
{{ID table
|displayname=Bamboo item
|spritename=bamboo-sign
|spritetype=item
|nameid=bamboo_sign
|id=660
|form=item
|itemtags=minecraft:sign}}
{{ID table
|displayname=Crimson item
|spritename=crimson-sign
|spritetype=item
|nameid=crimson_sign
|id=614
|form=item
|itemtags=minecraft:sign}}
{{ID table
|displayname=Warped item
|spritename=warped-sign
|spritetype=item
|nameid=warped_sign
|id=615
|form=item
|itemtags=minecraft:sign}}
{{ID table
|displayname=Oak Hanging Sign
|spritename=Oak Wall Hanging Sign
|spritetype=block
|nameid=oak_hanging_sign
|id=-500
|itemtags=minecraft:hanging_sign
|translationkey=item.oak_hanging_sign.name}}
{{ID table
|displayname=Spruce Hanging Sign
|spritename=Spruce Wall Hanging Sign
|spritetype=block
|nameid=spruce_hanging_sign
|id=-501
|itemtags=minecraft:hanging_sign
|translationkey=item.spruce_hanging_sign.name}}
{{ID table
|displayname=Birch Hanging Sign
|spritename=Birch Wall Hanging Sign
|spritetype=block
|nameid=birch_hanging_sign
|id=-502
|itemtags=minecraft:hanging_sign
|translationkey=item.birch_hanging_sign.name}}
{{ID table
|displayname=Jungle Hanging Sign
|spritename=Jungle Wall Hanging Sign
|spritetype=block
|nameid=jungle_hanging_sign
|id=-503
|itemtags=minecraft:hanging_sign
|translationkey=item.jungle_hanging_sign.name}}
{{ID table
|displayname=Acacia Hanging Sign
|spritename=Acacia Wall Hanging Sign
|spritetype=block
|nameid=acacia_hanging_sign
|id=-504
|itemtags=minecraft:hanging_sign
|translationkey=item.acacia_hanging_sign.name}}
{{ID table
|displayname=Dark Oak Hanging Sign
|spritename=Dark Oak Wall Hanging Sign
|spritetype=block
|nameid=dark_oak_hanging_sign
|id=-505
|itemtags=minecraft:hanging_sign
|translationkey=item.dark_oak_hanging_sign.name}}
{{ID table
|displayname=Mangrove Hanging Sign
|spritename=Mangrove Wall Hanging Sign
|spritetype=block
|nameid=mangrove_hanging_sign
|id=-508
|itemtags=minecraft:hanging_sign
|translationkey=item.mangrove_hanging_sign.name}}
{{ID table
|displayname=Cherry Hanging Sign
|spritename=Cherry Wall Hanging Sign
|spritetype=block
|nameid=cherry_hanging_sign
|id=-534
|itemtags=minecraft:hanging_sign
|translationkey=item.cherry_hanging_sign.name}}
{{ID table
|displayname=Bamboo Hanging Sign
|spritename=Bamboo Wall Hanging Sign
|spritetype=block
|nameid=bamboo_hanging_sign
|id=-522
|itemtags=minecraft:hanging_sign
|translationkey=item.bamboo_hanging_sign.name}}
{{ID table
|displayname=Crimson Hanging Sign
|spritename=Crimson Wall Hanging Sign
|spritetype=block
|nameid=crimson_hanging_sign
|id=-506
|itemtags=minecraft:hanging_sign
|translationkey=item.crimson_hanging_sign.name}}
{{ID table
|displayname=Warped Hanging Sign
|spritename=Warped Wall Hanging Sign
|spritetype=block
|nameid=warped_hanging_sign
|id=-507
|itemtags=minecraft:hanging_sign
|translationkey=item.warped_hanging_sign.name
|foot=1}}
{{ID table
|notnamespaced=y
|displayname=Block entity
|spritename=signs
|spritetype=block
|nameid=Sign}}
{{ID table
|displayname=Block entity
|spritename=hanging-signs
|spritetype=block
|nameid=HangingSign
|foot=1}}
=== Block states ===
{{see also|Block states}}
{{/BS}}
=== Block data ===
A sign has a block entity associated with it that holds additional data about the block.
{{el|java}}:
{{see also|Block entity format}}
{{/BE}}
{{el|bedrock}}:
:See [[Bedrock Edition level format/Block entity format]].
== Achievements ==
{{load achievements|It's a Sign}}
== Advancements ==
{{load advancements|Glow and Behold}}
== History ==
{{main|/History}}
{{History|java classic}}
{{History||0.24_SURVIVAL_TEST|[[File:Sign Entity.png|32px]] Signs are currently being tested as [[entity|entities]]. They always display "This is a test of the signs. Each line can be 15 chars!" and can only be spawned by pressing {{key|B}}.<ref>{{ytl|bdT76iFEnLk}}</ref>}}
{{History||0.26 SURVIVAL TEST|Removed signs.}}
{{History|java infdev}}
{{History||20100607|[[File:Oak Sign (0) JE1.png|32px]] Signs have been re-implemented as [[block]]s, although still rendering as entities.
|Signs now have a [[crafting]] recipe and the text can now be edited. Editing a sign pauses the game in [[singleplayer]].
|Signs are currently huge and drop [[planks]] when destroyed.
|Signs do not have a particle texture defined. As such, they [[Placeholder texture#Default texture|default to using the grass block texture instead]].}}
{{History||20100608|Signs are now broken faster.
|Signs now [[drops|drop]] themselves when [[breaking|destroyed]], instead of planks.
|Signs now use planks particles.}}
{{History|java alpha}}
{{History||v1.0.1|[[File:Oak Wall Sign (S) JE1 BE1.png|32px]] Added wall signs.
|[[File:Oak Sign (0) JE2.png|32px]] Signs are now smaller.}}
{{History||v1.0.5|Signs no longer require a free [[block]] above it to place.}}
{{History|java beta}}
{{History||April 27, 2011|link=https://notch.tumblr.com/post/4988431144|Hand-drawn signs are mentioned.}}
{{History|java}}
{{History||1.0.0|snap=Beta 1.9 Prerelease 6|Signs are now broken faster using an [[axe]].}}
{{History||1.3.1|snap=12w18a|Editing a sign no longer pauses the game in [[singleplayer]].}}
{{History|||snap=12w27a|Signs are now stackable up to 16.
|The same [[crafting]] recipe now produces 3 signs instead of 1.}}
{{History||June 9, 2014|link=https://twitter.com/SeargeDP/status/476047216541700096|[[Searge]] tweeted a picture of a sign showing a username and a [[scoreboard]] score.}}
{{History||1.8|snap=14w25a|Added support for JSON text to signs.
|Sign character limit now depends on character width.}}
{{History|||snap=14w29a|Signs now display the cracking animation.}}
{{History||1.9|snap=15w43a|A sign now generates within [[igloo]] basements.}}
{{History||1.11|snap=16w33a|Signs can now be used as [[fuel]] in [[furnace]]s.}}
{{History||1.13|snap=17w47a|The standing sign ID has been changed from <code>standing_sign</code> to <code>sign</code>.
|Prior to [[1.13/Flattening|''The Flattening'']], these [[block]]s' numeral IDs were 63 and 68, and the [[item]]'s 323.}}
{{History|||snap=18w10d|[[Water]] can now be placed on the same block as signs.}}
{{History||1.14|snap=18w43a|"Sign" has been renamed to "Oak Sign".
|[[File:Oak Sign JE2 BE2.png|32px]] The texture of oak sign [[item]]s has been changed.
|[[File:Spruce Standing Sign JE1 BE1.png|32px]] [[File:Birch Standing Sign JE1 BE1.png|32px]] [[File:Jungle Standing Sign JE1 BE1.png|32px]] [[File:Acacia Standing Sign JE1 BE1.png|32px]] [[File:Dark Oak Standing Sign JE1 BE1.png|32px]] [[File:Spruce Sign JE1 BE1.png|32px]] [[File:Birch Sign JE1 BE1.png|32px]] [[File:Jungle Sign JE1 BE1.png|32px]] [[File:Acacia Sign JE1 BE1.png|32px]] [[File:Dark Oak Sign JE1 BE1.png|32px]] Added spruce, birch, jungle, acacia and dark oak signs.
|The sign's text has been changed from black to white.
|A sign's recipe now requires the same type of [[wood]] instead of a random assortment.}}
{{History|||snap=18w44a|Signs can now be {{control|used}} while holding a [[dye]] to change the text color.
|Default text color for signs has been changed back to black.}}
{{History|||snap=18w45a|A new movable cursor for free text editing to signs has been added.
|Selection and copy/paste support have been added to signs.}}
{{History|||snap=18w50a|Spruce signs now generate in some [[taiga]] [[village]] houses.
|Spruce sign items can now be found in [[chest]]s in taiga village houses.}}
{{History|||snap=19w12a|Signs can now be [[dye]]d only in [[Creative mode]].}}
{{History|||snap=19w12b|Signs can now be dyed in [[Survival mode]] again.}}
{{History||1.16|snap=20w06a|[[File:Crimson Standing Sign JE1 BE1.png|32px]] [[File:Warped Standing Sign JE1 BE1.png|32px]] [[File:Crimson Sign JE1 BE1.png|32px]] [[File:Warped Sign JE1 BE1.png|32px]] Added crimson and warped signs.}}
{{History|||snap=20w09a|Crimson and warped signs can now be [[crafting|crafted]].}}
{{History||1.17|snap=21w03a|Signs can now be tinted with [[Glow Ink Sac|glow ink sac]]s to make the text glow.
|Works with both undyed and dyed signs.
|Signs now have a sound for being dyed.}}
{{History|||snap=21w11a|[[File:Oak Standing Sign (S) JE2.png|32px]][[File:Spruce Standing Sign (S) JE2 BE2.png|32px]] [[File:Birch Standing Sign (S) JE2 BE2.png|32px]] [[File:Jungle Standing Sign (S) JE2 BE2.png|32px]] [[File:Acacia Standing Sign (S) JE2 BE2.png|32px]] [[File:Dark Oak Standing Sign (S) JE2 BE2.png|32px]] [[File:Oak Wall Sign (S) JE2.png|32px]] [[File:Spruce Wall Sign (S) JE2 BE2.png|32px]] [[File:Birch Wall Sign (S) JE2 BE2.png|32px]] [[File:Jungle Wall Sign (S) JE2 BE2.png|32px]] [[File:Acacia Wall Sign (S) JE2 BE2.png|32px]] [[File:Dark Oak Wall Sign (S) JE2 BE2.png|32px]] The textures of signs have been changed to reflect the changes made to planks in the [[Texture Update]].}}
{{History|||snap=Pre-release 1|Glowing text on signs now has an outer glow, making text more visible in the dark.}}
{{History||1.18|snap=21w41a|[[File:Oak Sign JE3.png|32px]] [[File:Spruce Sign JE2.png|32px]] [[File:Birch Sign JE2.png|32px]] [[File:Jungle Sign JE2.png|32px]] [[File:Acacia Sign JE2.png|32px]] [[File:Dark Oak Sign JE2.png|32px]] [[File:Crimson Sign JE2.png|32px]] [[File:Warped Sign JE2.png|32px]] Changed all signs textures as items.}}
{{History||1.19|snap=22w11a|[[File:Mangrove Sign JE1 BE1.png|32px]][[File:Mangrove Wall Sign JE1 BE1.png|32px]][[File:Mangrove Sign (item) JE1 BE1.png|32px]] Added mangrove signs.}}
{{History|||snap=22w14a|Due to the addition of the [[mangrove tree]] and [[mangrove swamp]], mangrove signs are now obtainable in survival and renewable.}}
{{History||October 15, 2022|link={{ytl|https://youtu.be/iM9KtHaDcUg?t=5437}}|Hanging signs were announced and shown on [[Minecraft Live 2022]].|Hanging signs were conceptualized by [[Agnes Larsson]] with input from her daughter.<ref>{{ytl|vJCMpPyaN8Q|Minecraft 1.20: New Blocks and Their Functions! @ 0:29|Minecraft|February 24, 2023|t=29s}}</ref>}}
{{History||1.20<br>(Experimental)|link=1.19.3|snap=22w42a|[[File:Bamboo Sign (0) JE1 BE1.png|32px]] [[File:Bamboo Wall Sign (S) JE1 BE1.png|32px]] [[File:Bamboo Sign (item) JE1 BE1.png|32px]] Added bamboo signs behind the [[Java Edition 1.20|Update 1.20 experimental datapack]].
|[[File:Oak Hanging Sign JE1 BE1.png|32px]] [[File:Spruce Hanging Sign JE1 BE1.png|32px]] [[File:Birch Hanging Sign JE1 BE1.png|32px]] [[File:Jungle Hanging Sign JE1 BE1.png|32px]] [[File:Acacia Hanging Sign JE1 BE1.png|32px]] [[File:Dark Oak Hanging Sign JE1 BE1.png|32px]] [[File:Mangrove Hanging Sign JE1 BE1.png|32px]] [[File:Bamboo Hanging Sign JE1 BE1.png|32px]] [[File:Crimson Hanging Sign JE1 BE1.png|32px]] [[File:Warped Hanging Sign JE1 BE1.png|32px]]<br>[[File:Oak Wall Hanging Sign JE1 BE1.png|32px]] [[File:Spruce Wall Hanging Sign JE1 BE1.png|32px]] [[File:Birch Wall Hanging Sign JE1 BE1.png|32px]] [[File:Jungle Wall Hanging Sign JE1 BE1.png|32px]] [[File:Acacia Wall Hanging Sign JE1 BE1.png|32px]] [[File:Dark Oak Wall Hanging Sign JE1 BE1.png|32px]] [[File:Mangrove Wall Hanging Sign JE1 BE1.png|32px]] [[File:Bamboo Wall Hanging Sign (S) JE1 BE1.png|32px]] [[File:Crimson Wall Hanging Sign JE1 BE1.png|32px]] [[File:Warped Wall Hanging Sign JE1 BE1.png|32px]]<br>[[File:Oak Hanging Sign (item) JE1 BE1.png|32px]] [[File:Spruce Hanging Sign (item) JE1 BE1.png|32px]] [[File:Birch Hanging Sign (item) JE1 BE1.png|32px]] [[File:Jungle Hanging Sign (item) JE1 BE1.png|32px]] [[File:Acacia Hanging Sign (item) JE1 BE1.png|32px]] [[File:Dark Oak Hanging Sign (item) JE1 BE1.png|32px]] [[File:Mangrove Hanging Sign (item) JE1 BE1.png|32px]] [[File:Bamboo Hanging Sign (item) JE1 BE1.png|32px]] [[File:Crimson Hanging Sign (item) JE1 BE1.png|32px]] [[File:Warped Hanging Sign (item) JE1 BE1.png|32px]]<br>Added hanging signs behind the [[Java Edition 1.20|Update 1.20 experimental datapack]].|Added unique sounds for Nether and bamboo wood signs.}}
{{History|||snap=22w45a|[[File:Jungle Wall Hanging Sign JE2 BE2.png|32px]] The texture of jungle hanging wall signs have been changed.|Added unique sounds for Nether and bamboo wood hanging signs.|Bamboo hanging signs now can be crafted using [[block of stripped bamboo]] instead of bamboo planks.|Crafting bamboo hanging signs now outputs 6 hanging signs instead of 2.}}
{{History||1.20<br>(Experimental)|link=1.19.4|snap=23w07a|[[File:Cherry Sign (0) JE1.png|32px]] [[File:Cherry Wall Sign (S) JE1.png|32px]] [[File:Cherry Sign (item) JE1.png|32px]] [[File:Cherry Hanging Sign JE1.png|32px]] [[File:Cherry Wall Hanging Sign JE1.png|32px]] [[File:Cherry Hanging Sign (item) JE1.png|32px]] Added cherry signs and hanging signs behind the [[Java Edition 1.20|Update 1.20 experimental datapack]]. There used to be a glitch where right clicking on a sign would play the “use” animation. This was fixed in the snapshots for 1.20, where signs are editable.}}
{{History|||snap=1.19.4 Pre-release 4|[[File:Cherry Sign (0) JE2 BE2.png|32px]] Updated the texture of cherry signs.}}
{{History||1.20|snap=23w12a|Bamboo sign, cherry sign and all of the hanging signs are now available without using the "Update 1.20" experimental datapack.|Signs and hanging signs can now be edited after being placed.|Signs and hanging signs now support text on both sides.|Signs and hanging signs can now be waxed with [[honeycomb]] to prevent editing.|Oak and spruce hanging sign can now be found in [[suspicious gravel]] and [[suspicious sand]] in [[trail ruins]].}}
{{History|||snap=23w14a|Signs and hanging signs with click commands can now be interacted with even if the sign is not waxed.|Signs and hanging signs can no longer be edited by players in [[Adventure]] mode.|Signs and hanging signs with non-text chat components can no longer be edited, even if the sign is not waxed.|Signs and hanging signs now save text even if the edit screen is closed by the player being moved far away.}}
{{History|||snap=23w16a|Oak and spruce hanging sign no longer generates in [[suspicious sand]] in [[trail ruins]].|Due to the split of the archaeological loot tables for the suspicious gravel within the [[trail ruins]]; oak and spruce hanging sign now are in the common loot.}}
{{History||1.20.2|snap=23w31a|Changed sounds for Nether wood hanging signs.<ref>{{Bug|MC-262295||Warped and Crimson hanging signs uses their respective plank sounds, despite their stripped stems having unique sounds|Fixed}}</ref>}}
{{History|pocket alpha}}
{{History||v0.5.0|[[File:Oak Standing Sign.png|32px]] [[File:Oak Sign JE1 BE1.png|32px]] Signs have been added, though they can be obtained only through [[inventory]] editors. |The [[player]] currently cannot write on signs.}}
{{History||v0.6.0|Signs can now be legitimately obtained in [[Survival]] and [[Creative]] mode.|The player can now write on signs.}}
{{History||v0.10.0|snap=build 1|Signs now have a selection overlay.}}
{{History|pocket}}
{{History||1.0.0|snap=alpha 0.17.0.1|Signs can now be found in [[igloo]] basements.}}
{{History|bedrock}}
{{History||1.9.0|snap=beta 1.9.0.0|"Sign" has been renamed to "Oak Sign".
|[[File:Spruce Standing Sign (S) JE2 BE2.png|32px]] [[File:Birch Standing Sign (S) JE2 BE2.png|32px]] [[File:Jungle Standing Sign (S) JE2 BE2.png|32px]] [[File:Acacia Standing Sign (S) JE2 BE2.png|32px]] [[File:Dark Oak Standing Sign (S) JE2 BE2.png|32px]] [[File:Spruce Sign JE1 BE1.png|32px]] [[File:Birch Sign JE1 BE1.png|32px]] [[File:Jungle Sign JE1 BE1.png|32px]] [[File:Acacia Sign JE1 BE1.png|32px]] [[File:Dark Oak Sign JE1 BE1.png|32px]] Added spruce, birch, jungle, acacia and dark oak signs.|The sign's text has been changed from black to white.|A sign's recipe now requires the same type of [[wood]] instead of a random assortment.}}
{{History|||snap=beta 1.9.0.2|The default sign text color has been changed back to black.|Sign variants are now grouped in their own [[inventory]] category.}}
{{History||1.10.0|snap=beta 1.10.0.3|[[File:Oak Sign JE2 BE2.png|32px]] The texture of oak sign [[item]]s has been changed.|Spruce signs now generate in new [[taiga]] and [[snowy taiga]] [[village]] houses.}}
{{History||1.11.0|snap=beta 1.11.0.1|Signs can now be used as a [[fuel]] in [[furnace]]s.|Oak signs can now be found inside taiga and snowy taiga village house [[chest]]s.}}
{{History||1.16.0|snap=beta 1.16.0.51|[[File:Crimson Standing Sign JE1 BE1.png|32px]] [[File:Warped Standing Sign JE1 BE1.png|32px]] [[File:Crimson Sign JE1 BE1.png|32px]] [[File:Warped Sign JE1 BE1.png|32px]] Added crimson and warped signs.|[[File:Spruce Standing Sign (S) JE2 BE2.png|32px]] [[File:Birch Standing Sign (S) JE2 BE2.png|32px]] [[File:Jungle Standing Sign (S) JE2 BE2.png|32px]] [[File:Acacia Standing Sign (S) JE2 BE2.png|32px]] [[File:Dark Oak Standing Sign (S) JE2 BE2.png|32px]] [[File:Spruce Wall Sign (S) JE2 BE2.png|32px]] [[File:Birch Wall Sign (S) JE2 BE2.png|32px]] [[File:Jungle Wall Sign (S) JE2 BE2.png|32px]] [[File:Acacia Wall Sign (S) JE2 BE2.png|32px]] [[File:Dark Oak Wall Sign (S) JE2 BE2.png|32px]] The texture of all signs except oak sign have been changed.}}
{{History||1.16.20|snap=beta 1.16.20.50|Crimson and warped signs now uses regular plank [[sound]]s instead of their stem variant sounds.}}
{{History||1.16.210|snap=beta 1.16.210.59|Signs can now be {{control|used}} while holding a [[dye]] to change the text color.|Signs can now be tinted with [[Glow Ink Sac|glow ink sac]]s to make the text glow.
|Works with both default and dyed signs.}}
{{History|||snap=beta 1.16.210.60|Color on dyed signs disappears and the text turns back to black.|Signs with applied glowing effect as well as color stops glowing and color is removed.}}
{{History||1.16.220|snap=beta 1.16.220.50|Signs can now be {{control|used}} while holding a [[dye]] to change the text color again.|Signs can now be tinted with [[Glow Ink Sac|glow ink sac]]s to make the text glow again.}}
{{History|||snap=beta 1.16.220.52|Now has sounds for being dyed.}}
{{History|||snap=release|A glowing effect can no longer be applied to signs due to glow ink sacs becoming inaccessible in the full release.}}
{{History||1.17.0|snap=beta 1.17.0.50|[[File:Oak Sign BE3.png|32px]] [[File:Spruce Sign BE2.png|32px]] [[File:Birch Sign BE2.png|32px]] [[File:Jungle Sign BE2.png|32px]] [[File:Acacia Sign BE2.png|32px]] [[File:Dark Oak Sign BE2.png|32px]] Textures of sign items was updated.
|[[File:Oak Standing Sign (S) JE2 BE2.png|32px]] [[File:Oak Wall Sign (S) JE2 BE2.png|32px]] The textures of oak signs have been changed to reflect the changes made to planks in the [[Texture Update]].}}
{{History||1.17.10|snap=beta 1.17.10.21|Glowing text on signs now has an outer glow, making text more visible in the dark.}}
{{History||1.18.10|snap=beta 1.18.10.20|[[File:Oak Sign JE3.png|32px]] [[File:Spruce Sign JE2.png|32px]] [[File:Birch Sign JE2.png|32px]] [[File:Jungle Sign JE2.png|32px]] [[File:Acacia Sign JE2.png|32px]] [[File:Dark Oak Sign JE2.png|32px]] [[File:Crimson Sign JE2.png|32px]] [[File:Warped Sign JE2.png|32px]] Changed all signs textures as items.}}
{{History||1.19.0|snap=beta 1.19.0.20|[[File:Mangrove Sign JE1 BE1.png|32px]][[File:Mangrove Wall Sign JE1 BE1.png|32px]][[File:Mangrove Sign (item) JE1 BE1.png|32px]] Added mangrove signs.}}
{{History||Next Major Update<br>(Experimental)|link=Bedrock Edition 1.20|snap=beta 1.19.50.21|[[File:Bamboo Sign (0) JE1 BE1.png|32px]] [[File:Bamboo Wall Sign (S) JE1 BE1.png|32px]] [[File:Bamboo Sign (item) JE1 BE1.png|32px]] Added bamboo signs behind the "[[Bedrock Edition 1.20|Next Major Update]]" [[experimental]] toggle.|[[File:Oak Hanging Sign JE1 BE1.png|32px]] [[File:Spruce Hanging Sign JE1 BE1.png|32px]] [[File:Birch Hanging Sign JE1 BE1.png|32px]] [[File:Jungle Hanging Sign JE1 BE1.png|32px]] [[File:Acacia Hanging Sign JE1 BE1.png|32px]] [[File:Dark Oak Hanging Sign JE1 BE1.png|32px]] [[File:Mangrove Hanging Sign JE1 BE1.png|32px]] [[File:Bamboo Hanging Sign JE1 BE1.png|32px]] [[File:Crimson Hanging Sign JE1 BE1.png|32px]] [[File:Warped Hanging Sign JE1 BE1.png|32px]]<br>[[File:Oak Wall Hanging Sign JE1 BE1.png|32px]] [[File:Spruce Wall Hanging Sign JE1 BE1.png|32px]] [[File:Birch Wall Hanging Sign JE1 BE1.png|32px]] [[File:Jungle Wall Hanging Sign JE1 BE1.png|32px]] [[File:Acacia Wall Hanging Sign JE1 BE1.png|32px]] [[File:Dark Oak Wall Hanging Sign JE1 BE1.png|32px]] [[File:Mangrove Wall Hanging Sign JE1 BE1.png|32px]] [[File:Bamboo Wall Hanging Sign (S) JE1 BE1.png|32px]] [[File:Crimson Wall Hanging Sign JE1 BE1.png|32px]] [[File:Warped Wall Hanging Sign JE1 BE1.png|32px]]<br>[[File:Oak Hanging Sign (item) JE1 BE1.png|32px]] [[File:Spruce Hanging Sign (item) JE1 BE1.png|32px]] [[File:Birch Hanging Sign (item) JE1 BE1.png|32px]] [[File:Jungle Hanging Sign (item) JE1 BE1.png|32px]] [[File:Acacia Hanging Sign (item) JE1 BE1.png|32px]] [[File:Dark Oak Hanging Sign (item) JE1 BE1.png|32px]] [[File:Mangrove Hanging Sign (item) JE1 BE1.png|32px]] [[File:Bamboo Hanging Sign (item) JE1 BE1.png|32px]] [[File:Crimson Hanging Sign (item) JE1 BE1.png|32px]] [[File:Warped Hanging Sign (item) JE1 BE1.png|32px]]<br>Added hanging signs behind the "[[Bedrock Edition 1.20.0|Next Major Update]]" [[experimental]] toggle.|Added unique sounds for Nether and bamboo wood signs.}}
{{History|||snap=beta 1.19.60.20|[[File:Jungle Wall Hanging Sign JE2 BE2.png|32px]] The texture of jungle hanging wall signs have been changed.|Bamboo hanging signs now can be crafted using [[block of stripped bamboo]] instead of bamboo planks.|Crafting bamboo hanging signs now outputs 6 hanging signs instead of 2.}}
{{History||Next Major Update<br>(Experimental)|link=Bedrock Edition 1.19.80|snap=beta 1.19.80.20|[[File:Cherry Sign (0).png|32px]] [[File:Cherry Wall Sign (S) JE1.png|32px]] [[File:Cherry Sign (item) JE1.png|32px]] [[File:Cherry Hanging Sign JE1.png|32px]] [[File:Cherry Wall Hanging Sign JE1.png|32px]] [[File:Cherry Hanging Sign (item) JE1.png|32px]] Added cherry signs and hanging signs behind the "[[Bedrock Edition 1.20.0|Next Major Update]]" [[experimental]] toggle.}}
{{History|||snap=beta 1.19.80.21|[[File:Cherry Sign (0) JE2 BE2.png|32px]] Updated the texture of cherry signs.}}
{{History|||snap=beta 1.19.80.22|Signs and hanging signs can now be edited after being placed.|Signs and hanging signs now support text on both sides.|Signs and hanging signs can now be waxed with [[honeycomb]] to prevent editing.}}
{{History|||snap=beta 1.20.0.20|Crimson, warped, and bamboo hanging signs now have custom sounds to match their wood type.<ref name=badnewsounds>{{Bug|MCPE-164246}}</ref>}}
{{History||1.20.0|snap=beta 1.20.0.21|Bamboo sign, cherry sign and all of the hanging signs are now available without using the "Next Major Update" experimental toggle.}}
{{History|console}}
{{History||xbox=TU1|xbone=CU1|ps=1.0|wiiu=Patch 1|switch=1.0.1|[[File:Oak Standing Sign.png|32px]] [[File:Oak Sign JE1 BE1.png|32px]] Added signs.}}
{{History||xbox=TU9|Signs are now stackable up to 16.
|The same [[crafting]] recipe for signs now produces 3 signs instead of 1.}}
{{History||xbox=none|xbone=none|ps=1.88|wiiu=none|switch=none|[[File:Spruce Standing Sign (S) JE2 BE2.png|32px]] [[File:Birch Standing Sign (S) JE2 BE2.png|32px]] [[File:Jungle Standing Sign (S) JE2 BE2.png|32px]] [[File:Acacia Standing Sign (S) JE2 BE2.png|32px]] [[File:Dark Oak Standing Sign (S) JE2 BE2.png|32px]] [[File:Spruce Sign JE1 BE1.png|32px]] [[File:Birch Sign JE1 BE1.png|32px]] [[File:Jungle Sign JE1 BE1.png|32px]] [[File:Acacia Sign JE1 BE1.png|32px]] [[File:Dark Oak Sign JE1 BE1.png|32px]] Added spruce, birch, jungle, acacia and dark oak signs.}}
{{History||xbox=none|xbone=none|ps=1.90|wiiu=none|switch=none|[[File:Oak Sign JE2 BE2.png|32px]] The texture of oak sign [[item]]s has been changed.}}
{{History|new 3ds}}
{{History||0.1.0|[[File:Oak Standing Sign (S) JE2 BE2.png|32px]] [[File:Oak Sign JE1 BE1.png|32px]] Added signs.}}
{{History|foot}}
== Trivia ==
* The first concept art of hanging signs came from [[Agnes Larsson]]'s daughter.<ref>{{Ytl|vJCMpPyaN8Q|Minecraft 1.20: New Blocks and Their Functions!|Minecraft|t=30s}}</ref>
== Gallery ==
=== Screenshots ===
<gallery>
Signs classic.png|Test of signs in early [[Java Edition Classic]].
Sigh test.jpg|Another early sign image.
Signs PreRelease.png|First image of sign blocks during [[Java Edition Infdev|Infdev]].
Pocket Edition v0.6.0 alpha Development sign.png|First image of signs on [[Pocket Edition]].
Pocket Edition v0.6.0 alpha Development sign editing.png|First image of editing text on [[PE]] iOS.
Pocket Edition v0.6.0 alpha Development sign editing 2.png|First image of editing text on [[PE]] Android.
Pocket Edition v0.6.0 alpha Development sky.png
Door Sign.png|A sign placed on a door.
Breaking News.png|A sign being broken.
Sign Text Dark.jpg|A dark oak sign with black text.
Sign Text Light.jpg|A dark oak sign with white text.
Sign Blockdata.gif|A sign using blockdata to dynamically change.
JSON Sign.png|First image of a sign using JSON text.
Width Based Character Limit.png|First image of a sign using width based character limits.
Glow Ink Sign with Pink Dye.png|Oak sign with glow ink in the dark in [[Java Edition 21w03a]].
Lit vs unlit signs.png|Difference in visibility of a lime text, from left to right, in a lit birch sign, unlit birch sign, lit dark oak sign, and unlit dark oak sign.
Glowing Text Comparison.png|The comparison between glow text and non-glow text.
Example Of Signs Being Weird.png|alt=Shading differences|Signs being different shades depending on orientation.
Glow text.gif|All sixteen colors of glow text.
Glow Ink Signs.jpg|Signs with glowing ink in several colors.
Lots of Glowing Signs.jpg|More signs with glowing ink.
Sign Platforms.jpg|[[Ari]] standing on top of a hanged sign.
Eric Shop.jpg|[[Sunny]] looking at a double sided hanging sign.
Hanging Sign Bedrock.png|Hanging sign with small text.
Hanging Sign Java.png|Hanging sign with large text.
New Hanging Sign Text Length 1.jpg|Text on hanging sign.
New Hanging Sign Text Length 2.jpg|Text on hanging sign.
</gallery>
=== Concept Art ===
<gallery>
Hanging_Sign_Concept_Art.png|Hanging sign concept art.
Hanging_Sign_Concept_Art2.png|Ditto.
Hanging_Sign_Concept_Art3.png|Hanging sign dimensions concept art.
Hanging_Sign_Concept_Art4.png|Hanging sign crafting recipe, block states concept art.
</gallery>
=== Renders ===
{{hidden begin}}
<div style="clear: both"></div>
<gallery>
Oak Sign.png|Oak Sign
Spruce Sign.png|Spruce Sign
Birch Sign.png|Birch Sign
Jungle Sign.png|Jungle Sign
Acacia Sign.png|Acacia Sign
Dark Oak Sign.png|Dark Oak Sign
Mangrove Sign.png|Mangrove Sign
Cherry Sign.png|Cherry Sign
Bamboo Sign.png|Bamboo Sign
Crimson Sign.png|Crimson Sign
Warped Sign.png|Warped Sign
Oak Wall Sign.png|Oak Wall Sign
Spruce Wall Sign.png|Spruce Wall Sign
Birch Wall Sign.png|Birch Wall Sign
Jungle Wall Sign.png|Jungle Wall Sign
Acacia Wall Sign.png|Acacia Wall Sign
Dark Oak Wall Sign.png|Dark Oak Wall Sign
Mangrove Wall Sign.png|Mangrove Wall Sign
Cherry Wall Sign.png|Cherry Wall Sign
Bamboo Wall Sign.png|Bamboo Wall Sign
Crimson Wall Sign.png|Crimson Wall Sign
Warped Wall Sign.png|Warped Wall Sign
Oak Hanging Sign.png|Oak Hanging Sign
Spruce Hanging Sign.png|Spruce Hanging Sign
Birch Hanging Sign.png|Birch Hanging Sign
Jungle Hanging Sign.png|Jungle Hanging Sign
Acacia Hanging Sign.png|Acacia Hanging Sign
Dark Oak Hanging Sign.png|Dark Oak Hanging Sign
Mangrove Hanging Sign.png|Mangrove Hanging Sign
Cherry Hanging Sign.png|Cherry Hanging Sign
Bamboo Hanging Sign.png|Bamboo Hanging Sign
Crimson Hanging Sign.png|Crimson Hanging Sign
Warped Hanging Sign.png|Warped Hanging Sign
Oak Wall Hanging Sign.png|Oak Wall Hanging Sign
Spruce Wall Hanging Sign.png|Spruce Wall Hanging Sign
Birch Wall Hanging Sign.png|Birch Wall Hanging Sign
Jungle Wall Hanging Sign.png|Jungle Wall Hanging Sign
Acacia Wall Hanging Sign.png|Acacia Wall Hanging Sign
Dark Oak Wall Hanging Sign.png|Dark Oak Wall Hanging Sign
Mangrove Wall Hanging Sign.png|Mangrove Wall Hanging Sign
Cherry Wall Hanging Sign.png|Cherry Wall Hanging Sign
Bamboo Wall Hanging Sign.png|Bamboo Wall Hanging Sign
Crimson Wall Hanging Sign.png|Crimson Wall Hanging Sign
Warped Wall Hanging Sign.png|Warped Wall Hanging Sign
</gallery>
<gallery>
Oak Sign JE3.png
Spruce Sign JE2.png
Birch Sign JE2.png
Jungle Sign JE2.png
Acacia Sign JE2.png
Dark Oak Sign JE2.png
Mangrove Sign (item) JE1 BE1.png
Cherry Sign (item) JE1.png
Bamboo Sign (item) JE1 BE1.png
Crimson Sign JE2.png
Warped Sign JE2.png
Oak Hanging Sign (item) JE1 BE1.png
Spruce Hanging Sign (item) JE1 BE1.png
Birch Hanging Sign (item) JE1 BE1.png
Jungle Hanging Sign (item) JE1 BE1.png
Acacia Hanging Sign (item) JE1 BE1.png
Dark Oak Hanging Sign (item) JE1 BE1.png
Mangrove Hanging Sign (item) JE1 BE1.png
Cherry Hanging Sign (item) JE1.png
Bamboo Hanging Sign (item) JE1 BE1.png
Crimson Hanging Sign (item) JE1 BE1.png
Warped Hanging Sign (item) JE1 BE1.png
</gallery>
{{hidden end}}
{{-}}
== Issues ==
{{issue list}}
== See also ==
* [[Chalkboard]]
== References ==
{{Reflist}}
== External Links ==
*[https://www.minecraft.net/en-us/article/taking-inventory--sign Taking Inventory: Sign] – Minecraft.net on January 9, 2020
{{Blocks|utility}}
{{Items}}
[[Category:Utility blocks]]
[[Category:Manufactured blocks]]
[[Category:Generated structure blocks]]
[[Category:Block entities]]
[[Category:Non-solid blocks]]
[[cs:Cedule]]
[[de:Schild (Schrift)]]
[[es:Cartel]]
[[fr:Pancarte]]
[[hu:Tábla]]
[[it:Cartello]]
[[ja:看板]]
[[ko:표지판]]
[[nl:Bord]]
[[pl:Tabliczka]]
[[pt:Placa]]
[[ru:Табличка]]
[[th:ป้าย]]
[[uk:Табличка]]
[[zh:告示牌]]</li></ul></nowiki> | May 02, 2011 | Portals were made to function properly in multiplayer, allowing players in servers to teleport between the Overworld and the Nether. | ||||||||||||||||||||||||||||||||||||||||||||||||||||||||||||||||||||||||||||||||||||||||||||||||||||||||||||
| release | Beds in the Nether were made to explode if used. | |||||||||||||||||||||||||||||||||||||||||||||||||||||||||||||||||||||||||||||||||||||||||||||||||||||||||||||
| release | ||||||||||||||||||||||||||||||||||||||||||||||||||||||||||||||||||||||||||||||||||||||||||||||||||||||||||||||
1.0.0{{Extension DPL}}<ul><li>[[Redstone Comparator|Redstone Comparator]]<br/>{{Block
| image =
| image2 =
| transparent = Yes
| light = No
| tool = any
| renewable = Yes
| stackable = Yes (64)
| flammable = No
| lavasusceptible = No
| group = Redstone Comparator
| group2 = Subtracting
| group3 = Powered
| group4 = Powered+Subtracting
| 1-1 = Redstone Comparator.png
| 2-1 = Subtracting Redstone Comparator.png
| 3-1 = Powered Redstone Comparator.png
| 4-1 = Powered Subtracting Redstone Comparator.png
}}
{{Many images}}
A '''redstone comparator''' is a [[block]] that can produce an [[Redstone Dust|output signal]] from its front by reading [[chest]]s, [[lectern]]s, [[beehive]]s and similar blocks, or repeat a signal without changing its strength. It can also be set to either stop outputting a signal when its side input recieves a stronger one (front torch off), or subtract its side input's signal strength from its output (front torch on).
== Obtaining ==
=== Natural generation ===
Redstone comparators generate in [[Ancient City|ancient cities]].
=== Breaking ===
A redstone comparator can be broken instantly with any [[tool]], or by hand, and drops itself as an item.
{{Breaking row|Redstone Comparator|horizontal=y}}
A redstone comparator is removed and dropped as an item if:
* its attachment block is moved, removed, or destroyed;
* [[water]] flows into its space;{{only|java}}
* a [[piston]] tries to push it or moves a block into its space.
If [[lava]] flows into a redstone comparator's space, the redstone comparator is destroyed without dropping as an item.
=== Crafting ===
{{Crafting
|B1=Redstone Torch
|A2=Redstone Torch
|B2=Nether Quartz
|C2=Redstone Torch
|A3=Stone
|B3=Stone
|C3=Stone
|Output= Redstone Comparator
|type=Redstone
}}
== Usage ==
A redstone comparator can be placed on the top of any [[opaque]] block with a solid full-height top surface (including upside-down [[slab]]s and upside-down [[stairs]]). {{IN|be}}, a comparator can also be placed on [[wall]]s and fences. For more information about placement on transparent blocks, see [[Opacity/Placement]].
The redstone comparator has a front and a back — the arrow on the top of the comparator points to the front. When placed, the comparator faces away from the player. The comparator has two miniature redstone torches at the back and one at the front. The back torches turn on when the comparator's output is greater than zero (the arrow on top also turns red). The front torch has two states that can be toggled by {{control|using}} the comparator:
* Down and unpowered (indicating the comparator is in "comparison mode")
* Up and powered (indicating the comparator is in "subtraction mode")
The redstone comparator can take a signal strength input from its rear as well as from both sides. Side inputs are accepted only from [[redstone dust]], [[block of redstone]], [[redstone repeater]]s, other comparators, and [[observer]]s in specific scenarios. The redstone comparator's front is its output.
It takes 1 [[redstone tick]] (2 game ticks, or 0.1 seconds barring lag) for signals to move through a redstone comparator, either from the rear or from the sides. This applies to changing signal strengths as well as simply to turning on and off.
Redstone comparators check their power state before their scheduled ticks update. This results in redstone comparators not usually responding to 1-tick fluctuations of power or signal strength — for example, a [[clock circuit|1-clock]] input is treated as always off from the side, and always on from the rear. This happens because the signal changes back to its original state before the redstone comparator checks its input states. However, certain setups such as powering any input with two separate observer pulses at the same time will cause a redstone comparator to respond to 2 gametick pulses.
The redstone comparator has four functions: maintain signal strength, compare signal strength, subtract signal strength, and measure certain block states (primarily the fullness of containers).
=== Maintain signal strength ===
A redstone comparator with no powered sides outputs the same signal strength as its rear input.
=== Compare signal strength ===
[[File:Comparators Explained.png|Comparators in comparison mode.|thumb]]
A redstone comparator in comparison mode (front torch down and unpowered) compares its rear input to its two side inputs. If either side input is greater than the rear input, the comparator output turns off. If neither side input is greater than the rear input, the comparator outputs the same signal strength as its rear input.
The formula for calculating the output signal strength is as follows:
<code>output = rear × [[Wikipedia:Iverson bracket|[]]'''''left''''' ≤ '''''rear''''' AND '''''right''''' ≤ '''''rear'''''[[Wikipedia:Iverson bracket|<nowiki>]]]</code>
{{-}}
=== Subtract signal strength ===
[[File:Redstone comparator.png|thumb|The greatest of the side inputs A and C is subtracted from the rear input B, outputting 1. If either A or C were greater than B, it would output 0.]]
A redstone comparator in subtraction mode (front torch up and powered) subtracts the signal strength of the higher side input from the signal strength of the rear input.
<code>output = max('''''rear''''' − max('''''left''', '''right'''''), 0)</code>
For example: if the signal strength is 6 at the left input, 7 at the right input and 4 at the rear, the output signal has a strength of ''max(4 − max(6, 7), 0) = max(4−7, 0) = max(−3, 0) = 0''.
If the signal strength is 9 at the rear, 2 at the right input and 5 at the left input, the output signal has a strength of ''max(9 − max(2, 5), 0) = max(9−5, 0) = 4''.
=== Measure block state ===
{{Schematic | caption = A redstone comparator can measure the fullness of a chest, as well as other block states, even through an opaque block.
|rd-ew!|rc-w!|ch|SB|rc-e!|rd-ew!
}}
A redstone comparator treats certain blocks behind it as power sources and outputs a signal strength proportional to the block's state. The comparator may be separated from the measured block by an opaque block. However, {{in|je}}, if the opaque block is powered to signal strength 15, then the comparator outputs 15 no matter the fullness of the container.<ref>{{bug|MC-64394}} (resolved as "Works As Intended")</ref>
[[Category:Java Edition specific information]]
{{-}}
==== Fullness of containers ====
{| class="wikitable floatright" style="margin-left: 0.5em; margin-right: 0; text-align: center;"
|+ Minimum Items for Container Signal Strength
|-
!Containers
!{{BlockSprite|Furnace|link=Furnace}}<br>{{BlockSprite|Blast Furnace|link=Blast Furnace}}<br>{{BlockSprite|Smoker|link=Smoker}}
!{{BlockSprite|Hopper|link=Hopper}}<br>{{EntitySprite|Minecart with Hopper|link=Minecart with Hopper}}<br>{{BlockSprite|Brewing Stand|link=Brewing Stand}}
!{{BlockSprite|Dispenser|link=Dispenser}}<br>{{BlockSprite|Dropper|link=Dropper}}
!{{BlockSprite|Chest|link=Chest}}<br>{{EntitySprite|Minecart with Chest|link=Minecart with Chest}}<br>{{BlockSprite|Shulker Box|link=Shulker Box}}<br>{{BlockSprite|Barrel|link=Barrel}}
![[Double Chest|{{Schematic|size=16|ch-s|-|ch-n}}
]]
!{{BlockSprite|Jukebox|link=Jukebox}}
|-
!Total Slots
!3!!5!!9!!27!!54!!1
|-
!Power Level
! colspan="5" |Number of Items
!Music Disc
|-
|0||0||0||0||0||0||No disc
|-
|1||1||1||1||1||1||"13"
|-
|2||14||23||42||1s 60||3s 55||"cat"
|-
|3||28||46||1s 19||3s 55||7s 46||"blocks"
|-
|4||42||1s 5||1s 60||5s 51||11s 37||"chirp"
|-
|5||55||1s 28||2s 37||7s 46||15s 28||"far"
|-
|6||1s 5||1s 51||3s 14||9s 42||19s 19||"mall"
|-
|7||1s 19||2s 10||3s 55||11s 37||23s 10||"mellohi"
|-
|8||1s 32||2s 32||4s 32||13s 32||27s||"stal"
|-
|9||1s 46||2s 55||5s 10||15s 28||30s 55||"strad"
|-
|10||1s 60||3s 14||5s 51||17s 23||34s 46||"ward"
|-
|11||2s 10||3s 37||6s 28||19s 19||38s 37||"11"
|-
|12||2s 23||3s 60||7s 5||21s 14||42s 28||"wait"
|-
|13||2s 37||4s 19||7s 46||23s 10||46s 19||"Pigstep"
|-
|14||2s 51||4s 42||8s 23||25s 5||50s 10||"Otherside"<br>"Relic"
|-
|15||3s||5s||9s||27s||54s||"5"
|}
A redstone comparator can output a signal indicating how full a container is. (0 for empty, 15 for full, etc.) The table on the right is described more in detail, later in this section.
Containers that can be measured by a comparator include:
* {{BlockLink|Furnace}}
* {{BlockLink|Blast Furnace}}
* {{BlockLink|Smoker}}
* {{BlockLink|Brewing Stand}}
* {{BlockLink|Hopper}}
* {{ItemLink|Minecart with Hopper}} on top of a [[detector rail]]
* {{BlockLink|Dispenser}}
* {{BlockLink|Dropper}}
* {{BlockLink|Chest}}
* {{BlockLink|Trapped Chest}}
* {{ItemLink|Minecart with Chest}} on top of a [[detector rail]]
* {{BlockLink|Barrel}}
* {{SchematicSprite|size=16|ch-e}}{{SchematicSprite|size=16|ch-w}} Large chest
* {{SchematicSprite|size=16|ch-e}}{{SchematicSprite|size=16|ch-w}} Large trapped chest
* {{BlockLink|Shulker Box}} (any color)
Generally speaking, the comparator output signal strength represents the average fullness of the slots, based on how many of that item form a full stack (64, 16, or 1 for non-stackable items).
The ''Minimum Items for Container Signal Strength'' table (right) shows the minimum '''''full-stack-equivalent (FSE)''''' to produce different signal strengths from common containers. A '''''full-stack-equivalent''''' quantifies how many normal 64-stackable items are needed to output a corresponding signal strength. The 's' is a constant 64, with the additional amount needed following after.
One may also consider the terms: '''c''umulative-weight''''' or '''''weighted-sum''''' instead of '''''full-stack-equivalent'''''.
Items that stack to a max of 16 ([[snowball]]s, [[sign]]s, [[ender pearl]]s, etc.), contribute +4 to the ''full-stack-equivalent'' for each unity (count of 1 item). Similarly, items that stack to 1 ([[minecart]], [[boat]], etc.) contribute +64, and items that stack to 64 contribute +1.
Example 1: 3 ender pearls will contribute a 3 x 4 = 12 ''full-stack-equivalent''.
Example 2: 16 ender pearls and 60 redstone dust contributes a 16x4 + 60x1 = 124 ''full-stack-equivalent''.
Example 3: 1 minecart and 60 redstone dust contributes a 1x64 + 60x1 = 124 ''full-stack-equivalent''.
Example 4: To produce a signal strength of 10 from a hopper, one requires a ''full-stack-equivalent'' of at least 3s + 14 = 206 but strictly less than than 3s + 37 = 229. This can be done with 3 minecarts, and 14 dirt.
When a comparator measures a large chest or large trapped chest, it measures the entire large chest (54 slots), not just the half directly behind the comparator. A chest or trapped chest that cannot be opened (either because it has an opaque block, [[ocelot]], or [[cat]] above it) always produces an output of 0 no matter how many items are in the container — shulker boxes can always be measured, even if they cannot open.
;Calculating signal strength from items
:When a container is empty, the output is off.
:When it is not empty, the output signal strength is calculated as follows:
:<code>'''''signal strength''''' = floor(1 + (('''''sum of all slots' fullnesses''''') / ('''''number of slots in container''''')) × 14)</code>
:<code>fullness of a slot = '''''number of items in slot''''' / '''''max stack size for this type of item'''''</code>
:''Example:'' 300 blocks in a dispenser (which has 9 slots), where each block stacks to a maximum of 64 has a 300 ''full-stack-equivalent.'' This produces an output with a signal strength of 8:
<blockquote>
1 + ((300 items / 64 items per slot) / 9 slots) × 14 = 8.292, floored is 8
</blockquote>
;Calculating items from signal strength
:It can be useful in redstone circuits to use containers with comparators to create signals of a specific strength. The number of items required in a container to produce a signal of desired strength is calculated as follows:
:<code>items required = max('''''desired signal strength''''', roundup(('''''total slots in container''''' × 64 / 14) × (desired signal strength − 1)))</code>
:''Example:'' To use a furnace (which has 3 slots) to create a strength 9 signal, players need 110 items:
<blockquote>
max(9, (3×64/14) × (9−1)) = 109.714, rounded up is 110
</blockquote>
{{-}}
==== Miscellaneous ====
[[File:Comparator storage.png|Comparators used to measure containers.|thumb]]
Some non-container blocks can also be measured by a redstone comparator:
;{{BlockLink|Beehive}} and {{BlockLink|Bee nest}}
: A hive or nest outputs a signal strength equal to the amount of honey in the hive/nest.
;{{BlockLink|Cake}}
: A cake outputs a signal strength relative to the amount of cake remaining. Each slice is worth 2 signal strength, with 7 total slices, for an output of 14 for a full cake.
[[File:Cauldron Redstone Strength Values.png|Cauldron signal strength|thumb]]
;{{BlockLink|Cauldron}}
: A cauldron outputs different signal strengths depending on how much water or powdered snow is inside. From completely empty to completely full, the output values are 0, 1, 2, and 3. If lava or powder snow is inside, the strength is always 3.
[[File:Composter Redstone Strength Values.png|Composter signal strength|thumb]]
;{{BlockLink|Composter}}
: A composter outputs different signal strengths depending on the level inside. From completely empty to completely full, the output values are 0, 1, 2, 3, 4, 5, 6, 7 and 8.
;{{Anchor|CommandBlock}}{{BlockLink|Command Block}}
: A command block stores the "success count" of the last command executed, which represents the number of times the most recently used command of this command block succeeded. A "success" is defined by the [[command]]'s success conditions: if a red error message is returned in the chat, the command was not successful.
: Most commands can succeed once per execution, but certain commands (such as those that accept players as arguments) can succeed multiple times, and the comparator outputs the number of times it succeeded (maximum 15 when sent to redstone dust, but in the code it is able to go up to the 32-bit integer limit, and can be used in contraptions with no redstone dust with those values).
: A command block continues to store the success count of the last command executed until it executes its command again, thus the comparator continues to output the same signal strength even after the command block is no longer being activated (it doesn't turn off when the signal to the command block turns off).
;{{BlockLink|End Portal Frame}}
: An end portal frame outputs a full signal of 15 if it contains an [[eye of ender]] and zero otherwise.
[[File:Item frame and comparator.png|A comparator can measure the presence and rotation of an item frame's contents.|thumb]]
;{{EntityLink|Item Frame}}
: A comparator can measure the state of an [[item frame]]'s contents. An item frame comparator outputs 0 if the item frame is empty, or 1 to 8 for any item depending on its rotation: 1 at initial placement, plus 1 for each 45° of rotation for a maximum of 8.
: For an item frame that holds a map, a unit of rotation is 90° instead of 45°, but a comparator still outputs power levels 1 to 8. It takes two full rotations to cycle through all comparator outputs, and each orientation of the map corresponds to two output levels that differ by 4.
: The comparator must be placed behind the block the item frame is attached to, facing away from the item frame. The block must be a full block, and the item frame cannot be submerged in water. Having a sign in the same block as the item frame will prevent the frame from sending a signal as well.{{only|java}}
;{{BlockLink|Jukebox}}
: A jukebox outputs a signal strength indicating which music disc is currently playing. See the ''Minimum Items for Container Signal Strength'' table above.
;{{BlockLink|Lectern}}
: A lectern outputs a signal strength that depends on what page the player is currently on. The calculation used is:
:<code>'''''signal strength''''' = floor(1 + (('''''current page''''' - 1) / ('''''number of pages in book''''' - 1)) × 14)</code>
:This results in page 1 having a signal strength of 1, and the last page having a signal strength of 15. The exception is a single page book, which will output a signal strength of 15.
:For example, a book with 15 pages will output a signal equal to the current page number. A book with 5 pages will output signal strengths of 1, 4, 8, 11 and 15 for the different pages. A book with 100 pages will have the signal strength increase to the next level on pages 1, 9, 16, 23, 30, 37, 44, 51, 58, 65, 72, 79, 86, 93 and 100.
:
;{{BlockLink|Respawn Anchor}}
: A respawn anchor outputs a signal strength of 0, 3, 7, 11, or 15, depending on the "charged" value.
;{{BlockLink|Sculk Sensor}}
: A sculk sensor outputs a signal strength depending on the type of vibration that is detected.
;{{BlockLink|Chiseled Bookshelf}}
: A chisled bookshelf outputs a signal strength between 1 and 6 indicating the last slot interacted with. When no slot has been interacted with yet, it outputs 0.
{{-}}
== Sounds ==
=== Generic ===
{{Edition|Java}}:
{{Sound table/Block/Stone/JE}}
{{Edition|Bedrock}}:
{{Sound table/Block/Wood/BE}}
=== Unique ===
{{edition|java}}:
{{Sound table
|rowspan=2
|sound=Click.ogg
|subtitle=Comparator clicks
|source=block
|description=When a comparator is set to subtraction mode
|id=block.comparator.click
|translationkey=subtitles.block.comparator.click
|volume=0.3
|pitch=0.55
|distance=16}}
{{Sound table
|subtitle=Comparator clicks
|source=block
|description=When a comparator is set to comparison mode
|id=block.comparator.click
|translationkey=subtitles.block.comparator.click
|volume=0.3
|pitch=0.5
|distance=16
|foot=1}}
{{edition|bedrock}}:
{{Sound table
|type=bedrock
|rowspan=2
|sound=Click.ogg
|source=block
|description=When a comparator is set to subtraction mode
|id=block.click
|volume=0.2
|pitch=0.55}}
{{Sound table
|source=block
|description=When a comparator is set to comparison mode
|id=block.click
|volume=0.2
|pitch=0.5
|foot=1}}
== Data values ==
=== ID ===
{{edition|java}}:
{{ID table
|edition=java
|showforms=y
|generatetranslationkeys=y
|displayname=Redstone Comparator
|spritetype=block
|nameid=comparator
|foot=1}}
{{ID table
|displayname=Block entity
|spritename=redstone-comparator
|spritetype=block
|nameid=comparator
|foot=1}}
{{edition|bedrock}}:
{{ID table
|edition=bedrock
|firstcolumnname=Redstone Comparator
|shownumericids=y
|showforms=y
|generatetranslationkeys=y
|displayname=Unpowered block
|spritename=unpowered-comparator
|spritetype=block
|nameid=unpowered_comparator
|id=149
|form=block
|translationkey=-}}
{{ID table
|displayname=Powered block
|spritename=powered-comparator
|spritetype=block
|nameid=powered_comparator
|id=150
|form=block
|translationkey=-}}
{{ID table
|displayname=Item
|spritename=redstone-comparator
|spritetype=item
|nameid=comparator
|id=522
|form=item
|foot=1}}
{{ID table
|notnamespaced=y
|displayname=Block entity
|spritename=redstone-comparator
|spritetype=block
|nameid=Comparator
|foot=1}}
=== Block states ===
{{see also|Block states}}
{{/BS}}
=== Block data ===
A redstone comparator has a block entity associated with it that holds additional data about the block.
{{el|je}}:
{{see also|Block entity format}}
{{/BE}}
{{el|be}}:
: See [[Bedrock Edition level format/Block entity format]].
== Advancements ==
{{Load advancements|the power of books}}
== Video ==
<div style="text-align:center">{{yt|J7Z20Zzz3yU}}</div>
== History ==
{{info needed section|If {{bug|MC-50242}} also affected comparators?}}
''For a more in-depth breakdown of changes to repeater textures and models, including a set of renders for each state combination, see [[/Asset history]]''
{{History|java}}
{{History||November 24, 2012|link=https://youtube.com/watch?v=YG9RNyRhIow&t=6m56s|[[Jeb]] stated that there may be a "capacitor" in [[Minecraft]]. }}
{{History||December 27, 2012|link={{tweet|Dinnerbone|284388625595125760}}|[[Dinnerbone]] released [https://web.archive.org/web/20190710120115/https://imgur.com/a/FBKed pictures] of the first version of the "comparator", stating it was a replacement for the "capacitor" idea that has variable, alternate inputs.}}
{{History||January 2, 2013|link={{tweet|Dinnerbone|286428595423965184}}|Dinnerbone released one more [http://dinnerbone.com/media/uploads/2013-01/screenshots/2013-01-02_12.06.47.png picture] of the comparator. The picture itself showing a digital-to-analog converter, using the comparator as the main [[block]].}}
{{History||1.5|snap=13w01a|[[File:Redstone Comparator (S) JE1.png|32px]] [[File:Powered Redstone Comparator (S) JE1.png|32px]] [[File:Subtracting Redstone Comparator (S) JE1.png|32px]] [[File:Powered Subtracting Redstone Comparator (S) JE1.png|32px]] [[File:Redstone Comparator (item) JE1 BE1.png|32px]] Added redstone comparators.
|Redstone comparators have 0 delay.
At this point, block ID 149 was used for unpowered comparators, and block ID 150 for powered comparators.}}
{{History|||snap=13w01b|A delay of 1 game tick ({{frac|1|2}} redstone tick) has now been added to redstone comparators to fix bugs.
|The ability to measure containers to redstone comparators has now been added.}}
{{History|||snap=13w02a|[[File:Redstone Comparator (S) JE2.png|32px]] [[File:Powered Redstone Comparator (S) JE2.png|32px]] [[File:Subtracting Redstone Comparator (S) JE2.png|32px]] [[File:Powered Subtracting Redstone Comparator (S) JE2.png|32px]] The appearance of redstone comparators has now been changed - the top texture has changed to show [[quartz]] in the middle and the sides now use the [[smooth stone]] texture rather than the smooth stone slab side texture.
|The algorithm for measuring containers has now been changed so that redstone comparators output a signal with as few as 1 [[item]] in the container.}}
{{History|||snap=13w02b|Redstone comparators now treat large [[chest]]s as a single container.}}
{{History|||snap=13w03a|Redstone comparators now output success count of [[command block]]s.
|Redstone comparators now measure container [[minecart]]s on [[detector rail]]s.}}
{{History|||snap=13w04a|Redstone comparators now measure [[jukebox]]es.}}
{{History|||snap=13w05a|Redstone comparators no longer cause constant [[block]] updates. The delay has now been made consistent, and side input no longer causes a pulse output.
|Block 150 (later <code>powered_comparator</code>) is no longer used; powered state is now represented by the 8s bit on block 149 (later <code>unpowered_comparator</code>).}}
{{History|||snap=13w05b|Redstone comparator delay has now been changed from 1 game tick (1/2 [[redstone]] tick) to 2 game ticks (1 redstone tick).}}
{{History|||snap=13w09c|The redstone signal strength from a redstone comparator next to a [[brewing stand]] with 3 [[water bottle]]s in it is now the same as one with 3 water bottles and 1 ingredient in it.}}
{{History||1.6.1|snap=13w18a|Redstone comparators now measure [[cauldron]]s and [[end portal frame]]s.}}
{{History||1.8|snap=14w04a|Redstone comparators now measure [[item frame]]s.}}
{{History|||snap=14w10a|The torches under redstone comparators have now been shortened, which has changed the underside appearance from [[File:Redstone Comparator UNKVER1 (facing NWU).png|32px]] [[File:Powered Redstone Comparator UNKVER1 (facing NWU).png|32px]] [[File:Subtracting Redstone Comparator UNKVER1 (facing NWU).png|32px]] [[File:Powered Subtracting Redstone Comparator UNKVER1 (facing NWU).png|32px]] to [[File:Redstone Comparator UNKVER2 (facing NWU).png|32px]].}}
{{History|||snap=14w25a|[[File:Redstone Comparator (S) JE3.png|32px]] [[File:Powered Redstone Comparator (S) JE3.png|32px]] [[File:Subtracting Redstone Comparator (S) JE3.png|32px]] [[File:Powered Subtracting Redstone Comparator (S) JE3.png|32px]] The torches on comparators are now subject to ambient occlusion.
|Comparators set to subtract mode appear to be powered as well regardless of incoming power. The subtracting-only model still exists and can be achieved through {{cmd|setblock}}.}}
{{History|||snap=14w25b|[[File:Subtracting Redstone Comparator (S) JE4.png|32px]] [[File:Powered Subtracting Redstone Comparator (S) JE4.png|32px]] The powered front torch when in subtraction mode is now lower.
|Comparators set to subtract by hand now appear normally again.}}
{{History|||snap=14w28a|Redstone comparators now measure [[cake]]s.}}
{{History||1.9|snap=15w42a|With the addition of the [[blaze powder]] fuel slot, [[brewing stand]]s now have 5 slots instead of 4. Their original comparative power values from redstone comparators are listed below:
{{{!}} class{{=}}"wikitable collapsible collapsed" data-description{{=}}"Original values"
! Original values
{{!}}-
{{!}}
*0: 0
*1: 1
*2: 19
*3: 37
*4: 55
*5: 1s 10
*6: 1s 28
*7: 1s 46
*8: 2s
*9: 2s 19
*10: 2s 37
*11: 2s 55
*12: 3s 10
*13: 3s 28
*14: 3s 46
*15: 4s
{{!}}}
}}
{{History|||snap=15w47a|Redstone comparators' side inputs now take power from [[redstone block]]s.}}
{{History||1.13|snap=17w47a|All 3 IDs for the redstone comparator have now been merged into one ID: <code>comparator</code>.
|Redstone comparators now render their underside, which has changed their undersides from [[File:Redstone Comparator UNKVER2 (facing NWU).png|32px]] to [[File:Redstone Comparator UNKVER3 (facing NWU).png|32px]].
|Prior to [[1.13/Flattening|''The Flattening'']], these blocks' numeral IDs were 149 and 150, and the [[item]]'s 404.
|As a result, the formerly unused comparator ID is now technically used again, due to both unpowered and powered versions being merged into a single comparator block ID.}}
{{History||1.14|snap=18w43a|[[File:Redstone Comparator (S) JE4.png|32px]] [[File:Powered Redstone Comparator (S) JE4.png|32px]] [[File:Subtracting Redstone Comparator (S) JE5.png|32px]] [[File:Powered Subtracting Redstone Comparator (S) JE5.png|32px]] [[File:Redstone Comparator (item) JE2 BE2.png|32px]] The textures of redstone comparators have now been changed.}}
{{History|||snap=19w02a|Redstone comparators now measure [[lectern]]s.}}
{{History|||snap=19w03a|Redstone comparators now measure [[composter]]s.}}
{{History|||snap=19w12b|Redstone comparators can now be placed on [[glass]], [[ice]], [[glowstone]] and [[sea lantern]]s.}}
{{History||1.15|snap=19w34a|Redstone comparators now measure how much honey is inside [[beehive|bee hive]]s and [[bee nest]]s.}}
{{History||1.16|snap=20w06a|The way to calculate the input signals of redstone comparators has now been changed.}}
{{History|||snap=20w11a|The changes to the way of calculating the input signals of redstone comparators from [[Java Edition 20w06a|20w06a]] have now been reverted.}}
{{History|||snap=20w16a|Redstone comparators now measure [[Pigstep music disc]]s in [[jukebox]]es.}}
{{History||1.17|snap=20w45a|Redstone comparators now measure [[lava cauldron]]s.}}
{{History|||snap=20w46a|Redstone comparators now measure [[Cauldron#Holding powder snow|powder snow cauldron]]s.}}
{{History||1.18|snap=21w41a|[[File:Powered Redstone Comparator (S) JE5.png|32px]] [[File:Powered Subtracting Redstone Comparator (S) JE6.png|32px]] The texture of powered redstone comparator have now been changed.}}
{{History||1.19|snap=22w13a|Redstone comparators now generate as part of [[ancient cities]].}}
{{History||1.20<br>(Experimental)|link=1.19.3|snap=22w42a|Redstone comparators now measure [[chiseled bookshelves]].}}
{{History||1.20.2|snap=23w33a|Redstone comparators now use stone sounds instead of wood sounds.<ref>{{bug|MC-182820|||Fixed}}</ref>}}
{{History|pocket alpha}}
{{History||v0.14.0|snap=build 1|[[File:Redstone Comparator (S) JE2 BE1.png|32px]] [[File:Powered Redstone Comparator (S) JE2 BE1.png|32px]] [[File:Subtracting Redstone Comparator (S) JE2 BE1.png|32px]] [[File:Powered Subtracting Redstone Comparator (S) JE2 BE1.png|32px]]{{verify|Was this the model used?}} [[File:Redstone Comparator (item) JE1 BE1.png|32px]] Added redstone comparators.}}
{{History|pocket}}
{{History||1.0.0|snap=alpha 0.17.0.1|Redstone comparators now measure [[end portal frame]]s.}}
{{History||1.0.5|snap=alpha 1.0.5.0|Redstone comparators now output success count of [[command block]]s.}}
{{History||1.1.0|snap=alpha 1.1.0.0|Redstone comparators now measure [[shulker box]]es.}}
{{History|bedrock}}
{{History||1.2.0|snap=beta 1.2.0.2|Redstone comparators now measure [[jukebox]]es.
|Redstone comparators now render their underside, which has changed their undersides from [[File:Redstone Comparator UNKVER1 (facing NWU).png|32px]] to [[File:Redstone Comparator UNKVER3 (facing NWU).png|32px]]}}
{{History||1.10.0|snap=beta 1.10.0.3|[[File:Redstone Comparator (S) BE.png|32px]] [[File:Powered Redstone Comparator (S) BE.png|32px]] [[File:Subtracting Redstone Comparator (S) BE.png|32px]] [[File:Powered Subtracting Redstone Comparator (S) BE.png|32px]] [[File:Redstone Comparator (item) JE2 BE2.png|32px]] The textures of redstone comparators have now been changed.}}
{{History||1.11.0|snap=beta 1.11.0.1|Redstone comparators now measure [[smoker]]s, [[blast furnace]]s, [[lectern]]s and [[composter]]s.}}
{{History||1.18.10|snap=beta 1.18.10.20|[[File:Powered Redstone Comparator (S) JE5.png|32px]] [[File:Powered Subtracting Redstone Comparator (S) JE6.png|32px]] The texture of powered redstone comparator have now been changed.}}
{{History||1.20.30|snap=beta 1.20.30.20|Redstone comparators now use the <code>minecraft:cardinal_direction</code> [[block state]] instead of <code>direction</code>.}}
{{History|console}}
{{History||xbox=TU19|xbone=CU7|ps=1.12|wiiu=Patch 1|switch=1.0.1|[[File:Redstone Comparator (S) JE2 BE1.png|32px]] [[File:Powered Redstone Comparator (S) JE2 BE1.png|32px]] [[File:Subtracting Redstone Comparator (S) JE2 BE1.png|32px]] [[File:Powered Subtracting Redstone Comparator (S) JE2 BE1.png|32px]]{{verify|Was this the model used?}} [[File:Redstone Comparator (item) JE1 BE1.png|32px]] Added redstone comparators.}}
{{History||xbox=TU31|xbone=CU19|ps=1.22|wiiu=Patch 3|switch=1.0.1|Redstone comparators can now measure [[item frame]]s.}}
{{History||xbox=none|xbone=none|ps=1.90|wiiu=none|switch=none|[[File:Redstone Comparator (S) BE.png|32px]] [[File:Powered Redstone Comparator (S) BE.png|32px]] [[File:Subtracting Redstone Comparator (S) BE.png|32px]] [[File:Powered Subtracting Redstone Comparator (S) BE.png|32px]]{{verify|Was this the model used?}} [[File:Redstone Comparator (item) JE2 BE2.png|32px]] The textures of redstone comparators have now been changed.}}
{{History|3ds}}
{{History||0.1.0|[[File:Redstone Comparator (S) JE2 BE1.png|32px]] [[File:Powered Redstone Comparator (S) JE2 BE1.png|32px]] [[File:Subtracting Redstone Comparator (S) JE2 BE1.png|32px]] [[File:Powered Subtracting Redstone Comparator (S) JE2 BE1.png|32px]]{{verify|Was this the model used?}} [[File:Redstone Comparator (item) JE2 BE2.png|32px]] Added redstone comparators.}}
{{History|foot}}
=== Redstone comparator "items" ===
{{:Technical blocks/Redstone Comparator}}
== Issues ==
{{issue list}}
== Trivia ==
* Comparators do not emit redstone particles when powered, unlike redstone torches and repeaters.<ref>{{bug|MC-51692|||WAI}}</ref>
== Gallery ==
<gallery>
Dinnerbone Comparator 1.png|Dinnerbone showing how comparators work.
Dinnerbone Comparator 2.png|Dinnerbone showing how comparators work.
Dinnerbone Comparator 3.png|Dinnerbone showing how comparators work.
Dinnerbone Comparators 1.png|A contraption incorporating comparators.
Dinnerbone Comparators 2.png|Comparators in action.
Dinnerbone Comparators 3.png|Output specific signals.
Dinnerbone Comparator Thing.png|Another comparator in use.
Item Frame Comparator.png|Rotating the torch in the item frame adjusts the comparator's output.
</gallery>
== References ==
{{reflist}}
{{Redstone}}
{{Blocks|Utility}}
{{Items}}
[[Category:Mechanics]]
[[Category:Block entities]]
[[Category:Redstone mechanics]]
[[Category:Mechanisms]]
[[Category:Manufactured blocks]]
[[Category:Non-solid blocks]]
[[de:Redstone-Komparator]]
[[es:Comparador de redstone]]
[[fr:Comparateur de redstone]]
[[hu:Redstone-komparátor]]
[[ja:レッドストーンコンパレーター]]
[[ko:레드스톤 비교기]]
[[nl:Redstonevergelijker]]
[[pl:Komparator]]
[[pt:Comparador de redstone]]
[[ru:Компаратор]]
[[uk:Редстоуновий компаратор]]
[[zh:红石比较器]]</li><li>[[Beetroot Seeds|Beetroot Seeds]]<br/>{{Block
| group = Age 0
| 1-1 = Beetroots Age 0.png
| 1-2 = Beetroots Age 0 BE.png
| group2 = Age 1
| 2-1 = Beetroots Age 1.png
| 2-2 = Beetroots Age 1 BE.png
| group3 = Age 2
| 3-1 = Beetroots Age 2.png
| 3-2 = Beetroots Age 2 BE.png
| group4 = Age 3
| 4-1 = Beetroots Age 3.png
| 4-2 = Beetroots Age 3 BE.png
|image=Beetroot Seeds JE2 BE2.png
|transparent=Yes
|light=No
|tool=Any
|renewable=Yes
|stackable=Yes (64)
|flammable=No
|lavasusceptible=No
}}
'''Beetroot seeds''' are items that can be used to plant beetroot crops.
'''Beetroot crops''' are planted in [[farmland]] and used to grow [[beetroot]] and beetroot seeds.
== Obtaining ==
=== Natural generation ===
[[Village]] farms have a chance of growing beetroot. The exact chance depends on the village:
{| class="wikitable"
! Village style !! Chance
|-
| {{EnvSprite|desert-village}} Desert || 20%
|-
| {{EnvSprite|plains-village}} Plains || 5%
|}
=== Breaking ===
Harvesting fully-grown beetroot yields from 1 to 4 seeds per crop harvested ({{frac|2|5|7}} seeds per crop harvested on average). The [[Fortune]] enchantment can be used to improve the drop rate.
=== Chest loot ===
{{LootChestItem|beetroot-seeds}}
=== Trading ===
Beetroot seeds are sold by [[wandering trader]]s for one [[emerald]].
== Usage ==
=== Farming ===
Beetroot seeds can be placed on [[farmland]]. After being placed, it goes through four stages of growth. When fully grown it can be broken to produce beetroot seeds and beetroots.
<!-- Java Edition only? -->While beetroot crops have only four growth stages compared to eight for [[wheat]], [[carrot]]s, and [[potato]]es, each growth tick has a {{frac|1|3}} chance of not advancing the growth stage and therefore beetroot grows slightly faster than other crops.
Crops grow faster if the farmland they are planted in is [[Farmland#Hydration|hydrated]]. One application of [[bonemeal]] has a 75% chance of advancing growth by one stage. This is less effective than for other crops: an average of {{frac|5|1|3}} are needed to fully grow beetroot compared to {{frac|2|2|7}} for other crops.
=== Breeding ===
Like other [[seeds]], beetroot seeds can be used to [[breed]] [[chicken]]s, lead chickens around, and make baby chickens grow up faster by 10% of the remaining time.
=== Taming ===
Like other seeds, beetroot seeds can be used to tame [[parrot]]s.
=== Composting ===
Placing beetroot seeds into a [[composter]] has a 30% chance of raising the compost level by 1.
=== Trading ===
[[Wandering trader]]s may offer to sell beetroot seeds for one emerald.
== Sounds ==
{{Edition|Java}}:
{{Sound table/Block/Crop/JE}}
{{Edition|Bedrock}}:
{{Sound table/Block/Wood/BE}}
== Data values ==
=== ID ===
{{edition|java}}:
{{ID table
|edition=java
|showblocktags=y
|showforms=y
|generatetranslationkeys=y
|displayname=Beetroots
|spritetype=block
|nameid=beetroots
|blocktags=bee_growables, crops
|form=block}}
{{ID table
|displayname=Beetroot Seeds
|spritetype=item
|nameid=beetroot_seeds
|form=item
|foot=1}}
{{edition|bedrock}}:
{{ID table
|edition=bedrock
|shownumericids=y
|showforms=y
|generatetranslationkeys=y
|displayname=Beetroots
|spritetype=block
|nameid=beetroot
|id=244
|form=block
|itemform=item.beetroot}}
{{ID table
|displayname=Beetroot Seeds
|spritetype=item
|nameid=beetroot_seeds
|id=295
|form=item
|foot=1}}
=== Block states ===
{{see also|Block states}}
{{/BS}}
== Advancements ==
{{load advancements|A Seedy Place}}
== History ==
{{History|java}}
{{History||1.9|snap=15w31a|[[File:Beetroot Seeds JE1 BE1.png|32px]] Added beetroot seeds.
|[[File:Beetroots Age 0 JE1.png|32px]] [[File:Beetroots Age 1 JE1.png|32px]] [[File:Beetroots Age 2 JE1.png|32px]] [[File:Beetroots Age 3 JE1.png|32px]] Added beetroot crops.
|Beetroot seeds can be found in [[end city]] [[chest]]s.
|Beetroot plants naturally generate in [[village]] farms.
|[[Villager]]s are able to harvest beetroot crops, but they are not yet able to pick up the seeds and plant them.}}
{{History|||snap=15w38a|The [[drop]] chances have been greatly improved from the average {{frac|4|5}} per beetroot crop harvested to 2.
|Villagers are now able to pick up and plant beetroot seeds.}}
{{History|||snap=15w44a|Beetroots now generate in [[dungeon]] and [[mineshaft]] chests.}}
{{History||1.11|snap=16w39a|Beetroot seeds are now found in the new [[woodland mansion]] chests.}}
{{History||1.12|snap=17w18b|Placing a beetroot seeds in farmland now gives the player the "A Seedy Place" [[advancement]].{{verify}}}}
{{History||1.13|snap=17w47a|Prior to [[1.13/Flattening|''The Flattening'']], this item's numeral ID was 458 and block's numeral ID was 244.}}
{{History||1.14|snap=18w43a|[[File:Beetroot Seeds JE2 BE2.png|32px]] The texture of beetroot seeds has been changed.
|[[File:Beetroots Age 0 JE2.png|32px]] [[File:Beetroots Age 1 JE2.png|32px]] [[File:Beetroots Age 2 JE2.png|32px]] [[File:Beetroots Age 3 JE2.png|32px]] The textures of beetroot crops have been changed.}}
{{History|||snap=18w49a|Beetroot seeds can now be found in chests in [[snowy tundra]] village houses.}}
{{History|||snap=19w03a|Placing beetroot seeds into the new [[composter]] has a 10% chance of raising the compost level by 1.}}
{{History|||snap=19w05a|Beetroot seeds now have a 30% chance of increasing the compost level in a composter.
|Added [[Wandering Trader|wandering trader]]s, which sell beetroot seeds.}}
{{History||1.15|snap=19w34a|[[Bee]]s can now pollinate beetroot crops.}}
{{History||1.17|snap=21w13a|[[File:Beetroots Age 0 JE3.png|32px]] [[File:Beetroots Age 1 JE3.png|32px]] [[File:Beetroots Age 2 JE3.png|32px]] [[File:Beetroots Age 3 JE3.png|32px]] The "crop" template model has changed such that pixels appear in the same physical positions on opposite sides of texture planes, changing the beetroot crop's appearance in the process.<ref>{{bug|MC-199242|||Fixed}}</ref>}}
{{History||1.18|snap=Pre-release 5|[[File:Beetroot Seeds JE3.png|32px]] The texture of beetroot seeds has been changed.}}
{{History||1.20|snap=23w12a|Beetroot seeds can now be found in [[suspicious gravel]] and [[suspicious sand]] in [[trail ruins]].}}
{{History|||snap=23w16a|Beetroot seeds no longer generates in [[suspicious sand]] in [[trail ruins]].|Due to the split of the archaeological loot tables for the suspicious gravel within the [[trail ruins]]; beetroot seeds now are in the common loot.}}
{{History|pocket alpha}}
{{History||November 14, 2013|link=https://twitter.com/jbernhardsson/status/400902957782147072|[[Johan Bernhardsson]] previewed an image of beetroot seeds.}}
{{History||v0.8.0|snap=build 2|[[File:Beetroot Seeds JE1 BE1.png|32px]] Added Beetroots seeds.
|[[File:Beetroots Age 0 JE1 BE1.png|32px]] [[File:Beetroots Age 1 JE1 BE1.png|32px]] [[File:Beetroots Age 2 JE1 BE1.png|32px]] [[File:Beetroots Age 3 JE1 BE1.png|32px]]{{verify|Correct models?}} Added Beetroots crops.}}
{{History|||snap=build 3|Beetroots seeds now have a chance of dropping when tilling [[grass block]]s.}}
{{History||v0.11.0|snap=build 1|"Beetroots seeds" have been renamed to "Beetroot Seeds" and the capitalization has now also been fixed.<ref>{{bug|MCPE-7953|||Fixed}}</ref>}}
{{History||v0.12.1|snap=build 1|Beetroot seeds no longer have a chance of dropping when tilling [[grass block]]s.}}
{{History||v0.14.0|snap=build 1|Beetroot seeds can now be found in [[minecart with chest]]s inside of [[mineshaft]]s.}}
{{History||v0.16.2|Beetroot seeds can now be found in [[chest]]s inside the large house in [[ice plains]] and [[cold taiga]] [[village]]s.}}
{{History|pocket}}
{{History||1.0.0|snap=alpha 0.17.0.1|Beetroot seeds can now be found in the [[chest]]s of [[dungeon]]s and [[end city|end cities]].}}
{{History||1.1.0|snap=alpha 1.1.0.0|Beetroot seeds can now be found in [[woodland mansion]] chests.}}
{{History|bedrock}}
{{History||1.2.0|snap=beta 1.2.0.2|Beetroot seeds can now be found inside [[bonus chest]]s.
|Beetroot seeds can now be used to tame [[parrot]]s.}}
{{History||1.10.0|snap=beta 1.10.0.3|[[File:Beetroot Seeds JE2 BE2.png|32px]] The texture of beetroot seeds has been changed.
|[[File:Beetroots Age 0 JE2.png|32px]] [[File:Beetroots Age 1 JE2.png|32px]] [[File:Beetroots Age 2 JE2.png|32px]] [[File:Beetroots Age 3 JE2.png|32px]]{{verify|Correct models?}} The textures of beetroot crops have been changed.
|Beetroot seeds are now [[trading|sold]] by the new [[wandering trader]]s.}}
{{History||1.11.0|snap=beta 1.11.0.1|Beetroot seeds can now be used to fill the [[composter]].
|Beetroot seeds can now be found in [[snowy tundra]] [[village]] house [[chest]]s.}}
{{History||1.14.0|snap=beta 1.14.0.1|[[Bee]]s can now pollinate beetroot crops.}}
{{History||?|[[File:Beetroots Age 0 BE.png|32px]] [[File:Beetroots Age 1 BE.png|32px]] [[File:Beetroots Age 2 BE.png|32px]] [[File:Beetroots Age 3 BE.png|32px]] Potato crop planes use a mapping that results in very unnatural mirroring when viewed from certain angles, such as northwest.<ref>{{bug|MCPE-146936}}</ref>}}
{{History|console}}
{{History||xbox=TU43|xbone=CU33|ps=1.36|wiiu=Patch 13|[[File:Beetroot Seeds JE1 BE1.png|32px]] Added beetroot seeds.
|[[File:Beetroots Age 0 JE1 BE1.png|32px]] [[File:Beetroots Age 1 JE1 BE1.png|32px]] [[File:Beetroots Age 2 JE1 BE1.png|32px]] [[File:Beetroots Age 3 JE1 BE1.png|32px]]{{verify|Correct models?}} Added beetroot crops.}}
{{History||xbox=none|xbone=none|ps=1.90|wiiu=none|switch=none|[[File:Beetroot Seeds JE2 BE2.png|32px]] The texture of beetroot seeds has been changed.
|[[File:Beetroots Age 0 JE2.png|32px]] [[File:Beetroots Age 1 JE2.png|32px]] [[File:Beetroots Age 2 JE2.png|32px]] [[File:Beetroots Age 3 JE2.png|32px]]{{verify|Correct models?}} The textures of beetroot crops have been changed.}}
{{History|New 3DS}}
{{History||0.1.0|[[File:Beetroot Seeds JE1 BE1.png|32px]] Added beetroot seeds.
|[[File:Beetroots Age 0 JE1 BE1.png|32px]] [[File:Beetroots Age 1 JE1 BE1.png|32px]] [[File:Beetroots Age 2 JE1 BE1.png|32px]] [[File:Beetroots Age 3 JE1 BE1.png|32px]]{{verify|Correct models?}} Added beetroot crops.}}
{{History|foot}}
== Issues ==
{{issue list}}
== Gallery ==
<gallery>
Beetrootstwitpic.png|The first image released of beetroot seeds.
Village Wheat Beetroot Farm.png|Beetroots generated in a [[village]].
File:Beetroot farm.png|A beetroot garden.
</gallery>
== References ==
<references />
{{Blocks|vegetation}}
{{Items}}
[[Category:Plants]]
[[Category:Food]]
[[Category:Generated structure blocks]]
[[Category:Non-solid blocks]]
[[cs:Semínka červené řepy]]
[[es:Semillas de remolacha]]
[[fr:Graines de betterave]]
[[it:Semi di barbabietola]]
[[ja:ビートルートの種]]
[[ko:비트 씨앗]]
[[nl:Bietenzaden]]
[[pl:Nasiona buraka]]
[[pt:Sementes de beterraba]]
[[ru:Семена свёклы]]
[[th:เมล็ดบีตรูท]]
[[zh:甜菜种子]]</li></ul></nowiki> | September 16, 2011 | Jens Bergensten tweets a teaser screenshot of changes to the Nether terrain generation, including nether fortresses. | ||||||||||||||||||||||||||||||||||||||||||||||||||||||||||||||||||||||||||||||||||||||||||||||||||||||||||||
| September 19, 2011 | Jens releases a second teaser screenshot, showcasing the structure of the upcoming nether fortresses. | |||||||||||||||||||||||||||||||||||||||||||||||||||||||||||||||||||||||||||||||||||||||||||||||||||||||||||||
| September 21, 2011 | Jens mentions that he is finished with most of the new Nether features, including two new mobs, one of which is a "retexturing attempt". | |||||||||||||||||||||||||||||||||||||||||||||||||||||||||||||||||||||||||||||||||||||||||||||||||||||||||||||
| Beta 1.9-pre1 | Many new additions to the nether, including: magma cubes, blazes (as well as blaze spawners and blaze rods), nether fortresses (including nether brick, nether brick stairs and Nether brick fences), nether wart, ghast tears dropped by ghasts and gold nuggets dropped by zombie pigmen. | |||||||||||||||||||||||||||||||||||||||||||||||||||||||||||||||||||||||||||||||||||||||||||||||||||||||||||||
| Beta 1.9-pre4 | With the addition of the Silk Touch enchantment, it was possible to legitimately obtain water using ice in the Nether. | |||||||||||||||||||||||||||||||||||||||||||||||||||||||||||||||||||||||||||||||||||||||||||||||||||||||||||||
| Beta 1.9-pre5 | The ability to pick up ice blocks with the Silk Touch enchantment was removed. | |||||||||||||||||||||||||||||||||||||||||||||||||||||||||||||||||||||||||||||||||||||||||||||||||||||||||||||
1.2.1{{Extension DPL}}<ul><li>[[Knowledge Book|Knowledge Book]]<br/>{{exclusive|java}}
{{Item
| image = Knowledge Book.png
| renewable = No
| stackable = No
| rarity = Epic
}}
A '''knowledge book''' is a utility item that reveals available [[crafting]] recipes to the player when {{control|used|use}}.
== Obtaining ==
Knowledge books can be obtained only by using [[commands]], as it is not found in the [[creative]] inventory; therefore, it is impossible to obtain in other modes such as [[survival]] and [[adventure]] except with commands.
For example, to give oneself a knowledge book that reveals the recipes for [[bucket]]s and [[flower pot]]s, use: {{cmd|give @s minecraft:knowledge_book{Recipes:["minecraft:bucket", "minecraft:flower_pot"]} }}.
== Usage ==
Knowledge books are used to reveal recipes to the player who uses it, by adding it to their [[recipe book]]. Using a knowledge book consumes it, removing it from the player's inventory.
Knowledge books are especially useful to mapmakers in conjunction with {{cmd|gamerule doLimitedCrafting true}}, because then any item is craftable only if its recipe is unlocked first.
== Sounds ==
{{Sound table
|sound=Chiseled bookshelf insert1.ogg
|sound2=Chiseled bookshelf insert2.ogg
|sound3=Chiseled bookshelf insert3.ogg
|sound4=Chiseled bookshelf insert4.ogg
|subtitle=Book placed
|source=block
|description=When a knowledge book is placed in a chiseled bookshelf
|id=block.chiseled_bookshelf.insert
|translationkey=subtitles.chiseled_bookshelf.insert
|volume=0.8
|pitch=''varies'' <ref group=sound>Can be 1.0, 0.85, or 1.1 for each sound</ref>
|distance=16}}
{{Sound table
|sound=Chiseled bookshelf pickup1.ogg
|sound2=Chiseled bookshelf pickup2.ogg
|sound3=Chiseled bookshelf pickup3.ogg
|subtitle=Book taken
|source=block
|description=When a knowledge book is removed from a chiseled bookshelf
|id=block.chiseled_bookshelf.pickup
|translationkey=subtitles.chiseled_bookshelf.take
|volume=0.8
|pitch=''varies'' <ref group=sound>Can be 1.0, 0.8, or 1.1 for each sound</ref>
|distance=16
|foot=1}}
== Data values ==
=== ID ===
{{ID table
|edition=java
|showforms=y
|generatetranslationkeys=y
|displayname=Knowledge Book
|spritetype=item
|nameid=knowledge_book
|form=item
|foot=1}}
=== Item data ===
Recipe books use the NBT tag <code>Recipes</code> to indicate the recipes they contain.
''The following NBT structure is provided to show how the <code>Recipes</code> tag is organized, and is not comprehensive above the <code>tag</code> tag. The full NBT for an item can be found [[Chunk format#Items and XP Orbs|here]].''
<div class="treeview" style="margin-top: 0;">
* {{nbt|compound}} Entity data
** {{nbt|compound|Item}}: The item
*** {{nbt|compound|tag}}: Additional information about the item. This tag is optional for most items.
**** {{nbt|list|Recipes}}: The list of recipes this book contains.
***** {{nbt|string}} the name of a recipe, for instance <code>minecraft:gold_nugget</code> or <code>minecraft:gold_ingot_from_nuggets</code>
</div>
== History ==
{{History|java}}
{{History||1.12|snap=17w13a|[[File:Knowledge Book JE1.png|32px]] Added knowledge books.}}
{{History||1.13|snap=17w47a|Prior to [[1.13/Flattening|''The Flattening'']], this [[item]]'s numeral ID was 453.}}
{{History||1.14|snap=18w43a|[[File:Knowledge Book JE2.png|32px]] The texture of knowledge books has now been changed.}}
{{History||1.20|snap=1.20 Release Candidate 1|Knowledge books can now be placed in [[chiseled bookshelf|chiseled bookshelves]].}}
{{History|Foot}}
== Issues ==
{{Issue list}}
== See also ==
* [[Book]]
* [[Enchanted Book]]
* {{cmd|recipe}} command
{{Items}}
[[Category:Non-renewable resources]]
[[de:Buch des Wissens]]
[[es:Enciclopedia]]
[[fr:Livre des connaissances]]
[[ja:知恵の本]]
[[ko:지식의 책]]
[[lzh:天工開物]]
[[pl:Księga wiedzy]]
[[pt:Enciclopédia]]
[[ru:Книга знаний]]
[[zh:知识之书]]</li><li>[[Bed|Bed]]<br/>{{Block
| image = White Bed (N).png
| extratext = View [[#Gallery|all renders]]
| transparent = Yes
| tntres = 25
| hardness = 4
| light = No
| tool = any
| renewable = Yes
| stackable = No
| flammable = No
| lavasusceptible = {{jebe|Yes|No}}
}}
A '''bed''' is a [[Dye|dyeable]] [[block]] that allows a player to sleep and to reset their [[spawn]] point to within a few blocks of the bed in the [[Overworld]]. If the bed is obstructed or removed, the player spawns at the default world spawning location.
== Obtaining ==
=== Natural generation ===
;Igloo
A red bed naturally generates in each [[igloo]].
;Village
Beds of various colors generate in [[village]] houses, depending on the specific structure and [[biome]]:
* [[Desert]] village houses have cyan, green, or lime beds.
* [[Plains]] village houses have white or yellow beds.
* [[Savanna]] village houses have orange, red, or yellow beds.
* [[Snowy taiga]]{{only|bedrock|short=1}} and [[taiga]] village houses have blue or purple beds.
* [[Snowy tundra]] village houses have blue, red, or white beds.
=== Breaking ===
Beds can be mined with any [[tool]], or without a tool.<ref>{{bug|MC-192722||Beds have no assigned tool}}</ref>
{{breaking row|horizontal=1|Bed|sprite=red-bed|any}}
A bed also drops itself as an item when pushed by a [[piston]].
=== Crafting ===
{{Crafting
|head=1
|showname=0
|showdescription=1
|A2=Matching Wool
|B2=Matching Wool
|C2=Matching Wool
|A3=Any Planks
|B3=Any Planks
|C3=Any Planks
|Output= Matching Bed
|type=Decoration block
|description=The wool color must match. The planks can be different.
}}
<!--recipe removed
{{Crafting
|showdescription=1
|White Bed
|Matching Colored Dye
|Output= Matching Dyed Bed
|type=Decoration block
|description=White beds can be re-dyed using dyes.{{only|java}}{{until|JE 1.20}}
}}-->
{{Crafting
|showdescription=1
|Any Bed
|Matching Dye
|Output= Matching Bed
|type=Decoration block
|description=A bed of any color can be re-dyed using dyes.
}}
{{Crafting
|showdescription=1
|Any Dyed Bed
|Bleach
|Output=White Bed
|type=Decoration block
|description=This removes the color from the bed.{{only|bedrock|education}}
|foot=1
}}
<div style="display:none">
<!--
This is so the pre-Village & Pillage dyes can have dye-related crafting recipes show on their respective pages.
They don't need to be displayed on this page because they already intuitively list "Any Matching Dye".
-->
{{Crafting
|showdescription=1
|Any Bed
|Bone Meal; Lapis Lazuli; Cocoa Beans; Ink Sac
|Output=White Bed; Blue Bed; Brown Bed; Black Bed
|type=Decoration block
|description={{only|bedrock|education}}
}}
</div>
=== Trading ===
Journeyman-level shepherd villagers sell 1 of 16 beds for 3 [[emerald]]s as part of their trades.
== Usage ==
=== Sleeping ===
[[File:Sleep Animation.gif|240px|thumb|Player falling asleep.]]
Beds are used by pressing the {{control|use item}} button while looking at the bed.
A player sleeps by {{control|using|using}} a bed during a [[thunderstorm]], or at [[night]] (between 12542 and 23459 ticks in clear weather, when stars appear in the sky, or between 12010 and 23991 ticks in rainy weather). Players can sleep during a thunderstorm even if they are in a biome where it does not rain (i.e. Desert). Attempting to use a bed at any other time results in the message "You can only sleep at night or during thunderstorms". A player sleeps in a bed for 101 in-game [[tick]]s, or 5.05 seconds before the time skips to the next day. Sleeping in a bed with the {{cmd|gamerule doDaylightCycle}} set to <code>false</code> results in the player being kicked out of the bed after the 101 ticks, but does not change time of the world to day.
Sleeping in a bed is possible only in the [[Overworld]]. Attempting to sleep in a bed in [[the Nether]], [[the End]], and [[custom dimension]]s in which they are disabled causes it to [[explosion|explode]] and set [[fire]] to surrounding blocks; unless {{cmd|gamerule respawnBlocksExplode}}{{only|bedrock}} is set to {{cd|false}}.<ref>{{bug|mcpe-28723}} – "Exploding bed in the Nether" resolved as "Works As Intended". This is referenced {{in|je}} when a player is killed by "Intentional Game Design". </ref> The explosion has power 5, which is stronger than [[TNT]] (4), but not as strong as a charged [[creeper]] or [[End Crystal|end crystal]] (6). The explosion centers on the head part of the bed. [[Villager]]s can sleep normally in any dimension without the bed being blown up.<ref>{{bug|MC-146515|||WAI}}</ref> Upon death from a bed explosion, the [[death messages|message]] "'''(Player) was killed by [Intentional Game Design]'''" appears.
The player must be close to the bed to sleep. If the player is close enough to click on the bed, but not close enough to sleep in it, the message "You may not rest now, the bed is too far away"{{only|java|short=1}}/"Bed is too far away"{{only|bedrock|short=1}} appears. A player must be within 2 blocks of the bed {{in|JE}} or 3 blocks {{in|BE}} to use the bed.
If a "monster" is within 8 blocks of the bed horizontally (in the X- and Z-axis), and 5 blocks vertically (in the Y-axis), the message "You may not rest now, there are monsters nearby" appears and the player is prevented from sleeping until the monsters leave or are killed. Most hostile mobs, as well as some neutral mobs prevent players from sleeping, as shown in the table below.
{| class="wikitable mw-collapsible"
!Mob
!Prevent the player from sleeping
|-
|{{EntityLink|Blaze}}
|{{Tc|yes}}
|-
|{{EntityLink|Chicken Jockey}}
|{{Tc|partial|when hostile{{Only|Java|short=1}}/Yes{{Only|Bedrock|short=1}}}}
|-
|{{EntityLink|Creeper}}
|{{Tc|yes}}
|-
|{{EntityLink|Drowned}}
|{{Tc|yes}}
|-
|{{EntityLink|Endermite}}
|{{Tc|yes}}
|-
|{{EntityLink|Enderman}}
|{{Tc|partial|when hostile}}
|-
|{{EntityLink|Ender Dragon}}
|{{Tc|no}}
|-
|{{EntityLink|Evoker}}
|{{Tc|yes}}
|-
|{{EntityLink|Ghast}}
|{{Tc|no}}
|-
|{{EntityLink|Giant}}
|{{Tc|yes}}
|-
|{{EntityLink|Guardian}}, {{EntityLink|Elder Guardian}}
|{{Tc|yes}}
|-
|{{EntityLink|Hoglin}}
|{{Tc|no}}
|-
|{{EntityLink|Illusioner}}
|{{Tc|yes}}
|-
|{{EntityLink|Killer Bunny}}
|{{Tc|no}}
|-
|{{EntityLink|Magma Cube}}
|{{Tc|partial|no{{Only|Java|short=1}}/Yes{{Only|Bedrock|short=1}}}}
|-
|{{EntityLink|Piglin}}
|{{Tc|no}}
|-
|{{EntityLink|Piglin Brute}}
|{{Tc|yes}}
|-
|{{EntityLink|Pillager}}
|{{Tc|yes}}
|-
|{{EntityLink|Phantom}}
|{{Tc|yes}}
|-
|{{EntityLink|Ravager}}
|{{Tc|yes}}
|-
|{{EntityLink|Shulker}}
|{{Tc|no}}
|-
|{{EntityLink|Silverfish}}
|{{Tc|yes}}
|-
|{{EntityLink|Skeleton}}, {{EntityLink|Skeleton Horseman}}, {{EntityLink|Stray}}, {{EntityLink|Wither Skeleton}}
|{{Tc|yes}}
|-
|{{EntityLink|Spider}}, {{EntityLink|Cave Spider}}, {{EntityLink|Spider Jockey}}
|{{Tc|yes}}
|-
|{{EntityLink|Slime}}
|{{Tc|partial|no{{Only|Java|short=1}}/Yes{{Only|Bedrock|short=1}}}}
|-
|{{EntityLink|Vex}}
|{{Tc|yes}}
|-
|{{EntityLink|Vindicator}}
|{{Tc|yes}}
|-
|{{EntityLink|Warden}}
|{{Tc|yes}}
|-
|{{EntityLink|Witch}}
|{{Tc|yes}}
|-
|{{EntityLink|Wither}}
|{{Tc|yes}}
|-
|{{EntityLink|Zoglin}}
|{{Tc|yes}}
|-
|{{EntityLink|Zombie}}, {{EntityLink|Zombie Villager}}, {{EntityLink|Husk}}
|{{Tc|yes}}
|-
|{{EntityLink|Zombified Piglin}}
|{{Tc|partial|when hostile{{Only|Java|short=1}}/Yes{{Only|Bedrock|short=1}}}}
|-
|}
{{notelist}}
If the player has not entered a bed and didn't die for 3 in-game days, [[phantom]]s can spawn unless {{cmd|gamerule doInsomnia}} is set to {{cd|false}}. {{in|java}}, this can be verified by checking if the "Time Since Last Rest" [[statistic]] is greater than 1.00 h.
A hostile mob can wake a player that is sleeping.
The player also cannot sleep in a bed occupied by another player, resulting in the message, "This bed is occupied".
A player can, however, sleep in a bed being used by a villager. The player may first wake the villager (pressing {{control|use}} on the villager) and then quickly enter the bed before the villager can lie down again. The villager reclaims the bed after the player wakes. The villager is kicked out of its bed when a player attempts to sleep there.
A player also cannot sleep while on fire, while poisoned, or while starving.
If all sleeping requirements are met and the player enters a bed, the player is positioned in the bed. The player falls asleep as the screen fades to black. {{IN|bedrock}}, the sleeping animation slowly lowers the player into bed.
Once all players in a world are asleep, after 5 seconds (100 ticks) the time of day changes to sunrise. (time 0)
During this time, the chat window is focused, and the player can leave the bed by clicking the {{btn|Leave Bed}} button.
[[Waterlogging|Waterlogged]] beds{{only|bedrock}} cannot be slept in unless the player or villager has the {{EffectLink|Water Breathing}} or {{EffectLink|Conduit Power}} status effects. Attempting to use a waterlogged bed otherwise does not display any message.<ref>{{bug|MCPE-35802}}</ref>
Beds displaying an error above the hotbar is a feature exclusive to beds; other blocks that cannot be used do not display such a message.<ref>{{bug|MC-160479}} resolved as "Works As Intended"</ref>
If there are two or more blocks of space above the bed, then the player can wake up on the bed. If there is less than two blocks above the bed and there is room on the side, then the player wakes up on the side of the bed. If there is no space on the side of the bed and there is less than two blocks above the bed, then the player still wakes up on top of the bed, but suffocates if it's a solid block.
Villagers always wake up on top of the bed, meaning they can suffocate if there isn't enough room above the bed.
====Passing the night====
Sleeping changes the [[daylight cycle|time of day]] to sunrise and resets the [[weather]] cycle, changing the weather to clear conditions. {{IN|JE}}, the weather cycle is only reset if it is currently raining or snowing. The player wakes up next to the bed, facing the bed.
Sleeping does not accelerate processes that take place over time such as the growth of [[crops]] or [[smelting]]. If {{cmd|gamerule doDaylightCycle}} is <code>false</code>, the player instead wakes up in the night.
To skip the night in multiplayer, all players in the [[Overworld]] must be in bed at the same time. Pressing the {{btn|Leave Bed}} button is not necessary in this case. The percentage of players that need to sleep to skip the night can be customized with the game rule {{cd|playersSleepingPercentage}}.
Villagers are unable to skip the night by sleeping in beds, unlike players.
If the bed is destroyed while the player is in it, due to for example an explosion or by another player, the player wakes prematurely and the night does not pass.
====Setting the spawn point====
Once a player has entered a bed (or right clicked the bed during daytime), their spawn point is set to the location of that bed. {{IN|java}}, multiple players can set their spawn point on a single bed. {{IN|bedrock}}, the last player to use a specific bed is the only player who can respawn there, and players who had previously slept there respawn at the world spawn.
{{ctrl|Using}} a bed in the daytime likewise sets the spawn point, without actually entering the bed.
When a bed explodes, it does not set the spawn point.
The message "Respawn point set" is displayed in chat when the respawn point is successfully changed.
The check for a bed is made only when the player respawns. This means that the bed can be destroyed and replaced or even reoriented, but as long as there is a bed present in the same location, the player can respawn there. If a player's bed is absent, or if the area around the bed is made unsuitable for respawning (see below), a message is displayed saying ''You have no home bed or charged respawn anchor, or it was obstructed''{{only|je}}/''Your home bed was missing or obstructed''{{only|be}}, and the player respawns at the [[Spawn#World spawn|world spawn]] point.
When choosing where to respawn the player, the northwesternmost (lowest X- and Z-coordinates) location of the seven blocks adjacent to the head of the bed is chosen first. If this location is obstructed, the next choice is to its south (+Z), rather than the east (+X). Only when all seven locations around the head are obstructed are the three remaining ones adjacent to the foot then to be considered.
For a location to be unobstructed, the block at the level of the bed must be air or non-solid (e.g. torches, but not glass) and there must be a space with a solid block below it and two non-colliding blocks for the player to stand in 0-2 blocks below the bed. It does not matter if the bed itself has blocks above it. Putting a slab one block above a bed can act as a two block tall space, as the bed is half a block tall. The bed never spawns the player on or directly below itself even if all other locations are obstructed. If a bed is obstructed, the player's spawn point is cleared after they respawn. That is, even if the bed is subsequently made usable again, the player continues to respawn at the world spawn until interacting with the bed again.
Specifically, when interacting with it, the location of the ''head'' of the bed is saved as the spawn point, and if a bed is in that space (whether it is the foot or the head) then the respawn works. This can be observed by reorienting the bed with its head in the same location. Interacting with it does not produce a "Respawn point set" message as the game doesn't change the saved spawn point. If a bed is reoriented so that its foot is in this space, it still functions on the next respawn, but it can also be interacted with to update the spawn point to the new head of the bed and cause a "Respawn point set" message. Attempting the reverse, reorienting the bed so that it overlaps the original location of the foot, results in a respawn at world spawn. However, the location of the foot of the bed is also saved. If the bed is moved so that part of it overlaps the original location of the head, it can be observed that the same locations need to be obstructed to stop spawning. It is possible to respawn 2 blocks away from the bed this way.
=== Bouncing===
Falling onto a bed bounces the player with 66% strength – the bouncing-up velocity is 66% of the impact velocity. The player also takes 50% of normal fall damage.
Baby villagers bounce on beds during the day.
If the player is falling while sleeping requirements are met, and presses {{control|use}} on a bed within reach before hitting the ground, the fall damage is delayed until the player wakes.
A player can bounce on a bed while another player or villager is sleeping on it without waking the player or the villager up.
Villagers can be pushed onto beds, as the bed is half a block tall.
=== Curing===
Each bed in the vicinity of a zombie villager has a chance to speed up the [[Zombie_Villager#Curing|process of curing the zombie villager]]. Iron bars (such as in a prison cell) also have this effect.
=== Placement===
Beds require two blocks of floor space. Placement requires at least 2 blocks from the player's facing direction. When placed, the foot of the bed is placed on the block selected and the head of the bed on the block farther away from the player. {{IN|bedrock}}, beds require solid blocks below them when placed. However, the bed remains in place if its supporting blocks are later removed. {{IN|java}}, beds do not require supporting blocks and can be placed anywhere, provided there is enough room.
==Sounds ==
===Generic===
{{Sound table/Block/Wood}}
===Unique===
{{edition|java}}:
{{Sound table
|sound=Explosion1.ogg
|sound2=Explosion2.ogg
|sound3=Explosion3.ogg
|sound4=Explosion4.ogg
|subtitle=Explosion
|source=block
|description=When a player attempts to sleep while not in the Overworld
|id=entity.generic.explode
|translationkey=subtitles.entity.generic.explode
|volume=4.0
|pitch=0.56-0.84
|distance=16
|foot=1}}
{{edition|bedrock}}:
{{Sound table
|type=bedrock
|sound=Explosion1.ogg
|sound2=Explosion2.ogg
|sound3=Explosion3.ogg
|sound4=Explosion4.ogg
|source=block
|description=When a player attempts to sleep while not in the Overworld
|id=random.explode
|volume=4.0
|pitch=1.0
|foot=1}}
==Data values==
===ID===
{{edition|java}}:
{{ID table|
|edition=java
|showblocktags=y
|showitemtags=y
|showforms=y
|generatetranslationkeys=y
|displayname=White Bed
|spritetype=block
|nameid=white_bed
|blocktags=beds
|itemtags=beds}}
{{ID table
|displayname=Orange Bed
|spritetype=block
|nameid=orange_bed
|blocktags=beds
|itemtags=beds}}
{{ID table
|displayname=Magenta Bed
|spritetype=block
|nameid=magenta_bed
|blocktags=beds
|itemtags=beds}}
{{ID table
|displayname=Light Blue Bed
|spritetype=block
|nameid=light_blue_bed
|blocktags=beds
|itemtags=beds}}
{{ID table
|displayname=Yellow Bed
|spritetype=block
|nameid=yellow_bed
|blocktags=beds
|itemtags=beds}}
{{ID table
|displayname=Lime Bed
|spritetype=block
|nameid=lime_bed
|blocktags=beds
|itemtags=beds}}
{{ID table
|displayname=Pink Bed
|spritetype=block
|nameid=pink_bed
|blocktags=beds
|itemtags=beds}}
{{ID table
|displayname=Gray Bed
|spritetype=block
|nameid=gray_bed
|blocktags=beds
|itemtags=beds}}
{{ID table
|displayname=Light Gray Bed
|spritetype=block
|nameid=light_gray_bed
|blocktags=beds
|itemtags=beds}}
{{ID table
|displayname=Cyan Bed
|spritetype=block
|nameid=cyan_bed
|blocktags=beds
|itemtags=beds}}
{{ID table
|displayname=Purple Bed
|spritetype=block
|nameid=purple_bed
|blocktags=beds
|itemtags=beds}}
{{ID table
|displayname=Blue Bed
|spritetype=block
|nameid=blue_bed
|blocktags=beds
|itemtags=beds}}
{{ID table
|displayname=Brown Bed
|spritetype=block
|nameid=brown_bed
|blocktags=beds
|itemtags=beds}}
{{ID table
|displayname=Green Bed
|spritetype=block
|nameid=green_bed
|blocktags=beds
|itemtags=beds}}
{{ID table
|displayname=Red Bed
|spritetype=block
|nameid=red_bed
|blocktags=beds
|itemtags=beds}}
{{ID table
|displayname=Black Bed
|spritetype=block
|nameid=black_bed
|blocktags=beds
|itemtags=beds
|foot=1}}
{{ID table
|displayname=Block entity
|spritename=beds
|spritetype=block
|nameid=bed
|foot=1}}
{{edition|bedrock}}:
{{ID table
|edition=bedrock
|firstcolumnname=Bed
|shownumericids=y
|showforms=y
|generatetranslationkeys=y
|displayname=Block
|spritename=Beds
|spritetype=block
|nameid=bed
|id=26
|form=block
|itemform=item.bed}}
{{ID table
|displayname=Item
|spritename=bed
|spritetype=item
|nameid=bed
|id=418
|form=item
|translationkey=item.bed.black.name,item.bed.red.name,item.bed.green.name,item.bed.brown.name,item.bed.blue.name,item.bed.cyan.name,item.bed.silver.name,item.bed.gray.name,item.bed.pink.name,item.bed.lime.name,item.bed.yellow.name,item.bed.lightBlue.name,item.bed.magenta.name,item.bed.orange.name,item.bed.white.name
|foot=1}}
{{ID table
|notnamespaced=y
|displayname=Block entity
|spritename=beds
|spritetype=block
|nameid=Bed
|foot=1}}
===Metadata===
{{see also|Data values}}
{{IN|be}}, bed items use the following data values:
{{/DV}}
===Block states===
{{see also|Block states}}
{{/BS}}
===Block data===
A bed has a block entity associated with it that holds additional data about the block.
{{el|java}}:
{{see also|Block entity format}}
{{/BE}}
{{el|bedrock}}:
: See [[Bedrock Edition level format/Block entity format]].
==Advancements==
{{load advancements|Sweet Dreams}}
==History==
''For a more in-depth breakdown of changes to textures and models, including a set of renders for each state combination, see [[/Asset history]]''
{{History|java beta}}
{{History||November 26, 2011|link={{tweet|jeb|140410431394160640}}|Originally, [[crying obsidian]] was intended to act as a block to reset spawn points, until beds were introduced.}}
{{History||1.3|[[File:Red Bed JE1 BE1.png|32px]] [[File:Red Bed (item) JE1 BE1.png|32px]] Added beds.
|The only color for beds is red.
|Beds can currently be crafted using any color combination of wool.
|Sleeping in an area potentially exposed to monsters can cause [[player]]s to wake up early, with a [[skeleton]] or [[zombie]] spawned next to them.
|Trying to sleep in a bed in [[the Nether]] does nothing.}}
{{History||1.4|Sleeping in a bed now resets the player's spawn position, though it does not work for most users. The spawn point unintentionally changes only if ''Leave Bed'' is clicked and the function is limited to [[multiplayer]].}}
{{History||1.4_01|Beds now act as a respawn point as intended.}}
{{History||1.6|snap=Test Build 3|Trying to sleep in a bed in the Nether now causes the bed to [[explosion|explode]].}}
{{History||1.7|As blocks now pull textures from the expected places for model application, this has resulted in the bed texture shifting downward in <samp>[[terrain.png]]</samp>. No visual difference has resulted for the actual bed.}}
{{History|java}}
{{History||1.0.0|snap=Beta 1.9 Prerelease 4|Bed explosions in the Nether now light nearby blocks on fire.}}
{{History|||snap=Beta 1.9 Prerelease 5|The bottom textures of beds have been changed to the texture of the new [[oak]] planks from [[File:Red Bed JE1 (facing NWU).png|32px]] to [[File:Red Bed JE2 BE1 (facing NWU).png|32px]].}}
{{History|||snap=Beta 1.9 Prerelease 6|Beds no longer spawn monsters. Instead, trying to sleep when monsters are around displays a message saying ''You may not rest now, there are monsters nearby''.}}
{{History||1.2.4|snap=release|[[Cat]]s while in standing position now purposely go and sit on beds.
|[[Spruce]], [[birch]], and [[jungle tree|jungle]] planks can now be used to craft beds.}}
{{History||1.5|snap=?|Beds now check their [[biome]] for detonation rather than just their dimension.}}
{{History||1.7.2|snap=1.7.1|[[Acacia]] planks and [[dark oak]] planks can now be used to craft beds.}}
{{History||1.8|snap=14w29a|Beds now display the cracking animation on top and bottom.}}
{{History|||snap=14w33a|Beds now make [[sound]]s when placed, and play logical sounds when stepped on and [[breaking|broken]].<ref>{{bug|MC-66347||Beds make incorrect sounds|Fixed}}</ref>}}
{{History||1.9|snap=15w43a|Bed now generates inside [[igloo]]s.}}
{{History||1.11|snap=16w32a|The messages "You can only sleep at night", "You may not rest now, there are monsters nearby", and "This bed is occupied" now appear on top of the hotbar, the place that the message "Press <whatever your sneak key is> to dismount" also appears when the player is riding a [[mob]].}}
{{History|||snap=16w33a|If the player is close enough to click on the bed, but not close enough to sleep in it, the message "You may not rest now, the bed is too far away" is now displayed.}}
{{History||1.12|snap=17w06a|Neutral [[zombie pigmen]] no longer prevent the player from sleeping in a bed.}}
{{History|||snap=March 13, 2017|slink={{tweet|jeb_|841311279784591361}}|[[Jeb]] mentions colored beds for [[Java Edition 1.12|1.12]].}}
{{History|||snap=17w15a|[[File:White Bed JE1.png|32px]] [[File:Light Gray Bed JE1.png|32px]] [[File:Gray Bed JE1.png|32px]] [[File:Black Bed JE1.png|32px]] [[File:Brown Bed JE1.png|32px]] [[File:Orange Bed JE1.png|32px]] [[File:Yellow Bed JE1.png|32px]] [[File:Lime Bed JE1.png|32px]] [[File:Green Bed JE1.png|32px]] [[File:Cyan Bed JE1.png|32px]] [[File:Light Blue Bed JE1.png|32px]] [[File:Blue Bed JE1.png|32px]] [[File:Purple Bed JE1.png|32px]] [[File:Magenta Bed JE1.png|32px]] [[File:Pink Bed JE1.png|32px]] [[Dye]]d beds have been added.
|The "Bed" has been renamed to "Red Bed".
|Beds can now only be crafted using wool of the same color.
|[[File:Red Bed JE2.png|32px]] The texture of red beds has been changed. The top of the beds are no longer mirrored. <!--- the numbers appear out of order but it is correct since it orders all beds in the current order in the Java Creative inventory --->
|{{Sprite|pos=1|image=Bed Icons 1.12.png|size=32|sheetsize=512}} {{Sprite|pos=9|image=Bed Icons 1.12.png|size=32|sheetsize=512}} {{Sprite|pos=8|image=Bed Icons 1.12.png|size=32|sheetsize=512}} {{Sprite|pos=16|image=Bed Icons 1.12.png|size=32|sheetsize=512}} {{Sprite|pos=13|image=Bed Icons 1.12.png|size=32|sheetsize=512}} {{Sprite|pos=15|image=Bed Icons 1.12.png|size=32|sheetsize=512}} {{Sprite|pos=2|image=Bed Icons 1.12.png|size=32|sheetsize=512}} {{Sprite|pos=5|image=Bed Icons 1.12.png|size=32|sheetsize=512}} {{Sprite|pos=6|image=Bed Icons 1.12.png|size=32|sheetsize=512}} {{Sprite|pos=14|image=Bed Icons 1.12.png|size=32|sheetsize=512}} {{Sprite|pos=10|image=Bed Icons 1.12.png|size=32|sheetsize=512}} {{Sprite|pos=4|image=Bed Icons 1.12.png|size=32|sheetsize=512}} {{Sprite|pos=12|image=Bed Icons 1.12.png|size=32|sheetsize=512}} {{Sprite|pos=11|image=Bed Icons 1.12.png|size=32|sheetsize=512}} {{Sprite|pos=3|image=Bed Icons 1.12.png|size=32|sheetsize=512}} {{Sprite|pos=7|image=Bed Icons 1.12.png|size=32|sheetsize=512}} Beds now appear 3D in the [[inventory]].
|[[File:Red Bed JE3 (facing NWU).png|32px]] Beds now have 3D legs.<ref>{{bug|MC-11963||bed hind legs not rendered|Fixed}}</ref>
|Beds have been made bouncy, though they do not completely reduce all [[fall damage]].
|Beds are now a [[block entity]].}}
{{History|||snap=17w17a|[[File:Red Bed JE4 BE2 (facing NWU).png|32px]] The four legs of a bed are now each textured separately, and their [[model]] is different.
|[[File:White Bed JE2 BE2.png|32px]] [[File:Light Gray Bed JE2 BE2.png|32px]] [[File:Gray Bed JE2 BE2.png|32px]] [[File:Black Bed JE2 BE2.png|32px]] [[File:Brown Bed JE2 BE2.png|32px]] [[File:Red Bed JE3 BE2.png|32px]] [[File:Orange Bed JE2 BE2.png|32px]] [[File:Yellow Bed JE2 BE2.png|32px]] [[File:Lime Bed JE2 BE2.png|32px]] [[File:Green Bed JE2 BE2.png|32px]] [[File:Cyan Bed JE2 BE2.png|32px]] [[File:Light Blue Bed JE2 BE2.png|32px]] [[File:Blue Bed JE2 BE2.png|32px]] [[File:Purple Bed JE2 BE2.png|32px]] [[File:Magenta Bed JE2 BE2.png|32px]] [[File:Pink Bed JE2 BE2.png|32px]]<br> <!--- the numbers appear out of order but it is correct since it orders all beds in the current order in the Java Creative inventory --->
{{Sprite|pos=17|image=Bed Icons 1.12.png|size=32|sheetsize=512}} {{Sprite|pos=25|image=Bed Icons 1.12.png|size=32|sheetsize=512}} {{Sprite|pos=24|image=Bed Icons 1.12.png|size=32|sheetsize=512}} {{Sprite|pos=32|image=Bed Icons 1.12.png|size=32|sheetsize=512}} {{Sprite|pos=29|image=Bed Icons 1.12.png|size=32|sheetsize=512}} {{Sprite|pos=31|image=Bed Icons 1.12.png|size=32|sheetsize=512}} {{Sprite|pos=18|image=Bed Icons 1.12.png|size=32|sheetsize=512}} {{Sprite|pos=21|image=Bed Icons 1.12.png|size=32|sheetsize=512}} {{Sprite|pos=22|image=Bed Icons 1.12.png|size=32|sheetsize=512}} {{Sprite|pos=30|image=Bed Icons 1.12.png|size=32|sheetsize=512}} {{Sprite|pos=26|image=Bed Icons 1.12.png|size=32|sheetsize=512}} {{Sprite|pos=20|image=Bed Icons 1.12.png|size=32|sheetsize=512}} {{Sprite|pos=28|image=Bed Icons 1.12.png|size=32|sheetsize=512}} {{Sprite|pos=27|image=Bed Icons 1.12.png|size=32|sheetsize=512}} {{Sprite|pos=19|image=Bed Icons 1.12.png|size=32|sheetsize=512}} {{Sprite|pos=23|image=Bed Icons 1.12.png|size=32|sheetsize=512}} The textures of beds have now also been changed.}}
{{History||1.13|snap=17w47a|Beds now require solid blocks below them, or they break into an item. Previously, a bed needed to be placed on solid blocks, but the blocks could later be removed.}}
{{History|||snap=18w07a|Sleeping in a bed is now important to keep [[phantom]]s from spawning.}}
{{History|||snap=18w20a|Players in [[Creative]] mode can now sleep even if monsters are nearby.}}
{{History|||snap=18w22a|Beds no longer require supporting blocks below them; they do not break into an [[item (entity)|item]] if said blocks are removed, and can be directly placed on top of non-solid blocks.}}
{{History|||snap=pre2|The "You can only sleep at night" message when using a bed has been changed to "You can sleep only at night and during [[thunderstorm]]s."}}
{{History||1.14|snap=18w43a|[[File:White Bed JE3 BE3.png|32px]] [[File:Light Gray Bed JE3 BE3.png|32px]] [[File:Gray Bed JE3 BE3.png|32px]] [[File:Black Bed JE3 BE3.png|32px]] [[File:Brown Bed JE3 BE3.png|32px]] [[File:Red Bed JE4 BE3.png|32px]] [[File:Orange Bed JE3 BE3.png|32px]] [[File:Yellow Bed JE3 BE3.png|32px]] [[File:Lime Bed JE3 BE3.png|32px]] [[File:Green Bed JE3 BE3.png|32px]] [[File:Cyan Bed JE3 BE3.png|32px]] [[File:Light Blue Bed JE3 BE3.png|32px]] [[File:Blue Bed JE3 BE3.png|32px]] [[File:Purple Bed JE3 BE3.png|32px]] [[File:Magenta Bed JE3 BE3.png|32px]] [[File:Pink Bed JE3 BE3.png|32px]]<br>{{InvSprite|White Bed}} {{InvSprite|Light Gray Bed}} {{InvSprite|Gray Bed}} {{InvSprite|Black Bed}} {{InvSprite|Brown Bed}} {{InvSprite|Red Bed}} {{InvSprite|Orange Bed}} {{InvSprite|Yellow Bed}} {{InvSprite|Lime Bed}} {{InvSprite|Green Bed}} {{InvSprite|Cyan Bed}} {{InvSprite|Light Blue Bed}} {{InvSprite|Blue Bed}} {{InvSprite|Purple Bed}} {{InvSprite|Magenta Bed}} {{InvSprite|Pink Bed}} The textures of all beds have been changed.
|[[File:Red Bed JE5 (facing NWU).png|32px]] The bottom textures of beds have been changed to new oak planks texture.}}
{{History|||snap=18w44a|Cats can now sleep in empty beds or sit on their owner when their owner is sleeping.}}
{{History|||snap=18w47a|[[File:Red Bed JE6 BE3 (facing NWU).png|32px]] The bottom textures of beds have been changed to the new oak planks to texture, once again.}}
{{History|||snap=18w48a|Beds now generate in the updated [[plains]] [[village]]s.}}
{{History|||snap=18w49a|Beds now generate in the updated [[savanna]] villages and the new [[snowy tundra]] villages.}}
{{History|||snap=18w50a|Beds now generate in the updated [[desert]] and [[taiga]] villages.}}
{{History|||snap=19w08a|All mobs can now sleep in beds using [[command]]s.}}
{{History|||snap=19w11a|[[Villager]]s now claim beds and sleep in them during the night.
|Shepherd villagers now [[trading|sell]] beds.}}
{{History||1.15|snap=19w35a|If a player tries to sleep in a bed that is occupied by a villager, that villager is now kicked out of the bed.}}
{{History|||snap=19w36a|Trying to sleep in a bed during the daytime now sets the player's spawn location to that bed.}}
{{History|||snap=pre2|Successfully changing a spawn point using a bed now displays a message in [[chat]].}}
{{History||1.16|snap=20w06a|Crimson and warped planks can now be used to craft beds.}}
{{History|||snap=20w12a|The message "Your home bed was missing or obstructed" has been changed to "You have no home bed or respawn anchor, or it was obstructed" due to the addition of the [[respawn anchor]], used to set the player's spawn in [[the Nether]].}}
{{History||1.16.2|snap=20w30a|Beds now prioritize the side of the bed the player or villager entered from and then spaces circling around the foot of the bed up to the head of the bed.}}
{{History||1.17|snap=20w51a|Added gamerules for sleeping in multiplayer.}}
{{History||1.18|snap=21w44a|Sleeping now only resets the weather cycle if it is currently raining or snowing.<ref>{{bug|MC-63340||Sleeping always resets time until rain|Fixed}}</ref>}}
{{History||1.19|snap=22w11a|[[Mangrove]] planks can now be used to craft beds.}}
{{History||1.19.3|snap=22w43a|Bed explosions can now be properly [[blocking|blocked]] by [[shield]]s.<ref>{{bug|MC-200006|||Fixed}}</ref>}}
{{History||1.20|snap=Pre-release 1|Beds of any color can now be dyed into any other color.}}
{{History|pocket alpha}}
{{History||v0.4.0|[[File:Red Bed JE1 BE1.png|32px]] [[File:Red Bed (item) JE1 BE1.png|32px]] Added beds.}}
{{History||v0.5.0|Beds can now be obtained after activating the [[nether reactor]].}}
{{History||v0.9.0|snap=build 1|Beds no longer restore [[health]] in normal difficulty, making [[food]] a more required [[Survival]]-needed resource.
|Added smooth lighting to beds.}}
{{History||v0.11.0|snap=build 8|The lighting on beds has been improved.}}
{{History||v0.12.1|snap=build 1|Tamed [[cat|ocelots]] while standing now purposely go and sit on beds.
|Beds are no longer available from the [[nether reactor]].}}
{{History||v0.16.0|snap=build 1|Beds now make a [[sound]] when placed, identical to [[block]]s like [[stone]].<ref name="lazilycodedsounds">{{bug|MCPE-10077}} – "Incorrect sounds on beds" resolved as "Fixed".</ref>}}
{{History|pocket}}
{{History||1.0.0|snap=alpha 0.17.0.1|Beds are now generated in [[igloo]]s.}}
{{History|||snap=alpha 0.17.0.2|[[File:Leave Bed 1.0.jpg|36px]] The ''Leave Bed'' button now has a new texture.}}
{{History|||snap=alpha 1.0.0.0|Sleeping now ends [[weather]].}}
{{History||1.1.0|snap=alpha 1.1.0.0|[[File:White Bed JE2 BE2.png|32px]] [[File:Light Gray Bed JE2 BE2.png|32px]] [[File:Gray Bed JE2 BE2.png|32px]] [[File:Black Bed JE2 BE2.png|32px]] [[File:Brown Bed JE2 BE2.png|32px]] [[File:Orange Bed JE2 BE2.png|32px]] [[File:Yellow Bed JE2 BE2.png|32px]] [[File:Lime Bed JE2 BE2.png|32px]] [[File:Green Bed JE2 BE2.png|32px]] [[File:Cyan Bed JE2 BE2.png|32px]] [[File:Light Blue Bed JE2 BE2.png|32px]] [[File:Blue Bed JE2 BE2.png|32px]] [[File:Purple Bed JE2 BE2.png|32px]] [[File:Magenta Bed JE2 BE2.png|32px]] [[File:Pink Bed JE2 BE2.png|32px]]<br>[[File:White Bed (item) BE1.png|32px]] [[File:Light Gray Bed (item) BE1.png|32px]] [[File:Gray Bed (item) BE1.png|32px]] [[File:Black Bed (item) BE1.png|32px]] [[File:Brown Bed (item) BE1.png|32px]] [[File:Orange Bed (item) BE1.png|32px]] [[File:Yellow Bed (item) BE1.png|32px]] [[File:Lime Bed (item) BE1.png|32px]] [[File:Green Bed (item) BE1.png|32px]] [[File:Cyan Bed (item) BE1.png|32px]] [[File:Light Blue Bed (item) BE1.png|32px]] [[File:Blue Bed (item) BE1.png|32px]] [[File:Purple Bed (item) BE1.png|32px]] [[File:Magenta Bed (item) BE1.png|32px]] [[File:Pink Bed (item) BE1.png|32px]] Added the other 15 colors of beds.
|The "Bed" has been renamed to "Red Bed".
|[[File:Red Bed JE3 BE2.png|32px]] The texture of red beds has been changed.
|A new animation when sleeping has been added to beds.
|Beds in [[igloo]]s are now white in [[ice plains]] and brown in [[cold taiga]]s.
|Beds now bounce the [[player]] two [[block]]s up, and have 3D legs.
|Placement, stepping and breaking [[sound]]s for beds are now correctly wooden.<ref name="lazilycodedsounds"/>}}
{{History|bedrock}}
{{History||1.4.0|snap=beta 1.2.14.2|Beds can now be [[waterlogging|waterlogged]] and require [[Water Breathing]] to sleep in.}}
{{History|||snap=beta 1.2.20.1|Colored beds can now be turned into white beds by adding [[bleach]]. This works only if {{el|ee}} features are turned on.}}
{{History||1.6.0|snap=beta 1.6.0.1|Sleeping in a bed is now important to keep [[phantom]]s from spawning.}}
{{History||1.8.0|snap=beta 1.8.0.8|[[Cat]]s can now sleep in empty beds or sit on their [[player|owner]] when their owner is sleeping.}}
{{History||1.10.0|snap=beta 1.10.0.3|Various beds now generate in the new [[village]]s.
|[[Villager]]s can now sleep by occupying a bed, which prevent [[player]]s from using it.
|[[Igloo]]s now generate with red beds.
|Beds are now used to count the number of available houses in [[village]]s.
|[[File:White Bed JE3 BE3.png|32px]] [[File:Light Gray Bed JE3 BE3.png|32px]] [[File:Gray Bed JE3 BE3.png|32px]] [[File:Black Bed JE3 BE3.png|32px]] [[File:Brown Bed JE3 BE3.png|32px]] [[File:Red Bed JE4 BE3.png|32px]] [[File:Orange Bed JE3 BE3.png|32px]] [[File:Yellow Bed JE3 BE3.png|32px]] [[File:Lime Bed JE3 BE3.png|32px]] [[File:Green Bed JE3 BE3.png|32px]] [[File:Cyan Bed JE3 BE3.png|32px]] [[File:Light Blue Bed JE3 BE3.png|32px]] [[File:Blue Bed JE3 BE3.png|32px]] [[File:Purple Bed JE3 BE3.png|32px]] [[File:Magenta Bed JE3 BE3.png|32px]] [[File:Pink Bed JE3 BE3.png|32px]] The textures of all beds have been changed.}}
{{History||1.11.0|snap=beta 1.11.0.4|Beds can now be [[trading|bought]] from shepherd [[villager]]s.}}
{{History||1.13.0|snap=?|[[Player]]s now succeed in attempting to sleep on villager-occupied beds, kicking the villager off.}}
{{History|console}}
{{History||xbox=TU1|xbone=CU1|ps=1.00|wiiu=Patch 1|switch=1.0.1|[[File:Red Bed JE1 BE1.png|32px]] [[File:Red Bed (item) JE1 BE1.png|32px]] Added beds.}}
{{History||xbox=TU12|xbone=CU1|ps=1.00|wiiu= Patch 1|[[Cat]]s in standing position now purposely go and sit on beds, preventing [[player]]s from using them.}}
{{History||xbox=TU43|xbone=CU33|ps=1.36|wiiu=Patch 13|The sleeping animation while in beds has been changed.}}
{{History||xbox=TU54|xbone=CU44|ps=1.52|wiiu=Patch 24|switch=1.0.4|[[File:White Bed JE2 BE2.png|32px]] [[File:Light Gray Bed JE2 BE2.png|32px]] [[File:Gray Bed JE2 BE2.png|32px]] [[File:Black Bed JE2 BE2.png|32px]] [[File:Brown Bed JE2 BE2.png|32px]] [[File:Orange Bed JE2 BE2.png|32px]] [[File:Yellow Bed JE2 BE2.png|32px]] [[File:Lime Bed JE2 BE2.png|32px]] [[File:Green Bed JE2 BE2.png|32px]] [[File:Cyan Bed JE2 BE2.png|32px]] [[File:Light Blue Bed JE2 BE2.png|32px]] [[File:Blue Bed JE2 BE2.png|32px]] [[File:Purple Bed JE2 BE2.png|32px]] [[File:Magenta Bed JE2 BE2.png|32px]] [[File:Pink Bed JE2 BE2.png|32px]]<br>[[File:White Bed (item) LCE.png|32px]] [[File:Light Gray Bed (item) LCE.png|32px]] [[File:Gray Bed (item) LCE.png|32px]] [[File:Black Bed (item) LCE.png|32px]] [[File:Brown Bed (item) LCE.png|32px]] [[File:Orange Bed (item) LCE.png|32px]] [[File:Yellow Bed (item) LCE.png|32px]] [[File:Lime Bed (item) LCE.png|32px]] [[File:Green Bed (item) LCE.png|32px]] [[File:Cyan Bed (item) LCE.png|32px]] [[File:Light Blue Bed (item) LCE.png|32px]] [[File:Blue Bed (item) LCE.png|32px]] [[File:Purple Bed (item) LCE.png|32px]] [[File:Magenta Bed (item) LCE.png|32px]] [[File:Pink Bed (item) LCE.png|32px]] Added the other 15 colors of beds.
|The "Bed" has been now renamed to "Red Bed".
|[[File:Red Bed JE3 BE2.png|32px]] [[File:Red Bed (item) LCE.png|32px]] The textures of red beds has been changed.
|Beds are now [[dye]]able and bounce the [[player]] two [[block]]s up, and have a single 3D legs.}}
{{History||xbox=TU60|xbone=CU51|ps=1.64|wiiu=Patch 30|switch=1.0.11|The sleeping animation in beds has been changed again.}}
{{History||xbox=TU69|xbone=none|ps=1.76|wiiu=Patch 38|switch=none|Sleeping in a bed is now important to keep [[phantom]]s from spawning.
|Beds can now be [[waterlogging|waterlogged]] and require {{EffectLink|Water Breathing}} to sleep in.}}
{{History||xbox=none|xbone=none|ps=1.83|wiiu=none|switch=none|The sleeping animation for beds has been reverted to how it was before [[Legacy Console Edition version history#ps-1.64|1.64]].}}
{{History||xbox=none|xbone=none|ps=1.91|wiiu=none|switch=none|Various beds now generate in the new [[village]]s.
|[[Villager]]s can now sleep by occupying a bed, which prevents [[player]]s from using it.
|Beds are now used to count the number of available houses in villages.
|Beds can now be [[trading|bought]] from shepherd [[villager]]s.}}
{{History|New 3DS}}
{{History||0.1.0|[[File:Red Bed JE1 BE1.png|32px]] [[File:Red Bed (item) JE1 BE1.png|32px]] Added beds.}}
{{History||1.9.19|[[File:White Bed JE2 BE2.png|32px]] [[File:Light Gray Bed JE2 BE2.png|32px]] [[File:Gray Bed JE2 BE2.png|32px]] [[File:Black Bed JE2 BE2.png|32px]] [[File:Brown Bed JE2 BE2.png|32px]] [[File:Orange Bed JE2 BE2.png|32px]] [[File:Yellow Bed JE2 BE2.png|32px]] [[File:Lime Bed JE2 BE2.png|32px]] [[File:Green Bed JE2 BE2.png|32px]] [[File:Cyan Bed JE2 BE2.png|32px]] [[File:Light Blue Bed JE2 BE2.png|32px]] [[File:Blue Bed JE2 BE2.png|32px]] [[File:Purple Bed JE2 BE2.png|32px]] [[File:Magenta Bed JE2 BE2.png|32px]] [[File:Pink Bed JE2 BE2.png|32px]]<br>[[File:White Bed (item) BE1.png|32px]] [[File:Light Gray Bed (item) BE1.png|32px]] [[File:Gray Bed (item) BE1.png|32px]] [[File:Black Bed (item) BE1.png|32px]] [[File:Brown Bed (item) BE1.png|32px]] [[File:Orange Bed (item) BE1.png|32px]] [[File:Yellow Bed (item) BE1.png|32px]] [[File:Lime Bed (item) BE1.png|32px]] [[File:Green Bed (item) BE1.png|32px]] [[File:Cyan Bed (item) BE1.png|32px]] [[File:Light Blue Bed (item) BE1.png|32px]] [[File:Blue Bed (item) BE1.png|32px]] [[File:Purple Bed (item) BE1.png|32px]] [[File:Magenta Bed (item) BE1.png|32px]] [[File:Pink Bed (item) BE1.png|32px]] Added the other 15 colors of beds.
|The "Bed" has been renamed to "Red Bed".
|[[File:Red Bed JE3 BE2.png|32px]] The texture of red beds has been changed.
|Beds now bounce the [[player]] two [[block]]s up and have 3D legs.}}
{{History|Education}}
{{History||1.0|[[File:Red Bed JE1 BE1.png|32px]] [[File:Red Bed (item) JE1 BE1.png|32px]] Added beds.}}
{{History||1.0.1|[[File:White Bed JE2 BE2.png|32px]] [[File:Light Gray Bed JE2 BE2.png|32px]] [[File:Gray Bed JE2 BE2.png|32px]] [[File:Black Bed JE2 BE2.png|32px]] [[File:Brown Bed JE2 BE2.png|32px]] [[File:Orange Bed JE2 BE2.png|32px]] [[File:Yellow Bed JE2 BE2.png|32px]] [[File:Lime Bed JE2 BE2.png|32px]] [[File:Green Bed JE2 BE2.png|32px]] [[File:Cyan Bed JE2 BE2.png|32px]] [[File:Light Blue Bed JE2 BE2.png|32px]] [[File:Blue Bed JE2 BE2.png|32px]] [[File:Purple Bed JE2 BE2.png|32px]] [[File:Magenta Bed JE2 BE2.png|32px]] [[File:Pink Bed JE2 BE2.png|32px]]<br>[[File:White Bed (item) BE1.png|32px]] [[File:Light Gray Bed (item) BE1.png|32px]] [[File:Gray Bed (item) BE1.png|32px]] [[File:Black Bed (item) BE1.png|32px]] [[File:Brown Bed (item) BE1.png|32px]] [[File:Orange Bed (item) BE1.png|32px]] [[File:Yellow Bed (item) BE1.png|32px]] [[File:Lime Bed (item) BE1.png|32px]] [[File:Green Bed (item) BE1.png|32px]] [[File:Cyan Bed (item) BE1.png|32px]] [[File:Light Blue Bed (item) BE1.png|32px]] [[File:Blue Bed (item) BE1.png|32px]] [[File:Purple Bed (item) BE1.png|32px]] [[File:Magenta Bed (item) BE1.png|32px]] [[File:Pink Bed (item) BE1.png|32px]] Added the other 15 colors of beds.
|The "Bed" has been renamed to "Red Bed".
|[[File:Red Bed JE3 BE2.png|32px]] The texture of red beds has been changed.
|Beds now bounce the [[player]] two [[block]]s up, and have 3D legs.}}
{{History||1.0.27|Colored beds can now be turned into white beds by adding [[bleach]].}}
{{History||1.12|[[File:White Bed JE3 BE3.png|32px]] [[File:Light Gray Bed JE3 BE3.png|32px]] [[File:Gray Bed JE3 BE3.png|32px]] [[File:Black Bed JE3 BE3.png|32px]] [[File:Brown Bed JE3 BE3.png|32px]] [[File:Red Bed JE4 BE3.png|32px]] [[File:Orange Bed JE3 BE3.png|32px]] [[File:Yellow Bed JE3 BE3.png|32px]] [[File:Lime Bed JE3 BE3.png|32px]] [[File:Green Bed JE3 BE3.png|32px]] [[File:Cyan Bed JE3 BE3.png|32px]] [[File:Light Blue Bed JE3 BE3.png|32px]] [[File:Blue Bed JE3 BE3.png|32px]] [[File:Purple Bed JE3 BE3.png|32px]] [[File:Magenta Bed JE3 BE3.png|32px]] [[File:Pink Bed JE3 BE3.png|32px]] The textures of all beds have been changed.}}
{{History|foot}}
=== Data history ===
{{History|java}}
{{History||1.13|snap=17w47a|The different block states for the <code>bed</code> ID have been split up into their own IDs.
|Prior to [[1.13/Flattening|''The Flattening'']], this block's numeral ID was 26, and the item's 355.}}
{{History|foot}}
=== Bed "item"===
{{:Technical blocks/Bed}}
==Issues==
{{Issue list}}
== Trivia==
* The reason beds explode in the Nether and the End is because Notch found it was the easiest solution to dimension-unique respawning.<ref>{{tweet|Notch|1259681657793077250|duh|11 May 2020}}, in response to {{tweet|NoahBandito|1259681319392550912|So you're telling me the "Inteded Game Design" should actually be "Sorry, I was too lazy to code"?|11 May 2020}}</ref>
** Dimension-unique respawning was eventually implemented via the [[respawn anchor]], and gained command support at the same time. Despite this, beds and respawn anchors still explode in invalid dimensions.
* If the player quits the game while sleeping, upon return the player wakes up beside the bed.
* Using the {{cmd|teleport}} command while another player is sleeping still teleports the sleeping player, but the player wakes immediately.{{only|java}}
* If the player places a bed on [[ice]], running over the bed acts like running over ice, similar to slabs.
* When placed using the {{cmd|setblock}} command, only one half of a bed is placed, because beds are two blocks long. A single half can be slept in like a whole bed.
* Villagers can sleep in the Nether and the End without causing the bed to explode.<ref>{{bug|MC-146515}} Resolved as Works As Intended</ref>
* While the block state used to determine the half of a two-block block such as [[door]]s and double-tall [[flower]]s is called ''half'', in the case of beds this is called ''part''.
* Players and villagers do not drown or take damage from lava while in a bed, even if the bed is covered in lava.
*The red bed was the original default bed color. In [[Java Edition 1.12]] and [[Pocket Edition 1.1.0]] version of the game, the default color was changed to white.
== Gallery ==
=== All renders ===
<gallery>
White Bed.png|White
Light Gray Bed.png|Light gray
Gray Bed.png|Gray
Black Bed.png|Black
Brown Bed.png|Brown
Red Bed.png|Red
Orange Bed.png|Orange
Yellow Bed.png|Yellow
Lime Bed.png|Lime
Green Bed.png|Green
Cyan Bed.png|Cyan
Light Blue Bed.png|Light blue
Blue Bed.png|Blue
Purple Bed.png|Purple
Magenta Bed.png|Magenta
Pink Bed.png|Pink
</gallery>
=== Screenshots ===
<gallery>
Multiplayer Sleeping.png|A sleeping player in multiplayer.
Missing Bed.png|The message that can be seen after a failed attempt to respawn at the spawn point set by a bed.
Nether Bed.png|A crater created by attempting to sleep in the Nether.
Ender Bed.png|A crater created by attempting to sleep in the End.
16 color beds.png|All the different color variants.
Old Village New Village VillagerSleeping MCEE.png|An unemployed [[villager]] and a [[butcher]] villager goes to sleep, unaware of the zombies outside.
Stackedbeds.png|A stack of beds.
Mob wakeup.png|Player being awakened by a [[zombie]].
Day Sleeping.png|The message that can be seen when any players attempt to sleep during daytime.
Sleeping.png|A player going to sleep in a bed on the first day of a ''Minecraft'' world.
CobwebVillage.png|A bed in an abandoned village has its bottom half replaced by wheat crops.
</gallery>
=== In other media ===
<gallery>
File:Rainbow Bed.png|The [[MCE:Rainbow Bed|rainbow bed]], a unique coloration featured in [[Minecraft Earth]].
File:The Sham.jpg|The Sham, a villainous, sentient bed featured in the [[skin pack|Campfire Tales]] skin pack.
</gallery>
==References==
{{Reflist}}
{{Blocks|Utility}}
{{Items}}
[[Category:Utility blocks]]
[[Category:Manufactured blocks]]
[[Category:Generated structure blocks]]
[[Category:Block entities]]
[[cs:Postel]]
[[de:Bett]]
[[es:Cama]]
[[fr:Lit]]
[[hu:Ágy]]
[[it:Letto]]
[[ja:ベッド]]
[[ko:침대]]
[[nl:Bed]]
[[pl:Łóżko]]
[[pt:Cama]]
[[ru:Кровать]]
[[th:เตียง]]
[[uk:Ліжко]]
[[zh:床]]</li></ul> | 12w06a | Snow golems now take damage in the Nether. | ||||||||||||||||||||||||||||||||||||||||||||||||||||||||||||||||||||||||||||||||||||||||||||||||||||||||||||
1.3.1{{Extension DPL}}<ul><li>[[Milk Bucket|Milk Bucket]]<br/>{{Item
| title=Milk Bucket
| image = Milk Bucket.png
| renewable = Yes
| effects = Clears all
| stackable = No
}}
A '''milk bucket'''{{fn|Known as '''Milk Bucket''' {{in|java}} and '''Milk''' {{in|bedrock}}.}} is a [[drink]] obtained from {{Control|use|text=using}} a [[bucket]] on [[cow]]s, [[mooshroom]]s and [[goat]]s that can be consumed to clear all [[Effect|effects]].
== Obtaining ==
=== Harvesting ===
Milk buckets can be obtained from [[cow]]s, [[mooshroom]]s, and [[goat]]s by pressing {{control|use}} while looking at them with an empty [[bucket]].
=== Mob loot ===
A milk bucket has a chance of dropping from a [[wandering trader]], if the trader is killed while holding it.{{only|java}}
== Usage ==
Holding {{control|use}} with a milk bucket starts the drinking sound and animation. {{IN|java}}, the animation is shown only in first-person camera mode.
When consumed, milk immediately removes all status [[effect]]s from the [[player]]. [[Fire]] is not a status effect; therefore, drinking milk doesn't extinguish a burning player.
The benefits of area status effects granted by [[beacon]]s and [[Conduit Power|conduit power]] are restored almost immediately in Bedrock Edition and after a few seconds in ''Java Edition''.
=== Crafting ingredient ===
{{crafting usage|Milk Bucket}}
== Sounds ==
{{el|je}}:
{{Sound table
|sound=Drink.ogg
|subtitle=Sipping
|source=player
|description=While a player is drinking milk
|id=entity.generic.drink
|translationkey=subtitles.entity.generic.drink
|volume=0.5
|pitch=0.9-1.0
|distance=16}}
{{Sound table
|sound=Cow milk1.ogg
|sound2=Cow milk2.ogg
|sound3=Cow milk3.ogg
|source=player
|subtitle=Cow gets milked
|description=When a cow is milked
|id=entity.cow.milk
|translationkey=subtitles.entity.cow.milk
|volume=1.0
|pitch=1.0
|distance=16}}
{{Sound table
|sound=Mooshroom milk1.ogg
|sound2=Mooshroom milk2.ogg
|sound3=Mooshroom milk3.ogg
|subtitle=Goat gets milked
|description=When a regular goat is milked
|source=neutral
|id=entity.goat.milk
|translationkey=subtitles.entity.goat.milk
|volume=1.0
|pitch=1.0
|distance=16}}
{{Sound table
|sound=Goat screaming milk1.ogg
|sound2=Goat screaming milk2.ogg
|sound3=Goat screaming milk3.ogg
|sound4=Goat screaming milk4.ogg
|sound5=Goat screaming milk5.ogg
|subtitle=Goat gets milked
|description=When a screaming goat is milked
|source=neutral
|id=entity.goat.screaming.milk
|translationkey=subtitles.entity.goat.milk
|volume=1.0
|pitch=1.0
|distance=16}}
{{Sound table
|sound=Wandering trader drink milk1.ogg
|sound2=Wandering trader drink milk2.ogg
|sound3=Wandering trader drink milk3.ogg
|sound4=Wandering trader drink milk4.ogg
|sound5=Wandering trader drink milk5.ogg
|subtitle=Wandering Trader drinks milk
|source=neutral
|description=While a wandering trader is drinking milk to become visible during daytime
|id=entity.wandering_trader.drink_milk
|translationkey=subtitles.entity.wandering_trader.drink_milk
|volume=0.5
|pitch=0.9-1.0
|distance=16
|foot=1}}
{{el|be}}:
{{Sound table
|type=bedrock
|sound=Drink.ogg
|source=player
|description=While a player is drinking milk
|id=random.drink
|volume=0.35
|pitch=0.9-1.1}}
{{Sound table
|sound=Cow milk1.ogg
|sound2=Cow milk2.ogg
|sound3=Cow milk3.ogg
|source=neutral
|description=When a cow is milked
|id=mob.cow.milk
|volume=1.0
|pitch=1.0}}
{{Sound table
|sound=Mooshroom milk1.ogg
|sound2=Mooshroom milk2.ogg
|sound3=Mooshroom milk3.ogg
|description=When a regular goat is milked
|source=neutral
|id=mob.mooshroom.suspicious_milk
|volume=1.0
|pitch=1.0/0.9/1.1}}
{{Sound table
|sound=Goat screaming milk1.ogg
|sound2=Goat screaming milk2.ogg
|sound3=Goat screaming milk3.ogg
|sound4=Goat screaming milk4.ogg
|sound5=Goat screaming milk5.ogg
|description=When a screaming goat is milked
|source=neutral
|id=mob.goat.milk.screamer
|volume=1.0
|pitch=1.0}}
{{Sound table
|sound=Wandering trader drink milk1.ogg
|sound2=Wandering trader drink milk2.ogg
|sound3=Wandering trader drink milk3.ogg
|sound4=Wandering trader drink milk4.ogg
|sound5=Wandering trader drink milk5.ogg
|source=neutral
|description=While a wandering trader is drinking milk to become visible during daytime
|id=mob.wanderingtrader.drink_milk
|volume=1.0
|pitch=0.8-1.2
|foot=1}}
== Data values ==
=== ID ===
{{edition|java}}:
{{ID table
|edition=java
|showforms=y
|generatetranslationkeys=y
|displayname=Milk Bucket
|spritetype=item
|nameid=milk_bucket
|form=item
|foot=1}}
{{edition|bedrock}}:
{{ID table
|edition=bedrock
|showaliasids=y
|shownumericids=y
|showforms=y
|notshowbeitemforms=y
|generatetranslationkeys=y
|displayname=Milk
|spritetype=item
|nameid=milk_bucket
|aliasid=bucket / 1
|id=361
|form=item
|translationkey=item.milk.name
|foot=1}}
== Achievements ==
{{load achievements|The Lie}}
== Advancements ==
{{Load advancements|Husbandry}}
== Video ==
<div style="text-align:center">{{yt|eyxea_d0b3s}}</div>
== History ==
{{History|java alpha}}
{{History||v1.0.8|[[File:Milk Bucket JE1 BE1.png|32px]] Milk has been introduced, but it has no purpose and is obtainable only through inventory editing.}}
{{History||v1.0.11|Milk can now be obtained by {{control|use|text=milking}} a [[cow]] with a [[bucket]]. However, it is not yet drinkable.}}
{{History||v1.0.17|Milk buckets can now be emptied.}}
{{History|java beta}}
{{History||1.2|Milk has been incorporated into the [[crafting]] recipe of [[cake]].}}
{{History||1.2_01|[[Squid]] can now be milked by right-clicking on their mouth if part of their body was exposed to [[air]] or if they were not touching another [[block]]. An easy way to accomplish this is to pull a squid with a [[fishing rod]] away from other blocks and then milk it.}}
{{History||1.3_01|Squid milking has been removed.}}
{{History|java}}
{{History||1.0.0|snap=Beta 1.9 Prerelease|Milk can now be obtained by milking [[mooshroom]]s.}}
{{History|||snap=Beta 1.9 Prerelease 2|Milk has been made drinkable.
|According to a tweet by [[Jeb]] on September 30th 2011, milk was made a cure for all status effects.<ref>{{tweet|jeb_|119842906528944129|@Nexusdog_UK I haven't! In beta 1.9 pre2 milk works like a clear-everything drink|September 30, 2011}}</ref>
|Milk is no longer emptiable.}}
{{History||1.13|snap=17w47a|Prior to [[1.13/Flattening|''The Flattening'']], this [[item]]'s numeral ID was 335.}}
{{History|||snap=18w20a|"Milk" has been renamed to "Milk Bucket".}}
{{History||1.14|snap=18w43a|[[File:Milk Bucket JE2 BE2.png|32px]] The texture of milk buckets has been changed.}}
{{History||1.14|snap=19w06a|[[Wandering trader]]s now drink from milk buckets at dawn, and have a change to drop them.}}
{{History||1.17|snap=21w13a|Milk can now be obtained by milking [[goat]]s.}}
{{History|upcoming java}}
{{History||Villager Trade Rebalance<br>(Experimental)|link=Java Edition 1.20.2|snap=23w31a|Wander traders now have a chance to [[trading|buy]] a milk bucket from the player.}}
{{History|pocket alpha}}
{{History||v0.7.0|[[File:Milk Bucket JE1 BE1.png|32px]] Added milk buckets.
|Milk buckets are not yet drinkable.}}
{{History||v0.11.0|snap=build 4|Drinking milk now removes [[status effects]].
|Added milk buckets to the Creative inventory.{{verify|type=update}}{{info needed}}<!---same update?--->}}
{{History|bedrock}}
{{History||1.4.0|snap=beta 1.2.14.2|Moved all bucket items, including milk, from the Equipment tab to the Items tab in the [[Creative inventory]].{{verify|type=update}}{{info needed}}<!---please check snapshots, only 1 major release version was checked each--->}}
{{History||1.10.0|snap=beta 1.10.0.3|[[File:Milk Bucket JE2 BE2.png|32px]] The texture of milk buckets has been changed.}}
{{History||1.16.100|snap=beta 1.16.100.56|The ID of milk has been changed from <code>bucket/1</code> to <code>milk_bucket</code>.}}
{{History||1.16.200|snap=beta 1.16.200.52|Milk can now be obtained by milking [[goat]]s.}}
{{History|console}}
{{History||xbox=TU1|xbone=CU1|ps=1.0|wiiu=Patch 1|switch=1.0.1|[[File:Milk Bucket JE1 BE1.png|32px]] Added milk buckets.}}
{{History|Ps4}}
{{History||1.90|[[File:Milk Bucket JE2 BE2.png|32px]] The texture of milk buckets has been changed.}}
{{History|New 3DS}}
{{History||0.1.0|[[File:Milk Bucket JE1 BE1.png|32px]] Added milk buckets.}}
{{History|foot}}
== Issues ==
{{issue list}}
== See also ==
*[[Water Bucket]]
*[[Lava]]
*[[Food]]
*[[Cake]]
*[[Honey Bottle]] (alternative to remove poison effect)
*[[Medicine]]
== Notes ==
{{fnlist}}
== References ==
{{reflist}}
== External Links ==
*[https://www.minecraft.net/en-us/article/taking-inventory--milk-bucket Taking Inventory: Milk Bucket] – Minecraft.net on October 8, 2019
{{Items}}
[[Category:Food]]
[[Category:Renewable resources]]
[[Category:Tools]]
[[cs:Mléko]]
[[de:Milcheimer]]
[[es:Cubo con leche]]
[[fr:Seau de lait]]
[[hu:Tej]]
[[it:Secchio di latte]]
[[ja:ミルク入りバケツ]]
[[ko:우유 양동이]]
[[nl:Emmer melk]]
[[pl:Wiadro mleka]]
[[pt:Balde de leite]]
[[ru:Ведро с молоком]]
[[th:ถังนม]]
[[uk:Відро молока]]
[[zh:奶桶]]</li><li>[[Lava|Lava]]<br/>{{About|the fluid|the [[bucket]]|Lava Bucket}}
{{Fluid
| image = Lava.gif
| image2 = Lava BE.gif
| invimage = Lava Bucket
| invimage2 = Lava
| renewable = Yes
| transparent = Yes
| light = Yes (15)
| tool = Bucket
| infinite = No
| flowrate = 30 [[tick]]s/block (Overworld, End)<br> 10 [[tick]]s/block (Nether)
| flowdistance = 4 blocks (Overworld, End)<br>8 blocks (Nether)
}}
'''Lava''' is a light-emitting [[fluid]] that causes fire [[damage]], mostly found in the [[altitude|lower reaches]] of the [[Overworld]] and [[the Nether]].
== Obtaining ==
Lava blocks do not exist as items (at least {{in|java}}), but can be retrieved with a [[Lava Bucket|bucket]]. {{IN|bedrock}}, they may be obtained as an item via glitches (in old versions), add-ons or inventory editing.
Lava may be obtained [[renewable resource|renewably]] from [[cauldron]]s, as [[pointed dripstone]] with a lava source above it can slowly fill a cauldron with lava.
=== Natural generation ===
During world generation, lava replaces [[air]] blocks generated in [[cave]]s and [[canyon]]s between Y=-55 and Y=-63. [[Aquifer]]s are sometimes filled with lava below Y=0. Lava does not replace air blocks inside [[mineshaft]]s, [[monster room]]s, [[amethyst geode]]s, or [[stronghold]]s.
Lava can also occur as lava flows from a single [[spring]] block, pouring down walls into pools. The spring block can be on the side of a cave, ravine, mineshaft, or stone cliff above ground.
Lava also generates as small [[lava lake]]s, which can be found above Y=0 within any [[biome]].
Two blocks of lava can also be found in plains, snowy plains, and desert [[village]] weaponsmith buildings, or one source in savanna village weaponsmith buildings.
Fifteen blocks of lava can be found in the [[end portal]] room of a [[stronghold]]: 3 along each side wall, and 9 below the portal frame.
Lava also generates in [[woodland mansion]]s: two blocks of lava generate in the "blacksmith room", and 25 blocks of lava generate in a secret "lava room".
In [[the Nether]], lava is more common than [[water]] in the [[Overworld]]. [[Terrain features#Lava sea|Seas of lava]] occur, with sea level at y-level 32, about a quarter of the total height of the Nether (as the usable space in the Nether is 128 blocks tall). They can extend down to about y-level 19-22. Lava also randomly appears [[Spring#Hidden lava|in single blocks]] inside [[netherrack]] formations. Lava is also generated as a single source in well rooms in [[nether fortress]]es. There are also large pockets of lava generated under y-19 and can reach all the way down to bedrock level. These pockets are generally over 12 blocks in height and often connect to a large lava lake on y-32; the size of these pockets in 1.18 can range from the size of a singular pre-1.18 ravine to multiple ravines combined.
Lava generates as [[delta]] shapes, which can be found commonly in the [[basalt deltas]] biome. Lava also generates in [[ruined portal]]s and [[bastion remnant]]s.
=== Post-generation ===
Unlike [[Water#Source blocks|water source blocks]], new lava source blocks cannot be created in a space by two or more adjacent source blocks. However {{in|Java}}, if the [[game rule]] {{cd|lavaSourceConversion}} is set to {{cd|true}}, new lava source blocks can form in a similar way to water source blocks.
== Usage ==
=== Fuel ===
When used in a [[furnace]], a bucket of lava lasts 1000 seconds (100 items).
=== Burning ===
[[File:Inside Lava.png|thumb|What it looks like inside lava.]]
[[File:Under lava fire resistance.png|thumb|What it looks like inside lava using Fire Resistance {{in|java}}.]]
Most [[entity|entities]] take {{hp|4}} damage every half-second while in contact with lava, and are set on [[fire]]. An entity/player in lava will also have its {{code|remainingFireTicks}} set to 300, setting it on fire for 15 seconds. This timer is reset to 300 every tick that the victim spends in lava, so it will only start counting down once the victim leaves the lava. Once the victim does exit the lava source, it will burn for just under 15 seconds, taking fire damage 14 times. This is due to the fact that for the first tick outside of lava, its {{code|remainingFireTicks}} decrease to 299, and entities take fire damage when {{code|remainingFireTicks}} is a multiple of 20 and greater than 0. If the victim touches water or [[rain]] falls on it, the fire is extinguished, but the lava continues to damage them directly.
In addition, a dense [[fog]] effect will be applied for players under lava to obscure vision. This can be slightly mitigated via the [[Fire Resistance]] effect.
An entity/player moving in lava has their horizontal movement speed reduced by 50% and their vertical movement speed reduced by 20%.
{{IN|bedrock}}, a player with the Fire Resistance effect or a total [[Fire Protection]] of 7 or higher does not catch fire.
[[Vex]]es, [[zoglin]]s, Nether [[mob]]s (excluding [[piglin]]s and [[hoglin]]s), [[Wither|withers]], [[Warden|wardens]], and players or mobs affected by the [[Fire Resistance]] effect are not damaged when touching lava.
The embers or fireballs that fly out of lava are purely decorative and do not cause fires or damage to entities. When rain falls on lava, the black ember particles appear more frequently.
A player in lava lasts a few seconds before dying:
==== ''Java Edition'' ====
* 2.5 seconds with no armor
* 3.5 seconds with full leather armor, no enchantments
* 4 seconds with full gold armor, no enchantments
* 4.5 seconds with full chain armor, no enchantments
* 5.5 seconds with full iron armor, no enchantments
* 10.5 seconds with full diamond armor, no enchantments
* 11 seconds with full netherite armor, no enchantments
==== Bedrock Edition====
* 2.5 seconds with no armor
* 3.5 seconds with full leather armor, no enchantments
* 4.5 seconds with full gold armor, no enchantments
* 5 seconds with full chain armor, no enchantments
* 6.5 seconds with full iron armor, no enchantments
* 12.5 seconds with full diamond armor, no enchantments
* 12.5 seconds with full netherite armor, no enchantments
If the player is wearing armor enchanted with [[Fire Protection]], they can last even longer. With the maximum bonus, the damage is small enough that the natural healing from a full hunger bar can outpace it {{only|JE|short=1}}, so a player could survive indefinitely as long as they have food and their armor holds up (non-netherite armor is damaged by lava). This maximum bonus can be obtained by wearing 2 pieces of armor with [[Fire Protection|Fire Protection IV]] and 1 with [[Protection|Protection IV]], or 1 piece of armor with [[Fire Protection|Fire Protection IV]] and 3 with [[Protection|Protection IV]].
==== Fire spread ====
Lava can cause fires by turning air blocks to fire blocks.
In order for air above lava to turn to fire, a block adjacent to the air has to be [[Fire#Burning blocks|flammable]], or one of the wood-constructed [[Fire#Non-flammable blocks|non-flammable]] blocks. Since catching fire depends on air blocks, even torches or lava itself can prevent a flammable block from catching fire. Additionally, not all flammable or wood-constructed blocks can be ignited by lava.
The lava of any depth can start fires this way, whether or not it appears to have a current.
Additional conditions must be met, depending on the edition of Minecraft.
===== Java Edition =====
{{FakeImage|align=right|{{BlockGrid|scale=2|L=lava|w=Oak Planks|p=Orange Stained Glass|s=Light Gray Stained Glass|wwwwwwwww|wwsssssww|wspppppsw|wwspppsww|wwwsLswww|wwwwwwwww}}|Example for JE. The orange area represents areas<br>where air could catch flame if the<br>gray and orange areas contain<br>flammable blocks. The wood<br>is all at a safe distance.
}}
Air block must be in a 3×1×3 area right above the lava or in a 5×1×5 2 blocks above the lava.
Note that an air block in the 5x1x5 area will not catch on fire if the 3x1x3 area is completely filled, even if the latter is filled with flammable blocks.
===== Bedrock Edition =====
The block to be set on fire must be in a 3×3×3 cube centered on a lava block, above which there must be either air or an ignitable block.
=== Flow ===
{{See also|Fluid}}
Lava flows from "source blocks". Most streams or "lava-falls" come from a single source block, but lava lakes (including the "flood lava" in the bottom 10 layers) are composed entirely of source blocks. A source block can be captured only with a [[lava bucket|bucket]].
In the [[Overworld]] and [[the End]], lava travels 3 blocks in any horizontal direction from a source block. Lava flows far more slowly than water (1 block every 30 game ticks, or 1.5 seconds), and sourceless lava flows linger for a short time more. In [[the Nether]], lava travels 7 blocks horizontally and spreads 1 block every 10 game ticks, or 2 blocks per second, which is half the speed as water in the Overworld. In all dimensions, lava spreading uses the same mechanic as water: for every adjacent block it can flow into it tries to find a way down that is reachable in four or fewer blocks from the block it wants to flow to. When found, the flow weight for that direction is set to the shortest path distance to the way down. (This can result in lava flows turning toward dropoffs that they cannot reach in the Overworld and the End.)
Flowing lava destroys the following in its path: [[sapling]]s, [[cobweb]], [[tall grass]], [[dead bush]], [[wheat]], [[flower]]s, [[mushroom]]s, [[snow]] on ground (but snow blocks are immune), [[lily pad]]s, [[vines]], [[lever]]s, [[button]]s, all three types of [[torch]]es, [[redstone]], [[redstone repeater|repeaters]], [[end rod]]s, and [[rail]]s. [[Sugar cane]]s hold back lava, but disappear if the sugar cane's water source is destroyed by the lava. Lava also slows down entities, including those that are normally immune to lava damage.
Using redstone wire, a one-block lava flow can be redirected by supplying power to the source block, which causes it to reset the flow toward the now-nearest terrain depression. It cannot, however, be reversed. This re-calculation is made because of the redstone wire when toggled changes the block from redstone (on) to redstone (off). Whenever a block updates on any side of the lava, the lava re-calculates where to flow, but does not cut off its current direction of flow. In Bedrock Edition using the /setblock command can be used to create stationary lava without the use of barriers.
Flowing lava can push entities.
==== Flow arrangement tables ====
===== Overworld and the End =====
{| class="wikitable"
|+
|
|
|
!4
|
|
|
|-
|
|
!4
!3
!4
|
|
|-
|
!4
!3
!2
!3
!4
|
|-
!4
!3
!2
!1
!2
!3
!4
|-
|
!4
!3
!2
!3
!4
|
|-
|
|
!4
!3
!4
|
|
|-
|
|
|
!4
|
|
|
|}
{| class="wikitable"
|+
! colspan="2" |Range
!Height in blocks
|-
!1
|block
|1
|-
!2
|blocks
|0.75-1
|-
!3
|blocks
|0.5-0.75
|-
!4
|blocks
|0.25-0.5
|}
===== The Nether =====
{| class="wikitable"
|+
|
|
|
|
|
|
!7
|
|
|
|
|
|
|-
|
|
|
|
|
!7
!6
!7
|
|
|
|
|
|-
|
|
|
|
!7
!6
!5
!6
!7
|
|
|
|
|-
|
|
|
!7
!6
!5
!4
!5
!6
!7
|
|
|
|-
|
|
!7
!6
!5
!4
!3
!4
!5
!6
!7
|
|
|-
|
!7
!6
!5
!4
!3
!2
!3
!4
!5
!6
!7
|
|-
!7
!6
!5
!4
!3
!2
!1
!2
!3
!4
!5
!6
!7
|-
|
!7
!6
!5
!4
!3
!2
!3
!4
!5
!6
!7
|
|-
|
|
!7
!6
!5
!4
!3
!4
!5
!6
!7
|
|
|-
|
|
|
!7
!6
!5
!4
!5
!6
!7
|
|
|
|-
|
|
|
|
!7
!6
!5
!6
!7
|
|
|
|
|-
|
|
|
|
|
!7
!6
!7
|
|
|
|
|
|-
|
|
|
|
|
|
!7
|
|
|
|
|
|
|}
{| class="wikitable"
! colspan="2" |Range
!Height in blocks
|-
!1
|block
|1
|-
!2
|blocks
|0.75-1
|-
!3
|blocks
|0.625-0.75
|-
!4
|blocks
|0.5-0.625
|-
!5
|blocks
|0.375-0.5
|-
!6
|blocks
|0.25-0.375
|-
!7
|blocks
|0.125-0.25
|}
=== Lava and water ===
{{Main|Fluid#Mixing}}
Water and lava can produce [[stone]], [[cobblestone]], or [[obsidian]] based on how they interact. Lava can also generate basalt when above soul soil and touching blue ice.
=== Light source ===
Lava blocks emit a [[light]] level of 15.
=== Other ===
[[File:LavaDropletsExample.png|thumb|If there is lava flowing above a [[block]], the lava seeps through.]]
Lava above a non-transparent block (does ''not'' include stairs, fences, and slabs) produces dripping particles on the underside of that block. These droplets do not do anything other than warn the player that a deluge of lava lies above that block. The particles function identically to their water counterparts, except that they drip slower.
Flowing lava can set off tripwires because it breaks placed string. Lava triggers a tripwire only once.
Any [[item (entity)|item]] dropped into lava is immediately destroyed, except for [[netherite]]-related items. [[Lodestone|Lodestones]], however, can be destroyed by lava despite containing netherite.<ref>{{bug|MC-176618|||WAI}}</ref>
Lava can be placed in an empty [[cauldron]].
If lava is above a non-transparent block supporting [[pointed dripstone]], dripping particles are created on the end. These can fill cauldrons with lava.
== Farming ==
{{main|Tutorials/Lava farming}}
Lava farms can be created by placing a lava source block on top of a solid block and a [[pointed dripstone]] and a [[cauldron]] underneath.
== Sounds ==
{{edition|java}}:
{{Sound table
|sound=Lava.ogg
|subtitle=Lava pops
|source=block
|description=Randomly
|id=block.lava.ambient
|translationkey=subtitles.block.lava.ambient
|volume=0.2-0.4
|pitch=0.9-1.05
|distance=16}}
{{Sound table
|sound=Fizz.ogg
|subtitle=Lava hisses
|source=block
|description=When lava mixes with water, making a block
|id=block.lava.extinguish
|translationkey=subtitles.block.lava.extinguish
|volume=0.5
|pitch=1.8-3.4
|distance=16}}
{{Sound table
|sound=Lava pop.ogg
|subtitle=Lava pops
|source=block
|description=When a lava bubble particle spawns
|id=block.lava.pop
|translationkey=subtitles.block.lava.ambient
|volume=0.2-0.4
|pitch=0.9-1.05
|distance=16}}
{{Sound table
|sound=Empty lava bucket1.ogg
|sound2=Empty lava bucket2.ogg
|sound3=Empty lava bucket3.ogg
|subtitle=Bucket empties
|source=block
|description=When lava is placed with a bucket
|id=item.bucket.empty_lava
|translationkey=subtitles.item.bucket.empty
|volume=1.0
|pitch=1.0
|distance=16}}
{{Sound table
|sound=Fill lava bucket1.ogg
|sound2=Fill lava bucket2.ogg
|sound3=Fill lava bucket3.ogg
|subtitle=Bucket fills
|source=player
|description=When lava is collected with a bucket
|id=item.bucket.fill_lava
|translationkey=subtitles.item.bucket.fill
|volume=1.0
|pitch=1.0
|distance=16}}
{{Sound table
|sound=Fizz.ogg
|subtitle=Fire extinguishes
|description=When something [[freezing]] is dunked into lava
|source=block
|id=entity.generic.extinguish_fire
|translationkey=subtitles.entity.generic.extinguish_fire
|volume=0.7
|pitch=1.2-2.0
|distance=16
|foot=1}}
{{edition|bedrock}}:
{{Sound table
|type=bedrock
|sound=Lava.ogg
|source=block
|description=Randomly
|id=liquid.lava
|volume=0.4-0.6
|pitch=0.9-1.05}}
{{Sound table
|sound=Fizz.ogg
|source=block
|description=When lava mixes with water, making a block
|id=random.fizz
|volume=0.5
|pitch=1.8-2.4}}
{{Sound table
|sound=Lava pop.ogg
|source=block
|description=When a lava bubble particle spawns
|id=liquid.lavapop
|volume=0.4-0.6
|pitch=0.9-1.05}}
{{Sound table
|sound=Empty lava bucket1.ogg
|sound2=Empty lava bucket2.ogg
|sound3=Empty lava bucket3.ogg
|source=block
|description=When lava is placed with a bucket
|id=bucket.empty_lava
|volume=1.0
|pitch=1.0}}
{{Sound table
|sound=Fill lava bucket1.ogg
|sound2=Fill lava bucket2.ogg
|sound3=Fill lava bucket3.ogg
|source=block
|description=When lava is collected with a bucket
|id=bucket.fill_lava
|volume=1.0
|pitch=1.0}}
{{Sound table
|sound=Fizz.ogg
|source=block
|description=When something freezing is dunked into lava
|id=random.fizz
|foot=1}}
== Data values ==
=== ID ===
{{edition|java}}:
{{ID table
|edition=java
|firstcolumnname=Lava
|showblocktags=y
|showforms=y
|generatetranslationkeys=y
|displayname=Block
|spritename=lava
|spritetype=block
|nameid=lava
|blocktags=strider_warm_blocks
|form=block
|foot=1}}
{{ID table
|firstcolumnname=Lava
|showfluidtags=y
|displayname=Fluid
|spritename=lava
|spritetype=block
|nameid=lava
|fluidtags=lava}}
{{ID table
|displayname=Flowing Fluid
|spritetype=block
|spritename=lava
|nameid=flowing_lava
|fluidtags=lava
|foot=1}}
{{edition|bedrock}}:
{{ID table
|edition=bedrock
|firstcolumnname=Lava
|shownumericids=y
|showforms=y
|generatetranslationkeys=y
|displayname=Flowing
|spritename=lava
|spritetype=block
|nameid=flowing_lava
|id=10
|form=block}}
{{ID table
|displayname=Stationary
|spritename=lava
|spritetype=block
|nameid=lava
|id=11
|form=block
|foot=1}}
Lava spends most of its time as stationary, rather than 'flowing' – regardless of its level, or whether it contains a current downward or to the side. When specifically triggered by a block update, lava changes to 'flowing', update its level, then change back to stationary. Lava springs are generated as flowing, and lava lakes are generated as stationary.
=== Block states ===
{{see also|Block states}}
{{/BS}}
=== Fluid states ===
{{see also|Block states}}
{{/FS}}
== Achievements ==
{{load achievements|Stayin' Frosty;Super Fuel;Feels Like Home}}
== Advancements ==
{{Load advancements|Hot Stuff;Feels Like Home}}
== History ==
{{main|/History}}
{{History|java classic}}
{{History||0.0.12a|snap=May 19, 2009|slink=Java Edition Classic 0.0.12a/Development#Lava test (May 19, 2009)|Lava is shown.}}
{{History|||snap=release|slink=Java Edition Classic 0.0.12a|[[File:Lava JE1.png|32px]] Added lava.
|The texture is transparent.
|Lava spreads by duplicating itself to open horizontal and downward squares.
|Lava is slower than [[water]] and can be easily outrun.
|Model has z-fighting with blocks below lava.}}
{{History||0.0.13a|[[File:Lava JE2.png|32px]] The texture has changed to be opaque.}}
{{History||0.0.13a_03|Lava lakes no longer generate.}}
{{History||0.0.15a|link=Java Edition Classic 0.0.15a (Multiplayer Test 1)|[[File:Lava JE3.png|32px]] The model is no longer shaded.}}
{{History||0.0.19a|[[File:Lava JE4.png|32px]] Added a [[Procedural animated texture generation|procedural animated texture]] to lava. Old texture is still retained for use as a [[animation placeholder texture|placeholder]].|Upscaled model 2% to fix z-fighting with blocks below lava. It's created lava or water models overlapping and z-fighting with each other.|Added lava layer to the bottom of the map.<!--as it traps the [[player]] and prevents the player from leaving unless [[water]] is let in and collides with it or if the player places a [[sand]] or [[gravel]] block, letting it [[drops|drop]] into the lava. If water is let into the area where the lava is, the lava becomes [[stone]], allowing the stone block to be removed to expose bedrock underneath.-->}}
{{History||0.0.20a_02|[[File:Lava JE5.png|32px]] Changed model scale back to normal with 1% offset on all coordinates.}}
{{History||0.0.22a|[[File:Lava JE6.png|32px]] Lava's generated texture has changed - it now appears brighter overall.}}
{{History||August 25, 2009|link=https://notch.tumblr.com/post/170887079/survival-mode-status-update-video-with-plenty-of|Lava has been shown to deal [[damage]].}}
{{History||0.24_SURVIVAL_TEST|Lava now deals damage.}}
{{History||0.26 SURVIVAL TEST|[[File:Lava JE7.png|32px]] UV mapping on side faces now has 11% v offset up.}}
{{History||0.28|[[File:Lava JE6.png|32px]] Fixed UV mapping.}}
{{History|java indev}}
{{History||0.31|snap=20091223-2|Lava is now luminous.}}
{{History|||snap=20100110|Lava now sets [[fire]] to flammable materials.}}
{{History|||snap=20100122|Added [[lava spawner]]s that spawn lava on sides and bottom.|It appears in the player's inventory in a stack of 5.
|Lava now flows, but more slowly than water.<ref>[[wordofnotch:347976621]]</ref>
|Dropped [[item]]s now burn in lava.
|Shot [[arrow]]s catch [[fire]] and not burn in lava.}}
{{History|||snap=20100124|Lava spawner can no longer be found in the player's inventory. Instead, a full stack (99) can be found inside the [[Indev house]] chests.}}
{{History|||snap=20100125-1|Lava now has [[particles|particle]] effects.}}
{{History|||snap=20100130|Re-added the infinite lava sea to the bottom of the map.}}
{{History||20100219|[[File:Lava JE8.png|32px]] The model is shaded again.}}
{{History|java infdev}}
{{History||20100227-1|Lava no longer flows due to changes in chunk handling for infinite worlds.}}
{{History||20100607|[[File:Lava JE9.png|32px]] UV mapping now has 1% uv offset on top and bottom faces and 1% u, 11% v offset on side faces.}}
{{History||20100608|[[File:Lava JE8.png|32px]] Fixed UV mapping, once again.}}
{{History||20100615|[[File:Lava JE10.png|32px]] The model has been changed.
|Added flowing lava.
|Lava now creates flowing lava for a total distance of 7 blocks "away" from the source block.
|Flowing lava flows in a single line toward the nearest terrain depression within four blocks.}}
{{History||20100616-1|[[File:Lava JE11.png|32px]] Added flowing lava texture for sides and vertex offset.
|Lava and flowing lava now have visual connection to blocks.|A large lava flow is now visible in the dark from a long distance.}}
{{History||20100617-2|[[File:Lava JE12.png|32px]] Removed vertex offset.
|Lava now flows 3 blocks horizontally instead of 7.
|Lava and flowing lava touching water, flowing water, water spawner, or lava spawner now replaces with [[obsidian]].
|Removed the infinite lava sea at the bottom of the map.}}
{{History|java alpha}}
{{History||v1.0.2_02|Flowing of lava has been tweaked.}}
{{History||v1.0.4|Added [[ice]] and [[snow]], which lava can melt.}}
{{History||v1.0.15|Lava now sets nearby [[block]]s on [[fire]].}}
{{History||v1.2.0|snap=preview|Added [[the Nether]], which contains lava.}}
{{History||v1.2.2|Lava now flows further in the Nether.}}
{{History||v1.2.6|Added [[lava lake]]s, which can generate at any [[altitude]].}}
{{History|java beta}}
{{History||1.8|snap=Pre-release|[[File:Lava JE13.png|32px]] Changed [[lighting]].
|When lava is touched by [[rain]], it emits smoke [[particles]].
|Lava now generates in the blacksmiths of the newly added [[village]]s.}}
{{History|java}}
{{History||1.0.0|snap=Beta 1.9 Prerelease|Added lava dripping.
|Lava blocks now form [[stone]] when falling directly onto [[water]] source blocks.}}
{{History|||snap=Beta 1.9 Prerelease 3|Lava now generates in the newly added [[end portal]] rooms of [[stronghold]]s.}}
{{History|||snap=Beta 1.9 Prerelease 5|Only in this version, it is possible to create an infinite lava source using a plus-sign shaped arrangement of [[block]]s with four lava source blocks flowing into a central empty block.}}
{{History|||snap=RC1|[[File:Lava JE14.png|32px]] Faces on model now 0.1% moved to center to fix z-fighting on inner faces.}}
{{History||1.2.1|snap=12w05a|Lava (as well as the embers that pop out of it) now makes [[sound]]s. These sounds were in the game files for a long time, but they had not played in-game.}}
{{History||1.3.1|snap=12w21a|Lava can now be collected and dispensed by [[dispenser]]s containing buckets.}}
{{History||1.4.2|snap=12w38a|Flowing lava now has a constant [[sound]].}}
{{History||1.5|snap=13w02a|[[File:Lava JE15.png|32px]] The model of lava now uses animated texture files.
|There is now "hidden lava" in [[the Nether]].
|Lava now flows much more quickly in the Nether.}}
{{History||1.6.1|snap=13w18a|Lava no longer lingers after the source is removed.}}
{{History||1.7.2|snap=13w37a|Flowing lava, which previously could be destroyed by a few [[block]]s of [[TNT]], can no longer be destroyed by [[explosion]]s.}}
{{History||1.10|snap=16w21a|[[File:Lava JE16.png|32px]] [[File:Lava (bottom view) 16w21a.png|32px]] Lava is now [[color]]ed red ({{color|#ff0000}}) except for the bottom face.<ref>{{bug|MC-102511}}</ref>}}
{{History|||snap=16w21b|[[File:Lava JE15.png|32px]] Lava is no longer colored.
|Added 2 [[splash]]es referencing colored lava: "Rule #1: it's never my fault", "Replaced molten cheese with blood?".}}
{{History||1.11|snap=16w39a|Lava can now generate in [[woodland mansion]]s.}}
{{History||1.13|snap=18w15a|[[File:Lava JE17.png|32px]] [[File:Swamp Lava 18w15a.png|32px]] [[File:Swamp Hills Lava 18w15a.png|32px]] [[File:Warm Ocean Lava 18w15a.png|32px]] [[File:Lukewarm Ocean Lava 18w15a.png|32px]] [[File:Cold Ocean Lava 18w15a.png|32px]] [[File:Frozen Ocean Lava 18w15a.png|32px]] Lava is now biome colored except for the bottom face. This is linked to new biome coloring for water.<ref>{{bug|MC-128233}}</ref>}}
{{History|||snap=18w16a|[[File:Lava JE15.png|32px]] Lava is no longer biome colored.}}
{{History||1.16|snap=20w09a|Lava now pushes [[Entity|entities]].}}
{{History|||snap=20w13a|Added [[strider]]s, which can be [[saddle]]d and ridden across lava.
|When lava flows over [[soul soil]] next to [[blue ice]], it now turns into [[basalt]].}}
{{History|||snap=20w16a|Lava now generates as part of [[bastion remnants]] and [[ruined portal]]s.}}
{{History|||snap=Pre-release 3|Visibility under lava is now slightly better when under the effect of [[Fire Resistance]].}}
{{History||1.17|snap=20w45a|[[Cauldron]]s can now be filled with lava.}}
{{History|||snap=20w48a|Added a [[renewable]] way of obtaining lava through cauldrons and [[pointed dripstone]].}}
{{History|||snap=21w06a|Lava no longer replaces air below Y{{=}}11.}}
{{History|||snap=21w08a|Lava now replaces air below Y{{=}}-53.
|Lava [[spring]]s are able to generate below Y{{=}}0.}}
{{History|||snap=21w11a|[[Spectator]] mode players can now see through lava.<ref>{{bug|MC-71530|||Fixed}}</ref>}}
{{History|||snap=21w13a|Lava is now fully renewable, as pointed dripstone can be obtained in Survival without custom generation.}}
{{History|||snap=21w15a|The changes to lava generation in 21w06a and 21w08a have been reverted.}}
{{History||1.18|snap=Experimental Snapshot 1|The changes to lava generation in the 1.17 snapshots have been reintroduced.
|[[Aquifer]]s below Y{{=}}0 sometimes generate with lava instead of water.}}
{{History||1.19.3|snap=22w44a|Added [[game rule]] {{cd|lavaSourceConversion}}, which allows the formation of new lava source blocks when set to {{cd|true}}.}}
{{History|pocket alpha}}
{{History||v0.1.0|[[File:Lava BE1.png|32px]] Added lava.}}
{{History||v0.3.3|Lava no longer creates [[fire]], due to a game breaking spreading bug.}}
{{History||v0.7.0|Lava now lights flammable [[block]]s around it on fire.
|[[File:Lava BE2.png|32px]] [[File:Lava BE2.gif|32px]] Lava now has a flowing animation.}}
{{History||v0.8.0|snap=build 5|Lava flowing directly into [[water]] now actually spreads out over it.}}
{{History||v0.9.0|snap=build 1|Underground ponds of lava can now be found, making lava much more easy to obtain.
|Lava dripping [[particles]] have been added.
|Lava now generates in [[village]] blacksmiths and [[stronghold]] end portal rooms.}}
{{History||v0.12.1|snap=build 1|[[Player]]s are now able to [[swimming|swim]] in lava.
|Lava now generates in [[the Nether]].}}
{{History|||snap=build 6|[[File:Lava BE3.png|32px]] [[File:Lava BE3.gif|32px]] Lava is now brighter shaded.}}
{{History|||snap=build 8|Lava now cancels all fall [[damage]].}}
{{History|pocket}}
{{History||1.1.0|snap=alpha 1.1.0.0|Lava now generates in [[woodland mansion]]s.}}
{{History|bedrock}}
{{History||1.11.0|snap=beta 1.11.0.5|[[File:Lava BE4.png|32px]] The texture for lava has been changed to match ''Java Edition''.}}
{{History||1.16.0|snap=beta 1.16.0.51|Lava can now push entities.}}
{{History|||snap=beta 1.16.0.57|Lava now generates as a [[delta]] that can be found in [[basalt deltas]].
|Lava now generates as part of [[bastion remnants]] and [[ruined portal]]s.
|When lava flows over [[soul soil]] next to [[blue ice]], it now turns into [[basalt]].}}
{{History|||snap=beta 1.16.0.59|Lava can no longer push entities.}}
{{History||1.17.30|snap=beta 1.17.20.22|Lava can now push entities, once again.<ref>{{bug|MCPE-75124}}</ref>}}
{{History|console}}
{{History||xbox=TU1|xbone=CU1|ps=1.00|wiiu=Patch 1|switch=1.0.1|[[File:Lava JE12.png|32px]] Added lava.}}
{{History||xbox=TU12|[[File:Lava JE15.png|32px]] The texture for lava has been changed.
|Lava (as well as the embers that pop out of it) now makes [[sound]]s.}}
{{History||xbox=TU25|xbone=CU14|ps=1.17|Lava can be used in custom superflats. It appears as a 3D block in the block selection screen of the custom superflat interface.}}
{{History|new 3ds}}
{{History||0.1.0|[[File:Lava BE3.png|32px]] Added lava.}}
{{History|foot}}
=== Data history ===
{{History|java}}
{{History||1.13|snap=17w47a|Prior to [[1.13/Flattening|''The Flattening'']], these blocks' numeral IDs were 10 and 11.}}
{{History|foot}}
== Issues ==
{{Issue list}}
== Trivia ==
* A player with [[Fire Resistance]] can swim in lava without taking damage, although the swimming speed does not become faster.
* A player cannot sprint-swim in lava.
* An arrow catches fire when shot into flowing lava, but not still lava.
* [[Water]] flows into lava-occupied blocks as though it were empty space, and vice versa.
* Although lava is a fluid, it is not possible to drown in lava. This applies to all mobs. However, it is still possible to suffocate in lava. This applies to almost every mob.{{only|bedrock}}<ref>{{bug|MCPE-17073}}</ref>
* A player sleeping in a bed cannot be damaged by lava.
* If the lava is changed to be transparent via a [[resource pack]], it does not become transparent.
* {{IN|bedrock}}, lava does not deactivate [[elytra]] like [[water]] does.
* Despite flowing identically to water while in [[the Nether]], it was not possible to create an infinite spring of lava before [[Java Edition 1.19.3|1.19.3]].
** Before Lava source conversion was implemented, the ''Minecraft: Combat Handbook'' (2014) stated the possibility to create infinite sources of lava by simply creating a cross shape with 4 nether bricks and placing lava in the middle. As expected, this turned out to be false, as confirmed by [[Nathan Adams|Dinnerbone]].<ref>[[bugtracker:MC-71088|MC-71088]]</ref>
* Geologically, lava in the Overworld is consistent with [[wikipedia:Felsic lava|felsic lava]], and lava in the Nether is consistent with [[wikipedia:mafic lava|mafic lava]]. Felsic lava is slow, sticky, and does not run as far as mafic lava, which is relatively thin and runny.
* When lava source conversion was implemented, any text where lava was supposed to be said "lave" instead.
** A splash text now says "Made with 'lave'".
== Gallery ==
<gallery>
Lavameltpattern1.png|Lava's melting pattern for snow and ice.
Water and lava springs.png|A natural lava spring near a waterfall.
Cave Lava.png|The lava "ocean" layer of [[cave]]s.
Lavastreamwithores.png|A naturally-occurring stream of lava next to diamond and iron ore.
Spawn Point Lava Warning.png|The warning in [[Legacy Console Edition]] when trying to place lava near the spawn point.
Lave found close under the dessert.png|A running lava source (origin not seen) uncovered six blocks below the surface of desert terrain.
Lava with Night vision potion.png|The inside view of lava with the night vision effect.
Ladders Blocking Lava.png|Ladders can stop lava from flowing.
Lava flowing off cliff.png|A lava [[spring]].
Minecraft Surface LavaFall.png|Lava spreading into dirt.
Exposed Cavern Lava.png|Lava in a ravine.
Lava in Ravine.png|Lava found in a snowy [[ravine]].
BedrockLava.png|Lava generates on bedrock.
BedrockPostLavaRemoval.png| Lava being extinguished near bedrock.
LavaRiver.png| Lava pool and water pool meeting each other naturally.
Lavafall.png| Two lava springs meeting water in a savannah plateau.
Lava spring.png| Lava spreading in the Overworld.
Minecraft lavalake.png| A lava spring spreading into a lava lake.
Lava cane.png|Sugar cane growing with lava flowing around it.
TallLavafall.png|Tall lavafall flowing into ravine.
RavineandStornghold.png|Ravine with multiple ores, water and lava falls, and stronghold bridge over it.
Underground Lava Lake.png|Another example of underground lava lake.
Lwava.png|Lava pouring from a cliff.
Extreme Hills Falls.png|Lava and water pouring from a cliff.
Lavalake.png|Lava and ores in a cave underground.
Cavern2.png|Lava texture in Classic [[0.0.21a_01]].
Lavaspring.png|Lava setting fire to [[grass]].
File:Mobbo Destroyed Village.jpeg|A [[village]] ravaged by lava.
File:Lava Moodlight.jpg|An officially licensed lava block moodlight.
</gallery>
== References ==
{{Reflist}}
== External links ==
*[https://www.minecraft.net/en-us/article/block-week-lava Block of the Week: Lava] – Minecraft.net on September 29, 2017
*[[wikipedia:Lava|Real-life lava on Wikipedia]]
*[[wikipedia:Magma|Real-life magma on Wikipedia]]
{{Blocks|natural}}
{{Items}}
[[Category:Fluids]]
[[Category:Natural blocks]]
[[Category:Non-solid blocks]]
[[Category:Generated structure blocks]]
[[Category:Light sources]]
[[cs:Láva]]
[[de:Lava]]
[[es:Lava]]
[[fr:Lave]]
[[hu:Láva]]
[[it:Lava]]
[[ja:溶岩]]
[[ko:용암]]
[[nl:Lava]]
[[pl:Lawa]]
[[pt:Lava]]
[[ru:Лава]]
[[th:ลาวา]]
[[tr:Lav]]
[[uk:Лава]]
[[zh:熔岩]]</li></ul> | 12w16a | Added the /give command. Using it to get water or flowing_water blocks allows another way to place water in the nether. | ||||||||||||||||||||||||||||||||||||||||||||||||||||||||||||||||||||||||||||||||||||||||||||||||||||||||||||
| 12w17a | Ice can now be obtained with Silk Touch again, but ice no longer melts into water in the Nether. | |||||||||||||||||||||||||||||||||||||||||||||||||||||||||||||||||||||||||||||||||||||||||||||||||||||||||||||
| 12w22a | Rarely, Nether portals will spawn zombie pigmen. | |||||||||||||||||||||||||||||||||||||||||||||||||||||||||||||||||||||||||||||||||||||||||||||||||||||||||||||
| 12w27a | Growing nether wart is no longer restricted to the Nether – it can be grown in the Overworld and The End. | |||||||||||||||||||||||||||||||||||||||||||||||||||||||||||||||||||||||||||||||||||||||||||||||||||||||||||||
| 12w30a | Made the Nether less laggy. | |||||||||||||||||||||||||||||||||||||||||||||||||||||||||||||||||||||||||||||||||||||||||||||||||||||||||||||
1.4.2{{Extension DPL}}<ul><li>[[:Category:Planned items|Category:Planned items]]<br/>All pages relating to items that have been officially announced, but are not yet in the game.
__EXPECTUNUSEDCATEGORY__
[[Category:Items]]
[[Category:Planned]]
[[pt:Itens planejados]]</li><li>[[Magma Cream|Magma Cream]]<br/>{{Item
| title = Magma Cream
| image = Magma Cream.png
| renewable = Yes
| stackable = Yes (64)
}}
'''Magma cream''' is an [[item]] used in [[brewing]] to create [[potion]]s of [[Fire Resistance]], and to manually craft [[magma block]]s.
== Obtaining ==
=== Mob loot ===
==== Magma cubes ====
All but tiny-sized [[magma cube]]s drop 0–1 magma cream. The maximum amount of magma cream is increased by 1 per level of [[Looting]], for a maximum of 4 with Looting III.
=== Crafting ===
{{Crafting
|Blaze Powder
|Slimeball
|Output= Magma Cream
|type= Brewing
}}
=== Chest Loot ===
{{LootChestItem|magma-cream}}
== Usage ==
=== Brewing ingredient ===
{{brewing
|showname=1
|head=1
|Magma Cream|Mundane Potion|base=Water Bottle
}}
{{brewing
|foot=1
|Magma Cream
|Potion of Fire Resistance
}}
=== Crafting ingredient ===
{{crafting usage}}
== Data values ==
=== ID ===
{{edition|java}}:
{{ID table
|edition=java
|showforms=y
|generatetranslationkeys=y
|displayname=Magma Cream
|spritetype=item
|nameid=magma_cream
|form=item
|foot=1}}
{{edition|bedrock}}:
{{ID table
|edition=bedrock
|shownumericids=y
|showforms=y
|notshowbeitemforms=y
|generatetranslationkeys=y
|displayname=Magma Cream
|spritetype=item
|nameid=magma_cream
|id=430
|form=item
|foot=1}}
== History ==
{{History|java}}
{{History||1.0.0|snap=Beta 1.9 Prerelease 2|[[File:Magma Cream JE1.png|32px]] Added magma cream.}}
{{History|||snap=Beta 1.9 Prerelease 3|Magma cream can now be [[brewing|brewed]] in a [[water bottle]] to create a mundane [[potion]], or in an awkward potion to create a potion of [[Fire Resistance]].}}
{{History||1.1|snap=release|[[Magma cube]]s now [[drops|drop]] magma cream.}}
{{History||1.3.1|snap=1.3|[[File:Magma Cream JE2 BE1.png|32px]] The texture of magma cream has been changed.}}
{{History||1.10|snap=16w20a|Magma cream can now be [[crafting|crafted]] into [[magma block]]s.}}
{{History||1.13|snap=17w47a|Prior to [[1.13/Flattening|''The Flattening'']], this [[item]]'s numeral ID was 378.}}
{{History||1.14|snap=18w43a|[[File:Magma Cream JE3 BE2.png|32px]] The texture of magma cream has been changed.}}
{{History||1.16|snap=20w07a|Magma cream has a {{frac|2|109}} (~1.83%) chance of being offered by [[piglin]]s when [[bartering]], in a stack size of 1–3.}}
{{History|||snap=20w09a|Magma cream now has a {{frac|10|226}} (~4.42%) chance of being offered by piglins when bartering, in a stack size of 1–5.}}
{{History|||snap=20w16a|Magma cream now generates in [[bastion remnant]]s chests.}}
{{History||1.16.2|snap=20w28a|Magma cream can no longer be obtained from bartering with piglins.}}
{{History|||snap=20w30a|The average yield of magma cream from bastion remnant chests has been slightly increased.}}
{{History|pocket edition alpha}}
{{History||v0.11.0|snap=build 1|[[File:Magma Cream JE2 BE1.png|32px]] Added magma cream.
|Magma cream is currently unobtainable.}}
{{History||v0.11.0|snap=build 8|[[Magma cube]]s now [[drops|drop]] magma cream.}}
{{History||v0.12.1|snap=build 1|Added magma cream to the [[Creative]] mode [[inventory]].
|Magma cream can now be [[crafting|crafted]].}}
{{History|pocket}}
{{History||1.1.3|snap=alpha 1.1.3.0|Magma cream can now be crafted into [[magma block]]s.}}
{{History|bedrock}}
{{History||1.10.0|snap=beta 1.10.0.3|[[File:Magma Cream JE3 BE2.png|32px]] The texture of magma cream has been changed.}}
{{History||1.16.0|snap=beta 1.16.0.57|Magma cream can be obtained from bartering with piglins.
|Magma cream can now be found in [[bastion remnants]] chests.}}
{{History||1.16.100|snap=beta 1.16.100.54|Magma cream can no longer be obtained from [[barter]]ing with [[piglin]]s.}}
{{History|console}}
{{History||xbox=TU7|xbone=CU1|ps=1.0|wiiu=Patch 1|switch=1.0.1|[[File:Magma Cream JE2 BE1.png|32px]] Added magma cream.}}
{{History||xbox=none|xbone=none|ps=1.90|wiiu=none|switch=none|[[File:Magma Cream JE3 BE2.png|32px]] The texture of magma cream has been changed.}}
{{History|New 3DS}}
{{History||0.1.0|[[File:Magma Cream JE2 BE1.png|32px]] Added magma cream.}}
{{history|foot}}
== Issues ==
{{issue list}}
{{items}}
[[Category:Renewable resources]]
[[cs:Lávová pěna]]
[[de:Magmacreme]]
[[es:Crema de magma]]
[[fr:Crème de magma]]
[[hu:Magmakrém]]
[[ja:マグマクリーム]]
[[ko:마그마 크림]]
[[lzh:火漿膏]]
[[nl:Magmacrème]]
[[pl:Magmowy krem]]
[[pt:Creme de magma]]
[[ru:Лавовый крем]]
[[th:ครีมแมกม่า]]
[[uk:Магмовий крем]]
[[zh:岩浆膏]]</li></ul> | 12w32a | Zombie pigmen can wear armor, and the sword they are holding makes them deal more damage. | ||||||||||||||||||||||||||||||||||||||||||||||||||||||||||||||||||||||||||||||||||||||||||||||||||||||||||||
| 12w34a | Any mobs and entities can travel through Nether portals. | |||||||||||||||||||||||||||||||||||||||||||||||||||||||||||||||||||||||||||||||||||||||||||||||||||||||||||||
| 12w36a | Added wither skeletons. | |||||||||||||||||||||||||||||||||||||||||||||||||||||||||||||||||||||||||||||||||||||||||||||||||||||||||||||
1.4.6{{Extension DPL}}<ul><li>[[Mushroom Stew|Mushroom Stew]]<br/>{{Item
| title = Mushroom Stew
| image = Mushroom Stew.png
| renewable = Yes
| heals = {{hunger|6}}
| stackable = No
}}
'''Mushroom stew''' is a [[food]] item.
== Obtaining ==
=== Harvesting ===
Mushroom stew can be obtained by “milking” a [[mooshroom]] with an empty [[bowl]]. This is accomplished by {{Control|using}} a bowl on a mooshroom. The bowl gets replaced by the mushroom stew item. There is no cooldown for doing so.
If a stack of more than one bowl is used on a mooshroom, only one bowl is consumed, and the mushroom stew goes into an empty inventory slot, or is dropped if the player's inventory is full.
=== Crafting ===
{{Crafting
|Red Mushroom
|Brown Mushroom
|Bowl
|Output= Mushroom Stew
|type= Foodstuff
}}
== Usage ==
=== Food ===
{{see also|Tutorials/Hunger management|title1=Hunger management}}
To eat mushroom stew, press and hold {{control|use}} while it is selected in the hotbar. Eating one restores {{hunger|6}} [[hunger]] and 7.2 hunger
[[Hunger#Mechanics|saturation]].
The bowl is returned to the player empty after the mushroom stew has been eaten, and can be reused to craft more, similarly to [[Rabbit Stew|rabbit stew]] and [[Beetroot Soup|beetroot soup]].
== Sounds ==
=== Generic ===
{{Sound table/Entity/Food}}
=== Unique ===
{{Edition|Java}}:
{{Sound table
|sound=Mooshroom milk1.ogg
|sound2=Mooshroom milk2.ogg
|sound3=Mooshroom milk3.ogg
|subtitle=Mooshroom gets milked
|source=neutral
|description=When a mooshroom is milked with a bowl
|id=entity.mooshroom.milk
|translationkey=subtitles.entity.mooshroom.milk
|volume=1.0
|pitch=''varies'' <ref group=sound name=milkpitch>Can be 1.0, 0.9, or 1.1 for each sound</ref>
|distance=16
|foot=1}}
{{Edition|Bedrock}}:
{{Sound table
|type=bedrock
|sound=Mooshroom milk1.ogg
|sound2=Mooshroom milk2.ogg
|sound3=Mooshroom milk3.ogg
|subtitle=Mooshroom gets milked
|source=Friendly Creatures
|description=When a mooshroom is milked with a bowl
|id=mob.mooshroom.suspicious_milk
|volume=1.0/0.9/1.1
|pitch=1.0
|foot=1}}
== Data values ==
=== ID ===
{{edition|java}}:
{{ID table
|edition=java
|showforms=y
|generatetranslationkeys=y
|displayname=Mushroom Stew
|spritetype=item
|nameid=mushroom_stew
|form=item
|foot=1}}
{{edition|bedrock}}:
{{ID table
|edition=bedrock
|shownumericids=y
|showforms=y
|notshowbeitemforms=y
|generatetranslationkeys=y
|displayname=Mushroom Stew
|spritetype=item
|nameid=mushroom_stew
|id=260
|form=item
|foot=1}}
== Advancements ==
{{load advancements|Husbandry;A Balanced Diet}}
== History ==
{{History|java indev}}
{{History||0.31|snap=20100130|[[File:Mushroom Stew JE1 BE1.png|32px]] Added mushroom stew.
|Restores {{hp|8}} [[health]].}}
{{History||20100206|Mushroom stew now restores {{hp|10}} health.}}
{{History|java beta}}
{{History||1.6|snap=Test Build 3|[[Mushroom]] spreading mechanic added, making mushroom stew [[renewable]].}}
{{History||1.8|snap=Pre-release|Now restores {{hunger|8}} [[hunger]].}}
{{History|java}}
{{History||1.0.0|snap=Beta 1.9 Prerelease|More fungi sources have now been introduced with the addition of the [[Mushroom Fields|mushroom biome]].
|A [[mooshroom]] can now be "milked" with a [[bowl]] to obtain mushroom stew.}}
{{History|||snap=Beta 1.9 Prerelease 3|Mushroom stew can now be crafted in the [[2×2 crafting grid]] in the [[inventory]]. Previously, the crafting recipe was shaped, now it's shapeless.}}
{{History||1.2.5|snap=release|The [[player]] milking a [[mooshroom]] with a stack of [[bowl]]s no longer results in receiving back a single bowl of mushroom stew.}}
{{History||1.4.2|snap=?|Mushroom stew now restores {{Hunger|6}} instead of {{Hunger|8}}.}}
{{History||1.13|snap=17w47a|Prior to [[1.13/Flattening|''The Flattening'']], this [[item]]'s numeral ID was 282.}}
{{History||1.14|snap=18w43a|[[File:Mushroom Stew JE2 BE2.png|32px]] The texture of mushroom stew has now been changed.}}
{{History||1.16|snap=Pre-release 1|Mooshrooms can now be milked for mushroom stew in Creative mode.<ref>{{Cite bug|MC|90969|Cannot get mushroom stew from mooshrooms / milk from cows in creative mode|date=October 19, 2015}}</ref>}}
{{History|pocket alpha}}
{{History||v0.4.0|[[File:Mushroom Stew JE1 BE1.png|32px]] Added mushroom stew.}}
{{History||v0.5.0|Mushroom stew now restores {{hp|8}} instead of {{hp|4}}.}}
{{History||v0.9.0|snap=build 1|A mooshroom can now be "milked" with a [[bowl]] to obtain mushroom stew.}}
{{History||v0.12.1|snap=build 1|Mushroom stew now restores [[hunger]] instead of [[health]].}}
{{History|bedrock}}
{{History||1.10.0|snap=beta 1.10.0.3|[[File:Mushroom Stew JE2 BE2.png|32px]] The texture of mushroom stew has now been changed.}}
{{History|console}}
{{History||xbox=TU1|xbone=CU1|ps=1.0|switch=1.0.1|wiiu=Patch 1|[[File:Mushroom Stew JE1 BE1.png|32px]] Added mushroom stew.}}
{{History||xbox=none|xbone=none|ps=1.90|wiiu=none|switch=none|[[File:Mushroom Stew JE2 BE2.png|32px]] The texture of mushroom stew has now been changed.}}
{{History|new3ds}}
{{History||0.1.0|[[File:Mushroom Stew JE1 BE1.png|32px]] Added mushroom stew.}}
{{History|foot}}
== Issues ==
{{Issue list}}
== References ==
{{reflist}}
== External Links ==
*[https://www.minecraft.net/en-us/article/taking-inventory--mushroom-stew Taking Inventory: Mushroom Stew] – Minecraft.net on September 1, 2022
{{items}}
[[de:Pilzsuppe]]
[[es:Estofado de champiñones]]
[[fr:Soupe de champignons]]
[[hu:Gombaragu]]
[[ja:キノコシチュー]]
[[ko:버섯 스튜]]
[[nl:Paddenstoelenstoofpot]]
[[pl:Zupa grzybowa]]
[[pt:Ensopado de cogumelos]]
[[ru:Тушёные грибы]]
[[zh:蘑菇煲]]
[[Category:Food]]
[[Category:Renewable resources]]
<references /></li><li>[[Eye of Ender|Eye of Ender]]<br/>{{redirect|Ender Eye|the boss|Ender Dragon|item that teleports the player to where it lands|Ender Pearl}}
{{ItemEntity
|image=Eye of Ender.png
|stackable=Yes (64)
|renewable=Yes
|size=Height: 0.25 Blocks<br>Width: 0.25 Blocks
|networkid='''[[JE]]''': 72
}}
An '''eye of ender''' is a craftable item used to locate [[stronghold]]s and activate the [[end portal]]s within them.
== Obtaining ==
=== Crafting ===
{{Crafting
|Blaze Powder
|Ender Pearl
|Output=Eye of Ender
|type=Miscellaneous
}}
== Usage ==
=== Locating strongholds ===
[[File:Eye of Ender (break).gif|thumb|right|An animation of an eye of ender shattering.]]
To locate [[stronghold]]s (and the [[end portal]]s they house):
* Pressing {{control|use}} while holding an eye of ender causes it to fly approximately 12 blocks in the direction of the nearest stronghold, traveling through any blocks necessary, and leave a trail of purple particles, the same particle effect used for [[endermen]] and [[ender chests]].
** The eye leads to the [[chunk]] where a spiral staircase, the first room generated in the stronghold, is located.
** The center of this entrance staircase is always exactly at the chunk coordinates 4, ~, 4, although the eye of ender leads to chunk coordinates 0, ~, 0 (the northwest corner of the chunk).
* While over 12 blocks away from the northwest corner of the staircase chunk, the eye will travel upward to offer an easily-visible indication of the horizontal direction the player must travel.
* When closer than 12 blocks to the northwest corner of the staircase chunk, the eye will travel downward, to indicate the player is above a stronghold and must mine downward.
* After two or three seconds of travel, the eye floats in the air briefly, then either falls (becoming collectable again) or shatters in mid-air. The eye has a 20% chance of shattering (80% chance of surviving) per throw, therefore throwing it three times has approximately 50% overall chance to shatter the eye (0.8<sup>3</sup>=51.2%).
* The eye of ender's flying function works only in the [[Overworld]]. It does nothing in [[the Nether]], [[the End]], [[custom dimension]]s{{verify|type=current}}, or in worlds with no strongholds.
Note that the eyes may point to an incorrect location if the target chunks were generated with a different biomes map in an older version or through different generation settings.<ref>See also {{bug|MC-135996}}</ref>
=== Activating end portals ===
[[File:Active End Portal.png|thumb|right|An end portal activated with eyes of ender.]]
Once an end portal is found, the eyes of ender are required to activate it. End portals require a total of 12 eyes of ender in order to activate, though each individual frame-block has a 10% chance of containing an eye of ender when generated. Eyes can be placed in empty [[End portal frame]]s by pressing {{control|use}} on them until the entire ring of 12 is filled, thereby activating the portal. Due to the fact that there is a 10% chance of each individual end portal frame having an eye in it, there is a one out of one trillion chance of every frame having an eye in it thereby activating the portal even if the player doesn't have any eyes of ender.
{| class="wikitable sortable mw-collapsible"
|+End Portal Pre-Filled Eyes
!Eyes
!0
!1
!2
!3
!4
!5-12
|-
|Exactly
|28%
|38%
|23%
|9%
|2%
|<1%
|-
|Or More
|100%
|72%
|34%
|11%
|3%
|<1%
|}
=== Crafting ingredient ===
{{crafting usage}}
== Sounds ==
{{Edition|Java}}:<br>
Eyes of ender use the Friendly Creatures sound category for entity-dependent sound events.
{{Sound table
|sound=Ender Eye death1.ogg
|sound2=Ender Eye death2.ogg
|subtitle=Eye of Ender falls <ref group=sound name=LousyEvents>{{Bug|MC-98316||Wrong subtitles caused by missing distinction}}</ref>
|source=neutral
|description=When an eye of ender drops or breaks
|id=entity.ender_eye.death|idnote=<ref group=sound name=LousyEvents/>
|translationkey=subtitles.entity.ender_eye.death|translationkeynote=<ref group=sound name=LousyEvents/>
|volume=1.3
|pitch=1.0
|distance=16}}
{{Sound table
|sound=Ender Eye launch1.ogg
|sound2=Ender Eye launch2.ogg
|subtitle=Eye of Ender shoots
|source=neutral
|description=When an eye of ender is thrown
|id=entity.ender_eye.launch
|translationkey=subtitles.entity.ender_eye.launch
|volume=0.5
|pitch={{frac|1|3}}-0.5
|distance=16}}
{{Sound table
|sound=End portal eye place1.ogg
|sound2=End portal eye place2.ogg
|sound3=End portal eye place3.ogg
|subtitle=Eye of Ender attaches
|source=block
|description=When an eye of ender is placed in an end portal frame
|id=block.end_portal_frame.fill
|translationkey=subtitles.block.end_portal_frame.fill
|volume=1.0
|pitch=1.0
|distance=16
|foot=1}}
{{Edition|Bedrock}}:
{{Sound table
|type=bedrock
|sound=Item Frame break1.ogg
|sound2=Item Frame break2.ogg
|sound3=Item Frame break3.ogg
|source=block
|description=When an eye of ender breaks <ref group=sound>{{Bug|MCPE-115646}}</ref>
|id=block.itemframe.break}}
{{Sound table
|sound=Bow shoot.ogg
|source=player
|description=When an eye of ender is thrown
|id=random.bow
|volume=0.5
|pitch=0.33-0.5}}
{{Sound table
|sound=End portal eye place1.ogg
|sound2=End portal eye place2.ogg
|sound3=End portal eye place3.ogg
|source=block
|description=When an eye of ender is placed in an end portal frame
|id=block.end_portal_frame.fill
|volume=0.3
|pitch=0.9/1.0/1.1
|foot=1}}
==Data values==
===ID===
{{edition|java}}:
{{ID table
|edition=java
|firstcolumnname=Item
|showforms=y
|generatetranslationkeys=y
|displayname=Eye of Ender
|spritetype=item
|nameid=ender_eye
|form=item
|foot=1}}
{{ID table
|edition=java
|firstcolumnname=Entity
|generatetranslationkeys=y
|displayname=Eye of Ender
|spritetype=entity
|nameid=eye_of_ender
|foot=1}}
{{edition|bedrock}}:
{{ID table
|edition=bedrock
|firstcolumnname=Item
|shownumericids=y
|showforms=y
|notshowbeitemforms=y
|generatetranslationkeys=y
|displayname=Eye of Ender
|spritetype=item
|nameid=ender_eye
|id=433
|form=item
|foot=1}}
{{ID table
|edition=bedrock
|firstcolumnname=Entity
|shownumericids=y
|generatetranslationkeys=y
|displayname=Eye of Ender
|spritetype=entity
|nameid=eye_of_ender_signal
|id=70
|foot=1}}
===Entity data===
The purple particles left by eyes of ender have entity data that define various properties of the entity.
{{el|java}}:
{{main|Entity format}}
{{/ED}}
{{el|bedrock}}:
:See [[Bedrock Edition level format/Entity format]].
==Advancements==
{{load advancements|Eye Spy}}
==Video ==
{{Video note|This video does not mention that eyes of ender can be used to craft [[ender chest]]s or [[end crystal]]s.}}
<div style="text-align:center">{{yt|E0AhoxYLomc}}</div>
==History==
{{History|java}}
{{History||1.0.0|snap=Beta 1.9 Prerelease 3|[[File:Eye of Ender JE1 BE1.png|32px]] Added eyes of ender.
|Eyes of ender can be used on a [[end portal frame|portal block]] to repair them, but repairing them does nothing.}}
{{History|||snap=Beta 1.9 Prerelease 4|Each eye can now be placed in a [[end portal frame|portal block]] or used to hone in on a [[stronghold]]. [[Jens Bergensten|Jeb]] demonstrated the new uses for an eye in his livestream.<ref>http://www.twitch.tv/jebox/b/297000418</ref> An [[end portal]] within a stronghold could be seen in the stream with two eyes inserted into blocks.
|In older worlds with chunks generated before [[Java Edition Beta 1.9 Prerelease 3|Beta 1.9 Prerelease 3]], the eyes may mislead the [[player]] to a place where there isn't a [[stronghold]] at all. This happens because the eyes lead to where a stronghold should be based on the world seed in the current version, but before Beta 1.9 Prerelease 3 strongholds generated differently based on the seed. Therefore, if the player saved the coordinates the eye traveled to in an old world and generated a new world with the same seed, the player could travel to those same coordinates and find a stronghold.}}
{{History|||snap=Beta 1.9 Prerelease 6|Eyes of ender no longer render like a tool in third person.}}
{{History|||snap=RC1|The throwing sound of eyes of ender has been changed.}}
{{History||1.3.1|snap=12w21a|Eyes of ender can now be used to craft [[ender chest]]s.
|Priest [[villager]]s would [[trading|buy]] 2–3 eyes of ender for one [[emerald]].}}
{{History|||snap=12w22a|Priest villagers no longer buy eyes of ender, instead selling them for 7–10 emeralds.}}
{{History||1.6.4|snap=1.6.3-pre|Eyes of ender now lead to [[stronghold]]s based on the structure data saved in the world file instead of calculating their approximate location via the [[seed (level generation)|world seed]]. Therefore, strongholds generated in old versions can still be found even if the distribution of strongholds is changed.}}
{{History||1.7.2|snap=13w41a|Eyes of Ender now lead to the entrance of a stronghold instead of the portal room.}}
{{History||1.8|snap=14w02a|With changes that have been made to villagers and the [[trading]] system, cleric villagers now sell eyes of ender for 7–11 [[emerald]]s, as one of their tier III trades.}}
{{History||1.9|snap=15w41a|Eyes of ender are no longer [[trading|sold]] by cleric [[villager]]s.}}
{{History|||snap=15w44b|An eye of ender is now used to craft an [[end crystal]].}}
{{History|||snap=pre3|Eyes of ender now point to the 125 new strongholds.<ref>{{bug|MC-91173}} resolved as "Fixed"</ref>}}
{{History||1.11|snap=16w32a|The [[entity]] ID has been changed from <code>EyeOfEnderSignal</code> to <code>eye_of_ender_signal</code>.}}
{{History||1.12|snap=17w17a|A new ''pop'' [[sound]] has been added when a thrown eye of ender bursts.}}
{{History||1.13|snap=17w47a|Prior to [[1.13/Flattening|''The Flattening'']], this [[item]]'s numeral ID was 381.}}
{{History|||snap=pre5|The [[entity]] ID has been changed to <code>eye_of_ender</code>.}}
{{History||1.14|snap=18w43a|[[File:Eye of Ender JE2 BE2.png|32px]] The texture of eyes of ender has been changed.}}
{{History||1.19|snap=22w11a|Eyes of Ender now lead to the corner of the chunk (0, ~, 0) instead of the center (8-9, ~, 8-9).<ref>{{bug|MC-253394}}</ref>}}
{{History|pocket}}
{{History||1.0.0|snap=alpha 0.17.0.1|[[File:Eye of Ender JE1 BE1.png|32px]] Added eyes of ender.}}
{{History|bedrock}}
{{History||1.10.0|snap=beta 1.10.0.3|[[File:Eye of Ender JE2 BE2.png|32px]] The texture of eyes of ender has been changed.}}
{{History||1.16.0|snap=beta 1.15.0.51|The [[particles]] of eyes of ender have been changed to match {{el|je}}.}}
{{History|console}}
{{History||xbox=TU7|xbone=CU1|ps=1.0|wiiu=Patch 1|[[File:Eye of Ender JE1 BE1.png|32px]] Added eyes of ender.}}
{{History||xbox=none|xbone=none|ps=1.90|wiiu=none|switch=none|[[File:Eye of Ender JE2 BE2.png|32px]] The texture of eyes of ender has been changed.}}
{{History|new 3ds}}
{{History||1.7.10|[[File:Eye of Ender JE1 BE1.png|32px]] Added eyes of ender.}}
{{History|foot}}
=== Historical images ===
<gallery>
File:Held_Eye_of_Ender.png|The eye of ender used to appear large in third-person view.
</gallery>
==Issues==
{{issue list}}
==Trivia ==
*When thrown in third-person view, the eyes of ender fly out from the player's feet instead of their hand.
*Before [[Java Edition 1.9]], eyes of ender can be purchased from cleric villagers, which means players can find a [[stronghold]] and go to [[the End]] without accessing [[the Nether]] at all.
*{{IN|bedrock}} if the player travels beyond a certain radius (roughly 740,000 blocks), eyes of ender always point to a stronghold near spawn, even though strongholds continue to generate past this limit. If one travels to this limit, they can see eyes of ender suddenly switching direction. A similar phenomenon occurs with the {{cmd|locate}} command.
==Gallery==
===Screenshots===
<gallery>
Stronghold Portal Room.png|An end portal frame containing a few eyes of ender.
EnderChestexample.png|An [[ender chest]] depicting an eye of ender on the front.
</gallery>
===In other media===
<gallery>
File:Eye of Ender JINX.jpg|Official T-shirt artwork "Eye of Ender" sold by JINX.
File:Happy Halloween Eye.jpg|A Halloween T-Shirt design featuring an eye of ender.
</gallery>
==External links==
*[http://www.strongholdfinder.com/ A super-easy stronghold triangulation tool]
*[http://jsfiddle.net/42EDX/40/ JSFiddle Eye of Ender triangulator - can guess the location of other 2 strongholds in the first ring]
*[https://ens-gijs.github.io/minecraft-stronghold-locator/ Minecraft Stronghold Locator Eye of Ender throw plotting visualizer - zoomable to show all possible stronghold rings]
*[https://github.com/winny-/stronghold Python Eye of Ender throw plotting tool]
*[http://www.purplefrog.com/~thoth/MinecraftStronghold/stronghold.html HTML Eye of Ender throw plotting visualizer (not updated after 1.9 stronghold placement changes)]
*[http://chunkbase.com/apps/stronghold-finder Chunk Base Stronghold Finder (seed-based)]
*[https://github.com/toolbox4minecraft/amidst/releases Amidst - File-based world visualizer]
*[http://minecraft.tournier.org/StrongholdLocator/ Find strongholds by analyzing stronghold.dat file]
== References==
{{reflist}}
{{Items}}
{{entities}}
[[cs:Endové oko]]
[[de:Enderauge]]
[[es:Ojo de ender]]
[[fr:Œil de l'Ender]]
[[hu:Végzet szeme]]
[[ja:エンダーアイ]]
[[ko:엔더의 눈]]
[[nl:Enderoog]]
[[pl:Oko Endera]]
[[pt:Olho de ender]]
[[ru:Око Края]]
[[th:ดวงตาแห่งเอนเดอร์]]
[[uk:Око Краю]]
[[zh:末影之眼]]</li></ul> | 12w49a | Added nether brick slabs. | ||||||||||||||||||||||||||||||||||||||||||||||||||||||||||||||||||||||||||||||||||||||||||||||||||||||||||||
1.5Tropical fish also have assigned names that can be seen after capture. In Java Edition, the smaller text under the item name is displayed showing the fish name, similar to the text that displays enchantments under enchanted items. In Bedrock Edition, the item name is displayed showing "Bucket of <fish name>". Their colors are mostly named according to the colored block names, though with a few exceptions:
The base color comes first, and if the pattern color is different, it comes after that. Lastly, the fish bucket is given a name according to the shape and pattern of the fish:
Some tropical fish don't follow the normal naming system, and instead, reference real-life fish species. Apart from these names, these types of fish aren't different from regular tropical fish in terms of design or behavior. These varieties are:
| 13w01a | Nether quartz ore is added to the Nether, which spawns around netherrack. | ||||||||||||||||||||||||||||||||||||||||||||||||||||||||||||||||||||||||||||||||||||||||||||||||||||||||||||
| 1.5.1 | Lava flows more quickly in the Nether, and hidden lava can be found in the Nether. | |||||||||||||||||||||||||||||||||||||||||||||||||||||||||||||||||||||||||||||||||||||||||||||||||||||||||||||
1.6.1{{Extension DPL}}<ul><li>[[Nether Brick|Nether Brick]]<br/><!--Please do not change "nether brick" to "Nether brick". According to style guide, item names are not proper nouns and should not be capitalized.-->
{{about|the item|the block|Nether Bricks}}
{{Item
| title = Nether Brick
| image = Nether Brick.png
| renewable = Yes
| stackable = Yes (64)
}}
A '''nether brick''' is an [[item]] made by [[smelting]] [[netherrack]] in a [[furnace]], and is used to craft the [[Nether Bricks|nether bricks]] block and its variants.
== Obtaining ==
=== Smelting ===
Nether brick can be smelted from netherrack.
{{smelting
|Netherrack
|Nether Brick
|0,1
}}
=== Bartering ===
[[Piglin]]s may [[barter]] 2 to 8 nether bricks when given a [[gold ingot]].
== Usage ==
=== Crafting ingredient ===
{{crafting usage|Nether Brick}}
== Data values ==
=== ID ===
{{edition|java}}:
{{ID table
|edition=java
|showforms=y
|generatetranslationkeys=y
|displayname=Nether Brick
|spritetype=item
|nameid=nether_brick
|form=item
|foot=1}}
{{edition|bedrock}}:
{{ID table
|edition=bedrock
|shownumericids=y
|showforms=y
|notshowbeitemforms=y
|generatetranslationkeys=y
|displayname=Nether Brick
|spritetype=item
|nameid=netherbrick
|id=523
|form=item
|foot=1}}
== History ==
{{History|java}}
{{History||1.5|snap=13w01a|[[File:Nether Brick JE1 BE1.png|32px]] Added nether brick items.}}
{{History||1.10|snap=16w20a|Nether brick items can now be used to craft [[red nether bricks]].}}
{{History||1.13|snap=17w47a|The ID of nether bricks has been changed from <code>netherbrick</code> to <code>nether_brick</code>.
|Prior to [[1.13/Flattening|''The Flattening'']], this [[item]]'s numeral ID was 405.}}
{{History||1.14|snap=18w43a|[[File:Nether Brick JE2 BE2.png|32px]] The texture of nether bricks has been changed.}}
{{History||1.16|snap=20w07a|Nether bricks now have a {{frac|10|109}} (~9.17%) chance of being given by the new [[piglin]]s when [[bartering]], in a stack size of 1–4.}}
{{History|||snap=20w09a|Nether bricks now have a {{frac|20|226}} (~8.84%) chance of being given by piglins when bartering, in a stack size of 1–5.}}
{{History|||snap=20w10a|Nether bricks now have a {{frac|40|411}} (~9.73%) chance of being given by piglins when bartering, in a stack size of 4–16.}}
{{History||1.16.2|snap=20w28a|Nether bricks now have a {{frac|40|459}} (~8.71%) chance of being given by piglins when bartering, in a stack size of 2–8.}}
{{History|pocket alpha}}
{{History||v0.6.0|[[File:Nether Brick JE1 BE1.png|32px]] Added nether brick items.}}
{{History||v0.16.0|snap=build 5|Added nether brick items to the [[Creative]] [[inventory]].<ref name="missing brick">{{Bug|MCPE-16556}}</ref>}}
{{History|pocket}}
{{History||1.1.3|snap=alpha 1.1.3.0|Nether brick items are now used to craft [[red nether bricks]].}}
{{History|bedrock}}
{{History||1.9.0|snap=beta 1.9.0.0|Nether brick items are now used to craft nether brick [[fence]]s.}}
{{History||1.10.0|snap=beta 1.10.0.3|[[File:Nether Brick JE2 BE2.png|32px]] The texture of nether bricks has been changed.}}
{{History||1.16.100|snap=beta 1.16.100.50|Nether bricks now can be used as fuel for a [[furnace]].<ref>{{bug|MCPE-114216}}</ref>}}
{{History|||snap=beta 1.16.100.54|Nether bricks now have a {{frac|40|459}} (~8.71%) chance of being given by piglins when bartering, in a stack size of 2–8 to match {{el|Java}}.}}
{{History||1.18.30|snap=beta 1.18.30.26|Nether bricks can no longer be used as fuel in a furnace.}}
{{History|console}}
{{History||xbox=TU9|xbone=CU1|ps=1.0|wiiu=Patch 1|switch=1.0.1|[[File:Nether Brick JE1 BE1.png|32px]] Added nether brick items.}}
{{History||xbox=none|xbone=none|ps=1.90|wiiu=none|switch=none|[[File:Nether Brick JE2 BE2.png|32px]] The texture of nether bricks has been changed.}}
{{History|New 3DS}}
{{History||0.1.0|[[File:Nether Brick JE1 BE1.png|32px]] Added nether brick items.}}
{{History|foot}}
== Issues ==
{{issue list}}
== References ==
{{reflist}}
{{items}}
[[cs:Netheritová cihla]]
[[de:Netherziegel (Gegenstand)]]
[[es:Ladrillo del Nether]]
[[fr:Brique du Nether]]
[[hu:Alvilági tégla]]
[[ja:ネザーレンガ (アイテム)]]
[[ko:네더 벽돌 (아이템)]]
[[lzh:焱界磚]]
[[nl:Netherbaksteen (voorwerp)]]
[[pl:Netherowa cegła]]
[[pt:Tijolo do Nether]]
[[ru:Адский кирпич (предмет)]]
[[uk:Пекельна цегла (предмет)]]
[[zh:下界砖]]
[[Category:Renewable resources]]</li><li>[[Debug fourj item|Debug fourj item]]<br/>{{DISPLAYTITLE:<samp>debug_fourj_item</samp>}}
{{exclusive|Legacy Console}}{{Unobtainable||edition=console|section=}}{{Item
| image = Barrier (held) JE1 BE1.png
| renewable = No
| stackable = Yes (64)
| rarity = Common
| title = <samp>debug_fourj_item</samp>
}}
<samp>'''debug_fourj_item'''</samp> is an unobtainable item exclusive to the [[Legacy Console Edition]] and can only be obtained through modding the game. It has the texture of a [[barrier]], no "What's this?" hint and no display name.
==Obtaining==
The only way to obtain this item is via inventory editors and other external tools.
==Usage==
The purpose of this item is unknown, and it cannot be placed. Although the ID<ref name="r">[https://youtu.be/IscH0rUw_20 "マインクラフト WiiU 全面の木、偽バリアブロックのアイテムID公開"] - YouTube, March 26, 2019</ref> suggests that it was used for debugging and testing purposes.
==Data values==
===ID===
{{ID table|displayname=[No displayed name]
|showforms=y|form=item|nameid=debug_fourj_item|id=2255<ref group="note">Numerical IDs aren't supported on the Legacy Console Edition anymore.</ref><ref name="r"/>|shownumericids=y|translationkey=item.debug_fourj_item.name|generatetranslationkeys=y|foot=1}}
<references group="note" />
==History==
{{History|console}}
{{History||xbox=unknown|xbone=unknown|ps=unknown|wiiu=unknown|switch=unknown|[[File:Barrier (held) JE1 BE1.png|32px]] Added <samp>debug_fourj_item</samp>.}}
{{History|foot}}
== Gallery ==
<gallery>
Debug fourj item in inventory.png|<samp>debug_fourj_item</samp> as it appears in one's inventory
</gallery>
==See also==
*[[Debug Stick]]
==References==
<references />
{{Items}}
{{Unused features}}
[[Category:Articles missing historical information]]</li></ul> | 13w18a | Chests can now be found in nether fortresses. | ||||||||||||||||||||||||||||||||||||||||||||||||||||||||||||||||||||||||||||||||||||||||||||||||||||||||||||
2013 Music Update{{Extension DPL}}<ul><li>[[Black Dye|Black Dye]]<br/>{{Item
| image = Black Dye.png
| renewable = Yes
| stackable = Yes (64)
}}
'''Black dye''' is a [[Dye#Primary|primary color dye]] similar to an [[ink sac]].
== Obtaining ==
=== Trading ===
[[Wandering trader]]s have a chance to [[trading|trade]] 3 black dyes for 1 [[emerald]].{{only|java}}
=== Crafting ===
{{Crafting
|head=1
|showname=0
|Ink Sac
|Output=Black Dye
|type=Material
}}
{{Crafting
|Wither Rose
|Output=Black Dye
|type=Material
|foot=1
}}
== Usage ==
{{dye usage}}
=== Crafting ingredient ===
{{crafting usage|ignore=Banner|continue=1}}
{{banner crafting usage}}
=== Loom ingredient ===
{{Banner loom usage|Black Dye}}
=== Trading ===
Apprentice-level Shepherd villagers have a 20%{{only|bedrock}} or {{frac|2|7}}{{only|java}} chance to buy 12 black dye for an emerald.
== Data values ==
=== ID ===
{{edition|java}}:
{{ID table
|edition=java
|showforms=y
|generatetranslationkeys=y
|displayname=Black Dye
|spritetype=item
|nameid=black_dye
|form=item
|foot=1}}
{{edition|bedrock}}:
{{ID table
|edition=bedrock
|showaliasids=y
|shownumericids=y
|showforms=y
|notshowbeitemforms=y
|generatetranslationkeys=y
|displayname=Black Dye
|spritetype=item
|nameid=black_dye
|aliasid=dye / 16
|id=395
|form=item
|translationkey=item.dye.black_new.name
|foot=1}}
== History ==
{{History|java}}
{{History||1.14|snap=18w43a|[[File:Black Dye JE1 BE1.png|32px]] Added black dye.}}
{{History|||snap=18w44a|Black dyes now can changed the text color on the [[sign]]s to black.}}
{{History|||snap=19w05a|Added the [[wandering trader]], which sell black dyes.}}
{{History|||snap=19w11a|Black dyes can now be [[trading|bought]] by shepherd villagers.}}
{{History||1.15|snap=Pre-release 1|Black dye can now be used to craft [[prismarine|dark prismarine]], just like [[Bedrock Edition]].}}
{{History||1.17|snap=20w45a|Black dyes can now used to craft newly added [[black candle]]s.}}
{{History|||snap=21w19a|Black dyes can no longer used to craft black candles.}}
{{History|||snap=Pre-release 1|Black dyes can once again used to craft black candles.}}
{{History||1.20<br>(Experimental)|link=1.19.3|snap=22w42a|Black dyes now can change the text color on [[hanging sign]]s to black.}}
{{History|bedrock}}
{{History||1.8.0|snap=beta 1.8.0.10|[[File:Black Dye JE1 BE1.png|32px]] Added black dye.}}
{{History||1.11.0|snap=beta 1.11.0.4|Black dye can now be [[trading|sold]] to shepherd [[villager]]s.}}
{{history||1.13.0|snap=beta 1.13.0.9|Black dye can now be [[crafting|crafted]] from [[flower|wither roses]].}}
{{History||1.16.100|snap=beta 1.16.100.56|The ID of black dye has been changed from <code>dye/16</code> to <code>black_dye</code>.}}
{{History|ps4}}
{{History||1.83|[[File:Black Dye JE1 BE1.png|32px]] Added black dye.}}
{{History|foot}}
== Issues ==
{{issue list}}
{{Items}}
[[Category:Dyes]]
[[Category:Renewable resources]]
[[de:Schwarzer Farbstoff]]
[[es:Tinte negro]]
[[fr:Teinture noire]]
[[ja:黒色の染料]]
[[ko:검은색 염료]]
[[pl:Czarny barwnik]]
[[pt:Corante preto]]
[[th:สีย้อมสีดำ]]
[[zh:黑色染料]]</li><li>[[Netherite Ingot|Netherite Ingot]]<br/>{{About|the refined item|the scrap|Netherite Scrap|the ore|Ancient Debris|other uses|Netherite}}
{{Item
| rarity = Common
| renewable = No
| stackable = Yes (64)
}}
'''Netherite ingots''' are items obtained from crafting [[netherite scrap]]s and [[gold ingot]]s together, as well as loot from [[bastion remnant]] loot chests. Unlike other items, they are immune to fire and [[lava]] damage. They are primarily used to upgrade [[diamond]] gear and craft [[lodestone]]s.
== Obtaining ==
Netherite ingots are obtained by crafting four [[netherite scrap]]s and four [[gold ingot]]s. It is a shapeless recipe, therefore the placement of the netherite scraps and gold ingots does not matter when crafting it.
=== Crafting ===
{{Crafting
|head=1
|showname=0
|Netherite Scrap
|Netherite Scrap
|Netherite Scrap
|Netherite Scrap
|Gold Ingot
|Gold Ingot
|Gold Ingot
|Gold Ingot
|Output=Netherite Ingot
|type=Material
}}
{{Crafting
|Block of Netherite
|Output=Netherite Ingot,9
|type=Material
|foot=1
}}
=== Chest loot ===
{{LootChestItem|netherite-ingot}}
== Usage ==
Netherite ingots are crafting materials used to make netherite tools, weapons, and armor.
=== Crafting ingredient ===
{{crafting usage}}
=== Smithing ingredient ===
Netherite ingots can be used on a [[smithing table]] to upgrade diamond items to netherite items, as well as trim any armor piece. Data such as durability, enchantments, and custom names are preserved.
{{Smithing
|head=1
|ingredients=[[Netherite Upgrade]] +<br>Any [[diamond]] gear +<br>[[Netherite Ingot]]
|Netherite Upgrade
|Diamond Helmet; Diamond Chestplate; Diamond Leggings; Diamond Boots; Diamond Sword; Diamond Pickaxe; Diamond Axe; Diamond Shovel; Diamond Hoe
|Netherite Ingot
|Netherite Helmet; Netherite Chestplate; Netherite Leggings; Netherite Boots; Netherite Sword; Netherite Pickaxe; Netherite Axe; Netherite Shovel; Netherite Hoe
}}
{{Smithing
|ingredients=Any Armor Trim +<br/>Any Armor Piece + <br/>Netherite Ingot
|Any Armor Trim Smithing Template
|Diamond Chestplate
|Netherite Ingot
|Netherite Trim Diamond Chestplate
|showdescription=1
|description = All armor types can be used in this recipe,<br/>a diamond chestplate is shown as an example.<br/>
|tail=1
}}
'''Trim color palette'''
The following color palettes are shown on the designs on trimmed armor:
* {{TrimPalette|netherite ingot}}
* {{TrimPalette|netherite ingot|darker=1}} (a darker color palette is used when a netherite armor piece is trimmed using a netherite ingot).
=== Repairing ===
Netherite ingots are the repair items for the netherite [[tier]] and [[armor material]], and thus can be used to [[item repair|repair]] the following items in an [[anvil]]:
* {{ItemLink|Netherite Helmet}}
* {{ItemLink|Netherite Chestplate}}
* {{ItemLink|Netherite Leggings}}
* {{ItemLink|Netherite Boots}}
* {{ItemLink|Netherite Sword}}
* {{ItemLink|Netherite Pickaxe}}
* {{ItemLink|Netherite Axe}}
* {{ItemLink|Netherite Shovel}}
* {{ItemLink|Netherite Hoe}}
=== Beacons ===
A netherite ingot could be used to select powers from a [[beacon]] instead of using an [[emerald]], [[gold ingot]], [[iron ingot]], or a [[diamond]]. The player must select one of the available powers, and then insert an ingot in the item slot. The [[gold]] option is more efficient than the netherite option because it consumes 3 fewer gold and no [[Netherite Scrap|netherite scrap]].
== Data values ==
=== ID ===
{{edition|java}}:
{{ID table
|edition=java
|showitemtags=y
|showforms=y
|generatetranslationkeys=y
|displayname=Netherite Ingot
|spritetype=item
|nameid=netherite_ingot
|itemtags=beacon_payment_items
|form=item
|foot=1}}
{{edition|bedrock}}:
{{ID table
|edition=bedrock
|shownumericids=y
|showforms=y
|notshowbeitemforms=y
|generatetranslationkeys=y
|displayname=Netherite Ingot
|spritetype=item
|nameid=netherite_ingot
|id=603
|form=item
|foot=1}}
=== Advancements ===
{{load advancements|Serious dedication}}
== History ==
{{History|java}}
{{History||1.16|snap=20w06a|[[File:Netherite Ingot JE1 BE2.png|32px]] Added netherite ingots.}}
{{History|||snap=20w07a|Netherite ingots can now be used to power [[beacon]]s.}}
{{History|||snap=20w10a|The [[crafting]] recipe for netherite [[tools]] and [[armor]] has been changed so that a [[smithing table]] is used instead of a [[crafting table]] and [[enchanting|enchantments]] are preserved when upgrading [[item]]s.}}
{{History|||snap=20w13a|Netherite ingots can now be used to craft [[lodestone]]s.}}
{{History|||snap=20w16a|Netherite ingots can now be found in [[bastion remnant]] chests.}}
{{History||1.16.2|snap=20w30a|Increased the chance of finding netherite ingots in bastion remnant chests from 16.8% to 42.1%.}}
{{History||1.20<br>(Experimental)|link=1.19.4|snap=23w04a|Netherite ingots can now be used as an armor trim material.|Upgrading diamond tools and armor to netherite now requires the netherite upgrade [[smithing template]] in addition to a netherite ingot.}}
{{History|||snap=23w05a|Netherite ingots can now be used to trim netherite armor.}}
{{History||1.20|snap=23w12a|Netherite ingots are now usable for trimming without requiring the "Update 1.20" experimental datapack to be enabled.}}
{{History|bedrock}}
{{History||1.16.0|snap=beta 1.16.0.51|[[File:Netherite Ingot BE1.png|32px]] Added netherite ingots.}}
{{History|||snap=beta 1.16.0.57|Netherite ingots can now be used to power [[beacon]]s.
|The [[crafting]] recipe for netherite [[tools]] and [[armor]] has been changed so that a [[smithing table]] is used instead of a [[crafting table]] and [[enchanting|enchantments]] are preserved when upgrading [[item]]s.
|Netherite ingots can now be used to craft [[lodestone]]s.
|Netherite ingots can now be found in [[bastion remnant]] chests.}}
{{History||1.17.10|snap=beta 1.17.10.20|[[File:Netherite Ingot JE1 BE2.png|32px]] The texture of netherite ingots has been changed to match ''Java Edition''.}}
{{History||Next Major Update<br>(Experimental)|link=Bedrock Edition 1.19.80|snap=beta 1.19.80.21|Netherite ingots can now be used as an armor trim material.|Upgrading diamond tools and armor to netherite now requires the netherite upgrade [[smithing template]] in addition to a netherite ingot.}}
{{History||1.20.0|snap=beta 1.20.0.21|Netherite ingots are now usable for trimming without requiring the "Next Major Update" experimental toggle to be enabled.}}
{{History|foot}}
== Issues ==
{{issue list}}
== See also ==
* {{EnvLink|Bastion Remnant}}
* {{BlockLink|Block of Netherite}}
* {{ItemLink|Netherite Scrap}}
* {{BlockLink|Ancient Debris}}
*{{BlockLink|Lodestone}}
== External Links ==
* [https://www.minecraft.net/en-us/article/taking-inventory--netherite-ingot Taking Inventory: Netherite Ingot] – Minecraft.net on May 28, 2020
{{Items}}
[[de:Netheritbarren]]
[[es:Lingote de netherita]]
[[fr:Lingot de Netherite]]
[[it:Lingotto di netherite]]
[[ja:ネザライトインゴット]]
[[ko:네더라이트 주괴]]
[[pl:Sztabka netherytu]]
[[pt:Barra de netherita]]
[[ru:Незеритовый слиток]]
[[th:แท่งเนเธอไรต์]]
[[uk:Незеритовий злиток]]
[[zh:下界合金锭]]
[[Category:Non-renewable resources]]</li></ul> | Four ambient music tracks added for the Nether. | |||||||||||||||||||||||||||||||||||||||||||||||||||||||||||||||||||||||||||||||||||||||||||||||||||||||||||||
1.8{{Extension DPL}}<ul><li>[[Knowledge Book|Knowledge Book]]<br/>{{exclusive|java}}
{{Item
| image = Knowledge Book.png
| renewable = No
| stackable = No
| rarity = Epic
}}
A '''knowledge book''' is a utility item that reveals available [[crafting]] recipes to the player when {{control|used|use}}.
== Obtaining ==
Knowledge books can be obtained only by using [[commands]], as it is not found in the [[creative]] inventory; therefore, it is impossible to obtain in other modes such as [[survival]] and [[adventure]] except with commands.
For example, to give oneself a knowledge book that reveals the recipes for [[bucket]]s and [[flower pot]]s, use: {{cmd|give @s minecraft:knowledge_book{Recipes:["minecraft:bucket", "minecraft:flower_pot"]} }}.
== Usage ==
Knowledge books are used to reveal recipes to the player who uses it, by adding it to their [[recipe book]]. Using a knowledge book consumes it, removing it from the player's inventory.
Knowledge books are especially useful to mapmakers in conjunction with {{cmd|gamerule doLimitedCrafting true}}, because then any item is craftable only if its recipe is unlocked first.
== Sounds ==
{{Sound table
|sound=Chiseled bookshelf insert1.ogg
|sound2=Chiseled bookshelf insert2.ogg
|sound3=Chiseled bookshelf insert3.ogg
|sound4=Chiseled bookshelf insert4.ogg
|subtitle=Book placed
|source=block
|description=When a knowledge book is placed in a chiseled bookshelf
|id=block.chiseled_bookshelf.insert
|translationkey=subtitles.chiseled_bookshelf.insert
|volume=0.8
|pitch=''varies'' <ref group=sound>Can be 1.0, 0.85, or 1.1 for each sound</ref>
|distance=16}}
{{Sound table
|sound=Chiseled bookshelf pickup1.ogg
|sound2=Chiseled bookshelf pickup2.ogg
|sound3=Chiseled bookshelf pickup3.ogg
|subtitle=Book taken
|source=block
|description=When a knowledge book is removed from a chiseled bookshelf
|id=block.chiseled_bookshelf.pickup
|translationkey=subtitles.chiseled_bookshelf.take
|volume=0.8
|pitch=''varies'' <ref group=sound>Can be 1.0, 0.8, or 1.1 for each sound</ref>
|distance=16
|foot=1}}
== Data values ==
=== ID ===
{{ID table
|edition=java
|showforms=y
|generatetranslationkeys=y
|displayname=Knowledge Book
|spritetype=item
|nameid=knowledge_book
|form=item
|foot=1}}
=== Item data ===
Recipe books use the NBT tag <code>Recipes</code> to indicate the recipes they contain.
''The following NBT structure is provided to show how the <code>Recipes</code> tag is organized, and is not comprehensive above the <code>tag</code> tag. The full NBT for an item can be found [[Chunk format#Items and XP Orbs|here]].''
<div class="treeview" style="margin-top: 0;">
* {{nbt|compound}} Entity data
** {{nbt|compound|Item}}: The item
*** {{nbt|compound|tag}}: Additional information about the item. This tag is optional for most items.
**** {{nbt|list|Recipes}}: The list of recipes this book contains.
***** {{nbt|string}} the name of a recipe, for instance <code>minecraft:gold_nugget</code> or <code>minecraft:gold_ingot_from_nuggets</code>
</div>
== History ==
{{History|java}}
{{History||1.12|snap=17w13a|[[File:Knowledge Book JE1.png|32px]] Added knowledge books.}}
{{History||1.13|snap=17w47a|Prior to [[1.13/Flattening|''The Flattening'']], this [[item]]'s numeral ID was 453.}}
{{History||1.14|snap=18w43a|[[File:Knowledge Book JE2.png|32px]] The texture of knowledge books has now been changed.}}
{{History||1.20|snap=1.20 Release Candidate 1|Knowledge books can now be placed in [[chiseled bookshelf|chiseled bookshelves]].}}
{{History|Foot}}
== Issues ==
{{Issue list}}
== See also ==
* [[Book]]
* [[Enchanted Book]]
* {{cmd|recipe}} command
{{Items}}
[[Category:Non-renewable resources]]
[[de:Buch des Wissens]]
[[es:Enciclopedia]]
[[fr:Livre des connaissances]]
[[ja:知恵の本]]
[[ko:지식의 책]]
[[lzh:天工開物]]
[[pl:Księga wiedzy]]
[[pt:Enciclopédia]]
[[ru:Книга знаний]]
[[zh:知识之书]]</li><li>[[Redstone Comparator|Redstone Comparator]]<br/>{{Block
| image =
| image2 =
| transparent = Yes
| light = No
| tool = any
| renewable = Yes
| stackable = Yes (64)
| flammable = No
| lavasusceptible = No
| group = Redstone Comparator
| group2 = Subtracting
| group3 = Powered
| group4 = Powered+Subtracting
| 1-1 = Redstone Comparator.png
| 2-1 = Subtracting Redstone Comparator.png
| 3-1 = Powered Redstone Comparator.png
| 4-1 = Powered Subtracting Redstone Comparator.png
}}
{{Many images}}
A '''redstone comparator''' is a [[block]] that can produce an [[Redstone Dust|output signal]] from its front by reading [[chest]]s, [[lectern]]s, [[beehive]]s and similar blocks, or repeat a signal without changing its strength. It can also be set to either stop outputting a signal when its side input recieves a stronger one (front torch off), or subtract its side input's signal strength from its output (front torch on).
== Obtaining ==
=== Natural generation ===
Redstone comparators generate in [[Ancient City|ancient cities]].
=== Breaking ===
A redstone comparator can be broken instantly with any [[tool]], or by hand, and drops itself as an item.
{{Breaking row|Redstone Comparator|horizontal=y}}
A redstone comparator is removed and dropped as an item if:
* its attachment block is moved, removed, or destroyed;
* [[water]] flows into its space;{{only|java}}
* a [[piston]] tries to push it or moves a block into its space.
If [[lava]] flows into a redstone comparator's space, the redstone comparator is destroyed without dropping as an item.
=== Crafting ===
{{Crafting
|B1=Redstone Torch
|A2=Redstone Torch
|B2=Nether Quartz
|C2=Redstone Torch
|A3=Stone
|B3=Stone
|C3=Stone
|Output= Redstone Comparator
|type=Redstone
}}
== Usage ==
A redstone comparator can be placed on the top of any [[opaque]] block with a solid full-height top surface (including upside-down [[slab]]s and upside-down [[stairs]]). {{IN|be}}, a comparator can also be placed on [[wall]]s and fences. For more information about placement on transparent blocks, see [[Opacity/Placement]].
The redstone comparator has a front and a back — the arrow on the top of the comparator points to the front. When placed, the comparator faces away from the player. The comparator has two miniature redstone torches at the back and one at the front. The back torches turn on when the comparator's output is greater than zero (the arrow on top also turns red). The front torch has two states that can be toggled by {{control|using}} the comparator:
* Down and unpowered (indicating the comparator is in "comparison mode")
* Up and powered (indicating the comparator is in "subtraction mode")
The redstone comparator can take a signal strength input from its rear as well as from both sides. Side inputs are accepted only from [[redstone dust]], [[block of redstone]], [[redstone repeater]]s, other comparators, and [[observer]]s in specific scenarios. The redstone comparator's front is its output.
It takes 1 [[redstone tick]] (2 game ticks, or 0.1 seconds barring lag) for signals to move through a redstone comparator, either from the rear or from the sides. This applies to changing signal strengths as well as simply to turning on and off.
Redstone comparators check their power state before their scheduled ticks update. This results in redstone comparators not usually responding to 1-tick fluctuations of power or signal strength — for example, a [[clock circuit|1-clock]] input is treated as always off from the side, and always on from the rear. This happens because the signal changes back to its original state before the redstone comparator checks its input states. However, certain setups such as powering any input with two separate observer pulses at the same time will cause a redstone comparator to respond to 2 gametick pulses.
The redstone comparator has four functions: maintain signal strength, compare signal strength, subtract signal strength, and measure certain block states (primarily the fullness of containers).
=== Maintain signal strength ===
A redstone comparator with no powered sides outputs the same signal strength as its rear input.
=== Compare signal strength ===
[[File:Comparators Explained.png|Comparators in comparison mode.|thumb]]
A redstone comparator in comparison mode (front torch down and unpowered) compares its rear input to its two side inputs. If either side input is greater than the rear input, the comparator output turns off. If neither side input is greater than the rear input, the comparator outputs the same signal strength as its rear input.
The formula for calculating the output signal strength is as follows:
<code>output = rear × [[Wikipedia:Iverson bracket|[]]'''''left''''' ≤ '''''rear''''' AND '''''right''''' ≤ '''''rear'''''[[Wikipedia:Iverson bracket|<nowiki>]]]</code>
{{-}}
=== Subtract signal strength ===
[[File:Redstone comparator.png|thumb|The greatest of the side inputs A and C is subtracted from the rear input B, outputting 1. If either A or C were greater than B, it would output 0.]]
A redstone comparator in subtraction mode (front torch up and powered) subtracts the signal strength of the higher side input from the signal strength of the rear input.
<code>output = max('''''rear''''' − max('''''left''', '''right'''''), 0)</code>
For example: if the signal strength is 6 at the left input, 7 at the right input and 4 at the rear, the output signal has a strength of ''max(4 − max(6, 7), 0) = max(4−7, 0) = max(−3, 0) = 0''.
If the signal strength is 9 at the rear, 2 at the right input and 5 at the left input, the output signal has a strength of ''max(9 − max(2, 5), 0) = max(9−5, 0) = 4''.
=== Measure block state ===
{{Schematic | caption = A redstone comparator can measure the fullness of a chest, as well as other block states, even through an opaque block.
|rd-ew!|rc-w!|ch|SB|rc-e!|rd-ew!
}}
A redstone comparator treats certain blocks behind it as power sources and outputs a signal strength proportional to the block's state. The comparator may be separated from the measured block by an opaque block. However, {{in|je}}, if the opaque block is powered to signal strength 15, then the comparator outputs 15 no matter the fullness of the container.<ref>{{bug|MC-64394}} (resolved as "Works As Intended")</ref>
[[Category:Java Edition specific information]]
{{-}}
==== Fullness of containers ====
{| class="wikitable floatright" style="margin-left: 0.5em; margin-right: 0; text-align: center;"
|+ Minimum Items for Container Signal Strength
|-
!Containers
!{{BlockSprite|Furnace|link=Furnace}}<br>{{BlockSprite|Blast Furnace|link=Blast Furnace}}<br>{{BlockSprite|Smoker|link=Smoker}}
!{{BlockSprite|Hopper|link=Hopper}}<br>{{EntitySprite|Minecart with Hopper|link=Minecart with Hopper}}<br>{{BlockSprite|Brewing Stand|link=Brewing Stand}}
!{{BlockSprite|Dispenser|link=Dispenser}}<br>{{BlockSprite|Dropper|link=Dropper}}
!{{BlockSprite|Chest|link=Chest}}<br>{{EntitySprite|Minecart with Chest|link=Minecart with Chest}}<br>{{BlockSprite|Shulker Box|link=Shulker Box}}<br>{{BlockSprite|Barrel|link=Barrel}}
![[Double Chest|{{Schematic|size=16|ch-s|-|ch-n}}
]]
!{{BlockSprite|Jukebox|link=Jukebox}}
|-
!Total Slots
!3!!5!!9!!27!!54!!1
|-
!Power Level
! colspan="5" |Number of Items
!Music Disc
|-
|0||0||0||0||0||0||No disc
|-
|1||1||1||1||1||1||"13"
|-
|2||14||23||42||1s 60||3s 55||"cat"
|-
|3||28||46||1s 19||3s 55||7s 46||"blocks"
|-
|4||42||1s 5||1s 60||5s 51||11s 37||"chirp"
|-
|5||55||1s 28||2s 37||7s 46||15s 28||"far"
|-
|6||1s 5||1s 51||3s 14||9s 42||19s 19||"mall"
|-
|7||1s 19||2s 10||3s 55||11s 37||23s 10||"mellohi"
|-
|8||1s 32||2s 32||4s 32||13s 32||27s||"stal"
|-
|9||1s 46||2s 55||5s 10||15s 28||30s 55||"strad"
|-
|10||1s 60||3s 14||5s 51||17s 23||34s 46||"ward"
|-
|11||2s 10||3s 37||6s 28||19s 19||38s 37||"11"
|-
|12||2s 23||3s 60||7s 5||21s 14||42s 28||"wait"
|-
|13||2s 37||4s 19||7s 46||23s 10||46s 19||"Pigstep"
|-
|14||2s 51||4s 42||8s 23||25s 5||50s 10||"Otherside"<br>"Relic"
|-
|15||3s||5s||9s||27s||54s||"5"
|}
A redstone comparator can output a signal indicating how full a container is. (0 for empty, 15 for full, etc.) The table on the right is described more in detail, later in this section.
Containers that can be measured by a comparator include:
* {{BlockLink|Furnace}}
* {{BlockLink|Blast Furnace}}
* {{BlockLink|Smoker}}
* {{BlockLink|Brewing Stand}}
* {{BlockLink|Hopper}}
* {{ItemLink|Minecart with Hopper}} on top of a [[detector rail]]
* {{BlockLink|Dispenser}}
* {{BlockLink|Dropper}}
* {{BlockLink|Chest}}
* {{BlockLink|Trapped Chest}}
* {{ItemLink|Minecart with Chest}} on top of a [[detector rail]]
* {{BlockLink|Barrel}}
* {{SchematicSprite|size=16|ch-e}}{{SchematicSprite|size=16|ch-w}} Large chest
* {{SchematicSprite|size=16|ch-e}}{{SchematicSprite|size=16|ch-w}} Large trapped chest
* {{BlockLink|Shulker Box}} (any color)
Generally speaking, the comparator output signal strength represents the average fullness of the slots, based on how many of that item form a full stack (64, 16, or 1 for non-stackable items).
The ''Minimum Items for Container Signal Strength'' table (right) shows the minimum '''''full-stack-equivalent (FSE)''''' to produce different signal strengths from common containers. A '''''full-stack-equivalent''''' quantifies how many normal 64-stackable items are needed to output a corresponding signal strength. The 's' is a constant 64, with the additional amount needed following after.
One may also consider the terms: '''c''umulative-weight''''' or '''''weighted-sum''''' instead of '''''full-stack-equivalent'''''.
Items that stack to a max of 16 ([[snowball]]s, [[sign]]s, [[ender pearl]]s, etc.), contribute +4 to the ''full-stack-equivalent'' for each unity (count of 1 item). Similarly, items that stack to 1 ([[minecart]], [[boat]], etc.) contribute +64, and items that stack to 64 contribute +1.
Example 1: 3 ender pearls will contribute a 3 x 4 = 12 ''full-stack-equivalent''.
Example 2: 16 ender pearls and 60 redstone dust contributes a 16x4 + 60x1 = 124 ''full-stack-equivalent''.
Example 3: 1 minecart and 60 redstone dust contributes a 1x64 + 60x1 = 124 ''full-stack-equivalent''.
Example 4: To produce a signal strength of 10 from a hopper, one requires a ''full-stack-equivalent'' of at least 3s + 14 = 206 but strictly less than than 3s + 37 = 229. This can be done with 3 minecarts, and 14 dirt.
When a comparator measures a large chest or large trapped chest, it measures the entire large chest (54 slots), not just the half directly behind the comparator. A chest or trapped chest that cannot be opened (either because it has an opaque block, [[ocelot]], or [[cat]] above it) always produces an output of 0 no matter how many items are in the container — shulker boxes can always be measured, even if they cannot open.
;Calculating signal strength from items
:When a container is empty, the output is off.
:When it is not empty, the output signal strength is calculated as follows:
:<code>'''''signal strength''''' = floor(1 + (('''''sum of all slots' fullnesses''''') / ('''''number of slots in container''''')) × 14)</code>
:<code>fullness of a slot = '''''number of items in slot''''' / '''''max stack size for this type of item'''''</code>
:''Example:'' 300 blocks in a dispenser (which has 9 slots), where each block stacks to a maximum of 64 has a 300 ''full-stack-equivalent.'' This produces an output with a signal strength of 8:
<blockquote>
1 + ((300 items / 64 items per slot) / 9 slots) × 14 = 8.292, floored is 8
</blockquote>
;Calculating items from signal strength
:It can be useful in redstone circuits to use containers with comparators to create signals of a specific strength. The number of items required in a container to produce a signal of desired strength is calculated as follows:
:<code>items required = max('''''desired signal strength''''', roundup(('''''total slots in container''''' × 64 / 14) × (desired signal strength − 1)))</code>
:''Example:'' To use a furnace (which has 3 slots) to create a strength 9 signal, players need 110 items:
<blockquote>
max(9, (3×64/14) × (9−1)) = 109.714, rounded up is 110
</blockquote>
{{-}}
==== Miscellaneous ====
[[File:Comparator storage.png|Comparators used to measure containers.|thumb]]
Some non-container blocks can also be measured by a redstone comparator:
;{{BlockLink|Beehive}} and {{BlockLink|Bee nest}}
: A hive or nest outputs a signal strength equal to the amount of honey in the hive/nest.
;{{BlockLink|Cake}}
: A cake outputs a signal strength relative to the amount of cake remaining. Each slice is worth 2 signal strength, with 7 total slices, for an output of 14 for a full cake.
[[File:Cauldron Redstone Strength Values.png|Cauldron signal strength|thumb]]
;{{BlockLink|Cauldron}}
: A cauldron outputs different signal strengths depending on how much water or powdered snow is inside. From completely empty to completely full, the output values are 0, 1, 2, and 3. If lava or powder snow is inside, the strength is always 3.
[[File:Composter Redstone Strength Values.png|Composter signal strength|thumb]]
;{{BlockLink|Composter}}
: A composter outputs different signal strengths depending on the level inside. From completely empty to completely full, the output values are 0, 1, 2, 3, 4, 5, 6, 7 and 8.
;{{Anchor|CommandBlock}}{{BlockLink|Command Block}}
: A command block stores the "success count" of the last command executed, which represents the number of times the most recently used command of this command block succeeded. A "success" is defined by the [[command]]'s success conditions: if a red error message is returned in the chat, the command was not successful.
: Most commands can succeed once per execution, but certain commands (such as those that accept players as arguments) can succeed multiple times, and the comparator outputs the number of times it succeeded (maximum 15 when sent to redstone dust, but in the code it is able to go up to the 32-bit integer limit, and can be used in contraptions with no redstone dust with those values).
: A command block continues to store the success count of the last command executed until it executes its command again, thus the comparator continues to output the same signal strength even after the command block is no longer being activated (it doesn't turn off when the signal to the command block turns off).
;{{BlockLink|End Portal Frame}}
: An end portal frame outputs a full signal of 15 if it contains an [[eye of ender]] and zero otherwise.
[[File:Item frame and comparator.png|A comparator can measure the presence and rotation of an item frame's contents.|thumb]]
;{{EntityLink|Item Frame}}
: A comparator can measure the state of an [[item frame]]'s contents. An item frame comparator outputs 0 if the item frame is empty, or 1 to 8 for any item depending on its rotation: 1 at initial placement, plus 1 for each 45° of rotation for a maximum of 8.
: For an item frame that holds a map, a unit of rotation is 90° instead of 45°, but a comparator still outputs power levels 1 to 8. It takes two full rotations to cycle through all comparator outputs, and each orientation of the map corresponds to two output levels that differ by 4.
: The comparator must be placed behind the block the item frame is attached to, facing away from the item frame. The block must be a full block, and the item frame cannot be submerged in water. Having a sign in the same block as the item frame will prevent the frame from sending a signal as well.{{only|java}}
;{{BlockLink|Jukebox}}
: A jukebox outputs a signal strength indicating which music disc is currently playing. See the ''Minimum Items for Container Signal Strength'' table above.
;{{BlockLink|Lectern}}
: A lectern outputs a signal strength that depends on what page the player is currently on. The calculation used is:
:<code>'''''signal strength''''' = floor(1 + (('''''current page''''' - 1) / ('''''number of pages in book''''' - 1)) × 14)</code>
:This results in page 1 having a signal strength of 1, and the last page having a signal strength of 15. The exception is a single page book, which will output a signal strength of 15.
:For example, a book with 15 pages will output a signal equal to the current page number. A book with 5 pages will output signal strengths of 1, 4, 8, 11 and 15 for the different pages. A book with 100 pages will have the signal strength increase to the next level on pages 1, 9, 16, 23, 30, 37, 44, 51, 58, 65, 72, 79, 86, 93 and 100.
:
;{{BlockLink|Respawn Anchor}}
: A respawn anchor outputs a signal strength of 0, 3, 7, 11, or 15, depending on the "charged" value.
;{{BlockLink|Sculk Sensor}}
: A sculk sensor outputs a signal strength depending on the type of vibration that is detected.
;{{BlockLink|Chiseled Bookshelf}}
: A chisled bookshelf outputs a signal strength between 1 and 6 indicating the last slot interacted with. When no slot has been interacted with yet, it outputs 0.
{{-}}
== Sounds ==
=== Generic ===
{{Edition|Java}}:
{{Sound table/Block/Stone/JE}}
{{Edition|Bedrock}}:
{{Sound table/Block/Wood/BE}}
=== Unique ===
{{edition|java}}:
{{Sound table
|rowspan=2
|sound=Click.ogg
|subtitle=Comparator clicks
|source=block
|description=When a comparator is set to subtraction mode
|id=block.comparator.click
|translationkey=subtitles.block.comparator.click
|volume=0.3
|pitch=0.55
|distance=16}}
{{Sound table
|subtitle=Comparator clicks
|source=block
|description=When a comparator is set to comparison mode
|id=block.comparator.click
|translationkey=subtitles.block.comparator.click
|volume=0.3
|pitch=0.5
|distance=16
|foot=1}}
{{edition|bedrock}}:
{{Sound table
|type=bedrock
|rowspan=2
|sound=Click.ogg
|source=block
|description=When a comparator is set to subtraction mode
|id=block.click
|volume=0.2
|pitch=0.55}}
{{Sound table
|source=block
|description=When a comparator is set to comparison mode
|id=block.click
|volume=0.2
|pitch=0.5
|foot=1}}
== Data values ==
=== ID ===
{{edition|java}}:
{{ID table
|edition=java
|showforms=y
|generatetranslationkeys=y
|displayname=Redstone Comparator
|spritetype=block
|nameid=comparator
|foot=1}}
{{ID table
|displayname=Block entity
|spritename=redstone-comparator
|spritetype=block
|nameid=comparator
|foot=1}}
{{edition|bedrock}}:
{{ID table
|edition=bedrock
|firstcolumnname=Redstone Comparator
|shownumericids=y
|showforms=y
|generatetranslationkeys=y
|displayname=Unpowered block
|spritename=unpowered-comparator
|spritetype=block
|nameid=unpowered_comparator
|id=149
|form=block
|translationkey=-}}
{{ID table
|displayname=Powered block
|spritename=powered-comparator
|spritetype=block
|nameid=powered_comparator
|id=150
|form=block
|translationkey=-}}
{{ID table
|displayname=Item
|spritename=redstone-comparator
|spritetype=item
|nameid=comparator
|id=522
|form=item
|foot=1}}
{{ID table
|notnamespaced=y
|displayname=Block entity
|spritename=redstone-comparator
|spritetype=block
|nameid=Comparator
|foot=1}}
=== Block states ===
{{see also|Block states}}
{{/BS}}
=== Block data ===
A redstone comparator has a block entity associated with it that holds additional data about the block.
{{el|je}}:
{{see also|Block entity format}}
{{/BE}}
{{el|be}}:
: See [[Bedrock Edition level format/Block entity format]].
== Advancements ==
{{Load advancements|the power of books}}
== Video ==
<div style="text-align:center">{{yt|J7Z20Zzz3yU}}</div>
== History ==
{{info needed section|If {{bug|MC-50242}} also affected comparators?}}
''For a more in-depth breakdown of changes to repeater textures and models, including a set of renders for each state combination, see [[/Asset history]]''
{{History|java}}
{{History||November 24, 2012|link=https://youtube.com/watch?v=YG9RNyRhIow&t=6m56s|[[Jeb]] stated that there may be a "capacitor" in [[Minecraft]]. }}
{{History||December 27, 2012|link={{tweet|Dinnerbone|284388625595125760}}|[[Dinnerbone]] released [https://web.archive.org/web/20190710120115/https://imgur.com/a/FBKed pictures] of the first version of the "comparator", stating it was a replacement for the "capacitor" idea that has variable, alternate inputs.}}
{{History||January 2, 2013|link={{tweet|Dinnerbone|286428595423965184}}|Dinnerbone released one more [http://dinnerbone.com/media/uploads/2013-01/screenshots/2013-01-02_12.06.47.png picture] of the comparator. The picture itself showing a digital-to-analog converter, using the comparator as the main [[block]].}}
{{History||1.5|snap=13w01a|[[File:Redstone Comparator (S) JE1.png|32px]] [[File:Powered Redstone Comparator (S) JE1.png|32px]] [[File:Subtracting Redstone Comparator (S) JE1.png|32px]] [[File:Powered Subtracting Redstone Comparator (S) JE1.png|32px]] [[File:Redstone Comparator (item) JE1 BE1.png|32px]] Added redstone comparators.
|Redstone comparators have 0 delay.
At this point, block ID 149 was used for unpowered comparators, and block ID 150 for powered comparators.}}
{{History|||snap=13w01b|A delay of 1 game tick ({{frac|1|2}} redstone tick) has now been added to redstone comparators to fix bugs.
|The ability to measure containers to redstone comparators has now been added.}}
{{History|||snap=13w02a|[[File:Redstone Comparator (S) JE2.png|32px]] [[File:Powered Redstone Comparator (S) JE2.png|32px]] [[File:Subtracting Redstone Comparator (S) JE2.png|32px]] [[File:Powered Subtracting Redstone Comparator (S) JE2.png|32px]] The appearance of redstone comparators has now been changed - the top texture has changed to show [[quartz]] in the middle and the sides now use the [[smooth stone]] texture rather than the smooth stone slab side texture.
|The algorithm for measuring containers has now been changed so that redstone comparators output a signal with as few as 1 [[item]] in the container.}}
{{History|||snap=13w02b|Redstone comparators now treat large [[chest]]s as a single container.}}
{{History|||snap=13w03a|Redstone comparators now output success count of [[command block]]s.
|Redstone comparators now measure container [[minecart]]s on [[detector rail]]s.}}
{{History|||snap=13w04a|Redstone comparators now measure [[jukebox]]es.}}
{{History|||snap=13w05a|Redstone comparators no longer cause constant [[block]] updates. The delay has now been made consistent, and side input no longer causes a pulse output.
|Block 150 (later <code>powered_comparator</code>) is no longer used; powered state is now represented by the 8s bit on block 149 (later <code>unpowered_comparator</code>).}}
{{History|||snap=13w05b|Redstone comparator delay has now been changed from 1 game tick (1/2 [[redstone]] tick) to 2 game ticks (1 redstone tick).}}
{{History|||snap=13w09c|The redstone signal strength from a redstone comparator next to a [[brewing stand]] with 3 [[water bottle]]s in it is now the same as one with 3 water bottles and 1 ingredient in it.}}
{{History||1.6.1|snap=13w18a|Redstone comparators now measure [[cauldron]]s and [[end portal frame]]s.}}
{{History||1.8|snap=14w04a|Redstone comparators now measure [[item frame]]s.}}
{{History|||snap=14w10a|The torches under redstone comparators have now been shortened, which has changed the underside appearance from [[File:Redstone Comparator UNKVER1 (facing NWU).png|32px]] [[File:Powered Redstone Comparator UNKVER1 (facing NWU).png|32px]] [[File:Subtracting Redstone Comparator UNKVER1 (facing NWU).png|32px]] [[File:Powered Subtracting Redstone Comparator UNKVER1 (facing NWU).png|32px]] to [[File:Redstone Comparator UNKVER2 (facing NWU).png|32px]].}}
{{History|||snap=14w25a|[[File:Redstone Comparator (S) JE3.png|32px]] [[File:Powered Redstone Comparator (S) JE3.png|32px]] [[File:Subtracting Redstone Comparator (S) JE3.png|32px]] [[File:Powered Subtracting Redstone Comparator (S) JE3.png|32px]] The torches on comparators are now subject to ambient occlusion.
|Comparators set to subtract mode appear to be powered as well regardless of incoming power. The subtracting-only model still exists and can be achieved through {{cmd|setblock}}.}}
{{History|||snap=14w25b|[[File:Subtracting Redstone Comparator (S) JE4.png|32px]] [[File:Powered Subtracting Redstone Comparator (S) JE4.png|32px]] The powered front torch when in subtraction mode is now lower.
|Comparators set to subtract by hand now appear normally again.}}
{{History|||snap=14w28a|Redstone comparators now measure [[cake]]s.}}
{{History||1.9|snap=15w42a|With the addition of the [[blaze powder]] fuel slot, [[brewing stand]]s now have 5 slots instead of 4. Their original comparative power values from redstone comparators are listed below:
{{{!}} class{{=}}"wikitable collapsible collapsed" data-description{{=}}"Original values"
! Original values
{{!}}-
{{!}}
*0: 0
*1: 1
*2: 19
*3: 37
*4: 55
*5: 1s 10
*6: 1s 28
*7: 1s 46
*8: 2s
*9: 2s 19
*10: 2s 37
*11: 2s 55
*12: 3s 10
*13: 3s 28
*14: 3s 46
*15: 4s
{{!}}}
}}
{{History|||snap=15w47a|Redstone comparators' side inputs now take power from [[redstone block]]s.}}
{{History||1.13|snap=17w47a|All 3 IDs for the redstone comparator have now been merged into one ID: <code>comparator</code>.
|Redstone comparators now render their underside, which has changed their undersides from [[File:Redstone Comparator UNKVER2 (facing NWU).png|32px]] to [[File:Redstone Comparator UNKVER3 (facing NWU).png|32px]].
|Prior to [[1.13/Flattening|''The Flattening'']], these blocks' numeral IDs were 149 and 150, and the [[item]]'s 404.
|As a result, the formerly unused comparator ID is now technically used again, due to both unpowered and powered versions being merged into a single comparator block ID.}}
{{History||1.14|snap=18w43a|[[File:Redstone Comparator (S) JE4.png|32px]] [[File:Powered Redstone Comparator (S) JE4.png|32px]] [[File:Subtracting Redstone Comparator (S) JE5.png|32px]] [[File:Powered Subtracting Redstone Comparator (S) JE5.png|32px]] [[File:Redstone Comparator (item) JE2 BE2.png|32px]] The textures of redstone comparators have now been changed.}}
{{History|||snap=19w02a|Redstone comparators now measure [[lectern]]s.}}
{{History|||snap=19w03a|Redstone comparators now measure [[composter]]s.}}
{{History|||snap=19w12b|Redstone comparators can now be placed on [[glass]], [[ice]], [[glowstone]] and [[sea lantern]]s.}}
{{History||1.15|snap=19w34a|Redstone comparators now measure how much honey is inside [[beehive|bee hive]]s and [[bee nest]]s.}}
{{History||1.16|snap=20w06a|The way to calculate the input signals of redstone comparators has now been changed.}}
{{History|||snap=20w11a|The changes to the way of calculating the input signals of redstone comparators from [[Java Edition 20w06a|20w06a]] have now been reverted.}}
{{History|||snap=20w16a|Redstone comparators now measure [[Pigstep music disc]]s in [[jukebox]]es.}}
{{History||1.17|snap=20w45a|Redstone comparators now measure [[lava cauldron]]s.}}
{{History|||snap=20w46a|Redstone comparators now measure [[Cauldron#Holding powder snow|powder snow cauldron]]s.}}
{{History||1.18|snap=21w41a|[[File:Powered Redstone Comparator (S) JE5.png|32px]] [[File:Powered Subtracting Redstone Comparator (S) JE6.png|32px]] The texture of powered redstone comparator have now been changed.}}
{{History||1.19|snap=22w13a|Redstone comparators now generate as part of [[ancient cities]].}}
{{History||1.20<br>(Experimental)|link=1.19.3|snap=22w42a|Redstone comparators now measure [[chiseled bookshelves]].}}
{{History||1.20.2|snap=23w33a|Redstone comparators now use stone sounds instead of wood sounds.<ref>{{bug|MC-182820|||Fixed}}</ref>}}
{{History|pocket alpha}}
{{History||v0.14.0|snap=build 1|[[File:Redstone Comparator (S) JE2 BE1.png|32px]] [[File:Powered Redstone Comparator (S) JE2 BE1.png|32px]] [[File:Subtracting Redstone Comparator (S) JE2 BE1.png|32px]] [[File:Powered Subtracting Redstone Comparator (S) JE2 BE1.png|32px]]{{verify|Was this the model used?}} [[File:Redstone Comparator (item) JE1 BE1.png|32px]] Added redstone comparators.}}
{{History|pocket}}
{{History||1.0.0|snap=alpha 0.17.0.1|Redstone comparators now measure [[end portal frame]]s.}}
{{History||1.0.5|snap=alpha 1.0.5.0|Redstone comparators now output success count of [[command block]]s.}}
{{History||1.1.0|snap=alpha 1.1.0.0|Redstone comparators now measure [[shulker box]]es.}}
{{History|bedrock}}
{{History||1.2.0|snap=beta 1.2.0.2|Redstone comparators now measure [[jukebox]]es.
|Redstone comparators now render their underside, which has changed their undersides from [[File:Redstone Comparator UNKVER1 (facing NWU).png|32px]] to [[File:Redstone Comparator UNKVER3 (facing NWU).png|32px]]}}
{{History||1.10.0|snap=beta 1.10.0.3|[[File:Redstone Comparator (S) BE.png|32px]] [[File:Powered Redstone Comparator (S) BE.png|32px]] [[File:Subtracting Redstone Comparator (S) BE.png|32px]] [[File:Powered Subtracting Redstone Comparator (S) BE.png|32px]] [[File:Redstone Comparator (item) JE2 BE2.png|32px]] The textures of redstone comparators have now been changed.}}
{{History||1.11.0|snap=beta 1.11.0.1|Redstone comparators now measure [[smoker]]s, [[blast furnace]]s, [[lectern]]s and [[composter]]s.}}
{{History||1.18.10|snap=beta 1.18.10.20|[[File:Powered Redstone Comparator (S) JE5.png|32px]] [[File:Powered Subtracting Redstone Comparator (S) JE6.png|32px]] The texture of powered redstone comparator have now been changed.}}
{{History||1.20.30|snap=beta 1.20.30.20|Redstone comparators now use the <code>minecraft:cardinal_direction</code> [[block state]] instead of <code>direction</code>.}}
{{History|console}}
{{History||xbox=TU19|xbone=CU7|ps=1.12|wiiu=Patch 1|switch=1.0.1|[[File:Redstone Comparator (S) JE2 BE1.png|32px]] [[File:Powered Redstone Comparator (S) JE2 BE1.png|32px]] [[File:Subtracting Redstone Comparator (S) JE2 BE1.png|32px]] [[File:Powered Subtracting Redstone Comparator (S) JE2 BE1.png|32px]]{{verify|Was this the model used?}} [[File:Redstone Comparator (item) JE1 BE1.png|32px]] Added redstone comparators.}}
{{History||xbox=TU31|xbone=CU19|ps=1.22|wiiu=Patch 3|switch=1.0.1|Redstone comparators can now measure [[item frame]]s.}}
{{History||xbox=none|xbone=none|ps=1.90|wiiu=none|switch=none|[[File:Redstone Comparator (S) BE.png|32px]] [[File:Powered Redstone Comparator (S) BE.png|32px]] [[File:Subtracting Redstone Comparator (S) BE.png|32px]] [[File:Powered Subtracting Redstone Comparator (S) BE.png|32px]]{{verify|Was this the model used?}} [[File:Redstone Comparator (item) JE2 BE2.png|32px]] The textures of redstone comparators have now been changed.}}
{{History|3ds}}
{{History||0.1.0|[[File:Redstone Comparator (S) JE2 BE1.png|32px]] [[File:Powered Redstone Comparator (S) JE2 BE1.png|32px]] [[File:Subtracting Redstone Comparator (S) JE2 BE1.png|32px]] [[File:Powered Subtracting Redstone Comparator (S) JE2 BE1.png|32px]]{{verify|Was this the model used?}} [[File:Redstone Comparator (item) JE2 BE2.png|32px]] Added redstone comparators.}}
{{History|foot}}
=== Redstone comparator "items" ===
{{:Technical blocks/Redstone Comparator}}
== Issues ==
{{issue list}}
== Trivia ==
* Comparators do not emit redstone particles when powered, unlike redstone torches and repeaters.<ref>{{bug|MC-51692|||WAI}}</ref>
== Gallery ==
<gallery>
Dinnerbone Comparator 1.png|Dinnerbone showing how comparators work.
Dinnerbone Comparator 2.png|Dinnerbone showing how comparators work.
Dinnerbone Comparator 3.png|Dinnerbone showing how comparators work.
Dinnerbone Comparators 1.png|A contraption incorporating comparators.
Dinnerbone Comparators 2.png|Comparators in action.
Dinnerbone Comparators 3.png|Output specific signals.
Dinnerbone Comparator Thing.png|Another comparator in use.
Item Frame Comparator.png|Rotating the torch in the item frame adjusts the comparator's output.
</gallery>
== References ==
{{reflist}}
{{Redstone}}
{{Blocks|Utility}}
{{Items}}
[[Category:Mechanics]]
[[Category:Block entities]]
[[Category:Redstone mechanics]]
[[Category:Mechanisms]]
[[Category:Manufactured blocks]]
[[Category:Non-solid blocks]]
[[de:Redstone-Komparator]]
[[es:Comparador de redstone]]
[[fr:Comparateur de redstone]]
[[hu:Redstone-komparátor]]
[[ja:レッドストーンコンパレーター]]
[[ko:레드스톤 비교기]]
[[nl:Redstonevergelijker]]
[[pl:Komparator]]
[[pt:Comparador de redstone]]
[[ru:Компаратор]]
[[uk:Редстоуновий компаратор]]
[[zh:红石比较器]]</li></ul></nowiki> | 14w03a | Added the /fill command which can place water in the Nether. | ||||||||||||||||||||||||||||||||||||||||||||||||||||||||||||||||||||||||||||||||||||||||||||||||||||||||||||
| 14w26a | water and flowing_water removed from the /give command. | |||||||||||||||||||||||||||||||||||||||||||||||||||||||||||||||||||||||||||||||||||||||||||||||||||||||||||||
1.9{{Extension DPL}}<ul><li>[[End Crystal|End Crystal]]<br/>{{ItemEntity
|image=End Crystal.gif
|imagesize=150px
|invimage=End Crystal
|renewable=Yes
|stackable=Yes (64)
|rarity=Rare
|drops=None
|size=
Height: 2 Blocks<br>Width: 2 Blocks
}}
An '''end crystal''' is an [[entity]] that can be [[Crafting|crafted]] or found on [[the End]]'s main island, where it heals the [[Ender Dragon|ender dragon]]. It can only be placed on [[obsidian]] or [[bedrock]] and [[Explosion|explodes]] instantly when attacked or damaged in most ways.
== Spawning ==
=== Natural generation ===
An end crystal is found atop each [[obsidian pillar]] on the central island of the End, each on top of a piece of [[bedrock]]. There are 10 end crystals in total, of which two are protected in "cages" of [[iron bars]]. All end crystals respawn one after another as the respawning process of the [[ender dragon]] starts.
== Obtaining ==
=== Crafting ===
{{Crafting
|A1=Glass
|B1=Glass
|C1=Glass
|A2=Glass
|B2=Eye of Ender
|C2=Glass
|A3=Glass
|B3=Ghast Tear
|C3=Glass
|Output= End Crystal
|type= Decoration block
}}
== Usage ==
=== Healing the ender dragon ===
Their primary purpose is to recharge the health of the ender dragon, who gains a charge from the nearest crystal within a cuboid extending 32 blocks from the dragon in all directions. The dragon is healed {{hp|1}} each half-second. If multiple ender dragons are spawned, an end crystal can affect multiple dragons at the same time. The healing beam is neither obstructed nor is its power diminished by entities or blocks.
=== Respawning the ender dragon ===
[[File:End Crystals on the Exit portal.png|right|thumb|How to arrange end crystals on the exit portal to respawn the ender dragon.]]
As items, end crystals may be placed on bedrock and [[obsidian]], if the two blocks above the bedrock or obsidian block are air or replaceable blocks and no other entities intersect the area. When an end crystal is placed in [[the End]], a [[fire]] block is created at the end crystal location. If four are placed on the end [[exit portal]], one on each of the flat sides, the crystals respawn the original end crystals on the obsidian pillars, as well as resurrect the dragon itself, before exploding. The top of each pillar also explodes, destroying any player-placed blocks. This happens even if TNT explosions are turned off in settings.
If the exit portal is ever broken for any reason, end crystals can still be placed on obsidian blocks with the same location as the exit portal.
=== Explosions ===
End crystals explode when attacked or damaged in most ways, even by attacks that normally do zero damage. They are not affected by exploding fireworks, and if damaged by an explosion, they disappear instead of exploding.{{Only|Java}}<ref>{{bug|MC-118429||End crystals don't explode when destroyed by nearby explosions}}</ref> The end crystal's [[explosion]] has an [[Explosion#Explosion strength|explosion strength]] of 6, the same as a [[charged creeper]]. The end crystal's fire often remains after the crystal explodes. Any ender dragon charging from the crystal when it is destroyed takes {{hp|10}} damage.
{{IN|java}}, an end crystal's explosion can be [[blocking|blocked]] by a [[shield]].
Although an ender dragon damages most blocks and entities in its path, it cannot destroy end crystals simply by going near them.
Placing [[water]] on the end crystal will neutralize the blast effect, but not the [[damage]] or knockback.
End crystals with obsidian or bedrock below them will not damage blocks below them when they explode.
{{IN|bedrock}}, having the game rule {{cd|mobGriefing}} to {{cd|false}} will prevent the End Crystal from destroying any blocks. While {{in|java}} the same game rule will not prevent the End Crystal from destroying any blocks.
=== Beams ===
The end crystal naturally shoots a beam at the ender dragon and heals it when the dragon is within range. This beam can be manually created using the command {{cmd|data merge entity @e[type{{=}}end_crystal,limit{{=}}1] {BeamTarget:{X:0, Y:0, Z:0<nowiki>}}}}. The beam can be pointed in any direction, allowing it to mark locations or objects.
=== Properties ===
[[File:End Crystal (Slateless).gif|thumb|A base-less end crystal.]]
End crystals are of two kinds: the ones with a base beneath them are created either by game mechanism or by the {{cmd|summon}} command; while the base-less ones are created by players by manually placing the crystal items on top of [[obsidian]] or [[bedrock]].
The base appears to be made of bedrock, with a crystal hovering over it. While in the End, a crystal continually generates fire at its current position, one block above the base (directly on top of the block the base is embedded in), replacing any other block at that location. This fire is capable of spreading.
The end crystal entity is not solid and can be walked through freely. End crystals can be pushed by [[piston]]s, but they explode if moved while on fire. Because fire is checked only when an entity moves, end crystals do not normally take damage from their own fire unless moved.
== Sounds ==
{{edition|java}}:
{{Sound table
|sound=Explosion1.ogg
|sound2=Explosion2.ogg
|sound3=Explosion3.ogg
|sound4=Explosion4.ogg
|subtitle=Explosion
|source=block
|description=When an end crystal explodes
|id=entity.generic.explode
|translationkey=subtitles.entity.generic.explode
|volume=4.0
|pitch=0.56-0.84
|distance=16
|foot=1}}
{{edition|bedrock}}:
{{Sound table
|type=bedrock
|sound=Explosion1.ogg
|sound2=Explosion2.ogg
|sound3=Explosion3.ogg
|sound4=Explosion4.ogg
|source=block
|description=When an end crystal explodes
|id=random.explode
|volume=4.0
|pitch=1.0
|foot=1}}
== Data values ==
=== ID ===
{{edition|java}}:
{{ID table
|edition=java
|firstcolumnname=Item
|showforms=y
|generatetranslationkeys=y
|displayname=End Crystal
|spritetype=item
|nameid=end_crystal
|form=item
|foot=1}}
{{ID table
|edition=java
|firstcolumnname=Entity
|generatetranslationkeys=y
|displayname=End Crystal
|spritetype=entity
|nameid=end_crystal
|foot=1}}
{{edition|bedrock}}:
{{ID table
|edition=bedrock
|firstcolumnname=Item
|shownumericids=y
|showforms=y
|notshowbeitemforms=y
|generatetranslationkeys=y
|displayname=End Crystal
|spritetype=item
|nameid=end_crystal
|id=637
|form=item
|foot=1}}
{{ID table
|edition=bedrock
|firstcolumnname=Entity
|shownumericids=y
|generatetranslationkeys=y
|displayname=End Crystal
|spritetype=entity
|nameid=ender_crystal
|id=71
|foot=1}}
=== Entity data ===
End crystals have entity data that define various properties of the entity.
{{el|java}}:
{{main|Entity format}}
{{/ED}}
{{el|bedrock}}:
: See [[Bedrock Edition level format/Entity format]].
== Achievements ==
{{load achievements|The End... Again...}}
== Advancements ==
{{load advancements|The End... Again...}}
== History ==
[[File:End Crystal 19w38a.gif|thumb|Java Edition 19w38a]]
{{History|java}}
{{History||1.0.0|snap=Beta 1.9 Prerelease 6|[[File:End Crystal JE1 BE1.png|32px]] Added ender crystals.}}
{{History||1.2.1|snap=12w04a|Previously, ender crystals could be spawned using [[spawn egg]]s with ID 200 (in a [[server]], these were created using {{cmd|give 383 1 200}}). The spawned crystal would be positioned where a natural crystal would be if there was a bedrock block at the location. It was still possible until 1.9 to obtain an end crystal spawn egg, but it would not spawn anything.}}
{{History||1.7.2|snap=13w36a|Ender crystals can now be spawned with the {{cmd|summon}} command.}}
{{History||1.8|snap=14w06a|Ender crystals now generate one [[block]] lower. The fire they generate destroys the [[bedrock]] block that is supposed to be underneath (see {{bug|MC-47526}}).}}
{{History||1.9|snap=15w31a|Ender crystals generate at the correct Y-level again.}}
{{History|||snap=15w33c|Respawning the ender dragon now also respawns the ender crystals on the obsidian pillars.
|Ender crystals now have a compound BeamTarget tag that hold the X, Y, Z block location the beam points to.}}
{{History|||snap=15w44a|"Ender crystals" have been renamed to "end crystals".
|[[File:End Crystal (item) JE1 BE1.png|32px]] End crystals can now be obtained as an item.
|End crystals now drop from [[skeleton trap]] horses and can be placed only on [[obsidian]] or bedrock. Placing several of them atop the end exit portal respawns the ender dragon.}}
{{History|||snap=15w44b|End crystals are no longer dropped by [[skeleton horse]]s.
|Added crafting recipe for end crystals, making end crystals [[renewable]].}}
{{History|||snap=15w49a|End crystals now require [[air]]/replaceable [[block]]s and lack of [[entity|entities]] for placement.}}
{{History|||snap=15w51a|End crystals can no longer be placed in [[Adventure mode]].}}
{{History||1.11|snap=16w32a|The entity ID has been changed from <code>EnderCrystal</code> to <code>ender_crystal</code>.}}
{{History||1.13|snap=17w47a|Prior to [[1.13/Flattening|''The Flattening'']], this [[item]]'s numeral ID was 426.}}
{{History|||snap=18w20b|Renamed to "End Crystal".}}
{{History|||snap=pre5|Entity ID has been changed to <code>end_crystal</code>.}}
{{History||1.14|snap=18w43a|[[File:End Crystal JE2.png|32px]][[File:End Crystal (item) JE2 BE2.png|32px]] The textures of end crystals and the end crystal [[item]] have been changed.}}
{{History||1.19.3|snap=22w43a|End crystal explosions can now be [[blocking|blocked]] by [[shield]]s.<ref>{{bug|MC-188247|||Fixed}}</ref>}}
{{History|pocket}}
{{History||1.0.0|snap=alpha 0.17.0.1|[[File:End Crystal JE1 BE1.png|32px]][[File:End Crystal (item) JE1 BE1.png|32px]] Added end crystals.}}
{{History|bedrock}}
{{History||1.6.0|snap=?|[[File:End Crystal BE2.png|32px]] [[File:End Crystal BE2.gif|32px]] The model of the end crystals has been changed. It has now two cubes instead of three.}}
{{History||1.10.0|snap=beta 1.10.0.3|[[File:End Crystal BE3.png|32px]][[File:End Crystal (item) JE2 BE2.png|32px]] The textures of end crystals and the end crystal item have been changed.}}
{{History||1.17.10|snap=beta 1.17.10.20|[[File:End Crystal JE2.png|32px]] The model of the end crystals has been changed to have three cubes again, and to match ''Java Edition''.}}
{{History||1.19.70|snap=beta 1.19.70.20|Increased end crystal collision box size to match ''Java Edition''.|End crystals with obsidian or bedrock below them now will not damage blocks below them when they explode.}}
{{History|console}}
{{History||xbox=TU9|xbone=CU1|ps=1.0|wiiu=Patch 1|[[File:End Crystal JE1 BE1.png|32px]] Added ender crystals.}}
{{History||xbox=TU31|xbone=CU19|ps=1.22|wiiu=Patch 3|Ender crystals now generate one block lower. The fire they generate destroys the [[bedrock]] block that is supposed to be underneath.}}
{{History||xbox=TU46|xbone=CU36|ps=1.38|wiiu=Patch 15|"Ender crystals" have been renamed to "end crystals".
|[[File:End Crystal (item) JE1 BE1.png|32px]] End crystals can now be obtained as an [[item]].
|End crystals now drop from [[skeleton trap]] horses and can be placed only on [[obsidian]] or bedrock. Placing several of them atop the [[end portal|end exit portal]] respawns the ender dragon.
|Added a crafting recipe for end crystals.}}
{{History||xbox=none|xbone=none|ps=1.90|wiiu=none|switch=none|[[File:End Crystal JE2.png|32px]][[File:End Crystal (item) JE2 BE2.png|32px]] The textures of end crystals and the end crystal item have been changed.}}
{{History|new 3ds}}
{{History||1.7.10|[[File:End Crystal JE1 BE1.png|32px]][[File:End Crystal (item) JE1 BE1.png|32px]] Added end crystals.}}
{{History|foot}}
== Issues ==
{{issue list}}
== Trivia ==
* According to [[Jens Bergensten|Jeb]], the reason behind the current crafting recipe using glass as opposed to [[Chorus Fruit|chorus fruit]] or any materials introduced in [[Java Edition 1.9|1.9]] is as a means for players to craft end crystals in older worlds that the dragon has already been killed in.<ref>{{tweet|jeb_|667000226524372992|The problem is that you need to be able to craft the crystals on worlds in which the dragon has been destroyed already|November 18, 2015}}</ref>
* A historical rendition of the [[beacon]] block featured an animated entity within it, which resembled a yellow miniaturized end crystal. The bedrock platform of the end crystal entity would also render below the beacon, though this would normally be hidden within the block below.
* Using a [[piston]] to push an end crystal's fire into an end portal block deletes the end portal block. However, natural portal blocks regenerate if the end crystal is moved.
== Gallery ==
<gallery>
End Crystal Usage.png|Using end crystals to respawn the ender dragon.
Crystal Link.png|An ender dragon being hit with the "healing beam" of an end crystal.
Ender Crystal.png|An end crystal.
EnderCrystalOverworld.png|An end crystal in the Overworld spawned using {{cmd|summon}} {{code|end_crystal}}.
Ender Dragon Revival.png|End crystals respawning the ender dragon.
CagedEnderCrystal.png|A caged end crystal.
Respawn ender dragon.png|A [[player]] trying to respawn the ender dragon.
End Crystal (item).gif|An animation of the item of the end crystal.
</gallery>
== References ==
{{reflist}}
{{Entities}}
{{Items}}
[[de:Enderkristall]]
[[el:Κρύσταλλος του Ender]]
[[es:Cristal del End]]
[[fr:Cristal de l'End]]
[[ja:エンドクリスタル]]
[[ko:엔드 수정]]
[[nl:Endkristal]]
[[pl:Kryształ Endu]]
[[pt:Cristal do End]]
[[ru:Кристалл Края]]
[[th:คริสตัลเอนด์]]
[[uk:Кристал Енду]]
[[zh:末影水晶]]</li><li>[[Lava Bucket|Lava Bucket]]<br/>{{Item
| title = Lava Bucket
| image = Lava Bucket.png
| renewable = Yes
| stackable = No
}}
A '''lava bucket''' is a [[bucket]] filled with [[lava]].
== Obtaining ==
=== Interacting ===
To fill an empty [[bucket]] with lava, {{control|use}} it on a [[lava]] source block or lava in a [[cauldron]]. The block is consumed in the process. Flowing lava does not fill a bucket.
If there is a lava source above the [[pointed dripstone]] stalactite, there is a {{frac|15|256}} (~5.9%) chance for it to completely fill an empty cauldron within 10 blocks under the tip with lava after a [[random tick]]. This lava can then be scooped with a bucket, making it a renewable resource.
==Usage==
A lava bucket can be used to place down lava sources with the {{key|Use Item}} button. Doing so gives the player the bucket back. Lava buckets can be used to replace some transparent, non-full blocks such as [[tall grass]] and [[water]], both flowing and sources.
{{IN|java}}, lava buckets can be used to break [[Nether Portal (block)|Nether portal blocks]] by placing the lava on the side of a block next to the portal block.
=== Smelting ===
A lava bucket can be used as an efficient [[fuel]]. It has the longest burning value of 1000 seconds, compared to 800 seconds for a [[coal block]] (a lava bucket smelts 100 items, and a coal block smelts 80). After smelting starts, the lava bucket turns into an empty bucket.
=== Trading ===
{{IN|bedrock}}, journeyman-level armorer villagers buy a lava bucket for one [[emerald]] as part of their trades.
{{IN|java}}, journeyman-level armorer villagers have a 40% chance of offering to buy a lava bucket for one emerald.
=== Cauldrons ===
A lava bucket can be used to fill a [[cauldron]] with lava. The lava damages any entity standing inside the cauldron, unless the entity is immune to fire damage.<!-- ex: nether mobs--> Flowing water or waterlogging does not affect the lava in the cauldron.
== Sounds ==
{{el|je}}:
{{Sound table
|sound=Fill lava bucket1.ogg
|sound2=Fill lava bucket2.ogg
|sound3=Fill lava bucket3.ogg
|subtitle=Bucket fills
|source=player
|description=When a bucket is filled with lava
|id=item.bucket.fill_lava
|translationkey=subtitles.item.bucket.fill
|volume=1.0
|pitch=1.0
|distance=16}}
{{Sound table
|sound=Empty lava bucket1.ogg
|sound2=Empty lava bucket2.ogg
|sound3=Empty lava bucket3.ogg
|subtitle=Bucket empties
|source=block
|description=When a lava bucket is emptied
|id=item.bucket.empty_lava
|translationkey=subtitles.item.bucket.empty
|volume=1.0
|pitch=1.0
|distance=16
|foot=1}}
{{el|be}}:
{{Sound table
|type=bedrock
|sound=Fill lava bucket1.ogg
|sound2=Fill lava bucket2.ogg
|sound3=Fill lava bucket3.ogg
|source=block
|description=When a bucket is filled with lava
|id=bucket.fill_lava
|volume=1.0
|pitch=1.0}}
{{Sound table
|sound=Empty lava bucket1.ogg
|sound2=Empty lava bucket2.ogg
|sound3=Empty lava bucket3.ogg
|source=block
|description=When a lava bucket is emptied
|id=bucket.empty_lava
|volume=1.0
|pitch=1.0
|foot=1}}
==Data values==
=== ID ===
{{edition|java}}:
{{ID table
|edition=java
|showforms=y
|generatetranslationkeys=y
|displayname=Lava Bucket
|spritetype=item
|nameid=lava_bucket
|form=item
|foot=1}}
{{edition|bedrock}}:
{{ID table
|edition=bedrock
|showaliasids=y
|shownumericids=y
|showforms=y
|notshowbeitemforms=y
|generatetranslationkeys=y
|displayname=Lava Bucket
|spritetype=item
|nameid=lava_bucket
|aliasid=bucket / 10
|id=363
|form=item
|translationkey=item.bucketLava.name
|foot=1}}
== Achievements ==
{{load achievements|Super Fuel}}
== Advancements ==
{{Load advancements|Hot Stuff}}
==History==
{{History|java infdev}}
{{History||20100615|[[File:Lava Bucket JE1 BE1.png|32px]] Added lava buckets.}}
{{History|java alpha}}
{{History||v1.1.0|Buckets of lava can now be used to fuel a [[furnace]] for 100 [[smelting|smelts]], consuming the [[lava]] and the [[bucket]]. This is the highest number of smelts of any single [[item]] in the game.}}
{{History||v1.2.6|{{control|use|text=Using}} a lava bucket on [[block]]s with GUIs ([[chest]]s, furnaces, etc.) no longer places the lava.}}
{{History|java}}
{{History||1.2.1|snap=1.2|Changed name from "Lava bucket" to "Lava Bucket".}}
{{History||1.3|snap=12w22a|[[Smelting]] in a [[furnace]] with a lava bucket now leaves an empty [[bucket]] for the [[player]] to retrieve.}}
{{History||1.8|snap=14w25a|A lava bucket is now shown as the icon when [[lava]] is used as a layer in [[Superflat]].}}
{{History||1.9|snap=15w50a|Added sounds for filling and pouring lava buckets.}}
{{History||1.13|snap=17w47a|Prior to the ''[[Flattening]]'' this item's numerical ID was 327.}}
{{History||1.14|snap=18w43a|[[File:Lava Bucket JE2 BE2.png|32px]] The texture of lava buckets has been changed.}}
{{History|||snap=19w11a|Armorer villagers can now [[trading|buy]] lava buckets.}}
{{History||1.17|snap=20w45a|Lava buckets can now be used to fill a [[cauldron]] with lava.}}
{{History|||snap=21w13a|The lava bucket is now fully renewable, as [[pointed dripstone]] can now be obtained in Survival mode without custom generation.}}
{{History|pocket alpha}}
{{History||v0.7.0|[[File:Lava Bucket JE1 BE1.png|32px]] Added lava buckets.}}
{{History||v0.7.4|Lava buckets can now be used as [[fuel]] in a [[furnace]].
|Lava buckets no longer stack to 64.}}
{{History|bedrock}}
{{History||1.4.0|snap=beta 1.2.14.2|Moved all bucket items, including lava buckets, from the Equipment tab to the Items tab in the [[Creative inventory]].{{verify|type=update}}{{info needed}}<!---please check snapshots, only 1 major release version was checked each--->}}
{{History||1.9.0|snap=beta 1.9.0.2|Lava bucket can now be used to fill a [[cauldron]].}}
{{History||1.10.0|snap=beta 1.10.0.3|[[File:Lava Bucket JE2 BE2.png|32px]] The texture of lava buckets has been changed.}}
{{History||1.11.0|snap=beta 1.11.0.4|Lava buckets can now be [[trading|sold]] to armorer [[villager]]s.}}
{{History||1.16.100|snap=beta 1.16.100.56|The ID of lava buckets has been changed from <code>bucket/10</code> to <code>lava_bucket</code>.}}
{{History||1.17.0|snap=beta 1.16.230.54|The lava bucket is now fully renewable, as [[pointed dripstone]] can now be obtained in Survival mode without custom generation.}}
{{History|console}}
{{History||xbox=TU1|xbone=CU1|ps=1.0|wiiu=Patch 1|switch=1.0.1|[[File:Lava Bucket JE1 BE1.png|32px]] Added lava buckets.}}
{{History||xbox=TU9|[[Dispenser]]s have now been given the ability to shoot out the [[liquids]] inside lava buckets. They can also suck up the liquids if activated again, but do not fill up the [[bucket]]s with the liquid dropped due to a bug.}}
{{History||xbox=none|xbone=none|ps=1.90|wiiu=none|switch=none|[[File:Lava Bucket JE2 BE2.png|32px]] The texture of lava buckets has been changed.}}
{{History|New Nintendo 3DS Edition}}
{{History||0.1.0|[[File:Lava Bucket JE1 BE1.png|32px]] Added lava buckets.}}
{{History|foot}}
== Issues ==
{{Issue list}}
==Trivia==
* One lava bucket has the highest number of [[smelting|smelts]] in the game at 100 items per bucket.
** This makes it 12.5 times more efficient than [[coal]] and [[charcoal]].
* A lava bucket is used as Steve's Down-Smash attack in the crossover fighting game Super Smash Bros. Ultimate.
{{Items}}
[[Category:Renewable resources]]
[[Category:Tools]]
[[de:Lavaeimer]]
[[ja:溶岩入りバケツ]]
[[pt:Balde de lava]]
[[th:ถังลาวา]]
[[uk:Відро лави]]
[[zh:熔岩桶]]</li></ul></nowiki> | 15w31a | Removed the Nether fog. | ||||||||||||||||||||||||||||||||||||||||||||||||||||||||||||||||||||||||||||||||||||||||||||||||||||||||||||
| 15w31c | Re-added the Nether fog. | |||||||||||||||||||||||||||||||||||||||||||||||||||||||||||||||||||||||||||||||||||||||||||||||||||||||||||||
| 15w49a | The wither and ender dragon no longer travel through portals. | |||||||||||||||||||||||||||||||||||||||||||||||||||||||||||||||||||||||||||||||||||||||||||||||||||||||||||||
1.10{{Extension DPL}}<ul><li>[[Sparkler|Sparkler]]<br/>{{About|the Education Edition exclusive item|the new melee weapon available from the ''Minecraft Dungeons'' anniversary event|MCD:Sparkler}}
{{Item
| image = <gallery>
Orange Sparkler.png | Orange
Blue Sparkler.png | Blue
Red Sparkler.png | Red
Purple Sparkler.png | Purple
Green Sparkler.png | Green
</gallery>
| image2 = <gallery>
Active Orange Sparkler.png | Active Orange
Active Blue Sparkler.png | Active Blue
Active Red Sparkler.png | Active Red
Active Purple Sparkler.png | Active Purple
Active Green Sparkler.png | Active Green
</gallery>
| renewable = No
| stackable = No
}}
{{education feature}}
{{exclusive|bedrock|education}}
A '''sparkler''' is a [[Chemistry Update|chemistry]]-related [[item]] that emits particles when lit.
Sparklers are available in orange, blue, red, purple, and green colors.
== Obtaining ==
=== Crafting ===
{{Crafting
|showdescription=1
|B1=Chloride |B2=Magnesium |B3=Stick
|Output=Sparkler
|description= Calcium Chloride: Orange<br>Cerium Chloride: Blue<br>Mercuric Chloride: Red<br>Potassium Chloride: Purple<br>Tungsten Chloride: Green<br>{{only|bedrock|education}}
|type=Miscellaneous
}}
== Usage ==
{{ctrl|Using}} a sparkler ignites it, causing its texture to change. When lit, the sparkler emits colored [[particles]]; the [[durability]] meter depletes while the sparkler is burning. Sparklers are one of the few [[item]]s that can be held in the [[off-hand]] {{in|be}}. Unlit sparklers have normal lighting like most items, while lit sparklers appear to glow when held in the player's hand, similarly to [[glow stick]]s.
When the [[player]] uses another item while a sparkler is lit, or holds the sparkler in the off-hand, the sparkler's durability stops depleting.
If the player has a lit sparkler in their [[inventory]] and goes into the [[water]], the sparkler is destroyed immediately. However, it does not get destroyed if dropped in water. It also cannot float.
Despite having durability, sparklers cannot be enchanted with [[Unbreaking]] or [[Mending]].
== Sounds ==
{{Sound table
|type=bedrock
|sound=Fuse.ogg
|source=sound
|description=While a sparkler is active
|id=sparkler.active
|volume=0.25
|pitch=0.8/1.2}}
{{Sound table
|sound=Fizz.ogg
|source=block
|description=While a sparkler is being lit
|id=random.fizz
|volume=1.0
|pitch=2.4/2.6
|foot=1}}
== Data values ==
=== ID ===
{{ID table
|edition=bedrock
|shownumericids=y
|showforms=y
|notshowbeitemforms=y
|generatetranslationkeys=y
|displayname=Sparkler
|spritename=sparklers
|spritetype=item
|nameid=sparkler
|id=600
|form=item
|translationkey=item.sparkler.orange.name,item.sparkler.blue.name,item.sparkler.red.name,item.sparkler.purple.name,item.sparkler.green.name
|foot=1}}
== History ==
{{History|bedrock}}
{{History||1.4.0|snap=beta 1.2.20.1|[[File:Orange Sparkler BE1.png|32px]] [[File:Blue Sparkler BE1.png|32px]] [[File:Red Sparkler BE1.png|32px]] [[File:Purple Sparkler BE1.png|32px]] [[File:Green Sparkler BE1.png|32px]] <br>[[File:Active Orange Sparkler BE1.png|32px]] [[File:Active Blue Sparkler BE1.png|32px]] [[File:Active Red Sparkler BE1.png|32px]] [[File:Active Purple Sparkler BE1.png|32px]] [[File:Active Green Sparkler BE1.png|32px]] Added sparklers.}}
{{History|education}}
{{History||1.0.27|[[File:Orange Sparkler BE1.png|32px]] [[File:Blue Sparkler BE1.png|32px]] [[File:Red Sparkler BE1.png|32px]] [[File:Purple Sparkler BE1.png|32px]] [[File:Green Sparkler BE1.png|32px]] <br>[[File:Active Orange Sparkler BE1.png|32px]] [[File:Active Blue Sparkler BE1.png|32px]] [[File:Active Red Sparkler BE1.png|32px]] [[File:Active Purple Sparkler BE1.png|32px]] [[File:Active Green Sparkler BE1.png|32px]] Added sparklers.}}
{{History|foot}}
== Issues ==
{{issue list}}
== Trivia ==
* The formula for sparkler roughly works in real life. Magnesium itself burns white in air, while the metal salts add [[wikipedia:flame test|color to the flame]].
{{items}}
{{Education Edition}}
[[Category:Non-renewable resources]]
[[Category:Education Edition items]]
[[de:Wunderkerze]]
[[ja:手持ち花火]]
[[ko:스파클러]]
[[pl:Zimne ognie]]
[[pt:Vela-Faísca]]
[[zh:烟花棒]]</li><li>[[Dye|Dye]]<br/>{{Item
| title = Dyes
| image = White Dye.png
| extratext = View [[#Gallery|all renders]]
| renewable = Yes
| stackable = Yes (64)
}}
'''Dyes''' are a set of sixteen items used to change the color of [[wool]], [[carpet]]s, [[terracotta]], [[concrete powder]], [[glass]], [[shulker box]]es, [[bed]]s, [[candle]]s, the patterns on [[banner]]s, [[firework star]]s, certain mobs, and text on [[sign]]s and [[hanging sign]]s. {{IN|bedrock}} they can also be used to dye water in a [[cauldron]] (which is thereafter used to dye leather [[armor]]); {{in|java}} leather armor can be dyed directly. {{IN|education}} dyes can also be used to dye [[balloon]]s and [[glow stick]]s.
{{IN|bedrock|education}}, [[bone meal]], [[ink sac]]s, [[lapis lazuli]], and [[cocoa bean]]s can generally substitute for [[white dye]], [[black dye]], [[blue dye]], and [[brown dye]], respectively, in crafting recipes and for use in dyeing items or mobs. However, they have other important uses that aren't related to color, and are therefore not considered true dyes. They are mentioned in this article only in regard to their use as dyeing agents; see their individual articles for complete information about them.
[[File:Dye Recipes.png|400px|thumb|A guide for creating all the dyes]]
== Obtaining ==
<!--[[File:Dye Chart.png|350px|thumb|A guide to crafting all the dyes.{{until|java 1.14}}]]-->
Dyes can be produced by crafting them from plants (mainly flowers), by crafting dyes of different colors together, by smelting plants, or by trading with a [[wandering trader]].
{{loadPage|Crafting/Dye|Crafting|h3}}
=== Smelting ===
{{smelting|head=1|Sea Pickle|Lime Dye|0,2}}
{{smelting|foot=1|Cactus|Green Dye|1||b=Lapis Lazuli|c=Any fuel|d=1}}
=== Trading ===
[[Wandering trader]]s can sell 3 dyes for an [[emerald]]. {{IN|bedrock}}, they can also sell 3 lapis lazuli, bone meal, cocoa beans, or ink sacs for one emerald.
Apprentice-level cleric [[villager]]s sell one lapis lazuli per emerald.
=== Chest loot ===
{{#invoke:LootChest|base3|blue-dye,green-dye,orange-dye,light-blue-dye,yellow-dye,white-dye}}
=== Other ===
Ink sacs can also be created using 1 iron, 1 sulfur, and 4 oxygen in the [[compound creator]]. {{only|bedrock|education}}
== Usage ==
Similar to their use in crafting, [[bone meal]], [[ink sac]]s, [[lapis lazuli]], and [[cocoa beans]] can be substituted for the corresponding dye in any of the following usages unless otherwise specified.{{only|bedrock}} <!--- sections are ordered by craftable dyeable blocks, dyeable items, version exclusive sections, and non-crafting miscellaneous uses--->
=== Dyeing wool and mobs ===
Players can dye wool by placing [[wool]] and any dye in a crafting grid.
{{Crafting
|nocat=1
|Any Wool
|Matching Dye
|Output=Any Wool
}}
Dyes can be {{control|use|text=used}} on sheep to change the color of the wool. Shearing a colored sheep drops the corresponding color of the wool, and the sheep retains the color when the wool regenerates. [[Breeding]] colored sheep produces a lamb colored as one of the parent sheep, or a color resulting from the combination of both parents' color. The color combining follows the same rules that dyes use – red and yellow sheep produce an orange lamb, but a blue and yellow sheep cannot create a green lamb. The unlimited reproduction of colored sheep makes dyeing and shearing sheep infinitely more efficient than just dyeing wool directly.
Dye can also be used on a tamed [[wolf]] or [[cat]] to change the color of its collar from the default red to the color of the dye.
=== Dyeing carpets ===
Carpets can be dyed.
{{Crafting
|Any Carpet
|Matching Dye
|Output= Matching Carpet
|type= Building block
}}
=== Dyeing terracotta ===
[[Terracotta]] can be dyed by placing 8 blocks around a dye on a crafting table.
{{Crafting
|nocat=1
|A1=Terracotta |B1=Terracotta |C1=Terracotta
|A2=Terracotta |B2=Matching Dye |C2=Terracotta
|A3=Terracotta |B3=Terracotta |C3=Terracotta
|Output=Matching Dyed Terracotta,8
}}
=== Creating concrete powder ===
Dyes can also be used to craft [[concrete powder]], which can then be set into their respective [[concrete]] blocks (they cannot be dyed directly).
{{Crafting
|nocat=1
|Sand |Gravel |Sand
|Gravel |Matching Dye |Gravel
|Sand |Gravel |Sand
|Output=Matching Concrete Powder,8
}}
=== Staining glass ===
[[Stained glass]] can be stained by placing 8 blocks of glass around a dye on a [[crafting table]]. Just like regular glass, stained glass can be crafted into stained glass panes. The recipe for this is the same as with regular glass.
{{Crafting
|nocat=1
|A1=Glass |B1=Glass |C1=Glass
|A2=Glass |B2=Matching Dye |C2=Glass
|A3=Glass |B3=Glass |C3=Glass
|Output=Matching Stained Glass,8
|head=1
}}
{{Crafting
|nocat=1
|A1= Glass Pane
|B1= Glass Pane
|C1= Glass Pane
|A2= Glass Pane
|B2= Matching Dye
|C2= Glass Pane
|A3= Glass Pane
|B3= Glass Pane
|C3= Glass Pane
|Output= Matching Stained Glass Pane,8
|type= Decoration block
|foot=1
}}
=== Dyeing shulker boxes ===
[[Shulker box]]es are generated in a light shade of purple (like the [[purpur block]]), but can be dyed any color. They can also be re-dyed as often as desired.
{{Crafting
|ignoreusage=1
|showname=1
|Any Shulker Box
|Matching Dye
|Output=Matching Shulker Box
}}
=== Dyeing beds ===
Players can dye beds by placing a [[bed]] and any color dye in a crafting grid.
{{Crafting
|nocat=1
|Any Bed
|Matching Dye
|Output=Matching Bed
}}
=== Dyeing candles ===
Players can dye [[candles]] by placing an undyed candle and any color dye in a crafting grid.
{{Crafting
|ignoreusage=1
|Candle
|Matching Dye
|Output=Matching Dyed Candle
}}
=== Banner patterns ===
{{main|Banner#Patterns}}
Dyes are used in most banner patterns to determine the pattern and color displayed.
=== Dyeing armor ===
[[File:DyeGraph2.png|200px|thumb|A graph showing all combinations of two dyes on a [[tunic]].]]
Leather [[armor]] can be dyed by:
* Crafting dyes with a piece of leather armor or leather [[horse armor]].{{Only|java}}
* Dousing the leather armor or leather [[horse armor]] in a [[cauldron]] to which dyes have been added.{{Only|bedrock}}
There are 5,713,438<ref>https://anrar4.github.io/DyeLeatherArmor/</ref> (34.1% of sRGB) colors leather armor can be, as it is possible to put more than one dye on the crafting bench alongside the leather armor. Armor can be dyed multiple times with previous colors affecting the final outcome. Colored armor can be reverted to their original color using a [[cauldron]] with undyed water.
The game has a specific formula for calculating the color of dyed armor: each color, in the RGB color model, has a red value, green value, and blue value. For each dye in the crafting grid, and the armor itself (if it is already dyed), the red, green, and blue values are added to running totals. In addition, a running total of the highest value (be it red, green, or blue) is also kept. After this, each total is divided by the number of colors used. This effectively produces the average red, green, blue, and maximum values. The maximum value of the average RGB values is also calculated. Finally, each average RGB value is multiplied by the average maximum value and divided by the maximum of the average RGB values. The modified average RGB values are then used as the final color. This procedure can be summed up with the following equations:
for each color (all "total" variables start at 0 before counting):
totalRed = totalRed + redValue
totalGreen = totalGreen + greenValue
totalBlue = totalBlue + blueValue
totalMaximum = totalMaximum + max(redValue, greenValue, blueValue)
numberOfColors = numberOfColors + 1
averageRed = totalRed / numberOfColors
averageGreen = totalGreen / numberOfColors
averageBlue = totalBlue / numberOfColors
averageMaximum = totalMaximum / numberOfColors
maximumOfAverage = max(averageRed, averageGreen, averageBlue)
gainFactor = averageMaximum / maximumOfAverage
resultRed = averageRed * gainFactor
resultGreen = averageGreen * gainFactor
resultBlue = averageBlue * gainFactor
Due to the way this formula works, the resulting color can never be darker than the average of the input colors and is often lighter and more saturated. Of course, the resulting color can never be lighter or more saturated than the lightest or most saturated input color. In addition, this formula never creates an RGB value higher than 255 (which would be invalid in the 8-bit RGB color model).
If leather armor is renamed on an [[anvil]], it retains its name when dyed or undyed.
;Mixing Samples
: {{ItemSprite|Yellow Dye}} + {{ItemSprite|Yellow Dye}} = {{Tint|leather-chestplate| #{{CalcDye| yellow=2 }} | code=1}}
: {{ItemSprite|Red Dye}} + {{ItemSprite|Blue Dye}} + {{ItemSprite|White Dye}} = {{Tint|leather-chestplate| #{{CalcDye| red=1 | blue=1 | white=1}} | code=1}}
: {{ItemSprite|Green Dye}} + {{ItemSprite|Red Dye}} + {{ItemSprite|Pink Dye}} = {{Tint|leather-chestplate| #{{CalcDye| green=1 | red=1 | pink=1}} | code=1}}
=== Dyeing firework stars ===
A [[firework star]] can have a single color or a combination of up to eight colors when crafted with dyes. Adding one or more dyes to a crafted firework star adds a "fade to color" effect to it, overwriting any existing fade colors.
{{Crafting
|head=1
|ignoreusage=1
|ingredients=[[Gunpowder]] +<br>Any Dye (1–8) +<br>Extra ingredient (optional)
|Gunpowder
|Matching Dye
|Diamond;Glowstone Dust;Head;Gold Nugget;Feather;Fire Charge;
|Output=Matching Firework Star
}}
{{Crafting
|ignoreusage=1
|Matching Firework Star
|Any Dye
|Output=Matching Firework Star
|foot=1
}}
=== Creating balloons ===
Dye can be used to craft balloons.{{only|education}}
{{Crafting
|nocat=1
|A1= Latex
|B1= Matching Dye
|C1= Latex
|A2= Latex
|B2= Helium
|C2= Latex
|A3= Latex
|B3= Lead
|C3= Latex
|Output= Matching Balloon
}}
=== Creating glow sticks ===
Dye can also be used to craft glow sticks.{{only|education}}
{{Crafting
|nocat=1
|A1= Polyethylene
|B1= Hydrogen Peroxide
|C1= Polyethylene
|A2= Polyethylene
|B2= Matching Dye
|C2= Polyethylene
|A3= Polyethylene
|B3= Luminol
|C3= Polyethylene
|Output= Matching Glow Stick
}}
=== Dyeing water inside cauldrons ===
Water can be dyed in a cauldron by holding any dye in the hand and pressing {{Ctrl|use}} on a cauldron filled with water.{{only|bedrock}}
=== Signs ===
Dye can be {{control|used}} on a [[sign]] or a [[hanging sign]] to change the text color. {{IN|bedrock}}, [[ink sac]]s cannot be used for this purpose; black dye must be used to change the text to black.
=== Trading ===
Apprentice, journeyman and expert-level shepherd [[villager]]s buy any of the 12 dyes for an [[emerald]].
== Color values ==
The "color codes" are used to determine the color imparted on sheep, wolf and cat collars, firework stars, [[beacon]] beams, and dyed leather armor. The hex value is shown in the extended tooltips of dyed leather armor; however, to set the color using an NBT data tag in a [[command]], the decimal value must be used instead. The color values for firework stars are slightly different from the ones listed below, and use [[Item colors#Firework stars|these values]] instead.
{| class="wikitable" style="margin:2px; border: 1px solid silver; text-align: left;" data-description="Data values"
! rowspan=2 | Description
! colspan=2 style="text-align:center" | Color Code
|-
! Dec
! <abbr title="Hexadecimal color code">Hex</abbr>
|-
| style="text-align:center" | White || 16383998 || {{color|#F9FFFE}}
|-
| style="text-align:center" | Light gray || 10329495 || {{color|#9D9D97}}
|-
| style="text-align:center" | Gray || 4673362 || {{color|#474F52}}
|-
| style="text-align:center" | Black || 1908001|| {{color|#1D1D21}}
|-
| style="text-align:center" | Brown || 8606770 || {{color|#835432}}
|-
| style="text-align:center" | Red || 11546150 || {{color|#B02E26}}
|-
| style="text-align:center" | Orange || 16351261 || {{color|#F9801D}}
|-
| style="text-align:center" | Yellow || 16701501 || {{color|#FED83D}}
|-
| style="text-align:center" | Lime || 8439583 || {{color|#80C71F}}
|-
| style="text-align:center" | Green || 6192150 || {{color|#5E7C16}}
|-
| style="text-align:center" | Cyan || 1481884|| {{color|#169C9C}}
|-
| style="text-align:center" | Light blue || 3847130 || {{color|#3AB3DA}}
|-
| style="text-align:center" | Blue || 3949738 || {{color|#3C44AA}}
|-
| style="text-align:center" | Purple || 8991416 || {{color|#8932B8}}
|-
| style="text-align:center" | Magenta || 13061821 || {{color|#C74EBD}}
|-
| style="text-align:center" | Pink || 15961002 || {{color|#F38BAA}}
|}
== Sounds ==
{{edition|java}}:
{{Sound table
|rowspan=2
|sound=Dye.ogg
|subtitle=Dye stains
|source=block
|description=When dye is used on a [[sign]]
|id=item.dye.use
|translationkey=subtitles.item.dye.use
|volume=1.0
|pitch=1.0/0.9/0.95/1.1
|distance=16}}
{{Sound table
|subtitle=Dye stains
|source=player
|description=When dye is used on a [[sheep]]
|id=item.dye.use
|translationkey=subtitles.item.dye.use
|volume=1.0
|pitch=1.0/0.9/0.95/1.1
|distance=16
|foot=1}}
{{edition|bedrock}}:
{{Sound table
|type=bedrock
|sound=Dye.ogg
|source=sound
|description=When dye is used on a sign
|id=sign.dye.use
|volume=1.0
|pitch=1.0}}
{{Sound table
|rowspan=3
|sound=Water Splash Old.ogg
|source=block
|description=When dye is added to a cauldron
|id=cauldron.adddye
|volume=0.1
|pitch=1.0}}
{{Sound table
|source=block
|description=When armor is dyed using a cauldron
|id=cauldron.dyearmor
|volume=0.1
|pitch=1.0}}
{{Sound table
|source=block
|description=When dye is removed from armor using a cauldron
|id=cauldron.cleanarmor
|volume=0.1
|pitch=1.0
|foot=1}}
== Achievements ==
{{load achievements|Rainbow Collection;Tie dye outfit}}
== Video ==
{{Video note|These videos are outdated, as it does not include details of the [[Java Edition 1.7.2|1.7.2]] update's changes to the dyeing system/production chain.}}
<div style="text-align:center">
<span style="display:inline-block">{{yt|8YD7oauNZHE}}</span>
<span style="display:inline-block">{{yt|7tETaRt7STM}}</span>
</div>
== History ==
{{History|java beta}}
{{History||January 3, 2011|link=https://web.archive.org/web/0/http://notch.tumblr.com/post/2582321901/2011-here-we-go|Notch mentions adding a "paint" feature if he can figure out how.}}
{{History||January 10, 2011<ref group="n">Supposed time when fragment was filmed. Based on modified date of client.jar/gui/trap.png in [[Beta 1.2]].</ref>|link=https://www.youtube.com/watch?v=cBF2ugTzXqQ&t=181s|[[File:Red Dye (pre-release).png|32px]] Shown rose red in development as part of [[Minecraft: The Story of Mojang]].}}
{{History||1.2|[[File:Ink Sac JE1 BE1.png|32px]] [[File:Red Dye JE1 BE1.png|32px]] [[File:Green Dye JE1 BE1.png|32px]] [[File:Cocoa Beans JE1 BE1.png|32px]] [[File:Lapis Lazuli JE1 BE1.png|32px]] [[File:Purple Dye JE1 BE1.png|32px]] [[File:Cyan Dye JE1 BE1.png|32px]] [[File:Light Gray Dye JE1 BE1.png|32px]] [[File:Gray Dye JE1 BE1.png|32px]] [[File:Pink Dye JE1 BE1.png|32px]] [[File:Lime Dye JE1 BE1.png|32px]] [[File:Yellow Dye JE1 BE1.png|32px]] [[File:Light Blue Dye JE1 BE1.png|32px]] [[File:Magenta Dye JE1 BE1.png|32px]] [[File:Orange Dye JE1 BE1.png|32px]] [[File:Bone Meal JE1 BE1.png|32px]] Added dyes.
|[[File:Black Dye (Recreated).png|32px]] [[File:Red Dye (pre-release).png|32px]] [[File:Green Dye (Recreated).png|32px]] [[File:Brown Dye (Recreated).png|32px]] [[File:Blue Dye (Recreated).png|32px]] [[File:Purple Dye (Recreated).png|32px]] [[File:Cyan Dye (Recreated).png|32px]] [[File:Light Gray Dye (Recreated).png|32px]] [[File:Gray Dye (Recreated).png|32px]] [[File:Pink Dye (Recreated).png|32px]] [[File:Lime Dye (Recreated).png|32px]] [[File:Yellow Dye (Recreated).png|32px]] [[File:Light Blue Dye (Recreated).png|32px]] [[File:Magenta Dye (Recreated).png|32px]] [[File:Orange Dye (Recreated).png|32px]] [[File:White Dye (Recreated).png|32px]] Leftovers of old textures can be seen in [[items.png]] with 100% opacity. The white dye texture was reused for [[Sugar]].
| The colors were as follows:{{verify|Did the color codes remain the same between Beta 1.2 and Java 1.11.2?}}
{{:Color/Java Edition dye colors before 17w06a}}
}}
{{History|java}}
{{History||1.1|snap=11w49a|[[Sheep]] can now regrow their [[wool]] by eating [[grass block|grass]]. Dyed sheep regrow wool in their new color.}}
{{History||1.3.1|snap=12w19a|[[File:Cocoa Beans JE2.png|32px]] The texture of [[cocoa beans]] has been changed.}}
{{History|||snap=1.3|[[File:bone meal changes.gif|32px]] The textures of [[bone meal]], [[cactus green]], cocoa beans and [[rose red]] have been changed. The textures have been lowered one pixel.}}
{{History||1.4.2|snap=12w34a|Added the ability to dye leather [[armor]] and [[wolf]] collars.}}
{{History||1.4.4|snap=1.4.3|Color codes have been changed. The colors of red, brown, blue, purple, cyan, pink, light blue, magenta and orange were adjusted a little vividly.}}
{{History||1.6.1|snap=13w19a|[[Stained clay]] can now be crafted using dyes.}}
{{history||1.7.2|snap=13w36a|With the addition of new [[flower]]s, many secondary and tertiary dyes are now primary dyes.}}
{{History|||snap=13w41a|[[Stained glass]] can now be crafted using dyes.}}
{{History||1.8|snap=14w02a|As cleric [[villager]]s now sell lapis lazuli, all dyes have become fully renewable.}}
{{History|||snap=14w30a|Added [[banner]]s, which can be dyed.}}
{{History||1.9|snap=15w34a|Added [[shield]]s, which can be dyed indirectly by applying a matching [[banner]].}}
{{History||1.11|snap=16w39b|Dyes are now used to change the color of [[shulker box]]es.}}
{{History||1.12|snap=17w06a|Dyes are now used to craft [[concrete powder]].
|Color codes have been changed. All colors are adjusted more vividly. The changes were as follows:
{{:Color/Java Edition dye color changes in 17w06a}}
|Light blue dye, stained glass, and stained glass panes, did not change colors in this update. This means that they still use old colors.<ref name="unchanged dyes">{{Bug|MC-214643}}<br>{{Bug|MC-214641}}</ref>
}}
{{History|||snap=17w15a|Dyes can now apply color to white [[bed]]s.}}
{{History||1.13|snap=17w47a|The different data values for the <code>dye</code> ID have been split up into their own IDs.}}
{{History||1.14|snap=18w43a|[[Bone meal]], [[ink sac]]s, [[cocoa beans]] and [[lapis lazuli]] are no longer considered dyes.
|[[File:White Dye JE1 BE1.png|32px]] [[File:Black Dye JE1 BE1.png|32px]] [[File:Brown Dye JE1 BE1.png|32px]] [[File:Blue Dye JE1 BE1.png|32px]] Added [[white dye|white]], [[black dye|black]], [[brown dye|brown]] and [[blue dye]]s.
|"Rose Red", "Dandelion Yellow" and "Cactus Green" have been renamed to "Red Dye", "Yellow Dye" and "Green Dye", respectively.
|[[Glass pane]]s and [[carpet]]s can now be dyed.
|[[File:Light Gray Dye JE2 BE2.png|32px]] [[File:Gray Dye JE2 BE2.png|32px]] [[File:Red Dye JE2 BE2.png|32px]] [[File:Orange Dye JE2 BE2.png|32px]] [[File:Yellow Dye JE2 BE2.png|32px]] [[File:Lime Dye JE2 BE2.png|32px]] [[File:Green Dye JE2 BE2.png|32px]] [[File:Cyan Dye.png|32px]] [[File:Light Blue Dye JE2 BE2.png|32px]] [[File:Purple Dye JE2 BE2.png|32px]] [[File:Magenta Dye JE2 BE2.png|32px]] [[File:Pink Dye JE2 BE2.png|32px]] The textures of light gray, gray, red, orange, yellow, lime, green, cyan, light blue, purple, magenta, and pink dyes, have been changed. The color texture for light blue dye was not changed to reflect the updated colors from 1.12.<ref name="unchanged dyes"></ref>}}
{{History|||snap=18w44a|The color of the text on [[sign]]s can now be changed with dye.}}
{{History|||snap=18w49a|Yellow dyes can now be found in [[chest]]s in [[village]] mason houses.}}
{{History|||snap=18w50a|Green dyes can now be found in [[chest]]s in [[desert]] [[village]] houses.}}
{{History|||snap=19w05a|Added the [[wandering trader]], which can sell any type of dye.}}
{{History|||snap=19w11a|All 16 types of dyes can now be [[trading|bought]] by shepherd villagers.}}
{{History||1.16.2|snap=Pre-release 2|Reversed the order of dyes to match other colored items in the [[Creative inventory]].<ref name="reverse dye">{{Bug|MC-136553}}</ref>
|Regrouped dyes in the Creative inventory such that white, blue, brown, and black dyes are within and not [[cocoa beans]], [[ink sacs]], [[lapis lazuli]], and [[bone meal]].<ref name="regroup dye">{{Bug|MC-177684}}</ref>}}
{{History||1.17|snap=20w45a|Added [[candle]]s, which can be dyed.}}
{{History|||snap=21w03a|Added a sound for applying dyes.}}
{{History|||snap=21w19a|Candles can no longer be dyed.}}
{{History|||snap=Pre-release 1|Candles can now once again be dyed.}}
{{History||1.20<br>(Experimental)|link=1.19.3|snap=22w42a|The color of the text on [[hanging sign]]s can now be changed with dye.}}
{{History||1.20<br>(Experimental)|link=1.19.4|snap=23w07a|[[Torchflower]]s can now be crafted into orange dye.|[[Pink petals]] can now be crafted into pink dye.}}
{{History||1.20|snap=23w12a|[[Pitcher plant]]s can now be crafted into cyan dye.|Blue, light blue, orange, white, and yellow dye can now be found in [[suspicious gravel]] and [[suspicious sand]] in [[trail ruins]].}}
{{History|||snap=23w14a|Pitcher plants can now craft two [[cyan dye]] instead of one.}}
{{History|||snap=23w16a|Blue, light blue, orange, white, and yellow dye no longer generates in [[suspicious sand]] in [[trail ruins]].|Due to the split of the archaeological loot tables for the suspicious gravel within the [[trail ruins]]; blue, light blue, orange, white, and yellow dye now are in the common loot.}}
{{History|pocket alpha}}
{{History||v0.3.0|[[File:Bone Meal JE1 BE1.png|32px]] [[File:Light Gray Dye JE1 BE1.png|32px]] [[File:Gray Dye JE1 BE1.png|32px]] [[File:Ink Sac JE1 BE1.png|32px]] [[File:Cocoa Beans JE1 BE1.png|32px]] [[File:Red Dye JE1 BE1.png|32px]] [[File:Orange Dye JE1 BE1.png|32px]] [[File:Yellow Dye JE1 BE1.png|32px]] [[File:Lime Dye JE1 BE1.png|32px]] [[File:Green Dye JE1 BE1.png|32px]] [[File:Cyan Dye JE1 BE1.png|32px]] [[File:Light Blue Dye JE1 BE1.png|32px]] [[File:Lapis Lazuli JE1 BE1.png|32px]] [[File:Purple Dye JE1 BE1.png|32px]] [[File:Magenta Dye JE1 BE1.png|32px]] [[File:Pink Dye JE1 BE1.png|32px]] Added dyes. Only [[dandelion yellow]] and [[lapis lazuli]] are currently obtainable and have functionality.}}
{{History||v0.3.2|[[Cactus green]] is now obtainable by smelting [[cacti]].}}
{{History||v0.3.3|[[Bone meal]] is now obtainable via [[crafting]].}}
{{History||v0.4.0|[[Cyan dye]], [[light blue dye]], [[lime dye]], [[magenta dye]], [[orange dye]], [[pink dye]], and [[purple dye]] are now obtainable via crafting.
|[[Rose red]] is now obtainable by smelting red [[mushroom]]s.
|All available dyes, excluding bone meal, can now be used to craft their respective [[wool]] color.}}
{{History||v0.8.0|snap=build 1|[[File:Cocoa Beans JE3 BE2.png|32px]] The texture of cocoa beans has been changed.}}
{{History|||snap=build 3|[[Ink sac]]s, [[cocoa bean]]s, [[gray dye]], and [[light gray dye]] are now available in the [[creative]] [[inventory]].
|Rose red can now be obtained from [[beetroot]]s.}}
{{History||v0.9.0|snap=build 1|Cocoa beans can now be obtained from [[cocoa pod]]s.
|The [[rose]] has been removed and replaced with a new poppy [[flower]] that can be crafted into rose red.}}
{{History|||snap=build 3|All new [[flower]]s can now be [[crafting|crafted]] into dyes. Because of this, many secondary and tertiary dyes are now primary dyes.
|[[Gray dye]] and [[light gray dye]] can now be obtained in [[survival]].}}
{{History|||snap=build 11|[[Terracotta|Stained clay]] can now be crafted using dyes.}}
{{History||v0.11.0|snap=build 1|[[Ink sac]]s can now be obtained from [[squid]].
|Added the ability to dye [[wolf]] collars.}}
{{History||v0.12.1|snap=build 1|Red [[mushroom]]s can no longer be smelted to obtain [[rose red]].}}
{{History||v0.14.0|snap=build 1|[[Cauldron]]s now used for leather dyeing, by applying a dye to a [[water]]-filled cauldron.}}
{{History||v0.16.0|snap=build 1|[[Cocoa bean]]s can no longer be crafted.}}
{{History|pocket}}
{{History||1.0.0|snap=alpha 0.17.0.1|Added a ''Dye'' button for [[sheep]].
|Added [[shulker]]s, which can be dyed.
|Added [[stained glass]]. Stain glass cannot be [[crafting|crafted]], but purple glass generates in [[end city|end cities]].}}
{{History||1.1.0|snap=alpha 1.1.0.0|Dyes can now apply color to a white [[bed]]s.
|Dyes are now used to craft [[concrete powder]].
|The color palette has been changed.}}
{{History|bedrock}}
{{History||1.2.0|snap=beta 1.2.0.2|Dyes can now be used for [[banner]] crafting.
|Dyes can now be used to craft [[firework star]]s.
|[[Stained glass]] is now [[crafting|craftable]], using dyes.}}
{{History||1.4.0|snap=beta 1.2.20.1|[[Lime dye]] can now be obtained from smelting [[sea pickle]]s.
|Dyes can now used to craft [[glow stick]]s and [[balloon]]s.}}
{{History||1.8.0|snap=beta 1.8.0.8|Dyes can now be used to dye [[cat]] collars.}}
{{History|||snap=beta 1.8.0.10|[[File:White Dye JE1 BE1.png|32px]] [[File:Black Dye JE1 BE1.png|32px]] [[File:Brown Dye JE1 BE1.png|32px]] [[File:Blue Dye JE1 BE1.png|32px]] Added [[white dye|white]], [[brown dye|brown]], [[black dye|black]] and [[blue dye]]s, which can be crafted from [[lapis lazuli]], [[bone meal]], [[cocoa beans]] and [[ink sac]]s. This, however, the later four still use as dyes.<ref>{{Bug|MCPE-42473}}</ref>
|"Rose Red", "Dandelion Yellow" and "Cactus Green" have been renamed to "Red Dye", "Yellow Dye" and "Green Dye", respectively.}}
{{History||1.9.0|snap=beta 1.9.0.0|Blue and white dye can now be obtained from [[cornflower]]s and [[lily of the valley]]s.}}
{{History||1.10.0|snap=beta 1.10.0.3|[[Glass pane]]s and [[carpet]]s can now be dyed.
|Only a single dye is now required to apply a banner pattern in a [[loom]].
|Various dyes except black dye, white dye, brown dye and blue dye are now [[trading|sold]] by [[wandering trader]]s.
|[[File:Bone Meal JE2 BE2.png|32px]] [[File:Light Gray Dye JE2 BE2.png|32px]] [[File:Gray Dye JE2 BE2.png|32px]] [[File:Ink Sac JE2 BE2.png|32px]] [[File:Cocoa Beans JE4 BE3.png|32px]] [[File:Red Dye JE3 BE3.png|32px]] [[File:Orange Dye JE2 BE2.png|32px]] [[File:Yellow Dye JE2 BE2.png|32px]] [[File:Lime Dye JE2 BE2.png|32px]] [[File:Green Dye JE2 BE2.png|32px]] [[File:Cyan Dye.png|32px]] [[File:Light Blue Dye JE2 BE2.png|32px]] [[File:Lapis Lazuli JE2 BE2.png|32px]] [[File:Purple Dye JE2 BE2.png|32px]] [[File:Magenta Dye JE2 BE2.png|32px]] [[File:Pink Dye JE2 BE2.png|32px]] The textures of bone meal, light gray, gray, ink sac, cocoa beans, red, orange, yellow, lime, green, cyan, light blue, lapis lazuli, purple, magenta, and pink dyes have been changed.}}
{{History||1.11.0|snap=beta 1.11.0.4|Dye can now be [[trading|sold]] to shepherd [[villager]]s.}}
{{History||1.16.210|snap=beta 1.16.210.59|The color of the text on [[sign]]s can now be changed with dye.}}
{{History|||snap=beta 1.16.210.60|The ability to dye the color of the text on [[sign]]s was temporarily removed.}}
{{History||1.16.220|snap=beta 1.16.220.50|The color of the text on [[sign]]s can now be changed with dye again.}}
{{History||1.17.10|snap=beta 1.17.10.22|Added [[candles]], which can be dyed.}}
{{History|console}}
{{History||xbox=TU1|xbone=CU1|ps=1.0|wiiu=Patch 1|switch=1.0.1|[[File:Bone Meal JE1 BE1.png|32px]] [[File:Light Gray Dye JE1 BE1.png|32px]] [[File:Gray Dye JE1 BE1.png|32px]] [[File:Ink Sac JE1 BE1.png|32px]] [[File:Cocoa Beans JE1 BE1.png|32px]] [[File:Red Dye JE1 BE1.png|32px]] [[File:Orange Dye JE1 BE1.png|32px]] [[File:Yellow Dye JE1 BE1.png|32px]] [[File:Lime Dye JE1 BE1.png|32px]] [[File:Green Dye JE1 BE1.png|32px]] [[File:Cyan Dye JE1 BE1.png|32px]] [[File:Light Blue Dye JE1 BE1.png|32px]] [[File:Lapis Lazuli JE1 BE1.png|32px]] [[File:Purple Dye JE1 BE1.png|32px]] [[File:Magenta Dye JE1 BE1.png|32px]] [[File:Pink Dye JE1 BE1.png|32px]] Added dyes.}}
{{History||xbox=TU9|[[File:Cocoa Beans JE3 BE2.png|32px]] The texture of cocoa beans has been changed.}}
{{History||xbox=none|xbone=none|ps=1.83|wiiu=none|switch=none|[[File:White Dye JE1 BE1.png|32px]] [[File:Black Dye JE1 BE1.png|32px]] [[File:Brown Dye JE1 BE1.png|32px]] [[File:Blue Dye JE1 BE1.png|32px]] Added [[white dye|white]], [[black dye|black]], [[brown dye|brown]], and [[blue dye|blue]] dyes, which can crafted from [[bone meal]], [[ink sac]], [[cocoa beans]], and [[lapis lazuli]].
|"Rose Red", "Dandelion Yellow" and "Cactus Green" have been renamed to "Red Dye", "Yellow Dye" and "Green Dye", respectively.}}
{{History||ps=1.90|[[File:Bone Meal JE2 BE2.png|32px]] [[File:Light Gray Dye JE2 BE2.png|32px]] [[File:Gray Dye JE2 BE2.png|32px]] [[File:Ink Sac JE2 BE2.png|32px]] [[File:Cocoa Beans JE4 BE3.png|32px]] [[File:Red Dye JE2 BE2.png|32px]] [[File:Orange Dye JE2 BE2.png|32px]] [[File:Yellow Dye JE2 BE2.png|32px]] [[File:Lime Dye JE2 BE2.png|32px]] [[File:Green Dye JE2 BE2.png|32px]] [[File:Cyan Dye.png|32px]] [[File:Light Blue Dye JE2 BE2.png|32px]] [[File:Lapis Lazuli JE2 BE2.png|32px]] [[File:Purple Dye JE2 BE2.png|32px]] [[File:Magenta Dye JE2 BE2.png|32px]] [[File:Pink Dye JE2 BE2.png|32px]] The textures of bone meal, light gray, gray, ink sac, cocoa beans, red, orange, yellow, lime, green, cyan, light blue, lapis lazuli, purple, magenta, and pink dyes have been changed.}}
{{History|3ds}}
{{History||0.1.0|[[File:Bone Meal JE1 BE1.png|32px]] [[File:Light Gray Dye JE1 BE1.png|32px]] [[File:Gray Dye JE1 BE1.png|32px]] [[File:Ink Sac JE1 BE1.png|32px]] [[File:Cocoa Beans JE3 BE2.png|32px]] [[File:Red Dye JE1 BE1.png|32px]] [[File:Orange Dye JE1 BE1.png|32px]] [[File:Yellow Dye JE1 BE1.png|32px]] [[File:Lime Dye JE1 BE1.png|32px]] [[File:Green Dye JE1 BE1.png|32px]] [[File:Cyan Dye JE1 BE1.png|32px]] [[File:Light Blue Dye JE1 BE1.png|32px]] [[File:Lapis Lazuli JE1 BE1.png|32px]] [[File:Purple Dye JE1 BE1.png|32px]] [[File:Magenta Dye JE1 BE1.png|32px]] [[File:Pink Dye JE1 BE1.png|32px]] Added dyes from [[Pocket Edition v0.15.4 alpha]].}}
{{History|foot}}
<gallery>
Pre-release dyes.png|Pre-release dye textures hidden within [[Items.png]].
</gallery>
;Notes
{{reflist|group=n}}
== Gallery ==
<gallery>
White Dye.png|White Dye
Light Gray Dye.png|Light Gray Dye
Gray Dye.png|Gray Dye
Black Dye.png|Black Dye
Brown Dye.png|Brown Dye
Red Dye.png|Red Dye
Orange Dye.png|Orange Dye
Yellow Dye.png|Yellow Dye
Lime Dye.png|Lime Dye
Green Dye.png|Green Dye
Cyan Dye.png|Cyan Dye
Light Blue Dye.png|Light Blue Dye
Blue Dye.png|Blue Dye
Purple Dye.png|Purple Dye
Magenta Dye.png|Magenta Dye
Pink Dye.png|Pink Dye
</gallery>
==Issues==
{{issue list}}
== Trivia ==
* Players can obtain each one of every color with 1 cocoa bean, 2 yellow dye, 2 ink sac, 3 green dye, 4 lapis lazuli, 4 red dye, and 6 bone meal (2 bones).
* The dyed sheep breeding behavior mirrors [[wikipedia:Lamarckism|Lamarck's theory]], in which the organisms evolve inheriting the external changes and adaptations of the previous generation, transmitting them to their offspring.
* In ''Bedrock Edition'', tertiary colors, along with their regular crafting recipes, can be crafted with primary colors. E.g.: Magenta can be crafted with one rose red and two bone meals.
* The colors of the dyes match the chat colors in [[color codes]] except for brown (dye only), light aqua, and gold (color codes only).
* The texture for light blue dye still uses the color from prior to the 1.12 World of Color update.<ref name="unchanged dyes"></ref>
== References ==
{{reflist}}
== External Links ==
* Tools for calculating leather dye combination: [https://minecraft.tools/en/armor.php minecraft.tools] (webapp); [https://github.com/pudquick/pyMCdyes/ pyMCDyes] (open-source Python script, outdated); [https://anrar4.github.io/DyeLeatherArmor/ DyeLeatherArmor]: a tool for calculating an exact crafting recipe for any sRGB color
{{Items}}
[[Category:Dyes]]
[[Category:Renewable resources]]
[[cs:Barvivo]]
[[de:Farbstoff]]
[[es:Tinte]]
[[fr:Teinture]]
[[hu:Színezés]]
[[it:Colorante]]
[[ja:染料]]
[[ko:염료]]
[[nl:Kleurstof]]
[[pl:Barwniki]]
[[pt:Corante]]
[[ru:Красители]]
[[th:สีย้อม]]
[[uk:Барвники]]
[[zh:染料]]</li></ul> | 16w20a | Endermen now rarely spawn in the Nether, and can now pick up netherrack. | ||||||||||||||||||||||||||||||||||||||||||||||||||||||||||||||||||||||||||||||||||||||||||||||||||||||||||||
| Added magma blocks. | ||||||||||||||||||||||||||||||||||||||||||||||||||||||||||||||||||||||||||||||||||||||||||||||||||||||||||||||
| Added red nether brick and nether wart blocks, which can be crafted but do not otherwise generate naturally in the Nether. | ||||||||||||||||||||||||||||||||||||||||||||||||||||||||||||||||||||||||||||||||||||||||||||||||||||||||||||||
| Pocket Edition Alpha | ||||||||||||||||||||||||||||||||||||||||||||||||||||||||||||||||||||||||||||||||||||||||||||||||||||||||||||||
0.12.1{{Extension DPL}}<ul><li>[[Minecart with Hopper|Minecart with Hopper]]<br/>{{ItemEntity
|image=Minecart with Hopper.png
|renewable=Yes
|stackable=No
|size=Height: 0.7 Blocks<br>Width: 0.98 Blocks
|networkid='''[[JE]]''': 10
|drops=1 {{ItemLink|Minecart with Hopper}}<br>plus contents
|health={{hp|6}}
}}
A '''minecart with hopper''' is a [[minecart]] with a [[hopper]] inside. Unlike a normal hopper, it pulls items from containers much more quickly, cannot push items into containers, can collect [[Item (entity)|item entities]] through a single layer of [[solid block]]s and is locked and unlocked via [[Activator Rail|activator rails]].
== Obtaining ==
=== Crafting ===
{{Crafting
|Output= Minecart with Hopper
|type= Transportation
|Hopper|Minecart}}
Minecarts with hoppers can be retrieved by attacking them. By doing so it drop as an [[item (entity)|item]] and any other contents of the hopper are dropped as well.
== Usage ==
[[File:Minecart with Hopper GUI.png|thumb|176px|The GUI of a minecart with hopper.]]
Minecarts with hoppers are placed similarly to other [[minecart]]s.
A minecart with hopper pulls in items lying nearby (within a range slightly larger than the cart itself), or inside a container directly above the minecart, at a rate of 1 item every [[game tick]] (20 items per second), eight times as fast as a normal hopper. It also picks up items that are lying on a block directly above the track. It does not push items into containers, but a hopper underneath the track can remove items from a minecart with hopper on the track. Ordinary hoppers can also drop items into a minecart with hopper like other containers, at the normal speed of 2.5 items per second. In Bedrock Edition, a minecart with hopper on curved rail pulls in items in a hopper lying in front of its moving direction and 1 block above if hopper's output funnel is pointed downward and no block is below that hopper.<ref>{{bug|MCPE-94293}}</ref>
The hopper can be disabled by passing over a powered [[activator rail]], and can be reenabled by an inactive activator rail.
An empty minecart with hopper can travel more than 85 blocks without stopping (as opposed to a normal cart going less than 12 blocks) from a dead stop using a 2 powered track starter even with another cart in front of them. However, the distance traveled by a minecart with hopper depends on the hopper's load. Using a 1 powered rail starter track, a minecart with an empty hopper travels 64 blocks until it stops (as opposed to an empty normal minecart going 8 blocks). The distance traveled diminishes non-linearly with increased hopper load; a minecart with a full hopper can travel only 16 blocks in this setup.
{{See also|Tutorials/Storage minecarts}}
== Sounds ==
{{Edition|Java}}:<br>
Minecarts with hoppers use the Friendly Creatures sound category for entity-dependent sound events.<ref group=sound name=rollsource>{{bug|MC-42132}}</ref>
{{Sound table
|sound=Minecart rolling.ogg
|subtitle=Minecart rolls
|source=Friendly Creatures <ref group=sound name=rollsource/>
|overridesource=1
|description=While a minecart with hopper is moving
|id=entity.minecart.riding
|translationkey=subtitles.entity.minecart.riding
|volume=0.0-0.35 <ref group=sound>Relates linearly with horizontal velocity (max 0.5)</ref>
|pitch=0.0-1.0 <ref group=sound>Will increase by 0.0025 per tick if the minecart's horizontal velocity is more than 0.01</ref>
|distance=16
|foot=1}}
{{Edition|Bedrock}}:
{{Sound table
|type=bedrock
|sound=Minecart rolling.ogg
|source=neutral
|description=While a minecart with hopper is moving
|id=minecart.base
|foot=1}}
== Data values ==
=== ID ===
{{edition|java}}:
{{ID table
|edition=java
|firstcolumnname=Item
|showforms=y
|generatetranslationkeys=y
|displayname=Minecart with Hopper
|spritetype=item
|nameid=hopper_minecart
|form=item
|foot=1}}
{{ID table
|edition=java
|firstcolumnname=Entity
|generatetranslationkeys=y
|displayname=Minecart with Hopper
|spritetype=entity
|nameid=hopper_minecart
|foot=1}}
{{edition|bedrock}}:
{{ID table
|edition=bedrock
|firstcolumnname=Item
|shownumericids=y
|showforms=y
|notshowbeitemforms=y
|generatetranslationkeys=y
|displayname=Minecart with Hopper
|spritetype=item
|nameid=hopper_minecart
|id=526
|form=item
|foot=1}}
{{ID table
|edition=bedrock
|firstcolumnname=Entity
|shownumericids=y
|generatetranslationkeys=y
|displayname=Minecart with Hopper
|spritetype=entity
|nameid=hopper_minecart
|id=96
|foot=1}}
=== Entity data ===
Minecarts with hoppers have entity data associated with them that contain various properties of the entity.
{{el|java}}:
{{main|Entity format}}
{{/ED}}
{{el|bedrock}}:
: See [[Bedrock Edition level format/Entity format]].
== Video ==
<div style="text-align:center">{{yt|I5etC7LeCac}}</div>
== History ==
{{History|java}}
{{History||1.5|snap=13w03a|[[File:Minecart with Hopper JE1 BE1.png|32px]] [[File:Minecart with Hopper (item) JE1 BE1.png|32px]] Added minecart with hopper.}}
{{History||1.9|snap=15w43a|Loot tables are added; minecarts with hopper now can use loot tables.}}
{{History||1.9.1|snap=pre2|The title of the [[inventory]] is changed from 'Hopper minecart' to 'Minecart with Hopper'.}}
{{History||1.11|snap=16w32a|The entity ID of the minecart with hopper has now been changed from <code>MinecartHopper</code> to <code>hopper_minecart</code>.}}
{{History||1.13|snap=17w47a|Prior to [[1.13/Flattening|''The Flattening'']], this [[item]]'s numeral ID was 408.}}
{{History||1.14|snap=18w43a|[[File:Minecart with Hopper JE2 BE2.png|32px]] [[File:Minecart with Hopper (item) JE2 BE2.png|32px]] The textures of the minecart with hopper have now been changed.}}
{{History||1.15|snap=19w38a|[[File:Minecart with Hopper 19w38a.png|32px]] The hopper now appears dark, same as suffocating mobs.}}
{{History|||snap=19w39a|The hopper now renders correctly.}}
{{History||1.16.2|snap=Pre-release 1|Opening or destroying a minecart with hopper now angers nearby [[piglin]]s.}}
{{History||1.19|snap=22w13a|The crafting recipe for a minecart with hopper is now shapeless.|Breaking a minecart with hopper will now drop the item instead of the minecart and hopper separately, though the contents of the hopper are still dropped.<ref>{{bug|MC-249493|||Fixed}}</ref>}}
{{History||1.19.4|snap=23w06a|Minecart with hopper now no longer aggravates [[piglin]]s when opened.}}
{{History|pocket alpha}}
{{History||v0.14.0|snap=build 1|[[File:Minecart with Hopper JE1 BE1.png|32px]] [[File:Minecart with Hopper (item) JE1 BE1.png|32px]] Added minecart with hopper.}}
{{History|pocket}}
{{History||1.1.0|snap=alpha 1.1.0.0|The entity ID of the minecart with hopper has now been changed from <code>minecarthopper</code> to <code>hopper_minecart</code>.}}
{{History|bedrock}}
{{History||1.10.0|snap=beta 1.10.0.3|[[File:Minecart with Hopper JE2 BE2.png|32px]] [[File:Minecart with Hopper (item) JE2 BE2.png|32px]] The textures of the minecart with hopper have now been changed.}}
{{History||1.19.0|snap=beta 1.19.0.30|Breaking a minecart with hopper will now drop the item instead of the minecart and hopper separately, though the contents of the hopper are still dropped.}}
{{History|console}}
{{History||xbox=TU19|xbone=CU7|ps=1.12|wiiu=Patch 1|switch=1.0.1|[[File:Minecart with Hopper JE1 BE1.png|32px]] [[File:Minecart with Hopper (item) JE1 BE1.png|32px]] Added minecart with hopper.}}
{{History||xbox=none|xbone=none|ps=1.90|wiiu=none|switch=none|[[File:Minecart with Hopper JE2 BE2.png|32px]] [[File:Minecart with Hopper (item) JE2 BE2.png|32px]] The textures of the minecart with hopper have now been changed.}}
{{History|new 3ds}}
{{History||0.1.0|[[File:Minecart with Hopper JE1 BE1.png|32px]] [[File:Minecart with Hopper (item) JE1 BE1.png|32px]] Added minecart with hopper.
|Minecarts with hopper emit smoke [[particles]] when destroyed.}}
{{History|foot}}
== Issues ==
{{issue list}}
== Gallery ==
<gallery>
File:First hopper Minecart Image.png|The first image of hopper carts released by Dinnerbone.<ref>{{Tweet|Dinnerbone|291215700213772289|Well you guys got that quick. The letters in the hotbar were for <nowiki>[imgur link]|January 15, 2013}}</ref>
File:13w03a Banner.png|The 13w03a banner showing a minecart with hopper and a [[dropper]].
</gallery>
== References ==
{{reflist}}
{{items}}
{{entities}}
[[Category:Mechanics]]
[[Category:Storage]]
[[cs:Vozík s násypkou]]
[[de:Trichterlore]]
[[es:Vagoneta con tolva]]
[[fr:Wagonnet à entonnoir]]
[[hu:Tölcsér csille]]
[[it:Carrello da miniera]]
[[ja:ホッパー付きのトロッコ]]
[[ko:호퍼가 실린 광산 수레]]
[[nl:Mijnkar met trechter]]
[[pl:Wagonik z lejem]]
[[pt:Carrinho de mina com funil]]
[[ru:Вагонетка с воронкой]]
[[uk:Вагонетка з лійкою]]
[[zh:漏斗矿车]]</li><li>[[Raw Salmon|Raw Salmon]]<br/>{{about|the item|the mob|Salmon}}
{{Item
| title = Raw Salmon
| image = Raw Salmon.png
| renewable = Yes
| heals = {{hunger|2}}
| stackable = Yes (64)
}}
'''Raw salmon''' is a food item that can be eaten by the [[player]] or cooked to make [[cooked salmon]].
== Obtaining ==
=== Mob loot ===
====Salmon====
[[Salmon]] always drops 1 raw salmon when killed, unaffected by Looting.<ref>{{bug|MC-212795||Salmon & Fish mobs are not affected by Looting}}</ref> If it is killed while on [[fire]], it drops 1 [[Cooked Salmon|cooked salmon]] instead.
====Guardians and elder guardians ====
[[Guardian|Guardians]] and [[Elder Guardian|elder guardians]] have a 2.5% chance to drop a random fish, with 25% of them being raw salmon, which drops as cooked if the guardian was on fire. The chance of getting the fish drop is increased by 1% per level with [[Looting]] (for a maximum of 5.5% with Looting III), but the type of fish is not affected.
====Polar bears====
[[Polar bear]]s have a 25% chance of dropping 0–2 raw salmon when killed. The maximum amount can be increased by 1 per level of Looting, for a maximum of 0-5 with Looting III. If killed while on fire, they drop cooked salmon instead.
=== Fishing ===
{{main|Fishing}}Raw salmon can be obtained from [[fishing]]. The wait time of one being caught is decreased with the [[Lure]] enchantment and the chance of one being caught is slightly decreased with the [[Luck of the Sea]] enchantment (named as such because it increases treasure, not fish).
Catching salmon awards 1-6 experience.
=== Chest loot ===
{{LootChestItem|raw-salmon}}
=== Villager gifts ===
{{in|java}}, Fisherman villagers throw raw salmon at [[player]]s under the [[Hero of the Village]] effect.
== Usage ==
=== Smelting ingredient ===
{{smelting
|Raw Salmon
|Cooked Salmon
|0.35
}}
=== Food ===
Raw salmon restores {{hunger|2}} [[hunger]] and 0.2 [[Hunger#Mechanics|saturation]].
=== Cats ===
Raw salmon can be used to tame [[cat]]s with {{frac|1|3}} chance of success, get cats off of [[chest]]s, and [[bed]]s, [[breed]] cats, and make baby cats grow up faster by 10% of the remaining time. Additionally, raw salmon can be used to heal cats by {{hp|2|mob=1}}.
Raw salmon can be used to gain [[ocelot]] trust, breed ocelots, and make baby ocelots grow up by 10%.
=== Dolphins ===
A [[dolphin]] can be fed raw salmon to increase its trust of the player and cause it to interact with the player more often. However, unlike most other animal mobs, this does not cause them to breed.
Additionally, dolphins swim to the nearest chest in a [[shipwreck]] or [[underwater ruin]] after they are fed raw salmon. If the chest in the nearest structure is broken, they swim to another structure with a chest.
=== Trading ===
Apprentice-level Fisherman [[villager]]s have 50%{{only|bedrock}} or {{frac|2|3}}{{only|java}} chance to buy 6 raw salmon and one [[emerald]] for 6 cooked salmon.
Journeyman-level Fisherman villagers offer to buy 13 raw salmon for an emerald.
=== Wolves ===
{{IN|bedrock}}, raw salmon can be fed only to [[wolves]] not at full health, healing them by {{hp|2|mob=1}}. Unlike other wolf food, raw salmon cannot be used to breed wolves or to accelerate the growth of baby wolves.
==Sounds==
{{Sound table/Entity/Food}}
== Data values ==
=== ID ===
{{edition|java}}:
{{ID table
|edition=java
|showitemtags=y
|showforms=y
|generatetranslationkeys=y
|displayname=Raw Salmon
|spritetype=item
|nameid=salmon
|itemtags=fishes
|form=item
|foot=1}}
{{edition|bedrock}}:
{{ID table
|edition=bedrock
|shownumericids=y
|showforms=y
|notshowbeitemforms=y
|generatetranslationkeys=y
|displayname=Raw Salmon
|spritetype=item
|nameid=salmon
|id=265
|form=item
|foot=1}}
== Achievements ==
{{load achievements|Lion Hunter}}
== Advancements ==
{{load advancements|Husbandry;A Balanced Diet;Fishy Business;A Complete Catalogue}}
== Video ==
<span style="display:inline-block">{{yt|s_GcAFeoREk}}</span>
== History ==
{{History|java}}
{{History||1.7.2|snap=13w36a|[[File:Raw Salmon JE1 BE1.png|32px]] Added raw salmon.}}
{{History||1.8|snap=14w25a|Raw salmon is now obtainable rare drops from [[guardian]]s and [[elder guardians]].}}
{{History||1.9|snap=15w44a|Raw salmon can now be found in [[bonus chest]]s.}}
{{History||1.10|snap=16w20a|Raw salmon is now dropped from [[polar bear]]s.}}
{{History||1.13|snap=17w47a|The different data values for the <code>fish</code> and <code>cooked_fish</code> IDs have been split up into their own IDs.
|Prior to [[1.13/Flattening|''The Flattening'']], these [[item]]s' numeral IDs were 349 and 250.}}
{{History|||snap=18w08b|Salmon has been added as a [[mob]], which drops raw salmon when killed (cooked while on [[fire]]).
|[[File:Raw Salmon JE2 BE2.png|32px]] The texture for raw salmon has been changed.}}
{{History||1.14|snap=18w48a|Raw salmon can now be found in chests in [[village]] fisher cottages.}}
{{History|||snap=19w11a|Fisherman [[villager]]s now [[trading|buy]] raw salmon.}}
{{History|||snap=19w13a|Fisherman villagers now give raw salmon to players under the [[Hero of the Village]] effect.}}
{{History|pocket alpha}}
{{History||v0.11.0|snap=build 1|[[File:Raw Salmon JE1 BE1.png|32px]] Added raw salmon.}}
{{History||v0.12.1|snap=build 1|Salmon now restores [[hunger]] instead of [[health]].
|Raw salmon can now be used to tame [[ocelot]]s.}}
{{History||v0.16.0|snap=build 1|Salmon is now [[drops|dropped]] by [[guardian]]s and [[elder guardian]]s.}}
{{History|pocket}}
{{History||1.0.0|snap=alpha 0.17.0.1|Added [[polar bear]]s, which drop raw salmon.}}
{{History|bedrock}}
{{History||1.2.0|snap=beta 1.2.0.2|Raw salmon is now found inside [[bonus chest]]s.}}
{{History||1.4.0|snap=beta 1.2.14.2|Salmon has been added as a [[mob]], which drops raw salmon when killed (cooked while on [[fire]]).
|[[File:Raw Salmon JE2 BE2.png|32px]] The texture for raw salmon has been changed.}}
{{History|||snap=beta 1.2.20.1|Added [[dolphin]]s, which can be [[breeding|bred]] with raw salmon.}}
{{History||1.5.0|snap=beta 1.5.0.0|Raw salmon can no longer be used to breed dolphins.
|Giving raw salmon to dolphins now leads the [[player]] to nearest [[underwater ruins]] or [[shipwreck]].}}
{{History||1.8.0|snap=beta 1.8.0.8|Raw salmon can no longer be used to tame [[ocelot]]s.
|Raw salmon can now be used to [[breeding|breed]] ocelots.
|Added stray [[cat]]s, which can be tamed by being fed raw salmon.}}
{{History||1.11.0|snap=beta 1.11.0.4|Raw salmon can now be [[trading|sold]] to fisherman [[villager]]s.}}
{{History||1.16.100|snap=beta 1.16.100.52|If [[salmon]] is [[death|killed]] while on [[fire]], then they now drop [[cooked salmon]] instead of a raw salmon.}}
{{History|console}}
{{History||xbox=TU31|xbone=CU19|ps=1.22|wiiu=Patch 3|[[File:Raw Salmon JE1 BE1.png|32px]] Added raw salmon.}}
{{History||xbox=TU69|ps=1.76|wiiu=Patch 38|[[File:Raw Salmon JE2 BE2.png|32px]] The texture for raw salmon have been changed.}}
{{History|new 3ds}}
{{History||0.1.0|[[File:Raw Salmon JE1 BE1.png|32px]] Added raw salmon.}}
{{History|foot}}
== Issues ==
{{issue list}}
== See also ==
* [[Fishing]]
== References ==
{{reflist}}
{{items}}
[[de:Roher Lachs]]
[[es:Salmón crudo]]
[[ja:生鮭]]
[[ko:생연어]]
[[pt:Salmão cru]]
[[ru:Сырой лосось]]
[[tr:Çiğ Somon]]
[[zh:生鲑鱼]]
[[Category:Renewable resources]]
[[Category:Food]]</li></ul></nowiki> | April 22, 2015 | Tommaso Checchi tweets a picture of the Nether, showing that it is officially in development. | ||||||||||||||||||||||||||||||||||||||||||||||||||||||||||||||||||||||||||||||||||||||||||||||||||||||||||||
| He later tweets stating that he won't tell how finished it is or what version it will be in.[2] | ||||||||||||||||||||||||||||||||||||||||||||||||||||||||||||||||||||||||||||||||||||||||||||||||||||||||||||||
| build 1 | Added the Nether. | |||||||||||||||||||||||||||||||||||||||||||||||||||||||||||||||||||||||||||||||||||||||||||||||||||||||||||||
| You can place water in nether breaking ice. | ||||||||||||||||||||||||||||||||||||||||||||||||||||||||||||||||||||||||||||||||||||||||||||||||||||||||||||||
| build 6 | Lava now spreads faster in the Nether. | |||||||||||||||||||||||||||||||||||||||||||||||||||||||||||||||||||||||||||||||||||||||||||||||||||||||||||||
0.15.0{{Extension DPL}}<ul><li>[[Dye|Dye]]<br/>{{Item
| title = Dyes
| image = White Dye.png
| extratext = View [[#Gallery|all renders]]
| renewable = Yes
| stackable = Yes (64)
}}
'''Dyes''' are a set of sixteen items used to change the color of [[wool]], [[carpet]]s, [[terracotta]], [[concrete powder]], [[glass]], [[shulker box]]es, [[bed]]s, [[candle]]s, the patterns on [[banner]]s, [[firework star]]s, certain mobs, and text on [[sign]]s and [[hanging sign]]s. {{IN|bedrock}} they can also be used to dye water in a [[cauldron]] (which is thereafter used to dye leather [[armor]]); {{in|java}} leather armor can be dyed directly. {{IN|education}} dyes can also be used to dye [[balloon]]s and [[glow stick]]s.
{{IN|bedrock|education}}, [[bone meal]], [[ink sac]]s, [[lapis lazuli]], and [[cocoa bean]]s can generally substitute for [[white dye]], [[black dye]], [[blue dye]], and [[brown dye]], respectively, in crafting recipes and for use in dyeing items or mobs. However, they have other important uses that aren't related to color, and are therefore not considered true dyes. They are mentioned in this article only in regard to their use as dyeing agents; see their individual articles for complete information about them.
[[File:Dye Recipes.png|400px|thumb|A guide for creating all the dyes]]
== Obtaining ==
<!--[[File:Dye Chart.png|350px|thumb|A guide to crafting all the dyes.{{until|java 1.14}}]]-->
Dyes can be produced by crafting them from plants (mainly flowers), by crafting dyes of different colors together, by smelting plants, or by trading with a [[wandering trader]].
{{loadPage|Crafting/Dye|Crafting|h3}}
=== Smelting ===
{{smelting|head=1|Sea Pickle|Lime Dye|0,2}}
{{smelting|foot=1|Cactus|Green Dye|1||b=Lapis Lazuli|c=Any fuel|d=1}}
=== Trading ===
[[Wandering trader]]s can sell 3 dyes for an [[emerald]]. {{IN|bedrock}}, they can also sell 3 lapis lazuli, bone meal, cocoa beans, or ink sacs for one emerald.
Apprentice-level cleric [[villager]]s sell one lapis lazuli per emerald.
=== Chest loot ===
{{#invoke:LootChest|base3|blue-dye,green-dye,orange-dye,light-blue-dye,yellow-dye,white-dye}}
=== Other ===
Ink sacs can also be created using 1 iron, 1 sulfur, and 4 oxygen in the [[compound creator]]. {{only|bedrock|education}}
== Usage ==
Similar to their use in crafting, [[bone meal]], [[ink sac]]s, [[lapis lazuli]], and [[cocoa beans]] can be substituted for the corresponding dye in any of the following usages unless otherwise specified.{{only|bedrock}} <!--- sections are ordered by craftable dyeable blocks, dyeable items, version exclusive sections, and non-crafting miscellaneous uses--->
=== Dyeing wool and mobs ===
Players can dye wool by placing [[wool]] and any dye in a crafting grid.
{{Crafting
|nocat=1
|Any Wool
|Matching Dye
|Output=Any Wool
}}
Dyes can be {{control|use|text=used}} on sheep to change the color of the wool. Shearing a colored sheep drops the corresponding color of the wool, and the sheep retains the color when the wool regenerates. [[Breeding]] colored sheep produces a lamb colored as one of the parent sheep, or a color resulting from the combination of both parents' color. The color combining follows the same rules that dyes use – red and yellow sheep produce an orange lamb, but a blue and yellow sheep cannot create a green lamb. The unlimited reproduction of colored sheep makes dyeing and shearing sheep infinitely more efficient than just dyeing wool directly.
Dye can also be used on a tamed [[wolf]] or [[cat]] to change the color of its collar from the default red to the color of the dye.
=== Dyeing carpets ===
Carpets can be dyed.
{{Crafting
|Any Carpet
|Matching Dye
|Output= Matching Carpet
|type= Building block
}}
=== Dyeing terracotta ===
[[Terracotta]] can be dyed by placing 8 blocks around a dye on a crafting table.
{{Crafting
|nocat=1
|A1=Terracotta |B1=Terracotta |C1=Terracotta
|A2=Terracotta |B2=Matching Dye |C2=Terracotta
|A3=Terracotta |B3=Terracotta |C3=Terracotta
|Output=Matching Dyed Terracotta,8
}}
=== Creating concrete powder ===
Dyes can also be used to craft [[concrete powder]], which can then be set into their respective [[concrete]] blocks (they cannot be dyed directly).
{{Crafting
|nocat=1
|Sand |Gravel |Sand
|Gravel |Matching Dye |Gravel
|Sand |Gravel |Sand
|Output=Matching Concrete Powder,8
}}
=== Staining glass ===
[[Stained glass]] can be stained by placing 8 blocks of glass around a dye on a [[crafting table]]. Just like regular glass, stained glass can be crafted into stained glass panes. The recipe for this is the same as with regular glass.
{{Crafting
|nocat=1
|A1=Glass |B1=Glass |C1=Glass
|A2=Glass |B2=Matching Dye |C2=Glass
|A3=Glass |B3=Glass |C3=Glass
|Output=Matching Stained Glass,8
|head=1
}}
{{Crafting
|nocat=1
|A1= Glass Pane
|B1= Glass Pane
|C1= Glass Pane
|A2= Glass Pane
|B2= Matching Dye
|C2= Glass Pane
|A3= Glass Pane
|B3= Glass Pane
|C3= Glass Pane
|Output= Matching Stained Glass Pane,8
|type= Decoration block
|foot=1
}}
=== Dyeing shulker boxes ===
[[Shulker box]]es are generated in a light shade of purple (like the [[purpur block]]), but can be dyed any color. They can also be re-dyed as often as desired.
{{Crafting
|ignoreusage=1
|showname=1
|Any Shulker Box
|Matching Dye
|Output=Matching Shulker Box
}}
=== Dyeing beds ===
Players can dye beds by placing a [[bed]] and any color dye in a crafting grid.
{{Crafting
|nocat=1
|Any Bed
|Matching Dye
|Output=Matching Bed
}}
=== Dyeing candles ===
Players can dye [[candles]] by placing an undyed candle and any color dye in a crafting grid.
{{Crafting
|ignoreusage=1
|Candle
|Matching Dye
|Output=Matching Dyed Candle
}}
=== Banner patterns ===
{{main|Banner#Patterns}}
Dyes are used in most banner patterns to determine the pattern and color displayed.
=== Dyeing armor ===
[[File:DyeGraph2.png|200px|thumb|A graph showing all combinations of two dyes on a [[tunic]].]]
Leather [[armor]] can be dyed by:
* Crafting dyes with a piece of leather armor or leather [[horse armor]].{{Only|java}}
* Dousing the leather armor or leather [[horse armor]] in a [[cauldron]] to which dyes have been added.{{Only|bedrock}}
There are 5,713,438<ref>https://anrar4.github.io/DyeLeatherArmor/</ref> (34.1% of sRGB) colors leather armor can be, as it is possible to put more than one dye on the crafting bench alongside the leather armor. Armor can be dyed multiple times with previous colors affecting the final outcome. Colored armor can be reverted to their original color using a [[cauldron]] with undyed water.
The game has a specific formula for calculating the color of dyed armor: each color, in the RGB color model, has a red value, green value, and blue value. For each dye in the crafting grid, and the armor itself (if it is already dyed), the red, green, and blue values are added to running totals. In addition, a running total of the highest value (be it red, green, or blue) is also kept. After this, each total is divided by the number of colors used. This effectively produces the average red, green, blue, and maximum values. The maximum value of the average RGB values is also calculated. Finally, each average RGB value is multiplied by the average maximum value and divided by the maximum of the average RGB values. The modified average RGB values are then used as the final color. This procedure can be summed up with the following equations:
for each color (all "total" variables start at 0 before counting):
totalRed = totalRed + redValue
totalGreen = totalGreen + greenValue
totalBlue = totalBlue + blueValue
totalMaximum = totalMaximum + max(redValue, greenValue, blueValue)
numberOfColors = numberOfColors + 1
averageRed = totalRed / numberOfColors
averageGreen = totalGreen / numberOfColors
averageBlue = totalBlue / numberOfColors
averageMaximum = totalMaximum / numberOfColors
maximumOfAverage = max(averageRed, averageGreen, averageBlue)
gainFactor = averageMaximum / maximumOfAverage
resultRed = averageRed * gainFactor
resultGreen = averageGreen * gainFactor
resultBlue = averageBlue * gainFactor
Due to the way this formula works, the resulting color can never be darker than the average of the input colors and is often lighter and more saturated. Of course, the resulting color can never be lighter or more saturated than the lightest or most saturated input color. In addition, this formula never creates an RGB value higher than 255 (which would be invalid in the 8-bit RGB color model).
If leather armor is renamed on an [[anvil]], it retains its name when dyed or undyed.
;Mixing Samples
: {{ItemSprite|Yellow Dye}} + {{ItemSprite|Yellow Dye}} = {{Tint|leather-chestplate| #{{CalcDye| yellow=2 }} | code=1}}
: {{ItemSprite|Red Dye}} + {{ItemSprite|Blue Dye}} + {{ItemSprite|White Dye}} = {{Tint|leather-chestplate| #{{CalcDye| red=1 | blue=1 | white=1}} | code=1}}
: {{ItemSprite|Green Dye}} + {{ItemSprite|Red Dye}} + {{ItemSprite|Pink Dye}} = {{Tint|leather-chestplate| #{{CalcDye| green=1 | red=1 | pink=1}} | code=1}}
=== Dyeing firework stars ===
A [[firework star]] can have a single color or a combination of up to eight colors when crafted with dyes. Adding one or more dyes to a crafted firework star adds a "fade to color" effect to it, overwriting any existing fade colors.
{{Crafting
|head=1
|ignoreusage=1
|ingredients=[[Gunpowder]] +<br>Any Dye (1–8) +<br>Extra ingredient (optional)
|Gunpowder
|Matching Dye
|Diamond;Glowstone Dust;Head;Gold Nugget;Feather;Fire Charge;
|Output=Matching Firework Star
}}
{{Crafting
|ignoreusage=1
|Matching Firework Star
|Any Dye
|Output=Matching Firework Star
|foot=1
}}
=== Creating balloons ===
Dye can be used to craft balloons.{{only|education}}
{{Crafting
|nocat=1
|A1= Latex
|B1= Matching Dye
|C1= Latex
|A2= Latex
|B2= Helium
|C2= Latex
|A3= Latex
|B3= Lead
|C3= Latex
|Output= Matching Balloon
}}
=== Creating glow sticks ===
Dye can also be used to craft glow sticks.{{only|education}}
{{Crafting
|nocat=1
|A1= Polyethylene
|B1= Hydrogen Peroxide
|C1= Polyethylene
|A2= Polyethylene
|B2= Matching Dye
|C2= Polyethylene
|A3= Polyethylene
|B3= Luminol
|C3= Polyethylene
|Output= Matching Glow Stick
}}
=== Dyeing water inside cauldrons ===
Water can be dyed in a cauldron by holding any dye in the hand and pressing {{Ctrl|use}} on a cauldron filled with water.{{only|bedrock}}
=== Signs ===
Dye can be {{control|used}} on a [[sign]] or a [[hanging sign]] to change the text color. {{IN|bedrock}}, [[ink sac]]s cannot be used for this purpose; black dye must be used to change the text to black.
=== Trading ===
Apprentice, journeyman and expert-level shepherd [[villager]]s buy any of the 12 dyes for an [[emerald]].
== Color values ==
The "color codes" are used to determine the color imparted on sheep, wolf and cat collars, firework stars, [[beacon]] beams, and dyed leather armor. The hex value is shown in the extended tooltips of dyed leather armor; however, to set the color using an NBT data tag in a [[command]], the decimal value must be used instead. The color values for firework stars are slightly different from the ones listed below, and use [[Item colors#Firework stars|these values]] instead.
{| class="wikitable" style="margin:2px; border: 1px solid silver; text-align: left;" data-description="Data values"
! rowspan=2 | Description
! colspan=2 style="text-align:center" | Color Code
|-
! Dec
! <abbr title="Hexadecimal color code">Hex</abbr>
|-
| style="text-align:center" | White || 16383998 || {{color|#F9FFFE}}
|-
| style="text-align:center" | Light gray || 10329495 || {{color|#9D9D97}}
|-
| style="text-align:center" | Gray || 4673362 || {{color|#474F52}}
|-
| style="text-align:center" | Black || 1908001|| {{color|#1D1D21}}
|-
| style="text-align:center" | Brown || 8606770 || {{color|#835432}}
|-
| style="text-align:center" | Red || 11546150 || {{color|#B02E26}}
|-
| style="text-align:center" | Orange || 16351261 || {{color|#F9801D}}
|-
| style="text-align:center" | Yellow || 16701501 || {{color|#FED83D}}
|-
| style="text-align:center" | Lime || 8439583 || {{color|#80C71F}}
|-
| style="text-align:center" | Green || 6192150 || {{color|#5E7C16}}
|-
| style="text-align:center" | Cyan || 1481884|| {{color|#169C9C}}
|-
| style="text-align:center" | Light blue || 3847130 || {{color|#3AB3DA}}
|-
| style="text-align:center" | Blue || 3949738 || {{color|#3C44AA}}
|-
| style="text-align:center" | Purple || 8991416 || {{color|#8932B8}}
|-
| style="text-align:center" | Magenta || 13061821 || {{color|#C74EBD}}
|-
| style="text-align:center" | Pink || 15961002 || {{color|#F38BAA}}
|}
== Sounds ==
{{edition|java}}:
{{Sound table
|rowspan=2
|sound=Dye.ogg
|subtitle=Dye stains
|source=block
|description=When dye is used on a [[sign]]
|id=item.dye.use
|translationkey=subtitles.item.dye.use
|volume=1.0
|pitch=1.0/0.9/0.95/1.1
|distance=16}}
{{Sound table
|subtitle=Dye stains
|source=player
|description=When dye is used on a [[sheep]]
|id=item.dye.use
|translationkey=subtitles.item.dye.use
|volume=1.0
|pitch=1.0/0.9/0.95/1.1
|distance=16
|foot=1}}
{{edition|bedrock}}:
{{Sound table
|type=bedrock
|sound=Dye.ogg
|source=sound
|description=When dye is used on a sign
|id=sign.dye.use
|volume=1.0
|pitch=1.0}}
{{Sound table
|rowspan=3
|sound=Water Splash Old.ogg
|source=block
|description=When dye is added to a cauldron
|id=cauldron.adddye
|volume=0.1
|pitch=1.0}}
{{Sound table
|source=block
|description=When armor is dyed using a cauldron
|id=cauldron.dyearmor
|volume=0.1
|pitch=1.0}}
{{Sound table
|source=block
|description=When dye is removed from armor using a cauldron
|id=cauldron.cleanarmor
|volume=0.1
|pitch=1.0
|foot=1}}
== Achievements ==
{{load achievements|Rainbow Collection;Tie dye outfit}}
== Video ==
{{Video note|These videos are outdated, as it does not include details of the [[Java Edition 1.7.2|1.7.2]] update's changes to the dyeing system/production chain.}}
<div style="text-align:center">
<span style="display:inline-block">{{yt|8YD7oauNZHE}}</span>
<span style="display:inline-block">{{yt|7tETaRt7STM}}</span>
</div>
== History ==
{{History|java beta}}
{{History||January 3, 2011|link=https://web.archive.org/web/0/http://notch.tumblr.com/post/2582321901/2011-here-we-go|Notch mentions adding a "paint" feature if he can figure out how.}}
{{History||January 10, 2011<ref group="n">Supposed time when fragment was filmed. Based on modified date of client.jar/gui/trap.png in [[Beta 1.2]].</ref>|link=https://www.youtube.com/watch?v=cBF2ugTzXqQ&t=181s|[[File:Red Dye (pre-release).png|32px]] Shown rose red in development as part of [[Minecraft: The Story of Mojang]].}}
{{History||1.2|[[File:Ink Sac JE1 BE1.png|32px]] [[File:Red Dye JE1 BE1.png|32px]] [[File:Green Dye JE1 BE1.png|32px]] [[File:Cocoa Beans JE1 BE1.png|32px]] [[File:Lapis Lazuli JE1 BE1.png|32px]] [[File:Purple Dye JE1 BE1.png|32px]] [[File:Cyan Dye JE1 BE1.png|32px]] [[File:Light Gray Dye JE1 BE1.png|32px]] [[File:Gray Dye JE1 BE1.png|32px]] [[File:Pink Dye JE1 BE1.png|32px]] [[File:Lime Dye JE1 BE1.png|32px]] [[File:Yellow Dye JE1 BE1.png|32px]] [[File:Light Blue Dye JE1 BE1.png|32px]] [[File:Magenta Dye JE1 BE1.png|32px]] [[File:Orange Dye JE1 BE1.png|32px]] [[File:Bone Meal JE1 BE1.png|32px]] Added dyes.
|[[File:Black Dye (Recreated).png|32px]] [[File:Red Dye (pre-release).png|32px]] [[File:Green Dye (Recreated).png|32px]] [[File:Brown Dye (Recreated).png|32px]] [[File:Blue Dye (Recreated).png|32px]] [[File:Purple Dye (Recreated).png|32px]] [[File:Cyan Dye (Recreated).png|32px]] [[File:Light Gray Dye (Recreated).png|32px]] [[File:Gray Dye (Recreated).png|32px]] [[File:Pink Dye (Recreated).png|32px]] [[File:Lime Dye (Recreated).png|32px]] [[File:Yellow Dye (Recreated).png|32px]] [[File:Light Blue Dye (Recreated).png|32px]] [[File:Magenta Dye (Recreated).png|32px]] [[File:Orange Dye (Recreated).png|32px]] [[File:White Dye (Recreated).png|32px]] Leftovers of old textures can be seen in [[items.png]] with 100% opacity. The white dye texture was reused for [[Sugar]].
| The colors were as follows:{{verify|Did the color codes remain the same between Beta 1.2 and Java 1.11.2?}}
{{:Color/Java Edition dye colors before 17w06a}}
}}
{{History|java}}
{{History||1.1|snap=11w49a|[[Sheep]] can now regrow their [[wool]] by eating [[grass block|grass]]. Dyed sheep regrow wool in their new color.}}
{{History||1.3.1|snap=12w19a|[[File:Cocoa Beans JE2.png|32px]] The texture of [[cocoa beans]] has been changed.}}
{{History|||snap=1.3|[[File:bone meal changes.gif|32px]] The textures of [[bone meal]], [[cactus green]], cocoa beans and [[rose red]] have been changed. The textures have been lowered one pixel.}}
{{History||1.4.2|snap=12w34a|Added the ability to dye leather [[armor]] and [[wolf]] collars.}}
{{History||1.4.4|snap=1.4.3|Color codes have been changed. The colors of red, brown, blue, purple, cyan, pink, light blue, magenta and orange were adjusted a little vividly.}}
{{History||1.6.1|snap=13w19a|[[Stained clay]] can now be crafted using dyes.}}
{{history||1.7.2|snap=13w36a|With the addition of new [[flower]]s, many secondary and tertiary dyes are now primary dyes.}}
{{History|||snap=13w41a|[[Stained glass]] can now be crafted using dyes.}}
{{History||1.8|snap=14w02a|As cleric [[villager]]s now sell lapis lazuli, all dyes have become fully renewable.}}
{{History|||snap=14w30a|Added [[banner]]s, which can be dyed.}}
{{History||1.9|snap=15w34a|Added [[shield]]s, which can be dyed indirectly by applying a matching [[banner]].}}
{{History||1.11|snap=16w39b|Dyes are now used to change the color of [[shulker box]]es.}}
{{History||1.12|snap=17w06a|Dyes are now used to craft [[concrete powder]].
|Color codes have been changed. All colors are adjusted more vividly. The changes were as follows:
{{:Color/Java Edition dye color changes in 17w06a}}
|Light blue dye, stained glass, and stained glass panes, did not change colors in this update. This means that they still use old colors.<ref name="unchanged dyes">{{Bug|MC-214643}}<br>{{Bug|MC-214641}}</ref>
}}
{{History|||snap=17w15a|Dyes can now apply color to white [[bed]]s.}}
{{History||1.13|snap=17w47a|The different data values for the <code>dye</code> ID have been split up into their own IDs.}}
{{History||1.14|snap=18w43a|[[Bone meal]], [[ink sac]]s, [[cocoa beans]] and [[lapis lazuli]] are no longer considered dyes.
|[[File:White Dye JE1 BE1.png|32px]] [[File:Black Dye JE1 BE1.png|32px]] [[File:Brown Dye JE1 BE1.png|32px]] [[File:Blue Dye JE1 BE1.png|32px]] Added [[white dye|white]], [[black dye|black]], [[brown dye|brown]] and [[blue dye]]s.
|"Rose Red", "Dandelion Yellow" and "Cactus Green" have been renamed to "Red Dye", "Yellow Dye" and "Green Dye", respectively.
|[[Glass pane]]s and [[carpet]]s can now be dyed.
|[[File:Light Gray Dye JE2 BE2.png|32px]] [[File:Gray Dye JE2 BE2.png|32px]] [[File:Red Dye JE2 BE2.png|32px]] [[File:Orange Dye JE2 BE2.png|32px]] [[File:Yellow Dye JE2 BE2.png|32px]] [[File:Lime Dye JE2 BE2.png|32px]] [[File:Green Dye JE2 BE2.png|32px]] [[File:Cyan Dye.png|32px]] [[File:Light Blue Dye JE2 BE2.png|32px]] [[File:Purple Dye JE2 BE2.png|32px]] [[File:Magenta Dye JE2 BE2.png|32px]] [[File:Pink Dye JE2 BE2.png|32px]] The textures of light gray, gray, red, orange, yellow, lime, green, cyan, light blue, purple, magenta, and pink dyes, have been changed. The color texture for light blue dye was not changed to reflect the updated colors from 1.12.<ref name="unchanged dyes"></ref>}}
{{History|||snap=18w44a|The color of the text on [[sign]]s can now be changed with dye.}}
{{History|||snap=18w49a|Yellow dyes can now be found in [[chest]]s in [[village]] mason houses.}}
{{History|||snap=18w50a|Green dyes can now be found in [[chest]]s in [[desert]] [[village]] houses.}}
{{History|||snap=19w05a|Added the [[wandering trader]], which can sell any type of dye.}}
{{History|||snap=19w11a|All 16 types of dyes can now be [[trading|bought]] by shepherd villagers.}}
{{History||1.16.2|snap=Pre-release 2|Reversed the order of dyes to match other colored items in the [[Creative inventory]].<ref name="reverse dye">{{Bug|MC-136553}}</ref>
|Regrouped dyes in the Creative inventory such that white, blue, brown, and black dyes are within and not [[cocoa beans]], [[ink sacs]], [[lapis lazuli]], and [[bone meal]].<ref name="regroup dye">{{Bug|MC-177684}}</ref>}}
{{History||1.17|snap=20w45a|Added [[candle]]s, which can be dyed.}}
{{History|||snap=21w03a|Added a sound for applying dyes.}}
{{History|||snap=21w19a|Candles can no longer be dyed.}}
{{History|||snap=Pre-release 1|Candles can now once again be dyed.}}
{{History||1.20<br>(Experimental)|link=1.19.3|snap=22w42a|The color of the text on [[hanging sign]]s can now be changed with dye.}}
{{History||1.20<br>(Experimental)|link=1.19.4|snap=23w07a|[[Torchflower]]s can now be crafted into orange dye.|[[Pink petals]] can now be crafted into pink dye.}}
{{History||1.20|snap=23w12a|[[Pitcher plant]]s can now be crafted into cyan dye.|Blue, light blue, orange, white, and yellow dye can now be found in [[suspicious gravel]] and [[suspicious sand]] in [[trail ruins]].}}
{{History|||snap=23w14a|Pitcher plants can now craft two [[cyan dye]] instead of one.}}
{{History|||snap=23w16a|Blue, light blue, orange, white, and yellow dye no longer generates in [[suspicious sand]] in [[trail ruins]].|Due to the split of the archaeological loot tables for the suspicious gravel within the [[trail ruins]]; blue, light blue, orange, white, and yellow dye now are in the common loot.}}
{{History|pocket alpha}}
{{History||v0.3.0|[[File:Bone Meal JE1 BE1.png|32px]] [[File:Light Gray Dye JE1 BE1.png|32px]] [[File:Gray Dye JE1 BE1.png|32px]] [[File:Ink Sac JE1 BE1.png|32px]] [[File:Cocoa Beans JE1 BE1.png|32px]] [[File:Red Dye JE1 BE1.png|32px]] [[File:Orange Dye JE1 BE1.png|32px]] [[File:Yellow Dye JE1 BE1.png|32px]] [[File:Lime Dye JE1 BE1.png|32px]] [[File:Green Dye JE1 BE1.png|32px]] [[File:Cyan Dye JE1 BE1.png|32px]] [[File:Light Blue Dye JE1 BE1.png|32px]] [[File:Lapis Lazuli JE1 BE1.png|32px]] [[File:Purple Dye JE1 BE1.png|32px]] [[File:Magenta Dye JE1 BE1.png|32px]] [[File:Pink Dye JE1 BE1.png|32px]] Added dyes. Only [[dandelion yellow]] and [[lapis lazuli]] are currently obtainable and have functionality.}}
{{History||v0.3.2|[[Cactus green]] is now obtainable by smelting [[cacti]].}}
{{History||v0.3.3|[[Bone meal]] is now obtainable via [[crafting]].}}
{{History||v0.4.0|[[Cyan dye]], [[light blue dye]], [[lime dye]], [[magenta dye]], [[orange dye]], [[pink dye]], and [[purple dye]] are now obtainable via crafting.
|[[Rose red]] is now obtainable by smelting red [[mushroom]]s.
|All available dyes, excluding bone meal, can now be used to craft their respective [[wool]] color.}}
{{History||v0.8.0|snap=build 1|[[File:Cocoa Beans JE3 BE2.png|32px]] The texture of cocoa beans has been changed.}}
{{History|||snap=build 3|[[Ink sac]]s, [[cocoa bean]]s, [[gray dye]], and [[light gray dye]] are now available in the [[creative]] [[inventory]].
|Rose red can now be obtained from [[beetroot]]s.}}
{{History||v0.9.0|snap=build 1|Cocoa beans can now be obtained from [[cocoa pod]]s.
|The [[rose]] has been removed and replaced with a new poppy [[flower]] that can be crafted into rose red.}}
{{History|||snap=build 3|All new [[flower]]s can now be [[crafting|crafted]] into dyes. Because of this, many secondary and tertiary dyes are now primary dyes.
|[[Gray dye]] and [[light gray dye]] can now be obtained in [[survival]].}}
{{History|||snap=build 11|[[Terracotta|Stained clay]] can now be crafted using dyes.}}
{{History||v0.11.0|snap=build 1|[[Ink sac]]s can now be obtained from [[squid]].
|Added the ability to dye [[wolf]] collars.}}
{{History||v0.12.1|snap=build 1|Red [[mushroom]]s can no longer be smelted to obtain [[rose red]].}}
{{History||v0.14.0|snap=build 1|[[Cauldron]]s now used for leather dyeing, by applying a dye to a [[water]]-filled cauldron.}}
{{History||v0.16.0|snap=build 1|[[Cocoa bean]]s can no longer be crafted.}}
{{History|pocket}}
{{History||1.0.0|snap=alpha 0.17.0.1|Added a ''Dye'' button for [[sheep]].
|Added [[shulker]]s, which can be dyed.
|Added [[stained glass]]. Stain glass cannot be [[crafting|crafted]], but purple glass generates in [[end city|end cities]].}}
{{History||1.1.0|snap=alpha 1.1.0.0|Dyes can now apply color to a white [[bed]]s.
|Dyes are now used to craft [[concrete powder]].
|The color palette has been changed.}}
{{History|bedrock}}
{{History||1.2.0|snap=beta 1.2.0.2|Dyes can now be used for [[banner]] crafting.
|Dyes can now be used to craft [[firework star]]s.
|[[Stained glass]] is now [[crafting|craftable]], using dyes.}}
{{History||1.4.0|snap=beta 1.2.20.1|[[Lime dye]] can now be obtained from smelting [[sea pickle]]s.
|Dyes can now used to craft [[glow stick]]s and [[balloon]]s.}}
{{History||1.8.0|snap=beta 1.8.0.8|Dyes can now be used to dye [[cat]] collars.}}
{{History|||snap=beta 1.8.0.10|[[File:White Dye JE1 BE1.png|32px]] [[File:Black Dye JE1 BE1.png|32px]] [[File:Brown Dye JE1 BE1.png|32px]] [[File:Blue Dye JE1 BE1.png|32px]] Added [[white dye|white]], [[brown dye|brown]], [[black dye|black]] and [[blue dye]]s, which can be crafted from [[lapis lazuli]], [[bone meal]], [[cocoa beans]] and [[ink sac]]s. This, however, the later four still use as dyes.<ref>{{Bug|MCPE-42473}}</ref>
|"Rose Red", "Dandelion Yellow" and "Cactus Green" have been renamed to "Red Dye", "Yellow Dye" and "Green Dye", respectively.}}
{{History||1.9.0|snap=beta 1.9.0.0|Blue and white dye can now be obtained from [[cornflower]]s and [[lily of the valley]]s.}}
{{History||1.10.0|snap=beta 1.10.0.3|[[Glass pane]]s and [[carpet]]s can now be dyed.
|Only a single dye is now required to apply a banner pattern in a [[loom]].
|Various dyes except black dye, white dye, brown dye and blue dye are now [[trading|sold]] by [[wandering trader]]s.
|[[File:Bone Meal JE2 BE2.png|32px]] [[File:Light Gray Dye JE2 BE2.png|32px]] [[File:Gray Dye JE2 BE2.png|32px]] [[File:Ink Sac JE2 BE2.png|32px]] [[File:Cocoa Beans JE4 BE3.png|32px]] [[File:Red Dye JE3 BE3.png|32px]] [[File:Orange Dye JE2 BE2.png|32px]] [[File:Yellow Dye JE2 BE2.png|32px]] [[File:Lime Dye JE2 BE2.png|32px]] [[File:Green Dye JE2 BE2.png|32px]] [[File:Cyan Dye.png|32px]] [[File:Light Blue Dye JE2 BE2.png|32px]] [[File:Lapis Lazuli JE2 BE2.png|32px]] [[File:Purple Dye JE2 BE2.png|32px]] [[File:Magenta Dye JE2 BE2.png|32px]] [[File:Pink Dye JE2 BE2.png|32px]] The textures of bone meal, light gray, gray, ink sac, cocoa beans, red, orange, yellow, lime, green, cyan, light blue, lapis lazuli, purple, magenta, and pink dyes have been changed.}}
{{History||1.11.0|snap=beta 1.11.0.4|Dye can now be [[trading|sold]] to shepherd [[villager]]s.}}
{{History||1.16.210|snap=beta 1.16.210.59|The color of the text on [[sign]]s can now be changed with dye.}}
{{History|||snap=beta 1.16.210.60|The ability to dye the color of the text on [[sign]]s was temporarily removed.}}
{{History||1.16.220|snap=beta 1.16.220.50|The color of the text on [[sign]]s can now be changed with dye again.}}
{{History||1.17.10|snap=beta 1.17.10.22|Added [[candles]], which can be dyed.}}
{{History|console}}
{{History||xbox=TU1|xbone=CU1|ps=1.0|wiiu=Patch 1|switch=1.0.1|[[File:Bone Meal JE1 BE1.png|32px]] [[File:Light Gray Dye JE1 BE1.png|32px]] [[File:Gray Dye JE1 BE1.png|32px]] [[File:Ink Sac JE1 BE1.png|32px]] [[File:Cocoa Beans JE1 BE1.png|32px]] [[File:Red Dye JE1 BE1.png|32px]] [[File:Orange Dye JE1 BE1.png|32px]] [[File:Yellow Dye JE1 BE1.png|32px]] [[File:Lime Dye JE1 BE1.png|32px]] [[File:Green Dye JE1 BE1.png|32px]] [[File:Cyan Dye JE1 BE1.png|32px]] [[File:Light Blue Dye JE1 BE1.png|32px]] [[File:Lapis Lazuli JE1 BE1.png|32px]] [[File:Purple Dye JE1 BE1.png|32px]] [[File:Magenta Dye JE1 BE1.png|32px]] [[File:Pink Dye JE1 BE1.png|32px]] Added dyes.}}
{{History||xbox=TU9|[[File:Cocoa Beans JE3 BE2.png|32px]] The texture of cocoa beans has been changed.}}
{{History||xbox=none|xbone=none|ps=1.83|wiiu=none|switch=none|[[File:White Dye JE1 BE1.png|32px]] [[File:Black Dye JE1 BE1.png|32px]] [[File:Brown Dye JE1 BE1.png|32px]] [[File:Blue Dye JE1 BE1.png|32px]] Added [[white dye|white]], [[black dye|black]], [[brown dye|brown]], and [[blue dye|blue]] dyes, which can crafted from [[bone meal]], [[ink sac]], [[cocoa beans]], and [[lapis lazuli]].
|"Rose Red", "Dandelion Yellow" and "Cactus Green" have been renamed to "Red Dye", "Yellow Dye" and "Green Dye", respectively.}}
{{History||ps=1.90|[[File:Bone Meal JE2 BE2.png|32px]] [[File:Light Gray Dye JE2 BE2.png|32px]] [[File:Gray Dye JE2 BE2.png|32px]] [[File:Ink Sac JE2 BE2.png|32px]] [[File:Cocoa Beans JE4 BE3.png|32px]] [[File:Red Dye JE2 BE2.png|32px]] [[File:Orange Dye JE2 BE2.png|32px]] [[File:Yellow Dye JE2 BE2.png|32px]] [[File:Lime Dye JE2 BE2.png|32px]] [[File:Green Dye JE2 BE2.png|32px]] [[File:Cyan Dye.png|32px]] [[File:Light Blue Dye JE2 BE2.png|32px]] [[File:Lapis Lazuli JE2 BE2.png|32px]] [[File:Purple Dye JE2 BE2.png|32px]] [[File:Magenta Dye JE2 BE2.png|32px]] [[File:Pink Dye JE2 BE2.png|32px]] The textures of bone meal, light gray, gray, ink sac, cocoa beans, red, orange, yellow, lime, green, cyan, light blue, lapis lazuli, purple, magenta, and pink dyes have been changed.}}
{{History|3ds}}
{{History||0.1.0|[[File:Bone Meal JE1 BE1.png|32px]] [[File:Light Gray Dye JE1 BE1.png|32px]] [[File:Gray Dye JE1 BE1.png|32px]] [[File:Ink Sac JE1 BE1.png|32px]] [[File:Cocoa Beans JE3 BE2.png|32px]] [[File:Red Dye JE1 BE1.png|32px]] [[File:Orange Dye JE1 BE1.png|32px]] [[File:Yellow Dye JE1 BE1.png|32px]] [[File:Lime Dye JE1 BE1.png|32px]] [[File:Green Dye JE1 BE1.png|32px]] [[File:Cyan Dye JE1 BE1.png|32px]] [[File:Light Blue Dye JE1 BE1.png|32px]] [[File:Lapis Lazuli JE1 BE1.png|32px]] [[File:Purple Dye JE1 BE1.png|32px]] [[File:Magenta Dye JE1 BE1.png|32px]] [[File:Pink Dye JE1 BE1.png|32px]] Added dyes from [[Pocket Edition v0.15.4 alpha]].}}
{{History|foot}}
<gallery>
Pre-release dyes.png|Pre-release dye textures hidden within [[Items.png]].
</gallery>
;Notes
{{reflist|group=n}}
== Gallery ==
<gallery>
White Dye.png|White Dye
Light Gray Dye.png|Light Gray Dye
Gray Dye.png|Gray Dye
Black Dye.png|Black Dye
Brown Dye.png|Brown Dye
Red Dye.png|Red Dye
Orange Dye.png|Orange Dye
Yellow Dye.png|Yellow Dye
Lime Dye.png|Lime Dye
Green Dye.png|Green Dye
Cyan Dye.png|Cyan Dye
Light Blue Dye.png|Light Blue Dye
Blue Dye.png|Blue Dye
Purple Dye.png|Purple Dye
Magenta Dye.png|Magenta Dye
Pink Dye.png|Pink Dye
</gallery>
==Issues==
{{issue list}}
== Trivia ==
* Players can obtain each one of every color with 1 cocoa bean, 2 yellow dye, 2 ink sac, 3 green dye, 4 lapis lazuli, 4 red dye, and 6 bone meal (2 bones).
* The dyed sheep breeding behavior mirrors [[wikipedia:Lamarckism|Lamarck's theory]], in which the organisms evolve inheriting the external changes and adaptations of the previous generation, transmitting them to their offspring.
* In ''Bedrock Edition'', tertiary colors, along with their regular crafting recipes, can be crafted with primary colors. E.g.: Magenta can be crafted with one rose red and two bone meals.
* The colors of the dyes match the chat colors in [[color codes]] except for brown (dye only), light aqua, and gold (color codes only).
* The texture for light blue dye still uses the color from prior to the 1.12 World of Color update.<ref name="unchanged dyes"></ref>
== References ==
{{reflist}}
== External Links ==
* Tools for calculating leather dye combination: [https://minecraft.tools/en/armor.php minecraft.tools] (webapp); [https://github.com/pudquick/pyMCdyes/ pyMCDyes] (open-source Python script, outdated); [https://anrar4.github.io/DyeLeatherArmor/ DyeLeatherArmor]: a tool for calculating an exact crafting recipe for any sRGB color
{{Items}}
[[Category:Dyes]]
[[Category:Renewable resources]]
[[cs:Barvivo]]
[[de:Farbstoff]]
[[es:Tinte]]
[[fr:Teinture]]
[[hu:Színezés]]
[[it:Colorante]]
[[ja:染料]]
[[ko:염료]]
[[nl:Kleurstof]]
[[pl:Barwniki]]
[[pt:Corante]]
[[ru:Красители]]
[[th:สีย้อม]]
[[uk:Барвники]]
[[zh:染料]]</li><li>[[Helmet|Helmet]]<br/>{{Update|Include information about armor trims and updated netherite upgrade information.}}
{{redirect|Cap|mob spawning caps|Spawn}}
{{redirect|Turtle Shell|the item dropped by maturing turtles|Scute}}
{{Item
| image = <gallery>
Leather Cap.png| Leather
Chainmail Helmet.png| Chainmail
Iron Helmet.png| Iron
Diamond Helmet.png| Diamond
Golden Helmet.png| Golden
Netherite Helmet.png| Netherite
Turtle Shell.png| Turtle Shell
</gallery>
| durability =
* Leather: 55
* Chainmail: 165
* Iron: 165
* Golden: 77
* Diamond: 363
* Netherite: 407
* Turtle Shell: 275
| renewable =
* '''Netherite''': No
* '''All others''': Yes
| stackable = No
}}
'''Helmets''' are a type of [[armor]] that covers the head of the player. There are seven types of helmets: '''leather cap''', '''chainmail helmet''', '''iron helmet''', '''diamond helmet''', '''gold helmet''', '''netherite helmet''', and '''turtle shell'''.
==Obtaining ==
===Crafting===
{{crafting
|head=1
|showname=0
|showdescription=1
|name=Helmet
|A2= Leather;Gold Ingot;Iron Ingot;Diamond;Scute
|B2= Leather;Gold Ingot;Iron Ingot;Diamond;Scute
|C2= Leather;Gold Ingot;Iron Ingot;Diamond;Scute
|A3= Leather;Gold Ingot;Iron Ingot;Diamond;Scute
|C3= Leather;Gold Ingot;Iron Ingot;Diamond;Scute
|description=
|Output= Leather Cap;Golden Helmet;Iron Helmet;Diamond Helmet;Turtle Shell
|type= Combat
}}
{{crafting
|ignoreusage=1
|name=[[Helmet]]
|ingredients=Damaged matching helmet
|Damaged Leather Cap; Damaged Golden Helmet; Damaged Chainmail Helmet; Damaged Iron Helmet; Damaged Diamond Helmet; Damaged Turtle Shell; Damaged Netherite Helmet
|Damaged Leather Cap; Damaged Golden Helmet; Damaged Chainmail Helmet; Damaged Iron Helmet; Damaged Diamond Helmet; Damaged Turtle Shell; Damaged Netherite Helmet
|Output= Leather Cap; Golden Helmet; Chainmail Helmet; Iron Helmet; Diamond Helmet; Turtle Shell; Netherite Helmet
|description= The durability of the two helmets is added together, plus an extra 5% durability.
|type= Combat
|foot=1
}}
===Upgrading===
{{Smithing
|head=1
|Netherite Upgrade
|Diamond Helmet
|Netherite Ingot
|Netherite Helmet
|tail=1
}}
===Repairing===
====Grinding====
{{Grinding
|showdescription=1
|ingredients=2x Damaged [[Leather Cap]] or<br>2x Damaged [[Chainmail Helmet]] or<br>2x Damaged [[Iron Helmet]] or<br>2x Damaged [[Golden Helmet]] or<br>2x Damaged [[Diamond Helmet]] or<br>2x Damaged [[Netherite Helmet]] or<br>2x Damaged [[Turtle Shell]]
|Damaged Leather Cap; Damaged Chainmail Helmet; Damaged Iron Helmet; Damaged Golden Helmet; Damaged Diamond Helmet; Damaged Netherite Helmet; Damaged Turtle Shell
|Damaged Leather Cap; Damaged Chainmail Helmet; Damaged Iron Helmet; Damaged Golden Helmet; Damaged Diamond Helmet; Damaged Netherite Helmet; Damaged Turtle Shell
|Leather Cap; Chainmail Helmet; Iron Helmet; Golden Helmet; Diamond Helmet; Netherite Helmet; Turtle Shell
|description=The durability of the two helmets are added together, plus an extra 5% durability.
}}
====[[Anvil mechanics#Unit repair|Unit repair]]====
Helmets can be repaired in an [[anvil]] by adding units of the [[armor material]]'s repair material, with each repair material restoring 25% of the helmet's maximum durability, rounded down.
===Mob loot===
If a [[zombie]], [[husk]], [[stray]] or [[skeleton]] is wearing armor, there is a 8.5% chance (9.5% with [[Looting]] I, 10.5% with Looting II and 11.5% with Looting III) for the mob to drop a helmet upon death. The dropped helmet is usually badly damaged, and may be [[enchanted]] with enchantment levels 5-19.
{{IN|bedrock}}, [[vindicator]]s and [[pillager]]s spawned in [[raid]]s have a 8.3525% chance (10.28% on hard) to drop [[iron]] helmets. The dropped helmets are usually badly damaged, and have a 50% chance of being [[enchanted]] with a random [[enchantment]].
===Natural generation===
Two [[armor stand]]s are found in each taiga [[village]] outdoor armory, one of them equipped with an [[iron helmet]].
===Chest loot===
{{IN|BE}}, a sealed room in [[woodland mansion]]s can appear that has a chest sometimes containing an [[Efficiency]] I leather cap.<ref>{{bug|MCPE-109048}}</ref>
{{LootChestItem|leather-cap,random-enchanted-leather-cap,chainmail-helmet,iron-helmet,level-enchanted-iron-helmet,golden-helmet,random-enchanted-golden-helmet,diamond-helmet,damaged-diamond-helmet,level-enchanted-diamond-helmet,damaged-random-enchanted-diamond-helmet,damaged-random-enchanted-diamond-helmet-2}}
===Trading===
{{IN|java}}, novice-level armorer villagers have a 40% chance to sell an iron helmet for 4 emeralds. Journeyman-level armorers have a 40% chance to sell a chainmail helmet for 1 emerald. Master-level armorers always sell an enchanted diamond helmet for 11-27 emeralds. Apprentice-level leatherworker villagers have a {{frac|2|3}} chance to sell a leather cap<ref group="note" name="dye note">The leather armor has a random color created by two dyes (possibly the same dye twice.)</ref> for 5 emeralds. Master-level leatherworker villagers offer the same trade.
Armorer villagers may give the players with the [[Hero of the Village]] effect a chainmail helmet.
{{IN|bedrock}}, novice-level armorer villagers have a 25% chance to sell iron helmet for 5 emeralds, {{frac|1|3}} chance to sell chainmail helmet at journeyman-level for an emerald, and 50% chance to sell enchanted diamond helmet for 8 emeralds at master-level. Apprentice-level leatherworker villagers have a 50% chance to sell leather cap for 5 emeralds as part of their trades, and 50% chance to sell an enchanted leather cap for 5 emeralds at the master level.
{{notelist|columns=1}}
==Usage ==
Helmets can be placed in the top armor slot of a player's [[inventory]] for activation.
===Defense points===
Defense points are each signified by half of a shirt of mail in the armor bar above the health bar. Each defense point reduces any damage dealt to the player that is absorbed by armor by 4%, increasing additively with the number of defense points. Different materials and combinations of armor provide different levels of defense.
The following table shows the number of defense points added by helmets.
{| class="wikitable" data-description="Helmet defense points"
|-
! scope="col" |Material
! scope="col" |
|-
! scope="row" |Leather
|{{armor|1}}
|-
! scope="row" |Golden
| rowspan="4" |{{armor|2}}
|-
! scope="row" |Chainmail
|-
! scope="row" |Iron
|-
! scope="row" |Turtle Shell
|-
! scope="row" |Diamond
| rowspan="2" |{{armor|3}}
|-
! scope="row" |Netherite
|}
===Knockback resistance===
A netherite helmet provides 10% knockback resistance.
===Durability===
The following table shows the amount of damage each piece of armor can absorb before being destroyed.
Any "hit" from a damage source that can be blocked by armor removes one point of durability from each piece of armor worn for every {{hp|4}} of incoming damage (rounded down, but never below 1). Damage taken that armor doesn't protect (such as [[Damage#Fall damage|falling]] or [[Damage#Drowning|drowning]]) does not damage the armor, even if it is enchanted to protect against that type of damage. The following chart displays how many hits helmets can endure.
Netherite armor is not damaged by [[lava]] or [[fire]] when worn.
{| class="wikitable" data-description="Helmet durability"
|-
!Material
!Durability
|-
! scope="row" |Leather
|55
|-
! scope="row" |Golden
|77
|-
! scope="row" |Chainmail
| rowspan="2" |165
|-
! scope="row" |Iron
|-
! scope="row" |Turtle Shell
|275
|-
! scope="row" |Diamond
|363
|-
! scope="row" |Netherite
|407
|}
====Repair====
Helmets may be [[item repair|repaired]] by using them along with some of their crafting material (leather, gold ingots, iron ingots, diamonds or netherite) in an [[anvil]]. Chainmail helmets may be repaired in this way with iron ingots. They may also be repaired by crafting them together with another helmet of like material.
===Enchantments===
A helmet can receive the following [[enchantment]]s. Note that while iron and chainmail have the same durability, chainmail has a higher [[Tutorials/Enchanting mechanics#Enchantability|enchantability]] than iron or diamond.
{| class="wikitable"
|-
!Enchantment !!Max Level !!Notes
|-
|[[Fire Protection]]|| IV ||<ref group="note" name="exclusive">Fire Protection, Blast Protection, Projectile Protection and Protection are mutually exclusive</ref>
|-
|[[Projectile Protection]]|| IV ||<ref group="note" name="exclusive" />
|-
|[[Blast Protection]]|| IV ||<ref group="note" name="exclusive" />
|-
|[[Protection]]|| IV ||<ref group="note" name="exclusive" />
|-
|[[Unbreaking]]||III
|
|-
|[[Respiration]]||III
|
|-
|[[Aqua Affinity]]||I
|
|-
|[[Thorns]]||III ||<ref group="note" name="anvil">Only from using an [[anvil]] and [[enchanted book]]s.</ref>
|-
|[[Mending]]||I ||<ref group="note" name="anvil2">Only from chest loot, fishing, or an anvil and enchanted books.</ref>
|-
|[[Curse of Binding]]||I ||<ref group="note" name="anvil2" />
|-
|[[Curse of Vanishing]]||I ||<ref group="note" name="anvil2" />
|}
{{notelist}}
===Turtle shell effect===
Equipping a {{ItemSprite|Turtle Shell}} turtle shell provides the {{EffectLink|Water Breathing}} status effect, allowing the player to remain underwater for an additional 10 seconds. The time that this effect lasts does not begin to count down until the player dives underwater, then the 10 seconds are counted down. The effect immediately recharges after exposure to air.
===Brewing ingredient===
A turtle shell can also be used as a potion brewing ingredient.
{{Brewing
|Turtle Shell
|Potion of the Turtle Master
|Potion of the Turtle Master
|Potion of the Turtle Master
|showname=1
}}
===Smelting usage===
{{Smelting|showname=1|Iron Helmet;Chainmail Helmet;Golden Helmet|Iron Nugget;Iron Nugget;Gold Nugget|0,1}}
===Piglins===
{{EntityLink|Piglin|Piglins}} are attracted to ''golden'' helmets and pick them up, examining them for 6 to 8 seconds. Piglins can wear other helmets but are not attracted to them. They prefer stronger helmets over weaker helmets, with one exception: They always prefer golden helmets, throwing out stronger helmets in favor of gold helmets. Enchanted helmets are preferred over unenchanted helmets.
==Sounds ==
{{el|je}}:
{{Sound table
|sound=Equip leather1.ogg
|sound2=Equip leather2.ogg
|sound3=Equip leather3.ogg
|sound4=Equip leather4.ogg
|sound5=Equip leather5.ogg
|sound6=Equip leather6.ogg
|subtitle=Leather armor rustles
|source=player
|description=When a leather helmet is equipped
|id=item.armor.equip_leather
|translationkey=subtitles.item.armor.equip_leather
|volume=1.0
|pitch=1.0
|distance=16}}
{{Sound table
|sound=Equip chain1.ogg
|sound2=Equip chain2.ogg
|sound3=Equip chain3.ogg
|sound4=Equip chain4.ogg
|sound5=Equip chain5.ogg
|sound6=Equip chain6.ogg
|subtitle=Chain armor jingles
|source=player
|description=When a chainmail helmet is equipped
|id=item.armor.equip_chain
|translationkey=subtitles.item.armor.equip_chain
|volume=1.0
|pitch=1.0
|distance=16}}
{{Sound table
|sound=Equip iron1.ogg
|sound2=Equip iron2.ogg
|sound3=Equip iron3.ogg
|sound4=Equip iron4.ogg
|sound5=Equip iron5.ogg
|sound6=Equip iron6.ogg
|subtitle=Iron armor clanks
|source=player
|description=When an iron helmet is equipped
|id=item.armor.equip_iron
|translationkey=subtitles.item.armor.equip_iron
|volume=1.0
|pitch=1.0
|distance=16}}
{{Sound table
|sound=Equip gold1.ogg
|sound2=Equip gold2.ogg
|sound3=Equip gold3.ogg
|sound4=Equip gold4.ogg
|sound5=Equip gold5.ogg
|sound6=Equip gold6.ogg
|subtitle=Gold armor clinks
|source=player
|description=When a gold helmet is equipped
|id=item.armor.equip_gold
|translationkey=subtitles.item.armor.equip_gold
|volume=1.0
|pitch=1.0
|distance=16}}
{{Sound table
|sound=Equip diamond1.ogg
|sound2=Equip diamond2.ogg
|sound3=Equip diamond3.ogg
|sound4=Equip diamond4.ogg
|sound5=Equip diamond5.ogg
|sound6=Equip diamond6.ogg
|subtitle=Diamond armor clangs
|source=player
|description=When a diamond helmet is equipped
|id=item.armor.equip_diamond
|translationkey=subtitles.item.armor.equip_diamond
|volume=1.0
|pitch=1.0
|distance=16}}
{{Sound table
|sound=Equip netherite1.ogg
|sound2=Equip netherite2.ogg
|sound3=Equip netherite3.ogg
|sound4=Equip netherite4.ogg
|subtitle=Netherite armor clanks
|source=player
|description=When a netherite helmet is equipped
|id=item.armor.equip_netherite
|translationkey=subtitles.item.armor.equip_netherite
|volume=0.8
|pitch=1.0/0.9
|distance=16}}
{{Sound table
|sound=Equip turtle shell.ogg
|subtitle=Turtle Shell thunks
|source=player
|description=When a turtle shell is equipped
|id=item.armor.equip_turtle
|translationkey=subtitles.item.armor.equip_turtle
|volume=1.0
|pitch=1.0/0.85/1.1
|distance=16}}
{{Sound table
|sound=Random break.ogg
|subtitle=Item breaks
|source=dependent
|description=When a helmet's durability is exhausted
|id=entity.item.break
|translationkey=subtitles.entity.item.break
|volume=0.8
|pitch=0.8-1.2
|distance=16
|foot=1}}
{{el|be}}:
{{Sound table
|type=bedrock
|sound=Equip leather1.ogg
|sound2=Equip leather2.ogg
|sound3=Equip leather3.ogg
|sound4=Equip leather4.ogg
|sound5=Equip leather5.ogg
|sound6=Equip leather6.ogg
|source=player
|description=When a leather helmet or a turtle shell is equipped
|id=armor.equip_leather
|volume=1.0
|pitch=1.0}}
{{Sound table
|sound=Equip chain1.ogg
|sound2=Equip chain2.ogg
|sound3=Equip chain3.ogg
|sound4=Equip chain4.ogg
|sound5=Equip chain5.ogg
|sound6=Equip chain6.ogg
|source=player
|description=When a chain helmet is equipped
|id=armor.equip_chain
|volume=1.0
|pitch=1.0}}
{{Sound table
|sound=Equip iron1.ogg
|sound2=Equip iron2.ogg
|sound3=Equip iron3.ogg
|sound4=Equip iron4.ogg
|sound5=Equip iron5.ogg
|sound6=Equip iron6.ogg
|source=player
|description=When an iron helmet is equipped
|id=armor.equip_iron
|volume=1.0
|pitch=1.0}}
{{Sound table
|sound=Equip gold1.ogg
|sound2=Equip gold2.ogg
|sound3=Equip gold3.ogg
|sound4=Equip gold4.ogg
|sound5=Equip gold5.ogg
|sound6=Equip gold6.ogg
|source=player
|description=When a gold helmet is equipped
|id=armor.equip_gold
|volume=1.0
|pitch=1.0}}
{{Sound table
|sound=Equip diamond1.ogg
|sound2=Equip diamond2.ogg
|sound3=Equip diamond3.ogg
|sound4=Equip diamond4.ogg
|sound5=Equip diamond5.ogg
|sound6=Equip diamond6.ogg
|source=player
|description=When a diamond helmet is equipped
|id=armor.equip_diamond
|volume=1.0
|pitch=1.0}}
{{Sound table
|sound=Equip netherite1.ogg
|sound2=Equip netherite2.ogg
|sound3=Equip netherite3.ogg
|sound4=Equip netherite4.ogg
|source=player
|description=When a netherite helmet is equipped.
|id=armor.equip_netherite
|volume=1.0
|pitch=1.0}}
{{Sound table
|rowspan=2
|sound=Water Splash Old.ogg
|source=block
|description=When a leather helmet is dyed using a cauldron
|id=cauldron.dyearmor
|volume=0.1
|pitch=1.0}}
{{Sound table
|source=block
|description=When a leather helmet's dye is removed using a cauldron
|id=cauldron.cleanarmor
|volume=0.1
|pitch=1.0}}
{{Sound table
|sound=Random break.ogg
|source=player
|description=When a helmet's durability is exhausted
|id=random.break
|volume=1.0
|pitch=0.9
|foot=1}}
==Data values ==
=== ID===
{{edition|java}}:
{{ID table
|edition=java
|showitemtags=y
|showforms=y
|generatetranslationkeys=y
|displayname=Leather Cap
|spritetype=item
|nameid=leather_helmet
|itemtags=freeze_immune_wearables
|form=item}}
{{ID table
|displayname=Chainmail Helmet
|spritetype=item
|nameid=chainmail_helmet
|form=item}}
{{ID table
|displayname=Iron Helmet
|spritetype=item
|nameid=iron_helmet
|form=item}}
{{ID table
|displayname=Diamond Helmet
|spritetype=item
|nameid=diamond_helmet
|form=item}}
{{ID table
|displayname=Golden Helmet
|spritetype=item
|nameid=golden_helmet
|form=item}}
{{ID table
|displayname=Netherite Helmet
|spritetype=item
|nameid=netherite_helmet
|form=item}}
{{ID table
|displayname=Turtle Shell
|spritetype=item
|nameid=turtle_helmet
|form=item
|foot=1}}
{{edition|bedrock}}:
{{ID table
|edition=bedrock
|shownumericids=y
|showforms=y
|notshowbeitemforms=y
|generatetranslationkeys=y
|displayname=Leather Cap
|spritetype=item
|nameid=leather_helmet
|id=335
|form=item}}
{{ID table
|displayname=Chainmail Helmet
|spritetype=item
|nameid=chainmail_helmet
|id=339
|form=item}}
{{ID table
|displayname=Iron Helmet
|spritetype=item
|nameid=iron_helmet
|id=343
|form=item}}
{{ID table
|displayname=Diamond Helmet
|spritetype=item
|nameid=diamond_helmet
|id=347
|form=item}}
{{ID table
|displayname=Golden Helmet
|spritetype=item
|nameid=golden_helmet
|id=351
|form=item}}
{{ID table
|displayname=Netherite Helmet
|spritetype=item
|nameid=netherite_helmet
|id=609
|form=item}}
{{ID table
|displayname=Turtle Shell
|spritetype=item
|nameid=turtle_helmet
|id=573
|form=item
|foot=1}}
===Item data===
When leather caps are dyed, it has the following NBT:
<div class="treeview">
*{{nbt|compound|tag}}: Parent tag.
**{{nbt|compound|display}}: Display properties.
***{{nbt|int|color}}: The color of the leather armor. The tooltip displays "Dyed" if advanced tooltips are disabled, otherwise it displays the hexadecimal color value. Color codes are calculated from the Red, Green and Blue components using this formula:<br>'''<span style="color:red">Red</span>[[wikipedia:Logical shift|<<]]16 + <span style="color:green">Green</span><<8 + <span style="color:blue">Blue</span>'''<ref>For positive values larger than 0x00FFFFFF, the top byte is ignored. All negative values produce white.</ref>
</div>
==Achievements ==
{{load achievements|Iron Man;Tie Dye Outfit;Cover me in debris;Oooh, shiny!}}
==Advancements ==
{{load advancements|Suit Up;Cover me With Diamonds;Oh Shiny;Cover Me in Debris;A Furious Cocktail;How Did We Get Here}}
==History ==
{{History|java classic}}
{{History||August 13, 2009|link=wordofnotch:162091556|Notch tested armor models on [[mob (entity)|mob]]. Only [[chestplate]]s and helmets were available. They were merely aesthetic at the time and had no effect on gameplay.}}
{{History||0.24_SURVIVAL_TEST|[[File:Plate Helmet.png|32px]] Added [[Java_Edition_removed_features#Armor_in_Survival_Test|plate helmet]]s.
|[[File:Chainmail Helmet JE1.png|32px]] Added the model and the texture for unused [[Java_Edition_removed_features#Armor_in_Survival_Test|chain helmet]]s.
|[[File:Zombie full set.png|32px]] [[File:Skeleton helmet.png|26px]] Plate armor models have been tested on [[zombie]]s and [[skeleton]]s. It had no effect on gameplay.}}
{{History|java indev}}
{{History||0.31|snap=20091223-1|Plate and chain armor [[model]]s are no longer used.}}
{{History|||snap=20091231-2|[[File:Leather Cap (item) JE1 BE1.png|32px]] [[File:Studded Helmet (item) JE1.png|32px]] [[File:Chainmail Helmet (item) JE1 BE1.png|32px]] [[File:Iron Helmet (item) JE1 BE1.png|32px]] Added [[item]]s of relation to leather, [[History of textures/Unused textures#Studded armor|studded]], chainmail and plate (iron) helmets.
|The textures of leather helmets are taken from one of [[Notch]]'s previous games, ''[[Legend of the Chambered]]''. The rest are from ''[[Legend of the Chambered 2]]''.}}
{{History||20100206|[[File:Golden Helmet (item) JE1 BE1.png|32px]] [[File:Diamond Helmet (item) JE1 BE1.png|32px]] Added items of golden and diamond helmets.
|Removed leather-chain helmets.}}
{{History||20100212-1|Added armor models.
|[[File:Indev 20100212 armor.png|50px]] Armor models are now displayed on the [[player]] in the [[inventory]].}}
{{History||20100218|[[File:Leather Cap JE1 BE1.png|32px]] [[File:Chainmail Helmet JE2 BE1.png|32px]] [[File:Iron Helmet JE1 BE1.png|32px]] [[File:Golden Helmet JE1 BE1.png|32px]] [[File:Diamond Helmet JE1 BE1.png|32px]] Added models of leather, chainmail, iron, gold, and diamond helmets.
|Helmets can now be [[crafting|crafted]] and worn.
|Helmets now function. All helmets give {{Armor|3}}. Helmets have limited [[item durability|durability]], with lower tier helmets less durable than higher tier helmets.}}
{{History|java alpha}}
{{History||v1.0.8|With the introduction of [[leather]], "Cloth Cap" has been renamed to "Leather Cap".
|Leather cap is now [[crafting|crafted]] with leather instead of [[wool|cloth]].}}
{{History|java}}
{{History||1.0.0|snap=Beta 1.9 Prerelease|The armor protection behavior has been changed. Prior to this update, the total armor protection is based in this equation: (((''total equipped armor damage reduction'' − 1) × (''all equipped armor max damage'' − ''total equipped armor damage'')) ÷ (''total equipped armor max damage'' + 1)). Armor no longer reduces certain damage types to be covered by enchantments.}}
{{History|||snap=October 3, 2011|slink={{tweet|notch|120859830339637249}}|The first images of a [[player]] wearing enchanted armor are revealed.}}
{{History|||snap=Beta 1.9 Prerelease 3|Iron helmets can now be found in the new [[stronghold]] altar [[chest]]s.}}
{{History|||snap=Beta 1.9 Prerelease 4|Helmets can now be [[enchanting|enchanted]].}}
{{History||1.1|snap=12w01a|Iron helmets can now be found in the new blacksmith [[chest]]s in [[village]]s.}}
{{History||1.2.1|snap=12w06a|[[Zombie]]s now drop iron helmets on rare occasions and [[zombie pigman|zombie pigmen]] now drop golden helmets.}}
{{History||1.3.1|snap=12w15a|{{key|Shift}}+clicking can now be used to wear helmets.}}
{{History|||snap=12w21a|Chain helmets can now be obtained legitimately in [[survival]] mode through [[trading]].
|Blacksmith [[villager]]s now [[trading|sell]] chain helmets for 5–6 emeralds.
|Blacksmith villagers now sell diamond helmets for 7 emeralds.
|Blacksmith villagers now sell iron helmets for 4–5 emeralds.
|Butchers now sell leather caps for 2–3 emeralds.}}
{{History||1.4.2|snap=12w32a|[[Mob]] armor has been reintroduced. A partial or full set of any armor is now sometimes worn by [[zombie]]s, [[skeleton]]s and [[zombified piglins|zombie pigmen]], with the likelihood increasing with difficulty.}}
{{History|||snap=August 17, 2012|slink={{tweet|Dinnerbone|236445090929844225}}|[[Jeb]] and [[Dinnerbone]] tweeted pictures of [[dye]]able leather armor.}}
{{History|||snap=12w34a|Leather helmets can now be dyed by [[crafting]] a leather armor piece with [[dye]]s. Dyes can be removed by {{control|use|text=using}} dyed leather armor on a [[cauldron]] with [[water]].
|[[File:Leather Cap JE2.png|32px]] [[File:Leather Cap (item) JE2.png|32px]] Default leather caps textures are now slightly darker.}}
{{History|||snap=12w36a|[[Dye]]d leather caps are now more saturated and have a slight tint of tan in respect to the default armor color.}}
{{History|||snap=12w37a|[[File:Leather Cap JE3 BE2.png|32px]] [[File:Leather Cap (item) JE3 BE2.png|32px]] Leather armor now has non-dyed parts on the cap. This has been implemented so that [[player]]s can distinguish between other types of helmets and similarly colored leather caps.}}
{{History||1.5|snap=13w04a|Helmets in the [[player]]'s hand can now be equipped by right-clicking.
|[[Dispenser]]s can now equip nearby players with helmets.}}
{{History||1.8|snap=14w02a|[[Trading|Trades]] changed: armorer [[villager]]s now [[trading|sell]] chain helmets for 5–7 emeralds.
|Armorer villagers no longer sell diamond helmets.
|Armorer villagers now sell iron helmets for 4–6 emeralds.
|Leatherworkers no longer sell other leather caps.}}
{{History|||snap=14w05a|Helmets no longer turns red when [[mob]]s and [[player]]s are hurt.}}
{{History|||snap=14w06a|Helmets are now visible on [[giant]]s.}}
{{History|||snap=14w25a|Chain helmets [[Java Edition removed features#Chainmail armor|cannot be crafted anymore]] due to the [[item]] form of [[fire]] being [[Java Edition removed features#Obtainable until 1.8|removed]].}}
{{History||1.9|snap=15w31a|Enchanted iron and diamond helmets can now be found in [[end city]] ship [[chest]]s.
|[[Mob]]s now wear armor from the bottom to the top, rather than from the top to the bottom. This means that a mob with three armor pieces, for example, spawn with all armor except a helmet.}}
{{History|||snap=15w34b|Helmet [[item durability|durability]] now affects armor value.}}
{{History|||snap=15w36a|Armor and armor [[enchanting|enchantment]] calculations have been changed. For the original values, see [[Armor/Before 1.9|here]].}}
{{History|||snap=15w36d|Helmet durability affecting value has been removed.
|Helmets now has an attribute controlling the defense points.}}
{{History|||snap=15w50a|Added <code>equip</code> [[sound]]s for leather armor.}}
{{History|||snap=16w02a|Armor and armor enchantment calculations have been changed again.}}
{{History|||snap=16w05a|Armor calculations have been changed, once again.}}
{{History||1.13|snap=17w47a|Prior to [[1.13/Flattening|''The Flattening'']], these [[item]]s' numeral IDs were 298, 302, 306, 310 and 314.}}
{{History|||snap=18w07a|[[File:Turtle Shell.png|32px]] [[File:Turtle Shell (item) JE1 BE1.png|32px]] Added turtle shells.}}
{{History|||snap=18w09a|Golden helmets now have a chance of generating in [[underwater ruins]].}}
{{History|||snap=18w11a|Enchanted leather caps can now generate in the chests of [[shipwreck]]s.}}
{{History|||snap=18w20a|"Chain Helmet" has now been renamed to "Chainmail Helmet".}}
{{History||1.14|snap=18w43a|[[File:Leather Cap JE4 BE2.png|32px]] [[File:Chainmail Helmet JE3 BE2.png|32px]] [[File:Iron Helmet JE2 BE2.png|32px]] [[File:Golden Helmet JE2 BE2.png|32px]] [[File:Diamond Helmet JE2 BE2.png|32px]]<br>[[File:Leather Cap (item) JE4 BE3.png|32px]] [[File:Chainmail Helmet (item) JE2 BE2.png|32px]] [[File:Iron Helmet (item) JE2 BE2.png|32px]] [[File:Golden Helmet (item) JE2 BE2.png|32px]] [[File:Diamond Helmet (item) JE2 BE2.png|32px]] The textures of all types of helmets have been changed.}}
{{History|||snap=18w48a|Leather caps can now be found in [[chest]]s in [[village]] tanneries.}}
{{History|||snap=18w50a|Iron helmets can now be found on [[armor stand]]s in [[taiga]] villages.}}
{{History|||snap=19w08a|[[File:Golden Helmet (item) JE3 BE3.png|32px]] The textures of gold helmet [[item]]s have been changed.}}
{{History|||snap=19w11a|Armorer villagers now sell enchanted diamond helmets, making diamond helmets effectively [[renewable resource|renewable]] again.
|Leatherworker villagers now sell randomly [[dye]]d leather caps.}}
{{History|||snap=19w13a|Armorer villagers now give chainmail helmets to players under the [[Hero of the Village]] effect.}}
{{History||1.16|snap=20w06a|[[File:Netherite Helmet JE1.png|32px]] [[File:Netherite Helmet (item) JE1.png|32px]] Added netherite helmets.}}
{{History|||snap=20w07a|[[File:Leather piglin helmet.png|32px]] [[File:Chainmail piglin helmet.png|32px]] [[File:Iron piglin helmet.png|32px]] [[File:Golden piglin helmet.png|32px]] [[File:Diamond piglin helmet.png|32px]] [[File:Netherite piglin helmet JE1.png|32px]] Added textures and [[model]]s for all helmets when they are used by [[piglin]]s.
|Netherite helmets are now obtained by combining one diamond armor piece and one netherite ingot in a crafting table.
|[[File:Turtle Shell piglin MC-172110.png|32px]] Turtle shells, when used by piglins and [[zombified piglin]]s, result in a [[missing texture]] when being displayed.<ref>{{Cite bug|MC|172110|Texture of turtle shells is missing when worn by a piglin or zombified piglin|date=February 14, 2020}}</ref>}}
{{History|||snap=20w09a|[[File:Diamond Helmet (item) JE3 BE3.png|32px]] The textures of diamond helmet [[item]]s have been changed.}}
{{History|||snap=20w10a|[[File:Netherite Helmet JE2 BE1.png|32px]] [[File:Netherite Helmet (item) JE2 BE1.png|32px]] The texture of netherite helmets has been changed.
|[[File:Netherite piglin helmet.png|32px]] The texture of netherite helmets for [[piglin]]s has been changed.
|Netherite helmets can no longer be [[crafting|crafted]].
|Netherite helmets are now obtained by combining one diamond helmet and one netherite ingot in a [[smithing table]].}}
{{History|||snap=20w16a|Golden and netherite helmets now generate randomly [[enchanting|enchanted]], and sometimes [[damage]]d, in [[bastion remnant]] and [[ruined portal]] chests.}}
{{History|||snap=20w17a|Diamonds helmets now generate in place of netherite helmets in bastion remnant [[chest]]s.}}
{{History|||snap=pre3|The special helmet [[model]]s and textures created for [[piglin]]s have been removed except for leather helmets.}}
{{History||1.17|snap=20w48a|Wearing a leather helmet now prevents [[Powder Snow#Freezing|freezing]] entirely.}}
{{History|||snap=21w13a|The two unused textures of the leather cap for [[piglin]]s<ref><code>/assets/minecraft/textures/models/armor/piglin_leather_layer_1.png</code></ref><ref><code>/assets/minecraft/textures/models/armor/piglin_leather_layer_1_overlay.png</code></ref> have been removed.}}
{{History||1.18.2|snap=22w03a|Netherite helmet knockback resistance is no longer random.}}
{{History||1.19|snap=22w17a|[[File:Leather Cap JE5.png|32px]] The texture of the leather cap item has been changed.|Changed the leather cap texture when worn so the center bar now extends to the bottom of the back face.}}
{{History||1.20<br>(Experimental)|link=1.19.4|snap=23w04a|Non-leather helmets can now be trimmed using a [[smithing table]].
|There are 10 types of material that determine the color of the trim:
*Iron
*Copper
*Gold
*Lapis
*Emerald
*Diamond
*Netherite
*Redstone
*Amethyst
*Quartz
|Upgrading diamond helmets to netherite helmets now requires the netherite upgrade [[smithing template]].}}
{{History|||snap=23w05a|Leather caps can now be trimmed using a smithing table.|Helmets can now have trims of the same material it is made out of.}}
{{History|||snap=23w06a|Swapped {{cd|iron}} and {{cd|iron_darker}} palette, then made {{cd|iron_darker}} darker overall.}}
{{History||1.19.4|snap=23w05a|Helmets can now be swapped by {{ctrl|using}} them in the hotbar.<ref>{{bug|MC-216270|||Fixed}}</ref>}}
{{History||?|Helmets can now be swapped in [[armor stand]]s by {{ctrl|using}} them/[[head]]s/[[carved pumpkin]]s in the armor stand's slot.}}
{{History||1.20|snap=23w12a|The pattern textures of dune and sentry armor trims are changed.|Those previous patterns were left with different names: dune was renamed sentry and sentry was renamed shaper.}}
{{History|pocket alpha}}
{{History||v0.6.0|[[File:Leather Cap JE1 BE1.png|32px]] [[File:Chainmail Helmet JE2 BE1.png|32px]] [[File:Iron Helmet JE1 BE1.png|32px]] [[File:Golden Helmet JE1 BE1.png|32px]] [[File:Diamond Helmet JE1 BE1.png|32px]]<br>[[File:Leather Cap (item) JE1 BE1.png|32px]] [[File:Chainmail Helmet (item) JE1 BE1.png|32px]] [[File:Iron Helmet (item) JE1 BE1.png|32px]] [[File:Golden Helmet (item) JE1 BE1.png|32px]] [[File:Diamond Helmet (item) JE1 BE1.png|32px]] Added helmets.}}
{{History||v0.8.0|snap=build 2|[[File:Leather Cap (item) JE3 BE2.png|32px]] The leather helmet sprite has been changed to that of {{el|je}}, but its armor [[model]] remains that of older versions.}}
{{History||v0.9.0|snap=build 1|Iron helmets now naturally generate in [[village]] [[chest]]s and in [[stronghold]] altar chests.}}
{{History||v0.11.0|snap=build 11|Helmets now protect against [[damage]] from [[mob]]s only.}}
{{History||v0.12.1|snap=build 1|Helmets can now be worn by mobs.
|Chainmail helmets can now be obtained in [[survival]] mode from a mob wearing it.}}
{{History||?|Helmets no longer turn red when [[mob]]s and [[player]]s are hurt.}}
{{History||v0.14.0|snap=build 1|[[File:Leather Cap JE3 BE2.png|32px]] The texture of leather helmets have been changed.
|Leather helmets can now be dyed.}}
{{History||v0.15.0|snap=build 1|Helmets can now be obtained from [[stray]]s and [[husk]]s that naturally spawn with armor.}}
{{History|pocket}}
{{History||1.0.0|snap=alpha 0.17.0.1|[[Enchanting|Enchanted]] iron helmets and enchanted diamond helmets can now be found inside [[chest]]s within [[end city|end cities]].}}
{{History||1.0.4|snap=alpha 1.0.4.0|Iron helmets and chainmail helmets are now [[trading|sold]] by armorer smith [[villager]]s via trading.}}
{{History||1.1.0|snap=alpha 1.1.0.0|Golden, chain and iron helmets can now be [[smelting|smelted]] down into one of their respective [[nugget]]s.}}
{{History|bedrock}}
{{History||1.4.0|snap=beta 1.2.14.2|Chainmail helmets now generate in [[buried treasure]] chests.
|Enchanted leather helmets can now be found inside [[shipwreck]] supply room [[chest]]s.}}
{{History|||snap=beta 1.2.20.1|Golden helmets can now be found inside [[underwater ruins]] chests.}}
{{History||1.5.0|snap=beta 1.5.0.4|[[File:Turtle Shell.png|32px]] [[File:Turtle Shell (item) JE1 BE1.png|32px]] Added turtle shells.}}
{{History||1.10.0|snap=beta 1.10.0.3|[[File:Leather Cap JE4 BE2.png|32px]] [[File:Chainmail Helmet JE3 BE2.png|32px]] [[File:Iron Helmet JE2 BE2.png|32px]] [[File:Golden Helmet JE2 BE2.png|32px]] [[File:Diamond Helmet JE2 BE2.png|32px]]<br>[[File:Leather Cap (item) JE4 BE3.png|32px]] [[File:Chainmail Helmet (item) JE2 BE2.png|32px]] [[File:Iron Helmet (item) JE2 BE2.png|32px]] [[File:Golden Helmet (item) JE2 BE2.png|32px]] [[File:Diamond Helmet (item) JE2 BE2.png|32px]] The textures of all types of helmets have been changed.
|Iron helmets now can be found in plains [[village]] weaponsmith [[chest]]s.
|Leather helmets can now be found inside plains village tannery chests.}}
{{History||1.11.0|snap=beta 1.11.0.1|Iron helmets now can be found in [[savanna]], [[taiga]], [[desert]], [[snowy taiga]] and [[snowy tundra]] [[village]] weaponsmith [[chest]]s.
|Leather helmets can now be found inside savanna, taiga, desert, snowy taiga and snowy tundra village tannery chests.
|Iron helmets can now be found in [[village]] armorer chests.}}
{{History|||snap=beta 1.11.0.4|[[Pillager]]s and [[vindicator]]s that spawn in [[raid]]s can now drop iron helmets.
|Diamond helmets are now sold by armorer villagers.}}
{{History||1.11.0|snap=beta 1.11.0.5|[[File:Golden Helmet (item) JE3 BE3.png|32px]] The textures of gold helmet [[item]]s have been changed.}}
{{History||1.12.0|snap=beta 1.12.0.2|[[File:Armor Stand with Leather Armor MCPE-44669.png|32px]] Leather armor no longer shows as being [[dye]]d properly when worn by [[armor stand]]s.}}
{{History||1.13.0|snap=beta 1.13.0.1|Leather armor now appears properly dyed when worn by armor stands.}}
{{History||1.16.0|snap=beta 1.16.0.51|[[File:Netherite Helmet JE2 BE1.png|32px]] [[File:Netherite Helmet (item) JE2 BE1.png|32px]] Added netherite helmets.
|[[File:Diamond Helmet (item) JE3 BE3.png|32px]] The textures of diamond helmet [[item]]s have been changed.
|Helmets can now be obtained from [[piglin]]s that naturally spawn with golden helmets.}}
{{History|||snap=beta 1.16.0.57|Golden and netherite helmets now generate randomly [[enchanting|enchanted]], and sometimes [[damage]]d, in [[bastion remnant]] chests.
|Netherite helmets can no longer be [[crafting|crafted]].
|Netherite helmets are now obtained by combining one diamond helmet and one netherite ingot in a [[smithing table]].}}
{{History|||snap=beta 1.16.0.63|Diamonds helmets now generate in place of netherite helmets in bastion remnant [[chest]]s.}}
{{History|||snap=beta 1.16.200.53|Netherite helmets now gives a 90% reduction in knockback.}}
{{History||1.16.210|snap=beta 1.16.210.53|Wearing leather helmets now prevents [[Powder Snow#Freezing|freezing]] entirely.}}
{{History|console}}
{{History||xbox=TU1|xbone=CU1|ps=1.0|wiiu=Patch 1|switch=1.0.1|[[File:Leather Cap JE1 BE1.png|32px]] [[File:Chainmail Helmet JE2 BE1.png|32px]] [[File:Iron Helmet JE1 BE1.png|32px]] [[File:Golden Helmet JE1 BE1.png|32px]] [[File:Diamond Helmet JE1 BE1.png|32px]]<br>[[File:Leather Cap (item) JE1 BE1.png|32px]] [[File:Chainmail Helmet (item) JE1 BE1.png|32px]] [[File:Iron Helmet (item) JE1 BE1.png|32px]] [[File:Golden Helmet (item) JE1 BE1.png|32px]] [[File:Diamond Helmet (item) JE1 BE1.png|32px]] Added helmets.
|Added a quick equip for armor to the [[inventory]] interface.}}
{{History||xbox=TU12|ps=1.03|[[File:Leather Cap JE3 BE2.png|32px]] [[File:Leather Cap (item) JE3 BE2.png|32px]] The textures for leather helmets have been changed.}}
{{History||xbox=TU14|ps=1.05|Leather helmets can now be [[dye]]d.
|[[Item repair]] can now repair helmets.}}
{{History||xbox=TU25|xbone=CU13|ps=1.16|Helmets now have the quick equip functionality.}}
{{History||xbox=TU53|xbone=CU43|ps=1.49|wiiu=Patch 23|switch=1.0.3|Golden, chain and iron helmets can now be [[smelting|smelted]] down into one of their respective [[nugget]]s.}}
{{History|PS4}}
{{History||1.90|[[File:Chainmail Helmet (item) JE2 BE2.png|32px]] [[File:Iron Helmet (item) JE2 BE2.png|32px]] [[File:Golden Helmet (item) JE2 BE2.png|32px]] [[File:Diamond Helmet (item) JE2 BE2.png|32px]] The textures of all types of helmet items have been changed (except for the leather helmets).}}
{{History|new 3ds}}
{{History||0.1.0|[[File:Leather Cap JE1 BE1.png|32px]] [[File:Chainmail Helmet JE2 BE1.png|32px]] [[File:Iron Helmet JE1 BE1.png|32px]] [[File:Golden Helmet JE1 BE1.png|32px]] [[File:Diamond Helmet JE1 BE1.png|32px]]<br>[[File:Leather Cap (item) JE3 BE2.png|32px]] [[File:Chainmail Helmet (item) JE1 BE1.png|32px]] [[File:Iron Helmet (item) JE1 BE1.png|32px]] [[File:Golden Helmet (item) JE1 BE1.png|32px]] [[File:Diamond Helmet (item) JE1 BE1.png|32px]] Added helmets.}}
{{History|foot}}
<gallery>
File:ArmorModel Aug 13 2009.jpg|First image of armor.
File:DinnerboneArmor.png|[[Dinnerbone]]'s first screenshot of dyed armor.
File:ArmorPE.png
</gallery>
;Armor durability from Indev until late Beta
{| class="wikitable" data-description="Armor Durability during Indev until late Beta" style="text-align:center;"
|-
!Leather
!Golden
!Chainmail
!Iron
!Diamond
|-
|33
|66
|66
|132
|264
|}
==Issues ==
{{issue list}}
==Trivia ==
*Unlike the other helmets, the netherite helmet covers most of the player's face, due to a nose guard and cheek plates.
*The turtle shell is the only helmet that is not part of a complete set.
* In Bedrock Edition, there exists a bug<ref>{{Cite bug|MCPE|109048|Efficiency 1 Leather Cap in Woodland Mansions|date=December 1, 2020}}</ref> that makes it possible to obtain a Leather Cap enchanted with Efficiency I from [[Woodland Mansion]] chests with a chance of 1.45%. The enchantment has no effect on the cap, however.
==Gallery ==
<gallery>
File:Zombie helmet.png|A zombie wearing a helmet in [[Survival Test]].
</gallery>
===Enchanted Helmets===
<gallery>
File:Enchanted Leather Cap (item).gif
File:Enchanted Chainmail Helmet (item).gif
File:Enchanted Iron Helmet (item).gif
File:Enchanted Golden Helmet (item).gif
File:Enchanted Diamond Helmet (item).gif
File:Enchanted Netherite Helmet (item).gif
File:Enchanted Turtle Shell (item).gif
</gallery>
<gallery>
File:Enchanted Leather Helmet.gif
File:Enchanted Chainmail Helmet.gif
File:Enchanted Iron Helmet.gif
File:Enchanted Golden Helmet.gif
File:Enchanted Diamond Helmet.gif
File:Enchanted Netherite Helmet.gif
File:Enchanted Turtle Shell.gif
</gallery>
==References ==
{{reflist}}
==External Links ==
*[https://www.minecraft.net/en-us/article/taking-inventory--helmet Taking Inventory: Helmet] – Minecraft.net on February 20, 2020
{{Items}}
[[Category:Armor]]
[[es:Casco]]
[[ja:ヘルメット]]
[[ko:투구]]
[[pt:Capacete]]
[[pl:Hełm]]
[[zh:头盔]]</li></ul> | build 1 | Endermen can now spawn in the Nether, and can now pick up netherrack. | ||||||||||||||||||||||||||||||||||||||||||||||||||||||||||||||||||||||||||||||||||||||||||||||||||||||||||||
0.16.0{{Extension DPL}}<ul><li>[[Ink Sac|Ink Sac]]<br/>{{For|the variant dropped by Glow squids|Glow Ink Sac}}
{{Item
| image = Ink Sac.png
| renewable = Yes
| stackable = Yes (64)
}}
An '''ink sac''' is an [[item]] dropped by a [[squid]] upon death used to create [[black dye]], [[dark prismarine]]{{only|BE|short=1}}, and [[Book and Quill|books and quills]].
== Obtaining ==
=== Mob loot ===
==== Squid ====
{{see also|Tutorials/Squid farming|title1=Squid farming}}
A [[squid]] drops one to three ink sacs upon death. The maximum amount is increased by 1 per level of [[Looting]], for a maximum of 1 to 6 with Looting III.
=== Fishing ===
Ink sacs can be obtained as a "junk" item from [[fishing]]. The [[Luck of the Sea]] [[enchantment]] decreases the chance.
=== Trading ===
[[Wandering trader]]s sometimes sell 3 ink sacs for an [[emerald]] {{in|bedrock}}. Apprentice level [[Trading#Librarian|librarians]] also buy 5 ink sacs for one [[emerald]].
=== Natural generation ===
{{LootChestItem|ink-sac}}
== Usage ==
=== Crafting ingredient ===
{{crafting usage}}
{{IN|bedrock}}, ink sacs can be also used in banner patterns:
{{banner crafting usage}}
=== Loom ingredient ===
{{Banner loom usage|Ink Sac}}
=== Dye ===
{{Dye usage}}
* Each type of [[Prismarine#Dark Prismarine|dark prismarine]] can be crafted using varying amounts of 8 [[Prismarine Shard#prismarine shards|prismarine shards]].
=== Trading ===
Journeyman-level librarian [[villager]]s have a {{frac|2|3}} chance to buy five ink sacs for an [[emerald]]. They always offer the trade {{in|bedrock|lc=}}.
=== Signs ===
Ink sacs can be applied to [[sign]]s or [[hanging sign]]s to revert glowing text back to default.
== Sounds ==
{{edition|java}}:
{{Sound table
|sound=Ink sac1.ogg
|sound2=Ink sac2.ogg
|sound3=Ink sac3.ogg
|subtitle=Ink Sac splotches
|source=block
|description=When an ink sac is used on a sign
|id=item.ink_sac.use
|translationkey=subtitles.item.ink_sac.use
|volume=1.0
|pitch=''varies'' <ref group=sound>Each sound can be 0.85, 0.88, or 0.9</ref>
|distance=16
|foot=1}}
{{edition|bedrock}}:
{{Sound table
|type=bedrock
|sound=Ink sac1.ogg
|sound2=Ink sac2.ogg
|sound3=Ink sac3.ogg
|source=sound
|description=When an ink sac is used on a sign
|id=sign.ink_sac.use
|volume=1.0
|pitch=1.0
|foot=1}}
== Data values ==
=== ID ===
{{edition|java}}:
{{ID table
|edition=java
|showforms=y
|generatetranslationkeys=y
|displayname=Ink Sac
|spritetype=item
|nameid=ink_sac
|form=item
|foot=1}}
{{edition|bedrock}}:
{{ID table
|edition=bedrock
|showaliasids=y
|shownumericids=y
|showforms=y
|notshowbeitemforms=y
|generatetranslationkeys=y
|displayname=Ink Sac
|spritetype=item
|nameid=ink_sac
|aliasid=dye / 0
|id=413
|form=item
|translationkey=item.dye.black.name
|foot=1}}
== Video ==
{{video note|Ink sacs can no longer be used as a dye in Java Edition.}}
<div style="text-align:center">{{yt|ABYCZfawO60}}</div>
== History ==
{{History|java beta}}
{{History||1.2|[[File:Ink Sac JE1 BE1.png|32px]] Added ink sacks, together with all other dyes.}}
{{History||1.2_02|"Ink Sack" has been renamed to "Ink Sac".}}
{{History|java}}
{{History||1.3.1|snap=12w17a|Ink sacs are now used to craft [[book and quill]]s.}}
{{History||1.4.2|snap=12w34a|Added the ability to [[Armor#Dyeing|dye]] leather [[armor]] and [[wolf]] collars.}}
{{History||1.4.6|snap=12w49a|Ink sacs can now be crafted with [[gunpowder]] to create a [[firework star]].}}
{{History||1.6.1|snap=13w19a|[[Stained clay]] can now be [[crafting|crafted]].}}
{{History||1.7.2|snap=13w41a|[[Stained glass]] can now be crafted.}}
{{History||1.8|snap=14w25a|Ink sacs are now used to craft [[dark prismarine]].}}
{{History|||snap=14w30a|Added [[banner]]s, which can be [[dye]]d with ink sacs.}}
{{History||1.11|snap=16w39a|Ink sacs can now be used to dye [[shulker box]]es.}}
{{History||1.12|snap=17w06a|Ink sacs are now used to craft black [[concrete powder]].}}
{{History|||snap=17w15a|Ink sacs can now be used to dye [[bed]]s.}}
{{History||1.13|snap=17w47a|The different data values for the <code>dye</code> ID have been split up into their own IDs.
|Prior to [[1.13/Flattening|''The Flattening'']], this [[item]]'s numeral ID was 351.}}
{{History||1.14|snap=18w43a|Ink sacs can now be used to craft [[black dye]].
|Ink sacs can no longer be used as a [[dye]].
|All of the dye-related functions and crafting recipes of ink sac (except books and quills and dark prismarine) have been transferred to black dye.
|[[File:Ink Sac JE2 BE2.png|32px]] The texture of ink sacs has been changed.}}
{{History|||snap=19w11a|Librarian [[villager]]s now [[trading|buy]] ink sacs.}}
{{History||1.15|snap=Pre-release 1|Ink sacs are no longer used to craft [[dark prismarine]].}}
{{History||1.17|snap=21w03a|Ink sacs can now be used to remove the text's glowing effect of a [[sign]].}}
{{History||1.20<br>(Experimental)|link=1.19.3|snap=22w42a|Ink sacs can now be used to remove the text's glowing effect of a [[hanging sign]].}}
{{History|pocket alpha}}
{{History||v0.3.0|[[File:Ink Sac JE1 BE1.png|32px]] Added ink sacs. They are currently unobtainable and serve no purpose.}}
{{History||v0.8.0|snap=build 1|Ink sacs can now be used to craft [[cocoa beans]].}}
{{History|||snap=build 3|Ink sacs are now available in [[creative]].}}
{{History||v0.9.0|snap=build 1|Ink sacs now generate in [[village]] and [[stronghold]] [[chest]]s.}}
{{History||v0.11.0|snap=build 1|Ink sacs can now be obtained from [[squid]].
|Ink sacs can now be obtained as a junk [[item]] from [[fishing]].}}
{{History||v0.14.0|snap=build 1|Ink sacs now can now be used to dye water in [[cauldron]]s.}}
{{History||v0.16.0|snap=build 1|Ink sacs are no longer used to craft [[cocoa beans]].
|Ink sacs can now be used to craft [[dark prismarine]].}}
{{History|pocket}}
{{History||1.0.0|snap=alpha 0.17.0.1|Ink sacs can now be used to dye [[shulker]]s.}}
{{History||1.1.0|snap=alpha 1.1.0.0|Ink sacs are now used to re-dye [[bed]]s.
|Ink sacs can now be used to dye [[shulker box]]es.}}
{{History|bedrock}}
{{History||1.2.0|snap=beta 1.2.0.2|Ink sacs can now be used to craft [[book and quill]]s.
|Added [[banner]]s, which can be [[dye]]d with ink sacs.
|Ink sacs can now be crafted with [[gunpowder]] to create [[firework star]]s.
|Ink sacs can now be used to craft black [[concrete powder]].
|[[Stained glass]] can now be [[crafting|crafted]].}}
{{History||1.4.0|snap=beta 1.2.20.1|Ink sacs can now be crafted from iron, sulfur, and 4 oxygen in the [[compound creator]]s.
|Ink sacs can now be used to craft [[balloon]]s and [[glow stick]]s.}}
{{History||1.8.0|snap=beta 1.8.0.10|Ink sacs can now be used to craft [[black dye]].}}
{{History||1.10.0|snap=beta 1.10.0.3|Ink sacs can now be bought from [[wandering trader]]s.
|[[File:Ink Sac JE2 BE2.png|32px]] The texture of ink sacs has been changed.}}
{{History||1.11.0|snap=beta 1.11.0.4|Ink sacs can now be [[trading|sold]] to librarian [[villager]]s.}}
{{History||1.16.100|snap=beta 1.16.100.56|The ID of ink sacs has been changed from {{cd|dye/0}} to {{cd|ink_sac}}.}}
{{History||1.16.210|snap=beta 1.16.210.59|Ink sacs can now be used to revert glowing text on signs to normal.}}
{{History|console}}
{{History||xbox=TU1|xbone=CU1|ps=1.00|switch=1.0.1|wiiu=Patch 1|[[File:Ink Sac JE1 BE1.png|32px]] Added ink sacs.}}
{{History||xbox=none|xbone=none|ps=1.90|wiiu=none|switch=none|[[File:Ink Sac JE2 BE2.png|32px]] The texture of ink sacs has been changed.}}
{{History|New 3DS}}
{{History||0.1.0|[[File:Ink Sac JE1 BE1.png|32px]] Added ink sacs.}}
{{History|foot}}
== Issues ==
{{issue list}}
== References ==
{{reflist}}
{{Items}}
[[Category:Bedrock Edition specific information]]
[[Category:Items]]
[[Category:Dyes]]
[[Category:Renewable resources]]
[[cs:Váček inkoustu]]
[[de:Tintenbeutel]]
[[es:Saco de tinta]]
[[fr:Poche d'encre]]
[[hu:Tintazsák]]
[[ja:イカスミ]]
[[ko:먹물 주머니]]
[[nl:Inktzak]]
[[pl:Torbiel z atramentem]]
[[pt:Bolsa de tinta]]
[[ru:Чернильный мешок]]
[[uk:Чорнильний мішок]]
[[zh:墨囊]]</li><li>[[:Category:Plants|Category:Plants]]<br/>All pages covering blocks of such things as tall grass and flowers.
[[Category:Blocks]]
[[Category:Items]]
[[cs:Kategorie:Rostliny]]
[[es:Categoría:Plantas]]
[[fr:Catégorie:Plante]]
[[hu:Kategória:Növények]]
[[it:Categoria:Piante]]
[[ja:カテゴリ:植物]]
[[ko:분류:식물]]
[[nl:Categorie:Planten]]
[[pl:Kategoria:Rośliny]]
[[pt:Categoria:Plantas]]
[[ru:Категория:Растения]]
[[th:หมวดหมู่:พืช]]
[[zh:Category:植物]]</li></ul> | ? | You can no longer place water in nether. | ||||||||||||||||||||||||||||||||||||||||||||||||||||||||||||||||||||||||||||||||||||||||||||||||||||||||||||
| Legacy Console Edition | ||||||||||||||||||||||||||||||||||||||||||||||||||||||||||||||||||||||||||||||||||||||||||||||||||||||||||||||
| TU1 | CU1 | 1.0 | Patch 1 | Added the Nether. | ||||||||||||||||||||||||||||||||||||||||||||||||||||||||||||||||||||||||||||||||||||||||||||||||||||||||||
| TU9 | Added new music to the Nether. | |||||||||||||||||||||||||||||||||||||||||||||||||||||||||||||||||||||||||||||||||||||||||||||||||||||||||||||
| Added nether fortresses. | ||||||||||||||||||||||||||||||||||||||||||||||||||||||||||||||||||||||||||||||||||||||||||||||||||||||||||||||
| Added Reset Nether option to force regeneration of the Nether. This is helpful for older saves that didn't have a nether fortress. | ||||||||||||||||||||||||||||||||||||||||||||||||||||||||||||||||||||||||||||||||||||||||||||||||||||||||||||||
| TU43 | CU33 | 1.36 | Patch 13 | Endermen can now spawn in the Nether, and can now pick up netherrack. | ||||||||||||||||||||||||||||||||||||||||||||||||||||||||||||||||||||||||||||||||||||||||||||||||||||||||||
| Added magma blocks. | ||||||||||||||||||||||||||||||||||||||||||||||||||||||||||||||||||||||||||||||||||||||||||||||||||||||||||||||
| Added red nether brick and nether wart blocks, which can be crafted but do not otherwise generate naturally in the Nether. | ||||||||||||||||||||||||||||||||||||||||||||||||||||||||||||||||||||||||||||||||||||||||||||||||||||||||||||||
Issues
Issues relating to "The Nether" are maintained on the bug tracker. Report issues there.
Trivia
- Upon entering the Nether in singleplayer, the Overworld will essentially freeze, and resume when the player returns. This is due to chunks loading and unloading.
- Pressing F3 in the Nether will display the biome as "Hell".
- In the Console Edition, everything in the Nether is renewable due to the fact the Nether can be restarted any number of times from the main menu using the "Reset Nether" button. This can be done on PC only by deleting your save folder's DIM-1 file, which resets the Nether.
- The numbers for the 3 dimensions are: -1=The Nether, 0=The Overworld, 1=The End. This implies that the Nether is the next dimension over from the Overworld in the "down" direction and The End is the next dimension over in the "up" direction.
- The Nether — an endless cave filled with masses of air — appears to be an inversion of the End, an endless sky with a central mass of end stone.
- In the Console Edition, the nether music in the festive mash-up pack is actually different from the original nether music, with some minor differences.
Gallery
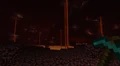
The first screenshot released by Notch showing what the Nether would look like.

The new Nether feature that Jeb released in September 2011, that being the release of nether brick.

An early view of a nether fortress Jeb released in September 2011

View of nether fortresses
View of Nether fortresses with a blaze spawner
A large, spreading stream of lava in the Nether
Ghasts are not harmed by lava or fire.
Bedrock naturally exposed in the Nether
Using a map in the Nether will cause the player's position indicator to rotate, but any markers will not.
A hidden lava source block uncovered.
Mushrooms naturally generated above the nether
The magma block naturally generated in the Nether
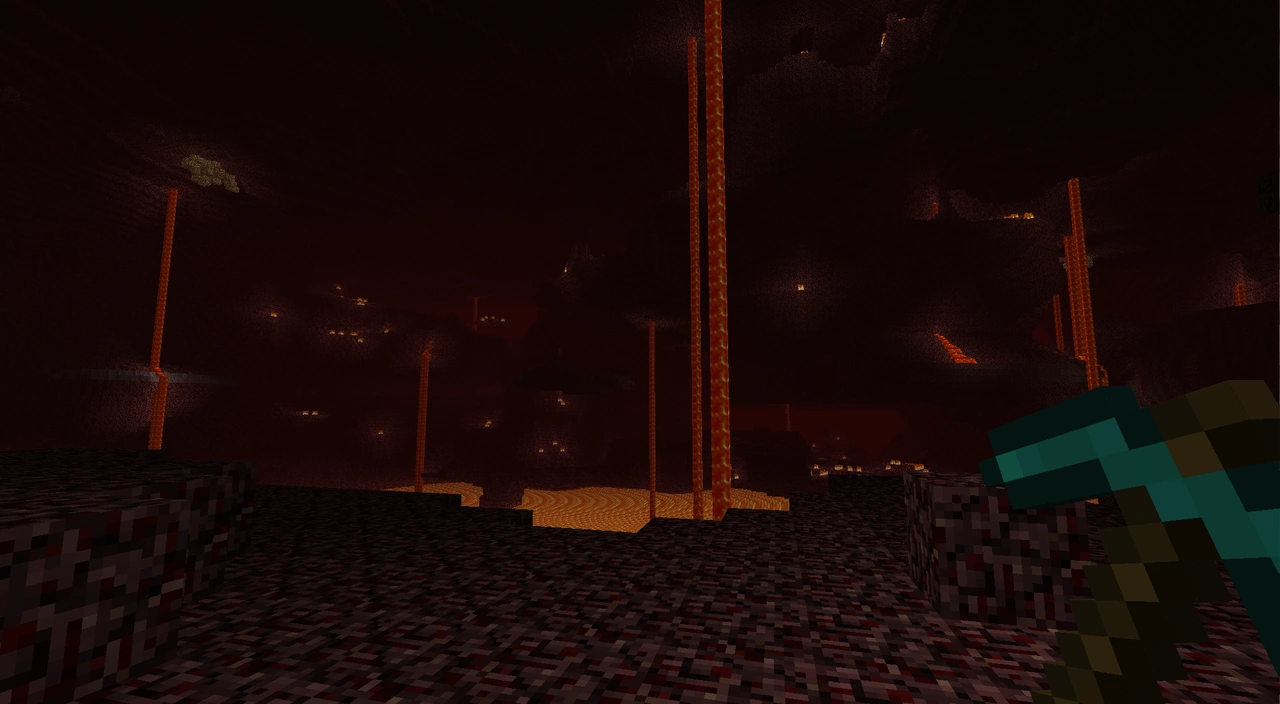

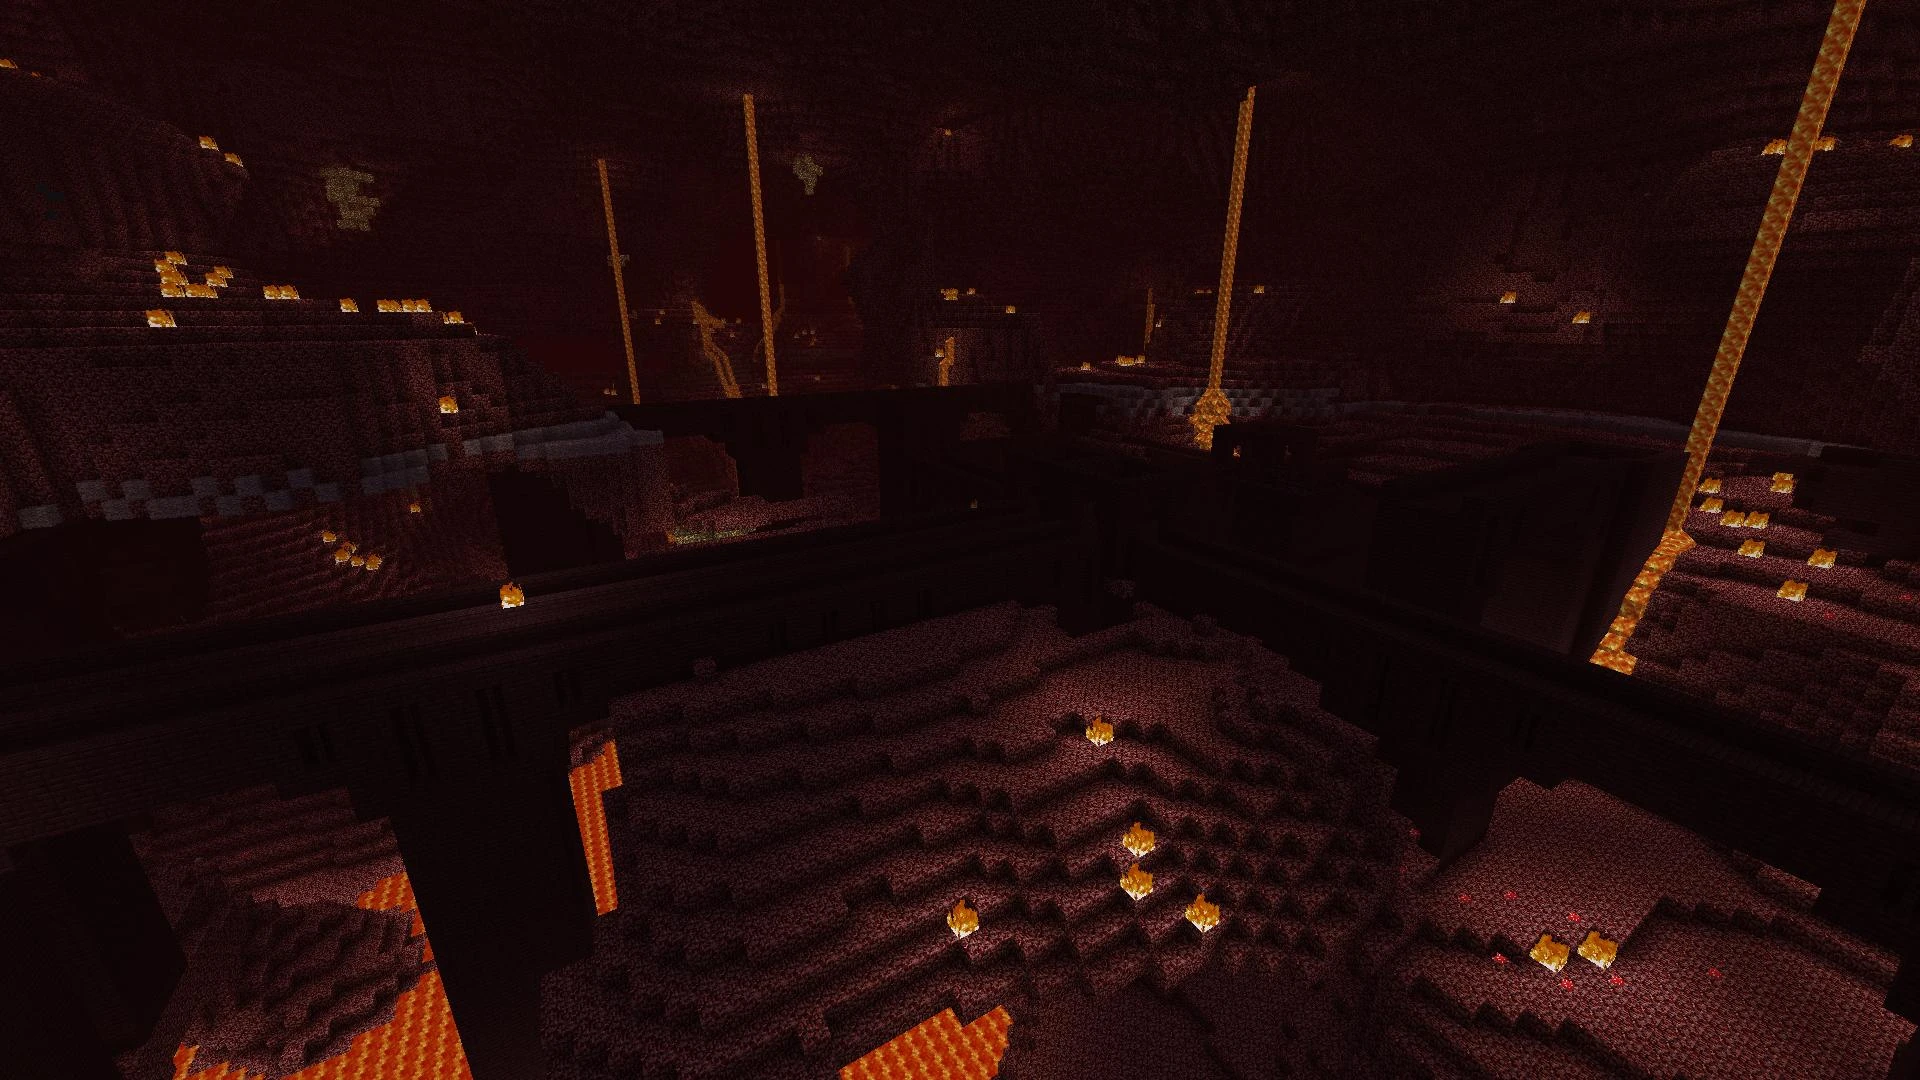
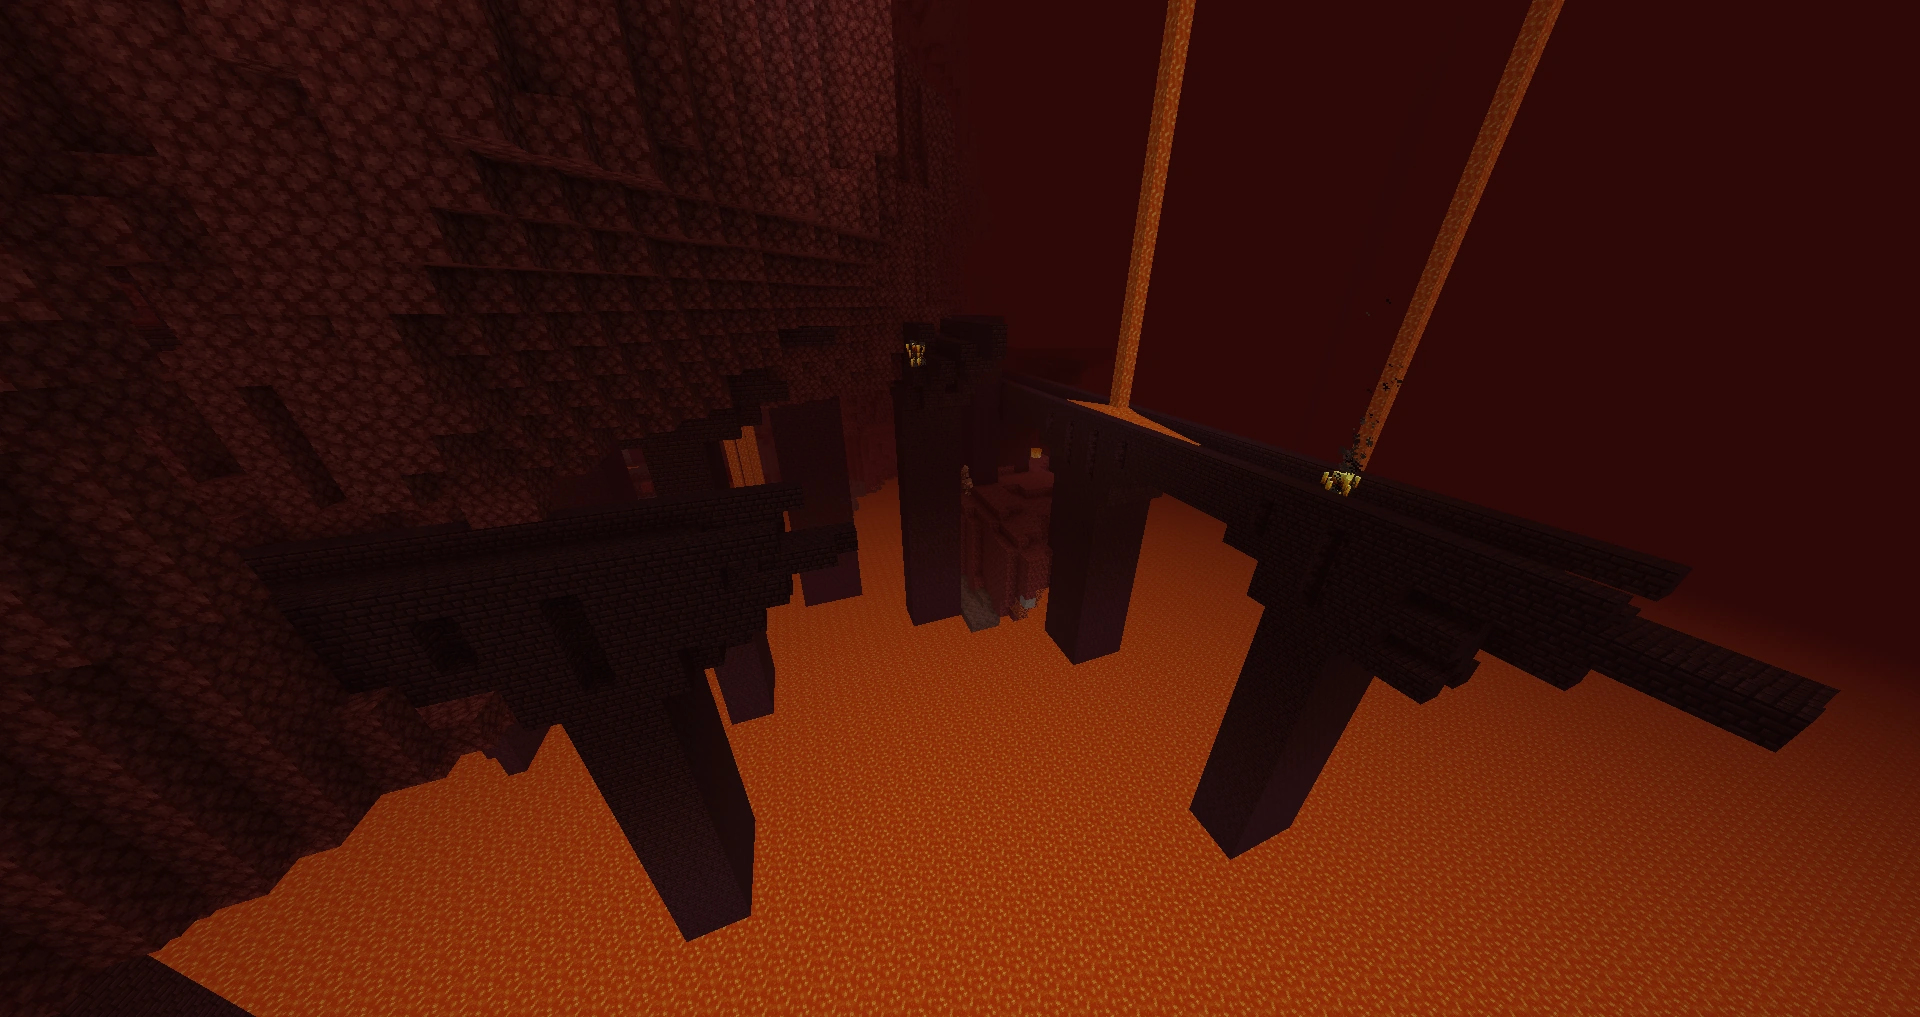
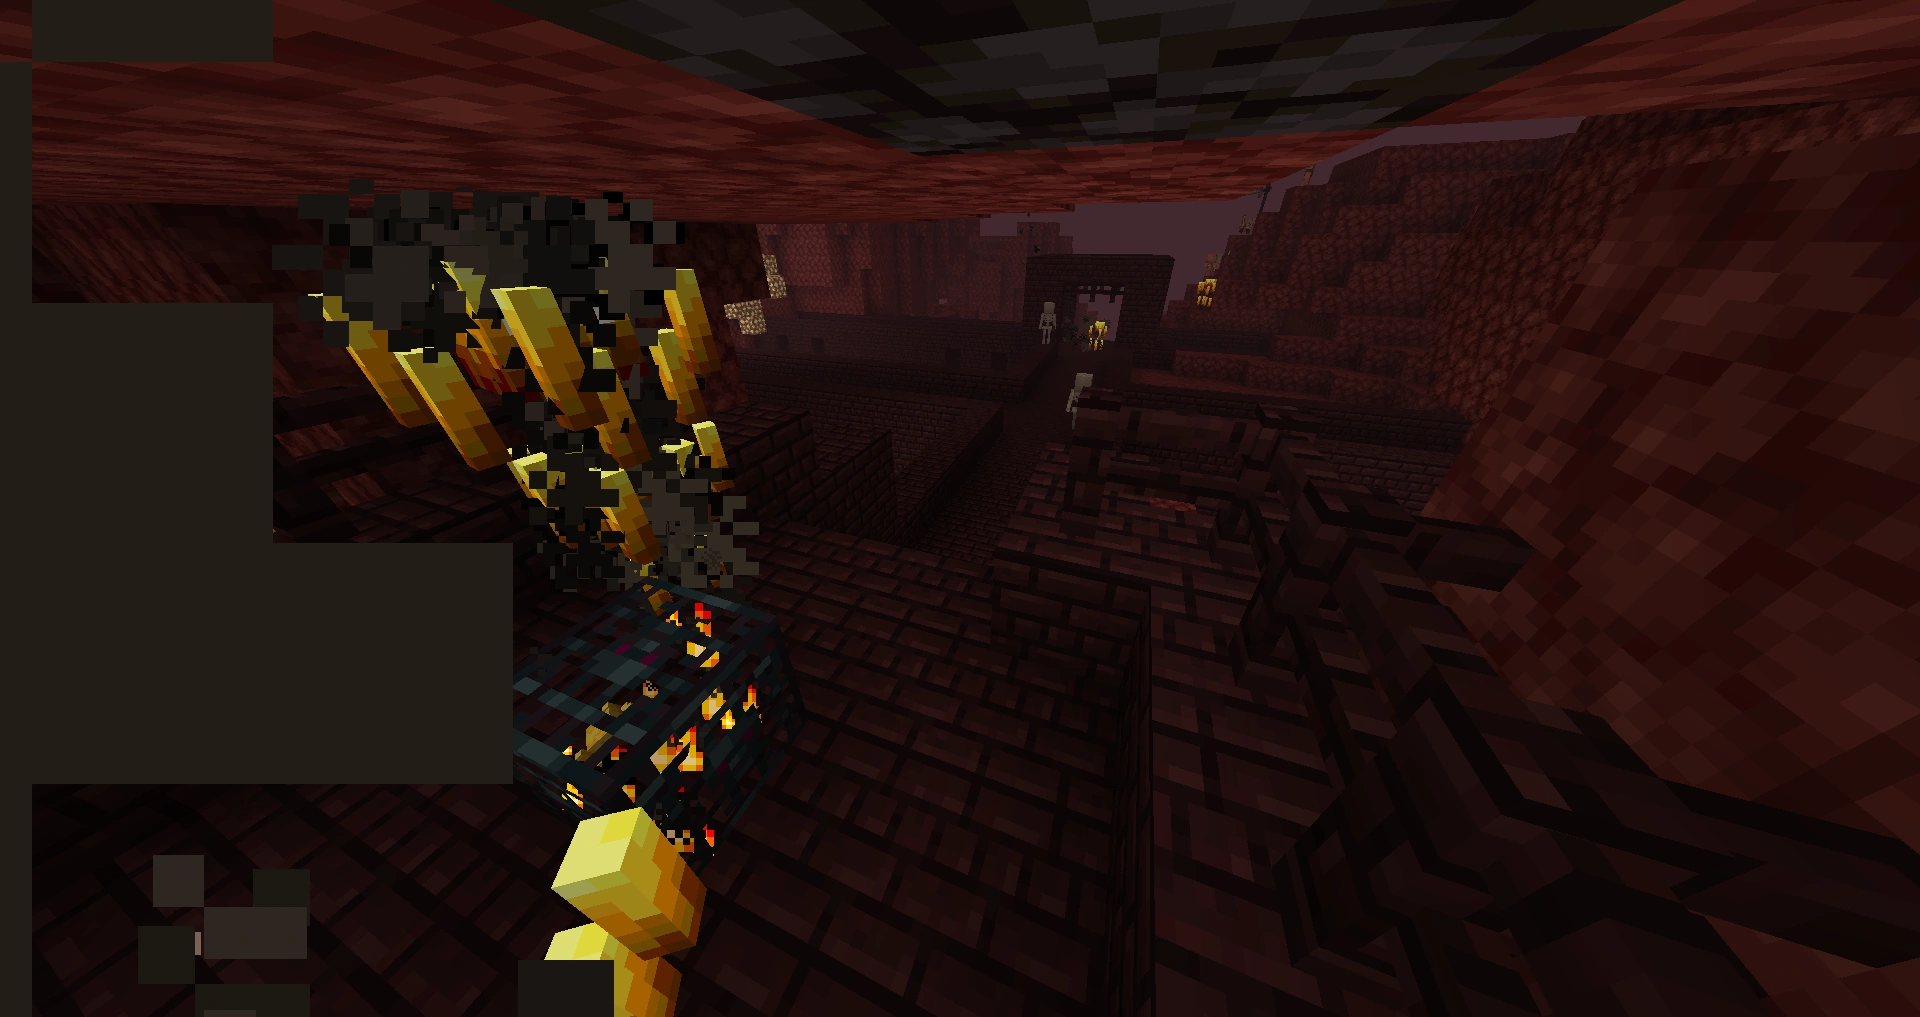
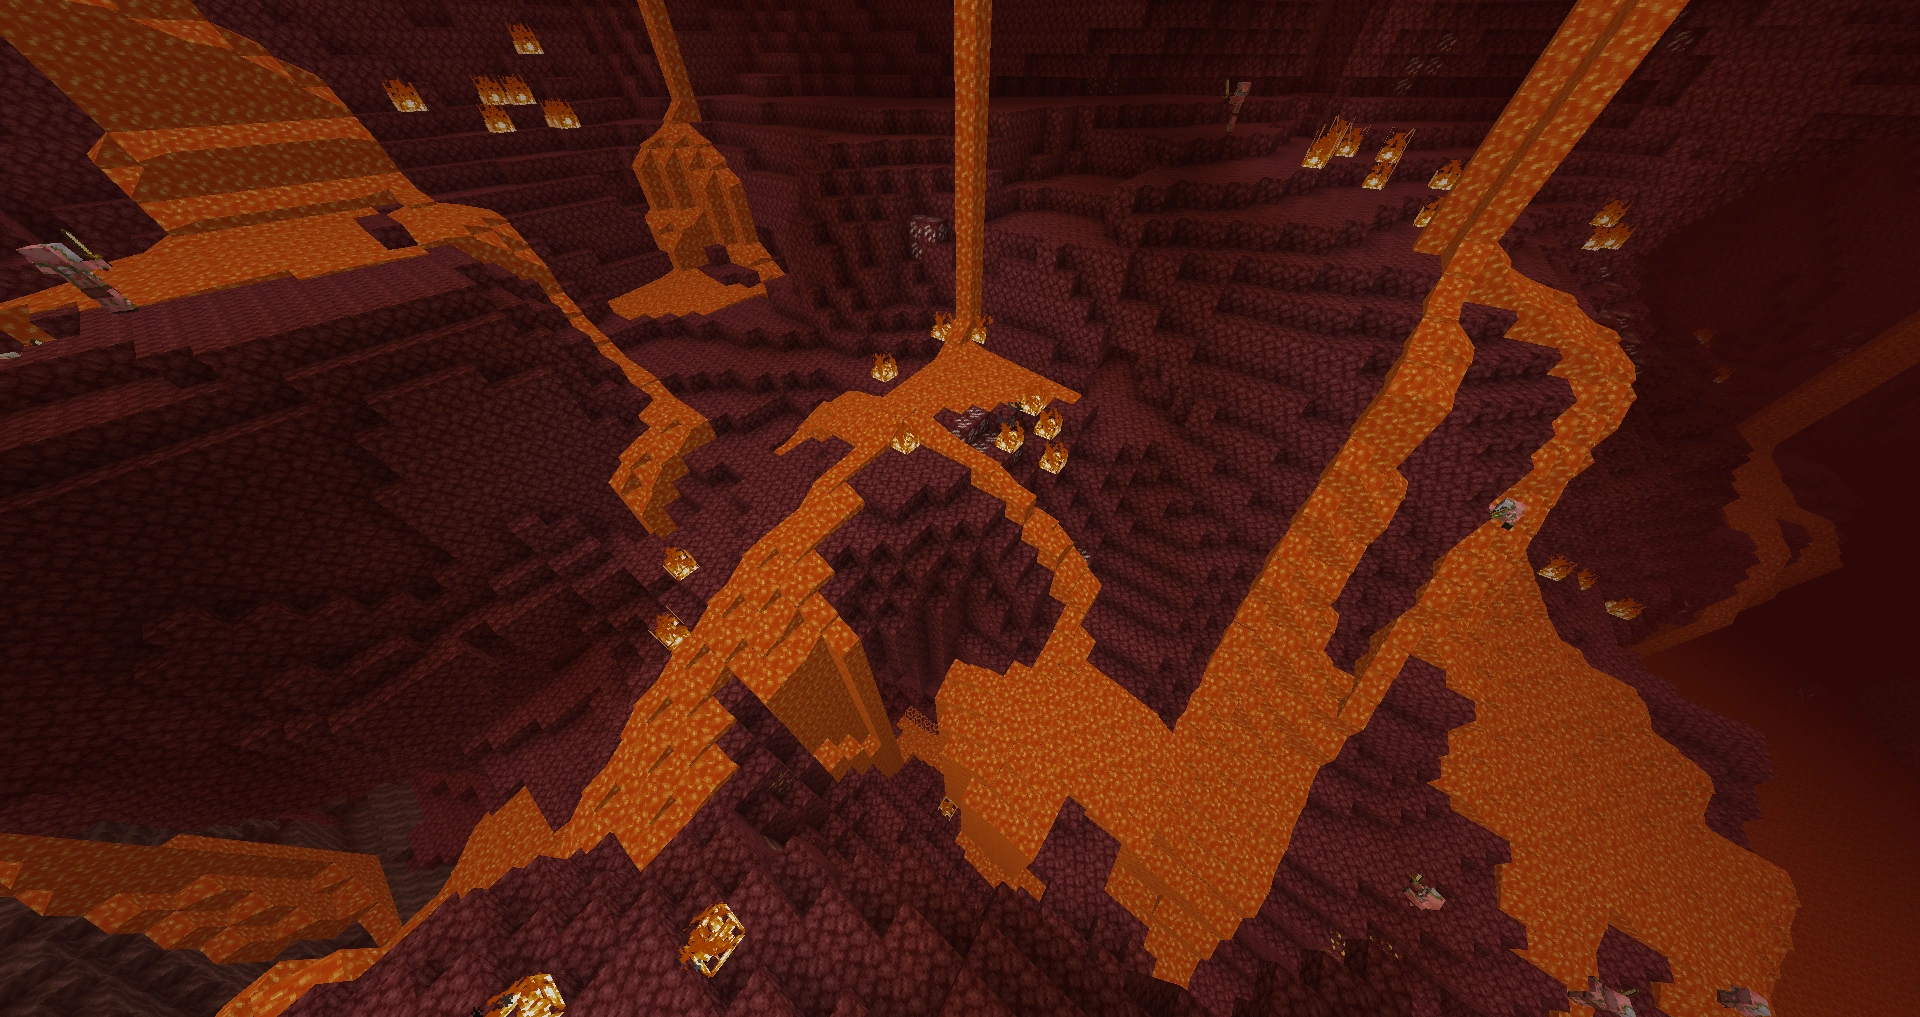
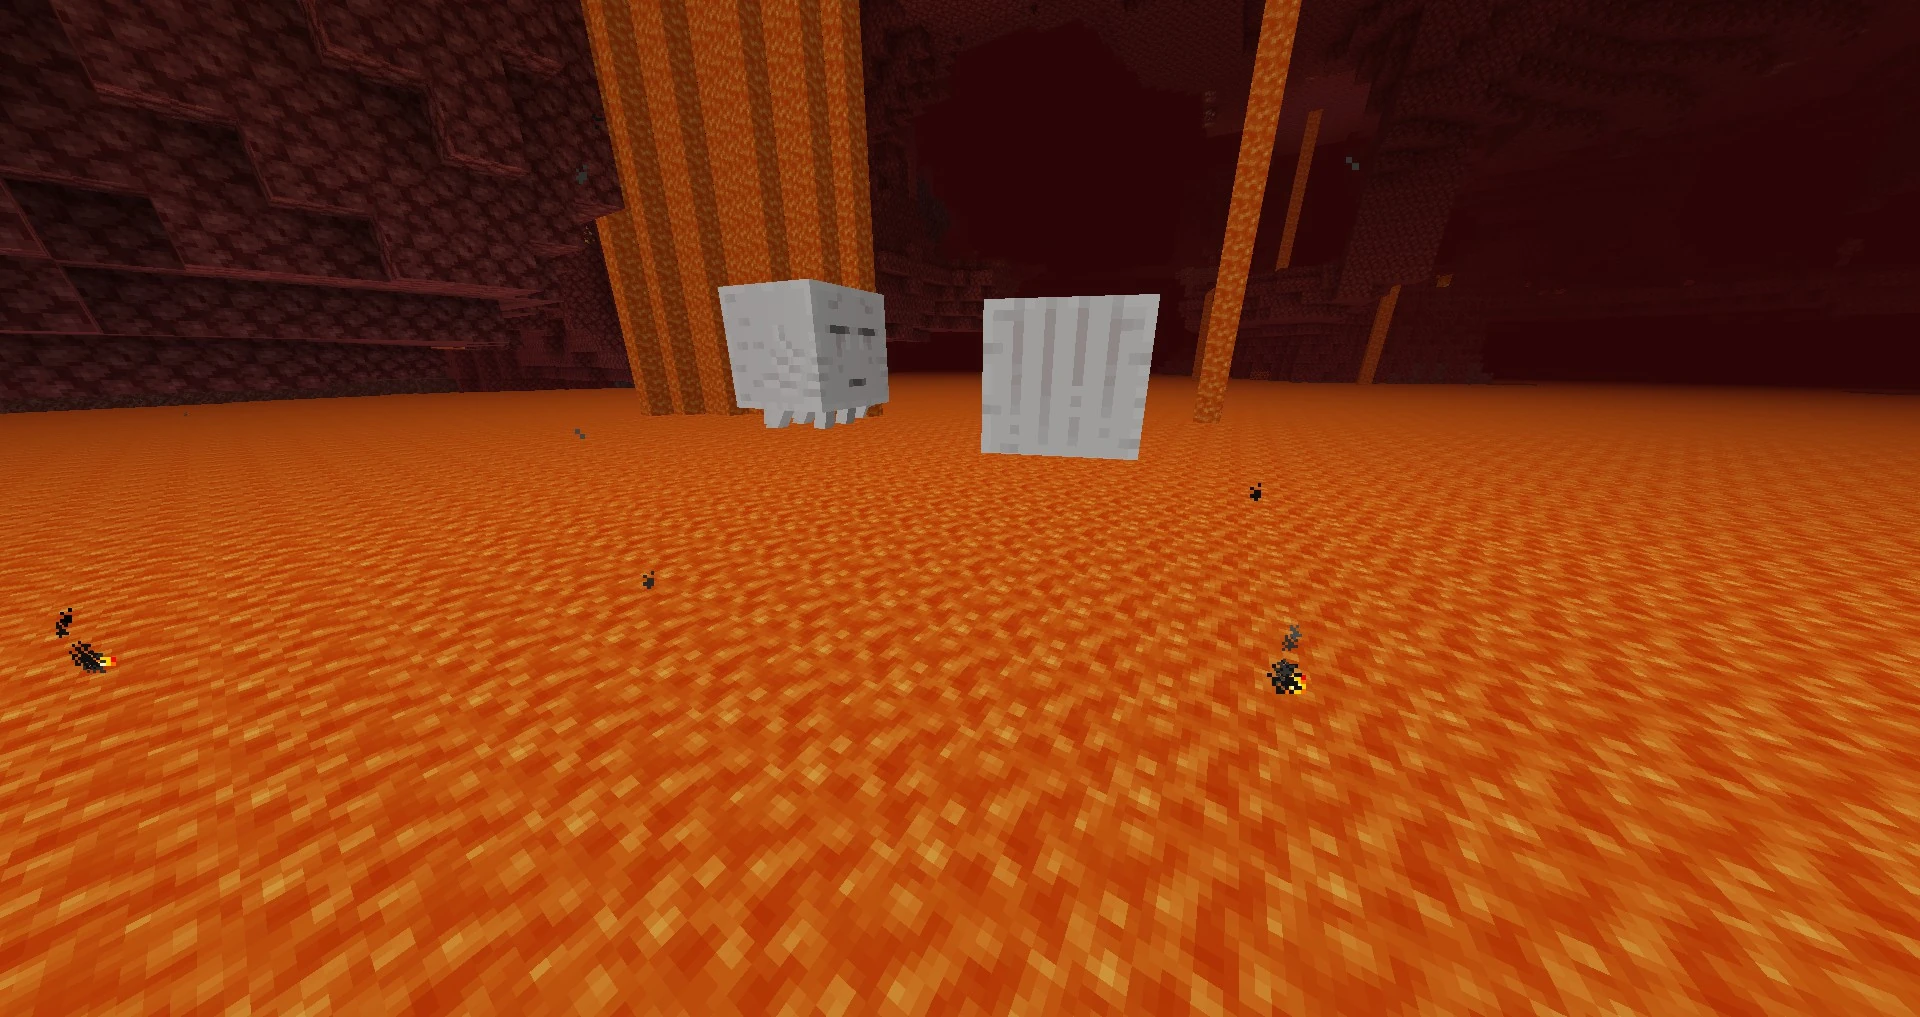
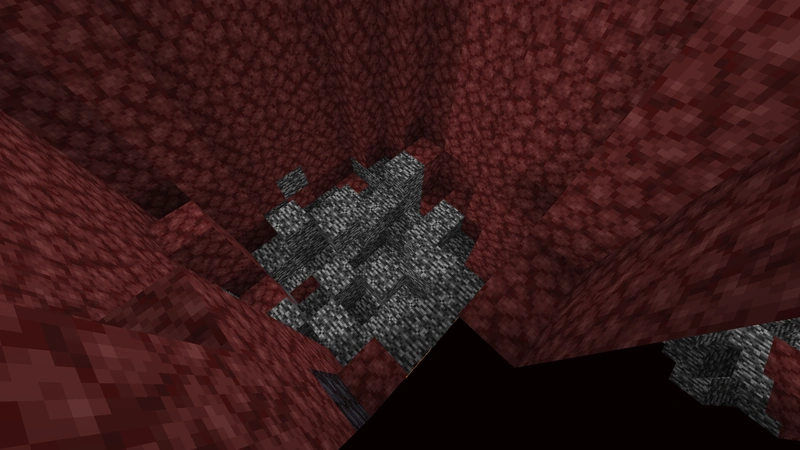
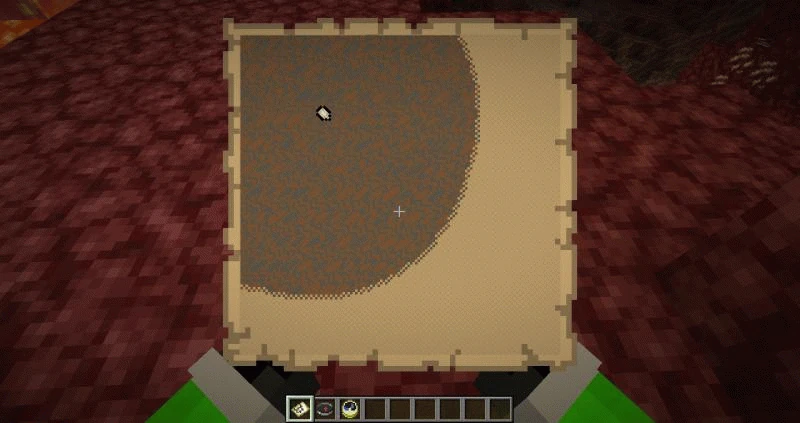
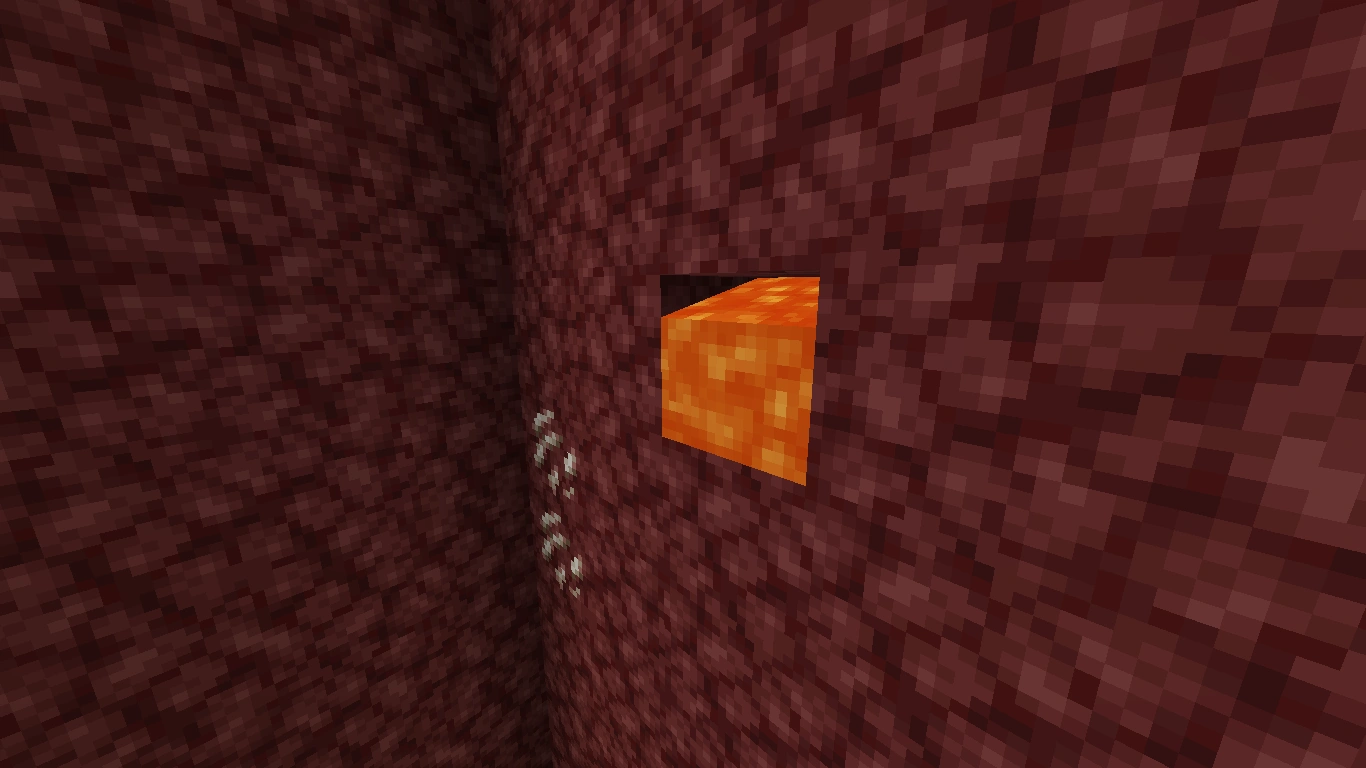
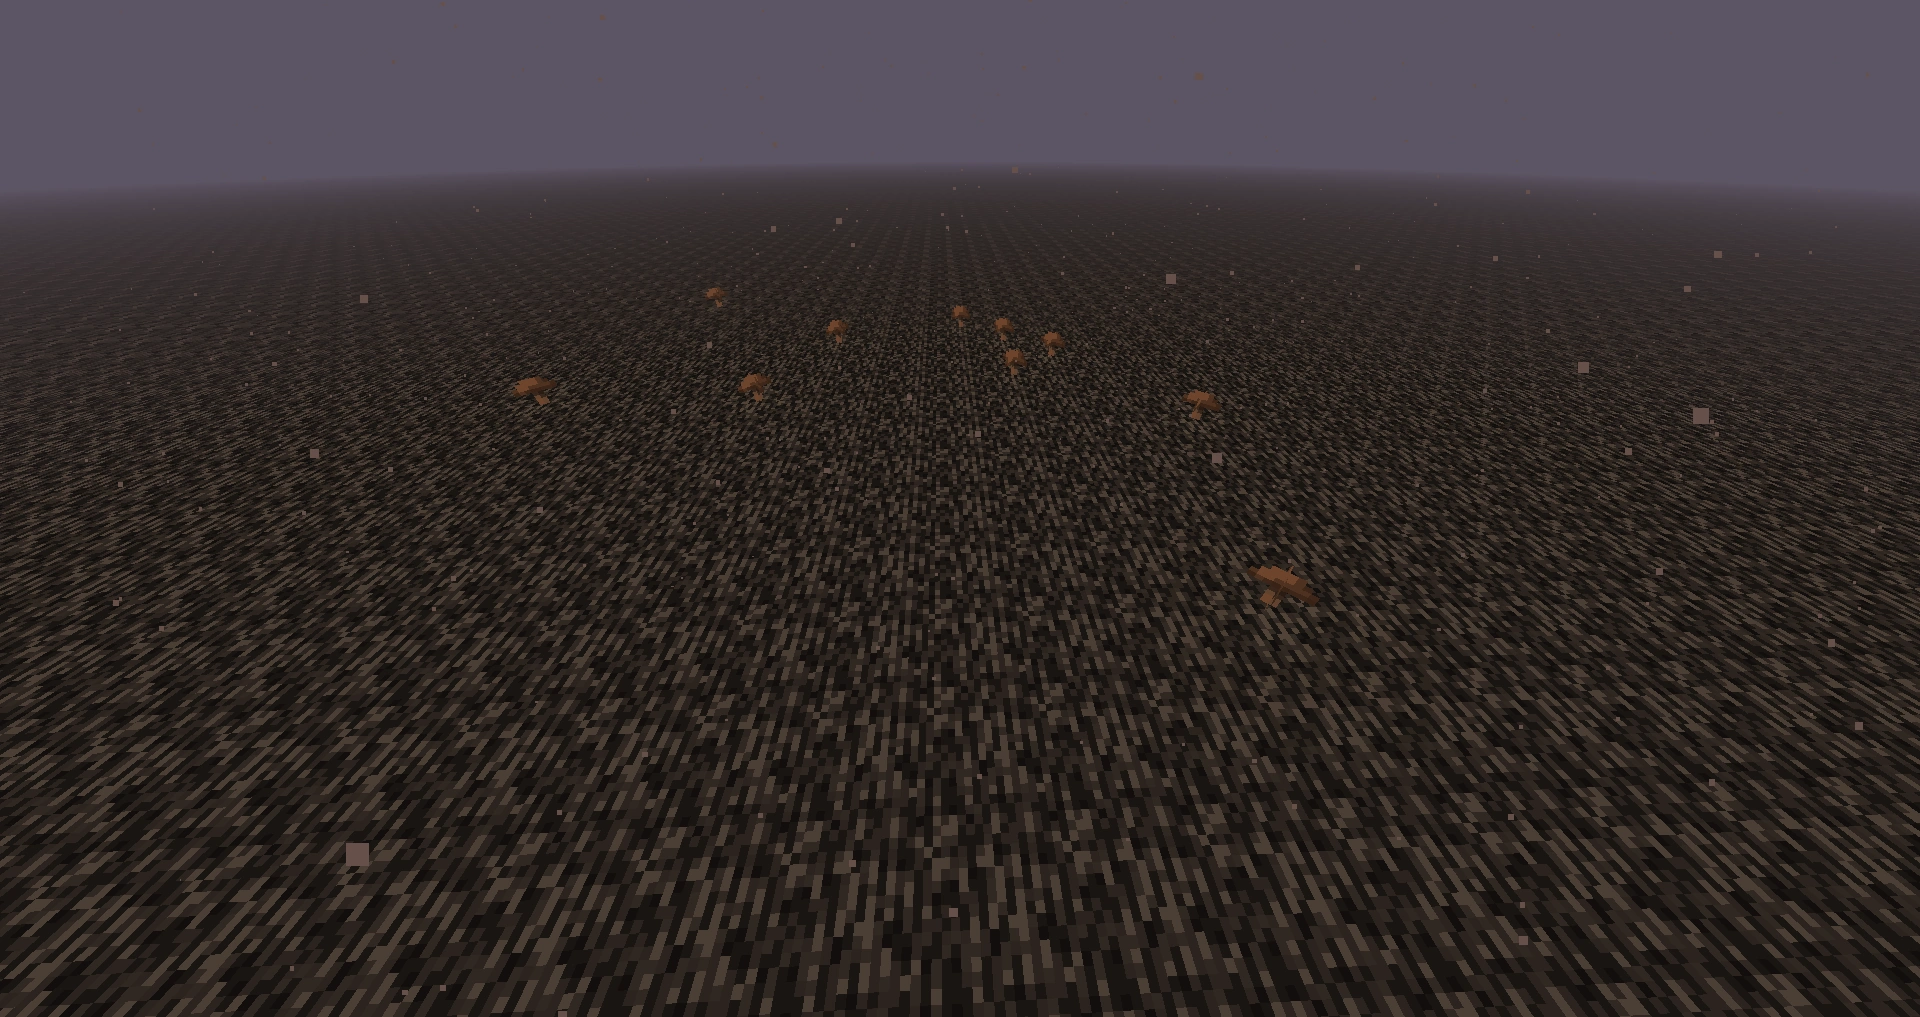
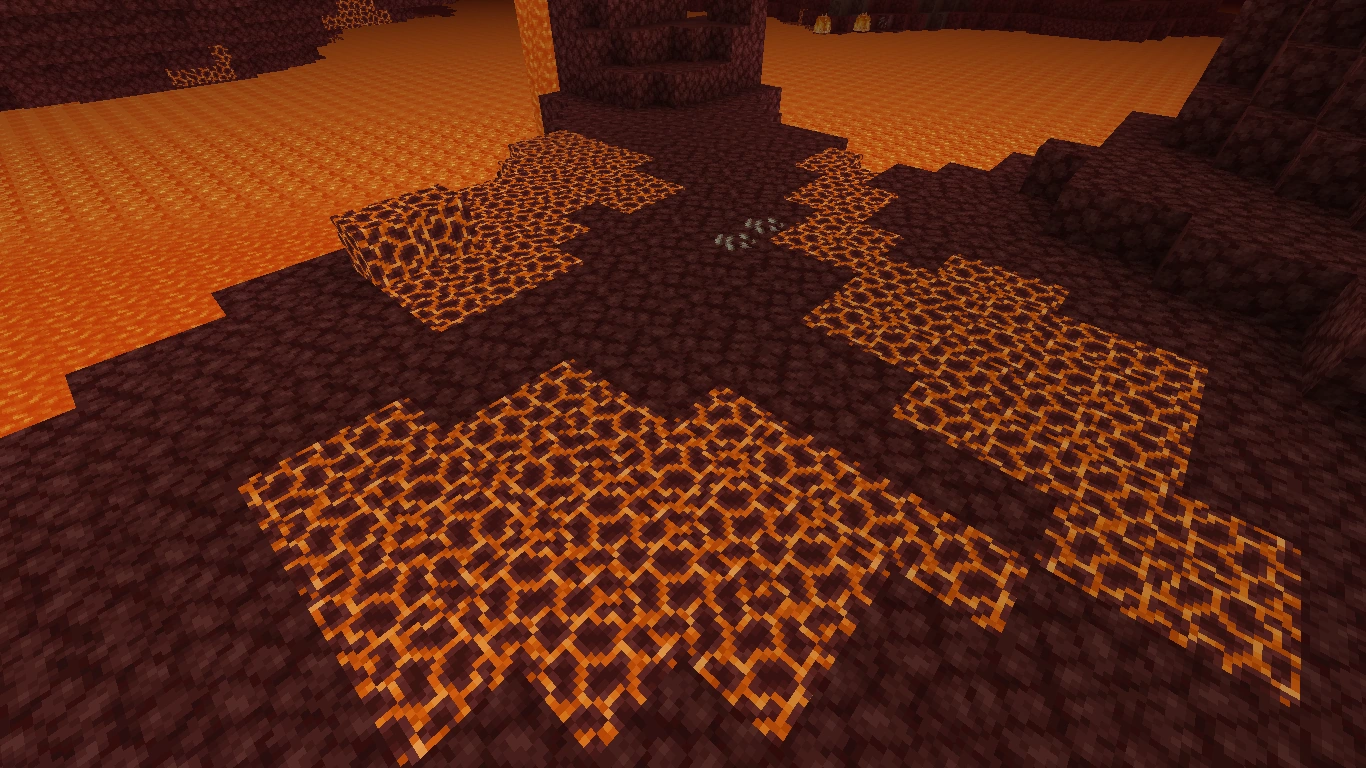
See also
References