Splash potions are a variant of potions that can be thrown.
Obtaining
Brewing
| Ingredients | Brewing recipe |
|---|---|
| Gunpowder + Any Potion |
Splash potions are brewed by adding gunpowder to a normal potion.
Natural generation
One splash potion of weakness can be found in a brewing stand inside an Igloo basement.
Filling bottles
Using a glass bottle on a cauldron that contains splash potion will turn it into a bottle of that splash potion.[Pocket Edition only] Using a glass bottle on a cauldron also removes 1⁄3 of that cauldron's contents.
Usage
Brewing
| Ingredients | Brewing recipe |
|---|---|
| Dragon's Breath + Any Splash Potion |
Lingering potions are brewed by adding dragon's breath to a splash potion.
Using
Splash potions are thrown by using them. On impact they explode, applying status effects to nearby entities. The bottle is lost, unlike drinkable potions. Entities within an 8.25×8.25×4.25 cuboid centered on the thrown potion at impact and within 4 blocks euclidean distance of the thrown potion[n 1] at impact are affected.
The farther away the entity is from the center of the explosion, the lesser the imbued effect. For effects without duration such as Healing or Harming, the potency of the effect reduces linearly from 100% on a direct hit to 0% at 4 blocks' distance. For effects with duration, the effect has full potency but the duration decreases linearly on the same scale (rounded to the nearest 1⁄20 second), with no effect being applied if the duration would be 1 second or less. Throwing a potion at an entity's head will maximize the duration, compared to the feet.
Splash water bottles
Splash water bottles have no effect on entities, but will put out fire in the block hit and the four blocks horizontally surrounding it.
A splash water bottle will deal 1![]() damage to an enderman or a blaze. An enderman will teleport away before being hit, but can still be caught in the effect radius if targeted indirectly.
damage to an enderman or a blaze. An enderman will teleport away before being hit, but can still be caught in the effect radius if targeted indirectly.
Filling cauldrons
Using a splash potion on a cauldron will add one level of that potion to the cauldron.[Pocket Edition only] Attempting to add a splash potion to a cauldron with water, dyed water or a non-matching potion will empty the cauldron and create an explosion sound (but no actual explosion).
Data values
Splash potions when thrown have entity data which define various properties of the entity. Their entity ID is potion.
In Pocket Edition, this is a distinct entity from the thrown lingering potion. In Java Edition, this is the same entity, and the stored Potion tag determines whether it is a splash or a lingering potion.
- Entity data
- Tags common to all entities
- Tags common to all projectiles
- Item: The item that was thrown. The entity renders as a lingering potion if the id is
lingering_potion, otherwise it renders as a splash potion.- Tags common to all potion items
Achievements
| Icon | Achievement | In-game description | Actual requirements (if different) | Gamerscore earned | Trophy type (PS4) | |
|---|---|---|---|---|---|---|
| PS4 | Other | |||||
| Zombie Doctor | Cure a zombie villager. | Throw a splash potion of weakness at a zombie villager and give it a golden apple (by facing the zombie and pressing the use key with a golden apple in your hand) | 40G | Gold | ||
| Taste of Your Own Medicine | Poison a witch with a splash potion. | Throw a splash potion of poison at a witch (by facing the witch and pressing the use key). | 20G | Silver | ||
Advancements
| Icon | Advancement | In-game description | Parent | Actual requirements (if different) | Resource location |
|---|---|---|---|---|---|
 | Zombie Doctor | Weaken and then cure a Zombie Villager | We Need to Go Deeper | Use a golden apple on a zombie villager under the Weakness effect; the advancement is granted when the zombie villager converts into a villager. In multiplayer, only the player that feeds the golden apple gets the advancement. | story/cure_zombie_villager
|
Video
Splash Potion/video
History
| release | |||||
|---|---|---|---|---|---|
1.0.0{{Extension DPL}}<ul><li>[[Lava Bucket|Lava Bucket]]<br/>{{Item
| title = Lava Bucket
| image = Lava Bucket.png
| renewable = Yes
| stackable = No
}}
A '''lava bucket''' is a [[bucket]] filled with [[lava]].
== Obtaining ==
=== Interacting ===
To fill an empty [[bucket]] with lava, {{control|use}} it on a [[lava]] source block or lava in a [[cauldron]]. The block is consumed in the process. Flowing lava does not fill a bucket.
If there is a lava source above the [[pointed dripstone]] stalactite, there is a {{frac|15|256}} (~5.9%) chance for it to completely fill an empty cauldron within 10 blocks under the tip with lava after a [[random tick]]. This lava can then be scooped with a bucket, making it a renewable resource.
==Usage==
A lava bucket can be used to place down lava sources with the {{key|Use Item}} button. Doing so gives the player the bucket back. Lava buckets can be used to replace some transparent, non-full blocks such as [[tall grass]] and [[water]], both flowing and sources.
{{IN|java}}, lava buckets can be used to break [[Nether Portal (block)|Nether portal blocks]] by placing the lava on the side of a block next to the portal block.
=== Smelting ===
A lava bucket can be used as an efficient [[fuel]]. It has the longest burning value of 1000 seconds, compared to 800 seconds for a [[coal block]] (a lava bucket smelts 100 items, and a coal block smelts 80). After smelting starts, the lava bucket turns into an empty bucket.
=== Trading ===
{{IN|bedrock}}, journeyman-level armorer villagers buy a lava bucket for one [[emerald]] as part of their trades.
{{IN|java}}, journeyman-level armorer villagers have a 40% chance of offering to buy a lava bucket for one emerald.
=== Cauldrons ===
A lava bucket can be used to fill a [[cauldron]] with lava. The lava damages any entity standing inside the cauldron, unless the entity is immune to fire damage.<!-- ex: nether mobs--> Flowing water or waterlogging does not affect the lava in the cauldron.
== Sounds ==
{{el|je}}:
{{Sound table
|sound=Fill lava bucket1.ogg
|sound2=Fill lava bucket2.ogg
|sound3=Fill lava bucket3.ogg
|subtitle=Bucket fills
|source=player
|description=When a bucket is filled with lava
|id=item.bucket.fill_lava
|translationkey=subtitles.item.bucket.fill
|volume=1.0
|pitch=1.0
|distance=16}}
{{Sound table
|sound=Empty lava bucket1.ogg
|sound2=Empty lava bucket2.ogg
|sound3=Empty lava bucket3.ogg
|subtitle=Bucket empties
|source=block
|description=When a lava bucket is emptied
|id=item.bucket.empty_lava
|translationkey=subtitles.item.bucket.empty
|volume=1.0
|pitch=1.0
|distance=16
|foot=1}}
{{el|be}}:
{{Sound table
|type=bedrock
|sound=Fill lava bucket1.ogg
|sound2=Fill lava bucket2.ogg
|sound3=Fill lava bucket3.ogg
|source=block
|description=When a bucket is filled with lava
|id=bucket.fill_lava
|volume=1.0
|pitch=1.0}}
{{Sound table
|sound=Empty lava bucket1.ogg
|sound2=Empty lava bucket2.ogg
|sound3=Empty lava bucket3.ogg
|source=block
|description=When a lava bucket is emptied
|id=bucket.empty_lava
|volume=1.0
|pitch=1.0
|foot=1}}
==Data values==
=== ID ===
{{edition|java}}:
{{ID table
|edition=java
|showforms=y
|generatetranslationkeys=y
|displayname=Lava Bucket
|spritetype=item
|nameid=lava_bucket
|form=item
|foot=1}}
{{edition|bedrock}}:
{{ID table
|edition=bedrock
|showaliasids=y
|shownumericids=y
|showforms=y
|notshowbeitemforms=y
|generatetranslationkeys=y
|displayname=Lava Bucket
|spritetype=item
|nameid=lava_bucket
|aliasid=bucket / 10
|id=363
|form=item
|translationkey=item.bucketLava.name
|foot=1}}
== Achievements ==
{{load achievements|Super Fuel}}
== Advancements ==
{{Load advancements|Hot Stuff}}
==History==
{{History|java infdev}}
{{History||20100615|[[File:Lava Bucket JE1 BE1.png|32px]] Added lava buckets.}}
{{History|java alpha}}
{{History||v1.1.0|Buckets of lava can now be used to fuel a [[furnace]] for 100 [[smelting|smelts]], consuming the [[lava]] and the [[bucket]]. This is the highest number of smelts of any single [[item]] in the game.}}
{{History||v1.2.6|{{control|use|text=Using}} a lava bucket on [[block]]s with GUIs ([[chest]]s, furnaces, etc.) no longer places the lava.}}
{{History|java}}
{{History||1.2.1|snap=1.2|Changed name from "Lava bucket" to "Lava Bucket".}}
{{History||1.3|snap=12w22a|[[Smelting]] in a [[furnace]] with a lava bucket now leaves an empty [[bucket]] for the [[player]] to retrieve.}}
{{History||1.8|snap=14w25a|A lava bucket is now shown as the icon when [[lava]] is used as a layer in [[Superflat]].}}
{{History||1.9|snap=15w50a|Added sounds for filling and pouring lava buckets.}}
{{History||1.13|snap=17w47a|Prior to the ''[[Flattening]]'' this item's numerical ID was 327.}}
{{History||1.14|snap=18w43a|[[File:Lava Bucket JE2 BE2.png|32px]] The texture of lava buckets has been changed.}}
{{History|||snap=19w11a|Armorer villagers can now [[trading|buy]] lava buckets.}}
{{History||1.17|snap=20w45a|Lava buckets can now be used to fill a [[cauldron]] with lava.}}
{{History|||snap=21w13a|The lava bucket is now fully renewable, as [[pointed dripstone]] can now be obtained in Survival mode without custom generation.}}
{{History|pocket alpha}}
{{History||v0.7.0|[[File:Lava Bucket JE1 BE1.png|32px]] Added lava buckets.}}
{{History||v0.7.4|Lava buckets can now be used as [[fuel]] in a [[furnace]].
|Lava buckets no longer stack to 64.}}
{{History|bedrock}}
{{History||1.4.0|snap=beta 1.2.14.2|Moved all bucket items, including lava buckets, from the Equipment tab to the Items tab in the [[Creative inventory]].{{verify|type=update}}{{info needed}}<!---please check snapshots, only 1 major release version was checked each--->}}
{{History||1.9.0|snap=beta 1.9.0.2|Lava bucket can now be used to fill a [[cauldron]].}}
{{History||1.10.0|snap=beta 1.10.0.3|[[File:Lava Bucket JE2 BE2.png|32px]] The texture of lava buckets has been changed.}}
{{History||1.11.0|snap=beta 1.11.0.4|Lava buckets can now be [[trading|sold]] to armorer [[villager]]s.}}
{{History||1.16.100|snap=beta 1.16.100.56|The ID of lava buckets has been changed from <code>bucket/10</code> to <code>lava_bucket</code>.}}
{{History||1.17.0|snap=beta 1.16.230.54|The lava bucket is now fully renewable, as [[pointed dripstone]] can now be obtained in Survival mode without custom generation.}}
{{History|console}}
{{History||xbox=TU1|xbone=CU1|ps=1.0|wiiu=Patch 1|switch=1.0.1|[[File:Lava Bucket JE1 BE1.png|32px]] Added lava buckets.}}
{{History||xbox=TU9|[[Dispenser]]s have now been given the ability to shoot out the [[liquids]] inside lava buckets. They can also suck up the liquids if activated again, but do not fill up the [[bucket]]s with the liquid dropped due to a bug.}}
{{History||xbox=none|xbone=none|ps=1.90|wiiu=none|switch=none|[[File:Lava Bucket JE2 BE2.png|32px]] The texture of lava buckets has been changed.}}
{{History|New Nintendo 3DS Edition}}
{{History||0.1.0|[[File:Lava Bucket JE1 BE1.png|32px]] Added lava buckets.}}
{{History|foot}}
== Issues ==
{{Issue list}}
==Trivia==
* One lava bucket has the highest number of [[smelting|smelts]] in the game at 100 items per bucket.
** This makes it 12.5 times more efficient than [[coal]] and [[charcoal]].
* A lava bucket is used as Steve's Down-Smash attack in the crossover fighting game Super Smash Bros. Ultimate.
{{Items}}
[[Category:Renewable resources]]
[[Category:Tools]]
[[de:Lavaeimer]]
[[ja:溶岩入りバケツ]]
[[pt:Balde de lava]]
[[th:ถังลาวา]]
[[uk:Відро лави]]
[[zh:熔岩桶]]</li><li>[[Apple|Apple]]<br/>{{for}}
{{Item
| title = Apple
| image = Apple.png
| renewable = Yes
| heals = {{hunger|4}}
| stackable = Yes (64)
}}
'''Apples''' are [[food]] items that can be eaten by the [[player]].
== Obtaining ==
=== Block loot ===
Oak and dark oak [[leaves]] have 0.5% ({{frac|1|200}}) chance of dropping an apple when decayed or broken, but not if burned. Breaking leaves with a [[tool]] enchanted with the [[Fortune]] enchantment increases the chances of dropping an apple: 0.556% ({{frac|1|180}}) with Fortune I, 0.625% ({{frac|1|160}}) with Fortune II, and 0.833% ({{frac|1|120}}) with Fortune III.
=== Chest loot ===
{{LootChestItem|apple}}
=== Trading ===
Apprentice-level [[Trading#Farmer|farmer]] [[Villager|villagers]] have a 50% ({{frac|1|2}}){{only|bedrock}} or 66.7% ({{frac|2|3}}){{only|java}} chance of selling 4 apples as part of their trades.
== Usage ==
{{see also|Tutorials/Hunger management|title1=Hunger management}}
To eat an apple, press and hold {{control|use}} while it is selected in the hotbar. Eating one restores {{hunger|4}} [[hunger]] and 2.4 [[Hunger#Mechanics|saturation]].
=== Crafting ingredient ===
{{crafting usage}}
=== Composting ===
Placing an apple into a [[composter]] has a 65% ({{frac|13|20}}) chance of raising the compost level by 1.
== Sounds ==
{{Sound table/Entity/Food}}
== Data values ==
=== ID ===
{{edition|java}}:
{{ID table
|edition=java
|showforms=y
|generatetranslationkeys=y
|displayname=Apple
|spritetype=item
|nameid=apple
|form=item
|foot=1}}
{{edition|bedrock}}:
{{ID table
|edition=bedrock
|shownumericids=y
|showforms=y
|notshowbeitemforms=y
|generatetranslationkeys=y
|displayname=Apple
|spritetype=item
|nameid=apple
|id=257
|form=item
|foot=1}}
== Advancements ==
{{load advancements|Husbandry;A Balanced Diet}}
== History ==
{{History|java indev}}
{{History||0.31|snap=20091231-2|[[File:Apple JE1 BE1.png|32px]] Added apples.
|Apples are currently non-functional in this version.}}
{{History|||snap=20100110|Apples are now functional and are edible, restoring {{hp|2}}. They are intended to replace [[mushroom]]s, which were previously edible.}}
{{History|||snap=20100128|Apples now used to [[craft]] [[arrow]]s.}}
{{History|||snap=20100129|Apples no longer used to craft [[arrow]]s.}}
{{History||20100206|Apples now use the texture of [[golden helmet]]s.}}
{{History|java infdev}}
{{History||February 23, 2010|link=none|At the bottom of a [[crafting]] guide they made, a player named JTE jokingly indicated that [[Notch]] dropped an apple when killed, and that apples could be crafted into something called a "[[golden apple]]" – this was a joke on the fact that apples were totally unobtainable.<ref>http://www.minecraftforum.net/topic/2750582-the-secret-history-of-minecraft/</ref><ref name="JTECraftingGuide">https://echidnatribe.org/Minecraft/crafting.php (This is an unofficial recreation with the original domain)</ref>}}
{{History||20100227-1|Players named "[[Notch]]" now drop an apple when they die in addition to their [[inventory]].
|Apples are now used to craft golden apples.
|Apples now correctly use the apple texture again.}}
{{History||20100327|With the addition of the respawn feature, apples have become legitimately obtainable in Survival and renewable for players named "Notch".}}
{{History|java beta}}
{{History||1.8|snap=Pre-release|Apples can now be found in the new [[stronghold]] storeroom [[chest]]s, making them obtainable in normal [[Survival]] gameplay for the first time.
|Apples now restore {{hunger|4}} instead of {{hp|4}}.
|Apples are now stackable.}}
{{History|java}}
{{History||1.0.0|snap=Beta 1.9 Prerelease 3|Apples are now found in the new stronghold altar chests.}}
{{History||1.1|snap=11w48a|Oak [[leaves]] now have a 1/200 chance of dropping an apple when destroyed, making apples fully [[renewable]].}}
{{History|||snap=12w01a|Apples are now found in the new [[village]] blacksmith chests.}}
{{History||1.3.1|snap=12w16a|Apples can now be found in the new [[bonus chest]]s.}}
{{History|||snap=12w18a|"[[Notch]]" players no longer drop apples when they die.}}
{{History|||snap=12w21a|Farmer [[villager]]s now [[trade|sell]] 5 apples for 1 [[emerald]].
|Apples are now used to craft [[enchanted golden apple]]s.}}
{{History||1.4.2|snap=12w37a|[[File:Apple JE2 BE2.png|32px]] The apple's texture has been changed: the [[item]] sprite no longer has a dark outline and now has a more detailed look.}}
{{History||1.5|snap=13w09b|The [[Fortune]] enchantment now increases the chance of dropping apples.}}
{{History||1.7.2|snap=13w43a|Added [[dark oak]] leaves, which drop apples.}}
{{history||1.9|snap=15w43a|Apples may now be found in [[igloo]] basement chests.}}
{{history|||snap=15w44a|Average yield of apples has been slightly increased in bonus chests.
|Apples can no longer be used to craft enchanted golden apples.}}
{{History||1.11|snap=16w33a|Farmer villagers now sell 5–7 apples for 1 emerald.}}
{{History||1.13|snap=17w47a|Prior to [[1.13/Flattening|''The Flattening'']], this item's numeral ID was 260.}}
{{History||1.14|snap=18w43a|[[File:Apple JE3 BE3.png|32px]] The texture of apples has been changed.}}
{{History|||snap=18w48a|Apples can now be found in [[chest]]s in [[plains]] village houses.}}
{{History|||snap=19w03a|Placing an apple into the new [[composter]] has a 50% chance of raising the compost level by 1.}}
{{History|||snap=19w05a|Apples now have a 65% chance of increasing the compost level in a composter by 1.}}
{{History|pocket alpha}}
{{History||v0.4.0|[[File:Apple JE1 BE1.png|32px]] Added apples.}}
{{History||v0.5.0|Apples now restore {{hp|4}} instead of {{hp|2}}.}}
{{History||v0.8.0|snap=build 1|[[File:Apple JE2 BE2.png|32px]] The apple's texture has been changed: the item sprite no longer has a dark outline and now has a more detailed look.}}
{{History||v0.12.1|snap=build 1|Added apples to the [[Creative inventory]].
|Apples are now stackable.
|Apples now restore {{hunger|4}} instead of {{hp|4}}.
|The [[Fortune]] [[enchantment]] can now be used to increase chance of dropping apples.
|Apples can now be used to craft golden apples and enchanted golden apples.}}
{{History||v0.15.0|snap=build 1|Apples can now be used to feed [[horse]]s.}}
{{History|pocket}}
{{History||1.0.0|snap=alpha 0.17.0.1|Apples can now be found inside [[igloo]] chests.}}
{{History||1.0.4|snap=alpha 1.0.4.0|Farmer villagers now sell 5-7 apples for 1 emerald.}}
{{History|bedrock}}
{{History||1.2.0|snap=beta 1.2.0.2|Apples can no longer be used to craft enchanted golden apples.
|Apples can now be found inside bonus chests.}}
{{History||1.10.0|snap=beta 1.10.0.3|Apples can now be found in [[plains]] village weaponsmith chests and plains house chests.
|[[File:Apple JE3 BE3.png|32px]] The texture of apples has been changed.}}
{{History||1.11.0|snap=beta 1.11.0.1|Apples can now be found in [[desert]], [[savanna]], [[taiga]] and [[snowy taiga]] village weaponsmith chests.
|Apples can now be used to fill up composters.}}
{{History|||snap=beta 1.11.0.4|Farmer villagers now sell 4 apples as part of their second tier trades.}}
{{History|console}}
{{History||xbox=TU1|wiiu=Patch 1|[[File:Apple JE1 BE1.png|32px]] Added apples.}}
{{History||xbox=TU5|Apples are now stackable.
|Apples now restore {{hunger|4}} instead of {{hp|4}}.}}
{{History||xbox=TU12|ps=1.03|[[File:Apple JE2 BE2.png|32px]] The apple's texture has been changed: the item sprite no longer has a dark outline and now has a more detailed look.}}
{{History||xbox=none|xbone=none|ps=1.90|wiiu=none|switch=none|[[File:Apple JE3 BE3.png|32px]] The texture of apples has been changed.}}
{{History|New 3DS}}
{{History||0.1.0|[[File:Apple JE2 BE2.png|32px]] Added apples.}}
{{History|foot}}
== Issues ==
{{issue list}}
== Trivia ==
*Prior to the texture update in Java Edition 1.4.2, the sprite of the apple was the same one used in [[Notch]]'s game ''[[Legend of the Chambered]]''.
*Before it was added to ''Minecraft'', apples dropping from trees was already a feature in ''[[Minicraft]]''.
== Gallery ==
<gallery>
Apple in Stronghold.png|An apple found in a stronghold chest.
Apple Item.png|An apple that dropped from decaying leaves.
Obtaining an apple by trading.png|Obtaining apples via villager trading.
File:Candy Apple (Trails and Tales Summer Event) Render.png|The Candy Apple, an item featured in the [[Trails & Tales Event]].
</gallery>
== References ==
{{reflist}}
== External Links ==
*[https://www.minecraft.net/en-us/article/taking-inventory-apple Taking Inventory: Apple] – Minecraft.net on November 23, 2018
{{items}}
[[Category:Plants]]
[[Category:Food]]
[[Category:Renewable resources]]
[[cs:Jablko]]
[[de:Apfel]]
[[es:Manzana]]
[[fr:Pomme]]
[[hu:Alma]]
[[it:Mela]]
[[ja:リンゴ]]
[[ko:사과]]
[[nl:Appel]]
[[pl:Jabłko]]
[[pt:Maçã]]
[[ru:Яблоко]]
[[th:แอปเปิ้ล]]
[[uk:Яблуко]]
[[zh:苹果]]</li></ul> | Beta 1.9-pre4 | Added splash potions. | |||
| Oct 14, 2011 | Jeb had commented that while splash water bottles should logically harm endermen and blazes, its coding would be more difficult to implement than is worthwhile. | ||||
1.3.1{{Extension DPL}}<ul><li>[[Super Fertilizer|Super Fertilizer]]<br/>{{education feature}}
{{Exclusive|Bedrock|Education}}
{{Item
| image = Super Fertilizer.png
| renewable = No
| stackable = Yes (64)
}}
'''Super fertilizer''' is a powerful form of [[bone meal]] that is created using [[ammonia]] and [[phosphorus]].
== Obtaining ==
=== Lab table ===
{| class="wikitable"
! Result
! Materials Needed
|-
!rowspan=2|{{slot|Super Fertilizer}}<br>[[Super Fertilizer]]
|{{slot}}{{slot|Ammonia|link=Compound}}{{slot|Phosphorus|link=Element}}{{slot}}
|-
|<center>[[Compound|Ammonia]], [[Element|Phosphorus]]</center>
|}
== Usage ==
Super fertilizer can be used in the same way as bone meal. It produces more [[flowers]] in a larger area when used on [[grass block]]s compared to bone meal. When super fertilizer is used on a [[sapling]], a [[tree]] is instantly grown after one use, instead of multiple uses as with bone meal. Super fertilizer matures crops with a single use.
Note that super fertilizer does not instantly grow a hanging [[mangrove propagule]]. This could be a bug.
== Sounds ==
{{Sound table
|type=bedrock
|sound=Gravel hit1.ogg
|sound2=Gravel hit2.ogg
|sound3=Gravel hit3.ogg
|sound4=Gravel hit4.ogg
|source=player
|description=When super fertilizer is created by a [[lab table]]
|id=step.gravel
|volume=1.0
|pitch=0.2/0.4}}
{{Sound table
|sound=Bonemeal1.ogg
|sound2=Bonemeal2.ogg
|sound3=Bonemeal3.ogg
|sound4=Bonemeal4.ogg
|sound5=Bonemeal5.ogg
|description=When super fertilizer is successfully used
|source=Blocks
|id=item.bone_meal.use
|foot=1}}
== Data values ==
=== ID ===
{{ID table
|edition=bedrock
|shownumericids=y
|showforms=y
|notshowbeitemforms=y
|generatetranslationkeys=y
|displayname=Super Fertilizer
|spritetype=item
|nameid=rapid_fertilizer
|id=597
|form=item
|foot=1}}
== History ==
{{History|bedrock}}
{{History||1.4.0|snap=beta 1.2.20.1|[[File:Super Fertilizer BE1.png|32px]] Added super fertilizer.}}
{{History|education}}
{{History||1.0.27|[[File:Super Fertilizer BE1.png|32px]] Added super fertilizer.}}
{{History|foot}}
{{items}}
{{Education Edition}}
[[Category:Plants]]
[[Category:Non-renewable resources]]
[[Category:Education Edition items]]
[[de:Superdünger]]
[[ja:スーパー肥料]]
[[ko:슈퍼 비료]]
[[lzh:神肥]]
[[pl:Supernawóz]]
[[pt:Super fertilizante]]
[[uk:Супердобриво]]
[[zh:超级肥料]]</li><li>[[Map|Map]]<br/>{{about|the craftable map|maps showing the locations of certain structures|Explorer Map|other uses|Map (disambiguation)}}
{{distinguish|World}}
{{Item
| image = Map Zoom 4.png
| renewable = Yes
| stackable = Yes (64)
}}
A '''map''' is an [[item]] used to view explored [[Chunk|terrain]] and mark landmarks.
==Obtaining==
===Crafting===
{{crafting
|head=1
|showname=0
|showdescription=1
|A1= Paper
|B1= Paper
|C1= Paper
|A2= Paper
|B2= Compass
|C2= Paper
|A3= Paper
|B3= Paper
|C3= Paper
|Output= Empty Map
|type= Miscellaneous
|description=This variation is called an "empty locator map" {{in|bedrock}}, or an "empty map" {{in|java}}.
When the player first creates a map, it is blank. It needs to be activated by holding it and pressing ''{{Control|use item}}''. after which it records terrain and location markers as the player travels within (or close to) the area it maps.
}}
{{crafting
|A1= Paper
|B1= Paper
|C1= Paper
|A2= Paper
|B2= Paper
|C2= Paper
|A3= Paper
|B3= Paper
|C3= Paper
|Output= Empty Map
|type= Miscellaneous
|description={{only|bedrock}}
This variation is called an "empty map". It does not show location markers. It is intended for cloning and zooming locator maps without having to consume an additional [[compass]] (thereby saving [[iron ingot]]s and [[redstone dust]]), but it can also be {{Control|use|text=activated}} and later converted to a locator map by combining it with a compass on an [[anvil]], [[crafting table]], or [[cartography table]].
|foot=1
}}
=== Natural generation ===
==== Chest loot ====
{{LootChestItem|empty-map,map
}}
=== Cartography table ===
A map can also be created using a single paper on a [[cartography table]] to create an empty map, or a paper with a compass for an empty locator map.{{only|bedrock}}
=== Starting map ===
{{exclusive|bedrock|section=1}}
When creating a new world {{in|bedrock}}, the player can enable the "Starting Map" option to spawn with an empty locator map in the hotbar. The map's zoom scale is 1:8. The map is updated only while the player holds it.
=== Trading ===
Novice-level cartographer [[Villager|villagers]] sell a single empty map for 7 [[Emerald|emeralds]] as their trades.
{{IN|java}}, cartographer villagers may give players with the [[Hero of the Village]] effect an empty map.
== Usage ==
{{See also|Tutorials/Mapping}}
=== Mapping ===
Crafting a map creates an empty map. The map is drawn for the first time when it is held and used (with ''{{control|use item}}''). This map can then be adjusted to different zoom levels. After conversion to a drawn map item, it starts to draw a top-down view of the player's surroundings, with North pointing to the top of the map. A pointed oval pointer indicates the player's position on the map, and moves in real-time as the player moves across the terrain shown on the map. The map does ''not'' center on the player when created, rather, the world is broken up into large invisible grid squares, and the map displays the area of whichever grid square it is in when it is first used. For example, if a player uses a new map in a certain grid square, and then moves a distance away and uses another fresh map but is still within the same grid square, both maps appear identical. To make a map that is not identical to the first one, the player would have to move outside of the edges of the first map (because then they would be in a new grid square). This way, no two maps of the same size can ever partially overlap and every map can display only a fixed area.
To record the world on a map, that specific map must be held in the player's hands while the player moves around the world. The world is recorded as-is during exploration, meaning that if the world is modified, a player must revisit the area while holding the map to update the map's view. Maps can also be [[Map#Cloning|cloned]]. If a player holds a map whose one or more clones are on display in item frames, updates are made on all clone-connected maps.
Other players are displayed on the map only if they have a map in their inventory cloned from the one being looked at. When placing a map into an [[item frame]], the map displays with a green pointer shown at the location of the item frame. This is to help the player see where they are in relation to the area that the map is showing. If the player leaves a map in an item frame and views a clone of it, the green pointer remains in the spot of the framed copy. This can be used to set up waypoints. Unexplored areas are transparent, making the item frame visible.
When the player leaves the area shown on a specific map, the player pointer transforms into a white dot that moves on that map. The marker shrinks to a smaller white dot if the player is far from the map's center: the area is 320 by 320 blocks per scale factor. The dot moves along the edge of the map to show the relative location of the player. However {{in|bedrock}}, the pointer remains as an arrow but shrinks until the player is near the area shown on the map.
While maps in [[the Nether]] work, they show only the red-and-gray pattern, regardless of the blocks placed. The only useful function is finding where the player is in relation to placed framed maps, which show as green pointers. Additionally, the player pointer rapidly spins and is not a good indicator of direction. Placing a [[banner]] in [[the Nether]] still shows it on the map as usual. Having a smaller map image while riding a [[strider]] in the Nether can help one to see one's footing while traveling over [[lava]].
{{IN|java}}, when using a map from another dimension, the map shows the player's position and direction when they were last in the dimension of the map. {{IN|bedrock}}, however, the player can use maps from one dimension while in another dimension. For locator maps, the place marker changes color depending on the dimension that the player is currently in (white for the Overworld, red for [[the Nether]], and magenta for [[the End]]). An Overworld map in the Nether shows the player's corresponding location and direction in the Overworld.<ref name=multiverse>{{ytl|EpP1diZdEdI}}</ref> Similarly, a Nether Map in the Overworld shows the player's corresponding location in the Overworld, but the place marker spins, just like a Nether map in the Nether. An Overworld map in the End shows the world spawn.<ref name=multiverse/> A Nether map cannot be used in the End — the map appears, but the place marker is not shown anywhere — and similarly, an End map cannot be used in the Overworld or the Nether.
A player can make a large piece of pixel art (128×128) facing upward, center a map on it, and place that map in an [[item frame]] to create a custom picture. Locking is recommended. See [[Map item format#Map Pixel Art]] for details on the techniques.
Maps display as a mini-map when held in the off-hand, or if the off-hand slot is occupied; the map is full-sized only when held in the dominant hand with both hands free.
A map always positions itself facing towards North when placed horizontally within an item frame regardless of how the map is placed.
=== Map content ===
{{Main|Map item format}}
Maps consist of square pixels arranged like pixels in a 128×128 square pattern, with each pixel representing a square portion of land. {{IN|java}}, the [[Map item format#Color table|color of a map pixel]] generally matches the color of the most common [[opaque]] block in the corresponding area, as seen from the sky. 'Minority blocks' in the target area have no effect on the color of the pixel, thus small features tend to be undetectable on zoomed-out maps.
{{IN|bedrock}}, the [[Map item format#Color table|color of a map pixel]] instead matches the single top-most opaque block in a grid sized by the map magnification pixel size (see the table in the "Player marker and pointer" section below). For example, a 3/4 magnification map has a pixel size of 8x8 blocks; this means the map will read only the top-most opaque blocks at the 0,0 coordinate, the 8,0 coordinate, the 0,8 coordinate, etcetera, ignoring all other blocks in the area. This means that {{in|bedrock}}, map pixel art requires only one block per pixel regardless of map magnification.
{{IN|bedrock}}, grass, foliage and water colors that are biome-dependent are represented accurately on a map.
{| class="wikitable"
|-
! style="width: 300px;" | {{el|je}}
! style="width: 300px;" | {{el|be}}
|-
| style="text-align: center;" | [[File:Map Zoom 4.png|alt=All banners marked on a map, alongside a named banner.|216px]]
| style="text-align: center;" | [[File:Map item BE.png|216px]]
|-
| Biome colors on ''Java Edition''.
| Biome colors on ''Bedrock Edition''.
|-
|}
Maps also show ground up to about 15 blocks below the surface of the water in oceans as slightly lighter blue, to show where the ground rises. This is not true with land above water. Higher elevations in the world mean lighter colors on the map. The map records the surface even as the player moves below the surface.
A standard map represents 128x128 blocks (1 block per pixel, 8x8 [[chunks]]) but maps can be zoomed-out to represent up to 2048x2048 blocks (16 square blocks per pixel, 128x128 [[chunks]]).
Some relevant distances: 64 blocks (4 chunks) is the update radius from a player in the Overworld and the End. However, it is half this (32 blocks) in the Nether. Also, 1024 blocks is the minimum Overworld distance from a [[nether portal]], at which players can build another portal and expect to reach a new location in the Nether. This is the distance across a 1:8 map, and also from a 1:16 map's center to its edge.
=== Player marker and pointer ===
{{IN|java}}, every map contains a marker that marks the position of the player, and points in the same direction as the player. When a player moves out of a map, a big white dot appears and moves relative to the player's position. The pointer either disappears when the player moves away a certain distance from the border of the map or, in case of [[explorer map]]s, the big white dot changes to a smaller white dot. The distance required for the small white dot to appear(explorer maps) or for the big dot to vanish (normal maps) changes with the scaling of the map.
* '''Level 0/4 :''' 128×128 blocks (each map pixel represents 1 block)
* '''Level 1/4 :''' 256×256 blocks (2×2 blocks per map pixel)
* '''Level 2/4 :''' 512×512 blocks (4×4 blocks per map pixel)
* '''Level 3/4 :''' 1024×1024 blocks (8×8 blocks per map pixel)
* '''Level 4/4 :''' 2048×2048 blocks (16×16 blocks per map pixel)
{{IN|bedrock}}, a map can be crafted with or without this marker, and a map without a position marker can add one later by adding a compass to the map. When a map is crafted without a compass, it's simply called an "empty map", but when crafted with a compass, it's called an "empty locator map". The marker also turns red if the player enters the Nether with an Overworld map and shows the player's Overworld location relative to the Nether location. A map created in the End has a purple marker showing the player's location. If an Overworld map is used in the End, a magenta dot appears on the player's spawn point.{{/BE|position}}
{{crafting
|name=Map<br>(with marker)
|ingredients=[[Map]] or Empty Map +<br>[[Compass]]
|showdescription=1
|Map (no markers);Empty Map
|Compass
|Output= Locator Map;Empty Locator Map
|type= Miscellaneous
|description={{el|be}} only.
Maps crafted from only paper do not show the location marker; to add it, a compass must be added to the map.
|foot=1
}}
{{IN|bedrock}}, a cartography table can also be used to add a pointer to create a locator map or empty locator map. This can be done by adding a compass to paper, or to an empty map or map.
=== Zooming out ===
[[File:Cartography table UI zoom.png|thumb|300px|{{IN|java}}, cartography table's UI, showing the map is being zoomed out.]]
A [[cartography table]] can also be used to zoom out, taking only one piece of paper per zoom level.
A blank map can not be zoomed out. A map has to have something already marked on it for the zooming to be possible.
{{Crafting
|A1= Paper |B1= Paper |C1= Paper
|A2= Paper |B2= Map;Locator Map |C2= Paper
|A3= Paper |B3= Paper |C3= Paper
|Output= Map;Locator Map
|showdescription=1
|description=Locator Map {{el|be}} only.
}}
{{/BE|zoom}}
==== Zoom details ====
The zooming function starts from when the map is created (zoom level 0) up to its fourth zoom step (zoom level 4).
{| class="wikitable" style="text-align: center" data-description="Zoom levels"
! colspan="2" |
! Zoom step 0
! Zoom step 1
! Zoom step 2
! Zoom step 3
! Zoom step 4
|-
! colspan="2" |
| [[File:Map Zoom 0.png|116px|Zoom step 0, 1:1]]
| [[File:Map Zoom 1.png|116px|Zoom step 1, 1:2]]
| [[File:Map Zoom 2.png|116px|Zoom step 2, 1:4]]
| [[File:Map Zoom 3.png|116px|Zoom step 3, 1:8]]
| [[File:Map Zoom 4.png|116px|Zoom step 4, 1:16]]
|-
! colspan="2" | Zoom level
| 0/4
| 1/4
| 2/4
| 3/4
| 4/4
|-
! colspan="2" | 1 map pixel represents
| 1 block
| 2×2 blocks
| 4×4 blocks
| 8×8 blocks
| 16×16 blocks<br>(1×1 chunk)
|-
! colspan="2" | Scaling ratio
| 1:1
| 1:2
| 1:4
| 1:8
| 1:16
|-
! rowspan="2" colspan="2" | Map covers an area of
| 128×128 blocks
| 256×256 blocks
| 512×512 blocks
| 1024×1024 blocks
| 2048×2048 blocks
|-
| 8×8 chunks
| 16×16 chunks
| 32×32 chunks
| 64×64 chunks
| 128×128 chunks
|-
! colspan="2" | Smallest discernible features
| Blocks
| Trees, Paths
| Lakes, Buildings
| Mountains, Rivers
| Biomes, Mountain Ranges
|-
! colspan="2" | Use cases
| Pixel art, Base plans
| Base surroundings
| Structure mapping
| Landscape mapping
| Biome mapping
|-
! rowspan="2" | Total paper needed to zoom out from Level 0
! in anvil{{only|bedrock|short=1}} or crafting table
| -
| {{ItemSprite|Paper}} 8
| {{ItemSprite|Paper}} 16
| {{ItemSprite|Paper}} 24
| {{ItemSprite|Paper}} 32
|-
! in cartography table
| -
| {{ItemSprite|Paper}} 1
| {{ItemSprite|Paper}} 2
| {{ItemSprite|Paper}} 3
| {{ItemSprite|Paper}} 4
|}
Maps are always aligned to a grid at all zoom levels. That means zooming out any different map in a specific area covered by that map always has the same center. As such, maps are aligned by map width (1024 blocks for a level 3 maps) minus 64. A level 3 map generated at spawn covers X and Z coordinates from -64 to 959. All maps generated in this area zoom out to the same coordinates, guaranteeing that they are always 'aligned' on a map wall. For a zoomed-out map to cover a new area, it must start with a base (level 0) map that is in that area.
At zoom level 0, a map created on the point (0,0) has (0,0) at the center of the map. At higher zoom levels of the same map, the coordinate (0,0) is in the top left square of the map.
{{IN|java}}, zoom level can be seen on a map by turning on Advanced Tooltips (a [[Debug screen#More debug keys|debug screen]] option that can be toggled by using the key combination {{key|F3+H}}). The tooltip of the map then shows the zoom level, scaling factors, and map ID.
=== Cloning ===
[[File:Cartography table UI clone.png|thumb|300px|{{IN|Java}}, cartography table's UI, showing the map is being cloned.]]
A mix of empty maps and empty locator maps may be used. Whether the cloned maps show position markers is dependent only on the input map.
A [[cartography table]] can also be used to clone a map.
The parts of the world that have already been explored and mapped are copied, and newly explored areas appear on both instances. If one of the maps is later zoomed out, then the maps lose their connection to each other and function as completely separate maps that have to be individually filled by exploring.
In Creative mode, a map in an item frame may be cloned by using {{control|pick block}} on it, as long as that map is not also in the player's inventory.
It doesn't matter if the map to be cloned is at a higher zoom level (made of more paper) than the blank map. Upon copying the map, both resulting maps have the same magnification as the starting map.
{{/BE|clone}}
=== Crafting ingredient ===
{{crafting usage|Map, Empty Map}}
=== Marking points ===
{{IN|java}} the player has the ability to mark spots on a map. To do this, {{control|use}} a map on a placed-down [[banner]], and the spot of the banner gets marked on the map. The mark takes the color of whatever the base color is for the banner, and if the banner has a name, the mark shows that name. Banner marks on a map are always oriented with their top facing north, regardless of the banner's actual orientation. If the banner is destroyed, the mark of the banner remains at first, but if the player gets closer to where the banner previously was, it disappears as the area is updated on the map.
If a map is mounted on an item frame and is within the area it depicts, the mounted map displays its current location with a green indicator rotated to match its orientation.
[[File:Map Marker Bedrock on Item frame.png|thumb|181x181px|{{IN|bedrock}} this is what a map lying on an item frame looks like, while showing markers.]]
{{IN|bedrock}} the player can place copies of locator maps in [[item frame]]s in order to create a land mark. The marker is a green dot that resembles the shape of the player's marker, but in green color. The position the marker points at depends on the direction the item frame is facing. It is worth noting that the markers work only on copies of the same map. Other maps of the same area do not show the existing markers that the player(s) had placed.
If a player has a cloned map in their inventory, their pointer appears white when viewed on the same map held by another player. Hence, if all players have the same cloned map in their inventory, all markers would appear white when the clone map is viewed.
{| class="wikitable"
|-
! style="width: 300px;" | {{el|je}}
! style="width: 300px;" | {{el|be}}
|-
| style="text-align: center;" | [[File:Banner marked map.png|alt=All banners marked on a map, alongside a named banner.|216px]]
| style="text-align: center;" | [[File:Tracking map with markers bedrock.png|216px]]
|-
| How every banner appears {{IN|java}} on a map, including named banners.
| {{IN|bedrock}} this is how a locator map shows map markers while held by a player.
|-
|}
===Locking===
[[File:Cartography table UI lock.png|thumb|300px|{{IN|Java}}, cartography table's UI, showing the map is being locked.]]
Maps can be locked when using a [[glass pane]] in a [[cartography table]]. This creates a new map containing the same data and locks it. All copies of this new map are also locked. A locked map never changes, even when the depicted terrain changes. {{IN|Be}}, locked maps have a unique texture.
{| class="wikitable" style="text-align: center;"
|-
! Condition
! style="width: 200px;" | Newly created map
! style="width: 200px;" | Map after terrain alteration
|-
! Unlocked map
| [[File:Map Zoom 0.png|174px]] || [[File:Unlocked Map.png|174px]]
|-
! Locked map
| [[File:Map Zoom 0.png|174px]] || [[File:Map Zoom 0.png|174px]]
|-
|}
{{-}}
== Sounds ==
{{Edition|Java}}:
{{Sound table
|rowspan=2
|sound=Drawmap1.ogg
|sound2=Drawmap2.ogg
|sound3=Drawmap3.ogg
|subtitle=Map drawn
|source=player
|description=When a map is drawn
|id=ui.cartography_table.take_result
|translationkey=subtitles.ui.cartography_table.take_result
|volume=1.0
|pitch=1.0
|distance=16}}
{{Sound table
|subtitle=Map drawn
|source=block
|description=When a map is edited using a cartography table
|id=ui.cartography_table.take_result
|translationkey=subtitles.ui.cartography_table.take_result
|volume=1.0
|pitch=1.0
|distance=16
|foot=1}}
{{Edition|Bedrock}}:
{{Sound table
|type=bedrock
|rowspan=2
|sound=Drawmap1.ogg
|sound2=Drawmap2.ogg
|sound3=Drawmap3.ogg
|source=block
|description=When a map is drawn<wbr>{{Upcoming|BE 1.20.20.20}}
|id=ui.cartography_table.take_result|idnote={{Verify|Could be block.cartography_table.use}}
|volume=0.8
|pitch=1.0}}
{{Sound table
|type=bedrock
|source=block
|description=When a map is edited using a cartography table
|id=ui.cartography_table.take_result
|volume=0.8
|pitch=1.0
|foot=1}}
== Data values ==
=== ID ===
{{edition|java}}:
{{ID table
|edition=java
|showforms=y
|generatetranslationkeys=y
|displayname=Empty Map
|spritetype=item
|nameid=map
|form=item}}
{{ID table
|displayname=Map
|spritetype=item
|nameid=filled_map
|form=item
|translationkey=item.minecraft.filled_map, filled_map.buried_treasure, filled_map.explorer_jungle{{upcoming|java 1.20.2}}, filled_map.explorer_swamp{{upcoming|java 1.20.2}}, filled_map.mansion, filled_map.monument, filled_map.unknown, filled_map.village_desert{{upcoming|java 1.20.2}}, filled_map.village_plains{{upcoming|java 1.20.2}}, filled_map.village_savanna{{upcoming|java 1.20.2}}, filled_map.village_snowy{{upcoming|java 1.20.2}}, filled_map.village_taiga{{upcoming|java 1.20.2}}
|foot=1}}
{{edition|bedrock}}:
{{ID table
|edition=bedrock
|showaliasids=y
|shownumericids=y
|showforms=y
|notshowbeitemforms=y
|generatetranslationkeys=y
|displayname=Empty Map
|spritetype=item
|nameid=empty_map
|aliasid=emptymap
|id=515
|form=item
|translationkey=item.emptyMap.name, item.emptyLocatorMap.name}}
{{ID table
|displayname=Map
|spritetype=item
|spritename=map-be
|nameid=filled_map
|aliasid=map
|id=420
|form=item
|translationkey=item.map.name, item.map.exploration.mansion.name, item.map.exploration.monument.name, item.map.exploration.treasure.name
|foot=1}}
=== Metadata ===
{{see also|Bedrock Edition data values}}
{{IN|bedrock}}, maps use the following data values:
{{/DV}}
=== Item data ===
{{el|java}}:
{{main|Player.dat format}}
<div class="treeview">
* {{nbt|compound|tag}}: The item's '''tag''' tag.
{{:Player.dat_format/Maps}}
</div>
{{el|bedrock}}:
: See [[Bedrock Edition level format/Item format]].
=== Map icons ===
{{see also|Player.dat format|Map item format|map_icons.png}}
Map icons are 8×8 in ''Java Edition'', but 16×16 in Bedrock Edition. As such, there are minor misalignment issues in ''Java Edition''.<ref>{{bug|MC-214649|||WF}}</ref>
[[File:Map icons.png|thumb|128px|Map icons texture {{in|Java}}]]
[[File:Map icons BE.png|thumb|128px|Map icons texture {{in|Bedrock}}]]
{| class="wikitable"
|-
! Java ID !! Bedrock ID !! Text ID !! Appearance !! Purpose !! Shown in item frames?
|-
| 0 || ||<code>player</code> || [[File:Player (texture) JE1 BE1.png|16px]] [[File:Player (texture) BE2.png|16px]] White marker || Players (on map) || No
|-
| 1 || 1 ||<code>frame</code> || [[File:Green Marker (texture) JE1 BE1.png|16px]] [[File:Green Marker (texture) BE2.png|16px]] Green marker || The current map in an item frame || Yes
|-
| 2 || ||<code>red_marker</code> || [[File:Red Marker (texture) JE1 BE1.png|16px]] [[File:Red Marker (texture) BE2.png|16px]] Red marker || Position converted to Overworld when opening Overworld map in the Nether{{Only|bedrock}} || No
|-
| 3 || ||<code>blue_marker</code> || [[File:Blue Marker (texture) JE1 BE1.png|16px]] [[File:Blue Marker (texture) BE2.png|16px]] Blue marker || Other players || No
|-
| 4 || ||<code>target_x</code> || [[File:Target X (texture) JE1 BE1.png|16px]] White X || Unused || Yes
|-
| 5 ||5
|<code>target_point</code> || [[File:Target Point (texture) JE1 BE1.png|16px]] [[File:Target Point (texture) BE2.png|16px]] Red triangle || Unused || Yes
|-
| 6 || 6 ||<code>player_off_map</code> || [[File:Player Off Map (texture) JE1 BE1.png|16px]] Large white dot || Players off map, nearby{{only|java}} || No
|-
| 7 || 13 ||<code>player_off_limits</code> || [[File:Player Off Limits (texture) JE1.png|16px]] [[File:Player Off Limits (texture) BE.png|16px]] Small white dot || Players off map, far away{{only|java}} || No
|-
| 8 ||14
|<code>mansion</code> || [[File:Mansion (texture) JE1.png|16px]] [[File:Mansion (Texture) BE2.png|frameless|16x16px]] Woodland mansion || Woodland mansion || Yes
|-
| 9 || 15 ||<code>monument</code> || [[File:Monument (texture) JE1.png|16px]] [[File:Monument Texture BE2.png|frameless|16x16px]] Ocean monument || Ocean monument || Yes
|-
| 10 - 25 || ||<code>{{tooltip|banner_*|banner_white, banner_orange, banner_magenta, banner_light_blue, banner_yellow, banner_lime, banner_pink, banner_gray, banner_light_gray, banner_cyan, banner_purple, banner_blue, banner_brown, banner_green, banner_red, banner_black}}</code> || [[File:Banner White (texture) JE1.png|16px]] [[File:Banner Light Gray (texture) JE1.png|16px]] [[File:Banner Gray (texture) JE1.png|16px]] [[File:Banner Black (texture) JE1.png|16px]] [[File:Banner Brown (texture) JE1.png|16px]] [[File:Banner Red (texture) JE1.png|16px]] [[File:Banner Orange (texture) JE1.png|16px]] [[File:Banner Yellow (texture) JE1.png|16px]] [[File:Banner Lime (texture) JE1.png|16px]] [[File:Banner Green (texture) JE1.png|16px]] [[File:Banner Cyan (texture) JE1.png|16px]] [[File:Banner Light Blue (texture) JE1.png|16px]] [[File:Banner Blue (texture) JE1.png|16px]] [[File:Banner Magenta (texture) JE1.png|16px]] [[File:Banner Purple (texture) JE1.png|16px]] [[File:Banner Pink (texture) JE1.png|16px]]<br>Banners in all 16 wool colors{{only|java}}|| Banner markers || Yes
|-
| 26 ||4
|<code>red_x</code> || [[File:Red X (texture) JE1.png|16px]] [[File:Target X (texture) BE2.png|16px]] Red X || Buried treasure || Yes
|-
| || 8 || || [[File:Magenta Marker (texture) BE1.png|16px]] Magenta marker
| Position converted to Overworld when opening Overworld map in the End{{Only|bedrock}} || No
|-
| || 9 || || [[File:Orange Marker (texture) BE1.png|16px]] Orange marker{{more info}}
|Other players
|Yes
|-
| || 10 || || [[File:Yellow Marker (texture) BE1.png|16px]] Yellow marker
| Other players || No
|-
| || 11 || || [[File:Cyan Marker (texture) BE1.png|16px]] Cyan marker
| Other players || No
|-
| -
|12
| || [[File:Green Point (texture) BE1.png|16px]] Green Triangle
| Other structure such as stronghold, fortress, end city, etc. when used as explorer map destination{{Only|bedrock}} || Yes
|}
It should be noted that even if the player used a NBT editor to add an additional icon on the map, ''Minecraft'' shows only the first one listed when the player loads up their world.
== Achievements ==
{{load achievements|Map Room}}
== History ==
{{see also|section=24|map_icons.png|Java Edition history of textures#Map icons}}
{{more images|section=24|{{bug|MC-72962}}}}
{{History||April 27, 2011|link=https://web.archive.org/web/0/http://notch.tumblr.com/post/4988431144/the-maps|[[Notch]] unveiled screenshots of the map.}}
{{History||April 28, 2011|link={{tweet|notch|63500114005721088}}|[[Notch]] said that he would try to make maps place-able on [[wall]]s.}}
{{History|java beta}}
{{History||1.6|snap=Test Build 3|[[File:Map (item) JE1 BE1.png|32px]] Added maps.}}
{{History||1.6.6|The ability to auto-craft maps using shift-click has been disabled.}}
{{History||1.8|snap=Pre-release|Maps can now be found in library chests in the brand-new [[stronghold]]s.
|Auto crafting maps has been restored. Map cloning, therefore, is unavailable for a period of time.}}
{{History||1.8.1|Maps now work both while walking and flying.}}
{{History|java}}
{{History||1.0.0|snap=Beta 1.9 Prerelease 5|Prior to this update, the [[sun]] in ''[[Minecraft]]'' rose in the North, which threw off many [[player]]s and led to a common misconception that ''Minecraft'' maps/[[world]]s were oriented with East at the top. The sun now rises in the east and sets in the west, making navigation much more intuitive.
|Before the change in sun position, it was commonly said that ''Minecraft'' maps/worlds are oriented with East at the top; sunrise, by definition, occurs at the East, which means it is certainly true that the maps were oriented "East" since the Sun rose from the top (North). However, [[Jeb]] asserted (and [[Notch]] agreed) that the sun rose in the north.<ref>{{Tweet|jeb|87815841160237056}}</ref><ref>{{Tweet|notch|88155424880201728}}</ref> Most mods and map-making tools, however, used the terms East and North consistent with their actual definitions (e.g. a [[Programs and editors/Cartograph|Cartograph]]-generated map with North at the top is rotated 90 degrees from the in-game map).}}
{{History||1.4.2|snap=12w34a|[[File:Empty Map JE1 BE1.png|32px]] [[Crafting]] a map now creates an empty map. The map is drawn for the first time when it is held and right clicked, and is centered near the location of the [[player]] when clicked (not as before where it was centered on the location it was crafted.)
|Previously, in order to map a new area, the map had to be ''crafted'' in that area (rather than carrying a previously-crafted map to the new area). The point where a map is crafted becomes its permanent center, and could never be changed.
|The pointer no longer disappears when leaving the map, but transforms into a white dot, indicating on what side of the map the player is located.
|Maps now align to a grid, making it easier to create adjacent maps.
|Maps can now be zoomed out (but not zoomed in).
|Maps can now be cloned and scaled.}}
{{History||1.4.2|snap=12w34b|Maps now have a ''zoom level'', which was fixed at 1:8 prior to snapshot [[Java Edition 12w34a|12w34a]],<ref name="mapinfo">https://web.archive.org/web/0/http://notch.tumblr.com/post/4988431144/the-maps</ref> but now starts at 1:1 and can be increased up to 1:16 by re-crafting an existing map.
|Maps are no longer numbered on the top-left corner and is labeled through the tooltip.}}
{{History|||snap=12w36a|New maps are now crafted at a scale factor of 1:1. A zoomed in map can be zoomed out by re-crafting it with another 8 sheets of [[paper]] on a [[crafting table]]. Each time this is done, the scale increases - 1:1, 1:2, 1:4, 1:8, 1:16 with a map scale of 1:16 being the current maximum.}}
{{History||1.7.2|snap=13w38a|The map size has been increased when placed on a [[wall]] using the [[item frame]].
|More colors have been added to maps for different [[block]]s.<ref name="infodump2">https://web.archive.org/web/0/https://www.mojang.com/2013/10/minecraft-1-7-the-update-that-changed-the-world</ref>}}
{{History||1.8|snap=14w31a|Zoomed maps now conform to an expanded grid based on their zoom level. Previously, careful considerations would need to be taken to creating a wall of adjoining maps.}}
{{History||1.8.1|snap=pre1|Some colors have been changed on maps to more accurately represent their respective [[block]].}}
{{History||1.9|snap=15w31a|Maps now display as a mini-map when held in the off-hand, or if the off-hand slot is occupied; the (old) large version is visible only when held in the dominant hand with the secondary hand free.}}
{{History|||snap=15w34a|New maps can now be [[crafting|crafted]] at a scale factor of 1:4.
|A crafting recipe has been added for zooming in maps.}}
{{History|||snap=15w43a|The average yield of empty maps from [[stronghold]] library [[chest]]s has been doubled.}}
{{History|||snap=15w45a|New maps are once again [[crafting|crafted]] at a scale factor of 1:1, as they had been before snapshot [[15w34a]].
|The [[crafting]] recipe, that was introduced in 15w34a, for zooming in maps has been removed.}}
{{History|||snap=15w49a|Map making now uses armor equipping sounds.}}
{{History||1.11|snap=16w39a|Maps now work in [[the End]].
|Empty maps are now [[trading|sold]] by cartographer [[villager]]s as their tier 3 [[trading|trade]].
|Added [[explorer map]]s, sold by cartographers as their tier 4 trades.}}
{{History||1.12|snap=17w17a|Maps now have separate colors for colored [[terracotta]] blocks from other colored blocks.}}
{{History||1.13|snap=17w47a|Prior to [[1.13/Flattening|''The Flattening'']], these [[item]]s' numeral IDs were 358 and 395.
|Maps now use additional NBT to specify which map they contain. Prior to this version, they used the [[damage]] value instead.
|Map IDs are no longer limited to 32,768.}}
{{History|||snap=17w50a|Maps can now be placed on floor and ceiling [[item frame]]s.}}
{{History|||snap=18w10a|Spots on maps can now be marked using [[banner]]s.}}
{{History|||snap=18w11a|Empty maps can now generate in [[shipwreck]] [[chest]]s.}}
{{History|||snap=pre7|Maps have been changed slightly, in regard to which [[block]]s are shown and which blocks are not.}}
{{History||1.14|snap=18w43a|[[File:Empty Map JE2 BE2.png|32px]] [[File:Map (item) JE2 BE2.png|32px]] The textures of maps have been changed.}}
{{History|||snap=18w48a|Empty maps can now be found in chests in [[village]] cartographer houses.}}
{{History|||snap=19w02a|Maps can now be cloned and zoomed out (extended) by using a [[cartography table]].
|Maps can now be locked by using a [[glass pane]] with a cartography table.
|The recipes for cloning and zooming out maps have been removed.}}
{{History|||snap=19w06a|Map making is now silent again.}}
{{History|||snap=19w13a|Cartographer villagers now give empty maps to players under the [[Hero of the Village]] effect.}}
{{History||1.16|snap=20w21a|Map making sounds are now the same as when using a cartography table.}}
{{History|pocket alpha}}
{{History||v0.14.0|snap=build 1|[[File:Empty Map JE1 BE1.png|32px]] [[File:Map (item) JE1 BE1.png|32px]] Added maps.
|Maps are crafted using nine [[paper]], one for every slot of the [[crafting]] grid.
|Maps must be combined with a [[compass]] using an [[anvil]] in order to show the [[player]]'s position.
|Maps can be zoomed using an anvil.}}
{{History|||snap=build 3|New maps are now [[crafting|crafted]] at full zoom.
|Empty maps now have a "Create Map" button to initialize them.}}
{{History|||snap=build 7|New maps are now crafted at a scale factor of 1:1.}}
{{History||v0.15.0|snap=unknown|Maps can now be crafted either with 8 pieces of [[paper]] and a [[compass]] ''or'' 9 pieces of paper, to get a map with or without a position marker.}}
{{History||v0.16.0|snap=build 1|Different colors have been added to maps for different [[biome]]s.}}
{{History|pocket}}
{{History||1.0.0|snap=?|[[Windows 10 Edition]] can now use the [[anvil]] as well as the [[crafting table]] to clone, zoom and apply markers, just as [[Pocket Edition]] in general could.
|Maps can now be found inside [[stronghold]] library [[chest]]s.}}
{{History||1.1.0|snap=alpha 1.1.0.0|Empty maps with direction markers built-in are now called "locator maps".}}
{{History|||snap=alpha 1.1.0.3|"Locator maps" are now called "empty locator maps".
|Empty maps are now [[trading|sold]] by cartographer [[villager]]s for 7-11 [[emerald]]s as their tier 3 [[trading|trade]].}}
{{History|bedrock}}
{{History||1.4.0|snap=beta 1.2.14.2|Maps can now be found inside map room [[chest]]s in [[shipwreck]]s.}}
{{History||?|The texture of the filled map overlay has been changed.}}
{{History||?|Maps now function in dimensions other than the dimension in which they were created.}}
{{History||1.10.0|snap=beta 1.10.0.3|Maps can now be found in cartographer house [[chest]]s in [[village]]s.
|[[File:Empty Map JE2 BE2.png|32px]] The texture of empty maps has been changed.}}
{{History||1.11.0|snap=beta 1.11.0.1|Empty maps can now be created from 1 [[paper]] in [[cartography table]]s.
|Maps can now be zoomed, cloned, renamed, and have pointers added in cartography tables.}}
{{History|||snap=beta 1.11.0.4|Cartographer [[villager]]s now [[trading|sell]] empty map for an [[emerald]] as their first tier [[trading|trades]].
|Empty locator maps can now be [[trading|bought]] from cartographer villagers.}}
{{History||1.13.0|snap=beta 1.13.0.1|[[File:Map (item) BE3.png|32px]] [[File:Locked Map (item) BE2.png|32px]] Filled maps and locked maps now have unique inventory icons.}}
{{History||1.16.0|snap=beta 1.16.0.57|Trading has been changed, novice-level cartographer now sell an empty map for 7 emeralds. Cartographer villager no longer sell empty locator map.}}
{{History||1.16.100|snap=beta 1.16.100.56|The ID of maps have been changed from <code>emptymap</code> to <code>empty_map</code> and <code>map</code> to <code>filled_map</code>.}}
{{History|console}}
{{History||xbox=TU1|xbone=CU1|ps=1.00|wiiu=Patch 1|switch=1.0.1|[[File:Map (item) JE1 BE1.png|32px]] Added maps.
|The [[player]] spawns with a free map.
|Maps are available only as zoom step 3 maps centered at coordinates 0,0. Biome colors do not appear on maps.}}
{{History||xbox=none|xbone=CU1|ps=1.0|wiiu=none|Larger sized worlds on Xbox One, Playstation 4, and Nintendo Switch have zoom step 3 maps aligned to a grid with maps centered at 0, 1024, or 2048 on the X or Z coordinates.}}
{{History||xbox=TU21|xbone=CU9|ps=1.14|wiiu=Patch 1|[[File:Empty Map JE1 BE1.png|32px]] [[Crafting]] a map now produces an empty map.}}
{{History||xbox=TU46|xbone=CU36|ps=1.38|wiiu=Patch 15|The outer end islands appear on different maps; even on Xbox 360, Playstation 3, Vita, and Wii U editions.}}
{{History||xbox=none|xbone=none|ps=1.90|wiiu=none|switch=none|[[File:Empty Map JE2 BE2.png|32px]] [[File:Map (item) JE2 BE2.png|32px]] The textures of maps have been changed.}}
{{History||ps=1.91|Maps can now be created and used in [[cartography table]]s.}}
{{History|foot}}
== Issues ==
{{issue list}}
== Trivia ==
* Use of the {{key|F1}} key can allow the player to hold a map without blocking their view at all.
* In ''Java Edition'', a map created using {{cmd|give}} can be any map by using the Map parameter to specify the map number desired. E.g. {{cmd|give [player] minecraft:filled_map{map:5<nowiki>}}} gives the specified player map_5. If no data value is supplied it defaults to map_0. If map_0 has not ever been crafted, it is centered on x=0, z=0.
* The maps are stored separately as their own data (<code>.dat</code>) file as <code>map_x.dat</code> with (x) being the map number, see [[map item format]] for more info. By manipulating this number, players can organize their maps to suit them, or if they accidentally create a map in the same location, they can delete their extra map so as to save the number they make.
* Certain programs can be used to make customized maps with images or text on them instead of actual maps, many people use these in adventure maps to show pictures or to tell a story.
* Since all copies of a map are links to the same file, copying an unfinished map keeps it synchronized with the copy as the player fills it in. Thus, a copy stored in a chest can act as a remote backup.
* A map that is in an item frame does not update itself until a player picks it up, lets it reload, and places it back again. However, if a player holds a clone of the map, both maps update.
* Filled maps are the only items that make 90 degree rotations in item frames, and also the only items that can expand the item frame into full block wide.
* On [[Legacy Console Edition]], the player always spawns with a map in their inventory after creating a world. This was later added to Bedrock Edition as an optional feature in the world creation menu.
* Maps on Legacy Console Edition always show the player's current coordinates, as a substitute for the optional [[Coordinates|coordinate display]] in other editions.
* A map cannot be created on [[New Nintendo 3DS Edition]]. Instead, the map is always displayed on the bottom screen along with the coordinates. Biome colors do not appear on maps.
== Gallery ==
<gallery>
MapItem1.png|A fully zoomed map.
MapRotation.png|Having a map in hand does not stop the ability to see ahead.
MapItem3.png|A world being recorded onto a map.
Mcmap4.png|Nearly fully explored map.
Zoomed Map.png|A map edited to the scale of 1.
Sky Map.png|A map mapping the [[Sky Dimension]].
MapOfVillage.png|A village and how it is represented on a map.
Pumpkin map.png|A map containing a custom image made by placing a large number of blocks.
Complete Map.png|A completely explored map.
MapZooms.png|A diagram showing how maps zoomed out before [[Java Edition 1.8]]. Notice how the larger maps have borders made of half and quarter small maps.
Map18zooms.png|From 1.8, zoomed maps are aligned to this grid exactly.
Large Biome Map.png|A map of a [[Large Biomes]] world.
Map0140-0160.png|A comparison of maps between versions in Pocket Edition Alpha [[Pocket Edition Alpha 0.14.0|0.14.0]] and [[Pocket Edition Alpha 0.16.0|0.16.0]].
Mycelium Map.png|A map view of a mushroom biome, showing that mycelium appears purple on a map.
MiniMap.png|Maps held in the off-hand or in either hand while [[dual wielding]] appear as mini-maps.
Partly filled treasure map.png|Partly filled treasure map with an odd area at the bottom left. Normally a partly filled map would look striped (as in the top left), but this map seems to be bugged and is possibly showing caves, or something, in the bottom left.
Partly filled ocean explorer map.png|Partly filled ocean explorer map. Updating the game from an older version (in this case the area was first generated before 1.18) and buying a map after updating (in this case in 1.19.4) can result in the map displaying rivers and terrain where there is really a frozen sea.
Map Stained Glass 1.png|Stained glasses' appearances on maps before and after 1.13.
Map Stained Glass 2.png|Stained glasses' appearances on maps before and after 1.13.
Map Various Blocks 1.png|Various blocks' appearances on maps before and after 1.13.
Map Various Blocks 2.png|Various blocks' appearances on maps before and after 1.13.
Better Together Map.jpg|Holding a map in the offhand in ''Bedrock Edition''.
Better Together Map Icon.jpg|Holding a map in both hands in ''Bedrock Edition''.
File:MapFailedtoFill.png|A map that has not yet filled. A rare bug in Java.
</gallery>
=== The Nether ===
<gallery>
Nethermap.png|A map in [[the Nether]].
Maponnether.png|A map in the Nether; the arrow turns around itself, like in [[compass]].
</gallery>
=== The End ===
<gallery>
Jeb End Map.png|The first image of a map in [[the End]].
Endmap.png|A map in the End.
</gallery>
=== Maps in item frames ===
<gallery>
FramedMap.png|A map displayed on an item frame, as it looked before [[Java Edition 1.7.2]].
Structure Map Collection.png|Multiple maps in item frames. Notice a [[village]], two [[desert temple]]s and a lava lake.
Minecraft maps 3by3.png|A collection of 9 connected full maps.
Full Map.png|A combination of 25 maps pasted together as one map.
Map wall BE.png|A map wall on ''Bedrock Edition'', showing large areas of biome colors for each biome.
Map's in item frames.png|Maps can be placed into [[item frame]]s so they can be viewed together.
Comparing Maps.png|The comparison between 3 zooms of maps.
SuperflatMap.png|A map in a [[Superflat]] world, with some [[village]]s.
MapWallWithMarkers.png|A 3x3 map wall with banner markers.
HEYYEYAAEYAAAEYAEYAA.png|He-Man map art.
Map Player Icons 1.png|First image of player icons on maps.
Map Player Icons 2.png|Second image of player icons on maps.
</gallery>
== See also ==
* [[Explorer Map]]
* [[Clock]]
* [[Tutorials/Navigation|Navigation]]
== References ==
{{Reflist}}
{{Items}}
[[cs:Mapa]]
[[de:Karte]]
[[es:Mapa]]
[[fr:Carte (objet)]]
[[hu:Térkép (tárgy)]]
[[ja:地図]]
[[ko:지도]]
[[nl:Kaart]]
[[pl:Mapa]]
[[pt:Mapa]]
[[ru:Карта]]
[[tr:Harita]]
[[th:แผนที่]]
[[uk:Мапа]]
[[zh:地图]]
[[Category:Renewable resources]]</li></ul></nowiki> | 12w17a | Splash potions are no longer depleted from your inventory when used in creative. | |||
| 12w22a | Splash potions were added to the new creative item selection from 12w21b. | ||||
1.4.2{{Extension DPL}}<ul><li>[[Honey Bottle|Honey Bottle]]<br/>{{Item
| title = Honey Bottle
| image = Honey Bottle.png
| renewable = Yes
| heals = {{hunger|6}}
|effects=Clears {{EffectLink|Poison}}
| stackable = Yes (16)
}}
A '''honey bottle''' is a [[drinks|consumable drink]] [[item]] obtainable by using a [[glass bottle]] on a full [[beehive]]. Honey bottles remove [[poison]] when drunk and can be used to craft [[Honey Block|honey blocks]] and [[sugar]].
== Obtaining ==
{{See also|Tutorials/Honey farming}}
=== Harvesting ===
A honey bottle can be obtained by using a [[glass bottle]] on either a [[beehive]] or [[beehive|bee nest]] with a honey level of 5. Doing this angers any [[bee]]s inside, causing them to attack the player, unless there is a [[campfire]] or another [[block]] on [[fire]] beneath the bee nest or beehive.
A [[dispenser]] with glass bottles can be used to collect the honey without angering the bees. The honey bottle appears as an item in the dispenser's inventory. If the dispenser is full, the honey bottle is shot out.
=== Crafting ===
{{Crafting
|Glass Bottle
|Glass Bottle
|Honey Block
|Glass Bottle
|Glass Bottle
|Output=Honey Bottle, 4
|type= Foodstuff
}}
== Usage ==
To drink a honey bottle, press and hold {{control|use}} while it is selected in the [[hotbar]]. Drinking one restores {{hunger|6}} [[hunger]] and 1.2 hunger [[Hunger#Mechanics|saturation]]. Consuming the item also has the benefit of removing any [[poison]] effect applied to the player. Unlike drinking [[Milk Bucket|milk]], other applied effects are not removed upon drinking a honey bottle.
Honey bottles can be drunk even with a full hunger bar. Drinking a honey bottle takes 25% longer than eating other [[food]] - 2 seconds - and has a unique sound.
=== Crafting ingredient ===
{{Crafting usage}}
== Sounds ==
{{edition|java}}:
{{Sound table
|sound=Drink honey1.ogg
|sound2=Drink honey2.ogg
|sound3=Drink honey3.ogg
|sound4=Drink honey3.ogg
|subtitle=Gulping
|source=player
|description=While a player is drinking a honey bottle
|id=item.honey_bottle.drink
|translationkey=subtitles.item.honey_bottle.drink
|volume=0.5
|pitch=''varies'' <ref group=sound>0.9-1.0 for <code>drink_honey1</code> and <code>drink_honey2</code>, 0.315-0.35 for <code>drink_honey3</code>, and 0.675-0.75 for the second copy of <code>drink_honey3</code></ref>
|distance=16}}
{{Sound table
|sound=Bottle fill water1.ogg
|sound2=Bottle fill water2.ogg
|sound3=Bottle fill water3.ogg
|sound4=Bottle fill water4.ogg
|subtitle=Bottle fills
|source=block
|description=When a bottle is filled with honey
|id=item.bottle.fill
|translationkey = subtitles.item.bottle.fill
|volume=1.0
|pitch=1.0
|distance=16
|foot=1}}
{{edition|bedrock}}:
{{Sound table
|type=bedrock
|sound=Drink honey1.ogg
|sound2=Drink honey2.ogg
|sound3=Drink honey3.ogg
|sound4=Drink honey3.ogg<!--This is duplicated intentionally, see below-->
|source=player
|description=While a player is drinking a honey bottle
|id=random.drink_honey
|volume=''varies''<ref group="sound" name="bevarieshoney">0.5 for <code>drink_honey1</code> and <code>drink_honey2</code>, but <code>drink_honey3</code> is 0.175 or 0.375</ref>
|pitch=0.9-1.0}}
{{Sound table
|sound=Fill water bucket1.ogg
|sound2=Fill water bucket2.ogg
|sound3=Fill water bucket3.ogg
|source=block
|description=When a bottle is filled with honey<wbr><ref group=sound>{{Bug|MCPE-53881}}</ref>
|id=bucket.fill_water
|volume=1.0
|pitch=1.0
|foot=1}}
== Data values ==
=== ID ===
{{edition|java}}:
{{ID table
|edition=java
|showforms=y
|generatetranslationkeys=y
|displayname=Honey Bottle
|spritetype=item
|nameid=honey_bottle
|form=item
|foot=1}}
{{edition|bedrock}}:
{{ID table
|edition=bedrock
|shownumericids=y
|showforms=y
|notshowbeitemforms=y
|generatetranslationkeys=y
|displayname=Honey Bottle
|spritetype=item
|nameid=honey_bottle
|id=592
|form=item
|foot=1}}
== Achievements ==
{{Load achievements|Bee Our Guest}}
== Advancements ==
{{Load advancements|Husbandry;A Balanced Diet;Bee Our Guest}}
== History ==
{{History|java}}
{{History||1.15|snap=19w34a|[[File:Honey Bottle JE1.png|32px]] Added honey bottles.}}
{{History|||snap=19w35a|Honey bottles now remove the [[Poison]] effect when consumed.
|Honey bottles are now included in the "A Balanced Diet" [[advancement]].}}
{{History|||snap=19w36a|Honey bottles are now less filling, restoring 1.2 [[Hunger#Mechanics|saturation]] instead of 9.6.}}
{{History||1.15|snap=19w41a|Honey bottles can now be used to craft [[honey block]]s.}}
{{History||1.15|snap=19w44a|Honey bottles can now be [[crafting|crafted]] with four [[glass bottle]]s and one [[honey block]].
|Honey bottles are now stackable (up to 16).}}
{{History|||snap=19w46a|Using [[glass bottle]]s to collect honey now unlocks the [[Bee Our Guest]] advancement.}}
{{History|bedrock}}
{{History||1.14.0|snap=beta 1.14.0.1|[[File:Honey Bottle BE1.png|32px]] Added honey bottles.}}
{{History|||snap=beta 1.14.0.4|[[File:Honey Bottle BE2.png|32px]] The texture of honey bottles has been changed to match {{el|je}}'s.
|Honey bottles can now be crafted with four [[glass bottle]]s and one [[honey block]].
|Honey bottles are now stackable to 16.}}
{{History|||snap=release|slink=Bedrock Edition 1.14.0|Using [[glass bottle]]s to collect honey now unlocks the [[Bee our guest]] achievement.}}
{{History|foot}}
== Issues ==
{{issue list}}
== Trivia ==
* Honey bottles are the only drinkable [[item]]s that can stack. They have a maximum stack size of 16.
* Honey bottles are the only drinkable items that can restore hunger.
* Honey bottles are 4 pixels more full than [[water bottles]].
{{Items}}
[[cs:Lahvička medu]]
[[de:Honigflasche]]
[[es:Frasco con miel]]
[[fr:Fiole de miel]]
[[ja:ハチミツ入りの瓶]]
[[ko:꿀이 든 병]]
[[lzh:蜜瓶]]
[[pl:Butelka miodu]]
[[pt:Frasco de mel]]
[[ru:Бутылочка мёда]]
[[th:ขวดน้ำผึ้ง]]
[[uk:Пляшечка меду]]
[[zh:蜂蜜瓶]]
[[Category:Food]]
[[Category:Renewable resources]]</li><li>[[Recovery Compass|Recovery Compass]]<br/>{{About|the item used to point to the location of the player's last death|the item used to point to the world spawn or to a lodestone|Compass}}
{{Item
| image = Recovery Compass.gif
| renewable = No
| stackable = Yes (64)
}}
A '''recovery compass''' is an item used to point to the location of the [[Player|player's]] last death.
== Obtaining ==
=== Crafting ===
{{Crafting
|A1= Echo Shard |B1= Echo Shard |C1= Echo Shard
|A2= Echo Shard |B2= Compass |C2= Echo Shard
|A3= Echo Shard |B3= Echo Shard |C3= Echo Shard
|Output= Recovery Compass
|type= Tool
}}
== Usage ==
When held by a player, the recovery compass will point towards the spot where they previously died.
The recovery compass will only work when it is held by a player who has previously died and is in the same dimension as their last death. Otherwise, it will spin around randomly.
Like other items, the recovery compass itself will still drop when a player dies and the <code>keepInventory</code> [[game rule]] is not enabled.
This item is useless on Hardcore mode, as once the player dies, the player cannot respawn.
=== Enchantments ===
A recovery compass can receive the following [[enchantment]]s:
{| class="wikitable col-2-center col-3-right"
|+
!Name
!Max Level
![[Enchanting|Method]]
|-
|[[Curse of Vanishing]]{{only|bedrock|short=1}}
|I
|{{Inventory slot|Anvil}}
|-
|}
== Data values ==
{{Missing information|section|data values for Bedrock Edition|type=data}}
=== ID ===
[[Java Edition|''Java Edition'']]:
{{ID table|edition=java|displayname=Recovery Compass|nameid=recovery_compass|translationkey=item.minecraft.recovery_compass|generatetranslationkeys=y|showforms=y|spritetype=item|form=item|foot=1}}
==History==
{{History|java}}
{{History||1.19|snap=22w14a|[[File:Recovery Compass JE1 BE1.gif|32px]] Added recovery compasses.}}
{{History|||snap=22w15a|Recovery compasses can no longer be used on [[lodestone]]s and can no longer be enchanted with [[Curse of Vanishing]].}}
{{History|bedrock}}
{{History||1.19.0|snap=beta 1.19.0.24|[[File:Recovery Compass JE1 BE1.gif|32px]] Added recovery compasses.}}
{{History|foot}}
==Issues==
{{issue list}}
==Gallery==
<gallery>
File:Recovery Compass In An Item Frame.jpg|Recovery Compass.<ref>{{tweet|kingbdogz|1511751971673419782|Tell us what you think of the new Recovery Compass! We're hoping it improves how rewarding it feels to obtain Ancient City loot. Despite that, how do you feel about it? Will you use it? If so, how? What situations would you use it instead of just trying to remember?|April 6, 2022}}</ref>
</gallery>
==References==
{{reflist}}
== External Links ==
*[https://www.minecraft.net/en-us/article/taking-inventory--recovery-compass Taking Inventory:Recovery Compass] – Minecraft.net on January 19, 2023
{{Items}}
[[Category:Tools]]
[[Category:Non-renewable resources]]
[[de:Bergungskompass]]
[[es:Brújula de recuperación]]
[[fr:Boussole de récupération]]
[[ja:リカバリーコンパス]]
[[pl:Kompas powrotny]]
[[pt:Bússola de retomada]]
[[ru:Компас восстановления]]
[[th:เข็มทิศกู้คืน]]
[[uk:Компас відновлення]]
[[zh:追溯指针]]</li></ul> | 12w32a | Added splash potions of night vision, not yet brewable. | |||
| 12w34a | Added splash potions of invisibility. | ||||
| Splash potions of night vision are now brewable. | |||||
| 12w38a | Witches now utilize splash potions for attacking. | ||||
| 12w39b | Custom potions can be created with a world editor.[1] | ||||
1.8{{Extension DPL}}<ul><li>[[Cookie|Cookie]]<br/>{{Item
| title = Cookie
| image = Cookie.png
| heals = {{hunger|2}}
| renewable = Yes
| stackable = Yes (64)
}}
'''Cookies''' are [[food]] items that can be obtained in large quantities, but do not restore hunger or saturation significantly.
== Obtaining ==
=== Trading ===
Journeyman-level farmer [[villager]]s sell 18 cookies for 3 [[emerald]]s as part of their trades.
=== Crafting ===
{{Crafting
|A2= Wheat
|B2= Cocoa Beans
|C2= Wheat
|Output= Cookie,8
|type= Foodstuff
}}
=== Villager gifts ===
{{in|java}}, if the [[player]] has the [[Hero of the Village]] effect, a farmer villager may gift them a cookie.
== Usage ==
=== Food ===
To eat a cookie, press and hold {{control|use}} while it is selected in the hotbar. Eating one restores {{hunger|2}} [[hunger]] and 0.4 hunger
[[Hunger#Mechanics|saturation]].
=== Parrots ===
Feeding a cookie to a [[parrot]] kills the parrot instantly, and causes it to give off [[Poison]] [[particles]] as it dies due to chocolate being toxic to parrots.
{{IN|Bedrock}}, feeding a cookie to a parrot inflicts the parrot with [[Fatal Poison]] for 1,000 seconds.
=== Composting ===
Placing a cookie into a [[composter]] has an 85% chance of raising the compost level by 1.
Considering the high yield of cookies (8 cookies from 1 cocoa bean and 2 wheats) and the higher chance to successfully compost a cookie (85%), it is more efficient to craft cookies to compost rather than using separate ingredients. For example, 100 wheats and 50 cocoa beans, which in total could yield only 13.92 bone meal on average, could be crafted into 400 cookies to yield 48.57 bone meal on average.
== Sounds ==
{{Sound table/Entity/Food}}
== Advancements ==
{{load advancements|Husbandry;A Balanced Diet}}
== Data values ==
=== ID ===
{{edition|java}}:
{{ID table
|edition=java
|showforms=y
|generatetranslationkeys=y
|displayname=Cookie
|spritetype=item
|nameid=cookie
|form=item
|foot=1}}
{{edition|bedrock}}:
{{ID table
|edition=bedrock
|shownumericids=y
|showforms=y
|notshowbeitemforms=y
|generatetranslationkeys=y
|displayname=Cookie
|spritetype=item
|nameid=cookie
|id=271
|form=item
|foot=1}}
== History ==
{{History|java beta}}
{{History||1.4|[[File:Cookie JE1 BE1.png|32px]] Added cookies.
|Cookies restore {{hp|1}} and are currently the only stackable [[food]], up to 8 cookies per stack.}}
{{History||1.8|snap=Pre-release|Cookies can now be stacked to 64.
|Cookies now restore {{hunger|1}}.}}
{{History|java}}
{{History||1.3.1|snap=12w18a|Cocoa beans have become farmable, making cookies [[renewable resource|renewable]] and ''much'' cheaper.}}
{{History|||snap=12w19a|Cookies now restore {{hunger|2}} instead of {{hunger|1}}.}}
{{History|||snap=12w21a|Farmer [[villager]]s now [[trading|sell]] 8–10 cookies for 1 [[emerald]].}}
{{History||1.8|snap=14w02a|Farmer villagers now sell 6 cookies for 1 emerald.}}
{{History||1.11|snap=16w33a|Farmer villagers now sell 6–10 cookies for 1 emerald.}}
{{History||1.12|snap=17w13a|Cookies can now be used to tame [[parrot]]s.}}
{{History|||snap=pre3|Cookies are no longer used to tame [[parrot]]s. Instead, a cookie now instantly kills a parrot.}}
{{History||1.13|snap=17w47a|Prior to [[1.13/Flattening|''The Flattening'']], this [[item]]'s numeral ID was 357.}}
{{History||1.14|snap=18w43a|[[File:Cookie JE2 BE2.png|32px]] The texture of cookies has been changed.}}
{{History|||snap=19w03a|Placing a cookie into the new [[composter]] has a 80% chance of raising the compost level by 1.}}
{{History|||snap=19w05a|Cookies now have an 85% chance of increasing the compost level in a composter by 1.}}
{{History|||snap=19w13a|Farmer villagers now give cookies to players under the [[Hero of the Village]] effect.}}
{{History|pocket alpha}}
{{History||v0.9.0|snap=build 1|[[File:Cookie JE1 BE1.png|32px]] Added cookies.}}
{{History||v0.12.1|snap=build 1|Cookies now restore [[hunger]] instead of [[health]].}}
{{History|pocket}}
{{History||1.0.4|snap=alpha 1.0.4.0|Farmer [[villager]]s now [[trading|sell]] 6-10 cookies for 1 [[emerald]].}}
{{History|bedrock}}
{{History||1.2.0|snap=beta 1.2.0.2|Cookies can now be used to inflict a fatal [[Poison]] [[status effect]] to [[parrot]]s.}}
{{History||1.10.0|snap=beta 1.10.0.3|[[File:Cookie JE2 BE2.png|32px]] The texture of cookies has been changed.}}
{{History||1.11.0|snap=beta 1.11.0.1|Cookies can now be used to fill up [[composter]]s.}}
{{History|||snap=beta 1.11.0.4|Farmer [[villager]]s now [[trading|sell]] 18 cookies for 3 [[emerald]]s as part of their third tier [[trading|trades]].}}
{{History|console}}
{{History||xbox=TU1|xbone=CU1|ps=1.0|wiiu=Patch 1|[[File:Cookie JE1 BE1.png|32px]] Added cookies.}}
{{History||xbox=none|xbone=none|ps=1.90|wiiu=none|switch=none|[[File:Cookie JE2 BE2.png|32px]] The texture of cookies has been changed.}}
{{History|new 3ds}}
{{History||0.1.0|[[File:Cookie JE1 BE1.png|32px]] Added cookies.}}
{{History|foot}}
== Issues ==
{{issue list}}
== Gallery ==
<gallery>
File:12w21a CookiePurchase.png|Cookies being obtained by [[trading]] with a farmer [[villager]].
File:Eating Steve.png|[[Steve]] eating a cookie.
File:Eating Alex.png|Alex eating a cookie.
</gallery>
== References ==
{{reflist}}
== External Links ==
*[https://www.minecraft.net/en-us/article/taking-inventory--cookie Taking Inventory: Cookie] – Minecraft.net on August 22, 2019
{{Items}}
[[Category:Food]]
[[Category:Renewable resources]]
[[cs:Sušenka]]
[[de:Keks]]
[[es:Galleta]]
[[fr:Cookie]]
[[hu:Csokis süti]]
[[ja:クッキー]]
[[ko:쿠키]]
[[nl:Koekje]]
[[pl:Ciastko]]
[[pt:Biscoito]]
[[ru:Печенье]]
[[uk:Печиво]]
[[zh:曲奇]]</li><li>[[Diamond|Diamond]]<br/>{{For}}
{{redirect|Diamonds|the achievement|Achievements#DIAMONDS!|the advancement|Advancements#Diamonds!}}
{{Item
| image = Diamond.png
| renewable = No
| stackable = Yes (64)
| rarity = Common}}
A '''diamond''' is a mineral that can only be obtained from [[Diamond Ore|diamond ore]], [[chest loot|loot chests]] and [[Suspicious Block|suspicious blocks]]. It is required to craft diamond [[tool]]s and [[armor]] (and therefore obtain [[obsidian]] to access the [[The Nether|Nether]]), [[enchanting table]]s, [[jukebox]]es and duplicate [[smithing template]]s.
== Obtaining ==
{{see also|Tutorials/Diamonds}}
=== Mining ===
{{see also|Diamond Ore#Natural generation}}
[[Diamond ore]] can be mined using an iron [[pickaxe]] or stronger. An ore drops a single diamond. If mined by any other tool, it drops nothing. If the pickaxe is enchanted with [[Fortune]], it can drop an extra diamond per level of Fortune, allowing for a maximum of 4 diamonds with Fortune III. If the ore is mined using a pickaxe enchanted with [[Silk Touch]], it drops an ore block rather than a diamond. The ore is found at level 15 or lower, most commonly between -50 and -64; levels -58 and -59 are the preferred levels to mine at since they don't contain [[bedrock]], as it starts spawning at -60.
=== Chest loot ===
{{LootChestItem|diamond}}
=== Suspicious sand ===
When brushing [[suspicious sand]] in [[desert pyramid]]s, they have a {{frac|1|7}} chance to drop a diamond.
=== Crafting ===
{{Crafting
|Block of Diamond
|Output= Diamond,9
|type= Material
}}
=== Smelting ===
{{Smelting
|showname=1
|Diamond Ore; Deepslate Diamond Ore
|Diamond
|1
}}
== Usage ==
Diamonds are mainly used to craft high-tier armor and equipment, which in turn are also used in making [[netherite]] armor and equipment.
=== Crafting ingredient ===
{{crafting usage}}
=== Trading ===
{{IN|bedrock}}, expert-level armorer, toolsmith, and weaponsmith villagers buy one diamond for an emerald as part of their trades.
{{IN|java}}, journeyman-level armorer villagers have a 40% chance of offering to buy one diamond for one emerald. Expert-level toolsmith villagers have {{frac|2|3}} chance of offering to buy one diamond for one emerald. Expert-level weaponsmith villagers always offer to buy one diamond for one emerald.
=== Repairing ===
Diamonds are the repair items for the diamond [[tier]] and [[armor material]], and thus can be used to [[item repair|repair]] the following items in an [[anvil]] or [[grindstone]]:
* {{ItemLink|Diamond Helmet}}
* {{ItemLink|Diamond Chestplate}}
* {{ItemLink|Diamond Leggings}}
* {{ItemLink|Diamond Boots}}
* {{ItemLink|Diamond Sword}}
* {{ItemLink|Diamond Pickaxe}}
* {{ItemLink|Diamond Axe}}
* {{ItemLink|Diamond Shovel}}
* {{ItemLink|Diamond Hoe}}
=== Beacons ===
Diamonds can be used to select powers from a [[beacon]]. The player must select one of the available powers then insert a diamond into the item slot.
A diamond can be substituted for an [[iron ingot]], a [[gold ingot]], an [[emerald]] or a [[netherite ingot]].
=== Smithing ingredient ===
{{Smithing
|head=1
|ingredients=Any Armor Trim +<br/>Any Armor Piece + <br/>Diamond
|Any Armor Trim Smithing Template
|Netherite Chestplate
|Diamond
|Diamond Trim Netherite Chestplate
|showdescription=1
|description = All armor types can be used in this recipe,<br/>a netherite chestplate is shown as an example.<br/>
|tail=1
}}
;Trim color palette
The following color palettes are shown on the designs on trimmed armor:
*{{TrimPalette|diamond}}
*{{TrimPalette|diamond|darker=1}} (a darker color palette is used when a diamond armor piece is trimmed using a diamond).
== Data values ==
=== ID ===
{{edition|java}}:
{{ID table
|edition=java
|showitemtags=y
|showforms=y
|generatetranslationkeys=y
|displayname=Diamond
|spritetype=item
|nameid=diamond
|itemtags=beacon_payment_items
|form=item
|foot=1}}
{{edition|bedrock}}:
{{ID table
|edition=bedrock
|shownumericids=y
|showforms=y
|notshowbeitemforms=y
|generatetranslationkeys=y
|displayname=Diamond
|spritetype=item
|nameid=diamond
|id=304
|form=item
|foot=1}}
== Achievements ==
{{load achievements|DIAMONDS!;Diamonds to you!;Enchanter}}
== Advancements ==
{{load advancements|Diamonds!}}
== History ==
{{History|java indev}}
{{History||0.31|snap=20100128|[[File:Diamond JE1 BE1.png|32px]] Added diamonds. Initially, they were referred to as "emeralds".
|A stack of 100 diamonds can be found inside the [[Indev house]] [[chest]]s.}}
{{History|||snap=20100129|Diamond can be used to craft [[diamond block]]s and diamond [[sword]]s, [[shovel]]s, [[pickaxe]]s and [[axe]]s.
|Diamonds can no longer be found inside the Indev House due to all items having been removed from its chests.
|Diamond can be obtained by smelting diamond blocks.}}
{{History|||snap=20100130|[[Emerald]]s from the previous version are now officially known as "diamonds", though this has no actual effect as item names are not yet displayed in-game.
|[[Diamond block]]s now require 9 diamonds (3×3) instead of 4 (2×2) to be [[crafting|crafted]], making them much more expensive.}}
{{History||20100206|Diamonds are now used to craft diamond [[hoe]]s.}}
{{History||20100212-1|Diamonds are now used to craft diamond [[helmet]]s, [[chestplate]]s, [[leggings]] and [[boots]].}}
{{History|java alpha}}
{{History||v1.0.14|Diamonds are now used to craft [[jukebox]]es.}}
{{History|java beta}}
{{History||1.8|snap=Pre-release|Diamonds are now found in [[mineshaft]] [[chest]]s.}}
{{History|java}}
{{History||1.0.0|snap=Beta 1.9 Prerelease 2|[[Diamond ore]] can now be [[smelting|smelted]] into diamonds.}}
{{History|||snap=Beta 1.9 Prerelease 3|Diamonds are now used to craft [[enchantment table]]s.
|Diamonds are now found in [[stronghold]] altar [[chest]]s.}}
{{History||1.1|snap=12w01a|Diamonds are now found in [[village]] [[villager|blacksmith]] [[chest]]s.}}
{{History||1.3.1|snap=12w21a|Diamonds can now be [[trading|traded]] to blacksmith [[villager]]s in quantities of 3–5 for 1 [[emerald]].
|Added [[desert temple]]s, with a hidden [[chest]] room and loot containing diamonds.}}
{{History|||snap=12w21b|Diamonds have been changed in the game code from "emerald" to "diamond", due to actual [[emerald]]s being added. Diamond's original name during [[Indev]], as stated above, was emerald in the code, and was kept this way until this snapshot.}}
{{History|||snap=12w22a|Added [[jungle temple]]s, which contain loot [[chest]]s with diamonds.}}
{{History|||snap=1.3|[[File:Diamond JE2 BE2.png|32px]] The texture of diamonds has been changed.}}
{{History||1.4.6|snap=12w49a|Diamonds can now be used to [[crafting|craft]] a [[firework star]] with a trail.}}
{{History||1.6.1|snap=13w16a|Diamond is now used to craft diamond [[horse armor]].}}
{{History|||snap=13w18a|Diamond is no longer used to craft diamond [[horse armor]].|Diamonds are now found in [[nether fortress]] [[chest]]s.}}
{{History||1.8|snap=14w02a|Diamonds can now be [[traded]] to any black apron [[villager]] in quantities of 3–4 for 1 [[emerald]], as their tier III trade.}}
{{History||1.9|snap=15w31a|Diamonds now generate in [[end city]] [[chest]]s.}}
{{History|||snap=15w43a|The average yield of diamonds have been slightly decreased in [[nether fortress]] chests.}}
{{History|||snap=15w44a|The average yield of diamonds in [[desert temple]] and [[mineshaft]] chests have been decreased.}}
{{History||1.13|snap=17w47a|Prior to [[1.13/Flattening|''The Flattening'']], this [[item]]'s numeral ID was 264.}}
{{History|||snap=18w10a|Diamonds now generate in [[buried treasure]] [[chest]]s.}}
{{History|||snap=18w11a|Diamonds now generate in [[shipwreck]] treasure chests.}}
{{History||1.14|snap=18w43a|[[File:Diamond JE3 BE3.png|32px]] The texture of diamonds has been changed.}}
{{History|||snap=18w50a|Diamonds can now be found in [[chest]]s in [[village]] toolsmith houses.}}
{{History||1.16|snap=20w16a|Diamonds now generate in bastion remnants chests.}}
{{History||1.16.2|snap=20w30a|The chance of finding diamonds in bastion remnant chests is increased from 8.6% to 15.8%.}}
{{History||1.17|snap=21w08a|Diamonds can now drop and be smelted from [[deepslate diamond ore]].}}
{{History||1.20<br>(Experimental)|link=1.19.4|snap=23w04a|Diamonds can now be used to craft [[smithing template]]s.
|Diamonds can now be used as an armor trim material.}}
{{History|||snap=23w07a|Diamonds now drop when brushing [[suspicious sand]] in [[desert pyramid]]s.}}
{{History||1.20|snap=23w12a|The probability for the diamond to generate in the [[suspicious sand]] in [[desert temple]] has been changed from 1/7 to 1/8.}}
{{History|pocket alpha}}
{{History||v0.2.0|[[File:Diamond JE1 BE1.png|32px]] Added diamonds. They are currently unobtainable and serve no purpose.}}
{{History||v0.3.2|Diamonds can be collected and used to craft [[blocks of diamond]] and diamond [[axe]]s, [[pickaxe]]s, [[sword]]s and [[shovel]]s.}}
{{History||v0.4.0|Diamonds are now used to [[crafting|craft]] diamond [[hoe]]s.}}
{{History||v0.5.0|Diamonds are now used to craft [[nether reactor core]]s.}}
{{History||v0.6.0|Diamonds are now used to craft diamond [[armor]].}}
{{History||v0.8.0|snap=build 1|[[File:Diamond JE2 BE2.png|32px]] The texture of diamonds has been changed.}}
{{History||v0.12.1|snap=build 1|Diamonds are now used to craft [[enchanting table]]s.
|Diamonds are no longer used to craft [[nether reactor core]]s and are now instead dropped by it.
|Diamonds now generate in [[nether fortress]] [[chest]]s.}}
{{History||v0.13.0|snap=build 1|Diamonds now have a chance to generate in [[desert temple]] chests.}}
{{History||v0.14.0|snap=build 1|Diamonds are now found in [[minecart with chest]]s in [[mineshaft]]s.}}
{{History||v0.15.0|snap=build 1|Diamonds can now be found in [[jungle temple]] [[chest]]s.}}
{{History|pocket}}
{{History||1.0.0|snap=alpha 0.17.0.1|Diamonds can now be found in altar [[chest]]s in [[stronghold]]s, [[dungeon]] chests and [[end city]] chests.}}
{{History|||snap=alpha 1.0.0.0|Diamonds can now be found in [[villager|blacksmith]] [[chest]]s in [[village]]s.}}
{{History||1.0.4|snap=alpha 1.0.4.0|3-4 diamonds can now be traded to blacksmith [[villager]]s for an [[emerald]] as part of their third tier trades.}}
{{History|bedrock}}
{{History||1.2.0|snap=beta 1.2.0.2|Diamonds can now be used to [[crafting|craft]] a [[firework star]] with a trail.
|Diamonds can now be used to craft [[jukebox]]es.}}
{{History||1.4.0|snap=beta 1.2.14.2|Diamonds can now be found inside [[buried treasure]] [[chest]]s and [[shipwreck]]s.}}
{{History||1.10.0|snap=beta 1.10.0.3|Diamonds can now be found in [[plains]] [[village]] weaponsmith chests.
|[[File:Diamond JE3 BE3.png|32px]] The texture of diamonds has been changed.}}
{{History||1.11.0|snap=beta 1.11.0.1|Diamonds can now be found in village toolsmith chests and in [[savanna]], [[desert]], [[taiga]], and [[snowy taiga]] village weaponsmith chests.}}
{{History|||snap=beta 1.11.0.4|Armorer, toolsmith, and weaponsmith [[villager]]s now [[trading|buy]] one diamond for an [[emerald]] as part of their fourth tier [[trading|trades]].}}
{{History||1.16.0|snap=beta 1.16.0.57|Diamonds can now be found in [[bastion remnant]] chests.}}
{{History||1.17.0|snap=beta 1.16.230.52|Diamonds can now drop and be smelted from [[deepslate diamond ore]].}}
{{History||1.20.0<br>(Experimental)|link=Bedrock Edition 1.19.70|snap=beta 1.19.70.23|Diamonds now drop when brushing [[suspicious sand]] in [[desert pyramid]]s.}}
{{History||1.20.0<br>(Experimental)|link=Bedrock Edition 1.19.80|snap=beta 1.19.80.21|Diamonds can now be used to craft [[smithing template]]s.
|Diamonds can now be used as an armor trim material.}}
{{History|console}}
{{History||xbox=TU1|xbone=CU1|ps=1.0|wiiu=Patch 1|switch=1.0.1|[[File:Diamond JE1 BE1.png|32px]] Added diamonds.}}
{{History||xbox=TU5|Diamonds are now found in the new [[mineshaft]] [[chest]]s.}}
{{History||xbox=TU7|Diamonds are now used to craft [[enchantment table]]s.}}
{{History||xbox=TU9|Diamonds are now found in [[village]] [[villager|blacksmith]] [[chest]]s.}}
{{History||xbox=TU14|ps=1.04|Diamonds can now be [[trading|traded]] to blacksmith [[villager]]s in quantities of 3–5 for 1 [[emerald]].
|Added [[desert temple]]s, with a hidden [[chest]] room and loot containing diamonds.|Added [[jungle temple]]s, which contain loot [[chest]]s with diamonds.|[[File:Diamond JE2 BE2.png|32px]] The texture of diamonds has been changed.}}
{{History||xbox=TU19|xbone=CU7|ps=1.12|Diamonds can now be used to [[crafting|craft]] a [[firework star]] with a trail|Diamonds are now found in the new [[nether fortress]] [[chest]]s.}}
{{History||xbox=TU31|xbone=CU19|ps=1.22|wiiu=Patch 3|Diamonds can now be [[traded]] to any black apron [[villager]] in quantities of 3–4 for 1 [[emerald]], as their tier III trade.}}
{{History||xbox=TU46|xbone=CU36|ps=1.36|wiiu=Patch 15|Diamonds now generate in [[end city]] [[chest]]s.}}
{{History||xbox=TU69|xbone=none|ps=1.76|wiiu=Patch 38|switch=none|Diamonds now generate in [[buried treasure]] [[chest]]s.|Diamonds now generate in [[shipwreck]] treasure chests.}}
{{History||xbox=none|ps=1.90|wiiu=none|[[File:Diamond JE3 BE3.png|32px]] The texture of diamonds has been changed.}}
{{History|new3DS}}
{{History||0.1.0|[[File:Diamond JE2 BE2.png|32px]] Added diamonds.}}
{{History|foot}}
==Issues==
{{issue list}}
==Trivia==
*Unlike in ''Minecraft'', newly mined [[Wikipedia:Diamond|diamond]]s in real life are rough, cloudy stones. The largest, purest ones are polished into crystal-clear gemstones, while the rest are used in industry for cutting and grinding.
*Although diamonds themselves are not renewable, all tools, weapons, and armor made from diamonds can be acquired through [[trading]], and are therefore renewable. Other items crafted from diamonds are not renewable.
*In the April fools version [[Java Edition 2.0]], [[Diamond Chicken|diamond chickens]] can lay diamonds. This does not exist in newer versions, as this was a joke.
*The item forms of diamonds and [[Turtle Egg|turtle eggs]] have the same shape.
==Gallery==
<gallery>
File:DiamondOre.png|Naturally occurring diamonds.
File:MultipleOreBlobs.png|Multiple ore blobs.
File:Lava Diamond.png|Diamond ore near Lava.
File:Diamond ore blob.png|Another Diamond ore blob near Lava.
File:10 ore diamond blob.png|10 ore diamond blob.
File:Trading a diamond for an emerald.png|A blacksmith offering an [[emerald]] for a diamond.
File:Diamond Pendant Necklace JINX.jpg|Official diamond pendant made by [https://www.jinx.com JINX].
File:All Mine JINX.jpg|Official t-shirt artwork "All Mine" which features a diamond. Made by JINX
File:4 ways of viewing 12 diamonds in stone form.png|4 ways of viewing 12 diamonds in stone form
</gallery>
== External Links ==
*[https://www.minecraft.net/en-us/article/taking-inventory--diamond Taking Inventory: Diamond] – Minecraft.net on February 20, 2019
{{items}}
[[cs:Diamant]]
[[de:Diamant]]
[[el:Διαμάντι]]
[[es:Diamante]]
[[fr:Diamant]]
[[hu:Gyémánt]]
[[it:Diamante]]
[[ja:ダイヤモンド]]
[[ko:다이아몬드]]
[[nl:Diamant]]
[[pl:Diament]]
[[pt:Diamante]]
[[ru:Алмаз]]
[[th:เพชร]]
[[tr:Elmas]]
[[uk:Діамант]]
[[zh:钻石]]
[[Category:Non-renewable resources]]</li></ul> | 14w27a | Added splash potions of leaping. | |||
1.8.1{{Extension DPL}}<ul><li>[[La Baguette|La Baguette]]<br/>{{Exclusive|Java}}
{{Joke feature}}
{{WIP}}
{{Item
| rarity = Common
| renewable = Yes
| durability = 59
| stackable = No
}}
'''La Baguette''' is a joke weapon from [[Java Edition 23w13a_or_b]]. Its stats are identical to a wooden [[sword]], though La Baguette cannot be used to fuel furnaces.
== Obtaining ==
One [[Le Tricolore|tricolore]] and one baguette is given to all players when [[French mode]] gets activated.
=== Repairing ===
==== Grinding ====
{{Grinding
|showdescription=1
|ingredients=2x La Baguette
|La Baguette
|La Baguette
|La Baguette
|description=The durability of the two baguettes is added together, plus an extra 5% durability. Any enchantments, besides curses, would be removed.
}}
====Unit repair====
Strangely, La Baguette can be repaired using planks rather than bread, just like a wooden sword.
{{Anvil|Input1=Damaged La Baguette|Input2=Damaged La Baguette; Any Planks|Output=La Baguette}}
==Usage==
La Baguette functions identically to a wooden sword.
===Attacking===
It can be used to damage mobs for {{hp|4}} health points. La Baguette has an attack speed of 1.6 and takes 0.625 seconds to [[Damage#Attack cooldown|recover]].
=== Breaking ===
La Baguette, just like other swords, can be used to break certain blocks 50% faster. See [[Sword#Sword breaking times]] for more.
=== Enchantments ===
La Baguette, like other swords, can receive the following [[enchantment]]s:
{| class="wikitable sortable col-2-center col-3-right"
|+
!Name
!Max Level
![[Enchanting|Method]]
!Weight
|-
|[[Fire Aspect]]
|II
|{{Inventory slot|Enchanting Table}}{{Inventory slot|Anvil}}
|2
|-
|[[Looting]]
|III
|{{Inventory slot|Enchanting Table}}{{Inventory slot|Anvil}}
|2
|-
|[[Unbreaking]]
|III
|{{Inventory slot|Enchanting Table}}{{Inventory slot|Anvil}}
|5
|-
|[[Sharpness]]<ref group=note name=note1>Sharpness, Smite, and Bane of Arthropods are mutually exclusive.</ref>
|V
|{{Inventory slot|Enchanting Table}}{{Inventory slot|Anvil}}
|10
|-
|[[Smite]]<ref group=note name=note1/>
|V
|{{Inventory slot|Enchanting Table}}{{Inventory slot|Anvil}}
|5
|-
|[[Bane of Arthropods]]<ref group="note" name=note1/>
|V
|{{Inventory slot|Enchanting Table}}{{Inventory slot|Anvil}}
|5
|-
|[[Knockback]]
|II
|{{Inventory slot|Enchanting Table}}{{Inventory slot|Anvil}}
|5
|-
|[[Mending]]
|I
|{{Inventory slot|Anvil}}
|2
|-
|[[Curse of Vanishing]]
|I
|{{Inventory slot|Anvil}}
|1
|-
|[[Sweeping Edge]]{{Only|java|short=1}}
|III
|{{Inventory slot|Enchanting Table}}{{Inventory slot|Anvil}}
|2
|}
{{Notelist}}
==Trivia==
This item is simply called "Baguette" in the official French translation, without an article.
{{Items}}
{{Jokes}}
[[Category:Tools]]
[[Category:Combat]]
[[ja:La Baguette]]
[[pt:La Baguette]]
[[Category:Joke items]]</li><li>[[Egg|Egg]]<br/>{{About|chicken eggs|the similar item that spawns mobs|Spawn egg|other uses}}
{{ItemEntity
|image=Egg.png
|renewable=Yes
|stackable=Yes (16)
|size=Height: 0.25 Blocks<br>Width: 0.25 Blocks
}}
An '''egg''' is an [[item]] that can be used to craft [[food]] items, or thrown for a chance to spawn [[chick]]s on impact.
== Obtaining ==
=== Mob loot ===
{{see also|Tutorials/Egg farming}}
A [[chicken]] drops an egg item every 5–10 minutes. The theoretical average would be expected at 1 egg every 7.5 minutes, or 0.1333 eggs per minute.
A [[fox]] sometimes spawns holding an egg, which it always drops upon death. Alternatively, a player dropping a food item causes the fox to drop the egg.
=== Chest loot ===
{{LootChestItem|egg}}
== Usage ==
=== Crafting ingredient ===
{{crafting usage}}
=== Combat ===
Players are able to throw eggs and deal knockback to [[mob]]s (but not other players{{only|JE|short=1}}<ref>{{bug|MC-3179|||WAI}}</ref>{{until|JE Combat Tests}}), but no damage is dealt, similar to a [[snowball]]. Likewise, throwing eggs at [[neutral mobs]] provokes them. Eggs can also be fired from [[dispenser]]s and are affected by gravity.
=== Spawning chickens ===
When thrown by a dispenser or by pressing the {{control|use}} button, an egg has a {{fraction|1|8}} (12.5%) chance of spawning a [[chick]]. If this occurs, there is a {{fraction|1|32}} (3.125%) chance of spawning three additional chicks (on average, 1 out of every 256 eggs spawns 4 chicks). In other words, whenever an egg is thrown, there is a {{fraction|31|256}} chance of spawning 1 chick and a {{fraction|1|256}} chance of spawning four chicks.
The expected value of the number of chicks an egg produces is {{fraction|35|256}} or 13.7%. This means that on average, a chick is spawned every 7.3 eggs, a stack of 16 eggs spawns 2.188 chicks, and a full inventory including the hotbar and off-hand (<code>37 * 16 = 592</code> eggs) is expected to spawn approximately 81 chicks.
== Sounds ==
{{Edition|Java}}:<br>
Thrown eggs use the Friendly Creatures sound category for entity-dependent sound events.
{{Sound table
|rowspan=2
|sound=Bow shoot.ogg
|subtitle=Egg flies
|source=player
|description=When an egg is thrown
|id=entity.egg.throw
|translationkey=subtitles.entity.egg.throw
|volume=0.5
|pitch={{frac|1|3}}-0.5
|distance=16}}
{{Sound table
|subtitle=Dispensed item
|source=block
|description=When a dispenser shoots an egg
|id=block.dispenser.launch
|translationkey=subtitles.block.dispenser.dispense
|volume=1.0
|pitch=1.2
|distance=16}}
{{Sound table
|sound=Chicken plop.ogg
|subtitle=Chicken plops
|source=Friendly Creatures
|description=When an egg is laid by a chicken
|id=entity.chicken.egg
|translationkey=subtitles.entity.chicken.egg
|volume=1.0
|pitch=0.8-1.2
|distance=16
|foot=1}}
{{Edition|Bedrock}}:
{{Sound table
|type=bedrock
|rowspan=2
|sound=Bow shoot.ogg
|source=player
|description=When an egg is thrown
|id=random.bow
|volume=0.5
|pitch=0.33-0.5}}
{{Sound table
|source=player
|description=When a dispenser shoots an egg
|id=random.bow
|volume=1.0
|pitch=0.83-1.25}}
{{Sound table
|sound=Chicken plop.ogg
|source=neutral
|description=When an egg is laid by a chicken
|id=mob.chicken.plop
|volume=1.0
|pitch=0.8-1.2
|foot=1}}
== Data values ==
=== ID ===
{{edition|java}}:
{{ID table
|edition=java
|showforms=y
|generatetranslationkeys=y
|displayname=Egg
|spritetype=item
|nameid=egg
|form=item
|foot=1}}
{{ID table
|edition=java
|showentitytags=y
|generatetranslationkeys=y
|displayname=Thrown Egg
|spritetype=entity
|spritename=Egg
|nameid=egg
|entitytags=impact_projectiles
|foot=1}}
{{edition|bedrock}}:
{{ID table
|edition=bedrock
|shownumericids=y
|showforms=y
|notshowbeitemforms=y
|generatetranslationkeys=y
|displayname=Egg
|spritetype=item
|nameid=egg
|id=390
|form=item
|foot=1}}
{{ID table
|edition=bedrock
|shownumericids=y
|generatetranslationkeys=y
|displayname=Egg
|spritetype=entity
|nameid=egg
|id=82
|foot=1}}
=== Entity Data ===
Thrown eggs have entity data that define various properties of the entity.
{{el|java}}:
{{main|Entity format}}
{{/ED}}
{{el|bedrock}}:
: See [[Bedrock Edition level format/Entity format]].
== Achievements ==
{{load achievements|The Lie}}
==Advancements==
{{Load advancements|Bullseye}}
== Video ==
<div style="text-align:center">{{yt|8rDbF8UYuTc}}</div>
== History ==
{{History|java alpha}}
{{History||v1.0.14|[[File:Egg JE1 BE1.png|32px]] Added eggs.
|Eggs currently have no purpose.}}
{{History|java beta}}
{{History||1.0|Eggs are now throwable at the request of a fan as the result of a [[wikipedia:Twitter|Twitter]] conversation about a man eating his [[wikipedia:USB|USB]], if [[Notch]] added egg throwing.<ref>{{tweet|notch|11773078791000065}}</ref>}}
{{History||1.2|Eggs are now used to craft [[cake]]s.
|Eggs can now be thrown by [[dispenser]]s.}}
{{History|java}}
{{History||1.0.0|snap=Beta 1.9 Prerelease 2|[[Breeding]] has been added, making eggs easier to obtain.}}
{{History|||snap=RC1|Thrown eggs now hatch chicks instead of adult chickens.
|The egg's throw [[sound]] has been changed.}}
{{History||1.4.2|snap=12w37a|Eggs are now used to craft [[pumpkin pie]]s.}}
{{History||1.9|snap=15w32a|Eggs no longer [[damage]] the [[ender dragon]].}}
{{History|||snap=15w36b|Eggs now produce particles when thrown at an entity.}}
{{History|||snap=15w49a|Eggs, like all throwable projectiles, now take the thrower's motion into account when fired.}}
{{History||1.11|snap=16w32a|The [[entity]] ID has now been changed from <code>ThrownEgg</code> to <code>egg</code>.}}
{{History||1.13|snap=17w47a|Prior to [[1.13/Flattening|''The Flattening'']], this [[item]]'s numeral ID was 344.}}
{{History||1.14|snap=18w43a|[[File:Egg JE2 BE2.png|32px]] The texture of eggs has been changed.}}
{{History|||snap=18w50a|Eggs can now be found in [[chest]]s in [[village]] fletcher houses.
|Therefore, chickens are no longer the only source of eggs.}}
{{History|||snap=19w07a|Added [[fox]]es, which sometimes spawn with eggs in their mouths.}}
{{History||1.16.2|snap=Pre-Release 1|Eggs are now affected by [[bubble column]]s.}}
{{History|pocket alpha}}
{{History||v0.4.0|[[File:Egg JE1 BE1.png|32px]] Added eggs. They are currently unobtainable.
|Eggs are throwable, but are unable to spawn chickens.}}
{{History||v0.7.0|[[Chicken]]s now occasionally lay eggs.
|Eggs can be used to craft [[cake]].
|Thrown eggs now have a chance of spawning adult chickens.}}
{{History||v0.8.0|snap=build 1|Eggs are now used to craft [[pumpkin pie]]s.}}
{{History|||snap=build 3|Thrown eggs now have a chance of spawning chicks instead of adult chickens.}}
{{History|pocket}}
{{History||1.1.0|snap=alpha 1.1.0.0|The [[entity]] ID has now been changed from <code>thrownegg</code> to <code>egg</code>.}}
{{History|bedrock}}
{{History||1.2.0|Eggs now deal knockback to [[player]]s.}}
{{History||1.10.0|snap=beta 1.10.0.3|[[File:Egg.png|32px]] The texture of eggs has been changed.}}
{{History||1.11.0|snap=beta 1.11.0.1|Eggs can now be found in [[village]] fletcher [[chest]]s.}}
{{History|||snap=beta 1.11.0.4|Eggs can now be [[trading|sold]] to farmer [[villager]]s.}}
{{History||1.13.0|snap=beta 1.13.0.1|Added [[fox]]es, which can [[drops|drop]] eggs.}}
{{History||1.16.0|snap=beta 1.16.0.57|[[Trading]] has now been changed, eggs can no longer be [[trading|sold]] to farmer [[villager]]s.}}
{{History|console}}
{{History||xbox=TU1|xbone=CU1|ps=1.0|wiiu=Patch 1|[[File:Egg JE1 BE1.png|32px]] Added eggs.}}
{{History|PS4}}
{{History||1.90|[[File:Egg JE2 BE2.png|32px]] The texture of eggs has been changed.}}
{{History|New 3DS}}
{{History||0.1.0|[[File:Egg JE1 BE1.png|32px]] Added eggs.}}
{{History|foot}}
== Issues ==
{{issue list}}
== Trivia ==
* Eggs break mid-fall if hit by another projectile; the chance of spawning a chick is not affected.
* Throwing an egg at a [[nether portal]] breaks the egg when it hits the portal.
* A thrown egg faces toward the [[player]] in first-person view, while it appears rotated horizontally in third-person view. This is the case for all throwable [[item]]s ([[ender pearl]]s, eggs, [[snowball]]s, and all throwable [[potion]]s).
== References ==
{{Reflist}}
{{Items}}
{{entities}}
[[Category:Combat]]
[[Category:Egg]]
[[cs:Vajíčko]]
[[de:Ei]]
[[es:Huevo]]
[[fr:Œuf]]
[[hu:Tojás]]
[[it:Uovo]]
[[ja:卵]]
[[ko:달걀]]
[[nl:Ei]]
[[pl:Jajko]]
[[pt:Ovo]]
[[ru:Яйцо]]
[[th:ไข่ไก่]]
[[uk:Яйце]]
[[zh:鸡蛋]]
<br /></li></ul> | 1.8.1-pre1 | Splash potions of leaping can be extended. | |||
1.9{{Extension DPL}}<ul><li>[[Milk Bucket|Milk Bucket]]<br/>{{Item
| title=Milk Bucket
| image = Milk Bucket.png
| renewable = Yes
| effects = Clears all
| stackable = No
}}
A '''milk bucket'''{{fn|Known as '''Milk Bucket''' {{in|java}} and '''Milk''' {{in|bedrock}}.}} is a [[drink]] obtained from {{Control|use|text=using}} a [[bucket]] on [[cow]]s, [[mooshroom]]s and [[goat]]s that can be consumed to clear all [[Effect|effects]].
== Obtaining ==
=== Harvesting ===
Milk buckets can be obtained from [[cow]]s, [[mooshroom]]s, and [[goat]]s by pressing {{control|use}} while looking at them with an empty [[bucket]].
=== Mob loot ===
A milk bucket has a chance of dropping from a [[wandering trader]], if the trader is killed while holding it.{{only|java}}
== Usage ==
Holding {{control|use}} with a milk bucket starts the drinking sound and animation. {{IN|java}}, the animation is shown only in first-person camera mode.
When consumed, milk immediately removes all status [[effect]]s from the [[player]]. [[Fire]] is not a status effect; therefore, drinking milk doesn't extinguish a burning player.
The benefits of area status effects granted by [[beacon]]s and [[Conduit Power|conduit power]] are restored almost immediately in Bedrock Edition and after a few seconds in ''Java Edition''.
=== Crafting ingredient ===
{{crafting usage|Milk Bucket}}
== Sounds ==
{{el|je}}:
{{Sound table
|sound=Drink.ogg
|subtitle=Sipping
|source=player
|description=While a player is drinking milk
|id=entity.generic.drink
|translationkey=subtitles.entity.generic.drink
|volume=0.5
|pitch=0.9-1.0
|distance=16}}
{{Sound table
|sound=Cow milk1.ogg
|sound2=Cow milk2.ogg
|sound3=Cow milk3.ogg
|source=player
|subtitle=Cow gets milked
|description=When a cow is milked
|id=entity.cow.milk
|translationkey=subtitles.entity.cow.milk
|volume=1.0
|pitch=1.0
|distance=16}}
{{Sound table
|sound=Mooshroom milk1.ogg
|sound2=Mooshroom milk2.ogg
|sound3=Mooshroom milk3.ogg
|subtitle=Goat gets milked
|description=When a regular goat is milked
|source=neutral
|id=entity.goat.milk
|translationkey=subtitles.entity.goat.milk
|volume=1.0
|pitch=1.0
|distance=16}}
{{Sound table
|sound=Goat screaming milk1.ogg
|sound2=Goat screaming milk2.ogg
|sound3=Goat screaming milk3.ogg
|sound4=Goat screaming milk4.ogg
|sound5=Goat screaming milk5.ogg
|subtitle=Goat gets milked
|description=When a screaming goat is milked
|source=neutral
|id=entity.goat.screaming.milk
|translationkey=subtitles.entity.goat.milk
|volume=1.0
|pitch=1.0
|distance=16}}
{{Sound table
|sound=Wandering trader drink milk1.ogg
|sound2=Wandering trader drink milk2.ogg
|sound3=Wandering trader drink milk3.ogg
|sound4=Wandering trader drink milk4.ogg
|sound5=Wandering trader drink milk5.ogg
|subtitle=Wandering Trader drinks milk
|source=neutral
|description=While a wandering trader is drinking milk to become visible during daytime
|id=entity.wandering_trader.drink_milk
|translationkey=subtitles.entity.wandering_trader.drink_milk
|volume=0.5
|pitch=0.9-1.0
|distance=16
|foot=1}}
{{el|be}}:
{{Sound table
|type=bedrock
|sound=Drink.ogg
|source=player
|description=While a player is drinking milk
|id=random.drink
|volume=0.35
|pitch=0.9-1.1}}
{{Sound table
|sound=Cow milk1.ogg
|sound2=Cow milk2.ogg
|sound3=Cow milk3.ogg
|source=neutral
|description=When a cow is milked
|id=mob.cow.milk
|volume=1.0
|pitch=1.0}}
{{Sound table
|sound=Mooshroom milk1.ogg
|sound2=Mooshroom milk2.ogg
|sound3=Mooshroom milk3.ogg
|description=When a regular goat is milked
|source=neutral
|id=mob.mooshroom.suspicious_milk
|volume=1.0
|pitch=1.0/0.9/1.1}}
{{Sound table
|sound=Goat screaming milk1.ogg
|sound2=Goat screaming milk2.ogg
|sound3=Goat screaming milk3.ogg
|sound4=Goat screaming milk4.ogg
|sound5=Goat screaming milk5.ogg
|description=When a screaming goat is milked
|source=neutral
|id=mob.goat.milk.screamer
|volume=1.0
|pitch=1.0}}
{{Sound table
|sound=Wandering trader drink milk1.ogg
|sound2=Wandering trader drink milk2.ogg
|sound3=Wandering trader drink milk3.ogg
|sound4=Wandering trader drink milk4.ogg
|sound5=Wandering trader drink milk5.ogg
|source=neutral
|description=While a wandering trader is drinking milk to become visible during daytime
|id=mob.wanderingtrader.drink_milk
|volume=1.0
|pitch=0.8-1.2
|foot=1}}
== Data values ==
=== ID ===
{{edition|java}}:
{{ID table
|edition=java
|showforms=y
|generatetranslationkeys=y
|displayname=Milk Bucket
|spritetype=item
|nameid=milk_bucket
|form=item
|foot=1}}
{{edition|bedrock}}:
{{ID table
|edition=bedrock
|showaliasids=y
|shownumericids=y
|showforms=y
|notshowbeitemforms=y
|generatetranslationkeys=y
|displayname=Milk
|spritetype=item
|nameid=milk_bucket
|aliasid=bucket / 1
|id=361
|form=item
|translationkey=item.milk.name
|foot=1}}
== Achievements ==
{{load achievements|The Lie}}
== Advancements ==
{{Load advancements|Husbandry}}
== Video ==
<div style="text-align:center">{{yt|eyxea_d0b3s}}</div>
== History ==
{{History|java alpha}}
{{History||v1.0.8|[[File:Milk Bucket JE1 BE1.png|32px]] Milk has been introduced, but it has no purpose and is obtainable only through inventory editing.}}
{{History||v1.0.11|Milk can now be obtained by {{control|use|text=milking}} a [[cow]] with a [[bucket]]. However, it is not yet drinkable.}}
{{History||v1.0.17|Milk buckets can now be emptied.}}
{{History|java beta}}
{{History||1.2|Milk has been incorporated into the [[crafting]] recipe of [[cake]].}}
{{History||1.2_01|[[Squid]] can now be milked by right-clicking on their mouth if part of their body was exposed to [[air]] or if they were not touching another [[block]]. An easy way to accomplish this is to pull a squid with a [[fishing rod]] away from other blocks and then milk it.}}
{{History||1.3_01|Squid milking has been removed.}}
{{History|java}}
{{History||1.0.0|snap=Beta 1.9 Prerelease|Milk can now be obtained by milking [[mooshroom]]s.}}
{{History|||snap=Beta 1.9 Prerelease 2|Milk has been made drinkable.
|According to a tweet by [[Jeb]] on September 30th 2011, milk was made a cure for all status effects.<ref>{{tweet|jeb_|119842906528944129|@Nexusdog_UK I haven't! In beta 1.9 pre2 milk works like a clear-everything drink|September 30, 2011}}</ref>
|Milk is no longer emptiable.}}
{{History||1.13|snap=17w47a|Prior to [[1.13/Flattening|''The Flattening'']], this [[item]]'s numeral ID was 335.}}
{{History|||snap=18w20a|"Milk" has been renamed to "Milk Bucket".}}
{{History||1.14|snap=18w43a|[[File:Milk Bucket JE2 BE2.png|32px]] The texture of milk buckets has been changed.}}
{{History||1.14|snap=19w06a|[[Wandering trader]]s now drink from milk buckets at dawn, and have a change to drop them.}}
{{History||1.17|snap=21w13a|Milk can now be obtained by milking [[goat]]s.}}
{{History|upcoming java}}
{{History||Villager Trade Rebalance<br>(Experimental)|link=Java Edition 1.20.2|snap=23w31a|Wander traders now have a chance to [[trading|buy]] a milk bucket from the player.}}
{{History|pocket alpha}}
{{History||v0.7.0|[[File:Milk Bucket JE1 BE1.png|32px]] Added milk buckets.
|Milk buckets are not yet drinkable.}}
{{History||v0.11.0|snap=build 4|Drinking milk now removes [[status effects]].
|Added milk buckets to the Creative inventory.{{verify|type=update}}{{info needed}}<!---same update?--->}}
{{History|bedrock}}
{{History||1.4.0|snap=beta 1.2.14.2|Moved all bucket items, including milk, from the Equipment tab to the Items tab in the [[Creative inventory]].{{verify|type=update}}{{info needed}}<!---please check snapshots, only 1 major release version was checked each--->}}
{{History||1.10.0|snap=beta 1.10.0.3|[[File:Milk Bucket JE2 BE2.png|32px]] The texture of milk buckets has been changed.}}
{{History||1.16.100|snap=beta 1.16.100.56|The ID of milk has been changed from <code>bucket/1</code> to <code>milk_bucket</code>.}}
{{History||1.16.200|snap=beta 1.16.200.52|Milk can now be obtained by milking [[goat]]s.}}
{{History|console}}
{{History||xbox=TU1|xbone=CU1|ps=1.0|wiiu=Patch 1|switch=1.0.1|[[File:Milk Bucket JE1 BE1.png|32px]] Added milk buckets.}}
{{History|Ps4}}
{{History||1.90|[[File:Milk Bucket JE2 BE2.png|32px]] The texture of milk buckets has been changed.}}
{{History|New 3DS}}
{{History||0.1.0|[[File:Milk Bucket JE1 BE1.png|32px]] Added milk buckets.}}
{{History|foot}}
== Issues ==
{{issue list}}
== See also ==
*[[Water Bucket]]
*[[Lava]]
*[[Food]]
*[[Cake]]
*[[Honey Bottle]] (alternative to remove poison effect)
*[[Medicine]]
== Notes ==
{{fnlist}}
== References ==
{{reflist}}
== External Links ==
*[https://www.minecraft.net/en-us/article/taking-inventory--milk-bucket Taking Inventory: Milk Bucket] – Minecraft.net on October 8, 2019
{{Items}}
[[Category:Food]]
[[Category:Renewable resources]]
[[Category:Tools]]
[[cs:Mléko]]
[[de:Milcheimer]]
[[es:Cubo con leche]]
[[fr:Seau de lait]]
[[hu:Tej]]
[[it:Secchio di latte]]
[[ja:ミルク入りバケツ]]
[[ko:우유 양동이]]
[[nl:Emmer melk]]
[[pl:Wiadro mleka]]
[[pt:Balde de leite]]
[[ru:Ведро с молоком]]
[[th:ถังนม]]
[[uk:Відро молока]]
[[zh:奶桶]]</li><li>[[Nether Sprouts|Nether Sprouts]]<br/>{{Block
|title=Nether Sprouts
|image=Nether Sprouts.png
|image2=Nether Sprouts (texture) JE2 BE2.png
|transparent=Yes
|tool=shears
|light=No
|renewable=Yes
|stackable=Yes (64)
|flammable=No
|lavasusceptible=Yes
}}
'''Nether sprouts''' are a non-solid fungi block that generate in [[warped forest]]s.
== Obtaining ==
=== Natural generation ===
Nether sprouts generate in [[warped forest]] biomes.
=== Breaking ===
Nether sprouts can be mined instantly with any item. The block also breaks if the block below is removed, or if [[water]] flows into its space. The block only drops if broken with [[shear]]s.
=== Post-generation ===
Applying [[bone meal]] to warped [[nylium]] creates nether sprouts on that block and surrounding nylium, along with both types of [[roots]] and [[fungi]].
== Usage ==
[[File:RootsSproutsPlaceBlock.png|thumb|All of the blocks that nether sprouts can be placed on.]]
Nether sprouts can be planted on the same blocks that [[fungus|fungi]] and [[roots]] can be placed on: [[nylium]], [[soul soil]], [[Grass Block|grass]], [[podzol]], [[mycelium]], [[Moss Block|moss]], [[dirt]], [[coarse dirt]], [[rooted dirt]], and [[farmland]]. However, they cannot be planted in [[flower pot]]s.
=== Composting ===
Placing nether sprouts into a [[composter]] has a 50% chance of raising the compost level by 1.
== Sounds ==
{{Sound table/Block/Nether sprouts}}
== Data values ==
=== ID ===
{{edition|java}}:
{{ID table
|edition=java
|generatetranslationkeys=y
|showforms=y
|displayname=Nether Sprouts
|spritetype=block
|nameid=nether_sprouts
|foot=1}}
{{edition|bedrock}}:
{{ID table
|edition=bedrock
|firstcolumnname=Nether Sprouts
|shownumericids=y
|showforms=y
|generatetranslationkeys=y
|displayname=Block
|spritename=nether-sprouts
|spritetype=block
|nameid=nether_sprouts
|id=493
|form=block
|itemform=item.nether_sprouts}}
{{ID table
|displayname=Item
|spritename=nether-sprouts
|spritetype=item
|nameid=nether_sprouts
|id=621
|form=item
|translationkey=tile.nether_sprouts.name
|foot=1}}
== History ==
{{History|java}}
{{History||1.16|snap=20w06a|[[File:Nether Sprouts JE1 BE1.png|24px]] [[File:Nether Sprouts (texture) JE1 BE1.png|24px]] Added nether sprouts.}}
{{History|||snap=20w10a|[[File:Nether Sprouts JE2 BE2.png|24px]] [[File:Nether Sprouts (texture) JE2 BE2.png|24px]] The textures of the nether sprouts have now been changed.}}
{{History|||snap=20w15a|Nether sprouts can now be [[composter|composted]].}}
{{History|||snap=20w19a|Nether sprouts now only [[drops|drop]] if [[breaking|broken]] with [[shears]].}}
{{History|||snap=20w21a|[[File:Nether Sprouts (item) JE3 BE2.png|24px]] The [[inventory]] texture of the nether sprouts have now been changed.
|The [[block]] [[model]] of nether sprouts is now centered of the block rather than positioned randomly.}}
{{History||1.19.3|snap=22w44a|Nether sprouts now make sounds when being walked on.<ref>{{bug|MC-171621|||Fixed}}</ref>}}
{{History|bedrock}}
{{History||1.16.0|snap=beta 1.16.0.51|[[File:Nether Sprouts JE1 BE1.png|24px]] [[File:Nether Sprouts (texture) JE1 BE1.png|24px]] Added nether sprouts.}}
{{History|||snap=beta 1.16.0.57|Nether sprouts can now be [[composter|composted]].}}
{{History|||snap=beta 1.16.0.59|[[File:Nether Sprouts JE2 BE2.png|24px]] [[File:Nether Sprouts (item) JE3 BE2.png|24px]] The textures of the nether sprouts have now been changed.
|[[File:Nether Sprouts Glitched BE.png|32px]] Nether sprouts now appear with a glitched texture when [[breaking|broken]] in [[survival]] mode or when picking the [[block]] in [[creative]] mode. The [[item]] received is also nameless.<ref>{{bug|MCPE-74339}}</ref>}}
{{History|||snap=beta 1.16.0.63|Nether sprouts now give the [[player]] the correct item when broken in survival mode or when picking the block in creative mode.}}
{{History|foot}}
== Issues ==
{{issue list}}
== Trivia ==
* Unlike other warped "plants", nether sprouts don't have a crimson equivalent. This is also the case with [[nether wart]], which lacks a warped equivalent.
== References ==
{{Reflist}}
{{Blocks|vegetation}}
{{Items}}
[[Category:Nether blocks]]
[[Category:Fungi]]
[[Category:Natural blocks]]
[[Category:Non-solid blocks]]
[[de:Nethersprossen]]
[[de:Nethersprossen]]
[[es:Rastrojo del Nether]]
[[fr:Germes du Nether]]
[[ja:ネザースプラウト]]
[[pl:Netherowe kiełki]]
[[pt:Brotos do Nether]]
[[ru:Адские ростки]]
[[zh:下界苗]]</li></ul> | 15w31a | Added splash water bottle, and Mundane, Thick, and Awkward splash potions. | |||
| 15w33a | Splash potions are used to brew lingering potions | ||||
| 15w33c | Splash potions can now be placed in brewing stands. | ||||
| 15w34a | Splash water bottles now just extinguish fire, without placing flowing water. | ||||
| 15w43a | A splash potion of weakness can be found in the brewing stand in an igloo basement. | ||||
1.11{{Extension DPL}}<ul><li>[[Longer String|Longer String]]<br/>{{stub}}
{{Joke feature}}
{{exclusive|java}}
{{item
| image = Longer String.png
| rarity=Common
| renewable=Yes
| stackable=Yes (64)
}}
'''Longer string''' is a joke item from [[Java Edition 23w13a_or_b]].
==Obtaining==
===Crafting===
{{Crafting
|A1= String |B1= String
|Output= Longer String
|shapeless= 1
|ignoreusage=1
}}
==Data values==
===ID===
{{edition|java}}:{{ID table
|edition=java
|showforms=y
|generatetranslationkeys=y
|displayname=Longer String
|spritetype=item
|nameid=string2
|form=item|foot=1}}
==History==
{{History|java}}
{{History||23w13a_or_b|[[File:Longer String.png|32px]] Added longer string.}}
{{History|foot}}
{{items}}
{{Jokes}}
[[Category:Joke items]]
[[ja:Longer String]]
[[pt:Linha mais comprida]]</li><li>[[Flint and Steel|Flint and Steel]]<br/>{{Item
| image = Flint and Steel.png
| rarity = Common
| renewable = Yes
| durability = 64
| stackable = No
}}
'''Flint and steel''' is a [[tool]] used to create [[fire]] or to ignite certain blocks, structures and mobs.
== Obtaining ==
=== Crafting ===
{{Crafting
|head=1
|showname=0
|showdescription=1
|Iron Ingot
|Flint
|Output=Flint and Steel
|type=Tool
}}
{{crafting
|foot=1
|ignoreusage=1
|Damaged Flint and Steel
|Damaged Flint and Steel
|Output= Flint and Steel
|description= The durability of the two tools is added together, plus an extra 5% durability.
|type= Tool
}}
=== Chest loot ===
{{LootChestItem|flint-and-steel}}
== Usage ==
=== Igniting ===
When {{control|use|text=used}} on the space above any solid top surface, on any side of any flammable block or any side of any [[obsidian]] block within a valid unlit [[nether portal]] frame regardless of if there is a solid top surface available, the flint and steel places a [[fire]] there.
Flint and steel can be used to light unlit [[campfire]]s, [[candle]]s and [[cake|cakes with candles]].
Flint and steel can be used to light [[nether portal]]s, as any fire existing within an appropriate [[obsidian]] frame will instantly be replaced with [[Nether Portal (block)|nether portal blocks]] that occupy the entirety of the frame.
Using flint and steel on [[TNT]] ignites it. The explosion damage dealt by TNT ignited with flint and steel in this specific way counts as the player's attack. If the player is {{Control|sneak|text=sneaking}} a fire is instead placed on the side of the TNT the flint and steel was used on.
A flint and steel can be used on a [[creeper]] to force it to explode. Explosions initiated in this way cannot be cancelled.
When powered, a [[dispenser]] containing flint and steel can place fires or ignite relevant blocks such as TNT or campfires in the space directly in front of it. This reduces the flint and steel's durability. A dispenser containing a flint and steel cannot detonate creepers.
=== Enchantments ===
Flint and steel can receive the following [[enchantment]]s:
{|class="wikitable col-2-center col-3-right"
|+
!Name
!Max Level
![[Enchanting|Method]]
|-
|[[Unbreaking]]
|III
|{{Inventory slot|Anvil}}
|-
|[[Mending]]
|I
|{{Inventory slot|Anvil}}
|-
|[[Curse of Vanishing]]
|I
|{{Inventory slot|Anvil}}
|}
== Sounds ==
{{edition|java}}:
{{Sound table
|rowspan=2
|sound=Flint and steel click.ogg
|subtitle=Flint and Steel click
|source=block
|description=When a flint and steel is used to place fire
|id=item.flintandsteel.use|idnote=<ref name=incorrecteventnames group=sound>{{Cite bug|MC|177457|Fire charge and flint and steel sound event names do not follow item IDs|date=April 5, 2020}}</ref>
|translationkey=subtitles.item.flintandsteel.use|translationkeynote=<ref name=incorrecteventnames group=sound/>
|volume=1.0
|pitch=0.8-1.2
|distance=16}}
{{Sound table
|subtitle=Flint and Steel click
|source=hostile
|description=When a flint and steel is used to light a creeper
|id=item.flintandsteel.use|idnote=<ref name=incorrecteventnames group=sound/>
|translationkey=subtitles.item.flintandsteel.use|translationkeynote=<ref name=incorrecteventnames group=sound/>
|volume=1.0
|pitch=0.8-1.2
|distance=16}}
{{Sound table
|sound=Random break.ogg
|subtitle=Item breaks
|source=player
|description=When a flint and steel's durability is exhausted
|id=entity.item.break
|translationkey=subtitles.entity.item.break
|volume=0.8
|pitch=0.8-1.2
|distance=16
|foot=1}}
{{edition|bedrock}};
{{Sound table
|type=bedrock
|sound=Flint and steel click.ogg
|source=block
|description=When a flint and steel is used to place fire
|id=fire.ignite
|volume=1.0
|pitch=0.8-1.2}}
{{Sound table
|sound=Random break.ogg
|source=player
|description=When a flint and steel's durability is exhausted
|id=random.break
|volume=1.0
|pitch=0.9
|foot=1}}
== Data values ==
=== ID ===
{{edition|java}}:
{{ID table
|edition=java
|showforms=y
|generatetranslationkeys=y
|displayname=Flint and Steel
|spritetype=item
|nameid=flint_and_steel
|form=item
|foot=1}}
{{edition|bedrock}}:
{{ID table
|edition=bedrock
|shownumericids=y
|showforms=y
|notshowbeitemforms=y
|generatetranslationkeys=y
|displayname=Flint and Steel
|spritetype=item
|nameid=flint_and_steel
|id=299
|form=item
|foot=1}}
== Achievements ==
{{Load achievements|Into the Nether}}
== Advancements ==
{{load advancements|We Need To Go Deeper}}
== Video ==
<div style="text-align:center">{{yt|caz8BBG48VU}}</div>
== History ==
{{more sounds|type=old|There is within the possible realm a different use sound from 2015-era Pocket Edition, can this be uploaded?}}
{{History|java indev}}
{{History||0.31|snap=20100110|[[File:Flint and Steel JE1.png|32px]] Added flint and steel.
|Flint and steel can be used to set [[fire]].}}
{{History|||snap=20100129|[[File:Flint and Steel JE2.png|32px]] The steel part of the texture has been brightened.
|Flint and steel can be used alongside [[lava]] to [[smelting|smelt]] [[ores]] and cook [[food]].<ref>http://www.youtube.com/watch?v=OpmK7rDU5bA</ref>}}
{{History|||snap=20100201-2|Flint and steel can now sometimes be dropped as loot from killing [[mobs]].}}
{{History||20100219|[[File:Flint and Steel JE3 BE1.png|32px]] The texture of flint and steel has been changed, due to its new crafting recipe.
|Flint and steel can no longer drop from mobs.
|Flint and steel can now be crafted from an [[iron ingot]] and the newly added [[flint]].
|[[Furnace]]s have been added to replace the cooking and [[smelting]] function of flint and steel.}}
{{History|java beta}}
{{History||1.7|Flint and steel, along with [[fire]] itself, [[explosion]]s and [[Mechanics/Redstone/Circuit|redstone]] are now the only ways to activate [[TNT]].<ref>{{tweet|jeb_|78154891637436416}}</ref>}}
{{History|java}}
{{History||1.3.1|snap=12w21a|The [[player]] can now [[trading|buy]] 1 flint and steel from farmer [[villager]]s for 3 [[emerald]]s, making flint and steel [[renewable]].}}
{{History||1.4.2|snap=12w38a|The [[sound]] when using flint and steel has been changed.}}
{{History||1.5|snap=13w04a|[[Dispenser]]s are now able to use flint and steel on the [[block]] in front of them.}}
{{History||1.6.1|snap=13w18a|Flint and steel can now be found in the new [[chest]]s in [[nether fortress]]es.}}
{{History|||snap=13w25a|Flint and steel now loses [[durability]] when igniting [[TNT]].}}
{{History||1.7.2|snap=13w36a|Flint and steel now has a shapeless crafting recipe.
{{{!}} class{{=}}"collapsible collapsed" data-description{{=}}"Old recipe"
! Old recipe
{{!}}-
{{!}}
{{Crafting
|A1=Iron Ingot
|B2=Flint
|Output=Flint and Steel
|ignoreusage=1
}}
{{!}}}
|Using flint and steel on a [[creeper]] now causes it to [[explosion|explode]].}}
{{History||1.8|snap=14w02a|[[Villager]]s no longer [[trading|sell]] flint and steel, making it no longer renewable. However, if a villager selling flint and steel already exists in the world, it can be continuously traded with to obtain flint and steel renewably.}}
{{History||1.9|snap=15w43a|The average yield of flint and steel in [[nether fortress]] [[chest]]s has been slightly reduced.}}
{{History||1.13|snap=17w47a|Prior to [[1.13/Flattening|''The Flattening'']], this [[item]]'s numeral ID was 259.}}
{{History||1.14|snap=18w43a|[[File:Flint and Steel JE4 BE2.png|32px]] The texture of flint and steel has been changed.}}
{{History||1.16|snap=20w07a|[[Gravel]] now can be given by the [[piglin]]s when [[bartering]], making flint and steel renewable again.}}
{{History|||snap=20w16a|Flint and steel can now be found inside [[ruined portal]] chests.}}
{{History|pocket alpha}}
{{History||v0.4.0|[[File:Flint and Steel JE3 BE1.png|32px]] Added flint and steel.}}
{{History||v0.7.0|Flint and steel can now be used to set [[fire]].}}
{{History||v0.7.4|Using flint and steel on a [[creeper]] now causes it to [[explosion|explode]].}}
{{History||v0.8.0|snap=build 1|Added flint and steel to the [[creative]] [[inventory]].}}
{{History||v0.12.1|snap=build 1|Flint and steel can now be used to activate a [[nether portal]].
|Flint and steel can now be found in [[nether fortress]]es.
|Flint and steel can now be [[enchanted]] in [[anvil]]s.}}
{{History||v0.14.0|snap=build 1|Flint and steel can now be used inside [[dispenser]]s when powered.}}
{{History|bedrock}}
{{History||1.10.0|snap=beta 1.10.0.3|[[File:Flint and Steel JE4 BE2.png|32px]] The texture of flint and steel has been changed.}}
{{History||1.16.0|snap=beta 1.16.0.51|Flint and steel can now be obtained by [[bartering]] with [[piglin]]s.|Flint and steel can now be enchanted with [[Curse of Vanishing]] through an [[anvil]].}}
{{History|||snap=beta 1.16.0.57|Flint and steel are no longer obtainable from [[bartering]].
|Flint and steel can now be found inside [[ruined portal]] chests.}}
{{History|console}}
{{History||xbox=TU1|xbone=CU1|ps=1.0|wiiu=Patch 1|switch=1.0.1|[[File:Flint and Steel JE3 BE1.png|32px]] Added flint and steel.}}
{{History||xbox=TU3|Flint and steel, along with [[fire]] itself, [[explosion]]s and [[redstone (disambiguation)|redstone]] are now the only ways to activate [[TNT]].}}
{{History||xbox=TU31|xbone=CU19|ps=1.22|wiiu=Patch 3|Flint and steel now makes [[sound]]s when igniting [[block]]s.}}
{{History||xbox=none|xbone=none|ps=1.90|wiiu=none|switch=none|[[File:Flint and Steel JE4 BE2.png|32px]] The texture of flint and steel has been changed.}}
{{History|New 3DS}}
{{History||0.1.0|[[File:Flint and Steel JE3 BE1.png|32px]] Added flint and steel.}}
{{History|foot}}
Historical sounds:
{| class="wikitable"
! Sound
! From
! to
! Pitch
|-
| {{sound||Flint and Steel old.ogg}}
| ?
| ?
| ?
|}
== Issues ==
{{issue list}}
== Trivia ==
* In [[Adventure mode]], flint and steel cannot light fires, nor can it ignite nether portals (unless it has the tag {{cd|CanPlaceOn:obsidian}}). However, it can still ignite TNT and creepers.
* The name "Flint and Steel" may be misleading and is inaccurate considering the game doesn’t have and possibly will have [[Java Edition mentioned features#Steel|steel]] in the game and it's crafted with iron instead. This is similar to the [[Old Growth Taiga|Old Growth Pine Taiga]], as there are no pines in the game and they have [[Spruce|Spruce Trees]] instead.
**In real life, Iron can’t be used as a fire striker, so Mojang had to rename it to Flint and Steel so it makes more sense. This explains why it is called Flint and Steel, but there is no steel in the game.
**Steel was mentioned by Mojang, as a “stronger” iron, but shortly rejected, and there are no currently no plans to add it to the game.
* Flint and steel cannot light end portals.
* Flint and Steel is the first item to mention another item that is not in the game.
*In the April Fools Snapshot, [[Java Edition 23w13a or b]], one of the possible voted was “Flint and Steel can ignite any block”.
==References==
{{Reflist}}
{{Items}}
[[Category:Renewable resources]]
[[cs:Křesadlo]]
[[de:Feuerzeug]]
[[es:Mechero]]
[[fr:Briquet]]
[[hu:Kovakő acéllal]]
[[ja:火打石と打ち金]]
[[ko:부싯돌과 부시]]
[[nl:Vuursteen en staal]]
[[pl:Krzesiwo]]
[[pt:Pederneira]]
[[ru:Огниво]]
[[zh:打火石]]</li></ul> | 16w32a | The entity ID is changed from ThrownPotion to potion. | |||
| 16w35a | Splash water bottles now deal 1 | ||||
| Pocket Edition Alpha | |||||
0.12.1{{Extension DPL}}<ul><li>[[Totem of Undying|Totem of Undying]]<br/>{{redirect|Totem}}
{{Item
| image = Totem_of_Undying_JE2_BE2.png
| renewable = Yes
| stackable = No
| rarity = Uncommon
|effects=: {{EffectLink|Absorption}} II (0:05)
: {{EffectLink|Regeneration}} II (0:45){{only|java|short=yes}}/ II (0:40){{only|bedrock|short=yes}}
: {{EffectLink|Fire Resistance}} I (0:40)
}}
A '''totem of undying''' is an uncommon [[combat]] item that can save holders from death. It is dropped by [[Evoker|evokers]], which spawn in [[woodland mansion]]s and [[raid]]s.
== Obtaining ==
=== Mob loot ===
Evokers always drop one totem of undying upon death. The drop rate is not affected by [[Looting]].
== Usage ==
[[File:Totem of Undying Animation.gif|alt=The totem animation in Java Edition.|thumb|Animation of the totem activating {{in|java}}.]]
[[File:Totem of Undying Bedrock Animation.gif|alt=The totem animation in Bedrock Edition.|thumb|Animation of the totem activating {{in|bedrock}}.]]
If the [[player]] is holding a totem of undying in their [[off-hand]] or main-hand slot and receives otherwise fatal [[damage]], the totem saves the player from [[death]]. The totem of undying must be in the player's hand (main hand or offhand) for it to work—it does not work if it is in the [[Heads-up display#Hotbar|hotbar]], unless selected. Any [[mob]] that can hold a totem of undying (in a hand or in the mouth) can use it while holding it.{{only|JE}} The totem can be used only once; it disappears after use. It does not save the player from death caused by [[void]] damage, the {{cmd|kill}} [[command]]s or even a [[tipped arrow]] with [[Instant Damage|harming]] effect damage.<ref>{{bug|MC-206307}}</ref>
== Effect ==
When activated, the totem of undying restores {{hp|1}}, removes all existing [[status effect]]s, then grants 40{{only|bedrock|short=1}} or 45{{only|java|short=1}} seconds<ref>{{bug|MCPE-90716}}</ref> of [[Regeneration]] II, 40 seconds of [[Fire Resistance]] I and 5 seconds of [[Absorption]] II. An animation shows the totem of undying appearing to hover in front of the [[player]]'s screen, similar to the animation seen when a player receives the [[Bad Omen]] or [[Hero of the Village]] effect{{only|bedrock|short=1}} or encounters an [[elder guardian]]. When killed by an [[Instant Damage]] tipped [[arrow]], the arrow's instant damage takes effect after the totem has been activated.
The totem of undying also works in [[Hardcore]] mode.
== Sounds ==
{{edition|java}}:
{{Sound table
|sound=Totem of Undying.ogg
|subtitle=Totem activates
|source=dependent
|description=When something dies, using a totem of undying
|id=item.totem.use
|translationkey=subtitles.item.totem.use
|volume=1.0
|pitch=1.0
|distance=16
|foot=1}}
{{edition|bedrock}}:
{{Sound table
|type=bedrock
|sound=Totem of Undying.ogg
|source=player
|description=When something dies, using a totem of undying
|id=random.totem
|volume=1.0
|pitch=1.0
|foot=1}}
== Data values ==
=== ID ===
{{edition|java}}:
{{ID table
|edition=java
|showforms=y
|generatetranslationkeys=y
|displayname=Totem of Undying
|spritetype=item
|nameid=totem_of_undying
|form=item
|foot=1}}
{{edition|bedrock}}:
{{ID table
|edition=bedrock
|showaliasids=y
|shownumericids=y
|showforms=y
|notshowbeitemforms=y
|generatetranslationkeys=y
|displayname=Totem of Undying
|spritetype=item
|nameid=totem_of_undying
|aliasid=totem
|id=568
|form=item
|translationkey=item.totem.name
|foot=1}}
== Achievements ==
{{load achievements|Cheating Death}}
== Advancements ==
{{load advancements|Postmortal}}
== History ==
{{History||2016|[[File:Totem of Undying (pre-release).png|32px]] An early version of the totem of undying was seen during Minecon shortly before its reveal.}}
{{History|java}}
{{History||1.11|snap=16w39a|[[File:Totem of Undying JE1 BE1.png|32px]] Added totem of undying.}}
{{History||1.11.1|snap=16w50a|The ID name has now been changed from <code>totem</code> to <code>totem_of_undying</code>.}}
{{History||1.13|snap=17w47a|Prior to [[1.13/Flattening|''The Flattening'']], this [[item]]'s numeral ID was 449.}}
{{History||1.14|snap=18w43a|[[File:Totem of Undying JE2 BE2.png|32px]] The texture of the totem of undying has been changed.}}
{{History|||snap=18w47a|The totem of undying is now [[renewable resource|renewable]] as [[evoker]]s now spawn in [[raid]]s.}}
{{History||1.16.2|snap=20w28a|The totem of undying now gives the [[Fire Resistance]] II status effect for 40 seconds.}}
{{History|||snap=20w29a|The level of Fire Resistance given by the totem of undying is now reduced from II to I.<ref>{{bug|MC-194220}}</ref>}}
{{History||1.20.2|snap=23w31a|Totems of undying now trigger [[sculk sensor]]s when they activate.<ref>{{bug|MC-261427||Sculk sensors and calibrated sculk sensors don't detect totem of undying activating|Fixed}}</ref>}}
{{History|pocket}}
{{History||1.1.0|snap=alpha 1.1.0.0|[[File:Totem of Undying JE1 BE1.png|32px]] Added totem of undying.}}
{{History|bedrock}}
{{History||1.10.0|snap=beta 1.10.0.3|[[File:Totem of Undying JE2 BE2.png|32px]] The texture of the totem of undying has been changed.}}
{{History||1.11.0|snap=beta 1.11.0.3|The totem of undying is now [[renewable resource|renewable]] as [[evoker]]s now spawn in [[raid]]s.}}
{{History||1.16.100|snap=beta 1.16.100.54|The level of Fire Resistance given by the totem of undying is now reduced from II to I.<ref>{{bug|MCPE-52364}}</ref>}}
{{History||1.16.100|snap=beta 1.16.100.56|The ID of totems of undying has been changed from <code>totem</code> to <code>totem_of_undying</code>.}}
{{History|console}}
{{History||xbox=TU54|xbone=CU44|ps=1.52|wiiu=Patch 24|switch=1.0.4|[[File:Totem of Undying JE1 BE1.png|32px]] Added totem of undying.}}
{{History||xbox=TU56|xbone=CU48|ps=1.55|wiiu=Patch 26|switch=1.0.6|The totem of undying now applies [[Fire Resistance]] II when used.}}
{{History||xbox=none|xbone=none|ps=1.90|wiiu=none|switch=none|[[File:Totem of Undying JE2 BE2.png|32px]] The texture of the totem of undying has been changed.}}
{{History||xbox=none|xbone=none|ps=1.91|wiiu=none|switch=none|The totem of undying is now [[renewable resource|renewable]] as [[evoker]]s now spawn in [[raid]]s.}}
{{History|new3ds}}
{{History||1.9.19|[[File:Totem of Undying JE1 BE1.png|32px]] Added totem of undying.}}
{{History|foot}}
== Issues ==
{{issue list}}
== Trivia ==
* If a [[mob]] holds a totem of undying, the mob also resurrects upon [[Health#Death|death]] and the [[sound]] effect plays. However, the animation does not appear.
* In the {{el|ds}}, the totem of undying can be put in any hotbar slot to activate it, due to the lack of an [[Dual wield|off-hand slot]] in that version.
* Being able to obtain totems of undying in [[raids]] without exploring [[woodland mansions]] is considered a "massive game play design flaw" by Mojang.<ref>{{ytl|YRPlscod34Y}}</ref>
== Gallery ==
<gallery>
File:Particle totem of undying.png|Screenshot of the totem of undying being used mid-animation after a [[drowned]] deals otherwise fatal damage to the player.
File:Totem of Undying activating.gif|Animation of the totem activating.
File:Totem animation in third person mode.png|The totem animation in third person mode.
</gallery>
== References ==
{{reflist}}
{{Items}}
[[de:Totem der Unsterblichkeit]]
[[fr:Totem d'immortalité]]
[[ja:不死のトーテム]]
[[ko:불사의 토템]]
[[lzh:保命符]]
[[nl:Totem der onsterfelijkheid]]
[[pl:Totem nieśmiertelności]]
[[pt:Totem da imortalidade]]
[[ru:Тотем бессмертия]]
[[th:Totem of Undying]]
[[zh:不死图腾]]
[[Category:Renewable resources]]</li><li>[[Spyglass|Spyglass]]<br/>{{Item
| title = Spyglass
| image = Spyglass.png
| durability =
| rarity = Common
| renewable = Yes
| stackable = No
}}
A '''spyglass''' is a [[tool]] used to zoom in on distant objects.
== Obtaining ==
=== Crafting ===
{{Crafting
|B1=Amethyst Shard
|B2=Copper Ingot
|B3=Copper Ingot
|Output=Spyglass
|type=Tool
}}
== Usage ==
[[File:Steve scoping Spyglass.png|right|100px]] [[File:Alex scoping Spyglass.png|right|100px]]
To use a spyglass, the player selects it from the hotbar and clicks {{control|use}} while looking in the desired direction.
Spyglasses are used to zoom in on a specific location in the player's field of view (FOV). The spyglass changes the FOV to {{frac|1|10}} of the FOV set in [[options]]. By default, the FOV is set to 70° in ''Java Edition'' and 60° in Bedrock Edition, resulting in an FOV of 7° in ''Java Edition'' and 6° in Bedrock Edition through the spyglass. The player's FOV can be set from 30° to 110°, so the spyglass FOV can range from 3° to 11°. Regardless of the situation, or status effects the player has, using the Spyglass always shows a FOV {{frac|1|10}} of the FOV set in [[options]].
A square vignette is applied when in use, similar to the effect when wearing a [[carved pumpkin]]. Pressing {{key|F1}} removes the vignette,{{only|java}}<ref>{{bug|MC-203575||The spyglass overlay goes away when pressing F1|WAI}}</ref><ref>{{bug|MCPE-125869||Spyglass's overlay don't go away even if the player toggles Hide GUI on/ Pressing F1|}}</ref> similar to a carved pumpkin.
Hazy distant objects remain hazy when viewed in the spyglass. Mobs too distant to render also do not render in the spyglass. The spyglass shows a magnified view of what the player already sees.
The player is slowed down while watching through the spyglass. When the player uses the spyglass continuously for {{convert|1|minute|game tick}}, the interface is automatically closed.
If the player has a certain effect on their screen like [[fire]], the spyglass does not remove that effect on the player's screen.
[[File:Spyglass Zooming.gif|thumb|center|A spyglass being used to zoom in on a [[block of gold]] starting from normal FOV (70°).]]
== Sounds ==
{{edition|java}}:
{{Sound table
|sound=Spyglass use.ogg
|subtitle=Spyglass expands
|source=player
|description=When a player uses a spyglass
|id=item.spyglass.use
|translationkey=subtitles.item.spyglass.use
|volume=0.5
|pitch=''varies'' <ref group=sound>Can be 1.15, 1.33, 1.4, or 1.55</ref>
|distance=16}}
{{Sound table
|sound=Spyglass stop.ogg
|subtitle=Spyglass retracts
|source=player
|description=When a player stops using a spyglass
|id=item.spyglass.stop_using
|translationkey=subtitles.item.spyglass.stop_using
|volume=0.5
|pitch=''varies'' <ref group=sound>Can be 1.0, 0.8, or 0.9</ref>
|distance=16
|foot=1}}
{{edition|bedrock}}:
{{Sound table
|type=bedrock
|sound=Spyglass use.ogg
|source=player
|description=When a player uses a spyglass
|id=item.spyglass.use
|volume=0.5
|pitch=1.15-1.55}}
{{Sound table
|sound=Spyglass stop.ogg
|source=player
|description=When a player stops using a spyglass
|id=item.spyglass.stop_using
|volume=0.5
|pitch=0.8-1.0
|foot=1}}
== Data values ==
=== ID ===
{{edition|java}}:
{{ID table
|edition=java
|showforms=y
|generatetranslationkeys=y
|displayname=Spyglass
|spritetype=item
|nameid=spyglass
|form=item
|foot=1}}
{{edition|bedrock}}:
{{ID table
|edition=bedrock
|shownumericids=y
|showforms=y
|notshowbeitemforms=y
|generatetranslationkeys=y
|displayname=Spyglass
|spritetype=item
|nameid=spyglass
|form=item
|foot=1|id=626}}
== Advancements ==
{{load advancements|Is it a Bird?;Is it a Balloon?;Is it a Plane?}}
== History ==
{{History||October 3, 2020|link={{ytl|DBvZ2Iqmm3M|t=25m21s}}|[[File:Spyglass JE1.png|32px]]<!-- [[File:Spyglass scope (pre-release).png|32px]]--> Spyglasses are revealed at [[Minecraft Live 2020]]. They were originally named "telescopes" and had an oval vignette.}}
{{History|java}}
{{History||1.17|snap=20w45a|[[File:Spyglass JE1.png|32px]] Added spyglasses.
|[[File:Spyglass scope JE1.png|32px]] The scope texture is currently a circle with glare spots.}}
{{History|||snap=20w46a|[[File:Spyglass scope JE2.png|32px]] The scope texture is now a [[glass]] square with a [[copper]] border.}}
{{History|||snap=20w48a|[[File:Spyglass JE2 BE1.png|32px]] The spyglass is now a 3D model instead of a flat sprite.
|[[File:Spyglass (texture) JE2.png|32px]] The texture of the spyglass has changed.
|A spyglass in use is anchored better to the player's "eye" when viewed in 3rd person.}}
{{History|||snap=21w05a|Copper ingots are now renewable via [[drowned]], making spyglasses renewable.}}
{{History|||snap=21w10a|[[File:Spyglass (item) JE3 BE1.png|32px]] Spyglasses have a new texture in the inventory. The 3D model is still used in the hand, similar to [[tridents]].}}
{{History||1.17.1|snap=Pre-release 1|[[File:Spyglass (texture) JE3.png|32px]] The texture of the spyglass model has changed.}}
{{History|bedrock}}
{{History||1.17.0|snap=beta 1.17.0.50|[[File:Spyglass JE2 BE1.png|32px]] [[File:Spyglass (item) JE3 BE1.png|32px]] Added spyglasses.}}
{{History|||snap=beta 1.17.0.52|Spyglasses are now available without enabling [[experimental gameplay]].}}
{{History|foot}}
== Issues ==
{{Issue list}}
== Trivia ==
*If {{command|item replace}} is used to place a spyglass on a player's head, the item appears stuck to the center of the player's face.
== Gallery ==
<gallery>
Villager Spyglass.png|Spying on [[villager]]s through a spyglass.
After using the spyglass at FOV 30 F1.png|Hiding the HUD removes the spyglass overlay.
Panda eating a spyglass.png|When eaten by a [[panda]], spyglasses cause [[missing texture]] particles to be produced.<ref>{{bug|MC-206684}}</ref>
JE 1.17 Development Telescope.jpg|The spyglass was originally called the telescope.
JE 1.17 Development Telescope 2.jpg|The telescope's overlay was originally round instead of square.
File:Ari Spyglass.jpg|How the spyglass looks in the third person.
Steve scoping Spyglass JE1.png|Steve using a spyglass before its 3D model was added.
Alex scoping Spyglass JE1.png|Alex using a spyglass before its 3D model was added.
File:Mangrove Portal.jpg|An [[allay]] peeking into view of [[Noor]]’s spyglass.
</gallery>
== References ==
{{Reflist}}
== External Links ==
*[https://www.minecraft.net/en-us/article/taking-inventory--spyglass Taking Inventory: Spyglass] – Minecraft.net on February 17, 2022
{{Items}}
[[Category:Renewable resources]]
[[de:Fernrohr]]
[[es:Catalejo]]
[[fr:Longue-vue]]
[[it:Cannocchiale]]
[[ja:望遠鏡]]
[[pl:Luneta]]
[[pt:Luneta]]
[[ru:Подзорная труба]]
[[zh:望远镜]]</li></ul> | build 1 | Added splash potions. | |||
0.13.0{{Extension DPL}}<ul><li>[[Disc Fragment|Disc Fragment]]<br/>{{Item
| image = Disc Fragment.png
| renewable = No
| stackable = Yes (64)
}}
A '''disc fragment''' is a [[music disc]] fragment obtained from [[ancient city]] loot chests. Nine fragments can be combined in a [[Crafting Table|crafting table]] to make a music disc named "5".
== Obtaining ==
=== Chest loot ===
{{LootChestItem|disc-fragment-5}}
== Usage ==
=== Crafting ingredient ===
{{crafting usage|Disc Fragment 5}}
== Data values ==
=== ID ===
{{ID table
|edition=java<!--
|showitemtags=y-->
|showforms=y
|firstcolumnname=Track
|generatetranslationkeys=y
|displayname=Samuel Åberg - 5
|spritename=disc-fragment-5
|spritetype=item
|nameid=disc_fragment_5<!--
|itemtags=-->
|form=item
|foot=y}}
== History ==
{{History|java}}
{{History||1.19|snap=22w16a|[[File:Disc Fragment.png|32px]] Added disc fragments.}}
{{History|bedrock}}
{{History||1.19.0|snap=beta 1.19.0.28|[[File:Disc Fragment.png|32px]] Added disc fragments.}}
{{History|foot}}
== Issues ==
{{Issue list}}
==Gallery==
<gallery>
9 to 5.jpg|9 fragments of the 5 music disc.
</gallery>
==See also==
* {{EnvLink|Music}}
* {{ItemLink|Music Disc}}
{{Items}}
[[de:Plattenbruchstück]]
[[es:Fragmento de disco]]
[[fr:Fragment de disque]]
[[ja:レコードの破片]]
[[pl:Fragment płyty]]
[[pt:Fragmento de disco]]
[[ru:Фрагмент пластинки 5]]
[[uk:Фрагмент платівки]]
[[zh:唱片残片]]
[[Category:Non-renewable resources]]</li><li>[[Recovery Compass|Recovery Compass]]<br/>{{About|the item used to point to the location of the player's last death|the item used to point to the world spawn or to a lodestone|Compass}}
{{Item
| image = Recovery Compass.gif
| renewable = No
| stackable = Yes (64)
}}
A '''recovery compass''' is an item used to point to the location of the [[Player|player's]] last death.
== Obtaining ==
=== Crafting ===
{{Crafting
|A1= Echo Shard |B1= Echo Shard |C1= Echo Shard
|A2= Echo Shard |B2= Compass |C2= Echo Shard
|A3= Echo Shard |B3= Echo Shard |C3= Echo Shard
|Output= Recovery Compass
|type= Tool
}}
== Usage ==
When held by a player, the recovery compass will point towards the spot where they previously died.
The recovery compass will only work when it is held by a player who has previously died and is in the same dimension as their last death. Otherwise, it will spin around randomly.
Like other items, the recovery compass itself will still drop when a player dies and the <code>keepInventory</code> [[game rule]] is not enabled.
This item is useless on Hardcore mode, as once the player dies, the player cannot respawn.
=== Enchantments ===
A recovery compass can receive the following [[enchantment]]s:
{| class="wikitable col-2-center col-3-right"
|+
!Name
!Max Level
![[Enchanting|Method]]
|-
|[[Curse of Vanishing]]{{only|bedrock|short=1}}
|I
|{{Inventory slot|Anvil}}
|-
|}
== Data values ==
{{Missing information|section|data values for Bedrock Edition|type=data}}
=== ID ===
[[Java Edition|''Java Edition'']]:
{{ID table|edition=java|displayname=Recovery Compass|nameid=recovery_compass|translationkey=item.minecraft.recovery_compass|generatetranslationkeys=y|showforms=y|spritetype=item|form=item|foot=1}}
==History==
{{History|java}}
{{History||1.19|snap=22w14a|[[File:Recovery Compass JE1 BE1.gif|32px]] Added recovery compasses.}}
{{History|||snap=22w15a|Recovery compasses can no longer be used on [[lodestone]]s and can no longer be enchanted with [[Curse of Vanishing]].}}
{{History|bedrock}}
{{History||1.19.0|snap=beta 1.19.0.24|[[File:Recovery Compass JE1 BE1.gif|32px]] Added recovery compasses.}}
{{History|foot}}
==Issues==
{{issue list}}
==Gallery==
<gallery>
File:Recovery Compass In An Item Frame.jpg|Recovery Compass.<ref>{{tweet|kingbdogz|1511751971673419782|Tell us what you think of the new Recovery Compass! We're hoping it improves how rewarding it feels to obtain Ancient City loot. Despite that, how do you feel about it? Will you use it? If so, how? What situations would you use it instead of just trying to remember?|April 6, 2022}}</ref>
</gallery>
==References==
{{reflist}}
== External Links ==
*[https://www.minecraft.net/en-us/article/taking-inventory--recovery-compass Taking Inventory:Recovery Compass] – Minecraft.net on January 19, 2023
{{Items}}
[[Category:Tools]]
[[Category:Non-renewable resources]]
[[de:Bergungskompass]]
[[es:Brújula de recuperación]]
[[fr:Boussole de récupération]]
[[ja:リカバリーコンパス]]
[[pl:Kompas powrotny]]
[[pt:Bússola de retomada]]
[[ru:Компас восстановления]]
[[th:เข็มทิศกู้คืน]]
[[uk:Компас відновлення]]
[[zh:追溯指针]]</li></ul> | build 1 | Splash potions of leaping are now obtainable in survival. | |||
0.16.0{{Extension DPL}}<ul><li>[[Brick|Brick]]<br/>{{about|the item|the crafted block|Bricks|other uses}}
{{Item
| image = [[File:Brick JE2 BE2.png|32px]]
| stackable = Yes (64)
| renewable = Yes
}}
A '''brick''' is an item used to craft [[bricks|brick]] blocks, [[flower pot]]s, and [[decorated pot]]s.
== Obtaining ==
=== Smelting ===
A brick can be obtained by smelting a [[clay ball]].
{{Smelting
|Clay Ball
|Brick
|0,3
}}
=== Mining ===
When [[breaking]] a [[decorated pot]] with a tool without [[Silk Touch]] on the main hand, the decorated pot can drops 0-4 brick(s) depend on the material that the decorated pot make of.
=== Loot ===
{{LootChestItem|brick}}
=== Trading ===
Novice-level stone mason [[villager]]s sell 16{{only|bedrock}} or 10{{only|java}} bricks for one [[emerald]].
== Usage ==
Brick can be used to craft [[bricks]], [[flower pot]]s, and [[decorated pot]]s.
=== Crafting ingredient ===
{{crafting usage}}
== Data values ==
=== ID ===
{{edition|java}}:
{{ID table
|edition=java
|showforms=y
|generatetranslationkeys=y
|displayname=Brick
|spritetype=item
|nameid=brick
|form=item
|foot=1}}
{{edition|bedrock}}:
{{ID table
|edition=bedrock
|shownumericids=y
|showforms=y
|notshowbeitemforms=y
|generatetranslationkeys=y
|displayname=Brick
|spritetype=item
|nameid=brick
|id=383
|form=item
|foot=1}}
== History ==
{{History|java alpha}}
{{History||v1.0.11|[[File:Brick JE1 BE1.png|32px]] Added bricks as an item.}}
{{History|java}}
{{History||1.4.2|snap=12w34a|Bricks are now used for [[flower pot]]s.}}
{{History||1.13|snap=17w47a|Prior to [[1.13/Flattening|''The Flattening'']], this item's numeral ID was 336.}}
{{History||1.14|snap=18w43a|[[File:Brick JE2 BE2.png|32px]] The texture of bricks has been changed.}}
{{History|||snap=19w11a|Bricks are now [[trading|sold]] by [[villager]]s of the new mason profession, making them [[renewable resource|renewable]].}}
{{History||1.20<br>(Experimental)|link=1.19.4|snap=23w07a|Bricks can now be used for crafting [[decorated pot]]s.|Bricks now drop when brushing [[suspicious sand]] in [[desert well]]s.|Bricks now drop when mining [[decorated pot]] with a tool on the main hand.}}
{{History||1.20|snap=23w12a|The probability for the brick to generate in the [[suspicious sand]] in [[desert well]] has been changed from 1/7 to 1/8.|Brick can now be found in [[suspicious gravel]] and [[suspicious sand]] in [[trail ruins]].}}
{{History|||snap=23w16a|Brick no longer generates in [[suspicious sand]] in [[trail ruins]].|Due to the split of the archaeological loot tables for the suspicious gravel within the [[trail ruins]]; brick now is in the common loot.}}
{{History|pocket alpha}}
{{History||v0.2.0|[[File:Brick JE1 BE1.png|32px]] Added bricks as an item. They are currently unobtainable and serve no purpose.}}
{{History||v0.3.2|Bricks can now be obtained by smelting clay balls.
|Bricks are now used to craft [[brick block]]s.}}
{{History||v0.12.1|snap=build 1|Bricks are now used to craft [[flower pot]]s.}}
{{History||v0.16.0|snap=build 5|Added bricks to the [[Creative]] [[inventory]].<ref name="missing brick">{{Bug|MCPE-16556}}</ref>}}
{{History|bedrock}}
{{History||1.10.0|snap=beta 1.10.0.3|16 bricks can now be obtained via trading with stone mason [[villager]]s for 1-2 [[emerald]]s.
|[[File:Brick JE2 BE2.png|32px]] The texture of bricks has now been changed.}}
{{History||1.11.0|snap=beta 1.11.0.4|Trading has been changed; bricks sold by stone mason villagers now cost only one emerald.}}
{{History||1.20.0<br>(Experimental)|link=Bedrock Edition 1.19.70|snap=beta 1.19.70.23|Bricks now drop when brushing [[suspicious sand]] in [[desert well]]s and can be used to craft decorated pots.}}
{{History|console}}
{{History||xbox=TU1|xbone=CU1|ps=1.0|wiiu=Patch 1|[[File:Brick JE1 BE1.png|32px]] Added bricks.}}
{{History||xbox=none|xbone=none|ps=1.90|wiiu=none|switch=none|[[File:Brick JE2 BE2.png|32px]] The texture of bricks has been changed.}}
{{History|3ds}}
{{History||0.1.0|[[File:Brick JE1 BE1.png|32px]] Added bricks.}}
{{History|foot}}
== Issues ==
{{issue list}}
== References ==
{{reflist}}
{{Items}}
[[Category:Renewable resources]]
[[cs:Cihla]]
[[de:Ziegel]]
[[es:Ladrillo]]
[[fr:Brique]]
[[hu:Tégla]]
[[it:Mattone]]
[[ja:レンガ]]
[[ko:벽돌 (아이템)]]
[[nl:Baksteen]]
[[pl:Cegła]]
[[pt:Tijolo]]
[[ru:Кирпич]]
[[th:อิฐ]]
[[uk:Цеглина]]
[[zh:红砖]]</li><li>[[Melon Seeds|Melon Seeds]]<br/>{{Block
|image = <gallery>
Melon Stem Age 0.png | Age 0
Melon Stem Age 1.png | Age 1
Melon Stem Age 2.png | Age 2
Melon Stem Age 3.png | Age 3
Melon Stem Age 4.png | Age 4
Melon Stem Age 5.png | Age 5
Melon Stem Age 6.png | Age 6
Melon Stem Age 7.png | Age 7
</gallery>
| image2 = <gallery>
Attached Melon Stem (N).png | North
Attached Melon Stem (E).png | East
Attached Melon Stem (S).png | South
Attached Melon Stem (W).png | West
</gallery>
| transparent = Yes
| light = No
| tool = none
| renewable = Yes
| stackable = Yes (64)
| flammable = No
| lavasusceptible = No
}}'''Melon seeds''' are items obtained from [[Melon Slice|melon slices]] that can be used to grow melon stems.
'''Melon stems''' are plants grown on [[farmland]] that, over time, grow [[melon]]s on dirt, mud and moss blocks adjacent to them.
== Obtaining ==
=== Breaking ===
When broken, a melon stem drops 0–3 melon seeds. The chance for melon seeds to drop increases with the stem's age.
{| class="wikitable"
! rowspan="3" |[[Resource location]]
! rowspan="3" | Source
! colspan="4" | Default
|-
| colspan="1" rowspan="2" style="text-align:center" | Nothing || colspan="3" style="text-align:center" |{{ItemLink|Melon Seeds|Melon seeds}}
|-
| style="text-align:center" | 1 || style="text-align:center" | 2 || style="text-align:center" | 3
|-
| rowspan="8" |<code>blocks/melon_stem</code>
|{{BlockLink|Melon Stem|Melon stem}} <code>age = 0</code>
| style="text-align:center" |81.3%|| style="text-align:center" |17.42%|| style="text-align:center" |1.24%|| style="text-align:center" |0.03%
|-
|{{BlockLink|Melon Stem|Melon stem}} <code>age = 1</code>
| style="text-align:center" |65.1%|| style="text-align:center" |30.04%|| style="text-align:center" |4.62%|| style="text-align:center" |0.24%
|-
|{{BlockLink|Melon Stem|Melon stem}} <code>age = 2</code>
| style="text-align:center" |51.2%|| style="text-align:center" |38.4%|| style="text-align:center" |9.6%|| style="text-align:center" |0.8%
|-
|{{BlockLink|Melon Stem|Melon stem}} <code>age = 3</code>
| style="text-align:center" |39.44%|| style="text-align:center" |43.02%|| style="text-align:center" |15.64%|| style="text-align:center" |1.9%
|-
|{{BlockLink|Melon Stem|Melon stem}} <code>age = 4</code>
| style="text-align:center" |29.13%|| style="text-align:center" |44.44%|| style="text-align:center" |22.22%|| style="text-align:center" |3.7%
|-
|{{BlockLink|Melon Stem|Melon stem}} <code>age = 5</code>
| style="text-align:center" |21.6%|| style="text-align:center" |43.2%|| style="text-align:center" |28.8%|| style="text-align:center" |6.4%
|-
|{{BlockLink|Melon Stem|Melon stem}} <code>age = 6</code>
| style="text-align:center" |15.17%|| style="text-align:center" |39.82%|| style="text-align:center" |34.84%|| style="text-align:center" |10.16%
|-
|{{BlockLink|Melon Stem|Melon stem}} <code>age = 7</code>
| style="text-align:center" |10.16%|| style="text-align:center" |34.84%|| style="text-align:center" |39.82%|| style="text-align:center" |15.17%
|-
| rowspan="1" |<code>blocks/attached_melon_stem</code>
|{{BlockLink|Attached Melon Stem|Attached Melon stem}}
| style="text-align:center" |10.16%|| style="text-align:center" |34.84%|| style="text-align:center" |39.82%|| style="text-align:center" |15.17%
|}
=== Natural generation ===
Melon stems generate naturally in stem farm inside [[woodland mansion]]s.
Melon stems generate in 20% of the farm plots in [[savanna]] [[village]]s, and 10% of the farm plots in [[desert]] villages.
=== Chest loot ===
{{LootChestItem|melon-seeds}}
=== Crafting ===
{{Crafting
|Melon Slice
|Output= Melon Seeds
|type= Material
}}
=== Trading ===
[[Wandering trader]]s sell melon seeds for 1 [[emerald]].
== Usage ==
=== Farming ===
{{see also|Tutorials/Pumpkin and melon farming}}
Melon seeds can be planted only on [[farmland]], as stems. Over time, a stem grows through several stages<sup>[''[[Talk:Pumpkin Seeds|needs testing]]'']</sup> and, at its final growth stage, will produce [[melon]]s on any adjacent [[dirt]], [[Coarse Dirt|coarse dirt]], [[Rooted Dirt|rooted dirt]], [[Grass Block|grass block]], [[farmland]], [[podzol]], [[mycelium]], [[Moss Block|moss block]], [[mud]] or [[Muddy Mangrove Roots|muddy mangrove roots]]. If a melon is already occupying a spot adjacent to a stem it does not grow more melons until the melons is removed. A single stem can grow an unlimited number of melons. Melon stems need a minimum light level of 10 in the block above the stem to grow and give melons. Melon seeds are affected by [[bone meal]] only with respect to stem growth; bone meal does not help produce the actual melons.
=== Breeding ===
Like other seeds, melon seeds can be used to [[breed]] [[chicken]]s, lead chickens around, and make baby chickens grow up faster by 10% of the remaining time.
=== Taming ===
Like other seeds, melon seeds can be used to tame [[parrot]]s.
=== Composting ===
Placing melon seeds into a [[composter]] has a 30% chance of raising the compost level by 1.
== Melon Stem ==
A '''melon stem''' is the block that is planted on [[farmland]] when melon seeds are used on it. It starts underground, and rises up as the plant grows. The stem is colored green when young, and then yellow once fully grown.
The stem curves once a melon has grown from it. A fully-grown single stem connects to any [[melon]] in an adjacent square, thus there are 5 possible appearances to a stem. If there are multiple melons it can connect to, it favors the east, then west, north, and south. When the melon is removed, the stem returns to its straight shape.
== Sounds ==
{{Sound table/Block/Hard crop}}
== Data values ==
=== ID ===
{{edition|java}}:
{{ID table
|edition=java
|showblocktags=y
|showforms=y
|generatetranslationkeys=y
|displayname=Melon Stem
|spritetype=block
|nameid=melon_stem
|blocktags=bee_growables, crops
|form=block}}
{{ID table
|displayname=Attached Melon Stem
|spritetype=block
|nameid=attached_melon_stem
|form=block}}
{{ID table
|displayname=Melon Seeds
|spritetype=item
|nameid=melon_seeds
|form=item
|foot=1}}
{{edition|bedrock}}:
{{ID table
|edition=bedrock
|shownumericids=y
|showforms=y
|generatetranslationkeys=y
|displayname=Melon Stem
|spritetype=block
|nameid=melon_stem
|id=105
|form=block
|translationkey=-}}
{{ID table
|displayname=Melon Seeds
|spritetype=item
|nameid=melon_seeds
|id=293
|form=item
|foot=1}}
=== Block states ===
{{see also|Block states}}
{{/BS}}
== Advancements ==
{{load advancements|A Seedy Place}}
== History ==
{{info needed section|check if stems floated above farmland upon initial implementation}}
{{History|java beta}}
{{History||1.8|snap=Pre-release|[[File:Melon Seeds JE1 BE1.png|32px]] Added melon seeds.
|[[File:Melon Stem Age 0 JE1.png|32px]] [[File:Stem Age 1 JE1.png|32px]] [[File:Melon Stem Age 2 JE1.png|32px]] [[File:Melon Stem Age 3 JE1.png|32px]] [[File:Melon Stem Age 4 JE1.png|32px]] [[File:Melon Stem Age 5 JE1.png|32px]] [[File:Melon Stem Age 6 JE1.png|32px]] [[File:Melon Stem Age 7 JE1.png|32px]] Added the melon stem, with seven stages of growth.
|Melon seeds can found in the new [[mineshaft]] [[chest]]s.
|[[File:Attached Melon Stem (N) JE1.png|32px]] [[File:Attached Melon Stem (E) JE1.png|32px]] [[File:Attached Melon Stem (S) JE1.png|32px]] [[File:Attached Melon Stem (W) JE1.png|32px]] Melon stems have four slightly visually distinct appearances for each facing direction - the bent part of the stem rotates, but the other two planes do not.
|[[File:Melon Stem Age 8 JE1.png|32px]] [[File:Melon Stem Age 9 JE1.png|32px]] [[File:Melon Stem Age 10 JE1.png|32px]] [[File:Melon Stem Age 11 JE1.png|32px]] [[File:Melon Stem Age 12 JE1.png|32px]] [[File:Melon Stem Age 13 JE1.png|32px]] [[File:Melon Stem Age 14 JE1.png|32px]] [[File:Melon Stem Age 15 JE1.png|32px]] Melon stem data values 8–15 now show a glitched formation, with a floating stem with an attached stem cross eventually emerging below.
|[[File:Attached Stem Age 8 JE1.png|32px]] [[File:Attached Stem Age 9 JE1.png|32px]] [[File:Attached Stem Age 10 JE1.png|32px]] [[File:Attached Stem Age 11 JE1.png|32px]] [[File:Attached Stem Age 12 JE1.png|32px]] [[File:Attached Stem Age 13 JE1.png|32px]] [[File:Attached Stem Age 14 JE1.png|32px]] [[File:Attached Stem Age 15 JE1.png|32px]] Melon stem blocks with data values higher than 7 can now attach to adjacent fruits, which results in buggy stem textures with [[vines]] in the mix due to vines being below attached stems in [[terrain.png]].}}
{{History|||snap=Pre-release 2 ;)|Melon stems can now be grown faster using [[bone meal]].}}
{{History|java}}
{{History||1.3.1|snap=1.3|The texture of melon stems has been moved one pixel to the left in [[terrain.png]].
|[[File:Melon Stem Age 0 JE2.png|32px]] [[File:Melon Stem Age 1 JE2.png|32px]] [[File:Melon Stem Age 2 JE2.png|32px]] [[File:Melon Stem Age 3 JE2.png|32px]] [[File:Melon Stem Age 4 JE2.png|32px]] [[File:Melon Stem Age 5 JE2.png|32px]] [[File:Melon Stem Age 6 JE2.png|32px]] [[File:Melon Stem Age 7 JE2.png|32px]] Stems now appear slightly different.
|[[File:Melon Stem Age 8 JE2.png|32px]] [[File:Melon Stem Age 9 JE2.png|32px]] [[File:Melon Stem Age 10 JE2.png|32px]] [[File:Melon Stem Age 11 JE2.png|32px]] [[File:Melon Stem Age 12 JE2.png|32px]] [[File:Melon Stem Age 13 JE2.png|32px]] [[File:Melon Stem Age 14 JE2.png|32px]] [[File:Melon Stem Age 15 JE2.png|32px]] Overgrown stems now appear slightly different.
|[[File:Attached Melon Stem (N) JE2.png|32px]] [[File:Attached Melon Stem (E) JE2.png|32px]] [[File:Attached Melon Stem (S) JE2.png|32px]] [[File:Attached Melon Stem (W) JE2.png|32px]] Attached melon stems now appear slightly different.
|[[File:Attached Stem Age 8 JE2.png|32px]] [[File:Attached Stem Age 9 JE2.png|32px]] [[File:Attached Stem Age 10 JE2.png|32px]] [[File:Attached Stem Age 11 JE2.png|32px]] [[File:Attached Stem Age 12 JE2.png|32px]] [[File:Attached Stem Age 13 JE2.png|32px]] [[File:Attached Stem Age 14 JE2.png|32px]] [[File:Attached Stem Age 15 JE2.png|32px]] Overgrown attached melon stems now appear slightly different.}}
{{History||1.4.2|snap=12w36a|[[Chicken]]s now use [[wheat seeds]], melon seeds, and [[pumpkin seeds]], instead of [[wheat]] to breed.}}
{{History||1.5|snap=13w02a|[[File:Melon Stem Age 0 JE3.png|32px]] [[File:Melon Stem Age 1 JE3.png|32px]] [[File:Melon Stem Age 2 JE3.png|32px]] [[File:Melon Stem Age 3 JE3.png|32px]] [[File:Melon Stem Age 4 JE3.png|32px]] [[File:Melon Stem Age 5 JE3.png|32px]] [[File:Melon Stem Age 6 JE3.png|32px]] Melon stems now use a squished version of their texture for immature stems, depending on age.
|[[File:Melon Stem Age 8 JE3.png|32px]] [[File:Melon Stem Age 9 JE3.png|32px]] [[File:Melon Stem Age 10 JE3.png|32px]] [[File:Melon Stem Age 11 JE3.png|32px]] [[File:Melon Stem Age 12 JE3.png|32px]] [[File:Melon Stem Age 13 JE3.png|32px]] [[File:Melon Stem Age 14 JE3.png|32px]] [[File:Melon Stem Age 15 JE3.png|32px]] This also affects melon stems of ages 8–15, which are likewise stretched to accommodate its predicted size.
|[[File:Attached Stem Age 8 JE3.png|32px]] [[File:Attached Stem Age 9 JE3.png|32px]] [[File:Attached Stem Age 10 JE3.png|32px]] [[File:Attached Stem Age 11 JE3.png|32px]] [[File:Attached Stem Age 12 JE3.png|32px]] [[File:Attached Stem Age 13 JE3.png|32px]] [[File:Attached Stem Age 14 JE3.png|32px]] [[File:Attached Stem Age 15 JE3.png|32px]] Melon stems of extreme ages, which are attached to adjacent fruits, now show a stretched and tinted stem appearance.}}
{{History|||snap=13w03a|[[File:Melon Stem Age 0 JE4.png|32px]] [[File:Melon Stem Age 1 JE4.png|32px]] [[File:Melon Stem Age 2 JE4.png|32px]] [[File:Melon Stem Age 3 JE4.png|32px]] [[File:Melon Stem Age 4 JE4.png|32px]] [[File:Melon Stem Age 5 JE4.png|32px]] [[File:Melon Stem Age 6 JE4.png|32px]] [[File:Melon Stem Age 7 JE4.png|32px]] Melon stems are no longer squished or stretched to account for age.<ref>{{bug|MC-7111}}</ref>
|[[File:Melon Stem Age 8 JE4.png|32px]] [[File:Melon Stem Age 9 JE4.png|32px]] [[File:Melon Stem Age 10 JE4.png|32px]] [[File:Melon Stem Age 11 JE4.png|32px]] [[File:Melon Stem Age 12 JE4.png|32px]] [[File:Melon Stem Age 13 JE4.png|32px]] [[File:Melon Stem Age 14 JE4.png|32px]] [[File:Melon Stem Age 15 JE4.png|32px]] Melon stems with age values 8 through 15 now show a tinted [[trapdoor]] texture.
|From this version up until 14w08a, overgrown melon stems start to draw from the texture below them on the [[texture atlas]], in much the same way they previously did with terrain.png. However, as texture atlases are unstable and textures tend to change positions as new blocks and textures are added, overgrown stems change the texture they draw from every time new textures are added, which includes when textures added by [[mods]].}}
{{History|||snap=13w09a|[[File:Melon Stem Age 8 JE5.png|32px]] [[File:Melon Stem Age 9 JE5.png|32px]] [[File:Melon Stem Age 10 JE5.png|32px]] [[File:Melon Stem Age 11 JE5.png|32px]] [[File:Melon Stem Age 12 JE5.png|32px]] [[File:Melon Stem Age 13 JE5.png|32px]] [[File:Melon Stem Age 14 JE5.png|32px]] [[File:Melon Stem Age 15 JE5.png|32px]] Melon stems with age values 8–15 now show a tinted [[birch wood]] texture.}}
{{History||1.6.1|snap=13w24a|Melon and pumpkin stems have now been assigned separate textures.
|[[File:Melon Stem Age 8 JE6.png|32px]] [[File:Melon Stem Age 9 JE6.png|32px]] [[File:Melon Stem Age 10 JE6.png|32px]] [[File:Melon Stem Age 11 JE6.png|32px]] [[File:Melon Stem Age 12 JE6.png|32px]] [[File:Melon Stem Age 13 JE6.png|32px]] [[File:Melon Stem Age 14 JE6.png|32px]] [[File:Melon Stem Age 15 JE6.png|32px]] Melon stems with age values 8–15 now show a tinted [[note block]] texture.}}
{{History||1.7.2|snap=13w37a|Added the {{cmd|setblock}} [[commands|command]], allowing for invalid stem ages to be placed in the world without using external editors. This also allows them to be obtained in earlier versions via backdating.}}
{{History|||snap=13w41a|[[File:Melon Stem Age 8 JE7.png|32px]] [[File:Melon Stem Age 9 JE7.png|32px]] [[File:Melon Stem Age 10 JE7.png|32px]] [[File:Melon Stem Age 11 JE7.png|32px]] [[File:Melon Stem Age 12 JE7.png|32px]] [[File:Melon Stem Age 13 JE7.png|32px]] [[File:Melon Stem Age 14 JE7.png|32px]] [[File:Melon Stem Age 15 JE7.png|32px]] Melon stems with age values 8–15 now show a tinted [[netherrack]] texture.}}
{{History||1.8|snap=14w10a|[[File:Melon Stem Age 8 JE8.png|32px]] [[File:Melon Stem Age 9 JE8.png|32px]] [[File:Melon Stem Age 10 JE8.png|32px]] [[File:Melon Stem Age 11 JE8.png|32px]] Melon stems with data values 8–11 now display a tinted attached stem, with 8 facing west, 9 facing east, 10 facing north and 11 facing south.
|Invalid melon stems with data values 12-15 now crash the game.}}
{{History|||snap=14w25a|[[File:Melon Stem Age 0 JE5.png|32px]] [[File:Melon Stem Age 1 JE5.png|32px]] [[File:Melon Stem Age 2 JE5.png|32px]] [[File:Melon Stem Age 3 JE5.png|32px]] [[File:Melon Stem Age 4 JE5.png|32px]] [[File:Melon Stem Age 5 JE5.png|32px]] [[File:Melon Stem Age 6 JE5.png|32px]] [[File:Melon Stem Age 7 JE5.png|32px]] Melon stems now render as a single diagonal plane, or, in the case of attached stems, a diagonal and orthogonal plane.
|[[File:Attached Melon Stem (N) JE3.png|32px]] [[File:Attached Melon Stem (E) JE3.png|32px]] [[File:Attached Melon Stem (S) JE3.png|32px]] [[File:Attached Melon Stem (W) JE3.png|32px]] The attached melon stem [[model]] now fully rotates to the direction the stem points. Prior to this update, the base of the melon stem would stay the same while the long attaching section would differ, resulting in four possible attached stem appearances.
|Invalid overgrown melon stems have effectively been removed from the game, as attempting to place an out of range stem via {{cmd|setblock}} creates a stem of age 0 and loading a world with such stems existing causes a game crash.}}
{{History|||snap=14w26a|[[File:Melon Stem Age 0 JE6.png|32px]] [[File:Melon Stem Age 1 JE6.png|32px]] [[File:Melon Stem Age 2 JE6.png|32px]] [[File:Melon Stem Age 3 JE6.png|32px]] [[File:Melon Stem Age 4 JE6.png|32px]] [[File:Melon Stem Age 5 JE6.png|32px]] [[File:Melon Stem Age 6 JE6.png|32px]] [[File:Melon Stem Age 7 JE6.png|32px]] [[File:Attached Melon Stem (N) JE4.png|32px]] [[File:Attached Melon Stem (E) JE4.png|32px]] [[File:Attached Melon Stem (S) JE4.png|32px]] [[File:Attached Melon Stem (W) JE4.png|32px]] Melon stems now correctly render as crosses again.<ref>{{bug|MC-58136}}</ref>}}
{{History|||snap=14w27a|[[File:Attached Stem Age 0 14w27a.png|32px]] [[File:Attached Stem Age 1 14w27a.png|32px]] [[File:Attached Stem Age 2 14w27a.png|32px]] [[File:Attached Stem Age 3 14w27a.png|32px]] [[File:Attached Stem Age 4 14w27a.png|32px]] [[File:Attached Stem Age 5 14w27a.png|32px]] [[File:Attached Stem Age 6 14w27a.png|32px]] Due to a bug, all melon stems appear attached regardless of age or any actual attachment.<ref>{{bug|MC-60208}}</ref>}}
{{History|||snap=14w28a|All melon stems appearing attached regardless of age or any actual attachment has been fixed. However, melon stems still appear attached to adjacent fruits regardless of age due to a similar bug.<ref>{{bug|MC-61716}}</ref>}}
{{History|||snap=14w34d|Melon seeds can no longer be used for [[breeding]] [[chicken]]s.}}
{{History||1.9|snap=15w31a|Chickens can now use melon seeds to breed again.}}
{{History|||snap=15w44a|Melon seeds have been added to [[dungeon]] [[chest]]s.
|The average yield of melon seeds from [[mineshaft]] chests has been decreased.}}
{{History|||snap=15w45a|Melon stems must now be fully grown again to attach.}}
{{History||1.11|snap=16w39a|Melon seeds can now be found inside chests in the new [[woodland mansion]]s.
|Melon crops now generate inside woodland mansions.}}
{{History||1.12|snap=17w18b|Placing a melon seeds in farmland now gives the player the "A Seedy Place" [[advancement]].{{verify}}}}
{{History||1.13|snap=17w47a|The different block states for the <code>melon_stem</code> ID have been split up into their own IDs.
|Prior to [[1.13/Flattening|''The Flattening'']], this [[block]]'s numeral ID was 105, and the [[item]]'s 362.}}
{{History|||snap=17w48a|Attached melon stems no longer [[drops|drop]] seeds.}}
{{History||1.14|snap=18w43a|[[File:Attached Melon Stem (N) JE5.png|32px]] [[File:Attached Melon Stem (E) JE5.png|32px]] [[File:Attached Melon Stem (S) JE5.png|32px]] [[File:Attached Melon Stem (W) JE5.png|32px]] The texture of attached melon stems has been changed.}}
{{History|||snap=18w49a|Melon stems now generate in the updated [[savanna]] [[village]]s.}}
{{History|||snap=18w50a|Melon stems now generate in the updated [[desert]] [[village]]s.}}
{{History|||snap=19w03a|Placing melon seeds into the new [[composter]] has a 10% chance of raising the compost level by 1.}}
{{History|||snap=19w05a|Melon seeds now have a 30% chance of increasing the compost level in a composter by 1.
|Added [[Wandering Trader|wandering trader]]s, which sell melon seeds.}}
{{History||1.15|snap=19w34a|[[Bee]]s can now pollinate melon stems.}}
{{History|||snap=19w39a|Attached melon stems now [[drops|drop]] seeds again.<ref>{{bug|MC-136360}}</ref>}}
{{History||1.18|snap=Pre-release 5|[[File:Melon Seeds JE2.png|32px]] The texture of melon seeds has been changed.}}
{{History|pocket alpha}}
{{History||v0.5.0|Added melon seeds.
|[[File:Melon Stem Age 0 JE1.png|32px]] [[File:Stem Age 1 JE1.png|32px]] [[File:Melon Stem Age 2 JE1.png|32px]] [[File:Melon Stem Age 3 JE1.png|32px]] [[File:Melon Stem Age 4 JE1.png|32px]] [[File:Melon Stem Age 5 JE1.png|32px]] [[File:Melon Stem Age 6 JE1.png|32px]] [[File:Melon Stem Age 7 JE1.png|32px]] [[File:Attached Melon Stem (N) JE1.png|32px]] [[File:Attached Melon Stem (E) JE1.png|32px]] [[File:Attached Melon Stem (S) JE1.png|32px]] [[File:Attached Melon Stem (W) JE1.png|32px]]{{verify|Are these models correct?}} Added melon stems.}}
{{History||v0.6.0|[[File:Melon Seeds JE1 BE1.png|32px]] Melon seeds no longer use the pumpkin seeds texture.}}
{{History||v0.9.0|snap=?|Melon seeds can now be found in [[mineshaft]] chests.}}
{{History||v0.12.1|snap=build 1|Melon seeds are no longer available from the [[Nether reactor]].}}
{{History||v0.14.0|snap=build 1|Melon seeds can now be found in [[minecart with chest|minecarts with chests]] in [[mineshaft]]s.}}
{{History|pocket}}
{{History||1.0.0|snap=alpha 0.17.0.1|Melon seeds now generate inside [[dungeon]] [[chest]]s.}}
{{History||1.1.0|snap=alpha 1.1.0.0|Melon crops now generate inside [[woodland mansion]]s.
|Melon seeds can now be found in woodland mansion chests.}}
{{History|bedrock}}
{{History||1.2.0|snap=beta 1.2.0.2|Melon seeds can now be found inside [[bonus chest]]s.
|Melon seeds are now used to tame [[parrot]]s.}}
{{History||1.10.0|snap=beta 1.10.0.3|[[File:Attached Melon Stem (W) JE5.png|32px]]{{info needed|More accurate image}} The texture of attached melon stems has been changed.
|Melon stems now generate in [[savanna]] and [[desert]] [[village]] farms.
|Added [[wandering trader]]s, who [[trading|sell]] melon seeds.}}
{{History||1.11.0|snap=beta 1.11.0.1|Melon seeds can now be used to fill up [[composter]]s.}}
{{History||1.14.0|snap=beta 1.14.0.1|[[Bee]]s can now pollinate melon stems.}}
{{History|console}}
{{History||xbox=TU5|xbone=CU1|ps=1.0|wiiu=Patch 1|[[File:Melon Seeds JE1 BE1.png|32px]] Added melon seeds.
|[[File:Melon Stem Age 0 JE1.png|32px]] [[File:Stem Age 1 JE1.png|32px]] [[File:Melon Stem Age 2 JE1.png|32px]] [[File:Melon Stem Age 3 JE1.png|32px]] [[File:Melon Stem Age 4 JE1.png|32px]] [[File:Melon Stem Age 5 JE1.png|32px]] [[File:Melon Stem Age 6 JE1.png|32px]] [[File:Melon Stem Age 7 JE1.png|32px]] [[File:Attached Melon Stem (N) JE1.png|32px]] [[File:Attached Melon Stem (E) JE1.png|32px]] [[File:Attached Melon Stem (S) JE1.png|32px]] [[File:Attached Melon Stem (W) JE1.png|32px]]{{verify|Are these models correct?}} Added melon stems.}}
{{History||xbox=none|xbone=none|ps=1.90|wiiu=none|switch=none|[[File:Attached Melon Stem (W) JE5.png|32px]]{{info needed|More accurate image}} The texture of attached melon stems has been changed.}}
{{History|New 3DS}}
{{History||0.1.0|[[File:Melon Stem Age 0 JE1.png|32px]] [[File:Stem Age 1 JE1.png|32px]] [[File:Melon Stem Age 2 JE1.png|32px]] [[File:Melon Stem Age 3 JE1.png|32px]] [[File:Melon Stem Age 4 JE1.png|32px]] [[File:Melon Stem Age 5 JE1.png|32px]] [[File:Melon Stem Age 6 JE1.png|32px]] [[File:Melon Stem Age 7 JE1.png|32px]] [[File:Attached Melon Stem (N) JE1.png|32px]] [[File:Attached Melon Stem (E) JE1.png|32px]] [[File:Attached Melon Stem (S) JE1.png|32px]] [[File:Attached Melon Stem (W) JE1.png|32px]]{{verify|Are these models correct?}} Added melon stems.}}
{{History|foot}}
<gallery>
Melon Stem with data value 15.png|The final version of the melon stem with age 15, as seen in-game.
Melonstems.png|Melon stems of ages 1–15 on a modded version of 1.7.2, hence the melon stems using the melon top texture.
Stems of 13w02a.png|All 16 stem sizes in 13w02a, with accompanying data values.
</gallery>
=== Melon stem "item" ===
{{:Technical blocks/Melon Stem}}
== Issues ==
{{issue list}}
== Gallery ==
<gallery>
Stem All Ages.png|All stages of growth.
AllSeeds.png|All the [[seeds]] that exist in the game.
</gallery>
== See also ==
* [[Melon]]
* [[Pumpkin Seeds]]
==References==
{{Reflist}}
{{Blocks|vegetation}}
{{Items}}
[[Category:Plants]]
[[Category:Food]]
[[Category:Non-solid blocks]]
[[Category:Generated structure blocks]]
[[cs:Semínka melounu]]
[[de:Melone]]
[[es:Semillas de sandía]]
[[fr:Graines de pastèque]]
[[hu:Dinnyemagok]]
[[it:Anguria]]
[[ja:スイカの種]]
[[ko:수박씨]]
[[nl:Meloenzaden]]
[[pl:Nasiona arbuza]]
[[pt:Sementes de melancia]]
[[ru:Семена арбуза]]
[[th:เมล็ดแตงโม]]
[[zh:西瓜种子]]</li></ul> | build 4 | As a version exclusive, added Splash Potions of Decay. | |||
| Legacy Console Edition | |||||
| TU7 | CU1 | 1.0 | Patch 1 | Added splash potions. | |
| TU14 | 1.04 | Added splash potions of night vision and splash potions of invisibility. | |||
| TU46 | CU36 | 1.38 | Patch 15 | Added splash water bottle. | |
Issues
Issues relating to "Splash Potion" are maintained on the bug tracker. Report issues there.
Trivia
- If endermen are targeted directly by a splash potion, they will teleport away before the potion can take effect. However, if they are caught in the splash radius of a potion not aimed at them, they will be affected.
- If killed by a splash potion of harming, the death message would be: <player> was killed by magic
Gallery
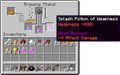
A splash potion hovered over in a brewing stand.
- 2011-10-14 01.01.39.png
Splash potions’ area of effect

See also
Notes
- ↑ Specifically its lower-north-west corner; the potion entity like most thrown entities is 0.25×0.25×0.25 blocks.
References
External links
- Minecraft Forum: All About Potions And Brewing - 1.9 Reference Guide
- Minecraft Potions - A Visual Guide