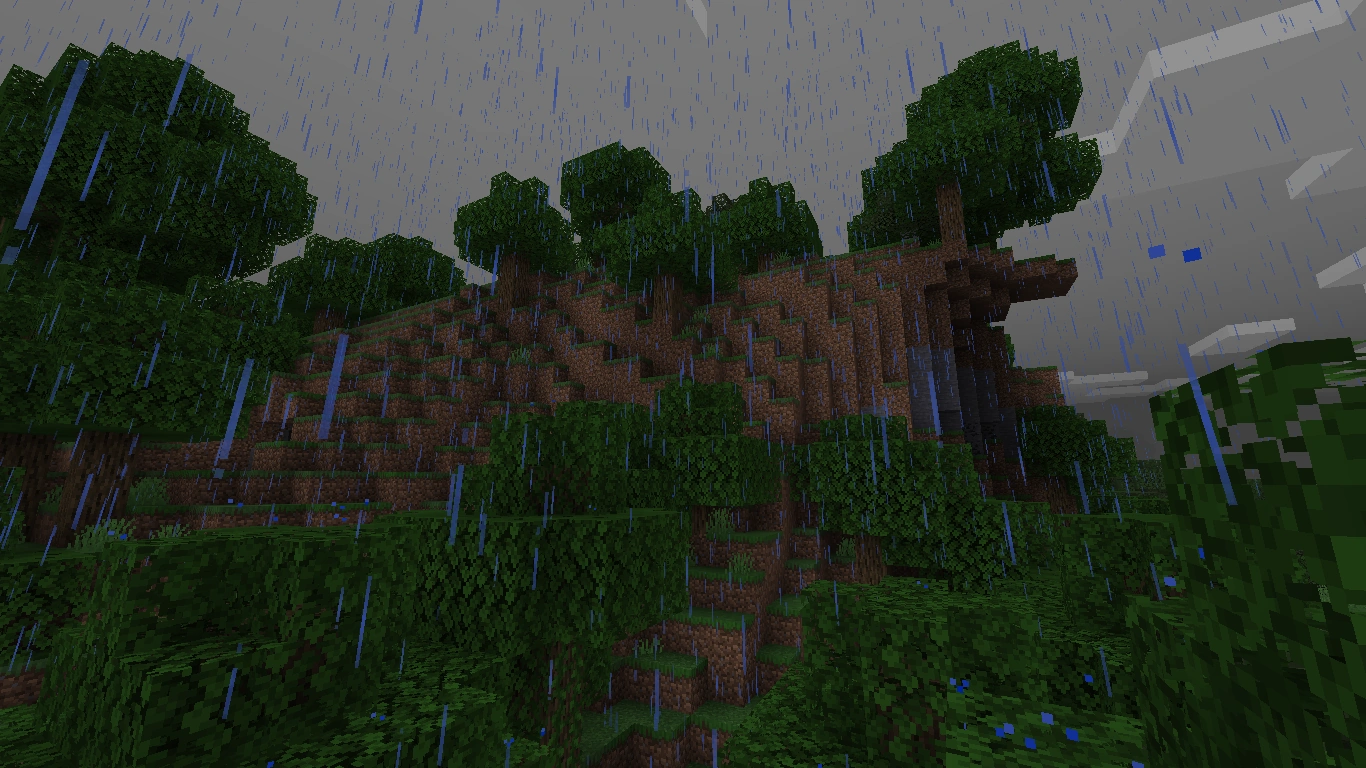
A view of hills during rain.
Rain is a type of weather that occurs occasionally in Minecraft.
Behavior
Rain is a semi-common temporary, global occurrence[1] that can happen randomly at any time within the Overworld. In colder biomes, and at certain altitudes, it snows instead. In warmer biomes, and in other dimensions, it does not rain at all.
The average rainfall lasts 0.5 – 1 Minecraft day, and there is a 0.5 to 7.5 day delay between rainstorms. Rainstorms have a small chance to worsen into thunderstorms.
Rainstorms can be skipped entirely with the use of a bed.
Effects
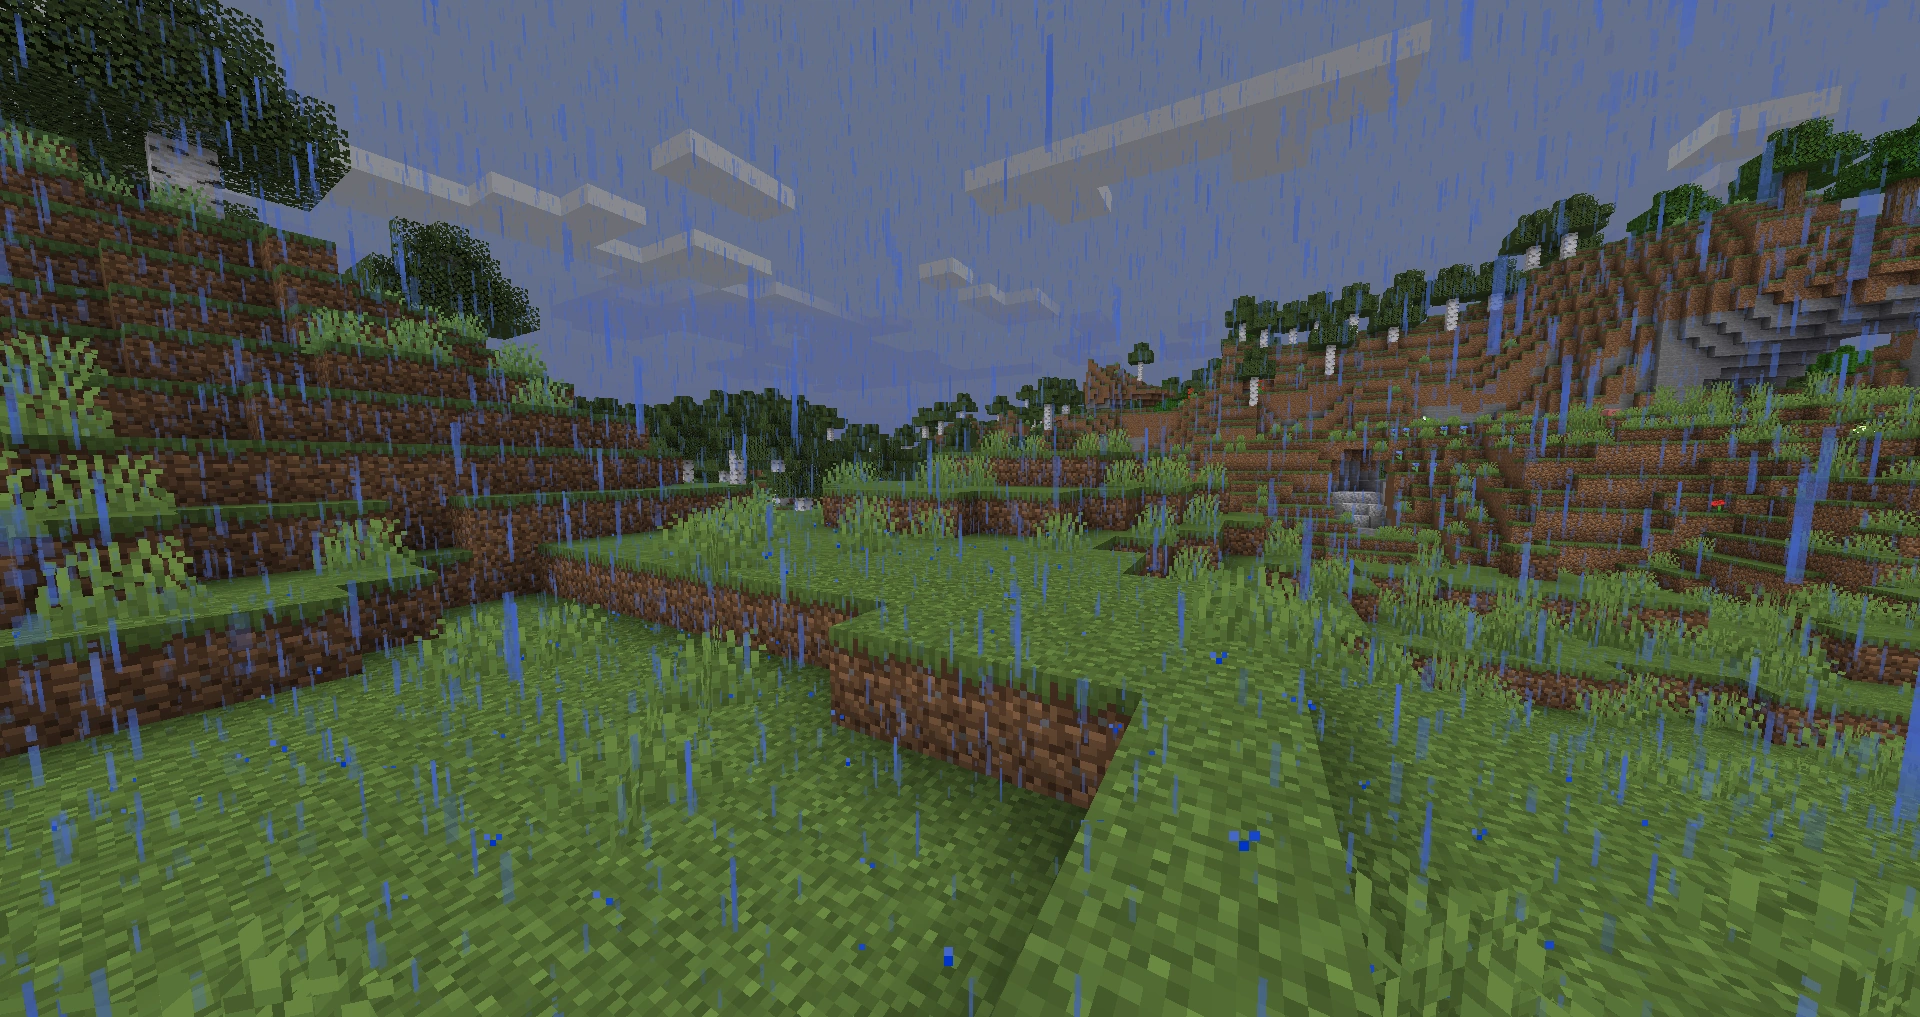
A heavy rainstorm obscuring the distance.
While flying, rain will also decrease visibility on land.
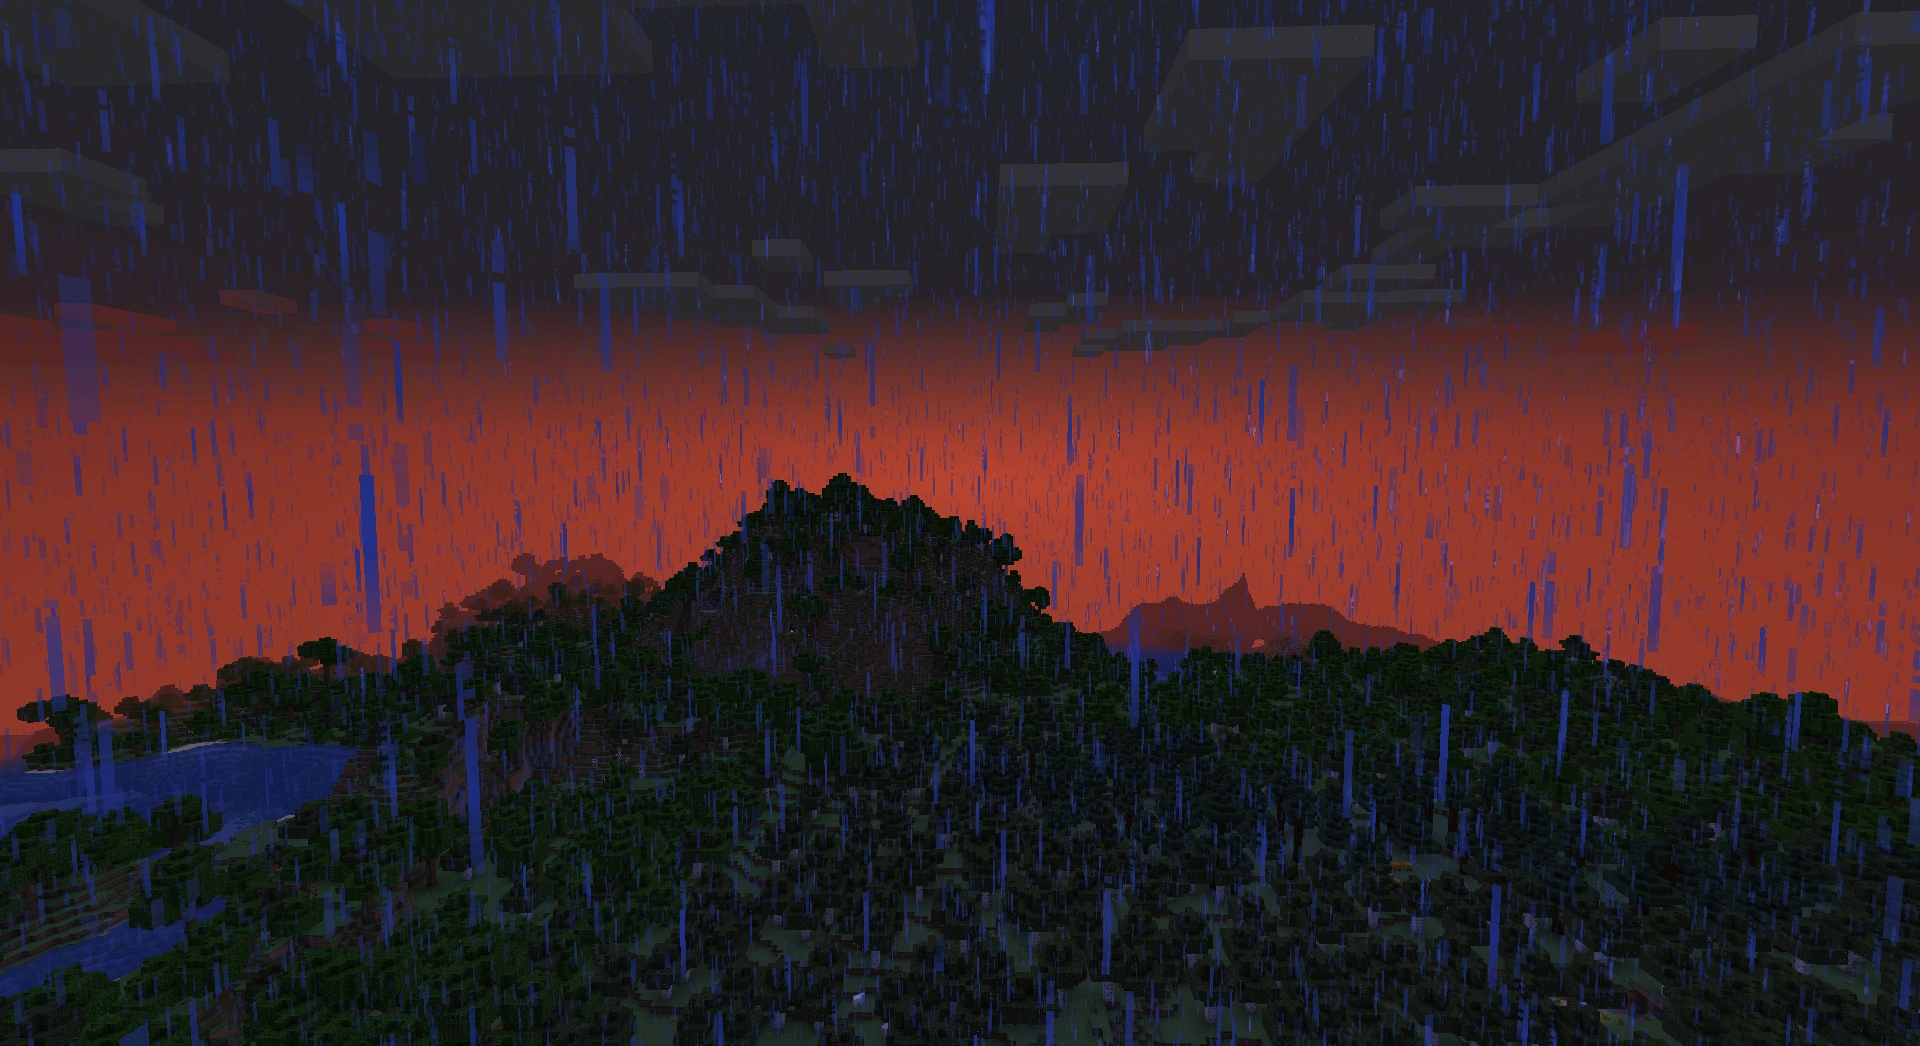
You cannot see the sun while it is raining, so you will see this afterglow during sunrise.
Rainstorms darken the world, causing the light from the sun to decrease by 3, bringing it to light level 12 in full daylight. Moonlight, however, is not reduced, and remains at light level 4. The sky itself will darken (even in biomes where it does not rain), to the point where celestial bodies (the sun, moon, and stars) are no longer visible.[2] The clouds darken from white to a light gray, although clouds themselves do not precipitate. Although the sun is not visible during rain, the glow associated with sunrise and sunset is still visible.
Rain will put out fires (including flaming arrows[3]). However, it will not put out fires on netherrack,[4] and it will not solidify lava. Mobs that are on fire will be put out on contact with rain; this prevents skeletons and zombies from burning during the day. On the contrary, endermen and snow golems may die due to their weakness to water. Endermen will teleport randomly until they find a place which is dry. Blazes that are brought into the Overworld will die on contact with rain as well. This level of damage hits its height limit on y=92, but interestingly, Blazes are damaged one block down.
At the same level as the height limit where Blazes are damaged, the rain becomes snowfall. Due to this, a few huge natural mountains can have snow on the tops while it is raining on the ground.
Other interesting effects caused by rain:
- Fish are more abundant during rain.[5]
- Wolves shake themselves dry if they are not moving (certain versions only).
- Farmland becomes hydrated if it isn't already.[6]
- Rain fills up cauldrons with water, albeit slowly. The limit for the cauldrons filling up is on y=94.
Rain particles
Rain particles make noise when they hit a block, and this noise can be heard at any point within 16 blocks. These particles (along with the associated sound) can be disabled by setting Particles to "Minimal" in the Video Settings menu. Although rain particles are only visible in the immediate vicinity, its effects occur within all loaded areas. Note that rain drops only fall in the two middle lines of a block, thus will not visibly fall directly onto the player. At y=1 and below, rain does not generate particles and the associated sound event.
Raindrops fall through ladders, vines, carpets, redstone repeaters, snow layers, mob heads, flower pots and cobwebs. They are stopped by signs, banners, doors, fence gates, trapdoors, pressure plates, glass panes and iron bars.
In Bedrock Edition, raindrops seem to be affected by the wind, i.e the rain appears to fall diagonally and randomly changes direction; it also falls faster.
History
Rain in Classic mode.
| classic | |||||
|---|---|---|---|---|---|
| October 22, 2009 | Rain was showcased. | ||||
| October 22, 2009 | Rain shown to be made thinner. | ||||
0.27 SURVIVAL TEST{{Extension DPL}}<ul><li>[[Recovery Compass|Recovery Compass]]<br/>{{About|the item used to point to the location of the player's last death|the item used to point to the world spawn or to a lodestone|Compass}}
{{Item
| image = Recovery Compass.gif
| renewable = No
| stackable = Yes (64)
}}
A '''recovery compass''' is an item used to point to the location of the [[Player|player's]] last death.
== Obtaining ==
=== Crafting ===
{{Crafting
|A1= Echo Shard |B1= Echo Shard |C1= Echo Shard
|A2= Echo Shard |B2= Compass |C2= Echo Shard
|A3= Echo Shard |B3= Echo Shard |C3= Echo Shard
|Output= Recovery Compass
|type= Tool
}}
== Usage ==
When held by a player, the recovery compass will point towards the spot where they previously died.
The recovery compass will only work when it is held by a player who has previously died and is in the same dimension as their last death. Otherwise, it will spin around randomly.
Like other items, the recovery compass itself will still drop when a player dies and the <code>keepInventory</code> [[game rule]] is not enabled.
This item is useless on Hardcore mode, as once the player dies, the player cannot respawn.
=== Enchantments ===
A recovery compass can receive the following [[enchantment]]s:
{| class="wikitable col-2-center col-3-right"
|+
!Name
!Max Level
![[Enchanting|Method]]
|-
|[[Curse of Vanishing]]{{only|bedrock|short=1}}
|I
|{{Inventory slot|Anvil}}
|-
|}
== Data values ==
{{Missing information|section|data values for Bedrock Edition|type=data}}
=== ID ===
[[Java Edition|''Java Edition'']]:
{{ID table|edition=java|displayname=Recovery Compass|nameid=recovery_compass|translationkey=item.minecraft.recovery_compass|generatetranslationkeys=y|showforms=y|spritetype=item|form=item|foot=1}}
==History==
{{History|java}}
{{History||1.19|snap=22w14a|[[File:Recovery Compass JE1 BE1.gif|32px]] Added recovery compasses.}}
{{History|||snap=22w15a|Recovery compasses can no longer be used on [[lodestone]]s and can no longer be enchanted with [[Curse of Vanishing]].}}
{{History|bedrock}}
{{History||1.19.0|snap=beta 1.19.0.24|[[File:Recovery Compass JE1 BE1.gif|32px]] Added recovery compasses.}}
{{History|foot}}
==Issues==
{{issue list}}
==Gallery==
<gallery>
File:Recovery Compass In An Item Frame.jpg|Recovery Compass.<ref>{{tweet|kingbdogz|1511751971673419782|Tell us what you think of the new Recovery Compass! We're hoping it improves how rewarding it feels to obtain Ancient City loot. Despite that, how do you feel about it? Will you use it? If so, how? What situations would you use it instead of just trying to remember?|April 6, 2022}}</ref>
</gallery>
==References==
{{reflist}}
== External Links ==
*[https://www.minecraft.net/en-us/article/taking-inventory--recovery-compass Taking Inventory:Recovery Compass] – Minecraft.net on January 19, 2023
{{Items}}
[[Category:Tools]]
[[Category:Non-renewable resources]]
[[de:Bergungskompass]]
[[es:Brújula de recuperación]]
[[fr:Boussole de récupération]]
[[ja:リカバリーコンパス]]
[[pl:Kompas powrotny]]
[[pt:Bússola de retomada]]
[[ru:Компас восстановления]]
[[th:เข็มทิศกู้คืน]]
[[uk:Компас відновлення]]
[[zh:追溯指针]]</li><li>[[Helmet|Helmet]]<br/>{{Update|Include information about armor trims and updated netherite upgrade information.}}
{{redirect|Cap|mob spawning caps|Spawn}}
{{redirect|Turtle Shell|the item dropped by maturing turtles|Scute}}
{{Item
| image = <gallery>
Leather Cap.png| Leather
Chainmail Helmet.png| Chainmail
Iron Helmet.png| Iron
Diamond Helmet.png| Diamond
Golden Helmet.png| Golden
Netherite Helmet.png| Netherite
Turtle Shell.png| Turtle Shell
</gallery>
| durability =
* Leather: 55
* Chainmail: 165
* Iron: 165
* Golden: 77
* Diamond: 363
* Netherite: 407
* Turtle Shell: 275
| renewable =
* '''Netherite''': No
* '''All others''': Yes
| stackable = No
}}
'''Helmets''' are a type of [[armor]] that covers the head of the player. There are seven types of helmets: '''leather cap''', '''chainmail helmet''', '''iron helmet''', '''diamond helmet''', '''gold helmet''', '''netherite helmet''', and '''turtle shell'''.
==Obtaining ==
===Crafting===
{{crafting
|head=1
|showname=0
|showdescription=1
|name=Helmet
|A2= Leather;Gold Ingot;Iron Ingot;Diamond;Scute
|B2= Leather;Gold Ingot;Iron Ingot;Diamond;Scute
|C2= Leather;Gold Ingot;Iron Ingot;Diamond;Scute
|A3= Leather;Gold Ingot;Iron Ingot;Diamond;Scute
|C3= Leather;Gold Ingot;Iron Ingot;Diamond;Scute
|description=
|Output= Leather Cap;Golden Helmet;Iron Helmet;Diamond Helmet;Turtle Shell
|type= Combat
}}
{{crafting
|ignoreusage=1
|name=[[Helmet]]
|ingredients=Damaged matching helmet
|Damaged Leather Cap; Damaged Golden Helmet; Damaged Chainmail Helmet; Damaged Iron Helmet; Damaged Diamond Helmet; Damaged Turtle Shell; Damaged Netherite Helmet
|Damaged Leather Cap; Damaged Golden Helmet; Damaged Chainmail Helmet; Damaged Iron Helmet; Damaged Diamond Helmet; Damaged Turtle Shell; Damaged Netherite Helmet
|Output= Leather Cap; Golden Helmet; Chainmail Helmet; Iron Helmet; Diamond Helmet; Turtle Shell; Netherite Helmet
|description= The durability of the two helmets is added together, plus an extra 5% durability.
|type= Combat
|foot=1
}}
===Upgrading===
{{Smithing
|head=1
|Netherite Upgrade
|Diamond Helmet
|Netherite Ingot
|Netherite Helmet
|tail=1
}}
===Repairing===
====Grinding====
{{Grinding
|showdescription=1
|ingredients=2x Damaged [[Leather Cap]] or<br>2x Damaged [[Chainmail Helmet]] or<br>2x Damaged [[Iron Helmet]] or<br>2x Damaged [[Golden Helmet]] or<br>2x Damaged [[Diamond Helmet]] or<br>2x Damaged [[Netherite Helmet]] or<br>2x Damaged [[Turtle Shell]]
|Damaged Leather Cap; Damaged Chainmail Helmet; Damaged Iron Helmet; Damaged Golden Helmet; Damaged Diamond Helmet; Damaged Netherite Helmet; Damaged Turtle Shell
|Damaged Leather Cap; Damaged Chainmail Helmet; Damaged Iron Helmet; Damaged Golden Helmet; Damaged Diamond Helmet; Damaged Netherite Helmet; Damaged Turtle Shell
|Leather Cap; Chainmail Helmet; Iron Helmet; Golden Helmet; Diamond Helmet; Netherite Helmet; Turtle Shell
|description=The durability of the two helmets are added together, plus an extra 5% durability.
}}
====[[Anvil mechanics#Unit repair|Unit repair]]====
Helmets can be repaired in an [[anvil]] by adding units of the [[armor material]]'s repair material, with each repair material restoring 25% of the helmet's maximum durability, rounded down.
===Mob loot===
If a [[zombie]], [[husk]], [[stray]] or [[skeleton]] is wearing armor, there is a 8.5% chance (9.5% with [[Looting]] I, 10.5% with Looting II and 11.5% with Looting III) for the mob to drop a helmet upon death. The dropped helmet is usually badly damaged, and may be [[enchanted]] with enchantment levels 5-19.
{{IN|bedrock}}, [[vindicator]]s and [[pillager]]s spawned in [[raid]]s have a 8.3525% chance (10.28% on hard) to drop [[iron]] helmets. The dropped helmets are usually badly damaged, and have a 50% chance of being [[enchanted]] with a random [[enchantment]].
===Natural generation===
Two [[armor stand]]s are found in each taiga [[village]] outdoor armory, one of them equipped with an [[iron helmet]].
===Chest loot===
{{IN|BE}}, a sealed room in [[woodland mansion]]s can appear that has a chest sometimes containing an [[Efficiency]] I leather cap.<ref>{{bug|MCPE-109048}}</ref>
{{LootChestItem|leather-cap,random-enchanted-leather-cap,chainmail-helmet,iron-helmet,level-enchanted-iron-helmet,golden-helmet,random-enchanted-golden-helmet,diamond-helmet,damaged-diamond-helmet,level-enchanted-diamond-helmet,damaged-random-enchanted-diamond-helmet,damaged-random-enchanted-diamond-helmet-2}}
===Trading===
{{IN|java}}, novice-level armorer villagers have a 40% chance to sell an iron helmet for 4 emeralds. Journeyman-level armorers have a 40% chance to sell a chainmail helmet for 1 emerald. Master-level armorers always sell an enchanted diamond helmet for 11-27 emeralds. Apprentice-level leatherworker villagers have a {{frac|2|3}} chance to sell a leather cap<ref group="note" name="dye note">The leather armor has a random color created by two dyes (possibly the same dye twice.)</ref> for 5 emeralds. Master-level leatherworker villagers offer the same trade.
Armorer villagers may give the players with the [[Hero of the Village]] effect a chainmail helmet.
{{IN|bedrock}}, novice-level armorer villagers have a 25% chance to sell iron helmet for 5 emeralds, {{frac|1|3}} chance to sell chainmail helmet at journeyman-level for an emerald, and 50% chance to sell enchanted diamond helmet for 8 emeralds at master-level. Apprentice-level leatherworker villagers have a 50% chance to sell leather cap for 5 emeralds as part of their trades, and 50% chance to sell an enchanted leather cap for 5 emeralds at the master level.
{{notelist|columns=1}}
==Usage ==
Helmets can be placed in the top armor slot of a player's [[inventory]] for activation.
===Defense points===
Defense points are each signified by half of a shirt of mail in the armor bar above the health bar. Each defense point reduces any damage dealt to the player that is absorbed by armor by 4%, increasing additively with the number of defense points. Different materials and combinations of armor provide different levels of defense.
The following table shows the number of defense points added by helmets.
{| class="wikitable" data-description="Helmet defense points"
|-
! scope="col" |Material
! scope="col" |
|-
! scope="row" |Leather
|{{armor|1}}
|-
! scope="row" |Golden
| rowspan="4" |{{armor|2}}
|-
! scope="row" |Chainmail
|-
! scope="row" |Iron
|-
! scope="row" |Turtle Shell
|-
! scope="row" |Diamond
| rowspan="2" |{{armor|3}}
|-
! scope="row" |Netherite
|}
===Knockback resistance===
A netherite helmet provides 10% knockback resistance.
===Durability===
The following table shows the amount of damage each piece of armor can absorb before being destroyed.
Any "hit" from a damage source that can be blocked by armor removes one point of durability from each piece of armor worn for every {{hp|4}} of incoming damage (rounded down, but never below 1). Damage taken that armor doesn't protect (such as [[Damage#Fall damage|falling]] or [[Damage#Drowning|drowning]]) does not damage the armor, even if it is enchanted to protect against that type of damage. The following chart displays how many hits helmets can endure.
Netherite armor is not damaged by [[lava]] or [[fire]] when worn.
{| class="wikitable" data-description="Helmet durability"
|-
!Material
!Durability
|-
! scope="row" |Leather
|55
|-
! scope="row" |Golden
|77
|-
! scope="row" |Chainmail
| rowspan="2" |165
|-
! scope="row" |Iron
|-
! scope="row" |Turtle Shell
|275
|-
! scope="row" |Diamond
|363
|-
! scope="row" |Netherite
|407
|}
====Repair====
Helmets may be [[item repair|repaired]] by using them along with some of their crafting material (leather, gold ingots, iron ingots, diamonds or netherite) in an [[anvil]]. Chainmail helmets may be repaired in this way with iron ingots. They may also be repaired by crafting them together with another helmet of like material.
===Enchantments===
A helmet can receive the following [[enchantment]]s. Note that while iron and chainmail have the same durability, chainmail has a higher [[Tutorials/Enchanting mechanics#Enchantability|enchantability]] than iron or diamond.
{| class="wikitable"
|-
!Enchantment !!Max Level !!Notes
|-
|[[Fire Protection]]|| IV ||<ref group="note" name="exclusive">Fire Protection, Blast Protection, Projectile Protection and Protection are mutually exclusive</ref>
|-
|[[Projectile Protection]]|| IV ||<ref group="note" name="exclusive" />
|-
|[[Blast Protection]]|| IV ||<ref group="note" name="exclusive" />
|-
|[[Protection]]|| IV ||<ref group="note" name="exclusive" />
|-
|[[Unbreaking]]||III
|
|-
|[[Respiration]]||III
|
|-
|[[Aqua Affinity]]||I
|
|-
|[[Thorns]]||III ||<ref group="note" name="anvil">Only from using an [[anvil]] and [[enchanted book]]s.</ref>
|-
|[[Mending]]||I ||<ref group="note" name="anvil2">Only from chest loot, fishing, or an anvil and enchanted books.</ref>
|-
|[[Curse of Binding]]||I ||<ref group="note" name="anvil2" />
|-
|[[Curse of Vanishing]]||I ||<ref group="note" name="anvil2" />
|}
{{notelist}}
===Turtle shell effect===
Equipping a {{ItemSprite|Turtle Shell}} turtle shell provides the {{EffectLink|Water Breathing}} status effect, allowing the player to remain underwater for an additional 10 seconds. The time that this effect lasts does not begin to count down until the player dives underwater, then the 10 seconds are counted down. The effect immediately recharges after exposure to air.
===Brewing ingredient===
A turtle shell can also be used as a potion brewing ingredient.
{{Brewing
|Turtle Shell
|Potion of the Turtle Master
|Potion of the Turtle Master
|Potion of the Turtle Master
|showname=1
}}
===Smelting usage===
{{Smelting|showname=1|Iron Helmet;Chainmail Helmet;Golden Helmet|Iron Nugget;Iron Nugget;Gold Nugget|0,1}}
===Piglins===
{{EntityLink|Piglin|Piglins}} are attracted to ''golden'' helmets and pick them up, examining them for 6 to 8 seconds. Piglins can wear other helmets but are not attracted to them. They prefer stronger helmets over weaker helmets, with one exception: They always prefer golden helmets, throwing out stronger helmets in favor of gold helmets. Enchanted helmets are preferred over unenchanted helmets.
==Sounds ==
{{el|je}}:
{{Sound table
|sound=Equip leather1.ogg
|sound2=Equip leather2.ogg
|sound3=Equip leather3.ogg
|sound4=Equip leather4.ogg
|sound5=Equip leather5.ogg
|sound6=Equip leather6.ogg
|subtitle=Leather armor rustles
|source=player
|description=When a leather helmet is equipped
|id=item.armor.equip_leather
|translationkey=subtitles.item.armor.equip_leather
|volume=1.0
|pitch=1.0
|distance=16}}
{{Sound table
|sound=Equip chain1.ogg
|sound2=Equip chain2.ogg
|sound3=Equip chain3.ogg
|sound4=Equip chain4.ogg
|sound5=Equip chain5.ogg
|sound6=Equip chain6.ogg
|subtitle=Chain armor jingles
|source=player
|description=When a chainmail helmet is equipped
|id=item.armor.equip_chain
|translationkey=subtitles.item.armor.equip_chain
|volume=1.0
|pitch=1.0
|distance=16}}
{{Sound table
|sound=Equip iron1.ogg
|sound2=Equip iron2.ogg
|sound3=Equip iron3.ogg
|sound4=Equip iron4.ogg
|sound5=Equip iron5.ogg
|sound6=Equip iron6.ogg
|subtitle=Iron armor clanks
|source=player
|description=When an iron helmet is equipped
|id=item.armor.equip_iron
|translationkey=subtitles.item.armor.equip_iron
|volume=1.0
|pitch=1.0
|distance=16}}
{{Sound table
|sound=Equip gold1.ogg
|sound2=Equip gold2.ogg
|sound3=Equip gold3.ogg
|sound4=Equip gold4.ogg
|sound5=Equip gold5.ogg
|sound6=Equip gold6.ogg
|subtitle=Gold armor clinks
|source=player
|description=When a gold helmet is equipped
|id=item.armor.equip_gold
|translationkey=subtitles.item.armor.equip_gold
|volume=1.0
|pitch=1.0
|distance=16}}
{{Sound table
|sound=Equip diamond1.ogg
|sound2=Equip diamond2.ogg
|sound3=Equip diamond3.ogg
|sound4=Equip diamond4.ogg
|sound5=Equip diamond5.ogg
|sound6=Equip diamond6.ogg
|subtitle=Diamond armor clangs
|source=player
|description=When a diamond helmet is equipped
|id=item.armor.equip_diamond
|translationkey=subtitles.item.armor.equip_diamond
|volume=1.0
|pitch=1.0
|distance=16}}
{{Sound table
|sound=Equip netherite1.ogg
|sound2=Equip netherite2.ogg
|sound3=Equip netherite3.ogg
|sound4=Equip netherite4.ogg
|subtitle=Netherite armor clanks
|source=player
|description=When a netherite helmet is equipped
|id=item.armor.equip_netherite
|translationkey=subtitles.item.armor.equip_netherite
|volume=0.8
|pitch=1.0/0.9
|distance=16}}
{{Sound table
|sound=Equip turtle shell.ogg
|subtitle=Turtle Shell thunks
|source=player
|description=When a turtle shell is equipped
|id=item.armor.equip_turtle
|translationkey=subtitles.item.armor.equip_turtle
|volume=1.0
|pitch=1.0/0.85/1.1
|distance=16}}
{{Sound table
|sound=Random break.ogg
|subtitle=Item breaks
|source=dependent
|description=When a helmet's durability is exhausted
|id=entity.item.break
|translationkey=subtitles.entity.item.break
|volume=0.8
|pitch=0.8-1.2
|distance=16
|foot=1}}
{{el|be}}:
{{Sound table
|type=bedrock
|sound=Equip leather1.ogg
|sound2=Equip leather2.ogg
|sound3=Equip leather3.ogg
|sound4=Equip leather4.ogg
|sound5=Equip leather5.ogg
|sound6=Equip leather6.ogg
|source=player
|description=When a leather helmet or a turtle shell is equipped
|id=armor.equip_leather
|volume=1.0
|pitch=1.0}}
{{Sound table
|sound=Equip chain1.ogg
|sound2=Equip chain2.ogg
|sound3=Equip chain3.ogg
|sound4=Equip chain4.ogg
|sound5=Equip chain5.ogg
|sound6=Equip chain6.ogg
|source=player
|description=When a chain helmet is equipped
|id=armor.equip_chain
|volume=1.0
|pitch=1.0}}
{{Sound table
|sound=Equip iron1.ogg
|sound2=Equip iron2.ogg
|sound3=Equip iron3.ogg
|sound4=Equip iron4.ogg
|sound5=Equip iron5.ogg
|sound6=Equip iron6.ogg
|source=player
|description=When an iron helmet is equipped
|id=armor.equip_iron
|volume=1.0
|pitch=1.0}}
{{Sound table
|sound=Equip gold1.ogg
|sound2=Equip gold2.ogg
|sound3=Equip gold3.ogg
|sound4=Equip gold4.ogg
|sound5=Equip gold5.ogg
|sound6=Equip gold6.ogg
|source=player
|description=When a gold helmet is equipped
|id=armor.equip_gold
|volume=1.0
|pitch=1.0}}
{{Sound table
|sound=Equip diamond1.ogg
|sound2=Equip diamond2.ogg
|sound3=Equip diamond3.ogg
|sound4=Equip diamond4.ogg
|sound5=Equip diamond5.ogg
|sound6=Equip diamond6.ogg
|source=player
|description=When a diamond helmet is equipped
|id=armor.equip_diamond
|volume=1.0
|pitch=1.0}}
{{Sound table
|sound=Equip netherite1.ogg
|sound2=Equip netherite2.ogg
|sound3=Equip netherite3.ogg
|sound4=Equip netherite4.ogg
|source=player
|description=When a netherite helmet is equipped.
|id=armor.equip_netherite
|volume=1.0
|pitch=1.0}}
{{Sound table
|rowspan=2
|sound=Water Splash Old.ogg
|source=block
|description=When a leather helmet is dyed using a cauldron
|id=cauldron.dyearmor
|volume=0.1
|pitch=1.0}}
{{Sound table
|source=block
|description=When a leather helmet's dye is removed using a cauldron
|id=cauldron.cleanarmor
|volume=0.1
|pitch=1.0}}
{{Sound table
|sound=Random break.ogg
|source=player
|description=When a helmet's durability is exhausted
|id=random.break
|volume=1.0
|pitch=0.9
|foot=1}}
==Data values ==
=== ID===
{{edition|java}}:
{{ID table
|edition=java
|showitemtags=y
|showforms=y
|generatetranslationkeys=y
|displayname=Leather Cap
|spritetype=item
|nameid=leather_helmet
|itemtags=freeze_immune_wearables
|form=item}}
{{ID table
|displayname=Chainmail Helmet
|spritetype=item
|nameid=chainmail_helmet
|form=item}}
{{ID table
|displayname=Iron Helmet
|spritetype=item
|nameid=iron_helmet
|form=item}}
{{ID table
|displayname=Diamond Helmet
|spritetype=item
|nameid=diamond_helmet
|form=item}}
{{ID table
|displayname=Golden Helmet
|spritetype=item
|nameid=golden_helmet
|form=item}}
{{ID table
|displayname=Netherite Helmet
|spritetype=item
|nameid=netherite_helmet
|form=item}}
{{ID table
|displayname=Turtle Shell
|spritetype=item
|nameid=turtle_helmet
|form=item
|foot=1}}
{{edition|bedrock}}:
{{ID table
|edition=bedrock
|shownumericids=y
|showforms=y
|notshowbeitemforms=y
|generatetranslationkeys=y
|displayname=Leather Cap
|spritetype=item
|nameid=leather_helmet
|id=335
|form=item}}
{{ID table
|displayname=Chainmail Helmet
|spritetype=item
|nameid=chainmail_helmet
|id=339
|form=item}}
{{ID table
|displayname=Iron Helmet
|spritetype=item
|nameid=iron_helmet
|id=343
|form=item}}
{{ID table
|displayname=Diamond Helmet
|spritetype=item
|nameid=diamond_helmet
|id=347
|form=item}}
{{ID table
|displayname=Golden Helmet
|spritetype=item
|nameid=golden_helmet
|id=351
|form=item}}
{{ID table
|displayname=Netherite Helmet
|spritetype=item
|nameid=netherite_helmet
|id=609
|form=item}}
{{ID table
|displayname=Turtle Shell
|spritetype=item
|nameid=turtle_helmet
|id=573
|form=item
|foot=1}}
===Item data===
When leather caps are dyed, it has the following NBT:
<div class="treeview">
*{{nbt|compound|tag}}: Parent tag.
**{{nbt|compound|display}}: Display properties.
***{{nbt|int|color}}: The color of the leather armor. The tooltip displays "Dyed" if advanced tooltips are disabled, otherwise it displays the hexadecimal color value. Color codes are calculated from the Red, Green and Blue components using this formula:<br>'''<span style="color:red">Red</span>[[wikipedia:Logical shift|<<]]16 + <span style="color:green">Green</span><<8 + <span style="color:blue">Blue</span>'''<ref>For positive values larger than 0x00FFFFFF, the top byte is ignored. All negative values produce white.</ref>
</div>
==Achievements ==
{{load achievements|Iron Man;Tie Dye Outfit;Cover me in debris;Oooh, shiny!}}
==Advancements ==
{{load advancements|Suit Up;Cover me With Diamonds;Oh Shiny;Cover Me in Debris;A Furious Cocktail;How Did We Get Here}}
==History ==
{{History|java classic}}
{{History||August 13, 2009|link=wordofnotch:162091556|Notch tested armor models on [[mob (entity)|mob]]. Only [[chestplate]]s and helmets were available. They were merely aesthetic at the time and had no effect on gameplay.}}
{{History||0.24_SURVIVAL_TEST|[[File:Plate Helmet.png|32px]] Added [[Java_Edition_removed_features#Armor_in_Survival_Test|plate helmet]]s.
|[[File:Chainmail Helmet JE1.png|32px]] Added the model and the texture for unused [[Java_Edition_removed_features#Armor_in_Survival_Test|chain helmet]]s.
|[[File:Zombie full set.png|32px]] [[File:Skeleton helmet.png|26px]] Plate armor models have been tested on [[zombie]]s and [[skeleton]]s. It had no effect on gameplay.}}
{{History|java indev}}
{{History||0.31|snap=20091223-1|Plate and chain armor [[model]]s are no longer used.}}
{{History|||snap=20091231-2|[[File:Leather Cap (item) JE1 BE1.png|32px]] [[File:Studded Helmet (item) JE1.png|32px]] [[File:Chainmail Helmet (item) JE1 BE1.png|32px]] [[File:Iron Helmet (item) JE1 BE1.png|32px]] Added [[item]]s of relation to leather, [[History of textures/Unused textures#Studded armor|studded]], chainmail and plate (iron) helmets.
|The textures of leather helmets are taken from one of [[Notch]]'s previous games, ''[[Legend of the Chambered]]''. The rest are from ''[[Legend of the Chambered 2]]''.}}
{{History||20100206|[[File:Golden Helmet (item) JE1 BE1.png|32px]] [[File:Diamond Helmet (item) JE1 BE1.png|32px]] Added items of golden and diamond helmets.
|Removed leather-chain helmets.}}
{{History||20100212-1|Added armor models.
|[[File:Indev 20100212 armor.png|50px]] Armor models are now displayed on the [[player]] in the [[inventory]].}}
{{History||20100218|[[File:Leather Cap JE1 BE1.png|32px]] [[File:Chainmail Helmet JE2 BE1.png|32px]] [[File:Iron Helmet JE1 BE1.png|32px]] [[File:Golden Helmet JE1 BE1.png|32px]] [[File:Diamond Helmet JE1 BE1.png|32px]] Added models of leather, chainmail, iron, gold, and diamond helmets.
|Helmets can now be [[crafting|crafted]] and worn.
|Helmets now function. All helmets give {{Armor|3}}. Helmets have limited [[item durability|durability]], with lower tier helmets less durable than higher tier helmets.}}
{{History|java alpha}}
{{History||v1.0.8|With the introduction of [[leather]], "Cloth Cap" has been renamed to "Leather Cap".
|Leather cap is now [[crafting|crafted]] with leather instead of [[wool|cloth]].}}
{{History|java}}
{{History||1.0.0|snap=Beta 1.9 Prerelease|The armor protection behavior has been changed. Prior to this update, the total armor protection is based in this equation: (((''total equipped armor damage reduction'' − 1) × (''all equipped armor max damage'' − ''total equipped armor damage'')) ÷ (''total equipped armor max damage'' + 1)). Armor no longer reduces certain damage types to be covered by enchantments.}}
{{History|||snap=October 3, 2011|slink={{tweet|notch|120859830339637249}}|The first images of a [[player]] wearing enchanted armor are revealed.}}
{{History|||snap=Beta 1.9 Prerelease 3|Iron helmets can now be found in the new [[stronghold]] altar [[chest]]s.}}
{{History|||snap=Beta 1.9 Prerelease 4|Helmets can now be [[enchanting|enchanted]].}}
{{History||1.1|snap=12w01a|Iron helmets can now be found in the new blacksmith [[chest]]s in [[village]]s.}}
{{History||1.2.1|snap=12w06a|[[Zombie]]s now drop iron helmets on rare occasions and [[zombie pigman|zombie pigmen]] now drop golden helmets.}}
{{History||1.3.1|snap=12w15a|{{key|Shift}}+clicking can now be used to wear helmets.}}
{{History|||snap=12w21a|Chain helmets can now be obtained legitimately in [[survival]] mode through [[trading]].
|Blacksmith [[villager]]s now [[trading|sell]] chain helmets for 5–6 emeralds.
|Blacksmith villagers now sell diamond helmets for 7 emeralds.
|Blacksmith villagers now sell iron helmets for 4–5 emeralds.
|Butchers now sell leather caps for 2–3 emeralds.}}
{{History||1.4.2|snap=12w32a|[[Mob]] armor has been reintroduced. A partial or full set of any armor is now sometimes worn by [[zombie]]s, [[skeleton]]s and [[zombified piglins|zombie pigmen]], with the likelihood increasing with difficulty.}}
{{History|||snap=August 17, 2012|slink={{tweet|Dinnerbone|236445090929844225}}|[[Jeb]] and [[Dinnerbone]] tweeted pictures of [[dye]]able leather armor.}}
{{History|||snap=12w34a|Leather helmets can now be dyed by [[crafting]] a leather armor piece with [[dye]]s. Dyes can be removed by {{control|use|text=using}} dyed leather armor on a [[cauldron]] with [[water]].
|[[File:Leather Cap JE2.png|32px]] [[File:Leather Cap (item) JE2.png|32px]] Default leather caps textures are now slightly darker.}}
{{History|||snap=12w36a|[[Dye]]d leather caps are now more saturated and have a slight tint of tan in respect to the default armor color.}}
{{History|||snap=12w37a|[[File:Leather Cap JE3 BE2.png|32px]] [[File:Leather Cap (item) JE3 BE2.png|32px]] Leather armor now has non-dyed parts on the cap. This has been implemented so that [[player]]s can distinguish between other types of helmets and similarly colored leather caps.}}
{{History||1.5|snap=13w04a|Helmets in the [[player]]'s hand can now be equipped by right-clicking.
|[[Dispenser]]s can now equip nearby players with helmets.}}
{{History||1.8|snap=14w02a|[[Trading|Trades]] changed: armorer [[villager]]s now [[trading|sell]] chain helmets for 5–7 emeralds.
|Armorer villagers no longer sell diamond helmets.
|Armorer villagers now sell iron helmets for 4–6 emeralds.
|Leatherworkers no longer sell other leather caps.}}
{{History|||snap=14w05a|Helmets no longer turns red when [[mob]]s and [[player]]s are hurt.}}
{{History|||snap=14w06a|Helmets are now visible on [[giant]]s.}}
{{History|||snap=14w25a|Chain helmets [[Java Edition removed features#Chainmail armor|cannot be crafted anymore]] due to the [[item]] form of [[fire]] being [[Java Edition removed features#Obtainable until 1.8|removed]].}}
{{History||1.9|snap=15w31a|Enchanted iron and diamond helmets can now be found in [[end city]] ship [[chest]]s.
|[[Mob]]s now wear armor from the bottom to the top, rather than from the top to the bottom. This means that a mob with three armor pieces, for example, spawn with all armor except a helmet.}}
{{History|||snap=15w34b|Helmet [[item durability|durability]] now affects armor value.}}
{{History|||snap=15w36a|Armor and armor [[enchanting|enchantment]] calculations have been changed. For the original values, see [[Armor/Before 1.9|here]].}}
{{History|||snap=15w36d|Helmet durability affecting value has been removed.
|Helmets now has an attribute controlling the defense points.}}
{{History|||snap=15w50a|Added <code>equip</code> [[sound]]s for leather armor.}}
{{History|||snap=16w02a|Armor and armor enchantment calculations have been changed again.}}
{{History|||snap=16w05a|Armor calculations have been changed, once again.}}
{{History||1.13|snap=17w47a|Prior to [[1.13/Flattening|''The Flattening'']], these [[item]]s' numeral IDs were 298, 302, 306, 310 and 314.}}
{{History|||snap=18w07a|[[File:Turtle Shell.png|32px]] [[File:Turtle Shell (item) JE1 BE1.png|32px]] Added turtle shells.}}
{{History|||snap=18w09a|Golden helmets now have a chance of generating in [[underwater ruins]].}}
{{History|||snap=18w11a|Enchanted leather caps can now generate in the chests of [[shipwreck]]s.}}
{{History|||snap=18w20a|"Chain Helmet" has now been renamed to "Chainmail Helmet".}}
{{History||1.14|snap=18w43a|[[File:Leather Cap JE4 BE2.png|32px]] [[File:Chainmail Helmet JE3 BE2.png|32px]] [[File:Iron Helmet JE2 BE2.png|32px]] [[File:Golden Helmet JE2 BE2.png|32px]] [[File:Diamond Helmet JE2 BE2.png|32px]]<br>[[File:Leather Cap (item) JE4 BE3.png|32px]] [[File:Chainmail Helmet (item) JE2 BE2.png|32px]] [[File:Iron Helmet (item) JE2 BE2.png|32px]] [[File:Golden Helmet (item) JE2 BE2.png|32px]] [[File:Diamond Helmet (item) JE2 BE2.png|32px]] The textures of all types of helmets have been changed.}}
{{History|||snap=18w48a|Leather caps can now be found in [[chest]]s in [[village]] tanneries.}}
{{History|||snap=18w50a|Iron helmets can now be found on [[armor stand]]s in [[taiga]] villages.}}
{{History|||snap=19w08a|[[File:Golden Helmet (item) JE3 BE3.png|32px]] The textures of gold helmet [[item]]s have been changed.}}
{{History|||snap=19w11a|Armorer villagers now sell enchanted diamond helmets, making diamond helmets effectively [[renewable resource|renewable]] again.
|Leatherworker villagers now sell randomly [[dye]]d leather caps.}}
{{History|||snap=19w13a|Armorer villagers now give chainmail helmets to players under the [[Hero of the Village]] effect.}}
{{History||1.16|snap=20w06a|[[File:Netherite Helmet JE1.png|32px]] [[File:Netherite Helmet (item) JE1.png|32px]] Added netherite helmets.}}
{{History|||snap=20w07a|[[File:Leather piglin helmet.png|32px]] [[File:Chainmail piglin helmet.png|32px]] [[File:Iron piglin helmet.png|32px]] [[File:Golden piglin helmet.png|32px]] [[File:Diamond piglin helmet.png|32px]] [[File:Netherite piglin helmet JE1.png|32px]] Added textures and [[model]]s for all helmets when they are used by [[piglin]]s.
|Netherite helmets are now obtained by combining one diamond armor piece and one netherite ingot in a crafting table.
|[[File:Turtle Shell piglin MC-172110.png|32px]] Turtle shells, when used by piglins and [[zombified piglin]]s, result in a [[missing texture]] when being displayed.<ref>{{Cite bug|MC|172110|Texture of turtle shells is missing when worn by a piglin or zombified piglin|date=February 14, 2020}}</ref>}}
{{History|||snap=20w09a|[[File:Diamond Helmet (item) JE3 BE3.png|32px]] The textures of diamond helmet [[item]]s have been changed.}}
{{History|||snap=20w10a|[[File:Netherite Helmet JE2 BE1.png|32px]] [[File:Netherite Helmet (item) JE2 BE1.png|32px]] The texture of netherite helmets has been changed.
|[[File:Netherite piglin helmet.png|32px]] The texture of netherite helmets for [[piglin]]s has been changed.
|Netherite helmets can no longer be [[crafting|crafted]].
|Netherite helmets are now obtained by combining one diamond helmet and one netherite ingot in a [[smithing table]].}}
{{History|||snap=20w16a|Golden and netherite helmets now generate randomly [[enchanting|enchanted]], and sometimes [[damage]]d, in [[bastion remnant]] and [[ruined portal]] chests.}}
{{History|||snap=20w17a|Diamonds helmets now generate in place of netherite helmets in bastion remnant [[chest]]s.}}
{{History|||snap=pre3|The special helmet [[model]]s and textures created for [[piglin]]s have been removed except for leather helmets.}}
{{History||1.17|snap=20w48a|Wearing a leather helmet now prevents [[Powder Snow#Freezing|freezing]] entirely.}}
{{History|||snap=21w13a|The two unused textures of the leather cap for [[piglin]]s<ref><code>/assets/minecraft/textures/models/armor/piglin_leather_layer_1.png</code></ref><ref><code>/assets/minecraft/textures/models/armor/piglin_leather_layer_1_overlay.png</code></ref> have been removed.}}
{{History||1.18.2|snap=22w03a|Netherite helmet knockback resistance is no longer random.}}
{{History||1.19|snap=22w17a|[[File:Leather Cap JE5.png|32px]] The texture of the leather cap item has been changed.|Changed the leather cap texture when worn so the center bar now extends to the bottom of the back face.}}
{{History||1.20<br>(Experimental)|link=1.19.4|snap=23w04a|Non-leather helmets can now be trimmed using a [[smithing table]].
|There are 10 types of material that determine the color of the trim:
*Iron
*Copper
*Gold
*Lapis
*Emerald
*Diamond
*Netherite
*Redstone
*Amethyst
*Quartz
|Upgrading diamond helmets to netherite helmets now requires the netherite upgrade [[smithing template]].}}
{{History|||snap=23w05a|Leather caps can now be trimmed using a smithing table.|Helmets can now have trims of the same material it is made out of.}}
{{History|||snap=23w06a|Swapped {{cd|iron}} and {{cd|iron_darker}} palette, then made {{cd|iron_darker}} darker overall.}}
{{History||1.19.4|snap=23w05a|Helmets can now be swapped by {{ctrl|using}} them in the hotbar.<ref>{{bug|MC-216270|||Fixed}}</ref>}}
{{History||?|Helmets can now be swapped in [[armor stand]]s by {{ctrl|using}} them/[[head]]s/[[carved pumpkin]]s in the armor stand's slot.}}
{{History||1.20|snap=23w12a|The pattern textures of dune and sentry armor trims are changed.|Those previous patterns were left with different names: dune was renamed sentry and sentry was renamed shaper.}}
{{History|pocket alpha}}
{{History||v0.6.0|[[File:Leather Cap JE1 BE1.png|32px]] [[File:Chainmail Helmet JE2 BE1.png|32px]] [[File:Iron Helmet JE1 BE1.png|32px]] [[File:Golden Helmet JE1 BE1.png|32px]] [[File:Diamond Helmet JE1 BE1.png|32px]]<br>[[File:Leather Cap (item) JE1 BE1.png|32px]] [[File:Chainmail Helmet (item) JE1 BE1.png|32px]] [[File:Iron Helmet (item) JE1 BE1.png|32px]] [[File:Golden Helmet (item) JE1 BE1.png|32px]] [[File:Diamond Helmet (item) JE1 BE1.png|32px]] Added helmets.}}
{{History||v0.8.0|snap=build 2|[[File:Leather Cap (item) JE3 BE2.png|32px]] The leather helmet sprite has been changed to that of {{el|je}}, but its armor [[model]] remains that of older versions.}}
{{History||v0.9.0|snap=build 1|Iron helmets now naturally generate in [[village]] [[chest]]s and in [[stronghold]] altar chests.}}
{{History||v0.11.0|snap=build 11|Helmets now protect against [[damage]] from [[mob]]s only.}}
{{History||v0.12.1|snap=build 1|Helmets can now be worn by mobs.
|Chainmail helmets can now be obtained in [[survival]] mode from a mob wearing it.}}
{{History||?|Helmets no longer turn red when [[mob]]s and [[player]]s are hurt.}}
{{History||v0.14.0|snap=build 1|[[File:Leather Cap JE3 BE2.png|32px]] The texture of leather helmets have been changed.
|Leather helmets can now be dyed.}}
{{History||v0.15.0|snap=build 1|Helmets can now be obtained from [[stray]]s and [[husk]]s that naturally spawn with armor.}}
{{History|pocket}}
{{History||1.0.0|snap=alpha 0.17.0.1|[[Enchanting|Enchanted]] iron helmets and enchanted diamond helmets can now be found inside [[chest]]s within [[end city|end cities]].}}
{{History||1.0.4|snap=alpha 1.0.4.0|Iron helmets and chainmail helmets are now [[trading|sold]] by armorer smith [[villager]]s via trading.}}
{{History||1.1.0|snap=alpha 1.1.0.0|Golden, chain and iron helmets can now be [[smelting|smelted]] down into one of their respective [[nugget]]s.}}
{{History|bedrock}}
{{History||1.4.0|snap=beta 1.2.14.2|Chainmail helmets now generate in [[buried treasure]] chests.
|Enchanted leather helmets can now be found inside [[shipwreck]] supply room [[chest]]s.}}
{{History|||snap=beta 1.2.20.1|Golden helmets can now be found inside [[underwater ruins]] chests.}}
{{History||1.5.0|snap=beta 1.5.0.4|[[File:Turtle Shell.png|32px]] [[File:Turtle Shell (item) JE1 BE1.png|32px]] Added turtle shells.}}
{{History||1.10.0|snap=beta 1.10.0.3|[[File:Leather Cap JE4 BE2.png|32px]] [[File:Chainmail Helmet JE3 BE2.png|32px]] [[File:Iron Helmet JE2 BE2.png|32px]] [[File:Golden Helmet JE2 BE2.png|32px]] [[File:Diamond Helmet JE2 BE2.png|32px]]<br>[[File:Leather Cap (item) JE4 BE3.png|32px]] [[File:Chainmail Helmet (item) JE2 BE2.png|32px]] [[File:Iron Helmet (item) JE2 BE2.png|32px]] [[File:Golden Helmet (item) JE2 BE2.png|32px]] [[File:Diamond Helmet (item) JE2 BE2.png|32px]] The textures of all types of helmets have been changed.
|Iron helmets now can be found in plains [[village]] weaponsmith [[chest]]s.
|Leather helmets can now be found inside plains village tannery chests.}}
{{History||1.11.0|snap=beta 1.11.0.1|Iron helmets now can be found in [[savanna]], [[taiga]], [[desert]], [[snowy taiga]] and [[snowy tundra]] [[village]] weaponsmith [[chest]]s.
|Leather helmets can now be found inside savanna, taiga, desert, snowy taiga and snowy tundra village tannery chests.
|Iron helmets can now be found in [[village]] armorer chests.}}
{{History|||snap=beta 1.11.0.4|[[Pillager]]s and [[vindicator]]s that spawn in [[raid]]s can now drop iron helmets.
|Diamond helmets are now sold by armorer villagers.}}
{{History||1.11.0|snap=beta 1.11.0.5|[[File:Golden Helmet (item) JE3 BE3.png|32px]] The textures of gold helmet [[item]]s have been changed.}}
{{History||1.12.0|snap=beta 1.12.0.2|[[File:Armor Stand with Leather Armor MCPE-44669.png|32px]] Leather armor no longer shows as being [[dye]]d properly when worn by [[armor stand]]s.}}
{{History||1.13.0|snap=beta 1.13.0.1|Leather armor now appears properly dyed when worn by armor stands.}}
{{History||1.16.0|snap=beta 1.16.0.51|[[File:Netherite Helmet JE2 BE1.png|32px]] [[File:Netherite Helmet (item) JE2 BE1.png|32px]] Added netherite helmets.
|[[File:Diamond Helmet (item) JE3 BE3.png|32px]] The textures of diamond helmet [[item]]s have been changed.
|Helmets can now be obtained from [[piglin]]s that naturally spawn with golden helmets.}}
{{History|||snap=beta 1.16.0.57|Golden and netherite helmets now generate randomly [[enchanting|enchanted]], and sometimes [[damage]]d, in [[bastion remnant]] chests.
|Netherite helmets can no longer be [[crafting|crafted]].
|Netherite helmets are now obtained by combining one diamond helmet and one netherite ingot in a [[smithing table]].}}
{{History|||snap=beta 1.16.0.63|Diamonds helmets now generate in place of netherite helmets in bastion remnant [[chest]]s.}}
{{History|||snap=beta 1.16.200.53|Netherite helmets now gives a 90% reduction in knockback.}}
{{History||1.16.210|snap=beta 1.16.210.53|Wearing leather helmets now prevents [[Powder Snow#Freezing|freezing]] entirely.}}
{{History|console}}
{{History||xbox=TU1|xbone=CU1|ps=1.0|wiiu=Patch 1|switch=1.0.1|[[File:Leather Cap JE1 BE1.png|32px]] [[File:Chainmail Helmet JE2 BE1.png|32px]] [[File:Iron Helmet JE1 BE1.png|32px]] [[File:Golden Helmet JE1 BE1.png|32px]] [[File:Diamond Helmet JE1 BE1.png|32px]]<br>[[File:Leather Cap (item) JE1 BE1.png|32px]] [[File:Chainmail Helmet (item) JE1 BE1.png|32px]] [[File:Iron Helmet (item) JE1 BE1.png|32px]] [[File:Golden Helmet (item) JE1 BE1.png|32px]] [[File:Diamond Helmet (item) JE1 BE1.png|32px]] Added helmets.
|Added a quick equip for armor to the [[inventory]] interface.}}
{{History||xbox=TU12|ps=1.03|[[File:Leather Cap JE3 BE2.png|32px]] [[File:Leather Cap (item) JE3 BE2.png|32px]] The textures for leather helmets have been changed.}}
{{History||xbox=TU14|ps=1.05|Leather helmets can now be [[dye]]d.
|[[Item repair]] can now repair helmets.}}
{{History||xbox=TU25|xbone=CU13|ps=1.16|Helmets now have the quick equip functionality.}}
{{History||xbox=TU53|xbone=CU43|ps=1.49|wiiu=Patch 23|switch=1.0.3|Golden, chain and iron helmets can now be [[smelting|smelted]] down into one of their respective [[nugget]]s.}}
{{History|PS4}}
{{History||1.90|[[File:Chainmail Helmet (item) JE2 BE2.png|32px]] [[File:Iron Helmet (item) JE2 BE2.png|32px]] [[File:Golden Helmet (item) JE2 BE2.png|32px]] [[File:Diamond Helmet (item) JE2 BE2.png|32px]] The textures of all types of helmet items have been changed (except for the leather helmets).}}
{{History|new 3ds}}
{{History||0.1.0|[[File:Leather Cap JE1 BE1.png|32px]] [[File:Chainmail Helmet JE2 BE1.png|32px]] [[File:Iron Helmet JE1 BE1.png|32px]] [[File:Golden Helmet JE1 BE1.png|32px]] [[File:Diamond Helmet JE1 BE1.png|32px]]<br>[[File:Leather Cap (item) JE3 BE2.png|32px]] [[File:Chainmail Helmet (item) JE1 BE1.png|32px]] [[File:Iron Helmet (item) JE1 BE1.png|32px]] [[File:Golden Helmet (item) JE1 BE1.png|32px]] [[File:Diamond Helmet (item) JE1 BE1.png|32px]] Added helmets.}}
{{History|foot}}
<gallery>
File:ArmorModel Aug 13 2009.jpg|First image of armor.
File:DinnerboneArmor.png|[[Dinnerbone]]'s first screenshot of dyed armor.
File:ArmorPE.png
</gallery>
;Armor durability from Indev until late Beta
{| class="wikitable" data-description="Armor Durability during Indev until late Beta" style="text-align:center;"
|-
!Leather
!Golden
!Chainmail
!Iron
!Diamond
|-
|33
|66
|66
|132
|264
|}
==Issues ==
{{issue list}}
==Trivia ==
*Unlike the other helmets, the netherite helmet covers most of the player's face, due to a nose guard and cheek plates.
*The turtle shell is the only helmet that is not part of a complete set.
* In Bedrock Edition, there exists a bug<ref>{{Cite bug|MCPE|109048|Efficiency 1 Leather Cap in Woodland Mansions|date=December 1, 2020}}</ref> that makes it possible to obtain a Leather Cap enchanted with Efficiency I from [[Woodland Mansion]] chests with a chance of 1.45%. The enchantment has no effect on the cap, however.
==Gallery ==
<gallery>
File:Zombie helmet.png|A zombie wearing a helmet in [[Survival Test]].
</gallery>
===Enchanted Helmets===
<gallery>
File:Enchanted Leather Cap (item).gif
File:Enchanted Chainmail Helmet (item).gif
File:Enchanted Iron Helmet (item).gif
File:Enchanted Golden Helmet (item).gif
File:Enchanted Diamond Helmet (item).gif
File:Enchanted Netherite Helmet (item).gif
File:Enchanted Turtle Shell (item).gif
</gallery>
<gallery>
File:Enchanted Leather Helmet.gif
File:Enchanted Chainmail Helmet.gif
File:Enchanted Iron Helmet.gif
File:Enchanted Golden Helmet.gif
File:Enchanted Diamond Helmet.gif
File:Enchanted Netherite Helmet.gif
File:Enchanted Turtle Shell.gif
</gallery>
==References ==
{{reflist}}
==External Links ==
*[https://www.minecraft.net/en-us/article/taking-inventory--helmet Taking Inventory: Helmet] – Minecraft.net on February 20, 2020
{{Items}}
[[Category:Armor]]
[[es:Casco]]
[[ja:ヘルメット]]
[[ko:투구]]
[[pt:Capacete]]
[[pl:Hełm]]
[[zh:头盔]]</li></ul> | Rain introduced purely for cosmetic purposes. The mechanics were simple, only testing if there is a block above to shelter the rain. It can now be toggled on and off with the F5 key. | ||||
| indev | |||||
February 18, 2010{{Extension DPL}}<ul><li>[[:Category:Fungi|Category:Fungi]]<br/>All pages covering blocks that are fungi.
[[Category:Blocks]]
[[Category:Items]]
[[ja:カテゴリ:菌類]]</li><li>[[Flower Pot|Flower Pot]]<br/>{{more images|The potted cherry sapling texture has been change in 1.19.4-pre2.}}
{{For|other uses|Pot}}
{{Block
| image = Flower Pot.png
| image2 = Potted Poppy.png
| extratext = View [[#Gallery|all renders]]
| transparent = Yes
| light = No
| tool = any
| renewable = Yes
| stackable = Yes (64)
| flammable = No
| lavasusceptible = No
}}
A '''flower pot''' is a decorative [[block]] that can contain flowers, bamboo, saplings, cacti, mushrooms, fungi, and other reasonably small plants.
== Obtaining ==
=== Natural generation ===
Flower pots naturally generate in [[witch hut]]s where they contain a red [[mushroom]], the basement of [[igloo]]s where they contain a [[cactus]], and in [[woodland mansion]]s, where they contain birch [[sapling]]s, dark oak saplings, dandelions, poppies, blue orchids, alliums, azure bluets, red and white tulips, and oxeye daisies.
Flower pots containing a dandelion can be found in some [[plains]] and [[savanna]] [[village]] houses. Flower pots containing a cactus or a dead bush can be found in some [[desert]] village houses. Flower pots containing a spruce sapling can be found in [[taiga]] village mason houses. Flower pots containing a poppy can be found in taiga village churches.
=== Breaking ===
Flower pots can be mined instantly using any [[tool]] or without a tool.
A flower pot drops itself as an [[item]] (any [[plant]] or [[mushroom]] in it separately) when pushed by a [[piston]] or washed away with [[water]].
[[Lava]] can flow into the space of a flower pot, destroying it.
=== Chest loot ===
{{LootChestItem|flower-pot}}
=== Crafting ===
{{Crafting
|A2= Brick
|C2= Brick
|B3= Brick
|Output= Flower Pot
|type= Decoration block
}}
== Usage ==
A flower pot can be used to hold [[mushroom]]s, [[Fungus|fungi]], and various [[plant]]s. Plants that can be {{control|placed}} in a pot include any one block high [[flower]]s, [[sapling]]s, [[fern]]s, [[dead bush]]es, [[cacti]], [[bamboo]], [[azalea]]s, [[mangrove propagule]], and [[roots]].
Plants can be removed by using the interact button.
{{IN|je}}, flower pots can be placed on any block, or over [[air]].<ref>{{bug|MC-127036|||WAI}}</ref>
{{IN|be}}, they must be placed on top of a full-[[block]] top surface, or the top of a [[fence]], stone [[wall]], or [[hopper]]. They cannot be placed on [[slab]]s and [[stairs]] unless those blocks are upside-down. Pots may also be placed on an upward facing trapdoor. If the trapdoor is opened, the pot will break.
Flower pots are {{frac|3|8}} of a block high and can be stepped on. It is not possible to walk from the top of a flower pot onto a full sized block without jumping. It is possible to jump from a flower pot onto a fence.
The plant or fungus can be removed from the flower pot by pressing the {{control|use}} control. This places the item directly back into the player's inventory.<ref>{{bug|MC-169496|||WAI}}</ref>
They can be used to display cacti and wither roses without inheriting their damaging properties.<ref>{{bug|MC-2241|||WAI}}</ref><ref>{{bug|MC-138024|||WAI}}</ref>
Potted [[Fungus|warped fungus]] can be used to repel [[hoglin]]s.
== Sounds ==
{{Sound table/Block/Normal}}
== Data values ==
=== ID ===
{{edition|java}}:
{{ID table
|edition=java
|showblocktags=y
|showforms=y
|generatetranslationkeys=y
|displayname=Flower Pot
|spritetype=block
|nameid=flower_pot
|blocktags=flower_pots
|translationkey=block.minecraft.flower_pot,item.minecraft.flower_pot}}
{{ID table
|displayname=Potted Dandelion
|spritetype=block
|nameid=potted_dandelion
|blocktags=flower_pots
|form=block}}
{{ID table
|displayname=Potted Poppy
|spritetype=block
|nameid=potted_poppy
|blocktags=flower_pots
|form=block}}
{{ID table
|displayname=Potted Blue Orchid
|spritetype=block
|nameid=potted_blue_orchid
|blocktags=flower_pots
|form=block}}
{{ID table
|displayname=Potted Allium
|spritetype=block
|nameid=potted_allium
|blocktags=flower_pots
|form=block}}
{{ID table
|displayname=Potted Azure Bluet
|spritetype=block
|nameid=potted_azure_bluet
|blocktags=flower_pots
|form=block}}
{{ID table
|displayname=Potted Red Tulip
|spritetype=block
|nameid=potted_red_tulip
|blocktags=flower_pots
|form=block}}
{{ID table
|displayname=Potted Orange Tulip
|spritetype=block
|nameid=potted_orange_tulip
|blocktags=flower_pots
|form=block}}
{{ID table
|displayname=Potted White Tulip
|spritetype=block
|nameid=potted_white_tulip
|blocktags=flower_pots
|form=block}}
{{ID table
|displayname=Potted Pink Tulip
|spritetype=block
|nameid=potted_pink_tulip
|blocktags=flower_pots
|form=block}}
{{ID table
|displayname=Potted Oxeye Daisy
|spritetype=block
|nameid=potted_oxeye_daisy
|blocktags=flower_pots
|form=block}}
{{ID table
|displayname=Potted Cornflower
|spritetype=block
|nameid=potted_cornflower
|blocktags=flower_pots
|form=block}}
{{ID table
|displayname=Potted Lily of the Valley
|spritetype=block
|nameid=potted_lily_of_the_valley
|blocktags=flower_pots
|form=block}}
{{ID table
|displayname=Potted Wither Rose
|spritetype=block
|nameid=potted_wither_rose
|blocktags=flower_pots
|form=block}}
{{ID table
|displayname=Potted Oak Sapling
|spritetype=block
|nameid=potted_oak_sapling
|blocktags=flower_pots
|form=block}}
{{ID table
|displayname=Potted Spruce Sapling
|spritetype=block
|nameid=potted_spruce_sapling
|blocktags=flower_pots
|form=block}}
{{ID table
|displayname=Potted Birch Sapling
|spritetype=block
|nameid=potted_birch_sapling
|blocktags=flower_pots
|form=block}}
{{ID table
|displayname=Potted Jungle Sapling
|spritetype=block
|nameid=potted_jungle_sapling
|blocktags=flower_pots
|form=block}}
{{ID table
|displayname=Potted Acacia Sapling
|spritetype=block
|nameid=potted_acacia_sapling
|blocktags=flower_pots
|form=block}}
{{ID table
|displayname=Potted Dark Oak Sapling
|spritetype=block
|nameid=potted_dark_oak_sapling
|blocktags=flower_pots
|form=block}}
{{ID table
|displayname=Potted Red Mushroom
|spritetype=block
|nameid=potted_red_mushroom
|blocktags=flower_pots
|form=block}}
{{ID table
|displayname=Potted Brown Mushroom
|spritetype=block
|nameid=potted_brown_mushroom
|blocktags=flower_pots
|form=block}}
{{ID table
|displayname=Potted Fern
|spritetype=block
|nameid=potted_fern
|blocktags=flower_pots
|form=block}}
{{ID table
|displayname=Potted Dead Bush
|spritetype=block
|nameid=potted_dead_bush
|blocktags=flower_pots
|form=block}}
{{ID table
|displayname=Potted Cactus
|spritetype=block
|nameid=potted_cactus
|blocktags=flower_pots
|form=block}}
{{ID table
|displayname=Potted Bamboo
|spritetype=block
|nameid=potted_bamboo
|blocktags=flower_pots
|form=block}}
{{ID table
|displayname=Potted Azalea
|spritetype=block
|nameid=potted_azalea_bush
|blocktags=flower_pots
|spritename=potted azalea bush
|form=block}}
{{ID table
|displayname=Potted Flowering Azalea
|spritetype=block
|nameid=potted_flowering_azalea_bush
|blocktags=flower_pots
|spritename=potted flowering azalea bush
|form=block}}
{{ID table
|displayname=Potted Crimson Fungus
|spritetype=block
|nameid=potted_crimson_fungus
|blocktags=flower_pots
|form=block}}
{{ID table
|displayname=Potted Warped Fungus
|spritetype=block
|nameid=potted_warped_fungus
|blocktags=flower_pots, hoglin_repellents
|form=block}}
{{ID table
|displayname=Potted Crimson Roots
|spritetype=block
|nameid=potted_crimson_roots
|blocktags=flower_pots
|form=block}}
{{ID table
|displayname=Potted Warped Roots
|spritetype=block
|nameid=potted_warped_roots
|blocktags=flower_pots
|form=block}}
{{ID table
|displayname=Potted Mangrove Propagule
|spritetype=block
|nameid=potted_mangrove_propagule
|blocktags=flower_pots
|form=block
|foot=1}}
{{edition|bedrock}}:
{{ID table
|edition=bedrock
|firstcolumnname=Flower Pot
|shownumericids=y
|showforms=y
|generatetranslationkeys=y
|displayname=Block
|spritename=flower-pot
|spritetype=block
|nameid=flower_pot
|id=140
|form=block
|itemform=item.flower_pot
|translationkey=-}}
{{ID table
|displayname=Item
|spritename=flower-pot
|spritetype=item
|nameid=flower_pot
|id=514
|form=item
|foot=1}}
=== Block states ===
{{see also|Block states}}
{{IN|be}}, flower pots use the following block states:
{{/BS}}
=== Block data ===
{{IN|bedrock}}, flower pot has a block entity associated with it that holds additional data about the block.
See [[Bedrock Edition level format/Block entity format]].
== Achievements ==
{{load achievements|Pot Planter}}
== History ==
{{History||August 16, 2012|link={{tweet|Dinnerbone|236062188555624448}}|[[Dinnerbone]] tweeted the first image of flower pots.}}
{{History|java}}
{{History||1.4.2|snap=12w34a|[[File:Flower Pot JE1.png|32px]] [[File:Potted Dandelion JE1.png|32px]] [[File:Potted Rose JE1.png|32px]] [[File:Potted Red Mushroom JE1.png|32px]] [[File:Potted Brown Mushroom JE1.png|32px]] [[File:Potted Oak Sapling JE1.png|32px]] [[File:Potted Birch Sapling JE1.png|32px]] [[File:Potted Spruce Sapling JE1.png|32px]] [[File:Potted Jungle Sapling JE1.png|32px]] [[File:Potted Cactus JE1.png|32px]] [[File:Potted Fern JE1.png|32px]] [[File:Potted Dead Bush JE1.png|32px]]<br>[[File:Flower Pot (item) JE1 BE1.png|32px]] Added flower pots.
|At this point, plants inside of pots rendered much like they do outside of flower pots, not being subject to directional shading.}}
{{History|||snap=12w40a|A potted [[red mushroom]] can now be found on one window of a [[witch hut]]. This changed to an empty pot in a far later unknown version,{{info needed}} but returned again afterward.{{info needed}}}}
{{History||1.7.2|snap=13w36a|[[File:Potted Allium JE1.png|32px]] [[File:Potted Azure Bluet JE1.png|32px]] [[File:Potted Oxeye Daisy JE1.png|32px]] [[File:Potted Blue Orchid JE1.png|32px]] [[File:Potted Red Tulip JE1.png|32px]] [[File:Potted Orange Tulip JE1.png|32px]] [[File:Potted White Tulip JE1.png|32px]] [[File:Potted Pink Tulip JE1.png|32px]] Allium, azure bluet, oxeye daisies, blue orchids, red tulips, orange tulips, white tulips and pink tulips can now be placed in flower pots.
|[[File:Potted Poppy JE1.png|32px]] As the rose has been replaced with the poppy, the potted rose is also now replaced with the potted poppy as a result.
|Flower pots can no longer use data values because more than 15 plants can be potted, it now has a [[block entity]] instead.
|[[File:Potted Green Shrub.png|32px]] [[File:Potted Cobweb JE1.png|32px]] Due to the tile entity handling, it is now possible to place any [[block]] inside of a flower pot via NBT editors. However, at this point, with the ones possible in vanilla [[survival]] aside, only [[grass]], [[shrub|green shrub]]s, and [[cobweb]]s actually render.
|[[File:Potted Grass JE1.png|32px]] Potted grass now exists can be placed in flower pots using [[commands]].
|[[File:Potted Grass (no tint) JE1.png|32px]] [[File:Potted Fern (no tint) JE1.png|32px]] Potted shrubs, grass, and ferns must now have block data value 11 to display biome colors, otherwise rendering as default/gray.}}
{{History|||snap=13w37a|Added {{cmd|setblock}}, allowing for the aforementioned potted plants to be obtained without map editing.}}
{{History|||snap=13w43a|[[File:Potted Acacia Sapling JE1.png|32px]] [[File:Potted Dark Oak Sapling JE1.png|32px]] Acacia sapling and dark oak saplings can now be placed in flower pots.}}
{{History||1.8|snap=14w06a|Many more blocks (almost all full cubes) placed into a flower pot by modifying the block entity now render, if in somewhat buggy fashion, as the texture is in a cross shape. {{LoadPage|Flower Pot/1.8 development gallery/14w06a|Click show to display all of the applicable blocks.|b}}
|[[File:Potted Cactus JE2.png|32px]] Potted cacti now appear as a cross formed of their bottom texture inside of a pot.<ref>{{bug|MC-47469}}</ref>}}
{{History|||snap=14w06b|Further blocks now render in flower pots than did in the previous snapshot. {{LoadPage|Flower Pot/1.8 development gallery/14w06b|Click show to display all of the applicable blocks.|b}}
|[[File:Potted Cactus JE3.png|32px]] The accidental potted cactus model change has been reverted.}}
{{History|||snap=14w07a|[[File:Potted Iron Trapdoor.png|32px]] The newly added [[iron trapdoor]] also renders in flower pots when created with commands.}}
{{History|||snap=14w17a|[[File:Flower Pot JE2.png|32px]] [[File:Potted Dandelion JE2.png|32px]] [[File:Potted Allium JE2.png|32px]] [[File:Potted Azure Bluet JE2.png|32px]] [[File:Potted Oxeye Daisy JE2.png|32px]] [[File:Potted Blue Orchid JE2.png|32px]] [[File:Potted Poppy JE2.png|32px]] [[File:Potted Red Tulip JE2.png|32px]] [[File:Potted Orange Tulip JE2.png|32px]] [[File:Potted White Tulip JE2.png|32px]] [[File:Potted Pink Tulip JE2.png|32px]] [[File:Potted Red Mushroom JE2.png|32px]] [[File:Potted Brown Mushroom JE2.png|32px]] [[File:Potted Oak Sapling JE2.png|32px]] [[File:Potted Birch Sapling JE2.png|32px]] [[File:Potted Spruce Sapling JE2.png|32px]] [[File:Potted Jungle Sapling JE2.png|32px]] [[File:Potted Acacia Sapling JE2.png|32px]] [[File:Potted Dark Oak Sapling JE2.png|32px]] [[File:Potted Cactus JE4.png|32px]] [[File:Potted Fern JE2.png|32px]] [[File:Potted Dead Bush JE2.png|32px]] The flower pot model and rendering has changed. The insides are now subject to directional shading, rather than being fully lit, much like the changes made to [[hopper]]s and [[cauldron]]s in 14w10a. In addition, the outer face (as well as the cuboids comprising the cactus in potted cactus) are no longer subject to ambient occlusion. The potted cactus also now uses the side texture on the top face, rather than the top texture.
|Invalid blocks no longer render inside flower pots. This also includes cobweb and grass.}}
{{History|||snap=14w25a|[[File:Potted Dandelion JE3.png|32px]] [[File:Potted Allium JE3.png|32px]] [[File:Potted Azure Bluet JE3.png|32px]] [[File:Potted Oxeye Daisy JE3.png|32px]] [[File:Potted Blue Orchid JE3.png|32px]] [[File:Potted Poppy JE3.png|32px]] [[File:Potted Red Tulip JE3.png|32px]] [[File:Potted Orange Tulip JE3.png|32px]] [[File:Potted White Tulip JE3.png|32px]] [[File:Potted Pink Tulip JE3.png|32px]] [[File:Potted Red Mushroom JE3.png|32px]] [[File:Potted Brown Mushroom JE3.png|32px]] [[File:Potted Oak Sapling JE3.png|32px]] [[File:Potted Birch Sapling JE3.png|32px]] [[File:Potted Spruce Sapling JE3.png|32px]] [[File:Potted Jungle Sapling JE3.png|32px]] [[File:Potted Acacia Sapling JE3.png|32px]] [[File:Potted Dark Oak Sapling JE3.png|32px]] [[File:Potted Fern JE3.png|32px]] [[File:Potted Dead Bush JE3.png|32px]] Potted cross shaped objects are now affected by directional shading.<ref>{{bug|MC-129826}}</ref>}}
{{History||1.9|snap=15w43a|A potted cactus can now be found on a table in [[igloo]] basements.}}
{{History||1.11|snap=16w32a|The block entity ID of flower pots has been changed from <code>FlowerPot</code> to <code>flower_pot</code>.}}
{{History|||snap=16w39a|Potted plants can now be removed from flower pots by pressing {{control|use}}.
|Flower pots now generate in [[woodland mansion]]s.}}
{{History||1.13|snap=17w47a|The different block states for the <code>flower_pot</code> ID have been split up into their own IDs.
|Flower pots are no longer block entities.
|Prior to [[1.13/Flattening|''The Flattening'']], this block's numeral ID was 140, and the item's was 390.}}
{{History||1.14|snap=18w43a|[[File:Flower Pot JE3.png|32px]] [[File:Potted Dandelion JE4.png|32px]] [[File:Potted Poppy JE4.png|32px]] [[File:Potted Allium JE4.png|32px]] [[File:Potted Azure Bluet JE4.png|32px]] [[File:Potted Oxeye Daisy JE4.png|32px]] [[File:Potted Blue Orchid JE4.png|32px]] [[File:Potted Red Tulip JE4.png|32px]] [[File:Potted Orange Tulip JE4.png|32px]] [[File:Potted White Tulip JE4.png|32px]] [[File:Potted Pink Tulip JE4.png|32px]] [[File:Potted Red Mushroom JE4.png|32px]] [[File:Potted Brown Mushroom JE4.png|32px]] [[File:Potted Oak Sapling JE4.png|32px]] [[File:Potted Birch Sapling JE4.png|32px]] [[File:Potted Spruce Sapling JE4.png|32px]] [[File:Potted Jungle Sapling JE4.png|32px]] [[File:Potted Acacia Sapling JE4.png|32px]] [[File:Potted Dark Oak Sapling JE4.png|32px]] [[File:Potted Cactus JE5.png|32px]] [[File:Potted Fern JE4.png|32px]] [[File:Potted Dead Bush JE4.png|32px]] <br>[[File:Flower Pot (item) JE2 BE2.png|32px]] The textures of flower pots and their contained plants have been changed.
|[[File:Potted Cornflower JE1 BE1.png|32px]] [[File:Potted Lily of the Valley JE1 BE1.png|32px]] [[File:Potted Wither Rose JE1 BE1.png|32px]] [[File:Potted Bamboo JE1 BE1.png|32px]] Cornflower, lily of the valley, wither rose and [[bamboo]] can now be placed in flower pots.}}
{{History|||snap=18w44a|[[File:Potted Cactus JE6.png|32px]] The texture of potted cacti has been changed.}}
{{History|||snap=18w47b|[[File:Potted Poppy JE5.png|32px]] The texture of potted poppies has been changed.}}
{{History|||snap=18w49a|Flower pots can now be found in [[chest]]s in [[village]] mason houses.}}
{{History|||snap=19w11a|Flower pots have become [[renewable resource|renewable]], as mason [[villager]]s now [[trading|sell]] [[brick]]s.}}
{{History||1.16|snap=20w06a|The model of flower pots has been fixed and has been given an underside, which has changed the model from [[File:Flower Pot UNKVER2 (facing NWU).png|32px]] to [[File:Flower Pot UNKVER3 (facing NWU).png|32px]].}}
{{History|||snap=20w09a|[[File:Potted Crimson Fungus JE1 BE1.png|32px]] [[File:Potted Warped Fungus JE1 BE1.png|32px]] [[File:Potted Crimson Roots JE1 BE1.png|32px]] [[File:Potted Warped Roots JE1 BE1.png|32px]] Crimson and warped [[fungi]] and crimson and warped [[roots]] can now be placed in flower pots.
|The model for potted plants has been fixed, so the bottom face now renders,<ref>{{bug|MC-170842}}</ref> which has changed the model from [[File:Potted Dandelion UNKVER1 (facing NWU).png|32px]] [[File:Potted Poppy UNKVER1 (facing NWU).png|32px]] [[File:Potted Allium UNKVER1 (facing NWU).png|32px]] [[File:Potted Azure Bluet UNKVER1 (facing NWU).png|32px]] [[File:Potted Oxeye Daisy UNKVER1 (facing NWU).png|32px]] [[File:Potted Blue Orchid UNKVER1 (facing NWU).png|32px]] [[File:Potted Red Tulip UNKVER1 (facing NWU).png|32px]] [[File:Potted Orange Tulip UNKVER1 (facing NWU).png|32px]] [[File:Potted White Tulip UNKVER1 (facing NWU).png|32px]] [[File:Potted Pink Tulip UNKVER1 (facing NWU).png|32px]] [[File:Potted Red Mushroom UNKVER1 (facing NWU).png|32px]] [[File:Potted Brown Mushroom UNKVER1 (facing NWU).png|32px]] [[File:Potted Oak Sapling UNKVER1 (facing NWU).png|32px]] [[File:Potted Birch Sapling UNKVER1 (facing NWU).png|32px]] [[File:Potted Spruce Sapling UNKVER1 (facing NWU).png|32px]] [[File:Potted Jungle Sapling UNKVER1 (facing NWU).png|32px]] [[File:Potted Acacia Sapling UNKVER1 (facing NWU).png|32px]] [[File:Potted Dark Oak Sapling UNKVER1 (facing NWU).png|32px]] [[File:Potted Cactus UNKVER1 (facing NWU).png|32px]] [[File:Potted Fern UNKVER1 (facing NWU).png|32px]] [[File:Potted Dead Bush UNKVER1 (facing NWU).png|32px]] [[File:Potted Cornflower UNKVER1 (facing NWU).png|32px]] [[File:Potted Lily of the Valley UNKVER1 (facing NWU).png|32px]] [[File:Potted Wither Rose UNKVER1 (facing NWU).png|32px]] [[File:Potted Bamboo UNKVER1 (facing NWU).png|32px]] to [[File:Potted Dandelion UNKVER2 (facing NWU).png|32px]] [[File:Potted Poppy UNKVER2 (facing NWU).png|32px]] [[File:Potted Allium UNKVER2 (facing NWU).png|32px]] [[File:Potted Azure Bluet UNKVER2 (facing NWU).png|32px]] [[File:Potted Oxeye Daisy UNKVER2 (facing NWU).png|32px]] [[File:Potted Blue Orchid UNKVER2 (facing NWU).png|32px]] [[File:Potted Red Tulip UNKVER2 (facing NWU).png|32px]] [[File:Potted Orange Tulip UNKVER2 (facing NWU).png|32px]] [[File:Potted White Tulip UNKVER2 (facing NWU).png|32px]] [[File:Potted Pink Tulip UNKVER2 (facing NWU).png|32px]] [[File:Potted Red Mushroom UNKVER2 (facing NWU).png|32px]] [[File:Potted Brown Mushroom UNKVER2 (facing NWU).png|32px]] [[File:Potted Oak Sapling UNKVER2 (facing NWU).png|32px]] [[File:Potted Birch Sapling UNKVER2 (facing NWU).png|32px]] [[File:Potted Spruce Sapling UNKVER2 (facing NWU).png|32px]] [[File:Potted Jungle Sapling UNKVER2 (facing NWU).png|32px]] [[File:Potted Acacia Sapling UNKVER2 (facing NWU).png|32px]] [[File:Potted Dark Oak Sapling UNKVER2 (facing NWU).png|32px]] [[File:Potted Cactus UNKVER2 (facing NWU).png|32px]] [[File:Potted Fern UNKVER2 (facing NWU).png|32px]] [[File:Potted Dead Bush UNKVER2 (facing NWU).png|32px]] [[File:Potted Cornflower UNKVER2 (facing NWU).png|32px]] [[File:Potted Lily of the Valley UNKVER2 (facing NWU).png|32px]] [[File:Potted Wither Rose UNKVER2 (facing NWU).png|32px]] [[File:Potted Bamboo UNKVER2 (facing NWU).png|32px]].}}
{{History|||snap=20w11a|[[File:Potted Bamboo UNKVER3 (facing NWU).png|32px]] An unneeded face has been removed from potted bamboo to solve a z-fighting issue.<ref>{{bug|MC-173156}}</ref>}}
{{History|||snap=Pre-release 3|[[File:Potted Cactus JE7.png|32px]] [[File:Potted Cactus UNKVER3 (facing NWU).png|32px]] The model of the potted cacti has been changed. The top face now uses the top texture of cactus, rather than the side texture and the bottom face has been changed to the top texture of the flower pot.}}
{{History||1.16.2|snap=20w28a|[[File:Potted Cactus UNKVER4 (facing NWU).png|32px]] The model of the potted cactus no longer has a hole in the bottom, although the texture is stretched.}}
{{History||1.17|snap=Pre-release 1|[[File:Potted Azalea JE1 BE1.png|32px]] [[File:Potted Flowering Azalea JE1 BE1.png|32px]][[Azalea]] and flowering azalea can now be placed in flower pots.
|[[File:Potted Flowering Azalea (plant texture) JE1.png|32px]] Potted flowering azalea has own unused plant texture but uses normal variant for consistency with flowering azalea: [[File:Potted Flowering Azalea (bottom) JE1 BE1.png|32px]] [[File:Flowering Azalea (bottom) JE2 BE2.png|32px]]}}
{{History||1.19|snap=22w11a|[[File:Potted Mangrove Propagule JE1.png|32px]] [[Mangrove propagule]]s can now be placed in flower pots.}}
{{History|||snap=22w18a|[[File:Potted Mangrove Propagule JE2.png|32px]] The western element of the flower pot in potted mangrove propagules has been deleted.<ref name="mc-251355">{{bug|MC-251355}}</ref>}}
{{History|||snap=Pre-release 1|[[File:Potted Mangrove Propagule JE1.png|32px]] The aforementioned western element has been restored.<ref name="mc-251355"/>}}
{{History||1.20<br>(Experimental)|link=1.19.4|snap=23w07a|[[File:Potted Torchflower JE1.png|32px]] [[File:Potted Cherry Sapling JE1.png|32px]] [[Torchflower]]s and [[cherry sapling]]s can now be placed in flower pots.}}
{{History|||snap=1.19.4-pre2|Changed the texture of potted cherry saplings.}}
{{History||1.20|snap=23w12a|Potted torchflower and cherry sapling are now available without using the "Update 1.20" experimental datapack.|Flower pot can now be found in [[suspicious gravel]] and [[suspicious sand]] in [[trail ruins]].}}
{{History|||snap=23w13a|[[File:Potted Flowering Azalea JE2.png|32px]] Flowering azalea now uses own plant texture, changing appearance from [[File:Potted Flowering Azalea (bottom) JE1 BE1.png|32px]] to [[File:Potted Flowering Azalea (bottom) JE2.png|32px]] and breaking consistency with flowering azalea.<ref>{{bug|MC-230916}}</ref>}}
{{History|||snap=23w16a|Flower pot no longer generates in [[suspicious sand]] in [[trail ruins]].|Due to the split of the archaeological loot tables for the suspicious gravel within the [[trail ruins]]; flower pot now is in the common loot.}}
{{History|pocket alpha}}
{{History||v0.12.1|snap=build 1|[[File:Flower Pot JE1.png|32px]] [[File:Potted Dandelion JE1.png|32px]] [[File:Potted Red Mushroom JE1.png|32px]] [[File:Potted Brown Mushroom JE1.png|32px]] [[File:Potted Oak Sapling JE1.png|32px]] [[File:Potted Birch Sapling JE1.png|32px]] [[File:Potted Spruce Sapling JE1.png|32px]] [[File:Potted Jungle Sapling JE1.png|32px]] [[File:Potted Cactus JE1.png|32px]] [[File:Potted Fern JE1.png|32px]] [[File:Potted Allium JE1.png|32px]] [[File:Potted Azure Bluet JE1.png|32px]] [[File:Potted Oxeye Daisy JE1.png|32px]] [[File:Potted Blue Orchid JE1.png|32px]] [[File:Potted Poppy JE1.png|32px]] [[File:Potted Red Tulip JE1.png|32px]] [[File:Potted Orange Tulip JE1.png|32px]] [[File:Potted White Tulip JE1.png|32px]] [[File:Potted Pink Tulip JE1.png|32px]] [[File:Potted Acacia Sapling JE1.png|32px]] [[File:Potted Dark Oak Sapling JE1.png|32px]]{{verify|Are these models the ones used in this version?}}<br>[[File:Flower Pot (item) JE1 BE1.png|32px]] Added flower pots.}}
{{History||v0.14.0|snap=build 1|Flower pots now generate in [[witch hut]]s.}}
{{History|pocket}}
{{History||1.0.0|snap=alpha 0.17.0.1|Flower pots now generate in [[igloo]] basements.}}
{{History||1.1.0|snap=alpha 1.1.0.0|Flower pots now generate naturally in [[woodland mansion]]s.}}
{{History|bedrock}}
{{History||1.8.0|snap=beta 1.8.0.8|[[File:Potted Bamboo JE1 BE1.png|32px]]{{verify|Is this how they really look in BE?}} [[Bamboo]] can now be placed in flower pots.}}
{{History||1.9.0|snap=beta 1.9.0.0|[[File:Potted Cornflower BE.jpg|32px]] [[File:Potted Lily of the Valley BE.jpg|32px]] Cornflower and lily of the valley can now be placed in flower pots.}}
{{History||1.10.0|snap=beta 1.10.0.3|[[File:Flower Pot BE.jpg|32px]] [[File:Potted Dandelion BE.jpg|32px]] [[File:Potted Poppy BE.jpg|32px]] [[File:Potted Allium BE.jpg|32px]] [[File:Potted Azure Bluet BE.jpg|32px]] [[File:Potted Oxeye Daisy BE.jpg|32px]] [[File:Potted Blue Orchid BE.jpg|32px]] [[File:Potted Red Tulip BE.jpg|32px]] [[File:Potted Orange Tulip BE.jpg|32px]] [[File:Potted White Tulip BE.jpg|32px]] [[File:Potted Pink Tulip BE.jpg|32px]] [[File:Potted Red Mushroom BE.jpg|32px]] [[File:Potted Brown Mushroom BE.jpg|32px]] [[File:Potted Oak Sapling BE.jpg|32px]] [[File:Potted Birch Sapling BE.jpg|32px]] [[File:Potted Spruce Sapling BE.jpg|32px]] [[File:Potted Jungle Sapling BE.jpg|32px]] [[File:Potted Acacia Sapling BE.jpg|32px]] [[File:Potted Dark Oak Sapling BE.jpg|32px]] [[File:Potted Cactus BE.png|32px]] [[File:Potted Fern BE.jpg|32px]]<br>[[File:Flower Pot (item) JE2 BE2.png|32px]] The textures of flower pots have been changed.
|Flower pots now generate in the new [[village]]s.}}
{{History||1.11.0|snap=beta 1.11.0.1|Flower pots can now be found in [[village]] mason [[chest]]s.}}
{{History||1.13.0|snap=beta 1.13.0.9|[[File:Potted Wither Rose JE1 BE1.png|32px]] [[Wither rose]]s can now be placed in flower pots.}}
{{History||1.16.0|snap=beta 1.15.0.51|Potted plants can now be removed from flower pots by pressing {{control|use}}.}}
{{History|||snap=beta 1.16.0.51|[[File:Potted Crimson Fungus JE1 BE1.png|32px]] [[File:Potted Warped Fungus JE1 BE1.png|32px]] [[File:Potted Crimson Roots JE1 BE1.png|32px]] [[File:Potted Warped Roots JE1 BE1.png|32px]] Crimson and warped [[fungi]] and crimson and warped [[roots]] can now be placed in flower pots.}}
{{History||1.17.10|snap=beta 1.17.10.21|[[File:Potted Azalea JE1 BE1.png|32px]] [[File:Potted Flowering Azalea JE1 BE1.png|32px]] [[Azalea]] and flowering azalea can now be placed in flower pots.}}
{{History|console}}
{{History||xbox=TU14|xbone=CU1|ps=1.04|wiiu=Patch 1|switch=1.0.1|[[File:Flower Pot JE1.png|32px]] [[File:Potted Dandelion JE1.png|32px]] [[File:Potted Red Mushroom JE1.png|32px]] [[File:Potted Brown Mushroom JE1.png|32px]] [[File:Potted Oak Sapling JE1.png|32px]] [[File:Potted Birch Sapling JE1.png|32px]] [[File:Potted Spruce Sapling JE1.png|32px]] [[File:Potted Jungle Sapling JE1.png|32px]] [[File:Potted Cactus JE1.png|32px]] [[File:Potted Fern JE1.png|32px]] [[File:Potted Allium JE1.png|32px]] [[File:Potted Azure Bluet JE1.png|32px]] [[File:Potted Oxeye Daisy JE1.png|32px]] [[File:Potted Blue Orchid JE1.png|32px]] [[File:Potted Poppy JE1.png|32px]] [[File:Potted Red Tulip JE1.png|32px]] [[File:Potted Orange Tulip JE1.png|32px]] [[File:Potted White Tulip JE1.png|32px]] [[File:Potted Pink Tulip JE1.png|32px]] [[File:Potted Acacia Sapling JE1.png|32px]] [[File:Potted Dark Oak Sapling JE1.png|32px]] [[File:Potted Dead Bush JE3.png|32px]]{{verify|Are these models the ones used in this version?}}<br>[[File:Flower Pot (item) JE1 BE1.png|32px]] Added flower pots.}}
{{History||xbox=none|xbone=none|ps=1.90|wiiu=none|switch=none|[[File:Flower Pot BE.png|32px]] [[File:Potted Dandelion BE.png|32px]] [[File:Potted Poppy BE.png|32px]] [[File:Potted Allium BE.png|32px]] [[File:Potted Azure Bluet BE.png|32px]] [[File:Potted Oxeye Daisy BE.png|32px]] [[File:Potted Blue Orchid BE.png|32px]] [[File:Potted Red Tulip BE.png|32px]] [[File:Potted Orange Tulip BE.png|32px]] [[File:Potted White Tulip BE.png|32px]] [[File:Potted Pink Tulip BE.png|32px]] [[File:Potted Red Mushroom BE.png|32px]] [[File:Potted Brown Mushroom BE.png|32px]] [[File:Potted Oak Sapling BE.png|32px]] [[File:Potted Birch Sapling BE.png|32px]] [[File:Potted Spruce Sapling BE.png|32px]] [[File:Potted Jungle Sapling BE.png|32px]] [[File:Potted Acacia Sapling BE.png|32px]] [[File:Potted Dark Oak Sapling BE.png|32px]] [[File:Potted Cactus BE.png|32px]] [[File:Potted Fern BE.png|32px]]<br>[[File:Flower Pot (item) JE2 BE2.png|32px]] The textures of flower pots have been changed.}}
{{History|new 3ds}}
{{History||0.1.0|[[File:Flower Pot JE1.png|32px]] [[File:Potted Dandelion JE1.png|32px]] [[File:Potted Red Mushroom JE1.png|32px]] [[File:Potted Brown Mushroom JE1.png|32px]] [[File:Potted Oak Sapling JE1.png|32px]] [[File:Potted Birch Sapling JE1.png|32px]] [[File:Potted Spruce Sapling JE1.png|32px]] [[File:Potted Jungle Sapling JE1.png|32px]] [[File:Potted Cactus JE1.png|32px]] [[File:Potted Fern JE1.png|32px]] [[File:Potted Allium JE1.png|32px]] [[File:Potted Azure Bluet JE1.png|32px]] [[File:Potted Oxeye Daisy JE1.png|32px]] [[File:Potted Blue Orchid JE1.png|32px]] [[File:Potted Poppy JE1.png|32px]] [[File:Potted Red Tulip JE1.png|32px]] [[File:Potted Orange Tulip JE1.png|32px]] [[File:Potted White Tulip JE1.png|32px]] [[File:Potted Pink Tulip JE1.png|32px]] [[File:Potted Acacia Sapling JE1.png|32px]] [[File:Potted Dark Oak Sapling JE1.png|32px]]{{verify|Are these models the ones used in this version?}}<br>[[File:Flower Pot (item) JE1 BE1.png|32px]] Added flower pots.}}
{{History|foot}}
<gallery>
Suggestion for itemframes.png|Original Reddit image suggesting item frames and flower pots.
FlowerPot.png|The first image of flower pots, released by [[Dinnerbone]].
Pots 1-100.png|An [[Java Edition 14w06a|14w06a]] example of some of the blocks that can be placed inside of flower pots, and their rendering.
Pots 1-100b.png|The same arrangement as prior in [[Java Edition 14w06b|14w06b]].
</gallery>
=== Flower pot "item" ===
{{:Technical blocks/Flower Pot}}
== Gallery ==
=== Renders ===
; Flowers
<gallery>
Potted Dandelion.png |
Potted Poppy.png |
Potted Blue Orchid.png |
Potted Allium.png |
Potted Azure Bluet.png |
Potted Red Tulip.png |
Potted Orange Tulip.png |
Potted White Tulip.png |
Potted Pink Tulip.png |
Potted Oxeye Daisy.png |
Potted Cornflower.png |
Potted Lily of the Valley.png |
Potted Wither Rose.png |
Potted Torchflower.png
</gallery>
; Saplings
<gallery>
Potted Oak Sapling.png |
Potted Spruce Sapling.png |
Potted Birch Sapling.png |
Potted Jungle Sapling.png |
Potted Acacia Sapling.png |
Potted Dark Oak Sapling.png |
Potted Azalea.png |
Potted Flowering Azalea.png |
Potted Mangrove Propagule.png |
Potted Cherry Sapling.png
</gallery>
; Mushrooms
<gallery>
Potted Red Mushroom.png |
Potted Brown Mushroom.png |
Potted Crimson Fungus.png |
Potted Warped Fungus.png |
</gallery>
; Roots and bushes
<gallery>
Potted Crimson Roots.png |
Potted Warped Roots.png |
Potted Fern.png |
Potted Dead Bush.png |
Potted Cactus.png |
Potted Cactus BE.png |
Potted Bamboo.png
</gallery>
=== Other ===
<gallery>
FiveFlowerPots.png | Five flower pots in a player-created village.
</gallery>
== Issues ==
{{issue list}}
== Trivia ==
* The flower pot is based on a suggestion from Reddit, like [[ender chest]]s and [[item frame]]s.<ref>{{tweet|dinnerbone|235747041286975488|My next task is going to be flower pots.|August 15, 2012}}</ref>
* Flower pots break [[falling block]]s.
* If a plant that has been [[Name Tag|named]] is put in a flower pot, the plant loses its name.
* The inside of the flower pot in ''Java Edition'' uses the center 4x4 pixels of the dirt texture while Bedrock Edition uses the center 6x6.
==References==
{{Reflist}}
{{Blocks|Utility}}
{{items}}
[[Category:Manufactured blocks]]
[[Category:Storage]]
[[Category:Generated structure blocks]]
[[Category:Non-solid blocks]]
[[Category:Utility blocks]]
[[cs:Květináč]]
[[de:Blumentopf]]
[[es:Maceta]]
[[fr:Pot de fleurs]]
[[hu:Virágcserép]]
[[it:Vaso da fiori]]
[[ja:植木鉢]]
[[ko:화분]]
[[nl:Bloempot]]
[[pl:Doniczka]]
[[pt:Vaso]]
[[ru:Цветочный горшок]]
[[zh:花盆]]
[[uk:Квітковий горщик]]</li></ul> | F5 no longer toggles rain. | ||||
| beta | |||||
1.5{{Extension DPL}}<ul><li>[[:Category:Tools|Category:Tools]]<br/>[[Category:Items]]
[[fr:Catégorie:Outil]]
[[it:Categoria:Attrezzi]]</li><li>[[Ender Pearl|Ender Pearl]]<br/>
{{ItemEntity
|image=Ender Pearl.png
|renewable=Yes
|stackable=Yes (16)
|size=Height: 0.25 Blocks<br>Width: 0.25 Blocks
}}
An '''ender pearl''' is an [[item]] that can be thrown and [[teleport|teleports]] the thrower to where it lands, and used to craft [[eye of ender|eyes of ender]] which are required to access [[the End]].
== Obtaining ==
=== Mob loot ===
An [[enderman]] has a 50% chance to drop 1 ender pearl when killed. The drop is increased by 1 per level of [[Looting]], with a maximum of 4 with Looting III.
=== Chest loot ===
{{LootChestItem|ender-pearl}}
A [[trapped chest]] always containing 2 ender pearls can be found in the "fake end portal" room of [[woodland mansion]]s.
=== Trading ===
{{IN|java}}, expert-level [[Trading#Cleric|cleric villagers]] have a {{frac|2|3}} chance to sell an ender pearl for 5 [[emerald]]s.
{{IN|bedrock}}, expert-level cleric villagers sell one ender pearl for 5 emeralds.
=== Bartering ===
[[Piglin]]s have a {{frac|10|459}} (4.27) chance to [[barter]] 3-4 ender pearls when given a [[gold ingot]].
== Usage ==
Ender pearls can be thrown by pressing {{control|use}}. After it is thrown, the ender pearl is consumed, and the player teleports to where it lands, taking {{hp|5}} [[fall damage]]. Wearing armor enchanted with [[Protection]] and/or [[Feather Falling]] reduces the damage taken from the ender pearl.
Ender pearls have a small cone of travel; they do not all follow the same path when thrown in the same direction. The direction and velocity of ender pearl throws is slightly randomized. They can travel about 30 blocks when thrown straight up, and up to 54 blocks forward when thrown at an optimum launch angle of ~35° (on even ground).
The thrower's vertical velocity influences the throw. Hence timing a throw with a jump can increase the throwing range to 42 blocks when thrown straight up and 64 blocks forward at a 35° angle. Throwing while falling significantly decreases the range. Ender pearls collide with all [[minecart]] types, [[boat]]s, [[end crystal]]s and [[nether portal]]s, and travel through [[end portal]]s. Ender pearls that fall into the [[void]] disappear, and do not trigger the player to teleport. However, ender pearl entities (instead of dropped items) are ''not'' destroyed by lava and will teleport the player to the bottom of lava pools/lava oceans.
Ender pearls have a cooldown of one second before they can be used again. The cooldown is shown in the hotbar by a white overlay on the ender pearl that shrinks and must disappear before the player can use it again. If there are other inventory or hotbar slots containing ender pearls, they are covered with the white overlay as well.<ref>{{bug|MC-88236|||WAI}}</ref>
Ender pearls can be thrown into [[end gateway]]s to reach the outer islands of the End. They can also be thrown into the [[exit portal]] to reach the player's spawn point.
Ender pearl teleportation makes no sound ''itself''{{only|java}}, but does emit a "small fall" sound at the destination when applying teleportation damage to the player.
=== Stasis chamber ===
Ender pearls are affected by [[bubble column]]s. An ender pearl can remain afloat on top of an upward bubble column, allowing it to be stored indefinitely. A mechanism can then be triggered to make the ender pearl hit a solid surface (e.g. by closing a [[trapdoor]]), teleporting the thrower back to the setup wherever they are.
=== Spawning endermites ===
An ender pearl has a 10% chance to spawn an [[endermite]] when it lands. This is the only way through which endermites can spawn, without using cheats. The endermite spawns at ''the player's position'' when the pearl lands{{only|je}}, or at the pearl's landing site{{only|be}}.
=== Crafting ingredient ===
{{crafting usage}}
== Sounds ==
{{edition|java}}:<br>
Thrown ender pearls use the Friendly Creatures sound category for entity-dependent sound events.
{{Sound table
|sound=Bow shoot.ogg
|subtitle=Ender Pearl flies
|source=neutral
|description=When an ender pearl is thrown
|id=entity.ender_pearl.throw
|translationkey=subtitles.entity.ender_pearl.throw
|volume=0.5
|pitch={{frac|1|3}}-0.5
|distance=16
|foot=1}}
{{Edition|Bedrock}}:
{{Sound table
|type=bedrock
|sound=Bow shoot.ogg
|source=player
|description=When an ender pearl is thrown
|id=random.bow
|volume=0.5
|pitch=0.33-0.5
|foot=1}}
== Data values ==
=== ID ===
{{edition|java}}:
{{ID table
|edition=java
|firstcolumnname=Item
|showforms=y
|generatetranslationkeys=y
|displayname=Ender Pearl
|spritetype=item
|nameid=ender_pearl
|form=item
|foot=1}}
{{ID table
|edition=java
|firstcolumnname=Entity
|generatetranslationkeys=y
|displayname=Thrown Ender Pearl
|spritetype=entity
|spritename=Ender Pearl
|nameid=ender_pearl
|foot=1}}
{{edition|bedrock}}:
{{ID table
|edition=bedrock
|firstcolumnname=Item
|shownumericids=y
|showforms=y
|notshowbeitemforms=y
|generatetranslationkeys=y
|displayname=Ender Pearl
|spritetype=item
|nameid=ender_pearl
|id=422
|foot=1}}
{{ID table
|edition=bedrock
|firstcolumnname=Entity
|shownumericids=y
|generatetranslationkeys=y
|displayname=Ender Pearl
|spritetype=entity
|nameid=ender_pearl
|id=87
|foot=1}}
===Entity Data===
Thrown ender pearls have entity data that define various properties of the entity.
{{el|java}}:
{{main|Entity format}}
{{/ED}}
{{el|bedrock}}:
: See [[Bedrock Edition level format/Entity format]].
== Achievements ==
{{Load achievements|Beam Me Up}}
== Advancements ==
{{load advancements|Remote Getaway;Bullseye}}
== History ==
{{History|java beta}}
{{History||1.8|snap=Pre-release|[[File:Ender Pearl JE1.png|32px]] Added ender pearls along with [[endermen]].
|Ender pearls have no use, but can stack up to 64.}}
{{History|java}}
{{History||1.0.0|snap=Beta 1.9 Prerelease|Ender pearls are now less commonly found near bodies of [[water]] since [[endermen]] now teleport away when in contact with water. Before this version, endermen didn't attempt to teleport and were [[damage]]d/killed from water much more frequently, causing numerous ender pearls to occur around bodies of water.
|Later, on a suggestion from [[wikipedia:Reddit|Reddit]] user isJesus, [[Notch]] implemented the teleporting feature for ender pearls.<ref>http://www.reddit.com/r/Minecraft/comments/kpsay/eggsnowballender_pearl_suggestiongif/c2mabfj</ref><ref>{{Tweet|notch|118614580539826176}}</ref><ref>http://www.reddit.com/r/Minecraft/comments/kss7n/twitter_ender_pearls_have_a_unique_ability_now/c2mwldd</ref>}}
{{History|||snap=Beta 1.9 Prerelease 2|Added teleporting feature to ender pearls.
|Using an ender pearl to teleport resulted in being kicked from servers for "hacking". This is due to a check triggering that was supposed to prevent modified clients from moving too quickly.
|Ender pearls now only stack up to 16.}}
{{History|||snap=Beta 1.9 Prerelease 3|Ender pearls are now used to craft [[eyes of ender]].
|Ender pearls can now be found in the new [[stronghold]] altar [[chest]]s.}}
{{History||1.3.1|snap=12w24a|[[File:Ender Pearl JE2 BE1.png|32px]] The texture of ender pearls has been changed.}}
{{History||1.8|snap=14w02a|As part of the revamp of the trading system, cleric [[villager]]s now [[trading|buy]] ender pearls.}}
{{History|||snap=14w03a|Villager clerics no longer buy ender pearls.}}
{{History|||snap=14w11b|Ender pearls have a 5% chance to spawn [[endermite]]s when used.}}
{{History||1.9|snap=15w31a|Ender pearls can now be thrown in [[Creative]] mode.}}
{{History|||snap=15w34c|Ender pearls now have a cooldown after using them.}}
{{History|||snap=15w41a|[[Villager]] clerics now [[trading|sell]] ender pearls for 4–7 [[emerald]]s, as one of their tier III trades.}}
{{History|||snap=15w49a|Thrown ender pearls now take the user's motion into account. For example, an ender pearl thrown forward will land closer if the player is falling, and land farther if the player is ascending.}}
{{History||1.10|snap=16w21a|Ender pearls can now teleport riders off their mounts.}}
{{History||1.11|snap=16w32a|The entity ID of ender pearls has been changed from <code>ThrownEnderpearl</code> to <code>ender_pearl</code>.}}
{{History|||snap=16w39a|Ender pearls can now be found in [[woodland mansion]]s' fake portal room [[chest]]s.}}
{{History||1.13|snap=17w47a|Prior to [[1.13/Flattening|''The Flattening'']], this [[item]]'s numeral ID was 368.}}
{{History||1.14|snap=18w43a|[[File:Ender Pearl JE3 BE2.png|32px]] The texture of ender pearls has been changed.}}
{{History||1.16|snap=20w07a|Ender pearls have a {{frac|2|109}} (~1.83%) chance of being offered by [[piglin]]s when [[bartering]], in a stack size of 2–4.}}
{{History|||snap=20w09a|Ender pearls now have a {{frac|10|226}} (~4.42%) chance of being offered by piglins when bartering, in a stack size of 1–5.}}
{{History|||snap=20w10a|Ender pearls now have a {{frac|20|411}} (~4.87%) chance of being offered by piglins when bartering, in a stack size of 4–8.}}
{{History|||snap=20w20a|Ender pearls now have a {{frac|20|423}} (~4.73%) chance of being offered by piglins when bartering, in a stack size of 4–8.}}
{{History||1.16.2|snap=20w28a|Ender pearls now have a {{frac|10|459}} (~2.18%) chance of being offered by piglins when bartering, in a stack size of 2–4.}}
{{History|||snap=Pre-Release 1|Ender pearls are now affected by [[bubble column]]s.<ref>{{bug|MC-125758|||Fixed}}</ref>
|Ender pearls no longer get destroyed at contact with non-solid blocks.<ref>{{bug|MC-73884|||Fixed}}</ref>}}
{{History|pocket alpha}}
{{History||v0.14.0|snap=build 1|[[File:Ender Pearl JE2 BE1.png|32px]] Added ender pearls.
|While fully implemented, ender pearls currently have no assigned ID and are currently unobtainable in-game.}}
{{History|pocket}}
{{History||1.0.0|snap=alpha 0.17.0.1|Ender pearls are now obtainable in-game.
|Ender pearls can now be used to craft [[eyes of ender]].}}
{{History|||snap=alpha 1.0.0.0|Ender pearls now require a 1-second cooldown.}}
{{History|||snap=alpha 1.0.0.1|Ender pearl cooldown now has an animation.}}
{{History||1.0.4|snap=alpha 1.0.4.0|Ender pearls can now be [[trading|bought]] from cleric [[villager]]s for 4-7 [[emerald]]s.}}
{{History||1.1.0|snap=alpha 1.1.0.0|Ender pearls can now be found in [[woodland mansion]]s' [[chest]]s.}}
{{History|bedrock}}
{{History||1.10.0|snap=beta 1.10.0.3|[[File:Ender Pearl JE3 BE2.png|32px]] The texture of ender pearls has been changed.}}
{{History||1.11.0|snap=beta 1.11.0.4|[[Trading]] has been changed, expert-level cleric [[villager]]s now [[trading|sell]] an ender pearl for 5 [[emerald]]s as part of their trade.}}
{{History||1.16.0|snap=beta 1.16.0.57|Ender pearls can now be obtained from [[bartering]] with [[piglin]]s.}}
{{History||1.16.100|snap=beta 1.16.100.54|Ender pearls now have a {{frac|10|459}} (~2.18%) chance of being offered by piglins when bartering, in a stack size of 2–4.}}
{{History|console}}
{{History||xbox=TU5|xbone=CU1|ps=1.0|wiiu=Patch 1|switch=1.0.1|[[File:Ender Pearl JE2 BE1.png|32px]] Added ender pearls.}}
{{History||xbox=TU7|A teleporting feature has been added to ender pearls.}}
{{History||xbox=none|xbone=none|ps=1.90|wiiu=none|switch=none|[[File:Ender Pearl JE3 BE2.png|32px]] The texture of ender pearls has been changed.}}
{{History|new 3ds}}
{{History||1.7.10|[[File:Ender Pearl JE2 BE1.png|32px]] Added ender pearls.}}
{{History|foot}}
== Issues ==
{{issue list}}
== Trivia ==
*Ender pearls can be used to teleport/move through non-[[solid block]]s without suffocation and solid blocks by pressing against the blocks and using the ender pearl at the player's feet until the player goes through.<ref>{{bug|MC-2164}}</ref><ref>{{ytl|KA1UmxraeUg}}</ref>
*In ''Java Edition'', it is possible to spawn a thrown ender pearl using commands, but it does not teleport, unless it is assigned an owner.
*If the player throws an ender pearl and then dies before impact while the pearl is in a loaded chunk, the pearl disappears and the player is not teleported. Pearls in unloaded chunks do not disappear if their owner dies.
*If the player throws an ender pearl in Survival mode and changes to Creative mode before the pearl lands, the player is still teleported.
*The player is still teleported by throwing an ender pearl and entering [[the Nether]] before it lands. The pearl is not lost if an ender pearl is thrown into a [[nether portal]] and the player travels through the portal; the pearl lands and teleports the player as usual.
*If multiple ender pearls are thrown in succession, the player can be hurt only once from fall damage within about a one-second span.
*If a [[player]] dies from ender pearl teleportation, the [[death message]] says: "<player> hit the ground too hard".
*A thrown ender pearl faces toward the player in first-person view, while it appears rotated horizontal in [[third-person view]]. This is the case for all throwable items (ender pearl, [[egg]], [[snowball]], and all throwable [[potion]]s).
*Ender pearls and [[snowball]]s have the exact same range when fired. Therefore, snowballs can be used to predict the trajectory of ender pearls, or simply for practicing ender pearl throwing. This can be very helpful when the player has to throw ender pearls in dangerous environments, such as the Nether or the End.
*Despite the fact that ender pearls deal no damage to anything they're thrown at, provokable mobs (such as iron golems and piglins) will be provoked by the player if one is thrown at them.
== Gallery ==
<gallery>
Ender Pearl Suggestion.gif|The original suggestion image for teleporting with ender pearls.
Enderlake.png|Ender pearls were formerly found in [[water]], however endermen now teleport out to prevent damage.
</gallery>
== References ==
{{reflist}}
== See also ==
*[[End Dimension]]
*[[Ender Dragon]]
*[[Ender Portal]]
*[[Enderman]]
{{Items}}
{{entities}}
[[cs:Endová perla]]
[[de:Enderperle]]
[[es:Perla de ender]]
[[fr:Perle de l'Ender]]
[[hu:Véggyöngy]]
[[ja:エンダーパール]]
[[ko:엔더 진주]]
[[nl:Enderparel]]
[[pl:Enderperła]]
[[pt:Pérola de ender]]
[[ru:Жемчуг Края]]
[[th:ไข่มุกเอนเดอร์]]
[[tr:Ender İncisi]]
[[uk:Перлина Краю]]
[[zh:末影珍珠]]</li></ul> | April 08, 2011 | Rain and falling snow were implemented after a teaser video was released. | |||
| Rain also plays two different sound files. | |||||
| Java Edition | |||||
1.9{{Extension DPL}}<ul><li>[[Green Dye|Green Dye]]<br/>{{redirect|Cactus Green|the plant|Cactus}}{{Item
| title = Green Dye
| renewable = Yes
| stackable = Yes (64)
}}
'''Green dye''' is a [[primary color dye]].
== Obtaining ==
=== Chest loot ===
{{LootChestItem|green-dye}}
=== Smelting ===
{{Smelting
|head=1
|showdescription=1
|Cactus
|Green Dye
|1
|description={{only|Java}}<ref>{{bug|MC-210211||Smelting cactus gives too much experience since 1.13}}</ref>
}}
{{Smelting
|head=0
|showdescription=1
|Cactus
|Green Dye
|0,2
|description={{only|Bedrock}}
|foot=1
}}
=== Trading ===
[[Wandering trader]]s sell 3 green dye for an [[emerald]].
== Usage ==
{{dye usage}}
=== Crafting ingredient ===
{{crafting usage|ignore=Banner|continue=1}}
{{banner crafting usage}}
=== Loom ingredient ===
{{Banner loom usage|Green Dye}}
=== Trading ===
Expert level shepherd villagers have {{frac|1|6}} chance to buy 12 green dye for an emerald.{{only|bedrock}} Expert level shepherds have a {{frac|2|7}} chance to buy 12 green dye for 1 emerald.{{only|java}}
== Data values ==
=== ID ===
{{edition|java}}:
{{ID table
|edition=java
|showforms=y
|generatetranslationkeys=y
|displayname=Green Dye
|spritetype=item
|nameid=green_dye
|form=item
|foot=1}}
{{edition|bedrock}}:
{{ID table
|edition=bedrock
|showaliasids=y
|shownumericids=y
|showforms=y
|notshowbeitemforms=y
|generatetranslationkeys=y
|displayname=Green Dye
|spritetype=item
|nameid=green_dye
|aliasid=dye / 2
|id=397
|form=item
|translationkey=item.dye.green.name
|foot=1}}
== Video ==
<div style="text-align:center">{{yt|O4KVTPI4qIc}}</div>
== History ==
{{History|java beta}}
{{History||1.2|[[File:Green Dye JE1 BE1.png|32px]] Added cactus green, together with all other dyes.}}
{{History|java}}
{{History||1.3.1|snap=1.3|[[File:Green Dye JE2 BE2.png|32px]] The texture of cactus green has been changed.}}
{{History||1.4.2|snap=12w34a|Added the ability to [[Armor#Dyeing|dye]] leather [[armor]] and [[wolf]] collars.}}
{{History||1.4.6|snap=12w49a|Cactus green can be crafted with [[gunpowder]] to create a [[firework star]].}}
{{History||1.6.1|snap=13w19a|[[Stained clay]] can now be [[crafting|crafted]].}}
{{History||1.7.2|snap=13w41a|[[Stained glass]] can now be crafted.}}
{{History||1.8|snap=14w30a|Added [[banner]]s, which can be dyed.}}
{{History||1.11|snap=16w39a|Added the ability to dye [[shulker box]]es.}}
{{History||1.12|snap=17w06a|Cactus green can now be used to craft green [[concrete powder]].}}
{{History||1.12|snap=17w15a|Added the ability to dye [[bed]]s.}}
{{History||1.13|snap=17w47a|The different data values for the <code>dye</code> ID have now been split up into their own IDs.
|Prior to [[1.13/Flattening|''The Flattening'']], this [[item]]'s numeral ID was 351.}}
{{History||1.14|snap=18w43a|"Cactus Green" has been renamed to "Green Dye".
|[[File:Green Dye JE3 BE3.png|32px]] The texture of green dye has been changed.}}
{{History|||snap=18w44a|Green dye can now change the text color on [[sign]]s to green.}}
{{History|||snap=18w50a|Green dye can now be found in [[chest]]s in [[desert]] [[village]] houses.}}
{{History|||snap=19w05a|Added the [[wandering trader]], which sells green dye.}}
{{History|||snap=19w11a|Green dye can now be [[trading|bought]] by shepherd villagers.}}
{{History||1.17|snap=20w45a|Green dye can now be used to craft [[green candle]]s.}}
{{History|||snap=21w19a|Green dye can no longer be used to craft green candles.}}
{{History|||snap=Pre-release 1|Green dye can once again be used to craft green candles.}}
{{History||1.20<br>(Experimental)|link=1.19.3|snap=22w42a|Green dye can now change the text color on [[hanging sign]]s to green.}}
{{History|pocket alpha}}
{{History||v0.3.0|[[File:Green Dye JE1 BE1.png|32px]] Added cactus green. It is currently unobtainable and has no usage.}}
{{History||v0.3.2|Cactus green is now obtainable by [[smelting]] cacti in a [[furnace]]. It still has no usage.}}
{{History||v0.4.0|Cactus green can now be used to craft [[cyan dye]], [[lime dye]], and [[green wool]].}}
{{History||v0.8.0|snap=build 1|[[File:Green Dye JE2 BE2.png|32px]] The texture of cactus green has been changed.}}
{{History||v0.14.0|snap=build 1|Cactus green can now be used to dye [[water]] in [[cauldron]]s.}}
{{History|pocket}}
{{History||1.0.0|snap=alpha 0.17.0.1|Cactus green can now be used to dye [[shulker]]s.}}
{{History||1.1.0|snap=alpha 1.1.0.0|Cactus green can now be used to dye [[bed]]s, [[shulker box]]es, and craft [[concrete powder]].}}
{{History|bedrock}}
{{History||1.2.0|snap=beta 1.2.0.2|Cactus green can now be used to craft [[stained glass]], patterns on [[banner]]s, and [[firework star]]s.}}
{{History||1.4.0|snap=beta 1.2.20.1|Cactus green can now be used to craft [[balloon]]s and [[glow stick]]s.}}
{{History||1.8.0|snap=beta 1.8.0.10|"Cactus Green" has been renamed to "Green Dye".}}
{{History||1.10.0|snap=beta 1.10.0.3|Green dye is now sold by [[wandering trader]]s.
|[[File:Green Dye JE3 BE3.png|32px]] The texture of green dye has been changed.}}
{{History||1.11.0|snap=beta 1.11.0.1|Green dye can now be found in [[desert]] [[village]] house [[chest]]s.}}
{{History|||snap=beta 1.11.0.4|Green dye can now be [[trading|sold]] to shepherd [[villager]]s.}}
{{History||1.16.100|snap=beta 1.16.100.56|The ID of green dye has been changed from <code>dye/2</code> to <code>green_dye</code>.}}
{{History|console}}
{{History||xbox=TU1|xbone=CU1|ps=1.00|wiiu=Patch 1|[[File:Green Dye JE1 BE1.png|32px]] Added cactus green.}}
{{History|PS4}}
{{History||1.83|"Cactus Green" has been renamed to "Green Dye".}}
{{History||1.90|[[File:Green Dye JE3 BE3.png|32px]] The texture of green dye has been changed.}}
{{History|new 3ds}}
{{History||0.1.0|[[File:Green Dye JE1 BE1.png|32px]] Added cactus green.}}
{{History|foot}}
== Issues ==
{{issue list}}
{{Items}}
[[cs:Kaktusová zeleň]]
[[de:Grüner Farbstoff]]
[[es:Tinte verde]]
[[fr:Teinture verte]]
[[hu:Kaktuszzöld]]
[[ja:緑色の染料]]
[[ko:초록색 염료]]
[[nl:Cactusgroen]]
[[pl:Zielony barwnik]]
[[pt:Corante verde]]
[[ru:Зелёный краситель]]
[[Category:Items]]
[[Category:Dyes]]
[[Category:Renewable resources]]</li><li>[[Dye|Dye]]<br/>{{Item
| title = Dyes
| image = White Dye.png
| extratext = View [[#Gallery|all renders]]
| renewable = Yes
| stackable = Yes (64)
}}
'''Dyes''' are a set of sixteen items used to change the color of [[wool]], [[carpet]]s, [[terracotta]], [[concrete powder]], [[glass]], [[shulker box]]es, [[bed]]s, [[candle]]s, the patterns on [[banner]]s, [[firework star]]s, certain mobs, and text on [[sign]]s and [[hanging sign]]s. {{IN|bedrock}} they can also be used to dye water in a [[cauldron]] (which is thereafter used to dye leather [[armor]]); {{in|java}} leather armor can be dyed directly. {{IN|education}} dyes can also be used to dye [[balloon]]s and [[glow stick]]s.
{{IN|bedrock|education}}, [[bone meal]], [[ink sac]]s, [[lapis lazuli]], and [[cocoa bean]]s can generally substitute for [[white dye]], [[black dye]], [[blue dye]], and [[brown dye]], respectively, in crafting recipes and for use in dyeing items or mobs. However, they have other important uses that aren't related to color, and are therefore not considered true dyes. They are mentioned in this article only in regard to their use as dyeing agents; see their individual articles for complete information about them.
[[File:Dye Recipes.png|400px|thumb|A guide for creating all the dyes]]
== Obtaining ==
<!--[[File:Dye Chart.png|350px|thumb|A guide to crafting all the dyes.{{until|java 1.14}}]]-->
Dyes can be produced by crafting them from plants (mainly flowers), by crafting dyes of different colors together, by smelting plants, or by trading with a [[wandering trader]].
{{loadPage|Crafting/Dye|Crafting|h3}}
=== Smelting ===
{{smelting|head=1|Sea Pickle|Lime Dye|0,2}}
{{smelting|foot=1|Cactus|Green Dye|1||b=Lapis Lazuli|c=Any fuel|d=1}}
=== Trading ===
[[Wandering trader]]s can sell 3 dyes for an [[emerald]]. {{IN|bedrock}}, they can also sell 3 lapis lazuli, bone meal, cocoa beans, or ink sacs for one emerald.
Apprentice-level cleric [[villager]]s sell one lapis lazuli per emerald.
=== Chest loot ===
{{#invoke:LootChest|base3|blue-dye,green-dye,orange-dye,light-blue-dye,yellow-dye,white-dye}}
=== Other ===
Ink sacs can also be created using 1 iron, 1 sulfur, and 4 oxygen in the [[compound creator]]. {{only|bedrock|education}}
== Usage ==
Similar to their use in crafting, [[bone meal]], [[ink sac]]s, [[lapis lazuli]], and [[cocoa beans]] can be substituted for the corresponding dye in any of the following usages unless otherwise specified.{{only|bedrock}} <!--- sections are ordered by craftable dyeable blocks, dyeable items, version exclusive sections, and non-crafting miscellaneous uses--->
=== Dyeing wool and mobs ===
Players can dye wool by placing [[wool]] and any dye in a crafting grid.
{{Crafting
|nocat=1
|Any Wool
|Matching Dye
|Output=Any Wool
}}
Dyes can be {{control|use|text=used}} on sheep to change the color of the wool. Shearing a colored sheep drops the corresponding color of the wool, and the sheep retains the color when the wool regenerates. [[Breeding]] colored sheep produces a lamb colored as one of the parent sheep, or a color resulting from the combination of both parents' color. The color combining follows the same rules that dyes use – red and yellow sheep produce an orange lamb, but a blue and yellow sheep cannot create a green lamb. The unlimited reproduction of colored sheep makes dyeing and shearing sheep infinitely more efficient than just dyeing wool directly.
Dye can also be used on a tamed [[wolf]] or [[cat]] to change the color of its collar from the default red to the color of the dye.
=== Dyeing carpets ===
Carpets can be dyed.
{{Crafting
|Any Carpet
|Matching Dye
|Output= Matching Carpet
|type= Building block
}}
=== Dyeing terracotta ===
[[Terracotta]] can be dyed by placing 8 blocks around a dye on a crafting table.
{{Crafting
|nocat=1
|A1=Terracotta |B1=Terracotta |C1=Terracotta
|A2=Terracotta |B2=Matching Dye |C2=Terracotta
|A3=Terracotta |B3=Terracotta |C3=Terracotta
|Output=Matching Dyed Terracotta,8
}}
=== Creating concrete powder ===
Dyes can also be used to craft [[concrete powder]], which can then be set into their respective [[concrete]] blocks (they cannot be dyed directly).
{{Crafting
|nocat=1
|Sand |Gravel |Sand
|Gravel |Matching Dye |Gravel
|Sand |Gravel |Sand
|Output=Matching Concrete Powder,8
}}
=== Staining glass ===
[[Stained glass]] can be stained by placing 8 blocks of glass around a dye on a [[crafting table]]. Just like regular glass, stained glass can be crafted into stained glass panes. The recipe for this is the same as with regular glass.
{{Crafting
|nocat=1
|A1=Glass |B1=Glass |C1=Glass
|A2=Glass |B2=Matching Dye |C2=Glass
|A3=Glass |B3=Glass |C3=Glass
|Output=Matching Stained Glass,8
|head=1
}}
{{Crafting
|nocat=1
|A1= Glass Pane
|B1= Glass Pane
|C1= Glass Pane
|A2= Glass Pane
|B2= Matching Dye
|C2= Glass Pane
|A3= Glass Pane
|B3= Glass Pane
|C3= Glass Pane
|Output= Matching Stained Glass Pane,8
|type= Decoration block
|foot=1
}}
=== Dyeing shulker boxes ===
[[Shulker box]]es are generated in a light shade of purple (like the [[purpur block]]), but can be dyed any color. They can also be re-dyed as often as desired.
{{Crafting
|ignoreusage=1
|showname=1
|Any Shulker Box
|Matching Dye
|Output=Matching Shulker Box
}}
=== Dyeing beds ===
Players can dye beds by placing a [[bed]] and any color dye in a crafting grid.
{{Crafting
|nocat=1
|Any Bed
|Matching Dye
|Output=Matching Bed
}}
=== Dyeing candles ===
Players can dye [[candles]] by placing an undyed candle and any color dye in a crafting grid.
{{Crafting
|ignoreusage=1
|Candle
|Matching Dye
|Output=Matching Dyed Candle
}}
=== Banner patterns ===
{{main|Banner#Patterns}}
Dyes are used in most banner patterns to determine the pattern and color displayed.
=== Dyeing armor ===
[[File:DyeGraph2.png|200px|thumb|A graph showing all combinations of two dyes on a [[tunic]].]]
Leather [[armor]] can be dyed by:
* Crafting dyes with a piece of leather armor or leather [[horse armor]].{{Only|java}}
* Dousing the leather armor or leather [[horse armor]] in a [[cauldron]] to which dyes have been added.{{Only|bedrock}}
There are 5,713,438<ref>https://anrar4.github.io/DyeLeatherArmor/</ref> (34.1% of sRGB) colors leather armor can be, as it is possible to put more than one dye on the crafting bench alongside the leather armor. Armor can be dyed multiple times with previous colors affecting the final outcome. Colored armor can be reverted to their original color using a [[cauldron]] with undyed water.
The game has a specific formula for calculating the color of dyed armor: each color, in the RGB color model, has a red value, green value, and blue value. For each dye in the crafting grid, and the armor itself (if it is already dyed), the red, green, and blue values are added to running totals. In addition, a running total of the highest value (be it red, green, or blue) is also kept. After this, each total is divided by the number of colors used. This effectively produces the average red, green, blue, and maximum values. The maximum value of the average RGB values is also calculated. Finally, each average RGB value is multiplied by the average maximum value and divided by the maximum of the average RGB values. The modified average RGB values are then used as the final color. This procedure can be summed up with the following equations:
for each color (all "total" variables start at 0 before counting):
totalRed = totalRed + redValue
totalGreen = totalGreen + greenValue
totalBlue = totalBlue + blueValue
totalMaximum = totalMaximum + max(redValue, greenValue, blueValue)
numberOfColors = numberOfColors + 1
averageRed = totalRed / numberOfColors
averageGreen = totalGreen / numberOfColors
averageBlue = totalBlue / numberOfColors
averageMaximum = totalMaximum / numberOfColors
maximumOfAverage = max(averageRed, averageGreen, averageBlue)
gainFactor = averageMaximum / maximumOfAverage
resultRed = averageRed * gainFactor
resultGreen = averageGreen * gainFactor
resultBlue = averageBlue * gainFactor
Due to the way this formula works, the resulting color can never be darker than the average of the input colors and is often lighter and more saturated. Of course, the resulting color can never be lighter or more saturated than the lightest or most saturated input color. In addition, this formula never creates an RGB value higher than 255 (which would be invalid in the 8-bit RGB color model).
If leather armor is renamed on an [[anvil]], it retains its name when dyed or undyed.
;Mixing Samples
: {{ItemSprite|Yellow Dye}} + {{ItemSprite|Yellow Dye}} = {{Tint|leather-chestplate| #{{CalcDye| yellow=2 }} | code=1}}
: {{ItemSprite|Red Dye}} + {{ItemSprite|Blue Dye}} + {{ItemSprite|White Dye}} = {{Tint|leather-chestplate| #{{CalcDye| red=1 | blue=1 | white=1}} | code=1}}
: {{ItemSprite|Green Dye}} + {{ItemSprite|Red Dye}} + {{ItemSprite|Pink Dye}} = {{Tint|leather-chestplate| #{{CalcDye| green=1 | red=1 | pink=1}} | code=1}}
=== Dyeing firework stars ===
A [[firework star]] can have a single color or a combination of up to eight colors when crafted with dyes. Adding one or more dyes to a crafted firework star adds a "fade to color" effect to it, overwriting any existing fade colors.
{{Crafting
|head=1
|ignoreusage=1
|ingredients=[[Gunpowder]] +<br>Any Dye (1–8) +<br>Extra ingredient (optional)
|Gunpowder
|Matching Dye
|Diamond;Glowstone Dust;Head;Gold Nugget;Feather;Fire Charge;
|Output=Matching Firework Star
}}
{{Crafting
|ignoreusage=1
|Matching Firework Star
|Any Dye
|Output=Matching Firework Star
|foot=1
}}
=== Creating balloons ===
Dye can be used to craft balloons.{{only|education}}
{{Crafting
|nocat=1
|A1= Latex
|B1= Matching Dye
|C1= Latex
|A2= Latex
|B2= Helium
|C2= Latex
|A3= Latex
|B3= Lead
|C3= Latex
|Output= Matching Balloon
}}
=== Creating glow sticks ===
Dye can also be used to craft glow sticks.{{only|education}}
{{Crafting
|nocat=1
|A1= Polyethylene
|B1= Hydrogen Peroxide
|C1= Polyethylene
|A2= Polyethylene
|B2= Matching Dye
|C2= Polyethylene
|A3= Polyethylene
|B3= Luminol
|C3= Polyethylene
|Output= Matching Glow Stick
}}
=== Dyeing water inside cauldrons ===
Water can be dyed in a cauldron by holding any dye in the hand and pressing {{Ctrl|use}} on a cauldron filled with water.{{only|bedrock}}
=== Signs ===
Dye can be {{control|used}} on a [[sign]] or a [[hanging sign]] to change the text color. {{IN|bedrock}}, [[ink sac]]s cannot be used for this purpose; black dye must be used to change the text to black.
=== Trading ===
Apprentice, journeyman and expert-level shepherd [[villager]]s buy any of the 12 dyes for an [[emerald]].
== Color values ==
The "color codes" are used to determine the color imparted on sheep, wolf and cat collars, firework stars, [[beacon]] beams, and dyed leather armor. The hex value is shown in the extended tooltips of dyed leather armor; however, to set the color using an NBT data tag in a [[command]], the decimal value must be used instead. The color values for firework stars are slightly different from the ones listed below, and use [[Item colors#Firework stars|these values]] instead.
{| class="wikitable" style="margin:2px; border: 1px solid silver; text-align: left;" data-description="Data values"
! rowspan=2 | Description
! colspan=2 style="text-align:center" | Color Code
|-
! Dec
! <abbr title="Hexadecimal color code">Hex</abbr>
|-
| style="text-align:center" | White || 16383998 || {{color|#F9FFFE}}
|-
| style="text-align:center" | Light gray || 10329495 || {{color|#9D9D97}}
|-
| style="text-align:center" | Gray || 4673362 || {{color|#474F52}}
|-
| style="text-align:center" | Black || 1908001|| {{color|#1D1D21}}
|-
| style="text-align:center" | Brown || 8606770 || {{color|#835432}}
|-
| style="text-align:center" | Red || 11546150 || {{color|#B02E26}}
|-
| style="text-align:center" | Orange || 16351261 || {{color|#F9801D}}
|-
| style="text-align:center" | Yellow || 16701501 || {{color|#FED83D}}
|-
| style="text-align:center" | Lime || 8439583 || {{color|#80C71F}}
|-
| style="text-align:center" | Green || 6192150 || {{color|#5E7C16}}
|-
| style="text-align:center" | Cyan || 1481884|| {{color|#169C9C}}
|-
| style="text-align:center" | Light blue || 3847130 || {{color|#3AB3DA}}
|-
| style="text-align:center" | Blue || 3949738 || {{color|#3C44AA}}
|-
| style="text-align:center" | Purple || 8991416 || {{color|#8932B8}}
|-
| style="text-align:center" | Magenta || 13061821 || {{color|#C74EBD}}
|-
| style="text-align:center" | Pink || 15961002 || {{color|#F38BAA}}
|}
== Sounds ==
{{edition|java}}:
{{Sound table
|rowspan=2
|sound=Dye.ogg
|subtitle=Dye stains
|source=block
|description=When dye is used on a [[sign]]
|id=item.dye.use
|translationkey=subtitles.item.dye.use
|volume=1.0
|pitch=1.0/0.9/0.95/1.1
|distance=16}}
{{Sound table
|subtitle=Dye stains
|source=player
|description=When dye is used on a [[sheep]]
|id=item.dye.use
|translationkey=subtitles.item.dye.use
|volume=1.0
|pitch=1.0/0.9/0.95/1.1
|distance=16
|foot=1}}
{{edition|bedrock}}:
{{Sound table
|type=bedrock
|sound=Dye.ogg
|source=sound
|description=When dye is used on a sign
|id=sign.dye.use
|volume=1.0
|pitch=1.0}}
{{Sound table
|rowspan=3
|sound=Water Splash Old.ogg
|source=block
|description=When dye is added to a cauldron
|id=cauldron.adddye
|volume=0.1
|pitch=1.0}}
{{Sound table
|source=block
|description=When armor is dyed using a cauldron
|id=cauldron.dyearmor
|volume=0.1
|pitch=1.0}}
{{Sound table
|source=block
|description=When dye is removed from armor using a cauldron
|id=cauldron.cleanarmor
|volume=0.1
|pitch=1.0
|foot=1}}
== Achievements ==
{{load achievements|Rainbow Collection;Tie dye outfit}}
== Video ==
{{Video note|These videos are outdated, as it does not include details of the [[Java Edition 1.7.2|1.7.2]] update's changes to the dyeing system/production chain.}}
<div style="text-align:center">
<span style="display:inline-block">{{yt|8YD7oauNZHE}}</span>
<span style="display:inline-block">{{yt|7tETaRt7STM}}</span>
</div>
== History ==
{{History|java beta}}
{{History||January 3, 2011|link=https://web.archive.org/web/0/http://notch.tumblr.com/post/2582321901/2011-here-we-go|Notch mentions adding a "paint" feature if he can figure out how.}}
{{History||January 10, 2011<ref group="n">Supposed time when fragment was filmed. Based on modified date of client.jar/gui/trap.png in [[Beta 1.2]].</ref>|link=https://www.youtube.com/watch?v=cBF2ugTzXqQ&t=181s|[[File:Red Dye (pre-release).png|32px]] Shown rose red in development as part of [[Minecraft: The Story of Mojang]].}}
{{History||1.2|[[File:Ink Sac JE1 BE1.png|32px]] [[File:Red Dye JE1 BE1.png|32px]] [[File:Green Dye JE1 BE1.png|32px]] [[File:Cocoa Beans JE1 BE1.png|32px]] [[File:Lapis Lazuli JE1 BE1.png|32px]] [[File:Purple Dye JE1 BE1.png|32px]] [[File:Cyan Dye JE1 BE1.png|32px]] [[File:Light Gray Dye JE1 BE1.png|32px]] [[File:Gray Dye JE1 BE1.png|32px]] [[File:Pink Dye JE1 BE1.png|32px]] [[File:Lime Dye JE1 BE1.png|32px]] [[File:Yellow Dye JE1 BE1.png|32px]] [[File:Light Blue Dye JE1 BE1.png|32px]] [[File:Magenta Dye JE1 BE1.png|32px]] [[File:Orange Dye JE1 BE1.png|32px]] [[File:Bone Meal JE1 BE1.png|32px]] Added dyes.
|[[File:Black Dye (Recreated).png|32px]] [[File:Red Dye (pre-release).png|32px]] [[File:Green Dye (Recreated).png|32px]] [[File:Brown Dye (Recreated).png|32px]] [[File:Blue Dye (Recreated).png|32px]] [[File:Purple Dye (Recreated).png|32px]] [[File:Cyan Dye (Recreated).png|32px]] [[File:Light Gray Dye (Recreated).png|32px]] [[File:Gray Dye (Recreated).png|32px]] [[File:Pink Dye (Recreated).png|32px]] [[File:Lime Dye (Recreated).png|32px]] [[File:Yellow Dye (Recreated).png|32px]] [[File:Light Blue Dye (Recreated).png|32px]] [[File:Magenta Dye (Recreated).png|32px]] [[File:Orange Dye (Recreated).png|32px]] [[File:White Dye (Recreated).png|32px]] Leftovers of old textures can be seen in [[items.png]] with 100% opacity. The white dye texture was reused for [[Sugar]].
| The colors were as follows:{{verify|Did the color codes remain the same between Beta 1.2 and Java 1.11.2?}}
{{:Color/Java Edition dye colors before 17w06a}}
}}
{{History|java}}
{{History||1.1|snap=11w49a|[[Sheep]] can now regrow their [[wool]] by eating [[grass block|grass]]. Dyed sheep regrow wool in their new color.}}
{{History||1.3.1|snap=12w19a|[[File:Cocoa Beans JE2.png|32px]] The texture of [[cocoa beans]] has been changed.}}
{{History|||snap=1.3|[[File:bone meal changes.gif|32px]] The textures of [[bone meal]], [[cactus green]], cocoa beans and [[rose red]] have been changed. The textures have been lowered one pixel.}}
{{History||1.4.2|snap=12w34a|Added the ability to dye leather [[armor]] and [[wolf]] collars.}}
{{History||1.4.4|snap=1.4.3|Color codes have been changed. The colors of red, brown, blue, purple, cyan, pink, light blue, magenta and orange were adjusted a little vividly.}}
{{History||1.6.1|snap=13w19a|[[Stained clay]] can now be crafted using dyes.}}
{{history||1.7.2|snap=13w36a|With the addition of new [[flower]]s, many secondary and tertiary dyes are now primary dyes.}}
{{History|||snap=13w41a|[[Stained glass]] can now be crafted using dyes.}}
{{History||1.8|snap=14w02a|As cleric [[villager]]s now sell lapis lazuli, all dyes have become fully renewable.}}
{{History|||snap=14w30a|Added [[banner]]s, which can be dyed.}}
{{History||1.9|snap=15w34a|Added [[shield]]s, which can be dyed indirectly by applying a matching [[banner]].}}
{{History||1.11|snap=16w39b|Dyes are now used to change the color of [[shulker box]]es.}}
{{History||1.12|snap=17w06a|Dyes are now used to craft [[concrete powder]].
|Color codes have been changed. All colors are adjusted more vividly. The changes were as follows:
{{:Color/Java Edition dye color changes in 17w06a}}
|Light blue dye, stained glass, and stained glass panes, did not change colors in this update. This means that they still use old colors.<ref name="unchanged dyes">{{Bug|MC-214643}}<br>{{Bug|MC-214641}}</ref>
}}
{{History|||snap=17w15a|Dyes can now apply color to white [[bed]]s.}}
{{History||1.13|snap=17w47a|The different data values for the <code>dye</code> ID have been split up into their own IDs.}}
{{History||1.14|snap=18w43a|[[Bone meal]], [[ink sac]]s, [[cocoa beans]] and [[lapis lazuli]] are no longer considered dyes.
|[[File:White Dye JE1 BE1.png|32px]] [[File:Black Dye JE1 BE1.png|32px]] [[File:Brown Dye JE1 BE1.png|32px]] [[File:Blue Dye JE1 BE1.png|32px]] Added [[white dye|white]], [[black dye|black]], [[brown dye|brown]] and [[blue dye]]s.
|"Rose Red", "Dandelion Yellow" and "Cactus Green" have been renamed to "Red Dye", "Yellow Dye" and "Green Dye", respectively.
|[[Glass pane]]s and [[carpet]]s can now be dyed.
|[[File:Light Gray Dye JE2 BE2.png|32px]] [[File:Gray Dye JE2 BE2.png|32px]] [[File:Red Dye JE2 BE2.png|32px]] [[File:Orange Dye JE2 BE2.png|32px]] [[File:Yellow Dye JE2 BE2.png|32px]] [[File:Lime Dye JE2 BE2.png|32px]] [[File:Green Dye JE2 BE2.png|32px]] [[File:Cyan Dye.png|32px]] [[File:Light Blue Dye JE2 BE2.png|32px]] [[File:Purple Dye JE2 BE2.png|32px]] [[File:Magenta Dye JE2 BE2.png|32px]] [[File:Pink Dye JE2 BE2.png|32px]] The textures of light gray, gray, red, orange, yellow, lime, green, cyan, light blue, purple, magenta, and pink dyes, have been changed. The color texture for light blue dye was not changed to reflect the updated colors from 1.12.<ref name="unchanged dyes"></ref>}}
{{History|||snap=18w44a|The color of the text on [[sign]]s can now be changed with dye.}}
{{History|||snap=18w49a|Yellow dyes can now be found in [[chest]]s in [[village]] mason houses.}}
{{History|||snap=18w50a|Green dyes can now be found in [[chest]]s in [[desert]] [[village]] houses.}}
{{History|||snap=19w05a|Added the [[wandering trader]], which can sell any type of dye.}}
{{History|||snap=19w11a|All 16 types of dyes can now be [[trading|bought]] by shepherd villagers.}}
{{History||1.16.2|snap=Pre-release 2|Reversed the order of dyes to match other colored items in the [[Creative inventory]].<ref name="reverse dye">{{Bug|MC-136553}}</ref>
|Regrouped dyes in the Creative inventory such that white, blue, brown, and black dyes are within and not [[cocoa beans]], [[ink sacs]], [[lapis lazuli]], and [[bone meal]].<ref name="regroup dye">{{Bug|MC-177684}}</ref>}}
{{History||1.17|snap=20w45a|Added [[candle]]s, which can be dyed.}}
{{History|||snap=21w03a|Added a sound for applying dyes.}}
{{History|||snap=21w19a|Candles can no longer be dyed.}}
{{History|||snap=Pre-release 1|Candles can now once again be dyed.}}
{{History||1.20<br>(Experimental)|link=1.19.3|snap=22w42a|The color of the text on [[hanging sign]]s can now be changed with dye.}}
{{History||1.20<br>(Experimental)|link=1.19.4|snap=23w07a|[[Torchflower]]s can now be crafted into orange dye.|[[Pink petals]] can now be crafted into pink dye.}}
{{History||1.20|snap=23w12a|[[Pitcher plant]]s can now be crafted into cyan dye.|Blue, light blue, orange, white, and yellow dye can now be found in [[suspicious gravel]] and [[suspicious sand]] in [[trail ruins]].}}
{{History|||snap=23w14a|Pitcher plants can now craft two [[cyan dye]] instead of one.}}
{{History|||snap=23w16a|Blue, light blue, orange, white, and yellow dye no longer generates in [[suspicious sand]] in [[trail ruins]].|Due to the split of the archaeological loot tables for the suspicious gravel within the [[trail ruins]]; blue, light blue, orange, white, and yellow dye now are in the common loot.}}
{{History|pocket alpha}}
{{History||v0.3.0|[[File:Bone Meal JE1 BE1.png|32px]] [[File:Light Gray Dye JE1 BE1.png|32px]] [[File:Gray Dye JE1 BE1.png|32px]] [[File:Ink Sac JE1 BE1.png|32px]] [[File:Cocoa Beans JE1 BE1.png|32px]] [[File:Red Dye JE1 BE1.png|32px]] [[File:Orange Dye JE1 BE1.png|32px]] [[File:Yellow Dye JE1 BE1.png|32px]] [[File:Lime Dye JE1 BE1.png|32px]] [[File:Green Dye JE1 BE1.png|32px]] [[File:Cyan Dye JE1 BE1.png|32px]] [[File:Light Blue Dye JE1 BE1.png|32px]] [[File:Lapis Lazuli JE1 BE1.png|32px]] [[File:Purple Dye JE1 BE1.png|32px]] [[File:Magenta Dye JE1 BE1.png|32px]] [[File:Pink Dye JE1 BE1.png|32px]] Added dyes. Only [[dandelion yellow]] and [[lapis lazuli]] are currently obtainable and have functionality.}}
{{History||v0.3.2|[[Cactus green]] is now obtainable by smelting [[cacti]].}}
{{History||v0.3.3|[[Bone meal]] is now obtainable via [[crafting]].}}
{{History||v0.4.0|[[Cyan dye]], [[light blue dye]], [[lime dye]], [[magenta dye]], [[orange dye]], [[pink dye]], and [[purple dye]] are now obtainable via crafting.
|[[Rose red]] is now obtainable by smelting red [[mushroom]]s.
|All available dyes, excluding bone meal, can now be used to craft their respective [[wool]] color.}}
{{History||v0.8.0|snap=build 1|[[File:Cocoa Beans JE3 BE2.png|32px]] The texture of cocoa beans has been changed.}}
{{History|||snap=build 3|[[Ink sac]]s, [[cocoa bean]]s, [[gray dye]], and [[light gray dye]] are now available in the [[creative]] [[inventory]].
|Rose red can now be obtained from [[beetroot]]s.}}
{{History||v0.9.0|snap=build 1|Cocoa beans can now be obtained from [[cocoa pod]]s.
|The [[rose]] has been removed and replaced with a new poppy [[flower]] that can be crafted into rose red.}}
{{History|||snap=build 3|All new [[flower]]s can now be [[crafting|crafted]] into dyes. Because of this, many secondary and tertiary dyes are now primary dyes.
|[[Gray dye]] and [[light gray dye]] can now be obtained in [[survival]].}}
{{History|||snap=build 11|[[Terracotta|Stained clay]] can now be crafted using dyes.}}
{{History||v0.11.0|snap=build 1|[[Ink sac]]s can now be obtained from [[squid]].
|Added the ability to dye [[wolf]] collars.}}
{{History||v0.12.1|snap=build 1|Red [[mushroom]]s can no longer be smelted to obtain [[rose red]].}}
{{History||v0.14.0|snap=build 1|[[Cauldron]]s now used for leather dyeing, by applying a dye to a [[water]]-filled cauldron.}}
{{History||v0.16.0|snap=build 1|[[Cocoa bean]]s can no longer be crafted.}}
{{History|pocket}}
{{History||1.0.0|snap=alpha 0.17.0.1|Added a ''Dye'' button for [[sheep]].
|Added [[shulker]]s, which can be dyed.
|Added [[stained glass]]. Stain glass cannot be [[crafting|crafted]], but purple glass generates in [[end city|end cities]].}}
{{History||1.1.0|snap=alpha 1.1.0.0|Dyes can now apply color to a white [[bed]]s.
|Dyes are now used to craft [[concrete powder]].
|The color palette has been changed.}}
{{History|bedrock}}
{{History||1.2.0|snap=beta 1.2.0.2|Dyes can now be used for [[banner]] crafting.
|Dyes can now be used to craft [[firework star]]s.
|[[Stained glass]] is now [[crafting|craftable]], using dyes.}}
{{History||1.4.0|snap=beta 1.2.20.1|[[Lime dye]] can now be obtained from smelting [[sea pickle]]s.
|Dyes can now used to craft [[glow stick]]s and [[balloon]]s.}}
{{History||1.8.0|snap=beta 1.8.0.8|Dyes can now be used to dye [[cat]] collars.}}
{{History|||snap=beta 1.8.0.10|[[File:White Dye JE1 BE1.png|32px]] [[File:Black Dye JE1 BE1.png|32px]] [[File:Brown Dye JE1 BE1.png|32px]] [[File:Blue Dye JE1 BE1.png|32px]] Added [[white dye|white]], [[brown dye|brown]], [[black dye|black]] and [[blue dye]]s, which can be crafted from [[lapis lazuli]], [[bone meal]], [[cocoa beans]] and [[ink sac]]s. This, however, the later four still use as dyes.<ref>{{Bug|MCPE-42473}}</ref>
|"Rose Red", "Dandelion Yellow" and "Cactus Green" have been renamed to "Red Dye", "Yellow Dye" and "Green Dye", respectively.}}
{{History||1.9.0|snap=beta 1.9.0.0|Blue and white dye can now be obtained from [[cornflower]]s and [[lily of the valley]]s.}}
{{History||1.10.0|snap=beta 1.10.0.3|[[Glass pane]]s and [[carpet]]s can now be dyed.
|Only a single dye is now required to apply a banner pattern in a [[loom]].
|Various dyes except black dye, white dye, brown dye and blue dye are now [[trading|sold]] by [[wandering trader]]s.
|[[File:Bone Meal JE2 BE2.png|32px]] [[File:Light Gray Dye JE2 BE2.png|32px]] [[File:Gray Dye JE2 BE2.png|32px]] [[File:Ink Sac JE2 BE2.png|32px]] [[File:Cocoa Beans JE4 BE3.png|32px]] [[File:Red Dye JE3 BE3.png|32px]] [[File:Orange Dye JE2 BE2.png|32px]] [[File:Yellow Dye JE2 BE2.png|32px]] [[File:Lime Dye JE2 BE2.png|32px]] [[File:Green Dye JE2 BE2.png|32px]] [[File:Cyan Dye.png|32px]] [[File:Light Blue Dye JE2 BE2.png|32px]] [[File:Lapis Lazuli JE2 BE2.png|32px]] [[File:Purple Dye JE2 BE2.png|32px]] [[File:Magenta Dye JE2 BE2.png|32px]] [[File:Pink Dye JE2 BE2.png|32px]] The textures of bone meal, light gray, gray, ink sac, cocoa beans, red, orange, yellow, lime, green, cyan, light blue, lapis lazuli, purple, magenta, and pink dyes have been changed.}}
{{History||1.11.0|snap=beta 1.11.0.4|Dye can now be [[trading|sold]] to shepherd [[villager]]s.}}
{{History||1.16.210|snap=beta 1.16.210.59|The color of the text on [[sign]]s can now be changed with dye.}}
{{History|||snap=beta 1.16.210.60|The ability to dye the color of the text on [[sign]]s was temporarily removed.}}
{{History||1.16.220|snap=beta 1.16.220.50|The color of the text on [[sign]]s can now be changed with dye again.}}
{{History||1.17.10|snap=beta 1.17.10.22|Added [[candles]], which can be dyed.}}
{{History|console}}
{{History||xbox=TU1|xbone=CU1|ps=1.0|wiiu=Patch 1|switch=1.0.1|[[File:Bone Meal JE1 BE1.png|32px]] [[File:Light Gray Dye JE1 BE1.png|32px]] [[File:Gray Dye JE1 BE1.png|32px]] [[File:Ink Sac JE1 BE1.png|32px]] [[File:Cocoa Beans JE1 BE1.png|32px]] [[File:Red Dye JE1 BE1.png|32px]] [[File:Orange Dye JE1 BE1.png|32px]] [[File:Yellow Dye JE1 BE1.png|32px]] [[File:Lime Dye JE1 BE1.png|32px]] [[File:Green Dye JE1 BE1.png|32px]] [[File:Cyan Dye JE1 BE1.png|32px]] [[File:Light Blue Dye JE1 BE1.png|32px]] [[File:Lapis Lazuli JE1 BE1.png|32px]] [[File:Purple Dye JE1 BE1.png|32px]] [[File:Magenta Dye JE1 BE1.png|32px]] [[File:Pink Dye JE1 BE1.png|32px]] Added dyes.}}
{{History||xbox=TU9|[[File:Cocoa Beans JE3 BE2.png|32px]] The texture of cocoa beans has been changed.}}
{{History||xbox=none|xbone=none|ps=1.83|wiiu=none|switch=none|[[File:White Dye JE1 BE1.png|32px]] [[File:Black Dye JE1 BE1.png|32px]] [[File:Brown Dye JE1 BE1.png|32px]] [[File:Blue Dye JE1 BE1.png|32px]] Added [[white dye|white]], [[black dye|black]], [[brown dye|brown]], and [[blue dye|blue]] dyes, which can crafted from [[bone meal]], [[ink sac]], [[cocoa beans]], and [[lapis lazuli]].
|"Rose Red", "Dandelion Yellow" and "Cactus Green" have been renamed to "Red Dye", "Yellow Dye" and "Green Dye", respectively.}}
{{History||ps=1.90|[[File:Bone Meal JE2 BE2.png|32px]] [[File:Light Gray Dye JE2 BE2.png|32px]] [[File:Gray Dye JE2 BE2.png|32px]] [[File:Ink Sac JE2 BE2.png|32px]] [[File:Cocoa Beans JE4 BE3.png|32px]] [[File:Red Dye JE2 BE2.png|32px]] [[File:Orange Dye JE2 BE2.png|32px]] [[File:Yellow Dye JE2 BE2.png|32px]] [[File:Lime Dye JE2 BE2.png|32px]] [[File:Green Dye JE2 BE2.png|32px]] [[File:Cyan Dye.png|32px]] [[File:Light Blue Dye JE2 BE2.png|32px]] [[File:Lapis Lazuli JE2 BE2.png|32px]] [[File:Purple Dye JE2 BE2.png|32px]] [[File:Magenta Dye JE2 BE2.png|32px]] [[File:Pink Dye JE2 BE2.png|32px]] The textures of bone meal, light gray, gray, ink sac, cocoa beans, red, orange, yellow, lime, green, cyan, light blue, lapis lazuli, purple, magenta, and pink dyes have been changed.}}
{{History|3ds}}
{{History||0.1.0|[[File:Bone Meal JE1 BE1.png|32px]] [[File:Light Gray Dye JE1 BE1.png|32px]] [[File:Gray Dye JE1 BE1.png|32px]] [[File:Ink Sac JE1 BE1.png|32px]] [[File:Cocoa Beans JE3 BE2.png|32px]] [[File:Red Dye JE1 BE1.png|32px]] [[File:Orange Dye JE1 BE1.png|32px]] [[File:Yellow Dye JE1 BE1.png|32px]] [[File:Lime Dye JE1 BE1.png|32px]] [[File:Green Dye JE1 BE1.png|32px]] [[File:Cyan Dye JE1 BE1.png|32px]] [[File:Light Blue Dye JE1 BE1.png|32px]] [[File:Lapis Lazuli JE1 BE1.png|32px]] [[File:Purple Dye JE1 BE1.png|32px]] [[File:Magenta Dye JE1 BE1.png|32px]] [[File:Pink Dye JE1 BE1.png|32px]] Added dyes from [[Pocket Edition v0.15.4 alpha]].}}
{{History|foot}}
<gallery>
Pre-release dyes.png|Pre-release dye textures hidden within [[Items.png]].
</gallery>
;Notes
{{reflist|group=n}}
== Gallery ==
<gallery>
White Dye.png|White Dye
Light Gray Dye.png|Light Gray Dye
Gray Dye.png|Gray Dye
Black Dye.png|Black Dye
Brown Dye.png|Brown Dye
Red Dye.png|Red Dye
Orange Dye.png|Orange Dye
Yellow Dye.png|Yellow Dye
Lime Dye.png|Lime Dye
Green Dye.png|Green Dye
Cyan Dye.png|Cyan Dye
Light Blue Dye.png|Light Blue Dye
Blue Dye.png|Blue Dye
Purple Dye.png|Purple Dye
Magenta Dye.png|Magenta Dye
Pink Dye.png|Pink Dye
</gallery>
==Issues==
{{issue list}}
== Trivia ==
* Players can obtain each one of every color with 1 cocoa bean, 2 yellow dye, 2 ink sac, 3 green dye, 4 lapis lazuli, 4 red dye, and 6 bone meal (2 bones).
* The dyed sheep breeding behavior mirrors [[wikipedia:Lamarckism|Lamarck's theory]], in which the organisms evolve inheriting the external changes and adaptations of the previous generation, transmitting them to their offspring.
* In ''Bedrock Edition'', tertiary colors, along with their regular crafting recipes, can be crafted with primary colors. E.g.: Magenta can be crafted with one rose red and two bone meals.
* The colors of the dyes match the chat colors in [[color codes]] except for brown (dye only), light aqua, and gold (color codes only).
* The texture for light blue dye still uses the color from prior to the 1.12 World of Color update.<ref name="unchanged dyes"></ref>
== References ==
{{reflist}}
== External Links ==
* Tools for calculating leather dye combination: [https://minecraft.tools/en/armor.php minecraft.tools] (webapp); [https://github.com/pudquick/pyMCdyes/ pyMCDyes] (open-source Python script, outdated); [https://anrar4.github.io/DyeLeatherArmor/ DyeLeatherArmor]: a tool for calculating an exact crafting recipe for any sRGB color
{{Items}}
[[Category:Dyes]]
[[Category:Renewable resources]]
[[cs:Barvivo]]
[[de:Farbstoff]]
[[es:Tinte]]
[[fr:Teinture]]
[[hu:Színezés]]
[[it:Colorante]]
[[ja:染料]]
[[ko:염료]]
[[nl:Kleurstof]]
[[pl:Barwniki]]
[[pt:Corante]]
[[ru:Красители]]
[[th:สีย้อม]]
[[uk:Барвники]]
[[zh:染料]]</li></ul> | 16w04a | Rain sounds updated. Now more ambient/quieter and sound more 'realistic'. | |||
| Pocket Edition Alpha | |||||
0.12.1{{Extension DPL}}<ul><li>[[Photo|Photo]]<br/>{{exclusive|education}}
{{Item
| image = Photo EE2.png
| renewable = No (unless [[portfolio]] is available)
| stackable =
}}
A '''photo''' is an [[item]] containing a picture taken with a [[camera]].<ref>{{cite|url=https://web.archive.org/web/20210925044841mp_/https://educommunity.minecraft.net/hc/en-us/articles/4407489082644-Feature-Walkthrough-Minecraft-Education-Edition-GOAT-Beta-version-1-17-30-| title = Feature Walkthrough Minecraft: Education Edition GOAT Beta (version 1.17.30)|website=Minecraft: Education Edition Support|date=September 24, 2021}}</ref><ref>{{cite|url=https://education.minecraft.net/en-us/blog/new-update-and-anniversary-for-mee| title = The GOAT Update Celebrates a Minecraft Milestone!|website=Minecraft: Education Edition|date=November 2, 2021}}</ref><ref>{{ytl|2Wd0J-EIfws|GOAT Release Playthrough|Minecraft: Education Edition|December 2, 2021}}</ref>
== Obtaining ==
A photo in a [[portfolio]] can be saved as a photo item by selecting the "Save to Inventory" button underneath it.
== Usage ==
Photos display an image when held in the hand or when placed in an [[item frame]], similarly to [[map]]s. Photos can have captions added to them by renaming them in an [[anvil]] or by adding a caption while they are in a portfolio. Photos can be added to [[book and quill]]s and portfolios by selecting the "Add Photo" button in the book and quill or portfolio.
== Data values ==
=== ID ===
{{ID table
|edition=bedrock
|shownumericids=y
|showforms=y
|notshowbeitemforms=y
|generatetranslationkeys=y
|displayname=Photo
|spritetype=item
|nameid=photo_item
|id=?
|form=item
|foot=1}}
== History ==
{{History|education}}
{{History||1.17.30|snap=1.17.30.2|[[File:Photo EE1.png|32px]] Added photos.}}
{{History||1.17.30|snap=release|[[File:Photo EE2.png|32px]] Changed photo texture.}}
{{History|foot}}
== Gallery ==
<gallery>
Photo Item 1.png|A photo being placed in an item frame.
Photo Item 2.png|A photo being saved from a portfolio.
Photo Item 3.png|A photo being added to a book and quill.
</gallery>
== References ==
{{Reflist}}
{{Items}}
{{Education Edition}}
[[Category:Education Edition items]]
[[Category:Non-renewable resources]]
[[ja:写真]]
[[pl:Zdjęcie]]
[[zh:相片]]</li><li>[[Lapis Lazuli|Lapis Lazuli]]<br/>{{Item
| image = Lapis Lazuli.png
|type=
| renewable = Yes
| stackable = Yes (64)
}}
{{About|the item|the ore|Lapis Lazuli Ore|the mineral block|Lapis Lazuli Block}}
'''Lapis lazuli''' is a mineral required to [[Enchanting|enchant]] items in an [[Enchanting Table|enchanting table]].
== Obtaining ==
=== Mining ===
When mined with a stone [[pickaxe]] or better, [[lapis lazuli ore]] drops 4–9 lapis lazuli. With the [[Fortune]] III enchantment, a single block has a chance of dropping up to 36 items.
=== Crafting ===
{{Crafting
|Block of Lapis Lazuli
|Output=Lapis Lazuli,9
|type=Material
}}
=== Smelting ===
{{Smelting
|showname=1
|Lapis Lazuli Ore; Deepslate Lapis Lazuli Ore
|Lapis Lazuli
|0.2
}}
=== Villager gifts ===
{{IN|java}}, cleric [[villager]]s give [[player]]s lapis lazuli if they have the [[Hero of the Village]] effect.
=== Trading ===
Apprentice-level cleric villagers sell one lapis lazuli for an [[emerald]] as part of their trades.
{{IN|bedrock}}, [[wandering trader]]s may sell 3 lapis lazuli for an emerald.
=== Chest loot ===
{{see also|Lapis Lazuli Ore#Natural generation}}
{{LootChestItem|lapis-lazuli}}
== Usage ==
=== Enchanting ===
1–3 pieces of lapis lazuli are required to use an [[Enchanting Table|enchanting table]] to enchant an [[items|item]]. More specifically, the enchanting table UI shows 3 options (see [[Enchanting mechanics]] for details): the first, second, and third options cost 1, 2, and 3 lapis lazuli, respectively.
=== Crafting ingredient ===
Lapis lazuli can be used to make [[blocks of lapis lazuli]] and [[blue dye]]. {{IN|bedrock}}, it can also be used directly as a substitute for blue dye.
{{crafting usage}}
{{IN|bedrock}}, lapis lazuli can be also used in banner patterns:
{{banner crafting usage}}
=== Loom ingredient ===
{{Banner loom usage|Lapis Lazuli}}
=== Dye ===
{{Dye usage}}
=== Smithing ingredient ===
{{Smithing
|head=1
|ingredients=Any Armor Trim +<br/>Any Armor Piece + <br/>Lapis Lazuli
|Any Armor Trim Smithing Template
|Netherite Chestplate
|Lapis Lazuli
|Lapis Trim Netherite Chestplate
|showdescription=1
|description = All armor types can be used in this recipe,<br/>a netherite chestplate is shown as an example.<br/>
|tail=1
}}
;Trim color palette
The following color palette is shown on the designs on trimmed armor:
*{{TrimPalette|lapis lazuli}}
== Data values ==
=== ID ===
{{edition|java}}:
{{ID table
|edition=java
|showforms=y
|generatetranslationkeys=y
|displayname=Lapis Lazuli
|spritetype=item
|nameid=lapis_lazuli
|form=item
|foot=1}}
{{edition|bedrock}}:
{{ID table
|edition=bedrock
|showaliasids=y
|shownumericids=y
|showforms=y
|notshowbeitemforms=y
|generatetranslationkeys=y
|displayname=Lapis Lazuli
|spritetype=item
|nameid=lapis_lazuli
|aliasid=dye / 4
|id=414
|form=item
|translationkey=item.dye.blue.name
|foot=1}}
== Advancements ==
{{load advancements|Enchanter}}
== History ==
{{History|java beta}}
{{History||1.2|[[File:Lapis Lazuli JE1 BE1.png|32px]] Added lapis lazuli.}}
{{History||1.2_02|[[Lapis lazuli ore]] can now be found at [[bedrock]] level and now drops 4–8 lapis lazuli per block mined (increased from 1) on [[singleplayer]] only. However, servers have not been affected yet.}}
{{History||1.8|snap=Pre-release|Lapis lazuli can now be found in [[mineshaft]] [[chest]]s.}}
{{History|java}}
{{History||1.4.2|snap=12w34a|Lapis lazuli can now be used to [[Armor#Dyeing|dye]] leather [[armor]] and [[wolf]] collars.}}
{{History||1.4.6|snap=12w49a|Lapis lazuli can now be [[crafting|crafted]] with [[gunpowder]] to create a [[firework star]].}}
{{History||1.6.1|snap=13w19a|Lapis lazuli can now be used to craft blue [[stained clay]].}}
{{History||1.7.2|snap=13w41a|Lapis lazuli can now be used to craft blue [[stained glass]].}}
{{History||1.8|snap=14w02a|[[Enchanting]] now requires lapis lazuli. Different enchantments require different amounts of levels and different amounts of levels now require different amounts of lapis lazuli (between 1-3).
|Cleric [[villager]]s now [[trading|sell]] 1–2 lapis lazuli for 1 [[emerald]], making it a [[renewable resource]].}}
{{History|||snap=14w30a|Lapis lazuli can now be used to dye [[banner]]s.}}
{{History||1.9|snap=15w44a|The average yield of lapis lazuli in [[mineshaft]] [[chest]]s has been decreased.}}{{History||1.11|snap=16w39a|Added the ability to dye [[shulker box]]es.}}
{{History||1.12|snap=17w06a|Can now be used to craft blue [[concrete powder]].}}
{{History|||snap=17w15a|Added the ability to dye [[bed]]s.}}
{{History||1.13|snap=17w47a|The different data values for the <code>dye</code> ID have been split up into their own IDs.
|Prior to [[1.13/Flattening|''The Flattening'']], this [[item]]'s numeral ID was 351.}}
{{History|||snap=18w11a|Lapis lazuli now generates in [[shipwreck]] [[chest]]s.}}
{{History||1.14|snap=18w43a|Lapis lazuli can now be used to craft [[blue dye]].
|Lapis lazuli can no longer be used as a [[dye]].
|All of the dye-related functions and crafting recipes of lapis lazuli (except lapis lazuli blocks) have been transferred to blue dye.
|[[File:Lapis Lazuli JE2 BE2.png|32px]] The texture of lapis lazuli has been changed.}}
{{History|||snap=18w50a|Lapis lazuli can now be found in chests in [[village]] temples.}}
{{History|||snap=19w13a|Cleric villagers now give lapis lazuli to players under the [[Hero of the Village]] effect.}}
{{History||1.17|snap=21w08a|Lapis lazuli can now drop and be smelted from [[deepslate lapis lazuli ore]].}}
{{History||1.20<br>(Experimental)|link=1.19.4|snap=23w04a|Lapis lazuli can now be used as an armor trim material.}}
{{History|pocket alpha}}
{{History||v0.3.0|[[File:Lapis Lazuli JE1 BE1.png|32px]] Added lapis lazuli.}}
{{History||v0.3.2|Lapis lazuli can now be crafted into lapis lazuli blocks, and vice versa.}}
{{History||v0.12.1|snap=build 1|Lapis lazuli is now required for [[enchanting]].}}
{{History||v0.14.0|snap=build 1|Lapis lazuli can now be found inside [[minecart with chest]]s in [[mineshaft]]s.
|Lapis lazuli can now be used to dye [[water]] in [[cauldron]]s.}}
{{History|pocket}}
{{History||1.0.4|snap=alpha 1.0.4.0|Cleric [[villager]]s now [[trading|sell]] 1–2 lapis lazuli for 1 [[emerald]].
|Lapis lazuli can now be used to [[dyeing|dye]] [[shulker shell]]s.}}
{{History||1.1.0|snap=alpha 1.1.0.0|Lapis lazuli can now be used to dye [[shulker box]]es and [[bed]]s.
|Lapis lazuli can now be used to [[crafting|craft]] blue [[concrete powder]].}}
{{History|bedrock}}
{{History||1.2.0|snap=beta 1.2.0.2|Lapis lazuli can now be used to dye [[banner]]s, [[firework star]]s and [[glass]].}}
{{History||1.4.0|snap=beta 1.2.14.2|Lapis lazuli can now be found in [[shipwreck]] treasure chests.}}
{{History|||snap=beta 1.2.20.1|Lapis lazuli can now be used to craft [[balloon]]s and [[glow stick]]s.}}
{{History||1.8.0|snap=beta 1.8.0.10|Lapis lazuli can now be used to craft [[blue dye]]s.}}
{{History||1.10.0|snap=beta 1.10.0.3|Lapis lazuli are now [[trading|sold]] by [[wandering trader]]s.
|[[File:Lapis Lazuli JE2 BE2.png|32px]] The texture of lapis lazuli has been changed.}}
{{History||1.11.0|snap=beta 1.11.0.1|Lapis lazuli can now be found in [[desert]] [[village]] temple [[chest]]s.}}
{{History|||snap=beta 1.11.0.4|Cleric [[villager]]s now [[trading|sell]] one lapis lazuli for one [[emerald]].}}
{{History||1.16.100|snap=beta 1.16.100.56|The ID of lapis lazuli has been changed from <code>dye/4</code> to <code>lapis_lazuli</code>.}}
{{History||1.17.0|snap=beta 1.16.230.52|Lapis lazuli can now drop and be smelted from [[deepslate lapis lazuli ore]].}}
{{History||1.19.80|snap=beta 1.19.80.21|Lapis lazuli can now be used as an armor trim material.}}
{{History|console}}
{{History||xbox=TU1|xbone=CU1|ps=1.0|wiiu=Patch 1|switch=1.0.1|[[File:Lapis Lazuli JE1 BE1.png|32px]] Added lapis lazuli.}}
{{History||xbox=TU31|xbone=CU19|ps=1.22|wiiu=Patch 3|switch=1.0.1|Lapis lazuli can now be used in [[enchanting]].}}
{{History|Ps4}}
{{History||1.90|[[File:Lapis Lazuli JE2 BE2.png|32px]] The texture of lapis lazuli has been changed.}}
{{History|foot}}
== Issues ==
{{issue list}}
== Trivia ==
* In real life, lapis lazuli is a blue gem that can be ground and processed into ultramarine pigment. Lapis lazuli pigment has been famously used in the production of illuminated manuscripts, stained glass, and cave paintings. [[Wikipedia:Lapis lazuli|See the Wikipedia article for more information]].
* Lapis lazuli is the only [[ore]] that can be used as a [[dye]]{{only|BE|short=1}} or making a dye.
* It is the only item that can be put in the second slot of an [[enchantment table]].
== References ==
{{reflist}}
{{Items}}
[[Category:Dyes]]
[[cs:Lazurit]]
[[de:Lapislazuli]]
[[es:Lapislázuli]]
[[fr:Lapis-lazuli]]
[[hu:Lazurit]]
[[ja:ラピスラズリ]]
[[ko:청금석]]
[[nl:Lapis lazuli]]
[[pl:Lazuryt]]
[[pt:Lápis-lazúli]]
[[ru:Лазурит]]
[[th:แร่แลพิสแลซูลี]]
[[uk:Лазурит]]
[[zh:青金石]]
[[Category:Renewable resources]]</li></ul> | build 1 | Added rain. | |||
| build 9 | Rain is now visible from under water. | ||||
| Rain should cause less lag. | |||||
| Pocket Edition | |||||
1.0{{Extension DPL}}<ul><li>[[Portfolio|Portfolio]]<br/>{{exclusive|education}}
{{Item
| image = Portfolio.png
| renewable = No
| stackable = Yes (64)
}}
A '''portfolio''' is an [[item]] that can save [[photo]]s taken with a [[camera]].<ref>https://education.minecraft.net/support/knowledge-base/using-cameras-portfolios/</ref>
== Obtaining ==
Portfolios can be obtained in the [[creative inventory]] or through the {{cmd|give}} command.
== Usage ==
[[File:Portfolio Interface.png|thumb|upright=1.5|The portfolio interface]]
Once a photo has been taken using the [[camera]], it appears in the portfolio. Once equipped, right-clicking brings up a two-page book of photos the [[player]] has taken, in chronological order. Captions can be added below each picture. Pressing the "Export Portfolio" button creates a .zip file with all photos as JPGs in a specified folder. The portfolio is also used to load custom items in [[Minecraft China]].
== Data values ==
=== ID ===
{{ID table
|edition=bedrock
|shownumericids=y
|showforms=y
|notshowbeitemforms=y
|generatetranslationkeys=y
|displayname=Portfolio
|spritetype=item
|nameid=portfolio
|id=456
|form=item
|foot=1}}
== History ==
{{History|pocket alpha}}
{{History||v0.16.0|snap=build 1|[[File:Portfolio BE1.png|32px]] Added portfolios.}}
{{History|||snap=build 2|Portfolios have been removed.}}
{{History|bedrock}}
{{History||1.16.100|Data-driven portfolios, allowing for add-ons to create custom portfolios. Normal Portfolios are still unobtainable.}}
{{History|education}}
{{History||1.0|[[File:Portfolio BE1.png|32px]] Added portfolios.}}
{{History|foot}}
== References ==
{{Reflist}}
{{Items}}
{{Education Edition}}
[[Category:Non-renewable resources]]
[[Category:Education Edition items]]
[[Category:Storage]]
[[de:Fotoalbum]]
[[es:Portafolio]]
[[ja:ポートフォリオ]]
[[ko:포트폴리오]]
[[pl:Portfolio]]
[[pt:Portfólio]]
[[ru:Портфолио]]
[[uk:Портфоліо]]
[[zh:公文包]]</li><li>[[Echo Shard|Echo Shard]]<br/>{{Item
| title = Echo Shard
| image = Echo Shard.png
| renewable = No
| stackable = Yes (64)
}}
An '''echo shard''' is an item found in [[ancient cities]] which can be used to craft [[recovery compass]]es.
== Obtaining ==
=== Chest loot ===
{{LootChestItem|echo-shard}}
== Usage ==
=== Crafting ingredient ===
{{crafting usage|Echo Shard}}
== History ==
{{History|java}}
{{History||1.19|snap=22w14a|[[File:Echo Shard JE1 BE1.png|32px]] Added echo shards.}}
{{History|bedrock}}
{{History||1.19.0|snap=beta 1.19.0.24|[[File:Echo Shard JE1 BE1.png|32px]] Added echo shards.
|Currently cannot be found inside [[ancient city]] chests due to outdated structures and loot chests.}}
{{History||1.19.0|snap=beta 1.19.0.26|Echo shards now generate inside [[ancient city]] loot chests.}}
{{History|foot}}
== Issues ==
{{issue list}}
{{Items}}
[[Category:Non-renewable resources]]
[[de:Echoscherbe]]
[[es:Fragmento resonante]]
[[fr:Éclat d'écho]]
[[ja:残響の欠片]]
[[lzh:回音殘片]]
[[pt:Fragmento de eco]]
[[pl:Odłamek pogłosu]]
[[ru:Осколок эха]]
[[th:เศษเอคโค]]
[[uk:Уламок відлуння]]
[[zh:回响碎片]]</li></ul> | ? | Rain can now be skipped by sleeping. | |||
| Legacy Console Edition | |||||
| TU1 | CU1 | 1.0 | Patch 1 | Added rain. | |
| TU5 | Improved the rain edges (when looking up in rain). | ||||
Issues
Issues relating to "Rain" are maintained on the bug tracker. Report issues there.
Trivia
Rain falling into the void.
- Rain falls at approximately the same speed one can descend while flying. This means that it is actually possible to free fall faster than the rain particles.
- If you fly up when it rains, the rain appears to fall faster. if you fly down while it rains, it will make the raindrops appear to be frozen in time.
- Rain actually falls one block into the void (Layer -1). This can be seen in Creative Mode by floating in the Void. Note that no particles are emitted from the rain, due to the absence of a block below it.
- Rain still falls above the clouds. Notch's explanation is that the gray above the clouds during a storm is another layer of clouds and the origin of the rain.[7]
- Raindrop splash particles can be seen on top of blocks of layer 255 at most, even in biomes where it cannot rain.
- If you enter a snowy biome during this occurrence, then snow particles will be falling instead of rain particles.
References
- ↑ https://twitter.com/notch/status/55984678875836416
- ↑ https://twitter.com/notch/status/55982751265988610
- ↑ https://twitter.com/notch/status/55977565839564800
- ↑ https://twitter.com/notch/status/56265234951831552
- ↑ https://twitter.com/notch/status/55981125994156032
- ↑ https://twitter.com/notch/status/55972362432151552
- ↑ https://twitter.com/notch/status/130230769347067905