Huge mushrooms are tree-like structures that consist of mushroom blocks. They can be found naturally in swamp[Bedrock Edition only], dark forest, and mushroom fields biomes, or grown from a small mushroom.
Generation
Huge mushrooms naturally generate in mushroom fields, swamp[Bedrock Edition only] and dark forest biomes.
Growth
Huge mushrooms can be grown by applying bone meal to a small red or brown mushroom that is planted on dirt, coarse dirt or grass blocks with a skylight and block light level of 12 or less, or on podzol or mycelium at any light level. A 3 block radius around the mushroom must be free of solid blocks, and 7-9 blocks above the mushroom. Extra tall huge mushrooms (up to 13 blocks tall) have a ~5% chance of growing from mushrooms fed with bone meal.
A huge mushroom does not grow above the height limit.
Structure
A huge mushroom's height is normally between 5 and 7 blocks inclusive, but have a 1⁄12 chance to generate twice as high, meaning they can be up to 13 blocks tall.[1]
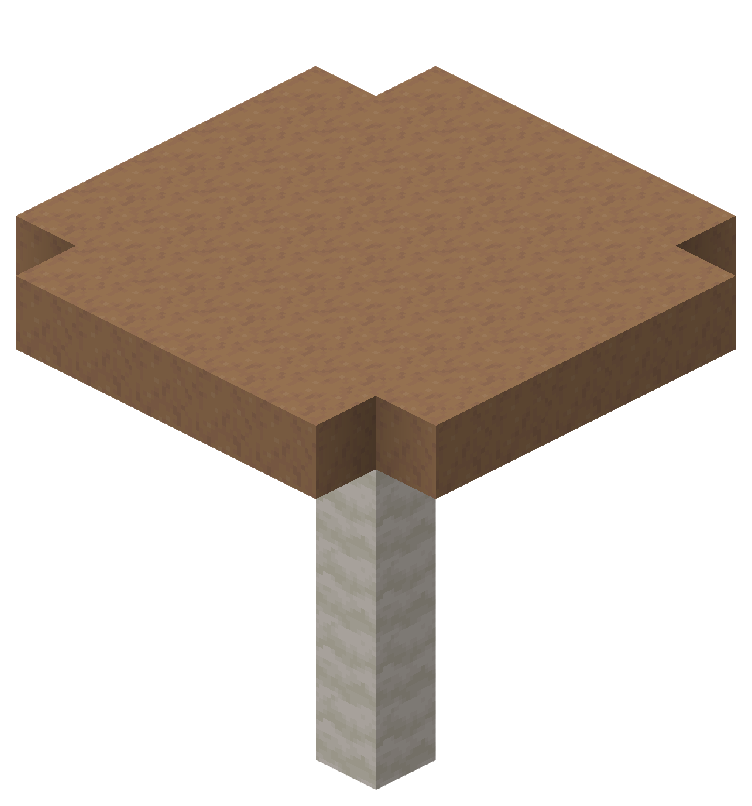
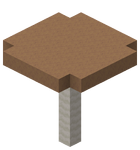
A huge brown mushroom
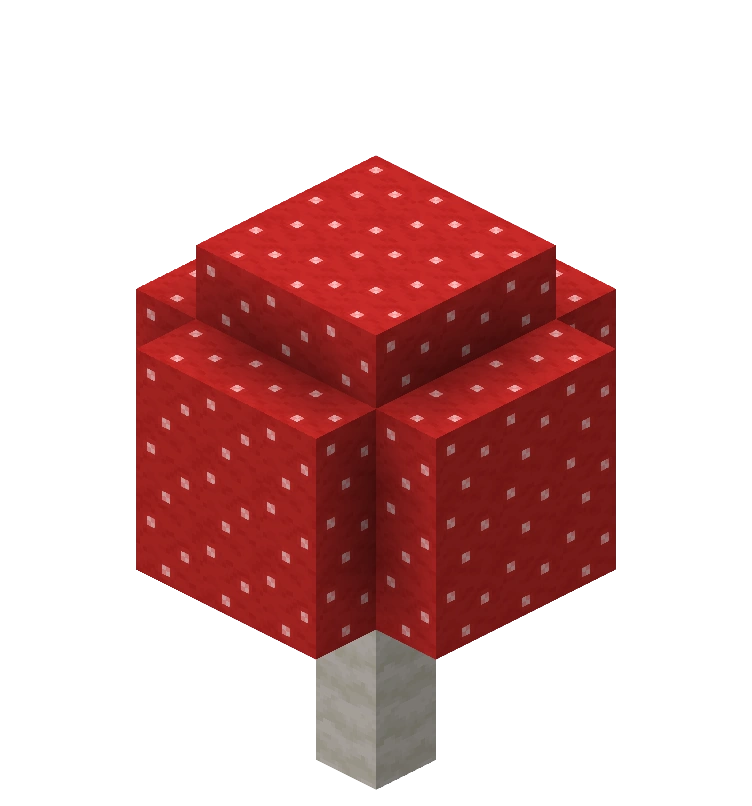
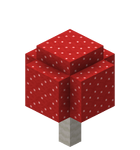
A huge red mushroom
To grow, the lowest four blocks of the stem (i.e. the three blocks above the small mushroom being grown) must be air or leaves, and a 7×7×(height−3) region above that must similarly be clear of anything except air or leaves. The block under the huge mushrooms stem must be dirt, podzol, or mycelium. Light level does not matter if placed on podzol, or mycelium, if placed on dirt, coarse dirt or grass blocks both skylight and blocklight must be 12 or less.
Huge brown mushrooms
Huge brown mushrooms consist of a single stalk in the center, with a 7×7 canopy of brown mushroom blocks at the top with the corners missing.
Due to the space requirement matching the size of the canopy at the top, it is possible for a huge brown mushroom to grow with its canopy directly touching a mushroom next to it.
Huge red mushrooms
Huge red mushrooms, like their brown counterparts, have a single stalk in the center, but a different canopy, composed of five 3×3 slabs of red mushroom blocks arranged above and around the stalk, forming a 'dome'. Note that the space requirements do not require that the area occupied by lower part of the 'dome' is clear of other blocks. Blocks that mobs can't suffocate in them such as slabs, end portal frame and end portal are replaced, while full blocks remain unchanged.
Due to the shape of the dome, the shortest huge red mushrooms can grow such that their domes touch despite the dome being smaller than the full space requirement.
Video
- Note: The narrator of the video says that huge mushrooms generate naturally only in one biome. However, they now generate naturally in multiple biomes.
History
| June 14, 2011 | Notch showed a picture of a Beta 1.7 change-list. Although it was completely blurred out and was at first thought of as a joke, Notch later stated that one of the pictures with the new lighting system and the change list had a secret in them. | ||||
|---|---|---|---|---|---|
| One place where people discussed it was on the Minecraft Forums, where it was discovered that the tabs at the top of the change list, which were partly covered, could be decoded based on the one pixel tall pattern available in the image.[2] | |||||
| After a user named "tmcaffeine" successfully decoded the image, the tabs read: ExperienceOrb.java, changelist.txt, Level.java, Tile.java, HugeMushroomTile.jav(a?), HugeMushroomFeature.(java?), RandomLevelSource(cut).[3] | |||||
| This led people to believe that huge mushrooms would be added, and indeed, later on Notch revealed a screenshot on Google+ in which two huge mushrooms could be seen as well as a village. | |||||
| beta | |||||
1.8{{Extension DPL}}<ul><li>[[Map|Map]]<br/>{{about|the craftable map|maps showing the locations of certain structures|Explorer Map|other uses|Map (disambiguation)}}
{{distinguish|World}}
{{Item
| image = Map Zoom 4.png
| renewable = Yes
| stackable = Yes (64)
}}
A '''map''' is an [[item]] used to view explored [[Chunk|terrain]] and mark landmarks.
==Obtaining==
===Crafting===
{{crafting
|head=1
|showname=0
|showdescription=1
|A1= Paper
|B1= Paper
|C1= Paper
|A2= Paper
|B2= Compass
|C2= Paper
|A3= Paper
|B3= Paper
|C3= Paper
|Output= Empty Map
|type= Miscellaneous
|description=This variation is called an "empty locator map" {{in|bedrock}}, or an "empty map" {{in|java}}.
When the player first creates a map, it is blank. It needs to be activated by holding it and pressing ''{{Control|use item}}''. after which it records terrain and location markers as the player travels within (or close to) the area it maps.
}}
{{crafting
|A1= Paper
|B1= Paper
|C1= Paper
|A2= Paper
|B2= Paper
|C2= Paper
|A3= Paper
|B3= Paper
|C3= Paper
|Output= Empty Map
|type= Miscellaneous
|description={{only|bedrock}}
This variation is called an "empty map". It does not show location markers. It is intended for cloning and zooming locator maps without having to consume an additional [[compass]] (thereby saving [[iron ingot]]s and [[redstone dust]]), but it can also be {{Control|use|text=activated}} and later converted to a locator map by combining it with a compass on an [[anvil]], [[crafting table]], or [[cartography table]].
|foot=1
}}
=== Natural generation ===
==== Chest loot ====
{{LootChestItem|empty-map,map
}}
=== Cartography table ===
A map can also be created using a single paper on a [[cartography table]] to create an empty map, or a paper with a compass for an empty locator map.{{only|bedrock}}
=== Starting map ===
{{exclusive|bedrock|section=1}}
When creating a new world {{in|bedrock}}, the player can enable the "Starting Map" option to spawn with an empty locator map in the hotbar. The map's zoom scale is 1:8. The map is updated only while the player holds it.
=== Trading ===
Novice-level cartographer [[Villager|villagers]] sell a single empty map for 7 [[Emerald|emeralds]] as their trades.
{{IN|java}}, cartographer villagers may give players with the [[Hero of the Village]] effect an empty map.
== Usage ==
{{See also|Tutorials/Mapping}}
=== Mapping ===
Crafting a map creates an empty map. The map is drawn for the first time when it is held and used (with ''{{control|use item}}''). This map can then be adjusted to different zoom levels. After conversion to a drawn map item, it starts to draw a top-down view of the player's surroundings, with North pointing to the top of the map. A pointed oval pointer indicates the player's position on the map, and moves in real-time as the player moves across the terrain shown on the map. The map does ''not'' center on the player when created, rather, the world is broken up into large invisible grid squares, and the map displays the area of whichever grid square it is in when it is first used. For example, if a player uses a new map in a certain grid square, and then moves a distance away and uses another fresh map but is still within the same grid square, both maps appear identical. To make a map that is not identical to the first one, the player would have to move outside of the edges of the first map (because then they would be in a new grid square). This way, no two maps of the same size can ever partially overlap and every map can display only a fixed area.
To record the world on a map, that specific map must be held in the player's hands while the player moves around the world. The world is recorded as-is during exploration, meaning that if the world is modified, a player must revisit the area while holding the map to update the map's view. Maps can also be [[Map#Cloning|cloned]]. If a player holds a map whose one or more clones are on display in item frames, updates are made on all clone-connected maps.
Other players are displayed on the map only if they have a map in their inventory cloned from the one being looked at. When placing a map into an [[item frame]], the map displays with a green pointer shown at the location of the item frame. This is to help the player see where they are in relation to the area that the map is showing. If the player leaves a map in an item frame and views a clone of it, the green pointer remains in the spot of the framed copy. This can be used to set up waypoints. Unexplored areas are transparent, making the item frame visible.
When the player leaves the area shown on a specific map, the player pointer transforms into a white dot that moves on that map. The marker shrinks to a smaller white dot if the player is far from the map's center: the area is 320 by 320 blocks per scale factor. The dot moves along the edge of the map to show the relative location of the player. However {{in|bedrock}}, the pointer remains as an arrow but shrinks until the player is near the area shown on the map.
While maps in [[the Nether]] work, they show only the red-and-gray pattern, regardless of the blocks placed. The only useful function is finding where the player is in relation to placed framed maps, which show as green pointers. Additionally, the player pointer rapidly spins and is not a good indicator of direction. Placing a [[banner]] in [[the Nether]] still shows it on the map as usual. Having a smaller map image while riding a [[strider]] in the Nether can help one to see one's footing while traveling over [[lava]].
{{IN|java}}, when using a map from another dimension, the map shows the player's position and direction when they were last in the dimension of the map. {{IN|bedrock}}, however, the player can use maps from one dimension while in another dimension. For locator maps, the place marker changes color depending on the dimension that the player is currently in (white for the Overworld, red for [[the Nether]], and magenta for [[the End]]). An Overworld map in the Nether shows the player's corresponding location and direction in the Overworld.<ref name=multiverse>{{ytl|EpP1diZdEdI}}</ref> Similarly, a Nether Map in the Overworld shows the player's corresponding location in the Overworld, but the place marker spins, just like a Nether map in the Nether. An Overworld map in the End shows the world spawn.<ref name=multiverse/> A Nether map cannot be used in the End — the map appears, but the place marker is not shown anywhere — and similarly, an End map cannot be used in the Overworld or the Nether.
A player can make a large piece of pixel art (128×128) facing upward, center a map on it, and place that map in an [[item frame]] to create a custom picture. Locking is recommended. See [[Map item format#Map Pixel Art]] for details on the techniques.
Maps display as a mini-map when held in the off-hand, or if the off-hand slot is occupied; the map is full-sized only when held in the dominant hand with both hands free.
A map always positions itself facing towards North when placed horizontally within an item frame regardless of how the map is placed.
=== Map content ===
{{Main|Map item format}}
Maps consist of square pixels arranged like pixels in a 128×128 square pattern, with each pixel representing a square portion of land. {{IN|java}}, the [[Map item format#Color table|color of a map pixel]] generally matches the color of the most common [[opaque]] block in the corresponding area, as seen from the sky. 'Minority blocks' in the target area have no effect on the color of the pixel, thus small features tend to be undetectable on zoomed-out maps.
{{IN|bedrock}}, the [[Map item format#Color table|color of a map pixel]] instead matches the single top-most opaque block in a grid sized by the map magnification pixel size (see the table in the "Player marker and pointer" section below). For example, a 3/4 magnification map has a pixel size of 8x8 blocks; this means the map will read only the top-most opaque blocks at the 0,0 coordinate, the 8,0 coordinate, the 0,8 coordinate, etcetera, ignoring all other blocks in the area. This means that {{in|bedrock}}, map pixel art requires only one block per pixel regardless of map magnification.
{{IN|bedrock}}, grass, foliage and water colors that are biome-dependent are represented accurately on a map.
{| class="wikitable"
|-
! style="width: 300px;" | {{el|je}}
! style="width: 300px;" | {{el|be}}
|-
| style="text-align: center;" | [[File:Map Zoom 4.png|alt=All banners marked on a map, alongside a named banner.|216px]]
| style="text-align: center;" | [[File:Map item BE.png|216px]]
|-
| Biome colors on ''Java Edition''.
| Biome colors on ''Bedrock Edition''.
|-
|}
Maps also show ground up to about 15 blocks below the surface of the water in oceans as slightly lighter blue, to show where the ground rises. This is not true with land above water. Higher elevations in the world mean lighter colors on the map. The map records the surface even as the player moves below the surface.
A standard map represents 128x128 blocks (1 block per pixel, 8x8 [[chunks]]) but maps can be zoomed-out to represent up to 2048x2048 blocks (16 square blocks per pixel, 128x128 [[chunks]]).
Some relevant distances: 64 blocks (4 chunks) is the update radius from a player in the Overworld and the End. However, it is half this (32 blocks) in the Nether. Also, 1024 blocks is the minimum Overworld distance from a [[nether portal]], at which players can build another portal and expect to reach a new location in the Nether. This is the distance across a 1:8 map, and also from a 1:16 map's center to its edge.
=== Player marker and pointer ===
{{IN|java}}, every map contains a marker that marks the position of the player, and points in the same direction as the player. When a player moves out of a map, a big white dot appears and moves relative to the player's position. The pointer either disappears when the player moves away a certain distance from the border of the map or, in case of [[explorer map]]s, the big white dot changes to a smaller white dot. The distance required for the small white dot to appear(explorer maps) or for the big dot to vanish (normal maps) changes with the scaling of the map.
* '''Level 0/4 :''' 128×128 blocks (each map pixel represents 1 block)
* '''Level 1/4 :''' 256×256 blocks (2×2 blocks per map pixel)
* '''Level 2/4 :''' 512×512 blocks (4×4 blocks per map pixel)
* '''Level 3/4 :''' 1024×1024 blocks (8×8 blocks per map pixel)
* '''Level 4/4 :''' 2048×2048 blocks (16×16 blocks per map pixel)
{{IN|bedrock}}, a map can be crafted with or without this marker, and a map without a position marker can add one later by adding a compass to the map. When a map is crafted without a compass, it's simply called an "empty map", but when crafted with a compass, it's called an "empty locator map". The marker also turns red if the player enters the Nether with an Overworld map and shows the player's Overworld location relative to the Nether location. A map created in the End has a purple marker showing the player's location. If an Overworld map is used in the End, a magenta dot appears on the player's spawn point.{{/BE|position}}
{{crafting
|name=Map<br>(with marker)
|ingredients=[[Map]] or Empty Map +<br>[[Compass]]
|showdescription=1
|Map (no markers);Empty Map
|Compass
|Output= Locator Map;Empty Locator Map
|type= Miscellaneous
|description={{el|be}} only.
Maps crafted from only paper do not show the location marker; to add it, a compass must be added to the map.
|foot=1
}}
{{IN|bedrock}}, a cartography table can also be used to add a pointer to create a locator map or empty locator map. This can be done by adding a compass to paper, or to an empty map or map.
=== Zooming out ===
[[File:Cartography table UI zoom.png|thumb|300px|{{IN|java}}, cartography table's UI, showing the map is being zoomed out.]]
A [[cartography table]] can also be used to zoom out, taking only one piece of paper per zoom level.
A blank map can not be zoomed out. A map has to have something already marked on it for the zooming to be possible.
{{Crafting
|A1= Paper |B1= Paper |C1= Paper
|A2= Paper |B2= Map;Locator Map |C2= Paper
|A3= Paper |B3= Paper |C3= Paper
|Output= Map;Locator Map
|showdescription=1
|description=Locator Map {{el|be}} only.
}}
{{/BE|zoom}}
==== Zoom details ====
The zooming function starts from when the map is created (zoom level 0) up to its fourth zoom step (zoom level 4).
{| class="wikitable" style="text-align: center" data-description="Zoom levels"
! colspan="2" |
! Zoom step 0
! Zoom step 1
! Zoom step 2
! Zoom step 3
! Zoom step 4
|-
! colspan="2" |
| [[File:Map Zoom 0.png|116px|Zoom step 0, 1:1]]
| [[File:Map Zoom 1.png|116px|Zoom step 1, 1:2]]
| [[File:Map Zoom 2.png|116px|Zoom step 2, 1:4]]
| [[File:Map Zoom 3.png|116px|Zoom step 3, 1:8]]
| [[File:Map Zoom 4.png|116px|Zoom step 4, 1:16]]
|-
! colspan="2" | Zoom level
| 0/4
| 1/4
| 2/4
| 3/4
| 4/4
|-
! colspan="2" | 1 map pixel represents
| 1 block
| 2×2 blocks
| 4×4 blocks
| 8×8 blocks
| 16×16 blocks<br>(1×1 chunk)
|-
! colspan="2" | Scaling ratio
| 1:1
| 1:2
| 1:4
| 1:8
| 1:16
|-
! rowspan="2" colspan="2" | Map covers an area of
| 128×128 blocks
| 256×256 blocks
| 512×512 blocks
| 1024×1024 blocks
| 2048×2048 blocks
|-
| 8×8 chunks
| 16×16 chunks
| 32×32 chunks
| 64×64 chunks
| 128×128 chunks
|-
! colspan="2" | Smallest discernible features
| Blocks
| Trees, Paths
| Lakes, Buildings
| Mountains, Rivers
| Biomes, Mountain Ranges
|-
! colspan="2" | Use cases
| Pixel art, Base plans
| Base surroundings
| Structure mapping
| Landscape mapping
| Biome mapping
|-
! rowspan="2" | Total paper needed to zoom out from Level 0
! in anvil{{only|bedrock|short=1}} or crafting table
| -
| {{ItemSprite|Paper}} 8
| {{ItemSprite|Paper}} 16
| {{ItemSprite|Paper}} 24
| {{ItemSprite|Paper}} 32
|-
! in cartography table
| -
| {{ItemSprite|Paper}} 1
| {{ItemSprite|Paper}} 2
| {{ItemSprite|Paper}} 3
| {{ItemSprite|Paper}} 4
|}
Maps are always aligned to a grid at all zoom levels. That means zooming out any different map in a specific area covered by that map always has the same center. As such, maps are aligned by map width (1024 blocks for a level 3 maps) minus 64. A level 3 map generated at spawn covers X and Z coordinates from -64 to 959. All maps generated in this area zoom out to the same coordinates, guaranteeing that they are always 'aligned' on a map wall. For a zoomed-out map to cover a new area, it must start with a base (level 0) map that is in that area.
At zoom level 0, a map created on the point (0,0) has (0,0) at the center of the map. At higher zoom levels of the same map, the coordinate (0,0) is in the top left square of the map.
{{IN|java}}, zoom level can be seen on a map by turning on Advanced Tooltips (a [[Debug screen#More debug keys|debug screen]] option that can be toggled by using the key combination {{key|F3+H}}). The tooltip of the map then shows the zoom level, scaling factors, and map ID.
=== Cloning ===
[[File:Cartography table UI clone.png|thumb|300px|{{IN|Java}}, cartography table's UI, showing the map is being cloned.]]
A mix of empty maps and empty locator maps may be used. Whether the cloned maps show position markers is dependent only on the input map.
A [[cartography table]] can also be used to clone a map.
The parts of the world that have already been explored and mapped are copied, and newly explored areas appear on both instances. If one of the maps is later zoomed out, then the maps lose their connection to each other and function as completely separate maps that have to be individually filled by exploring.
In Creative mode, a map in an item frame may be cloned by using {{control|pick block}} on it, as long as that map is not also in the player's inventory.
It doesn't matter if the map to be cloned is at a higher zoom level (made of more paper) than the blank map. Upon copying the map, both resulting maps have the same magnification as the starting map.
{{/BE|clone}}
=== Crafting ingredient ===
{{crafting usage|Map, Empty Map}}
=== Marking points ===
{{IN|java}} the player has the ability to mark spots on a map. To do this, {{control|use}} a map on a placed-down [[banner]], and the spot of the banner gets marked on the map. The mark takes the color of whatever the base color is for the banner, and if the banner has a name, the mark shows that name. Banner marks on a map are always oriented with their top facing north, regardless of the banner's actual orientation. If the banner is destroyed, the mark of the banner remains at first, but if the player gets closer to where the banner previously was, it disappears as the area is updated on the map.
If a map is mounted on an item frame and is within the area it depicts, the mounted map displays its current location with a green indicator rotated to match its orientation.
[[File:Map Marker Bedrock on Item frame.png|thumb|181x181px|{{IN|bedrock}} this is what a map lying on an item frame looks like, while showing markers.]]
{{IN|bedrock}} the player can place copies of locator maps in [[item frame]]s in order to create a land mark. The marker is a green dot that resembles the shape of the player's marker, but in green color. The position the marker points at depends on the direction the item frame is facing. It is worth noting that the markers work only on copies of the same map. Other maps of the same area do not show the existing markers that the player(s) had placed.
If a player has a cloned map in their inventory, their pointer appears white when viewed on the same map held by another player. Hence, if all players have the same cloned map in their inventory, all markers would appear white when the clone map is viewed.
{| class="wikitable"
|-
! style="width: 300px;" | {{el|je}}
! style="width: 300px;" | {{el|be}}
|-
| style="text-align: center;" | [[File:Banner marked map.png|alt=All banners marked on a map, alongside a named banner.|216px]]
| style="text-align: center;" | [[File:Tracking map with markers bedrock.png|216px]]
|-
| How every banner appears {{IN|java}} on a map, including named banners.
| {{IN|bedrock}} this is how a locator map shows map markers while held by a player.
|-
|}
===Locking===
[[File:Cartography table UI lock.png|thumb|300px|{{IN|Java}}, cartography table's UI, showing the map is being locked.]]
Maps can be locked when using a [[glass pane]] in a [[cartography table]]. This creates a new map containing the same data and locks it. All copies of this new map are also locked. A locked map never changes, even when the depicted terrain changes. {{IN|Be}}, locked maps have a unique texture.
{| class="wikitable" style="text-align: center;"
|-
! Condition
! style="width: 200px;" | Newly created map
! style="width: 200px;" | Map after terrain alteration
|-
! Unlocked map
| [[File:Map Zoom 0.png|174px]] || [[File:Unlocked Map.png|174px]]
|-
! Locked map
| [[File:Map Zoom 0.png|174px]] || [[File:Map Zoom 0.png|174px]]
|-
|}
{{-}}
== Sounds ==
{{Edition|Java}}:
{{Sound table
|rowspan=2
|sound=Drawmap1.ogg
|sound2=Drawmap2.ogg
|sound3=Drawmap3.ogg
|subtitle=Map drawn
|source=player
|description=When a map is drawn
|id=ui.cartography_table.take_result
|translationkey=subtitles.ui.cartography_table.take_result
|volume=1.0
|pitch=1.0
|distance=16}}
{{Sound table
|subtitle=Map drawn
|source=block
|description=When a map is edited using a cartography table
|id=ui.cartography_table.take_result
|translationkey=subtitles.ui.cartography_table.take_result
|volume=1.0
|pitch=1.0
|distance=16
|foot=1}}
{{Edition|Bedrock}}:
{{Sound table
|type=bedrock
|rowspan=2
|sound=Drawmap1.ogg
|sound2=Drawmap2.ogg
|sound3=Drawmap3.ogg
|source=block
|description=When a map is drawn<wbr>{{Upcoming|BE 1.20.20.20}}
|id=ui.cartography_table.take_result|idnote={{Verify|Could be block.cartography_table.use}}
|volume=0.8
|pitch=1.0}}
{{Sound table
|type=bedrock
|source=block
|description=When a map is edited using a cartography table
|id=ui.cartography_table.take_result
|volume=0.8
|pitch=1.0
|foot=1}}
== Data values ==
=== ID ===
{{edition|java}}:
{{ID table
|edition=java
|showforms=y
|generatetranslationkeys=y
|displayname=Empty Map
|spritetype=item
|nameid=map
|form=item}}
{{ID table
|displayname=Map
|spritetype=item
|nameid=filled_map
|form=item
|translationkey=item.minecraft.filled_map, filled_map.buried_treasure, filled_map.explorer_jungle{{upcoming|java 1.20.2}}, filled_map.explorer_swamp{{upcoming|java 1.20.2}}, filled_map.mansion, filled_map.monument, filled_map.unknown, filled_map.village_desert{{upcoming|java 1.20.2}}, filled_map.village_plains{{upcoming|java 1.20.2}}, filled_map.village_savanna{{upcoming|java 1.20.2}}, filled_map.village_snowy{{upcoming|java 1.20.2}}, filled_map.village_taiga{{upcoming|java 1.20.2}}
|foot=1}}
{{edition|bedrock}}:
{{ID table
|edition=bedrock
|showaliasids=y
|shownumericids=y
|showforms=y
|notshowbeitemforms=y
|generatetranslationkeys=y
|displayname=Empty Map
|spritetype=item
|nameid=empty_map
|aliasid=emptymap
|id=515
|form=item
|translationkey=item.emptyMap.name, item.emptyLocatorMap.name}}
{{ID table
|displayname=Map
|spritetype=item
|spritename=map-be
|nameid=filled_map
|aliasid=map
|id=420
|form=item
|translationkey=item.map.name, item.map.exploration.mansion.name, item.map.exploration.monument.name, item.map.exploration.treasure.name
|foot=1}}
=== Metadata ===
{{see also|Bedrock Edition data values}}
{{IN|bedrock}}, maps use the following data values:
{{/DV}}
=== Item data ===
{{el|java}}:
{{main|Player.dat format}}
<div class="treeview">
* {{nbt|compound|tag}}: The item's '''tag''' tag.
{{:Player.dat_format/Maps}}
</div>
{{el|bedrock}}:
: See [[Bedrock Edition level format/Item format]].
=== Map icons ===
{{see also|Player.dat format|Map item format|map_icons.png}}
Map icons are 8×8 in ''Java Edition'', but 16×16 in Bedrock Edition. As such, there are minor misalignment issues in ''Java Edition''.<ref>{{bug|MC-214649|||WF}}</ref>
[[File:Map icons.png|thumb|128px|Map icons texture {{in|Java}}]]
[[File:Map icons BE.png|thumb|128px|Map icons texture {{in|Bedrock}}]]
{| class="wikitable"
|-
! Java ID !! Bedrock ID !! Text ID !! Appearance !! Purpose !! Shown in item frames?
|-
| 0 || ||<code>player</code> || [[File:Player (texture) JE1 BE1.png|16px]] [[File:Player (texture) BE2.png|16px]] White marker || Players (on map) || No
|-
| 1 || 1 ||<code>frame</code> || [[File:Green Marker (texture) JE1 BE1.png|16px]] [[File:Green Marker (texture) BE2.png|16px]] Green marker || The current map in an item frame || Yes
|-
| 2 || ||<code>red_marker</code> || [[File:Red Marker (texture) JE1 BE1.png|16px]] [[File:Red Marker (texture) BE2.png|16px]] Red marker || Position converted to Overworld when opening Overworld map in the Nether{{Only|bedrock}} || No
|-
| 3 || ||<code>blue_marker</code> || [[File:Blue Marker (texture) JE1 BE1.png|16px]] [[File:Blue Marker (texture) BE2.png|16px]] Blue marker || Other players || No
|-
| 4 || ||<code>target_x</code> || [[File:Target X (texture) JE1 BE1.png|16px]] White X || Unused || Yes
|-
| 5 ||5
|<code>target_point</code> || [[File:Target Point (texture) JE1 BE1.png|16px]] [[File:Target Point (texture) BE2.png|16px]] Red triangle || Unused || Yes
|-
| 6 || 6 ||<code>player_off_map</code> || [[File:Player Off Map (texture) JE1 BE1.png|16px]] Large white dot || Players off map, nearby{{only|java}} || No
|-
| 7 || 13 ||<code>player_off_limits</code> || [[File:Player Off Limits (texture) JE1.png|16px]] [[File:Player Off Limits (texture) BE.png|16px]] Small white dot || Players off map, far away{{only|java}} || No
|-
| 8 ||14
|<code>mansion</code> || [[File:Mansion (texture) JE1.png|16px]] [[File:Mansion (Texture) BE2.png|frameless|16x16px]] Woodland mansion || Woodland mansion || Yes
|-
| 9 || 15 ||<code>monument</code> || [[File:Monument (texture) JE1.png|16px]] [[File:Monument Texture BE2.png|frameless|16x16px]] Ocean monument || Ocean monument || Yes
|-
| 10 - 25 || ||<code>{{tooltip|banner_*|banner_white, banner_orange, banner_magenta, banner_light_blue, banner_yellow, banner_lime, banner_pink, banner_gray, banner_light_gray, banner_cyan, banner_purple, banner_blue, banner_brown, banner_green, banner_red, banner_black}}</code> || [[File:Banner White (texture) JE1.png|16px]] [[File:Banner Light Gray (texture) JE1.png|16px]] [[File:Banner Gray (texture) JE1.png|16px]] [[File:Banner Black (texture) JE1.png|16px]] [[File:Banner Brown (texture) JE1.png|16px]] [[File:Banner Red (texture) JE1.png|16px]] [[File:Banner Orange (texture) JE1.png|16px]] [[File:Banner Yellow (texture) JE1.png|16px]] [[File:Banner Lime (texture) JE1.png|16px]] [[File:Banner Green (texture) JE1.png|16px]] [[File:Banner Cyan (texture) JE1.png|16px]] [[File:Banner Light Blue (texture) JE1.png|16px]] [[File:Banner Blue (texture) JE1.png|16px]] [[File:Banner Magenta (texture) JE1.png|16px]] [[File:Banner Purple (texture) JE1.png|16px]] [[File:Banner Pink (texture) JE1.png|16px]]<br>Banners in all 16 wool colors{{only|java}}|| Banner markers || Yes
|-
| 26 ||4
|<code>red_x</code> || [[File:Red X (texture) JE1.png|16px]] [[File:Target X (texture) BE2.png|16px]] Red X || Buried treasure || Yes
|-
| || 8 || || [[File:Magenta Marker (texture) BE1.png|16px]] Magenta marker
| Position converted to Overworld when opening Overworld map in the End{{Only|bedrock}} || No
|-
| || 9 || || [[File:Orange Marker (texture) BE1.png|16px]] Orange marker{{more info}}
|Other players
|Yes
|-
| || 10 || || [[File:Yellow Marker (texture) BE1.png|16px]] Yellow marker
| Other players || No
|-
| || 11 || || [[File:Cyan Marker (texture) BE1.png|16px]] Cyan marker
| Other players || No
|-
| -
|12
| || [[File:Green Point (texture) BE1.png|16px]] Green Triangle
| Other structure such as stronghold, fortress, end city, etc. when used as explorer map destination{{Only|bedrock}} || Yes
|}
It should be noted that even if the player used a NBT editor to add an additional icon on the map, ''Minecraft'' shows only the first one listed when the player loads up their world.
== Achievements ==
{{load achievements|Map Room}}
== History ==
{{see also|section=24|map_icons.png|Java Edition history of textures#Map icons}}
{{more images|section=24|{{bug|MC-72962}}}}
{{History||April 27, 2011|link=https://web.archive.org/web/0/http://notch.tumblr.com/post/4988431144/the-maps|[[Notch]] unveiled screenshots of the map.}}
{{History||April 28, 2011|link={{tweet|notch|63500114005721088}}|[[Notch]] said that he would try to make maps place-able on [[wall]]s.}}
{{History|java beta}}
{{History||1.6|snap=Test Build 3|[[File:Map (item) JE1 BE1.png|32px]] Added maps.}}
{{History||1.6.6|The ability to auto-craft maps using shift-click has been disabled.}}
{{History||1.8|snap=Pre-release|Maps can now be found in library chests in the brand-new [[stronghold]]s.
|Auto crafting maps has been restored. Map cloning, therefore, is unavailable for a period of time.}}
{{History||1.8.1|Maps now work both while walking and flying.}}
{{History|java}}
{{History||1.0.0|snap=Beta 1.9 Prerelease 5|Prior to this update, the [[sun]] in ''[[Minecraft]]'' rose in the North, which threw off many [[player]]s and led to a common misconception that ''Minecraft'' maps/[[world]]s were oriented with East at the top. The sun now rises in the east and sets in the west, making navigation much more intuitive.
|Before the change in sun position, it was commonly said that ''Minecraft'' maps/worlds are oriented with East at the top; sunrise, by definition, occurs at the East, which means it is certainly true that the maps were oriented "East" since the Sun rose from the top (North). However, [[Jeb]] asserted (and [[Notch]] agreed) that the sun rose in the north.<ref>{{Tweet|jeb|87815841160237056}}</ref><ref>{{Tweet|notch|88155424880201728}}</ref> Most mods and map-making tools, however, used the terms East and North consistent with their actual definitions (e.g. a [[Programs and editors/Cartograph|Cartograph]]-generated map with North at the top is rotated 90 degrees from the in-game map).}}
{{History||1.4.2|snap=12w34a|[[File:Empty Map JE1 BE1.png|32px]] [[Crafting]] a map now creates an empty map. The map is drawn for the first time when it is held and right clicked, and is centered near the location of the [[player]] when clicked (not as before where it was centered on the location it was crafted.)
|Previously, in order to map a new area, the map had to be ''crafted'' in that area (rather than carrying a previously-crafted map to the new area). The point where a map is crafted becomes its permanent center, and could never be changed.
|The pointer no longer disappears when leaving the map, but transforms into a white dot, indicating on what side of the map the player is located.
|Maps now align to a grid, making it easier to create adjacent maps.
|Maps can now be zoomed out (but not zoomed in).
|Maps can now be cloned and scaled.}}
{{History||1.4.2|snap=12w34b|Maps now have a ''zoom level'', which was fixed at 1:8 prior to snapshot [[Java Edition 12w34a|12w34a]],<ref name="mapinfo">https://web.archive.org/web/0/http://notch.tumblr.com/post/4988431144/the-maps</ref> but now starts at 1:1 and can be increased up to 1:16 by re-crafting an existing map.
|Maps are no longer numbered on the top-left corner and is labeled through the tooltip.}}
{{History|||snap=12w36a|New maps are now crafted at a scale factor of 1:1. A zoomed in map can be zoomed out by re-crafting it with another 8 sheets of [[paper]] on a [[crafting table]]. Each time this is done, the scale increases - 1:1, 1:2, 1:4, 1:8, 1:16 with a map scale of 1:16 being the current maximum.}}
{{History||1.7.2|snap=13w38a|The map size has been increased when placed on a [[wall]] using the [[item frame]].
|More colors have been added to maps for different [[block]]s.<ref name="infodump2">https://web.archive.org/web/0/https://www.mojang.com/2013/10/minecraft-1-7-the-update-that-changed-the-world</ref>}}
{{History||1.8|snap=14w31a|Zoomed maps now conform to an expanded grid based on their zoom level. Previously, careful considerations would need to be taken to creating a wall of adjoining maps.}}
{{History||1.8.1|snap=pre1|Some colors have been changed on maps to more accurately represent their respective [[block]].}}
{{History||1.9|snap=15w31a|Maps now display as a mini-map when held in the off-hand, or if the off-hand slot is occupied; the (old) large version is visible only when held in the dominant hand with the secondary hand free.}}
{{History|||snap=15w34a|New maps can now be [[crafting|crafted]] at a scale factor of 1:4.
|A crafting recipe has been added for zooming in maps.}}
{{History|||snap=15w43a|The average yield of empty maps from [[stronghold]] library [[chest]]s has been doubled.}}
{{History|||snap=15w45a|New maps are once again [[crafting|crafted]] at a scale factor of 1:1, as they had been before snapshot [[15w34a]].
|The [[crafting]] recipe, that was introduced in 15w34a, for zooming in maps has been removed.}}
{{History|||snap=15w49a|Map making now uses armor equipping sounds.}}
{{History||1.11|snap=16w39a|Maps now work in [[the End]].
|Empty maps are now [[trading|sold]] by cartographer [[villager]]s as their tier 3 [[trading|trade]].
|Added [[explorer map]]s, sold by cartographers as their tier 4 trades.}}
{{History||1.12|snap=17w17a|Maps now have separate colors for colored [[terracotta]] blocks from other colored blocks.}}
{{History||1.13|snap=17w47a|Prior to [[1.13/Flattening|''The Flattening'']], these [[item]]s' numeral IDs were 358 and 395.
|Maps now use additional NBT to specify which map they contain. Prior to this version, they used the [[damage]] value instead.
|Map IDs are no longer limited to 32,768.}}
{{History|||snap=17w50a|Maps can now be placed on floor and ceiling [[item frame]]s.}}
{{History|||snap=18w10a|Spots on maps can now be marked using [[banner]]s.}}
{{History|||snap=18w11a|Empty maps can now generate in [[shipwreck]] [[chest]]s.}}
{{History|||snap=pre7|Maps have been changed slightly, in regard to which [[block]]s are shown and which blocks are not.}}
{{History||1.14|snap=18w43a|[[File:Empty Map JE2 BE2.png|32px]] [[File:Map (item) JE2 BE2.png|32px]] The textures of maps have been changed.}}
{{History|||snap=18w48a|Empty maps can now be found in chests in [[village]] cartographer houses.}}
{{History|||snap=19w02a|Maps can now be cloned and zoomed out (extended) by using a [[cartography table]].
|Maps can now be locked by using a [[glass pane]] with a cartography table.
|The recipes for cloning and zooming out maps have been removed.}}
{{History|||snap=19w06a|Map making is now silent again.}}
{{History|||snap=19w13a|Cartographer villagers now give empty maps to players under the [[Hero of the Village]] effect.}}
{{History||1.16|snap=20w21a|Map making sounds are now the same as when using a cartography table.}}
{{History|pocket alpha}}
{{History||v0.14.0|snap=build 1|[[File:Empty Map JE1 BE1.png|32px]] [[File:Map (item) JE1 BE1.png|32px]] Added maps.
|Maps are crafted using nine [[paper]], one for every slot of the [[crafting]] grid.
|Maps must be combined with a [[compass]] using an [[anvil]] in order to show the [[player]]'s position.
|Maps can be zoomed using an anvil.}}
{{History|||snap=build 3|New maps are now [[crafting|crafted]] at full zoom.
|Empty maps now have a "Create Map" button to initialize them.}}
{{History|||snap=build 7|New maps are now crafted at a scale factor of 1:1.}}
{{History||v0.15.0|snap=unknown|Maps can now be crafted either with 8 pieces of [[paper]] and a [[compass]] ''or'' 9 pieces of paper, to get a map with or without a position marker.}}
{{History||v0.16.0|snap=build 1|Different colors have been added to maps for different [[biome]]s.}}
{{History|pocket}}
{{History||1.0.0|snap=?|[[Windows 10 Edition]] can now use the [[anvil]] as well as the [[crafting table]] to clone, zoom and apply markers, just as [[Pocket Edition]] in general could.
|Maps can now be found inside [[stronghold]] library [[chest]]s.}}
{{History||1.1.0|snap=alpha 1.1.0.0|Empty maps with direction markers built-in are now called "locator maps".}}
{{History|||snap=alpha 1.1.0.3|"Locator maps" are now called "empty locator maps".
|Empty maps are now [[trading|sold]] by cartographer [[villager]]s for 7-11 [[emerald]]s as their tier 3 [[trading|trade]].}}
{{History|bedrock}}
{{History||1.4.0|snap=beta 1.2.14.2|Maps can now be found inside map room [[chest]]s in [[shipwreck]]s.}}
{{History||?|The texture of the filled map overlay has been changed.}}
{{History||?|Maps now function in dimensions other than the dimension in which they were created.}}
{{History||1.10.0|snap=beta 1.10.0.3|Maps can now be found in cartographer house [[chest]]s in [[village]]s.
|[[File:Empty Map JE2 BE2.png|32px]] The texture of empty maps has been changed.}}
{{History||1.11.0|snap=beta 1.11.0.1|Empty maps can now be created from 1 [[paper]] in [[cartography table]]s.
|Maps can now be zoomed, cloned, renamed, and have pointers added in cartography tables.}}
{{History|||snap=beta 1.11.0.4|Cartographer [[villager]]s now [[trading|sell]] empty map for an [[emerald]] as their first tier [[trading|trades]].
|Empty locator maps can now be [[trading|bought]] from cartographer villagers.}}
{{History||1.13.0|snap=beta 1.13.0.1|[[File:Map (item) BE3.png|32px]] [[File:Locked Map (item) BE2.png|32px]] Filled maps and locked maps now have unique inventory icons.}}
{{History||1.16.0|snap=beta 1.16.0.57|Trading has been changed, novice-level cartographer now sell an empty map for 7 emeralds. Cartographer villager no longer sell empty locator map.}}
{{History||1.16.100|snap=beta 1.16.100.56|The ID of maps have been changed from <code>emptymap</code> to <code>empty_map</code> and <code>map</code> to <code>filled_map</code>.}}
{{History|console}}
{{History||xbox=TU1|xbone=CU1|ps=1.00|wiiu=Patch 1|switch=1.0.1|[[File:Map (item) JE1 BE1.png|32px]] Added maps.
|The [[player]] spawns with a free map.
|Maps are available only as zoom step 3 maps centered at coordinates 0,0. Biome colors do not appear on maps.}}
{{History||xbox=none|xbone=CU1|ps=1.0|wiiu=none|Larger sized worlds on Xbox One, Playstation 4, and Nintendo Switch have zoom step 3 maps aligned to a grid with maps centered at 0, 1024, or 2048 on the X or Z coordinates.}}
{{History||xbox=TU21|xbone=CU9|ps=1.14|wiiu=Patch 1|[[File:Empty Map JE1 BE1.png|32px]] [[Crafting]] a map now produces an empty map.}}
{{History||xbox=TU46|xbone=CU36|ps=1.38|wiiu=Patch 15|The outer end islands appear on different maps; even on Xbox 360, Playstation 3, Vita, and Wii U editions.}}
{{History||xbox=none|xbone=none|ps=1.90|wiiu=none|switch=none|[[File:Empty Map JE2 BE2.png|32px]] [[File:Map (item) JE2 BE2.png|32px]] The textures of maps have been changed.}}
{{History||ps=1.91|Maps can now be created and used in [[cartography table]]s.}}
{{History|foot}}
== Issues ==
{{issue list}}
== Trivia ==
* Use of the {{key|F1}} key can allow the player to hold a map without blocking their view at all.
* In ''Java Edition'', a map created using {{cmd|give}} can be any map by using the Map parameter to specify the map number desired. E.g. {{cmd|give [player] minecraft:filled_map{map:5<nowiki>}}} gives the specified player map_5. If no data value is supplied it defaults to map_0. If map_0 has not ever been crafted, it is centered on x=0, z=0.
* The maps are stored separately as their own data (<code>.dat</code>) file as <code>map_x.dat</code> with (x) being the map number, see [[map item format]] for more info. By manipulating this number, players can organize their maps to suit them, or if they accidentally create a map in the same location, they can delete their extra map so as to save the number they make.
* Certain programs can be used to make customized maps with images or text on them instead of actual maps, many people use these in adventure maps to show pictures or to tell a story.
* Since all copies of a map are links to the same file, copying an unfinished map keeps it synchronized with the copy as the player fills it in. Thus, a copy stored in a chest can act as a remote backup.
* A map that is in an item frame does not update itself until a player picks it up, lets it reload, and places it back again. However, if a player holds a clone of the map, both maps update.
* Filled maps are the only items that make 90 degree rotations in item frames, and also the only items that can expand the item frame into full block wide.
* On [[Legacy Console Edition]], the player always spawns with a map in their inventory after creating a world. This was later added to Bedrock Edition as an optional feature in the world creation menu.
* Maps on Legacy Console Edition always show the player's current coordinates, as a substitute for the optional [[Coordinates|coordinate display]] in other editions.
* A map cannot be created on [[New Nintendo 3DS Edition]]. Instead, the map is always displayed on the bottom screen along with the coordinates. Biome colors do not appear on maps.
== Gallery ==
<gallery>
MapItem1.png|A fully zoomed map.
MapRotation.png|Having a map in hand does not stop the ability to see ahead.
MapItem3.png|A world being recorded onto a map.
Mcmap4.png|Nearly fully explored map.
Zoomed Map.png|A map edited to the scale of 1.
Sky Map.png|A map mapping the [[Sky Dimension]].
MapOfVillage.png|A village and how it is represented on a map.
Pumpkin map.png|A map containing a custom image made by placing a large number of blocks.
Complete Map.png|A completely explored map.
MapZooms.png|A diagram showing how maps zoomed out before [[Java Edition 1.8]]. Notice how the larger maps have borders made of half and quarter small maps.
Map18zooms.png|From 1.8, zoomed maps are aligned to this grid exactly.
Large Biome Map.png|A map of a [[Large Biomes]] world.
Map0140-0160.png|A comparison of maps between versions in Pocket Edition Alpha [[Pocket Edition Alpha 0.14.0|0.14.0]] and [[Pocket Edition Alpha 0.16.0|0.16.0]].
Mycelium Map.png|A map view of a mushroom biome, showing that mycelium appears purple on a map.
MiniMap.png|Maps held in the off-hand or in either hand while [[dual wielding]] appear as mini-maps.
Partly filled treasure map.png|Partly filled treasure map with an odd area at the bottom left. Normally a partly filled map would look striped (as in the top left), but this map seems to be bugged and is possibly showing caves, or something, in the bottom left.
Partly filled ocean explorer map.png|Partly filled ocean explorer map. Updating the game from an older version (in this case the area was first generated before 1.18) and buying a map after updating (in this case in 1.19.4) can result in the map displaying rivers and terrain where there is really a frozen sea.
Map Stained Glass 1.png|Stained glasses' appearances on maps before and after 1.13.
Map Stained Glass 2.png|Stained glasses' appearances on maps before and after 1.13.
Map Various Blocks 1.png|Various blocks' appearances on maps before and after 1.13.
Map Various Blocks 2.png|Various blocks' appearances on maps before and after 1.13.
Better Together Map.jpg|Holding a map in the offhand in ''Bedrock Edition''.
Better Together Map Icon.jpg|Holding a map in both hands in ''Bedrock Edition''.
File:MapFailedtoFill.png|A map that has not yet filled. A rare bug in Java.
</gallery>
=== The Nether ===
<gallery>
Nethermap.png|A map in [[the Nether]].
Maponnether.png|A map in the Nether; the arrow turns around itself, like in [[compass]].
</gallery>
=== The End ===
<gallery>
Jeb End Map.png|The first image of a map in [[the End]].
Endmap.png|A map in the End.
</gallery>
=== Maps in item frames ===
<gallery>
FramedMap.png|A map displayed on an item frame, as it looked before [[Java Edition 1.7.2]].
Structure Map Collection.png|Multiple maps in item frames. Notice a [[village]], two [[desert temple]]s and a lava lake.
Minecraft maps 3by3.png|A collection of 9 connected full maps.
Full Map.png|A combination of 25 maps pasted together as one map.
Map wall BE.png|A map wall on ''Bedrock Edition'', showing large areas of biome colors for each biome.
Map's in item frames.png|Maps can be placed into [[item frame]]s so they can be viewed together.
Comparing Maps.png|The comparison between 3 zooms of maps.
SuperflatMap.png|A map in a [[Superflat]] world, with some [[village]]s.
MapWallWithMarkers.png|A 3x3 map wall with banner markers.
HEYYEYAAEYAAAEYAEYAA.png|He-Man map art.
Map Player Icons 1.png|First image of player icons on maps.
Map Player Icons 2.png|Second image of player icons on maps.
</gallery>
== See also ==
* [[Explorer Map]]
* [[Clock]]
* [[Tutorials/Navigation|Navigation]]
== References ==
{{Reflist}}
{{Items}}
[[cs:Mapa]]
[[de:Karte]]
[[es:Mapa]]
[[fr:Carte (objet)]]
[[hu:Térkép (tárgy)]]
[[ja:地図]]
[[ko:지도]]
[[nl:Kaart]]
[[pl:Mapa]]
[[pt:Mapa]]
[[ru:Карта]]
[[tr:Harita]]
[[th:แผนที่]]
[[uk:Мапа]]
[[zh:地图]]
[[Category:Renewable resources]]</li><li>[[Bundle|Bundle]]<br/>{{Experimental feature|bundle}}
{{planned|BE}}
{{Item
| image = Bundle.png
| image2 = Bundle Filled.png
| rarity = Common
| renewable = No
| stackable = No
}}
A '''bundle''' is an [[item]] that can store up to a stack's worth of mixed [[item]] types within itself in a single [[inventory]] slot. Items that stack to 16 occupy more space within the bundle, and items that do not stack occupy the entire bundle without allowing space for any other items.
== Obtaining ==
=== Crafting ===
{{Crafting
|showdescription=1
|A1=String |B1=Rabbit Hide |C1=String
|A2=Rabbit Hide |C2=Rabbit Hide
|A3=Rabbit Hide |B3=Rabbit Hide |C3=Rabbit Hide
|Output=Bundle
|type=Tool
|description={{OnlyExperimental|bundle}}
}}
== Usage ==
<!--The tooltip does not reflect the current bundle "tooltip"-->
{{FakeImage|style=max-width:250px;
|1={{Slot|Stick,64}}{{Slot|Ender Pearl,16}}{{Slot|Iron Sword}}<br>{{Slot|Stick,1}}{{Slot|Ender Pearl,4}}{{Slot|Iron Sword,64}}<br>{{Slot|Filled Bundle[Stick x32/Ender Pearl x8]| title = Bundle|link=none}}
|2=Item stack sizes (top row) and the number of bundle slots they take up (middle row). Sticks stack to 64, so they take up one bundle slot; ender pearls stack to 16, so they take up four; and swords do not stack, so they take up the whole bundle. So, for instance, a bundle may have 32 sticks and 8 ender pearls inside (bottom), which take up a total of {{Tooltip|(32×1)|32 Sticks}}+{{Tooltip|(8×4)|8 Ender Pearls}}=64 bundle slots.
}}
Bundles are used to store different [[item|item type]]s in the same [[inventory]] slot. This does not, however, increase the total capacity of the slot: each bundle has 64 "bundle slots" and each item placed in the bundle takes up these slots similar to how they take up space in a normal inventory slot: items that stack to 64 take up 1 bundle slot, items that stack to 16 (for example, [[egg]]s) take up 4, and items that do not stack (such as tools/weapons/armor) take up the whole bundle, all 64 slots.
Although bundles themselves cannot be stacked, a bundle can be placed inside another (nested): the inner bundle itself uses 4 slots plus the number of slots already occupied by the items in that bundle.<ref>{{bug|MC-203567||Bundles can be placed inside of bundles|WAI}}</ref>
To place items inside a bundle, either (1) pick up the bundle in the inventory and right-click on the item(s) to be placed inside or (2) pick up the item(s) and right-click on the bundle. When placing bundles inside another bundle, the interface uses the first method: picking up Bundle A and right clicking on Bundle B attempts to store Bundle B inside A.
Bundles can be {{ctrl|used}} inside the inventory to take out the last item put in. In this way, items are accessible LIFO (last in, first out). When {{ctrl|used}} outside the inventory, it dumps all the items out into the world.
Hovering over the bundle shows its contained items in its inventory slots. The number of bundle slots used is displayed as ''<fullness>''/64 in the tooltip. If the bundle is full, then the empty slots are greyed out with an <span class="invslot">{{SlotSprite|Bundle full}}</span>.
[[Shulker box]]es cannot be placed inside of bundles.
[[File:MinecraftBundle.jpg|thumb|Hovering the mouse over a bundle filled with mob loot, nearly full, with 61 items.]]
== Sounds ==
{{Sound table
|sound=Bundle drop contents1.ogg
|sound2=Bundle drop contents2.ogg
|sound3=Bundle drop contents3.ogg
|subtitle=Bundle empties
|source=player
|description=When a bundle's items are thrown onto the ground
|id=item.bundle.drop_contents
|translationkey=subtitles.item.bundle.drop_contents
|volume=0.8
|pitch=''varies'' <ref group=sound>Can be 0.8-1.2 or 0.76-1.14 for each sound</ref>
|distance=16}}
{{Sound table
|sound=Bundle insert1.ogg
|sound2=Bundle insert2.ogg
|sound3=Bundle insert3.ogg
|subtitle=Item packed
|source=player
|description=When items are placed into a bundle
|id=item.bundle.insert
|translationkey=subtitles.item.bundle.insert
|volume=0.8
|pitch=''varies'' <ref group=sound>Can be 0.8-1.2, 0.76-1.14, or 0.84-1.26 for each sound</ref>
|distance=16}}
{{Sound table
|sound=Bundle remove one1.ogg
|sound2=Bundle remove one2.ogg
|sound3=Bundle remove one3.ogg
|subtitle=Item unpacked
|source=player
|description=When items are removed from a bundle
|id=item.bundle.remove_one
|translationkey=subtitles.item.bundle.remove_one
|volume=0.8
|pitch=''varies' <ref group=sound>Can be 0.8-1.2, 0.84-1.26, or 0.88-1.32 for each sound</ref>
|distance=16
|foot=1}}
== Data values ==
=== ID ===
{{JE}}:
{{ID table
|edition=java
|showforms=y
|generatetranslationkeys=y
|displayname=Bundle
|spritetype=item
|nameid=bundle
|form=item
|foot=1}}
=== Item data ===
<div class="treeview" style="margin-top: 0;">
* {{nbt|compound|tag}}: The '''tag''' tag.
{{:Player.dat_format/Bundle}}
</div>
== History ==
{{History||October 3, 2020|link={{ytl|DBvZ2Iqmm3M|t=1846s}}|[[File:Bundle JE1.png|32px]][[File:Bundle Filled JE1.png|32px]] Bundles are revealed at [[Minecraft Live 2020]]. Hovering over them shows all items inside scattered around a large area, and incomplete bundles have the empty texture.}}
{{History||October 16, 2021|link=https://clips.twitch.tv/AffluentEncouragingOryxPeteZaroll-cd8pIapkfD4PRHxO|Ulraf, a game developer on ''Minecraft'', states that bundles will not be included in [[Caves & Cliffs]].}}
{{History||November 17, 2021|link=https://www.minecraft.net/en-us/article/caves---cliffs-update-part-ii-coming|Bundles are announced to be added after [[The Wild Update]].}}
{{History|java}}
{{History||1.17|snap=20w45a|[[File:Bundle JE1.png|32px]][[File:Bundle Filled JE1.png|32px]] Added bundles. Hovering over them shows some of the items contained and their quantities, much like the tooltip of a [[shulker box]]. Incomplete bundles have the full texture.}}
{{History|||snap=20w46a|[[File:Bundle JE2.png|32px]][[File:Bundle Filled JE2.png|32px]] The textures of bundles have been changed.
|Hovering over bundles now shows its contained items in special slots, similar to slots in the [[inventory]]. If the bundle is not full, it also has an empty slot with a plus on it.}}
{{History|||snap=20w48a|Bundles now show fullness as a number when [[advanced tooltips]] are enabled.
|{{ctrl|Using}} a bundle in the inventory now empties one item from the bundle instead of emptying all the contents out to the [[inventory]].
|{{ctrl|Using}} a bundle now throws out its entire content into the world.}}
{{History|||snap=20w49a|Bundle fullness is now always shown.
|Full bundles now show the blue bar instead of hiding it, to distinguish from empty bundles.}}
{{History|||snap=20w51a|Bundles now drop its contents when destroyed as an [[Item (entity)|item entity]].
|Bundle fullness has been changed from <code>Fullness: ''<fullness>'' / 64</code> to <code>''<fullness>''/64</code>
|The slots in the tooltip when hovering over bundles have changed to have a border, and rows of slot have a thicker edge between them.
|When the bundle is not full, it instead shows empty slots instead of one slot with a plus. When it is full, those empty slots become greyed out with an X.}}
{{History|||snap=21w05a|The player now receives a tutorial when first having a bundle in the inventory.}}
{{History|||snap=21w19a|Bundles are now accessible only through commands.}}
{{History||1.18|snap=Experimental Snapshot 1|Bundles are now available in the creative inventory and can be crafted once again.}}
{{History|||snap=21w37a|Bundles are once again accessible only through commands.}}
{{History||1.19.3|snap=22w42a|Bundles have been made available once again, and have been moved behind their own datapack.}}
{{h|bedrock}}
{{h||1.19.50|snap=beta 1.19.50.21|Added bundle GUI textures in the Vanilla Packs.}}
{{History|foot}}
== Issues ==
{{Issue list}}
== Gallery ==
<gallery>
JE 1.17 Development Bundle.png|The original bundle UI
Bundle in Inventory.jpg|A bundle inventory in the inventory
</gallery>
== References ==
{{Reflist}}
{{Items}}
[[Category:Storage]]
[[Category:Tools]]
[[Category:Renewable resources]]
[[de:Bündel]]
[[es:Saco]]
[[fr:Sac]]
[[ja:バンドル]]
[[pl:Sakwa]]
[[pt:Trouxa]]
[[ru:Мешок]]
[[zh:收纳袋]]</li></ul></nowiki> | Pre-release | Huge mushrooms were added. | |||
| They did not generate naturally, but could be planted by the player by using bone meal on a red or brown mushroom planted on grass or dirt. | |||||
| Java Edition | |||||
1.0.0{{Extension DPL}}<ul><li>[[Blaze Rod|Blaze Rod]]<br/>{{Item
| image = Blaze Rod.png
| renewable = Yes
| stackable = Yes (64)
}}
'''Blaze rods''' are [[item]]s exclusively obtained from [[blaze]]s. They act as a fuel for both brewing and [[smelting]], and are required to craft [[eye of ender|eyes of ender]] used to access to [[the End]].
== Obtaining ==
=== Mob loot ===
When killed by a player or tamed [[wolf]], a [[blaze]] has a 50% chance to drop a blaze rod. The [[Looting]] [[enchantment]] can increase the drops by one per level, for a maximum of 4 blaze rods. Blazes do not drop any blaze rods if killed by any other source.
== Usage ==
=== Crafting ingredient ===
{{crafting usage}}
=== Fuel ===
When used in a [[furnace]], a blaze rod lasts 120 seconds (12 items).
== Achievements ==
{{load achievements|Into Fire}}
== Advancements ==
{{load advancements|Into Fire}}
== Video ==
{{Video note|This video does not mention the crafting of [[End Rod]]s.|minor}}
<div style="text-align:center">{{yt|_mhRHuRlICY}}</div>
== Data values ==
=== ID ===
{{el|java}}:
{{ID table
|edition=java
|showforms=y
|generatetranslationkeys=y
|displayname=Blaze Rod
|spritetype=item
|nameid=blaze_rod
|form=item
|foot=1}}
{{el|bedrock}}:
{{ID table
|edition=bedrock
|shownumericids=y
|showforms=y
|notshowbeitemforms=y
|generatetranslationkeys=y
|displayname=Blaze Rod
|spritetype=item
|nameid=blaze_rod
|id=423
|form=item
|foot=1}}
== History ==
{{History|java}}
{{History||1.0.0|snap=Beta 1.9 Prerelease|[[File:Blaze Rod JE1 BE1.png|32px]] Added blaze rods.}}
{{History|||snap=Beta 1.9 Prerelease 2|Blaze rods are now used to craft [[blaze powder]].}}
{{History|||snap=Beta 1.9 Prerelease 3|Blaze rods are now used to craft [[brewing stand]]s.}}
{{History||1.8|snap=14w07a|Blaze rods are now held similarly to [[tools]].}}
{{History||1.9|snap=15w44b|Blaze rods are now used to craft [[end rod]]s.}}
{{History||1.13|snap=17w47a|Prior to [[1.13/Flattening|''The Flattening'']], this [[item]]'s numeral ID was 369.}}
{{History|pocket alpha}}
{{History||v0.12.1|snap=build 1|[[File:Blaze Rod JE1 BE1.png|32px]] Added blaze rods.
|Blaze rods can be used to craft [[blaze powder]] and [[brewing stand]]s.}}
{{History|pocket}}
{{History||1.0.0|snap=alpha 0.17.0.1|Blaze rods are now used to craft [[end rod]]s.}}
{{History|console}}
{{History||xbox=TU7|xbone=CU1|ps=1.00|wiiu=Patch 1|switch=1.0.1|[[File:Blaze Rod JE1 BE1.png|32px]] Added blaze rods.
|Blaze rods can be used to craft [[blaze powder]] and [[brewing stand]]s.}}
{{History||xbox=TU46|xbone=CU36|ps=1.38|wiiu=Patch 15|Blaze rods are now used to craft [[end rod]]s.}}
{{History|New 3DS}}
{{History||0.1.0|[[File:Blaze Rod JE1 BE1.png|32px]] Added blaze rods.
|Blaze rods can be used to craft [[blaze powder]] and [[brewing stand]]s.}}
{{History|foot}}
== Issues ==
{{issue list}}
== Trivia ==
* As part of an official collaboration, blaze rods are included in a free add-on for the roleplaying game [https://en.wikipedia.org/wiki/Dungeons_%26_Dragons ''Dungeons and Dragons''].<ref>https://www.google.com/url?sa=t&rct=j&q=&esrc=s&source=web&cd=&cad=rja&uact=8&ved=2ahUKEwj9uvqlwIT-AhV7LUQIHYlVDiwQFnoECBAQAQ&url=https%3A%2F%2Fwww.minecraft.net%2Fcontent%2Fdam%2Fgames%2Fminecraft%2Fsoftware%2FMinecraft-Monstrous-Compendium.pdf&usg=AOvVaw0aKOqpKAHSH11qgZhN_Bhx</ref> In the game, they are worth 100 gold pieces, create light, and can be broken to create an explosion.
* They are the spinning things surrounding the blaze's head
{{items}}
== References ==
{{Reflist}}
[[Category:Renewable resources]]
[[cs:Ohnivá hůl]]
[[de:Lohenrute]]
[[el:Οι ράβδοι των Blaze]]
[[es:Vara de blaze]]
[[fr:Bâton de Blaze]]
[[hu:Lángrúd]]
[[it:Verga di blaze]]
[[ja:ブレイズロッド]]
[[ko:블레이즈 막대]]
[[lzh:炎靈桿]]
[[nl:Blazestaf]]
[[pl:Płomienna różdżka]]
[[pt:Vara de blaze]]
[[ru:Огненный стержень]]
[[th:แท่งเบลซ]]
[[tr:Alaz Çubuğu]]
[[uk:Стрижень Блейза]]
[[zh:烈焰棒]]</li><li>[[Wheat Seeds|Wheat Seeds]]<br/>{{Block
| group = Age 0
| 1-1 = Wheat Age 0.png
| 1-2 = Wheat Age 0 BE.png
| group2 = Age 7
| 2-1 = Wheat Age 7.png
| 2-2 = Wheat Age 7 BE.png
| image = Wheat Seeds.png
| extratext = [[#Renders|View all renders]]
| invimage = Wheat Seeds
| transparent = Yes
| light = No
| tool = N/A
| renewable = Yes
| stackable = Yes (64)
| flammable = No
| lavasusceptible = No
}}
'''Wheat seeds''' ({{in|java}}) or '''seeds''' ({{in|bedrock}}) are [[item]]s obtained by breaking [[grass]], or more abundantly harvested from wheat crops, and are used to plant them.
'''Wheat crops''' are planted in [[farmland]] and used to grow [[wheat]] and wheat seeds.
== Obtaining ==
=== Breaking ===
Harvesting fully-grown [[wheat]] [[crops]] yields from 1 to 4 seeds per crop harvested (about {{frac|2|5|7}} seeds/crop harvested on average).
In '''Bedrock edition''' yields are 0-3.[https://bugs.mojang.com/browse/MCPE-169402]<sup><nowiki>https://bugs.mojang.com/browse/MCPE-169402</sup>
Wheat seeds can be obtained from breaking all variants of [[grass]], which yields 0 to 1 seed. If harvested with a [[Fortune]] enchanted tool the drop rate from grass is increased.
The looting is calculated by a binomial distribution: a drop is attempted three times with a success rate of around 57% to yield the 0–3 drops. Each level of Fortune enchantment increases the number of attempts by one.
{| class="wikitable"
! rowspan="3" |[[Resource location]]
! rowspan="3" | Source
! colspan="5" | Drops
|- style="text-align:center"
! rowspan="2" |{{ItemLink|Wheat}}
! colspan="4" |{{ItemText|Wheat Seeds}}
|- style="text-align:center"
! Default tool
! With [[Fortune]] I
! With Fortune II
! With Fortune III
|- style="text-align:center"
| rowspan="2" |<code>blocks/wheat</code>
|{{BlockLink|Wheat}} (age 0–6)
| 0 {{ItemSprite|Wheat}}
| 1 {{ItemSprite|Wheat Seeds}}|| 1 {{ItemSprite|Wheat Seeds}}|| 1 {{ItemSprite|Wheat Seeds}}|| 1 {{ItemSprite|Wheat Seeds}}
|- style="text-align:center"
|{{BlockLink|Wheat}} (age 7)
| 1 {{ItemSprite|Wheat}}
| 1 {{ItemSprite|Wheat Seeds}} (~7.87%) ''or''<br>2 {{ItemSprite|Wheat Seeds}} (~31.49%) ''or''<br>3 {{ItemSprite|Wheat Seeds}} (~41.98%) ''or''<br>4 {{ItemSprite|Wheat Seeds}} (~18.66%)
| 1 {{ItemSprite|Wheat Seeds}} (~3.37%) ''or''<br>2 {{ItemSprite|Wheat Seeds}} (~17.99%) ''or''<br>3 {{ItemSprite|Wheat Seeds}} (~35.98%) ''or''<br>4 {{ItemSprite|Wheat Seeds}} (~31.99%) ''or''<br>5 {{ItemSprite|Wheat Seeds}} (~10.66%)
| 1 {{ItemSprite|Wheat Seeds}} (~1.44%) ''or''<br>2 {{ItemSprite|Wheat Seeds}} (~9.64%) ''or''<br>3 {{ItemSprite|Wheat Seeds}} (~25.70%) ''or''<br>4 {{ItemSprite|Wheat Seeds}} (~34.27%) ''or''<br>5 {{ItemSprite|Wheat Seeds}} (~22.85%) ''or''<br>6 {{ItemSprite|Wheat Seeds}} (~6.09%)
| 1 {{ItemSprite|Wheat Seeds}} (~0.62%) ''or''<br>2 {{ItemSprite|Wheat Seeds}} (~4.96%) ''or''<br>3 {{ItemSprite|Wheat Seeds}} (~16.52%) ''or''<br>4 {{ItemSprite|Wheat Seeds}} (~29.38%) ''or''<br>5 {{ItemSprite|Wheat Seeds}} (~29.38%) ''or''<br>6 {{ItemSprite|Wheat Seeds}} (~15.67%) ''or''<br>7 {{ItemSprite|Wheat Seeds}} (~3.48%)
|}
=== Natural generation ===
[[Village]] farm plots have a chance of being wheat crops. The exact chance depends on the style of the village:
{| class="wikitable"
! Village style !! Chance
|-
| {{EnvSprite|savanna-village}} Savanna || 80%
|-
| {{EnvSprite|desert-village}} Desert || 70%
|-
| {{EnvSprite|taiga-village}} Taiga || 60%
|-
| {{EnvSprite|plains-village}} Plains || 50%
|-
| {{EnvSprite|snowy-village}} Snowy || 20%
|}
=== Chest loot ===
{{LootChestItem|wheat-seeds}}
=== Trading ===
[[Wandering trader]]s sell wheat seeds for an [[emerald]].
=== Villager gifts ===
{{exclusive|java|section=1}}
Nitwit and unemployed [[villager]]s throw wheat seeds at players under the [[Hero of the Village]] effect.
== Usage ==
=== Crop ===
{{main|Tutorials/Crop farming|title1=Crop Farming}}
[[File:Crop states.png|thumb|Different stages of crop growth.]]
Wheat seeds can be placed on [[farmland]] by right-clicking, where they grow through eight stages. When left alone, wheat seeds planted on farmland grow to become wheat crops, which can be harvested by the player. Planted seeds require a light level of 9 or greater to continue growing. If the light level is 7 or below, the crops instantly un-plant themselves ("pop off"). It is not possible to plant seeds if the light level is too low.
Crops grow faster if the farmland they are planted in is [[Farmland#Hydration|hydrated]]. Using [[bone meal]] on crops also increases the speed of growth by randomly increasing their growth stage by 2 to 5.
Breaking the final stage produces 1 to 4 wheat seeds (or more with Fortune) and 1 [[wheat]]. If they are harvested early, they drop 1 seed without any wheat. Crops break if pushed by a [[piston]] or if their supporting farmland breaks or turns to dirt (i.e. by being trampled), dropping their usual drops.
=== Breeding ===
Like other seeds, wheat seeds can be used to breed [[chicken]]s and reduce the remaining growth duration of baby chickens by 10%. Chickens also follow a player holding wheat seeds.
=== Taming ===
Like other seeds, wheat seeds can be used to tame [[parrot]]s.
=== Composting ===
Placing wheat seeds into a [[composter]] has a 30% chance of raising the compost level by 1. A stack of wheat seeds yields an average of 2.74 [[bonemeal]].
== Sounds ==
{{Sound table/Block/Crop}}
== Data values ==
=== ID ===
{{edition|java}}:
{{ID table
|edition=java
|showblocktags=y
|showforms=y
|generatetranslationkeys=y
|displayname=Wheat Crops
|spritetype=block
|nameid=wheat
|blocktags=bee_growables, crops
|form=block}}
{{ID table
|displayname=Wheat Seeds
|spritetype=item
|nameid=wheat_seeds
|form=item
|foot=1}}
{{edition|bedrock}}:
{{ID table
|edition=bedrock
|shownumericids=y
|showforms=y
|generatetranslationkeys=y
|displayname=Wheat
|spritetype=block
|nameid=wheat
|id=59
|form=block
|itemform=item.wheat}}
{{ID table
|displayname=Seeds
|spritetype=item
|nameid=wheat_seeds
|id=291
|form=item
|foot=1}}
=== Block states ===
{{see also|Block states}}
{{/BS}}
== Advancements ==
{{load advancements|A Seedy Place}}
== History ==
''For a more in-depth breakdown of changes to wheat textures and models, including a set of renders for each state, see [[/Asset history]]''
{{History|java classic}}
{{History||May 21, 2009|link=wordofnotch:110762705|[[Notch]] shows interest in adding [[crops]] on [[farmland]].}}
{{History|java indev}}
{{History||Minecraft Indev|snap=20100206|link=Minecraft Indev|slink=Java Edition Indev 20100206|[[File:Wheat Seeds JE1 BE1.png|32px]] Added seeds.
|[[File:Wheat Age 0 JE1.png|32px]] [[File:Wheat Age 1 JE1.png|32px]] [[File:Wheat Age 2 JE1.png|32px]] [[File:Wheat Age 3 JE1.png|32px]] [[File:Wheat Age 4 JE1.png|32px]] [[File:Wheat Age 5 JE1.png|32px]] [[File:Wheat Age 6 JE1.png|32px]] [[File:Wheat Age 7 JE1.png|32px]] Added crops.
|Seeds can be planted on farmland.
|Seeds have a chance of [[drop]]ping while using a [[hoe]] on a [[grass block]].}}
{{History|java beta}}
{{History||1.5|Crops destroyed by [[water]] now drop both seeds and wheat. Prior to this update, they dropped only wheat when destroyed by water.}}
{{History||1.6|snap=Test Build 3|Seeds can no longer be tilled from a grass block.
|Seeds are now found by destroying [[tall grass]] or by harvesting fully-grown crops.}}
{{History||1.8|snap=Pre-release|Crops can now be found in [[village]] farms.}}
{{History|java}}
{{History||1.4.2|snap=12w36a|[[Chicken]]s now use seeds instead of wheat to [[breeding|breed]].}}
{{History||1.8|snap=14w02a|[[Villager]]s can now harvest and plant seeds to grow crops.}}
{{History|||snap=14w06a|[[File:Wheat Age 0 JE2.png|32px]] [[File:Wheat Age 1 JE2.png|32px]] [[File:Wheat Age 2 JE2.png|32px]] [[File:Wheat Age 3 JE2.png|32px]] [[File:Wheat Age 4 JE2.png|32px]] [[File:Wheat Age 5 JE2.png|32px]] [[File:Wheat Age 6 JE2.png|32px]] [[File:Wheat Age 7 JE2.png|32px]] Crops are now a pixel higher - previously they were offset one pixel down as to match farmland. This is likely an accidental result of model conversion.}}
{{History|||snap=14w10a|[[File:Missing Model JE2.png|32px]] [[File:Missing Model JE2.png|32px]] [[File:Missing Model JE2.png|32px]] [[File:Missing Model JE2.png|32px]] [[File:Missing Model JE2.png|32px]] [[File:Missing Model JE2.png|32px]] [[File:Missing Model JE2.png|32px]] [[File:Missing Model JE2.png|32px]] Crops of all stages [[Missing model|no longer have a model]].}}
{{History|||snap=14w10b|[[File:Wheat Age 0 JE4.png|32px]] [[File:Wheat Age 1 JE4.png|32px]] [[File:Wheat Age 2 JE4.png|32px]] [[File:Wheat Age 3 JE4.png|32px]] [[File:Wheat Age 4 JE4.png|32px]] [[File:Wheat Age 5 JE4.png|32px]] [[File:Wheat Age 6 JE4.png|32px]] [[File:Wheat Age 7 JE4.png|32px]] Crops now have models again.<ref>{{bug|MC-50232|||Fixed}}</ref> In addition, they are now offset downwards by one pixel once more.<ref>{{bug|MC-50155|||Fixed}}</ref>}}
{{History|||snap=14w25a|[[File:Wheat Age 0 JE5.png|32px]] [[File:Wheat Age 1 JE5.png|32px]] [[File:Wheat Age 2 JE5.png|32px]] [[File:Wheat Age 3 JE5.png|32px]] [[File:Wheat Age 4 JE5.png|32px]] [[File:Wheat Age 5 JE5.png|32px]] [[File:Wheat Age 6 JE5.png|32px]] [[File:Wheat Age 7 JE5.png|32px]] Crops model are now shaded.}}
{{History|||snap=14w27a|[[File:Wheat Age 0 JE6.png|32px]] [[File:Wheat Age 1 JE6.png|32px]] [[File:Wheat Age 2 JE6.png|32px]] [[File:Wheat Age 3 JE6.png|32px]] [[File:Wheat Age 4 JE6.png|32px]] [[File:Wheat Age 5 JE6.png|32px]] [[File:Wheat Age 6 JE6.png|32px]] [[File:Wheat Age 7 JE6.png|32px]] Crops are no longer shaded.}}
{{History||1.9|snap=15w38a|The drop chances of crops has been slightly improved from an average of {{frac|1|3|5}} per [[crop]] harvested to {{frac|1|5|7}}.}}
{{History||1.11|snap=16w39a|Crops now generate inside [[woodland mansion]]s.}}
{{History||1.12|snap=17w18b|Placing a wheat seeds in farmland now gives the player the "A Seedy Place" [[advancement]].}}
{{History|||snap=pre3|Seeds are now used to tame [[parrot]]s.}}
{{History||1.13|snap=17w47a|Prior to [[1.13/Flattening|''The Flattening'']], this block's numeral ID was 59, and the item's was 295.}}
{{History|||snap=18w14a|Seeds no longer become destroyed when an [[entity]] jumps on them if they have the [[Slow Falling]] status effect.}}
{{History|||snap=18w20a|"Seeds" have been renamed to "Wheat Seeds".
|"Crops" have been renamed to "Wheat Crops".}}
{{History||1.14|snap=18w43a|[[File:Wheat Age 0 JE7.png|32px]] [[File:Wheat Age 1 JE7.png|32px]] [[File:Wheat Age 2 JE7.png|32px]] [[File:Wheat Age 3 JE7.png|32px]] [[File:Wheat Age 4 JE7.png|32px]] [[File:Wheat Age 5 JE7.png|32px]] [[File:Wheat Age 6 JE7.png|32px]] [[File:Wheat Age 7 JE7.png|32px]] The textures of wheat crops have been changed.
|The drop rate of fully grown wheat seeds has been changed from 0-3 to 1-4.}}
{{History|||snap=18w44a|[[File:Wheat Age 6 JE8.png|32px]] [[File:Wheat Age 7 JE8.png|32px]] The textures of wheat crops of age 6 and 7 have been changed again.}}
{{History|||snap=18w47a|[[File:Wheat Age 0 JE8.png|32px]] [[File:Wheat Age 1 JE8.png|32px]] [[File:Wheat Age 2 JE8.png|32px]] [[File:Wheat Age 3 JE8.png|32px]] [[File:Wheat Age 4 JE8.png|32px]] [[File:Wheat Age 5 JE8.png|32px]] [[File:Wheat Age 6 JE9.png|32px]] [[File:Wheat Age 7 JE9.png|32px]] The textures of wheat crops have been changed, once again.}}
{{History|||snap=18w48a|Wheat seeds can now be found in [[chest]]s in [[village]] fisher cottages.}}
{{History|||snap=18w49a|Wheat seeds can now be found in chests in [[savanna]] village houses.}}
{{History|||snap=19w03a|Placement and breaking [[sound]]s have been added to wheat crops.
|Placing wheat seeds into the new [[composter]] has a 10% chance of raising the compost level by 1.}}
{{History|||snap=19w05a|Wheat seeds now have a 30% chance of increasing the compost level in a composter by 1.
|Added [[Wandering Trader|wandering trader]]s, which sell wheat seeds.}}
{{History|||snap=19w13a|Nitwit and unemployed villagers now give wheat seeds to players under the [[Hero of the Village]] effect.}}
{{History||1.15|snap=19w34a|[[Bee]]s can now pollinate wheat crops.}}
{{History||1.17|snap=21w13a|[[File:Wheat Age 0.png|32px]] [[File:Wheat Age 1.png|32px]] [[File:Wheat Age 2.png|32px]] [[File:Wheat Age 3.png|32px]] [[File:Wheat Age 4.png|32px]] [[File:Wheat Age 5.png|32px]] [[File:Wheat Age 6.png|32px]] [[File:Wheat Age 7.png|32px]] The "crop" template model has changed such that pixels appear in the same physical positions on opposite sides of texture planes.<ref>{{bug|MC-199242|||Fixed}}</ref>}}
{{History||1.20|snap=23w12a|Wheat seeds can now be found in [[suspicious gravel]] and [[suspicious sand]] in [[trail ruins]].}}
{{History|||snap=23w16a|Wheat seeds no longer generates in [[suspicious sand]] in [[trail ruins]].|Due to the split of the archaeological loot tables for suspicious gravel within [[trail ruins]], wheat seeds are now common loot.}}
{{History|pocket alpha}}
{{History||v0.4.0|[[File:Wheat Seeds JE1 BE1.png|32px]] Added seeds.
|[[File:Wheat Age 0 JE6 BE1.png|32px]] [[File:Wheat Age 1 JE6 BE1.png|32px]] [[File:Wheat Age 2 JE6 BE1.png|32px]] [[File:Wheat Age 3 JE6 BE1.png|32px]] [[File:Wheat Age 4 JE6 BE1.png|32px]] [[File:Wheat Age 5 JE6 BE1.png|32px]] [[File:Wheat Age 6 JE6 BE1.png|32px]] [[File:Wheat Age 7 JE6 BE1.png|32px]] Added crops.
|Seeds can be obtained by tilling [[grass block]]s.}}
{{History||v0.9.0|snap=build 1|[[File:Wheat Age 0 BE2.png|32px]] [[File:Wheat Age 1 BE2.png|32px]] [[File:Wheat Age 2 BE2.png|32px]] [[File:Wheat Age 3 BE2.png|32px]] [[File:Wheat Age 4 BE2.png|32px]] [[File:Wheat Age 5 BE2.png|32px]] [[File:Wheat Age 6 BE2.png|32px]] [[File:Wheat Age 7 BE2.png|32px]] Faces now renders from both sides, resulting in z-fighting.
|Seeds can now be used to [[breeding|breed]] [[chicken]].
|Crops can now be found in [[village]] farms.}}
{{History|||snap=build 2|[[File:Wheat Age 0 BE3.png|32px]] [[File:Wheat Age 1 BE3.png|32px]] [[File:Wheat Age 2 BE3.png|32px]] [[File:Wheat Age 3 BE3.png|32px]] [[File:Wheat Age 4 BE3.png|32px]] [[File:Wheat Age 5 BE3.png|32px]] [[File:Wheat Age 6 BE3.png|32px]] [[File:Wheat Age 7 BE3.png|32px]] Removed some faces to fix z-fighting.}}
{{History||v0.12.1|snap=build 1|Farmer [[villager]]s can now pick up, harvest and plant seeds to grow [[wheat]].}}
{{History|||snap=build 2|Crops now always drop seeds when mined, regardless of growth stage.}}
{{History|||snap=build 8|Seeds can no longer be obtained by tilling [[grass block]]s.}}
{{History||v0.16.2|Seeds can now be found in [[chest]]s inside the large house of [[snowy tundra]] and [[snowy taiga]] [[village]]s.}}
{{History|pocket}}
{{History||1.1.0|snap=alpha 1.1.0.0|Crops now generate inside [[woodland mansion]]s.}}
{{History|bedrock}}
{{History||1.2.0|snap=beta 1.2.0.2|Seeds are now used to tame [[parrot]]s.}}
{{History||1.6.0|snap=beta 1.6.0.1|Seeds no longer become destroyed when an [[entity]] jumps on them if they have the [[Slow Falling]] status effect.}}
{{History||1.10.0|snap=beta 1.10.0.3|Seeds can now be bought from [[wandering trader]]s.
|Placement and breaking [[sound]]s have been added to crops.
|[[File:Wheat Age 0 BE.png|32px]] [[File:Wheat Age 1 BE.png|32px]] [[File:Wheat Age 2 BE.png|32px]] [[File:Wheat Age 3 BE.png|32px]] [[File:Wheat Age 4 BE.png|32px]] [[File:Wheat Age 5 BE.png|32px]] [[File:Wheat Age 6 BE.png|32px]] [[File:Wheat Age 7 BE.png|32px]] The textures of crops have been changed.}}
{{History||1.11.0|snap=beta 1.11.0.1|Seeds can now be found in [[savanna]] [[village]] house [[chest]]s.
|Seeds can now be used to fill up [[composter]]s.}}
{{History||1.14.0|snap=beta 1.14.0.1|[[Bee]]s can now pollinate crops.}}
{{History|console}}
{{History||xbox=TU1|xbone=CU1|ps=1.0|wiiu=Patch 1|switch=1.0.1|[[File:Wheat Seeds JE1 BE1.png|32px]] Added seeds.
|[[File:Wheat Age 0 JE6 BE1.png|32px]] [[File:Wheat Age 1 JE6 BE1.png|32px]] [[File:Wheat Age 2 JE6 BE1.png|32px]] [[File:Wheat Age 3 JE6 BE1.png|32px]] [[File:Wheat Age 4 JE6 BE1.png|32px]] [[File:Wheat Age 5 JE6 BE1.png|32px]] [[File:Wheat Age 6 JE6 BE1.png|32px]] [[File:Wheat Age 7 JE6 BE1.png|32px]] Added crops.}}
{{History||xbox=none|xbone=none|ps=1.90|wiiu=none|switch=none|[[File:Wheat Age 0 JE8.png|32px]] [[File:Wheat Age 1 JE8.png|32px]] [[File:Wheat Age 2 JE8.png|32px]] [[File:Wheat Age 3 JE8.png|32px]] [[File:Wheat Age 4 JE8.png|32px]] [[File:Wheat Age 5 JE8.png|32px]] [[File:Wheat Age 6 JE9.png|32px]] [[File:Wheat Age 7 JE9.png|32px]] The textures of crops have been changed.}}
{{History|New 3DS}}
{{History||0.1.0|[[File:Wheat Seeds JE1 BE1.png|32px]] Added seeds.
|[[File:Wheat Age 0 JE6 BE1.png|32px]] [[File:Wheat Age 1 JE6 BE1.png|32px]] [[File:Wheat Age 2 JE6 BE1.png|32px]] [[File:Wheat Age 3 JE6 BE1.png|32px]] [[File:Wheat Age 4 JE6 BE1.png|32px]] [[File:Wheat Age 5 JE6 BE1.png|32px]] [[File:Wheat Age 6 JE6 BE1.png|32px]] [[File:Wheat Age 7 JE6 BE1.png|32px]] Added crops.}}
{{History|foot}}
=== Wheat "item" ===
{{:Technical blocks/Crops}}
== Issues ==
{{issue list}}
== Gallery ==
===Renders===
;Java Edition
<gallery>
Wheat Age 0.png|
Wheat Age 1.png|
Wheat Age 2.png|
Wheat Age 3.png|
Wheat Age 4.png|
Wheat Age 5.png|
Wheat Age 6.png|
Wheat Age 7.png|
</gallery>
;Bedrock Edition
<gallery>
Wheat Age 0 BE.png|
Wheat Age 1 BE.png|
Wheat Age 2 BE.png|
Wheat Age 3 BE.png|
Wheat Age 4 BE.png|
Wheat Age 5 BE.png|
Wheat Age 6 BE.png|
Wheat Age 7 BE.png|
</gallery>
===Screenshots===
<gallery>
AllSeeds.png|All the seeds that exist.
Wheat.jpg|Wheat crops in Pocket Edition.
Village Wheat Beetroot Farm.png| Wheat generated in a village.
</gallery>
== References ==
{{reflist}}
{{Blocks|vegetation}}
{{Items}}
[[Category:Plants]]
[[Category:Food]]
[[Category:Non-solid blocks]]
[[Category:Generated structure blocks]]
[[de:Weizensamen]]
[[es:Semillas de trigo]]
[[fr:Graines de blé]]
[[hu:Búzamagok]]
[[it:Semi di grano]]
[[ja:小麦の種]]
[[ko:밀 씨앗]]
[[nl:Zaden]]
[[pl:Nasiona zboża]]
[[pt:Sementes de trigo]]
[[ru:Семена пшеницы]]
[[zh:小麦种子]]</li></ul></nowiki> | Beta 1.9 Prerelease | The mushroom island biome was added, which naturally generates huge mushrooms. | |||
1.7.2{{Extension DPL}}<ul><li>[[Purple Dye|Purple Dye]]<br/>{{Item
| image = Purple_Dye_JE2_BE2.png
| renewable = Yes
| stackable = Yes (64)
}}
'''Purple dye''' is a [[Dyeing#Secondary colors|secondary dye color]] created by combining [[red dye]] and [[blue dye]] in a crafting grid.
== Obtaining ==
=== Crafting ===
{{Crafting
|head=1
|showname=0
|Blue Dye
|Red Dye
|Output=Purple Dye,2
|type=Material
}}
{{Crafting
|foot=1
|Lapis Lazuli
|Red Dye
|Output=Purple Dye,2
|description={{only|bedrock|education}}
|type=Material
}}
=== Trading ===
[[Wandering trader]]s sometimes sell 3 purple dye for an [[emerald]].
== Usage ==
{{dye usage}}
=== Crafting ingredient ===
{{crafting usage|ignore=Banner|continue=1}}
{{banner crafting usage}}
=== Loom ingredient ===
{{Banner loom usage|Purple Dye}}
=== Trading ===
Apprentice-level Shepherd villagers have a 20% chance to buy 12 purple dye for an emerald as part of their trades.{{only|bedrock}}
Expert-level Shepherd villagers have a {{frac|2|7}} chance to buy 12 purple dye for an emerald.{{only|java}}
== Data values ==
=== ID ===
{{edition|java}}:
{{ID table
|edition=java
|showforms=y
|generatetranslationkeys=y
|displayname=Purple Dye
|spritetype=item
|nameid=purple_dye
|form=item
|foot=1}}
{{edition|bedrock}}:
{{ID table
|edition=bedrock
|showaliasids=y
|shownumericids=y
|showforms=y
|notshowbeitemforms=y
|generatetranslationkeys=y
|displayname=Purple Dye
|spritetype=item
|nameid=purple_dye
|aliasid=dye / 5
|id=400
|form=item
|translationkey=item.dye.purple.name
|foot=1}}
== Video ==
<div style="text-align:center">{{yt|Cx52CGo5QnI}}</div>
== History ==
{{History|java beta}}
{{History||1.2|[[File:Purple Dye JE1 BE1.png|32px]] Added purple dye.}}
{{History|java}}
{{History||1.4.2|snap=12w34a|Added the ability to [[Armor#Dyeing|dye]] leather [[armor]] and [[wolf]] collars.}}
{{History||1.4.6|snap=12w49a|Purple dye can now be [[crafting|crafted]] with [[gunpowder]] to create a [[firework star]].}}
{{History||1.6.1|snap=13w19a|[[Stained clay]] can now be crafted.}}
{{history||1.7.2|snap=13w36a|With the addition of new [[flower]]s, many secondary and tertiary dyes are now primary [[dye]]s.}}
{{History|||snap=13w41a|[[Stained glass]] can now be crafted.}}
{{History||1.8|snap=14w02a|Due to [[lapis lazuli]] being [[renewable resource|renewable]] now, purple dye is also now renewable.}}
{{History|||snap=14w30a|Added [[banner]]s which can be dyed.}}
{{History||1.13|snap=17w47a|The different data values for the <code>dye</code> ID have now been split up into their own IDs.
|Prior to [[1.13/Flattening|''The Flattening'']], this [[item]]'s numeral ID was 351.}}
{{History||1.14|snap=18w43a|Purple dye is now [[crafting|crafted]] using [[blue dye]], instead of [[lapis lazuli]].
|[[File:Purple_Dye_JE2_BE2.png|32px]] The texture of purple dye has now been changed.}}
{{History|||snap=18w44a|Purple dye can now change the text color on [[sign]]s to purple.}}
{{History|||snap=19w05a|Added the [[wandering trader]], which sells purple dye.}}
{{History|||snap=19w11a|Purple dye can now be [[trading|bought]] by shepherd villagers.}}
{{History||1.17|snap=20w45a|Purple dye can now be used to craft [[purple candle]]s.}}
{{History|||snap=21w19a|Purple dye can no longer be used to craft purple candles.}}
{{History|||snap=Pre-release 1|Purple dye can once again be used to craft purple candles.}}
{{History||1.20<br>(Experimental)|link=1.19.3|snap=22w42a|Purple dye can now change the text color on [[hanging sign]]s to purple.}}
{{History|pocket alpha}}
{{History||v0.3.0|[[File:Purple Dye JE1 BE1.png|32px]] Added purple dye. It is currently unobtainable and serves no purpose.}}
{{History||v0.4.0|Purple dye is now [[craft]]able with rose red and lapis lazuli.
|Purple dye can now be used to craft purple [[wool]].}}
{{History||v0.6.0|Purple dye can now be used to dye [[sheep]].}}
{{History||v0.8.0|snap=build 1|Purple dye can now be used to craft [[magenta dye]].}}
{{History||v0.9.0|snap=build 11|Purple dye can now be used to craft colored [[terracotta]].}}
{{History||v0.11.0|snap=build 1|Purple dye can now be used to dye tamed [[wolf]] collars.}}
{{History||v0.14.0|snap=build 1|Purple dye can now be used to dye [[water]] in [[cauldron]]s.}}
{{History|pocket}}
{{History||1.0.0|snap=alpha 0.17.0.1|Purple dye can now be used to dye [[shulker]]s.}}
{{History||1.1.0|snap=alpha 1.1.0.0|Purple dye can now be used to craft [[concrete powder]], colored [[bed]]s and dyed [[shulker box]]es.}}
{{History|bedrock}}
{{History||1.2.0|snap=beta 1.2.0.2|Purple dye can now be used to craft [[firework star]]s, [[stained glass]] and patterns on [[banner]]s.}}
{{History||1.4.0|snap=beta 1.2.20.1|Purple dye can now be used to craft [[balloon]]s and [[glow stick]]s.}}
{{History||1.8.0|snap=beta 1.8.0.8|Purple dye can now be used to dye tamed [[cat]] collars.}}
{{History||1.10.0|snap=beta 1.10.0.3|Purple dye is now [[trading|sold]] by [[wandering trader]]s.
|Purple dye can now be used to dye white [[carpet]]s and undyed [[glass pane]]s.
|[[File:Purple_Dye_JE2_BE2.png|32px]] The texture of purple dye has now been changed.}}
{{History||1.11.0|snap=beta 1.11.0.4|Purple dye can now be [[trading|sold]] to shepherd [[villager]]s.}}
{{History||1.16.100|snap=beta 1.16.100.56|The ID of purple dye has been changed from <code>dye/5</code> to <code>purple_dye</code>.}}
{{History|console}}
{{History||xbox=TU1|xbone=CU1|ps=1.00|switch=1.0.1|wiiu=Patch 1|[[File:Purple Dye JE1 BE1.png|32px]] Added purple dye.}}
{{History|PS4}}
{{History||1.90|[[File:Purple_Dye_JE2_BE2.png|32px]] The texture of purple dye has now been changed.}}
{{History|new 3ds}}
{{History||0.1.0|[[File:Purple Dye JE1 BE1.png|32px]] Added purple dye.}}
{{History|foot}}
== Issues ==
{{issue list}}
{{Items}}
[[Category:Items]]
[[Category:Dyes]]
[[Category:Renewable resources]]
[[cs:Fialové barvivo]]
[[de:Violetter Farbstoff]]
[[es:Tinte morado]]
[[fr:Teinture violette]]
[[hu:Lila festék]]
[[ja:紫色の染料]]
[[ko:보라색 염료]]
[[nl:Paarse kleurstof]]
[[pl:Fioletowy barwnik]]
[[pt:Corante roxo]]
[[ru:Фиолетовый краситель]]
[[zh:紫色染料]]</li><li>[[Phantom Membrane|Phantom Membrane]]<br/>{{Item
| title = Phantom Membrane
| image = Phantom Membrane.png
| renewable = Yes
| stackable = Yes (64)
}}
'''Phantom membranes''' are items obtained from killing [[phantom]]s. They are used to repair [[elytra]] and brew [[Potion of Slow Falling|potions of Slow Falling]].
== Obtaining ==
=== Mob loot ===
[[Phantom]]s drop 0–1 phantom membrane when killed by a [[player]] or tamed [[wolf]]. [[Looting]] increases the maximum drops by 1 per level, for a maximum of 4 with Looting III.
=== Cat gifts ===
{{main|Cat#Gifts}}
Tamed [[cat]]s have a 70% chance to bring the player a gift when they wake up from a [[bed]], and the gift has a 3.22% chance to be a phantom membrane.
== Usage ==
=== Repairing ===
Phantom membranes can be used in an [[anvil]] to repair [[elytra]], restoring 108 durability points (25% of the pair's total durability) per membrane while preserving their [[enchantments]].
{| class="wikitable" data-description="Repairing elytra"
! scope="col" style="width:64px;" | Name
! Ingredients
! [[Anvil]] usage
|-
! scope="row" style="text-align: center;" | '''Elytra'''
| [[Elytra]] +<br>[[Phantom Membrane]]
| style="width: 260px; padding: 1px;" | {{Anvil| title = Elytra|Input1=Damaged Elytra|Input2=Phantom Membrane, 2|Output=Elytra}}
|-
|}
=== Brewing ingredient ===
Phantom membranes are used to [[brewing|brew]] [[Potion of Slow Falling|slow falling potions]] from an [[awkward potion]].
{{Brewing
|Phantom Membrane
|Potion of Slow Falling
|showname=3
}}
== Data values ==
=== ID ===
{{edition|java}}:
{{ID table
|edition=java
|showforms=y
|generatetranslationkeys=y
|displayname=Phantom Membrane
|spritetype=item
|nameid=phantom_membrane
|form=item
|foot=1}}
{{edition|bedrock}}:
{{ID table
|edition=bedrock
|shownumericids=y
|showforms=y
|notshowbeitemforms=y
|generatetranslationkeys=y
|displayname=Phantom Membrane
|spritetype=item
|nameid=phantom_membrane
|id=574
|form=item
|foot=1}}
== History ==
{{History|java}}
{{History||1.13|snap=18w14a|[[File:Phantom Membrane JE1 BE1.png|32px]] Added phantom membranes.}}
{{History||1.14|snap=18w44a|Tamed [[cat]]s now have a chance to give the [[player]] phantom membranes as [[Cat#Gifts|gifts]].}}
{{History|||snap=19w08a|[[File:Phantom Membrane JE2 BE2.png|32px]] The texture of phantom membranes has now been changed.}}
{{History|bedrock}}
{{History||1.6.0|snap=beta 1.6.0.5|[[File:Phantom Membrane JE1 BE1.png|32px]] Added phantom membranes.}}
{{History||1.8.0|snap=beta 1.8.0.8|Tamed [[cat]]s now have a chance to give the [[player]] phantom membranes as gifts.}}
{{History||1.10.0|snap=beta 1.10.0.3|[[File:Phantom Membrane JE2 BE2.png|32px]] The texture of phantom membranes has now been changed.}}
{{History|console}}
{{History||xbox=TU69|ps=1.76|wiiu=Patch 38|[[File:Phantom Membrane JE1 BE1.png|32px]] Added phantom membranes.}}
{{History||xbox=none|xbone=none|ps=1.90|wiiu=none|switch=none|[[File:Phantom Membrane JE2 BE2.png|32px]] The texture of phantom membranes has now been changed.}}
{{History|foot}}
== Issues ==
{{issue list}}
== References ==
{{reflist}}
== External Links ==
*[https://www.minecraft.net/en-us/article/taking-inventory--phantom-membrane Taking Inventory: Phantom Membrane] – Minecraft.net on August 2, 2019
{{items}}
[[de:Phantomhaut]]
[[fr:Membrane de Phantom]]
[[ja:ファントムの皮膜]]
[[ko:팬텀 막]]
[[pl:Błona fantoma]]
[[pt:Membrana de phantom]]
[[ru:Мембрана фантома]]
[[th:เนื้อเยื่อแฟนท่อม]]
[[uk:Перетинка фантома]]
[[zh:幻翼膜]]
[[Category:Renewable resources]]
[[Category:Brewing recipe]]</li></ul> | 13w36a | The roofed forest biome was added, which naturally generates huge mushrooms. | |||
1.10{{Extension DPL}}<ul><li>[[Debug Stick|Debug Stick]]<br/>{{about|the item|other uses|Debug}}
{{exclusive|java}}
{{Item
| image = Debug Stick.gif
| rarity = Epic
| renewable = No
| stackable = No
}}
The '''debug stick''' is an [[item]] used to edit the [[block states]] of [[block]]s. It is visually identical to a regular [[stick]], but with a glint (as if [[Enchanting|enchanted]]).
== Obtaining ==
The debug stick is obtainable via [[commands]] such as {{cmd|/give}} or {{Cmd|/item}}, or the Creative inventory if the player has the appropriate permissions. It can be obtained only in worlds with cheats on.
== Usage ==
The debug stick can be used to change block states. {{control|Hitting}} the block allows players to select the block state key they wish to change, for an example, switching between the ''conditional'' and the ''facing'' block state keys for a [[command block]]. {{control|Using}} the block allows them to cycle through the valid values for the block state key, again as an example, the player can make the command block face, ''down'', ''east'', ''north'', ''south'', ''up'', or ''west'' if they chose the ''facing'' block state key. {{control|Sneaking}} while {{control|hitting}} or {{control|using}} cycles through the block state keys or values in reverse order.
It is notable that {{Control|using}} debug stick directly on an interactive block without {{Control|sneaking}} uses the block itself instead of the stick.<ref>{{bug|MC-200199}} </ref>
The debug stick cannot be used while in Survival or Adventure mode. It works only in creative mode with cheats enabled. In modes other than Creative, it acts like a regular item — although when {{control|using}} it on a block, the player swings the stick as if interacting with it (but nothing happens).
== Data values ==
=== ID ===
{{ID table
|edition=java
|showforms=y
|generatetranslationkeys=y
|displayname=Debug Stick
|spritetype=item
|nameid=debug_stick
|form=item
|foot=1}}
=== Item data ===
<div class="treeview">
* {{nbt|compound|tag}}: The item's '''tag''' tag.
{{:Player.dat_format/Debug Sticks}}
</div>
== History ==
{{History|java}}
{{History||1.13|snap=17w47a|[[File:Debug Stick.gif|32px]] Added debug sticks.}}
{{History||1.16|snap=20w10a|Debug sticks are now capable of editing [[fire]] due to its added hitbox.}}
{{History||1.19.3|snap=22w44a|The debug stick is now available in the creative inventory, but only if cheats are enabled.}}
{{History|||snap=22w45a|Moved the debug stick behind the Operator Utilities tab in the creative inventory. The tab is only available if cheats are enabled and the "Operator Items Tab" option in the controls menu is turned on.}}
{{History|foot}}
== Issues ==
The debug stick is not supported, and any issues resulting of its usage are closed as "Won't Fix" in the issue tracker.<br/> Issues with the stick itself are considered valid.<ref>https://bugs.mojang.com/browse/MC-122323?focusedCommentId=419481&page=com.atlassian.jira.plugin.system.issuetabpanels:comment-tabpanel#comment-419481</ref><ref>{{reddit|7es23r||Just be aware that any weird state you create with it you cannot naturally create and any bugs that come from it will be shot down as 'Wont fix' :D|_Grum|November 22, 2017}}</ref>
{{issue list}}
== Trivia ==
*An [[add-on]] made by Mineplex was showcased in [[MINECON Live 2019]], which had an editor stick for {{el|be}}, similar to the Debug Stick.<ref>{{ytl|OZqNaEX8208|MINECON Live 2019 @ 1:05:02|Minecraft|September 28, 2019|t=3902}}</ref>
== Gallery ==
<gallery>
Technically Updated.jpg|Artwork of Steve and Alex wielding debug sticks.
</gallery>
== See also ==
*[[Block states]]
== References ==
{{Reflist}}
{{Items}}
[[Category:Non-renewable resources]]
[[de:Debug-Stab]]
[[es:Palo de depuración]]
[[fr:Bâton de débogage]]
[[ja:デバッグ棒]]
[[ko:디버그 막대기]]
[[pl:Patyk debugujący]]
[[pt:Graveto de depuração]]
[[ru:Палка отладки]]
[[zh:调试棒]]</li><li>[[Cooked Porkchop|Cooked Porkchop]]<br/>{{Item
| title = Cooked Porkchop
| image = Cooked Porkchop.png
| renewable = Yes
| heals = {{hunger|8}}
| stackable = Yes (64)
}}
'''Cooked porkchop''' is a [[food]] [[item]] that can be eaten by the [[player]].
== Obtaining ==
{{see also|Tutorials/Animal farming|title1=Animal farming}}
Cooked porkchops can be obtained by cooking [[raw porkchop]]s or by [[trading]] with butchers, and is a [[drops|drop]] from [[pig]]s and [[hoglin]]s that die while on [[fire]].
=== Mob loot ===
==== Pigs ====
Adult [[pig]]s drop 1–3 cooked porkchop if killed while on fire. The maximum amount is increased by 1 per level of [[Looting]], for a maximum of 1-6 with Looting III.
==== Hoglins ====
Adult [[hoglin]]s drop 2–4 cooked porkchop if killed while on fire. The maximum amount is increased by 1 per level of Looting, for a maximum of 7 with Looting III.
=== Cooking ===
[[Raw porkchop]] can be cooked in a [[furnace]], [[smoker]], or [[campfire]]. Each piece of cooked porkchop removed from a furnace output slot gives 0.35 [[experience]] (22.4 experience per stack).
{{Smelting
|Raw Porkchop
|Cooked Porkchop
|0,35
}}
=== Trading ===
{{IN|java}}, apprentice-level butcher [[villager]]s have a {{frac|2|3}} chance of selling 5 cooked porkchop for 1 [[emerald]].
Butcher villagers may give players with the [[Hero of the Village]] effect a cooked porkchop.{{only|java}}
{{IN|bedrock}}, apprentice-level butcher villagers have a 25% chance to sell 5 cooked porkchop for 1 emerald.
=== Chest loot ===
{{LootChestItem|cooked-porkchop}}
== Usage ==
=== Food ===
{{see also|Tutorials/Hunger management|title1=Hunger management}}
To eat cooked porkchop, press and hold {{control|use}} while it is selected in the hotbar. Eating one restores {{hunger|8}} [[hunger]] and 12.8 [[Hunger#Mechanics|saturation]].
=== Wolves ===
Cooked porkchops can be used to [[breeding|breed]] and heal tamed [[wolf|wolves]], lead them around, and make baby tamed wolves grow up faster by 10% of the remaining time.
=== Piglins ===
[[Piglin]]s pick up any cooked porkchops in their [[item (entity)|item]] form. However, they do not eat it.
==Sounds==
{{Sound table/Entity/Food}}
== Data values ==
=== ID ===
{{edition|java}}:
{{ID table
|edition=java
|showitemtags=y
|showforms=y
|generatetranslationkeys=y
|displayname=Cooked Porkchop
|spritetype=item
|nameid=cooked_porkchop
|itemtags=piglin_food
|form=item
|foot=1}}
{{edition|bedrock}}:
{{ID table
|edition=bedrock
|shownumericids=y
|showforms=y
|notshowbeitemforms=y
|generatetranslationkeys=y
|displayname=Cooked Porkchop
|spritetype=item
|nameid=cooked_porkchop
|id=263
|form=item
|foot=1}}
== Achievements ==
{{load achievements|Pork Chop}}
== Advancements ==
{{load advancements|Husbandry;A Balanced Diet}}
== History ==
{{History|java indev}}
{{History||20100219|[[File:Cooked Porkchop JE1.png|32px]] Added cooked porkchops.
|Cooked porkchops restore {{hp|8}} and do not stack in the [[inventory]].
|Created by cooking [[raw porkchops]] in the inventory.}}
{{History|java alpha}}
{{History||v1.2.0|snap=preview|[[Zombie pigmen]] now [[drops|drop]] 0-2 cooked porkchops upon [[death]].}}
{{History|java beta}}
{{History||1.5|[[Pig]]s now [[drops|drop]] cooked porkchops when killed with [[fire]].}}
{{History||1.8|snap=Pre-release|[[File:Cooked Porkchop JE2 BE1.png|32px]] The texture of cooked porkchops has been changed to avoid confusion with [[steak]].
|Cooked porkchops are now stackable to 64 and restore [[hunger]] instead of [[health]].
|Cooked porkchops now restore {{hunger|8}} to the food bar.
|Cooked porkchops are no longer dropped by [[zombie pigmen]] upon their [[death]].}}
{{History|java}}
{{History||1.2.1|snap=12w03a|Cooked porkchop can now be used to breed wolves.}}
{{History||1.3.1|snap=12w21a|Butcher [[villager]]s now [[trading|sell]] 6–7 cooked porkchops for 1 [[emerald]].}}
{{History||1.4.2|snap=12w37a|[[File:Cooked Porkchop JE3 BE2.png|32px]] The texture of cooked porkchops has been changed, so that it no longer has a dark outline.}}
{{History||1.8|snap=14w02a|Butcher [[villager]]s now [[trading|sell]] 5–7 cooked porkchops for 1 [[emerald]].}}
{{History||1.13|snap=17w47a|Prior to [[1.13/Flattening|''The Flattening'']], this [[item]]'s numeral ID was 320.}}
{{History||1.14|snap=18w43a|[[File:Cooked Porkchop JE4 BE3.png|32px]] The texture of cooked porkchops has been changed.}}
{{History|||snap=19w13a|Butcher villagers now give cooked porkchops to players under the [[Hero of the Village]] effect.}}
{{History||1.16|snap=20w07a|[[Hoglin]]s now drop cooked porkchops if killed while on fire.}}
{{History|||snap=20w16a|Cooked porkchops can now be found in hoglin stable chests in [[bastion remnant]]s.}}
{{History||1.16.2|snap=20w30a|Cooked porkchops can now be found in generic bastion remnant chests as well.}}
{{History|pocket alpha}}
{{History||v0.4.0|[[File:Cooked Porkchop JE2 BE1.png|32px]] Added cooked porkchops.}}
{{History||v0.5.0|Cooked porkchops now restore {{hp|8}} instead of {{hp|4}}.}}
{{History||v0.8.0|snap=build 1|[[File:Cooked Porkchop JE3 BE2.png|32px]] The texture of cooked porkchops has been changed, so that it no longer has a dark outline.}}
{{History||v0.12.1|snap=build 1|Cooked porkchops now restore [[hunger]] instead of [[health]].}}
{{History|pocket}}
{{History||1.0.4|snap=alpha 1.0.4.0|Butcher [[villager]]s now [[trading|sell]] 5–7 cooked porkchops for 1 [[emerald]].}}
{{History|bedrock}}
{{History||1.10.0|snap=beta 1.10.0.3|[[File:Cooked Porkchop JE4 BE3.png|32px]] The texture of cooked porkchops has been changed.}}
{{History||1.11.0|snap=beta 1.11.0.4|[[Trading]] has been changed, butcher [[villager]]s now have a 25% chance to [[trading|sell]] 4 cooked porkchops as part of their second-tier [[trading|trade]].}}
{{History||1.16.0|snap=beta 1.16.0.57|Trading has been changed, apprentice butcher [[villager]]s now have a 25% chance to [[trading|sell]] 5 cooked porkchops instead of 3.}}
{{History|console}}
{{History||xbox=TU1|xbone=CU1|ps=1.0|wiiu=Patch 1|[[File:Cooked Porkchop JE1.png|32px]] Added cooked porkchops.}}
{{History||xbox=TU3|[[File:Cooked Porkchop JE2 BE1.png|32px]] The texture of cooked porkchops has been changed to be consistent with [[Java Edition]].}}
{{History||xbox=TU5|Cooked porkchops are now stackable to 64.
|Cooked porkchops now fill [[hunger]] instead of [[health]].}}
{{History||xbox=TU12|[[File:Cooked Porkchop JE3 BE2.png|32px]] The texture of cooked porkchops has been changed, so that it no longer has a dark outline.}}
{{History|PS4}}
{{History||1.90|[[File:Cooked Porkchop JE4 BE3.png|32px]] The texture of cooked porkchops has been changed.}}
{{History|new3DS}}
{{History||0.1.0|[[File:Cooked Porkchop JE3 BE2.png|32px]] Added cooked porkchops.}}
{{History|foot}}
== Issues ==
{{issue list}}
== External Links ==
*[https://www.minecraft.net/en-us/article/taking-inventory--porkchop Taking Inventory: Porkchop] – Minecraft.net on February 13, 2020
{{Items}}
[[Category:Food]]
[[Category:Renewable resources]]
[[cs:Pečená kotleta]]
[[de:Gebratenes Schweinefleisch]]
[[es:Chuleta de cerdo cocinada]]
[[fr:Côtelette de porc cuite]]
[[hu:Sült sertésszelet]]
[[ja:焼き豚]]
[[nl:Gebraden varkensvlees]]
[[pl:Pieczony schab]]
[[pt:Costeleta de porco assada]]
[[ru:Жареная свинина]]
[[uk:Смажена свинина]]
[[zh:熟猪排]]</li></ul> | 16w20a | Huge mushrooms can now generate or grow much taller, matching the height from Pocket Edition. | |||
| Pocket Edition Alpha | |||||
0.9.0{{Extension DPL}}<ul><li>[[Poisonous Potato|Poisonous Potato]]<br/>{{Item
| title = Poisonous Potato
| image = Poisonous Potato.png
| heals = {{hunger|2}}
|effects={{EffectLink|Poison}} (0:05) (60% chance)
| stackable = Yes (64)
| renewable = Yes
}}
A '''poisonous potato''' is a type of [[potato]] that can [[poison]] the [[player]].
== Obtaining ==
The poisonous potato is a rare [[drop]] when harvesting (destroying) [[potato|potato crops]]; a fully grown plant has a 2% chance of dropping one in addition to the 2-5 regular potatoes.
=== Chest loot ===
{{LootChestItem|poisonous-potato}}
== Usage ==
Poisonous potatoes cannot be planted on [[farmland]] or [[Baked Potato|baked]]. They also have no use with the [[composter]].<ref>{{bug|MC-142373|resolution=WAI}}</ref>
=== Food ===
{{see also|Tutorials/Hunger management|title1=Hunger management}}
To eat a poisonous potato, press and hold {{control|use}} while it is selected in the hotbar. Eating one restores {{hunger|2}} [[hunger]] and 1.2 hunger [[Hunger#Mechanics|saturation]] and has a 60% chance of applying 5 seconds of [[Poison]] II, draining {{hp|4|poisoned=1}} points of [[health]].
Interestingly, a poisonous potato actually restores double the hunger and saturation than a normal, unpoisoned potato. (A normal potato gives {{hunger|1}} hunger and 0.6 saturation points.)
==Sounds==
{{Sound table/Entity/Food}}
== Advancements ==
{{load advancements|Husbandry;A Balanced Diet}}
== Data values ==
=== ID ===
{{edition|java}}:
{{ID table
|edition=java
|showforms=y
|generatetranslationkeys=y
|displayname=Poisonous Potato
|spritetype=item
|nameid=poisonous_potato
|form=item
|foot=1}}
{{edition|bedrock}}:
{{ID table
|edition=bedrock
|shownumericids=y
|showforms=y
|notshowbeitemforms=y
|generatetranslationkeys=y
|displayname=Poisonous Potato
|spritetype=item
|nameid=poisonous_potato
|id=282
|form=item
|foot=1}}
== History ==
{{History|java}}
{{History||1.4.2|snap=12w34a|[[File:Poisonous Potato JE1 BE1.png|32px]] Added poisonous potatoes.}}
{{History||1.13|snap=17w47a|Prior to [[Java_Edition_1.13/Flattening|''The Flattening'']], this [[item]]'s numeral ID was 394.}}
{{History|||snap=18w11a|Poisonous potatoes now generate in the [[chest]]s of [[shipwreck]]s.}}
{{History||1.14|snap=18w43a|[[File:Poisonous Potato JE2.png|32px]] The texture of poisonous potatoes has been changed.}}
{{History|||snap=18w50a|[[File:Poisonous Potato JE3 BE2.png|32px]] The texture of poisonous potatoes has been changed, once again.}}
{{History|pocket alpha}}
{{History||v0.12.1|snap=build 1|[[File:Poisonous Potato JE1 BE1.png|32px]] Added poisonous potatoes.}}
{{History|bedrock}}
{{History||1.4.0|snap=beta 1.2.14.2|Poisonous potatoes can now be found inside of [[shipwreck]] [[chest]]s.}}
{{History||1.10.0|snap=beta 1.10.0.3|[[File:Poisonous Potato JE3 BE2.png|32px]] The texture of poisonous potatoes has been changed.}}
{{History|console}}
{{History||xbox=TU14|xbone=CU1|ps=1.04|wiiu=Patch 1|switch=1.0.1|[[File:Poisonous Potato JE1 BE1.png|32px]] Added poisonous potatoes.}}
{{History||xbox=none|xbone=none|ps=1.90|wiiu=none|switch=none|[[File:Poisonous Potato JE3 BE2.png|32px]] The texture of poisonous potatoes has been changed.}}
{{History|New 3DS}}
{{History||0.1.0|[[File:Poisonous Potato JE1 BE1.png|32px]] Added poisonous potatoes.}}
{{History|foot}}
== Issues ==
{{issue list}}
== References ==
{{reflist}}
{{Items}}
[[Category:Plants]]
[[cs:Jedovatá brambora]]
[[de:Giftige Kartoffel]]
[[es:Patata envenenada]]
[[fr:Pomme de terre empoisonnée]]
[[hu:Mérgező burgonya]]
[[it:Patata velenosa]]
[[ja:青くなったジャガイモ]]
[[ko:독이 있는 감자]]
[[nl:Giftige aardappel]]
[[pl:Trujący ziemniak]]
[[pt:Batata venenosa]]
[[ru:Ядовитый картофель]]
[[th:มันฝรั่งพิษ]]
[[uk:Отруйна картопля]]
[[zh:毒马铃薯]]
[[Category:Food]]
[[Category:Renewable resources]]</li><li>[[Iron Ingot|Iron Ingot]]<br/>{{About|the ingot|the ore|Iron Ore|the mineral block|Block of Iron|the nugget|Iron Nugget|the raw mineral|Raw Iron}}
{{Item
| image = Iron Ingot.png
|type=
| renewable = Yes
| stackable = Yes (64)
}}
'''Iron ingots''' are versatile [[metal]] ingots used extensively in [[crafting]].
== Obtaining ==
=== Chest loot ===
{{LootChestItem|iron-ingot}}
=== Crafting ===
{{Crafting
|head=1
|showname=0
|Block of Iron
|Output=Iron Ingot,9
|type=Material
}}
{{Crafting
|A1= Iron Nugget
|B1= Iron Nugget
|C1= Iron Nugget
|A2= Iron Nugget
|B2= Iron Nugget
|C2= Iron Nugget
|A3= Iron Nugget
|B3= Iron Nugget
|C3= Iron Nugget
|Output=Iron Ingot
|type= Material
|foot=1
}}
=== Smelting ===
{{see also|Iron Ore#Natural generation}}[[Smelting]] raw iron in a [[furnace]] or [[blast furnace]] is the most common way to obtain iron ingots.
{{Smelting
|head=1
|Iron Ore;Deepslate Iron Ore
|Iron Ingot
|0,7
}}
{{Smelting
|foot=1
|Raw Iron
|Iron Ingot
|0,7
}}
=== Compound creation ===
Iron Ingot can be created from its base [[element]]s, using the [[compound creator]].{{only|bedrock|education}}
{| class="wikitable"
!Name
!Elements
!Example recipe
|- <!-- Temporarily using crafting grid as a substitute for the compound creator (template not yet available), since the layout is the same, even if the appearance is different -->
!Iron Ingot
|Iron <br>
|{{Crafting Table
|shapeless= 1
|A2=Iron
|Output=Iron Ingot}}
|}
=== Mob loot ===
{{see also|Tutorials/Iron golem farming}}
[[Iron golem]]s drop 3-5 iron ingots upon death, regardless of the way they die. The looting enchantment does not increase the amount of iron ingots dropped.
[[Zombie]]s, [[husk]]s, and [[zombie villager]]s have a 2.5% ({{frac|1|40}}) chance of dropping either an iron ingot, [[carrot]], or [[potato]] when killed by a player or tamed wolf. This is increased by 1% ({{frac|1|100}}) per level of looting. This gives iron ingots the following chances of dropping:
* {{frac|1|120}} (about 0.83%)
* {{frac|7|600}} (about 1.17%) with Looting I
* {{frac|9|600}} (1.50%) with Looting II
* {{frac|11|600}} (about 1.83%) with Looting III
== Usage ==
=== Crafting ingredient ===
{{crafting usage}}
=== Trading ===
Apprentice-level Armorer, Toolsmith, and Weaponsmith [[Villager|villagers]] buy 3 iron ingots for an [[emerald]] as their third trade.{{only|bedrock}}
Apprentice-level Armorer villagers have a 50% chance to buy 4 iron ingots for one emerald, and apprentice-level Toolsmith and Weaponsmith villagers always offer to buy 4 iron ingots for one emerald.{{only|java}}
=== Repairing ===
Iron ingots are the repair items for the iron [[tier]] and chainmail and iron [[armor material]]s, and thus can be used to [[item repair|repair]] the following items in an [[anvil]]:
* {{ItemLink|Chainmail Helmet}}
* {{ItemLink|Chainmail Chestplate}}
* {{ItemLink|Chainmail Leggings}}
* {{ItemLink|Chainmail Boots}}
* {{ItemLink|Iron Helmet}}
* {{ItemLink|Iron Chestplate}}
* {{ItemLink|Iron Leggings}}
* {{ItemLink|Iron Boots}}
* {{ItemLink|Iron Sword}}
* {{ItemLink|Iron Axe}}
* {{ItemLink|Iron Pickaxe}}
* {{ItemLink|Iron Shovel}}
* {{ItemLink|Iron Hoe}}
=== Healing iron golems ===
{{control|Using}} an iron ingot on an [[iron golem]] restores its health by {{hp|25}}.
=== Beacons ===
Iron ingots can be used to select powers from a [[beacon]]. The player must select one of the available powers, and then insert an iron ingot in the item slot.
An iron ingot can be substituted for an [[emerald]], a [[gold ingot]], a [[diamond]], or a [[netherite ingot]].
=== Smithing ingredient ===
{{Smithing
|head=1
|ingredients=Any Armor Trim +<br/>Any Armor Piece + <br/>Iron Ingot
|Any Armor Trim Smithing Template
|Netherite Chestplate
|Iron Ingot
|Iron Trim Netherite Chestplate
|showdescription=1
|description = All armor types can be used in this recipe,<br/>a netherite chestplate is shown as an example.<br/>
|tail=1
}}
;Trim color palette
The following color palettes are shown on the designs on trimmed armor:
*{{TrimPalette|iron ingot}}
*{{TrimPalette|iron ingot|darker=1}} (a darker color palette is used when an iron armor piece is trimmed using an iron ingot).
== Achievements ==
{{load achievements|Acquire Hardware}}
== Advancements ==
{{load advancements|Acquire Hardware}}
== Data values ==
=== ID ===
{{edition|java}}:
{{ID table
|edition=java
|showitemtags=y
|showforms=y
|generatetranslationkeys=y
|displayname=Iron Ingot
|spritetype=item
|nameid=iron_ingot
|itemtags=beacon_payment_items
|form=item
|foot=1}}
{{edition|bedrock}}:
{{ID table
|edition=bedrock
|shownumericids=y
|showforms=y
|notshowbeitemforms=y
|generatetranslationkeys=y
|displayname=Iron Ingot
|spritetype=item
|nameid=iron_ingot
|id=305
|form=item
|foot=1}}
== History ==
{{History|java indev}}
{{History||0.31|snap=20100128|[[File:Iron Ingot JE1.png|32px]] Added iron ingots.}}
{{History|||snap=20100129|[[File:Iron Ingot JE2 BE1.png|32px]] The texture of iron ingots has been changed.
|Iron ingots can be [[smelting|smelted]] from [[iron ore]] and [[drops|drop]] 3–5 iron ingots.
|Iron ingots can be used to craft [[iron block]]s, [[flint and steel]] and iron [[sword]]s, [[shovel]]s, [[pickaxe]]s and [[axe]]s.}}
{{History|||snap=20100130|Iron ingots are now used to craft [[arrow]]s.|[[Iron block]]s now require 9 iron ingots (3×3) instead 4 (2×2) to be [[crafting|crafted]], making them much more expensive.}}
{{History||20100206|Iron ingots can now be used to [[crafting|craft]] iron [[hoe]]s.}}
{{History||?|[[Smelting]] now [[drops]] only 1 iron ingot (down from 3–5).}}
{{History||20100218|Iron ingots are now used to craft iron [[helmet]]s, [[chestplate]]s, [[leggings]] and [[boots]].}}
{{History|java infdev}}
{{History||20100615|Iron ingots are now used to craft [[bucket]]s.}}
{{History||20100618|Iron ingots are now used to craft [[rail]]s and [[minecart]]s.}}
{{History||20100625-2|Iron ingots can be found in [[dungeon]] [[chest]]s.}}
{{History|java alpha}}
{{History||v1.0.1|Iron ingots are now used to [[crafting|craft]] iron [[door]]s.}}
{{History||v1.0.14|Iron ingots are no longer used to craft [[arrow]]s.}}
{{History||v1.1.0|Iron ingots are now used to craft [[compass]]es.}}
{{History|java beta}}
{{History||1.5|Iron ingots are now used to craft [[detector rail]]s.}}
{{History||1.7|Iron ingots are now used to craft [[piston]]s and [[shears]].}}
{{History||1.8|snap=Pre-release|Iron ingots are found in the new [[stronghold]] storeroom and [[mineshaft]] [[chest]]s.
|Iron ingots are now used to craft [[iron bars]].}}
{{History|java}}
{{History||1.0.0|snap=Beta 1.9 Prerelease 2|Iron ingots are now used to craft [[cauldron]]s.}}
{{History|||snap=Beta 1.9 Prerelease 3|Iron ingots are now found in the new stronghold altar [[chest]]s.}}
{{History||1.1|snap=12w01a|Iron ingots are now found in [[village]] blacksmith chests.}}
{{History||1.2.1|snap=12w06a|[[Zombie]]s now rarely [[drops|drop]] iron ingots, making it a [[renewable resource]].}}
{{History|||snap=12w08a|[[Iron golem]]s now drop 3–5 iron ingots.}}
{{History||1.3.1|snap=12w21a|Added [[desert temple]]s, with a hidden [[chest]] room and loot containing iron ingots.
|Blacksmith [[villager]]s now [[trading|buy]] 8–9 iron ingots for 1 [[emerald]].}}
{{History|||snap=12w22a|Added [[jungle temple]]s, which contain loot [[chest]]s with iron ingots.
|Iron ingots are now used to craft [[tripwire hook]]s.}}
{{History||1.4.2|snap=12w32a|Iron ingots can be used to activate [[beacon]]s.}}
{{History|||snap=12w41a|Iron ingots are now used to craft [[anvil]]s.}}
{{History|||snap=12w42a|Anvils now need 4 iron ingots to [[craft]] instead of 1.}}
{{History||1.5|snap=13w01a|Iron ingots are now used to [[crafting|craft]] heavy [[weighted pressure plate]]s.}}
{{History|||snap=13w02a|Iron ingots are now used to craft [[hopper]]s and [[activator rail]]s.}}
{{History||1.6.1|snap=13w16a|Iron ingot is now used to craft iron [[horse armor]] and [[horse saddle]].}}
{{History|||snap=13w18a|Iron ingot is no longer used to craft iron [[horse armor]] and [[horse saddle]].|Iron ingots are now found in [[nether fortress]] [[chest]]s.}}
{{History||1.8|snap=14w02a|[[Trading]] for iron ingots has been changed: armorer, weapon smith and tool smith [[villager]]s now [[trading|buy]] 7–9 iron ingots for 1 [[emerald]].}}
{{History|||snap=14w07a|Iron ingots are now used to craft [[iron trapdoor]]s.}}
{{History||1.9|snap=15w31a|Iron ingots are now found in [[end city]] ship [[chest]]s.}}
{{History|||snap=15w33c|Iron ingots are now used to craft [[shield]]s.}}
{{History|||snap=15w44a|The average yield from [[dungeon]] and [[desert temple]] chests has been substantially decreased.
|The average yield from [[mineshaft]] and [[nether fortress]] chests has been slightly decreased.}}
{{History||1.11|snap=16w39a|Iron ingots are now found in the new [[woodland mansion]] chests.}}
{{History||1.11.1|snap=16w50a|Iron ingots are now used to craft [[iron nugget]]s.}}
{{History||1.13|snap=17w47a|Prior to [[1.13/Flattening|''The Flattening'']], this [[item]]'s numeral ID was 265.}}
{{History|||snap=18w10a|Iron ingots now generate in [[buried treasure]] [[chest]]s.}}
{{History|||snap=18w11a|Iron ingots can now be found in the chests of [[shipwreck]]s.}}
{{History||1.14|snap=18w43a|Iron ingots can now be used to craft [[crossbow]]s.
|[[File:Iron Ingot JE3 BE2.png|32px]] The texture of iron ingots has been changed.}}
{{History|||snap=18w47a|Iron ingots can now be found inside of loot [[chest]]s on top of [[pillager outpost]]s.}}
{{History|||snap=18w50a|Iron ingots can now be found in chests in [[village]] toolsmith houses.
|Iron ingots can now be used to craft a [[blast furnace]].}}
{{History|||snap=19w04a|Iron ingots can now be used to craft [[stonecutter]]s.}}
{{History||1.15|snap=19w41a|Iron ingots can now be used to heal [[iron golem]]s.}}
{{History||1.16|snap=20w16a|Iron ingots now generate in [[bastion remnants]] chests.
|Iron ingots are now used to craft [[chain]]s.}}
{{History||1.16.2|snap=20w30a|The average yield of iron ingots from bastion remnant chests has been slightly increased.}}
{{History||1.17|snap=21w08a|Iron ingots can now be smelted from [[deepslate iron ore]].}}
{{History|||snap=21w14a|Iron ingots can now be smelted from [[raw iron]].}}
{{History||1.20<br>(Experimental)|link=1.19.4|snap=23w04a|Iron ingots can now be used as an armor trim material.}}
{{History|||snap=23w05a|Iron ingots can now be trimmed with iron [[armor]].}}
{{History|pocket alpha}}
{{History||v0.2.0|[[File:Iron Ingot JE2 BE1.png|32px]] Added iron ingots. They are currently unobtainable and serve no purpose.}}
{{History||v0.3.2|Iron ingots are now obtainable by [[smelting]] iron ore in a [[furnace]].
|Iron ingots can be used to craft [[shears]], [[blocks of iron]] and iron [[pickaxe]]s, [[axe]]s, [[sword]]s and [[shovel]]s.}}
{{History||v0.4.0|Iron ingots are now used to craft [[flint and steel]] and iron [[hoe]]s.}}
{{History||v0.5.0|Iron ingots are now used to craft [[nether reactor core]]s.}}
{{History||v0.6.0|Iron ingots are now used to craft iron [[armor]].}}
{{History||v0.7.0|Iron ingots are now used to craft [[bucket]]s.}}
{{History||v0.8.0|snap=build 1|Iron ingots are now used to craft [[compass]]es and [[iron bars]].}}
{{History|||snap=build 2|Iron ingots are now used to craft [[minecart]]s and [[rail]]s.}}
{{History||v0.9.0|snap=build 1|Iron ingots can now be found in [[village]] blacksmith [[chest]]s, [[stronghold]] altar chests and [[dungeon]] chests.
|[[Zombie]]s now rarely drop iron ingots.}}
{{History||v0.12.1|snap=build 1|Iron ingots are no longer used to craft [[nether reactor core]]s and are instead dropped by it.
|Iron ingots are now used to craft [[anvil]]s.
|Iron ingots are now found in [[nether fortress]] chests.
|Added [[iron golem]]s, which [[drops|drop]] iron ingots.
|Iron ingots can now be used to repair iron [[tool]]s, [[armor]] and [[weapon]]s in [[anvil]]s.
|Added [[zombie villager]]s, which rarely drop iron ingots.}}
{{History||v0.13.0|snap=build 1|Iron ingots are now used to craft [[tripwire hook]]s, [[detector rail]]s, [[iron trapdoor]]s and heavy [[weighted pressure plate]]s.
|Added [[desert temple]]s, which have hidden [[chest]] rooms and loot containing iron ingots.}}
{{History||v0.14.0|snap=build 1|Iron ingots are now used to craft [[hoppers]] and [[cauldron]]s.
|Iron ingots can now be found in [[minecart with chest|minecart chests]] generated in [[mineshaft]]s.}}
{{History||v0.15.0|snap=build 1|Iron ingots are now used to craft [[piston]]s.
|Added [[jungle temple]]s, which have hidden [[chest]] rooms and main treasure rooms that have loot containing iron ingots.
|Added [[husk]]s, which rarely [[drops|drop]] iron ingots.}}
{{History||v0.16.0|snap=build 4|Iron ingots can now be used to activate [[beacon]]s.}}
{{History|pocket}}
{{History||1.0.0|snap=alpha 0.17.0.1|Iron ingots can now be found in [[end city]] ship [[chest]]s.
|Iron ingots can now be found in [[stronghold]] storeroom chests.}}
{{History||1.0.4|snap=alpha 1.0.4.0|Added [[trading]]—armorer, weaponsmith and toolsmith [[villager]]s now [[trading|buy]] 7–9 iron ingots for 1 [[emerald]].}}
{{History||1.1.0|snap=alpha 1.1.0.0|Iron ingots can now be [[crafting|crafted]] using [[iron nugget]]s.
|Iron ingots can now be used to [[crafting|craft]] iron nuggets.
|Iron ingots can now be found in [[woodland mansion]] [[chest]]s.}}
{{History|bedrock}}
{{History||1.4.0|snap=beta 1.2.14.2|Iron ingots now generate in [[buried treasure]] [[chest]]s.
|Iron ingots can now be found in [[shipwreck]] treasure chests.}}
{{History||1.8.0|snap=beta 1.8.0.10|Iron ingots can now be used to craft [[crossbow]]s.}}
{{History||1.10.0|snap=beta 1.10.0.3|Iron ingots can now be found inside [[pillager outpost]]s and plains [[village]]s' weaponsmith chests.
|Iron ingots can now be used to craft [[blast furnace]]s, [[stonecutter]]s and [[shield]]s.
|[[File:Iron Ingot JE3 BE2.png|32px]] The texture of iron ingots has been changed.}}
{{History||1.11.0|snap=beta 1.11.0.1|Iron ingots can now be found in [[village]] armorer and toolsmith [[chest]]s.
|Iron ingots can now be found in [[savanna]], [[taiga]], [[desert]] and [[snowy taiga]] village weaponsmiths.}}
{{History|||snap=beta 1.11.0.4|Armorer, toolsmith, and weaponsmith [[villager]]s now [[trading|buy]] 4 iron ingots for an [[emerald]].}}
{{History||1.16.0|snap=beta 1.16.0.57|Iron ingots now generate in bastion remnants chests.}}
{{History||1.17.0|snap=beta 1.16.230.52|Iron ingots can now be smelted from [[deepslate iron ore]].}}
{{History|||snap=beta 1.17.0.50|Iron ingots can now be smelted from [[raw iron]].}}
{{History||1.18.10|snap=beta 1.18.10.26|Iron ingots can now be used to heal iron golems.}}
{{History||1.19.80|snap=beta 1.19.80.21|Iron ingots can now be used as an armor trim material.}}
{{History|console}}
{{History||xbox=TU1|xbone=CU1|ps=1.0|wiiu=Patch 1|switch=1.0.1|[[File:Iron Ingot JE2 BE1.png|32px]] Added iron ingots.}}
{{History||xbox=none|xbone=none|ps=1.90|wiiu=none|switch=none|[[File:Iron Ingot JE3 BE2.png|32px]] The texture of iron ingots has been changed.}}
{{History|new3DS}}
{{History||0.1.0|[[File:Iron Ingot JE2 BE1.png|32px]] Added iron ingots.}}
{{History|foot}}
== Issues ==
{{issue list}}
== Trivia ==
* To craft each recipe once, a player would need 152 iron ingots, including 27 for the iron blocks in an [[anvil]], while using the extra tripwire hook for the [[crossbow]] and the [[iron nuggets]] for the [[chain]].
== See also ==
* {{BlockLink|Block of Iron}}
* {{ItemSprite|Iron Chestplate}} [[Iron armor]]
* {{ItemLink|Iron Nugget}}
* {{BlockLink|Iron Ore}}
* [[Ores]]
== External links ==
* {{Mcnet|taking-inventory--iron-ignot|Taking Inventory: Iron Ingot}}
{{Items}}
[[cs:Železný ingot]]
[[de:Eisenbarren]]
[[es:Lingote de hierro]]
[[fr:Lingot de fer]]
[[hu:Vasrúd]]
[[it:Lingotto di ferro]]
[[ja:鉄インゴット]]
[[ko:철괴]]
[[nl:IJzerstaaf]]
[[pl:Sztabka żelaza]]
[[pt:Barra de ferro]]
[[ru:Железный слиток]]
[[uk:Залізний зливок]]
[[zh:铁锭]]
[[Category:Renewable resources]]</li></ul> | build 1 | Added huge mushrooms. | |||
0.10.0{{Extension DPL}}<ul><li>[[Dye|Dye]]<br/>{{Item
| title = Dyes
| image = White Dye.png
| extratext = View [[#Gallery|all renders]]
| renewable = Yes
| stackable = Yes (64)
}}
'''Dyes''' are a set of sixteen items used to change the color of [[wool]], [[carpet]]s, [[terracotta]], [[concrete powder]], [[glass]], [[shulker box]]es, [[bed]]s, [[candle]]s, the patterns on [[banner]]s, [[firework star]]s, certain mobs, and text on [[sign]]s and [[hanging sign]]s. {{IN|bedrock}} they can also be used to dye water in a [[cauldron]] (which is thereafter used to dye leather [[armor]]); {{in|java}} leather armor can be dyed directly. {{IN|education}} dyes can also be used to dye [[balloon]]s and [[glow stick]]s.
{{IN|bedrock|education}}, [[bone meal]], [[ink sac]]s, [[lapis lazuli]], and [[cocoa bean]]s can generally substitute for [[white dye]], [[black dye]], [[blue dye]], and [[brown dye]], respectively, in crafting recipes and for use in dyeing items or mobs. However, they have other important uses that aren't related to color, and are therefore not considered true dyes. They are mentioned in this article only in regard to their use as dyeing agents; see their individual articles for complete information about them.
[[File:Dye Recipes.png|400px|thumb|A guide for creating all the dyes]]
== Obtaining ==
<!--[[File:Dye Chart.png|350px|thumb|A guide to crafting all the dyes.{{until|java 1.14}}]]-->
Dyes can be produced by crafting them from plants (mainly flowers), by crafting dyes of different colors together, by smelting plants, or by trading with a [[wandering trader]].
{{loadPage|Crafting/Dye|Crafting|h3}}
=== Smelting ===
{{smelting|head=1|Sea Pickle|Lime Dye|0,2}}
{{smelting|foot=1|Cactus|Green Dye|1||b=Lapis Lazuli|c=Any fuel|d=1}}
=== Trading ===
[[Wandering trader]]s can sell 3 dyes for an [[emerald]]. {{IN|bedrock}}, they can also sell 3 lapis lazuli, bone meal, cocoa beans, or ink sacs for one emerald.
Apprentice-level cleric [[villager]]s sell one lapis lazuli per emerald.
=== Chest loot ===
{{#invoke:LootChest|base3|blue-dye,green-dye,orange-dye,light-blue-dye,yellow-dye,white-dye}}
=== Other ===
Ink sacs can also be created using 1 iron, 1 sulfur, and 4 oxygen in the [[compound creator]]. {{only|bedrock|education}}
== Usage ==
Similar to their use in crafting, [[bone meal]], [[ink sac]]s, [[lapis lazuli]], and [[cocoa beans]] can be substituted for the corresponding dye in any of the following usages unless otherwise specified.{{only|bedrock}} <!--- sections are ordered by craftable dyeable blocks, dyeable items, version exclusive sections, and non-crafting miscellaneous uses--->
=== Dyeing wool and mobs ===
Players can dye wool by placing [[wool]] and any dye in a crafting grid.
{{Crafting
|nocat=1
|Any Wool
|Matching Dye
|Output=Any Wool
}}
Dyes can be {{control|use|text=used}} on sheep to change the color of the wool. Shearing a colored sheep drops the corresponding color of the wool, and the sheep retains the color when the wool regenerates. [[Breeding]] colored sheep produces a lamb colored as one of the parent sheep, or a color resulting from the combination of both parents' color. The color combining follows the same rules that dyes use – red and yellow sheep produce an orange lamb, but a blue and yellow sheep cannot create a green lamb. The unlimited reproduction of colored sheep makes dyeing and shearing sheep infinitely more efficient than just dyeing wool directly.
Dye can also be used on a tamed [[wolf]] or [[cat]] to change the color of its collar from the default red to the color of the dye.
=== Dyeing carpets ===
Carpets can be dyed.
{{Crafting
|Any Carpet
|Matching Dye
|Output= Matching Carpet
|type= Building block
}}
=== Dyeing terracotta ===
[[Terracotta]] can be dyed by placing 8 blocks around a dye on a crafting table.
{{Crafting
|nocat=1
|A1=Terracotta |B1=Terracotta |C1=Terracotta
|A2=Terracotta |B2=Matching Dye |C2=Terracotta
|A3=Terracotta |B3=Terracotta |C3=Terracotta
|Output=Matching Dyed Terracotta,8
}}
=== Creating concrete powder ===
Dyes can also be used to craft [[concrete powder]], which can then be set into their respective [[concrete]] blocks (they cannot be dyed directly).
{{Crafting
|nocat=1
|Sand |Gravel |Sand
|Gravel |Matching Dye |Gravel
|Sand |Gravel |Sand
|Output=Matching Concrete Powder,8
}}
=== Staining glass ===
[[Stained glass]] can be stained by placing 8 blocks of glass around a dye on a [[crafting table]]. Just like regular glass, stained glass can be crafted into stained glass panes. The recipe for this is the same as with regular glass.
{{Crafting
|nocat=1
|A1=Glass |B1=Glass |C1=Glass
|A2=Glass |B2=Matching Dye |C2=Glass
|A3=Glass |B3=Glass |C3=Glass
|Output=Matching Stained Glass,8
|head=1
}}
{{Crafting
|nocat=1
|A1= Glass Pane
|B1= Glass Pane
|C1= Glass Pane
|A2= Glass Pane
|B2= Matching Dye
|C2= Glass Pane
|A3= Glass Pane
|B3= Glass Pane
|C3= Glass Pane
|Output= Matching Stained Glass Pane,8
|type= Decoration block
|foot=1
}}
=== Dyeing shulker boxes ===
[[Shulker box]]es are generated in a light shade of purple (like the [[purpur block]]), but can be dyed any color. They can also be re-dyed as often as desired.
{{Crafting
|ignoreusage=1
|showname=1
|Any Shulker Box
|Matching Dye
|Output=Matching Shulker Box
}}
=== Dyeing beds ===
Players can dye beds by placing a [[bed]] and any color dye in a crafting grid.
{{Crafting
|nocat=1
|Any Bed
|Matching Dye
|Output=Matching Bed
}}
=== Dyeing candles ===
Players can dye [[candles]] by placing an undyed candle and any color dye in a crafting grid.
{{Crafting
|ignoreusage=1
|Candle
|Matching Dye
|Output=Matching Dyed Candle
}}
=== Banner patterns ===
{{main|Banner#Patterns}}
Dyes are used in most banner patterns to determine the pattern and color displayed.
=== Dyeing armor ===
[[File:DyeGraph2.png|200px|thumb|A graph showing all combinations of two dyes on a [[tunic]].]]
Leather [[armor]] can be dyed by:
* Crafting dyes with a piece of leather armor or leather [[horse armor]].{{Only|java}}
* Dousing the leather armor or leather [[horse armor]] in a [[cauldron]] to which dyes have been added.{{Only|bedrock}}
There are 5,713,438<ref>https://anrar4.github.io/DyeLeatherArmor/</ref> (34.1% of sRGB) colors leather armor can be, as it is possible to put more than one dye on the crafting bench alongside the leather armor. Armor can be dyed multiple times with previous colors affecting the final outcome. Colored armor can be reverted to their original color using a [[cauldron]] with undyed water.
The game has a specific formula for calculating the color of dyed armor: each color, in the RGB color model, has a red value, green value, and blue value. For each dye in the crafting grid, and the armor itself (if it is already dyed), the red, green, and blue values are added to running totals. In addition, a running total of the highest value (be it red, green, or blue) is also kept. After this, each total is divided by the number of colors used. This effectively produces the average red, green, blue, and maximum values. The maximum value of the average RGB values is also calculated. Finally, each average RGB value is multiplied by the average maximum value and divided by the maximum of the average RGB values. The modified average RGB values are then used as the final color. This procedure can be summed up with the following equations:
for each color (all "total" variables start at 0 before counting):
totalRed = totalRed + redValue
totalGreen = totalGreen + greenValue
totalBlue = totalBlue + blueValue
totalMaximum = totalMaximum + max(redValue, greenValue, blueValue)
numberOfColors = numberOfColors + 1
averageRed = totalRed / numberOfColors
averageGreen = totalGreen / numberOfColors
averageBlue = totalBlue / numberOfColors
averageMaximum = totalMaximum / numberOfColors
maximumOfAverage = max(averageRed, averageGreen, averageBlue)
gainFactor = averageMaximum / maximumOfAverage
resultRed = averageRed * gainFactor
resultGreen = averageGreen * gainFactor
resultBlue = averageBlue * gainFactor
Due to the way this formula works, the resulting color can never be darker than the average of the input colors and is often lighter and more saturated. Of course, the resulting color can never be lighter or more saturated than the lightest or most saturated input color. In addition, this formula never creates an RGB value higher than 255 (which would be invalid in the 8-bit RGB color model).
If leather armor is renamed on an [[anvil]], it retains its name when dyed or undyed.
;Mixing Samples
: {{ItemSprite|Yellow Dye}} + {{ItemSprite|Yellow Dye}} = {{Tint|leather-chestplate| #{{CalcDye| yellow=2 }} | code=1}}
: {{ItemSprite|Red Dye}} + {{ItemSprite|Blue Dye}} + {{ItemSprite|White Dye}} = {{Tint|leather-chestplate| #{{CalcDye| red=1 | blue=1 | white=1}} | code=1}}
: {{ItemSprite|Green Dye}} + {{ItemSprite|Red Dye}} + {{ItemSprite|Pink Dye}} = {{Tint|leather-chestplate| #{{CalcDye| green=1 | red=1 | pink=1}} | code=1}}
=== Dyeing firework stars ===
A [[firework star]] can have a single color or a combination of up to eight colors when crafted with dyes. Adding one or more dyes to a crafted firework star adds a "fade to color" effect to it, overwriting any existing fade colors.
{{Crafting
|head=1
|ignoreusage=1
|ingredients=[[Gunpowder]] +<br>Any Dye (1–8) +<br>Extra ingredient (optional)
|Gunpowder
|Matching Dye
|Diamond;Glowstone Dust;Head;Gold Nugget;Feather;Fire Charge;
|Output=Matching Firework Star
}}
{{Crafting
|ignoreusage=1
|Matching Firework Star
|Any Dye
|Output=Matching Firework Star
|foot=1
}}
=== Creating balloons ===
Dye can be used to craft balloons.{{only|education}}
{{Crafting
|nocat=1
|A1= Latex
|B1= Matching Dye
|C1= Latex
|A2= Latex
|B2= Helium
|C2= Latex
|A3= Latex
|B3= Lead
|C3= Latex
|Output= Matching Balloon
}}
=== Creating glow sticks ===
Dye can also be used to craft glow sticks.{{only|education}}
{{Crafting
|nocat=1
|A1= Polyethylene
|B1= Hydrogen Peroxide
|C1= Polyethylene
|A2= Polyethylene
|B2= Matching Dye
|C2= Polyethylene
|A3= Polyethylene
|B3= Luminol
|C3= Polyethylene
|Output= Matching Glow Stick
}}
=== Dyeing water inside cauldrons ===
Water can be dyed in a cauldron by holding any dye in the hand and pressing {{Ctrl|use}} on a cauldron filled with water.{{only|bedrock}}
=== Signs ===
Dye can be {{control|used}} on a [[sign]] or a [[hanging sign]] to change the text color. {{IN|bedrock}}, [[ink sac]]s cannot be used for this purpose; black dye must be used to change the text to black.
=== Trading ===
Apprentice, journeyman and expert-level shepherd [[villager]]s buy any of the 12 dyes for an [[emerald]].
== Color values ==
The "color codes" are used to determine the color imparted on sheep, wolf and cat collars, firework stars, [[beacon]] beams, and dyed leather armor. The hex value is shown in the extended tooltips of dyed leather armor; however, to set the color using an NBT data tag in a [[command]], the decimal value must be used instead. The color values for firework stars are slightly different from the ones listed below, and use [[Item colors#Firework stars|these values]] instead.
{| class="wikitable" style="margin:2px; border: 1px solid silver; text-align: left;" data-description="Data values"
! rowspan=2 | Description
! colspan=2 style="text-align:center" | Color Code
|-
! Dec
! <abbr title="Hexadecimal color code">Hex</abbr>
|-
| style="text-align:center" | White || 16383998 || {{color|#F9FFFE}}
|-
| style="text-align:center" | Light gray || 10329495 || {{color|#9D9D97}}
|-
| style="text-align:center" | Gray || 4673362 || {{color|#474F52}}
|-
| style="text-align:center" | Black || 1908001|| {{color|#1D1D21}}
|-
| style="text-align:center" | Brown || 8606770 || {{color|#835432}}
|-
| style="text-align:center" | Red || 11546150 || {{color|#B02E26}}
|-
| style="text-align:center" | Orange || 16351261 || {{color|#F9801D}}
|-
| style="text-align:center" | Yellow || 16701501 || {{color|#FED83D}}
|-
| style="text-align:center" | Lime || 8439583 || {{color|#80C71F}}
|-
| style="text-align:center" | Green || 6192150 || {{color|#5E7C16}}
|-
| style="text-align:center" | Cyan || 1481884|| {{color|#169C9C}}
|-
| style="text-align:center" | Light blue || 3847130 || {{color|#3AB3DA}}
|-
| style="text-align:center" | Blue || 3949738 || {{color|#3C44AA}}
|-
| style="text-align:center" | Purple || 8991416 || {{color|#8932B8}}
|-
| style="text-align:center" | Magenta || 13061821 || {{color|#C74EBD}}
|-
| style="text-align:center" | Pink || 15961002 || {{color|#F38BAA}}
|}
== Sounds ==
{{edition|java}}:
{{Sound table
|rowspan=2
|sound=Dye.ogg
|subtitle=Dye stains
|source=block
|description=When dye is used on a [[sign]]
|id=item.dye.use
|translationkey=subtitles.item.dye.use
|volume=1.0
|pitch=1.0/0.9/0.95/1.1
|distance=16}}
{{Sound table
|subtitle=Dye stains
|source=player
|description=When dye is used on a [[sheep]]
|id=item.dye.use
|translationkey=subtitles.item.dye.use
|volume=1.0
|pitch=1.0/0.9/0.95/1.1
|distance=16
|foot=1}}
{{edition|bedrock}}:
{{Sound table
|type=bedrock
|sound=Dye.ogg
|source=sound
|description=When dye is used on a sign
|id=sign.dye.use
|volume=1.0
|pitch=1.0}}
{{Sound table
|rowspan=3
|sound=Water Splash Old.ogg
|source=block
|description=When dye is added to a cauldron
|id=cauldron.adddye
|volume=0.1
|pitch=1.0}}
{{Sound table
|source=block
|description=When armor is dyed using a cauldron
|id=cauldron.dyearmor
|volume=0.1
|pitch=1.0}}
{{Sound table
|source=block
|description=When dye is removed from armor using a cauldron
|id=cauldron.cleanarmor
|volume=0.1
|pitch=1.0
|foot=1}}
== Achievements ==
{{load achievements|Rainbow Collection;Tie dye outfit}}
== Video ==
{{Video note|These videos are outdated, as it does not include details of the [[Java Edition 1.7.2|1.7.2]] update's changes to the dyeing system/production chain.}}
<div style="text-align:center">
<span style="display:inline-block">{{yt|8YD7oauNZHE}}</span>
<span style="display:inline-block">{{yt|7tETaRt7STM}}</span>
</div>
== History ==
{{History|java beta}}
{{History||January 3, 2011|link=https://web.archive.org/web/0/http://notch.tumblr.com/post/2582321901/2011-here-we-go|Notch mentions adding a "paint" feature if he can figure out how.}}
{{History||January 10, 2011<ref group="n">Supposed time when fragment was filmed. Based on modified date of client.jar/gui/trap.png in [[Beta 1.2]].</ref>|link=https://www.youtube.com/watch?v=cBF2ugTzXqQ&t=181s|[[File:Red Dye (pre-release).png|32px]] Shown rose red in development as part of [[Minecraft: The Story of Mojang]].}}
{{History||1.2|[[File:Ink Sac JE1 BE1.png|32px]] [[File:Red Dye JE1 BE1.png|32px]] [[File:Green Dye JE1 BE1.png|32px]] [[File:Cocoa Beans JE1 BE1.png|32px]] [[File:Lapis Lazuli JE1 BE1.png|32px]] [[File:Purple Dye JE1 BE1.png|32px]] [[File:Cyan Dye JE1 BE1.png|32px]] [[File:Light Gray Dye JE1 BE1.png|32px]] [[File:Gray Dye JE1 BE1.png|32px]] [[File:Pink Dye JE1 BE1.png|32px]] [[File:Lime Dye JE1 BE1.png|32px]] [[File:Yellow Dye JE1 BE1.png|32px]] [[File:Light Blue Dye JE1 BE1.png|32px]] [[File:Magenta Dye JE1 BE1.png|32px]] [[File:Orange Dye JE1 BE1.png|32px]] [[File:Bone Meal JE1 BE1.png|32px]] Added dyes.
|[[File:Black Dye (Recreated).png|32px]] [[File:Red Dye (pre-release).png|32px]] [[File:Green Dye (Recreated).png|32px]] [[File:Brown Dye (Recreated).png|32px]] [[File:Blue Dye (Recreated).png|32px]] [[File:Purple Dye (Recreated).png|32px]] [[File:Cyan Dye (Recreated).png|32px]] [[File:Light Gray Dye (Recreated).png|32px]] [[File:Gray Dye (Recreated).png|32px]] [[File:Pink Dye (Recreated).png|32px]] [[File:Lime Dye (Recreated).png|32px]] [[File:Yellow Dye (Recreated).png|32px]] [[File:Light Blue Dye (Recreated).png|32px]] [[File:Magenta Dye (Recreated).png|32px]] [[File:Orange Dye (Recreated).png|32px]] [[File:White Dye (Recreated).png|32px]] Leftovers of old textures can be seen in [[items.png]] with 100% opacity. The white dye texture was reused for [[Sugar]].
| The colors were as follows:{{verify|Did the color codes remain the same between Beta 1.2 and Java 1.11.2?}}
{{:Color/Java Edition dye colors before 17w06a}}
}}
{{History|java}}
{{History||1.1|snap=11w49a|[[Sheep]] can now regrow their [[wool]] by eating [[grass block|grass]]. Dyed sheep regrow wool in their new color.}}
{{History||1.3.1|snap=12w19a|[[File:Cocoa Beans JE2.png|32px]] The texture of [[cocoa beans]] has been changed.}}
{{History|||snap=1.3|[[File:bone meal changes.gif|32px]] The textures of [[bone meal]], [[cactus green]], cocoa beans and [[rose red]] have been changed. The textures have been lowered one pixel.}}
{{History||1.4.2|snap=12w34a|Added the ability to dye leather [[armor]] and [[wolf]] collars.}}
{{History||1.4.4|snap=1.4.3|Color codes have been changed. The colors of red, brown, blue, purple, cyan, pink, light blue, magenta and orange were adjusted a little vividly.}}
{{History||1.6.1|snap=13w19a|[[Stained clay]] can now be crafted using dyes.}}
{{history||1.7.2|snap=13w36a|With the addition of new [[flower]]s, many secondary and tertiary dyes are now primary dyes.}}
{{History|||snap=13w41a|[[Stained glass]] can now be crafted using dyes.}}
{{History||1.8|snap=14w02a|As cleric [[villager]]s now sell lapis lazuli, all dyes have become fully renewable.}}
{{History|||snap=14w30a|Added [[banner]]s, which can be dyed.}}
{{History||1.9|snap=15w34a|Added [[shield]]s, which can be dyed indirectly by applying a matching [[banner]].}}
{{History||1.11|snap=16w39b|Dyes are now used to change the color of [[shulker box]]es.}}
{{History||1.12|snap=17w06a|Dyes are now used to craft [[concrete powder]].
|Color codes have been changed. All colors are adjusted more vividly. The changes were as follows:
{{:Color/Java Edition dye color changes in 17w06a}}
|Light blue dye, stained glass, and stained glass panes, did not change colors in this update. This means that they still use old colors.<ref name="unchanged dyes">{{Bug|MC-214643}}<br>{{Bug|MC-214641}}</ref>
}}
{{History|||snap=17w15a|Dyes can now apply color to white [[bed]]s.}}
{{History||1.13|snap=17w47a|The different data values for the <code>dye</code> ID have been split up into their own IDs.}}
{{History||1.14|snap=18w43a|[[Bone meal]], [[ink sac]]s, [[cocoa beans]] and [[lapis lazuli]] are no longer considered dyes.
|[[File:White Dye JE1 BE1.png|32px]] [[File:Black Dye JE1 BE1.png|32px]] [[File:Brown Dye JE1 BE1.png|32px]] [[File:Blue Dye JE1 BE1.png|32px]] Added [[white dye|white]], [[black dye|black]], [[brown dye|brown]] and [[blue dye]]s.
|"Rose Red", "Dandelion Yellow" and "Cactus Green" have been renamed to "Red Dye", "Yellow Dye" and "Green Dye", respectively.
|[[Glass pane]]s and [[carpet]]s can now be dyed.
|[[File:Light Gray Dye JE2 BE2.png|32px]] [[File:Gray Dye JE2 BE2.png|32px]] [[File:Red Dye JE2 BE2.png|32px]] [[File:Orange Dye JE2 BE2.png|32px]] [[File:Yellow Dye JE2 BE2.png|32px]] [[File:Lime Dye JE2 BE2.png|32px]] [[File:Green Dye JE2 BE2.png|32px]] [[File:Cyan Dye.png|32px]] [[File:Light Blue Dye JE2 BE2.png|32px]] [[File:Purple Dye JE2 BE2.png|32px]] [[File:Magenta Dye JE2 BE2.png|32px]] [[File:Pink Dye JE2 BE2.png|32px]] The textures of light gray, gray, red, orange, yellow, lime, green, cyan, light blue, purple, magenta, and pink dyes, have been changed. The color texture for light blue dye was not changed to reflect the updated colors from 1.12.<ref name="unchanged dyes"></ref>}}
{{History|||snap=18w44a|The color of the text on [[sign]]s can now be changed with dye.}}
{{History|||snap=18w49a|Yellow dyes can now be found in [[chest]]s in [[village]] mason houses.}}
{{History|||snap=18w50a|Green dyes can now be found in [[chest]]s in [[desert]] [[village]] houses.}}
{{History|||snap=19w05a|Added the [[wandering trader]], which can sell any type of dye.}}
{{History|||snap=19w11a|All 16 types of dyes can now be [[trading|bought]] by shepherd villagers.}}
{{History||1.16.2|snap=Pre-release 2|Reversed the order of dyes to match other colored items in the [[Creative inventory]].<ref name="reverse dye">{{Bug|MC-136553}}</ref>
|Regrouped dyes in the Creative inventory such that white, blue, brown, and black dyes are within and not [[cocoa beans]], [[ink sacs]], [[lapis lazuli]], and [[bone meal]].<ref name="regroup dye">{{Bug|MC-177684}}</ref>}}
{{History||1.17|snap=20w45a|Added [[candle]]s, which can be dyed.}}
{{History|||snap=21w03a|Added a sound for applying dyes.}}
{{History|||snap=21w19a|Candles can no longer be dyed.}}
{{History|||snap=Pre-release 1|Candles can now once again be dyed.}}
{{History||1.20<br>(Experimental)|link=1.19.3|snap=22w42a|The color of the text on [[hanging sign]]s can now be changed with dye.}}
{{History||1.20<br>(Experimental)|link=1.19.4|snap=23w07a|[[Torchflower]]s can now be crafted into orange dye.|[[Pink petals]] can now be crafted into pink dye.}}
{{History||1.20|snap=23w12a|[[Pitcher plant]]s can now be crafted into cyan dye.|Blue, light blue, orange, white, and yellow dye can now be found in [[suspicious gravel]] and [[suspicious sand]] in [[trail ruins]].}}
{{History|||snap=23w14a|Pitcher plants can now craft two [[cyan dye]] instead of one.}}
{{History|||snap=23w16a|Blue, light blue, orange, white, and yellow dye no longer generates in [[suspicious sand]] in [[trail ruins]].|Due to the split of the archaeological loot tables for the suspicious gravel within the [[trail ruins]]; blue, light blue, orange, white, and yellow dye now are in the common loot.}}
{{History|pocket alpha}}
{{History||v0.3.0|[[File:Bone Meal JE1 BE1.png|32px]] [[File:Light Gray Dye JE1 BE1.png|32px]] [[File:Gray Dye JE1 BE1.png|32px]] [[File:Ink Sac JE1 BE1.png|32px]] [[File:Cocoa Beans JE1 BE1.png|32px]] [[File:Red Dye JE1 BE1.png|32px]] [[File:Orange Dye JE1 BE1.png|32px]] [[File:Yellow Dye JE1 BE1.png|32px]] [[File:Lime Dye JE1 BE1.png|32px]] [[File:Green Dye JE1 BE1.png|32px]] [[File:Cyan Dye JE1 BE1.png|32px]] [[File:Light Blue Dye JE1 BE1.png|32px]] [[File:Lapis Lazuli JE1 BE1.png|32px]] [[File:Purple Dye JE1 BE1.png|32px]] [[File:Magenta Dye JE1 BE1.png|32px]] [[File:Pink Dye JE1 BE1.png|32px]] Added dyes. Only [[dandelion yellow]] and [[lapis lazuli]] are currently obtainable and have functionality.}}
{{History||v0.3.2|[[Cactus green]] is now obtainable by smelting [[cacti]].}}
{{History||v0.3.3|[[Bone meal]] is now obtainable via [[crafting]].}}
{{History||v0.4.0|[[Cyan dye]], [[light blue dye]], [[lime dye]], [[magenta dye]], [[orange dye]], [[pink dye]], and [[purple dye]] are now obtainable via crafting.
|[[Rose red]] is now obtainable by smelting red [[mushroom]]s.
|All available dyes, excluding bone meal, can now be used to craft their respective [[wool]] color.}}
{{History||v0.8.0|snap=build 1|[[File:Cocoa Beans JE3 BE2.png|32px]] The texture of cocoa beans has been changed.}}
{{History|||snap=build 3|[[Ink sac]]s, [[cocoa bean]]s, [[gray dye]], and [[light gray dye]] are now available in the [[creative]] [[inventory]].
|Rose red can now be obtained from [[beetroot]]s.}}
{{History||v0.9.0|snap=build 1|Cocoa beans can now be obtained from [[cocoa pod]]s.
|The [[rose]] has been removed and replaced with a new poppy [[flower]] that can be crafted into rose red.}}
{{History|||snap=build 3|All new [[flower]]s can now be [[crafting|crafted]] into dyes. Because of this, many secondary and tertiary dyes are now primary dyes.
|[[Gray dye]] and [[light gray dye]] can now be obtained in [[survival]].}}
{{History|||snap=build 11|[[Terracotta|Stained clay]] can now be crafted using dyes.}}
{{History||v0.11.0|snap=build 1|[[Ink sac]]s can now be obtained from [[squid]].
|Added the ability to dye [[wolf]] collars.}}
{{History||v0.12.1|snap=build 1|Red [[mushroom]]s can no longer be smelted to obtain [[rose red]].}}
{{History||v0.14.0|snap=build 1|[[Cauldron]]s now used for leather dyeing, by applying a dye to a [[water]]-filled cauldron.}}
{{History||v0.16.0|snap=build 1|[[Cocoa bean]]s can no longer be crafted.}}
{{History|pocket}}
{{History||1.0.0|snap=alpha 0.17.0.1|Added a ''Dye'' button for [[sheep]].
|Added [[shulker]]s, which can be dyed.
|Added [[stained glass]]. Stain glass cannot be [[crafting|crafted]], but purple glass generates in [[end city|end cities]].}}
{{History||1.1.0|snap=alpha 1.1.0.0|Dyes can now apply color to a white [[bed]]s.
|Dyes are now used to craft [[concrete powder]].
|The color palette has been changed.}}
{{History|bedrock}}
{{History||1.2.0|snap=beta 1.2.0.2|Dyes can now be used for [[banner]] crafting.
|Dyes can now be used to craft [[firework star]]s.
|[[Stained glass]] is now [[crafting|craftable]], using dyes.}}
{{History||1.4.0|snap=beta 1.2.20.1|[[Lime dye]] can now be obtained from smelting [[sea pickle]]s.
|Dyes can now used to craft [[glow stick]]s and [[balloon]]s.}}
{{History||1.8.0|snap=beta 1.8.0.8|Dyes can now be used to dye [[cat]] collars.}}
{{History|||snap=beta 1.8.0.10|[[File:White Dye JE1 BE1.png|32px]] [[File:Black Dye JE1 BE1.png|32px]] [[File:Brown Dye JE1 BE1.png|32px]] [[File:Blue Dye JE1 BE1.png|32px]] Added [[white dye|white]], [[brown dye|brown]], [[black dye|black]] and [[blue dye]]s, which can be crafted from [[lapis lazuli]], [[bone meal]], [[cocoa beans]] and [[ink sac]]s. This, however, the later four still use as dyes.<ref>{{Bug|MCPE-42473}}</ref>
|"Rose Red", "Dandelion Yellow" and "Cactus Green" have been renamed to "Red Dye", "Yellow Dye" and "Green Dye", respectively.}}
{{History||1.9.0|snap=beta 1.9.0.0|Blue and white dye can now be obtained from [[cornflower]]s and [[lily of the valley]]s.}}
{{History||1.10.0|snap=beta 1.10.0.3|[[Glass pane]]s and [[carpet]]s can now be dyed.
|Only a single dye is now required to apply a banner pattern in a [[loom]].
|Various dyes except black dye, white dye, brown dye and blue dye are now [[trading|sold]] by [[wandering trader]]s.
|[[File:Bone Meal JE2 BE2.png|32px]] [[File:Light Gray Dye JE2 BE2.png|32px]] [[File:Gray Dye JE2 BE2.png|32px]] [[File:Ink Sac JE2 BE2.png|32px]] [[File:Cocoa Beans JE4 BE3.png|32px]] [[File:Red Dye JE3 BE3.png|32px]] [[File:Orange Dye JE2 BE2.png|32px]] [[File:Yellow Dye JE2 BE2.png|32px]] [[File:Lime Dye JE2 BE2.png|32px]] [[File:Green Dye JE2 BE2.png|32px]] [[File:Cyan Dye.png|32px]] [[File:Light Blue Dye JE2 BE2.png|32px]] [[File:Lapis Lazuli JE2 BE2.png|32px]] [[File:Purple Dye JE2 BE2.png|32px]] [[File:Magenta Dye JE2 BE2.png|32px]] [[File:Pink Dye JE2 BE2.png|32px]] The textures of bone meal, light gray, gray, ink sac, cocoa beans, red, orange, yellow, lime, green, cyan, light blue, lapis lazuli, purple, magenta, and pink dyes have been changed.}}
{{History||1.11.0|snap=beta 1.11.0.4|Dye can now be [[trading|sold]] to shepherd [[villager]]s.}}
{{History||1.16.210|snap=beta 1.16.210.59|The color of the text on [[sign]]s can now be changed with dye.}}
{{History|||snap=beta 1.16.210.60|The ability to dye the color of the text on [[sign]]s was temporarily removed.}}
{{History||1.16.220|snap=beta 1.16.220.50|The color of the text on [[sign]]s can now be changed with dye again.}}
{{History||1.17.10|snap=beta 1.17.10.22|Added [[candles]], which can be dyed.}}
{{History|console}}
{{History||xbox=TU1|xbone=CU1|ps=1.0|wiiu=Patch 1|switch=1.0.1|[[File:Bone Meal JE1 BE1.png|32px]] [[File:Light Gray Dye JE1 BE1.png|32px]] [[File:Gray Dye JE1 BE1.png|32px]] [[File:Ink Sac JE1 BE1.png|32px]] [[File:Cocoa Beans JE1 BE1.png|32px]] [[File:Red Dye JE1 BE1.png|32px]] [[File:Orange Dye JE1 BE1.png|32px]] [[File:Yellow Dye JE1 BE1.png|32px]] [[File:Lime Dye JE1 BE1.png|32px]] [[File:Green Dye JE1 BE1.png|32px]] [[File:Cyan Dye JE1 BE1.png|32px]] [[File:Light Blue Dye JE1 BE1.png|32px]] [[File:Lapis Lazuli JE1 BE1.png|32px]] [[File:Purple Dye JE1 BE1.png|32px]] [[File:Magenta Dye JE1 BE1.png|32px]] [[File:Pink Dye JE1 BE1.png|32px]] Added dyes.}}
{{History||xbox=TU9|[[File:Cocoa Beans JE3 BE2.png|32px]] The texture of cocoa beans has been changed.}}
{{History||xbox=none|xbone=none|ps=1.83|wiiu=none|switch=none|[[File:White Dye JE1 BE1.png|32px]] [[File:Black Dye JE1 BE1.png|32px]] [[File:Brown Dye JE1 BE1.png|32px]] [[File:Blue Dye JE1 BE1.png|32px]] Added [[white dye|white]], [[black dye|black]], [[brown dye|brown]], and [[blue dye|blue]] dyes, which can crafted from [[bone meal]], [[ink sac]], [[cocoa beans]], and [[lapis lazuli]].
|"Rose Red", "Dandelion Yellow" and "Cactus Green" have been renamed to "Red Dye", "Yellow Dye" and "Green Dye", respectively.}}
{{History||ps=1.90|[[File:Bone Meal JE2 BE2.png|32px]] [[File:Light Gray Dye JE2 BE2.png|32px]] [[File:Gray Dye JE2 BE2.png|32px]] [[File:Ink Sac JE2 BE2.png|32px]] [[File:Cocoa Beans JE4 BE3.png|32px]] [[File:Red Dye JE2 BE2.png|32px]] [[File:Orange Dye JE2 BE2.png|32px]] [[File:Yellow Dye JE2 BE2.png|32px]] [[File:Lime Dye JE2 BE2.png|32px]] [[File:Green Dye JE2 BE2.png|32px]] [[File:Cyan Dye.png|32px]] [[File:Light Blue Dye JE2 BE2.png|32px]] [[File:Lapis Lazuli JE2 BE2.png|32px]] [[File:Purple Dye JE2 BE2.png|32px]] [[File:Magenta Dye JE2 BE2.png|32px]] [[File:Pink Dye JE2 BE2.png|32px]] The textures of bone meal, light gray, gray, ink sac, cocoa beans, red, orange, yellow, lime, green, cyan, light blue, lapis lazuli, purple, magenta, and pink dyes have been changed.}}
{{History|3ds}}
{{History||0.1.0|[[File:Bone Meal JE1 BE1.png|32px]] [[File:Light Gray Dye JE1 BE1.png|32px]] [[File:Gray Dye JE1 BE1.png|32px]] [[File:Ink Sac JE1 BE1.png|32px]] [[File:Cocoa Beans JE3 BE2.png|32px]] [[File:Red Dye JE1 BE1.png|32px]] [[File:Orange Dye JE1 BE1.png|32px]] [[File:Yellow Dye JE1 BE1.png|32px]] [[File:Lime Dye JE1 BE1.png|32px]] [[File:Green Dye JE1 BE1.png|32px]] [[File:Cyan Dye JE1 BE1.png|32px]] [[File:Light Blue Dye JE1 BE1.png|32px]] [[File:Lapis Lazuli JE1 BE1.png|32px]] [[File:Purple Dye JE1 BE1.png|32px]] [[File:Magenta Dye JE1 BE1.png|32px]] [[File:Pink Dye JE1 BE1.png|32px]] Added dyes from [[Pocket Edition v0.15.4 alpha]].}}
{{History|foot}}
<gallery>
Pre-release dyes.png|Pre-release dye textures hidden within [[Items.png]].
</gallery>
;Notes
{{reflist|group=n}}
== Gallery ==
<gallery>
White Dye.png|White Dye
Light Gray Dye.png|Light Gray Dye
Gray Dye.png|Gray Dye
Black Dye.png|Black Dye
Brown Dye.png|Brown Dye
Red Dye.png|Red Dye
Orange Dye.png|Orange Dye
Yellow Dye.png|Yellow Dye
Lime Dye.png|Lime Dye
Green Dye.png|Green Dye
Cyan Dye.png|Cyan Dye
Light Blue Dye.png|Light Blue Dye
Blue Dye.png|Blue Dye
Purple Dye.png|Purple Dye
Magenta Dye.png|Magenta Dye
Pink Dye.png|Pink Dye
</gallery>
==Issues==
{{issue list}}
== Trivia ==
* Players can obtain each one of every color with 1 cocoa bean, 2 yellow dye, 2 ink sac, 3 green dye, 4 lapis lazuli, 4 red dye, and 6 bone meal (2 bones).
* The dyed sheep breeding behavior mirrors [[wikipedia:Lamarckism|Lamarck's theory]], in which the organisms evolve inheriting the external changes and adaptations of the previous generation, transmitting them to their offspring.
* In ''Bedrock Edition'', tertiary colors, along with their regular crafting recipes, can be crafted with primary colors. E.g.: Magenta can be crafted with one rose red and two bone meals.
* The colors of the dyes match the chat colors in [[color codes]] except for brown (dye only), light aqua, and gold (color codes only).
* The texture for light blue dye still uses the color from prior to the 1.12 World of Color update.<ref name="unchanged dyes"></ref>
== References ==
{{reflist}}
== External Links ==
* Tools for calculating leather dye combination: [https://minecraft.tools/en/armor.php minecraft.tools] (webapp); [https://github.com/pudquick/pyMCdyes/ pyMCDyes] (open-source Python script, outdated); [https://anrar4.github.io/DyeLeatherArmor/ DyeLeatherArmor]: a tool for calculating an exact crafting recipe for any sRGB color
{{Items}}
[[Category:Dyes]]
[[Category:Renewable resources]]
[[cs:Barvivo]]
[[de:Farbstoff]]
[[es:Tinte]]
[[fr:Teinture]]
[[hu:Színezés]]
[[it:Colorante]]
[[ja:染料]]
[[ko:염료]]
[[nl:Kleurstof]]
[[pl:Barwniki]]
[[pt:Corante]]
[[ru:Красители]]
[[th:สีย้อม]]
[[uk:Барвники]]
[[zh:染料]]</li><li>[[Pitcher Pod|Pitcher Pod]]<br/>{{wip}}
{{Block
| image = <gallery>
Pitcher Crop Age 0 JE1.png| Age 0
Pitcher Crop Age 1 JE1.png| Age 1
Pitcher Crop Age 2 JE1.png| Age 2
Pitcher Crop Age 3 JE1.png| Age 3
Pitcher Crop Age 4 JE1.png| Age 4
</gallery>
| image2 = Pitcher Pod.png
| transparent = Yes
| light = Yes
| tool = N/A
| renewable = Yes
| stackable = Yes (64)
| rarity = Common
| flammable = No
| lavasusceptible = No
}}
A '''pitcher pod''' is an ancient bulbous seed that has a chance to be dropped by [[Sniffer|sniffers]] when they finish digging. It is the seed for [[Pitcher Plant]]s.
== Obtaining ==
[[Sniffer]]s occasionally bury their nose in the ground and start digging. Once the sniffer has finished digging, one pitcher pod has a chance to be dropped on the floor as an item.
Sniffers can only dig for pitcher pods in the following blocks:
*{{BlockLink|Dirt}}
*{{BlockLink|Grass Block}}
*{{BlockLink|Podzol}}
*{{BlockLink|Coarse Dirt}}
*{{BlockLink|Rooted Dirt}}
*{{BlockLink|Moss Block}}
*{{BlockLink|Mud}}
*{{BlockLink|Muddy Mangrove Roots}}
They cannot dig for pitcher pods on [[mycelium]].<ref>{{bug|MC-260259||Sniffers cannot dig nor find seeds on mycelium|WAI}}</ref>
== Usage ==
=== Pitcher Crop ===
{{main|Tutorials/Crop farming|title1=Pitcher Crop Farming}}
Pitcher pods can be placed on [[farmland]] by {{ctrl|using}}, where they grow through three stages as a '''pitcher crop'''.
Breaking the crop before it matures drops the pitcher pod, while breaking the final stage produces a [[pitcher plant]] and does ''not'' yield the pod. Pitcher crops break if pushed by a [[piston]] or if their supporting farmland breaks or turns to dirt (i.e. by being trampled), dropping their usual drops.
Farmer [[villager]]s can plant pitcher pods, but cannot harvest them once they have fully grown.<ref>{{bug|MC-263382|||WAI}}</ref>
=== Feeding ===
Pitcher pods can be used to breed [[chicken]]s and reduce the remaining growth duration of chicks by 10%.
=== Taming ===
Pitcher pods can be used to tame [[parrot]]s.
== Sounds ==
{{Sound table/Block/Crop}}
== Data values ==
=== ID ===
{{edition|java}}:
{{ID table
|edition=java
|showblocktags=y
|showitemtags=y
|showforms=y
|generatetranslationkeys=y
|displayname=Pitcher Crop
|spritetype=block
|nameid=pitcher_crop
|form=block
|blocktags=bee_growables, crops}}
{{ID table
|displayname=Pitcher Pod
|spritetype=item
|nameid=pitcher_pod
|form=item
|itemtags=villager_plantable_seeds
|foot=1}}
{{edition|bedrock}}:
{{ID table
|edition=bedrock
|shownumericids=y
|showforms=y
|generatetranslationkeys=y
|displayname=Pitcher Crop
|spritetype=block
|nameid=pitcher_crop
|id=-574
|form=block
|translationkey=-}}
{{ID table
|displayname=Pitcher Pod
|spritetype=item
|nameid=pitcher_pod
|id=297
|form=item
|foot=1}}
=== Block states ===
{{see also|Block states}}
{{/BS}}
== Achievements ==
{{Load achievements|Planting The Past}}
== Advancements ==
{{load advancements|A Seedy Place;Planting The Past}}
== History ==
{{History|java}}
{{History||1.20|snap=23w12a|[[File:Pitcher Crop Age 0 JE1.png|32px]] [[File:Pitcher Crop Age 1 JE1.png|32px]] [[File:Pitcher Crop Age 2 JE1.png|32px]] [[File:Pitcher Crop Age 3 JE1.png|32px]] [[File:Pitcher Crop Age 4 JE1.png|32px]] [[File:Pitcher Pod JE1.png|32px]] Added pitcher crops and pods.
|[[File:Pitcher Crop Age 0 (bottom) JE1.png|32px]] [[File:Pitcher Crop Age 1 (bottom) JE1.png|32px]] [[File:Pitcher Crop Age 2 (bottom) JE1.png|32px]] [[File:Pitcher Crop Age 3 (bottom) JE1.png|32px]] [[File:Pitcher Crop Age 4 (bottom) JE1.png|32px]] The bottom face on all pitcher crop models is missing.<ref>{{bug|MC-261208}}</ref>}}
{{History|||snap=23w13a|Placing a pitcher pod in farmland now gives the player the "A Seedy Place" [[advancement]].
|Fully grown pitcher crops are now destroyed when the farmland they are placed in is destroyed.}}
{{History|||snap=23w14a|Pitcher crops can now be destroyed by [[ravagers]].|Pitcher crops' hitboxes now change according to their age.|[[File:Pitcher Crop Age 0 (bottom) JE2.png|32px]] [[File:Pitcher Crop Age 1 (bottom) JE2.png|32px]] [[File:Pitcher Crop Age 2 (bottom) JE2.png|32px]] [[File:Pitcher Crop Age 3 (bottom) JE2.png|32px]] [[File:Pitcher Crop Age 4 (bottom) JE2.png|32px]] Pitcher crops now have their bottom texture.}}
{{History|||snap=23w16a|Hitbox shape of pitcher crop has been changed for each stage of its growth.|[[Villager]]s can now plant pitcher pods.}}
{{History|||snap=23w17a|The player now get the [[advancement]] "Planting the past" when they plant pitcher pods on [[farmland]].}}
{{History|bedrock}}
{{History||1.20.0|snap=beta 1.20.0.20|[[File:Pitcher Crop Age 0 JE1.png|32px]] [[File:Pitcher Crop Age 1 JE1.png|32px]] [[File:Pitcher Crop Age 2 JE1.png|32px]] [[File:Pitcher Crop Age 3 JE1.png|32px]] [[File:Pitcher Crop Age 4 JE1.png|32px]] [[File:Pitcher Pod JE1.png|32px]] Added pitcher crops and pods.
|Unlike in Java Edition, pitcher pods can be used to feed chickens and parrots.}}
{{history|foot}}
== Notelist ==
{{notelist}}
== References ==
{{reflist}}
{{Blocks|upcoming}}
{{Items}}
[[Category:Plants]]
[[Category:Non-solid blocks]]
[[de:kannenpflanzentrieb]]
[[es:Vaina de planta odre]]
[[ja:ウツボカズラのさや]]
[[pt:Muda de planta-jarro]]</li></ul> | build 1 | Huge mushrooms can now generate in swamps. | |||
| Legacy Console Edition | |||||
| TU5 | CU1 | 1.0 | Patch 1 | 1.0.1 | Added huge mushrooms. |
| TU43 | CU33 | 1.36 | Patch 13 | Huge mushrooms can now generate or grow much taller, matching the height from Java and Bedrock editions. | |
| New Nintendo 3DS Edition | |||||
0.1.0{{Extension DPL}}<ul><li>[[Blaze Rod|Blaze Rod]]<br/>{{Item
| image = Blaze Rod.png
| renewable = Yes
| stackable = Yes (64)
}}
'''Blaze rods''' are [[item]]s exclusively obtained from [[blaze]]s. They act as a fuel for both brewing and [[smelting]], and are required to craft [[eye of ender|eyes of ender]] used to access to [[the End]].
== Obtaining ==
=== Mob loot ===
When killed by a player or tamed [[wolf]], a [[blaze]] has a 50% chance to drop a blaze rod. The [[Looting]] [[enchantment]] can increase the drops by one per level, for a maximum of 4 blaze rods. Blazes do not drop any blaze rods if killed by any other source.
== Usage ==
=== Crafting ingredient ===
{{crafting usage}}
=== Fuel ===
When used in a [[furnace]], a blaze rod lasts 120 seconds (12 items).
== Achievements ==
{{load achievements|Into Fire}}
== Advancements ==
{{load advancements|Into Fire}}
== Video ==
{{Video note|This video does not mention the crafting of [[End Rod]]s.|minor}}
<div style="text-align:center">{{yt|_mhRHuRlICY}}</div>
== Data values ==
=== ID ===
{{el|java}}:
{{ID table
|edition=java
|showforms=y
|generatetranslationkeys=y
|displayname=Blaze Rod
|spritetype=item
|nameid=blaze_rod
|form=item
|foot=1}}
{{el|bedrock}}:
{{ID table
|edition=bedrock
|shownumericids=y
|showforms=y
|notshowbeitemforms=y
|generatetranslationkeys=y
|displayname=Blaze Rod
|spritetype=item
|nameid=blaze_rod
|id=423
|form=item
|foot=1}}
== History ==
{{History|java}}
{{History||1.0.0|snap=Beta 1.9 Prerelease|[[File:Blaze Rod JE1 BE1.png|32px]] Added blaze rods.}}
{{History|||snap=Beta 1.9 Prerelease 2|Blaze rods are now used to craft [[blaze powder]].}}
{{History|||snap=Beta 1.9 Prerelease 3|Blaze rods are now used to craft [[brewing stand]]s.}}
{{History||1.8|snap=14w07a|Blaze rods are now held similarly to [[tools]].}}
{{History||1.9|snap=15w44b|Blaze rods are now used to craft [[end rod]]s.}}
{{History||1.13|snap=17w47a|Prior to [[1.13/Flattening|''The Flattening'']], this [[item]]'s numeral ID was 369.}}
{{History|pocket alpha}}
{{History||v0.12.1|snap=build 1|[[File:Blaze Rod JE1 BE1.png|32px]] Added blaze rods.
|Blaze rods can be used to craft [[blaze powder]] and [[brewing stand]]s.}}
{{History|pocket}}
{{History||1.0.0|snap=alpha 0.17.0.1|Blaze rods are now used to craft [[end rod]]s.}}
{{History|console}}
{{History||xbox=TU7|xbone=CU1|ps=1.00|wiiu=Patch 1|switch=1.0.1|[[File:Blaze Rod JE1 BE1.png|32px]] Added blaze rods.
|Blaze rods can be used to craft [[blaze powder]] and [[brewing stand]]s.}}
{{History||xbox=TU46|xbone=CU36|ps=1.38|wiiu=Patch 15|Blaze rods are now used to craft [[end rod]]s.}}
{{History|New 3DS}}
{{History||0.1.0|[[File:Blaze Rod JE1 BE1.png|32px]] Added blaze rods.
|Blaze rods can be used to craft [[blaze powder]] and [[brewing stand]]s.}}
{{History|foot}}
== Issues ==
{{issue list}}
== Trivia ==
* As part of an official collaboration, blaze rods are included in a free add-on for the roleplaying game [https://en.wikipedia.org/wiki/Dungeons_%26_Dragons ''Dungeons and Dragons''].<ref>https://www.google.com/url?sa=t&rct=j&q=&esrc=s&source=web&cd=&cad=rja&uact=8&ved=2ahUKEwj9uvqlwIT-AhV7LUQIHYlVDiwQFnoECBAQAQ&url=https%3A%2F%2Fwww.minecraft.net%2Fcontent%2Fdam%2Fgames%2Fminecraft%2Fsoftware%2FMinecraft-Monstrous-Compendium.pdf&usg=AOvVaw0aKOqpKAHSH11qgZhN_Bhx</ref> In the game, they are worth 100 gold pieces, create light, and can be broken to create an explosion.
* They are the spinning things surrounding the blaze's head
{{items}}
== References ==
{{Reflist}}
[[Category:Renewable resources]]
[[cs:Ohnivá hůl]]
[[de:Lohenrute]]
[[el:Οι ράβδοι των Blaze]]
[[es:Vara de blaze]]
[[fr:Bâton de Blaze]]
[[hu:Lángrúd]]
[[it:Verga di blaze]]
[[ja:ブレイズロッド]]
[[ko:블레이즈 막대]]
[[lzh:炎靈桿]]
[[nl:Blazestaf]]
[[pl:Płomienna różdżka]]
[[pt:Vara de blaze]]
[[ru:Огненный стержень]]
[[th:แท่งเบลซ]]
[[tr:Alaz Çubuğu]]
[[uk:Стрижень Блейза]]
[[zh:烈焰棒]]</li><li>[[Glistering Melon Slice|Glistering Melon Slice]]<br/>{{Item
| image = Glistering Melon Slice.png
| renewable = Yes
| stackable = Yes (64)
}}
A '''glistering melon slice'''{{fn|Known as '''Glistering Melon Slice''' {{in|java}} and '''Glistering Melon''' {{in|bedrock}}.}} is an inedible [[item]] used for brewing [[potion]]s of [[Healing]]. It is also one of the many potion ingredients that can be used to make mundane potions.
== Obtaining ==
=== Chest loot ===
{{LootChestItem|glistering-melon-slice}}
=== Crafting ===
{{Crafting
|A1= Gold Nugget
|B1= Gold Nugget
|C1= Gold Nugget
|A2= Gold Nugget
|B2= Melon Slice
|C2= Gold Nugget
|A3= Gold Nugget
|B3= Gold Nugget
|C3= Gold Nugget
|Output= Glistering Melon Slice
|type= Brewing
}}
=== Trading ===
Master-level farmer [[villager]]s sell 3 glistering melon for 4 [[emerald]]s.
== Usage ==
Despite being crafted with a [[melon slice]], a glistering melon slice cannot be eaten, unlike a [[golden apple]] or [[golden carrot]].
=== Brewing ingredient ===
{{Brewing
|head=1
|Glistering Melon Slice
|Mundane Potion
|base=Water Bottle
}}
{{Brewing
|Glistering Melon Slice
|Potion of Healing
|foot=1}}
===Piglins===
[[Piglin]]s are attracted to glistering melon slices. They run toward any glistering melon slice on the ground, and inspect it for 6 to 8 seconds before putting it in their inventory.
== Achievements ==
{{load achievements|Oooh, shiny!}}
== Advancements ==
{{load advancements|Oh Shiny}}
== Data values ==
=== ID ===
{{edition|java}}:
{{ID table
|edition=java
|showforms=y
|generatetranslationkeys=y
|displayname=Glistering Melon Slice
|spritetype=item
|nameid=glistering_melon_slice
|form=item
|foot=1}}
{{edition|bedrock}}:
{{ID table
|edition=bedrock
|showaliasids=y
|shownumericids=y
|showforms=y
|notshowbeitemforms=y
|generatetranslationkeys=y
|displayname=Glistering Melon
|spritetype=item
|nameid=glistering_melon_slice
|aliasid=speckled_melon
|id=434
|form=item
|translationkey=item.speckled_melon.name
|foot=1}}
== History ==
{{History|java}}
{{History||1.0.0|snap=Beta 1.9 Prerelease 4|[[File:Glistering Melon Slice JE1 BE1.png|32px]] Added glistering melons.
|The [[crafting]] recipe of glistering melons is one [[melon slice]] and one [[gold nugget]].
|Glistering melons have replaced [[ghast tear]]s as the ingredient to produce [[potions of Healing]] due to the difficulty in getting tears.<ref>{{tweet|jeb_|123671273904680960}}</ref> They also now brew with [[water bottle]]s to create [[mundane potion]]s.}}
{{History||1.6.1|snap=13w23a|The [[crafting]] recipe of glistering melons is changed from one [[gold nugget]] to eight.}}
{{History||1.9|snap=15w49a|[[File:Glistering Melon Slice JE2.png|32px]] The rotation of glistering melon [[item]]s has been changed to be consistent with [[melon slice]]s.<ref>{{bug|MC-85963}}</ref>}}
{{History|||snap=15w49b|[[File:Glistering Melon Slice JE1 BE1.png|32px]] The rotation of glistering melons has been reverted and is no longer consistent with melon slices.}}
{{History||1.13|snap=17w47a|Prior to [[1.13/Flattening|''The Flattening'']], this [[item]]'s numeral ID was 382.}}
{{History|||snap=18w20b|"Glistering Melon" has been renamed to "Glistering Melon Slice".
|The ID of glistering melon slices has been changed from <code>speckled_melon</code> to <code>glistering_melon_slice</code>.}}
{{History||1.14|snap=18w43a|[[File:Glistering Melon Slice JE3 BE2.png|32px]] The texture of glistering melon slices has been changed.}}
{{History|||snap=19w11a|Farmer [[villager]]s now [[trading|sell]] glistering melon slices.}}
{{History||1.16|snap=20w09a|Glistering melon slices are now admired by [[piglin]]s.<ref>{{bug|MC-172363}}</ref>}}
{{History|||snap=20w16a|Glistering melon slices now generate in [[ruined portal]] chests.}}
{{History|pocket alpha}}
{{History||v0.12.1|snap=build 1|[[File:Glistering Melon Slice JE1 BE1.png|32px]] Added glistering melons.}}
{{History|bedrock}}
{{History||1.10.0|snap=beta 1.10.0.3|[[File:Glistering Melon Slice JE3 BE2.png|32px]] The texture of glistering melons has been changed.}}
{{History||1.11.0|snap=beta 1.11.0.4|Glistering melons can now be [[trading|bought]] from farmer [[villager]]s.}}
{{History||1.13.0|snap=beta 1.13.0.9|[[Trading]] has been changed. Master-level farmer villagers now have a {{frac|1|3}} chance to [[trading|sell]] glistering melon slices.}}
{{History||1.16.0|snap=beta 1.16.0.57|Glistering melons are [[trading|sold]] from farmer villagers under a 50% chance, once again.
|Glistering melons now generate in [[ruined portal]] chests.}}
{{History||1.16.100|snap=beta 1.16.100.54|[[Ruined Portal]]s can now generate with 4–12 glistering melons instead of only one.}}
{{History|||snap=beta 1.16.100.56|The ID of glistering melon slices has been changed from <code>speckled_melon</code> to <code>glistering_melon_slice</code>.}}
{{History|console}}
{{History||xbox=TU7|xbone=CU1|ps=1.0|wiiu=Patch 1|[[File:Glistering Melon Slice JE1 BE1.png|32px]] Added glistering melons.}}
{{History||xbox=none|xbone=none|ps=1.90|wiiu=none|switch=none|[[File:Glistering Melon Slice JE3 BE2.png|32px]] The texture of glistering melons has been changed.}}
{{History|New 3DS}}
{{History||0.1.0|[[File:Glistering Melon Slice JE1 BE1.png|32px]] Added glistering melons.}}
{{History|foot}}
== Issues ==
{{issue list}}
== See also ==
* [[Melon Slice]]
* [[Melon]]
== Notes ==
{{fnlist}}
== References ==
{{reflist}}
{{Items}}
[[Category:Renewable resources]]
[[cs:Zlatavý kousek melounu]]
[[de:Glitzernde Melonenscheibe]]
[[es:Rodaja de sandía reluciente]]
[[fr:Tranche de pastèque scintillante]]
[[hu:Ragyogó dinnye]]
[[ja:きらめくスイカの薄切り]]
[[ko:반짝이는 수박 조각]]
[[nl:Glinsterende meloenschijf]]
[[pl:Błyszczący arbuz]]
[[pt:Fatia de melancia reluzente]]
[[ru:Сверкающий ломтик арбуза]]
[[uk:Блискуча скибка кавуна]]
[[zh:闪烁的西瓜片]]</li></ul> | Huge mushrooms are added. | ||||

The decoded change-list
Trivia
- All huge mushrooms have exactly 45 blocks besides the stalk, so on average, you can get 13.5 mushrooms from each huge mushroom.
- Red mushrooms are rarer than brown mushrooms, but this is not the case for huge mushrooms.
Gallery
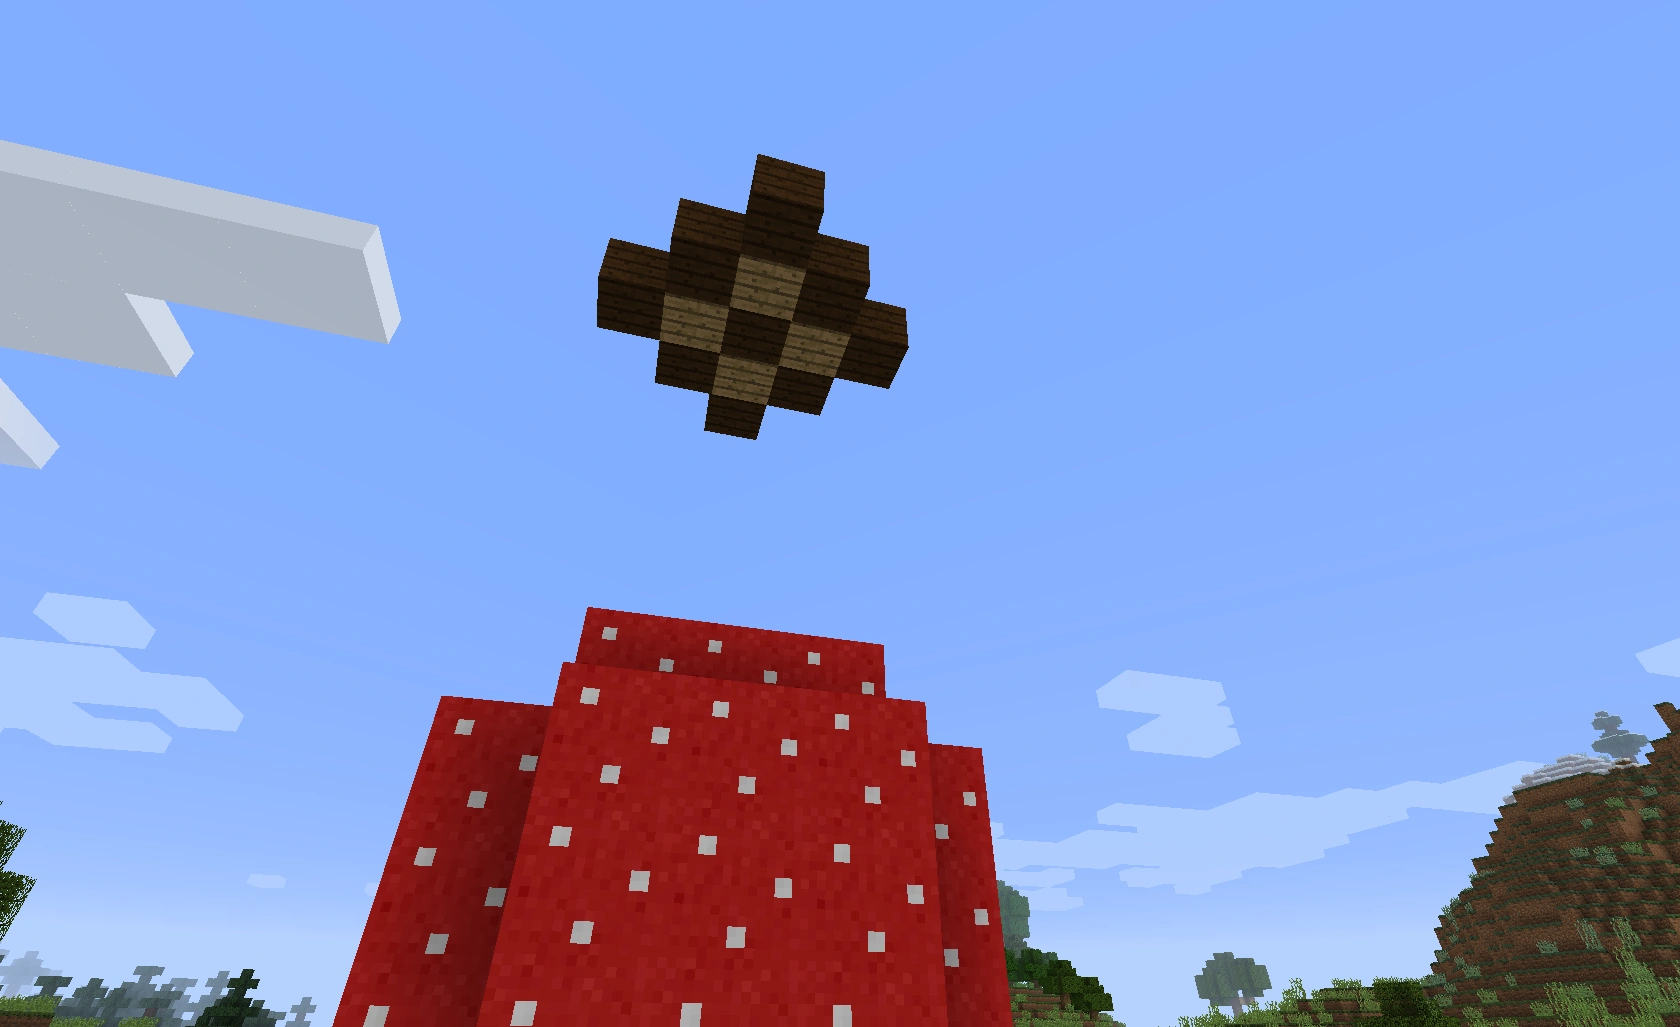

Enough roof for growing huge mushrooms even in daylight.
A brown huge mushroom found in a dark forest.
A red huge mushroom found in a dark forest.
![A brown 13 block-tall huge mushroom generated in a swamp [Bedrock Edition only].](data:image/gif;base64,R0lGODlhAQABAIABAAAAAP///yH5BAEAAAEALAAAAAABAAEAQAICTAEAOw%3D%3D)
A brown 13 block-tall huge mushroom generated in a swamp [Bedrock Edition only].
A red 13 block-tall huge mushroom generated in mushroom fields.
A guide to the minimum growth requirements for each type of huge mushroom.
A huge mushroom house incorporating both red and brown huge mushroom.

![A brown 13 block-tall huge mushroom generated in a swamp [Bedrock Edition only].](https://static.wikia.nocookie.net/minecraft_gamepedia/images/2/29/Brown_Hugemushroom_y13block.jpg/revision/latest?cb=20150502220403)
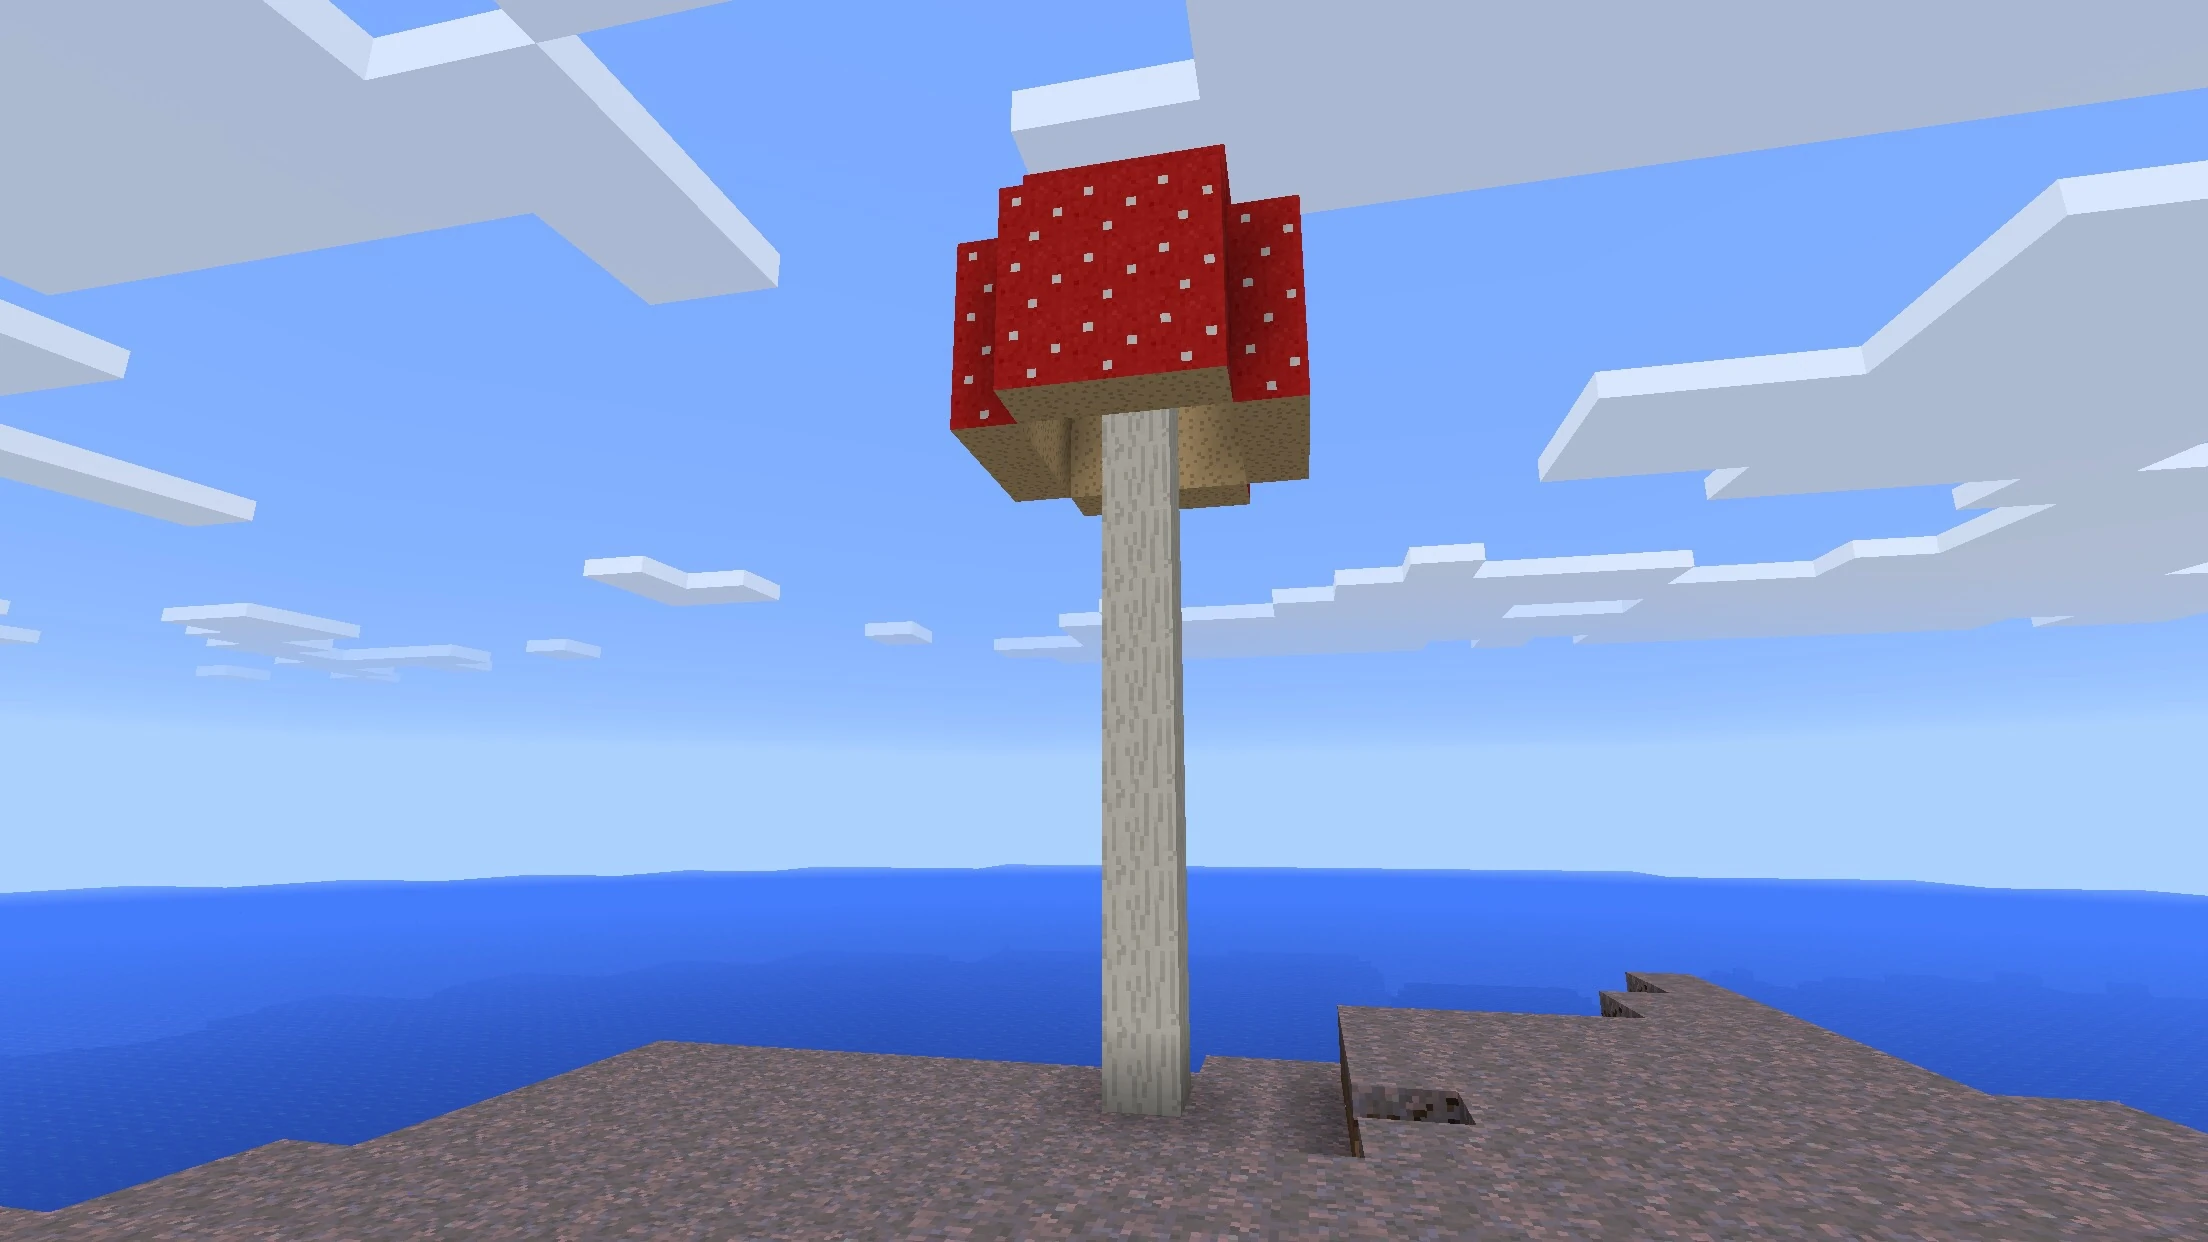
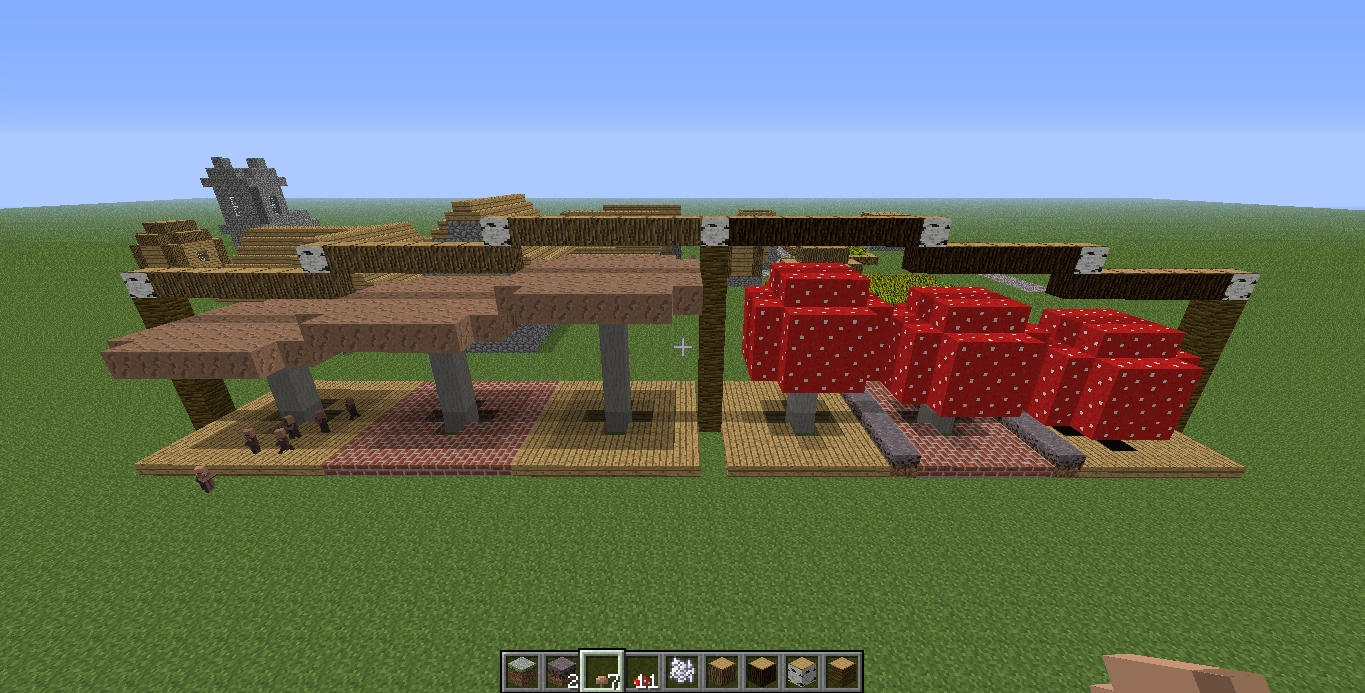
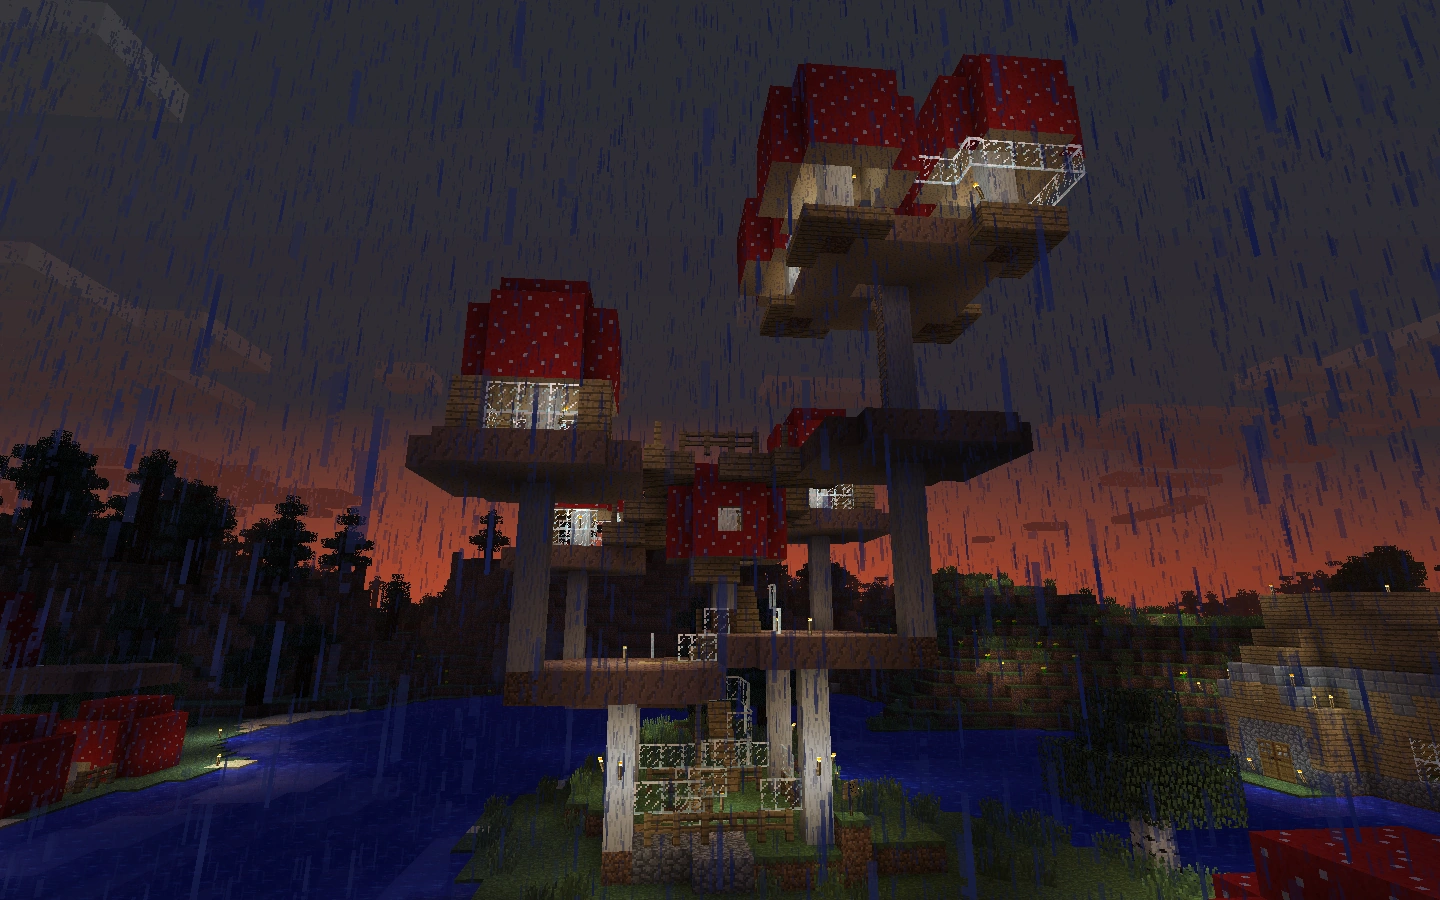
Scenery
Red and brown huge mushrooms in mushroom fields.
Huge mushrooms generated in a dark forest.
Some huge mushrooms generated in a swamp (Bedrock Edition).
A river test with 3 huge red mushrooms (Bottom left, top, and one hidden behind a tree at the far left).
An early village (a first screenshot about villages, posted by Notch) with 2 huge mushrooms.
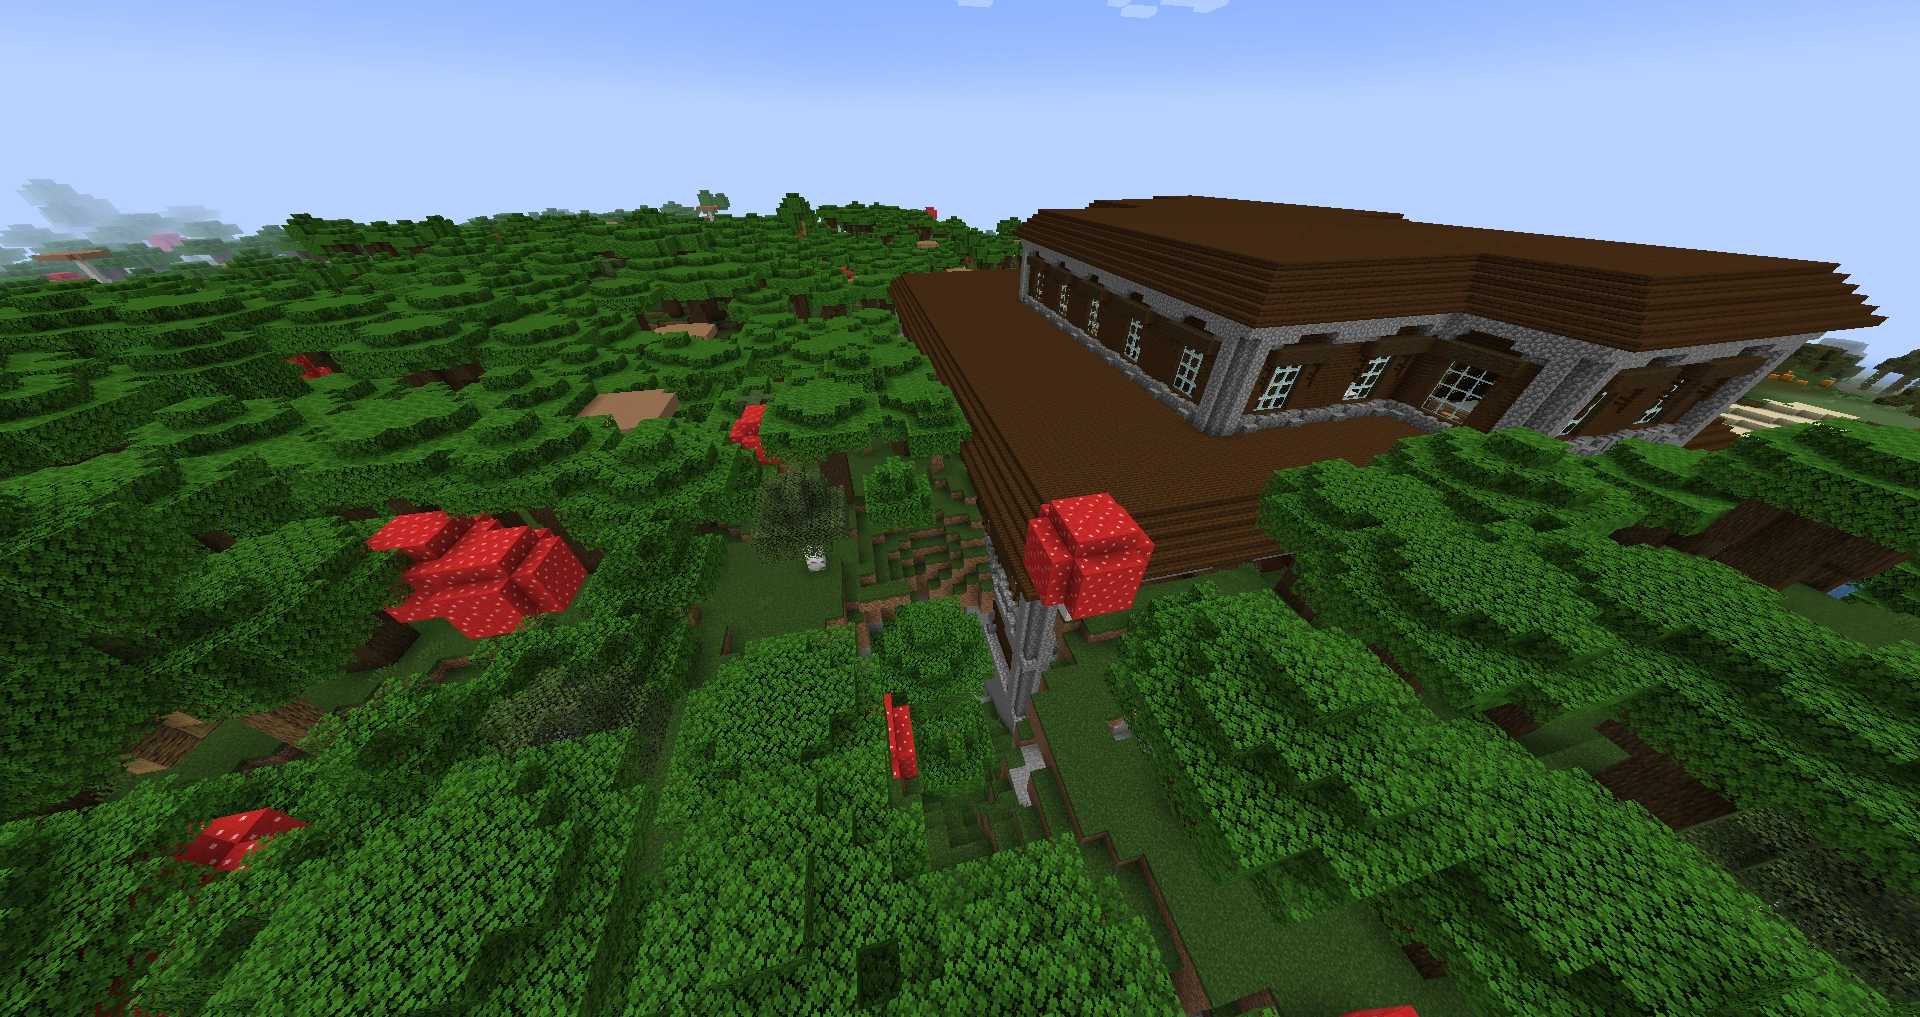
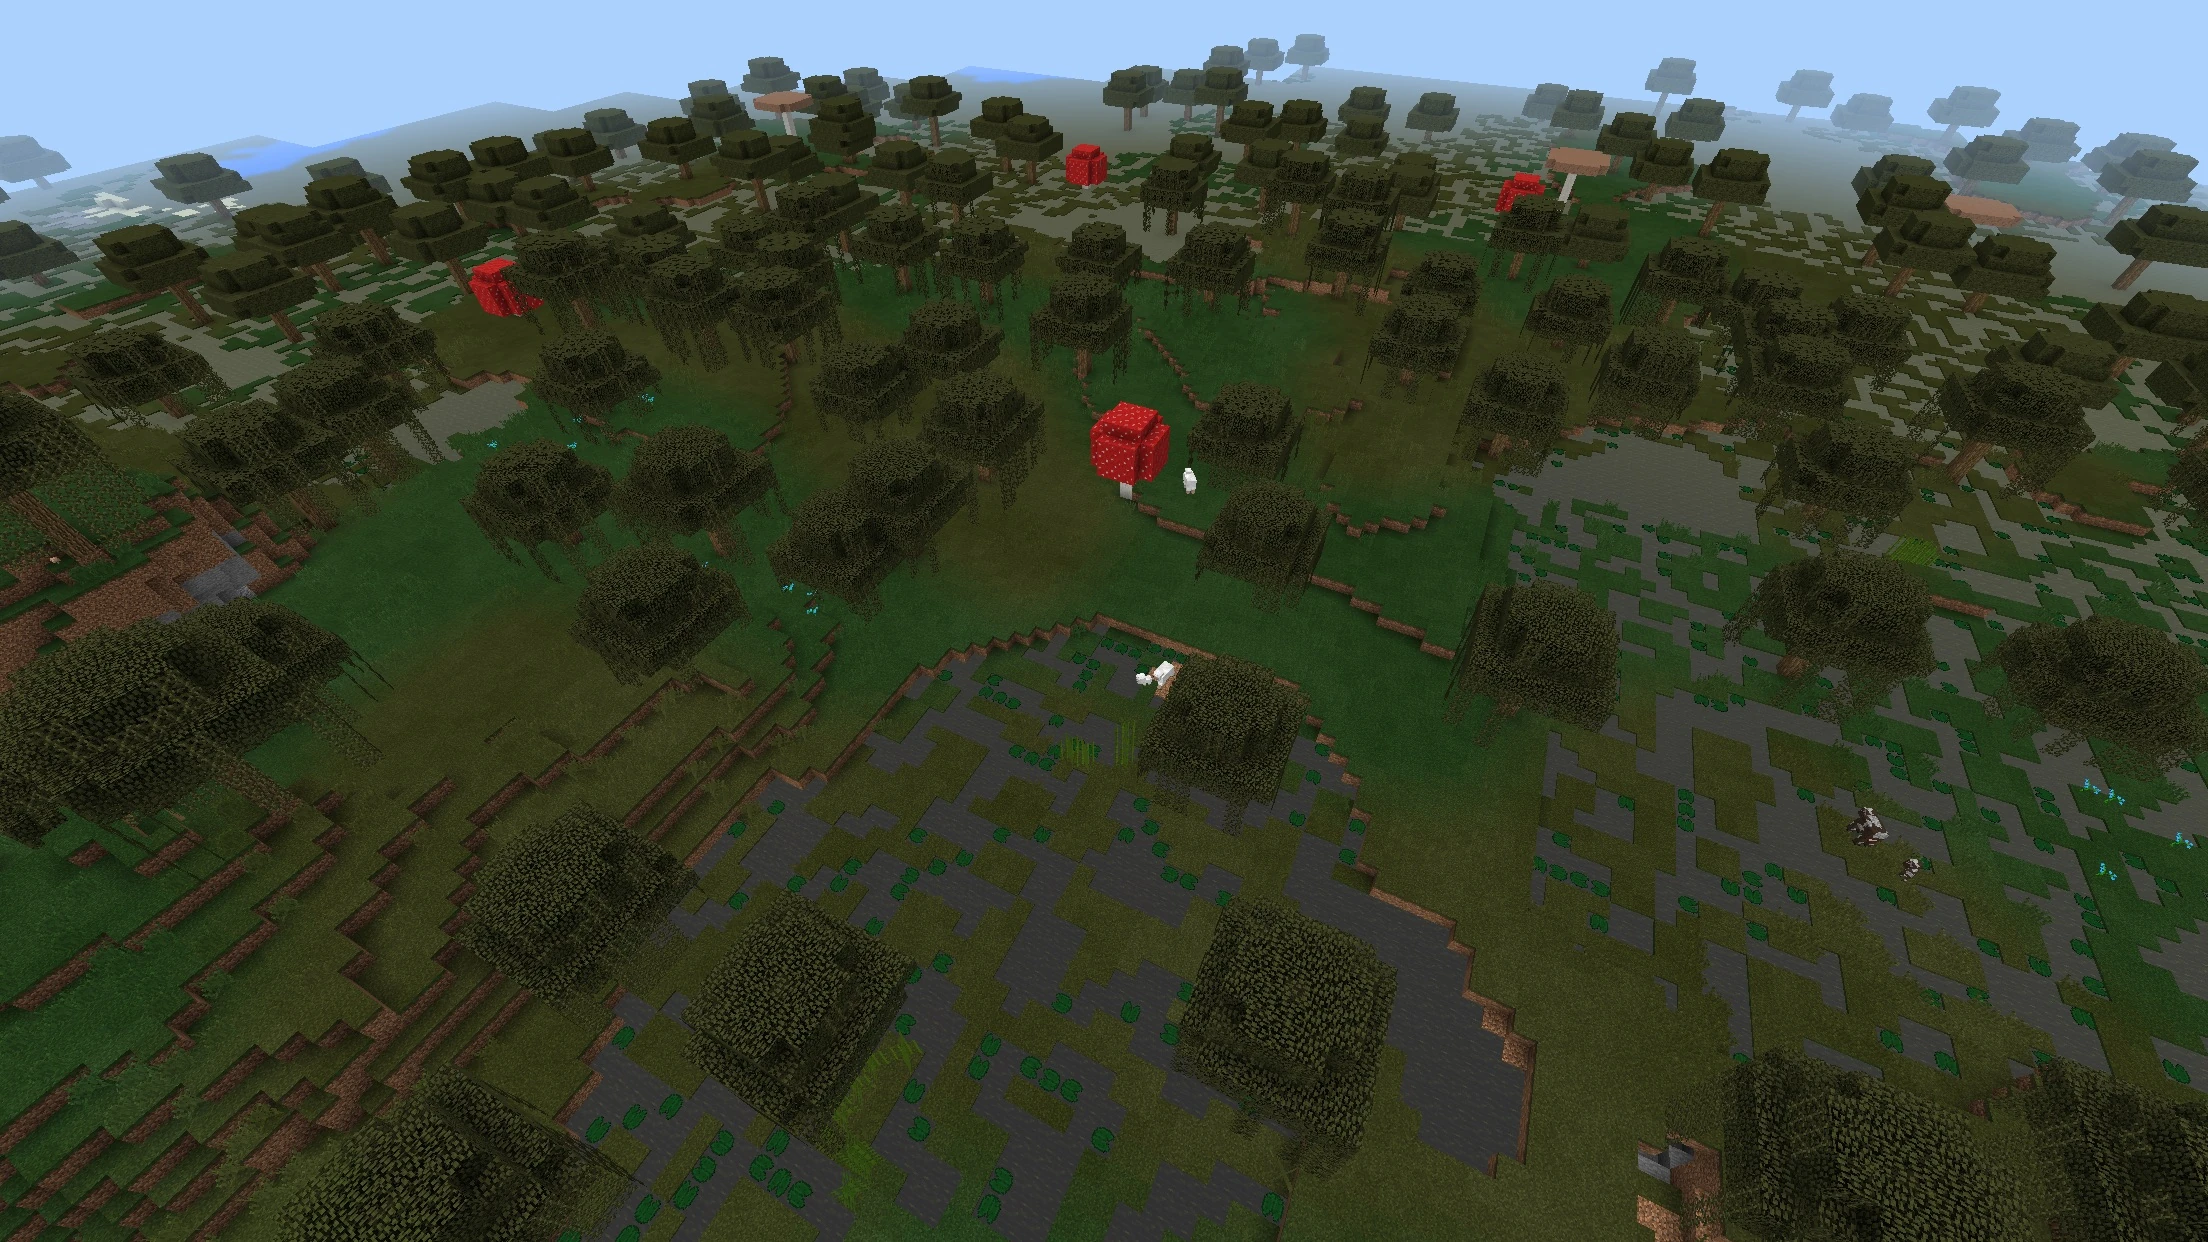
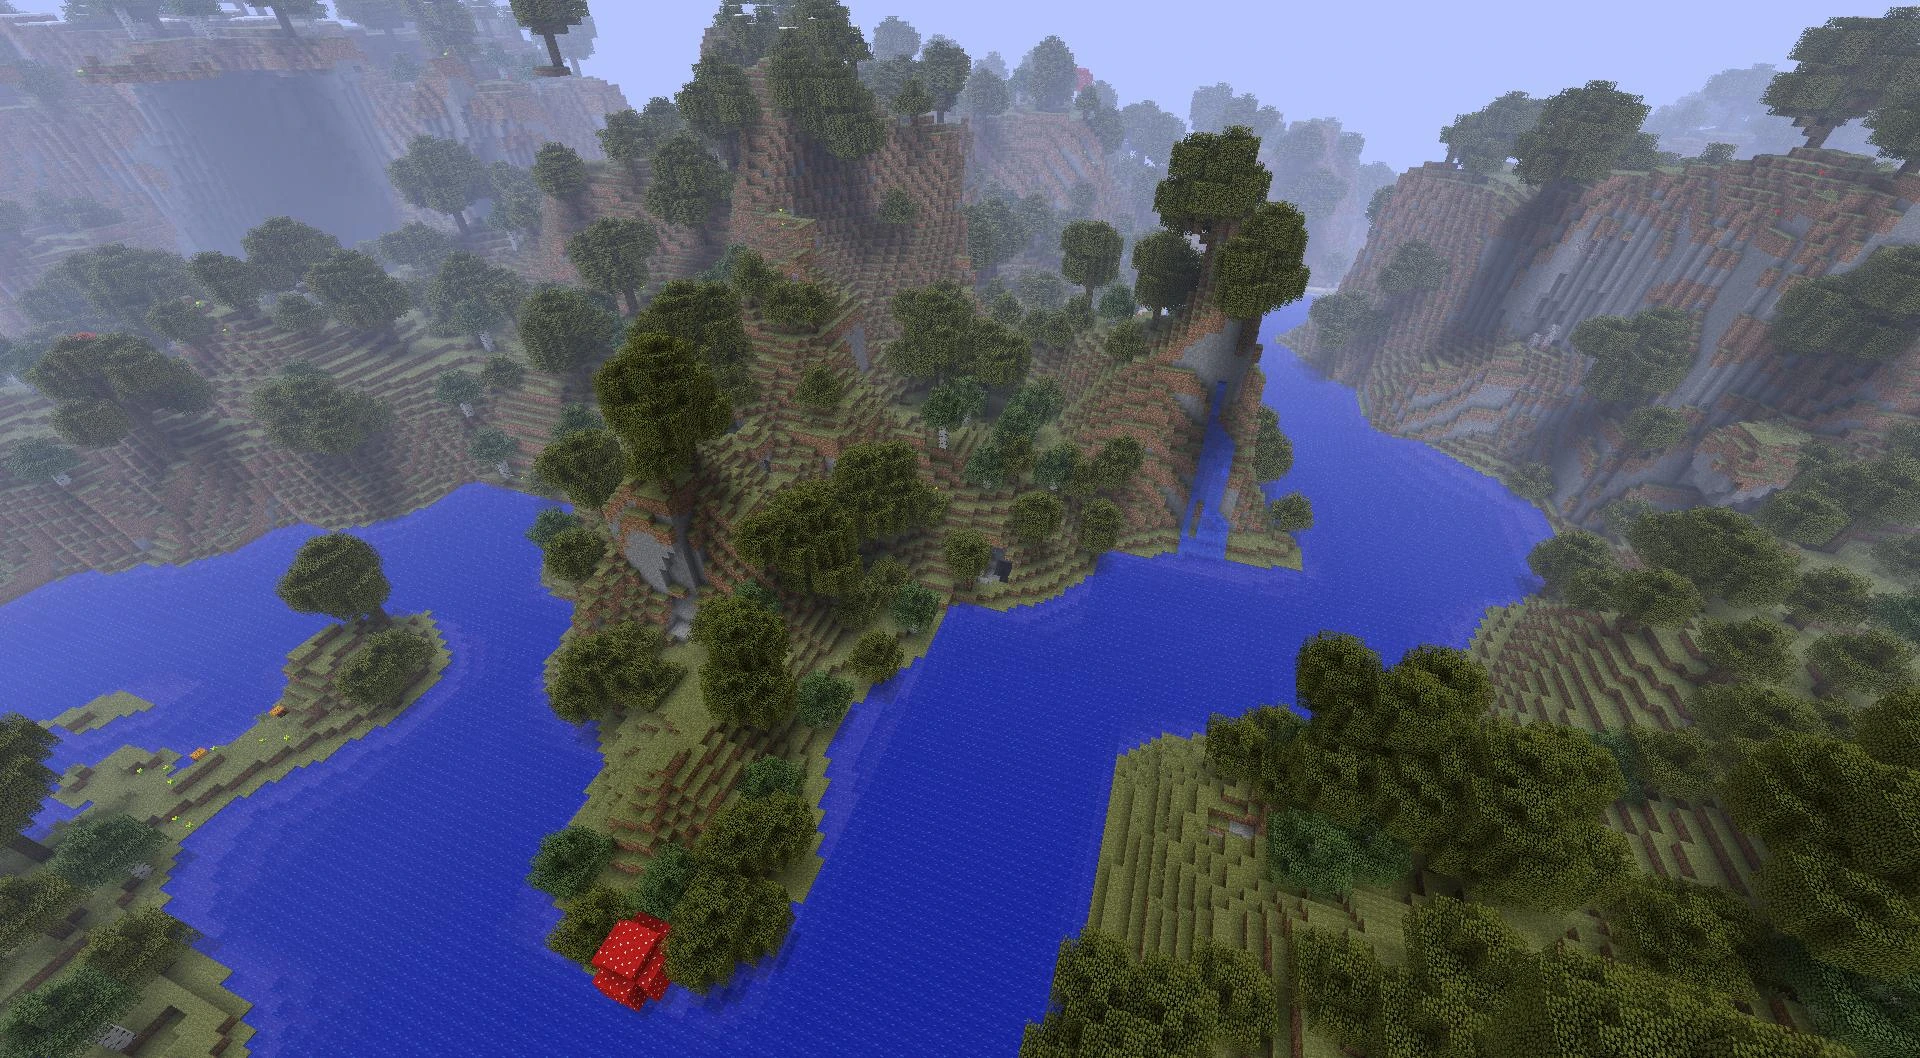
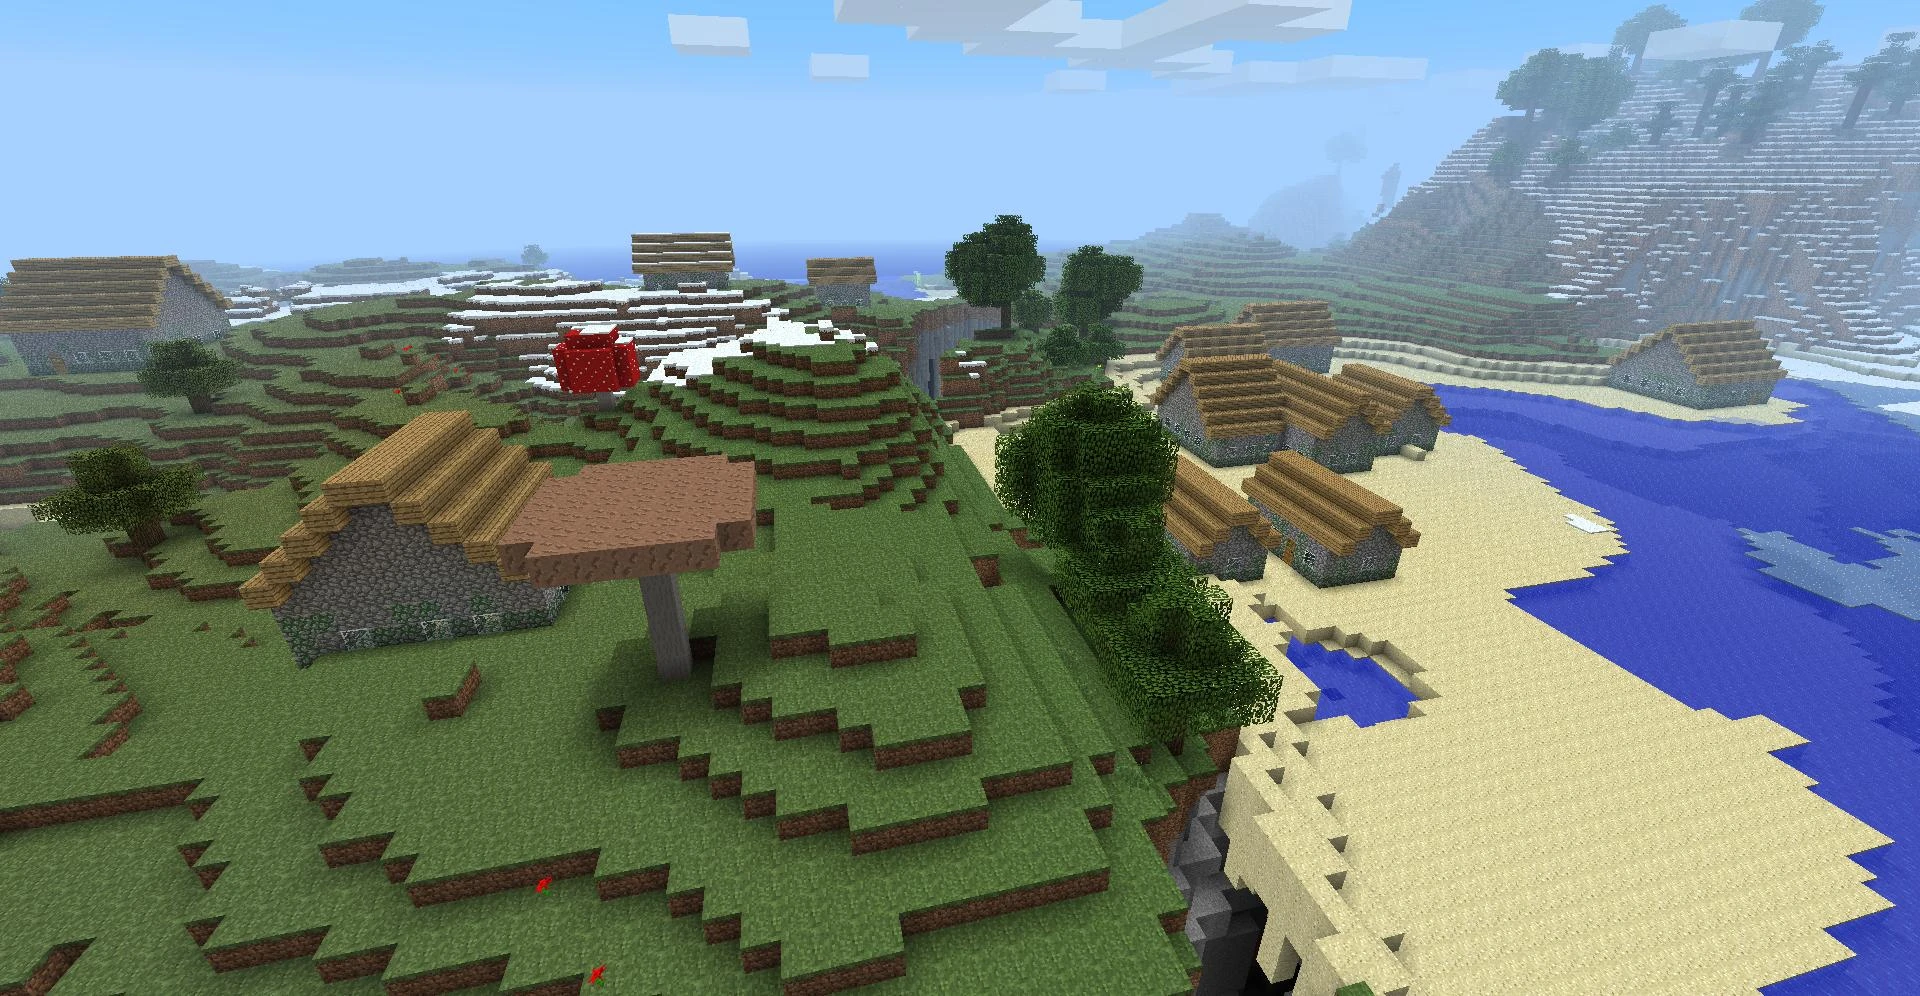
Odd generation
A red mushroom intersecting a dark oak tree.

References