Template:Technical Block
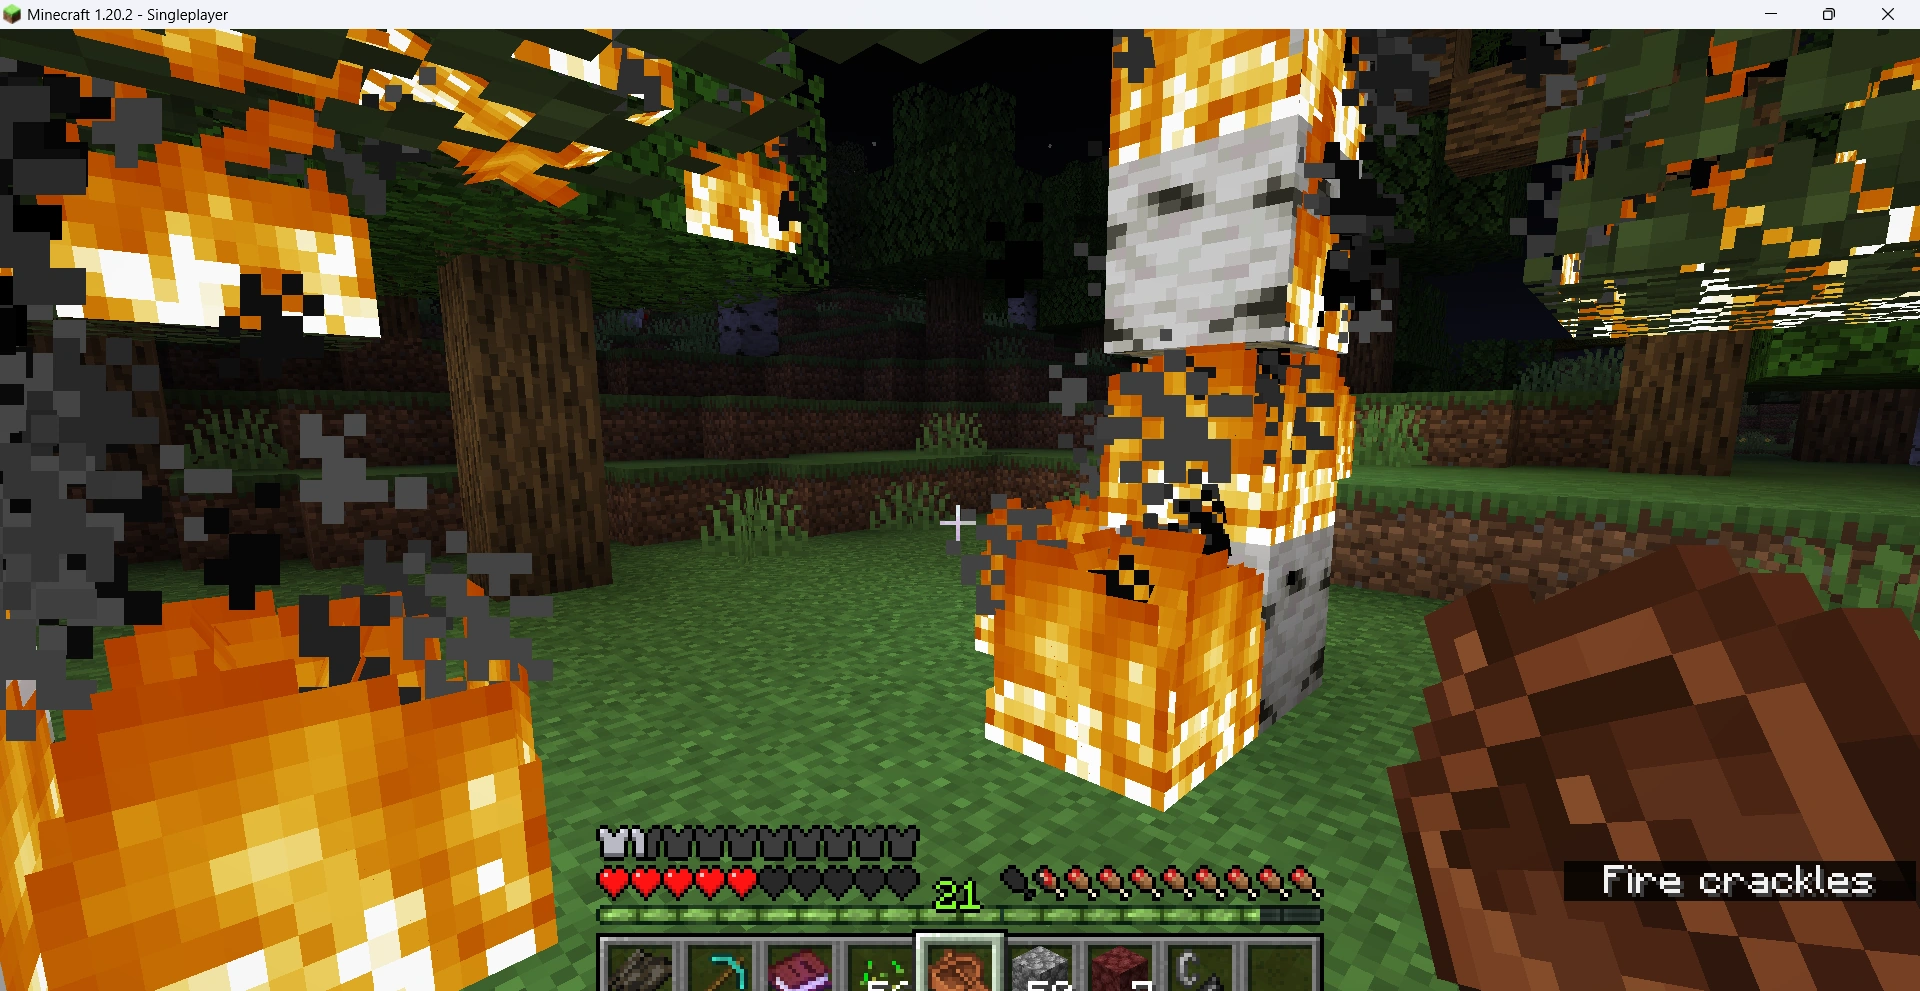
Fire is a neutral non-solid block that can spread to nearby flammable blocks.
Soul fire is a turquoise variation of fire that is created when soul sand or soul soil is ignited.
Natural generation
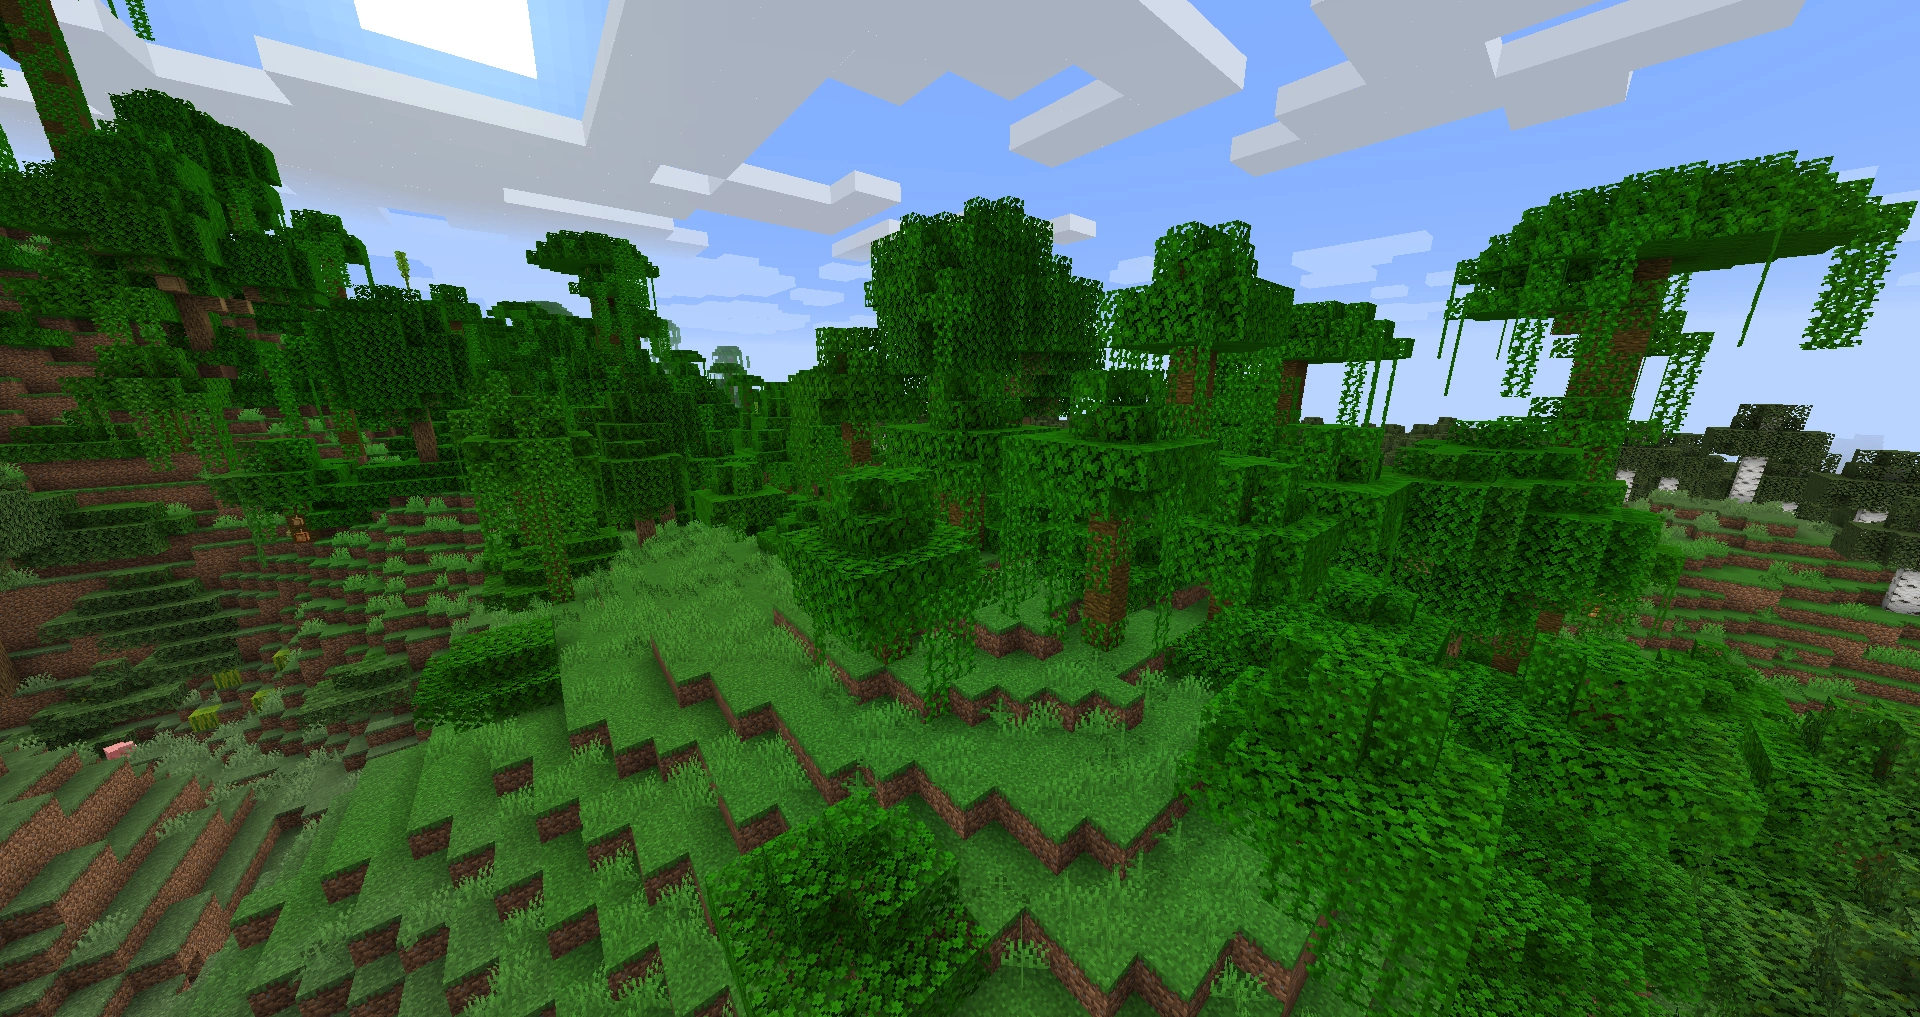
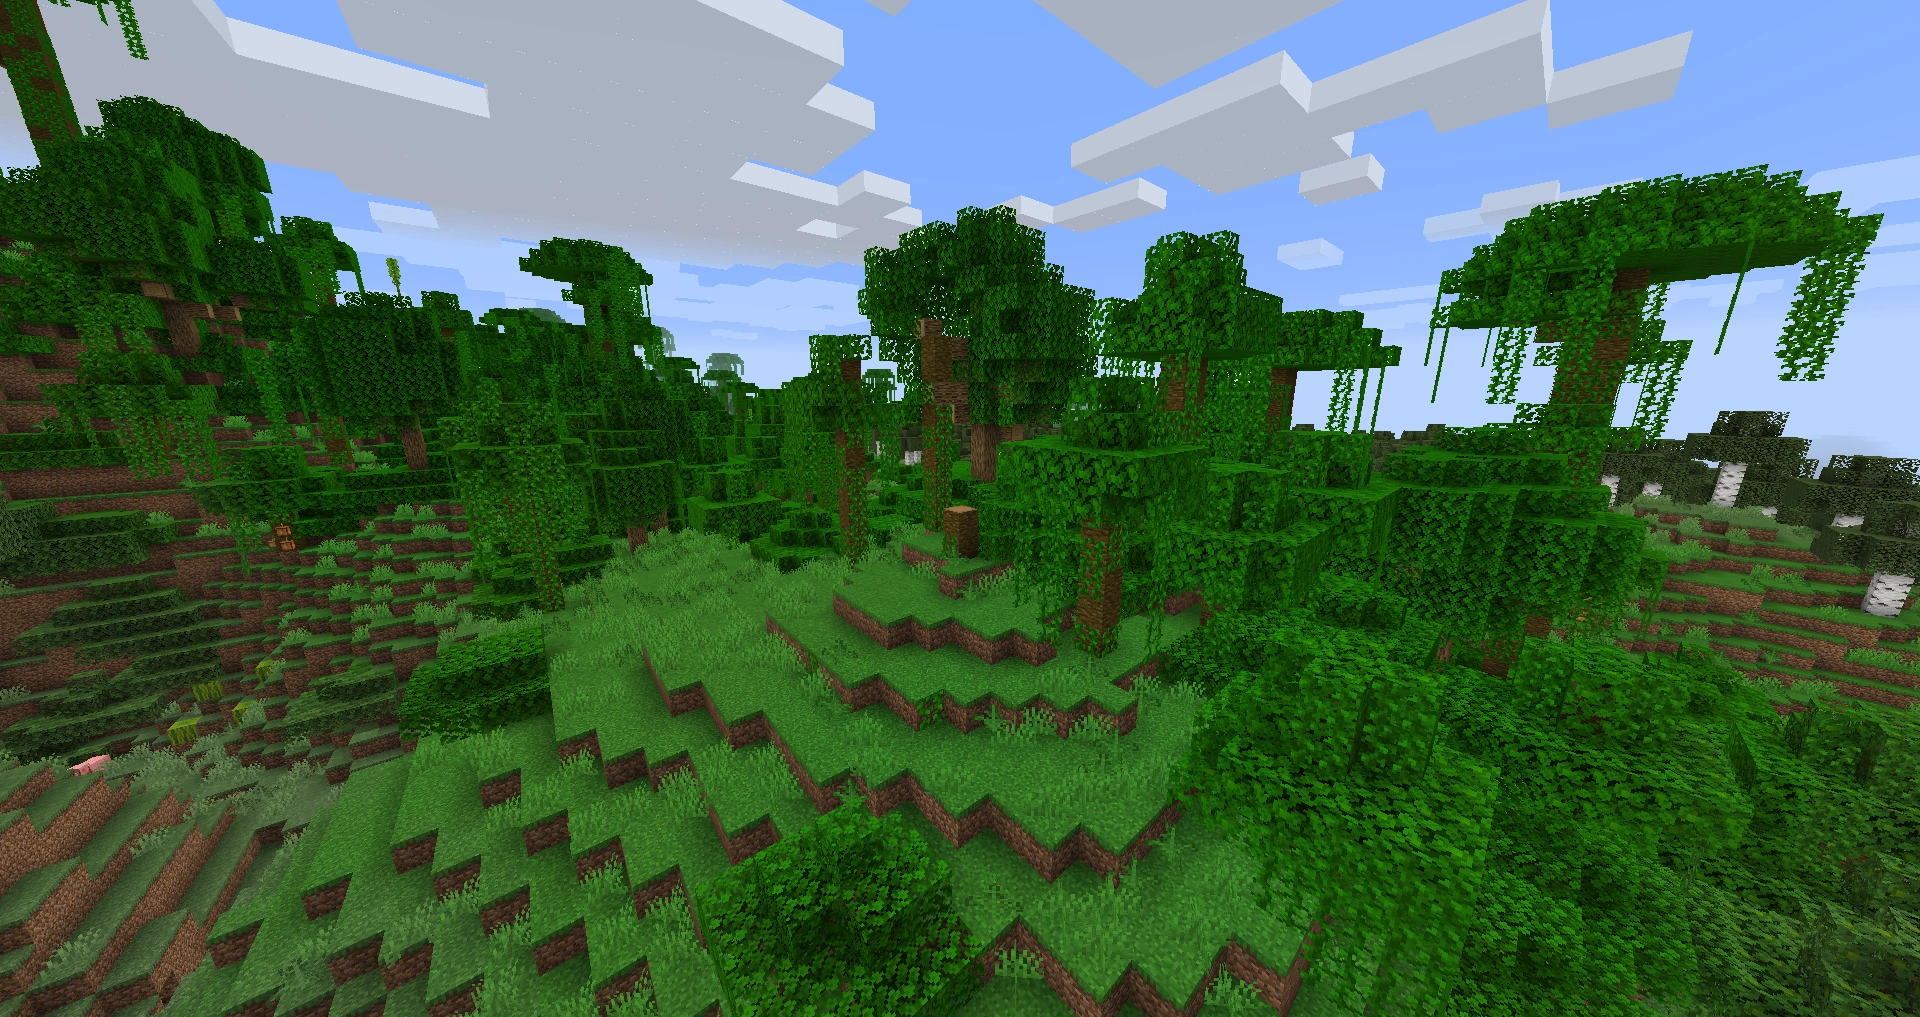
Fire naturally generates across the terrain of the Nether. Soul fire generates exclusively in soul sand valley biomes in the Nether. However, it exclusively generates on soul soil; it does not generate on soul sand within either the same biome[1] nor in the Nether Wastes biome.[2]
Post-generation
Lava generated next to flammable blocks can naturally ignite fires.
Fire spreads quickly across flammable blocks, and can spontaneously ignite when flammable blocks are near lava, even though many blocks that should be flammable cannot catch fire from nearby lava.
Lightning strikes can also set fires.
The explosion from sleeping in a bed in the Nether or the End creates fire, as does the explosion of a ghast fireball or the impact of a blaze fireball. Using a charged respawn anchor in the Overworld or the End also creates fire from the explosion.
Obtaining
Fire cannot be obtained as an item under any circumstances in Java Edition, though in Bedrock Edition both fire and soul fire may be obtained as an item via inventory editing.
Usage
Placement
Before a fire.

During the fire.

After a fire.
Fire can be placed using flint and steel or a fire charge. Fire ignited on soul sand or soul soil becomes soul fire.
When placed, a fire burns for a short and randomly determined amount of time. If nothing flammable is adjacent to it, the flames die out. Water that touches fire extinguishes it.
It cannot be placed suspended in midair, even with commands.[3]
Burning entities
Players and many mobs burn when exposed to fire. Burning obstructs the player's view slightly and, unless the player or mob has Fire Resistance, inflicts damage at a rate of 1![]() per second. This is the same rate that the player gains health in Peaceful difficulty, so burning alone cannot kill the player in this mode. Soul fire deals damage at a rate of 2
per second. This is the same rate that the player gains health in Peaceful difficulty, so burning alone cannot kill the player in this mode. Soul fire deals damage at a rate of 2![]() , making it more dangerous than normal fire. After leaving a fire source, the player or mob continues burning for some time depending on how long it was exposed to the fire (stored in a
, making it more dangerous than normal fire. After leaving a fire source, the player or mob continues burning for some time depending on how long it was exposed to the fire (stored in a Fire tag shared by all entities).[more information needed] Players and mobs that are burning can be extinguished by rain, water or a cauldron.
Dropped items except netherite axe, netherite sword, netherite shovel, netherite pickaxe, netherite helmet, netherite chestplate, netherite leggings, netherite boots, blocks of netherite, netherite scrap, netherite ingots and ancient debris[Java Edition only] falling into fire briefly catch fire and disappear.
If a mob that can drop meat dies while on fire, it drops the cooked version of it, with the exception of fish that is dropped by polar bears or guardians and potatoes that are dropped by zombies.
Nether mobs are invulnerable to fire and cannot burn. Exceptions include skeletons, as well as piglins and hoglins.
Burning is not considered a status effect and therefore cannot be cured by milk.
Spread
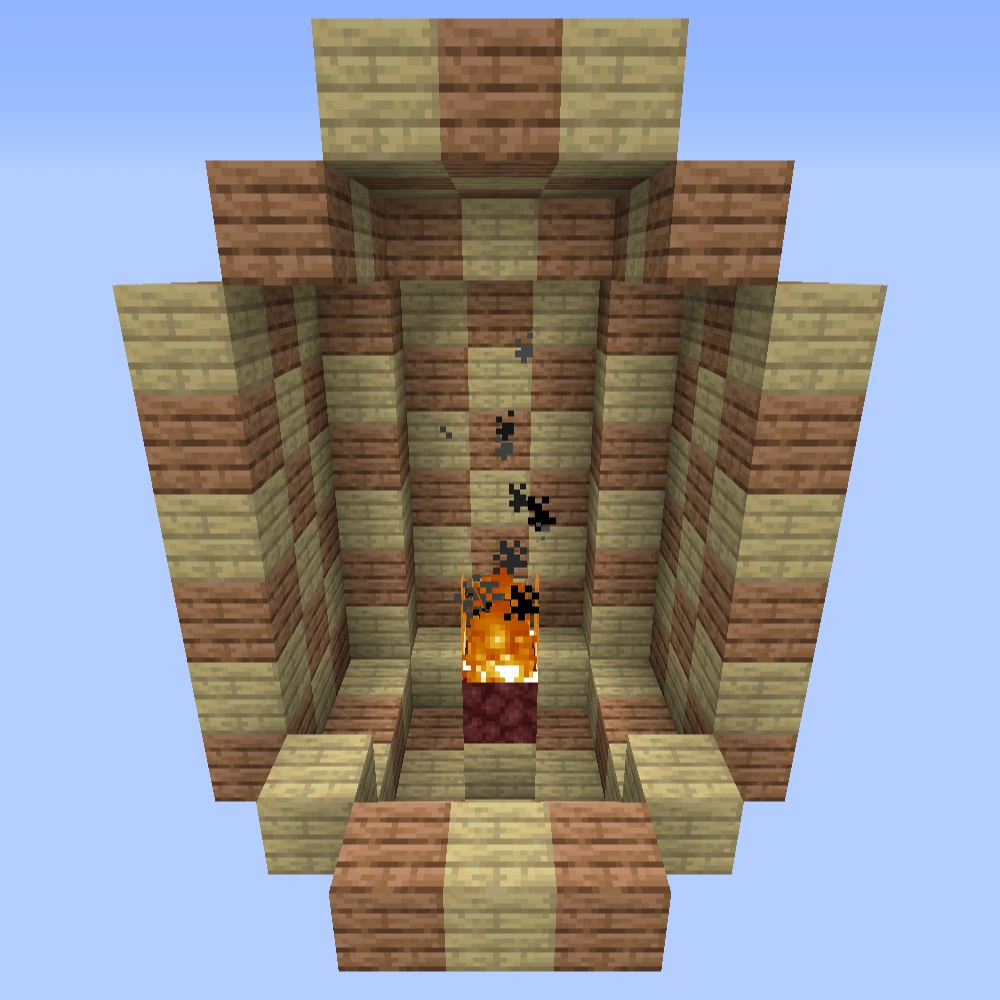
Safe building area around a fire
Fire spreads over flammable surfaces and can climb up walls, across floors and ceilings, and over small gaps. More precisely, a fire block can turn any air block that is adjacent to a flammable block into a fire block. This can happen at a distance of up to one block downward, one block sideways (including diagonals), and four blocks upward of the original fire block (not the block the fire is on/next to). Therefore, if the player is using fire to build a fireplace, caution is needed. Blocks in the way do not prevent fire from igniting blocks above it—so even if the player protects a wooden roof with cobblestone between it and the fire, the fire ignores that cobblestone.
Fire spreads from a still lava block similarly: any air block one above and up to one block sideways (including diagonals) or two above and two blocks sideways (including diagonals) that is adjacent to a flammable block may be turned into a fire block.
Unlike normal fire, soul fire cannot spread and does not burn any flammable blocks nearby.
Fire that naturally spreads into a valid nether portal frame will activate the portal.
Flammable blocks
Fire can spread onto and burn away any flammable block (or in the case of TNT, ignite it). On the other hand, a fire that is not adjacent to any flammable block does not spread, even to another flammable block within the normal range.
In the following table, the higher the encouragement, the more quickly a block catches fire if the fire is available to spread there. The higher the flammability, the more quickly a block on fire burns away. These are relative values; actual flammability and burn time depends not only on these values, but on difficulty, rain, the age of the fire, and a certain amount of randomness due to block ticks, among other things.[more information needed] Fire spread is also reduced significantly if the flammable blocks are located in a rather humid biome. Humid biomes are swamp, mushroom island and jungle with all of their respective variants excluding jungle edge.
| Block | Encouragement | Flammability | Can catch fire from lava | |
|---|---|---|---|---|
| Logs Stripped Logs Wood Stripped Wood |
5 | 5 | Yes | |
| Block of Coal | No | |||
| Overworld Planks Wooden Slabs Fence Gates Fences Signs [Bedrock Edition only] Wooden Stairs Composter Beehive |
5 | 20 | Yes | |
| Target | 15 | 20 | No | |
| TNT (ignites instead of vanishing) Vines |
15 | 100 | Yes | |
| Bookshelf Lectern Bee Nest |
30 | 20 | Yes | |
| Leaves Wool |
30 | 60 | Yes | |
| Dried Kelp Block | No | |||
| Carpets | JE | 60 | 20 | Yes |
| BE | 30 | 60 | ||
| Hay Bale | 60 | 20 | No | |
| Bamboo | 60 | 60 | Yes | |
| Scaffolding | No | |||
| Flowers, 1-block Sweet Berry Bush | JE | 60 | 100 | No |
| BE | 30 | |||
| Flowers, 2-block Grass, ferns, both 1-block and 2-block |
60 | 100 | Yes | |
| Dead Bush[Java Edition only] | ||||
Non-flammable blocks
Non-flammable blocks can be lit but do not burn away, and such fire does not spread. Non-flammable blocks other than netherrack or magma blocks extinguish themselves after a few seconds. In the end, bedrock also does not extinguish itself.
If a block is a part of a flammable material, it catches fire from lava. However, certain blocks do not burn away:
| Block | Can catch fire from lava |
Can burn away | ||
|---|---|---|---|---|
| Bamboo Sapling Banners Barrel Campfire Cartography Table Chest Crafting Table Crimson Roots Daylight Detector Fletching Table Jukebox Loom Mushroom Blocks Nether Sprouts Note Block Smithing Table Trapped Chest Warped Roots Wooden Doors of all types Wooden Pressure Plates of all types Wooden Trapdoors of all types |
Yes | No | ||
| Wooden Signs of all types | Yes | BE | Yes | |
| JE | No | |||
| Dead Bush | Yes | JE | Yes | |
| BE | No | |||
| Bed | JE | Yes | No | |
| BE | No | |||
| Wood-derived blocks such as: Grindstone Ladder Lever Piston Rails of all types Redstone Torch Saplings Smoker Torch Tripwire Hook Wooden Buttons of all types ... and all other non-flammable blocks |
No | No | ||
Extinguishing
Fire burns out after a while when on a non-flammable block other than Netherrack or Magma Block; however, punching or hitting the side of a burning block extinguishes the fire on that side, making the Fire extinguished sound (see below). Hitting fire while holding a tool does not reduce the tool's durability. Placing blocks on the fire also extinguishes it. Water and lava extinguish fires that they flow into, and thrown splash and lingering water bottles extinguish fires in the block hit and the four blocks horizontally surrounding it.
Mobs on fire are extinguished when in water or in a cauldron containing it. In the latter case, one layer of water disappears.
Fire extinguishes more quickly if nothing flammable is present, and soon after it consumes a flammable block immediately beneath it.
- Fire has an age property that determines how it extinguishes, ranging from age 0 when the fire is set, and growing to age 15.[more information needed] For fire older than age 3, if nothing flammable is adjacent to the fire, or if the block below doesn't have a solid top surface, the fire is extinguished by the next block tick. At age 15, as long as there isn't a flammable block below the fire, a block tick has a 1⁄4 chance to extinguish the fire.
If a fire is exposed to rain, it extinguishes quickly.
- Rain affects fire if it falls directly onto the fire, or into the four adjacent blocks. Specifically, no matter the age, any block tick has a 20–65% chance of rain extinguishing the fire, depending on the fire's age: 3 percentage points per age of the fire.
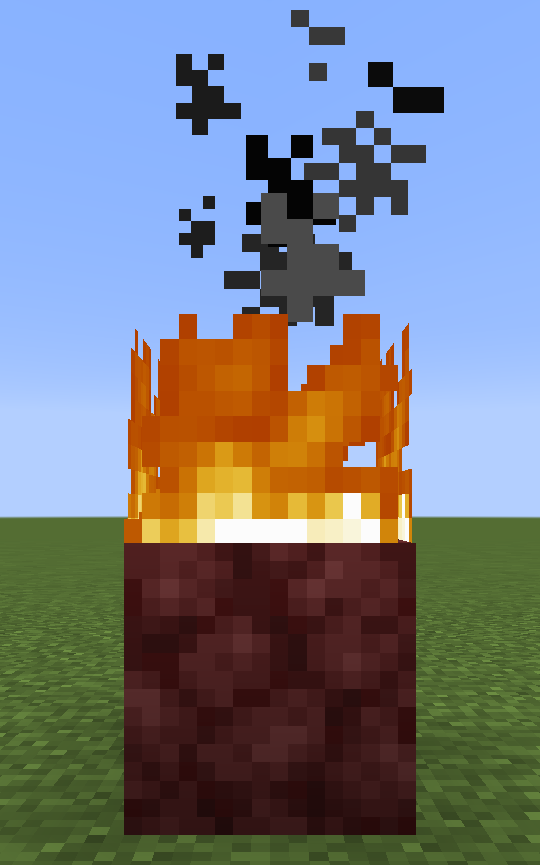
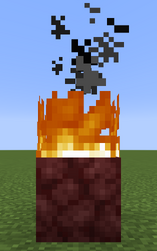
Fire burning on netherrack creates a perpetually burning fire.
Soul fire never extinguishes unless punched or when it receives a block update and finds there is no soul soil or soul sand below it.
Eternal fire
When lit, netherrack and magma blocks maintain fire forever, unless extinguished by any method except rain. Bedrock in the End also burns eternally. Soul fire will burn eternally regardless. Eternal fire cannot exist on the sides of these blocks.
Which blocks can support eternal fire is defined per-dimension, in the #infiniburn_overworld, #infiniburn_nether, and #infiniburn_end block tags.
If /gamerule doFireTick is false, fire lasts forever until it is put out by the player, and does not spread or affect flammable blocks.
Bees
Lighting fire to a beehive or bee nest causes the contained bees to be ejected from the block.
Piglins
Soul fire repels piglins. Like hoglins, they are not fire-resistant, which is unique among Nether mobs.
Sounds
| Sound | Subtitles | Source | Description | Resource location | Translation key | Volume | Pitch | Attenuation distance |
|---|---|---|---|---|---|---|---|---|
| Fire crackles | Blocks | Random | block | subtitles | ? | ? | 16 | |
| Fire extinguished | Blocks | Fire gets put out by hitting | block | subtitles | ? | ? | 16 | |
| Fireball whooshes | Blocks | Creating with fire charge | item | subtitles | ? | ? | 16 | |
| Flint and Steel click | Blocks | Creating with flint and steel | item | subtitles | ? | ? | 16 |
Data values
ID
| Name | Identifier | Translation key |
|---|---|---|
| Fire | fire | block.minecraft.fire |
| Soul Fire | soul_fire | block.minecraft.soul_fire |
| Name | Identifier | Numeric ID | Translation key |
|---|---|---|---|
| Fire | fire | 51 | tile.fire.name |
| Soul Fire | soul_fire | 492 | tile.soul_fire.name |
Block states
Java Edition:
Fire:
| Name | Default value | Allowed values | Description |
|---|---|---|---|
| age | 0 | 0123456789101112131415 | Newly placed fire has an age of 0, and has a 1⁄3 chance of incrementing with each block tick. This factor affects how the fire extinguishes. |
| east | false | falsetrue | When true, fire texture shows on that face of the block to the east; false if there's a block below this fire. |
| north | false | falsetrue | When true, fire texture shows on that face of the block to the north; false if there's a block below this fire. |
| south | false | falsetrue | When true, fire texture shows on that face of the block to the south; false if there's a block below this fire. |
| up | false | falsetrue | When true, fire texture shows on that face of the block above; false if there's a block below this fire. |
| west | false | falsetrue | When true, fire texture shows on that face of the block to the west; false if there's a block below this fire. |
Bedrock Edition:
Fire and Soul Fire:
| Name | Metadata Bits | Default value | Allowed values | Values for Metadata Bits |
Description |
|---|---|---|---|---|---|
| age | 0x10x20x40x8 | 0 | 0123456789101112131415 | 0123456789101112131415 | Newly placed fire has an age of 0. This factor affects how the fire extinguishes. |
History
| indev | |||||
|---|---|---|---|---|---|
0.31{{Extension DPL}}<ul><li>[[Dye|Dye]]<br/>{{Item
| title = Dyes
| image = White Dye.png
| extratext = View [[#Gallery|all renders]]
| renewable = Yes
| stackable = Yes (64)
}}
'''Dyes''' are a set of sixteen items used to change the color of [[wool]], [[carpet]]s, [[terracotta]], [[concrete powder]], [[glass]], [[shulker box]]es, [[bed]]s, [[candle]]s, the patterns on [[banner]]s, [[firework star]]s, certain mobs, and text on [[sign]]s and [[hanging sign]]s. {{IN|bedrock}} they can also be used to dye water in a [[cauldron]] (which is thereafter used to dye leather [[armor]]); {{in|java}} leather armor can be dyed directly. {{IN|education}} dyes can also be used to dye [[balloon]]s and [[glow stick]]s.
{{IN|bedrock|education}}, [[bone meal]], [[ink sac]]s, [[lapis lazuli]], and [[cocoa bean]]s can generally substitute for [[white dye]], [[black dye]], [[blue dye]], and [[brown dye]], respectively, in crafting recipes and for use in dyeing items or mobs. However, they have other important uses that aren't related to color, and are therefore not considered true dyes. They are mentioned in this article only in regard to their use as dyeing agents; see their individual articles for complete information about them.
[[File:Dye Recipes.png|400px|thumb|A guide for creating all the dyes]]
== Obtaining ==
<!--[[File:Dye Chart.png|350px|thumb|A guide to crafting all the dyes.{{until|java 1.14}}]]-->
Dyes can be produced by crafting them from plants (mainly flowers), by crafting dyes of different colors together, by smelting plants, or by trading with a [[wandering trader]].
{{loadPage|Crafting/Dye|Crafting|h3}}
=== Smelting ===
{{smelting|head=1|Sea Pickle|Lime Dye|0,2}}
{{smelting|foot=1|Cactus|Green Dye|1||b=Lapis Lazuli|c=Any fuel|d=1}}
=== Trading ===
[[Wandering trader]]s can sell 3 dyes for an [[emerald]]. {{IN|bedrock}}, they can also sell 3 lapis lazuli, bone meal, cocoa beans, or ink sacs for one emerald.
Apprentice-level cleric [[villager]]s sell one lapis lazuli per emerald.
=== Chest loot ===
{{#invoke:LootChest|base3|blue-dye,green-dye,orange-dye,light-blue-dye,yellow-dye,white-dye}}
=== Other ===
Ink sacs can also be created using 1 iron, 1 sulfur, and 4 oxygen in the [[compound creator]]. {{only|bedrock|education}}
== Usage ==
Similar to their use in crafting, [[bone meal]], [[ink sac]]s, [[lapis lazuli]], and [[cocoa beans]] can be substituted for the corresponding dye in any of the following usages unless otherwise specified.{{only|bedrock}} <!--- sections are ordered by craftable dyeable blocks, dyeable items, version exclusive sections, and non-crafting miscellaneous uses--->
=== Dyeing wool and mobs ===
Players can dye wool by placing [[wool]] and any dye in a crafting grid.
{{Crafting
|nocat=1
|Any Wool
|Matching Dye
|Output=Any Wool
}}
Dyes can be {{control|use|text=used}} on sheep to change the color of the wool. Shearing a colored sheep drops the corresponding color of the wool, and the sheep retains the color when the wool regenerates. [[Breeding]] colored sheep produces a lamb colored as one of the parent sheep, or a color resulting from the combination of both parents' color. The color combining follows the same rules that dyes use – red and yellow sheep produce an orange lamb, but a blue and yellow sheep cannot create a green lamb. The unlimited reproduction of colored sheep makes dyeing and shearing sheep infinitely more efficient than just dyeing wool directly.
Dye can also be used on a tamed [[wolf]] or [[cat]] to change the color of its collar from the default red to the color of the dye.
=== Dyeing carpets ===
Carpets can be dyed.
{{Crafting
|Any Carpet
|Matching Dye
|Output= Matching Carpet
|type= Building block
}}
=== Dyeing terracotta ===
[[Terracotta]] can be dyed by placing 8 blocks around a dye on a crafting table.
{{Crafting
|nocat=1
|A1=Terracotta |B1=Terracotta |C1=Terracotta
|A2=Terracotta |B2=Matching Dye |C2=Terracotta
|A3=Terracotta |B3=Terracotta |C3=Terracotta
|Output=Matching Dyed Terracotta,8
}}
=== Creating concrete powder ===
Dyes can also be used to craft [[concrete powder]], which can then be set into their respective [[concrete]] blocks (they cannot be dyed directly).
{{Crafting
|nocat=1
|Sand |Gravel |Sand
|Gravel |Matching Dye |Gravel
|Sand |Gravel |Sand
|Output=Matching Concrete Powder,8
}}
=== Staining glass ===
[[Stained glass]] can be stained by placing 8 blocks of glass around a dye on a [[crafting table]]. Just like regular glass, stained glass can be crafted into stained glass panes. The recipe for this is the same as with regular glass.
{{Crafting
|nocat=1
|A1=Glass |B1=Glass |C1=Glass
|A2=Glass |B2=Matching Dye |C2=Glass
|A3=Glass |B3=Glass |C3=Glass
|Output=Matching Stained Glass,8
|head=1
}}
{{Crafting
|nocat=1
|A1= Glass Pane
|B1= Glass Pane
|C1= Glass Pane
|A2= Glass Pane
|B2= Matching Dye
|C2= Glass Pane
|A3= Glass Pane
|B3= Glass Pane
|C3= Glass Pane
|Output= Matching Stained Glass Pane,8
|type= Decoration block
|foot=1
}}
=== Dyeing shulker boxes ===
[[Shulker box]]es are generated in a light shade of purple (like the [[purpur block]]), but can be dyed any color. They can also be re-dyed as often as desired.
{{Crafting
|ignoreusage=1
|showname=1
|Any Shulker Box
|Matching Dye
|Output=Matching Shulker Box
}}
=== Dyeing beds ===
Players can dye beds by placing a [[bed]] and any color dye in a crafting grid.
{{Crafting
|nocat=1
|Any Bed
|Matching Dye
|Output=Matching Bed
}}
=== Dyeing candles ===
Players can dye [[candles]] by placing an undyed candle and any color dye in a crafting grid.
{{Crafting
|ignoreusage=1
|Candle
|Matching Dye
|Output=Matching Dyed Candle
}}
=== Banner patterns ===
{{main|Banner#Patterns}}
Dyes are used in most banner patterns to determine the pattern and color displayed.
=== Dyeing armor ===
[[File:DyeGraph2.png|200px|thumb|A graph showing all combinations of two dyes on a [[tunic]].]]
Leather [[armor]] can be dyed by:
* Crafting dyes with a piece of leather armor or leather [[horse armor]].{{Only|java}}
* Dousing the leather armor or leather [[horse armor]] in a [[cauldron]] to which dyes have been added.{{Only|bedrock}}
There are 5,713,438<ref>https://anrar4.github.io/DyeLeatherArmor/</ref> (34.1% of sRGB) colors leather armor can be, as it is possible to put more than one dye on the crafting bench alongside the leather armor. Armor can be dyed multiple times with previous colors affecting the final outcome. Colored armor can be reverted to their original color using a [[cauldron]] with undyed water.
The game has a specific formula for calculating the color of dyed armor: each color, in the RGB color model, has a red value, green value, and blue value. For each dye in the crafting grid, and the armor itself (if it is already dyed), the red, green, and blue values are added to running totals. In addition, a running total of the highest value (be it red, green, or blue) is also kept. After this, each total is divided by the number of colors used. This effectively produces the average red, green, blue, and maximum values. The maximum value of the average RGB values is also calculated. Finally, each average RGB value is multiplied by the average maximum value and divided by the maximum of the average RGB values. The modified average RGB values are then used as the final color. This procedure can be summed up with the following equations:
for each color (all "total" variables start at 0 before counting):
totalRed = totalRed + redValue
totalGreen = totalGreen + greenValue
totalBlue = totalBlue + blueValue
totalMaximum = totalMaximum + max(redValue, greenValue, blueValue)
numberOfColors = numberOfColors + 1
averageRed = totalRed / numberOfColors
averageGreen = totalGreen / numberOfColors
averageBlue = totalBlue / numberOfColors
averageMaximum = totalMaximum / numberOfColors
maximumOfAverage = max(averageRed, averageGreen, averageBlue)
gainFactor = averageMaximum / maximumOfAverage
resultRed = averageRed * gainFactor
resultGreen = averageGreen * gainFactor
resultBlue = averageBlue * gainFactor
Due to the way this formula works, the resulting color can never be darker than the average of the input colors and is often lighter and more saturated. Of course, the resulting color can never be lighter or more saturated than the lightest or most saturated input color. In addition, this formula never creates an RGB value higher than 255 (which would be invalid in the 8-bit RGB color model).
If leather armor is renamed on an [[anvil]], it retains its name when dyed or undyed.
;Mixing Samples
: {{ItemSprite|Yellow Dye}} + {{ItemSprite|Yellow Dye}} = {{Tint|leather-chestplate| #{{CalcDye| yellow=2 }} | code=1}}
: {{ItemSprite|Red Dye}} + {{ItemSprite|Blue Dye}} + {{ItemSprite|White Dye}} = {{Tint|leather-chestplate| #{{CalcDye| red=1 | blue=1 | white=1}} | code=1}}
: {{ItemSprite|Green Dye}} + {{ItemSprite|Red Dye}} + {{ItemSprite|Pink Dye}} = {{Tint|leather-chestplate| #{{CalcDye| green=1 | red=1 | pink=1}} | code=1}}
=== Dyeing firework stars ===
A [[firework star]] can have a single color or a combination of up to eight colors when crafted with dyes. Adding one or more dyes to a crafted firework star adds a "fade to color" effect to it, overwriting any existing fade colors.
{{Crafting
|head=1
|ignoreusage=1
|ingredients=[[Gunpowder]] +<br>Any Dye (1–8) +<br>Extra ingredient (optional)
|Gunpowder
|Matching Dye
|Diamond;Glowstone Dust;Head;Gold Nugget;Feather;Fire Charge;
|Output=Matching Firework Star
}}
{{Crafting
|ignoreusage=1
|Matching Firework Star
|Any Dye
|Output=Matching Firework Star
|foot=1
}}
=== Creating balloons ===
Dye can be used to craft balloons.{{only|education}}
{{Crafting
|nocat=1
|A1= Latex
|B1= Matching Dye
|C1= Latex
|A2= Latex
|B2= Helium
|C2= Latex
|A3= Latex
|B3= Lead
|C3= Latex
|Output= Matching Balloon
}}
=== Creating glow sticks ===
Dye can also be used to craft glow sticks.{{only|education}}
{{Crafting
|nocat=1
|A1= Polyethylene
|B1= Hydrogen Peroxide
|C1= Polyethylene
|A2= Polyethylene
|B2= Matching Dye
|C2= Polyethylene
|A3= Polyethylene
|B3= Luminol
|C3= Polyethylene
|Output= Matching Glow Stick
}}
=== Dyeing water inside cauldrons ===
Water can be dyed in a cauldron by holding any dye in the hand and pressing {{Ctrl|use}} on a cauldron filled with water.{{only|bedrock}}
=== Signs ===
Dye can be {{control|used}} on a [[sign]] or a [[hanging sign]] to change the text color. {{IN|bedrock}}, [[ink sac]]s cannot be used for this purpose; black dye must be used to change the text to black.
=== Trading ===
Apprentice, journeyman and expert-level shepherd [[villager]]s buy any of the 12 dyes for an [[emerald]].
== Color values ==
The "color codes" are used to determine the color imparted on sheep, wolf and cat collars, firework stars, [[beacon]] beams, and dyed leather armor. The hex value is shown in the extended tooltips of dyed leather armor; however, to set the color using an NBT data tag in a [[command]], the decimal value must be used instead. The color values for firework stars are slightly different from the ones listed below, and use [[Item colors#Firework stars|these values]] instead.
{| class="wikitable" style="margin:2px; border: 1px solid silver; text-align: left;" data-description="Data values"
! rowspan=2 | Description
! colspan=2 style="text-align:center" | Color Code
|-
! Dec
! <abbr title="Hexadecimal color code">Hex</abbr>
|-
| style="text-align:center" | White || 16383998 || {{color|#F9FFFE}}
|-
| style="text-align:center" | Light gray || 10329495 || {{color|#9D9D97}}
|-
| style="text-align:center" | Gray || 4673362 || {{color|#474F52}}
|-
| style="text-align:center" | Black || 1908001|| {{color|#1D1D21}}
|-
| style="text-align:center" | Brown || 8606770 || {{color|#835432}}
|-
| style="text-align:center" | Red || 11546150 || {{color|#B02E26}}
|-
| style="text-align:center" | Orange || 16351261 || {{color|#F9801D}}
|-
| style="text-align:center" | Yellow || 16701501 || {{color|#FED83D}}
|-
| style="text-align:center" | Lime || 8439583 || {{color|#80C71F}}
|-
| style="text-align:center" | Green || 6192150 || {{color|#5E7C16}}
|-
| style="text-align:center" | Cyan || 1481884|| {{color|#169C9C}}
|-
| style="text-align:center" | Light blue || 3847130 || {{color|#3AB3DA}}
|-
| style="text-align:center" | Blue || 3949738 || {{color|#3C44AA}}
|-
| style="text-align:center" | Purple || 8991416 || {{color|#8932B8}}
|-
| style="text-align:center" | Magenta || 13061821 || {{color|#C74EBD}}
|-
| style="text-align:center" | Pink || 15961002 || {{color|#F38BAA}}
|}
== Sounds ==
{{edition|java}}:
{{Sound table
|rowspan=2
|sound=Dye.ogg
|subtitle=Dye stains
|source=block
|description=When dye is used on a [[sign]]
|id=item.dye.use
|translationkey=subtitles.item.dye.use
|volume=1.0
|pitch=1.0/0.9/0.95/1.1
|distance=16}}
{{Sound table
|subtitle=Dye stains
|source=player
|description=When dye is used on a [[sheep]]
|id=item.dye.use
|translationkey=subtitles.item.dye.use
|volume=1.0
|pitch=1.0/0.9/0.95/1.1
|distance=16
|foot=1}}
{{edition|bedrock}}:
{{Sound table
|type=bedrock
|sound=Dye.ogg
|source=sound
|description=When dye is used on a sign
|id=sign.dye.use
|volume=1.0
|pitch=1.0}}
{{Sound table
|rowspan=3
|sound=Water Splash Old.ogg
|source=block
|description=When dye is added to a cauldron
|id=cauldron.adddye
|volume=0.1
|pitch=1.0}}
{{Sound table
|source=block
|description=When armor is dyed using a cauldron
|id=cauldron.dyearmor
|volume=0.1
|pitch=1.0}}
{{Sound table
|source=block
|description=When dye is removed from armor using a cauldron
|id=cauldron.cleanarmor
|volume=0.1
|pitch=1.0
|foot=1}}
== Achievements ==
{{load achievements|Rainbow Collection;Tie dye outfit}}
== Video ==
{{Video note|These videos are outdated, as it does not include details of the [[Java Edition 1.7.2|1.7.2]] update's changes to the dyeing system/production chain.}}
<div style="text-align:center">
<span style="display:inline-block">{{yt|8YD7oauNZHE}}</span>
<span style="display:inline-block">{{yt|7tETaRt7STM}}</span>
</div>
== History ==
{{History|java beta}}
{{History||January 3, 2011|link=https://web.archive.org/web/0/http://notch.tumblr.com/post/2582321901/2011-here-we-go|Notch mentions adding a "paint" feature if he can figure out how.}}
{{History||January 10, 2011<ref group="n">Supposed time when fragment was filmed. Based on modified date of client.jar/gui/trap.png in [[Beta 1.2]].</ref>|link=https://www.youtube.com/watch?v=cBF2ugTzXqQ&t=181s|[[File:Red Dye (pre-release).png|32px]] Shown rose red in development as part of [[Minecraft: The Story of Mojang]].}}
{{History||1.2|[[File:Ink Sac JE1 BE1.png|32px]] [[File:Red Dye JE1 BE1.png|32px]] [[File:Green Dye JE1 BE1.png|32px]] [[File:Cocoa Beans JE1 BE1.png|32px]] [[File:Lapis Lazuli JE1 BE1.png|32px]] [[File:Purple Dye JE1 BE1.png|32px]] [[File:Cyan Dye JE1 BE1.png|32px]] [[File:Light Gray Dye JE1 BE1.png|32px]] [[File:Gray Dye JE1 BE1.png|32px]] [[File:Pink Dye JE1 BE1.png|32px]] [[File:Lime Dye JE1 BE1.png|32px]] [[File:Yellow Dye JE1 BE1.png|32px]] [[File:Light Blue Dye JE1 BE1.png|32px]] [[File:Magenta Dye JE1 BE1.png|32px]] [[File:Orange Dye JE1 BE1.png|32px]] [[File:Bone Meal JE1 BE1.png|32px]] Added dyes.
|[[File:Black Dye (Recreated).png|32px]] [[File:Red Dye (pre-release).png|32px]] [[File:Green Dye (Recreated).png|32px]] [[File:Brown Dye (Recreated).png|32px]] [[File:Blue Dye (Recreated).png|32px]] [[File:Purple Dye (Recreated).png|32px]] [[File:Cyan Dye (Recreated).png|32px]] [[File:Light Gray Dye (Recreated).png|32px]] [[File:Gray Dye (Recreated).png|32px]] [[File:Pink Dye (Recreated).png|32px]] [[File:Lime Dye (Recreated).png|32px]] [[File:Yellow Dye (Recreated).png|32px]] [[File:Light Blue Dye (Recreated).png|32px]] [[File:Magenta Dye (Recreated).png|32px]] [[File:Orange Dye (Recreated).png|32px]] [[File:White Dye (Recreated).png|32px]] Leftovers of old textures can be seen in [[items.png]] with 100% opacity. The white dye texture was reused for [[Sugar]].
| The colors were as follows:{{verify|Did the color codes remain the same between Beta 1.2 and Java 1.11.2?}}
{{:Color/Java Edition dye colors before 17w06a}}
}}
{{History|java}}
{{History||1.1|snap=11w49a|[[Sheep]] can now regrow their [[wool]] by eating [[grass block|grass]]. Dyed sheep regrow wool in their new color.}}
{{History||1.3.1|snap=12w19a|[[File:Cocoa Beans JE2.png|32px]] The texture of [[cocoa beans]] has been changed.}}
{{History|||snap=1.3|[[File:bone meal changes.gif|32px]] The textures of [[bone meal]], [[cactus green]], cocoa beans and [[rose red]] have been changed. The textures have been lowered one pixel.}}
{{History||1.4.2|snap=12w34a|Added the ability to dye leather [[armor]] and [[wolf]] collars.}}
{{History||1.4.4|snap=1.4.3|Color codes have been changed. The colors of red, brown, blue, purple, cyan, pink, light blue, magenta and orange were adjusted a little vividly.}}
{{History||1.6.1|snap=13w19a|[[Stained clay]] can now be crafted using dyes.}}
{{history||1.7.2|snap=13w36a|With the addition of new [[flower]]s, many secondary and tertiary dyes are now primary dyes.}}
{{History|||snap=13w41a|[[Stained glass]] can now be crafted using dyes.}}
{{History||1.8|snap=14w02a|As cleric [[villager]]s now sell lapis lazuli, all dyes have become fully renewable.}}
{{History|||snap=14w30a|Added [[banner]]s, which can be dyed.}}
{{History||1.9|snap=15w34a|Added [[shield]]s, which can be dyed indirectly by applying a matching [[banner]].}}
{{History||1.11|snap=16w39b|Dyes are now used to change the color of [[shulker box]]es.}}
{{History||1.12|snap=17w06a|Dyes are now used to craft [[concrete powder]].
|Color codes have been changed. All colors are adjusted more vividly. The changes were as follows:
{{:Color/Java Edition dye color changes in 17w06a}}
|Light blue dye, stained glass, and stained glass panes, did not change colors in this update. This means that they still use old colors.<ref name="unchanged dyes">{{Bug|MC-214643}}<br>{{Bug|MC-214641}}</ref>
}}
{{History|||snap=17w15a|Dyes can now apply color to white [[bed]]s.}}
{{History||1.13|snap=17w47a|The different data values for the <code>dye</code> ID have been split up into their own IDs.}}
{{History||1.14|snap=18w43a|[[Bone meal]], [[ink sac]]s, [[cocoa beans]] and [[lapis lazuli]] are no longer considered dyes.
|[[File:White Dye JE1 BE1.png|32px]] [[File:Black Dye JE1 BE1.png|32px]] [[File:Brown Dye JE1 BE1.png|32px]] [[File:Blue Dye JE1 BE1.png|32px]] Added [[white dye|white]], [[black dye|black]], [[brown dye|brown]] and [[blue dye]]s.
|"Rose Red", "Dandelion Yellow" and "Cactus Green" have been renamed to "Red Dye", "Yellow Dye" and "Green Dye", respectively.
|[[Glass pane]]s and [[carpet]]s can now be dyed.
|[[File:Light Gray Dye JE2 BE2.png|32px]] [[File:Gray Dye JE2 BE2.png|32px]] [[File:Red Dye JE2 BE2.png|32px]] [[File:Orange Dye JE2 BE2.png|32px]] [[File:Yellow Dye JE2 BE2.png|32px]] [[File:Lime Dye JE2 BE2.png|32px]] [[File:Green Dye JE2 BE2.png|32px]] [[File:Cyan Dye.png|32px]] [[File:Light Blue Dye JE2 BE2.png|32px]] [[File:Purple Dye JE2 BE2.png|32px]] [[File:Magenta Dye JE2 BE2.png|32px]] [[File:Pink Dye JE2 BE2.png|32px]] The textures of light gray, gray, red, orange, yellow, lime, green, cyan, light blue, purple, magenta, and pink dyes, have been changed. The color texture for light blue dye was not changed to reflect the updated colors from 1.12.<ref name="unchanged dyes"></ref>}}
{{History|||snap=18w44a|The color of the text on [[sign]]s can now be changed with dye.}}
{{History|||snap=18w49a|Yellow dyes can now be found in [[chest]]s in [[village]] mason houses.}}
{{History|||snap=18w50a|Green dyes can now be found in [[chest]]s in [[desert]] [[village]] houses.}}
{{History|||snap=19w05a|Added the [[wandering trader]], which can sell any type of dye.}}
{{History|||snap=19w11a|All 16 types of dyes can now be [[trading|bought]] by shepherd villagers.}}
{{History||1.16.2|snap=Pre-release 2|Reversed the order of dyes to match other colored items in the [[Creative inventory]].<ref name="reverse dye">{{Bug|MC-136553}}</ref>
|Regrouped dyes in the Creative inventory such that white, blue, brown, and black dyes are within and not [[cocoa beans]], [[ink sacs]], [[lapis lazuli]], and [[bone meal]].<ref name="regroup dye">{{Bug|MC-177684}}</ref>}}
{{History||1.17|snap=20w45a|Added [[candle]]s, which can be dyed.}}
{{History|||snap=21w03a|Added a sound for applying dyes.}}
{{History|||snap=21w19a|Candles can no longer be dyed.}}
{{History|||snap=Pre-release 1|Candles can now once again be dyed.}}
{{History||1.20<br>(Experimental)|link=1.19.3|snap=22w42a|The color of the text on [[hanging sign]]s can now be changed with dye.}}
{{History||1.20<br>(Experimental)|link=1.19.4|snap=23w07a|[[Torchflower]]s can now be crafted into orange dye.|[[Pink petals]] can now be crafted into pink dye.}}
{{History||1.20|snap=23w12a|[[Pitcher plant]]s can now be crafted into cyan dye.|Blue, light blue, orange, white, and yellow dye can now be found in [[suspicious gravel]] and [[suspicious sand]] in [[trail ruins]].}}
{{History|||snap=23w14a|Pitcher plants can now craft two [[cyan dye]] instead of one.}}
{{History|||snap=23w16a|Blue, light blue, orange, white, and yellow dye no longer generates in [[suspicious sand]] in [[trail ruins]].|Due to the split of the archaeological loot tables for the suspicious gravel within the [[trail ruins]]; blue, light blue, orange, white, and yellow dye now are in the common loot.}}
{{History|pocket alpha}}
{{History||v0.3.0|[[File:Bone Meal JE1 BE1.png|32px]] [[File:Light Gray Dye JE1 BE1.png|32px]] [[File:Gray Dye JE1 BE1.png|32px]] [[File:Ink Sac JE1 BE1.png|32px]] [[File:Cocoa Beans JE1 BE1.png|32px]] [[File:Red Dye JE1 BE1.png|32px]] [[File:Orange Dye JE1 BE1.png|32px]] [[File:Yellow Dye JE1 BE1.png|32px]] [[File:Lime Dye JE1 BE1.png|32px]] [[File:Green Dye JE1 BE1.png|32px]] [[File:Cyan Dye JE1 BE1.png|32px]] [[File:Light Blue Dye JE1 BE1.png|32px]] [[File:Lapis Lazuli JE1 BE1.png|32px]] [[File:Purple Dye JE1 BE1.png|32px]] [[File:Magenta Dye JE1 BE1.png|32px]] [[File:Pink Dye JE1 BE1.png|32px]] Added dyes. Only [[dandelion yellow]] and [[lapis lazuli]] are currently obtainable and have functionality.}}
{{History||v0.3.2|[[Cactus green]] is now obtainable by smelting [[cacti]].}}
{{History||v0.3.3|[[Bone meal]] is now obtainable via [[crafting]].}}
{{History||v0.4.0|[[Cyan dye]], [[light blue dye]], [[lime dye]], [[magenta dye]], [[orange dye]], [[pink dye]], and [[purple dye]] are now obtainable via crafting.
|[[Rose red]] is now obtainable by smelting red [[mushroom]]s.
|All available dyes, excluding bone meal, can now be used to craft their respective [[wool]] color.}}
{{History||v0.8.0|snap=build 1|[[File:Cocoa Beans JE3 BE2.png|32px]] The texture of cocoa beans has been changed.}}
{{History|||snap=build 3|[[Ink sac]]s, [[cocoa bean]]s, [[gray dye]], and [[light gray dye]] are now available in the [[creative]] [[inventory]].
|Rose red can now be obtained from [[beetroot]]s.}}
{{History||v0.9.0|snap=build 1|Cocoa beans can now be obtained from [[cocoa pod]]s.
|The [[rose]] has been removed and replaced with a new poppy [[flower]] that can be crafted into rose red.}}
{{History|||snap=build 3|All new [[flower]]s can now be [[crafting|crafted]] into dyes. Because of this, many secondary and tertiary dyes are now primary dyes.
|[[Gray dye]] and [[light gray dye]] can now be obtained in [[survival]].}}
{{History|||snap=build 11|[[Terracotta|Stained clay]] can now be crafted using dyes.}}
{{History||v0.11.0|snap=build 1|[[Ink sac]]s can now be obtained from [[squid]].
|Added the ability to dye [[wolf]] collars.}}
{{History||v0.12.1|snap=build 1|Red [[mushroom]]s can no longer be smelted to obtain [[rose red]].}}
{{History||v0.14.0|snap=build 1|[[Cauldron]]s now used for leather dyeing, by applying a dye to a [[water]]-filled cauldron.}}
{{History||v0.16.0|snap=build 1|[[Cocoa bean]]s can no longer be crafted.}}
{{History|pocket}}
{{History||1.0.0|snap=alpha 0.17.0.1|Added a ''Dye'' button for [[sheep]].
|Added [[shulker]]s, which can be dyed.
|Added [[stained glass]]. Stain glass cannot be [[crafting|crafted]], but purple glass generates in [[end city|end cities]].}}
{{History||1.1.0|snap=alpha 1.1.0.0|Dyes can now apply color to a white [[bed]]s.
|Dyes are now used to craft [[concrete powder]].
|The color palette has been changed.}}
{{History|bedrock}}
{{History||1.2.0|snap=beta 1.2.0.2|Dyes can now be used for [[banner]] crafting.
|Dyes can now be used to craft [[firework star]]s.
|[[Stained glass]] is now [[crafting|craftable]], using dyes.}}
{{History||1.4.0|snap=beta 1.2.20.1|[[Lime dye]] can now be obtained from smelting [[sea pickle]]s.
|Dyes can now used to craft [[glow stick]]s and [[balloon]]s.}}
{{History||1.8.0|snap=beta 1.8.0.8|Dyes can now be used to dye [[cat]] collars.}}
{{History|||snap=beta 1.8.0.10|[[File:White Dye JE1 BE1.png|32px]] [[File:Black Dye JE1 BE1.png|32px]] [[File:Brown Dye JE1 BE1.png|32px]] [[File:Blue Dye JE1 BE1.png|32px]] Added [[white dye|white]], [[brown dye|brown]], [[black dye|black]] and [[blue dye]]s, which can be crafted from [[lapis lazuli]], [[bone meal]], [[cocoa beans]] and [[ink sac]]s. This, however, the later four still use as dyes.<ref>{{Bug|MCPE-42473}}</ref>
|"Rose Red", "Dandelion Yellow" and "Cactus Green" have been renamed to "Red Dye", "Yellow Dye" and "Green Dye", respectively.}}
{{History||1.9.0|snap=beta 1.9.0.0|Blue and white dye can now be obtained from [[cornflower]]s and [[lily of the valley]]s.}}
{{History||1.10.0|snap=beta 1.10.0.3|[[Glass pane]]s and [[carpet]]s can now be dyed.
|Only a single dye is now required to apply a banner pattern in a [[loom]].
|Various dyes except black dye, white dye, brown dye and blue dye are now [[trading|sold]] by [[wandering trader]]s.
|[[File:Bone Meal JE2 BE2.png|32px]] [[File:Light Gray Dye JE2 BE2.png|32px]] [[File:Gray Dye JE2 BE2.png|32px]] [[File:Ink Sac JE2 BE2.png|32px]] [[File:Cocoa Beans JE4 BE3.png|32px]] [[File:Red Dye JE3 BE3.png|32px]] [[File:Orange Dye JE2 BE2.png|32px]] [[File:Yellow Dye JE2 BE2.png|32px]] [[File:Lime Dye JE2 BE2.png|32px]] [[File:Green Dye JE2 BE2.png|32px]] [[File:Cyan Dye.png|32px]] [[File:Light Blue Dye JE2 BE2.png|32px]] [[File:Lapis Lazuli JE2 BE2.png|32px]] [[File:Purple Dye JE2 BE2.png|32px]] [[File:Magenta Dye JE2 BE2.png|32px]] [[File:Pink Dye JE2 BE2.png|32px]] The textures of bone meal, light gray, gray, ink sac, cocoa beans, red, orange, yellow, lime, green, cyan, light blue, lapis lazuli, purple, magenta, and pink dyes have been changed.}}
{{History||1.11.0|snap=beta 1.11.0.4|Dye can now be [[trading|sold]] to shepherd [[villager]]s.}}
{{History||1.16.210|snap=beta 1.16.210.59|The color of the text on [[sign]]s can now be changed with dye.}}
{{History|||snap=beta 1.16.210.60|The ability to dye the color of the text on [[sign]]s was temporarily removed.}}
{{History||1.16.220|snap=beta 1.16.220.50|The color of the text on [[sign]]s can now be changed with dye again.}}
{{History||1.17.10|snap=beta 1.17.10.22|Added [[candles]], which can be dyed.}}
{{History|console}}
{{History||xbox=TU1|xbone=CU1|ps=1.0|wiiu=Patch 1|switch=1.0.1|[[File:Bone Meal JE1 BE1.png|32px]] [[File:Light Gray Dye JE1 BE1.png|32px]] [[File:Gray Dye JE1 BE1.png|32px]] [[File:Ink Sac JE1 BE1.png|32px]] [[File:Cocoa Beans JE1 BE1.png|32px]] [[File:Red Dye JE1 BE1.png|32px]] [[File:Orange Dye JE1 BE1.png|32px]] [[File:Yellow Dye JE1 BE1.png|32px]] [[File:Lime Dye JE1 BE1.png|32px]] [[File:Green Dye JE1 BE1.png|32px]] [[File:Cyan Dye JE1 BE1.png|32px]] [[File:Light Blue Dye JE1 BE1.png|32px]] [[File:Lapis Lazuli JE1 BE1.png|32px]] [[File:Purple Dye JE1 BE1.png|32px]] [[File:Magenta Dye JE1 BE1.png|32px]] [[File:Pink Dye JE1 BE1.png|32px]] Added dyes.}}
{{History||xbox=TU9|[[File:Cocoa Beans JE3 BE2.png|32px]] The texture of cocoa beans has been changed.}}
{{History||xbox=none|xbone=none|ps=1.83|wiiu=none|switch=none|[[File:White Dye JE1 BE1.png|32px]] [[File:Black Dye JE1 BE1.png|32px]] [[File:Brown Dye JE1 BE1.png|32px]] [[File:Blue Dye JE1 BE1.png|32px]] Added [[white dye|white]], [[black dye|black]], [[brown dye|brown]], and [[blue dye|blue]] dyes, which can crafted from [[bone meal]], [[ink sac]], [[cocoa beans]], and [[lapis lazuli]].
|"Rose Red", "Dandelion Yellow" and "Cactus Green" have been renamed to "Red Dye", "Yellow Dye" and "Green Dye", respectively.}}
{{History||ps=1.90|[[File:Bone Meal JE2 BE2.png|32px]] [[File:Light Gray Dye JE2 BE2.png|32px]] [[File:Gray Dye JE2 BE2.png|32px]] [[File:Ink Sac JE2 BE2.png|32px]] [[File:Cocoa Beans JE4 BE3.png|32px]] [[File:Red Dye JE2 BE2.png|32px]] [[File:Orange Dye JE2 BE2.png|32px]] [[File:Yellow Dye JE2 BE2.png|32px]] [[File:Lime Dye JE2 BE2.png|32px]] [[File:Green Dye JE2 BE2.png|32px]] [[File:Cyan Dye.png|32px]] [[File:Light Blue Dye JE2 BE2.png|32px]] [[File:Lapis Lazuli JE2 BE2.png|32px]] [[File:Purple Dye JE2 BE2.png|32px]] [[File:Magenta Dye JE2 BE2.png|32px]] [[File:Pink Dye JE2 BE2.png|32px]] The textures of bone meal, light gray, gray, ink sac, cocoa beans, red, orange, yellow, lime, green, cyan, light blue, lapis lazuli, purple, magenta, and pink dyes have been changed.}}
{{History|3ds}}
{{History||0.1.0|[[File:Bone Meal JE1 BE1.png|32px]] [[File:Light Gray Dye JE1 BE1.png|32px]] [[File:Gray Dye JE1 BE1.png|32px]] [[File:Ink Sac JE1 BE1.png|32px]] [[File:Cocoa Beans JE3 BE2.png|32px]] [[File:Red Dye JE1 BE1.png|32px]] [[File:Orange Dye JE1 BE1.png|32px]] [[File:Yellow Dye JE1 BE1.png|32px]] [[File:Lime Dye JE1 BE1.png|32px]] [[File:Green Dye JE1 BE1.png|32px]] [[File:Cyan Dye JE1 BE1.png|32px]] [[File:Light Blue Dye JE1 BE1.png|32px]] [[File:Lapis Lazuli JE1 BE1.png|32px]] [[File:Purple Dye JE1 BE1.png|32px]] [[File:Magenta Dye JE1 BE1.png|32px]] [[File:Pink Dye JE1 BE1.png|32px]] Added dyes from [[Pocket Edition v0.15.4 alpha]].}}
{{History|foot}}
<gallery>
Pre-release dyes.png|Pre-release dye textures hidden within [[Items.png]].
</gallery>
;Notes
{{reflist|group=n}}
== Gallery ==
<gallery>
White Dye.png|White Dye
Light Gray Dye.png|Light Gray Dye
Gray Dye.png|Gray Dye
Black Dye.png|Black Dye
Brown Dye.png|Brown Dye
Red Dye.png|Red Dye
Orange Dye.png|Orange Dye
Yellow Dye.png|Yellow Dye
Lime Dye.png|Lime Dye
Green Dye.png|Green Dye
Cyan Dye.png|Cyan Dye
Light Blue Dye.png|Light Blue Dye
Blue Dye.png|Blue Dye
Purple Dye.png|Purple Dye
Magenta Dye.png|Magenta Dye
Pink Dye.png|Pink Dye
</gallery>
==Issues==
{{issue list}}
== Trivia ==
* Players can obtain each one of every color with 1 cocoa bean, 2 yellow dye, 2 ink sac, 3 green dye, 4 lapis lazuli, 4 red dye, and 6 bone meal (2 bones).
* The dyed sheep breeding behavior mirrors [[wikipedia:Lamarckism|Lamarck's theory]], in which the organisms evolve inheriting the external changes and adaptations of the previous generation, transmitting them to their offspring.
* In ''Bedrock Edition'', tertiary colors, along with their regular crafting recipes, can be crafted with primary colors. E.g.: Magenta can be crafted with one rose red and two bone meals.
* The colors of the dyes match the chat colors in [[color codes]] except for brown (dye only), light aqua, and gold (color codes only).
* The texture for light blue dye still uses the color from prior to the 1.12 World of Color update.<ref name="unchanged dyes"></ref>
== References ==
{{reflist}}
== External Links ==
* Tools for calculating leather dye combination: [https://minecraft.tools/en/armor.php minecraft.tools] (webapp); [https://github.com/pudquick/pyMCdyes/ pyMCDyes] (open-source Python script, outdated); [https://anrar4.github.io/DyeLeatherArmor/ DyeLeatherArmor]: a tool for calculating an exact crafting recipe for any sRGB color
{{Items}}
[[Category:Dyes]]
[[Category:Renewable resources]]
[[cs:Barvivo]]
[[de:Farbstoff]]
[[es:Tinte]]
[[fr:Teinture]]
[[hu:Színezés]]
[[it:Colorante]]
[[ja:染料]]
[[ko:염료]]
[[nl:Kleurstof]]
[[pl:Barwniki]]
[[pt:Corante]]
[[ru:Красители]]
[[th:สีย้อม]]
[[uk:Барвники]]
[[zh:染料]]</li><li>[[Purple Dye|Purple Dye]]<br/>{{Item
| image = Purple_Dye_JE2_BE2.png
| renewable = Yes
| stackable = Yes (64)
}}
'''Purple dye''' is a [[Dyeing#Secondary colors|secondary dye color]] created by combining [[red dye]] and [[blue dye]] in a crafting grid.
== Obtaining ==
=== Crafting ===
{{Crafting
|head=1
|showname=0
|Blue Dye
|Red Dye
|Output=Purple Dye,2
|type=Material
}}
{{Crafting
|foot=1
|Lapis Lazuli
|Red Dye
|Output=Purple Dye,2
|description={{only|bedrock|education}}
|type=Material
}}
=== Trading ===
[[Wandering trader]]s sometimes sell 3 purple dye for an [[emerald]].
== Usage ==
{{dye usage}}
=== Crafting ingredient ===
{{crafting usage|ignore=Banner|continue=1}}
{{banner crafting usage}}
=== Loom ingredient ===
{{Banner loom usage|Purple Dye}}
=== Trading ===
Apprentice-level Shepherd villagers have a 20% chance to buy 12 purple dye for an emerald as part of their trades.{{only|bedrock}}
Expert-level Shepherd villagers have a {{frac|2|7}} chance to buy 12 purple dye for an emerald.{{only|java}}
== Data values ==
=== ID ===
{{edition|java}}:
{{ID table
|edition=java
|showforms=y
|generatetranslationkeys=y
|displayname=Purple Dye
|spritetype=item
|nameid=purple_dye
|form=item
|foot=1}}
{{edition|bedrock}}:
{{ID table
|edition=bedrock
|showaliasids=y
|shownumericids=y
|showforms=y
|notshowbeitemforms=y
|generatetranslationkeys=y
|displayname=Purple Dye
|spritetype=item
|nameid=purple_dye
|aliasid=dye / 5
|id=400
|form=item
|translationkey=item.dye.purple.name
|foot=1}}
== Video ==
<div style="text-align:center">{{yt|Cx52CGo5QnI}}</div>
== History ==
{{History|java beta}}
{{History||1.2|[[File:Purple Dye JE1 BE1.png|32px]] Added purple dye.}}
{{History|java}}
{{History||1.4.2|snap=12w34a|Added the ability to [[Armor#Dyeing|dye]] leather [[armor]] and [[wolf]] collars.}}
{{History||1.4.6|snap=12w49a|Purple dye can now be [[crafting|crafted]] with [[gunpowder]] to create a [[firework star]].}}
{{History||1.6.1|snap=13w19a|[[Stained clay]] can now be crafted.}}
{{history||1.7.2|snap=13w36a|With the addition of new [[flower]]s, many secondary and tertiary dyes are now primary [[dye]]s.}}
{{History|||snap=13w41a|[[Stained glass]] can now be crafted.}}
{{History||1.8|snap=14w02a|Due to [[lapis lazuli]] being [[renewable resource|renewable]] now, purple dye is also now renewable.}}
{{History|||snap=14w30a|Added [[banner]]s which can be dyed.}}
{{History||1.13|snap=17w47a|The different data values for the <code>dye</code> ID have now been split up into their own IDs.
|Prior to [[1.13/Flattening|''The Flattening'']], this [[item]]'s numeral ID was 351.}}
{{History||1.14|snap=18w43a|Purple dye is now [[crafting|crafted]] using [[blue dye]], instead of [[lapis lazuli]].
|[[File:Purple_Dye_JE2_BE2.png|32px]] The texture of purple dye has now been changed.}}
{{History|||snap=18w44a|Purple dye can now change the text color on [[sign]]s to purple.}}
{{History|||snap=19w05a|Added the [[wandering trader]], which sells purple dye.}}
{{History|||snap=19w11a|Purple dye can now be [[trading|bought]] by shepherd villagers.}}
{{History||1.17|snap=20w45a|Purple dye can now be used to craft [[purple candle]]s.}}
{{History|||snap=21w19a|Purple dye can no longer be used to craft purple candles.}}
{{History|||snap=Pre-release 1|Purple dye can once again be used to craft purple candles.}}
{{History||1.20<br>(Experimental)|link=1.19.3|snap=22w42a|Purple dye can now change the text color on [[hanging sign]]s to purple.}}
{{History|pocket alpha}}
{{History||v0.3.0|[[File:Purple Dye JE1 BE1.png|32px]] Added purple dye. It is currently unobtainable and serves no purpose.}}
{{History||v0.4.0|Purple dye is now [[craft]]able with rose red and lapis lazuli.
|Purple dye can now be used to craft purple [[wool]].}}
{{History||v0.6.0|Purple dye can now be used to dye [[sheep]].}}
{{History||v0.8.0|snap=build 1|Purple dye can now be used to craft [[magenta dye]].}}
{{History||v0.9.0|snap=build 11|Purple dye can now be used to craft colored [[terracotta]].}}
{{History||v0.11.0|snap=build 1|Purple dye can now be used to dye tamed [[wolf]] collars.}}
{{History||v0.14.0|snap=build 1|Purple dye can now be used to dye [[water]] in [[cauldron]]s.}}
{{History|pocket}}
{{History||1.0.0|snap=alpha 0.17.0.1|Purple dye can now be used to dye [[shulker]]s.}}
{{History||1.1.0|snap=alpha 1.1.0.0|Purple dye can now be used to craft [[concrete powder]], colored [[bed]]s and dyed [[shulker box]]es.}}
{{History|bedrock}}
{{History||1.2.0|snap=beta 1.2.0.2|Purple dye can now be used to craft [[firework star]]s, [[stained glass]] and patterns on [[banner]]s.}}
{{History||1.4.0|snap=beta 1.2.20.1|Purple dye can now be used to craft [[balloon]]s and [[glow stick]]s.}}
{{History||1.8.0|snap=beta 1.8.0.8|Purple dye can now be used to dye tamed [[cat]] collars.}}
{{History||1.10.0|snap=beta 1.10.0.3|Purple dye is now [[trading|sold]] by [[wandering trader]]s.
|Purple dye can now be used to dye white [[carpet]]s and undyed [[glass pane]]s.
|[[File:Purple_Dye_JE2_BE2.png|32px]] The texture of purple dye has now been changed.}}
{{History||1.11.0|snap=beta 1.11.0.4|Purple dye can now be [[trading|sold]] to shepherd [[villager]]s.}}
{{History||1.16.100|snap=beta 1.16.100.56|The ID of purple dye has been changed from <code>dye/5</code> to <code>purple_dye</code>.}}
{{History|console}}
{{History||xbox=TU1|xbone=CU1|ps=1.00|switch=1.0.1|wiiu=Patch 1|[[File:Purple Dye JE1 BE1.png|32px]] Added purple dye.}}
{{History|PS4}}
{{History||1.90|[[File:Purple_Dye_JE2_BE2.png|32px]] The texture of purple dye has now been changed.}}
{{History|new 3ds}}
{{History||0.1.0|[[File:Purple Dye JE1 BE1.png|32px]] Added purple dye.}}
{{History|foot}}
== Issues ==
{{issue list}}
{{Items}}
[[Category:Items]]
[[Category:Dyes]]
[[Category:Renewable resources]]
[[cs:Fialové barvivo]]
[[de:Violetter Farbstoff]]
[[es:Tinte morado]]
[[fr:Teinture violette]]
[[hu:Lila festék]]
[[ja:紫色の染料]]
[[ko:보라색 염료]]
[[nl:Paarse kleurstof]]
[[pl:Fioletowy barwnik]]
[[pt:Corante roxo]]
[[ru:Фиолетовый краситель]]
[[zh:紫色染料]]</li></ul> | 20100109 | ||||
| The model of fire currently does not render the back faces; faces have to be seen from the front to be rendered. | |||||
| Fire is placed directly like a block. It is not known if its texture was any different. | |||||
| 20100111-1 | Lava now sets fire to flammable materials. | ||||
| All items and mobs can now catch fire. | |||||
| Fire is now placed by flint and steel. | |||||
| 20100125-1 | Fire now has particle effects. | ||||
| 20100129 | Ores can now be smelted by using fire on dropped items. It is not known when this was removed. | ||||
| infdev | |||||
| ? | |||||
| alpha | |||||
v1.2.0{{Extension DPL}}<ul><li>[[Horse Armor|Horse Armor]]<br/>{{Item
| image = <gallery>
Leather Horse Armor.png | Leather
Iron Horse Armor.png | Iron
Golden Horse Armor.png | Golden
Diamond Horse Armor.png | Diamond
</gallery>
| image2 = <gallery>
Leather Horse Armor (item).png|Leather
Iron Horse Armor (item).png|Iron
Golden Horse Armor (item).png|Golden
Diamond Horse Armor (item).png|Diamond
</gallery>
| extratext = View [[#Gallery|all renders]]
| renewable =
* '''Leather''': Yes
* '''All others''': No
| stackable = No
}}
'''Horse armor''' is a special type of [[armor]] that can be given to a [[horse]] to wear.
== Obtaining ==
===Chest loot===
{{LootChestItem|iron-horse-armor}}
{{LootChestItem|golden-horse-armor}}
{{LootChestItem|diamond-horse-armor}}
===Crafting===
{{crafting
|A1= Leather
|C1= Leather
|A2= Leather
|B2= Leather
|C2= Leather
|A3= Leather
|C3= Leather
|Output= Leather Horse Armor
|type=Miscellaneous
}}
Only leather horse armor can be crafted; other horse armor can be obtained only from chest loot from some generated structures.
===Trading===
Expert-level [[leatherworker]] villagers [[trading|sell]] leather horse armor for 6 [[emerald]]s as part of their trade.
==Usage==
Only normal adult horses can wear armor; foals, [[donkey]]s, [[mule]]s, and undead variants such as [[skeleton horse]]s and [[zombie horse]]s cannot be equipped with armor.
=== Types ===
Horse armor has leather, iron, gold, and diamond variants. However, horse armor does not have netherite or chainmail variants.
=== Armor Stands ===
Horse armor cannot be placed or displayed on [[armor stand]]s.
===Protection===
Horse armor can be equipped to horses either by manually placing it in its respective slot by pressing E while riding the horse ({{SlotSprite|Horse Armor}}), or by right-clicking the horse with it.
There is a gradual increase in the defense given from a horse wearing the different types of armor. Note that golden horse armor provides more protection than iron horse armor, whereas the opposite is true for [[armor|player armor]].
{| class="wikitable" data-description="Armor defense"
|-
! Material !! [[Armor]]
|-
! [[Leather]]
| {{armor|3}}
|-
! [[Iron]]
| {{armor|5}}
|-
! [[Gold]]
| {{armor|7}}
|-
! [[Diamond]]
| {{armor|11}}
|}
When a horse dies while equipped with any horse armor, it drops its normal loot, saddle (if it had one), and the horse armor.
Leather horse armor protects horses from freezing in [[powder snow]], but it does not negate other powder snow effects (e.g., falling through, inability to jump).
===Durability===
Unlike [[armor|player armor]], horse armor does not have durability. This means a single horse armor can be used infinitely unless destroyed.
=== Enchanting ===
Unlike [[armor|player armor]], horse armor cannot be enchanted in survival mode. However, {{in|java}} Creative mode, horse armor can be used with an [[anvil]] to enchant with [[Depth Strider]], [[Thorns]], [[Respiration]], [[Feather Falling]], and [[Curse of vanishing]]. Other enchantments can be applied, but they have no effect.
=== Dyeing ===
Leather horse armor can be dyed 12,326,391 different colors (using lone dyes or dye combinations) and put onto a horse to display that color. These changes can be reverted by {{control|using}} a filled [[cauldron]] with dyed leather horse armor.
===Smelting usage===
{{Smelting|showname=1|Iron Horse Armor;Golden Horse Armor|Iron Nugget;Gold Nugget|0,1}}
===Piglins===
{{EntityLink|Piglin|Piglins}} are attracted to golden horse armor and run toward any golden horse armor on the ground, inspecting it for 6 to 8 seconds before putting it in their inventory.
== Sounds ==
{{Edition|Java}}:
{{Sound table
|sound=Horse armor.ogg
|subtitle=Horse armor equips
|source=neutral
|description=When armor is equipped to a horse
|id=entity.horse.armor
|translationkey=subtitles.entity.horse.armor
|volume=0.5
|pitch=1.0
|distance=16
|foot=1}}
{{Edition|Bedrock}}:
{{Sound table
|type=bedrock
|sound=Horse armor.ogg
|source=neutral
|description=When armor is equipped to a horse
|id=mob.horse.armor
|volume=0.6
|pitch=1.0
|foot=1}}
== Data values ==
=== ID ===
{{edition|java}}:
{{ID table
|edition=java
|showforms=y
|generatetranslationkeys=y
|displayname=Leather Horse Armor
|spritetype=item
|nameid=leather_horse_armor
|form=item}}
{{ID table
|displayname=Iron Horse Armor
|spritetype=item
|nameid=iron_horse_armor
|form=item}}
{{ID table
|displayname=Diamond Horse Armor
|spritetype=item
|nameid=diamond_horse_armor
|form=item}}
{{ID table
|displayname=Golden Horse Armor
|spritetype=item
|nameid=golden_horse_armor
|form=item
|foot=1}}
{{edition|bedrock}}:
{{ID table
|edition=bedrock
|shownumericids=y
|showforms=y
|showaliasids=y
|notshowbeitemforms=y
|generatetranslationkeys=y
|displayname=Leather Horse Armor
|spritetype=item
|nameid=leather_horse_armor
|aliasid=horsearmorleather
|id=530
|form=item
|translationkey=item.horsearmorleather.name}}
{{ID table
|displayname=Iron Horse Armor
|spritetype=item
|nameid=iron_horse_armor
|aliasid=horsearmoriron
|id=531
|form=item
|translationkey=item.horsearmoriron.name}}
{{ID table
|displayname=Diamond Horse Armor
|spritetype=item
|nameid=diamond_horse_armor
|aliasid=horsearmordiamond
|id=533
|form=item
|translationkey=item.horsearmordiamond.name}}
{{ID table
|displayname=Golden Horse Armor
|spritetype=item
|nameid=golden_horse_armor
|aliasid=horsearmorgold
|id=532
|form=item
|translationkey=item.horsearmorgold.name
|foot=1}}
=== Item data ===
When leather horse armor is dyed, it has the following NBT:
{{el|java}}:
{{main|Player.dat format}}
<div class="treeview">
* {{nbt|compound|tag}}: Parent tag.
** {{nbt|compound|display}}: Display properties.
*** {{nbt|int|color}}: The color of the leather armor. The tooltip displays "Dyed" if advanced tooltips are disabled, otherwise it displays the hexadecimal color value. Color codes are calculated from the Red, Green and Blue components using this formula:<br>'''<span style="color:red">Red</span>[[wikipedia:Logical shift|<<]]16 + <span style="color:green">Green</span><<8 + <span style="color:blue">Blue</span>'''<ref>For positive values larger than 0x00FFFFFF, the top byte is ignored. All negative values produce white.</ref>
</div>
{{el|bedrock}}:
: See [[Bedrock Edition level format/Item format]].
== History ==
{{History|java}}
{{History||1.6.1|snap=13w16a|[[File:Iron Horse Armor JE1 BE1.png|32px]] [[File:Golden Horse Armor JE1 BE1.png|32px]] [[File:Diamond Horse Armor JE1 BE1.png|32px]]<br>[[File:Iron Horse Armor (item) JE1 BE1.png|32px]] [[File:Golden Horse Armor (item) JE1 BE1.png|32px]] [[File:Diamond Horse Armor (item) JE1 BE1.png|32px]] Added horse armor.
|Horse armor can be [[crafting|crafted]] using the following recipe.
{{{!}} class{{=}}"collapsible collapsed"
! Recipe
{{!}}-
{{!}}
{{Crafting Table
|C1=Iron Ingot; Gold Ingot; Diamond
|A2=Iron Ingot; Gold Ingot; Diamond
|B2=Any Wool
|C2=Iron Ingot; Gold Ingot; Diamond
|A3=Iron Ingot; Gold Ingot; Diamond
|B3=Iron Ingot; Gold Ingot; Diamond
|C3=Iron Ingot; Gold Ingot; Diamond
|Output=Iron Horse Armor; Golden Horse Armor; Diamond Horse Armor
}}
{{!}}}
}}
{{History|||snap=13w18a|The crafting recipe for horse armor has been removed.
|Horse armor can now be found in [[chest]]s in [[jungle temple|jungle]] & [[desert temple]]s, [[dungeon]]s, [[nether fortress]]es, [[stronghold]] altar rooms and [[village]] blacksmith buildings.
|Iron horse armor can now additionally be found in [[mineshaft]] chests.}}
{{History|||snap=13w21a|Horse armor is no longer stackable, to be consistent with other types of [[armor]].}}
{{History||1.9|snap=15w31a|Horse armor has been added to [[end city]] [[chest]]s.}}
{{History|||snap=15w43a|The average yield of horse armor in [[nether fortress]] chests has slightly decreased.}}
{{History|||snap=15w44a|The average yield of horse armor in [[desert temple]] chests has increased.
|The average yield of iron horse armor from [[dungeon]] chests has slightly decreased.
|Iron horse armor has been removed from [[mineshaft]] [[chest]]s.}}
{{History||1.11.1|snap=16w50a|Golden and iron horse armor can now be [[smelting|smelted]] down into one of their respective [[nugget]]s.}}
{{History||1.13|snap=17w45a|[[File:Iron Horse Armor JE2.png|32px]] [[File:Golden Horse Armor JE2.png|32px]] [[File:Diamond Horse Armor JE2.png|32px]] The textures of horse armor have been changed, as the [[model]] of [[horse]]s has changed.}}
{{History|||snap=17w46a|[[File:Iron Horse Armor 17w46a.png|32px]] [[File:Golden Horse Armor 17w46a.png|32px]] [[File:Diamond Horse Armor 17w46a.png|32px]] The model of horse armor has been changed, but the textures of horse armor have remained unaltered.}}
{{History|||snap=17w47a|Prior to [[1.13/Flattening|''The Flattening'']], these [[item]]s' numeral IDs were 417, 418 and 419.}}
{{History|||snap=18w03a|[[File:Iron Horse Armor JE3.png|32px]] [[File:Golden Horse Armor JE3 BE2.png|32px]] [[File:Diamond Horse Armor JE3 BE2.png|32px]] The textures of horse armor have been changed, as the [[model]] of [[horse]]s has changed.}}
{{History|||snap=18w22a|[[File:Iron Horse Armor JE4 BE2.png|32px]] The texture of iron horse armor when equipped has been changed.<ref>{{bug|MC-124357}}</ref>}}
{{History|||snap=pre2|A bug with the [[horse]] skin and horse armor textures not applying correctly has been fixed.<ref>{{bug|MC-124364}}</ref>}}
{{History||1.14|snap=18w50a|[[File:Iron Horse Armor (item) JE2 BE2.png|32px]] [[File:Golden Horse Armor (item) JE2 BE2.png|32px]] [[File:Diamond Horse Armor (item) JE2 BE2.png|32px]] The textures of horse armor [[item]]s have been changed.}}
{{History|||snap=February 20, 2019|slink=https://twitter.com/_LadyAgnes/status/1098134917299531776?s=19|Leather horse armor announced for {{el|je}}.}}
{{History|||snap=19w08a|[[File:Iron Horse Armor JE5 BE3.png|32px]] [[File:Golden Horse Armor JE4 BE3.png|32px]] [[File:Diamond Horse Armor JE4 BE3.png|32px]]<br>[[File:Iron Horse Armor (item) JE3.png|32px]] [[File:Golden Horse Armor (item) JE3 BE3.png|32px]] [[File:Diamond Horse Armor (item) JE3 BE3.png|32px]] The textures of iron, gold and diamond horse armor have been changed.
|[[File:Leather Horse Armor JE1 BE3.png|32px]] [[File:Leather Horse Armor (item) JE1.png|32px]] Added leather horse armor, which can be [[dyeing|dyed]] 12,326,391 different colors, similar to leather [[armor]].}}
{{History|||snap=19w11a|Leatherworker [[villager]]s now [[trading|sell]] leather horse armor.}}
{{History||1.14.1|snap=Pre-Release 1|[[File:Leather Horse Armor (item) JE2.png|32px]] The texture of leather horse armor [[item]] has been changed to be more consistent with the other types of horse armor.
|[[File:Iron Horse Armor (item) JE4 BE3.png|32px]] The texture of iron horse armor item has been changed.}}
{{History||1.16|snap=20w15a|Horse armor placed in a dispenser can now be put on tamed horses.}}
{{History|||snap=20w16a|Golden horse armor now generates in [[ruined portal]] chests.}}
{{History||1.17|snap=21w13a|Leather horse armor now protects [[horse]]s from [[freezing]].}}
{{History||1.19|snap=22w13a|Diamond horse armor may now be found in [[ancient city]] [[chest]]s.}}
{{History|pocket alpha}}
{{History||v0.15.0|snap=build 1|[[File:Leather Horse Armor BE1.png|32px]] [[File:Iron Horse Armor JE1 BE1.png|32px]] [[File:Golden Horse Armor JE1 BE1.png|32px]] [[File:Diamond Horse Armor JE1 BE1.png|32px]]<br>[[File:Leather Horse Armor (item) BE1.png|32px]] [[File:Iron Horse Armor (item) JE1 BE1.png|32px]] [[File:Golden Horse Armor (item) JE1 BE1.png|32px]] [[File:Diamond Horse Armor (item) JE1 BE1.png|32px]] Added horse armor and [[dyeing|dyeable]] leather horse armor as a version exclusive.}}
{{History|pocket}}
{{History||1.0.0|snap=alpha 0.17.0.1|Horse armor can now be found inside [[end city]] [[chest]]s.}}
{{History||1.1.0|snap=alpha 1.1.0.0|Iron and golden horse armor are now [[smelting|smeltable]].}}
{{History|bedrock}}
{{History||1.2.6|snap=beta 1.2.6.2|[[File:Leather Horse Armor BE2.png|32px]] [[File:Iron Horse Armor JE4 BE2.png|32px]] [[File:Golden Horse Armor JE3 BE2.png|32px]] [[File:Diamond Horse Armor JE3 BE2.png|32px]] The textures of horse armor have been changed, as the [[model]] of [[horse]]s has been changed.}}
{{History||1.10.0|snap=beta 1.10.0.3|Horse armor can now be found in [[plains]] [[village]] weaponsmith [[chest]]s.
|[[File:Leather Horse Armor JE1 BE3.png|32px]] [[File:Iron Horse Armor JE5 BE3.png|32px]] [[File:Golden Horse Armor JE4 BE3.png|32px]] [[File:Diamond Horse Armor JE4 BE3.png|32px]]<br>[[File:Leather Horse Armor (item) BE2.png|32px]] [[File:Iron Horse Armor (item) JE2 BE2.png|32px]] [[File:Golden Horse Armor (item) JE2 BE2.png|32px]] [[File:Diamond Horse Armor (item) JE2 BE2.png|32px]] The textures of all horse armor have been changed.}}
{{History||1.11.0|snap=beta 1.11.0.1|Horse armor can now be found in [[savanna]], [[desert]], [[taiga]], [[snowy taiga]] and [[snowy tundra]] [[village]] weaponsmith [[chest]]s.}}
{{History|||snap=beta 1.11.0.4|Leather horse armor can now be [[trading|bought]] from leatherworker [[villager]]s.}}
{{History|||snap=beta 1.11.0.5|[[File:Leather Horse Armor (item) BE3.png|32px]] [[File:Iron Horse Armor (item) JE4 BE3.png|32px]] [[File:Golden Horse Armor (item) JE3 BE3.png|32px]] [[File:Diamond Horse Armor (item) JE3 BE3.png|32px]] The textures of all horse armor [[item]]s have been changed.}}
{{History||1.17.0|snap=beta 1.16.230.54|Leather horse armor now protects [[horse]]s from [[freezing]].}}
{{History|console}}
{{History||xbox=TU19|xbone=CU7|ps=1.12|wiiu=Patch 1|switch=1.0.1|[[File:Iron Horse Armor JE1 BE1.png|32px]] [[File:Golden Horse Armor JE1 BE1.png|32px]] [[File:Diamond Horse Armor JE1 BE1.png|32px]]<br>[[File:Iron Horse Armor (item) JE1 BE1.png|32px]] [[File:Golden Horse Armor (item) JE1 BE1.png|32px]] [[File:Diamond Horse Armor (item) JE1 BE1.png|32px]] Added horse armor.}}
{{History||xbox=TU53|xbone=CU43|ps=1.49|wiiu=Patch 23|switch=1.0.3|Iron and golden horse armor are now [[smelting|smeltable]].}}
{{History||xbox=TU60|xbone=CU51|ps=1.64|wiiu=Patch 30|switch=1.0.11|[[File:Leather Horse Armor BE1.png|32px]]<br>[[File:Leather Horse Armor (item) BE1.png|32px]] Added leather horse armor.}}
{{History||xbox=none|xbone=none|ps=1.90|wiiu=none|switch=none|[[File:Leather Horse Armor JE1 BE3.png|32px]] [[File:Iron Horse Armor JE5 BE3.png|32px]] [[File:Golden Horse Armor JE4 BE3.png|32px]] [[File:Diamond Horse Armor JE4 BE3.png|32px]]<br>[[File:Leather Horse Armor (item) BE3.png|32px]] [[File:Iron Horse Armor (item) JE3.png|32px]] [[File:Golden Horse Armor (item) JE3 BE3.png|32px]] [[File:Diamond Horse Armor (item) JE3 BE3.png|32px]] The textures of leather, iron, gold and diamond horse armor have been changed.}}
{{History|3ds}}
{{History||0.1.0|[[File:Leather Horse Armor BE1.png|32px]] [[File:Iron Horse Armor JE1 BE1.png|32px]] [[File:Golden Horse Armor JE1 BE1.png|32px]] [[File:Diamond Horse Armor JE1 BE1.png|32px]]<br>[[File:Leather Horse Armor (item) BE1.png|32px]] [[File:Iron Horse Armor (item) JE1 BE1.png|32px]] [[File:Golden Horse Armor (item) JE1 BE1.png|32px]] [[File:Diamond Horse Armor (item) JE1 BE1.png|32px]] Added horse armor.}}
{{History|foot}}
== Issues ==
{{issue list}}
== Gallery ==
<gallery>
Leather Horse Armor.png | Undyed Leather armor
White Leather Horse Armor.png | White Leather armor
Light Gray Leather Horse Armor.png | Light Gray Leather armor
Gray Leather Horse Armor.png | Gray Leather armor
Black Leather Horse Armor.png | Black Leather armor
Brown Leather Horse Armor.png | Brown Leather armor
Red Leather Horse Armor.png | Red Leather armor
Orange Leather Horse Armor.png | Orange Leather armor
Yellow Leather Horse Armor.png | Yellow Leather armor
Lime Leather Horse Armor.png | Lime Leather armor
Green Leather Horse Armor.png | Green Leather armor
Cyan Leather Horse Armor.png | Cyan Leather armor
Light Blue Leather Horse Armor.png | Light Blue Leather armor
Blue Leather Horse Armor.png | Blue Leather armor
Purple Leather Horse Armor.png | Purple Leather armor
Magenta Leather Horse Armor.png | Magenta Leather armor
Pink Leather Horse Armor.png | Pink Leather armor
</gallery>
=== Screenshots ===
<gallery>
Armored Horse.png|A [[horse]] equipped with iron horse armor and bound to a fence post by a [[lead]].
13w21a-new-HorseUI-inventory.png|The GUI for horses implemented in [[Java Edition 13w21a|13w21a]], which allows the removal and switching of armor.
GodSpawner.png|A golden horse armor found in a [[dungeon]] chest, which coincidentally contains an [[enchanted golden apple]].
Horses with armor.png|4 [[horse]]s equipped with [[leather]], [[iron]], [[gold]], and [[diamond]] armor.
Leather Horse Armor 1.jpg|First image of leather horse armor.
Leather Horse Armor 2.jpg|Second image of leather horse armor.
Leather Horse Armor 3.jpg|Third image of leather horse armor.
Leather Horse Armor 4.jpg|Fourth image of leather horse armor.
Leather Horse Armor 5.jpg|Fifth image of leather horse armor.
</gallery>
== Notes ==
{{Notelist}}
== References ==
{{Reflist}}
{{items}}
[[Category:Armor]]
[[de:Rossharnisch]]
[[es:Armadura para caballo]]
[[fr:Armure pour cheval]]
[[it:Bardatura]]
[[ja:馬鎧]]
[[ko:말 갑옷]]
[[nl:Paardenharnas]]
[[pl:Zbroja końska]]
[[pt:Armadura para cavalo]]
[[ru:Конская броня]]
[[uk:Кінські обладунки]]
[[zh:马铠]]</li><li>[[Spider Eye|Spider Eye]]<br/>{{Item
| title = Spider Eye
| image = Spider Eye.png
| renewable = Yes
| heals = {{Hunger|2}}
|effects={{EffectLink|Poison}} (0:05)
| stackable = Yes (64)
}}
A '''spider eye''' is a poisonous [[food]] and [[brewing]] item.
== Obtaining ==
=== Mob loot ===
==== Spiders ====
[[Spider]]s and [[cave spider]]s have a {{frac|1|3}} chance of dropping a [[spider eye]] when killed by a player or tamed wolf, but not when killed by environmental damage (such as falling). The maximum amount of spider eyes is increased by 1 per level of [[Looting]]. The chance of a spider '''not''' dropping any spider eyes can be found using the formula <code>2 / (Looting Level + 3)</code>. For example, Looting III gives a {{frac|1|3}} chance of not dropping any spider eyes. All other amounts have an equal chance of occurring.
==== Witches ====
[[Witch]]es have a chance of dropping 0–6 spider eyes upon death. This is increased by 3 per level of [[Looting]], for a maximum of 0-15 spider eyes.
=== Chest loot ===
{{LootChestItem|spider-eye}}
== Usage ==
=== Food ===
When [[Food|eaten]], a spider eye restores {{hunger|2}} [[Hunger|hunger points]] and 3.2 [[Hunger#Mechanics|saturation points]], giving a nourishment value of 1.6. It also applies a [[Poison]] [[effect]] lasting 5 seconds to the player, causing {{hp|4|poisoned=1}} damage, which reduces hunger/saturation by 6 points.
=== Crafting ingredient ===
{{crafting usage}}
=== Brewing ingredient ===
{{brewing
|showname=1
|head=1
|Spider Eye
|Mundane Potion
|base=Water Bottle
}}
{{brewing
|foot=1
|Spider Eye
|Potion of Poison
}}
==Sounds==
{{Sound table/Entity/Food}}
== Data values ==
=== ID ===
{{edition|java}}:
{{ID table
|edition=java
|showforms=y
|generatetranslationkeys=y
|displayname=Spider Eye
|spritetype=item
|nameid=spider_eye
|form=item
|foot=1}}
{{edition|bedrock}}:
{{ID table
|edition=bedrock
|shownumericids=y
|showforms=y
|notshowbeitemforms=y
|generatetranslationkeys=y
|displayname=Spider Eye
|spritetype=item
|nameid=spider_eye
|id=278
|form=item
|foot=1}}
== Advancements ==
{{load advancements|Husbandry;A Balanced Diet}}
== Video ==
<div style="text-align:center">{{yt|-PD-wX07TCg}}</div>
== History ==
{{History|java}}
{{History||1.0.0|snap=Beta 1.9 Prerelease 2|[[File:Spider Eye JE1 BE1.png|32px]] Added spider eyes.
|Spider eyes can be used to craft [[fermented spider eye]]s.}}
{{History|||snap=Beta 1.9 Prerelease 3|Spider eyes can now be [[brewing|brewed]] in a [[water bottle]] to create a [[Mundane Potion]], or in an [[Awkward Potion]] to create a [[Potion of Poison]].}}
{{History||1.4.2|snap=12w38b|Spider eyes can now be dropped by [[witch]]es.}}
{{History||1.9|snap=15w44a|Spider eyes can now be found in [[desert pyramid|desert temple]] [[chest]]s.}}
{{History||1.13|snap=17w47a|Prior to [[1.13/Flattening|''The Flattening'']], this [[item]]'s numeral ID was 375.}}
{{History||1.14|snap=18w43a|[[File:Spider Eye JE2 BE2.png|32px]] The texture of spider eyes has been changed.}}
{{History|pocket alpha}}
{{History||v0.12.1|snap=build 1|[[File:Spider Eye JE1 BE1.png|32px]] Added spider eyes.|Spider eyes can be used to craft [[fermented spider eye]]s and for [[brewing]].}}
{{History||v0.13.0|snap=build 1|Spider eyes can now be found in [[desert pyramid|desert temple]] [[chest]]s.}}
{{History||v0.14.0|snap=build 1|Spider eyes can now dropped by [[witch]]es.}}
{{History|bedrock}}
{{History||1.10.0|snap=beta 1.10.0.3|[[File:Spider Eye JE2 BE2.png|32px]] The texture of spider eyes has been changed.}}
{{History|console}}
{{History||xbox=TU7|xbone=CU1|ps=1.0|wiiu=Patch 1|[[File:Spider Eye JE1 BE1.png|32px]] Added spider eyes.}}
{{History||xbox=none|xbone=none|ps=1.90|wiiu=none|[[File:Spider Eye JE2 BE2.png|32px]] The texture of spider eyes has been changed.}}
{{History|New 3DS}}
{{History||0.1.0|[[File:Spider Eye JE1 BE1.png|32px]] Added spider eyes.}}
{{History|foot}}
== Issues ==
{{issue list}}
== References ==
{{reflist}}
{{items}}
[[cs:Pavoučí oko]]
[[de:Spinnenauge]]
[[es:Ojo de araña]]
[[fr:Œil d'araignée]]
[[hu:Pókszem]]
[[it:Occhio di ragno]]
[[ja:クモの目]]
[[ko:거미 눈]]
[[nl:Spinnenoog]]
[[pl:Oko pająka]]
[[pt:Olho de aranha]]
[[ru:Паучий глаз]]
[[zh:蜘蛛眼]]
[[Category:Food]]
[[Category:Renewable resources]]
[[Category:Brewing recipe]]</li></ul> | preview | Fire now generates in the Nether. | |||
v1.2.6{{Extension DPL}}<ul><li>[[Fire Charge|Fire Charge]]<br/>{{ItemEntity
|image=Fire Charge.png
|invimage=Fire Charge
|durability=
|renewable=Yes
|stackable=Yes (64)
|networkid='''[[JE]]''': 64
}}
'''Fire charges''' are items that can be {{control|used}} as a single-use version of a [[flint and steel]] or shot as a [[small fireball]] from a [[dispenser]].
== Obtaining ==
=== Chest loot ===
{{LootChestItem|fire-charge}}
=== Crafting ===
{{Crafting
|Blaze Powder
|Coal; Charcoal
|Gunpowder
|Output= Fire Charge, 3
|type= Miscellaneous
}}
=== Bartering ===
[[Piglin]]s may [[barter]] 1 fire charge when given a [[gold ingot]].
== Usage ==
[[File:Natural Fire Charge.png|200px|thumb|Dispensing Fire Charge]]
Fire charges can be used as ammunition for [[dispenser]]s, or as a substitute for [[flint and steel]].
When used, it instantly places a [[fire]], similar to flint and steel. The fire charge is consumed in the process. It can prime [[TNT]], light [[Nether portal|nether portals]], [[Campfire|campfires]], [[Candle|candles]], [[Cake|cakes with candles]] and [[creeper]]s{{only|JE}} like flint and steel.
When a fire charge is fired from a dispenser, it shoots a [[small fireball]].
=== Crafting ingredient ===
{{crafting usage}}
== Sounds ==
{{edition|java}}:
{{Sound table
|rowspan=4
|sound=Ghast fireball4.ogg
|subtitle=Ghast shoots
|source=hostile
|description=When a fireball is shot by a ghast
|id=entity.ghast.shoot
|translationkey=subtitles.entity.ghast.shoot
|volume=10.0
|pitch=0.8-1.2
|distance=16 {{verify}}}}
{{Sound table
|subtitle=Blaze shoots <ref group=sound name=LousyEvents>{{Bug|MC-98316||Wrong subtitles caused by missing distinction}}</ref>
|source=hostile
|description=When a fire charge is fired from a dispenser or a blaze
|id=entity.blaze.shoot|idnote=<ref group=sound name=LousyEvents/>
|translationkey=subtitles.entity.blaze.shoot|translationkeynote=<ref group=sound name=LousyEvents/>
|volume=2.0
|pitch=0.8–1.2
|distance=32}}
{{Sound table
|subtitle=Fireball whooshes
|source=block
|description=When a fire charge is used by hand
|id=item.firecharge.use|idnote=<ref group=sound name=nounderscore>{{bug|MC-177457}}</ref>
|translationkey=subtitles.item.firecharge.use|translationkeynote=<ref group=sound name=nounderscore/>
|volume=1.0
|pitch=0.8-1.2
|distance=16}}
{{Sound table
|subtitle=Fireball whooshes
|source=hostile
|description=When a fire charge is used to light a creeper
|id=item.firecharge.use|idnote=<ref group=sound name=nounderscore/>
|translationkey=subtitles.item.firecharge.use|translationkeynote=<ref group=sound name=nounderscore/>
|volume=1.0
|pitch=0.8-1.2
|distance=16
|foot=1}}
{{edition|bedrock}}:
{{Sound table
|type=bedrock
|sound=Ghast fireball4.ogg
|source=hostile
|description=When something shoots or uses a fire charge
|id=mob.ghast.fireball
|volume=1.0
|pitch=1.0
|foot=1}}
== Data values ==
=== ID ===
{{edition|java}}:
{{ID table
|edition=java
|showforms=y
|generatetranslationkeys=y
|displayname=Fire Charge
|spritetype=item
|nameid=fire_charge
|form=item
|foot=1}}
{{edition|bedrock}}:
{{ID table
|edition=bedrock
|showaliasids=y
|shownumericids=y
|showforms=y
|notshowbeitemforms=y
|generatetranslationkeys=y
|displayname=Fire Charge
|spritetype=item
|nameid=fire_charge
|aliasid=fireball
|id=509
|form=item
|translationkey=item.fireball.name
|foot=1}}
=== Entity data ===
{{main|Small Fireball#Entity data}}
== Achievements ==
{{Load achievements|Into the Nether}}
== Advancements ==
{{load advancements|We Need to Go Deeper}}
== Video ==
<div style="text-align:center">{{yt|IiCTxsHg6SQ}}</div>
== History ==
{{for|information pertaining to smallmfireballs (which fire charges produce when shot from a dispenser)|Small Fireball#History}}
{{History|java}}
{{History||1.0.0|snap=Beta 1.9 Prerelease|[[File:Fire Charge JE1 BE1.png|32px]] Added the fire charge texture. It is currently only used by [[fireball]]s and [[small fireball]]s, both of which are entities, and is not used by any items.}}
{{History||1.2.1|snap=12w04a|Added fire charges, which use the above texture. They can be crafted only with [[coal]].}}
{{History|||snap=12w05a|Fire charges can now be crafted with charcoal.}}
{{History||1.4.2|snap=12w38b|The [[sound]] when using the fire charge has now been changed; it now uses the same sound as [[flint and steel]].}}
{{History||1.4.6|snap=12w49a|Fire charges can now be used to craft [[Firework Rocket|fireworks]].}}
{{History||1.8|snap=14w31a|The sound when using fire charges to set fire has now been changed; it now uses the same sound as when fired from [[dispenser]]s.}}
{{History||1.9|snap=15w33c|Fire charges now appear purple and explode with [[dragon's breath]] when fired from dispensers. Whether a true dragon fireball entity is created or if this effect is purely visual is unknown.}}
{{History|||snap=15w44b|Fire charges once again appear as [[small fireball]]s when fired from dispensers.}}
{{History||1.11|snap=16w40a|The <code>life</code> tag is no longer used for anything, but still saved/read.{{info needed|Is this even relevant to the fire charge, or is it a remnant from the blaze page or something?}}}}
{{History||1.13|snap=17w47a|Prior to [[1.13/Flattening|''The Flattening'']], this [[item]]'s numeral ID was 385.}}
{{History||1.14|snap=18w43a|[[File:Fire Charge JE2 BE2.png|32px]] The texture of fire charges has now been changed.}}
{{History||1.15|snap=19w42a|Dispensed fire charges{{info needed|as in the fireball, or a dispenser facing straight into a campfire?}} can now light campfires.}}
{{History||1.16|snap=20w07a|Fire charges have a {{frac|5|109}} (~4.59%) chance of being given by the new [[piglin]]s when [[bartering]], in a stack size of 1.}}
{{History|||snap=20w09a|Fire charges now have a {{frac|20|226}} (~8.85%) chance of being given by piglins when bartering, in a stack size of 1–5.}}
{{History|||snap=20w10a|Fire charges now have a {{frac|40|411}} (~9.73%) chance of being given by piglins when bartering, in a stack size of 1–5.}}
{{History|||snap=20w11a|Fire charges now have a {{frac|40|417}} (~9.59%) chance of being given by piglins when bartering, in a stack size of 1–5.}}
{{History|||snap=20w13a|Fire charges now have a {{frac|40|424}} (~9.43%) chance of being given by piglins when bartering, in a stack size of 1–5.}}
{{History|||snap=20w16a|Fire charges now generate in [[ruined portal]] chests.}}
{{History|||snap=20w20a|Fire charges now have a {{frac|40|423}} (~9.46%) chance of being given by piglins when bartering, in a stack size of 1–5.}}
{{History||1.16.2|snap=20w28a|Fire charges now have a {{frac|40|459}} (~8.71%) chance of being given by piglins when bartering, in a stack size of 1.}}
{{History||1.19.3|snap=Pre-release 2|Fire charges can now be {{control|use|text=used}} to forcibly detonate [[creeper]]s.<ref>{{bug|MC-185618|||Fixed}}</ref>}}
{{History||1.19.4|snap=23w06a|Added the [[fire charge]] to the "Ingredients" tab in the creative inventory.}}
{{History|pocket alpha}}
{{History||v0.15.0|snap=build 1|[[File:Fire Charge JE1 BE1.png|32px]] Added fire charges.}}
{{History|bedrock}}
{{History||1.2.0|snap=beta 1.2.0.2|Fire charges can now be used to craft [[firework star]]s.}}
{{History||1.10.0|snap=beta 1.10.0.3|[[File:Fire Charge JE2 BE2.png|32px]] The texture of fire charges has now been changed.}}
{{History||1.16.0|snap=beta 1.16.0.57|Fire charges can now be obtained from bartering with piglin.
|Fire charges can now be found in [[ruined portal]] chests.}}
{{History||1.16.100|snap=beta 1.16.100.56|The ID of fire charges has been changed from <code>fireball</code> to <code>fire_charge</code>.}}
{{History|console}}
{{History||xbox=TU9|xbone=CU1|ps=1.0|wiiu=Patch 1|switch=1.0.1|[[File:Fire Charge JE1 BE1.png|32px]] Added fire charges.}}
{{History||xbox=TU31|xbone=CU19|ps=1.22|wiiu=Patch 3|Fire charges now make [[sound]]s when igniting [[block]]s.}}
{{History||xbox=none|xbone=none|ps=1.90|wiiu=none|switch=none|[[File:Fire Charge JE2 BE2.png|32px]] The texture of fire charges has now been changed.}}
{{History|3ds}}
{{History||0.1.0|[[File:Fire Charge JE1 BE1.png|32px]] Added fire charges.}}
{{History|foot}}
== Issues ==
{{issue list}}
== Gallery ==
<gallery>
GodPortal.png|A fire charge found in a [[ruined portal]] chest, together with an [[enchanted golden apple]].
</gallery>
== See also ==
* [[Flint and Steel]]
* [[Dragon Fireball]]
* [[Ghast]]
== References ==
{{reflist}}
== External Links ==
*[https://www.minecraft.net/en-us/article/taking-inventory-fire-charge Taking Inventory: Fire Charge] – Minecraft.net on January 11, 2019
{{Items}}
[[Category:Recipe using Charcoal]]
[[cs:Ohnivá koule]]
[[de:Feuerkugel]]
[[es:Carga ígnea]]
[[fr:Boule de feu]]
[[hu:Tűzgolyó]]
[[ja:ファイヤーチャージ]]
[[ko:화염구]]
[[nl:Vuurbal]]
[[pl:Ognista kula]]
[[pt:Bola de fogo]]
[[ru:Огненный шар]]
[[th:ลูกไฟ]]
[[zh:火焰弹]]</li><li>[[Reality Vision|Reality Vision]]<br/>{{Joke feature}}
{{Item
| title = Reality Vision
| image = Reality Vision.png
| renewable = No
| stackable = Yes (64)
}}
The '''Reality vision''' was a joke [[helmet]].
== Usage ==
Reality vision was equipped via the [[helmet]] slot. When equipped, it showed a [[wikipedia:Mini-map|minimap]] in the bottom-center of the screen (which moved when the [[player]]'s camera moves). The minimap showed all [[chunk]]s that were currently rendered. The player's location was represented by a green [[beacon]] beam marker on the map.
It displayed a vision overlay (similar to the [[pumpkin]] overlay). The overlay would change to a new overlay if the player went into third person (unlike the pumpkin overlay), which made the screen appear like an old [[wikipedia:Television|television]] screen. The overlay was called <code>cantseeshit<!-- Do not change this; this is that word that is actually used-->captain.png</code> in the assets folder. It activated a [[Shaders|shader]] when equipped (<code>scan_pincushion</code>).
== Sounds ==
{{Sound table
|sound=Equipvr.ogg
|subtitle=''None''
|source=player
|description=When equipped
|id=item.reality_vision.use
|translationkey=''None''
|volume=1.0
|pitch=1.0
|distance=16
|foot=1}}
== Data values ==
=== ID ===
{{ID table
|edition=java
|shownumericids=y
|showforms=y
|generatetranslationkeys=y
|displayname=Reality Vision
|spritetype=item
|nameid=reality_vision
|id=500
|form=item
|translationkey=item.realityVision.name
|foot=1}}
== History ==
{{History|java}}
{{History||1.RV-Pre1|[[File:Reality_Vision_(item).png|32px]] [[File:Reality Vision.png|32px]] Added reality vision.}}
{{History|foot}}
== Issues ==
Reality Vision is an unsupported item due to being an [[Wikipedia:April Fools' Day|April Fools']] joke, and therefore such issues relating to them will not be fixed.
== Trivia ==
* [[Sign]]s display the text "OBEY" while equipped, a reference to the movie [[wikipedia:They Live|''They Live'']].
== Gallery ==
<gallery>
Sign2.png|The [[sign]] texture found in the game files.
OBEY.png|OBEY seen in a sign.
OBEY sign in 1.RV-Pre1..png|OBEY seen in a sign, but seen from a better perspective.
TechGear.png|A [[player]] wearing reality vision, featured in this [[wikipedia:April Fools' Day|April Fools']] joke version.
</gallery>
{{Items}}
{{Jokes}}
[[Category:Non-renewable resources]]
[[Category:Joke items]]
[[pt:Visão da realidade]]
[[es:Reality Vision]]</li></ul> | Lava can now cause surrounding flammable blocks to burn. Forest fires may start spontaneously if an above-ground lava pool is generated among trees during a biome's creation. | ||||
| beta | |||||
1.2_02{{Extension DPL}}<ul><li>[[Golden Carrot|Golden Carrot]]<br/>{{Item
| title = Golden Carrot
| image = Golden Carrot.png
| heals = {{hunger|6}}
| renewable = Yes
| stackable = Yes (64)
}}
A '''golden carrot''' is a valuable [[food]] item and [[brewing]] ingredient. It provides the second most saturation in the game, behind [[suspicious stew]] crafted with either a [[Flower|dandelion]] or [[Flower|blue orchid]].
==Obtaining==
=== Chest loot ===
{{LootChestItem|golden-carrot}}
=== Crafting ===
{{Crafting
|A1= Gold Nugget
|B1= Gold Nugget
|C1= Gold Nugget
|A2= Gold Nugget
|B2= Carrot
|C2= Gold Nugget
|A3= Gold Nugget
|B3= Gold Nugget
|C3= Gold Nugget
|Output= Golden Carrot
|type= Foodstuff
}}
=== Trading ===
Master-level farmer [[villager]]s have a 50% chance to sell 3 golden carrots for 3 [[emerald]]s {{in|bedrock}}, and always offer the same trade {{in|java}}.
== Usage ==
=== Food ===
To eat a golden carrot, press and hold {{control|use}} while it is selected in the hotbar. Eating one restores {{hunger|6}} and 14.4 [[Hunger#Mechanics|saturation points]].
=== Animal food ===
Golden carrots are used to tame, [[breed]], lead, grow, and heal [[horse]]s, [[donkey]]s, and [[mule]]s, and to breed, lead, and grow [[rabbit]]s.
=== Brewing ingredient ===
{{Brewing
|showname=1
|Golden Carrot
|Potion of Night Vision
}}
== Sounds ==
{{Sound table/Entity/Food}}
== Data values ==
=== ID ===
{{edition|java}}:
{{ID table
|edition=java
|showforms=y
|generatetranslationkeys=y
|displayname=Golden Carrot
|spritetype=item
|nameid=golden_carrot
|form=item
|foot=1}}
{{edition|bedrock}}:
{{ID table
|edition=bedrock
|shownumericids=y
|showforms=y
|notshowbeitemforms=y
|generatetranslationkeys=y
|displayname=Golden Carrot
|spritetype=item
|nameid=golden_carrot
|id=283
|form=item
|foot=1}}
== Achievements ==
{{load achievements|Artificial Selection;Oooh, shiny!}}
== Advancements ==
{{load advancements|Oh Shiny;Husbandry;A Balanced Diet}}
== Video ==
{{Video note|this video is outdated; it does not mention that golden carrots can be used as animal food.}}
<div style="text-align:center">{{yt|HJUaKroydLQ}}</div>
== History ==
{{History|java}}
{{History||1.4.2|snap=12w34a|[[File:Golden Carrot JE1.png|32px]] Added golden carrots.
|The new [[Potion of Night Vision]] is brewed by adding a golden carrot to an [[Awkward Potion]].}}
{{History|||snap=12w36a|[[File:Golden Carrot JE2.png|32px]] The texture of golden carrots has been changed.}}
{{History|||snap=12w37a|[[File:Golden Carrot JE3 BE1.png|32px]] The texture of golden carrots has been changed in order to match the new [[carrot]] texture. The [[item]] sprite no longer has a dark outline.}}
{{History||1.6.1|snap=?|Golden carrots can now be used to tame, breed and heal horses and donkeys.}}
{{History||1.8|snap=?|Golden carrots can now be used to breed rabbits.}}
{{History|||snap=14w32a|Moved golden carrots from the Foodstuffs tab to the Brewing tab in the [[Creative inventory]].<ref name="gold carrot inventory">https://bugs.mojang.com/browse/MC-3664</ref>}}
{{History||1.8.1|snap=pre1|Rabbits now follow players holding golden carrots.<ref>{{bug|MC-70054|||Fixed}}</ref>}}
{{History||1.13|snap=17w47a|Prior to [[1.13/Flattening|''The Flattening'']], this [[item]]'s numeral ID was 396.}}
{{History||1.14|snap=18w43a|[[File:Golden Carrot JE4 BE2.png|32px]] The texture of golden carrots has been changed.}}
{{History|||snap=19w11a|Farmer [[villager]]s now [[trading|sell]] golden carrots.}}
{{History||1.16|snap=20w16a|Golden carrots can now be found in [[ruined portal]] chests.}}
{{History||1.16.2|snap=20w30a|Golden carrots can now be found in [[bastion remnant]] chests.}}
{{History||1.18|snap=experimental snapshot 6|Horses, donkeys and mules now follow players holding golden carrots.}}
{{History||1.19|snap=22w13a|Golden carrots may now be found in [[ancient city]] ice box [[chest]]s.
|A single golden carrot now generates in the [[chest]] in <code>ancient_city/city_center/city_center_2</code>.}}
{{History|||snap=22w14a|The golden carrot in the chest in <code>ancient_city/city_center/city_center_2</code> has been replaced with a [[golden apple]].}}
{{History|pocket alpha}}
{{History||v0.12.1|snap=build 1|[[File:Golden Carrot JE3 BE1.png|32px]] Added golden carrots.}}
{{History||v0.13.0|snap=build 1| Golden carrots can now be used to feed [[rabbit]]s.}}
{{History||v0.15.0|snap=build 1|Golden carrots can now be used to feed [[horse]]s and [[donkey]]s.}}
{{History|bedrock}}
{{History||1.10.0|snap=beta 1.10.0.3|[[File:Golden Carrot JE4 BE2.png|32px]] The texture of golden carrots has been changed.}}
{{History||1.11.0|snap=beta 1.11.0.4|Golden carrots can now be [[trading|bought]] from farmer [[villager]]s.}}
{{History||1.13.0|snap=beta 1.13.0.9|Trading has been changed, master-level farmer now has {{frac|1|3}} chance to sell golden carrots.}}
{{History||1.16.0|snap=beta 1.16.0.57|Golden carrots now generate in [[ruined portal]] chests.
|Golden carrots trade offering chance changed to 50%.}}
{{History|console}}
{{History||xbox=TU14|xbone=CU1|ps=1.04|wiiu=Patch 1|[[File:Golden Carrot JE3 BE1.png|32px]] Added golden carrots.}}
{{History||xbox=none|xbone=none|ps=1.90|wiiu=none|switch=none|[[File:Golden Carrot JE4 BE2.png|32px]] The texture of golden carrots has been changed.}}
{{History|New 3DS}}
{{History||0.1.0|[[File:Golden Carrot JE3 BE1.png|32px]] Added golden carrots.}}
{{History|foot}}
== Issues ==
{{issue list}}
== See also ==
* [[Carrot]]
* [[Golden Apple]]
== External Links ==
*[https://www.minecraft.net/en-us/article/taking-inventory--golden-carrot Taking Inventory: Golden Carrot] – Minecraft.net on September 6, 2022
{{items}}
[[cs:Zlatá mrkev]]
[[de:Goldene Karotte]]
[[es:Zanahoria dorada]]
[[fr:Carotte dorée]]
[[hu:Aranyrépa]]
[[ja:金のニンジン]]
[[ko:황금 당근]]
[[nl:Gouden wortel]]
[[pl:Złota marchewka]]
[[pt:Cenoura dourada]]
[[ru:Золотая морковь]]
[[uk:Золота морква]]
[[zh:金胡萝卜]]
[[Category:Renewable resources]]
[[Category:Food]]
[[Category:Brewing recipe]]</li><li>[[Smithing Template|Smithing Template]]<br/>{{for|the block|Smithing Table}}
{{Item
| title = Smithing Template
| image = <gallery>
Netherite Upgrade Smithing Template.png | Netherite Upgrade
Sentry Armor Trim Smithing Template.png | Armor Trim
</gallery>
| rarity = Rare
| renewable = No<!--Smithing templates are not renewable because diamonds, their only other method of creation, are not renewable.-->
| stackable = Yes (64)
}}
'''Smithing templates''' are items used in [[Smithing Table|smithing tables]] to alter [[Tool|tools]] and [[armor]]. They are consumed when used, but can be [[Crafting|duplicated]] using an existing template, its material and [[Diamond|diamonds]].
The sixteen '''armor trim smithing templates''' are found in a variety of [[Generated structures|structures]], and are used to apply various decorative trims (dependent on the variant) to armor using certain minerals for different colors.
'''Netherite upgrade smithing templates''' are required to upgrade diamond equipment with a [[Netherite Ingot|netherite ingot]]. They are only found in [[Bastion Remnant|bastion remnants]], but are guaranteed only in [[:en:Bastion_Remnant#Treasure_room|treasure rooms]].
== Obtaining ==
Smithing templates can be found in various [[Generated structures|structures]] and can be duplicated by using seven diamonds and a block based on what the template is.
=== Crafting ===
{{Crafting
|A1=Diamond |B1=Matching Smithing Template |C1=Diamond
|A2=Diamond |B2=Netherrack;Cobblestone;Sandstone;End Stone;Terracotta;Terracotta;Netherrack;Cobblestone;Terracotta;Cobbled Deepslate;Blackstone;Purpur Block;Prismarine;Cobblestone;Cobbled Deepslate;Terracotta;Mossy Cobblestone |C2=Diamond
|A3=Diamond |B3=Diamond |C3=Diamond
|Output=Matching Smithing Template,2
}}
{| class="article-table"
|+ Duplication
! Item !! Material
|-
| {{ItemSprite|netherite-upgrade|text=Netherite Upgrade}} || {{BlockSprite|Netherrack|text=Netherrack}}
|-
| {{ItemSprite|sentry-armor-trim|text=Sentry Armor Trim}} || {{BlockSprite|Cobblestone|text=Cobblestone}}
|-
| {{ItemSprite|vex-armor-trim|text=Vex Armor Trim}} || {{BlockSprite|Cobblestone|text=Cobblestone}}
|-
| {{ItemSprite|wild-armor-trim|text=Wild Armor Trim}} || {{BlockSprite|Mossy Cobblestone|text=Mossy Cobblestone}}
|-
| {{ItemSprite|coast-armor-trim|text=Coast Armor Trim}} || {{BlockSprite|Cobblestone|text=Cobblestone}}
|-
| {{ItemSprite|dune-armor-trim|text=Dune Armor Trim}} || {{BlockSprite|Sandstone|text=Sandstone}}
|-
| {{ItemSprite|wayfinder-armor-trim|text=Wayfinder Armor Trim}} || {{BlockSprite|Terracotta|text=Terracotta}}
|-
| {{ItemSprite|raiser-armor-trim|text=Raiser Armor Trim}} || {{BlockSprite|Terracotta|text=Terracotta}}
|-
| {{ItemSprite|shaper-armor-trim|text=Shaper Armor Trim}} || {{BlockSprite|Terracotta|text=Terracotta}}
|-
| {{ItemSprite|host-armor-trim|text=Host Armor Trim}} || {{BlockSprite|Terracotta|text=Terracotta}}
|-
| {{ItemSprite|ward-armor-trim|text=Ward Armor Trim}} || {{BlockSprite|Cobbled Deepslate|text=Cobbled Deepslate}}
|-
| {{ItemSprite|silence-armor-trim|text=Silence Armor Trim}} || {{BlockSprite|Cobbled Deepslate|text=Cobbled Deepslate}}
|-
| {{ItemSprite|tide-armor-trim|text=Tide Armor Trim}} || {{BlockSprite|Prismarine|text=Prismarine}}
|-
| {{ItemSprite|snout-armor-trim|text=Snout Armor Trim}} || {{BlockSprite|Blackstone|text=Blackstone}}
|-
| {{ItemSprite|rib-armor-trim|text=Rib Armor Trim}} || {{BlockSprite|Netherrack|text=Netherrack}}
|-
| {{ItemSprite|eye-armor-trim|text=Eye Armor Trim}} || {{BlockSprite|End Stone|text=End Stone}}
|-
| {{ItemSprite|spire-armor-trim|text=Spire Armor Trim}} || {{BlockSprite|Purpur Block|text=Purpur Block}}
|}
{{IN|bedrock}}, spire, tide, and dune armor trims can be duplicated with more blocks than {{in|java}}. In addition to the normal blocks, Tide armor trims can be duplicated using Prismarine Bricks or Dark Prismarine, dune armor trims can be duplicated with smooth sandstone, cut sandstone, or chiseled sandstone, and spire armor trims can be duplicated with purpur pillars.<ref>{{bug|MCPE-172711||Tide, Spire, and Dune Armor Trims can be crafted from more blocks than in Java Edition}}</ref>
=== Mob loot ===
[[Elder guardian]]s have a 20% chance to drop 1 tide armor trim upon death. [[Looting]] doesn't affect this percentage, and the elder guardian doesn't need to be killed by a player in order for the trim to drop and can be duplicated with [[prismarine]].
=== Chest loot ===
{{#invoke:LootChest|base3|netherite-upgrade-smithing-template,sentry-armor-trim-smithing-template,vex-armor-trim-smithing-template,wild-armor-trim-smithing-template,coast-armor-trim-smithing-template,dune-armor-trim-smithing-template,ward-armor-trim-smithing-template,silence-armor-trim-smithing-template,snout-armor-trim-smithing-template,rib-armor-trim-smithing-template,eye-armor-trim-smithing-template,spire-armor-trim-smithing-template}}
Note: In Woodland Mansions, only chests with random loot have the chance to contain the Vex Smithing Template, chests in the "Allium room", "Sapling farm", "Tree-chopping room" and "Fake End portal room" always generate with the same, room specific, loot.
=== Suspicious block loot ===
Items can only be extracted from [[Suspicious Block|suspicious blocks]] using a [[brush]].{{#invoke:LootChest|base3|wayfinder-armor-trim-smithing-template,raiser-armor-trim-smithing-template,shaper-armor-trim-smithing-template,host-armor-trim-smithing-template}}
== Usage ==
=== Crafting ingredient ===
{{Crafting
|A1=Diamond |B1=Matching Smithing Template |C1=Diamond
|A2=Diamond |B2=Netherrack;Cobblestone;Sandstone;End Stone;Terracotta;Terracotta;Netherrack;Cobblestone;Terracotta;Cobbled Deepslate;Blackstone;Purpur Block;Prismarine;Cobblestone;Cobbled Deepslate;Terracotta;Mossy Cobblestone |C2=Diamond
|A3=Diamond |B3=Diamond |C3=Diamond
|Output=Matching Smithing Template,2
}}
=== Smithing ingredient ===
Smithing templates are used at a [[smithing table]]. Netherite upgrade smithing templates are used to upgrade diamond gear into netherite gear by using a netherite upgrade, a piece of diamond gear, and a [[netherite ingot]].
{{Smithing
|head=1
|ingredients=Netherite Upgrade +<br>Any Diamond Gear +<br>[[Netherite Ingot]]
|Netherite Upgrade
|Diamond Helmet; Diamond Chestplate; Diamond Leggings; Diamond Boots; Diamond Sword; Diamond Pickaxe; Diamond Axe; Diamond Shovel
|Netherite Ingot
|Netherite Helmet; Netherite Chestplate; Netherite Leggings; Netherite Boots; Netherite Sword; Netherite Pickaxe; Netherite Axe; Netherite Shovel
|tail=1
}}
{{FakeImage|{{Animate|Iron_Armor_with_Iron_Shaper_Trim.png; Golden_Armor_with_Golden_Shaper_Trim.png; Diamond_Armor_with_Diamond_Shaper_Trim.png; Netherite_Armor_with_Netherite_Shaper_Trim.png|180px}}|If the armor material and the trimming material are the same, the color palette used for the armor trim is darker.}}
Armor trim smithing templates are used to customize an armor piece's appearance by using a smithing template, an armor piece, and an ingot or crystal ([[emerald]], [[redstone dust]], [[lapis lazuli]], [[amethyst shard]], [[nether quartz]], [[netherite ingot]], [[diamond]], [[gold ingot]], [[iron ingot]], or [[copper ingot]]). Including all dyed leather armor colors and regular armor, there are ≈3.679x10<sup>9</sup> different possible armor pieces<!--5713438 leather colors, plus the 4 other armor materials = 5713442. 5713442 * 161 (the 160 trim combos (16 trims, 10 materials) + untrimmed) = 919864162. 919864162 * 4 (helmet, chestplate, leggings, boots) = 3679456648 ≈ 3.679x10^9-->, and 7.16x10<sup>35</sup> <!--919864162 + 1 (no armor in that slot) = 919864163. 919864163^4 = 715969952015045562662444917041515536 ≈ 7.16x10^35 total possible armor combinations-->total possible armor combinations excluding enchantments and the player not wearing armor.
Already trimmed armor can be trimmed again by applying another template on it; the old trim pattern is overwritten in the process.<ref>{{bug|MC-262538||When combining armor trims the new trim deletes the old one|WAI}}</ref> Therefore, one piece of armor cannot possess multiple trims at the same time.
Most armor trims cover a small portion of the armor piece's surface with the trim material, except for the silence armor trim, which allows the trim material to cover a majority of the armor piece's surface.
All of the trims are purely decorative, and don't impact gameplay or strength(without the use of mods or plugins) of the armor they are applied to in any way. [[Piglin]]s do not pick up any gold-trimmed armor pieces, and they are not pacified by players wearing even a full set of gold-trimmed armor (unless, of course, the armor pieces in question are themselves golden), and netherite-trimmed armor pieces can still be burned by [[fire]].
{{Smithing
|head=1
|ingredients=Any Armor Trim +<br>Any Armor Piece +<br>Any Ingot/Crystal
|Any Armor Trim Smithing Template
|Iron Helmet; Netherite Chestplate;Golden Leggings;Diamond Boots
|Amethyst Shard; Copper Ingot; Diamond; Emerald; Gold Ingot; Iron Ingot; Lapis Lazuli; Nether Quartz; Netherite Ingot; Redstone Dust; Diamond; Emerald
|Amethyst Trim Iron Helmet; Copper Trim Netherite Chestplate; Diamond Trim Golden Leggings; Emerald Trim Diamond Boots; Gold Trim Iron Helmet; Iron Trim Netherite Chestplate; Lapis Trim Golden Leggings; Quartz Trim Diamond Boots; Netherite Trim Iron Helmet; Redstone Trim Netherite Chestplate; Diamond Trim Golden Leggings; Emerald Trim Diamond Boots
|tail=1
}}
;List of color palettes for all materials
*{{ItemSprite|emerald }} - {{TrimPalette| emerald }}
*{{ItemSprite|redstone dust }} - {{TrimPalette| redstone dust }}
*{{ItemSprite|lapis lazuli }} - {{TrimPalette| lapis lazuli }}
*{{ItemSprite|amethyst shard }} - {{TrimPalette| amethyst shard }}
*{{ItemSprite|nether quartz }} - {{TrimPalette| nether quartz }}
*{{ItemSprite|netherite ingot }} - {{TrimPalette| netherite ingot }} (Darker: {{TrimPalette| netherite ingot |darker=1}})
*{{ItemSprite|diamond }} - {{TrimPalette| diamond }} (Darker: {{TrimPalette| diamond |darker=1}})
*{{ItemSprite|gold ingot }} - {{TrimPalette| gold ingot }} (Darker: {{TrimPalette| gold ingot |darker=1}})
*{{ItemSprite|iron ingot }} - {{TrimPalette| iron ingot }} (Darker: {{TrimPalette| iron ingot |darker=1}})
*{{ItemSprite|copper ingot }} - {{TrimPalette| copper ingot }}
== Data values ==
=== ID ===
{{edition|java}}:
{{ID table
|edition=java
|firstcolumnname=Smithing Template
|showforms=y
|generatetranslationkeys=y
|displayname=Netherite Upgrade
|spritename=netherite-upgrade-smithing-template
|spritetype=item
|nameid=netherite_upgrade_smithing_template
|form=item}}
{{ID table
|displayname=Sentry Armor Trim
|spritename=sentry-armor-trim-smithing-template
|spritetype=item
|nameid=sentry_armor_trim_smithing_template
|form=item}}
{{ID table
|displayname=Vex Armor Trim
|spritename=vex-armor-trim-smithing-template
|spritetype=item
|nameid=vex_armor_trim_smithing_template
|form=item}}
{{ID table
|displayname=Wild Armor Trim
|spritename=wild-armor-trim-smithing-template
|spritetype=item
|nameid=wild_armor_trim_smithing_template
|form=item}}
{{ID table
|displayname=Coast Armor Trim
|spritename=coast-armor-trim-smithing-template
|spritetype=item
|nameid=coast_armor_trim_smithing_template
|form=item}}
{{ID table
|displayname=Dune Armor Trim
|spritename=dune-armor-trim-smithing-template
|spritetype=item
|nameid=dune_armor_trim_smithing_template
|form=item}}
{{ID table
|displayname=Wayfinder Armor Trim
|spritename=wayfinder-armor-trim-smithing-template
|spritetype=item
|nameid=wayfinder_armor_trim_smithing_template
|form=item}}
{{ID table
|displayname=Raiser Armor Trim
|spritename=raiser-armor-trim-smithing-template
|spritetype=item
|nameid=raiser_armor_trim_smithing_template
|form=item}}
{{ID table
|displayname=Shaper Armor Trim
|spritename=shaper-armor-trim-smithing-template
|spritetype=item
|nameid=shaper_armor_trim_smithing_template
|form=item}}
{{ID table
|displayname=Host Armor Trim
|spritename=host-armor-trim-smithing-template
|spritetype=item
|nameid=host_armor_trim_smithing_template
|form=item}}
{{ID table
|displayname=Ward Armor Trim
|spritename=ward-armor-trim-smithing-template
|spritetype=item
|nameid=ward_armor_trim_smithing_template
|form=item}}
{{ID table
|displayname=Silence Armor Trim
|spritename=silence-armor-trim-smithing-template
|spritetype=item
|nameid=silence_armor_trim_smithing_template
|form=item}}
{{ID table
|displayname=Tide Armor Trim
|spritename=tide-armor-trim-smithing-template
|spritetype=item
|nameid=tide_armor_trim_smithing_template
|form=item}}
{{ID table
|displayname=Snout Armor Trim
|spritename=snout-armor-trim-smithing-template
|spritetype=item
|nameid=snout_armor_trim_smithing_template
|form=item}}
{{ID table
|displayname=Rib Armor Trim
|spritename=rib-armor-trim-smithing-template
|spritetype=item
|nameid=rib_armor_trim_smithing_template
|form=item}}
{{ID table
|displayname=Eye Armor Trim
|spritename=eye-armor-trim-smithing-template
|spritetype=item
|nameid=eye_armor_trim_smithing_template
|form=item}}
{{ID table
|displayname=Spire Armor Trim
|spritename=spire-armor-trim-smithing-template
|spritetype=item
|nameid=spire_armor_trim_smithing_template
|form=item
|foot=1}}
{{edition|bedrock}}:
{{ID table
|edition=bedrock
|firstcolumnname=Smithing Template
|shownumericids=y
|showforms=y
|notshowbeitemforms=y
|generatetranslationkeys=y
|displayname=Netherite Upgrade
|spritename=netherite-upgrade-smithing-template
|spritetype=item
|nameid=netherite_upgrade_smithing_template
|id=685
|form=item
|translationkey=item.smithing_template.name, upgrade.netherite_upgrade.name}}
{{ID table
|displayname=Sentry Armor Trim
|spritename=sentry-armor-trim-smithing-template
|spritetype=item
|nameid=sentry_armor_trim_smithing_template
|id=686
|form=item
|translationkey=item.smithing_template.name, trim_pattern.sentry.name}}
{{ID table
|displayname=Vex Armor Trim
|spritename=vex-armor-trim-smithing-template
|spritetype=item
|nameid=vex_armor_trim_smithing_template
|id=692
|form=item
|translationkey=item.smithing_template.name, trim_pattern.vex.name}}
{{ID table
|displayname=Wild Armor Trim
|spritename=wild-armor-trim-smithing-template
|spritetype=item
|nameid=wild_armor_trim_smithing_template
|id=689
|form=item
|translationkey=item.smithing_template.name, trim_pattern.wild.name}}
{{ID table
|displayname=Coast Armor Trim
|spritename=coast-armor-trim-smithing-template
|spritetype=item
|nameid=coast_armor_trim_smithing_template
|id=688
|form=item
|translationkey=item.smithing_template.name, trim_pattern.coast.name}}
{{ID table
|displayname=Dune Armor Trim
|spritename=dune-armor-trim-smithing-template
|spritetype=item
|nameid=dune_armor_trim_smithing_template
|id=687
|form=item
|translationkey=item.smithing_template.name, trim_pattern.dune.name}}
{{ID table
|displayname=Wayfinder Armor Trim
|spritename=wayfinder-armor-trim-smithing-template
|spritetype=item
|nameid=wayfinder_armor_trim_smithing_template
|id=698
|form=item
|translationkey=item.smithing_template.name, trim_pattern.wayfinder.name}}
{{ID table
|displayname=Raiser Armor Trim
|spritename=raiser-armor-trim-smithing-template
|spritetype=item
|nameid=raiser_armor_trim_smithing_template
|id=699
|form=item
|translationkey=item.smithing_template.name, trim_pattern.raiser.name}}
{{ID table
|displayname=Shaper Armor Trim
|spritename=shaper-armor-trim-smithing-template
|spritetype=item
|nameid=shaper_armor_trim_smithing_template
|id=700
|form=item
|translationkey=item.smithing_template.name, trim_pattern.shaper.name}}
{{ID table
|displayname=Host Armor Trim
|spritename=host-armor-trim-smithing-template
|spritetype=item
|nameid=host_armor_trim_smithing_template
|id=701
|form=item
|translationkey=item.smithing_template.name, trim_pattern.host.name}}
{{ID table
|displayname=Ward Armor Trim
|spritename=ward-armor-trim-smithing-template
|spritetype=item
|nameid=ward_armor_trim_smithing_template
|id=690
|form=item
|translationkey=item.smithing_template.name, trim_pattern.ward.name}}
{{ID table
|displayname=Silence Armor Trim
|spritename=silence-armor-trim-smithing-template
|spritetype=item
|nameid=silence_armor_trim_smithing_template
|id=697
|form=item
|translationkey=item.smithing_template.name, trim_pattern.silence.name}}
{{ID table
|displayname=Tide Armor Trim
|spritename=tide-armor-trim-smithing-template
|spritetype=item
|nameid=tide_armor_trim_smithing_template
|id=693
|form=item
|translationkey=item.smithing_template.name, trim_pattern.tide.name}}
{{ID table
|displayname=Snout Armor Trim
|spritename=snout-armor-trim-smithing-template
|spritetype=item
|nameid=snout_armor_trim_smithing_template
|id=694
|form=item
|translationkey=item.smithing_template.name, trim_pattern.snout.name}}
{{ID table
|displayname=Rib Armor Trim
|spritename=rib-armor-trim-smithing-template
|spritetype=item
|nameid=rib_armor_trim_smithing_template
|id=695
|form=item
|translationkey=item.smithing_template.name, trim_pattern.rib.name}}
{{ID table
|displayname=Eye Armor Trim
|spritename=eye-armor-trim-smithing-template
|spritetype=item
|nameid=eye_armor_trim_smithing_template
|id=691
|form=item
|translationkey=item.smithing_template.name, trim_pattern.eye.name}}
{{ID table
|displayname=Spire Armor Trim
|spritename=spire-armor-trim-smithing-template
|spritetype=item
|nameid=spire_armor_trim_smithing_template
|id=696
|form=item
|translationkey=item.smithing_template.name, trim_pattern.spire.name
|foot=1}}
== Achievements ==
{{load achievements|Smithing with style}}
== Advancements ==
{{load advancements|Crafting a New Look;Smithing with Style}}
== Video ==
{{yt|klP9SrJFDU8}}
== History ==
{{History|java}}
{{History||1.20<br>(Experimental)|link=1.19.4|snap=23w04a|[[File:Netherite Upgrade Smithing Template JE1 BE1.png|32px]] [[File:Sentry Armor Trim Smithing Template JE1 BE1.png|32px]] [[File:Vex Armor Trim Smithing Template JE1 BE1.png|32px]] [[File:Wild Armor Trim Smithing Template JE1 BE1.png|32px]] [[File:Coast Armor Trim Smithing Template JE1 BE1.png|32px]] [[File:Dune Armor Trim Smithing Template JE1 BE1.png|32px]] [[File:Ward Armor Trim Smithing Template JE1 BE1.png|32px]] [[File:Tide Armor Trim Smithing Template JE1 BE1.png|32px]] [[File:Snout Armor Trim Smithing Template JE1 BE1.png|32px]] [[File:Rib Armor Trim Smithing Template JE1 BE1.png|32px]] [[File:Eye Armor Trim Smithing Template JE1 BE1.png|32px]] [[File:Spire Armor Trim Smithing Template JE1 BE1.png|32px]] Added smithing templates behind the "Update 1.20" experimental datapack.}}
{{History|||snap=23w05a|Smithing templates can be used to trim leather armor.
|Gold, iron, diamond, and netherite armor can be trimmed with their respective material.
|The dune, coast, wild, and sentry armor trims now always generate two templates in a chest when found.
|Increased the chances for all smithing templates that generate in chest loot to spawn:
*Netherite upgrade chance to find increased from 3.2% to 10%.
*Coast chance to find increased from 11.1% to 16.7%.
*Dune chance to find increased from 11.1% to 14.3%.
*Eye chance to find increased from 4.7% to 10% in alter chests, and to 100% in library chests.
*Rib chance to find increased from 4.7% to 6.7%.
*Sentry chance to find increased from 20% to 25%.
*Snout chance to find increased from 4.7% to 8.3%.
*Spire chance to find increased from 4.7% to 6.7%.
*Vex chance to find increased from 4.7% to 50%.
*Ward chance to find increased from 4.7% to 5%.
*Wild chance to find increased from 20% to 33%.}}
{{History||1.20|snap=23w12a|Smithing templates are now available without using the "Update 1.20" experimental datapack.|[[File:Wayfinder Armor Trim Smithing Template JE1 BE1.png|32px]] [[File:Raiser Armor Trim Smithing Template JE1 BE1.png|32px]] [[File:Shaper Armor Trim Smithing Template JE1 BE1.png|32px]] [[File:Host Armor Trim Smithing Template JE1 BE1.png|32px]] [[File:Silence Armor Trim Smithing Template JE1 BE1.png|32px]] Added wayfinder, raiser, shaper, host, and silence armor trim smithing templates.
|[[File:Sentry Armor Trim Smithing Template JE2 BE2.png|32px]] [[File:Dune Armor Trim Smithing Template JE2 BE2.png|32px]] Changed the textures of the sentry and dune armor trim smithing templates.
|The pattern textures of dune and sentry armor trims are changed from [[File:Armor Trim Dune (sample model) JE1 BE1.png|24px]] [[File:Armor Trim Sentry (sample model) JE1 BE1.png|24px]] to [[File:Armor Trim Dune (sample model) JE2 BE2.png|24px]] [[File:Armor Trim Sentry (sample model) JE2 BE2.png|24px]].<br>
Those previous patterns were left with different names: dune was renamed sentry and sentry was renamed shaper.}}
{{History|||snap=23w16a|Wayfinder, raiser, shaper, and host armor trim no longer generates in [[suspicious sand]] in [[trail ruins]].|Due to the split of the archaeological loot tables for the suspicious gravel within the [[trail ruins]]; wayfinder, raiser, shaper, and host armor trim now are in the rare loot.}}
{{History|||snap=23w17a|The probability of the wayfinder, raiser, shaper, and host armor trim to generate in [[suspicious gravel]] in [[trail ruins]] has been changed from 1/11 to 1/12.|The player now get the [[advancement]] "Crafting a new look" when they craft a trimmed armor at a [[smithing table]] using a smithing template, "Smithing with style" when they apply these smithing templates at least once on their armor: Spire, Snout, Rib, Ward, Silence, Vex, Tide, and Wayfinder.}}
{{History|bedrock}}
{{History||Next Major Update<br>(Experimental)|link=Bedrock Edition 1.19.80|snap=beta 1.19.80.21|[[File:Netherite Upgrade Smithing Template JE1 BE1.png|32px]] [[File:Sentry Armor Trim Smithing Template JE1 BE1.png|32px]] [[File:Vex Armor Trim Smithing Template JE1 BE1.png|32px]] [[File:Wild Armor Trim Smithing Template JE1 BE1.png|32px]] [[File:Coast Armor Trim Smithing Template JE1 BE1.png|32px]] [[File:Dune Armor Trim Smithing Template JE1 BE1.png|32px]] [[File:Ward Armor Trim Smithing Template JE1 BE1.png|32px]] [[File:Tide Armor Trim Smithing Template JE1 BE1.png|32px]] [[File:Snout Armor Trim Smithing Template JE1 BE1.png|32px]] [[File:Rib Armor Trim Smithing Template JE1 BE1.png|32px]] [[File:Eye Armor Trim Smithing Template JE1 BE1.png|32px]] [[File:Spire Armor Trim Smithing Template JE1 BE1.png|32px]] Added smithing templates behind the "[[Bedrock Edition 1.20.0|Next Major Update]]" [[experimental]] toggle.}}
{{History|||snap=beta 1.19.80.22|[[File:Wayfinder Armor Trim Smithing Template JE1 BE1.png|32px]] [[File:Raiser Armor Trim Smithing Template JE1 BE1.png|32px]] [[File:Shaper Armor Trim Smithing Template JE1 BE1.png|32px]] [[File:Host Armor Trim Smithing Template JE1 BE1.png|32px]] [[File:Silence Armor Trim Smithing Template JE1 BE1.png|32px]] Added wayfinder, raiser, shaper, host, and silence armor trim smithing templates.
|[[File:Sentry Armor Trim Smithing Template JE2 BE2.png|32px]] [[File:Dune Armor Trim Smithing Template JE2 BE2.png|32px]] Changed the textures of the sentry and dune armor trim smithing templates.
|The pattern textures of dune and sentry armor trims are changed from [[File:Armor Trim Dune (sample model) JE1 BE1.png|24px]] [[File:Armor Trim Sentry (sample model) JE1 BE1.png|24px]] to [[File:Armor Trim Dune (sample model) JE2 BE2.png|24px]] [[File:Armor Trim Sentry (sample model) JE2 BE2.png|24px]].<br>
Those previous patterns were left with different names: dune was renamed sentry and sentry was renamed shaper.}}
{{History||1.20.0|snap=beta 1.20.0.21|Smithing templates are now available without using the "Next Major Update" experimental toggle.}}
{{History|foot}}
== Issues ==
{{Issue list}}
== Trivia ==
* Smithing templates were named "Smithing Blueprints" in the prototype but was changed because the word "blueprint" sounded modern and technical.<ref>{{ytl|klP9SrJFDU8|Minecraft 1.20: Armor Trims - What Do They Mean?|Minecraft|May 4, 2023|t=98}}</ref>
* When Mojang developer Gnembon was working on armor trims, he accidentally messed up their rendering, making them jet through the player's body in a weird fashion, similar to what appears in {{w|Salvador Dalí}}'s paintings where a hand might poke through a forehead.<ref>{{ytl|ghQODkq4ITI|Mojang Dev Comes To Hermitcraft! (Mojang Developer Gnembom Interview)|GoodVodsWithScar|June 23, 2023|t=1980}}</ref>
* Some of the armor trims feature patterns based on a [[mob]] or [[block]] that is found in the same [[Generated structures|structure]] as the corresponding smithing template.<ref name=":0">"Some of the armor trims reflect the place where you found the template, for example bastions contain a piglin-inspired trim."-[[Sofia Dankis]]-{{Mcnet|armor-trims-coming-minecraft-1-20|Armor Trims Coming to Minecraft 1.20|January 24, 2023}}</ref>
** The spire armor trim resembles a [[shulker]].
** The vex armor trim resembles an [[evoker]]. As an item in the [[inventory]], it resembles the wing or the vein texture of a [[vex]].
** The wild armor trim has moss growing on 3 of its corners.
** The coast armor trim appears to have barnacles attached to it.
** The ward armor trim, as an item in the inventory, resembles the faces inside a [[warden]]'s chest.
** The silence armor trim appears to have sculk creeping onto / infecting it.
** The tide armor trim resembles [[Prismarine|prismarine bricks]].
** The snout armor trim resembles a [[piglin]]<ref name=":0" />.
** The rib armor trim resembles a [[wither skeleton]].
** The eye armor trim resembles an [[eye of ender]]. There are also two eyes on the head part of the armor trim that resemble those of an [[enderman]].
* ''Netherite upgrade smithing template'' (35 characters with "_" and 32 characters without "_") and ''sentry armor trim smithing template'' (35 characters with "_" and 31 characters without "_") are the current longest name for item ID, while ''[[polished blackstone pressure plate]]'' and ''[[cracked polished blackstone bricks]]'' have 34 characters with "_" and 31 characters without "_".
* The silence armor trim is the rarest trim, due to being found in ancient cities in the deep dark, and having only a 1.2% chance to be per chest.
* When [[lapis lazuli]] is used as trim material, it is called "Lapis" instead of its full name "Lapis Lazuli"; this is the only instance of the abbreviation "Lapis" being used in-game.<ref>{{bug|MC-262486|||WAI}}</ref>
== Gallery ==
=== Sprites ===
<gallery>
Netherite Upgrade Smithing Template.png|Netherite Upgrade
Sentry Armor Trim Smithing Template.png|Sentry Armor Trim
Vex Armor Trim Smithing Template.png|Vex Armor Trim
Wild Armor Trim Smithing Template.png|Wild Armor Trim
Coast Armor Trim Smithing Template.png|Coast Armor Trim
Dune Armor Trim Smithing Template.png|Dune Armor Trim
Wayfinder Armor Trim Smithing Template.png|Wayfinder Armor Trim
Raiser Armor Trim Smithing Template.png|Raiser Armor Trim
Shaper Armor Trim Smithing Template.png|Shaper Armor Trim
Host Armor Trim Smithing Template.png|Host Armor Trim
Ward Armor Trim Smithing Template.png|Ward Armor Trim
Silence Armor Trim Smithing Template.png|Silence Armor Trim
Tide Armor Trim Smithing Template.png|Tide Armor Trim
Snout Armor Trim Smithing Template.png|Snout Armor Trim
Rib Armor Trim Smithing Template.png|Rib Armor Trim
Eye Armor Trim Smithing Template.png|Eye Armor Trim
Spire Armor Trim Smithing Template.png|Spire Armor Trim
</gallery>
=== Armor trim patterns ===
<gallery>
Armor Trim Sentry (sample model).png|Sentry Armor Trim
Armor Trim Vex (sample model).png|Vex Armor Trim
Armor Trim Wild (sample model).png|Wild Armor Trim
Armor Trim Coast (sample model).png|Coast Armor Trim
Armor Trim Dune (sample model).png|Dune Armor Trim
Armor Trim Wayfinder (sample model).png|Wayfinder Armor Trim
Armor Trim Raiser (sample model).png|Raiser Armor Trim
Armor Trim Shaper (sample model).png|Shaper Armor Trim
Armor Trim Host (sample model).png|Host Armor Trim
Armor Trim Ward (sample model).png|Ward Armor Trim
Armor Trim Silence (sample model).png|Silence Armor Trim
Armor Trim Tide (sample model).png|Tide Armor Trim
Armor Trim Snout (sample model).png|Snout Armor Trim
Armor Trim Rib (sample model).png|Rib Armor Trim
Armor Trim Eye (sample model).png|Eye Armor Trim
Armor Trim Spire (sample model).png|Spire Armor Trim
</gallery>
=== Official Artwork ===
<gallery>
T&T Thumbnail.jpg|[[Sunny]] wearing amethyst armor trims.
Warden Chasing Alex with Silence Trim Pixel Art.png|A [[warden]] chasing Alex holding the silence armor trim.
Alex Trimming Armor in Smithing Table Pixel Art.png|Alex adding the silence armor trim and amethyst on iron armor.
Alex Wearing Iron Armor with Amethyst Pixel Art.jpg|Alex wearing the trimmed iron armor.
File:Live2023-01.jpeg|Noor working on trimmed iron armor.
</gallery>
=== Screenshots ===
<gallery>
Kingbdogz Armor Trim 1.jpg|Redstone trims on diamond armor.
Kingbdogz Armor Trim 2.jpg|Gold trims on netherite armor.
Too Many Trims.jpg|A large amount of armor trims.
Kingbdogz Armor Trim 3.jpg|Gold on netherite.
Kingbdogz Armor Trim 4.jpg|Diamond on diamond.
New Armor Trims in 23W12A.jpg|<ref>{{Tweet|kingbdogz|1638580472962850831|new trims got the drip The new "Silence" armor trim to the left is now the hardest trim to get, with only a 1% chance per chest to spawn in Ancient Cities. Definitely gonna be a challenge to get!|March 22, 2023}}</ref>
Emerald Armor.png|Emerald on gold.
Xilefian Armor Trims 1.png|[[Xilefian]] showing how armor trims work.
Xilefian Armor Trims 2.png|[[Xilefian]] showing how armor trims work.
Xilefian Armor Trims 3.png|[[Xilefian]] showing how armor trims work.
Armor Trims On Netherite Armors.png|A display of all eleven (before [[Java Edition 23w12a]]) armor trims and ten colors on netherite armors.
Armor Trim Showcase.png|A display of all eleven (before [[Java Edition 23w12a]]) armor trims, on netherite armor using emerald as the trim material.
Armor Trim Colors.png|A display of all ten armor trim colors, using the ward trim on a netherite helmet.
Silence Armor Trim on All Armors.png|A display of all ten colors of the silence armor trim on all armors.
Image 2023-06-07 154100087.png|A screenshot of every armor trim in every color(besides quartz) on leather armor.
Armor Trim Friends.jpg|Official screenshot of [[Alex]] and [[Zuri]] wearing armor trims.
LadyAgnes Armor Trims.jpg|Copper trims on netherite armor.
Trim Lineup.jpg
Fancy Delta.jpg|[[Kai]] wearing trimmed armor in a [[Basalt Delta]].
Trims & Pots.jpg
Noor Gold Armor Trim .jpeg
Noor Diamond Armor Trim.jpeg
Noor Netherite Armor Trim.jpeg
Noor Iron Armor Trim.jpeg
</gallery>
== References ==
{{Reflist}}
{{Items}}
[[Category:Bedrock Edition]]
[[Category:Non-renewable resources]]
[[de:Schmiedevorlage]]
[[es:Molde de herrería]]
[[fr:Modèle de forge]]
[[ja:鍛冶型]]
[[pl:Szablon kowalski]]
[[pt:Molde de ferraria]]
[[ru:Кузнечный шаблон]]
[[uk:Ковальський шаблон]]
[[zh:锻造模板]]</li></ul> | The ability for blocks to burn forever has been removed. Previously, a non-netherrack flammable block, like wood, may burn continuously when its sides are surrounded by nonflammable blocks, like stone or dirt. | ||||
1.6{{Extension DPL}}<ul><li>[[Nether Sprouts|Nether Sprouts]]<br/>{{Block
|title=Nether Sprouts
|image=Nether Sprouts.png
|image2=Nether Sprouts (texture) JE2 BE2.png
|transparent=Yes
|tool=shears
|light=No
|renewable=Yes
|stackable=Yes (64)
|flammable=No
|lavasusceptible=Yes
}}
'''Nether sprouts''' are a non-solid fungi block that generate in [[warped forest]]s.
== Obtaining ==
=== Natural generation ===
Nether sprouts generate in [[warped forest]] biomes.
=== Breaking ===
Nether sprouts can be mined instantly with any item. The block also breaks if the block below is removed, or if [[water]] flows into its space. The block only drops if broken with [[shear]]s.
=== Post-generation ===
Applying [[bone meal]] to warped [[nylium]] creates nether sprouts on that block and surrounding nylium, along with both types of [[roots]] and [[fungi]].
== Usage ==
[[File:RootsSproutsPlaceBlock.png|thumb|All of the blocks that nether sprouts can be placed on.]]
Nether sprouts can be planted on the same blocks that [[fungus|fungi]] and [[roots]] can be placed on: [[nylium]], [[soul soil]], [[Grass Block|grass]], [[podzol]], [[mycelium]], [[Moss Block|moss]], [[dirt]], [[coarse dirt]], [[rooted dirt]], and [[farmland]]. However, they cannot be planted in [[flower pot]]s.
=== Composting ===
Placing nether sprouts into a [[composter]] has a 50% chance of raising the compost level by 1.
== Sounds ==
{{Sound table/Block/Nether sprouts}}
== Data values ==
=== ID ===
{{edition|java}}:
{{ID table
|edition=java
|generatetranslationkeys=y
|showforms=y
|displayname=Nether Sprouts
|spritetype=block
|nameid=nether_sprouts
|foot=1}}
{{edition|bedrock}}:
{{ID table
|edition=bedrock
|firstcolumnname=Nether Sprouts
|shownumericids=y
|showforms=y
|generatetranslationkeys=y
|displayname=Block
|spritename=nether-sprouts
|spritetype=block
|nameid=nether_sprouts
|id=493
|form=block
|itemform=item.nether_sprouts}}
{{ID table
|displayname=Item
|spritename=nether-sprouts
|spritetype=item
|nameid=nether_sprouts
|id=621
|form=item
|translationkey=tile.nether_sprouts.name
|foot=1}}
== History ==
{{History|java}}
{{History||1.16|snap=20w06a|[[File:Nether Sprouts JE1 BE1.png|24px]] [[File:Nether Sprouts (texture) JE1 BE1.png|24px]] Added nether sprouts.}}
{{History|||snap=20w10a|[[File:Nether Sprouts JE2 BE2.png|24px]] [[File:Nether Sprouts (texture) JE2 BE2.png|24px]] The textures of the nether sprouts have now been changed.}}
{{History|||snap=20w15a|Nether sprouts can now be [[composter|composted]].}}
{{History|||snap=20w19a|Nether sprouts now only [[drops|drop]] if [[breaking|broken]] with [[shears]].}}
{{History|||snap=20w21a|[[File:Nether Sprouts (item) JE3 BE2.png|24px]] The [[inventory]] texture of the nether sprouts have now been changed.
|The [[block]] [[model]] of nether sprouts is now centered of the block rather than positioned randomly.}}
{{History||1.19.3|snap=22w44a|Nether sprouts now make sounds when being walked on.<ref>{{bug|MC-171621|||Fixed}}</ref>}}
{{History|bedrock}}
{{History||1.16.0|snap=beta 1.16.0.51|[[File:Nether Sprouts JE1 BE1.png|24px]] [[File:Nether Sprouts (texture) JE1 BE1.png|24px]] Added nether sprouts.}}
{{History|||snap=beta 1.16.0.57|Nether sprouts can now be [[composter|composted]].}}
{{History|||snap=beta 1.16.0.59|[[File:Nether Sprouts JE2 BE2.png|24px]] [[File:Nether Sprouts (item) JE3 BE2.png|24px]] The textures of the nether sprouts have now been changed.
|[[File:Nether Sprouts Glitched BE.png|32px]] Nether sprouts now appear with a glitched texture when [[breaking|broken]] in [[survival]] mode or when picking the [[block]] in [[creative]] mode. The [[item]] received is also nameless.<ref>{{bug|MCPE-74339}}</ref>}}
{{History|||snap=beta 1.16.0.63|Nether sprouts now give the [[player]] the correct item when broken in survival mode or when picking the block in creative mode.}}
{{History|foot}}
== Issues ==
{{issue list}}
== Trivia ==
* Unlike other warped "plants", nether sprouts don't have a crimson equivalent. This is also the case with [[nether wart]], which lacks a warped equivalent.
== References ==
{{Reflist}}
{{Blocks|vegetation}}
{{Items}}
[[Category:Nether blocks]]
[[Category:Fungi]]
[[Category:Natural blocks]]
[[Category:Non-solid blocks]]
[[de:Nethersprossen]]
[[de:Nethersprossen]]
[[es:Rastrojo del Nether]]
[[fr:Germes du Nether]]
[[ja:ネザースプラウト]]
[[pl:Netherowe kiełki]]
[[pt:Brotos do Nether]]
[[ru:Адские ростки]]
[[zh:下界苗]]</li><li>[[Raw Porkchop|Raw Porkchop]]<br/>{{Item
| title = Raw Porkchop
| image = Raw Porkchop.png
| renewable = Yes
| heals = {{hunger|3}}
| stackable = Yes (64)
}}
A '''raw porkchop''' is a [[food]] item that can be eaten by the [[player]] or cooked to make a [[cooked porkchop]].
== Obtaining ==
=== Mob loot ===
==== Pigs ====
Adult [[pig]]s drop 1–3 raw porkchop when killed. The maximum amount is increased by 1 per level of [[Looting]], for a maximum of 1-6 with Looting III. If killed while on fire, they drop [[cooked porkchop]] instead.
==== Hoglins ====
Adult [[hoglin]]s drop 2–4 raw porkchop when killed. The maximum amount is increased by 1 per level of [[Looting]], for a maximum of 7 with Looting III. If killed while on fire, they drop [[cooked porkchop]] instead.
=== Chest loot ===
{{LootChestItem|raw-porkchop}}
== Usage ==
=== Food ===
To eat raw porkchop, press and hold {{control|use}} while it is selected in the hotbar. Eating one restores {{hunger|3}} [[hunger]] and 0.6 [[Hunger#Mechanics|saturation]].
=== Smelting ingredient ===
{{Smelting
|showname=1
|Raw Porkchop
|Cooked Porkchop
|0.35
}}
=== Trading ===
{{IN|bedrock}}, novice-level butcher [[villager]]s have a {{frac|1|3}} chance to [[trading|buy]] 7 raw porkchop for an [[emerald]] as part of their [[trading|trades]].
{{IN|java}}, novice-level butcher villagers have a 40% chance to buy 7 raw porkchop for an emerald.
=== Wolves ===
Raw porkchops can be used to [[breed]] and heal tamed [[wolves]], lead them around, and make baby tamed wolves grow up faster by 10% of the remaining time.
=== Piglins ===
[[Piglin|Piglins]] instantly pick up raw or [[Cooked Porkchop|cooked porkchops]] that are within 1 block of them, unless they have already picked up one within the last 10 seconds. Porkchops picked up are not dropped upon the piglin's death.
==Sounds==
{{Sound table/Entity/Food}}
== Data values ==
=== ID ===
{{edition|java}}:
{{ID table
|edition=java
|showitemtags=y
|showforms=y
|generatetranslationkeys=y
|displayname=Raw Porkchop
|spritetype=item
|nameid=porkchop
|itemtags=piglin_food
|form=item
|foot=1}}
{{edition|bedrock}}:
{{ID table
|edition=bedrock
|shownumericids=y
|showforms=y
|notshowbeitemforms=y
|generatetranslationkeys=y
|displayname=Raw Porkchop
|spritetype=item
|nameid=porkchop
|id=262
|form=item
|foot=1}}
== Achievements ==
{{load achievements|Pork Chop}}
== Advancements ==
{{load advancements|Husbandry;A Balanced Diet}}
== History ==
{{History|java indev}}
{{History||20100219|[[File:Raw Porkchop JE1 BE1.png|32px]] Added raw porkchops.
|Raw porkchops restore {{hp|3}} and do not stack in the [[inventory]].
|Raw porkchops are [[drops|dropped]] by [[pig]]s.}}
{{History|java beta}}
{{History||1.4|Raw porkchops can now be given to [[wolf|wolves]].}}
{{History||1.8|snap=Pre-release|Raw porkchops can now be stacked to 64.<ref>{{Tweet|jeb|103408168356421632|Some Minecraft food changes...}}</ref>
|Raw porkchops now restore {{hunger|3}} to the [[Hunger|food bar]].}}
{{History|java}}
{{History||1.2.1|snap=12w03a|Raw porkchops can now be used to breed wolves.}}
{{History||1.3.1|snap=12w21a|Raw porkchops can now be [[trading|sold]] to butcher [[villager]]s, at 14–17 pork chops for 1 [[emerald]].}}
{{History|||snap=12w25a|[[Pig]]s now [[drops|drop]] 1–3 porkchops instead of 0–2.}}
{{History||1.4.2|snap=12w37a|[[File:Raw Porkchop JE2 BE2.png|32px]] The texture of raw porkchops has been changed, so that it no longer has a dark outline.}}
{{History||1.8|snap=14w02a|[[Trading]] has been changed; butcher villagers now [[trading|buy]] 14–18 porkchops for 1 emerald.}}
{{History||1.13|snap=17w47a|Prior to [[1.13/Flattening|''The Flattening'']], this [[item]]'s numeral ID was 319.}}
{{History||1.14|snap=18w43a|[[File:Raw Porkchop.png|32px]] The texture of raw porkchops has been changed.}}
{{History|||snap=18w49a|Raw porkchops can now be found in [[chest]]s in [[village]] butcher shops.}}
{{History||1.16|snap=20w07a|Raw porkchops are dropped by the new [[hoglin]]s.
|Raw porkchops have a {{frac|5|109}} (~4.59%) chance of being given by the new [[piglin]]s when [[bartering]], in a stack size of 2–5.}}
{{History|||snap=20w09a|Raw porkchops can no longer be obtained by bartering with piglins.}}
{{History|||snap=20w16a|Raw porkchops now generate in [[bastion remnants]] chests.}}
{{History|pocket alpha}}
{{History||v0.4.0|[[File:Raw Porkchop JE1 BE1.png|32px]] Added raw porkchops.}}
{{History||v0.5.0|Raw porkchops now restore {{hp|3}} instead of {{hp|1}}.}}
{{History||v0.8.0|snap=build 1|[[File:Raw Porkchop JE2 BE2.png|32px]] The texture of raw porkchops has been changed, so that it no longer has that dark outline.}}
{{History||v0.12.1|snap=build 1|Raw porkchops now restore [[hunger]] instead of [[health]].}}
{{History||v0.16.2|[[Pig]]s now [[drops|drop]] 1–3 raw porkchops rather than 0–2.}}
{{History|pocket}}
{{History||1.0.4|snap=alpha 1.0.4.0|14–18 raw porkchops can now be [[trading|sold]] to butcher [[villager]]s for an [[emerald]].}}
{{History|bedrock}}
{{History||1.10.0|snap=beta 1.10.0.3|[[File:Raw Porkchop.png|32px]] The texture of raw porkchops has been changed.}}
{{History||1.11.0|snap=beta 1.11.0.3|Raw porkchops can now be found in [[village]] butcher [[chest]]s.}}
{{History|||snap=beta 1.11.0.4|Butcher [[villager]]s now have {{frac|1|3}} chance to [[trading|buy]] 7 raw porkchops.}}
{{History|console}}
{{History||xbox=TU1|xbone=CU1|ps=1.0|wiiu=Patch 1|switch=1.0.1|[[File:Raw Porkchop JE1 BE1.png|32px]] Added raw porkchops.}}
{{History||xbox=TU5|Raw porkchops are now stackable to 64 and fills [[hunger]] instead of [[health]].}}
{{History||xbox=TU12|[[File:Raw Porkchop JE2 BE2.png|32px]] The texture of raw porkchops has been changed, so that it no longer has a dark outline.}}
{{History||xbox=none|xbone=none|ps=1.90|wiiu=none|switch=none|[[File:Raw Porkchop.png|32px]] The texture of raw porkchops has been changed.}}
{{History|new3DS}}
{{History||0.1.0|[[File:Raw Porkchop JE2 BE2.png|32px]] Added raw porkchops.}}
{{History|foot}}
== Issues ==
{{issue list}}
== Gallery ==
<gallery>
I Porkchop Minecraft JINX.jpg|Official T-shirt artwork "I Porkchop Minecraft" sold by [https://www.jinx.com JINX].
I Brake for Porkchop Bumper Sticker JINX.jpg|An official bumper sticker featuring a raw porkchop sold by JINX.
</gallery>
== References ==
{{reflist}}
== External Links ==
*[https://www.minecraft.net/en-us/article/taking-inventory--porkchop Taking Inventory: Porkchop] – Minecraft.net on February 13, 2020
{{Items}}
[[Category:Food]]
[[cs:Syrová kotleta]]
[[de:Rohes Schweinefleisch]]
[[es:Chuleta de cerdo cruda]]
[[fr:Côtelette de porc crue]]
[[hu:Nyers disznóhús]]
[[ja:生の豚肉]]
[[nl:Rauw varkensvlees]]
[[pl:Surowy schab]]
[[pt:Costeleta de porco crua]]
[[ru:Сырая свинина]]
[[uk:Сира свинина]]
[[zh:生猪排]]
[[Category:Renewable resources]]</li></ul> | ? | Fire spreading has been severely nerfed — infinite fire spread has been disabled.[4] | |||
| Java Edition | |||||
1.2.1{{Extension DPL}}<ul><li>[[Blaze Rod|Blaze Rod]]<br/>{{Item
| image = Blaze Rod.png
| renewable = Yes
| stackable = Yes (64)
}}
'''Blaze rods''' are [[item]]s exclusively obtained from [[blaze]]s. They act as a fuel for both brewing and [[smelting]], and are required to craft [[eye of ender|eyes of ender]] used to access to [[the End]].
== Obtaining ==
=== Mob loot ===
When killed by a player or tamed [[wolf]], a [[blaze]] has a 50% chance to drop a blaze rod. The [[Looting]] [[enchantment]] can increase the drops by one per level, for a maximum of 4 blaze rods. Blazes do not drop any blaze rods if killed by any other source.
== Usage ==
=== Crafting ingredient ===
{{crafting usage}}
=== Fuel ===
When used in a [[furnace]], a blaze rod lasts 120 seconds (12 items).
== Achievements ==
{{load achievements|Into Fire}}
== Advancements ==
{{load advancements|Into Fire}}
== Video ==
{{Video note|This video does not mention the crafting of [[End Rod]]s.|minor}}
<div style="text-align:center">{{yt|_mhRHuRlICY}}</div>
== Data values ==
=== ID ===
{{el|java}}:
{{ID table
|edition=java
|showforms=y
|generatetranslationkeys=y
|displayname=Blaze Rod
|spritetype=item
|nameid=blaze_rod
|form=item
|foot=1}}
{{el|bedrock}}:
{{ID table
|edition=bedrock
|shownumericids=y
|showforms=y
|notshowbeitemforms=y
|generatetranslationkeys=y
|displayname=Blaze Rod
|spritetype=item
|nameid=blaze_rod
|id=423
|form=item
|foot=1}}
== History ==
{{History|java}}
{{History||1.0.0|snap=Beta 1.9 Prerelease|[[File:Blaze Rod JE1 BE1.png|32px]] Added blaze rods.}}
{{History|||snap=Beta 1.9 Prerelease 2|Blaze rods are now used to craft [[blaze powder]].}}
{{History|||snap=Beta 1.9 Prerelease 3|Blaze rods are now used to craft [[brewing stand]]s.}}
{{History||1.8|snap=14w07a|Blaze rods are now held similarly to [[tools]].}}
{{History||1.9|snap=15w44b|Blaze rods are now used to craft [[end rod]]s.}}
{{History||1.13|snap=17w47a|Prior to [[1.13/Flattening|''The Flattening'']], this [[item]]'s numeral ID was 369.}}
{{History|pocket alpha}}
{{History||v0.12.1|snap=build 1|[[File:Blaze Rod JE1 BE1.png|32px]] Added blaze rods.
|Blaze rods can be used to craft [[blaze powder]] and [[brewing stand]]s.}}
{{History|pocket}}
{{History||1.0.0|snap=alpha 0.17.0.1|Blaze rods are now used to craft [[end rod]]s.}}
{{History|console}}
{{History||xbox=TU7|xbone=CU1|ps=1.00|wiiu=Patch 1|switch=1.0.1|[[File:Blaze Rod JE1 BE1.png|32px]] Added blaze rods.
|Blaze rods can be used to craft [[blaze powder]] and [[brewing stand]]s.}}
{{History||xbox=TU46|xbone=CU36|ps=1.38|wiiu=Patch 15|Blaze rods are now used to craft [[end rod]]s.}}
{{History|New 3DS}}
{{History||0.1.0|[[File:Blaze Rod JE1 BE1.png|32px]] Added blaze rods.
|Blaze rods can be used to craft [[blaze powder]] and [[brewing stand]]s.}}
{{History|foot}}
== Issues ==
{{issue list}}
== Trivia ==
* As part of an official collaboration, blaze rods are included in a free add-on for the roleplaying game [https://en.wikipedia.org/wiki/Dungeons_%26_Dragons ''Dungeons and Dragons''].<ref>https://www.google.com/url?sa=t&rct=j&q=&esrc=s&source=web&cd=&cad=rja&uact=8&ved=2ahUKEwj9uvqlwIT-AhV7LUQIHYlVDiwQFnoECBAQAQ&url=https%3A%2F%2Fwww.minecraft.net%2Fcontent%2Fdam%2Fgames%2Fminecraft%2Fsoftware%2FMinecraft-Monstrous-Compendium.pdf&usg=AOvVaw0aKOqpKAHSH11qgZhN_Bhx</ref> In the game, they are worth 100 gold pieces, create light, and can be broken to create an explosion.
* They are the spinning things surrounding the blaze's head
{{items}}
== References ==
{{Reflist}}
[[Category:Renewable resources]]
[[cs:Ohnivá hůl]]
[[de:Lohenrute]]
[[el:Οι ράβδοι των Blaze]]
[[es:Vara de blaze]]
[[fr:Bâton de Blaze]]
[[hu:Lángrúd]]
[[it:Verga di blaze]]
[[ja:ブレイズロッド]]
[[ko:블레이즈 막대]]
[[lzh:炎靈桿]]
[[nl:Blazestaf]]
[[pl:Płomienna różdżka]]
[[pt:Vara de blaze]]
[[ru:Огненный стержень]]
[[th:แท่งเบลซ]]
[[tr:Alaz Çubuğu]]
[[uk:Стрижень Блейза]]
[[zh:烈焰棒]]</li><li>[[Snowball|Snowball]]<br/>{{about|the throwable item|the enchantment in ''Minecraft Dungeons''|MCD:Snowball}}
{{ItemEntity
|image=Snowball.png
|renewable=Yes
|stackable=Yes (16)<br>
Yes (64){{upcoming|java Combat Tests}}
|size=Height: 0.25 Blocks<br>Width: 0.25 Blocks
}}
'''Snowballs''' are throwable combat items that hit but do not damage most [[Mob|mobs]] on impact.
== Obtaining ==
{{see also|Tutorials/Snow farming}}
=== Mining ===
A [[shovel]] without the [[Silk Touch]] enchantment can get 4 snowballs by breaking a [[snow block]], and 1–8 snowballs by breaking or blasting [[snow layer]]s – one per layer. The [[Fortune]] enchantment does not affect these amounts.
{{IN|bedrock}}, snowballs are dropped from snow layers even when mined with a Silk Touch shovel.<ref>{{bug|MCPE-59729||Snow layers don't drop themselves when mined with a silk touch enchanted shovel}}</ref>
==== Explosions ====
Creeper and TNT [[explosion]]s leave snowballs in the resulting debris field if near snow.
==== Ravagers ====
{{IN|BE}}, Ravagers destroy snow layers, dropping snowballs.
==== Pistons ====
{{IN|BE}}, a block or piston head pushed into the position of snow layers destroys the snow layers, dropping snowballs. 1-3 layers drops 1 snowball, 4-5 layers drops 2 snowballs, 6-7 layers drops 3 snowballs and 8 layers drops 4 snowballs.
=== Mob loot ===
[[Snow golem]]s drop 0–15 snowballs upon death, unaffected by [[Looting]].
=== Chest loot ===
{{LootChestItem|snowball}}
== Usage ==
=== Crafting ingredient ===
{{crafting usage}}
=== Combat ===
[[File:Throwing a snowball on a pig.gif|300px|thumbnail|right|Throwing a snowball on a pig animation.]]
Snowballs can be thrown by {{control|using}} them. There is no charging time or cooldown for firing them,{{Until|java Combat Tests}} meaning they can be thrown as fast as the player can click.
Like other projectiles, snowballs are affected by gravity: their range is the same as those of [[egg]]s and [[ender pearl]]s, less than that of [[arrow]]s fired from [[bow]]s, and more than that of [[splash potion]]s. In [[Bedrock Edition]], players will receive damage and will be knockbacked.
Snowballs deal {{hp|3}} each to [[blaze]]s but they deal no damage to other mobs. Mobs still receive knockback and act the same as if they were being damaged (for example, [[zombified piglin]]s who are hit by snowballs become aggressive). Players {{in|BE}} receive knockback, while players {{in|JE}} are unaffected.<ref>{{bug|MC-3179|||WAI}}</ref>{{Until|java Combat Tests}}
When fighting the [[ender dragon]], [[end crystal]]s are able to be destroyed by snowballs being thrown at them.
Snowball, like other projectiles, can be used to distract the [[warden]]. A warden walks towards the location where the snowball lands to inspect it, giving the player time to escape. However, if snowballs are fired too frequently (at least twice in 5 seconds), the warden walks straight to the player instead.
In the new versions they can hit players but just only in bedrock
=== Dispenser ===
Snowballs can be fired from [[dispenser]]s.
== Sounds ==
{{Edition|Java}}:<br>
Thrown snowballs use the Friendly Creatures sound category for entity-dependent sound events.
{{Sound table
|rowspan=3
|sound=Bow shoot.ogg
|subtitle=Snowball flies
|source=neutral
|description=When a player throws a snowball
|id=entity.snowball.throw
|translationkey=subtitles.entity.snowball.throw
|volume=0.5
|pitch={{frac|1|3}}-0.5
|distance=16}}
{{Sound table
|subtitle=Snowball flies
|source=neutral
|description=When a snow golem shoots a snowball
|id=entity.snow_golem.shoot
|translationkey=subtitles.entity.snowball.throw
|volume=1.0
|pitch={{frac|1|3}}-0.5
|distance=16}}
{{Sound table
|subtitle=Dispensed item
|source=block
|description=When a dispenser shoots a snowball
|id=block.dispenser.launch
|translationkey=subtitles.block.dispenser.dispense
|volume=1.0
|pitch=1.2
|distance=16
|foot=1}}
{{Edition|Bedrock}}:
{{Sound table
|type=bedrock
|rowspan=3
|sound=Bow shoot.ogg
|source=player
|description=When a player throws a snowball
|id=random.bow
|volume=0.5
|pitch=0.33-0.5}}
{{Sound table
|source=neutral
|description=When a snow golem shoots a snowball
|id=mob.snowgolem.shoot
|volume=1.0
|pitch=0.8-1.2}}
{{Sound table
|source=player
|description=When a dispenser shoots a snowball
|id=random.bow
|volume=1.0
|pitch=0.83-1.25
|foot=1}}
== Data values ==
=== ID ===
{{edition|java}}:
{{ID table
|edition=java
|firstcolumnname=Item
|showforms=y
|generatetranslationkeys=y
|displayname=Snowball
|spritetype=item
|nameid=snowball
|form=item
|foot=1}}
{{ID table
|edition=java
|firstcolumnname=Entity
|showentitytags=y
|generatetranslationkeys=y
|displayname=Snowball
|spritetype=entity
|nameid=snowball
|entitytags=impact_projectiles
|foot=1}}
{{edition|bedrock}}:
{{ID table
|edition=bedrock
|firstcolumnname=Item
|shownumericids=y
|showforms=y
|notshowbeitemforms=y
|generatetranslationkeys=y
|displayname=Snowball
|spritetype=item
|nameid=snowball
|id=374
|form=item
|foot=1}}
{{ID table
|edition=bedrock
|firstcolumnname=Entity
|shownumericids=y
|generatetranslationkeys=y
|displayname=Snowball
|spritetype=entity
|nameid=snowball
|id=81
|foot=1}}
=== Entity Data ===
Snowballs have entity data that define various properties of the entity.
{{el|java}}:
{{main|Entity format}}
{{/ED}}
{{el|bedrock}}:
: See [[Bedrock Edition level format/Entity format]].
== Advancements ==
{{Load advancements|Bullseye}}
== Video ==
<div style="text-align:center">{{yt|2E-c9P8kyfg}}</div>
==History==
{{History|java alpha}}
{{History||v1.0.5|[[File:Snowball JE1 BE1.png|32px]] Added snowballs.
|Snowballs are used to craft [[snow block]]s.
|Snowballs could stack up to 64.}}
{{History||v1.0.5_01|Snowballs now stack to 8.
|Added a new snowball [[sound]] effect.
|Harvesting snowballs now requires a [[shovel]].}}
{{History||v1.0.6|Snowballs now stack up to 16.
|Thrown snowballs no longer disappear.}}
{{History||v1.1.1|It is no longer possible to obtain more than four snowballs from a solid [[snow block]] (the [[player]] was previously able to obtain 4-6 snowballs per snow block allowing an infinite number of snowballs to be made).}}
{{History||v1.2.0|snap=preview|[[Fireball]]s use the same texture as the snowball.}}
{{History|java beta}}
{{History||1.2|Snowballs can now be fired by [[dispenser]]s.}}
{{History|java}}
{{History||1.0.0|snap=Beta 1.9 Prerelease|[[Fireball]]s no longer use the snowball texture.}}
{{History|||snap=RC1|Snowball throwing sound was changed.}}
{{History||1.9|snap=15w32a|Snowballs no longer damage the [[ender dragon]].}}
{{History|||snap=15w36b|Snowballs now produce particles when thrown at an entity.}}
{{History|||snap=15w49a|Snowballs, as well as all projectiles, now take the thrower's motion into account when fired.}}
{{History||1.11|snap=16w32a|The entity ID has been changed from <code>Snowball</code> to <code>snowball</code>.}}
{{History||1.13|snap=17w47a|Prior to [[1.13/Flattening|''The Flattening'']], this [[item]]'s numeral ID was 332.}}
{{History||1.14|snap=18w43a|[[File:Snowball JE2 BE2.png|32px]] The texture of snowballs has been changed.}}
{{History|||snap=18w49a|Snowballs can now be found in [[chest]]s in [[snowy tundra]] [[village]] houses.}}
{{History|||snap=19w08a|[[File:Snowball JE3 BE3.png|32px]] The texture of snowballs has been changed, once again.}}
{{History||1.16.2|snap=Pre-Release 1|Snowballs are now affected by [[bubble column]]s.}}
{{History||1.19|snap=Deep Dark Experimental Snapshot 1|Snowballs now generate in [[ancient city]] chests.}}
{{History|upcoming java}}
{{History||Combat Tests|snap=Combat Test 4|Snowballs now stack to 64, once again.
|Snowballs now have 4-tick cooldown and are not rendered for the first 2 ticks to prevent screen flickering.}}
{{History|pocket alpha}}
{{History||v0.2.0|[[File:Snowball JE1 BE1.png|32px]] Added snowballs. They are currently unobtainable and serve no purpose.}}
{{History||v0.3.0|Snowballs now drop as an item when mining [[snow block]]s and [[snow layer]]s.
|Snowballs can be used to craft [[snow block]]s.}}
{{History||v0.4.0|Snowballs can now be thrown.}}
{{History||v0.11.0|snap=build 14|Snowballs are now available in the [[creative]] inventory.}}
{{History||v0.12.0|Snowballs now deal [[damage]] to [[blaze]]s.}}
{{History||v0.12.1|snap=build 1|Added [[snow golem]]s, which [[drops|drop]] snowballs.}}
{{History|bedrock}}
{{History||1.2.0|Snowballs now deal knockback to [[player]]s.}}
{{History||1.10.0|snap=beta 1.10.0.3|[[File:Snowball JE2 BE2.png|32px]] The texture of snowballs has been changed.}}
{{History||1.11.0|snap=beta 1.11.0.1|Snowballs can now be found in some [[snowy tundra]] [[village]] house [[chest]]s.}}
{{History|||snap=beta 1.11.0.5|[[File:Snowball JE3 BE3.png|32px]] The texture of snowballs has been changed, once again.}}
{{History|console}}
{{History||xbox=TU1|xbone=CU1|ps=1.0|switch=1.0.1|wiiu=Patch 1|[[File:Snowball JE1 BE1.png|32px]] Added snowballs.}}
{{History||xbox=none|xbone=none|ps=1.90|switch=none|wiiu=none|[[File:Snowball JE3 BE3.png|32px]] The texture of snowballs has been changed.}}
{{History|3DS}}
{{History||0.1.0|[[File:Snowball JE1 BE1.png|32px]] Added snowballs.}}
{{History|foot}}
== Issues ==
{{issue list}}
== Trivia ==
* A thrown snowball faces the player in the first-person view, while it appears horizontally rotated in third-person view. This is the case for all throwable items ([[ender pearl]]s, [[egg]]s, snowballs, and all throwable [[potion]]s).
== References ==
{{reflist}}
== External Links ==
*[https://www.minecraft.net/en-us/article/taking-inventory--snowball Taking Inventory: Snowball] – Minecraft.net on August 3, 2019
{{Items}}
{{entities}}
[[Category:Combat]]
[[cs:Sněhová koule]]
[[de:Schneeball]]
[[es:Bola de nieve]]
[[fr:Boule de neige]]
[[hu:Hógolyó]]
[[ja:雪玉]]
[[ko:눈덩이]]
[[nl:Sneeuwbal]]
[[pl:Śnieżka]]
[[pt:Bola de neve]]
[[ru:Снежок]]
[[th:บอลหิมะ]]
[[uk:Сніжок]]
[[zh:雪球]]</li></ul> | 12w06a | When the player hits fire in creative, the block under the fire is no longer removed. | |||
1.4.2{{Extension DPL}}<ul><li>[[Cyan Dye|Cyan Dye]]<br/>{{Item
| image = Cyan Dye.png
| renewable = Yes
| stackable = Yes (64)
}}
'''Cyan dye''' is a [[Dyeing#Secondary|secondary dye color]].
== Obtaining ==
=== Crafting ===
{{Crafting
|head=1
|showdescription=1
|showname=0
|Blue Dye
|Green Dye
|Output=Cyan Dye,2
|type=Material
}}
{{Crafting
|Lapis Lazuli
|Green Dye
|Output=Cyan Dye,2
|description={{only|bedrock|education}}
|type=Material
}}
{{Crafting
|Pitcher Plant
|Output=Cyan Dye,2
|description=
|type=Material
|foot=1
}}
=== Trading ===
[[Wandering trader]]s sell 3 cyan dye for an [[emerald]].
== Usage ==
{{dye usage}}
=== Crafting ingredient ===
{{crafting usage|ignore=Banner|continue=1}}
{{banner crafting usage}}
=== Loom ingredient ===
{{Banner loom usage|Cyan Dye}}
=== Trading ===
{{IN|bedrock}}, journeyman-level shepherd villagers have 20% chance to buy 12 cyan dye for an emerald.
{{More info|java=1|Java UI does not use a specific trade slot, which results in a different chance to offer this trade.}}
== Data values ==
=== ID ===
{{edition|java}}:
{{ID table
|edition=java
|showforms=y
|generatetranslationkeys=y
|displayname=Cyan Dye
|spritetype=item
|nameid=cyan_dye
|form=item
|foot=1}}
{{edition|bedrock}}:
{{ID table
|edition=bedrock
|showaliasids=y
|shownumericids=y
|showforms=y
|notshowbeitemforms=y
|generatetranslationkeys=y
|displayname=Cyan Dye
|spritetype=item
|nameid=cyan_dye
|aliasid=dye / 6
|id=401
|form=item
|translationkey=item.dye.cyan.name
|foot=1}}
== History ==
{{History|java beta}}
{{History||1.2|[[File:Cyan Dye JE1 BE1.png|32px]] Added cyan dye.}}
{{History|java}}
{{History||1.4.2|snap=12w34a|Added the ability to [[Armor#Dyeing|dye]] leather [[armor]] and [[wolf]] collars.}}
{{History||1.4.6|snap=12w49a|Cyan dye can now be [[crafting|crafted]] with [[gunpowder]] to create a [[firework star]].}}
{{History||1.6.1|snap=13w19a|[[Stained clay]] can now be crafted.}}
{{history||1.7.2|snap=13w36a|With the addition of new [[flower]]s, many secondary and tertiary dyes are now primary [[dye]]s.}}
{{History|||snap=13w41a|[[Stained glass]] can now be crafted.}}
{{History||1.8|snap=14w02a|Due to [[lapis lazuli]] being [[renewable resource|renewable]], cyan dye is also renewable.}}
{{History|||snap=14w30a|Added [[banner]]s, which can be dyed.}}
{{History||1.13|snap=17w47a|The different data values for the <code>dye</code> ID have now been split up into their own IDs.
|Prior to [[1.13/Flattening|''The Flattening'']], this [[item]]'s numeral ID was 351.}}
{{History||1.14|snap=18w43a|Cyan dye is now [[crafting|crafted]] using [[blue dye]], instead of [[lapis lazuli]].
|[[File:Cyan Dye.png|32px]] The texture of cyan dye has now been changed.}}
{{History|||snap=18w44a|Cyan dye can now change the text color on [[sign]]s to cyan.}}
{{History|||snap=19w05a|Added the [[wandering trader]], which sell cyan dyes.}}
{{History|||snap=19w11a|Cyan dye can now be [[trading|bought]] by shepherd villagers.}}
{{History||1.17|snap=20w45a|Cyan dye can now be used to craft [[cyan candle]]s.}}
{{History|||snap=21w19a|Cyan dye can no longer be used to craft cyan candles.}}
{{History|||snap=Pre-release 1|Cyan dye can once again be used to craft cyan candles.}}
{{History||1.20<br>(Experimental)|link=1.19.3|snap=22w42a|Cyan dye can now change the text color on [[hanging sign]]s to cyan.}}
{{History||1.20|snap=23w12a|Added [[pitcher plant]]s, which can be crafted into cyan dye.}}
{{History|||snap=23w14a|[[Pitcher plant]]s now craft into 2 cyan dye instead of 1.}}
{{History|pocket alpha}}
{{History||v0.3.0|[[File:Cyan Dye JE1 BE1.png|32px]] Added cyan dye. It is currently unobtainable and serves no purpose.}}
{{History||v0.4.0|Cyan dye is now craftable with [[lapis lazuli]] and [[cactus green]].
|Cyan dye can now be used to craft cyan wool.}}
{{History||v0.6.0|Cyan dye can now be used to dye [[sheep]].}}
{{History||v0.9.0|snap=build 11|Cyan dye can now be used to craft colored [[terracotta]].}}
{{History||v0.11.0|snap=build 1|Cyan dye can now be used to dye tamed [[wolf]] collars.}}
{{History||v0.14.0|snap=build 1|Cyan dye can now be used to dye water in [[cauldron]]s.}}
{{History|pocket}}
{{History||1.0.0|snap=alpha 0.17.0.1|Cyan dye can now be used to dye [[shulker]]s.}}
{{History||1.1.0|snap=alpha 1.1.0.0|Cyan dye can now be used to craft [[concrete powder]], colored [[bed]]s and dyed [[shulker box]]es.}}
{{History|bedrock}}
{{History||1.2.0|snap=beta 1.2.0.2|Cyan dye can now be used to craft [[firework star]]s, [[stained glass]] and patterns on [[banner]]s.}}
{{History||1.4.0|snap=beta 1.2.20.1|Cyan dye can now be used to craft [[balloon|ballons]] and [[glow stick|glow sticks]].}}
{{History||1.8.0|snap=beta 1.8.0.8|Cyan dye can now be used to dye tamed [[cat]] collars.}}
{{History||1.10.0|snap=beta 1.10.0.3|Cyan dye are now [[trading|sold]] by [[wandering trader]]s.
|Cyan dye can now be used to dye white [[carpet|carpets]] and undyed [[glass pane]]s.
|[[File:Cyan Dye.png|32px]] The texture of cyan dye has now been changed.}}
{{History||1.11.0|snap=beta 1.11.0.4|Cyan dye can be [[trading|sold]] to shepherd [[villager]]s.}}
{{History||1.16.100|snap=beta 1.16.100.56|The ID of cyan dye has been changed from <code>dye/6</code> to <code>cyan_dye</code>.}}
{{History|console}}
{{History||xbox=TU1|xbone=CU1|ps=1.00|switch=1.0.1|wiiu=Patch 1|[[File:Cyan Dye JE1 BE1.png|32px]] Added cyan dye.}}
{{History|PS4}}
{{History||1.90|[[File:Cyan Dye.png|32px]] The texture of cyan dye has now been changed.}}
{{History|new 3ds}}
{{History||0.1.0|[[File:Cyan Dye JE1 BE1.png|32px]] Added cyan dye.}}
{{History|foot}}
== Issues ==
{{issue list}}
{{Items}}
[[Category:Items]]
[[Category:Dyes]]
[[Category:Renewable resources]]
[[cs:Azurové barvivo]]
[[de:Türkiser Farbstoff]]
[[es:Tinte cian]]
[[fr:Teinture cyan]]
[[hu:Ciánkék festék]]
[[ja:青緑色の染料]]
[[ko:청록색 염료]]
[[nl:Turquoise kleurstof]]
[[pl:Błękitny barwnik]]
[[pt:Corante ciano]]
[[ru:Бирюзовый краситель]]
[[zh:青色染料]]</li><li>[[Minecart with Hopper|Minecart with Hopper]]<br/>{{ItemEntity
|image=Minecart with Hopper.png
|renewable=Yes
|stackable=No
|size=Height: 0.7 Blocks<br>Width: 0.98 Blocks
|networkid='''[[JE]]''': 10
|drops=1 {{ItemLink|Minecart with Hopper}}<br>plus contents
|health={{hp|6}}
}}
A '''minecart with hopper''' is a [[minecart]] with a [[hopper]] inside. Unlike a normal hopper, it pulls items from containers much more quickly, cannot push items into containers, can collect [[Item (entity)|item entities]] through a single layer of [[solid block]]s and is locked and unlocked via [[Activator Rail|activator rails]].
== Obtaining ==
=== Crafting ===
{{Crafting
|Output= Minecart with Hopper
|type= Transportation
|Hopper|Minecart}}
Minecarts with hoppers can be retrieved by attacking them. By doing so it drop as an [[item (entity)|item]] and any other contents of the hopper are dropped as well.
== Usage ==
[[File:Minecart with Hopper GUI.png|thumb|176px|The GUI of a minecart with hopper.]]
Minecarts with hoppers are placed similarly to other [[minecart]]s.
A minecart with hopper pulls in items lying nearby (within a range slightly larger than the cart itself), or inside a container directly above the minecart, at a rate of 1 item every [[game tick]] (20 items per second), eight times as fast as a normal hopper. It also picks up items that are lying on a block directly above the track. It does not push items into containers, but a hopper underneath the track can remove items from a minecart with hopper on the track. Ordinary hoppers can also drop items into a minecart with hopper like other containers, at the normal speed of 2.5 items per second. In Bedrock Edition, a minecart with hopper on curved rail pulls in items in a hopper lying in front of its moving direction and 1 block above if hopper's output funnel is pointed downward and no block is below that hopper.<ref>{{bug|MCPE-94293}}</ref>
The hopper can be disabled by passing over a powered [[activator rail]], and can be reenabled by an inactive activator rail.
An empty minecart with hopper can travel more than 85 blocks without stopping (as opposed to a normal cart going less than 12 blocks) from a dead stop using a 2 powered track starter even with another cart in front of them. However, the distance traveled by a minecart with hopper depends on the hopper's load. Using a 1 powered rail starter track, a minecart with an empty hopper travels 64 blocks until it stops (as opposed to an empty normal minecart going 8 blocks). The distance traveled diminishes non-linearly with increased hopper load; a minecart with a full hopper can travel only 16 blocks in this setup.
{{See also|Tutorials/Storage minecarts}}
== Sounds ==
{{Edition|Java}}:<br>
Minecarts with hoppers use the Friendly Creatures sound category for entity-dependent sound events.<ref group=sound name=rollsource>{{bug|MC-42132}}</ref>
{{Sound table
|sound=Minecart rolling.ogg
|subtitle=Minecart rolls
|source=Friendly Creatures <ref group=sound name=rollsource/>
|overridesource=1
|description=While a minecart with hopper is moving
|id=entity.minecart.riding
|translationkey=subtitles.entity.minecart.riding
|volume=0.0-0.35 <ref group=sound>Relates linearly with horizontal velocity (max 0.5)</ref>
|pitch=0.0-1.0 <ref group=sound>Will increase by 0.0025 per tick if the minecart's horizontal velocity is more than 0.01</ref>
|distance=16
|foot=1}}
{{Edition|Bedrock}}:
{{Sound table
|type=bedrock
|sound=Minecart rolling.ogg
|source=neutral
|description=While a minecart with hopper is moving
|id=minecart.base
|foot=1}}
== Data values ==
=== ID ===
{{edition|java}}:
{{ID table
|edition=java
|firstcolumnname=Item
|showforms=y
|generatetranslationkeys=y
|displayname=Minecart with Hopper
|spritetype=item
|nameid=hopper_minecart
|form=item
|foot=1}}
{{ID table
|edition=java
|firstcolumnname=Entity
|generatetranslationkeys=y
|displayname=Minecart with Hopper
|spritetype=entity
|nameid=hopper_minecart
|foot=1}}
{{edition|bedrock}}:
{{ID table
|edition=bedrock
|firstcolumnname=Item
|shownumericids=y
|showforms=y
|notshowbeitemforms=y
|generatetranslationkeys=y
|displayname=Minecart with Hopper
|spritetype=item
|nameid=hopper_minecart
|id=526
|form=item
|foot=1}}
{{ID table
|edition=bedrock
|firstcolumnname=Entity
|shownumericids=y
|generatetranslationkeys=y
|displayname=Minecart with Hopper
|spritetype=entity
|nameid=hopper_minecart
|id=96
|foot=1}}
=== Entity data ===
Minecarts with hoppers have entity data associated with them that contain various properties of the entity.
{{el|java}}:
{{main|Entity format}}
{{/ED}}
{{el|bedrock}}:
: See [[Bedrock Edition level format/Entity format]].
== Video ==
<div style="text-align:center">{{yt|I5etC7LeCac}}</div>
== History ==
{{History|java}}
{{History||1.5|snap=13w03a|[[File:Minecart with Hopper JE1 BE1.png|32px]] [[File:Minecart with Hopper (item) JE1 BE1.png|32px]] Added minecart with hopper.}}
{{History||1.9|snap=15w43a|Loot tables are added; minecarts with hopper now can use loot tables.}}
{{History||1.9.1|snap=pre2|The title of the [[inventory]] is changed from 'Hopper minecart' to 'Minecart with Hopper'.}}
{{History||1.11|snap=16w32a|The entity ID of the minecart with hopper has now been changed from <code>MinecartHopper</code> to <code>hopper_minecart</code>.}}
{{History||1.13|snap=17w47a|Prior to [[1.13/Flattening|''The Flattening'']], this [[item]]'s numeral ID was 408.}}
{{History||1.14|snap=18w43a|[[File:Minecart with Hopper JE2 BE2.png|32px]] [[File:Minecart with Hopper (item) JE2 BE2.png|32px]] The textures of the minecart with hopper have now been changed.}}
{{History||1.15|snap=19w38a|[[File:Minecart with Hopper 19w38a.png|32px]] The hopper now appears dark, same as suffocating mobs.}}
{{History|||snap=19w39a|The hopper now renders correctly.}}
{{History||1.16.2|snap=Pre-release 1|Opening or destroying a minecart with hopper now angers nearby [[piglin]]s.}}
{{History||1.19|snap=22w13a|The crafting recipe for a minecart with hopper is now shapeless.|Breaking a minecart with hopper will now drop the item instead of the minecart and hopper separately, though the contents of the hopper are still dropped.<ref>{{bug|MC-249493|||Fixed}}</ref>}}
{{History||1.19.4|snap=23w06a|Minecart with hopper now no longer aggravates [[piglin]]s when opened.}}
{{History|pocket alpha}}
{{History||v0.14.0|snap=build 1|[[File:Minecart with Hopper JE1 BE1.png|32px]] [[File:Minecart with Hopper (item) JE1 BE1.png|32px]] Added minecart with hopper.}}
{{History|pocket}}
{{History||1.1.0|snap=alpha 1.1.0.0|The entity ID of the minecart with hopper has now been changed from <code>minecarthopper</code> to <code>hopper_minecart</code>.}}
{{History|bedrock}}
{{History||1.10.0|snap=beta 1.10.0.3|[[File:Minecart with Hopper JE2 BE2.png|32px]] [[File:Minecart with Hopper (item) JE2 BE2.png|32px]] The textures of the minecart with hopper have now been changed.}}
{{History||1.19.0|snap=beta 1.19.0.30|Breaking a minecart with hopper will now drop the item instead of the minecart and hopper separately, though the contents of the hopper are still dropped.}}
{{History|console}}
{{History||xbox=TU19|xbone=CU7|ps=1.12|wiiu=Patch 1|switch=1.0.1|[[File:Minecart with Hopper JE1 BE1.png|32px]] [[File:Minecart with Hopper (item) JE1 BE1.png|32px]] Added minecart with hopper.}}
{{History||xbox=none|xbone=none|ps=1.90|wiiu=none|switch=none|[[File:Minecart with Hopper JE2 BE2.png|32px]] [[File:Minecart with Hopper (item) JE2 BE2.png|32px]] The textures of the minecart with hopper have now been changed.}}
{{History|new 3ds}}
{{History||0.1.0|[[File:Minecart with Hopper JE1 BE1.png|32px]] [[File:Minecart with Hopper (item) JE1 BE1.png|32px]] Added minecart with hopper.
|Minecarts with hopper emit smoke [[particles]] when destroyed.}}
{{History|foot}}
== Issues ==
{{issue list}}
== Gallery ==
<gallery>
File:First hopper Minecart Image.png|The first image of hopper carts released by Dinnerbone.<ref>{{Tweet|Dinnerbone|291215700213772289|Well you guys got that quick. The letters in the hotbar were for <nowiki>[imgur link]|January 15, 2013}}</ref>
File:13w03a Banner.png|The 13w03a banner showing a minecart with hopper and a [[dropper]].
</gallery>
== References ==
{{reflist}}
{{items}}
{{entities}}
[[Category:Mechanics]]
[[Category:Storage]]
[[cs:Vozík s násypkou]]
[[de:Trichterlore]]
[[es:Vagoneta con tolva]]
[[fr:Wagonnet à entonnoir]]
[[hu:Tölcsér csille]]
[[it:Carrello da miniera]]
[[ja:ホッパー付きのトロッコ]]
[[ko:호퍼가 실린 광산 수레]]
[[nl:Mijnkar met trechter]]
[[pl:Wagonik z lejem]]
[[pt:Carrinho de mina com funil]]
[[ru:Вагонетка с воронкой]]
[[uk:Вагонетка з лійкою]]
[[zh:漏斗矿车]]</li></ul></nowiki> | 12w34a | Fire now spreads differently based on difficulty. | |||
| 12w40a | Firespread has been slightly nerfed again to prevent infinitely spreading fires. | ||||
1.5{{Extension DPL}}<ul><li>[[Item Frame|Item Frame]]<br/>{{redirect|Frame}}
{{ItemEntity
| group = Item Frame
| 1-1 = Item Frame.png
| 1-2 = Item Frame (item).png
| group2 = Glow Item Frame
| 2-1 = Glow Item Frame.png
| 2-2 = Glow Item Frame (item).png
| extratext = [[#Renders|View all renders]]
| renewable = Yes
| stackable = Yes (64)
| drops = {{ItemLink|Item Frame}} (1)<br>
or
{{ItemLink|Glow Item Frame}} (1)<br>{{EnvSprite|items}} The item it contains.
}}
An '''item frame''' is an [[entity]]{{only|java|short=y}} or [[block entity]]{{only|bedrock|short=y}} that displays the item or block that is inside it.
A '''glow item frame''' keeps itself and the item inside it illuminated, even in the dark.
== Obtaining ==
=== Breaking ===
{{IN|je}}, an empty item frame can be broken simply by punching it. If the item frame contains an item, punching it drops the item, leaving the frame on the wall.
Because item frames are [[entities]] {{in|java}}, they can be broken in [[Adventure]] mode. They will also be targeted by commands using the @e selector.{{only|java}}
=== Natural generation ===
An item frame containing a pair of [[elytra]] generates in each [[end ship]].
[[File:BoatElytra.png|thumb|An item frame naturally generating in an end ship.]]
=== Crafting ===
{{Crafting
|head=1
|A1= Stick |B1= Stick |C1= Stick
|A2= Stick |B2= Leather |C2= Stick
|A3= Stick |B3= Stick |C3= Stick
|Output= Item Frame
|type= Decoration block
}}
{{Crafting
|foot=1
|Glow Ink Sac
|Item Frame
|Output= Glow Item Frame
|type= Decoration block
}}
=== Trading ===
Expert-level [[Trading#Cartographer|cartographer]] [[villager]]s have a chance to sell an item frame for 7 [[emerald]]s.
== Usage ==
=== Item display ===
[[File:Item Frame (map filled partial).png|thumb|150px|Item frame with partially filled map]]
Item frames can be placed on the sides of [[cactus]] blocks, [[pressure plate]]s, [[fence]]s, [[tree]]s, [[slab]]s, [[cobblestone wall]]s, [[chest]]s, [[door]]s, and all [[solid block]]s. They can also be placed on the top and bottom of these blocks. To place on chests and doors, the player needs to be [[sneaking]]. As item frames are an entity, multiple item frames can occupy the same block, although on different faces. It also allows non-solid blocks to occupy the same space.{{only|java}}
Players can place items in the frame by {{control|using}} the item. If a [[map]] is placed in an item frame, it enlarges to show the map in the size of a full block, with the item frame's location displayed as a green pointer on the map, pointing in the direction the item frame is facing. If this is done in the Nether, the green cursor spins around similar to the white cursor (players). If an item in an item frame has been renamed using an [[anvil]], it displays its custom name when the cursor is over the item frame. If the player places a block inside the frame, it is displayed in miniature half in, half out of the block. This can be most notably seen on stairs or slabs.
{{control|Pick block}} may be used on item frames by players in creative mode only, the control has no effect for players in Survival or Adventure mode. When the item frame is displaying an item, {{control|pick block}} picks the displayed item instead of the item frame.
Item frames can be placed on the lid of a [[shulker box]] that is positioned horizontally, but pop off when the lid is opened.{{only|java}}
=== Rotation ===
The displayed item can then be rotated by right-clicking the frame. Items displayed in the item frame can turn 45° diagonally, with a total of 8 possibilities (90° and 4 possibilities if it is a map), and the frame outputs a [[Mechanics/Redstone/Circuit#Power level|redstone signal]] depending on the rotation phase that can be interpreted by a [[redstone comparator]] (note that this rotation value is separate from the clock or compass rotation). As long as the frame remains placed, it remembers the orientation of the last item it held, and uses it for the next item it holds.{{only|java}}
=== Glow item frames ===
[[File:Item Frames Comparison.png|thumb|260px|Comparison between ordinary item frame and glow item frame in the dark.]]
When an item is placed inside a glow item frame, it appears to glow, even though it does not emit any [[light level]].
== Sounds ==
Item frames and glow item frames share the same sounds.
=== Generic ===
{{Edition|Bedrock}}:<!--Item frames are blocks in BE, so they get the generic section.-->
{{Sound table/Block/Item frame/BE}}
=== Unique ===
{{Edition|Java}}:
{{Sound table
|rowspan=2
|sound=Item Frame add item1.ogg
|sound2=Item Frame add item2.ogg
|soumd3=Item Frame add item3.ogg
|sound4=Item Frame add item4.ogg
|subtitle=Item Frame fills
|source=neutral
|description=When an item is placed in an item frame
|id=entity.item_frame.add_item
|translationkey=subtitles.entity.item_frame.add_item
|volume=1.0
|pitch=1.0
|distance=16}}
{{Sound table
|subtitle=Glow Item Frame fills
|source=neutral
|description=When an item is placed in a glow item frame
|id=entity.glow_item_frame.add_item
|translationkey=subtitles.entity.glow_item_frame.add_item
|volume=1.0
|pitch=1.0
|distance=16}}
{{Sound table
|rowspan=2
|sound=Item Frame break1.ogg
|sound2=Item Frame break2.ogg
|sound3=Item Frame break3.ogg
|subtitle=Item Frame breaks<ref group=sound name=breaks>{{bug|MC-194948}}</ref>
|source=neutral
|description=When an item frame is broken or pops off
|id=entity.item_frame.break
|translationkey=subtitles.entity.item_frame.break
|volume=1.0
|pitch=1.0
|distance=16}}
{{Sound table
|subtitle=Glow Item Frame breaks<ref group=sound name=breaks/>
|source=neutral
|description=When a glow item frame is broken or pops off
|id=entity.glow_item_frame.break
|translationkey=subtitles.entity.glow_item_frame.break
|volume=1.0
|pitch=1.0
|distance=16}}
{{Sound table
|rowspan=2
|sound=Item Frame place1.ogg
|sound2=Item Frame place2.ogg
|sound3=Item Frame place3.ogg
|sound4=Item Frame place4.ogg
|subtitle=Item Frame placed
|source=neutral
|description=When an item frame is placed
|id=entity.item_frame.place
|translationkey=subtitles.entity.item_frame.place
|volume=1.0
|pitch=1.0
|distance=16}}
{{Sound table
|subtitle=Glow Item Frame placed
|source=neutral
|description=When a glow item frame is placed
|id=entity.glow_item_frame.place
|translationkey=subtitles.entity.glow_item_frame.place
|volume=1.0
|pitch=1.0
|distance=16}}
{{Sound table
|rowspan=2
|sound=Item Frame remove item1.ogg
|sound2=Item Frame remove item2.ogg
|sound3=Item Frame remove item3.ogg
|sound4=Item Frame remove item4.ogg
|subtitle=Item Frame empties
|source=neutral
|description=When an item is removed from an item frame
|id=entity.item_frame.remove_item
|translationkey=subtitles.entity.item_frame.remove_item
|volume=1.0
|pitch=1.0
|distance=16}}
{{Sound table
|subtitle=Glow Item Frame empties
|source=neutral
|description=When an item is removed from a glow item frame
|id=entity.glow_item_frame.remove_item
|translationkey=subtitles.entity.glow_item_frame.remove_item
|volume=1.0
|pitch=1.0
|distance=16}}
{{Sound table
|rowspan=2
|sound=Item Frame rotate item1.ogg
|sound2=Item Frame rotate item2.ogg
|sound3=Item Frame rotate item3.ogg
|sound4=Item Frame rotate item4.ogg
|subtitle=Item Frame clicks
|source=neutral
|description=When an item is rotated in an item frame
|id=entity.item_frame.rotate_item
|translationkey=subtitles.entity.item_frame.rotate_item
|volume=1.0
|pitch=1.0
|distance=16}}
{{Sound table
|subtitle=Glow Item Frame clicks
|source=neutral
|description=When an item is rotated in an item frame
|id=entity.glow_item_frame.rotate_item
|translationkey=subtitles.entity.glow_item_frame.rotate_item
|volume=1.0
|pitch=1.0
|distance=16
|foot=1}}
{{Edition|Bedrock}}:
{{Sound table
|type=bedrock
|sound=Item Frame add item1.ogg
|sound2=Item Frame add item2.ogg
|soumd3=Item Frame add item3.ogg
|sound4=Item Frame add item4.ogg
|source=block
|description=When an item is placed in an item frame
|id=block.itemframe.add_item
|volume=1.0
|pitch=1.0}}
{{Sound table
|sound=Item Frame remove item1.ogg
|sound2=Item Frame remove item2.ogg
|sound3=Item Frame remove item3.ogg
|sound4=Item Frame remove item4.ogg
|source=block
|description=When an item is removed from an item frame
|id=block.itemframe.remove_item
|volume=1.0
|pitch=1.0}}
{{Sound table
|sound=Item Frame rotate item1.ogg
|sound2=Item Frame rotate item2.ogg
|sound3=Item Frame rotate item3.ogg
|sound4=Item Frame rotate item4.ogg
|source=block
|description=When an item is rotated in an item frame
|id=block.itemframe.rotate_item
|volume=1.0
|pitch=1.0
|foot=1}}
== Achievements ==
{{load achievements|Map room}}
== Data values ==
=== ID ===
{{edition|java}}:
{{ID table
|edition=java
|firstcolumnname=Item
|showforms=y
|generatetranslationkeys=y
|displayname=Item Frame
|spritetype=item
|nameid=item_frame
|form=item}}
{{ID table
|displayname=Glow Item Frame
|spritetype=item
|nameid=glow_item_frame
|form=item
|foot=1}}
{{ID table
|edition=java
|firstcolumnname=Entity
|generatetranslationkeys=y
|displayname=Item Frame
|spritetype=entity
|nameid=item_frame}}
{{ID table
|displayname=Glow Item Frame
|spritetype=entity
|nameid=glow_item_frame
|foot=1}}
{{edition|bedrock}}:
{{ID table
|edition=bedrock
|firstcolumnname=Item Frame
|shownumericids=y
|showforms=y
|generatetranslationkeys=y
|displayname=Item
|spritename=item-frame
|spritetype=item
|nameid=frame
|id=513
|form=item}}
{{ID table
|displayname=Block
|spritename=item-frame
|spritetype=block
|nameid=frame
|id=199
|form=block
|translationkey=-
|itemform=item.frame}}
{{ID table
|displayname=Item
|spritename=glow-item-frame
|spritetype=item
|nameid=glow_frame
|id=623
|form=item}}
{{ID table
|displayname=Block
|spritename=glow-item-frame
|spritetype=block
|nameid=glow_frame
|form=block
|id=594
|itemform=item.glow_frame
|translationkey=-
|foot=1}}
{{ID table
|notnamespaced=y
|displayname=Block entity
|spritename=item-frame
|spritetype=block
|nameid=ItemFrame}}
{{ID table
|displayname=Block entity
|spritename=glow-item-frame
|spritetype=block
|nameid=GlowItemFrame
|foot=1}}
=== Block states===
{{see also|Block states}}
{{/BS}}<br />
===Item data===
{{el|java}}:{{main|Player.dat format}}<div class="treeview">
*{{nbt|compound|tag}}'''<span data-ve-ignore="true" class="nowrap"> tag</span>''': The item's '''tag''' tag.
{{:Player.dat_format/Entity Spawners}}Unlike spawn eggs, cannot change the type of entity created using the <code>id</code> tag. Data that item frames do not normally use (see below) has no effect.
</div>
===Entity data===
{{main|Entity format}}
{{IN|java}}, item frames have entity data that define various properties of the entity.
{{/ED}}
===Block data===
{{IN|bedrock}}, an item frame has a block entity associated with it that holds additional data about the block.
See [[Bedrock Edition level format/Block entity format]].
== Video==
<div style="text-align:center">{{yt|rJLj95DBb-w}}</div>
==History==
{{History|java}}
{{History||August 15, 2012|link={{tweet|Dinnerbone|235724805196877824}}|[[File:Item Frame (pre-release).png|32px]] [[Dinnerbone]] showed the first image of item frames.}}
{{History||August 15, 2012|link={{tweet|Dinnerbone|235742974271700993}}|[[File:Item Frame (item) (pre-release).png|32px]] Dinnerbone showed item frame in item form.}}
{{History||August 15, 2012|link={{tweet|jeb_|235746335368814592}}|[[File:Item Frame (pre-release 2).png|32px]] [[Jeb]] showed the item frames with new model.}}
{{History||August 16, 2012|link={{tweet|Dinnerbone|236062188555624448}}|[[File:Item Frame (item) JE1 BE1.png|32px]] Dinnerbone showed the item frame in item form with new texture.}}
{{History||1.4.2|snap=12w34a|[[File:Item Frame JE1 BE1.png|32px]] [[File:Item Frame (item) JE1 BE1.png|32px]] Added item frames.
|There is currently a bug where attempting to place an item frame in [[multiplayer]] causes an internal server error, as well as other bugs.}}
{{History|||snap=12w34b|The multiplayer item frame bug has been fixed.}}
{{History|||snap=12w38a|Item frames no longer despawn when the [[player]] moves 20 [[block]]s away.}}
{{History||1.7.2|snap=13w36a|Items renamed using an [[anvil]] now display their name when looked at up close.}}
{{History|||snap=13w38a|[[Map]]s placed in an item frame now cover the whole block face, allowing seamless tiling of adjacent maps. This makes undiscovered areas of maps invisible.}}
{{History|||snap=13w43a|[[File:Item Frame (map) JE1 BE1.png|32px]] Incomplete maps placed in item frames now display the item frame texture underneath.}}
{{History||1.8|snap=14w04a|[[Item]]s and [[block]]s displayed in the item frame now rotate 45 degrees when rotated instead of 90 degrees, and a [[comparator]] outputs a [[redstone]] signal depending on the rotation phase.}}
{{History|||snap=14w10a|Multiple item frames can no longer be placed on the same block face.}}
{{History||1.9|snap=15w41a|An item frame now generates in the treasure room of [[end ship]]s, above the [[shulker]] that guards the treasure. It holds [[elytra]].}}
{{History|||snap=15w49a|Item frames are no longer destroyed by [[lightning]] bolts.}}
{{History|||snap=15w50a|Added [[sound]]s to item frames: <code>entity.itemframe.add_item</code>, <code>entity.itemframe.break</code>, <code>entity.itemframe.place</code>, <code>entity.itemframe.remove_item</code>, and <code>entity.itemframe.rotate_item</code>.}}
{{History||1.11|snap=16w32a|The [[entity]] ID of item frames has been changed from <code>ItemFrame</code> to <code>item_frame</code>.}}
{{History||1.13|snap=17w47a|Prior to [[1.13/Flattening|''The Flattening'']], this [[item]]'s numeral ID was 389.}}
{{History|||snap=17w50a|Item frames can now be put on floors and ceilings.}}
{{History||1.14|snap=18w43a|[[File:Item Frame JE2 BE2.png|32px]] [[File:Item Frame (map) JE2 BE2.png|32px]] [[File:Item Frame (item) JE2 BE2.png|32px]] The textures of item frames have been changed.}}
{{History|||snap=19w11a|Item frames are now [[trading|sold]] by cartographer [[villager]]s.}}
{{History||1.15|snap=19w38a|[[File:Item Frame 19w38a.png|32px]] [[File:Item Frame Map 19w38a.png|32px]] Item frames now appear dark, same as suffocating [[mob]]s.<ref>{{bug|mc-161283|||Fixed}}</ref>}}
{{History|||snap=19w39a|Item frames are now colored correctly.}}
{{History||1.16|snap=20w10a|The NBT <code>Invisible</code> and <code>Fixed</code> have been added to item frames.}}
{{History||1.17|snap=21w03a|[[File:Glow Item Frame JE1 BE3.png|32px]] [[File:Glow Item Frame (map) JE1 BE3.png|32px]] [[File:Glow Item Frame (item) JE1 BE1.png|32px]] Added glow item frames.}}
{{History|||snap=21w10a|Added new [[subtitles]] for glow item frames.}}
{{History||1.18|snap=21w41a|[[File:Item Frame (item) JE3.png|32px]] [[File:Glow Item Frame (item) JE2.png|32px]] The textures of item frames and glow item frames as item have been changed.}}
{{History||1.19|snap=22w15a|Item frames now adjusts its hitbox to account for the larger size of a framed [[map]].}}
{{History|||snap=Pre-release 3|Reverted the change in 22w15a.}}
{{History|pocket alpha}}
{{History||v0.14.0|snap=build 1|[[File:Item Frame JE1 BE1.png|32px]] [[File:Item Frame (map) JE1 BE1.png|32px]] [[File:Item Frame (item) JE1 BE1.png|32px]] Added item frames.
|Item frames are considered as a [[block entity]] instead of an [[entity]].<ref>{{tweet|_tomcc|690127591525728257|Let's create some drama: ItemFrames in MCPE will behave like signs and won't be placeable in blocks, and can't put many in the same block.|21 Jan 2016}}</ref>}}
{{History|pocket}}
{{History||1.0.0|snap=alpha 0.17.0.1|An item frame containing [[elytra]] now generates in [[end city]] ships.}}
{{History|bedrock}}
{{History||1.10.0|snap=beta 1.10.0.3|[[File:Item Frame JE2 BE2.png|32px]] [[File:Item Frame (map) JE2 BE2.png|32px]] [[File:Item Frame (item) JE2 BE2.png|32px]] The textures of item frames have been changed.}}
{{History||1.11.0|snap=beta 1.11.0.4|Item frames can now be [[trading|bought]] from cartographer [[villager]]s.}}
{{History||1.13.0|snap=beta 1.13.0.9|Item frames can now be placed on the top and bottom of [[block]]s.}}
{{History||1.16.0|snap=beta 1.16.0.57|Trading has been changed, item frames are now offered by expert-level cartographer villager.}}
{{History||Caves & Cliffs (experimental)|link=Bedrock Edition 1.17.0|snap=beta 1.16.210.59|[[File:Item Frame.png|32px]] [[File:Item Frame (map) JE2 BE2.png|32px]] [[File:Glow Item Frame (item) JE1 BE1.png|32px]] Added glow item frames.
|Has the default item frame block texture.}}
{{History|||snap=beta 1.16.210.60|Temporarily removed glow item frames due to a crash.}}
{{History|||snap=beta 1.16.220.50|[[File:Item Frame JE2 BE2.png|32px]] [[File:Item Frame (map) JE2 BE2.png|32px]] [[File:Glow Item Frame (item) JE1 BE1.png|32px]] Re-added glow item frames.}}
{{History|||snap=beta 1.16.220.52|[[File:Glow Item Frame BE2.png|32px]] [[File:Glow Item Frame (map) BE2.png|32px]] Glow Item Frame block texture uses update block texture due to a bug.}}
{{History||1.17.0|snap=beta 1.16.230.52|[[File:Item Frame.png|32px]] [[File:Item Frame (map) JE2 BE2.png|32px]] The glow item frame block textures have been reverted back to the previous one.}}
{{History|||snap=beta 1.17.0.50|[[File:Glow Item Frame JE1 BE3.png|32px]] [[File:Glow Item Frame (map) JE1 BE3.png|32px]] The textures of glow item frames have been changed to match Java Edition.
|Now produces [[redstone]] signals.}}
{{History|||snap=beta 1.17.0.52|Maps now glow in glow item frames.
|Glow Item Frames are no longer available only through [[Experimental Gameplay]].}}
{{History||1.18.10|snap=beta 1.18.10.20|[[File:Item Frame (item) JE3.png|32px]] [[File:Glow Item Frame (item) JE2.png|32px]] The textures of item frames and glow item frames as item have been changed.}}
{{History|console}}
{{History||xbox=TU9|xbone=CU1|ps=1.0|wiiu=Patch 1|switch=1.0.1|[[File:Item Frame LCE1.png|32px]] [[File:Item Frame (item) JE1 BE1.png|32px]] Added item frames.}}
{{History||xbox=TU11|The limit for item frames in a world has been increased. A message is now displayed when the maximum number of item frames are reached.}}
{{History||xbox=TU12|[[File:Item Frame JE1 BE1.png|32px]] The entity texture of item frames has been changed.}}
{{History||xbox=TU31|xbone=CU19|ps=1.22|wiiu=Patch 3|[[Item]]s and [[block]]s displayed in the item frame now rotate 45 degrees when rotated instead of 90 degrees, and a [[redstone comparator|comparator]] now outputs a [[redstone]] signal depending on the rotation phase.}}
{{History||xbox=TU43|xbone=CU33|ps=1.36|wiiu=Patch 13|Added [[sound]]s for item frames.}}
{{History||xbox=TU56|xbone=CU47|ps=1.55|wiiu=Patch 26|switch=1.0.6|If the [[item]] in the item frame has a name (from an [[anvil]]) it now shows as if there is a name tag on the item frame.}}
{{History||xbox=none|xbone=none|ps=1.90|wiiu=none|switch=none|[[File:Item Frame JE2 BE2.png|32px]] [[File:Item Frame (map) JE2 BE2.png|32px]] [[File:Item Frame (item) JE2 BE2.png|32px]] The textures of item frames have been changed.}}
{{History|new 3ds}}
{{History||0.1.0|[[File:Item Frame JE1 BE1.png|32px]] [[File:Item Frame (map) JE1 BE1.png|32px]] [[File:Item Frame (item) JE1 BE1.png|32px]] Added item frames.}}
{{History|foot}}
== Issues==
{{issue list}}
== Trivia==
*The item frame is based upon a suggestion on [[wikipedia:Reddit|Reddit]], like the [[ender chest]] and [[flower pot]].<ref>{{Tweet|dinnerbone|235747041286975488}}</ref>
*The item frame is the only entity to reference a block [[model]].{{only|java|short=1}} Because of this, the texture of the frame border is the same as the birch planks texture.
*Item frame is the '''only''' placeable item that can interfere with other non-full block entities.
*Due to the way layer textures are displayed in Minecraft, maps float on item frames, similar to how icons float on the map itself.
== Gallery ==
=== Renders ===
<gallery>
Item Frame.png | Item Frame
Item Frame (map).png | Map Item Frame
Glow Item Frame.png | Glow Item Frame
Glow Item Frame (map).png | Map Glow Item Frame
Item Frame with Item.png | With item
Item Frame with rotated Item.png | With rotated item
Item Frame with Block.png | With block
Item Frame with rotated Block.png | With rotated block
</gallery>
=== Screenshots ===
<gallery>
Slab Frame.png|An item frame on the side of a slab.
ItemFrameBoxed.png|Four item frames in a one-block space.{{only|java}}
Item Frames Woodbase.png|The frame itself uses the texture of birch planks.
Item Frame rotation.gif|The rotation of an item in an item frame.
Front-back-itemframe.png|The front and back of an item frame are the same.
Big skills right there.png|A glow item frame inside a glow item frame.
Frame fireplace.png|An image of a fireplace retweeted by Dinnerbone.
11 Framed.png|[[11]] in an item frame.
</gallery>
=== Development images ===
<gallery>
Suggestion for itemframes.png|Original Reddit image suggesting item frames and flower pots.
Item frame2.png|Dinnerbone's first screenshot showing armor and weapons.
Item frame3.png|Dinnerbone's second screenshot showing a map, a compass, and two diamond swords.
Item frame4.png|Dinnerbone's third screenshot showing a golden sword in all directions, the item frame item itself, and a working clock.
Item frame1.png|Jeb's screenshot of the item frame.
FlowerPot.png|Snapshot showing plant pots and item frames.
Item frame5.png|Snapshot image of an ender pearl in an item frame.
SOATPC.png|An image tweeted by Dinnerbone showing how hovering over an item frame containing a renamed item shows a name tag.
Pocket Edition Item Frames.jpg|First image of item frames in ''Bedrock Edition''.
</gallery>
== See also ==
*{{ItemLink|Painting}}
== References ==
{{Reflist}}
{{Blocks|Utility}}
{{items}}
{{entities}}
[[Category:Block entities]]
[[Category:Utility blocks]]
[[Category:Manufactured blocks]]
[[Category:Generated structure blocks]]
[[Category:Storage]]
[[cs:Rámeček]]
[[de:Rahmen]]
[[es:Marco]]
[[fr:Cadre]]
[[hu:Eszköz keret]]
[[it:Cornice]]
[[ja:額縁]]
[[ko:아이템 액자]]
[[nl:Voorwerplijst]]
[[pl:Ramka na przedmiot]]
[[pt:Moldura]]
[[ru:Рамка]]
[[th:กรอบโชว์สิ่งของ]]
[[zh:物品展示框]]</li><li>[[Spider Eye|Spider Eye]]<br/>{{Item
| title = Spider Eye
| image = Spider Eye.png
| renewable = Yes
| heals = {{Hunger|2}}
|effects={{EffectLink|Poison}} (0:05)
| stackable = Yes (64)
}}
A '''spider eye''' is a poisonous [[food]] and [[brewing]] item.
== Obtaining ==
=== Mob loot ===
==== Spiders ====
[[Spider]]s and [[cave spider]]s have a {{frac|1|3}} chance of dropping a [[spider eye]] when killed by a player or tamed wolf, but not when killed by environmental damage (such as falling). The maximum amount of spider eyes is increased by 1 per level of [[Looting]]. The chance of a spider '''not''' dropping any spider eyes can be found using the formula <code>2 / (Looting Level + 3)</code>. For example, Looting III gives a {{frac|1|3}} chance of not dropping any spider eyes. All other amounts have an equal chance of occurring.
==== Witches ====
[[Witch]]es have a chance of dropping 0–6 spider eyes upon death. This is increased by 3 per level of [[Looting]], for a maximum of 0-15 spider eyes.
=== Chest loot ===
{{LootChestItem|spider-eye}}
== Usage ==
=== Food ===
When [[Food|eaten]], a spider eye restores {{hunger|2}} [[Hunger|hunger points]] and 3.2 [[Hunger#Mechanics|saturation points]], giving a nourishment value of 1.6. It also applies a [[Poison]] [[effect]] lasting 5 seconds to the player, causing {{hp|4|poisoned=1}} damage, which reduces hunger/saturation by 6 points.
=== Crafting ingredient ===
{{crafting usage}}
=== Brewing ingredient ===
{{brewing
|showname=1
|head=1
|Spider Eye
|Mundane Potion
|base=Water Bottle
}}
{{brewing
|foot=1
|Spider Eye
|Potion of Poison
}}
==Sounds==
{{Sound table/Entity/Food}}
== Data values ==
=== ID ===
{{edition|java}}:
{{ID table
|edition=java
|showforms=y
|generatetranslationkeys=y
|displayname=Spider Eye
|spritetype=item
|nameid=spider_eye
|form=item
|foot=1}}
{{edition|bedrock}}:
{{ID table
|edition=bedrock
|shownumericids=y
|showforms=y
|notshowbeitemforms=y
|generatetranslationkeys=y
|displayname=Spider Eye
|spritetype=item
|nameid=spider_eye
|id=278
|form=item
|foot=1}}
== Advancements ==
{{load advancements|Husbandry;A Balanced Diet}}
== Video ==
<div style="text-align:center">{{yt|-PD-wX07TCg}}</div>
== History ==
{{History|java}}
{{History||1.0.0|snap=Beta 1.9 Prerelease 2|[[File:Spider Eye JE1 BE1.png|32px]] Added spider eyes.
|Spider eyes can be used to craft [[fermented spider eye]]s.}}
{{History|||snap=Beta 1.9 Prerelease 3|Spider eyes can now be [[brewing|brewed]] in a [[water bottle]] to create a [[Mundane Potion]], or in an [[Awkward Potion]] to create a [[Potion of Poison]].}}
{{History||1.4.2|snap=12w38b|Spider eyes can now be dropped by [[witch]]es.}}
{{History||1.9|snap=15w44a|Spider eyes can now be found in [[desert pyramid|desert temple]] [[chest]]s.}}
{{History||1.13|snap=17w47a|Prior to [[1.13/Flattening|''The Flattening'']], this [[item]]'s numeral ID was 375.}}
{{History||1.14|snap=18w43a|[[File:Spider Eye JE2 BE2.png|32px]] The texture of spider eyes has been changed.}}
{{History|pocket alpha}}
{{History||v0.12.1|snap=build 1|[[File:Spider Eye JE1 BE1.png|32px]] Added spider eyes.|Spider eyes can be used to craft [[fermented spider eye]]s and for [[brewing]].}}
{{History||v0.13.0|snap=build 1|Spider eyes can now be found in [[desert pyramid|desert temple]] [[chest]]s.}}
{{History||v0.14.0|snap=build 1|Spider eyes can now dropped by [[witch]]es.}}
{{History|bedrock}}
{{History||1.10.0|snap=beta 1.10.0.3|[[File:Spider Eye JE2 BE2.png|32px]] The texture of spider eyes has been changed.}}
{{History|console}}
{{History||xbox=TU7|xbone=CU1|ps=1.0|wiiu=Patch 1|[[File:Spider Eye JE1 BE1.png|32px]] Added spider eyes.}}
{{History||xbox=none|xbone=none|ps=1.90|wiiu=none|[[File:Spider Eye JE2 BE2.png|32px]] The texture of spider eyes has been changed.}}
{{History|New 3DS}}
{{History||0.1.0|[[File:Spider Eye JE1 BE1.png|32px]] Added spider eyes.}}
{{History|foot}}
== Issues ==
{{issue list}}
== References ==
{{reflist}}
{{items}}
[[cs:Pavoučí oko]]
[[de:Spinnenauge]]
[[es:Ojo de araña]]
[[fr:Œil d'araignée]]
[[hu:Pókszem]]
[[it:Occhio di ragno]]
[[ja:クモの目]]
[[ko:거미 눈]]
[[nl:Spinnenoog]]
[[pl:Oko pająka]]
[[pt:Olho de aranha]]
[[ru:Паучий глаз]]
[[zh:蜘蛛眼]]
[[Category:Food]]
[[Category:Renewable resources]]
[[Category:Brewing recipe]]</li></ul> | 13w02a | The texture of fire is now accessible. Before, the texture was hidden in the code and not accessible by any normal bases. | |||
| Following texture storage reforms, the usually-unobtainable fire block now appears completely invisible as an item. | |||||
| 13w02b | Fire is now visible as an item again. | ||||
| ? | Mobs such as zombie pigmen no longer appear to be on fire in cases where mobs susceptible to fire would be. | ||||
1.8{{Extension DPL}}<ul><li>[[Brush|Brush]]<br/>{{Item
|image=Brush.png
|rarity=Common
|renewable=Yes
|durability=64
|stackable=No
}}
A '''brush''' is a [[tool]] used in [[archaeology]] to excavate [[suspicious block]]s for different items.
==Obtaining==
===Crafting===
{{Crafting
|head=1
|showname=0
|showdescription=1
|B1=Feather
|B2=Copper Ingot
|B3=Stick
|Output=Brush
|type=Tool
}}
{{crafting
|foot=1
|ignoreusage=1
|Damaged Brush
|Damaged Brush
|Output=Brush
|description=The durability of the two brushes is added together, plus an extra 5% durability.
|type=Tool
}}
==Usage==
{{Main|Suspicious Block}}
{{Control|Using}} the brush on any block displays a brushing animation, slowing down the player and creating breaking [[particles]], but not actually damaging the block or brush. When continuously brushing a [[suspicious block]], a random item slowly emerges from it until it drops out, and the block turns into regular [[sand]] or regular [[gravel]], depleting 1 [[durability]] point on the brush. It takes 96 [[game tick]]s (4.8 seconds) to brush a single suspicious block.
=== Enchantments ===
A brush can receive the following [[enchantment]]s:
{|class="wikitable col-2-center col-3-right"
|+
!Name
!Max Level
![[Enchanting|Method]]
|-
|[[Unbreaking]]
|III
|{{Inventory slot|Anvil}}
|-
|[[Mending]]
|I
|{{Inventory slot|Anvil}}
|-
|[[Curse of Vanishing]]
|I
|{{Inventory slot|Anvil}}
|}
== Sounds ==
{{Edition|Java}}:
{{Sound table
<!--All of these sounds are, in fact, different-->
|sound=Brushing sand1.ogg
|sound2=Brushing sand2.ogg
|sound3=Brushing sand3.ogg
|sound4=Brushing sand4.ogg
|subtitle=Brushing Sand
|source=block
|description=While a brush is brushing suspicious sand
|id=item.brush.brushing.sand
|translationkey=subtitles.item.brush.brushing.sand
|volume=0.6
|pitch=0.6
|distance=16}}
{{Sound table
|sound=Brushing gravel1.ogg
|sound2=Brushing gravel2.ogg
|sound3=Brushing gravel3.ogg
|sound4=Brushing gravel4.ogg
|subtitle=Brushing Gravel
|source=block
|description=While a brush is brushing suspicious gravel
|id=item.brush.brushing.gravel
|translationkey=subtitles.item.brush.brushing.gravel
|volume=0.6
|pitch=0.6
|distance=16}}
{{Sound table
|sound=Brushing generic1.ogg
|sound2=Brushing generic2.ogg
|sound3=Brushing generic3.ogg
|sound4=Brushing generic4.ogg
|subtitle=Brushing
|source=block
|description=While a brush is brushing any other block
|id=item.brush.brushing.generic
|translationkey=subtitles.item.brush.brushing.generic
|volume=0.6
|pitch=0.6
|distance=16}}
{{Sound table
|sound=Brushing sand completed1.ogg
|sound2=Brushing sand completed2.ogg
|sound3=Brushing sand completed3.ogg
|sound4=Brushing sand completed4.ogg
|sound5=Brushing sand completed5.ogg
|subtitle=Brushing Sand completed
|source=Players<ref group=sound name=badsource>{{Bug|MC-260202}}</ref>|overridesource=1
|description=When a brush finishes brushing suspicious sand
|id=item.brush.brushing.sand.complete
|translationkey=subtitles.item.brush.brushing.sand.complete
|volume=1.0
|pitch=1.0
|distance=16}}
{{Sound table
|sound=Brushing gravel completed1.ogg
|sound2=Brushing gravel completed2.ogg
|sound3=Brushing gravel completed3.ogg
|sound4=Brushing gravel completed4.ogg
|subtitle=Brushing Gravel completed
|source=Players<ref group=sound name=badsource/>|overridesource=1
|description=When a brush finishes brushing suspicious gravel
|id=item.brush.brushing.gravel.complete
|translationkey=subtitles.item.brush.brushing.gravel.complete
|volume=1.0
|pitch=1.0
|distance=16
|foot=1}}
{{Edition|Bedrock}}:
{{Sound table
|type=bedrock
|sound=Brushing sand1.ogg
|sound2=Brushing sand2.ogg
|sound3=Brushing sand3.ogg
|sound4=Brushing sand4.ogg
|source=player
|description=While a brush is brushing suspicious sand
|id=brush.suspicious_sand
|volume=1.0
|pitch=0.8-1.0}}
{{Sound table
|sound=Brushing gravel1.ogg
|sound2=Brushing gravel2.ogg
|sound3=Brushing gravel3.ogg
|sound4=Brushing gravel4.ogg
|source=player
|description=While a brush is brushing suspicious gravel
|id=brush.suspicious_gravel
|volume=1.0
|pitch=0.8-1.0}}
{{Sound table
|sound=Brushing generic1.ogg
|sound2=Brushing generic2.ogg
|sound3=Brushing generic3.ogg
|sound4=Brushing generic4.ogg
|source=player
|description=While a brush is brushing any other block
|id=brush.generic
|volume=1.0
|pitch=0.8-1.0}}
{{Sound table
|sound=Brushing sand completed1.ogg
|sound2=Brushing sand completed2.ogg
|sound3=Brushing sand completed3.ogg
|sound4=Brushing sand completed4.ogg
|sound5=Brushing sand completed5.ogg
|source=player
|description=When a brush finishes brushing suspicious sand
|id=brush_completed.suspicious_sand
|volume=1.0
|pitch=0.8-1.0}}
{{Sound table
|sound=Brushing gravel completed1.ogg
|sound2=Brushing gravel completed2.ogg
|sound3=Brushing gravel completed3.ogg
|sound4=Brushing gravel completed4.ogg
|source=player
|description=When a brush finishes brushing suspicious gravel
|id=brush_completed.suspicious_gravel
|volume=1.0
|pitch=0.8-1.0
|foot=1}}
== Data values ==
=== ID ===
{{edition|java}}:
{{ID table
|edition=java
|showforms=y
|generatetranslationkeys=y
|displayname=Brush
|spritetype=item
|nameid=brush
|form=item
|foot=1}}
{{edition|bedrock}}:
{{ID table
|edition=bedrock
|shownumericids=y
|showforms=y
|notshowbeitemforms=y
|generatetranslationkeys=y
|displayname=Brush
|spritetype=item
|nameid=brush
|id=684
|form=item
|foot=1}}
== Advancements ==
{{load advancements|Respecting the Remnants}}
== History ==
{{History||October 3, 2020|link=https://youtu.be/DBvZ2Iqmm3M?t=2178|[[File:Brush (pre-release 1).png|32px]][[File:Brush 2.png|32px]] Brushes were announced at [[Minecraft Live 2020]] with two variants.}}
{{History||?|link=https://youtu.be/klP9SrJFDU8?t=206|[[File:Brush (pre-release 2).png|32px]] Changed the brush's item texture.}}
{{History||February 10, 2023|[[File:Brush JE1 BE1.png|32px]] [[Sofia Dankis]] posted an article about upcoming archaeology features, including brushes.|link=https://www.minecraft.net/en-us/article/archeology-coming-minecraft-120}}
{{History|java}}
{{History||1.20<br>(Experimental)|link=1.19.4|snap=23w07a|[[File:Brush JE1 BE1.png|32px]] Added brushes with an updated texture behind the [[Java Edition 1.20|Update 1.20 experimental datapack]].|The crafting recipe was originally three [[string]] and two [[stick]]s.
{{{!}} class{{=}}"collapsible collapsed" data-description{{=}}"Recipe"
! Recipe
{{!}}-
{{!}}{{Crafting Table
|A1 = String
|B1 = String
|C1 = String
|B2 = Stick
|B3 = Stick
|Output = Brush
|type = Tool
|ignoreusage=1}}
{{!}}}
}}
{{History|||snap=1.19.4 Pre-release 1|The crafting recipe for brushes has been changed:
{{{!}} class{{=}}"collapsible collapsed" data-description{{=}}"Recipe"
! Recipe
{{!}}-
{{!}}{{Crafting Table
|B1 = Feather
|B2 = Copper Ingot
|B3 = Stick
|Output = Brush
|type = Tool
|ignoreusage=1}}
{{!}}}
}}
{{History||1.20|snap=23w12a|Brushes are now available without using the "Update 1.20" experimental data pack.
|Brushes can now brush [[suspicious gravel]].}}
{{History|||snap=23w14a|The brushing sound of brush is now controlled by the "Blocks" sound slider instead of the "Players" sound slider.}}
{{History|||snap=23w17a|The player now gets the [[advancement]] "Respecting the Remnants" when they use a brush on a [[suspicious block]] to obtain a [[pottery sherd]].}}
{{History|bedrock}}
{{History||Next Major Update<br>(Experimental)|link=Bedrock Edition 1.19.70|snap=beta 1.19.70.23|[[File:Brush JE1 BE1.png|32px]] Added brushes behind the "[[Bedrock Edition 1.20.0|Next Major Update]]" [[experimental]] toggle.
|The crafting recipe is originally three [[string]] and two [[stick]]s.
{{{!}} class{{=}}"collapsible collapsed" data-description{{=}}"Recipe"
! Recipe
{{!}}-
{{!}}{{Crafting Table
|A1 = String
|B1 = String
|C1 = String
|B2 = Stick
|B3 = Stick
|Output = Brush
|type = Tool
|ignoreusage=1}}
{{!}}}
}}
{{History||Next Major Update<br>(Experimental)|link=Bedrock Edition 1.19.80|snap=beta 1.19.80.20|The crafting recipe for brushes has been changed:
{{{!}} class{{=}}"collapsible collapsed" data-description{{=}}"Recipe"
! Recipe
{{!}}-
{{!}}{{Crafting Table
|B1 = Feather
|B2 = Copper Ingot
|B3 = Stick
|Output = Brush
|type = Tool
|ignoreusage=1}}
{{!}}}
}}
{{History||1.20.0|snap=beta 1.20.0.21|Brushes are now available without using the "Next Major Update" experimental toggle.}}
{{History|foot}}
== Issues ==
{{Issue list}}
== References ==
{{Reflist}}
==External Links==
*[https://www.minecraft.net/en-us/article/brush Taking Inventory: Brush] – Minecraft.net on July 6, 2023
{{Items}}
[[Category:Renewable resources]]
[[de:Pinsel]]
[[es:Pincel]]
[[ja:ブラシ]]
[[pt:Pincel]]
[[pl:Pędzel]]
[[uk:Щітка]]
[[zh:刷子]]</li><li>[[Pink Dye|Pink Dye]]<br/>{{Item
| image = Pink Dye.png
| renewable = Yes
| stackable = Yes (64)
}}
'''Pink dye''' is a [[Dyeing#Quasi-Primary|quasi-primary color dye]].
== Obtaining ==
=== Crafting ===
{{Crafting
|head=1
|showname=0
|showdescription=1
|Peony;Pink Tulip;Pink Petals
|Output=Pink Dye,2;Pink Dye;Pink Dye
|type=Material
}}
{{Crafting
|Red Dye
|White Dye
|Output=Pink Dye,2
|type=Material
}}
{{Crafting
|Red Dye
|Bone Meal
|Output=Pink Dye,2
|type=Material
|foot=1
|description={{only|bedrock|education}}
}}
=== Trading ===
[[Wandering trader]]s sell 3 pink dye for an [[emerald]].
== Usage ==
{{dye usage}}
=== Crafting ingredient ===
{{crafting usage|ignore=Banner|continue=1}}
{{banner crafting usage}}
=== Loom ingredient ===
{{Banner loom usage|Pink Dye}}
== Data values ==
=== ID ===
{{edition|java}}:
{{ID table
|edition=java
|showforms=y
|generatetranslationkeys=y
|displayname=Pink Dye
|spritetype=item
|nameid=pink_dye
|form=item
|foot=1}}
{{edition|bedrock}}:
{{ID table
|edition=bedrock
|showaliasids=y
|shownumericids=y
|showforms=y
|notshowbeitemforms=y
|generatetranslationkeys=y
|displayname=Pink Dye
|spritetype=item
|nameid=pink_dye
|aliasid=dye / 9
|id=404
|form=item
|translationkey=item.dye.pink.name
|foot=1}}
== Video ==
{{yt|pPq-Hs9ZPx4}}
== History ==
{{History|java beta}}
{{History||1.2|[[File:Pink Dye JE1 BE1.png|32px]] Added pink dye.}}
{{History|java}}
{{History||1.4.2|snap=12w34a|Added the ability to [[Armor#Dyeing|dye]] leather [[armor]] and [[wolf]] collars.}}
{{History||1.4.6|snap=12w49a|Pink dye can now be [[crafting|crafted]] with [[gunpowder]] to create a [[firework star]].}}
{{History||1.6.1|snap=13w19a|[[Stained clay]] can now be crafted.}}
{{history||1.7.2|snap=13w36a|With the addition of new [[flower]]s, many secondary and tertiary dyes are now primary [[dye]]s.}}
{{History|||snap=13w41a|[[Stained glass]] can now be crafted.}}
{{History||1.8|snap=14w30a|Added [[banner]]s, which can be dyed.}}
{{History||1.11|snap=16w39a|Added the ability to dye [[shulker box]]es.}}
{{History||1.12|snap=17w15a|Added the ability to dye [[bed]]s.}}
{{History||1.13|snap=17w47a|The different data values for the <code>dye</code> ID have now been split up into their own IDs.
|Prior to [[1.13/Flattening|''The Flattening'']], this [[item]]'s numeral ID was 351.}}
{{History||1.14|snap=18w43a|Pink dye is now crafted using [[white dye]], instead of [[bone meal]].
|[[File:Pink Dye JE2 BE2.png|32px]] The texture of pink dye has now been changed.}}
{{History|||snap=18w44a|Pink dye can now change the text color on [[sign]]s to pink.}}
{{History|||snap=19w05a|Added the [[wandering trader]], which sells pink dye.}}
{{History|||snap=19w11a|Pink dye can now be [[trading|bought]] by shepherd villagers.}}
{{History||1.17|snap=20w45a|Pink dye can now be used to craft [[pink candle]]s.}}
{{History|||snap=21w19a|Pink dye can no longer be used to craft pink candles.}}
{{History|||snap=Pre-release 1|Pink dye can now once again be used to craft pink candles.}}
{{History||1.20<br>(Experimental)|link=1.19.3|snap=22w42a|Pink dye can now change the text color on [[hanging sign]]s to pink.}}
{{History||1.20<br>(Experimental)|link=1.19.4|snap=23w07a|[[Pink petals]] can now be crafted into pink dye.}}
{{History|pocket alpha}}
{{History||v0.3.0|[[File:Pink Dye JE1 BE1.png|32px]] Added pink dye.}}
{{History||v0.4.0|Pink dye is now craftable with [[rose red]] and [[bone meal]].
|Pink dye can now be used to craft pink wool.}}
{{History||v0.6.0|Pink dye can now be used to dye [[sheep]].}}
{{History||v0.8.0|snap=build 1|Pink dye can now be used to craft [[magenta dye]].}}
{{History||v0.9.0|snap=build 11|Pink dye can now be used to craft colored [[terracotta]].}}
{{History||v0.11.0|snap=build 1|Pink dye can now be used to dye tamed [[wolf]] collars.}}
{{History||v0.14.0|snap=build 1|Pink dye can now be used to dye [[water]] in [[cauldron]]s.}}
{{History|pocket}}
{{History||1.0.0|snap=alpha 0.17.0.1|Pink dye can now be used to dye [[shulker]]s.}}
{{History||1.1.0|snap=alpha 1.1.0.0|Pink dye can now be used to craft [[concrete powder]], colored [[bed]]s and dyed [[shulker box]]es.}}
{{History|bedrock}}
{{History||1.2.0|snap=beta 1.2.0.2|Pink dye can now be used to craft [[firework star]]s, [[stained glass]] and patterns on [[banner]]s.}}
{{History||1.4.0|snap=beta 1.2.20.1|Pink dye can now be used to craft [[balloon]]s and [[glow stick]]s.}}
{{History||1.8.0|snap=beta 1.8.0.8|Pink dye can now be used to dye tamed [[cat]] collars.}}
{{History||1.10.0|snap=beta 1.10.0.3|Pink dye is now [[trading|sold]] by [[wandering trader]]s.
|Pink dye can now be used to dye white [[carpet]]s and undyed [[glass pane]]s.
|[[File:Pink Dye JE2 BE2.png|32px]] The texture of pink dye has now been changed.}}
{{History||1.16.100|snap=beta 1.16.100.56|The ID of pink dye has been changed from <code>dye/9</code> to <code>pink_dye</code>.}}
{{History|console}}
{{History||xbox=TU1|xbone=CU1|ps=1.00|switch=1.0.1|wiiu=Patch 1|[[File:Pink Dye JE1 BE1.png|32px]] Added pink dye.}}
{{History|PS4}}
{{History||1.90|[[File:Pink Dye JE2 BE2.png|32px]] The texture of pink dye has now been changed.}}
{{History|new 3ds}}
{{History||0.1.0|[[File:Pink Dye JE1 BE1.png|32px]] Added pink dye.}}
{{History|foot}}
== Issues ==
{{issue list}}
{{Items}}
[[Category:Dyes]]
[[cs:Růžové barvivo]]
[[de:Rosa Farbstoff]]
[[es:Tinte rosa]]
[[fr:Teinture rose]]
[[hu:Rózsaszín festék]]
[[ja:桃色の染料]]
[[ko:분홍색 염료]]
[[nl:Roze kleurstof]]
[[pl:Różowy barwnik]]
[[pt:Corante rosa]]
[[ru:Розовый краситель]]
[[zh:粉红色染料]]
[[Category:Renewable resources]]</li></ul> | 14w25a | The model of fire has been changed slightly (the sides are no longer rotated). | |||
| The block form of fire (ID 51) has been removed. It can no longer exist in inventories, only as a block in the world. | |||||
| With the removal of the block form of fire, chain armor is no longer craftable. | |||||
1.9{{Extension DPL}}<ul><li>[[Bucket|Bucket]]<br/>{{about|the empty bucket|buckets filled with objects}}
{{Item
| image = Bucket.png
| renewable = Yes
| stackable = Yes (16), except in furnace fuel slot
}}
A '''bucket''' is an item used to carry [[water]], [[lava]], [[milk]], [[powder snow]], and [[Bucket of aquatic mob|various aquatic mobs]].
== Obtaining ==
=== Crafting ===
{{Crafting
|A2= Iron Ingot
|C2= Iron Ingot
|B3= Iron Ingot
|Output= Bucket
|type= Miscellaneous
}}
=== Natural generation ===
{{LootChestItem|bucket}}
== Usage ==
Empty buckets can be used to "pick up" a [[water]] or [[lava]] source block by pressing {{control|use}} item on a block of the relevant type. If the empty bucket is part of a stack and the player's inventory is full, the filled bucket drops in front of the player as an item.
A bucket filled with a source block can then be used to place its source block contents in the empty block next to the side of the block the player is currently looking at, or replacing the block looked at for some replaceable blocks.
One can press {{control|use}} when looking at a [[cow]], [[mooshroom]], or [[goat]] to fill a bucket with [[milk]]. A bucket full of milk can be emptied only by drinking it or by using it in crafting a recipe (like [[cake]]).
A bucket full of water can be used on a live aquatic mob ([[cod]], [[salmon]], [[tropical fish]], [[pufferfish]], [[axolotl]], or [[tadpole]]) to collect the mob in the bucket for transportation to another location. The mob in item form becomes a [[bucket of aquatic mob]].
An empty bucket can be used to empty a [[cauldron]] with water or lava, filling the bucket with the fluid. This does not work with dispensers.<ref>{{bug|MC-165196}}</ref>
A lava bucket placed in the fuel slot of a [[furnace]] becomes an empty bucket after the lava is consumed during [[smelting]].
An empty bucket fills with [[water]] when placed in the fuel slot of a [[furnace]] while smelting a [[Sponge|wet sponge]].
An empty bucket can be used to collect [[powder snow]], filling the bucket with powder snow. Emptying the powder snow bucket places the powder snow block in the empty block next to the side of the block the player is currently looking at.
== Sounds ==
{{el|je}}:
{{Sound table
|sound=Fill water bucket1.ogg
|sound2=Fill water bucket2.ogg
|sound3=Fill water bucket3.ogg
|subtitle=Bucket fills
|source=player
|description=When a bucket is filled with water
|id=item.bucket.fill
|translationkey=subtitles.item.bucket.fill
|volume=1.0
|pitch=1.0
|distance=16}}
{{Sound table
|sound=Empty water bucket1.ogg
|sound2=Empty water bucket1.ogg
|sound3=Empty water bucket2.ogg
|sound4=Empty water bucket3.ogg
|subtitle=Bucket empties
|source=block
|description=When a water bucket is emptied <ref group=sound><code>empty1</code> plays at twice the frequency as the other sounds</ref>
|id=item.bucket.empty
|translationkey=subtitles.item.bucket.empty
|volume=1.0
|pitch=1.0 <ref group=sound>Except for the second copy of <code>empty1</code>, which is 0.9</ref>
|distance=16}}
{{Sound table
|sound=Fill lava bucket1.ogg
|sound2=Fill lava bucket2.ogg
|sound3=Fill lava bucket3.ogg
|subtitle=Bucket fills
|source=player
|description=When a bucket is filled with lava
|id=item.bucket.fill_lava
|translationkey=subtitles.item.bucket.fill
|volume=1.0
|pitch=1.0
|distance=16}}
{{Sound table
|sound=Empty lava bucket1.ogg
|sound2=Empty lava bucket2.ogg
|sound3=Empty lava bucket3.ogg
|subtitle=Bucket empties
|source=block
|description=When a lava bucket is emptied
|id=item.bucket.empty_lava
|translationkey=subtitles.item.bucket.empty
|volume=1.0
|pitch=1.0
|distance=16}}
{{Sound table
|sound=Fill powder snow bucket1.ogg
|sound2=Fill powder snow bucket2.ogg
|subtitle=Bucket fills
|source=player
|description=When a bucket is filled with powder snow
|id=item.bucket.fill_powder_snow
|translationkey=subtitles.item.bucket.fill
|volume=1.0
|pitch=1.0/0.9/1.1
|distance=16}}
{{Sound table
|sound=Empty powder snow bucket1.ogg
|sound2=Empty powder snow bucket2.ogg
|subtitle=Bucket empties
|source=block
|description=When a powder snow bucket is emptied
|id=item.bucket.empty_powder_snow
|translationkey=subtitles.item.bucket.empty
|volume=1.0
|pitch=1.0
|distance=16}}
{{Sound table
|rowspan=2
|sound=Fill fish bucket1.ogg
|sound2=Fill fish bucket2.ogg
|sound3=Fill fish bucket3.ogg
|subtitle=Fish captured
|source=neutral
|description=When a fish is collected into a water bucket
|translationkey=subtitles.item.bucket.fill_fish
|id=item.bucket.fill_fish
|volume=1.0
|pitch=1.0
|distance=16}}
{{Sound table
|subtitle=Tadpole captured
|source=neutral
|description=When a tadpole is collected into a bucket
|id=item.bucket.fill_tadpole
|translationkey=subtitles.item.bucket.fill_tadpole
|volume=0.5
|pitch=1.5
|distance=16}}
{{Sound table
|sound=Fill axolotl1.ogg
|sound2=Fill axolotl2.ogg
|sound3=Fill axolotl3.ogg
|subtitle=Axolotl scooped
|source=neutral
|description=When an axolotl is collected into a bucket
|id=item.bucket.fill_axolotl
|translationkey=subtitles.item.bucket.fill_axolotl
|volume=1.0
|pitch=1.0
|distance=16}}
{{Sound table
|rowspan=3
|sound=Empty fish bucket1.ogg
|sound2=Empty fish bucket2.ogg
|sound3=Empty fish bucket3.ogg
|subtitle=Bucket empties
|source=neutral
|description=When a fish is placed from a bucket
|id=item.bucket.empty_fish
|translationkey=subtitles.item.bucket.empty
|volume=1.0
|pitch=1.0
|distance=16}}
{{Sound table
|subtitle=Bucket empties
|source=neutral
|description=When a tadpole is placed from a bucket
|id=item.bucket.empty_tadpole
|translationkey=subtitles.item.bucket.empty
|volume=0.5
|pitch=1.5
|distance=16}}
{{Sound table
|subtitle=Bucket empties
|source=neutral
|description=When an axolotl is placed from a bucket
|id=item.bucket.empty_axolotl
|translationkey=subtitles.item.bucket.empty
|volume=1.0
|pitch=1.0
|distance=16}}
{{Sound table
|sound=Cow milk1.ogg
|sound2=Cow milk2.ogg
|sound3=Cow milk3.ogg
|source=player
|subtitle=Cow gets milked
|description=When a cow is milked
|id=entity.cow.milk
|translationkey=subtitles.entity.cow.milk
|volume=1.0
|pitch=1.0
|distance=16}}
{{Sound table
|sound=Mooshroom milk1.ogg
|sound2=Mooshroom milk2.ogg
|sound3=Mooshroom milk3.ogg
|subtitle=Goat gets milked
|description=When a regular goat is milked
|source=neutral
|id=entity.goat.milk
|translationkey=subtitles.entity.goat.milk
|volume=1.0
|pitch=1.0
|distance=16}}
{{Sound table
|sound=Goat screaming milk1.ogg
|sound2=Goat screaming milk2.ogg
|sound3=Goat screaming milk3.ogg
|sound4=Goat screaming milk4.ogg
|sound5=Goat screaming milk5.ogg
|subtitle=Goat gets milked
|source=neutral
|description=When a screaming goat is milked
|id=entity.goat.screaming.milk
|translationkey=subtitles.entity.goat.milk
|volume=1.0
|pitch=1.0
|distance=16
|foot=1}}
{{el|be}}:
{{Sound table
|type=bedrock
|sound=Fill water bucket1.ogg
|sound2=Fill water bucket2.ogg
|sound3=Fill water bucket3.ogg
|source=block
|description=When a bucket is filled with water
|id=bucket.fill_water
|volume=1.0
|pitch=1.0}}
{{Sound table
|sound=Empty water bucket1.ogg
|sound2=Empty water bucket2.ogg
|sound3=Empty water bucket3.ogg
|source=block
|description=When a water bucket is emptied
|id=bucket.empty_water
|volume=1.0
|pitch=1.0}}
{{Sound table
|rowspan=2
|sound=Water Splash Old.ogg
|source=block
|description=When a water bucket is placed in a cauldron<wbr><ref group=sound name=bucketsplash>{{Bug|MCPE-135919}}</ref>
|id=cauldron.fillwater
|volume=0.1
|pitch=1.0}}
{{Sound table
|source=block
|description=When a water bucket is removed from a cauldron<wbr><ref group=sound name=bucketsplash/>
|id=cauldron.takewater
|volume=0.1
|pitch=1.0}}
{{Sound table
|sound=Fill lava bucket1.ogg
|sound2=Fill lava bucket2.ogg
|sound3=Fill lava bucket3.ogg
|source=block
|description=When a bucket is filled with lava
|id=bucket.fill_lava
|volume=1.0
|pitch=1.0}}
{{Sound table
|sound=Empty lava bucket1.ogg
|sound2=Empty lava bucket2.ogg
|sound3=Empty lava bucket3.ogg
|source=block
|description=When a lava bucket is emptied
|id=bucket.empty_lava
|volume=1.0
|pitch=1.0}}
{{Sound table
|sound=Fill powder snow bucket1.ogg
|sound2=Fill powder snow bucket2.ogg
|source=player
|description=When a bucket is filled with powder snow
|id=bucket.fill_powder_snow
|volume=1.0
|pitch=1.0}}
{{Sound table
|sound=Empty powder snow bucket1.ogg
|sound2=Empty powder snow bucket2.ogg
|source=block
|description=When a powder snow bucket is emptied
|id=bucket.empty_powder_snow
|volume=1.0
|pitch=1.0}}
{{Sound table
|sound=Fill fish bucket1.ogg
|sound2=Fill fish bucket2.ogg
|sound3=Fill fish bucket3.ogg
|source=block
|description=When a creature is collected into a water bucket
|id=bucket.fill_fish
|volume=1.0
|pitch=1.0}}
{{Sound table
|sound=Empty fish bucket1.ogg
|sound2=Empty fish bucket2.ogg
|sound3=Empty fish bucket3.ogg
|source=block
|description=When a creature is placed from a bucket
|id=bucket.empty_fish
|volume=1.0
|pitch=1.0}}
{{Sound table
|sound=Cow milk1.ogg
|sound2=Cow milk2.ogg
|sound3=Cow milk3.ogg
|source=neutral
|description=When a cow is milked
|id=mob.cow.milk
|volume=1.0
|pitch=1.0}}
{{Sound table
|sound=Mooshroom milk1.ogg
|sound2=Mooshroom milk2.ogg
|sound3=Mooshroom milk3.ogg
|description=When a regular goat is milked
|source=neutral
|id=mob.mooshroom.suspicious_milk
|volume=1.0
|pitch=1.0, 0.9, 1.1}}
{{Sound table
|sound=Goat screaming milk1.ogg
|sound2=Goat screaming milk2.ogg
|sound3=Goat screaming milk3.ogg
|sound4=Goat screaming milk4.ogg
|sound5=Goat screaming milk5.ogg
|description=When a screaming goat is milked
|source=neutral
|id=mob.goat.milk.screamer
|volume=1.0
|pitch=1.0
|foot=1}}
== Data values ==
=== ID ===
{{edition|java}}:
{{ID table
|edition=java
|showforms=y
|generatetranslationkeys=y
|displayname=Bucket
|spritetype=item
|nameid=bucket
|form=item
|foot=1}}
{{edition|bedrock}}:
{{ID table
|edition=bedrock
|shownumericids=y
|showforms=y
|notshowbeitemforms=y
|showaliasids=y
|generatetranslationkeys=y
|displayname=Bucket
|spritetype=item
|nameid=bucket
|id=360
|aliasid=bucket / 0
|form=item
|foot=1}}
== Video ==
<div style="text-align:center">{{yt|0tVu5HYLQMw}}</div>
== Achievements ==
{{Load achievements|I am a Marine Biologist}}
== Advancements ==
{{Load advancements|Hot Stuff}}
== History ==
{{History|java infdev}}
{{History||20100615|[[File:Bucket JE1 BE1.png|32px]] Added buckets.
|Buckets can currently pick up only [[water]] and [[lava]].}}
{{History||20100625-2|Buckets can now be found in the new [[dungeon]] [[chest]]s.}}
{{History|java alpha}}
{{History||v1.0.11|[[Cow]]s are now [[milk]]able by using buckets.}}
{{History|java}}
{{History||1.0.0|snap=Beta 1.9 Prerelease|Added [[mooshroom]]s, which can be milked like normal [[cow]]s.}}
{{History|||snap=Beta 1.9 Prerelease 5|In [[Creative]] mode, buckets now remain empty when {{control|used}} to pick up [[water]] and [[lava]].}}
{{History||1.2.1|snap=12w06a|Buckets are now [[renewable resource|renewable]], due to zombies having a chance to drop iron ingots.}}
{{History||1.3.1|snap=12w21a|Buckets are now stackable up to 16.
|[[Dispenser]]s can now use buckets to collect and dispense water and lava.}}
{{History|||snap=12w22a|[[Smelting]] in a [[furnace]] with a [[lava bucket]] now leaves an empty bucket for the [[player]] to retrieve.}}
{{History||1.8|snap=14w25b|An empty bucket in the [[fuel]] slot now fills and become a [[water bucket]] after a [[sponge|wet sponge]] is dried. This happens for empty buckets placed by the [[player]] while the furnace is still smelting, and for empty buckets left by lava buckets.
|Stacked buckets in the fuel slot now become a single water bucket.}}
{{History|||snap=14w26a|The [[player]] can now place only one bucket in the [[fuel]] slot, which fixes the bug above.}}
{{History||1.9|snap=15w44a|A full [[cauldron]] can now be emptied with a bucket, filling the bucket with [[water]].
|The average yield of buckets from [[dungeon]] [[chest]]s has been substantially decreased.}}
{{History|||snap=15w46a|Buckets now replace single [[snow|snow layers]] when {{control|used}} on the top, instead of placing the [[water]] or [[lava]] in the [[air]] above the snow layer.}}
{{History|||snap=15w50a|Added [[sound]]s for buckets: <code>item.bucket.fill</code>, <code>item.bucket.fill_lava</code>, <code>item.bucket.empty</code>, and <code>item.bucket.empty_lava</code>.}}
{{History||1.11|snap=16w39a|Buckets are now found in the new [[woodland mansion]] [[chest]]s.}}
{{History||1.13|snap=17w47a|Prior to [[1.13/Flattening|''The Flattening'']], this [[item]]'s numeral ID was 325.}}
{{History|||snap=November 18, 2017|slink=https://youtu.be/A_Z3AokMwWI?t=1h52m07s|Buckets were said to be able to pick up fish mobs.}}
{{History|||snap=18w08b|Added [[fish bucket]]s, which turn into regular buckets when {{control|used}}.}}
{{History||1.14|snap=18w43a|[[File:Bucket JE2 BE2.png|32px]] The texture of buckets has been changed.}}
{{History|||snap=18w49a|Buckets can now be found in chests in [[savanna]] [[village]] houses.}}
{{History||1.16|snap=Pre-release 1|Using a bucket on water or lava in Creative mode now provides the player with one water or lava bucket in the inventory.<ref>{{bug|MC-9856}}</ref> This is created in a new inventory slot rather than replacing the used bucket. A limit of one bucket per fluid can be obtained this way - attempting to fill a bucket where a filled one already exists in the inventory removes the fluid as expected but does not provide any new buckets.
|Cows and mooshrooms can also now be milked in Creative mode,<ref>{{bug|MC-36322}}</ref> providing the player with limitless milk buckets.}}
{{History|||snap=Pre-release 4|Milking cows now provides Creative players with only one bucket.<ref>{{bug|MC-188352}}</ref>}}
{{History||1.17|snap=October 3, 2020|slink=https://youtu.be/DWZIfsaIgtE?t=2h04m58s|Buckets were revealed to be able to be used to collect [[axolotl]]s.}}
{{History|||snap=21w13a|[[Goat]]s are now milkable by using buckets.}}
{{History|||snap=20w46a|Added [[powder snow]], which can be collected with buckets.}}
{{History|pocket alpha}}
{{History||v0.7.0|[[File:Bucket JE1 BE1.png|32px]] Added buckets.}}
{{History||v0.7.4|Filled buckets no longer stack.<ref>{{bug|MCPE-3960}}</ref>
|Empty buckets no longer allow [[liquid]] sources to be targeted and broken like [[block]]s.<ref>{{bug|MCPE-3857}}</ref>}}
{{History||unknown|The stack limit for empty buckets has been changed from 64 to 16.}}
{{History||v0.14.0|snap=build 1|A full [[cauldron]] can now be emptied with a bucket, filling the bucket with [[water]].}}
{{History||v0.16.0|snap=build 1|Added [[sound]]s when using buckets.
|An empty bucket in the [[fuel]] slot now fills and becomes a [[water bucket]] after a [[sponge|wet sponge]] is dried. This happens for empty buckets placed by the [[player]] while the [[furnace]] is still [[smelting]], and for empty buckets left by [[lava bucket]]s.}}
{{History||?|Buckets no longer highlight fluid blocks when aiming at them.}}
{{History|pocket}}
{{History||1.1.0|snap=alpha 1.1.0.0|Buckets now generate in [[woodland mansion]] [[chest]]s.}}
{{History|bedrock}}
{{History||1.4.0|snap=beta 1.2.14.2|Added [[fish bucket]]s, which turn into regular buckets when used.
|Empty buckets can now be used to catch [[fish]].
|Moved all bucket items from the Equipment tab to the Items tab in the [[Creative inventory]].{{verify|type=update}}{{info needed}}<!---please check snapshots, only 1 major release version was checked each--->}}
{{History||1.9.0|snap=beta 1.9.0.2|[[Cauldron]]s filled with [[lava]] can now be emptied by using a bucket, filling it with lava.}}
{{History||1.10.0|snap=beta 1.10.0.3|[[File:Bucket JE2 BE2.png|32px]] The texture of buckets has been changed.}}
{{History||1.11.0|snap=beta 1.11.0.1|Buckets can now be found in [[savanna]] [[village]] house [[chest]]s.}}
{{History||1.16.200|snap=beta 1.16.200.52|[[Goat]]s are now milkable by using buckets.}}
{{History||1.16.210|snap=beta 1.16.210.53|Added [[powder snow]], which can be used to turn bucket to powder snow bucket.}}
{{History||1.17.0|snap=beta 1.16.230.52|Added [[axolotl]]s, which can be used to turn bucket to axolotl bucket.}}
{{History||1.19.0|snap=?|Added [[tadpole]]s, which can be used to turn bucket to tadpole bucket.}}
{{History|console}}
{{History||xbox=TU1|xbone=CU1|ps=1.0|wiiu=Patch 1|[[File:Bucket JE1 BE1.png|32px]] Added buckets.}}
{{History||xbox=TU9|Buckets are now stackable up to 16.}}
{{History|PS4}}
{{History||1.90|[[File:Bucket JE2 BE2.png|32px]] The texture of buckets has been changed.}}
{{History|new 3DS}}
{{History||0.1.0|[[File:Bucket JE1 BE1.png|32px]] Added buckets.}}
{{History|foot}}
== Issues ==
{{issue list}}
== Gallery ==
<gallery>
Bucket SDGP.png|Bucket in the [[Super Duper Graphics Pack]].
</gallery>
== See also ==
*[[Cauldron]]
*[[Bowl]]
*[[Glass Bottle]]
*[[Water]]
== References ==
{{reflist}}
== External Links ==
*[https://www.minecraft.net/en-us/article/taking-inventory-bucket Taking Inventory: Bucket] – Minecraft.net on December 14, 2018
{{Items}}
[[Category:Tools]]
[[Category:Renewable resources]]
[[cs:Kbelík]]
[[de:Eimer]]
[[es:Cubo]]
[[fr:Seau]]
[[hu:Vödör]]
[[it:Secchio]]
[[ja:バケツ]]
[[ko:양동이]]
[[nl:Emmer]]
[[pl:Wiadro]]
[[pt:Balde]]
[[ru:Ведро]]
[[th:ถัง]]
[[uk:Відро]]
[[zh:桶]]</li><li>[[Firework Rocket|Firework Rocket]]<br/>{{redirect|Firework}}
{{ItemEntity
|image=Firework Rocket.png
|renewable='''Trail Effect''':No<br>'''All Others''':Yes
|stackable=Yes (64)
|size=Height: 0.25 Blocks<br>Width: 0.25 Blocks
|networkid=76
}}
A '''firework rocket''' is an [[item]] (and [[entity]]) used for creating decorative explosions, boosting when flying with [[elytra]], and loading into a [[crossbow]] as ammunition.
== Obtaining ==
Fireworks can be obtained by crafting. {{IN|java}}, a firework with no explosion effect is available on the [[Creative]] inventory and can be crafted as shown below. {{IN|bedrock}}, fireworks with the different base colors or no explosion are available in the Creative inventory.
=== Crafting ===
{{Crafting
|head=1
|showname=0
|showdescription=1
|Paper
|; ; Gunpowder
|; Gunpowder; Gunpowder
|Gunpowder
|Output=Firework Rocket,3
|description=When crafted this way (without a firework star), the rocket does not have explosion effects. The value of gunpowder affects the [[Firework Rocket#Duration and direction|flight duration]].
|type=Miscellaneous
}}
{{Crafting
|Any Firework Star
|Paper
|; ; Gunpowder
|; Gunpowder; Gunpowder
|Gunpowder
|Output= Firework Rocket,3
|description=Adding more gunpowder increases the duration of the rocket. Up to three gunpowder can be used. Up to five firework stars can also be used with three gunpowder. Up to seven firework stars can be used by using firework stars instead of additional gunpowder. All firework stars explode almost simultaneously when the rocket detonates.
|type=Miscellaneous
|foot=1
}}
== Usage ==
=== Launching fireworks ===
To launch a firework rocket, {{control|use}} its item on a block. They can also be launched from [[dispenser]]s and [[crossbow]]s. If shot from a [[Multishot]] [[crossbow]], then 3 rockets fire with the same effects.
=== Elytra ===
{{control|Using}} a firework rocket while flying with [[elytra]] propels the player in the direction they are facing. The duration of the speed boost depends on the flight duration of the rocket. If the rocket is equipped with a firework star of any kind, the player takes damage when it explodes.
=== Crossbow ===
A firework rocket can be used as ammunition for [[crossbow]]s, although it deals [[damage]] only if it has an [[explosion]] effect. A higher flight duration gives the firework rocket a longer range, and more damage is added per firework star. The [[Piercing]] enchantment has no effect on firework rockets shot from a crossbow.
{{IN|java}}, if a firework rocket shot from a [[crossbow]] hits an [[entity]], the rocket instantly [[explosion|explodes]], no matter the flight duration. Attempting to do this {{in|bedrock}}, however, results in the firework passing through the entity,<ref>[[bugtracker:MCPE-52675|MCPE-52675]]</ref> so the [[player]] must plan where to aim.
== Behavior ==
{{see also|Firework Star#Effects}}
Once launched, fireworks fly out vertically, with random horizontal offset up to 5 blocks. {{IN|bedrock|java}}, fireworks can fly in any of the 6 directions a dispenser can point. After [[#Duration and direction|some time]], the firework explodes into a colorful explosion based on the effects of the [[firework star]]s added upon crafting, or no explosion if no firework star was used. If multiple firework stars were added to the rocket upon crafting, they all explode simultaneously.
The explosion of a firework rocket deals damage to mobs and players that are within 5 blocks and not obstructed by [[solid block]]s. The maximum damage of a rocket with one firework star is {{hp|7}}, with the damage decreasing with distance. Each additional firework star on the rocket adds {{hp|2}} points of damage, for a maximum damage of {{hp|19}} with 7 stars. Using commands to add additional firework stars results in more damage. The damage dealt is unaffected by any other ingredients used. The explosion does not destroy end crystals nor damage the Ender dragon, but does destroy armor stands.
There is a delay between the detonation and the player hearing the sound, emulating real fireworks, but this sound travels much more slowly than in the real world.<ref>{{Tweet|jeb|277075644804907009|However, no sound effects for fireworks yet... but everything's implemented, so they can be added without doing a new snapshot|December 7, 2012}}</ref><ref>{{Tweet|jeb|277075517226762242|Haha, @igblan , the speed of sound is 40 m/s, because the realistic speed of ~340 m/s didn't work well in Minecraft scale|December 7, 2012}}</ref> {{IN|java}}, the explosion of a firework can be seen 64 blocks away, regardless of its height. {{IN|bedrock}}, the explosion can be seen from your render distance.
If the explosion exceeds the (unmodded) [[particle]] limit of 16,384, the oldest particles are removed before displaying new ones, resulting in severely diminished firework quality / duration. At most a firework should have 3 trail stars, more than that could waste diamonds, firework stars, and other fireworks. Particle counts per star are:
{| class="wikitable" data-description="Particle counts per firework star"
|-
! Ball Type !! Plain !! Trail
|-
| Small || 98 || ~1300
|-
| Large || 387 || 4000+
|-
| Star || 122 || ~1600
|-
| Creeper || 266 || ~3500
|-
| Burst || 72 || ~930
|}
Twinkle effect adds 2 particles to the count.
Like most other entities, they can be moved by [[water]] and [[explosion]]s, and teleported via [[portal]]s. They also cannot move through solid surfaced blocks, upon hitting one, they either move to a side or explode based on the duration. If a firework explodes under a block, its explosion is flattened.
=== Duration and direction ===
Fireworks travel different heights based on the amount of gunpowder added. The number is displayed as a tag on the item's tooltip with the description of "Flight Duration".
The height it rises is between 8 and 20 blocks with 1 gunpowder, 18 to 34 blocks with 2 gunpowder, and 32 to 52 blocks with 3 gunpowder.
(Note: Using command blocks, firework rockets with higher durations go higher and keep accelerating with virtually no terminal velocity. If the duration is long enough, the firework rocket could reach heights of over 1,000,000 blocks and speeds of over 10,000 m/s in a matter of minutes. Such fireworks with significant X and Z motions speed up sideways exponentially and reach outside the world boundary in a matter of seconds.{{only|java}})
When spawned, <!-- server-side --> fireworks have a vertical speed of .05 and a random small X and Z speed (random value near zero with a standard deviation of .001). Each firework also determines its lifetime in ticks by 10 × (number of gunpowder + 1) + random value from 0 to 5 + random value from 0 to 6, after which it explodes. Each tick, the firework accelerates horizontally by multiplying its X and Z velocities by 1.15, and vertically by adding a constant factor of .04.
Fireworks can be made to travel different directions by being dispensed or launched under flowing water. The firework's direction combines with the flow of the water to go diagonally.
Firework rockets without firework stars shot from a crossbow upon hitting terrain elements will traverse along until stopped by a ledge or into unobstructed terrains again continuing its original flight path. Ledges as tall as one pixel high (e.g. from [[Dirt Path|Dirt Paths]] to [[Grass Block|Grass Blocks]]) will also block the firework. They will still vanish if they hit entities early amidst their flight.
==Village Raids==
After successfully defending a village from a [[Raid]] the villagers may celebrate by setting off firework rockets.
==Boosting elytra==
Fireworks can be used to boost [[elytra]] when in flight. Normally, elytra can glide for a short distance, but with the use of fireworks, the player can fly a long distance, gain speed, and take off from the ground.
Simply using the firework rocket with elytra spread boosts the player in the direction the player faces. It can leave behind a trail sometimes.
Although fireworks with firework stars can be used, the player takes blast damage if they use it in flight.
There are four types of rockets, with three types of flight duration. Higher flight durations mean longer boosts. {{IN|bedrock}}, the fireworks obtained from the Creative menu have a flight duration of 1, while {{in|java}}, the fireworks obtained in the Creative menu have a flight duration of 1, 2, or 3.
==Sounds ==
{{Edition|Java}}:<br>
Firework rockets use the Friendly Creatures sound category for entity-dependent sound events.
{{Sound table
|sound=Firework blast.ogg
|subtitle=Firework blasts
|source=ambient
|description=When a non-large firework rocket explodes within a 16-block radius of the player
|id=entity.firework_rocket.blast
|translationkey=subtitles.entity.firework_rocket.blast
|volume=20.0
|pitch=0.95-1.05
|distance=16}}
{{Sound table
|sound=Firework blast far.ogg
|subtitle=Firework blasts
|source=ambient
|description=When a non-large firework rocket explodes greater than 16 blocks away from the player
|id=entity.firework_rocket.blast_far
|translationkey=subtitles.entity.firework_rocket.blast
|volume=20.0
|pitch=0.95-1.05
|distance=16}}
{{Sound table
|sound=Firework large blast.ogg
|subtitle=Firework blasts
|source=ambient
|description=When a large firework rocket explodes within a 16-block radius of the player
|id=entity.firework_rocket.large_blast
|translationkey=subtitles.entity.firework_rocket.blast
|volume=20.0
|pitch=0.95-1.05
|distance=16}}
{{Sound table
|sound=Firework large blast far.ogg
|subtitle=Firework blasts
|source=ambient
|description=When a large firework rocket explodes greater than 16 blocks away from the player
|id=entity.firework_rocket.large_blast_far
|translationkey=subtitles.entity.firework_rocket.blast
|volume=20.0
|pitch=0.95-1.05
|distance=16}}
{{Sound table
|sound=Firework twinkle.ogg
|subtitle=Firework twinkles
|source=ambient
|description=When a twinkle firework rocket explodes within a 16-block radius of the player
|id=entity.firework_rocket.twinkle
|translationkey=subtitles.entity.firework_rocket.twinkle
|volume=20.0
|pitch=0.9-1.05
|distance=16}}
{{Sound table
|sound=Firework twinkle far.ogg
|subtitle=Firework twinkles
|source=ambient
|description=When a twinkle firework rocket explodes greater than 16 blocks away from the player
|id=entity.firework_rocket.twinkle_far
|translationkey=subtitles.entity.firework_rocket.twinkle
|volume=20.0
|pitch=0.9-1.05
|distance=16}}
{{Sound table
|sound=Firework launch.ogg
|subtitle=Firework launches
|source=ambient
|description=When a dispenser shoots, a player uses, or a crossbow fires a firework rocket
|id=entity.firework_rocket.launch
|translationkey=subtitles.entity.firework_rocket.launch
|volume=3.0
|pitch=1.0
|distance=16}}
{{Sound table
|sound=Bow shoot.ogg
|subtitle=Firework launches
|source=neutral
|description=When a dispenser fires a firework rocket
|id=entity.firework_rocket.shoot
|translationkey=subtitles.entity.firework_rocket.launch
|volume=1.0
|pitch=1.2
|distance=16
|foot=1}}
{{Edition|Bedrock}}:
{{Sound table
|type=bedrock
|sound=Firework blast.ogg
|source=ambient
|description=When a non-large firework rocket explodes
|id=firework.blast
|volume=1.0
|pitch=1.0}}
{{Sound table
|sound=Firework large blast.ogg
|source=ambient
|description=When a large firework rocket explodes
|id=firework.large_blast
|volume=1.0
|pitch=1.0}}
{{Sound table
|sound=Firework twinkle.ogg
|source=ambient
|description=When a twinkle firework rocket explodes
|id=firework.twinkle
|volume=1.0
|pitch=1.0}}
{{Sound table
|sound=Firework launch.ogg
|source=ambient
|description=When a dispenser shoots, a player uses, or a crossbow fires a firework rocket
|id=firework.launch
|volume=1.0
|pitch=1.0}}
{{Sound table
|sound=Bow shoot.ogg
|source=ambient
|description=''Unused sound event''
|id=firework.shoot
|volume=1.0
|pitch=1.0
|foot=1}}
==Data values==
===ID===
{{edition|java}}:
{{ID table
|edition=java
|firstcolumnname=Item
|showforms=y
|generatetranslationkeys=y
|displayname=Firework Rocket
|spritetype=item
|nameid=firework_rocket
|form=item
|foot=1}}
{{ID table
|edition=java
|firstcolumnname=Entity
|generatetranslationkeys=y
|displayname=Firework Rocket
|spritetype=entity
|nameid=firework_rocket
|foot=1}}
{{edition|bedrock}}:
{{ID table
|edition=bedrock
|firstcolumnname=Item
|showaliasids=y
|shownumericids=y
|showforms=y
|notshowbeitemforms=y
|generatetranslationkeys=y
|displayname=Firework Rocket
|spritetype=item
|nameid=firework_rocket
|aliasid=fireworks
|id=519
|form=item
|translationkey=item.fireworks.name
|foot=1}}
{{ID table
|edition=bedrock
|firstcolumnname=Entity
|shownumericids=y
|generatetranslationkeys=y
|displayname=Firework Rocket
|spritetype=entity
|nameid=fireworks_rocket
|id=72
|foot=1}}
===Item data===
{{el|java}}:
{{main|Player.dat format}}
<div class="treeview">
* {{nbt|compound|tag}}: The item's '''tag''' tag.
{{:Player.dat_format/Firework Rockets}}
</div>
{{el|bedrock}}:
: See [[Bedrock Edition level format/Item format]].
===Entity data===
{{el|java}}:
{{main|Entity format}}
{{/ED}}
{{el|bedrock}}:
:See [[Bedrock Edition level format/Entity format]].
==Advancements ==
{{load advancements|Bullseye;Ol' Betsy}}
==History==
{{History|java}}
{{History||November 24, 2012|link=none|[[Jeb]] stated that there may be fireworks in ''Minecraft'' at the ''Future Updates with the Minecraft PC Team'' panel at [[MINECON 2012]].}}
{{History||December 5, 2012|link={{tweet|jeb|276367442362630144}}|Jeb released the first image of fireworks, along with the information that colors, fade, height, effects and shapes are [[crafting|craftable]].}}
{{History||December 7, 2012|link=https://twitter.com/jeb_/status/277075087503536128|Jeb mentions that fireworks should probably scare [[wolves]] and potentially have other effects on mobs.}}
{{History||1.4.6|snap=12w49a|[[File:Firework Rocket JE1 BE1.png|32px]] Added firework rockets.
|Firework rockets cannot be obtained within the [[Creative inventory]].}}
{{History|||snap=12w50a|Added [[sound]] and more effects to firework rockets.}}
{{History||1.10|snap=16w20a|The firework rocket [[crafting]] recipe now produces 3 rockets, rather than 1.}}
{{History||1.11|snap=16w32a|The entity ID has been changed from <code>FireworksRocketEntity</code> to <code>fireworks_rocket</code>.}}
{{History||1.11.1|snap=16w50a|Firework rockets can now cause [[damage]] to [[entity|entities]] that are within their [[explosion]] radius.
|Firework rockets can now boost [[player]]s while flying with [[elytra]].}}
{{History||1.13|snap=17w47a|The ID has been changed from <code>fireworks</code> to <code>firework_rocket</code>.
|The fade effects on fireworks can now be added by combining the firework star with [[dye]]s.
|Prior to [[1.13/Flattening|''The Flattening'']], this [[item]]'s numeral ID was 401.}}
{{History||1.13|snap=?|Firework rockets are now available in the [[Creative]] [[Inventory]]. However, it does not show a flight duration}}
{{History|||snap=pre5|The [[entity]] ID of firework rockets has been changed to <code>firework_rocket</code>.}}
{{History||1.14|snap=18w43a|Fireworks can now be shot from [[crossbow]]s.
|[[File:Firework Rocket JE2 BE2.png|32px]] The texture of firework rockets has been changed.}}
{{History||1.15|snap=19w36a|Firework rockets dispensed from a [[dispenser]] now travel in the direction they were fired.}}
{{History||1.17|snap=20w45a|Simple firework rockets with one gunpowder can now be crafted using the [[recipe book]].}}
{{History||1.19.3|snap=22w45a|All three flight durations of firework rockets are now available in the Creative inventory.<ref>{{bug
|MC-194390||A firework rocket from the creative inventory doesn't show a flight duration|Fixed}}</ref>}}
{{History|bedrock}}
{{History||1.2.0|snap=beta 1.2.0.2|[[File:Firework Rocket JE1 BE1.png|32px]] Added firework rockets.
|Firework rockets are available in the Creative inventory in 17 variants, sixteen colors in small ball duration 1, plus one additional preset with only duration 1.{{verify|type=update|Is this the right snapshot?}}{{info needed}}}}
{{History||1.8.0|snap=beta 1.8.0.10|Firework rockets can now be held in the off-hand and be shot from [[crossbow]]s.}}
{{History||1.10.0|snap=beta 1.10.0.3|[[File:Firework Rocket JE2 BE2.png|32px]] The texture of firework rockets has been changed.}}
{{History||1.16.100|snap=beta 1.16.100.56|The ID of firework rockets has been changed from <code>fireworks</code> to <code>firework_rocket</code>.}}
{{History|console}}
{{History||xbox=TU19|xbone=CU7|ps=1.12|wiiu=Patch 1|switch=1.0.1|[[File:Firework Rocket JE1 BE1.png|32px]] Added firework rockets.
|Firework rockets are available in five types in the Creative inventory. The presets are as follows:
* Duration 1, small ball, light blue, twinkle
* Duration 2, creeper shaped, green
* Duration 2, burst, red, fade to orange
* Duration 3, burst, magenta, fade to blue, twinkle
* Duration 2, star shaped, yellow, fade to orange, trail}}
{{History||xbox=TU46|xbone=CU36|ps=1.38|wiiu=Patch 15|The crafting interface has been updated to allow crafting [[firework star]]s and fireworks.}}
{{History||xbox=TU53|xbone=CU43|ps=1.49|wiiu=Patch 23|switch=1.0.3|Firework rockets can now boost [[player]]s while flying with [[elytra]].}}
{{History||xbox=TU53|xbone=CU43|ps=1.49|wiiu=Patch 23|switch=1.0.3|Firework rockets now [[damage]] players if there is a [[firework star]] applicated to the firework rocket.}}
{{History||xbox=TU56|xbone=CU47|ps=1.55|wiiu=Patch 26|switch=1.0.6|Firework rockets now produce 3 rockets upon [[crafting]] them instead of 1.}}
{{History||xbox=TU60|xbone=CU51|ps=1.64|wiiu=Patch 30|switch=1.0.11|Added new firework rocket models.}}
{{History|PS4}}
{{History||1.90|[[File:Firework Rocket JE2 BE2.png|32px]] The texture of firework rockets has been changed.}}
{{History|foot}}
==Issues==
{{issue list}}
== Trivia==
* Launching a rocket by hand on a wooden [[pressure plate]] activates it. The same doesn't hold for stone pressure plates, or for a [[dispenser]] placing a rocket onto a wooden pressure plate.
* New Year's Eve is what inspired [[Jeb]] to add fireworks.<ref>{{tweet|jeb|277080498814189568|@SPvs_TheWorld New Year's Eve|December 7, 2012}}</ref>
*If the player shoots a firework into a [[Nether portal]], it explodes in [[the Nether]].
*There are around 2×10{{^|136}} distinct fireworks.
==Gallery==
<gallery>
File:Firework jeb twitter.jpg|[[Jeb]]'s first image of Fireworks, also showing that they can be shot from dispensers.
File:1.4.6 release image.png|1.4.6 Release image.
File:Flatexplosion.png|An example of a flattened firework explosion.
File:Creeper firework.png|Creeper face shaped firework.
</gallery>
==References==
{{Reflist}}
{{Items}}
{{Entities}}
[[cs:Rachejtle]]
[[de:Feuerwerksrakete]]
[[es:Cohete de fuegos artificiales]]
[[fr:Feu d'artifice]]
[[hu:Tűzijáték rakéta]]
[[ja:ロケット花火]]
[[ko:폭죽 로켓]]
[[nl:Vuurpijl]]
[[pl:Fajerwerk]]
[[pt:Fogo de artifício]]
[[ru:Пиротехническая ракета]]
[[th:ดอกไม้ไฟ]]
[[zh:烟花火箭]]
[[Category:Renewable resources]]</li></ul> | 15w31a | The block states alt and flip of fire have been removed, and the state upper has been changed to the byte state up. However, the behavior of fire has remained unchanged. | |||
| 15w38a | Fire's chance of extinguishing in the rain on its block tick has been decreased from 100% to a chance from 0–45% depending on its age state. | ||||
| 15w49a | Fire's chance of extinguishing in the rain on its block tick has been increased to 20–65% depending on its age state. | ||||
1.12{{Extension DPL}}<ul><li>[[Photo|Photo]]<br/>{{exclusive|education}}
{{Item
| image = Photo EE2.png
| renewable = No (unless [[portfolio]] is available)
| stackable =
}}
A '''photo''' is an [[item]] containing a picture taken with a [[camera]].<ref>{{cite|url=https://web.archive.org/web/20210925044841mp_/https://educommunity.minecraft.net/hc/en-us/articles/4407489082644-Feature-Walkthrough-Minecraft-Education-Edition-GOAT-Beta-version-1-17-30-| title = Feature Walkthrough Minecraft: Education Edition GOAT Beta (version 1.17.30)|website=Minecraft: Education Edition Support|date=September 24, 2021}}</ref><ref>{{cite|url=https://education.minecraft.net/en-us/blog/new-update-and-anniversary-for-mee| title = The GOAT Update Celebrates a Minecraft Milestone!|website=Minecraft: Education Edition|date=November 2, 2021}}</ref><ref>{{ytl|2Wd0J-EIfws|GOAT Release Playthrough|Minecraft: Education Edition|December 2, 2021}}</ref>
== Obtaining ==
A photo in a [[portfolio]] can be saved as a photo item by selecting the "Save to Inventory" button underneath it.
== Usage ==
Photos display an image when held in the hand or when placed in an [[item frame]], similarly to [[map]]s. Photos can have captions added to them by renaming them in an [[anvil]] or by adding a caption while they are in a portfolio. Photos can be added to [[book and quill]]s and portfolios by selecting the "Add Photo" button in the book and quill or portfolio.
== Data values ==
=== ID ===
{{ID table
|edition=bedrock
|shownumericids=y
|showforms=y
|notshowbeitemforms=y
|generatetranslationkeys=y
|displayname=Photo
|spritetype=item
|nameid=photo_item
|id=?
|form=item
|foot=1}}
== History ==
{{History|education}}
{{History||1.17.30|snap=1.17.30.2|[[File:Photo EE1.png|32px]] Added photos.}}
{{History||1.17.30|snap=release|[[File:Photo EE2.png|32px]] Changed photo texture.}}
{{History|foot}}
== Gallery ==
<gallery>
Photo Item 1.png|A photo being placed in an item frame.
Photo Item 2.png|A photo being saved from a portfolio.
Photo Item 3.png|A photo being added to a book and quill.
</gallery>
== References ==
{{Reflist}}
{{Items}}
{{Education Edition}}
[[Category:Education Edition items]]
[[Category:Non-renewable resources]]
[[ja:写真]]
[[pl:Zdjęcie]]
[[zh:相片]]</li><li>[[Raw Rabbit|Raw Rabbit]]<br/>{{for|the cooked version|Cooked Rabbit}}
{{Item
| title = Raw Rabbit
| image = Raw Rabbit.png
| heals = {{hunger|3}}
| renewable = Yes
| stackable = Yes (64)
}}
'''Raw rabbit''' is a food item that can be eaten by the [[player]], or cooked in a [[furnace]] or a [[campfire]] to make [[cooked rabbit]].
== Obtaining ==
=== Mob loot ===
{{IN|Bedrock}}, adult [[rabbit]]s drop 0-1 raw rabbit when killed. The maximum amount is increased by 1 per level of [[Looting]], for a maximum of 0-4 with [[Looting]] III. If killed while on [[fire]], they drop [[cooked rabbit]] instead.
{{IN|Java}}, adult [[rabbit]]s drop 1 raw rabbit when killed. The maximum amount is increased by 1 per level of [[Looting]], for a maximum of 1-4 with [[Looting]] III. If killed while on [[fire]], they drop [[cooked rabbit]] instead.
== Usage ==
To eat raw rabbit, press and hold {{control|use}} while it is selected in the hotbar. Eating one restores {{hunger|3}} [[hunger]] and 1.8 [[Hunger#Mechanics|saturation]].
=== Smelting ingredient ===
{{Smelting
|showname=1
|Raw Rabbit
|Cooked Rabbit
|0.35
}}
=== Wolves ===
Raw rabbit can be used to [[breed]] and heal tamed [[wolves]], lead them around, and make baby tamed [[Wolf|wolves]] grow up faster by 10% of the remaining time.
=== Trading ===
Novice-level Butcher [[villager|villagers]] have a {{frac|1|3}} chance to buy 4 raw rabbit for an [[emerald]] as their trades.{{only|bedrock}}
Novice-level Butcher villagers have 40% chance of offering to buy 4 raw rabbit for an emerald.{{only|java}}
==Sounds==
{{Sound table/Entity/Food}}
== Data values ==
=== ID ===
{{edition|java}}:
{{ID table
|edition=java
|showforms=y
|generatetranslationkeys=y
|displayname=Raw Rabbit
|spritetype=item
|nameid=rabbit
|form=item
|foot=1}}
{{edition|bedrock}}:
{{ID table
|edition=bedrock
|shownumericids=y
|showforms=y
|notshowbeitemforms=y
|generatetranslationkeys=y
|displayname=Raw Rabbit
|spritetype=item
|nameid=rabbit
|id=288
|form=item
|foot=1}}
== Achievements ==
{{load achievements|Rabbit Season}}
== Advancements ==
{{load advancements|Husbandry;A Balanced Diet}}
== History ==
{{History|java}}
{{History||1.8|snap=June 30, 2014|slink=https://twitter.com/TheMogMiner/status/483636993780232192|[[Ryan Holtz]] tweeted images of raw rabbits and some other new [[item]]s.}}
{{History|||snap=14w27a|[[File:Raw Rabbit JE1.png|32px]] Added raw rabbit.}}
{{History|||snap=14w33b|[[File:Raw Rabbit JE2 BE1.png|32px]] The texture of raw rabbit has been changed. The new texture was created by [[wikipedia:Reddit|Reddit]] user [http://www.reddit.com/u/zeldahuman zeldahuman].<ref>{{reddit|2bjzes/a_reminder_of_the_blocks_and_items_added_in_18_so|cj69zie|context=3}}</ref><ref>{{reddit|2c5f35/minecraft_snapshot_14w31a_has_been_released|cjct7gb}}</ref>}}
{{History||1.13|snap=17w47a|Prior to [[1.13/Flattening|''The Flattening'']], this [[item]]'s numeral ID was 411.}}
{{History||1.14|snap=18w43a|[[File:Raw Rabbit JE3 BE2.png|32px]] The texture of raw rabbit has been changed.}}
{{History|||snap=19w11a|Butcher [[villager]]s now [[trading|buy]] raw rabbit.}}
{{History||1.19.3|snap=22w42a|Rabbits now always drop at least 1 raw rabbit when killed.<ref>{{bug|MC-96449|||Fixed}}</ref>}}
{{History|pocket alpha}}
{{History||v0.13.0|snap=build 1|[[File:Raw Rabbit JE2 BE1.png|32px]] Added raw rabbit.}}
{{History|bedrock}}
{{History||1.10.0|snap=beta 1.10.0.3|[[File:Raw Rabbit JE3 BE2.png|32px]] The texture of raw rabbit has been changed.}}
{{History||1.11.0|snap=beta 1.11.0.4|Raw rabbit can now be [[trading|sold]] to butcher [[villager]]s.}}
{{History|console}}
{{History||xbox=TU31|xbone=CU19|ps=1.22|wiiu=Patch 3|[[File:Raw Rabbit JE2 BE1.png|32px]] Added raw rabbit.}}
{{History|PS4}}
{{History||1.90|[[File:Raw Rabbit JE3 BE2.png|32px]] The texture of raw rabbit has been changed.}}
{{History|new 3ds}}
{{History||0.1.0|[[File:Raw Rabbit JE2 BE1.png|32px]] Added raw rabbit.}}
{{History|foot}}
== Issues ==
{{issue list}}
== Gallery ==
<gallery>
File:Rabbit Items 2 Ryan Holtz.png|First image of the item by [[Ryan Holtz]].
</gallery>
== References ==
{{reflist}}
{{items}}
[[de:Rohes Kaninchen]]
[[es:Conejo crudo]]
[[it:Coniglio crudo]]
[[fr:Lapin cru]]
[[ja:生の兎肉]]
[[ko:익히지 않은 토끼고기]]
[[nl:Rauw konijnenvlees]]
[[pl:Surowy królik]]
[[pt:Coelho cru]]
[[ru:Сырая крольчатина]]
[[zh:生兔肉]]
[[Category:Food]]
[[Category:Renewable resources]]</li></ul> | 17w06a | Fire now burns infinitely on magma blocks. | |||
1.13{{Extension DPL}}<ul><li>[[Lingering Potion|Lingering Potion]]<br/>{{about|throwable potions that leave a lingering area of effect|the throwable potions without a lingering effect|Splash Potion|the drinkable potions|Potion}}
{{Item
| image = <gallery>
Lingering Water Bottle.png | Water Bottle
Uncraftable Lingering Potion.png | Uncraftable
</gallery>
| extratext = View [[#Gallery|all renders]]
| renewable = Uncraftable, Luck{{only|java|short=1}}, Decay{{only|bedrock|short=1}}: No<br>
All others: Yes
| stackable = No
}}
'''Lingering potions''' are variants of [[splash potion]]s that can be thrown to leave clouds with [[status effect]]s that linger on the ground in an area.
== Obtaining ==
=== Brewing ===
{{main|Brewing}}
{{brewing
|Dragon's Breath
|Any Lingering Potion
|ingredients=[[Dragon's Breath]] + <br>Any [[Splash Potion]]
}}
== Usage ==
=== Creating area effect clouds ===
Lingering potions are thrown, like [[splash potion]]s, by {{control|using}} them. On impact they explode, creating a cloud. The cloud is made of the potion particles corresponding to the potion that was thrown.
The cloud starts with a radius of 3 blocks, decreasing to 0 over the course of 30 seconds. During the cloud's existence, any player or mob that walks into it after the first second gets the corresponding status effect; this decreases the radius by a {{frac|1|2}} block immediately, reducing the cloud's lifespan by 5 seconds.
For effects with duration, the duration applied by the cloud is {{frac|1|4}} that of the corresponding [[potion]]. For effects without duration such as healing or harming, the potency of the effect is {{frac|1|2}} that of the corresponding potion.
The effect may be applied consecutively if the player or mob remains in the cloud. For example, a player throwing the Lingering Potion of Healing II straight down consumes the cloud within a few seconds while being healed 5 times for a total of {{hp|20}} health. As far as healing is concerned, this makes the lingering potion much more powerful than the regular or splash potion, provided that the player is away from other mobs or players.
Lingering potions can also be thrown out of [[dispenser]]s like splash potions.
=== Lingering water bottle ===
Like the [[Splash potion#Splash water bottles|splash water bottle]], a lingering water bottle puts out fire and damages endermen and blazes by {{hp|1}}. It creates no effect cloud.
==== Mud ====
Lingering water bottles can be {{control|used}} on [[dirt]], [[coarse dirt]], or [[rooted dirt]] to turn it into [[mud]].
=== Crafting ingredient ===
{{crafting usage|Lingering Potion, Lingering Water Bottle|match=any}}
=== Filling cauldrons ===
{{IN|bedrock}}, using a lingering potion on a cauldron adds one level of that potion to the cauldron. Attempting to add a lingering potion to a cauldron with water, dyed water or a non-matching potion empties the cauldron and creates an explosion sound (but no actual explosion).
=== Uncraftable lingering potion ===
{{IN|java}}, the uncraftable potion is a splash potion with no effect that is unobtainable in regular gameplay. It is also available in potion and splash potion forms, as well as for tipped arrows.
It can be obtained using the following command: {{cmd|give @s minecraft:lingering_potion{Potion:"minecraft:empty"} }}. It is also obtained any time a potion has invalid or missing potion effect tags, and thus serves as a placeholder.
{| class="wikitable" style="text-align: center;" data-description="Unused potions"
! Icon
! Name
|-
| {{Slot|Uncraftable Lingering Potion|link=none}}
! Uncraftable Lingering Potion
|}
== Custom effects ==
{{IN|java}}, lingering potions can be obtained with any status effect using {{cmd|give}} and the tag {{code|CustomPotionEffects}}, which is an array of effects for the potion. See [[Item format#Potion Effects]] for more information, and [[status effect]] for a list of effects and IDs.
== Sounds ==
{{edition|java}}:<br>
Lingering potions use the Friendly Creatures sound category for entity-dependent sound events.
{{Sound table
|sound=Glass dig1.ogg
|sound2=Glass dig2.ogg
|sound3=Glass dig3.ogg
|subtitle=Bottle smashes
|source=neutral
|description=When a lingering potion impacts something
|id=entity.splash_potion.break
|translationkey=subtitles.entity.potion.splash
|volume=1.0
|pitch=0.9-1.0
|distance=16}}
{{Sound table
|rowspan=2
|sound=Bow shoot.ogg
|subtitle=Bottle thrown
|source=neutral
|description=When a lingering potion is thrown by a player
|id=entity.lingering_potion.throw
|translationkey=subtitles.entity.potion.throw
|volume=0.5
|pitch={{frac|1|3}}-0.5
|distance=16}}
{{Sound table
|subtitle=Dispensed item
|source=block
|description=When a lingering potion is dispensed by a [[dispenser]]
|id=block.dispenser.launch
|translationkey=subtitles.block.dispenser.dispense
|volume=1.0
|pitch=1.2
|distance=16
|foot=1}}
{{edition|bedrock}}:
{{Sound table
|type=bedrock
|sound=Glass dig1.ogg
|sound2=Glass dig2.ogg
|sound3=Glass dig3.ogg
|source=block
|description=When a splash potion impacts something
|id=random.glass
|volume=1.0
|pitch=1.0}}
{{Sound table
|rowspan=2
|sound=Bow shoot.ogg
|source=player
|description=When a splash potion is thrown by a player
|id=random.bow
|volume=0.5
|pitch=0.33-0.5}}
{{Sound table
|source=player
|description=When a splash potion is dispensed from a dispenser
|id=random.bow
|volume=1.0
|pitch=0.83-1.25
|foot=1}}
== Data values ==
=== ID ===
{{edition|java}}:
{{ID table
|edition=java
|showforms=y
|generatetranslationkeys=y
|displayname=Lingering Potion
|spritetype=item
|nameid=lingering_potion
|form=item
|translationkey=item.minecraft.lingering_potion,item.minecraft.lingering_potion.effect.empty,item.minecraft.lingering_potion.effect.water,item.minecraft.lingering_potion.effect.mundane,item.minecraft.lingering_potion.effect.thick,item.minecraft.lingering_potion.effect.awkward,item.minecraft.lingering_potion.effect.night_vision,item.minecraft.lingering_potion.effect.invisibility,item.minecraft.lingering_potion.effect.leaping,item.minecraft.lingering_potion.effect.fire_resistance,item.minecraft.lingering_potion.effect.swiftness,item.minecraft.lingering_potion.effect.slowness,item.minecraft.lingering_potion.effect.water_breathing,item.minecraft.lingering_potion.effect.healing,item.minecraft.lingering_potion.effect.harming,item.minecraft.lingering_potion.effect.poison,item.minecraft.lingering_potion.effect.regeneration,item.minecraft.lingering_potion.effect.strength,item.minecraft.lingering_potion.effect.weakness,item.minecraft.lingering_potion.effect.levitation,item.minecraft.lingering_potion.effect.luck,item.minecraft.lingering_potion.effect.turtle_master,item.minecraft.lingering_potion.effect.slow_falling
|foot=1}}
{{edition|bedrock}}:
{{ID table
|edition=bedrock
|shownumericids=y
|showforms=y
|notshowbeitemforms=y
|generatetranslationkeys=y
|displayname=Lingering Potion
|spritetype=item
|nameid=lingering_potion
|id=562
|form=item
|translationkey=potion.emptyPotion.linger.name,potion.mundane.linger.name,potion.mundane.extended.linger.name,potion.thick.linger.name,potion.awkward.linger.name,potion.nightVision.linger.name,potion.invisibility.linger.name,potion.jump.linger.name,potion.fireResistance.linger.name,potion.moveSpeed.linger.name,potion.moveSlowdown.linger.name,potion.heal.linger.name,potion.harm.linger.name,potion.poison.linger.name,potion.regeneration.linger.name,potion.damageBoost.linger.name,potion.weakness.linger.name,potion.wither.linger.name,potion.turtleMaster.linger.name,potion.slowFalling.linger.name
|foot=1}}
=== Item data ===
<div class="treeview">
* {{nbt|compound|tag}}: The item's '''tag''' tag.
{{:Player.dat_format/Potion}}
</div>
=== Thrown potion ===
{{Entity
| title = Thrown lingering potion
| networkid = '''[[JE]]''': 73
}}
==== ID ====
{{edition|java}}:
{{ID table
|generatetranslationkeys=java
|displayname=Lingering Potion
|spritetype=entity
|nameid=potion
|foot=1}}
{{edition|bedrock}}:
{{ID table
|shownumericids=y
|generatetranslationkeys=bedrock
|displayname=Lingering Potion
|spritetype=entity
|nameid=lingering_potion
|id=101
|foot=1}}
==== Entity Data ====
{{see also|Chunk format|Potions#Data values|title2=Potion data values}}
Lingering potions when thrown have entity data that define various properties of the entity.
{{:Splash Potion/ED}}
=== Area Effect Cloud ===
{{Entity
| title = Area Effect Cloud
| image = Area Effect Cloud.png
|imagesize=290px
}}
==== ID ====
{{edition|java}}:
{{ID table
|generatetranslationkeys=java
|displayname=Area Effect Cloud
|spritetype=entity
|nameid=area_effect_cloud
|foot=1}}
{{edition|bedrock}}:
{{ID table
|shownumericids=y
|generatetranslationkeys=bedrock
|displayname=Area Effect Cloud
|spritetype=entity
|nameid=area_effect_cloud
|id=95
|foot=1}}
==== Entity data ====
{{see also|Chunk format}}
The cloud that is created when: lingering potions are thrown; [[creeper]]s with potion effects explode; [[Ender Dragon#Dragon_Fireball|dragon fireballs]] hit the ground, is an entity, which has entity data that defines the properties of the entity.
{{/ED}}
==Advancements==
{{Load advancements|Zombie Doctor;A Furious Cocktail;How Did We Get Here?;Bullseye}}
== History ==
{{Info needed section|Lingering Potion of Decay; Lingering Potion of Weakness; Uncraftable Lingering Potion}}
{{History|java}}
{{History||1.9|snap=15w33a|[[File:Lingering Potion of Night Vision JE1 BE1.png|32px]] [[File:Lingering Potion of Invisibility JE1 BE1.png|32px]] [[File:Lingering Potion of Leaping JE1 BE1.png|32px]] [[File:Lingering Potion of Fire Resistance JE1 BE1.png|32px]] [[File:Lingering Potion of Swiftness JE1 BE1.png|32px]] [[File:Lingering Potion of Slowness JE1 BE1.png|32px]] [[File:Lingering Potion of Water Breathing JE1 BE1.png|32px]] [[File:Lingering Potion of Healing JE1 BE1.png|32px]] [[File:Lingering Potion of Harming JE1 BE1.png|32px]] [[File:Lingering Potion of Poison JE1 BE1.png|32px]] [[File:Lingering Potion of Regeneration JE1 BE1.png|32px]] [[File:Lingering Potion of Strength JE1 BE1.png|32px]] [[File:Lingering Potion of Weakness JE1 BE1.png|32px]] [[File:Lingering Potion of Luck JE1.png|32px]] Added lingering potions.
|[[File:Lingering Water Bottle JE1 BE1.png|32px]] [[File:Lingering Water Bottle JE1 BE1.png|32px]] [[File:Lingering Water Bottle JE1 BE1.png|32px]] [[File:Lingering Water Bottle JE1 BE1.png|32px]] Added lingering water bottle, and Mundane, Thick, and Awkward lingering potions.}}
{{History|||snap=15w33c|The bug where the [[player]] could not place [[splash potion]]s in the [[brewing stand]] has been fixed. This now allows for easier creation of lingering potions.}}
{{History|||snap=16w06a|Lingering potions can now be used to craft [[tipped arrow]]s.}}
{{History||1.11|snap=16w32a|The [[entity]] ID has been changed from {{code|AreaEffectCloud}} to {{code|area_effect_cloud}}.}}
{{History||1.13|snap=17w47a|Prior to [[1.13/Flattening|''The Flattening'']], this [[item]]'s numeral ID was 441.}}
{{History|||snap=18w07a|[[File:Lingering Potion of the Turtle Master JE1 BE1.png|32px]] Added the lingering potions of the Turtle Master.}}
{{History|||snap=18w14a|[[File:Lingering Potion of Slow Falling JE1 BE1.png|32px]] Added lingering potions of [[Slow Falling]].}}
{{History||1.14|snap=18w43a|[[File:Lingering Water Bottle JE2 BE2.png|32px]] [[File:Lingering Potion of Night Vision JE2 BE2.png|32px]] [[File:Lingering Potion of Invisibility JE2 BE2.png|32px]] [[File:Lingering Potion of Leaping JE2 BE2.png|32px]] [[File:Lingering Potion of Fire Resistance JE2 BE2.png|32px]] [[File:Lingering Potion of Swiftness JE2 BE2.png|32px]] [[File:Lingering Potion of Slowness JE2 BE2.png|32px]] [[File:Lingering Potion of the Turtle Master JE2 BE2.png|32px]] [[File:Lingering Potion of Water Breathing JE2 BE2.png|32px]] [[File:Lingering Potion of Healing JE2 BE2.png|32px]] [[File:Lingering Potion of Harming JE2 BE2.png|32px]] [[File:Lingering Potion of Poison JE2 BE2.png|32px]] [[File:Lingering Potion of Regeneration JE2 BE2.png|32px]] [[File:Lingering Potion of Strength JE2 BE2.png|32px]] [[File:Lingering Potion of Weakness JE2 BE2.png|32px]] [[File:Lingering Potion of Luck JE2.png|32px]] [[File:Lingering Potion of Slow Falling JE2 BE2.png|32px]] The textures of lingering potions have been changed.}}
{{History||1.19|snap=22w11a|Lingering water bottles can be {{control|used}} on [[dirt]], [[coarse dirt]], or [[rooted dirt]] to turn it into [[mud]].}}
{{History||1.19.3|snap=22w43a|Lingering water bottles can now extinguish burning entities.<ref>{{bug|MC-189911|||Fixed}}</ref>}}
{{History||1.19.4|snap=Pre-release 1|Lingering potions no longer have an enchantment glint.}}
{{History|||snap=Pre-release 3|[[File:Lingering Potion of Night Vision JE3.png|32px]] [[File:Lingering Potion of Invisibility JE3.png|32px]] [[File:Lingering Potion of Leaping JE3.png|32px]] [[File:Lingering Potion of Fire Resistance JE3.png|32px]] [[File:Lingering Potion of Swiftness JE3.png|32px]] [[File:Lingering Potion of Slowness JE3.png|32px]] [[File:Lingering Potion of the Turtle Master JE3.png|32px]] [[File:Lingering Potion of Water Breathing JE3.png|32px]] [[File:Lingering Potion of Harming JE3.png|32px]] [[File:Lingering Potion of Poison JE3.png|32px]] [[File:Lingering Potion of Strength JE3.png|32px]] Changed colors of the following lingering potions: Night Vision, Invisibility, Leaping, Fire Resistance, Swiftness, Slowness, Turtle Master, Water Breathing, Harming, Poison, Strength, Resistance.}}
{{History||1.20|snap=23w12a|Wither [[effect]] particle colors have been adjusted to make them more distinguishable.
|The lingering potion of [[Slow Falling]] has had its color tweaked to make it more distinguishable from the lingering potion of [[Invisibility]].}}
{{History|pocket}}
{{History||1.0.0|snap=alpha 0.17.0.1|[[File:Lingering Water Bottle JE1 BE1.png|32px]] [[File:Lingering Potion of Night Vision JE1 BE1.png|32px]] [[File:Lingering Potion of Invisibility JE1 BE1.png|32px]] [[File:Lingering Potion of Leaping JE1 BE1.png|32px]] [[File:Lingering Potion of Fire Resistance JE1 BE1.png|32px]] [[File:Lingering Potion of Swiftness JE1 BE1.png|32px]] [[File:Lingering Potion of Slowness JE1 BE1.png|32px]] [[File:Lingering Potion of Water Breathing JE1 BE1.png|32px]] [[File:Lingering Potion of Healing JE1 BE1.png|32px]] [[File:Lingering Potion of Harming JE1 BE1.png|32px]] [[File:Lingering Potion of Poison JE1 BE1.png|32px]] [[File:Lingering Potion of Regeneration JE1 BE1.png|32px]] [[File:Lingering Potion of Strength JE1 BE1.png|32px]] [[File:Lingering Potion of Weakness JE1 BE1.png|32px]] [[File:Lingering Potion of Decay BE1.png|32px]] Added lingering potions.
|Lingering water bottles, mundane, long mundane, thick, and awkward lingering potions are all available in the Creative inventory.}}
{{History|bedrock}}
{{History||1.5.0|snap=beta 1.5.0.4|[[File:Lingering Potion of the Turtle Master JE1 BE1.png|32px]] Added lingering potions of the Turtle Master.}}
{{History||1.6.0|snap=beta 1.6.0.5|[[File:Lingering Potion of Slow Falling JE1 BE1.png|32px]] Added lingering potions of [[Slow Falling]].}}
{{History||1.10.0|snap=beta 1.10.0.3|[[File:Lingering Water Bottle JE2 BE2.png|32px]] [[File:Lingering Potion of Night Vision JE2 BE2.png|32px]] [[File:Lingering Potion of Invisibility JE2 BE2.png|32px]] [[File:Lingering Potion of Leaping JE2 BE2.png|32px]] [[File:Lingering Potion of Fire Resistance JE2 BE2.png|32px]] [[File:Lingering Potion of Swiftness JE2 BE2.png|32px]] [[File:Lingering Potion of Slowness JE2 BE2.png|32px]] [[File:Lingering Potion of Water Breathing JE2 BE2.png|32px]] [[File:Lingering Potion of Healing JE2 BE2.png|32px]] [[File:Lingering Potion of Harming JE2 BE2.png|32px]] [[File:Lingering Potion of Poison JE2 BE2.png|32px]] [[File:Lingering Potion of Regeneration JE2 BE2.png|32px]] [[File:Lingering Potion of Strength JE2 BE2.png|32px]] [[File:Lingering Potion of Weakness JE2 BE2.png|32px]] [[File:Lingering Potion of Decay BE2.png|32px]] [[File:Lingering Potion of the Turtle Master JE2 BE2.png|32px]] [[File:Lingering Potion of Slow Falling JE2 BE2.png|32px]] The textures of lingering potions have been changed.}}
{{History||1.19.80|snap=beta 1.19.80.21|Changed potion colors for the following lingering potions: Fire Resistance, Harming, Invisibility, Leaping, Night Vision, Poison, Slowness, Strength, Swiftness, Turtle Master, and Water Breathing.
|Removed enchantment glint from lingering potions.}}
{{History|console}}
{{History||xbox=TU46|xbone=CU36|ps=1.38|wiiu=Patch 15|switch=1.0.1|[[File:Lingering Water Bottle JE1 BE1.png|32px]] [[File:Lingering Potion of Night Vision JE1 BE1.png|32px]] [[File:Lingering Potion of Invisibility JE1 BE1.png|32px]] [[File:Lingering Potion of Leaping JE1 BE1.png|32px]] [[File:Lingering Potion of Fire Resistance JE1 BE1.png|32px]] [[File:Lingering Potion of Swiftness JE1 BE1.png|32px]] [[File:Lingering Potion of Slowness JE1 BE1.png|32px]] [[File:Lingering Potion of Water Breathing JE1 BE1.png|32px]] [[File:Lingering Potion of Healing JE1 BE1.png|32px]] [[File:Lingering Potion of Harming JE1 BE1.png|32px]] [[File:Lingering Potion of Poison JE1 BE1.png|32px]] [[File:Lingering Potion of Regeneration JE1 BE1.png|32px]] [[File:Lingering Potion of Strength JE1 BE1.png|32px]] [[File:Lingering Potion of Weakness JE1 BE1.png|32px]] [[File:Lingering Potion of Luck JE1.png|32px]] Added lingering potions.}}
{{History||xbox=TU69|xbone=none|ps=1.76|wiiu=Patch 38|switch=none|[[File:Lingering Potion of Decay BE1.png|32px]] [[File:Lingering Potion of the Turtle Master JE1 BE1.png|32px]] [[File:Lingering Potion of Slow Falling JE1 BE1.png|32px]] Added lingering potions of the [[Wither (effect)|Decay]], [[Slow Falling]], and Turtle Master.}}
{{History||xbox=none|xbone=none|ps=1.90|wiiu=none|switch=none|[[File:Lingering Water Bottle JE2 BE2.png|32px]] [[File:Lingering Potion of Night Vision JE2 BE2.png|32px]] [[File:Lingering Potion of Invisibility JE2 BE2.png|32px]] [[File:Lingering Potion of Leaping JE2 BE2.png|32px]] [[File:Lingering Potion of Fire Resistance JE2 BE2.png|32px]] [[File:Lingering Potion of Swiftness JE2 BE2.png|32px]] [[File:Lingering Potion of Slowness JE2 BE2.png|32px]] [[File:Lingering Potion of Water Breathing JE2 BE2.png|32px]] [[File:Lingering Potion of Healing JE2 BE2.png|32px]] [[File:Lingering Potion of Harming JE2 BE2.png|32px]] [[File:Lingering Potion of Poison JE2 BE2.png|32px]] [[File:Lingering Potion of Regeneration JE2 BE2.png|32px]] [[File:Lingering Potion of Strength JE2 BE2.png|32px]] [[File:Lingering Potion of Weakness JE2 BE2.png|32px]] [[File:Lingering Potion of Luck JE2.png|32px]] [[File:Lingering Potion of Decay BE2.png|32px]] [[File:Lingering Potion of the Turtle Master JE2 BE2.png|32px]] [[File:Lingering Potion of Slow Falling JE2 BE2.png|32px]] The textures of lingering potions have been changed.}}
{{History|new 3ds}}
{{History||1.7.10|[[File:Lingering Water Bottle JE1 BE1.png|32px]] [[File:Lingering Potion of Night Vision JE1 BE1.png|32px]] [[File:Lingering Potion of Invisibility JE1 BE1.png|32px]] [[File:Lingering Potion of Leaping JE1 BE1.png|32px]] [[File:Lingering Potion of Fire Resistance JE1 BE1.png|32px]] [[File:Lingering Potion of Swiftness JE1 BE1.png|32px]] [[File:Lingering Potion of Slowness JE1 BE1.png|32px]] [[File:Lingering Potion of Water Breathing JE1 BE1.png|32px]] [[File:Lingering Potion of Healing JE1 BE1.png|32px]] [[File:Lingering Potion of Harming JE1 BE1.png|32px]] [[File:Lingering Potion of Poison JE1 BE1.png|32px]] [[File:Lingering Potion of Regeneration JE1 BE1.png|32px]] [[File:Lingering Potion of Strength JE1 BE1.png|32px]] [[File:Lingering Potion of Weakness JE1 BE1.png|32px]] [[File:Lingering Potion of Decay BE1.png|32px]] Added lingering potions.
|Lingering water bottles, mundane, long mundane, thick, and awkward lingering potions are all available in the Creative inventory.}}
{{History|foot}}
== Issues ==
{{issue list}}
== Trivia ==
* A thrown lingering potion faces toward the [[player]] in first-person view while it appears rotated horizontally in third-person view. This is the case for all throwable [[item]]s ([[ender pearl]]s, [[eggs]], [[snowball]]s, and all throwable potions).
== Gallery ==
<gallery>
Lingering Water Bottle.png|Water Bottle
Lingering Potion of Night Vision.png|Night Vision
Lingering Potion of Invisibility.png|Invisibility
Lingering Potion of Leaping.png|Leaping
Lingering Potion of Fire Resistance.png|Fire Resistance
Lingering Potion of Swiftness.png|Swiftness
Lingering Potion of Slowness.png|Slowness
Lingering Potion of the Turtle Master.png|Turtle Master
Lingering Potion of Water Breathing.png|Water Breathing
Lingering Potion of Healing.png|Healing
Lingering Potion of Harming.png|Harming
Lingering Potion of Poison.png|Poison
Lingering Potion of Regeneration.png|Regeneration
Lingering Potion of Strength.png|Strength
Lingering Potion of Weakness.png|Weakness
Lingering Potion of Slow Falling.png|Slow Falling
Lingering Potion of Luck.png|Luck
Lingering Potion of Decay.png|Decay
Uncraftable Lingering Potion.png|Uncraftable
</gallery>
=== Screenshots ===
<gallery>
Transparent Area Effect Cloud Image.png|Just area affect cloud particles
</gallery>
== See also ==
* {{ItemLink|Glass Bottle}}
* {{ItemLink|Potion}}
* {{ItemLink|Splash Potion}}
{{Items}}
{{Entities}}
[[Category:Combat]]
[[de:Verweiltrank]]
[[fr:Potion persistante]]
[[ko:잔류형 물약]]
[[ja:残留ポーション]]
[[pl:Trwałe miotane mikstury]]
[[pt:Poção prolongada]]
[[ru:Оседающие зелья]]
[[uk:Осідаючі зілля]]
[[zh:滞留药水]]</li><li>[[Minecart with Chest|Minecart with Chest]]<br/>{{ItemEntity
|image=Minecart with Chest.png
|renewable=Yes
|stackable=No
|size=Height: 0.7 Blocks<br>Width: 0.98 Blocks
|networkid='''[[JE]]''': 10
|drops=1 {{ItemLink|Minecart with Chest}}<br> plus contents
|health={{hp|6}}
}}
A '''minecart with chest''' is a single [[chest]] inside a [[minecart]], and functions as such.
== Natural generation ==
Minecarts with chests containing loot naturally generate in [[mineshaft]]s, each on top of a piece of [[rail]].
== Obtaining ==
=== Crafting ===
{{Crafting|Chest|Minecart|Output=Minecart with Chest|type=Transportation}}
Minecarts with chests can be retrieved by attacking them. By doing so it drops as an [[item]] and any other contents of the chest are dropped as well.
==Usage==
[[File:Minecart with Chest GUI.png|thumb|176px|The GUI of a minecart with chest.]]
Minecarts with chests can be placed by {{control|use item|text=using its item}} on any type of [[rail]].
Chest minecarts' contents can be accessed by pressing {{control|use item}} button on them. The interaction makes no sounds and the chest does not show the opening or closing animation, unlike regular chests.
The boost that minecarts with chests gain from [[powered rail]]s is dependent on their load. For example, from a 1 powered rail starter track, an empty minecart with chest travels 64 blocks, but a full minecart with chest travels only 16 blocks (opposed to 80 blocks for an occupied normal minecart and 8 blocks for an empty normal minecart).
Another physical property of chest minecarts is their ability to be stacked. While three chests can fit in an area three blocks tall, up to four chest minecarts can fit in the same area. Like other minecarts, an unlimited number of minecarts with chests can exist in the same block space.
Minecarts with chests are also able to interact with [[hopper]]s. Hoppers can take items out from the minecart chest if they are below the track as the minecart rolls over it or put them in if the minecart rolls under a downward facing hopper. Hoppers can also input items if they are facing into the side of the minecart.
Opening or destroying a minecart with chest angers [[piglin]]s.
{{See also|Tutorials/Storage minecarts}}
When on top of [[detector rail]]s, nearby [[redstone comparators]] will give out redstone signals based on how full the minecarts with chests are.
== Sounds ==
{{Edition|Java}}:<br>
Minecarts with chests use the Friendly Creatures sound category for entity-dependent sound events.<ref group=sound name=rollsource>{{bug|MC-42132}}</ref>
{{Sound table
|sound=Minecart rolling.ogg
|subtitle=Minecart rolls
|source=Friendly Creatures <ref group=sound name=rollsource/>
|overridesource=1
|description=While a minecart with chest is moving
|id=entity.minecart.riding
|translationkey=subtitles.entity.minecart.riding
|volume=0.0-0.35 <ref group=sound>Relates linearly with horizontal velocity (max 0.5)</ref>
|pitch=0.0-1.0 <ref group=sound>Will increase by 0.0025 per tick if the minecart's horizontal velocity is more than 0.01</ref>
|distance=16
|foot=1}}
{{Edition|Bedrock}}:
{{Sound table
|type=bedrock
|sound=Minecart rolling.ogg
|source=neutral
|description=While a minecart with chest is moving
|id=minecart.base
|foot=1}}
==Data values==
===ID===
{{edition|java}}:
{{ID table
|edition=java
|firstcolumnname=Item
|showforms=y
|generatetranslationkeys=y
|displayname=Minecart with Chest
|spritetype=item
|nameid=chest_minecart
|form=item
|foot=1}}
{{ID table
|edition=java
|firstcolumnname=Entity
|generatetranslationkeys=y
|displayname=Minecart with Chest
|spritetype=entity
|nameid=chest_minecart
|foot=1}}
{{edition|bedrock}}:
{{ID table
|edition=bedrock
|firstcolumnname=Item
|shownumericids=y
|showforms=y
|notshowbeitemforms=y
|generatetranslationkeys=y
|displayname=Minecart with Chest
|spritetype=item
|nameid=chest_minecart
|id=389
|form=item
|foot=1}}
{{ID table
|edition=bedrock
|firstcolumnname=Entity
|shownumericids=y
|generatetranslationkeys=y
|displayname=Minecart with Chest
|spritetype=entity
|nameid=chest_minecart
|id=98
|foot=1}}
===Entity data===
Minecarts with chests have entity data associated with them that contain various properties of the entity.
{{el|java}}:
{{main|Entity format}}
{{/ED}}
{{el|bedrock}}:
: See [[Bedrock Edition level format/Entity format]].
==Achievements==
{{load achievements|Freight Station}}
== Video==
<div style="text-align:center">{{yt|2yVVMiQrCwo}}</div>
==History ==
[[File:Minecart with Chest BE3.png|thumb|The Minecart models in the Bedrock Edition were north or south on the sides. In the latest version, the front and rear sides are north or south. But the absolute orientation of the chest was not changed.]]
{{info needed section|In bedrock edition 1.16.100 it seems that chests in minecarts face sideways instead of forward - when was this changed?}}
{{History|java alpha}}
{{History||v1.0.14|[[File:Minecart with Chest JE1.png|32px]] [[File:Minecart with Chest (item) JE1 BE1.png|32px]] Minecarts with chests have been added.
|At this point, they are either called "chest minecarts" or "storage minecarts" because no in-game name was indicated.}}
{{History|java beta}}
{{History||1.0|"Minecart with Chest" has been first indicated as its name, via the new item tooltips.}}
{{History||1.8|snap=Pre-release|[[File:Minecart with Chest JE2.png|32px]] The [[model]] of the minecart with chest has been changed to match the new [[chest]] model. However, the [[chest]] is incorrectly offset.<ref>[[mcw:Issues/Beta 1.8pre2#Graphical]]</ref>}}
{{History|||snap=release|[[File:Minecart with Chest JE3 BE1.png|32px]] The model of minecarts with chests has been fixed.}}
{{History|java}}
{{History||1.5|snap=13w02a|Minecarts with chests now generate in [[mineshaft]]s in place of normal chests.}}
{{History||1.9|snap=15w43a|[[Loot table]]s have been added; minecarts with chests now use loot tables, and those in generated in [[mineshaft]]s now use loot tables.}}
{{History||1.9.1|snap=pre2|The title of the [[inventory]] has been changed from 'Chest minecart' to 'Minecart with Chest'.}}
{{History||1.11|snap=16w32a|The [[entity]] ID has been changed from <code>MinecartChest</code> to <code>chest_minecart</code>.}}
{{History||1.13|snap=17w47a|Prior to [[1.13/Flattening|''The Flattening'']], this [[item]]'s numeral ID was 342.}}
{{History||1.14|snap=18w43a|[[File:Minecart with Chest JE4 BE2.png|32px]] [[File:Minecart with Chest (item) JE2 BE2.png|32px]] The textures of minecarts with chests have been changed.}}
{{History||1.16.2|snap=Pre-release 1|[[Piglin]]s now become angry with players who open or destroy a chest minecart.}}
{{History||1.19|snap=22w13a|The crafting recipe for a minecart with chest is now shapeless.
|Breaking a minecart with chest will now drop the item instead of the minecart and chest separately, though the contents of the chest are still dropped.<ref>{{bug|MC-249493|||Fixed}}</ref>}}
{{History|pocket alpha}}
{{History||v0.14.0|snap=build 1|[[File:Minecart with Chest JE3 BE1.png|32px]] [[File:Minecart with Chest (item) JE1 BE1.png|32px]] Added minecarts with chests.}}
{{History|||snap=build 3|Minecarts with chests now drop [[item]]s when destroyed in [[Creative]] mode.}}
{{History|pocket}}
{{History||1.1.0|snap=alpha 1.1.0.0|The [[entity]] ID has been changed from <code>minecartchest</code> to <code>chest_minecart</code>.}}
{{History|bedrock}}
{{History||1.10.0|snap=beta 1.10.0.3|[[File:Minecart with Chest JE4 BE2.png|32px]] [[File:Minecart with Chest (item) JE2 BE2.png|32px]] The textures of minecarts with chests have been changed.}}
{{History||1.19.0|snap=beta 1.19.0.30|Breaking a minecart with chest will now drop the item instead of the minecart and chest separately, though the contents of the chest are still dropped.}}
{{History|console}}
{{History||xbox=TU1|xbone=CU1|ps=1.0|wiiu=Patch 1|switch=1.0.1|[[File:Minecart with Chest JE3 BE1.png|32px]] [[File:Minecart with Chest (item) JE1 BE1.png|32px]] Added minecarts with chests.}}
{{History||xbox=none|xbone=none|ps=1.90|wiiu=none|switch=none|[[File:Minecart with Chest JE4 BE2.png|32px]] [[File:Minecart with Chest (item) JE2 BE2.png|32px]] The textures of minecarts with chests have been changed.}}
{{History|new 3ds}}
{{History||0.1.0|[[File:Minecart_with_Chest_JE3_BE1.png|32px]] [[File:Minecart_with_Chest_(item)_JE1_BE1.png|32px]] Added minecarts with chests.
|Minecarts with chests emit smoke [[particles]] when destroyed.}}
{{History|foot}}
==Issues==
{{issue list}}
==Gallery ==
<gallery>
Compact Minecart Storage.png|A compact storage using chest minecarts (left) compared to chest storage in the same volume. Notice how chests cannot be placed next to each other, which is no longer the case after Java Edition 1.13.
GlitchedMinecartChest.png|This minecart with chest is trapped inside a block, due to a [[stronghold]] and a [[mineshaft]] that generated partially overlapping.
Minecartportal.png|A minecart with chest generated on top of an [[end portal frame]], because there is a mineshaft behind the wall.
Chest Minecart Stack.png|A large stack of chest minecarts.
</gallery>
==References==
{{Reflist}}
{{items}}
{{entities}}
[[Category:Mechanics]]
[[Category:Storage]]
[[cs:Nákladní vozík]]
[[de:Güterlore]]
[[es:Vagoneta con cofre]]
[[fr:Wagonnet de stockage]]
[[hu:Tárolócsille]]
[[it:Carrello da miniera]]
[[ja:チェスト付きのトロッコ]]
[[ko:상자가 실린 광산 수레]]
[[nl:Mijnkar met kist]]
[[pl:Wagonik ze skrzynią]]
[[pt:Carrinho de mina com baú]]
[[ru:Вагонетка с сундуком]]
[[uk:Вагонетка зі скринею]]
[[zh:运输矿车]]</li></ul> | 17w47a | Prior to The Flattening, this block's numeral ID was 51. | |||
| September 28, 2019 | Soul fire is showcased at Minecon Live 2019. | ||||
| December 3, 2019 | Maria Lemón confirms that fire set on soul sand is not soul fire. | ||||
1.16{{Extension DPL}}<ul><li>[[Explorer Map|Explorer Map]]<br/>{{about|the map used to find rare structures|the craftable map|Map|others|Map (disambiguation)}}{{Needs updating|Add info on the new jungle, swamp, and village maps in Java 1.20.2 Pre-Release 1}}{{Item
| image = <gallery>
Ocean Explorer Map.png | Ocean
Woodland Explorer Map.png | Woodland
Buried Treasure Map.png | Buried Treasure
</gallery>
|image2 = <gallery>
Ocean Explorer Map BE.png | Ocean (BE)
Woodland Explorer Map BE.png | Woodland (BE)
Buried Treasure Map BE.png | Buried in Treasure (BE)
</gallery>
| renewable =
* '''Buried Treasure''': No
* '''Woodland and Ocean''': Yes
| stackable = Yes (64)
}}
An '''explorer map''' is a special [[map]] used to aid in finding rare [[generated structures]], including [[woodland mansion]]s, [[ocean monument]]s, and [[buried treasure]]s.
== Obtaining ==
=== Trading ===
Apprentice-level [[cartographer]] villagers sell ocean explorer maps for 13 emeralds and a compass. Journeyman-level cartographer villagers sell woodland explorer maps for 14 emeralds and a compass.
{{IN|java}}, if the cartographer is in [[the Nether]] or [[the End]], either spawned or transported, the trades for the map do not unlock. However, {{in|bedrock}}, the cartographer trades for the map are unlocked, but the purchased map shows the same layout as in the corresponding dimension and shows no destination structure, but if cartographer trades are unlocked in an old world type (prior-1.11.0), the game stops ticking.
In ''Java Edition'', each cartographer sells its own unique explorer map that points to a different location than other cartographers. Purchasing another explorer map from the same cartographer results in the same explorer map. In Bedrock Edition, a cartographer sells an explorer map that points to the nearest location, regardless of whether it is explored or previously mapped by another cartographer.<!-- start to glitched out-->
=== Chest loot ===
Treasure maps, in contrast to explorer maps, generate in underwater ruins or in shipwrecks.
{{LootChestItem|buried-treasure-map}}
== Usage ==
[[File:Explorer Map Comparison.gif|thumb|217px|Unexplored and partially explored maps.]]
{{See also|Map#Mapping|Map#Map content}}
=== Locating structures ===
There are three types of explorer maps: woodland, [[ocean]], and buried treasure. The maps differ from a normal map, in that it shows the area's land-water outline, with an orange striated (striped) texture for water<ref>Specifically, biomes in the "water_on_map_outlines" [[Tag#Biomes|biome tag]].</ref>, and the blank map texture for land. The maps show a section of land that contains a [[woodland mansion]], [[monument]] or [[buried treasure]] respectively. This may not be the nearest such [[structure]] to the [[player]]. The structures are displayed as a small icon. If the player icon is smaller than it would be on a normal map, that means the player is a great distance away. When the player is less than 1027 blocks away from the map border, the icon returns to the proper size. When the player reaches the map's area of land (512×512), the [[map]] fills in like a normal map.
The basic functions of a buried treasure explorer map are similar to that of the other two. However, instead of showing the structure icon on the map, it shows a red X instead. The [[buried treasure]] structure is located on the same X and Z coordinates as the middle of the X (the player marker may need to be aligned with the bottom of the middle 2×2 pixel square of the X). To locate the [[chest]] spot, hold the treasure map with both hands, not in the offhand slot.
=== Cloning ===
{{Crafting
|showdescription=1
|shapeless=1
|name=[[Explorer Map]]<br>(cloned)
|;;;Empty Map;Empty Map;Empty Map;Empty Map;Empty Map
|;;;;Empty Map;Empty Map;Empty Map;Empty Map
|;;;;;Empty Map;Empty Map;Empty Map
|Ocean Explorer Map; Woodland Explorer Map; Buried Treasure Map; Ocean Explorer Map; Woodland Explorer Map; Buried Treasure Map; Ocean Explorer Map; Woodland Explorer Map
|Empty Map
|;;;;;;Empty Map;Empty Map
|;Empty Map;Empty Map;Empty Map;Empty Map;Empty Map;Empty Map;Empty Map
|;;Empty Map;Empty Map;Empty Map;Empty Map;Empty Map;Empty Map
|;;;;;;;Empty Map
|Output= Ocean Explorer Map,2; Woodland Explorer Map,3; Buried Treasure Map,4; Ocean Explorer Map,5; Woodland Explorer Map,6; Buried Treasure Map,7; Ocean Explorer Map,8; Woodland Explorer Map,9
|type= Miscellaneous
|description=The output has the same map center as the input map, and the same [[monument]], [[woodland mansion]] or [[buried treasure]] marker. Cloned maps are stackable.
}}
The parts of the world that have already been explored and mapped are copied, and newly explored areas appear on both instances. In Creative mode, cloned explorer maps can be obtained by pick blocking on the explorer map displayed on [[item frames]] (the map needs to be out of the [[player]]'s inventory when using pick block, or else that map moves into the active hotbar slot).
== Sounds ==
{{edition|java}}:
{{Sound table
|sound=Drawmap1.ogg
|sound2=Drawmap2.ogg
|sound3=Drawmap3.ogg
|subtitle=Map drawn
|source=block
|description=When an explorer map is edited using a cartography table
|id=ui.cartography_table.take_result
|translationkey=subtitles.ui.cartography_table.take_result
|volume=1.0
|pitch=1.0
|distance=16
|foot=1}}
{{edition|bedrock}}: ''None''
== Data values ==
=== ID ===
{{edition|java}}:
{{ID table
|edition=java
|showforms=y
|generatetranslationkeys=y
|displayname=Map
|spritetype=item
|nameid=filled_map
|form=item
|translationkey=filled_map.mansion,filled_map.ocean,filled_map.buried_treasure
|foot=1}}
{{edition|bedrock}}:
{{ID table
|edition=bedrock
|showaliasids=y
|shownumericids=y
|showforms=y
|notshowbeitemforms=y
|generatetranslationkeys=y
|displayname=Map
|spritetype=item
|nameid=filled_map
|aliasid=map
|id=358
|form=item
|translationkey=item.map.exploration.monument.name,item.map.exploration.mansion.name,item.map.exploration.treasure.name
|foot=1}}
=== Metadata ===
{{see also|Bedrock Edition data values}}
{{IN|bedrock}}, the item [[Data value]] distinguishes explorer maps from one another:
{{:Map/DV}}
=== Item data ===
An explorer map differs from a map in that its <code>display</code> tag is set, which includes a <code>Mapcolor</code> and a <code>LocName</code>; also its <code>Decorations</code> list includes an entry for its target monument, mansion or buried treasure. Its [[Map item format#map_<#>.dat format|map item entry]] is identical to that of a normal map, except that by the time the player sees it, its <code>colors</code> byte array is pre-filled with explorer maps' characteristic land-water boundary lines and water shading.
<div class="treeview">
It should be noted that this additional data is stored in the Cartographer's NBT data and in the inventory item's NBT data, and not in the map file (e.g. <samp>map_0.dat</samp>). If the [[player]] were to use the {{cmd|give}} command to give themselves a map with the same map ID as an existing explorer map, it would still have the Ocean Monument or the Woodland Mansion icon on the map, but it would simply be named "Map" instead of, for example, "Ocean Explorer Map".
* {{nbt|compound}} Item data
** {{nbt|compound|tag}}:
*** {{nbt|compound|display}}: How the map looks in an item slot. See also [[Player.dat_format#Display Properties]].
**** {{nbt|string|Name}}: The name the map is given. In this case, they are localized strings: either <code>{"translate":"filled_map.monument"}</code>,<code>{"translate":"filled_map.mansion"}</code> or <code>{"translate":"filled_map.buried_treasure"}</code>.
**** {{nbt|int|MapColor}}: Color codes are calculated from the Red, Green and Blue components using this formula:<br>'''<span style="color:red">Red</span>[[wikipedia:Logical shift|<<]]16 + <span style="color:green">Green</span><<8 + <span style="color:blue">Blue</span>'''.<ref group=note>For positive values larger than 0x00FFFFFF, the top byte is ignored. All negative values produce white.</ref> Monument maps use 3830373, which is {{color swatch|58|114|101}}. Mansion maps use 5393476, which is {{color swatch|82|76|68}}. Buried treasure explorer maps do not use a color code.
*** {{nbt|list|Decorations}}:
**** {{nbt|compound}}: One of these for each icon on the map. Explorer maps always have at least one representing their target.
***** {{nbt|string|id}}: An arbitrary unique string identifying the decoration. For explorer map target structures, this is "+".
***** {{nbt|double|rot}}: The rotation of the icon. For explorer map target structures, this is always 180.
***** {{nbt|byte|type}}: The ID of the [[Map#Map icons|map icon]]: 8 for a mansion map, 9 for a monument map, 26 for a treasure map.
***** {{nbt|double|x}}: The world x-coordinate of the target structure icon.
***** {{nbt|double|z}}: The world z-coordinate of the target structure icon.
</div>
; Notes
{{notelist}}
== Achievements ==
{{load achievements|Treasure Hunter}}
== History ==
{{History|java}}
{{History||1.11|snap=16w39a|[[File:Woodland Explorer Map JE1 BE1.png|32px]] [[File:Ocean Explorer Map JE1 BE1.png|32px]] Added woodland and ocean explorer maps.}}
{{History|||snap=16w41a|Explorer maps can now no longer be zoomed out.}}
{{History||1.13|snap=18w10a|[[File:Map (item) JE1 BE1.png|32px]] Added buried treasure explorer maps.}}
{{History|||snap=18w11a|Buried treasure explorer maps now generate in the [[chest]]s of [[shipwreck]]s.}}
{{History||1.14|snap=18w43a|[[File:Woodland Explorer Map JE2 BE2.png|32px]] [[File:Ocean Explorer Map JE2 BE2.png|32px]] [[File:Map (item) JE2 BE2.png|32px]] The textures for explorer maps have now been changed.}}
{{History||1.20.2|snap=1.20.2 Pre-release 1|Updated structure icons on explorer maps sold by cartographers.}}
{{History||Villager Trade Rebalance<br>(Experimental)|link=Java Edition 1.20.2|snap=1.20.2 Pre-release 1|Added seven new maps which cartographers can sell.}}
{{History|pocket}}
{{History||1.1.0|snap=alpha 1.1.0.0|[[File:Woodland Explorer Map JE1 BE1.png|32px]] [[File:Ocean Explorer Map JE1 BE1.png|32px]] Added explorer maps.<ref>{{Mcnet|discovery-update-pocket-and-win-10-soon|The Discovery Update: on Pocket and Win 10 soon|March 29, 2017}}</ref>
|Explorer maps are not yet obtainable in [[survival]] mode.}}
{{History|||snap=alpha 1.1.0.3|Explorer maps are now obtainable as [[trading|trades]] from [[cartographer]] [[villager]]s.}}
{{History|bedrock}}
{{History||1.4.0|snap=beta 1.2.14.2|[[File:Map (item) JE1 BE1.png|32px]] Added buried treasure explorer maps.}}
{{History|||snap=beta 1.2.20.1|Treasure maps now generate in [[underwater ruins]] [[chest]]s.}}
{{History||1.10.0|snap=beta 1.10.0.3|[[File:Woodland Explorer Map JE2 BE2.png|32px]] [[File:Ocean Explorer Map JE2 BE2.png|32px]] [[File:Map (item) JE2 BE2.png|32px]] The textures for explorer maps have now been changed.}}
{{History||1.11.0|snap=beta 1.11.0.4|[[Trading]] has now been changed, woodland and ocean explorer maps now cost a [[compass]] and 12 [[emerald]]s.
|Journeyman-level [[cartographer]] [[villager]]s no longer [[trading|sell]] 2 type of explorer map as they now have {{frac|1|3}} chance to sell woodland explorer maps, {{frac|1|3}} chance to sell ocean explorer maps, or {{frac|1|3}} chance to sell other [[item]]s<!-- empty locator map--> as part of their [[trading|trades]].
|Woodland explorer maps can now be [[trading|bought]] from fletcher [[villager]]s.}}
{{History||1.12.0|snap=beta 1.12.0.3|Journeyman-level fletcher villagers no longer [[trading|sell]] woodland explorer maps.}}
{{History||1.13.0|snap=beta 1.13.0.1|[[File:Woodland Explorer Map BE3.png|32px]] [[File:Ocean Explorer Map BE3.png|32px]] [[File:Buried Treasure Map BE3.png|32px]] The textures of explorer maps have now been changed.}}
{{History||1.16.100|snap=beta 1.16.100.56|The ID of maps has been changed from <code>map</code> to <code>filled_map</code>.}}
{{History|console}}
{{History||xbox=TU54|xbone=CU44|ps=1.52|wiiu=Patch 24|switch=1.0.4|[[File:Woodland Explorer Map JE1 BE1.png|32px]] [[File:Ocean Explorer Map JE1 BE1.png|32px]] Added explorer maps.}}
{{History|PS4}}
{{History||1.90|[[File:Woodland Explorer Map JE2 BE2.png|32px]] [[File:Ocean Explorer Map JE2 BE2.png|32px]] The textures for explorer maps have now been changed.}}
{{History|new3ds}}
{{History||1.9.19|[[File:Woodland Explorer Map JE1 BE1.png|32px]] [[File:Ocean Explorer Map JE1 BE1.png|32px]] Added explorer maps.}}
{{History|foot}}
== Issues ==
{{Issue list}}
== Trivia ==
* When a [[cartographer]] generates the trade offers for the explorer maps, it chooses the location of one of the nearest structures of the respective type ([[monument]] or [[woodland mansion]]).
* For the reason above, explorer maps obtained from one cartographer are always the same. Also, if two cartographers unlock the explorer map trades approximately at the same place and at the same time, the map locations are usually identical. This sometimes also happens when finding multiple treasure maps from [[ocean ruins]].
* Explorer maps fill as the [[chunk]]s are generated, rather than when the [[player]] holds them while in the area; leaving an explorer map while exploring the area still fills the map.
* Buried treasure explorer maps are named ''Buried Treasure Map'' {{in|java}} while {{in|bedrock}}, they are named ''Treasure Map''.
* It is possible for a cartographer to give a monument or woodland mansion explorer map for areas where the [[generated structures|structures]] would have spawned in the world, but were unable to as a result of terrain generation. As a result, explorer maps, unfortunately, don't always guarantee that a structure exists at the purported location. This is most common with woodland mansion explorer maps, due to its generation algorithm.
* On [[Bedrock Edition]], inventory editors and add-ons can be used to create Explorer Maps that lead to any structure.
== Gallery ==
<gallery>
File:Explorer Maps.png|An ocean explorer map in the [[off-hand]], a woodland explorer map in the main hand, and a [[cartographer]] [[villager]] in between them.
File:Partial Explorer Map.png|A partially-explored explorer map.
File:ExplorerToNormal Map Comparison.png|Two fully-explored maps of the same place, one of which is a woodland explorer map.
File:Buried Treasure Explorer Map.png|An [[item frame]] holding a buried treasure explorer map. The player can see the red X on the left side of the map.
File:Purchase.png|Purchasing explorer maps from a cartographer.
</gallery>
== See also ==
* [[Map]]
* [[Woodland Mansion]]
* [[Ocean Monument]]
* [[Shipwreck]]
* [[Buried treasure]]
== References ==
{{reflist}}
== External Links ==
*[https://www.minecraft.net/en-us/article/taking-inventory--explorer-map Taking Inventory: Explorer Map] – Minecraft.net on November 13, 2019
{{Items}}
[[de:Schatzkarte]]
[[es:Mapa (localización de estructura)]]
[[fr:Carte d'exploration]]
[[ja:探検家の地図]]
[[ko:탐험 지도]]
[[pl:Mapa eksploracyjna]]
[[pt:Mapa de exploração]]
[[ru:Карта сокровищ]]
[[zh:探险家地图]]</li><li>[[Rabbit's Foot|Rabbit's Foot]]<br/>{{Item
| image = Rabbit's Foot.png
|type=
| renewable = Yes
| stackable = Yes (64)
}}
A '''rabbit's foot''' is a [[brewing]] item obtained from [[rabbit]]s.
== Obtaining ==
=== Mob loot ===
Each [[rabbit]] has a 10% chance to drop a rabbit's foot when killed by the [[player]]. This chance can be increased by 3% per level using a sword enchanted with [[Looting]].
A [[fox]] sometimes spawns with a rabbit's foot in its mouth, which always drops upon death. Alternatively, the player can drop a [[food]] item, which causes the fox to drop the rabbit's foot.
=== Cat gifts ===
{{main|Cat#Gifts}}
A tamed [[cat]] has a 70% chance of giving the player a gift when the player wakes up from a [[bed]], and the gift has a 16.13% chance to be a rabbit's foot.
== Usage ==
=== Brewing ingredient ===
{{Brewing
|head=1
|Rabbit's Foot
|Mundane Potion
|base=Water Bottle
}}
{{brewing
|foot=1
|showname=1
|Rabbit's Foot
|Potion of Leaping
}}
=== Trading ===
Journeyman-level cleric [[villager]]s buy rabbit's feet for an [[emerald]] as part of their trade: {{in|java}} they buy 2, and {{in|bedrock}} they buy 4.
== Video ==
<div style="text-align:center">{{yt|Ba3QN3uCniU}}</div>
== Data values ==
=== ID ===
{{edition|java}}:
{{ID table
|edition=java
|showforms=y
|generatetranslationkeys=y
|displayname=Rabbit's Foot
|spritetype=item
|nameid=rabbit_foot
|form=item
|foot=1}}
{{edition|bedrock}}:
{{ID table
|edition=bedrock
|shownumericids=y
|showforms=y
|notshowbeitemforms=y
|generatetranslationkeys=y
|displayname=Rabbit's Foot
|spritetype=item
|nameid=rabbit_foot
|id=528
|form=item
|foot=1}}
== History ==
{{History|java}}
{{History||1.8|snap=June 30, 2014|slink=https://twitter.com/TheMogMiner/status/483636993780232192|[[Ryan Holtz]] tweeted images of a rabbit's foot with some other new [[item]]s.}}
{{History|||snap=14w27a|[[File:Rabbit's Foot JE1.png|32px]] Added rabbit's foot.
|Added the [[potion of Leaping]]; it is [[brewing|brewed]] by adding a rabbit's foot to an [[awkward potion]]. The rabbit's foot also creates the [[mundane potion]] when brewed into a [[water bottle]].}}
{{History|||snap=14w33b|[[File:Rabbit's Foot JE2 BE1.png|32px]] The texture of the rabbit's foot has been changed. The new texture was created by [[wikipedia:Reddit|Reddit]] user [http://www.reddit.com/u/zeldahuman zeldahuman].<ref>{{reddit|2bjzes/a_reminder_of_the_blocks_and_items_added_in_18_so|cj69zie|context=3}}</ref><ref>{{reddit|2c5f35/minecraft_snapshot_14w31a_has_been_released|cjct7gb}}</ref>}}
{{History||1.8.1|snap=pre1|Potions of Leaping, which use rabbit's foot, can now be extended using [[redstone]].}}
{{History||1.9|snap=15w46a|The drop rate of rabbit's foot has been quadrupled.{{more info|Before/After rates}}}}
{{History||1.13|snap=17w47a|Prior to [[1.13/Flattening|''The Flattening'']], this [[item]]'s numeral ID was 414.}}
{{History||1.14|snap=18w43a|[[File:Rabbit's Foot JE3 BE2.png|32px]] The texture of rabbit's foot has been changed.}}
{{History|||snap=18w44a|[[Cat]]s now offer rabbit's feet as [[Cat#Gifts|gifts]].}}
{{History|||snap=19w07a|Added [[fox]]es, which sometimes spawn with rabbit's feet in their mouths.}}
{{History|||snap=19w11a|Cleric [[villager]]s now [[trading|buy]] rabbit's feet.}}
{{History|pocket alpha}}
{{History||v0.12.1|snap=build 1|[[File:Rabbit's Foot JE2 BE1.png|32px]] Added rabbit's foot to the [[Creative]] mode [[inventory]].}}
{{History||v0.13.0|snap=build 1|Rabbit's foot can now be obtained as a rare [[drops|drop]] upon killing [[rabbit]]s.
|Rabbit's foot can now be [[brewing|brewed]] to make [[potions of Leaping]].}}
{{History|bedrock}}
{{History||1.8.0|snap=beta 1.8.0.8|Tamed [[cat]]s can now give the [[player]] rabbit's foot as a gift.}}
{{History||1.10.0|snap=beta 1.10.0.3|[[File:Rabbit's Foot JE3 BE2.png|32px]] The texture of rabbit's foot has been changed.}}
{{History||1.11.0|snap=beta 1.11.0.4|Rabbit's foot can now be [[trading|sold]] to cleric [[villager]]s.}}
{{History||1.13.0|snap=beta 1.13.0.1|Added [[fox]]es, which can [[drops|drop]] rabbit's foot.}}
{{History|console}}
{{History||xbox=TU31|xbone=CU19|ps=1.22|wiiu=Patch 3|switch=1.0.1|[[File:Rabbit's Foot JE2 BE1.png|32px]] Added rabbit's foot.}}
{{History||xbox=none|xbone=none|ps=1.90|wiiu=none|switch=none|[[File:Rabbit's Foot JE3 BE2.png|32px]] The texture of rabbit's foot has been changed.}}
{{History|New 3DS}}
{{History||0.1.0|[[File:Rabbit's Foot JE2 BE1.png|32px]] Added rabbit's foot.}}
{{History|foot}}
== Issues ==
{{issue list}}
== Trivia ==
* The superstition that [[wikipedia:Rabbit's_foot|a rabbit's foot is a lucky charm]] applies equally to Minecraft as it does in the real world: it does not actually increase luck.
== Gallery ==
<gallery>
Rabbit Items 4 Ryan Holtz.png|First image of the item by [[Ryan Holtz]].
Rabbit Items 5 Ryan Holtz.png|Ryan Holtz brewing the item into a potion.
Rabbit Items 6 Ryan Holtz.png|Ryan Holtz enhancing the potion.
</gallery>
== References ==
{{reflist}}
== External Links ==
*[https://www.minecraft.net/en-us/article/taking-inventory--rabbit-s-foot Taking Inventory: Rabbit's Foot] – Minecraft.net on May 3, 2019
{{items}}
[[de:Hasenpfote]]
[[es:Pata de conejo]]
[[fr:Patte de lapin]]
[[it:Zampa di coniglio]]
[[ja:ウサギの足]]
[[ko:토끼발]]
[[nl:Konijnenpootje]]
[[pl:Królicza łapka]]
[[pt:Pé de coelho]]
[[ru:Кроличья лапка]]
[[uk:Кроляча лапка]]
[[zh:兔子脚]]
[[Category:Renewable resources]]
[[Category:Brewing recipe]]</li></ul> | 20w06a | ||||
| Fire no longer burns items.[5] | |||||
| 20w07a | The texture of soul fire has been changed. The color channel of transparent pixels is now filled to black. | ||||
| Normal fire burns items again, and soul fire now burns items. | |||||
| 20w10a | Fire now has a proper hitbox like all other blocks. | ||||
| Fire now produces fire particles when destroyed. | |||||
| Fire can no longer be put out with swords or tridents in Creative mode. | |||||
| The blockstates and info of fire can now be properly read via F3. | |||||
| Fire can now be modified using debug sticks. | |||||
| 20w11a | Loot tables have been added for fire. | ||||
| Fire no longer produces particles when destroyed. | |||||
| Soul sand is now capable of supporting fire on its top surface,[6] however this is regular fire, not soul fire.[7] | |||||
| 20w12a | Fire lit on top of soul sand is now soul fire. | ||||
| A dedicated block tag is now used to determine what blocks support soul fire. | |||||
| Pocket Edition Alpha | |||||
0.1.0{{Extension DPL}}<ul><li>[[Bamboo|Bamboo]]<br/>{{for|the plant feature|Bamboo (feature)}}
{{Distinguish|text = [[Sugar Cane]], which was colloquially known as Bamboo}}
{{Block
| image = <gallery>
Leafless Bamboo.png|Leafless
Small Leaves Bamboo.png|Small
Big Leaves Bamboo.png|Big
Leafless Old Bamboo.png|Leafless Old
Small Leaves Old Bamboo.png|Small Old
Big Leaves Old Bamboo.png|Big Old
</gallery>
| image2 = Bamboo Shoot.png<!--different infobox for this later down the line, like with pistons?-->
| image3 = Bamboo (item) JE1 BE1.png
| transparent = Yes
| light = No
| tool = Sword
| tool2 = Axe
| renewable = Yes
| stackable = Yes (64)
| flammable = '''Bamboo''': Yes (60)<br>'''Shoot''': No
| lavasusceptible = Yes
}}
'''Bamboo''' is a versatile, fast-growing, [[Bone Meal|bonemealable]] [[plant]] found primarily in [[jungle]]s, which is used for [[crafting]] (particularly [[scaffolding]] and [[Block of Bamboo|bamboo wood]]), [[smelting]] and [[breeding]] [[Panda|pandas]].
A '''bamboo shoot''' is the initial non-solid sapling form of planted bamboo.
== Obtaining ==
Bamboo shoots cannot be obtained through vanilla means. {{IN|bedrock}}, they can be obtained through [[add-on]]s or inventory editing. {{IN|java}}, they are completely unobtainable.
=== Breaking ===
Bamboo can be mined with any [[tool]], but a [[sword]] breaks the block [[instant mining|instantly]], even with [[Mining Fatigue]]. Flowing [[water]] also breaks bamboo shoots, but not mature bamboo stalks.
{{breaking row|Bamboo|Sword|sword=1|horizontal=1}}
{{notelist}}
=== Natural generation ===
Bamboo generates in widely scattered single shoots within [[jungle]] [[biome]]s. Bamboo generates much more densely in the [[bamboo jungle|bamboo variant]]s of jungles, covering large areas of the landscape. Bamboo does ''not'' generate in [[sparse jungle]]s.<ref>{{bug|MC-156638|||WAI}}</ref>
=== Mob loot ===
{{IN|java}}, a [[panda]] drops 1 bamboo when killed. [[Looting]] does not affect the drop rate.<ref>{{bug|MC-160006}}</ref>
{{IN|bedrock}}, a panda drops 0-2 bamboo when killed. Looting increases the drop by 1 per level.
=== Fishing ===
Bamboo can be found while [[fishing]] in [[jungle]] [[biome]]s as a junk [[item]].
=== Chest loot ===
{{LootChestItem|bamboo}}
== Usage ==
When broken, any bamboo [[block]] placed or grown above it is also broken. A bamboo block drops itself as an [[item]] if a [[piston]] pushes it or moves a block into its space. When bamboo is first placed as a shoot it's not solid and can be destroyed by water flowing into it. After growing at least one block taller it becomes solid and can't be destroyed by water. To transform a bamboo shoot into a solid bamboo block place another bamboo on top of it.
Unlike most plants, bamboo cannot be [[Composter#Composting|composted]].<ref>{{bug|MC-142452|||WAI}}</ref>
=== Farming ===
Bamboo can be planted on [[moss block]]s{{only|java|short=1}}, [[grass block]]s, [[dirt]], [[coarse dirt]], [[rooted dirt]], [[gravel]], [[mycelium]], [[podzol]], [[sand]], [[red sand]], [[suspicious sand]], [[suspicious gravel]], [[mud]], bamboo shoot, or on itself. At default random tick speed (3), each plant grows on average every {{convert|4096|ticks|seconds}}. When [[bone meal]] is {{control|used}} on it, it grows by 1–2 [[blocks]]. Bamboo can grow up to 12–16 blocks tall. The top of a bamboo plant requires a [[light]] level of 9 or above to grow.
Because bamboo breaks in almost the same way as [[sugar cane]]s, [[Tutorials/Sugar cane farming|a sugar cane farm]] can be easily adapted to this use. While water is not needed with such a farm, some spacing is recommended if the harvest is done manually as mature stalks are solid.
=== Pandas ===
Bamboo [[item]]s are eaten by [[panda]]s and can be used to speed up the growth of baby pandas. Bamboo can also be used to breed pandas when at least 8 [[block]]s of bamboo are within 5 blocks of the pandas, making the panda the only animal in the game to have extra breeding requirements. At this point, the [[player]] can feed them bamboo and they [[breeding|mate]] to have a baby.
=== Fuel ===
Bamboo can be used as fuel for [[smelting]]. Each bamboo item smelts 0.25 [[item]]s. Crafting two bamboo into a [[stick]] and using that as fuel is equivalent, smelting 0.5 items.
Bamboo can be crafted into other items to increase its fuel efficiency.
* By crafting 9 bamboo into 2 [[bamboo planks]], 3 items can be smelted instead of 2.25, a 33.3% increase in efficiency.
** {{IN|bedrock}}, the fuel efficiency can be further doubled by crafting the bamboo planks into twice the amount of [[slab]]s.<ref>{{bug|MCPE-94368||Wooden slabs last for the same amount of time as planks in a furnace}}</ref>
* {{IN|java}}, by crafting 14 bamboo into 3 [[ladder]]s, 4.5 items can be smelted instead of 3.5, a 28.6% increase in efficiency.
=== Flower pots ===
Bamboo can be placed in a [[flower pot]], where it retains the design it has in its item form.
=== Crafting ingredient ===
{{crafting usage}}
== Appearance ==
[[File:Bamboo stages.png|thumb|The different stages of bamboo growth.]]
The appearance of bamboo changes as it grows. When first placed, it takes the form of a small shoot, which has no [[hitbox]]. When it grows one [[block]] taller it grows to 2 pixels in length and width and the top block has leaves coming off it. At 3 blocks, the top 2 blocks have leaves and at 4 blocks the bamboo expands to 3×3 pixels. At 5 blocks tall, the top 3 blocks have leaves on them. As the bamboo grows, the leaves move up and stay at the top 3 blocks. Destroying a block of bamboo does not change the appearance of the blocks below it. Bamboo is oriented at a random position in the block that it is in.
== Sounds ==
=== Bamboo ===
{{Sound table/Block/Bamboo}}
=== Bamboo Shoot ===
{{Sound table/Block/Bamboo shoot}}
== Data values ==
=== ID ===
{{edition|java}}:
{{ID table
|edition=java
|showblocktags=y
|showforms=y
|generatetranslationkeys=y
|displayname=Bamboo
|spritetype=block
|nameid=bamboo
|blocktags=bamboo_plantable_on}}
{{ID table
|displayname=Bamboo Shoot
|spritetype=block
|nameid=bamboo_sapling
|blocktags=bamboo_plantable_on
|form=block
|foot=1}}
{{edition|bedrock}}:
{{ID table
|edition=bedrock
|shownumericids=y
|showforms=y
|generatetranslationkeys=y
|displayname=Bamboo
|spritetype=block
|nameid=bamboo
|id=418}}
{{ID table
|displayname=Bamboo Sapling
|spritetype=block
|nameid=bamboo_sapling
|id=419
|form=block
|translationkey=-
|foot=1}}
=== Block states ===
{{see also|Block states}}
{{/BS}}
== Achievements ==
{{load achievements|Zoologist}}
== History ==
{{History||September 29, 2018|link={{tweet|minecraft|1046096508570009602}}|Bamboo is announced at [[MINECON Earth 2018]].}}
{{History|java}}
{{History||1.14|snap=18w43a|[[File:Leafless Bamboo JE1 BE2.png|32px]] [[File:Small Leaves Bamboo JE1 BE2.png|32px]] [[File:Big Leaves Bamboo JE1 BE2.png|32px]] [[File:Leafless Old Bamboo JE1 BE2.png|32px]] [[File:Small Leaves Old Bamboo JE1 BE2.png|32px]] [[File:Big Leaves Old Bamboo JE1 BE2.png|32px]] [[File:Bamboo Shoot JE1 BE1.png|32px]] Added bamboo.
|[[File:Bamboo (item) JE1 BE1.png|32px]] Bamboo as an [[item]] can be [[drops|dropped]] by bamboo and planted to grow bamboo.
|Added [[bamboo jungle]]s, where bamboo naturally generates.}}
{{History||1.16|snap=20w06a|"Bamboo Sapling" has been renamed to "Bamboo Shoot".}}
{{History|||snap=20w13a|Bamboo has been moved from the Miscellaneous tab to the Decoration Blocks tab in the [[Creative inventory]].<ref name="misc decoration">https://bugs.mojang.com/browse/MC-174434</ref>}}
{{History||1.17|snap=21w13a|Bamboo can now be planted on rooted dirt.}}
{{History|||snap=21w16a|Bamboo can now be planted on moss blocks.}}
{{History||1.18|snap=21w39a|Bamboo no longer generates underground.<ref>{{bug|MC-145376}}</ref><ref>{{bug|MC-214894}}</ref>}}
{{History||1.19|snap=22w15a|Bamboo can now be planted on mud.}}
{{History||1.20<br>(Experimental)|link=1.19.3|snap=22w42a|Bamboo can now be used to craft [[bamboo planks]].}}
{{History|||snap=22w45a|Bamboo can no longer be used to craft bamboo planks.|Bamboo can now be used to craft a [[block of bamboo]].}}
{{History||1.20<br>(Experimental)|link=1.19.4|snap=23w07a|Bamboo can now be planted on [[suspicious sand]].}}
{{History||1.20|snap=23w14a|Bamboo can now be planted on [[suspicious gravel]].}}
{{History|bedrock}}
{{History||1.8.0|snap=beta 1.8.0.8|[[File:Leafless Bamboo BE1.png|32px]] [[File:Small Leaves Bamboo BE1.png|32px]] [[File:Big Leaves Bamboo BE1.png|32px]] [[File:Leafless Old Bamboo BE1.png|32px]] [[File:Small Leaves Old Bamboo BE1.png|32px]] [[File:Big Leaves Old Bamboo BE1.png|32px]] [[File:Bamboo Shoot JE1 BE1.png|32px]] Added bamboo.
|[[File:Bamboo (item) JE1 BE1.png|32px]] Bamboo as an [[item]] can be [[drops|dropped]] by bamboo and planted to grow bamboo.}}
{{History||1.9.0|snap=beta 1.9.0.0|Bamboo can now generate in [[jungle]] [[biome]]s in single shoots.
|Added [[bamboo jungle]]s, where bamboo naturally generates.}}
{{History||1.12.0|snap=beta 1.12.0.3|[[File:Leafless Bamboo JE1 BE2.png|32px]] [[File:Small Leaves Bamboo JE1 BE2.png|32px]] [[File:Big Leaves Bamboo JE1 BE2.png|32px]] [[File:Leafless Old Bamboo JE1 BE2.png|32px]] [[File:Small Leaves Old Bamboo JE1 BE2.png|32px]] [[File:Big Leaves Old Bamboo JE1 BE2.png|32px]] The bamboo texture brightness has been updated to match {{el|je}}.<ref>{{bug|MCPE-42635}}</ref>}}
{{History||1.17.30|snap=beta 1.17.20.20|Swords now break bamboo instantly to match ''Java Edition''.<ref>{{bug|MCPE-64013}}</ref>}}
{{History||1.20.0|link=Bedrock Edition 1.20.0|snap=beta 1.19.50.21|Bamboo can now be used to craft [[bamboo planks]].}}
{{History|||snap=beta 1.19.60.20|Bamboo can no longer be used to craft bamboo planks.|Bamboo can now be used to craft a [[block of bamboo]].}}
{{History|console}}
{{History||xbox=none|xbone=none|ps=1.83|wiiu=none|switch=none|[[File:Leafless Bamboo JE1 BE2.png|32px]] [[File:Small Leaves Bamboo JE1 BE2.png|32px]] [[File:Big Leaves Bamboo JE1 BE2.png|32px]] [[File:Leafless Old Bamboo JE1 BE2.png|32px]] [[File:Small Leaves Old Bamboo JE1 BE2.png|32px]] [[File:Big Leaves Old Bamboo JE1 BE2.png|32px]] [[File:Bamboo Shoot JE1 BE1.png|32px]] Added bamboo.
|[[File:Bamboo (item) JE1 BE1.png|32px]] Bamboo as an [[item]] can be [[drops|dropped]] by bamboo and planted to grow bamboo.}}
{{History|foot}}
=== Bamboo shoot "item" ===
{{:Technical blocks/Bamboo Shoot}}
== Issues ==
{{Issue list}}
== Trivia ==
* Because bamboo grows quickly (on average 1 growth per 200 seconds), just 500 plants in an automatic farm produce more [[item]]s than a [[hopper]] can collect (2.5 items per second). A single hopper can move only enough items to keep 6.25 [[furnace]]s running.
* Bamboo is the fastest-growing plant in ''[[Minecraft]]'', which reflects its status as the fastest-growing plant known in real life.
* While bamboo cannot be composted in ''Minecraft'', it can be composted in real life.
== Gallery ==
<gallery>
File:PandaMinecon.png|The first image featuring bamboo, from [[MINECON Earth 2018]].
File:PandasEatingMinecon.jpg|A group of [[Panda|pandas]] eating bamboo, shown at [[MINECON Earth 2018]].
File:Growing bamboo BE.png|Planted bamboo growing.
File:Bamboo in tree.png|A bamboo shoot growing through a [[tree]].
File:Bamboo Jungle.png|Bamboo seen in a [[jungle]] [[biome]] variant.
File:Bamboo Jungle in Amplified world.png|Bamboo Jungle in an [[Amplified]] world in 1.19-rc2.
File:Naturalbamboo.png|Multiple naturally generated bamboo stems growing by a river.
File:Tall Bamboo.png|Grown Bamboo with three parts
File:Zuri Chopping Bamboo Pixel Art.png|[[Zuri]] chopping down bamboo for a baby panda.
File:Bamboo Wallpaper.png|Smartphone wallpaper of the aforementioned artwork, showing more of the treetops and bamboo.
File:Panda Packaging.jpg|Packing for the ''Diamond Level Panda'', modeled after bamboo.
</gallery>
==References==
{{Reflist}}
{{Blocks|vegetation}}
{{Items}}
[[Category:Plants]]
[[Category:Food]]
[[Category:Natural blocks]]
[[Category:Non-solid blocks]]
[[Category:Flammable blocks]]
[[cs:Bambus]]
[[de:Bambus]]
[[es:Bambú]]
[[fr:Bambou]]
[[it:Bambù]]
[[ja:竹]]
[[ko:대나무]]
[[pl:Bambus]]
[[pt:Bambu]]
[[ru:Бамбук]]
[[th:ไม้ไผ่]]
[[zh:竹子]]</li><li>[[Copper Horn|Copper Horn]]<br/>{{About|the removed item|the current item|Goat Horn}}
{{outdated feature|edition=bedrock}}
{{Item
| renewable = Yes
| stackable = No
}}
A '''copper horn''' was an [[item]] crafted from a [[goat horn]] and [[copper ingots]].
== Obtaining ==
=== Crafting ===
{{Crafting
|ignoreusage=1
|A2=Copper Ingot
|B2=Goat Horn
|B3=Copper Ingot
|C2=Copper Ingot
|Output=Copper Horn
}}
=== Natural generation ===
Copper horns were found in pillager outpost chests.
== Usage ==
Copper horns were used to play sounds. They took one second to use and had a four second cooldown. There were ten variations of copper horns, and each of them played three different sounds: when looking up, crouching, or neither of those. In total, there were thirty different sounds that could be played using copper horns. The sound a copper horn plays based on multiple conditions, which are in order as follows:
* If crouching, the bass tune was played.
* Else, if looking up (by 45 degrees), the harmony tune was played.
* Else, the melody tune was played.
== Sounds ==
Sound names in the item tooltip are created using the harmony, melody, and bass sounds in that order.
=== Harmony ===
{{Sound table
|type=bedrock
|sound=harmony0.ogg
|description="Great" ("Great Sky Falling")
|source=hostile
|id=horn.call.0
|volume=1.0
|pitch=1.0}}
{{Sound table
|sound=harmony1.ogg
|description="Old" ("Old Hymn Resting")
|source=hostile
|id=horn.call.1
|volume=1.0
|pitch=1.0}}
{{Sound table
|sound=harmony2.ogg
|description="Pure" ("Pure Water Desire")
|source=hostile
|id=horn.call.2
|volume=1.0
|pitch=1.0}}
{{Sound table
|sound=harmony3.ogg
|description="Humble" ("Humble Fire Memory")
|source=hostile
|id=horn.call.3
|volume=1.0
|pitch=1.0}}
{{Sound table
|sound=harmony4.ogg
|description="Dry" ("Dry Urge Anger")
|source=hostile
|id=horn.call.4
|volume=1.0
|pitch=1.0}}
{{Sound table
|sound=harmony5.ogg
|description="Clear" ("Clear Temper Journey")
|source=hostile
|id=horn.call.5
|volume=1.0
|pitch=1.0}}
{{Sound table
|sound=harmony6.ogg
|description="Fresh" ("Fresh Nest Thought")
|source=hostile
|id=horn.call.6
|volume=1.0
|pitch=1.0}}
{{Sound table
|sound=harmony7.ogg
|description="Secret" ("Secret Lake Tear")
|source=hostile
|id=horn.call.7
|volume=1.0
|pitch=1.0}}
{{Sound table
|sound=harmony8.ogg
|description="Fearless" ("Fearless River Gift")
|source=hostile
|id=horn.call.8
|volume=1.0
|pitch=1.0}}
{{Sound table
|sound=harmony9.ogg
|description="Sweet" ("Sweet Moon Love")
|source=hostile
|id=horn.call.9
|volume=1.0
|pitch=1.0
|foot=1}}
=== Melody ===
{{Sound table
|type=bedrock
|sound=melody0.ogg
|description="Sky" ("Great Sky Falling")
|source=hostile
|id=horn.melody.0
|volume=1.0
|pitch=1.0}}
{{Sound table
|sound=melody1.ogg
|description="Hymn" ("Old Hymn Resting")
|source=hostile
|id=horn.melody.1
|volume=1.0
|pitch=1.0}}
{{Sound table
|sound=melody2.ogg
|description="Water" ("Pure Water Desire")
|source=hostile
|id=horn.melody.2
|volume=1.0
|pitch=1.0}}
{{Sound table
|sound=melody3.ogg
|description="Fire" ("Humble Fire Memory")
|source=hostile
|id=horn.melody.3
|volume=1.0
|pitch=1.0}}
{{Sound table
|sound=melody4.ogg
|description="Urge" ("Dry Urge Anger")
|source=hostile
|id=horn.melody.4
|volume=1.0
|pitch=1.0}}
{{Sound table
|sound=melody5.ogg
|description="Temper" ("Clear Temper Journey")
|source=hostile
|id=horn.melody.5
|volume=1.0
|pitch=1.0}}
{{Sound table
|sound=melody6.ogg
|description="Nest" ("Fresh Nest Thought")
|source=hostile
|id=horn.melody.6
|volume=1.0
|pitch=1.0}}
{{Sound table
|sound=melody7.ogg
|description="Lake" ("Secret Lake Tear")
|source=hostile
|id=horn.melody.7
|volume=1.0
|pitch=1.0}}
{{Sound table
|sound=melody8.ogg
|description="River" ("Fearless River Gift")
|source=hostile
|id=horn.melody.8
|volume=1.0
|pitch=1.0}}
{{Sound table
|sound=melody9.ogg
|description="Moon" ("Sweet Moon Love")
|source=hostile
|id=horn.melody.9
|volume=1.0
|pitch=1.0
|foot=1}}
=== Bass ===
{{Sound table
|type=bedrock
|sound=bass0.ogg
|description="Falling" ("Great Sky Falling")
|source=hostile
|id=horn.bass.0
|volume=1.0
|pitch=1.0}}
{{Sound table
|sound=bass1.ogg
|description="Resting" ("Old Hymn Resting")
|source=hostile
|id=horn.bass.1
|volume=1.0
|pitch=1.0}}
{{Sound table
|sound=bass2.ogg
|description="Desire" ("Pure Water Desire")
|source=hostile
|id=horn.bass.2
|volume=1.0
|pitch=1.0}}
{{Sound table
|sound=bass3.ogg
|description="Memory" ("Humble Fire Memory")
|source=hostile
|id=horn.bass.3
|volume=1.0
|pitch=1.0}}
{{Sound table
|sound=bass4.ogg
|description="Anger" ("Dry Urge Anger")
|source=hostile
|id=horn.bass.4
|volume=1.0
|pitch=1.0}}
{{Sound table
|sound=bass5.ogg
|description="Journey" ("Clear Temper Journey")
|source=hostile
|id=horn.bass.5
|volume=1.0
|pitch=1.0}}
{{Sound table
|sound=bass6.ogg
|description="Thought" ("Fresh Nest Thought")
|source=hostile
|id=horn.bass.6
|volume=1.0
|pitch=1.0}}
{{Sound table
|sound=bass7.ogg
|description="Tear" ("Secret Lake Tear")
|source=hostile
|id=horn.bass.7
|volume=1.0
|pitch=1.0}}
{{Sound table
|sound=bass8.ogg
|description="Gift" ("Fearless River Gift")
|source=hostile
|id=horn.bass.8
|volume=1.0
|pitch=1.0}}
{{Sound table
|sound=bass9.ogg
|description="Love" ("Sweet Moon Love")
|source=hostile
|id=horn.bass.9
|volume=1.0
|pitch=1.0
|foot=1}}
==Data Values==
===ID===
{{ID table
|edition=bedrock
|shownumericids=y
|showforms=y
|notshowbeitemforms=y
|generatetranslationkeys=y
|displayname=Copper Horn
|spritetype=item
|nameid=copper_horn
|form=item
|foot=1}}
== History ==
{{h|bedrock}}
{{h||Vanilla Experiments<br>(experimental)|link=1.18.30|snap=beta 1.18.30.26|[[File:Copper Horn BE1.png|32px]]Added copper horns.}}
{{h|||snap=beta 1.18.30.28|[[File:Copper Horn BE2.png|32px]]Changed the texture of copper horns.}}
{{h||1.19.0|snap=beta 1.19.0.24|Removed copper horns.}}
{{h|foot}}
== Trivia ==
* Copper horns were removed from the game as they didn't live up to the developers' design goals, and as such are no longer supported.<ref>{{cite|url=https://feedback.minecraft.net/hc/en-us/articles/5540500564365| title = Minecraft Beta & Preview - 1.19.0.24/25|website=feedback.minecraft.net|date=April 14, 2022}}</ref>
* This is the first item in {{el|be}} to have been completely removed instead of just made unobtainable. This is likely due to the fact it never made it out of [[experimental gameplay]].
** If a world that contained this item is loaded into a newer version, the horn will disappear upon loading.
== References ==
{{reflist}}
{{Items}}
{{Removed features}}
[[Category:Renewable resources]]
[[de:Ziegenhorn]]
[[es:Cuerno de cobre]]
[[fr:Corne de chèvre]]
[[it:Corno di capra]]
[[lzh:銅號]]
[[pl:Kozi róg]]
[[pt:Chifre de cobre]]
[[ru:Козий рог]]
[[zh:铜制号角]]</li></ul> | |||||
0.3.3{{Extension DPL}}<ul><li>[[Minecart with Furnace|Minecart with Furnace]]<br/>{{ItemEntity
|image=Minecart with Furnace.png
|renewable=Yes
|stackable=No
|size=Height: 0.7 Blocks<br>Width: 0.98 Blocks
|networkid=10
|drops= 1 {{ItemLink|Minecart with Furnace}}
|health={{Hp|6}}
}}
A '''minecart with furnace''' is a [[furnace]] inside a [[minecart]]. It can be powered with [[coal]] or [[charcoal]] to propel it across a [[rail]] line for a limited time, which can be used to move other minecarts.
==Obtaining==
Minecarts with furnace can be retrieved by attacking them, and by doing so it drops as an [[item]].
===Crafting===
{{Crafting
|Output= Minecart with Furnace
|type= Transportation
|Furnace|Minecart}}
==Usage==
Minecarts with furnaces are placed in the same way as other minecarts. It does not have a graphical user interface, unlike a [[furnace]].
Minecarts with furnaces can be powered, done by feeding fuel ([[coal]] or [[charcoal]]) into the furnace minecart with the {{Control|use}} button. The fuel is consumed immediately and it starts to move in the same direction the player clicked toward. Pressing {{Control|use}} always turns it to that direction, even when not holding coal.
Any piece of fuel, added at any time, increases the total range by an additional 3600 ticks (equal to 180 seconds or 3 minutes). The upper limit is 32767 ticks, approximately 27 minutes.
When powered, minecarts with furnaces cover 240m per minute (about 4 m/s, slightly slower than walking speed) or 720m per piece of coal. They do not accelerate beyond this speed when going downhill or on active [[powered rail]]s, and as long as they remain powered, they do not slow down when going uphill, on inactive powered rails, or when pushing or pulling other minecarts.
If a powered furnace minecart is derailed and then pushed back onto a rail, it starts moving again in the direction it came from, so they are not easily turned around in this state unless a player is nearby to redirect it with {{Control|use}}.
Minecarts with furnaces can climb up steep inclines while pushing other minecarts as long as they have fuel. If a minecart with furnace reaches a slope while pulling another minecart, the pulled minecart is switched to the forward position so that it can be pushed along the slope instead of pulled.
When a minecart with furnace bumps into another minecart or multiple minecarts, the other minecarts are pushed forward with great speed. The furnace minecart continues on with its own speed. Because of this speed difference, some of the minecarts may end up inside unloaded chunks on straight tracks.
===Train mechanics===
{{Schematic
|caption=weakly-shunted 1-cart train, one cart was used only to push the train together and is left behind
|AB|mc-$ew|mc-$ew|mc/Fu-$ew|-
|AB|ra-$wu|ra-$ew|ra-$ew|ra-$ew|ellipsis-ew
}}
{{Schematic
|caption=Creating a strongly-shunted 1-cart train. The sloped rail must be replaced with a horizontal rail before powering.
|AB|mc-$ew||mc/Fu-$ew|-
|AB|ra-$ew|ra-$ew|ra-$eu|ra-$ew|ra-$ew|ellipsis-ew
}}
[[File:FurnaceMinecartTrain.png|thumb|right|A Minecart train powered by furnace [[Minecart|minecarts.]]|alt=]]
A furnace minecart can be made to pull up to four other minecarts. All minecarts in this train move at the constant speed of the furnace minecart. Trains are formed when a minecart is pushed into the back of a powered furnace minecart or a short-enough train. These shunts are fragile at best and easily come undone, but some methods are stronger than others. For example, pushing a minecart into a furnace minecart and then powering the furnace gives a weaker shunt than pushing the furnace minecart into the other minecart against a wall, and then powering the furnace in the other direction.
A high-speed minecart running into the back of a furnace minecart going in the same direction automatically creates a weak shunt with it, pulling it along.
Pulling a minecart with TNT causes it to explode.
{| class="wikitable"
|+Pulled minecart/Shunt behavior
!Condition
!Result
|-
|Furnace loses power/speed||Shunt comes undone
|-
|Entity bumping besides those part of the train||Jettisoned forward
|-
|Upward sloped track||Jettisoned forward
|-
|Downward sloped track||Jettisoned forward (strong shunt) or shunt comes undone (weak shunt)
|-
|90° turn in track||Jettisoned backward
|-
|Turn toward north/south or east/west that is not the direction the train was shunted in||Train derails
|}
When a train comes to a turn, the shunt comes undone with the pulled minecart jettisoned backward. The correct way to make such a turn is having the shunt undone before a turn, and then make the two rejoin on a straight rail later by having the pulled cart catch up with the minecart with furnace.<ref name=mango/>
Since the train runs slower on a fully powered track than a normal minecart (~5 m/s compared to 8m/s), a train pulled by an unpowered furnace minecart is ideal for AFK farms involving breaking or placing blocks like [[nether wart]].<ref name=mango>{{YouTubeLink|1=pRLiAQfhTG8|2=Why The Furnace Minecart Isn't As Useless As You Think|3=ilmango}}</ref>
==Properties==
The coal is not stored as an item in the entity, but in the object data in the fuel property as a time in ticks. ''Fuel'' is a short value, i.e. a maximum of 32767 ticks, which is about 27 minutes. However, {{cmd|/summon furnace_minecart ~ ~ ~ {Fuel:32000} }} alone doesn't make it go since it doesn't have a direction. It can be right-clicked on a track to give it a direction, or it can be summoned with the properties ''PushX'' and ''PushZ'' set, which are responsible for the direction. The <code>Motion</code> property of every entity allows for movement of the minecart, but it does not direct the minecart to move on its own.
==Sounds==
{{Edition|Java}}:<br>
Minecarts with furnaces use the Friendly Creatures sound category for entity-dependent sound events.<ref group=sound name=rollsource>{{bug|MC-42132}}</ref>
{{Sound table
|sound=Minecart rolling.ogg
|subtitle=Minecart rolls
|source=Friendly Creatures <ref group=sound name=rollsource/>
|overridesource=1
|description=While a minecart with furnace is moving
|id=entity.minecart.riding
|translationkey=subtitles.entity.minecart.riding
|volume=0.0-0.35 <ref group=sound>Relates linearly with horizontal velocity (max 0.5)</ref>
|pitch=0.0-1.0 <ref group=sound>Will increase by 0.0025 per tick if the minecart's horizontal velocity is more than 0.01</ref>
|distance=16
|foot=1}}
{{Edition|Bedrock}}:
{{Sound table
|type=bedrock
|sound=Minecart rolling.ogg
|source=neutral
|description=While a minecart with furnace is moving
|id=minecart.base
|foot=1}}
==Data values==
===ID===
{{ID table
|edition=java
|firstcolumnname=Item
|showforms=y
|generatetranslationkeys=y
|displayname=Minecart with Furnace
|spritetype=item
|nameid=furnace_minecart
|form=item
|foot=1}}
{{ID table
|edition=java
|firstcolumnname=Entity
|generatetranslationkeys=y
|displayname=Minecart with Furnace
|spritetype=entity
|nameid=furnace_minecart
|foot=1}}
===Entity data===
Minecarts with furnace have entity data associated with them that contain various properties of the entity.
{{el|java}}:
{{main|Entity format}}
{{/ED}}
{{el|bedrock}}:
: See [[Bedrock Edition level format/Entity format]].
==History==
{{History|java alpha}}
{{History||v1.0.14|[[File:Minecart with Furnace JE1.png|32px]] [[File:Minecart with Furnace (item) JE1.png|32px]] Minecarts with furnace were added.
|Since no in-game name was indicated, they were referred to by names such as "powered minecart" or "furnace minecart".
|No matter how much fuel was added to the minecart, it would never move for more than 3 minutes after the last fuel.}}
{{History|java beta}}
{{History||1.0|When tooltips were added to items in inventory, this was named "Minecart with Furnace".}}
{{History||1.2|[[File:Minecart with Furnace JE2.png|32px]] The texture of the minecart with furnace has been changed.}}
{{History|java}}
{{History||1.0.0|snap=?|Each piece of [[coal]] now powers a [[minecart]] with furnace for {{convert|3|minutes|ticks}}, so that adding another piece of coal at any time increases the total range by another 3 minutes. A full stack of 64 coal now powers it for {{convert|192|minutes|ticks}}.
|Minecarts with furnace on a level track cover 204 meters per minute.}}
{{History||1.8|snap=14w11a|Minecarts with furnace now give a much greater boost to other minecarts.
|When powered, minecarts with furnace now move on non-powered rails without decelerating.}}
{{History|||snap=14w17a|Minecarts with furnace's behavior has been reverted, so that no change was released in [[Java Edition 1.8]].}}
{{History||1.11|snap=16w32a|The entity ID of the minecart with furnace has been changed from <code>MinecartFurnace</code> to <code>furnace_minecart</code>.}}
{{History||1.13|snap=17w47a|Prior to [[1.13/Flattening|''The Flattening'']], this [[item]]'s numeral ID was 343.}}
{{History||1.14|snap=18w43a|[[File:Minecart with Furnace JE3.png|32px]] [[File:Minecart with Furnace (item) JE2.png|32px]] The texture of the minecart with furnace has been changed.}}
{{History||1.15|snap=19w38a|[[File:Minecart with Furnace 19w38a.png|32px]] The furnace now appears dark, like suffocating mobs.}}
{{History|||snap=19w39a|The furnace texture is now colored correctly.}}
{{History||1.15.2|snap=Pre-Release 1|Furnace minecarts can now navigate around any corner.}}
{{History||1.19|snap=22w13a|The crafting recipe for a minecart with furnace is now shapeless.
|Breaking a minecart with furnace will now drop the item instead of the minecart and furnace separately.<ref>{{bug|MC-249493|||Fixed}}</ref>}}
{{History|console}}
{{History||xbox=TU1|xbone=CU1|ps=1.0|wiiu=Patch 1|switch=1.0.1|[[File:Minecart with Furnace JE2.png|32px]] [[File:Minecart with Furnace (item) JE1.png|32px]] Added minecart with furnace.}}
{{History|Ps4}}
{{History||1.90|[[File:Minecart with Furnace JE3.png|32px]] [[File:Minecart with Furnace (item) JE2.png|32px]] The texture of the minecart with furnace has been changed.}}
{{History|foot}}
==Issues==
{{issue list}}
==Trivia==
*The minecart with furnace is excluded from {{els|be|3ds}} on purpose. In a tweet, [[Jeb]] considered removing it from {{el|je}}.<ref>{{tweet|jeb|699241247391772672|I think we will phase out the furnace minecraft ''(sic)''|15 Feb 2016}}</ref>
**When converting a [[Legacy Console Edition]] world to a [[Bedrock Edition]] world, any present minecarts with furnaces are converted into a normal minecart.
**Despite the above-described poor standing of the minecart, it was most recently briefly featured in an animation in the [[Minecraft Live 2022]], where one was depicted as moving a train of about 20 minecarts at a higher than normal speed.
==Gallery==
<gallery>
Running Powered Minecart.png|A powered minecart in action.
</gallery>
==References==
{{reflist}}
{{Items}}
{{Entities}}
[[Category:Mechanics]]
[[cs:Parní vozík]]
[[de:Antriebslore]]
[[es:Vagoneta con horno]]
[[fr:Wagonnet motorisé]]
[[hu:Gőzmeghajtású csille]]
[[ja:かまど付きのトロッコ]]
[[ko:화로가 실린 광산 수레]]
[[nl:Mijnkar met oven]]
[[pl:Wagonik z piecem]]
[[ru:Вагонетка с печью]]
[[uk:Вагонетка з піччю]]
[[zh:动力矿车]]</li><li>[[Raw Salmon|Raw Salmon]]<br/>{{about|the item|the mob|Salmon}}
{{Item
| title = Raw Salmon
| image = Raw Salmon.png
| renewable = Yes
| heals = {{hunger|2}}
| stackable = Yes (64)
}}
'''Raw salmon''' is a food item that can be eaten by the [[player]] or cooked to make [[cooked salmon]].
== Obtaining ==
=== Mob loot ===
====Salmon====
[[Salmon]] always drops 1 raw salmon when killed, unaffected by Looting.<ref>{{bug|MC-212795||Salmon & Fish mobs are not affected by Looting}}</ref> If it is killed while on [[fire]], it drops 1 [[Cooked Salmon|cooked salmon]] instead.
====Guardians and elder guardians ====
[[Guardian|Guardians]] and [[Elder Guardian|elder guardians]] have a 2.5% chance to drop a random fish, with 25% of them being raw salmon, which drops as cooked if the guardian was on fire. The chance of getting the fish drop is increased by 1% per level with [[Looting]] (for a maximum of 5.5% with Looting III), but the type of fish is not affected.
====Polar bears====
[[Polar bear]]s have a 25% chance of dropping 0–2 raw salmon when killed. The maximum amount can be increased by 1 per level of Looting, for a maximum of 0-5 with Looting III. If killed while on fire, they drop cooked salmon instead.
=== Fishing ===
{{main|Fishing}}Raw salmon can be obtained from [[fishing]]. The wait time of one being caught is decreased with the [[Lure]] enchantment and the chance of one being caught is slightly decreased with the [[Luck of the Sea]] enchantment (named as such because it increases treasure, not fish).
Catching salmon awards 1-6 experience.
=== Chest loot ===
{{LootChestItem|raw-salmon}}
=== Villager gifts ===
{{in|java}}, Fisherman villagers throw raw salmon at [[player]]s under the [[Hero of the Village]] effect.
== Usage ==
=== Smelting ingredient ===
{{smelting
|Raw Salmon
|Cooked Salmon
|0.35
}}
=== Food ===
Raw salmon restores {{hunger|2}} [[hunger]] and 0.2 [[Hunger#Mechanics|saturation]].
=== Cats ===
Raw salmon can be used to tame [[cat]]s with {{frac|1|3}} chance of success, get cats off of [[chest]]s, and [[bed]]s, [[breed]] cats, and make baby cats grow up faster by 10% of the remaining time. Additionally, raw salmon can be used to heal cats by {{hp|2|mob=1}}.
Raw salmon can be used to gain [[ocelot]] trust, breed ocelots, and make baby ocelots grow up by 10%.
=== Dolphins ===
A [[dolphin]] can be fed raw salmon to increase its trust of the player and cause it to interact with the player more often. However, unlike most other animal mobs, this does not cause them to breed.
Additionally, dolphins swim to the nearest chest in a [[shipwreck]] or [[underwater ruin]] after they are fed raw salmon. If the chest in the nearest structure is broken, they swim to another structure with a chest.
=== Trading ===
Apprentice-level Fisherman [[villager]]s have 50%{{only|bedrock}} or {{frac|2|3}}{{only|java}} chance to buy 6 raw salmon and one [[emerald]] for 6 cooked salmon.
Journeyman-level Fisherman villagers offer to buy 13 raw salmon for an emerald.
=== Wolves ===
{{IN|bedrock}}, raw salmon can be fed only to [[wolves]] not at full health, healing them by {{hp|2|mob=1}}. Unlike other wolf food, raw salmon cannot be used to breed wolves or to accelerate the growth of baby wolves.
==Sounds==
{{Sound table/Entity/Food}}
== Data values ==
=== ID ===
{{edition|java}}:
{{ID table
|edition=java
|showitemtags=y
|showforms=y
|generatetranslationkeys=y
|displayname=Raw Salmon
|spritetype=item
|nameid=salmon
|itemtags=fishes
|form=item
|foot=1}}
{{edition|bedrock}}:
{{ID table
|edition=bedrock
|shownumericids=y
|showforms=y
|notshowbeitemforms=y
|generatetranslationkeys=y
|displayname=Raw Salmon
|spritetype=item
|nameid=salmon
|id=265
|form=item
|foot=1}}
== Achievements ==
{{load achievements|Lion Hunter}}
== Advancements ==
{{load advancements|Husbandry;A Balanced Diet;Fishy Business;A Complete Catalogue}}
== Video ==
<span style="display:inline-block">{{yt|s_GcAFeoREk}}</span>
== History ==
{{History|java}}
{{History||1.7.2|snap=13w36a|[[File:Raw Salmon JE1 BE1.png|32px]] Added raw salmon.}}
{{History||1.8|snap=14w25a|Raw salmon is now obtainable rare drops from [[guardian]]s and [[elder guardians]].}}
{{History||1.9|snap=15w44a|Raw salmon can now be found in [[bonus chest]]s.}}
{{History||1.10|snap=16w20a|Raw salmon is now dropped from [[polar bear]]s.}}
{{History||1.13|snap=17w47a|The different data values for the <code>fish</code> and <code>cooked_fish</code> IDs have been split up into their own IDs.
|Prior to [[1.13/Flattening|''The Flattening'']], these [[item]]s' numeral IDs were 349 and 250.}}
{{History|||snap=18w08b|Salmon has been added as a [[mob]], which drops raw salmon when killed (cooked while on [[fire]]).
|[[File:Raw Salmon JE2 BE2.png|32px]] The texture for raw salmon has been changed.}}
{{History||1.14|snap=18w48a|Raw salmon can now be found in chests in [[village]] fisher cottages.}}
{{History|||snap=19w11a|Fisherman [[villager]]s now [[trading|buy]] raw salmon.}}
{{History|||snap=19w13a|Fisherman villagers now give raw salmon to players under the [[Hero of the Village]] effect.}}
{{History|pocket alpha}}
{{History||v0.11.0|snap=build 1|[[File:Raw Salmon JE1 BE1.png|32px]] Added raw salmon.}}
{{History||v0.12.1|snap=build 1|Salmon now restores [[hunger]] instead of [[health]].
|Raw salmon can now be used to tame [[ocelot]]s.}}
{{History||v0.16.0|snap=build 1|Salmon is now [[drops|dropped]] by [[guardian]]s and [[elder guardian]]s.}}
{{History|pocket}}
{{History||1.0.0|snap=alpha 0.17.0.1|Added [[polar bear]]s, which drop raw salmon.}}
{{History|bedrock}}
{{History||1.2.0|snap=beta 1.2.0.2|Raw salmon is now found inside [[bonus chest]]s.}}
{{History||1.4.0|snap=beta 1.2.14.2|Salmon has been added as a [[mob]], which drops raw salmon when killed (cooked while on [[fire]]).
|[[File:Raw Salmon JE2 BE2.png|32px]] The texture for raw salmon has been changed.}}
{{History|||snap=beta 1.2.20.1|Added [[dolphin]]s, which can be [[breeding|bred]] with raw salmon.}}
{{History||1.5.0|snap=beta 1.5.0.0|Raw salmon can no longer be used to breed dolphins.
|Giving raw salmon to dolphins now leads the [[player]] to nearest [[underwater ruins]] or [[shipwreck]].}}
{{History||1.8.0|snap=beta 1.8.0.8|Raw salmon can no longer be used to tame [[ocelot]]s.
|Raw salmon can now be used to [[breeding|breed]] ocelots.
|Added stray [[cat]]s, which can be tamed by being fed raw salmon.}}
{{History||1.11.0|snap=beta 1.11.0.4|Raw salmon can now be [[trading|sold]] to fisherman [[villager]]s.}}
{{History||1.16.100|snap=beta 1.16.100.52|If [[salmon]] is [[death|killed]] while on [[fire]], then they now drop [[cooked salmon]] instead of a raw salmon.}}
{{History|console}}
{{History||xbox=TU31|xbone=CU19|ps=1.22|wiiu=Patch 3|[[File:Raw Salmon JE1 BE1.png|32px]] Added raw salmon.}}
{{History||xbox=TU69|ps=1.76|wiiu=Patch 38|[[File:Raw Salmon JE2 BE2.png|32px]] The texture for raw salmon have been changed.}}
{{History|new 3ds}}
{{History||0.1.0|[[File:Raw Salmon JE1 BE1.png|32px]] Added raw salmon.}}
{{History|foot}}
== Issues ==
{{issue list}}
== See also ==
* [[Fishing]]
== References ==
{{reflist}}
{{items}}
[[de:Roher Lachs]]
[[es:Salmón crudo]]
[[ja:生鮭]]
[[ko:생연어]]
[[pt:Salmão cru]]
[[ru:Сырой лосось]]
[[tr:Çiğ Somon]]
[[zh:生鲑鱼]]
[[Category:Renewable resources]]
[[Category:Food]]</li></ul> | File:.name.png Fire has been replaced by reserved6 due to a bug in fire spreading mechanics that causes fire to spread to any block. | ||||
0.7.0{{Extension DPL}}<ul><li>[[Camera|Camera]]<br/>{{about|the entity|the command|commands/camera}}
{{exclusive|edu}}
{{unobtainable|edition=be}}
{{ItemEntity
|imagesize=80px
|renewable=No
|stackable=Yes (64)
|health={{hp|4}}
|image=Camera.png}}
{{Block
| title = Camera Block
| image = Camera (block).png
| invimage = none
| transparent = No
| light = 0
| tool = any
| stackable = Yes (64)
| flammable = No
| lavasusceptible = No
| renewable = No
}}
The '''camera''' is an [[entity]] that is capable of capturing and storing images. {{IN|edu}}, it works together with the [[portfolio]] item to create collections of [[photo]]s.<ref>https://education.minecraft.net/support/knowledge-base/using-cameras-portfolios/</ref>
== Obtaining ==
The camera can be obtained in the [[Creative inventory]] in ''Minecraft Education''. It can be obtained either by NBT editors, inventory editors, or glitches in Bedrock Edition.
To get the block form of the camera in Bedrock Edition using an NBT editor, you need to set the item name of the block in the inventory slot (<code>name:</code> ) to <code>item.camera</code>, then you need to add a compound tag called <code>Block</code> and inside of that put the int tag <code>version: 18040335</code> and the text tag <code>name: minecraft:camera</code> into the block compound tag. For the usable "[[spawn egg]]" form of the camera, you only need to set the item name of the block in the inventory slot (<code>name:</code> ) to <code>camera</code>; you do not need to add the block compound for this form of the camera.
== Usage ==
Using a camera from the [[inventory]] captures a first-person screenshot. It can also be placed, creating a camera [[entity]] that can track the user, and take pictures from the camera's perspective. Photos that are taken using the camera appear in the [[portfolio]].
Close-up snapshots of an [[item]] on the ground can be taken by holding the Shift key while right-clicking.
Photos that are taken with the camera block are stored in <code>%localappdata%\Packages\MinecraftUWP_8wekyb3d8bbwe\LocalState\screenshots</code>.
== Sounds ==
=== Generic ===
{{Sound table/Block/Normal/BE}}
=== Unique ===
{{Sound table
|sound=Camera1.ogg
|sound2=Camera2.ogg
|sound3=Camera3.ogg
|type=bedrock
|description=When a picture is taken with a camera
|source=Players
|id=camera.take_picture
|volume=1.0
|pitch=1.0
|foot=1}}
== Data values ==
=== ID ===
{{ID table
|edition=bedrock
|firstcolumnname=Camera
|shownumericids=y
|showforms=y
|generatetranslationkeys=y
|displayname=Block
|spritename=camera
|spritetype=block
|nameid=camera
|id=242
|form=block
|itemform=item.camera}}
{{ID table
|displayname=Item
|spritename=camera
|spritetype=item
|translationtype=item
|nameid=camera
|id=593
|form=item
|foot=1}}
{{ID table
|edition=bedrock
|firstcolumnname=Camera
|shownumericids=y
|generatetranslationkeys=y
|displayname=Entity
|spritename=camera
|spritetype=entity
|nameid=tripod_camera
|id=62
|foot=1}}
=== Entity data ===
See [[Bedrock Edition level format/Entity format]].
== Video ==
{{yt|1XLRGFibFNQ}}
== History ==
{{History|pocket alpha}}
{{History||v0.1.0|[[File:Camera BE1.png|50px]] [[File:Camera (item texture) BE1.png|32px]] The textures and model of the camera can be found in the game apk file.<ref name="found">[{{Reddit|jkkmr/found_image_file_for_camera_in_minecraft_portable}} Reddit - Found image file for camera in Minecraft Portable Edition Demo APK file.]</ref><ref>https://web.archive.org/web/20160604161800/https://twitter.com/Kappische/status/103548954368679936</ref>}}
{{History||v0.2.0|[[File:Camera BE2.png|50px]] [[File:Music Disc Blocks JE1 BE1.png|32px]] Added cameras
|Changed item and tripod textures.
|To use a camera, equip it in the [[player]]'s hand, then look in the direction the player wants the picture to be taken. Long-press the screen, and a camera [[drops]] to the ground where the player are standing. Step back, then press on the camera until it starts emitting smoke [[particles]]. The smoke means a picture has been taken, and the camera may disappear immediately afterward.
|Cameras have infinite uses.
|Entity id 62 and item id 456.<ref>https://www.minecraftforum.net/topic/1233138-i-found-the-camera-id/</ref>}}
{{History||v0.5.0|The camera is now invisible and makes the standard player [[damage]] [[sound]].}}
{{History||v0.7.0|Added the "F1" feature (Hide GUI), which has now made the camera obsolete.}}
{{History||v0.8.0|snap=build 2|[[File:Egg JE1 BE1.png|32px]] Item form now uses [[egg]] texture.}}
{{History||v0.9.0|snap=build 1|The camera [[entity]] has been removed. [[Tommaso]] also stated: ''"It doesn't mean that it's dead forever, in fact I have a lot of ideas for it! I think it will be back when have [[shader]]s, sharing and [[redstone]]."''<ref>{{Reddit|sub=MCPE|281sep/camera|ci6znr8}}</ref>}}
{{History||v0.14.0|snap=build 1|[[File:Camera BE3.png|32px]] [[File:Camera (item) BE2.png|32px]] Re-added the camera. It is accessible only with [[inventory]] editors.
|In this version, if the player spawns a camera, leaves the [[world]] and joins back, it summons [[lightning]].}}
{{History||v0.14.2|The camera [[item]] ID has been changed to 498, but it cannot be used at the moment. The [[entity]] can now be spawned with a [[spawn egg]] with a [[damage]] value of 62.
|According to the language files of the game, the empty label that shows up whenever hovering a finger to a camera would now say "Take Picture". However, the button doesn't do anything.}}
{{History||v0.15.0|snap=build 1|The previous empty label on the camera mentioned above now displays the words "Take Picture".
|The [[health]] of the camera [[entity]] is now {{hp|2}} instead {{hp|4}}.
|The camera no longer summons [[lightning]].}}
{{History||v0.16.0|snap=build 1|The camera now has a [[block]] form in [[inventory]], but still spawns the entity. However, the block can be placed only with [[commands]] and editing.
|"Take picture" button on the camera works now, but no image files are created.
|The oldest ID for camera (456) now refers to [[portfolio]].}}
{{History|||snap=build 2|[[File:Camera Block.png|32px]] The camera now has an [[item]] form and the [[block]] has been removed. However, it is still obtainable in servers.
|[[Portfolio]], which works together with the camera to create collections of pictures, has been removed.}}
{{History|||snap=build 4|Camera item form has been removed, and the camera can no longer be obtained or placed using any [[commands|command]].}}
{{History|bedrock}}
{{History||1.8.0|snap=beta 1.8.0.8|[[File:Camera BE3.png|32px]] [[File:Camera Block.png|32px]] The camera has been reimplemented.
|The camera [[entity]] can now be spawned with a [[spawn egg]] with [[damage]] value 258.}}
{{History||1.12.0|snap=beta 1.12.0.2|The camera can now be obtained with the {{cmd|give}} [[commands|command]].}}
{{History||1.13.0|snap=beta 1.13.0.1|The camera can no longer be obtained with the {{cmd|give}} command.
|Functionality has been added to the camera. Screenshots that are taken by the camera can now be saved into the {{cd|screenshots}} folder.
|Cameras are now a part of the {{el|ee}} toggle as a hidden feature.
|Cameras no longer have a [[death]] animation when killed by the [[player]] and instead, instantly emit smoke [[particles]].}}
{{History||1.16.100|snap=beta 1.16.100.50|The camera can now be obtained with the {{cmd|give}} [[commands|command]] once again.}}
{{History|||snap=beta 1.16.100.55|The camera can no longer be obtained with the {{cmd|give}} command.}}
{{History|education}}
{{History||1.0|[[File:Camera BE3.png|32px]] [[File:Camera Block.png|32px]] Added cameras.}}
{{History||1.4.0|Cameras no longer have a [[death]] animation when killed by the [[player]] and instead instantly emit smoke [[particles]].}}
{{History|foot}}
=== Future ===
At the Minecraft [[Pocket Edition]] panel at [[MineCon 2012]], as well as one of [[Johan Bernhardsson|Jbernhardsson]]'s livestreams, it was stated that future plans include trying to have a proper use for cameras, perhaps an easier way to take screenshots and share them with others.<ref>{{ytl|YMhyX_lKWV4}}</ref> In the BlockTalk Q&A, the camera was briefly mentioned as part of a broader "sharing" theme planned for {{el|be}} in the future.<ref>{{ytl|Ruf6tvqsD84}}</ref>
It later got implemented into {{el|ee}}, using the camera to make screenshots and share them in a special book.
== Issues ==
{{Issue list}}
== Trivia ==
* A camera prevents a [[Book and Quill]] from working. Attempting to craft it or obtain it by commands gives a regular book instead, due to non-implementation of photo attaching to written books.
* The camera can take a screenshot, which appears a bit smaller with a thick paper outline having cuts on its edges, making it look like an old photograph.
* This feature is hidden from the Creative inventory and from the /give command item menu.
== Gallery ==
<gallery>
PEcameras030.jpg|A row of cameras, as seen in [[Pocket Edition v0.3.0 alpha|v0.3.0]].
PEcameraphoto.jpg|Example image taken by the camera [[entity]].
CameraUse-1.png|The first method of using cameras.
CameraUse-2.png|The second method of using cameras.
Dinnerbone Camera.png|A camera spawned using a [[spawn egg]] named "[[Dinnerbone]]" in the v0.15.0 beta.
Cam2.png|A camera falling from a [[tree]]. This shows that cameras are entities.
Education Edition Exclusive Features.png|The camera and camera block placed in a world along with other Education Edition features.
Screenshot by camera.jpg|An example of the screenshot taken by a camera in [[Bedrock Edition beta 1.13.0.1|beta 1.13.0.1]].
File:Say Cheese.jpeg|[[Steve]], [[Alex]], [[Jesse]], and an [[Agent]] getting their picture taken.
</gallery>
== See also ==
* [[Portfolio]]
* [[Screenshot]]
== References ==
{{Reflist}}
{{Items}}
{{Entities}}
{{Education Edition}}
[[Category:Education Edition entities]]
[[Category:Education Edition items]]
[[Category:Tools]]
[[cs:Kamera]]
[[de:Kamera]]
[[el:Camera]]
[[es:Cámara]]
[[fr:Appareil photo]]
[[hu:Kamera]]
[[ja:カメラ]]
[[ko:카메라]]
[[nl:Camera]]
[[pl:Kamera]]
[[pt:Câmera]]
[[ru:Камера]]
[[uk:Камера]]
[[zh:相机]]</li><li>[[Cocoa Beans|Cocoa Beans]]<br/>{{Block
|image=<gallery>
Cocoa Age 0.png|Age 0 JE
Cocoa Age 1.png|Age 1 JE
Cocoa Age 2.png|Age 2 JE
</gallery>
|image2=<gallery>
Cocoa Age 0 BE.png|Age 0 BE
Cocoa Age 1 BE.png|Age 1 BE
Cocoa Age 2 BE.png|Age 2 BE
</gallery>
|transparent=Yes
|light=No
|tool=axe
|renewable=Yes
|stackable=Yes (64)
|flammable=No
|lavasusceptible=No
}} '''Cocoa beans''' are items obtained from cocoa pods and are used to plant them, as well as to craft [[dye|brown dye]] and [[cookie|cookies]].
'''Cocoa pods''' are [[Bone Meal|bonemealable]] [[plant]]s placed on [[Log|jungle log]] sides that grow cocoa beans, and can be found naturally in [[Jungle|jungles]].
==Obtaining==
In ''Java Edition'', cocoa beans are only obtained through the natural generation of cocoa pods, while in ''Bedrock Edition'', they can also be gotten in bonus chests, from [[fishing]] inside the jungle, bamboo jungle and sparse jungle biomes and during a [[trading]] with a wandering trader.
Cocoa beans come from cocoa pods, which are found on the trunks of normal-sized naturally-generated [[jungle tree]]s in [[jungle]], [[bamboo jungle]]s and [[sparse jungle]] temperate [[biome]]s.
Cocoa pods can be mined with any item, but [[axe]]s are the quickest. Fully grown cocoa pods drop 3 cocoa beans. Using a tool enchanted with Fortune does not increase the amount of cocoa beans dropped.
{{breaking row|horizontal=1|Cocoa|Axe|sword=1|link=none}}
The block itself can be obtained by inventory editing or [[add-on]]s {{in|bedrock}}.
From one to two cocoa beans can be found in 40% of bonus [[chest]]s {{in|bedrock}}.
{{LootChestItem|cocoa-beans}}
Cocoa beans can be obtained from [[fishing]] in a jungle {{in|bedrock}}.
[[Wandering trader]]s may sell 3 cocoa beans for an [[emerald]] during a [[trading]] {{in|bedrock}}.
==Usage==
===Farming===
{{main|Tutorials/Cocoa bean farming}}
Placing cocoa beans on the side of a jungle [[log]] plants a new cocoa pod. The log does not need to be attached to a tree. A cocoa pod can be placed on jungle logs, jungle [[wood]], stripped jungle logs and stripped jungle wood.
[[File:Cocoaplant farm.png|thumb|left|A somewhat efficient cocoa pod farm, minimizing space and wood use.]]
Cocoa has three stages of growth. During its first stage, the pod is small and green. In the second stage, the plant is bigger and colored tan. In its last stage, the pod is even larger and orange. The cocoa block has a 20% chance to grow a stage when receiving a [[Tick#Random tick|random tick]], giving it an average time of 5 minutes and 41 seconds per stage. When destroyed in the first two stages, the pod yields only one cocoa bean. When destroyed in the third stage, it gives 3 cocoa beans. [[Bone meal]] can be used to force the cocoa pod forward by one growth stage. Cocoa pods burst and drop their beans when struck by flowing water, pushed by a piston or if their [[log]] or wood are removed by any means.
===Composting===
Placing cocoa beans into a [[composter]] has a 65% chance of raising the compost level by 1. {{IN|bedrock}}, cocoa beans are accepted as a direct substitute of brown dye in many recipes.
===Crafting ingredient===
{{crafting usage}}
{{Dye usage}}
{{IN|bedrock}}, cocoa beans can be also used in banner patterns:
{{banner crafting usage}}
{{Banner loom usage|Cocoa Beans}}
==Sounds==
{{Sound table/Block/Wood}}
==Data values==
===ID===
{{edition|java}}:
{{ID table
|edition=java
|showforms=y
|generatetranslationkeys=y
|displayname=Cocoa
|spritetype=block
|nameid=cocoa
|form=block}}
{{ID table
|displayname=Cocoa Beans
|spritetype=item
|nameid=cocoa_beans
|form=item
|foot=1}}
{{edition|bedrock}}:
{{ID table
|edition=bedrock
|showforms=y
|showaliasids=y
|shownumericids=y
|generatetranslationkeys=y
|displayname=Cocoa
|spritetype=block
|nameid=cocoa
|id=127
|form=block}}
{{ID table
|displayname=Cocoa Beans
|spritetype=item
|nameid=cocoa_beans
|aliasid=dye / 3
|id=412
|form=item
|translationkey=item.dye.brown.name
|foot=1}}
===Block states===
{{see also|Block states}}
{{/BS}}
==History==
''For a more in-depth breakdown of changes to textures and models, including a set of renders for each state combination, see [[/Asset history]]''
{{History|java beta}}
{{History||1.2|[[File:Cocoa Beans JE1 BE1.png|32px]] Added cocoa beans.
|Cocoa beans are currently obtainable only through an inventory editor.}}
{{History||1.2_02|Prior to this, Cocoa Beans were misspelled as 'Coco Beans'.}}
{{History||1.4|Cocoa beans have been formally brought into the game as a reward found in [[dungeon]] chests.<ref>{{tweet|notch|53161729990987776}}</ref> (53% chance) Also, brown [[sheep]] now naturally spawn, making brown [[wool]] obtainable without hacking the game.
|Cocoa beans can now be used to craft [[cookie]]s.}}
{{History|java}}
{{History||May 8, 2012|link={{tweet|jeb|199867730927697920}}|[[Jeb]] revealed cocoa with a screenshot.}}
{{History||1.3.1|snap=12w18a|For only this snapshot, cocoa beans have been given a small (0.5%) chance of dropping from destroyed [[jungle tree]] [[leaves]] in a similar fashion to [[apple]]s from oak leaves, which makes cocoa beans [[renewable resource|renewable]] for the first time.}}
{{History|||snap=12w19a|[[File:Cocoa Age 0 (S) JE1.png|32px]] [[File:Cocoa Age 1 (S) JE1.png|32px]] [[File:Cocoa Age 2 (S) JE1.png|32px]] Added cocoa. The top textures of cocoa always keep a completely constant rotation, regardless of what direction they face. They also not shaded.
|[[File:Cocoa Beans JE2.png|32px]] The texture of cocoa beans has been changed.
|Cocoa has replaced jungle [[leaves]] as the main method of finding cocoa beans.
|[[File:Cocoa Age 3 (S) JE1.png|32px]] Cocoa with values 12–15 is inaccessible normally, and use the texture of the [[dragon egg]]. This is due to the dragon egg texture being to the left of the ripe cocoa texture in <samp>[[terrain.png]]</samp>, as cocoa textures are arranged with the oldest on the left and the youngest on the right, resulting in the unusually ripe cocoa reading the dragon egg texture.}}
{{History|||snap=1.3|[[File:Cocoa Beans JE3 BE2.png|32px]] The texture of cocoa beans has been changed.}}
{{History||1.4.2|snap=12w34a|Cocoa beans have been given the ability to [[Armor#Dyeing|dye]] leather [[armor]] and [[wolf]] collars.}}
{{History||1.4.6|snap=12w49a|Cocoa beans can now be [[crafting|crafted]] with [[gunpowder]] to create a [[firework star]].}}
{{History||1.5|snap=13w02a|Due to textures being stored in individual files, cocoa beans with data 12–15 no longer have a texture to use, and now crash the game if a [[chunk]] containing one is loaded.}}
{{History|||snap=13w03a|Cocoa with data values 12–15 now only crash the game if one is directly in the field of view.}}
{{History|||snap=13w04a|[[Bone meal]] now grows cocoa by only one stage.}}
{{History|||snap=13w10a|[[File:Cocoa Age 3 (S) JE2.png|32px]] Cocoa with data 12–15 now use the age 2 texture, resulting in a broken appearance, preventing previously mentioned crashes.}}
{{History||1.6.1|snap=13w18a|Cocoa beans have been removed from [[dungeon]] [[chest]]s.}}
{{History|||snap=13w19a|Brown [[Terracotta|stained clay]] can now be [[crafting|crafted]] using cocoa beans.}}
{{History||1.7.2|snap=13w41a|Brown [[stained glass]] can now be crafted using cocoa beans.}}
{{History||1.8|snap=14w07a|[[File:Cocoa Age 0 (S) JE2.png|32px]] [[File:Cocoa Age 1 (S) JE2.png|32px]] [[File:Cocoa Age 2 (S) JE2.png|32px]] [[File:Missing Model JE1.png|32px]] The top textures of cocoa now rotate with the blocks themselves (cocoa facing north remaining visually unaffected), and cocoa of age 3 has [[Missing model|no model]].}}
{{History|||snap=14w10a|[[File:Cocoa Age 0 (S) JE3.png|32px]] [[File:Cocoa Age 1 (S) JE3.png|32px]] [[File:Cocoa Age 2 (S) JE3.png|32px]] [[File:Missing Model JE2.png|32px]] The large section of cocoa is shaded, and the missing model (which age 3 cocoa uses) has changed.}}
{{History|||snap=14w25a|[[File:Cocoa Age 0 (S) JE4.png|32px]] [[File:Cocoa Age 1 (S) JE4.png|32px]] [[File:Cocoa Age 2 (S) JE4.png|32px]] The connecting region of cocoa is now shaded.}}
{{History|||snap=14w26a|Cocoa with data 12–15 has been effectively removed from the game, as such blocks now convert to a proper value with {{cmd|setblock}}. Loading worlds with existing out of range cocoa crash the game.}}
{{History|||snap=14w30a|Cocoa beans can now be used to dye [[banner]]s.}}
{{History||1.13|snap=17w47a|The different data values for the <code>dye</code> ID have been split up into their own IDs.
|Prior to [[1.13/Flattening|''The Flattening'']], this block's and item's numeral ID were respectively 127 and 351.}}
{{History||1.14|snap=18w43a|Cocoa beans can now be used to craft [[brown dye]].
|Cocoa beans can no longer be used as a [[dye]].
|All of the dye-related functions and crafting recipes of cocoa beans (except cookies) have been transferred to brown dye.
|"Cocoa Beans" item has been renamed to "Cocoa".
|[[File:Cocoa Beans JE4 BE3.png|32px]] The texture of cocoa has been changed.
|[[File:Cocoa Age 0 (S) JE5.png|32px]] [[File:Cocoa Age 1 (S) JE5.png|32px]] [[File:Cocoa Age 2 (S) JE5.png|32px]] The textures of cocoa have been changed.
|[[File:Cocoa Age 0 (texture) JE2 BE2.png|32px]] [[File:Cocoa Age 1 (texture) JE2 BE2.png|32px]] Textures for cocoa age 0 and 1 has palette left, visible only on particles.
|Cocoa now has a placement [[sound]].}}
{{History|||snap=19w03a|Placing cocoa into the new [[composter]] has a 50% chance of raising the compost level by 1.}}
{{History|||snap=19w05a|Cocoa now has a 65% chance of increasing the compost level in a composter by 1.}}
{{History|||snap=19w11b|"Cocoa" item has been renamed back to "Cocoa Beans".{{verify|was this not just one bug that affected other crops as well? if so cite the ticket and add to all other affected pages}}}}
{{History||1.18|snap=Pre-release 5|[[File:Cocoa Age 0 (texture) JE3 BE3.png|32px]] [[File:Cocoa Age 1 (texture) JE3 BE3.png|32px]] Textures for cocoa age 0 and 1 were changed. This visually changes only particles.}}
{{History||1.19|snap=22w11a|[[File:Cocoa Age 2 (S) JE6.png|32px]] The texture and model of cocoa age 2 have been changed.}}
{{History|pocket alpha}}
{{History||v0.3.0|[[File:Cocoa Beans JE1 BE1.png|32px]] Added cocoa beans. They are currently unobtainable and serve no purpose.}}
{{History||v0.8.0|snap=build 1|[[File:Cocoa Beans JE3 BE2.png|32px]] The texture of cocoa beans has been changed.
|Cocoa beans can be [[crafted]] from an [[orange dye]] and an [[ink sac]], or from [[dandelion yellow]], [[rose red]], and an ink sac, despite there being no way of obtaining ink sacs at the time.}}
{{History|||snap=build 3|Cocoa beans are now available in [[creative]].}}
{{History||v0.9.0|snap=build 1|[[File:Cocoa Age 0 (S) JE1.png|32px]] [[File:Cocoa Age 1 (S) JE1.png|32px]] [[File:Cocoa Age 2 (S) JE1.png|32px]] {{info needed|How did 12-16 appear?}} Added cocoa.
|Cocoa provides an additional way of obtaining cocoa beans.
|Cocoa beans are now used to craft [[cookie]]s.}}
{{History||v0.11.0|snap=build 14|Cocoa now grows over time.<ref>{{bug|MCPE-7887}}</ref>}}
{{History||?|[[File:Cocoa Age 0 (S) BE4.png|32px]] [[File:Cocoa Age 1 (S) BE4.png|32px]] [[File:Cocoa Age 2 (S) BE2.png|32px]] Cocoa no longer has a stem connecting it to the log.}}
{{History||v0.15.0|snap=Realms build 4|[[File:Cocoa Age 0 (S) JE1.png|32px]] [[File:Cocoa Age 1 (S) JE1.png|32px]] [[File:Cocoa Age 2 (S) JE1.png|32px]] Cocoa stems now render again.<ref>{{bug|MCPE-13579}}</ref>}}
{{History||v0.16.0|snap=build 1|Cocoa beans can no longer be crafted from [[orange dye]] and an ink sac.
|Cocoa beans can no longer be crafted from rose red, dandelion yellow and ink sacs.}}
{{History|pocket}}
{{History||1.0.0|snap=alpha 0.17.0.1|Cocoa beans can now be used to dye [[shulker]]s.}}
{{History||1.1.0|snap=alpha 1.1.0.0|Cocoa beans can now be used to dye [[shulker box]]es and [[bed]]s.
|Cocoa beans can now be used to craft [[concrete powder]].}}
{{History|bedrock}}
{{History||1.2.0|snap=beta 1.2.0.2|Cocoa beans can now be used to dye [[banner]]s, [[firework star]]s, and [[glass]].
|Cocoa beans can now be found in [[bonus chest]]s.}}
{{History||1.4.0|snap=beta 1.2.20.1|Cocoa beans can now be used to craft brown [[balloon]]s and [[glow stick]]s.}}
{{History||1.8.0|snap=beta 1.8.0.10|Cocoa beans can now be used to craft [[brown dye]].}}
{{History||1.10.0|snap=beta 1.10.0.3|Cocoa beans are now [[trading|sold]] by [[wandering trader]]s.
|[[File:Cocoa Beans JE4 BE3.png|32px]] The texture of cocoa beans has been changed.
|[[File:Cocoa Age 0 (S) BE4.png|32px]] [[File:Cocoa Age 1 (S) BE4.png|32px]] [[File:Cocoa Age 2 (S) BE4.png|32px]] The textures of cocoa have been changed.}}
{{History||1.11.0|snap=beta 1.11.0.1|Cocoa beans can now be used to fill up [[composter]]s.}}
{{History||1.16.100|snap=beta 1.16.100.56|The ID of cocoa beans has been changed from <code>dye/3</code> to <code>cocoa_beans</code>.}}
{{History||1.18.10|snap=beta 1.18.10.22|[[File:Cocoa Age 0 (texture) JE3 BE3.png|32px]] [[File:Cocoa Age 1 (texture) JE3 BE3.png|32px]] Textures for cocoa age 0 and 1 were changed. This visually changes only particles.}}
{{History|console}}
{{History||xbox=TU1|xbone=CU1|ps=1.0|wiiu=Patch 1|switch=1.0.1|[[File:Cocoa Beans JE1 BE1.png|32px]] Added cocoa beans.}}
{{History||xbox=TU9|[[File:Cocoa Beans JE3 BE2.png|32px]] The texture of cocoa beans has been changed.}}
{{History||xbox=TU12|[[File:Cocoa Age 0 (S) JE3.png|32px]] [[File:Cocoa Age 1 (S) JE3.png|32px]] [[File:Cocoa Age 2 (S) JE3.png|32px]]{{verify|Were these the models used?}} Added cocoa.}}
{{History||xbox=none|xbone=none|ps=1.90|wiiu=none|switch=none|[[File:Cocoa Beans JE4 BE3.png|32px]] The texture of cocoa beans has been changed once again.
|[[File:Cocoa Age 0 (S) JE5.png|32px]] [[File:Cocoa Age 1 (S) JE5.png|32px]] [[File:Cocoa Age 2 (S) JE5.png|32px]]{{verify|Were these the models used?}} The textures of cocoa have been changed.}}
{{History|new 3ds}}
{{History||0.1.0|[[File:Cocoa Beans JE3 BE2.png|32px]] Added cocoa beans.
|[[File:Cocoa Age 0 (S) JE3.png|32px]] [[File:Cocoa Age 1 (S) JE3.png|32px]] [[File:Cocoa Age 2 (S) JE3.png|32px]]{{verify|Were these the models used?}} Added cocoa.}}
{{History|foot}}
=== Cocoa "item" ===
{{:Technical blocks/Cocoa}}
== Issues ==
{{issue list|Cocoa Beans|Cocoa Pod}}
== Trivia ==
*Cocoa pods have a different hitbox for each size; however, the top is always 0.25 blocks below the top of the [[log]] it is on.
*If a cocoa pod grows while the player is standing next to it, the player is forced into the appropriate form of [[suffocation prevention]] depending on available space.
*{{IN|be}}, the pixels on top of the fully grown pod are 8/7 the size of those on the side.<ref>{{bug|MC-109055||Fixed}}</ref><ref>{{bug|MCPE-152862}}</ref>
== Gallery ==
<gallery>
CocoaReveal.png|The first screenshot of cocoa pods tweeted by [[Jens Bergensten]], which revealed the plants.
CocoaPlant.png|A screenshot tweeted by Jens Bergensten, showing the pod.
Cocoa Plants in a Jungle Biome (12w19a).png|Naturally generated cocoa pods.
CPlantsJWood.png|A cocoa pod farm.
Cocoa2.jpg|A cocoa farm.
Cocoa beans phases.png|Three growing phases of the cocoa pod.
AreaOptimizedBeanPods.gif|A log and pod layout for optimizing an example area of 14×14 (including walls).
File:CocoaBean15.png|Cocoa beans with values greater than 12 appeared this way
</gallery>
==Literature==
===References===
{{reflist}}
===External Links===
*[https://www.minecraft.net/en-us/article/taking-inventory--cocoa-beans Taking Inventory: Cocoa Beans] – Minecraft.net on December 5, 2019
{{Items}}
{{Blocks|vegetation}}
[[Category:Dyes]]
[[Category:Food]]
[[Category:Plants]]
[[Category:Renewable resources]]
[[Category:Non-solid blocks]]
[[Category:Natural blocks]]
[[cs:Kakaové boby]]
[[de:Kakaobohnen]]
[[es:Semillas de cacao]]
[[fr:Fèves de cacao]]
[[hu:Kakaóbab]]
[[ja:カカオ豆]]
[[ko:코코아 콩]]
[[nl:Cacaobonen]]
[[pl:Ziarna kakaowe]]
[[pt:Sementes de cacau]]
[[ru:Какао-бобы]]
[[uk:Какао-боби]]
[[zh:可可豆]]</li></ul> | reserved6 has been replaced with fire, which now has better spreading mechanics. | ||||
| Added reserved6 as ID 255. | |||||
0.7.1{{Extension DPL}}<ul><li>[[Glow Berries|Glow Berries]]<br/>{{Block
|image=<gallery>
Cave Vines (head).png|Without Berries
Cave Vines (berries).png|With Berries
</gallery>
|image2 = Glow Berries JE1 BE1.png
|extratext=[[#Gallery|View all renders]]
|rarity=Common
|renewable=Yes
|stackable=Yes (64)
|tool=Any
|light=Yes
|transparent=Yes
|heals={{hunger|2}}
|flammable=Yes
|lavasusceptible=No
}}
'''Glow berries''' are a [[food]] [[item]] obtained from cave vines and can be used to plant them.
'''Cave vines''' are a climbable, [[Bone Meal|bonemealable]] plant that hangs off ceilings and grows glow berries. Cave vines with glow berries produce [[light]] and drop glow berries when broken or harvested. Cave vines with no glow berries will not drop anything.
== Obtaining ==
=== Natural generation ===
Cave vines can be found in [[lush caves]], hanging from cave ceilings.
=== Chest loot ===
{{LootChestItem|glow-berries}}
=== Post-generation ===
Glow berries can be collected from a cave vine by {{control|using}} or {{control|breaking}} the vine. This yields one glow berry when the vine is bearing them and nothing when it is not. A cave vine also breaks if [[water]] runs over its location or if a [[piston]] extends or pushes a block into its location.
{{IN|bedrock}}, using a tool with [[Silk Touch]] on cave vines always yields a glow berry, even if the vine appears empty.
[[Fortune]] has no effect on the number of glow berries dropped.
== Usage ==
=== Placement ===
Glow berries can be placed on and grown from the bottom of most blocks. They have no specific lighting requirements. When placed, they can be of any length.
=== Growth ===
Placing glow berries on the bottom of a block creates a cave vine that grows downward one block at a time as long as [[air]] is beneath it and its maximum height (2 to 26 blocks) has not been reached. Each newly-grown cave vine block has a 1 in 9 chance of bearing glow berries. Only this tip can ever naturally grow them.{{only|JE}}{{More info|exact growth rate and chance to bear glow berries}}
{{control|Using}} [[bone meal]] on a cave vine produces glow berries if the vine was not bearing any.
{{IN|Java}}, cave vines stop growing if [[shears]] are {{control|used}} on the tip.
{{IN|bedrock}}, if placing glow berries in the Nether, cave vines are able to grow and produces glow berries.
=== Food ===
To eat glow berries, press and hold {{control|use}} while it is selected in the hotbar. Eating one restores {{hunger|2}} [[hunger]] and 0.4 hunger [[Hunger#Mechanics|saturation]] points, like [[sweet berries]].
=== Light ===
When bearing glow berries, cave vines give off a [[light]] level of 14.
=== Composting ===
Placing glow berries into a [[composter]] by {{control|using}} them on it has a 30% chance of raising the compost level by 1.
=== Breeding ===
Glow berries can be fed to [[fox]]es to [[breeding|breed]] them. Foxes are similar to cats when being fed as a wild animal; a sudden movement by the player may cause the fox to flee even if the player holds glow berries. The resulting baby fox trusts the [[player]] and does not flee.
Glow berries can be {{control|used}} on baby foxes to reduce the time until they grow by 10%.
==Sounds==
===Glow berries===
{{Sound table/Entity/Food}}
===Cave vines===
====Generic====
{{Sound table/Block/Cave vines}}
==== Unique ====
{{edition|java}}:
{{Sound table
|sound=Berries pick1.ogg
|sound2=Berries pick2.ogg
|subtitle=Berries pop
|source=block
|description=When glow berries are picked
|id=block.cave_vines.pick_berries
|translationkey=subtitles.item.berries.pick
|volume=1.0
|pitch=0.8-1.2
|distance=16}}
{{Sound table
|sound=Shear.ogg
|subtitle=Plant cropped
|source=block
|description=When the tip of cave vines are cropped with [[Shears#Cropping growing plants|shears]]
|id=block.growing_plant.crop
|translationkey=subtitles.block.growing_plant.crop
|volume=1.0
|pitch=1.0
|distance=16
|foot=1}}
{{edition|bedrock}}:
{{Sound table
|type=bedrock
|sound=Berries pick1.ogg
|sound2=Berries pick2.ogg
|source=block
|description=When glow berries are picked
|id=pick_berries.cave_vines
|volume=1.0
|pitch=0.8-1.2
|foot=1}}
==Data values==
===ID===
{{edition|java}}:
{{ID table
|edition=java
|showblocktags=y
|showitemtags=y
|showforms=y
|generatetranslationkeys=y
|displayname=Cave Vines
|spritetype=block
|nameid=cave_vines
|blocktags=cave_vines,lush_plants_replaceable
|form=block
}}
{{ID table
|displayname=Cave Vines Plant
|spritetype=block
|nameid=cave_vines_plant
|blocktags=cave_vines,lush_plants_replaceable
|form=block
}}
{{ID table
|displayname=Glow Berries
|spritetype=item
|nameid=glow_berries
|itemtags=fox_food
|form=item
|foot=1}}
{{el|be}}:
{{ID table
|edition=bedrock
|shownumericids=y
|showforms=y
|generatetranslationkeys=y
|displayname=Cave Vines
|nameid=cave_vines
|spritetype=block
|id=577}}
{{ID table
|displayname=Cave Vines Body With Berries
|nameid=cave_vines_body_with_berries
|spritename=lit-cave-vines-plant
|spritetype=block
|id=630}}
{{ID table
|displayname=Cave Vines Head With Berries
|spritename=lit-cave-vines
|nameid=cave_vines_head_with_berries
|spritetype=block
|id=631}}
{{ID table
|displayname=Glow Berries
|spritetype=item
|nameid=glow_berries
|form=item
|id=638
|foot=1}}
=== Block states===
{{See also|Block states}}
{{/BS}}
==Advancements==
{{load advancements|Husbandry;A Balanced Diet}}
==History==
{{History||October 3, 2020|link={{ytl|DWZIfsaIgtE|t=1781}}|[[File:Cave Vines Plant JE1 BE1.png|32px]] [[File:Cave Vines Plant (berries) JE1 BE1.png|32px]] [[File:Cave Vines (head) JE1 BE1.png|32px]] [[File:Cave Vines (berries) JE1 BE1.png|32px]] Cave vines (named as glow berries) are shown as part of lush caves at [[Minecraft Live 2020]].}}
{{History|java}}
{{History||1.17|snap=21w05a|[[File:Glow Berries JE1 BE1.png|32px]] Added glow berries.
|[[File:Cave Vines Plant JE1 BE1.png|32px]] [[File:Cave Vines Plant (berries) JE1 BE1.png|32px]] [[File:Cave Vines (head) JE1 BE1.png|32px]] [[File:Cave Vines (berries) JE1 BE1.png|32px]] Added cave vines.}}
{{History|||snap=21w11a|Renamed from "cave vines head" and "cave vines body" to "cave vines" and "cave vines plant", respectively.
|The IDs have also changed.
|Cave vines now always give 14 light, regardless of the type of part.
|Now slow down the player.
|Can now be climbed.}}
{{History|||snap=21w13a|Glow berries now generate as loot in [[mineshaft]] [[Minecart with Chest|chest minecarts]].}}
{{History||1.18|snap=Experimental Snapshot 1|With the implementation of cave biomes including lush caves, caves vines can now generate in normal worlds.}}
{{History|||snap=21w37a|Cave vines stop growing if [[shears]] are used on the tip.}}
{{History|||snap=21w41a|[[File:Cave Vines Plant JE2.png|32px]] [[File:Cave Vines Plant (berries) JE2.png|32px]] Changed cave vines plant texture.}}
{{History||1.19|snap=22w13a|Glow Berries may now be found in [[ancient city]] [[chest]]s.}}
{{History|bedrock}}
{{History||Caves & Cliffs (experimental)|link=Bedrock Edition 1.17.0|snap=beta 1.16.220.52|[[File:Glow Berries JE1 BE1.png|32px]] Added glow berries.
|[[File:Cave Vines Plant JE1 BE1.png|32px]] [[File:Cave Vines Plant (berries) JE1 BE1.png|32px]] [[File:Cave Vines (head) JE1 BE1.png|32px]] [[File:Cave Vines (berries) JE1 BE1.png|32px]] Added cave vines.}}
{{History||1.17.0|snap=beta 1.16.230.54|Glow Berries now generate as loot in [[mineshaft]] [[Minecart with Chest|chest minecarts]].}}
{{History|||snap=beta 1.17.0.52|Glow Berries are now available without enabling [[experimental gameplay]].}}
{{History||1.17.20|snap=beta 1.17.20.20|Cave Vines can now be pollinated by [[bee]]s.}}
{{History||1.18.10|snap=beta 1.18.10.20|[[File:Cave Vines Plant JE2.png|32px]] [[File:Cave Vines Plant (berries) JE2.png|32px]] Changed cave vines plant texture.}}
{{History||1.19.20|snap=beta 1.19.20.20|Cave vines can now be destroyed by [[ravagers]].}}
{{History|foot}}
<gallery>
Lush_caves_overview_concept_art.jpg|Concept art for the lush caves and vegetation including Glow Berries.
JE_1.17_Development_Lush_Caves.jpg|A view of the lush caves with glow berries from Minecraft Live 2020.
Lushcaves_minecon.png|Lush cave in MINECON.
Cavesworkinprogress.jpg|A view of the lush caves with glow berries, tweeted by LadyAgnes.
Livestream_lush_cave.jpg|Another view of the lush caves with glow berries, in an interview with LadyAgnes.
Glow Berry Fox.jpg|A fox under a glow berry vine.
</gallery>
===Cave vines "item"===
{{:Technical blocks/Cave Vines}}
==Issues==
{{Issue list}}
==Trivia==
*They are the first item to be usable as both a food and a light source.
==Gallery==
<gallery>
Cave Vines (plant).png
Cave Vines (berries, plant).png
Cave Vines (head).png
Cave Vines (berries).png
Cave_Vines_Age2_(Possibility_pattern_1)_JE1.png|A possible pattern of the cave vines at Age 2.
Cave_Vines_Age2_(Possibility_pattern_2)_JE1.png|And another pattern.
</gallery>
{{Blocks|vegetation}}
{{Items}}
[[Category:Food]]
[[Category:Plants]]
[[Category:Natural blocks]]
[[Category:Non-solid blocks]]
[[Category:Light sources]]
[[Category:Flammable blocks]]
[[Category:Climbable blocks]]
[[de:Leuchtbeeren]]
[[es:Bayas luminosas]]
[[fr:Baies lumineuses]]
[[it:Bacche luminose]]
[[ja:グロウベリー]]
[[pt:Bagas brilhantes]]
[[ru:Светящиеся ягоды]]
[[zh:发光浆果]]</li><li>[[Map|Map]]<br/>{{about|the craftable map|maps showing the locations of certain structures|Explorer Map|other uses|Map (disambiguation)}}
{{distinguish|World}}
{{Item
| image = Map Zoom 4.png
| renewable = Yes
| stackable = Yes (64)
}}
A '''map''' is an [[item]] used to view explored [[Chunk|terrain]] and mark landmarks.
==Obtaining==
===Crafting===
{{crafting
|head=1
|showname=0
|showdescription=1
|A1= Paper
|B1= Paper
|C1= Paper
|A2= Paper
|B2= Compass
|C2= Paper
|A3= Paper
|B3= Paper
|C3= Paper
|Output= Empty Map
|type= Miscellaneous
|description=This variation is called an "empty locator map" {{in|bedrock}}, or an "empty map" {{in|java}}.
When the player first creates a map, it is blank. It needs to be activated by holding it and pressing ''{{Control|use item}}''. after which it records terrain and location markers as the player travels within (or close to) the area it maps.
}}
{{crafting
|A1= Paper
|B1= Paper
|C1= Paper
|A2= Paper
|B2= Paper
|C2= Paper
|A3= Paper
|B3= Paper
|C3= Paper
|Output= Empty Map
|type= Miscellaneous
|description={{only|bedrock}}
This variation is called an "empty map". It does not show location markers. It is intended for cloning and zooming locator maps without having to consume an additional [[compass]] (thereby saving [[iron ingot]]s and [[redstone dust]]), but it can also be {{Control|use|text=activated}} and later converted to a locator map by combining it with a compass on an [[anvil]], [[crafting table]], or [[cartography table]].
|foot=1
}}
=== Natural generation ===
==== Chest loot ====
{{LootChestItem|empty-map,map
}}
=== Cartography table ===
A map can also be created using a single paper on a [[cartography table]] to create an empty map, or a paper with a compass for an empty locator map.{{only|bedrock}}
=== Starting map ===
{{exclusive|bedrock|section=1}}
When creating a new world {{in|bedrock}}, the player can enable the "Starting Map" option to spawn with an empty locator map in the hotbar. The map's zoom scale is 1:8. The map is updated only while the player holds it.
=== Trading ===
Novice-level cartographer [[Villager|villagers]] sell a single empty map for 7 [[Emerald|emeralds]] as their trades.
{{IN|java}}, cartographer villagers may give players with the [[Hero of the Village]] effect an empty map.
== Usage ==
{{See also|Tutorials/Mapping}}
=== Mapping ===
Crafting a map creates an empty map. The map is drawn for the first time when it is held and used (with ''{{control|use item}}''). This map can then be adjusted to different zoom levels. After conversion to a drawn map item, it starts to draw a top-down view of the player's surroundings, with North pointing to the top of the map. A pointed oval pointer indicates the player's position on the map, and moves in real-time as the player moves across the terrain shown on the map. The map does ''not'' center on the player when created, rather, the world is broken up into large invisible grid squares, and the map displays the area of whichever grid square it is in when it is first used. For example, if a player uses a new map in a certain grid square, and then moves a distance away and uses another fresh map but is still within the same grid square, both maps appear identical. To make a map that is not identical to the first one, the player would have to move outside of the edges of the first map (because then they would be in a new grid square). This way, no two maps of the same size can ever partially overlap and every map can display only a fixed area.
To record the world on a map, that specific map must be held in the player's hands while the player moves around the world. The world is recorded as-is during exploration, meaning that if the world is modified, a player must revisit the area while holding the map to update the map's view. Maps can also be [[Map#Cloning|cloned]]. If a player holds a map whose one or more clones are on display in item frames, updates are made on all clone-connected maps.
Other players are displayed on the map only if they have a map in their inventory cloned from the one being looked at. When placing a map into an [[item frame]], the map displays with a green pointer shown at the location of the item frame. This is to help the player see where they are in relation to the area that the map is showing. If the player leaves a map in an item frame and views a clone of it, the green pointer remains in the spot of the framed copy. This can be used to set up waypoints. Unexplored areas are transparent, making the item frame visible.
When the player leaves the area shown on a specific map, the player pointer transforms into a white dot that moves on that map. The marker shrinks to a smaller white dot if the player is far from the map's center: the area is 320 by 320 blocks per scale factor. The dot moves along the edge of the map to show the relative location of the player. However {{in|bedrock}}, the pointer remains as an arrow but shrinks until the player is near the area shown on the map.
While maps in [[the Nether]] work, they show only the red-and-gray pattern, regardless of the blocks placed. The only useful function is finding where the player is in relation to placed framed maps, which show as green pointers. Additionally, the player pointer rapidly spins and is not a good indicator of direction. Placing a [[banner]] in [[the Nether]] still shows it on the map as usual. Having a smaller map image while riding a [[strider]] in the Nether can help one to see one's footing while traveling over [[lava]].
{{IN|java}}, when using a map from another dimension, the map shows the player's position and direction when they were last in the dimension of the map. {{IN|bedrock}}, however, the player can use maps from one dimension while in another dimension. For locator maps, the place marker changes color depending on the dimension that the player is currently in (white for the Overworld, red for [[the Nether]], and magenta for [[the End]]). An Overworld map in the Nether shows the player's corresponding location and direction in the Overworld.<ref name=multiverse>{{ytl|EpP1diZdEdI}}</ref> Similarly, a Nether Map in the Overworld shows the player's corresponding location in the Overworld, but the place marker spins, just like a Nether map in the Nether. An Overworld map in the End shows the world spawn.<ref name=multiverse/> A Nether map cannot be used in the End — the map appears, but the place marker is not shown anywhere — and similarly, an End map cannot be used in the Overworld or the Nether.
A player can make a large piece of pixel art (128×128) facing upward, center a map on it, and place that map in an [[item frame]] to create a custom picture. Locking is recommended. See [[Map item format#Map Pixel Art]] for details on the techniques.
Maps display as a mini-map when held in the off-hand, or if the off-hand slot is occupied; the map is full-sized only when held in the dominant hand with both hands free.
A map always positions itself facing towards North when placed horizontally within an item frame regardless of how the map is placed.
=== Map content ===
{{Main|Map item format}}
Maps consist of square pixels arranged like pixels in a 128×128 square pattern, with each pixel representing a square portion of land. {{IN|java}}, the [[Map item format#Color table|color of a map pixel]] generally matches the color of the most common [[opaque]] block in the corresponding area, as seen from the sky. 'Minority blocks' in the target area have no effect on the color of the pixel, thus small features tend to be undetectable on zoomed-out maps.
{{IN|bedrock}}, the [[Map item format#Color table|color of a map pixel]] instead matches the single top-most opaque block in a grid sized by the map magnification pixel size (see the table in the "Player marker and pointer" section below). For example, a 3/4 magnification map has a pixel size of 8x8 blocks; this means the map will read only the top-most opaque blocks at the 0,0 coordinate, the 8,0 coordinate, the 0,8 coordinate, etcetera, ignoring all other blocks in the area. This means that {{in|bedrock}}, map pixel art requires only one block per pixel regardless of map magnification.
{{IN|bedrock}}, grass, foliage and water colors that are biome-dependent are represented accurately on a map.
{| class="wikitable"
|-
! style="width: 300px;" | {{el|je}}
! style="width: 300px;" | {{el|be}}
|-
| style="text-align: center;" | [[File:Map Zoom 4.png|alt=All banners marked on a map, alongside a named banner.|216px]]
| style="text-align: center;" | [[File:Map item BE.png|216px]]
|-
| Biome colors on ''Java Edition''.
| Biome colors on ''Bedrock Edition''.
|-
|}
Maps also show ground up to about 15 blocks below the surface of the water in oceans as slightly lighter blue, to show where the ground rises. This is not true with land above water. Higher elevations in the world mean lighter colors on the map. The map records the surface even as the player moves below the surface.
A standard map represents 128x128 blocks (1 block per pixel, 8x8 [[chunks]]) but maps can be zoomed-out to represent up to 2048x2048 blocks (16 square blocks per pixel, 128x128 [[chunks]]).
Some relevant distances: 64 blocks (4 chunks) is the update radius from a player in the Overworld and the End. However, it is half this (32 blocks) in the Nether. Also, 1024 blocks is the minimum Overworld distance from a [[nether portal]], at which players can build another portal and expect to reach a new location in the Nether. This is the distance across a 1:8 map, and also from a 1:16 map's center to its edge.
=== Player marker and pointer ===
{{IN|java}}, every map contains a marker that marks the position of the player, and points in the same direction as the player. When a player moves out of a map, a big white dot appears and moves relative to the player's position. The pointer either disappears when the player moves away a certain distance from the border of the map or, in case of [[explorer map]]s, the big white dot changes to a smaller white dot. The distance required for the small white dot to appear(explorer maps) or for the big dot to vanish (normal maps) changes with the scaling of the map.
* '''Level 0/4 :''' 128×128 blocks (each map pixel represents 1 block)
* '''Level 1/4 :''' 256×256 blocks (2×2 blocks per map pixel)
* '''Level 2/4 :''' 512×512 blocks (4×4 blocks per map pixel)
* '''Level 3/4 :''' 1024×1024 blocks (8×8 blocks per map pixel)
* '''Level 4/4 :''' 2048×2048 blocks (16×16 blocks per map pixel)
{{IN|bedrock}}, a map can be crafted with or without this marker, and a map without a position marker can add one later by adding a compass to the map. When a map is crafted without a compass, it's simply called an "empty map", but when crafted with a compass, it's called an "empty locator map". The marker also turns red if the player enters the Nether with an Overworld map and shows the player's Overworld location relative to the Nether location. A map created in the End has a purple marker showing the player's location. If an Overworld map is used in the End, a magenta dot appears on the player's spawn point.{{/BE|position}}
{{crafting
|name=Map<br>(with marker)
|ingredients=[[Map]] or Empty Map +<br>[[Compass]]
|showdescription=1
|Map (no markers);Empty Map
|Compass
|Output= Locator Map;Empty Locator Map
|type= Miscellaneous
|description={{el|be}} only.
Maps crafted from only paper do not show the location marker; to add it, a compass must be added to the map.
|foot=1
}}
{{IN|bedrock}}, a cartography table can also be used to add a pointer to create a locator map or empty locator map. This can be done by adding a compass to paper, or to an empty map or map.
=== Zooming out ===
[[File:Cartography table UI zoom.png|thumb|300px|{{IN|java}}, cartography table's UI, showing the map is being zoomed out.]]
A [[cartography table]] can also be used to zoom out, taking only one piece of paper per zoom level.
A blank map can not be zoomed out. A map has to have something already marked on it for the zooming to be possible.
{{Crafting
|A1= Paper |B1= Paper |C1= Paper
|A2= Paper |B2= Map;Locator Map |C2= Paper
|A3= Paper |B3= Paper |C3= Paper
|Output= Map;Locator Map
|showdescription=1
|description=Locator Map {{el|be}} only.
}}
{{/BE|zoom}}
==== Zoom details ====
The zooming function starts from when the map is created (zoom level 0) up to its fourth zoom step (zoom level 4).
{| class="wikitable" style="text-align: center" data-description="Zoom levels"
! colspan="2" |
! Zoom step 0
! Zoom step 1
! Zoom step 2
! Zoom step 3
! Zoom step 4
|-
! colspan="2" |
| [[File:Map Zoom 0.png|116px|Zoom step 0, 1:1]]
| [[File:Map Zoom 1.png|116px|Zoom step 1, 1:2]]
| [[File:Map Zoom 2.png|116px|Zoom step 2, 1:4]]
| [[File:Map Zoom 3.png|116px|Zoom step 3, 1:8]]
| [[File:Map Zoom 4.png|116px|Zoom step 4, 1:16]]
|-
! colspan="2" | Zoom level
| 0/4
| 1/4
| 2/4
| 3/4
| 4/4
|-
! colspan="2" | 1 map pixel represents
| 1 block
| 2×2 blocks
| 4×4 blocks
| 8×8 blocks
| 16×16 blocks<br>(1×1 chunk)
|-
! colspan="2" | Scaling ratio
| 1:1
| 1:2
| 1:4
| 1:8
| 1:16
|-
! rowspan="2" colspan="2" | Map covers an area of
| 128×128 blocks
| 256×256 blocks
| 512×512 blocks
| 1024×1024 blocks
| 2048×2048 blocks
|-
| 8×8 chunks
| 16×16 chunks
| 32×32 chunks
| 64×64 chunks
| 128×128 chunks
|-
! colspan="2" | Smallest discernible features
| Blocks
| Trees, Paths
| Lakes, Buildings
| Mountains, Rivers
| Biomes, Mountain Ranges
|-
! colspan="2" | Use cases
| Pixel art, Base plans
| Base surroundings
| Structure mapping
| Landscape mapping
| Biome mapping
|-
! rowspan="2" | Total paper needed to zoom out from Level 0
! in anvil{{only|bedrock|short=1}} or crafting table
| -
| {{ItemSprite|Paper}} 8
| {{ItemSprite|Paper}} 16
| {{ItemSprite|Paper}} 24
| {{ItemSprite|Paper}} 32
|-
! in cartography table
| -
| {{ItemSprite|Paper}} 1
| {{ItemSprite|Paper}} 2
| {{ItemSprite|Paper}} 3
| {{ItemSprite|Paper}} 4
|}
Maps are always aligned to a grid at all zoom levels. That means zooming out any different map in a specific area covered by that map always has the same center. As such, maps are aligned by map width (1024 blocks for a level 3 maps) minus 64. A level 3 map generated at spawn covers X and Z coordinates from -64 to 959. All maps generated in this area zoom out to the same coordinates, guaranteeing that they are always 'aligned' on a map wall. For a zoomed-out map to cover a new area, it must start with a base (level 0) map that is in that area.
At zoom level 0, a map created on the point (0,0) has (0,0) at the center of the map. At higher zoom levels of the same map, the coordinate (0,0) is in the top left square of the map.
{{IN|java}}, zoom level can be seen on a map by turning on Advanced Tooltips (a [[Debug screen#More debug keys|debug screen]] option that can be toggled by using the key combination {{key|F3+H}}). The tooltip of the map then shows the zoom level, scaling factors, and map ID.
=== Cloning ===
[[File:Cartography table UI clone.png|thumb|300px|{{IN|Java}}, cartography table's UI, showing the map is being cloned.]]
A mix of empty maps and empty locator maps may be used. Whether the cloned maps show position markers is dependent only on the input map.
A [[cartography table]] can also be used to clone a map.
The parts of the world that have already been explored and mapped are copied, and newly explored areas appear on both instances. If one of the maps is later zoomed out, then the maps lose their connection to each other and function as completely separate maps that have to be individually filled by exploring.
In Creative mode, a map in an item frame may be cloned by using {{control|pick block}} on it, as long as that map is not also in the player's inventory.
It doesn't matter if the map to be cloned is at a higher zoom level (made of more paper) than the blank map. Upon copying the map, both resulting maps have the same magnification as the starting map.
{{/BE|clone}}
=== Crafting ingredient ===
{{crafting usage|Map, Empty Map}}
=== Marking points ===
{{IN|java}} the player has the ability to mark spots on a map. To do this, {{control|use}} a map on a placed-down [[banner]], and the spot of the banner gets marked on the map. The mark takes the color of whatever the base color is for the banner, and if the banner has a name, the mark shows that name. Banner marks on a map are always oriented with their top facing north, regardless of the banner's actual orientation. If the banner is destroyed, the mark of the banner remains at first, but if the player gets closer to where the banner previously was, it disappears as the area is updated on the map.
If a map is mounted on an item frame and is within the area it depicts, the mounted map displays its current location with a green indicator rotated to match its orientation.
[[File:Map Marker Bedrock on Item frame.png|thumb|181x181px|{{IN|bedrock}} this is what a map lying on an item frame looks like, while showing markers.]]
{{IN|bedrock}} the player can place copies of locator maps in [[item frame]]s in order to create a land mark. The marker is a green dot that resembles the shape of the player's marker, but in green color. The position the marker points at depends on the direction the item frame is facing. It is worth noting that the markers work only on copies of the same map. Other maps of the same area do not show the existing markers that the player(s) had placed.
If a player has a cloned map in their inventory, their pointer appears white when viewed on the same map held by another player. Hence, if all players have the same cloned map in their inventory, all markers would appear white when the clone map is viewed.
{| class="wikitable"
|-
! style="width: 300px;" | {{el|je}}
! style="width: 300px;" | {{el|be}}
|-
| style="text-align: center;" | [[File:Banner marked map.png|alt=All banners marked on a map, alongside a named banner.|216px]]
| style="text-align: center;" | [[File:Tracking map with markers bedrock.png|216px]]
|-
| How every banner appears {{IN|java}} on a map, including named banners.
| {{IN|bedrock}} this is how a locator map shows map markers while held by a player.
|-
|}
===Locking===
[[File:Cartography table UI lock.png|thumb|300px|{{IN|Java}}, cartography table's UI, showing the map is being locked.]]
Maps can be locked when using a [[glass pane]] in a [[cartography table]]. This creates a new map containing the same data and locks it. All copies of this new map are also locked. A locked map never changes, even when the depicted terrain changes. {{IN|Be}}, locked maps have a unique texture.
{| class="wikitable" style="text-align: center;"
|-
! Condition
! style="width: 200px;" | Newly created map
! style="width: 200px;" | Map after terrain alteration
|-
! Unlocked map
| [[File:Map Zoom 0.png|174px]] || [[File:Unlocked Map.png|174px]]
|-
! Locked map
| [[File:Map Zoom 0.png|174px]] || [[File:Map Zoom 0.png|174px]]
|-
|}
{{-}}
== Sounds ==
{{Edition|Java}}:
{{Sound table
|rowspan=2
|sound=Drawmap1.ogg
|sound2=Drawmap2.ogg
|sound3=Drawmap3.ogg
|subtitle=Map drawn
|source=player
|description=When a map is drawn
|id=ui.cartography_table.take_result
|translationkey=subtitles.ui.cartography_table.take_result
|volume=1.0
|pitch=1.0
|distance=16}}
{{Sound table
|subtitle=Map drawn
|source=block
|description=When a map is edited using a cartography table
|id=ui.cartography_table.take_result
|translationkey=subtitles.ui.cartography_table.take_result
|volume=1.0
|pitch=1.0
|distance=16
|foot=1}}
{{Edition|Bedrock}}:
{{Sound table
|type=bedrock
|rowspan=2
|sound=Drawmap1.ogg
|sound2=Drawmap2.ogg
|sound3=Drawmap3.ogg
|source=block
|description=When a map is drawn<wbr>{{Upcoming|BE 1.20.20.20}}
|id=ui.cartography_table.take_result|idnote={{Verify|Could be block.cartography_table.use}}
|volume=0.8
|pitch=1.0}}
{{Sound table
|type=bedrock
|source=block
|description=When a map is edited using a cartography table
|id=ui.cartography_table.take_result
|volume=0.8
|pitch=1.0
|foot=1}}
== Data values ==
=== ID ===
{{edition|java}}:
{{ID table
|edition=java
|showforms=y
|generatetranslationkeys=y
|displayname=Empty Map
|spritetype=item
|nameid=map
|form=item}}
{{ID table
|displayname=Map
|spritetype=item
|nameid=filled_map
|form=item
|translationkey=item.minecraft.filled_map, filled_map.buried_treasure, filled_map.explorer_jungle{{upcoming|java 1.20.2}}, filled_map.explorer_swamp{{upcoming|java 1.20.2}}, filled_map.mansion, filled_map.monument, filled_map.unknown, filled_map.village_desert{{upcoming|java 1.20.2}}, filled_map.village_plains{{upcoming|java 1.20.2}}, filled_map.village_savanna{{upcoming|java 1.20.2}}, filled_map.village_snowy{{upcoming|java 1.20.2}}, filled_map.village_taiga{{upcoming|java 1.20.2}}
|foot=1}}
{{edition|bedrock}}:
{{ID table
|edition=bedrock
|showaliasids=y
|shownumericids=y
|showforms=y
|notshowbeitemforms=y
|generatetranslationkeys=y
|displayname=Empty Map
|spritetype=item
|nameid=empty_map
|aliasid=emptymap
|id=515
|form=item
|translationkey=item.emptyMap.name, item.emptyLocatorMap.name}}
{{ID table
|displayname=Map
|spritetype=item
|spritename=map-be
|nameid=filled_map
|aliasid=map
|id=420
|form=item
|translationkey=item.map.name, item.map.exploration.mansion.name, item.map.exploration.monument.name, item.map.exploration.treasure.name
|foot=1}}
=== Metadata ===
{{see also|Bedrock Edition data values}}
{{IN|bedrock}}, maps use the following data values:
{{/DV}}
=== Item data ===
{{el|java}}:
{{main|Player.dat format}}
<div class="treeview">
* {{nbt|compound|tag}}: The item's '''tag''' tag.
{{:Player.dat_format/Maps}}
</div>
{{el|bedrock}}:
: See [[Bedrock Edition level format/Item format]].
=== Map icons ===
{{see also|Player.dat format|Map item format|map_icons.png}}
Map icons are 8×8 in ''Java Edition'', but 16×16 in Bedrock Edition. As such, there are minor misalignment issues in ''Java Edition''.<ref>{{bug|MC-214649|||WF}}</ref>
[[File:Map icons.png|thumb|128px|Map icons texture {{in|Java}}]]
[[File:Map icons BE.png|thumb|128px|Map icons texture {{in|Bedrock}}]]
{| class="wikitable"
|-
! Java ID !! Bedrock ID !! Text ID !! Appearance !! Purpose !! Shown in item frames?
|-
| 0 || ||<code>player</code> || [[File:Player (texture) JE1 BE1.png|16px]] [[File:Player (texture) BE2.png|16px]] White marker || Players (on map) || No
|-
| 1 || 1 ||<code>frame</code> || [[File:Green Marker (texture) JE1 BE1.png|16px]] [[File:Green Marker (texture) BE2.png|16px]] Green marker || The current map in an item frame || Yes
|-
| 2 || ||<code>red_marker</code> || [[File:Red Marker (texture) JE1 BE1.png|16px]] [[File:Red Marker (texture) BE2.png|16px]] Red marker || Position converted to Overworld when opening Overworld map in the Nether{{Only|bedrock}} || No
|-
| 3 || ||<code>blue_marker</code> || [[File:Blue Marker (texture) JE1 BE1.png|16px]] [[File:Blue Marker (texture) BE2.png|16px]] Blue marker || Other players || No
|-
| 4 || ||<code>target_x</code> || [[File:Target X (texture) JE1 BE1.png|16px]] White X || Unused || Yes
|-
| 5 ||5
|<code>target_point</code> || [[File:Target Point (texture) JE1 BE1.png|16px]] [[File:Target Point (texture) BE2.png|16px]] Red triangle || Unused || Yes
|-
| 6 || 6 ||<code>player_off_map</code> || [[File:Player Off Map (texture) JE1 BE1.png|16px]] Large white dot || Players off map, nearby{{only|java}} || No
|-
| 7 || 13 ||<code>player_off_limits</code> || [[File:Player Off Limits (texture) JE1.png|16px]] [[File:Player Off Limits (texture) BE.png|16px]] Small white dot || Players off map, far away{{only|java}} || No
|-
| 8 ||14
|<code>mansion</code> || [[File:Mansion (texture) JE1.png|16px]] [[File:Mansion (Texture) BE2.png|frameless|16x16px]] Woodland mansion || Woodland mansion || Yes
|-
| 9 || 15 ||<code>monument</code> || [[File:Monument (texture) JE1.png|16px]] [[File:Monument Texture BE2.png|frameless|16x16px]] Ocean monument || Ocean monument || Yes
|-
| 10 - 25 || ||<code>{{tooltip|banner_*|banner_white, banner_orange, banner_magenta, banner_light_blue, banner_yellow, banner_lime, banner_pink, banner_gray, banner_light_gray, banner_cyan, banner_purple, banner_blue, banner_brown, banner_green, banner_red, banner_black}}</code> || [[File:Banner White (texture) JE1.png|16px]] [[File:Banner Light Gray (texture) JE1.png|16px]] [[File:Banner Gray (texture) JE1.png|16px]] [[File:Banner Black (texture) JE1.png|16px]] [[File:Banner Brown (texture) JE1.png|16px]] [[File:Banner Red (texture) JE1.png|16px]] [[File:Banner Orange (texture) JE1.png|16px]] [[File:Banner Yellow (texture) JE1.png|16px]] [[File:Banner Lime (texture) JE1.png|16px]] [[File:Banner Green (texture) JE1.png|16px]] [[File:Banner Cyan (texture) JE1.png|16px]] [[File:Banner Light Blue (texture) JE1.png|16px]] [[File:Banner Blue (texture) JE1.png|16px]] [[File:Banner Magenta (texture) JE1.png|16px]] [[File:Banner Purple (texture) JE1.png|16px]] [[File:Banner Pink (texture) JE1.png|16px]]<br>Banners in all 16 wool colors{{only|java}}|| Banner markers || Yes
|-
| 26 ||4
|<code>red_x</code> || [[File:Red X (texture) JE1.png|16px]] [[File:Target X (texture) BE2.png|16px]] Red X || Buried treasure || Yes
|-
| || 8 || || [[File:Magenta Marker (texture) BE1.png|16px]] Magenta marker
| Position converted to Overworld when opening Overworld map in the End{{Only|bedrock}} || No
|-
| || 9 || || [[File:Orange Marker (texture) BE1.png|16px]] Orange marker{{more info}}
|Other players
|Yes
|-
| || 10 || || [[File:Yellow Marker (texture) BE1.png|16px]] Yellow marker
| Other players || No
|-
| || 11 || || [[File:Cyan Marker (texture) BE1.png|16px]] Cyan marker
| Other players || No
|-
| -
|12
| || [[File:Green Point (texture) BE1.png|16px]] Green Triangle
| Other structure such as stronghold, fortress, end city, etc. when used as explorer map destination{{Only|bedrock}} || Yes
|}
It should be noted that even if the player used a NBT editor to add an additional icon on the map, ''Minecraft'' shows only the first one listed when the player loads up their world.
== Achievements ==
{{load achievements|Map Room}}
== History ==
{{see also|section=24|map_icons.png|Java Edition history of textures#Map icons}}
{{more images|section=24|{{bug|MC-72962}}}}
{{History||April 27, 2011|link=https://web.archive.org/web/0/http://notch.tumblr.com/post/4988431144/the-maps|[[Notch]] unveiled screenshots of the map.}}
{{History||April 28, 2011|link={{tweet|notch|63500114005721088}}|[[Notch]] said that he would try to make maps place-able on [[wall]]s.}}
{{History|java beta}}
{{History||1.6|snap=Test Build 3|[[File:Map (item) JE1 BE1.png|32px]] Added maps.}}
{{History||1.6.6|The ability to auto-craft maps using shift-click has been disabled.}}
{{History||1.8|snap=Pre-release|Maps can now be found in library chests in the brand-new [[stronghold]]s.
|Auto crafting maps has been restored. Map cloning, therefore, is unavailable for a period of time.}}
{{History||1.8.1|Maps now work both while walking and flying.}}
{{History|java}}
{{History||1.0.0|snap=Beta 1.9 Prerelease 5|Prior to this update, the [[sun]] in ''[[Minecraft]]'' rose in the North, which threw off many [[player]]s and led to a common misconception that ''Minecraft'' maps/[[world]]s were oriented with East at the top. The sun now rises in the east and sets in the west, making navigation much more intuitive.
|Before the change in sun position, it was commonly said that ''Minecraft'' maps/worlds are oriented with East at the top; sunrise, by definition, occurs at the East, which means it is certainly true that the maps were oriented "East" since the Sun rose from the top (North). However, [[Jeb]] asserted (and [[Notch]] agreed) that the sun rose in the north.<ref>{{Tweet|jeb|87815841160237056}}</ref><ref>{{Tweet|notch|88155424880201728}}</ref> Most mods and map-making tools, however, used the terms East and North consistent with their actual definitions (e.g. a [[Programs and editors/Cartograph|Cartograph]]-generated map with North at the top is rotated 90 degrees from the in-game map).}}
{{History||1.4.2|snap=12w34a|[[File:Empty Map JE1 BE1.png|32px]] [[Crafting]] a map now creates an empty map. The map is drawn for the first time when it is held and right clicked, and is centered near the location of the [[player]] when clicked (not as before where it was centered on the location it was crafted.)
|Previously, in order to map a new area, the map had to be ''crafted'' in that area (rather than carrying a previously-crafted map to the new area). The point where a map is crafted becomes its permanent center, and could never be changed.
|The pointer no longer disappears when leaving the map, but transforms into a white dot, indicating on what side of the map the player is located.
|Maps now align to a grid, making it easier to create adjacent maps.
|Maps can now be zoomed out (but not zoomed in).
|Maps can now be cloned and scaled.}}
{{History||1.4.2|snap=12w34b|Maps now have a ''zoom level'', which was fixed at 1:8 prior to snapshot [[Java Edition 12w34a|12w34a]],<ref name="mapinfo">https://web.archive.org/web/0/http://notch.tumblr.com/post/4988431144/the-maps</ref> but now starts at 1:1 and can be increased up to 1:16 by re-crafting an existing map.
|Maps are no longer numbered on the top-left corner and is labeled through the tooltip.}}
{{History|||snap=12w36a|New maps are now crafted at a scale factor of 1:1. A zoomed in map can be zoomed out by re-crafting it with another 8 sheets of [[paper]] on a [[crafting table]]. Each time this is done, the scale increases - 1:1, 1:2, 1:4, 1:8, 1:16 with a map scale of 1:16 being the current maximum.}}
{{History||1.7.2|snap=13w38a|The map size has been increased when placed on a [[wall]] using the [[item frame]].
|More colors have been added to maps for different [[block]]s.<ref name="infodump2">https://web.archive.org/web/0/https://www.mojang.com/2013/10/minecraft-1-7-the-update-that-changed-the-world</ref>}}
{{History||1.8|snap=14w31a|Zoomed maps now conform to an expanded grid based on their zoom level. Previously, careful considerations would need to be taken to creating a wall of adjoining maps.}}
{{History||1.8.1|snap=pre1|Some colors have been changed on maps to more accurately represent their respective [[block]].}}
{{History||1.9|snap=15w31a|Maps now display as a mini-map when held in the off-hand, or if the off-hand slot is occupied; the (old) large version is visible only when held in the dominant hand with the secondary hand free.}}
{{History|||snap=15w34a|New maps can now be [[crafting|crafted]] at a scale factor of 1:4.
|A crafting recipe has been added for zooming in maps.}}
{{History|||snap=15w43a|The average yield of empty maps from [[stronghold]] library [[chest]]s has been doubled.}}
{{History|||snap=15w45a|New maps are once again [[crafting|crafted]] at a scale factor of 1:1, as they had been before snapshot [[15w34a]].
|The [[crafting]] recipe, that was introduced in 15w34a, for zooming in maps has been removed.}}
{{History|||snap=15w49a|Map making now uses armor equipping sounds.}}
{{History||1.11|snap=16w39a|Maps now work in [[the End]].
|Empty maps are now [[trading|sold]] by cartographer [[villager]]s as their tier 3 [[trading|trade]].
|Added [[explorer map]]s, sold by cartographers as their tier 4 trades.}}
{{History||1.12|snap=17w17a|Maps now have separate colors for colored [[terracotta]] blocks from other colored blocks.}}
{{History||1.13|snap=17w47a|Prior to [[1.13/Flattening|''The Flattening'']], these [[item]]s' numeral IDs were 358 and 395.
|Maps now use additional NBT to specify which map they contain. Prior to this version, they used the [[damage]] value instead.
|Map IDs are no longer limited to 32,768.}}
{{History|||snap=17w50a|Maps can now be placed on floor and ceiling [[item frame]]s.}}
{{History|||snap=18w10a|Spots on maps can now be marked using [[banner]]s.}}
{{History|||snap=18w11a|Empty maps can now generate in [[shipwreck]] [[chest]]s.}}
{{History|||snap=pre7|Maps have been changed slightly, in regard to which [[block]]s are shown and which blocks are not.}}
{{History||1.14|snap=18w43a|[[File:Empty Map JE2 BE2.png|32px]] [[File:Map (item) JE2 BE2.png|32px]] The textures of maps have been changed.}}
{{History|||snap=18w48a|Empty maps can now be found in chests in [[village]] cartographer houses.}}
{{History|||snap=19w02a|Maps can now be cloned and zoomed out (extended) by using a [[cartography table]].
|Maps can now be locked by using a [[glass pane]] with a cartography table.
|The recipes for cloning and zooming out maps have been removed.}}
{{History|||snap=19w06a|Map making is now silent again.}}
{{History|||snap=19w13a|Cartographer villagers now give empty maps to players under the [[Hero of the Village]] effect.}}
{{History||1.16|snap=20w21a|Map making sounds are now the same as when using a cartography table.}}
{{History|pocket alpha}}
{{History||v0.14.0|snap=build 1|[[File:Empty Map JE1 BE1.png|32px]] [[File:Map (item) JE1 BE1.png|32px]] Added maps.
|Maps are crafted using nine [[paper]], one for every slot of the [[crafting]] grid.
|Maps must be combined with a [[compass]] using an [[anvil]] in order to show the [[player]]'s position.
|Maps can be zoomed using an anvil.}}
{{History|||snap=build 3|New maps are now [[crafting|crafted]] at full zoom.
|Empty maps now have a "Create Map" button to initialize them.}}
{{History|||snap=build 7|New maps are now crafted at a scale factor of 1:1.}}
{{History||v0.15.0|snap=unknown|Maps can now be crafted either with 8 pieces of [[paper]] and a [[compass]] ''or'' 9 pieces of paper, to get a map with or without a position marker.}}
{{History||v0.16.0|snap=build 1|Different colors have been added to maps for different [[biome]]s.}}
{{History|pocket}}
{{History||1.0.0|snap=?|[[Windows 10 Edition]] can now use the [[anvil]] as well as the [[crafting table]] to clone, zoom and apply markers, just as [[Pocket Edition]] in general could.
|Maps can now be found inside [[stronghold]] library [[chest]]s.}}
{{History||1.1.0|snap=alpha 1.1.0.0|Empty maps with direction markers built-in are now called "locator maps".}}
{{History|||snap=alpha 1.1.0.3|"Locator maps" are now called "empty locator maps".
|Empty maps are now [[trading|sold]] by cartographer [[villager]]s for 7-11 [[emerald]]s as their tier 3 [[trading|trade]].}}
{{History|bedrock}}
{{History||1.4.0|snap=beta 1.2.14.2|Maps can now be found inside map room [[chest]]s in [[shipwreck]]s.}}
{{History||?|The texture of the filled map overlay has been changed.}}
{{History||?|Maps now function in dimensions other than the dimension in which they were created.}}
{{History||1.10.0|snap=beta 1.10.0.3|Maps can now be found in cartographer house [[chest]]s in [[village]]s.
|[[File:Empty Map JE2 BE2.png|32px]] The texture of empty maps has been changed.}}
{{History||1.11.0|snap=beta 1.11.0.1|Empty maps can now be created from 1 [[paper]] in [[cartography table]]s.
|Maps can now be zoomed, cloned, renamed, and have pointers added in cartography tables.}}
{{History|||snap=beta 1.11.0.4|Cartographer [[villager]]s now [[trading|sell]] empty map for an [[emerald]] as their first tier [[trading|trades]].
|Empty locator maps can now be [[trading|bought]] from cartographer villagers.}}
{{History||1.13.0|snap=beta 1.13.0.1|[[File:Map (item) BE3.png|32px]] [[File:Locked Map (item) BE2.png|32px]] Filled maps and locked maps now have unique inventory icons.}}
{{History||1.16.0|snap=beta 1.16.0.57|Trading has been changed, novice-level cartographer now sell an empty map for 7 emeralds. Cartographer villager no longer sell empty locator map.}}
{{History||1.16.100|snap=beta 1.16.100.56|The ID of maps have been changed from <code>emptymap</code> to <code>empty_map</code> and <code>map</code> to <code>filled_map</code>.}}
{{History|console}}
{{History||xbox=TU1|xbone=CU1|ps=1.00|wiiu=Patch 1|switch=1.0.1|[[File:Map (item) JE1 BE1.png|32px]] Added maps.
|The [[player]] spawns with a free map.
|Maps are available only as zoom step 3 maps centered at coordinates 0,0. Biome colors do not appear on maps.}}
{{History||xbox=none|xbone=CU1|ps=1.0|wiiu=none|Larger sized worlds on Xbox One, Playstation 4, and Nintendo Switch have zoom step 3 maps aligned to a grid with maps centered at 0, 1024, or 2048 on the X or Z coordinates.}}
{{History||xbox=TU21|xbone=CU9|ps=1.14|wiiu=Patch 1|[[File:Empty Map JE1 BE1.png|32px]] [[Crafting]] a map now produces an empty map.}}
{{History||xbox=TU46|xbone=CU36|ps=1.38|wiiu=Patch 15|The outer end islands appear on different maps; even on Xbox 360, Playstation 3, Vita, and Wii U editions.}}
{{History||xbox=none|xbone=none|ps=1.90|wiiu=none|switch=none|[[File:Empty Map JE2 BE2.png|32px]] [[File:Map (item) JE2 BE2.png|32px]] The textures of maps have been changed.}}
{{History||ps=1.91|Maps can now be created and used in [[cartography table]]s.}}
{{History|foot}}
== Issues ==
{{issue list}}
== Trivia ==
* Use of the {{key|F1}} key can allow the player to hold a map without blocking their view at all.
* In ''Java Edition'', a map created using {{cmd|give}} can be any map by using the Map parameter to specify the map number desired. E.g. {{cmd|give [player] minecraft:filled_map{map:5<nowiki>}}} gives the specified player map_5. If no data value is supplied it defaults to map_0. If map_0 has not ever been crafted, it is centered on x=0, z=0.
* The maps are stored separately as their own data (<code>.dat</code>) file as <code>map_x.dat</code> with (x) being the map number, see [[map item format]] for more info. By manipulating this number, players can organize their maps to suit them, or if they accidentally create a map in the same location, they can delete their extra map so as to save the number they make.
* Certain programs can be used to make customized maps with images or text on them instead of actual maps, many people use these in adventure maps to show pictures or to tell a story.
* Since all copies of a map are links to the same file, copying an unfinished map keeps it synchronized with the copy as the player fills it in. Thus, a copy stored in a chest can act as a remote backup.
* A map that is in an item frame does not update itself until a player picks it up, lets it reload, and places it back again. However, if a player holds a clone of the map, both maps update.
* Filled maps are the only items that make 90 degree rotations in item frames, and also the only items that can expand the item frame into full block wide.
* On [[Legacy Console Edition]], the player always spawns with a map in their inventory after creating a world. This was later added to Bedrock Edition as an optional feature in the world creation menu.
* Maps on Legacy Console Edition always show the player's current coordinates, as a substitute for the optional [[Coordinates|coordinate display]] in other editions.
* A map cannot be created on [[New Nintendo 3DS Edition]]. Instead, the map is always displayed on the bottom screen along with the coordinates. Biome colors do not appear on maps.
== Gallery ==
<gallery>
MapItem1.png|A fully zoomed map.
MapRotation.png|Having a map in hand does not stop the ability to see ahead.
MapItem3.png|A world being recorded onto a map.
Mcmap4.png|Nearly fully explored map.
Zoomed Map.png|A map edited to the scale of 1.
Sky Map.png|A map mapping the [[Sky Dimension]].
MapOfVillage.png|A village and how it is represented on a map.
Pumpkin map.png|A map containing a custom image made by placing a large number of blocks.
Complete Map.png|A completely explored map.
MapZooms.png|A diagram showing how maps zoomed out before [[Java Edition 1.8]]. Notice how the larger maps have borders made of half and quarter small maps.
Map18zooms.png|From 1.8, zoomed maps are aligned to this grid exactly.
Large Biome Map.png|A map of a [[Large Biomes]] world.
Map0140-0160.png|A comparison of maps between versions in Pocket Edition Alpha [[Pocket Edition Alpha 0.14.0|0.14.0]] and [[Pocket Edition Alpha 0.16.0|0.16.0]].
Mycelium Map.png|A map view of a mushroom biome, showing that mycelium appears purple on a map.
MiniMap.png|Maps held in the off-hand or in either hand while [[dual wielding]] appear as mini-maps.
Partly filled treasure map.png|Partly filled treasure map with an odd area at the bottom left. Normally a partly filled map would look striped (as in the top left), but this map seems to be bugged and is possibly showing caves, or something, in the bottom left.
Partly filled ocean explorer map.png|Partly filled ocean explorer map. Updating the game from an older version (in this case the area was first generated before 1.18) and buying a map after updating (in this case in 1.19.4) can result in the map displaying rivers and terrain where there is really a frozen sea.
Map Stained Glass 1.png|Stained glasses' appearances on maps before and after 1.13.
Map Stained Glass 2.png|Stained glasses' appearances on maps before and after 1.13.
Map Various Blocks 1.png|Various blocks' appearances on maps before and after 1.13.
Map Various Blocks 2.png|Various blocks' appearances on maps before and after 1.13.
Better Together Map.jpg|Holding a map in the offhand in ''Bedrock Edition''.
Better Together Map Icon.jpg|Holding a map in both hands in ''Bedrock Edition''.
File:MapFailedtoFill.png|A map that has not yet filled. A rare bug in Java.
</gallery>
=== The Nether ===
<gallery>
Nethermap.png|A map in [[the Nether]].
Maponnether.png|A map in the Nether; the arrow turns around itself, like in [[compass]].
</gallery>
=== The End ===
<gallery>
Jeb End Map.png|The first image of a map in [[the End]].
Endmap.png|A map in the End.
</gallery>
=== Maps in item frames ===
<gallery>
FramedMap.png|A map displayed on an item frame, as it looked before [[Java Edition 1.7.2]].
Structure Map Collection.png|Multiple maps in item frames. Notice a [[village]], two [[desert temple]]s and a lava lake.
Minecraft maps 3by3.png|A collection of 9 connected full maps.
Full Map.png|A combination of 25 maps pasted together as one map.
Map wall BE.png|A map wall on ''Bedrock Edition'', showing large areas of biome colors for each biome.
Map's in item frames.png|Maps can be placed into [[item frame]]s so they can be viewed together.
Comparing Maps.png|The comparison between 3 zooms of maps.
SuperflatMap.png|A map in a [[Superflat]] world, with some [[village]]s.
MapWallWithMarkers.png|A 3x3 map wall with banner markers.
HEYYEYAAEYAAAEYAEYAA.png|He-Man map art.
Map Player Icons 1.png|First image of player icons on maps.
Map Player Icons 2.png|Second image of player icons on maps.
</gallery>
== See also ==
* [[Explorer Map]]
* [[Clock]]
* [[Tutorials/Navigation|Navigation]]
== References ==
{{Reflist}}
{{Items}}
[[cs:Mapa]]
[[de:Karte]]
[[es:Mapa]]
[[fr:Carte (objet)]]
[[hu:Térkép (tárgy)]]
[[ja:地図]]
[[ko:지도]]
[[nl:Kaart]]
[[pl:Mapa]]
[[pt:Mapa]]
[[ru:Карта]]
[[tr:Harita]]
[[th:แผนที่]]
[[uk:Мапа]]
[[zh:地图]]
[[Category:Renewable resources]]</li></ul></nowiki> | |||||
| Fire now burns infinitely on netherrack. | |||||
0.8.0{{Extension DPL}}<ul><li>[[Milk Bucket|Milk Bucket]]<br/>{{Item
| title=Milk Bucket
| image = Milk Bucket.png
| renewable = Yes
| effects = Clears all
| stackable = No
}}
A '''milk bucket'''{{fn|Known as '''Milk Bucket''' {{in|java}} and '''Milk''' {{in|bedrock}}.}} is a [[drink]] obtained from {{Control|use|text=using}} a [[bucket]] on [[cow]]s, [[mooshroom]]s and [[goat]]s that can be consumed to clear all [[Effect|effects]].
== Obtaining ==
=== Harvesting ===
Milk buckets can be obtained from [[cow]]s, [[mooshroom]]s, and [[goat]]s by pressing {{control|use}} while looking at them with an empty [[bucket]].
=== Mob loot ===
A milk bucket has a chance of dropping from a [[wandering trader]], if the trader is killed while holding it.{{only|java}}
== Usage ==
Holding {{control|use}} with a milk bucket starts the drinking sound and animation. {{IN|java}}, the animation is shown only in first-person camera mode.
When consumed, milk immediately removes all status [[effect]]s from the [[player]]. [[Fire]] is not a status effect; therefore, drinking milk doesn't extinguish a burning player.
The benefits of area status effects granted by [[beacon]]s and [[Conduit Power|conduit power]] are restored almost immediately in Bedrock Edition and after a few seconds in ''Java Edition''.
=== Crafting ingredient ===
{{crafting usage|Milk Bucket}}
== Sounds ==
{{el|je}}:
{{Sound table
|sound=Drink.ogg
|subtitle=Sipping
|source=player
|description=While a player is drinking milk
|id=entity.generic.drink
|translationkey=subtitles.entity.generic.drink
|volume=0.5
|pitch=0.9-1.0
|distance=16}}
{{Sound table
|sound=Cow milk1.ogg
|sound2=Cow milk2.ogg
|sound3=Cow milk3.ogg
|source=player
|subtitle=Cow gets milked
|description=When a cow is milked
|id=entity.cow.milk
|translationkey=subtitles.entity.cow.milk
|volume=1.0
|pitch=1.0
|distance=16}}
{{Sound table
|sound=Mooshroom milk1.ogg
|sound2=Mooshroom milk2.ogg
|sound3=Mooshroom milk3.ogg
|subtitle=Goat gets milked
|description=When a regular goat is milked
|source=neutral
|id=entity.goat.milk
|translationkey=subtitles.entity.goat.milk
|volume=1.0
|pitch=1.0
|distance=16}}
{{Sound table
|sound=Goat screaming milk1.ogg
|sound2=Goat screaming milk2.ogg
|sound3=Goat screaming milk3.ogg
|sound4=Goat screaming milk4.ogg
|sound5=Goat screaming milk5.ogg
|subtitle=Goat gets milked
|description=When a screaming goat is milked
|source=neutral
|id=entity.goat.screaming.milk
|translationkey=subtitles.entity.goat.milk
|volume=1.0
|pitch=1.0
|distance=16}}
{{Sound table
|sound=Wandering trader drink milk1.ogg
|sound2=Wandering trader drink milk2.ogg
|sound3=Wandering trader drink milk3.ogg
|sound4=Wandering trader drink milk4.ogg
|sound5=Wandering trader drink milk5.ogg
|subtitle=Wandering Trader drinks milk
|source=neutral
|description=While a wandering trader is drinking milk to become visible during daytime
|id=entity.wandering_trader.drink_milk
|translationkey=subtitles.entity.wandering_trader.drink_milk
|volume=0.5
|pitch=0.9-1.0
|distance=16
|foot=1}}
{{el|be}}:
{{Sound table
|type=bedrock
|sound=Drink.ogg
|source=player
|description=While a player is drinking milk
|id=random.drink
|volume=0.35
|pitch=0.9-1.1}}
{{Sound table
|sound=Cow milk1.ogg
|sound2=Cow milk2.ogg
|sound3=Cow milk3.ogg
|source=neutral
|description=When a cow is milked
|id=mob.cow.milk
|volume=1.0
|pitch=1.0}}
{{Sound table
|sound=Mooshroom milk1.ogg
|sound2=Mooshroom milk2.ogg
|sound3=Mooshroom milk3.ogg
|description=When a regular goat is milked
|source=neutral
|id=mob.mooshroom.suspicious_milk
|volume=1.0
|pitch=1.0/0.9/1.1}}
{{Sound table
|sound=Goat screaming milk1.ogg
|sound2=Goat screaming milk2.ogg
|sound3=Goat screaming milk3.ogg
|sound4=Goat screaming milk4.ogg
|sound5=Goat screaming milk5.ogg
|description=When a screaming goat is milked
|source=neutral
|id=mob.goat.milk.screamer
|volume=1.0
|pitch=1.0}}
{{Sound table
|sound=Wandering trader drink milk1.ogg
|sound2=Wandering trader drink milk2.ogg
|sound3=Wandering trader drink milk3.ogg
|sound4=Wandering trader drink milk4.ogg
|sound5=Wandering trader drink milk5.ogg
|source=neutral
|description=While a wandering trader is drinking milk to become visible during daytime
|id=mob.wanderingtrader.drink_milk
|volume=1.0
|pitch=0.8-1.2
|foot=1}}
== Data values ==
=== ID ===
{{edition|java}}:
{{ID table
|edition=java
|showforms=y
|generatetranslationkeys=y
|displayname=Milk Bucket
|spritetype=item
|nameid=milk_bucket
|form=item
|foot=1}}
{{edition|bedrock}}:
{{ID table
|edition=bedrock
|showaliasids=y
|shownumericids=y
|showforms=y
|notshowbeitemforms=y
|generatetranslationkeys=y
|displayname=Milk
|spritetype=item
|nameid=milk_bucket
|aliasid=bucket / 1
|id=361
|form=item
|translationkey=item.milk.name
|foot=1}}
== Achievements ==
{{load achievements|The Lie}}
== Advancements ==
{{Load advancements|Husbandry}}
== Video ==
<div style="text-align:center">{{yt|eyxea_d0b3s}}</div>
== History ==
{{History|java alpha}}
{{History||v1.0.8|[[File:Milk Bucket JE1 BE1.png|32px]] Milk has been introduced, but it has no purpose and is obtainable only through inventory editing.}}
{{History||v1.0.11|Milk can now be obtained by {{control|use|text=milking}} a [[cow]] with a [[bucket]]. However, it is not yet drinkable.}}
{{History||v1.0.17|Milk buckets can now be emptied.}}
{{History|java beta}}
{{History||1.2|Milk has been incorporated into the [[crafting]] recipe of [[cake]].}}
{{History||1.2_01|[[Squid]] can now be milked by right-clicking on their mouth if part of their body was exposed to [[air]] or if they were not touching another [[block]]. An easy way to accomplish this is to pull a squid with a [[fishing rod]] away from other blocks and then milk it.}}
{{History||1.3_01|Squid milking has been removed.}}
{{History|java}}
{{History||1.0.0|snap=Beta 1.9 Prerelease|Milk can now be obtained by milking [[mooshroom]]s.}}
{{History|||snap=Beta 1.9 Prerelease 2|Milk has been made drinkable.
|According to a tweet by [[Jeb]] on September 30th 2011, milk was made a cure for all status effects.<ref>{{tweet|jeb_|119842906528944129|@Nexusdog_UK I haven't! In beta 1.9 pre2 milk works like a clear-everything drink|September 30, 2011}}</ref>
|Milk is no longer emptiable.}}
{{History||1.13|snap=17w47a|Prior to [[1.13/Flattening|''The Flattening'']], this [[item]]'s numeral ID was 335.}}
{{History|||snap=18w20a|"Milk" has been renamed to "Milk Bucket".}}
{{History||1.14|snap=18w43a|[[File:Milk Bucket JE2 BE2.png|32px]] The texture of milk buckets has been changed.}}
{{History||1.14|snap=19w06a|[[Wandering trader]]s now drink from milk buckets at dawn, and have a change to drop them.}}
{{History||1.17|snap=21w13a|Milk can now be obtained by milking [[goat]]s.}}
{{History|upcoming java}}
{{History||Villager Trade Rebalance<br>(Experimental)|link=Java Edition 1.20.2|snap=23w31a|Wander traders now have a chance to [[trading|buy]] a milk bucket from the player.}}
{{History|pocket alpha}}
{{History||v0.7.0|[[File:Milk Bucket JE1 BE1.png|32px]] Added milk buckets.
|Milk buckets are not yet drinkable.}}
{{History||v0.11.0|snap=build 4|Drinking milk now removes [[status effects]].
|Added milk buckets to the Creative inventory.{{verify|type=update}}{{info needed}}<!---same update?--->}}
{{History|bedrock}}
{{History||1.4.0|snap=beta 1.2.14.2|Moved all bucket items, including milk, from the Equipment tab to the Items tab in the [[Creative inventory]].{{verify|type=update}}{{info needed}}<!---please check snapshots, only 1 major release version was checked each--->}}
{{History||1.10.0|snap=beta 1.10.0.3|[[File:Milk Bucket JE2 BE2.png|32px]] The texture of milk buckets has been changed.}}
{{History||1.16.100|snap=beta 1.16.100.56|The ID of milk has been changed from <code>bucket/1</code> to <code>milk_bucket</code>.}}
{{History||1.16.200|snap=beta 1.16.200.52|Milk can now be obtained by milking [[goat]]s.}}
{{History|console}}
{{History||xbox=TU1|xbone=CU1|ps=1.0|wiiu=Patch 1|switch=1.0.1|[[File:Milk Bucket JE1 BE1.png|32px]] Added milk buckets.}}
{{History|Ps4}}
{{History||1.90|[[File:Milk Bucket JE2 BE2.png|32px]] The texture of milk buckets has been changed.}}
{{History|New 3DS}}
{{History||0.1.0|[[File:Milk Bucket JE1 BE1.png|32px]] Added milk buckets.}}
{{History|foot}}
== Issues ==
{{issue list}}
== See also ==
*[[Water Bucket]]
*[[Lava]]
*[[Food]]
*[[Cake]]
*[[Honey Bottle]] (alternative to remove poison effect)
*[[Medicine]]
== Notes ==
{{fnlist}}
== References ==
{{reflist}}
== External Links ==
*[https://www.minecraft.net/en-us/article/taking-inventory--milk-bucket Taking Inventory: Milk Bucket] – Minecraft.net on October 8, 2019
{{Items}}
[[Category:Food]]
[[Category:Renewable resources]]
[[Category:Tools]]
[[cs:Mléko]]
[[de:Milcheimer]]
[[es:Cubo con leche]]
[[fr:Seau de lait]]
[[hu:Tej]]
[[it:Secchio di latte]]
[[ja:ミルク入りバケツ]]
[[ko:우유 양동이]]
[[nl:Emmer melk]]
[[pl:Wiadro mleka]]
[[pt:Balde de leite]]
[[ru:Ведро с молоком]]
[[th:ถังนม]]
[[uk:Відро молока]]
[[zh:奶桶]]</li><li>[[Spyglass|Spyglass]]<br/>{{Item
| title = Spyglass
| image = Spyglass.png
| durability =
| rarity = Common
| renewable = Yes
| stackable = No
}}
A '''spyglass''' is a [[tool]] used to zoom in on distant objects.
== Obtaining ==
=== Crafting ===
{{Crafting
|B1=Amethyst Shard
|B2=Copper Ingot
|B3=Copper Ingot
|Output=Spyglass
|type=Tool
}}
== Usage ==
[[File:Steve scoping Spyglass.png|right|100px]] [[File:Alex scoping Spyglass.png|right|100px]]
To use a spyglass, the player selects it from the hotbar and clicks {{control|use}} while looking in the desired direction.
Spyglasses are used to zoom in on a specific location in the player's field of view (FOV). The spyglass changes the FOV to {{frac|1|10}} of the FOV set in [[options]]. By default, the FOV is set to 70° in ''Java Edition'' and 60° in Bedrock Edition, resulting in an FOV of 7° in ''Java Edition'' and 6° in Bedrock Edition through the spyglass. The player's FOV can be set from 30° to 110°, so the spyglass FOV can range from 3° to 11°. Regardless of the situation, or status effects the player has, using the Spyglass always shows a FOV {{frac|1|10}} of the FOV set in [[options]].
A square vignette is applied when in use, similar to the effect when wearing a [[carved pumpkin]]. Pressing {{key|F1}} removes the vignette,{{only|java}}<ref>{{bug|MC-203575||The spyglass overlay goes away when pressing F1|WAI}}</ref><ref>{{bug|MCPE-125869||Spyglass's overlay don't go away even if the player toggles Hide GUI on/ Pressing F1|}}</ref> similar to a carved pumpkin.
Hazy distant objects remain hazy when viewed in the spyglass. Mobs too distant to render also do not render in the spyglass. The spyglass shows a magnified view of what the player already sees.
The player is slowed down while watching through the spyglass. When the player uses the spyglass continuously for {{convert|1|minute|game tick}}, the interface is automatically closed.
If the player has a certain effect on their screen like [[fire]], the spyglass does not remove that effect on the player's screen.
[[File:Spyglass Zooming.gif|thumb|center|A spyglass being used to zoom in on a [[block of gold]] starting from normal FOV (70°).]]
== Sounds ==
{{edition|java}}:
{{Sound table
|sound=Spyglass use.ogg
|subtitle=Spyglass expands
|source=player
|description=When a player uses a spyglass
|id=item.spyglass.use
|translationkey=subtitles.item.spyglass.use
|volume=0.5
|pitch=''varies'' <ref group=sound>Can be 1.15, 1.33, 1.4, or 1.55</ref>
|distance=16}}
{{Sound table
|sound=Spyglass stop.ogg
|subtitle=Spyglass retracts
|source=player
|description=When a player stops using a spyglass
|id=item.spyglass.stop_using
|translationkey=subtitles.item.spyglass.stop_using
|volume=0.5
|pitch=''varies'' <ref group=sound>Can be 1.0, 0.8, or 0.9</ref>
|distance=16
|foot=1}}
{{edition|bedrock}}:
{{Sound table
|type=bedrock
|sound=Spyglass use.ogg
|source=player
|description=When a player uses a spyglass
|id=item.spyglass.use
|volume=0.5
|pitch=1.15-1.55}}
{{Sound table
|sound=Spyglass stop.ogg
|source=player
|description=When a player stops using a spyglass
|id=item.spyglass.stop_using
|volume=0.5
|pitch=0.8-1.0
|foot=1}}
== Data values ==
=== ID ===
{{edition|java}}:
{{ID table
|edition=java
|showforms=y
|generatetranslationkeys=y
|displayname=Spyglass
|spritetype=item
|nameid=spyglass
|form=item
|foot=1}}
{{edition|bedrock}}:
{{ID table
|edition=bedrock
|shownumericids=y
|showforms=y
|notshowbeitemforms=y
|generatetranslationkeys=y
|displayname=Spyglass
|spritetype=item
|nameid=spyglass
|form=item
|foot=1|id=626}}
== Advancements ==
{{load advancements|Is it a Bird?;Is it a Balloon?;Is it a Plane?}}
== History ==
{{History||October 3, 2020|link={{ytl|DBvZ2Iqmm3M|t=25m21s}}|[[File:Spyglass JE1.png|32px]]<!-- [[File:Spyglass scope (pre-release).png|32px]]--> Spyglasses are revealed at [[Minecraft Live 2020]]. They were originally named "telescopes" and had an oval vignette.}}
{{History|java}}
{{History||1.17|snap=20w45a|[[File:Spyglass JE1.png|32px]] Added spyglasses.
|[[File:Spyglass scope JE1.png|32px]] The scope texture is currently a circle with glare spots.}}
{{History|||snap=20w46a|[[File:Spyglass scope JE2.png|32px]] The scope texture is now a [[glass]] square with a [[copper]] border.}}
{{History|||snap=20w48a|[[File:Spyglass JE2 BE1.png|32px]] The spyglass is now a 3D model instead of a flat sprite.
|[[File:Spyglass (texture) JE2.png|32px]] The texture of the spyglass has changed.
|A spyglass in use is anchored better to the player's "eye" when viewed in 3rd person.}}
{{History|||snap=21w05a|Copper ingots are now renewable via [[drowned]], making spyglasses renewable.}}
{{History|||snap=21w10a|[[File:Spyglass (item) JE3 BE1.png|32px]] Spyglasses have a new texture in the inventory. The 3D model is still used in the hand, similar to [[tridents]].}}
{{History||1.17.1|snap=Pre-release 1|[[File:Spyglass (texture) JE3.png|32px]] The texture of the spyglass model has changed.}}
{{History|bedrock}}
{{History||1.17.0|snap=beta 1.17.0.50|[[File:Spyglass JE2 BE1.png|32px]] [[File:Spyglass (item) JE3 BE1.png|32px]] Added spyglasses.}}
{{History|||snap=beta 1.17.0.52|Spyglasses are now available without enabling [[experimental gameplay]].}}
{{History|foot}}
== Issues ==
{{Issue list}}
== Trivia ==
*If {{command|item replace}} is used to place a spyglass on a player's head, the item appears stuck to the center of the player's face.
== Gallery ==
<gallery>
Villager Spyglass.png|Spying on [[villager]]s through a spyglass.
After using the spyglass at FOV 30 F1.png|Hiding the HUD removes the spyglass overlay.
Panda eating a spyglass.png|When eaten by a [[panda]], spyglasses cause [[missing texture]] particles to be produced.<ref>{{bug|MC-206684}}</ref>
JE 1.17 Development Telescope.jpg|The spyglass was originally called the telescope.
JE 1.17 Development Telescope 2.jpg|The telescope's overlay was originally round instead of square.
File:Ari Spyglass.jpg|How the spyglass looks in the third person.
Steve scoping Spyglass JE1.png|Steve using a spyglass before its 3D model was added.
Alex scoping Spyglass JE1.png|Alex using a spyglass before its 3D model was added.
File:Mangrove Portal.jpg|An [[allay]] peeking into view of [[Noor]]’s spyglass.
</gallery>
== References ==
{{Reflist}}
== External Links ==
*[https://www.minecraft.net/en-us/article/taking-inventory--spyglass Taking Inventory: Spyglass] – Minecraft.net on February 17, 2022
{{Items}}
[[Category:Renewable resources]]
[[de:Fernrohr]]
[[es:Catalejo]]
[[fr:Longue-vue]]
[[it:Cannocchiale]]
[[ja:望遠鏡]]
[[pl:Luneta]]
[[pt:Luneta]]
[[ru:Подзорная труба]]
[[zh:望远镜]]</li></ul> | build 2 | Burning mobs now turn orange and emit large fire particles. | |||
| build 4 | Fire now ignites TNT more aggressively. | ||||
| ? | Undead mobs now actually catch fire in sunlight, rather than just taking damage. | ||||
0.9.0{{Extension DPL}}<ul><li>[[Clock|Clock]]<br/>{{about|the item|the redstone circuit|Redstone circuits/Clock}}
{{Item
| image = Clock.gif
| renewable = Yes
| stackable = Yes (64)
}}
'''Clocks''' are [[Daylight cycle|time]]-telling devices that display the current in-game position of the sun and the moon. Clocks only function properly in the [[Overworld]].
== Obtaining ==
=== Crafting ===
{{Crafting
|B1= Gold Ingot
|A2= Gold Ingot
|B2= Redstone Dust
|C2= Gold Ingot
|B3= Gold Ingot
|Output= Clock
|type= Tool
}}
=== Natural generation ===
{{LootChestItem|clock}}
=== Trading ===
Expert-level [[Trading#Librarian|librarian villagers]] have a {{frac|1|3}} (roughly 33.3%) chance to sell a single clock for 4 [[emerald]]s as part of their trades.{{only|bedrock}}
Expert-level librarian villagers have a {{frac|1|2}} (50%) chance to sell a clock for 5 emeralds.{{only|java}}
== Usage ==
[[File:WatchCycle.gif|thumb|Clock animation]]
The clock dial consists of two halves, a day side and a night side. The dial spins clockwise slowly to indicate the time of day, corresponding to the sun or moon's actual position in the sky. The player is able to [[bed|sleep]] a few seconds after the clock shows exactly dusk.
The dial always shows the current in-game time when in the [[Overworld]], regardless of where it appears. This includes a player's hand, an inventory slot, a [[Crafting table|crafting grid]], an [[item frame]], or even as a dropped [[Item (entity)|item]]. For a clock to be mounted on a wall, an [[item frame]] is required.
Because there is no day/night cycle in [[the Nether]] or [[the End]], clocks do not work properly in these dimensions. Instead, the dial rotates rapidly and randomly {{in|JE}} or clockwise {{in|BE}}, making them useless.
=== Piglins ===
{{EntityLink|Piglin|Piglins}} are attracted to clocks and run toward any clock on the ground, and inspect it for 6 to 8 seconds before putting it in their inventory.
== Data values ==
=== ID ===
{{edition|java}}:
{{ID table
|edition=java
|showforms=y
|generatetranslationkeys=y
|displayname=Clock
|spritetype=item
|nameid=clock
|form=item
|foot=1}}
{{edition|bedrock}}:
{{ID table
|edition=bedrock
|shownumericids=y
|showforms=y
|notshowbeitemforms=y
|generatetranslationkeys=y
|displayname=Clock
|spritetype=item
|nameid=clock
|id=393
|form=item
|foot=1}}
== Achievements ==
{{load achievements|Oooh, shiny!}}
== Advancements ==
{{load advancements|Oh Shiny}}
== Video ==
''Note: This video doesn't state that clocks can be found in [[shipwreck]]s or [[ruined portal]]s because the video was released in an earlier [[Java Edition version history|version]].''
<div style="text-align:center">{{yt|Q3bsT84oVz4}}</div>
== History ==
{{History|java alpha}}
{{History||v1.2.0|snap=<nowiki>?|slink=:Category:Information needed requiring unarchived version|[[File:Clock JE1.gif|32px]] Added clocks.
|They have 228 visually distinct frames due to how the texture is generated – see the section below.}}
{{History|java}}
{{History||1.3.1|snap=12w21a|Librarian [[villager]]s now [[trading|sell]] clocks for 10-11 [[emerald]]s, making them [[renewable]].}}
{{History||1.5|snap=13w02a|[[File:Clock JE2 BE2.gif|32px]] Clocks now use the new animation feature included in [[texture pack]]s. As a result, they are considerably less precise, having only 64 frames.}}
{{History||1.8|snap=14w02a|Librarian [[villager]]s now [[trading|sell]] clocks for 10-12 [[emerald]]s.}}
{{History||1.9|snap=15w31a|Clocks are now broken up into individual textures, instead of having every individual frame on one vertical strip like with animated textures.}}
{{History||1.13|snap=17w47a|Prior to [[1.13/Flattening|''The Flattening'']], this [[item]]'s numeral ID was 347.}}
{{History|||snap=18w14a|Clocks can now be found in [[shipwreck]] map rooms.}}
{{History||1.16|snap=20w09a|Clocks can now be used to distract [[piglin]]s.<ref>{{bug|MC-172363}}</ref>}}
{{History|||snap=20w16a|Clocks now generate in [[ruined portal]] chests.}}
{{History|||snap=20w19a|Clocks no longer work in the [[recipe book]].<ref>{{bug|MC-116293}}</ref>}}
{{History|||snap=20w22a|Clocks no longer work in the villager trading GUI.<ref>{{bug|MC-182888}}</ref>}}
{{History||1.17|snap=20w48a|[[File:Clock JE3.gif|32px]] The texture of clocks has been changed to match the new gold ingot texture from the texture update.}}
{{History|pocket alpha}}
{{History||v0.2.0|[[File:Clock BE1.png|32px]] Added clocks.
|Clocks currently have no function or legitimate method of obtaining them.}}
{{History||v0.8.0|snap=build 1|Clocks are now functional and [[crafting|craftable]]. They have been added into the Creative inventory.
|[[File:Clock JE2 BE2.gif|32px]] The texture of clocks has been changed. They use an predefined texture file with 64 different frames.}}
{{History|pocket}}
{{History||1.0.4|snap=alpha 1.0.4.0|Librarian [[villager]]s now [[trading|sell]] clocks for 10-12 [[emerald]]s.}}
{{History|bedrock}}
{{History||1.4.0|snap=beta 1.2.20.1|Clocks can now be found inside map room [[chest]]s in [[shipwreck]]s.}}
{{History||1.11.0|snap=beta 1.11.0.4|[[Trading]] has been changed, librarian [[villager]]s now have {{frac|1|3}} chance to [[trading|sell]] a clock for 4 [[emerald]]s as part of their [[trading|trades]].}}
{{History||1.16.0|snap=beta 1.16.0.57|Clocks now generate in [[ruined portal]] chests.}}
{{History||1.17.0|snap=beta 1.17.0.54|[[File:Clock JE3.gif|32px]] The texture of clocks has been changed to match the new gold ingot texture from the texture update.}}
{{History|console}}
{{History||xbox=TU1|xbone=CU1|ps=1.0|wiiu=Patch 1|switch=1.0.1|[[File:Clock JE2 BE2.gif|32px]] Added clocks.}}
{{History||xbox=TU69|xbone=none|ps=1.76|wiiu=Patch 38|switch=none|Clocks can now be found in [[shipwreck]] map rooms.}}
{{History|New Nintendo 3DS Edition}}
{{History||0.1.0|[[File:Clock JE2 BE2.gif|32px]] Added clocks.}}
{{History|foot}}
=== Texture generation prior to Java Edition 13w02a ===
{{:Procedural animated texture generation/Clocks}}
== Issues ==
{{issue list}}
== Trivia ==
* {{IN|java}}, a clock can be viewed under the item [[statistics]] page as long as one obtained a clock at some point.
* {{IN|java}}, the default resource pack for the clock contains 64 individual frames, each frame lasting about 18.75 seconds in real time (375 ticks) (1350 seconds (22 minutes, 30 seconds) in Minecraft time).
* When the time of day changes suddenly, such as after sleeping or when {{cmd|time}} is used, the clock dial spins rapidly to catch up.
* Although clocks do not function in the Nether or the End, the actual daylight cycle does continue.
== Gallery ==
<gallery>
File:Clockonawall.png|A clock in an [[item frame]] on a wall in a [[player]]'s base, showing the night is near.
File:Player Holding Clock.png|Early-game player holding a clock.
File:Clock In Item Frame.png|A clock placed in an item frame.
</gallery>
== References ==
{{Reflist}}
{{Items}}
[[Category:Tools]]
[[Category:Renewable resources]]
[[cs:Hodiny]]
[[de:Uhr]]
[[es:Reloj]]
[[fr:Montre]]
[[hu:Óra]]
[[it:Orologio]]
[[ja:時計]]
[[ko:시계]]
[[nl:Klok]]
[[pl:Zegar]]
[[pt:Relógio]]
[[ru:Часы]]
[[th:นาฬิกา]]
[[uk:Годинник]]
[[zh:时钟]]</li><li>[[Flint and Steel|Flint and Steel]]<br/>{{Item
| image = Flint and Steel.png
| rarity = Common
| renewable = Yes
| durability = 64
| stackable = No
}}
'''Flint and steel''' is a [[tool]] used to create [[fire]] or to ignite certain blocks, structures and mobs.
== Obtaining ==
=== Crafting ===
{{Crafting
|head=1
|showname=0
|showdescription=1
|Iron Ingot
|Flint
|Output=Flint and Steel
|type=Tool
}}
{{crafting
|foot=1
|ignoreusage=1
|Damaged Flint and Steel
|Damaged Flint and Steel
|Output= Flint and Steel
|description= The durability of the two tools is added together, plus an extra 5% durability.
|type= Tool
}}
=== Chest loot ===
{{LootChestItem|flint-and-steel}}
== Usage ==
=== Igniting ===
When {{control|use|text=used}} on the space above any solid top surface, on any side of any flammable block or any side of any [[obsidian]] block within a valid unlit [[nether portal]] frame regardless of if there is a solid top surface available, the flint and steel places a [[fire]] there.
Flint and steel can be used to light unlit [[campfire]]s, [[candle]]s and [[cake|cakes with candles]].
Flint and steel can be used to light [[nether portal]]s, as any fire existing within an appropriate [[obsidian]] frame will instantly be replaced with [[Nether Portal (block)|nether portal blocks]] that occupy the entirety of the frame.
Using flint and steel on [[TNT]] ignites it. The explosion damage dealt by TNT ignited with flint and steel in this specific way counts as the player's attack. If the player is {{Control|sneak|text=sneaking}} a fire is instead placed on the side of the TNT the flint and steel was used on.
A flint and steel can be used on a [[creeper]] to force it to explode. Explosions initiated in this way cannot be cancelled.
When powered, a [[dispenser]] containing flint and steel can place fires or ignite relevant blocks such as TNT or campfires in the space directly in front of it. This reduces the flint and steel's durability. A dispenser containing a flint and steel cannot detonate creepers.
=== Enchantments ===
Flint and steel can receive the following [[enchantment]]s:
{|class="wikitable col-2-center col-3-right"
|+
!Name
!Max Level
![[Enchanting|Method]]
|-
|[[Unbreaking]]
|III
|{{Inventory slot|Anvil}}
|-
|[[Mending]]
|I
|{{Inventory slot|Anvil}}
|-
|[[Curse of Vanishing]]
|I
|{{Inventory slot|Anvil}}
|}
== Sounds ==
{{edition|java}}:
{{Sound table
|rowspan=2
|sound=Flint and steel click.ogg
|subtitle=Flint and Steel click
|source=block
|description=When a flint and steel is used to place fire
|id=item.flintandsteel.use|idnote=<ref name=incorrecteventnames group=sound>{{Cite bug|MC|177457|Fire charge and flint and steel sound event names do not follow item IDs|date=April 5, 2020}}</ref>
|translationkey=subtitles.item.flintandsteel.use|translationkeynote=<ref name=incorrecteventnames group=sound/>
|volume=1.0
|pitch=0.8-1.2
|distance=16}}
{{Sound table
|subtitle=Flint and Steel click
|source=hostile
|description=When a flint and steel is used to light a creeper
|id=item.flintandsteel.use|idnote=<ref name=incorrecteventnames group=sound/>
|translationkey=subtitles.item.flintandsteel.use|translationkeynote=<ref name=incorrecteventnames group=sound/>
|volume=1.0
|pitch=0.8-1.2
|distance=16}}
{{Sound table
|sound=Random break.ogg
|subtitle=Item breaks
|source=player
|description=When a flint and steel's durability is exhausted
|id=entity.item.break
|translationkey=subtitles.entity.item.break
|volume=0.8
|pitch=0.8-1.2
|distance=16
|foot=1}}
{{edition|bedrock}};
{{Sound table
|type=bedrock
|sound=Flint and steel click.ogg
|source=block
|description=When a flint and steel is used to place fire
|id=fire.ignite
|volume=1.0
|pitch=0.8-1.2}}
{{Sound table
|sound=Random break.ogg
|source=player
|description=When a flint and steel's durability is exhausted
|id=random.break
|volume=1.0
|pitch=0.9
|foot=1}}
== Data values ==
=== ID ===
{{edition|java}}:
{{ID table
|edition=java
|showforms=y
|generatetranslationkeys=y
|displayname=Flint and Steel
|spritetype=item
|nameid=flint_and_steel
|form=item
|foot=1}}
{{edition|bedrock}}:
{{ID table
|edition=bedrock
|shownumericids=y
|showforms=y
|notshowbeitemforms=y
|generatetranslationkeys=y
|displayname=Flint and Steel
|spritetype=item
|nameid=flint_and_steel
|id=299
|form=item
|foot=1}}
== Achievements ==
{{Load achievements|Into the Nether}}
== Advancements ==
{{load advancements|We Need To Go Deeper}}
== Video ==
<div style="text-align:center">{{yt|caz8BBG48VU}}</div>
== History ==
{{more sounds|type=old|There is within the possible realm a different use sound from 2015-era Pocket Edition, can this be uploaded?}}
{{History|java indev}}
{{History||0.31|snap=20100110|[[File:Flint and Steel JE1.png|32px]] Added flint and steel.
|Flint and steel can be used to set [[fire]].}}
{{History|||snap=20100129|[[File:Flint and Steel JE2.png|32px]] The steel part of the texture has been brightened.
|Flint and steel can be used alongside [[lava]] to [[smelting|smelt]] [[ores]] and cook [[food]].<ref>http://www.youtube.com/watch?v=OpmK7rDU5bA</ref>}}
{{History|||snap=20100201-2|Flint and steel can now sometimes be dropped as loot from killing [[mobs]].}}
{{History||20100219|[[File:Flint and Steel JE3 BE1.png|32px]] The texture of flint and steel has been changed, due to its new crafting recipe.
|Flint and steel can no longer drop from mobs.
|Flint and steel can now be crafted from an [[iron ingot]] and the newly added [[flint]].
|[[Furnace]]s have been added to replace the cooking and [[smelting]] function of flint and steel.}}
{{History|java beta}}
{{History||1.7|Flint and steel, along with [[fire]] itself, [[explosion]]s and [[Mechanics/Redstone/Circuit|redstone]] are now the only ways to activate [[TNT]].<ref>{{tweet|jeb_|78154891637436416}}</ref>}}
{{History|java}}
{{History||1.3.1|snap=12w21a|The [[player]] can now [[trading|buy]] 1 flint and steel from farmer [[villager]]s for 3 [[emerald]]s, making flint and steel [[renewable]].}}
{{History||1.4.2|snap=12w38a|The [[sound]] when using flint and steel has been changed.}}
{{History||1.5|snap=13w04a|[[Dispenser]]s are now able to use flint and steel on the [[block]] in front of them.}}
{{History||1.6.1|snap=13w18a|Flint and steel can now be found in the new [[chest]]s in [[nether fortress]]es.}}
{{History|||snap=13w25a|Flint and steel now loses [[durability]] when igniting [[TNT]].}}
{{History||1.7.2|snap=13w36a|Flint and steel now has a shapeless crafting recipe.
{{{!}} class{{=}}"collapsible collapsed" data-description{{=}}"Old recipe"
! Old recipe
{{!}}-
{{!}}
{{Crafting
|A1=Iron Ingot
|B2=Flint
|Output=Flint and Steel
|ignoreusage=1
}}
{{!}}}
|Using flint and steel on a [[creeper]] now causes it to [[explosion|explode]].}}
{{History||1.8|snap=14w02a|[[Villager]]s no longer [[trading|sell]] flint and steel, making it no longer renewable. However, if a villager selling flint and steel already exists in the world, it can be continuously traded with to obtain flint and steel renewably.}}
{{History||1.9|snap=15w43a|The average yield of flint and steel in [[nether fortress]] [[chest]]s has been slightly reduced.}}
{{History||1.13|snap=17w47a|Prior to [[1.13/Flattening|''The Flattening'']], this [[item]]'s numeral ID was 259.}}
{{History||1.14|snap=18w43a|[[File:Flint and Steel JE4 BE2.png|32px]] The texture of flint and steel has been changed.}}
{{History||1.16|snap=20w07a|[[Gravel]] now can be given by the [[piglin]]s when [[bartering]], making flint and steel renewable again.}}
{{History|||snap=20w16a|Flint and steel can now be found inside [[ruined portal]] chests.}}
{{History|pocket alpha}}
{{History||v0.4.0|[[File:Flint and Steel JE3 BE1.png|32px]] Added flint and steel.}}
{{History||v0.7.0|Flint and steel can now be used to set [[fire]].}}
{{History||v0.7.4|Using flint and steel on a [[creeper]] now causes it to [[explosion|explode]].}}
{{History||v0.8.0|snap=build 1|Added flint and steel to the [[creative]] [[inventory]].}}
{{History||v0.12.1|snap=build 1|Flint and steel can now be used to activate a [[nether portal]].
|Flint and steel can now be found in [[nether fortress]]es.
|Flint and steel can now be [[enchanted]] in [[anvil]]s.}}
{{History||v0.14.0|snap=build 1|Flint and steel can now be used inside [[dispenser]]s when powered.}}
{{History|bedrock}}
{{History||1.10.0|snap=beta 1.10.0.3|[[File:Flint and Steel JE4 BE2.png|32px]] The texture of flint and steel has been changed.}}
{{History||1.16.0|snap=beta 1.16.0.51|Flint and steel can now be obtained by [[bartering]] with [[piglin]]s.|Flint and steel can now be enchanted with [[Curse of Vanishing]] through an [[anvil]].}}
{{History|||snap=beta 1.16.0.57|Flint and steel are no longer obtainable from [[bartering]].
|Flint and steel can now be found inside [[ruined portal]] chests.}}
{{History|console}}
{{History||xbox=TU1|xbone=CU1|ps=1.0|wiiu=Patch 1|switch=1.0.1|[[File:Flint and Steel JE3 BE1.png|32px]] Added flint and steel.}}
{{History||xbox=TU3|Flint and steel, along with [[fire]] itself, [[explosion]]s and [[redstone (disambiguation)|redstone]] are now the only ways to activate [[TNT]].}}
{{History||xbox=TU31|xbone=CU19|ps=1.22|wiiu=Patch 3|Flint and steel now makes [[sound]]s when igniting [[block]]s.}}
{{History||xbox=none|xbone=none|ps=1.90|wiiu=none|switch=none|[[File:Flint and Steel JE4 BE2.png|32px]] The texture of flint and steel has been changed.}}
{{History|New 3DS}}
{{History||0.1.0|[[File:Flint and Steel JE3 BE1.png|32px]] Added flint and steel.}}
{{History|foot}}
Historical sounds:
{| class="wikitable"
! Sound
! From
! to
! Pitch
|-
| {{sound||Flint and Steel old.ogg}}
| ?
| ?
| ?
|}
== Issues ==
{{issue list}}
== Trivia ==
* In [[Adventure mode]], flint and steel cannot light fires, nor can it ignite nether portals (unless it has the tag {{cd|CanPlaceOn:obsidian}}). However, it can still ignite TNT and creepers.
* The name "Flint and Steel" may be misleading and is inaccurate considering the game doesn’t have and possibly will have [[Java Edition mentioned features#Steel|steel]] in the game and it's crafted with iron instead. This is similar to the [[Old Growth Taiga|Old Growth Pine Taiga]], as there are no pines in the game and they have [[Spruce|Spruce Trees]] instead.
**In real life, Iron can’t be used as a fire striker, so Mojang had to rename it to Flint and Steel so it makes more sense. This explains why it is called Flint and Steel, but there is no steel in the game.
**Steel was mentioned by Mojang, as a “stronger” iron, but shortly rejected, and there are no currently no plans to add it to the game.
* Flint and steel cannot light end portals.
* Flint and Steel is the first item to mention another item that is not in the game.
*In the April Fools Snapshot, [[Java Edition 23w13a or b]], one of the possible voted was “Flint and Steel can ignite any block”.
==References==
{{Reflist}}
{{Items}}
[[Category:Renewable resources]]
[[cs:Křesadlo]]
[[de:Feuerzeug]]
[[es:Mechero]]
[[fr:Briquet]]
[[hu:Kovakő acéllal]]
[[ja:火打石と打ち金]]
[[ko:부싯돌과 부시]]
[[nl:Vuursteen en staal]]
[[pl:Krzesiwo]]
[[pt:Pederneira]]
[[ru:Огниво]]
[[zh:打火石]]</li></ul></nowiki> | build 2 | Fire now burns out faster in jungle and roofed forest biomes. | |||
0.11.0{{Extension DPL}}<ul><li>[[Kelp|Kelp]]<br/>{{About|the plant|the dried variant|Dried Kelp}}
{{For}}
{{Block
|image=Kelp.gif
|invimage=Kelp
|transparent=Yes
|tool=Any
|renewable=Yes
|stackable=Yes (64)
|flammable=No
|lavasusceptible=No
|light=No
|hardness=0}}
'''Kelp''' is an underwater plant that generates in most [[ocean]]s.
== Obtaining ==
=== Natural generation ===
Kelp naturally generates in any [[ocean]] [[biome]]s (except in [[Frozen Ocean|frozen]], [[Deep Frozen Ocean|deep frozen]] and [[Warm Ocean|warm]]), near and around [[seagrass]]. Each chunk has {{frac|1|18}} chance to generate a [[vegetation]] of kelp.
=== Breaking ===
Kelp can be mined instantly with any [[tool]] or with the player's fist. Removing water from the kelp block destroys the kelp. Breaking one part of a kelp stalk destroys all kelp [[block]]s above it. Each block drops a kelp [[item (entity)|item]].
=== Trading ===
Kelp can be bought from [[wandering trader]]s for 3 emeralds.
== Usage ==
Kelp can be placed underwater by hand, or anywhere by the use of [[commands]] such as {{cmd|setblock}}. Placing it by hand gives it a random {{code|age}} value between 0 and 24. Kelp can be placed only in [[water]] source blocks or downward-flowing water, not horizontally flowing water.
When placed in downward-flowing water, the flowing water transforms into a water source block,<ref>{{bug|MC-134229}}</ref> which is useful for faster [[bubble column]] elevator creation.
Any building block can be placed on top of a kelp plant, which is useful for building structures over a deep ocean without needing to build from the ocean floor (see also [[lily pad]]).
=== Cooking ingredient ===
{{smelting
| showname = 1
| Kelp
| Dried Kelp
| 0.1
}}
=== Composting ===
Placing kelp into a [[composter]] has a 30% chance of raising the compost level by 1.
=== Growth mechanics ===
Kelp can be planted on a broad variety of blocks. It grows underwater if it has either a source block of water or, {{in|Java}}, flowing water above it.<ref>{{bug|MC-133354}}</ref> Neither [[player]]s nor [[dispenser]]s can remove the water source block that kelp grows in without breaking the kelp first.
Kelp does not require any [[light]] level to grow. Kelp also grows without having [[sky]] access. [[Bone meal]] can be used to grow kelp by 1 block on each use.
Kelp, when planted, is generated with a randomly chosen age value, which can be checked when pressing [[Debug screen|<kbd>F3</kbd>]]{{only|java}}. The age value of a newly planted kelp plant varies randomly from 0 to 24. Each time the kelp grows in height by one block, the newly generated top of the kelp plant increases its age by 1. When the top block of the kelp plant reaches an age of 25, it stops growing. This means that kelp can naturally grow to a height between 2 (if the first kelp plant had an age of 24) and 26 blocks (if the first kelp plant had an age of 0).
When a kelp plant block is broken, the age of the kelp plant block underneath is randomized to a value from 0 to 24 and the kelp continues growing until it reaches age 25. It is possible to use this mechanic to cultivate a kelp plant to increase its growth height beyond its natural maximum height of 26 blocks. This can be done by breaking the top-most block of the kelp plant each time it reaches age 25. A kelp plant cultivated by a player in this way repeatedly grows until it reaches the water surface.
Each time it receives a [[random tick]], kelp has a 14% chance of growing.
If [[shears]] are used on the topmost block of kelp, that block automatically sets its {{cd|age}} value to {{cd|25}} and stop growing.{{only|JE}}
=== Farming ===
{{Main|Tutorials/Kelp farming}}
Kelp farming is similar to farming [[sugar cane]], although kelp must be placed underwater. Automation of harvest is easier because items float up in water.
== Sounds ==
=== Generic ===
{{Sound table/Block/Wet grass}}
=== Unique ===
{{edition|java}}:
{{Sound table
|sound=Shear.ogg
|subtitle=Plant cropped
|source=block
|description=When the tip of kelp is cropped with [[Shears#Cropping growing plants|shears]]
|id=block.growing_plant.crop
|translationkey=subtitles.block.growing_plant.crop
|volume=1.0
|pitch=1.0
|distance=16
|foot=1}}
{{edition|bedrock}}: ''None''
== Data values ==
=== ID ===
{{edition|java}}:
{{ID table
|edition=java
|showforms=y
|generatetranslationkeys=y
|displayname=Kelp
|spritetype=block
|nameid=kelp}}
{{ID table
|displayname=Kelp Plant
|spritetype=block
|nameid=kelp_plant
|form=block
|foot=1}}
{{edition|bedrock}}:
{{ID table
|edition=bedrock
|firstcolumnname=Kelp
|shownumericids=y
|showforms=y
|generatetranslationkeys=y
|displayname=Item
|spritename=kelp
|spritetype=item
|nameid=kelp
|id=382
|form=item}}
{{ID table
|displayname=Block
|spritename=kelp
|spritetype=block
|nameid=kelp
|id=393
|form=block
|itemform=item.kelp
|translationkey=-
|foot=1}}
=== Block states ===
{{see also|Block states}}
{{/BS}}
== History ==
{{History|java classic}}
{{History||May 21, 2009|link=https://web.archive.org/web/0/http://notch.tumblr.com/post/110762705/my-list-on-tile-types-so-far|[[Notch]] shows interest in adding a "[[seaweed]]" [[block]].}}
{{History|java}}
{{History||November 18, 2017|link={{YouTubeLink|mAapz_nIC_Y}}|Kelp plants were shown in a clip of [[MineCon Earth]].}}
{{History||1.13|snap=18w07a|[[File:Kelp JE1 BE1.gif|32px]] [[File:Kelp (item) JE1 BE2.png|32px]] Added kelp.}}
{{History|||snap=18w07b|Kelp now behaves more like [[water]], meaning [[mob]]s can no longer spawn within the plant under water nor can they replenish their breath by [[swimming]] through it.}}
{{History|||snap=18w10a|[[File:Kelp JE2.gif|32px]] The texture for kelp has been overhauled.}}
{{History|||snap=18w14a|[[File:Kelp.gif|32px]] Top of the kelp textures have been shifted slightly downward.
|The generation rules for kelp have been changed, it now mainly generates in [[cold ocean]] [[biome]]s and can no longer generate in [[warm ocean]]s.}}
{{History|||snap=18w20a|The {{cd|kelp_top}} has been changed ID to {{cd|kelp}} and {{cd|kelp}} has been changed to {{cd|kelp_plant}}, for both the [[block]] and [[item]] forms.}}
{{History|||snap=pre2|Kelp is now destroyed by [[sponge]]s.<ref>{{bug|MC-127111}}</ref>}}
{{History|||snap=pre6|Added 5 new [[sound]] events that apply to kelp: <code>block.wet_grass.break</code>, <code>block.wet_grass.fall</code>, <code>block.wet_grass.hit</code>, <code>block.wet_grass.place</code>, and <code>block.wet_grass.step</code>.}}
{{History||1.14|snap=19w03a|Placing kelp into the new [[composter]] has a 10% chance of raising the compost level by 1.}}
{{History|||snap=19w05a|Kelp now has a 30% chance of increasing the compost level in a composter by 1.
|Added [[Wandering Trader|wandering trader]]s, which sell kelp.}}
{{History||1.16|snap=20w11a|Kelp can now be grown with [[bone meal]].}}
{{History|||snap=20w13a|Kelp has been moved from the Miscellaneous tab to the Decoration Blocks tab in the [[Creative inventory]].<ref name="misc decoration">https://bugs.mojang.com/browse/MC-174434</ref>}}
{{History||1.17|snap=20w46a|Kelp no longer generates on magma blocks.<ref>{{Bug|MC-185605|resolution=Fixed}}</ref>}}
{{History||1.18|snap=21w37a|Kelp now stops growing if [[shears]] are used on the tip.}}
{{History|bedrock}}
{{History||1.4.0|snap=beta 1.2.14.2|[[File:Kelp JE1 BE1.gif|32px]] [[File:Kelp (item) BE1.png|32px]] Added kelp.}}
{{History|||snap=beta 1.2.20.1|[[File:Kelp (item) JE1 BE2.png|32px]] The kelp [[item]] texture has been updated to the {{el|je}}'s.}}
{{History||1.5.0|snap=beta 1.5.0.4|[[File:Kelp.gif|32px]] The texture of the kelp plant has been updated.}}
{{History||1.10.0|snap=beta 1.10.0.3|Kelp can now be bought from [[wandering trader]]s for 3 [[emerald]]s.}}
{{History||1.11.0|snap=beta 1.11.0.1|Kelp can now be used to fill [[composter]]s.}}
{{History|console}}
{{History||xbox=TU69|ps=1.76|wiiu=Patch 38|[[File:Kelp.gif|32px]] [[File:Kelp (item) JE1 BE2.png|32px]] Added kelp.}}
{{History|foot}}
== Issues ==
{{issue list}}
== Trivia ==
* In real life, [[wikipedia:kelp|kelp]] is not considered a [[wikipedia:plant|plant]]. It is classified by scientists as a [[wikipedia:Brown algae|brown algae]].
** Kelp in real life absorbs nutrients directly from the water, instead of through its root-like structure, [[wikipedia:Holdfast (biology)|holdfast]], which merely attaches it to the seabed. This is in accordance with kelp being able to grow on almost any solid block in ''Minecraft''.
== Gallery ==
<gallery heights="60">
SeaPlantsMineConEarth2017.jpg|Kelp shown in a clip from MINECON Earth 2017.
Kelp in ocean with Jappa textures.jpg|Naturally generated kelp in an [[ocean]] biome.
Kelp on shoreline.png|Naturally generated kelp near the shore.
Ocean life.png|An ocean with kelp visible in the far distance.
Kelp on Land.png|Kelp placed outside of [[water]] using the {{cmd|setblock}} command before 18w07b.
Waterless kelp.png|What kelp looks like without water (water removed using a [[resource pack]]).
Coral reef at night.png|Kelp within a [[coral reef]].
Floating Kelp.png|Kelp that generated in mid-air due to an [[ocean monument]]'s water cutting through it.
Kelp in ocean.jpg|Multiple kelps.
Kelp 255 blocks tall.png|Without obstacles, kelp can grow all the way to building limit.
ArgoMajor Kelp.jpg|First image of kelp in ''Bedrock Edition''.
</gallery>
== References ==
{{reflist}}
{{Blocks|vegetation}}
{{Items}}
[[Category:Plants]]
[[Category:Natural blocks]]
[[Category:Non-solid blocks]]
[[de:Seetang]]
[[es:Alga]]
[[fr:Algue]]
[[ja:コンブ]]
[[ko:켈프]]
[[pl:Wodorosty]]
[[pt:Alga]]
[[ru:Ламинария]]
[[th:สาหร่ายทะเล]]
[[zh:海带]]</li><li>[[Mushroom Stew|Mushroom Stew]]<br/>{{Item
| title = Mushroom Stew
| image = Mushroom Stew.png
| renewable = Yes
| heals = {{hunger|6}}
| stackable = No
}}
'''Mushroom stew''' is a [[food]] item.
== Obtaining ==
=== Harvesting ===
Mushroom stew can be obtained by “milking” a [[mooshroom]] with an empty [[bowl]]. This is accomplished by {{Control|using}} a bowl on a mooshroom. The bowl gets replaced by the mushroom stew item. There is no cooldown for doing so.
If a stack of more than one bowl is used on a mooshroom, only one bowl is consumed, and the mushroom stew goes into an empty inventory slot, or is dropped if the player's inventory is full.
=== Crafting ===
{{Crafting
|Red Mushroom
|Brown Mushroom
|Bowl
|Output= Mushroom Stew
|type= Foodstuff
}}
== Usage ==
=== Food ===
{{see also|Tutorials/Hunger management|title1=Hunger management}}
To eat mushroom stew, press and hold {{control|use}} while it is selected in the hotbar. Eating one restores {{hunger|6}} [[hunger]] and 7.2 hunger
[[Hunger#Mechanics|saturation]].
The bowl is returned to the player empty after the mushroom stew has been eaten, and can be reused to craft more, similarly to [[Rabbit Stew|rabbit stew]] and [[Beetroot Soup|beetroot soup]].
== Sounds ==
=== Generic ===
{{Sound table/Entity/Food}}
=== Unique ===
{{Edition|Java}}:
{{Sound table
|sound=Mooshroom milk1.ogg
|sound2=Mooshroom milk2.ogg
|sound3=Mooshroom milk3.ogg
|subtitle=Mooshroom gets milked
|source=neutral
|description=When a mooshroom is milked with a bowl
|id=entity.mooshroom.milk
|translationkey=subtitles.entity.mooshroom.milk
|volume=1.0
|pitch=''varies'' <ref group=sound name=milkpitch>Can be 1.0, 0.9, or 1.1 for each sound</ref>
|distance=16
|foot=1}}
{{Edition|Bedrock}}:
{{Sound table
|type=bedrock
|sound=Mooshroom milk1.ogg
|sound2=Mooshroom milk2.ogg
|sound3=Mooshroom milk3.ogg
|subtitle=Mooshroom gets milked
|source=Friendly Creatures
|description=When a mooshroom is milked with a bowl
|id=mob.mooshroom.suspicious_milk
|volume=1.0/0.9/1.1
|pitch=1.0
|foot=1}}
== Data values ==
=== ID ===
{{edition|java}}:
{{ID table
|edition=java
|showforms=y
|generatetranslationkeys=y
|displayname=Mushroom Stew
|spritetype=item
|nameid=mushroom_stew
|form=item
|foot=1}}
{{edition|bedrock}}:
{{ID table
|edition=bedrock
|shownumericids=y
|showforms=y
|notshowbeitemforms=y
|generatetranslationkeys=y
|displayname=Mushroom Stew
|spritetype=item
|nameid=mushroom_stew
|id=260
|form=item
|foot=1}}
== Advancements ==
{{load advancements|Husbandry;A Balanced Diet}}
== History ==
{{History|java indev}}
{{History||0.31|snap=20100130|[[File:Mushroom Stew JE1 BE1.png|32px]] Added mushroom stew.
|Restores {{hp|8}} [[health]].}}
{{History||20100206|Mushroom stew now restores {{hp|10}} health.}}
{{History|java beta}}
{{History||1.6|snap=Test Build 3|[[Mushroom]] spreading mechanic added, making mushroom stew [[renewable]].}}
{{History||1.8|snap=Pre-release|Now restores {{hunger|8}} [[hunger]].}}
{{History|java}}
{{History||1.0.0|snap=Beta 1.9 Prerelease|More fungi sources have now been introduced with the addition of the [[Mushroom Fields|mushroom biome]].
|A [[mooshroom]] can now be "milked" with a [[bowl]] to obtain mushroom stew.}}
{{History|||snap=Beta 1.9 Prerelease 3|Mushroom stew can now be crafted in the [[2×2 crafting grid]] in the [[inventory]]. Previously, the crafting recipe was shaped, now it's shapeless.}}
{{History||1.2.5|snap=release|The [[player]] milking a [[mooshroom]] with a stack of [[bowl]]s no longer results in receiving back a single bowl of mushroom stew.}}
{{History||1.4.2|snap=?|Mushroom stew now restores {{Hunger|6}} instead of {{Hunger|8}}.}}
{{History||1.13|snap=17w47a|Prior to [[1.13/Flattening|''The Flattening'']], this [[item]]'s numeral ID was 282.}}
{{History||1.14|snap=18w43a|[[File:Mushroom Stew JE2 BE2.png|32px]] The texture of mushroom stew has now been changed.}}
{{History||1.16|snap=Pre-release 1|Mooshrooms can now be milked for mushroom stew in Creative mode.<ref>{{Cite bug|MC|90969|Cannot get mushroom stew from mooshrooms / milk from cows in creative mode|date=October 19, 2015}}</ref>}}
{{History|pocket alpha}}
{{History||v0.4.0|[[File:Mushroom Stew JE1 BE1.png|32px]] Added mushroom stew.}}
{{History||v0.5.0|Mushroom stew now restores {{hp|8}} instead of {{hp|4}}.}}
{{History||v0.9.0|snap=build 1|A mooshroom can now be "milked" with a [[bowl]] to obtain mushroom stew.}}
{{History||v0.12.1|snap=build 1|Mushroom stew now restores [[hunger]] instead of [[health]].}}
{{History|bedrock}}
{{History||1.10.0|snap=beta 1.10.0.3|[[File:Mushroom Stew JE2 BE2.png|32px]] The texture of mushroom stew has now been changed.}}
{{History|console}}
{{History||xbox=TU1|xbone=CU1|ps=1.0|switch=1.0.1|wiiu=Patch 1|[[File:Mushroom Stew JE1 BE1.png|32px]] Added mushroom stew.}}
{{History||xbox=none|xbone=none|ps=1.90|wiiu=none|switch=none|[[File:Mushroom Stew JE2 BE2.png|32px]] The texture of mushroom stew has now been changed.}}
{{History|new3ds}}
{{History||0.1.0|[[File:Mushroom Stew JE1 BE1.png|32px]] Added mushroom stew.}}
{{History|foot}}
== Issues ==
{{Issue list}}
== References ==
{{reflist}}
== External Links ==
*[https://www.minecraft.net/en-us/article/taking-inventory--mushroom-stew Taking Inventory: Mushroom Stew] – Minecraft.net on September 1, 2022
{{items}}
[[de:Pilzsuppe]]
[[es:Estofado de champiñones]]
[[fr:Soupe de champignons]]
[[hu:Gombaragu]]
[[ja:キノコシチュー]]
[[ko:버섯 스튜]]
[[nl:Paddenstoelenstoofpot]]
[[pl:Zupa grzybowa]]
[[pt:Ensopado de cogumelos]]
[[ru:Тушёные грибы]]
[[zh:蘑菇煲]]
[[Category:Food]]
[[Category:Renewable resources]]
<references /></li></ul> | build 9 | Attacks from burning mobs can now catch fire to the victim. | |||
| build 14 | The burning animation has been removed from creative mode completely. | ||||
0.12.1{{Extension DPL}}<ul><li>[[Le Tricolore|Le Tricolore]]<br/>{{Exclusive|Java}}
{{Joke feature}}
{{Item
| image =
| renewable = Yes
| stackable = Yes (64)
}}
'''Le Tricolore''' (French for ''The Tricolour'') is a joke item from [[Java Edition 23w13a_or_b]].
== Obtaining ==
One le tricolore and one [[la baguette]] is given to all players when [[French mode]] gets activated. Deactivating the mode will remove le tricolore from the player's inventory (but not la baguette; [[container]]s such as [[chest]]s are not affected).
Le Tricolore is not available in the creative inventory, but can be obtained by using the {{cmd|give}} command.
== Data values ==
=== ID ===
{{ID table
|showforms=y
|generatetranslationkeys=java
|displayname=Le Tricolore
|spritetype=item
|nameid=le_tricolore
|form=item
|foot=1}}
== History ==
{{History|java}}
{{History||23w13a or b|[[File:Le Tricolore.png|32px]] Added Le Tricolore.}}
{{History|foot}}
{{Items}}
{{Jokes}}
[[Category:Joke items]]
[[ja:Le Tricolore]]
[[pt:Le Tricolore]]</li><li>[[Saddle|Saddle]]<br/>{{about|normal saddles|the removed horse saddle|Horse Saddle}}
{{item
| image = <gallery>
Saddle (Pig).png | Pig
Saddle (Horse).png | Horse
Saddle (Strider).png | Strider
</gallery>
| invimage = Saddle
| renewable = Yes
| stackable = No
}}
A '''saddle''' is an [[item]] required to ride [[Pig|pigs]] and [[Strider|striders]] or control ridden [[camel]]s, [[Horse|horses]], [[Donkey|donkeys]] and [[Mule|mules]].
== Obtaining ==
=== Chest loot ===
{{LootChestItem|saddle}}
=== Fishing ===
Saddles can be obtained as a "treasure" item from [[fishing]] with a base chance (without fishing rod enchantments) of 0.8%.
=== Trading ===
Master-level [[Trading#Leatherworker|leatherworker]] [[villager]]s have a 50% chance to sell a saddle for 6 [[Emerald|emeralds]] as their trade.{{only|bedrock}} This trade is always offered in ''Java Edition''.
=== Mob loot ===
Any mob that the player equips with a saddle drops the saddle upon death.
A [[strider]] may spawn being ridden by a [[zombified piglin]], which causes it to spawn wearing a saddle. This saddle always drops when the strider is killed.
A [[ravager]] always spawns with a saddle and always drops the saddle upon death. Looting does not affect the drop.
== Usage ==
[[File:SaddledHorse.png|thumb|right|A [[horse]] equipped with a saddle.]]
While [[camel]]s, [[horse]]s, [[donkey]]s, [[mule]]s and [[Skeleton Horse|skeleton horse]]s{{Only|Java}} can always be ridden, a saddle is required to control them. These mobs (only after being tamed, in the case of equine mobs) can be equipped with a saddle by placing it in their inventory, which can be opened by pressing {{control|use}} while holding a saddle or {{control|sneaking}}. The saddle can be unequipped by removing it from {{SlotSprite|Saddle}} the specific inventory slot.
Saddles are required to ride [[Pig|pigs]] and [[Strider|striders]], but even with a saddle their movement cannot be controlled like other mobs. A [[Carrot on a Stick|carrot on a stick]] (for pigs) or a [[Warped Fungus on a Stick|warped fungus on a stick]] (for striders) is required to direct these mobs. {{control|Using}} a saddle on one of these mobs equips them with the saddle, and, since they have no inventory, there is no way to retrieve the saddle without killing the mob.
Animals can also be equipped with saddles by a [[dispenser]].
Although [[ravager]]s are equipped with saddles and sometimes ridden by other mobs, the [[player]] is unable to ride ravagers.
== Sounds ==
{{edition|java}}:
{{Sound table
|rowspan=4
|sound=Saddle equip.ogg
|source=neutral
|subtitle=Saddle equips
|description=When a saddle is equipped to a camel
|id=entity.camel.saddle
|translationkey=subtitles.entity.horse.saddle
|volume=0.5
|pitch=0.8
|distance=16}}
{{Sound table
|subtitle=MC-184399
|source=neutral
|description=When a saddle is equipped to a strider
|id=entity.strider.saddle
|translationkey=-
|volume=0.5
|pitch=1.0
|distance=16}}
{{Sound table
|subtitle=Saddle equips
|source=neutral
|description=When a saddle is equipped to a horse, donkey, mule, skeleton horse, or zombie horse
|id=entity.horse.saddle
|translationkey=subtitles.entity.horse.saddle
|volume=0.5
|pitch=1.0
|distance=16}}
{{Sound table
|subtitle=Saddle equips
|source=neutral
|description=When a saddle is equipped to a pig
|id=entity.pig.saddle
|translationkey=subtitles.entity.pig.saddle
|volume=0.5
|pitch=1.0
|distance=16
|foot=1}}
{{edition|bedrock}}:
{{Sound table
|type=bedrock
|rowspan=3
|sound=Saddle equip.ogg
|source=neutral
|description=When a saddle is equipped to a camel
|id=mob.horse.leather
|volume=1.0
|pitch=1.0}}
{{Sound table
|source=neutral
|description=When a saddle is equipped to a horse, mule, skeleton horse, or zombie horse
|id=mob.horse.leather
|volume=0.6
|pitch=1.0}}
{{Sound table
|source=neutral
|description=When a saddle is equipped to a donkey
|id=mob.horse.leather
|volume=0.5
|pitch=1.0
|foot=1}}
== Data values ==
=== ID ===
{{edition|java}}:
{{ID table
|edition=java
|showforms=y
|generatetranslationkeys=y
|displayname=Saddle
|spritetype=item
|nameid=saddle
|form=item
|foot=1}}
{{edition|bedrock}}:
{{ID table
|edition=bedrock
|shownumericids=y
|showforms=y
|notshowbeitemforms=y
|generatetranslationkeys=y
|displayname=Saddle
|spritetype=item
|nameid=saddle
|id=371
|form=item
|foot=1}}
== Achievements ==
{{load achievements|When Pigs Fly}}
== Advancements ==
{{load advancements|This Boat Has Legs}}
== History ==
{{needs render|type=old|isolated saddles in 1.13 dev|section=11}}
{{History|java infdev}}
{{History||20100625-2|[[File:Saddle (Pig) JE1 BE1.png|32px]] [[File:Saddle JE1 BE1.png|32px]] Added saddles.
|Saddles do not [[drops|drop]] from saddled [[pig]]s.
|Saddles can be found in the new [[dungeon]] [[chest]]s.}}
{{History|java}}
{{History||1.2.4|snap=release|When baby animals were introduced, baby [[pig]]s could be ridden just like adult pigs. After this version, baby pigs can no longer be saddled.}}
{{History||1.3.1|snap=12w21a|Saddles can now be [[trading|bought]] from butcher [[villager]]s for 6–7 [[emerald]]s each, and thus have become [[renewable resource|renewable]].}}
{{History||1.4.2|snap=12w36a|Saddles now [[drops|drop]] from killing saddled [[pig]]s.
|Added [[Carrot on a Stick|carrot on a stick]] to direct saddled pigs, effectively controlling them.}}
{{History|||snap=12w37a|Pigs can now jump when being ridden.}}
{{History||1.6.1|snap=13w18a|Regular saddles can now be used to ride [[horse]]s, while previously they required [[Horse Saddle|horse saddle]]s.
|Added saddles to the loot tables of [[mineshaft]] minecarts, [[stronghold]] altar chests, [[village]] blacksmith chests, as well as [[Desert pyramid|desert]] and [[jungle pyramid]]s.
|Added chests to [[Nether Fortress|nether fortresses]], where saddles can be found.}}
{{History||1.7.2|snap=13w36a|Saddles can now be [[fishing|fished]] with [[Fishing Rod|fishing rod]]s and are described as treasure.}}
{{History||1.8|snap=14w02a|[[Trading]] has been changed: leatherworker [[villager]]s now [[trading|sell]] saddles for 8–10 [[emerald]]s each, and butchers no longer [[trading|trade]] saddles.}}
{{History||1.9|snap=15w31a|Saddles can now be found in [[End City|end city]] [[chest]]s.}}
{{History|||snap=15w43a|The average yield of saddles in [[Nether Fortress|nether fortress]] chests has been slightly decreased.}}
{{History|||snap=15w44a|Saddles have been removed from [[mineshaft]] chests.
|The average yield of saddles in [[dungeon]] chests has been decreased.
|The average yield of saddles in [[desert pyramid|desert temple]] chests has been increased.}}
{{History||1.13|snap=17w45a|[[File:White Horse (Saddle) 17w45a.png|50px]] The models of the horse's saddle has been changed.}}
{{History|||snap=17w46a|[[File:White Horse (Saddle) 17w46a.png|50px]] The models of the horse's saddle has been changed once again.}}
{{History|||snap=17w47a|Prior to [[Java Edition 1.13/Flattening|''The Flattening'']], this [[item]]'s numeral ID was 329.}}
{{History|||snap=18w03a|[[File:White Horse (Saddle) 18w03a.png|50px]] The models of the horse's saddle has been changed once again.}}
{{History|||snap=pre2|[[File:White Horse (Saddle) 1.13pre2.png|50px]] The models of the horse's saddle has been changed once again. The reins bit has now been rendered. Also, the lines of the reins are no longer rendered except when riding.}}
{{History||1.14|snap=18w43a|Added [[ravager|illager beast]]s, which [[drops|drop]] saddles.
|[[File:Saddle (Pig) JE2 BE2.png|32px]] [[File:Saddle (Horse) JE2 BE2.png|32px]] <br>[[File:Saddle JE2 BE2.png|32px]] The textures of saddles have been changed.}}
{{History|||snap=18w48a|Saddles can now be found in [[chest]]s in [[village]] tanneries.}}
{{History|||snap=18w49a|Saddles can now be found in chests in [[savanna]] village houses.}}
{{History||1.16|snap=20w13a|[[File:Saddle (Strider) JE1 BE1.png|32px]] Added [[strider]]s, which can be ridden with saddles.}}
{{History|||snap=20w15a|Saddles placed in a [[dispenser]] can now saddle pigs, striders, and tamed horses, donkeys and mules.}}
{{History|||snap=20w16a|Saddles now generate in [[Bastion Remnant|bastion remnant]] chests.}}
{{History|||snap=20w17a|[[File:Saddle (Strider) JE2.png|32px]] The texture of the strider saddles has been changed. The front and back orientation of the saddle has been corrected.<ref>{{bug|MC-176116}}</ref>}}
{{History||1.19|snap=22w13a|Saddles may now be found in [[ancient city]] [[chest]]s.}}
{{History||1.20<br>(Experimental)|link=1.19.3|snap=22w42a|Saddles can be used to ride [[camel]]s with the use of a built-in experimental data pack.}}
{{History|pocket alpha}}
{{History||v0.7.0|[[File:Saddle JE1 BE1.png|32px]] Added saddles. They are currently unobtainable and have no practical usage since they cannot be equipped on any mobs.}}
{{History||v0.9.0|snap=build 1|Saddles can now be obtained from [[village]] blacksmith [[chest]]s.}}
{{History||v0.11.0|snap=build 1|Saddles can now be [[fishing|fished]] with [[fishing rod]]s and are described as treasure.}}
{{History||v0.12.1|snap=build 1|Saddles can now be found in [[nether fortress]]es.}}
{{History||v0.13.0|snap=build 1|Saddles can now be found in [[desert temple]]s.}}
{{History||v0.15.0|snap=build 1|[[File:Saddle (Pig) JE1 BE1.png|32px]] [[File:Saddle (Horse) JE1 BE1.png|32px]] Saddles can now be used for riding [[horse]]s and [[pig]]s.|Saddles can now be found inside [[jungle temple]]s.}}
{{History||snap=?||Added saddles to the [[Creative inventory]].{{info needed}}}}
{{History|pocket}}
{{History||1.0.0|snap=alpha 0.17.0.1|Saddles can now be found in [[end cities]].}}
{{History||1.0.4|snap=alpha 1.0.4.0|Saddles are now [[trading|sold]] by leatherworker [[villager]]s for 8-10 [[emerald]]s as their only third tiers [[trading|trades]].}}
{{History|bedrock}}
{{History||1.10.0|snap=beta 1.10.0.3|Saddles can now be found in [[plains]] [[village]] tannery and weaponsmith [[chest]]s.
|Added [[ravager]]s, which [[drops|drop]] a saddle upon death.
|[[File:Saddle (Pig) JE2 BE2.png|32px]] [[File:Saddle (Horse) JE2 BE2.png|32px]] <br>[[File:Saddle JE2 BE2.png|32px]] The textures of saddles have been changed.}}
{{History||1.11.0|snap=beta 1.11.0.1|Saddles can now be found in [[savanna]], [[snowy taiga]], [[taiga]] and [[snowy tundra]] village tannery [[chest]]s.
|Saddles can now be found in savanna, taiga, snowy taiga, and [[desert]] village weaponsmith chests.
|Saddles can now be found in savanna [[village]] house chests.}}
{{History|||snap=beta 1.11.0.4|[[Trading]] has been changed. Leatherworker [[villager]]s now have 50% chance to [[trading|sell]] saddles for 10 [[emerald]]s as part of their last tier [[trading|trade]].}}
{{History||1.12.0|snap=beta 1.12.0.3|The trading price of saddles has been lowered to 6 emeralds.}}
{{History||1.16.0|snap=beta 1.16.0.57|[[File:Saddle (Strider) JE1 BE1.png|32px]] Added [[strider]]s, which can be ridden with saddles.|Saddles now generate in [[Bastion Remnant|bastion remnant]] chests.}}
{{History||1.20.0<br>(Experimental)|link=Bedrock Edition 1.19.50|snap=beta 1.19.50.21|Saddles can now be used to ride [[camel]]s with the use of the "[[Bedrock Edition 1.20|Next Major Update]]" [[experimental]] toggle.}}
{{History|console}}
{{History||xbox=TU1|xbone=CU1|ps=1.0|wiiu=Patch 1|switch=1.0.1|[[File:Saddle (Pig) JE1 BE1.png|32px]] <br>[[File:Saddle JE1 BE1.png|32px]] Added saddles.}}
{{History||xbox=none|xbone=none|ps=1.90|wiiu=none|switch=none|[[File:Saddle (Pig) JE2 BE2.png|32px]] [[File:Saddle (Horse) JE2 BE2.png|32px]] <br>[[File:Saddle JE2 BE2.png|32px]] The textures of saddles have been changed.}}
{{History|3ds}}
{{History||0.1.0|[[File:Saddle (Pig) JE1 BE1.png|32px]] <br>[[File:Saddle JE1 BE1.png|32px]] Added saddles.}}
{{History|foot}}
== Issues ==
{{issue list}}
== Trivia ==
* A saddle is considered "armor" by the game, but the value of protection to the animal is zero.
* A saddle on a pig can still be seen if the pig is afflicted with [[Invisibility]].
* When riding a saddled mob, the hunger bar is replaced by hearts (representing the mounted mob's health) resembling the look of the saddle.
== Gallery ==
<gallery>
File:Pig saddle.png|A [[player]] riding a [[pig]] (before [[Java Edition Beta 1.8|Beta 1.8]]).
File:Horse saddle.png|A player riding a [[horse]].
File:13w21a-new-HorseUI-inventory.png|The horse interface implemented in [[Java Edition 13w21a|13w21a]] that allows for the removal of saddles, but only on horses, [[donkey]]s or [[mule]]s.
File:Saddled Mule (picture).png|Mule equipped with both a saddle and a [[chest]].
File:GodSpawner.png|A saddle found in a monster room chest, which coincidentally contains an [[enchanted golden apple]].
</gallery>
== See also ==
* [[Transportation]]
== References ==
{{reflist}}
{{items}}
[[cs:Sedlo]]
[[de:Sattel]]
[[es:Montura]]
[[fr:Selle]]
[[hu:Nyereg]]
[[it:Sella]]
[[ja:鞍]]
[[ko:안장]]
[[nl:Zadel]]
[[pl:Siodło]]
[[pt:Sela]]
[[ru:Седло]]
[[zh:鞍]]
[[Category:Renewable resources]]
[[uk:Сідло]]</li></ul> | build 1 | Burning mobs now have a sizzling particle effect once extinguished. | |||
0.15.0{{Extension DPL}}<ul><li>[[Horse Armor|Horse Armor]]<br/>{{Item
| image = <gallery>
Leather Horse Armor.png | Leather
Iron Horse Armor.png | Iron
Golden Horse Armor.png | Golden
Diamond Horse Armor.png | Diamond
</gallery>
| image2 = <gallery>
Leather Horse Armor (item).png|Leather
Iron Horse Armor (item).png|Iron
Golden Horse Armor (item).png|Golden
Diamond Horse Armor (item).png|Diamond
</gallery>
| extratext = View [[#Gallery|all renders]]
| renewable =
* '''Leather''': Yes
* '''All others''': No
| stackable = No
}}
'''Horse armor''' is a special type of [[armor]] that can be given to a [[horse]] to wear.
== Obtaining ==
===Chest loot===
{{LootChestItem|iron-horse-armor}}
{{LootChestItem|golden-horse-armor}}
{{LootChestItem|diamond-horse-armor}}
===Crafting===
{{crafting
|A1= Leather
|C1= Leather
|A2= Leather
|B2= Leather
|C2= Leather
|A3= Leather
|C3= Leather
|Output= Leather Horse Armor
|type=Miscellaneous
}}
Only leather horse armor can be crafted; other horse armor can be obtained only from chest loot from some generated structures.
===Trading===
Expert-level [[leatherworker]] villagers [[trading|sell]] leather horse armor for 6 [[emerald]]s as part of their trade.
==Usage==
Only normal adult horses can wear armor; foals, [[donkey]]s, [[mule]]s, and undead variants such as [[skeleton horse]]s and [[zombie horse]]s cannot be equipped with armor.
=== Types ===
Horse armor has leather, iron, gold, and diamond variants. However, horse armor does not have netherite or chainmail variants.
=== Armor Stands ===
Horse armor cannot be placed or displayed on [[armor stand]]s.
===Protection===
Horse armor can be equipped to horses either by manually placing it in its respective slot by pressing E while riding the horse ({{SlotSprite|Horse Armor}}), or by right-clicking the horse with it.
There is a gradual increase in the defense given from a horse wearing the different types of armor. Note that golden horse armor provides more protection than iron horse armor, whereas the opposite is true for [[armor|player armor]].
{| class="wikitable" data-description="Armor defense"
|-
! Material !! [[Armor]]
|-
! [[Leather]]
| {{armor|3}}
|-
! [[Iron]]
| {{armor|5}}
|-
! [[Gold]]
| {{armor|7}}
|-
! [[Diamond]]
| {{armor|11}}
|}
When a horse dies while equipped with any horse armor, it drops its normal loot, saddle (if it had one), and the horse armor.
Leather horse armor protects horses from freezing in [[powder snow]], but it does not negate other powder snow effects (e.g., falling through, inability to jump).
===Durability===
Unlike [[armor|player armor]], horse armor does not have durability. This means a single horse armor can be used infinitely unless destroyed.
=== Enchanting ===
Unlike [[armor|player armor]], horse armor cannot be enchanted in survival mode. However, {{in|java}} Creative mode, horse armor can be used with an [[anvil]] to enchant with [[Depth Strider]], [[Thorns]], [[Respiration]], [[Feather Falling]], and [[Curse of vanishing]]. Other enchantments can be applied, but they have no effect.
=== Dyeing ===
Leather horse armor can be dyed 12,326,391 different colors (using lone dyes or dye combinations) and put onto a horse to display that color. These changes can be reverted by {{control|using}} a filled [[cauldron]] with dyed leather horse armor.
===Smelting usage===
{{Smelting|showname=1|Iron Horse Armor;Golden Horse Armor|Iron Nugget;Gold Nugget|0,1}}
===Piglins===
{{EntityLink|Piglin|Piglins}} are attracted to golden horse armor and run toward any golden horse armor on the ground, inspecting it for 6 to 8 seconds before putting it in their inventory.
== Sounds ==
{{Edition|Java}}:
{{Sound table
|sound=Horse armor.ogg
|subtitle=Horse armor equips
|source=neutral
|description=When armor is equipped to a horse
|id=entity.horse.armor
|translationkey=subtitles.entity.horse.armor
|volume=0.5
|pitch=1.0
|distance=16
|foot=1}}
{{Edition|Bedrock}}:
{{Sound table
|type=bedrock
|sound=Horse armor.ogg
|source=neutral
|description=When armor is equipped to a horse
|id=mob.horse.armor
|volume=0.6
|pitch=1.0
|foot=1}}
== Data values ==
=== ID ===
{{edition|java}}:
{{ID table
|edition=java
|showforms=y
|generatetranslationkeys=y
|displayname=Leather Horse Armor
|spritetype=item
|nameid=leather_horse_armor
|form=item}}
{{ID table
|displayname=Iron Horse Armor
|spritetype=item
|nameid=iron_horse_armor
|form=item}}
{{ID table
|displayname=Diamond Horse Armor
|spritetype=item
|nameid=diamond_horse_armor
|form=item}}
{{ID table
|displayname=Golden Horse Armor
|spritetype=item
|nameid=golden_horse_armor
|form=item
|foot=1}}
{{edition|bedrock}}:
{{ID table
|edition=bedrock
|shownumericids=y
|showforms=y
|showaliasids=y
|notshowbeitemforms=y
|generatetranslationkeys=y
|displayname=Leather Horse Armor
|spritetype=item
|nameid=leather_horse_armor
|aliasid=horsearmorleather
|id=530
|form=item
|translationkey=item.horsearmorleather.name}}
{{ID table
|displayname=Iron Horse Armor
|spritetype=item
|nameid=iron_horse_armor
|aliasid=horsearmoriron
|id=531
|form=item
|translationkey=item.horsearmoriron.name}}
{{ID table
|displayname=Diamond Horse Armor
|spritetype=item
|nameid=diamond_horse_armor
|aliasid=horsearmordiamond
|id=533
|form=item
|translationkey=item.horsearmordiamond.name}}
{{ID table
|displayname=Golden Horse Armor
|spritetype=item
|nameid=golden_horse_armor
|aliasid=horsearmorgold
|id=532
|form=item
|translationkey=item.horsearmorgold.name
|foot=1}}
=== Item data ===
When leather horse armor is dyed, it has the following NBT:
{{el|java}}:
{{main|Player.dat format}}
<div class="treeview">
* {{nbt|compound|tag}}: Parent tag.
** {{nbt|compound|display}}: Display properties.
*** {{nbt|int|color}}: The color of the leather armor. The tooltip displays "Dyed" if advanced tooltips are disabled, otherwise it displays the hexadecimal color value. Color codes are calculated from the Red, Green and Blue components using this formula:<br>'''<span style="color:red">Red</span>[[wikipedia:Logical shift|<<]]16 + <span style="color:green">Green</span><<8 + <span style="color:blue">Blue</span>'''<ref>For positive values larger than 0x00FFFFFF, the top byte is ignored. All negative values produce white.</ref>
</div>
{{el|bedrock}}:
: See [[Bedrock Edition level format/Item format]].
== History ==
{{History|java}}
{{History||1.6.1|snap=13w16a|[[File:Iron Horse Armor JE1 BE1.png|32px]] [[File:Golden Horse Armor JE1 BE1.png|32px]] [[File:Diamond Horse Armor JE1 BE1.png|32px]]<br>[[File:Iron Horse Armor (item) JE1 BE1.png|32px]] [[File:Golden Horse Armor (item) JE1 BE1.png|32px]] [[File:Diamond Horse Armor (item) JE1 BE1.png|32px]] Added horse armor.
|Horse armor can be [[crafting|crafted]] using the following recipe.
{{{!}} class{{=}}"collapsible collapsed"
! Recipe
{{!}}-
{{!}}
{{Crafting Table
|C1=Iron Ingot; Gold Ingot; Diamond
|A2=Iron Ingot; Gold Ingot; Diamond
|B2=Any Wool
|C2=Iron Ingot; Gold Ingot; Diamond
|A3=Iron Ingot; Gold Ingot; Diamond
|B3=Iron Ingot; Gold Ingot; Diamond
|C3=Iron Ingot; Gold Ingot; Diamond
|Output=Iron Horse Armor; Golden Horse Armor; Diamond Horse Armor
}}
{{!}}}
}}
{{History|||snap=13w18a|The crafting recipe for horse armor has been removed.
|Horse armor can now be found in [[chest]]s in [[jungle temple|jungle]] & [[desert temple]]s, [[dungeon]]s, [[nether fortress]]es, [[stronghold]] altar rooms and [[village]] blacksmith buildings.
|Iron horse armor can now additionally be found in [[mineshaft]] chests.}}
{{History|||snap=13w21a|Horse armor is no longer stackable, to be consistent with other types of [[armor]].}}
{{History||1.9|snap=15w31a|Horse armor has been added to [[end city]] [[chest]]s.}}
{{History|||snap=15w43a|The average yield of horse armor in [[nether fortress]] chests has slightly decreased.}}
{{History|||snap=15w44a|The average yield of horse armor in [[desert temple]] chests has increased.
|The average yield of iron horse armor from [[dungeon]] chests has slightly decreased.
|Iron horse armor has been removed from [[mineshaft]] [[chest]]s.}}
{{History||1.11.1|snap=16w50a|Golden and iron horse armor can now be [[smelting|smelted]] down into one of their respective [[nugget]]s.}}
{{History||1.13|snap=17w45a|[[File:Iron Horse Armor JE2.png|32px]] [[File:Golden Horse Armor JE2.png|32px]] [[File:Diamond Horse Armor JE2.png|32px]] The textures of horse armor have been changed, as the [[model]] of [[horse]]s has changed.}}
{{History|||snap=17w46a|[[File:Iron Horse Armor 17w46a.png|32px]] [[File:Golden Horse Armor 17w46a.png|32px]] [[File:Diamond Horse Armor 17w46a.png|32px]] The model of horse armor has been changed, but the textures of horse armor have remained unaltered.}}
{{History|||snap=17w47a|Prior to [[1.13/Flattening|''The Flattening'']], these [[item]]s' numeral IDs were 417, 418 and 419.}}
{{History|||snap=18w03a|[[File:Iron Horse Armor JE3.png|32px]] [[File:Golden Horse Armor JE3 BE2.png|32px]] [[File:Diamond Horse Armor JE3 BE2.png|32px]] The textures of horse armor have been changed, as the [[model]] of [[horse]]s has changed.}}
{{History|||snap=18w22a|[[File:Iron Horse Armor JE4 BE2.png|32px]] The texture of iron horse armor when equipped has been changed.<ref>{{bug|MC-124357}}</ref>}}
{{History|||snap=pre2|A bug with the [[horse]] skin and horse armor textures not applying correctly has been fixed.<ref>{{bug|MC-124364}}</ref>}}
{{History||1.14|snap=18w50a|[[File:Iron Horse Armor (item) JE2 BE2.png|32px]] [[File:Golden Horse Armor (item) JE2 BE2.png|32px]] [[File:Diamond Horse Armor (item) JE2 BE2.png|32px]] The textures of horse armor [[item]]s have been changed.}}
{{History|||snap=February 20, 2019|slink=https://twitter.com/_LadyAgnes/status/1098134917299531776?s=19|Leather horse armor announced for {{el|je}}.}}
{{History|||snap=19w08a|[[File:Iron Horse Armor JE5 BE3.png|32px]] [[File:Golden Horse Armor JE4 BE3.png|32px]] [[File:Diamond Horse Armor JE4 BE3.png|32px]]<br>[[File:Iron Horse Armor (item) JE3.png|32px]] [[File:Golden Horse Armor (item) JE3 BE3.png|32px]] [[File:Diamond Horse Armor (item) JE3 BE3.png|32px]] The textures of iron, gold and diamond horse armor have been changed.
|[[File:Leather Horse Armor JE1 BE3.png|32px]] [[File:Leather Horse Armor (item) JE1.png|32px]] Added leather horse armor, which can be [[dyeing|dyed]] 12,326,391 different colors, similar to leather [[armor]].}}
{{History|||snap=19w11a|Leatherworker [[villager]]s now [[trading|sell]] leather horse armor.}}
{{History||1.14.1|snap=Pre-Release 1|[[File:Leather Horse Armor (item) JE2.png|32px]] The texture of leather horse armor [[item]] has been changed to be more consistent with the other types of horse armor.
|[[File:Iron Horse Armor (item) JE4 BE3.png|32px]] The texture of iron horse armor item has been changed.}}
{{History||1.16|snap=20w15a|Horse armor placed in a dispenser can now be put on tamed horses.}}
{{History|||snap=20w16a|Golden horse armor now generates in [[ruined portal]] chests.}}
{{History||1.17|snap=21w13a|Leather horse armor now protects [[horse]]s from [[freezing]].}}
{{History||1.19|snap=22w13a|Diamond horse armor may now be found in [[ancient city]] [[chest]]s.}}
{{History|pocket alpha}}
{{History||v0.15.0|snap=build 1|[[File:Leather Horse Armor BE1.png|32px]] [[File:Iron Horse Armor JE1 BE1.png|32px]] [[File:Golden Horse Armor JE1 BE1.png|32px]] [[File:Diamond Horse Armor JE1 BE1.png|32px]]<br>[[File:Leather Horse Armor (item) BE1.png|32px]] [[File:Iron Horse Armor (item) JE1 BE1.png|32px]] [[File:Golden Horse Armor (item) JE1 BE1.png|32px]] [[File:Diamond Horse Armor (item) JE1 BE1.png|32px]] Added horse armor and [[dyeing|dyeable]] leather horse armor as a version exclusive.}}
{{History|pocket}}
{{History||1.0.0|snap=alpha 0.17.0.1|Horse armor can now be found inside [[end city]] [[chest]]s.}}
{{History||1.1.0|snap=alpha 1.1.0.0|Iron and golden horse armor are now [[smelting|smeltable]].}}
{{History|bedrock}}
{{History||1.2.6|snap=beta 1.2.6.2|[[File:Leather Horse Armor BE2.png|32px]] [[File:Iron Horse Armor JE4 BE2.png|32px]] [[File:Golden Horse Armor JE3 BE2.png|32px]] [[File:Diamond Horse Armor JE3 BE2.png|32px]] The textures of horse armor have been changed, as the [[model]] of [[horse]]s has been changed.}}
{{History||1.10.0|snap=beta 1.10.0.3|Horse armor can now be found in [[plains]] [[village]] weaponsmith [[chest]]s.
|[[File:Leather Horse Armor JE1 BE3.png|32px]] [[File:Iron Horse Armor JE5 BE3.png|32px]] [[File:Golden Horse Armor JE4 BE3.png|32px]] [[File:Diamond Horse Armor JE4 BE3.png|32px]]<br>[[File:Leather Horse Armor (item) BE2.png|32px]] [[File:Iron Horse Armor (item) JE2 BE2.png|32px]] [[File:Golden Horse Armor (item) JE2 BE2.png|32px]] [[File:Diamond Horse Armor (item) JE2 BE2.png|32px]] The textures of all horse armor have been changed.}}
{{History||1.11.0|snap=beta 1.11.0.1|Horse armor can now be found in [[savanna]], [[desert]], [[taiga]], [[snowy taiga]] and [[snowy tundra]] [[village]] weaponsmith [[chest]]s.}}
{{History|||snap=beta 1.11.0.4|Leather horse armor can now be [[trading|bought]] from leatherworker [[villager]]s.}}
{{History|||snap=beta 1.11.0.5|[[File:Leather Horse Armor (item) BE3.png|32px]] [[File:Iron Horse Armor (item) JE4 BE3.png|32px]] [[File:Golden Horse Armor (item) JE3 BE3.png|32px]] [[File:Diamond Horse Armor (item) JE3 BE3.png|32px]] The textures of all horse armor [[item]]s have been changed.}}
{{History||1.17.0|snap=beta 1.16.230.54|Leather horse armor now protects [[horse]]s from [[freezing]].}}
{{History|console}}
{{History||xbox=TU19|xbone=CU7|ps=1.12|wiiu=Patch 1|switch=1.0.1|[[File:Iron Horse Armor JE1 BE1.png|32px]] [[File:Golden Horse Armor JE1 BE1.png|32px]] [[File:Diamond Horse Armor JE1 BE1.png|32px]]<br>[[File:Iron Horse Armor (item) JE1 BE1.png|32px]] [[File:Golden Horse Armor (item) JE1 BE1.png|32px]] [[File:Diamond Horse Armor (item) JE1 BE1.png|32px]] Added horse armor.}}
{{History||xbox=TU53|xbone=CU43|ps=1.49|wiiu=Patch 23|switch=1.0.3|Iron and golden horse armor are now [[smelting|smeltable]].}}
{{History||xbox=TU60|xbone=CU51|ps=1.64|wiiu=Patch 30|switch=1.0.11|[[File:Leather Horse Armor BE1.png|32px]]<br>[[File:Leather Horse Armor (item) BE1.png|32px]] Added leather horse armor.}}
{{History||xbox=none|xbone=none|ps=1.90|wiiu=none|switch=none|[[File:Leather Horse Armor JE1 BE3.png|32px]] [[File:Iron Horse Armor JE5 BE3.png|32px]] [[File:Golden Horse Armor JE4 BE3.png|32px]] [[File:Diamond Horse Armor JE4 BE3.png|32px]]<br>[[File:Leather Horse Armor (item) BE3.png|32px]] [[File:Iron Horse Armor (item) JE3.png|32px]] [[File:Golden Horse Armor (item) JE3 BE3.png|32px]] [[File:Diamond Horse Armor (item) JE3 BE3.png|32px]] The textures of leather, iron, gold and diamond horse armor have been changed.}}
{{History|3ds}}
{{History||0.1.0|[[File:Leather Horse Armor BE1.png|32px]] [[File:Iron Horse Armor JE1 BE1.png|32px]] [[File:Golden Horse Armor JE1 BE1.png|32px]] [[File:Diamond Horse Armor JE1 BE1.png|32px]]<br>[[File:Leather Horse Armor (item) BE1.png|32px]] [[File:Iron Horse Armor (item) JE1 BE1.png|32px]] [[File:Golden Horse Armor (item) JE1 BE1.png|32px]] [[File:Diamond Horse Armor (item) JE1 BE1.png|32px]] Added horse armor.}}
{{History|foot}}
== Issues ==
{{issue list}}
== Gallery ==
<gallery>
Leather Horse Armor.png | Undyed Leather armor
White Leather Horse Armor.png | White Leather armor
Light Gray Leather Horse Armor.png | Light Gray Leather armor
Gray Leather Horse Armor.png | Gray Leather armor
Black Leather Horse Armor.png | Black Leather armor
Brown Leather Horse Armor.png | Brown Leather armor
Red Leather Horse Armor.png | Red Leather armor
Orange Leather Horse Armor.png | Orange Leather armor
Yellow Leather Horse Armor.png | Yellow Leather armor
Lime Leather Horse Armor.png | Lime Leather armor
Green Leather Horse Armor.png | Green Leather armor
Cyan Leather Horse Armor.png | Cyan Leather armor
Light Blue Leather Horse Armor.png | Light Blue Leather armor
Blue Leather Horse Armor.png | Blue Leather armor
Purple Leather Horse Armor.png | Purple Leather armor
Magenta Leather Horse Armor.png | Magenta Leather armor
Pink Leather Horse Armor.png | Pink Leather armor
</gallery>
=== Screenshots ===
<gallery>
Armored Horse.png|A [[horse]] equipped with iron horse armor and bound to a fence post by a [[lead]].
13w21a-new-HorseUI-inventory.png|The GUI for horses implemented in [[Java Edition 13w21a|13w21a]], which allows the removal and switching of armor.
GodSpawner.png|A golden horse armor found in a [[dungeon]] chest, which coincidentally contains an [[enchanted golden apple]].
Horses with armor.png|4 [[horse]]s equipped with [[leather]], [[iron]], [[gold]], and [[diamond]] armor.
Leather Horse Armor 1.jpg|First image of leather horse armor.
Leather Horse Armor 2.jpg|Second image of leather horse armor.
Leather Horse Armor 3.jpg|Third image of leather horse armor.
Leather Horse Armor 4.jpg|Fourth image of leather horse armor.
Leather Horse Armor 5.jpg|Fifth image of leather horse armor.
</gallery>
== Notes ==
{{Notelist}}
== References ==
{{Reflist}}
{{items}}
[[Category:Armor]]
[[de:Rossharnisch]]
[[es:Armadura para caballo]]
[[fr:Armure pour cheval]]
[[it:Bardatura]]
[[ja:馬鎧]]
[[ko:말 갑옷]]
[[nl:Paardenharnas]]
[[pl:Zbroja końska]]
[[pt:Armadura para cavalo]]
[[ru:Конская броня]]
[[uk:Кінські обладунки]]
[[zh:马铠]]</li><li>[[Lime Dye|Lime Dye]]<br/>{{Item
| image = Lime_Dye_JE2_BE2.png
| renewable = Yes
| stackable = Yes (64)
}}
'''Lime dye''' is a [[Dye#Quasi-Primary|quasi-primary dye]] obtained by combining one [[green dye]] and one [[white dye]] in a crafting square, or by smelting a [[sea pickle]].
== Obtaining ==
=== Crafting ===
{{Crafting
|head=1
|showname=0
|showdescription=1
|Green Dye
|White Dye
|Output=Lime Dye,2
|type=Material
}}
{{Crafting
|foot=1
|Green Dye
|Bone Meal
|Output=Lime Dye,2
|description={{only|bedrock|education}}
|type=Material
}}
=== Smelting ===
{{Smelting
|head=1
|foot=1
|Sea Pickle
|Lime Dye
|0,2
}}
=== Trading ===
[[Wandering trader]]s sell 3 lime [[dye]] for 1 [[emerald]].
== Usage ==
{{dye usage}}
=== Crafting ingredient ===
{{crafting usage|continue=1}}
{{banner crafting usage}}
=== Loom ingredient ===
{{Banner loom usage|Lime Dye}}
=== Trading ===
Journeyman-level shepherd villagers have a 20% chance to buy 12 lime dye for an emerald as part of their trades.
== Data values ==
=== ID ===
{{edition|java}}:
{{ID table
|edition=java
|showforms=y
|generatetranslationkeys=y
|displayname=Lime Dye
|spritetype=item
|nameid=lime_dye
|form=item
|foot=1}}
{{edition|bedrock}}:
{{ID table
|edition=bedrock
|showaliasids=y
|shownumericids=y
|showforms=y
|notshowbeitemforms=y
|generatetranslationkeys=y
|displayname=Lime Dye
|spritetype=item
|nameid=lime_dye
|aliasid=dye / 10
|id=405
|form=item
|translationkey=item.dye.lime.name
|foot=1}}
== Video ==
<div style="text-align:center">{{yt|5oPGO6jL1zQ}}</div>
== History ==
{{History|java beta}}
{{History||1.2|[[File:Lime Dye JE1 BE1.png|32px]] Added lime dye.}}
{{History|java}}
{{History||1.4.2|snap=12w34a|Added the ability to [[Armor#Dyeing|dye]] leather [[armor]] and [[wolf]] collars.}}
{{History||1.4.6|snap=12w49a|Lime dye can now be [[crafting|crafted]] with [[gunpowder]] to create a [[firework star]].}}
{{History||1.6.1|snap=13w19a|[[Stained clay]] can now be crafted.}}
{{history||1.7.2|snap=13w41a|[[Stained glass]] can now be crafted.}}
{{History||1.8|snap=14w30a|Added [[banner]]s, which can be dyed.}}
{{History||1.11|snap=16w39a|Added the ability to dye [[shulker box]]es.}}
{{History||1.12|snap=17w15a|Added the ability to dye [[bed]]s.}}
{{History||1.13|snap=17w47a|The different data values for the <code>dye</code> ID have now been split up into their own IDs.
|Prior to [[1.13/Flattening|''The Flattening'']], this [[item]]'s numeral ID was 351.}}
{{History|||snap=18w14b|Lime dye can now be smelted from [[sea pickle]]s.}}
{{History||1.14|snap=18w43a|Lime dye is now crafted using [[white dye]], instead of [[bone meal]].
|[[File:Lime_Dye_JE2_BE2.png|32px]] The texture of lime dye has now been changed.}}
{{History|||snap=18w44a|Lime dye can now change the text color on [[sign]]s to lime.}}
{{History|||snap=19w05a|Added the [[wandering trader]], which sells lime dye.}}
{{History|||snap=19w11a|Lime dye can now be [[trading|bought]] by shepherd villagers.}}
{{History||1.17|snap=20w45a|Lime dye can now be used to craft [[lime candle]]s.}}
{{History|||snap=21w19a|Lime dye can no longer be used to craft lime candles.}}
{{History|||snap=Pre-release 1|Lime dye can now once again be used to craft lime candles.}}
{{History||1.20<br>(Experimental)|link=1.19.3|snap=22w42a|Lime dye can now change the text color on [[hanging sign]]s to lime.}}
{{History|pocket alpha}}
{{History||v0.3.0|[[File:Lime Dye JE1 BE1.png|32px]] Added lime dye. It is currently unobtainable and serves no purpose.}}
{{History||v0.4.0|Lime dye is now craftable with [[cactus green]] and [[bone meal]].
|Lime dye can now be used to craft lime wool.}}
{{History||v0.6.0|Lime dye can now be used to dye [[sheep]].}}
{{History||v0.9.0|snap=build 11|Lime dye can now be used to craft colored [[terracotta]].}}
{{History||v0.11.0|snap=build 1|Lime dye can now be used to dye tamed [[wolf]] collars.}}
{{History||v0.14.0|snap=build 1|Lime dye can now be used to dye [[water]] in [[cauldron]]s.}}
{{History|pocket}}
{{History||1.0.0|snap=alpha 0.17.0.1|Lime dye can now be used to dye [[shulker]]s.}}
{{History||1.1.0|snap=alpha 1.1.0.0|Lime dye can now be used to craft [[concrete powder]], colored [[bed]]s and dyed [[shulker box]]es.}}
{{History|bedrock}}
{{History||1.2.0|snap=beta 1.2.0.2|Lime dye can now be used to craft [[firework star]]s, [[stained glass]] and patterns on [[banner]]s.}}
{{History||1.4.0|snap=beta 1.2.20.1|Lime dye can now be used to craft [[balloon]]s and [[glow stick]]s.
|Lime dye can now be obtained from smelting [[sea pickle]]s.}}
{{History||1.8.0|snap=beta 1.8.0.8|Lime dye can now be used to dye tamed [[cat]] collars.}}
{{History||1.10.0|snap=beta 1.10.0.3|Lime dye is now [[trading|sold]] by [[wandering trader]]s.
|Lime dye can now be used to dye white [[carpet]]s and undyed [[glass pane]]s.
|[[File:Lime_Dye_JE2_BE2.png|32px]] The texture of lime dye has now been changed.}}
{{History||1.11.0|snap=beta 1.11.0.4|Lime dye can now be [[trading|sold]] to shepherd [[villager]]s.}}
{{History||1.16.100|snap=beta 1.16.100.56|The ID of lime dye has been changed from <code>dye/10</code> to <code>lime_dye</code>.}}
{{History|console}}
{{History||xbox=TU1|xbone=CU1|ps=1.00|switch=1.0.1|wiiu=Patch 1|[[File:Lime Dye JE1 BE1.png|32px]] Added lime dye.}}
{{History|PS4}}
{{History||1.90|[[File:Lime_Dye_JE2_BE2.png|32px]] The texture of lime dye has now been changed.}}
{{History|new 3ds}}
{{History||0.1.0|[[File:Lime Dye JE1 BE1.png|32px]] Added lime dye.}}
{{History|foot}}
== Issues ==
{{issue list}}
== References ==
{{Reflist}}
{{Items}}
[[Category:Dyes]]
[[Category:Renewable resources]]
[[cs:Světle zelené barvivo]]
[[de:Hellgrüner Farbstoff]]
[[es:Tinte verde lima]]
[[fr:Teinture vert clair]]
[[hu:Neonzöld festék]]
[[ja:黄緑色の染料]]
[[ko:연두색 염료]]
[[nl:Lichtgroene kleurstof]]
[[pl:Jasnozielony barwnik]]
[[pt:Corante verde-limão]]
[[ru:Лаймовый краситель]]
[[zh:黄绿色染料]]</li></ul> | ? | reserved6 texture has been removed, causing it to have an info_update block texture. | |||
| Bedrock Edition | |||||
1.2.0{{Extension DPL}}<ul><li>[[Food|Food]]<br/>{{For|food in ''Minecraft Dungeons''|MCD:Food}}
[[File:Eating Steve.png|thumb|right|150px]]
[[File:Eating Alex.png|thumb|right|150px]]
'''Food''' refers to any consumable [[item]]s that, when eaten, restore [[hunger]] points and hunger saturation points, and sometimes cause [[status effect]]s. They are essential to survival, as going without them eventually causes the player to starve, causing damage until reaching {{hp|10}} in Easy [[difficulty]], and {{hp|1}} on Normal. [[Hunger#Effects of hunger|Starvation]] damage kills the player in Hard and [[Hardcore]] Mode.
Food is eaten by holding {{control|use}} while having the food item selected in the hot bar or in the off-hand.
[[Cake]] cannot be eaten this way, and must instead be placed on a surface before being eaten.
With the exception of [[chorus fruit]], [[golden apple]]s, [[honey bottle]]s, [[milk]], and [[suspicious stew]]{{only|Java}}, food cannot be eaten when the hunger bar is completely full. In [[Creative]] Mode, any food can be consumed at any time.
All food items and ingredients can be stacked in the inventory slots, except for [[milk]], [[rabbit stew]], [[mushroom stew]], [[beetroot soup]], [[suspicious stew]], and [[cake]].{{only|Java}}
This page covers food items for players; blocks and items that can be eaten by other [[mob]]s are not included here.
== Hunger and saturation ==
{{main|Hunger#Mechanics}}
{{seealso|Tutorials/Hunger_management}}
[[File:Raw_and_Cooked_Chicken_Comparison.png|thumb|Raw (left) and cooked (right) [[chicken]]. Eating raw chicken can give the [[player]] [[food poisoning]].]]
[[Player]]s have two different food statistics, one of which is visible: The hunger level is visible, and the saturation level is not.
[[Saturation]] is the first statistic to decrease when a player performs energy-intensive actions, and it must be completely depleted before the visible hunger meter begins decreasing. Although the current saturation level is generally hidden, the player can tell that their saturation level is completely depleted if the visible hunger meter begins displaying a jittering effect.
Eating a food item replenishes a fixed number of hunger points and saturation points, based on the item. Some foods have a better ratio of saturation to hunger points replenished than others. Overeating the hunger bar does not overflow to saturation.
A player's current saturation level can never exceed their current hunger level. A player at a hunger level of 5, for example, can be at a maximum of 5 saturation. Food always restores hunger (raising the saturation limit) ''before'' supplying saturation. The most efficient use of food is to eat low-saturation food to fill the hunger bar, followed by high-saturation food to fill saturation. While a few hunger points may be wasted when eating nourishing food when nearly full, eating nourishing foods on a low hunger bar wastes even more points of saturation. Maximizing saturation increases the length of time (and/or the amount of damage healed) before the player needs to eat again.
=== Usage ===
Most foods can be eaten by holding down the right-click button with a food item in hand. It takes 1.61 seconds to eat most foods; dried kelp takes 0.865 seconds to eat. Additionally, a player can hold food in their [[offhand]] {{in|Java}}.
While eating, food [[particles]] form from the player's mouth correlated with their respective food item, and produces a munching noise. Eating also slows the user significantly.
Unlike other foods, [[cake]] has to be eaten by placing it, then right-clicking on its block form. Eating cake is instant and it has 7 edible slices, each giving {{hunger|2}} hunger and 0.4 hunger [[saturation]].
=== Nourishment value ===
Nourishment is defined as the ratio of saturation to hunger points restored. Foods with higher nourishment values should be eaten when the hunger bar is more full.
The "nourishment" table below can help by categorizing foods by their saturation-to-hunger restoration ratios. See the more detailed [[#Foods|Foods]] table for the exact hunger and saturation statistics of each food.
<!-- do not change the locations of the food in this table without providing an explanation in the edit summary -->
{| class="wikitable" data-description="Nourishment value"
|-
!Nourishment
! Value
!Food
|- style="text-align: left;"
!Great
| 2.4
| {{Slot|Enchanted Golden Apple}}{{Slot|Golden Apple}}{{Slot|Golden Carrot}}
|- style="text-align: left;"
!Good
| 1.6
| {{Slot|Cooked Mutton}}{{Slot|Cooked Porkchop}}{{Slot|Cooked Salmon}}{{Slot|Steak}}
|- style="text-align: left;"
!Normal
| 1.2
| {{Slot|Baked Potato}}{{Slot|Beetroot}}{{Slot|Beetroot Soup}}{{Slot|Bread}}{{Slot|Carrot}}{{Slot|Cooked Chicken}}{{Slot|Cooked Cod}}{{Slot|Cooked Rabbit}}{{Slot|Mushroom Stew}}{{Slot|Rabbit Stew}}{{Slot|Suspicious Stew}}
|- style="text-align: left;"
! Low
| 0.6
| {{Slot|Apple}}{{Slot|Chorus Fruit}}{{Slot|Dried Kelp}}<ref group="note" name="Java">{{only|java}}</ref>{{Slot|Melon Slice}}{{Slot|Poisonous Potato}}{{Slot|Potato}}{{Slot|Pumpkin Pie}}{{Slot|Raw Beef}}{{Slot|Raw Chicken}}{{Slot|Raw Mutton}}{{Slot|Raw Porkchop}}{{Slot|Raw Rabbit}}{{Slot|Sweet Berries}}<ref group="note" name="Bedrock">{{only|bedrock}}</ref>
|- style="text-align: left;"
!Poor
| 0.2
| {{Slot|Cake}}{{Slot|Cookie}}{{Slot|Dried Kelp}}<ref group="note" name="Bedrock"/>{{Slot|Glow Berries}}{{Slot|Honey Bottle}}{{Slot|Pufferfish|link=Pufferfish (item)}}{{Slot|Raw Cod}}{{Slot|Raw Salmon}}{{Slot|Rotten Flesh}}{{Slot|Spider Eye}}{{Slot|Sweet Berries}}<ref group="note" name="Java"/>{{Slot|Tropical Fish|link=Tropical Fish (item)}}
|}
== Foods ==
{{/table}}
=== Ingredients ===
The following items cannot be eaten on their own. Instead, they are used to craft consumable food items.
<!--
Please leave spaces between each row in the table - this has no effect on the appearance of the table, but it makes it a lot easier on future wiki editors!
-->
{| class="sortable wikitable list-style-none" data-description="Ingredients"
|-
! Name
! Icon
! Used to make
! Source(s)
! Notes
|- id="Bowl"
! scope="row" | [[Bowl]]
| {{Slot|Bowl}}
| {{itemLink|Mushroom Stew}}
* {{itemLink|Beetroot Soup}}
* {{itemLink|Rabbit Stew}}
* {{itemLink|Suspicious Stew}}
|
* [[Crafting]] from [[planks]]
* [[Fishing Rod#Usage|Fishing]]
* [[Turtle]] killed by [[lightning]]
* Eating food made with them
|
|- id="Cocoa Bean"
! scope="row" | [[Cocoa Beans]]
| {{Slot|Cocoa Beans}}
| {{itemLink|Cookie}}s
|
* Breaking [[cocoa plant]]s
* Bought from [[wandering trader]]
|
|- id="Egg"
! scope="row" | [[Egg]]
| {{Slot|Egg}}
|
* {{itemLink|Cake}}
* {{itemLink|Pumpkin Pie}}
|
* Laid by [[chicken]]s
* Found in village fletcher chests
|
|- id="Milk"
! scope="row" | [[Milk Bucket]]
| {{Slot|Milk Bucket}}
| {{itemLink|Cake}}
|
* Milking a [[cow]], [[mooshroom]]s, or [[goat]]s
* Killing a [[Wandering trader]] drinking it
| Can also be consumed to clear [[status effect]]s
|- id="Mushroom"
! scope="row" | [[Brown Mushroom]] and [[Red Mushroom]]
| {{Slot|Brown Mushroom;Red Mushroom}}
| {{itemLink|Mushroom Stew}}
* {{itemLink|Rabbit Stew}}
* {{itemLink|Suspicious Stew}}
| {{anchor|Brown Mushroom|Red Mushroom}}
* Dark/shady areas
* Swamp [[biome]]s
* [[Mushroom fields]]
* Breaking [[Huge Mushroom|huge brown or red mushrooms]]
* [[The Nether]]
* Using [[shears]] on a [[mooshroom|brown mooshroom or red mushroom]]
* Bought from [[wandering trader]]
|
|- id="Flower"
! scope="row" | [[Flower]]
| {{Slot|Any Flower}}
|{{itemLink|Suspicious Stew}}
|
* Breaking [[Flower]]
* Using [[Bone Meal]] on a [[Grass Block]]
* Bought from [[wandering trader]]
* Killing [[Iron Golem]] (poppy)
|
|- id="Pumpkin"
! scope="row" | [[Pumpkin]]
| {{Slot|Pumpkin}}
| {{itemLink|Pumpkin Pie}}
|
* Harvesting mature [[pumpkin]]s grown from [[pumpkin seeds]]
* Naturally occurring [[pumpkin]]s
* Taiga and Snowy Taiga [[Village]]s
* Bought from [[wandering trader]]
|
|- id="Sugar"
! scope="row" | [[Sugar]]
| {{Slot|Sugar}}
|
* {{itemLink|Cake}}
* {{itemLink|Pumpkin Pie}}
|
* Crafting [[sugar cane]]
* Dropped by [[witch]]es
* Creating from its base [[element]]s {{only|bedrock|education}}
* Redeemed from [[honey bottle]] on a crafting table
|
|- id="Wheat"
! scope="row" | [[Wheat]]
| {{Slot|Wheat}}
|
* {{itemLink|Bread}}
* {{itemLink|Cake}}
* {{itemLink|Cookie}}s
|
* Harvesting mature [[wheat]]
* Found in [[Dungeon#Loot|dungeon]], [[Woodland Mansion#Loot|woodland mansion]], [[Shipwreck#Loot|shipwreck]], [[Igloo#Loot|igloo]], [[Village#Loot|village]], [[Ocean Ruins#Loot|ocean ruins]], and [[Pillager Outpost#Loot|pillager outpost]] chest
* Crafting [[hay bale]]s
|
|- id="Gold Nugget"
! scope="row" | [[Gold Nugget]]
| {{Slot|Gold Nugget}}
| {{itemLink|Golden Carrot}}
|
* Crafting [[gold ingot]]s
* Dropped by [[zombified piglin]]s
* Found in [[Shipwreck#Loot|shipwreck]], [[Igloo#Loot|igloo]], [[Village#Loot|village]], and [[Ocean Ruins#Loot|ocean ruins]] chest
* Smelting golden armor or tools
* Mining [[nether gold ore]] without [[Silk Touch]]
|
|- id="Gold Ingot"
! scope="row" | [[Gold Ingot]]
| {{Slot|Gold Ingot}}
| {{itemLink|Golden Apple}}
|
* Crafting [[gold block]]s or [[gold nugget]]s
* Rarely dropped by [[zombified piglin]]s and by [[Drowned]]
* Smelting [[gold ore]] or [[nether gold ore]]
* Found in [[Shipwreck#Loot|shipwreck]], [[Jungle Pyramid#Structure:Loot|jungle pyramid]], [[Dungeon#Loot|dungeon]], [[Woodland Mansion#Loot|woodland mansion]], [[Nether Fortress#Loot|nether fortress]], [[End city#Loot|end city]], [[Mineshaft#Loot|mineshaft]], [[Village#Structure:Loot|village]], [[Stronghold#Loot|stronghold]], [[Buried Treasure#Loot|buried treasure]] and [[Desert pyramid#Structure:Loot|desert pyramid]] chest
|
|- id="Honey Block"
! scope="row" | [[Honey Block]]
| {{Slot|Honey Block}}
| {{itemLink|Honey Bottle}}
|
* Crafting [[honey bottle]]s
|
|}
== Sounds ==
{{Sound table/Entity/Food}}
== Achievements ==
{{load achievements|Pork Chop;Iron Belly;Rabbit Season;Overpowered;Castaway;Delicious Fish;The Lie;Bake Bread;Time For Stew}}
== Advancements ==
{{load advancements|Husbandry;A Balanced Diet;A Furious Cocktail;How Did We Get Here;Fishy Business}}
== History ==
{{History|java classic}}
{{History||June 14, 2009|link=https://notch.tumblr.com/post/123343045/my-vision-for-survival|[[Notch]] discussed how food would work in [[survival]] mode: "Monsters will hurt you and take away from your health. The only way to regain health is to eat food. You get food from either hunting or from farming."}}
{{History||0.24_SURVIVAL_TEST|[[Mushroom]]s are now edible, making them the first food to be added in the game. At this point, food restores [[health]] instead of [[hunger]], and are eaten instantly without sound or animation. Pigs drop them upon death.}}
{{History|java indev}}
{{History||0.31|snap=20091231-2|Added [[apple]]s, which are currently non-functional.}}
{{History|||snap=20100110|Apples are now edible, and restore {{hp|4}} each.}}
{{History|||snap=?|Mushrooms are no longer edible.}}
{{History|||snap=20100130|Added [[mushroom stew]], which restores {{hp|8}} health.}}
{{History||20100206|Added [[wheat]] and [[bread]].
|Mushroom stew now restores {{hp|10}} health.}}
{{History||20100219|[[Pig]]s now drop [[raw porkchop]]s, which can be [[smelt]]ed to become [[cooked porkchop]]s.}}
{{History|java infdev}}
{{History||20100227-1|Added [[golden apple]]s. At this point, they were crafted with [[block of gold]], and restored {{hp|20}}.}}
{{History|java alpha}}
{{History||v1.0.8|Added [[milk]], which was at this point unobtainable and the player could not use it in any way.}}
{{History||v1.0.11|Milk can now be obtained in the game, by milking a [[cow]] with an empty [[bucket]].}}
{{History||v1.0.14|With the addition of [[chicken]]s, [[egg]]s are now in the game, but have no use. Chickens do not drop raw chicken at this point in time.}}
{{History||v1.2.0|snap=<nowiki>?|slink=:Category:Information needed requiring unarchived version|Added [[pumpkin]]s, but not pumpkin seeds.
|Added [[raw fish]] and [[cooked fish]], obtainable through [[fishing]].}}
{{History||v1.2.3|Eating food now functions correctly in multiplayer.}}
{{History|java beta}}
{{History||1.2|Added [[sugar]] and [[cake]].}}
{{History||1.4|[[Cocoa beans]] now appear naturally in the game; since Beta 1.2, they were available only through inventory editors.
|Added [[cookie]]s.}}
{{History||1.5|Pigs now drop cooked porkchops if killed while on fire.}}
{{History||1.8|snap=Pre-release|Added [[melon]]s, [[melon seeds]], and [[pumpkin seeds]].
|Added [[raw chicken]] as a drop from chickens, which can be smelted into [[cooked chicken]].
|Added [[raw beef]] as a drop from cows, which can be smelted into [[steak]].
|Added [[rotten flesh]] as a new drop from [[zombie]]s.
|Added an eating animation, instead of food simply disappearing from the player's hand as if a block had been placed.
|Added [[hunger bar]]; now food restores hunger instead of health.
|Food now stacks in the inventory, with the exception of cake, mushroom stew, and milk.
|[[Huge mushroom]]s were added as a new source for [[mushroom]]s.
|With the addition of the hunger bar, golden apples now restore {{Hunger|10}} and give 30 seconds of [[regeneration]], but do not heal health directly anymore.}}
{{History|java}}
{{History||1.0.0|snap=Beta 1.9 Prerelease 2|Mushrooms can now be obtained from the mushroom island [[biome]], via the huge mushrooms, random scattered mushrooms, or the new [[mooshroom]]s.
|[[Milk]] can be used to nullify the effects of [[potion]]s.
|[[Spider]]s now drop [[Spider Eye|eyes]].}}
{{History||1.1|snap=release|Golden apples are now made with [[gold nugget]]s instead of blocks of gold, restore {{Hunger|4}} and give 4 seconds of regeneration.}}
{{History||1.3.1|snap=12w21a|Added enchanted golden apples, which functioned like golden apples prior to 1.1 and had the same crafting recipe, but also gave resistance and fire resistance for 5 minutes each.
|[[Cocoa Beans]] are now a crop, making all food items a renewable resource.}}
{{History||1.4.2|snap=12w34a|[[Potato]]es and [[carrot]]s can be obtainable from zombies (rare drop) or harvested.
|Potatoes can be cooked to make [[baked potato]]es
|Harvesting potatoes may give 0–2 [[poisonous potato]]es.
|Carrots can be crafted into [[golden carrot]]s.
|Added [[pumpkin pie]], making [[pumpkin]]s a food ingredient.}}
{{History||1.7.2|snap=13w36a|Added [[tropical fish (item)|clownfish]], [[Raw Salmon|raw]] and [[cooked salmon]], and [[pufferfish (item)|pufferfish]].}}
{{History||1.8|snap=14w02a|Baked potatoes now restore {{Hunger|5}} hunger points instead of 6, with a corresponding reduction in saturation restored.
|Carrots now restore {{Hunger|3}} hunger points instead of 4, with a corresponding reduction in saturation restored.}}
{{History|||snap=14w27a|Added [[Raw Mutton|raw]] and [[cooked mutton]], [[Raw Rabbit|raw]] and [[cooked rabbit]], and [[rabbit stew]].}}
{{History||1.9|snap=15w31a|Added [[chorus fruit]], [[beetroot]] and [[beetroot soup]].
|Enchanted golden apples are no longer craftable, making them no longer renewable.}}
{{History||1.13|snap=18w07a|Added [[dried kelp]], which is edible.}}
{{History||1.14|snap=18w43a|Added [[suspicious stew]].}}
{{History|||snap=18w49a|Added [[sweet berries]].}}
{{History||1.15|snap=19w34a|Added [[honey bottle]]s.}}
{{History|||snap=19w35a|[[Honey bottle]]s now remove [[poison]] effects when consumed.}}
{{History|||snap=19w46a|All foods can now be consumed in Creative mode, including cake.}}
{{History||1.17|snap=21w05a|Added [[glow berries]].}}
{{History|pocket alpha}}
{{History||v0.4.0|Added the first food items: [[apple]]s, [[bread]], [[mushroom stew]], [[raw beef]], [[steak]], [[raw chicken]], [[cooked chicken]], [[raw porkchop]]s, and [[cooked porkchop]].}}
{{History||v0.5.0|Added [[melon]]s, [[melon slice]]s, and [[melon seeds]].}}
{{History||v0.7.0|Added [[milk]] and [[cake]].}}
{{History||v0.8.0|snap=build 1|Added [[pumpkin pie]], [[carrot]]s, [[potato]]es, and [[baked potato]]es.}}
{{History|||snap=build 2|Added [[beetroot]]s and [[beetroot soup]].}}
{{History||v0.9.0|snap=build 1|[[Potato]]es and [[carrot]]s can be obtainable from zombies (rare drop) or harvested.
|Added [[cookie]]s.}}
{{History||v0.11.0|snap=build 1|Added [[rotten flesh]] as a new drop from [[zombie]]s, at this time, it inflicts poison.
|Added [[Raw Fish|raw]] and [[cooked fish]], [[clownfish]], [[Raw Salmon|raw]] and [[cooked salmon]], and [[pufferfish]].}}
{{History|||snap=build 4|[[Milk]] can be used to nullify the effects of [[potion]]s.}}
{{History||v0.12.1|snap=build 1|Eating food now restores hunger.
|[[Spider]]s now drop [[Spider Eye|eyes]].
|Added poisonous potatoes, golden apples, enchanted golden apples and golden carrots.}}
{{History||v0.13.0|snap=build 1|Hunger restored by food now matches Minecraft PC.
|Added raw rabbit, cooked rabbit, and [[rabbit stew]].}}
{{History||v0.15.0|snap=build 1|Added raw mutton and cooked mutton.}}
{{History|pocket}}
{{History||1.0.0|snap=alpha 0.17.0.1|Added chorus fruit.}}
{{History|bedrock}}
{{History||1.4.0|snap=beta 1.2.14.2|Added [[dried kelp]], which is edible.}}
{{History||1.7.0|snap=beta 1.7.0.2|Food can now be eaten in creative mode and on peaceful difficulty.}}
{{History||1.10.0|snap=beta 1.10.0.3|Added [[sweet berries]].}}
{{History||1.13.0|snap=beta 1.13.0.9|Added [[suspicious stew]].}}
{{History||1.14.0|snap=beta 1.14.0.1|Added [[honey bottle]].}}
{{History||1.17.0|snap=beta 1.16.220.52|Added [[glow berries]].}}
{{History|foot}}
{{items}}
[[Category:Food]]
[[cs:Potraviny]]
[[de:Hunger]]
[[es:Comida]]
[[fr:Nourriture]]
[[hu:Étel]]
[[it:Cibo]]
[[ja:食料]]
[[ko:식료품]]
[[nl:Voedsel]]
[[pl:Jedzenie]]
[[pt:Alimento]]
[[ru:Еда]]
[[th:อาหาร]]
[[uk:Їжа]]
[[zh:食物]]</li><li>[[Honey Bottle|Honey Bottle]]<br/>{{Item
| title = Honey Bottle
| image = Honey Bottle.png
| renewable = Yes
| heals = {{hunger|6}}
|effects=Clears {{EffectLink|Poison}}
| stackable = Yes (16)
}}
A '''honey bottle''' is a [[drinks|consumable drink]] [[item]] obtainable by using a [[glass bottle]] on a full [[beehive]]. Honey bottles remove [[poison]] when drunk and can be used to craft [[Honey Block|honey blocks]] and [[sugar]].
== Obtaining ==
{{See also|Tutorials/Honey farming}}
=== Harvesting ===
A honey bottle can be obtained by using a [[glass bottle]] on either a [[beehive]] or [[beehive|bee nest]] with a honey level of 5. Doing this angers any [[bee]]s inside, causing them to attack the player, unless there is a [[campfire]] or another [[block]] on [[fire]] beneath the bee nest or beehive.
A [[dispenser]] with glass bottles can be used to collect the honey without angering the bees. The honey bottle appears as an item in the dispenser's inventory. If the dispenser is full, the honey bottle is shot out.
=== Crafting ===
{{Crafting
|Glass Bottle
|Glass Bottle
|Honey Block
|Glass Bottle
|Glass Bottle
|Output=Honey Bottle, 4
|type= Foodstuff
}}
== Usage ==
To drink a honey bottle, press and hold {{control|use}} while it is selected in the [[hotbar]]. Drinking one restores {{hunger|6}} [[hunger]] and 1.2 hunger [[Hunger#Mechanics|saturation]]. Consuming the item also has the benefit of removing any [[poison]] effect applied to the player. Unlike drinking [[Milk Bucket|milk]], other applied effects are not removed upon drinking a honey bottle.
Honey bottles can be drunk even with a full hunger bar. Drinking a honey bottle takes 25% longer than eating other [[food]] - 2 seconds - and has a unique sound.
=== Crafting ingredient ===
{{Crafting usage}}
== Sounds ==
{{edition|java}}:
{{Sound table
|sound=Drink honey1.ogg
|sound2=Drink honey2.ogg
|sound3=Drink honey3.ogg
|sound4=Drink honey3.ogg
|subtitle=Gulping
|source=player
|description=While a player is drinking a honey bottle
|id=item.honey_bottle.drink
|translationkey=subtitles.item.honey_bottle.drink
|volume=0.5
|pitch=''varies'' <ref group=sound>0.9-1.0 for <code>drink_honey1</code> and <code>drink_honey2</code>, 0.315-0.35 for <code>drink_honey3</code>, and 0.675-0.75 for the second copy of <code>drink_honey3</code></ref>
|distance=16}}
{{Sound table
|sound=Bottle fill water1.ogg
|sound2=Bottle fill water2.ogg
|sound3=Bottle fill water3.ogg
|sound4=Bottle fill water4.ogg
|subtitle=Bottle fills
|source=block
|description=When a bottle is filled with honey
|id=item.bottle.fill
|translationkey = subtitles.item.bottle.fill
|volume=1.0
|pitch=1.0
|distance=16
|foot=1}}
{{edition|bedrock}}:
{{Sound table
|type=bedrock
|sound=Drink honey1.ogg
|sound2=Drink honey2.ogg
|sound3=Drink honey3.ogg
|sound4=Drink honey3.ogg<!--This is duplicated intentionally, see below-->
|source=player
|description=While a player is drinking a honey bottle
|id=random.drink_honey
|volume=''varies''<ref group="sound" name="bevarieshoney">0.5 for <code>drink_honey1</code> and <code>drink_honey2</code>, but <code>drink_honey3</code> is 0.175 or 0.375</ref>
|pitch=0.9-1.0}}
{{Sound table
|sound=Fill water bucket1.ogg
|sound2=Fill water bucket2.ogg
|sound3=Fill water bucket3.ogg
|source=block
|description=When a bottle is filled with honey<wbr><ref group=sound>{{Bug|MCPE-53881}}</ref>
|id=bucket.fill_water
|volume=1.0
|pitch=1.0
|foot=1}}
== Data values ==
=== ID ===
{{edition|java}}:
{{ID table
|edition=java
|showforms=y
|generatetranslationkeys=y
|displayname=Honey Bottle
|spritetype=item
|nameid=honey_bottle
|form=item
|foot=1}}
{{edition|bedrock}}:
{{ID table
|edition=bedrock
|shownumericids=y
|showforms=y
|notshowbeitemforms=y
|generatetranslationkeys=y
|displayname=Honey Bottle
|spritetype=item
|nameid=honey_bottle
|id=592
|form=item
|foot=1}}
== Achievements ==
{{Load achievements|Bee Our Guest}}
== Advancements ==
{{Load advancements|Husbandry;A Balanced Diet;Bee Our Guest}}
== History ==
{{History|java}}
{{History||1.15|snap=19w34a|[[File:Honey Bottle JE1.png|32px]] Added honey bottles.}}
{{History|||snap=19w35a|Honey bottles now remove the [[Poison]] effect when consumed.
|Honey bottles are now included in the "A Balanced Diet" [[advancement]].}}
{{History|||snap=19w36a|Honey bottles are now less filling, restoring 1.2 [[Hunger#Mechanics|saturation]] instead of 9.6.}}
{{History||1.15|snap=19w41a|Honey bottles can now be used to craft [[honey block]]s.}}
{{History||1.15|snap=19w44a|Honey bottles can now be [[crafting|crafted]] with four [[glass bottle]]s and one [[honey block]].
|Honey bottles are now stackable (up to 16).}}
{{History|||snap=19w46a|Using [[glass bottle]]s to collect honey now unlocks the [[Bee Our Guest]] advancement.}}
{{History|bedrock}}
{{History||1.14.0|snap=beta 1.14.0.1|[[File:Honey Bottle BE1.png|32px]] Added honey bottles.}}
{{History|||snap=beta 1.14.0.4|[[File:Honey Bottle BE2.png|32px]] The texture of honey bottles has been changed to match {{el|je}}'s.
|Honey bottles can now be crafted with four [[glass bottle]]s and one [[honey block]].
|Honey bottles are now stackable to 16.}}
{{History|||snap=release|slink=Bedrock Edition 1.14.0|Using [[glass bottle]]s to collect honey now unlocks the [[Bee our guest]] achievement.}}
{{History|foot}}
== Issues ==
{{issue list}}
== Trivia ==
* Honey bottles are the only drinkable [[item]]s that can stack. They have a maximum stack size of 16.
* Honey bottles are the only drinkable items that can restore hunger.
* Honey bottles are 4 pixels more full than [[water bottles]].
{{Items}}
[[cs:Lahvička medu]]
[[de:Honigflasche]]
[[es:Frasco con miel]]
[[fr:Fiole de miel]]
[[ja:ハチミツ入りの瓶]]
[[ko:꿀이 든 병]]
[[lzh:蜜瓶]]
[[pl:Butelka miodu]]
[[pt:Frasco de mel]]
[[ru:Бутылочка мёда]]
[[th:ขวดน้ำผึ้ง]]
[[uk:Пляшечка меду]]
[[zh:蜂蜜瓶]]
[[Category:Food]]
[[Category:Renewable resources]]</li></ul></nowiki> | beta 1.2.0.2 | The unique fire animation has been removed from burning mobs (excluding blazes), and replaced with a stretched burning animation like that on Java Edition. | |||
1.16.0{{Extension DPL}}<ul><li>[[Compass|Compass]]<br/>{{About|the item used to point to the world spawn or to a lodestone|the item used to point to the location of the player's last death|Recovery Compass}}
{{Item
| image = Compass.gif
| image2 = Lodestone Compass.gif
| renewable = Yes
| stackable = '''Compass:''' Yes (64)<br>'''Lodestone Compass:''' No
}}
A '''compass''' is an item used to point to the world spawn or to a [[lodestone]].
== Obtaining ==
=== Crafting ===
{{Crafting
|B1= Iron Ingot
|A2= Iron Ingot |B2= Redstone Dust |C2= Iron Ingot
|B3= Iron Ingot
|Output= Compass
|type= Tool
}}
=== Chest loot ===
{{LootChestItem|compass}}
=== Trading ===
{{IN|java}}, expert-level librarian [[villager]]s have a 50% chance to sell a single compass for 4 [[emerald]]s.
{{IN|bedrock}}, expert-level librarian villagers have a {{frac|1|3}} chance to sell a single compass for 4 emeralds.
== Usage ==
Normally, the compass' needle points toward the world [[Spawn#World spawn|spawn point]]. The compass points to spawn when viewed in any way, including as a dropped [[Item (entity)|item]], in a player's hand, in an inventory or the crafting table, or in an [[item frame]]. The direction the needle points to is relative to the player who is viewing it. When a compass in an item frame is rotated, the needle turns accordingly.
In [[the Nether]] or [[the End]], the compass' needle spins and points in random directions.
The compass can be used on a [[lodestone]], after which it is named lodestone compass by default and points to that lodestone as long as the compass is in the same dimension as the lodestone, but if the compass is taken to a different dimension, it spins randomly, as a normal compass would in the Nether or the End. If the lodestone is destroyed, it also spins randomly, even if the lodestone is replaced afterward. However, if a lodestone compass is placed in storage, the lodestone can be broken and replaced without the compass losing the attunement, as long as the compass remains in storage while the lodestone is missing.
A lodestone compass appears [[enchanting|enchanted]], similar to the [[Enchanted Golden Apple|enchanted golden apple]].
Using {{cmd|setworldspawn}} to change the world spawn also changes where the compass points.
=== Crafting ingredient ===
{{crafting usage|Compass, Compass.gif}}
=== Anvil usage ===
{{:Map/BE|position}}
=== Trading ===
A single compass can be sold to a journeyman-level cartographer villager for 1 [[emerald]].{{only|java}}
A single compass can be sold to an expert-level cartographer villager for 1 emerald as their sixth trade.{{only|bedrock}}
A compass is also part of the cost of [[explorer map]]s:
* An ocean explorer map and{{only|java|short=1}}/or{{only|bedrock|short=1}} a woodland explorer map can be bought from a journeyman-level cartographer for 12 emeralds and one compass, as part of their fifth trade.{{only|bedrock}}
* {{IN|java}}, apprentice-level cartographer villagers offer to sell an ocean explorer map for 13 emeralds and a compass, and journeyman-level cartographer villagers offer to sell a woodland explorer map for 14 emeralds and one compass.
=== Enchantments ===
A compass can receive the following [[enchantment]]s:
{|class="wikitable col-2-center col-3-right"
|+
!Name
!Max Level
![[Enchanting|Method]]
|-
|[[Curse of Vanishing]]
|I
|{{Inventory slot|Anvil}}
|-
|}
== Sounds ==
{{edition|java}}:
{{Sound table
|sound=Lodestone lock1.ogg
|sound2=Lodestone lock2.ogg
|source=player
|subtitle=Lodestone Compass locks onto Lodestone
|description=When a compass is used on a lodestone
|id=item.lodestone_compass.lock
|translationkey=subtitles.item.lodestone_compass.lock
|volume=1.0
|pitch=''varies'' <ref group=sound>Can be 0.85 or 0.95 for each sound</ref>
|distance=16
|foot=1}}
{{edition|bedrock}}:
{{Sound table
|type=bedrock
|sound=Lodestone lock1.ogg
|sound2=Lodestone lock2.ogg
|source=block
|description=When a compass is used on a lodestone
|id=lodestone_compass.link_compass_to_lodestone
|volume=1.0
|pitch=0.85-0.95
|foot=1}}
== Data values ==
=== ID ===
{{edition|java}}:
{{ID table
|edition=java
|showforms=y
|generatetranslationkeys=y
|displayname=Compass
|spritetype=item
|nameid=compass
|form=item
|translationkey=item.minecraft.compass,item.minecraft.lodestone_compass
|foot=1}}
{{edition|bedrock}}:
{{ID table
|edition=bedrock
|showaliasids=y
|shownumericids=y
|showforms=y
|notshowbeitemforms=y
|generatetranslationkeys=y
|displayname=Compass
|spritetype=item
|nameid=compass
|id=391
|form=item}}
{{ID table
|displayname=Lodestone Compass
|spritename=lodestone-compass-be
|spritetype=item
|nameid=lodestone_compass
|aliasid=lodestonecompass
|id=602
|form=item
|translationkey=item.lodestonecompass.name
|foot=1}}
=== Item data ===
{{el|java}}:
{{main|Player.dat format}}
<div class="treeview">
* {{nbt|compound|tag}}: The item's '''tag''' tag.
{{:Player.dat_format/Compasses}}
</div>
{{el|bedrock}}:
: See [[Bedrock Edition level format/Item format]].
== Advancements ==
{{load advancements|Country Lode}}
== History ==
{{History|java alpha}}
{{History||v1.1.0|[[File:Compass JE1.gif|32px]] Added compasses.
|They have 102 visually distinct frames due to how the texture is generated - see the section below.}}
{{History|java beta}}
{{History||1.8|snap=Pre-release|Compasses can now be found in library [[chest]]s in the new [[strongholds]].}}
{{History|java}}
{{History||1.3.1|snap=12w21a|Librarian [[villager]]s now [[trading|sell]] 1 compass for 10–11 [[emerald]]s, making them [[renewable]].}}
{{History||1.4.2|snap=12w34a|Since the mapping system has been changed, a compass can now be used to [[crafting|craft]] an empty [[map]].}}
{{History||1.5|snap=13w02a|[[File:Compass JE2 BE2.gif|32px]] Compasses now, instead of splitting two textures, use the new animation feature included in texture packs. As a result, they are considerably less precise, having only 29 visually distinct frames. }}
{{History||1.8|snap=14w02a|Librarian villagers now sell 1 compass for 10–12 emeralds.}}
{{History||1.9|snap=15w31a|Compasses are now broken up into individual textures, instead of having every individual frame on one vertical strip like with animated textures.}}
{{History|||snap=15w43a|The average yield of compasses in [[stronghold]] library [[chest]]s has been increased.}}
{{History||1.11|snap=16w39a|Cartographer [[villager]]s have been added, who [[trading|buy]] compasses as their tier 2 trade.}}
{{History||1.13|snap=17w47a|Prior to [[1.13/Flattening|''The Flattening'']], this [[item]]'s numeral ID was 345.}}
{{History|||snap=18w11a|Compasses can now generate in [[shipwreck]] [[chest]]s.}}
{{History||1.14|snap=18w48a|Compasses can now generate in chests in [[village]] cartographer houses.}}
{{History||1.16|snap=20w13a|[[File:Lodestone Compass JE1.gif|32px]] Compasses can now be used on [[lodestone]]s to make them point to the stones.
|Compasses now point to the center of the spawn point block, instead of its north-west corner.}}
{{History|||snap=20w14a|Compasses now have the <code>LodestonePos</code>, <code>LodestoneDimension</code>, and <code>LodestoneTracked</code> data fields. If <code>LodestoneTracked</code> is zero, the game skips checking for a lodestone in the specified position.
|Compasses can now have the [[Curse of Vanishing]] [[enchantment]] on them.}}
{{History|||snap=20w19a|Compasses no longer work in the [[recipe book]].<ref>{{bug|MC-116293}}</ref>}}
{{History|||snap=20w22a|Compasses no longer work in the villager trading GUI.<ref>{{bug|MC-182888}}</ref>}}
{{History||1.17|snap=20w48a|[[File:Compass JE3.gif|32px]] [[File:Lodestone Compass JE2.gif|32px]] The textures of compass and lodestone compass have been changed.}}
{{History||1.19|snap=22w13a|Compasses may now be found in [[ancient city]] [[chest]]s.}}
{{History|||snap=22w14a|Compasses can now used to craft [[recovery compass]]es.}}
{{History|pocket alpha}}
{{History||v0.2.0|[[File:Compass BE1.png|32px]] Added compasses.
|Compasses currently have no function or legitimate method of obtaining them.}}
{{History||v0.8.0|snap=build 1|[[File:Compass JE2 BE2.gif|32px]] Added animated texture to compasses.
|Compasses are now functional and [[crafting|craftable]]. They have been added into the Creative Inventory.}}
{{History||v0.14.0|snap=build 1|Compasses must now be added to a [[map]] using an [[anvil]] to add the location marker.}}
{{History|pocket}}
{{History||1.0.0|snap=?|[[Windows 10 Edition]] can now use the [[anvil]], as well as the [[crafting table]], to apply position markers, with compasses just as [[Pocket Edition]] can in general.}}
{{History||1.0.4|snap=alpha 1.0.4.0|Librarian [[villager]]s now [[trading|sell]] 1 compass for 10–12 [[emerald]]s.}}
{{History||1.1.0|snap=alpha 1.1.0.3|Cartographer villagers have been added, who [[trading|buy]] compasses as part of their tier 2 trade.
|Compasses used with emeralds can be used to buy explorer maps as part of cartographer villagers' fourth tiers trade.}}
{{History|bedrock}}
{{History||1.4.0|snap=beta 1.2.14.2|Compasses can now be found inside map room [[chest]]s in [[shipwreck]]s.}}
{{History||1.10.0|snap=beta 1.10.0.3|Compasses can now be found in [[village]] cartographer house chests.}}
{{History||1.11.0|snap=beta 1.11.0.4|[[Trading]] has been changed, cartographer [[villager]]s now [[trading|buy]] compassess as part of their fourth tier trades.
|Compasses used with [[emerald]]s can now be used to buy explorer maps as part of cartographer and fletcher villagers' third tier trades.
|Librarian villagers now have a {{frac|1|3}} chance to [[trading|sell]] compasses for 4 emeralds as part of their fourth tier trades.}}
{{History||1.16.0|snap=beta 1.16.0.57|[[File:Lodestone Compass BE1.gif|32px]] Compasses can now be used on [[lodestone]]s to make them point to the stones.
|Compasses now have the <code>LodestonePos</code>, <code>LodestoneDimension</code>, and <code>LodestoneTracked</code> data fields. If <code>LodestoneTracked</code> is zero, the game skips checking for a lodestone in the specified position.
|Compasses can now have the [[Curse of Vanishing]] [[enchantment]] on them.}}
{{History||1.16.100|snap=beta 1.16.100.56|Changed the ID {{code|lodestonecompass}} to {{code|lodestone_compass}}.}}
{{History||1.17.0|snap=beta 1.17.0.54|[[File:Compass JE3.gif|32px]] The texture of compass has been changed.}}
{{History||1.18.10|snap=beta 1.18.10.20|[[File:Lodestone Compass JE2.gif|32px]] The texture of lodestone compass has been changed.}}
{{History|console}}
{{History||xbox=TU1|xbone=CU1|ps=1.0|wiiu=Patch 1|switch=1.0.1|[[File:Compass JE2 BE2.gif|32px]] Added compasses.}}
{{History|New Nintendo 3DS Edition}}
{{History||0.1.0|[[File:Compass JE2 BE2.gif|32px]] Added compasses.}}
{{History|foot}}
=== Texture generation prior to Java Edition 13w02a ===
{{:Procedural animated texture generation/Compasses}}
== Issues ==
{{issue list}}
== Gallery ==
<gallery>
12w21a CompassPurchase.png|Purchasing a compass from a librarian [[villager]].
</gallery>
== See also ==
*[[Clock]]
*[[Tutorials/Navigation|Navigation]]
== External Links ==
*[https://www.minecraft.net/en-us/article/taking-inventory--compass Taking Inventory: Compass] – Minecraft.net on August 15, 2019
{{Items}}
[[Category:Tools]]
[[Category:Renewable resources]]
[[cs:Kompas]]
[[de:Kompass]]
[[es:Brújula]]
[[fr:Boussole]]
[[hu:Iránytű]]
[[it:Bussola]]
[[ja:コンパス]]
[[ko:나침반]]
[[nl:Kompas]]
[[pl:Kompas]]
[[pt:Bússola]]
[[ru:Компас]]
[[uk:Компас]]
[[zh:指南针]]</li><li>[[Lead|Lead]]<br/>{{About|the item used for leashing and leading mobs|the element|Element#Lead}}
{{Item
| image = Lead.png
| stackable = Yes (64)
| renewable = Yes
}}
'''Leads''' are [[tool]]s used to leash and lead passive and neutral [[animal]]s, [[golem]]s and some [[monster]]s.
== Obtaining ==
=== Chest loot ===
{{LootChestItem|lead}}
=== Crafting ===
{{Crafting
|A1= String
|B1= String
|A2= String
|B2= Slimeball
|C3= String
|Output= Lead,2
|type= Tool
}}
=== Mob loot ===
[[Wandering Trader|Wandering trader]]s always spawn with 2 [[llama|trader llama]]s, each held with a lead. When a trader llama is detached, either by killing it or the wandering trader, dragging them far apart, or putting the llama in a [[boat]] or a [[minecart]], the lead drops at the llama's position.
== Usage ==
=== Crafting ingredient ===
{{crafting usage}}
=== Leashing mobs ===
[[File:SuspendedPigs.png|190px|thumb|One block tall mobs, such as pigs, suspend at 7 blocks above the ground.]]
[[File:SuspendedCows.png|190px|thumb|Two block tall mobs, such as cows, also suspend at 7 blocks above the ground.]]
{{control|Using}} a lead on a [[mob]] ties the lead to the mob, allowing it to be moved by the player. Multiple mobs can be held by leads at once, but each mob held requires its own lead.
It is possible to leash the following mobs and other entities:
{{columns-list|colwidth=20em|
* {{EntityLink|Allay}}
* {{EntityLink|Axolotl}}
* {{EntityLink|Bee}}
* {{EntityLink|Boat}}{{only|bedrock}}
* {{EntityLink|Camel}}
* {{EntityLink|Cat}}
* {{EntityLink|Chicken}}
* {{EntityLink|Chicken Jockey}} (only the mount)
* {{EntityLink|Cow}}
* {{EntityLink|Dolphin}}
* {{EntityLink|Donkey}}
* {{EntityLink|Fox}}
* {{EntityLink|Frog}}
* {{EntityLink|Glow Squid}}
* {{EntityLink|Goat}}
* {{EntityLink|Hoglin}}
* {{EntityLink|Horse}}
* {{EntityLink|Iron Golem}}
* {{EntityLink|Llama}}
* {{EntityLink|Mooshroom}}
* {{EntityLink|Mule}}
* {{EntityLink|Ocelot}}
* {{EntityLink|Parrot}}
* {{EntityLink|Pig}}
* {{EntityLink|Polar Bear}}
* {{EntityLink|Rabbit}}
* {{EntityLink|Sheep}}
* {{EntityLink|Skeleton Horse}}
* {{EntityLink|Skeleton Horseman}} (only the mount)
* {{EntityLink|Sniffer}}
* {{EntityLink|Snow Golem}}
* {{EntityLink|Squid}}
* {{EntityLink|Strider}}
* {{EntityLink|Trader Llama}}
* {{EntityLink|Wolf}}
* {{EntityLink|Zoglin}}
* {{EntityLink|Zombie Horse}}}}
Additionally, [[villager]]s, [[wandering trader]]s, and [[monster]]s other than the ones listed above, can be leashed using a map editor or [[NBT]] editor.
With a mob on a lead held by the player, {{control|using}} the lead on any type of [[fence]] (or [[wall]]{{only|bedrock|short=1}}) attaches the lead to it with a visible knot, tying the mob to it. To attach it to a wall on Bedrock Edition, the player must hold a lead in the main hand.<ref>{{bug|MCPE-108078}}</ref> Multiple leads may be attached to one fence post. A mob tied to a fence tends to stay within 5 blocks of the fence post.
A lead is broken by pressing the {{control|use item}} control on the mob again, hitting the knot, or removing the attached fence post. Leads also break when hit by projectiles. Whenever a lead is removed or broken, it drops as an [[item (entity)|item]] at the location of the mob. However, it does not drop when unleashed in Creative mode.{{only|java}}<ref>{{bug|MCPE-79639}}</ref> A lead does not break if the attached animal dies.
A lead can stretch a maximum of 10 blocks. If the mob is able to move towards the player or fence post, it does so. If not, or if the mob is moving very quickly away from the player, the lead breaks.
When the player or the knot is more than 7 blocks above the ground, the mob being leashed becomes suspended.
Most mobs that can be leashed can still be leashed even if attacking the player leashing them, and any attached leads do not break.
[[Wolf|Wolves]] cannot be leashed after becoming angry. Despite this, if they become angry while already leashed, the lead does not break, but it cannot be reattached when broken through other methods while the wolf is still angry.
A lead attached to a hoglin breaks if it becomes a [[zoglin]].
A lead does not prevent mobs from despawning if they normally would despawn.
When moving downwards and accelerating towards the ground, leashed mobs accumulate fall damage and take it if they hit the ground while still accelerating. When moving up or decelerating (such as when the lead is stretched to its limit), the fall distance is set to one block and the mob therefore does not take any fall damage if it touches the ground.
If the player walks into and back out of a [[nether portal]] while holding a lead connected to a mob, the lead remains attached to the mob. However, if a mob attached to a lead walks into a nether portal, the lead breaks and drops as an item in the other dimension.
A lead can be used to remove a mob from a boat without needing to break the boat, if the mob can normally be leashed.
If a chunk unloads while containing a leashed mob (either by the player walking too far away, or traveling to another dimension via a portal), the lead breaks and drops as an item, leaving the mob free to wander around.
== Sounds ==
{{Edition|Java}}:
{{Sound table
|sound=Lead Knot break1.ogg
|sound2=Lead Knot break2.ogg
|sound3=Lead Knot break3.ogg
|subtitle=Leash Knot breaks
|source=neutral
|description=When a leash knot is destroyed
|id=entity.leash_knot.break
|translationkey=subtitles.entity.leashknot.break
|volume=1.0
|pitch=1.0
|distance=16}}
{{Sound table
|sound=Lead Knot place1.ogg
|sound2=Lead Knot place2.ogg
|sound3=Lead Knot place3.ogg
|subtitle=Leash Knot tied
|source=neutral
|description=When a leash knot is placed on a fence
|id=entity.leash_knot.place
|translationkey=subtitles.entity.leashknot.place
|volume=1.0
|pitch=1.0
|distance=16
|foot=1}}
{{Edition|Bedrock}}:
{{Sound table
|type=bedrock
|sound=Lead Knot break1.ogg
|sound2=Lead Knot break2.ogg
|sound3=Lead Knot break3.ogg
|source=neutral
|description=When a leash knot is broken by {{ctrl|interacting}} with it
|id=leashknot.break
|volume=1.0
|pitch=1.0}}
{{Sound table
|sound=Lead Knot place1.ogg
|sound2=Lead Knot place2.ogg
|sound3=Lead Knot place3.ogg
|source=neutral
|description=When a leash knot is placed on a fence or wall
|id=leashknot.place
|volume=1.0
|pitch=1.0
|foot=1}}
== Leash Knot ==
'''Leash knot''' is an entity created when the [[player]] right-clicks the fence while having a mob leashed.
{{Entity| title = Leash Knot| image = Knot.png|imagesize= 100px|networkid='''[[JE]]''': 77}}
=== Data values ===
==== ID ====
{{edition|java}}:
{{ID table
|edition=java
|generatetranslationkeys=y
|displayname=Leash Knot
|spritetype=entity
|nameid=leash_knot
|foot=1}}
{{edition|bedrock}}:
{{ID table
|edition=bedrock
|shownumericids=y
|notshowbeitemforms=y
|generatetranslationkeys=y
|displayname=Leash Knot
|spritetype=entity
|nameid=leash_knot
|id=88
|foot=1}}
==== Entity data ====
Leash knots have entity data that define various properties of the entity.
{{el|java}}:
{{main|Entity format}}
{{/ED}}
{{el|bedrock}}:
: See [[Bedrock Edition level format/Entity format]].
== Data values ==
=== ID ===
{{edition|java}}:
{{ID table
|edition=java
|showforms=y
|generatetranslationkeys=y
|displayname=Lead
|spritetype=item
|nameid=lead
|form=item
|foot=1}}
{{edition|bedrock}}:
{{ID table
|edition=bedrock
|shownumericids=y
|showforms=y
|notshowbeitemforms=y
|generatetranslationkeys=y
|displayname=Lead
|spritetype=item
|nameid=lead
|id=547
|form=item
|foot=1}}
== Achievements ==
{{load achievements|So I Got That Going for Me}}
== Advancements ==
{{load advancements|When the Squad Hops into Town}}
== History ==
{{missing information|The history of a lot of mobs be leashed}}
{{History|java}}
{{History||1.6.1|snap=13w16a|[[File:Lead JE1 BE1.png|32px]] Added leads.
|Leads do not currently have a tooltip and are called “leashes” in [http://www.mojang.com/2013/04/minecraft-snapshot-13w16a-and-new-launcher/ the change notes].}}
{{History|||snap=13w16b|Leads have been given a tooltip.}}
{{History|||snap=13w18a|Leads have been given a [[crafting]] recipe.}}
{{History||1.9|snap=15w50a|Added a [[sound]] for leads: <code>entity.leashknot.place</code>.}}
{{History||1.11|snap=16w32a|The [[entity]] ID of the knot has been changed from <code>LeashKnot</code> to <code>leash_knot</code>.}}
{{History|||snap=16w39a|Leads can now be found in [[woodland mansion]] chests.}}
{{History||1.13|snap=17w47a|Prior to [[1.13/Flattening|''The Flattening'']], this [[item]]'s numeral ID was 420.}}
{{History||1.14|snap=18w43a|[[File:Lead JE2 BE2.png|32px]] The texture of leads has been changed.}}
{{History|||snap=19w05a|Added [[wandering trader]]s, which are naturally equipped with leads.}}
{{History||1.15|snap=?|[[Bee]]s can now be leashed.}}
{{History||1.16|snap=20w09a|[[Skeleton horse]]s and [[zombie horse]]s can now be leashed.<ref>{{bug|MC-166246}}</ref>}}
{{History|||snap=?|[[Hoglin]]s can now be leashed.}}
{{History||1.16.2|snap=20w27a|[[Zoglin]]s can now be leashed.}}
{{History||1.17|snap=21w19a|[[Squid]]s and [[glow squid]]s can now be leashed.<ref>{{bug|MC-136647}}</ref>}}
{{History|||snap=?|[[Axolotl]]s can now be leashed.}}
{{History||1.19|snap=22w13a|Lead may now be found in [[ancient city]] [[chest]]s.}}
{{History|||snap=?|[[Frog]]s can now be leashed.}}
{{History||1.19.3|snap=22w42a|[[Camel]]s can now be leashed.|Mobs no longer accumulate fall damage when dangling on leads.<ref>{{bug|MC-14167||Mobs build up fall damage when dangling on a lead|Fixed}}</ref>}}
{{History||1.20 (Experimental)|link=1.19.4|snap=?|[[Sniffer]]s can now be leashed.}}
{{History||1.20|snap=23w12a|Lead can now be found in [[suspicious gravel]] and [[suspicious sand]] in [[trail ruins]].}}
{{History|||snap=23w16a|Lead no longer generates in [[suspicious sand]] in [[trail ruins]].|Due to the split of the archaeological loot tables for the suspicious gravel within the [[trail ruins]]; lead now is in the common loot.}}
{{History|pocket alpha}}
{{History||v0.15.0|snap=build 1|[[File:Lead JE1 BE1.png|32px]] Added leads.}}
{{History|pocket}}
{{History||1.1.0|snap=alpha 1.1.0.0|Leads now have better "physics".
|The [[entity]] ID of the knot has been changed from <code>leashknot</code> to <code>leash_knot</code>.
|Leads can now be found inside [[woodland mansion]] [[chest]]s.}}
{{History|bedrock}}
{{History||1.4.0|snap=beta 1.2.14.2|Leads can now be found inside [[buried treasure]] [[chest]]s.
|Leads can now be used on [[boat]]s.}}
{{History||1.4.0|snap=beta 1.2.20.1|Leads can now be used to craft [[balloon]]s.}}
{{History||1.10.0|snap=beta 1.10.0.3|[[File:Lead JE2 BE2.png|32px]] The texture of leads has been changed.
|[[Wandering trader]]s now [[drops|drop]] leads after they are detached from trader [[llama]]s.}}
{{History||1.14.0|snap=beta 1.14.0.1|Leads can now be used on [[polar bear]]s, [[ocelot]]s, [[parrot]]s, [[dolphin]]s and old [[villager]]s.}}
{{History||1.19.0|snap=beta 1.19.0.20|Allays can now be leashed.}}
{{History|console}}
{{History||xbox=TU19|xbone=CU7|ps=1.12|wiiu=Patch 1|switch=1.0.1|[[File:Lead JE1 BE1.png|32px]] Added leads.}}
{{History||xbox=TU43|xbone=CU33|ps=1.36|wiiu=Patch 13|[[Sound]]s have been added for leads.}}
{{History|Ps4}}
{{History||1.90|[[File:Lead JE2 BE2.png|32px]] The texture of leads has been changed.}}
{{History|3ds}}
{{History||0.1.0|[[File:Lead JE1 BE1.png|32px]] Added leads.}}
{{History|foot}}
== Issues ==
{{issue list|Lead|Leash}}
== Trivia ==
[[File:Steve wearing Lead.png|100px]] [[File:Alex wearing Lead.png|100px]]
* The lead is named as "leash" in the texture file.
* If a [[player]] goes to sleep while holding a mob on a lead, the lead remains attached.
* {{IN|Java}}, when using the {{cmd|item}} command to put a lead in a player's head slot, the item gets rotated and positioned in such a way that it looks like the player is wearing a monocle.
== Gallery ==
<gallery>
Multiple_Leash.png|Many animals can be tied to one fence post.
HorseLeashedOnAFence.png|A [[horse]] wearing [[golden horse armor]] that is leashed to a fence post.
ThreeTiedSheep.png|Three sheep tied to the same fence.
More accurate lead mobs.png|A shot of all the mobs that could be tied with leads as of 1.6.1, except donkeys and mules.
Yo Yo.png|With the use of the leash, it is possible to suspend animals in the air by tying the leash on high-up fence posts.
YoYo.png|A [[donkey]] with the Grumm/Dinnerbone [[name tag]] [[easter egg]] tied to a fence with a lead to make a yo-yo.
Flying_Sheep.png|Several [[sheep]] hanging in the air in [[Creative]] mode.
Pocket Edition Lead.jpg|First image of a lead in ''Bedrock Edition''.
</gallery>
== References ==
{{Reflist}}
== External Links ==
*[https://www.minecraft.net/en-us/article/taking-inventory-lead Taking Inventory: Lead] – Minecraft.net on April 8, 2022
{{items}}
{{entities}}
[[Category:Tools]]
[[de:Leine]]
[[es:Rienda]]
[[fr:Laisse]]
[[hu:Lasszó]]
[[it:Guinzaglio]]
[[ja:リード]]
[[ko:끈]]
[[nl:Leidtouw]]
[[pl:Smycz]]
[[pt:Laço]]
[[ru:Поводок]]
[[th:เชือกจูง]]
[[zh:拴绳]]
[[Category:Renewable resources]]</li></ul> | beta 1.16.0.51 | ||||
| beta 1.16.0.59 | Fire lit on top of soul sand is now soul fire. | ||||
| beta 1.16.0.63 | Soul fire is now created when randomTickSpeed is set to 0.
| ||||
Soul fire is now created when dofiretick is set to false. | |||||
| Legacy Console Edition | |||||
| TU1 | CU1 | 1.0 | Patch 1 | 1.0.1 | |
| New Nintendo 3DS Edition | |||||
0.1.0{{Extension DPL}}<ul><li>[[Nether Sprouts|Nether Sprouts]]<br/>{{Block
|title=Nether Sprouts
|image=Nether Sprouts.png
|image2=Nether Sprouts (texture) JE2 BE2.png
|transparent=Yes
|tool=shears
|light=No
|renewable=Yes
|stackable=Yes (64)
|flammable=No
|lavasusceptible=Yes
}}
'''Nether sprouts''' are a non-solid fungi block that generate in [[warped forest]]s.
== Obtaining ==
=== Natural generation ===
Nether sprouts generate in [[warped forest]] biomes.
=== Breaking ===
Nether sprouts can be mined instantly with any item. The block also breaks if the block below is removed, or if [[water]] flows into its space. The block only drops if broken with [[shear]]s.
=== Post-generation ===
Applying [[bone meal]] to warped [[nylium]] creates nether sprouts on that block and surrounding nylium, along with both types of [[roots]] and [[fungi]].
== Usage ==
[[File:RootsSproutsPlaceBlock.png|thumb|All of the blocks that nether sprouts can be placed on.]]
Nether sprouts can be planted on the same blocks that [[fungus|fungi]] and [[roots]] can be placed on: [[nylium]], [[soul soil]], [[Grass Block|grass]], [[podzol]], [[mycelium]], [[Moss Block|moss]], [[dirt]], [[coarse dirt]], [[rooted dirt]], and [[farmland]]. However, they cannot be planted in [[flower pot]]s.
=== Composting ===
Placing nether sprouts into a [[composter]] has a 50% chance of raising the compost level by 1.
== Sounds ==
{{Sound table/Block/Nether sprouts}}
== Data values ==
=== ID ===
{{edition|java}}:
{{ID table
|edition=java
|generatetranslationkeys=y
|showforms=y
|displayname=Nether Sprouts
|spritetype=block
|nameid=nether_sprouts
|foot=1}}
{{edition|bedrock}}:
{{ID table
|edition=bedrock
|firstcolumnname=Nether Sprouts
|shownumericids=y
|showforms=y
|generatetranslationkeys=y
|displayname=Block
|spritename=nether-sprouts
|spritetype=block
|nameid=nether_sprouts
|id=493
|form=block
|itemform=item.nether_sprouts}}
{{ID table
|displayname=Item
|spritename=nether-sprouts
|spritetype=item
|nameid=nether_sprouts
|id=621
|form=item
|translationkey=tile.nether_sprouts.name
|foot=1}}
== History ==
{{History|java}}
{{History||1.16|snap=20w06a|[[File:Nether Sprouts JE1 BE1.png|24px]] [[File:Nether Sprouts (texture) JE1 BE1.png|24px]] Added nether sprouts.}}
{{History|||snap=20w10a|[[File:Nether Sprouts JE2 BE2.png|24px]] [[File:Nether Sprouts (texture) JE2 BE2.png|24px]] The textures of the nether sprouts have now been changed.}}
{{History|||snap=20w15a|Nether sprouts can now be [[composter|composted]].}}
{{History|||snap=20w19a|Nether sprouts now only [[drops|drop]] if [[breaking|broken]] with [[shears]].}}
{{History|||snap=20w21a|[[File:Nether Sprouts (item) JE3 BE2.png|24px]] The [[inventory]] texture of the nether sprouts have now been changed.
|The [[block]] [[model]] of nether sprouts is now centered of the block rather than positioned randomly.}}
{{History||1.19.3|snap=22w44a|Nether sprouts now make sounds when being walked on.<ref>{{bug|MC-171621|||Fixed}}</ref>}}
{{History|bedrock}}
{{History||1.16.0|snap=beta 1.16.0.51|[[File:Nether Sprouts JE1 BE1.png|24px]] [[File:Nether Sprouts (texture) JE1 BE1.png|24px]] Added nether sprouts.}}
{{History|||snap=beta 1.16.0.57|Nether sprouts can now be [[composter|composted]].}}
{{History|||snap=beta 1.16.0.59|[[File:Nether Sprouts JE2 BE2.png|24px]] [[File:Nether Sprouts (item) JE3 BE2.png|24px]] The textures of the nether sprouts have now been changed.
|[[File:Nether Sprouts Glitched BE.png|32px]] Nether sprouts now appear with a glitched texture when [[breaking|broken]] in [[survival]] mode or when picking the [[block]] in [[creative]] mode. The [[item]] received is also nameless.<ref>{{bug|MCPE-74339}}</ref>}}
{{History|||snap=beta 1.16.0.63|Nether sprouts now give the [[player]] the correct item when broken in survival mode or when picking the block in creative mode.}}
{{History|foot}}
== Issues ==
{{issue list}}
== Trivia ==
* Unlike other warped "plants", nether sprouts don't have a crimson equivalent. This is also the case with [[nether wart]], which lacks a warped equivalent.
== References ==
{{Reflist}}
{{Blocks|vegetation}}
{{Items}}
[[Category:Nether blocks]]
[[Category:Fungi]]
[[Category:Natural blocks]]
[[Category:Non-solid blocks]]
[[de:Nethersprossen]]
[[de:Nethersprossen]]
[[es:Rastrojo del Nether]]
[[fr:Germes du Nether]]
[[ja:ネザースプラウト]]
[[pl:Netherowe kiełki]]
[[pt:Brotos do Nether]]
[[ru:Адские ростки]]
[[zh:下界苗]]</li><li>[[Popped Chorus Fruit|Popped Chorus Fruit]]<br/>{{Item
| image = Popped Chorus Fruit.png
| renewable = Yes
| stackable = Yes (64)
}}
'''Popped chorus fruit''' is an [[item]] obtained by [[smelting]] [[chorus fruit]], and used to craft [[End Rod|end rods]] and [[purpur blocks]]. Unlike raw chorus fruit, the popped fruit is inedible.
== Obtaining ==
=== Smelting ===
{{Smelting
|Chorus Fruit
|Popped Chorus Fruit
|0,1
}}
== Usage ==
=== Crafting ingredient ===
{{crafting usage}}
== Data values ==
=== ID ===
{{edition|java}}:
{{ID table
|edition=java
|showforms=y
|generatetranslationkeys=y
|displayname=Popped Chorus Fruit
|spritetype=item
|nameid=popped_chorus_fruit
|form=item
|foot=1}}
{{edition|bedrock}}:
{{ID table
|edition=bedrock
|showaliasids=y
|shownumericids=y
|showforms=y
|notshowbeitemforms=y
|generatetranslationkeys=y
|displayname=Popped Chorus Fruit
|spritetype=item
|nameid=popped_chorus_fruit
|aliasid=chorus_fruit_popped
|id=559
|form=item
|translationkey=item.chorus_fruit_popped.name
|foot=1}}
== History ==
{{History|java}}
{{History||1.9|snap=15w31a|[[File:Popped Chorus Fruit JE1 BE1.png|32px]] Added popped chorus fruit.
|Popped chorus fruit are used to craft [[purpur block]]s.}}
{{History|||snap=15w44b|Popped chorus fruit are now used to craft [[end rod]]s.}}
{{History||1.13|snap=17w47a|Prior to [[1.13/Flattening|''The Flattening'']], this [[item]]'s numeral ID was 433.}}
{{History|||snap=pre5|The ID of popped chorus fruit has now been changed to <code>popped_chorus_fruit</code>.}}
{{History||1.14|snap=18w43a|[[File:Popped Chorus Fruit JE2 BE2.png|32px]] The texture of popped chorus fruit has now been changed.}}
{{History|pocket}}
{{History||1.0.0|snap=alpha 0.17.0.1|[[File:Popped Chorus Fruit JE1 BE1.png|32px]] Added popped chorus fruit.}}
{{History|bedrock}}
{{History||1.10.0|snap=beta 1.10.0.3|[[File:Popped Chorus Fruit JE2 BE2.png|32px]] The texture of popped chorus fruit has now been changed.}}
{{History||1.16.100|snap=beta 1.16.100.56|The ID of popped chorus fruit has been changed from <code>chorus_fruit_popped</code> to <code>popped_chorus_fruit</code>.}}
{{History|console}}
{{History||xbox=TU46|xbone=CU36|ps=1.38|wiiu=Patch 15|[[File:Popped Chorus Fruit JE1 BE1.png|32px]] Added popped chorus fruit.}}
{{History||xbox=none|xbone=none|ps=1.90|wiiu=none|switch=none|[[File:Popped Chorus Fruit JE2 BE2.png|32px]] The texture of popped chorus fruit has now been changed.}}
{{History|new 3ds}}
{{History||1.7.10|[[File:Popped Chorus Fruit JE1 BE1.png|32px]] Added popped chorus fruit.}}
{{History|foot}}
== Issues ==
{{issue list}}
{{Items}}
[[cs:Vypukaný květ chorusu]]
[[de:Geplatzte Chorusfrucht]]
[[fr:Chorus éclaté]]
[[it:Frutto di chorus scoppiato]]
[[ja:焼いたコーラスフルーツ]]
[[ko:튀긴 후렴과]]
[[nl:Gepoft Chorusfruit]]
[[pl:Prażony owoc refrenusu]]
[[pt:Fruta do coro cozida]]
[[ru:Приготовленный плод коруса]]
[[zh:爆裂紫颂果]]
[[Category:Renewable resources]]</li></ul> | |||||
Issues
Issues relating to "Fire" are maintained on the bug tracker. Report issues there.
Trivia
- Sometimes, in survival, when the player walks into a fire briefly and walk out quickly enough, the player takes minor damage, but does not stay on fire.
- Fire uses two texture files, one for the inner fire and one for the outer fire.
- Each end crystal continuously generates a block of fire at its location, if the crystal is placed or generated in The End. This fire is incapable of spreading.
- While soul fire was not announced until MINECON Live 2019, a similar-looking blue fire was seen in the spin-off game Minecraft: Story Mode, several years earlier.
- Minecraft Dungeons also has a similar feature whenever a wraith attacks.
- There is also a purple fire seen in Minecraft Dungeons.
- Minecraft Dungeons also has a similar feature whenever a wraith attacks.
- Soul fire can not be placed on any other block other than soul sand or soul soil, even if it's placed with
/setblock.[Java Edition only] - Soul fire (or at least a blue fire) really exists and is caused by the burning of sulfur. Soul soil and soul sand, blocks on which soul fire is created, probably contain quantities of this element, as they are similar to volcanic ash.
Bedrock Edition
- Burning mobs have the same animation as Java, yet differently scaled.
- The fire spreading mechanic is based on how it would be prior to Java Edition Beta 1.6.
- The sides of the fire model in this edition are rotated like in versions before Java Edition 1.8
- When the player is on fire, there is a different burning animation on the screen than in Java Edition (it partially obstructs view when looking downward).
- Players with fire resistance do not visibly burn when in fire sources.
- Soul Fire can be placed on other blocks with
/setblock, but eventually extinguish.[Bedrock Edition only]
Gallery
Screenshots
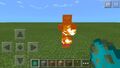
A burning zombie in Bedrock Edition emitting unique fire particles.

A fire spreading across several trees.
Fire as seen in a burning forest.
Invisible fire as seen in early Pocket Edition, and could burn up non-flammable blocks such as stone and dirt.
Animated render of the mob burning fire.
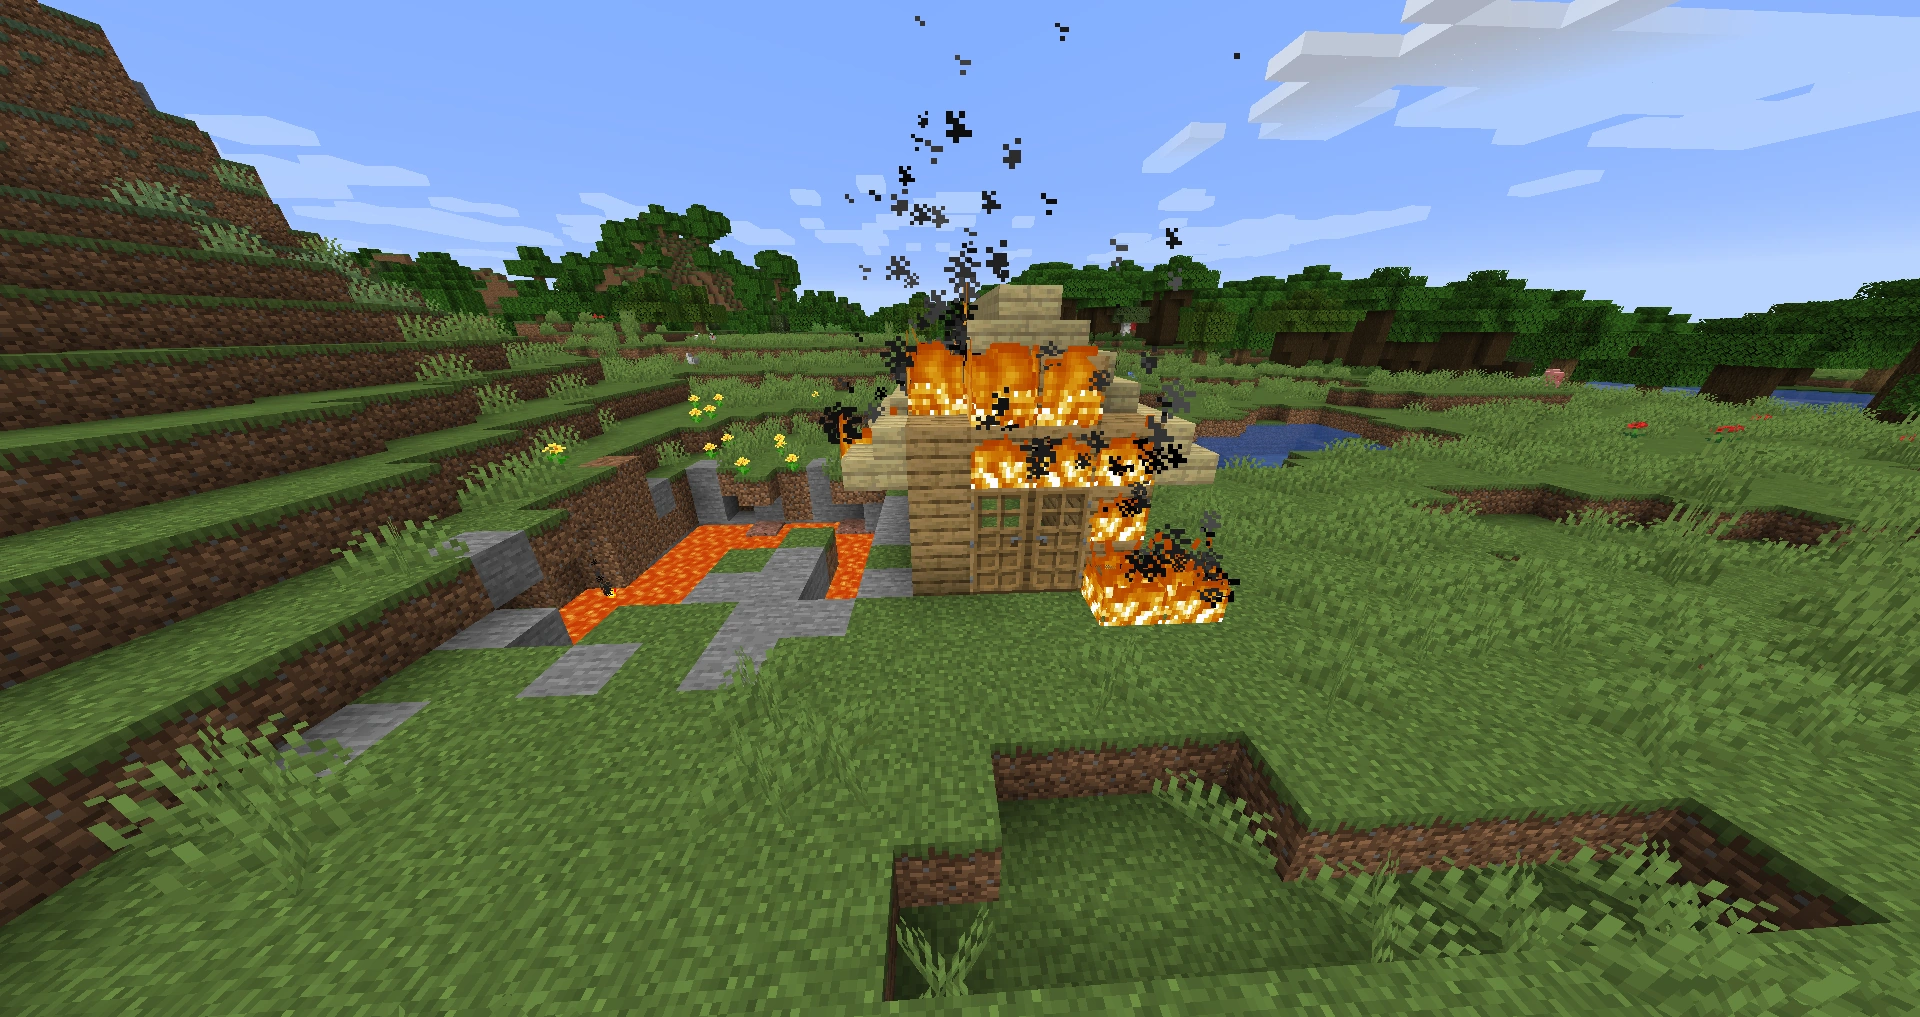

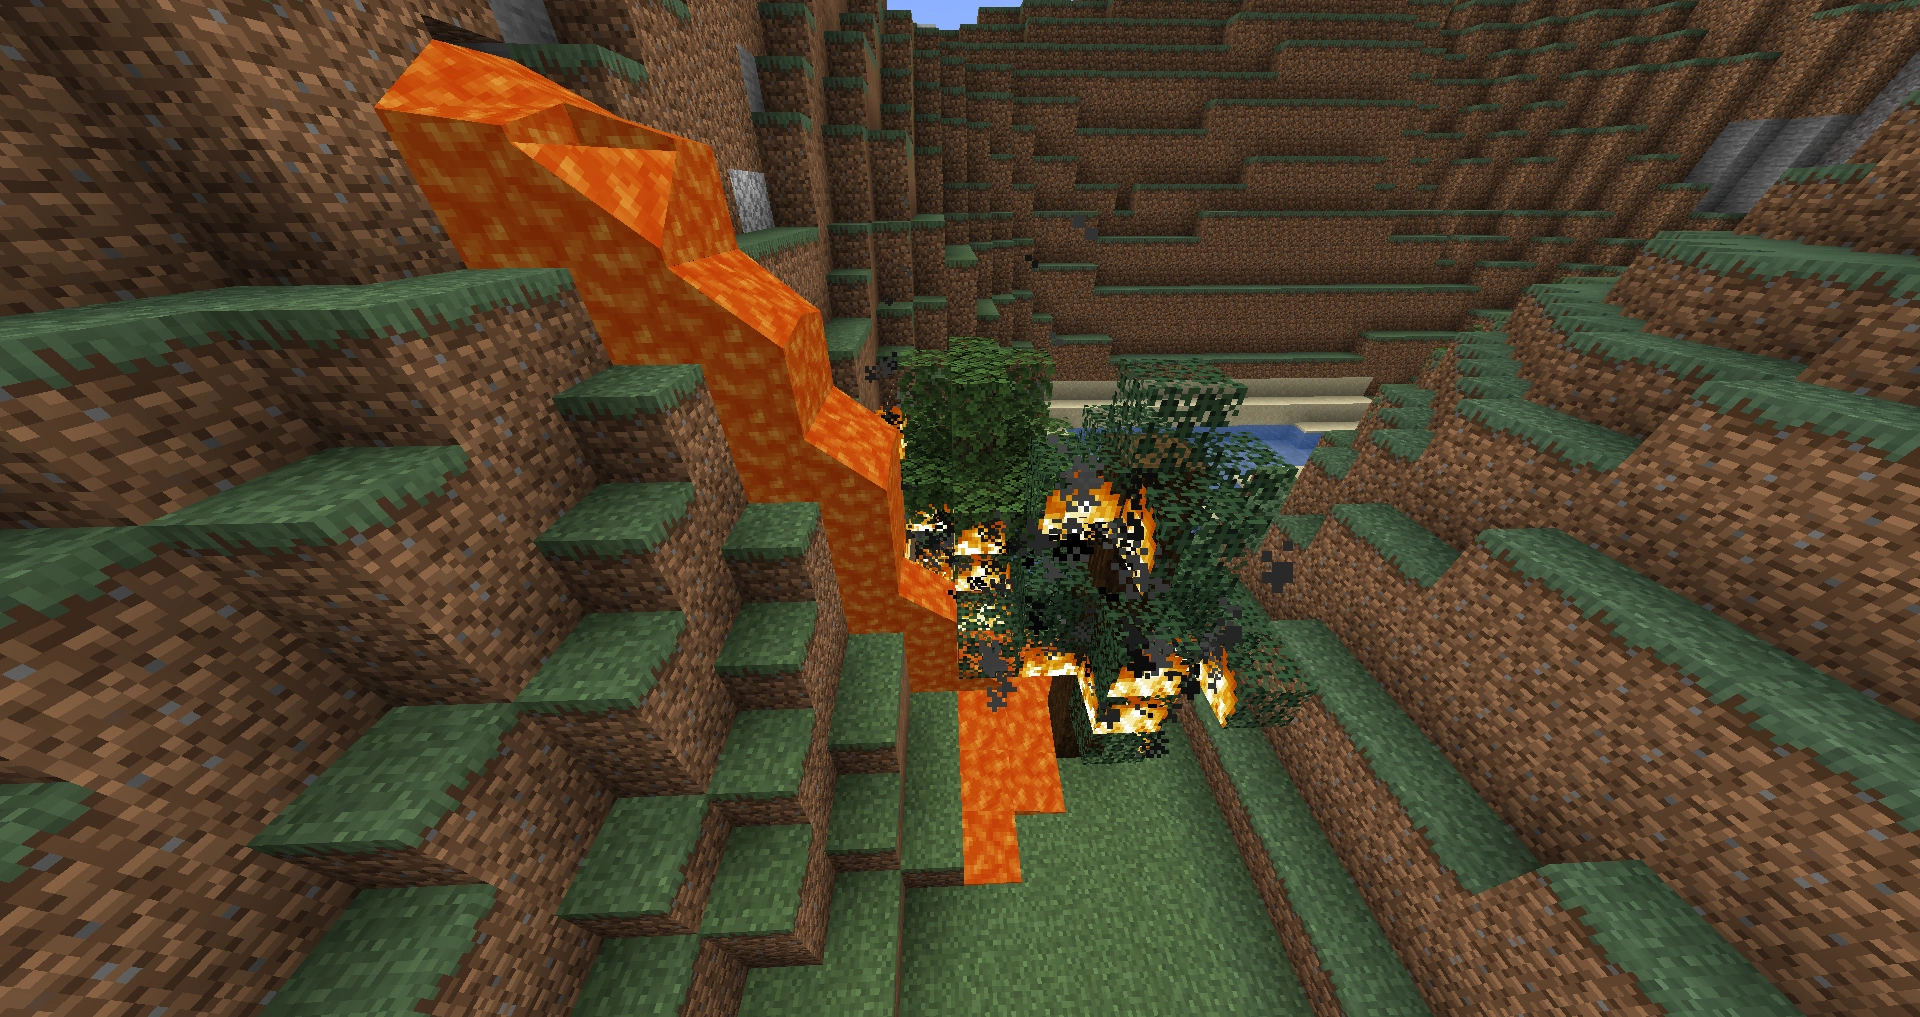
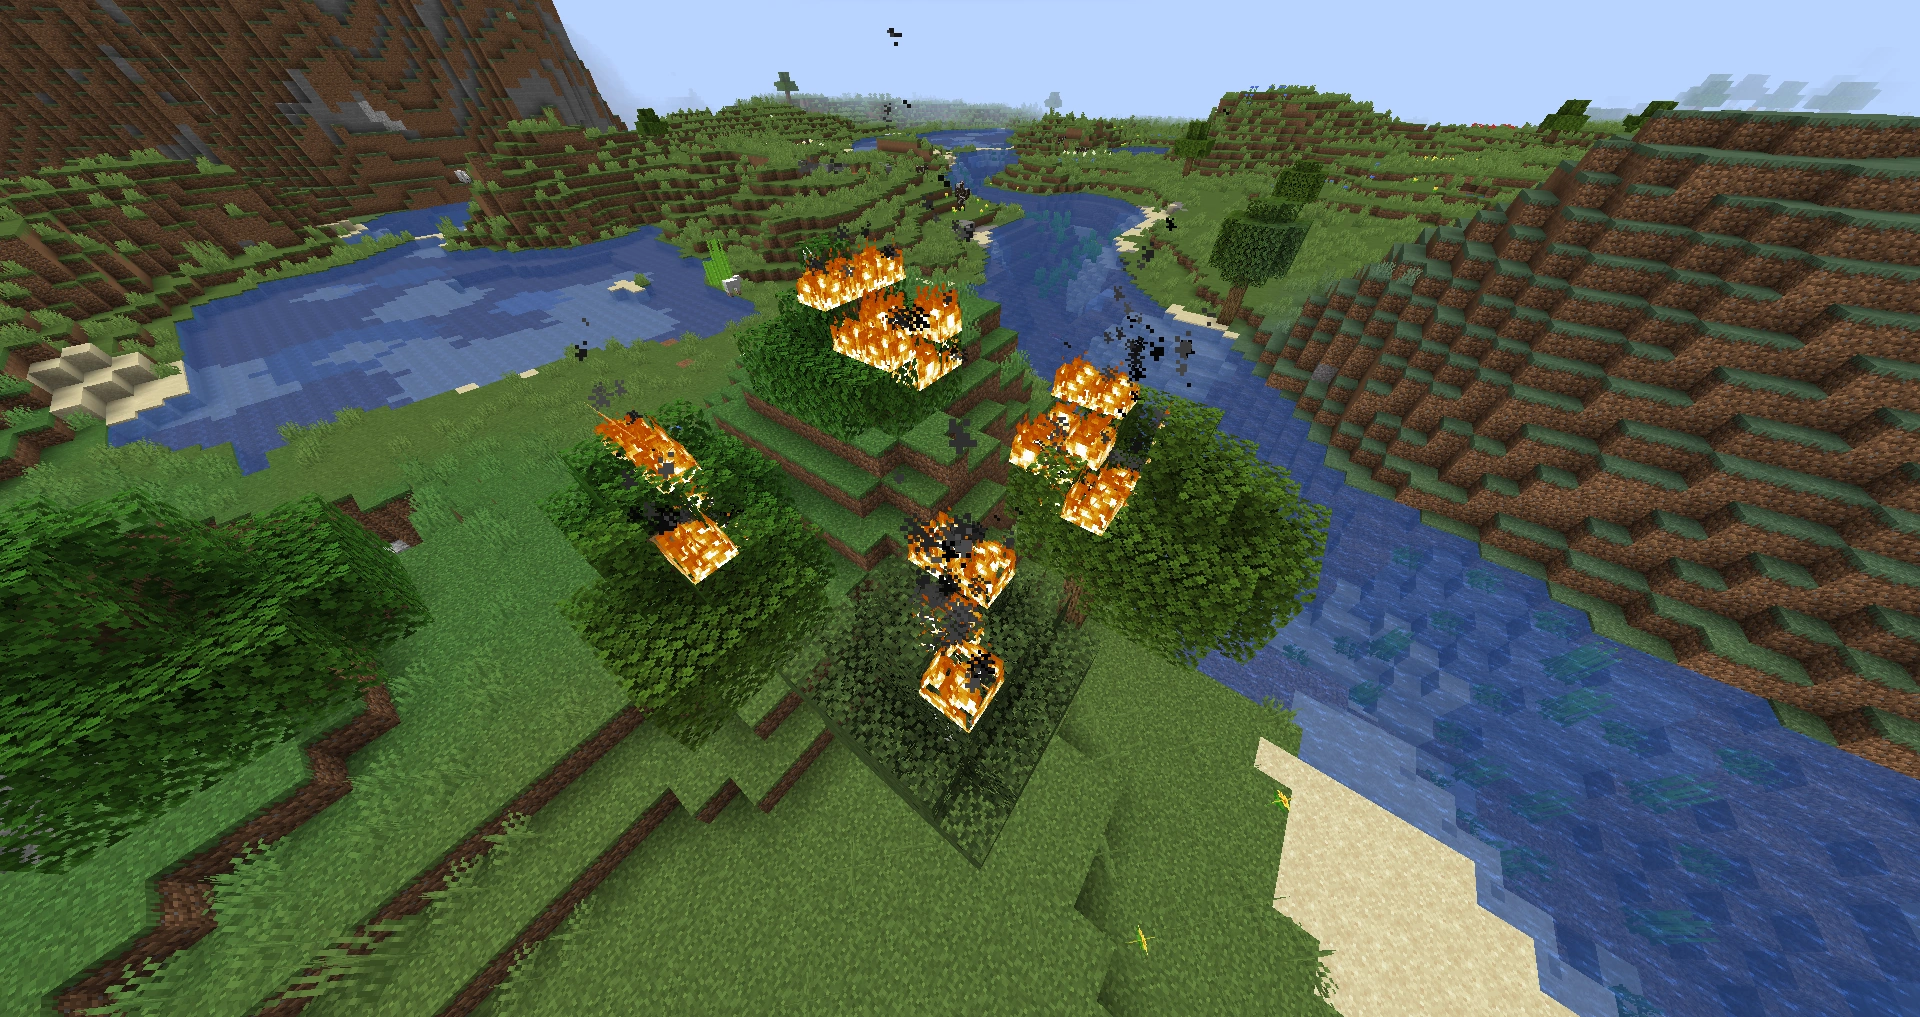

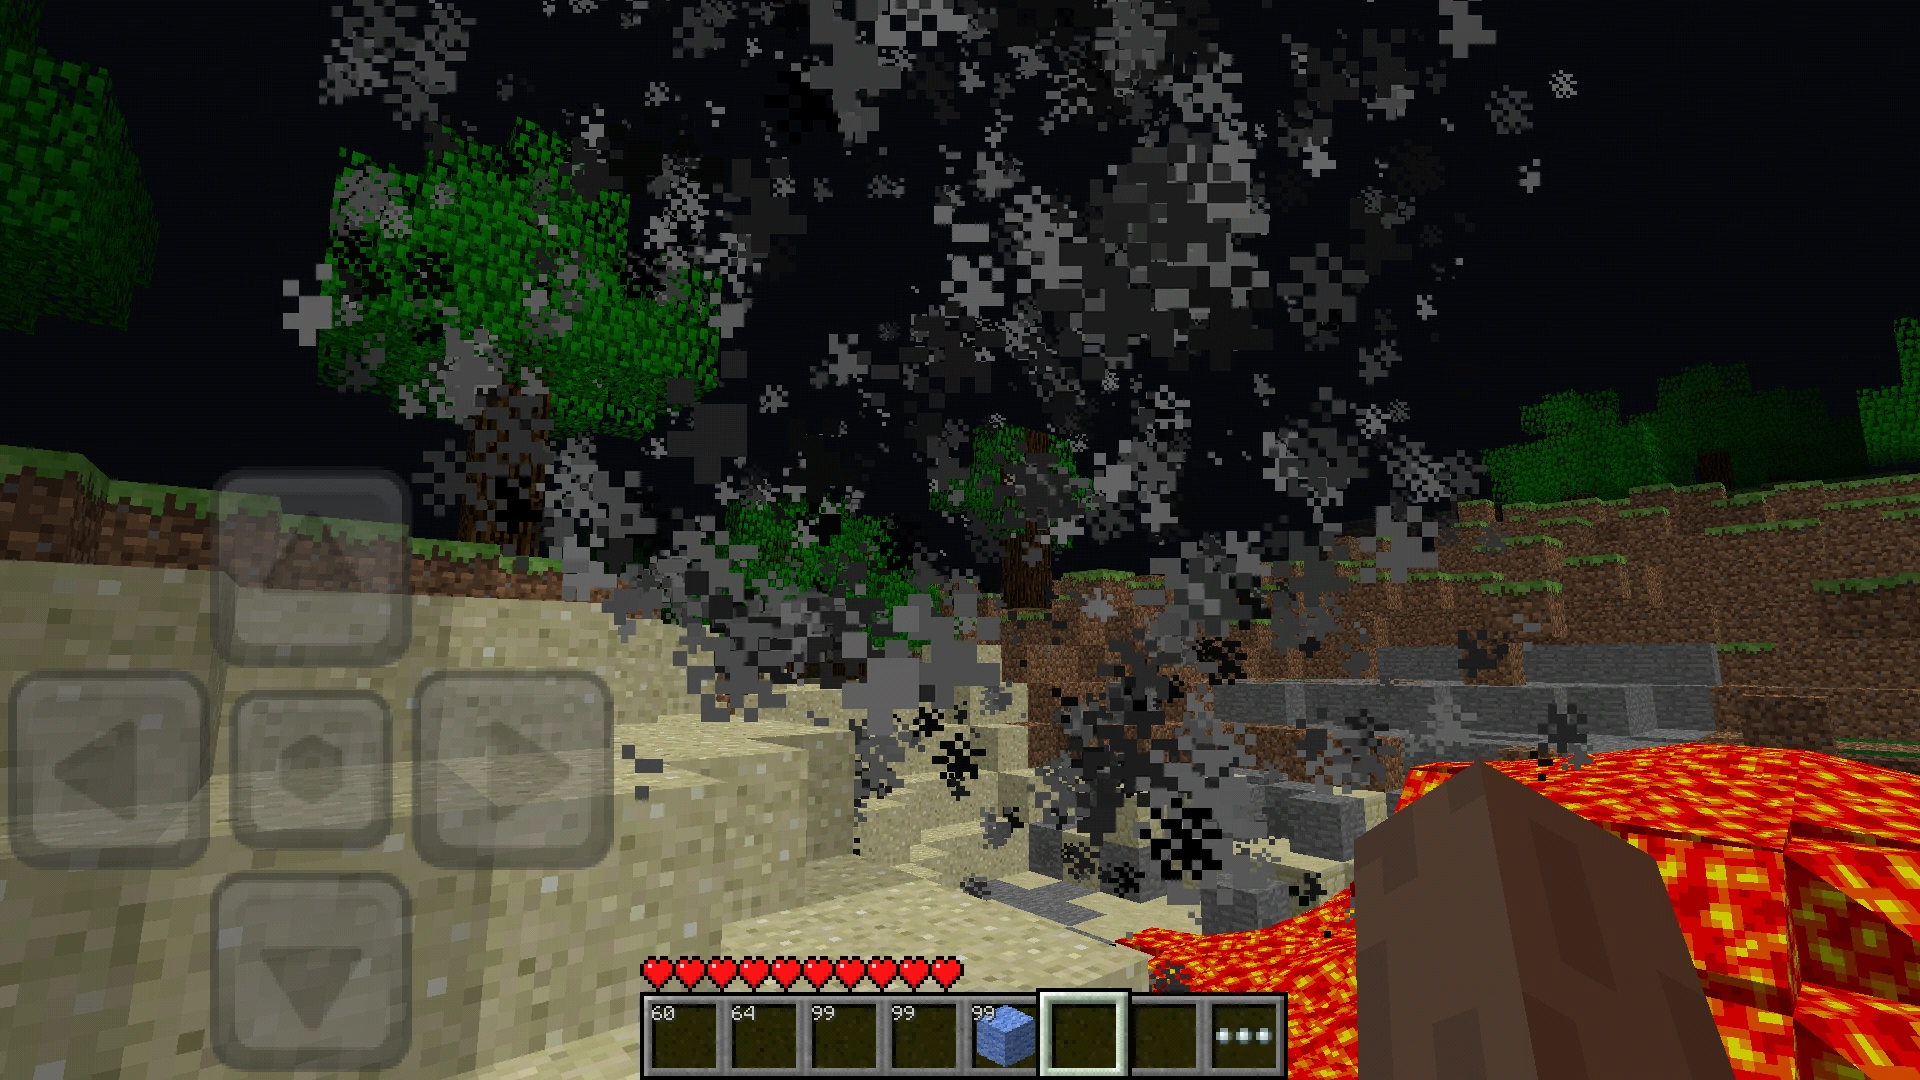
References