An Enderman (plural Endermen) is a unique three-block-high humanoid neutral mob that densely populates The End, however, Endermen will spawn occasionally in the Overworld where there is a light level of 7 or less. Endermen will turn hostile when provoked. They are known for their spooky presentation and behavior, their unique abilities to pick up blocks and teleport, and their vulnerability to water. They are the only source for Ender Pearls, (other than Stronghold chests) which are both useful in their own right and (trading notwithstanding) needed to craft Eyes of Ender, which are necessary to reach the The End realm.
Endermen can be provoked via an attack, but also become hostile towards players who merely look at them (placing the crosshairs on them). Endermen's lower legs can safely be looked at, but placing the crosshairs any higher, from up to 64 blocks away, will be considered provocation. When provoked, Endermen stand still, stare at the player with trembling, gaping mouths, and emit a long, loud, unsettling noise.
Endermen frequently spawn in The End, their home world, but they still require a light level of seven or less in order to spawn. They will also spawn in the Overworld, although about 10 times more rarely in comparison to other mobs. They spawn in pairs, and can be seen regularly at night in groups of up to five. However, they will very often teleport away carelessly, so you will most likely see only one or two at a time.
Appearance
Endermen have long limbs, thin bodies, black skin, glowing purple eyes, and emit the signature purple Ender particle effect (like Ender Chests, Nether Portals and Eyes of Ender). They are often seen holding blocks.
Behavior
Endermen always spawn in pairs, but sometimes pairs can mix and therefore appear to be a group, and likewise, one of the pair could teleport away, leaving a lone enderman. Endermen will take damage from coming in contact with water or rain.[1] They can step up one full block without having to jump.
Endermen are neutral mobs that don't attack unless provoked, similar to Zombie Pigmen and Wolves. They have a unique ability to pick up certain block types and move them around, which they generally spend their time doing while neutral. Aside from attacking, if the player simply passes their crosshairs over the head or body (upper legs in SSP), Endermen will proceed to attack. This "staring" provocation can occur from a surprisingly long distance, so take caution when scanning an open area, like Plains or a Desert.
When provoked, Endermen will open their mouths and shake with rage. They will do this on the Xbox 360 edition, though rarely (Most often seen when spawned in a two block high place, or when lit on fire and punched) They will continue to shake even when the game is paused. If they are, staring at their torso will stop them from moving, and you can go up to them and attack, at which point they will teleport behind you. Provoking an Enderman will cause the player to hear a lengthy, threatening sound. This sound is not linked to the Enderman's current state; it will continue to play if the Enderman is pacified by water or sunlight, or even killed. Conversely, when the sound ends, it does not mean that the Enderman is pacified.
Endermen will continue chasing a player until they are either killed, sustain several hits, or become distracted by exterior elements like rain or sun; Endermen are likely to teleport away to underground locations at day break.
In Creative mode, looking at Endermen will not provoke them. Attacking them, on the other hand, will provoke them, regardless of game mode, that was until the 1.7.2 Update when attacking them in creative mode won't provoke them.
If an aggravated Enderman is hit by another mob, for example, a Skeleton or the Ender Dragon, the enderman will cease attacking the player. [2]
Endermen can't see the player through transparent blocks such as glass/glass panes.
Teleportation
Endermen always attempt to teleport when attacked. Melee attacks are usually successful, but are followed by an immediate teleport, generally to a point a few blocks behind the attacking player. It is possible to hit Endermen with projectiles, but you have to be far enough away that your crosshairs are above them, not on them. Confirmed with bow with fire enchantment on Xbox 360 version. Endermen teleport when coming into contact with rain or water, and are pacified.
When teleporting, Endermen search for an air block within 32m (along each axis); if there is a solid block below that air block, they can teleport to it regardless of the downward distance. An Enderman can teleport onto nearly any solid block, exceptions being blocks directly beneath water or lava or blocks with less than 3 vertical spaces above.
An Enderman cannot teleport when it is in a minecart unless attacked or hit with rain, in which case it will teleport out of the minecart and then immediately teleport back (repeatedly until death, if rain continues long enough).
In Creative mode, if an Enderman gets stuck in a hole 3 blocks deep, and is aggressive, it will not be able to teleport out.
Endermen will not teleport in the day when it is on soul sand (of course it still will if it gets hurt!)
Endermen cannot be hurt by potions of harming, because they will teleport away before it hits the ground
Moving blocks
Endermen will only pick up and move certain blocks, regardless of whether they were natural or placed by the player. They will pick up blocks horizontally and vertically nearby, within 3 layers
Endermen will not drop the block they are holding when enraged or slain. It will simply disappear.
Endermen can only pick up the following blocks:[3]
Endermen cannot pick up entities, such as boats, minecarts, primed TNT, and mobs.
Because Endermen possess the ability to move blocks, they can cause damage to the natural environment and in some cases player-built structures. They can also allow fenced animals to jump out by placing blocks adjacent to fences. Their block handling is not purposeful, but they may randomly breach walls and the like.
In the Overworld, signs of Enderman activity will become apparent in frequently loaded chunks in the form of misplaced blocks. In desert areas, Endermen may also propagate cacti by removing blocks and placing them on fresh sand, gradually increasing the population of cacti in frequently loaded deserts.
Endermen do not spawn in well-lit areas, but they may wander or teleport into lit areas from adjacent dark ones, particularly if rain or water causes them to teleport. It can be risky to stay awake at night, as an Enderman can teleport into your house. This is more apparent in large buildings, where rain may cause the building to be invaded by multiple Endermen seeking shelter. Therefore, lighting your structures with torches is not a guaranteed defense. However, they will not teleport into areas where they won't fit, so two-block high ceilings will keep them out.
Strategy
Endermen are considered one of the most dangerous mobs in the game to fight. While initially neutral, they are easily provoked. They have more health (40 hit points) than any mob short of an Iron Golem (which has 100), and cause deadly amounts of damage (half the players health from full health in hard/hardcore difficulty). On top of that, they use their teleportation in combat—they often teleport behind the player to attack, or teleport out of sight only to reappear later for a surprise attack.
That said, they do have a few weaknesses that can be exploited: They take damage from water and rain on top of most of the usual sources, sunlight can turn them neutral (as does water or fire damage), and their height lets the player retreat to, or attack them from, a 2 block high shelter. Also, while their block-moving ability can be annoying, they don't use it purposefully: If they breach your defenses, it's by accident, and you need to strengthen your defenses.
Avoiding attack
There are only three ways to provoke an Enderman:
- Actually hit it, which is usually easy to avoid. Using potions against them, or pushing them off a cliff or into a trap, will not provoke them.
- Set off TNT with a flint and steel or flame bow. Setting it off with Dispensers or Redstone power won't provoke them.
- Look at its face/upper body with the crosshairs. Looking at them through transparent blocks such as glass or fences will not provoke them, so a windowed watchtower is safe. As well, a player wearing a pumpkin as a helmet can look at them safely, without provoking them. This can be very useful in The End. However, once provoked, a pumpkin will not prevent them from attacking, nor will the pumpkin help as armor.
As Endermen are 3 blocks tall, the player can keep his or her house's interior 2-2.5 blocks tall to prevent Endermen from teleporting into it. Due partly to their size, Endermen are usually only encountered in relatively open spaces. Although they will still spawn, you're much more likely to see other mobs in cramped caves underground, before you see any Endermen. When exploring caves, a player can often spot an Enderman in the darkness by its glowing eyes. A player can use this warning to avoid accidentally staring at them. In a cave, you can often retreat into a 2 block high area, or even build a small ceiling as shelter as soon as one is spotted.
Also, if the player is in a body of water, no closer than 2-3 blocks away from dry land, and at least one block deep, and provokes an Enderman, it will become aggressive, but rather than charge and attack when the player moves the crosshairs away, it will stand in one spot for at least 30 seconds, then either teleport into the water, take damage, and teleport away, or continue to stand in one spot. Also, if the player continuously stares at the Enderman for at least 30 seconds, it may teleport away, or try to attack, and then teleport away upon coming in contact with water. After at least 90–120 seconds, if the Enderman has not tried to attack or teleport away, it will turn neutral again.
If provoked under sunlight, Endermen will usually teleport away rather than attack the player. In any case, they will immediately become neutral. In rain, they will teleport randomly and rapidly, and even if provoked, they will not stay hostile.
Defense
If a player has accidentally provoked an Enderman, they have several options for turning them neutral and cutting off the fight:
- Endermen will become neutral and teleport away once they take damage from water, lava, fire, or any other environmental source (except fall damage). This makes a bucket of water/lava (or a Dispenser with a Bucket) very useful for chasing off an accidentally provoked Enderman, or for clearing out crowds in The End. Likewise, if the player retreating into water (beyond their attack range of 3-4 blocks), they will generally try to follow, but then take damage from the water, turn neutral, and teleport away. Similarly, Flint and Steel can put fire in their way, and they are likely to walk into the fire.
- Enchanted weapons can be useful: Hitting them with a Fire Aspect sword, or otherwise setting them on fire will also cause them to turn neutral and teleport rapidly. Using a Knockback sword to knock them into water or off a steep drop will effectively get rid of them.
- Luring them into sunlight or rain will likewise turn them neutral and make them go away. (If already provoked, you may need to attack or "look" at them in the sun.)
- When Endermen take damage from a Creeper explosion when following you, right after the blast they have a chance of teleporting away and back again, teleporting away and getting neutral, just getting neutral or still continuing to follow you.
- When you encounter Endermen in the desert, you can try hiding behind a cactus, or build some around you (try not to get hurt by them yourself). Unfortunately, they may teleport behind you instead of running into the cactus, or they may even pick the cactus up.
- If you're planning on using a trap for them, make a 3 deep hole with 1 extra block on top (not over the hole!), then make a 2 high way out, make a way back up and suffocate them with sand or gravel by placing it on the 1 extra block on top.
Combat
The most basic preparation against them is to build a 2-high ceiling, at least 3×3 in size. 4×4 is a little safer, giving more room to retreat out of their attack range. Underground or in close quarters, this should be done against a wall to prevent them from teleporting behind you. In an open area, it's probably better to have the shelter open on all sides, including removing any pillar used to build it. This will let you scan in all directions, and also keep watch for other monsters such as Skeletons or Creepers.
Hostile Endermen will often teleport away after a player hits them, though they may attack first. Similarly, Endermen may teleport away several seconds after attacking. Above or below ground, be very wary if they teleport away in the middle of a fight, as they may well teleport behind you (and attack) as soon as you emerge from your shelter. In open areas or under high ceilings, they may also teleport onto the roof. Endermen teleportation can be tracked by looking for the glowing particle trail they leave behind, or by listening for their snarls and screeches.
Their melee attacks hit hard enough that you want to avoid being hit by them as much as possible. Naturally, you'll want good armor and sword, preferably iron or better. For armor enchantments, only Protection and Thorns will be useful. For the sword, Sharpness and Knockback are both useful. However, Fire Aspect is useless for hunting them, as they will turn neutral and flee at the first strike.
A flint and steel is difficult to use effectively, but still rather useful, as the flame can damage them before they are provoked. Prior to 1.6.1, with care, lava can be used similarly. Before 1.6.1, Endermen that wander into fire or lava will not teleport away, nor will they become aggressive to the player. This can be used to weaken or kill them, though killing them will require they setting them on fire several times, due to their high hit points. One problem with this is that the drops might get destroyed by the lava.
In general, focus on hitting their legs, as they will not teleport when their legs are attacked. Try to time your attacks so that the Enderman is continually knocked back, so that it will not be able to hit you. This will usually kill them fairly quickly.
You can perform preemptive strikes against Endermen by keeping your crosshair over them, which will cause them to stay still for several seconds, or until the Enderman is hit, whichever comes first. A player can also get in the first hit by looking only at the Enderman's legs until they attack - though once hit, the Enderman will become aggressive as normal.
A height advantage of at least one block will also help keep the Enderman at bay as you hit it. A three block height advantage will prevent them from hitting you at all.
Fishing lures will hit an Enderman and snag them on the end of the line. However, the Enderman teleports away when the lure hits them (possibly behind a wall or into caves), so this is only sometimes useful as a tool for killing them. If do you manage to pull it forward, it will travel a remarkable distance.
Another effective way of hunting an Enderman is to make a 4-block high pillar underneath yourself, then look at them. The Enderman will run toward you and come into melee range. You will be in range to attack them, but they will not be in range to attack you. Make sure that there are no skeletons nearby (within 16 blocks), as they will shoot you off your pillar and make you a vulnerable target. If you can restrict the Enderman to a single square, you may also be able to drop three blocks of sand and gravel onto them, which will suffocate them to death.
Another technique is to have four or more wolves ready before attacking them. Fewer wolves can still help, but be ready to help them out with your own attacks, and/or by healing them during combat. Similarly, Iron golems will attack Endermen, and will kill one in two hits. Endermen will hit the iron golem once before the iron golem kills it.
If you are near a high drop, it is possible to kill Endermen by pushing them off the edge of a cliff. With care, this can be done without even provoking them. Note that Endermen cannot teleport while falling, so it may be possible to kill them with repeated attacks that knock them down the slope.
Endermen also cannot teleport when riding a minecart, even hitting them with an arrow will not cause the Enderman to teleport away (Though they will flash red and disappear for a second, as if trying to teleport unsuccessfully.) This is one potential way to kill them at a distance.[4]
Players with brewing capability can also use splash potions of poison against them. A level II potion, or two level I potions (waiting for the first to finish before using the second) can reduce them to 1 health, or nearly so. Then they can easily be killed with a single sword blow. Make sure to carry a milk bucket to cure self-inflicted poison, and be wary that it may take two hits to kill them if the potion(s) struck too far away (reducing their effect).
Video
Enderman/video
History
| b | |||||
|---|---|---|---|---|---|
| ? | At first, when Notch was still designing the Endermen, he thought they were not 'creepy' enough, coming with the idea that having a situation which the player would want to avoid could make the Enderman significantly more scary. This gave Notch the idea to implement the staring feature, where aiming the crosshair at the Enderman's face would cause a suspenseful moment in which breaking eye contact would trigger an attack, as well as the Enderman having the ability to teleport so that when the player has stared at the Enderman, he or she would have to face a consequence for that action.[5] | ||||
| According to Burnie Burns of Rooster Teeth Productions, the Endermen's weakness to water was suggested by Burnie's son when Notch mentioned that he needed to come up with a way to kill a group of Endermen.[6] | |||||
| ? | In the Beta 1.8 demo at PAX, Endermen dropped diamonds as a placeholder for Ender Pearls. | ||||
1.8pre1{{Extension DPL}}<ul><li>[[Blaze Powder|Blaze Powder]]<br/>{{Item
| image = Blaze Powder.png
| renewable = Yes
| stackable = Yes (64)
}}
'''Blaze powder''' is an item made from a [[blaze rod]], which is dropped by a [[blaze]] when killed. Its main uses are to fuel [[brewing stand]]s, to brew [[strength]] [[potions]], and to make [[eyes of ender]] to take the player to [[the End]].
== Obtaining ==
=== Crafting ===
{{Crafting
|Blaze Rod
|Output= Blaze Powder,2
|type= Brewing
}}
== Usage ==
=== Crafting Ingredient ===
{{crafting usage}}
=== Brewing stand fuel ===
In addition to being a [[brewing]] ingredient, blaze powder is needed to fuel a [[brewing stand]]. Each piece of blaze powder can brew up to 20 batches of [[Potion|potions]].
=== Brewing ingredient ===
{{brewing
|showname=1
|head=1
|Blaze Powder
|Mundane Potion
|base=Water Bottle
}}
{{brewing
|foot=1
|Blaze Powder
|Potion of Strength
}}
== Data values ==
=== ID ===
{{edition|java}}:
{{ID table
|edition=java
|showforms=y
|generatetranslationkeys=y
|displayname=Blaze Powder
|spritetype=item
|nameid=blaze_powder
|form=item
|foot=1}}
{{edition|bedrock}}:
{{ID table
|edition=bedrock
|shownumericids=y
|showforms=y
|notshowbeitemforms=y
|generatetranslationkeys=y
|displayname=Blaze Powder
|spritetype=item
|nameid=blaze_powder
|id=429
|form=item
|foot=1}}
== Video ==
{{Video note|This video does not mention that blaze powder must be used to fuel [[brewing stand]]s.|minor}}
<div style="text-align:center">{{yt|FSP2qBpe9vI}}</div>
==History==
{{History|java}}
{{History||1.0.0|snap=Beta 1.9 Prerelease 2|[[File:Blaze Powder JE1.png|32px]] Added blaze powder.
|Blaze powder can be used to craft [[eyes of ender]] and [[magma cream]].}}
{{History|||snap=Beta 1.9 Prerelease 3|Blaze powder can now be [[brewing|brewed]] in a [[water bottle]] to create a [[mundane potion]], or in an [[awkward potion]] to create a [[potion of Strength]].}}
{{History||1.2.1|snap=12w04a|Blaze powder can now be used to craft [[fire charge]]s.}}
{{History||1.3.1|snap=1.3|[[File:Blaze Powder JE2 BE1.png|32px]] The texture of blaze powder has been changed.}}
{{History||1.9|snap=15w42a|Blaze powder is now required to operate a [[brewing stand]].}}
{{History|||snap=15w43a|Blaze powder now [[fuel]]s 20 operations rather than 30.}}
{{History||1.13|snap=17w47a|Prior to [[1.13/Flattening|''The Flattening'']], this [[item]]'s numeral ID was 377.}}
{{History|pocket alpha}}
{{History||v0.12.1|snap=build 1|[[File:Blaze Powder JE2 BE1.png|32px]] Added blaze powder.
|Blaze powder can be used to craft [[magma cream]].
|Blaze powder is used as an ingredient to brew [[potion]]s.}}
{{History||v0.15.0|snap=build 1|Blaze powder is now used to craft [[fire charge]]s.}}
{{History|pocket}}
{{History||1.0.0|snap=alpha 0.17.0.1|Blaze powder is now used to craft [[eyes of ender]].}}
{{History|bedrock}}
{{History||1.2.0|snap=beta 1.2.0.2|Blaze powder is now required to operate a [[brewing stand]].}}
{{History|console}}
{{History||xbox=TU7|xbone=CU1|ps=1.00|wiiu=Patch 1|switch=1.0.1|[[File:Blaze Powder JE2 BE1.png|32px]] Added blaze powder.}}
{{History||xbox=TU46|xbone=CU36|ps=1.38|wiiu=Patch 15|Blaze powder is now required to operate a [[brewing stand]].}}
{{History|New 3DS}}
{{History||0.1.0|[[File:Blaze Powder JE2 BE1.png|32px]] Added blaze powder.}}
{{History|foot}}
== Issues ==
{{issue list}}
== See also ==
* [[The Nether]]
* [[Potions]]
== External Links ==
*[https://www.minecraft.net/en-us/article/taking-inventory--blaze-powder Taking Inventory: Blaze Powder] – Minecraft.net on November 25, 2021
{{Items}}
[[Category:Renewable resources]]
[[cs:Ohnivý prach]]
[[de:Lohenstaub]]
[[es:Polvo de blaze]]
[[fr:Poudre de Blaze]]
[[hu:Őrlángpor]]
[[ja:ブレイズパウダー]]
[[ko:블레이즈 가루]]
[[nl:Blazepoeder]]
[[pl:Płomienny proszek]]
[[pt:Pó de blaze]]
[[ru:Огненный порошок]]
[[th:ผงปีศาจไฟ]]
[[zh:烈焰粉]]</li><li>[[Bottle o' Enchanting|Bottle o' Enchanting]]<br/>{{ItemEntity
|image=Bottle o' Enchanting.gif
|imagesize=160px
|invimage=Bottle o' Enchanting
|stackable=Yes (64)
|renewable=Yes
|size=Height: 0.25 Blocks<br>Width: 0.25 Blocks
|rarity=Uncommon
|networkid='''[[JE]]''': 75
}}
A '''bottle o' enchanting''' is a throwable item that releases [[experience]] orbs on impact.
== Obtaining ==
=== Trading ===
Master-level cleric [[villager]]s sell bottles o' enchanting for 3 emeralds as part of their trade.
=== Natural generation ===
{{LootChestItem|bottle-o'-enchanting}}
== Usage ==
A bottle o' enchanting can be thrown by pressing {{control|use}}. On impact, it drops [[experience]] orbs worth {{xp|3|11}} (average 7.0) and sends out blue particles.
== Sounds ==
{{Edition|Java}}:<br>
Bottles o' enchanting use the Friendly Creatures sound category for entity-dependent sound events.
{{Sound table
|sound=Glass dig1.ogg
|sound2=Glass dig2.ogg
|sound3=Glass dig3.ogg
|subtitle=Bottle smashes
|source=neutral
|description=When a bottle o' enchanting impacts something
|id=entity.splash_potion.break
|translationkey=subtitles.entity.potion.splash
|volume=1.0
|pitch=0.9-1.0
|distance=16}}
{{Sound table
|rowspan=2
|sound=Bow shoot.ogg
|subtitle=Bottle thrown
|source=neutral
|description=When a bottle o' enchanting is thrown by a player
|id=entity.experience_bottle.throw
|translationkey=subtitles.entity.potion.throw
|volume=0.5
|pitch={{frac|1|3}}-0.5
|distance=16}}
{{Sound table
|subtitle=Dispensed item
|source=block
|description=When a bottle o' enchanting is dispensed from a [[dispenser]]
|id=block.dispenser.launch
|translationkey=subtitles.block.dispenser.dispense
|volume=1.0
|pitch=1.2
|distance=16
|foot=1}}
{{Edition|Bedrock}}:
{{Sound table
|type=bedrock
|sound=Glass dig1.ogg
|sound2=Glass dig2.ogg
|sound3=Glass dig3.ogg
|source=block
|description=When a splash potion impacts something
|id=random.glass
|volume=1.0
|pitch=1.0}}
{{Sound table
|rowspan=2
|sound=Bow shoot.ogg
|source=player
|description=When a splash potion is thrown by a player
|id=random.bow
|volume=0.5
|pitch=0.33-0.5}}
{{Sound table
|source=player
|description=When a splash potion is dispensed from a dispenser
|id=random.bow
|volume=1.0
|pitch=0.83-1.25
|foot=1}}
== Data values ==
=== ID ===
{{edition|java}}:
{{ID table
|edition=java
|firstcolumnname=Item
|showforms=y
|generatetranslationkeys=y
|displayname=Bottle o' Enchanting
|spritetype=item
|nameid=experience_bottle
|form=item
|foot=1}}
{{ID table
|edition=java
|firstcolumnname=Entity
|generatetranslationkeys=y
|displayname=Thrown Bottle o' Enchanting
|spritetype=entity
|spritename=Bottle o' Enchanting
|nameid=experience_bottle
|foot=1}}
{{edition|bedrock}}:
{{ID table
|edition=bedrock
|firstcolumnname=Item
|shownumericids=y
|showforms=y
|notshowbeitemforms=y
|generatetranslationkeys=y
|displayname=Bottle o' Enchanting
|spritetype=item
|nameid=experience_bottle
|id=508
|form=item
|foot=1}}
{{ID table
|edition=bedrock
|firstcolumnname=Entity
|shownumericids=y
|generatetranslationkeys=y
|displayname=Bottle o' Enchanting
|spritetype=entity
|nameid=xp_bottle
|id=68
|foot=1}}
=== Entity data ===
{{see also|Chunk format}}
Thrown bottles o' enchanting have entity data that define various properties of the entity.
{{/ED}}
== History ==
<!--When were dispensers made able to fire these? Or was this always a thing?-->
{{History|java}}
{{History||1.2.1|snap=12w04a|[[File:Bottle o' Enchanting JE1 BE1.png|32px]] Added bottles o' enchanting.
|Bottles o' enchanting can currently be obtained only in [[creative]] mode.}}
{{History||1.3.1|snap=12w21a|With the implementation of the [[trading]] system, the [[player]] can now trade with priest [[villager]]s to obtain 2–4 bottles o' enchanting for 1 [[emerald]].}}
{{History||1.8|snap=14w02a|With the trading revamp, villagers no longer [[trading|sell]] bottles o' enchanting, making them again unobtainable in regular [[survival]].}}
{{History|||snap=14w31a|Cleric [[villager]]s now sell bottles o' enchanting for 3–11 [[emerald]]s each, making them [[renewable resource|renewable]] again.}}
{{History||1.9|snap=15w49a|Bottles o' enchanting, like all projectiles, now take thrower's motion into account.}}
{{History||1.11|snap=16w32a|The entity ID has now been changed from <code>ThrownExpBottle</code> to <code>xp_bottle</code>.}}
{{History||1.13|snap=17w47a|Prior to [[1.13/Flattening|''The Flattening'']], this [[item]]'s numeral ID was 384.}}
{{History|||snap=18w11a|Bottles o' enchanting can now generate in [[shipwreck]] chests.}}
{{History|||snap=pre5|The entity ID has now been changed to <code>experience_bottle</code>.}}
{{History||1.14|snap=18w43a|[[File:Bottle o' Enchanting JE2 BE2.png|32px]] The texture of bottles o' enchanting has now been changed.}}
{{History|||snap=18w47a|Bottles o' enchanting can now generate in [[pillager outpost]] chests.}}
{{History||1.19|snap=22w13a|Bottles o' enchanting may now be found in [[ancient city]] [[chest]]s.}}
{{History|pocket alpha}}
{{History||v0.12.1|snap=build 1|[[File:Bottle o' Enchanting JE1 BE1.png|32px]] Added bottles o' enchanting.
|Due to the lack of [[trading]], bottles o' enchanting are currently available only in [[creative]] mode, similar to [[Java Edition 12w04a|12w04a]] when it was first released.}}
{{History|pocket}}
{{History||1.0.4|snap=alpha 1.0.4.0|With [[villager]] [[trading]] added, it is now possible to obtain bottles o' enchanting legitimately.}}
{{History||1.1.0|snap=alpha 1.1.0.0|The entity ID has now been changed from <code>potion.experience</code> to <code>xp_bottle</code>.}}
{{History|bedrock}}
{{History||1.4.0|snap=beta 1.2.14.2|Bottles o' enchanting can now be found inside [[shipwreck]] and [[buried treasure]] [[chest]]s.}}
{{History||1.10.0|snap=beta 1.10.0.3|Bottles o' enchanting can now be found in [[pillager outpost]] chests.
|[[File:Bottle o' Enchanting JE2 BE2.png|32px]] The texture of bottles o' enchanting has now been changed.}}
{{History||1.11.0|snap=beta 1.11.0.4|[[Trading]] has now been changed and bottles o' enchanting are now [[trading|sold]] by cleric [[villager]]s for 3 [[emerald]]s.}}
{{History|console}}
{{History||xbox=TU7|xbone=CU1|ps=1.0|wiiu=Patch 1|[[File:Bottle o' Enchanting JE1 BE1.png|32px]] Added bottles o' enchanting.
|Bottle o' enchanting can be found in the Miscellaneous tab in the [[Creative inventory]].}}
{{History||xbox=TU12|Moved bottle o' enchanting to the Brewing tab in the Creative inventory.}}
{{History|PS4}}
{{History||1.90|[[File:Bottle o' Enchanting JE2 BE2.png|32px]] The texture of bottles o' enchanting has now been changed.}}
{{History|3ds}}
{{History||0.1.0|[[File:Bottle o' Enchanting JE1 BE1.png|32px]] Added bottles o' enchanting.
|Bottles o' enchanting are not available within the [[Creative inventory]].}}
{{History||?|Added bottles o' enchanting to the Creative inventory.{{info needed|Which update did this occur?}}}}
{{History|foot}}
== Issues ==
{{issue list|Bottle o' Enchanting|Experience Bottle}}
== Gallery ==
<gallery>
Bottle O' Enchanting Splash.gif|Bottle o' enchanting splash animation on impact.
Bottle O' Enchanting villager.png|Players may trade with villagers to obtain bottles o' enchanting in survival mode.
</gallery>
{{Items}}
{{Entities}}
[[cs:Lektvar očarování]]
[[de:Erfahrungsfläschchen]]
[[es:Frasco con experiencia]]
[[fr:Fiole d'expérience]]
[[ja:エンチャントの瓶]]
[[ko:경험치 병]]
[[pl:Zaklęta butelka]]
[[pt:Frasco de experiência]]
[[ru:Зелье опыта]]
[[th:ขวดแห่งเวทมนตร์]]
[[zh:附魔之瓶]]</li></ul> | Endermen were added. | ||||
1.8{{Extension DPL}}<ul><li>[[Longer String|Longer String]]<br/>{{stub}}
{{Joke feature}}
{{exclusive|java}}
{{item
| image = Longer String.png
| rarity=Common
| renewable=Yes
| stackable=Yes (64)
}}
'''Longer string''' is a joke item from [[Java Edition 23w13a_or_b]].
==Obtaining==
===Crafting===
{{Crafting
|A1= String |B1= String
|Output= Longer String
|shapeless= 1
|ignoreusage=1
}}
==Data values==
===ID===
{{edition|java}}:{{ID table
|edition=java
|showforms=y
|generatetranslationkeys=y
|displayname=Longer String
|spritetype=item
|nameid=string2
|form=item|foot=1}}
==History==
{{History|java}}
{{History||23w13a_or_b|[[File:Longer String.png|32px]] Added longer string.}}
{{History|foot}}
{{items}}
{{Jokes}}
[[Category:Joke items]]
[[ja:Longer String]]
[[pt:Linha mais comprida]]</li><li>[[Iron Ingot|Iron Ingot]]<br/>{{About|the ingot|the ore|Iron Ore|the mineral block|Block of Iron|the nugget|Iron Nugget|the raw mineral|Raw Iron}}
{{Item
| image = Iron Ingot.png
|type=
| renewable = Yes
| stackable = Yes (64)
}}
'''Iron ingots''' are versatile [[metal]] ingots used extensively in [[crafting]].
== Obtaining ==
=== Chest loot ===
{{LootChestItem|iron-ingot}}
=== Crafting ===
{{Crafting
|head=1
|showname=0
|Block of Iron
|Output=Iron Ingot,9
|type=Material
}}
{{Crafting
|A1= Iron Nugget
|B1= Iron Nugget
|C1= Iron Nugget
|A2= Iron Nugget
|B2= Iron Nugget
|C2= Iron Nugget
|A3= Iron Nugget
|B3= Iron Nugget
|C3= Iron Nugget
|Output=Iron Ingot
|type= Material
|foot=1
}}
=== Smelting ===
{{see also|Iron Ore#Natural generation}}[[Smelting]] raw iron in a [[furnace]] or [[blast furnace]] is the most common way to obtain iron ingots.
{{Smelting
|head=1
|Iron Ore;Deepslate Iron Ore
|Iron Ingot
|0,7
}}
{{Smelting
|foot=1
|Raw Iron
|Iron Ingot
|0,7
}}
=== Compound creation ===
Iron Ingot can be created from its base [[element]]s, using the [[compound creator]].{{only|bedrock|education}}
{| class="wikitable"
!Name
!Elements
!Example recipe
|- <!-- Temporarily using crafting grid as a substitute for the compound creator (template not yet available), since the layout is the same, even if the appearance is different -->
!Iron Ingot
|Iron <br>
|{{Crafting Table
|shapeless= 1
|A2=Iron
|Output=Iron Ingot}}
|}
=== Mob loot ===
{{see also|Tutorials/Iron golem farming}}
[[Iron golem]]s drop 3-5 iron ingots upon death, regardless of the way they die. The looting enchantment does not increase the amount of iron ingots dropped.
[[Zombie]]s, [[husk]]s, and [[zombie villager]]s have a 2.5% ({{frac|1|40}}) chance of dropping either an iron ingot, [[carrot]], or [[potato]] when killed by a player or tamed wolf. This is increased by 1% ({{frac|1|100}}) per level of looting. This gives iron ingots the following chances of dropping:
* {{frac|1|120}} (about 0.83%)
* {{frac|7|600}} (about 1.17%) with Looting I
* {{frac|9|600}} (1.50%) with Looting II
* {{frac|11|600}} (about 1.83%) with Looting III
== Usage ==
=== Crafting ingredient ===
{{crafting usage}}
=== Trading ===
Apprentice-level Armorer, Toolsmith, and Weaponsmith [[Villager|villagers]] buy 3 iron ingots for an [[emerald]] as their third trade.{{only|bedrock}}
Apprentice-level Armorer villagers have a 50% chance to buy 4 iron ingots for one emerald, and apprentice-level Toolsmith and Weaponsmith villagers always offer to buy 4 iron ingots for one emerald.{{only|java}}
=== Repairing ===
Iron ingots are the repair items for the iron [[tier]] and chainmail and iron [[armor material]]s, and thus can be used to [[item repair|repair]] the following items in an [[anvil]]:
* {{ItemLink|Chainmail Helmet}}
* {{ItemLink|Chainmail Chestplate}}
* {{ItemLink|Chainmail Leggings}}
* {{ItemLink|Chainmail Boots}}
* {{ItemLink|Iron Helmet}}
* {{ItemLink|Iron Chestplate}}
* {{ItemLink|Iron Leggings}}
* {{ItemLink|Iron Boots}}
* {{ItemLink|Iron Sword}}
* {{ItemLink|Iron Axe}}
* {{ItemLink|Iron Pickaxe}}
* {{ItemLink|Iron Shovel}}
* {{ItemLink|Iron Hoe}}
=== Healing iron golems ===
{{control|Using}} an iron ingot on an [[iron golem]] restores its health by {{hp|25}}.
=== Beacons ===
Iron ingots can be used to select powers from a [[beacon]]. The player must select one of the available powers, and then insert an iron ingot in the item slot.
An iron ingot can be substituted for an [[emerald]], a [[gold ingot]], a [[diamond]], or a [[netherite ingot]].
=== Smithing ingredient ===
{{Smithing
|head=1
|ingredients=Any Armor Trim +<br/>Any Armor Piece + <br/>Iron Ingot
|Any Armor Trim Smithing Template
|Netherite Chestplate
|Iron Ingot
|Iron Trim Netherite Chestplate
|showdescription=1
|description = All armor types can be used in this recipe,<br/>a netherite chestplate is shown as an example.<br/>
|tail=1
}}
;Trim color palette
The following color palettes are shown on the designs on trimmed armor:
*{{TrimPalette|iron ingot}}
*{{TrimPalette|iron ingot|darker=1}} (a darker color palette is used when an iron armor piece is trimmed using an iron ingot).
== Achievements ==
{{load achievements|Acquire Hardware}}
== Advancements ==
{{load advancements|Acquire Hardware}}
== Data values ==
=== ID ===
{{edition|java}}:
{{ID table
|edition=java
|showitemtags=y
|showforms=y
|generatetranslationkeys=y
|displayname=Iron Ingot
|spritetype=item
|nameid=iron_ingot
|itemtags=beacon_payment_items
|form=item
|foot=1}}
{{edition|bedrock}}:
{{ID table
|edition=bedrock
|shownumericids=y
|showforms=y
|notshowbeitemforms=y
|generatetranslationkeys=y
|displayname=Iron Ingot
|spritetype=item
|nameid=iron_ingot
|id=305
|form=item
|foot=1}}
== History ==
{{History|java indev}}
{{History||0.31|snap=20100128|[[File:Iron Ingot JE1.png|32px]] Added iron ingots.}}
{{History|||snap=20100129|[[File:Iron Ingot JE2 BE1.png|32px]] The texture of iron ingots has been changed.
|Iron ingots can be [[smelting|smelted]] from [[iron ore]] and [[drops|drop]] 3–5 iron ingots.
|Iron ingots can be used to craft [[iron block]]s, [[flint and steel]] and iron [[sword]]s, [[shovel]]s, [[pickaxe]]s and [[axe]]s.}}
{{History|||snap=20100130|Iron ingots are now used to craft [[arrow]]s.|[[Iron block]]s now require 9 iron ingots (3×3) instead 4 (2×2) to be [[crafting|crafted]], making them much more expensive.}}
{{History||20100206|Iron ingots can now be used to [[crafting|craft]] iron [[hoe]]s.}}
{{History||?|[[Smelting]] now [[drops]] only 1 iron ingot (down from 3–5).}}
{{History||20100218|Iron ingots are now used to craft iron [[helmet]]s, [[chestplate]]s, [[leggings]] and [[boots]].}}
{{History|java infdev}}
{{History||20100615|Iron ingots are now used to craft [[bucket]]s.}}
{{History||20100618|Iron ingots are now used to craft [[rail]]s and [[minecart]]s.}}
{{History||20100625-2|Iron ingots can be found in [[dungeon]] [[chest]]s.}}
{{History|java alpha}}
{{History||v1.0.1|Iron ingots are now used to [[crafting|craft]] iron [[door]]s.}}
{{History||v1.0.14|Iron ingots are no longer used to craft [[arrow]]s.}}
{{History||v1.1.0|Iron ingots are now used to craft [[compass]]es.}}
{{History|java beta}}
{{History||1.5|Iron ingots are now used to craft [[detector rail]]s.}}
{{History||1.7|Iron ingots are now used to craft [[piston]]s and [[shears]].}}
{{History||1.8|snap=Pre-release|Iron ingots are found in the new [[stronghold]] storeroom and [[mineshaft]] [[chest]]s.
|Iron ingots are now used to craft [[iron bars]].}}
{{History|java}}
{{History||1.0.0|snap=Beta 1.9 Prerelease 2|Iron ingots are now used to craft [[cauldron]]s.}}
{{History|||snap=Beta 1.9 Prerelease 3|Iron ingots are now found in the new stronghold altar [[chest]]s.}}
{{History||1.1|snap=12w01a|Iron ingots are now found in [[village]] blacksmith chests.}}
{{History||1.2.1|snap=12w06a|[[Zombie]]s now rarely [[drops|drop]] iron ingots, making it a [[renewable resource]].}}
{{History|||snap=12w08a|[[Iron golem]]s now drop 3–5 iron ingots.}}
{{History||1.3.1|snap=12w21a|Added [[desert temple]]s, with a hidden [[chest]] room and loot containing iron ingots.
|Blacksmith [[villager]]s now [[trading|buy]] 8–9 iron ingots for 1 [[emerald]].}}
{{History|||snap=12w22a|Added [[jungle temple]]s, which contain loot [[chest]]s with iron ingots.
|Iron ingots are now used to craft [[tripwire hook]]s.}}
{{History||1.4.2|snap=12w32a|Iron ingots can be used to activate [[beacon]]s.}}
{{History|||snap=12w41a|Iron ingots are now used to craft [[anvil]]s.}}
{{History|||snap=12w42a|Anvils now need 4 iron ingots to [[craft]] instead of 1.}}
{{History||1.5|snap=13w01a|Iron ingots are now used to [[crafting|craft]] heavy [[weighted pressure plate]]s.}}
{{History|||snap=13w02a|Iron ingots are now used to craft [[hopper]]s and [[activator rail]]s.}}
{{History||1.6.1|snap=13w16a|Iron ingot is now used to craft iron [[horse armor]] and [[horse saddle]].}}
{{History|||snap=13w18a|Iron ingot is no longer used to craft iron [[horse armor]] and [[horse saddle]].|Iron ingots are now found in [[nether fortress]] [[chest]]s.}}
{{History||1.8|snap=14w02a|[[Trading]] for iron ingots has been changed: armorer, weapon smith and tool smith [[villager]]s now [[trading|buy]] 7–9 iron ingots for 1 [[emerald]].}}
{{History|||snap=14w07a|Iron ingots are now used to craft [[iron trapdoor]]s.}}
{{History||1.9|snap=15w31a|Iron ingots are now found in [[end city]] ship [[chest]]s.}}
{{History|||snap=15w33c|Iron ingots are now used to craft [[shield]]s.}}
{{History|||snap=15w44a|The average yield from [[dungeon]] and [[desert temple]] chests has been substantially decreased.
|The average yield from [[mineshaft]] and [[nether fortress]] chests has been slightly decreased.}}
{{History||1.11|snap=16w39a|Iron ingots are now found in the new [[woodland mansion]] chests.}}
{{History||1.11.1|snap=16w50a|Iron ingots are now used to craft [[iron nugget]]s.}}
{{History||1.13|snap=17w47a|Prior to [[1.13/Flattening|''The Flattening'']], this [[item]]'s numeral ID was 265.}}
{{History|||snap=18w10a|Iron ingots now generate in [[buried treasure]] [[chest]]s.}}
{{History|||snap=18w11a|Iron ingots can now be found in the chests of [[shipwreck]]s.}}
{{History||1.14|snap=18w43a|Iron ingots can now be used to craft [[crossbow]]s.
|[[File:Iron Ingot JE3 BE2.png|32px]] The texture of iron ingots has been changed.}}
{{History|||snap=18w47a|Iron ingots can now be found inside of loot [[chest]]s on top of [[pillager outpost]]s.}}
{{History|||snap=18w50a|Iron ingots can now be found in chests in [[village]] toolsmith houses.
|Iron ingots can now be used to craft a [[blast furnace]].}}
{{History|||snap=19w04a|Iron ingots can now be used to craft [[stonecutter]]s.}}
{{History||1.15|snap=19w41a|Iron ingots can now be used to heal [[iron golem]]s.}}
{{History||1.16|snap=20w16a|Iron ingots now generate in [[bastion remnants]] chests.
|Iron ingots are now used to craft [[chain]]s.}}
{{History||1.16.2|snap=20w30a|The average yield of iron ingots from bastion remnant chests has been slightly increased.}}
{{History||1.17|snap=21w08a|Iron ingots can now be smelted from [[deepslate iron ore]].}}
{{History|||snap=21w14a|Iron ingots can now be smelted from [[raw iron]].}}
{{History||1.20<br>(Experimental)|link=1.19.4|snap=23w04a|Iron ingots can now be used as an armor trim material.}}
{{History|||snap=23w05a|Iron ingots can now be trimmed with iron [[armor]].}}
{{History|pocket alpha}}
{{History||v0.2.0|[[File:Iron Ingot JE2 BE1.png|32px]] Added iron ingots. They are currently unobtainable and serve no purpose.}}
{{History||v0.3.2|Iron ingots are now obtainable by [[smelting]] iron ore in a [[furnace]].
|Iron ingots can be used to craft [[shears]], [[blocks of iron]] and iron [[pickaxe]]s, [[axe]]s, [[sword]]s and [[shovel]]s.}}
{{History||v0.4.0|Iron ingots are now used to craft [[flint and steel]] and iron [[hoe]]s.}}
{{History||v0.5.0|Iron ingots are now used to craft [[nether reactor core]]s.}}
{{History||v0.6.0|Iron ingots are now used to craft iron [[armor]].}}
{{History||v0.7.0|Iron ingots are now used to craft [[bucket]]s.}}
{{History||v0.8.0|snap=build 1|Iron ingots are now used to craft [[compass]]es and [[iron bars]].}}
{{History|||snap=build 2|Iron ingots are now used to craft [[minecart]]s and [[rail]]s.}}
{{History||v0.9.0|snap=build 1|Iron ingots can now be found in [[village]] blacksmith [[chest]]s, [[stronghold]] altar chests and [[dungeon]] chests.
|[[Zombie]]s now rarely drop iron ingots.}}
{{History||v0.12.1|snap=build 1|Iron ingots are no longer used to craft [[nether reactor core]]s and are instead dropped by it.
|Iron ingots are now used to craft [[anvil]]s.
|Iron ingots are now found in [[nether fortress]] chests.
|Added [[iron golem]]s, which [[drops|drop]] iron ingots.
|Iron ingots can now be used to repair iron [[tool]]s, [[armor]] and [[weapon]]s in [[anvil]]s.
|Added [[zombie villager]]s, which rarely drop iron ingots.}}
{{History||v0.13.0|snap=build 1|Iron ingots are now used to craft [[tripwire hook]]s, [[detector rail]]s, [[iron trapdoor]]s and heavy [[weighted pressure plate]]s.
|Added [[desert temple]]s, which have hidden [[chest]] rooms and loot containing iron ingots.}}
{{History||v0.14.0|snap=build 1|Iron ingots are now used to craft [[hoppers]] and [[cauldron]]s.
|Iron ingots can now be found in [[minecart with chest|minecart chests]] generated in [[mineshaft]]s.}}
{{History||v0.15.0|snap=build 1|Iron ingots are now used to craft [[piston]]s.
|Added [[jungle temple]]s, which have hidden [[chest]] rooms and main treasure rooms that have loot containing iron ingots.
|Added [[husk]]s, which rarely [[drops|drop]] iron ingots.}}
{{History||v0.16.0|snap=build 4|Iron ingots can now be used to activate [[beacon]]s.}}
{{History|pocket}}
{{History||1.0.0|snap=alpha 0.17.0.1|Iron ingots can now be found in [[end city]] ship [[chest]]s.
|Iron ingots can now be found in [[stronghold]] storeroom chests.}}
{{History||1.0.4|snap=alpha 1.0.4.0|Added [[trading]]—armorer, weaponsmith and toolsmith [[villager]]s now [[trading|buy]] 7–9 iron ingots for 1 [[emerald]].}}
{{History||1.1.0|snap=alpha 1.1.0.0|Iron ingots can now be [[crafting|crafted]] using [[iron nugget]]s.
|Iron ingots can now be used to [[crafting|craft]] iron nuggets.
|Iron ingots can now be found in [[woodland mansion]] [[chest]]s.}}
{{History|bedrock}}
{{History||1.4.0|snap=beta 1.2.14.2|Iron ingots now generate in [[buried treasure]] [[chest]]s.
|Iron ingots can now be found in [[shipwreck]] treasure chests.}}
{{History||1.8.0|snap=beta 1.8.0.10|Iron ingots can now be used to craft [[crossbow]]s.}}
{{History||1.10.0|snap=beta 1.10.0.3|Iron ingots can now be found inside [[pillager outpost]]s and plains [[village]]s' weaponsmith chests.
|Iron ingots can now be used to craft [[blast furnace]]s, [[stonecutter]]s and [[shield]]s.
|[[File:Iron Ingot JE3 BE2.png|32px]] The texture of iron ingots has been changed.}}
{{History||1.11.0|snap=beta 1.11.0.1|Iron ingots can now be found in [[village]] armorer and toolsmith [[chest]]s.
|Iron ingots can now be found in [[savanna]], [[taiga]], [[desert]] and [[snowy taiga]] village weaponsmiths.}}
{{History|||snap=beta 1.11.0.4|Armorer, toolsmith, and weaponsmith [[villager]]s now [[trading|buy]] 4 iron ingots for an [[emerald]].}}
{{History||1.16.0|snap=beta 1.16.0.57|Iron ingots now generate in bastion remnants chests.}}
{{History||1.17.0|snap=beta 1.16.230.52|Iron ingots can now be smelted from [[deepslate iron ore]].}}
{{History|||snap=beta 1.17.0.50|Iron ingots can now be smelted from [[raw iron]].}}
{{History||1.18.10|snap=beta 1.18.10.26|Iron ingots can now be used to heal iron golems.}}
{{History||1.19.80|snap=beta 1.19.80.21|Iron ingots can now be used as an armor trim material.}}
{{History|console}}
{{History||xbox=TU1|xbone=CU1|ps=1.0|wiiu=Patch 1|switch=1.0.1|[[File:Iron Ingot JE2 BE1.png|32px]] Added iron ingots.}}
{{History||xbox=none|xbone=none|ps=1.90|wiiu=none|switch=none|[[File:Iron Ingot JE3 BE2.png|32px]] The texture of iron ingots has been changed.}}
{{History|new3DS}}
{{History||0.1.0|[[File:Iron Ingot JE2 BE1.png|32px]] Added iron ingots.}}
{{History|foot}}
== Issues ==
{{issue list}}
== Trivia ==
* To craft each recipe once, a player would need 152 iron ingots, including 27 for the iron blocks in an [[anvil]], while using the extra tripwire hook for the [[crossbow]] and the [[iron nuggets]] for the [[chain]].
== See also ==
* {{BlockLink|Block of Iron}}
* {{ItemSprite|Iron Chestplate}} [[Iron armor]]
* {{ItemLink|Iron Nugget}}
* {{BlockLink|Iron Ore}}
* [[Ores]]
== External links ==
* {{Mcnet|taking-inventory--iron-ignot|Taking Inventory: Iron Ingot}}
{{Items}}
[[cs:Železný ingot]]
[[de:Eisenbarren]]
[[es:Lingote de hierro]]
[[fr:Lingot de fer]]
[[hu:Vasrúd]]
[[it:Lingotto di ferro]]
[[ja:鉄インゴット]]
[[ko:철괴]]
[[nl:IJzerstaaf]]
[[pl:Sztabka żelaza]]
[[pt:Barra de ferro]]
[[ru:Железный слиток]]
[[uk:Залізний зливок]]
[[zh:铁锭]]
[[Category:Renewable resources]]</li></ul> | The Enderman was officially introduced in Beta 1.8, "part one" of the Adventure Update.[7] | ||||
| In Beta 1.8pre1&2, Endermen originally had green eyes and emitted black smoke. The release of Beta 1.8 changed the eyes to purple and black smoke has been replaced with purple particles similar to the particles emitted from Nether portals. | |||||
| The blocks Endermen can pick up are now limited. In Beta 1.8 pre-releases, Endermen were able to pick up any block, including Bedrock. | |||||
1.9pre1{{Extension DPL}}<ul><li>[[:Category:Armor|Category:Armor]]<br/>[[Category:Items]]</li><li>[[Beetroot Soup|Beetroot Soup]]<br/>{{for|other uses|Soup}}
{{Item
| title = Beetroot Soup
| image = Beetroot Soup.png
| renewable = Yes
| heals = {{hunger|6}}
| stackable = No
}}
'''Beetroot soup''' is an unstackable [[food]] item.
== Obtaining ==
=== Crafting ===
{{Crafting
|Beetroot
|Beetroot
|Beetroot
|Beetroot
|Beetroot
|Beetroot
|Bowl
|Output=Beetroot Soup
|type=Foodstuff
}}
=== Natural generation ===
{{LootChestItem|beetroot-soup}}
== Usage ==
Beetroot soup can be eaten to restore {{hunger|6}} [[hunger]] points and 7.2 [[Hunger#Mechanics|saturation]], the same as [[cooked chicken]] and [[mushroom stew]]. After eating, the empty [[bowl]] remains, similarly to mushroom stew and [[rabbit stew]].
== Sounds ==
{{Sound table/Entity/Food}}
== Data values ==
=== ID ===
{{edition|java}}:
{{ID table
|edition=java
|showforms=y
|generatetranslationkeys=y
|displayname=Beetroot Soup
|spritetype=item
|nameid=beetroot_soup
|form=item
|foot=1}}
{{edition|bedrock}}:
{{ID table
|edition=bedrock
|shownumericids=y
|showforms=y
|notshowbeitemforms=y
|generatetranslationkeys=y
|displayname=Beetroot Soup
|spritetype=item
|nameid=beetroot_soup
|id=286
|form=item
|foot=1}}
== Advancements ==
{{load advancements|Husbandry;A Balanced Diet}}
== History ==
{{History|java}}
{{History||1.9|snap=15w31a|[[File:Beetroot Soup JE1 BE1.png|32px]] Added beetroot soup.}}
{{History||1.13|snap=17w47a|Prior to [[1.13/Flattening|''The Flattening'']], this [[item]]'s numeral ID was 436.}}
{{History||1.14|snap=18w43a|[[File:Beetroot Soup JE2 BE2.png|32px]] The texture of beetroot soup has been changed.
|The recipe for beetroot soup is now shapeless.}}
{{History|||snap=18w49a|Beetroot soup can now be found in [[chest]]s in [[snowy tundra]] [[village]] houses.}}
{{History|pocket alpha}}
{{History||November 14, 2013|link={{tweet|jbernhardsson|400902957782147072}}|[[Johan Bernhardsson]] posts an image of beetroot soup.}}
{{History||v0.8.0|snap=build 2|[[File:Beetroot Soup JE1 BE1.png|32px]] Added beetroot soup. It is not obtainable in the Creative inventory.}}
{{History||v0.9.0|snap=build 1|Beetroot soup now requires 6 [[beetroot]]s instead of 4.}}
{{History||v0.12.1|snap=build 12|Beetroot soup now restores {{hunger|6}} instead of {{health|8}}.}}
{{History||v0.13.0|snap=build 3|Beetroot soup can now be stacked.}}
{{history|pocket}}
{{History||1.0.0|snap=alpha 0.17.0.1|Beetroot soup has been added to the Creative inventory.<ref name="missing beetroot soup">{{Bug|MCPE-13804}}</ref>}}
{{History|bedrock}}
{{History||1.10.0|snap=beta 1.10.0.3|[[File:Beetroot Soup JE2 BE2.png|32px]] The texture of beetroot soup has been changed.
|The recipe for beetroot soup is now shapeless.}}
{{History||1.11.0|snap=beta 1.11.0.1|Beetroot soup can now be found in [[snowy tundra]] [[village]] house [[chest]]s.}}
{{History|console}}
{{History||xbox=TU43|xbone=CU33|ps=1.36|switch=1.0.1|wiiu=Patch 13|[[File:Beetroot Soup JE1 BE1.png|32px]] Added beetroot soup.}}
{{History||xbox=none|xbone=none|ps=1.90|wiiu=none|switch=none|[[File:Beetroot Soup JE2 BE2.png|32px]] The texture of beetroot soup has been changed.
|The recipe for beetroot soup is now shapeless.}}
{{History|new 3ds}}
{{History||0.1.0|[[File:Beetroot Soup JE1 BE1.png|32px]] Added beetroot soup.
|Beetroot soup is not available within the [[Creative inventory]].}}
{{History||?|Added beetroot soup to the Creative inventory.{{info needed|Which update did this occur?}}}}
{{History|foot}}
== Issues ==
{{issue list}}
== References ==
{{reflist}}
{{Items}}
[[Category:Food]]
[[Category:Renewable resources]]
[[de:Borschtsch]]
[[es:Estofado de remolacha]]
[[fr:Soupe de betteraves]]
[[it:Zuppa di barbabietole]]
[[ja:ビートルートスープ]]
[[ko:비트 수프]]
[[nl:Bietensoep]]
[[pl:Barszcz]]
[[pt:Ensopado de beterraba]]
[[ru:Свекольный суп]]
[[th:ซุปบีทรูท]]
[[uk:Борщ]]
[[zh:甜菜汤]]</li></ul> | Before this update, Endermen could be killed with the use of a bow. Afterwards, arrows, snowballs, eggs, and negative splash potions will not hit them due to the fact that they teleport away before impact. | ||||
| Enderman will teleport away and become neutral if the player pours water on a hostile Enderman. | |||||
1.9pre3{{Extension DPL}}<ul><li>[[:Category:Tools|Category:Tools]]<br/>[[Category:Items]]
[[fr:Catégorie:Outil]]
[[it:Categoria:Attrezzi]]</li><li>[[Pumpkin Pie|Pumpkin Pie]]<br/>{{redirect|Pie|the other craftable dessert|Cake|the terrain features|Pile}}
{{Item
| title = Pumpkin Pie
| image = Pumpkin Pie.png
| renewable = Yes
| heals = {{hunger|8}}
| stackable = Yes (64)
}}
'''Pumpkin pie''' is a [[food]] item that can be eaten by the [[player]].
== Obtaining ==
{{see also
| Tutorials/Pumpkin and melon farming |title1= Pumpkin and melon farming
| Tutorials/Sugar Cane farming |title2= Sugar cane farming
| Tutorials/Egg farming |title3= Egg farming
}}
=== Crafting ===
{{Crafting
|Pumpkin
|Sugar
|Egg
|Output= Pumpkin Pie
|type=Foodstuff
}}
=== Trading ===
Apprentice-level farmer [[villager]]s have a 50%{{only|bedrock}} or {{frac|2|3}}{{only|java}} chance to sell 4 pumpkin pies for an emerald as part of their trades.
{{in|java}}, farmer villagers throw pumpkin pies at players under the [[Hero of the Village]] effect.
=== Natural generation ===
{{LootChestItem|pumpkin-pie}}
== Usage ==
=== Food ===
{{see also|Tutorials/Hunger management|title1=Hunger management}}
To eat pumpkin pie, press and hold {{control|use}} while it is selected in the hotbar. Eating one restores {{hunger|8}} [[hunger]] and 4.8 [[:en:Hunger#Mechanics|saturation]].
=== Composting ===
Placing pumpkin pie into a [[composter]] raises the compost level by 1.
==Sounds==
{{Sound table/Entity/Food}}
== Advancements ==
{{load advancements|Husbandry;A Balanced Diet}}
== Data values ==
=== ID ===
{{edition|java}}:
{{ID table
|edition=java
|showforms=y
|generatetranslationkeys=y
|displayname=Pumpkin Pie
|spritetype=item
|nameid=pumpkin_pie
|form=item
|foot=1}}
{{edition|bedrock}}:
{{ID table
|edition=bedrock
|shownumericids=y
|showforms=y
|notshowbeitemforms=y
|generatetranslationkeys=y
|displayname=Pumpkin Pie
|spritetype=item
|nameid=pumpkin_pie
|id=284
|form=item
|foot=1}}
== Video ==
<div style="text-align:center">{{yt|IjeeTE117HM}}</div>
== History ==
{{History|java}}
{{History||September 11, 2012|link=http://twitter.com/jeb_/status/245503714167750656|The first screenshot of pumpkin pie was posted on [[Jens Bergensten|Jeb's]] Twitter.<ref>{{Tweet|jeb|245503714167750656}}</ref><ref>{{Tweet|jeb|245506498099298305}}</ref>}}
{{History||1.4.2|snap=12w37a|[[File:Pumpkin Pie JE1 BE1.png|32px]] Added pumpkin pies.}}
{{History||1.8|snap=14w02a|Pumpkin pie can now be [[trading|bought]] from farmer [[villager]]s, at 2–3 pumpkin pies for 1 [[emerald]].}}
{{History||1.13|snap=17w47a|Prior to [[1.13/Flattening|''The Flattening'']], this [[item]]'s numeral ID was 400.}}
{{History||1.14|snap=18w43a|[[File:Pumpkin Pie JE2 BE2.png|32px]] The texture of pumpkin pie has been changed.}}
{{History|||snap=18w50a|Pumpkin pies now generate in chests in taiga [[village]] houses.}}
{{History|||snap=19w03a|Placing pumpkin pie into the new [[composter]] raises the compost level by 1.}}
{{History|||snap=19w13a|Farmer villagers now give pumpkin pies to players under the [[Hero of the Village]] effect.}}
{{History|pocket alpha}}
{{History||v0.8.0|snap=build 1|[[File:Pumpkin Pie JE1 BE1.png|32px]] Added pumpkin pie.}}
{{History||v0.12.1|snap=build 1|Pumpkin pie now restores [[hunger]] instead of [[health]].}}
{{History|bedrock}}
{{History||1.10.0|snap=beta 1.10.0.3|[[File:Pumpkin Pie JE2 BE2.png|32px]] The texture of pumpkin pie has been changed.}}
{{History||1.11.0|snap=beta 1.11.0.1|Pumpkin pie can now be found in [[taiga]] and [[snowy taiga]] [[village]] house [[chest]]s.
|Pumpkin pie can now be used to fill up [[composter]]s.}}
{{History|||snap=beta 1.11.0.4|Farmer [[villager]]s now have a 50% chance to [[trading|sell]] 4 pumpkin pies for an [[emerald]].}}
{{History|console}}
{{History||xbox=TU14|xbone=CU1|ps=1.04|wiiu=Patch 1|switch=1.0.1|[[File:Pumpkin Pie JE1 BE1.png|32px]] Added pumpkin pie.}}
{{History||xbox=none|xbone=none|ps=1.90|wiiu=none|switch=none|[[File:Pumpkin Pie JE2 BE2.png|32px]] The texture of pumpkin pie has been changed.}}
{{History|New 3DS}}
{{History||0.1.0|[[File:Pumpkin Pie JE1 BE1.png|32px]] Added pumpkin pie.}}
{{History|foot}}
== Issues ==
{{issue list}}
== Gallery ==
<gallery>
File:Twitter Pumpkin Pie.png|The first screenshot of pumpkin pies, posted on Jeb's twitter.
</gallery>
== References ==
{{reflist}}
{{Items}}
[[cs:Dýňový koláč]]
[[de:Kürbiskuchen]]
[[es:Tarta de calabaza]]
[[fr:Tarte à la citrouille]]
[[it:Torta di zucca]]
[[ja:パンプキンパイ]]
[[ko:호박 파이]]
[[lzh:南瓜餅]]
[[nl:Pompoentaart]]
[[pl:Placek dyniowy]]
[[pt:Torta de abóbora]]
[[ru:Тыквенный пирог]]
[[zh:南瓜派]]
[[Category:Food]]
[[Category:Renewable resources]]</li></ul> | Notch stated "Endermen suck because they're annoying, and because I nerfed them and made them too easy. I shall fix this."[8] Because of this, Endermen were modified in this update to have 40 hp (instead of 20), requiring 6 hits (5 with all critical hits) from a diamond sword to kill, or 40 punches with just a fist. Combined with their teleportation aspect, Endermen are significantly more challenging. | ||||
1.9pre4{{Extension DPL}}<ul><li>[[Purple Dye|Purple Dye]]<br/>{{Item
| image = Purple_Dye_JE2_BE2.png
| renewable = Yes
| stackable = Yes (64)
}}
'''Purple dye''' is a [[Dyeing#Secondary colors|secondary dye color]] created by combining [[red dye]] and [[blue dye]] in a crafting grid.
== Obtaining ==
=== Crafting ===
{{Crafting
|head=1
|showname=0
|Blue Dye
|Red Dye
|Output=Purple Dye,2
|type=Material
}}
{{Crafting
|foot=1
|Lapis Lazuli
|Red Dye
|Output=Purple Dye,2
|description={{only|bedrock|education}}
|type=Material
}}
=== Trading ===
[[Wandering trader]]s sometimes sell 3 purple dye for an [[emerald]].
== Usage ==
{{dye usage}}
=== Crafting ingredient ===
{{crafting usage|ignore=Banner|continue=1}}
{{banner crafting usage}}
=== Loom ingredient ===
{{Banner loom usage|Purple Dye}}
=== Trading ===
Apprentice-level Shepherd villagers have a 20% chance to buy 12 purple dye for an emerald as part of their trades.{{only|bedrock}}
Expert-level Shepherd villagers have a {{frac|2|7}} chance to buy 12 purple dye for an emerald.{{only|java}}
== Data values ==
=== ID ===
{{edition|java}}:
{{ID table
|edition=java
|showforms=y
|generatetranslationkeys=y
|displayname=Purple Dye
|spritetype=item
|nameid=purple_dye
|form=item
|foot=1}}
{{edition|bedrock}}:
{{ID table
|edition=bedrock
|showaliasids=y
|shownumericids=y
|showforms=y
|notshowbeitemforms=y
|generatetranslationkeys=y
|displayname=Purple Dye
|spritetype=item
|nameid=purple_dye
|aliasid=dye / 5
|id=400
|form=item
|translationkey=item.dye.purple.name
|foot=1}}
== Video ==
<div style="text-align:center">{{yt|Cx52CGo5QnI}}</div>
== History ==
{{History|java beta}}
{{History||1.2|[[File:Purple Dye JE1 BE1.png|32px]] Added purple dye.}}
{{History|java}}
{{History||1.4.2|snap=12w34a|Added the ability to [[Armor#Dyeing|dye]] leather [[armor]] and [[wolf]] collars.}}
{{History||1.4.6|snap=12w49a|Purple dye can now be [[crafting|crafted]] with [[gunpowder]] to create a [[firework star]].}}
{{History||1.6.1|snap=13w19a|[[Stained clay]] can now be crafted.}}
{{history||1.7.2|snap=13w36a|With the addition of new [[flower]]s, many secondary and tertiary dyes are now primary [[dye]]s.}}
{{History|||snap=13w41a|[[Stained glass]] can now be crafted.}}
{{History||1.8|snap=14w02a|Due to [[lapis lazuli]] being [[renewable resource|renewable]] now, purple dye is also now renewable.}}
{{History|||snap=14w30a|Added [[banner]]s which can be dyed.}}
{{History||1.13|snap=17w47a|The different data values for the <code>dye</code> ID have now been split up into their own IDs.
|Prior to [[1.13/Flattening|''The Flattening'']], this [[item]]'s numeral ID was 351.}}
{{History||1.14|snap=18w43a|Purple dye is now [[crafting|crafted]] using [[blue dye]], instead of [[lapis lazuli]].
|[[File:Purple_Dye_JE2_BE2.png|32px]] The texture of purple dye has now been changed.}}
{{History|||snap=18w44a|Purple dye can now change the text color on [[sign]]s to purple.}}
{{History|||snap=19w05a|Added the [[wandering trader]], which sells purple dye.}}
{{History|||snap=19w11a|Purple dye can now be [[trading|bought]] by shepherd villagers.}}
{{History||1.17|snap=20w45a|Purple dye can now be used to craft [[purple candle]]s.}}
{{History|||snap=21w19a|Purple dye can no longer be used to craft purple candles.}}
{{History|||snap=Pre-release 1|Purple dye can once again be used to craft purple candles.}}
{{History||1.20<br>(Experimental)|link=1.19.3|snap=22w42a|Purple dye can now change the text color on [[hanging sign]]s to purple.}}
{{History|pocket alpha}}
{{History||v0.3.0|[[File:Purple Dye JE1 BE1.png|32px]] Added purple dye. It is currently unobtainable and serves no purpose.}}
{{History||v0.4.0|Purple dye is now [[craft]]able with rose red and lapis lazuli.
|Purple dye can now be used to craft purple [[wool]].}}
{{History||v0.6.0|Purple dye can now be used to dye [[sheep]].}}
{{History||v0.8.0|snap=build 1|Purple dye can now be used to craft [[magenta dye]].}}
{{History||v0.9.0|snap=build 11|Purple dye can now be used to craft colored [[terracotta]].}}
{{History||v0.11.0|snap=build 1|Purple dye can now be used to dye tamed [[wolf]] collars.}}
{{History||v0.14.0|snap=build 1|Purple dye can now be used to dye [[water]] in [[cauldron]]s.}}
{{History|pocket}}
{{History||1.0.0|snap=alpha 0.17.0.1|Purple dye can now be used to dye [[shulker]]s.}}
{{History||1.1.0|snap=alpha 1.1.0.0|Purple dye can now be used to craft [[concrete powder]], colored [[bed]]s and dyed [[shulker box]]es.}}
{{History|bedrock}}
{{History||1.2.0|snap=beta 1.2.0.2|Purple dye can now be used to craft [[firework star]]s, [[stained glass]] and patterns on [[banner]]s.}}
{{History||1.4.0|snap=beta 1.2.20.1|Purple dye can now be used to craft [[balloon]]s and [[glow stick]]s.}}
{{History||1.8.0|snap=beta 1.8.0.8|Purple dye can now be used to dye tamed [[cat]] collars.}}
{{History||1.10.0|snap=beta 1.10.0.3|Purple dye is now [[trading|sold]] by [[wandering trader]]s.
|Purple dye can now be used to dye white [[carpet]]s and undyed [[glass pane]]s.
|[[File:Purple_Dye_JE2_BE2.png|32px]] The texture of purple dye has now been changed.}}
{{History||1.11.0|snap=beta 1.11.0.4|Purple dye can now be [[trading|sold]] to shepherd [[villager]]s.}}
{{History||1.16.100|snap=beta 1.16.100.56|The ID of purple dye has been changed from <code>dye/5</code> to <code>purple_dye</code>.}}
{{History|console}}
{{History||xbox=TU1|xbone=CU1|ps=1.00|switch=1.0.1|wiiu=Patch 1|[[File:Purple Dye JE1 BE1.png|32px]] Added purple dye.}}
{{History|PS4}}
{{History||1.90|[[File:Purple_Dye_JE2_BE2.png|32px]] The texture of purple dye has now been changed.}}
{{History|new 3ds}}
{{History||0.1.0|[[File:Purple Dye JE1 BE1.png|32px]] Added purple dye.}}
{{History|foot}}
== Issues ==
{{issue list}}
{{Items}}
[[Category:Items]]
[[Category:Dyes]]
[[Category:Renewable resources]]
[[cs:Fialové barvivo]]
[[de:Violetter Farbstoff]]
[[es:Tinte morado]]
[[fr:Teinture violette]]
[[hu:Lila festék]]
[[ja:紫色の染料]]
[[ko:보라색 염료]]
[[nl:Paarse kleurstof]]
[[pl:Fioletowy barwnik]]
[[pt:Corante roxo]]
[[ru:Фиолетовый краситель]]
[[zh:紫色染料]]</li><li>[[:Category:Storage|Category:Storage]]<br/>Blocks and items used to '''store''' other blocks or items.
[[Category:Blocks]][[Category:Items]]
[[ja:カテゴリ:ストレージ]]
[[zh:Category:储物]]</li></ul> | The Endermen now have a realm of their own: the End, where they spawn frequently. | ||||
| Endermen used to burn in sunlight, but as of this update, Endermen won't burn in daylight. They will instead teleport away when the player walks up to them in the daytime, making it extremely hard to get close enough to kill them. | |||||
Sound Update{{Extension DPL}}<ul><li>[[Popped Chorus Fruit|Popped Chorus Fruit]]<br/>{{Item
| image = Popped Chorus Fruit.png
| renewable = Yes
| stackable = Yes (64)
}}
'''Popped chorus fruit''' is an [[item]] obtained by [[smelting]] [[chorus fruit]], and used to craft [[End Rod|end rods]] and [[purpur blocks]]. Unlike raw chorus fruit, the popped fruit is inedible.
== Obtaining ==
=== Smelting ===
{{Smelting
|Chorus Fruit
|Popped Chorus Fruit
|0,1
}}
== Usage ==
=== Crafting ingredient ===
{{crafting usage}}
== Data values ==
=== ID ===
{{edition|java}}:
{{ID table
|edition=java
|showforms=y
|generatetranslationkeys=y
|displayname=Popped Chorus Fruit
|spritetype=item
|nameid=popped_chorus_fruit
|form=item
|foot=1}}
{{edition|bedrock}}:
{{ID table
|edition=bedrock
|showaliasids=y
|shownumericids=y
|showforms=y
|notshowbeitemforms=y
|generatetranslationkeys=y
|displayname=Popped Chorus Fruit
|spritetype=item
|nameid=popped_chorus_fruit
|aliasid=chorus_fruit_popped
|id=559
|form=item
|translationkey=item.chorus_fruit_popped.name
|foot=1}}
== History ==
{{History|java}}
{{History||1.9|snap=15w31a|[[File:Popped Chorus Fruit JE1 BE1.png|32px]] Added popped chorus fruit.
|Popped chorus fruit are used to craft [[purpur block]]s.}}
{{History|||snap=15w44b|Popped chorus fruit are now used to craft [[end rod]]s.}}
{{History||1.13|snap=17w47a|Prior to [[1.13/Flattening|''The Flattening'']], this [[item]]'s numeral ID was 433.}}
{{History|||snap=pre5|The ID of popped chorus fruit has now been changed to <code>popped_chorus_fruit</code>.}}
{{History||1.14|snap=18w43a|[[File:Popped Chorus Fruit JE2 BE2.png|32px]] The texture of popped chorus fruit has now been changed.}}
{{History|pocket}}
{{History||1.0.0|snap=alpha 0.17.0.1|[[File:Popped Chorus Fruit JE1 BE1.png|32px]] Added popped chorus fruit.}}
{{History|bedrock}}
{{History||1.10.0|snap=beta 1.10.0.3|[[File:Popped Chorus Fruit JE2 BE2.png|32px]] The texture of popped chorus fruit has now been changed.}}
{{History||1.16.100|snap=beta 1.16.100.56|The ID of popped chorus fruit has been changed from <code>chorus_fruit_popped</code> to <code>popped_chorus_fruit</code>.}}
{{History|console}}
{{History||xbox=TU46|xbone=CU36|ps=1.38|wiiu=Patch 15|[[File:Popped Chorus Fruit JE1 BE1.png|32px]] Added popped chorus fruit.}}
{{History||xbox=none|xbone=none|ps=1.90|wiiu=none|switch=none|[[File:Popped Chorus Fruit JE2 BE2.png|32px]] The texture of popped chorus fruit has now been changed.}}
{{History|new 3ds}}
{{History||1.7.10|[[File:Popped Chorus Fruit JE1 BE1.png|32px]] Added popped chorus fruit.}}
{{History|foot}}
== Issues ==
{{issue list}}
{{Items}}
[[cs:Vypukaný květ chorusu]]
[[de:Geplatzte Chorusfrucht]]
[[fr:Chorus éclaté]]
[[it:Frutto di chorus scoppiato]]
[[ja:焼いたコーラスフルーツ]]
[[ko:튀긴 후렴과]]
[[nl:Gepoft Chorusfruit]]
[[pl:Prażony owoc refrenusu]]
[[pt:Fruta do coro cozida]]
[[ru:Приготовленный плод коруса]]
[[zh:爆裂紫颂果]]
[[Category:Renewable resources]]</li><li>[[Tag (item)|Tag (item)]]<br/>{{About|the April Fools item|the standard item used to rename mobs|Name Tag}}
{{wip}}
{{joke feature}}
{{exclusive|java}}
{{Item
| title = Tag
| image = Tag.png
| renewable = Yes
| stackable = Yes (64)
}}
Tags and Bits are items exclusive to the [[Java Edition 23w13a or b|23w13a_or_b]] [[Easter eggs#April Fools|April Fools' joke]] snapshot from 2023. They are used to craft in-game representations of [[NBT format|NBT tags]].
==Obtaining==
A [[stonecutter]] can be used to cut a [[Name Tag|name tag]] into either 16 "Name" or 16 "Tag" items. These can be cut into 16 Bit items each.
{{Stonecutting
|head=1
|showdescription=1
|Name Tag
|Name, 16; Tag, 16
|description=The resulting "Name" items must be named in an [[anvil]].
}}
{{Stonecutting
|showdescription=
|Name; Tag
|Bit, 16
|foot=1
}}
To be able to proceed from here the <code>nbt_crafting</code> vote must be approved. Bits can be used in a crafting table to craft Left Curly, Right Curly, Left Square, and Right Square. In appears like these are the only tag items that can be crafted from Bits.
A [[Crafting Table|crafting table]] can be used to convert a "Tag" item into a "Byte Tag." The amount of [[stick]]s added to the crafting recipe specifies the value of the Byte, as a [[wikipedia:Signed number representations#Two's complement|signed 8-bit value]]. For example, a "Tag" and a full stack of sticks make a Byte with the value <code>64b</code>, while 255 sticks result in <code>-1b</code>. Only one of the sticks is consumed. Two Bytes can be crafted into a "Short Tag" (equivalent to 16 bit), two Shorts into an "Int Tag" (equivalent to 32 bit), and two Ints into a "Long Tag" (equivalent to 64 bit). Many other combinations that form either 16, 32, or 64 bit are possible. For example, two Shorts and an Int make a Long. When combining values, their digits are stuck together in the given order, e.g. <code>1b</code> and <code>0b</code> make <code>256s</code> (equivalent to 0100<sub>16</sub> in [[wikipedia:Hexadecimal|hexadecimal]]). Undoing any of these crafting actions in e.g. a stonecutter is not possible.
"Float" and "Double Tags" can be crafted by adding one or two [[boat]]s to any numeric tag. A "String Tag" is crafted with a "Tag" and a piece of [[string]].
{{Crafting
|head=1
|showdescription=1
|A1= Bit; ; Bit; Bit |B1= ; Bit; Bit; Bit
|A2= ; Bit; Bit; |B2= Bit; ; ; Bit
|A3= Bit; ; Bit; Bit |B3= ; Bit; Bit; Bit
|Output= Right Curly; Left Curly; Left Square; Right Square
|ignoreusage=1
}}
{{Crafting
|Tag
|String
|Output= String Tag
|description=String tags must be named in an [[anvil]] to set their value.
|ignoreusage=1
}}
{{Crafting
|Tag; Tag; Tag
|; Stick; Stick, 64
|; ; Stick, 63
|Output= Byte Tag; Byte Tag; Byte Tag
|description=Only 1 stick is consumed. 128 and more sticks make [[wikipedia:Signed number representations#Two's complement|two's complements]]:
128 sticks = <code>-128b</code><br>
129 sticks = <code>-127b</code><br>
⋮<br>
254 sticks = <code>-2b</code><br>
255 sticks = <code>-1b</code>
|ignoreusage=1
}}
{{Crafting
|Byte Tag; Byte Tag; Byte Tag
|Byte Tag; Byte Tag; Byte Tag
| ; Byte Tag; Byte Tag
| ; Byte Tag; Byte Tag
| ; ; Byte Tag
| ; ; Byte Tag
| ; ; Byte Tag
| ; ; Byte Tag
|Output= Short Tag; Int Tag; Long Tag
|description=Shorts and Ints can be combined the same way, even mixed.
Digits are appended, e.g. two <code>1b</code> tags make <code>257b</code> (0101<sub>16</sub> in [[wikipedia:Hexadecimal|hexadecimal]]).
|ignoreusage=1
}}
{{Crafting
|Byte Tag; Short Tag; Int Tag; Long Tag
|Any Boat; Any Boat; Any Boat; Any Boat
|Output= Float Tag; Float Tag; Float Tag; Float Tag
|ignoreusage=1
}}
{{Crafting
|Byte Tag; Short Tag; Int Tag; Long Tag
|Any Boat; Any Boat; Any Boat; Any Boat
|Any Boat; Any Boat; Any Boat; Any Boat
|Output= Double Tag; Double Tag; Double Tag; Double Tag
|ignoreusage=1
}}
{{Crafting
|Left Curly; Left Curly
|Name; Name
|Byte Tag; Byte Tag
|Right Curly; Name |; Byte Tag | |; Name |; Byte Tag |; Right Curly
|Output= Compound Tag; Compound Tag
|description=Instead of Bytes any other tag can be used, including other compound tags.
|ignoreusage=1
}}
{{Crafting
|Left Square; Left Square
|Byte Tag; Byte Tag
|Right Square; Byte Tag |; Byte Tag |; Byte Tag |; Byte Tag |; Byte Tag |; Byte Tag |; Right Square
|Output= List Tag; List Tag
|description=Instead of Bytes any other tag can be used, including other list tags.
|ignoreusage=1
}}
{{Crafting
|Compound Tag; List Tag
|Compound Tag; List Tag
|Output= Compound Tag; List Tag
|description=Up to 9 can be combined.
When compound tags contain identical names, only the latest of the corresponding values is used.
|ignoreusage=1
|foot=1
}}
"Name" and "String Tags" must be named in an [[anvil]] before they can be used. Unnamed Names and Strings always produce a "Sssyntax Error". None of the other tag items can be named.
All these items can be combined in a crafting table to form a short sequence of JSON code, as long as the resulting syntax is valid. For example:
*A pair of Curlies that enclose a named "Name" item and some value, e.g. a Byte, create a "Compound Tag" with the content <code>{Example:0b}</code>.
**Because of the limited size of the crafting table only 3 name-value pairs can be put between Curlies at a time. Compound Tags of any length can be created by concatenating two or more Compound Tags.
**An empty pair of Curlies produces an empty Compound Tag with the content <code>{}</code>.
*A pair of Square brackets that enclose any number of values, e.g. 7 Bytes, create a "List Tag" with the content <code>[0b,0b,0b,0b,0b,0b,0b]</code>.
**Because of the limited size of the crafting table only 7 values can be put between Square brackets at a time. List Tags of any length can be created by concatenating two or more List Tags.
**An empty pair of Square brackets produces an empty List with the content <code>[]</code>.
**"Name" items cannot be used in a List.
The resulting Compound and List Tags can be used as values in other Compound and List Tags, as deeply nested as you want.
==Usage==
Tags appear to have no further functionality. They cannot be eaten or placed in the world, except in an item frame, as each other item can. However, Compound Tags with values like <code>{Enchantments:[{id:"minecraft:sharpness",lvl:127b}]}</code> will show the [[Enchanting|enchantment]] glint and actually act accordingly when used.<ref>https://www.reddit.com/r/Minecraft/comments/129xdyl/i_figure_out_how_the_nbtcrafting_in_the_vote/</ref> This appears to work with many weapon and tool [[Enchanting#Summary of enchantments by item|enchantments]].
In theory, an extremely lucky <code>replace_recipe_output</code> vote can change the crafting recipe for compound tags to output something else. When cheats are enabled you can test this with a command like <code>/vote rule minecraft:replace_recipe_output approve {key:"minecraft:compound_tag",value:"minecraft:netherite_sword"}</code>. However, as long as this vote is approved no other compound tag can be crafted. Use <code>/vote rule minecraft:replace_recipe_output repeal *</code> to undo all recipe replacements.
In combination with the <code>midas_touch</code> vote tag items can be converted into [[Gold Ingot|gold ingots]]. These retain their NBT data. When the world is loaded in another version of the game tag items disappear, but gold ingots persist.
==Trivia==
*This implies that a [[Name Tag|name tag]] is 128 bit.
*Compound and list tags are special in so far that the value they show in their [[tooltip]] is not merely a property of the item, but their ''actual'' [[NBT format|NBT data]]. This is also the reason why naming them is disabled as that would mess up the NBT data.
*The snapshot also contains an [[History of textures/Unused textures|unused texture]] for an {{ItemLink|End Tag}}.
==History==
{{History|java}}
{{History||23w13a_or_b|[[File:Tag.png|32px]] Added tags.}}
{{History|foot}}
==Gallery==
<gallery>
Tag.png|Tag
Bit.png|Bit
Byte Tag.png|Byte Tag
Double Tag.png|Double Tag
End Tag.png|End Tag
Float Tag.png|Float Tag
Int Tag.png|Int Tag
Left Curly.png|Left Curly
Left Square.png|Left Sqaure
List Tag.png|List Tag
Long Tag.png|Long Tag
Name (23w13a or b).png|Name
Right Curly.png|Right Curly
Right Square.png|Right Square
Short Tag.png|Short Tag
Sssyntax Error.png|Sssyntax Error
String Tag.png|String Tag
</gallery>
== References ==
{{reflist}}
{{items}}
{{jokes}}
[[pt:Tag (item)]]
[[Category:Joke items]]</li></ul> | Before the Sound Update, Endermen used the sound effects of Zombies as a place holder. Then in Beta 1.9, the Zombie sounds for the Enderman were removed. On November 13th, 2011 Endermen received their own audio scheme, most notably a long moan overlaid with static for when they are triggered hostile by the player. The noises are actually a person saying 'Hi' and 'What's Up' backwards and distorted.[9][10] | ||||
| r | |||||
1.3.1{{Extension DPL}}<ul><li>[[Egg|Egg]]<br/>{{About|chicken eggs|the similar item that spawns mobs|Spawn egg|other uses}}
{{ItemEntity
|image=Egg.png
|renewable=Yes
|stackable=Yes (16)
|size=Height: 0.25 Blocks<br>Width: 0.25 Blocks
}}
An '''egg''' is an [[item]] that can be used to craft [[food]] items, or thrown for a chance to spawn [[chick]]s on impact.
== Obtaining ==
=== Mob loot ===
{{see also|Tutorials/Egg farming}}
A [[chicken]] drops an egg item every 5–10 minutes. The theoretical average would be expected at 1 egg every 7.5 minutes, or 0.1333 eggs per minute.
A [[fox]] sometimes spawns holding an egg, which it always drops upon death. Alternatively, a player dropping a food item causes the fox to drop the egg.
=== Chest loot ===
{{LootChestItem|egg}}
== Usage ==
=== Crafting ingredient ===
{{crafting usage}}
=== Combat ===
Players are able to throw eggs and deal knockback to [[mob]]s (but not other players{{only|JE|short=1}}<ref>{{bug|MC-3179|||WAI}}</ref>{{until|JE Combat Tests}}), but no damage is dealt, similar to a [[snowball]]. Likewise, throwing eggs at [[neutral mobs]] provokes them. Eggs can also be fired from [[dispenser]]s and are affected by gravity.
=== Spawning chickens ===
When thrown by a dispenser or by pressing the {{control|use}} button, an egg has a {{fraction|1|8}} (12.5%) chance of spawning a [[chick]]. If this occurs, there is a {{fraction|1|32}} (3.125%) chance of spawning three additional chicks (on average, 1 out of every 256 eggs spawns 4 chicks). In other words, whenever an egg is thrown, there is a {{fraction|31|256}} chance of spawning 1 chick and a {{fraction|1|256}} chance of spawning four chicks.
The expected value of the number of chicks an egg produces is {{fraction|35|256}} or 13.7%. This means that on average, a chick is spawned every 7.3 eggs, a stack of 16 eggs spawns 2.188 chicks, and a full inventory including the hotbar and off-hand (<code>37 * 16 = 592</code> eggs) is expected to spawn approximately 81 chicks.
== Sounds ==
{{Edition|Java}}:<br>
Thrown eggs use the Friendly Creatures sound category for entity-dependent sound events.
{{Sound table
|rowspan=2
|sound=Bow shoot.ogg
|subtitle=Egg flies
|source=player
|description=When an egg is thrown
|id=entity.egg.throw
|translationkey=subtitles.entity.egg.throw
|volume=0.5
|pitch={{frac|1|3}}-0.5
|distance=16}}
{{Sound table
|subtitle=Dispensed item
|source=block
|description=When a dispenser shoots an egg
|id=block.dispenser.launch
|translationkey=subtitles.block.dispenser.dispense
|volume=1.0
|pitch=1.2
|distance=16}}
{{Sound table
|sound=Chicken plop.ogg
|subtitle=Chicken plops
|source=Friendly Creatures
|description=When an egg is laid by a chicken
|id=entity.chicken.egg
|translationkey=subtitles.entity.chicken.egg
|volume=1.0
|pitch=0.8-1.2
|distance=16
|foot=1}}
{{Edition|Bedrock}}:
{{Sound table
|type=bedrock
|rowspan=2
|sound=Bow shoot.ogg
|source=player
|description=When an egg is thrown
|id=random.bow
|volume=0.5
|pitch=0.33-0.5}}
{{Sound table
|source=player
|description=When a dispenser shoots an egg
|id=random.bow
|volume=1.0
|pitch=0.83-1.25}}
{{Sound table
|sound=Chicken plop.ogg
|source=neutral
|description=When an egg is laid by a chicken
|id=mob.chicken.plop
|volume=1.0
|pitch=0.8-1.2
|foot=1}}
== Data values ==
=== ID ===
{{edition|java}}:
{{ID table
|edition=java
|showforms=y
|generatetranslationkeys=y
|displayname=Egg
|spritetype=item
|nameid=egg
|form=item
|foot=1}}
{{ID table
|edition=java
|showentitytags=y
|generatetranslationkeys=y
|displayname=Thrown Egg
|spritetype=entity
|spritename=Egg
|nameid=egg
|entitytags=impact_projectiles
|foot=1}}
{{edition|bedrock}}:
{{ID table
|edition=bedrock
|shownumericids=y
|showforms=y
|notshowbeitemforms=y
|generatetranslationkeys=y
|displayname=Egg
|spritetype=item
|nameid=egg
|id=390
|form=item
|foot=1}}
{{ID table
|edition=bedrock
|shownumericids=y
|generatetranslationkeys=y
|displayname=Egg
|spritetype=entity
|nameid=egg
|id=82
|foot=1}}
=== Entity Data ===
Thrown eggs have entity data that define various properties of the entity.
{{el|java}}:
{{main|Entity format}}
{{/ED}}
{{el|bedrock}}:
: See [[Bedrock Edition level format/Entity format]].
== Achievements ==
{{load achievements|The Lie}}
==Advancements==
{{Load advancements|Bullseye}}
== Video ==
<div style="text-align:center">{{yt|8rDbF8UYuTc}}</div>
== History ==
{{History|java alpha}}
{{History||v1.0.14|[[File:Egg JE1 BE1.png|32px]] Added eggs.
|Eggs currently have no purpose.}}
{{History|java beta}}
{{History||1.0|Eggs are now throwable at the request of a fan as the result of a [[wikipedia:Twitter|Twitter]] conversation about a man eating his [[wikipedia:USB|USB]], if [[Notch]] added egg throwing.<ref>{{tweet|notch|11773078791000065}}</ref>}}
{{History||1.2|Eggs are now used to craft [[cake]]s.
|Eggs can now be thrown by [[dispenser]]s.}}
{{History|java}}
{{History||1.0.0|snap=Beta 1.9 Prerelease 2|[[Breeding]] has been added, making eggs easier to obtain.}}
{{History|||snap=RC1|Thrown eggs now hatch chicks instead of adult chickens.
|The egg's throw [[sound]] has been changed.}}
{{History||1.4.2|snap=12w37a|Eggs are now used to craft [[pumpkin pie]]s.}}
{{History||1.9|snap=15w32a|Eggs no longer [[damage]] the [[ender dragon]].}}
{{History|||snap=15w36b|Eggs now produce particles when thrown at an entity.}}
{{History|||snap=15w49a|Eggs, like all throwable projectiles, now take the thrower's motion into account when fired.}}
{{History||1.11|snap=16w32a|The [[entity]] ID has now been changed from <code>ThrownEgg</code> to <code>egg</code>.}}
{{History||1.13|snap=17w47a|Prior to [[1.13/Flattening|''The Flattening'']], this [[item]]'s numeral ID was 344.}}
{{History||1.14|snap=18w43a|[[File:Egg JE2 BE2.png|32px]] The texture of eggs has been changed.}}
{{History|||snap=18w50a|Eggs can now be found in [[chest]]s in [[village]] fletcher houses.
|Therefore, chickens are no longer the only source of eggs.}}
{{History|||snap=19w07a|Added [[fox]]es, which sometimes spawn with eggs in their mouths.}}
{{History||1.16.2|snap=Pre-Release 1|Eggs are now affected by [[bubble column]]s.}}
{{History|pocket alpha}}
{{History||v0.4.0|[[File:Egg JE1 BE1.png|32px]] Added eggs. They are currently unobtainable.
|Eggs are throwable, but are unable to spawn chickens.}}
{{History||v0.7.0|[[Chicken]]s now occasionally lay eggs.
|Eggs can be used to craft [[cake]].
|Thrown eggs now have a chance of spawning adult chickens.}}
{{History||v0.8.0|snap=build 1|Eggs are now used to craft [[pumpkin pie]]s.}}
{{History|||snap=build 3|Thrown eggs now have a chance of spawning chicks instead of adult chickens.}}
{{History|pocket}}
{{History||1.1.0|snap=alpha 1.1.0.0|The [[entity]] ID has now been changed from <code>thrownegg</code> to <code>egg</code>.}}
{{History|bedrock}}
{{History||1.2.0|Eggs now deal knockback to [[player]]s.}}
{{History||1.10.0|snap=beta 1.10.0.3|[[File:Egg.png|32px]] The texture of eggs has been changed.}}
{{History||1.11.0|snap=beta 1.11.0.1|Eggs can now be found in [[village]] fletcher [[chest]]s.}}
{{History|||snap=beta 1.11.0.4|Eggs can now be [[trading|sold]] to farmer [[villager]]s.}}
{{History||1.13.0|snap=beta 1.13.0.1|Added [[fox]]es, which can [[drops|drop]] eggs.}}
{{History||1.16.0|snap=beta 1.16.0.57|[[Trading]] has now been changed, eggs can no longer be [[trading|sold]] to farmer [[villager]]s.}}
{{History|console}}
{{History||xbox=TU1|xbone=CU1|ps=1.0|wiiu=Patch 1|[[File:Egg JE1 BE1.png|32px]] Added eggs.}}
{{History|PS4}}
{{History||1.90|[[File:Egg JE2 BE2.png|32px]] The texture of eggs has been changed.}}
{{History|New 3DS}}
{{History||0.1.0|[[File:Egg JE1 BE1.png|32px]] Added eggs.}}
{{History|foot}}
== Issues ==
{{issue list}}
== Trivia ==
* Eggs break mid-fall if hit by another projectile; the chance of spawning a chick is not affected.
* Throwing an egg at a [[nether portal]] breaks the egg when it hits the portal.
* A thrown egg faces toward the [[player]] in first-person view, while it appears rotated horizontally in third-person view. This is the case for all throwable [[item]]s ([[ender pearl]]s, eggs, [[snowball]]s, and all throwable [[potion]]s).
== References ==
{{Reflist}}
{{Items}}
{{entities}}
[[Category:Combat]]
[[Category:Egg]]
[[cs:Vajíčko]]
[[de:Ei]]
[[es:Huevo]]
[[fr:Œuf]]
[[hu:Tojás]]
[[it:Uovo]]
[[ja:卵]]
[[ko:달걀]]
[[nl:Ei]]
[[pl:Jajko]]
[[pt:Ovo]]
[[ru:Яйцо]]
[[th:ไข่ไก่]]
[[uk:Яйце]]
[[zh:鸡蛋]]
<br /></li><li>[[Map|Map]]<br/>{{about|the craftable map|maps showing the locations of certain structures|Explorer Map|other uses|Map (disambiguation)}}
{{distinguish|World}}
{{Item
| image = Map Zoom 4.png
| renewable = Yes
| stackable = Yes (64)
}}
A '''map''' is an [[item]] used to view explored [[Chunk|terrain]] and mark landmarks.
==Obtaining==
===Crafting===
{{crafting
|head=1
|showname=0
|showdescription=1
|A1= Paper
|B1= Paper
|C1= Paper
|A2= Paper
|B2= Compass
|C2= Paper
|A3= Paper
|B3= Paper
|C3= Paper
|Output= Empty Map
|type= Miscellaneous
|description=This variation is called an "empty locator map" {{in|bedrock}}, or an "empty map" {{in|java}}.
When the player first creates a map, it is blank. It needs to be activated by holding it and pressing ''{{Control|use item}}''. after which it records terrain and location markers as the player travels within (or close to) the area it maps.
}}
{{crafting
|A1= Paper
|B1= Paper
|C1= Paper
|A2= Paper
|B2= Paper
|C2= Paper
|A3= Paper
|B3= Paper
|C3= Paper
|Output= Empty Map
|type= Miscellaneous
|description={{only|bedrock}}
This variation is called an "empty map". It does not show location markers. It is intended for cloning and zooming locator maps without having to consume an additional [[compass]] (thereby saving [[iron ingot]]s and [[redstone dust]]), but it can also be {{Control|use|text=activated}} and later converted to a locator map by combining it with a compass on an [[anvil]], [[crafting table]], or [[cartography table]].
|foot=1
}}
=== Natural generation ===
==== Chest loot ====
{{LootChestItem|empty-map,map
}}
=== Cartography table ===
A map can also be created using a single paper on a [[cartography table]] to create an empty map, or a paper with a compass for an empty locator map.{{only|bedrock}}
=== Starting map ===
{{exclusive|bedrock|section=1}}
When creating a new world {{in|bedrock}}, the player can enable the "Starting Map" option to spawn with an empty locator map in the hotbar. The map's zoom scale is 1:8. The map is updated only while the player holds it.
=== Trading ===
Novice-level cartographer [[Villager|villagers]] sell a single empty map for 7 [[Emerald|emeralds]] as their trades.
{{IN|java}}, cartographer villagers may give players with the [[Hero of the Village]] effect an empty map.
== Usage ==
{{See also|Tutorials/Mapping}}
=== Mapping ===
Crafting a map creates an empty map. The map is drawn for the first time when it is held and used (with ''{{control|use item}}''). This map can then be adjusted to different zoom levels. After conversion to a drawn map item, it starts to draw a top-down view of the player's surroundings, with North pointing to the top of the map. A pointed oval pointer indicates the player's position on the map, and moves in real-time as the player moves across the terrain shown on the map. The map does ''not'' center on the player when created, rather, the world is broken up into large invisible grid squares, and the map displays the area of whichever grid square it is in when it is first used. For example, if a player uses a new map in a certain grid square, and then moves a distance away and uses another fresh map but is still within the same grid square, both maps appear identical. To make a map that is not identical to the first one, the player would have to move outside of the edges of the first map (because then they would be in a new grid square). This way, no two maps of the same size can ever partially overlap and every map can display only a fixed area.
To record the world on a map, that specific map must be held in the player's hands while the player moves around the world. The world is recorded as-is during exploration, meaning that if the world is modified, a player must revisit the area while holding the map to update the map's view. Maps can also be [[Map#Cloning|cloned]]. If a player holds a map whose one or more clones are on display in item frames, updates are made on all clone-connected maps.
Other players are displayed on the map only if they have a map in their inventory cloned from the one being looked at. When placing a map into an [[item frame]], the map displays with a green pointer shown at the location of the item frame. This is to help the player see where they are in relation to the area that the map is showing. If the player leaves a map in an item frame and views a clone of it, the green pointer remains in the spot of the framed copy. This can be used to set up waypoints. Unexplored areas are transparent, making the item frame visible.
When the player leaves the area shown on a specific map, the player pointer transforms into a white dot that moves on that map. The marker shrinks to a smaller white dot if the player is far from the map's center: the area is 320 by 320 blocks per scale factor. The dot moves along the edge of the map to show the relative location of the player. However {{in|bedrock}}, the pointer remains as an arrow but shrinks until the player is near the area shown on the map.
While maps in [[the Nether]] work, they show only the red-and-gray pattern, regardless of the blocks placed. The only useful function is finding where the player is in relation to placed framed maps, which show as green pointers. Additionally, the player pointer rapidly spins and is not a good indicator of direction. Placing a [[banner]] in [[the Nether]] still shows it on the map as usual. Having a smaller map image while riding a [[strider]] in the Nether can help one to see one's footing while traveling over [[lava]].
{{IN|java}}, when using a map from another dimension, the map shows the player's position and direction when they were last in the dimension of the map. {{IN|bedrock}}, however, the player can use maps from one dimension while in another dimension. For locator maps, the place marker changes color depending on the dimension that the player is currently in (white for the Overworld, red for [[the Nether]], and magenta for [[the End]]). An Overworld map in the Nether shows the player's corresponding location and direction in the Overworld.<ref name=multiverse>{{ytl|EpP1diZdEdI}}</ref> Similarly, a Nether Map in the Overworld shows the player's corresponding location in the Overworld, but the place marker spins, just like a Nether map in the Nether. An Overworld map in the End shows the world spawn.<ref name=multiverse/> A Nether map cannot be used in the End — the map appears, but the place marker is not shown anywhere — and similarly, an End map cannot be used in the Overworld or the Nether.
A player can make a large piece of pixel art (128×128) facing upward, center a map on it, and place that map in an [[item frame]] to create a custom picture. Locking is recommended. See [[Map item format#Map Pixel Art]] for details on the techniques.
Maps display as a mini-map when held in the off-hand, or if the off-hand slot is occupied; the map is full-sized only when held in the dominant hand with both hands free.
A map always positions itself facing towards North when placed horizontally within an item frame regardless of how the map is placed.
=== Map content ===
{{Main|Map item format}}
Maps consist of square pixels arranged like pixels in a 128×128 square pattern, with each pixel representing a square portion of land. {{IN|java}}, the [[Map item format#Color table|color of a map pixel]] generally matches the color of the most common [[opaque]] block in the corresponding area, as seen from the sky. 'Minority blocks' in the target area have no effect on the color of the pixel, thus small features tend to be undetectable on zoomed-out maps.
{{IN|bedrock}}, the [[Map item format#Color table|color of a map pixel]] instead matches the single top-most opaque block in a grid sized by the map magnification pixel size (see the table in the "Player marker and pointer" section below). For example, a 3/4 magnification map has a pixel size of 8x8 blocks; this means the map will read only the top-most opaque blocks at the 0,0 coordinate, the 8,0 coordinate, the 0,8 coordinate, etcetera, ignoring all other blocks in the area. This means that {{in|bedrock}}, map pixel art requires only one block per pixel regardless of map magnification.
{{IN|bedrock}}, grass, foliage and water colors that are biome-dependent are represented accurately on a map.
{| class="wikitable"
|-
! style="width: 300px;" | {{el|je}}
! style="width: 300px;" | {{el|be}}
|-
| style="text-align: center;" | [[File:Map Zoom 4.png|alt=All banners marked on a map, alongside a named banner.|216px]]
| style="text-align: center;" | [[File:Map item BE.png|216px]]
|-
| Biome colors on ''Java Edition''.
| Biome colors on ''Bedrock Edition''.
|-
|}
Maps also show ground up to about 15 blocks below the surface of the water in oceans as slightly lighter blue, to show where the ground rises. This is not true with land above water. Higher elevations in the world mean lighter colors on the map. The map records the surface even as the player moves below the surface.
A standard map represents 128x128 blocks (1 block per pixel, 8x8 [[chunks]]) but maps can be zoomed-out to represent up to 2048x2048 blocks (16 square blocks per pixel, 128x128 [[chunks]]).
Some relevant distances: 64 blocks (4 chunks) is the update radius from a player in the Overworld and the End. However, it is half this (32 blocks) in the Nether. Also, 1024 blocks is the minimum Overworld distance from a [[nether portal]], at which players can build another portal and expect to reach a new location in the Nether. This is the distance across a 1:8 map, and also from a 1:16 map's center to its edge.
=== Player marker and pointer ===
{{IN|java}}, every map contains a marker that marks the position of the player, and points in the same direction as the player. When a player moves out of a map, a big white dot appears and moves relative to the player's position. The pointer either disappears when the player moves away a certain distance from the border of the map or, in case of [[explorer map]]s, the big white dot changes to a smaller white dot. The distance required for the small white dot to appear(explorer maps) or for the big dot to vanish (normal maps) changes with the scaling of the map.
* '''Level 0/4 :''' 128×128 blocks (each map pixel represents 1 block)
* '''Level 1/4 :''' 256×256 blocks (2×2 blocks per map pixel)
* '''Level 2/4 :''' 512×512 blocks (4×4 blocks per map pixel)
* '''Level 3/4 :''' 1024×1024 blocks (8×8 blocks per map pixel)
* '''Level 4/4 :''' 2048×2048 blocks (16×16 blocks per map pixel)
{{IN|bedrock}}, a map can be crafted with or without this marker, and a map without a position marker can add one later by adding a compass to the map. When a map is crafted without a compass, it's simply called an "empty map", but when crafted with a compass, it's called an "empty locator map". The marker also turns red if the player enters the Nether with an Overworld map and shows the player's Overworld location relative to the Nether location. A map created in the End has a purple marker showing the player's location. If an Overworld map is used in the End, a magenta dot appears on the player's spawn point.{{/BE|position}}
{{crafting
|name=Map<br>(with marker)
|ingredients=[[Map]] or Empty Map +<br>[[Compass]]
|showdescription=1
|Map (no markers);Empty Map
|Compass
|Output= Locator Map;Empty Locator Map
|type= Miscellaneous
|description={{el|be}} only.
Maps crafted from only paper do not show the location marker; to add it, a compass must be added to the map.
|foot=1
}}
{{IN|bedrock}}, a cartography table can also be used to add a pointer to create a locator map or empty locator map. This can be done by adding a compass to paper, or to an empty map or map.
=== Zooming out ===
[[File:Cartography table UI zoom.png|thumb|300px|{{IN|java}}, cartography table's UI, showing the map is being zoomed out.]]
A [[cartography table]] can also be used to zoom out, taking only one piece of paper per zoom level.
A blank map can not be zoomed out. A map has to have something already marked on it for the zooming to be possible.
{{Crafting
|A1= Paper |B1= Paper |C1= Paper
|A2= Paper |B2= Map;Locator Map |C2= Paper
|A3= Paper |B3= Paper |C3= Paper
|Output= Map;Locator Map
|showdescription=1
|description=Locator Map {{el|be}} only.
}}
{{/BE|zoom}}
==== Zoom details ====
The zooming function starts from when the map is created (zoom level 0) up to its fourth zoom step (zoom level 4).
{| class="wikitable" style="text-align: center" data-description="Zoom levels"
! colspan="2" |
! Zoom step 0
! Zoom step 1
! Zoom step 2
! Zoom step 3
! Zoom step 4
|-
! colspan="2" |
| [[File:Map Zoom 0.png|116px|Zoom step 0, 1:1]]
| [[File:Map Zoom 1.png|116px|Zoom step 1, 1:2]]
| [[File:Map Zoom 2.png|116px|Zoom step 2, 1:4]]
| [[File:Map Zoom 3.png|116px|Zoom step 3, 1:8]]
| [[File:Map Zoom 4.png|116px|Zoom step 4, 1:16]]
|-
! colspan="2" | Zoom level
| 0/4
| 1/4
| 2/4
| 3/4
| 4/4
|-
! colspan="2" | 1 map pixel represents
| 1 block
| 2×2 blocks
| 4×4 blocks
| 8×8 blocks
| 16×16 blocks<br>(1×1 chunk)
|-
! colspan="2" | Scaling ratio
| 1:1
| 1:2
| 1:4
| 1:8
| 1:16
|-
! rowspan="2" colspan="2" | Map covers an area of
| 128×128 blocks
| 256×256 blocks
| 512×512 blocks
| 1024×1024 blocks
| 2048×2048 blocks
|-
| 8×8 chunks
| 16×16 chunks
| 32×32 chunks
| 64×64 chunks
| 128×128 chunks
|-
! colspan="2" | Smallest discernible features
| Blocks
| Trees, Paths
| Lakes, Buildings
| Mountains, Rivers
| Biomes, Mountain Ranges
|-
! colspan="2" | Use cases
| Pixel art, Base plans
| Base surroundings
| Structure mapping
| Landscape mapping
| Biome mapping
|-
! rowspan="2" | Total paper needed to zoom out from Level 0
! in anvil{{only|bedrock|short=1}} or crafting table
| -
| {{ItemSprite|Paper}} 8
| {{ItemSprite|Paper}} 16
| {{ItemSprite|Paper}} 24
| {{ItemSprite|Paper}} 32
|-
! in cartography table
| -
| {{ItemSprite|Paper}} 1
| {{ItemSprite|Paper}} 2
| {{ItemSprite|Paper}} 3
| {{ItemSprite|Paper}} 4
|}
Maps are always aligned to a grid at all zoom levels. That means zooming out any different map in a specific area covered by that map always has the same center. As such, maps are aligned by map width (1024 blocks for a level 3 maps) minus 64. A level 3 map generated at spawn covers X and Z coordinates from -64 to 959. All maps generated in this area zoom out to the same coordinates, guaranteeing that they are always 'aligned' on a map wall. For a zoomed-out map to cover a new area, it must start with a base (level 0) map that is in that area.
At zoom level 0, a map created on the point (0,0) has (0,0) at the center of the map. At higher zoom levels of the same map, the coordinate (0,0) is in the top left square of the map.
{{IN|java}}, zoom level can be seen on a map by turning on Advanced Tooltips (a [[Debug screen#More debug keys|debug screen]] option that can be toggled by using the key combination {{key|F3+H}}). The tooltip of the map then shows the zoom level, scaling factors, and map ID.
=== Cloning ===
[[File:Cartography table UI clone.png|thumb|300px|{{IN|Java}}, cartography table's UI, showing the map is being cloned.]]
A mix of empty maps and empty locator maps may be used. Whether the cloned maps show position markers is dependent only on the input map.
A [[cartography table]] can also be used to clone a map.
The parts of the world that have already been explored and mapped are copied, and newly explored areas appear on both instances. If one of the maps is later zoomed out, then the maps lose their connection to each other and function as completely separate maps that have to be individually filled by exploring.
In Creative mode, a map in an item frame may be cloned by using {{control|pick block}} on it, as long as that map is not also in the player's inventory.
It doesn't matter if the map to be cloned is at a higher zoom level (made of more paper) than the blank map. Upon copying the map, both resulting maps have the same magnification as the starting map.
{{/BE|clone}}
=== Crafting ingredient ===
{{crafting usage|Map, Empty Map}}
=== Marking points ===
{{IN|java}} the player has the ability to mark spots on a map. To do this, {{control|use}} a map on a placed-down [[banner]], and the spot of the banner gets marked on the map. The mark takes the color of whatever the base color is for the banner, and if the banner has a name, the mark shows that name. Banner marks on a map are always oriented with their top facing north, regardless of the banner's actual orientation. If the banner is destroyed, the mark of the banner remains at first, but if the player gets closer to where the banner previously was, it disappears as the area is updated on the map.
If a map is mounted on an item frame and is within the area it depicts, the mounted map displays its current location with a green indicator rotated to match its orientation.
[[File:Map Marker Bedrock on Item frame.png|thumb|181x181px|{{IN|bedrock}} this is what a map lying on an item frame looks like, while showing markers.]]
{{IN|bedrock}} the player can place copies of locator maps in [[item frame]]s in order to create a land mark. The marker is a green dot that resembles the shape of the player's marker, but in green color. The position the marker points at depends on the direction the item frame is facing. It is worth noting that the markers work only on copies of the same map. Other maps of the same area do not show the existing markers that the player(s) had placed.
If a player has a cloned map in their inventory, their pointer appears white when viewed on the same map held by another player. Hence, if all players have the same cloned map in their inventory, all markers would appear white when the clone map is viewed.
{| class="wikitable"
|-
! style="width: 300px;" | {{el|je}}
! style="width: 300px;" | {{el|be}}
|-
| style="text-align: center;" | [[File:Banner marked map.png|alt=All banners marked on a map, alongside a named banner.|216px]]
| style="text-align: center;" | [[File:Tracking map with markers bedrock.png|216px]]
|-
| How every banner appears {{IN|java}} on a map, including named banners.
| {{IN|bedrock}} this is how a locator map shows map markers while held by a player.
|-
|}
===Locking===
[[File:Cartography table UI lock.png|thumb|300px|{{IN|Java}}, cartography table's UI, showing the map is being locked.]]
Maps can be locked when using a [[glass pane]] in a [[cartography table]]. This creates a new map containing the same data and locks it. All copies of this new map are also locked. A locked map never changes, even when the depicted terrain changes. {{IN|Be}}, locked maps have a unique texture.
{| class="wikitable" style="text-align: center;"
|-
! Condition
! style="width: 200px;" | Newly created map
! style="width: 200px;" | Map after terrain alteration
|-
! Unlocked map
| [[File:Map Zoom 0.png|174px]] || [[File:Unlocked Map.png|174px]]
|-
! Locked map
| [[File:Map Zoom 0.png|174px]] || [[File:Map Zoom 0.png|174px]]
|-
|}
{{-}}
== Sounds ==
{{Edition|Java}}:
{{Sound table
|rowspan=2
|sound=Drawmap1.ogg
|sound2=Drawmap2.ogg
|sound3=Drawmap3.ogg
|subtitle=Map drawn
|source=player
|description=When a map is drawn
|id=ui.cartography_table.take_result
|translationkey=subtitles.ui.cartography_table.take_result
|volume=1.0
|pitch=1.0
|distance=16}}
{{Sound table
|subtitle=Map drawn
|source=block
|description=When a map is edited using a cartography table
|id=ui.cartography_table.take_result
|translationkey=subtitles.ui.cartography_table.take_result
|volume=1.0
|pitch=1.0
|distance=16
|foot=1}}
{{Edition|Bedrock}}:
{{Sound table
|type=bedrock
|rowspan=2
|sound=Drawmap1.ogg
|sound2=Drawmap2.ogg
|sound3=Drawmap3.ogg
|source=block
|description=When a map is drawn<wbr>{{Upcoming|BE 1.20.20.20}}
|id=ui.cartography_table.take_result|idnote={{Verify|Could be block.cartography_table.use}}
|volume=0.8
|pitch=1.0}}
{{Sound table
|type=bedrock
|source=block
|description=When a map is edited using a cartography table
|id=ui.cartography_table.take_result
|volume=0.8
|pitch=1.0
|foot=1}}
== Data values ==
=== ID ===
{{edition|java}}:
{{ID table
|edition=java
|showforms=y
|generatetranslationkeys=y
|displayname=Empty Map
|spritetype=item
|nameid=map
|form=item}}
{{ID table
|displayname=Map
|spritetype=item
|nameid=filled_map
|form=item
|translationkey=item.minecraft.filled_map, filled_map.buried_treasure, filled_map.explorer_jungle{{upcoming|java 1.20.2}}, filled_map.explorer_swamp{{upcoming|java 1.20.2}}, filled_map.mansion, filled_map.monument, filled_map.unknown, filled_map.village_desert{{upcoming|java 1.20.2}}, filled_map.village_plains{{upcoming|java 1.20.2}}, filled_map.village_savanna{{upcoming|java 1.20.2}}, filled_map.village_snowy{{upcoming|java 1.20.2}}, filled_map.village_taiga{{upcoming|java 1.20.2}}
|foot=1}}
{{edition|bedrock}}:
{{ID table
|edition=bedrock
|showaliasids=y
|shownumericids=y
|showforms=y
|notshowbeitemforms=y
|generatetranslationkeys=y
|displayname=Empty Map
|spritetype=item
|nameid=empty_map
|aliasid=emptymap
|id=515
|form=item
|translationkey=item.emptyMap.name, item.emptyLocatorMap.name}}
{{ID table
|displayname=Map
|spritetype=item
|spritename=map-be
|nameid=filled_map
|aliasid=map
|id=420
|form=item
|translationkey=item.map.name, item.map.exploration.mansion.name, item.map.exploration.monument.name, item.map.exploration.treasure.name
|foot=1}}
=== Metadata ===
{{see also|Bedrock Edition data values}}
{{IN|bedrock}}, maps use the following data values:
{{/DV}}
=== Item data ===
{{el|java}}:
{{main|Player.dat format}}
<div class="treeview">
* {{nbt|compound|tag}}: The item's '''tag''' tag.
{{:Player.dat_format/Maps}}
</div>
{{el|bedrock}}:
: See [[Bedrock Edition level format/Item format]].
=== Map icons ===
{{see also|Player.dat format|Map item format|map_icons.png}}
Map icons are 8×8 in ''Java Edition'', but 16×16 in Bedrock Edition. As such, there are minor misalignment issues in ''Java Edition''.<ref>{{bug|MC-214649|||WF}}</ref>
[[File:Map icons.png|thumb|128px|Map icons texture {{in|Java}}]]
[[File:Map icons BE.png|thumb|128px|Map icons texture {{in|Bedrock}}]]
{| class="wikitable"
|-
! Java ID !! Bedrock ID !! Text ID !! Appearance !! Purpose !! Shown in item frames?
|-
| 0 || ||<code>player</code> || [[File:Player (texture) JE1 BE1.png|16px]] [[File:Player (texture) BE2.png|16px]] White marker || Players (on map) || No
|-
| 1 || 1 ||<code>frame</code> || [[File:Green Marker (texture) JE1 BE1.png|16px]] [[File:Green Marker (texture) BE2.png|16px]] Green marker || The current map in an item frame || Yes
|-
| 2 || ||<code>red_marker</code> || [[File:Red Marker (texture) JE1 BE1.png|16px]] [[File:Red Marker (texture) BE2.png|16px]] Red marker || Position converted to Overworld when opening Overworld map in the Nether{{Only|bedrock}} || No
|-
| 3 || ||<code>blue_marker</code> || [[File:Blue Marker (texture) JE1 BE1.png|16px]] [[File:Blue Marker (texture) BE2.png|16px]] Blue marker || Other players || No
|-
| 4 || ||<code>target_x</code> || [[File:Target X (texture) JE1 BE1.png|16px]] White X || Unused || Yes
|-
| 5 ||5
|<code>target_point</code> || [[File:Target Point (texture) JE1 BE1.png|16px]] [[File:Target Point (texture) BE2.png|16px]] Red triangle || Unused || Yes
|-
| 6 || 6 ||<code>player_off_map</code> || [[File:Player Off Map (texture) JE1 BE1.png|16px]] Large white dot || Players off map, nearby{{only|java}} || No
|-
| 7 || 13 ||<code>player_off_limits</code> || [[File:Player Off Limits (texture) JE1.png|16px]] [[File:Player Off Limits (texture) BE.png|16px]] Small white dot || Players off map, far away{{only|java}} || No
|-
| 8 ||14
|<code>mansion</code> || [[File:Mansion (texture) JE1.png|16px]] [[File:Mansion (Texture) BE2.png|frameless|16x16px]] Woodland mansion || Woodland mansion || Yes
|-
| 9 || 15 ||<code>monument</code> || [[File:Monument (texture) JE1.png|16px]] [[File:Monument Texture BE2.png|frameless|16x16px]] Ocean monument || Ocean monument || Yes
|-
| 10 - 25 || ||<code>{{tooltip|banner_*|banner_white, banner_orange, banner_magenta, banner_light_blue, banner_yellow, banner_lime, banner_pink, banner_gray, banner_light_gray, banner_cyan, banner_purple, banner_blue, banner_brown, banner_green, banner_red, banner_black}}</code> || [[File:Banner White (texture) JE1.png|16px]] [[File:Banner Light Gray (texture) JE1.png|16px]] [[File:Banner Gray (texture) JE1.png|16px]] [[File:Banner Black (texture) JE1.png|16px]] [[File:Banner Brown (texture) JE1.png|16px]] [[File:Banner Red (texture) JE1.png|16px]] [[File:Banner Orange (texture) JE1.png|16px]] [[File:Banner Yellow (texture) JE1.png|16px]] [[File:Banner Lime (texture) JE1.png|16px]] [[File:Banner Green (texture) JE1.png|16px]] [[File:Banner Cyan (texture) JE1.png|16px]] [[File:Banner Light Blue (texture) JE1.png|16px]] [[File:Banner Blue (texture) JE1.png|16px]] [[File:Banner Magenta (texture) JE1.png|16px]] [[File:Banner Purple (texture) JE1.png|16px]] [[File:Banner Pink (texture) JE1.png|16px]]<br>Banners in all 16 wool colors{{only|java}}|| Banner markers || Yes
|-
| 26 ||4
|<code>red_x</code> || [[File:Red X (texture) JE1.png|16px]] [[File:Target X (texture) BE2.png|16px]] Red X || Buried treasure || Yes
|-
| || 8 || || [[File:Magenta Marker (texture) BE1.png|16px]] Magenta marker
| Position converted to Overworld when opening Overworld map in the End{{Only|bedrock}} || No
|-
| || 9 || || [[File:Orange Marker (texture) BE1.png|16px]] Orange marker{{more info}}
|Other players
|Yes
|-
| || 10 || || [[File:Yellow Marker (texture) BE1.png|16px]] Yellow marker
| Other players || No
|-
| || 11 || || [[File:Cyan Marker (texture) BE1.png|16px]] Cyan marker
| Other players || No
|-
| -
|12
| || [[File:Green Point (texture) BE1.png|16px]] Green Triangle
| Other structure such as stronghold, fortress, end city, etc. when used as explorer map destination{{Only|bedrock}} || Yes
|}
It should be noted that even if the player used a NBT editor to add an additional icon on the map, ''Minecraft'' shows only the first one listed when the player loads up their world.
== Achievements ==
{{load achievements|Map Room}}
== History ==
{{see also|section=24|map_icons.png|Java Edition history of textures#Map icons}}
{{more images|section=24|{{bug|MC-72962}}}}
{{History||April 27, 2011|link=https://web.archive.org/web/0/http://notch.tumblr.com/post/4988431144/the-maps|[[Notch]] unveiled screenshots of the map.}}
{{History||April 28, 2011|link={{tweet|notch|63500114005721088}}|[[Notch]] said that he would try to make maps place-able on [[wall]]s.}}
{{History|java beta}}
{{History||1.6|snap=Test Build 3|[[File:Map (item) JE1 BE1.png|32px]] Added maps.}}
{{History||1.6.6|The ability to auto-craft maps using shift-click has been disabled.}}
{{History||1.8|snap=Pre-release|Maps can now be found in library chests in the brand-new [[stronghold]]s.
|Auto crafting maps has been restored. Map cloning, therefore, is unavailable for a period of time.}}
{{History||1.8.1|Maps now work both while walking and flying.}}
{{History|java}}
{{History||1.0.0|snap=Beta 1.9 Prerelease 5|Prior to this update, the [[sun]] in ''[[Minecraft]]'' rose in the North, which threw off many [[player]]s and led to a common misconception that ''Minecraft'' maps/[[world]]s were oriented with East at the top. The sun now rises in the east and sets in the west, making navigation much more intuitive.
|Before the change in sun position, it was commonly said that ''Minecraft'' maps/worlds are oriented with East at the top; sunrise, by definition, occurs at the East, which means it is certainly true that the maps were oriented "East" since the Sun rose from the top (North). However, [[Jeb]] asserted (and [[Notch]] agreed) that the sun rose in the north.<ref>{{Tweet|jeb|87815841160237056}}</ref><ref>{{Tweet|notch|88155424880201728}}</ref> Most mods and map-making tools, however, used the terms East and North consistent with their actual definitions (e.g. a [[Programs and editors/Cartograph|Cartograph]]-generated map with North at the top is rotated 90 degrees from the in-game map).}}
{{History||1.4.2|snap=12w34a|[[File:Empty Map JE1 BE1.png|32px]] [[Crafting]] a map now creates an empty map. The map is drawn for the first time when it is held and right clicked, and is centered near the location of the [[player]] when clicked (not as before where it was centered on the location it was crafted.)
|Previously, in order to map a new area, the map had to be ''crafted'' in that area (rather than carrying a previously-crafted map to the new area). The point where a map is crafted becomes its permanent center, and could never be changed.
|The pointer no longer disappears when leaving the map, but transforms into a white dot, indicating on what side of the map the player is located.
|Maps now align to a grid, making it easier to create adjacent maps.
|Maps can now be zoomed out (but not zoomed in).
|Maps can now be cloned and scaled.}}
{{History||1.4.2|snap=12w34b|Maps now have a ''zoom level'', which was fixed at 1:8 prior to snapshot [[Java Edition 12w34a|12w34a]],<ref name="mapinfo">https://web.archive.org/web/0/http://notch.tumblr.com/post/4988431144/the-maps</ref> but now starts at 1:1 and can be increased up to 1:16 by re-crafting an existing map.
|Maps are no longer numbered on the top-left corner and is labeled through the tooltip.}}
{{History|||snap=12w36a|New maps are now crafted at a scale factor of 1:1. A zoomed in map can be zoomed out by re-crafting it with another 8 sheets of [[paper]] on a [[crafting table]]. Each time this is done, the scale increases - 1:1, 1:2, 1:4, 1:8, 1:16 with a map scale of 1:16 being the current maximum.}}
{{History||1.7.2|snap=13w38a|The map size has been increased when placed on a [[wall]] using the [[item frame]].
|More colors have been added to maps for different [[block]]s.<ref name="infodump2">https://web.archive.org/web/0/https://www.mojang.com/2013/10/minecraft-1-7-the-update-that-changed-the-world</ref>}}
{{History||1.8|snap=14w31a|Zoomed maps now conform to an expanded grid based on their zoom level. Previously, careful considerations would need to be taken to creating a wall of adjoining maps.}}
{{History||1.8.1|snap=pre1|Some colors have been changed on maps to more accurately represent their respective [[block]].}}
{{History||1.9|snap=15w31a|Maps now display as a mini-map when held in the off-hand, or if the off-hand slot is occupied; the (old) large version is visible only when held in the dominant hand with the secondary hand free.}}
{{History|||snap=15w34a|New maps can now be [[crafting|crafted]] at a scale factor of 1:4.
|A crafting recipe has been added for zooming in maps.}}
{{History|||snap=15w43a|The average yield of empty maps from [[stronghold]] library [[chest]]s has been doubled.}}
{{History|||snap=15w45a|New maps are once again [[crafting|crafted]] at a scale factor of 1:1, as they had been before snapshot [[15w34a]].
|The [[crafting]] recipe, that was introduced in 15w34a, for zooming in maps has been removed.}}
{{History|||snap=15w49a|Map making now uses armor equipping sounds.}}
{{History||1.11|snap=16w39a|Maps now work in [[the End]].
|Empty maps are now [[trading|sold]] by cartographer [[villager]]s as their tier 3 [[trading|trade]].
|Added [[explorer map]]s, sold by cartographers as their tier 4 trades.}}
{{History||1.12|snap=17w17a|Maps now have separate colors for colored [[terracotta]] blocks from other colored blocks.}}
{{History||1.13|snap=17w47a|Prior to [[1.13/Flattening|''The Flattening'']], these [[item]]s' numeral IDs were 358 and 395.
|Maps now use additional NBT to specify which map they contain. Prior to this version, they used the [[damage]] value instead.
|Map IDs are no longer limited to 32,768.}}
{{History|||snap=17w50a|Maps can now be placed on floor and ceiling [[item frame]]s.}}
{{History|||snap=18w10a|Spots on maps can now be marked using [[banner]]s.}}
{{History|||snap=18w11a|Empty maps can now generate in [[shipwreck]] [[chest]]s.}}
{{History|||snap=pre7|Maps have been changed slightly, in regard to which [[block]]s are shown and which blocks are not.}}
{{History||1.14|snap=18w43a|[[File:Empty Map JE2 BE2.png|32px]] [[File:Map (item) JE2 BE2.png|32px]] The textures of maps have been changed.}}
{{History|||snap=18w48a|Empty maps can now be found in chests in [[village]] cartographer houses.}}
{{History|||snap=19w02a|Maps can now be cloned and zoomed out (extended) by using a [[cartography table]].
|Maps can now be locked by using a [[glass pane]] with a cartography table.
|The recipes for cloning and zooming out maps have been removed.}}
{{History|||snap=19w06a|Map making is now silent again.}}
{{History|||snap=19w13a|Cartographer villagers now give empty maps to players under the [[Hero of the Village]] effect.}}
{{History||1.16|snap=20w21a|Map making sounds are now the same as when using a cartography table.}}
{{History|pocket alpha}}
{{History||v0.14.0|snap=build 1|[[File:Empty Map JE1 BE1.png|32px]] [[File:Map (item) JE1 BE1.png|32px]] Added maps.
|Maps are crafted using nine [[paper]], one for every slot of the [[crafting]] grid.
|Maps must be combined with a [[compass]] using an [[anvil]] in order to show the [[player]]'s position.
|Maps can be zoomed using an anvil.}}
{{History|||snap=build 3|New maps are now [[crafting|crafted]] at full zoom.
|Empty maps now have a "Create Map" button to initialize them.}}
{{History|||snap=build 7|New maps are now crafted at a scale factor of 1:1.}}
{{History||v0.15.0|snap=unknown|Maps can now be crafted either with 8 pieces of [[paper]] and a [[compass]] ''or'' 9 pieces of paper, to get a map with or without a position marker.}}
{{History||v0.16.0|snap=build 1|Different colors have been added to maps for different [[biome]]s.}}
{{History|pocket}}
{{History||1.0.0|snap=?|[[Windows 10 Edition]] can now use the [[anvil]] as well as the [[crafting table]] to clone, zoom and apply markers, just as [[Pocket Edition]] in general could.
|Maps can now be found inside [[stronghold]] library [[chest]]s.}}
{{History||1.1.0|snap=alpha 1.1.0.0|Empty maps with direction markers built-in are now called "locator maps".}}
{{History|||snap=alpha 1.1.0.3|"Locator maps" are now called "empty locator maps".
|Empty maps are now [[trading|sold]] by cartographer [[villager]]s for 7-11 [[emerald]]s as their tier 3 [[trading|trade]].}}
{{History|bedrock}}
{{History||1.4.0|snap=beta 1.2.14.2|Maps can now be found inside map room [[chest]]s in [[shipwreck]]s.}}
{{History||?|The texture of the filled map overlay has been changed.}}
{{History||?|Maps now function in dimensions other than the dimension in which they were created.}}
{{History||1.10.0|snap=beta 1.10.0.3|Maps can now be found in cartographer house [[chest]]s in [[village]]s.
|[[File:Empty Map JE2 BE2.png|32px]] The texture of empty maps has been changed.}}
{{History||1.11.0|snap=beta 1.11.0.1|Empty maps can now be created from 1 [[paper]] in [[cartography table]]s.
|Maps can now be zoomed, cloned, renamed, and have pointers added in cartography tables.}}
{{History|||snap=beta 1.11.0.4|Cartographer [[villager]]s now [[trading|sell]] empty map for an [[emerald]] as their first tier [[trading|trades]].
|Empty locator maps can now be [[trading|bought]] from cartographer villagers.}}
{{History||1.13.0|snap=beta 1.13.0.1|[[File:Map (item) BE3.png|32px]] [[File:Locked Map (item) BE2.png|32px]] Filled maps and locked maps now have unique inventory icons.}}
{{History||1.16.0|snap=beta 1.16.0.57|Trading has been changed, novice-level cartographer now sell an empty map for 7 emeralds. Cartographer villager no longer sell empty locator map.}}
{{History||1.16.100|snap=beta 1.16.100.56|The ID of maps have been changed from <code>emptymap</code> to <code>empty_map</code> and <code>map</code> to <code>filled_map</code>.}}
{{History|console}}
{{History||xbox=TU1|xbone=CU1|ps=1.00|wiiu=Patch 1|switch=1.0.1|[[File:Map (item) JE1 BE1.png|32px]] Added maps.
|The [[player]] spawns with a free map.
|Maps are available only as zoom step 3 maps centered at coordinates 0,0. Biome colors do not appear on maps.}}
{{History||xbox=none|xbone=CU1|ps=1.0|wiiu=none|Larger sized worlds on Xbox One, Playstation 4, and Nintendo Switch have zoom step 3 maps aligned to a grid with maps centered at 0, 1024, or 2048 on the X or Z coordinates.}}
{{History||xbox=TU21|xbone=CU9|ps=1.14|wiiu=Patch 1|[[File:Empty Map JE1 BE1.png|32px]] [[Crafting]] a map now produces an empty map.}}
{{History||xbox=TU46|xbone=CU36|ps=1.38|wiiu=Patch 15|The outer end islands appear on different maps; even on Xbox 360, Playstation 3, Vita, and Wii U editions.}}
{{History||xbox=none|xbone=none|ps=1.90|wiiu=none|switch=none|[[File:Empty Map JE2 BE2.png|32px]] [[File:Map (item) JE2 BE2.png|32px]] The textures of maps have been changed.}}
{{History||ps=1.91|Maps can now be created and used in [[cartography table]]s.}}
{{History|foot}}
== Issues ==
{{issue list}}
== Trivia ==
* Use of the {{key|F1}} key can allow the player to hold a map without blocking their view at all.
* In ''Java Edition'', a map created using {{cmd|give}} can be any map by using the Map parameter to specify the map number desired. E.g. {{cmd|give [player] minecraft:filled_map{map:5<nowiki>}}} gives the specified player map_5. If no data value is supplied it defaults to map_0. If map_0 has not ever been crafted, it is centered on x=0, z=0.
* The maps are stored separately as their own data (<code>.dat</code>) file as <code>map_x.dat</code> with (x) being the map number, see [[map item format]] for more info. By manipulating this number, players can organize their maps to suit them, or if they accidentally create a map in the same location, they can delete their extra map so as to save the number they make.
* Certain programs can be used to make customized maps with images or text on them instead of actual maps, many people use these in adventure maps to show pictures or to tell a story.
* Since all copies of a map are links to the same file, copying an unfinished map keeps it synchronized with the copy as the player fills it in. Thus, a copy stored in a chest can act as a remote backup.
* A map that is in an item frame does not update itself until a player picks it up, lets it reload, and places it back again. However, if a player holds a clone of the map, both maps update.
* Filled maps are the only items that make 90 degree rotations in item frames, and also the only items that can expand the item frame into full block wide.
* On [[Legacy Console Edition]], the player always spawns with a map in their inventory after creating a world. This was later added to Bedrock Edition as an optional feature in the world creation menu.
* Maps on Legacy Console Edition always show the player's current coordinates, as a substitute for the optional [[Coordinates|coordinate display]] in other editions.
* A map cannot be created on [[New Nintendo 3DS Edition]]. Instead, the map is always displayed on the bottom screen along with the coordinates. Biome colors do not appear on maps.
== Gallery ==
<gallery>
MapItem1.png|A fully zoomed map.
MapRotation.png|Having a map in hand does not stop the ability to see ahead.
MapItem3.png|A world being recorded onto a map.
Mcmap4.png|Nearly fully explored map.
Zoomed Map.png|A map edited to the scale of 1.
Sky Map.png|A map mapping the [[Sky Dimension]].
MapOfVillage.png|A village and how it is represented on a map.
Pumpkin map.png|A map containing a custom image made by placing a large number of blocks.
Complete Map.png|A completely explored map.
MapZooms.png|A diagram showing how maps zoomed out before [[Java Edition 1.8]]. Notice how the larger maps have borders made of half and quarter small maps.
Map18zooms.png|From 1.8, zoomed maps are aligned to this grid exactly.
Large Biome Map.png|A map of a [[Large Biomes]] world.
Map0140-0160.png|A comparison of maps between versions in Pocket Edition Alpha [[Pocket Edition Alpha 0.14.0|0.14.0]] and [[Pocket Edition Alpha 0.16.0|0.16.0]].
Mycelium Map.png|A map view of a mushroom biome, showing that mycelium appears purple on a map.
MiniMap.png|Maps held in the off-hand or in either hand while [[dual wielding]] appear as mini-maps.
Partly filled treasure map.png|Partly filled treasure map with an odd area at the bottom left. Normally a partly filled map would look striped (as in the top left), but this map seems to be bugged and is possibly showing caves, or something, in the bottom left.
Partly filled ocean explorer map.png|Partly filled ocean explorer map. Updating the game from an older version (in this case the area was first generated before 1.18) and buying a map after updating (in this case in 1.19.4) can result in the map displaying rivers and terrain where there is really a frozen sea.
Map Stained Glass 1.png|Stained glasses' appearances on maps before and after 1.13.
Map Stained Glass 2.png|Stained glasses' appearances on maps before and after 1.13.
Map Various Blocks 1.png|Various blocks' appearances on maps before and after 1.13.
Map Various Blocks 2.png|Various blocks' appearances on maps before and after 1.13.
Better Together Map.jpg|Holding a map in the offhand in ''Bedrock Edition''.
Better Together Map Icon.jpg|Holding a map in both hands in ''Bedrock Edition''.
File:MapFailedtoFill.png|A map that has not yet filled. A rare bug in Java.
</gallery>
=== The Nether ===
<gallery>
Nethermap.png|A map in [[the Nether]].
Maponnether.png|A map in the Nether; the arrow turns around itself, like in [[compass]].
</gallery>
=== The End ===
<gallery>
Jeb End Map.png|The first image of a map in [[the End]].
Endmap.png|A map in the End.
</gallery>
=== Maps in item frames ===
<gallery>
FramedMap.png|A map displayed on an item frame, as it looked before [[Java Edition 1.7.2]].
Structure Map Collection.png|Multiple maps in item frames. Notice a [[village]], two [[desert temple]]s and a lava lake.
Minecraft maps 3by3.png|A collection of 9 connected full maps.
Full Map.png|A combination of 25 maps pasted together as one map.
Map wall BE.png|A map wall on ''Bedrock Edition'', showing large areas of biome colors for each biome.
Map's in item frames.png|Maps can be placed into [[item frame]]s so they can be viewed together.
Comparing Maps.png|The comparison between 3 zooms of maps.
SuperflatMap.png|A map in a [[Superflat]] world, with some [[village]]s.
MapWallWithMarkers.png|A 3x3 map wall with banner markers.
HEYYEYAAEYAAAEYAEYAA.png|He-Man map art.
Map Player Icons 1.png|First image of player icons on maps.
Map Player Icons 2.png|Second image of player icons on maps.
</gallery>
== See also ==
* [[Explorer Map]]
* [[Clock]]
* [[Tutorials/Navigation|Navigation]]
== References ==
{{Reflist}}
{{Items}}
[[cs:Mapa]]
[[de:Karte]]
[[es:Mapa]]
[[fr:Carte (objet)]]
[[hu:Térkép (tárgy)]]
[[ja:地図]]
[[ko:지도]]
[[nl:Kaart]]
[[pl:Mapa]]
[[pt:Mapa]]
[[ru:Карта]]
[[tr:Harita]]
[[th:แผนที่]]
[[uk:Мапа]]
[[zh:地图]]
[[Category:Renewable resources]]</li></ul></nowiki> | 12w22a | The Enderman's behavior was modified slightly. Now, it stops in front of the player. When the player swings his/her sword, it teleports behind the player. | |||
1.4.2{{Extension DPL}}<ul><li>[[Green Dye|Green Dye]]<br/>{{redirect|Cactus Green|the plant|Cactus}}{{Item
| title = Green Dye
| renewable = Yes
| stackable = Yes (64)
}}
'''Green dye''' is a [[primary color dye]].
== Obtaining ==
=== Chest loot ===
{{LootChestItem|green-dye}}
=== Smelting ===
{{Smelting
|head=1
|showdescription=1
|Cactus
|Green Dye
|1
|description={{only|Java}}<ref>{{bug|MC-210211||Smelting cactus gives too much experience since 1.13}}</ref>
}}
{{Smelting
|head=0
|showdescription=1
|Cactus
|Green Dye
|0,2
|description={{only|Bedrock}}
|foot=1
}}
=== Trading ===
[[Wandering trader]]s sell 3 green dye for an [[emerald]].
== Usage ==
{{dye usage}}
=== Crafting ingredient ===
{{crafting usage|ignore=Banner|continue=1}}
{{banner crafting usage}}
=== Loom ingredient ===
{{Banner loom usage|Green Dye}}
=== Trading ===
Expert level shepherd villagers have {{frac|1|6}} chance to buy 12 green dye for an emerald.{{only|bedrock}} Expert level shepherds have a {{frac|2|7}} chance to buy 12 green dye for 1 emerald.{{only|java}}
== Data values ==
=== ID ===
{{edition|java}}:
{{ID table
|edition=java
|showforms=y
|generatetranslationkeys=y
|displayname=Green Dye
|spritetype=item
|nameid=green_dye
|form=item
|foot=1}}
{{edition|bedrock}}:
{{ID table
|edition=bedrock
|showaliasids=y
|shownumericids=y
|showforms=y
|notshowbeitemforms=y
|generatetranslationkeys=y
|displayname=Green Dye
|spritetype=item
|nameid=green_dye
|aliasid=dye / 2
|id=397
|form=item
|translationkey=item.dye.green.name
|foot=1}}
== Video ==
<div style="text-align:center">{{yt|O4KVTPI4qIc}}</div>
== History ==
{{History|java beta}}
{{History||1.2|[[File:Green Dye JE1 BE1.png|32px]] Added cactus green, together with all other dyes.}}
{{History|java}}
{{History||1.3.1|snap=1.3|[[File:Green Dye JE2 BE2.png|32px]] The texture of cactus green has been changed.}}
{{History||1.4.2|snap=12w34a|Added the ability to [[Armor#Dyeing|dye]] leather [[armor]] and [[wolf]] collars.}}
{{History||1.4.6|snap=12w49a|Cactus green can be crafted with [[gunpowder]] to create a [[firework star]].}}
{{History||1.6.1|snap=13w19a|[[Stained clay]] can now be [[crafting|crafted]].}}
{{History||1.7.2|snap=13w41a|[[Stained glass]] can now be crafted.}}
{{History||1.8|snap=14w30a|Added [[banner]]s, which can be dyed.}}
{{History||1.11|snap=16w39a|Added the ability to dye [[shulker box]]es.}}
{{History||1.12|snap=17w06a|Cactus green can now be used to craft green [[concrete powder]].}}
{{History||1.12|snap=17w15a|Added the ability to dye [[bed]]s.}}
{{History||1.13|snap=17w47a|The different data values for the <code>dye</code> ID have now been split up into their own IDs.
|Prior to [[1.13/Flattening|''The Flattening'']], this [[item]]'s numeral ID was 351.}}
{{History||1.14|snap=18w43a|"Cactus Green" has been renamed to "Green Dye".
|[[File:Green Dye JE3 BE3.png|32px]] The texture of green dye has been changed.}}
{{History|||snap=18w44a|Green dye can now change the text color on [[sign]]s to green.}}
{{History|||snap=18w50a|Green dye can now be found in [[chest]]s in [[desert]] [[village]] houses.}}
{{History|||snap=19w05a|Added the [[wandering trader]], which sells green dye.}}
{{History|||snap=19w11a|Green dye can now be [[trading|bought]] by shepherd villagers.}}
{{History||1.17|snap=20w45a|Green dye can now be used to craft [[green candle]]s.}}
{{History|||snap=21w19a|Green dye can no longer be used to craft green candles.}}
{{History|||snap=Pre-release 1|Green dye can once again be used to craft green candles.}}
{{History||1.20<br>(Experimental)|link=1.19.3|snap=22w42a|Green dye can now change the text color on [[hanging sign]]s to green.}}
{{History|pocket alpha}}
{{History||v0.3.0|[[File:Green Dye JE1 BE1.png|32px]] Added cactus green. It is currently unobtainable and has no usage.}}
{{History||v0.3.2|Cactus green is now obtainable by [[smelting]] cacti in a [[furnace]]. It still has no usage.}}
{{History||v0.4.0|Cactus green can now be used to craft [[cyan dye]], [[lime dye]], and [[green wool]].}}
{{History||v0.8.0|snap=build 1|[[File:Green Dye JE2 BE2.png|32px]] The texture of cactus green has been changed.}}
{{History||v0.14.0|snap=build 1|Cactus green can now be used to dye [[water]] in [[cauldron]]s.}}
{{History|pocket}}
{{History||1.0.0|snap=alpha 0.17.0.1|Cactus green can now be used to dye [[shulker]]s.}}
{{History||1.1.0|snap=alpha 1.1.0.0|Cactus green can now be used to dye [[bed]]s, [[shulker box]]es, and craft [[concrete powder]].}}
{{History|bedrock}}
{{History||1.2.0|snap=beta 1.2.0.2|Cactus green can now be used to craft [[stained glass]], patterns on [[banner]]s, and [[firework star]]s.}}
{{History||1.4.0|snap=beta 1.2.20.1|Cactus green can now be used to craft [[balloon]]s and [[glow stick]]s.}}
{{History||1.8.0|snap=beta 1.8.0.10|"Cactus Green" has been renamed to "Green Dye".}}
{{History||1.10.0|snap=beta 1.10.0.3|Green dye is now sold by [[wandering trader]]s.
|[[File:Green Dye JE3 BE3.png|32px]] The texture of green dye has been changed.}}
{{History||1.11.0|snap=beta 1.11.0.1|Green dye can now be found in [[desert]] [[village]] house [[chest]]s.}}
{{History|||snap=beta 1.11.0.4|Green dye can now be [[trading|sold]] to shepherd [[villager]]s.}}
{{History||1.16.100|snap=beta 1.16.100.56|The ID of green dye has been changed from <code>dye/2</code> to <code>green_dye</code>.}}
{{History|console}}
{{History||xbox=TU1|xbone=CU1|ps=1.00|wiiu=Patch 1|[[File:Green Dye JE1 BE1.png|32px]] Added cactus green.}}
{{History|PS4}}
{{History||1.83|"Cactus Green" has been renamed to "Green Dye".}}
{{History||1.90|[[File:Green Dye JE3 BE3.png|32px]] The texture of green dye has been changed.}}
{{History|new 3ds}}
{{History||0.1.0|[[File:Green Dye JE1 BE1.png|32px]] Added cactus green.}}
{{History|foot}}
== Issues ==
{{issue list}}
{{Items}}
[[cs:Kaktusová zeleň]]
[[de:Grüner Farbstoff]]
[[es:Tinte verde]]
[[fr:Teinture verte]]
[[hu:Kaktuszzöld]]
[[ja:緑色の染料]]
[[ko:초록색 염료]]
[[nl:Cactusgroen]]
[[pl:Zielony barwnik]]
[[pt:Corante verde]]
[[ru:Зелёный краситель]]
[[Category:Items]]
[[Category:Dyes]]
[[Category:Renewable resources]]</li><li>[[Minecart with Furnace|Minecart with Furnace]]<br/>{{ItemEntity
|image=Minecart with Furnace.png
|renewable=Yes
|stackable=No
|size=Height: 0.7 Blocks<br>Width: 0.98 Blocks
|networkid=10
|drops= 1 {{ItemLink|Minecart with Furnace}}
|health={{Hp|6}}
}}
A '''minecart with furnace''' is a [[furnace]] inside a [[minecart]]. It can be powered with [[coal]] or [[charcoal]] to propel it across a [[rail]] line for a limited time, which can be used to move other minecarts.
==Obtaining==
Minecarts with furnace can be retrieved by attacking them, and by doing so it drops as an [[item]].
===Crafting===
{{Crafting
|Output= Minecart with Furnace
|type= Transportation
|Furnace|Minecart}}
==Usage==
Minecarts with furnaces are placed in the same way as other minecarts. It does not have a graphical user interface, unlike a [[furnace]].
Minecarts with furnaces can be powered, done by feeding fuel ([[coal]] or [[charcoal]]) into the furnace minecart with the {{Control|use}} button. The fuel is consumed immediately and it starts to move in the same direction the player clicked toward. Pressing {{Control|use}} always turns it to that direction, even when not holding coal.
Any piece of fuel, added at any time, increases the total range by an additional 3600 ticks (equal to 180 seconds or 3 minutes). The upper limit is 32767 ticks, approximately 27 minutes.
When powered, minecarts with furnaces cover 240m per minute (about 4 m/s, slightly slower than walking speed) or 720m per piece of coal. They do not accelerate beyond this speed when going downhill or on active [[powered rail]]s, and as long as they remain powered, they do not slow down when going uphill, on inactive powered rails, or when pushing or pulling other minecarts.
If a powered furnace minecart is derailed and then pushed back onto a rail, it starts moving again in the direction it came from, so they are not easily turned around in this state unless a player is nearby to redirect it with {{Control|use}}.
Minecarts with furnaces can climb up steep inclines while pushing other minecarts as long as they have fuel. If a minecart with furnace reaches a slope while pulling another minecart, the pulled minecart is switched to the forward position so that it can be pushed along the slope instead of pulled.
When a minecart with furnace bumps into another minecart or multiple minecarts, the other minecarts are pushed forward with great speed. The furnace minecart continues on with its own speed. Because of this speed difference, some of the minecarts may end up inside unloaded chunks on straight tracks.
===Train mechanics===
{{Schematic
|caption=weakly-shunted 1-cart train, one cart was used only to push the train together and is left behind
|AB|mc-$ew|mc-$ew|mc/Fu-$ew|-
|AB|ra-$wu|ra-$ew|ra-$ew|ra-$ew|ellipsis-ew
}}
{{Schematic
|caption=Creating a strongly-shunted 1-cart train. The sloped rail must be replaced with a horizontal rail before powering.
|AB|mc-$ew||mc/Fu-$ew|-
|AB|ra-$ew|ra-$ew|ra-$eu|ra-$ew|ra-$ew|ellipsis-ew
}}
[[File:FurnaceMinecartTrain.png|thumb|right|A Minecart train powered by furnace [[Minecart|minecarts.]]|alt=]]
A furnace minecart can be made to pull up to four other minecarts. All minecarts in this train move at the constant speed of the furnace minecart. Trains are formed when a minecart is pushed into the back of a powered furnace minecart or a short-enough train. These shunts are fragile at best and easily come undone, but some methods are stronger than others. For example, pushing a minecart into a furnace minecart and then powering the furnace gives a weaker shunt than pushing the furnace minecart into the other minecart against a wall, and then powering the furnace in the other direction.
A high-speed minecart running into the back of a furnace minecart going in the same direction automatically creates a weak shunt with it, pulling it along.
Pulling a minecart with TNT causes it to explode.
{| class="wikitable"
|+Pulled minecart/Shunt behavior
!Condition
!Result
|-
|Furnace loses power/speed||Shunt comes undone
|-
|Entity bumping besides those part of the train||Jettisoned forward
|-
|Upward sloped track||Jettisoned forward
|-
|Downward sloped track||Jettisoned forward (strong shunt) or shunt comes undone (weak shunt)
|-
|90° turn in track||Jettisoned backward
|-
|Turn toward north/south or east/west that is not the direction the train was shunted in||Train derails
|}
When a train comes to a turn, the shunt comes undone with the pulled minecart jettisoned backward. The correct way to make such a turn is having the shunt undone before a turn, and then make the two rejoin on a straight rail later by having the pulled cart catch up with the minecart with furnace.<ref name=mango/>
Since the train runs slower on a fully powered track than a normal minecart (~5 m/s compared to 8m/s), a train pulled by an unpowered furnace minecart is ideal for AFK farms involving breaking or placing blocks like [[nether wart]].<ref name=mango>{{YouTubeLink|1=pRLiAQfhTG8|2=Why The Furnace Minecart Isn't As Useless As You Think|3=ilmango}}</ref>
==Properties==
The coal is not stored as an item in the entity, but in the object data in the fuel property as a time in ticks. ''Fuel'' is a short value, i.e. a maximum of 32767 ticks, which is about 27 minutes. However, {{cmd|/summon furnace_minecart ~ ~ ~ {Fuel:32000} }} alone doesn't make it go since it doesn't have a direction. It can be right-clicked on a track to give it a direction, or it can be summoned with the properties ''PushX'' and ''PushZ'' set, which are responsible for the direction. The <code>Motion</code> property of every entity allows for movement of the minecart, but it does not direct the minecart to move on its own.
==Sounds==
{{Edition|Java}}:<br>
Minecarts with furnaces use the Friendly Creatures sound category for entity-dependent sound events.<ref group=sound name=rollsource>{{bug|MC-42132}}</ref>
{{Sound table
|sound=Minecart rolling.ogg
|subtitle=Minecart rolls
|source=Friendly Creatures <ref group=sound name=rollsource/>
|overridesource=1
|description=While a minecart with furnace is moving
|id=entity.minecart.riding
|translationkey=subtitles.entity.minecart.riding
|volume=0.0-0.35 <ref group=sound>Relates linearly with horizontal velocity (max 0.5)</ref>
|pitch=0.0-1.0 <ref group=sound>Will increase by 0.0025 per tick if the minecart's horizontal velocity is more than 0.01</ref>
|distance=16
|foot=1}}
{{Edition|Bedrock}}:
{{Sound table
|type=bedrock
|sound=Minecart rolling.ogg
|source=neutral
|description=While a minecart with furnace is moving
|id=minecart.base
|foot=1}}
==Data values==
===ID===
{{ID table
|edition=java
|firstcolumnname=Item
|showforms=y
|generatetranslationkeys=y
|displayname=Minecart with Furnace
|spritetype=item
|nameid=furnace_minecart
|form=item
|foot=1}}
{{ID table
|edition=java
|firstcolumnname=Entity
|generatetranslationkeys=y
|displayname=Minecart with Furnace
|spritetype=entity
|nameid=furnace_minecart
|foot=1}}
===Entity data===
Minecarts with furnace have entity data associated with them that contain various properties of the entity.
{{el|java}}:
{{main|Entity format}}
{{/ED}}
{{el|bedrock}}:
: See [[Bedrock Edition level format/Entity format]].
==History==
{{History|java alpha}}
{{History||v1.0.14|[[File:Minecart with Furnace JE1.png|32px]] [[File:Minecart with Furnace (item) JE1.png|32px]] Minecarts with furnace were added.
|Since no in-game name was indicated, they were referred to by names such as "powered minecart" or "furnace minecart".
|No matter how much fuel was added to the minecart, it would never move for more than 3 minutes after the last fuel.}}
{{History|java beta}}
{{History||1.0|When tooltips were added to items in inventory, this was named "Minecart with Furnace".}}
{{History||1.2|[[File:Minecart with Furnace JE2.png|32px]] The texture of the minecart with furnace has been changed.}}
{{History|java}}
{{History||1.0.0|snap=?|Each piece of [[coal]] now powers a [[minecart]] with furnace for {{convert|3|minutes|ticks}}, so that adding another piece of coal at any time increases the total range by another 3 minutes. A full stack of 64 coal now powers it for {{convert|192|minutes|ticks}}.
|Minecarts with furnace on a level track cover 204 meters per minute.}}
{{History||1.8|snap=14w11a|Minecarts with furnace now give a much greater boost to other minecarts.
|When powered, minecarts with furnace now move on non-powered rails without decelerating.}}
{{History|||snap=14w17a|Minecarts with furnace's behavior has been reverted, so that no change was released in [[Java Edition 1.8]].}}
{{History||1.11|snap=16w32a|The entity ID of the minecart with furnace has been changed from <code>MinecartFurnace</code> to <code>furnace_minecart</code>.}}
{{History||1.13|snap=17w47a|Prior to [[1.13/Flattening|''The Flattening'']], this [[item]]'s numeral ID was 343.}}
{{History||1.14|snap=18w43a|[[File:Minecart with Furnace JE3.png|32px]] [[File:Minecart with Furnace (item) JE2.png|32px]] The texture of the minecart with furnace has been changed.}}
{{History||1.15|snap=19w38a|[[File:Minecart with Furnace 19w38a.png|32px]] The furnace now appears dark, like suffocating mobs.}}
{{History|||snap=19w39a|The furnace texture is now colored correctly.}}
{{History||1.15.2|snap=Pre-Release 1|Furnace minecarts can now navigate around any corner.}}
{{History||1.19|snap=22w13a|The crafting recipe for a minecart with furnace is now shapeless.
|Breaking a minecart with furnace will now drop the item instead of the minecart and furnace separately.<ref>{{bug|MC-249493|||Fixed}}</ref>}}
{{History|console}}
{{History||xbox=TU1|xbone=CU1|ps=1.0|wiiu=Patch 1|switch=1.0.1|[[File:Minecart with Furnace JE2.png|32px]] [[File:Minecart with Furnace (item) JE1.png|32px]] Added minecart with furnace.}}
{{History|Ps4}}
{{History||1.90|[[File:Minecart with Furnace JE3.png|32px]] [[File:Minecart with Furnace (item) JE2.png|32px]] The texture of the minecart with furnace has been changed.}}
{{History|foot}}
==Issues==
{{issue list}}
==Trivia==
*The minecart with furnace is excluded from {{els|be|3ds}} on purpose. In a tweet, [[Jeb]] considered removing it from {{el|je}}.<ref>{{tweet|jeb|699241247391772672|I think we will phase out the furnace minecraft ''(sic)''|15 Feb 2016}}</ref>
**When converting a [[Legacy Console Edition]] world to a [[Bedrock Edition]] world, any present minecarts with furnaces are converted into a normal minecart.
**Despite the above-described poor standing of the minecart, it was most recently briefly featured in an animation in the [[Minecraft Live 2022]], where one was depicted as moving a train of about 20 minecarts at a higher than normal speed.
==Gallery==
<gallery>
Running Powered Minecart.png|A powered minecart in action.
</gallery>
==References==
{{reflist}}
{{Items}}
{{Entities}}
[[Category:Mechanics]]
[[cs:Parní vozík]]
[[de:Antriebslore]]
[[es:Vagoneta con horno]]
[[fr:Wagonnet motorisé]]
[[hu:Gőzmeghajtású csille]]
[[ja:かまど付きのトロッコ]]
[[ko:화로가 실린 광산 수레]]
[[nl:Mijnkar met oven]]
[[pl:Wagonik z piecem]]
[[ru:Вагонетка с печью]]
[[uk:Вагонетка з піччю]]
[[zh:动力矿车]]</li></ul> | 12w38a | The Enderman's sound now plays the full length sounds instead of shortened, now if you look at them (or they open the jaw), a static sound will play. | |||
1.7.2{{Extension DPL}}<ul><li>[[Banner Pattern|Banner Pattern]]<br/>{{Item
| image = Banner Pattern.png
| rarity =
* '''Flower Charge, Field Masoned, Bordure Indented, Globe, Snout'''
* Common
* '''Creeper Charge, Skull Charge'''
* Uncommon
* '''Thing'''
* Epic
| renewable =
* '''Snout, Thing''': No
* '''All others''': Yes
| stackable = No
}}
'''Banner patterns''' are [[item]]s used to customize [[banner]]s inside [[loom]]s.
There are six patterns {{in|java}} and eight {{in|bedrock}}.
== Obtaining ==
[[File:Banner Patterns 20w15a.png|thumb|All six banner patterns {{in|java}} with their various sources.]]
=== Crafting ===
{{see also|Banner/Patterns|title1=List of patterned banners}}
4 out of 6 banner patterns {{only|JE}} and 2 more {{only|BE}} can be obtained by crafting. They are crafted by combining one [[paper]] along with a certain material.
{{Crafting
|head=1
|Paper
|Creeper Head
|Output=Banner Pattern Creeper
|type=Miscellaneous
|description=Creeper face
}}
{{Crafting
|Paper
|Wither Skeleton Skull
|Output=Banner Pattern Skull
|type=Miscellaneous
|description=Skeleton skull and crossbones
}}
{{Crafting
|Paper
|Oxeye Daisy
|Output=Banner Pattern Flower
|type=Miscellaneous
|description=Daisy
}}
{{Crafting
|Paper
|Enchanted Golden Apple
|Output=Banner Pattern Thing
|type=Miscellaneous
|showdescription=true
|description=Former [[Mojang Studios]] logo
}}
{{Crafting
|Paper
|Bricks
|Output=Banner Pattern Field Masoned
|type=Miscellaneous
|description={{only|bedrock}}
}}
{{Crafting
|Paper
|Vines
|Output=Banner Pattern Bordure Indented
|type=Miscellaneous
|description={{only|bedrock}}
|foot=1
}}
=== Trading ===
'''Globe banner pattern''' is obtained by trading with a master-level [[Trading#Cartographer|cartographer villager]] for a price of 8 emeralds.
=== Chest loot ===
'''Snout banner pattern''' is obtained in the [[Bastion Remnant]] as loot.
{{LootChestItem|snout-banner-pattern}}
== Usage ==
=== Loom ingredient ===
Banner patterns are used in [[loom]]s to add customization to [[banner]]s. The pattern must be combined with 1 banner and 1 [[dye]]. Upon usage in the loom, the banner pattern is not consumed.
{{Looming
|head=1
|showdescription=1
|name=[[Banner|Flower Charge Banner]]
|ingredients={{:Banner/recipe|ingredients}}
|{{:Banner/recipe|banner}}
|Matching Dye
|Banner Pattern Flower Charge
|Flower Charge
|{{:Banner/recipe|output|Flower Charge}}
|Blink=Banner
|Olink=Banner
|description=Emblazons a flower charge (flower icon)
}}
{{Looming
|name=[[Banner|Creeper Charge Banner]]
|ingredients={{:Banner/recipe|ingredients}}
|{{:Banner/recipe|banner}}
|Matching Dye
|Banner Pattern Creeper Charge
|Creeper Charge
|{{:Banner/recipe|output|Creeper Charge}}
|Blink=Banner
|Olink=Banner
|description=Emblazons a creeper charge (creeper face)
}}
{{Looming
|name=[[Banner|Skull Charge Banner]]
|ingredients={{:Banner/recipe|ingredients}}
|{{:Banner/recipe|banner}}
|Matching Dye
|Banner Pattern Skull Charge
|Skull Charge
|{{:Banner/recipe|output|Skull Charge}}
|Blink=Banner
|Olink=Banner
|description=Emblazons a skull charge (skull and crossbones)
}}
{{Looming
|name=[[Banner|Thing Banner]]
|ingredients={{:Banner/recipe|ingredients}}
|{{:Banner/recipe|banner}}
|Matching Dye
|Banner Pattern Thing
|Thing
|{{:Banner/recipe|output|Thing}}
|Blink=Banner
|Olink=Banner
|description=Emblazons a thing (old Mojang logo)}}
{{Looming
|name=[[Banner|Snout Banner]]
|ingredients={{:Banner/recipe|ingredients}}
|{{:Banner/recipe|banner}}
|Matching Dye
|Banner Pattern Snout
|Snout
|{{:Banner/recipe|output|Snout}}
|Blink=Banner
|Olink=Banner
|description=Emblazons a piglin snout
}}
{{Looming
|name=[[Banner|Globe Banner]]
|ingredients={{:Banner/recipe|ingredients}}
|{{:Banner/recipe|banner}}
|Matching Dye
|Banner Pattern Globe
|Globe
|{{:Banner/recipe|output|Globe}}
|Blink=Banner
|Olink=Banner
|description=Emblazons a globe (cube shaped earth)
}}
{{Looming
|name=[[Banner|Bordure Indented Banner]]
|ingredients={{:Banner/recipe|ingredients}}
|{{:Banner/recipe|banner}}
|Matching Dye
|Banner Pattern Bordure Indented
|Bordure Indented
|{{:Banner/recipe|output|Bordure Indented}}
|Blink=Banner
|Olink=Banner
|description=Emblazons a bordure indented (fancy border){{only|bedrock}}
}}
{{Looming
|name=[[Banner|Field Masoned Banner]]
|ingredients={{:Banner/recipe|ingredients}}
|{{:Banner/recipe|banner}}
|Matching Dye
|Banner Pattern Field Masoned
|Field Masoned
|{{:Banner/recipe|output|Field Masoned}}
|Blink=Banner
|Olink=Banner
|description=Emblazons a field masoned (brick pattern){{only|bedrock}}
|foot=1
}}
== Data values ==
=== ID ===
{{edition|java}}:
{{ID table
|edition=java
|firstcolumnname=Banner Pattern
|showforms=y
|generatetranslationkeys=y
|displayname=Flower Charge
|spritename=banner-pattern
|spritetype=item
|nameid=flower_banner_pattern
|form=item}}
{{ID table
|displayname=Creeper Charge
|spritename=banner-pattern
|spritetype=item
|nameid=creeper_banner_pattern
|form=item}}
{{ID table
|displayname=Skull Charge
|spritename=banner-pattern
|spritetype=item
|nameid=skull_banner_pattern
|form=item}}
{{ID table
|displayname=Thing
|spritename=banner-pattern
|spritetype=item
|nameid=mojang_banner_pattern
|form=item}}
{{ID table
|displayname=Globe
|spritename=banner-pattern
|spritetype=item
|nameid=globe_banner_pattern
|form=item}}
{{ID table
|displayname=Snout
|spritename=banner-pattern
|spritetype=item
|nameid=piglin_banner_pattern
|form=item
|foot=1}}
{{edition|bedrock}}:
{{ID table
|edition=bedrock
|firstcolumnname=Banner Pattern
|showaliasids=y
|shownumericids=y
|showforms=y
|notshowbeitemforms=y
|generatetranslationkeys=y
|displayname=Creeper Charge
|spritename=banner-pattern
|spritetype=item
|nameid=creeper_banner_pattern
|aliasid=banner_pattern / 0
|id=582
|form=item
|translationkey=item.banner_pattern.name, item.banner_pattern.creeper}}
{{ID table
|displayname=Skull Charge
|spritename=banner-pattern
|spritetype=item
|nameid=skull_banner_pattern
|aliasid=banner_pattern / 1
|id=583
|form=item
|translationkey=item.banner_pattern.name, item.banner_pattern.skull}}
{{ID table
|displayname=Flower Charge
|spritename=banner-pattern
|spritetype=item
|nameid=flower_banner_pattern
|aliasid=banner_pattern / 2
|id=581
|form=item
|translationkey=item.banner_pattern.name, item.banner_pattern.flower}}
{{ID table
|displayname=Thing
|spritename=banner-pattern
|spritetype=item
|nameid=mojang_banner_pattern
|aliasid=banner_pattern / 3
|id=584
|form=item
|translationkey=item.banner_pattern.name, item.banner_pattern.thing}}
{{ID table
|displayname=Field Masoned
|spritename=banner-pattern
|spritetype=item
|nameid=field_masoned_banner_pattern
|aliasid=banner_pattern / 4
|id=585
|form=item
|translationkey=item.banner_pattern.name, item.banner_pattern.bricks}}
{{ID table
|displayname=Bordure Indented
|spritename=banner-pattern
|spritetype=item
|nameid=bordure_indented_banner_pattern
|aliasid=banner_pattern / 5
|id=586
|form=item
|translationkey=item.banner_pattern.name, item.banner_pattern.vines}}
{{ID table
|displayname=Snout
|spritename=banner-pattern
|spritetype=item
|nameid=piglin_banner_pattern
|aliasid=banner_pattern / 6
|id=587
|form=item
|translationkey=item.banner_pattern.name, item.banner_pattern.piglin}}
{{ID table
|displayname=Globe
|spritename=banner-pattern
|spritetype=item
|nameid=globe_banner_pattern
|aliasid=banner_pattern / 7
|id=588
|form=item
|translationkey=item.banner_pattern.name, item.banner_pattern.globe
|foot=1}}
== Achievements ==
{{load achievements|Fruit on the Loom}}
== History ==
{{History|java}}
{{History||1.14|snap=18w43a|[[File:Banner Pattern JE1 BE1.png|32px]] [[File:Banner Pattern JE1 BE1.png|32px]] [[File:Banner Pattern JE1 BE1.png|32px]] [[File:Banner Pattern JE1 BE1.png|32px]] Added banner patterns for flower charge, creeper charge, skull charge and thing patterns.}}
{{History|||snap=19w11a|[[File:Banner Pattern JE1 BE1.png|32px]] Added banner pattern for globe.
|The banner pattern for globe can be [[trading|bought]] from master-level cartographer [[villager]]s for 8 [[emerald]]s.}}
{{History||1.16|snap=20w15a|[[File:Banner Pattern JE1 BE1.png|32px]] Added the piglin banner pattern.}}
{{History|||snap=20w16a|The piglin banner pattern can now be found in [[chest]]s in [[bastion remnants]].}}
{{History|||snap=20w18a|The piglin pattern has now been renamed to "Snout".}}
{{History||1.16.2|snap=20w30a|The chance of finding the "Snout" banner pattern in bastion remnant chests has been increased from 5.5% to 10.1%.}}
{{History|bedrock}}
{{History||1.10.0|snap=beta 1.10.0.3|[[File:Banner Pattern JE1 BE1.png|32px]] [[File:Banner Pattern JE1 BE1.png|32px]] [[File:Banner Pattern JE1 BE1.png|32px]] [[File:Banner Pattern JE1 BE1.png|32px]] [[File:Banner Pattern JE1 BE1.png|32px]] [[File:Banner Pattern JE1 BE1.png|32px]] Added banner patterns for creeper charge, skull charge, flower charge, thing, field masoned and bordure indented patterns.}}
{{History||1.11.0|snap=beta 1.11.0.4|The banner patterns flower charge, field masoned and bordure indented can now be [[trading|bought]] from cartographer [[villager]]s.}}
{{History||1.16.0|snap=beta 1.16.0.57|[[File:Banner Pattern JE1 BE1.png|32px]] Added the piglin banner pattern.}}
{{History|||snap=beta 1.16.0.59|The piglin pattern has now been renamed to "Snout".}}
{{History||1.16.100|snap=beta 1.16.100.55|The "Thing" banner pattern can now be crafted at the [[loom]].}}
{{History||1.16.100|snap=beta 1.16.100.56|The ID of banner patterns have been changed from <code>banner_pattern</code> to <code><type>_banner_pattern</code>.}}
{{History||1.18.10|snap=beta 1.18.10.24|[[File:Banner Pattern JE1 BE1.png|32px]] Added banner pattern for globe. It is currently unobtainable in survival.}}
{{History|||snap=beta 1.18.10.26|The banner pattern for globe are now obtainable in survival and can be [[trading|bought]] from master-level cartographer [[villager]]s for 8 [[emerald]]s.
|Removed flower charge, field masoned and bordure indented banner pattern from villager trading.}}
{{History|PS4}}
{{History||1.90|[[File:Banner Pattern JE1 BE1.png|32px]] [[File:Banner Pattern JE1 BE1.png|32px]] [[File:Banner Pattern JE1 BE1.png|32px]] [[File:Banner Pattern JE1 BE1.png|32px]] [[File:Banner Pattern JE1 BE1.png|32px]] [[File:Banner Pattern JE1 BE1.png|32px]] Added banner patterns for creeper charge, skull charge, flower charge, thing, field masoned and bordure indented patterns.}}
{{History|foot}}
== Issues ==
{{issue list}}
{{Items}}
[[de:Bannervorlage]]
[[es:Diseño de estandarte]]
[[fr:Motif de bannière]]
[[ja:旗の模様]]
[[ko:현수막 무늬]]
[[pl:Wzór sztandaru]]
[[pt:Desenho para estandarte]]
[[ru:Узор флага]]
[[th:ลวดลายธง]]
[[zh:旗帜图案]]</li><li>[[:Category:Joke items|Category:Joke items]]<br/>[[Category:Joke features|Items]]
[[Category:Items]]</li></ul> | ??? | Endermen are no longer provoked when attacked by the player in creative mode | |||
Issues
Issues relating to "Enderman" are maintained on the bug tracker. Report issues there.
Trivia
- Notch claimed in public that the Enderman is a "(subtle)" reference to "the Slenderman", a similar looking monster with a similar name. Given the later development of the End, it is possible he already had the name in mind, and did not choose it because of the Reddit thread in which their name was revealed.[11]
- In the Halloween texture pack for the Xbox 360 Edition, the Enderman is re-skinned to look like The Slenderman.
- If an Enderman is in his aggressive state, you can prevent him from walking/going anywhere if you stare at him (you can freeze the enderman as long as your cursor remains on him). However, if attacked in this state, the enderman may teleport away.
- The Enderman seems to use a re-colored version of the player's face texture, much like blazes, zombies, and skeletons.
- The exact size of an Enderman is 0.6x0.6x2.9 blocks(1.9x1.9x9.5 feet).
- Enderman sounds seems to stem from reverse audios:
- the "idle1" sound is a reversed “here”
- the "idle2" sound is a reversed "hiya"
- the "idle3" sound is a down-pitched “whats up?” or "this way!"
- the "idle4" sound is a down-pitched reversed "forever!"
- the "idle5" sound is a reversed "uh oh!"
- Even in an aggressive state, they can still pick up blocks, which at times makes it look like they are tearing through walls to reach the player. However, they will never pick up blocks to reach the player.
- If a Mob Spawner is tweaked to spawn Endermen, the model inside will have its head jutting out the top of the frame.
- The purple particles that Endermen emit are hard-coded into the game, so they cannot be re-textured without mods.
- Endermen are able to create snow golems and iron golems if they pick up a pumpkin and place it correctly on snow and iron blocks placed by the player.
- After 12w38a Snapshot update, the previously unused stare.ogg and scream.ogg can now be heard without use of any mods. Stare.ogg plays whenever the player is staring at an Enderman, and Scream.ogg plays when Enderman is chasing a player.
- Amusingly, if an Enderman is set on fire, they may try to put it out by teleporting into water, and therefore committing 'suicide', because they take damage from it.
- Amusingly enough, if an Enderman is caught in rain, he will continuously teleport in random directions. Players can sometimes, during rain, see Endermen teleport in front of them quickly and teleport off the moment they take damage.
- If you throw a Potion of Invisibility to an Enderman, the Enderman will be invisible, but you can still see the eyes. This is because the eyes, like spiders, are in a separate texture file.
- In the End, an invisible Enderman at a distance will become visible as a pale purple figure.
- Burning Endermen will teleport randomly; similar to if they are in rain.
- Using spawn eggs, Enderman continuously spawned into lava will humorously teleport - in the Nether, they will often teleport in circles for lack of room due to the lava oceans.
- If you go to sleep in a bed it is possible for an Enderman to teleport on it and knock you off. You will still continue to go to sleep as if you were in a bed.
- To make Endermen aggressive in the Xbox 360 Edition, players must perform critical hits.
- Endermen can be hit by arrows in the Xbox 360 Edition. Although they appear to teleport away half a second before the arrow hits they will have the arrow sticking out of their arm when they reappear, and if it was a flaming arrow the Enderman will be on fire.
- Endermen cannot teleport onto lily pads or cobwebs.
- Endermen originate from the End, yet they are unable to pick up and move the End Stone of which that world is made.
- It is actually possible to hit Endermen with arrows, but only if you are far enough from the Enderman.
- Strangely, this will not make the Enderman hostile.
- Endermen will be added to the Pocket Edition in 0.9.0 Alpha.
Gallery
Beta 1.8 pre-release
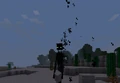
An Enderman striking in 1.8.
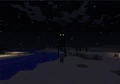
The glowing eyes of an Enderman in 1.8.

An official image of Endermen. (Auto-leveled for clarity)

Notch's release of the Endermen texture file, as of September 3rd.
The Enderman attacking the camera in the 1.8 official trailer.
An Enderman's height compared to the Player's height.

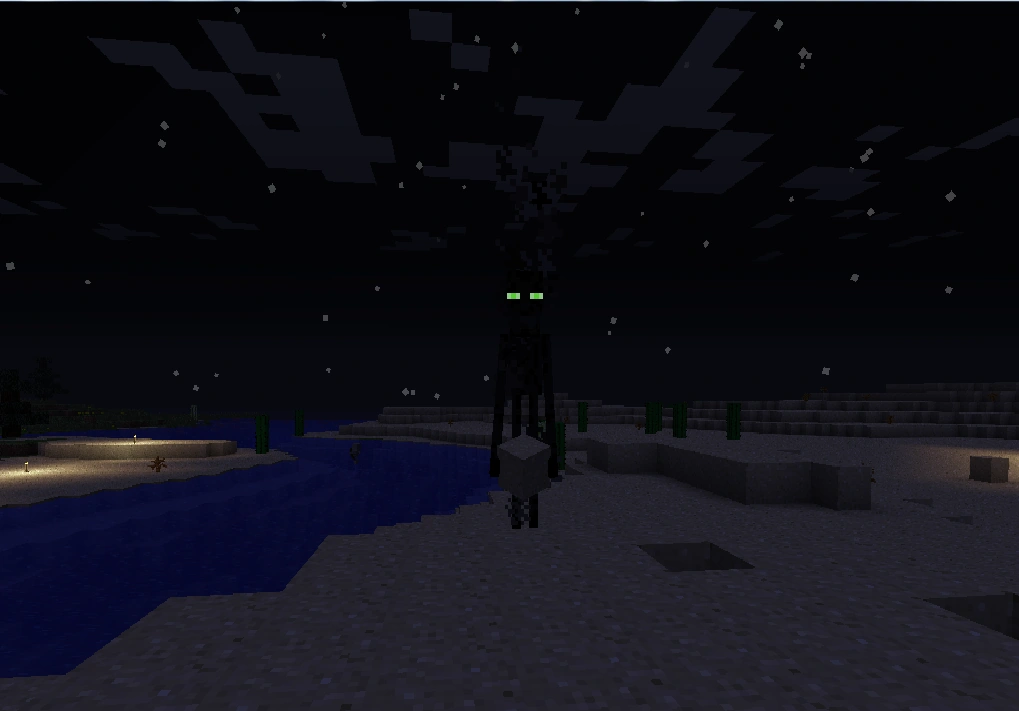
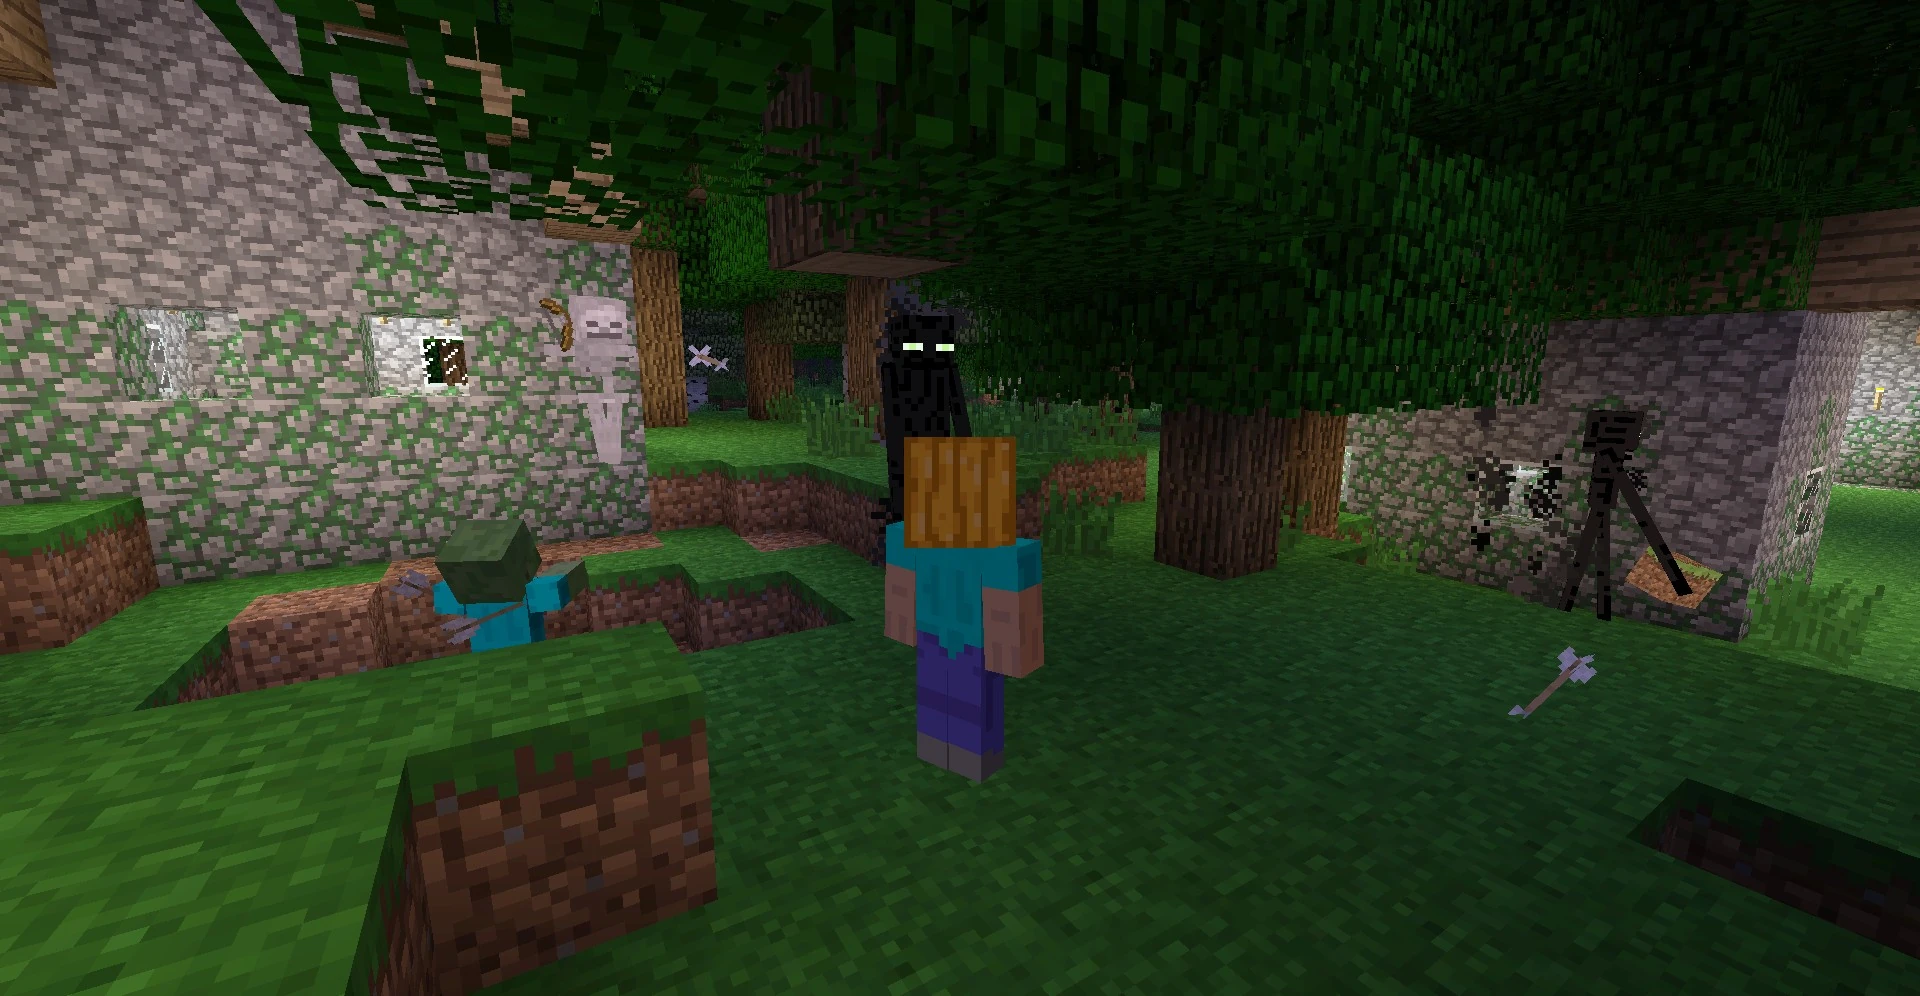

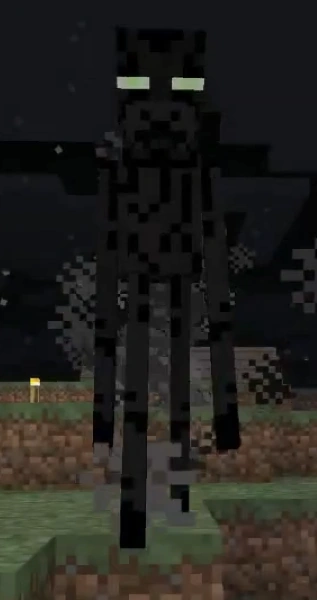
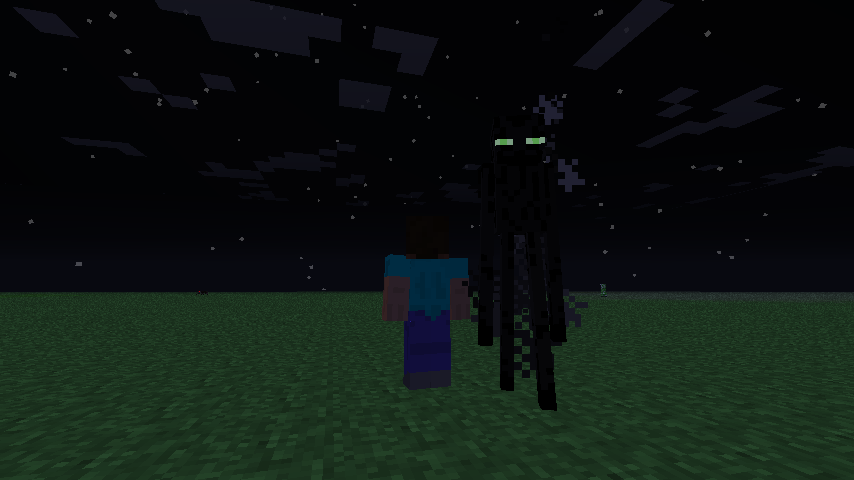
Beta 1.8+
- He be stealing my TNT.png
An Enderman holding TNT. Note that the block of TNT is inverted.
A group of Endermen in a desert biome.
Three Endermen in a village.
- Endermans Attack.png
Horde of Endermen attacking a player.
- Front view of Enderman.png
Front view of an Enderman.
- 2013-06-06 11.15.53.png
Endermen in The End.
- Dandelion Enderman.png
An Enderman holding a dandelion. Note that it is reduced to half its normal size.
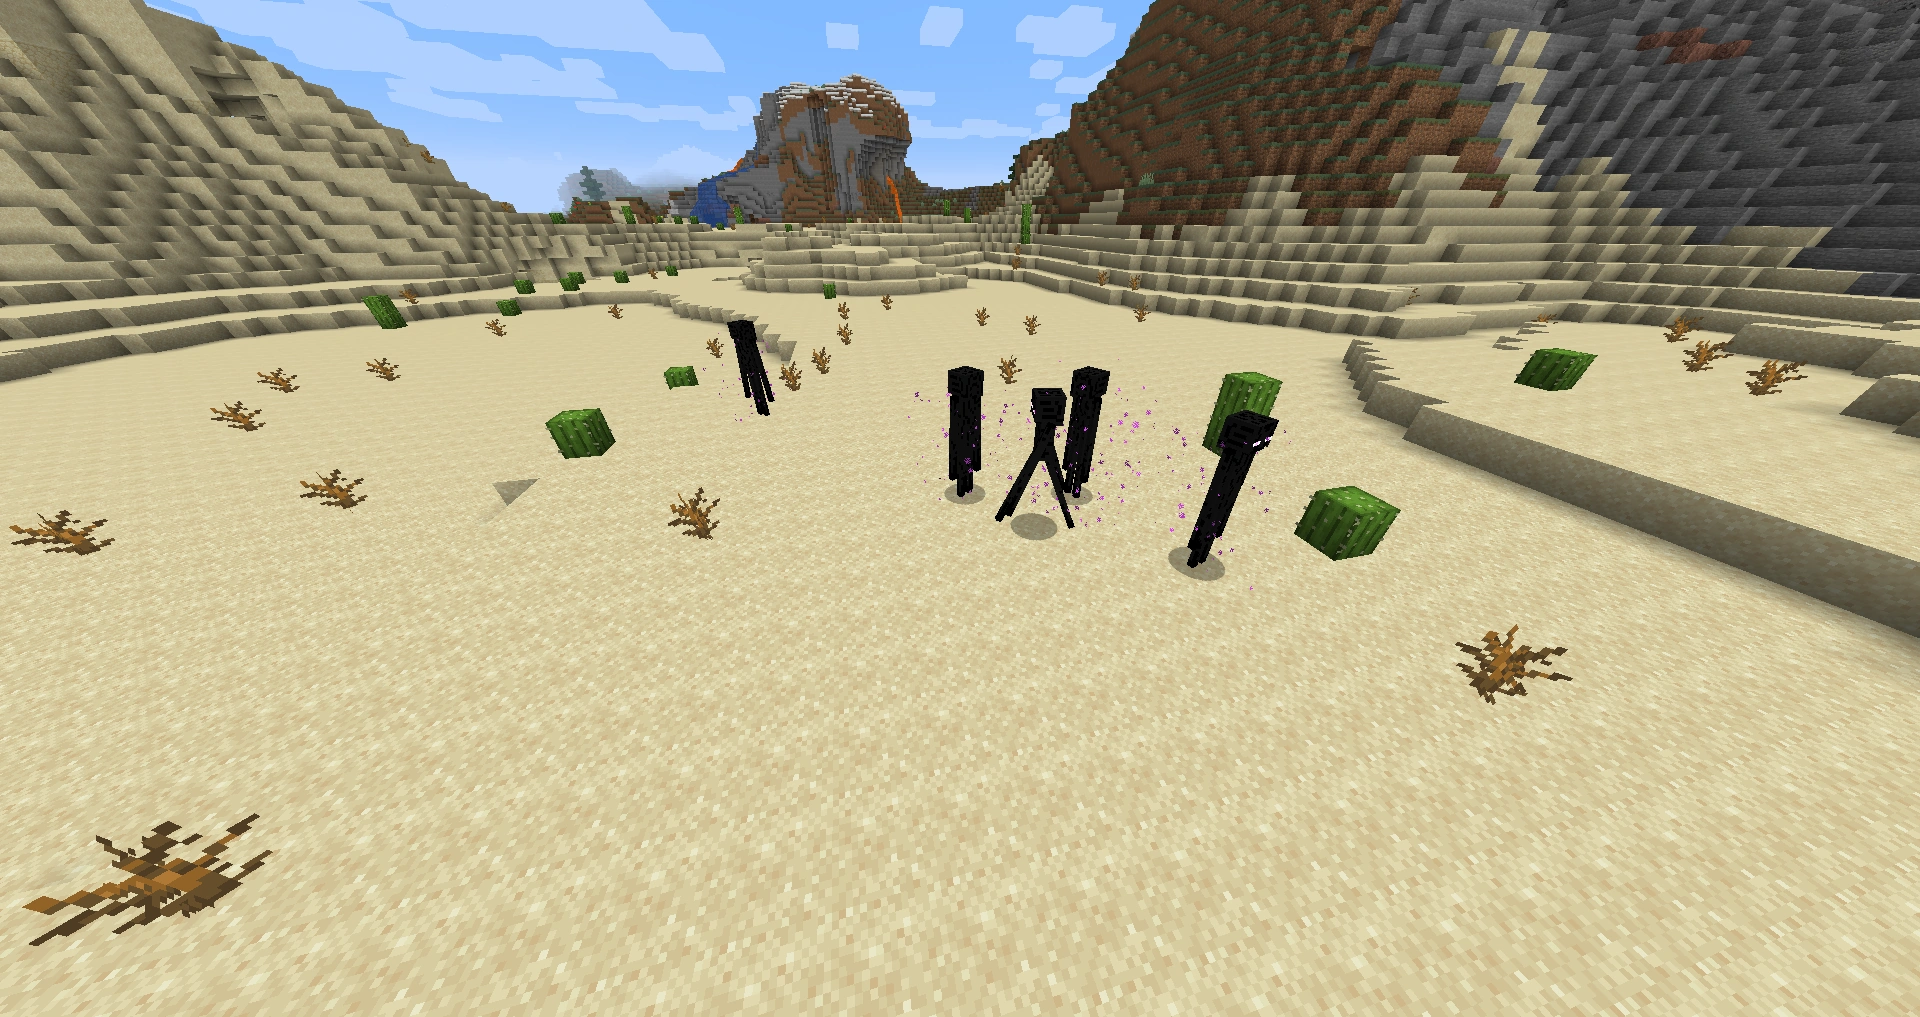
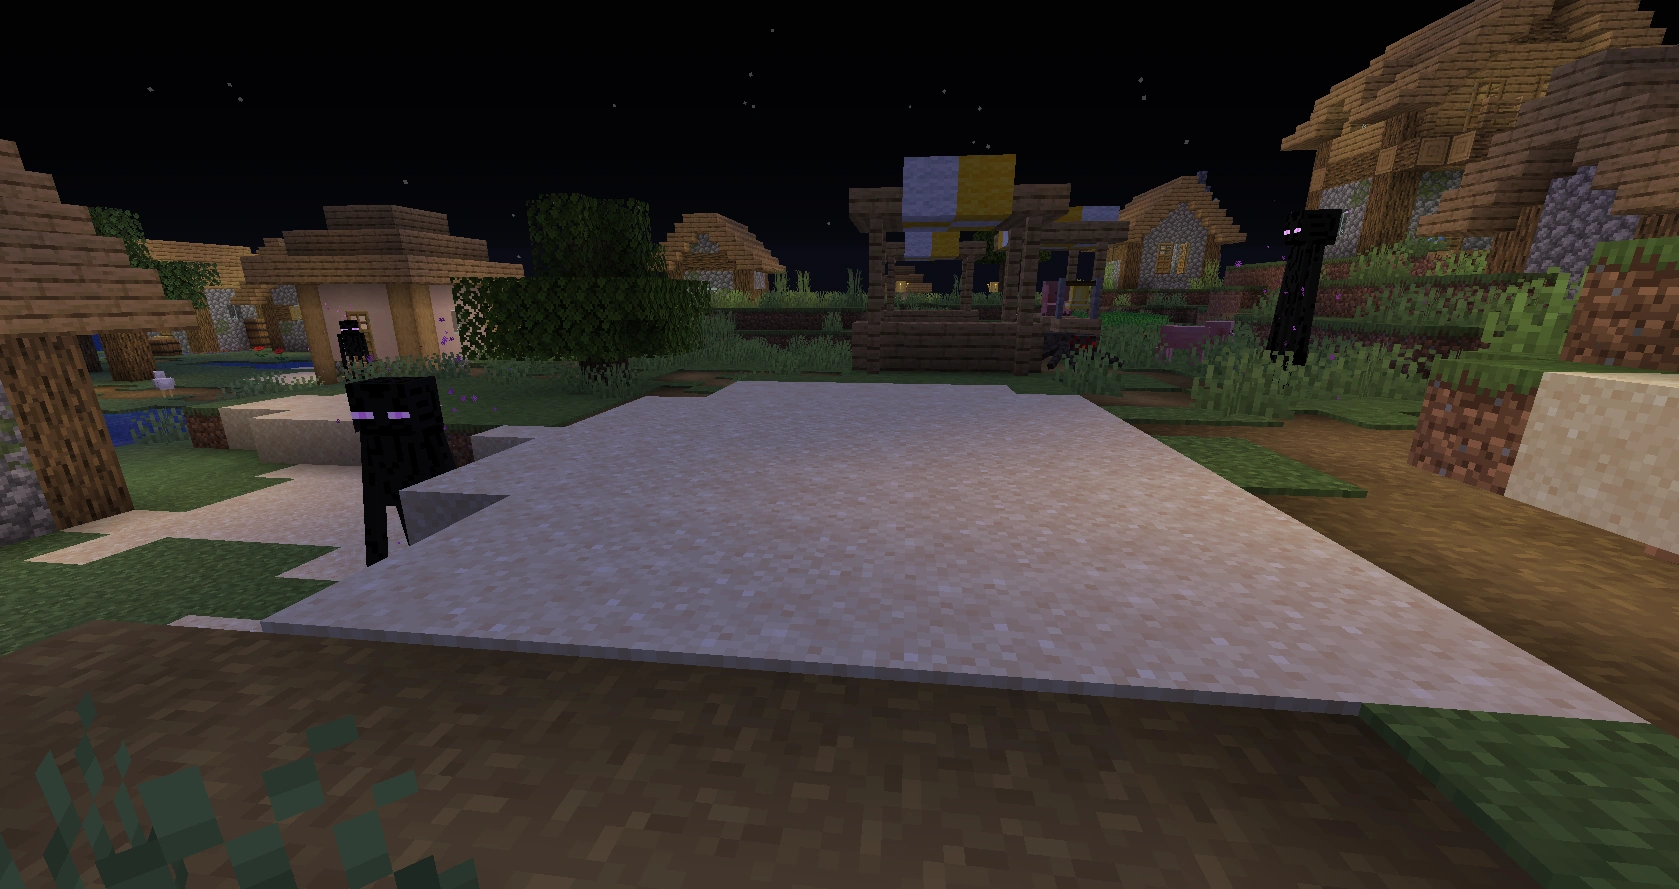
.
References
- ↑ http://www.twitch.tv/notch/b/293537610
- ↑ notchtweet:113639625364480001
- ↑ http://www.reddit.com/ko2d4
- ↑ http://www.youtube.com/watch?v=WI6jWk_ozH8#t=12m00s
- ↑ wordofnotch:8208212863
- ↑ http://roosterteeth.com/podcast/episode.php?id=132
- ↑ https://plus.google.com/116872576248355504859/posts/DrjzbDobiws
- ↑ notchtweet:118903247212773376
- ↑ http://www.reddit.com/r/Minecraft/comments/l3jgm/enderdragons_decrypt_w_rot13_via_notch/c2ph1f1
- ↑ http://www.reddit.com/r/Minecraft/comments/l3jgm/enderdragons_decrypt_w_rot13_via_notch/c2ph3nd
- ↑ http://www.reddit.com/r/Minecraft/comments/j09ma/notch_posts_images_of_new_mob/c282dzr