
|
“ |
|
„ |
| — Duncan Geere[1] |
A crafting table allows the player to craft a variety of blocks and items.
Obtaining
Crafting tables can be mined with or without any tool, but axes are the quickest.
| Block | Crafting Table | |
|---|---|---|
| Hardness | 2.5 | |
| Tool | ||
| Breaking time[A] | ||
| Default | 3.75 | |
| Wooden | 1.9 | |
| Stone | 0.95 | |
| Iron | 0.65 | |
| Diamond | 0.5 | |
| Netherite | 0.45 | |
| Golden | 0.35 | |
- ↑ Times are for unenchanted tools as wielded by players with no status effects, measured in seconds. For more information, see Breaking § Speed.
Natural generation
Crafting tables naturally generate in village libraries, witch huts and igloos basement. Crafting tables generate in woolen tents outside pillager outpost and in some small village houses.
Crafting
| Ingredients | Crafting recipe |
|---|---|
| Any Planks |
Usage
Crafting
Pressing use on a crafting table will open the 3×3 crafting grid that allows the player to craft many more items than are available with the crafting grid in the inventory.
The recipe book is available to the left of the crafting grid (collapsed by default in Java Edition, expanded by default in Bedrock Edition), which stores crafting recipes for reference and one-click crafting.
Fuel
Crafting tables can be used as a fuel in furnaces, smelting 1.5 items per crafting table.
Achievements
| Icon | Achievement | In-game description | Actual requirements (if different) | Gamerscore earned | Trophy type (PS4) | |
|---|---|---|---|---|---|---|
| PS4 | Other | |||||
| Benchmaking | Craft a workbench with four blocks of wooden planks. | Pick up a crafting table from the inventory's crafting field output or a crafting table output. | 10G | Bronze | ||
Advancements
| Icon | Advancement | In-game description | Parent | Actual requirements (if different) | Resource location |
|---|---|---|---|---|---|
 | Minecraft | The heart and story of the game | — | Have a crafting table in your inventory. | story/root
|
History
| indev | |||||
|---|---|---|---|---|---|
0.31{{Extension DPL}}<ul><li>[[Brush|Brush]]<br/>{{Item
|image=Brush.png
|rarity=Common
|renewable=Yes
|durability=64
|stackable=No
}}
A '''brush''' is a [[tool]] used in [[archaeology]] to excavate [[suspicious block]]s for different items.
==Obtaining==
===Crafting===
{{Crafting
|head=1
|showname=0
|showdescription=1
|B1=Feather
|B2=Copper Ingot
|B3=Stick
|Output=Brush
|type=Tool
}}
{{crafting
|foot=1
|ignoreusage=1
|Damaged Brush
|Damaged Brush
|Output=Brush
|description=The durability of the two brushes is added together, plus an extra 5% durability.
|type=Tool
}}
==Usage==
{{Main|Suspicious Block}}
{{Control|Using}} the brush on any block displays a brushing animation, slowing down the player and creating breaking [[particles]], but not actually damaging the block or brush. When continuously brushing a [[suspicious block]], a random item slowly emerges from it until it drops out, and the block turns into regular [[sand]] or regular [[gravel]], depleting 1 [[durability]] point on the brush. It takes 96 [[game tick]]s (4.8 seconds) to brush a single suspicious block.
=== Enchantments ===
A brush can receive the following [[enchantment]]s:
{|class="wikitable col-2-center col-3-right"
|+
!Name
!Max Level
![[Enchanting|Method]]
|-
|[[Unbreaking]]
|III
|{{Inventory slot|Anvil}}
|-
|[[Mending]]
|I
|{{Inventory slot|Anvil}}
|-
|[[Curse of Vanishing]]
|I
|{{Inventory slot|Anvil}}
|}
== Sounds ==
{{Edition|Java}}:
{{Sound table
<!--All of these sounds are, in fact, different-->
|sound=Brushing sand1.ogg
|sound2=Brushing sand2.ogg
|sound3=Brushing sand3.ogg
|sound4=Brushing sand4.ogg
|subtitle=Brushing Sand
|source=block
|description=While a brush is brushing suspicious sand
|id=item.brush.brushing.sand
|translationkey=subtitles.item.brush.brushing.sand
|volume=0.6
|pitch=0.6
|distance=16}}
{{Sound table
|sound=Brushing gravel1.ogg
|sound2=Brushing gravel2.ogg
|sound3=Brushing gravel3.ogg
|sound4=Brushing gravel4.ogg
|subtitle=Brushing Gravel
|source=block
|description=While a brush is brushing suspicious gravel
|id=item.brush.brushing.gravel
|translationkey=subtitles.item.brush.brushing.gravel
|volume=0.6
|pitch=0.6
|distance=16}}
{{Sound table
|sound=Brushing generic1.ogg
|sound2=Brushing generic2.ogg
|sound3=Brushing generic3.ogg
|sound4=Brushing generic4.ogg
|subtitle=Brushing
|source=block
|description=While a brush is brushing any other block
|id=item.brush.brushing.generic
|translationkey=subtitles.item.brush.brushing.generic
|volume=0.6
|pitch=0.6
|distance=16}}
{{Sound table
|sound=Brushing sand completed1.ogg
|sound2=Brushing sand completed2.ogg
|sound3=Brushing sand completed3.ogg
|sound4=Brushing sand completed4.ogg
|sound5=Brushing sand completed5.ogg
|subtitle=Brushing Sand completed
|source=Players<ref group=sound name=badsource>{{Bug|MC-260202}}</ref>|overridesource=1
|description=When a brush finishes brushing suspicious sand
|id=item.brush.brushing.sand.complete
|translationkey=subtitles.item.brush.brushing.sand.complete
|volume=1.0
|pitch=1.0
|distance=16}}
{{Sound table
|sound=Brushing gravel completed1.ogg
|sound2=Brushing gravel completed2.ogg
|sound3=Brushing gravel completed3.ogg
|sound4=Brushing gravel completed4.ogg
|subtitle=Brushing Gravel completed
|source=Players<ref group=sound name=badsource/>|overridesource=1
|description=When a brush finishes brushing suspicious gravel
|id=item.brush.brushing.gravel.complete
|translationkey=subtitles.item.brush.brushing.gravel.complete
|volume=1.0
|pitch=1.0
|distance=16
|foot=1}}
{{Edition|Bedrock}}:
{{Sound table
|type=bedrock
|sound=Brushing sand1.ogg
|sound2=Brushing sand2.ogg
|sound3=Brushing sand3.ogg
|sound4=Brushing sand4.ogg
|source=player
|description=While a brush is brushing suspicious sand
|id=brush.suspicious_sand
|volume=1.0
|pitch=0.8-1.0}}
{{Sound table
|sound=Brushing gravel1.ogg
|sound2=Brushing gravel2.ogg
|sound3=Brushing gravel3.ogg
|sound4=Brushing gravel4.ogg
|source=player
|description=While a brush is brushing suspicious gravel
|id=brush.suspicious_gravel
|volume=1.0
|pitch=0.8-1.0}}
{{Sound table
|sound=Brushing generic1.ogg
|sound2=Brushing generic2.ogg
|sound3=Brushing generic3.ogg
|sound4=Brushing generic4.ogg
|source=player
|description=While a brush is brushing any other block
|id=brush.generic
|volume=1.0
|pitch=0.8-1.0}}
{{Sound table
|sound=Brushing sand completed1.ogg
|sound2=Brushing sand completed2.ogg
|sound3=Brushing sand completed3.ogg
|sound4=Brushing sand completed4.ogg
|sound5=Brushing sand completed5.ogg
|source=player
|description=When a brush finishes brushing suspicious sand
|id=brush_completed.suspicious_sand
|volume=1.0
|pitch=0.8-1.0}}
{{Sound table
|sound=Brushing gravel completed1.ogg
|sound2=Brushing gravel completed2.ogg
|sound3=Brushing gravel completed3.ogg
|sound4=Brushing gravel completed4.ogg
|source=player
|description=When a brush finishes brushing suspicious gravel
|id=brush_completed.suspicious_gravel
|volume=1.0
|pitch=0.8-1.0
|foot=1}}
== Data values ==
=== ID ===
{{edition|java}}:
{{ID table
|edition=java
|showforms=y
|generatetranslationkeys=y
|displayname=Brush
|spritetype=item
|nameid=brush
|form=item
|foot=1}}
{{edition|bedrock}}:
{{ID table
|edition=bedrock
|shownumericids=y
|showforms=y
|notshowbeitemforms=y
|generatetranslationkeys=y
|displayname=Brush
|spritetype=item
|nameid=brush
|id=684
|form=item
|foot=1}}
== Advancements ==
{{load advancements|Respecting the Remnants}}
== History ==
{{History||October 3, 2020|link=https://youtu.be/DBvZ2Iqmm3M?t=2178|[[File:Brush (pre-release 1).png|32px]][[File:Brush 2.png|32px]] Brushes were announced at [[Minecraft Live 2020]] with two variants.}}
{{History||?|link=https://youtu.be/klP9SrJFDU8?t=206|[[File:Brush (pre-release 2).png|32px]] Changed the brush's item texture.}}
{{History||February 10, 2023|[[File:Brush JE1 BE1.png|32px]] [[Sofia Dankis]] posted an article about upcoming archaeology features, including brushes.|link=https://www.minecraft.net/en-us/article/archeology-coming-minecraft-120}}
{{History|java}}
{{History||1.20<br>(Experimental)|link=1.19.4|snap=23w07a|[[File:Brush JE1 BE1.png|32px]] Added brushes with an updated texture behind the [[Java Edition 1.20|Update 1.20 experimental datapack]].|The crafting recipe was originally three [[string]] and two [[stick]]s.
{{{!}} class{{=}}"collapsible collapsed" data-description{{=}}"Recipe"
! Recipe
{{!}}-
{{!}}{{Crafting Table
|A1 = String
|B1 = String
|C1 = String
|B2 = Stick
|B3 = Stick
|Output = Brush
|type = Tool
|ignoreusage=1}}
{{!}}}
}}
{{History|||snap=1.19.4 Pre-release 1|The crafting recipe for brushes has been changed:
{{{!}} class{{=}}"collapsible collapsed" data-description{{=}}"Recipe"
! Recipe
{{!}}-
{{!}}{{Crafting Table
|B1 = Feather
|B2 = Copper Ingot
|B3 = Stick
|Output = Brush
|type = Tool
|ignoreusage=1}}
{{!}}}
}}
{{History||1.20|snap=23w12a|Brushes are now available without using the "Update 1.20" experimental data pack.
|Brushes can now brush [[suspicious gravel]].}}
{{History|||snap=23w14a|The brushing sound of brush is now controlled by the "Blocks" sound slider instead of the "Players" sound slider.}}
{{History|||snap=23w17a|The player now gets the [[advancement]] "Respecting the Remnants" when they use a brush on a [[suspicious block]] to obtain a [[pottery sherd]].}}
{{History|bedrock}}
{{History||Next Major Update<br>(Experimental)|link=Bedrock Edition 1.19.70|snap=beta 1.19.70.23|[[File:Brush JE1 BE1.png|32px]] Added brushes behind the "[[Bedrock Edition 1.20.0|Next Major Update]]" [[experimental]] toggle.
|The crafting recipe is originally three [[string]] and two [[stick]]s.
{{{!}} class{{=}}"collapsible collapsed" data-description{{=}}"Recipe"
! Recipe
{{!}}-
{{!}}{{Crafting Table
|A1 = String
|B1 = String
|C1 = String
|B2 = Stick
|B3 = Stick
|Output = Brush
|type = Tool
|ignoreusage=1}}
{{!}}}
}}
{{History||Next Major Update<br>(Experimental)|link=Bedrock Edition 1.19.80|snap=beta 1.19.80.20|The crafting recipe for brushes has been changed:
{{{!}} class{{=}}"collapsible collapsed" data-description{{=}}"Recipe"
! Recipe
{{!}}-
{{!}}{{Crafting Table
|B1 = Feather
|B2 = Copper Ingot
|B3 = Stick
|Output = Brush
|type = Tool
|ignoreusage=1}}
{{!}}}
}}
{{History||1.20.0|snap=beta 1.20.0.21|Brushes are now available without using the "Next Major Update" experimental toggle.}}
{{History|foot}}
== Issues ==
{{Issue list}}
== References ==
{{Reflist}}
==External Links==
*[https://www.minecraft.net/en-us/article/brush Taking Inventory: Brush] – Minecraft.net on July 6, 2023
{{Items}}
[[Category:Renewable resources]]
[[de:Pinsel]]
[[es:Pincel]]
[[ja:ブラシ]]
[[pt:Pincel]]
[[pl:Pędzel]]
[[uk:Щітка]]
[[zh:刷子]]</li><li>[[Chestplate|Chestplate]]<br/>{{Update|Include information about armor trims and updated netherite upgrade information.}}
{{Item
| image = <gallery>
Leather Tunic.png | Leather
Chainmail Chestplate.png | Chainmail
Iron Chestplate.png | Iron
Diamond Chestplate.png | Diamond
Golden Chestplate.png | Golden
Netherite Chestplate.png | Netherite
</gallery>
| durability =
* Leather: 80
* Chainmail: 240
* Iron: 240
* Golden: 112
* Diamond: 528
* Netherite: 592
| renewable =
* '''Netherite''': No
* '''All Other''': Yes
| stackable = No
}}
'''Chestplates''' are a type of [[armor]] that covers the upper body of the player. There are six types of chestplates: '''leather''', '''chainmail''', '''iron''', '''diamond''', '''gold''' and '''netherite'''.
== Obtaining ==
=== Crafting ===
{{crafting
|head=1
|showname=0
|showdescription=1
|name=[[Chestplate]]
|A1= Leather;Gold Ingot;Iron Ingot;Diamond
|C1= Leather;Gold Ingot;Iron Ingot;Diamond
|A2= Leather;Gold Ingot;Iron Ingot;Diamond
|B2= Leather;Gold Ingot;Iron Ingot;Diamond
|C2= Leather;Gold Ingot;Iron Ingot;Diamond
|A3= Leather;Gold Ingot;Iron Ingot;Diamond
|B3= Leather;Gold Ingot;Iron Ingot;Diamond
|C3= Leather;Gold Ingot;Iron Ingot;Diamond
|Output= Leather Tunic;Golden Chestplate;Iron Chestplate;Diamond Chestplate
|type= Combat
}}
{{crafting
|foot=1
|ignoreusage=1
|name=[[Chestplate]]
|ingredients=Damaged Matching [[Chestplate]]
|Damaged Leather Tunic; Damaged Golden Chestplate; Damaged Chainmail Chestplate; Damaged Iron Chestplate; Damaged Diamond Chestplate; Damaged Netherite Chestplate
|Damaged Leather Tunic; Damaged Golden Chestplate; Damaged Chainmail Chestplate; Damaged Iron Chestplate; Damaged Diamond Chestplate; Damaged Netherite Chestplate
|Output= Leather Tunic; Golden Chestplate; Chainmail Chestplate; Iron Chestplate; Diamond Chestplate; Netherite Chestplate
|description= The durability of the two chestplates is added together, making a fully healed chestplate. You can get 5% more durability while using a grindstone to fix.
|type= Combat
}}
=== Upgrading ===
{{Smithing
|Netherite Upgrade
|Diamond Chestplate
|Netherite Ingot
|Netherite Chestplate
|description=
|tail=1
}}
=== Repairing ===
==== Grinding ====
{{Grinding
|showdescription=1
|ingredients=Damaged Matching Chestplates
|Damaged Leather Tunic; Damaged Chainmail Chestplate; Damaged Iron Chestplate; Damaged Golden Chestplate; Damaged Diamond Chestplate; Damaged Netherite Chestplate
|Damaged Leather Tunic; Damaged Chainmail Chestplate; Damaged Iron Chestplate; Damaged Golden Chestplate; Damaged Diamond Chestplate; Damaged Netherite Chestplate
|Leather Tunic; Chainmail Chestplate; Iron Chestplate; Golden Chestplate; Diamond Chestplate; Netherite Chestplate
|description=The durability of the two chestplates are added together, plus an extra 5% durability.
}}
==== [[Anvil mechanics#Unit repair|Unit repair]] ====
Chestplates can be repaired in an [[anvil]] by adding units of the [[armor material]]'s repair material, with each repair material restoring 25% of the chestplate's maximum durability, rounded down.
=== Mob loot ===
[[Zombie]]s and [[skeleton]]s have a small chance to spawn wearing any armor. There is an 8.5% chance (9.5% with [[Looting]] I, 10.5% with Looting II and 11.5% with Looting III) for the mob to drop a chestplate upon death. The chestplate the mob drops is usually badly damaged, and rarely enchanted.
[[Vindicator]]s and [[Pillager]]s spawning in [[raid]]s have a 4.1% chance (5.12% on hard difficulty) to drop iron chestplate, which is almost always badly damaged and rarely enchanted.
=== Natural generation ===
Two [[armor stand]]s are found in each taiga [[village]] outdoor armory, one of them equipped with an [[iron chestplate]].
=== Chest loot ===
{{IN|BE}}, a sealed room in [[woodland mansion]]s can appear that has a chest sometimes containing an [[Efficiency]] I leather tunic.<ref>{{bug|MCPE-109048}}</ref>
{{LootChestItem|leather-tunic,random-enchanted-leather-tunic,chainmail-chestplate,iron-chestplate,level-enchanted-iron-chestplate,golden-chestplate,random-enchanted-golden-chestplate,diamond-chestplate,damaged-diamond-chestplate,level-enchanted-diamond-chestplate,damaged-random-enchanted-diamond-chestplate,damaged-random-enchanted-diamond-chestplate-2}}
=== Trading ===
{{IN|java}}, novice-level armorer villagers have a 40% chance to sell an iron chestplate for 9 emeralds. Journeyman-level armorers have a 40% chance to sell a chainmail chestplate for 4 emeralds. Master-level armorers always sell an enchanted<ref group="note" name="enchantment" /> diamond chestplate for 18-35 emeralds. Novice-level leatherworker villagers have a {{frac|2|3}} chance to sell a leather tunic<ref group="note" name="dye note">The leather armor has a random color created by two dyes (possibly the same dye twice).</ref> for 7 emeralds. Journeyman-level Leatherworker villagers always offer the same trade.
Armorer villagers may give the players with the [[Hero of the Village]] effect a chainmail chestplate.
{{IN|bedrock}}, novice-level armorer villagers have a 25% chance to sell an iron chestplate for 9 emeralds. Journeyman-level armorers have a {{frac|1|3}} chance to sell a chainmail chestplate for 4 emeralds. Master-level armorers have a 50% chance to sell an enchanted<ref group="note" name="enchantment">When creating an enchantment offer, the game uses a random enchantment level from 5 – 19. The enchantments are never treasure enchantments.</ref> diamond chestplate for 16 emeralds. Novice-level leatherworker villagers have a 50% chance to sell leather tunic for 7 emeralds. Master-level leatherworkers always sell an enchanted<ref group="note" name="enchantment" /> leather tunic for 7 emeralds.
{{notelist|columns=1}}
== Usage ==
Chestplates can be placed in the 2nd armor slot of a player's [[inventory]] for activation.
=== Defense points ===
Defense points are each signified by chestplates in the armor bar above the [[health]] bar. 1 defense point is half of a chestplate in the armor bar. Each defense point reduces any damage dealt to the player, which is absorbed by armor by 4%, increasing additively with the number of defense points. Different materials and combinations of armor provide different levels of defense.
The following table shows the amount of defense points added by chestplates.
{| class="wikitable" data-description="Chestplate defense points"
|-
!scope="col" | Material
!scope="col" | Defense points
|-
!scope="row" | Leather
| {{armor|3}}
|-
!scope="row" | Golden
| rowspan="2" | {{armor|5}}
|-
!scope="row" | Chainmail
|-
!scope="row" | Iron
| {{armor|6}}
|-
!scope="row" | Diamond
| rowspan="2" | {{armor|8}}
|-
!scope="row" | Netherite
|}
===Knockback Resistance ===
A netherite chestplate provides 10% knockback resistance.
=== Durability ===
The following table shows the amount of damage each piece of armor can absorb before being destroyed.
Any "hit" from a damage source that can be blocked by armor removes one point of durability from each piece of armor worn for every {{hp|4}} of incoming damage (rounded down, but never below 1). Damage taken that unenchanted armor does not protect against (such as [[Damage#Fall damage|falling]] or [[Damage#Drowning|drowning]]) does not damage the armor, even if it is enchanted to protect against that type of damage. The following chart displays how many hits chest plates can endure.
Netherite armor is not damaged by [[lava]] or [[fire]] when worn.
{| class="wikitable" data-description="Chestplate durability"
|-
! Material
! Durability
|-
!scope="row" | Leather
| 80
|-
!scope="row" | Golden
| 112
|-
!scope="row" | Chainmail
| rowspan="2" | 240
|-
!Iron
|-
!scope="row" | Diamond
| 528
|-
!scope="row" | Netherite
| 592
|}
==== Repair ====
Chestplates may be [[item repair|repaired]] by using them along with some of their crafting material ([[leather]], [[gold ingot]]s, [[iron ingot]]s, [[diamond]]s, or [[netherite ingot]]s) in an [[anvil]]. Chainmail chestplates may be repaired in this way with iron ingots. They may also be repaired by crafting them together with another chestplate of the same material.
=== Enchantments ===
A chestplate can receive the following [[enchantment]]s:
{| class="wikitable"
|-
! Enchantment !! Max Level !! Notes
|-
| [[Fire Protection]] || IV || <ref group=note name=exclusive>Fire Protection, Blast Protection, Projectile Protection and Protection are mutually exclusive</ref>
|-
| [[Projectile Protection]] || IV || <ref group=note name="exclusive"/>
|-
| [[Blast Protection]] || IV || <ref group=note name="exclusive"/>
|-
| [[Protection]] || IV || <ref group=note name="exclusive"/>
|-
| [[Unbreaking]] || III ||
|-
| [[Thorns]] || III || <ref group="note" name="maxlvl">The max level obtainable in the enchanting table is 2</ref>
|-
| [[Mending]] || I || <ref group=note name="anvil2">Only from chest loot, fishing, or an anvil and enchanted books.</ref>
|-
| [[Curse of Binding]] || I || <ref group="note" name="anvil2"/>
|-
| [[Curse of Vanishing]] || I || <ref group="note" name="anvil2"/>
|}
{{notelist}}
=== Smelting usage ===
{{Smelting|showname=1|Iron Chestplate;Chainmail Chestplate;Golden Chestplate|Iron Nugget;Iron Nugget;Gold Nugget|0,1}}
=== Piglins ===
{{EntityLink|Piglin|Piglins}} are attracted to ''golden'' chestplates and pick them up, examining them for 6 to 8 seconds. Piglins can wear other chestplates but are not attracted to them. They prefer stronger chestplates over weaker chestplates, with one exception: They always prefer golden chestplates over all other chestplates, throwing out stronger chestplates to equip them. Enchanted chestplates are preferred over unenchanted chestplates.
== Sounds ==
{{el|je}}:
{{Sound table
|sound=Equip leather1.ogg
|sound2=Equip leather2.ogg
|sound3=Equip leather3.ogg
|sound4=Equip leather4.ogg
|sound5=Equip leather5.ogg
|sound6=Equip leather6.ogg
|subtitle=Leather armor rustles
|source=player
|description=When a leather chestplate is equipped
|id=item.armor.equip_leather
|translationkey=subtitles.item.armor.equip_leather
|volume=1.0
|pitch=1.0
|distance=16}}
{{Sound table
|sound=Equip chain1.ogg
|sound2=Equip chain2.ogg
|sound3=Equip chain3.ogg
|sound4=Equip chain4.ogg
|sound5=Equip chain5.ogg
|sound6=Equip chain6.ogg
|subtitle=Chain armor jingles
|source=player
|description=When a chainmail chestplate is equipped
|id=item.armor.equip_chain
|translationkey=subtitles.item.armor.equip_chain
|volume=1.0
|pitch=1.0
|distance=16}}
{{Sound table
|sound=Equip iron1.ogg
|sound2=Equip iron2.ogg
|sound3=Equip iron3.ogg
|sound4=Equip iron4.ogg
|sound5=Equip iron5.ogg
|sound6=Equip iron6.ogg
|subtitle=Iron armor clanks
|source=player
|description=When an iron chestplate is equipped
|id=item.armor.equip_iron
|translationkey=subtitles.item.armor.equip_iron
|volume=1.0
|pitch=1.0
|distance=16}}
{{Sound table
|sound=Equip gold1.ogg
|sound2=Equip gold2.ogg
|sound3=Equip gold3.ogg
|sound4=Equip gold4.ogg
|sound5=Equip gold5.ogg
|sound6=Equip gold6.ogg
|subtitle=Gold armor clinks
|source=player
|description=When a gold chestplate is equipped
|id=item.armor.equip_gold
|translationkey=subtitles.item.armor.equip_gold
|volume=1.0
|pitch=1.0
|distance=16}}
{{Sound table
|sound=Equip diamond1.ogg
|sound2=Equip diamond2.ogg
|sound3=Equip diamond3.ogg
|sound4=Equip diamond4.ogg
|sound5=Equip diamond5.ogg
|sound6=Equip diamond6.ogg
|subtitle=Diamond armor clangs
|source=player
|description=When a diamond chestplate is equipped
|id=item.armor.equip_diamond
|translationkey=subtitles.item.armor.equip_diamond
|volume=1.0
|pitch=1.0
|distance=16}}
{{Sound table
|sound=Equip netherite1.ogg
|sound2=Equip netherite2.ogg
|sound3=Equip netherite3.ogg
|sound4=Equip netherite4.ogg
|subtitle=Netherite armor clanks
|source=player
|description=When a netherite chestplate is equipped
|id=item.armor.equip_netherite
|translationkey=subtitles.item.armor.equip_netherite
|volume=0.8
|pitch=1.0/0.9
|distance=16}}
{{Sound table
|sound=Random break.ogg
|subtitle=Item breaks
|source=dependent
|description=When a chestplate's durability is exhausted
|id=entity.item.break
|translationkey=subtitles.entity.item.break
|volume=0.8
|pitch=0.8-1.2
|distance=16
|foot=1}}
{{el|be}}:
{{Sound table
|type=bedrock
|sound=Equip leather1.ogg
|sound2=Equip leather2.ogg
|sound3=Equip leather3.ogg
|sound4=Equip leather4.ogg
|sound5=Equip leather5.ogg
|sound6=Equip leather6.ogg
|source=player
|description=When a leather chestplate is equipped
|id=armor.equip_leather
|volume=1.0
|pitch=1.0}}
{{Sound table
|sound=Equip chain1.ogg
|sound2=Equip chain2.ogg
|sound3=Equip chain3.ogg
|sound4=Equip chain4.ogg
|sound5=Equip chain5.ogg
|sound6=Equip chain6.ogg
|source=player
|description=When a chain chestplate is equipped
|id=armor.equip_chain
|volume=1.0
|pitch=1.0}}
{{Sound table
|sound=Equip iron1.ogg
|sound2=Equip iron2.ogg
|sound3=Equip iron3.ogg
|sound4=Equip iron4.ogg
|sound5=Equip iron5.ogg
|sound6=Equip iron6.ogg
|source=player
|description=When an iron chestplate is equipped
|id=armor.equip_iron
|volume=1.0
|pitch=1.0}}
{{Sound table
|sound=Equip gold1.ogg
|sound2=Equip gold2.ogg
|sound3=Equip gold3.ogg
|sound4=Equip gold4.ogg
|sound5=Equip gold5.ogg
|sound6=Equip gold6.ogg
|source=player
|description=When a gold chestplate is equipped
|id=armor.equip_gold
|volume=1.0
|pitch=1.0}}
{{Sound table
|sound=Equip diamond1.ogg
|sound2=Equip diamond2.ogg
|sound3=Equip diamond3.ogg
|sound4=Equip diamond4.ogg
|sound5=Equip diamond5.ogg
|sound6=Equip diamond6.ogg
|source=player
|description=When a diamond chestplate is equipped
|id=armor.equip_diamond
|volume=1.0
|pitch=1.0}}
{{Sound table
|sound=Equip netherite1.ogg
|sound2=Equip netherite2.ogg
|sound3=Equip netherite3.ogg
|sound4=Equip netherite4.ogg
|source=player
|description=When a netherite chestplate is equipped.
|id=armor.equip_netherite
|volume=1.0
|pitch=1.0}}
{{Sound table
|rowspan=2
|sound=Water Splash Old.ogg
|source=block
|description=When a leather chestplate is dyed using a cauldron
|id=cauldron.dyearmor
|volume=0.1
|pitch=1.0}}
{{Sound table
|source=block
|description=When a leather chestplate's dye is removed using a cauldron
|id=cauldron.cleanarmor
|volume=0.1
|pitch=1.0}}
{{Sound table
|sound=Random break.ogg
|source=player
|description=When a chestplate's durability is exhausted
|id=random.break
|volume=1.0
|pitch=0.9
|foot=1}}
== Data values ==
=== ID ===
{{edition|java}}:
{{ID table
|edition=java
|showitemtags=y
|showforms=y
|generatetranslationkeys=y
|displayname=Leather Tunic
|spritetype=item
|nameid=leather_chestplate
|itemtags=freeze_immune_wearables
|form=item}}
{{ID table
|displayname=Chainmail Chestplate
|spritetype=item
|nameid=chainmail_chestplate
|form=item}}
{{ID table
|displayname=Iron Chestplate
|spritetype=item
|nameid=iron_chestplate
|form=item}}
{{ID table
|displayname=Diamond Chestplate
|spritetype=item
|nameid=diamond_chestplate
|form=item}}
{{ID table
|displayname=Golden Chestplate
|spritetype=item
|nameid=golden_chestplate
|form=item}}
{{ID table
|displayname=Netherite Chestplate
|spritetype=item
|nameid=netherite_chestplate
|form=item
|foot=1}}
{{edition|bedrock}}:
{{ID table
|edition=bedrock
|shownumericids=y
|showforms=y
|notshowbeitemforms=y
|generatetranslationkeys=y
|displayname=Leather Tunic
|spritetype=item
|nameid=leather_chestplate
|id=336
|form=item}}
{{ID table
|displayname=Chainmail Chestplate
|spritetype=item
|nameid=chainmail_chestplate
|id=340
|form=item}}
{{ID table
|displayname=Iron Chestplate
|spritetype=item
|nameid=iron_chestplate
|id=344
|form=item}}
{{ID table
|displayname=Diamond Chestplate
|spritetype=item
|nameid=diamond_chestplate
|id=348
|form=item}}
{{ID table
|displayname=Golden Chestplate
|spritetype=item
|nameid=golden_chestplate
|id=352
|form=item}}
{{ID table
|displayname=Netherite Chestplate
|spritetype=item
|nameid=netherite_chestplate
|id=610
|form=item
|foot=1}}
=== Item data ===
When leather tunics are dyed, it has the following NBT:
<div class="treeview">
* {{nbt|compound|tag}}: Parent tag.
** {{nbt|compound|display}}: Display properties.
*** {{nbt|int|color}}: The color of the leather armor. The tooltip displays "Dyed" if advanced tooltips are disabled, otherwise it displays the hexadecimal color value. Color codes are calculated from the Red, Green and Blue components using this formula:<br>'''<span style="color:red">Red</span>[[wikipedia:Logical shift|<<]]16 + <span style="color:green">Green</span><<8 + <span style="color:blue">Blue</span>'''<ref>For positive values larger than 0x00FFFFFF, the top byte is ignored. All negative values produce white.</ref>
</div>
== Achievements ==
{{load achievements|Iron Man;Tie Dye Outfit;Cover me in debris;Oooh, shiny!}}
== Advancements ==
{{load advancements|Suit Up;Cover me With Diamonds;Oh Shiny;Cover Me in Debris}}
== History ==
{{History|java classic}}
{{History||June 14, 2009|link=wordofnotch:123343045|[[Notch]] discussed how armor would work in [[Survival]] mode: "Two types of swords, two types of armor, two types of helmets. The basic versions require iron. The advanced versions require steel, which you make by combining iron and coal. Carrying swords, armor or helmets take up inventory slots, but otherwise have no penalty and work pretty much as you expect (prevent some damage, or cause more damage)".}}
{{History||August 13, 2009|link=wordofnotch:162091556|Notch tested chestplates on the [[human]]. They were merely aesthetic at the time and had no effect on gameplay.}}
{{History||0.24_SURVIVAL_TEST|[[File:Plate Chestplate.png|32px]] Added the [[Java_Edition_removed_features#Armor_in_Survival_Test|plate chestplate]].
|[[File:Chainmail Chestplate JE1.png|32px]] Added the model and the texture for the unused [[Java_Edition_removed_features#Armor_in_Survival Test|chain chestplate]].
|[[File:Zombie full set.png|32px]] [[File:Skeleton helmet.png|26px]] The plate chestplate has been tested on [[zombie]]s and [[skeleton]]s. It had no effect on gameplay.}}
{{History|java indev}}
{{History||0.31|snap=20091223-1|Plate and chain armor chestplates are no longer used.}}
{{History|||snap=20091231-2|[[File:Leather Tunic (item) JE1 BE1.png|32px]] [[File:Studded Chestplate (item) JE1.png|32px]] [[File:Chainmail Chestplate (item) JE1 BE1.png|32px]] [[File:Iron Chestplate (item) JE1 BE1.png|32px]] Added the single item form of relation to leather, [[History of textures/Unused textures#Studded armor|studded]], chainmail, and plate (iron) chestplates.
|The textures of the cloth chestplate are taken from one of [[Notch]]'s previous games, ''[[Legend of the Chambered]]''. The rest are from ''[[Legend of the Chambered 2]]''.}}
{{History||20100206|[[File:Golden Chestplate (item) JE1 BE1.png|32px]] [[File:Diamond Chestplate (item) JE1 BE1.png|32px]] Added the item form of golden and diamond chestplates.
|Removed the leather-chain chestplate.}}
{{History||February 9, 2010|link=wordofnotch:380486636|[[File:Notch revealed armor.png|32px]] [[Notch]] revealed new models for armor - including chestplates.}}
{{History||20100212-1|Added armor models.
|[[File:Indev 20100212 armor.png|50px]] Armor models are now displayed on the [[player]] in the [[inventory]].}}
{{History||20100218|[[File:Leather Tunic JE1 BE1.png|32px]] [[File:Chainmail Chestplate JE2 BE1.png|32px]] [[File:Iron Chestplate JE1 BE1.png|32px]] [[File:Golden Chestplate JE1 BE1.png|32px]] [[File:Diamond Chestplate JE1 BE1.png|32px]] Added models of cloth, chainmail, iron, gold, and diamond chestplates.
|Chestplates can now be [[crafting|crafted]] and worn.
|Chestplates now functions. All chestplates give {{Armor|8}}. Chestplates have limited [[item durability|durability]], with lower tier chestplates less durable than higher tier chestplates.}}
{{History|java alpha}}
{{History||v1.0.8|With the introduction of [[leather]], "Cloth Chestplate" has been renamed to "Leather Tunic".
|Leather tunics is now [[crafting|crafted]] with leather instead of [[wool|cloth]].}}
{{History|java}}
{{History||1.0.0|snap=Beta 1.9 Prerelease|The armor protection behavior has been changed. Previous to this update, the total armor protection is based in this equation: ((''total equipped armor damage reduction'' − 1) × (''all equipped armor max damage'' − ''total equipped armor damage'')) ÷ (''total equipped armor max damage'' + 1)). Armor no longer reduces certain damage types to be covered by enchantments.}}
{{History|||snap=October 3, 2011|slink={{tweet|notch|120859830339637249}}|The first images of a [[player]] wearing enchanted chestplates are revealed.}}
{{History|||snap=Beta 1.9 Prerelease 3|Iron chestplates can now be found in the new [[stronghold]] altar [[chest]]s.}}
{{History|||snap=Beta 1.9 Prerelease 4|Chestplates can now be [[enchanting|enchanted]].}}
{{History||1.1|snap=12w01a|Iron chestplates can now be found in the new blacksmith [[chest]]s in [[village]]s.}}
{{History||1.3.1|snap=12w15a|{{key|Shift}}+clicking can now be used to wear chestplates.}}
{{History|||snap=12w21a|Chainmail chestplates can now be obtained legitimately in [[survival]] mode through [[trading]].
|Blacksmith [[villager]]s now [[trading|sell]] chainmail chestplates for 11–14 emeralds.
|Blacksmith villagers now sell diamond chestplates for 16–18 emeralds.
|Blacksmith villagers now sell iron chestplates for 10–13 emeralds.
|Butchers now sell leather tunics for 4 emeralds.}}
{{History||1.4.2|snap=12w32a|[[Mob]] armor has been reintroduced. A partial or full set of any armor is now sometimes worn by [[zombie]]s, [[skeleton]]s and [[zombified piglins|zombie pigmen]], with the likelihood increasing with difficulty.}}
{{History|||snap=August 17, 2012|slink={{tweet|Dinnerbone|236445090929844225}}|[[Jeb]] and [[Dinnerbone]] tweeted pictures of [[dye]]able leather chestplates.}}
{{History|||snap=12w34a|Leather tunics can now be dyed by [[crafting]] a leather tunic piece with [[dye]]s. Dyes can be removed by {{control|use|text=using}} dyed leather tunics on a [[cauldron]] with [[water]].
|[[File:Leather Tunic JE2.png|32px]] [[File:Leather Tunic (item) JE2.png|32px]] Default leather tunic textures are now slightly darker and have buttons.}}
{{History|||snap=12w34b|[[File:Leather Tunic JE3 BE2.png|32px]] [[File:Leather Tunic (item) JE3 BE2.png|32px]] [[File:Diamond Chestplate JE2.png|32px]] The texture of leather and diamond chestplates has been changed. Leather tunics now have longer sleeves. Diamond chestplates now have notches under the shoulders.}}
{{History|||snap=12w36a|[[Dye]]d leather tunics are now more saturated and have a slight tint of tan in respect to the default armor color.}}
{{History|||snap=12w37a|[[File:Leather Cap JE3 BE2.png|32px]] [[File:Leather Boots JE2 BE2.png|32px]] [[File:Leather Cap (item) JE3 BE2.png|32px]] [[File:Leather Boots (item) JE3 BE2.png|32px]] Leather armor now have non-dyed parts on cap, pants and boots. This has been implemented so that [[player]]s can distinguish between other types of armor and similarly colored leather armor.}}
{{History||1.4.6|snap=12w50a|The [[Thorns]] enchantment can now be [[enchanting|enchanted]] on chestplates.}}
{{History||1.5|snap=13w04a|Armor in the [[player]]'s hand can now be equipped by right-clicking.
|[[Dispenser]]s can now equip nearby players with armor.}}
{{History||1.6.1|snap=13w18a|Golden chestplates are now found in the new [[chest]]s in [[nether fortress]]es.}}
{{History||1.7.2|snap=13w36a|Leather [[boots]] can now be obtained as one of the "junk" items by [[fishing]].}}
{{History||1.8|snap=14w02a|[[Trading|Trades]] changed: armorer [[villager]]s now [[trading|sell]] chain boots for 5–7 [[emerald]]s, chain [[leggings]] for 9–11 emeralds, chain chestplates for 11–15 emeralds and chain helmets for 5–7 emeralds.
|Armorer villagers now sell enchanted diamond chestplates for 16–19 emeralds, and no longer sell other diamond armor.
|Armorer villagers now sell iron chestplates for 10–14 emeralds and iron helmets for 4–6 emeralds, and no longer sell other iron armor.
|Leatherworkers now sell enchanted leather tunics for 7–12 emeralds, and no longer sell other leather armor.}}
{{History|||snap=14w05a|Armor no longer turns red when [[mob]]s and [[player]]s are hurt.}}
{{History|||snap=14w06a|Armor is now visible on [[giant]]s.}}
{{History|||snap=14w25a|Chain armor [[Java Edition removed features#Chainmail armor|cannot be crafted anymore]] due to the [[item]] form of [[fire]] being [[Java Edition removed features#Obtainable until 1.8|removed]].}}
{{History||1.9|snap=15w31a|Enchanted iron and diamond armor can now be found in [[end city]] ship [[chest]]s.
|[[Mob]]s now wear armor from the bottom to the top, rather than from the top to the bottom. This means that a mob with three armor pieces, for example, spawn with all armor except a helmet.}}
{{History|||snap=15w34b|Armor [[item durability|durability]] now affects armor value.}}
{{History|||snap=15w36a|Armor and armor [[enchanting|enchantment]] calculations have been changed. For the original values, see [[Armor/Before 1.9|here]].}}
{{History|||snap=15w36d|Armor durability affecting value has been removed.
|Armor now has an attribute controlling the defense points.}}
{{History|||snap=15w43a|The average yield of gold chestplates in [[nether fortress]] [[chest]]s has been decreased.}}
{{History|||snap=15w50a|Added <code>equip</code> [[sound]]s for all types of armor.}}
{{History|||snap=16w02a|Armor and armor enchantment calculations have been changed again.}}
{{History|||snap=16w05a|Armor calculations have been changed, once again.}}
{{History||1.11|snap=16w39a|Diamond and chainmail chestplates are now found in the new [[woodland mansion]] chests.}}
{{History||1.11.1|snap=16w50a|Golden, chain and iron armor can now be [[smelting|smelted]] down into one of their respective [[nugget]]s.}}
{{History||1.13|snap=17w47a|Prior to [[1.13/Flattening|''The Flattening'']], these [[item]]s' numeral IDs were 298 through 317.}}
{{History|||snap=18w09a|Leather tunics now have a chance of generating in [[underwater ruins]].}}
{{History|||snap=18w10a|Leather tunics can now generate in [[buried treasure]] [[chest]]s.}}
{{History|||snap=18w11a|Enchanted leather tunics can now generate in the chests of [[shipwreck]]s.}}
{{History|||snap=18w20a|Chain armor pieces have been renamed to "chainmail".}}
{{History||1.14|snap=18w43a|[[File:Leather Tunic JE4 BE2.png|32px]] [[File:Chainmail Chestplate JE3 BE2.png|32px]] [[File:Iron Chestplate JE2 BE2.png|32px]] [[File:Golden Chestplate JE2 BE2.png|32px]] [[File:Diamond Chestplate JE3 BE2.png|32px]] [[File:Leather Tunic (item) JE4 BE3.png|32px]] [[File:Chainmail Chestplate (item) JE2 BE2.png|32px]] [[File:Iron Chestplate (item) JE2 BE2.png|32px]] [[File:Golden Chestplate (item) JE2 BE2.png|32px]] [[File:Diamond Chestplate (item) JE2 BE2.png|32px]] The textures of all types of armor have been changed.}}
{{History|||snap=18w48a|Leather tunics can now be found in [[chest]]s in [[village]] tanneries.}}
{{History|||snap=18w50a|Iron chestplates can now be found on [[armor stand]]s in [[taiga]] villages.}}
{{History|||snap=19w08a|[[File:Golden Chestplate (item) JE3 BE3.png|32px]] The textures of gold chestplate [[item]] have been changed.}}
{{History|||snap=19w11a|Leatherworker villagers now sell randomly [[dye]]d leather tunics, instead of enchanted leather tunics.}}
{{History|||snap=19w13a|Armorer villagers now give chainmail chestplates to players under the [[Hero of the Village]] effect.}}
{{History||1.16|snap=20w06a|[[File:Netherite Chestplate JE1.png|32px]] [[File:Netherite Chestplate (item) JE1.png|32px]] Added netherite chestplate.}}
{{History|||snap=20w10a|[[File:Netherite Chestplate JE2 BE1.png|32px]] [[File:Netherite Chestplate (item) JE2 BE1.png|32px]] The texture of netherite chestplate have been changed.
|Netherite chestplate can no longer be [[crafting|crafted]].
|Netherite chestplate is now obtained by combining one diamond armor piece and one netherite ingot in a [[smithing table]].}}
{{History|||snap=20w16a|All parts of golden and netherite chestplates now generate randomly [[enchanting|enchanted]], and sometimes [[damage]]d, in [[bastion remnant]] and [[ruined portal]] chests.}}
{{History|||snap=20w17a|Diamonds chestplates now generates in place of netherite armor in bastion remnant [[chest]]s.}}
{{History||1.17|snap=20w48a|Wearing any piece of leather armor now prevents [[Powder Snow#Freezing|freezing]] entirely.}}
{{History||1.18.2|snap=22w03a|Netherite chestplate knockback resistance is no longer random.}}
{{History||1.20<br>(Experimental)|link=1.19.4|snap=23w04a|Non-leather chestplates can now be trimmed using a [[smithing table]].
|There are 10 types of material that determine the color of the trim:
*Iron
*Copper
*Gold
*Lapis
*Emerald
*Diamond
*Netherite
*Redstone
*Amethyst
*Quartz
|Upgrading diamond chestplate to netherite chestplate now requires the netherite upgrade [[smithing template]].}}
{{History|||snap=23w05a|Leather tunics can now be trimmed using a smithing table.|Chestplates can now have trims of the same material it is made out of.|The texture of the dune armor trim has been tweaked, so that the symbol on the chestplate is moved up a few pixels.}}
{{History|||snap=23w06a|Swapped {{cd|iron}} and {{cd|iron_darker}} palette, then made {{cd|iron_darker}} darker overall.|Added a darkest pixel to {{cd|chestplate_trim}} trim item texture.}}
{{History||1.19.4|snap=23w05a|Chestplates can now be swapped by {{ctrl|using}} them/elytra in the hotbar.<ref>{{bug|MC-216270|||Fixed}}</ref>}}
{{History||?|Chestplates can now be swapped in [[armor stand]]s by {{ctrl|using}} them/elytra in the armor stand's slot.}}
{{History||1.20|snap=23w12a|The pattern textures of dune and sentry armor trims are changed.|
Those previous patterns were left with different names: dune was renamed sentry and sentry was renamed shaper.}}
{{History|pocket alpha}}
{{History||v0.6.0|[[File:Leather Tunic JE1 BE1.png|32px]] [[File:Chainmail Chestplate JE2 BE1.png|32px]] [[File:Iron Chestplate JE1 BE1.png|32px]] [[File:Golden Chestplate JE1 BE1.png|32px]] [[File:Diamond Chestplate JE1 BE1.png|32px]] [[File:Leather Tunic (item) JE1 BE1.png|32px]] [[File:Chainmail Chestplate (item) JE1 BE1.png|32px]] [[File:Iron Chestplate (item) JE1 BE1.png|32px]] [[File:Golden Chestplate (item) JE1 BE1.png|32px]] [[File:Diamond Chestplate (item) JE1 BE1.png|32px]] Added chestplates.}}
{{History||v0.8.0|snap=build 2|[[File:Leather Tunic (item) JE3 BE2.png|32px]] The leather armor sprites have been changed to that of {{el|je}}, but its armor [[model]] remains that of older versions.}}
{{History||v0.9.0|snap=build 1|Iron armor now naturally generates in [[village]] [[chest]]s and a [[stronghold]] altar chest.}}
{{History||v0.11.0|snap=build 11|Armor now protects against [[damage]] from [[mob]]s only.}}
{{History||v0.12.1|snap=build 1|Armor can now be worn by mobs.
|Golden chestplates can now be found in [[nether fortress]] [[chest]]s.
|Chainmail armor can now be obtained in [[survival]] mode from a mob wearing it.}}
{{History||?|Armor no longer turns red when [[mob]]s and [[player]]s are hurt.}}
{{History||v0.14.0|snap=build 1|[[File:Leather Tunic JE3 BE2.png|32px]] The textures of leather chestplate have been changed.
|Leather armor can now be dyed.}}
{{History||v0.15.0|snap=build 1|Armor can now be obtained from [[stray]]s and [[husk]]s that naturally spawn with armor.}}
{{History||v0.15.10|[[Cape]]s no longer clip through armor.}}
{{History|pocket}}
{{History||1.0.0|snap=alpha 0.17.0.1|[[Enchanting|Enchanted]] iron armor and enchanted diamond armor can now be found inside [[chest]]s within [[end city]].}}
{{History||1.0.4|snap=alpha 1.0.4.0|Iron [[helmet]]s, iron chestplates, enchanted diamond chestplates and chainmail armor are now [[trading|sold]] by armorer smith [[villager]]s via [[trading]].}}
{{History||1.1.0|snap=alpha 1.1.0.0|Golden, chain and iron armor can now be [[smelting|smelted]] down into one of their respective [[nugget]]s.
|Diamond chestplates and chainmail chestplates can now be found inside [[woodland mansion]] chests.}}
{{History|bedrock}}
{{History||1.4.0|snap=beta 1.2.14.2|Chainmail chestplates now generate in [[buried treasure]] chests.
|Enchanted leather armor can now be found inside [[shipwreck]] supply room [[chest]]s.}}
{{History|||snap=beta 1.2.20.1|Leather chestplates can now be found inside [[underwater ruins]] chests.}}
{{History||1.10.0|snap=beta 1.10.0.3|[[File:Leather Tunic JE4 BE2.png|32px]] [[File:Chainmail Chestplate JE3 BE2.png|32px]] [[File:Iron Chestplate JE2 BE2.png|32px]] [[File:Golden Chestplate JE2 BE2.png|32px]] [[File:Diamond Chestplate JE3 BE2.png|32px]] [[File:Leather Tunic (item) JE4 BE3.png|32px]] [[File:Chainmail Chestplate (item) JE2 BE2.png|32px]] [[File:Iron Chestplate (item) JE2 BE2.png|32px]] [[File:Golden Chestplate (item) JE2 BE2.png|32px]] [[File:Diamond Chestplate (item) JE2 BE2.png|32px]] The textures of all types of chestplates have been changed.
|Iron armor now can be found in plains [[village]] weaponsmith [[chest]]s.
|Leather armor can now be found inside plains village tannery chests.}}
{{History||1.11.0|snap=beta 1.11.0.1|Iron armor now can be found in [[savanna]], [[taiga]], [[desert]], [[snowy taiga]] and [[snowy tundra]] [[village]] weaponsmith [[chest]]s.
|Leather armor can now be found inside savanna, taiga, desert, snowy taiga and snowy tundra village tannery chests.}}
{{History|||snap=beta 1.11.0.4|[[Pillager]]s and [[vindicator]]s that spawn in [[raid]]s can now drop iron armor.}}
{{History||1.11.0|snap=beta 1.11.0.5|[[File:Golden Chestplate (item) JE3 BE3.png|32px]] The textures of gold chestplate [[item]] have been changed.}}
{{History||1.12.0|snap=beta 1.12.0.2|[[File:Armor Stand with Leather Armor MCPE-44669.png|32px]] Leather armor no longer show as being [[dye]]d properly when worn by [[armor stand]]s.}}
{{History||1.13.0|snap=beta 1.13.0.1|Leather armor now appears dyed properly when worn by armor stands.}}
{{History||1.16.0|snap=beta 1.16.0.51|[[File:Netherite Chestplate JE2 BE1.png|32px]] [[File:Netherite Chestplate (item) JE2 BE1.png|32px]] Added netherite chestplate.
|Armor can now be obtained from [[piglin]]s that naturally spawn with golden armor.}}
{{History|||snap=beta 1.16.0.57|All parts of golden and netherite armor now generate randomly [[enchanting|enchanted]], and sometimes [[damage]]d, in [[bastion remnant]] chests.
|Netherite armor can no longer be [[crafting|crafted]].
|Netherite armor is now obtained by combining one diamond armor piece and one netherite ingot in a [[smithing table]].}}
{{History|||snap=beta 1.16.0.63|Diamonds armor now generates in place of netherite armor in bastion remnant [[chest]]s.}}
{{History|||snap=beta 1.16.200.53|Netherite Armor now gives a 90% reduction in Knockback.}}
{{History||1.16.210|snap=beta 1.16.210.53|Wearing any piece of leather armor now prevents [[Powder Snow#Freezing|freezing]] entirely.}}
{{History|console}}
{{History||xbox=TU1|xbone=CU1|ps=1.0|wiiu=Patch 1|switch=1.0.1|[[File:Leather Tunic JE1 BE1.png|32px]] [[File:Chainmail Chestplate JE2 BE1.png|32px]] [[File:Iron Chestplate JE1 BE1.png|32px]] [[File:Golden Chestplate JE1 BE1.png|32px]] [[File:Diamond Chestplate JE1 BE1.png|32px]] [[File:Leather Tunic (item) JE1 BE1.png|32px]] [[File:Chainmail Chestplate (item) JE1 BE1.png|32px]] [[File:Iron Chestplate (item) JE1 BE1.png|32px]] [[File:Golden Chestplate (item) JE1 BE1.png|32px]] [[File:Diamond Chestplate (item) JE1 BE1.png|32px]] Added chestplates.
|Added a quick equip for armor to the [[inventory]] interface.}}
{{History||xbox=TU12|ps=1.03|[[File:Leather Tunic JE3 BE2.png|32px]] [[File:Leather Tunic (item) JE3 BE2.png|32px]] The textures for leather chestplate have been changed.}}
{{History||xbox=TU14|ps=1.05|Leather armor can now be [[dye]]d.
|[[Item repair]] can now repair armor.}}
{{History||xbox=TU25|xbone=CU13|ps=1.16|Armor now have the quick equip functionality.}}
{{History||xbox=TU53|xbone=CU43|ps=1.49|wiiu=Patch 23|switch=1.0.3|Golden, chain and iron armor can now be [[smelting|smelted]] down into one of their respective [[nugget]]s.}}
{{History|PS4}}
{{History||1.90|[[File:Chainmail Chestplate (item) JE2 BE2.png|32px]] [[File:Iron Chestplate (item) JE2 BE2.png|32px]] [[File:Golden Chestplate (item) JE2 BE2.png|32px]] [[File:Diamond Chestplate (item) JE2 BE2.png|32px]] The textures of all types of chestplate items have been changed (except for the leather one).}}
{{History|new 3ds}}
{{History||0.1.0|[[File:Leather Tunic JE1 BE1.png|32px]] [[File:Chainmail Chestplate JE2 BE1.png|32px]] [[File:Iron Chestplate JE1 BE1.png|32px]] [[File:Golden Chestplate JE1 BE1.png|32px]] [[File:Diamond Chestplate JE1 BE1.png|32px]] [[File:Leather Tunic (item) JE3 BE2.png|32px]] [[File:Chainmail Chestplate (item) JE1 BE1.png|32px]] [[File:Iron Chestplate (item) JE1 BE1.png|32px]] [[File:Golden Chestplate (item) JE1 BE1.png|32px]] [[File:Diamond Chestplate (item) JE1 BE1.png|32px]] Added chestplates.}}
{{History|foot}}
; Armor durability from Indev until late Beta
{| class="wikitable" data-description="Armor Durability during Indev until late Beta" style="text-align:center;"
|-
!scope="col" | Material
!scope="col" | Helmet
!scope="col" | Chestplate
!scope="col" | Leggings
!scope="col" | Boots
|-
|scope="row" | '''Leather'''
| 33
| 48
| 45
| 39
|-
|scope="row" | '''Golden'''
| 66
| 96
| 90
| 78
|-
|scope="row" | '''Chainmail'''
| 66
| 96
| 90
| 78
|-
|scope="row" | '''Iron'''
| 132
| 192
| 180
| 156
|-
|scope="row" | '''Diamond'''
| 264
| 384
| 360
| 312
|}
== Issues ==
{{issue list}}
== Trivia ==
* Chestplates do not render on the player's arm in first person view.<ref>{{bug|MC-25512}}</ref><ref>{{bug|MCPE-30000}}</ref>
== Gallery ==
=== Enchanted Chestplates ===
<gallery>
File:Enchanted Leather Tunic (item).gif
File:Enchanted Chainmail Chestplate (item).gif
File:Enchanted Iron Chestplate (item).gif
File:Enchanted Golden Chestplate (item).gif
File:Enchanted Diamond Chestplate (item).gif
File:Enchanted Netherite Chestplate (item).gif
</gallery>
<gallery>
File:Enchanted Leather Chestplate.gif
File:Enchanted Chainmail Chestplate.gif
File:Enchanted Iron Chestplate.gif
File:Enchanted Golden Chestplate.gif
File:Enchanted Diamond Chestplate.gif
File:Enchanted Netherite Chestplate.gif
</gallery>
== References ==
{{reflist}}
== External Links ==
*[https://www.minecraft.net/en-us/article/taking-inventory--chestplate Taking Inventory: Chestplate] – Minecraft.net on August 4, 2021
{{Items}}
[[Category:Armor]]
[[ja:チェストプレート]]
[[ko:흉갑]]
[[pt:Peitoral]]
[[pl:Napierśnik]]
[[th:เสื้อเกราะ]]
[[zh:胸甲]]</li></ul> | 20100130 | File:Crafting Table Revision 1.png Workbench added; the 3×3 crafting grid can no longer be accessed using B. | |||
| beta | |||||
1.2{{Extension DPL}}<ul><li>[[Banner|Banner]]<br/>{{for|the image|Banner (image)}}
{{Block
| image = <gallery>
White Banner.gif | Banner
White Wall Banner.png | Wall Banner
</gallery>
| rarity = Common
| transparent = Yes
| light = No
| tool = axe
| renewable = Yes
| stackable = Yes (16)
| flammable = No
| lavasusceptible = Yes
}}
'''Banners''' are tall decorative [[blocks]], featuring a field that is highly customizable using [[dye]]s and [[banner pattern]]s.
== Obtaining ==
=== Breaking ===
Banners can be broken with or without a [[tool]], but an [[axe]] is fastest.
{{breaking row|horizontal=1|Banners|Axe}}
A banner also breaks and drops itself as an [[Item (entity)|item]] if the block the banner is attached to is moved, removed, or destroyed.
=== Natural generation ===
{| class="wikitable collapsible"
! Name !! Location !! Appearance !! Design
|-
! Magenta Banner
| Outside of [[end cities]].
| style="text-align: center" | [[File:End City Banner.png|32px]]
| Magenta Banner
* Black Inverted Chevron
* Black Chevron
|-
! Gray Banner
| In banner room in [[woodland mansion]]s.
| style="text-align: center" | [[File:Gray Banner.png|32px]]
| Gray Banner
|-
! Light Gray Banner
| In master bedroom in [[woodland mansion]]s.
| style="text-align: center" | [[File:Master Bedroom Banner.png|32px]]
| Light Gray Banner
* White Flower Charge
|- id="Ominous Banner"
! Ominous Banner{{only|java|short=1}}
Illager Banner{{only|bedrock|education|short=1}}
| Carried by [[raid captain]]s.<br> Located in [[pillager outpost]]s.
{{IN|java}}, the ominous banner cannot be crafted or copied because the design uses 8 patterns.
{{IN|bedrock}}, the illager banner is a separate type that cannot be placed in a loom.
| style="text-align: center" | [[File:Ominous Banner.png|32px]]<br/>[[File:Ominous Banner BE.png|32px]]
| White Banner{{only|java|short=1}}
* Cyan Lozenge
* Light Gray Base
* Gray Pale
* Light Gray Bordure
* Black Fess
* Light Gray Per Fess
* Light Gray Roundel
* Black Bordure
Separate type entirely{{only|bedrock|short=1}}
|-
! Brown Banner
| Outside of some houses, meeting points, and pillar fountains in savanna [[village]]s.
| style="text-align: center" | [[File:Brown Banner.png|32px]]
| Brown Banner
|-
! Black Banner
| In altar room in [[woodland mansions]].
| style="text-align: center" | [[File:Black Banner.png|32px]]
| Black Banner
|}
=== Crafting ===
Banners can be crafted from six [[wool]] and a [[stick]] in a pattern resembling a [[sign]].
{{Crafting
|head=1
|showdescription=1
|A1=Matching Wool |B1=Matching Wool |C1=Matching Wool
|A2=Matching Wool |B2=Matching Wool |C2=Matching Wool
|B3=Stick
|Output=Matching Banner
|Olink=Banner
|type=Decoration block
|description=Once the banner is crafted, its base color cannot be changed.{{only|java}}
}}
{{Crafting
|showdescription=1
|Any Banner
|Bleach
|Output=White Banner
|type=Decoration block
|description=Bleach can be used to remove the color of a banner, resulting in a white banner. This includes removing patterns from a white banner.{{only|bedrock|education}}
|foot=1
}}
=== Trading ===
Expert-level cartographer [[villager]]s always offer to [[trading|sell]] 1 or 2 blank banners of a random color for 3 [[emeralds]]. Expert-level shepherd villagers have a {{frac|2|7}} chance of offering the same trade.{{only|java}}
{{IN|bedrock}}, expert-level cartographer and shepherd villagers both offer to sell one of 16 blank banners for 3 emeralds as part of their trades.
=== Mob loot ===
[[Illager]]s that spawn carrying an ominous banner{{only|java|short=1}} / illager banner{{only|bedrock|education|short=1}} always drop it upon death.
== Usage ==
[[File:Standing banner with block.png|thumb|upright|Overlapping block on a banner.]]
[[File:Wall banner with block.png|thumb|upright|Overlapping on a wall mounted banner.]]
There are 16 colored blank banners, and numerous patterns each available in each of the 16 colors. A banner can feature up to 6 different patterns. The top layer of a banner (or the last pattern added) can be washed off by {{control|using}} it on a [[cauldron]] containing water.
Banners, much like signs, can be placed both on the ground facing in any direction, or on a wall. They gently sway as if affected by a breeze, regardless of dimension or location.
Banners have no collision mask as they are completely non-solid, so [[entities]] can move through them.
Other blocks (including other banners) can be placed on any edge of a banner's hitbox, which is only one block high despite the banner appearing as two blocks tall. This makes it possible to overlap another solid block on the top half of a banner for floor banners, or the bottom half of wall banners.
When a banner is placed on the side of a block, its position is set by the top block, and it is possible to place it so it appears half buried.
Banners can also be placed in [[item frame]]s, where they simply appear as their item model.
[[Water]] and [[lava]] flow around banners. {{IN|bedrock}}, banners can be [[waterlogged]].
<gallery>
File:Wall banner with water below.png| Water can be placed below wall banners
File:Water flowing around banner.png| Water flows around a banner on the ground
</gallery>
Lava can create [[fire]] in air blocks next to banners as if the banners were flammable, but the banners do not burn (and cannot be burned by other methods). Banners also cannot be moved by [[piston]]s.
If a banner is renamed on an [[anvil]], it retains its name when a pattern is added, but not when a pattern is removed.
=== Helmet ===
{{exclusive|java|section=13}}
While a banner cannot be equipped in the [[Helmet|head slot]] in [[Survival]] mode, equipping it using commands causes it to appear on top of the player. This is how [[raid captain]]s wear banners{{only|java|short=1}}.
=== Chestplate ===
{{exclusive|bedrock|section=13}}
While a banner cannot be equipped in the [[chestplate]] slot in Survival mode, equipping it using NBT editors causes it to appear on top of the player. This is how [[raid captain]]s wear banners{{only|bedrock|education|short=1}}.
<gallery>
Steve wearing White Banner.png|
Alex wearing White Banner.png|
Pillager with Ominous Banner.png|
Vindicator with Ominous Banner.png|
Evoker with Ominous Banner.png|Illusioner with Ominous Banner.png|
</gallery>
=== Crafting ingredient ===
[[Shield]]s can have patterns applied to them using banners. The shield pattern has a smaller resolution than the banner pattern, causing them to look different or offset. Banners that have more than six patterns, such as Ominous Banners or banners obtained through inventory editors, will be reduced to six patterns on the shield.
{{Crafting
|showdescription=1
|Shield
|Matching Banner; Ominous Banner
|Output=Matching Shield; Ominous Shield
|B2link=Banner
|type=Combat
|description=Applies the banner pattern to the shield. The banner is consumed.<br>The shield must have no pre-existing patterns.<br>Does not change existing durability or enchantments on the shield.
}}
=== Copying ===
Banners can be copied with a blank banner to make multiple identical banners. Banners with more than 6 patterns applied using commands cannot be copied in this manner.
{{Crafting
|showdescription=1
|Matching Banner
|Matching Banner
|Output=Matching Banner
|A2link=Banner
|B2link=Banner
|Olink=Banner
|type=Decoration block
|ignoreusage=1
|description=Copies pattern; both banners must have the same base color, and the one having a pattern copied onto it must have no preexisting pattern.
}}
=== Map marker ===
[[File:Banner marked map.png|alt=All banners marked on a map, alongside a named banner.|thumb|right|How every banner appears {{IN|java}} on a map, including named banners.]]
{{exclusive|java|section=13}}
{{IN|java}}, {{control|using}} on a standing banner with a [[map]] selected places a marker of the banner's position on the selected map, and {{control|using}} on the banner again removes the marker. Note that wall banners cannot serve as map markers. The marker has the same color as the banner's base without decorations. The marker is removed if the banner is destroyed unless the map is locked using a [[cartography table]]. If the banner is renamed, the name appears below the marker.
=== Patterns ===
{{see also|Banner/Patterns|title1=List of patterned banners}}
[[File:Spawned-in Banner.png|thumb|100px|Example of a banner with more than 6 patterns, a result of using the {{cmd|give}} command.]]
A banner may have up to six layers of patterns, which are overlaid with the last-crafted on top. A banner can have up to 16 layers of patterns with the use of commands. The total number of unique banners is approximately 2.3x10^16 (or 23 quadrillion).
Any color banner can be used; the pattern overlays the color. {{IN|java}}, a [[loom]] is used to make patterns. However, {{in|bedrock}}, the patterns can be made in a [[loom]] or a [[crafting table]].
A banner can have more than six layers of patterns through the commands <code>/[[Commands/give|give]]</code>, <code>/[[Commands/setblock|setblock]]</code> or <code>/[[Commands/fill|fill]]</code>. This only works in ''Java Edition'', as Bedrock Edition doesn't have any NBT commands. Here is an example of a mining banner with seven different patterns. There is specific codes for the [[Banner#Item data:~:text=white-,Item,-In Java Edition|colors]] and [[Banner/Patterns|patterns]] that you have to input.
<code><nowiki>/give @p white_banner{display:{Name:"\"Mining Industries Banner\""},BlockEntityTag:{Patterns:[{Pattern:"cr",Color:15},{Pattern:"bs",Color:15},{Pattern:"sc",Color:12},{Pattern:"ms",Color:0},{Pattern:"hh",Color:15},{Pattern:"bo",Color:15},{Pattern:"tts",Color:8}]}} 1</code>
{{LoadPage|Template:Banner pattern loom recipes|Loom recipes|h4}}
{{LoadPage|Banner/Banner pattern crafting recipes|Crafting recipes|h4|transcluded=1}}
=== Renaming ===
{{IN|java}}, a banner can be given a custom name that remains as the banner is placed and retrieved. The player can use an [[anvil]] to rename the banner item, or may change the <code>CustomName</code> tag using the {{cmd|data}} command on the banner block.
=== Fuel ===
Banners can be used as a fuel in [[furnace]]s, smelting 1.5 items per banner.
=== Note Blocks ===
Banners can be placed under [[note block]]s to produce "bass" sounds.
== Sounds ==
=== Generic ===
{{Sound table/Block/Wood}}
=== Unique ===
{{edition|java}}: ''None''
{{edition|bedrock}}:
{{Sound table
|type=bedrock
|sound=Water Splash Old.ogg
|source=block
|description=When all patterns are removed from a banner using a cauldron
|id=cauldron.cleanbanner
|volume=0.1
|pitch=1.0
|foot=1}}
== Data values ==
=== ID ===
{{edition|java}}:
{{ID table
|edition=java
|showblocktags=y
|showitemtags=y
|showforms=y
|generatetranslationkeys=y
|displayname=White Banner
|spritetype=block
|nameid=white_banner
|blocktags=banners, wall_post_override
|itemtags=banners
|translationkey=block.minecraft.white_banner,block.minecraft.ominous_banner
}}
{{ID table
|displayname=Orange Banner
|spritetype=block
|nameid=orange_banner
|blocktags=banners, wall_post_override
|itemtags=banners}}
{{ID table
|displayname=Magenta Banner
|spritetype=block
|nameid=magenta_banner
|blocktags=banners, wall_post_override
|itemtags=banners}}
{{ID table
|displayname=Light Blue Banner
|spritetype=block
|nameid=light_blue_banner
|blocktags=banners, wall_post_override
|itemtags=banners}}
{{ID table
|displayname=Yellow Banner
|spritetype=block
|nameid=yellow_banner
|blocktags=banners, wall_post_override
|itemtags=banners}}
{{ID table
|displayname=Lime Banner
|spritetype=block
|nameid=lime_banner
|blocktags=banners, wall_post_override
|itemtags=banners}}
{{ID table
|displayname=Pink Banner
|spritetype=block
|nameid=pink_banner
|blocktags=banners, wall_post_override
|itemtags=banners}}
{{ID table
|displayname=Gray Banner
|spritetype=block
|nameid=gray_banner
|blocktags=banners, wall_post_override
|itemtags=banners}}
{{ID table
|displayname=Light Gray Banner
|spritetype=block
|nameid=light_gray_banner
|blocktags=banners, wall_post_override
|itemtags=banners}}
{{ID table
|displayname=Cyan Banner
|spritetype=block
|nameid=cyan_banner
|blocktags=banners, wall_post_override
|itemtags=banners}}
{{ID table
|displayname=Purple Banner
|spritetype=block
|nameid=purple_banner
|blocktags=banners, wall_post_override
|itemtags=banners}}
{{ID table
|displayname=Blue Banner
|spritetype=block
|nameid=blue_banner
|blocktags=banners, wall_post_override
|itemtags=banners}}
{{ID table
|displayname=Brown Banner
|spritetype=block
|nameid=brown_banner
|blocktags=banners, wall_post_override
|itemtags=banners}}
{{ID table
|displayname=Green Banner
|spritetype=block
|nameid=green_banner
|blocktags=banners, wall_post_override
|itemtags=banners}}
{{ID table
|displayname=Red Banner
|spritetype=block
|nameid=red_banner
|blocktags=banners, wall_post_override
|itemtags=banners}}
{{ID table
|displayname=Black Banner
|spritetype=block
|nameid=black_banner
|blocktags=banners, wall_post_override
|itemtags=banners}}
{{ID table
|displayname=White Wall Banner
|spritetype=block
|nameid=white_wall_banner
|blocktags=banners, wall_post_override
|form=block
|translationkey=block.minecraft.white_banner,block.minecraft.ominous_banner}}
{{ID table
|displayname=Orange Wall Banner
|spritetype=block
|nameid=orange_wall_banner
|blocktags=banners, wall_post_override
|form=block
|translationkey=block.minecraft.orange_banner}}
{{ID table
|displayname=Magenta Wall Banner
|spritetype=block
|nameid=magenta_wall_banner
|blocktags=banners, wall_post_override
|form=block
|translationkey=block.minecraft.magenta_banner}}
{{ID table
|displayname=Light Blue Wall Banner
|spritetype=block
|nameid=light_blue_wall_banner
|blocktags=banners, wall_post_override
|form=block
|translationkey=block.minecraft.light_blue_banner}}
{{ID table
|displayname=Yellow Wall Banner
|spritetype=block
|nameid=yellow_wall_banner
|blocktags=banners, wall_post_override
|form=block
|translationkey=block.minecraft.yellow_banner}}
{{ID table
|displayname=Lime Wall Banner
|spritetype=block
|nameid=lime_wall_banner
|blocktags=banners, wall_post_override
|form=block
|translationkey=block.minecraft.lime_banner}}
{{ID table
|displayname=Pink Wall Banner
|spritetype=block
|nameid=pink_wall_banner
|blocktags=banners, wall_post_override
|form=block
|translationkey=block.minecraft.pink_banner}}
{{ID table
|displayname=Gray Wall Banner
|spritetype=block
|nameid=gray_wall_banner
|blocktags=banners, wall_post_override
|form=block
|translationkey=block.minecraft.gray_banner}}
{{ID table
|displayname=Light Gray Wall Banner
|spritetype=block
|nameid=light_gray_wall_banner
|blocktags=banners, wall_post_override
|form=block
|translationkey=block.minecraft.light_gray_banner}}
{{ID table
|displayname=Cyan Wall Banner
|spritetype=block
|nameid=cyan_wall_banner
|blocktags=banners, wall_post_override
|form=block
|translationkey=block.minecraft.cyan_banner}}
{{ID table
|displayname=Purple Wall Banner
|spritetype=block
|nameid=purple_wall_banner
|blocktags=banners, wall_post_override
|form=block
|translationkey=block.minecraft.purple_banner}}
{{ID table
|displayname=Blue Wall Banner
|spritetype=block
|nameid=blue_wall_banner
|blocktags=banners, wall_post_override
|form=block
|translationkey=block.minecraft.blue_banner}}
{{ID table
|displayname=Brown Wall Banner
|spritetype=block
|nameid=brown_wall_banner
|blocktags=banners, wall_post_override
|form=block
|translationkey=block.minecraft.brown_banner}}
{{ID table
|displayname=Green Wall Banner
|spritetype=block
|nameid=green_wall_banner
|blocktags=banners, wall_post_override
|form=block
|translationkey=block.minecraft.green_banner}}
{{ID table
|displayname=Red Wall Banner
|spritetype=block
|nameid=red_wall_banner
|blocktags=banners, wall_post_override
|form=block
|translationkey=block.minecraft.red_banner}}
{{ID table
|displayname=Black Wall Banner
|spritetype=block
|nameid=black_wall_banner
|blocktags=banners, wall_post_override
|form=block
|translationkey=block.minecraft.black_banner
|foot=1}}
{{ID table
|displayname=Block entity
|spritename=Banners
|spritetype=block
|nameid=banner
|foot=1}}
{{edition|bedrock}}:
{{ID table
|edition=bedrock
|firstcolumnname=Banner
|shownumericids=y
|showforms=y
|generatetranslationkeys=y
|displayname=Standing
|spritename=Banners
|spritetype=block
|nameid=standing_banner
|translationkey=tile.standing_banner.black.name, tile.standing_banner.red.name, tile.standing_banner.green.name, tile.standing_banner.brown.name, tile.standing_banner.blue.name, tile.standing_banner.purple.name, tile.standing_banner.cyan.name, tile.standing_banner.silver.name, tile.standing_banner.gray.name, tile.standing_banner.pink.name, tile.standing_banner.lime.name, tile.standing_banner.yellow.name, tile.standing_banner.lightBlue.name, tile.standing_banner.magenta.name, tile.standing_banner.orange.name, tile.standing_banner.white.name
|id=176
|form=block}}
{{ID table
|displayname=Wall
|spritename=Banners
|spritetype=block
|nameid=wall_banner
|id=177
|form=block
|translationkey=-}}
{{ID table
|displayname=Item
|spritename=Banners
|spritetype=item
|nameid=banner
|translationkey=item.banner.black.name, item.banner.red.name, item.banner.green.name, item.banner.brown.name, item.banner.blue.name, item.banner.purple.name, item.banner.cyan.name, item.banner.silver.name, item.banner.gray.name, item.banner.pink.name, item.banner.lime.name, item.banner.yellow.name, item.banner.lightBlue.name, item.banner.magenta.name, item.banner.orange.name, item.banner.white.name
|id=567
|form=item
|foot=1}}
{{ID table
|notnamespaced=y
|displayname=Block entity
|spritename=Banners
|spritetype=block
|nameid=Banner
|foot=1}}
=== Metadata ===
==== Item ====
{{IN|Bedrock}}, banner items use the following data values:
{| class="wikitable"
! DV !! Banner color
|-
|| 0 || black
|-
|| 1 || red
|-
|| 2 || green
|-
|| 3 || brown
|-
|| 4 || blue
|-
|| 5 || purple
|-
|| 6 || cyan
|-
|| 7 || light gray
|-
|| 8 || gray
|-
|| 9 || pink
|-
|| 10 || lime
|-
|| 11 || yellow
|-
|| 12 || light blue
|-
|| 13 || magenta
|-
|| 14 || orange
|-
|| 15 || white
|}
=== Item ===
{{IN|Java}}, banner items use the following data values:
{| class="wikitable"
! DV !! Banner color
|-
|| 15 || black
|-
|| 14 || red
|-
|| 13 || green
|-
|| 12 || brown
|-
|| 11 || blue
|-
|| 10 || purple
|-
|| 9 || cyan
|-
|| 8 || light gray
|-
|| 7 || gray
|-
|| 6 || pink
|-
|| 5 || lime
|-
|| 4 || yellow
|-
|| 3 || light blue
|-
|| 2 || magenta
|-
|| 1 || orange
|-
|| 0 || white
|}
=== Block states ===
{{see also|Block states}}
{{/BS}}
=== Block data ===
A banner has a block entity associated with it that holds additional data about the block.
{{el|bedrock}}:
: See [[Bedrock Edition level format/Block entity format]].
{{el|java}}:
{{see also|Block entity format}}
{{/BE}}
=== Item data ===
{{el|java}}:
{{main|Player.dat format}}
Banners, as items, use an NBT tag <code>BlockEntityTag</code> to indicate the patterns and details when it is placed.
<div class="treeview" style="margin-top: 0;">
* {{nbt|compound|Item}}: The item
** {{nbt|compound|tag}}: Additional information about the item. This tag is optional for most items.
*** {{nbt|compound|BlockEntityTag}}: The details of the shulker box.
**** All block data, except tags common to all block entities.
</div>
{{el|bedrock}}:
: See [[Bedrock Edition level format/Item format]].
== Achievements ==
{{load achievements|Fruit on the Loom}}
== Advancements ==
{{load advancements|Voluntary Exile}}
== History ==
{{info needed section|The Nether Update}}
{{History|java}}
{{History||1.8|snap=July 21, 2014|slink=https://twitter.com/jeb_/status/491238882789572608|[[Jeb]] posted a picture of banners, and stated that he is working on them.}}
{{History|||snap=14w30a|[[File:White Banner Revision 1.png|22px]][[File:Light Gray Banner Revision 1.png|22px]][[File:Gray Banner Revision 1.png|22px]][[File:Black Banner Revision 1.png|22px]][[File:Brown Banner Revision 1.png|22px]][[File:Red Banner Revision 1.png|22px]][[File:Orange Banner Revision 1.png|22px]][[File:Yellow Banner Revision 1.png|22px]][[File:Lime Banner Revision 1.png|22px]][[File:Green Banner Revision 1.png|22px]][[File:Cyan Banner Revision 1.png|22px]][[File:Light Blue Banner Revision 1.png|22px]][[File:Blue Banner Revision 1.png|22px]][[File:Purple Banner Revision 1.png|22px]][[File:Magenta Banner Revision 1.png|22px]][[File:Pink Banner Revision 1.png|22px]] Added banners.}}
{{History|||snap=14w30c|Added four additional patterns: Cross (+), Border, Curly Border and Thing (Mojang logo).}}
{{History|||snap=14w31a|Added two additional patterns: Inverted Halves and Base Gradient.
|The banner pattern terminology has been changed based on vexillology advice [[Jeb]] received from [http://www.reddit.com/r/Minecraft/comments/2bkxej/i_made_a_huge_mistake_banners/ his Reddit post].
|Banners can now be used as a [[fuel]] in [[furnace]]s.}}
{{History||1.8.8|snap=pre|The number of layers attainable by using [[commands]] is now limited to 16 per banner.}}
{{History||1.9|snap=15w31a|[[File:End City Banner.png|17px]] Magenta banners with a black chevron and inverted chevron are now naturally generated on the outside walls of [[end city|end cities]].}}
{{History|||snap=15w33c|Banners can be used to apply patterns to [[shield]]s.}}
{{History||1.11|snap=16w33a|Banners now require a [[dye]] when applying a pattern that uses a non-dye [[item]], such as a [[mob head|creeper head]] or [[golden apple|enchanted golden apple]]. Previously, the lack of a dye would have applied the black variant of the pattern.}}
{{History|||snap=16w39a|Black and gray banners, and light gray banners with a white flower charge are now naturally generated in rooms of [[woodland mansion]]s.}}
{{History||1.12|snap=January 24, 2017|slink={{tweet|jeb_|823817090511601664}}|[[Jeb]] tweets a screenshot of the changes to the banner color palette.}}
{{History|||snap=17w06a|[[File:White Banner.png|17px]] [[File:Light Gray Banner.png|17px]] [[File:Gray Banner.png|17px]] [[File:Black Banner.png|17px]] [[File:Brown Banner.png|17px]] [[File:Red Banner.png|17px]] [[File:Orange Banner.png|17px]] [[File:Yellow Banner.png|17px]] [[File:Lime Banner.png|17px]] [[File:Green Banner.png|17px]] [[File:Cyan Banner.png|17px]] [[File:Light Blue Banner.png|17px]] [[File:Blue Banner.png|17px]] [[File:Purple Banner.png|17px]] [[File:Magenta Banner.png|17px]] [[File:Pink Banner.png|17px]] Changed banners' [[tint]]s.}}
{{History|||snap=pre6|"Chief fess" and "base fess" banners are now just "chief" and "base" banners.}}
{{History||1.13|snap=17w47a|The colors for the <code>banner</code>, <code>wall_banner</code> and <code>standing_banner</code> ID have been split up into their own IDs.
|Prior to [[1.13/Flattening|''The Flattening'']], these [[block]]s' numeral IDs were 176 and 177, and the [[item]]'s 425.}}
{{History|||snap=18w10a|{{control|Using}} a [[map]] on a banner now mark the spot of the banner on the map.}}
{{History||1.14|snap=18w43a|[[Loom]]s have been added to help the [[player]] edit banners more easily.
|All recipes for banner patterns have been removed.}}
{{History|||snap=18w45a|[[File:Ominous Banner Revision 1.png|17px]] Added [[illager patrol]]s, where the leader of an illager patrol carries an [[illager]] banner.}}
{{History|||snap=18w46a|[[File:Ominous Banner.png|17px]] The pattern of [[illager]] banner now has a black border.}}
{{History|||snap=19w11a|Cartographer and shepherd [[villager]]s now [[trading|sell]] banners.}}
{{History|||snap=Pre-Release 2|"Illager Banners" have been renamed to "Ominous Banners".}}
{{History||1.17|snap=20w46a|The unused "base" pattern has been renamed to the "field" pattern and given proper translation strings (its ID is still "base").}}
{{History||1.19.3|snap=22w43a|The ominous banner is now available in the Creative inventory.}}
{{History|bedrock}}
{{History||1.2.0|snap=beta 1.2.0.2|[[File:White Banner.png|17px]] [[File:Light Gray Banner.png|17px]] [[File:Gray Banner.png|17px]] [[File:Black Banner.png|17px]] [[File:Brown Banner.png|17px]] [[File:Red Banner.png|17px]] [[File:Orange Banner.png|17px]] [[File:Yellow Banner.png|17px]] [[File:Lime Banner.png|17px]] [[File:Green Banner.png|17px]] [[File:Cyan Banner.png|17px]] [[File:Light Blue Banner.png|17px]] [[File:Blue Banner.png|17px]] [[File:Purple Banner.png|17px]] [[File:Magenta Banner.png|17px]] [[File:Pink Banner.png|17px]] Added banners.
|[[File:End City Banner.png|17px]] Magenta banners with a black chevron and inverted chevron are now naturally generated on the outside walls of [[end city|end cities]].
|Black and gray banners, and light gray banners with a white flower charge are now naturally generated in rooms of [[woodland mansion]]s.}}
{{History||1.4.0|snap=beta 1.2.20.1|The white banner can now be crafted from a colored banner and [[bleach]], which also removes all patterns, if used on a white banner.}}
{{History||1.10.0|snap=beta 1.10.0.3|[[Loom]]s have been added to help the [[player]] edit banners more easily.
|Brown banners now generate in new [[savanna]] [[village]]s.
|Black banners now generate in [[pillager outpost]] watchtowers.}}
{{History||1.11.0|snap=beta 1.11.0.1|Gray banners now generate in pillager outpost watchtowers, instead of black banners.
|[[File:Ominous Banner BE.png|17px]] Added [[illager captain]]s, which drop an [[illager]] banner upon [[death]].}}
{{History|||snap=beta 1.11.0.3|Illager banners now generate in [[pillager outpost]] watchtowers, instead of gray banners.}}
{{History|||snap=beta 1.11.0.4|Banners can now be [[trading|bought]] from cartographer and shepherd [[villager]]s.}}
{{History||1.20.0|snap=beta 1.20.0.20|Banners can now be used to customise [[shield]]s.}}
{{History|console}}
{{History||xbox=TU43|xbone=CU33|ps=1.36|wiiu=Patch 13|switch=1.0.1|[[File:White Banner Revision 1.png|22px]][[File:Light Gray Banner Revision 1.png|22px]][[File:Gray Banner Revision 1.png|22px]][[File:Black Banner Revision 1.png|22px]][[File:Brown Banner Revision 1.png|22px]][[File:Red Banner Revision 1.png|22px]][[File:Orange Banner Revision 1.png|22px]][[File:Yellow Banner Revision 1.png|22px]][[File:Lime Banner Revision 1.png|22px]][[File:Green Banner Revision 1.png|22px]][[File:Cyan Banner Revision 1.png|22px]][[File:Light Blue Banner Revision 1.png|22px]][[File:Blue Banner Revision 1.png|22px]][[File:Purple Banner Revision 1.png|22px]][[File:Magenta Banner Revision 1.png|22px]][[File:Pink Banner Revision 1.png|22px]] Added banners.}}
{{History||xbox=TU46|xbone=CU36|ps=1.38|wiiu=Patch 15|switch=1.0.1|[[File:End City Banner.png|17px]] Magenta banners with a black chevron and inverted chevron are now naturally generated on the outside walls of [[end city|end cities]].}}
{{History||xbox=TU53|xbone=CU43|ps=1.49|wiiu=Patch 23|switch=1.0.3|[[File:White Banner.png|17px]] [[File:Light Gray Banner.png|17px]] [[File:Gray Banner.png|17px]] [[File:Black Banner.png|17px]] [[File:Brown Banner.png|17px]] [[File:Red Banner.png|17px]] [[File:Orange Banner.png|17px]] [[File:Yellow Banner.png|17px]] [[File:Lime Banner.png|17px]] [[File:Green Banner.png|17px]] [[File:Cyan Banner.png|17px]] [[File:Light Blue Banner.png|17px]] [[File:Blue Banner.png|17px]] [[File:Purple Banner.png|17px]] [[File:Magenta Banner.png|17px]] [[File:Pink Banner.png|17px]] Changed banners' [[tint]]s.}}
{{History||xbox=none|xbone=none|ps=1.90|wiiu=none|switch=none|[[Loom]]s have been added to help the [[player]] edit banners more easily.}}
{{History||ps=1.91|[[File:Ominous Banner BE.png|17px]] Added [[illager]] banners, which generate with [[pillager outpost]]s and are [[drops|dropped]] by [[illager captain]]s upon [[death]].}}
{{History|foot}}
== Issues ==
{{issue list}}
== Trivia ==
* With 16 blank banners, 38 patterns of 16 colors each (608 uniquely-colored patterns), and 0 to 6 patterns per banner, the number of uniquely crafted banners is 16 × (608<sup>0</sup> + 608<sup>1</sup> + 608<sup>2</sup> + 608<sup>3</sup> + 608<sup>4</sup> + 608<sup>5</sup> + 608<sup>6</sup>) ≈ 809 quadrillion - 809 with 15 zeros (809,573,616,779,945,488). The number of visually distinct banners is smaller, because one or more patterns may completely cover other patterns, or the entire banner, or be duplicated due to the symmetric set of patterns (e.g. field or (yellow) + per pale azure (blue) = field azure + per pale or inverted).
** Not 38 patterns are available on BE, but 40 patterns of 16 colors each (640 uniquely-colored patterns), so the number is even greater. 16 × (640<sup>0</sup> + 640<sup>1</sup> + 640<sup>2</sup> + 640<sup>3</sup> + 640<sup>4</sup> + 640<sup>5</sup> + 640<sup>6</sup>) ≈ 1 quintillion - 1 with 18 zeros (1,101,232,303,249,827,856). This increases the number by almost 1.4 times, or almost 292 quadrillion, despite the addition of only 2 patterns.
* If a banner has over 6 patterns, only the six bottom-most patterns are displayed when hovered over in the [[inventory]].
* The Mojang logo is called "Thing" in-game, which could be considered an alternate translation for [[wiktionary:mojäng|mojäng]]. If [[wikipedia:Google Translate|Google Translate]] is used, it translates to "thingys" or "contraption".
** In the Swedish translation of the game, this pattern is, in fact, called ''mojäng''.
* [[List of block textures#Banner Textures|Banner textures]] are located in \assets\minecraft\textures\entity\banner.
** There are 40 monochrome textures, each containing all 6 sides of the banner.
** The texture of the back side is the mirrored texture of the front side.
** Compared to the texture files, textures' colors are inverted in-game due to them acting as masks for the re-colored base texture, base.png. That means white is visible, while black is transparent.
* Banners that have the purple NBT+ line in the bottom (obtained by holding Ctrl and middle-clicking the banner, which also copies the NBT [[tag]] of anything that the player points their crosshair to) actually have no difference with the base banner obtained by middle click.
*The Illager Banner in Bedrock Edition is available as a separate item but is just a second variant of the white banner.
**Standard variant of white banner is set to type 0.
**Illager variant is set to type 1.
== Gallery ==
<gallery>
Banners Jeb.png|The first image of banners, as tweeted by Jens Bergensten.
Iceland and Norway Flags.png|Another banner image from Jeb.
Searge Banners.png|Several banners made by Searge.
The Bountiful Update.png|Banners in the official 1.8 poster.
BannersBeforeAndAfter.png|An image, tweeted by Jeb, showcasing the changes he made to the banner color palette in the 1.12 update.
Gradients Overlay.png|The result of using gradient different numbers of times, each time increasing the level of gradient by 1.
All positions and rotations of a banner.png|All positions and rotations of a banner
Item Frame with Banner.png|A banner with the [[Mojang]] logo in an [[item frame]].
EndCityBanners.png|Banners floating outside of an [[End city]] tower.
Woodland mansion 1x2 d1.png|Banners hanging above the doorway of a [[woodland mansion]] master bedroom.
Replaceitembanner.png|Banner put in the helmet slot by using the command {{cmd|replaceitem}}{{Only|BE}} or {{cmd|item replace}}{{Only|JE}}.
Better Together Banners.jpg|Banners in ''Bedrock Edition''.
Better Together Banner Crafting 1.jpg|A banner in the hand.
Better Together Banner Crafting 2.jpg|A banner in the inventory.
Better Together Banner Crafting 3.jpg|A banner in the crafting grid.
Better Together Banner Crafting 4.jpg|A banner being given a pattern.
</gallery>
=== Renders ===
<gallery>
Ominous Banner.gif
White Banner.gif
Light Gray Banner.gif
Gray Banner.gif
Black Banner.gif
Brown Banner.gif
Red Banner.gif
Orange Banner.gif
Yellow Banner.gif
Lime Banner.gif
Green Banner.gif
Cyan Banner.gif
Light Blue Banner.gif
Blue Banner.gif
Purple Banner.gif
Magenta Banner.gif
Pink Banner.gif
Ominous Wall Banner.png|
White Wall Banner.png|
Light Gray Wall Banner.png|
Gray Wall Banner.png|
Black Wall Banner.png|
Brown Wall Banner.png|
Red Wall Banner.png|
Orange Wall Banner.png|
Yellow Wall Banner.png|
Lime Wall Banner.png|
Green Wall Banner.png|
Cyan Wall Banner.png|
Light Blue Wall Banner.png|
Blue Wall Banner.png|
Purple Wall Banner.png|
Magenta Wall Banner.png|
Pink Wall Banner.png
</gallery>
<gallery>
File:Ominous Banner.gif|Ominous banner pattern in Java Edition.
File:Ominous Banner BE.gif|Illager banner pattern in Bedrock Edition.
File:Ominous Banner Revision 1.gif|Old Ominous banner pattern.
File:Ominous Banner washing.gif|Washing with cauldron shows how to apply the ominous banner pattern.
</gallery>
=== [[Lego Minecraft]] Banners ===
<gallery>
File:Lego Red Creeper Banner Collage.jpg|Lego banners from 21127 and 21131
File:Lego Melon Banner.png|Lego banner from 21138
File:Lego Fish Banner.png|Lego banner from 21142
File:Lego Beetroot Banner.png|Lego banner from 21144
File:Lego Wheat Banner.png|Another lego banner from 21144
File:Lego Carrot Banner.png|A third lego banner from 21144
File:Lego Crossbones Banner.png|Lego banner from 21152
File:Lego Green Creeper Banner Collage.jpg|Lego banners from 21155
File:Lego Ominous Banner.png|Lego ominous banner from 21160
</gallery>
== References ==
{{reflist}}
{{Blocks|Utility}}
{{Items}}
[[Category:Generated structure blocks]]
[[Category:Manufactured blocks]]
[[Category:Block entities]]
[[Category:Non-solid blocks]]
[[cs:Prapor]]
[[de:Banner]]
[[es:Estandarte]]
[[fr:Bannière]]
[[ja:旗]]
[[ko:현수막]]
[[nl:Banier]]
[[pl:Sztandar]]
[[pt:Estandarte]]
[[ru:Флаг]]
[[uk:Стяг]]
[[zh:旗帜]]</li><li>[[Bowl|Bowl]]<br/>{{Item
| image = Bowl.png
| renewable = Yes
| stackable = Yes (64)
}}
'''Bowls''' are containers that can hold certain [[food]]s.
== Obtaining ==
=== Crafting ===
{{Crafting
|A2= Any Planks
|C2= Any Planks
|B3= Any Planks
|Output= Bowl,4
|type= Material
}}
=== Fishing ===
Bowls can be obtained as a "junk" item while [[fishing]].
=== Eating ===
A bowl containing food becomes an empty bowl when the food is eaten.
=== Mob loot ===
When a [[turtle]] is killed by a [[Thunderstorm#Lightning|lightning bolt]], it drops 1 bowl.<ref name=BowlReport>{{Cite bug|MC|125562|Turtles drop bowls when killed by lightning|date=February 16, 2018}}</ref><ref>{{Cite bug|MCPE|57038| Turtles killed by lightning drop Bowls.|date=November 17, 2019}}</ref>
== Usage ==
=== Crafting ingredient ===
{{crafting usage}}
=== Mooshrooms ===
{{control|use|text=Using}} a bowl on a [[mooshroom]] turns the bowl into [[mushroom stew]] or [[suspicious stew]]. The stew can then be consumed immediately and the process repeated, making this an excellent way to quickly restore depleted [[hunger]] and [[saturation]] with almost no cost or effort.
=== Fuel ===
Bowls can be used as a fuel in [[furnace]]s, smelting 0.5 items per bowl {{in|je}}, and 1 item per bowl {{in|be}}.
== Data values ==
=== ID ===
{{edition|java}}:
{{ID table
|edition=java
|showforms=y
|generatetranslationkeys=y
|displayname=Bowl
|spritetype=item
|nameid=bowl
|form=item
|foot=1}}
{{edition|bedrock}}:
{{ID table
|edition=bedrock
|shownumericids=y
|showforms=y
|notshowbeitemforms=y
|generatetranslationkeys=y
|displayname=Bowl
|spritetype=item
|nameid=bowl
|id=321
|form=item
|foot=1}}
== History ==
{{History|java indev}}
{{History||0.31|snap=20100130|[[File:Bowl JE1 BE1.png|32px]] Added bowls.
|Bowls are used to craft [[mushroom soup]].}}
{{History|java}}
{{History||1.0.0|snap=Beta 1.9 Prerelease|Added [[mooshroom]]s, which can be {{control|use|text=milked}} with a bowl.}}
{{History||1.2.4|snap=release|[[Spruce planks]], [[birch planks]], and [[jungle planks]] can now be used to craft bowls.}}
{{History||1.7.2|snap=13w36a|Bowls can now be obtained as one of the "junk" [[item]]s by [[fishing]].}}
{{History|||snap=1.7.1|[[Acacia planks]] and [[dark oak planks]] can now be used to craft bowls.}}
{{History||1.8|snap=14w27a|Bowls are now used to craft [[rabbit stew]].}}
{{History||1.9|snap=15w31a|Bowls are now used to craft [[beetroot soup]].}}
{{History||1.11|snap=16w33a|Bowls can now be used to fuel [[furnace]]s.}}
{{History||1.13|snap=17w47a|Prior to [[1.13/Flattening|''The Flattening'']], this [[item]]'s numeral ID was 281.}}
{{History|||snap=18w07a|[[Turtles]] drop 0 to 1 bowls if killed by [[lightning]].<ref name=BowlReport/>}}
{{History||1.14|snap=18w43a|[[File:Bowl JE2 BE2.png|32px]] The texture of bowls has now been changed.
|Bowls are now used to craft [[suspicious stew]].}}
{{History||1.16|snap=20w06a|[[Crimson planks]] and [[warped planks]] can now be used to craft bowls.}}
{{History||1.19|snap=22w11a|[[Mangrove planks]] can now be used to craft bowls.}}
{{History|pocket alpha}}
{{History||v0.2.0|[[File:Bowl JE1 BE1.png|32px]] Added bowls. They are currently unobtainable and serve no purpose.}}
{{History||v0.3.0|Bowls are now [[craft]]able. They still serve no purpose.}}
{{History||v0.4.0|Bowls are now used to craft [[mushroom stew]].}}
{{History||v0.5.0|Bowls now appear in the [[nether reactor]].}}
{{History||v0.8.0|snap=build 2|Bowls are now used to craft [[beetroot soup]].}}
{{History|||snap=build 7|Bowls can now be used as fuel in a [[furnace]].}}
{{History||v0.9.0|snap=build 1|Added bowls to [[creative]] mode.
|[[Mooshroom]]s can now be "milked" to obtain [[mushroom stew]].}}
{{History||v0.12.1|snap=build 1|Bowls are no longer available from the [[nether reactor]].}}
{{History||v0.13.0|snap=build 1|Bowls are now used to craft [[rabbit stew]].}}
{{History|bedrock}}
{{History||1.10.0|snap=beta 1.10.0.3|[[File:Bowl JE2 BE2.png|32px]] The texture of bowls has now been changed.}}
{{History||1.13.0|snap=beta 1.13.0.9|Bowls can now be used to craft [[suspicious stew]].}}
{{History|console}}
{{History||xbox=TU1|xbone=CU1|ps=1.0|wiiu=Patch 1|switch=1.0.1|[[File:Bowl JE1 BE1.png|32px]] Added bowls.}}
{{History||xbox=TU9|Bowls now stack to 64.}}
{{History||xbox=none|xbone=none|ps=1.90|wiiu=none|switch=none|[[File:Bowl JE2 BE2.png|32px]] The texture of bowls has now been changed.}}
{{History|new 3ds}}
{{History||0.1.0|[[File:Bowl JE1 BE1.png|32px]] Added bowls.}}
{{History|foot}}
== Issues ==
{{issue list}}
== Trivia ==
* {{in|be}}, bowls are actually more fuel efficient than [[stick]]s. If 6 wood planks are crafted into 8 bowls, 8 items can be [[smelt]]ed; but if those are crafted into 12 sticks, only 6 items can be smelted. This can be useful when the player only has access to Nether wood types, which cannot be used as fuel.
== See also ==
* [[Mushrooms]]
== References ==
{{reflist}}
== External Links ==
* {{Mcnet|taking-inventory--bowl|Taking Inventory: Bowl|April 25, 2019}}
{{Items}}
[[Category:Renewable resources]]
[[cs:Miska]]
[[de:Schüssel]]
[[es:Cuenco]]
[[fr:Bol]]
[[hu:Tál]]
[[it:Ciotola]]
[[ja:ボウル]]
[[ko:그릇]]
[[nl:Kom]]
[[pl:Miska]]
[[pt:Tigela]]
[[ru:Миска]]
[[th:ชาม]]
[[uk:Миска]]
[[zh:碗]]</li></ul></nowiki> | Renamed "Workbench" to "Crafting Table". | ||||
1.5{{Extension DPL}}<ul><li>[[Lime Dye|Lime Dye]]<br/>{{Item
| image = Lime_Dye_JE2_BE2.png
| renewable = Yes
| stackable = Yes (64)
}}
'''Lime dye''' is a [[Dye#Quasi-Primary|quasi-primary dye]] obtained by combining one [[green dye]] and one [[white dye]] in a crafting square, or by smelting a [[sea pickle]].
== Obtaining ==
=== Crafting ===
{{Crafting
|head=1
|showname=0
|showdescription=1
|Green Dye
|White Dye
|Output=Lime Dye,2
|type=Material
}}
{{Crafting
|foot=1
|Green Dye
|Bone Meal
|Output=Lime Dye,2
|description={{only|bedrock|education}}
|type=Material
}}
=== Smelting ===
{{Smelting
|head=1
|foot=1
|Sea Pickle
|Lime Dye
|0,2
}}
=== Trading ===
[[Wandering trader]]s sell 3 lime [[dye]] for 1 [[emerald]].
== Usage ==
{{dye usage}}
=== Crafting ingredient ===
{{crafting usage|continue=1}}
{{banner crafting usage}}
=== Loom ingredient ===
{{Banner loom usage|Lime Dye}}
=== Trading ===
Journeyman-level shepherd villagers have a 20% chance to buy 12 lime dye for an emerald as part of their trades.
== Data values ==
=== ID ===
{{edition|java}}:
{{ID table
|edition=java
|showforms=y
|generatetranslationkeys=y
|displayname=Lime Dye
|spritetype=item
|nameid=lime_dye
|form=item
|foot=1}}
{{edition|bedrock}}:
{{ID table
|edition=bedrock
|showaliasids=y
|shownumericids=y
|showforms=y
|notshowbeitemforms=y
|generatetranslationkeys=y
|displayname=Lime Dye
|spritetype=item
|nameid=lime_dye
|aliasid=dye / 10
|id=405
|form=item
|translationkey=item.dye.lime.name
|foot=1}}
== Video ==
<div style="text-align:center">{{yt|5oPGO6jL1zQ}}</div>
== History ==
{{History|java beta}}
{{History||1.2|[[File:Lime Dye JE1 BE1.png|32px]] Added lime dye.}}
{{History|java}}
{{History||1.4.2|snap=12w34a|Added the ability to [[Armor#Dyeing|dye]] leather [[armor]] and [[wolf]] collars.}}
{{History||1.4.6|snap=12w49a|Lime dye can now be [[crafting|crafted]] with [[gunpowder]] to create a [[firework star]].}}
{{History||1.6.1|snap=13w19a|[[Stained clay]] can now be crafted.}}
{{history||1.7.2|snap=13w41a|[[Stained glass]] can now be crafted.}}
{{History||1.8|snap=14w30a|Added [[banner]]s, which can be dyed.}}
{{History||1.11|snap=16w39a|Added the ability to dye [[shulker box]]es.}}
{{History||1.12|snap=17w15a|Added the ability to dye [[bed]]s.}}
{{History||1.13|snap=17w47a|The different data values for the <code>dye</code> ID have now been split up into their own IDs.
|Prior to [[1.13/Flattening|''The Flattening'']], this [[item]]'s numeral ID was 351.}}
{{History|||snap=18w14b|Lime dye can now be smelted from [[sea pickle]]s.}}
{{History||1.14|snap=18w43a|Lime dye is now crafted using [[white dye]], instead of [[bone meal]].
|[[File:Lime_Dye_JE2_BE2.png|32px]] The texture of lime dye has now been changed.}}
{{History|||snap=18w44a|Lime dye can now change the text color on [[sign]]s to lime.}}
{{History|||snap=19w05a|Added the [[wandering trader]], which sells lime dye.}}
{{History|||snap=19w11a|Lime dye can now be [[trading|bought]] by shepherd villagers.}}
{{History||1.17|snap=20w45a|Lime dye can now be used to craft [[lime candle]]s.}}
{{History|||snap=21w19a|Lime dye can no longer be used to craft lime candles.}}
{{History|||snap=Pre-release 1|Lime dye can now once again be used to craft lime candles.}}
{{History||1.20<br>(Experimental)|link=1.19.3|snap=22w42a|Lime dye can now change the text color on [[hanging sign]]s to lime.}}
{{History|pocket alpha}}
{{History||v0.3.0|[[File:Lime Dye JE1 BE1.png|32px]] Added lime dye. It is currently unobtainable and serves no purpose.}}
{{History||v0.4.0|Lime dye is now craftable with [[cactus green]] and [[bone meal]].
|Lime dye can now be used to craft lime wool.}}
{{History||v0.6.0|Lime dye can now be used to dye [[sheep]].}}
{{History||v0.9.0|snap=build 11|Lime dye can now be used to craft colored [[terracotta]].}}
{{History||v0.11.0|snap=build 1|Lime dye can now be used to dye tamed [[wolf]] collars.}}
{{History||v0.14.0|snap=build 1|Lime dye can now be used to dye [[water]] in [[cauldron]]s.}}
{{History|pocket}}
{{History||1.0.0|snap=alpha 0.17.0.1|Lime dye can now be used to dye [[shulker]]s.}}
{{History||1.1.0|snap=alpha 1.1.0.0|Lime dye can now be used to craft [[concrete powder]], colored [[bed]]s and dyed [[shulker box]]es.}}
{{History|bedrock}}
{{History||1.2.0|snap=beta 1.2.0.2|Lime dye can now be used to craft [[firework star]]s, [[stained glass]] and patterns on [[banner]]s.}}
{{History||1.4.0|snap=beta 1.2.20.1|Lime dye can now be used to craft [[balloon]]s and [[glow stick]]s.
|Lime dye can now be obtained from smelting [[sea pickle]]s.}}
{{History||1.8.0|snap=beta 1.8.0.8|Lime dye can now be used to dye tamed [[cat]] collars.}}
{{History||1.10.0|snap=beta 1.10.0.3|Lime dye is now [[trading|sold]] by [[wandering trader]]s.
|Lime dye can now be used to dye white [[carpet]]s and undyed [[glass pane]]s.
|[[File:Lime_Dye_JE2_BE2.png|32px]] The texture of lime dye has now been changed.}}
{{History||1.11.0|snap=beta 1.11.0.4|Lime dye can now be [[trading|sold]] to shepherd [[villager]]s.}}
{{History||1.16.100|snap=beta 1.16.100.56|The ID of lime dye has been changed from <code>dye/10</code> to <code>lime_dye</code>.}}
{{History|console}}
{{History||xbox=TU1|xbone=CU1|ps=1.00|switch=1.0.1|wiiu=Patch 1|[[File:Lime Dye JE1 BE1.png|32px]] Added lime dye.}}
{{History|PS4}}
{{History||1.90|[[File:Lime_Dye_JE2_BE2.png|32px]] The texture of lime dye has now been changed.}}
{{History|new 3ds}}
{{History||0.1.0|[[File:Lime Dye JE1 BE1.png|32px]] Added lime dye.}}
{{History|foot}}
== Issues ==
{{issue list}}
== References ==
{{Reflist}}
{{Items}}
[[Category:Dyes]]
[[Category:Renewable resources]]
[[cs:Světle zelené barvivo]]
[[de:Hellgrüner Farbstoff]]
[[es:Tinte verde lima]]
[[fr:Teinture vert clair]]
[[hu:Neonzöld festék]]
[[ja:黄緑色の染料]]
[[ko:연두색 염료]]
[[nl:Lichtgroene kleurstof]]
[[pl:Jasnozielony barwnik]]
[[pt:Corante verde-limão]]
[[ru:Лаймовый краситель]]
[[zh:黄绿色染料]]</li><li>[[Trial Key|Trial Key]]<br/>{{Item|
|image=Trial Key .webp
|renewable=Yes
|stackable=Yes (64)
}}
{{Stub}}
{{in dev|java|bedrock|1.21|1.21.0}}
A '''Trial Key''' is an item found in [[Trial Chambers]].
Its functionality remained a mystery for a pretty good time, but on the Minecraft Monthly of January 2024, it has been revealed to open vaults, which once opened will drop an item. It's still unknown what will the loot be, but was seen dispensing the following:
Enchanted iron helmet, enchanted iron leggings, enchanted crossbow, enchanted diamond chestplate, iron, gold and diamond horse armour, enchanted golden apple, saddle, enchanted diamond axe, enchanted iron pickaxe and enchanted iron Shovel.
The trial key can currently be obtained from trial spawners (50%), or from pots and chests (8%).
[[Category:Items]]
[[ja:Trial Key]]
[[lzh:煉管]]</li></ul> | The crafting table can now be used to smelt items in a furnace. | ||||
1.6{{Extension DPL}}<ul><li>[[Cooked Cod|Cooked Cod]]<br/>{{redirect|Cooked Fish|cooked salmon|Cooked Salmon}}
{{Item
| title = Cooked Cod
| image = Cooked Cod.png
| renewable = Yes
| heals = {{hunger|5}}
| stackable = Yes (64)
}}
'''Cooked cod''' is a food item obtained by cooking [[raw cod]].
== Obtaining ==
=== Mob loot ===
====Cod====
[[Cod]] always drops 1 [[Raw Cod|raw cod]] when killed, unaffected by Looting.<ref>{{bug|MC-212795||Salmon & Fish mobs are not affected by Looting}}</ref> If it is killed while on [[fire]], it drops 1 cooked cod instead.
====Dolphins ====
When killed, [[Dolphin|dolphins]] drop 0–1 raw cod. The maximum amount is increased by 1 per level of [[Looting]], for a maximum of 0-4 with Looting III. If killed while on fire, they drop cooked cod instead.
====Guardians and elder guardians====
[[Guardian]]s and [[elder guardian]]s have a 40% and 50% chance, respectively, to drop raw cod when killed. {{IN|java}}, cooked cod is dropped if a guardian is on fire when killed.
Guardians and elder guardians also drop a 2.5% chance to drop a random fish, with 60% of them being raw cod, which drops as cooked if the guardian was on fire. The chance of getting the fish drop is increased by 1% per level with [[Looting]] (for a maximum of 5.5% with Looting III), but the type of fish is not affected.
====Polar bears====
[[Polar bear]]s have a 75% chance of dropping 0–2 raw cod when killed. The maximum amount can be increased by 1 per level of Looting, for a maximum of 0-5 with Looting III. If killed while on fire, they drop cooked cod instead.
===Chest loot===
{{LootChestItem|cooked-cod}}
===Cooking===
Cooked cod can be obtained by cooking [[raw cod]] in a [[furnace]], [[smoker]], or [[campfire]].
{{smelting|Raw Cod|Cooked Cod|0,35}}
===Trading===
Novice-level Fisherman [[Villager|villagers]] have a 50% chance to sell 6 cooked cod for 6 raw cod and 1 [[emerald]].
== Usage ==
=== Food ===
To eat cooked cod, press and hold {{control|use}} while it is selected in the hotbar. Eating one restores {{hunger|5}} [[hunger]] and 6 hunger [[Hunger#Mechanics|saturation]].
=== Wolves ===
{{IN|Bedrock}}, cooked cod can be used to feed a wolf not at full health, healing by {{hp|5|mob=1}}. However, unlike other wolf food, cooked cod cannot be used to speed up the growth of baby wolves nor used to breed them.
==Sounds==
{{Sound table/Entity/Food}}
== Data values ==
=== ID ===
{{edition|java}}:
{{ID table
|edition=java
|showitemtags=y
|showforms=y
|generatetranslationkeys=y
|displayname=Cooked Cod
|spritetype=item
|nameid=cooked_cod
|itemtags=fishes
|form=item
|foot=1}}
{{edition|bedrock}}:
{{ID table
|edition=bedrock
|shownumericids=y
|showforms=y
|showaliasids=y
|notshowbeitemforms=y
|generatetranslationkeys=y
|displayname=Cooked Cod
|spritetype=item
|nameid=cooked_cod
|aliasid=cooked_fish
|id=268
|form=item
|translationkey=item.cooked_fish.name
|foot=1}}
== Achievements ==
{{load achievements|Delicious Fish}}
== Advancements ==
{{load advancements|Husbandry;A Balanced Diet}}
== Video ==
<div style="text-align:center">{{yt|nPl0HUGPMcA}}</div>
== History ==
{{History|java alpha}}
{{History||v1.2.0|snap=<nowiki>?|slink=:Category:Information needed requiring unarchived version|[[File:Cooked Cod JE1 BE1.png|32px]] Added cooked fish, which restores {{hp|5}}.}}
{{History|java beta}}
{{History||1.5|Cooking fish now gives the '''Delicious Fish''' [[achievement]].}}
{{History||1.8|snap=Pre-release|Cooked fish is now stackable to 64.
|Cooked fish now fills {{hunger|5}} instead of {{hp|5}}.}}
{{History|java}}
{{History||1.3.1|snap=12w21a|Farmer [[villager]]s now [[trading|buy]] 9–12 cooked fish for 1 [[emerald]].}}
{{History||1.8|snap=14w02a|[[Trading]] has been changed: fisherman [[villager]]s now [[trading|sell]] 6 cooked fish for 1 [[emerald]] plus 6 [[raw cod|raw fish]].
|Farmer villagers no longer buy cooked fish.}}
{{History|||snap=14w04a|The name of cooked fish has been corrected from <code>cooked_fished</code> to <code>cooked_fish</code>.}}
{{History|||snap=14w25a|Cooked fish are now obtainable rare [[drops]] from [[guardian]]s and [[elder guardians]].}}
{{History||1.13|snap=17w47a|The different data values for the <code>cooked_fish</code> IDs have been split up into their own IDs.
|"Cooked Fish" have been renamed to "Cooked Cod".
|Prior to [[1.13/Flattening|''The Flattening'']], these [[item]]s' numeral ID were 349 and 350.}}
{{History|||snap=18w08b|[[Cod]], and other [[fish]], have been added as [[mob]]s, which [[drops|drop]] their cooked [[item]] form when killed with [[fire]].
|[[File:Cooked Cod JE2 BE2.png|32px]] The texture of cooked cod has been changed.}}
{{History|||snap=18w10a|Cooked cod now generates in [[buried treasure]] [[chest]]s.}}
{{History||1.14|snap=18w43a|[[File:Cooked Cod JE3.png|32px]] The texture of cooked cod has been changed.}}
{{History|||snap=18w47b|[[File:Cooked Cod JE4 BE3.png|32px]] The texture of cooked cod has been changed, once again to match {{el|be}}.}}
{{History|pocket alpha}}
{{History||v0.11.0|snap=build 1|[[File:Cooked Cod JE1 BE1.png|32px]] Added cooked fish.}}
{{History||v0.12.1|snap=build 1|Cooked fish now restores [[hunger]] instead of [[health]].}}
{{History||v0.16.0|snap=build 1|Cooked fish is now [[drops|dropped]] by [[guardian]]s and [[elder guardian]]s.}}
{{History|pocket}}
{{History||1.0.4|snap=alpha 1.0.4.0|Fisherman [[villager]]s now [[trading|sell]] 6 cooked fish for 1 [[emerald]] plus 6 [[raw cod|raw fish]].}}
{{History|bedrock}}
{{History||1.4.0|snap=beta 1.2.14.2|[[Cod]] and other [[fish]] have been added as [[mob]]s, which [[drops|drop]] their cooked [[item]] form when killed with [[fire]].
|[[File:Cooked Cod JE2 BE2.png|32px]] The texture of cooked fish has been changed.}}
{{History||1.5.0|snap=beta 1.5.0.4|[[File:Cooked Cod JE4 BE3.png|32px]] The texture of cooked fish has been changed.}}
{{History||1.7.0|snap=beta 1.7.0.2|"Cooked Fish" has been renamed to "Cooked Cod".}}
{{History||1.11.0|snap=beta 1.11.0.4|Fisherman [[villager]]s now have a 50% chance to [[trading|sell]] 6 cooked cod for 6 [[raw cod]] and 1 [[emerald]].}}
{{History||1.16.100|snap=beta 1.16.100.52|Cod now drop their cooked cod when killed with fire.}}
{{History|console}}
{{History||xbox=TU1|xbone=CU1|ps=1.0|wiiu=Patch 1|[[File:Cooked Cod JE1 BE1.png|32px]] Added cooked fish.}}
{{History||xbox=TU5|Cooked fish is now stackable to 64.
|Cooked fish now fills [[hunger]] instead of [[health]].}}
{{History||xbox=TU69|ps=1.76|wiiu=Patch 38|"Cooked Fish" has been renamed to "Cooked Cod".
|[[File:Cooked Cod JE2 BE2.png|32px]] The texture of cooked cod has been changed.}}
{{History|new 3ds}}
{{History||0.1.0|[[File:Cooked Cod JE1 BE1.png|32px]] Added cooked fish.}}
{{History|foot}}
== Issues ==
{{Issue list}}
{{Items}}
[[Category:Food]]
[[Category:Renewable resources]]
[[de:Gebratener Kabeljau]]
[[es:Bacalao cocinado]]
[[ko:익힌 대구]]
[[pt:Bacalhau assado]]
[[ru:Жареная треска]]
[[th:Cod (ไอเทม)]]
[[zh:熟鳕鱼]]</li><li>[[Trial Key|Trial Key]]<br/>{{Item|
|image=Trial Key .webp
|renewable=Yes
|stackable=Yes (64)
}}
{{Stub}}
{{in dev|java|bedrock|1.21|1.21.0}}
A '''Trial Key''' is an item found in [[Trial Chambers]].
Its functionality remained a mystery for a pretty good time, but on the Minecraft Monthly of January 2024, it has been revealed to open vaults, which once opened will drop an item. It's still unknown what will the loot be, but was seen dispensing the following:
Enchanted iron helmet, enchanted iron leggings, enchanted crossbow, enchanted diamond chestplate, iron, gold and diamond horse armour, enchanted golden apple, saddle, enchanted diamond axe, enchanted iron pickaxe and enchanted iron Shovel.
The trial key can currently be obtained from trial spawners (50%), or from pots and chests (8%).
[[Category:Items]]
[[ja:Trial Key]]
[[lzh:煉管]]</li></ul></nowiki> | ? | Holding ⇧ Shift when clicking on an item in the crafting table will now craft as many of the product as possible. | |||
1.8{{Extension DPL}}<ul><li>[[Poisonous Potato|Poisonous Potato]]<br/>{{Item
| title = Poisonous Potato
| image = Poisonous Potato.png
| heals = {{hunger|2}}
|effects={{EffectLink|Poison}} (0:05) (60% chance)
| stackable = Yes (64)
| renewable = Yes
}}
A '''poisonous potato''' is a type of [[potato]] that can [[poison]] the [[player]].
== Obtaining ==
The poisonous potato is a rare [[drop]] when harvesting (destroying) [[potato|potato crops]]; a fully grown plant has a 2% chance of dropping one in addition to the 2-5 regular potatoes.
=== Chest loot ===
{{LootChestItem|poisonous-potato}}
== Usage ==
Poisonous potatoes cannot be planted on [[farmland]] or [[Baked Potato|baked]]. They also have no use with the [[composter]].<ref>{{bug|MC-142373|resolution=WAI}}</ref>
=== Food ===
{{see also|Tutorials/Hunger management|title1=Hunger management}}
To eat a poisonous potato, press and hold {{control|use}} while it is selected in the hotbar. Eating one restores {{hunger|2}} [[hunger]] and 1.2 hunger [[Hunger#Mechanics|saturation]] and has a 60% chance of applying 5 seconds of [[Poison]] II, draining {{hp|4|poisoned=1}} points of [[health]].
Interestingly, a poisonous potato actually restores double the hunger and saturation than a normal, unpoisoned potato. (A normal potato gives {{hunger|1}} hunger and 0.6 saturation points.)
==Sounds==
{{Sound table/Entity/Food}}
== Advancements ==
{{load advancements|Husbandry;A Balanced Diet}}
== Data values ==
=== ID ===
{{edition|java}}:
{{ID table
|edition=java
|showforms=y
|generatetranslationkeys=y
|displayname=Poisonous Potato
|spritetype=item
|nameid=poisonous_potato
|form=item
|foot=1}}
{{edition|bedrock}}:
{{ID table
|edition=bedrock
|shownumericids=y
|showforms=y
|notshowbeitemforms=y
|generatetranslationkeys=y
|displayname=Poisonous Potato
|spritetype=item
|nameid=poisonous_potato
|id=282
|form=item
|foot=1}}
== History ==
{{History|java}}
{{History||1.4.2|snap=12w34a|[[File:Poisonous Potato JE1 BE1.png|32px]] Added poisonous potatoes.}}
{{History||1.13|snap=17w47a|Prior to [[Java_Edition_1.13/Flattening|''The Flattening'']], this [[item]]'s numeral ID was 394.}}
{{History|||snap=18w11a|Poisonous potatoes now generate in the [[chest]]s of [[shipwreck]]s.}}
{{History||1.14|snap=18w43a|[[File:Poisonous Potato JE2.png|32px]] The texture of poisonous potatoes has been changed.}}
{{History|||snap=18w50a|[[File:Poisonous Potato JE3 BE2.png|32px]] The texture of poisonous potatoes has been changed, once again.}}
{{History|pocket alpha}}
{{History||v0.12.1|snap=build 1|[[File:Poisonous Potato JE1 BE1.png|32px]] Added poisonous potatoes.}}
{{History|bedrock}}
{{History||1.4.0|snap=beta 1.2.14.2|Poisonous potatoes can now be found inside of [[shipwreck]] [[chest]]s.}}
{{History||1.10.0|snap=beta 1.10.0.3|[[File:Poisonous Potato JE3 BE2.png|32px]] The texture of poisonous potatoes has been changed.}}
{{History|console}}
{{History||xbox=TU14|xbone=CU1|ps=1.04|wiiu=Patch 1|switch=1.0.1|[[File:Poisonous Potato JE1 BE1.png|32px]] Added poisonous potatoes.}}
{{History||xbox=none|xbone=none|ps=1.90|wiiu=none|switch=none|[[File:Poisonous Potato JE3 BE2.png|32px]] The texture of poisonous potatoes has been changed.}}
{{History|New 3DS}}
{{History||0.1.0|[[File:Poisonous Potato JE1 BE1.png|32px]] Added poisonous potatoes.}}
{{History|foot}}
== Issues ==
{{issue list}}
== References ==
{{reflist}}
{{Items}}
[[Category:Plants]]
[[cs:Jedovatá brambora]]
[[de:Giftige Kartoffel]]
[[es:Patata envenenada]]
[[fr:Pomme de terre empoisonnée]]
[[hu:Mérgező burgonya]]
[[it:Patata velenosa]]
[[ja:青くなったジャガイモ]]
[[ko:독이 있는 감자]]
[[nl:Giftige aardappel]]
[[pl:Trujący ziemniak]]
[[pt:Batata venenosa]]
[[ru:Ядовитый картофель]]
[[th:มันฝรั่งพิษ]]
[[uk:Отруйна картопля]]
[[zh:毒马铃薯]]
[[Category:Food]]
[[Category:Renewable resources]]</li><li>[[Pottery Sherd|Pottery Sherd]]<br/>{{Item
| image=Angler Pottery Sherd.png
| extratext = View [[#Items|all items]]
| renewable = No
| stackable = Yes (64)
}}
<!-- IT IS SHERD, NOT SHARD! DO NOT CHANGE TO SHARD, AS IT IS NAMED SHERD IN-GAME! -->
'''Pottery sherds'''<ref group="note">The word "[[wiktionary:sherd#English|sherd]]" or "[[wiktionary:potsherd#English|potsherd]]" is used by archaeologists to refer to fragments of pottery or other ceramics in order to differentiate them from "shards" of glass, metal, minerals and other materials.
</ref> are a set of twenty [[item]]s used to craft [[decorated pot]]s with ornamental designs. They can be obtained only by [[brush]]ing [[suspicious block]]s, with the variants of sherd obtainable being dependent on the structure.
== Obtaining ==
=== Breaking ===
When a [[decorated pot]] is broken with a [[pickaxe]], [[axe]], [[shovel]], [[hoe]] or [[sword]] that is ''not'' enchanted with [[Silk Touch]], it drops all of the pottery sherds and [[brick]]s used to craft it.
=== Suspicious block loot ===
Pottery sherds can be found as [[suspicious block]] loot in [[trail ruins]], [[ocean ruins]], [[desert pyramids]] and [[desert well]]s, and can be extracted from these blocks using a [[brush]].
{{#invoke:LootChest|base3|angler-pottery-sherd,archer-pottery-sherd,arms-up-pottery-sherd,blade-pottery-sherd,brewer-pottery-sherd,burn-pottery-sherd,danger-pottery-sherd,explorer-pottery-sherd,friend-pottery-sherd,heart-pottery-sherd,heartbreak-pottery-sherd,howl-pottery-sherd,miner-pottery-sherd,mourner-pottery-sherd,plenty-pottery-sherd,prize-pottery-sherd,sheaf-pottery-sherd,shelter-pottery-sherd,skull-pottery-sherd,snort-pottery-sherd}}
== Usage ==
=== Crafting ingredient ===
{{Crafting
|ingredients=Any Pottery Sherd or [[Brick]]
|B1= Any Pottery Sherd
|A2= Any Pottery Sherd |C2= Any Pottery Sherd
|B3= Any Pottery Sherd
|Output= Decorated Pot
|type= Decoration block
}}
== Data values ==
=== ID ===
{{edition|java}}:
{{ID table
|edition=java
|showforms=y
|generatetranslationkeys=y
|displayname=Angler Pottery Sherd
|spritetype=item
|nameid=angler_pottery_sherd
|form=item}}
{{ID table
|displayname=Archer Pottery Sherd
|spritetype=item
|nameid=archer_pottery_sherd
|form=item}}
{{ID table
|displayname=Arms Up Pottery Sherd
|spritetype=item
|nameid=arms_up_pottery_sherd
|form=item}}
{{ID table
|displayname=Blade Pottery Sherd
|spritetype=item
|nameid=blade_pottery_sherd
|form=item}}
{{ID table
|displayname=Brewer Pottery Sherd
|spritetype=item
|nameid=brewer_pottery_sherd
|form=item}}
{{ID table
|displayname=Burn Pottery Sherd
|spritetype=item
|nameid=burn_pottery_sherd
|form=item}}
{{ID table
|displayname=Danger Pottery Sherd
|spritetype=item
|nameid=danger_pottery_sherd
|form=item}}
{{ID table
|displayname=Explorer Pottery Sherd
|spritetype=item
|nameid=explorer_pottery_sherd
|form=item}}
{{ID table
|displayname=Friend Pottery Sherd
|spritetype=item
|nameid=friend_pottery_sherd
|form=item}}
{{ID table
|displayname=Heart Pottery Sherd
|spritetype=item
|nameid=heart_pottery_sherd
|form=item}}
{{ID table
|displayname=Heartbreak Pottery Sherd
|spritetype=item
|nameid=heartbreak_pottery_sherd
|form=item}}
{{ID table
|displayname=Howl Pottery Sherd
|spritetype=item
|nameid=howl_pottery_sherd
|form=item}}
{{ID table
|displayname=Miner Pottery Sherd
|spritetype=item
|nameid=miner_pottery_sherd
|form=item}}
{{ID table
|displayname=Mourner Pottery Sherd
|spritetype=item
|nameid=mourner_pottery_sherd
|form=item}}
{{ID table
|displayname=Plenty Pottery Sherd
|spritetype=item
|nameid=plenty_pottery_sherd
|form=item}}
{{ID table
|displayname=Prize Pottery Sherd
|spritetype=item
|nameid=prize_pottery_sherd
|form=item}}
{{ID table
|displayname=Sheaf Pottery Sherd
|spritetype=item
|nameid=sheaf_pottery_sherd
|form=item}}
{{ID table
|displayname=Shelter Pottery Sherd
|spritetype=item
|nameid=shelter_pottery_sherd
|form=item}}
{{ID table
|displayname=Skull Pottery Sherd
|spritetype=item
|nameid=skull_pottery_sherd
|form=item}}
{{ID table
|displayname=Snort Pottery Sherd
|spritetype=item
|nameid=snort_pottery_sherd
|form=item
|foot=1}}
{{edition|bedrock}}:
{{ID table
|edition=bedrock
|shownumericids=y
|showforms=y
|notshowbeitemforms=y
|generatetranslationkeys=y
|displayname=Angler Pottery Sherd
|spritetype=item
|nameid=angler_pottery_sherd
|id=664
|form=item}}
{{ID table
|displayname=Archer Pottery Sherd
|spritetype=item
|nameid=archer_pottery_sherd
|id=665
|form=item}}
{{ID table
|displayname=Arms Up Pottery Sherd
|spritetype=item
|nameid=arms_up_pottery_sherd
|id=666
|form=item}}
{{ID table
|displayname=Blade Pottery Sherd
|spritetype=item
|nameid=blade_pottery_sherd
|id=667
|form=item}}
{{ID table
|displayname=Brewer Pottery Sherd
|spritetype=item
|nameid=brewer_pottery_sherd
|id=668
|form=item}}
{{ID table
|displayname=Burn Pottery Sherd
|spritetype=item
|nameid=burn_pottery_sherd
|id=669
|form=item}}
{{ID table
|displayname=Danger Pottery Sherd
|spritetype=item
|nameid=danger_pottery_sherd
|id=670
|form=item}}
{{ID table
|displayname=Explorer Pottery Sherd
|spritetype=item
|nameid=explorer_pottery_sherd
|id=671
|form=item}}
{{ID table
|displayname=Friend Pottery Sherd
|spritetype=item
|nameid=friend_pottery_sherd
|id=672
|form=item}}
{{ID table
|displayname=Heart Pottery Sherd
|spritetype=item
|nameid=heart_pottery_sherd
|id=673
|form=item}}
{{ID table
|displayname=Heartbreak Pottery Sherd
|spritetype=item
|nameid=heartbreak_pottery_sherd
|id=674
|form=item}}
{{ID table
|displayname=Howl Pottery Sherd
|spritetype=item
|nameid=howl_pottery_sherd
|id=675
|form=item}}
{{ID table
|displayname=Miner Pottery Sherd
|spritetype=item
|nameid=miner_pottery_sherd
|id=676
|form=item}}
{{ID table
|displayname=Mourner Pottery Sherd
|spritetype=item
|nameid=mourner_pottery_sherd
|id=677
|form=item}}
{{ID table
|displayname=Plenty Pottery Sherd
|spritetype=item
|nameid=plenty_pottery_sherd
|id=678
|form=item}}
{{ID table
|displayname=Prize Pottery Sherd
|spritetype=item
|nameid=prize_pottery_sherd
|id=679
|form=item}}
{{ID table
|displayname=Sheaf Pottery Sherd
|spritetype=item
|nameid=sheaf_pottery_sherd
|id=680
|form=item}}
{{ID table
|displayname=Shelter Pottery Sherd
|spritetype=item
|nameid=shelter_pottery_sherd
|id=681
|form=item}}
{{ID table
|displayname=Skull Pottery Sherd
|spritetype=item
|nameid=skull_pottery_sherd
|id=682
|form=item}}
{{ID table
|displayname=Snort Pottery Sherd
|spritetype=item
|nameid=snort_pottery_sherd
|id=683
|form=item
|foot=1}}
== Achievements ==
{{Load achievements|Careful restoration}}
== Advancements ==
{{Load advancements|Respecting the Remnants;Careful Restoration}}
== History ==
{{History||October 3, 2020|[[File:Blue Ceramic Shard.png|32px]][[File:Orange Ceramic Shard.png|32px]][[File:Ceramic Shard 1.png|32px]][[File:Ceramic Shard 2.png|32px]][[File:Ceramic Shard 3.png|32px]][[File:Ceramic Shard 4.png|32px]] Ceramic shards were announced at [[Minecraft Live 2020]].|link=https://youtu.be/DBvZ2Iqmm3M?t=2216}}
{{History||February 10, 2023|[[Sofia Dankis]] posted an article about upcoming archaeology features, including pottery shards.|link=https://www.minecraft.net/en-us/article/archeology-coming-minecraft-120}}
{{History|java}}
{{History||1.20<br>(Experimental)|link=1.19.4|snap=23w07a|[[File:Archer Pottery Sherd JE1.png|32px]] [[File:Arms Up Pottery Sherd JE1 BE2.png|32px]] [[File:Prize Pottery Sherd JE1 BE2.png|32px]] [[File:Skull Pottery Sherd JE1 BE2.png|32px]] Added pottery shards behind the [[Java Edition 1.20|Update 1.20 experimental datapack]].}}
{{History|||snap=1.19.4 Pre-release 3|[[File:Archer Pottery Sherd JE2 BE2.png|32px]] Changed the texture of archer pottery shard.}}
{{History||1.20|snap=23w12a|Pottery shards are now out of the 1.20 experimental data pack.|[[File:Angler Pottery Sherd JE1 BE1.png|32px]] [[File:Blade Pottery Sherd JE1 BE1.png|32px]] [[File:Brewer Pottery Sherd JE1 BE1.png|32px]] [[File:Burn Pottery Sherd JE1 BE1.png|32px]] [[File:Danger Pottery Sherd JE1 BE1.png|32px]] [[File:Explorer Pottery Sherd JE1 BE1.png|32px]] [[File:Friend Pottery Sherd JE1 BE1.png|32px]] [[File:Heart Pottery Sherd JE1 BE1.png|32px]] [[File:Heartbreak Pottery Sherd JE1 BE1.png|32px]] [[File:Howl Pottery Sherd JE1 BE1.png|32px]] [[File:Miner Pottery Sherd JE1 BE1.png|32px]] [[File:Mourner Pottery Sherd JE1 BE1.png|32px]] [[File:Plenty Pottery Sherd JE1 BE1.png|32px]] [[File:Sheaf Pottery Sherd JE1 BE1.png|32px]] [[File:Shelter Pottery Sherd JE1 BE1.png|32px]] [[File:Snort Pottery Sherd JE1 BE1.png|32px]] Added another sixteen pottery shards.
|The probability for the archer, prize, and skull pottery shards to generate in the [[suspicious sand]] in [[desert temple]] and in [[desert well]] has been changed from 1/7 to 1/8, for the arms up pottery sherd to generate in the suspicious sand in [[desert well]] has been changed from 3/7 to 1/4.}}
{{History|||snap=23w16a|Renamed "Pottery Shard" to "Pottery Sherd".|Burn, danger, friend, heart, heartbreak, howl and sheaf pottery sherds no longer generates in [[suspicious sand]] in [[trail ruins]].|Due to the split of the archaeological loot tables for the suspicious gravel within the [[trail ruins]]; burn, danger, friend, heart, heartbreak, howl and sheaf pottery sherds now are in the rare loot.}}
{{History|||snap=23w17a|The probability of the burn, danger, friend, heart, heartbreak, howl, and sheaf pottery sherds to generate in [[suspicious gravel]] in [[trail ruins]] has been changed from 1/11 to 1/12.{{verify}}|The player now gets the [[advancement]] "Respecting the remnants" when they brush a [[suspicious sand]] or a [[suspicious gravel]] to obtain a pottery sherd, "Careful restoration" when they craft a decorated pot using 4 pottery sherds.}}
{{History|bedrock}}
{{History||Next Major Update<br>(Experimental)|link=Bedrock Edition 1.19.70|snap=beta 1.19.70.23|[[File:Archer Pottery Sherd BE1.png|32px]] [[File:Arms Up Pottery Sherd BE1.png|32px]] [[File:Prize Pottery Sherd BE1.png|32px]] [[File:Skull Pottery Sherd BE1.png|32px]] Added pottery shards behind the "[[Bedrock Edition 1.20.0|Next Major Update]]" [[experimental]] toggle.}}
{{History|||snap=beta 1.19.80.20|[[File:Archer Pottery Sherd JE2 BE2.png|32px]] Changed the texture of archer pottery shard.}}
{{h|||snap=beta 1.19.80.22|[[File:Angler Pottery Sherd JE1 BE1.png|32px]] [[File:Blade Pottery Sherd JE1 BE1.png|32px]] [[File:Brewer Pottery Sherd JE1 BE1.png|32px]] [[File:Burn Pottery Sherd JE1 BE1.png|32px]] [[File:Danger Pottery Sherd JE1 BE1.png|32px]] [[File:Explorer Pottery Sherd JE1 BE1.png|32px]] [[File:Friend Pottery Sherd JE1 BE1.png|32px]] [[File:Heart Pottery Sherd JE1 BE1.png|32px]] [[File:Heartbreak Pottery Sherd JE1 BE1.png|32px]] [[File:Howl Pottery Sherd JE1 BE1.png|32px]] [[File:Miner Pottery Sherd JE1 BE1.png|32px]] [[File:Mourner Pottery Sherd JE1 BE1.png|32px]] [[File:Plenty Pottery Sherd JE1 BE1.png|32px]] [[File:Sheaf Pottery Sherd JE1 BE1.png|32px]] [[File:Shelter Pottery Sherd JE1 BE1.png|32px]] [[File:Snort Pottery Sherd JE1 BE1.png|32px]] Added another sixteen pottery shards.
|[[File:Arms Up Pottery Sherd JE1 BE2.png|32px]] [[File:Prize Pottery Sherd JE1 BE2.png|32px]] [[File:Skull Pottery Sherd JE1 BE2.png|32px]] Changed the texture of arms up, prize and skull pottery shards.<ref>{{bug|MCPE-167202}}</ref>}}
{{History||Next Major Update<br>(Experimental)|link=Bedrock Edition 1.20.0|snap=beta 1.20.0.20|Miner pottery shard can generate in desert pyramids.}}
{{History||1.20.0|snap=beta 1.20.0.21|Pottery shards are now available without using the "Next Major Update" experimental toggle.}}
{{History|||snap=beta 1.20.0.22|Renamed "Pottery Shard" to "Pottery Sherd".}}
{{History|foot}}
== Issues ==
{{issue list}}
== Trivia ==
* Many pottery sherds are based on another in-game mob or item:
** The angler pottery sherd depicts a [[fishing rod]].
** The archer pottery sherd depicts a [[bow]] and [[arrow]].
** The blade pottery sherd depicts a [[sword]].
** The brewer pottery sherd depicts a [[potion]].
** The burn pottery sherd depicts [[fire]].
** The danger pottery sherd depicts a [[creeper]].
** The explorer pottery sherd depicts a [[map]].
** The friend pottery sherd depicts the unibrow and nose of a [[villager]] or [[iron golem]].
** The howl pottery sherd depicts a [[wolf]].
** The miner pottery sherd depicts a [[pickaxe]].
** The mourner pottery sherd depicts an early design for the [[warden]].
** The plenty pottery sherd depicts a [[chest]].
** The sheaf pottery sherd depicts [[wheat]].
** The skull pottery sherd depicts a [[skeleton]].
** The snort pottery sherd depicts a [[sniffer]].
**The prize pottery sherd depicts a diamond cut [[diamond]]
***It could depict a [[MCE:Ruby|ruby]] from ''Minecraft Earth'', as well.
**The arms up pottery sherd depicts a [[character]] with their arms up.
**The heart and heartbreak pottery sherds depict a [[Health|heart]] and broken heart respectively.
**The shelter pottery sherd depicts a [[tree]].
==Gallery==
=== Items ===
<gallery>
Angler Pottery Sherd.png|Angler Pottery Sherd
Archer Pottery Sherd.png|Archer Pottery Sherd
Arms Up Pottery Sherd.png|Arms Up Pottery Sherd
Blade Pottery Sherd.png|Blade Pottery Sherd
Brewer Pottery Sherd.png|Brewer Pottery Sherd
Burn Pottery Sherd.png|Burn Pottery Sherd
Danger Pottery Sherd.png|Danger Pottery Sherd
Explorer Pottery Sherd.png|Explorer Pottery Sherd
Friend Pottery Sherd.png|Friend Pottery Sherd
Heart Pottery Sherd.png|Heart Pottery Sherd
Heartbreak Pottery Sherd.png|Heartbreak Pottery Sherd
Howl Pottery Sherd.png|Howl Pottery Sherd
Miner Pottery Sherd.png|Miner Pottery Sherd
Mourner Pottery Sherd.png|Mourner Pottery Sherd
Plenty Pottery Sherd.png|Plenty Pottery Sherd
Prize Pottery Sherd.png|Prize Pottery Sherd
Sheaf Pottery Sherd.png|Sheaf Pottery Sherd
Shelter Pottery Sherd.png|Shelter Pottery Sherd
Skull Pottery Sherd.png|Skull Pottery Sherd
Snort Pottery Sherd.png|Snort Pottery Sherd
</gallery>
=== Development images ===
<gallery>
JE 1.17 Development Archeology.jpg|Blue ceramic shard.
JE 1.17 Development Archeology 2.jpg|Ceramic shards.
</gallery>
=== Official artwork ===
<gallery>
Pottery Sherd Pixel Art.png|Pixel artwork of [[Ari]] holding a skull pottery sherd.
File:T&T Thumbnail.jpg|Ari holding up a different sherd.
</gallery>
== References ==
<references />
== Notes ==
<references group="note"/>
{{Items}}
[[Category:Non-renewable resources]]
[[de:Töpferscherbe]]
[[es:Fragmento de cerámica]]
[[fr:Tesson de poterie]]
[[ja:壺の欠片]]
[[pt:Óstraco]]
[[zh:陶片]]</li></ul> | ? | Crafting tables now naturally occur in villages. | |||
| Java Edition | |||||
1.0.0{{Extension DPL}}<ul><li>[[Raw Mutton|Raw Mutton]]<br/>{{Distinguish|Cooked Mutton}}
{{Item
| title = Raw Mutton
| image = Raw Mutton.png
| heals = {{hunger|2}}
| renewable = Yes
| stackable = Yes (64)
}}
'''Raw mutton''' is a [[food]] item dropped by [[sheep]] when killed.
== Obtaining ==
=== Mob loot ===
An adult [[sheep]] drops 1–2 raw mutton when killed. The maximum amount is increased by 1 per level of [[Looting]], for a maximum of 1–5 with Looting III. If killed while on fire, a sheep drops [[cooked mutton]] instead.
=== Chest loot ===
{{LootChestItem|raw-mutton}}
== Usage ==
=== Food ===
To eat raw mutton, press and hold {{control|use}} while it is selected in the [[hotbar]]. Eating one restores {{hunger|2}} [[hunger]] and 1.2 [[Hunger#Mechanics|saturation]].
=== Smelting ingredient ===
{{Smelting
|showname=1
|Raw Mutton
|Cooked Mutton
|0.35
}}
=== Wolves ===
Raw mutton can be used to [[breed]] and heal tamed [[wolves]], lead them around, and make baby tamed wolves grow up faster by 10% of the remaining time.
=== Trading ===
Journeyman-level butcher [[villager]]s have a 50% chance to buy 7 raw mutton for an [[emerald]] as part of their trades.{{only|bedrock}}
Journeyman-level butcher villagers always offer to buy 7 raw mutton for an emerald.{{only|java}}
==Sounds==
{{Sound table/Entity/Food}}
== Data values ==
=== ID ===
{{edition|java}}:
{{ID table
|edition=java
|showforms=y
|generatetranslationkeys=y
|displayname=Raw Mutton
|spritetype=item
|nameid=mutton
|form=item
|foot=1}}
{{edition|bedrock}}:
{{ID table
|edition=bedrock
|showaliasids=y
|shownumericids=y
|showforms=y
|notshowbeitemforms=y
|generatetranslationkeys=y
|displayname=Raw Mutton
|spritetype=item
|nameid=mutton
|aliasid=muttonraw
|id=550
|form=item
|translationkey=item.muttonRaw.name
|foot=1}}
== Advancements ==
{{load advancements|Husbandry;A Balanced Diet}}
== Video ==
<div style="text-align:center">{{yt|PXlW-sZygTs}}</div>
== History ==
{{History||September 23, 2011|link={{tweet|jeb|117313469900009472}}|Mutton is mentioned by [[Jeb]].}}
{{History||September 11, 2012|link={{tweet|jeb|245503714167750656}}|Jeb again mentions the possibility of mutton as well as calamari being added into the game.}}
{{History|java}}
{{History||June 30, 2014|link=https://twitter.com/TheMogMiner/status/483636993780232192|[[Ryan Holtz]] tweets images of raw mutton and some other new items.}}
{{History||1.8|snap=14w27a|[[File:Raw Mutton JE1.png|32px]] Added raw mutton.}}
{{History||1.8|snap=14w33b|[[File:Raw Mutton JE2 BE1.png|32px]] The texture of raw mutton has been changed. The new texture was created by [[wikipedia:Reddit|Reddit]] user [http://www.reddit.com/u/zeldahuman zeldahuman].<ref>{{reddit|2bjzes/a_reminder_of_the_blocks_and_items_added_in_18_so|cj69zie|context=3}}</ref><ref>{{reddit|2c5f35/minecraft_snapshot_14w31a_has_been_released|cjct7gb}}</ref>}}
{{History||1.13|snap=17w47a|Prior to [[1.13/Flattening|''The Flattening'']], this [[item]]'s numeral ID was 423.}}
{{History||1.14|snap=18w43a|[[File:Raw Mutton JE3 BE2.png|32px]] The texture of raw mutton has been changed.}}
{{History|||snap=18w49a|Raw mutton can now be found in [[chest]]s in [[village]] butcher shops.}}
{{History|||snap=19w11a|Butcher villagers now [[trading|buy]] raw mutton.}}
{{History|pocket alpha}}
{{History||v0.15.0|snap=build 1|[[File:Raw Mutton JE2 BE1.png|32px]] Added raw mutton.}}
{{History|bedrock}}
{{History||1.10.0|snap=beta 1.10.0.3|[[File:Raw Mutton JE3 BE2.png|32px]] The texture of raw mutton has been changed.}}
{{History||1.11.0|snap=beta 1.11.0.1|Raw mutton can now be found in [[village]] butcher [[chest]]s.}}
{{History|||snap=beta 1.11.0.4|Raw mutton can now be [[trading|sold]] to butcher [[villager]]s.}}
{{History||1.16.0|snap=beta 1.16.0.57|Trading has been changed; journeyman butcher villagers now buy 7 raw mutton for an emerald instead of 8.}}
{{History||1.16.100|snap=beta 1.16.100.56|The ID of raw mutton has been changed from <code>muttonraw</code> to <code>mutton</code>.}}
{{History||1.16.210|snap=beta 1.16.210.51|Raw mutton is [[drops|dropped]] by [[goats]].}}
{{History||1.17.0|snap=beta 1.17.0.52|Goats no longer drop raw mutton.}}
{{History|console}}
{{History||xbox=TU31|xbone=CU19|ps=1.22|wiiu=Patch 3|[[File:Raw Mutton JE2 BE1.png|32px]] Added raw mutton.}}
{{History|PS4}}
{{History||1.90|[[File:Raw Mutton JE3 BE2.png|32px]] The texture of raw mutton has been changed.}}
{{History|3ds}}
{{History||0.1.0|[[File:Raw Mutton JE2 BE1.png|32px]] Added raw mutton.}}
{{History|foot}}
== Issues ==
{{issue list}}
== Gallery ==
<gallery>
Rabbit Items 3 Ryan Holtz.png|First image of the item by [[Ryan Holtz]].
Pocket Edition Mutton.jpg|First image of the item in ''Bedrock Edition'' by [[Jason Major]].
</gallery>
== References ==
{{reflist}}
{{items}}
[[de:Rohes Hammelfleisch]]
[[es:Cordero crudo]]
[[fr:Mouton cru]]
[[ja:生の羊肉]]
[[ko:익히지 않은 양고기]]
[[nl:Rauw schapenvlees]]
[[pl:Surowa baranina]]
[[pt:Carneiro cru]]
[[ru:Сырая баранина]]
[[zh:生羊肉]]
[[Category:Food]]
[[Category:Renewable resources]]</li><li>[[Snowball|Snowball]]<br/>{{about|the throwable item|the enchantment in ''Minecraft Dungeons''|MCD:Snowball}}
{{ItemEntity
|image=Snowball.png
|renewable=Yes
|stackable=Yes (16)<br>
Yes (64){{upcoming|java Combat Tests}}
|size=Height: 0.25 Blocks<br>Width: 0.25 Blocks
}}
'''Snowballs''' are throwable combat items that hit but do not damage most [[Mob|mobs]] on impact.
== Obtaining ==
{{see also|Tutorials/Snow farming}}
=== Mining ===
A [[shovel]] without the [[Silk Touch]] enchantment can get 4 snowballs by breaking a [[snow block]], and 1–8 snowballs by breaking or blasting [[snow layer]]s – one per layer. The [[Fortune]] enchantment does not affect these amounts.
{{IN|bedrock}}, snowballs are dropped from snow layers even when mined with a Silk Touch shovel.<ref>{{bug|MCPE-59729||Snow layers don't drop themselves when mined with a silk touch enchanted shovel}}</ref>
==== Explosions ====
Creeper and TNT [[explosion]]s leave snowballs in the resulting debris field if near snow.
==== Ravagers ====
{{IN|BE}}, Ravagers destroy snow layers, dropping snowballs.
==== Pistons ====
{{IN|BE}}, a block or piston head pushed into the position of snow layers destroys the snow layers, dropping snowballs. 1-3 layers drops 1 snowball, 4-5 layers drops 2 snowballs, 6-7 layers drops 3 snowballs and 8 layers drops 4 snowballs.
=== Mob loot ===
[[Snow golem]]s drop 0–15 snowballs upon death, unaffected by [[Looting]].
=== Chest loot ===
{{LootChestItem|snowball}}
== Usage ==
=== Crafting ingredient ===
{{crafting usage}}
=== Combat ===
[[File:Throwing a snowball on a pig.gif|300px|thumbnail|right|Throwing a snowball on a pig animation.]]
Snowballs can be thrown by {{control|using}} them. There is no charging time or cooldown for firing them,{{Until|java Combat Tests}} meaning they can be thrown as fast as the player can click.
Like other projectiles, snowballs are affected by gravity: their range is the same as those of [[egg]]s and [[ender pearl]]s, less than that of [[arrow]]s fired from [[bow]]s, and more than that of [[splash potion]]s. In [[Bedrock Edition]], players will receive damage and will be knockbacked.
Snowballs deal {{hp|3}} each to [[blaze]]s but they deal no damage to other mobs. Mobs still receive knockback and act the same as if they were being damaged (for example, [[zombified piglin]]s who are hit by snowballs become aggressive). Players {{in|BE}} receive knockback, while players {{in|JE}} are unaffected.<ref>{{bug|MC-3179|||WAI}}</ref>{{Until|java Combat Tests}}
When fighting the [[ender dragon]], [[end crystal]]s are able to be destroyed by snowballs being thrown at them.
Snowball, like other projectiles, can be used to distract the [[warden]]. A warden walks towards the location where the snowball lands to inspect it, giving the player time to escape. However, if snowballs are fired too frequently (at least twice in 5 seconds), the warden walks straight to the player instead.
In the new versions they can hit players but just only in bedrock
=== Dispenser ===
Snowballs can be fired from [[dispenser]]s.
== Sounds ==
{{Edition|Java}}:<br>
Thrown snowballs use the Friendly Creatures sound category for entity-dependent sound events.
{{Sound table
|rowspan=3
|sound=Bow shoot.ogg
|subtitle=Snowball flies
|source=neutral
|description=When a player throws a snowball
|id=entity.snowball.throw
|translationkey=subtitles.entity.snowball.throw
|volume=0.5
|pitch={{frac|1|3}}-0.5
|distance=16}}
{{Sound table
|subtitle=Snowball flies
|source=neutral
|description=When a snow golem shoots a snowball
|id=entity.snow_golem.shoot
|translationkey=subtitles.entity.snowball.throw
|volume=1.0
|pitch={{frac|1|3}}-0.5
|distance=16}}
{{Sound table
|subtitle=Dispensed item
|source=block
|description=When a dispenser shoots a snowball
|id=block.dispenser.launch
|translationkey=subtitles.block.dispenser.dispense
|volume=1.0
|pitch=1.2
|distance=16
|foot=1}}
{{Edition|Bedrock}}:
{{Sound table
|type=bedrock
|rowspan=3
|sound=Bow shoot.ogg
|source=player
|description=When a player throws a snowball
|id=random.bow
|volume=0.5
|pitch=0.33-0.5}}
{{Sound table
|source=neutral
|description=When a snow golem shoots a snowball
|id=mob.snowgolem.shoot
|volume=1.0
|pitch=0.8-1.2}}
{{Sound table
|source=player
|description=When a dispenser shoots a snowball
|id=random.bow
|volume=1.0
|pitch=0.83-1.25
|foot=1}}
== Data values ==
=== ID ===
{{edition|java}}:
{{ID table
|edition=java
|firstcolumnname=Item
|showforms=y
|generatetranslationkeys=y
|displayname=Snowball
|spritetype=item
|nameid=snowball
|form=item
|foot=1}}
{{ID table
|edition=java
|firstcolumnname=Entity
|showentitytags=y
|generatetranslationkeys=y
|displayname=Snowball
|spritetype=entity
|nameid=snowball
|entitytags=impact_projectiles
|foot=1}}
{{edition|bedrock}}:
{{ID table
|edition=bedrock
|firstcolumnname=Item
|shownumericids=y
|showforms=y
|notshowbeitemforms=y
|generatetranslationkeys=y
|displayname=Snowball
|spritetype=item
|nameid=snowball
|id=374
|form=item
|foot=1}}
{{ID table
|edition=bedrock
|firstcolumnname=Entity
|shownumericids=y
|generatetranslationkeys=y
|displayname=Snowball
|spritetype=entity
|nameid=snowball
|id=81
|foot=1}}
=== Entity Data ===
Snowballs have entity data that define various properties of the entity.
{{el|java}}:
{{main|Entity format}}
{{/ED}}
{{el|bedrock}}:
: See [[Bedrock Edition level format/Entity format]].
== Advancements ==
{{Load advancements|Bullseye}}
== Video ==
<div style="text-align:center">{{yt|2E-c9P8kyfg}}</div>
==History==
{{History|java alpha}}
{{History||v1.0.5|[[File:Snowball JE1 BE1.png|32px]] Added snowballs.
|Snowballs are used to craft [[snow block]]s.
|Snowballs could stack up to 64.}}
{{History||v1.0.5_01|Snowballs now stack to 8.
|Added a new snowball [[sound]] effect.
|Harvesting snowballs now requires a [[shovel]].}}
{{History||v1.0.6|Snowballs now stack up to 16.
|Thrown snowballs no longer disappear.}}
{{History||v1.1.1|It is no longer possible to obtain more than four snowballs from a solid [[snow block]] (the [[player]] was previously able to obtain 4-6 snowballs per snow block allowing an infinite number of snowballs to be made).}}
{{History||v1.2.0|snap=preview|[[Fireball]]s use the same texture as the snowball.}}
{{History|java beta}}
{{History||1.2|Snowballs can now be fired by [[dispenser]]s.}}
{{History|java}}
{{History||1.0.0|snap=Beta 1.9 Prerelease|[[Fireball]]s no longer use the snowball texture.}}
{{History|||snap=RC1|Snowball throwing sound was changed.}}
{{History||1.9|snap=15w32a|Snowballs no longer damage the [[ender dragon]].}}
{{History|||snap=15w36b|Snowballs now produce particles when thrown at an entity.}}
{{History|||snap=15w49a|Snowballs, as well as all projectiles, now take the thrower's motion into account when fired.}}
{{History||1.11|snap=16w32a|The entity ID has been changed from <code>Snowball</code> to <code>snowball</code>.}}
{{History||1.13|snap=17w47a|Prior to [[1.13/Flattening|''The Flattening'']], this [[item]]'s numeral ID was 332.}}
{{History||1.14|snap=18w43a|[[File:Snowball JE2 BE2.png|32px]] The texture of snowballs has been changed.}}
{{History|||snap=18w49a|Snowballs can now be found in [[chest]]s in [[snowy tundra]] [[village]] houses.}}
{{History|||snap=19w08a|[[File:Snowball JE3 BE3.png|32px]] The texture of snowballs has been changed, once again.}}
{{History||1.16.2|snap=Pre-Release 1|Snowballs are now affected by [[bubble column]]s.}}
{{History||1.19|snap=Deep Dark Experimental Snapshot 1|Snowballs now generate in [[ancient city]] chests.}}
{{History|upcoming java}}
{{History||Combat Tests|snap=Combat Test 4|Snowballs now stack to 64, once again.
|Snowballs now have 4-tick cooldown and are not rendered for the first 2 ticks to prevent screen flickering.}}
{{History|pocket alpha}}
{{History||v0.2.0|[[File:Snowball JE1 BE1.png|32px]] Added snowballs. They are currently unobtainable and serve no purpose.}}
{{History||v0.3.0|Snowballs now drop as an item when mining [[snow block]]s and [[snow layer]]s.
|Snowballs can be used to craft [[snow block]]s.}}
{{History||v0.4.0|Snowballs can now be thrown.}}
{{History||v0.11.0|snap=build 14|Snowballs are now available in the [[creative]] inventory.}}
{{History||v0.12.0|Snowballs now deal [[damage]] to [[blaze]]s.}}
{{History||v0.12.1|snap=build 1|Added [[snow golem]]s, which [[drops|drop]] snowballs.}}
{{History|bedrock}}
{{History||1.2.0|Snowballs now deal knockback to [[player]]s.}}
{{History||1.10.0|snap=beta 1.10.0.3|[[File:Snowball JE2 BE2.png|32px]] The texture of snowballs has been changed.}}
{{History||1.11.0|snap=beta 1.11.0.1|Snowballs can now be found in some [[snowy tundra]] [[village]] house [[chest]]s.}}
{{History|||snap=beta 1.11.0.5|[[File:Snowball JE3 BE3.png|32px]] The texture of snowballs has been changed, once again.}}
{{History|console}}
{{History||xbox=TU1|xbone=CU1|ps=1.0|switch=1.0.1|wiiu=Patch 1|[[File:Snowball JE1 BE1.png|32px]] Added snowballs.}}
{{History||xbox=none|xbone=none|ps=1.90|switch=none|wiiu=none|[[File:Snowball JE3 BE3.png|32px]] The texture of snowballs has been changed.}}
{{History|3DS}}
{{History||0.1.0|[[File:Snowball JE1 BE1.png|32px]] Added snowballs.}}
{{History|foot}}
== Issues ==
{{issue list}}
== Trivia ==
* A thrown snowball faces the player in the first-person view, while it appears horizontally rotated in third-person view. This is the case for all throwable items ([[ender pearl]]s, [[egg]]s, snowballs, and all throwable [[potion]]s).
== References ==
{{reflist}}
== External Links ==
*[https://www.minecraft.net/en-us/article/taking-inventory--snowball Taking Inventory: Snowball] – Minecraft.net on August 3, 2019
{{Items}}
{{entities}}
[[Category:Combat]]
[[cs:Sněhová koule]]
[[de:Schneeball]]
[[es:Bola de nieve]]
[[fr:Boule de neige]]
[[hu:Hógolyó]]
[[ja:雪玉]]
[[ko:눈덩이]]
[[nl:Sneeuwbal]]
[[pl:Śnieżka]]
[[pt:Bola de neve]]
[[ru:Снежок]]
[[th:บอลหิมะ]]
[[uk:Сніжок]]
[[zh:雪球]]</li></ul> | ? | Crafting tables can now be mined faster with an axe than with hand. | |||
1.3.1{{Extension DPL}}<ul><li>[[Knowledge Book|Knowledge Book]]<br/>{{exclusive|java}}
{{Item
| image = Knowledge Book.png
| renewable = No
| stackable = No
| rarity = Epic
}}
A '''knowledge book''' is a utility item that reveals available [[crafting]] recipes to the player when {{control|used|use}}.
== Obtaining ==
Knowledge books can be obtained only by using [[commands]], as it is not found in the [[creative]] inventory; therefore, it is impossible to obtain in other modes such as [[survival]] and [[adventure]] except with commands.
For example, to give oneself a knowledge book that reveals the recipes for [[bucket]]s and [[flower pot]]s, use: {{cmd|give @s minecraft:knowledge_book{Recipes:["minecraft:bucket", "minecraft:flower_pot"]} }}.
== Usage ==
Knowledge books are used to reveal recipes to the player who uses it, by adding it to their [[recipe book]]. Using a knowledge book consumes it, removing it from the player's inventory.
Knowledge books are especially useful to mapmakers in conjunction with {{cmd|gamerule doLimitedCrafting true}}, because then any item is craftable only if its recipe is unlocked first.
== Sounds ==
{{Sound table
|sound=Chiseled bookshelf insert1.ogg
|sound2=Chiseled bookshelf insert2.ogg
|sound3=Chiseled bookshelf insert3.ogg
|sound4=Chiseled bookshelf insert4.ogg
|subtitle=Book placed
|source=block
|description=When a knowledge book is placed in a chiseled bookshelf
|id=block.chiseled_bookshelf.insert
|translationkey=subtitles.chiseled_bookshelf.insert
|volume=0.8
|pitch=''varies'' <ref group=sound>Can be 1.0, 0.85, or 1.1 for each sound</ref>
|distance=16}}
{{Sound table
|sound=Chiseled bookshelf pickup1.ogg
|sound2=Chiseled bookshelf pickup2.ogg
|sound3=Chiseled bookshelf pickup3.ogg
|subtitle=Book taken
|source=block
|description=When a knowledge book is removed from a chiseled bookshelf
|id=block.chiseled_bookshelf.pickup
|translationkey=subtitles.chiseled_bookshelf.take
|volume=0.8
|pitch=''varies'' <ref group=sound>Can be 1.0, 0.8, or 1.1 for each sound</ref>
|distance=16
|foot=1}}
== Data values ==
=== ID ===
{{ID table
|edition=java
|showforms=y
|generatetranslationkeys=y
|displayname=Knowledge Book
|spritetype=item
|nameid=knowledge_book
|form=item
|foot=1}}
=== Item data ===
Recipe books use the NBT tag <code>Recipes</code> to indicate the recipes they contain.
''The following NBT structure is provided to show how the <code>Recipes</code> tag is organized, and is not comprehensive above the <code>tag</code> tag. The full NBT for an item can be found [[Chunk format#Items and XP Orbs|here]].''
<div class="treeview" style="margin-top: 0;">
* {{nbt|compound}} Entity data
** {{nbt|compound|Item}}: The item
*** {{nbt|compound|tag}}: Additional information about the item. This tag is optional for most items.
**** {{nbt|list|Recipes}}: The list of recipes this book contains.
***** {{nbt|string}} the name of a recipe, for instance <code>minecraft:gold_nugget</code> or <code>minecraft:gold_ingot_from_nuggets</code>
</div>
== History ==
{{History|java}}
{{History||1.12|snap=17w13a|[[File:Knowledge Book JE1.png|32px]] Added knowledge books.}}
{{History||1.13|snap=17w47a|Prior to [[1.13/Flattening|''The Flattening'']], this [[item]]'s numeral ID was 453.}}
{{History||1.14|snap=18w43a|[[File:Knowledge Book JE2.png|32px]] The texture of knowledge books has now been changed.}}
{{History||1.20|snap=1.20 Release Candidate 1|Knowledge books can now be placed in [[chiseled bookshelf|chiseled bookshelves]].}}
{{History|Foot}}
== Issues ==
{{Issue list}}
== See also ==
* [[Book]]
* [[Enchanted Book]]
* {{cmd|recipe}} command
{{Items}}
[[Category:Non-renewable resources]]
[[de:Buch des Wissens]]
[[es:Enciclopedia]]
[[fr:Livre des connaissances]]
[[ja:知恵の本]]
[[ko:지식의 책]]
[[lzh:天工開物]]
[[pl:Księga wiedzy]]
[[pt:Enciclopédia]]
[[ru:Книга знаний]]
[[zh:知识之书]]</li><li>[[Torchflower Seeds|Torchflower Seeds]]<br/>{{wip}}
{{Block
| image = <gallery>
Torchflower Age 0.png| Age 0
Torchflower Age 1.png| Age 1
Torchflower Age 2.png| Age 2
</gallery>
| image2 = Torchflower Seeds JE1.png
| transparent = Yes
| light = No
| tool = N/A
| renewable = Yes
| stackable = Yes (64)
| rarity = Common
|flammable=No
|lavasusceptible=No
}}
'''Torchflower seeds''' are seeds that have a chance to be dropped by [[Sniffer|sniffers]] when they finish digging.
== Obtaining ==
[[Sniffer]]s will occasionally bury their nose in the ground and start digging. Once the sniffer has finished digging, one torchflower seed will have a chance to be dropped on the floor as an item.
Sniffers can only dig for torchflower seeds in the following blocks:
*{{BlockLink|Dirt}}
*{{BlockLink|Grass Block}}
*{{BlockLink|Podzol}}
*{{BlockLink|Coarse Dirt}}
*{{BlockLink|Rooted Dirt}}
*{{BlockLink|Moss Block}}
*{{BlockLink|Mud}}
*{{BlockLink|Muddy Mangrove Roots}}
They cannot dig for torchflower seeds on [[mycelium]], which is intended.<ref>{{bug|MC-260259||Sniffers cannot dig nor find seeds on mycelium|WAI}}</ref>
== Usage ==
=== Crop ===
{{main|Tutorials/Crop farming|title1=Crop farming}}
Torchflower seeds can be {{control|placed}} on [[farmland]], where they grow through three stages. Breaking the torchflower crop before it matures drops the seed, while breaking the final stage produces one [[torchflower]] and does not yield the seed.
Crops break if pushed by a [[piston]] or if their supporting farmland breaks or turns to dirt (i.e. by being trampled), dropping their usual drops.
Farmer [[villager]]s can plant torchflower seeds, but cannot harvest them after they have fully grown.<ref>{{bug|MC-263382|||WAI}}</ref>
=== Feeding ===
Torchflower seeds can be used to breed [[sniffer]]s and [[chicken]]s and reduce the remaining growth duration of snifflets and chicks by 10%. Also, if some torchflower seeds were fed to an injured sniffer, it will heal it by {{hp|2}} health points.
=== Taming ===
Torchflower seeds can be used to tame [[parrot]]s.
=== Composting ===
Placing torchflower seeds into a [[composter]] has a 30% chance of raising the compost level by 1.
== Sounds ==
{{Sound table/Block/Crop}}
== Data values ==
=== ID ===
{{edition|java}}:
{{ID table
|edition=java
|showblocktags=y
|showitemtags=y
|showforms=y
|generatetranslationkeys=y
|displayname=Torchflower Crop
|spritetype=block
|nameid=torchflower_crop
|form=block
|blocktags=bee_growables, crops}}
{{ID table
|displayname=Torchflower Seeds
|spritetype=item
|nameid=torchflower_seeds
|form=item
|itemtags=villager_plantable_seeds
|foot=1}}
{{edition|bedrock}}:
{{ID table
|edition=bedrock
|shownumericids=y
|showforms=y
|generatetranslationkeys=y
|displayname=Torchflower Crop
|spritetype=block
|nameid=torchflower_crop
|id=-567
|form=block
|translationkey=-}}
{{ID table
|displayname=Torchflower Seeds
|spritetype=item
|nameid=torchflower_seeds
|id=296
|form=item
|foot=1}}
=== Block states ===
{{see also|Block states}}
{{/BS}}
== Achievements ==
{{Load achievements|Planting The Past}}
== Advancements ==
{{load advancements|A Seedy Place;Planting The Past;Little Sniffs}}
== History ==
{{History|java}}
{{History||1.20<br>(Experimental)|link=1.19.4|snap=23w07a|[[File:Torchflower Seeds JE1.png|32px]] Added torchflower seeds behind the [[Java Edition 1.20|Update 1.20 experimental datapack]].}}
{{History|||snap=1.19.4 Pre-release 1|Torchflower seeds can now be used to breed [[chicken]]s and tame [[parrot]]s.<ref>{{bug|MC-260035|||Fixed}}</ref>|Torchflower seeds are now next to other seeds in the [[Creative inventory]].|Placing torchflower seeds in farmland now gives the player the "A Seedy Place" [[advancement]].}}
{{History||1.20|snap=23w12a|[[Sniffer]]s can now be obtained in Survival, making torchflower seeds [[renewable]].|Torchflower seeds are now available without using the "Update 1.20" experimental datapack.}}
{{History|||snap=23w14a|Torchflower seeds can now be picked up by farmer [[villager]]s.|[[Sniffer]]s can now be tempted with torchflower seeds.}}
{{History|||snap=23w16a|[[Villager]]s can now plant torchflower seeds.}}
{{History|||snap=23w17a|The player now get the [[advancement]] "Little sniffs" when they feed a [[snifflet]] using torchflower seeds, "Planting the past" when they plant torchflower seeds on [[farmland]].}}
{{History|bedrock}}
{{History||Sniffer<br>(Experimental)|link=Bedrock Edition 1.19.70|snap=beta 1.19.70.23|[[File:Torchflower Seeds JE1.png|32px]] Added torchflower seeds behind the "[[Bedrock Edition 1.20.0|Sniffer]]" [[experimental]] toggle.}}
{{History||1.20.0|snap=beta 1.20.0.20|Torchflower seeds are now available without using the "Sniffer" experimental toggle.}}
{{History|foot}}
== Issues ==
{{issue list}}
== Trivia ==
* The final growth stage of the torchflower crop uses the same ID as the actual torchflower. This causes some side effects, such as the plant becoming offset and randomly jumping to the side.<ref>{{bug|MC-260472|resolution=wai}}</ref>
== Gallery ==
<gallery>
Torchflower Seeds stages.png|All the growth stages of torchflower seeds.
</gallery>
== Notes ==
{{notelist}}
== References ==
{{reflist}}
{{Blocks|upcoming}}
{{Items}}
[[Category:Plants]]
[[Category:Non-solid blocks]]
[[de:Fackelliliensamen]]
[[es:Semillas de plantorcha]]
[[ja:トーチフラワーの種]]
[[pt:Sementes de plantocha]]
[[zh:火把莲种子]]</li></ul> | 12w22a | Inventory sprites for blocks are flipped from left to right, changing to . | |||
1.4.2{{Extension DPL}}<ul><li>[[Raw Beef|Raw Beef]]<br/>{{Item
| title = Raw Beef
| image = Raw Beef.png
| heals = {{hunger|3}}
| renewable = Yes
| stackable = Yes (64)
}}
'''Raw beef''' is a [[food]] item that can be eaten by the [[player]] or cooked in a [[furnace]], [[smoker]], or [[campfire]] to make [[steak]].
== Obtaining ==
=== Mob loot ===
When adult [[cow]]s and [[mooshroom]]s are killed, they drop 1-3 raw beef. The maximum amount is increased by 1 per level of [[Looting]], for a maximum of 1-6 with Looting III. If killed while on fire, they drop [[steak]] instead.
=== Chest loot ===
{{LootChestItem|raw-beef}}
== Usage ==
=== Food ===
To eat raw beef, press and hold {{control|use}} while it is selected in the hotbar. Eating one restores {{hunger|3}} hunger and 1.8 hunger [[Hunger#Mechanics|saturation]].
=== Smelting ingredient ===
{{Smelting
|showname=1
|Raw Beef
|Steak
|0.35
}}
=== Wolves ===
Raw beef can be used to [[breed]] and heal tamed [[wolves]], lead them around, and make baby tamed wolves grow up faster by 10% of the remaining time.
=== Trading ===
Journeyman-level Butcher villagers have a 50% chance to buy 10 raw beef for an emerald.{{only|bedrock}}
Journeyman-level Butcher villagers always offer buy 10 raw beef for an emerald.{{only|java}}
==Sounds==
{{Sound table/Entity/Food}}
== Advancements ==
{{load advancements|Husbandry;A Balanced Diet}}
== Data values ==
=== ID ===
{{edition|java}}:
{{ID table
|edition=java
|showforms=y
|generatetranslationkeys=y
|displayname=Raw Beef
|spritetype=item
|nameid=beef
|form=item
|foot=1}}
{{edition|bedrock}}:
{{ID table
|edition=bedrock
|shownumericids=y
|showforms=y
|notshowbeitemforms=y
|generatetranslationkeys=y
|displayname=Raw Beef
|spritetype=item
|nameid=beef
|id=273
|form=item
|foot=1}}
== History ==
{{History|java beta}}
{{History||1.8|snap=Pre-release|[[File:Raw Beef JE1 BE1.png|32px]] Added raw beef.|Raw beef is one of the new [[food]] items, [[drops|dropped]] by [[cow]]s in addition to their [[leather]].}}
{{History|java}}
{{History||1.2.1|snap=12w03a|Raw beef can now be used to breed wolves.}}
{{History||1.3.1|snap=12w21a|Raw beef can now be [[trading|sold]] to butcher [[villager]]s, at 14–17 raw beef for 1 [[emerald]].}}
{{History|||snap=1.3|[[File:Raw Beef JE2.png|32px]] The texture of raw beef has been changed.}}
{{History||1.4.2|snap=12w37a|[[File:Raw Beef JE3 BE2.png|32px]] The texture of raw beef has been changed, so that it no longer has a dark outline.}}
{{History||1.8|snap=14w02a|[[Villager]]s no longer [[trading|trade]] for raw beef.}}
{{History||1.13|snap=17w47a|Prior to [[1.13/Flattening|''The Flattening'']], this [[item]]'s numeral ID was 363.}}
{{History||1.14|snap=18w43a|[[File:Raw Beef JE4 BE3.png|32px]] The texture of raw beef has been changed.}}
{{History|||snap=18w49a|Raw beef can now be found in [[chest]]s in [[village]] butcher shops.}}
{{History|||snap=19w11a|Butcher [[villager]]s now [[trading|buy]] raw beef.}}
{{History|pocket alpha}}
{{History||v0.4.0|[[File:Raw Beef JE1 BE1.png|32px]] Added raw beef.}}
{{History||v0.5.0|Raw beef now restores {{hp|3}} instead of {{hp|1}}.}}
{{History||v0.8.0|snap=build 1|[[File:Raw Beef JE3 BE2.png|32px]] The texture of raw beef has been changed, so that it no longer has a dark outline.}}
{{History||v0.9.0|snap=build 1|Raw beef has been added to [[Creative]] mode.}}
{{History||v0.12.1|snap=build 1|Raw beef now restores [[hunger]] instead of [[health]].}}
{{History|bedrock}}
{{History||1.10.0|snap=beta 1.10.0.3|[[File:Raw Beef JE4 BE3.png|32px]] The texture of raw beef has been changed.}}
{{History||1.11.0|snap=beta 1.11.0.1|Raw beef can now be found in [[village]] butcher [[chest]]s.}}
{{History|||snap=beta 1.11.0.4|Raw beef can now be [[trading|sold]] to butcher [[villager]]s.}}
{{History|console}}
{{History||xbox=TU5|xbone=CU1|ps=1.0|wiiu=Patch 1|[[File:Raw Beef JE1 BE1.png|32px]] Added raw beef.}}
{{History||xbox=TU12|[[File:Raw Beef JE3 BE2.png|32px]] The texture of raw beef has been changed, so that it no longer has a dark outline.}}
{{History||xbox=none|xbone=none|ps=1.90|wiiu=none|switch=none|[[File:Raw Beef JE4 BE3.png|32px]] The texture of raw beef has been changed.}}
{{History|New 3DS}}
{{History||0.1.0|[[File:Raw Beef JE3 BE2.png|32px]] Added raw beef.}}
{{History|foot}}
== Issues ==
{{issue list}}
== Gallery ==
<gallery>
File:Jeb steak.png|Raw Beef and [[Steak]] in a preview screenshot.
</gallery>
{{Items}}
[[de:Rohes Rindfleisch]]
[[es:Filete crudo]]
[[fr:Bœuf cru]]
[[hu:Nyers marhahús]]
[[ja:生の牛肉]]
[[ko:익히지 않은 소고기]]
[[nl:Rauwe biefstuk]]
[[pl:Surowa wołowina]]
[[pt:Bife cru]]
[[ru:Сырая говядина]]
[[uk:Сира яловичина]]
[[zh:生牛肉]]
[[Category:Food]]
[[Category:Renewable resources]]</li><li>[[Shulker Shell|Shulker Shell]]<br/>{{Item
| image = Shulker Shell.png
|type=
|renewable = Yes
| stackable = Yes (64)
}}
{{about|the item that drops from the mob|the mob |Shulker|the storage block|Shulker Box}}
'''Shulker shells''' are [[item]]s dropped by [[shulker]]s that are used solely to craft [[shulker box]]es.
== Obtaining ==
=== Mob loot ===
{{IN|bedrock}}, [[shulker]]s drop 0-1 shulker shells. The maximum can be increased by 1 per level of [[Looting]], which is 0-4 shells with Looting III.
{{IN|java}}, shulkers have a 50% chance of dropping a shulker shell when killed. This is increased by 6.25% per level of [[Looting]], for a maximum of 68.75% with Looting III.
== Usage ==
=== Crafting ingredient ===
{{crafting usage}}
== Data values ==
=== ID ===
{{edition|java}}:
{{ID table
|edition=java
|showforms=y
|generatetranslationkeys=y
|displayname=Shulker Shell
|spritetype=item
|nameid=shulker_shell
|form=item
|foot=1}}
{{edition|bedrock}}:
{{ID table
|edition=bedrock
|shownumericids=y
|showforms=y
|notshowbeitemforms=y
|generatetranslationkeys=y
|displayname=Shulker Shell
|spritetype=item
|nameid=shulker_shell
|id=566
|form=item
|foot=1}}
== History ==
{{History|java}}
{{History||1.11|snap=16w39a|[[File:Shulker Shell JE1 BE1.png|32px]] Added shulker shells.}}
{{History||1.13|snap=17w47a|Prior to [[1.13/Flattening|''The Flattening'']], this [[item]]'s numeral ID was 450.}}
{{History||1.14|snap=18w43a|[[File:Shulker Shell JE2 BE2.png|32px]] The texture of the shulker shell has now been changed.}}
{{History||1.17|snap=20w45a|When a shulker is hit by a shulker bullet, the shulker can spawn another shulker depending on the amount of shulkers in the area, making shulker shells [[renewable resource|renewable]].}}
{{History|pocket}}
{{History||1.0.0|snap=alpha 1.0.0.1|[[File:Shulker Shell JE1 BE1.png|32px]] Added shulker shells.
|Shulker shells currently have no purpose as [[shulker box]]es haven't been implemented yet.}}
{{History||1.1.0|snap=alpha 1.1.0.0|Shulker shells can now be used to [[crafting|craft]] shulker boxes.}}
{{History|bedrock}}
{{History||1.10.0|snap=beta 1.10.0.3|[[File:Shulker Shell JE2 BE2.png|32px]] The texture of the shulker shell has now been changed.}}
{{History||1.18.30|snap=beta 1.18.30.22|Shulkers now have a chance to spawn another shulker when hit by a shulker projectile, making shulker shells [[renewable resource|renewable]].}}
{{History|console}}
{{History||xbox=TU53|xbone=CU43|ps=1.49|wiiu=Patch 23|switch=1.0.3|[[File:Shulker Shell JE1 BE1.png|32px]] Added shulker shells.}}
{{History||xbox=none|xbone=none|ps=1.90|wiiu=none|switch=none|[[File:Shulker Shell JE2 BE2.png|32px]] The texture of the shulker shell has now been changed.}}
{{History|new 3ds}}
{{History||1.7.10|[[File:Shulker Shell JE1 BE1.png|32px]] Added shulker shells.}}
{{History|foot}}
== Issues ==
{{Issue list}}
{{Items}}
[[de:Shulkerschale]]
[[es:Caparazón de shulker]]
[[fr:Carapace de Shulker]]
[[it:Guscio di shulker]]
[[ja:シュルカーの殻]]
[[ko:셜커 껍데기]]
[[nl:Shulkerschelp]]
[[pl:Skorupa Shulkera]]
[[pt:Casco de shulker]]
[[ru:Панцирь шалкера]]
[[th:เปลือกชัลเกอร์]]
[[zh:潜影壳]]</li></ul> | 12w40a | A crafting table now generates inside witch huts. | |||
1.9{{Extension DPL}}<ul><li>[[Raw Salmon|Raw Salmon]]<br/>{{about|the item|the mob|Salmon}}
{{Item
| title = Raw Salmon
| image = Raw Salmon.png
| renewable = Yes
| heals = {{hunger|2}}
| stackable = Yes (64)
}}
'''Raw salmon''' is a food item that can be eaten by the [[player]] or cooked to make [[cooked salmon]].
== Obtaining ==
=== Mob loot ===
====Salmon====
[[Salmon]] always drops 1 raw salmon when killed, unaffected by Looting.<ref>{{bug|MC-212795||Salmon & Fish mobs are not affected by Looting}}</ref> If it is killed while on [[fire]], it drops 1 [[Cooked Salmon|cooked salmon]] instead.
====Guardians and elder guardians ====
[[Guardian|Guardians]] and [[Elder Guardian|elder guardians]] have a 2.5% chance to drop a random fish, with 25% of them being raw salmon, which drops as cooked if the guardian was on fire. The chance of getting the fish drop is increased by 1% per level with [[Looting]] (for a maximum of 5.5% with Looting III), but the type of fish is not affected.
====Polar bears====
[[Polar bear]]s have a 25% chance of dropping 0–2 raw salmon when killed. The maximum amount can be increased by 1 per level of Looting, for a maximum of 0-5 with Looting III. If killed while on fire, they drop cooked salmon instead.
=== Fishing ===
{{main|Fishing}}Raw salmon can be obtained from [[fishing]]. The wait time of one being caught is decreased with the [[Lure]] enchantment and the chance of one being caught is slightly decreased with the [[Luck of the Sea]] enchantment (named as such because it increases treasure, not fish).
Catching salmon awards 1-6 experience.
=== Chest loot ===
{{LootChestItem|raw-salmon}}
=== Villager gifts ===
{{in|java}}, Fisherman villagers throw raw salmon at [[player]]s under the [[Hero of the Village]] effect.
== Usage ==
=== Smelting ingredient ===
{{smelting
|Raw Salmon
|Cooked Salmon
|0.35
}}
=== Food ===
Raw salmon restores {{hunger|2}} [[hunger]] and 0.2 [[Hunger#Mechanics|saturation]].
=== Cats ===
Raw salmon can be used to tame [[cat]]s with {{frac|1|3}} chance of success, get cats off of [[chest]]s, and [[bed]]s, [[breed]] cats, and make baby cats grow up faster by 10% of the remaining time. Additionally, raw salmon can be used to heal cats by {{hp|2|mob=1}}.
Raw salmon can be used to gain [[ocelot]] trust, breed ocelots, and make baby ocelots grow up by 10%.
=== Dolphins ===
A [[dolphin]] can be fed raw salmon to increase its trust of the player and cause it to interact with the player more often. However, unlike most other animal mobs, this does not cause them to breed.
Additionally, dolphins swim to the nearest chest in a [[shipwreck]] or [[underwater ruin]] after they are fed raw salmon. If the chest in the nearest structure is broken, they swim to another structure with a chest.
=== Trading ===
Apprentice-level Fisherman [[villager]]s have 50%{{only|bedrock}} or {{frac|2|3}}{{only|java}} chance to buy 6 raw salmon and one [[emerald]] for 6 cooked salmon.
Journeyman-level Fisherman villagers offer to buy 13 raw salmon for an emerald.
=== Wolves ===
{{IN|bedrock}}, raw salmon can be fed only to [[wolves]] not at full health, healing them by {{hp|2|mob=1}}. Unlike other wolf food, raw salmon cannot be used to breed wolves or to accelerate the growth of baby wolves.
==Sounds==
{{Sound table/Entity/Food}}
== Data values ==
=== ID ===
{{edition|java}}:
{{ID table
|edition=java
|showitemtags=y
|showforms=y
|generatetranslationkeys=y
|displayname=Raw Salmon
|spritetype=item
|nameid=salmon
|itemtags=fishes
|form=item
|foot=1}}
{{edition|bedrock}}:
{{ID table
|edition=bedrock
|shownumericids=y
|showforms=y
|notshowbeitemforms=y
|generatetranslationkeys=y
|displayname=Raw Salmon
|spritetype=item
|nameid=salmon
|id=265
|form=item
|foot=1}}
== Achievements ==
{{load achievements|Lion Hunter}}
== Advancements ==
{{load advancements|Husbandry;A Balanced Diet;Fishy Business;A Complete Catalogue}}
== Video ==
<span style="display:inline-block">{{yt|s_GcAFeoREk}}</span>
== History ==
{{History|java}}
{{History||1.7.2|snap=13w36a|[[File:Raw Salmon JE1 BE1.png|32px]] Added raw salmon.}}
{{History||1.8|snap=14w25a|Raw salmon is now obtainable rare drops from [[guardian]]s and [[elder guardians]].}}
{{History||1.9|snap=15w44a|Raw salmon can now be found in [[bonus chest]]s.}}
{{History||1.10|snap=16w20a|Raw salmon is now dropped from [[polar bear]]s.}}
{{History||1.13|snap=17w47a|The different data values for the <code>fish</code> and <code>cooked_fish</code> IDs have been split up into their own IDs.
|Prior to [[1.13/Flattening|''The Flattening'']], these [[item]]s' numeral IDs were 349 and 250.}}
{{History|||snap=18w08b|Salmon has been added as a [[mob]], which drops raw salmon when killed (cooked while on [[fire]]).
|[[File:Raw Salmon JE2 BE2.png|32px]] The texture for raw salmon has been changed.}}
{{History||1.14|snap=18w48a|Raw salmon can now be found in chests in [[village]] fisher cottages.}}
{{History|||snap=19w11a|Fisherman [[villager]]s now [[trading|buy]] raw salmon.}}
{{History|||snap=19w13a|Fisherman villagers now give raw salmon to players under the [[Hero of the Village]] effect.}}
{{History|pocket alpha}}
{{History||v0.11.0|snap=build 1|[[File:Raw Salmon JE1 BE1.png|32px]] Added raw salmon.}}
{{History||v0.12.1|snap=build 1|Salmon now restores [[hunger]] instead of [[health]].
|Raw salmon can now be used to tame [[ocelot]]s.}}
{{History||v0.16.0|snap=build 1|Salmon is now [[drops|dropped]] by [[guardian]]s and [[elder guardian]]s.}}
{{History|pocket}}
{{History||1.0.0|snap=alpha 0.17.0.1|Added [[polar bear]]s, which drop raw salmon.}}
{{History|bedrock}}
{{History||1.2.0|snap=beta 1.2.0.2|Raw salmon is now found inside [[bonus chest]]s.}}
{{History||1.4.0|snap=beta 1.2.14.2|Salmon has been added as a [[mob]], which drops raw salmon when killed (cooked while on [[fire]]).
|[[File:Raw Salmon JE2 BE2.png|32px]] The texture for raw salmon has been changed.}}
{{History|||snap=beta 1.2.20.1|Added [[dolphin]]s, which can be [[breeding|bred]] with raw salmon.}}
{{History||1.5.0|snap=beta 1.5.0.0|Raw salmon can no longer be used to breed dolphins.
|Giving raw salmon to dolphins now leads the [[player]] to nearest [[underwater ruins]] or [[shipwreck]].}}
{{History||1.8.0|snap=beta 1.8.0.8|Raw salmon can no longer be used to tame [[ocelot]]s.
|Raw salmon can now be used to [[breeding|breed]] ocelots.
|Added stray [[cat]]s, which can be tamed by being fed raw salmon.}}
{{History||1.11.0|snap=beta 1.11.0.4|Raw salmon can now be [[trading|sold]] to fisherman [[villager]]s.}}
{{History||1.16.100|snap=beta 1.16.100.52|If [[salmon]] is [[death|killed]] while on [[fire]], then they now drop [[cooked salmon]] instead of a raw salmon.}}
{{History|console}}
{{History||xbox=TU31|xbone=CU19|ps=1.22|wiiu=Patch 3|[[File:Raw Salmon JE1 BE1.png|32px]] Added raw salmon.}}
{{History||xbox=TU69|ps=1.76|wiiu=Patch 38|[[File:Raw Salmon JE2 BE2.png|32px]] The texture for raw salmon have been changed.}}
{{History|new 3ds}}
{{History||0.1.0|[[File:Raw Salmon JE1 BE1.png|32px]] Added raw salmon.}}
{{History|foot}}
== Issues ==
{{issue list}}
== See also ==
* [[Fishing]]
== References ==
{{reflist}}
{{items}}
[[de:Roher Lachs]]
[[es:Salmón crudo]]
[[ja:生鮭]]
[[ko:생연어]]
[[pt:Salmão cru]]
[[ru:Сырой лосось]]
[[tr:Çiğ Somon]]
[[zh:生鲑鱼]]
[[Category:Renewable resources]]
[[Category:Food]]</li><li>[[Water Bucket|Water Bucket]]<br/>{{Item
| title = Water Bucket
| renewable = Yes
| image = Water Bucket.png
| stackable = No
}}
A '''water bucket''' is a [[bucket]] filled with [[water]].
== Obtaining ==
=== Interacting ===
To fill an empty [[bucket]] with water, {{control|use}} it on a [[water]] source block. The water is consumed in the process. Flowing water does not fill a bucket.
{{control|Using}} an empty bucket on a [[cauldron]] filled with water (water level 3) empties the cauldron and fills the bucket.
Water buckets can also be filled by placing an empty one in the fuel slot of a [[furnace]], and a wet [[sponge]] into the oven slot. The bucket is filled when the [[smelting]] process completes, which also leaves the sponge dry and ready to be reused.
=== Chest Loot ===
{{LootChestItem|water-bucket}}
== Usage ==
{{Control|Using}} a water bucket on a solid block places a water source block against that block, emptying the bucket; using a water bucket on a [[waterlogging|waterloggable]] block waterlogs the block. In [[the Nether]], however, the water evaporates, making a fire extinguishing sound and displays smoke particles while nothing gets placed.
=== Dispensers ===
A [[dispenser]] can be loaded with a water bucket, and when activated it places a water block directly before it, emptying the bucket. A dispenser loaded with an empty bucket and a water source right in front of it draws the source into the bucket when activated.
=== Cauldrons ===
A single water bucket can fill a [[cauldron]], and using an empty bucket on a water-filled cauldron fills the bucket. Empty buckets cannot be filled from partly-filled cauldrons.
=== Filling bucket with mobs ===
Water buckets can be used on a [[fish]], [[axolotl]] or [[tadpole]] to create a [[bucket of aquatic mob]].
=== Transportation ===
{{main|Tutorials/Elevators#Water elevators}}
Water buckets can be used as a means of quickly descending great heights in the [[Overworld]] and [[the End]], either by creating a waterfall or using the water bucket while falling to create a safe water landing.
Water buckets can also be used to climb vertical surfaces anywhere but [[the Nether]] by repeatedly creating higher waterfalls from the bottom and swimming up them.
== Sounds ==
{{el|je}}:
{{Sound table
|sound=Fill water bucket1.ogg
|sound2=Fill water bucket2.ogg
|sound3=Fill water bucket3.ogg
|subtitle=Bucket fills
|source=player
|description=When a bucket is filled with water
|id=item.bucket.fill
|translationkey=subtitles.item.bucket.fill
|volume=1.0
|pitch=1.0
|distance=16}}
{{Sound table
|sound=Empty water bucket1.ogg
|sound2=Empty water bucket2.ogg
|sound3=Empty water bucket3.ogg
|subtitle=Bucket empties
|source=block
|description=When the bucket is placed
|id=item.bucket.empty
|translationkey=subtitles.item.bucket.empty
|volume=1.0 <ref group=sound>Except for the second copy of {{cd|empty1}}, which is 0.9</ref>
|pitch=1.0
|distance=16
|foot=1}}
{{el|je}}:
{{Sound table
|type=bedrock
|sound=Fill water bucket1.ogg
|sound2=Fill water bucket2.ogg
|sound3=Fill water bucket3.ogg
|source=block
|description=When a bucket is filled with water
|id=bucket.fill_water
|volume=1.0
|pitch=1.0}}
{{Sound table
|sound=Empty water bucket1.ogg
|sound2=Empty water bucket2.ogg
|sound3=Empty water bucket3.ogg
|source=block
|description=When a water bucket is emptied
|id=bucket.empty_water
|volume=1.0
|pitch=1.0}}
{{Sound table
|rowspan=2
|sound=Water Splash Old.ogg
|source=block
|description=When a water bucket is placed in a cauldron<wbr><ref group=sound name=bucketsplash>{{Bug|MCPE-135919}}</ref>
|id=cauldron.fillwater
|volume=0.1
|pitch=1.0}}
{{Sound table
|source=block
|description=When a water bucket is removed from a cauldron<wbr><ref group=sound name=bucketsplash/>
|id=cauldron.takewater
|volume=0.1
|pitch=1.0
|foot=1}}
==Data values==
=== ID ===
{{edition|java}}:
{{ID table
|edition=java
|showforms=y
|generatetranslationkeys=y
|displayname=Water Bucket
|spritetype=item
|nameid=water_bucket
|form=item
|foot=1}}
{{edition|bedrock}}:
{{ID table
|edition=bedrock
|showaliasids=y
|shownumericids=y
|showforms=y
|notshowbeitemforms=y
|generatetranslationkeys=y
|displayname=Water Bucket
|spritetype=item
|nameid=water_bucket
|aliasid=bucket / 8
|id=362
|form=item
|translationkey=item.bucketWater.name
|foot=1}}
== Advancements ==
{{load advancements|Tactical fishing;The Cutest Predator;Bukkit bukkit}}
==History==
{{History|java infdev}}
{{History||20100615|[[File:Water Bucket JE1 BE1.png|32px]] Added water buckets.}}
{{History|java alpha}}
{{History||v1.2.6|{{control|use|text=Using}} a water bucket on [[block]]s with GUIs ([[chest]]s, [[furnace]]s, etc.) no longer places the water.}}
{{History|java}}
{{History||1.0.0|snap=Beta 1.9 Prerelease 2|Water buckets can now be used to fill [[cauldron]]s.}}
{{History||1.3.1|snap=12w15a|[[Dispenser]]s have now been given the ability to dispense water buckets. They can also collect if activated again.}}
{{History||1.8|snap=14w25a|A water bucket is now shown as the icon when [[water]] is used as a layer in [[Superflat]].}}
{{History|||snap=14w25b|[[Smelting]] a wet [[sponge]] while an empty bucket is in the fuel slot fills the bucket with water.}}
{{History||1.9|snap=15w44a|A full [[cauldron]] can now be emptied with a bucket, yielding a water bucket.}}
{{History|||snap=15w50a|Added sounds for collecting and pouring water using a bucket.}}
{{History||1.13|snap=17w47a|Prior to the ''[[Flattening]]'' this item's numerical ID was 326.}}
{{History|||snap=18w08b|Water buckets can now be used to pick up [[fish]] mobs.}}
{{History||1.14|snap=18w43a|[[File:Water Bucket JE2 BE2.png|32px]] The texture of water buckets has now been changed.
|Water buckets can now suck up liquids directly adjacent to the side they are facing. How this works is unknown, given the water bucket clearly already contains a liquid.}}
{{History|||snap=18w48a|Water buckets can now be found in [[chest]]s in [[village]] fishing cottages.}}
{{History|||snap=19w02a|Water buckets can now be used to put out [[campfire]]s.}}
{{History||1.17|snap=20w51a|Water buckets can now be used to collect [[axolotl]]s.}}
{{History||1.19|snap=22w11a|Water buckets can now be used to collect [[tadpole]]s.}}
{{History||1.19.3|snap=22w45a|Water buckets can now be emptied into [[waterlogging|waterlogged]] blocks, instead of placing water against them.<ref>{{bug|MC-127110|||Fixed}}</ref>}}
{{History|upcoming java}}
{{History||Villager Trade Rebalance<br>(Experimental)|link=Java Edition 1.20.2|snap=23w31a|[[Wandering trader]]s now have a chance to [[trading|buy]] a water bucket from the player.}}
{{History|pocket alpha}}
{{History||v0.7.0|[[File:Water Bucket JE1 BE1.png|32px]] Added water buckets.
|Water buckets were simply called "Bucket".}}
{{History||v0.7.4|Water buckets no longer stack to 64.}}
{{History||v0.14.0|snap=build 1|Dispensers can now shoot out water from water buckets.}}
{{History|bedrock}}
{{History||1.4.0|snap=beta 1.2.14.2|Water buckets can now be used to pick up [[fish mob]]s.
|Moved all bucket items, including water buckets, from the Equipment tab to the Items tab in the [[Creative inventory]].{{verify|type=update}}{{info needed}}<!---please check snapshots, only 1 major release version was checked each--->}}
{{History||1.10.0|snap=beta 1.10.0.3|[[File:Water Bucket JE2 BE2.png|32px]] The texture of water buckets has now been changed.}}
{{History||1.16.100|snap=beta 1.16.100.56|The ID of water buckets has been changed from <code>bucket/8</code> to <code>water_bucket</code>.}}
{{History||1.17.0|snap=beta 1.16.230.52|Water buckets can now be used to collect [[axolotl]]s.}}
{{History||1.18.10|snap=beta 1.18.10.24|Water buckets can now be used to collect [[tadpole]]s behind the "Wild Update" experimental toggle.}}
{{History|console}}
{{History||xbox=TU1|xbone=CU1|ps=1.0|wiiu=Patch 1|switch=1.0.1|[[File:Water Bucket JE1 BE1.png|32px]] Added water buckets.}}
{{History||xbox=TU9|[[Dispenser]]s have now been given the ability to shoot out the [[liquids]] inside water buckets. They can also suck up the liquids if activated again, but a bug prevents the empty [[bucket]] from being filled. Whether this was ever fixed is unknown.}}
{{History||xbox=none|xbone=none|ps=1.90|wiiu=none|switch=none|[[File:Water Bucket JE2 BE2.png|32px]] The texture of water buckets has now been changed.}}
{{History|New Nintendo 3DS Edition}}
{{History||0.1.0|[[File:Water Bucket JE1 BE1.png|32px]] Added water buckets.}}
{{History|foot}}
==Issues==
{{issue list}}
==Gallery==
<gallery>
Water Bucket SDGP.png|Water bucket in the [[Super Duper Graphics Pack]].
</gallery>
==References==
{{Reflist}}
{{Items}}
[[Category:Renewable resources]]
[[Category:Tools]]
[[de:Wassereimer]]
[[ja:水入りバケツ]]
[[pt:Balde de água]]
[[th:ถังน้ำ]]
[[uk:Відро води]]
[[zh:水桶]]</li></ul> | 15w43a | A crafting table generates inside igloos. | |||
1.12{{Extension DPL}}<ul><li>[[Bamboo|Bamboo]]<br/>{{for|the plant feature|Bamboo (feature)}}
{{Distinguish|text = [[Sugar Cane]], which was colloquially known as Bamboo}}
{{Block
| image = <gallery>
Leafless Bamboo.png|Leafless
Small Leaves Bamboo.png|Small
Big Leaves Bamboo.png|Big
Leafless Old Bamboo.png|Leafless Old
Small Leaves Old Bamboo.png|Small Old
Big Leaves Old Bamboo.png|Big Old
</gallery>
| image2 = Bamboo Shoot.png<!--different infobox for this later down the line, like with pistons?-->
| image3 = Bamboo (item) JE1 BE1.png
| transparent = Yes
| light = No
| tool = Sword
| tool2 = Axe
| renewable = Yes
| stackable = Yes (64)
| flammable = '''Bamboo''': Yes (60)<br>'''Shoot''': No
| lavasusceptible = Yes
}}
'''Bamboo''' is a versatile, fast-growing, [[Bone Meal|bonemealable]] [[plant]] found primarily in [[jungle]]s, which is used for [[crafting]] (particularly [[scaffolding]] and [[Block of Bamboo|bamboo wood]]), [[smelting]] and [[breeding]] [[Panda|pandas]].
A '''bamboo shoot''' is the initial non-solid sapling form of planted bamboo.
== Obtaining ==
Bamboo shoots cannot be obtained through vanilla means. {{IN|bedrock}}, they can be obtained through [[add-on]]s or inventory editing. {{IN|java}}, they are completely unobtainable.
=== Breaking ===
Bamboo can be mined with any [[tool]], but a [[sword]] breaks the block [[instant mining|instantly]], even with [[Mining Fatigue]]. Flowing [[water]] also breaks bamboo shoots, but not mature bamboo stalks.
{{breaking row|Bamboo|Sword|sword=1|horizontal=1}}
{{notelist}}
=== Natural generation ===
Bamboo generates in widely scattered single shoots within [[jungle]] [[biome]]s. Bamboo generates much more densely in the [[bamboo jungle|bamboo variant]]s of jungles, covering large areas of the landscape. Bamboo does ''not'' generate in [[sparse jungle]]s.<ref>{{bug|MC-156638|||WAI}}</ref>
=== Mob loot ===
{{IN|java}}, a [[panda]] drops 1 bamboo when killed. [[Looting]] does not affect the drop rate.<ref>{{bug|MC-160006}}</ref>
{{IN|bedrock}}, a panda drops 0-2 bamboo when killed. Looting increases the drop by 1 per level.
=== Fishing ===
Bamboo can be found while [[fishing]] in [[jungle]] [[biome]]s as a junk [[item]].
=== Chest loot ===
{{LootChestItem|bamboo}}
== Usage ==
When broken, any bamboo [[block]] placed or grown above it is also broken. A bamboo block drops itself as an [[item]] if a [[piston]] pushes it or moves a block into its space. When bamboo is first placed as a shoot it's not solid and can be destroyed by water flowing into it. After growing at least one block taller it becomes solid and can't be destroyed by water. To transform a bamboo shoot into a solid bamboo block place another bamboo on top of it.
Unlike most plants, bamboo cannot be [[Composter#Composting|composted]].<ref>{{bug|MC-142452|||WAI}}</ref>
=== Farming ===
Bamboo can be planted on [[moss block]]s{{only|java|short=1}}, [[grass block]]s, [[dirt]], [[coarse dirt]], [[rooted dirt]], [[gravel]], [[mycelium]], [[podzol]], [[sand]], [[red sand]], [[suspicious sand]], [[suspicious gravel]], [[mud]], bamboo shoot, or on itself. At default random tick speed (3), each plant grows on average every {{convert|4096|ticks|seconds}}. When [[bone meal]] is {{control|used}} on it, it grows by 1–2 [[blocks]]. Bamboo can grow up to 12–16 blocks tall. The top of a bamboo plant requires a [[light]] level of 9 or above to grow.
Because bamboo breaks in almost the same way as [[sugar cane]]s, [[Tutorials/Sugar cane farming|a sugar cane farm]] can be easily adapted to this use. While water is not needed with such a farm, some spacing is recommended if the harvest is done manually as mature stalks are solid.
=== Pandas ===
Bamboo [[item]]s are eaten by [[panda]]s and can be used to speed up the growth of baby pandas. Bamboo can also be used to breed pandas when at least 8 [[block]]s of bamboo are within 5 blocks of the pandas, making the panda the only animal in the game to have extra breeding requirements. At this point, the [[player]] can feed them bamboo and they [[breeding|mate]] to have a baby.
=== Fuel ===
Bamboo can be used as fuel for [[smelting]]. Each bamboo item smelts 0.25 [[item]]s. Crafting two bamboo into a [[stick]] and using that as fuel is equivalent, smelting 0.5 items.
Bamboo can be crafted into other items to increase its fuel efficiency.
* By crafting 9 bamboo into 2 [[bamboo planks]], 3 items can be smelted instead of 2.25, a 33.3% increase in efficiency.
** {{IN|bedrock}}, the fuel efficiency can be further doubled by crafting the bamboo planks into twice the amount of [[slab]]s.<ref>{{bug|MCPE-94368||Wooden slabs last for the same amount of time as planks in a furnace}}</ref>
* {{IN|java}}, by crafting 14 bamboo into 3 [[ladder]]s, 4.5 items can be smelted instead of 3.5, a 28.6% increase in efficiency.
=== Flower pots ===
Bamboo can be placed in a [[flower pot]], where it retains the design it has in its item form.
=== Crafting ingredient ===
{{crafting usage}}
== Appearance ==
[[File:Bamboo stages.png|thumb|The different stages of bamboo growth.]]
The appearance of bamboo changes as it grows. When first placed, it takes the form of a small shoot, which has no [[hitbox]]. When it grows one [[block]] taller it grows to 2 pixels in length and width and the top block has leaves coming off it. At 3 blocks, the top 2 blocks have leaves and at 4 blocks the bamboo expands to 3×3 pixels. At 5 blocks tall, the top 3 blocks have leaves on them. As the bamboo grows, the leaves move up and stay at the top 3 blocks. Destroying a block of bamboo does not change the appearance of the blocks below it. Bamboo is oriented at a random position in the block that it is in.
== Sounds ==
=== Bamboo ===
{{Sound table/Block/Bamboo}}
=== Bamboo Shoot ===
{{Sound table/Block/Bamboo shoot}}
== Data values ==
=== ID ===
{{edition|java}}:
{{ID table
|edition=java
|showblocktags=y
|showforms=y
|generatetranslationkeys=y
|displayname=Bamboo
|spritetype=block
|nameid=bamboo
|blocktags=bamboo_plantable_on}}
{{ID table
|displayname=Bamboo Shoot
|spritetype=block
|nameid=bamboo_sapling
|blocktags=bamboo_plantable_on
|form=block
|foot=1}}
{{edition|bedrock}}:
{{ID table
|edition=bedrock
|shownumericids=y
|showforms=y
|generatetranslationkeys=y
|displayname=Bamboo
|spritetype=block
|nameid=bamboo
|id=418}}
{{ID table
|displayname=Bamboo Sapling
|spritetype=block
|nameid=bamboo_sapling
|id=419
|form=block
|translationkey=-
|foot=1}}
=== Block states ===
{{see also|Block states}}
{{/BS}}
== Achievements ==
{{load achievements|Zoologist}}
== History ==
{{History||September 29, 2018|link={{tweet|minecraft|1046096508570009602}}|Bamboo is announced at [[MINECON Earth 2018]].}}
{{History|java}}
{{History||1.14|snap=18w43a|[[File:Leafless Bamboo JE1 BE2.png|32px]] [[File:Small Leaves Bamboo JE1 BE2.png|32px]] [[File:Big Leaves Bamboo JE1 BE2.png|32px]] [[File:Leafless Old Bamboo JE1 BE2.png|32px]] [[File:Small Leaves Old Bamboo JE1 BE2.png|32px]] [[File:Big Leaves Old Bamboo JE1 BE2.png|32px]] [[File:Bamboo Shoot JE1 BE1.png|32px]] Added bamboo.
|[[File:Bamboo (item) JE1 BE1.png|32px]] Bamboo as an [[item]] can be [[drops|dropped]] by bamboo and planted to grow bamboo.
|Added [[bamboo jungle]]s, where bamboo naturally generates.}}
{{History||1.16|snap=20w06a|"Bamboo Sapling" has been renamed to "Bamboo Shoot".}}
{{History|||snap=20w13a|Bamboo has been moved from the Miscellaneous tab to the Decoration Blocks tab in the [[Creative inventory]].<ref name="misc decoration">https://bugs.mojang.com/browse/MC-174434</ref>}}
{{History||1.17|snap=21w13a|Bamboo can now be planted on rooted dirt.}}
{{History|||snap=21w16a|Bamboo can now be planted on moss blocks.}}
{{History||1.18|snap=21w39a|Bamboo no longer generates underground.<ref>{{bug|MC-145376}}</ref><ref>{{bug|MC-214894}}</ref>}}
{{History||1.19|snap=22w15a|Bamboo can now be planted on mud.}}
{{History||1.20<br>(Experimental)|link=1.19.3|snap=22w42a|Bamboo can now be used to craft [[bamboo planks]].}}
{{History|||snap=22w45a|Bamboo can no longer be used to craft bamboo planks.|Bamboo can now be used to craft a [[block of bamboo]].}}
{{History||1.20<br>(Experimental)|link=1.19.4|snap=23w07a|Bamboo can now be planted on [[suspicious sand]].}}
{{History||1.20|snap=23w14a|Bamboo can now be planted on [[suspicious gravel]].}}
{{History|bedrock}}
{{History||1.8.0|snap=beta 1.8.0.8|[[File:Leafless Bamboo BE1.png|32px]] [[File:Small Leaves Bamboo BE1.png|32px]] [[File:Big Leaves Bamboo BE1.png|32px]] [[File:Leafless Old Bamboo BE1.png|32px]] [[File:Small Leaves Old Bamboo BE1.png|32px]] [[File:Big Leaves Old Bamboo BE1.png|32px]] [[File:Bamboo Shoot JE1 BE1.png|32px]] Added bamboo.
|[[File:Bamboo (item) JE1 BE1.png|32px]] Bamboo as an [[item]] can be [[drops|dropped]] by bamboo and planted to grow bamboo.}}
{{History||1.9.0|snap=beta 1.9.0.0|Bamboo can now generate in [[jungle]] [[biome]]s in single shoots.
|Added [[bamboo jungle]]s, where bamboo naturally generates.}}
{{History||1.12.0|snap=beta 1.12.0.3|[[File:Leafless Bamboo JE1 BE2.png|32px]] [[File:Small Leaves Bamboo JE1 BE2.png|32px]] [[File:Big Leaves Bamboo JE1 BE2.png|32px]] [[File:Leafless Old Bamboo JE1 BE2.png|32px]] [[File:Small Leaves Old Bamboo JE1 BE2.png|32px]] [[File:Big Leaves Old Bamboo JE1 BE2.png|32px]] The bamboo texture brightness has been updated to match {{el|je}}.<ref>{{bug|MCPE-42635}}</ref>}}
{{History||1.17.30|snap=beta 1.17.20.20|Swords now break bamboo instantly to match ''Java Edition''.<ref>{{bug|MCPE-64013}}</ref>}}
{{History||1.20.0|link=Bedrock Edition 1.20.0|snap=beta 1.19.50.21|Bamboo can now be used to craft [[bamboo planks]].}}
{{History|||snap=beta 1.19.60.20|Bamboo can no longer be used to craft bamboo planks.|Bamboo can now be used to craft a [[block of bamboo]].}}
{{History|console}}
{{History||xbox=none|xbone=none|ps=1.83|wiiu=none|switch=none|[[File:Leafless Bamboo JE1 BE2.png|32px]] [[File:Small Leaves Bamboo JE1 BE2.png|32px]] [[File:Big Leaves Bamboo JE1 BE2.png|32px]] [[File:Leafless Old Bamboo JE1 BE2.png|32px]] [[File:Small Leaves Old Bamboo JE1 BE2.png|32px]] [[File:Big Leaves Old Bamboo JE1 BE2.png|32px]] [[File:Bamboo Shoot JE1 BE1.png|32px]] Added bamboo.
|[[File:Bamboo (item) JE1 BE1.png|32px]] Bamboo as an [[item]] can be [[drops|dropped]] by bamboo and planted to grow bamboo.}}
{{History|foot}}
=== Bamboo shoot "item" ===
{{:Technical blocks/Bamboo Shoot}}
== Issues ==
{{Issue list}}
== Trivia ==
* Because bamboo grows quickly (on average 1 growth per 200 seconds), just 500 plants in an automatic farm produce more [[item]]s than a [[hopper]] can collect (2.5 items per second). A single hopper can move only enough items to keep 6.25 [[furnace]]s running.
* Bamboo is the fastest-growing plant in ''[[Minecraft]]'', which reflects its status as the fastest-growing plant known in real life.
* While bamboo cannot be composted in ''Minecraft'', it can be composted in real life.
== Gallery ==
<gallery>
File:PandaMinecon.png|The first image featuring bamboo, from [[MINECON Earth 2018]].
File:PandasEatingMinecon.jpg|A group of [[Panda|pandas]] eating bamboo, shown at [[MINECON Earth 2018]].
File:Growing bamboo BE.png|Planted bamboo growing.
File:Bamboo in tree.png|A bamboo shoot growing through a [[tree]].
File:Bamboo Jungle.png|Bamboo seen in a [[jungle]] [[biome]] variant.
File:Bamboo Jungle in Amplified world.png|Bamboo Jungle in an [[Amplified]] world in 1.19-rc2.
File:Naturalbamboo.png|Multiple naturally generated bamboo stems growing by a river.
File:Tall Bamboo.png|Grown Bamboo with three parts
File:Zuri Chopping Bamboo Pixel Art.png|[[Zuri]] chopping down bamboo for a baby panda.
File:Bamboo Wallpaper.png|Smartphone wallpaper of the aforementioned artwork, showing more of the treetops and bamboo.
File:Panda Packaging.jpg|Packing for the ''Diamond Level Panda'', modeled after bamboo.
</gallery>
==References==
{{Reflist}}
{{Blocks|vegetation}}
{{Items}}
[[Category:Plants]]
[[Category:Food]]
[[Category:Natural blocks]]
[[Category:Non-solid blocks]]
[[Category:Flammable blocks]]
[[cs:Bambus]]
[[de:Bambus]]
[[es:Bambú]]
[[fr:Bambou]]
[[it:Bambù]]
[[ja:竹]]
[[ko:대나무]]
[[pl:Bambus]]
[[pt:Bambu]]
[[ru:Бамбук]]
[[th:ไม้ไผ่]]
[[zh:竹子]]</li><li>[[Dupe Hack|Dupe Hack]]<br/>{{for|the method to duplicate items and blocks|Tutorials/Block and item duplication}}
{{stub}}
{{Joke feature}}
{{exclusive|java}}{{item
| image = Missing Texture.png
| rarity=Common
| stackable=No
|title=minecraft:dupe_hack|renewable=Yes}}
'''minecraft:dupe_hack''' is a joke item from [[Java Edition 23w13a_or_b]].
==Obtaining==
Once the <code>dupe_hack_occurrence_chance</code> vote is approved the '''dupe hack''' item has a random chance of dropping whenever an entity with chests is killed by a player, e.g. when destroying a [[Minecart with Chest|minecart with chest]] with a [[sword]].
It doesn't appear in the [[creative]] menu, not even when the [[Options#Controls|option]] "Operator Items Tab" is enabled, but can be given to the player with [[Commands/give|<code>/give</code>]] and other commands.
==Usage==
The dupe hack item can be used to create a limited amount of duplicate items by placing it on a [[crafting table]] with any other item. It has a random chance of breaking, controlled by the <code>dupe_hack_break_chance</code> vote. This limitation can be mostly bypassed by putting the items in an [[Ender Chest|ender chest]] first and duplicating the chest.
When using the Dupe Hack, it has a random chance of breaking, which is often decided by votes.
===Crafting ingredient===
{{Crafting
|Any Item
|Dupe Hack
|Output=Any Item, 2
|showdescription=1
|description=The dupe hack item remains in the crafting grid after duplicating an item.
|foot=1
}}
==Data values==
===ID===
{{edition|java}}:{{ID table
|edition=java
|showforms=y
|generatetranslationkeys=y
|displayname=minecraft:dupe_hack
|spritetype=item
|nameid=dupe_hack
|form=item|foot=1|spritename=missingno}}
==History==
{{History|java}}
{{History||23w13a_or_b|[[File:Missing Texture JE4.png|32px]] Added minecraft:dupe_hack.}}
{{History|foot}}
{{items}}
{{Jokes}}
<references />
[[Category:Joke items]]
[[ja:Dupe Hack]]
[[pt:Dupe Hack]]</li></ul> | 17w13a | A tab for learned recipes is now usable in the crafting table GUI. The player is able to automatically fill in the desired recipe into the crafting table by clicking on the item. | |||
| The achievement for crafting a crafting table was removed and was not included with the new advancements system. | |||||
| Closing the crafting interface will now return the items from the crafting grid to the inventory, if space allows. | |||||
| July 22, 2017 | Jasper Boerstra tweets an image of new crafting table, wood planks, and wood textures. | ||||
1.13{{Extension DPL}}<ul><li>[[Gold Ingot|Gold Ingot]]<br/>{{About|the item|the ore|Gold Ore|the mineral block|Block of Gold|the nugget|Gold Nugget}}
{{Item
| image = Gold Ingot.png
| renewable = Yes
| stackable = Yes (64)
}}
A '''gold ingot''' is a [[metal]] ingot used to craft various [[item]]s, and also used as currency for [[bartering]] with [[piglin]]s.
== Obtaining ==
Gold ingots are mainly obtained by smelting [[raw gold]], [[gold ore]] and [[nether gold ore]], or just mining nether gold ore, dropping gold nuggets. Gold generates more frequently in [[badlands]] biomes.
=== Crafting ===
{{Crafting
|head=1
|showname=0
|Block of Gold
|Output=Gold Ingot,9
|type=Material
}}
{{Crafting
|A1= Gold Nugget
|B1= Gold Nugget
|C1= Gold Nugget
|A2= Gold Nugget
|B2= Gold Nugget
|C2= Gold Nugget
|A3= Gold Nugget
|B3= Gold Nugget
|C3= Gold Nugget
|Output= Gold Ingot
|type= Material
|foot=1
}}
=== Smelting ===
{{see also|Gold Ore#Natural generation}}
{{Smelting
|head=1
|Gold Ore;Nether Gold Ore;Deepslate Gold Ore
|Gold Ingot
|1
}}
{{Smelting
|foot=1
|Raw Gold
|Gold Ingot
|1
}}
=== Mob loot ===
[[Zombified piglin]]s have a 2.5% ({{frac|1|40}}) chance of dropping a gold ingot if killed by a player or tamed wolf. The chance is increased by 1% per level of [[Looting]], for a maximum of 5.5% with Looting III.
=== Chest loot ===
{{LootChestItem|gold-ingot}}
== Usage ==
=== Crafting ingredient===
As a material for weapons, tools, and armor, gold is not a straight upgrade from iron (except in the case of [[Horse Armor|horse armor]]). Gold has a higher mining speed and enchantability than any other material, but attack power and durability is less.
{{crafting usage}}
=== Trading ===
Apprentice-level cleric [[Villager|villagers]] buy 3 gold ingots for an [[emerald]] as part of their trade.
=== Repairing ===
Golden [[helmet]]s, [[chestplate]]s, [[leggings]], [[boots]], [[sword]]s, [[pickaxe]]s, [[axe]]s, [[hoe]]s and [[shovel]]s can be [[item repair|repaired]] with gold ingots in an [[anvil]].
=== Bartering ===
{{main|Bartering}}
[[Piglin]]s throw the player [[Bartering#Mechanics|item(s)]] if the player throws or {{ctrl|uses}} a gold ingot on them.
=== Beacons ===
Gold ingots can be used to select powers from a [[beacon]]. The player must select one of the available powers, and then insert an ingot in the item slot.
A gold ingot can be substituted for an [[iron ingot]] or [[netherite ingot]], an [[emerald]], or a [[diamond]].
=== Smithing ingredient ===
{{Smithing
|head=1
|ingredients=Any Armor Trim +<br/>Any Armor Piece + <br/>Gold Ingot
|Any Armor Trim Smithing Template
|Netherite Chestplate
|Gold Ingot
|Gold Trim Netherite Chestplate
|showdescription=1
|description = All armor types can be used in this recipe,<br/>a netherite chestplate is shown as an example.<br/>
|tail=1
}}
;Trim color palette
The following color palettes are shown on the designs on trimmed armor:
*{{TrimPalette|gold ingot}}
*{{TrimPalette|gold ingot|darker=1}} (a darker color palette is used when a golden armor piece is trimmed using a gold ingot).
== Achievements ==
{{load achievements|Oooh, shiny!}}
== Advancements ==
{{load advancements|Oh Shiny}}
== Data values ==
=== ID ===
{{edition|java}}:
{{ID table
|edition=java
|showitemtags=y
|showforms=y
|generatetranslationkeys=y
|displayname=Gold Ingot
|spritetype=item
|nameid=gold_ingot
|itemtags=beacon_payment_items, piglin_loved
|form=item
|foot=1}}
{{edition|bedrock}}:
{{ID table
|edition=bedrock
|shownumericids=y
|showforms=y
|notshowbeitemforms=y
|generatetranslationkeys=y
|displayname=Gold Ingot
|spritetype=item
|nameid=gold_ingot
|id=306
|form=item
|foot=1}}
== History ==
{{History|java indev}}
{{History||0.31|snap=20100128|[[File:Gold Ingot JE1.png|32px]] Added gold ingots.}}
{{History|||snap=20100129|[[File:Gold Ingot JE2 BE1.png|32px]] The texture of gold ingots has been changed.
|Gold ingots can be [[smelting|smelted]] from [[gold ore]] with [[flint and steel]] and [[drops|drop]] 3-5 gold ingots.
|Gold ingots can be used to craft [[gold block]]s.
|[[Gold block]]s now require 9 gold ingots (3×3) instead of 4 (2×2) to be [[crafting|crafted]], making them much more expensive.}}
{{History|||snap=20100130|Gold ingots can now be used to craft gold [[sword]]s, [[shovel]]s, [[pickaxe]]s and [[axe]]s.}}
{{History||20100206|Gold ingots are now used to [[crafting|craft]] gold [[hoe]]s.}}
{{History||?|Smelting gold ore now drops 1 gold ingot (down from 3-5).}}
{{History||20100218|Gold ingots are now used to craft gold [[helmet]]s, [[chestplate]]s, [[leggings]] and [[boots]].}}
{{history|java alpha}}
{{History||v1.2.0|snap=<nowiki>?|slink=:Category:Information needed requiring unarchived version|Gold ingots are now used to craft [[clock]]s.}}
{{History|java beta}}
{{History||1.5|Gold ingots are now used to craft [[powered rail]]s.}}
{{History||1.8|snap=Pre-release|Gold ingots can now be found in the new [[stronghold]] storerooms and [[mineshaft]] [[chest]]s.}}
{{History|java}}
{{History||1.0.0|snap=Beta 1.9 Prerelease|Gold ingots can be crafted from [[gold nuggets]], which are dropped by [[Zombified Piglin|zombie pigmen]], making gold a [[renewable resource]].}}
{{History|||snap=Beta 1.9 Prerelease 3|Gold ingots can now be found in the new [[stronghold]] altar [[chest]]s.}}
{{History|||snap=Beta 1.9 Prerelease 4|Gold ingots are now used to craft [[gold nugget]]s.}}
{{History||1.1|snap=12w01a|Gold ingots can now be found in [[village]] blacksmith chests.}}
{{History||1.2.1|snap=12w06a|Zombie pigmen now rarely drop gold ingots.}}
{{History||1.3.1|snap=12w21a|Added [[desert temple]]s, with a hidden [[chest]] room and loot containing gold ingots.
|All types of [[villager]]s now [[trading|buy]] 8–9 gold ingots for 1 [[emerald]], as a fallback trade in case no trades were generated for that villager.}}
{{History|||snap=12w22a|Added [[jungle temple]]s, which contain loot chests with gold ingots.}}
{{History||1.5|snap=13w01a|Gold ingots are now used to craft light [[weighted pressure plate]]s.}}
{{History||1.6.1|snap=13w16a|Gold ingot is now used to craft golden [[horse armor]].}}
{{History|||snap=13w18a|Gold ingot is no longer used to craft golden [[horse armor]].|Gold ingots are now found in [[nether fortress]] [[chest]]s.}}
{{History|||snap=13w23a|Gold ingots are now used to craft normal [[golden apple]]s.}}
{{History||1.8|snap=14w02a|[[Trading]] has been changed: only cleric [[villager]]s now [[trading|buy]] 8–10 gold ingots for 1 [[emerald]], as a legitimate trade.}}
{{History||1.9|snap=15w31a|Gold ingots can now be found in [[end city]] [[chest]]s.}}
{{History|||snap=15w43a|The average yield of gold ingots in [[nether fortress]] chest has been decreased.}}
{{History|||snap=15w44a|The average yield of gold ingots in [[mineshaft]] and [[desert temple]] chests has been decreased.
|Gold ingots have been added to [[dungeon]] [[chest]]s.}}
{{History||1.11|snap=16w39a|Gold ingots are now found in the new [[woodland mansion]] chests.}}
{{History||1.13|snap=17w47a|Prior to [[1.13/Flattening|''The Flattening'']], this [[item]]'s numeral ID was 266.}}
{{History|||snap=18w10a|Gold ingots now generate in [[buried treasure]] chests.}}
{{History|||snap=18w11a|Gold ingots can now be obtained as a [[drops|drop]] from [[drowned]].
|Gold ingots now generate in [[shipwreck]] chests.}}
{{History||1.14|snap=18w43a|[[File:Gold Ingot JE3.png|32px]] The texture of gold ingots has been changed.}}
{{History|||snap=18w44a|[[File:Gold Ingot JE4 BE2.png|32px]] The texture of gold ingots has been changed, once again.}}
{{History|||snap=18w50a|Gold ingots now generate in chests in [[village]] toolsmith houses and temples.}}
{{History||1.16|snap=20w06a|Gold ingots are now used to craft [[netherite ingot]]s.}}
{{History|||snap=20w07a|Gold ingots can now be used to [[bartering|barter]] with [[piglin]]s.}}
{{History|||snap=20w11a|Gold ingots can now be [[smelting|smelted]] from [[nether gold ore]].}}
{{History|||snap=20w16a|Gold ingots now generate in [[bastion remnants]] and [[ruined portal]] chests.}}
{{History||1.16.2|snap=20w30a|The average yield of gold ingots from bastion remnant chests has been slightly increased.}}
{{History||1.17|snap=21w05a|Drowneds no longer drop gold ingots, and instead drop [[copper ingot]]s.}}
{{History|||snap=21w08a|Gold ingots can now be smelted from [[deepslate gold ore]].}}
{{History|||snap=21w14a|Gold ingots can now be smelted from [[raw gold]].}}
{{History||1.20<br>(Experimental)|link=1.19.4|snap=23w04a|Gold ingots can now be used as an armor trim material.}}
{{History|||snap=23w05a|Gold ingots can now be trimmed with gold [[armor]].}}
{{History|pocket alpha}}
{{History||v0.2.0|[[File:Gold Ingot JE2 BE1.png|32px]] Added gold ingots. They are currently unobtainable and serve no purpose.}}
{{History||v0.3.2|Gold ingots are now obtainable by [[smelting]] gold ore in a [[furnace]].
|Gold ingots can be used to craft [[blocks of gold]], gold [[pickaxe]]s, [[axe]]s, [[sword]]s and [[shovel]]s.}}
{{History||v0.4.0|Gold ingots are now used to [[crafting|craft]] gold [[hoe]]s.}}
{{History||v0.6.0|Gold ingots are now used to craft gold [[armor]].}}
{{History||v0.8.0|snap=build 1|Gold ingots are now used to craft [[clock]]s.}}
{{History|||snap=build 2|Gold ingots are now used to craft [[powered rail]]s.}}
{{History||v0.9.0|snap=build 1|Gold ingots can now be found in blacksmith [[chest]]s in [[village]]s, [[stronghold]] altar chests and [[dungeon]] chests.}}
{{History||v0.12.1|snap=build 1|Gold ingots are now used to craft [[gold nugget]]s and [[golden apple]]s.
|Gold ingots are now found in [[nether fortress]] chests.}}
{{History||v0.13.0|snap=build 1|Gold ingots are now used to [[crafting|craft]] light [[weighted pressure plate]]s.
|Gold ingots now generate inside of hidden chest rooms in [[desert temple]]s.}}
{{History||v0.14.0|snap=build 1|Gold ingots are now found in [[minecart with chest]]s that generate in [[mineshaft]]s.}}
{{History||v0.15.0|snap=build 1|Gold ingots can now be found in [[jungle temple]] [[chest]]s.}}
{{History||v0.16.0|snap=build 4|Gold ingots can now be used to power [[beacon]]s.}}
{{History|pocket edition}}
{{History||1.0.0|snap=alpha 0.17.0.1|Gold ingots can now be found in [[end city]] ship chests and [[stronghold]] storerooms.}}
{{History||1.0.4|snap=alpha 1.0.4.0|Added [[trading]], cleric [[villager]]s now [[trading|buy]] 8–10 gold ingots for 1 [[emerald]].}}
{{History||1.1.0|snap=alpha 1.1.0.0|Gold ingots are now found in [[woodland mansion]] [[chest]]s.}}
{{history|bedrock}}
{{History||1.4.0|snap=beta 1.2.13.8|Added [[drowned]], which rarely [[drops|drop]] gold ingots.}}
{{History|||snap=beta 1.2.14.2|Gold ingots can now be found inside [[buried treasure]] [[chest]]s and [[shipwreck]]s.}}
{{History||1.10.0|snap=beta 1.10.0.3|Gold ingots can now be found in [[plains]] [[village]] weaponsmith chests.
|[[File:Gold Ingot JE4 BE2.png|32px]] The texture of gold ingots has been changed.}}
{{History||1.11.0|snap=beta 1.11.0.1|Gold ingots can now be found in [[desert]] village temple [[chest]]s and village toolsmith chests.
|Gold ingots can now be found in [[savanna]], [[taiga]], [[snowy taiga]], [[snowy tundra]] and desert village weaponsmith chests.}}
{{History|||snap=beta 1.11.0.4|Cleric [[villager]]s now [[trading|buy]] 3 gold ingots for one [[emerald]].}}
{{History||1.16.0|snap=beta 1.16.0.51|Gold ingots are now used to craft [[netherite ingot]]s.
|Gold ingots can now be used to [[bartering|barter]] with [[piglin]]s.}}
{{History|||snap=beta 1.16.0.57|Gold ingots can now be [[smelting|smelted]] from [[nether gold ore]].
|Gold ingots now be found in [[ruined portal]] and [[bastion remnants]] chests.}}
{{History||1.16.210|snap=beta 1.16.210.57|Gold ingots can no longer be obtained as a [[drops|drop]] from [[drowned]].}}
{{History||1.17.0|snap=beta 1.16.230.52|Gold ingots can now be smelted from [[deepslate gold ore]].}}
{{History|||snap=beta 1.17.0.50|Gold ingots can now be smelted from [[raw gold]].}}
{{History||1.19.80|snap=beta 1.19.80.21|Gold ingots can now be used as an armor trim material.}}
{{History|console}}
{{History||xbox=TU1|xbone=CU1|ps=1.0|wiiu=Patch 1|switch=1.0.1|[[File:Gold Ingot JE2 BE1.png|32px]] Added gold ingots.}}
{{History||xbox=none|xbone=none|ps=1.90|wiiu=none|switch=none|[[File:Gold Ingot JE4 BE2.png|32px]] The texture of gold ingots has been changed.}}
{{History|new3DS}}
{{History||0.1.0|[[File:Gold Ingot JE2 BE1.png|32px]] Added gold ingots.}}
{{History|foot}}
== Issues ==
{{issue list}}
== Trivia ==
*Gold ingots are the only ingots in the game used alongside another [[item]] to [[crafting|craft]] another type of ingot; in this case, it is used with [[netherite scrap]] to craft a [[netherite ingot]].
== See also ==
*{{BlockLink|Block of Gold}}
*{{ItemSprite|Golden Chestplate}} [[Golden Armor]]
*{{ItemLink|Gold Nugget}}
*{{BlockLink|Gold Ore}}
*[[Ore]]s
{{Items}}
[[cs:Zlatý ingot]]
[[de:Goldbarren]]
[[es:Lingote de oro]]
[[fr:Lingot d'or]]
[[hu:Aranyrúd]]
[[ja:金インゴット]]
[[ko:금괴]]
[[nl:Goudstaaf]]
[[pl:Sztabka złota]]
[[pt:Barra de ouro]]
[[ru:Золотой слиток]]
[[uk:Золотий зливок]]
[[zh:金锭]]
[[Category:Renewable resources]]</li><li>[[Sugar Cane|Sugar Cane]]<br/>{{Block
|image=Sugar Cane.png
|image2=Sugar Cane (item) JE3.png
|extratext = View all [[#Gallery|renders]]
|transparent=Yes
|light=No
|tool=any
|renewable=Yes
|stackable=Yes (64)
|flammable=No
|lavasusceptible=No
}}
'''Sugar cane''' is a block found as 1–4-block-tall. It plants near water in the [[Overworld]]. As an item, it is an important crafting ingredient.
==Obtaining==
Sugar cane can be mined instantly with anything.
When the spot a sugar cane block is placed in becomes unsuitable, such as when the supporting block is removed, the sugar cane block uproots and drops as an item. {{IN|be}}, sugar cane uproots immediately after all adjacent water is removed. {{IN|je}}, sugar cane uproots on the next block update or [[Tick#Random tick|random tick]].
A sugar cane block drops itself as an item if a piston tries to push it (trying to pull it does nothing) or moves a block into its space.
===Natural generation===
[[File:Sugar Canez.png|thumb|250px|Naturally-occurring sugar cane near a river.]]
Sugar cane can generate naturally near [[water]] and [[ice]], as two ({{frac|11|18}} chance), three ({{frac|5|18}} chance), or four ({{frac|2|18}} chance) blocks tall. Rare taller sugar canes can be found if the world generator places two smaller canes on top of each other. It generates in approximately 0.8 sugar cane per chunk seeing as how they only generate near bodies of water.
Sugar canes attempt to generate 10 times in any Overworld biome, which requires water. An extra 10 attempts are made in [[swamp]] biomes, and 50 in [[desert]] biomes, which makes sugar cane twice as frequent in swamps and six times as frequent in desert biomes, making the banks of [[river]]s that cut through deserts lined with sugar canes. Sugar canes do not grow faster in swamps or deserts they only spawn a increased amount.
Sugar cane cannot generate in caves {{in|je}}.<ref>{{bug|MC-214959||Sugar cane generated in cave|Fixed}}</ref>
===Trading===
[[Wandering trader]]s can sell sugar cane for an [[emerald]].
==Usage==
Due to its water-displacing properties, sugar cane can interestingly be used to create underwater paths, allowing [[player]]s to move at normal speed and breathe if it is two blocks in height.{{only|java}}<ref>{{bug|MC-929||Sugar cane can be placed underwater|WAI}}</ref>
Sugar cane takes on a different shade of green depending on the biome in which it is placed.
===Crafting ingredient===
{{crafting usage}}
===Farming===
{{main|Tutorials/Sugar cane farming}}
[[File:Underground Sugar Farm.png|200px|thumb|An underground sugar cane farm.]]
Sugar cane can generate naturally up to any number of blocks tall, but ''grow'' only to a height of three blocks, adding a block of height when the top sugar cane block has received 16 random [[Tick#Block tick|block tick]]s (i.e. on average every 18 minutes on ''Java Edition''<!-- Average 68.27 seconds/tick * 16 ticks/growth = 18.2 minutes --> or 54 minutes on Bedrock Edition, but the actual rate can vary widely).
Sugar cane must be planted on a [[grass block]], [[dirt]], [[coarse dirt]], [[rooted dirt]], [[podzol]], [[mycelium]], [[sand]], [[red sand]], [[suspicious sand]], [[moss block]], or [[mud]] that is directly adjacent to [[water]], [[waterlogged]] block, or [[frosted ice]] (not merely above or diagonal to water), or on top of another sugar cane block. The adjacent water block can be covered with another block, whether [[opacity|opaque or transparent]], and sugar cane can still be placed and grow next to it. Sugar cane grows regardless of light level, even in complete darkness.
[[File:4blockcane.png|thumb|A natural 4-block-high sugar cane plant.]]
{{IN|bedrock}}, [[bone meal]] can be used to instantly grow sugar cane to three blocks. Only one bone meal is consumed. {{IN|java}}, bone meal cannot be used on sugar cane.<ref>{{bug|MC-73963||Can't use bonemeal on cacti or sugar cane|WAI}}</ref>
On average, it takes [[Tutorials/Sugar_cane_farming#Mechanics|18 minutes]] for a single block of sugar cane to grow 3 blocks tall.
=== Composting ===
Placing sugar cane into a [[composter]] has a 50% chance of raising the compost level by 1.
== List of colors ==
{{Missing information|Bedrock Edition colors (see [[Water#Color]]{{verify|it's there?}})}}
=== ''Java Edition'' ===
These values are generated by the biome dyeing algorithm. See [[Color#Biome colors|Biome colors]] for more information.
<div class="mw-collapsible mw-collapsed" style="float: left">
{| class="wikitable sortable" style="text-align:center" data-description="Java edition biome colors"
!Biome !! Category !! Rainfall !! Sugarcane Color !! Temperature Affects !! Render
|-
| {{BiomeLink|Badlands}} || Mesa || No || #90814d || No || [[File:Badlands Sugar Cane.png|32px]]
|-
| {{BiomeLink|Beach}} || Beach || Rain || #91bd59 || || [[File:Plains Sugar Cane.png|32px]]
|-
| {{BiomeLink|Birch Forest}} || Forest || Rain || #88bb67 || || [[File:Birch Forest Sugar Cane.png|32px]]
|-
| {{BiomeLink|Cold Ocean}} || Ocean || Rain || #8eb971 || || [[File:Ocean Sugar Cane.png|32px]]
|-
| {{BiomeLink|Dark Forest}} || Forest || Rain || #507a32 || || [[File:Dark Forest Sugar Cane.png|32px]]
|-
| {{BiomeLink|Deep Cold Ocean}} || Ocean || Rain || #8eb971 || || [[File:Ocean Sugar Cane.png|32px]]
|-
| {{BiomeLink|Deep Frozen Ocean}} || Ocean || Rain || #8eb971 || || [[File:Ocean Sugar Cane.png|32px]]
|-
| {{BiomeLink|Deep Lukewarm Ocean}} || Ocean || Rain || #8eb971 || || [[File:Ocean Sugar Cane.png|32px]]
|-
| {{BiomeLink|Deep Ocean}} || Ocean || Rain || #8eb971 || || [[File:Ocean Sugar Cane.png|32px]]
|-
| {{BiomeLink|Desert}} || Desert || No || #bfb755 || || [[File:Desert Sugar Cane.png|32px]]
|-
| {{BiomeLink|End Barrens}} || The End || No || #8eb971 || || [[File:Ocean Sugar Cane.png|32px]]
|-
| {{BiomeLink|End Highlands}} || The End || No || #8eb971 || || [[File:Ocean Sugar Cane.png|32px]]
|-
| {{BiomeLink|End Midlands}} || The End || No || #8eb971 || || [[File:Ocean Sugar Cane.png|32px]]
|-
| {{BiomeLink|Eroded Badlands}} || Mesa || No || #90814d || No || [[File:Badlands Sugar Cane.png|32px]]
|-
| {{BiomeLink|Flower Forest}} || Forest || Rain || #79c05a || || [[File:Forest Sugar Cane.png|32px]]
|-
| {{BiomeLink|Forest}} || Forest || Rain || #79c05a || || [[File:Forest Sugar Cane.png|32px]]
|-
| {{BiomeLink|Frozen Ocean}} || Ocean || Snow || #80b497 || || [[File:Snowy Plains Sugar Cane.png|32px]]
|-
| {{BiomeLink|Frozen River}} || River || Snow || #80b497 || || [[File:Snowy Plains Sugar Cane.png|32px]]
|-
| {{BiomeLink|Old Growth Spruce Taiga}} || Taiga || Rain || #86b783 || || [[File:Taiga Sugar Cane.png|32px]]
|-
| {{BiomeLink|Old Growth Pine Taiga}} || Taiga || Rain || #86b87f || || [[File:Old Growth Pine Taiga Sugar Cane.png|32px]]
|-
| {{BiomeLink|Ice Spikes}} || Icy || Snow || #80b497 || || [[File:Snowy Plains Sugar Cane.png|32px]]
|-
| {{BiomeLink|Jungle}} || Jungle || Rain || #59c93c || || [[File:Jungle Sugar Cane.png|32px]]
|-
| {{BiomeLink|Sparse Jungle}} || Jungle || Rain || #64c73f || || [[File:Sparse Jungle Sugar Cane.png|32px]]
|-
| {{BiomeLink|Lukewarm Ocean}} || Ocean || Rain || #8eb971 || || [[File:Ocean Sugar Cane.png|32px]]
|-
| {{BiomeLink|Windswept Hills}} || Extreme Hills || Rain || #8ab689 || || [[File:Windswept Hills Sugar Cane.png|32px]]
|-
| {{BiomeLink|Mushroom Fields}} || Mushroom || Rain || #55c93f || || [[File:Mushroom Fields Sugar Cane.png|32px]]
|-
| {{BiomeLink|Nether}} || Nether || No || #bfb755 || || [[File:Desert Sugar Cane.png|32px]]
|-
| {{BiomeLink|Ocean}} || Ocean || Rain || #8eb971 || || [[File:Ocean Sugar Cane.png|32px]]
|-
| {{BiomeLink|Plains}} || Plains || Rain || #91bd59 || || [[File:Plains Sugar Cane.png|32px]]
|-
| {{BiomeLink|River}} || River || Rain || #8eb971 || || [[File:Ocean Sugar Cane.png|32px]]
|-
| {{BiomeLink|Savanna}} || Savanna || No || #bfb755 || || [[File:Desert Sugar Cane.png|32px]]
|-
| {{BiomeLink|Savanna Plateau}} || Savanna || No || #bfb755 || || [[File:Desert Sugar Cane.png|32px]]
|-
| {{BiomeLink|Windswept Savanna}} || Savanna || No || #bfb755 || || [[File:Desert Sugar Cane.png|32px]]
|-
| {{BiomeLink|Small End Islands}} || The End || No || #8eb971 || || [[File:Ocean Sugar Cane.png|32px]]
|-
| {{BiomeLink|Snowy Beach}} || Beach || Snow || #83b593 || || [[File:Snowy Beach Sugar Cane.png|32px]]
|-
| {{BiomeLink|Snowy Taiga}} || Taiga || Snow || #80b497 || || [[File:Snowy Plains Sugar Cane.png|32px]]
|-
| {{BiomeLink|Snowy Plains}} || Icy || Snow || #80b497 || || [[File:Snowy Plains Sugar Cane.png|32px]]
|-
| {{BiomeLink|Stony Shore}} || None || Rain || #8ab689 || || [[File:Windswept Hills Sugar Cane.png|32px]]
|-
| {{BiomeLink|Sunflower Plains}} || Plains || Rain || #91bd59 || || [[File:Plains Sugar Cane.png|32px]]
|-
| {{BiomeLink|Swamp}} || Swamp || Rain || #6A7039 || If temperature below -0.1, used #4C763C. || [[File:Swamp Sugar Cane.png|32px]] / [[File:Swamp Sugar Cane (Cold).png|32px]]
|-
| {{BiomeLink|Taiga}} || Taiga || Rain || #86b783 || || [[File:Taiga Sugar Cane.png|32px]]
|-
| {{BiomeLink|Old Growth Birch Forest}} || Forest || Rain || #88bb67 || || [[File:Birch Forest Sugar Cane.png|32px]]
|-
| {{BiomeLink|The End}} || The End || No || #8eb971 || || [[File:Ocean Sugar Cane.png|32px]]
|-
| {{BiomeLink|The Void}} || None || No || #8eb971 || || [[File:Ocean Sugar Cane.png|32px]]
|-
| {{BiomeLink|Warm Ocean}} || Ocean || Rain || #8eb971 || || [[File:Ocean Sugar Cane.png|32px]]
|-
| {{BiomeLink|Wooded Badlands}} || Mesa || No || #90814d || No || [[File:Badlands Sugar Cane.png|32px]]
|-
| {{BiomeLink|Windswept Forest}} || Extreme Hills || Rain || #8ab689 || || [[File:Windswept Hills Sugar Cane.png|32px]]
|}
</div>
{{clear}}
=== Bedrock Edition ===
{{empty section}}
== Sounds ==
{{Sound table/Block/Grass}}
== Data values ==
=== ID ===
{{edition|java}}:
{{ID table
|edition=java
|showforms=y
|generatetranslationkeys=y
|displayname=Sugar Cane
|spritetype=block
|nameid=sugar_cane
|foot=1}}
{{edition|bedrock}}:
{{ID table
|edition=bedrock
|firstcolumnname=Sugar Cane
|shownumericids=y
|showforms=y
|showaliasids=y
|generatetranslationkeys=y
|displayname=Block
|spritename=sugar-cane
|spritetype=block
|nameid=reeds
|id=83
|form=block
|itemform=item.reeds}}
{{ID table
|displayname=Item
|spritename=sugar-cane
|spritetype=item
|nameid=sugar_cane
|id=385
|form=item
|aliasid=reeds
|translationkey=item.reeds.name
|foot=1}}
=== Block states ===
{{see also|Block states}}
{{/BS}}
== Video ==
{{Video note|This video was made before sugar cane had a different shade of green depending on the biome.|minor}}
<div style="text-align:center">{{yt|zlOnwn3PH5o}}</div>
== History ==
{{more images|Appearance when affected by {{bug|MC-48831}}}}
{{History|java alpha}}
{{History||v1.0.11|[[File:Sugar Cane JE1 BE1.png|32px]] [[File:Sugar Cane (item) JE1 BE1.png|32px]] Added reeds in the [[Seecret Updates|Seecret Friday Update 6]].
|Reeds are informally referred to as "bamboo" or "papyrus" by many [[player]]s.
|Since reeds can be washed away with [[water]] currents or instantly destroyed by removing the water adjacent to them, automated reed farms can be made.
|Reeds can be used to craft [[paper]].}}
{{History|java beta}}
{{History||1.2|[[Notch]] has [[wikipedia:Retroactive continuity|retconned]] reeds into sugar cane so that it can now be [[crafting|crafted]] into [[sugar]], included in the recipe for the [[cake]]s.}}
{{History||1.6|snap=Test Build 3|[[Arrow]]s no longer stick to sugar cane, and instead, they pass through. However, [[snowball]]s still come into contact with any sugar cane blocks, as if they are solid.}}
{{History||1.8|snap=Pre-release|Sugar cane can now grow and be placed onto [[sand]] as long as they are adjacent to [[water]]. This update allows sugar canes to appear next to [[water]] ponds in [[desert]] biomes.
|Sugar cane is now available in the [[creative]] [[inventory]] in both block and item forms.}}
{{History|java}}
{{History||1.0.0|snap=?|The sugar cane block has been removed from the creative inventory.}}
{{History||1.7.2|snap=13w36a|[[File:Sugar Cane JE2 BE2.png|32px]] Sugar cane is now [[tint]]ed depending on the [[biome]] it's in.
|The item texture remained unchanged, however, and still used the color palette from Alpha to 1.6.4.<ref name="Bug">{{bug|MC-216227}}</ref>}}
{{History||1.9|snap=15w43a|Sugar cane no longer breaks if its adjacent [[water]] is turned to [[frosted ice]].}}
{{History||1.13|snap=17w47a|The ID of sugar cane has now been changed from <code>reeds</code> to <code>sugar_cane</code>.
|"Sugar Canes" have now been renamed to "Sugar Cane".
|Prior to [[1.13/Flattening|''The Flattening'']], this [[block]]'s numeral ID was 83, and the [[item]]'s 338.}}
{{History||1.14|snap=18w43a|[[File:Sugar Cane (item) JE2 BE2.png|32px]] The texture of the sugar cane item has been changed.}}
{{History|||snap=19w03a|Placing sugar cane into a [[composter]] has a 20% chance of raising the compost level by 1.}}
{{History|||snap=19w05a|Sugar cane now has a 50% chance of increasing the compost level in a composter by 1.
|Added [[wandering trader]]s, which sell sugar cane.}}
{{History||1.16|snap=20w13a|Sugar cane has been moved from the Miscellaneous tab to the Decoration Blocks tab in the [[Creative inventory]].<ref name="misc decoration">https://bugs.mojang.com/browse/MC-174434</ref>}}
{{History||1.17|snap=21w11a|[[File:Sugar Cane (item) JE3.png|32px]] The texture of the sugar cane item has been changed, so that it actually matches the color it uses when placed again.<ref name="Bug"/>}}
{{History|||snap=Pre-release 1|Sugar cane now generates in mushroom fields.<ref>{{bug|MC-226683}}</ref>}}
{{History||1.19|snap=22w15a|Sugar cane can now be planted on mud.}}
{{History||1.20|snap=23w14a|Sugar cane can now be planted on [[suspicious sand]].}}
{{History|pocket alpha}}
{{History||Pre-release|[[File:Sugar Cane JE1 BE1.png|32px]] [[File:Sugar Cane (item) JE1 BE1.png|32px]] Added sugar cane.}}
{{History||v0.2.0|Despite being visible in the inventory, sugar cane does not drop anything when mined, making it unobtainable in Survival mode.}}
{{History||v0.2.1|Survival players now start with an infinite stack of sugar cane in the inventory.}}
{{History||v0.3.0|Sugar cane now drops its item form when mined.
|Survival players no longer start with an infinite stack of sugar cane in the inventory.}}
{{History||v0.5.0|Sugar cane can now be grown on [[sand]].
|Sugar cane can now be obtained after activating the [[nether reactor]].}}
{{History||v0.8.0|snap=build 5|[[Bone meal]] can now grow sugar cane to maximum height.}}
{{History||v0.9.0|snap=build 1|[[File:Sugar Cane JE2 BE2.png|32px]] The color of sugar cane now changes depending on the [[biome]] they are in.
|Using bone meal on sugar cane is no longer able to break blocks above it.}}
{{History||v0.12.1|snap=build 1|Sugar cane is no longer available from the [[nether reactor]].}}
{{History|pocket}}
{{History||1.0.0|snap=alpha 0.17.0.1|[[File:Sugar Cane JE1 BE1.png|32px]] Due to a bug, sugar canes no longer change color depending on the [[biome]].}}
{{History|bedrock}}
{{History||1.2.13|snap=beta 1.2.13.5|[[File:Sugar Cane JE2 BE2.png|32px]] The color of sugar canes now changes depending on the [[biome]], once again.}}
{{History||1.10.0|snap=beta 1.10.0.3|[[File:Sugar Cane (item) JE2 BE2.png|32px]] The texture of the sugar cane [[item]] has been changed.
|Sugar cane can now be [[trading|bought]] from [[wandering trader]]s.}}
{{History||1.11.0|snap=beta 1.11.0.1|Sugar canes can now be used to fill up [[composter]]s.}}
{{History||1.17.0|snap=beta 1.17.0.50|[[File:Sugar Cane (item) JE3.png|32px]] The texture of the sugar cane item has been changed, so that it actually matches the color it uses when placed again.}}
{{History|console}}
{{History||xbox=TU1|xbone=CU1|ps=1.0|wiiu=Patch 1|switch=1.0.1|[[File:Sugar Cane JE1 BE1.png|32px]] [[File:Sugar Cane (item) JE1 BE1.png|32px]] Added sugar canes.
|Sugar canes are solid, making it useful for growable walls. Unlike on Java Edition, they were never renamed to Sugar Cane.}}
{{History||xbox=TU2|Sugar canes are no longer solid, and arrows pass through them.}}
{{History||xbox=TU31|xbone=CU19|ps=1.22|wiiu=Patch 3|[[File:Sugar Cane JE2 BE2.png|32px]] The color of sugar cane now changes depending on the [[biome]] they're in.}}
{{History||xbox=TU60|xbone=CU51|ps=1.64|wiiu=Patch 30|switch=1.0.11|Sugar cane can now be grown with [[bonemeal]].}}
{{History||xbox=none|xbone=none|ps=1.90|wiiu=none|switch=none|[[File:Sugar Cane (item) JE2 BE2.png|32px]] The texture of the sugar cane [[item]] has been changed.}}
{{History||xbox=none|xbone=none|ps=1.91|wiiu=none|switch=none|Sugar cane can now be [[trading|bought]] from [[wandering trader]]s.
|Sugar canes can now be used to fill up [[composter]]s.}}
{{History|New Nintendo 3DS Edition}}
{{History||0.1.0|[[File:Sugar Cane JE1 BE1.png|32px]] [[File:Sugar Cane (item) JE1 BE1.png|32px]] Added sugar cane.}}
{{History|foot}}
=== Sugar cane "item" ===
{{:Technical blocks/Sugar Cane}}
== Issues ==
{{Issue list}}
== Trivia ==
*When a sugar cane is broken at the second level, the time resets (for example, if a two-block high sugar cane is broken, but is just about to grow to the third stage, it would reset that time).
*By placing more sugar canes on top of a sugar cane plant, it is possible to create tall sugar canes (up to y=319, the maximum height for building), although they do not naturally grow this high.
*Before sugar cane received an official name, they were sometimes referred to as [[bamboo]], a block added 9 years later. Other names were "reeds" and "papyrus".
== Gallery ==
=== Renders ===
<gallery>
Plains Sugar Cane.png|Plains
Taiga Sugar Cane.png|Taiga
Snowy Plains Sugar Cane.png|Snowy plains
Jungle Sugar Cane.png|Jungle
Desert Sugar Cane.png|Desert
Swamp Sugar Cane (Cold).png|Swamp (cold)
Swamp Sugar Cane.png|Swamp
Badlands Sugar Cane.png|Badlands
</gallery>
=== In-game ===
<gallery>
Huge Sugar Farm.png|A large sugar cane farm using 2×2 [[water]] holes.
Sugar Cane Waterfall.png|Water flowing over sugar cane.
UnderwaterSugarCane.png|Naturally generated sugar cane found underwater.
Sugar and Cactus.png|A [[cactus]] and sugar cane stalk generated next to each other.
SugarCaneRavine.png|Sugar cane found in the [[ravine]].
Reeds in Winter mode.png|Reeds generated in the [[winter mode]].
Sugar Cane Naturally Growing.png|Sugar cane growing between [[biome]]s.
Mesa Sugar Cane.jpg|Sugar cane growing on [[red sand]] in a [[badlands]] biome.
Sugarcanenowaterglitch.png|Sugar cane generated without a water source.
SwampCane.png|Sugar cane generated in a [[swamp]] biome.
Sugar cane savanna.png|Sugar cane growing in a [[savanna]] biome.
ForestSugarcane.png|Sugar cane growing in a [[forest]] biome.
Lava cane.png|Sugar cane growing with lava flowing around it.
Before breaking.png|Sugar canes few seconds before breaking because the water is frozen.
Undergroundreed.png|A sugar cane plant that generated in an underground [[water lake]].
Cave Sugar.png|Another example.
</gallery>
=== Heights ===
<gallery>
Tall Sugar Cane.png|Four-block tall sugar cane.
4RiverCane.png|Four-block tall sugar cane.
4-block tall sugar cane.png|Four-block tall sugar cane in a [[plains]] biome.
</gallery>
== References ==
{{Reflist}}
{{Blocks|vegetation}}
{{Items}}
[[Category:Plants]]
[[Category:Natural blocks]]
[[Category:Non-solid blocks]]
[[cs:Cukrová třtina]]
[[de:Zuckerrohr]]
[[es:Caña de azúcar]]
[[fr:Canne à sucre]]
[[hu:Cukornád]]
[[it:Canna da zucchero]]
[[ja:サトウキビ]]
[[ko:사탕수수]]
[[nl:Suikerriet]]
[[pl:Trzcina cukrowa]]
[[pt:Cana-de-açúcar]]
[[ru:Сахарный тростник]]
[[th:อ้อย]]
[[uk:Цукрова тростина]]
[[zh:甘蔗]]</li></ul></nowiki> | 17w47a | Prior to The Flattening, this block's numeral ID was 58. | |||
1.14{{Extension DPL}}<ul><li>[[Lead|Lead]]<br/>{{About|the item used for leashing and leading mobs|the element|Element#Lead}}
{{Item
| image = Lead.png
| stackable = Yes (64)
| renewable = Yes
}}
'''Leads''' are [[tool]]s used to leash and lead passive and neutral [[animal]]s, [[golem]]s and some [[monster]]s.
== Obtaining ==
=== Chest loot ===
{{LootChestItem|lead}}
=== Crafting ===
{{Crafting
|A1= String
|B1= String
|A2= String
|B2= Slimeball
|C3= String
|Output= Lead,2
|type= Tool
}}
=== Mob loot ===
[[Wandering Trader|Wandering trader]]s always spawn with 2 [[llama|trader llama]]s, each held with a lead. When a trader llama is detached, either by killing it or the wandering trader, dragging them far apart, or putting the llama in a [[boat]] or a [[minecart]], the lead drops at the llama's position.
== Usage ==
=== Crafting ingredient ===
{{crafting usage}}
=== Leashing mobs ===
[[File:SuspendedPigs.png|190px|thumb|One block tall mobs, such as pigs, suspend at 7 blocks above the ground.]]
[[File:SuspendedCows.png|190px|thumb|Two block tall mobs, such as cows, also suspend at 7 blocks above the ground.]]
{{control|Using}} a lead on a [[mob]] ties the lead to the mob, allowing it to be moved by the player. Multiple mobs can be held by leads at once, but each mob held requires its own lead.
It is possible to leash the following mobs and other entities:
{{columns-list|colwidth=20em|
* {{EntityLink|Allay}}
* {{EntityLink|Axolotl}}
* {{EntityLink|Bee}}
* {{EntityLink|Boat}}{{only|bedrock}}
* {{EntityLink|Camel}}
* {{EntityLink|Cat}}
* {{EntityLink|Chicken}}
* {{EntityLink|Chicken Jockey}} (only the mount)
* {{EntityLink|Cow}}
* {{EntityLink|Dolphin}}
* {{EntityLink|Donkey}}
* {{EntityLink|Fox}}
* {{EntityLink|Frog}}
* {{EntityLink|Glow Squid}}
* {{EntityLink|Goat}}
* {{EntityLink|Hoglin}}
* {{EntityLink|Horse}}
* {{EntityLink|Iron Golem}}
* {{EntityLink|Llama}}
* {{EntityLink|Mooshroom}}
* {{EntityLink|Mule}}
* {{EntityLink|Ocelot}}
* {{EntityLink|Parrot}}
* {{EntityLink|Pig}}
* {{EntityLink|Polar Bear}}
* {{EntityLink|Rabbit}}
* {{EntityLink|Sheep}}
* {{EntityLink|Skeleton Horse}}
* {{EntityLink|Skeleton Horseman}} (only the mount)
* {{EntityLink|Sniffer}}
* {{EntityLink|Snow Golem}}
* {{EntityLink|Squid}}
* {{EntityLink|Strider}}
* {{EntityLink|Trader Llama}}
* {{EntityLink|Wolf}}
* {{EntityLink|Zoglin}}
* {{EntityLink|Zombie Horse}}}}
Additionally, [[villager]]s, [[wandering trader]]s, and [[monster]]s other than the ones listed above, can be leashed using a map editor or [[NBT]] editor.
With a mob on a lead held by the player, {{control|using}} the lead on any type of [[fence]] (or [[wall]]{{only|bedrock|short=1}}) attaches the lead to it with a visible knot, tying the mob to it. To attach it to a wall on Bedrock Edition, the player must hold a lead in the main hand.<ref>{{bug|MCPE-108078}}</ref> Multiple leads may be attached to one fence post. A mob tied to a fence tends to stay within 5 blocks of the fence post.
A lead is broken by pressing the {{control|use item}} control on the mob again, hitting the knot, or removing the attached fence post. Leads also break when hit by projectiles. Whenever a lead is removed or broken, it drops as an [[item (entity)|item]] at the location of the mob. However, it does not drop when unleashed in Creative mode.{{only|java}}<ref>{{bug|MCPE-79639}}</ref> A lead does not break if the attached animal dies.
A lead can stretch a maximum of 10 blocks. If the mob is able to move towards the player or fence post, it does so. If not, or if the mob is moving very quickly away from the player, the lead breaks.
When the player or the knot is more than 7 blocks above the ground, the mob being leashed becomes suspended.
Most mobs that can be leashed can still be leashed even if attacking the player leashing them, and any attached leads do not break.
[[Wolf|Wolves]] cannot be leashed after becoming angry. Despite this, if they become angry while already leashed, the lead does not break, but it cannot be reattached when broken through other methods while the wolf is still angry.
A lead attached to a hoglin breaks if it becomes a [[zoglin]].
A lead does not prevent mobs from despawning if they normally would despawn.
When moving downwards and accelerating towards the ground, leashed mobs accumulate fall damage and take it if they hit the ground while still accelerating. When moving up or decelerating (such as when the lead is stretched to its limit), the fall distance is set to one block and the mob therefore does not take any fall damage if it touches the ground.
If the player walks into and back out of a [[nether portal]] while holding a lead connected to a mob, the lead remains attached to the mob. However, if a mob attached to a lead walks into a nether portal, the lead breaks and drops as an item in the other dimension.
A lead can be used to remove a mob from a boat without needing to break the boat, if the mob can normally be leashed.
If a chunk unloads while containing a leashed mob (either by the player walking too far away, or traveling to another dimension via a portal), the lead breaks and drops as an item, leaving the mob free to wander around.
== Sounds ==
{{Edition|Java}}:
{{Sound table
|sound=Lead Knot break1.ogg
|sound2=Lead Knot break2.ogg
|sound3=Lead Knot break3.ogg
|subtitle=Leash Knot breaks
|source=neutral
|description=When a leash knot is destroyed
|id=entity.leash_knot.break
|translationkey=subtitles.entity.leashknot.break
|volume=1.0
|pitch=1.0
|distance=16}}
{{Sound table
|sound=Lead Knot place1.ogg
|sound2=Lead Knot place2.ogg
|sound3=Lead Knot place3.ogg
|subtitle=Leash Knot tied
|source=neutral
|description=When a leash knot is placed on a fence
|id=entity.leash_knot.place
|translationkey=subtitles.entity.leashknot.place
|volume=1.0
|pitch=1.0
|distance=16
|foot=1}}
{{Edition|Bedrock}}:
{{Sound table
|type=bedrock
|sound=Lead Knot break1.ogg
|sound2=Lead Knot break2.ogg
|sound3=Lead Knot break3.ogg
|source=neutral
|description=When a leash knot is broken by {{ctrl|interacting}} with it
|id=leashknot.break
|volume=1.0
|pitch=1.0}}
{{Sound table
|sound=Lead Knot place1.ogg
|sound2=Lead Knot place2.ogg
|sound3=Lead Knot place3.ogg
|source=neutral
|description=When a leash knot is placed on a fence or wall
|id=leashknot.place
|volume=1.0
|pitch=1.0
|foot=1}}
== Leash Knot ==
'''Leash knot''' is an entity created when the [[player]] right-clicks the fence while having a mob leashed.
{{Entity| title = Leash Knot| image = Knot.png|imagesize= 100px|networkid='''[[JE]]''': 77}}
=== Data values ===
==== ID ====
{{edition|java}}:
{{ID table
|edition=java
|generatetranslationkeys=y
|displayname=Leash Knot
|spritetype=entity
|nameid=leash_knot
|foot=1}}
{{edition|bedrock}}:
{{ID table
|edition=bedrock
|shownumericids=y
|notshowbeitemforms=y
|generatetranslationkeys=y
|displayname=Leash Knot
|spritetype=entity
|nameid=leash_knot
|id=88
|foot=1}}
==== Entity data ====
Leash knots have entity data that define various properties of the entity.
{{el|java}}:
{{main|Entity format}}
{{/ED}}
{{el|bedrock}}:
: See [[Bedrock Edition level format/Entity format]].
== Data values ==
=== ID ===
{{edition|java}}:
{{ID table
|edition=java
|showforms=y
|generatetranslationkeys=y
|displayname=Lead
|spritetype=item
|nameid=lead
|form=item
|foot=1}}
{{edition|bedrock}}:
{{ID table
|edition=bedrock
|shownumericids=y
|showforms=y
|notshowbeitemforms=y
|generatetranslationkeys=y
|displayname=Lead
|spritetype=item
|nameid=lead
|id=547
|form=item
|foot=1}}
== Achievements ==
{{load achievements|So I Got That Going for Me}}
== Advancements ==
{{load advancements|When the Squad Hops into Town}}
== History ==
{{missing information|The history of a lot of mobs be leashed}}
{{History|java}}
{{History||1.6.1|snap=13w16a|[[File:Lead JE1 BE1.png|32px]] Added leads.
|Leads do not currently have a tooltip and are called “leashes” in [http://www.mojang.com/2013/04/minecraft-snapshot-13w16a-and-new-launcher/ the change notes].}}
{{History|||snap=13w16b|Leads have been given a tooltip.}}
{{History|||snap=13w18a|Leads have been given a [[crafting]] recipe.}}
{{History||1.9|snap=15w50a|Added a [[sound]] for leads: <code>entity.leashknot.place</code>.}}
{{History||1.11|snap=16w32a|The [[entity]] ID of the knot has been changed from <code>LeashKnot</code> to <code>leash_knot</code>.}}
{{History|||snap=16w39a|Leads can now be found in [[woodland mansion]] chests.}}
{{History||1.13|snap=17w47a|Prior to [[1.13/Flattening|''The Flattening'']], this [[item]]'s numeral ID was 420.}}
{{History||1.14|snap=18w43a|[[File:Lead JE2 BE2.png|32px]] The texture of leads has been changed.}}
{{History|||snap=19w05a|Added [[wandering trader]]s, which are naturally equipped with leads.}}
{{History||1.15|snap=?|[[Bee]]s can now be leashed.}}
{{History||1.16|snap=20w09a|[[Skeleton horse]]s and [[zombie horse]]s can now be leashed.<ref>{{bug|MC-166246}}</ref>}}
{{History|||snap=?|[[Hoglin]]s can now be leashed.}}
{{History||1.16.2|snap=20w27a|[[Zoglin]]s can now be leashed.}}
{{History||1.17|snap=21w19a|[[Squid]]s and [[glow squid]]s can now be leashed.<ref>{{bug|MC-136647}}</ref>}}
{{History|||snap=?|[[Axolotl]]s can now be leashed.}}
{{History||1.19|snap=22w13a|Lead may now be found in [[ancient city]] [[chest]]s.}}
{{History|||snap=?|[[Frog]]s can now be leashed.}}
{{History||1.19.3|snap=22w42a|[[Camel]]s can now be leashed.|Mobs no longer accumulate fall damage when dangling on leads.<ref>{{bug|MC-14167||Mobs build up fall damage when dangling on a lead|Fixed}}</ref>}}
{{History||1.20 (Experimental)|link=1.19.4|snap=?|[[Sniffer]]s can now be leashed.}}
{{History||1.20|snap=23w12a|Lead can now be found in [[suspicious gravel]] and [[suspicious sand]] in [[trail ruins]].}}
{{History|||snap=23w16a|Lead no longer generates in [[suspicious sand]] in [[trail ruins]].|Due to the split of the archaeological loot tables for the suspicious gravel within the [[trail ruins]]; lead now is in the common loot.}}
{{History|pocket alpha}}
{{History||v0.15.0|snap=build 1|[[File:Lead JE1 BE1.png|32px]] Added leads.}}
{{History|pocket}}
{{History||1.1.0|snap=alpha 1.1.0.0|Leads now have better "physics".
|The [[entity]] ID of the knot has been changed from <code>leashknot</code> to <code>leash_knot</code>.
|Leads can now be found inside [[woodland mansion]] [[chest]]s.}}
{{History|bedrock}}
{{History||1.4.0|snap=beta 1.2.14.2|Leads can now be found inside [[buried treasure]] [[chest]]s.
|Leads can now be used on [[boat]]s.}}
{{History||1.4.0|snap=beta 1.2.20.1|Leads can now be used to craft [[balloon]]s.}}
{{History||1.10.0|snap=beta 1.10.0.3|[[File:Lead JE2 BE2.png|32px]] The texture of leads has been changed.
|[[Wandering trader]]s now [[drops|drop]] leads after they are detached from trader [[llama]]s.}}
{{History||1.14.0|snap=beta 1.14.0.1|Leads can now be used on [[polar bear]]s, [[ocelot]]s, [[parrot]]s, [[dolphin]]s and old [[villager]]s.}}
{{History||1.19.0|snap=beta 1.19.0.20|Allays can now be leashed.}}
{{History|console}}
{{History||xbox=TU19|xbone=CU7|ps=1.12|wiiu=Patch 1|switch=1.0.1|[[File:Lead JE1 BE1.png|32px]] Added leads.}}
{{History||xbox=TU43|xbone=CU33|ps=1.36|wiiu=Patch 13|[[Sound]]s have been added for leads.}}
{{History|Ps4}}
{{History||1.90|[[File:Lead JE2 BE2.png|32px]] The texture of leads has been changed.}}
{{History|3ds}}
{{History||0.1.0|[[File:Lead JE1 BE1.png|32px]] Added leads.}}
{{History|foot}}
== Issues ==
{{issue list|Lead|Leash}}
== Trivia ==
[[File:Steve wearing Lead.png|100px]] [[File:Alex wearing Lead.png|100px]]
* The lead is named as "leash" in the texture file.
* If a [[player]] goes to sleep while holding a mob on a lead, the lead remains attached.
* {{IN|Java}}, when using the {{cmd|item}} command to put a lead in a player's head slot, the item gets rotated and positioned in such a way that it looks like the player is wearing a monocle.
== Gallery ==
<gallery>
Multiple_Leash.png|Many animals can be tied to one fence post.
HorseLeashedOnAFence.png|A [[horse]] wearing [[golden horse armor]] that is leashed to a fence post.
ThreeTiedSheep.png|Three sheep tied to the same fence.
More accurate lead mobs.png|A shot of all the mobs that could be tied with leads as of 1.6.1, except donkeys and mules.
Yo Yo.png|With the use of the leash, it is possible to suspend animals in the air by tying the leash on high-up fence posts.
YoYo.png|A [[donkey]] with the Grumm/Dinnerbone [[name tag]] [[easter egg]] tied to a fence with a lead to make a yo-yo.
Flying_Sheep.png|Several [[sheep]] hanging in the air in [[Creative]] mode.
Pocket Edition Lead.jpg|First image of a lead in ''Bedrock Edition''.
</gallery>
== References ==
{{Reflist}}
== External Links ==
*[https://www.minecraft.net/en-us/article/taking-inventory-lead Taking Inventory: Lead] – Minecraft.net on April 8, 2022
{{items}}
{{entities}}
[[Category:Tools]]
[[de:Leine]]
[[es:Rienda]]
[[fr:Laisse]]
[[hu:Lasszó]]
[[it:Guinzaglio]]
[[ja:リード]]
[[ko:끈]]
[[nl:Leidtouw]]
[[pl:Smycz]]
[[pt:Laço]]
[[ru:Поводок]]
[[th:เชือกจูง]]
[[zh:拴绳]]
[[Category:Renewable resources]]</li><li>[[Shulker Shell|Shulker Shell]]<br/>{{Item
| image = Shulker Shell.png
|type=
|renewable = Yes
| stackable = Yes (64)
}}
{{about|the item that drops from the mob|the mob |Shulker|the storage block|Shulker Box}}
'''Shulker shells''' are [[item]]s dropped by [[shulker]]s that are used solely to craft [[shulker box]]es.
== Obtaining ==
=== Mob loot ===
{{IN|bedrock}}, [[shulker]]s drop 0-1 shulker shells. The maximum can be increased by 1 per level of [[Looting]], which is 0-4 shells with Looting III.
{{IN|java}}, shulkers have a 50% chance of dropping a shulker shell when killed. This is increased by 6.25% per level of [[Looting]], for a maximum of 68.75% with Looting III.
== Usage ==
=== Crafting ingredient ===
{{crafting usage}}
== Data values ==
=== ID ===
{{edition|java}}:
{{ID table
|edition=java
|showforms=y
|generatetranslationkeys=y
|displayname=Shulker Shell
|spritetype=item
|nameid=shulker_shell
|form=item
|foot=1}}
{{edition|bedrock}}:
{{ID table
|edition=bedrock
|shownumericids=y
|showforms=y
|notshowbeitemforms=y
|generatetranslationkeys=y
|displayname=Shulker Shell
|spritetype=item
|nameid=shulker_shell
|id=566
|form=item
|foot=1}}
== History ==
{{History|java}}
{{History||1.11|snap=16w39a|[[File:Shulker Shell JE1 BE1.png|32px]] Added shulker shells.}}
{{History||1.13|snap=17w47a|Prior to [[1.13/Flattening|''The Flattening'']], this [[item]]'s numeral ID was 450.}}
{{History||1.14|snap=18w43a|[[File:Shulker Shell JE2 BE2.png|32px]] The texture of the shulker shell has now been changed.}}
{{History||1.17|snap=20w45a|When a shulker is hit by a shulker bullet, the shulker can spawn another shulker depending on the amount of shulkers in the area, making shulker shells [[renewable resource|renewable]].}}
{{History|pocket}}
{{History||1.0.0|snap=alpha 1.0.0.1|[[File:Shulker Shell JE1 BE1.png|32px]] Added shulker shells.
|Shulker shells currently have no purpose as [[shulker box]]es haven't been implemented yet.}}
{{History||1.1.0|snap=alpha 1.1.0.0|Shulker shells can now be used to [[crafting|craft]] shulker boxes.}}
{{History|bedrock}}
{{History||1.10.0|snap=beta 1.10.0.3|[[File:Shulker Shell JE2 BE2.png|32px]] The texture of the shulker shell has now been changed.}}
{{History||1.18.30|snap=beta 1.18.30.22|Shulkers now have a chance to spawn another shulker when hit by a shulker projectile, making shulker shells [[renewable resource|renewable]].}}
{{History|console}}
{{History||xbox=TU53|xbone=CU43|ps=1.49|wiiu=Patch 23|switch=1.0.3|[[File:Shulker Shell JE1 BE1.png|32px]] Added shulker shells.}}
{{History||xbox=none|xbone=none|ps=1.90|wiiu=none|switch=none|[[File:Shulker Shell JE2 BE2.png|32px]] The texture of the shulker shell has now been changed.}}
{{History|new 3ds}}
{{History||1.7.10|[[File:Shulker Shell JE1 BE1.png|32px]] Added shulker shells.}}
{{History|foot}}
== Issues ==
{{Issue list}}
{{Items}}
[[de:Shulkerschale]]
[[es:Caparazón de shulker]]
[[fr:Carapace de Shulker]]
[[it:Guscio di shulker]]
[[ja:シュルカーの殻]]
[[ko:셜커 껍데기]]
[[nl:Shulkerschelp]]
[[pl:Skorupa Shulkera]]
[[pt:Casco de shulker]]
[[ru:Панцирь шалкера]]
[[th:เปลือกชัลเกอร์]]
[[zh:潜影壳]]</li></ul> | 18w43a | File:Crafting Table TextureUpdate Revision 1.png Changed the texture of the crafting table. | |||
| Banner dyeing is moved to the loom; banners can no longer be dyed in crafting tables. | |||||
| 18w44a | File:Crafting Table TextureUpdate.png Changed the texture of the crafting table again. | ||||
| 18w47a | Crafting tables can now be found in pillager outposts. | ||||
1.14.1{{Extension DPL}}<ul><li>[[Minecart with Chest|Minecart with Chest]]<br/>{{ItemEntity
|image=Minecart with Chest.png
|renewable=Yes
|stackable=No
|size=Height: 0.7 Blocks<br>Width: 0.98 Blocks
|networkid='''[[JE]]''': 10
|drops=1 {{ItemLink|Minecart with Chest}}<br> plus contents
|health={{hp|6}}
}}
A '''minecart with chest''' is a single [[chest]] inside a [[minecart]], and functions as such.
== Natural generation ==
Minecarts with chests containing loot naturally generate in [[mineshaft]]s, each on top of a piece of [[rail]].
== Obtaining ==
=== Crafting ===
{{Crafting|Chest|Minecart|Output=Minecart with Chest|type=Transportation}}
Minecarts with chests can be retrieved by attacking them. By doing so it drops as an [[item]] and any other contents of the chest are dropped as well.
==Usage==
[[File:Minecart with Chest GUI.png|thumb|176px|The GUI of a minecart with chest.]]
Minecarts with chests can be placed by {{control|use item|text=using its item}} on any type of [[rail]].
Chest minecarts' contents can be accessed by pressing {{control|use item}} button on them. The interaction makes no sounds and the chest does not show the opening or closing animation, unlike regular chests.
The boost that minecarts with chests gain from [[powered rail]]s is dependent on their load. For example, from a 1 powered rail starter track, an empty minecart with chest travels 64 blocks, but a full minecart with chest travels only 16 blocks (opposed to 80 blocks for an occupied normal minecart and 8 blocks for an empty normal minecart).
Another physical property of chest minecarts is their ability to be stacked. While three chests can fit in an area three blocks tall, up to four chest minecarts can fit in the same area. Like other minecarts, an unlimited number of minecarts with chests can exist in the same block space.
Minecarts with chests are also able to interact with [[hopper]]s. Hoppers can take items out from the minecart chest if they are below the track as the minecart rolls over it or put them in if the minecart rolls under a downward facing hopper. Hoppers can also input items if they are facing into the side of the minecart.
Opening or destroying a minecart with chest angers [[piglin]]s.
{{See also|Tutorials/Storage minecarts}}
When on top of [[detector rail]]s, nearby [[redstone comparators]] will give out redstone signals based on how full the minecarts with chests are.
== Sounds ==
{{Edition|Java}}:<br>
Minecarts with chests use the Friendly Creatures sound category for entity-dependent sound events.<ref group=sound name=rollsource>{{bug|MC-42132}}</ref>
{{Sound table
|sound=Minecart rolling.ogg
|subtitle=Minecart rolls
|source=Friendly Creatures <ref group=sound name=rollsource/>
|overridesource=1
|description=While a minecart with chest is moving
|id=entity.minecart.riding
|translationkey=subtitles.entity.minecart.riding
|volume=0.0-0.35 <ref group=sound>Relates linearly with horizontal velocity (max 0.5)</ref>
|pitch=0.0-1.0 <ref group=sound>Will increase by 0.0025 per tick if the minecart's horizontal velocity is more than 0.01</ref>
|distance=16
|foot=1}}
{{Edition|Bedrock}}:
{{Sound table
|type=bedrock
|sound=Minecart rolling.ogg
|source=neutral
|description=While a minecart with chest is moving
|id=minecart.base
|foot=1}}
==Data values==
===ID===
{{edition|java}}:
{{ID table
|edition=java
|firstcolumnname=Item
|showforms=y
|generatetranslationkeys=y
|displayname=Minecart with Chest
|spritetype=item
|nameid=chest_minecart
|form=item
|foot=1}}
{{ID table
|edition=java
|firstcolumnname=Entity
|generatetranslationkeys=y
|displayname=Minecart with Chest
|spritetype=entity
|nameid=chest_minecart
|foot=1}}
{{edition|bedrock}}:
{{ID table
|edition=bedrock
|firstcolumnname=Item
|shownumericids=y
|showforms=y
|notshowbeitemforms=y
|generatetranslationkeys=y
|displayname=Minecart with Chest
|spritetype=item
|nameid=chest_minecart
|id=389
|form=item
|foot=1}}
{{ID table
|edition=bedrock
|firstcolumnname=Entity
|shownumericids=y
|generatetranslationkeys=y
|displayname=Minecart with Chest
|spritetype=entity
|nameid=chest_minecart
|id=98
|foot=1}}
===Entity data===
Minecarts with chests have entity data associated with them that contain various properties of the entity.
{{el|java}}:
{{main|Entity format}}
{{/ED}}
{{el|bedrock}}:
: See [[Bedrock Edition level format/Entity format]].
==Achievements==
{{load achievements|Freight Station}}
== Video==
<div style="text-align:center">{{yt|2yVVMiQrCwo}}</div>
==History ==
[[File:Minecart with Chest BE3.png|thumb|The Minecart models in the Bedrock Edition were north or south on the sides. In the latest version, the front and rear sides are north or south. But the absolute orientation of the chest was not changed.]]
{{info needed section|In bedrock edition 1.16.100 it seems that chests in minecarts face sideways instead of forward - when was this changed?}}
{{History|java alpha}}
{{History||v1.0.14|[[File:Minecart with Chest JE1.png|32px]] [[File:Minecart with Chest (item) JE1 BE1.png|32px]] Minecarts with chests have been added.
|At this point, they are either called "chest minecarts" or "storage minecarts" because no in-game name was indicated.}}
{{History|java beta}}
{{History||1.0|"Minecart with Chest" has been first indicated as its name, via the new item tooltips.}}
{{History||1.8|snap=Pre-release|[[File:Minecart with Chest JE2.png|32px]] The [[model]] of the minecart with chest has been changed to match the new [[chest]] model. However, the [[chest]] is incorrectly offset.<ref>[[mcw:Issues/Beta 1.8pre2#Graphical]]</ref>}}
{{History|||snap=release|[[File:Minecart with Chest JE3 BE1.png|32px]] The model of minecarts with chests has been fixed.}}
{{History|java}}
{{History||1.5|snap=13w02a|Minecarts with chests now generate in [[mineshaft]]s in place of normal chests.}}
{{History||1.9|snap=15w43a|[[Loot table]]s have been added; minecarts with chests now use loot tables, and those in generated in [[mineshaft]]s now use loot tables.}}
{{History||1.9.1|snap=pre2|The title of the [[inventory]] has been changed from 'Chest minecart' to 'Minecart with Chest'.}}
{{History||1.11|snap=16w32a|The [[entity]] ID has been changed from <code>MinecartChest</code> to <code>chest_minecart</code>.}}
{{History||1.13|snap=17w47a|Prior to [[1.13/Flattening|''The Flattening'']], this [[item]]'s numeral ID was 342.}}
{{History||1.14|snap=18w43a|[[File:Minecart with Chest JE4 BE2.png|32px]] [[File:Minecart with Chest (item) JE2 BE2.png|32px]] The textures of minecarts with chests have been changed.}}
{{History||1.16.2|snap=Pre-release 1|[[Piglin]]s now become angry with players who open or destroy a chest minecart.}}
{{History||1.19|snap=22w13a|The crafting recipe for a minecart with chest is now shapeless.
|Breaking a minecart with chest will now drop the item instead of the minecart and chest separately, though the contents of the chest are still dropped.<ref>{{bug|MC-249493|||Fixed}}</ref>}}
{{History|pocket alpha}}
{{History||v0.14.0|snap=build 1|[[File:Minecart with Chest JE3 BE1.png|32px]] [[File:Minecart with Chest (item) JE1 BE1.png|32px]] Added minecarts with chests.}}
{{History|||snap=build 3|Minecarts with chests now drop [[item]]s when destroyed in [[Creative]] mode.}}
{{History|pocket}}
{{History||1.1.0|snap=alpha 1.1.0.0|The [[entity]] ID has been changed from <code>minecartchest</code> to <code>chest_minecart</code>.}}
{{History|bedrock}}
{{History||1.10.0|snap=beta 1.10.0.3|[[File:Minecart with Chest JE4 BE2.png|32px]] [[File:Minecart with Chest (item) JE2 BE2.png|32px]] The textures of minecarts with chests have been changed.}}
{{History||1.19.0|snap=beta 1.19.0.30|Breaking a minecart with chest will now drop the item instead of the minecart and chest separately, though the contents of the chest are still dropped.}}
{{History|console}}
{{History||xbox=TU1|xbone=CU1|ps=1.0|wiiu=Patch 1|switch=1.0.1|[[File:Minecart with Chest JE3 BE1.png|32px]] [[File:Minecart with Chest (item) JE1 BE1.png|32px]] Added minecarts with chests.}}
{{History||xbox=none|xbone=none|ps=1.90|wiiu=none|switch=none|[[File:Minecart with Chest JE4 BE2.png|32px]] [[File:Minecart with Chest (item) JE2 BE2.png|32px]] The textures of minecarts with chests have been changed.}}
{{History|new 3ds}}
{{History||0.1.0|[[File:Minecart_with_Chest_JE3_BE1.png|32px]] [[File:Minecart_with_Chest_(item)_JE1_BE1.png|32px]] Added minecarts with chests.
|Minecarts with chests emit smoke [[particles]] when destroyed.}}
{{History|foot}}
==Issues==
{{issue list}}
==Gallery ==
<gallery>
Compact Minecart Storage.png|A compact storage using chest minecarts (left) compared to chest storage in the same volume. Notice how chests cannot be placed next to each other, which is no longer the case after Java Edition 1.13.
GlitchedMinecartChest.png|This minecart with chest is trapped inside a block, due to a [[stronghold]] and a [[mineshaft]] that generated partially overlapping.
Minecartportal.png|A minecart with chest generated on top of an [[end portal frame]], because there is a mineshaft behind the wall.
Chest Minecart Stack.png|A large stack of chest minecarts.
</gallery>
==References==
{{Reflist}}
{{items}}
{{entities}}
[[Category:Mechanics]]
[[Category:Storage]]
[[cs:Nákladní vozík]]
[[de:Güterlore]]
[[es:Vagoneta con cofre]]
[[fr:Wagonnet de stockage]]
[[hu:Tárolócsille]]
[[it:Carrello da miniera]]
[[ja:チェスト付きのトロッコ]]
[[ko:상자가 실린 광산 수레]]
[[nl:Mijnkar met kist]]
[[pl:Wagonik ze skrzynią]]
[[pt:Carrinho de mina com baú]]
[[ru:Вагонетка с сундуком]]
[[uk:Вагонетка зі скринею]]
[[zh:运输矿车]]</li><li>[[Stick|Stick]]<br/>{{for|other uses|Stick (disambiguation)}}
{{Item
| image = Stick.png
| renewable = Yes
| stackable = Yes (64)
}}
A '''stick''' is an item used for [[crafting]] many [[tools]] and [[item]]s.
== Obtaining ==
=== Crafting ===
{{Crafting
|B2= Any Planks
|B3= Any Planks
|Output= Stick,4
|type= Material
|head=1
}}
{{Crafting
|B2= Bamboo
|B3= Bamboo
|Output= Stick
|type= Material
|foot=1
}}
=== Fishing ===
Sticks can be obtained as a "junk" item while [[fishing]].
=== Block loot ===
[[Dead bush]]es drop between 0–2 sticks when destroyed.
All [[Leaves|leaf]] types have a 2% chance to drop between 1-2 sticks when broken. Using a tool with [[Fortune]] increase these chances to 2.2%, 2.5%, and 3.3% for Fortune I, II, and III respectively.
=== Entity loot ===
[[Witch]]es have a chance of dropping 0–6 sticks upon death. This is increased by 3 per level of [[Looting]], for a chance of 0-15 sticks.
[[Boat]]s and [[Boat with Chest|boats with chest]]s drop 2 sticks when falling from exactly 12, 13, 49, 51, 111, 114, 198, 202, 310, or 315 blocks.<ref>{{bug|MC-119369}}</ref>.
=== Chest loot ===
{{LootChestItem|stick}}
== Usage ==
=== Crafting ingredient ===
{{crafting usage}}
=== Fuel ===
When used as a [[furnace]] fuel, a stick smelts 0.5 [[item]]s.
=== Trading ===
Novice-level [[Trading#Fletcher|fletcher]] [[villager]]s have a {{frac|2|3}} chance to buy 32 sticks for an [[emerald]] in ''Java Edition'', and they always offer the trade in Bedrock Edition.
== Video ==
<div style="text-align:center">{{yt|SYoHAJBuoss}}</div>
== Data values ==
=== ID ===
{{edition|java}}:
{{ID table
|edition=java
|showforms=y
|generatetranslationkeys=y
|displayname=Stick
|spritetype=item
|nameid=stick
|form=item
|foot=1}}
{{edition|bedrock}}:
{{ID table
|edition=bedrock
|shownumericids=y
|showforms=y
|notshowbeitemforms=y
|generatetranslationkeys=y
|displayname=Stick
|spritetype=item
|nameid=stick
|id=320
|form=item
|foot=1}}
== History ==
{{History|java indev}}
{{History||0.31|snap=20100129|[[File:Stick JE1 BE1.png|32px]] Added sticks.
|Sticks are used to craft [[sign]]s, [[torch]]es, [[sword]]s, [[pickaxe]]s, [[axe]]s and [[shovel]]s.}}
{{History|||snap=20100130|Sticks are now used to craft [[bow]]s and [[arrow]]s.}}
{{History||20100206|Sticks are now used to craft [[hoe]]s.}}
{{History||20100219|Sticks can be used as fuel for the newly added [[furnace]].}}
{{History||20100223|Sticks are now used to craft [[painting]]s.}}
{{History|java infdev}}
{{History||20100607|Sticks are now used to craft [[ladder]]s.}}
{{History||20100618|Sticks are now used to craft [[rail]]s.}}
{{History|java alpha}}
{{History||v1.0.1|Sticks are now used to craft [[redstone torch]]es and [[lever]]s.}}
{{History||v1.0.6|2 sticks now drops from breaking [[boat]]s.}}
{{History||v1.0.17|Sticks are now used to craft [[fence]]s.}}
{{History||v1.1.1|Sticks are now used to craft [[fishing rod]]s.}}
{{History|java beta}}
{{History||1.5|Sticks are now used to craft [[powered rail]]s.}}
{{History||1.8|snap=Pre-release|Sticks are now used to craft [[fence gate]]s.}}
{{History|java}}
{{History||1.2.4|snap=release|[[Spruce planks]], [[birch planks]], and [[jungle planks]] can now be used to craft sticks.}}
{{History||1.3.1|snap=12w16a|Sticks are found in the new [[bonus chest]]s.}}
{{History|||snap=12w22a|Sticks are now used to craft [[tripwire hook]]s.}}
{{History|||snap=12w27a|Sticks no longer drops from breaking [[boat]]s.|Instead, it needs to fall certain heights to drop 2 sticks.}}
{{History||1.4.2|snap=12w34a|Sticks are now used to craft [[item frame]]s.}}
{{History|||snap=12w38b|[[Witch]]es now have a chance to drop sticks.}}
{{History||1.5|snap=13w02a|Sticks are now used to craft [[activator rail]]s.}}
{{History||1.7.2|snap=13w36a|Sticks can be obtained as one of the "junk" [[item]]s by [[fishing]].}}
{{History|||snap=1.7.1|[[Acacia planks]] and [[dark oak planks]] can now be used to craft sticks.}}
{{History||1.8|snap=14w30a|Sticks are now used to craft [[banner]]s.}}
{{History|||snap=14w32a|Sticks are now used to craft [[armor stand]]s.}}
{{History||1.9|snap=15w31a|Sticks are now dropped by [[dead bush]]es.}}
{{History|||snap=15w44a|Sticks are now found in [[bonus chest]]s for more than double the average yield.}}
{{History||1.13|snap=17w47a|Sticks can now be found in 70.5% of bonus chests in stacks of 1–12.
|Prior to [[1.13/Flattening|''The Flattening'']], this [[item]]'s numeral ID was 280.}}
{{History||1.14|snap=18w43a|Sticks can now be crafted from [[bamboo]].
|Sticks can now be used to craft [[crossbow]]s.
|Sticks are now [[drops|dropped]] by [[leaves]].}}
{{History|||snap=18w48a|Sticks can now be used to craft [[grindstone]]s.
|Sticks can now be found in [[chest]]s in [[village]] cartographer houses.}}
{{History|||snap=18w50a|Sticks can now be found in village fletcher houses and toolsmith houses.}}
{{History|||snap=19w02a|Sticks can now be used to craft [[campfire]]s.}}
{{History|||snap=19w11a|Fletcher [[villager]]s now [[trading|buy]] sticks.}}
{{History||1.16|snap=20w06a|[[Crimson planks]] and [[warped planks]] can now be used to craft sticks.
|Sticks can now be used to craft [[soul torch]]es.}}
{{History||1.17|snap=21w05a|Sticks are now dropped by [[azalea leaves]] and [[flowering azalea leaves]].}}
{{History||1.19|snap=22w11a|[[Mangrove planks]] can now be used to craft sticks.}}
{{History|||snap=22w13a|Sticks are now dropped by [[mangrove leaves]].}}
{{History||1.19.4|snap=23w07a|The [[crossbow]] and [[soul campfire]] recipes are no longer unlocked by sticks.}}
{{History||1.20<br>(Experimental)|link=1.19.4|snap=23w07a|Sticks are now dropped by [[cherry leaves]].
|Sticks can now be used to craft [[brush]]es.
|Sticks now drop when brushing [[suspicious sand]] in [[desert well]]s.}}
{{History||1.20|snap=23w12a|The probability for the stick to generate in the [[suspicious sand]] in [[desert well]] has been changed from 1/7 to 1/8.}}
{{History|pocket alpha}}
{{History||v0.2.0|[[File:Stick JE1 BE1.png|32px]] Added sticks. They are currently unobtainable and serve no purpose.}}
{{History||v0.3.0|Sticks are now [[craft]]able.
|Sticks can be used to [[craft]] wooden and stone [[pickaxe]]s, [[axe]]s, [[sword]]s and [[shovel]]s, [[ladder]]s, [[torch]]es, [[fence]]s and [[fence gate]]s.}}
{{History||v0.3.2|Sticks are now used to craft iron, gold and diamond [[pickaxe]]s, [[axe]]s, [[sword]]s and [[shovel]]s.}}
{{History||v0.3.3|Sticks are now used to craft [[bow]]s.}}
{{History||v0.4.0|Sticks are now used to craft [[hoe]]s.}}
{{History||v0.5.0|Sticks are now used to craft [[painting]]s.}}
{{History||v0.6.0|Sticks are now used to craft [[sign]]s.}}
{{History||v0.8.0|snap=build 2|Sticks are now used to craft [[rail]]s and [[powered rail]]s.}}
{{History||v0.11.0|snap=build 1|Sticks are now used to craft [[fishing rod]]s.
|Sticks can now be found as a junk [[item]] from [[fishing]].}}
{{History||v0.12.1|snap=build 1|Sticks are now [[drops|dropped]] when [[dead bush]]es are [[breaking|destroyed]].}}
{{History||v0.13.0|snap=build 1|Sticks are now used to craft [[redstone torch]]es, [[lever]]s and [[tripwire hook]]s.}}
{{History||v0.14.0|snap=build 1|Added [[witch]]es, which have a chance of [[drops|dropping]] sticks.
|Sticks can now be used to craft [[item frame]]s.}}
{{History|bedrock}}
{{History||1.2.0|snap=beta 1.2.0.2|Sticks can now be used to craft [[armor stand]]s and [[banner]]s.
|Sticks can now generate inside [[bonus chest]]s.}}
{{History||1.4.0|snap=beta 1.2.20.1|Sticks can now be used to craft [[sparkler]]s.}}
{{History||1.8.0|snap=beta 1.8.0.8|Sticks can now be crafted from [[bamboo]].}}
{{History|||snap=beta 1.8.0.10|Sticks can now be used to craft [[crossbow]]s.}}
{{History||1.10.0|snap=beta 1.10.0.3|Sticks can now be used to craft [[barrel]]s, [[grindstone]]s, and [[campfire]]s.
|[[Leaves]] now have a chance of [[drops|dropping]] 0-2 sticks when [[breaking|destroyed]].}}
{{History||1.11.0|snap=beta 1.11.0.1|Sticks can now be found in [[village]] toolsmith and fletcher [[chest]]s.}}
{{History|||snap=beta 1.11.0.4|Sticks can now be [[trading|sold]] to fletcher [[villager]]s.}}
{{History||1.16.0|snap=beta 1.16.0.51|Sticks can now be used to craft [[soul torch]]es.}}
{{History||1.20.0<br>(Experimental)|link=Bedrock Edition 1.19.70|snap=beta 1.19.70.23|Sticks can now be used to craft [[brush]]es.
|Sticks now drop when brushing [[suspicious sand]] in [[desert well]]s.}}
{{History||1.20.10|snap=beta 1.20.10.20|Sticks are no longer used to craft barrels.}}
{{History|console}}
{{History||xbox=TU1|xbone=CU1|ps=1.0|wiiu=Patch 1|[[File:Stick JE1 BE1.png|32px]] Added sticks.}}
{{History|PS4}}
{{History||1.90|Sticks can now be [[drops|dropped]] by [[leaves]].}}
{{History|new3DS}}
{{History||0.1.0|[[File:Stick JE1 BE1.png|32px]] Added sticks.}}
{{History|foot}}
== Issues ==
{{issue list}}
== Trivia ==
* The stick is used in 49 recipes in ''Java Edition'', and 50 recipes in ''Bedrock Edition'', more than any other item in the game. [[Iron ingot]] takes second place with 35 recipes, and [[planks]] take third place with 34 recipes.
* To craft each recipe once, a player would need 111 sticks, including 1 for the [[redstone torch]] in an [[activator rail]], while using the extra tripwire hook for the [[crossbow]]. This would require 56 [[planks]], or 14 [[logs]], for the sticks, and an extra 29 planks for the [[tool|wooden tools]], [[tripwire hook]], [[signs]], [[fences]], [[fence gate]], [[grindstone]], and slabs for the [[barrel]]. This means that the player needs a total of 85 planks, or 22 logs, plus 6 more for the [[campfire]] and [[soul campfire]].
== External Links ==
*[https://www.minecraft.net/en-us/article/taking-inventory--stick Taking Inventory: Stick] – Minecraft.net on April 2, 2020
{{Items}}
[[cs:Tyčka]]
[[de:Stock]]
[[es:Palo]]
[[fr:Bâton]]
[[hu:Bot]]
[[it:Bastone]]
[[ja:棒]]
[[ko:막대기]]
[[nl:Stok]]
[[pl:Patyk]]
[[pt:Graveto]]
[[ru:Палка]]
[[th:แท่งไม้]]
[[tr:Çubuk]]
[[uk:Палиця]]
[[zh:木棍]]
[[Category:Renewable resources]]</li></ul> | Pre-Release 1 | ||||
| Pocket Edition Alpha | |||||
0.3.0{{Extension DPL}}<ul><li>[[Brick|Brick]]<br/>{{about|the item|the crafted block|Bricks|other uses}}
{{Item
| image = [[File:Brick JE2 BE2.png|32px]]
| stackable = Yes (64)
| renewable = Yes
}}
A '''brick''' is an item used to craft [[bricks|brick]] blocks, [[flower pot]]s, and [[decorated pot]]s.
== Obtaining ==
=== Smelting ===
A brick can be obtained by smelting a [[clay ball]].
{{Smelting
|Clay Ball
|Brick
|0,3
}}
=== Mining ===
When [[breaking]] a [[decorated pot]] with a tool without [[Silk Touch]] on the main hand, the decorated pot can drops 0-4 brick(s) depend on the material that the decorated pot make of.
=== Loot ===
{{LootChestItem|brick}}
=== Trading ===
Novice-level stone mason [[villager]]s sell 16{{only|bedrock}} or 10{{only|java}} bricks for one [[emerald]].
== Usage ==
Brick can be used to craft [[bricks]], [[flower pot]]s, and [[decorated pot]]s.
=== Crafting ingredient ===
{{crafting usage}}
== Data values ==
=== ID ===
{{edition|java}}:
{{ID table
|edition=java
|showforms=y
|generatetranslationkeys=y
|displayname=Brick
|spritetype=item
|nameid=brick
|form=item
|foot=1}}
{{edition|bedrock}}:
{{ID table
|edition=bedrock
|shownumericids=y
|showforms=y
|notshowbeitemforms=y
|generatetranslationkeys=y
|displayname=Brick
|spritetype=item
|nameid=brick
|id=383
|form=item
|foot=1}}
== History ==
{{History|java alpha}}
{{History||v1.0.11|[[File:Brick JE1 BE1.png|32px]] Added bricks as an item.}}
{{History|java}}
{{History||1.4.2|snap=12w34a|Bricks are now used for [[flower pot]]s.}}
{{History||1.13|snap=17w47a|Prior to [[1.13/Flattening|''The Flattening'']], this item's numeral ID was 336.}}
{{History||1.14|snap=18w43a|[[File:Brick JE2 BE2.png|32px]] The texture of bricks has been changed.}}
{{History|||snap=19w11a|Bricks are now [[trading|sold]] by [[villager]]s of the new mason profession, making them [[renewable resource|renewable]].}}
{{History||1.20<br>(Experimental)|link=1.19.4|snap=23w07a|Bricks can now be used for crafting [[decorated pot]]s.|Bricks now drop when brushing [[suspicious sand]] in [[desert well]]s.|Bricks now drop when mining [[decorated pot]] with a tool on the main hand.}}
{{History||1.20|snap=23w12a|The probability for the brick to generate in the [[suspicious sand]] in [[desert well]] has been changed from 1/7 to 1/8.|Brick can now be found in [[suspicious gravel]] and [[suspicious sand]] in [[trail ruins]].}}
{{History|||snap=23w16a|Brick no longer generates in [[suspicious sand]] in [[trail ruins]].|Due to the split of the archaeological loot tables for the suspicious gravel within the [[trail ruins]]; brick now is in the common loot.}}
{{History|pocket alpha}}
{{History||v0.2.0|[[File:Brick JE1 BE1.png|32px]] Added bricks as an item. They are currently unobtainable and serve no purpose.}}
{{History||v0.3.2|Bricks can now be obtained by smelting clay balls.
|Bricks are now used to craft [[brick block]]s.}}
{{History||v0.12.1|snap=build 1|Bricks are now used to craft [[flower pot]]s.}}
{{History||v0.16.0|snap=build 5|Added bricks to the [[Creative]] [[inventory]].<ref name="missing brick">{{Bug|MCPE-16556}}</ref>}}
{{History|bedrock}}
{{History||1.10.0|snap=beta 1.10.0.3|16 bricks can now be obtained via trading with stone mason [[villager]]s for 1-2 [[emerald]]s.
|[[File:Brick JE2 BE2.png|32px]] The texture of bricks has now been changed.}}
{{History||1.11.0|snap=beta 1.11.0.4|Trading has been changed; bricks sold by stone mason villagers now cost only one emerald.}}
{{History||1.20.0<br>(Experimental)|link=Bedrock Edition 1.19.70|snap=beta 1.19.70.23|Bricks now drop when brushing [[suspicious sand]] in [[desert well]]s and can be used to craft decorated pots.}}
{{History|console}}
{{History||xbox=TU1|xbone=CU1|ps=1.0|wiiu=Patch 1|[[File:Brick JE1 BE1.png|32px]] Added bricks.}}
{{History||xbox=none|xbone=none|ps=1.90|wiiu=none|switch=none|[[File:Brick JE2 BE2.png|32px]] The texture of bricks has been changed.}}
{{History|3ds}}
{{History||0.1.0|[[File:Brick JE1 BE1.png|32px]] Added bricks.}}
{{History|foot}}
== Issues ==
{{issue list}}
== References ==
{{reflist}}
{{Items}}
[[Category:Renewable resources]]
[[cs:Cihla]]
[[de:Ziegel]]
[[es:Ladrillo]]
[[fr:Brique]]
[[hu:Tégla]]
[[it:Mattone]]
[[ja:レンガ]]
[[ko:벽돌 (아이템)]]
[[nl:Baksteen]]
[[pl:Cegła]]
[[pt:Tijolo]]
[[ru:Кирпич]]
[[th:อิฐ]]
[[uk:Цеглина]]
[[zh:红砖]]</li><li>[[Raw Mutton|Raw Mutton]]<br/>{{Distinguish|Cooked Mutton}}
{{Item
| title = Raw Mutton
| image = Raw Mutton.png
| heals = {{hunger|2}}
| renewable = Yes
| stackable = Yes (64)
}}
'''Raw mutton''' is a [[food]] item dropped by [[sheep]] when killed.
== Obtaining ==
=== Mob loot ===
An adult [[sheep]] drops 1–2 raw mutton when killed. The maximum amount is increased by 1 per level of [[Looting]], for a maximum of 1–5 with Looting III. If killed while on fire, a sheep drops [[cooked mutton]] instead.
=== Chest loot ===
{{LootChestItem|raw-mutton}}
== Usage ==
=== Food ===
To eat raw mutton, press and hold {{control|use}} while it is selected in the [[hotbar]]. Eating one restores {{hunger|2}} [[hunger]] and 1.2 [[Hunger#Mechanics|saturation]].
=== Smelting ingredient ===
{{Smelting
|showname=1
|Raw Mutton
|Cooked Mutton
|0.35
}}
=== Wolves ===
Raw mutton can be used to [[breed]] and heal tamed [[wolves]], lead them around, and make baby tamed wolves grow up faster by 10% of the remaining time.
=== Trading ===
Journeyman-level butcher [[villager]]s have a 50% chance to buy 7 raw mutton for an [[emerald]] as part of their trades.{{only|bedrock}}
Journeyman-level butcher villagers always offer to buy 7 raw mutton for an emerald.{{only|java}}
==Sounds==
{{Sound table/Entity/Food}}
== Data values ==
=== ID ===
{{edition|java}}:
{{ID table
|edition=java
|showforms=y
|generatetranslationkeys=y
|displayname=Raw Mutton
|spritetype=item
|nameid=mutton
|form=item
|foot=1}}
{{edition|bedrock}}:
{{ID table
|edition=bedrock
|showaliasids=y
|shownumericids=y
|showforms=y
|notshowbeitemforms=y
|generatetranslationkeys=y
|displayname=Raw Mutton
|spritetype=item
|nameid=mutton
|aliasid=muttonraw
|id=550
|form=item
|translationkey=item.muttonRaw.name
|foot=1}}
== Advancements ==
{{load advancements|Husbandry;A Balanced Diet}}
== Video ==
<div style="text-align:center">{{yt|PXlW-sZygTs}}</div>
== History ==
{{History||September 23, 2011|link={{tweet|jeb|117313469900009472}}|Mutton is mentioned by [[Jeb]].}}
{{History||September 11, 2012|link={{tweet|jeb|245503714167750656}}|Jeb again mentions the possibility of mutton as well as calamari being added into the game.}}
{{History|java}}
{{History||June 30, 2014|link=https://twitter.com/TheMogMiner/status/483636993780232192|[[Ryan Holtz]] tweets images of raw mutton and some other new items.}}
{{History||1.8|snap=14w27a|[[File:Raw Mutton JE1.png|32px]] Added raw mutton.}}
{{History||1.8|snap=14w33b|[[File:Raw Mutton JE2 BE1.png|32px]] The texture of raw mutton has been changed. The new texture was created by [[wikipedia:Reddit|Reddit]] user [http://www.reddit.com/u/zeldahuman zeldahuman].<ref>{{reddit|2bjzes/a_reminder_of_the_blocks_and_items_added_in_18_so|cj69zie|context=3}}</ref><ref>{{reddit|2c5f35/minecraft_snapshot_14w31a_has_been_released|cjct7gb}}</ref>}}
{{History||1.13|snap=17w47a|Prior to [[1.13/Flattening|''The Flattening'']], this [[item]]'s numeral ID was 423.}}
{{History||1.14|snap=18w43a|[[File:Raw Mutton JE3 BE2.png|32px]] The texture of raw mutton has been changed.}}
{{History|||snap=18w49a|Raw mutton can now be found in [[chest]]s in [[village]] butcher shops.}}
{{History|||snap=19w11a|Butcher villagers now [[trading|buy]] raw mutton.}}
{{History|pocket alpha}}
{{History||v0.15.0|snap=build 1|[[File:Raw Mutton JE2 BE1.png|32px]] Added raw mutton.}}
{{History|bedrock}}
{{History||1.10.0|snap=beta 1.10.0.3|[[File:Raw Mutton JE3 BE2.png|32px]] The texture of raw mutton has been changed.}}
{{History||1.11.0|snap=beta 1.11.0.1|Raw mutton can now be found in [[village]] butcher [[chest]]s.}}
{{History|||snap=beta 1.11.0.4|Raw mutton can now be [[trading|sold]] to butcher [[villager]]s.}}
{{History||1.16.0|snap=beta 1.16.0.57|Trading has been changed; journeyman butcher villagers now buy 7 raw mutton for an emerald instead of 8.}}
{{History||1.16.100|snap=beta 1.16.100.56|The ID of raw mutton has been changed from <code>muttonraw</code> to <code>mutton</code>.}}
{{History||1.16.210|snap=beta 1.16.210.51|Raw mutton is [[drops|dropped]] by [[goats]].}}
{{History||1.17.0|snap=beta 1.17.0.52|Goats no longer drop raw mutton.}}
{{History|console}}
{{History||xbox=TU31|xbone=CU19|ps=1.22|wiiu=Patch 3|[[File:Raw Mutton JE2 BE1.png|32px]] Added raw mutton.}}
{{History|PS4}}
{{History||1.90|[[File:Raw Mutton JE3 BE2.png|32px]] The texture of raw mutton has been changed.}}
{{History|3ds}}
{{History||0.1.0|[[File:Raw Mutton JE2 BE1.png|32px]] Added raw mutton.}}
{{History|foot}}
== Issues ==
{{issue list}}
== Gallery ==
<gallery>
Rabbit Items 3 Ryan Holtz.png|First image of the item by [[Ryan Holtz]].
Pocket Edition Mutton.jpg|First image of the item in ''Bedrock Edition'' by [[Jason Major]].
</gallery>
== References ==
{{reflist}}
{{items}}
[[de:Rohes Hammelfleisch]]
[[es:Cordero crudo]]
[[fr:Mouton cru]]
[[ja:生の羊肉]]
[[ko:익히지 않은 양고기]]
[[nl:Rauw schapenvlees]]
[[pl:Surowa baranina]]
[[pt:Carneiro cru]]
[[ru:Сырая баранина]]
[[zh:生羊肉]]
[[Category:Food]]
[[Category:Renewable resources]]</li></ul> | File:Crafting Table Revision 1.png Added crafting tables. | ||||
0.6.0{{Extension DPL}}<ul><li>[[:Category:Food|Category:Food]]<br/>
[[Category:Items]]
[[cs:Kategorie:Potraviny]]
[[fr:Catégorie:Nourriture]]
[[hu:Kategória:Ételek]]
[[zh:Category:食物]]</li><li>[[:Category:Tools|Category:Tools]]<br/>[[Category:Items]]
[[fr:Catégorie:Outil]]
[[it:Categoria:Attrezzi]]</li></ul> | Stone blocks (minus furnaces and the stonecutter) are now made with the stonecutter, and they have been removed from the crafting table's list. | ||||
0.9.0{{Extension DPL}}<ul><li>[[Longer String|Longer String]]<br/>{{stub}}
{{Joke feature}}
{{exclusive|java}}
{{item
| image = Longer String.png
| rarity=Common
| renewable=Yes
| stackable=Yes (64)
}}
'''Longer string''' is a joke item from [[Java Edition 23w13a_or_b]].
==Obtaining==
===Crafting===
{{Crafting
|A1= String |B1= String
|Output= Longer String
|shapeless= 1
|ignoreusage=1
}}
==Data values==
===ID===
{{edition|java}}:{{ID table
|edition=java
|showforms=y
|generatetranslationkeys=y
|displayname=Longer String
|spritetype=item
|nameid=string2
|form=item|foot=1}}
==History==
{{History|java}}
{{History||23w13a_or_b|[[File:Longer String.png|32px]] Added longer string.}}
{{History|foot}}
{{items}}
{{Jokes}}
[[Category:Joke items]]
[[ja:Longer String]]
[[pt:Linha mais comprida]]</li><li>[[Medicine|Medicine]]<br/>{{Redirect|Elixir", "Antidote", "Eye Drops", and "Tonic|s=1|the brewable items|Potion}}
{{Education feature}}
{{Exclusive|bedrock|education}}
{{Item
| image = <gallery>
Antidote.png | Antidote
Elixir.png | Elixir
Eye Drops.png | Eye Drops
Tonic.png | Tonic
</gallery>
| renewable = Yes
| stackable = No
}}
A '''medicine''' is a type of [[potion]] that cures the specified [[effect]] instead of applying it.
== Obtaining ==
=== Brewing ===
Cures are brewed from awkward potions using different [[element]]s.{{only|bedrock|education}} These drinks remove the specified effect when drank, and cannot be modified into splash, lingering, extended or enhanced versions.
{| class="wikitable" style="text-align: center;" data-description="Remedies"
! Potion
! Reagent, base
! Effect
! Notes
|-
! {{Inventory slot|Antidote}}<br>Antidote
| {{Brewing Stand
|Input= Silver
|Output2= Awkward Potion
}}
| Cures [[Poison]]
| Silver detects poison {{w|Silver#Symbolic role|in folklore}}, and possesses anti-microbial properties.
|-
! {{Inventory slot|Elixir}}<br>Elixir
| {{Brewing Stand
|Input= Cobalt
|Output2= Awkward Potion
}}
| Cures [[Weakness]]
|
|-
! {{Inventory slot|Eye Drops}}<br>Eye Drops
| {{Brewing Stand
|Input= Calcium
|Output2= Awkward Potion
}}
| Cures [[Blindness]]
|
|-
! {{Inventory slot|Tonic}}<br>Tonic
| {{Brewing Stand
|Input= Bismuth
|Output2= Awkward Potion
}}
| Cures [[Nausea]]
| In real life, {{w|bismuth subsalicylate}} is used as a nausea treatment.
|}
== Usage ==
Each type of medicine has an associated effect that it can cure (see {{slink||Brewing}} for details). Players can drink the medicine only if they have the corresponding effect. Drinking the medicine eliminates the effect. Although medicine does not resemble [[potion]]s, the player still gets the [[glass bottle]] back.
== Sounds ==
{{Sound table
|type=bedrock
|sound=Drink.ogg
|source=player
|description=When a player drinks medicine
|id=random.drink
|foot=1}}
== Data values ==
=== ID ===
{{ID table
|edition=bedrock
|shownumericids=y
|showforms=y
|generatetranslationkeys=y
|displayname=Medicine
|spritetype=item
|nameid=medicine
|id=599
|form=item
|notshowbeitemforms=y
|translationkey=item.medicine.poison.name,item.medicine.weakness.name,item.medicine.blindness.name,item.medicine.nausea.name
|foot=1}}
== History ==
{{History|bedrock}}
{{History||1.4.0|snap=beta 1.2.20.1|[[File:Antidote BE1.png|32px]] [[File:Elixir BE1.png|32px]] [[File:Eye Drops BE1.png|32px]] [[File:Tonic BE1.png|32px]] Added medicines.}}
{{History|education}}
{{History||1.0.27|[[File:Antidote BE1.png|32px]] [[File:Elixir BE1.png|32px]] [[File:Eye Drops BE1.png|32px]] [[File:Tonic BE1.png|32px]] Added medicines.}}
{{History|foot}}
== Issues ==
{{issue list|Cures|Medicine}}
== See also ==
* [[Potion]]
* [[Splash Potion]]
* [[Lingering Potion]]
{{Items}}
{{Education Edition}}
[[Category:Non-renewable resources]]
[[Category:Education Edition items]]
[[de:Medizin]]
[[it:Medicinale]]
[[ja:治療薬]]
[[lzh:藥]]
[[pl:Leki]]
[[pt:Remédio]]
[[zh:药物]]</li></ul> | build 1 | Crafting tables now naturally spawn in villages. | |||
| The crafting menu has a new, organised layout. | |||||
0.13.0{{Extension DPL}}<ul><li>[[Ghast Tear|Ghast Tear]]<br/>{{Item
| image = Ghast Tear.png
| renewable = Yes
| stackable = Yes (64)
}}
'''Ghast tears''' are items [[Drops|dropped]] by [[ghast]]s. They can be used to make potions of [[Regeneration]] and [[end crystal]]s.
== Obtaining ==
=== Mob loot ===
[[Ghast]]s drop 0–1 ghast tears. [[Looting]] increases the maximum ghast tears dropped by one per level, for a maximum of 4 ghast tears with Looting III. Looting also works when knocking back a [[fireball]] with an enchanted item.
== Usage ==
=== Brewing ingredient ===
{{brewing
|showname=1
|head=1
|Ghast Tear
|Mundane Potion
|base=Water Bottle
}}
{{brewing
|foot=1
|Ghast Tear
|Potion of Regeneration
}}
=== Crafting ingredient ===
{{crafting usage}}
== Data values ==
=== ID ===
{{edition|java}}:
{{ID table
|edition=java
|showforms=y
|generatetranslationkeys=y
|displayname=Ghast Tear
|spritetype=item
|nameid=ghast_tear
|form=item
|foot=1}}
{{edition|bedrock}}:
{{ID table
|edition=bedrock
|shownumericids=y
|showforms=y
|notshowbeitemforms=y
|generatetranslationkeys=y
|displayname=Ghast Tear
|spritetype=item
|nameid=ghast_tear
|id=424
|form=item
|foot=1}}
== History ==
{{History|java}}
{{History||1.0.0|snap=Beta 1.9 Prerelease|[[File:Ghast Tear JE1 BE1.png|32px]] Added ghast tears.}}
{{History|||snap=Beta 1.9 Prerelease 3|Ghast tears can now be brewed in a [[water bottle]] to create a [[mundane potion]], or in an [[awkward potion]] to create a [[potion of Healing]].}}
{{History|||snap=Beta 1.9 Prerelease 4|Ghast tears now create [[potion of regeneration|potions of Regeneration]]. This was due to the sheer difficulty in obtaining them.<ref>{{tweet|jeb|123671273904680960|Since Ghast Tears are so hard to get, I've decided to replace the "Instant Health" with "Regeneration" for them|October 11, 2011}}</ref> [[Glistering melon]]s have been added to create potions of Healing, instead.}}
{{History||1.9|snap=15w44b|A ghast tear is now used to [[crafting|craft]] an [[end crystal]].}}
{{History||1.13|snap=17w47a|Prior to [[1.13/Flattening|''The Flattening'']], this [[item]]'s numeral ID was 370.}}
{{History||1.14|snap=18w43a|[[File:Ghast Tear JE2 BE2.png|32px]] The texture of ghast tears has been changed.}}
{{History|pocket alpha}}
{{History||v0.12.1|snap=build 1|[[File:Ghast Tear JE1 BE1.png|32px]] Added ghast tears.|Ghast tears are currently unobtainable as [[ghast]]s don’t [[drops|drop]] them.}}
{{History|||snap=build 7|Ghasts now drop ghast tears.<ref>{{bug|MCPE-9338}}</ref>}}
{{History|pocket}}
{{History||1.0.0|snap=alpha 0.17.0.1|A ghast tear is now used to [[crafting|craft]] an [[end crystal]].}}
{{History|bedrock}}
{{History||1.10.0|snap=beta 1.10.0.3|[[File:Ghast Tear JE2 BE2.png|32px]] The texture of ghast tears has been changed.}}
{{History|console}}
{{History||xbox=TU7|xbone=CU1|ps=1.0|wiiu=Patch 1|switch=1.0.1|[[File:Ghast Tear JE1 BE1.png|32px]] Added ghast tears.}}
{{History||xbox=none|xbone=none|ps=1.90|wiiu=none|switch=none|[[File:Ghast Tear JE2 BE2.png|32px]] The texture of ghast tears has been changed.}}
{{History|New 3DS}}
{{History||0.1.0|[[File:Ghast Tear JE1 BE1.png|32px]] Added ghast tears.}}
{{History|foot}}
== Issues ==
{{issue list}}
== References ==
{{reflist}}
{{items}}
[[Category:Renewable resources]]
[[Category:Brewing recipe]]
[[cs:Ďasova slza]]
[[de:Ghast-Träne]]
[[es:Lágrima de ghast]]
[[fr:Larme de Ghast]]
[[hu:Kísértetkönny]]
[[it:Lacrima di ghast]]
[[ja:ガストの涙]]
[[ko:가스트 눈물]]
[[nl:Ghasttraan]]
[[pl:Łza ghasta]]
[[pt:Lágrima de ghast]]
[[ru:Слеза гаста]]
[[uk:Сльоза ґаста]]
[[zh:恶魂之泪]]</li><li>[[Orange Dye|Orange Dye]]<br/>{{Item
|image = Orange_Dye_JE2_BE2.png
|renewable = Yes
|stackable = Yes (64)
}}
'''Orange dye''' is a [[Dye#Quasi-Primary|quasi-primary dye]] crafted from [[Flower|orange tulips]], or by combining one [[red dye]] with one [[yellow dye]].
== Obtaining ==
=== Crafting ===
{{Crafting
|head = 1
|showname = 0
|Orange Tulip; Torchflower
|Output=Orange Dye
|type=Material
}}
{{Crafting
|Red Dye
|Yellow Dye
|Output = Orange Dye,2
|type = Material
|foot = 1
}}
=== Loot chest ===
{{#invoke:LootChest|base3|orange-dye}}
=== Trading ===
[[Wandering trader|Wandering traders]] sell 3 orange dye for an [[emerald]].
== Usage ==
{{dye usage}}
=== Crafting ingredient ===
{{crafting usage|ignore=Banner|continue=1}}
{{banner crafting usage}}
=== Loom ingredient ===
{{Banner loom usage|Orange Dye}}
=== Trading ===
Apprentice-level shepherd [[villager]]s have a 20% chance to buy 12 orange dye for an [[emerald]] as part of their trades.{{only|bedrock}}
Journeyman-level shepherd [[villager]]s have a {{frac|1|3}} chance to buy 12 orange dye for an [[emerald]].{{only|java}}
== Data values ==
=== ID ===
{{edition|java}}:
{{ID table
|edition=java
|showforms=y
|generatetranslationkeys=y
|displayname=Orange Dye
|spritetype=item
|nameid=orange_dye
|form=item
|foot=1}}
{{edition|bedrock}}:
{{ID table
|edition=bedrock
|showaliasids=y
|shownumericids=y
|showforms=y
|notshowbeitemforms=y
|generatetranslationkeys=y
|displayname=Orange Dye
|spritetype=item
|nameid=orange_dye
|aliasid=dye / 14
|id=409
|form=item
|translationkey=item.dye.orange.name
|foot=1}}
== Video ==
<div style="text-align:center">{{yt|25t7uNMOFS8}}</div>
== History ==
{{History|java beta}}
{{History||1.2|[[File:Orange Dye JE1 BE1.png|32px]] Added orange dye.}}
{{History|java}}
{{History||1.4.2|snap=12w34a|Added the ability to [[Armor#Dyeing|dye]] leather [[armor]] and [[wolf]] collars.}}
{{History||1.4.6|snap=12w49a|Orange dye can now be crafted with [[gunpowder]] to create a [[firework star]].}}
{{History||1.6.1|snap=13w19a|[[Stained clay]] can now be [[crafting|crafted]].}}
{{History||1.7.2|snap=13w36a|With the addition of the new [[flower]]s, many secondary and tertiary [[dye]]s are now primary dyes.}}
{{History|||snap=13w41a|[[Stained glass]] can now be crafted.}}
{{History||1.8|snap=14w30a|Added [[banner]]s, which can be dyed.}}
{{History||1.11|snap=16w39a|Added the ability to dye [[shulker box]]es.}}
{{History||1.12|snap=17w15a|Added the ability to dye [[bed]]s.}}
{{History||1.13|snap=17w47a|The different data values for the <code>dye</code> ID has now been split up into their own IDs.
|Prior to [[1.13/Flattening|''The Flattening'']], this [[item]]'s numeral ID was 351.}}
{{History||1.14|snap=18w43a|[[File:Orange_Dye_JE2_BE2.png|32px]] The texture of orange dye has now been changed.}}
{{History|||snap=18w44a|Orange dye can now change the text color on [[sign]]s to orange.}}
{{History|||snap=19w05a|Added the [[wandering trader]], which sells orange dye.}}
{{History|||snap=19w11a|Orange dye can now be [[trading|bought]] by shepherd villagers.}}
{{History||1.17|snap=20w45a|Orange dye can now be used to craft [[orange candle]]s.}}
{{History|||snap=21w19a|Orange dye can no longer be used to craft orange candles.}}
{{History|||snap=Pre-release 1|Orange dye can now once again be used to craft orange candles.}}
{{History||1.20 (Experimental)|link=1.19.3|snap=22w42a|Orange dye can now change the text color on [[hanging sign]]s to orange.}}
{{History||1.20<br>(Experimental)|link=1.19.4|snap=23w07a|[[Torchflower]]s can now be crafted into orange dye.}}
{{History||1.20|snap=23w12a|Orange dye can now be found in [[suspicious gravel]] and [[suspicious sand]] in [[trail ruins]].}}
{{History|||snap=23w16a|Orange dye no longer generates in [[suspicious sand]] in [[trail ruins]].|Due to the split of the archaeological loot tables for suspicious gravel within [[trail ruins]], orange dye is now common loot.}}
{{History|pocket alpha}}
{{History||v0.3.0|[[File:Orange Dye JE1 BE1.png|32px]] Added orange dye. It is currently unobtainable and serves no purpose.}}
{{History||v0.4.0|Orange dye is now [[craft]]able with rose red and dandelion yellow.
|Orange dye can now be used to craft orange [[wool]].}}
{{History||v0.8.0|snap=build 1|Orange dye is now used to craft [[cocoa bean]]s (version exclusive).}}
{{History||v0.14.0|snap=build 1|Orange dye can now be used to dye [[water]] in [[cauldron]]s.}}
{{History||unknown|The above recipe for orange dye has now been removed.}}
{{History|pocket}}
{{History||1.0.0|snap=alpha 0.17.0.1|Orange dye can now be used to dye [[shulker]]s.}}
{{History||1.1.0|snap=alpha 1.1.0.0|Orange dye can now be used to craft [[concrete powder]] and colored [[bed]]s.}}
{{History|bedrock}}
{{History||1.2.0|snap=beta 1.2.0.2|Orange dye can now be used to craft [[firework star]]s, [[stained glass]], and patterns on [[banner]]s.}}
{{History||1.4.0|snap=beta 1.2.20.1|Orange dye can now be used to craft [[balloon]]s and [[glow stick]]s.}}
{{History||1.8.0|snap=beta 1.8.0.8|Orange dye can now be used to dye [[cat]] collars.}}
{{History||1.10.0|snap=beta 1.10.0.3|Orange dye is now [[trading|sold]] by [[wandering trader]]s.
|Orange dye can now be used to dye white [[carpet]]s.
|[[File:Orange_Dye_JE2_BE2.png|32px]] The texture of orange dye has now been changed.}}
{{History||1.11.0|snap=beta 1.11.0.4|Orange dye can now be [[trading|sold]] to shepherd [[villager]]s.}}
{{History||1.16.100|snap=beta 1.16.100.56|The ID of orange dye has been changed from <code>dye/14</code> to <code>orange_dye</code>.}}
{{History|console}}
{{History||xbox=TU1|xbone=CU1|ps=1.00|switch=1.0.1|wiiu=Patch 1|[[File:Orange Dye JE1 BE1.png|32px]] Added orange dye.}}
{{History|ps4}}
{{History||1.90|[[File:Orange_Dye_JE2_BE2.png|32px]] The texture of orange dye has now been changed.}}
{{History|new 3ds}}
{{History||0.1.0|[[File:Orange_Dye_JE2_BE2.png|32px]] Added orange dye.}}
{{History|foot}}
== Issues ==
{{issue list}}
== References ==
{{Reflist}}
{{Items}}
[[cs:Oranžové barvivo]]
[[de:Oranger Farbstoff]]
[[es:Tinte naranja]]
[[fr:Teinture orange]]
[[hu:Narancssárga festék]]
[[ja:橙色の染料]]
[[ko:주황색 염료]]
[[nl:Oranje kleurstof]]
[[pl:Pomarańczowy barwnik]]
[[pt:Corante laranja]]
[[ru:Оранжевый краситель]]
[[zh:橙色染料]]
[[Category:Items]]
[[Category:Dyes]]
[[Category:Renewable resources]]</li></ul> | build 1 | Stone items which were previously crafted using the stonecutter are now made with the crafting table. | |||
0.14.0{{Extension DPL}}<ul><li>[[Iron Ingot|Iron Ingot]]<br/>{{About|the ingot|the ore|Iron Ore|the mineral block|Block of Iron|the nugget|Iron Nugget|the raw mineral|Raw Iron}}
{{Item
| image = Iron Ingot.png
|type=
| renewable = Yes
| stackable = Yes (64)
}}
'''Iron ingots''' are versatile [[metal]] ingots used extensively in [[crafting]].
== Obtaining ==
=== Chest loot ===
{{LootChestItem|iron-ingot}}
=== Crafting ===
{{Crafting
|head=1
|showname=0
|Block of Iron
|Output=Iron Ingot,9
|type=Material
}}
{{Crafting
|A1= Iron Nugget
|B1= Iron Nugget
|C1= Iron Nugget
|A2= Iron Nugget
|B2= Iron Nugget
|C2= Iron Nugget
|A3= Iron Nugget
|B3= Iron Nugget
|C3= Iron Nugget
|Output=Iron Ingot
|type= Material
|foot=1
}}
=== Smelting ===
{{see also|Iron Ore#Natural generation}}[[Smelting]] raw iron in a [[furnace]] or [[blast furnace]] is the most common way to obtain iron ingots.
{{Smelting
|head=1
|Iron Ore;Deepslate Iron Ore
|Iron Ingot
|0,7
}}
{{Smelting
|foot=1
|Raw Iron
|Iron Ingot
|0,7
}}
=== Compound creation ===
Iron Ingot can be created from its base [[element]]s, using the [[compound creator]].{{only|bedrock|education}}
{| class="wikitable"
!Name
!Elements
!Example recipe
|- <!-- Temporarily using crafting grid as a substitute for the compound creator (template not yet available), since the layout is the same, even if the appearance is different -->
!Iron Ingot
|Iron <br>
|{{Crafting Table
|shapeless= 1
|A2=Iron
|Output=Iron Ingot}}
|}
=== Mob loot ===
{{see also|Tutorials/Iron golem farming}}
[[Iron golem]]s drop 3-5 iron ingots upon death, regardless of the way they die. The looting enchantment does not increase the amount of iron ingots dropped.
[[Zombie]]s, [[husk]]s, and [[zombie villager]]s have a 2.5% ({{frac|1|40}}) chance of dropping either an iron ingot, [[carrot]], or [[potato]] when killed by a player or tamed wolf. This is increased by 1% ({{frac|1|100}}) per level of looting. This gives iron ingots the following chances of dropping:
* {{frac|1|120}} (about 0.83%)
* {{frac|7|600}} (about 1.17%) with Looting I
* {{frac|9|600}} (1.50%) with Looting II
* {{frac|11|600}} (about 1.83%) with Looting III
== Usage ==
=== Crafting ingredient ===
{{crafting usage}}
=== Trading ===
Apprentice-level Armorer, Toolsmith, and Weaponsmith [[Villager|villagers]] buy 3 iron ingots for an [[emerald]] as their third trade.{{only|bedrock}}
Apprentice-level Armorer villagers have a 50% chance to buy 4 iron ingots for one emerald, and apprentice-level Toolsmith and Weaponsmith villagers always offer to buy 4 iron ingots for one emerald.{{only|java}}
=== Repairing ===
Iron ingots are the repair items for the iron [[tier]] and chainmail and iron [[armor material]]s, and thus can be used to [[item repair|repair]] the following items in an [[anvil]]:
* {{ItemLink|Chainmail Helmet}}
* {{ItemLink|Chainmail Chestplate}}
* {{ItemLink|Chainmail Leggings}}
* {{ItemLink|Chainmail Boots}}
* {{ItemLink|Iron Helmet}}
* {{ItemLink|Iron Chestplate}}
* {{ItemLink|Iron Leggings}}
* {{ItemLink|Iron Boots}}
* {{ItemLink|Iron Sword}}
* {{ItemLink|Iron Axe}}
* {{ItemLink|Iron Pickaxe}}
* {{ItemLink|Iron Shovel}}
* {{ItemLink|Iron Hoe}}
=== Healing iron golems ===
{{control|Using}} an iron ingot on an [[iron golem]] restores its health by {{hp|25}}.
=== Beacons ===
Iron ingots can be used to select powers from a [[beacon]]. The player must select one of the available powers, and then insert an iron ingot in the item slot.
An iron ingot can be substituted for an [[emerald]], a [[gold ingot]], a [[diamond]], or a [[netherite ingot]].
=== Smithing ingredient ===
{{Smithing
|head=1
|ingredients=Any Armor Trim +<br/>Any Armor Piece + <br/>Iron Ingot
|Any Armor Trim Smithing Template
|Netherite Chestplate
|Iron Ingot
|Iron Trim Netherite Chestplate
|showdescription=1
|description = All armor types can be used in this recipe,<br/>a netherite chestplate is shown as an example.<br/>
|tail=1
}}
;Trim color palette
The following color palettes are shown on the designs on trimmed armor:
*{{TrimPalette|iron ingot}}
*{{TrimPalette|iron ingot|darker=1}} (a darker color palette is used when an iron armor piece is trimmed using an iron ingot).
== Achievements ==
{{load achievements|Acquire Hardware}}
== Advancements ==
{{load advancements|Acquire Hardware}}
== Data values ==
=== ID ===
{{edition|java}}:
{{ID table
|edition=java
|showitemtags=y
|showforms=y
|generatetranslationkeys=y
|displayname=Iron Ingot
|spritetype=item
|nameid=iron_ingot
|itemtags=beacon_payment_items
|form=item
|foot=1}}
{{edition|bedrock}}:
{{ID table
|edition=bedrock
|shownumericids=y
|showforms=y
|notshowbeitemforms=y
|generatetranslationkeys=y
|displayname=Iron Ingot
|spritetype=item
|nameid=iron_ingot
|id=305
|form=item
|foot=1}}
== History ==
{{History|java indev}}
{{History||0.31|snap=20100128|[[File:Iron Ingot JE1.png|32px]] Added iron ingots.}}
{{History|||snap=20100129|[[File:Iron Ingot JE2 BE1.png|32px]] The texture of iron ingots has been changed.
|Iron ingots can be [[smelting|smelted]] from [[iron ore]] and [[drops|drop]] 3–5 iron ingots.
|Iron ingots can be used to craft [[iron block]]s, [[flint and steel]] and iron [[sword]]s, [[shovel]]s, [[pickaxe]]s and [[axe]]s.}}
{{History|||snap=20100130|Iron ingots are now used to craft [[arrow]]s.|[[Iron block]]s now require 9 iron ingots (3×3) instead 4 (2×2) to be [[crafting|crafted]], making them much more expensive.}}
{{History||20100206|Iron ingots can now be used to [[crafting|craft]] iron [[hoe]]s.}}
{{History||?|[[Smelting]] now [[drops]] only 1 iron ingot (down from 3–5).}}
{{History||20100218|Iron ingots are now used to craft iron [[helmet]]s, [[chestplate]]s, [[leggings]] and [[boots]].}}
{{History|java infdev}}
{{History||20100615|Iron ingots are now used to craft [[bucket]]s.}}
{{History||20100618|Iron ingots are now used to craft [[rail]]s and [[minecart]]s.}}
{{History||20100625-2|Iron ingots can be found in [[dungeon]] [[chest]]s.}}
{{History|java alpha}}
{{History||v1.0.1|Iron ingots are now used to [[crafting|craft]] iron [[door]]s.}}
{{History||v1.0.14|Iron ingots are no longer used to craft [[arrow]]s.}}
{{History||v1.1.0|Iron ingots are now used to craft [[compass]]es.}}
{{History|java beta}}
{{History||1.5|Iron ingots are now used to craft [[detector rail]]s.}}
{{History||1.7|Iron ingots are now used to craft [[piston]]s and [[shears]].}}
{{History||1.8|snap=Pre-release|Iron ingots are found in the new [[stronghold]] storeroom and [[mineshaft]] [[chest]]s.
|Iron ingots are now used to craft [[iron bars]].}}
{{History|java}}
{{History||1.0.0|snap=Beta 1.9 Prerelease 2|Iron ingots are now used to craft [[cauldron]]s.}}
{{History|||snap=Beta 1.9 Prerelease 3|Iron ingots are now found in the new stronghold altar [[chest]]s.}}
{{History||1.1|snap=12w01a|Iron ingots are now found in [[village]] blacksmith chests.}}
{{History||1.2.1|snap=12w06a|[[Zombie]]s now rarely [[drops|drop]] iron ingots, making it a [[renewable resource]].}}
{{History|||snap=12w08a|[[Iron golem]]s now drop 3–5 iron ingots.}}
{{History||1.3.1|snap=12w21a|Added [[desert temple]]s, with a hidden [[chest]] room and loot containing iron ingots.
|Blacksmith [[villager]]s now [[trading|buy]] 8–9 iron ingots for 1 [[emerald]].}}
{{History|||snap=12w22a|Added [[jungle temple]]s, which contain loot [[chest]]s with iron ingots.
|Iron ingots are now used to craft [[tripwire hook]]s.}}
{{History||1.4.2|snap=12w32a|Iron ingots can be used to activate [[beacon]]s.}}
{{History|||snap=12w41a|Iron ingots are now used to craft [[anvil]]s.}}
{{History|||snap=12w42a|Anvils now need 4 iron ingots to [[craft]] instead of 1.}}
{{History||1.5|snap=13w01a|Iron ingots are now used to [[crafting|craft]] heavy [[weighted pressure plate]]s.}}
{{History|||snap=13w02a|Iron ingots are now used to craft [[hopper]]s and [[activator rail]]s.}}
{{History||1.6.1|snap=13w16a|Iron ingot is now used to craft iron [[horse armor]] and [[horse saddle]].}}
{{History|||snap=13w18a|Iron ingot is no longer used to craft iron [[horse armor]] and [[horse saddle]].|Iron ingots are now found in [[nether fortress]] [[chest]]s.}}
{{History||1.8|snap=14w02a|[[Trading]] for iron ingots has been changed: armorer, weapon smith and tool smith [[villager]]s now [[trading|buy]] 7–9 iron ingots for 1 [[emerald]].}}
{{History|||snap=14w07a|Iron ingots are now used to craft [[iron trapdoor]]s.}}
{{History||1.9|snap=15w31a|Iron ingots are now found in [[end city]] ship [[chest]]s.}}
{{History|||snap=15w33c|Iron ingots are now used to craft [[shield]]s.}}
{{History|||snap=15w44a|The average yield from [[dungeon]] and [[desert temple]] chests has been substantially decreased.
|The average yield from [[mineshaft]] and [[nether fortress]] chests has been slightly decreased.}}
{{History||1.11|snap=16w39a|Iron ingots are now found in the new [[woodland mansion]] chests.}}
{{History||1.11.1|snap=16w50a|Iron ingots are now used to craft [[iron nugget]]s.}}
{{History||1.13|snap=17w47a|Prior to [[1.13/Flattening|''The Flattening'']], this [[item]]'s numeral ID was 265.}}
{{History|||snap=18w10a|Iron ingots now generate in [[buried treasure]] [[chest]]s.}}
{{History|||snap=18w11a|Iron ingots can now be found in the chests of [[shipwreck]]s.}}
{{History||1.14|snap=18w43a|Iron ingots can now be used to craft [[crossbow]]s.
|[[File:Iron Ingot JE3 BE2.png|32px]] The texture of iron ingots has been changed.}}
{{History|||snap=18w47a|Iron ingots can now be found inside of loot [[chest]]s on top of [[pillager outpost]]s.}}
{{History|||snap=18w50a|Iron ingots can now be found in chests in [[village]] toolsmith houses.
|Iron ingots can now be used to craft a [[blast furnace]].}}
{{History|||snap=19w04a|Iron ingots can now be used to craft [[stonecutter]]s.}}
{{History||1.15|snap=19w41a|Iron ingots can now be used to heal [[iron golem]]s.}}
{{History||1.16|snap=20w16a|Iron ingots now generate in [[bastion remnants]] chests.
|Iron ingots are now used to craft [[chain]]s.}}
{{History||1.16.2|snap=20w30a|The average yield of iron ingots from bastion remnant chests has been slightly increased.}}
{{History||1.17|snap=21w08a|Iron ingots can now be smelted from [[deepslate iron ore]].}}
{{History|||snap=21w14a|Iron ingots can now be smelted from [[raw iron]].}}
{{History||1.20<br>(Experimental)|link=1.19.4|snap=23w04a|Iron ingots can now be used as an armor trim material.}}
{{History|||snap=23w05a|Iron ingots can now be trimmed with iron [[armor]].}}
{{History|pocket alpha}}
{{History||v0.2.0|[[File:Iron Ingot JE2 BE1.png|32px]] Added iron ingots. They are currently unobtainable and serve no purpose.}}
{{History||v0.3.2|Iron ingots are now obtainable by [[smelting]] iron ore in a [[furnace]].
|Iron ingots can be used to craft [[shears]], [[blocks of iron]] and iron [[pickaxe]]s, [[axe]]s, [[sword]]s and [[shovel]]s.}}
{{History||v0.4.0|Iron ingots are now used to craft [[flint and steel]] and iron [[hoe]]s.}}
{{History||v0.5.0|Iron ingots are now used to craft [[nether reactor core]]s.}}
{{History||v0.6.0|Iron ingots are now used to craft iron [[armor]].}}
{{History||v0.7.0|Iron ingots are now used to craft [[bucket]]s.}}
{{History||v0.8.0|snap=build 1|Iron ingots are now used to craft [[compass]]es and [[iron bars]].}}
{{History|||snap=build 2|Iron ingots are now used to craft [[minecart]]s and [[rail]]s.}}
{{History||v0.9.0|snap=build 1|Iron ingots can now be found in [[village]] blacksmith [[chest]]s, [[stronghold]] altar chests and [[dungeon]] chests.
|[[Zombie]]s now rarely drop iron ingots.}}
{{History||v0.12.1|snap=build 1|Iron ingots are no longer used to craft [[nether reactor core]]s and are instead dropped by it.
|Iron ingots are now used to craft [[anvil]]s.
|Iron ingots are now found in [[nether fortress]] chests.
|Added [[iron golem]]s, which [[drops|drop]] iron ingots.
|Iron ingots can now be used to repair iron [[tool]]s, [[armor]] and [[weapon]]s in [[anvil]]s.
|Added [[zombie villager]]s, which rarely drop iron ingots.}}
{{History||v0.13.0|snap=build 1|Iron ingots are now used to craft [[tripwire hook]]s, [[detector rail]]s, [[iron trapdoor]]s and heavy [[weighted pressure plate]]s.
|Added [[desert temple]]s, which have hidden [[chest]] rooms and loot containing iron ingots.}}
{{History||v0.14.0|snap=build 1|Iron ingots are now used to craft [[hoppers]] and [[cauldron]]s.
|Iron ingots can now be found in [[minecart with chest|minecart chests]] generated in [[mineshaft]]s.}}
{{History||v0.15.0|snap=build 1|Iron ingots are now used to craft [[piston]]s.
|Added [[jungle temple]]s, which have hidden [[chest]] rooms and main treasure rooms that have loot containing iron ingots.
|Added [[husk]]s, which rarely [[drops|drop]] iron ingots.}}
{{History||v0.16.0|snap=build 4|Iron ingots can now be used to activate [[beacon]]s.}}
{{History|pocket}}
{{History||1.0.0|snap=alpha 0.17.0.1|Iron ingots can now be found in [[end city]] ship [[chest]]s.
|Iron ingots can now be found in [[stronghold]] storeroom chests.}}
{{History||1.0.4|snap=alpha 1.0.4.0|Added [[trading]]—armorer, weaponsmith and toolsmith [[villager]]s now [[trading|buy]] 7–9 iron ingots for 1 [[emerald]].}}
{{History||1.1.0|snap=alpha 1.1.0.0|Iron ingots can now be [[crafting|crafted]] using [[iron nugget]]s.
|Iron ingots can now be used to [[crafting|craft]] iron nuggets.
|Iron ingots can now be found in [[woodland mansion]] [[chest]]s.}}
{{History|bedrock}}
{{History||1.4.0|snap=beta 1.2.14.2|Iron ingots now generate in [[buried treasure]] [[chest]]s.
|Iron ingots can now be found in [[shipwreck]] treasure chests.}}
{{History||1.8.0|snap=beta 1.8.0.10|Iron ingots can now be used to craft [[crossbow]]s.}}
{{History||1.10.0|snap=beta 1.10.0.3|Iron ingots can now be found inside [[pillager outpost]]s and plains [[village]]s' weaponsmith chests.
|Iron ingots can now be used to craft [[blast furnace]]s, [[stonecutter]]s and [[shield]]s.
|[[File:Iron Ingot JE3 BE2.png|32px]] The texture of iron ingots has been changed.}}
{{History||1.11.0|snap=beta 1.11.0.1|Iron ingots can now be found in [[village]] armorer and toolsmith [[chest]]s.
|Iron ingots can now be found in [[savanna]], [[taiga]], [[desert]] and [[snowy taiga]] village weaponsmiths.}}
{{History|||snap=beta 1.11.0.4|Armorer, toolsmith, and weaponsmith [[villager]]s now [[trading|buy]] 4 iron ingots for an [[emerald]].}}
{{History||1.16.0|snap=beta 1.16.0.57|Iron ingots now generate in bastion remnants chests.}}
{{History||1.17.0|snap=beta 1.16.230.52|Iron ingots can now be smelted from [[deepslate iron ore]].}}
{{History|||snap=beta 1.17.0.50|Iron ingots can now be smelted from [[raw iron]].}}
{{History||1.18.10|snap=beta 1.18.10.26|Iron ingots can now be used to heal iron golems.}}
{{History||1.19.80|snap=beta 1.19.80.21|Iron ingots can now be used as an armor trim material.}}
{{History|console}}
{{History||xbox=TU1|xbone=CU1|ps=1.0|wiiu=Patch 1|switch=1.0.1|[[File:Iron Ingot JE2 BE1.png|32px]] Added iron ingots.}}
{{History||xbox=none|xbone=none|ps=1.90|wiiu=none|switch=none|[[File:Iron Ingot JE3 BE2.png|32px]] The texture of iron ingots has been changed.}}
{{History|new3DS}}
{{History||0.1.0|[[File:Iron Ingot JE2 BE1.png|32px]] Added iron ingots.}}
{{History|foot}}
== Issues ==
{{issue list}}
== Trivia ==
* To craft each recipe once, a player would need 152 iron ingots, including 27 for the iron blocks in an [[anvil]], while using the extra tripwire hook for the [[crossbow]] and the [[iron nuggets]] for the [[chain]].
== See also ==
* {{BlockLink|Block of Iron}}
* {{ItemSprite|Iron Chestplate}} [[Iron armor]]
* {{ItemLink|Iron Nugget}}
* {{BlockLink|Iron Ore}}
* [[Ores]]
== External links ==
* {{Mcnet|taking-inventory--iron-ignot|Taking Inventory: Iron Ingot}}
{{Items}}
[[cs:Železný ingot]]
[[de:Eisenbarren]]
[[es:Lingote de hierro]]
[[fr:Lingot de fer]]
[[hu:Vasrúd]]
[[it:Lingotto di ferro]]
[[ja:鉄インゴット]]
[[ko:철괴]]
[[nl:IJzerstaaf]]
[[pl:Sztabka żelaza]]
[[pt:Barra de ferro]]
[[ru:Железный слиток]]
[[uk:Залізний зливок]]
[[zh:铁锭]]
[[Category:Renewable resources]]</li><li>[[Light Gray Dye|Light Gray Dye]]<br/>{{Item
| image = Light Gray Dye.png
| renewable = Yes
| stackable = Yes (64)
}}
'''Light gray dye'''{{fn|Known as '''Light Grey Dye''' in British, Canadian, Australian, and New Zealand English variants.}} is a [[Dyeing#Primary Colors|quasi-primary dye]].
== Obtaining ==
=== Crafting ===
{{Crafting
|head=1
|showname=0
|showdescription=1
|Azure Bluet;Oxeye Daisy;White Tulip
|Output=Light Gray Dye
|type=Material
}}
{{Crafting
|Black Dye
|White Dye
|White Dye
|Output=Light Gray Dye,3
|type=Material
|description={{IN|bedrock}}, the black and white dye can be replaced with [[ink sac]]s and [[bone meal]], respectively.
}}
{{Crafting
|Gray Dye
|White Dye
|Output=Light Gray Dye,2
|type=Material
|description={{IN|bedrock}}, the white dye can be replaced with [[bone meal]].
|foot=1
}}
=== Trading ===
[[Wandering trader]]s sell 3 light gray dye for an [[emerald]].
== Usage ==
{{dye usage}}
=== Crafting ingredient ===
{{crafting usage|ignore=Banner|continue=1}}
{{banner crafting usage}}
=== Loom ingredient ===
{{Banner loom usage|Light Gray Dye}}
=== Trading ===
Expert-level shepherd villagers have {{frac|1|6}} chance to buy 12 light gray dye for an emerald.
== Data values ==
=== ID ===
{{edition|java}}:
{{ID table
|edition=java
|showforms=y
|generatetranslationkeys=y
|displayname=Light Gray Dye
|spritetype=item
|nameid=light_gray_dye
|form=item
|foot=1}}
{{edition|bedrock}}:
{{ID table
|edition=bedrock
|showaliasids=y
|shownumericids=y
|showforms=y
|notshowbeitemforms=y
|generatetranslationkeys=y
|displayname=Light Gray Dye
|spritetype=item
|nameid=light_gray_dye
|aliasid=dye / 7
|id=402
|form=item
|translationkey=item.dye.silver.name
|foot=1}}
== Video ==
<div style="text-align:center">{{yt|1w3j1SKcoww}}</div>
== History ==
{{History|java beta}}
{{History||1.2|[[File:Light Gray Dye JE1 BE1.png|32px]] Added light gray dye.}}
{{History|java}}
{{History||1.4.2|snap=12w34a|Added the ability to [[Armor#Dyeing|dye]] leather [[armor]] and [[wolf]] collars.}}
{{History||1.4.6|snap=12w49a|Light gray dye can now be [[crafting|crafted]] with [[gunpowder]] to create a [[firework star]].}}
{{History||1.6.1|snap=13w19a|[[Stained clay]] can now be crafted.}}
{{history||1.7.2|snap=13w36a|With the addition of new [[flower]]s, many secondary and tertiary dyes are now primary [[dye]]s.}}
{{History|||snap=13w41a|[[Stained glass]] can now be crafted.}}
{{History||1.8|snap=14w30a|Added [[banner]]s, which can be dyed.}}
{{History||1.11|snap=16w39a|Added the ability to dye [[shulker box]]es.}}
{{History||1.12|snap=17w15a|Added the ability to dye [[bed]]s.}}
{{History||1.13|snap=17w47a|The different data values for the <code>dye</code> ID have now been split up into their own IDs.
|Prior to [[1.13/Flattening|''The Flattening'']], this [[item]]'s numeral ID was 351.}}
{{History||1.14|snap=18w43a|Light gray dye is now crafted using [[white dye|white]] and [[black dye]]s, instead of [[bone meal]] and [[ink sac]]s.
|[[File:Light Gray Dye JE2 BE2.png|32px]] The texture of light gray dye has now been changed.}}
{{History|||snap=18w44a|Light gray dye can now change the text color on [[sign]]s to light gray.}}
{{History|||snap=19w05a|Added the [[wandering trader]], which sells light gray dye.}}
{{History|||snap=19w11a|Light gray dye can now be [[trading|bought]] by shepherd villagers.}}
{{History||1.17|snap=20w45a|Light gray dye can now be used to craft [[light gray candle]]s.}}
{{History|||snap=21w19a|Light gray dye can no longer be used to craft light gray candles.}}
{{History|||snap=Pre-release 1|Light gray dye can now once again be used to craft light gray candles.}}
{{History||1.20<br>(Experimental)|link=1.19.3|snap=22w42a|Light gray dye can now change the text color on [[hanging sign]]s to light gray.}}
{{History|pocket alpha}}
{{History||v0.3.0|[[File:Light Gray Dye JE1 BE1.png|32px]] Added light gray dye. It is currently unobtainable and serves no purpose.}}
{{History||v0.8.0|snap=build 1|Light gray dye can be [[craft]]ed with [[bone meal]] and [[gray dye]], or with two bone meals and an [[ink sac]], despite there being no way of obtaining gray dye or ink sacs at the time.}}
{{History||v0.8.0|snap=build 3|Light gray dye is now available in [[creative]] mode.}}
{{History||v0.9.0|snap=build 3|Light gray dye can now be obtained in [[survival]] mode.}}
{{History|||snap=build 11|Light gray dye can now be used to craft colored [[terracotta]].}}
{{History||v0.11.0|snap=build 1|Light gray dye can now be used to dye tamed [[wolf]] collars.}}
{{History||v0.14.0|snap=build 1|Light gray dye can now be used to dye [[water]] in [[cauldron]]s.}}
{{History|pocket}}
{{History||1.0.0|snap=alpha 0.17.0.1|Light gray dye can now be used to dye [[shulker]]s.}}
{{History||1.1.0|snap=alpha 1.1.0.0|Light gray dye can now be used to craft [[concrete powder]], colored [[bed]]s and dyed [[shulker box]]es.}}
{{History|bedrock}}
{{History||1.2.0|snap=beta 1.2.0.2|Light gray dye can now be used to craft [[firework star]]s, [[stained glass]] and patterns on [[banner]]s.}}
{{History||1.4.0|snap=beta 1.2.20.1|Light gray dye can now be used to craft [[balloon]]s and [[glow stick]]s.}}
{{History||1.8.0|snap=beta 1.8.0.8|Light gray dye can now be used to dye tamed [[cat]] collars.}}
{{History||1.10.0|snap=beta 1.10.0.3|Light gray dye is now [[trading|sold]] by [[wandering trader]]s.
|Light gray dye can now be used to dye white [[carpet]]s and undyed [[glass pane]]s.
|[[File:Light Gray Dye JE2 BE2.png|32px]] The texture of light gray dye has now been changed.}}
{{History||1.11.0|snap=beta 1.11.0.1|Light gray dye can be [[trading|sold]] to shepherd [[villager]]s.}}
{{History||1.16.100|snap=beta 1.16.100.56|The ID of light gray dye has been changed from <code>dye/7</code> to <code>light_gray_dye</code>.}}
{{History|console}}
{{History||xbox=TU1|xbone=CU1|ps=1.00|switch=1.0.1|wiiu=Patch 1|[[File:Light Gray Dye JE1 BE1.png|32px]] Added light gray dye.}}
{{History|PS4}}
{{History||1.90|[[File:Light Gray Dye JE2 BE2.png|32px]] The texture of light gray dye has now been changed.}}
{{History|new 3ds}}
{{History||0.1.0|[[File:Light Gray Dye JE1 BE1.png|32px]] Added light gray dye.}}
{{History|foot}}
== Issues ==
{{issue list}}
== Trivia ==
* In [[Bedrock Edition]], Some items/blocks' Block states/Item NBT uses '''Silver''' instead of '''Light Gray'''
== Notes ==
{{fnlist}}
{{Items}}
[[Category:Dyes]]
[[cs:Světle šedé barvivo]]
[[de:Hellgrauer Farbstoff]]
[[es:Tinte gris claro]]
[[fr:Teinture gris clair]]
[[hu:Világosszürke festék]]
[[ja:薄灰色の染料]]
[[ko:회백색 염료]]
[[nl:Lichtgrijze kleurstof]]
[[pl:Jasnoszary barwnik]]
[[pt:Corante cinza-claro]]
[[ru:Светло-серый краситель]]
[[zh:淡灰色染料]]
[[Category:Renewable resources]]</li></ul> | build 1 | A crafting table now generates in Witch Huts. | |||
| Pocket Edition | |||||
1.0.0{{Extension DPL}}<ul><li>[[Fire Charge|Fire Charge]]<br/>{{ItemEntity
|image=Fire Charge.png
|invimage=Fire Charge
|durability=
|renewable=Yes
|stackable=Yes (64)
|networkid='''[[JE]]''': 64
}}
'''Fire charges''' are items that can be {{control|used}} as a single-use version of a [[flint and steel]] or shot as a [[small fireball]] from a [[dispenser]].
== Obtaining ==
=== Chest loot ===
{{LootChestItem|fire-charge}}
=== Crafting ===
{{Crafting
|Blaze Powder
|Coal; Charcoal
|Gunpowder
|Output= Fire Charge, 3
|type= Miscellaneous
}}
=== Bartering ===
[[Piglin]]s may [[barter]] 1 fire charge when given a [[gold ingot]].
== Usage ==
[[File:Natural Fire Charge.png|200px|thumb|Dispensing Fire Charge]]
Fire charges can be used as ammunition for [[dispenser]]s, or as a substitute for [[flint and steel]].
When used, it instantly places a [[fire]], similar to flint and steel. The fire charge is consumed in the process. It can prime [[TNT]], light [[Nether portal|nether portals]], [[Campfire|campfires]], [[Candle|candles]], [[Cake|cakes with candles]] and [[creeper]]s{{only|JE}} like flint and steel.
When a fire charge is fired from a dispenser, it shoots a [[small fireball]].
=== Crafting ingredient ===
{{crafting usage}}
== Sounds ==
{{edition|java}}:
{{Sound table
|rowspan=4
|sound=Ghast fireball4.ogg
|subtitle=Ghast shoots
|source=hostile
|description=When a fireball is shot by a ghast
|id=entity.ghast.shoot
|translationkey=subtitles.entity.ghast.shoot
|volume=10.0
|pitch=0.8-1.2
|distance=16 {{verify}}}}
{{Sound table
|subtitle=Blaze shoots <ref group=sound name=LousyEvents>{{Bug|MC-98316||Wrong subtitles caused by missing distinction}}</ref>
|source=hostile
|description=When a fire charge is fired from a dispenser or a blaze
|id=entity.blaze.shoot|idnote=<ref group=sound name=LousyEvents/>
|translationkey=subtitles.entity.blaze.shoot|translationkeynote=<ref group=sound name=LousyEvents/>
|volume=2.0
|pitch=0.8–1.2
|distance=32}}
{{Sound table
|subtitle=Fireball whooshes
|source=block
|description=When a fire charge is used by hand
|id=item.firecharge.use|idnote=<ref group=sound name=nounderscore>{{bug|MC-177457}}</ref>
|translationkey=subtitles.item.firecharge.use|translationkeynote=<ref group=sound name=nounderscore/>
|volume=1.0
|pitch=0.8-1.2
|distance=16}}
{{Sound table
|subtitle=Fireball whooshes
|source=hostile
|description=When a fire charge is used to light a creeper
|id=item.firecharge.use|idnote=<ref group=sound name=nounderscore/>
|translationkey=subtitles.item.firecharge.use|translationkeynote=<ref group=sound name=nounderscore/>
|volume=1.0
|pitch=0.8-1.2
|distance=16
|foot=1}}
{{edition|bedrock}}:
{{Sound table
|type=bedrock
|sound=Ghast fireball4.ogg
|source=hostile
|description=When something shoots or uses a fire charge
|id=mob.ghast.fireball
|volume=1.0
|pitch=1.0
|foot=1}}
== Data values ==
=== ID ===
{{edition|java}}:
{{ID table
|edition=java
|showforms=y
|generatetranslationkeys=y
|displayname=Fire Charge
|spritetype=item
|nameid=fire_charge
|form=item
|foot=1}}
{{edition|bedrock}}:
{{ID table
|edition=bedrock
|showaliasids=y
|shownumericids=y
|showforms=y
|notshowbeitemforms=y
|generatetranslationkeys=y
|displayname=Fire Charge
|spritetype=item
|nameid=fire_charge
|aliasid=fireball
|id=509
|form=item
|translationkey=item.fireball.name
|foot=1}}
=== Entity data ===
{{main|Small Fireball#Entity data}}
== Achievements ==
{{Load achievements|Into the Nether}}
== Advancements ==
{{load advancements|We Need to Go Deeper}}
== Video ==
<div style="text-align:center">{{yt|IiCTxsHg6SQ}}</div>
== History ==
{{for|information pertaining to smallmfireballs (which fire charges produce when shot from a dispenser)|Small Fireball#History}}
{{History|java}}
{{History||1.0.0|snap=Beta 1.9 Prerelease|[[File:Fire Charge JE1 BE1.png|32px]] Added the fire charge texture. It is currently only used by [[fireball]]s and [[small fireball]]s, both of which are entities, and is not used by any items.}}
{{History||1.2.1|snap=12w04a|Added fire charges, which use the above texture. They can be crafted only with [[coal]].}}
{{History|||snap=12w05a|Fire charges can now be crafted with charcoal.}}
{{History||1.4.2|snap=12w38b|The [[sound]] when using the fire charge has now been changed; it now uses the same sound as [[flint and steel]].}}
{{History||1.4.6|snap=12w49a|Fire charges can now be used to craft [[Firework Rocket|fireworks]].}}
{{History||1.8|snap=14w31a|The sound when using fire charges to set fire has now been changed; it now uses the same sound as when fired from [[dispenser]]s.}}
{{History||1.9|snap=15w33c|Fire charges now appear purple and explode with [[dragon's breath]] when fired from dispensers. Whether a true dragon fireball entity is created or if this effect is purely visual is unknown.}}
{{History|||snap=15w44b|Fire charges once again appear as [[small fireball]]s when fired from dispensers.}}
{{History||1.11|snap=16w40a|The <code>life</code> tag is no longer used for anything, but still saved/read.{{info needed|Is this even relevant to the fire charge, or is it a remnant from the blaze page or something?}}}}
{{History||1.13|snap=17w47a|Prior to [[1.13/Flattening|''The Flattening'']], this [[item]]'s numeral ID was 385.}}
{{History||1.14|snap=18w43a|[[File:Fire Charge JE2 BE2.png|32px]] The texture of fire charges has now been changed.}}
{{History||1.15|snap=19w42a|Dispensed fire charges{{info needed|as in the fireball, or a dispenser facing straight into a campfire?}} can now light campfires.}}
{{History||1.16|snap=20w07a|Fire charges have a {{frac|5|109}} (~4.59%) chance of being given by the new [[piglin]]s when [[bartering]], in a stack size of 1.}}
{{History|||snap=20w09a|Fire charges now have a {{frac|20|226}} (~8.85%) chance of being given by piglins when bartering, in a stack size of 1–5.}}
{{History|||snap=20w10a|Fire charges now have a {{frac|40|411}} (~9.73%) chance of being given by piglins when bartering, in a stack size of 1–5.}}
{{History|||snap=20w11a|Fire charges now have a {{frac|40|417}} (~9.59%) chance of being given by piglins when bartering, in a stack size of 1–5.}}
{{History|||snap=20w13a|Fire charges now have a {{frac|40|424}} (~9.43%) chance of being given by piglins when bartering, in a stack size of 1–5.}}
{{History|||snap=20w16a|Fire charges now generate in [[ruined portal]] chests.}}
{{History|||snap=20w20a|Fire charges now have a {{frac|40|423}} (~9.46%) chance of being given by piglins when bartering, in a stack size of 1–5.}}
{{History||1.16.2|snap=20w28a|Fire charges now have a {{frac|40|459}} (~8.71%) chance of being given by piglins when bartering, in a stack size of 1.}}
{{History||1.19.3|snap=Pre-release 2|Fire charges can now be {{control|use|text=used}} to forcibly detonate [[creeper]]s.<ref>{{bug|MC-185618|||Fixed}}</ref>}}
{{History||1.19.4|snap=23w06a|Added the [[fire charge]] to the "Ingredients" tab in the creative inventory.}}
{{History|pocket alpha}}
{{History||v0.15.0|snap=build 1|[[File:Fire Charge JE1 BE1.png|32px]] Added fire charges.}}
{{History|bedrock}}
{{History||1.2.0|snap=beta 1.2.0.2|Fire charges can now be used to craft [[firework star]]s.}}
{{History||1.10.0|snap=beta 1.10.0.3|[[File:Fire Charge JE2 BE2.png|32px]] The texture of fire charges has now been changed.}}
{{History||1.16.0|snap=beta 1.16.0.57|Fire charges can now be obtained from bartering with piglin.
|Fire charges can now be found in [[ruined portal]] chests.}}
{{History||1.16.100|snap=beta 1.16.100.56|The ID of fire charges has been changed from <code>fireball</code> to <code>fire_charge</code>.}}
{{History|console}}
{{History||xbox=TU9|xbone=CU1|ps=1.0|wiiu=Patch 1|switch=1.0.1|[[File:Fire Charge JE1 BE1.png|32px]] Added fire charges.}}
{{History||xbox=TU31|xbone=CU19|ps=1.22|wiiu=Patch 3|Fire charges now make [[sound]]s when igniting [[block]]s.}}
{{History||xbox=none|xbone=none|ps=1.90|wiiu=none|switch=none|[[File:Fire Charge JE2 BE2.png|32px]] The texture of fire charges has now been changed.}}
{{History|3ds}}
{{History||0.1.0|[[File:Fire Charge JE1 BE1.png|32px]] Added fire charges.}}
{{History|foot}}
== Issues ==
{{issue list}}
== Gallery ==
<gallery>
GodPortal.png|A fire charge found in a [[ruined portal]] chest, together with an [[enchanted golden apple]].
</gallery>
== See also ==
* [[Flint and Steel]]
* [[Dragon Fireball]]
* [[Ghast]]
== References ==
{{reflist}}
== External Links ==
*[https://www.minecraft.net/en-us/article/taking-inventory-fire-charge Taking Inventory: Fire Charge] – Minecraft.net on January 11, 2019
{{Items}}
[[Category:Recipe using Charcoal]]
[[cs:Ohnivá koule]]
[[de:Feuerkugel]]
[[es:Carga ígnea]]
[[fr:Boule de feu]]
[[hu:Tűzgolyó]]
[[ja:ファイヤーチャージ]]
[[ko:화염구]]
[[nl:Vuurbal]]
[[pl:Ognista kula]]
[[pt:Bola de fogo]]
[[ru:Огненный шар]]
[[th:ลูกไฟ]]
[[zh:火焰弹]]</li><li>[[Firework Star|Firework Star]]<br/>{{Item
| image = Firework Star.png
| renewable =
* '''Trail Effect''': No
* '''All Others''': Yes
| stackable = Yes (64)
}}
'''Firework stars''' are [[items]] used to determine the color, effect, and shape of [[firework rocket]]s.
== Obtaining ==
In [[Survival]] mode, firework stars are obtainable only through crafting. In [[Creative]] mode, they can be found in the creative inventory.
=== Crafting ===
{{Crafting
|head=1
|showname=0
|showdescription=1
|ingredients=[[Gunpowder]] +<br>Matching [[Dye]] +<br>Extra ingredients (optional)
|Gunpowder
|Matching Dye
|Head; Gold Nugget; Feather;Fire Charge;
|Glowstone Dust;
|Diamond;
|Output=Matching Firework Star
|arggroups=1;2,Output;3;4;5
|description=Up to eight dyes can be added.<br>One head, gold nugget, feather, or fire charge can be added.<br>Both the diamond and the glowstone dust can be added with any of the other ingredients.
|type=Miscellaneous
}}
{{Crafting
|ignoreusage=1
|Matching Firework Star
|Any Dye
|Output=Matching Firework Star
|type=Miscellaneous
|description=Adds a "fade to color" effect to the firework star, overwriting any existing fades.<br>Up to eight dyes can be added.
|foot=1
|arggroups=1,Output
}}
<div style="display:none">
<!--
This is so the pre-Village & Pillage dyes can have dye-related crafting recipes show on their respective pages.
They don't need to be displayed on this page because they already intuitively list "Any Matching/Colored Dye".
-->
{{Crafting
|head=1
|showname=0
|showdescription=1
|Gunpowder
|Bone Meal; Lapis Lazuli; Cocoa Beans; Ink Sac
|Head; Gold Nugget; Feather;Fire Charge;
|Glowstone Dust;
|Diamond;
|Output=White Firework Star; Blue Firework Star; Brown Firework Star; Black Firework Star
|arggroups=1;2,Output;3;4;5
|description={{only|bedrock|education}}<br>Up to eight dyes can be added.<br>One head, gold nugget, feather, or fire charge can be added.<br>Both the diamond and the glowstone dust can be added with any of the other ingredients.
|type=Miscellaneous
}}
{{Crafting
|showdescription=1
|White Firework Star; Blue Firework Star; Brown Firework Star; Black Firework Star
|Bone Meal; Lapis Lazuli; Cocoa Beans; Ink Sac
|Output=White Firework Star; Blue Firework Star; Brown Firework Star; Black Firework Star
|type=Decoration block
|description={{only|bedrock|education}}<br>Adds a "fade to color" effect to the firework star, overwriting any existing fades.<br>Up to eight dyes can be added.
|foot=1
}}
</div>
== Usage ==
The only usage of firework stars is to create [[firework rocket]]s.
=== Crafting ingredient ===
{{crafting usage|match=end}}
== Effects ==
=== Shape effects ===
A firework star can have only one shape effect.
{| class="wikitable"
|+ Shape Effects
! <abbr title="Type (Byte tag in NBT structure)">Type</abbr>
! Ingredient
! Effect
! Sample Animation
|-
| 0
| None
| Small Ball explosion (default)
| [[File:Firework Star (Small Sphere).gif|200px]]
|-
| 1
| {{ItemLink|Fire Charge}}
| Large Ball explosion and heavy sound.
| [[File:Firework Star (Large Sphere).gif|200px]]
|-
| 2
| {{ItemLink|Gold Nugget}}
| Star-shaped explosion
| [[File:Firework Star (Star Shape).gif|200px]]
|-
| 3
| {{BlockLink|id=Heads|Head}} (any)
| Creeper-shaped (Creeper Face) explosion
| [[File:Firework Star (Creeper Shape).gif|200px]]
|-
| 4
| {{ItemLink|Feather}}
| Burst explosion
| [[File:Firework Star (Burst).gif|200px]]
|}
=== Additional effects ===
In addition to the shape effects, any combination of these additional effects may be added to a firework star.
{| class="wikitable"
|+ Additional Effects
! Ingredient
! Effect
! Sample Animation
|-
| None
| Default
| [[File:Firework Star (Small Sphere).gif|200px]]
|-
| {{ItemLink|Glowstone Dust}}
| Twinkle (Crackle effect and sounds after the explosion)
| [[File:Firework Star (Twinkle effect).gif|200px]]
|-
| {{ItemLink|Diamond}}
| Trail effect after the explosion
| [[File:Firework Star (Trail effect).gif|200px]]
|-
| {{ItemLink|Glowstone Dust}} <br> {{ItemLink|Diamond}}
| Twinkle + Trail effect after the explosion
| [[File:Firework Star (Twinkle and Trail effect).gif|200px]]
|}
== Sounds ==
{{see also|Firework_Rocket#Sounds}}
== Data values ==
=== ID ===
{{edition|java}}:
{{ID table
|edition=java
|showforms=y
|generatetranslationkeys=y
|displayname=Firework Star
|spritetype=item
|nameid=firework_star
|form=item
|foot=1}}
{{edition|bedrock}}:
{{ID table
|edition=bedrock
|showaliasids=y
|shownumericids=y
|showforms=y
|notshowbeitemforms=y
|generatetranslationkeys=y
|displayname=Firework Star
|spritetype=item
|nameid=firework_star
|aliasid=fireworkscharge
|id=520
|form=item
|translationkey=item.fireworksCharge.name
|foot=1}}
=== Item data ===
{{el|java}}:
{{main|Player.dat format}}
<div class="treeview">
* {{nbt|compound|tag}}: The item's '''tag''' tag.
{{:Player.dat_format/Firework Stars}}
</div>
{{el|bedrock}}:
: See [[Bedrock Edition level format/Item format]].
== Video ==
<div style="text-align:center">{{yt|fYL1W9aW0UU}}</div>
== History ==
{{History|java}}
{{History||1.4.6|snap=12w49a|[[File:Firework Star JE1 BE1.png|32px]] Added firework stars.
|Firework stars in the [[Creative inventory]] come in only one variation; they do not have any color.}}
{{History||1.13|snap=17w47a|The ID of firework stars has now been changed from <code>firework_charge</code> to <code>firework_star</code>.
|Prior to [[Java Edition 1.13/Flattening|''The Flattening'']], this [[item]]'s numeral ID was 402.}}
{{History|bedrock}}
{{History||1.2.0|snap=beta 1.2.0.2|[[File:Firework Star JE1 BE1.png|32px]] Added firework stars.
|Firework stars come in all 16 colors in the [[Creative]] [[inventory]].{{verify|type=update}}{{info needed}}}}
{{History||1.16.100|snap=beta 1.16.100.56|The ID of firework star has been changed from <code>fireworkscharge</code> to <code>firework_star</code>.}}
{{History|console}}
{{History||xbox=TU19|xbone=CU7|ps=1.12|wiiu=Patch 1|switch=1.0.1|[[File:Firework Star JE1 BE1.png|32px]] Added firework stars.
|Firework stars cannot be obtained within the Creative inventory.}}
{{History||xbox=TU46|xbone=CU36|ps=1.38|wiiu=Patch 15|The [[crafting]] interface has now been updated to allow the crafting of firework stars and [[firework rocket]]s.}}
{{History|foot}}
== Issues ==
{{Issue list}}
== Trivia ==
* There are 29,617,272,331,290,537 (29.6 quintillion) unique firework stars.
* Putting firework stars on rockets causes the player to take explosion damage when using them for flying with [[elytra]].
== Gallery ==
<gallery>
File:Firework Star (Tricolor Star shaped with Twinkle and Trail effect).gif|Tricolor (Magenta, Pink, White dye) + Star shaped with Twinkle and Trail effect.
</gallery>
{{Items}}
[[cs:Ohňostrojová hvězda]]
[[de:Feuerwerksstern]]
[[es:Estrella de fuegos artificiales]]
[[fr:Étoile de feu d'artifice]]
[[hu:Tűzijáték csillag]]
[[it:Stella pirotecnica]]
[[ja:花火の星]]
[[ko:폭죽 탄약]]
[[nl:Vuurwerkster]]
[[pl:Gwiazdka pirotechniczna]]
[[pt:Estrela de fogo de artifício]]
[[ru:Пиротехническая звезда]]
[[uk:Зірка феєрверку]]
[[zh:烟火之星]]</li></ul> | alpha 0.17.0.1 | A crafting table now generates inside igloos. | |||
| Bedrock Edition | |||||
1.2.0{{Extension DPL}}<ul><li>[[Minecart with Chest|Minecart with Chest]]<br/>{{ItemEntity
|image=Minecart with Chest.png
|renewable=Yes
|stackable=No
|size=Height: 0.7 Blocks<br>Width: 0.98 Blocks
|networkid='''[[JE]]''': 10
|drops=1 {{ItemLink|Minecart with Chest}}<br> plus contents
|health={{hp|6}}
}}
A '''minecart with chest''' is a single [[chest]] inside a [[minecart]], and functions as such.
== Natural generation ==
Minecarts with chests containing loot naturally generate in [[mineshaft]]s, each on top of a piece of [[rail]].
== Obtaining ==
=== Crafting ===
{{Crafting|Chest|Minecart|Output=Minecart with Chest|type=Transportation}}
Minecarts with chests can be retrieved by attacking them. By doing so it drops as an [[item]] and any other contents of the chest are dropped as well.
==Usage==
[[File:Minecart with Chest GUI.png|thumb|176px|The GUI of a minecart with chest.]]
Minecarts with chests can be placed by {{control|use item|text=using its item}} on any type of [[rail]].
Chest minecarts' contents can be accessed by pressing {{control|use item}} button on them. The interaction makes no sounds and the chest does not show the opening or closing animation, unlike regular chests.
The boost that minecarts with chests gain from [[powered rail]]s is dependent on their load. For example, from a 1 powered rail starter track, an empty minecart with chest travels 64 blocks, but a full minecart with chest travels only 16 blocks (opposed to 80 blocks for an occupied normal minecart and 8 blocks for an empty normal minecart).
Another physical property of chest minecarts is their ability to be stacked. While three chests can fit in an area three blocks tall, up to four chest minecarts can fit in the same area. Like other minecarts, an unlimited number of minecarts with chests can exist in the same block space.
Minecarts with chests are also able to interact with [[hopper]]s. Hoppers can take items out from the minecart chest if they are below the track as the minecart rolls over it or put them in if the minecart rolls under a downward facing hopper. Hoppers can also input items if they are facing into the side of the minecart.
Opening or destroying a minecart with chest angers [[piglin]]s.
{{See also|Tutorials/Storage minecarts}}
When on top of [[detector rail]]s, nearby [[redstone comparators]] will give out redstone signals based on how full the minecarts with chests are.
== Sounds ==
{{Edition|Java}}:<br>
Minecarts with chests use the Friendly Creatures sound category for entity-dependent sound events.<ref group=sound name=rollsource>{{bug|MC-42132}}</ref>
{{Sound table
|sound=Minecart rolling.ogg
|subtitle=Minecart rolls
|source=Friendly Creatures <ref group=sound name=rollsource/>
|overridesource=1
|description=While a minecart with chest is moving
|id=entity.minecart.riding
|translationkey=subtitles.entity.minecart.riding
|volume=0.0-0.35 <ref group=sound>Relates linearly with horizontal velocity (max 0.5)</ref>
|pitch=0.0-1.0 <ref group=sound>Will increase by 0.0025 per tick if the minecart's horizontal velocity is more than 0.01</ref>
|distance=16
|foot=1}}
{{Edition|Bedrock}}:
{{Sound table
|type=bedrock
|sound=Minecart rolling.ogg
|source=neutral
|description=While a minecart with chest is moving
|id=minecart.base
|foot=1}}
==Data values==
===ID===
{{edition|java}}:
{{ID table
|edition=java
|firstcolumnname=Item
|showforms=y
|generatetranslationkeys=y
|displayname=Minecart with Chest
|spritetype=item
|nameid=chest_minecart
|form=item
|foot=1}}
{{ID table
|edition=java
|firstcolumnname=Entity
|generatetranslationkeys=y
|displayname=Minecart with Chest
|spritetype=entity
|nameid=chest_minecart
|foot=1}}
{{edition|bedrock}}:
{{ID table
|edition=bedrock
|firstcolumnname=Item
|shownumericids=y
|showforms=y
|notshowbeitemforms=y
|generatetranslationkeys=y
|displayname=Minecart with Chest
|spritetype=item
|nameid=chest_minecart
|id=389
|form=item
|foot=1}}
{{ID table
|edition=bedrock
|firstcolumnname=Entity
|shownumericids=y
|generatetranslationkeys=y
|displayname=Minecart with Chest
|spritetype=entity
|nameid=chest_minecart
|id=98
|foot=1}}
===Entity data===
Minecarts with chests have entity data associated with them that contain various properties of the entity.
{{el|java}}:
{{main|Entity format}}
{{/ED}}
{{el|bedrock}}:
: See [[Bedrock Edition level format/Entity format]].
==Achievements==
{{load achievements|Freight Station}}
== Video==
<div style="text-align:center">{{yt|2yVVMiQrCwo}}</div>
==History ==
[[File:Minecart with Chest BE3.png|thumb|The Minecart models in the Bedrock Edition were north or south on the sides. In the latest version, the front and rear sides are north or south. But the absolute orientation of the chest was not changed.]]
{{info needed section|In bedrock edition 1.16.100 it seems that chests in minecarts face sideways instead of forward - when was this changed?}}
{{History|java alpha}}
{{History||v1.0.14|[[File:Minecart with Chest JE1.png|32px]] [[File:Minecart with Chest (item) JE1 BE1.png|32px]] Minecarts with chests have been added.
|At this point, they are either called "chest minecarts" or "storage minecarts" because no in-game name was indicated.}}
{{History|java beta}}
{{History||1.0|"Minecart with Chest" has been first indicated as its name, via the new item tooltips.}}
{{History||1.8|snap=Pre-release|[[File:Minecart with Chest JE2.png|32px]] The [[model]] of the minecart with chest has been changed to match the new [[chest]] model. However, the [[chest]] is incorrectly offset.<ref>[[mcw:Issues/Beta 1.8pre2#Graphical]]</ref>}}
{{History|||snap=release|[[File:Minecart with Chest JE3 BE1.png|32px]] The model of minecarts with chests has been fixed.}}
{{History|java}}
{{History||1.5|snap=13w02a|Minecarts with chests now generate in [[mineshaft]]s in place of normal chests.}}
{{History||1.9|snap=15w43a|[[Loot table]]s have been added; minecarts with chests now use loot tables, and those in generated in [[mineshaft]]s now use loot tables.}}
{{History||1.9.1|snap=pre2|The title of the [[inventory]] has been changed from 'Chest minecart' to 'Minecart with Chest'.}}
{{History||1.11|snap=16w32a|The [[entity]] ID has been changed from <code>MinecartChest</code> to <code>chest_minecart</code>.}}
{{History||1.13|snap=17w47a|Prior to [[1.13/Flattening|''The Flattening'']], this [[item]]'s numeral ID was 342.}}
{{History||1.14|snap=18w43a|[[File:Minecart with Chest JE4 BE2.png|32px]] [[File:Minecart with Chest (item) JE2 BE2.png|32px]] The textures of minecarts with chests have been changed.}}
{{History||1.16.2|snap=Pre-release 1|[[Piglin]]s now become angry with players who open or destroy a chest minecart.}}
{{History||1.19|snap=22w13a|The crafting recipe for a minecart with chest is now shapeless.
|Breaking a minecart with chest will now drop the item instead of the minecart and chest separately, though the contents of the chest are still dropped.<ref>{{bug|MC-249493|||Fixed}}</ref>}}
{{History|pocket alpha}}
{{History||v0.14.0|snap=build 1|[[File:Minecart with Chest JE3 BE1.png|32px]] [[File:Minecart with Chest (item) JE1 BE1.png|32px]] Added minecarts with chests.}}
{{History|||snap=build 3|Minecarts with chests now drop [[item]]s when destroyed in [[Creative]] mode.}}
{{History|pocket}}
{{History||1.1.0|snap=alpha 1.1.0.0|The [[entity]] ID has been changed from <code>minecartchest</code> to <code>chest_minecart</code>.}}
{{History|bedrock}}
{{History||1.10.0|snap=beta 1.10.0.3|[[File:Minecart with Chest JE4 BE2.png|32px]] [[File:Minecart with Chest (item) JE2 BE2.png|32px]] The textures of minecarts with chests have been changed.}}
{{History||1.19.0|snap=beta 1.19.0.30|Breaking a minecart with chest will now drop the item instead of the minecart and chest separately, though the contents of the chest are still dropped.}}
{{History|console}}
{{History||xbox=TU1|xbone=CU1|ps=1.0|wiiu=Patch 1|switch=1.0.1|[[File:Minecart with Chest JE3 BE1.png|32px]] [[File:Minecart with Chest (item) JE1 BE1.png|32px]] Added minecarts with chests.}}
{{History||xbox=none|xbone=none|ps=1.90|wiiu=none|switch=none|[[File:Minecart with Chest JE4 BE2.png|32px]] [[File:Minecart with Chest (item) JE2 BE2.png|32px]] The textures of minecarts with chests have been changed.}}
{{History|new 3ds}}
{{History||0.1.0|[[File:Minecart_with_Chest_JE3_BE1.png|32px]] [[File:Minecart_with_Chest_(item)_JE1_BE1.png|32px]] Added minecarts with chests.
|Minecarts with chests emit smoke [[particles]] when destroyed.}}
{{History|foot}}
==Issues==
{{issue list}}
==Gallery ==
<gallery>
Compact Minecart Storage.png|A compact storage using chest minecarts (left) compared to chest storage in the same volume. Notice how chests cannot be placed next to each other, which is no longer the case after Java Edition 1.13.
GlitchedMinecartChest.png|This minecart with chest is trapped inside a block, due to a [[stronghold]] and a [[mineshaft]] that generated partially overlapping.
Minecartportal.png|A minecart with chest generated on top of an [[end portal frame]], because there is a mineshaft behind the wall.
Chest Minecart Stack.png|A large stack of chest minecarts.
</gallery>
==References==
{{Reflist}}
{{items}}
{{entities}}
[[Category:Mechanics]]
[[Category:Storage]]
[[cs:Nákladní vozík]]
[[de:Güterlore]]
[[es:Vagoneta con cofre]]
[[fr:Wagonnet de stockage]]
[[hu:Tárolócsille]]
[[it:Carrello da miniera]]
[[ja:チェスト付きのトロッコ]]
[[ko:상자가 실린 광산 수레]]
[[nl:Mijnkar met kist]]
[[pl:Wagonik ze skrzynią]]
[[pt:Carrinho de mina com baú]]
[[ru:Вагонетка с сундуком]]
[[uk:Вагонетка зі скринею]]
[[zh:运输矿车]]</li><li>[[:Category:Armor|Category:Armor]]<br/>[[Category:Items]]</li></ul> | ? | A tab for learned recipes is now usable in the crafting table GUI. The player is able to automatically fill in the desired recipe into the crafting table by clicking on the item. | |||
| Closing the crafting interface will now return the items from the crafting grid to the inventory, if space allows. | |||||
1.9.0{{Extension DPL}}<ul><li>[[Honey Bottle|Honey Bottle]]<br/>{{Item
| title = Honey Bottle
| image = Honey Bottle.png
| renewable = Yes
| heals = {{hunger|6}}
|effects=Clears {{EffectLink|Poison}}
| stackable = Yes (16)
}}
A '''honey bottle''' is a [[drinks|consumable drink]] [[item]] obtainable by using a [[glass bottle]] on a full [[beehive]]. Honey bottles remove [[poison]] when drunk and can be used to craft [[Honey Block|honey blocks]] and [[sugar]].
== Obtaining ==
{{See also|Tutorials/Honey farming}}
=== Harvesting ===
A honey bottle can be obtained by using a [[glass bottle]] on either a [[beehive]] or [[beehive|bee nest]] with a honey level of 5. Doing this angers any [[bee]]s inside, causing them to attack the player, unless there is a [[campfire]] or another [[block]] on [[fire]] beneath the bee nest or beehive.
A [[dispenser]] with glass bottles can be used to collect the honey without angering the bees. The honey bottle appears as an item in the dispenser's inventory. If the dispenser is full, the honey bottle is shot out.
=== Crafting ===
{{Crafting
|Glass Bottle
|Glass Bottle
|Honey Block
|Glass Bottle
|Glass Bottle
|Output=Honey Bottle, 4
|type= Foodstuff
}}
== Usage ==
To drink a honey bottle, press and hold {{control|use}} while it is selected in the [[hotbar]]. Drinking one restores {{hunger|6}} [[hunger]] and 1.2 hunger [[Hunger#Mechanics|saturation]]. Consuming the item also has the benefit of removing any [[poison]] effect applied to the player. Unlike drinking [[Milk Bucket|milk]], other applied effects are not removed upon drinking a honey bottle.
Honey bottles can be drunk even with a full hunger bar. Drinking a honey bottle takes 25% longer than eating other [[food]] - 2 seconds - and has a unique sound.
=== Crafting ingredient ===
{{Crafting usage}}
== Sounds ==
{{edition|java}}:
{{Sound table
|sound=Drink honey1.ogg
|sound2=Drink honey2.ogg
|sound3=Drink honey3.ogg
|sound4=Drink honey3.ogg
|subtitle=Gulping
|source=player
|description=While a player is drinking a honey bottle
|id=item.honey_bottle.drink
|translationkey=subtitles.item.honey_bottle.drink
|volume=0.5
|pitch=''varies'' <ref group=sound>0.9-1.0 for <code>drink_honey1</code> and <code>drink_honey2</code>, 0.315-0.35 for <code>drink_honey3</code>, and 0.675-0.75 for the second copy of <code>drink_honey3</code></ref>
|distance=16}}
{{Sound table
|sound=Bottle fill water1.ogg
|sound2=Bottle fill water2.ogg
|sound3=Bottle fill water3.ogg
|sound4=Bottle fill water4.ogg
|subtitle=Bottle fills
|source=block
|description=When a bottle is filled with honey
|id=item.bottle.fill
|translationkey = subtitles.item.bottle.fill
|volume=1.0
|pitch=1.0
|distance=16
|foot=1}}
{{edition|bedrock}}:
{{Sound table
|type=bedrock
|sound=Drink honey1.ogg
|sound2=Drink honey2.ogg
|sound3=Drink honey3.ogg
|sound4=Drink honey3.ogg<!--This is duplicated intentionally, see below-->
|source=player
|description=While a player is drinking a honey bottle
|id=random.drink_honey
|volume=''varies''<ref group="sound" name="bevarieshoney">0.5 for <code>drink_honey1</code> and <code>drink_honey2</code>, but <code>drink_honey3</code> is 0.175 or 0.375</ref>
|pitch=0.9-1.0}}
{{Sound table
|sound=Fill water bucket1.ogg
|sound2=Fill water bucket2.ogg
|sound3=Fill water bucket3.ogg
|source=block
|description=When a bottle is filled with honey<wbr><ref group=sound>{{Bug|MCPE-53881}}</ref>
|id=bucket.fill_water
|volume=1.0
|pitch=1.0
|foot=1}}
== Data values ==
=== ID ===
{{edition|java}}:
{{ID table
|edition=java
|showforms=y
|generatetranslationkeys=y
|displayname=Honey Bottle
|spritetype=item
|nameid=honey_bottle
|form=item
|foot=1}}
{{edition|bedrock}}:
{{ID table
|edition=bedrock
|shownumericids=y
|showforms=y
|notshowbeitemforms=y
|generatetranslationkeys=y
|displayname=Honey Bottle
|spritetype=item
|nameid=honey_bottle
|id=592
|form=item
|foot=1}}
== Achievements ==
{{Load achievements|Bee Our Guest}}
== Advancements ==
{{Load advancements|Husbandry;A Balanced Diet;Bee Our Guest}}
== History ==
{{History|java}}
{{History||1.15|snap=19w34a|[[File:Honey Bottle JE1.png|32px]] Added honey bottles.}}
{{History|||snap=19w35a|Honey bottles now remove the [[Poison]] effect when consumed.
|Honey bottles are now included in the "A Balanced Diet" [[advancement]].}}
{{History|||snap=19w36a|Honey bottles are now less filling, restoring 1.2 [[Hunger#Mechanics|saturation]] instead of 9.6.}}
{{History||1.15|snap=19w41a|Honey bottles can now be used to craft [[honey block]]s.}}
{{History||1.15|snap=19w44a|Honey bottles can now be [[crafting|crafted]] with four [[glass bottle]]s and one [[honey block]].
|Honey bottles are now stackable (up to 16).}}
{{History|||snap=19w46a|Using [[glass bottle]]s to collect honey now unlocks the [[Bee Our Guest]] advancement.}}
{{History|bedrock}}
{{History||1.14.0|snap=beta 1.14.0.1|[[File:Honey Bottle BE1.png|32px]] Added honey bottles.}}
{{History|||snap=beta 1.14.0.4|[[File:Honey Bottle BE2.png|32px]] The texture of honey bottles has been changed to match {{el|je}}'s.
|Honey bottles can now be crafted with four [[glass bottle]]s and one [[honey block]].
|Honey bottles are now stackable to 16.}}
{{History|||snap=release|slink=Bedrock Edition 1.14.0|Using [[glass bottle]]s to collect honey now unlocks the [[Bee our guest]] achievement.}}
{{History|foot}}
== Issues ==
{{issue list}}
== Trivia ==
* Honey bottles are the only drinkable [[item]]s that can stack. They have a maximum stack size of 16.
* Honey bottles are the only drinkable items that can restore hunger.
* Honey bottles are 4 pixels more full than [[water bottles]].
{{Items}}
[[cs:Lahvička medu]]
[[de:Honigflasche]]
[[es:Frasco con miel]]
[[fr:Fiole de miel]]
[[ja:ハチミツ入りの瓶]]
[[ko:꿀이 든 병]]
[[lzh:蜜瓶]]
[[pl:Butelka miodu]]
[[pt:Frasco de mel]]
[[ru:Бутылочка мёда]]
[[th:ขวดน้ำผึ้ง]]
[[uk:Пляшечка меду]]
[[zh:蜂蜜瓶]]
[[Category:Food]]
[[Category:Renewable resources]]</li><li>[[Iron Ingot|Iron Ingot]]<br/>{{About|the ingot|the ore|Iron Ore|the mineral block|Block of Iron|the nugget|Iron Nugget|the raw mineral|Raw Iron}}
{{Item
| image = Iron Ingot.png
|type=
| renewable = Yes
| stackable = Yes (64)
}}
'''Iron ingots''' are versatile [[metal]] ingots used extensively in [[crafting]].
== Obtaining ==
=== Chest loot ===
{{LootChestItem|iron-ingot}}
=== Crafting ===
{{Crafting
|head=1
|showname=0
|Block of Iron
|Output=Iron Ingot,9
|type=Material
}}
{{Crafting
|A1= Iron Nugget
|B1= Iron Nugget
|C1= Iron Nugget
|A2= Iron Nugget
|B2= Iron Nugget
|C2= Iron Nugget
|A3= Iron Nugget
|B3= Iron Nugget
|C3= Iron Nugget
|Output=Iron Ingot
|type= Material
|foot=1
}}
=== Smelting ===
{{see also|Iron Ore#Natural generation}}[[Smelting]] raw iron in a [[furnace]] or [[blast furnace]] is the most common way to obtain iron ingots.
{{Smelting
|head=1
|Iron Ore;Deepslate Iron Ore
|Iron Ingot
|0,7
}}
{{Smelting
|foot=1
|Raw Iron
|Iron Ingot
|0,7
}}
=== Compound creation ===
Iron Ingot can be created from its base [[element]]s, using the [[compound creator]].{{only|bedrock|education}}
{| class="wikitable"
!Name
!Elements
!Example recipe
|- <!-- Temporarily using crafting grid as a substitute for the compound creator (template not yet available), since the layout is the same, even if the appearance is different -->
!Iron Ingot
|Iron <br>
|{{Crafting Table
|shapeless= 1
|A2=Iron
|Output=Iron Ingot}}
|}
=== Mob loot ===
{{see also|Tutorials/Iron golem farming}}
[[Iron golem]]s drop 3-5 iron ingots upon death, regardless of the way they die. The looting enchantment does not increase the amount of iron ingots dropped.
[[Zombie]]s, [[husk]]s, and [[zombie villager]]s have a 2.5% ({{frac|1|40}}) chance of dropping either an iron ingot, [[carrot]], or [[potato]] when killed by a player or tamed wolf. This is increased by 1% ({{frac|1|100}}) per level of looting. This gives iron ingots the following chances of dropping:
* {{frac|1|120}} (about 0.83%)
* {{frac|7|600}} (about 1.17%) with Looting I
* {{frac|9|600}} (1.50%) with Looting II
* {{frac|11|600}} (about 1.83%) with Looting III
== Usage ==
=== Crafting ingredient ===
{{crafting usage}}
=== Trading ===
Apprentice-level Armorer, Toolsmith, and Weaponsmith [[Villager|villagers]] buy 3 iron ingots for an [[emerald]] as their third trade.{{only|bedrock}}
Apprentice-level Armorer villagers have a 50% chance to buy 4 iron ingots for one emerald, and apprentice-level Toolsmith and Weaponsmith villagers always offer to buy 4 iron ingots for one emerald.{{only|java}}
=== Repairing ===
Iron ingots are the repair items for the iron [[tier]] and chainmail and iron [[armor material]]s, and thus can be used to [[item repair|repair]] the following items in an [[anvil]]:
* {{ItemLink|Chainmail Helmet}}
* {{ItemLink|Chainmail Chestplate}}
* {{ItemLink|Chainmail Leggings}}
* {{ItemLink|Chainmail Boots}}
* {{ItemLink|Iron Helmet}}
* {{ItemLink|Iron Chestplate}}
* {{ItemLink|Iron Leggings}}
* {{ItemLink|Iron Boots}}
* {{ItemLink|Iron Sword}}
* {{ItemLink|Iron Axe}}
* {{ItemLink|Iron Pickaxe}}
* {{ItemLink|Iron Shovel}}
* {{ItemLink|Iron Hoe}}
=== Healing iron golems ===
{{control|Using}} an iron ingot on an [[iron golem]] restores its health by {{hp|25}}.
=== Beacons ===
Iron ingots can be used to select powers from a [[beacon]]. The player must select one of the available powers, and then insert an iron ingot in the item slot.
An iron ingot can be substituted for an [[emerald]], a [[gold ingot]], a [[diamond]], or a [[netherite ingot]].
=== Smithing ingredient ===
{{Smithing
|head=1
|ingredients=Any Armor Trim +<br/>Any Armor Piece + <br/>Iron Ingot
|Any Armor Trim Smithing Template
|Netherite Chestplate
|Iron Ingot
|Iron Trim Netherite Chestplate
|showdescription=1
|description = All armor types can be used in this recipe,<br/>a netherite chestplate is shown as an example.<br/>
|tail=1
}}
;Trim color palette
The following color palettes are shown on the designs on trimmed armor:
*{{TrimPalette|iron ingot}}
*{{TrimPalette|iron ingot|darker=1}} (a darker color palette is used when an iron armor piece is trimmed using an iron ingot).
== Achievements ==
{{load achievements|Acquire Hardware}}
== Advancements ==
{{load advancements|Acquire Hardware}}
== Data values ==
=== ID ===
{{edition|java}}:
{{ID table
|edition=java
|showitemtags=y
|showforms=y
|generatetranslationkeys=y
|displayname=Iron Ingot
|spritetype=item
|nameid=iron_ingot
|itemtags=beacon_payment_items
|form=item
|foot=1}}
{{edition|bedrock}}:
{{ID table
|edition=bedrock
|shownumericids=y
|showforms=y
|notshowbeitemforms=y
|generatetranslationkeys=y
|displayname=Iron Ingot
|spritetype=item
|nameid=iron_ingot
|id=305
|form=item
|foot=1}}
== History ==
{{History|java indev}}
{{History||0.31|snap=20100128|[[File:Iron Ingot JE1.png|32px]] Added iron ingots.}}
{{History|||snap=20100129|[[File:Iron Ingot JE2 BE1.png|32px]] The texture of iron ingots has been changed.
|Iron ingots can be [[smelting|smelted]] from [[iron ore]] and [[drops|drop]] 3–5 iron ingots.
|Iron ingots can be used to craft [[iron block]]s, [[flint and steel]] and iron [[sword]]s, [[shovel]]s, [[pickaxe]]s and [[axe]]s.}}
{{History|||snap=20100130|Iron ingots are now used to craft [[arrow]]s.|[[Iron block]]s now require 9 iron ingots (3×3) instead 4 (2×2) to be [[crafting|crafted]], making them much more expensive.}}
{{History||20100206|Iron ingots can now be used to [[crafting|craft]] iron [[hoe]]s.}}
{{History||?|[[Smelting]] now [[drops]] only 1 iron ingot (down from 3–5).}}
{{History||20100218|Iron ingots are now used to craft iron [[helmet]]s, [[chestplate]]s, [[leggings]] and [[boots]].}}
{{History|java infdev}}
{{History||20100615|Iron ingots are now used to craft [[bucket]]s.}}
{{History||20100618|Iron ingots are now used to craft [[rail]]s and [[minecart]]s.}}
{{History||20100625-2|Iron ingots can be found in [[dungeon]] [[chest]]s.}}
{{History|java alpha}}
{{History||v1.0.1|Iron ingots are now used to [[crafting|craft]] iron [[door]]s.}}
{{History||v1.0.14|Iron ingots are no longer used to craft [[arrow]]s.}}
{{History||v1.1.0|Iron ingots are now used to craft [[compass]]es.}}
{{History|java beta}}
{{History||1.5|Iron ingots are now used to craft [[detector rail]]s.}}
{{History||1.7|Iron ingots are now used to craft [[piston]]s and [[shears]].}}
{{History||1.8|snap=Pre-release|Iron ingots are found in the new [[stronghold]] storeroom and [[mineshaft]] [[chest]]s.
|Iron ingots are now used to craft [[iron bars]].}}
{{History|java}}
{{History||1.0.0|snap=Beta 1.9 Prerelease 2|Iron ingots are now used to craft [[cauldron]]s.}}
{{History|||snap=Beta 1.9 Prerelease 3|Iron ingots are now found in the new stronghold altar [[chest]]s.}}
{{History||1.1|snap=12w01a|Iron ingots are now found in [[village]] blacksmith chests.}}
{{History||1.2.1|snap=12w06a|[[Zombie]]s now rarely [[drops|drop]] iron ingots, making it a [[renewable resource]].}}
{{History|||snap=12w08a|[[Iron golem]]s now drop 3–5 iron ingots.}}
{{History||1.3.1|snap=12w21a|Added [[desert temple]]s, with a hidden [[chest]] room and loot containing iron ingots.
|Blacksmith [[villager]]s now [[trading|buy]] 8–9 iron ingots for 1 [[emerald]].}}
{{History|||snap=12w22a|Added [[jungle temple]]s, which contain loot [[chest]]s with iron ingots.
|Iron ingots are now used to craft [[tripwire hook]]s.}}
{{History||1.4.2|snap=12w32a|Iron ingots can be used to activate [[beacon]]s.}}
{{History|||snap=12w41a|Iron ingots are now used to craft [[anvil]]s.}}
{{History|||snap=12w42a|Anvils now need 4 iron ingots to [[craft]] instead of 1.}}
{{History||1.5|snap=13w01a|Iron ingots are now used to [[crafting|craft]] heavy [[weighted pressure plate]]s.}}
{{History|||snap=13w02a|Iron ingots are now used to craft [[hopper]]s and [[activator rail]]s.}}
{{History||1.6.1|snap=13w16a|Iron ingot is now used to craft iron [[horse armor]] and [[horse saddle]].}}
{{History|||snap=13w18a|Iron ingot is no longer used to craft iron [[horse armor]] and [[horse saddle]].|Iron ingots are now found in [[nether fortress]] [[chest]]s.}}
{{History||1.8|snap=14w02a|[[Trading]] for iron ingots has been changed: armorer, weapon smith and tool smith [[villager]]s now [[trading|buy]] 7–9 iron ingots for 1 [[emerald]].}}
{{History|||snap=14w07a|Iron ingots are now used to craft [[iron trapdoor]]s.}}
{{History||1.9|snap=15w31a|Iron ingots are now found in [[end city]] ship [[chest]]s.}}
{{History|||snap=15w33c|Iron ingots are now used to craft [[shield]]s.}}
{{History|||snap=15w44a|The average yield from [[dungeon]] and [[desert temple]] chests has been substantially decreased.
|The average yield from [[mineshaft]] and [[nether fortress]] chests has been slightly decreased.}}
{{History||1.11|snap=16w39a|Iron ingots are now found in the new [[woodland mansion]] chests.}}
{{History||1.11.1|snap=16w50a|Iron ingots are now used to craft [[iron nugget]]s.}}
{{History||1.13|snap=17w47a|Prior to [[1.13/Flattening|''The Flattening'']], this [[item]]'s numeral ID was 265.}}
{{History|||snap=18w10a|Iron ingots now generate in [[buried treasure]] [[chest]]s.}}
{{History|||snap=18w11a|Iron ingots can now be found in the chests of [[shipwreck]]s.}}
{{History||1.14|snap=18w43a|Iron ingots can now be used to craft [[crossbow]]s.
|[[File:Iron Ingot JE3 BE2.png|32px]] The texture of iron ingots has been changed.}}
{{History|||snap=18w47a|Iron ingots can now be found inside of loot [[chest]]s on top of [[pillager outpost]]s.}}
{{History|||snap=18w50a|Iron ingots can now be found in chests in [[village]] toolsmith houses.
|Iron ingots can now be used to craft a [[blast furnace]].}}
{{History|||snap=19w04a|Iron ingots can now be used to craft [[stonecutter]]s.}}
{{History||1.15|snap=19w41a|Iron ingots can now be used to heal [[iron golem]]s.}}
{{History||1.16|snap=20w16a|Iron ingots now generate in [[bastion remnants]] chests.
|Iron ingots are now used to craft [[chain]]s.}}
{{History||1.16.2|snap=20w30a|The average yield of iron ingots from bastion remnant chests has been slightly increased.}}
{{History||1.17|snap=21w08a|Iron ingots can now be smelted from [[deepslate iron ore]].}}
{{History|||snap=21w14a|Iron ingots can now be smelted from [[raw iron]].}}
{{History||1.20<br>(Experimental)|link=1.19.4|snap=23w04a|Iron ingots can now be used as an armor trim material.}}
{{History|||snap=23w05a|Iron ingots can now be trimmed with iron [[armor]].}}
{{History|pocket alpha}}
{{History||v0.2.0|[[File:Iron Ingot JE2 BE1.png|32px]] Added iron ingots. They are currently unobtainable and serve no purpose.}}
{{History||v0.3.2|Iron ingots are now obtainable by [[smelting]] iron ore in a [[furnace]].
|Iron ingots can be used to craft [[shears]], [[blocks of iron]] and iron [[pickaxe]]s, [[axe]]s, [[sword]]s and [[shovel]]s.}}
{{History||v0.4.0|Iron ingots are now used to craft [[flint and steel]] and iron [[hoe]]s.}}
{{History||v0.5.0|Iron ingots are now used to craft [[nether reactor core]]s.}}
{{History||v0.6.0|Iron ingots are now used to craft iron [[armor]].}}
{{History||v0.7.0|Iron ingots are now used to craft [[bucket]]s.}}
{{History||v0.8.0|snap=build 1|Iron ingots are now used to craft [[compass]]es and [[iron bars]].}}
{{History|||snap=build 2|Iron ingots are now used to craft [[minecart]]s and [[rail]]s.}}
{{History||v0.9.0|snap=build 1|Iron ingots can now be found in [[village]] blacksmith [[chest]]s, [[stronghold]] altar chests and [[dungeon]] chests.
|[[Zombie]]s now rarely drop iron ingots.}}
{{History||v0.12.1|snap=build 1|Iron ingots are no longer used to craft [[nether reactor core]]s and are instead dropped by it.
|Iron ingots are now used to craft [[anvil]]s.
|Iron ingots are now found in [[nether fortress]] chests.
|Added [[iron golem]]s, which [[drops|drop]] iron ingots.
|Iron ingots can now be used to repair iron [[tool]]s, [[armor]] and [[weapon]]s in [[anvil]]s.
|Added [[zombie villager]]s, which rarely drop iron ingots.}}
{{History||v0.13.0|snap=build 1|Iron ingots are now used to craft [[tripwire hook]]s, [[detector rail]]s, [[iron trapdoor]]s and heavy [[weighted pressure plate]]s.
|Added [[desert temple]]s, which have hidden [[chest]] rooms and loot containing iron ingots.}}
{{History||v0.14.0|snap=build 1|Iron ingots are now used to craft [[hoppers]] and [[cauldron]]s.
|Iron ingots can now be found in [[minecart with chest|minecart chests]] generated in [[mineshaft]]s.}}
{{History||v0.15.0|snap=build 1|Iron ingots are now used to craft [[piston]]s.
|Added [[jungle temple]]s, which have hidden [[chest]] rooms and main treasure rooms that have loot containing iron ingots.
|Added [[husk]]s, which rarely [[drops|drop]] iron ingots.}}
{{History||v0.16.0|snap=build 4|Iron ingots can now be used to activate [[beacon]]s.}}
{{History|pocket}}
{{History||1.0.0|snap=alpha 0.17.0.1|Iron ingots can now be found in [[end city]] ship [[chest]]s.
|Iron ingots can now be found in [[stronghold]] storeroom chests.}}
{{History||1.0.4|snap=alpha 1.0.4.0|Added [[trading]]—armorer, weaponsmith and toolsmith [[villager]]s now [[trading|buy]] 7–9 iron ingots for 1 [[emerald]].}}
{{History||1.1.0|snap=alpha 1.1.0.0|Iron ingots can now be [[crafting|crafted]] using [[iron nugget]]s.
|Iron ingots can now be used to [[crafting|craft]] iron nuggets.
|Iron ingots can now be found in [[woodland mansion]] [[chest]]s.}}
{{History|bedrock}}
{{History||1.4.0|snap=beta 1.2.14.2|Iron ingots now generate in [[buried treasure]] [[chest]]s.
|Iron ingots can now be found in [[shipwreck]] treasure chests.}}
{{History||1.8.0|snap=beta 1.8.0.10|Iron ingots can now be used to craft [[crossbow]]s.}}
{{History||1.10.0|snap=beta 1.10.0.3|Iron ingots can now be found inside [[pillager outpost]]s and plains [[village]]s' weaponsmith chests.
|Iron ingots can now be used to craft [[blast furnace]]s, [[stonecutter]]s and [[shield]]s.
|[[File:Iron Ingot JE3 BE2.png|32px]] The texture of iron ingots has been changed.}}
{{History||1.11.0|snap=beta 1.11.0.1|Iron ingots can now be found in [[village]] armorer and toolsmith [[chest]]s.
|Iron ingots can now be found in [[savanna]], [[taiga]], [[desert]] and [[snowy taiga]] village weaponsmiths.}}
{{History|||snap=beta 1.11.0.4|Armorer, toolsmith, and weaponsmith [[villager]]s now [[trading|buy]] 4 iron ingots for an [[emerald]].}}
{{History||1.16.0|snap=beta 1.16.0.57|Iron ingots now generate in bastion remnants chests.}}
{{History||1.17.0|snap=beta 1.16.230.52|Iron ingots can now be smelted from [[deepslate iron ore]].}}
{{History|||snap=beta 1.17.0.50|Iron ingots can now be smelted from [[raw iron]].}}
{{History||1.18.10|snap=beta 1.18.10.26|Iron ingots can now be used to heal iron golems.}}
{{History||1.19.80|snap=beta 1.19.80.21|Iron ingots can now be used as an armor trim material.}}
{{History|console}}
{{History||xbox=TU1|xbone=CU1|ps=1.0|wiiu=Patch 1|switch=1.0.1|[[File:Iron Ingot JE2 BE1.png|32px]] Added iron ingots.}}
{{History||xbox=none|xbone=none|ps=1.90|wiiu=none|switch=none|[[File:Iron Ingot JE3 BE2.png|32px]] The texture of iron ingots has been changed.}}
{{History|new3DS}}
{{History||0.1.0|[[File:Iron Ingot JE2 BE1.png|32px]] Added iron ingots.}}
{{History|foot}}
== Issues ==
{{issue list}}
== Trivia ==
* To craft each recipe once, a player would need 152 iron ingots, including 27 for the iron blocks in an [[anvil]], while using the extra tripwire hook for the [[crossbow]] and the [[iron nuggets]] for the [[chain]].
== See also ==
* {{BlockLink|Block of Iron}}
* {{ItemSprite|Iron Chestplate}} [[Iron armor]]
* {{ItemLink|Iron Nugget}}
* {{BlockLink|Iron Ore}}
* [[Ores]]
== External links ==
* {{Mcnet|taking-inventory--iron-ignot|Taking Inventory: Iron Ingot}}
{{Items}}
[[cs:Železný ingot]]
[[de:Eisenbarren]]
[[es:Lingote de hierro]]
[[fr:Lingot de fer]]
[[hu:Vasrúd]]
[[it:Lingotto di ferro]]
[[ja:鉄インゴット]]
[[ko:철괴]]
[[nl:IJzerstaaf]]
[[pl:Sztabka żelaza]]
[[pt:Barra de ferro]]
[[ru:Железный слиток]]
[[uk:Залізний зливок]]
[[zh:铁锭]]
[[Category:Renewable resources]]</li></ul> | beta 1.9.0.2 | Crafting tables can now be used to craft smithing tables and fletching tables. | |||
1.10.0{{Extension DPL}}<ul><li>[[Cookie|Cookie]]<br/>{{Item
| title = Cookie
| image = Cookie.png
| heals = {{hunger|2}}
| renewable = Yes
| stackable = Yes (64)
}}
'''Cookies''' are [[food]] items that can be obtained in large quantities, but do not restore hunger or saturation significantly.
== Obtaining ==
=== Trading ===
Journeyman-level farmer [[villager]]s sell 18 cookies for 3 [[emerald]]s as part of their trades.
=== Crafting ===
{{Crafting
|A2= Wheat
|B2= Cocoa Beans
|C2= Wheat
|Output= Cookie,8
|type= Foodstuff
}}
=== Villager gifts ===
{{in|java}}, if the [[player]] has the [[Hero of the Village]] effect, a farmer villager may gift them a cookie.
== Usage ==
=== Food ===
To eat a cookie, press and hold {{control|use}} while it is selected in the hotbar. Eating one restores {{hunger|2}} [[hunger]] and 0.4 hunger
[[Hunger#Mechanics|saturation]].
=== Parrots ===
Feeding a cookie to a [[parrot]] kills the parrot instantly, and causes it to give off [[Poison]] [[particles]] as it dies due to chocolate being toxic to parrots.
{{IN|Bedrock}}, feeding a cookie to a parrot inflicts the parrot with [[Fatal Poison]] for 1,000 seconds.
=== Composting ===
Placing a cookie into a [[composter]] has an 85% chance of raising the compost level by 1.
Considering the high yield of cookies (8 cookies from 1 cocoa bean and 2 wheats) and the higher chance to successfully compost a cookie (85%), it is more efficient to craft cookies to compost rather than using separate ingredients. For example, 100 wheats and 50 cocoa beans, which in total could yield only 13.92 bone meal on average, could be crafted into 400 cookies to yield 48.57 bone meal on average.
== Sounds ==
{{Sound table/Entity/Food}}
== Advancements ==
{{load advancements|Husbandry;A Balanced Diet}}
== Data values ==
=== ID ===
{{edition|java}}:
{{ID table
|edition=java
|showforms=y
|generatetranslationkeys=y
|displayname=Cookie
|spritetype=item
|nameid=cookie
|form=item
|foot=1}}
{{edition|bedrock}}:
{{ID table
|edition=bedrock
|shownumericids=y
|showforms=y
|notshowbeitemforms=y
|generatetranslationkeys=y
|displayname=Cookie
|spritetype=item
|nameid=cookie
|id=271
|form=item
|foot=1}}
== History ==
{{History|java beta}}
{{History||1.4|[[File:Cookie JE1 BE1.png|32px]] Added cookies.
|Cookies restore {{hp|1}} and are currently the only stackable [[food]], up to 8 cookies per stack.}}
{{History||1.8|snap=Pre-release|Cookies can now be stacked to 64.
|Cookies now restore {{hunger|1}}.}}
{{History|java}}
{{History||1.3.1|snap=12w18a|Cocoa beans have become farmable, making cookies [[renewable resource|renewable]] and ''much'' cheaper.}}
{{History|||snap=12w19a|Cookies now restore {{hunger|2}} instead of {{hunger|1}}.}}
{{History|||snap=12w21a|Farmer [[villager]]s now [[trading|sell]] 8–10 cookies for 1 [[emerald]].}}
{{History||1.8|snap=14w02a|Farmer villagers now sell 6 cookies for 1 emerald.}}
{{History||1.11|snap=16w33a|Farmer villagers now sell 6–10 cookies for 1 emerald.}}
{{History||1.12|snap=17w13a|Cookies can now be used to tame [[parrot]]s.}}
{{History|||snap=pre3|Cookies are no longer used to tame [[parrot]]s. Instead, a cookie now instantly kills a parrot.}}
{{History||1.13|snap=17w47a|Prior to [[1.13/Flattening|''The Flattening'']], this [[item]]'s numeral ID was 357.}}
{{History||1.14|snap=18w43a|[[File:Cookie JE2 BE2.png|32px]] The texture of cookies has been changed.}}
{{History|||snap=19w03a|Placing a cookie into the new [[composter]] has a 80% chance of raising the compost level by 1.}}
{{History|||snap=19w05a|Cookies now have an 85% chance of increasing the compost level in a composter by 1.}}
{{History|||snap=19w13a|Farmer villagers now give cookies to players under the [[Hero of the Village]] effect.}}
{{History|pocket alpha}}
{{History||v0.9.0|snap=build 1|[[File:Cookie JE1 BE1.png|32px]] Added cookies.}}
{{History||v0.12.1|snap=build 1|Cookies now restore [[hunger]] instead of [[health]].}}
{{History|pocket}}
{{History||1.0.4|snap=alpha 1.0.4.0|Farmer [[villager]]s now [[trading|sell]] 6-10 cookies for 1 [[emerald]].}}
{{History|bedrock}}
{{History||1.2.0|snap=beta 1.2.0.2|Cookies can now be used to inflict a fatal [[Poison]] [[status effect]] to [[parrot]]s.}}
{{History||1.10.0|snap=beta 1.10.0.3|[[File:Cookie JE2 BE2.png|32px]] The texture of cookies has been changed.}}
{{History||1.11.0|snap=beta 1.11.0.1|Cookies can now be used to fill up [[composter]]s.}}
{{History|||snap=beta 1.11.0.4|Farmer [[villager]]s now [[trading|sell]] 18 cookies for 3 [[emerald]]s as part of their third tier [[trading|trades]].}}
{{History|console}}
{{History||xbox=TU1|xbone=CU1|ps=1.0|wiiu=Patch 1|[[File:Cookie JE1 BE1.png|32px]] Added cookies.}}
{{History||xbox=none|xbone=none|ps=1.90|wiiu=none|switch=none|[[File:Cookie JE2 BE2.png|32px]] The texture of cookies has been changed.}}
{{History|new 3ds}}
{{History||0.1.0|[[File:Cookie JE1 BE1.png|32px]] Added cookies.}}
{{History|foot}}
== Issues ==
{{issue list}}
== Gallery ==
<gallery>
File:12w21a CookiePurchase.png|Cookies being obtained by [[trading]] with a farmer [[villager]].
File:Eating Steve.png|[[Steve]] eating a cookie.
File:Eating Alex.png|Alex eating a cookie.
</gallery>
== References ==
{{reflist}}
== External Links ==
*[https://www.minecraft.net/en-us/article/taking-inventory--cookie Taking Inventory: Cookie] – Minecraft.net on August 22, 2019
{{Items}}
[[Category:Food]]
[[Category:Renewable resources]]
[[cs:Sušenka]]
[[de:Keks]]
[[es:Galleta]]
[[fr:Cookie]]
[[hu:Csokis süti]]
[[ja:クッキー]]
[[ko:쿠키]]
[[nl:Koekje]]
[[pl:Ciastko]]
[[pt:Biscoito]]
[[ru:Печенье]]
[[uk:Печиво]]
[[zh:曲奇]]</li><li>[[Melon Seeds|Melon Seeds]]<br/>{{Block
|image = <gallery>
Melon Stem Age 0.png | Age 0
Melon Stem Age 1.png | Age 1
Melon Stem Age 2.png | Age 2
Melon Stem Age 3.png | Age 3
Melon Stem Age 4.png | Age 4
Melon Stem Age 5.png | Age 5
Melon Stem Age 6.png | Age 6
Melon Stem Age 7.png | Age 7
</gallery>
| image2 = <gallery>
Attached Melon Stem (N).png | North
Attached Melon Stem (E).png | East
Attached Melon Stem (S).png | South
Attached Melon Stem (W).png | West
</gallery>
| transparent = Yes
| light = No
| tool = none
| renewable = Yes
| stackable = Yes (64)
| flammable = No
| lavasusceptible = No
}}'''Melon seeds''' are items obtained from [[Melon Slice|melon slices]] that can be used to grow melon stems.
'''Melon stems''' are plants grown on [[farmland]] that, over time, grow [[melon]]s on dirt, mud and moss blocks adjacent to them.
== Obtaining ==
=== Breaking ===
When broken, a melon stem drops 0–3 melon seeds. The chance for melon seeds to drop increases with the stem's age.
{| class="wikitable"
! rowspan="3" |[[Resource location]]
! rowspan="3" | Source
! colspan="4" | Default
|-
| colspan="1" rowspan="2" style="text-align:center" | Nothing || colspan="3" style="text-align:center" |{{ItemLink|Melon Seeds|Melon seeds}}
|-
| style="text-align:center" | 1 || style="text-align:center" | 2 || style="text-align:center" | 3
|-
| rowspan="8" |<code>blocks/melon_stem</code>
|{{BlockLink|Melon Stem|Melon stem}} <code>age = 0</code>
| style="text-align:center" |81.3%|| style="text-align:center" |17.42%|| style="text-align:center" |1.24%|| style="text-align:center" |0.03%
|-
|{{BlockLink|Melon Stem|Melon stem}} <code>age = 1</code>
| style="text-align:center" |65.1%|| style="text-align:center" |30.04%|| style="text-align:center" |4.62%|| style="text-align:center" |0.24%
|-
|{{BlockLink|Melon Stem|Melon stem}} <code>age = 2</code>
| style="text-align:center" |51.2%|| style="text-align:center" |38.4%|| style="text-align:center" |9.6%|| style="text-align:center" |0.8%
|-
|{{BlockLink|Melon Stem|Melon stem}} <code>age = 3</code>
| style="text-align:center" |39.44%|| style="text-align:center" |43.02%|| style="text-align:center" |15.64%|| style="text-align:center" |1.9%
|-
|{{BlockLink|Melon Stem|Melon stem}} <code>age = 4</code>
| style="text-align:center" |29.13%|| style="text-align:center" |44.44%|| style="text-align:center" |22.22%|| style="text-align:center" |3.7%
|-
|{{BlockLink|Melon Stem|Melon stem}} <code>age = 5</code>
| style="text-align:center" |21.6%|| style="text-align:center" |43.2%|| style="text-align:center" |28.8%|| style="text-align:center" |6.4%
|-
|{{BlockLink|Melon Stem|Melon stem}} <code>age = 6</code>
| style="text-align:center" |15.17%|| style="text-align:center" |39.82%|| style="text-align:center" |34.84%|| style="text-align:center" |10.16%
|-
|{{BlockLink|Melon Stem|Melon stem}} <code>age = 7</code>
| style="text-align:center" |10.16%|| style="text-align:center" |34.84%|| style="text-align:center" |39.82%|| style="text-align:center" |15.17%
|-
| rowspan="1" |<code>blocks/attached_melon_stem</code>
|{{BlockLink|Attached Melon Stem|Attached Melon stem}}
| style="text-align:center" |10.16%|| style="text-align:center" |34.84%|| style="text-align:center" |39.82%|| style="text-align:center" |15.17%
|}
=== Natural generation ===
Melon stems generate naturally in stem farm inside [[woodland mansion]]s.
Melon stems generate in 20% of the farm plots in [[savanna]] [[village]]s, and 10% of the farm plots in [[desert]] villages.
=== Chest loot ===
{{LootChestItem|melon-seeds}}
=== Crafting ===
{{Crafting
|Melon Slice
|Output= Melon Seeds
|type= Material
}}
=== Trading ===
[[Wandering trader]]s sell melon seeds for 1 [[emerald]].
== Usage ==
=== Farming ===
{{see also|Tutorials/Pumpkin and melon farming}}
Melon seeds can be planted only on [[farmland]], as stems. Over time, a stem grows through several stages<sup>[''[[Talk:Pumpkin Seeds|needs testing]]'']</sup> and, at its final growth stage, will produce [[melon]]s on any adjacent [[dirt]], [[Coarse Dirt|coarse dirt]], [[Rooted Dirt|rooted dirt]], [[Grass Block|grass block]], [[farmland]], [[podzol]], [[mycelium]], [[Moss Block|moss block]], [[mud]] or [[Muddy Mangrove Roots|muddy mangrove roots]]. If a melon is already occupying a spot adjacent to a stem it does not grow more melons until the melons is removed. A single stem can grow an unlimited number of melons. Melon stems need a minimum light level of 10 in the block above the stem to grow and give melons. Melon seeds are affected by [[bone meal]] only with respect to stem growth; bone meal does not help produce the actual melons.
=== Breeding ===
Like other seeds, melon seeds can be used to [[breed]] [[chicken]]s, lead chickens around, and make baby chickens grow up faster by 10% of the remaining time.
=== Taming ===
Like other seeds, melon seeds can be used to tame [[parrot]]s.
=== Composting ===
Placing melon seeds into a [[composter]] has a 30% chance of raising the compost level by 1.
== Melon Stem ==
A '''melon stem''' is the block that is planted on [[farmland]] when melon seeds are used on it. It starts underground, and rises up as the plant grows. The stem is colored green when young, and then yellow once fully grown.
The stem curves once a melon has grown from it. A fully-grown single stem connects to any [[melon]] in an adjacent square, thus there are 5 possible appearances to a stem. If there are multiple melons it can connect to, it favors the east, then west, north, and south. When the melon is removed, the stem returns to its straight shape.
== Sounds ==
{{Sound table/Block/Hard crop}}
== Data values ==
=== ID ===
{{edition|java}}:
{{ID table
|edition=java
|showblocktags=y
|showforms=y
|generatetranslationkeys=y
|displayname=Melon Stem
|spritetype=block
|nameid=melon_stem
|blocktags=bee_growables, crops
|form=block}}
{{ID table
|displayname=Attached Melon Stem
|spritetype=block
|nameid=attached_melon_stem
|form=block}}
{{ID table
|displayname=Melon Seeds
|spritetype=item
|nameid=melon_seeds
|form=item
|foot=1}}
{{edition|bedrock}}:
{{ID table
|edition=bedrock
|shownumericids=y
|showforms=y
|generatetranslationkeys=y
|displayname=Melon Stem
|spritetype=block
|nameid=melon_stem
|id=105
|form=block
|translationkey=-}}
{{ID table
|displayname=Melon Seeds
|spritetype=item
|nameid=melon_seeds
|id=293
|form=item
|foot=1}}
=== Block states ===
{{see also|Block states}}
{{/BS}}
== Advancements ==
{{load advancements|A Seedy Place}}
== History ==
{{info needed section|check if stems floated above farmland upon initial implementation}}
{{History|java beta}}
{{History||1.8|snap=Pre-release|[[File:Melon Seeds JE1 BE1.png|32px]] Added melon seeds.
|[[File:Melon Stem Age 0 JE1.png|32px]] [[File:Stem Age 1 JE1.png|32px]] [[File:Melon Stem Age 2 JE1.png|32px]] [[File:Melon Stem Age 3 JE1.png|32px]] [[File:Melon Stem Age 4 JE1.png|32px]] [[File:Melon Stem Age 5 JE1.png|32px]] [[File:Melon Stem Age 6 JE1.png|32px]] [[File:Melon Stem Age 7 JE1.png|32px]] Added the melon stem, with seven stages of growth.
|Melon seeds can found in the new [[mineshaft]] [[chest]]s.
|[[File:Attached Melon Stem (N) JE1.png|32px]] [[File:Attached Melon Stem (E) JE1.png|32px]] [[File:Attached Melon Stem (S) JE1.png|32px]] [[File:Attached Melon Stem (W) JE1.png|32px]] Melon stems have four slightly visually distinct appearances for each facing direction - the bent part of the stem rotates, but the other two planes do not.
|[[File:Melon Stem Age 8 JE1.png|32px]] [[File:Melon Stem Age 9 JE1.png|32px]] [[File:Melon Stem Age 10 JE1.png|32px]] [[File:Melon Stem Age 11 JE1.png|32px]] [[File:Melon Stem Age 12 JE1.png|32px]] [[File:Melon Stem Age 13 JE1.png|32px]] [[File:Melon Stem Age 14 JE1.png|32px]] [[File:Melon Stem Age 15 JE1.png|32px]] Melon stem data values 8–15 now show a glitched formation, with a floating stem with an attached stem cross eventually emerging below.
|[[File:Attached Stem Age 8 JE1.png|32px]] [[File:Attached Stem Age 9 JE1.png|32px]] [[File:Attached Stem Age 10 JE1.png|32px]] [[File:Attached Stem Age 11 JE1.png|32px]] [[File:Attached Stem Age 12 JE1.png|32px]] [[File:Attached Stem Age 13 JE1.png|32px]] [[File:Attached Stem Age 14 JE1.png|32px]] [[File:Attached Stem Age 15 JE1.png|32px]] Melon stem blocks with data values higher than 7 can now attach to adjacent fruits, which results in buggy stem textures with [[vines]] in the mix due to vines being below attached stems in [[terrain.png]].}}
{{History|||snap=Pre-release 2 ;)|Melon stems can now be grown faster using [[bone meal]].}}
{{History|java}}
{{History||1.3.1|snap=1.3|The texture of melon stems has been moved one pixel to the left in [[terrain.png]].
|[[File:Melon Stem Age 0 JE2.png|32px]] [[File:Melon Stem Age 1 JE2.png|32px]] [[File:Melon Stem Age 2 JE2.png|32px]] [[File:Melon Stem Age 3 JE2.png|32px]] [[File:Melon Stem Age 4 JE2.png|32px]] [[File:Melon Stem Age 5 JE2.png|32px]] [[File:Melon Stem Age 6 JE2.png|32px]] [[File:Melon Stem Age 7 JE2.png|32px]] Stems now appear slightly different.
|[[File:Melon Stem Age 8 JE2.png|32px]] [[File:Melon Stem Age 9 JE2.png|32px]] [[File:Melon Stem Age 10 JE2.png|32px]] [[File:Melon Stem Age 11 JE2.png|32px]] [[File:Melon Stem Age 12 JE2.png|32px]] [[File:Melon Stem Age 13 JE2.png|32px]] [[File:Melon Stem Age 14 JE2.png|32px]] [[File:Melon Stem Age 15 JE2.png|32px]] Overgrown stems now appear slightly different.
|[[File:Attached Melon Stem (N) JE2.png|32px]] [[File:Attached Melon Stem (E) JE2.png|32px]] [[File:Attached Melon Stem (S) JE2.png|32px]] [[File:Attached Melon Stem (W) JE2.png|32px]] Attached melon stems now appear slightly different.
|[[File:Attached Stem Age 8 JE2.png|32px]] [[File:Attached Stem Age 9 JE2.png|32px]] [[File:Attached Stem Age 10 JE2.png|32px]] [[File:Attached Stem Age 11 JE2.png|32px]] [[File:Attached Stem Age 12 JE2.png|32px]] [[File:Attached Stem Age 13 JE2.png|32px]] [[File:Attached Stem Age 14 JE2.png|32px]] [[File:Attached Stem Age 15 JE2.png|32px]] Overgrown attached melon stems now appear slightly different.}}
{{History||1.4.2|snap=12w36a|[[Chicken]]s now use [[wheat seeds]], melon seeds, and [[pumpkin seeds]], instead of [[wheat]] to breed.}}
{{History||1.5|snap=13w02a|[[File:Melon Stem Age 0 JE3.png|32px]] [[File:Melon Stem Age 1 JE3.png|32px]] [[File:Melon Stem Age 2 JE3.png|32px]] [[File:Melon Stem Age 3 JE3.png|32px]] [[File:Melon Stem Age 4 JE3.png|32px]] [[File:Melon Stem Age 5 JE3.png|32px]] [[File:Melon Stem Age 6 JE3.png|32px]] Melon stems now use a squished version of their texture for immature stems, depending on age.
|[[File:Melon Stem Age 8 JE3.png|32px]] [[File:Melon Stem Age 9 JE3.png|32px]] [[File:Melon Stem Age 10 JE3.png|32px]] [[File:Melon Stem Age 11 JE3.png|32px]] [[File:Melon Stem Age 12 JE3.png|32px]] [[File:Melon Stem Age 13 JE3.png|32px]] [[File:Melon Stem Age 14 JE3.png|32px]] [[File:Melon Stem Age 15 JE3.png|32px]] This also affects melon stems of ages 8–15, which are likewise stretched to accommodate its predicted size.
|[[File:Attached Stem Age 8 JE3.png|32px]] [[File:Attached Stem Age 9 JE3.png|32px]] [[File:Attached Stem Age 10 JE3.png|32px]] [[File:Attached Stem Age 11 JE3.png|32px]] [[File:Attached Stem Age 12 JE3.png|32px]] [[File:Attached Stem Age 13 JE3.png|32px]] [[File:Attached Stem Age 14 JE3.png|32px]] [[File:Attached Stem Age 15 JE3.png|32px]] Melon stems of extreme ages, which are attached to adjacent fruits, now show a stretched and tinted stem appearance.}}
{{History|||snap=13w03a|[[File:Melon Stem Age 0 JE4.png|32px]] [[File:Melon Stem Age 1 JE4.png|32px]] [[File:Melon Stem Age 2 JE4.png|32px]] [[File:Melon Stem Age 3 JE4.png|32px]] [[File:Melon Stem Age 4 JE4.png|32px]] [[File:Melon Stem Age 5 JE4.png|32px]] [[File:Melon Stem Age 6 JE4.png|32px]] [[File:Melon Stem Age 7 JE4.png|32px]] Melon stems are no longer squished or stretched to account for age.<ref>{{bug|MC-7111}}</ref>
|[[File:Melon Stem Age 8 JE4.png|32px]] [[File:Melon Stem Age 9 JE4.png|32px]] [[File:Melon Stem Age 10 JE4.png|32px]] [[File:Melon Stem Age 11 JE4.png|32px]] [[File:Melon Stem Age 12 JE4.png|32px]] [[File:Melon Stem Age 13 JE4.png|32px]] [[File:Melon Stem Age 14 JE4.png|32px]] [[File:Melon Stem Age 15 JE4.png|32px]] Melon stems with age values 8 through 15 now show a tinted [[trapdoor]] texture.
|From this version up until 14w08a, overgrown melon stems start to draw from the texture below them on the [[texture atlas]], in much the same way they previously did with terrain.png. However, as texture atlases are unstable and textures tend to change positions as new blocks and textures are added, overgrown stems change the texture they draw from every time new textures are added, which includes when textures added by [[mods]].}}
{{History|||snap=13w09a|[[File:Melon Stem Age 8 JE5.png|32px]] [[File:Melon Stem Age 9 JE5.png|32px]] [[File:Melon Stem Age 10 JE5.png|32px]] [[File:Melon Stem Age 11 JE5.png|32px]] [[File:Melon Stem Age 12 JE5.png|32px]] [[File:Melon Stem Age 13 JE5.png|32px]] [[File:Melon Stem Age 14 JE5.png|32px]] [[File:Melon Stem Age 15 JE5.png|32px]] Melon stems with age values 8–15 now show a tinted [[birch wood]] texture.}}
{{History||1.6.1|snap=13w24a|Melon and pumpkin stems have now been assigned separate textures.
|[[File:Melon Stem Age 8 JE6.png|32px]] [[File:Melon Stem Age 9 JE6.png|32px]] [[File:Melon Stem Age 10 JE6.png|32px]] [[File:Melon Stem Age 11 JE6.png|32px]] [[File:Melon Stem Age 12 JE6.png|32px]] [[File:Melon Stem Age 13 JE6.png|32px]] [[File:Melon Stem Age 14 JE6.png|32px]] [[File:Melon Stem Age 15 JE6.png|32px]] Melon stems with age values 8–15 now show a tinted [[note block]] texture.}}
{{History||1.7.2|snap=13w37a|Added the {{cmd|setblock}} [[commands|command]], allowing for invalid stem ages to be placed in the world without using external editors. This also allows them to be obtained in earlier versions via backdating.}}
{{History|||snap=13w41a|[[File:Melon Stem Age 8 JE7.png|32px]] [[File:Melon Stem Age 9 JE7.png|32px]] [[File:Melon Stem Age 10 JE7.png|32px]] [[File:Melon Stem Age 11 JE7.png|32px]] [[File:Melon Stem Age 12 JE7.png|32px]] [[File:Melon Stem Age 13 JE7.png|32px]] [[File:Melon Stem Age 14 JE7.png|32px]] [[File:Melon Stem Age 15 JE7.png|32px]] Melon stems with age values 8–15 now show a tinted [[netherrack]] texture.}}
{{History||1.8|snap=14w10a|[[File:Melon Stem Age 8 JE8.png|32px]] [[File:Melon Stem Age 9 JE8.png|32px]] [[File:Melon Stem Age 10 JE8.png|32px]] [[File:Melon Stem Age 11 JE8.png|32px]] Melon stems with data values 8–11 now display a tinted attached stem, with 8 facing west, 9 facing east, 10 facing north and 11 facing south.
|Invalid melon stems with data values 12-15 now crash the game.}}
{{History|||snap=14w25a|[[File:Melon Stem Age 0 JE5.png|32px]] [[File:Melon Stem Age 1 JE5.png|32px]] [[File:Melon Stem Age 2 JE5.png|32px]] [[File:Melon Stem Age 3 JE5.png|32px]] [[File:Melon Stem Age 4 JE5.png|32px]] [[File:Melon Stem Age 5 JE5.png|32px]] [[File:Melon Stem Age 6 JE5.png|32px]] [[File:Melon Stem Age 7 JE5.png|32px]] Melon stems now render as a single diagonal plane, or, in the case of attached stems, a diagonal and orthogonal plane.
|[[File:Attached Melon Stem (N) JE3.png|32px]] [[File:Attached Melon Stem (E) JE3.png|32px]] [[File:Attached Melon Stem (S) JE3.png|32px]] [[File:Attached Melon Stem (W) JE3.png|32px]] The attached melon stem [[model]] now fully rotates to the direction the stem points. Prior to this update, the base of the melon stem would stay the same while the long attaching section would differ, resulting in four possible attached stem appearances.
|Invalid overgrown melon stems have effectively been removed from the game, as attempting to place an out of range stem via {{cmd|setblock}} creates a stem of age 0 and loading a world with such stems existing causes a game crash.}}
{{History|||snap=14w26a|[[File:Melon Stem Age 0 JE6.png|32px]] [[File:Melon Stem Age 1 JE6.png|32px]] [[File:Melon Stem Age 2 JE6.png|32px]] [[File:Melon Stem Age 3 JE6.png|32px]] [[File:Melon Stem Age 4 JE6.png|32px]] [[File:Melon Stem Age 5 JE6.png|32px]] [[File:Melon Stem Age 6 JE6.png|32px]] [[File:Melon Stem Age 7 JE6.png|32px]] [[File:Attached Melon Stem (N) JE4.png|32px]] [[File:Attached Melon Stem (E) JE4.png|32px]] [[File:Attached Melon Stem (S) JE4.png|32px]] [[File:Attached Melon Stem (W) JE4.png|32px]] Melon stems now correctly render as crosses again.<ref>{{bug|MC-58136}}</ref>}}
{{History|||snap=14w27a|[[File:Attached Stem Age 0 14w27a.png|32px]] [[File:Attached Stem Age 1 14w27a.png|32px]] [[File:Attached Stem Age 2 14w27a.png|32px]] [[File:Attached Stem Age 3 14w27a.png|32px]] [[File:Attached Stem Age 4 14w27a.png|32px]] [[File:Attached Stem Age 5 14w27a.png|32px]] [[File:Attached Stem Age 6 14w27a.png|32px]] Due to a bug, all melon stems appear attached regardless of age or any actual attachment.<ref>{{bug|MC-60208}}</ref>}}
{{History|||snap=14w28a|All melon stems appearing attached regardless of age or any actual attachment has been fixed. However, melon stems still appear attached to adjacent fruits regardless of age due to a similar bug.<ref>{{bug|MC-61716}}</ref>}}
{{History|||snap=14w34d|Melon seeds can no longer be used for [[breeding]] [[chicken]]s.}}
{{History||1.9|snap=15w31a|Chickens can now use melon seeds to breed again.}}
{{History|||snap=15w44a|Melon seeds have been added to [[dungeon]] [[chest]]s.
|The average yield of melon seeds from [[mineshaft]] chests has been decreased.}}
{{History|||snap=15w45a|Melon stems must now be fully grown again to attach.}}
{{History||1.11|snap=16w39a|Melon seeds can now be found inside chests in the new [[woodland mansion]]s.
|Melon crops now generate inside woodland mansions.}}
{{History||1.12|snap=17w18b|Placing a melon seeds in farmland now gives the player the "A Seedy Place" [[advancement]].{{verify}}}}
{{History||1.13|snap=17w47a|The different block states for the <code>melon_stem</code> ID have been split up into their own IDs.
|Prior to [[1.13/Flattening|''The Flattening'']], this [[block]]'s numeral ID was 105, and the [[item]]'s 362.}}
{{History|||snap=17w48a|Attached melon stems no longer [[drops|drop]] seeds.}}
{{History||1.14|snap=18w43a|[[File:Attached Melon Stem (N) JE5.png|32px]] [[File:Attached Melon Stem (E) JE5.png|32px]] [[File:Attached Melon Stem (S) JE5.png|32px]] [[File:Attached Melon Stem (W) JE5.png|32px]] The texture of attached melon stems has been changed.}}
{{History|||snap=18w49a|Melon stems now generate in the updated [[savanna]] [[village]]s.}}
{{History|||snap=18w50a|Melon stems now generate in the updated [[desert]] [[village]]s.}}
{{History|||snap=19w03a|Placing melon seeds into the new [[composter]] has a 10% chance of raising the compost level by 1.}}
{{History|||snap=19w05a|Melon seeds now have a 30% chance of increasing the compost level in a composter by 1.
|Added [[Wandering Trader|wandering trader]]s, which sell melon seeds.}}
{{History||1.15|snap=19w34a|[[Bee]]s can now pollinate melon stems.}}
{{History|||snap=19w39a|Attached melon stems now [[drops|drop]] seeds again.<ref>{{bug|MC-136360}}</ref>}}
{{History||1.18|snap=Pre-release 5|[[File:Melon Seeds JE2.png|32px]] The texture of melon seeds has been changed.}}
{{History|pocket alpha}}
{{History||v0.5.0|Added melon seeds.
|[[File:Melon Stem Age 0 JE1.png|32px]] [[File:Stem Age 1 JE1.png|32px]] [[File:Melon Stem Age 2 JE1.png|32px]] [[File:Melon Stem Age 3 JE1.png|32px]] [[File:Melon Stem Age 4 JE1.png|32px]] [[File:Melon Stem Age 5 JE1.png|32px]] [[File:Melon Stem Age 6 JE1.png|32px]] [[File:Melon Stem Age 7 JE1.png|32px]] [[File:Attached Melon Stem (N) JE1.png|32px]] [[File:Attached Melon Stem (E) JE1.png|32px]] [[File:Attached Melon Stem (S) JE1.png|32px]] [[File:Attached Melon Stem (W) JE1.png|32px]]{{verify|Are these models correct?}} Added melon stems.}}
{{History||v0.6.0|[[File:Melon Seeds JE1 BE1.png|32px]] Melon seeds no longer use the pumpkin seeds texture.}}
{{History||v0.9.0|snap=?|Melon seeds can now be found in [[mineshaft]] chests.}}
{{History||v0.12.1|snap=build 1|Melon seeds are no longer available from the [[Nether reactor]].}}
{{History||v0.14.0|snap=build 1|Melon seeds can now be found in [[minecart with chest|minecarts with chests]] in [[mineshaft]]s.}}
{{History|pocket}}
{{History||1.0.0|snap=alpha 0.17.0.1|Melon seeds now generate inside [[dungeon]] [[chest]]s.}}
{{History||1.1.0|snap=alpha 1.1.0.0|Melon crops now generate inside [[woodland mansion]]s.
|Melon seeds can now be found in woodland mansion chests.}}
{{History|bedrock}}
{{History||1.2.0|snap=beta 1.2.0.2|Melon seeds can now be found inside [[bonus chest]]s.
|Melon seeds are now used to tame [[parrot]]s.}}
{{History||1.10.0|snap=beta 1.10.0.3|[[File:Attached Melon Stem (W) JE5.png|32px]]{{info needed|More accurate image}} The texture of attached melon stems has been changed.
|Melon stems now generate in [[savanna]] and [[desert]] [[village]] farms.
|Added [[wandering trader]]s, who [[trading|sell]] melon seeds.}}
{{History||1.11.0|snap=beta 1.11.0.1|Melon seeds can now be used to fill up [[composter]]s.}}
{{History||1.14.0|snap=beta 1.14.0.1|[[Bee]]s can now pollinate melon stems.}}
{{History|console}}
{{History||xbox=TU5|xbone=CU1|ps=1.0|wiiu=Patch 1|[[File:Melon Seeds JE1 BE1.png|32px]] Added melon seeds.
|[[File:Melon Stem Age 0 JE1.png|32px]] [[File:Stem Age 1 JE1.png|32px]] [[File:Melon Stem Age 2 JE1.png|32px]] [[File:Melon Stem Age 3 JE1.png|32px]] [[File:Melon Stem Age 4 JE1.png|32px]] [[File:Melon Stem Age 5 JE1.png|32px]] [[File:Melon Stem Age 6 JE1.png|32px]] [[File:Melon Stem Age 7 JE1.png|32px]] [[File:Attached Melon Stem (N) JE1.png|32px]] [[File:Attached Melon Stem (E) JE1.png|32px]] [[File:Attached Melon Stem (S) JE1.png|32px]] [[File:Attached Melon Stem (W) JE1.png|32px]]{{verify|Are these models correct?}} Added melon stems.}}
{{History||xbox=none|xbone=none|ps=1.90|wiiu=none|switch=none|[[File:Attached Melon Stem (W) JE5.png|32px]]{{info needed|More accurate image}} The texture of attached melon stems has been changed.}}
{{History|New 3DS}}
{{History||0.1.0|[[File:Melon Stem Age 0 JE1.png|32px]] [[File:Stem Age 1 JE1.png|32px]] [[File:Melon Stem Age 2 JE1.png|32px]] [[File:Melon Stem Age 3 JE1.png|32px]] [[File:Melon Stem Age 4 JE1.png|32px]] [[File:Melon Stem Age 5 JE1.png|32px]] [[File:Melon Stem Age 6 JE1.png|32px]] [[File:Melon Stem Age 7 JE1.png|32px]] [[File:Attached Melon Stem (N) JE1.png|32px]] [[File:Attached Melon Stem (E) JE1.png|32px]] [[File:Attached Melon Stem (S) JE1.png|32px]] [[File:Attached Melon Stem (W) JE1.png|32px]]{{verify|Are these models correct?}} Added melon stems.}}
{{History|foot}}
<gallery>
Melon Stem with data value 15.png|The final version of the melon stem with age 15, as seen in-game.
Melonstems.png|Melon stems of ages 1–15 on a modded version of 1.7.2, hence the melon stems using the melon top texture.
Stems of 13w02a.png|All 16 stem sizes in 13w02a, with accompanying data values.
</gallery>
=== Melon stem "item" ===
{{:Technical blocks/Melon Stem}}
== Issues ==
{{issue list}}
== Gallery ==
<gallery>
Stem All Ages.png|All stages of growth.
AllSeeds.png|All the [[seeds]] that exist in the game.
</gallery>
== See also ==
* [[Melon]]
* [[Pumpkin Seeds]]
==References==
{{Reflist}}
{{Blocks|vegetation}}
{{Items}}
[[Category:Plants]]
[[Category:Food]]
[[Category:Non-solid blocks]]
[[Category:Generated structure blocks]]
[[cs:Semínka melounu]]
[[de:Melone]]
[[es:Semillas de sandía]]
[[fr:Graines de pastèque]]
[[hu:Dinnyemagok]]
[[it:Anguria]]
[[ja:スイカの種]]
[[ko:수박씨]]
[[nl:Meloenzaden]]
[[pl:Nasiona arbuza]]
[[pt:Sementes de melancia]]
[[ru:Семена арбуза]]
[[th:เมล็ดแตงโม]]
[[zh:西瓜种子]]</li></ul> | beta 1.10.0.3 | File:Crafting Table TextureUpdate.png Changed the texture of the crafting table. | |||
| Crafting tables now generate in pillager outposts and several new houses in villages. | |||||
| Crafting tables are now used to craft cartography tables. | |||||
1.11.0{{Extension DPL}}<ul><li>[[Apple|Apple]]<br/>{{for}}
{{Item
| title = Apple
| image = Apple.png
| renewable = Yes
| heals = {{hunger|4}}
| stackable = Yes (64)
}}
'''Apples''' are [[food]] items that can be eaten by the [[player]].
== Obtaining ==
=== Block loot ===
Oak and dark oak [[leaves]] have 0.5% ({{frac|1|200}}) chance of dropping an apple when decayed or broken, but not if burned. Breaking leaves with a [[tool]] enchanted with the [[Fortune]] enchantment increases the chances of dropping an apple: 0.556% ({{frac|1|180}}) with Fortune I, 0.625% ({{frac|1|160}}) with Fortune II, and 0.833% ({{frac|1|120}}) with Fortune III.
=== Chest loot ===
{{LootChestItem|apple}}
=== Trading ===
Apprentice-level [[Trading#Farmer|farmer]] [[Villager|villagers]] have a 50% ({{frac|1|2}}){{only|bedrock}} or 66.7% ({{frac|2|3}}){{only|java}} chance of selling 4 apples as part of their trades.
== Usage ==
{{see also|Tutorials/Hunger management|title1=Hunger management}}
To eat an apple, press and hold {{control|use}} while it is selected in the hotbar. Eating one restores {{hunger|4}} [[hunger]] and 2.4 [[Hunger#Mechanics|saturation]].
=== Crafting ingredient ===
{{crafting usage}}
=== Composting ===
Placing an apple into a [[composter]] has a 65% ({{frac|13|20}}) chance of raising the compost level by 1.
== Sounds ==
{{Sound table/Entity/Food}}
== Data values ==
=== ID ===
{{edition|java}}:
{{ID table
|edition=java
|showforms=y
|generatetranslationkeys=y
|displayname=Apple
|spritetype=item
|nameid=apple
|form=item
|foot=1}}
{{edition|bedrock}}:
{{ID table
|edition=bedrock
|shownumericids=y
|showforms=y
|notshowbeitemforms=y
|generatetranslationkeys=y
|displayname=Apple
|spritetype=item
|nameid=apple
|id=257
|form=item
|foot=1}}
== Advancements ==
{{load advancements|Husbandry;A Balanced Diet}}
== History ==
{{History|java indev}}
{{History||0.31|snap=20091231-2|[[File:Apple JE1 BE1.png|32px]] Added apples.
|Apples are currently non-functional in this version.}}
{{History|||snap=20100110|Apples are now functional and are edible, restoring {{hp|2}}. They are intended to replace [[mushroom]]s, which were previously edible.}}
{{History|||snap=20100128|Apples now used to [[craft]] [[arrow]]s.}}
{{History|||snap=20100129|Apples no longer used to craft [[arrow]]s.}}
{{History||20100206|Apples now use the texture of [[golden helmet]]s.}}
{{History|java infdev}}
{{History||February 23, 2010|link=none|At the bottom of a [[crafting]] guide they made, a player named JTE jokingly indicated that [[Notch]] dropped an apple when killed, and that apples could be crafted into something called a "[[golden apple]]" – this was a joke on the fact that apples were totally unobtainable.<ref>http://www.minecraftforum.net/topic/2750582-the-secret-history-of-minecraft/</ref><ref name="JTECraftingGuide">https://echidnatribe.org/Minecraft/crafting.php (This is an unofficial recreation with the original domain)</ref>}}
{{History||20100227-1|Players named "[[Notch]]" now drop an apple when they die in addition to their [[inventory]].
|Apples are now used to craft golden apples.
|Apples now correctly use the apple texture again.}}
{{History||20100327|With the addition of the respawn feature, apples have become legitimately obtainable in Survival and renewable for players named "Notch".}}
{{History|java beta}}
{{History||1.8|snap=Pre-release|Apples can now be found in the new [[stronghold]] storeroom [[chest]]s, making them obtainable in normal [[Survival]] gameplay for the first time.
|Apples now restore {{hunger|4}} instead of {{hp|4}}.
|Apples are now stackable.}}
{{History|java}}
{{History||1.0.0|snap=Beta 1.9 Prerelease 3|Apples are now found in the new stronghold altar chests.}}
{{History||1.1|snap=11w48a|Oak [[leaves]] now have a 1/200 chance of dropping an apple when destroyed, making apples fully [[renewable]].}}
{{History|||snap=12w01a|Apples are now found in the new [[village]] blacksmith chests.}}
{{History||1.3.1|snap=12w16a|Apples can now be found in the new [[bonus chest]]s.}}
{{History|||snap=12w18a|"[[Notch]]" players no longer drop apples when they die.}}
{{History|||snap=12w21a|Farmer [[villager]]s now [[trade|sell]] 5 apples for 1 [[emerald]].
|Apples are now used to craft [[enchanted golden apple]]s.}}
{{History||1.4.2|snap=12w37a|[[File:Apple JE2 BE2.png|32px]] The apple's texture has been changed: the [[item]] sprite no longer has a dark outline and now has a more detailed look.}}
{{History||1.5|snap=13w09b|The [[Fortune]] enchantment now increases the chance of dropping apples.}}
{{History||1.7.2|snap=13w43a|Added [[dark oak]] leaves, which drop apples.}}
{{history||1.9|snap=15w43a|Apples may now be found in [[igloo]] basement chests.}}
{{history|||snap=15w44a|Average yield of apples has been slightly increased in bonus chests.
|Apples can no longer be used to craft enchanted golden apples.}}
{{History||1.11|snap=16w33a|Farmer villagers now sell 5–7 apples for 1 emerald.}}
{{History||1.13|snap=17w47a|Prior to [[1.13/Flattening|''The Flattening'']], this item's numeral ID was 260.}}
{{History||1.14|snap=18w43a|[[File:Apple JE3 BE3.png|32px]] The texture of apples has been changed.}}
{{History|||snap=18w48a|Apples can now be found in [[chest]]s in [[plains]] village houses.}}
{{History|||snap=19w03a|Placing an apple into the new [[composter]] has a 50% chance of raising the compost level by 1.}}
{{History|||snap=19w05a|Apples now have a 65% chance of increasing the compost level in a composter by 1.}}
{{History|pocket alpha}}
{{History||v0.4.0|[[File:Apple JE1 BE1.png|32px]] Added apples.}}
{{History||v0.5.0|Apples now restore {{hp|4}} instead of {{hp|2}}.}}
{{History||v0.8.0|snap=build 1|[[File:Apple JE2 BE2.png|32px]] The apple's texture has been changed: the item sprite no longer has a dark outline and now has a more detailed look.}}
{{History||v0.12.1|snap=build 1|Added apples to the [[Creative inventory]].
|Apples are now stackable.
|Apples now restore {{hunger|4}} instead of {{hp|4}}.
|The [[Fortune]] [[enchantment]] can now be used to increase chance of dropping apples.
|Apples can now be used to craft golden apples and enchanted golden apples.}}
{{History||v0.15.0|snap=build 1|Apples can now be used to feed [[horse]]s.}}
{{History|pocket}}
{{History||1.0.0|snap=alpha 0.17.0.1|Apples can now be found inside [[igloo]] chests.}}
{{History||1.0.4|snap=alpha 1.0.4.0|Farmer villagers now sell 5-7 apples for 1 emerald.}}
{{History|bedrock}}
{{History||1.2.0|snap=beta 1.2.0.2|Apples can no longer be used to craft enchanted golden apples.
|Apples can now be found inside bonus chests.}}
{{History||1.10.0|snap=beta 1.10.0.3|Apples can now be found in [[plains]] village weaponsmith chests and plains house chests.
|[[File:Apple JE3 BE3.png|32px]] The texture of apples has been changed.}}
{{History||1.11.0|snap=beta 1.11.0.1|Apples can now be found in [[desert]], [[savanna]], [[taiga]] and [[snowy taiga]] village weaponsmith chests.
|Apples can now be used to fill up composters.}}
{{History|||snap=beta 1.11.0.4|Farmer villagers now sell 4 apples as part of their second tier trades.}}
{{History|console}}
{{History||xbox=TU1|wiiu=Patch 1|[[File:Apple JE1 BE1.png|32px]] Added apples.}}
{{History||xbox=TU5|Apples are now stackable.
|Apples now restore {{hunger|4}} instead of {{hp|4}}.}}
{{History||xbox=TU12|ps=1.03|[[File:Apple JE2 BE2.png|32px]] The apple's texture has been changed: the item sprite no longer has a dark outline and now has a more detailed look.}}
{{History||xbox=none|xbone=none|ps=1.90|wiiu=none|switch=none|[[File:Apple JE3 BE3.png|32px]] The texture of apples has been changed.}}
{{History|New 3DS}}
{{History||0.1.0|[[File:Apple JE2 BE2.png|32px]] Added apples.}}
{{History|foot}}
== Issues ==
{{issue list}}
== Trivia ==
*Prior to the texture update in Java Edition 1.4.2, the sprite of the apple was the same one used in [[Notch]]'s game ''[[Legend of the Chambered]]''.
*Before it was added to ''Minecraft'', apples dropping from trees was already a feature in ''[[Minicraft]]''.
== Gallery ==
<gallery>
Apple in Stronghold.png|An apple found in a stronghold chest.
Apple Item.png|An apple that dropped from decaying leaves.
Obtaining an apple by trading.png|Obtaining apples via villager trading.
File:Candy Apple (Trails and Tales Summer Event) Render.png|The Candy Apple, an item featured in the [[Trails & Tales Event]].
</gallery>
== References ==
{{reflist}}
== External Links ==
*[https://www.minecraft.net/en-us/article/taking-inventory-apple Taking Inventory: Apple] – Minecraft.net on November 23, 2018
{{items}}
[[Category:Plants]]
[[Category:Food]]
[[Category:Renewable resources]]
[[cs:Jablko]]
[[de:Apfel]]
[[es:Manzana]]
[[fr:Pomme]]
[[hu:Alma]]
[[it:Mela]]
[[ja:リンゴ]]
[[ko:사과]]
[[nl:Appel]]
[[pl:Jabłko]]
[[pt:Maçã]]
[[ru:Яблоко]]
[[th:แอปเปิ้ล]]
[[uk:Яблуко]]
[[zh:苹果]]</li><li>[[Eye of Ender|Eye of Ender]]<br/>{{redirect|Ender Eye|the boss|Ender Dragon|item that teleports the player to where it lands|Ender Pearl}}
{{ItemEntity
|image=Eye of Ender.png
|stackable=Yes (64)
|renewable=Yes
|size=Height: 0.25 Blocks<br>Width: 0.25 Blocks
|networkid='''[[JE]]''': 72
}}
An '''eye of ender''' is a craftable item used to locate [[stronghold]]s and activate the [[end portal]]s within them.
== Obtaining ==
=== Crafting ===
{{Crafting
|Blaze Powder
|Ender Pearl
|Output=Eye of Ender
|type=Miscellaneous
}}
== Usage ==
=== Locating strongholds ===
[[File:Eye of Ender (break).gif|thumb|right|An animation of an eye of ender shattering.]]
To locate [[stronghold]]s (and the [[end portal]]s they house):
* Pressing {{control|use}} while holding an eye of ender causes it to fly approximately 12 blocks in the direction of the nearest stronghold, traveling through any blocks necessary, and leave a trail of purple particles, the same particle effect used for [[endermen]] and [[ender chests]].
** The eye leads to the [[chunk]] where a spiral staircase, the first room generated in the stronghold, is located.
** The center of this entrance staircase is always exactly at the chunk coordinates 4, ~, 4, although the eye of ender leads to chunk coordinates 0, ~, 0 (the northwest corner of the chunk).
* While over 12 blocks away from the northwest corner of the staircase chunk, the eye will travel upward to offer an easily-visible indication of the horizontal direction the player must travel.
* When closer than 12 blocks to the northwest corner of the staircase chunk, the eye will travel downward, to indicate the player is above a stronghold and must mine downward.
* After two or three seconds of travel, the eye floats in the air briefly, then either falls (becoming collectable again) or shatters in mid-air. The eye has a 20% chance of shattering (80% chance of surviving) per throw, therefore throwing it three times has approximately 50% overall chance to shatter the eye (0.8<sup>3</sup>=51.2%).
* The eye of ender's flying function works only in the [[Overworld]]. It does nothing in [[the Nether]], [[the End]], [[custom dimension]]s{{verify|type=current}}, or in worlds with no strongholds.
Note that the eyes may point to an incorrect location if the target chunks were generated with a different biomes map in an older version or through different generation settings.<ref>See also {{bug|MC-135996}}</ref>
=== Activating end portals ===
[[File:Active End Portal.png|thumb|right|An end portal activated with eyes of ender.]]
Once an end portal is found, the eyes of ender are required to activate it. End portals require a total of 12 eyes of ender in order to activate, though each individual frame-block has a 10% chance of containing an eye of ender when generated. Eyes can be placed in empty [[End portal frame]]s by pressing {{control|use}} on them until the entire ring of 12 is filled, thereby activating the portal. Due to the fact that there is a 10% chance of each individual end portal frame having an eye in it, there is a one out of one trillion chance of every frame having an eye in it thereby activating the portal even if the player doesn't have any eyes of ender.
{| class="wikitable sortable mw-collapsible"
|+End Portal Pre-Filled Eyes
!Eyes
!0
!1
!2
!3
!4
!5-12
|-
|Exactly
|28%
|38%
|23%
|9%
|2%
|<1%
|-
|Or More
|100%
|72%
|34%
|11%
|3%
|<1%
|}
=== Crafting ingredient ===
{{crafting usage}}
== Sounds ==
{{Edition|Java}}:<br>
Eyes of ender use the Friendly Creatures sound category for entity-dependent sound events.
{{Sound table
|sound=Ender Eye death1.ogg
|sound2=Ender Eye death2.ogg
|subtitle=Eye of Ender falls <ref group=sound name=LousyEvents>{{Bug|MC-98316||Wrong subtitles caused by missing distinction}}</ref>
|source=neutral
|description=When an eye of ender drops or breaks
|id=entity.ender_eye.death|idnote=<ref group=sound name=LousyEvents/>
|translationkey=subtitles.entity.ender_eye.death|translationkeynote=<ref group=sound name=LousyEvents/>
|volume=1.3
|pitch=1.0
|distance=16}}
{{Sound table
|sound=Ender Eye launch1.ogg
|sound2=Ender Eye launch2.ogg
|subtitle=Eye of Ender shoots
|source=neutral
|description=When an eye of ender is thrown
|id=entity.ender_eye.launch
|translationkey=subtitles.entity.ender_eye.launch
|volume=0.5
|pitch={{frac|1|3}}-0.5
|distance=16}}
{{Sound table
|sound=End portal eye place1.ogg
|sound2=End portal eye place2.ogg
|sound3=End portal eye place3.ogg
|subtitle=Eye of Ender attaches
|source=block
|description=When an eye of ender is placed in an end portal frame
|id=block.end_portal_frame.fill
|translationkey=subtitles.block.end_portal_frame.fill
|volume=1.0
|pitch=1.0
|distance=16
|foot=1}}
{{Edition|Bedrock}}:
{{Sound table
|type=bedrock
|sound=Item Frame break1.ogg
|sound2=Item Frame break2.ogg
|sound3=Item Frame break3.ogg
|source=block
|description=When an eye of ender breaks <ref group=sound>{{Bug|MCPE-115646}}</ref>
|id=block.itemframe.break}}
{{Sound table
|sound=Bow shoot.ogg
|source=player
|description=When an eye of ender is thrown
|id=random.bow
|volume=0.5
|pitch=0.33-0.5}}
{{Sound table
|sound=End portal eye place1.ogg
|sound2=End portal eye place2.ogg
|sound3=End portal eye place3.ogg
|source=block
|description=When an eye of ender is placed in an end portal frame
|id=block.end_portal_frame.fill
|volume=0.3
|pitch=0.9/1.0/1.1
|foot=1}}
==Data values==
===ID===
{{edition|java}}:
{{ID table
|edition=java
|firstcolumnname=Item
|showforms=y
|generatetranslationkeys=y
|displayname=Eye of Ender
|spritetype=item
|nameid=ender_eye
|form=item
|foot=1}}
{{ID table
|edition=java
|firstcolumnname=Entity
|generatetranslationkeys=y
|displayname=Eye of Ender
|spritetype=entity
|nameid=eye_of_ender
|foot=1}}
{{edition|bedrock}}:
{{ID table
|edition=bedrock
|firstcolumnname=Item
|shownumericids=y
|showforms=y
|notshowbeitemforms=y
|generatetranslationkeys=y
|displayname=Eye of Ender
|spritetype=item
|nameid=ender_eye
|id=433
|form=item
|foot=1}}
{{ID table
|edition=bedrock
|firstcolumnname=Entity
|shownumericids=y
|generatetranslationkeys=y
|displayname=Eye of Ender
|spritetype=entity
|nameid=eye_of_ender_signal
|id=70
|foot=1}}
===Entity data===
The purple particles left by eyes of ender have entity data that define various properties of the entity.
{{el|java}}:
{{main|Entity format}}
{{/ED}}
{{el|bedrock}}:
:See [[Bedrock Edition level format/Entity format]].
==Advancements==
{{load advancements|Eye Spy}}
==Video ==
{{Video note|This video does not mention that eyes of ender can be used to craft [[ender chest]]s or [[end crystal]]s.}}
<div style="text-align:center">{{yt|E0AhoxYLomc}}</div>
==History==
{{History|java}}
{{History||1.0.0|snap=Beta 1.9 Prerelease 3|[[File:Eye of Ender JE1 BE1.png|32px]] Added eyes of ender.
|Eyes of ender can be used on a [[end portal frame|portal block]] to repair them, but repairing them does nothing.}}
{{History|||snap=Beta 1.9 Prerelease 4|Each eye can now be placed in a [[end portal frame|portal block]] or used to hone in on a [[stronghold]]. [[Jens Bergensten|Jeb]] demonstrated the new uses for an eye in his livestream.<ref>http://www.twitch.tv/jebox/b/297000418</ref> An [[end portal]] within a stronghold could be seen in the stream with two eyes inserted into blocks.
|In older worlds with chunks generated before [[Java Edition Beta 1.9 Prerelease 3|Beta 1.9 Prerelease 3]], the eyes may mislead the [[player]] to a place where there isn't a [[stronghold]] at all. This happens because the eyes lead to where a stronghold should be based on the world seed in the current version, but before Beta 1.9 Prerelease 3 strongholds generated differently based on the seed. Therefore, if the player saved the coordinates the eye traveled to in an old world and generated a new world with the same seed, the player could travel to those same coordinates and find a stronghold.}}
{{History|||snap=Beta 1.9 Prerelease 6|Eyes of ender no longer render like a tool in third person.}}
{{History|||snap=RC1|The throwing sound of eyes of ender has been changed.}}
{{History||1.3.1|snap=12w21a|Eyes of ender can now be used to craft [[ender chest]]s.
|Priest [[villager]]s would [[trading|buy]] 2–3 eyes of ender for one [[emerald]].}}
{{History|||snap=12w22a|Priest villagers no longer buy eyes of ender, instead selling them for 7–10 emeralds.}}
{{History||1.6.4|snap=1.6.3-pre|Eyes of ender now lead to [[stronghold]]s based on the structure data saved in the world file instead of calculating their approximate location via the [[seed (level generation)|world seed]]. Therefore, strongholds generated in old versions can still be found even if the distribution of strongholds is changed.}}
{{History||1.7.2|snap=13w41a|Eyes of Ender now lead to the entrance of a stronghold instead of the portal room.}}
{{History||1.8|snap=14w02a|With changes that have been made to villagers and the [[trading]] system, cleric villagers now sell eyes of ender for 7–11 [[emerald]]s, as one of their tier III trades.}}
{{History||1.9|snap=15w41a|Eyes of ender are no longer [[trading|sold]] by cleric [[villager]]s.}}
{{History|||snap=15w44b|An eye of ender is now used to craft an [[end crystal]].}}
{{History|||snap=pre3|Eyes of ender now point to the 125 new strongholds.<ref>{{bug|MC-91173}} resolved as "Fixed"</ref>}}
{{History||1.11|snap=16w32a|The [[entity]] ID has been changed from <code>EyeOfEnderSignal</code> to <code>eye_of_ender_signal</code>.}}
{{History||1.12|snap=17w17a|A new ''pop'' [[sound]] has been added when a thrown eye of ender bursts.}}
{{History||1.13|snap=17w47a|Prior to [[1.13/Flattening|''The Flattening'']], this [[item]]'s numeral ID was 381.}}
{{History|||snap=pre5|The [[entity]] ID has been changed to <code>eye_of_ender</code>.}}
{{History||1.14|snap=18w43a|[[File:Eye of Ender JE2 BE2.png|32px]] The texture of eyes of ender has been changed.}}
{{History||1.19|snap=22w11a|Eyes of Ender now lead to the corner of the chunk (0, ~, 0) instead of the center (8-9, ~, 8-9).<ref>{{bug|MC-253394}}</ref>}}
{{History|pocket}}
{{History||1.0.0|snap=alpha 0.17.0.1|[[File:Eye of Ender JE1 BE1.png|32px]] Added eyes of ender.}}
{{History|bedrock}}
{{History||1.10.0|snap=beta 1.10.0.3|[[File:Eye of Ender JE2 BE2.png|32px]] The texture of eyes of ender has been changed.}}
{{History||1.16.0|snap=beta 1.15.0.51|The [[particles]] of eyes of ender have been changed to match {{el|je}}.}}
{{History|console}}
{{History||xbox=TU7|xbone=CU1|ps=1.0|wiiu=Patch 1|[[File:Eye of Ender JE1 BE1.png|32px]] Added eyes of ender.}}
{{History||xbox=none|xbone=none|ps=1.90|wiiu=none|switch=none|[[File:Eye of Ender JE2 BE2.png|32px]] The texture of eyes of ender has been changed.}}
{{History|new 3ds}}
{{History||1.7.10|[[File:Eye of Ender JE1 BE1.png|32px]] Added eyes of ender.}}
{{History|foot}}
=== Historical images ===
<gallery>
File:Held_Eye_of_Ender.png|The eye of ender used to appear large in third-person view.
</gallery>
==Issues==
{{issue list}}
==Trivia ==
*When thrown in third-person view, the eyes of ender fly out from the player's feet instead of their hand.
*Before [[Java Edition 1.9]], eyes of ender can be purchased from cleric villagers, which means players can find a [[stronghold]] and go to [[the End]] without accessing [[the Nether]] at all.
*{{IN|bedrock}} if the player travels beyond a certain radius (roughly 740,000 blocks), eyes of ender always point to a stronghold near spawn, even though strongholds continue to generate past this limit. If one travels to this limit, they can see eyes of ender suddenly switching direction. A similar phenomenon occurs with the {{cmd|locate}} command.
==Gallery==
===Screenshots===
<gallery>
Stronghold Portal Room.png|An end portal frame containing a few eyes of ender.
EnderChestexample.png|An [[ender chest]] depicting an eye of ender on the front.
</gallery>
===In other media===
<gallery>
File:Eye of Ender JINX.jpg|Official T-shirt artwork "Eye of Ender" sold by JINX.
File:Happy Halloween Eye.jpg|A Halloween T-Shirt design featuring an eye of ender.
</gallery>
==External links==
*[http://www.strongholdfinder.com/ A super-easy stronghold triangulation tool]
*[http://jsfiddle.net/42EDX/40/ JSFiddle Eye of Ender triangulator - can guess the location of other 2 strongholds in the first ring]
*[https://ens-gijs.github.io/minecraft-stronghold-locator/ Minecraft Stronghold Locator Eye of Ender throw plotting visualizer - zoomable to show all possible stronghold rings]
*[https://github.com/winny-/stronghold Python Eye of Ender throw plotting tool]
*[http://www.purplefrog.com/~thoth/MinecraftStronghold/stronghold.html HTML Eye of Ender throw plotting visualizer (not updated after 1.9 stronghold placement changes)]
*[http://chunkbase.com/apps/stronghold-finder Chunk Base Stronghold Finder (seed-based)]
*[https://github.com/toolbox4minecraft/amidst/releases Amidst - File-based world visualizer]
*[http://minecraft.tournier.org/StrongholdLocator/ Find strongholds by analyzing stronghold.dat file]
== References==
{{reflist}}
{{Items}}
{{entities}}
[[cs:Endové oko]]
[[de:Enderauge]]
[[es:Ojo de ender]]
[[fr:Œil de l'Ender]]
[[hu:Végzet szeme]]
[[ja:エンダーアイ]]
[[ko:엔더의 눈]]
[[nl:Enderoog]]
[[pl:Oko Endera]]
[[pt:Olho de ender]]
[[ru:Око Края]]
[[th:ดวงตาแห่งเอนเดอร์]]
[[uk:Око Краю]]
[[zh:末影之眼]]</li></ul> | beta 1.11.0.1 | A crafting table is no longer required to craft a cartography table. | |||
| beta 1.11.0.7 | A crafting table is no longer required to craft a fletching table and smithing table. | ||||
| Legacy Console Edition | |||||
| TU1 | CU1 | 1.0 | Patch 1 | 1.0.1 | File:Crafting Table Revision 1.png Added crafting tables. |
1.90{{Extension DPL}}<ul><li>[[Golden Carrot|Golden Carrot]]<br/>{{Item
| title = Golden Carrot
| image = Golden Carrot.png
| heals = {{hunger|6}}
| renewable = Yes
| stackable = Yes (64)
}}
A '''golden carrot''' is a valuable [[food]] item and [[brewing]] ingredient. It provides the second most saturation in the game, behind [[suspicious stew]] crafted with either a [[Flower|dandelion]] or [[Flower|blue orchid]].
==Obtaining==
=== Chest loot ===
{{LootChestItem|golden-carrot}}
=== Crafting ===
{{Crafting
|A1= Gold Nugget
|B1= Gold Nugget
|C1= Gold Nugget
|A2= Gold Nugget
|B2= Carrot
|C2= Gold Nugget
|A3= Gold Nugget
|B3= Gold Nugget
|C3= Gold Nugget
|Output= Golden Carrot
|type= Foodstuff
}}
=== Trading ===
Master-level farmer [[villager]]s have a 50% chance to sell 3 golden carrots for 3 [[emerald]]s {{in|bedrock}}, and always offer the same trade {{in|java}}.
== Usage ==
=== Food ===
To eat a golden carrot, press and hold {{control|use}} while it is selected in the hotbar. Eating one restores {{hunger|6}} and 14.4 [[Hunger#Mechanics|saturation points]].
=== Animal food ===
Golden carrots are used to tame, [[breed]], lead, grow, and heal [[horse]]s, [[donkey]]s, and [[mule]]s, and to breed, lead, and grow [[rabbit]]s.
=== Brewing ingredient ===
{{Brewing
|showname=1
|Golden Carrot
|Potion of Night Vision
}}
== Sounds ==
{{Sound table/Entity/Food}}
== Data values ==
=== ID ===
{{edition|java}}:
{{ID table
|edition=java
|showforms=y
|generatetranslationkeys=y
|displayname=Golden Carrot
|spritetype=item
|nameid=golden_carrot
|form=item
|foot=1}}
{{edition|bedrock}}:
{{ID table
|edition=bedrock
|shownumericids=y
|showforms=y
|notshowbeitemforms=y
|generatetranslationkeys=y
|displayname=Golden Carrot
|spritetype=item
|nameid=golden_carrot
|id=283
|form=item
|foot=1}}
== Achievements ==
{{load achievements|Artificial Selection;Oooh, shiny!}}
== Advancements ==
{{load advancements|Oh Shiny;Husbandry;A Balanced Diet}}
== Video ==
{{Video note|this video is outdated; it does not mention that golden carrots can be used as animal food.}}
<div style="text-align:center">{{yt|HJUaKroydLQ}}</div>
== History ==
{{History|java}}
{{History||1.4.2|snap=12w34a|[[File:Golden Carrot JE1.png|32px]] Added golden carrots.
|The new [[Potion of Night Vision]] is brewed by adding a golden carrot to an [[Awkward Potion]].}}
{{History|||snap=12w36a|[[File:Golden Carrot JE2.png|32px]] The texture of golden carrots has been changed.}}
{{History|||snap=12w37a|[[File:Golden Carrot JE3 BE1.png|32px]] The texture of golden carrots has been changed in order to match the new [[carrot]] texture. The [[item]] sprite no longer has a dark outline.}}
{{History||1.6.1|snap=?|Golden carrots can now be used to tame, breed and heal horses and donkeys.}}
{{History||1.8|snap=?|Golden carrots can now be used to breed rabbits.}}
{{History|||snap=14w32a|Moved golden carrots from the Foodstuffs tab to the Brewing tab in the [[Creative inventory]].<ref name="gold carrot inventory">https://bugs.mojang.com/browse/MC-3664</ref>}}
{{History||1.8.1|snap=pre1|Rabbits now follow players holding golden carrots.<ref>{{bug|MC-70054|||Fixed}}</ref>}}
{{History||1.13|snap=17w47a|Prior to [[1.13/Flattening|''The Flattening'']], this [[item]]'s numeral ID was 396.}}
{{History||1.14|snap=18w43a|[[File:Golden Carrot JE4 BE2.png|32px]] The texture of golden carrots has been changed.}}
{{History|||snap=19w11a|Farmer [[villager]]s now [[trading|sell]] golden carrots.}}
{{History||1.16|snap=20w16a|Golden carrots can now be found in [[ruined portal]] chests.}}
{{History||1.16.2|snap=20w30a|Golden carrots can now be found in [[bastion remnant]] chests.}}
{{History||1.18|snap=experimental snapshot 6|Horses, donkeys and mules now follow players holding golden carrots.}}
{{History||1.19|snap=22w13a|Golden carrots may now be found in [[ancient city]] ice box [[chest]]s.
|A single golden carrot now generates in the [[chest]] in <code>ancient_city/city_center/city_center_2</code>.}}
{{History|||snap=22w14a|The golden carrot in the chest in <code>ancient_city/city_center/city_center_2</code> has been replaced with a [[golden apple]].}}
{{History|pocket alpha}}
{{History||v0.12.1|snap=build 1|[[File:Golden Carrot JE3 BE1.png|32px]] Added golden carrots.}}
{{History||v0.13.0|snap=build 1| Golden carrots can now be used to feed [[rabbit]]s.}}
{{History||v0.15.0|snap=build 1|Golden carrots can now be used to feed [[horse]]s and [[donkey]]s.}}
{{History|bedrock}}
{{History||1.10.0|snap=beta 1.10.0.3|[[File:Golden Carrot JE4 BE2.png|32px]] The texture of golden carrots has been changed.}}
{{History||1.11.0|snap=beta 1.11.0.4|Golden carrots can now be [[trading|bought]] from farmer [[villager]]s.}}
{{History||1.13.0|snap=beta 1.13.0.9|Trading has been changed, master-level farmer now has {{frac|1|3}} chance to sell golden carrots.}}
{{History||1.16.0|snap=beta 1.16.0.57|Golden carrots now generate in [[ruined portal]] chests.
|Golden carrots trade offering chance changed to 50%.}}
{{History|console}}
{{History||xbox=TU14|xbone=CU1|ps=1.04|wiiu=Patch 1|[[File:Golden Carrot JE3 BE1.png|32px]] Added golden carrots.}}
{{History||xbox=none|xbone=none|ps=1.90|wiiu=none|switch=none|[[File:Golden Carrot JE4 BE2.png|32px]] The texture of golden carrots has been changed.}}
{{History|New 3DS}}
{{History||0.1.0|[[File:Golden Carrot JE3 BE1.png|32px]] Added golden carrots.}}
{{History|foot}}
== Issues ==
{{issue list}}
== See also ==
* [[Carrot]]
* [[Golden Apple]]
== External Links ==
*[https://www.minecraft.net/en-us/article/taking-inventory--golden-carrot Taking Inventory: Golden Carrot] – Minecraft.net on September 6, 2022
{{items}}
[[cs:Zlatá mrkev]]
[[de:Goldene Karotte]]
[[es:Zanahoria dorada]]
[[fr:Carotte dorée]]
[[hu:Aranyrépa]]
[[ja:金のニンジン]]
[[ko:황금 당근]]
[[nl:Gouden wortel]]
[[pl:Złota marchewka]]
[[pt:Cenoura dourada]]
[[ru:Золотая морковь]]
[[uk:Золота морква]]
[[zh:金胡萝卜]]
[[Category:Renewable resources]]
[[Category:Food]]
[[Category:Brewing recipe]]</li><li>[[Light Gray Dye|Light Gray Dye]]<br/>{{Item
| image = Light Gray Dye.png
| renewable = Yes
| stackable = Yes (64)
}}
'''Light gray dye'''{{fn|Known as '''Light Grey Dye''' in British, Canadian, Australian, and New Zealand English variants.}} is a [[Dyeing#Primary Colors|quasi-primary dye]].
== Obtaining ==
=== Crafting ===
{{Crafting
|head=1
|showname=0
|showdescription=1
|Azure Bluet;Oxeye Daisy;White Tulip
|Output=Light Gray Dye
|type=Material
}}
{{Crafting
|Black Dye
|White Dye
|White Dye
|Output=Light Gray Dye,3
|type=Material
|description={{IN|bedrock}}, the black and white dye can be replaced with [[ink sac]]s and [[bone meal]], respectively.
}}
{{Crafting
|Gray Dye
|White Dye
|Output=Light Gray Dye,2
|type=Material
|description={{IN|bedrock}}, the white dye can be replaced with [[bone meal]].
|foot=1
}}
=== Trading ===
[[Wandering trader]]s sell 3 light gray dye for an [[emerald]].
== Usage ==
{{dye usage}}
=== Crafting ingredient ===
{{crafting usage|ignore=Banner|continue=1}}
{{banner crafting usage}}
=== Loom ingredient ===
{{Banner loom usage|Light Gray Dye}}
=== Trading ===
Expert-level shepherd villagers have {{frac|1|6}} chance to buy 12 light gray dye for an emerald.
== Data values ==
=== ID ===
{{edition|java}}:
{{ID table
|edition=java
|showforms=y
|generatetranslationkeys=y
|displayname=Light Gray Dye
|spritetype=item
|nameid=light_gray_dye
|form=item
|foot=1}}
{{edition|bedrock}}:
{{ID table
|edition=bedrock
|showaliasids=y
|shownumericids=y
|showforms=y
|notshowbeitemforms=y
|generatetranslationkeys=y
|displayname=Light Gray Dye
|spritetype=item
|nameid=light_gray_dye
|aliasid=dye / 7
|id=402
|form=item
|translationkey=item.dye.silver.name
|foot=1}}
== Video ==
<div style="text-align:center">{{yt|1w3j1SKcoww}}</div>
== History ==
{{History|java beta}}
{{History||1.2|[[File:Light Gray Dye JE1 BE1.png|32px]] Added light gray dye.}}
{{History|java}}
{{History||1.4.2|snap=12w34a|Added the ability to [[Armor#Dyeing|dye]] leather [[armor]] and [[wolf]] collars.}}
{{History||1.4.6|snap=12w49a|Light gray dye can now be [[crafting|crafted]] with [[gunpowder]] to create a [[firework star]].}}
{{History||1.6.1|snap=13w19a|[[Stained clay]] can now be crafted.}}
{{history||1.7.2|snap=13w36a|With the addition of new [[flower]]s, many secondary and tertiary dyes are now primary [[dye]]s.}}
{{History|||snap=13w41a|[[Stained glass]] can now be crafted.}}
{{History||1.8|snap=14w30a|Added [[banner]]s, which can be dyed.}}
{{History||1.11|snap=16w39a|Added the ability to dye [[shulker box]]es.}}
{{History||1.12|snap=17w15a|Added the ability to dye [[bed]]s.}}
{{History||1.13|snap=17w47a|The different data values for the <code>dye</code> ID have now been split up into their own IDs.
|Prior to [[1.13/Flattening|''The Flattening'']], this [[item]]'s numeral ID was 351.}}
{{History||1.14|snap=18w43a|Light gray dye is now crafted using [[white dye|white]] and [[black dye]]s, instead of [[bone meal]] and [[ink sac]]s.
|[[File:Light Gray Dye JE2 BE2.png|32px]] The texture of light gray dye has now been changed.}}
{{History|||snap=18w44a|Light gray dye can now change the text color on [[sign]]s to light gray.}}
{{History|||snap=19w05a|Added the [[wandering trader]], which sells light gray dye.}}
{{History|||snap=19w11a|Light gray dye can now be [[trading|bought]] by shepherd villagers.}}
{{History||1.17|snap=20w45a|Light gray dye can now be used to craft [[light gray candle]]s.}}
{{History|||snap=21w19a|Light gray dye can no longer be used to craft light gray candles.}}
{{History|||snap=Pre-release 1|Light gray dye can now once again be used to craft light gray candles.}}
{{History||1.20<br>(Experimental)|link=1.19.3|snap=22w42a|Light gray dye can now change the text color on [[hanging sign]]s to light gray.}}
{{History|pocket alpha}}
{{History||v0.3.0|[[File:Light Gray Dye JE1 BE1.png|32px]] Added light gray dye. It is currently unobtainable and serves no purpose.}}
{{History||v0.8.0|snap=build 1|Light gray dye can be [[craft]]ed with [[bone meal]] and [[gray dye]], or with two bone meals and an [[ink sac]], despite there being no way of obtaining gray dye or ink sacs at the time.}}
{{History||v0.8.0|snap=build 3|Light gray dye is now available in [[creative]] mode.}}
{{History||v0.9.0|snap=build 3|Light gray dye can now be obtained in [[survival]] mode.}}
{{History|||snap=build 11|Light gray dye can now be used to craft colored [[terracotta]].}}
{{History||v0.11.0|snap=build 1|Light gray dye can now be used to dye tamed [[wolf]] collars.}}
{{History||v0.14.0|snap=build 1|Light gray dye can now be used to dye [[water]] in [[cauldron]]s.}}
{{History|pocket}}
{{History||1.0.0|snap=alpha 0.17.0.1|Light gray dye can now be used to dye [[shulker]]s.}}
{{History||1.1.0|snap=alpha 1.1.0.0|Light gray dye can now be used to craft [[concrete powder]], colored [[bed]]s and dyed [[shulker box]]es.}}
{{History|bedrock}}
{{History||1.2.0|snap=beta 1.2.0.2|Light gray dye can now be used to craft [[firework star]]s, [[stained glass]] and patterns on [[banner]]s.}}
{{History||1.4.0|snap=beta 1.2.20.1|Light gray dye can now be used to craft [[balloon]]s and [[glow stick]]s.}}
{{History||1.8.0|snap=beta 1.8.0.8|Light gray dye can now be used to dye tamed [[cat]] collars.}}
{{History||1.10.0|snap=beta 1.10.0.3|Light gray dye is now [[trading|sold]] by [[wandering trader]]s.
|Light gray dye can now be used to dye white [[carpet]]s and undyed [[glass pane]]s.
|[[File:Light Gray Dye JE2 BE2.png|32px]] The texture of light gray dye has now been changed.}}
{{History||1.11.0|snap=beta 1.11.0.1|Light gray dye can be [[trading|sold]] to shepherd [[villager]]s.}}
{{History||1.16.100|snap=beta 1.16.100.56|The ID of light gray dye has been changed from <code>dye/7</code> to <code>light_gray_dye</code>.}}
{{History|console}}
{{History||xbox=TU1|xbone=CU1|ps=1.00|switch=1.0.1|wiiu=Patch 1|[[File:Light Gray Dye JE1 BE1.png|32px]] Added light gray dye.}}
{{History|PS4}}
{{History||1.90|[[File:Light Gray Dye JE2 BE2.png|32px]] The texture of light gray dye has now been changed.}}
{{History|new 3ds}}
{{History||0.1.0|[[File:Light Gray Dye JE1 BE1.png|32px]] Added light gray dye.}}
{{History|foot}}
== Issues ==
{{issue list}}
== Trivia ==
* In [[Bedrock Edition]], Some items/blocks' Block states/Item NBT uses '''Silver''' instead of '''Light Gray'''
== Notes ==
{{fnlist}}
{{Items}}
[[Category:Dyes]]
[[cs:Světle šedé barvivo]]
[[de:Hellgrauer Farbstoff]]
[[es:Tinte gris claro]]
[[fr:Teinture gris clair]]
[[hu:Világosszürke festék]]
[[ja:薄灰色の染料]]
[[ko:회백색 염료]]
[[nl:Lichtgrijze kleurstof]]
[[pl:Jasnoszary barwnik]]
[[pt:Corante cinza-claro]]
[[ru:Светло-серый краситель]]
[[zh:淡灰色染料]]
[[Category:Renewable resources]]</li></ul> | File:Crafting Table TextureUpdate.png Changed the texture of the crafting table. | ||||
| New Nintendo 3DS Edition | |||||
0.1.0{{Extension DPL}}<ul><li>[[Explorer Map|Explorer Map]]<br/>{{about|the map used to find rare structures|the craftable map|Map|others|Map (disambiguation)}}{{Needs updating|Add info on the new jungle, swamp, and village maps in Java 1.20.2 Pre-Release 1}}{{Item
| image = <gallery>
Ocean Explorer Map.png | Ocean
Woodland Explorer Map.png | Woodland
Buried Treasure Map.png | Buried Treasure
</gallery>
|image2 = <gallery>
Ocean Explorer Map BE.png | Ocean (BE)
Woodland Explorer Map BE.png | Woodland (BE)
Buried Treasure Map BE.png | Buried in Treasure (BE)
</gallery>
| renewable =
* '''Buried Treasure''': No
* '''Woodland and Ocean''': Yes
| stackable = Yes (64)
}}
An '''explorer map''' is a special [[map]] used to aid in finding rare [[generated structures]], including [[woodland mansion]]s, [[ocean monument]]s, and [[buried treasure]]s.
== Obtaining ==
=== Trading ===
Apprentice-level [[cartographer]] villagers sell ocean explorer maps for 13 emeralds and a compass. Journeyman-level cartographer villagers sell woodland explorer maps for 14 emeralds and a compass.
{{IN|java}}, if the cartographer is in [[the Nether]] or [[the End]], either spawned or transported, the trades for the map do not unlock. However, {{in|bedrock}}, the cartographer trades for the map are unlocked, but the purchased map shows the same layout as in the corresponding dimension and shows no destination structure, but if cartographer trades are unlocked in an old world type (prior-1.11.0), the game stops ticking.
In ''Java Edition'', each cartographer sells its own unique explorer map that points to a different location than other cartographers. Purchasing another explorer map from the same cartographer results in the same explorer map. In Bedrock Edition, a cartographer sells an explorer map that points to the nearest location, regardless of whether it is explored or previously mapped by another cartographer.<!-- start to glitched out-->
=== Chest loot ===
Treasure maps, in contrast to explorer maps, generate in underwater ruins or in shipwrecks.
{{LootChestItem|buried-treasure-map}}
== Usage ==
[[File:Explorer Map Comparison.gif|thumb|217px|Unexplored and partially explored maps.]]
{{See also|Map#Mapping|Map#Map content}}
=== Locating structures ===
There are three types of explorer maps: woodland, [[ocean]], and buried treasure. The maps differ from a normal map, in that it shows the area's land-water outline, with an orange striated (striped) texture for water<ref>Specifically, biomes in the "water_on_map_outlines" [[Tag#Biomes|biome tag]].</ref>, and the blank map texture for land. The maps show a section of land that contains a [[woodland mansion]], [[monument]] or [[buried treasure]] respectively. This may not be the nearest such [[structure]] to the [[player]]. The structures are displayed as a small icon. If the player icon is smaller than it would be on a normal map, that means the player is a great distance away. When the player is less than 1027 blocks away from the map border, the icon returns to the proper size. When the player reaches the map's area of land (512×512), the [[map]] fills in like a normal map.
The basic functions of a buried treasure explorer map are similar to that of the other two. However, instead of showing the structure icon on the map, it shows a red X instead. The [[buried treasure]] structure is located on the same X and Z coordinates as the middle of the X (the player marker may need to be aligned with the bottom of the middle 2×2 pixel square of the X). To locate the [[chest]] spot, hold the treasure map with both hands, not in the offhand slot.
=== Cloning ===
{{Crafting
|showdescription=1
|shapeless=1
|name=[[Explorer Map]]<br>(cloned)
|;;;Empty Map;Empty Map;Empty Map;Empty Map;Empty Map
|;;;;Empty Map;Empty Map;Empty Map;Empty Map
|;;;;;Empty Map;Empty Map;Empty Map
|Ocean Explorer Map; Woodland Explorer Map; Buried Treasure Map; Ocean Explorer Map; Woodland Explorer Map; Buried Treasure Map; Ocean Explorer Map; Woodland Explorer Map
|Empty Map
|;;;;;;Empty Map;Empty Map
|;Empty Map;Empty Map;Empty Map;Empty Map;Empty Map;Empty Map;Empty Map
|;;Empty Map;Empty Map;Empty Map;Empty Map;Empty Map;Empty Map
|;;;;;;;Empty Map
|Output= Ocean Explorer Map,2; Woodland Explorer Map,3; Buried Treasure Map,4; Ocean Explorer Map,5; Woodland Explorer Map,6; Buried Treasure Map,7; Ocean Explorer Map,8; Woodland Explorer Map,9
|type= Miscellaneous
|description=The output has the same map center as the input map, and the same [[monument]], [[woodland mansion]] or [[buried treasure]] marker. Cloned maps are stackable.
}}
The parts of the world that have already been explored and mapped are copied, and newly explored areas appear on both instances. In Creative mode, cloned explorer maps can be obtained by pick blocking on the explorer map displayed on [[item frames]] (the map needs to be out of the [[player]]'s inventory when using pick block, or else that map moves into the active hotbar slot).
== Sounds ==
{{edition|java}}:
{{Sound table
|sound=Drawmap1.ogg
|sound2=Drawmap2.ogg
|sound3=Drawmap3.ogg
|subtitle=Map drawn
|source=block
|description=When an explorer map is edited using a cartography table
|id=ui.cartography_table.take_result
|translationkey=subtitles.ui.cartography_table.take_result
|volume=1.0
|pitch=1.0
|distance=16
|foot=1}}
{{edition|bedrock}}: ''None''
== Data values ==
=== ID ===
{{edition|java}}:
{{ID table
|edition=java
|showforms=y
|generatetranslationkeys=y
|displayname=Map
|spritetype=item
|nameid=filled_map
|form=item
|translationkey=filled_map.mansion,filled_map.ocean,filled_map.buried_treasure
|foot=1}}
{{edition|bedrock}}:
{{ID table
|edition=bedrock
|showaliasids=y
|shownumericids=y
|showforms=y
|notshowbeitemforms=y
|generatetranslationkeys=y
|displayname=Map
|spritetype=item
|nameid=filled_map
|aliasid=map
|id=358
|form=item
|translationkey=item.map.exploration.monument.name,item.map.exploration.mansion.name,item.map.exploration.treasure.name
|foot=1}}
=== Metadata ===
{{see also|Bedrock Edition data values}}
{{IN|bedrock}}, the item [[Data value]] distinguishes explorer maps from one another:
{{:Map/DV}}
=== Item data ===
An explorer map differs from a map in that its <code>display</code> tag is set, which includes a <code>Mapcolor</code> and a <code>LocName</code>; also its <code>Decorations</code> list includes an entry for its target monument, mansion or buried treasure. Its [[Map item format#map_<#>.dat format|map item entry]] is identical to that of a normal map, except that by the time the player sees it, its <code>colors</code> byte array is pre-filled with explorer maps' characteristic land-water boundary lines and water shading.
<div class="treeview">
It should be noted that this additional data is stored in the Cartographer's NBT data and in the inventory item's NBT data, and not in the map file (e.g. <samp>map_0.dat</samp>). If the [[player]] were to use the {{cmd|give}} command to give themselves a map with the same map ID as an existing explorer map, it would still have the Ocean Monument or the Woodland Mansion icon on the map, but it would simply be named "Map" instead of, for example, "Ocean Explorer Map".
* {{nbt|compound}} Item data
** {{nbt|compound|tag}}:
*** {{nbt|compound|display}}: How the map looks in an item slot. See also [[Player.dat_format#Display Properties]].
**** {{nbt|string|Name}}: The name the map is given. In this case, they are localized strings: either <code>{"translate":"filled_map.monument"}</code>,<code>{"translate":"filled_map.mansion"}</code> or <code>{"translate":"filled_map.buried_treasure"}</code>.
**** {{nbt|int|MapColor}}: Color codes are calculated from the Red, Green and Blue components using this formula:<br>'''<span style="color:red">Red</span>[[wikipedia:Logical shift|<<]]16 + <span style="color:green">Green</span><<8 + <span style="color:blue">Blue</span>'''.<ref group=note>For positive values larger than 0x00FFFFFF, the top byte is ignored. All negative values produce white.</ref> Monument maps use 3830373, which is {{color swatch|58|114|101}}. Mansion maps use 5393476, which is {{color swatch|82|76|68}}. Buried treasure explorer maps do not use a color code.
*** {{nbt|list|Decorations}}:
**** {{nbt|compound}}: One of these for each icon on the map. Explorer maps always have at least one representing their target.
***** {{nbt|string|id}}: An arbitrary unique string identifying the decoration. For explorer map target structures, this is "+".
***** {{nbt|double|rot}}: The rotation of the icon. For explorer map target structures, this is always 180.
***** {{nbt|byte|type}}: The ID of the [[Map#Map icons|map icon]]: 8 for a mansion map, 9 for a monument map, 26 for a treasure map.
***** {{nbt|double|x}}: The world x-coordinate of the target structure icon.
***** {{nbt|double|z}}: The world z-coordinate of the target structure icon.
</div>
; Notes
{{notelist}}
== Achievements ==
{{load achievements|Treasure Hunter}}
== History ==
{{History|java}}
{{History||1.11|snap=16w39a|[[File:Woodland Explorer Map JE1 BE1.png|32px]] [[File:Ocean Explorer Map JE1 BE1.png|32px]] Added woodland and ocean explorer maps.}}
{{History|||snap=16w41a|Explorer maps can now no longer be zoomed out.}}
{{History||1.13|snap=18w10a|[[File:Map (item) JE1 BE1.png|32px]] Added buried treasure explorer maps.}}
{{History|||snap=18w11a|Buried treasure explorer maps now generate in the [[chest]]s of [[shipwreck]]s.}}
{{History||1.14|snap=18w43a|[[File:Woodland Explorer Map JE2 BE2.png|32px]] [[File:Ocean Explorer Map JE2 BE2.png|32px]] [[File:Map (item) JE2 BE2.png|32px]] The textures for explorer maps have now been changed.}}
{{History||1.20.2|snap=1.20.2 Pre-release 1|Updated structure icons on explorer maps sold by cartographers.}}
{{History||Villager Trade Rebalance<br>(Experimental)|link=Java Edition 1.20.2|snap=1.20.2 Pre-release 1|Added seven new maps which cartographers can sell.}}
{{History|pocket}}
{{History||1.1.0|snap=alpha 1.1.0.0|[[File:Woodland Explorer Map JE1 BE1.png|32px]] [[File:Ocean Explorer Map JE1 BE1.png|32px]] Added explorer maps.<ref>{{Mcnet|discovery-update-pocket-and-win-10-soon|The Discovery Update: on Pocket and Win 10 soon|March 29, 2017}}</ref>
|Explorer maps are not yet obtainable in [[survival]] mode.}}
{{History|||snap=alpha 1.1.0.3|Explorer maps are now obtainable as [[trading|trades]] from [[cartographer]] [[villager]]s.}}
{{History|bedrock}}
{{History||1.4.0|snap=beta 1.2.14.2|[[File:Map (item) JE1 BE1.png|32px]] Added buried treasure explorer maps.}}
{{History|||snap=beta 1.2.20.1|Treasure maps now generate in [[underwater ruins]] [[chest]]s.}}
{{History||1.10.0|snap=beta 1.10.0.3|[[File:Woodland Explorer Map JE2 BE2.png|32px]] [[File:Ocean Explorer Map JE2 BE2.png|32px]] [[File:Map (item) JE2 BE2.png|32px]] The textures for explorer maps have now been changed.}}
{{History||1.11.0|snap=beta 1.11.0.4|[[Trading]] has now been changed, woodland and ocean explorer maps now cost a [[compass]] and 12 [[emerald]]s.
|Journeyman-level [[cartographer]] [[villager]]s no longer [[trading|sell]] 2 type of explorer map as they now have {{frac|1|3}} chance to sell woodland explorer maps, {{frac|1|3}} chance to sell ocean explorer maps, or {{frac|1|3}} chance to sell other [[item]]s<!-- empty locator map--> as part of their [[trading|trades]].
|Woodland explorer maps can now be [[trading|bought]] from fletcher [[villager]]s.}}
{{History||1.12.0|snap=beta 1.12.0.3|Journeyman-level fletcher villagers no longer [[trading|sell]] woodland explorer maps.}}
{{History||1.13.0|snap=beta 1.13.0.1|[[File:Woodland Explorer Map BE3.png|32px]] [[File:Ocean Explorer Map BE3.png|32px]] [[File:Buried Treasure Map BE3.png|32px]] The textures of explorer maps have now been changed.}}
{{History||1.16.100|snap=beta 1.16.100.56|The ID of maps has been changed from <code>map</code> to <code>filled_map</code>.}}
{{History|console}}
{{History||xbox=TU54|xbone=CU44|ps=1.52|wiiu=Patch 24|switch=1.0.4|[[File:Woodland Explorer Map JE1 BE1.png|32px]] [[File:Ocean Explorer Map JE1 BE1.png|32px]] Added explorer maps.}}
{{History|PS4}}
{{History||1.90|[[File:Woodland Explorer Map JE2 BE2.png|32px]] [[File:Ocean Explorer Map JE2 BE2.png|32px]] The textures for explorer maps have now been changed.}}
{{History|new3ds}}
{{History||1.9.19|[[File:Woodland Explorer Map JE1 BE1.png|32px]] [[File:Ocean Explorer Map JE1 BE1.png|32px]] Added explorer maps.}}
{{History|foot}}
== Issues ==
{{Issue list}}
== Trivia ==
* When a [[cartographer]] generates the trade offers for the explorer maps, it chooses the location of one of the nearest structures of the respective type ([[monument]] or [[woodland mansion]]).
* For the reason above, explorer maps obtained from one cartographer are always the same. Also, if two cartographers unlock the explorer map trades approximately at the same place and at the same time, the map locations are usually identical. This sometimes also happens when finding multiple treasure maps from [[ocean ruins]].
* Explorer maps fill as the [[chunk]]s are generated, rather than when the [[player]] holds them while in the area; leaving an explorer map while exploring the area still fills the map.
* Buried treasure explorer maps are named ''Buried Treasure Map'' {{in|java}} while {{in|bedrock}}, they are named ''Treasure Map''.
* It is possible for a cartographer to give a monument or woodland mansion explorer map for areas where the [[generated structures|structures]] would have spawned in the world, but were unable to as a result of terrain generation. As a result, explorer maps, unfortunately, don't always guarantee that a structure exists at the purported location. This is most common with woodland mansion explorer maps, due to its generation algorithm.
* On [[Bedrock Edition]], inventory editors and add-ons can be used to create Explorer Maps that lead to any structure.
== Gallery ==
<gallery>
File:Explorer Maps.png|An ocean explorer map in the [[off-hand]], a woodland explorer map in the main hand, and a [[cartographer]] [[villager]] in between them.
File:Partial Explorer Map.png|A partially-explored explorer map.
File:ExplorerToNormal Map Comparison.png|Two fully-explored maps of the same place, one of which is a woodland explorer map.
File:Buried Treasure Explorer Map.png|An [[item frame]] holding a buried treasure explorer map. The player can see the red X on the left side of the map.
File:Purchase.png|Purchasing explorer maps from a cartographer.
</gallery>
== See also ==
* [[Map]]
* [[Woodland Mansion]]
* [[Ocean Monument]]
* [[Shipwreck]]
* [[Buried treasure]]
== References ==
{{reflist}}
== External Links ==
*[https://www.minecraft.net/en-us/article/taking-inventory--explorer-map Taking Inventory: Explorer Map] – Minecraft.net on November 13, 2019
{{Items}}
[[de:Schatzkarte]]
[[es:Mapa (localización de estructura)]]
[[fr:Carte d'exploration]]
[[ja:探検家の地図]]
[[ko:탐험 지도]]
[[pl:Mapa eksploracyjna]]
[[pt:Mapa de exploração]]
[[ru:Карта сокровищ]]
[[zh:探险家地图]]</li><li>[[Pumpkin Pie|Pumpkin Pie]]<br/>{{redirect|Pie|the other craftable dessert|Cake|the terrain features|Pile}}
{{Item
| title = Pumpkin Pie
| image = Pumpkin Pie.png
| renewable = Yes
| heals = {{hunger|8}}
| stackable = Yes (64)
}}
'''Pumpkin pie''' is a [[food]] item that can be eaten by the [[player]].
== Obtaining ==
{{see also
| Tutorials/Pumpkin and melon farming |title1= Pumpkin and melon farming
| Tutorials/Sugar Cane farming |title2= Sugar cane farming
| Tutorials/Egg farming |title3= Egg farming
}}
=== Crafting ===
{{Crafting
|Pumpkin
|Sugar
|Egg
|Output= Pumpkin Pie
|type=Foodstuff
}}
=== Trading ===
Apprentice-level farmer [[villager]]s have a 50%{{only|bedrock}} or {{frac|2|3}}{{only|java}} chance to sell 4 pumpkin pies for an emerald as part of their trades.
{{in|java}}, farmer villagers throw pumpkin pies at players under the [[Hero of the Village]] effect.
=== Natural generation ===
{{LootChestItem|pumpkin-pie}}
== Usage ==
=== Food ===
{{see also|Tutorials/Hunger management|title1=Hunger management}}
To eat pumpkin pie, press and hold {{control|use}} while it is selected in the hotbar. Eating one restores {{hunger|8}} [[hunger]] and 4.8 [[:en:Hunger#Mechanics|saturation]].
=== Composting ===
Placing pumpkin pie into a [[composter]] raises the compost level by 1.
==Sounds==
{{Sound table/Entity/Food}}
== Advancements ==
{{load advancements|Husbandry;A Balanced Diet}}
== Data values ==
=== ID ===
{{edition|java}}:
{{ID table
|edition=java
|showforms=y
|generatetranslationkeys=y
|displayname=Pumpkin Pie
|spritetype=item
|nameid=pumpkin_pie
|form=item
|foot=1}}
{{edition|bedrock}}:
{{ID table
|edition=bedrock
|shownumericids=y
|showforms=y
|notshowbeitemforms=y
|generatetranslationkeys=y
|displayname=Pumpkin Pie
|spritetype=item
|nameid=pumpkin_pie
|id=284
|form=item
|foot=1}}
== Video ==
<div style="text-align:center">{{yt|IjeeTE117HM}}</div>
== History ==
{{History|java}}
{{History||September 11, 2012|link=http://twitter.com/jeb_/status/245503714167750656|The first screenshot of pumpkin pie was posted on [[Jens Bergensten|Jeb's]] Twitter.<ref>{{Tweet|jeb|245503714167750656}}</ref><ref>{{Tweet|jeb|245506498099298305}}</ref>}}
{{History||1.4.2|snap=12w37a|[[File:Pumpkin Pie JE1 BE1.png|32px]] Added pumpkin pies.}}
{{History||1.8|snap=14w02a|Pumpkin pie can now be [[trading|bought]] from farmer [[villager]]s, at 2–3 pumpkin pies for 1 [[emerald]].}}
{{History||1.13|snap=17w47a|Prior to [[1.13/Flattening|''The Flattening'']], this [[item]]'s numeral ID was 400.}}
{{History||1.14|snap=18w43a|[[File:Pumpkin Pie JE2 BE2.png|32px]] The texture of pumpkin pie has been changed.}}
{{History|||snap=18w50a|Pumpkin pies now generate in chests in taiga [[village]] houses.}}
{{History|||snap=19w03a|Placing pumpkin pie into the new [[composter]] raises the compost level by 1.}}
{{History|||snap=19w13a|Farmer villagers now give pumpkin pies to players under the [[Hero of the Village]] effect.}}
{{History|pocket alpha}}
{{History||v0.8.0|snap=build 1|[[File:Pumpkin Pie JE1 BE1.png|32px]] Added pumpkin pie.}}
{{History||v0.12.1|snap=build 1|Pumpkin pie now restores [[hunger]] instead of [[health]].}}
{{History|bedrock}}
{{History||1.10.0|snap=beta 1.10.0.3|[[File:Pumpkin Pie JE2 BE2.png|32px]] The texture of pumpkin pie has been changed.}}
{{History||1.11.0|snap=beta 1.11.0.1|Pumpkin pie can now be found in [[taiga]] and [[snowy taiga]] [[village]] house [[chest]]s.
|Pumpkin pie can now be used to fill up [[composter]]s.}}
{{History|||snap=beta 1.11.0.4|Farmer [[villager]]s now have a 50% chance to [[trading|sell]] 4 pumpkin pies for an [[emerald]].}}
{{History|console}}
{{History||xbox=TU14|xbone=CU1|ps=1.04|wiiu=Patch 1|switch=1.0.1|[[File:Pumpkin Pie JE1 BE1.png|32px]] Added pumpkin pie.}}
{{History||xbox=none|xbone=none|ps=1.90|wiiu=none|switch=none|[[File:Pumpkin Pie JE2 BE2.png|32px]] The texture of pumpkin pie has been changed.}}
{{History|New 3DS}}
{{History||0.1.0|[[File:Pumpkin Pie JE1 BE1.png|32px]] Added pumpkin pie.}}
{{History|foot}}
== Issues ==
{{issue list}}
== Gallery ==
<gallery>
File:Twitter Pumpkin Pie.png|The first screenshot of pumpkin pies, posted on Jeb's twitter.
</gallery>
== References ==
{{reflist}}
{{Items}}
[[cs:Dýňový koláč]]
[[de:Kürbiskuchen]]
[[es:Tarta de calabaza]]
[[fr:Tarte à la citrouille]]
[[it:Torta di zucca]]
[[ja:パンプキンパイ]]
[[ko:호박 파이]]
[[lzh:南瓜餅]]
[[nl:Pompoentaart]]
[[pl:Placek dyniowy]]
[[pt:Torta de abóbora]]
[[ru:Тыквенный пирог]]
[[zh:南瓜派]]
[[Category:Food]]
[[Category:Renewable resources]]</li></ul> | File:Crafting Table Revision 1.png Added crafting tables. | ||||
Issues
Issues relating to "Crafting Table" are maintained on the bug tracker. Report issues there.
Trivia
- The application icon for Java Edition is a crafting table, since 1.6.1.
- 1.6.2 had a strange icon like RubyDung versions.
- Before that, the icon was the Java icon.
- After 1.6.2, the icon is changed again.
- The original inventory screen before January 29, 2010 was the crafting table interface, meaning there was no way of putting on armor yet, and the player could not be seen.
Gallery
- Crafting Table in Village.png
Naturally occurring crafting table in villages libraries.
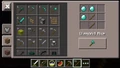
The crafting table GUI in Bedrock Edition, using the MATTIS system, used until Bedrock Edition beta 1.2.0.2.
- MATTIS.jpg
The former Minecraft Pocket Edition MATTIS crafting system, used until 0.9.0
- Console Crafting GUI.jpg
Legacy Console Edition simplified crafting interface.
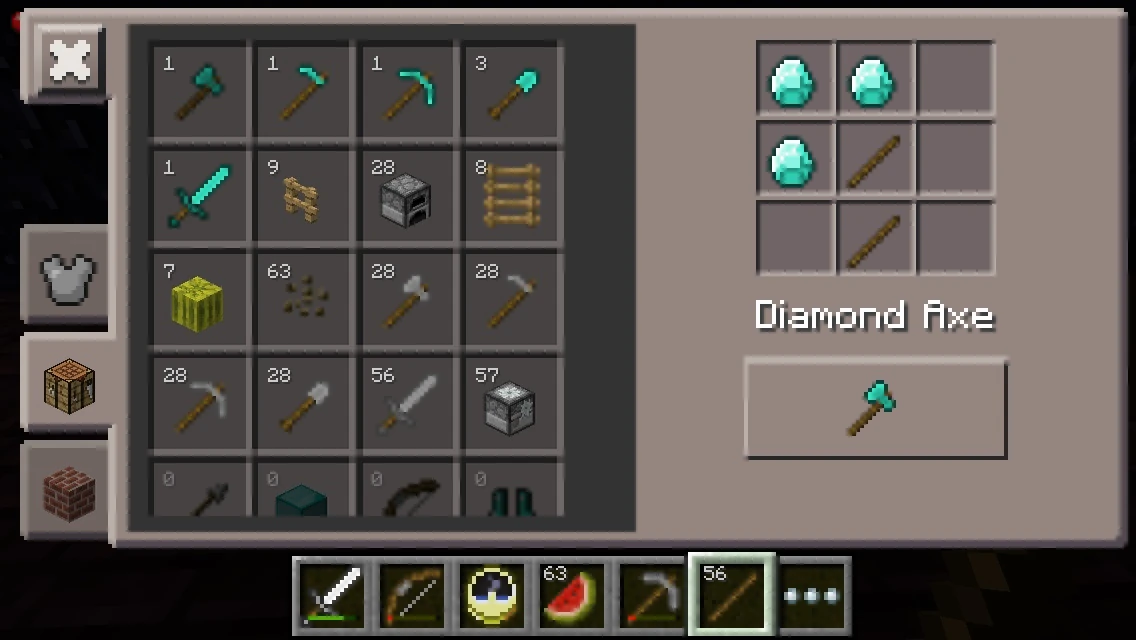
See also
References
- ↑ "Block of the Week: Crafting Table" – Minecraft.net, February 2, 2018