A bow is a ranged weapon that shoots arrows.
Obtaining[]
Crafting[]
| Ingredients | Crafting recipe |
|---|---|
| Stick + String |
Mob loot[]
Skeletons and Strays[]
Skeletons and strays have an 8.5% chance of dropping a normal or enchanted bow on death when killed by a player or a tamed wolf.
The chance of dropping a bow is increased by 1% per level of Looting, allowing up to an 11.5% chance of dropping.
The chance of being enchanted depends on the difficulty, whether it is normal or hard. The enchantment level is equal to enchant level 5-22.
Bows of skeleton traps are always enchanted at level 5 to 23. The exact level depends on regional difficulty, as on Easy it is always a level-5 enchantment.
Illusioners[]
Illusioners have an 8.5% chance of dropping an unenchanted bow when killed by the player. The chance of dropping a bow is increased by 1% per level of Looting, allowing up to an 11.5% chance of dropping.
Trading[]
Apprentice-level fletcher villagers sell bows for 2 emeralds as part of their trades.
Expert-level fletcher villagers sell enchanted bows for 7–21 emeralds as part of their trades. The enchantment level is equal to enchant level 5–19.
Fishing[]
Bows have a chance of being caught by fishing. When caught, the bow may be damaged and contain random enchantments equivalent to a level 30 enchantment from an enchanting table, including treasure enchantments like Mending.
Repairing[]
| Ingredients | Grinding recipe | Description |
|---|---|---|
| 2x Damaged Bow | The durability of the two bows is added together, plus an extra 5% durability. |
| Ingredients | Crafting recipe |
|---|---|
| Damaged Bow |
Usage[]
Weapon[]
Bows can be drawn back by using them. In order to use a bow, the player must have at least one arrow in their inventory or be in Creative mode. The arrow that is shown inside the bow always looks like a regular arrow, regardless of what kind of arrow is actually being shot from the bow.[1]
When drawing a bow, the display zooms in slightly. Charging the bow to its maximum causes it to visually shake as an indicator. Releasing the button shoots an arrow if it is charged at least 15%. Drawing a bow can be canceled by switching to another hotbar slot while holding use.
While the bow is being charged or remains fully charged, the player is forced to move at sneaking speed, unless they are riding a horse, minecart or boat, or flying with elytra. It is not possible to sprint while charging a bow or holding a drawn bow. When the bow is released, normal motion resumes although any prior sprint is cancelled. Sneaking while drawing the bow makes the player move even slower.
If an arrow hits another player, the player that shoots the arrow hears a high-pitched "ding" sound.[Java Edition only]
Fully charged shots launch critical arrows which have a trail of particles behind them and deal up to damage, where is the damage after any enchantments. The listed values below describe maximum damage from a bow with no Power enchantments, assuming the target is at a distance where drag and gravity are negligible. However, the critical damage is likely to be more around 8-10; critical damage is added at a random value between and and it is rare to have minimum or maximum values. The damage dealt can ultimately be less than the maximum damage if the arrow slows down after being shot.


| Charging time | Maximum attack damage |
|---|---|
| 0.1 s (no charge) | 1 |
| 0.2–0.9 s (medium charge) | 5 |
| 1+ s (full charge) | 6 |
| 1+ s (critical) | 11 |
The game stores the damage of arrows even in values with a decimal point. For example, it is possible for a critical arrow shot to cause damage values such as 6.4. In this cases of a broken value, the game can round up or down and store the amount for subsequent damage sources.
Any projectile thrown by the player is under the influence of momentum in current versions of Minecraft. Naturally, the player's movement speed can be modified under a number of circumstances, affecting the ballistic trajectory of projectiles, and as a result, the damage inflicted by arrows.
In Java Edition Combat Tests, to avoid sniping, arrows shot from fully-charged bows become non-critical if held drawn back for longer than three seconds. Instantaneous effects on tipped arrows are scaled by 1/8, just like the duration of other effects. For example, Instant Damage I arrow will deal an additional 0.75![]() × 0.375 magical damage.
× 0.375 magical damage.
Damage caused by the arrow is not affected by the Strength effect.
Endermen cannot be shot using an arrow, because the arrow either disappears as the enderman teleports, or it gets deflected. Even while immobile, the enderman is immune to damage from arrows. However, an arrow shot from a bow enchanted with Flame can ignite the enderman.
Crafting ingredient[]
| Name | Ingredients | Crafting recipe | Description |
|---|---|---|---|
| Dispenser | Cobblestone + Bow + Redstone Dust |
The bow can be of any durability. Enchantments on the bow do not affect the resulting dispenser. |
Enchantments[]
Bows can receive several different enchantments and have a base enchantability of 1. Bow enchantments have no effect on arrow speed or the distance it travels. In Bedrock Edition, if a bow is enchanted with any level 1 enchantment, it always gets Power I.[verify]
| Name | Summary | Max Level |
|---|---|---|
| Power | Increases the damage dealt by bow-shot arrows. | V |
| Punch | Increases the knockback dealt by bow-shot arrows. | II |
| Flame | Ignites arrows, dealing fire damage to anyone hit as well as igniting TNT and campfires. | I |
| Infinity[n 1] | Stops the bow from consuming arrows when shot. A minimum of 1 arrow is still required to work. | I |
| Unbreaking | Grants a chance to negate durability consumption, making the bow last longer. | III |
| Mending[n 1] | Repairs the bow using experience, but also preventing the player from gaining score. | I |
| Curse of Vanishing | The bow vanishes on death, not dropping as an item. Overridden by keepInventory. | I |
- Notes
Fuel[]
A bow can be used as fuel in furnaces, smelting 1.5 items per bow in Java Edition or 1 item per bow in Bedrock Edition.
Arrows[]
As in real life, a flying arrow in Minecraft is affected by gravity. Its vertical speed is modified by one block downward every second, resulting in a parabolic flight path. An arrow slows down if shot through water, reducing its damage to near zero unless brought back into the air or otherwise given momentum.[Java Edition only]
Arrows that hit solid blocks become stuck and can be retrieved, unless the arrow was shot by a bow enchanted with Infinity, a player in Creative mode, or a mob.
An arrow shot through lava ignites, giving it the effect of the Flame enchantment, igniting any entity it hits. If not extinguished, the fire inflicts up to 4![]()
![]() damage. Although a wither skeleton does not spawn naturally with bows, if it holds a bow then it also shoots flaming arrows.
damage. Although a wither skeleton does not spawn naturally with bows, if it holds a bow then it also shoots flaming arrows.
On impact, an arrow can trigger a wooden pressure plate, target block, wooden button, or tripwire. Arrows cannot trigger stone pressure plates or stone buttons.
The player can choose the type of arrow to shoot based on its location in the inventory. Arrows in the off-hand, or the selected hotbar slot if the bow is in the off-hand, are prioritized first. If there are no arrows in the off-hand or selected hotbar slot then the arrow closest to slot 0 is selected.
Arrows shot by bows in Bedrock Edition has a slightly higher range than arrows shot by bows in Java Edition.
Sounds[]
| Sound | Subtitles | Source | Description | Resource location | Translation key | Volume | Pitch | Attenuation distance |
|---|---|---|---|---|---|---|---|---|
| Arrow hits | Friendly Creatures | When an arrow impacts something | entity | subtitles | 1.0 | 12⁄11-4⁄3 | 16 | |
| Arrow fired | Players | When a bow shoots an arrow | entity | subtitles | 1.0 | 4⁄3-1.125 [sound 1] | 16 | |
| Player hit | Players | When an arrow shot by a player hits another player | entity | subtitles | 0.18 | 0.45 | 16 | |
| Item breaks | Players | When a bow's durability is exhausted | entity | subtitles | 0.8 | 0.8-1.2 | 16 |
- ↑ Depends on how long the bow has been charging. uncharged bows give 5⁄6-0.625
| Sound | Source | Description | Resource location | Volume | Pitch |
|---|---|---|---|---|---|
| Players | When an arrow impacts something | random | 1.0 | 1.09-1.3 | |
| Players | When a bow shoots an arrow | random | 1.0 | 0.83-1.25 | |
| Players | When a bow's durability is exhausted | random | 1.0 | 0.9 |
Data values[]
ID[]
| Name | Identifier | Form | Translation key |
|---|---|---|---|
| Bow | bow | Item | item.minecraft.bow |
| Name | Identifier | Numeric ID | Form | Translation key |
|---|---|---|---|---|
| Bow | bow | 300 | Item | item.bow.name |
Achievements[]
| Icon | Achievement | In-game description | Actual requirements (if different) | Gamerscore earned | Trophy type (PS4) | |
|---|---|---|---|---|---|---|
| PS4 | Other | |||||
| Sniper Duel | Kill a Skeleton with an arrow from more than 50 meters. | Use a launched arrow to kill a skeleton, spider jockey, wither skeleton, or a stray from 50 or more blocks away, horizontally. | 30G | Bronze | ||
| Dispense with This | Construct a Dispenser. | — | 20G | Bronze | ||
| Archer | Kill a creeper with arrows. | — | 10G | Bronze | ||
| Bullseye | Hit the bullseye of a Target block | — | 15G | Bronze | ||
Advancements[]
| Icon | Advancement | In-game description | Parent | Actual requirements (if different) | Resource location |
|---|---|---|---|---|---|
 | Take Aim | Shoot something with an Arrow | Monster Hunter | Using a bow or a crossbow, shoot an entity with an arrow, tipped arrow, or spectral arrow. | adventure/shoot_arrow
|
 | Sniper Duel | Kill a Skeleton from at least 50 meters away | Take Aim | Be at least 50 blocks away horizontally when a skeleton is killed by an arrow after the player has attacked it once. | adventure/sniper_duel
|
| Bullseye | Hit the bullseye of a Target block from at least 30 meters away | Take Aim | Be at least 30 blocks away horizontally when the center of a target is shot with a projectile by the player. | adventure/bullseye
|
Video[]
History[]
| Java Edition Classic | |||||
|---|---|---|---|---|---|
| June 14, 2009 | Notch discussed how bows and arrows would work in Survival mode: "Bows and arrows can be made out of wood. To use it, select the bow from your inventory and make sure you’ve got some arrows. Click in front of you, and an arrow goes flying using real physics. To actually HIT something, aim above it." | ||||
0.24 SURVIVAL TEST{{Extension DPL}}<ul><li>[[Cyan Dye|Cyan Dye]]<br/>{{Item
| image = Cyan Dye.png
| renewable = Yes
| stackable = Yes (64)
}}
'''Cyan dye''' is a [[Dyeing#Secondary|secondary dye color]].
== Obtaining ==
=== Crafting ===
{{Crafting
|head=1
|showdescription=1
|showname=0
|Blue Dye
|Green Dye
|Output=Cyan Dye,2
|type=Material
}}
{{Crafting
|Lapis Lazuli
|Green Dye
|Output=Cyan Dye,2
|description={{only|bedrock|education}}
|type=Material
}}
{{Crafting
|Pitcher Plant
|Output=Cyan Dye,2
|description=
|type=Material
|foot=1
}}
=== Trading ===
[[Wandering trader]]s sell 3 cyan dye for an [[emerald]].
== Usage ==
{{dye usage}}
=== Crafting ingredient ===
{{crafting usage|ignore=Banner|continue=1}}
{{banner crafting usage}}
=== Loom ingredient ===
{{Banner loom usage|Cyan Dye}}
=== Trading ===
{{IN|bedrock}}, journeyman-level shepherd villagers have 20% chance to buy 12 cyan dye for an emerald.
{{More info|java=1|Java UI does not use a specific trade slot, which results in a different chance to offer this trade.}}
== Data values ==
=== ID ===
{{edition|java}}:
{{ID table
|edition=java
|showforms=y
|generatetranslationkeys=y
|displayname=Cyan Dye
|spritetype=item
|nameid=cyan_dye
|form=item
|foot=1}}
{{edition|bedrock}}:
{{ID table
|edition=bedrock
|showaliasids=y
|shownumericids=y
|showforms=y
|notshowbeitemforms=y
|generatetranslationkeys=y
|displayname=Cyan Dye
|spritetype=item
|nameid=cyan_dye
|aliasid=dye / 6
|id=401
|form=item
|translationkey=item.dye.cyan.name
|foot=1}}
== History ==
{{History|java beta}}
{{History||1.2|[[File:Cyan Dye JE1 BE1.png|32px]] Added cyan dye.}}
{{History|java}}
{{History||1.4.2|snap=12w34a|Added the ability to [[Armor#Dyeing|dye]] leather [[armor]] and [[wolf]] collars.}}
{{History||1.4.6|snap=12w49a|Cyan dye can now be [[crafting|crafted]] with [[gunpowder]] to create a [[firework star]].}}
{{History||1.6.1|snap=13w19a|[[Stained clay]] can now be crafted.}}
{{history||1.7.2|snap=13w36a|With the addition of new [[flower]]s, many secondary and tertiary dyes are now primary [[dye]]s.}}
{{History|||snap=13w41a|[[Stained glass]] can now be crafted.}}
{{History||1.8|snap=14w02a|Due to [[lapis lazuli]] being [[renewable resource|renewable]], cyan dye is also renewable.}}
{{History|||snap=14w30a|Added [[banner]]s, which can be dyed.}}
{{History||1.13|snap=17w47a|The different data values for the <code>dye</code> ID have now been split up into their own IDs.
|Prior to [[1.13/Flattening|''The Flattening'']], this [[item]]'s numeral ID was 351.}}
{{History||1.14|snap=18w43a|Cyan dye is now [[crafting|crafted]] using [[blue dye]], instead of [[lapis lazuli]].
|[[File:Cyan Dye.png|32px]] The texture of cyan dye has now been changed.}}
{{History|||snap=18w44a|Cyan dye can now change the text color on [[sign]]s to cyan.}}
{{History|||snap=19w05a|Added the [[wandering trader]], which sell cyan dyes.}}
{{History|||snap=19w11a|Cyan dye can now be [[trading|bought]] by shepherd villagers.}}
{{History||1.17|snap=20w45a|Cyan dye can now be used to craft [[cyan candle]]s.}}
{{History|||snap=21w19a|Cyan dye can no longer be used to craft cyan candles.}}
{{History|||snap=Pre-release 1|Cyan dye can once again be used to craft cyan candles.}}
{{History||1.20<br>(Experimental)|link=1.19.3|snap=22w42a|Cyan dye can now change the text color on [[hanging sign]]s to cyan.}}
{{History||1.20|snap=23w12a|Added [[pitcher plant]]s, which can be crafted into cyan dye.}}
{{History|||snap=23w14a|[[Pitcher plant]]s now craft into 2 cyan dye instead of 1.}}
{{History|pocket alpha}}
{{History||v0.3.0|[[File:Cyan Dye JE1 BE1.png|32px]] Added cyan dye. It is currently unobtainable and serves no purpose.}}
{{History||v0.4.0|Cyan dye is now craftable with [[lapis lazuli]] and [[cactus green]].
|Cyan dye can now be used to craft cyan wool.}}
{{History||v0.6.0|Cyan dye can now be used to dye [[sheep]].}}
{{History||v0.9.0|snap=build 11|Cyan dye can now be used to craft colored [[terracotta]].}}
{{History||v0.11.0|snap=build 1|Cyan dye can now be used to dye tamed [[wolf]] collars.}}
{{History||v0.14.0|snap=build 1|Cyan dye can now be used to dye water in [[cauldron]]s.}}
{{History|pocket}}
{{History||1.0.0|snap=alpha 0.17.0.1|Cyan dye can now be used to dye [[shulker]]s.}}
{{History||1.1.0|snap=alpha 1.1.0.0|Cyan dye can now be used to craft [[concrete powder]], colored [[bed]]s and dyed [[shulker box]]es.}}
{{History|bedrock}}
{{History||1.2.0|snap=beta 1.2.0.2|Cyan dye can now be used to craft [[firework star]]s, [[stained glass]] and patterns on [[banner]]s.}}
{{History||1.4.0|snap=beta 1.2.20.1|Cyan dye can now be used to craft [[balloon|ballons]] and [[glow stick|glow sticks]].}}
{{History||1.8.0|snap=beta 1.8.0.8|Cyan dye can now be used to dye tamed [[cat]] collars.}}
{{History||1.10.0|snap=beta 1.10.0.3|Cyan dye are now [[trading|sold]] by [[wandering trader]]s.
|Cyan dye can now be used to dye white [[carpet|carpets]] and undyed [[glass pane]]s.
|[[File:Cyan Dye.png|32px]] The texture of cyan dye has now been changed.}}
{{History||1.11.0|snap=beta 1.11.0.4|Cyan dye can be [[trading|sold]] to shepherd [[villager]]s.}}
{{History||1.16.100|snap=beta 1.16.100.56|The ID of cyan dye has been changed from <code>dye/6</code> to <code>cyan_dye</code>.}}
{{History|console}}
{{History||xbox=TU1|xbone=CU1|ps=1.00|switch=1.0.1|wiiu=Patch 1|[[File:Cyan Dye JE1 BE1.png|32px]] Added cyan dye.}}
{{History|PS4}}
{{History||1.90|[[File:Cyan Dye.png|32px]] The texture of cyan dye has now been changed.}}
{{History|new 3ds}}
{{History||0.1.0|[[File:Cyan Dye JE1 BE1.png|32px]] Added cyan dye.}}
{{History|foot}}
== Issues ==
{{issue list}}
{{Items}}
[[Category:Items]]
[[Category:Dyes]]
[[Category:Renewable resources]]
[[cs:Azurové barvivo]]
[[de:Türkiser Farbstoff]]
[[es:Tinte cian]]
[[fr:Teinture cyan]]
[[hu:Ciánkék festék]]
[[ja:青緑色の染料]]
[[ko:청록색 염료]]
[[nl:Turquoise kleurstof]]
[[pl:Błękitny barwnik]]
[[pt:Corante ciano]]
[[ru:Бирюзовый краситель]]
[[zh:青色染料]]</li><li>[[Camera|Camera]]<br/>{{about|the entity|the command|commands/camera}}
{{exclusive|edu}}
{{unobtainable|edition=be}}
{{ItemEntity
|imagesize=80px
|renewable=No
|stackable=Yes (64)
|health={{hp|4}}
|image=Camera.png}}
{{Block
| title = Camera Block
| image = Camera (block).png
| invimage = none
| transparent = No
| light = 0
| tool = any
| stackable = Yes (64)
| flammable = No
| lavasusceptible = No
| renewable = No
}}
The '''camera''' is an [[entity]] that is capable of capturing and storing images. {{IN|edu}}, it works together with the [[portfolio]] item to create collections of [[photo]]s.<ref>https://education.minecraft.net/support/knowledge-base/using-cameras-portfolios/</ref>
== Obtaining ==
The camera can be obtained in the [[Creative inventory]] in ''Minecraft Education''. It can be obtained either by NBT editors, inventory editors, or glitches in Bedrock Edition.
To get the block form of the camera in Bedrock Edition using an NBT editor, you need to set the item name of the block in the inventory slot (<code>name:</code> ) to <code>item.camera</code>, then you need to add a compound tag called <code>Block</code> and inside of that put the int tag <code>version: 18040335</code> and the text tag <code>name: minecraft:camera</code> into the block compound tag. For the usable "[[spawn egg]]" form of the camera, you only need to set the item name of the block in the inventory slot (<code>name:</code> ) to <code>camera</code>; you do not need to add the block compound for this form of the camera.
== Usage ==
Using a camera from the [[inventory]] captures a first-person screenshot. It can also be placed, creating a camera [[entity]] that can track the user, and take pictures from the camera's perspective. Photos that are taken using the camera appear in the [[portfolio]].
Close-up snapshots of an [[item]] on the ground can be taken by holding the Shift key while right-clicking.
Photos that are taken with the camera block are stored in <code>%localappdata%\Packages\MinecraftUWP_8wekyb3d8bbwe\LocalState\screenshots</code>.
== Sounds ==
=== Generic ===
{{Sound table/Block/Normal/BE}}
=== Unique ===
{{Sound table
|sound=Camera1.ogg
|sound2=Camera2.ogg
|sound3=Camera3.ogg
|type=bedrock
|description=When a picture is taken with a camera
|source=Players
|id=camera.take_picture
|volume=1.0
|pitch=1.0
|foot=1}}
== Data values ==
=== ID ===
{{ID table
|edition=bedrock
|firstcolumnname=Camera
|shownumericids=y
|showforms=y
|generatetranslationkeys=y
|displayname=Block
|spritename=camera
|spritetype=block
|nameid=camera
|id=242
|form=block
|itemform=item.camera}}
{{ID table
|displayname=Item
|spritename=camera
|spritetype=item
|translationtype=item
|nameid=camera
|id=593
|form=item
|foot=1}}
{{ID table
|edition=bedrock
|firstcolumnname=Camera
|shownumericids=y
|generatetranslationkeys=y
|displayname=Entity
|spritename=camera
|spritetype=entity
|nameid=tripod_camera
|id=62
|foot=1}}
=== Entity data ===
See [[Bedrock Edition level format/Entity format]].
== Video ==
{{yt|1XLRGFibFNQ}}
== History ==
{{History|pocket alpha}}
{{History||v0.1.0|[[File:Camera BE1.png|50px]] [[File:Camera (item texture) BE1.png|32px]] The textures and model of the camera can be found in the game apk file.<ref name="found">[{{Reddit|jkkmr/found_image_file_for_camera_in_minecraft_portable}} Reddit - Found image file for camera in Minecraft Portable Edition Demo APK file.]</ref><ref>https://web.archive.org/web/20160604161800/https://twitter.com/Kappische/status/103548954368679936</ref>}}
{{History||v0.2.0|[[File:Camera BE2.png|50px]] [[File:Music Disc Blocks JE1 BE1.png|32px]] Added cameras
|Changed item and tripod textures.
|To use a camera, equip it in the [[player]]'s hand, then look in the direction the player wants the picture to be taken. Long-press the screen, and a camera [[drops]] to the ground where the player are standing. Step back, then press on the camera until it starts emitting smoke [[particles]]. The smoke means a picture has been taken, and the camera may disappear immediately afterward.
|Cameras have infinite uses.
|Entity id 62 and item id 456.<ref>https://www.minecraftforum.net/topic/1233138-i-found-the-camera-id/</ref>}}
{{History||v0.5.0|The camera is now invisible and makes the standard player [[damage]] [[sound]].}}
{{History||v0.7.0|Added the "F1" feature (Hide GUI), which has now made the camera obsolete.}}
{{History||v0.8.0|snap=build 2|[[File:Egg JE1 BE1.png|32px]] Item form now uses [[egg]] texture.}}
{{History||v0.9.0|snap=build 1|The camera [[entity]] has been removed. [[Tommaso]] also stated: ''"It doesn't mean that it's dead forever, in fact I have a lot of ideas for it! I think it will be back when have [[shader]]s, sharing and [[redstone]]."''<ref>{{Reddit|sub=MCPE|281sep/camera|ci6znr8}}</ref>}}
{{History||v0.14.0|snap=build 1|[[File:Camera BE3.png|32px]] [[File:Camera (item) BE2.png|32px]] Re-added the camera. It is accessible only with [[inventory]] editors.
|In this version, if the player spawns a camera, leaves the [[world]] and joins back, it summons [[lightning]].}}
{{History||v0.14.2|The camera [[item]] ID has been changed to 498, but it cannot be used at the moment. The [[entity]] can now be spawned with a [[spawn egg]] with a [[damage]] value of 62.
|According to the language files of the game, the empty label that shows up whenever hovering a finger to a camera would now say "Take Picture". However, the button doesn't do anything.}}
{{History||v0.15.0|snap=build 1|The previous empty label on the camera mentioned above now displays the words "Take Picture".
|The [[health]] of the camera [[entity]] is now {{hp|2}} instead {{hp|4}}.
|The camera no longer summons [[lightning]].}}
{{History||v0.16.0|snap=build 1|The camera now has a [[block]] form in [[inventory]], but still spawns the entity. However, the block can be placed only with [[commands]] and editing.
|"Take picture" button on the camera works now, but no image files are created.
|The oldest ID for camera (456) now refers to [[portfolio]].}}
{{History|||snap=build 2|[[File:Camera Block.png|32px]] The camera now has an [[item]] form and the [[block]] has been removed. However, it is still obtainable in servers.
|[[Portfolio]], which works together with the camera to create collections of pictures, has been removed.}}
{{History|||snap=build 4|Camera item form has been removed, and the camera can no longer be obtained or placed using any [[commands|command]].}}
{{History|bedrock}}
{{History||1.8.0|snap=beta 1.8.0.8|[[File:Camera BE3.png|32px]] [[File:Camera Block.png|32px]] The camera has been reimplemented.
|The camera [[entity]] can now be spawned with a [[spawn egg]] with [[damage]] value 258.}}
{{History||1.12.0|snap=beta 1.12.0.2|The camera can now be obtained with the {{cmd|give}} [[commands|command]].}}
{{History||1.13.0|snap=beta 1.13.0.1|The camera can no longer be obtained with the {{cmd|give}} command.
|Functionality has been added to the camera. Screenshots that are taken by the camera can now be saved into the {{cd|screenshots}} folder.
|Cameras are now a part of the {{el|ee}} toggle as a hidden feature.
|Cameras no longer have a [[death]] animation when killed by the [[player]] and instead, instantly emit smoke [[particles]].}}
{{History||1.16.100|snap=beta 1.16.100.50|The camera can now be obtained with the {{cmd|give}} [[commands|command]] once again.}}
{{History|||snap=beta 1.16.100.55|The camera can no longer be obtained with the {{cmd|give}} command.}}
{{History|education}}
{{History||1.0|[[File:Camera BE3.png|32px]] [[File:Camera Block.png|32px]] Added cameras.}}
{{History||1.4.0|Cameras no longer have a [[death]] animation when killed by the [[player]] and instead instantly emit smoke [[particles]].}}
{{History|foot}}
=== Future ===
At the Minecraft [[Pocket Edition]] panel at [[MineCon 2012]], as well as one of [[Johan Bernhardsson|Jbernhardsson]]'s livestreams, it was stated that future plans include trying to have a proper use for cameras, perhaps an easier way to take screenshots and share them with others.<ref>{{ytl|YMhyX_lKWV4}}</ref> In the BlockTalk Q&A, the camera was briefly mentioned as part of a broader "sharing" theme planned for {{el|be}} in the future.<ref>{{ytl|Ruf6tvqsD84}}</ref>
It later got implemented into {{el|ee}}, using the camera to make screenshots and share them in a special book.
== Issues ==
{{Issue list}}
== Trivia ==
* A camera prevents a [[Book and Quill]] from working. Attempting to craft it or obtain it by commands gives a regular book instead, due to non-implementation of photo attaching to written books.
* The camera can take a screenshot, which appears a bit smaller with a thick paper outline having cuts on its edges, making it look like an old photograph.
* This feature is hidden from the Creative inventory and from the /give command item menu.
== Gallery ==
<gallery>
PEcameras030.jpg|A row of cameras, as seen in [[Pocket Edition v0.3.0 alpha|v0.3.0]].
PEcameraphoto.jpg|Example image taken by the camera [[entity]].
CameraUse-1.png|The first method of using cameras.
CameraUse-2.png|The second method of using cameras.
Dinnerbone Camera.png|A camera spawned using a [[spawn egg]] named "[[Dinnerbone]]" in the v0.15.0 beta.
Cam2.png|A camera falling from a [[tree]]. This shows that cameras are entities.
Education Edition Exclusive Features.png|The camera and camera block placed in a world along with other Education Edition features.
Screenshot by camera.jpg|An example of the screenshot taken by a camera in [[Bedrock Edition beta 1.13.0.1|beta 1.13.0.1]].
File:Say Cheese.jpeg|[[Steve]], [[Alex]], [[Jesse]], and an [[Agent]] getting their picture taken.
</gallery>
== See also ==
* [[Portfolio]]
* [[Screenshot]]
== References ==
{{Reflist}}
{{Items}}
{{Entities}}
{{Education Edition}}
[[Category:Education Edition entities]]
[[Category:Education Edition items]]
[[Category:Tools]]
[[cs:Kamera]]
[[de:Kamera]]
[[el:Camera]]
[[es:Cámara]]
[[fr:Appareil photo]]
[[hu:Kamera]]
[[ja:カメラ]]
[[ko:카메라]]
[[nl:Camera]]
[[pl:Kamera]]
[[pt:Câmera]]
[[ru:Камера]]
[[uk:Камера]]
[[zh:相机]]</li></ul> | The player did not need a bow to shoot arrows. Instead, Tab ↹ was used to fire arrows. However, arrows still had to be collected to shoot. Launching arrows this way was much slower than the bow that now fires them. | ||||
| Java Edition Indev | |||||
0.31{{Extension DPL}}<ul><li>[[:Category:Fungi|Category:Fungi]]<br/>All pages covering blocks that are fungi.
[[Category:Blocks]]
[[Category:Items]]
[[ja:カテゴリ:菌類]]</li><li>[[Compass|Compass]]<br/>{{About|the item used to point to the world spawn or to a lodestone|the item used to point to the location of the player's last death|Recovery Compass}}
{{Item
| image = Compass.gif
| image2 = Lodestone Compass.gif
| renewable = Yes
| stackable = '''Compass:''' Yes (64)<br>'''Lodestone Compass:''' No
}}
A '''compass''' is an item used to point to the world spawn or to a [[lodestone]].
== Obtaining ==
=== Crafting ===
{{Crafting
|B1= Iron Ingot
|A2= Iron Ingot |B2= Redstone Dust |C2= Iron Ingot
|B3= Iron Ingot
|Output= Compass
|type= Tool
}}
=== Chest loot ===
{{LootChestItem|compass}}
=== Trading ===
{{IN|java}}, expert-level librarian [[villager]]s have a 50% chance to sell a single compass for 4 [[emerald]]s.
{{IN|bedrock}}, expert-level librarian villagers have a {{frac|1|3}} chance to sell a single compass for 4 emeralds.
== Usage ==
Normally, the compass' needle points toward the world [[Spawn#World spawn|spawn point]]. The compass points to spawn when viewed in any way, including as a dropped [[Item (entity)|item]], in a player's hand, in an inventory or the crafting table, or in an [[item frame]]. The direction the needle points to is relative to the player who is viewing it. When a compass in an item frame is rotated, the needle turns accordingly.
In [[the Nether]] or [[the End]], the compass' needle spins and points in random directions.
The compass can be used on a [[lodestone]], after which it is named lodestone compass by default and points to that lodestone as long as the compass is in the same dimension as the lodestone, but if the compass is taken to a different dimension, it spins randomly, as a normal compass would in the Nether or the End. If the lodestone is destroyed, it also spins randomly, even if the lodestone is replaced afterward. However, if a lodestone compass is placed in storage, the lodestone can be broken and replaced without the compass losing the attunement, as long as the compass remains in storage while the lodestone is missing.
A lodestone compass appears [[enchanting|enchanted]], similar to the [[Enchanted Golden Apple|enchanted golden apple]].
Using {{cmd|setworldspawn}} to change the world spawn also changes where the compass points.
=== Crafting ingredient ===
{{crafting usage|Compass, Compass.gif}}
=== Anvil usage ===
{{:Map/BE|position}}
=== Trading ===
A single compass can be sold to a journeyman-level cartographer villager for 1 [[emerald]].{{only|java}}
A single compass can be sold to an expert-level cartographer villager for 1 emerald as their sixth trade.{{only|bedrock}}
A compass is also part of the cost of [[explorer map]]s:
* An ocean explorer map and{{only|java|short=1}}/or{{only|bedrock|short=1}} a woodland explorer map can be bought from a journeyman-level cartographer for 12 emeralds and one compass, as part of their fifth trade.{{only|bedrock}}
* {{IN|java}}, apprentice-level cartographer villagers offer to sell an ocean explorer map for 13 emeralds and a compass, and journeyman-level cartographer villagers offer to sell a woodland explorer map for 14 emeralds and one compass.
=== Enchantments ===
A compass can receive the following [[enchantment]]s:
{|class="wikitable col-2-center col-3-right"
|+
!Name
!Max Level
![[Enchanting|Method]]
|-
|[[Curse of Vanishing]]
|I
|{{Inventory slot|Anvil}}
|-
|}
== Sounds ==
{{edition|java}}:
{{Sound table
|sound=Lodestone lock1.ogg
|sound2=Lodestone lock2.ogg
|source=player
|subtitle=Lodestone Compass locks onto Lodestone
|description=When a compass is used on a lodestone
|id=item.lodestone_compass.lock
|translationkey=subtitles.item.lodestone_compass.lock
|volume=1.0
|pitch=''varies'' <ref group=sound>Can be 0.85 or 0.95 for each sound</ref>
|distance=16
|foot=1}}
{{edition|bedrock}}:
{{Sound table
|type=bedrock
|sound=Lodestone lock1.ogg
|sound2=Lodestone lock2.ogg
|source=block
|description=When a compass is used on a lodestone
|id=lodestone_compass.link_compass_to_lodestone
|volume=1.0
|pitch=0.85-0.95
|foot=1}}
== Data values ==
=== ID ===
{{edition|java}}:
{{ID table
|edition=java
|showforms=y
|generatetranslationkeys=y
|displayname=Compass
|spritetype=item
|nameid=compass
|form=item
|translationkey=item.minecraft.compass,item.minecraft.lodestone_compass
|foot=1}}
{{edition|bedrock}}:
{{ID table
|edition=bedrock
|showaliasids=y
|shownumericids=y
|showforms=y
|notshowbeitemforms=y
|generatetranslationkeys=y
|displayname=Compass
|spritetype=item
|nameid=compass
|id=391
|form=item}}
{{ID table
|displayname=Lodestone Compass
|spritename=lodestone-compass-be
|spritetype=item
|nameid=lodestone_compass
|aliasid=lodestonecompass
|id=602
|form=item
|translationkey=item.lodestonecompass.name
|foot=1}}
=== Item data ===
{{el|java}}:
{{main|Player.dat format}}
<div class="treeview">
* {{nbt|compound|tag}}: The item's '''tag''' tag.
{{:Player.dat_format/Compasses}}
</div>
{{el|bedrock}}:
: See [[Bedrock Edition level format/Item format]].
== Advancements ==
{{load advancements|Country Lode}}
== History ==
{{History|java alpha}}
{{History||v1.1.0|[[File:Compass JE1.gif|32px]] Added compasses.
|They have 102 visually distinct frames due to how the texture is generated - see the section below.}}
{{History|java beta}}
{{History||1.8|snap=Pre-release|Compasses can now be found in library [[chest]]s in the new [[strongholds]].}}
{{History|java}}
{{History||1.3.1|snap=12w21a|Librarian [[villager]]s now [[trading|sell]] 1 compass for 10–11 [[emerald]]s, making them [[renewable]].}}
{{History||1.4.2|snap=12w34a|Since the mapping system has been changed, a compass can now be used to [[crafting|craft]] an empty [[map]].}}
{{History||1.5|snap=13w02a|[[File:Compass JE2 BE2.gif|32px]] Compasses now, instead of splitting two textures, use the new animation feature included in texture packs. As a result, they are considerably less precise, having only 29 visually distinct frames. }}
{{History||1.8|snap=14w02a|Librarian villagers now sell 1 compass for 10–12 emeralds.}}
{{History||1.9|snap=15w31a|Compasses are now broken up into individual textures, instead of having every individual frame on one vertical strip like with animated textures.}}
{{History|||snap=15w43a|The average yield of compasses in [[stronghold]] library [[chest]]s has been increased.}}
{{History||1.11|snap=16w39a|Cartographer [[villager]]s have been added, who [[trading|buy]] compasses as their tier 2 trade.}}
{{History||1.13|snap=17w47a|Prior to [[1.13/Flattening|''The Flattening'']], this [[item]]'s numeral ID was 345.}}
{{History|||snap=18w11a|Compasses can now generate in [[shipwreck]] [[chest]]s.}}
{{History||1.14|snap=18w48a|Compasses can now generate in chests in [[village]] cartographer houses.}}
{{History||1.16|snap=20w13a|[[File:Lodestone Compass JE1.gif|32px]] Compasses can now be used on [[lodestone]]s to make them point to the stones.
|Compasses now point to the center of the spawn point block, instead of its north-west corner.}}
{{History|||snap=20w14a|Compasses now have the <code>LodestonePos</code>, <code>LodestoneDimension</code>, and <code>LodestoneTracked</code> data fields. If <code>LodestoneTracked</code> is zero, the game skips checking for a lodestone in the specified position.
|Compasses can now have the [[Curse of Vanishing]] [[enchantment]] on them.}}
{{History|||snap=20w19a|Compasses no longer work in the [[recipe book]].<ref>{{bug|MC-116293}}</ref>}}
{{History|||snap=20w22a|Compasses no longer work in the villager trading GUI.<ref>{{bug|MC-182888}}</ref>}}
{{History||1.17|snap=20w48a|[[File:Compass JE3.gif|32px]] [[File:Lodestone Compass JE2.gif|32px]] The textures of compass and lodestone compass have been changed.}}
{{History||1.19|snap=22w13a|Compasses may now be found in [[ancient city]] [[chest]]s.}}
{{History|||snap=22w14a|Compasses can now used to craft [[recovery compass]]es.}}
{{History|pocket alpha}}
{{History||v0.2.0|[[File:Compass BE1.png|32px]] Added compasses.
|Compasses currently have no function or legitimate method of obtaining them.}}
{{History||v0.8.0|snap=build 1|[[File:Compass JE2 BE2.gif|32px]] Added animated texture to compasses.
|Compasses are now functional and [[crafting|craftable]]. They have been added into the Creative Inventory.}}
{{History||v0.14.0|snap=build 1|Compasses must now be added to a [[map]] using an [[anvil]] to add the location marker.}}
{{History|pocket}}
{{History||1.0.0|snap=?|[[Windows 10 Edition]] can now use the [[anvil]], as well as the [[crafting table]], to apply position markers, with compasses just as [[Pocket Edition]] can in general.}}
{{History||1.0.4|snap=alpha 1.0.4.0|Librarian [[villager]]s now [[trading|sell]] 1 compass for 10–12 [[emerald]]s.}}
{{History||1.1.0|snap=alpha 1.1.0.3|Cartographer villagers have been added, who [[trading|buy]] compasses as part of their tier 2 trade.
|Compasses used with emeralds can be used to buy explorer maps as part of cartographer villagers' fourth tiers trade.}}
{{History|bedrock}}
{{History||1.4.0|snap=beta 1.2.14.2|Compasses can now be found inside map room [[chest]]s in [[shipwreck]]s.}}
{{History||1.10.0|snap=beta 1.10.0.3|Compasses can now be found in [[village]] cartographer house chests.}}
{{History||1.11.0|snap=beta 1.11.0.4|[[Trading]] has been changed, cartographer [[villager]]s now [[trading|buy]] compassess as part of their fourth tier trades.
|Compasses used with [[emerald]]s can now be used to buy explorer maps as part of cartographer and fletcher villagers' third tier trades.
|Librarian villagers now have a {{frac|1|3}} chance to [[trading|sell]] compasses for 4 emeralds as part of their fourth tier trades.}}
{{History||1.16.0|snap=beta 1.16.0.57|[[File:Lodestone Compass BE1.gif|32px]] Compasses can now be used on [[lodestone]]s to make them point to the stones.
|Compasses now have the <code>LodestonePos</code>, <code>LodestoneDimension</code>, and <code>LodestoneTracked</code> data fields. If <code>LodestoneTracked</code> is zero, the game skips checking for a lodestone in the specified position.
|Compasses can now have the [[Curse of Vanishing]] [[enchantment]] on them.}}
{{History||1.16.100|snap=beta 1.16.100.56|Changed the ID {{code|lodestonecompass}} to {{code|lodestone_compass}}.}}
{{History||1.17.0|snap=beta 1.17.0.54|[[File:Compass JE3.gif|32px]] The texture of compass has been changed.}}
{{History||1.18.10|snap=beta 1.18.10.20|[[File:Lodestone Compass JE2.gif|32px]] The texture of lodestone compass has been changed.}}
{{History|console}}
{{History||xbox=TU1|xbone=CU1|ps=1.0|wiiu=Patch 1|switch=1.0.1|[[File:Compass JE2 BE2.gif|32px]] Added compasses.}}
{{History|New Nintendo 3DS Edition}}
{{History||0.1.0|[[File:Compass JE2 BE2.gif|32px]] Added compasses.}}
{{History|foot}}
=== Texture generation prior to Java Edition 13w02a ===
{{:Procedural animated texture generation/Compasses}}
== Issues ==
{{issue list}}
== Gallery ==
<gallery>
12w21a CompassPurchase.png|Purchasing a compass from a librarian [[villager]].
</gallery>
== See also ==
*[[Clock]]
*[[Tutorials/Navigation|Navigation]]
== External Links ==
*[https://www.minecraft.net/en-us/article/taking-inventory--compass Taking Inventory: Compass] – Minecraft.net on August 15, 2019
{{Items}}
[[Category:Tools]]
[[Category:Renewable resources]]
[[cs:Kompas]]
[[de:Kompass]]
[[es:Brújula]]
[[fr:Boussole]]
[[hu:Iránytű]]
[[it:Bussola]]
[[ja:コンパス]]
[[ko:나침반]]
[[nl:Kompas]]
[[pl:Kompas]]
[[pt:Bússola]]
[[ru:Компас]]
[[uk:Компас]]
[[zh:指南针]]</li></ul> | 20100110 | ||||
| 20100122 | |||||
| Bows often fail to interact with objects, but instead shoot. This is due to the fact that shooting arrows is an instantaneous action. | |||||
| At this point, bows have no durability, and can essentially be used infinitely. | |||||
| Java Edition Alpha | |||||
v1.2.6{{Extension DPL}}<ul><li>[[Blaze Powder|Blaze Powder]]<br/>{{Item
| image = Blaze Powder.png
| renewable = Yes
| stackable = Yes (64)
}}
'''Blaze powder''' is an item made from a [[blaze rod]], which is dropped by a [[blaze]] when killed. Its main uses are to fuel [[brewing stand]]s, to brew [[strength]] [[potions]], and to make [[eyes of ender]] to take the player to [[the End]].
== Obtaining ==
=== Crafting ===
{{Crafting
|Blaze Rod
|Output= Blaze Powder,2
|type= Brewing
}}
== Usage ==
=== Crafting Ingredient ===
{{crafting usage}}
=== Brewing stand fuel ===
In addition to being a [[brewing]] ingredient, blaze powder is needed to fuel a [[brewing stand]]. Each piece of blaze powder can brew up to 20 batches of [[Potion|potions]].
=== Brewing ingredient ===
{{brewing
|showname=1
|head=1
|Blaze Powder
|Mundane Potion
|base=Water Bottle
}}
{{brewing
|foot=1
|Blaze Powder
|Potion of Strength
}}
== Data values ==
=== ID ===
{{edition|java}}:
{{ID table
|edition=java
|showforms=y
|generatetranslationkeys=y
|displayname=Blaze Powder
|spritetype=item
|nameid=blaze_powder
|form=item
|foot=1}}
{{edition|bedrock}}:
{{ID table
|edition=bedrock
|shownumericids=y
|showforms=y
|notshowbeitemforms=y
|generatetranslationkeys=y
|displayname=Blaze Powder
|spritetype=item
|nameid=blaze_powder
|id=429
|form=item
|foot=1}}
== Video ==
{{Video note|This video does not mention that blaze powder must be used to fuel [[brewing stand]]s.|minor}}
<div style="text-align:center">{{yt|FSP2qBpe9vI}}</div>
==History==
{{History|java}}
{{History||1.0.0|snap=Beta 1.9 Prerelease 2|[[File:Blaze Powder JE1.png|32px]] Added blaze powder.
|Blaze powder can be used to craft [[eyes of ender]] and [[magma cream]].}}
{{History|||snap=Beta 1.9 Prerelease 3|Blaze powder can now be [[brewing|brewed]] in a [[water bottle]] to create a [[mundane potion]], or in an [[awkward potion]] to create a [[potion of Strength]].}}
{{History||1.2.1|snap=12w04a|Blaze powder can now be used to craft [[fire charge]]s.}}
{{History||1.3.1|snap=1.3|[[File:Blaze Powder JE2 BE1.png|32px]] The texture of blaze powder has been changed.}}
{{History||1.9|snap=15w42a|Blaze powder is now required to operate a [[brewing stand]].}}
{{History|||snap=15w43a|Blaze powder now [[fuel]]s 20 operations rather than 30.}}
{{History||1.13|snap=17w47a|Prior to [[1.13/Flattening|''The Flattening'']], this [[item]]'s numeral ID was 377.}}
{{History|pocket alpha}}
{{History||v0.12.1|snap=build 1|[[File:Blaze Powder JE2 BE1.png|32px]] Added blaze powder.
|Blaze powder can be used to craft [[magma cream]].
|Blaze powder is used as an ingredient to brew [[potion]]s.}}
{{History||v0.15.0|snap=build 1|Blaze powder is now used to craft [[fire charge]]s.}}
{{History|pocket}}
{{History||1.0.0|snap=alpha 0.17.0.1|Blaze powder is now used to craft [[eyes of ender]].}}
{{History|bedrock}}
{{History||1.2.0|snap=beta 1.2.0.2|Blaze powder is now required to operate a [[brewing stand]].}}
{{History|console}}
{{History||xbox=TU7|xbone=CU1|ps=1.00|wiiu=Patch 1|switch=1.0.1|[[File:Blaze Powder JE2 BE1.png|32px]] Added blaze powder.}}
{{History||xbox=TU46|xbone=CU36|ps=1.38|wiiu=Patch 15|Blaze powder is now required to operate a [[brewing stand]].}}
{{History|New 3DS}}
{{History||0.1.0|[[File:Blaze Powder JE2 BE1.png|32px]] Added blaze powder.}}
{{History|foot}}
== Issues ==
{{issue list}}
== See also ==
* [[The Nether]]
* [[Potions]]
== External Links ==
*[https://www.minecraft.net/en-us/article/taking-inventory--blaze-powder Taking Inventory: Blaze Powder] – Minecraft.net on November 25, 2021
{{Items}}
[[Category:Renewable resources]]
[[cs:Ohnivý prach]]
[[de:Lohenstaub]]
[[es:Polvo de blaze]]
[[fr:Poudre de Blaze]]
[[hu:Őrlángpor]]
[[ja:ブレイズパウダー]]
[[ko:블레이즈 가루]]
[[nl:Blazepoeder]]
[[pl:Płomienny proszek]]
[[pt:Pó de blaze]]
[[ru:Огненный порошок]]
[[th:ผงปีศาจไฟ]]
[[zh:烈焰粉]]</li><li>[[Head|Head]]<br/>{{Block
| image =
<gallery>
Skeleton Skull.png | Skeleton
Wither Skeleton Skull.png | Wither Skeleton
Player Head.png | Player
Zombie Head.png| Zombie
Creeper Head.png | Creeper
Dragon Head.png | Dragon
Piglin Head.png | Piglin
</gallery>
| transparent = Yes
| light = No
| tool = any
| renewable =
* '''Skeleton, Wither Skeleton, Zombie, Creeper, Piglin:'''
* Yes
* '''Dragon, Player:'''
* No
| stackable = Yes (64)
| flammable = No
| lavasusceptible = No
| rarity = Uncommon
}}
A '''head''' or '''skull''' is a [[block]] modeled after the head of a specific [[entity]]. There are seven types of heads: [[player]] ([[Steve]]'s head by default), [[zombie]], [[skeleton]], [[wither skeleton]], [[creeper]], [[piglin]], and [[dragon]].
== Obtaining ==
=== Breaking ===
A mob head can be mined using any item,<ref>{{bug|MC-192905||Heads & Skulls have no assigned tool}}</ref> and drops itself when broken.
{{breaking row|horizontal=1|Mob Head|sprite=Heads}}
If a head is pushed by a [[piston]] or comes in contact with [[water]] or [[lava]], it breaks off as an [[item (entity)|item]].
When destroyed by an [[explosion]], the head ''always'' drops as an item.
===Natural generation===
Dragon heads generate on [[end ships]] found in [[End City|end cities]].
Skeleton skulls can generate in [[ancient cities]], which sometimes generate in the [[deep dark]].
=== Mob loot ===
A [[wither skeleton]] has a 2.5% chance of dropping a wither skeleton skull when killed by a player or a tamed [[wolf]]. The chance is increased by 1% per level of [[Looting]], for a maximum of 5.5% with Looting III. {{IN|bedrock}}, the chance is increased by 2% per level of [[Looting]], for a maximum of 8.5% with Looting III.
[[Skeleton]], [[wither skeleton]], [[zombie]], [[creeper]] and [[piglin]] heads are always dropped by the respective mob if it dies due to a [[charged creeper]]'s explosion. {{IN|bedrock}}, if multiple mobs are killed by the same charged creeper, all of them drop their heads, however {{in|java}} only one mob selected at random drops its head.<ref>{{bug|MC-63534|||WAI}}</ref> If an [[ender dragon]] or a [[player]] is killed by a charged creeper, it does not drop its head.<ref name=":0">{{bug|MC-132933|||WAI}}</ref>
==Usage ==
===Decoration===
Mob heads can be oriented in 16 different directions on top of a block, and 4 directions on the sides of blocks, similar to [[sign]]s. They can be placed on top of, or beside each other by shift clicking.
When placed and powered by redstone, the piglin and dragon heads plays an animation. The piglin head flaps its ears (2 times per second for the right ear and 2.5 times per second for the left ear) while the dragon head opens and closes its mouth repeatedly (2 times per second). The same animation occurs when worn by a (horizontally) moving player, zombie, skeleton, or [[armor stand]] (note: the animation does not play if the <code>NoGravity</code> tag is set to 1)
=== Wearing ===
{{See also|#Renders}}
The player can wear heads, similarly to [[pumpkin]]s or helmets. This overlays the second layer of the player's [[skin]].
====Disguise====
Wearing the corresponding mob head reduces the detection range for [[skeleton]]s (but not [[wither skeleton]]s), [[creeper]]s, [[zombie]]s, and [[piglin]]s to 50% of the normal range. This is similar to (and stacks with) the reductions in detection range from [[sneaking]] and from the [[Invisibility]] status effect.
{{IN|bedrock}}, wearing any mob head or carved pumpkin makes the player invisible to other players on a locator [[map]].
=== Withers===
{{FakeImage|{{BlockGrid|scale=2|w=Wither Skeleton Skull|s=Soul Sand|www|sss| s }}|Wither build configuration}}
[[Wither]]s can be spawned by placing soul sand or soul soil in a T shape, and putting 3 wither skeleton skulls on top of the T. The T can be horizontal or vertical. The last block placed must be one of the three wither skeleton skulls. A dispenser can also create a wither, by placing the final skull onto soul sand directly in front of and below it.
===Dispensers===
A [[dispenser]] can equip a mob head on a player, mob, or armor stand with an empty helmet slot, within the block the dispenser is facing.
[[Dispenser]]s can also complete the construction of a wither.
=== Crafting ingredient===
{{crafting usage|Wither Skeleton Skull,Creeper Head|continue=1}}
{{Crafting
|ignoreusage=1
|ingredients=Any '''Mob head''' +<br>[[Gunpowder]] +<br>Any [[Dye]]
|Gunpowder
|Wither Skeleton Skull;Skeleton Skull;Zombie Head;Head;Creeper Head;Dragon Head;Player Head
|Matching Dye
|Output= Matching Firework Star
|description=Forms Creeper shape
|foot=1
}}
===Enchantments===
Mob heads can receive the following enchantments, but only through an [[anvil]].
{| class="wikitable col-2-center col-3-right"
|+
!Name
!Max Level
![[Enchanting|Method]]
|-
|[[Curse of Binding]]
|I
|{{Inventory slot|Anvil}}
|-
|[[Curse of Vanishing]]
|I
|{{Inventory slot|Anvil}}
|-
|}
=== Note blocks ===
Placing a head above a [[note block]] causes the note block to play the corresponding mob's {{cd|ambient}} sound when activated. The only exception is the creeper head; as creepers don't make {{cd|ambient}} sounds, the note block plays the {{cd|primed}} (hissing) sound instead.
The block below the note block does not affect the mob sound it creates.
==Player skins==
{{exclusive|java|section=1}}
Human heads have an extra usage for map makers, they can be given [[Chunk format#Entity Format|NBT data]] so that they appear with the skin of any ''Minecraft'' account. This means if a player knows that a specific account has a head that is desired to display, the NBT data can be edited to make it appear.
The command to give the player a head with the skin of another player is {{cmd|give @s minecraft:player_head{SkullOwner:"<''PlayerName''>"} }}. Commonly, this kind of head is called a custom head.
Another command to give the player a head with another player's skin is {{cmd|give @s minecraft:player_head{SkullOwner:{Id:"<''PlayerUUID''>",Properties:{textures:[{Value:"<''SkinURL''>"}]} } } }}. ''SkinURL'' is a string encoded in [https://en.wikipedia.org/wiki/Base64 Base64] containing the URL of the player's skin.<ref>Example: {"textures":{"SKIN":{"url":"<nowiki>http://textures.minecraft.net/texture/292009a4925b58f02c77dadc3ecef07ea4c7472f64e0fdc32ce5522489362680"}}}</ref> A player head saves the skin of the player from the time it was created, meaning if the player changes their skin, the head still displays the original texture.<ref>{{tweet|Dinnerbone|464414369452142592|Skulls are a snapshot of the skin as it was made; just change your skin, make a skull, and change your skin back. That's intended behaviour.|May 8, 2014}}</ref>
Note that it is therefore necessary to be connected to the internet to load the texture of a skin, whatever the property used.
When they are loaded for the first time by the client, the skins textures are cached in {{code|[[.minecraft]]\assets\skins\(subfolders)\(files)}}.
If the client does not have access to the internet when it first loads, the player's head displays a regular head (Steve's skin) which is also cached.
Afterwards, even if the client reconnects to the internet, in order to display the skin correctly, it is necessary to clear the cache manually by deleting the recently created files in {{code|[[.minecraft]]\assets\skins\(subfolder)}}, then restarting the game.
When NBT-customized heads (with names and lores) are placed on the ground, they lose their names and given lores upon picking up. Therefore, using Ctrl + {{ctrl|pick block}} on a custom player head gives the player a head that still retains its textures, but with no lores and its name is reset to either {{code|[PlayerName]'s Head}} (heads obtained by MHF-Marc's Head Format or existing players in the world) or {{code|Player Head}} (heads obtained by using skin URLs).
=== Marc's Head Format===
[[File:Allmobheads.png|thumb|right|Most of the MHF mob heads provided.]]
{{exclusive|Java|section=1}}
[[Marc Watson]] created a number of accounts with specific skins so map makers could use common heads without the risk of someone changing their skins.<ref>{{reddit|1m0itx/twitter_marc_irl_mapmakers_would_it_be_useful|cc4m1cq|I'm here to make it so that people don't have to worry about having a consistent account whose skin might change.|Marc_IRL|September 9, 2013}}</ref> Nowadays, since heads do not update the skin if a player changes their skin, this is not something map-makers need to worry about, though these skins are still useful. These accounts have names in the format <code>MHF_<''Name''></code>, for example <code>MHF_PigZombie</code> is the name of a ''Minecraft'' user with a [[zombified piglin]] head. MHF stands for "Marc's Head Format".<ref>{{tweet|Marc_IRL|377453670410891264|head format. I needed to pick a prefix that was short and not already taken by other usernames.|September 10, 2013}}</ref> There are also a few blocks and "bonus" heads, for more variety. These player heads have not been updated in compliance with the [[Texture Update]], and are outdated.
Because these are names of player accounts, these heads are obtained or placed using the <code>SkullOwner</code> tag, for instance: {{cmd|/give @s minecraft:player_head{SkullOwner:"MHF_''<Name>''"}<nowiki />}}.
The following names/heads have been made available:<ref>{{tweet|Marc_IRL|542330244473311232|For those following the MHF list, I have presents for you. Full list of accounts I've made: http://pastebin.com/5mug6EBu|December 9, 2014}}</ref>
<!--
DO NOT add ANY skull to this list without a source that it is made by Mojang; unsourced additions will be reverted!
In particular:
* MHF_Apple, MHF_Wither and MHF_Tree are not made by Mojang, see {{tweet|Marc_IRL|542599419678707714}} and {{tweet|Marc_IRL|590522239616954369}}
* MHF_Guardian is unofficial, see http://redd.it/3439u0
-->
;Mobs
<div class="list-style-none" style="-moz-column-width:15em;-webkit-column-width:15em;column-width:15em">
*{{InvSprite|MHF Alex}} MHF_Alex
*{{InvSprite|MHF Blaze}} MHF_Blaze
*{{InvSprite|MHF CaveSpider}} MHF_CaveSpider
*{{InvSprite|MHF Chicken}} MHF_Chicken
*{{InvSprite|MHF Cow}} MHF_Cow
*{{InvSprite|MHF Creeper}} MHF_Creeper
*{{InvSprite|MHF Enderman}} MHF_Enderman
*{{InvSprite|MHF Ghast}} MHF_Ghast
*{{InvSprite|MHF Golem}} MHF_Golem
*{{InvSprite|MHF Herobrine}} MHF_Herobrine
*{{InvSprite|MHF LavaSlime}} MHF_LavaSlime
*{{InvSprite|MHF MushroomCow}} MHF_MushroomCow
*{{InvSprite|MHF Ocelot}} MHF_Ocelot
*{{InvSprite|MHF Pig}} MHF_Pig
*{{InvSprite|MHF PigZombie}} MHF_PigZombie
*{{InvSprite|MHF Sheep}} MHF_Sheep
*{{InvSprite|MHF Skeleton}} MHF_Skeleton
*{{InvSprite|MHF Slime}} MHF_Slime
*{{InvSprite|MHF Spider}} MHF_Spider
*{{InvSprite|MHF Squid}} MHF_Squid
*{{InvSprite|MHF Steve}} MHF_Steve
*{{InvSprite|MHF Villager}} MHF_Villager
*{{InvSprite|MHF WSkeleton}} MHF_WSkeleton
*{{InvSprite|MHF Zombie}} MHF_Zombie
</div>
;Blocks
<div class="list-style-none" style="-moz-column-width:15em;-webkit-column-width:15em;column-width:15em">
*{{InvSprite|MHF Cactus}} MHF_Cactus
*{{InvSprite|MHF Cake}} MHF_Cake
*{{InvSprite|MHF Chest}} MHF_Chest
*{{InvSprite|MHF CoconutB}} MHF_CoconutB
*{{InvSprite|MHF CoconutG}} MHF_CoconutG
*{{InvSprite|MHF Melon}} MHF_Melon
*{{InvSprite|MHF OakLog}} MHF_OakLog
*{{InvSprite|MHF Present1}} MHF_Present1
*{{InvSprite|MHF Present2}} MHF_Present2
*{{InvSprite|MHF Pumpkin}} MHF_Pumpkin
*{{InvSprite|MHF TNT}} MHF_TNT
*{{InvSprite|MHF TNT2}} MHF_TNT2
</div>
;Bonus
<div class="list-style-none" style="-moz-column-width:15em;-webkit-column-width:15em;column-width:15em">
*{{InvSprite|MHF ArrowUp}} MHF_ArrowUp
*{{InvSprite|MHF ArrowDown}} MHF_ArrowDown
*{{InvSprite|MHF ArrowLeft}} MHF_ArrowLeft
*{{InvSprite|MHF ArrowRight}} MHF_ArrowRight
*{{InvSprite|MHF Exclamation}} MHF_Exclamation
*{{InvSprite|MHF Question}} MHF_Question
</div>
==Sounds==
===Generic===
{{Sound table/Block/Stone}}
===Unique===
{{Edition|Java}}:
{{Sound table
|sound=Zombie idle1.ogg
|sound2=Zombie idle2.ogg
|sound3=Zombie idle3.ogg
|subtitle=Zombie groans
|source=record
|description=When a zombie head is played using a note block
|id=block.note_block.imitate.zombie
|translationkey=subtitles.entity.zombie.ambient
|volume=3.0
|pitch=1.0
|distance=16}}
{{Sound table
|sound=Skeleton idle1.ogg
|sound2=Skeleton idle2.ogg
|sound3=Skeleton idle3.ogg
|subtitle=Skeleton rattles
|source=record
|description=When a skeleton skull is played using a note block
|id=block.note_block.imitate.skeleton
|translationkey=subtitles.entity.skeleton.ambient
|volume=3.0
|pitch=1.0
|distance=16}}
{{Sound table
|sound=Creeper fuse.ogg
|subtitle=Creeper hisses
|source=record
|description=When a creeper head is played using a note block
|id=block.note_block.imitate.creeper
|translationkey=subtitles.entity.creeper.primed
|volume=3.0
|pitch=0.5
|distance=16}}
{{Sound table
|sound=Ender dragon idle1.ogg
|sound2=Ender dragon idle2.ogg
|sound3=Ender dragon idle3.ogg
|sound4=Ender dragon idle4.ogg
|subtitle=Dragon roars
|source=record
|description=When an ender dragon head is played using a note block
|id=block.note_block.imitate.ender_dragon
|translationkey=subtitles.entity.ender_dragon.ambient
|volume=3.0
|pitch=1.0
|distance=16}}
{{Sound table
|sound=Wither skeleton idle1.ogg
|sound2=Wither skeleton idle2.ogg
|sound3=Wither skeleton idle3.ogg
|subtitle=Wither Skeleton rattles
|source=record
|description=When a wither skeleton skull is played using a note block
|id=block.note_block.imitate.wither_skeleton
|translationkey=subtitles.entity.wither_skeleton.ambient
|volume=3.0
|pitch=1.0
|distance=16}}
{{Sound table
|sound=Piglin idle1.ogg
|sound2=Piglin idle2.ogg
|sound3=Piglin idle3.ogg
|sound4=Piglin idle4.ogg
|sound5=Piglin idle5.ogg
|subtitle=Piglin snorts
|source=record
|description=When a piglin head is played using a note block
|id=block.note_block.imitate.piglin
|translationkey=subtitles.entity.piglin.ambient
|volume=1.98
|pitch=1.0
|distance=16}}
{{Sound table
|sound=Equip generic1.ogg
|sound2=Equip generic2.ogg
|sound3=Equip generic3.ogg
|sound4=Equip generic4.ogg
|sound5=Equip generic5.ogg
|sound6=Equip generic6.ogg
|subtitle=Gear equips
|source=player
|description=When a carved pumpkin is equipped
|id=item.armor.equip_generic
|translationkey=subtitles.item.armor.equip
|volume=1.0
|pitch=1.0
|distance=16
|foot=1}}
<!--volumes and pitches seem to be approximately v=0.9 p=0.84, but those values are approximate and are not in the files. They are probably inside of the code.-->
{{Edition|Bedrock}}:
{{Sound table
|type=bedrock
|sound=Zombie idle1.ogg
|sound2=Zombie idle2.ogg
|sound3=Zombie idle3.ogg
|source=record
|description=When a zombie head is played using a note block
|id=note.zombie
|pitch=0.84 <ref group=sound name=pitch>Actually equal to <math>\frac{1}{\sqrt[4]{2}}</math>, which is about 0.8409</ref>}}
{{Sound table
|sound=Skeleton step1.ogg
|sound2=Skeleton step2.ogg
|sound3=Skeleton step3.ogg
|sound4=Skeleton step4.ogg
|source=record
|description=When a skeleton skull is played using a note block<wbr><ref group=sound name=skeletoncreeper>{{Bug|MCPE-164530}}</ref>
|id=note.skeleton
|pitch=0.84 <ref group=sound name=pitch/>}}
{{Sound table
|sound=Fuse.ogg
|source=record
|description=When a creeper head is played using a note block<wbr><ref group=sound name=skeletoncreeper/>
|id=note.creeper
|pitch=0.84 <ref group=sound name=pitch/>}}
{{Sound table
|sound=Ender dragon idle1.ogg
|sound2=Ender dragon idle2.ogg
|sound3=Ender dragon idle3.ogg
|sound4=Ender dragon idle4.ogg
|source=record
|description=When a dragon head is played using a note block
|id=note.enderdragon
|pitch=0.84 <ref group=sound name=pitch/>}}
{{Sound table
|sound=Skeleton step1.ogg
|sound2=Skeleton step2.ogg
|sound3=Skeleton step3.ogg
|sound4=Skeleton step4.ogg
|source=record
|description=When a wither skeleton skull is played using a note block<wbr>{{Until|BE 1.20.40}}<wbr><ref group=sound name=skeletoncreeper/>
|id=note.witherskeleton
|pitch=0.84 <ref group=sound name=pitch/>}}
{{Sound table
|sound=Wither skeleton step1.ogg
|sound2=Wither skeleton step2.ogg
|sound3=Wither skeleton step3.ogg
|sound4=Wither skeleton step4.ogg
|source=record
|description=When a wither skeleton skull is played using a note block<wbr>{{Upcoming|BE 1.20.40}}<wbr><ref group=sound name=skeletoncreeper/>
|id=note.witherskeleton
|pitch=0.84 <ref group=sound name=pitch/>}}
{{Sound table
|sound=Piglin angry1.ogg
|sound2=Piglin angry2.ogg
|sound3=Piglin angry3.ogg
|sound4=Piglin angry4.ogg
|source=record
|description=When a piglin head is played using a note block<wbr><ref group=sound>{{Bug|MCPE-164710}}</ref>
|id=note.piglin
|pitch=0.84 <ref group=sound name=pitch/>}}
{{Sound table
|sound=Equip generic1.ogg
|sound2=Equip generic2.ogg
|sound3=Equip generic3.ogg
|sound4=Equip generic4.ogg
|sound5=Equip generic5.ogg
|sound6=Equip generic6.ogg
|source=player
|description=When a carved pumpkin is equipped
|id=armor.equip_generic
|volume=1.0
|pitch=1.0
|foot=1}}
==Data values==
===ID===
{{edition|java}}:
{{ID table
|edition=java
|showforms=y
|generatetranslationkeys=y
|displayname=Skeleton Skull
|spritetype=block
|nameid=skeleton_skull}}
{{ID table
|displayname=Wither Skeleton Skull
|spritetype=block
|nameid=wither_skeleton_skull}}
{{ID table
|displayname=Zombie Head
|spritetype=block
|nameid=zombie_head}}
{{ID table
|displayname=Player Head
|spritetype=block
|nameid=player_head}}
{{ID table
|displayname=Creeper Head
|spritetype=block
|nameid=creeper_head}}
{{ID table
|displayname=Dragon Head
|spritetype=block
|nameid=dragon_head}}
{{ID table
|displayname=Piglin Head
|spritetype=block
|nameid=piglin_head}}
{{ID table
|displayname=Skeleton Wall Skull
|spritetype=block
|nameid=skeleton_wall_skull
|form=block}}
{{ID table
|displayname=Wither Skeleton Wall Skull
|spritetype=block
|nameid=wither_skeleton_wall_skull
|form=block}}
{{ID table
|displayname=Zombie Wall Head
|spritetype=block
|nameid=zombie_wall_head
|form=block}}
{{ID table
|displayname=Player Wall Head
|spritetype=block
|nameid=player_wall_head
|form=block}}
{{ID table
|displayname=Creeper Wall Head
|spritetype=block
|nameid=creeper_wall_head
|form=block}}
{{ID table
|displayname=Dragon Wall Head
|spritetype=block
|nameid=dragon_wall_head
|form=block}}
{{ID table
|displayname=Piglin Wall Head
|spritetype=block
|nameid=piglin_wall_head
|foot=1}}
{{ID table
|displayname=Block entity
|spritename=heads
|spritetype=block
|nameid=skull
|foot=1}}
{{edition|bedrock}}:
{{ID table
|edition=bedrock
|firstcolumnname=Head
|shownumericids=y
|showforms=y
|generatetranslationkeys=y
|displayname=Block
|spritename=skulls
|spritetype=block
|nameid=skull
|id=144
|form=block
|itemform=item.skull
|translationkey=-}}
{{ID table
|displayname=Item
|spritename=skulls
|spritetype=item
|nameid=skull
|id=516
|form=item
|translationkey=item.skull.skeleton.name, item.skull.wither.name, item.skull.zombie.name, item.skull.char.name, item.skull.creeper.name, item.skull.dragon.name, item.skull.piglin.name
|foot=1}}
{{ID table
|notnamespaced=y
|displayname=Block entity
|spritename=heads
|spritetype=block
|nameid=Skull
|foot=1}}
===Metadata===
{{see also|Data values}}
{{IN|bedrock}}, mob heads use the following data values:
{{/DV}}
===Item data===
{{el|java}}:
{{main|Player.dat format}}
Player heads use item NBT to save the owner.
<div class="treeview">
* {{nbt|compound|tag}}: The item's '''tag''' tag.
{{:Player.dat_format/Player Heads}}
</div>
{{el|bedrock}}:
:{{IN|bedrock}}, heads have no additional item tag.
:See [[Bedrock Edition level format/Item format]].
===Block states===
{{see also|Block states}}
{{/BS}}
===Block data===
A mob head has a block entity associated with it that holds additional data about the block.
{{el|java}}:
{{see also|Block entity format}}
{{/BE}}
{{el|bedrock}}:
:See [[Bedrock Edition level format/Block entity format]].
== Achievements==
{{load achievements|Camouflage;The Beginning?}}
==Advancements==
{{load advancements|Spooky Scary Skeleton;Withering Heights}}
==History==
''For a more in-depth breakdown of changes to textures and models, including a set of renders for each state combination, see [[/Asset history]]''
{{History|java}}
{{History||August 28, 2012|link={{tweet|jeb|240383066831462401}}|[[Jeb]] released images of the skeleton head, hinting of more types to come.}}
{{History||PAX 2012|link={{ytl|IqciEbjYd-I|t=03m21s}}|At [[wikipedia:PAX (event)|PAX]], [[Dinnerbone]] revealed that there would be rare [[drops]] of these [[mob]]s.<ref>http://www.twitch.tv/pax2/b/330745811 (at 3:59:00)</ref>}}
{{History||1.4.2|snap=12w36a|[[File:Skeleton Skull (item) JE1.png|32px]] [[File:Wither Skeleton Skull (item) JE1.png|32px]] [[File:Zombie Head (item) JE1.png|32px]] [[File:Player Head (item) JE1.png|32px]] [[File:Creeper Head (item) JE1.png|32px]] Added skeleton, wither skeleton, zombie, player, and creeper heads.
|Wither skeleton skulls are rarely [[drops|dropped]] by the [[wither skeleton]] upon [[death]] (2.5% chance), while the other four are obtainable only from the [[creative]] [[inventory]].}}
{{History|||snap=12w37a|[[File:Skeleton Skull (item) JE1 BE1.png|32px]] [[File:Wither Skeleton Skull (item) JE1 BE1.png|32px]] [[File:Zombie Head (item) JE1 BE1.png|32px]] [[File:Player Head (item) JE1 BE1.png|32px]] [[File:Creeper Head (item) JE1 BE1.png|32px]] Changed item textures.
|Added as a hidden and disabled feature, player heads can now have the [[skin]] of a specific [[player]]. A line in the language file implies that there either used to be, or in a future update, the possibility of obtaining a specific player's head.<ref name="en_US 12w21">Snapshot 12w37a {{cd|lang/en_US.lang}}: <code>item.skull.player.name=%s's Head</code></ref>
|Player heads do not [[drops|drop]] in vanilla, but mapmakers/modders/etc. can make them by adding an [[NBT format|NBT]] string tag <code>{"SkullOwner":"''player_name''"}</code> on the skull [[item]]s.<ref name="playerheads">{{reddit|zxn7u/its_apparently_my_cakeday_so_lets_cash_in_this}}</ref>}}
{{History||November 7, 2012|link=https://www.reddit.com/r/minecraftsuggestions/comments/12qtbz/killing_other_players_with_a_sword_should_drop/c6xqpym/?context=3|[[Jeb]] states that the official opinion is that "[dropping] player heads [on player kills] are a bit too gory for [[Minecraft]], so it's better suited for a plugin or mod."}}
{{History||1.4.6|snap=12w49a|Any kind of [[mob]] head can now be used to [[crafting|craft]] a [[firework star]] with [[creeper]]-face effect.}}
{{History||1.7.2|snap=13w36a|Custom heads can now be obtained without third party programs via {{cmd|give}}.}}
{{History||1.8|snap=14w03a|Player heads now show the [[skin]]'s hat layer (this also works when a [[mob]]/player wears the head).}}
{{History|||snap=14w29a|Heads now display a cracking animation.}}
{{History|||snap=14w30a|[[File:Skeleton Skull (item) JE2.png|32px]] [[File:Wither Skeleton Skull (item) JE2.png|32px]] [[File:Zombie Head (item) JE2.png|32px]] [[File:Player Head (item) JE2.png|32px]] [[File:Creeper Head (item) JE2.png|32px]] Player and mob heads in [[inventory|inventories]] and held by mobs/players now display as [[block]]s.
|Skulls worn by [[mob]]s and [[player]]s are now displayed on the armor layer. Previously, the skull replaced the mob/player's head texture; the hat layer appeared over the skull.
|Skeleton, zombie, and creeper heads are now available in [[survival]]. The player can obtain them by killing the appropriate mob with a charged [[creeper]].
|Creeper heads and wither skeleton skulls are now used in [[crafting]] specific [[banner]] patterns.}}
{{History|||snap=14w30b|A single charged creeper explosion no longer yields more than one [[mob]] head. The mob head that drops is chosen randomly.}}
{{History||1.8.4|snap=release|For security reasons, custom heads can now have textures only from [[mojang.com]] and [[minecraft.net]].}}
{{History||1.9|snap=15w31a|[[File:Dragon Head (8) JE2.png|32px]] Added dragon heads.
|Dragon heads are currently available only in [[creative]] mode.
|[[Mob]] heads now appear larger in the [[inventory]].}}
{{History|||snap=15w32a|Creeper, zombie, and skeleton heads can now be worn to reduce detection by the corresponding mobs by 50%.}}
{{History|||snap=15w32c|Dragon heads now generate on [[end ship]]s, meaning they are now obtainable in [[survival]].}}
{{History|||snap=15w33c|The disguise that is given by mob heads now reduces detection range to 37.5% of normal.}}
{{History|||snap=15w36a|The disguise that is given by mob heads now reduces detection range to 50% of normal again.}}
{{History|||snap=15w39a|[[Dispenser]]s can now equip mob heads onto [[player]]s, [[mob]]s and [[armor stand]]s.}}
{{History||1.13|snap=17w47a|The ID of heads have been split into 12; one of each available standard head, as well as a wall counterpart of each.
|<code>skeleton_skull</code>, <code>wither_skeleton_skull</code>, <code>player_head</code>, <code>zombie_head</code>, <code>creeper_head</code> and <code>dragon_head</code> are now available as [[item]]s and placed [[block]]s with a <code>rotation</code> block state of 0-15.
|<code>skeleton_wall_skull</code>, <code>wither_skeleton_wall_skull</code>, <code>player_wall_head</code>, <code>zombie_wall_head</code>, <code>creeper_wall_head</code> and <code>dragon_wall_head</code> are available only as placed blocks with a <code>facing</code> block state of north, south, east or west.
|Prior to [[1.13/Flattening|''The Flattening'']], this [[block]]'s numeral ID was 144, and the [[item]]'s 397.}}
{{History||1.19|snap=Deep Dark Experimental Snapshot 1|Skeleton skulls now generate as part of [[ancient cities]].}}
{{History||November 14, 2022|link=https://www.minecraft.net/en-us/article/playable-mob-sounds-coming-minecraft-1-20|Piglin heads are announced to be added in [[Java Edition 1.20]] on the Minecraft website.}}
{{History||1.19.3|snap=22w45a|[[File:Player Head (8) JE5.png|32px]] The texture of the player head has been changed.}}
{{History||1.20<br>(Experimental)|link=1.19.3|snap=22w46a|[[File:Piglin Head (8) JE1.png|32px]] Added piglin heads behind the [[Java Edition 1.20|Update 1.20 experimental datapack]].}}
{{History||1.20<br>(Experimental)|link=1.19.4|snap=23w03a|Heads can now be placed on top of note blocks without sneaking.}}
<!--
{{History||1.19.4|snap=23w05a|Heads can now be swapped by let [[helmet]]s {{ctrl|using}} in the hotbar.<ref>{{bug|MC-216270|||Fixed}}</ref>}}
{{History||?|Head can now be swapped in [[armor stand]]s by {{ctrl|using}} them/[[helmet]]s/[[carved pumpkin]]s in the armor stand's slot.}}
RE-ADD WHEN THE WORDING IS BETTER -->
{{History||1.20|snap=23w12a|Piglin heads are now available without using the "Update 1.20" experimental datapack.}}
{{History|pocket alpha}}
{{History||v0.12.1|snap=build 1|[[File:Skeleton Skull (item) JE1 BE1.png|32px]] [[File:Wither Skeleton Skull (item) JE1 BE1.png|32px]] [[File:Zombie Head (item) JE1 BE1.png|32px]] [[File:Player Head (item) JE1 BE1.png|32px]] [[File:Creeper Head (item) JE1 BE1.png|32px]] Added skeleton, wither skeleton, zombie, player, and creeper heads.
|The skeleton, wither skeleton, zombie, player and creeper heads use the [[Java Edition|Java]] textures prior to [[Java Edition 14w30a|14w30a]].}}
{{History||v0.14.0|snap=build 1|Mob heads can now be worn as armor.}}
{{History||v0.16.0|snap=build 4|Wither skeleton skulls can now be used to spawn the [[wither]].}}
{{History|pocket}}
{{History||1.0.0|snap=alpha 0.17.0.1|[[File:Dragon Head (item) BE1.png|32px]] Added dragon heads.
|Dragon heads use a two-dimensional sprite, unlike [[Java Edition|Java]] does.}}
{{History|bedrock}}
{{History||1.2.0|snap=beta 1.2.0.2|Mob heads can now be used to craft [[firework star]]s.
|Creeper heads and wither skeleton skulls are now used to [[crafting|craft]] specific patterns on [[banner]]s.}}
{{History|||snap=beta 1.2.0.11|[[File:Skeleton Skull (item) BE2.png|32px]] [[File:Wither Skeleton Skull (item) BE2.png|32px]] [[File:Zombie Head (item) BE2.png|32px]] [[File:Head (item) BE2.png|32px]] [[File:Creeper Head (item) BE2.png|32px]] [[File:Dragon Head (item) BE2.png|32px]] [[Player]] and [[mob]] heads in [[inventory|inventories]] and when held by mobs/players now display as [[block]]s.}}
{{History||1.10.0|snap=beta 1.10.0.3|Wither skeleton skulls and creeper heads can now be used to craft [[banner pattern]]s.}}
{{History||November 14, 2022|link=https://www.minecraft.net/en-us/article/playable-mob-sounds-coming-minecraft-1-20|Piglin heads are announced to be added in [[Bedrock Edition 1.20.0]] on the Minecraft website.}}
{{History||Next Major Update<br>(Experimental)|link=1.19.60|snap=beta 1.19.60.20|[[File:Piglin Head (item) BE1.png|32px]] Added piglin heads behind the "[[Bedrock Edition 1.20.0|Next Major Update]]" [[experimental]] toggle.}}
{{History|||snap=beta 1.19.60.25|Heads can now be placed on top of note blocks without sneaking.}}
{{History||1.20.0|snap=beta 1.20.0.21|Piglin heads are now available without using the "Next Major Update" experimental toggle.}}
{{History||1.20.40|snap=beta 1.20.40.20|Wither skeleton skulls now make their respective step sounds when played by a note block.}}
{{History|console}}
{{History||xbox=TU12|xbone=CU1|ps=1.0|wiiu=Patch 1|switch=1.0.1|[[File:Skeleton Skull (item) JE1 BE1.png|32px]] [[File:Wither Skeleton Skull (item) JE1 BE1.png|32px]] [[File:Zombie Head (item) JE1 BE1.png|32px]] [[File:Player Head (item) JE1 BE1.png|32px]] [[File:Creeper Head (item) JE1 BE1.png|32px]] Added skeleton, wither skeleton, zombie, player, and creeper heads to the [[creative inventory]].
|Wither skeleton skulls currently do not have a use.}}
{{History||xbox=TU19|xbone=CU7|ps=1.12|Wither skeleton skulls can now be obtained by killing [[wither skeleton]]s.
|Wither skeleton skulls can now be used to build the [[wither]].}}
{{History||xbox=TU31|xbone=CU19|ps=1.22|wiiu=Patch 3|Skeleton, zombie, and creeper heads are now available in [[survival]]. The [[player]] can obtain them by killing the appropriate [[mob]] with a charged [[creeper]].}}
{{History||xbox=TU46|xbone=CU36|ps=1.38|wiiu=Patch 15|[[File:Dragon Head (item) JE1.png|32px]] Added dragon heads.}}
{{History|new 3ds}}
{{History||0.1.0|[[File:Skeleton Skull (item) JE1 BE1.png|32px]] [[File:Wither Skeleton Skull (item) JE1 BE1.png|32px]] [[File:Zombie Head (item) JE1 BE1.png|32px]] [[File:Player Head (item) JE1 BE1.png|32px]] [[File:Creeper Head (item) JE1 BE1.png|32px]] Added skeleton, wither skeleton, zombie, player, and creeper heads.}}
{{History||1.7.10|[[File:Dragon Head (item) BE1.png|32px]] Added dragon heads.}}
{{History|foot}}
===Skull "item"===
{{:Technical blocks/Skull}}
==Issues==
{{issue list}}
== Trivia==
* Despite there being a default Steve head, heads for the other protagonist skins cannot be obtained without using custom names.
*{{IN|be}}, the skull variant for the item is stored under the {{cd|damage}} component, normally used for items with [[durability]].
*The head item's model when wore on a player is slightly larger than its placed block counterpart in the world, which in turn is also slightly larger than the actual player's head. Therefore, a player who wears their own head appears with a larger head.
==Gallery==
===Renders===
<gallery>
Steve wearing Skeleton Skull.png|
Steve wearing Wither Skeleton Skull.png|
Steve wearing Creeper Head.png|
Steve wearing Zombie Head.png|
Steve wearing Dragon Head.png|
Alex wearing Skeleton Skull.png|
Alex wearing Wither Skeleton Skull.png|
Alex wearing Creeper Head.png|
Alex wearing Zombie Head.png|
Alex wearing Dragon Head.png|
Dragon Head.gif|An animation of the dragon head when redstone power is supplied.
</gallery>
===Screenshots===
<gallery>
All The Heads.png|All of the heads.
Headsrotation.png|Heads oriented in different directions.
HeadsOnAFence.png|Heads are the same scale as [[cobblestone wall]] posts.
Playerheads.png|A picture of player heads, including some Mojang characters.
EndShipBow.png|A dragon head found at the bow of an end ship.
</gallery>
====Development====
<gallery>
1st image Mob Head.png|First screenshot released of heads.
Minecart with chest and head thing.png|Notch's head in a [[minecart with chest]].
PauseUnpause's Head 1.png|First image of held heads rendering as blocks.
PauseUnpause's Head 2.png|Second image of held heads rendering as blocks.
Pocket Edition Heads.jpg|First image of a head being worn in bedrock edition.
1.16 Dev failed head holding.jpg|First attempt to fix {{bug|MC-91869}} by [[Xilefian]].
1.16 Dev failed head holding 2.jpg|Second attempt.
</gallery>
===In other media===
<gallery>
Efe Looking at Makena Napping on a Note Block.jpg|[[Efe]] looking at [[Makena]] napping on a Note block
Efe Placing a Zombie Head on a Note Block.jpg|Efe placing a zombie head sneakily on the note block.
Makena Waking up Startled by the Zombie Noise.jpg|Makena waking up startled at the sound of zombies being played on the note block.
File:Piglin Head Animation.jpg|[[Sunny]] using a piglin head to make noise in a [[Crimson Forest]].<ref>https://www.instagram.com/p/Ct7CfOBplrG/</ref>
</gallery>
==References==
{{reflist}}
{{blocks|Utility}}
{{items}}
[[Category:Utility blocks]]
[[Category:Manufactured blocks]]
[[Category:Generated structure blocks]]
[[Category:Block entities]]
[[Category:Non-solid blocks]]
[[cs:Hlava]]
[[de:Kopf]]
[[es:Cabeza]]
[[fr:Tête]]
[[hu:Mob fejek]]
[[it:Testa di creatura]]
[[ja:Mobの頭]]
[[ko:몹 머리]]
[[nl:Wezenhoofd]]
[[pl:Głowa]]
[[pt:Cabeça de criatura]]
[[ru:Голова]]
[[uk:Голова]]
[[zh:生物头颅]]</li></ul></nowiki> | Interacting with objects (door, chest, etc.) while holding a bow no longer shoots the arrow. | ||||
| Java Edition Beta | |||||
1.2{{Extension DPL}}<ul><li>[[Kelp|Kelp]]<br/>{{About|the plant|the dried variant|Dried Kelp}}
{{For}}
{{Block
|image=Kelp.gif
|invimage=Kelp
|transparent=Yes
|tool=Any
|renewable=Yes
|stackable=Yes (64)
|flammable=No
|lavasusceptible=No
|light=No
|hardness=0}}
'''Kelp''' is an underwater plant that generates in most [[ocean]]s.
== Obtaining ==
=== Natural generation ===
Kelp naturally generates in any [[ocean]] [[biome]]s (except in [[Frozen Ocean|frozen]], [[Deep Frozen Ocean|deep frozen]] and [[Warm Ocean|warm]]), near and around [[seagrass]]. Each chunk has {{frac|1|18}} chance to generate a [[vegetation]] of kelp.
=== Breaking ===
Kelp can be mined instantly with any [[tool]] or with the player's fist. Removing water from the kelp block destroys the kelp. Breaking one part of a kelp stalk destroys all kelp [[block]]s above it. Each block drops a kelp [[item (entity)|item]].
=== Trading ===
Kelp can be bought from [[wandering trader]]s for 3 emeralds.
== Usage ==
Kelp can be placed underwater by hand, or anywhere by the use of [[commands]] such as {{cmd|setblock}}. Placing it by hand gives it a random {{code|age}} value between 0 and 24. Kelp can be placed only in [[water]] source blocks or downward-flowing water, not horizontally flowing water.
When placed in downward-flowing water, the flowing water transforms into a water source block,<ref>{{bug|MC-134229}}</ref> which is useful for faster [[bubble column]] elevator creation.
Any building block can be placed on top of a kelp plant, which is useful for building structures over a deep ocean without needing to build from the ocean floor (see also [[lily pad]]).
=== Cooking ingredient ===
{{smelting
| showname = 1
| Kelp
| Dried Kelp
| 0.1
}}
=== Composting ===
Placing kelp into a [[composter]] has a 30% chance of raising the compost level by 1.
=== Growth mechanics ===
Kelp can be planted on a broad variety of blocks. It grows underwater if it has either a source block of water or, {{in|Java}}, flowing water above it.<ref>{{bug|MC-133354}}</ref> Neither [[player]]s nor [[dispenser]]s can remove the water source block that kelp grows in without breaking the kelp first.
Kelp does not require any [[light]] level to grow. Kelp also grows without having [[sky]] access. [[Bone meal]] can be used to grow kelp by 1 block on each use.
Kelp, when planted, is generated with a randomly chosen age value, which can be checked when pressing [[Debug screen|<kbd>F3</kbd>]]{{only|java}}. The age value of a newly planted kelp plant varies randomly from 0 to 24. Each time the kelp grows in height by one block, the newly generated top of the kelp plant increases its age by 1. When the top block of the kelp plant reaches an age of 25, it stops growing. This means that kelp can naturally grow to a height between 2 (if the first kelp plant had an age of 24) and 26 blocks (if the first kelp plant had an age of 0).
When a kelp plant block is broken, the age of the kelp plant block underneath is randomized to a value from 0 to 24 and the kelp continues growing until it reaches age 25. It is possible to use this mechanic to cultivate a kelp plant to increase its growth height beyond its natural maximum height of 26 blocks. This can be done by breaking the top-most block of the kelp plant each time it reaches age 25. A kelp plant cultivated by a player in this way repeatedly grows until it reaches the water surface.
Each time it receives a [[random tick]], kelp has a 14% chance of growing.
If [[shears]] are used on the topmost block of kelp, that block automatically sets its {{cd|age}} value to {{cd|25}} and stop growing.{{only|JE}}
=== Farming ===
{{Main|Tutorials/Kelp farming}}
Kelp farming is similar to farming [[sugar cane]], although kelp must be placed underwater. Automation of harvest is easier because items float up in water.
== Sounds ==
=== Generic ===
{{Sound table/Block/Wet grass}}
=== Unique ===
{{edition|java}}:
{{Sound table
|sound=Shear.ogg
|subtitle=Plant cropped
|source=block
|description=When the tip of kelp is cropped with [[Shears#Cropping growing plants|shears]]
|id=block.growing_plant.crop
|translationkey=subtitles.block.growing_plant.crop
|volume=1.0
|pitch=1.0
|distance=16
|foot=1}}
{{edition|bedrock}}: ''None''
== Data values ==
=== ID ===
{{edition|java}}:
{{ID table
|edition=java
|showforms=y
|generatetranslationkeys=y
|displayname=Kelp
|spritetype=block
|nameid=kelp}}
{{ID table
|displayname=Kelp Plant
|spritetype=block
|nameid=kelp_plant
|form=block
|foot=1}}
{{edition|bedrock}}:
{{ID table
|edition=bedrock
|firstcolumnname=Kelp
|shownumericids=y
|showforms=y
|generatetranslationkeys=y
|displayname=Item
|spritename=kelp
|spritetype=item
|nameid=kelp
|id=382
|form=item}}
{{ID table
|displayname=Block
|spritename=kelp
|spritetype=block
|nameid=kelp
|id=393
|form=block
|itemform=item.kelp
|translationkey=-
|foot=1}}
=== Block states ===
{{see also|Block states}}
{{/BS}}
== History ==
{{History|java classic}}
{{History||May 21, 2009|link=https://web.archive.org/web/0/http://notch.tumblr.com/post/110762705/my-list-on-tile-types-so-far|[[Notch]] shows interest in adding a "[[seaweed]]" [[block]].}}
{{History|java}}
{{History||November 18, 2017|link={{YouTubeLink|mAapz_nIC_Y}}|Kelp plants were shown in a clip of [[MineCon Earth]].}}
{{History||1.13|snap=18w07a|[[File:Kelp JE1 BE1.gif|32px]] [[File:Kelp (item) JE1 BE2.png|32px]] Added kelp.}}
{{History|||snap=18w07b|Kelp now behaves more like [[water]], meaning [[mob]]s can no longer spawn within the plant under water nor can they replenish their breath by [[swimming]] through it.}}
{{History|||snap=18w10a|[[File:Kelp JE2.gif|32px]] The texture for kelp has been overhauled.}}
{{History|||snap=18w14a|[[File:Kelp.gif|32px]] Top of the kelp textures have been shifted slightly downward.
|The generation rules for kelp have been changed, it now mainly generates in [[cold ocean]] [[biome]]s and can no longer generate in [[warm ocean]]s.}}
{{History|||snap=18w20a|The {{cd|kelp_top}} has been changed ID to {{cd|kelp}} and {{cd|kelp}} has been changed to {{cd|kelp_plant}}, for both the [[block]] and [[item]] forms.}}
{{History|||snap=pre2|Kelp is now destroyed by [[sponge]]s.<ref>{{bug|MC-127111}}</ref>}}
{{History|||snap=pre6|Added 5 new [[sound]] events that apply to kelp: <code>block.wet_grass.break</code>, <code>block.wet_grass.fall</code>, <code>block.wet_grass.hit</code>, <code>block.wet_grass.place</code>, and <code>block.wet_grass.step</code>.}}
{{History||1.14|snap=19w03a|Placing kelp into the new [[composter]] has a 10% chance of raising the compost level by 1.}}
{{History|||snap=19w05a|Kelp now has a 30% chance of increasing the compost level in a composter by 1.
|Added [[Wandering Trader|wandering trader]]s, which sell kelp.}}
{{History||1.16|snap=20w11a|Kelp can now be grown with [[bone meal]].}}
{{History|||snap=20w13a|Kelp has been moved from the Miscellaneous tab to the Decoration Blocks tab in the [[Creative inventory]].<ref name="misc decoration">https://bugs.mojang.com/browse/MC-174434</ref>}}
{{History||1.17|snap=20w46a|Kelp no longer generates on magma blocks.<ref>{{Bug|MC-185605|resolution=Fixed}}</ref>}}
{{History||1.18|snap=21w37a|Kelp now stops growing if [[shears]] are used on the tip.}}
{{History|bedrock}}
{{History||1.4.0|snap=beta 1.2.14.2|[[File:Kelp JE1 BE1.gif|32px]] [[File:Kelp (item) BE1.png|32px]] Added kelp.}}
{{History|||snap=beta 1.2.20.1|[[File:Kelp (item) JE1 BE2.png|32px]] The kelp [[item]] texture has been updated to the {{el|je}}'s.}}
{{History||1.5.0|snap=beta 1.5.0.4|[[File:Kelp.gif|32px]] The texture of the kelp plant has been updated.}}
{{History||1.10.0|snap=beta 1.10.0.3|Kelp can now be bought from [[wandering trader]]s for 3 [[emerald]]s.}}
{{History||1.11.0|snap=beta 1.11.0.1|Kelp can now be used to fill [[composter]]s.}}
{{History|console}}
{{History||xbox=TU69|ps=1.76|wiiu=Patch 38|[[File:Kelp.gif|32px]] [[File:Kelp (item) JE1 BE2.png|32px]] Added kelp.}}
{{History|foot}}
== Issues ==
{{issue list}}
== Trivia ==
* In real life, [[wikipedia:kelp|kelp]] is not considered a [[wikipedia:plant|plant]]. It is classified by scientists as a [[wikipedia:Brown algae|brown algae]].
** Kelp in real life absorbs nutrients directly from the water, instead of through its root-like structure, [[wikipedia:Holdfast (biology)|holdfast]], which merely attaches it to the seabed. This is in accordance with kelp being able to grow on almost any solid block in ''Minecraft''.
== Gallery ==
<gallery heights="60">
SeaPlantsMineConEarth2017.jpg|Kelp shown in a clip from MINECON Earth 2017.
Kelp in ocean with Jappa textures.jpg|Naturally generated kelp in an [[ocean]] biome.
Kelp on shoreline.png|Naturally generated kelp near the shore.
Ocean life.png|An ocean with kelp visible in the far distance.
Kelp on Land.png|Kelp placed outside of [[water]] using the {{cmd|setblock}} command before 18w07b.
Waterless kelp.png|What kelp looks like without water (water removed using a [[resource pack]]).
Coral reef at night.png|Kelp within a [[coral reef]].
Floating Kelp.png|Kelp that generated in mid-air due to an [[ocean monument]]'s water cutting through it.
Kelp in ocean.jpg|Multiple kelps.
Kelp 255 blocks tall.png|Without obstacles, kelp can grow all the way to building limit.
ArgoMajor Kelp.jpg|First image of kelp in ''Bedrock Edition''.
</gallery>
== References ==
{{reflist}}
{{Blocks|vegetation}}
{{Items}}
[[Category:Plants]]
[[Category:Natural blocks]]
[[Category:Non-solid blocks]]
[[de:Seetang]]
[[es:Alga]]
[[fr:Algue]]
[[ja:コンブ]]
[[ko:켈프]]
[[pl:Wodorosty]]
[[pt:Alga]]
[[ru:Ламинария]]
[[th:สาหร่ายทะเล]]
[[zh:海带]]</li><li>[[Melon Seeds|Melon Seeds]]<br/>{{Block
|image = <gallery>
Melon Stem Age 0.png | Age 0
Melon Stem Age 1.png | Age 1
Melon Stem Age 2.png | Age 2
Melon Stem Age 3.png | Age 3
Melon Stem Age 4.png | Age 4
Melon Stem Age 5.png | Age 5
Melon Stem Age 6.png | Age 6
Melon Stem Age 7.png | Age 7
</gallery>
| image2 = <gallery>
Attached Melon Stem (N).png | North
Attached Melon Stem (E).png | East
Attached Melon Stem (S).png | South
Attached Melon Stem (W).png | West
</gallery>
| transparent = Yes
| light = No
| tool = none
| renewable = Yes
| stackable = Yes (64)
| flammable = No
| lavasusceptible = No
}}'''Melon seeds''' are items obtained from [[Melon Slice|melon slices]] that can be used to grow melon stems.
'''Melon stems''' are plants grown on [[farmland]] that, over time, grow [[melon]]s on dirt, mud and moss blocks adjacent to them.
== Obtaining ==
=== Breaking ===
When broken, a melon stem drops 0–3 melon seeds. The chance for melon seeds to drop increases with the stem's age.
{| class="wikitable"
! rowspan="3" |[[Resource location]]
! rowspan="3" | Source
! colspan="4" | Default
|-
| colspan="1" rowspan="2" style="text-align:center" | Nothing || colspan="3" style="text-align:center" |{{ItemLink|Melon Seeds|Melon seeds}}
|-
| style="text-align:center" | 1 || style="text-align:center" | 2 || style="text-align:center" | 3
|-
| rowspan="8" |<code>blocks/melon_stem</code>
|{{BlockLink|Melon Stem|Melon stem}} <code>age = 0</code>
| style="text-align:center" |81.3%|| style="text-align:center" |17.42%|| style="text-align:center" |1.24%|| style="text-align:center" |0.03%
|-
|{{BlockLink|Melon Stem|Melon stem}} <code>age = 1</code>
| style="text-align:center" |65.1%|| style="text-align:center" |30.04%|| style="text-align:center" |4.62%|| style="text-align:center" |0.24%
|-
|{{BlockLink|Melon Stem|Melon stem}} <code>age = 2</code>
| style="text-align:center" |51.2%|| style="text-align:center" |38.4%|| style="text-align:center" |9.6%|| style="text-align:center" |0.8%
|-
|{{BlockLink|Melon Stem|Melon stem}} <code>age = 3</code>
| style="text-align:center" |39.44%|| style="text-align:center" |43.02%|| style="text-align:center" |15.64%|| style="text-align:center" |1.9%
|-
|{{BlockLink|Melon Stem|Melon stem}} <code>age = 4</code>
| style="text-align:center" |29.13%|| style="text-align:center" |44.44%|| style="text-align:center" |22.22%|| style="text-align:center" |3.7%
|-
|{{BlockLink|Melon Stem|Melon stem}} <code>age = 5</code>
| style="text-align:center" |21.6%|| style="text-align:center" |43.2%|| style="text-align:center" |28.8%|| style="text-align:center" |6.4%
|-
|{{BlockLink|Melon Stem|Melon stem}} <code>age = 6</code>
| style="text-align:center" |15.17%|| style="text-align:center" |39.82%|| style="text-align:center" |34.84%|| style="text-align:center" |10.16%
|-
|{{BlockLink|Melon Stem|Melon stem}} <code>age = 7</code>
| style="text-align:center" |10.16%|| style="text-align:center" |34.84%|| style="text-align:center" |39.82%|| style="text-align:center" |15.17%
|-
| rowspan="1" |<code>blocks/attached_melon_stem</code>
|{{BlockLink|Attached Melon Stem|Attached Melon stem}}
| style="text-align:center" |10.16%|| style="text-align:center" |34.84%|| style="text-align:center" |39.82%|| style="text-align:center" |15.17%
|}
=== Natural generation ===
Melon stems generate naturally in stem farm inside [[woodland mansion]]s.
Melon stems generate in 20% of the farm plots in [[savanna]] [[village]]s, and 10% of the farm plots in [[desert]] villages.
=== Chest loot ===
{{LootChestItem|melon-seeds}}
=== Crafting ===
{{Crafting
|Melon Slice
|Output= Melon Seeds
|type= Material
}}
=== Trading ===
[[Wandering trader]]s sell melon seeds for 1 [[emerald]].
== Usage ==
=== Farming ===
{{see also|Tutorials/Pumpkin and melon farming}}
Melon seeds can be planted only on [[farmland]], as stems. Over time, a stem grows through several stages<sup>[''[[Talk:Pumpkin Seeds|needs testing]]'']</sup> and, at its final growth stage, will produce [[melon]]s on any adjacent [[dirt]], [[Coarse Dirt|coarse dirt]], [[Rooted Dirt|rooted dirt]], [[Grass Block|grass block]], [[farmland]], [[podzol]], [[mycelium]], [[Moss Block|moss block]], [[mud]] or [[Muddy Mangrove Roots|muddy mangrove roots]]. If a melon is already occupying a spot adjacent to a stem it does not grow more melons until the melons is removed. A single stem can grow an unlimited number of melons. Melon stems need a minimum light level of 10 in the block above the stem to grow and give melons. Melon seeds are affected by [[bone meal]] only with respect to stem growth; bone meal does not help produce the actual melons.
=== Breeding ===
Like other seeds, melon seeds can be used to [[breed]] [[chicken]]s, lead chickens around, and make baby chickens grow up faster by 10% of the remaining time.
=== Taming ===
Like other seeds, melon seeds can be used to tame [[parrot]]s.
=== Composting ===
Placing melon seeds into a [[composter]] has a 30% chance of raising the compost level by 1.
== Melon Stem ==
A '''melon stem''' is the block that is planted on [[farmland]] when melon seeds are used on it. It starts underground, and rises up as the plant grows. The stem is colored green when young, and then yellow once fully grown.
The stem curves once a melon has grown from it. A fully-grown single stem connects to any [[melon]] in an adjacent square, thus there are 5 possible appearances to a stem. If there are multiple melons it can connect to, it favors the east, then west, north, and south. When the melon is removed, the stem returns to its straight shape.
== Sounds ==
{{Sound table/Block/Hard crop}}
== Data values ==
=== ID ===
{{edition|java}}:
{{ID table
|edition=java
|showblocktags=y
|showforms=y
|generatetranslationkeys=y
|displayname=Melon Stem
|spritetype=block
|nameid=melon_stem
|blocktags=bee_growables, crops
|form=block}}
{{ID table
|displayname=Attached Melon Stem
|spritetype=block
|nameid=attached_melon_stem
|form=block}}
{{ID table
|displayname=Melon Seeds
|spritetype=item
|nameid=melon_seeds
|form=item
|foot=1}}
{{edition|bedrock}}:
{{ID table
|edition=bedrock
|shownumericids=y
|showforms=y
|generatetranslationkeys=y
|displayname=Melon Stem
|spritetype=block
|nameid=melon_stem
|id=105
|form=block
|translationkey=-}}
{{ID table
|displayname=Melon Seeds
|spritetype=item
|nameid=melon_seeds
|id=293
|form=item
|foot=1}}
=== Block states ===
{{see also|Block states}}
{{/BS}}
== Advancements ==
{{load advancements|A Seedy Place}}
== History ==
{{info needed section|check if stems floated above farmland upon initial implementation}}
{{History|java beta}}
{{History||1.8|snap=Pre-release|[[File:Melon Seeds JE1 BE1.png|32px]] Added melon seeds.
|[[File:Melon Stem Age 0 JE1.png|32px]] [[File:Stem Age 1 JE1.png|32px]] [[File:Melon Stem Age 2 JE1.png|32px]] [[File:Melon Stem Age 3 JE1.png|32px]] [[File:Melon Stem Age 4 JE1.png|32px]] [[File:Melon Stem Age 5 JE1.png|32px]] [[File:Melon Stem Age 6 JE1.png|32px]] [[File:Melon Stem Age 7 JE1.png|32px]] Added the melon stem, with seven stages of growth.
|Melon seeds can found in the new [[mineshaft]] [[chest]]s.
|[[File:Attached Melon Stem (N) JE1.png|32px]] [[File:Attached Melon Stem (E) JE1.png|32px]] [[File:Attached Melon Stem (S) JE1.png|32px]] [[File:Attached Melon Stem (W) JE1.png|32px]] Melon stems have four slightly visually distinct appearances for each facing direction - the bent part of the stem rotates, but the other two planes do not.
|[[File:Melon Stem Age 8 JE1.png|32px]] [[File:Melon Stem Age 9 JE1.png|32px]] [[File:Melon Stem Age 10 JE1.png|32px]] [[File:Melon Stem Age 11 JE1.png|32px]] [[File:Melon Stem Age 12 JE1.png|32px]] [[File:Melon Stem Age 13 JE1.png|32px]] [[File:Melon Stem Age 14 JE1.png|32px]] [[File:Melon Stem Age 15 JE1.png|32px]] Melon stem data values 8–15 now show a glitched formation, with a floating stem with an attached stem cross eventually emerging below.
|[[File:Attached Stem Age 8 JE1.png|32px]] [[File:Attached Stem Age 9 JE1.png|32px]] [[File:Attached Stem Age 10 JE1.png|32px]] [[File:Attached Stem Age 11 JE1.png|32px]] [[File:Attached Stem Age 12 JE1.png|32px]] [[File:Attached Stem Age 13 JE1.png|32px]] [[File:Attached Stem Age 14 JE1.png|32px]] [[File:Attached Stem Age 15 JE1.png|32px]] Melon stem blocks with data values higher than 7 can now attach to adjacent fruits, which results in buggy stem textures with [[vines]] in the mix due to vines being below attached stems in [[terrain.png]].}}
{{History|||snap=Pre-release 2 ;)|Melon stems can now be grown faster using [[bone meal]].}}
{{History|java}}
{{History||1.3.1|snap=1.3|The texture of melon stems has been moved one pixel to the left in [[terrain.png]].
|[[File:Melon Stem Age 0 JE2.png|32px]] [[File:Melon Stem Age 1 JE2.png|32px]] [[File:Melon Stem Age 2 JE2.png|32px]] [[File:Melon Stem Age 3 JE2.png|32px]] [[File:Melon Stem Age 4 JE2.png|32px]] [[File:Melon Stem Age 5 JE2.png|32px]] [[File:Melon Stem Age 6 JE2.png|32px]] [[File:Melon Stem Age 7 JE2.png|32px]] Stems now appear slightly different.
|[[File:Melon Stem Age 8 JE2.png|32px]] [[File:Melon Stem Age 9 JE2.png|32px]] [[File:Melon Stem Age 10 JE2.png|32px]] [[File:Melon Stem Age 11 JE2.png|32px]] [[File:Melon Stem Age 12 JE2.png|32px]] [[File:Melon Stem Age 13 JE2.png|32px]] [[File:Melon Stem Age 14 JE2.png|32px]] [[File:Melon Stem Age 15 JE2.png|32px]] Overgrown stems now appear slightly different.
|[[File:Attached Melon Stem (N) JE2.png|32px]] [[File:Attached Melon Stem (E) JE2.png|32px]] [[File:Attached Melon Stem (S) JE2.png|32px]] [[File:Attached Melon Stem (W) JE2.png|32px]] Attached melon stems now appear slightly different.
|[[File:Attached Stem Age 8 JE2.png|32px]] [[File:Attached Stem Age 9 JE2.png|32px]] [[File:Attached Stem Age 10 JE2.png|32px]] [[File:Attached Stem Age 11 JE2.png|32px]] [[File:Attached Stem Age 12 JE2.png|32px]] [[File:Attached Stem Age 13 JE2.png|32px]] [[File:Attached Stem Age 14 JE2.png|32px]] [[File:Attached Stem Age 15 JE2.png|32px]] Overgrown attached melon stems now appear slightly different.}}
{{History||1.4.2|snap=12w36a|[[Chicken]]s now use [[wheat seeds]], melon seeds, and [[pumpkin seeds]], instead of [[wheat]] to breed.}}
{{History||1.5|snap=13w02a|[[File:Melon Stem Age 0 JE3.png|32px]] [[File:Melon Stem Age 1 JE3.png|32px]] [[File:Melon Stem Age 2 JE3.png|32px]] [[File:Melon Stem Age 3 JE3.png|32px]] [[File:Melon Stem Age 4 JE3.png|32px]] [[File:Melon Stem Age 5 JE3.png|32px]] [[File:Melon Stem Age 6 JE3.png|32px]] Melon stems now use a squished version of their texture for immature stems, depending on age.
|[[File:Melon Stem Age 8 JE3.png|32px]] [[File:Melon Stem Age 9 JE3.png|32px]] [[File:Melon Stem Age 10 JE3.png|32px]] [[File:Melon Stem Age 11 JE3.png|32px]] [[File:Melon Stem Age 12 JE3.png|32px]] [[File:Melon Stem Age 13 JE3.png|32px]] [[File:Melon Stem Age 14 JE3.png|32px]] [[File:Melon Stem Age 15 JE3.png|32px]] This also affects melon stems of ages 8–15, which are likewise stretched to accommodate its predicted size.
|[[File:Attached Stem Age 8 JE3.png|32px]] [[File:Attached Stem Age 9 JE3.png|32px]] [[File:Attached Stem Age 10 JE3.png|32px]] [[File:Attached Stem Age 11 JE3.png|32px]] [[File:Attached Stem Age 12 JE3.png|32px]] [[File:Attached Stem Age 13 JE3.png|32px]] [[File:Attached Stem Age 14 JE3.png|32px]] [[File:Attached Stem Age 15 JE3.png|32px]] Melon stems of extreme ages, which are attached to adjacent fruits, now show a stretched and tinted stem appearance.}}
{{History|||snap=13w03a|[[File:Melon Stem Age 0 JE4.png|32px]] [[File:Melon Stem Age 1 JE4.png|32px]] [[File:Melon Stem Age 2 JE4.png|32px]] [[File:Melon Stem Age 3 JE4.png|32px]] [[File:Melon Stem Age 4 JE4.png|32px]] [[File:Melon Stem Age 5 JE4.png|32px]] [[File:Melon Stem Age 6 JE4.png|32px]] [[File:Melon Stem Age 7 JE4.png|32px]] Melon stems are no longer squished or stretched to account for age.<ref>{{bug|MC-7111}}</ref>
|[[File:Melon Stem Age 8 JE4.png|32px]] [[File:Melon Stem Age 9 JE4.png|32px]] [[File:Melon Stem Age 10 JE4.png|32px]] [[File:Melon Stem Age 11 JE4.png|32px]] [[File:Melon Stem Age 12 JE4.png|32px]] [[File:Melon Stem Age 13 JE4.png|32px]] [[File:Melon Stem Age 14 JE4.png|32px]] [[File:Melon Stem Age 15 JE4.png|32px]] Melon stems with age values 8 through 15 now show a tinted [[trapdoor]] texture.
|From this version up until 14w08a, overgrown melon stems start to draw from the texture below them on the [[texture atlas]], in much the same way they previously did with terrain.png. However, as texture atlases are unstable and textures tend to change positions as new blocks and textures are added, overgrown stems change the texture they draw from every time new textures are added, which includes when textures added by [[mods]].}}
{{History|||snap=13w09a|[[File:Melon Stem Age 8 JE5.png|32px]] [[File:Melon Stem Age 9 JE5.png|32px]] [[File:Melon Stem Age 10 JE5.png|32px]] [[File:Melon Stem Age 11 JE5.png|32px]] [[File:Melon Stem Age 12 JE5.png|32px]] [[File:Melon Stem Age 13 JE5.png|32px]] [[File:Melon Stem Age 14 JE5.png|32px]] [[File:Melon Stem Age 15 JE5.png|32px]] Melon stems with age values 8–15 now show a tinted [[birch wood]] texture.}}
{{History||1.6.1|snap=13w24a|Melon and pumpkin stems have now been assigned separate textures.
|[[File:Melon Stem Age 8 JE6.png|32px]] [[File:Melon Stem Age 9 JE6.png|32px]] [[File:Melon Stem Age 10 JE6.png|32px]] [[File:Melon Stem Age 11 JE6.png|32px]] [[File:Melon Stem Age 12 JE6.png|32px]] [[File:Melon Stem Age 13 JE6.png|32px]] [[File:Melon Stem Age 14 JE6.png|32px]] [[File:Melon Stem Age 15 JE6.png|32px]] Melon stems with age values 8–15 now show a tinted [[note block]] texture.}}
{{History||1.7.2|snap=13w37a|Added the {{cmd|setblock}} [[commands|command]], allowing for invalid stem ages to be placed in the world without using external editors. This also allows them to be obtained in earlier versions via backdating.}}
{{History|||snap=13w41a|[[File:Melon Stem Age 8 JE7.png|32px]] [[File:Melon Stem Age 9 JE7.png|32px]] [[File:Melon Stem Age 10 JE7.png|32px]] [[File:Melon Stem Age 11 JE7.png|32px]] [[File:Melon Stem Age 12 JE7.png|32px]] [[File:Melon Stem Age 13 JE7.png|32px]] [[File:Melon Stem Age 14 JE7.png|32px]] [[File:Melon Stem Age 15 JE7.png|32px]] Melon stems with age values 8–15 now show a tinted [[netherrack]] texture.}}
{{History||1.8|snap=14w10a|[[File:Melon Stem Age 8 JE8.png|32px]] [[File:Melon Stem Age 9 JE8.png|32px]] [[File:Melon Stem Age 10 JE8.png|32px]] [[File:Melon Stem Age 11 JE8.png|32px]] Melon stems with data values 8–11 now display a tinted attached stem, with 8 facing west, 9 facing east, 10 facing north and 11 facing south.
|Invalid melon stems with data values 12-15 now crash the game.}}
{{History|||snap=14w25a|[[File:Melon Stem Age 0 JE5.png|32px]] [[File:Melon Stem Age 1 JE5.png|32px]] [[File:Melon Stem Age 2 JE5.png|32px]] [[File:Melon Stem Age 3 JE5.png|32px]] [[File:Melon Stem Age 4 JE5.png|32px]] [[File:Melon Stem Age 5 JE5.png|32px]] [[File:Melon Stem Age 6 JE5.png|32px]] [[File:Melon Stem Age 7 JE5.png|32px]] Melon stems now render as a single diagonal plane, or, in the case of attached stems, a diagonal and orthogonal plane.
|[[File:Attached Melon Stem (N) JE3.png|32px]] [[File:Attached Melon Stem (E) JE3.png|32px]] [[File:Attached Melon Stem (S) JE3.png|32px]] [[File:Attached Melon Stem (W) JE3.png|32px]] The attached melon stem [[model]] now fully rotates to the direction the stem points. Prior to this update, the base of the melon stem would stay the same while the long attaching section would differ, resulting in four possible attached stem appearances.
|Invalid overgrown melon stems have effectively been removed from the game, as attempting to place an out of range stem via {{cmd|setblock}} creates a stem of age 0 and loading a world with such stems existing causes a game crash.}}
{{History|||snap=14w26a|[[File:Melon Stem Age 0 JE6.png|32px]] [[File:Melon Stem Age 1 JE6.png|32px]] [[File:Melon Stem Age 2 JE6.png|32px]] [[File:Melon Stem Age 3 JE6.png|32px]] [[File:Melon Stem Age 4 JE6.png|32px]] [[File:Melon Stem Age 5 JE6.png|32px]] [[File:Melon Stem Age 6 JE6.png|32px]] [[File:Melon Stem Age 7 JE6.png|32px]] [[File:Attached Melon Stem (N) JE4.png|32px]] [[File:Attached Melon Stem (E) JE4.png|32px]] [[File:Attached Melon Stem (S) JE4.png|32px]] [[File:Attached Melon Stem (W) JE4.png|32px]] Melon stems now correctly render as crosses again.<ref>{{bug|MC-58136}}</ref>}}
{{History|||snap=14w27a|[[File:Attached Stem Age 0 14w27a.png|32px]] [[File:Attached Stem Age 1 14w27a.png|32px]] [[File:Attached Stem Age 2 14w27a.png|32px]] [[File:Attached Stem Age 3 14w27a.png|32px]] [[File:Attached Stem Age 4 14w27a.png|32px]] [[File:Attached Stem Age 5 14w27a.png|32px]] [[File:Attached Stem Age 6 14w27a.png|32px]] Due to a bug, all melon stems appear attached regardless of age or any actual attachment.<ref>{{bug|MC-60208}}</ref>}}
{{History|||snap=14w28a|All melon stems appearing attached regardless of age or any actual attachment has been fixed. However, melon stems still appear attached to adjacent fruits regardless of age due to a similar bug.<ref>{{bug|MC-61716}}</ref>}}
{{History|||snap=14w34d|Melon seeds can no longer be used for [[breeding]] [[chicken]]s.}}
{{History||1.9|snap=15w31a|Chickens can now use melon seeds to breed again.}}
{{History|||snap=15w44a|Melon seeds have been added to [[dungeon]] [[chest]]s.
|The average yield of melon seeds from [[mineshaft]] chests has been decreased.}}
{{History|||snap=15w45a|Melon stems must now be fully grown again to attach.}}
{{History||1.11|snap=16w39a|Melon seeds can now be found inside chests in the new [[woodland mansion]]s.
|Melon crops now generate inside woodland mansions.}}
{{History||1.12|snap=17w18b|Placing a melon seeds in farmland now gives the player the "A Seedy Place" [[advancement]].{{verify}}}}
{{History||1.13|snap=17w47a|The different block states for the <code>melon_stem</code> ID have been split up into their own IDs.
|Prior to [[1.13/Flattening|''The Flattening'']], this [[block]]'s numeral ID was 105, and the [[item]]'s 362.}}
{{History|||snap=17w48a|Attached melon stems no longer [[drops|drop]] seeds.}}
{{History||1.14|snap=18w43a|[[File:Attached Melon Stem (N) JE5.png|32px]] [[File:Attached Melon Stem (E) JE5.png|32px]] [[File:Attached Melon Stem (S) JE5.png|32px]] [[File:Attached Melon Stem (W) JE5.png|32px]] The texture of attached melon stems has been changed.}}
{{History|||snap=18w49a|Melon stems now generate in the updated [[savanna]] [[village]]s.}}
{{History|||snap=18w50a|Melon stems now generate in the updated [[desert]] [[village]]s.}}
{{History|||snap=19w03a|Placing melon seeds into the new [[composter]] has a 10% chance of raising the compost level by 1.}}
{{History|||snap=19w05a|Melon seeds now have a 30% chance of increasing the compost level in a composter by 1.
|Added [[Wandering Trader|wandering trader]]s, which sell melon seeds.}}
{{History||1.15|snap=19w34a|[[Bee]]s can now pollinate melon stems.}}
{{History|||snap=19w39a|Attached melon stems now [[drops|drop]] seeds again.<ref>{{bug|MC-136360}}</ref>}}
{{History||1.18|snap=Pre-release 5|[[File:Melon Seeds JE2.png|32px]] The texture of melon seeds has been changed.}}
{{History|pocket alpha}}
{{History||v0.5.0|Added melon seeds.
|[[File:Melon Stem Age 0 JE1.png|32px]] [[File:Stem Age 1 JE1.png|32px]] [[File:Melon Stem Age 2 JE1.png|32px]] [[File:Melon Stem Age 3 JE1.png|32px]] [[File:Melon Stem Age 4 JE1.png|32px]] [[File:Melon Stem Age 5 JE1.png|32px]] [[File:Melon Stem Age 6 JE1.png|32px]] [[File:Melon Stem Age 7 JE1.png|32px]] [[File:Attached Melon Stem (N) JE1.png|32px]] [[File:Attached Melon Stem (E) JE1.png|32px]] [[File:Attached Melon Stem (S) JE1.png|32px]] [[File:Attached Melon Stem (W) JE1.png|32px]]{{verify|Are these models correct?}} Added melon stems.}}
{{History||v0.6.0|[[File:Melon Seeds JE1 BE1.png|32px]] Melon seeds no longer use the pumpkin seeds texture.}}
{{History||v0.9.0|snap=?|Melon seeds can now be found in [[mineshaft]] chests.}}
{{History||v0.12.1|snap=build 1|Melon seeds are no longer available from the [[Nether reactor]].}}
{{History||v0.14.0|snap=build 1|Melon seeds can now be found in [[minecart with chest|minecarts with chests]] in [[mineshaft]]s.}}
{{History|pocket}}
{{History||1.0.0|snap=alpha 0.17.0.1|Melon seeds now generate inside [[dungeon]] [[chest]]s.}}
{{History||1.1.0|snap=alpha 1.1.0.0|Melon crops now generate inside [[woodland mansion]]s.
|Melon seeds can now be found in woodland mansion chests.}}
{{History|bedrock}}
{{History||1.2.0|snap=beta 1.2.0.2|Melon seeds can now be found inside [[bonus chest]]s.
|Melon seeds are now used to tame [[parrot]]s.}}
{{History||1.10.0|snap=beta 1.10.0.3|[[File:Attached Melon Stem (W) JE5.png|32px]]{{info needed|More accurate image}} The texture of attached melon stems has been changed.
|Melon stems now generate in [[savanna]] and [[desert]] [[village]] farms.
|Added [[wandering trader]]s, who [[trading|sell]] melon seeds.}}
{{History||1.11.0|snap=beta 1.11.0.1|Melon seeds can now be used to fill up [[composter]]s.}}
{{History||1.14.0|snap=beta 1.14.0.1|[[Bee]]s can now pollinate melon stems.}}
{{History|console}}
{{History||xbox=TU5|xbone=CU1|ps=1.0|wiiu=Patch 1|[[File:Melon Seeds JE1 BE1.png|32px]] Added melon seeds.
|[[File:Melon Stem Age 0 JE1.png|32px]] [[File:Stem Age 1 JE1.png|32px]] [[File:Melon Stem Age 2 JE1.png|32px]] [[File:Melon Stem Age 3 JE1.png|32px]] [[File:Melon Stem Age 4 JE1.png|32px]] [[File:Melon Stem Age 5 JE1.png|32px]] [[File:Melon Stem Age 6 JE1.png|32px]] [[File:Melon Stem Age 7 JE1.png|32px]] [[File:Attached Melon Stem (N) JE1.png|32px]] [[File:Attached Melon Stem (E) JE1.png|32px]] [[File:Attached Melon Stem (S) JE1.png|32px]] [[File:Attached Melon Stem (W) JE1.png|32px]]{{verify|Are these models correct?}} Added melon stems.}}
{{History||xbox=none|xbone=none|ps=1.90|wiiu=none|switch=none|[[File:Attached Melon Stem (W) JE5.png|32px]]{{info needed|More accurate image}} The texture of attached melon stems has been changed.}}
{{History|New 3DS}}
{{History||0.1.0|[[File:Melon Stem Age 0 JE1.png|32px]] [[File:Stem Age 1 JE1.png|32px]] [[File:Melon Stem Age 2 JE1.png|32px]] [[File:Melon Stem Age 3 JE1.png|32px]] [[File:Melon Stem Age 4 JE1.png|32px]] [[File:Melon Stem Age 5 JE1.png|32px]] [[File:Melon Stem Age 6 JE1.png|32px]] [[File:Melon Stem Age 7 JE1.png|32px]] [[File:Attached Melon Stem (N) JE1.png|32px]] [[File:Attached Melon Stem (E) JE1.png|32px]] [[File:Attached Melon Stem (S) JE1.png|32px]] [[File:Attached Melon Stem (W) JE1.png|32px]]{{verify|Are these models correct?}} Added melon stems.}}
{{History|foot}}
<gallery>
Melon Stem with data value 15.png|The final version of the melon stem with age 15, as seen in-game.
Melonstems.png|Melon stems of ages 1–15 on a modded version of 1.7.2, hence the melon stems using the melon top texture.
Stems of 13w02a.png|All 16 stem sizes in 13w02a, with accompanying data values.
</gallery>
=== Melon stem "item" ===
{{:Technical blocks/Melon Stem}}
== Issues ==
{{issue list}}
== Gallery ==
<gallery>
Stem All Ages.png|All stages of growth.
AllSeeds.png|All the [[seeds]] that exist in the game.
</gallery>
== See also ==
* [[Melon]]
* [[Pumpkin Seeds]]
==References==
{{Reflist}}
{{Blocks|vegetation}}
{{Items}}
[[Category:Plants]]
[[Category:Food]]
[[Category:Non-solid blocks]]
[[Category:Generated structure blocks]]
[[cs:Semínka melounu]]
[[de:Melone]]
[[es:Semillas de sandía]]
[[fr:Graines de pastèque]]
[[hu:Dinnyemagok]]
[[it:Anguria]]
[[ja:スイカの種]]
[[ko:수박씨]]
[[nl:Meloenzaden]]
[[pl:Nasiona arbuza]]
[[pt:Sementes de melancia]]
[[ru:Семена арбуза]]
[[th:เมล็ดแตงโม]]
[[zh:西瓜种子]]</li></ul> | Bows are now used to craft dispensers. | ||||
1.8{{Extension DPL}}<ul><li>[[Item (entity)|Item (entity)]]<br/>{{Entity
| title = Item Entity
| image = Item.gif
| health = {{hp|5}}<ref>Items cannot be damaged by attacking them.</ref>
| size = Height: 0.25 Blocks<br>Width: 0.25 Blocks
}}
'''Items''' are "dropped" [[block]]s or [[item]]s (non-block resources) that appear in the world, rather than being in the [[inventory]] of a [[player]] or [[block entity]]; they are a type of [[entity]].
== Appearance ==
[[File:Item entities.png|150px|thumb|3D dropped items, both blocks and strict items.]]
Items have two possible appearances, generally corresponding to whether the item appears as a 3D or 2D shape in a player's inventory screens. 3D items appear as their 3D shape, miniaturized to about {{frac|1|4}} scale, while 2D items appear as {{frac|1|2}} scale with all the pixels extruded into a cube. Both types slowly rotate and bob up and down; this is merely a visual effect, the item itself does not actually rotate or bob up and down.
Item entities that represent a stack of more than one item appear as several items stuck together. Stacks of 1 appear as one item, 2-16 as two items, 17–32 as three, 33-48 as four, and 49+ as five.
The rotation rate of the item is approximately 2.87675 degrees per tick, or 57.595 degrees per second.
== Behavior ==
Item entities come from many sources. Some common ones are:
* The death of a [[mob]] or [[player]].
* A [[block]] that is mined by a player, destroyed by an [[explosion]], or washed away by [[water]].
* An inventory item tossed by pressing the drop item key (default {{key|Q}} on PC, {{xbtn|dpad-down}} on Xbox, {{nsbtn|down}}/{{nsbtn|dpad-down}} on Nintendo Switch, {{psbtn|dpad-down}} on PlayStation) or dragging a stack outside of an inventory window.
** In the mobile versions of {{el|be}}, items in the hotbar can be dropped by pressing on the item's slot. The entire stack is dropped.
* A container (other than an {{BlockLink|ender chest}} or a {{BlockLink|shulker box}}) that is destroyed while holding items inside.
The player may be thought of as having an "item pickup" box that surrounds their hitbox. This pickup box extends 1 additional block to the horizontal sides, and 0.5 additional blocks up and down. Any item whose hitbox intersects with the pickup box can be picked up. The pickup box is inclusive on the horizontal sides (distance less than or equal to 1 will count), and exclusive on the vertical sides (distance less than 0.5 will count, but not equal). When the player's hitbox size changes, such as when crouching{{only|java}} or sleeping, the pickup box size changes with it.
Once an item entity's hitbox overlaps with the player's pickup box, it can transfer its items. As many items as can fit in the player inventory, excluding the armor slots and the [[dual wield|off-hand slot]], are transferred. If any item is transferred, [[Item (entity)#Sounds|a "plopping" sound]] is played. If all items are transferred, the items appear to move into the center of the player. The item entity never physically moves, however, which means it can appear to go through lava and blocks in its path. This can happen through blocks that are thinner than a full block, but also through the shared edge of two full blocks. Unlike [[experience orb]]s, multiple item entities can be picked up simultaneously. Dropped items have a delay of 10 [[tick]]s (half a second) between appearing and being able to be picked up, or 40 ticks (2 seconds) if thrown by a player, [[dolphin]], or [[fox]].
When two stackable items of the same type come within 3/4 of a block of each other, they merge into a single stack if the resulting stack size does not exceed that item's maximum stack size.
Items do not collide with other entities(except boats) and are only moved or stopped by blocks.
Like other entities, items can be pushed by flowing water and [[bubble column]]s, pushed by a [[piston]], launched by a moving [[slime block]], stuck to a [[honey block]], or caught in a [[cobweb]]. Items move at faster speeds if [[ice]] is placed under the flowing water. When in still water, items float slowly up to the surface.
Items can be reared by [[fishing rod]]s, costing 3 [[durability]].{{only|je}}
If an item is within a [[solid block]], then it flies out one of the unobstructed sides, or out of the top of the block if surrounded by solid blocks on all sides. It does this even if the space below is unoccupied; therefore, it is possible to recover an item dropped by breaking a hole in a floor by quickly placing another block there.
Items visually disappear when the player is about 16 blocks away from them, and reappear when they get closer. This distance can be adjusted by the "Entity Distance" slider in [[Options#Video Settings|video settings]].
Unlike most entities, items cannot be spectated in [[Spectator]] mode without use of the {{cmd|spectate}} command.
=== Damage ===
Items cannot be attacked by players or mobs; attempting to do so simply hits through them. However, they take damage and disappear from environmental or block-based damage such as [[explosion]]s, [[fire]], [[lava]], and contact with [[cactus|cacti]]. Items have essentially no health, so they are destroyed by the slightest damage, though if set on fire they may remain for a few seconds before disappearing. [[Nether star]]s are immune to explosions, and [[netherite]]-based items and tools are immune to fire and float on top of lava. Also, some blocks that normally damage mobs, such as [[magma block]]s, [[campfire]]s, [[Sweet Berries|sweet berry bushes]], [[flower|wither rose]]s and [[powder snow]], do not damage items.
=== Despawning ===
Items despawn after 6000 game [[tick]]s (5 minutes) of being in a loaded, entity-ticking [[chunk]]; this is affected by the player's [[simulation distance]]. If two item stacks merge, the timer is set to the item that has more time remaining. The 5-minute timer is paused when the chunk is unloaded or no longer processing entities. Nether stars do not despawn{{only|bedrock}}.
Items that fall into the [[void]] immediately despawn when they fall below Y=-128 in the [[Overworld]], or Y=-64 in [[the Nether]] and [[the End]].
== Sounds ==
{{Edition|Java}}:<br>
Item Entities use the Ambient/Environment sound category for entity-dependent sound events.
{{Sound table
|nocat=1
|sound=Pop.ogg
|subtitle=Item plops
|source=player<!--Even when not picked up by player-->
|description=When an item is picked up
|id=entity.item.pickup
|translationkey=subtitles.entity.item.pickup
|volume=0.2
|pitch=1.6-3.4 <ref group=sound>0.6-3.4 for using {{cmd|give}} and items from advancement rewards</ref>
|distance=16}}
{{Sound table
|sound=fizz.ogg
|nocat=1
|subtitle=Burning
|source=ambient
|description=When an item is destroyed by [[lava]], but not [[fire]]<ref>{{bug|MC-36538}}</ref>
|id=entity.generic.burn
|translationkey=subtitles.entity.generic.burn
|volume=0.4
|pitch=2.0-2.4
|distance=16
|foot=1}}
{{Edition|Bedrock}}:
{{Sound table
|type=bedrock
|rowspan=2
|sound=Pop.ogg
|source=player
|description=When an item is picked up
|id=random.pop
|volume=0.25
|pitch=0.6-2.2}}
{{Sound table
|source=player
|description=When an item is dropped
|id=random.pop
|volume=0.3
|pitch=0.55-0.75}}
{{Sound table
|sound=fizz.ogg
|source=block
|description=When an item is destroyed by lava, but not fire
|id=random.fizz
|volume=0.5
|pitch=1.8-2.4
|foot=1}}
== Data values ==
=== ID ===
{{editions|java}}:
{{ID table
|generatetranslationkeys=java
|displayname=Item
|spritename=items
|spritetype=env
|translationtype=entity
|nameid=item
|foot=1}}
{{editions|bedrock}}:
{{ID table
|shownumericids=y
|generatetranslationkeys=bedrock
|displayname=Item
|spritename=items
|spritetype=env
|translationtype=entity
|nameid=item
|id=64
|foot=1}}
=== Entity data ===
{{see also|Chunk format}}
Dropped items have entity data associated with them that contain various properties of the entity.
{{el|java}}:
{{main|Entity format}}
{{/ED}}
{{el|bedrock}}:
: See [[Bedrock Edition level format/Entity format]].
== History ==
{{History|java classic}}
{{History||0.24 Resource Test|In the first public mention of item entities, {{ytl|OP3jzMWJmu8|this early video of Minecraft (Classic 0.24) by Notch}}, they were referred to as "resources".<ref name="resources">{{ytl|YIm_AKUbqh8}} Early video of Minecraft (Classic 0.24) by Notch referring to item entities as "resources"</ref>}}
{{History||August 4, 2009|link=https://notch.tumblr.com/post/155882307/a-video-showing-what-i-did-today-are-vids-like|Items were showcased by [[Notch]] in a blog post.}}
{{History||0.24_SURVIVAL_TEST|Added items to the game.
|Items currently take the form of destroyed [[block]]s.
|Items currently pulse white (similar to the selection cursor).<ref name="resources"/>
|Instead of appearing as shrunken down blocks, items use pixels the same size as block pixels.}}
{{History|java indev}}
{{History||0.31|snap=20091231-2|Dropped items don't spin and don't glow white anymore.
|Dropped items now appear as shrunken down blocks.
|Items no longer prevent the placement of blocks but instead are moved to the nearest chunk. {{info needed}}
|Non-block items added (as sprites); they now rotate to face the [[player]].}}
{{History||?|Dropped items now spin again.}}
{{History|java beta}}
{{History||1.8|snap=Pre-release|[[File:Oversized items.png|100px|right]][[File:In awe at the size of these fluids.png|100px|right]] A bug causing many item forms of blocks to be displayed at the {{frac|1|2}} scale rather than {{frac|1|4}} was fixed. The following items were affected by this at least at one point:
* [[Cactus]]
* [[Oak Trapdoor]]
* [[Oak Fence]]
* [[Oak Pressure Plate]]
* [[Stone Pressure Plate]]
* [[Stone Button]]
* [[Oak Stairs]]
* [[Cobblestone Stairs]]
* [[Snow]] (unobtainable at the time)
* [[Farmland]] (unobtainable)
* [[Cake]] ([[Technical blocks/Cake|unobtainable version]])
* [[Nether Portal (block)|Nether Portal]] ([[Technical blocks/Nether Portal|unobtainable]])
* [[Water]] ([[Technical blocks/Water|unobtainable]], before becoming 2D in [[Java Edition Infdev 20100615]])
* [[Lava]] ([[Technical blocks/Lava|unobtainable]], before becoming 2D in [[Java Edition Infdev 20100615]])
}}
{{History|java}}
{{History||1.3.1|snap=12w15a|Items that are moved into the same location now combine into stacks instead of remaining independent entities.}}
{{History||1.4.2|snap=12w34a|Items, like other entities, can now travel through [[portal]]s.}}
{{History|||snap=12w34b|Some [[zombie]]s, [[skeleton]]s and [[Zombified Piglin|zombie pigmen]] can now pick up items.}}
{{History||1.4.4|snap=1.4.3|Items are now pushed out of transparent solid blocks as well as opaque ones.<ref>{{bug|MC-15}}</ref> Items can push into solid blocks while trying to escape a solid block instead of stopping (this has been used to create vertical transport of items). New feature: items are pushed out of the inside corner of stair blocks, causing "bouncing" effects.}}
{{History||December 11, 2012|link=none|[[Dinnerbone]] tweeted a picture of [[diamond]]s being rendered in 3D as dropped items.<ref>{{tweet|dinner|278457679805030401|Diamonds are a miners best friend. It's only fair they get treated to some luxury rendering. http://dinnerbone.com/media/uploads/2012-12/screenshots/Minecraft_2012-12-11_12-13-11.png … #AndMaybeEverythingElseToo|December 11, 2012}}</ref> He also revealed that other items would rendered in this way, but only in [[fancy graphics]].<ref>{{tweet|dinner|278463997982949378|@PaymenowTV It's Fancy Rendering option, but really won't make much of a difference on even a slow pc.|December 11, 2012}}</ref>}}
{{History||December 12, 2012|link=none|TeamMojang ([[wikipedia:Youtube|YouTube]]) posted a video showing off the new 3D items.<ref>{{ytl|tMOZLAxPWFE}}</ref>}}
{{History||1.4.6|snap=12w49a|[[Nether star]]s are the first items to not be deleted by [[explosion]]s.}}
{{History|||snap=12w50a|When dropped, items now render in the [[fancy graphics]] setting as 3D spinning animations (non-block items no longer display as [[Wikipedia:Sprite (computer graphics)|sprites]]).
|Dropped items now merge with nearby items and be stacked.
|Enchanted items now show the enchanted glow when dropped.}}
{{History||1.5|snap=13w01a|Added [[hopper]]s, which can collect items.}}
{{History|||snap=13w03a|Added [[Minecart with Hopper|hopper minecart]]s, which can collect items.}}
{{History||1.8|snap=14w04a|Dropped items don't spin, and they are visible only from the south on fast graphics.}}
{{History|||snap=14w04b|Dropped items are now completely invisible on fast graphics.}}
{{History|||snap=14w05a|Dropped items on fast graphics now face the player on all three axes, and they spin again on fancy graphics.}}
{{History|||snap=14w25a|Dropped items now render in 3D on fast graphics, instead of just on fancy graphics, likely due to item models being fully implemented and replacing the need for 2D items. However, they do not spin.}}
{{History||1.8.1|snap=pre4|Dropped items now spin on fast graphics.}}
{{History||1.10|snap=16w21a|Items can now be reared by [[fishing rod]]s.}}
{{History||1.11|snap=16w32a|The entity ID of items has been changed from <code>Item</code> to <code>item</code>.}}
{{History||1.13|snap=18w07a|Items in water now float up.}}
{{History||1.16|snap=20w06a|Netherite items are the first items to not burn in [[lava]], and float in lava.}}
{{History||1.20|snap=Pre-release 5|Item are no longer destroyed by falling [[anvil]]s.<ref>{{bug|MC-120158
||Anvils and other falling_blocks with HurtEntities set to true kill items and xp orbs|Fixed}}</ref>}}
{{History|pocket alpha}}
{{History||v0.2.0|Added items to the game.}}
{{History||?|Items now have improved graphics.{{more info|clarify}}}}
{{History|Bedrock}}
{{History||1.4.0|snap=beta 1.2.14.2|Items in [[water]] now float up.}}
{{History||1.16.0|snap=beta 1.15.0.51|When dropped, items now render as 3D spinning animations (non-block items no longer display as [[Wikipedia:Sprite (computer graphics)|sprites]]).}}
{{History|||snap=beta 1.16.0.51|Added [[netherite]] items, which float and do not burn in [[lava]].}}
{{History|console}}
{{History||xbox=TU1|xbone=CU1|ps=1.0|wiiu=Patch 1|switch=1.0.1|Added items to the game.}}
{{History||xbox=TU12|When dropped, items now render as 3D spinning animations (non-block items no longer display as [[Wikipedia:Sprite (computer graphics)|sprites]]).}}
{{History||xbox=TU69|xbone=none|ps=1.76|wiiu=Patch 38|switch=none|Items in [[water]] now float up.}}
{{History|foot}}
== Trivia ==
* {{bug|MC-4}}, the oldest standing bug in the Minecraft [[bug tracker]], involves item entity positioning being incorrectly handled.
==Gallery==
<gallery>
3D Diamonds.png|First image of 3D dropped items.
</gallery>
== See also ==
* [[Drops]] — items dropped by [[mobs]] when killed.
* [[Chunk format#Items|Chunk format]] for more information about the attributes of items.
== References ==
{{Reflist}}
{{entities}}
{{items}}
[[Category:Items| ]]
[[de:Drop]]
[[es:Objeto (entidad)]]
[[fr:Objet (entité)]]
[[ja:アイテム (エンティティ)]]
[[ko:아이템 (개체)]]
[[nl:Voorwerp (entiteit)]]
[[pt:Drops]]
[[ru:Предмет (сущность)]]
[[zh:物品(实体)]]</li><li>[[Compass|Compass]]<br/>{{About|the item used to point to the world spawn or to a lodestone|the item used to point to the location of the player's last death|Recovery Compass}}
{{Item
| image = Compass.gif
| image2 = Lodestone Compass.gif
| renewable = Yes
| stackable = '''Compass:''' Yes (64)<br>'''Lodestone Compass:''' No
}}
A '''compass''' is an item used to point to the world spawn or to a [[lodestone]].
== Obtaining ==
=== Crafting ===
{{Crafting
|B1= Iron Ingot
|A2= Iron Ingot |B2= Redstone Dust |C2= Iron Ingot
|B3= Iron Ingot
|Output= Compass
|type= Tool
}}
=== Chest loot ===
{{LootChestItem|compass}}
=== Trading ===
{{IN|java}}, expert-level librarian [[villager]]s have a 50% chance to sell a single compass for 4 [[emerald]]s.
{{IN|bedrock}}, expert-level librarian villagers have a {{frac|1|3}} chance to sell a single compass for 4 emeralds.
== Usage ==
Normally, the compass' needle points toward the world [[Spawn#World spawn|spawn point]]. The compass points to spawn when viewed in any way, including as a dropped [[Item (entity)|item]], in a player's hand, in an inventory or the crafting table, or in an [[item frame]]. The direction the needle points to is relative to the player who is viewing it. When a compass in an item frame is rotated, the needle turns accordingly.
In [[the Nether]] or [[the End]], the compass' needle spins and points in random directions.
The compass can be used on a [[lodestone]], after which it is named lodestone compass by default and points to that lodestone as long as the compass is in the same dimension as the lodestone, but if the compass is taken to a different dimension, it spins randomly, as a normal compass would in the Nether or the End. If the lodestone is destroyed, it also spins randomly, even if the lodestone is replaced afterward. However, if a lodestone compass is placed in storage, the lodestone can be broken and replaced without the compass losing the attunement, as long as the compass remains in storage while the lodestone is missing.
A lodestone compass appears [[enchanting|enchanted]], similar to the [[Enchanted Golden Apple|enchanted golden apple]].
Using {{cmd|setworldspawn}} to change the world spawn also changes where the compass points.
=== Crafting ingredient ===
{{crafting usage|Compass, Compass.gif}}
=== Anvil usage ===
{{:Map/BE|position}}
=== Trading ===
A single compass can be sold to a journeyman-level cartographer villager for 1 [[emerald]].{{only|java}}
A single compass can be sold to an expert-level cartographer villager for 1 emerald as their sixth trade.{{only|bedrock}}
A compass is also part of the cost of [[explorer map]]s:
* An ocean explorer map and{{only|java|short=1}}/or{{only|bedrock|short=1}} a woodland explorer map can be bought from a journeyman-level cartographer for 12 emeralds and one compass, as part of their fifth trade.{{only|bedrock}}
* {{IN|java}}, apprentice-level cartographer villagers offer to sell an ocean explorer map for 13 emeralds and a compass, and journeyman-level cartographer villagers offer to sell a woodland explorer map for 14 emeralds and one compass.
=== Enchantments ===
A compass can receive the following [[enchantment]]s:
{|class="wikitable col-2-center col-3-right"
|+
!Name
!Max Level
![[Enchanting|Method]]
|-
|[[Curse of Vanishing]]
|I
|{{Inventory slot|Anvil}}
|-
|}
== Sounds ==
{{edition|java}}:
{{Sound table
|sound=Lodestone lock1.ogg
|sound2=Lodestone lock2.ogg
|source=player
|subtitle=Lodestone Compass locks onto Lodestone
|description=When a compass is used on a lodestone
|id=item.lodestone_compass.lock
|translationkey=subtitles.item.lodestone_compass.lock
|volume=1.0
|pitch=''varies'' <ref group=sound>Can be 0.85 or 0.95 for each sound</ref>
|distance=16
|foot=1}}
{{edition|bedrock}}:
{{Sound table
|type=bedrock
|sound=Lodestone lock1.ogg
|sound2=Lodestone lock2.ogg
|source=block
|description=When a compass is used on a lodestone
|id=lodestone_compass.link_compass_to_lodestone
|volume=1.0
|pitch=0.85-0.95
|foot=1}}
== Data values ==
=== ID ===
{{edition|java}}:
{{ID table
|edition=java
|showforms=y
|generatetranslationkeys=y
|displayname=Compass
|spritetype=item
|nameid=compass
|form=item
|translationkey=item.minecraft.compass,item.minecraft.lodestone_compass
|foot=1}}
{{edition|bedrock}}:
{{ID table
|edition=bedrock
|showaliasids=y
|shownumericids=y
|showforms=y
|notshowbeitemforms=y
|generatetranslationkeys=y
|displayname=Compass
|spritetype=item
|nameid=compass
|id=391
|form=item}}
{{ID table
|displayname=Lodestone Compass
|spritename=lodestone-compass-be
|spritetype=item
|nameid=lodestone_compass
|aliasid=lodestonecompass
|id=602
|form=item
|translationkey=item.lodestonecompass.name
|foot=1}}
=== Item data ===
{{el|java}}:
{{main|Player.dat format}}
<div class="treeview">
* {{nbt|compound|tag}}: The item's '''tag''' tag.
{{:Player.dat_format/Compasses}}
</div>
{{el|bedrock}}:
: See [[Bedrock Edition level format/Item format]].
== Advancements ==
{{load advancements|Country Lode}}
== History ==
{{History|java alpha}}
{{History||v1.1.0|[[File:Compass JE1.gif|32px]] Added compasses.
|They have 102 visually distinct frames due to how the texture is generated - see the section below.}}
{{History|java beta}}
{{History||1.8|snap=Pre-release|Compasses can now be found in library [[chest]]s in the new [[strongholds]].}}
{{History|java}}
{{History||1.3.1|snap=12w21a|Librarian [[villager]]s now [[trading|sell]] 1 compass for 10–11 [[emerald]]s, making them [[renewable]].}}
{{History||1.4.2|snap=12w34a|Since the mapping system has been changed, a compass can now be used to [[crafting|craft]] an empty [[map]].}}
{{History||1.5|snap=13w02a|[[File:Compass JE2 BE2.gif|32px]] Compasses now, instead of splitting two textures, use the new animation feature included in texture packs. As a result, they are considerably less precise, having only 29 visually distinct frames. }}
{{History||1.8|snap=14w02a|Librarian villagers now sell 1 compass for 10–12 emeralds.}}
{{History||1.9|snap=15w31a|Compasses are now broken up into individual textures, instead of having every individual frame on one vertical strip like with animated textures.}}
{{History|||snap=15w43a|The average yield of compasses in [[stronghold]] library [[chest]]s has been increased.}}
{{History||1.11|snap=16w39a|Cartographer [[villager]]s have been added, who [[trading|buy]] compasses as their tier 2 trade.}}
{{History||1.13|snap=17w47a|Prior to [[1.13/Flattening|''The Flattening'']], this [[item]]'s numeral ID was 345.}}
{{History|||snap=18w11a|Compasses can now generate in [[shipwreck]] [[chest]]s.}}
{{History||1.14|snap=18w48a|Compasses can now generate in chests in [[village]] cartographer houses.}}
{{History||1.16|snap=20w13a|[[File:Lodestone Compass JE1.gif|32px]] Compasses can now be used on [[lodestone]]s to make them point to the stones.
|Compasses now point to the center of the spawn point block, instead of its north-west corner.}}
{{History|||snap=20w14a|Compasses now have the <code>LodestonePos</code>, <code>LodestoneDimension</code>, and <code>LodestoneTracked</code> data fields. If <code>LodestoneTracked</code> is zero, the game skips checking for a lodestone in the specified position.
|Compasses can now have the [[Curse of Vanishing]] [[enchantment]] on them.}}
{{History|||snap=20w19a|Compasses no longer work in the [[recipe book]].<ref>{{bug|MC-116293}}</ref>}}
{{History|||snap=20w22a|Compasses no longer work in the villager trading GUI.<ref>{{bug|MC-182888}}</ref>}}
{{History||1.17|snap=20w48a|[[File:Compass JE3.gif|32px]] [[File:Lodestone Compass JE2.gif|32px]] The textures of compass and lodestone compass have been changed.}}
{{History||1.19|snap=22w13a|Compasses may now be found in [[ancient city]] [[chest]]s.}}
{{History|||snap=22w14a|Compasses can now used to craft [[recovery compass]]es.}}
{{History|pocket alpha}}
{{History||v0.2.0|[[File:Compass BE1.png|32px]] Added compasses.
|Compasses currently have no function or legitimate method of obtaining them.}}
{{History||v0.8.0|snap=build 1|[[File:Compass JE2 BE2.gif|32px]] Added animated texture to compasses.
|Compasses are now functional and [[crafting|craftable]]. They have been added into the Creative Inventory.}}
{{History||v0.14.0|snap=build 1|Compasses must now be added to a [[map]] using an [[anvil]] to add the location marker.}}
{{History|pocket}}
{{History||1.0.0|snap=?|[[Windows 10 Edition]] can now use the [[anvil]], as well as the [[crafting table]], to apply position markers, with compasses just as [[Pocket Edition]] can in general.}}
{{History||1.0.4|snap=alpha 1.0.4.0|Librarian [[villager]]s now [[trading|sell]] 1 compass for 10–12 [[emerald]]s.}}
{{History||1.1.0|snap=alpha 1.1.0.3|Cartographer villagers have been added, who [[trading|buy]] compasses as part of their tier 2 trade.
|Compasses used with emeralds can be used to buy explorer maps as part of cartographer villagers' fourth tiers trade.}}
{{History|bedrock}}
{{History||1.4.0|snap=beta 1.2.14.2|Compasses can now be found inside map room [[chest]]s in [[shipwreck]]s.}}
{{History||1.10.0|snap=beta 1.10.0.3|Compasses can now be found in [[village]] cartographer house chests.}}
{{History||1.11.0|snap=beta 1.11.0.4|[[Trading]] has been changed, cartographer [[villager]]s now [[trading|buy]] compassess as part of their fourth tier trades.
|Compasses used with [[emerald]]s can now be used to buy explorer maps as part of cartographer and fletcher villagers' third tier trades.
|Librarian villagers now have a {{frac|1|3}} chance to [[trading|sell]] compasses for 4 emeralds as part of their fourth tier trades.}}
{{History||1.16.0|snap=beta 1.16.0.57|[[File:Lodestone Compass BE1.gif|32px]] Compasses can now be used on [[lodestone]]s to make them point to the stones.
|Compasses now have the <code>LodestonePos</code>, <code>LodestoneDimension</code>, and <code>LodestoneTracked</code> data fields. If <code>LodestoneTracked</code> is zero, the game skips checking for a lodestone in the specified position.
|Compasses can now have the [[Curse of Vanishing]] [[enchantment]] on them.}}
{{History||1.16.100|snap=beta 1.16.100.56|Changed the ID {{code|lodestonecompass}} to {{code|lodestone_compass}}.}}
{{History||1.17.0|snap=beta 1.17.0.54|[[File:Compass JE3.gif|32px]] The texture of compass has been changed.}}
{{History||1.18.10|snap=beta 1.18.10.20|[[File:Lodestone Compass JE2.gif|32px]] The texture of lodestone compass has been changed.}}
{{History|console}}
{{History||xbox=TU1|xbone=CU1|ps=1.0|wiiu=Patch 1|switch=1.0.1|[[File:Compass JE2 BE2.gif|32px]] Added compasses.}}
{{History|New Nintendo 3DS Edition}}
{{History||0.1.0|[[File:Compass JE2 BE2.gif|32px]] Added compasses.}}
{{History|foot}}
=== Texture generation prior to Java Edition 13w02a ===
{{:Procedural animated texture generation/Compasses}}
== Issues ==
{{issue list}}
== Gallery ==
<gallery>
12w21a CompassPurchase.png|Purchasing a compass from a librarian [[villager]].
</gallery>
== See also ==
*[[Clock]]
*[[Tutorials/Navigation|Navigation]]
== External Links ==
*[https://www.minecraft.net/en-us/article/taking-inventory--compass Taking Inventory: Compass] – Minecraft.net on August 15, 2019
{{Items}}
[[Category:Tools]]
[[Category:Renewable resources]]
[[cs:Kompas]]
[[de:Kompass]]
[[es:Brújula]]
[[fr:Boussole]]
[[hu:Iránytű]]
[[it:Bussola]]
[[ja:コンパス]]
[[ko:나침반]]
[[nl:Kompas]]
[[pl:Kompas]]
[[pt:Bússola]]
[[ru:Компас]]
[[uk:Компас]]
[[zh:指南针]]</li></ul> | July 8, 2011 | Notch teased hold-to-charge bows. | |||
| July 13, 2011 | Notch indicated that along with bow charging, he would add an achievement based around shooting a skeleton at 50 meters, eventually to be known as Sniper duel. | ||||
| Pre-release | Bow behavior has been overhauled; they now need to be charged to fire. | ||||
| Java Edition | |||||
1.0.0{{Extension DPL}}<ul><li>[[Nether Quartz|Nether Quartz]]<br/>{{About|the item|the ore|Nether Quartz Ore|the mineral block|Block of Quartz|other uses|Quartz}}
{{Item
| image = Nether Quartz.png
|type=
| renewable = Yes
| stackable = Yes (64)
}}
'''Nether quartz''' is a white mineral found in [[the Nether]].
== Obtaining ==
{{see also|Nether Quartz Ore#Natural generation}}
=== Mining ===
[[Nether quartz ore]] mined using a [[pickaxe]] drops one unit of Nether quartz. If the pickaxe is enchanted with [[Fortune]], it may drop an extra unit per level of Fortune, up to a maximum of four with Fortune III. If the pickaxe is enchanted with [[Silk Touch]], the ore drops itself.
=== Chest loot ===
{{LootChestItem|nether-quartz}}
=== Smelting ===
{{Smelting
|Nether Quartz Ore
|Nether Quartz
|0,2
}}
=== Bartering ===
[[Piglin]]s may [[barter]] 5–12 nether quartz when given a [[gold ingot]].
== Usage ==
=== Crafting ingredient ===
{{crafting usage}}
=== Trading ===
Expert-level stone mason [[villagers]] have a {{frac|1|33}} chance to trade one [[emerald]] for 12 Nether quartz {{in|java}}. This trade is always offered {{in|bedrock}}.
=== Smithing ingredient ===
{{Smithing
|head=1
|ingredients=Any Armor Trim +<br/>Any Armor Piece + <br/>Nether Quartz
|Any Armor Trim Smithing Template
|Netherite Chestplate
|Nether Quartz
|Quartz Trim Netherite Chestplate
|showdescription=1
|description = All armor types can be used in this recipe,<br/>a netherite chestplate is shown as an example.<br/>
|tail=1
}}
;Trim color palette
The following color palette is shown on the designs on trimmed armor:
*{{TrimPalette|nether quartz}}
== Data values ==
=== ID ===
{{edition|java}}:
{{ID table
|edition=java
|showforms=y
|generatetranslationkeys=y
|displayname=Nether Quartz
|spritetype=item
|nameid=quartz
|form=item
|foot=1}}
{{edition|bedrock}}:
{{ID table
|edition=bedrock
|shownumericids=y
|showforms=y
|notshowbeitemforms=y
|generatetranslationkeys=y
|displayname=Nether Quartz
|spritetype=item
|nameid=quartz
|id=524
|form=item
|foot=1}}
== History ==
{{History|java}}
{{History||1.5|snap=13w01a|[[File:Nether Quartz JE1 BE1.png|32px]] Added Nether quartz.
|Nether quartz is used to craft [[daylight sensor]]s and [[redstone comparator]]s.}}
{{History|||snap=January 4, 2013|slink=http://twitter.com/jeb_/status/287481098760499201|[[Jeb]] tweeted that Nether quartz would be used for more decorative uses as well.}}
{{History|||snap=January 7, 2013|slink=http://twitter.com/jeb_/status/288311932304371712|Jeb tweeted a picture of some [[block of quartz]] tests potentially being replacements for the lack of limestone/marble in the game.}}
{{History|||snap=13w02a|Added [[block of quartz]], which is [[crafting|crafted]] with Nether quartz.}}
{{History||1.8|snap=14w02a|Nether quartz can now be used to craft [[granite]] and [[diorite]].}}
{{History||1.11|snap=16w39a|Nether quartz is now used to craft [[observer]]s.}}
{{History||1.13|snap=17w47a|Prior to [[1.13/Flattening|''The Flattening'']], this [[item]]'s numeric ID was 406.}}
{{History||1.14|snap=18w43a|[[File:Nether Quartz JE2 BE2.png|32px]] The texture of Nether quartz has now been changed.}}
{{History|||snap=19w11a|Nether quartz is now [[trading|bought]] by [[villager]]s of the new mason profession.}}
{{History||1.16|snap=20w07a|Nether quartz now has a {{frac|1|109}} (~0.92%) chance of being offered by [[piglin]]s when [[bartering]], in a stack size of 1–4, making it [[renewable resource|renewable]].}}
{{History|||snap=20w09a|Nether quartz now has a {{frac|10|226}} (~4.42%) chance of being offered by piglins when bartering, in a stack size of 1–5.}}
{{History|||snap=20w10a|Nether quartz now has a {{frac|20|411}} (~4.87%) chance of being offered by piglins when bartering, in a stack size of 8-16.}}
{{History|||snap=20w11a|Nether quartz now has a {{frac|20|417}} (~4.80%) chance of being offered by piglins when bartering.}}
{{History|||snap=20w13a|Nether quartz now has a {{frac|20|424}} (~4.72%) chance of being offered by piglins when bartering.}}
{{History|||snap=20w16a|Nether quartz can now be found in [[bastion remnant]] chests.}}
{{History|||snap=20w20a|Nether quartz now has a {{frac|20|423}} (~4.73%) chance of being offered by piglins when bartering.}}
{{History||1.16.2|snap=20w28a|Nether quartz now has a {{frac|20|459}} (~4.36%) chance of being offered by piglins when bartering, in a stack size of 5-12.}}
{{History||1.20<br>(Experimental)|link=1.19.4|snap=23w04a|Nether quartz can now be used as an armor trim material.}}
{{History|pocket alpha}}
{{History||v0.6.0|[[File:Nether Quartz JE1 BE1.png|32px]] Added Nether quartz.}}
{{History||v0.12.1|snap=build 1|Nether quartz is no longer available from the [[Nether reactor]] and is now available from [[the Nether]].}}
{{History||v0.13.0|snap=build 1|Nether quartz is now used to craft [[daylight sensor]]s.}}
{{History||v0.14.0|snap=build 1|Nether quartz can now be used to craft [[redstone comparator]]s.}}
{{History||v0.15.0|snap=build 1|Nether quartz is now used to craft [[observer]]s.}}
{{History|bedrock}}
{{History||1.10.0|snap=beta 1.10.0.3|[[File:Nether Quartz JE2 BE2.png|32px]] The texture of Nether quartz has now been changed.
|Between 20 and 26 nether quartz can now be [[trading|sold]] to stone mason [[villager]]s.}}
{{History||1.11.0|snap=beta 1.11.0.4|[[Trading]] has now been changed, 12 Nether quartz can now be sold to stone mason villagers.}}
{{History||1.16.0|snap=beta 1.16.0.57|Nether Quartz can now be obtained from bartering with piglin.}}
{{History||1.19.80|snap=beta 1.19.80.21|Nether quartz can now be used as an armor trim material.}}
{{History|console}}
{{History||xbox=TU14|xbone=CU1|ps=1.04|wiiu=Patch 1|switch=1.0.1|[[File:Nether Quartz JE1 BE1.png|32px]] Added Nether quartz.}}
{{History||xbox=none|xbone=none|ps=1.90|wiiu=none|switch=none|[[File:Nether Quartz JE2 BE2.png|32px]] The texture of Nether quartz has now been changed.}}
{{History|New 3DS}}
{{History||0.1.0|[[File:Nether Quartz JE1 BE1.png|32px]] Added Nether quartz.}}
{{History|foot}}
== Issues ==
{{issue list}}
== Trivia ==
* All of the sensor related items that are craftable (comparator, daylight sensor, observer) are crafted with some Nether quartz involved.
== References ==
{{reflist}}
{{items}}
[[Category:Renewable resources]]
[[cs:Netheritový křemen]]
[[de:Netherquarz]]
[[es:Cuarzo del Nether]]
[[fr:Quartz du Nether]]
[[hu:Alvilági kvarc]]
[[ja:ネザークォーツ]]
[[ko:네더 석영]]
[[nl:Netherkwarts]]
[[pl:Kwarc]]
[[pt:Quartzo do Nether]]
[[ru:Кварц Нижнего мира]]
[[uk:Пекельний кварц]]
[[zh:下界石英]]</li><li>[[Flower Pot|Flower Pot]]<br/>{{more images|The potted cherry sapling texture has been change in 1.19.4-pre2.}}
{{For|other uses|Pot}}
{{Block
| image = Flower Pot.png
| image2 = Potted Poppy.png
| extratext = View [[#Gallery|all renders]]
| transparent = Yes
| light = No
| tool = any
| renewable = Yes
| stackable = Yes (64)
| flammable = No
| lavasusceptible = No
}}
A '''flower pot''' is a decorative [[block]] that can contain flowers, bamboo, saplings, cacti, mushrooms, fungi, and other reasonably small plants.
== Obtaining ==
=== Natural generation ===
Flower pots naturally generate in [[witch hut]]s where they contain a red [[mushroom]], the basement of [[igloo]]s where they contain a [[cactus]], and in [[woodland mansion]]s, where they contain birch [[sapling]]s, dark oak saplings, dandelions, poppies, blue orchids, alliums, azure bluets, red and white tulips, and oxeye daisies.
Flower pots containing a dandelion can be found in some [[plains]] and [[savanna]] [[village]] houses. Flower pots containing a cactus or a dead bush can be found in some [[desert]] village houses. Flower pots containing a spruce sapling can be found in [[taiga]] village mason houses. Flower pots containing a poppy can be found in taiga village churches.
=== Breaking ===
Flower pots can be mined instantly using any [[tool]] or without a tool.
A flower pot drops itself as an [[item]] (any [[plant]] or [[mushroom]] in it separately) when pushed by a [[piston]] or washed away with [[water]].
[[Lava]] can flow into the space of a flower pot, destroying it.
=== Chest loot ===
{{LootChestItem|flower-pot}}
=== Crafting ===
{{Crafting
|A2= Brick
|C2= Brick
|B3= Brick
|Output= Flower Pot
|type= Decoration block
}}
== Usage ==
A flower pot can be used to hold [[mushroom]]s, [[Fungus|fungi]], and various [[plant]]s. Plants that can be {{control|placed}} in a pot include any one block high [[flower]]s, [[sapling]]s, [[fern]]s, [[dead bush]]es, [[cacti]], [[bamboo]], [[azalea]]s, [[mangrove propagule]], and [[roots]].
Plants can be removed by using the interact button.
{{IN|je}}, flower pots can be placed on any block, or over [[air]].<ref>{{bug|MC-127036|||WAI}}</ref>
{{IN|be}}, they must be placed on top of a full-[[block]] top surface, or the top of a [[fence]], stone [[wall]], or [[hopper]]. They cannot be placed on [[slab]]s and [[stairs]] unless those blocks are upside-down. Pots may also be placed on an upward facing trapdoor. If the trapdoor is opened, the pot will break.
Flower pots are {{frac|3|8}} of a block high and can be stepped on. It is not possible to walk from the top of a flower pot onto a full sized block without jumping. It is possible to jump from a flower pot onto a fence.
The plant or fungus can be removed from the flower pot by pressing the {{control|use}} control. This places the item directly back into the player's inventory.<ref>{{bug|MC-169496|||WAI}}</ref>
They can be used to display cacti and wither roses without inheriting their damaging properties.<ref>{{bug|MC-2241|||WAI}}</ref><ref>{{bug|MC-138024|||WAI}}</ref>
Potted [[Fungus|warped fungus]] can be used to repel [[hoglin]]s.
== Sounds ==
{{Sound table/Block/Normal}}
== Data values ==
=== ID ===
{{edition|java}}:
{{ID table
|edition=java
|showblocktags=y
|showforms=y
|generatetranslationkeys=y
|displayname=Flower Pot
|spritetype=block
|nameid=flower_pot
|blocktags=flower_pots
|translationkey=block.minecraft.flower_pot,item.minecraft.flower_pot}}
{{ID table
|displayname=Potted Dandelion
|spritetype=block
|nameid=potted_dandelion
|blocktags=flower_pots
|form=block}}
{{ID table
|displayname=Potted Poppy
|spritetype=block
|nameid=potted_poppy
|blocktags=flower_pots
|form=block}}
{{ID table
|displayname=Potted Blue Orchid
|spritetype=block
|nameid=potted_blue_orchid
|blocktags=flower_pots
|form=block}}
{{ID table
|displayname=Potted Allium
|spritetype=block
|nameid=potted_allium
|blocktags=flower_pots
|form=block}}
{{ID table
|displayname=Potted Azure Bluet
|spritetype=block
|nameid=potted_azure_bluet
|blocktags=flower_pots
|form=block}}
{{ID table
|displayname=Potted Red Tulip
|spritetype=block
|nameid=potted_red_tulip
|blocktags=flower_pots
|form=block}}
{{ID table
|displayname=Potted Orange Tulip
|spritetype=block
|nameid=potted_orange_tulip
|blocktags=flower_pots
|form=block}}
{{ID table
|displayname=Potted White Tulip
|spritetype=block
|nameid=potted_white_tulip
|blocktags=flower_pots
|form=block}}
{{ID table
|displayname=Potted Pink Tulip
|spritetype=block
|nameid=potted_pink_tulip
|blocktags=flower_pots
|form=block}}
{{ID table
|displayname=Potted Oxeye Daisy
|spritetype=block
|nameid=potted_oxeye_daisy
|blocktags=flower_pots
|form=block}}
{{ID table
|displayname=Potted Cornflower
|spritetype=block
|nameid=potted_cornflower
|blocktags=flower_pots
|form=block}}
{{ID table
|displayname=Potted Lily of the Valley
|spritetype=block
|nameid=potted_lily_of_the_valley
|blocktags=flower_pots
|form=block}}
{{ID table
|displayname=Potted Wither Rose
|spritetype=block
|nameid=potted_wither_rose
|blocktags=flower_pots
|form=block}}
{{ID table
|displayname=Potted Oak Sapling
|spritetype=block
|nameid=potted_oak_sapling
|blocktags=flower_pots
|form=block}}
{{ID table
|displayname=Potted Spruce Sapling
|spritetype=block
|nameid=potted_spruce_sapling
|blocktags=flower_pots
|form=block}}
{{ID table
|displayname=Potted Birch Sapling
|spritetype=block
|nameid=potted_birch_sapling
|blocktags=flower_pots
|form=block}}
{{ID table
|displayname=Potted Jungle Sapling
|spritetype=block
|nameid=potted_jungle_sapling
|blocktags=flower_pots
|form=block}}
{{ID table
|displayname=Potted Acacia Sapling
|spritetype=block
|nameid=potted_acacia_sapling
|blocktags=flower_pots
|form=block}}
{{ID table
|displayname=Potted Dark Oak Sapling
|spritetype=block
|nameid=potted_dark_oak_sapling
|blocktags=flower_pots
|form=block}}
{{ID table
|displayname=Potted Red Mushroom
|spritetype=block
|nameid=potted_red_mushroom
|blocktags=flower_pots
|form=block}}
{{ID table
|displayname=Potted Brown Mushroom
|spritetype=block
|nameid=potted_brown_mushroom
|blocktags=flower_pots
|form=block}}
{{ID table
|displayname=Potted Fern
|spritetype=block
|nameid=potted_fern
|blocktags=flower_pots
|form=block}}
{{ID table
|displayname=Potted Dead Bush
|spritetype=block
|nameid=potted_dead_bush
|blocktags=flower_pots
|form=block}}
{{ID table
|displayname=Potted Cactus
|spritetype=block
|nameid=potted_cactus
|blocktags=flower_pots
|form=block}}
{{ID table
|displayname=Potted Bamboo
|spritetype=block
|nameid=potted_bamboo
|blocktags=flower_pots
|form=block}}
{{ID table
|displayname=Potted Azalea
|spritetype=block
|nameid=potted_azalea_bush
|blocktags=flower_pots
|spritename=potted azalea bush
|form=block}}
{{ID table
|displayname=Potted Flowering Azalea
|spritetype=block
|nameid=potted_flowering_azalea_bush
|blocktags=flower_pots
|spritename=potted flowering azalea bush
|form=block}}
{{ID table
|displayname=Potted Crimson Fungus
|spritetype=block
|nameid=potted_crimson_fungus
|blocktags=flower_pots
|form=block}}
{{ID table
|displayname=Potted Warped Fungus
|spritetype=block
|nameid=potted_warped_fungus
|blocktags=flower_pots, hoglin_repellents
|form=block}}
{{ID table
|displayname=Potted Crimson Roots
|spritetype=block
|nameid=potted_crimson_roots
|blocktags=flower_pots
|form=block}}
{{ID table
|displayname=Potted Warped Roots
|spritetype=block
|nameid=potted_warped_roots
|blocktags=flower_pots
|form=block}}
{{ID table
|displayname=Potted Mangrove Propagule
|spritetype=block
|nameid=potted_mangrove_propagule
|blocktags=flower_pots
|form=block
|foot=1}}
{{edition|bedrock}}:
{{ID table
|edition=bedrock
|firstcolumnname=Flower Pot
|shownumericids=y
|showforms=y
|generatetranslationkeys=y
|displayname=Block
|spritename=flower-pot
|spritetype=block
|nameid=flower_pot
|id=140
|form=block
|itemform=item.flower_pot
|translationkey=-}}
{{ID table
|displayname=Item
|spritename=flower-pot
|spritetype=item
|nameid=flower_pot
|id=514
|form=item
|foot=1}}
=== Block states ===
{{see also|Block states}}
{{IN|be}}, flower pots use the following block states:
{{/BS}}
=== Block data ===
{{IN|bedrock}}, flower pot has a block entity associated with it that holds additional data about the block.
See [[Bedrock Edition level format/Block entity format]].
== Achievements ==
{{load achievements|Pot Planter}}
== History ==
{{History||August 16, 2012|link={{tweet|Dinnerbone|236062188555624448}}|[[Dinnerbone]] tweeted the first image of flower pots.}}
{{History|java}}
{{History||1.4.2|snap=12w34a|[[File:Flower Pot JE1.png|32px]] [[File:Potted Dandelion JE1.png|32px]] [[File:Potted Rose JE1.png|32px]] [[File:Potted Red Mushroom JE1.png|32px]] [[File:Potted Brown Mushroom JE1.png|32px]] [[File:Potted Oak Sapling JE1.png|32px]] [[File:Potted Birch Sapling JE1.png|32px]] [[File:Potted Spruce Sapling JE1.png|32px]] [[File:Potted Jungle Sapling JE1.png|32px]] [[File:Potted Cactus JE1.png|32px]] [[File:Potted Fern JE1.png|32px]] [[File:Potted Dead Bush JE1.png|32px]]<br>[[File:Flower Pot (item) JE1 BE1.png|32px]] Added flower pots.
|At this point, plants inside of pots rendered much like they do outside of flower pots, not being subject to directional shading.}}
{{History|||snap=12w40a|A potted [[red mushroom]] can now be found on one window of a [[witch hut]]. This changed to an empty pot in a far later unknown version,{{info needed}} but returned again afterward.{{info needed}}}}
{{History||1.7.2|snap=13w36a|[[File:Potted Allium JE1.png|32px]] [[File:Potted Azure Bluet JE1.png|32px]] [[File:Potted Oxeye Daisy JE1.png|32px]] [[File:Potted Blue Orchid JE1.png|32px]] [[File:Potted Red Tulip JE1.png|32px]] [[File:Potted Orange Tulip JE1.png|32px]] [[File:Potted White Tulip JE1.png|32px]] [[File:Potted Pink Tulip JE1.png|32px]] Allium, azure bluet, oxeye daisies, blue orchids, red tulips, orange tulips, white tulips and pink tulips can now be placed in flower pots.
|[[File:Potted Poppy JE1.png|32px]] As the rose has been replaced with the poppy, the potted rose is also now replaced with the potted poppy as a result.
|Flower pots can no longer use data values because more than 15 plants can be potted, it now has a [[block entity]] instead.
|[[File:Potted Green Shrub.png|32px]] [[File:Potted Cobweb JE1.png|32px]] Due to the tile entity handling, it is now possible to place any [[block]] inside of a flower pot via NBT editors. However, at this point, with the ones possible in vanilla [[survival]] aside, only [[grass]], [[shrub|green shrub]]s, and [[cobweb]]s actually render.
|[[File:Potted Grass JE1.png|32px]] Potted grass now exists can be placed in flower pots using [[commands]].
|[[File:Potted Grass (no tint) JE1.png|32px]] [[File:Potted Fern (no tint) JE1.png|32px]] Potted shrubs, grass, and ferns must now have block data value 11 to display biome colors, otherwise rendering as default/gray.}}
{{History|||snap=13w37a|Added {{cmd|setblock}}, allowing for the aforementioned potted plants to be obtained without map editing.}}
{{History|||snap=13w43a|[[File:Potted Acacia Sapling JE1.png|32px]] [[File:Potted Dark Oak Sapling JE1.png|32px]] Acacia sapling and dark oak saplings can now be placed in flower pots.}}
{{History||1.8|snap=14w06a|Many more blocks (almost all full cubes) placed into a flower pot by modifying the block entity now render, if in somewhat buggy fashion, as the texture is in a cross shape. {{LoadPage|Flower Pot/1.8 development gallery/14w06a|Click show to display all of the applicable blocks.|b}}
|[[File:Potted Cactus JE2.png|32px]] Potted cacti now appear as a cross formed of their bottom texture inside of a pot.<ref>{{bug|MC-47469}}</ref>}}
{{History|||snap=14w06b|Further blocks now render in flower pots than did in the previous snapshot. {{LoadPage|Flower Pot/1.8 development gallery/14w06b|Click show to display all of the applicable blocks.|b}}
|[[File:Potted Cactus JE3.png|32px]] The accidental potted cactus model change has been reverted.}}
{{History|||snap=14w07a|[[File:Potted Iron Trapdoor.png|32px]] The newly added [[iron trapdoor]] also renders in flower pots when created with commands.}}
{{History|||snap=14w17a|[[File:Flower Pot JE2.png|32px]] [[File:Potted Dandelion JE2.png|32px]] [[File:Potted Allium JE2.png|32px]] [[File:Potted Azure Bluet JE2.png|32px]] [[File:Potted Oxeye Daisy JE2.png|32px]] [[File:Potted Blue Orchid JE2.png|32px]] [[File:Potted Poppy JE2.png|32px]] [[File:Potted Red Tulip JE2.png|32px]] [[File:Potted Orange Tulip JE2.png|32px]] [[File:Potted White Tulip JE2.png|32px]] [[File:Potted Pink Tulip JE2.png|32px]] [[File:Potted Red Mushroom JE2.png|32px]] [[File:Potted Brown Mushroom JE2.png|32px]] [[File:Potted Oak Sapling JE2.png|32px]] [[File:Potted Birch Sapling JE2.png|32px]] [[File:Potted Spruce Sapling JE2.png|32px]] [[File:Potted Jungle Sapling JE2.png|32px]] [[File:Potted Acacia Sapling JE2.png|32px]] [[File:Potted Dark Oak Sapling JE2.png|32px]] [[File:Potted Cactus JE4.png|32px]] [[File:Potted Fern JE2.png|32px]] [[File:Potted Dead Bush JE2.png|32px]] The flower pot model and rendering has changed. The insides are now subject to directional shading, rather than being fully lit, much like the changes made to [[hopper]]s and [[cauldron]]s in 14w10a. In addition, the outer face (as well as the cuboids comprising the cactus in potted cactus) are no longer subject to ambient occlusion. The potted cactus also now uses the side texture on the top face, rather than the top texture.
|Invalid blocks no longer render inside flower pots. This also includes cobweb and grass.}}
{{History|||snap=14w25a|[[File:Potted Dandelion JE3.png|32px]] [[File:Potted Allium JE3.png|32px]] [[File:Potted Azure Bluet JE3.png|32px]] [[File:Potted Oxeye Daisy JE3.png|32px]] [[File:Potted Blue Orchid JE3.png|32px]] [[File:Potted Poppy JE3.png|32px]] [[File:Potted Red Tulip JE3.png|32px]] [[File:Potted Orange Tulip JE3.png|32px]] [[File:Potted White Tulip JE3.png|32px]] [[File:Potted Pink Tulip JE3.png|32px]] [[File:Potted Red Mushroom JE3.png|32px]] [[File:Potted Brown Mushroom JE3.png|32px]] [[File:Potted Oak Sapling JE3.png|32px]] [[File:Potted Birch Sapling JE3.png|32px]] [[File:Potted Spruce Sapling JE3.png|32px]] [[File:Potted Jungle Sapling JE3.png|32px]] [[File:Potted Acacia Sapling JE3.png|32px]] [[File:Potted Dark Oak Sapling JE3.png|32px]] [[File:Potted Fern JE3.png|32px]] [[File:Potted Dead Bush JE3.png|32px]] Potted cross shaped objects are now affected by directional shading.<ref>{{bug|MC-129826}}</ref>}}
{{History||1.9|snap=15w43a|A potted cactus can now be found on a table in [[igloo]] basements.}}
{{History||1.11|snap=16w32a|The block entity ID of flower pots has been changed from <code>FlowerPot</code> to <code>flower_pot</code>.}}
{{History|||snap=16w39a|Potted plants can now be removed from flower pots by pressing {{control|use}}.
|Flower pots now generate in [[woodland mansion]]s.}}
{{History||1.13|snap=17w47a|The different block states for the <code>flower_pot</code> ID have been split up into their own IDs.
|Flower pots are no longer block entities.
|Prior to [[1.13/Flattening|''The Flattening'']], this block's numeral ID was 140, and the item's was 390.}}
{{History||1.14|snap=18w43a|[[File:Flower Pot JE3.png|32px]] [[File:Potted Dandelion JE4.png|32px]] [[File:Potted Poppy JE4.png|32px]] [[File:Potted Allium JE4.png|32px]] [[File:Potted Azure Bluet JE4.png|32px]] [[File:Potted Oxeye Daisy JE4.png|32px]] [[File:Potted Blue Orchid JE4.png|32px]] [[File:Potted Red Tulip JE4.png|32px]] [[File:Potted Orange Tulip JE4.png|32px]] [[File:Potted White Tulip JE4.png|32px]] [[File:Potted Pink Tulip JE4.png|32px]] [[File:Potted Red Mushroom JE4.png|32px]] [[File:Potted Brown Mushroom JE4.png|32px]] [[File:Potted Oak Sapling JE4.png|32px]] [[File:Potted Birch Sapling JE4.png|32px]] [[File:Potted Spruce Sapling JE4.png|32px]] [[File:Potted Jungle Sapling JE4.png|32px]] [[File:Potted Acacia Sapling JE4.png|32px]] [[File:Potted Dark Oak Sapling JE4.png|32px]] [[File:Potted Cactus JE5.png|32px]] [[File:Potted Fern JE4.png|32px]] [[File:Potted Dead Bush JE4.png|32px]] <br>[[File:Flower Pot (item) JE2 BE2.png|32px]] The textures of flower pots and their contained plants have been changed.
|[[File:Potted Cornflower JE1 BE1.png|32px]] [[File:Potted Lily of the Valley JE1 BE1.png|32px]] [[File:Potted Wither Rose JE1 BE1.png|32px]] [[File:Potted Bamboo JE1 BE1.png|32px]] Cornflower, lily of the valley, wither rose and [[bamboo]] can now be placed in flower pots.}}
{{History|||snap=18w44a|[[File:Potted Cactus JE6.png|32px]] The texture of potted cacti has been changed.}}
{{History|||snap=18w47b|[[File:Potted Poppy JE5.png|32px]] The texture of potted poppies has been changed.}}
{{History|||snap=18w49a|Flower pots can now be found in [[chest]]s in [[village]] mason houses.}}
{{History|||snap=19w11a|Flower pots have become [[renewable resource|renewable]], as mason [[villager]]s now [[trading|sell]] [[brick]]s.}}
{{History||1.16|snap=20w06a|The model of flower pots has been fixed and has been given an underside, which has changed the model from [[File:Flower Pot UNKVER2 (facing NWU).png|32px]] to [[File:Flower Pot UNKVER3 (facing NWU).png|32px]].}}
{{History|||snap=20w09a|[[File:Potted Crimson Fungus JE1 BE1.png|32px]] [[File:Potted Warped Fungus JE1 BE1.png|32px]] [[File:Potted Crimson Roots JE1 BE1.png|32px]] [[File:Potted Warped Roots JE1 BE1.png|32px]] Crimson and warped [[fungi]] and crimson and warped [[roots]] can now be placed in flower pots.
|The model for potted plants has been fixed, so the bottom face now renders,<ref>{{bug|MC-170842}}</ref> which has changed the model from [[File:Potted Dandelion UNKVER1 (facing NWU).png|32px]] [[File:Potted Poppy UNKVER1 (facing NWU).png|32px]] [[File:Potted Allium UNKVER1 (facing NWU).png|32px]] [[File:Potted Azure Bluet UNKVER1 (facing NWU).png|32px]] [[File:Potted Oxeye Daisy UNKVER1 (facing NWU).png|32px]] [[File:Potted Blue Orchid UNKVER1 (facing NWU).png|32px]] [[File:Potted Red Tulip UNKVER1 (facing NWU).png|32px]] [[File:Potted Orange Tulip UNKVER1 (facing NWU).png|32px]] [[File:Potted White Tulip UNKVER1 (facing NWU).png|32px]] [[File:Potted Pink Tulip UNKVER1 (facing NWU).png|32px]] [[File:Potted Red Mushroom UNKVER1 (facing NWU).png|32px]] [[File:Potted Brown Mushroom UNKVER1 (facing NWU).png|32px]] [[File:Potted Oak Sapling UNKVER1 (facing NWU).png|32px]] [[File:Potted Birch Sapling UNKVER1 (facing NWU).png|32px]] [[File:Potted Spruce Sapling UNKVER1 (facing NWU).png|32px]] [[File:Potted Jungle Sapling UNKVER1 (facing NWU).png|32px]] [[File:Potted Acacia Sapling UNKVER1 (facing NWU).png|32px]] [[File:Potted Dark Oak Sapling UNKVER1 (facing NWU).png|32px]] [[File:Potted Cactus UNKVER1 (facing NWU).png|32px]] [[File:Potted Fern UNKVER1 (facing NWU).png|32px]] [[File:Potted Dead Bush UNKVER1 (facing NWU).png|32px]] [[File:Potted Cornflower UNKVER1 (facing NWU).png|32px]] [[File:Potted Lily of the Valley UNKVER1 (facing NWU).png|32px]] [[File:Potted Wither Rose UNKVER1 (facing NWU).png|32px]] [[File:Potted Bamboo UNKVER1 (facing NWU).png|32px]] to [[File:Potted Dandelion UNKVER2 (facing NWU).png|32px]] [[File:Potted Poppy UNKVER2 (facing NWU).png|32px]] [[File:Potted Allium UNKVER2 (facing NWU).png|32px]] [[File:Potted Azure Bluet UNKVER2 (facing NWU).png|32px]] [[File:Potted Oxeye Daisy UNKVER2 (facing NWU).png|32px]] [[File:Potted Blue Orchid UNKVER2 (facing NWU).png|32px]] [[File:Potted Red Tulip UNKVER2 (facing NWU).png|32px]] [[File:Potted Orange Tulip UNKVER2 (facing NWU).png|32px]] [[File:Potted White Tulip UNKVER2 (facing NWU).png|32px]] [[File:Potted Pink Tulip UNKVER2 (facing NWU).png|32px]] [[File:Potted Red Mushroom UNKVER2 (facing NWU).png|32px]] [[File:Potted Brown Mushroom UNKVER2 (facing NWU).png|32px]] [[File:Potted Oak Sapling UNKVER2 (facing NWU).png|32px]] [[File:Potted Birch Sapling UNKVER2 (facing NWU).png|32px]] [[File:Potted Spruce Sapling UNKVER2 (facing NWU).png|32px]] [[File:Potted Jungle Sapling UNKVER2 (facing NWU).png|32px]] [[File:Potted Acacia Sapling UNKVER2 (facing NWU).png|32px]] [[File:Potted Dark Oak Sapling UNKVER2 (facing NWU).png|32px]] [[File:Potted Cactus UNKVER2 (facing NWU).png|32px]] [[File:Potted Fern UNKVER2 (facing NWU).png|32px]] [[File:Potted Dead Bush UNKVER2 (facing NWU).png|32px]] [[File:Potted Cornflower UNKVER2 (facing NWU).png|32px]] [[File:Potted Lily of the Valley UNKVER2 (facing NWU).png|32px]] [[File:Potted Wither Rose UNKVER2 (facing NWU).png|32px]] [[File:Potted Bamboo UNKVER2 (facing NWU).png|32px]].}}
{{History|||snap=20w11a|[[File:Potted Bamboo UNKVER3 (facing NWU).png|32px]] An unneeded face has been removed from potted bamboo to solve a z-fighting issue.<ref>{{bug|MC-173156}}</ref>}}
{{History|||snap=Pre-release 3|[[File:Potted Cactus JE7.png|32px]] [[File:Potted Cactus UNKVER3 (facing NWU).png|32px]] The model of the potted cacti has been changed. The top face now uses the top texture of cactus, rather than the side texture and the bottom face has been changed to the top texture of the flower pot.}}
{{History||1.16.2|snap=20w28a|[[File:Potted Cactus UNKVER4 (facing NWU).png|32px]] The model of the potted cactus no longer has a hole in the bottom, although the texture is stretched.}}
{{History||1.17|snap=Pre-release 1|[[File:Potted Azalea JE1 BE1.png|32px]] [[File:Potted Flowering Azalea JE1 BE1.png|32px]][[Azalea]] and flowering azalea can now be placed in flower pots.
|[[File:Potted Flowering Azalea (plant texture) JE1.png|32px]] Potted flowering azalea has own unused plant texture but uses normal variant for consistency with flowering azalea: [[File:Potted Flowering Azalea (bottom) JE1 BE1.png|32px]] [[File:Flowering Azalea (bottom) JE2 BE2.png|32px]]}}
{{History||1.19|snap=22w11a|[[File:Potted Mangrove Propagule JE1.png|32px]] [[Mangrove propagule]]s can now be placed in flower pots.}}
{{History|||snap=22w18a|[[File:Potted Mangrove Propagule JE2.png|32px]] The western element of the flower pot in potted mangrove propagules has been deleted.<ref name="mc-251355">{{bug|MC-251355}}</ref>}}
{{History|||snap=Pre-release 1|[[File:Potted Mangrove Propagule JE1.png|32px]] The aforementioned western element has been restored.<ref name="mc-251355"/>}}
{{History||1.20<br>(Experimental)|link=1.19.4|snap=23w07a|[[File:Potted Torchflower JE1.png|32px]] [[File:Potted Cherry Sapling JE1.png|32px]] [[Torchflower]]s and [[cherry sapling]]s can now be placed in flower pots.}}
{{History|||snap=1.19.4-pre2|Changed the texture of potted cherry saplings.}}
{{History||1.20|snap=23w12a|Potted torchflower and cherry sapling are now available without using the "Update 1.20" experimental datapack.|Flower pot can now be found in [[suspicious gravel]] and [[suspicious sand]] in [[trail ruins]].}}
{{History|||snap=23w13a|[[File:Potted Flowering Azalea JE2.png|32px]] Flowering azalea now uses own plant texture, changing appearance from [[File:Potted Flowering Azalea (bottom) JE1 BE1.png|32px]] to [[File:Potted Flowering Azalea (bottom) JE2.png|32px]] and breaking consistency with flowering azalea.<ref>{{bug|MC-230916}}</ref>}}
{{History|||snap=23w16a|Flower pot no longer generates in [[suspicious sand]] in [[trail ruins]].|Due to the split of the archaeological loot tables for the suspicious gravel within the [[trail ruins]]; flower pot now is in the common loot.}}
{{History|pocket alpha}}
{{History||v0.12.1|snap=build 1|[[File:Flower Pot JE1.png|32px]] [[File:Potted Dandelion JE1.png|32px]] [[File:Potted Red Mushroom JE1.png|32px]] [[File:Potted Brown Mushroom JE1.png|32px]] [[File:Potted Oak Sapling JE1.png|32px]] [[File:Potted Birch Sapling JE1.png|32px]] [[File:Potted Spruce Sapling JE1.png|32px]] [[File:Potted Jungle Sapling JE1.png|32px]] [[File:Potted Cactus JE1.png|32px]] [[File:Potted Fern JE1.png|32px]] [[File:Potted Allium JE1.png|32px]] [[File:Potted Azure Bluet JE1.png|32px]] [[File:Potted Oxeye Daisy JE1.png|32px]] [[File:Potted Blue Orchid JE1.png|32px]] [[File:Potted Poppy JE1.png|32px]] [[File:Potted Red Tulip JE1.png|32px]] [[File:Potted Orange Tulip JE1.png|32px]] [[File:Potted White Tulip JE1.png|32px]] [[File:Potted Pink Tulip JE1.png|32px]] [[File:Potted Acacia Sapling JE1.png|32px]] [[File:Potted Dark Oak Sapling JE1.png|32px]]{{verify|Are these models the ones used in this version?}}<br>[[File:Flower Pot (item) JE1 BE1.png|32px]] Added flower pots.}}
{{History||v0.14.0|snap=build 1|Flower pots now generate in [[witch hut]]s.}}
{{History|pocket}}
{{History||1.0.0|snap=alpha 0.17.0.1|Flower pots now generate in [[igloo]] basements.}}
{{History||1.1.0|snap=alpha 1.1.0.0|Flower pots now generate naturally in [[woodland mansion]]s.}}
{{History|bedrock}}
{{History||1.8.0|snap=beta 1.8.0.8|[[File:Potted Bamboo JE1 BE1.png|32px]]{{verify|Is this how they really look in BE?}} [[Bamboo]] can now be placed in flower pots.}}
{{History||1.9.0|snap=beta 1.9.0.0|[[File:Potted Cornflower BE.jpg|32px]] [[File:Potted Lily of the Valley BE.jpg|32px]] Cornflower and lily of the valley can now be placed in flower pots.}}
{{History||1.10.0|snap=beta 1.10.0.3|[[File:Flower Pot BE.jpg|32px]] [[File:Potted Dandelion BE.jpg|32px]] [[File:Potted Poppy BE.jpg|32px]] [[File:Potted Allium BE.jpg|32px]] [[File:Potted Azure Bluet BE.jpg|32px]] [[File:Potted Oxeye Daisy BE.jpg|32px]] [[File:Potted Blue Orchid BE.jpg|32px]] [[File:Potted Red Tulip BE.jpg|32px]] [[File:Potted Orange Tulip BE.jpg|32px]] [[File:Potted White Tulip BE.jpg|32px]] [[File:Potted Pink Tulip BE.jpg|32px]] [[File:Potted Red Mushroom BE.jpg|32px]] [[File:Potted Brown Mushroom BE.jpg|32px]] [[File:Potted Oak Sapling BE.jpg|32px]] [[File:Potted Birch Sapling BE.jpg|32px]] [[File:Potted Spruce Sapling BE.jpg|32px]] [[File:Potted Jungle Sapling BE.jpg|32px]] [[File:Potted Acacia Sapling BE.jpg|32px]] [[File:Potted Dark Oak Sapling BE.jpg|32px]] [[File:Potted Cactus BE.png|32px]] [[File:Potted Fern BE.jpg|32px]]<br>[[File:Flower Pot (item) JE2 BE2.png|32px]] The textures of flower pots have been changed.
|Flower pots now generate in the new [[village]]s.}}
{{History||1.11.0|snap=beta 1.11.0.1|Flower pots can now be found in [[village]] mason [[chest]]s.}}
{{History||1.13.0|snap=beta 1.13.0.9|[[File:Potted Wither Rose JE1 BE1.png|32px]] [[Wither rose]]s can now be placed in flower pots.}}
{{History||1.16.0|snap=beta 1.15.0.51|Potted plants can now be removed from flower pots by pressing {{control|use}}.}}
{{History|||snap=beta 1.16.0.51|[[File:Potted Crimson Fungus JE1 BE1.png|32px]] [[File:Potted Warped Fungus JE1 BE1.png|32px]] [[File:Potted Crimson Roots JE1 BE1.png|32px]] [[File:Potted Warped Roots JE1 BE1.png|32px]] Crimson and warped [[fungi]] and crimson and warped [[roots]] can now be placed in flower pots.}}
{{History||1.17.10|snap=beta 1.17.10.21|[[File:Potted Azalea JE1 BE1.png|32px]] [[File:Potted Flowering Azalea JE1 BE1.png|32px]] [[Azalea]] and flowering azalea can now be placed in flower pots.}}
{{History|console}}
{{History||xbox=TU14|xbone=CU1|ps=1.04|wiiu=Patch 1|switch=1.0.1|[[File:Flower Pot JE1.png|32px]] [[File:Potted Dandelion JE1.png|32px]] [[File:Potted Red Mushroom JE1.png|32px]] [[File:Potted Brown Mushroom JE1.png|32px]] [[File:Potted Oak Sapling JE1.png|32px]] [[File:Potted Birch Sapling JE1.png|32px]] [[File:Potted Spruce Sapling JE1.png|32px]] [[File:Potted Jungle Sapling JE1.png|32px]] [[File:Potted Cactus JE1.png|32px]] [[File:Potted Fern JE1.png|32px]] [[File:Potted Allium JE1.png|32px]] [[File:Potted Azure Bluet JE1.png|32px]] [[File:Potted Oxeye Daisy JE1.png|32px]] [[File:Potted Blue Orchid JE1.png|32px]] [[File:Potted Poppy JE1.png|32px]] [[File:Potted Red Tulip JE1.png|32px]] [[File:Potted Orange Tulip JE1.png|32px]] [[File:Potted White Tulip JE1.png|32px]] [[File:Potted Pink Tulip JE1.png|32px]] [[File:Potted Acacia Sapling JE1.png|32px]] [[File:Potted Dark Oak Sapling JE1.png|32px]] [[File:Potted Dead Bush JE3.png|32px]]{{verify|Are these models the ones used in this version?}}<br>[[File:Flower Pot (item) JE1 BE1.png|32px]] Added flower pots.}}
{{History||xbox=none|xbone=none|ps=1.90|wiiu=none|switch=none|[[File:Flower Pot BE.png|32px]] [[File:Potted Dandelion BE.png|32px]] [[File:Potted Poppy BE.png|32px]] [[File:Potted Allium BE.png|32px]] [[File:Potted Azure Bluet BE.png|32px]] [[File:Potted Oxeye Daisy BE.png|32px]] [[File:Potted Blue Orchid BE.png|32px]] [[File:Potted Red Tulip BE.png|32px]] [[File:Potted Orange Tulip BE.png|32px]] [[File:Potted White Tulip BE.png|32px]] [[File:Potted Pink Tulip BE.png|32px]] [[File:Potted Red Mushroom BE.png|32px]] [[File:Potted Brown Mushroom BE.png|32px]] [[File:Potted Oak Sapling BE.png|32px]] [[File:Potted Birch Sapling BE.png|32px]] [[File:Potted Spruce Sapling BE.png|32px]] [[File:Potted Jungle Sapling BE.png|32px]] [[File:Potted Acacia Sapling BE.png|32px]] [[File:Potted Dark Oak Sapling BE.png|32px]] [[File:Potted Cactus BE.png|32px]] [[File:Potted Fern BE.png|32px]]<br>[[File:Flower Pot (item) JE2 BE2.png|32px]] The textures of flower pots have been changed.}}
{{History|new 3ds}}
{{History||0.1.0|[[File:Flower Pot JE1.png|32px]] [[File:Potted Dandelion JE1.png|32px]] [[File:Potted Red Mushroom JE1.png|32px]] [[File:Potted Brown Mushroom JE1.png|32px]] [[File:Potted Oak Sapling JE1.png|32px]] [[File:Potted Birch Sapling JE1.png|32px]] [[File:Potted Spruce Sapling JE1.png|32px]] [[File:Potted Jungle Sapling JE1.png|32px]] [[File:Potted Cactus JE1.png|32px]] [[File:Potted Fern JE1.png|32px]] [[File:Potted Allium JE1.png|32px]] [[File:Potted Azure Bluet JE1.png|32px]] [[File:Potted Oxeye Daisy JE1.png|32px]] [[File:Potted Blue Orchid JE1.png|32px]] [[File:Potted Poppy JE1.png|32px]] [[File:Potted Red Tulip JE1.png|32px]] [[File:Potted Orange Tulip JE1.png|32px]] [[File:Potted White Tulip JE1.png|32px]] [[File:Potted Pink Tulip JE1.png|32px]] [[File:Potted Acacia Sapling JE1.png|32px]] [[File:Potted Dark Oak Sapling JE1.png|32px]]{{verify|Are these models the ones used in this version?}}<br>[[File:Flower Pot (item) JE1 BE1.png|32px]] Added flower pots.}}
{{History|foot}}
<gallery>
Suggestion for itemframes.png|Original Reddit image suggesting item frames and flower pots.
FlowerPot.png|The first image of flower pots, released by [[Dinnerbone]].
Pots 1-100.png|An [[Java Edition 14w06a|14w06a]] example of some of the blocks that can be placed inside of flower pots, and their rendering.
Pots 1-100b.png|The same arrangement as prior in [[Java Edition 14w06b|14w06b]].
</gallery>
=== Flower pot "item" ===
{{:Technical blocks/Flower Pot}}
== Gallery ==
=== Renders ===
; Flowers
<gallery>
Potted Dandelion.png |
Potted Poppy.png |
Potted Blue Orchid.png |
Potted Allium.png |
Potted Azure Bluet.png |
Potted Red Tulip.png |
Potted Orange Tulip.png |
Potted White Tulip.png |
Potted Pink Tulip.png |
Potted Oxeye Daisy.png |
Potted Cornflower.png |
Potted Lily of the Valley.png |
Potted Wither Rose.png |
Potted Torchflower.png
</gallery>
; Saplings
<gallery>
Potted Oak Sapling.png |
Potted Spruce Sapling.png |
Potted Birch Sapling.png |
Potted Jungle Sapling.png |
Potted Acacia Sapling.png |
Potted Dark Oak Sapling.png |
Potted Azalea.png |
Potted Flowering Azalea.png |
Potted Mangrove Propagule.png |
Potted Cherry Sapling.png
</gallery>
; Mushrooms
<gallery>
Potted Red Mushroom.png |
Potted Brown Mushroom.png |
Potted Crimson Fungus.png |
Potted Warped Fungus.png |
</gallery>
; Roots and bushes
<gallery>
Potted Crimson Roots.png |
Potted Warped Roots.png |
Potted Fern.png |
Potted Dead Bush.png |
Potted Cactus.png |
Potted Cactus BE.png |
Potted Bamboo.png
</gallery>
=== Other ===
<gallery>
FiveFlowerPots.png | Five flower pots in a player-created village.
</gallery>
== Issues ==
{{issue list}}
== Trivia ==
* The flower pot is based on a suggestion from Reddit, like [[ender chest]]s and [[item frame]]s.<ref>{{tweet|dinnerbone|235747041286975488|My next task is going to be flower pots.|August 15, 2012}}</ref>
* Flower pots break [[falling block]]s.
* If a plant that has been [[Name Tag|named]] is put in a flower pot, the plant loses its name.
* The inside of the flower pot in ''Java Edition'' uses the center 4x4 pixels of the dirt texture while Bedrock Edition uses the center 6x6.
==References==
{{Reflist}}
{{Blocks|Utility}}
{{items}}
[[Category:Manufactured blocks]]
[[Category:Storage]]
[[Category:Generated structure blocks]]
[[Category:Non-solid blocks]]
[[Category:Utility blocks]]
[[cs:Květináč]]
[[de:Blumentopf]]
[[es:Maceta]]
[[fr:Pot de fleurs]]
[[hu:Virágcserép]]
[[it:Vaso da fiori]]
[[ja:植木鉢]]
[[ko:화분]]
[[nl:Bloempot]]
[[pl:Doniczka]]
[[pt:Vaso]]
[[ru:Цветочный горшок]]
[[zh:花盆]]
[[uk:Квітковий горщик]]</li></ul> | RC1 | A fully charged arrow from a bow now consistently deals 9 | |||
| Bows now have a durability of 385 uses. | |||||
| Bows no longer need arrows for ammo in Creative mode. | |||||
| The bow can now be enchanted via console commands, but no enchantment affects it. | |||||
1.1{{Extension DPL}}<ul><li>[[A Very Fine Item|A Very Fine Item]]<br/>{{Joke feature}}
{{Item
| image = A Very Fine Item.png
| renewable = No
| stackable = Yes (64)
}}
'''A very fine item''' was a joke item from [[Java Edition 20w14∞]], found only in the {{code|isolation}} dimension.
== Appearance ==
The texture of a very fine item resembles the side face of a grass block with the words "Home Sweet Home" written on it. Unlike most items, its texture is 64x64 pixels, rather than the usual 16x16.
== Obtaining ==
=== Dimension ===
A very fine item can only be obtained from an item frame in the {{Code|isolation}} dimension. There is a maximum of 1 fine item that can be found legitimately in any world.
=== Cheats/Creative mode ===
This item can't be found in the creative inventory, but it can be middle-click duplicated in creative mode or given with the {{Code|code=give <target> minecraft:fine_item <amount>}} command.
== Usage ==
This item cannot be placed or used in any way other than a trophy. It can still be inserted and/or rotated inside of an item frame.
== Data values ==
=== ID ===
{{ID table
|showforms=y
|generatetranslationkeys=java
|displayname=A Very Fine Item
|spritetype=item
|nameid=fine_item
|form=item
|foot=1}}
== History ==
{{History|java}}
{{History||20w14∞|[[File:A Very Fine Item.png|32px]] Added a very fine item.}}
{{History|foot}}
== Gallery ==
<gallery>
File:isolation biome.png|The Easter Egg dimension that the item spawns in.
</gallery>
== References ==
{{reflist}}
{{Items}}
{{Jokes}}
[[Category:Non-renewable resources]]
[[Category:Joke items]]
[[es:A Very Fine Item]]
[[pt:Um item muito bom]]</li><li>[[Lead|Lead]]<br/>{{About|the item used for leashing and leading mobs|the element|Element#Lead}}
{{Item
| image = Lead.png
| stackable = Yes (64)
| renewable = Yes
}}
'''Leads''' are [[tool]]s used to leash and lead passive and neutral [[animal]]s, [[golem]]s and some [[monster]]s.
== Obtaining ==
=== Chest loot ===
{{LootChestItem|lead}}
=== Crafting ===
{{Crafting
|A1= String
|B1= String
|A2= String
|B2= Slimeball
|C3= String
|Output= Lead,2
|type= Tool
}}
=== Mob loot ===
[[Wandering Trader|Wandering trader]]s always spawn with 2 [[llama|trader llama]]s, each held with a lead. When a trader llama is detached, either by killing it or the wandering trader, dragging them far apart, or putting the llama in a [[boat]] or a [[minecart]], the lead drops at the llama's position.
== Usage ==
=== Crafting ingredient ===
{{crafting usage}}
=== Leashing mobs ===
[[File:SuspendedPigs.png|190px|thumb|One block tall mobs, such as pigs, suspend at 7 blocks above the ground.]]
[[File:SuspendedCows.png|190px|thumb|Two block tall mobs, such as cows, also suspend at 7 blocks above the ground.]]
{{control|Using}} a lead on a [[mob]] ties the lead to the mob, allowing it to be moved by the player. Multiple mobs can be held by leads at once, but each mob held requires its own lead.
It is possible to leash the following mobs and other entities:
{{columns-list|colwidth=20em|
* {{EntityLink|Allay}}
* {{EntityLink|Axolotl}}
* {{EntityLink|Bee}}
* {{EntityLink|Boat}}{{only|bedrock}}
* {{EntityLink|Camel}}
* {{EntityLink|Cat}}
* {{EntityLink|Chicken}}
* {{EntityLink|Chicken Jockey}} (only the mount)
* {{EntityLink|Cow}}
* {{EntityLink|Dolphin}}
* {{EntityLink|Donkey}}
* {{EntityLink|Fox}}
* {{EntityLink|Frog}}
* {{EntityLink|Glow Squid}}
* {{EntityLink|Goat}}
* {{EntityLink|Hoglin}}
* {{EntityLink|Horse}}
* {{EntityLink|Iron Golem}}
* {{EntityLink|Llama}}
* {{EntityLink|Mooshroom}}
* {{EntityLink|Mule}}
* {{EntityLink|Ocelot}}
* {{EntityLink|Parrot}}
* {{EntityLink|Pig}}
* {{EntityLink|Polar Bear}}
* {{EntityLink|Rabbit}}
* {{EntityLink|Sheep}}
* {{EntityLink|Skeleton Horse}}
* {{EntityLink|Skeleton Horseman}} (only the mount)
* {{EntityLink|Sniffer}}
* {{EntityLink|Snow Golem}}
* {{EntityLink|Squid}}
* {{EntityLink|Strider}}
* {{EntityLink|Trader Llama}}
* {{EntityLink|Wolf}}
* {{EntityLink|Zoglin}}
* {{EntityLink|Zombie Horse}}}}
Additionally, [[villager]]s, [[wandering trader]]s, and [[monster]]s other than the ones listed above, can be leashed using a map editor or [[NBT]] editor.
With a mob on a lead held by the player, {{control|using}} the lead on any type of [[fence]] (or [[wall]]{{only|bedrock|short=1}}) attaches the lead to it with a visible knot, tying the mob to it. To attach it to a wall on Bedrock Edition, the player must hold a lead in the main hand.<ref>{{bug|MCPE-108078}}</ref> Multiple leads may be attached to one fence post. A mob tied to a fence tends to stay within 5 blocks of the fence post.
A lead is broken by pressing the {{control|use item}} control on the mob again, hitting the knot, or removing the attached fence post. Leads also break when hit by projectiles. Whenever a lead is removed or broken, it drops as an [[item (entity)|item]] at the location of the mob. However, it does not drop when unleashed in Creative mode.{{only|java}}<ref>{{bug|MCPE-79639}}</ref> A lead does not break if the attached animal dies.
A lead can stretch a maximum of 10 blocks. If the mob is able to move towards the player or fence post, it does so. If not, or if the mob is moving very quickly away from the player, the lead breaks.
When the player or the knot is more than 7 blocks above the ground, the mob being leashed becomes suspended.
Most mobs that can be leashed can still be leashed even if attacking the player leashing them, and any attached leads do not break.
[[Wolf|Wolves]] cannot be leashed after becoming angry. Despite this, if they become angry while already leashed, the lead does not break, but it cannot be reattached when broken through other methods while the wolf is still angry.
A lead attached to a hoglin breaks if it becomes a [[zoglin]].
A lead does not prevent mobs from despawning if they normally would despawn.
When moving downwards and accelerating towards the ground, leashed mobs accumulate fall damage and take it if they hit the ground while still accelerating. When moving up or decelerating (such as when the lead is stretched to its limit), the fall distance is set to one block and the mob therefore does not take any fall damage if it touches the ground.
If the player walks into and back out of a [[nether portal]] while holding a lead connected to a mob, the lead remains attached to the mob. However, if a mob attached to a lead walks into a nether portal, the lead breaks and drops as an item in the other dimension.
A lead can be used to remove a mob from a boat without needing to break the boat, if the mob can normally be leashed.
If a chunk unloads while containing a leashed mob (either by the player walking too far away, or traveling to another dimension via a portal), the lead breaks and drops as an item, leaving the mob free to wander around.
== Sounds ==
{{Edition|Java}}:
{{Sound table
|sound=Lead Knot break1.ogg
|sound2=Lead Knot break2.ogg
|sound3=Lead Knot break3.ogg
|subtitle=Leash Knot breaks
|source=neutral
|description=When a leash knot is destroyed
|id=entity.leash_knot.break
|translationkey=subtitles.entity.leashknot.break
|volume=1.0
|pitch=1.0
|distance=16}}
{{Sound table
|sound=Lead Knot place1.ogg
|sound2=Lead Knot place2.ogg
|sound3=Lead Knot place3.ogg
|subtitle=Leash Knot tied
|source=neutral
|description=When a leash knot is placed on a fence
|id=entity.leash_knot.place
|translationkey=subtitles.entity.leashknot.place
|volume=1.0
|pitch=1.0
|distance=16
|foot=1}}
{{Edition|Bedrock}}:
{{Sound table
|type=bedrock
|sound=Lead Knot break1.ogg
|sound2=Lead Knot break2.ogg
|sound3=Lead Knot break3.ogg
|source=neutral
|description=When a leash knot is broken by {{ctrl|interacting}} with it
|id=leashknot.break
|volume=1.0
|pitch=1.0}}
{{Sound table
|sound=Lead Knot place1.ogg
|sound2=Lead Knot place2.ogg
|sound3=Lead Knot place3.ogg
|source=neutral
|description=When a leash knot is placed on a fence or wall
|id=leashknot.place
|volume=1.0
|pitch=1.0
|foot=1}}
== Leash Knot ==
'''Leash knot''' is an entity created when the [[player]] right-clicks the fence while having a mob leashed.
{{Entity| title = Leash Knot| image = Knot.png|imagesize= 100px|networkid='''[[JE]]''': 77}}
=== Data values ===
==== ID ====
{{edition|java}}:
{{ID table
|edition=java
|generatetranslationkeys=y
|displayname=Leash Knot
|spritetype=entity
|nameid=leash_knot
|foot=1}}
{{edition|bedrock}}:
{{ID table
|edition=bedrock
|shownumericids=y
|notshowbeitemforms=y
|generatetranslationkeys=y
|displayname=Leash Knot
|spritetype=entity
|nameid=leash_knot
|id=88
|foot=1}}
==== Entity data ====
Leash knots have entity data that define various properties of the entity.
{{el|java}}:
{{main|Entity format}}
{{/ED}}
{{el|bedrock}}:
: See [[Bedrock Edition level format/Entity format]].
== Data values ==
=== ID ===
{{edition|java}}:
{{ID table
|edition=java
|showforms=y
|generatetranslationkeys=y
|displayname=Lead
|spritetype=item
|nameid=lead
|form=item
|foot=1}}
{{edition|bedrock}}:
{{ID table
|edition=bedrock
|shownumericids=y
|showforms=y
|notshowbeitemforms=y
|generatetranslationkeys=y
|displayname=Lead
|spritetype=item
|nameid=lead
|id=547
|form=item
|foot=1}}
== Achievements ==
{{load achievements|So I Got That Going for Me}}
== Advancements ==
{{load advancements|When the Squad Hops into Town}}
== History ==
{{missing information|The history of a lot of mobs be leashed}}
{{History|java}}
{{History||1.6.1|snap=13w16a|[[File:Lead JE1 BE1.png|32px]] Added leads.
|Leads do not currently have a tooltip and are called “leashes” in [http://www.mojang.com/2013/04/minecraft-snapshot-13w16a-and-new-launcher/ the change notes].}}
{{History|||snap=13w16b|Leads have been given a tooltip.}}
{{History|||snap=13w18a|Leads have been given a [[crafting]] recipe.}}
{{History||1.9|snap=15w50a|Added a [[sound]] for leads: <code>entity.leashknot.place</code>.}}
{{History||1.11|snap=16w32a|The [[entity]] ID of the knot has been changed from <code>LeashKnot</code> to <code>leash_knot</code>.}}
{{History|||snap=16w39a|Leads can now be found in [[woodland mansion]] chests.}}
{{History||1.13|snap=17w47a|Prior to [[1.13/Flattening|''The Flattening'']], this [[item]]'s numeral ID was 420.}}
{{History||1.14|snap=18w43a|[[File:Lead JE2 BE2.png|32px]] The texture of leads has been changed.}}
{{History|||snap=19w05a|Added [[wandering trader]]s, which are naturally equipped with leads.}}
{{History||1.15|snap=?|[[Bee]]s can now be leashed.}}
{{History||1.16|snap=20w09a|[[Skeleton horse]]s and [[zombie horse]]s can now be leashed.<ref>{{bug|MC-166246}}</ref>}}
{{History|||snap=?|[[Hoglin]]s can now be leashed.}}
{{History||1.16.2|snap=20w27a|[[Zoglin]]s can now be leashed.}}
{{History||1.17|snap=21w19a|[[Squid]]s and [[glow squid]]s can now be leashed.<ref>{{bug|MC-136647}}</ref>}}
{{History|||snap=?|[[Axolotl]]s can now be leashed.}}
{{History||1.19|snap=22w13a|Lead may now be found in [[ancient city]] [[chest]]s.}}
{{History|||snap=?|[[Frog]]s can now be leashed.}}
{{History||1.19.3|snap=22w42a|[[Camel]]s can now be leashed.|Mobs no longer accumulate fall damage when dangling on leads.<ref>{{bug|MC-14167||Mobs build up fall damage when dangling on a lead|Fixed}}</ref>}}
{{History||1.20 (Experimental)|link=1.19.4|snap=?|[[Sniffer]]s can now be leashed.}}
{{History||1.20|snap=23w12a|Lead can now be found in [[suspicious gravel]] and [[suspicious sand]] in [[trail ruins]].}}
{{History|||snap=23w16a|Lead no longer generates in [[suspicious sand]] in [[trail ruins]].|Due to the split of the archaeological loot tables for the suspicious gravel within the [[trail ruins]]; lead now is in the common loot.}}
{{History|pocket alpha}}
{{History||v0.15.0|snap=build 1|[[File:Lead JE1 BE1.png|32px]] Added leads.}}
{{History|pocket}}
{{History||1.1.0|snap=alpha 1.1.0.0|Leads now have better "physics".
|The [[entity]] ID of the knot has been changed from <code>leashknot</code> to <code>leash_knot</code>.
|Leads can now be found inside [[woodland mansion]] [[chest]]s.}}
{{History|bedrock}}
{{History||1.4.0|snap=beta 1.2.14.2|Leads can now be found inside [[buried treasure]] [[chest]]s.
|Leads can now be used on [[boat]]s.}}
{{History||1.4.0|snap=beta 1.2.20.1|Leads can now be used to craft [[balloon]]s.}}
{{History||1.10.0|snap=beta 1.10.0.3|[[File:Lead JE2 BE2.png|32px]] The texture of leads has been changed.
|[[Wandering trader]]s now [[drops|drop]] leads after they are detached from trader [[llama]]s.}}
{{History||1.14.0|snap=beta 1.14.0.1|Leads can now be used on [[polar bear]]s, [[ocelot]]s, [[parrot]]s, [[dolphin]]s and old [[villager]]s.}}
{{History||1.19.0|snap=beta 1.19.0.20|Allays can now be leashed.}}
{{History|console}}
{{History||xbox=TU19|xbone=CU7|ps=1.12|wiiu=Patch 1|switch=1.0.1|[[File:Lead JE1 BE1.png|32px]] Added leads.}}
{{History||xbox=TU43|xbone=CU33|ps=1.36|wiiu=Patch 13|[[Sound]]s have been added for leads.}}
{{History|Ps4}}
{{History||1.90|[[File:Lead JE2 BE2.png|32px]] The texture of leads has been changed.}}
{{History|3ds}}
{{History||0.1.0|[[File:Lead JE1 BE1.png|32px]] Added leads.}}
{{History|foot}}
== Issues ==
{{issue list|Lead|Leash}}
== Trivia ==
[[File:Steve wearing Lead.png|100px]] [[File:Alex wearing Lead.png|100px]]
* The lead is named as "leash" in the texture file.
* If a [[player]] goes to sleep while holding a mob on a lead, the lead remains attached.
* {{IN|Java}}, when using the {{cmd|item}} command to put a lead in a player's head slot, the item gets rotated and positioned in such a way that it looks like the player is wearing a monocle.
== Gallery ==
<gallery>
Multiple_Leash.png|Many animals can be tied to one fence post.
HorseLeashedOnAFence.png|A [[horse]] wearing [[golden horse armor]] that is leashed to a fence post.
ThreeTiedSheep.png|Three sheep tied to the same fence.
More accurate lead mobs.png|A shot of all the mobs that could be tied with leads as of 1.6.1, except donkeys and mules.
Yo Yo.png|With the use of the leash, it is possible to suspend animals in the air by tying the leash on high-up fence posts.
YoYo.png|A [[donkey]] with the Grumm/Dinnerbone [[name tag]] [[easter egg]] tied to a fence with a lead to make a yo-yo.
Flying_Sheep.png|Several [[sheep]] hanging in the air in [[Creative]] mode.
Pocket Edition Lead.jpg|First image of a lead in ''Bedrock Edition''.
</gallery>
== References ==
{{Reflist}}
== External Links ==
*[https://www.minecraft.net/en-us/article/taking-inventory-lead Taking Inventory: Lead] – Minecraft.net on April 8, 2022
{{items}}
{{entities}}
[[Category:Tools]]
[[de:Leine]]
[[es:Rienda]]
[[fr:Laisse]]
[[hu:Lasszó]]
[[it:Guinzaglio]]
[[ja:リード]]
[[ko:끈]]
[[nl:Leidtouw]]
[[pl:Smycz]]
[[pt:Laço]]
[[ru:Поводок]]
[[th:เชือกจูง]]
[[zh:拴绳]]
[[Category:Renewable resources]]</li></ul> | release | Bows can now be legitimately enchanted. Four enchantments have been added: Flame, Punch, Power and Infinity. | |||
1.2.1{{Extension DPL}}<ul><li>[[Raw Gold|Raw Gold]]<br/>{{Item
| image = Raw Gold.png
| renewable = No
| stackable = Yes (64)
}}
'''Raw gold''' is a raw metal resource obtained from mining [[gold ore]].
== Obtaining ==
=== Mining ===
[[Gold ore]] and [[deepslate gold ore]] mined with an [[iron pickaxe]] or higher drops 1 unit of raw gold. If the pickaxe is enchanted with [[Fortune]], it can drop an extra unit per level of Fortune, allowing for a maximum of 4 with Fortune III. If the ore is mined using a pickaxe enchanted with [[Silk Touch]], it drops the ore block instead.
=== Crafting ===
{{Crafting
|showname=1
|Block of Raw Gold
|Output=Raw Gold,9
|type=Material
|foot=1
}}
== Usage ==
The primary usage of raw gold is smelting it into [[gold ingot]]s.
=== Crafting ===
{{crafting usage|Raw Gold}}
=== Smelting ingredient ===
{{Smelting
|showname=2
|Raw Gold
|Gold Ingot
|1.0
}}
=== Piglins ===
{{EntityLink|Piglin|Piglins}} are attracted to raw gold. They run toward any raw gold on the ground, and inspect it for 6 to 8 seconds before putting it in their inventory.
== Advancements ==
{{load advancements|Oh Shiny}}
== Data values ==
=== ID ===
{{edition|java}}:
{{ID table
|edition=java
|showitemtags=y
|showforms=y
|generatetranslationkeys=y
|displayname=Raw Gold
|spritetype=item
|nameid=raw_gold
|itemtags=piglin_loved
|form=item
|foot=1}}
{{edition|bedrock}}:
{{ID table
|edition=bedrock
|shownumericids=y
|showforms=y
|notshowbeitemforms=y
|generatetranslationkeys=y
|displayname=Raw Gold
|spritetype=item
|nameid=raw_gold
|form=item
|id=506
|foot=1}}
== History ==
{{History|java}}
{{History||1.17|snap=21w14a|[[File:Raw Gold JE1.png|32px]] Added raw gold.}}
{{History|||snap=April 13, 2021|slink={{Tweet|JasperBoerstra|1381991999952277513}}|[[File:Raw Gold JE2.png|32px]] [[JAPPA]] shows a new raw gold texture.}}
{{History|||snap=21w15a|[[File:Raw Gold JE2.png|32px]] The texture of raw gold has been changed.
|Raw gold can now be used to craft [[block of raw gold]].}}
{{History|||snap=April 16, 2021|slink={{Tweet|JasperBoerstra|1383047666037325829}}|[[File:Raw Gold (pre-release).png|32px]] [[JAPPA]] shows a new raw gold texture again.}}
{{History|||snap=21w16a|[[File:Raw Gold JE3.png|32px]] The texture of raw gold has been changed.}}
{{History|Bedrock}}
{{History||1.17.0|snap=beta 1.17.0.50|[[File:Raw Gold JE2.png|32px]] Added raw gold.}}
{{History|||snap=beta 1.17.0.52|Raw gold are now available without enabling [[experimental gameplay]].}}
{{History|||snap=beta 1.17.0.54|[[File:Raw Gold JE3.png|32px]] The texture of raw gold has been changed.}}
{{History|foot}}
== Issues ==
{{Issue list}}
==Gallery==
<gallery>
JE 1.17 Dev Raw Metals.jpg|Jappa shows raw ore textures.
Jappa Raw Ores 1.jpg|Jappa shows raw ore textures.
Jappa Raw Ores 2.png|Jappa shows raw ore textures.
Jappa Raw Ores 3.jpg|Jappa shows raw ore textures.
Jappa Raw Ores 4.jpg|Jappa shows raw ore textures.
Jappa Raw Ores 5.jpg|Jappa shows raw ore textures.
</gallery>
{{Items}}
[[Category:Non-renewable resources]]
[[de:Rohgold]]
[[es:Oro en bruto]]
[[fr:Or brut]]
[[ja:金の原石]]
[[pl:Surowe złoto]]
[[pt:Ouro bruto]]
[[ru:Необработанное золото]]
[[uk:Необроблене золото]]
[[zh:粗金]]</li><li>[[Slimeball|Slimeball]]<br/>{{about|the item|the mob|Slime|the block constructed with slimeballs|Slime Block|other uses|Slime (disambiguation)}}
{{Item
| image = Slimeball.png
| renewable = Yes
| stackable = Yes (64)
}}
A '''slimeball''' is a [[crafting]] ingredient commonly dropped by [[slime]]s, and can be sneezed out by [[panda]]s.
== Obtaining ==
=== Mob loot ===
==== Slimes ====
{{see also|Tutorials/Slime farming}}
If a [[slime]]'s size is 1, it drops 0–2 slimeballs when killed. The maximum number of slimeballs is increased by 1 per level of [[Looting]], for a maximum of 5 slimeballs with Looting III.
==== Pandas ====
Baby [[panda]]s have a {{frac|1|700}} chance of [[drop]]ping one slimeball when sneezing.
=== Crafting ===
{{Crafting
|Slime Block
|Output= Slimeball,9
|type= Miscellaneous
}}
=== Trading ===
[[Wandering trader]]s sometimes offer to sell a slimeball for 4 [[emerald]]s.
== Usage ==
=== Crafting ingredient ===
{{crafting usage}}
=== Breeding ===
Slimeballs can be used to breed [[frog]]s and reduce the remaining growth duration of [[tadpole]]s by 10%. Both also follow a player holding a slimeball.
==Video==
{{Video note|This video is outdated, as slimeballs can now also be used to craft [[lead]]s and [[slime block]]s, breed [[frog]]s, and can now be obtained from baby [[panda]]s and [[wandering trader]]s.}}
{{yt|J6oR3fdbbjY}}
== Data values ==
===ID===
{{edition|java}}:
{{ID table
|edition=java
|showforms=y
|generatetranslationkeys=y
|displayname=Slimeball
|spritetype=item
|nameid=slime_ball
|form=item
|foot=1}}
{{edition|bedrock}}:
{{ID table
|edition=bedrock
|shownumericids=y
|showforms=y
|notshowbeitemforms=y
|generatetranslationkeys=y
|displayname=Slimeball
|spritetype=item
|nameid=slime_ball
|id=388
|form=item
|foot=1}}
==History==
{{History|java alpha}}
{{History||v1.0.11|[[File:Slimeball JE1 BE1.png|32px]] Added slimeballs, which are dropped from [[slime]]s. At the moment, they serve no purpose.}}
{{History|java beta}}
{{History||1.7|Slimeballs are now used to craft [[sticky piston]]s.}}
{{History|java}}
{{History||1.0.0|snap=Beta 1.9 Prerelease 2|Slimeballs are used to craft [[magma cream]].}}
{{History||1.6.1|snap=13w18a|[[Lead]]s, which were originally implemented in the [[13w16a]] snapshot, now have a [[crafting]] recipe that includes slimeballs.}}
{{History||1.8|snap=14w02a|Nine slimeballs are now used to [[crafting|craft]] a [[slime block]]. Slime blocks also act as storage [[block]]s, being able to craft back into 9 slimeballs.}}
{{History||1.13|snap=17w47a|Prior to [[1.13/Flattening|''The Flattening'']], this [[item]]'s numeral ID was 341.}}
{{History||1.14|snap=18w43a|[[File:Slimeball JE2 BE2.png|32px]] The texture of slimeballs has been changed.
|Slimeballs can now be obtained when a [[panda|baby panda]] sneezes.}}
{{History|||snap=19w05a|Slimeballs can now be bought from [[wandering trader]]s.}}
{{History||1.19|snap=22w11a|Slimeballs can now be used to breed [[frog]]s.}}
{{History|pocket alpha}}
{{History||v0.9.0|snap=build 1|[[File:Slimeball JE1 BE1.png|32px]] Added slimeballs. They are currently unobtainable and serve no purpose.}}
{{History||v0.12.1|snap=build 1|Added slimeballs to the [[creative]] [[inventory]].
|Slimeballs can now be obtained by killing [[slime]]s.
|Slimeballs are now used to craft [[magma cream]].}}
{{History||v0.14.0|snap=build 1|Slimeballs are now used to craft [[slime block]]s.}}
{{History||v0.15.0|snap=build 1|Slimeballs are now used to craft [[sticky piston]]s and [[lead]]s.}}
{{History|bedrock}}
{{History||1.8.0|snap=beta 1.8.0.8|Slimeballs can now be obtained when a [[panda|baby panda]] sneezes.}}
{{History||1.10.0|snap=beta 1.10.0.3|[[File:Slimeball JE2 BE2.png|32px]] The texture of slimeballs has been changed.
|Slimeballs can now be obtained via [[trading]] with [[wandering trader]]s.}}
{{History|console}}
{{History||xbox=TU1|xbone=CU1|ps=1.0|wiiu=Patch 1|switch=1.0.1|[[File:Slimeball JE1 BE1.png|32px]] Added slimeballs.}}
{{History||xbox=TU3|Slimeballs are now used to craft [[sticky piston]]s.}}
{{History||xbox=TU5|Slimeballs are found in the Miscellaneous tab in the [[Creative inventory]].}}
{{History||xbox=TU9|Moved slimeballs to the Materials tab in the Creative inventory.}}
{{History||xbox=none|xbone=none|ps=1.83|wiiu=none|switch=none|Slimeballs can now be obtained when a [[panda|baby panda]] sneezes.}}
{{History||xbox=none|xbone=none|ps=1.90|wiiu=none|switch=none|[[File:Slimeball JE2 BE2.png|32px]] The texture of slimeballs has been changed.}}
{{History|New 3DS}}
{{History||0.1.0|[[File:Slimeball JE1 BE1.png|32px]] Added slimeballs.}}
{{History|foot}}
==Issues ==
{{issue list}}
== External Links ==
*[https://www.minecraft.net/en-us/article/taking-inventory--slimeball Taking Inventory: Slimeball] – Minecraft.net on June 24, 2021
{{Items}}
[[Category:Renewable resources]]
[[cs:Sliz]]
[[de:Schleimball]]
[[es:Bola de slime]]
[[fr:Boule de Slime]]
[[hu:Nyálkagolyó]]
[[it:Palla di slime]]
[[ja:スライムボール]]
[[ko:슬라임볼]]
[[nl:Slijmbal]]
[[pl:Kula szlamu]]
[[pt:Bola de slime]]
[[ru:Слизь]]
[[th:ลูกเมือก]]
[[uk:Слизова кулька]]
[[zh:黏液球]]</li></ul> | 12w06a | Skeletons now have a 2.5% chance of dropping a bow. One fifth of the time, this bow is enchanted with Power I (20%). | |||
1.4.6{{Extension DPL}}<ul><li>[[:Category:Fungi|Category:Fungi]]<br/>All pages covering blocks that are fungi.
[[Category:Blocks]]
[[Category:Items]]
[[ja:カテゴリ:菌類]]</li><li>[[Leather|Leather]]<br/>{{About||the leather from rabbits|Rabbit Hide|the armor material|Armor materials}}
{{Item
| image = Leather.png
| renewable = Yes
| stackable = Yes (64)
}}
'''Leather''' is an [[item]] used to make [[item frame]]s, [[armor]] and [[book]]s.
== Obtaining ==
=== Mob loot ===
Upon death, [[cow]]s, [[mooshroom]]s, [[horse]]s, [[donkey]]s, [[mule]]s, [[llama]]s and [[trader llama]]s drop 0–2 leather, while [[hoglin]]s drop 0–1 leather. The maximum amount is increased by 1 per level of [[Looting]], for a maximum of 5 leather (4 leather from hoglins) with Looting III.
A [[fox]] sometimes spawns holding leather, which always drops upon death. Alternatively, a player can drop a [[food]] item, causing the fox to drop the leather.
=== Fishing ===
Leather can be obtained as a "junk" item from [[fishing]].
=== Crafting ===
{{Crafting
|A1= Rabbit Hide |B1= Rabbit Hide
|A2= Rabbit Hide |B2= Rabbit Hide
|Output=Leather
|type=Material
}}
=== Chest loot ===
{{LootChestItem|leather}}
=== Villager gifts ===
{{in|java}}, leatherworker [[villager]]s throw leather at players under the [[Hero of the Village]] effect.
=== Bartering ===
[[Piglin]]s may [[barter]] 2-4 leather when given a [[gold ingot]].
== Usage ==
=== Crafting ingredient ===
{{crafting usage}}
=== Trading ===
Novice-level leatherworker villagers have a {{frac|2|3}} chance to [[trading|buy]] 6 leather for one [[emerald]] {{in|java}}, and always offer the trade {{in|bedrock}}.
=== Repairing ===
Leather is the repair item for the [[armor materials|leather armor]], and thus can be used to [[item repair|repair]] the following items in an [[anvil]]:
* {{ItemLink|Leather cap}}
* {{ItemLink|Leather tunic}}
* {{ItemLink|Leather pants}}
* {{ItemLink|Leather boots}}
== Achievements ==
{{load achievements|Cow Tipper}}
== Data values ==
=== ID ===
{{edition|java}}:
{{ID table
|edition=java
|showitemtags=y
|showforms=y
|generatetranslationkeys=y
|displayname=Leather
|spritetype=item
|nameid=leather
|itemtags=ignored_by_piglin_babies
|form=item
|foot=1}}
{{edition|bedrock}}:
{{ID table
|edition=bedrock
|shownumericids=y
|showforms=y
|notshowbeitemforms=y
|generatetranslationkeys=y
|displayname=Leather
|spritetype=item
|nameid=leather
|id=381
|form=item
|foot=1}}
== History ==
{{History|java alpha}}
{{History||v1.0.8|[[File:Leather JE1 BE1.png|32px]] Added leather.
|Leather [[drops]] from [[cow]]s.
|The [[crafting]] recipe for leather [[armor]] has been changed from cloth to leather (leather armor was previously [[craft]]ed with [[wool]], and was called "cloth armor" in the game code).}}
{{History||v1.0.17|[[Chicken]]s in [[Survival]] [[multiplayer]] now [[drop]] leather if killed by [[fire]], fall [[damage]] or [[cactus]].}}
{{History||v1.2.6|Chickens dropping leather was fixed by this version at the latest.{{when|It would be nice to know exactly when. It's at most a 3 1/2 month bug, though it was at the beginning. Might count as short-lived.}}.}}
{{History|java}}
{{History||1.3.1|snap=12w17a|Leather is now required to craft [[book]]s.}}
{{History||1.4.2|snap=12w34a|Leather is now used to craft the newly added [[item frame]]s.}}
{{History||1.6.1|snap=13w16a|Leather is now used to craft [[horse saddle]]s.|[[Horse]]s now [[drop]] leather.}}
{{History|||snap=13w18a|Leather is no longer used to craft [[horse saddle]]s.}}
{{History||1.7.2|snap=13w36a|Leather can be obtained as one of the "junk" [[item]]s in [[fishing]], making it possible to obtain it without killing any [[animal]]s.}}
{{History||1.8|snap=14w02a|Leather can now be [[trading|sold]] to leatherworker [[villager]]s, at 9–12 leather for 1 [[emerald]].}}
{{History|||snap=14w27b|Leather can now be crafted using 4 [[rabbit hide]].}}
{{History||1.9|snap=15w41a|Leather can now be used to repair [[elytra]].}}
{{History||1.11|snap=16w39a|[[Llama]]s now [[drop]] leather.}}
{{History||1.13|snap=17w47a|Prior to [[1.13/Flattening|''The Flattening'']], this [[item]]'s numeral ID was 334.}}
{{History|||snap=18w07a|[[Phantom]]s now drop leather.}}
{{History|||snap=18w14a|Phantoms no longer [[drop]] leather.
|[[Phantom membrane]]s are now used to repair [[elytra]], instead of leather.}}
{{History||1.14|snap=18w43a|[[File:Leather JE2 BE2.png|32px]] The texture of leather has been changed.}}
{{History|||snap=18w48a|Leather can now be found in chests in [[village]] tanneries.}}
{{History|||snap=19w07a|Added [[fox]]es, which sometimes spawn with leather in their mouths.}}
{{History|||snap=19w08a|Leather is now used to [[craft]] leather [[horse armor]].}}
{{History|||snap=19w13a|Leatherworker villagers now give leather to players under the [[Hero of the Village]] effect.}}
{{History||1.16|snap=20w07a|Leather is dropped by the new [[hoglin]]s.
|Leather has a {{frac|5|109}} (~4.59%) chance of being given by the new [[piglin]]s when [[bartering]], in a stack size of 2–7.}}
{{History|||snap=20w09a|Leather now has a {{frac|20|226}} (~8.84%) chance of being given by piglins when bartering, in a stack size of 1–5.}}
{{History|||snap=20w16a|Leather now generates in [[bastion remnants]] chests.}}
{{History|pocket alpha}}
{{History||v0.2.0|[[File:Leather JE1 BE1.png|32px]] Added leather. It is currently unobtainable and serves no purpose.}}
{{History||v0.6.0|Leather is now obtainable by killing [[cow]]s.
|Leather can be used to craft leather [[armor]].}}
{{History||v0.11.0|snap=build 1|Leather can now be obtained as one of the "junk" [[item]]s in [[fishing]], making it possible to obtain it without killing any [[animal]]s.}}
{{History||v0.12.1|snap=build 1|Leather is now required to craft [[book]]s.}}
{{History||v0.13.0|snap=build 1|Leather can now be [[craft]]ed using 4 [[rabbit hide]].}}
{{History||v0.15.0|snap=build 1|Leather is now used to craft leather [[horse armor]].}}
{{History|pocket}}
{{History||1.0.0|snap=alpha 0.17.0.1|Leather can now be used to repair [[elytra]].}}
{{History||1.0.4|snap=alpha 1.0.4.0|9-12 leather can now be [[trading|sold]] to leatherworker [[villager]]s.}}
{{History|bedrock}}
{{History||1.6.0|snap=beta 1.6.0.5|[[Phantom membrane]]s are now used to repair [[elytra]], instead of leather.}}
{{History||1.10.0|snap=beta 1.10.0.3|Leather can now be found in [[village]] tannery house [[chest]]s.
|[[File:Leather JE2 BE2.png|32px]] The texture of leather has been changed.}}
{{History||1.11.0|snap=beta 1.11.0.4|[[Trading]] has been changed, leatherworker [[villager]]s now [[trading|buy]] 6 leather for an [[emerald]].}}
{{History||1.13.0|snap=beta 1.13.0.1|Added [[fox]]es, which can drop leather.}}
{{History||1.16.0|snap=beta 1.16.0.57|Hoglins now drop leather.
|Leather can now be obtained from bartering with piglin.
|Leather can now be found in [[bastion remnants]] chests.}}
{{History|console}}
{{History||xbox=TU1|xbone=CU1|ps=1.0|wiiu=Patch 1|switch=1.0.1|[[File:Leather JE1 BE1.png|32px]] Added leather.}}
{{History||xbox=TU60|xbone=CU51|ps=1.64|wiiu=Patch 30|switch=1.0.11|Leather is now used to [[craft]] leather [[horse armor]].}}
{{History||xbox=TU69|xbone=none|ps=1.76|wiiu=Patch 38|switch=none|[[Phantom membrane]]s are now used to repair [[elytra]], instead of leather.}}
{{History||xbox=none|xbone=none|ps=1.90|wiiu=none|switch=none|[[File:Leather JE2 BE2.png|32px]] The texture of leather has been changed.}}
{{History|new 3ds}}
{{History||0.1.0|[[File:Leather JE1 BE1.png|32px]] Added leather.}}
{{History|foot}}
== Issues ==
{{issue list}}
{{Items}}
[[Category:Renewable resources]]
[[cs:Kůže]]
[[de:Leder]]
[[es:Cuero]]
[[fr:Cuir]]
[[hu:Bőr]]
[[it:Cuoio]]
[[ja:革]]
[[ko:가죽]]
[[nl:Leer]]
[[pl:Skóra]]
[[pt:Couro]]
[[ru:Кожа]]
[[th:หนังสัตว์]]
[[uk:Шкіра]]
[[zh:皮革]]</li></ul> | 12w50a | Bows can now be enchanted with Unbreaking using an anvil and an appropriate enchanted book. | |||
| pre | When a player hits another player from far away with a bow it makes a high pitched "dinging" sound. | ||||
1.7.2{{Extension DPL}}<ul><li>[[Rabbit Stew|Rabbit Stew]]<br/>{{Item
| title = Rabbit Stew
| heals = {{hunger|10}}
| renewable = Yes
| stackable = No
}}
'''Rabbit stew''' is a [[food]] [[item]] that can be eaten by the [[player]].
== Obtaining ==
=== Crafting ===
{{Crafting
|shapeless=true
|B1=Cooked Rabbit
|A2=Carrot
|B2=Baked Potato
|C2=Any Mushroom
|B3=Bowl
|Output=Rabbit Stew
|type=Foodstuff
}}
=== Trading ===
{{IN|bedrock}}, novice-level Butcher villagers always offer to sell rabbit stew for one emerald as their second trade.
{{IN|java}}, novice-level Butcher villagers have a 50% chance of offering rabbit stew for one emerald.
== Usage ==
=== Food ===
To eat rabbit stew, press and hold {{control|use}} while it is selected in the hotbar. Eating one restores {{hunger|10}} [[hunger]] and 12 hunger [[Hunger#Mechanics|saturation]]. This restores more hunger than any other food type in the game except [[cake]], but has less saturation than a [[golden carrot]], a [[cooked porkchop]], or a [[steak]].
Eating rabbit stew leaves the player with an empty bowl, similar to [[mushroom stew]], [[suspicious stew]], and [[beetroot soup]].
=== Wolves ===
{{IN|bedrock}}, rabbit stew can be used to feed [[wolves]], healing them by {{hp|10|mob=1}}. However, unlike other wolf food, rabbit stew does not speed up the growth of baby wolves, and it cannot be used to breed them. It is usable only on a wolf that has less than full health.
== Sounds ==
{{Sound table/Entity/Food}}
== Data values ==
=== ID ===
{{edition|java}}:
{{ID table
|edition=java
|showforms=y
|generatetranslationkeys=y
|displayname=Rabbit Stew
|spritetype=item
|nameid=rabbit_stew
|form=item
|foot=1}}
{{edition|bedrock}}:
{{ID table
|edition=bedrock
|shownumericids=y
|showforms=y
|notshowbeitemforms=y
|generatetranslationkeys=y
|displayname=Rabbit Stew
|spritetype=item
|nameid=rabbit_stew
|id=290
|form=item
|foot=1}}
== Advancements ==
{{load advancements|Husbandry;A Balanced Diet}}
== Video ==
<div style="text-align:center">{{yt|GwCqwtydRBc}}</div>
== History ==
{{History|java}}
{{History||1.8|snap=June 30, 2014|slink={{tweet|TheMogMiner|483725253018157057}}|[[Ryan Holtz]] tweets the recipe of rabbit stew, and that it can restore hunger better than any other item other than [[golden apple]]s (which was incorrect, as golden apples restore less hunger, but a whole [[cake]] restores more).}}
{{History|||snap=14w27a|[[File:Rabbit Stew JE1 BE1.png|32px]] Added rabbit stew.}}
{{History||1.13|snap=17w47a|Prior to [[1.13/Flattening|''The Flattening'']], this [[item]]'s numeral ID was 413.}}
{{History||1.14|snap=18w43a|[[File:Rabbit Stew JE2.png|32px]] The texture of rabbit stew has been changed.
|The rabbit stew's [[recipe]] is now shapeless.}}
{{History|||snap=18w50a|[[File:Rabbit Stew JE3 BE2.png|32px]] The texture of rabbit stew has been changed.}}
{{History|||snap=19w11a|Butcher [[villager]]s now [[trading|sell]] rabbit stew.}}
{{History|pocket alpha}}
{{History||v0.13.0|snap=build 1|[[File:Rabbit Stew JE1 BE1.png|32px]] Added rabbit stew.}}
{{History|bedrock}}
{{History||1.10.0|snap=beta 1.10.0.3|[[File:Rabbit Stew JE3 BE2.png|32px]] The texture of rabbit stew has been changed.
|The recipe for rabbit stew is now shapeless.}}
{{History||1.11.0|snap=beta 1.11.0.4|Butcher [[villager]]s now [[trading|sell]] rabbit stew.}}
{{History|console}}
{{History||xbox=TU31|xbone=CU19|ps=1.22|wiiu=Patch 3|switch=1.0.1|[[File:Rabbit Stew JE1 BE1.png|32px]] Added rabbit stew.}}
{{History||xbox=none|xbone=none|ps=1.90|wiiu=none|switch=none|[[File:Rabbit Stew JE3 BE2.png|32px]] The texture of rabbit stew has been changed.
|The recipe for rabbit stew is now shapeless.}}
{{History|new 3ds}}
{{History||0.1.0|[[File:Rabbit Stew JE1 BE1.png|32px]] Added rabbit stew.}}
{{History|foot}}
== Issues ==
{{issue list}}
== Trivia ==
* If the ingredients of rabbit stew were eaten separately and the [[mushroom]] had become half of a [[mushroom stew]], they would restore a total of {{Hunger|16}} and 19.2 saturation points. Without counting the mushroom, the separate ingredients would restore {{Hunger|13}} and 15.6 saturation points. Therefore, crafting rabbit stew results in a net loss of restorative points, though it is quicker than eating all the ingredients separately.
* Rabbit stew restores more hunger and total food points (hunger + saturation) than nearly any other single item (the exception is a suspicious stew with Saturation). This is balanced by the point that the stew does not stack, and with its complex recipe it's not so easy to make "on the road". The suspicious stew shares the unstackability, but with only four ingredients it can at least be crafted in the inventory.
==Gallery==
<gallery>
Rabbit Stew Crafting.jpg|Crafting rabbit stew.
</gallery>
== References ==
{{Reflist}}
{{items}}
[[de:Kaninchenragout]]
[[es:Estofado de conejo]]
[[it:Stufato di coniglio]]
[[fr:Ragoût de lapin]]
[[ja:ウサギシチュー]]
[[ko:토끼 스튜]]
[[nl:Konijnenstoofpot]]
[[pl:Gulasz z królika]]
[[pt:Ensopado de coelho]]
[[ru:Тушёный кролик]]
[[uk:Тушкований кролик]]
[[zh:兔肉煲]]
[[Category:Food]]
[[Category:Renewable resources]]</li><li>[[Armor Stand|Armor Stand]]<br/>{{ItemEntity
| image = Armor Stand.png
| image2 = Armor Stand BE.png
| extratext = View [[#Gallery|all renders]]
| stackable =
* '''[[JE]]:''' Yes (16)
* '''[[BE]]:''' Yes (64)
| renewable = Yes
| flammable = Yes
| size = '''Normal:'''<br>
Width: 0.5 Blocks<br>
Height: 1.975 Blocks<br>
'''Small:'''<br>
Width: 0.25 Blocks<br>
Height: 0.9875 Blocks<br>
| health = {{hp|20}}
}}
An '''armor stand''' is an inanimate [[entity]] that can wear [[armor]]. It can also hold [[Item|items]] and be posed (but these are not possible in [[Survival]] in [[Java Edition]]).
== Obtaining ==
An armor stand can be broken by quickly {{control|attack|text=attacking}} it twice, dropping itself and any armor placed onto it.
=== Crafting ===
{{Crafting
|A1= Stick
|B1= Stick
|C1= Stick
|B2= Stick
|A3= Stick
|B3= Smooth Stone Slab
|C3= Stick
|Output= Armor Stand
|type=Decoration block
}}
=== Natural generation ===
Two armor stands are found in each taiga [[village]] outdoor armory, one equipped with an [[iron helmet]], the other with an [[iron chestplate]].
== Usage ==
[[Player]]s can use armor stands to hold [[armor]], [[mob head]]s, [[carved pumpkin]]s, and [[elytra]]. [[Commands]] can be used to give them other [[item]]s. The stand does not have a GUI, so players interact with it directly. Armor stands are also able to be placed in different orientations, similar to [[banner]]s or [[sign]]s. Armor stands are [[entity|entities]], allowing them to be pushed by [[piston]]s, moved by flowing [[water]], pulled with [[fishing rod]]s, pushed by players (with knockback), and bounced by [[slime block]]s.
{{Control|use|text=Using}} armor on the stand places the armor if done on a bare spot. Conversely, clicking on armor with a bare hand removes the armor and places it in the highlighted hotbar slot. It is not possible to take or place items from the armor stand's hands unless playing on Bedrock Edition.
Armor, mob heads, or carved pumpkins can be automatically placed on armor stands with a [[dispenser]].
Armor stands can be customized further to have arms, pose, disobey gravity, dual wield and other things by summoning them using {{cmd|summon}} with [[Tutorials/Command NBT tags#Armor Stand|NBT tags]].
In maps heavily using [[command blocks]], armor stands can be used to keep [[scoreboard]] objectives that are 'global' to the map, run [[commands]], etc.
{{IN|bedrock}}, the pose of the armor stand can be changed by interacting with the armor stand (or pressing the {{btn|Pose|be=1}} button on mobile devices) while sneaking, or by using a redstone signal. There are 13 possible poses. Armor stands can also hold items by interacting with the armor stand (or pressing the {{btn|Equip|be=1}} button on mobile devices) while holding an item that cannot be worn.
;<nowiki>Below are the poses:
{| class="wikitable collapsible collapsed"
!No.!!Namespace ID!! Redstone power
!
! !! Image
|-
|0
|{{cd|animation.armor_stand.default_pose}}
|0
|
|
|[[File:Armor Stand Default Pose.png|128px]]
|-
|1
|{{cd|animation.armor_stand.no_pose}}
|1
|
|
|[[File:Armor Stand No Pose.png|128px]]
|-
|2
|{{cd|animation.armor_stand.solemn_pose}}
|2
|
|
|[[File:Armor Stand Solemn Pose.png|128px]]
|-
|3
|{{cd|animation.armor_stand.athena_pose}}
|3
|
|
|[[File:Armor Stand Athena Pose.png|128px]]
|-
|4
|{{cd|animation.armor_stand.brandish_pose}}
|4
|
|
|[[File:Armor Stand Brandish Pose.png|128px]]
|-
|5
|{{cd|animation.armor_stand.honor_pose}}
|5
|
|
|[[File:Armor Stand Honor Pose.png|128px]]
|-
|6
|{{cd|animation.armor_stand.entertain_pose}}
|6
|
|
|[[File:Armor Stand Entertain Pose.png|128px]]
|-
|7
|{{cd|animation.armor_stand.salute_pose}}
|7
|
|
|[[File:Armor Stand Salute Pose.png|128px]]
|-
|8
|{{cd|animation.armor_stand.hero_pose}}
|8, 13 or more
|
|
|[[File:Armor Stand Hero Pose.png|128px]]
|-
|9
|{{cd|animation.armor_stand.riposte_pose}}
|9
|
|
|[[File:Armor Stand Riposte Pose.png|128px]]
|-
|10
|{{cd|animation.armor_stand.zombie_pose}}
|10
|
|
|[[File:Armor Stand Zombie Pose.png|128px]]
|-
|11
|{{cd|animation.armor_stand.cancan_a_pose}}
|11
|
|
|[[File:Armor Stand Cancan A Pose.png|128px]]
|-
|12
|{{cd|animation.armor_stand.cancan_b_pose}}
|12
|
|
|[[File:Armor Stand Cancan B Pose.png|128px]]
|}
==Behavior==
Because armor stands are entities, they obey gravity, allowing them to fall and rest on non-full [[block]]s such as [[enchanting table]]s, [[snow layer]]s and [[slab]]s.
Any [[armor]] on the stand drops when the stand is broken. Armor stands can display [[enchanting|enchanted]] and all forms of [[dye]]d armor. The effects of most enchanted armor have no effect when on an armor stand, with three exceptions:
*[[Frost Walker]] creates [[frosted ice]] blocks on [[water]] as usual if an armor stand is pushed with a [[piston]].
*[[Depth Strider]] slows the movement of the armor stand when being pushed with water.
*A [[player]] may take damage from hitting an armor stand that holds armor enchanted with [[Thorns]].
Armor stands are not damaged by [[cacti]] but can be broken by [[arrow]]s. An armor stand destroyed by an explosion or a firework does not drop as an [[item (entity)|item]]. Armor stands in water and [[lava]] at the same time are not consumed by the lava.
{{IN|be}}, armor stands can be affected by [[status effect]]s. They can be 'killed' by [[Harming]] and [[Decay]] [[splash potion|splash]]/[[lingering potion]]s, lava, [[fire]], and [[campfire]]s, and they play the player death sound and fall to their side and disappear, yielding no armor stand item. If an armor stand is equipped with an item or armor, that item or armor is considered as "naturally-spawned equipment" with an 8.5% chance of dropping when the armor stand "dies" from the [[Instant Damage]] or the [[Wither (status effect)|Wither]] status effect. If the dropped item is any form of [[weapon]], [[tool]] or armor, it drops in a badly damaged state because the game considers it as "naturally-spawned equipment".<ref>{{Bug|MCPE-24341}}</ref>
The stand wobbles slightly when being hit by the player.
{{IN|java}}, it is possible to create an armor stand with arms using the {{cmd|summon}} [[command]]. It is also possible to change an armor stand without arms into a stand with arms by using the {{cmd|data}} command. The commands are as follows:
*<code>/data merge entity @e[type=armor_stand,sort=nearest,limit=1] {ShowArms:1}</code>, which changes the nearest armor stand into an armor stand with arms.
*<code>/summon minecraft:armor_stand ~ ~ ~ {ShowArms:1}</code>, which summons a new armor stand with arms shown.
*<code>/summon armor_stand ~ ~ ~ {Rotation:[0.0f]}</code>, which summons a new armor stand that faces a desired direction (dependent on changing "0.0f" to other numbers like "90.0f" or "180.0f", otherwise it faces the same way as a default armor stand).
==Sounds==
{{edition|java}}:<br>
Armor stands use the Friendly Creatures sound category for entity-dependent sound events.
{{Sound table
|sound=Armor Stand hit1.ogg
|sound2=Armor Stand hit2.ogg
|sound3=Armor Stand hit3.ogg
|sound4=Armor Stand hit4.ogg
|subtitle=Block breaking
|source=Friendly Creatures
|description=When an armor stand is damaged
|id=entity.armor_stand.hit
|translationkey=subtitles.block.generic.hit
|volume=1.0
|pitch=1.0
|distance=16}}
{{Sound table
|sound=Armor Stand break1.ogg
|sound2=Armor Stand break2.ogg
|sound3=Armor Stand break3.ogg
|sound4=Armor Stand break4.ogg
|subtitle=Block broken
|source=Friendly Creatures
|description=When an armor stand is destroyed
|id=entity.armor_stand.break
|translationkey=subtitles.block.generic.break
|volume=1.0
|pitch=1.0
|distance=16}}
{{Sound table
|sound=Stone dig1.ogg
|sound2=Stone dig2.ogg
|sound3=Stone dig3.ogg
|sound4=Stone dig4.ogg
|subtitle=Block placed
|source=Blocks
|description=When an armor stand is placed
|id=entity.armor_stand.place
|translationkey=subtitles.block.generic.place
|volume=1.0
|pitch=1.0
|distance=16}}
{{Sound table
|sound=Wood dig1.ogg
|sound2=Wood dig2.ogg
|sound3=Wood dig3.ogg
|sound4=Wood dig4.ogg
|subtitle=Block placed
|source=Friendly Creatures
|description=When an armor stand falls onto a block at a high speed{{Info needed}}
|id=entity.armor_stand.fall
|translationkey=subtitles.entity.armorstand.fall
|volume=1.0
|pitch=1.0
|distance=16
|foot=1}}
{{edition|bedrock}}:
{{Sound table
|type=bedrock
|sound=Armor Stand hit1.ogg
|sound2=Armor Stand hit2.ogg
|sound3=Armor Stand hit3.ogg
|sound4=Armor Stand hit4.ogg
|source=neutral
|description=When an armor stand is damaged
|id=mob.armor_stand.hit
|volume=1.0
|pitch=1.0}}
{{Sound table
|sound=Armor Stand break1.ogg
|sound2=Armor Stand break2.ogg
|sound3=Armor Stand break3.ogg
|sound4=Armor Stand break4.ogg
|source=neutral
|description=When an armor stand is destroyed
|id=mob.armor_stand.break
|volume=1.0
|pitch=1.0}}
{{Sound table
|sound=Stone dig1.ogg
|sound2=Stone dig2.ogg
|sound3=Stone dig3.ogg
|sound4=Stone dig4.ogg
|source=neutral
|description=When an armor stand is placed
|id=mob.armor_stand.place
|volume=1.0
|pitch=1.0}}
{{Sound table
|sound=Wood dig1.ogg
|sound2=Wood dig2.ogg
|sound3=Wood dig3.ogg
|sound4=Wood dig4.ogg
|source=neutral
|description=When an armor stand falls onto a block at a high speed{{Info needed}}
|id=mob.armor_stand.land
|volume=1.0
|pitch=1.0
|foot=1}}
==Data values==
===ID===
{{edition|java}}:
{{ID table
|edition=java
|firstcolumnname=Armor Stand
|showforms=y
|generatetranslationkeys=y
|displayname=Item
|spritename=armor-stand
|spritetype=item
|nameid=armor_stand
|form=item
|foot=1}}
{{ID table
|edition=java
|firstcolumnname=Armor Stand
|generatetranslationkeys=y
|displayname=Entity
|spritename=armor-stand
|spritetype=entity
|nameid=armor_stand
|foot=1}}
{{edition|bedrock}}:
{{ID table
|edition=bedrock
|firstcolumnname=Armor Stand
|shownumericids=y
|showforms=y
|notshowbeitemforms=y
|generatetranslationkeys=y
|displayname=Item
|spritename=armor-stand
|spritetype=item
|nameid=armor_stand
|id=552
|form=item
|foot=1}}
{{ID table
|edition=bedrock
|firstcolumnname=Armor Stand
|shownumericids=y
|generatetranslationkeys=y
|displayname=Entity
|spritename=armor-stand
|spritetype=entity
|nameid=armor_stand
|id=61
|foot=1}}
===Item data===
{{el|java}}:
{{main|Player.dat format}}
<div class="treeview">
* {{nbt|compound|tag}}: The item's '''tag''' tag.
{{:Player.dat_format/Entity Spawners}}
</div>
{{el|bedrock}}:
:{{IN|bedrock}}, armor stands have no additional item tag.
:See [[Bedrock Edition level format/Item format]].
===Entity data===
Armor stands have entity data associated with them that contain various properties of the [[entity]].
{{el|java}}:
{{main|Entity format}}
{{/ED}}
{{el|bedrock}}:
:See [[Bedrock Edition level format/Entity format]].
== Video==
Note: This video is outdated as Zoglins now attack armor stands
<div style="text-align:center">{{yt|tCFkdTfCleQ}}</div>
==History==
{{History|java}}
{{History||1.8|snap=August 5, 2014|slink={{Tweet|SeargeDP|496666952530538498}}|[[File:Armor Stand (pre-release).png|32px]] [[File:Armor Stand (item) (pre-release).png|32px]] [[Searge]] tweeted a image of an armor stand. The appearance was changed before release.}}
{{History|||snap=August 5, 2014|slink={{Tweet|SeargeDP|496673890148823040}}|Showed crafting recipe and name "[Armor Stand]", both were changed before release.}}
{{History|||snap=14w32a|[[File:Armor Stand JE1.png|32px]] Added armor stands.}}
{{History|||snap=14w32b|[[File:Armor Stand (item) JE1 BE1.png|32px]] The item texture has changed.
|Pick-block can now be used on armor stands.
|Armor stands can now no longer be crafted using [[slabs]] other than stone slabs.}}
{{History|||snap=14w32c|Added a <code>NoBasePlate</code> tag for the armor stand.}}
{{History|||snap=14w33a|Breaking [[particles]] have been added for the armor stand.}}
{{History||1.8.1|snap=pre1|Added <code>Marker</code> tag for armor stands.}}
{{History||1.9|snap=15w31a|Armor stands can now dual wield.
|<code>HandItems</code> and <code>ArmorItems</code> tags added for armor stands, which is intended to replace the <code>Equipment</code> tag.}}
{{History|||snap=15w33a|The <code>Equipment</code> tag has been removed from armor stands.}}
{{History|||snap=15w47a|The armor stand now wobbles when hit by the [[player]].}}
{{History|||snap=16w02a|Marker <code>ArmorStand</code>s now outline their equipment only when glowing.}}
{{History||1.11|snap=16w32a|The entity ID of the armor stand has been changed from <code>ArmorStand</code> to <code>armor_stand</code>.}}
{{History||1.13|snap=17w47a|Prior to [[1.13/Flattening|''The Flattening'']], this [[item]]'s numeral ID was 416.}}
{{History||1.14|snap=18w43a|[[File:Armor Stand JE2.png|32px]] The texture of armor stands has been changed to the new [[planks|oak planks]] texture.
|[[File:Armor Stand (item) JE2 BE2.png|32px]] The texture of armor stand [[item]]s has been slightly changed. (Comparison: [[File:Armor Stand (item) Texture Change 1.13 to 18w43a.gif|32px]])}}
{{History|||snap=18w50a|[[File:Armor Stand JE3.png|32px]] The texture of armor stands has been changed again.
|Armor stands now generate in taiga [[village]]s.}}
{{History||1.15|snap=19w42a|Armor stands can now be placed by [[dispenser]]s.}}
{{History||1.16|snap=20w07a|Armor stands no longer fall through fences and walls when placed.<ref>{{bug|MC-65951}}</ref>}}
{{History|||snap=20w14a|[[Zoglin]]s now attack armor stands.}}
{{History||1.17|snap=20w45a|[[File:Armor Stand 20w45a.png|32px]] The model of the armor stand has been changed.}}
{{History|||snap=20w46a|[[File:Armor Stand JE3.png|32px]] The model of the armor stand has been changed back to how it was in 1.16.}}
{{History||1.18|snap=Pre-release 5|[[File:Armor Stand JE4.png|32px]] Changed smooth stone texture on armor stand.}}
{{History||1.19.4|snap=23w03a|Armor stands now preserve custom names when placed and broken.}}
{{History||1.20<br>(Experimental)|link=1.19.4|snap=23w04a|An armor stand now appears in the smithing table GUI; arms are displayed as in Bedrock Edition.
|When an armor stand is placed, its model now changes in effect of the player's facing direction<ref>{{bug|MC-93533}}</ref>.}}
{{History|||snap=23w06a|The model no longer changes when the armory is placed. Also, the head, which tilted slightly to the lower right in the version from 1.8 up to 1.19.3, now faces forward from [[File:Armor Stand JE4.png|32px]] to [[File:Armor Stand JE5.png|32px]].}}
{{History||?|Armor can now be swapped in [[armor stand]]s by {{ctrl|using}} them in the armor stand's slot.}}
{{History|bedrock}}
{{History||1.2.0|snap=beta 1.2.0.2|[[File:Armor Stand BE1.png|32px]] [[File:Armor Stand (item) JE1 BE1.png|32px]] Added armor stands.}}
{{History||1.10.0|snap=beta 1.10.0.3|[[File:Armor Stand BE2.png|32px]] The texture of armor stands has been changed.
|[[File:Armor Stand (item) JE2 BE2.png|32px]] The texture of armor stand [[item]]s has been slightly changed.}}
{{History||1.12.0|snap=beta 1.12.0.2|[[File:Armor Stand with Leather Armor MCPE-44669.png|32px]] Leather [[armor]] no longer shows as being [[dye]]d properly when worn by armor stands.}}
{{History|||snap=beta 1.12.0.3|[[File:Armor Stand wear Chicken.png|x73px]][[File:Armor Stand wear Rabbit.png|x73px]] [[File:Armor Stand wear Salmon.gif|x73px]] [[File:Armor Stand wear Pufferfish.gif|x73px]] [[File:Armor Stand wear Slime.png|x73px]] When armor stands hold a [[raw chicken]], [[raw rabbit]], [[raw salmon]], [[pufferfish]] or a [[slime block]], they now wear these [[mob]] counterparts.<ref>{{bug|mcpe-48629}}</ref>}}
{{History||1.13.0|snap=beta 1.13.0.1|Leather armor now shows as being dyed properly when worn by armor stands.}}
{{History|||snap=beta 1.13.0.4|Armor stands no longer hold certain [[mob]]s if they are holding a [[item]] related to them.
|Armor stands now have a smoother animation when changing poses.}}
{{History||1.16.0|snap=?|Armor stands are now targeted by zoglins.}}
{{History||1.16.210|snap=beta 1.16.210.51|Armor stands are no longer attacked by [[goat]]s.}}
{{History|console}}
{{History||xbox=TU31|xbone=CU19|ps=1.22|wiiu=Patch 3|switch=1.0.1|[[File:Armor Stand JE1.png|32px]] [[File:Armor Stand (item) JE1 BE1.png|32px]] Added armor stands.}}
{{History||xbox=TU43|xbone=CU33|ps=1.36|wiiu=Patch 13|Added [[sound]]s for armor stands.}}
{{History||xbox=TU60|xbone=CU51|ps=1.64|wiiu=Patch 30|switch=1.0.11|[[File:Armor Stand BE1.png|32px]] Armor stands now have arms and the [[player]] can now change the pose of the armor stand.}}
{{History||xbox=none|xbone=none|ps=1.90|wiiu=none|switch=none|[[File:Armor Stand BE2.png|32px]] The texture of armor stands has been changed.
|[[File:Armor Stand (item) JE2 BE2.png|32px]] The texture of armor stand [[item]]s has been slightly changed.}}
{{History|foot}}
<gallery>
Armour stand 1.png|The first image of the armor stand.
JE 1.8 Dev Armor Stand crafting.png|The first image of armor stand crafting recipe.
The Bountiful Update.png|Armor stands in the [[Java Edition 1.8|1.8]] poster.
Dual Wielding Armor Stand.png|A dual wielding armor stand.
Glowing Armor Stands.png|Armor stands with the [[glowing]] effect.
Armor Stand Chess.jpg|Chess with armor stands.
</gallery>
==Issues==
{{issue list}}
==Trivia ==
*Equipping armor stands with certain [[block]]s and [[item]]s can cause rendering glitches. According to [[Searge]] this is due to transparent rendering on entities not yet being supported.<ref>{{bug|MC-67415||"Armor Stands with Slime Block rendering entities behind them"}} resolved as "Won't Fix"</ref><ref>{{bug|MC-67674||"Armor Stand wearing a Skull and Holding Stained Glass causes Graphical issues"}} resolved as "Won't Fix"</ref>
*Bedrock Edition has a version exclusive armor stand [[model]], which includes posable arms.
*Using [[redstone]] to change the stands reverse the poses, starting with the can-can pose first.
*Placing the stand within three powered [[redstone dust]] always changes its pose to the honor pose. [[Redstone Repeater|Repeaters]] also switch the stand to the honor pose if not set four blocks from one.
*Using external tools, armor stand spawners can be placed.
*Secret signatures for [[Jasper Boerstra|JAPPA]], Chi Wong, and [[Michael Stoyke|Searge]] can be found at the bottom of the armor stand texture.
== Gallery ==
===Renders===
;Armor (Java Edition)
<gallery>
Armor Stand Leather.png
Armor Stand Golden.png
Armor Stand Chainmail.png
Armor Stand Iron.png
Armor Stand Diamond.png
Armor Stand Netherite.png
</gallery>
; Armor (Bedrock Edition)
<gallery>
Armor Stand with Leather Armor BE.png
Armor Stand with Golden Armor BE.png
Armor Stand with Chain Armor BE.png
Armor Stand with Iron Armor BE.png
Armor Stand with Diamond Armor BE.png
Armor Stand with Netherite Armor BE.png
</gallery>
;Poses
<gallery>
Armor Stand Pose 0.png|
Armor Stand Pose 1.png|
Armor Stand Pose 2.png|
Armor Stand Pose 3.png|
Armor Stand Pose 4.png|
Armor Stand Pose 5.png|
Armor Stand Pose 6.png|
Armor Stand Pose 7.png|
Armor Stand Pose 8.png|
Armor Stand Pose 9.png|
Armor Stand Pose 10.png|
Armor Stand Pose 11.png|
Armor Stand Pose 12.png|
</gallery>
===Screenshots===
<gallery>
Armor Stand Demo.png|Armor stands in various positions with various [[armor]].
Armor Stand glass and sword.png|Armor stands can wear [[block]]s on their heads. This is accessible with [[command]]s such as {{cmd|item}}.
Bedrock edition armor stand poses.png|All armor stand poses as seen in {{el|be}}.
Netherite to the rescue!.png|An entire set of netherite [[armor]] on an armor stand.
Armor Stand Garage.png|An armor stand in a garage.
</gallery>
==References ==
{{reflist}}
==External Links==
*[https://www.minecraft.net/en-us/article/taking-inventory--armor-stand Taking Inventory: Armor Stand] – Minecraft.net on March 16, 2023
{{Items}}
{{Entities}}
[[Category:Storage]]
[[de:Rüstungsständer]]
[[es:Soporte para armadura]]
[[fr:Porte-armure]]
[[ja:防具立て]]
[[ko:갑옷 거치대]]
[[pl:Stojak na zbroję]]
[[pt:Suporte de armaduras]]
[[ru:Стойка для брони]]
[[th:แท่นวางชุดเกราะ]]
[[uk:Стійка для обладунків]]
[[zh:盔甲架]]</li></ul></nowiki> | 13w36a | Bows can now be obtained as a "treasure" item from fishing. | |||
| Bows can now be enchanted with Unbreaking directly in an enchantment table without the use of an anvil. | |||||
1.8{{Extension DPL}}<ul><li>[[Helmet|Helmet]]<br/>{{Update|Include information about armor trims and updated netherite upgrade information.}}
{{redirect|Cap|mob spawning caps|Spawn}}
{{redirect|Turtle Shell|the item dropped by maturing turtles|Scute}}
{{Item
| image = <gallery>
Leather Cap.png| Leather
Chainmail Helmet.png| Chainmail
Iron Helmet.png| Iron
Diamond Helmet.png| Diamond
Golden Helmet.png| Golden
Netherite Helmet.png| Netherite
Turtle Shell.png| Turtle Shell
</gallery>
| durability =
* Leather: 55
* Chainmail: 165
* Iron: 165
* Golden: 77
* Diamond: 363
* Netherite: 407
* Turtle Shell: 275
| renewable =
* '''Netherite''': No
* '''All others''': Yes
| stackable = No
}}
'''Helmets''' are a type of [[armor]] that covers the head of the player. There are seven types of helmets: '''leather cap''', '''chainmail helmet''', '''iron helmet''', '''diamond helmet''', '''gold helmet''', '''netherite helmet''', and '''turtle shell'''.
==Obtaining ==
===Crafting===
{{crafting
|head=1
|showname=0
|showdescription=1
|name=Helmet
|A2= Leather;Gold Ingot;Iron Ingot;Diamond;Scute
|B2= Leather;Gold Ingot;Iron Ingot;Diamond;Scute
|C2= Leather;Gold Ingot;Iron Ingot;Diamond;Scute
|A3= Leather;Gold Ingot;Iron Ingot;Diamond;Scute
|C3= Leather;Gold Ingot;Iron Ingot;Diamond;Scute
|description=
|Output= Leather Cap;Golden Helmet;Iron Helmet;Diamond Helmet;Turtle Shell
|type= Combat
}}
{{crafting
|ignoreusage=1
|name=[[Helmet]]
|ingredients=Damaged matching helmet
|Damaged Leather Cap; Damaged Golden Helmet; Damaged Chainmail Helmet; Damaged Iron Helmet; Damaged Diamond Helmet; Damaged Turtle Shell; Damaged Netherite Helmet
|Damaged Leather Cap; Damaged Golden Helmet; Damaged Chainmail Helmet; Damaged Iron Helmet; Damaged Diamond Helmet; Damaged Turtle Shell; Damaged Netherite Helmet
|Output= Leather Cap; Golden Helmet; Chainmail Helmet; Iron Helmet; Diamond Helmet; Turtle Shell; Netherite Helmet
|description= The durability of the two helmets is added together, plus an extra 5% durability.
|type= Combat
|foot=1
}}
===Upgrading===
{{Smithing
|head=1
|Netherite Upgrade
|Diamond Helmet
|Netherite Ingot
|Netherite Helmet
|tail=1
}}
===Repairing===
====Grinding====
{{Grinding
|showdescription=1
|ingredients=2x Damaged [[Leather Cap]] or<br>2x Damaged [[Chainmail Helmet]] or<br>2x Damaged [[Iron Helmet]] or<br>2x Damaged [[Golden Helmet]] or<br>2x Damaged [[Diamond Helmet]] or<br>2x Damaged [[Netherite Helmet]] or<br>2x Damaged [[Turtle Shell]]
|Damaged Leather Cap; Damaged Chainmail Helmet; Damaged Iron Helmet; Damaged Golden Helmet; Damaged Diamond Helmet; Damaged Netherite Helmet; Damaged Turtle Shell
|Damaged Leather Cap; Damaged Chainmail Helmet; Damaged Iron Helmet; Damaged Golden Helmet; Damaged Diamond Helmet; Damaged Netherite Helmet; Damaged Turtle Shell
|Leather Cap; Chainmail Helmet; Iron Helmet; Golden Helmet; Diamond Helmet; Netherite Helmet; Turtle Shell
|description=The durability of the two helmets are added together, plus an extra 5% durability.
}}
====[[Anvil mechanics#Unit repair|Unit repair]]====
Helmets can be repaired in an [[anvil]] by adding units of the [[armor material]]'s repair material, with each repair material restoring 25% of the helmet's maximum durability, rounded down.
===Mob loot===
If a [[zombie]], [[husk]], [[stray]] or [[skeleton]] is wearing armor, there is a 8.5% chance (9.5% with [[Looting]] I, 10.5% with Looting II and 11.5% with Looting III) for the mob to drop a helmet upon death. The dropped helmet is usually badly damaged, and may be [[enchanted]] with enchantment levels 5-19.
{{IN|bedrock}}, [[vindicator]]s and [[pillager]]s spawned in [[raid]]s have a 8.3525% chance (10.28% on hard) to drop [[iron]] helmets. The dropped helmets are usually badly damaged, and have a 50% chance of being [[enchanted]] with a random [[enchantment]].
===Natural generation===
Two [[armor stand]]s are found in each taiga [[village]] outdoor armory, one of them equipped with an [[iron helmet]].
===Chest loot===
{{IN|BE}}, a sealed room in [[woodland mansion]]s can appear that has a chest sometimes containing an [[Efficiency]] I leather cap.<ref>{{bug|MCPE-109048}}</ref>
{{LootChestItem|leather-cap,random-enchanted-leather-cap,chainmail-helmet,iron-helmet,level-enchanted-iron-helmet,golden-helmet,random-enchanted-golden-helmet,diamond-helmet,damaged-diamond-helmet,level-enchanted-diamond-helmet,damaged-random-enchanted-diamond-helmet,damaged-random-enchanted-diamond-helmet-2}}
===Trading===
{{IN|java}}, novice-level armorer villagers have a 40% chance to sell an iron helmet for 4 emeralds. Journeyman-level armorers have a 40% chance to sell a chainmail helmet for 1 emerald. Master-level armorers always sell an enchanted diamond helmet for 11-27 emeralds. Apprentice-level leatherworker villagers have a {{frac|2|3}} chance to sell a leather cap<ref group="note" name="dye note">The leather armor has a random color created by two dyes (possibly the same dye twice.)</ref> for 5 emeralds. Master-level leatherworker villagers offer the same trade.
Armorer villagers may give the players with the [[Hero of the Village]] effect a chainmail helmet.
{{IN|bedrock}}, novice-level armorer villagers have a 25% chance to sell iron helmet for 5 emeralds, {{frac|1|3}} chance to sell chainmail helmet at journeyman-level for an emerald, and 50% chance to sell enchanted diamond helmet for 8 emeralds at master-level. Apprentice-level leatherworker villagers have a 50% chance to sell leather cap for 5 emeralds as part of their trades, and 50% chance to sell an enchanted leather cap for 5 emeralds at the master level.
{{notelist|columns=1}}
==Usage ==
Helmets can be placed in the top armor slot of a player's [[inventory]] for activation.
===Defense points===
Defense points are each signified by half of a shirt of mail in the armor bar above the health bar. Each defense point reduces any damage dealt to the player that is absorbed by armor by 4%, increasing additively with the number of defense points. Different materials and combinations of armor provide different levels of defense.
The following table shows the number of defense points added by helmets.
{| class="wikitable" data-description="Helmet defense points"
|-
! scope="col" |Material
! scope="col" |
|-
! scope="row" |Leather
|{{armor|1}}
|-
! scope="row" |Golden
| rowspan="4" |{{armor|2}}
|-
! scope="row" |Chainmail
|-
! scope="row" |Iron
|-
! scope="row" |Turtle Shell
|-
! scope="row" |Diamond
| rowspan="2" |{{armor|3}}
|-
! scope="row" |Netherite
|}
===Knockback resistance===
A netherite helmet provides 10% knockback resistance.
===Durability===
The following table shows the amount of damage each piece of armor can absorb before being destroyed.
Any "hit" from a damage source that can be blocked by armor removes one point of durability from each piece of armor worn for every {{hp|4}} of incoming damage (rounded down, but never below 1). Damage taken that armor doesn't protect (such as [[Damage#Fall damage|falling]] or [[Damage#Drowning|drowning]]) does not damage the armor, even if it is enchanted to protect against that type of damage. The following chart displays how many hits helmets can endure.
Netherite armor is not damaged by [[lava]] or [[fire]] when worn.
{| class="wikitable" data-description="Helmet durability"
|-
!Material
!Durability
|-
! scope="row" |Leather
|55
|-
! scope="row" |Golden
|77
|-
! scope="row" |Chainmail
| rowspan="2" |165
|-
! scope="row" |Iron
|-
! scope="row" |Turtle Shell
|275
|-
! scope="row" |Diamond
|363
|-
! scope="row" |Netherite
|407
|}
====Repair====
Helmets may be [[item repair|repaired]] by using them along with some of their crafting material (leather, gold ingots, iron ingots, diamonds or netherite) in an [[anvil]]. Chainmail helmets may be repaired in this way with iron ingots. They may also be repaired by crafting them together with another helmet of like material.
===Enchantments===
A helmet can receive the following [[enchantment]]s. Note that while iron and chainmail have the same durability, chainmail has a higher [[Tutorials/Enchanting mechanics#Enchantability|enchantability]] than iron or diamond.
{| class="wikitable"
|-
!Enchantment !!Max Level !!Notes
|-
|[[Fire Protection]]|| IV ||<ref group="note" name="exclusive">Fire Protection, Blast Protection, Projectile Protection and Protection are mutually exclusive</ref>
|-
|[[Projectile Protection]]|| IV ||<ref group="note" name="exclusive" />
|-
|[[Blast Protection]]|| IV ||<ref group="note" name="exclusive" />
|-
|[[Protection]]|| IV ||<ref group="note" name="exclusive" />
|-
|[[Unbreaking]]||III
|
|-
|[[Respiration]]||III
|
|-
|[[Aqua Affinity]]||I
|
|-
|[[Thorns]]||III ||<ref group="note" name="anvil">Only from using an [[anvil]] and [[enchanted book]]s.</ref>
|-
|[[Mending]]||I ||<ref group="note" name="anvil2">Only from chest loot, fishing, or an anvil and enchanted books.</ref>
|-
|[[Curse of Binding]]||I ||<ref group="note" name="anvil2" />
|-
|[[Curse of Vanishing]]||I ||<ref group="note" name="anvil2" />
|}
{{notelist}}
===Turtle shell effect===
Equipping a {{ItemSprite|Turtle Shell}} turtle shell provides the {{EffectLink|Water Breathing}} status effect, allowing the player to remain underwater for an additional 10 seconds. The time that this effect lasts does not begin to count down until the player dives underwater, then the 10 seconds are counted down. The effect immediately recharges after exposure to air.
===Brewing ingredient===
A turtle shell can also be used as a potion brewing ingredient.
{{Brewing
|Turtle Shell
|Potion of the Turtle Master
|Potion of the Turtle Master
|Potion of the Turtle Master
|showname=1
}}
===Smelting usage===
{{Smelting|showname=1|Iron Helmet;Chainmail Helmet;Golden Helmet|Iron Nugget;Iron Nugget;Gold Nugget|0,1}}
===Piglins===
{{EntityLink|Piglin|Piglins}} are attracted to ''golden'' helmets and pick them up, examining them for 6 to 8 seconds. Piglins can wear other helmets but are not attracted to them. They prefer stronger helmets over weaker helmets, with one exception: They always prefer golden helmets, throwing out stronger helmets in favor of gold helmets. Enchanted helmets are preferred over unenchanted helmets.
==Sounds ==
{{el|je}}:
{{Sound table
|sound=Equip leather1.ogg
|sound2=Equip leather2.ogg
|sound3=Equip leather3.ogg
|sound4=Equip leather4.ogg
|sound5=Equip leather5.ogg
|sound6=Equip leather6.ogg
|subtitle=Leather armor rustles
|source=player
|description=When a leather helmet is equipped
|id=item.armor.equip_leather
|translationkey=subtitles.item.armor.equip_leather
|volume=1.0
|pitch=1.0
|distance=16}}
{{Sound table
|sound=Equip chain1.ogg
|sound2=Equip chain2.ogg
|sound3=Equip chain3.ogg
|sound4=Equip chain4.ogg
|sound5=Equip chain5.ogg
|sound6=Equip chain6.ogg
|subtitle=Chain armor jingles
|source=player
|description=When a chainmail helmet is equipped
|id=item.armor.equip_chain
|translationkey=subtitles.item.armor.equip_chain
|volume=1.0
|pitch=1.0
|distance=16}}
{{Sound table
|sound=Equip iron1.ogg
|sound2=Equip iron2.ogg
|sound3=Equip iron3.ogg
|sound4=Equip iron4.ogg
|sound5=Equip iron5.ogg
|sound6=Equip iron6.ogg
|subtitle=Iron armor clanks
|source=player
|description=When an iron helmet is equipped
|id=item.armor.equip_iron
|translationkey=subtitles.item.armor.equip_iron
|volume=1.0
|pitch=1.0
|distance=16}}
{{Sound table
|sound=Equip gold1.ogg
|sound2=Equip gold2.ogg
|sound3=Equip gold3.ogg
|sound4=Equip gold4.ogg
|sound5=Equip gold5.ogg
|sound6=Equip gold6.ogg
|subtitle=Gold armor clinks
|source=player
|description=When a gold helmet is equipped
|id=item.armor.equip_gold
|translationkey=subtitles.item.armor.equip_gold
|volume=1.0
|pitch=1.0
|distance=16}}
{{Sound table
|sound=Equip diamond1.ogg
|sound2=Equip diamond2.ogg
|sound3=Equip diamond3.ogg
|sound4=Equip diamond4.ogg
|sound5=Equip diamond5.ogg
|sound6=Equip diamond6.ogg
|subtitle=Diamond armor clangs
|source=player
|description=When a diamond helmet is equipped
|id=item.armor.equip_diamond
|translationkey=subtitles.item.armor.equip_diamond
|volume=1.0
|pitch=1.0
|distance=16}}
{{Sound table
|sound=Equip netherite1.ogg
|sound2=Equip netherite2.ogg
|sound3=Equip netherite3.ogg
|sound4=Equip netherite4.ogg
|subtitle=Netherite armor clanks
|source=player
|description=When a netherite helmet is equipped
|id=item.armor.equip_netherite
|translationkey=subtitles.item.armor.equip_netherite
|volume=0.8
|pitch=1.0/0.9
|distance=16}}
{{Sound table
|sound=Equip turtle shell.ogg
|subtitle=Turtle Shell thunks
|source=player
|description=When a turtle shell is equipped
|id=item.armor.equip_turtle
|translationkey=subtitles.item.armor.equip_turtle
|volume=1.0
|pitch=1.0/0.85/1.1
|distance=16}}
{{Sound table
|sound=Random break.ogg
|subtitle=Item breaks
|source=dependent
|description=When a helmet's durability is exhausted
|id=entity.item.break
|translationkey=subtitles.entity.item.break
|volume=0.8
|pitch=0.8-1.2
|distance=16
|foot=1}}
{{el|be}}:
{{Sound table
|type=bedrock
|sound=Equip leather1.ogg
|sound2=Equip leather2.ogg
|sound3=Equip leather3.ogg
|sound4=Equip leather4.ogg
|sound5=Equip leather5.ogg
|sound6=Equip leather6.ogg
|source=player
|description=When a leather helmet or a turtle shell is equipped
|id=armor.equip_leather
|volume=1.0
|pitch=1.0}}
{{Sound table
|sound=Equip chain1.ogg
|sound2=Equip chain2.ogg
|sound3=Equip chain3.ogg
|sound4=Equip chain4.ogg
|sound5=Equip chain5.ogg
|sound6=Equip chain6.ogg
|source=player
|description=When a chain helmet is equipped
|id=armor.equip_chain
|volume=1.0
|pitch=1.0}}
{{Sound table
|sound=Equip iron1.ogg
|sound2=Equip iron2.ogg
|sound3=Equip iron3.ogg
|sound4=Equip iron4.ogg
|sound5=Equip iron5.ogg
|sound6=Equip iron6.ogg
|source=player
|description=When an iron helmet is equipped
|id=armor.equip_iron
|volume=1.0
|pitch=1.0}}
{{Sound table
|sound=Equip gold1.ogg
|sound2=Equip gold2.ogg
|sound3=Equip gold3.ogg
|sound4=Equip gold4.ogg
|sound5=Equip gold5.ogg
|sound6=Equip gold6.ogg
|source=player
|description=When a gold helmet is equipped
|id=armor.equip_gold
|volume=1.0
|pitch=1.0}}
{{Sound table
|sound=Equip diamond1.ogg
|sound2=Equip diamond2.ogg
|sound3=Equip diamond3.ogg
|sound4=Equip diamond4.ogg
|sound5=Equip diamond5.ogg
|sound6=Equip diamond6.ogg
|source=player
|description=When a diamond helmet is equipped
|id=armor.equip_diamond
|volume=1.0
|pitch=1.0}}
{{Sound table
|sound=Equip netherite1.ogg
|sound2=Equip netherite2.ogg
|sound3=Equip netherite3.ogg
|sound4=Equip netherite4.ogg
|source=player
|description=When a netherite helmet is equipped.
|id=armor.equip_netherite
|volume=1.0
|pitch=1.0}}
{{Sound table
|rowspan=2
|sound=Water Splash Old.ogg
|source=block
|description=When a leather helmet is dyed using a cauldron
|id=cauldron.dyearmor
|volume=0.1
|pitch=1.0}}
{{Sound table
|source=block
|description=When a leather helmet's dye is removed using a cauldron
|id=cauldron.cleanarmor
|volume=0.1
|pitch=1.0}}
{{Sound table
|sound=Random break.ogg
|source=player
|description=When a helmet's durability is exhausted
|id=random.break
|volume=1.0
|pitch=0.9
|foot=1}}
==Data values ==
=== ID===
{{edition|java}}:
{{ID table
|edition=java
|showitemtags=y
|showforms=y
|generatetranslationkeys=y
|displayname=Leather Cap
|spritetype=item
|nameid=leather_helmet
|itemtags=freeze_immune_wearables
|form=item}}
{{ID table
|displayname=Chainmail Helmet
|spritetype=item
|nameid=chainmail_helmet
|form=item}}
{{ID table
|displayname=Iron Helmet
|spritetype=item
|nameid=iron_helmet
|form=item}}
{{ID table
|displayname=Diamond Helmet
|spritetype=item
|nameid=diamond_helmet
|form=item}}
{{ID table
|displayname=Golden Helmet
|spritetype=item
|nameid=golden_helmet
|form=item}}
{{ID table
|displayname=Netherite Helmet
|spritetype=item
|nameid=netherite_helmet
|form=item}}
{{ID table
|displayname=Turtle Shell
|spritetype=item
|nameid=turtle_helmet
|form=item
|foot=1}}
{{edition|bedrock}}:
{{ID table
|edition=bedrock
|shownumericids=y
|showforms=y
|notshowbeitemforms=y
|generatetranslationkeys=y
|displayname=Leather Cap
|spritetype=item
|nameid=leather_helmet
|id=335
|form=item}}
{{ID table
|displayname=Chainmail Helmet
|spritetype=item
|nameid=chainmail_helmet
|id=339
|form=item}}
{{ID table
|displayname=Iron Helmet
|spritetype=item
|nameid=iron_helmet
|id=343
|form=item}}
{{ID table
|displayname=Diamond Helmet
|spritetype=item
|nameid=diamond_helmet
|id=347
|form=item}}
{{ID table
|displayname=Golden Helmet
|spritetype=item
|nameid=golden_helmet
|id=351
|form=item}}
{{ID table
|displayname=Netherite Helmet
|spritetype=item
|nameid=netherite_helmet
|id=609
|form=item}}
{{ID table
|displayname=Turtle Shell
|spritetype=item
|nameid=turtle_helmet
|id=573
|form=item
|foot=1}}
===Item data===
When leather caps are dyed, it has the following NBT:
<div class="treeview">
*{{nbt|compound|tag}}: Parent tag.
**{{nbt|compound|display}}: Display properties.
***{{nbt|int|color}}: The color of the leather armor. The tooltip displays "Dyed" if advanced tooltips are disabled, otherwise it displays the hexadecimal color value. Color codes are calculated from the Red, Green and Blue components using this formula:<br>'''<span style="color:red">Red</span>[[wikipedia:Logical shift|<<]]16 + <span style="color:green">Green</span><<8 + <span style="color:blue">Blue</span>'''<ref>For positive values larger than 0x00FFFFFF, the top byte is ignored. All negative values produce white.</ref>
</div>
==Achievements ==
{{load achievements|Iron Man;Tie Dye Outfit;Cover me in debris;Oooh, shiny!}}
==Advancements ==
{{load advancements|Suit Up;Cover me With Diamonds;Oh Shiny;Cover Me in Debris;A Furious Cocktail;How Did We Get Here}}
==History ==
{{History|java classic}}
{{History||August 13, 2009|link=wordofnotch:162091556|Notch tested armor models on [[mob (entity)|mob]]. Only [[chestplate]]s and helmets were available. They were merely aesthetic at the time and had no effect on gameplay.}}
{{History||0.24_SURVIVAL_TEST|[[File:Plate Helmet.png|32px]] Added [[Java_Edition_removed_features#Armor_in_Survival_Test|plate helmet]]s.
|[[File:Chainmail Helmet JE1.png|32px]] Added the model and the texture for unused [[Java_Edition_removed_features#Armor_in_Survival_Test|chain helmet]]s.
|[[File:Zombie full set.png|32px]] [[File:Skeleton helmet.png|26px]] Plate armor models have been tested on [[zombie]]s and [[skeleton]]s. It had no effect on gameplay.}}
{{History|java indev}}
{{History||0.31|snap=20091223-1|Plate and chain armor [[model]]s are no longer used.}}
{{History|||snap=20091231-2|[[File:Leather Cap (item) JE1 BE1.png|32px]] [[File:Studded Helmet (item) JE1.png|32px]] [[File:Chainmail Helmet (item) JE1 BE1.png|32px]] [[File:Iron Helmet (item) JE1 BE1.png|32px]] Added [[item]]s of relation to leather, [[History of textures/Unused textures#Studded armor|studded]], chainmail and plate (iron) helmets.
|The textures of leather helmets are taken from one of [[Notch]]'s previous games, ''[[Legend of the Chambered]]''. The rest are from ''[[Legend of the Chambered 2]]''.}}
{{History||20100206|[[File:Golden Helmet (item) JE1 BE1.png|32px]] [[File:Diamond Helmet (item) JE1 BE1.png|32px]] Added items of golden and diamond helmets.
|Removed leather-chain helmets.}}
{{History||20100212-1|Added armor models.
|[[File:Indev 20100212 armor.png|50px]] Armor models are now displayed on the [[player]] in the [[inventory]].}}
{{History||20100218|[[File:Leather Cap JE1 BE1.png|32px]] [[File:Chainmail Helmet JE2 BE1.png|32px]] [[File:Iron Helmet JE1 BE1.png|32px]] [[File:Golden Helmet JE1 BE1.png|32px]] [[File:Diamond Helmet JE1 BE1.png|32px]] Added models of leather, chainmail, iron, gold, and diamond helmets.
|Helmets can now be [[crafting|crafted]] and worn.
|Helmets now function. All helmets give {{Armor|3}}. Helmets have limited [[item durability|durability]], with lower tier helmets less durable than higher tier helmets.}}
{{History|java alpha}}
{{History||v1.0.8|With the introduction of [[leather]], "Cloth Cap" has been renamed to "Leather Cap".
|Leather cap is now [[crafting|crafted]] with leather instead of [[wool|cloth]].}}
{{History|java}}
{{History||1.0.0|snap=Beta 1.9 Prerelease|The armor protection behavior has been changed. Prior to this update, the total armor protection is based in this equation: (((''total equipped armor damage reduction'' − 1) × (''all equipped armor max damage'' − ''total equipped armor damage'')) ÷ (''total equipped armor max damage'' + 1)). Armor no longer reduces certain damage types to be covered by enchantments.}}
{{History|||snap=October 3, 2011|slink={{tweet|notch|120859830339637249}}|The first images of a [[player]] wearing enchanted armor are revealed.}}
{{History|||snap=Beta 1.9 Prerelease 3|Iron helmets can now be found in the new [[stronghold]] altar [[chest]]s.}}
{{History|||snap=Beta 1.9 Prerelease 4|Helmets can now be [[enchanting|enchanted]].}}
{{History||1.1|snap=12w01a|Iron helmets can now be found in the new blacksmith [[chest]]s in [[village]]s.}}
{{History||1.2.1|snap=12w06a|[[Zombie]]s now drop iron helmets on rare occasions and [[zombie pigman|zombie pigmen]] now drop golden helmets.}}
{{History||1.3.1|snap=12w15a|{{key|Shift}}+clicking can now be used to wear helmets.}}
{{History|||snap=12w21a|Chain helmets can now be obtained legitimately in [[survival]] mode through [[trading]].
|Blacksmith [[villager]]s now [[trading|sell]] chain helmets for 5–6 emeralds.
|Blacksmith villagers now sell diamond helmets for 7 emeralds.
|Blacksmith villagers now sell iron helmets for 4–5 emeralds.
|Butchers now sell leather caps for 2–3 emeralds.}}
{{History||1.4.2|snap=12w32a|[[Mob]] armor has been reintroduced. A partial or full set of any armor is now sometimes worn by [[zombie]]s, [[skeleton]]s and [[zombified piglins|zombie pigmen]], with the likelihood increasing with difficulty.}}
{{History|||snap=August 17, 2012|slink={{tweet|Dinnerbone|236445090929844225}}|[[Jeb]] and [[Dinnerbone]] tweeted pictures of [[dye]]able leather armor.}}
{{History|||snap=12w34a|Leather helmets can now be dyed by [[crafting]] a leather armor piece with [[dye]]s. Dyes can be removed by {{control|use|text=using}} dyed leather armor on a [[cauldron]] with [[water]].
|[[File:Leather Cap JE2.png|32px]] [[File:Leather Cap (item) JE2.png|32px]] Default leather caps textures are now slightly darker.}}
{{History|||snap=12w36a|[[Dye]]d leather caps are now more saturated and have a slight tint of tan in respect to the default armor color.}}
{{History|||snap=12w37a|[[File:Leather Cap JE3 BE2.png|32px]] [[File:Leather Cap (item) JE3 BE2.png|32px]] Leather armor now has non-dyed parts on the cap. This has been implemented so that [[player]]s can distinguish between other types of helmets and similarly colored leather caps.}}
{{History||1.5|snap=13w04a|Helmets in the [[player]]'s hand can now be equipped by right-clicking.
|[[Dispenser]]s can now equip nearby players with helmets.}}
{{History||1.8|snap=14w02a|[[Trading|Trades]] changed: armorer [[villager]]s now [[trading|sell]] chain helmets for 5–7 emeralds.
|Armorer villagers no longer sell diamond helmets.
|Armorer villagers now sell iron helmets for 4–6 emeralds.
|Leatherworkers no longer sell other leather caps.}}
{{History|||snap=14w05a|Helmets no longer turns red when [[mob]]s and [[player]]s are hurt.}}
{{History|||snap=14w06a|Helmets are now visible on [[giant]]s.}}
{{History|||snap=14w25a|Chain helmets [[Java Edition removed features#Chainmail armor|cannot be crafted anymore]] due to the [[item]] form of [[fire]] being [[Java Edition removed features#Obtainable until 1.8|removed]].}}
{{History||1.9|snap=15w31a|Enchanted iron and diamond helmets can now be found in [[end city]] ship [[chest]]s.
|[[Mob]]s now wear armor from the bottom to the top, rather than from the top to the bottom. This means that a mob with three armor pieces, for example, spawn with all armor except a helmet.}}
{{History|||snap=15w34b|Helmet [[item durability|durability]] now affects armor value.}}
{{History|||snap=15w36a|Armor and armor [[enchanting|enchantment]] calculations have been changed. For the original values, see [[Armor/Before 1.9|here]].}}
{{History|||snap=15w36d|Helmet durability affecting value has been removed.
|Helmets now has an attribute controlling the defense points.}}
{{History|||snap=15w50a|Added <code>equip</code> [[sound]]s for leather armor.}}
{{History|||snap=16w02a|Armor and armor enchantment calculations have been changed again.}}
{{History|||snap=16w05a|Armor calculations have been changed, once again.}}
{{History||1.13|snap=17w47a|Prior to [[1.13/Flattening|''The Flattening'']], these [[item]]s' numeral IDs were 298, 302, 306, 310 and 314.}}
{{History|||snap=18w07a|[[File:Turtle Shell.png|32px]] [[File:Turtle Shell (item) JE1 BE1.png|32px]] Added turtle shells.}}
{{History|||snap=18w09a|Golden helmets now have a chance of generating in [[underwater ruins]].}}
{{History|||snap=18w11a|Enchanted leather caps can now generate in the chests of [[shipwreck]]s.}}
{{History|||snap=18w20a|"Chain Helmet" has now been renamed to "Chainmail Helmet".}}
{{History||1.14|snap=18w43a|[[File:Leather Cap JE4 BE2.png|32px]] [[File:Chainmail Helmet JE3 BE2.png|32px]] [[File:Iron Helmet JE2 BE2.png|32px]] [[File:Golden Helmet JE2 BE2.png|32px]] [[File:Diamond Helmet JE2 BE2.png|32px]]<br>[[File:Leather Cap (item) JE4 BE3.png|32px]] [[File:Chainmail Helmet (item) JE2 BE2.png|32px]] [[File:Iron Helmet (item) JE2 BE2.png|32px]] [[File:Golden Helmet (item) JE2 BE2.png|32px]] [[File:Diamond Helmet (item) JE2 BE2.png|32px]] The textures of all types of helmets have been changed.}}
{{History|||snap=18w48a|Leather caps can now be found in [[chest]]s in [[village]] tanneries.}}
{{History|||snap=18w50a|Iron helmets can now be found on [[armor stand]]s in [[taiga]] villages.}}
{{History|||snap=19w08a|[[File:Golden Helmet (item) JE3 BE3.png|32px]] The textures of gold helmet [[item]]s have been changed.}}
{{History|||snap=19w11a|Armorer villagers now sell enchanted diamond helmets, making diamond helmets effectively [[renewable resource|renewable]] again.
|Leatherworker villagers now sell randomly [[dye]]d leather caps.}}
{{History|||snap=19w13a|Armorer villagers now give chainmail helmets to players under the [[Hero of the Village]] effect.}}
{{History||1.16|snap=20w06a|[[File:Netherite Helmet JE1.png|32px]] [[File:Netherite Helmet (item) JE1.png|32px]] Added netherite helmets.}}
{{History|||snap=20w07a|[[File:Leather piglin helmet.png|32px]] [[File:Chainmail piglin helmet.png|32px]] [[File:Iron piglin helmet.png|32px]] [[File:Golden piglin helmet.png|32px]] [[File:Diamond piglin helmet.png|32px]] [[File:Netherite piglin helmet JE1.png|32px]] Added textures and [[model]]s for all helmets when they are used by [[piglin]]s.
|Netherite helmets are now obtained by combining one diamond armor piece and one netherite ingot in a crafting table.
|[[File:Turtle Shell piglin MC-172110.png|32px]] Turtle shells, when used by piglins and [[zombified piglin]]s, result in a [[missing texture]] when being displayed.<ref>{{Cite bug|MC|172110|Texture of turtle shells is missing when worn by a piglin or zombified piglin|date=February 14, 2020}}</ref>}}
{{History|||snap=20w09a|[[File:Diamond Helmet (item) JE3 BE3.png|32px]] The textures of diamond helmet [[item]]s have been changed.}}
{{History|||snap=20w10a|[[File:Netherite Helmet JE2 BE1.png|32px]] [[File:Netherite Helmet (item) JE2 BE1.png|32px]] The texture of netherite helmets has been changed.
|[[File:Netherite piglin helmet.png|32px]] The texture of netherite helmets for [[piglin]]s has been changed.
|Netherite helmets can no longer be [[crafting|crafted]].
|Netherite helmets are now obtained by combining one diamond helmet and one netherite ingot in a [[smithing table]].}}
{{History|||snap=20w16a|Golden and netherite helmets now generate randomly [[enchanting|enchanted]], and sometimes [[damage]]d, in [[bastion remnant]] and [[ruined portal]] chests.}}
{{History|||snap=20w17a|Diamonds helmets now generate in place of netherite helmets in bastion remnant [[chest]]s.}}
{{History|||snap=pre3|The special helmet [[model]]s and textures created for [[piglin]]s have been removed except for leather helmets.}}
{{History||1.17|snap=20w48a|Wearing a leather helmet now prevents [[Powder Snow#Freezing|freezing]] entirely.}}
{{History|||snap=21w13a|The two unused textures of the leather cap for [[piglin]]s<ref><code>/assets/minecraft/textures/models/armor/piglin_leather_layer_1.png</code></ref><ref><code>/assets/minecraft/textures/models/armor/piglin_leather_layer_1_overlay.png</code></ref> have been removed.}}
{{History||1.18.2|snap=22w03a|Netherite helmet knockback resistance is no longer random.}}
{{History||1.19|snap=22w17a|[[File:Leather Cap JE5.png|32px]] The texture of the leather cap item has been changed.|Changed the leather cap texture when worn so the center bar now extends to the bottom of the back face.}}
{{History||1.20<br>(Experimental)|link=1.19.4|snap=23w04a|Non-leather helmets can now be trimmed using a [[smithing table]].
|There are 10 types of material that determine the color of the trim:
*Iron
*Copper
*Gold
*Lapis
*Emerald
*Diamond
*Netherite
*Redstone
*Amethyst
*Quartz
|Upgrading diamond helmets to netherite helmets now requires the netherite upgrade [[smithing template]].}}
{{History|||snap=23w05a|Leather caps can now be trimmed using a smithing table.|Helmets can now have trims of the same material it is made out of.}}
{{History|||snap=23w06a|Swapped {{cd|iron}} and {{cd|iron_darker}} palette, then made {{cd|iron_darker}} darker overall.}}
{{History||1.19.4|snap=23w05a|Helmets can now be swapped by {{ctrl|using}} them in the hotbar.<ref>{{bug|MC-216270|||Fixed}}</ref>}}
{{History||?|Helmets can now be swapped in [[armor stand]]s by {{ctrl|using}} them/[[head]]s/[[carved pumpkin]]s in the armor stand's slot.}}
{{History||1.20|snap=23w12a|The pattern textures of dune and sentry armor trims are changed.|Those previous patterns were left with different names: dune was renamed sentry and sentry was renamed shaper.}}
{{History|pocket alpha}}
{{History||v0.6.0|[[File:Leather Cap JE1 BE1.png|32px]] [[File:Chainmail Helmet JE2 BE1.png|32px]] [[File:Iron Helmet JE1 BE1.png|32px]] [[File:Golden Helmet JE1 BE1.png|32px]] [[File:Diamond Helmet JE1 BE1.png|32px]]<br>[[File:Leather Cap (item) JE1 BE1.png|32px]] [[File:Chainmail Helmet (item) JE1 BE1.png|32px]] [[File:Iron Helmet (item) JE1 BE1.png|32px]] [[File:Golden Helmet (item) JE1 BE1.png|32px]] [[File:Diamond Helmet (item) JE1 BE1.png|32px]] Added helmets.}}
{{History||v0.8.0|snap=build 2|[[File:Leather Cap (item) JE3 BE2.png|32px]] The leather helmet sprite has been changed to that of {{el|je}}, but its armor [[model]] remains that of older versions.}}
{{History||v0.9.0|snap=build 1|Iron helmets now naturally generate in [[village]] [[chest]]s and in [[stronghold]] altar chests.}}
{{History||v0.11.0|snap=build 11|Helmets now protect against [[damage]] from [[mob]]s only.}}
{{History||v0.12.1|snap=build 1|Helmets can now be worn by mobs.
|Chainmail helmets can now be obtained in [[survival]] mode from a mob wearing it.}}
{{History||?|Helmets no longer turn red when [[mob]]s and [[player]]s are hurt.}}
{{History||v0.14.0|snap=build 1|[[File:Leather Cap JE3 BE2.png|32px]] The texture of leather helmets have been changed.
|Leather helmets can now be dyed.}}
{{History||v0.15.0|snap=build 1|Helmets can now be obtained from [[stray]]s and [[husk]]s that naturally spawn with armor.}}
{{History|pocket}}
{{History||1.0.0|snap=alpha 0.17.0.1|[[Enchanting|Enchanted]] iron helmets and enchanted diamond helmets can now be found inside [[chest]]s within [[end city|end cities]].}}
{{History||1.0.4|snap=alpha 1.0.4.0|Iron helmets and chainmail helmets are now [[trading|sold]] by armorer smith [[villager]]s via trading.}}
{{History||1.1.0|snap=alpha 1.1.0.0|Golden, chain and iron helmets can now be [[smelting|smelted]] down into one of their respective [[nugget]]s.}}
{{History|bedrock}}
{{History||1.4.0|snap=beta 1.2.14.2|Chainmail helmets now generate in [[buried treasure]] chests.
|Enchanted leather helmets can now be found inside [[shipwreck]] supply room [[chest]]s.}}
{{History|||snap=beta 1.2.20.1|Golden helmets can now be found inside [[underwater ruins]] chests.}}
{{History||1.5.0|snap=beta 1.5.0.4|[[File:Turtle Shell.png|32px]] [[File:Turtle Shell (item) JE1 BE1.png|32px]] Added turtle shells.}}
{{History||1.10.0|snap=beta 1.10.0.3|[[File:Leather Cap JE4 BE2.png|32px]] [[File:Chainmail Helmet JE3 BE2.png|32px]] [[File:Iron Helmet JE2 BE2.png|32px]] [[File:Golden Helmet JE2 BE2.png|32px]] [[File:Diamond Helmet JE2 BE2.png|32px]]<br>[[File:Leather Cap (item) JE4 BE3.png|32px]] [[File:Chainmail Helmet (item) JE2 BE2.png|32px]] [[File:Iron Helmet (item) JE2 BE2.png|32px]] [[File:Golden Helmet (item) JE2 BE2.png|32px]] [[File:Diamond Helmet (item) JE2 BE2.png|32px]] The textures of all types of helmets have been changed.
|Iron helmets now can be found in plains [[village]] weaponsmith [[chest]]s.
|Leather helmets can now be found inside plains village tannery chests.}}
{{History||1.11.0|snap=beta 1.11.0.1|Iron helmets now can be found in [[savanna]], [[taiga]], [[desert]], [[snowy taiga]] and [[snowy tundra]] [[village]] weaponsmith [[chest]]s.
|Leather helmets can now be found inside savanna, taiga, desert, snowy taiga and snowy tundra village tannery chests.
|Iron helmets can now be found in [[village]] armorer chests.}}
{{History|||snap=beta 1.11.0.4|[[Pillager]]s and [[vindicator]]s that spawn in [[raid]]s can now drop iron helmets.
|Diamond helmets are now sold by armorer villagers.}}
{{History||1.11.0|snap=beta 1.11.0.5|[[File:Golden Helmet (item) JE3 BE3.png|32px]] The textures of gold helmet [[item]]s have been changed.}}
{{History||1.12.0|snap=beta 1.12.0.2|[[File:Armor Stand with Leather Armor MCPE-44669.png|32px]] Leather armor no longer shows as being [[dye]]d properly when worn by [[armor stand]]s.}}
{{History||1.13.0|snap=beta 1.13.0.1|Leather armor now appears properly dyed when worn by armor stands.}}
{{History||1.16.0|snap=beta 1.16.0.51|[[File:Netherite Helmet JE2 BE1.png|32px]] [[File:Netherite Helmet (item) JE2 BE1.png|32px]] Added netherite helmets.
|[[File:Diamond Helmet (item) JE3 BE3.png|32px]] The textures of diamond helmet [[item]]s have been changed.
|Helmets can now be obtained from [[piglin]]s that naturally spawn with golden helmets.}}
{{History|||snap=beta 1.16.0.57|Golden and netherite helmets now generate randomly [[enchanting|enchanted]], and sometimes [[damage]]d, in [[bastion remnant]] chests.
|Netherite helmets can no longer be [[crafting|crafted]].
|Netherite helmets are now obtained by combining one diamond helmet and one netherite ingot in a [[smithing table]].}}
{{History|||snap=beta 1.16.0.63|Diamonds helmets now generate in place of netherite helmets in bastion remnant [[chest]]s.}}
{{History|||snap=beta 1.16.200.53|Netherite helmets now gives a 90% reduction in knockback.}}
{{History||1.16.210|snap=beta 1.16.210.53|Wearing leather helmets now prevents [[Powder Snow#Freezing|freezing]] entirely.}}
{{History|console}}
{{History||xbox=TU1|xbone=CU1|ps=1.0|wiiu=Patch 1|switch=1.0.1|[[File:Leather Cap JE1 BE1.png|32px]] [[File:Chainmail Helmet JE2 BE1.png|32px]] [[File:Iron Helmet JE1 BE1.png|32px]] [[File:Golden Helmet JE1 BE1.png|32px]] [[File:Diamond Helmet JE1 BE1.png|32px]]<br>[[File:Leather Cap (item) JE1 BE1.png|32px]] [[File:Chainmail Helmet (item) JE1 BE1.png|32px]] [[File:Iron Helmet (item) JE1 BE1.png|32px]] [[File:Golden Helmet (item) JE1 BE1.png|32px]] [[File:Diamond Helmet (item) JE1 BE1.png|32px]] Added helmets.
|Added a quick equip for armor to the [[inventory]] interface.}}
{{History||xbox=TU12|ps=1.03|[[File:Leather Cap JE3 BE2.png|32px]] [[File:Leather Cap (item) JE3 BE2.png|32px]] The textures for leather helmets have been changed.}}
{{History||xbox=TU14|ps=1.05|Leather helmets can now be [[dye]]d.
|[[Item repair]] can now repair helmets.}}
{{History||xbox=TU25|xbone=CU13|ps=1.16|Helmets now have the quick equip functionality.}}
{{History||xbox=TU53|xbone=CU43|ps=1.49|wiiu=Patch 23|switch=1.0.3|Golden, chain and iron helmets can now be [[smelting|smelted]] down into one of their respective [[nugget]]s.}}
{{History|PS4}}
{{History||1.90|[[File:Chainmail Helmet (item) JE2 BE2.png|32px]] [[File:Iron Helmet (item) JE2 BE2.png|32px]] [[File:Golden Helmet (item) JE2 BE2.png|32px]] [[File:Diamond Helmet (item) JE2 BE2.png|32px]] The textures of all types of helmet items have been changed (except for the leather helmets).}}
{{History|new 3ds}}
{{History||0.1.0|[[File:Leather Cap JE1 BE1.png|32px]] [[File:Chainmail Helmet JE2 BE1.png|32px]] [[File:Iron Helmet JE1 BE1.png|32px]] [[File:Golden Helmet JE1 BE1.png|32px]] [[File:Diamond Helmet JE1 BE1.png|32px]]<br>[[File:Leather Cap (item) JE3 BE2.png|32px]] [[File:Chainmail Helmet (item) JE1 BE1.png|32px]] [[File:Iron Helmet (item) JE1 BE1.png|32px]] [[File:Golden Helmet (item) JE1 BE1.png|32px]] [[File:Diamond Helmet (item) JE1 BE1.png|32px]] Added helmets.}}
{{History|foot}}
<gallery>
File:ArmorModel Aug 13 2009.jpg|First image of armor.
File:DinnerboneArmor.png|[[Dinnerbone]]'s first screenshot of dyed armor.
File:ArmorPE.png
</gallery>
;Armor durability from Indev until late Beta
{| class="wikitable" data-description="Armor Durability during Indev until late Beta" style="text-align:center;"
|-
!Leather
!Golden
!Chainmail
!Iron
!Diamond
|-
|33
|66
|66
|132
|264
|}
==Issues ==
{{issue list}}
==Trivia ==
*Unlike the other helmets, the netherite helmet covers most of the player's face, due to a nose guard and cheek plates.
*The turtle shell is the only helmet that is not part of a complete set.
* In Bedrock Edition, there exists a bug<ref>{{Cite bug|MCPE|109048|Efficiency 1 Leather Cap in Woodland Mansions|date=December 1, 2020}}</ref> that makes it possible to obtain a Leather Cap enchanted with Efficiency I from [[Woodland Mansion]] chests with a chance of 1.45%. The enchantment has no effect on the cap, however.
==Gallery ==
<gallery>
File:Zombie helmet.png|A zombie wearing a helmet in [[Survival Test]].
</gallery>
===Enchanted Helmets===
<gallery>
File:Enchanted Leather Cap (item).gif
File:Enchanted Chainmail Helmet (item).gif
File:Enchanted Iron Helmet (item).gif
File:Enchanted Golden Helmet (item).gif
File:Enchanted Diamond Helmet (item).gif
File:Enchanted Netherite Helmet (item).gif
File:Enchanted Turtle Shell (item).gif
</gallery>
<gallery>
File:Enchanted Leather Helmet.gif
File:Enchanted Chainmail Helmet.gif
File:Enchanted Iron Helmet.gif
File:Enchanted Golden Helmet.gif
File:Enchanted Diamond Helmet.gif
File:Enchanted Netherite Helmet.gif
File:Enchanted Turtle Shell.gif
</gallery>
==References ==
{{reflist}}
==External Links ==
*[https://www.minecraft.net/en-us/article/taking-inventory--helmet Taking Inventory: Helmet] – Minecraft.net on February 20, 2020
{{Items}}
[[Category:Armor]]
[[es:Casco]]
[[ja:ヘルメット]]
[[ko:투구]]
[[pt:Capacete]]
[[pl:Hełm]]
[[zh:头盔]]</li><li>[[Bowl|Bowl]]<br/>{{Item
| image = Bowl.png
| renewable = Yes
| stackable = Yes (64)
}}
'''Bowls''' are containers that can hold certain [[food]]s.
== Obtaining ==
=== Crafting ===
{{Crafting
|A2= Any Planks
|C2= Any Planks
|B3= Any Planks
|Output= Bowl,4
|type= Material
}}
=== Fishing ===
Bowls can be obtained as a "junk" item while [[fishing]].
=== Eating ===
A bowl containing food becomes an empty bowl when the food is eaten.
=== Mob loot ===
When a [[turtle]] is killed by a [[Thunderstorm#Lightning|lightning bolt]], it drops 1 bowl.<ref name=BowlReport>{{Cite bug|MC|125562|Turtles drop bowls when killed by lightning|date=February 16, 2018}}</ref><ref>{{Cite bug|MCPE|57038| Turtles killed by lightning drop Bowls.|date=November 17, 2019}}</ref>
== Usage ==
=== Crafting ingredient ===
{{crafting usage}}
=== Mooshrooms ===
{{control|use|text=Using}} a bowl on a [[mooshroom]] turns the bowl into [[mushroom stew]] or [[suspicious stew]]. The stew can then be consumed immediately and the process repeated, making this an excellent way to quickly restore depleted [[hunger]] and [[saturation]] with almost no cost or effort.
=== Fuel ===
Bowls can be used as a fuel in [[furnace]]s, smelting 0.5 items per bowl {{in|je}}, and 1 item per bowl {{in|be}}.
== Data values ==
=== ID ===
{{edition|java}}:
{{ID table
|edition=java
|showforms=y
|generatetranslationkeys=y
|displayname=Bowl
|spritetype=item
|nameid=bowl
|form=item
|foot=1}}
{{edition|bedrock}}:
{{ID table
|edition=bedrock
|shownumericids=y
|showforms=y
|notshowbeitemforms=y
|generatetranslationkeys=y
|displayname=Bowl
|spritetype=item
|nameid=bowl
|id=321
|form=item
|foot=1}}
== History ==
{{History|java indev}}
{{History||0.31|snap=20100130|[[File:Bowl JE1 BE1.png|32px]] Added bowls.
|Bowls are used to craft [[mushroom soup]].}}
{{History|java}}
{{History||1.0.0|snap=Beta 1.9 Prerelease|Added [[mooshroom]]s, which can be {{control|use|text=milked}} with a bowl.}}
{{History||1.2.4|snap=release|[[Spruce planks]], [[birch planks]], and [[jungle planks]] can now be used to craft bowls.}}
{{History||1.7.2|snap=13w36a|Bowls can now be obtained as one of the "junk" [[item]]s by [[fishing]].}}
{{History|||snap=1.7.1|[[Acacia planks]] and [[dark oak planks]] can now be used to craft bowls.}}
{{History||1.8|snap=14w27a|Bowls are now used to craft [[rabbit stew]].}}
{{History||1.9|snap=15w31a|Bowls are now used to craft [[beetroot soup]].}}
{{History||1.11|snap=16w33a|Bowls can now be used to fuel [[furnace]]s.}}
{{History||1.13|snap=17w47a|Prior to [[1.13/Flattening|''The Flattening'']], this [[item]]'s numeral ID was 281.}}
{{History|||snap=18w07a|[[Turtles]] drop 0 to 1 bowls if killed by [[lightning]].<ref name=BowlReport/>}}
{{History||1.14|snap=18w43a|[[File:Bowl JE2 BE2.png|32px]] The texture of bowls has now been changed.
|Bowls are now used to craft [[suspicious stew]].}}
{{History||1.16|snap=20w06a|[[Crimson planks]] and [[warped planks]] can now be used to craft bowls.}}
{{History||1.19|snap=22w11a|[[Mangrove planks]] can now be used to craft bowls.}}
{{History|pocket alpha}}
{{History||v0.2.0|[[File:Bowl JE1 BE1.png|32px]] Added bowls. They are currently unobtainable and serve no purpose.}}
{{History||v0.3.0|Bowls are now [[craft]]able. They still serve no purpose.}}
{{History||v0.4.0|Bowls are now used to craft [[mushroom stew]].}}
{{History||v0.5.0|Bowls now appear in the [[nether reactor]].}}
{{History||v0.8.0|snap=build 2|Bowls are now used to craft [[beetroot soup]].}}
{{History|||snap=build 7|Bowls can now be used as fuel in a [[furnace]].}}
{{History||v0.9.0|snap=build 1|Added bowls to [[creative]] mode.
|[[Mooshroom]]s can now be "milked" to obtain [[mushroom stew]].}}
{{History||v0.12.1|snap=build 1|Bowls are no longer available from the [[nether reactor]].}}
{{History||v0.13.0|snap=build 1|Bowls are now used to craft [[rabbit stew]].}}
{{History|bedrock}}
{{History||1.10.0|snap=beta 1.10.0.3|[[File:Bowl JE2 BE2.png|32px]] The texture of bowls has now been changed.}}
{{History||1.13.0|snap=beta 1.13.0.9|Bowls can now be used to craft [[suspicious stew]].}}
{{History|console}}
{{History||xbox=TU1|xbone=CU1|ps=1.0|wiiu=Patch 1|switch=1.0.1|[[File:Bowl JE1 BE1.png|32px]] Added bowls.}}
{{History||xbox=TU9|Bowls now stack to 64.}}
{{History||xbox=none|xbone=none|ps=1.90|wiiu=none|switch=none|[[File:Bowl JE2 BE2.png|32px]] The texture of bowls has now been changed.}}
{{History|new 3ds}}
{{History||0.1.0|[[File:Bowl JE1 BE1.png|32px]] Added bowls.}}
{{History|foot}}
== Issues ==
{{issue list}}
== Trivia ==
* {{in|be}}, bowls are actually more fuel efficient than [[stick]]s. If 6 wood planks are crafted into 8 bowls, 8 items can be [[smelt]]ed; but if those are crafted into 12 sticks, only 6 items can be smelted. This can be useful when the player only has access to Nether wood types, which cannot be used as fuel.
== See also ==
* [[Mushrooms]]
== References ==
{{reflist}}
== External Links ==
* {{Mcnet|taking-inventory--bowl|Taking Inventory: Bowl|April 25, 2019}}
{{Items}}
[[Category:Renewable resources]]
[[cs:Miska]]
[[de:Schüssel]]
[[es:Cuenco]]
[[fr:Bol]]
[[hu:Tál]]
[[it:Ciotola]]
[[ja:ボウル]]
[[ko:그릇]]
[[nl:Kom]]
[[pl:Miska]]
[[pt:Tigela]]
[[ru:Миска]]
[[th:ชาม]]
[[uk:Миска]]
[[zh:碗]]</li></ul> | 14w02a | Fletcher villagers now sell 1 bow for 2–3 emeralds. | |||
| 14w30a | Bow placement when drawing back has been slightly changed. | ||||
1.9{{Extension DPL}}<ul><li>[[Banner Pattern|Banner Pattern]]<br/>{{Item
| image = Banner Pattern.png
| rarity =
* '''Flower Charge, Field Masoned, Bordure Indented, Globe, Snout'''
* Common
* '''Creeper Charge, Skull Charge'''
* Uncommon
* '''Thing'''
* Epic
| renewable =
* '''Snout, Thing''': No
* '''All others''': Yes
| stackable = No
}}
'''Banner patterns''' are [[item]]s used to customize [[banner]]s inside [[loom]]s.
There are six patterns {{in|java}} and eight {{in|bedrock}}.
== Obtaining ==
[[File:Banner Patterns 20w15a.png|thumb|All six banner patterns {{in|java}} with their various sources.]]
=== Crafting ===
{{see also|Banner/Patterns|title1=List of patterned banners}}
4 out of 6 banner patterns {{only|JE}} and 2 more {{only|BE}} can be obtained by crafting. They are crafted by combining one [[paper]] along with a certain material.
{{Crafting
|head=1
|Paper
|Creeper Head
|Output=Banner Pattern Creeper
|type=Miscellaneous
|description=Creeper face
}}
{{Crafting
|Paper
|Wither Skeleton Skull
|Output=Banner Pattern Skull
|type=Miscellaneous
|description=Skeleton skull and crossbones
}}
{{Crafting
|Paper
|Oxeye Daisy
|Output=Banner Pattern Flower
|type=Miscellaneous
|description=Daisy
}}
{{Crafting
|Paper
|Enchanted Golden Apple
|Output=Banner Pattern Thing
|type=Miscellaneous
|showdescription=true
|description=Former [[Mojang Studios]] logo
}}
{{Crafting
|Paper
|Bricks
|Output=Banner Pattern Field Masoned
|type=Miscellaneous
|description={{only|bedrock}}
}}
{{Crafting
|Paper
|Vines
|Output=Banner Pattern Bordure Indented
|type=Miscellaneous
|description={{only|bedrock}}
|foot=1
}}
=== Trading ===
'''Globe banner pattern''' is obtained by trading with a master-level [[Trading#Cartographer|cartographer villager]] for a price of 8 emeralds.
=== Chest loot ===
'''Snout banner pattern''' is obtained in the [[Bastion Remnant]] as loot.
{{LootChestItem|snout-banner-pattern}}
== Usage ==
=== Loom ingredient ===
Banner patterns are used in [[loom]]s to add customization to [[banner]]s. The pattern must be combined with 1 banner and 1 [[dye]]. Upon usage in the loom, the banner pattern is not consumed.
{{Looming
|head=1
|showdescription=1
|name=[[Banner|Flower Charge Banner]]
|ingredients={{:Banner/recipe|ingredients}}
|{{:Banner/recipe|banner}}
|Matching Dye
|Banner Pattern Flower Charge
|Flower Charge
|{{:Banner/recipe|output|Flower Charge}}
|Blink=Banner
|Olink=Banner
|description=Emblazons a flower charge (flower icon)
}}
{{Looming
|name=[[Banner|Creeper Charge Banner]]
|ingredients={{:Banner/recipe|ingredients}}
|{{:Banner/recipe|banner}}
|Matching Dye
|Banner Pattern Creeper Charge
|Creeper Charge
|{{:Banner/recipe|output|Creeper Charge}}
|Blink=Banner
|Olink=Banner
|description=Emblazons a creeper charge (creeper face)
}}
{{Looming
|name=[[Banner|Skull Charge Banner]]
|ingredients={{:Banner/recipe|ingredients}}
|{{:Banner/recipe|banner}}
|Matching Dye
|Banner Pattern Skull Charge
|Skull Charge
|{{:Banner/recipe|output|Skull Charge}}
|Blink=Banner
|Olink=Banner
|description=Emblazons a skull charge (skull and crossbones)
}}
{{Looming
|name=[[Banner|Thing Banner]]
|ingredients={{:Banner/recipe|ingredients}}
|{{:Banner/recipe|banner}}
|Matching Dye
|Banner Pattern Thing
|Thing
|{{:Banner/recipe|output|Thing}}
|Blink=Banner
|Olink=Banner
|description=Emblazons a thing (old Mojang logo)}}
{{Looming
|name=[[Banner|Snout Banner]]
|ingredients={{:Banner/recipe|ingredients}}
|{{:Banner/recipe|banner}}
|Matching Dye
|Banner Pattern Snout
|Snout
|{{:Banner/recipe|output|Snout}}
|Blink=Banner
|Olink=Banner
|description=Emblazons a piglin snout
}}
{{Looming
|name=[[Banner|Globe Banner]]
|ingredients={{:Banner/recipe|ingredients}}
|{{:Banner/recipe|banner}}
|Matching Dye
|Banner Pattern Globe
|Globe
|{{:Banner/recipe|output|Globe}}
|Blink=Banner
|Olink=Banner
|description=Emblazons a globe (cube shaped earth)
}}
{{Looming
|name=[[Banner|Bordure Indented Banner]]
|ingredients={{:Banner/recipe|ingredients}}
|{{:Banner/recipe|banner}}
|Matching Dye
|Banner Pattern Bordure Indented
|Bordure Indented
|{{:Banner/recipe|output|Bordure Indented}}
|Blink=Banner
|Olink=Banner
|description=Emblazons a bordure indented (fancy border){{only|bedrock}}
}}
{{Looming
|name=[[Banner|Field Masoned Banner]]
|ingredients={{:Banner/recipe|ingredients}}
|{{:Banner/recipe|banner}}
|Matching Dye
|Banner Pattern Field Masoned
|Field Masoned
|{{:Banner/recipe|output|Field Masoned}}
|Blink=Banner
|Olink=Banner
|description=Emblazons a field masoned (brick pattern){{only|bedrock}}
|foot=1
}}
== Data values ==
=== ID ===
{{edition|java}}:
{{ID table
|edition=java
|firstcolumnname=Banner Pattern
|showforms=y
|generatetranslationkeys=y
|displayname=Flower Charge
|spritename=banner-pattern
|spritetype=item
|nameid=flower_banner_pattern
|form=item}}
{{ID table
|displayname=Creeper Charge
|spritename=banner-pattern
|spritetype=item
|nameid=creeper_banner_pattern
|form=item}}
{{ID table
|displayname=Skull Charge
|spritename=banner-pattern
|spritetype=item
|nameid=skull_banner_pattern
|form=item}}
{{ID table
|displayname=Thing
|spritename=banner-pattern
|spritetype=item
|nameid=mojang_banner_pattern
|form=item}}
{{ID table
|displayname=Globe
|spritename=banner-pattern
|spritetype=item
|nameid=globe_banner_pattern
|form=item}}
{{ID table
|displayname=Snout
|spritename=banner-pattern
|spritetype=item
|nameid=piglin_banner_pattern
|form=item
|foot=1}}
{{edition|bedrock}}:
{{ID table
|edition=bedrock
|firstcolumnname=Banner Pattern
|showaliasids=y
|shownumericids=y
|showforms=y
|notshowbeitemforms=y
|generatetranslationkeys=y
|displayname=Creeper Charge
|spritename=banner-pattern
|spritetype=item
|nameid=creeper_banner_pattern
|aliasid=banner_pattern / 0
|id=582
|form=item
|translationkey=item.banner_pattern.name, item.banner_pattern.creeper}}
{{ID table
|displayname=Skull Charge
|spritename=banner-pattern
|spritetype=item
|nameid=skull_banner_pattern
|aliasid=banner_pattern / 1
|id=583
|form=item
|translationkey=item.banner_pattern.name, item.banner_pattern.skull}}
{{ID table
|displayname=Flower Charge
|spritename=banner-pattern
|spritetype=item
|nameid=flower_banner_pattern
|aliasid=banner_pattern / 2
|id=581
|form=item
|translationkey=item.banner_pattern.name, item.banner_pattern.flower}}
{{ID table
|displayname=Thing
|spritename=banner-pattern
|spritetype=item
|nameid=mojang_banner_pattern
|aliasid=banner_pattern / 3
|id=584
|form=item
|translationkey=item.banner_pattern.name, item.banner_pattern.thing}}
{{ID table
|displayname=Field Masoned
|spritename=banner-pattern
|spritetype=item
|nameid=field_masoned_banner_pattern
|aliasid=banner_pattern / 4
|id=585
|form=item
|translationkey=item.banner_pattern.name, item.banner_pattern.bricks}}
{{ID table
|displayname=Bordure Indented
|spritename=banner-pattern
|spritetype=item
|nameid=bordure_indented_banner_pattern
|aliasid=banner_pattern / 5
|id=586
|form=item
|translationkey=item.banner_pattern.name, item.banner_pattern.vines}}
{{ID table
|displayname=Snout
|spritename=banner-pattern
|spritetype=item
|nameid=piglin_banner_pattern
|aliasid=banner_pattern / 6
|id=587
|form=item
|translationkey=item.banner_pattern.name, item.banner_pattern.piglin}}
{{ID table
|displayname=Globe
|spritename=banner-pattern
|spritetype=item
|nameid=globe_banner_pattern
|aliasid=banner_pattern / 7
|id=588
|form=item
|translationkey=item.banner_pattern.name, item.banner_pattern.globe
|foot=1}}
== Achievements ==
{{load achievements|Fruit on the Loom}}
== History ==
{{History|java}}
{{History||1.14|snap=18w43a|[[File:Banner Pattern JE1 BE1.png|32px]] [[File:Banner Pattern JE1 BE1.png|32px]] [[File:Banner Pattern JE1 BE1.png|32px]] [[File:Banner Pattern JE1 BE1.png|32px]] Added banner patterns for flower charge, creeper charge, skull charge and thing patterns.}}
{{History|||snap=19w11a|[[File:Banner Pattern JE1 BE1.png|32px]] Added banner pattern for globe.
|The banner pattern for globe can be [[trading|bought]] from master-level cartographer [[villager]]s for 8 [[emerald]]s.}}
{{History||1.16|snap=20w15a|[[File:Banner Pattern JE1 BE1.png|32px]] Added the piglin banner pattern.}}
{{History|||snap=20w16a|The piglin banner pattern can now be found in [[chest]]s in [[bastion remnants]].}}
{{History|||snap=20w18a|The piglin pattern has now been renamed to "Snout".}}
{{History||1.16.2|snap=20w30a|The chance of finding the "Snout" banner pattern in bastion remnant chests has been increased from 5.5% to 10.1%.}}
{{History|bedrock}}
{{History||1.10.0|snap=beta 1.10.0.3|[[File:Banner Pattern JE1 BE1.png|32px]] [[File:Banner Pattern JE1 BE1.png|32px]] [[File:Banner Pattern JE1 BE1.png|32px]] [[File:Banner Pattern JE1 BE1.png|32px]] [[File:Banner Pattern JE1 BE1.png|32px]] [[File:Banner Pattern JE1 BE1.png|32px]] Added banner patterns for creeper charge, skull charge, flower charge, thing, field masoned and bordure indented patterns.}}
{{History||1.11.0|snap=beta 1.11.0.4|The banner patterns flower charge, field masoned and bordure indented can now be [[trading|bought]] from cartographer [[villager]]s.}}
{{History||1.16.0|snap=beta 1.16.0.57|[[File:Banner Pattern JE1 BE1.png|32px]] Added the piglin banner pattern.}}
{{History|||snap=beta 1.16.0.59|The piglin pattern has now been renamed to "Snout".}}
{{History||1.16.100|snap=beta 1.16.100.55|The "Thing" banner pattern can now be crafted at the [[loom]].}}
{{History||1.16.100|snap=beta 1.16.100.56|The ID of banner patterns have been changed from <code>banner_pattern</code> to <code><type>_banner_pattern</code>.}}
{{History||1.18.10|snap=beta 1.18.10.24|[[File:Banner Pattern JE1 BE1.png|32px]] Added banner pattern for globe. It is currently unobtainable in survival.}}
{{History|||snap=beta 1.18.10.26|The banner pattern for globe are now obtainable in survival and can be [[trading|bought]] from master-level cartographer [[villager]]s for 8 [[emerald]]s.
|Removed flower charge, field masoned and bordure indented banner pattern from villager trading.}}
{{History|PS4}}
{{History||1.90|[[File:Banner Pattern JE1 BE1.png|32px]] [[File:Banner Pattern JE1 BE1.png|32px]] [[File:Banner Pattern JE1 BE1.png|32px]] [[File:Banner Pattern JE1 BE1.png|32px]] [[File:Banner Pattern JE1 BE1.png|32px]] [[File:Banner Pattern JE1 BE1.png|32px]] Added banner patterns for creeper charge, skull charge, flower charge, thing, field masoned and bordure indented patterns.}}
{{History|foot}}
== Issues ==
{{issue list}}
{{Items}}
[[de:Bannervorlage]]
[[es:Diseño de estandarte]]
[[fr:Motif de bannière]]
[[ja:旗の模様]]
[[ko:현수막 무늬]]
[[pl:Wzór sztandaru]]
[[pt:Desenho para estandarte]]
[[ru:Узор флага]]
[[th:ลวดลายธง]]
[[zh:旗帜图案]]</li><li>[[Drinks|Drinks]]<br/>[[File:Drinking Steve.png|150px|right]] [[File:Drinking Alex.png|150px|right]]
'''Drinks''' are a narrow class of consumable [[item]]s that can be ingested by the [[player]] in an extremely similar manner to [[food]]. However, drinks are not encountered quite as commonly as food is, and they are not nearly as integral to Survival gameplay. Drinks can generally be distinguished from food by the sounds they make upon consumption, the lack of [[particles]] they emit, and the fact that they leave an empty container item in the [[inventory]] after consumption. Drinks do not affect [[hunger]] or saturation values upon use (with the exception of [[honey bottle]]s), and do not need those values to be depleted in order to be consumed.
Drinks are drunk by holding {{control|use item}} while having the drink item selected in the hotbar or in the off hand.
== Drinks ==
{{/table}}
== History ==
{{main|Milk#History|Potion#History|Honey Bottle#History}}
{{History|java alpha}}
{{History||v1.0.11|[[File:Milk Bucket JE1 BE1.png|32px]] Added milk.}}
{{History|java}}
{{History||1.0.0|snap=Beta 1.9 Prerelease 3|Added water bottles and potions.}}
{{History||1.15|snap=19w34a|[[File:Honey Bottle JE1.png|32px]] Added honey bottles.}}
{{History|pocket alpha}}
{{History||v0.7.0|[[File:Milk Bucket JE1 BE1.png|32px]] Added milk buckets.}}
{{History||v0.12.1|snap=build 1|Added water bottles and potions.}}
{{History|bedrock}}
{{History||1.14.0|snap=beta 1.14.0.1|[[File:Honey Bottle BE1.png|32px]] Added honey bottles.}}
{{History|foot}}
{{Items}}
[[ja:飲み物]]
[[pt:Bebidas]]
[[Category:Food]]</li></ul> | 15w31a | When shooting, the arrows are no longer offset to the right of the Crosshair. | |||
| The bow in the hotbar now shows an arrow when being drawn. | |||||
| Bows can now shoot an additional 14 types of arrows, selected based on the arrow type held in the off-hand or closest to slot 0. | |||||
| Bows cannot be used in the off-hand. | |||||
| 15w37a | The bow can now be used in the off-hand. | ||||
| Bows now prioritize the selected hotbar slot for arrows if the bow is in the off hand. | |||||
| When using the bow in the off-hand, the bow does do the animation, but does not aim at the target. | |||||
| ? | Momentum now affects the physics of arrows fired from bows. | ||||
1.10{{Extension DPL}}<ul><li>[[Glistering Melon Slice|Glistering Melon Slice]]<br/>{{Item
| image = Glistering Melon Slice.png
| renewable = Yes
| stackable = Yes (64)
}}
A '''glistering melon slice'''{{fn|Known as '''Glistering Melon Slice''' {{in|java}} and '''Glistering Melon''' {{in|bedrock}}.}} is an inedible [[item]] used for brewing [[potion]]s of [[Healing]]. It is also one of the many potion ingredients that can be used to make mundane potions.
== Obtaining ==
=== Chest loot ===
{{LootChestItem|glistering-melon-slice}}
=== Crafting ===
{{Crafting
|A1= Gold Nugget
|B1= Gold Nugget
|C1= Gold Nugget
|A2= Gold Nugget
|B2= Melon Slice
|C2= Gold Nugget
|A3= Gold Nugget
|B3= Gold Nugget
|C3= Gold Nugget
|Output= Glistering Melon Slice
|type= Brewing
}}
=== Trading ===
Master-level farmer [[villager]]s sell 3 glistering melon for 4 [[emerald]]s.
== Usage ==
Despite being crafted with a [[melon slice]], a glistering melon slice cannot be eaten, unlike a [[golden apple]] or [[golden carrot]].
=== Brewing ingredient ===
{{Brewing
|head=1
|Glistering Melon Slice
|Mundane Potion
|base=Water Bottle
}}
{{Brewing
|Glistering Melon Slice
|Potion of Healing
|foot=1}}
===Piglins===
[[Piglin]]s are attracted to glistering melon slices. They run toward any glistering melon slice on the ground, and inspect it for 6 to 8 seconds before putting it in their inventory.
== Achievements ==
{{load achievements|Oooh, shiny!}}
== Advancements ==
{{load advancements|Oh Shiny}}
== Data values ==
=== ID ===
{{edition|java}}:
{{ID table
|edition=java
|showforms=y
|generatetranslationkeys=y
|displayname=Glistering Melon Slice
|spritetype=item
|nameid=glistering_melon_slice
|form=item
|foot=1}}
{{edition|bedrock}}:
{{ID table
|edition=bedrock
|showaliasids=y
|shownumericids=y
|showforms=y
|notshowbeitemforms=y
|generatetranslationkeys=y
|displayname=Glistering Melon
|spritetype=item
|nameid=glistering_melon_slice
|aliasid=speckled_melon
|id=434
|form=item
|translationkey=item.speckled_melon.name
|foot=1}}
== History ==
{{History|java}}
{{History||1.0.0|snap=Beta 1.9 Prerelease 4|[[File:Glistering Melon Slice JE1 BE1.png|32px]] Added glistering melons.
|The [[crafting]] recipe of glistering melons is one [[melon slice]] and one [[gold nugget]].
|Glistering melons have replaced [[ghast tear]]s as the ingredient to produce [[potions of Healing]] due to the difficulty in getting tears.<ref>{{tweet|jeb_|123671273904680960}}</ref> They also now brew with [[water bottle]]s to create [[mundane potion]]s.}}
{{History||1.6.1|snap=13w23a|The [[crafting]] recipe of glistering melons is changed from one [[gold nugget]] to eight.}}
{{History||1.9|snap=15w49a|[[File:Glistering Melon Slice JE2.png|32px]] The rotation of glistering melon [[item]]s has been changed to be consistent with [[melon slice]]s.<ref>{{bug|MC-85963}}</ref>}}
{{History|||snap=15w49b|[[File:Glistering Melon Slice JE1 BE1.png|32px]] The rotation of glistering melons has been reverted and is no longer consistent with melon slices.}}
{{History||1.13|snap=17w47a|Prior to [[1.13/Flattening|''The Flattening'']], this [[item]]'s numeral ID was 382.}}
{{History|||snap=18w20b|"Glistering Melon" has been renamed to "Glistering Melon Slice".
|The ID of glistering melon slices has been changed from <code>speckled_melon</code> to <code>glistering_melon_slice</code>.}}
{{History||1.14|snap=18w43a|[[File:Glistering Melon Slice JE3 BE2.png|32px]] The texture of glistering melon slices has been changed.}}
{{History|||snap=19w11a|Farmer [[villager]]s now [[trading|sell]] glistering melon slices.}}
{{History||1.16|snap=20w09a|Glistering melon slices are now admired by [[piglin]]s.<ref>{{bug|MC-172363}}</ref>}}
{{History|||snap=20w16a|Glistering melon slices now generate in [[ruined portal]] chests.}}
{{History|pocket alpha}}
{{History||v0.12.1|snap=build 1|[[File:Glistering Melon Slice JE1 BE1.png|32px]] Added glistering melons.}}
{{History|bedrock}}
{{History||1.10.0|snap=beta 1.10.0.3|[[File:Glistering Melon Slice JE3 BE2.png|32px]] The texture of glistering melons has been changed.}}
{{History||1.11.0|snap=beta 1.11.0.4|Glistering melons can now be [[trading|bought]] from farmer [[villager]]s.}}
{{History||1.13.0|snap=beta 1.13.0.9|[[Trading]] has been changed. Master-level farmer villagers now have a {{frac|1|3}} chance to [[trading|sell]] glistering melon slices.}}
{{History||1.16.0|snap=beta 1.16.0.57|Glistering melons are [[trading|sold]] from farmer villagers under a 50% chance, once again.
|Glistering melons now generate in [[ruined portal]] chests.}}
{{History||1.16.100|snap=beta 1.16.100.54|[[Ruined Portal]]s can now generate with 4–12 glistering melons instead of only one.}}
{{History|||snap=beta 1.16.100.56|The ID of glistering melon slices has been changed from <code>speckled_melon</code> to <code>glistering_melon_slice</code>.}}
{{History|console}}
{{History||xbox=TU7|xbone=CU1|ps=1.0|wiiu=Patch 1|[[File:Glistering Melon Slice JE1 BE1.png|32px]] Added glistering melons.}}
{{History||xbox=none|xbone=none|ps=1.90|wiiu=none|switch=none|[[File:Glistering Melon Slice JE3 BE2.png|32px]] The texture of glistering melons has been changed.}}
{{History|New 3DS}}
{{History||0.1.0|[[File:Glistering Melon Slice JE1 BE1.png|32px]] Added glistering melons.}}
{{History|foot}}
== Issues ==
{{issue list}}
== See also ==
* [[Melon Slice]]
* [[Melon]]
== Notes ==
{{fnlist}}
== References ==
{{reflist}}
{{Items}}
[[Category:Renewable resources]]
[[cs:Zlatavý kousek melounu]]
[[de:Glitzernde Melonenscheibe]]
[[es:Rodaja de sandía reluciente]]
[[fr:Tranche de pastèque scintillante]]
[[hu:Ragyogó dinnye]]
[[ja:きらめくスイカの薄切り]]
[[ko:반짝이는 수박 조각]]
[[nl:Glinsterende meloenschijf]]
[[pl:Błyszczący arbuz]]
[[pt:Fatia de melancia reluzente]]
[[ru:Сверкающий ломтик арбуза]]
[[uk:Блискуча скибка кавуна]]
[[zh:闪烁的西瓜片]]</li><li>[[Nether Wart|Nether Wart]]<br/><!--Please do not change "nether wart" to "Nether wart". According to style guide, block names should not be capitalized.-->
{{about|the fungus used for potions|the block found in crimson forests|Nether Wart Block}}{{Block
| group = Age 0
| 1-1 = Nether Wart Age 0.png
| 1-2 = Nether Wart Age 0 BE.png
| group2 = Age 1-2
| 2-1 = Nether Wart Age 1-2.png
| 2-2 = Nether Wart Age 1-2 BE.png
| group3 = Age 3
| 3-1 = Nether Wart Age 3.png
| 3-2 = Nether Wart Age 3 BE.png
|image= Nether Wart (item).png
|transparent=Yes
|light=No
|tool=any
|renewable=Yes
|stackable=Yes (64)
|flammable=No
|lavasusceptible=No
}}
'''Nether wart''' is a fungus harvested from nether wart crops and is used to plant them, as well as being vital in the creation of [[potions]].
'''Nether wart crops''' are found in [[Nether Fortress/Structure|nether fortresses]] and [[Bastion Remnant|bastions]] and is used to grow nether wart in [[Soul Sand|soul sand]].
== Obtaining ==
=== Breaking ===
Nether wart can be mined instantly with any tool. A fully mature nether wart crop yields 2–4 nether wart. This is increased by one for each level of [[Fortune]], this allows for a maximum of 7 nether warts dropping from one crop. Less mature stages drop one nether wart, even with the Fortune enchantment.
=== Natural generation ===
Nether wart can generate in [[nether fortress]]es in [[soul sand]] gardens around stairwells. Nether wart can also generate in the courtyards of housing unit [[bastion remnant]]s. Due to only spawning in these specific structures, it's entirely possible for a nether fortress or bastion remnant to generate without nether wart (though they may still appear in the chests that generate in the fortress).
{| class="wikitable"
|+
!Location
!Description
!Image
|-
|{{anchor|Nether Fortress}}'''Nether Fortress'''
|Nether wart can be found growing near stairwells in small soul sand gardens.
|[[File:Nether wart garden.png|thumb|Nether wart growing in a nether fortress.]]
|-
|{{anchor|Bastion Remnant}}'''Bastion Remnant'''
|Nether wart can be found growing in the central courtyard of each of the sections of piglin housing unit bastions.
|[[File:Bastion Courtyard.png|thumb|Nether wart growing in a bastion remnant.]]
|}
<br>
=== Chest loot ===
{{LootChestItem|nether-wart}}
== Usage ==
=== Brewing ingredient ===
Nether wart's primary purpose is to [[brew]] the [[Potion|awkward potion]], the base for all potions, but optional for Weakness.
{{brewing
|showname=1
|Nether Wart
|Awkward Potion
|base=Water Bottle
}}
=== Crafting ingredient ===
{{crafting usage}}
=== Trading ===
Master-level cleric [[villager]]s buy 22 nether warts for an [[emerald]] as part of their trades.
=== Farming ===
{{main|Tutorials/Nether Wart farming}}
When planted on [[soul sand]], nether wart grows through four stages, though the middle two stages use the same texture (the hitbox of stage 3 is three pixels taller). {{IN|java}}, the exact age can be seen using the [[debug screen]], and the ages range from 0 to 3. Each random tick, nether wart has a 10% chance of growing one stage. At default random tick speed, each nether wart grows one age step approximately every {{convert|13653|ticks|minutes}} on average, and fully grows from planting to harvest every {{convert|40960|ticks|minutes}} on average. The growth rate is not affected by light or any other environmental factors. [[Bone meal]] cannot be used on the nether wart.
Nether wart can only be planted on [[soul sand]]. It cannot be planted on [[soul soil]]. It can grow in any [[dimension]].
Nether wart is ready to harvest when it reaches its fourth stage (age:3). Breaking a fully grown nether wart drops 2 to 4 nether wart, while an immature one drops a single nether wart. Using a tool enchanted with fortune increases the maximum number of nether wart dropped by 1 per level, for a maximum of 7 for a tool enchanted with [[Fortune|Fortune III]].
=== Composting ===
Placing a nether wart into a [[composter]] has a 30% chance of raising the compost level by 1.
== Sounds ==
{{Sound table/Block/Nether wart}}
== Data values ==
=== ID ===
{{edition|java}}:
{{ID table
|edition=java
|showforms=y
|generatetranslationkeys=y
|displayname=Nether Wart
|spritetype=block
|nameid=nether_wart
|translationkey=block.minecraft.nether_wart,item.minecraft.nether_wart
|foot=1}}
{{edition|bedrock}}:
{{ID table
|edition=bedrock
|firstcolumnname=Nether Wart
|shownumericids=y
|showforms=y
|generatetranslationkeys=y
|displayname=Block
|spritename=nether-wart
|spritetype=block
|nameid=nether_wart
|id=115
|form=block
|itemform=item.nether_wart}}
{{ID table
|displayname=Item
|spritename=nether-wart
|spritetype=item
|nameid=nether_wart
|id=294
|form=item
|foot=1}}
=== Block states ===
{{see also|Block states}}
{{/BS}}
== Advancements ==
{{load advancements|A Seedy Place}}
== History ==
{{History|java}}
{{History||1.0.0|snap=Beta 1.9 Prerelease|[[File:Nether Wart Age 0 JE1.png|32px]] [[File:Nether Wart Age 1-2 JE1.png|32px]] [[File:Nether Wart Age 3 JE1.png|32px]] [[File:Nether Wart (item) JE1.png|32px]] Added nether wart.}}
{{History|||snap=Beta 1.9 Prerelease 3|Nether wart can now be brewed in a [[water bottle]] to create an [[awkward potion]].}}
{{History||1.3.1|snap=12w27a|Nether wart can now grow outside of [[the Nether]].}}
{{History|||snap=1.3|[[File:Nether Wart (item) JE2 BE1.png|32px]] The item texture has been changed.}}
{{History||1.4.2|snap=12w36a|Nether wart can now be used to breed [[chicken]]s.}}
{{History||1.6.1|snap=13w18a|Nether wart is now found in the new [[chest]]s in [[nether fortress]]es.}}
{{History||1.8|snap=14w06a|[[File:Nether Wart Age 0 JE2.png|32px]] [[File:Nether Wart Age 1-2 JE2.png|32px]] [[File:Nether Wart Age 3 JE2.png|32px]] Nether wart crops are now a pixel higher, likely as an accidental result of model conversion. Previously they were offset one pixel downwards like the other crops (wheat, carrots potatoes) to match farmland, although in nether wart's case such a downwards offset hides some pixels of the texture inside of the soul sand.<ref>{{bug|MC-250679}}</ref>}}
{{History|||snap=14w10a|[[File:Missing Model JE2.png|32px]] [[File:Missing Model JE2.png|32px]] [[File:Missing Model JE2.png|32px]]<br>[[File:Missing Model (anisotropic filtering) JE2.png|32px]] [[File:Missing Model (anisotropic filtering) JE2.png|32px]] [[File:Missing Model (anisotropic filtering) JE2.png|32px]] Nether wart crops of all ages [[Missing model|no longer have a model]].}}
{{History|||snap=14w10b|[[File:Nether Wart Age 0 JE4.png|32px]] [[File:Nether Wart Age 1-2 JE4.png|32px]] [[File:Nether Wart Age 3 JE4.png|32px]] Nether wart crops now have models again.<ref>{{bug|MC-50276}}</ref> In addition, they are now offset downwards by one pixel once more, hiding the bottom row of pixels again.}}
{{History|||snap=14w25a|[[File:Nether Wart Age 0 JE5.png|32px]] [[File:Nether Wart Age 1-2 JE5.png|32px]] [[File:Nether Wart Age 3 JE5.png|32px]] Nether wart crops are now darker and subject to directional shading.}}
{{History|||snap=14w27a|[[File:Nether Wart Age 0 JE6.png|32px]] [[File:Nether Wart Age 1-2 JE6.png|32px]] [[File:Nether Wart Age 3 JE6.png|32px]] Nether wart crops are no longer subject to directional shading.}}
{{History|||snap=14w34d|Nether wart can no longer be used to breed [[chicken]]s.}}
{{History||1.9|snap=15w43a|The average yield of nether wart from [[nether fortress]] chests has now been slightly decreased.}}
{{History||1.10|snap=16w20a|Nether wart can now be used to [[crafting|craft]] the new [[red nether brick]] blocks and [[nether wart block]]s.}}
{{History||1.12|snap=17w18b|Placing a nether wart in soul sand now gives the player the "A Seedy Place" [[advancement]].{{verify}}}}
{{History||1.13|snap=17w47a|Prior to [[1.13/Flattening|''The Flattening'']], this block's numeral ID was 115, and the item's 372.}}
{{History||1.14|snap=18w43a|[[File:Nether Wart Age 0 JE7.png|32px]] [[File:Nether Wart Age 1-2 JE7.png|32px]] [[File:Nether Wart Age 3 JE7.png|32px]] The textures of nether wart crops have changed.}}
{{History|||snap=19w03a|Placement and breaking [[sound]]s have now been added to nether wart. Before this version, nether wart made stone sounds.}}
{{History|||snap=19w11a|Cleric [[villager]]s now [[trading|buy]] nether wart.
|Nether wart can now be planted by aiming against the sides and underside of blocks, rather than just the top surface of the soul sand.}}
{{History||1.16|snap=20w15a|Nether wart can now be [[composter|composted]].}}
{{History|||snap=20w16a|Nether wart now generates as part of [[bastion remnant]]s.}}
{{History||1.17|snap=21w13a|[[File:Nether Wart Age 0 JE8.png|32px]] [[File:Nether Wart Age 1-2 JE8.png|32px]] [[File:Nether Wart Age 3 JE8.png|32px]] The "crop" template model has changed such that pixels appear in the same physical positions on opposite sides of texture planes, changing the nether wart crop's appearance in the process.<ref>{{bug|MC-199242}}</ref>}}
{{History|pocket alpha}}
{{History||v0.12.1|snap=build 1|[[File:Nether Wart Age 0 BE1.png|32px]] [[File:Nether Wart Age 1-2 BE1.png|32px]] [[File:Nether Wart Age 3 BE1.png|32px]] [[File:Nether Wart (item) JE2 BE1.png|32px]] Added nether wart.
|Nether wart uses a cross model instead of the "hash" shape associated with crops.}}
{{History||?|[[File:Nether Wart Age 0 JE6 BE2.png|32px]] [[File:Nether Wart Age 1-2 JE6 BE2.png|32px]] [[File:Nether Wart Age 3 JE6 BE2.png|32px]]{{verify|Correct models? check UV, etc.}} Nether wart now uses a more conventional crop model.}}
{{History|pocket}}
{{History||1.1.3|snap=alpha 1.1.3.0|Nether wart can now be used to [[crafting|craft]] [[red nether bricks]] and [[nether wart block]]s.}}
{{History|bedrock}}
{{History||1.10.0|snap=beta 1.10.0.3|[[File:Nether Wart Age 0 BE.png|32px]] [[File:Nether Wart Age 1-2 BE.png|32px]] [[File:Nether Wart Age 3 BE.png|32px]] The textures of nether wart crops have changed.
|Placement and breaking [[sound]]s have now been added to nether wart.}}
{{History||1.11.0|snap=beta 1.11.0.4|Nether wart can now be [[trading|sold]] to cleric [[villager]]s.}}
{{History||1.16.0|snap=beta 1.16.0.57|Nether wart now generates as part of [[bastion remnant]]s.
|The placement and breaking [[sound]]s for nether wart have been changed to match {{el|je}}.
|Nether wart can now be [[composter|composted]].}}
{{History|console}}
{{History||xbox=TU7|xbone=CU1|ps=1.0|wiiu=Patch 1|switch=1.0.1|[[File:Nether Wart Age 0 JE6 BE2.png|32px]] [[File:Nether Wart Age 1-2 JE6 BE2.png|32px]] [[File:Nether Wart Age 3 JE6 BE2.png|32px]]{{verify|Correct models? check UV, etc.}} [[File:Nether Wart (item) JE2 BE1.png|32px]] Added nether wart.}}
{{History||xbox=TU9|Nether wart now spawns randomly wherever [[soul sand]] is generated in [[the Nether]].
|[[Nether fortress]]es have now been changed to make nether wart rooms more likely.
|Nether wart can now grow outside of [[the Nether]].}}
{{History||xbox=none|xbone=none|ps=1.90|wiiu=none|switch=none|[[File:Nether Wart Age 0 JE7.png|32px]] [[File:Nether Wart Age 1-2 JE7.png|32px]] [[File:Nether Wart Age 3 JE7.png|32px]]{{verify|Correct models?}} The textures of nether wart crops have now been changed.}}
{{History|New 3DS}}
{{History||0.1.0|[[File:Nether Wart Age 0 JE6 BE2.png|32px]] [[File:Nether Wart Age 1-2 JE6 BE2.png|32px]] [[File:Nether Wart Age 3 JE6 BE2.png|32px]]{{verify|Correct models? check UV, etc.}} [[File:Nether Wart (item) JE2 BE1.png|32px]] Added nether wart.}}
{{History|foot}}
=== Nether wart "item" ===
{{:Technical blocks/Nether Wart}}
==Issues==
{{issue list}}
== Trivia ==
* Nether wart's stage changes cannot be detected by a [[block update detector]], but can by an [[observer]] block.
* Unlike other crimson "plants", nether wart doesn't have a warped equivalent. This is also the case with [[nether sprouts]], which lack a crimson equivalent.
== Gallery ==
<gallery>
Nether Brick And Wart.png|Nether wart found in a nether fortress.
Nether Wart Closeup.png| Another example of nether wart found in a nether fortress.
Nether wart three sizes.png|The three different sizes of the nether wart as viewed from the side.
Nether Fortress Large Stairs Room.png
</gallery>
== References ==
{{reflist}}
{{Blocks|vegetation}}
{{Items}}
[[Category:Nether blocks]]
[[Category:Fungi]]
[[Category:Non-solid blocks]]
[[Category:Generated structure blocks]]
[[de:Netherwarze]]
[[es:Verruga del Nether]]
[[fr:Verrues du Nether]]
[[hu:Bibircsók]]
[[it:Verruca del Nether]]
[[ja:ネザーウォート]]
[[ko:네더 사마귀]]
[[nl:Netherkruid]]
[[pl:Netherowa brodawka]]
[[pt:Fungo do Nether]]
[[ru:Адский нарост]]
[[th:หูดเนเธอร์]]
[[uk:Пекельний наріст]]
[[zh:下界疣]]
[[Category:Brewing recipe]]</li></ul> | 16w20a | Bows are now used by strays and can now sometimes be obtained as a rare drop. | |||
1.11{{Extension DPL}}<ul><li>[[Leather|Leather]]<br/>{{About||the leather from rabbits|Rabbit Hide|the armor material|Armor materials}}
{{Item
| image = Leather.png
| renewable = Yes
| stackable = Yes (64)
}}
'''Leather''' is an [[item]] used to make [[item frame]]s, [[armor]] and [[book]]s.
== Obtaining ==
=== Mob loot ===
Upon death, [[cow]]s, [[mooshroom]]s, [[horse]]s, [[donkey]]s, [[mule]]s, [[llama]]s and [[trader llama]]s drop 0–2 leather, while [[hoglin]]s drop 0–1 leather. The maximum amount is increased by 1 per level of [[Looting]], for a maximum of 5 leather (4 leather from hoglins) with Looting III.
A [[fox]] sometimes spawns holding leather, which always drops upon death. Alternatively, a player can drop a [[food]] item, causing the fox to drop the leather.
=== Fishing ===
Leather can be obtained as a "junk" item from [[fishing]].
=== Crafting ===
{{Crafting
|A1= Rabbit Hide |B1= Rabbit Hide
|A2= Rabbit Hide |B2= Rabbit Hide
|Output=Leather
|type=Material
}}
=== Chest loot ===
{{LootChestItem|leather}}
=== Villager gifts ===
{{in|java}}, leatherworker [[villager]]s throw leather at players under the [[Hero of the Village]] effect.
=== Bartering ===
[[Piglin]]s may [[barter]] 2-4 leather when given a [[gold ingot]].
== Usage ==
=== Crafting ingredient ===
{{crafting usage}}
=== Trading ===
Novice-level leatherworker villagers have a {{frac|2|3}} chance to [[trading|buy]] 6 leather for one [[emerald]] {{in|java}}, and always offer the trade {{in|bedrock}}.
=== Repairing ===
Leather is the repair item for the [[armor materials|leather armor]], and thus can be used to [[item repair|repair]] the following items in an [[anvil]]:
* {{ItemLink|Leather cap}}
* {{ItemLink|Leather tunic}}
* {{ItemLink|Leather pants}}
* {{ItemLink|Leather boots}}
== Achievements ==
{{load achievements|Cow Tipper}}
== Data values ==
=== ID ===
{{edition|java}}:
{{ID table
|edition=java
|showitemtags=y
|showforms=y
|generatetranslationkeys=y
|displayname=Leather
|spritetype=item
|nameid=leather
|itemtags=ignored_by_piglin_babies
|form=item
|foot=1}}
{{edition|bedrock}}:
{{ID table
|edition=bedrock
|shownumericids=y
|showforms=y
|notshowbeitemforms=y
|generatetranslationkeys=y
|displayname=Leather
|spritetype=item
|nameid=leather
|id=381
|form=item
|foot=1}}
== History ==
{{History|java alpha}}
{{History||v1.0.8|[[File:Leather JE1 BE1.png|32px]] Added leather.
|Leather [[drops]] from [[cow]]s.
|The [[crafting]] recipe for leather [[armor]] has been changed from cloth to leather (leather armor was previously [[craft]]ed with [[wool]], and was called "cloth armor" in the game code).}}
{{History||v1.0.17|[[Chicken]]s in [[Survival]] [[multiplayer]] now [[drop]] leather if killed by [[fire]], fall [[damage]] or [[cactus]].}}
{{History||v1.2.6|Chickens dropping leather was fixed by this version at the latest.{{when|It would be nice to know exactly when. It's at most a 3 1/2 month bug, though it was at the beginning. Might count as short-lived.}}.}}
{{History|java}}
{{History||1.3.1|snap=12w17a|Leather is now required to craft [[book]]s.}}
{{History||1.4.2|snap=12w34a|Leather is now used to craft the newly added [[item frame]]s.}}
{{History||1.6.1|snap=13w16a|Leather is now used to craft [[horse saddle]]s.|[[Horse]]s now [[drop]] leather.}}
{{History|||snap=13w18a|Leather is no longer used to craft [[horse saddle]]s.}}
{{History||1.7.2|snap=13w36a|Leather can be obtained as one of the "junk" [[item]]s in [[fishing]], making it possible to obtain it without killing any [[animal]]s.}}
{{History||1.8|snap=14w02a|Leather can now be [[trading|sold]] to leatherworker [[villager]]s, at 9–12 leather for 1 [[emerald]].}}
{{History|||snap=14w27b|Leather can now be crafted using 4 [[rabbit hide]].}}
{{History||1.9|snap=15w41a|Leather can now be used to repair [[elytra]].}}
{{History||1.11|snap=16w39a|[[Llama]]s now [[drop]] leather.}}
{{History||1.13|snap=17w47a|Prior to [[1.13/Flattening|''The Flattening'']], this [[item]]'s numeral ID was 334.}}
{{History|||snap=18w07a|[[Phantom]]s now drop leather.}}
{{History|||snap=18w14a|Phantoms no longer [[drop]] leather.
|[[Phantom membrane]]s are now used to repair [[elytra]], instead of leather.}}
{{History||1.14|snap=18w43a|[[File:Leather JE2 BE2.png|32px]] The texture of leather has been changed.}}
{{History|||snap=18w48a|Leather can now be found in chests in [[village]] tanneries.}}
{{History|||snap=19w07a|Added [[fox]]es, which sometimes spawn with leather in their mouths.}}
{{History|||snap=19w08a|Leather is now used to [[craft]] leather [[horse armor]].}}
{{History|||snap=19w13a|Leatherworker villagers now give leather to players under the [[Hero of the Village]] effect.}}
{{History||1.16|snap=20w07a|Leather is dropped by the new [[hoglin]]s.
|Leather has a {{frac|5|109}} (~4.59%) chance of being given by the new [[piglin]]s when [[bartering]], in a stack size of 2–7.}}
{{History|||snap=20w09a|Leather now has a {{frac|20|226}} (~8.84%) chance of being given by piglins when bartering, in a stack size of 1–5.}}
{{History|||snap=20w16a|Leather now generates in [[bastion remnants]] chests.}}
{{History|pocket alpha}}
{{History||v0.2.0|[[File:Leather JE1 BE1.png|32px]] Added leather. It is currently unobtainable and serves no purpose.}}
{{History||v0.6.0|Leather is now obtainable by killing [[cow]]s.
|Leather can be used to craft leather [[armor]].}}
{{History||v0.11.0|snap=build 1|Leather can now be obtained as one of the "junk" [[item]]s in [[fishing]], making it possible to obtain it without killing any [[animal]]s.}}
{{History||v0.12.1|snap=build 1|Leather is now required to craft [[book]]s.}}
{{History||v0.13.0|snap=build 1|Leather can now be [[craft]]ed using 4 [[rabbit hide]].}}
{{History||v0.15.0|snap=build 1|Leather is now used to craft leather [[horse armor]].}}
{{History|pocket}}
{{History||1.0.0|snap=alpha 0.17.0.1|Leather can now be used to repair [[elytra]].}}
{{History||1.0.4|snap=alpha 1.0.4.0|9-12 leather can now be [[trading|sold]] to leatherworker [[villager]]s.}}
{{History|bedrock}}
{{History||1.6.0|snap=beta 1.6.0.5|[[Phantom membrane]]s are now used to repair [[elytra]], instead of leather.}}
{{History||1.10.0|snap=beta 1.10.0.3|Leather can now be found in [[village]] tannery house [[chest]]s.
|[[File:Leather JE2 BE2.png|32px]] The texture of leather has been changed.}}
{{History||1.11.0|snap=beta 1.11.0.4|[[Trading]] has been changed, leatherworker [[villager]]s now [[trading|buy]] 6 leather for an [[emerald]].}}
{{History||1.13.0|snap=beta 1.13.0.1|Added [[fox]]es, which can drop leather.}}
{{History||1.16.0|snap=beta 1.16.0.57|Hoglins now drop leather.
|Leather can now be obtained from bartering with piglin.
|Leather can now be found in [[bastion remnants]] chests.}}
{{History|console}}
{{History||xbox=TU1|xbone=CU1|ps=1.0|wiiu=Patch 1|switch=1.0.1|[[File:Leather JE1 BE1.png|32px]] Added leather.}}
{{History||xbox=TU60|xbone=CU51|ps=1.64|wiiu=Patch 30|switch=1.0.11|Leather is now used to [[craft]] leather [[horse armor]].}}
{{History||xbox=TU69|xbone=none|ps=1.76|wiiu=Patch 38|switch=none|[[Phantom membrane]]s are now used to repair [[elytra]], instead of leather.}}
{{History||xbox=none|xbone=none|ps=1.90|wiiu=none|switch=none|[[File:Leather JE2 BE2.png|32px]] The texture of leather has been changed.}}
{{History|new 3ds}}
{{History||0.1.0|[[File:Leather JE1 BE1.png|32px]] Added leather.}}
{{History|foot}}
== Issues ==
{{issue list}}
{{Items}}
[[Category:Renewable resources]]
[[cs:Kůže]]
[[de:Leder]]
[[es:Cuero]]
[[fr:Cuir]]
[[hu:Bőr]]
[[it:Cuoio]]
[[ja:革]]
[[ko:가죽]]
[[nl:Leer]]
[[pl:Skóra]]
[[pt:Couro]]
[[ru:Кожа]]
[[th:หนังสัตว์]]
[[uk:Шкіра]]
[[zh:皮革]]</li><li>[[Sugar Cane|Sugar Cane]]<br/>{{Block
|image=Sugar Cane.png
|image2=Sugar Cane (item) JE3.png
|extratext = View all [[#Gallery|renders]]
|transparent=Yes
|light=No
|tool=any
|renewable=Yes
|stackable=Yes (64)
|flammable=No
|lavasusceptible=No
}}
'''Sugar cane''' is a block found as 1–4-block-tall. It plants near water in the [[Overworld]]. As an item, it is an important crafting ingredient.
==Obtaining==
Sugar cane can be mined instantly with anything.
When the spot a sugar cane block is placed in becomes unsuitable, such as when the supporting block is removed, the sugar cane block uproots and drops as an item. {{IN|be}}, sugar cane uproots immediately after all adjacent water is removed. {{IN|je}}, sugar cane uproots on the next block update or [[Tick#Random tick|random tick]].
A sugar cane block drops itself as an item if a piston tries to push it (trying to pull it does nothing) or moves a block into its space.
===Natural generation===
[[File:Sugar Canez.png|thumb|250px|Naturally-occurring sugar cane near a river.]]
Sugar cane can generate naturally near [[water]] and [[ice]], as two ({{frac|11|18}} chance), three ({{frac|5|18}} chance), or four ({{frac|2|18}} chance) blocks tall. Rare taller sugar canes can be found if the world generator places two smaller canes on top of each other. It generates in approximately 0.8 sugar cane per chunk seeing as how they only generate near bodies of water.
Sugar canes attempt to generate 10 times in any Overworld biome, which requires water. An extra 10 attempts are made in [[swamp]] biomes, and 50 in [[desert]] biomes, which makes sugar cane twice as frequent in swamps and six times as frequent in desert biomes, making the banks of [[river]]s that cut through deserts lined with sugar canes. Sugar canes do not grow faster in swamps or deserts they only spawn a increased amount.
Sugar cane cannot generate in caves {{in|je}}.<ref>{{bug|MC-214959||Sugar cane generated in cave|Fixed}}</ref>
===Trading===
[[Wandering trader]]s can sell sugar cane for an [[emerald]].
==Usage==
Due to its water-displacing properties, sugar cane can interestingly be used to create underwater paths, allowing [[player]]s to move at normal speed and breathe if it is two blocks in height.{{only|java}}<ref>{{bug|MC-929||Sugar cane can be placed underwater|WAI}}</ref>
Sugar cane takes on a different shade of green depending on the biome in which it is placed.
===Crafting ingredient===
{{crafting usage}}
===Farming===
{{main|Tutorials/Sugar cane farming}}
[[File:Underground Sugar Farm.png|200px|thumb|An underground sugar cane farm.]]
Sugar cane can generate naturally up to any number of blocks tall, but ''grow'' only to a height of three blocks, adding a block of height when the top sugar cane block has received 16 random [[Tick#Block tick|block tick]]s (i.e. on average every 18 minutes on ''Java Edition''<!-- Average 68.27 seconds/tick * 16 ticks/growth = 18.2 minutes --> or 54 minutes on Bedrock Edition, but the actual rate can vary widely).
Sugar cane must be planted on a [[grass block]], [[dirt]], [[coarse dirt]], [[rooted dirt]], [[podzol]], [[mycelium]], [[sand]], [[red sand]], [[suspicious sand]], [[moss block]], or [[mud]] that is directly adjacent to [[water]], [[waterlogged]] block, or [[frosted ice]] (not merely above or diagonal to water), or on top of another sugar cane block. The adjacent water block can be covered with another block, whether [[opacity|opaque or transparent]], and sugar cane can still be placed and grow next to it. Sugar cane grows regardless of light level, even in complete darkness.
[[File:4blockcane.png|thumb|A natural 4-block-high sugar cane plant.]]
{{IN|bedrock}}, [[bone meal]] can be used to instantly grow sugar cane to three blocks. Only one bone meal is consumed. {{IN|java}}, bone meal cannot be used on sugar cane.<ref>{{bug|MC-73963||Can't use bonemeal on cacti or sugar cane|WAI}}</ref>
On average, it takes [[Tutorials/Sugar_cane_farming#Mechanics|18 minutes]] for a single block of sugar cane to grow 3 blocks tall.
=== Composting ===
Placing sugar cane into a [[composter]] has a 50% chance of raising the compost level by 1.
== List of colors ==
{{Missing information|Bedrock Edition colors (see [[Water#Color]]{{verify|it's there?}})}}
=== ''Java Edition'' ===
These values are generated by the biome dyeing algorithm. See [[Color#Biome colors|Biome colors]] for more information.
<div class="mw-collapsible mw-collapsed" style="float: left">
{| class="wikitable sortable" style="text-align:center" data-description="Java edition biome colors"
!Biome !! Category !! Rainfall !! Sugarcane Color !! Temperature Affects !! Render
|-
| {{BiomeLink|Badlands}} || Mesa || No || #90814d || No || [[File:Badlands Sugar Cane.png|32px]]
|-
| {{BiomeLink|Beach}} || Beach || Rain || #91bd59 || || [[File:Plains Sugar Cane.png|32px]]
|-
| {{BiomeLink|Birch Forest}} || Forest || Rain || #88bb67 || || [[File:Birch Forest Sugar Cane.png|32px]]
|-
| {{BiomeLink|Cold Ocean}} || Ocean || Rain || #8eb971 || || [[File:Ocean Sugar Cane.png|32px]]
|-
| {{BiomeLink|Dark Forest}} || Forest || Rain || #507a32 || || [[File:Dark Forest Sugar Cane.png|32px]]
|-
| {{BiomeLink|Deep Cold Ocean}} || Ocean || Rain || #8eb971 || || [[File:Ocean Sugar Cane.png|32px]]
|-
| {{BiomeLink|Deep Frozen Ocean}} || Ocean || Rain || #8eb971 || || [[File:Ocean Sugar Cane.png|32px]]
|-
| {{BiomeLink|Deep Lukewarm Ocean}} || Ocean || Rain || #8eb971 || || [[File:Ocean Sugar Cane.png|32px]]
|-
| {{BiomeLink|Deep Ocean}} || Ocean || Rain || #8eb971 || || [[File:Ocean Sugar Cane.png|32px]]
|-
| {{BiomeLink|Desert}} || Desert || No || #bfb755 || || [[File:Desert Sugar Cane.png|32px]]
|-
| {{BiomeLink|End Barrens}} || The End || No || #8eb971 || || [[File:Ocean Sugar Cane.png|32px]]
|-
| {{BiomeLink|End Highlands}} || The End || No || #8eb971 || || [[File:Ocean Sugar Cane.png|32px]]
|-
| {{BiomeLink|End Midlands}} || The End || No || #8eb971 || || [[File:Ocean Sugar Cane.png|32px]]
|-
| {{BiomeLink|Eroded Badlands}} || Mesa || No || #90814d || No || [[File:Badlands Sugar Cane.png|32px]]
|-
| {{BiomeLink|Flower Forest}} || Forest || Rain || #79c05a || || [[File:Forest Sugar Cane.png|32px]]
|-
| {{BiomeLink|Forest}} || Forest || Rain || #79c05a || || [[File:Forest Sugar Cane.png|32px]]
|-
| {{BiomeLink|Frozen Ocean}} || Ocean || Snow || #80b497 || || [[File:Snowy Plains Sugar Cane.png|32px]]
|-
| {{BiomeLink|Frozen River}} || River || Snow || #80b497 || || [[File:Snowy Plains Sugar Cane.png|32px]]
|-
| {{BiomeLink|Old Growth Spruce Taiga}} || Taiga || Rain || #86b783 || || [[File:Taiga Sugar Cane.png|32px]]
|-
| {{BiomeLink|Old Growth Pine Taiga}} || Taiga || Rain || #86b87f || || [[File:Old Growth Pine Taiga Sugar Cane.png|32px]]
|-
| {{BiomeLink|Ice Spikes}} || Icy || Snow || #80b497 || || [[File:Snowy Plains Sugar Cane.png|32px]]
|-
| {{BiomeLink|Jungle}} || Jungle || Rain || #59c93c || || [[File:Jungle Sugar Cane.png|32px]]
|-
| {{BiomeLink|Sparse Jungle}} || Jungle || Rain || #64c73f || || [[File:Sparse Jungle Sugar Cane.png|32px]]
|-
| {{BiomeLink|Lukewarm Ocean}} || Ocean || Rain || #8eb971 || || [[File:Ocean Sugar Cane.png|32px]]
|-
| {{BiomeLink|Windswept Hills}} || Extreme Hills || Rain || #8ab689 || || [[File:Windswept Hills Sugar Cane.png|32px]]
|-
| {{BiomeLink|Mushroom Fields}} || Mushroom || Rain || #55c93f || || [[File:Mushroom Fields Sugar Cane.png|32px]]
|-
| {{BiomeLink|Nether}} || Nether || No || #bfb755 || || [[File:Desert Sugar Cane.png|32px]]
|-
| {{BiomeLink|Ocean}} || Ocean || Rain || #8eb971 || || [[File:Ocean Sugar Cane.png|32px]]
|-
| {{BiomeLink|Plains}} || Plains || Rain || #91bd59 || || [[File:Plains Sugar Cane.png|32px]]
|-
| {{BiomeLink|River}} || River || Rain || #8eb971 || || [[File:Ocean Sugar Cane.png|32px]]
|-
| {{BiomeLink|Savanna}} || Savanna || No || #bfb755 || || [[File:Desert Sugar Cane.png|32px]]
|-
| {{BiomeLink|Savanna Plateau}} || Savanna || No || #bfb755 || || [[File:Desert Sugar Cane.png|32px]]
|-
| {{BiomeLink|Windswept Savanna}} || Savanna || No || #bfb755 || || [[File:Desert Sugar Cane.png|32px]]
|-
| {{BiomeLink|Small End Islands}} || The End || No || #8eb971 || || [[File:Ocean Sugar Cane.png|32px]]
|-
| {{BiomeLink|Snowy Beach}} || Beach || Snow || #83b593 || || [[File:Snowy Beach Sugar Cane.png|32px]]
|-
| {{BiomeLink|Snowy Taiga}} || Taiga || Snow || #80b497 || || [[File:Snowy Plains Sugar Cane.png|32px]]
|-
| {{BiomeLink|Snowy Plains}} || Icy || Snow || #80b497 || || [[File:Snowy Plains Sugar Cane.png|32px]]
|-
| {{BiomeLink|Stony Shore}} || None || Rain || #8ab689 || || [[File:Windswept Hills Sugar Cane.png|32px]]
|-
| {{BiomeLink|Sunflower Plains}} || Plains || Rain || #91bd59 || || [[File:Plains Sugar Cane.png|32px]]
|-
| {{BiomeLink|Swamp}} || Swamp || Rain || #6A7039 || If temperature below -0.1, used #4C763C. || [[File:Swamp Sugar Cane.png|32px]] / [[File:Swamp Sugar Cane (Cold).png|32px]]
|-
| {{BiomeLink|Taiga}} || Taiga || Rain || #86b783 || || [[File:Taiga Sugar Cane.png|32px]]
|-
| {{BiomeLink|Old Growth Birch Forest}} || Forest || Rain || #88bb67 || || [[File:Birch Forest Sugar Cane.png|32px]]
|-
| {{BiomeLink|The End}} || The End || No || #8eb971 || || [[File:Ocean Sugar Cane.png|32px]]
|-
| {{BiomeLink|The Void}} || None || No || #8eb971 || || [[File:Ocean Sugar Cane.png|32px]]
|-
| {{BiomeLink|Warm Ocean}} || Ocean || Rain || #8eb971 || || [[File:Ocean Sugar Cane.png|32px]]
|-
| {{BiomeLink|Wooded Badlands}} || Mesa || No || #90814d || No || [[File:Badlands Sugar Cane.png|32px]]
|-
| {{BiomeLink|Windswept Forest}} || Extreme Hills || Rain || #8ab689 || || [[File:Windswept Hills Sugar Cane.png|32px]]
|}
</div>
{{clear}}
=== Bedrock Edition ===
{{empty section}}
== Sounds ==
{{Sound table/Block/Grass}}
== Data values ==
=== ID ===
{{edition|java}}:
{{ID table
|edition=java
|showforms=y
|generatetranslationkeys=y
|displayname=Sugar Cane
|spritetype=block
|nameid=sugar_cane
|foot=1}}
{{edition|bedrock}}:
{{ID table
|edition=bedrock
|firstcolumnname=Sugar Cane
|shownumericids=y
|showforms=y
|showaliasids=y
|generatetranslationkeys=y
|displayname=Block
|spritename=sugar-cane
|spritetype=block
|nameid=reeds
|id=83
|form=block
|itemform=item.reeds}}
{{ID table
|displayname=Item
|spritename=sugar-cane
|spritetype=item
|nameid=sugar_cane
|id=385
|form=item
|aliasid=reeds
|translationkey=item.reeds.name
|foot=1}}
=== Block states ===
{{see also|Block states}}
{{/BS}}
== Video ==
{{Video note|This video was made before sugar cane had a different shade of green depending on the biome.|minor}}
<div style="text-align:center">{{yt|zlOnwn3PH5o}}</div>
== History ==
{{more images|Appearance when affected by {{bug|MC-48831}}}}
{{History|java alpha}}
{{History||v1.0.11|[[File:Sugar Cane JE1 BE1.png|32px]] [[File:Sugar Cane (item) JE1 BE1.png|32px]] Added reeds in the [[Seecret Updates|Seecret Friday Update 6]].
|Reeds are informally referred to as "bamboo" or "papyrus" by many [[player]]s.
|Since reeds can be washed away with [[water]] currents or instantly destroyed by removing the water adjacent to them, automated reed farms can be made.
|Reeds can be used to craft [[paper]].}}
{{History|java beta}}
{{History||1.2|[[Notch]] has [[wikipedia:Retroactive continuity|retconned]] reeds into sugar cane so that it can now be [[crafting|crafted]] into [[sugar]], included in the recipe for the [[cake]]s.}}
{{History||1.6|snap=Test Build 3|[[Arrow]]s no longer stick to sugar cane, and instead, they pass through. However, [[snowball]]s still come into contact with any sugar cane blocks, as if they are solid.}}
{{History||1.8|snap=Pre-release|Sugar cane can now grow and be placed onto [[sand]] as long as they are adjacent to [[water]]. This update allows sugar canes to appear next to [[water]] ponds in [[desert]] biomes.
|Sugar cane is now available in the [[creative]] [[inventory]] in both block and item forms.}}
{{History|java}}
{{History||1.0.0|snap=?|The sugar cane block has been removed from the creative inventory.}}
{{History||1.7.2|snap=13w36a|[[File:Sugar Cane JE2 BE2.png|32px]] Sugar cane is now [[tint]]ed depending on the [[biome]] it's in.
|The item texture remained unchanged, however, and still used the color palette from Alpha to 1.6.4.<ref name="Bug">{{bug|MC-216227}}</ref>}}
{{History||1.9|snap=15w43a|Sugar cane no longer breaks if its adjacent [[water]] is turned to [[frosted ice]].}}
{{History||1.13|snap=17w47a|The ID of sugar cane has now been changed from <code>reeds</code> to <code>sugar_cane</code>.
|"Sugar Canes" have now been renamed to "Sugar Cane".
|Prior to [[1.13/Flattening|''The Flattening'']], this [[block]]'s numeral ID was 83, and the [[item]]'s 338.}}
{{History||1.14|snap=18w43a|[[File:Sugar Cane (item) JE2 BE2.png|32px]] The texture of the sugar cane item has been changed.}}
{{History|||snap=19w03a|Placing sugar cane into a [[composter]] has a 20% chance of raising the compost level by 1.}}
{{History|||snap=19w05a|Sugar cane now has a 50% chance of increasing the compost level in a composter by 1.
|Added [[wandering trader]]s, which sell sugar cane.}}
{{History||1.16|snap=20w13a|Sugar cane has been moved from the Miscellaneous tab to the Decoration Blocks tab in the [[Creative inventory]].<ref name="misc decoration">https://bugs.mojang.com/browse/MC-174434</ref>}}
{{History||1.17|snap=21w11a|[[File:Sugar Cane (item) JE3.png|32px]] The texture of the sugar cane item has been changed, so that it actually matches the color it uses when placed again.<ref name="Bug"/>}}
{{History|||snap=Pre-release 1|Sugar cane now generates in mushroom fields.<ref>{{bug|MC-226683}}</ref>}}
{{History||1.19|snap=22w15a|Sugar cane can now be planted on mud.}}
{{History||1.20|snap=23w14a|Sugar cane can now be planted on [[suspicious sand]].}}
{{History|pocket alpha}}
{{History||Pre-release|[[File:Sugar Cane JE1 BE1.png|32px]] [[File:Sugar Cane (item) JE1 BE1.png|32px]] Added sugar cane.}}
{{History||v0.2.0|Despite being visible in the inventory, sugar cane does not drop anything when mined, making it unobtainable in Survival mode.}}
{{History||v0.2.1|Survival players now start with an infinite stack of sugar cane in the inventory.}}
{{History||v0.3.0|Sugar cane now drops its item form when mined.
|Survival players no longer start with an infinite stack of sugar cane in the inventory.}}
{{History||v0.5.0|Sugar cane can now be grown on [[sand]].
|Sugar cane can now be obtained after activating the [[nether reactor]].}}
{{History||v0.8.0|snap=build 5|[[Bone meal]] can now grow sugar cane to maximum height.}}
{{History||v0.9.0|snap=build 1|[[File:Sugar Cane JE2 BE2.png|32px]] The color of sugar cane now changes depending on the [[biome]] they are in.
|Using bone meal on sugar cane is no longer able to break blocks above it.}}
{{History||v0.12.1|snap=build 1|Sugar cane is no longer available from the [[nether reactor]].}}
{{History|pocket}}
{{History||1.0.0|snap=alpha 0.17.0.1|[[File:Sugar Cane JE1 BE1.png|32px]] Due to a bug, sugar canes no longer change color depending on the [[biome]].}}
{{History|bedrock}}
{{History||1.2.13|snap=beta 1.2.13.5|[[File:Sugar Cane JE2 BE2.png|32px]] The color of sugar canes now changes depending on the [[biome]], once again.}}
{{History||1.10.0|snap=beta 1.10.0.3|[[File:Sugar Cane (item) JE2 BE2.png|32px]] The texture of the sugar cane [[item]] has been changed.
|Sugar cane can now be [[trading|bought]] from [[wandering trader]]s.}}
{{History||1.11.0|snap=beta 1.11.0.1|Sugar canes can now be used to fill up [[composter]]s.}}
{{History||1.17.0|snap=beta 1.17.0.50|[[File:Sugar Cane (item) JE3.png|32px]] The texture of the sugar cane item has been changed, so that it actually matches the color it uses when placed again.}}
{{History|console}}
{{History||xbox=TU1|xbone=CU1|ps=1.0|wiiu=Patch 1|switch=1.0.1|[[File:Sugar Cane JE1 BE1.png|32px]] [[File:Sugar Cane (item) JE1 BE1.png|32px]] Added sugar canes.
|Sugar canes are solid, making it useful for growable walls. Unlike on Java Edition, they were never renamed to Sugar Cane.}}
{{History||xbox=TU2|Sugar canes are no longer solid, and arrows pass through them.}}
{{History||xbox=TU31|xbone=CU19|ps=1.22|wiiu=Patch 3|[[File:Sugar Cane JE2 BE2.png|32px]] The color of sugar cane now changes depending on the [[biome]] they're in.}}
{{History||xbox=TU60|xbone=CU51|ps=1.64|wiiu=Patch 30|switch=1.0.11|Sugar cane can now be grown with [[bonemeal]].}}
{{History||xbox=none|xbone=none|ps=1.90|wiiu=none|switch=none|[[File:Sugar Cane (item) JE2 BE2.png|32px]] The texture of the sugar cane [[item]] has been changed.}}
{{History||xbox=none|xbone=none|ps=1.91|wiiu=none|switch=none|Sugar cane can now be [[trading|bought]] from [[wandering trader]]s.
|Sugar canes can now be used to fill up [[composter]]s.}}
{{History|New Nintendo 3DS Edition}}
{{History||0.1.0|[[File:Sugar Cane JE1 BE1.png|32px]] [[File:Sugar Cane (item) JE1 BE1.png|32px]] Added sugar cane.}}
{{History|foot}}
=== Sugar cane "item" ===
{{:Technical blocks/Sugar Cane}}
== Issues ==
{{Issue list}}
== Trivia ==
*When a sugar cane is broken at the second level, the time resets (for example, if a two-block high sugar cane is broken, but is just about to grow to the third stage, it would reset that time).
*By placing more sugar canes on top of a sugar cane plant, it is possible to create tall sugar canes (up to y=319, the maximum height for building), although they do not naturally grow this high.
*Before sugar cane received an official name, they were sometimes referred to as [[bamboo]], a block added 9 years later. Other names were "reeds" and "papyrus".
== Gallery ==
=== Renders ===
<gallery>
Plains Sugar Cane.png|Plains
Taiga Sugar Cane.png|Taiga
Snowy Plains Sugar Cane.png|Snowy plains
Jungle Sugar Cane.png|Jungle
Desert Sugar Cane.png|Desert
Swamp Sugar Cane (Cold).png|Swamp (cold)
Swamp Sugar Cane.png|Swamp
Badlands Sugar Cane.png|Badlands
</gallery>
=== In-game ===
<gallery>
Huge Sugar Farm.png|A large sugar cane farm using 2×2 [[water]] holes.
Sugar Cane Waterfall.png|Water flowing over sugar cane.
UnderwaterSugarCane.png|Naturally generated sugar cane found underwater.
Sugar and Cactus.png|A [[cactus]] and sugar cane stalk generated next to each other.
SugarCaneRavine.png|Sugar cane found in the [[ravine]].
Reeds in Winter mode.png|Reeds generated in the [[winter mode]].
Sugar Cane Naturally Growing.png|Sugar cane growing between [[biome]]s.
Mesa Sugar Cane.jpg|Sugar cane growing on [[red sand]] in a [[badlands]] biome.
Sugarcanenowaterglitch.png|Sugar cane generated without a water source.
SwampCane.png|Sugar cane generated in a [[swamp]] biome.
Sugar cane savanna.png|Sugar cane growing in a [[savanna]] biome.
ForestSugarcane.png|Sugar cane growing in a [[forest]] biome.
Lava cane.png|Sugar cane growing with lava flowing around it.
Before breaking.png|Sugar canes few seconds before breaking because the water is frozen.
Undergroundreed.png|A sugar cane plant that generated in an underground [[water lake]].
Cave Sugar.png|Another example.
</gallery>
=== Heights ===
<gallery>
Tall Sugar Cane.png|Four-block tall sugar cane.
4RiverCane.png|Four-block tall sugar cane.
4-block tall sugar cane.png|Four-block tall sugar cane in a [[plains]] biome.
</gallery>
== References ==
{{Reflist}}
{{Blocks|vegetation}}
{{Items}}
[[Category:Plants]]
[[Category:Natural blocks]]
[[Category:Non-solid blocks]]
[[cs:Cukrová třtina]]
[[de:Zuckerrohr]]
[[es:Caña de azúcar]]
[[fr:Canne à sucre]]
[[hu:Cukornád]]
[[it:Canna da zucchero]]
[[ja:サトウキビ]]
[[ko:사탕수수]]
[[nl:Suikerriet]]
[[pl:Trzcina cukrowa]]
[[pt:Cana-de-açúcar]]
[[ru:Сахарный тростник]]
[[th:อ้อย]]
[[uk:Цукрова тростина]]
[[zh:甘蔗]]</li></ul> | 16w33a | Bows can now be used to fuel furnaces. | |||
1.11.1{{Extension DPL}}<ul><li>[[Melon Slice|Melon Slice]]<br/>{{Dungeons hatnote|type=consumable|Melon}}
{{Item
| title = Melon Slice
|typeimage=Melon Slice.png
| renewable = Yes
| heals = {{hunger|2}}
| stackable = Yes (64)
}}
A '''melon slice'''{{efn|Known as '''Melon Slice''' {{in|java}} and '''Melon''' {{in|bedrock}}.}} is a [[food]] item that can be eaten by the [[player]].
== Obtaining ==
=== Block loot ===
{{see also|Tutorials/Pumpkin and melon farming|title1 = Pumpkin and melon farming}}
Melon slices can be obtained by breaking (harvesting) [[melon]]s using any [[tool]] or by hand. [[Axe]]s, followed by [[sword]]s, are the fastest tools for harvesting melons. A melon drops 3–7 melon slices, when broken; by hand, using a [[tool]], or after being broken by the movement of a [[piston]], with an average of 4.64 slices per melon.
Breaking a melon with a tool enchanted with [[Fortune]] increases the potential number of drops by 1 slice per level, up to a maximum of 9 slices.
== Usage ==
=== Food ===
{{see also|Tutorials/Hunger management|title1=Hunger management}}
To eat a melon slice, press and hold {{control|use}} while it is selected in the hotbar. Eating one restores {{hunger|2}} [[hunger]] and 1.2 hunger
[[Hunger#Mechanics|saturation]].
=== Crafting ingredient ===
{{crafting usage}}
=== Composting ===
Placing a melon slice into a [[composter]] has a 50% chance of raising the compost level by 1.
==Sounds==
{{Sound table/Entity/Food}}
== Data values ==
=== ID ===
{{edition|java}}:
{{ID table
|edition=java
|showforms=y
|generatetranslationkeys=y
|displayname=Melon Slice
|spritetype=item
|nameid=melon_slice
|form=item
|foot=1}}
{{edition|bedrock}}:
{{ID table
|edition=bedrock
|showaliasids=y
|shownumericids=y
|showforms=y
|notshowbeitemforms=y
|generatetranslationkeys=y
|spritename=melon-slice
|displayname=Melon
|spritetype=item
|nameid=melon_slice
|aliasid=melon
|id=272
|form=item
|translationkey=item.melon.name
|foot=1}}
== Advancements ==
{{load advancements|Husbandry;A Balanced Diet}}
== History ==
{{History|java beta}}
{{History||1.8|snap=Pre-release|[[File:Melon Slice JE1 BE1.png|32px]] Added melons.}}
{{History|java}}
{{History||1.0.0|snap=Beta 1.9 Prerelease 4|Melons are now used in the [[crafting]] recipe of [[glistering melon]]s.}}
{{History|||snap=Beta 1.9 Prerelease 5|Melons once again drop the correct number of slices.}}
{{History||1.3.1|snap=12w21a|Melons can now be [[trading|bought]] from farmer [[villager]]s, at 5–8 melon slices for 1 [[emerald]].}}
{{History||1.7.2|snap=13w37a|Block ID 105, [[melon stem]], has been removed from the {{cmd|give}} [[commands|command]].}}
{{History||1.8|snap=14w02a|[[Villager]]s no longer [[trading|sell]] melons. They now buy [[melon]]s instead.}}
{{History||1.13|snap=17w47a|Prior to [[1.13/Flattening|''The Flattening'']], this [[item]]'s numeral ID was 360.}}
{{History|||snap=18w20b|"Melon" has been renamed to "Melon Slice."
|The ID of melon slices has been changed from <code>melon</code> to <code>melon_slice</code>.}}
{{History||1.14|snap=18w43a|[[File:Melon Slice JE2 BE2.png|32px]] The texture of melon slices has been changed.}}
{{History|||snap=19w03a|Placing a melon slice into the new [[composter]] has a 20% chance of raising the compost level by 1.}}
{{History|||snap=19w05a|Melon slices now have a 50% chance of increasing the compost level in a composter by 1.}}
{{History|pocket alpha}}
{{History||v0.5.0|[[File:Melon Slice JE1 BE1.png|32px]] Added melons.
|Melons restore {{health|2}} each, rather than {{hunger|2}}.}}
{{History||v0.12.1|snap=?|Added Melon slice to the Creative inventory.}}
{{History|||snap=build 1|Melons now restores [[hunger]] instead of [[health]].
|Melons can no longer be obtained from [[nether reactor]]s.}}
{{History|pocket}}
{{History||1.1.0|snap=alpha 1.1.0.3|[[Breaking]] a [[melon]] with [[shears]] now always yields 9 melons.}}
{{History|bedrock}}
{{History||1.10.0|snap=beta 1.10.0.3|[[File:Melon Slice JE2 BE2.png|32px]] The texture of melons has been changed.}}
{{History||1.11.0|snap=beta 1.11.0.1|Melons can now be used to fill up [[composter]]s.}}
{{History|||snap=beta 1.11.0.4|Melons can now be [[trading|sold]] to farmer [[villager]]s.}}
{{History||1.16.0|snap=beta 1.16.0.57|[[Trading]] has been changed, melon slices can no longer be sold to farmer villagers.}}
{{History||1.16.100|snap=beta 1.16.100.56|The ID of melon slices has been changed from <code>melon</code> to <code>melon_slice</code>.}}
{{History|console}}
{{History||xbox=TU5|xbone=CU1|ps=1.0|wiiu=Patch 1|[[File:Melon Slice JE1 BE1.png|32px]] Added melons.}}
{{History||xbox=none|xbone=none|ps=1.90|wiiu=none|switch=none|[[File:Melon Slice JE2 BE2.png|32px]] The texture of melons has been changed.}}
{{History|new 3ds}}
{{History||0.1.0|[[File:Melon Slice JE1 BE1.png|32px]] Added melons.}}
{{History|foot}}
== Issues ==
{{issue list}}
== See also ==
* [[Pumpkin]]
* [[Glistering Melon Slice]]
== Notes ==
{{fnlist}}
{{Items}}
[[Category:Plants]]
[[cs:Meloun]]
[[de:Melone]]
[[es:Rodaja de sandía]]
[[fr:Tranche de pastèque]]
[[hu:Dinnye Szelet]]
[[ko:수박]]
[[nl:Meloenschijf]]
[[pl:Arbuz]]
[[pt:Fatia de melancia]]
[[ru:Ломтик арбуза]]
[[zh:西瓜片]]
[[Category:Food]]
[[Category:Renewable resources]]</li><li>[[:Category:Invalid data value items|Category:Invalid data value items]]<br/>[[Category:Items]]</li></ul> | 16w50a | Infinity and Mending are now mutually exclusive for bows. | |||
1.12{{Extension DPL}}<ul><li>[[:Category:Joke items|Category:Joke items]]<br/>[[Category:Joke features|Items]]
[[Category:Items]]</li><li>[[Cooked Porkchop|Cooked Porkchop]]<br/>{{Item
| title = Cooked Porkchop
| image = Cooked Porkchop.png
| renewable = Yes
| heals = {{hunger|8}}
| stackable = Yes (64)
}}
'''Cooked porkchop''' is a [[food]] [[item]] that can be eaten by the [[player]].
== Obtaining ==
{{see also|Tutorials/Animal farming|title1=Animal farming}}
Cooked porkchops can be obtained by cooking [[raw porkchop]]s or by [[trading]] with butchers, and is a [[drops|drop]] from [[pig]]s and [[hoglin]]s that die while on [[fire]].
=== Mob loot ===
==== Pigs ====
Adult [[pig]]s drop 1–3 cooked porkchop if killed while on fire. The maximum amount is increased by 1 per level of [[Looting]], for a maximum of 1-6 with Looting III.
==== Hoglins ====
Adult [[hoglin]]s drop 2–4 cooked porkchop if killed while on fire. The maximum amount is increased by 1 per level of Looting, for a maximum of 7 with Looting III.
=== Cooking ===
[[Raw porkchop]] can be cooked in a [[furnace]], [[smoker]], or [[campfire]]. Each piece of cooked porkchop removed from a furnace output slot gives 0.35 [[experience]] (22.4 experience per stack).
{{Smelting
|Raw Porkchop
|Cooked Porkchop
|0,35
}}
=== Trading ===
{{IN|java}}, apprentice-level butcher [[villager]]s have a {{frac|2|3}} chance of selling 5 cooked porkchop for 1 [[emerald]].
Butcher villagers may give players with the [[Hero of the Village]] effect a cooked porkchop.{{only|java}}
{{IN|bedrock}}, apprentice-level butcher villagers have a 25% chance to sell 5 cooked porkchop for 1 emerald.
=== Chest loot ===
{{LootChestItem|cooked-porkchop}}
== Usage ==
=== Food ===
{{see also|Tutorials/Hunger management|title1=Hunger management}}
To eat cooked porkchop, press and hold {{control|use}} while it is selected in the hotbar. Eating one restores {{hunger|8}} [[hunger]] and 12.8 [[Hunger#Mechanics|saturation]].
=== Wolves ===
Cooked porkchops can be used to [[breeding|breed]] and heal tamed [[wolf|wolves]], lead them around, and make baby tamed wolves grow up faster by 10% of the remaining time.
=== Piglins ===
[[Piglin]]s pick up any cooked porkchops in their [[item (entity)|item]] form. However, they do not eat it.
==Sounds==
{{Sound table/Entity/Food}}
== Data values ==
=== ID ===
{{edition|java}}:
{{ID table
|edition=java
|showitemtags=y
|showforms=y
|generatetranslationkeys=y
|displayname=Cooked Porkchop
|spritetype=item
|nameid=cooked_porkchop
|itemtags=piglin_food
|form=item
|foot=1}}
{{edition|bedrock}}:
{{ID table
|edition=bedrock
|shownumericids=y
|showforms=y
|notshowbeitemforms=y
|generatetranslationkeys=y
|displayname=Cooked Porkchop
|spritetype=item
|nameid=cooked_porkchop
|id=263
|form=item
|foot=1}}
== Achievements ==
{{load achievements|Pork Chop}}
== Advancements ==
{{load advancements|Husbandry;A Balanced Diet}}
== History ==
{{History|java indev}}
{{History||20100219|[[File:Cooked Porkchop JE1.png|32px]] Added cooked porkchops.
|Cooked porkchops restore {{hp|8}} and do not stack in the [[inventory]].
|Created by cooking [[raw porkchops]] in the inventory.}}
{{History|java alpha}}
{{History||v1.2.0|snap=preview|[[Zombie pigmen]] now [[drops|drop]] 0-2 cooked porkchops upon [[death]].}}
{{History|java beta}}
{{History||1.5|[[Pig]]s now [[drops|drop]] cooked porkchops when killed with [[fire]].}}
{{History||1.8|snap=Pre-release|[[File:Cooked Porkchop JE2 BE1.png|32px]] The texture of cooked porkchops has been changed to avoid confusion with [[steak]].
|Cooked porkchops are now stackable to 64 and restore [[hunger]] instead of [[health]].
|Cooked porkchops now restore {{hunger|8}} to the food bar.
|Cooked porkchops are no longer dropped by [[zombie pigmen]] upon their [[death]].}}
{{History|java}}
{{History||1.2.1|snap=12w03a|Cooked porkchop can now be used to breed wolves.}}
{{History||1.3.1|snap=12w21a|Butcher [[villager]]s now [[trading|sell]] 6–7 cooked porkchops for 1 [[emerald]].}}
{{History||1.4.2|snap=12w37a|[[File:Cooked Porkchop JE3 BE2.png|32px]] The texture of cooked porkchops has been changed, so that it no longer has a dark outline.}}
{{History||1.8|snap=14w02a|Butcher [[villager]]s now [[trading|sell]] 5–7 cooked porkchops for 1 [[emerald]].}}
{{History||1.13|snap=17w47a|Prior to [[1.13/Flattening|''The Flattening'']], this [[item]]'s numeral ID was 320.}}
{{History||1.14|snap=18w43a|[[File:Cooked Porkchop JE4 BE3.png|32px]] The texture of cooked porkchops has been changed.}}
{{History|||snap=19w13a|Butcher villagers now give cooked porkchops to players under the [[Hero of the Village]] effect.}}
{{History||1.16|snap=20w07a|[[Hoglin]]s now drop cooked porkchops if killed while on fire.}}
{{History|||snap=20w16a|Cooked porkchops can now be found in hoglin stable chests in [[bastion remnant]]s.}}
{{History||1.16.2|snap=20w30a|Cooked porkchops can now be found in generic bastion remnant chests as well.}}
{{History|pocket alpha}}
{{History||v0.4.0|[[File:Cooked Porkchop JE2 BE1.png|32px]] Added cooked porkchops.}}
{{History||v0.5.0|Cooked porkchops now restore {{hp|8}} instead of {{hp|4}}.}}
{{History||v0.8.0|snap=build 1|[[File:Cooked Porkchop JE3 BE2.png|32px]] The texture of cooked porkchops has been changed, so that it no longer has a dark outline.}}
{{History||v0.12.1|snap=build 1|Cooked porkchops now restore [[hunger]] instead of [[health]].}}
{{History|pocket}}
{{History||1.0.4|snap=alpha 1.0.4.0|Butcher [[villager]]s now [[trading|sell]] 5–7 cooked porkchops for 1 [[emerald]].}}
{{History|bedrock}}
{{History||1.10.0|snap=beta 1.10.0.3|[[File:Cooked Porkchop JE4 BE3.png|32px]] The texture of cooked porkchops has been changed.}}
{{History||1.11.0|snap=beta 1.11.0.4|[[Trading]] has been changed, butcher [[villager]]s now have a 25% chance to [[trading|sell]] 4 cooked porkchops as part of their second-tier [[trading|trade]].}}
{{History||1.16.0|snap=beta 1.16.0.57|Trading has been changed, apprentice butcher [[villager]]s now have a 25% chance to [[trading|sell]] 5 cooked porkchops instead of 3.}}
{{History|console}}
{{History||xbox=TU1|xbone=CU1|ps=1.0|wiiu=Patch 1|[[File:Cooked Porkchop JE1.png|32px]] Added cooked porkchops.}}
{{History||xbox=TU3|[[File:Cooked Porkchop JE2 BE1.png|32px]] The texture of cooked porkchops has been changed to be consistent with [[Java Edition]].}}
{{History||xbox=TU5|Cooked porkchops are now stackable to 64.
|Cooked porkchops now fill [[hunger]] instead of [[health]].}}
{{History||xbox=TU12|[[File:Cooked Porkchop JE3 BE2.png|32px]] The texture of cooked porkchops has been changed, so that it no longer has a dark outline.}}
{{History|PS4}}
{{History||1.90|[[File:Cooked Porkchop JE4 BE3.png|32px]] The texture of cooked porkchops has been changed.}}
{{History|new3DS}}
{{History||0.1.0|[[File:Cooked Porkchop JE3 BE2.png|32px]] Added cooked porkchops.}}
{{History|foot}}
== Issues ==
{{issue list}}
== External Links ==
*[https://www.minecraft.net/en-us/article/taking-inventory--porkchop Taking Inventory: Porkchop] – Minecraft.net on February 13, 2020
{{Items}}
[[Category:Food]]
[[Category:Renewable resources]]
[[cs:Pečená kotleta]]
[[de:Gebratenes Schweinefleisch]]
[[es:Chuleta de cerdo cocinada]]
[[fr:Côtelette de porc cuite]]
[[hu:Sült sertésszelet]]
[[ja:焼き豚]]
[[nl:Gebraden varkensvlees]]
[[pl:Pieczony schab]]
[[pt:Costeleta de porco assada]]
[[ru:Жареная свинина]]
[[uk:Смажена свинина]]
[[zh:熟猪排]]</li></ul> | 17w16a | Bows are now used by illusioners and can now sometimes be obtained as a rare drop, although unenchanted. | |||
1.13{{Extension DPL}}<ul><li>[[Nautilus Shell|Nautilus Shell]]<br/>{{Item
| type =
| stackable = Yes (64)
| renewable = Yes
}}
A '''nautilus shell''' is an item that is used for crafting [[conduit]]s.
==Obtaining==
===Fishing===
{{main|Fishing#Junk and treasure}}
Nautilus shells can be rarely obtained as a treasure item from fishing. The drop chances of nautilus shells slightly increase with each level of [[Luck of the Sea]] on the [[player]]'s [[fishing rod]].
===Mob loot===
[[Drowned]] have a 3%{{only|java|short=1}} or 8%{{only|bedrock|short=1}} chance to spawn with a nautilus shell in their off-hand, and this nautilus shell always drops upon [[death]].
===Trading===
[[Wandering trader]]s may [[trading|sell]] a nautilus shell for 5 [[emerald]]s each, but they only sell 5 of them at a time.
==Usage==
{{IN|bedrock}}, a nautilus shell is one of the few items that can be held in the off-hand.
===Crafting ingredient===
{{crafting usage}}
=== Trading ===
Nautilus shells can be given to trident-wielding drowned with a chance for the drowned to pick up the shell and drop the trident.<sup>[''[[Bedrock Edition]] only'']</sup>
==Data values==
===ID===
{{edition|java}}:
{{ID table
|edition=java
|showforms=y
|generatetranslationkeys=y
|displayname=Nautilus Shell
|spritetype=item
|nameid=nautilus_shell
|form=item
|foot=1}}
{{edition|bedrock}}:
{{ID table
|edition=bedrock
|shownumericids=y
|showforms=y
|notshowbeitemforms=y
|generatetranslationkeys=y
|displayname=Nautilus Shell
|spritetype=item
|nameid=nautilus_shell
|id=570
|form=item
|foot=1}}
==History==
{{History|java}}
{{History||1.13|snap=18w15a|[[File:Nautilus Shell JE1 BE2.png|32px]] Added nautilus shells.}}
{{History||1.14|snap=19w05a|Added [[Wandering Trader|wandering trader]]s, which sell nautilus shells.}}
{{History|bedrock}}
{{History||1.4.0|snap=beta 1.2.20.1|[[File:Nautilus Shell BE1.png|32px]] Added nautilus shells.}}
{{History|||snap=beta 1.2.20.2|[[File:Nautilus Shell JE1 BE2.png|32px]] The texture of nautilus shells has now been changed.}}
{{History||1.5.0|snap=beta 1.5.0.0|[[Drowned]] now sometimes spawn holding a nautilus shell.
|Nautilus shells are no longer behind [[Experimental Gameplay]].}}
{{History|||snap=beta 1.5.0.1|Nautilus shells can now be used to craft [[conduit]]s.}}
{{History||1.10.0|snap=beta 1.10.0.3|Nautilus shells can now be obtained from [[trading]] with [[wandering trader]]s.}}
{{History|console}}
{{History||xbox=TU69|ps=1.76|wiiu=Patch 38|[[File:Nautilus Shell JE1 BE2.png|32px]] Added nautilus shells.}}
{{History||xbox=none|ps=1.91|wiiu=none|Nautilus shells can now be obtained from [[trading]] with [[wandering trader]]s.}}
{{History|foot}}
==Issues==
{{issue list}}
==Trivia==
*[[wikipedia:Nautilus|Nautilus]]es are animals that occupy deep oceans in the real world. However, they are absent in Minecraft and there are currently no plans to add nautilus [[mob]]s into the game.
*Because {{el|bedrock}} allows for Nautilus shells to be held in the off-hand (since drowned hold them), they are the only item in that version that can be put in the off-hand slot without having a specific function.
{{items}}
[[de:Nautilusschale]]
[[es:Caparazón de nautilo]]
[[fr:Coquille de nautile]]
[[it:Conchiglia di nautilus]]
[[ja:オウムガイの殻]]
[[ko:앵무조개 껍데기]]
[[nl:Nautilusschelp]]
[[pl:Muszla łodzika]]
[[pt:Concha de náutilo]]
[[ru:Раковина наутилуса]]
[[th:เปลือกหอยงวงช้าง]]
[[uk:Мушля наутилуса]]
[[zh:鹦鹉螺壳]]
[[Category:Renewable resources]]</li><li>[[Bookshelf|Bookshelf]]<br/>{{About|the bookshelf used with an enchanting table|the bookshelf that can hold books|Chiseled Bookshelf}}
{{Block
|image=Bookshelf.png
|transparent=No
|light=No
|tool=Axe
|renewable=Yes
|stackable=Yes (64)
|flammable=Yes (30)
|lavasusceptible=Yes
}}
'''Bookshelves''' are [[blocks]] that improve [[enchanting|enchantments]] applied with an [[enchanting table]] when placed around one, up to a maximum of fifteen bookshelves, at the expense of [[Enchanting/Levels|level]] requirement.
== Obtaining ==
=== Natural generation ===
Bookshelves can generate in village libraries and sometimes village houses.
[[Stronghold]]s may contain up to two libraries, each of which may be single-level or have an upper balcony. These feature some bookshelves arranged in pillars, and more bookshelves arranged in pillars in the walls. Single-level libraries contain 161 bookshelves, while libraries with balconies contain 233.
Bookshelves also naturally generate in certain [[woodland mansion]] rooms.
=== Breaking ===
Bookshelves can be broken fairly easily by hand, but can be broken faster by using an [[axe]]. In either case, they drop 3 books when broken, allowing the reconstruction of the bookshelf with the addition of six wood planks. When broken by an item that is [[enchanted]] with [[Silk Touch]], a bookshelf drops itself.
{{breaking row|horizontal=1|Bookshelf|Axe}}
=== Crafting ===
{{Crafting
|A1=Any Planks
|B1=Any Planks
|C1=Any Planks
|A2=Book
|B2=Book
|C2=Book
|A3=Any Planks
|B3=Any Planks
|C3=Any Planks
|Output=Bookshelf
|type=Building block
}}
=== Trading ===
Novice-level librarian [[Villager|villagers]] have a 50% chance to sell 1 bookshelf for 9 [[Emerald|emeralds]] as part of their trades.{{only|bedrock}}
Novice-level librarian villagers have a {{frac|2|3}} chance to sell 1 bookshelf for 9 emeralds.{{only|java}}
== Usage ==
=== Enchanting ===
{{main|Enchantment mechanics#Bookshelf placement}}
If an [[enchanting table]] is placed near a bookshelf, glyph [[particles]] fly from the bookshelf toward the enchanting table. Having bookshelves in the proper position near the table allows the table to apply higher-level enchantments.
=== Crafting ingredient ===
{{crafting usage}}
=== Fuel ===
Bookshelves can be used as a [[fuel]] in [[furnace]]s, smelting 1.5 items per block.
=== Villager ===
Librarian [[villager]]s can interact with bookshelves.
=== Note Blocks ===
Bookshelf can be placed under [[note block]]s to produce "bass" sounds.
== Sounds ==
{{Sound table/Block/Wood}}
== Data values ==
=== ID ===
{{edition|java}}:
{{ID table
|edition=java
|showforms=y
|generatetranslationkeys=y
|displayname=Bookshelf
|spritetype=block
|nameid=bookshelf
|showblocktags=y|blocktags=mineable/axe
|foot=1}}
{{edition|bedrock}}:
{{ID table
|edition=bedrock
|shownumericids=y
|showforms=y
|generatetranslationkeys=y
|displayname=Bookshelf
|spritetype=block
|nameid=bookshelf
|id=47
|foot=1}}
== Achievements ==
{{load achievements|Librarian}}
== History ==
{{History|java classic}}
{{History||October 24, 2009|link=https://notch.tumblr.com/post/221308991/the-new-block-types-and-new-graphics-for-the-gold|Bookshelves were teased by [[Notch]].}}
{{History||0.26 SURVIVAL TEST|[[File:Bookshelf JE1.png|32px]] Added bookshelves.
|Bookshelves are currently impossible to obtain without loading a pre-edited map.
|Bookshelves are currently destroyed in [[explosion]]s.
|When bookshelves are broken, they currently do not drop anything.}}
{{History||0.28|Bookshelves can now be freely placed.}}
{{History|java alpha}}
{{History||v1.0.11|Bookshelves can now be [[crafting|crafted]] from 3 [[book]]s and 6 [[planks]].}}
{{History|java beta}}
{{History||1.8|snap=Pre-release|Bookshelves can now be found generated in libraries in [[village]]s, and libraries in [[stronghold]]s.}}
{{History|java}}
{{History||1.0.0|snap=Beta 1.9 Prerelease 3|Bookshelves now drop 3 [[book]]s when broken by a non-[[Silk Touch]] [[item]].
|They are now necessary to [[enchanting|enchant]] with higher levels for better enchanted items.
|The number of bookshelves required to reach the maximum enchantment level is 30.}}
{{History|||snap=Beta 1.9 Prerelease 5|[[File:Bookshelf JE2 BE1.png|32px]] The top texture of bookshelves have now been updated as a result of the [[planks]] texture update.}}
{{History||1.2.4|snap=release|[[Spruce planks]], [[birch planks]], and [[jungle planks]] can now be used to craft bookshelves.}}
{{History||1.3.1|snap=12w21a|Librarian [[villager]]s now [[trading|sell]] 1 bookshelf for 3 [[emerald]]s.}}
{{History|||snap=12w22a|The number of bookshelves required to reach the maximum enchantment level has been now decreased to 15.}}
{{History||1.7.2|snap=1.7.1|[[Acacia planks]] and [[dark oak planks]] can now be used to craft bookshelves.}}
{{History||1.8|snap=14w02a|Librarian villagers now sell 1 bookshelf for 3–4 [[emerald]]s.}}
{{History||1.11|snap=16w39a|Bookshelves now generate in [[woodland mansion]]s.}}
{{History||1.13|snap=17w47a|Prior to [[1.13/Flattening|''The Flattening'']], this [[block]]'s numeral ID was 47.}}
{{History||1.14|snap=18w43a|[[File:Bookshelf JE3.png|32px]] The texture of bookshelves has now been changed.}}
{{History|||snap=18w47a|[[File:Bookshelf JE4 BE2.png|32px]] The texture of bookshelves has now been changed, once again.}}
{{History|||snap=19w02a|Bookshelves can now be used to craft [[lectern]]s.}}
{{History||1.16|snap=20w06a|[[Crimson planks]] and [[warped planks]] can now be used to craft bookshelves.}}
{{History||1.19|snap=22w11a|[[Mangrove planks]] can now be used to craft bookshelves.}}
{{History|pocket alpha}}
{{History||v0.2.1|[[File:Bookshelf JE2 BE1.png|32px]] Added bookshelves.|Bookshelves are currently obtainable only in [[Creative]] mode.}}
{{History||v0.3.0|Bookshelves are now obtainable in [[Survival]] mode.}}
{{History||v0.9.0|snap=build 1|Bookshelves now naturally spawn in [[stronghold]]s and [[village]]s.}}
{{History||v0.12.1|snap=build 1|Bookshelves can now be used to increase [[enchantment table]] levels.|Bookshelves can now be obtained by using a [[tool]] with the [[Silk Touch]] enchantment.}}
{{History|pocket}}
{{History||1.0.4|snap=alpha 1.0.4.0|Librarian [[villager]]s now [[trading|sell]] 1 bookshelf for 3-4 [[emerald]]s as their second tier trade.}}
{{History||1.1.0|snap=alpha 1.1.0.0|Bookshelves now generate in [[woodland mansion]]s.}}
{{History|bedrock}}
{{History||1.10.0|snap=beta 1.10.0.3|Bookshelves can now be used to craft [[lectern]]s.|Bookshelves now get inspected by librarian [[villager]]s.|[[File:Bookshelf JE4 BE2.png|32px]] The texture of bookshelves has been changed.}}
{{History||1.11.0|snap=beta 1.11.0.4|[[Trading]] has now been changed, librarian villagers now have a 50% chance to sell a bookshelf for 6 [[emerald]]s as part of their first trade.}}
{{History|console}}
{{History||xbox=TU1|xbone=CU1|ps=1.00|wiiu=Patch 1|switch=1.0.1|[[File:Bookshelf JE2 BE1.png|32px]] Added bookshelves. Whether they actually used this texture is unknown.}}
{{History||xbox=none|xbone=none|ps=1.90|wiiu=none|switch=none|[[File:Bookshelf JE4 BE2.png|32px]] The texture of bookshelves has been changed.}}
{{History|new 3ds}}
{{History||0.1.0|[[File:Bookshelf JE2 BE1.png|32px]] Added bookshelves.}}
{{History|foot}}
== Issues ==
{{Issue list}}
== Trivia ==
* Bookshelves' top and bottom textures by default use the same texture as [[oak planks]].
* It takes 90 planks, 45 [[leather]] and 135 [[paper]] to make 15 bookshelves in order to get a level 30 [[enchantment]].
* A bookshelf is the icon for [[Education Edition]].
== Gallery ==
<gallery>
File:Library in Village.png|Naturally occurring bookshelves in a [[village]]. (Before Village & Pillage).
File:Large Stronghold Library.png|Naturally occurring bookshelves in a [[stronghold]].
File:Achievement get! Trading emeralds for bookshelves.png|Bookshelves obtained by [[trading]] with a [[villager]].
File:Enchanting-Table.png|Bookshelves powering an [[enchanting table]].
</gallery>
== References ==
{{Reflist}}
== External Links ==
*[https://www.minecraft.net/en-us/article/block-week-bookshelf Block of the Week: Bookshelf] – Minecraft.net on December 16, 2016
{{Blocks|Building}}
[[Category:Manufactured blocks]]
[[Category:Natural blocks]]
[[Category:Generated structure blocks]]
[[Category:Utility blocks]]
[[Category:Bedrock Edition]]
[[Category:Java Edition]]
[[Category:Items]]
[[Category:Flammable blocks]]
[[cs:Knihovna]]
[[de:Bücherregal]]
[[es:Librería]]
[[fr:Bibliothèque]]
[[hu:Könyvespolc]]
[[it:Libreria]]
[[ja:本棚]]
[[ko:책장]]
[[nl:Boekenkast]]
[[pl:Biblioteczka]]
[[pt:Estante de livros]]
[[ru:Книжные полки]]
[[th:ชั้นหนังสือ]]
[[uk:Книжкова полиця]]
[[zh:书架]]</li></ul> | 17w47a | Prior to The Flattening, this item's numeral ID was 261. | |||
1.13.1{{Extension DPL}}<ul><li>[[Debug Stick|Debug Stick]]<br/>{{about|the item|other uses|Debug}}
{{exclusive|java}}
{{Item
| image = Debug Stick.gif
| rarity = Epic
| renewable = No
| stackable = No
}}
The '''debug stick''' is an [[item]] used to edit the [[block states]] of [[block]]s. It is visually identical to a regular [[stick]], but with a glint (as if [[Enchanting|enchanted]]).
== Obtaining ==
The debug stick is obtainable via [[commands]] such as {{cmd|/give}} or {{Cmd|/item}}, or the Creative inventory if the player has the appropriate permissions. It can be obtained only in worlds with cheats on.
== Usage ==
The debug stick can be used to change block states. {{control|Hitting}} the block allows players to select the block state key they wish to change, for an example, switching between the ''conditional'' and the ''facing'' block state keys for a [[command block]]. {{control|Using}} the block allows them to cycle through the valid values for the block state key, again as an example, the player can make the command block face, ''down'', ''east'', ''north'', ''south'', ''up'', or ''west'' if they chose the ''facing'' block state key. {{control|Sneaking}} while {{control|hitting}} or {{control|using}} cycles through the block state keys or values in reverse order.
It is notable that {{Control|using}} debug stick directly on an interactive block without {{Control|sneaking}} uses the block itself instead of the stick.<ref>{{bug|MC-200199}} </ref>
The debug stick cannot be used while in Survival or Adventure mode. It works only in creative mode with cheats enabled. In modes other than Creative, it acts like a regular item — although when {{control|using}} it on a block, the player swings the stick as if interacting with it (but nothing happens).
== Data values ==
=== ID ===
{{ID table
|edition=java
|showforms=y
|generatetranslationkeys=y
|displayname=Debug Stick
|spritetype=item
|nameid=debug_stick
|form=item
|foot=1}}
=== Item data ===
<div class="treeview">
* {{nbt|compound|tag}}: The item's '''tag''' tag.
{{:Player.dat_format/Debug Sticks}}
</div>
== History ==
{{History|java}}
{{History||1.13|snap=17w47a|[[File:Debug Stick.gif|32px]] Added debug sticks.}}
{{History||1.16|snap=20w10a|Debug sticks are now capable of editing [[fire]] due to its added hitbox.}}
{{History||1.19.3|snap=22w44a|The debug stick is now available in the creative inventory, but only if cheats are enabled.}}
{{History|||snap=22w45a|Moved the debug stick behind the Operator Utilities tab in the creative inventory. The tab is only available if cheats are enabled and the "Operator Items Tab" option in the controls menu is turned on.}}
{{History|foot}}
== Issues ==
The debug stick is not supported, and any issues resulting of its usage are closed as "Won't Fix" in the issue tracker.<br/> Issues with the stick itself are considered valid.<ref>https://bugs.mojang.com/browse/MC-122323?focusedCommentId=419481&page=com.atlassian.jira.plugin.system.issuetabpanels:comment-tabpanel#comment-419481</ref><ref>{{reddit|7es23r||Just be aware that any weird state you create with it you cannot naturally create and any bugs that come from it will be shot down as 'Wont fix' :D|_Grum|November 22, 2017}}</ref>
{{issue list}}
== Trivia ==
*An [[add-on]] made by Mineplex was showcased in [[MINECON Live 2019]], which had an editor stick for {{el|be}}, similar to the Debug Stick.<ref>{{ytl|OZqNaEX8208|MINECON Live 2019 @ 1:05:02|Minecraft|September 28, 2019|t=3902}}</ref>
== Gallery ==
<gallery>
Technically Updated.jpg|Artwork of Steve and Alex wielding debug sticks.
</gallery>
== See also ==
*[[Block states]]
== References ==
{{Reflist}}
{{Items}}
[[Category:Non-renewable resources]]
[[de:Debug-Stab]]
[[es:Palo de depuración]]
[[fr:Bâton de débogage]]
[[ja:デバッグ棒]]
[[ko:디버그 막대기]]
[[pl:Patyk debugujący]]
[[pt:Graveto de depuração]]
[[ru:Палка отладки]]
[[zh:调试棒]]</li><li>[[Echo Shard|Echo Shard]]<br/>{{Item
| title = Echo Shard
| image = Echo Shard.png
| renewable = No
| stackable = Yes (64)
}}
An '''echo shard''' is an item found in [[ancient cities]] which can be used to craft [[recovery compass]]es.
== Obtaining ==
=== Chest loot ===
{{LootChestItem|echo-shard}}
== Usage ==
=== Crafting ingredient ===
{{crafting usage|Echo Shard}}
== History ==
{{History|java}}
{{History||1.19|snap=22w14a|[[File:Echo Shard JE1 BE1.png|32px]] Added echo shards.}}
{{History|bedrock}}
{{History||1.19.0|snap=beta 1.19.0.24|[[File:Echo Shard JE1 BE1.png|32px]] Added echo shards.
|Currently cannot be found inside [[ancient city]] chests due to outdated structures and loot chests.}}
{{History||1.19.0|snap=beta 1.19.0.26|Echo shards now generate inside [[ancient city]] loot chests.}}
{{History|foot}}
== Issues ==
{{issue list}}
{{Items}}
[[Category:Non-renewable resources]]
[[de:Echoscherbe]]
[[es:Fragmento resonante]]
[[fr:Éclat d'écho]]
[[ja:残響の欠片]]
[[lzh:回音殘片]]
[[pt:Fragmento de eco]]
[[pl:Odłamek pogłosu]]
[[ru:Осколок эха]]
[[th:เศษเอคโค]]
[[uk:Уламок відлуння]]
[[zh:回响碎片]]</li></ul> | 18w30a | MC-88356: Fixed a bug: When using the bow in the off-hand, the bow does do the animation, but does not aim at the target. | |||
1.14{{Extension DPL}}<ul><li>[[Key|Key]]<br/>{{About|the joke item|the golem|Key Golem|in-game control keys|Controls}}
{{Exclusive|Java}}
{{Joke feature}}
{{Item
| image = <gallery>
Red Key.gif | Red
Yellow Key.gif | Yellow
Blue Key.gif | Blue
</gallery>
| renewable =
* Blue: No
* Red, Yellow: Yes
| stackable = No
}}
'''Keys''' were a joke item from [[Java Edition 3D Shareware v1.34]].
There are three different keys: '''red''', '''yellow''', and '''blue'''.
== Obtaining ==
=== Mobs ===
The red key was dropped by the [[wither]], the yellow key was dropped by [[ravager]]s, and the blue key was dropped by the [[elder guardian]].
=== Cheat codes ===
These keys were also obtainable by using the cheat code "IDKFA" when typing in chat.
=== Natural generation ===
{{LootChestItem|red-key,yellow-key,blue-key}}
== Data values ==
=== ID ===
{{ID table
|showforms=y
|generatetranslationkeys=java
|displayname=Red Key
|spritetype=item
|nameid=red_key
|form=item}}
{{ID table
|displayname=Yellow Key
|spritetype=item
|nameid=yellow_key
|form=item}}
{{ID table
|displayname=Blue Key
|spritetype=item
|nameid=blue_key
|form=item
|foot=1}}
== History ==
{{History|java}}
{{History||3D Shareware v1.34|[[File:Red Key.gif|32px]] [[File:Yellow Key.gif|32px]] [[File:Blue Key.gif|32px]] Added red, yellow, and blue keys.}}
{{History|foot}}
== Trivia ==
*[[File:Green Key.png|32px]] A key with a similar appearance is present in ''The Europa Arcology Incident'', a game made by [[Notch]] in 2009.
{{Items}}
{{Jokes}}
[[Category:Joke items]]
[[pt:Chave]]</li><li>[[Sign|Sign]]<br/>{{Block
| image = <gallery>
Oak Sign.png|Sign
Oak Wall Sign.png|Wall Sign
Oak Hanging Sign.png|Hanging Sign
Oak Wall Hanging Sign.png|Wall Hanging Sign
</gallery>
| image2 = <gallery>
Oak Sign JE3.png|Sign
Oak Hanging Sign (item) JE1 BE1.png|Hanging Sign
</gallery>
| extratext = [[#Gallery|View all renders]]
| transparent = Yes
| light = No
| tool = axe
| renewable = Yes
| stackable = Yes (16)
| flammable = No
| lavasusceptible = No
}}
A '''sign''' is a non-solid [[block]] that displays text and can be placed on the top or side of other blocks. A '''hanging sign''' is a decorative block that also displays text, and can be placed underneath blocks or with a solid self-supporting bracket. The text of both types of signs can be customized with [[dye]]s and [[glow ink sac]]s.
== Obtaining ==
=== Breaking ===
Signs can be broken with any tool or without a tool, but an [[axe]] is fastest.
{{breaking row|horizontal=1|Sign|sprite=oak-sign|Axe|foot=1|item=1}}
A sign or a hanging sign also breaks and drops itself as an [[item]] if the block the sign is attached to is moved, removed or destroyed. However, a wall hanging sign will stay here if the block the hanging sign is attached to is removed.<ref>{{bug|MC-256501|||WAI}}</ref>
If a sign is broken while being edited, the player continues to edit the sign<ref>{{bug|MC-117815}}</ref>, although {{in|bedrock}} breaking the sign stops the editing operation.
=== Natural generation ===
An oak sign can be found in [[igloo]] basements. Spruce signs can be found in taiga [[village]] houses, as part of a chair.
=== Chest loot ===
{{LootChestItem|oak-sign,oak-hanging-sign,spruce-sign,spruce-hanging-sign}}
=== Crafting ===
[[The player]] can place six stripped [[log]] [[block]]s at the bottom half of the crafting table and place two [[chain]]s on the top-left and top-right slots to create hanging signs. This crafting recipe will create six hanging signs. Hanging signs can only be crafted with stripped logs or [[stem]]s; non-stripped wood cannot be used to craft hanging signs.
{{Crafting
|head=1
|showdescription=1
|nolink=1
|A1= Matching Planks
|B1= Matching Planks
|C1= Matching Planks
|A2= Matching Planks
|B2= Matching Planks
|C2= Matching Planks
|B3= Stick
|Output=Matching Sign,3
|type=Decoration block
}}
{{Crafting
|name= Hanging Sign
|A1= Chain
|C1= Chain
|A2= Matching Stripped Log or Stem; Block of Stripped Bamboo
|B2= Matching Stripped Log or Stem; Block of Stripped Bamboo
|C2= Matching Stripped Log or Stem; Block of Stripped Bamboo
|A3= Matching Stripped Log or Stem; Block of Stripped Bamboo
|B3= Matching Stripped Log or Stem; Block of Stripped Bamboo
|C3= Matching Stripped Log or Stem; Block of Stripped Bamboo
|Output= Matching Hanging Sign,6; Bamboo Hanging Sign,6
|type=Decoration block
|foot=1
}}
== Usage ==
Signs can be used to display text; they can be used to label storage, display information to other players or note areas of interest. Signs are also not destroyed by [[water]] or [[lava]] and therefore may be used to control the flow of these fluids.
=== Placement ===
==== Signs ====
Signs may be placed on the top or side of other [[block]]s (including semi-solid and non-solid blocks such as [[fence]]s, [[Trapdoor|trapdoors]] and other signs). To place a sign, {{control|use}} a sign [[item]] while pointing at the block the sign should be attached to, enter the desired text (or none), and click the "Done" button or press "escape" on a keyboard (or press × {{in|bedrock}}, {{xbtn|b}} on an Xbox controller, {{psbtn|o}} on a PlayStation controller, or {{nsbutton|B}} on a Nintendo Switch controller. Closing the virtual keyboard on a mobile device also exits the typing menu). To place a sign on a block that can be interacted with by the {{control|use}} control (for example, [[chest]]s, [[note block]]s, etc.), {{control|sneak}} while placing the sign.
Signs on the top of a block stand on a short post and face toward the player who placed it, in any of 16 different directions. Signs placed on the side of a block simply float there, even if the block doesn't make contact with the sign.
Even if placed on a vertical surface, a sign may not co-exist in the same block of air as any other item, despite not necessarily visibly obstructing eachother.
For more information about the blocks signs can be placed on, see [[Opacity/Placement]].
==== Hanging signs ====
Hanging signs can be placed in three different ways:
* Placing a hanging sign on the side of a block will result in it being placed with a self-supporting bracket, which allows it to float without any supporting block. This version can be placed in four different directions.
* Placing a hanging sign on the bottom of a block will result in the sign hanging below the block.
** If the block is wide enough, the chains holding the sign will be parallel. This version can be placed in four different directions.
** If the block is too narrow, the chains will meet together in a upwards arrow shape. This version is also placed if the player is {{control|sneaking}} when placing a hanging sign below a wide-enough block. This version can be placed in sixteen different directions.
=== Text ===
[[File:Oak Sign GUI.png|thumb|240px|Oak Sign editing.]]
Placing a sign opens an editor interface resembling a magnified view of the sign. Up to four lines of text can then be entered using a keyboard (hardware or on-screen). The editor supports limited editing, including moving the cursor and inserting and deleting characters. {{IN|bedrock}}, [[formatting codes]] can also be used to apply decorative effects such as color, bold, italic and underline to various bits of the text. Depending on the edition and platform in use, copy and paste operations may be supported and the editor may also support keyboard entry of Alt-codes for displaying Unicode characters.
Text can be added to the back side of a sign by interacting with the that side of the sign after placing it and editing the front.
Signs can be waxed by {{Control|use|text=using}} a [[honeycomb]] on it. Once waxed, a sign cannot be unwaxed or edited.
After placing and affixing text on a sign, a player can change the text color by {{control|using}} a [[dye]] on it. When colored with dye, the text color may differ from any color specified by formatting codes.{{Info needed|How does this work? Does the dye affect all the text? One line? One word? Does dye override all formatting codes, including font effects?}}
[[File:Glow Ink Sign with Orange Dye JE2.png|thumb|216px|Oak sign with glow ink and orange dye applied in {{JE}}.]]
A player can {{control|use}} a [[glow ink sac]] on a sign to make its text glow. The glowing text is not affected by lighting. The player can use a regular black [[ink sac]] on the sign to remove the glowing effect.
{| class="wikitable mw-collapsible mw-collapsed"
|+ class="nowrap" | Glow ink colors
!Name !! Main Color !! Edge Color
|-
! Black
| {{color|#000000}}
| {{color|#EDE8CA}}
|-
! Red
| {{color|#FC0000}}
| {{color|#650000}}
|-
! Green
| {{color|#00FC00}}
| {{color|#006500}}
|-
! Brown
| {{color|#894413}}
| {{color|#361B07}}
|-
! Blue
| {{color|#0000FC}}
| {{color|#000065}}
|-
! Purple
| {{color|#9E20ED}}
| {{color|#3F0C5F}}
|-
! Cyan
| {{color|#00D6D6}}
| {{color|#006565}}
|-
! Light Gray
| {{color|#D0D0D0}}
| {{color|#535353}}
|-
! Gray
| {{color|#7E7E7E}}
| {{color|#323232}}
|-
! Pink
| {{color|#FC68B2}}
| {{color|#652947}}
|-
! Lime
| {{color|#8DFC00}}
| {{color|#4B6500}}
|-
! Yellow
| {{color|#FCFC00}}
| {{color|#656500}}
|-
! Light Blue
| {{color|#98BECB}}
| {{color|#3C4B51}}
|-
! Magenta
| {{color|#FC00FC}}
| {{color|#650065}}
|-
! Orange
| {{color|#FC671F}}
| {{color|#65280C}}
|-
! White
| {{color|#FCFCFC}}
| {{color|#656565}}
|}
In [[Creative]] mode, the combination {{key|Ctrl}} + {{control|pick block}} on Windows/Linux, or {{key|cmd}} + {{control|pick block}} on macOS, can be used to copy an already-placed sign, including its text (with decorations), into the player's inventory.
A dyed sign facing east or west will have its text appear more saturated and bright than a sign facing north or south. However, it is actually the sign that is dimmer, because ''Minecraft'''s lighting engine uses side lighting to make the world appear less flat, but the text on signs is not affected by this.
{{IN|bedrock}}, inappropriate words or phrases in a sign's text are displayed as asterisks.
{{IN|java}}, signs can be created with [[Commands#Raw JSON Text|JSON text]], which allows complex formatting (colors, bold, italic, etc.), hover and click events, localized translation (for ''Minecraft'' technical terms, like "Redstone Repeater", otherwise translations must be provided in language files in resource packs), and the incorporation of scoreboard values into text. Use the {{cmd|data merge block}} command to create or alter JSON signs.
: Example: {{cmd|long=1|data merge block ~ ~1 ~ <nowiki>{front_text:{ color:"green", messages:[ '{"selector":"@p", "bold":false, "italic":false, "underlined":false, "strikethrough":false, "obfuscated":false}' , '{"text":"Second Line"}']}}}}
Signs can post the success count of JSON text hover and click events to [[scoreboard]] objectives. The objectives to be used can be specified by running the {{cmd|execute store}} command or by modifying the sign's NBT data directly with the {{cmd|data merge block}} command.
=== Interaction ===
Signs act as though they have a {{control|use}} action, so the [[player]] is unable to place [[block]]s or use [[item]]s while the cursor is pointed at them without {{control|sneaking}}.
Signs are destroyed and drop as an item when pushed by a [[piston]].{{Only|bedrock}}
Signs are non-solid and have no collision, so [[item]]s and [[mob]]s can move through sign blocks. Other [[block]]s (including other signs) can be placed on any edge of a sign.
[[Water]] and [[lava]] flow around signs. Lava can create [[fire]] in [[air]] blocks next to signs as if the signs were flammable, but the signs do not burn (and cannot be burned by other methods either, except {{in|be}}).
=== Fuel ===
Wooden signs can be used as a fuel in [[furnace]]s, smelting an [[item]] per sign.
=== Note Blocks ===
Signs can be placed under [[note block]]s to produce a "bass" sounds.
== Sounds ==
=== Generic ===
==== Normal wood ====
; Sign
{{Sound table/Block/Wood|forcecollapsed=1}}
; Hanging sign
{{Sound table/Block/Hanging sign|forcecollapsed=1}}
==== Cherry wood ====
; Sign
{{Sound table/Block/Cherry wood|forcecollapsed=1}}
; Hanging sign
{{Sound table/Block/Cherry wood hanging sign|forcecollapsed=1}}
==== Bamboo wood ====
; Sign
{{Sound table/Block/Bamboo wood|forcecollapsed=1}}
; Hanging sign
{{edition|java}}:
{{Sound table/Block/Bamboo wood hanging sign/JE|forcecollapsed=1}}
{{edition|bedrock}}:
{{Sound table/Block/Bamboo wood hanging sign/BE|forcecollapsed=1}}
==== Nether wood ====
; Sign
{{Sound table/Block/Nether wood|forcecollapsed=1}}
; Hanging sign
{{edition|java}}:
{{Sound table/Block/Nether wood hanging sign/JE|forcecollapsed=1}}
{{edition|bedrock}}:
{{Sound table/Block/Nether wood hanging sign/BE|forcecollapsed=1}}
=== Unique ===
{{edition|java}}:
{{Sound table|forcecollapsed=1
|rowspan=2
|sound=Ink sac1.ogg
|sound2=Ink sac2.ogg
|sound3=Ink sac3.ogg
|subtitle=Glow Ink Sac splotches
|source=block
|description=When a [[glow ink sac]] is used on a sign
|id=item.glow_ink_sac.use
|translationkey=subtitles.item.glow_ink_sac.use
|volume=1.0
|pitch=''varies'' <ref group=sound>Can be 1.0, 0.95, or 1.05 for each sound</ref>
|distance=16}}
{{Sound table
|subtitle=Ink Sac splotches
|source=block
|description=When an [[ink sac]] is used on a sign
|id=item.ink_sac.use
|translationkey=subtitles.item.ink_sac.use
|volume=1.0
|pitch=''varies'' <ref group=sound>Can be 0.85, 0.88, or 0.9 for each sound</ref>
|distance=16}}
{{Sound table
|sound=Dye.ogg
|subtitle=Dye stains
|source=block
|description=When [[dye]] is used on a sign
|id=item.dye.use
|translationkey=subtitles.item.dye.use
|volume=1.0
|pitch=''varies'' <ref group=sound>Can be 1.0, 0.9, 0.95, or 1.1</ref>
|distance=16}}
{{Sound table
|sound=Wax on1.ogg
|sound2=Wax on2.ogg
|sound3=Wax on3.ogg
|subtitle=Wax on
|source=block
|description=When a sign is waxed
|id=item.honeycomb.wax_on
|translationkey=subtitles.item.honeycomb.wax_on
|volume=1.0
|pitch=1.0/0.9/1.1
|distance=16}}
{{Sound table
|sound=Sign waxed interact fail1.ogg
|sound2=Sign waxed interact fail2.ogg
|sound3=Sign waxed interact fail3.ogg
|subtitle=Sign wobbles
|source=block
|description=When a player attempts to edit a waxed sign
|id=block.sign.waxed_interact_fail
|translationkey=subtitles.block.sign.waxed_interact_fail
|volume=1.0
|pitch=''varies''<ref group=sound>{{cd|fail1}} can be 1.0 or 0.9; {{cd|fail2}} and {{cd|fail3}} can be 0.8 or 0.9</ref>
|distance=16
|foot=1}}
{{edition|bedrock}}:
{{Sound table|forcecollapsed=1
|type=bedrock
|sound=Ink sac1.ogg
|sound2=Ink sac2.ogg
|sound3=Ink sac3.ogg
|source=sound
|description=When a glow ink sac or an ink sac is used on a sign
|id=sign.ink_sac.use
|volume=1.0
|pitch=1.0}}
{{Sound table
|type=bedrock
|sound=Dye.ogg
|source=sound
|description=When dye is used on a sign
|id=sign.dye.use
|volume=1.0
|pitch=1.0}}
{{Sound table
|sound=Wax on1.ogg
|sound2=Wax on2.ogg
|sound3=Wax on3.ogg
|source=neutral
|description=When a honeycomb waxes a sign
|id=copper.wax.on
|volume=1.0
|pitch=0.8-1.2}}
{{Sound table
|sound=Sign waxed interact fail1.ogg
|sound2=Sign waxed interact fail2.ogg
|sound3=Sign waxed interact fail3.ogg
|source=block
|description=When a player attempts to edit a waxed sign
|id=block.sign.waxed_interact_fail
|volume=1.0
|pitch=''varies'' <ref group=sound>Can be 1.0 or 0.9 for <code>waxed_interact_fail1</code>; can be 0.8 or 0.9 for <code>waxed_interact_fail2</code> and <code>waxed_interact_fail3</code></ref>
|foot=1}}
== Data values ==
=== ID ===
{{edition|java}}:
{{ID table
|edition=java
|showblocktags=y
|showitemtags=y
|showforms=y
|generatetranslationkeys=y
|displayname=Oak Sign
|spritetype=block
|nameid=oak_sign
|blocktags=signs, standing_signs, wall_post_override
|itemtags=signs}}
{{ID table
|displayname=Spruce Sign
|spritetype=block
|nameid=spruce_sign
|blocktags=signs, standing_signs, wall_post_override
|itemtags=signs}}
{{ID table
|displayname=Birch Sign
|spritetype=block
|nameid=birch_sign
|blocktags=signs, standing_signs, wall_post_override
|itemtags=signs}}
{{ID table
|displayname=Jungle Sign
|spritetype=block
|nameid=jungle_sign
|blocktags=signs, standing_signs, wall_post_override
|itemtags=signs}}
{{ID table
|displayname=Acacia Sign
|spritetype=block
|nameid=acacia_sign
|blocktags=signs, standing_signs, wall_post_override
|itemtags=signs}}
{{ID table
|displayname=Dark Oak Sign
|spritetype=block
|nameid=dark_oak_sign
|blocktags=signs, standing_signs, wall_post_override
|itemtags=signs}}
{{ID table
|displayname=Mangrove Sign
|spritetype=block
|nameid=mangrove_sign
|blocktags=signs, standing_signs, wall_post_override
|itemtags=signs}}
{{ID table
|displayname=Cherry Sign
|spritename=Cherry Sign
|spritetype=block
|nameid=cherry_sign
|blocktags=signs, standing_signs, wall_post_override
|itemtags=signs}}
{{ID table
|displayname=Bamboo Sign
|spritename=Bamboo Sign
|spritetype=block
|nameid=bamboo_sign
|blocktags=signs, standing_signs, wall_post_override
|itemtags=signs}}
{{ID table
|displayname=Crimson Sign
|spritetype=block
|nameid=crimson_sign
|blocktags= signs, standing_signs, wall_post_override
|itemtags=non_flammable_wood, signs}}
{{ID table
|displayname=Warped Sign
|spritetype=block
|nameid=warped_sign
|blocktags=signs, standing_signs, wall_post_override
|itemtags=non_flammable_wood, signs}}
{{ID table
|displayname=Oak Wall Sign
|spritetype=block
|nameid=oak_wall_sign
|blocktags=signs, wall_signs
|form=block}}
{{ID table
|displayname=Spruce Wall Sign
|spritetype=block
|nameid=spruce_wall_sign
|blocktags=signs, wall_signs
|form=block}}
{{ID table
|displayname=Birch Wall Sign
|spritetype=block
|nameid=birch_wall_sign
|blocktags=signs, wall_signs
|form=block}}
{{ID table
|displayname=Jungle Wall Sign
|spritetype=block
|nameid=jungle_wall_sign
|blocktags=signs, wall_signs
|form=block}}
{{ID table
|displayname=Acacia Wall Sign
|spritetype=block
|nameid=acacia_wall_sign
|blocktags=signs, wall_signs
|form=block}}
{{ID table
|displayname=Dark Oak Wall Sign
|spritetype=block
|nameid=dark_oak_wall_sign
|blocktags=signs, wall_signs
|form=block}}
{{ID table
|displayname=Mangrove Wall Sign
|spritetype=block
|nameid=mangrove_wall_sign
|blocktags=signs, wall_signs
|form=block}}
{{ID table
|displayname=Cherry Wall Sign
|spritename=Cherry Wall Sign
|spritetype=block
|nameid=cherry_wall_sign
|blocktags=signs, wall_signs
|form=block}}
{{ID table
|displayname=Bamboo Wall Sign
|spritename=Bamboo Wall Sign
|spritetype=block
|nameid=bamboo_wall_sign
|blocktags=signs, wall_signs
|form=block}}
{{ID table
|displayname=Crimson Wall Sign
|spritetype=block
|nameid=crimson_wall_sign
|blocktags=signs, wall_signs
|form=block}}
{{ID table
|displayname=Warped Wall Sign
|spritetype=block
|nameid=warped_wall_sign
|blocktags=signs, wall_signs
|form=block}}
{{ID table
|displayname=Oak Hanging Sign
|spritename=Oak Hanging Sign
|spritetype=block
|nameid=oak_hanging_sign
|blocktags=all_hanging_signs, ceiling_hanging_signs
|itemtags=hanging_signs}}
{{ID table
|displayname=Spruce Hanging Sign
|spritename=Spruce Hanging Sign
|spritetype=block
|nameid=spruce_hanging_sign
|blocktags=all_hanging_signs, ceiling_hanging_signs
|itemtags=hanging_signs}}
{{ID table
|displayname=Birch Hanging Sign
|spritename=Birch Hanging Sign
|spritetype=block
|nameid=birch_hanging_sign
|blocktags=all_hanging_signs, ceiling_hanging_signs
|itemtags=hanging_signs}}
{{ID table
|displayname=Jungle Hanging Sign
|spritename=Jungle Hanging Sign
|spritetype=block
|nameid=jungle_hanging_sign
|blocktags=all_hanging_signs, ceiling_hanging_signs
|itemtags=hanging_signs}}
{{ID table
|displayname=Acacia Hanging Sign
|spritename=Acacia Hanging Sign
|spritetype=block
|nameid=acacia_hanging_sign
|blocktags=all_hanging_signs, ceiling_hanging_signs
|itemtags=hanging_signs}}
{{ID table
|displayname=Dark Oak Hanging Sign
|spritename=Dark Oak Hanging Sign
|spritetype=block
|nameid=dark_oak_hanging_sign
|blocktags=all_hanging_signs, ceiling_hanging_signs
|itemtags=hanging_signs}}
{{ID table
|displayname=Mangrove Hanging Sign
|spritename=Mangrove Hanging Sign
|spritetype=block
|nameid=mangrove_hanging_sign
|blocktags=all_hanging_signs, ceiling_hanging_signs
|itemtags=hanging_signs}}
{{ID table
|displayname=Cherry Hanging Sign
|spritename=Cherry Hanging Sign
|spritetype=block
|nameid=cherry_hanging_sign
|blocktags=all_hanging_signs, ceiling_hanging_signs
|itemtags=hanging_signs}}
{{ID table
|displayname=Bamboo Hanging Sign
|spritename=Bamboo Hanging Sign
|spritetype=block
|nameid=bamboo_hanging_sign
|blocktags=all_hanging_signs, ceiling_hanging_signs
|itemtags=hanging_signs}}
{{ID table
|displayname=Crimson Hanging Sign
|spritename=Crimson Hanging Sign
|spritetype=block
|nameid=crimson_hanging_sign
|blocktags=all_hanging_signs, ceiling_hanging_signs
|itemtags=hanging_signs, non_flammable_wood}}
{{ID table
|displayname=Warped Hanging Sign
|spritename=Warped Hanging Sign
|spritetype=block
|nameid=warped_hanging_sign
|blocktags=all_hanging_signs, ceiling_hanging_signs
|itemtags=hanging_signs, non_flammable_wood}}
{{ID table
|displayname=Oak Wall Hanging Sign
|spritename=Oak Wall Hanging Sign
|spritetype=block
|nameid=oak_wall_hanging_sign
|blocktags=all_hanging_signs, wall_hanging_signs
|form=block}}
{{ID table
|displayname=Spruce Wall Hanging Sign
|spritename=Spruce Wall Hanging Sign
|spritetype=block
|nameid=spruce_wall_hanging_sign
|blocktags=all_hanging_signs, wall_hanging_signs
|form=block}}
{{ID table
|displayname=Birch Wall Hanging Sign
|spritename=Birch Wall Hanging Sign
|spritetype=block
|nameid=birch_wall_hanging_sign
|blocktags=all_hanging_signs, wall_hanging_signs
|form=block}}
{{ID table
|displayname=Jungle Wall Hanging Sign
|spritename=Jungle Wall Hanging Sign
|spritetype=block
|nameid=jungle_wall_hanging_sign
|blocktags=all_hanging_signs, wall_hanging_signs
|form=block}}
{{ID table
|displayname=Acacia Wall Hanging Sign
|spritename=Acacia Wall Hanging Sign
|spritetype=block
|nameid=acacia_wall_hanging_sign
|blocktags=all_hanging_signs, wall_hanging_signs
|form=block}}
{{ID table
|displayname=Dark Oak Wall Hanging Sign
|spritename=Dark Oak Wall Hanging Sign
|spritetype=block
|nameid=dark_oak_wall_hanging_sign
|blocktags=all_hanging_signs, wall_hanging_signs
|form=block}}
{{ID table
|displayname=Mangrove Wall Hanging Sign
|spritename=Mangrove Wall Hanging Sign
|spritetype=block
|nameid=mangrove_wall_hanging_sign
|blocktags=all_hanging_signs, wall_hanging_signs
|form=block}}
{{ID table
|displayname=Cherry Wall Hanging Sign
|spritename=Cherry Wall Hanging Sign
|spritetype=block
|nameid=cherry_wall_hanging_sign
|blocktags=all_hanging_signs, wall_hanging_signs
|form=block}}
{{ID table
|displayname=Bamboo Wall Hanging Sign
|spritename=Bamboo Wall Hanging Sign
|spritetype=block
|nameid=bamboo_wall_hanging_sign
|blocktags=all_hanging_signs, wall_hanging_signs
|form=block}}
{{ID table
|displayname=Crimson Wall Hanging Sign
|spritename=Crimson Wall Hanging Sign
|spritetype=block
|nameid=crimson_wall_hanging_sign
|blocktags=all_hanging_signs, wall_hanging_signs
|form=block}}
{{ID table
|displayname=Warped Wall Hanging Sign
|spritename=Warped Wall Hanging Sign
|spritetype=block
|nameid=warped_wall_hanging_sign
|blocktags=all_hanging_signs, wall_hanging_signs
|form=block
|foot=1}}
{{ID table
|displayname=Block entity
|spritename=signs
|spritetype=block
|nameid=sign}}
{{ID table
|displayname=Block entity
|spritename=hanging-signs
|spritetype=block
|nameid=hanging_sign
|foot=1}}
{{edition|bedrock}}:
{{ID table
|edition=bedrock
|firstcolumnname=Sign
|shownumericids=y
|showforms=y
|showaliasids=y
|showitemtags=y
|generatetranslationkeys=y
|displayname=Oak standing
|spritename=oak-sign
|spritetype=block
|nameid=standing_sign
|id=63
|form=block}}
{{ID table
|displayname=Spruce standing
|spritename=spruce-sign
|spritetype=block
|nameid=spruce_standing_sign
|id=436
|form=block}}
{{ID table
|displayname=Birch standing
|spritename=birch-sign
|spritetype=block
|nameid=birch_standing_sign
|id=441
|form=block}}
{{ID table
|displayname=Jungle standing
|spritename=jungle-sign
|spritetype=block
|nameid=jungle_standing_sign
|id=443
|form=block}}
{{ID table
|displayname=Acacia standing
|spritename=acacia-sign
|spritetype=block
|nameid=acacia_standing_sign
|id=445
|form=block}}
{{ID table
|displayname=Dark Oak standing
|spritename=dark-oak-sign
|spritetype=block
|nameid=darkoak_standing_sign
|id=447
|form=block}}
{{ID table
|displayname=Mangrove standing
|spritename=mangrove-sign
|spritetype=block
|nameid=mangrove_standing_sign
|id=-494
|form=block
|translationkey=-}}
{{ID table
|displayname=Cherry standing
|spritename=cherry-sign
|spritetype=block
|nameid=cherry_standing_sign
|id=-542
|form=block
|translationkey=-}}
{{ID table
|displayname=Bamboo standing
|spritename=bamboo-sign
|spritetype=block
|nameid=bamboo_standing_sign
|id=-518
|form=block
|translationkey=-}}
{{ID table
|displayname=Crimson standing
|spritename=crimson-sign
|spritetype=block
|nameid=crimson_standing_sign
|id=505
|form=block}}
{{ID table
|displayname=Warped standing
|spritename=warped-sign
|spritetype=block
|nameid=warped_standing_sign
|id=506
|form=block}}
{{ID table
|displayname=Oak wall
|spritename=oak-wall-sign
|spritetype=block
|nameid=wall_sign
|id=68
|form=block
|translationkey=-}}
{{ID table
|displayname=Spruce wall
|spritename=spruce-wall-sign
|spritetype=block
|nameid=spruce_wall_sign
|id=437
|form=block
|translationkey=-}}
{{ID table
|displayname=Birch wall
|spritename=birch-wall-sign
|spritetype=block
|nameid=birch_wall_sign
|id=442
|form=block
|translationkey=-}}
{{ID table
|displayname=Jungle wall
|spritename=jungle-wall-sign
|spritetype=block
|nameid=jungle_wall_sign
|id=444
|form=block
|translationkey=-}}
{{ID table
|displayname=Acacia wall
|spritename=acacia-wall-sign
|spritetype=block
|nameid=acacia_wall_sign
|id=446
|form=block
|translationkey=-}}
{{ID table
|displayname=Dark Oak wall
|spritename=dark-oak-wall-sign
|spritetype=block
|nameid=darkoak_wall_sign
|id=448
|form=block
|translationkey=-}}
{{ID table
|displayname=Mangrove wall
|spritename=mangrove-wall-sign
|spritetype=block
|nameid=mangrove_wall_sign
|id=-495
|form=block
|translationkey=-}}
{{ID table
|displayname=Cherry wall
|spritename=cherry-wall-sign
|spritetype=block
|nameid=cherry_wall_sign
|id=-544
|form=block
|translationkey=-}}
{{ID table
|displayname=Bamboo wall
|spritename=bamboo-wall-sign
|spritetype=block
|nameid=bamboo_wall_sign
|id=-519
|form=block
|translationkey=-}}
{{ID table
|displayname=Crimson wall
|spritename=crimson-wall-sign
|spritetype=block
|nameid=crimson_wall_sign
|id=507
|form=block}}
{{ID table
|displayname=Warped wall
|spritename=warped-wall-sign
|spritetype=block
|nameid=warped_wall_sign
|id=508
|form=block}}
{{ID table
|displayname=Oak item
|spritename=oak-sign
|spritetype=item
|nameid=oak_sign
|aliasid=sign
|id=360
|form=item
|itemtags=minecraft:sign
|translationkey=item.sign.name}}
{{ID table
|displayname=Spruce item
|spritename=spruce-sign
|spritetype=item
|nameid=spruce_sign
|id=576
|form=item
|itemtags=minecraft:sign}}
{{ID table
|displayname=Birch item
|spritename=birch-sign
|spritetype=item
|nameid=birch_sign
|id=577
|form=item
|itemtags=minecraft:sign}}
{{ID table
|displayname=Jungle item
|spritename=jungle-sign
|spritetype=item
|nameid=jungle_sign
|id=578
|form=item
|itemtags=minecraft:sign}}
{{ID table
|displayname=Acacia item
|spritename=acacia-sign
|spritetype=item
|nameid=acacia_sign
|id=579
|form=item
|itemtags=minecraft:sign}}
{{ID table
|displayname=Dark Oak item
|spritename=dark-oak-sign
|spritetype=item
|nameid=dark_oak_sign
|aliasid=darkoak_sign
|id=587
|form=item
|itemtags=minecraft:sign
|translationkey=item.darkoak_sign.name}}
{{ID table
|displayname=Mangrove item
|spritename=mangrove-sign
|spritetype=item
|nameid=mangrove_sign
|id=642
|form=item
|itemtags=minecraft:sign}}
{{ID table
|displayname=Cherry item
|spritename=cherry-sign
|spritetype=item
|nameid=cherry_sign
|id=659
|form=item
|itemtags=minecraft:sign}}
{{ID table
|displayname=Bamboo item
|spritename=bamboo-sign
|spritetype=item
|nameid=bamboo_sign
|id=660
|form=item
|itemtags=minecraft:sign}}
{{ID table
|displayname=Crimson item
|spritename=crimson-sign
|spritetype=item
|nameid=crimson_sign
|id=614
|form=item
|itemtags=minecraft:sign}}
{{ID table
|displayname=Warped item
|spritename=warped-sign
|spritetype=item
|nameid=warped_sign
|id=615
|form=item
|itemtags=minecraft:sign}}
{{ID table
|displayname=Oak Hanging Sign
|spritename=Oak Wall Hanging Sign
|spritetype=block
|nameid=oak_hanging_sign
|id=-500
|itemtags=minecraft:hanging_sign
|translationkey=item.oak_hanging_sign.name}}
{{ID table
|displayname=Spruce Hanging Sign
|spritename=Spruce Wall Hanging Sign
|spritetype=block
|nameid=spruce_hanging_sign
|id=-501
|itemtags=minecraft:hanging_sign
|translationkey=item.spruce_hanging_sign.name}}
{{ID table
|displayname=Birch Hanging Sign
|spritename=Birch Wall Hanging Sign
|spritetype=block
|nameid=birch_hanging_sign
|id=-502
|itemtags=minecraft:hanging_sign
|translationkey=item.birch_hanging_sign.name}}
{{ID table
|displayname=Jungle Hanging Sign
|spritename=Jungle Wall Hanging Sign
|spritetype=block
|nameid=jungle_hanging_sign
|id=-503
|itemtags=minecraft:hanging_sign
|translationkey=item.jungle_hanging_sign.name}}
{{ID table
|displayname=Acacia Hanging Sign
|spritename=Acacia Wall Hanging Sign
|spritetype=block
|nameid=acacia_hanging_sign
|id=-504
|itemtags=minecraft:hanging_sign
|translationkey=item.acacia_hanging_sign.name}}
{{ID table
|displayname=Dark Oak Hanging Sign
|spritename=Dark Oak Wall Hanging Sign
|spritetype=block
|nameid=dark_oak_hanging_sign
|id=-505
|itemtags=minecraft:hanging_sign
|translationkey=item.dark_oak_hanging_sign.name}}
{{ID table
|displayname=Mangrove Hanging Sign
|spritename=Mangrove Wall Hanging Sign
|spritetype=block
|nameid=mangrove_hanging_sign
|id=-508
|itemtags=minecraft:hanging_sign
|translationkey=item.mangrove_hanging_sign.name}}
{{ID table
|displayname=Cherry Hanging Sign
|spritename=Cherry Wall Hanging Sign
|spritetype=block
|nameid=cherry_hanging_sign
|id=-534
|itemtags=minecraft:hanging_sign
|translationkey=item.cherry_hanging_sign.name}}
{{ID table
|displayname=Bamboo Hanging Sign
|spritename=Bamboo Wall Hanging Sign
|spritetype=block
|nameid=bamboo_hanging_sign
|id=-522
|itemtags=minecraft:hanging_sign
|translationkey=item.bamboo_hanging_sign.name}}
{{ID table
|displayname=Crimson Hanging Sign
|spritename=Crimson Wall Hanging Sign
|spritetype=block
|nameid=crimson_hanging_sign
|id=-506
|itemtags=minecraft:hanging_sign
|translationkey=item.crimson_hanging_sign.name}}
{{ID table
|displayname=Warped Hanging Sign
|spritename=Warped Wall Hanging Sign
|spritetype=block
|nameid=warped_hanging_sign
|id=-507
|itemtags=minecraft:hanging_sign
|translationkey=item.warped_hanging_sign.name
|foot=1}}
{{ID table
|notnamespaced=y
|displayname=Block entity
|spritename=signs
|spritetype=block
|nameid=Sign}}
{{ID table
|displayname=Block entity
|spritename=hanging-signs
|spritetype=block
|nameid=HangingSign
|foot=1}}
=== Block states ===
{{see also|Block states}}
{{/BS}}
=== Block data ===
A sign has a block entity associated with it that holds additional data about the block.
{{el|java}}:
{{see also|Block entity format}}
{{/BE}}
{{el|bedrock}}:
:See [[Bedrock Edition level format/Block entity format]].
== Achievements ==
{{load achievements|It's a Sign}}
== Advancements ==
{{load advancements|Glow and Behold}}
== History ==
{{main|/History}}
{{History|java classic}}
{{History||0.24_SURVIVAL_TEST|[[File:Sign Entity.png|32px]] Signs are currently being tested as [[entity|entities]]. They always display "This is a test of the signs. Each line can be 15 chars!" and can only be spawned by pressing {{key|B}}.<ref>{{ytl|bdT76iFEnLk}}</ref>}}
{{History||0.26 SURVIVAL TEST|Removed signs.}}
{{History|java infdev}}
{{History||20100607|[[File:Oak Sign (0) JE1.png|32px]] Signs have been re-implemented as [[block]]s, although still rendering as entities.
|Signs now have a [[crafting]] recipe and the text can now be edited. Editing a sign pauses the game in [[singleplayer]].
|Signs are currently huge and drop [[planks]] when destroyed.
|Signs do not have a particle texture defined. As such, they [[Placeholder texture#Default texture|default to using the grass block texture instead]].}}
{{History||20100608|Signs are now broken faster.
|Signs now [[drops|drop]] themselves when [[breaking|destroyed]], instead of planks.
|Signs now use planks particles.}}
{{History|java alpha}}
{{History||v1.0.1|[[File:Oak Wall Sign (S) JE1 BE1.png|32px]] Added wall signs.
|[[File:Oak Sign (0) JE2.png|32px]] Signs are now smaller.}}
{{History||v1.0.5|Signs no longer require a free [[block]] above it to place.}}
{{History|java beta}}
{{History||April 27, 2011|link=https://notch.tumblr.com/post/4988431144|Hand-drawn signs are mentioned.}}
{{History|java}}
{{History||1.0.0|snap=Beta 1.9 Prerelease 6|Signs are now broken faster using an [[axe]].}}
{{History||1.3.1|snap=12w18a|Editing a sign no longer pauses the game in [[singleplayer]].}}
{{History|||snap=12w27a|Signs are now stackable up to 16.
|The same [[crafting]] recipe now produces 3 signs instead of 1.}}
{{History||June 9, 2014|link=https://twitter.com/SeargeDP/status/476047216541700096|[[Searge]] tweeted a picture of a sign showing a username and a [[scoreboard]] score.}}
{{History||1.8|snap=14w25a|Added support for JSON text to signs.
|Sign character limit now depends on character width.}}
{{History|||snap=14w29a|Signs now display the cracking animation.}}
{{History||1.9|snap=15w43a|A sign now generates within [[igloo]] basements.}}
{{History||1.11|snap=16w33a|Signs can now be used as [[fuel]] in [[furnace]]s.}}
{{History||1.13|snap=17w47a|The standing sign ID has been changed from <code>standing_sign</code> to <code>sign</code>.
|Prior to [[1.13/Flattening|''The Flattening'']], these [[block]]s' numeral IDs were 63 and 68, and the [[item]]'s 323.}}
{{History|||snap=18w10d|[[Water]] can now be placed on the same block as signs.}}
{{History||1.14|snap=18w43a|"Sign" has been renamed to "Oak Sign".
|[[File:Oak Sign JE2 BE2.png|32px]] The texture of oak sign [[item]]s has been changed.
|[[File:Spruce Standing Sign JE1 BE1.png|32px]] [[File:Birch Standing Sign JE1 BE1.png|32px]] [[File:Jungle Standing Sign JE1 BE1.png|32px]] [[File:Acacia Standing Sign JE1 BE1.png|32px]] [[File:Dark Oak Standing Sign JE1 BE1.png|32px]] [[File:Spruce Sign JE1 BE1.png|32px]] [[File:Birch Sign JE1 BE1.png|32px]] [[File:Jungle Sign JE1 BE1.png|32px]] [[File:Acacia Sign JE1 BE1.png|32px]] [[File:Dark Oak Sign JE1 BE1.png|32px]] Added spruce, birch, jungle, acacia and dark oak signs.
|The sign's text has been changed from black to white.
|A sign's recipe now requires the same type of [[wood]] instead of a random assortment.}}
{{History|||snap=18w44a|Signs can now be {{control|used}} while holding a [[dye]] to change the text color.
|Default text color for signs has been changed back to black.}}
{{History|||snap=18w45a|A new movable cursor for free text editing to signs has been added.
|Selection and copy/paste support have been added to signs.}}
{{History|||snap=18w50a|Spruce signs now generate in some [[taiga]] [[village]] houses.
|Spruce sign items can now be found in [[chest]]s in taiga village houses.}}
{{History|||snap=19w12a|Signs can now be [[dye]]d only in [[Creative mode]].}}
{{History|||snap=19w12b|Signs can now be dyed in [[Survival mode]] again.}}
{{History||1.16|snap=20w06a|[[File:Crimson Standing Sign JE1 BE1.png|32px]] [[File:Warped Standing Sign JE1 BE1.png|32px]] [[File:Crimson Sign JE1 BE1.png|32px]] [[File:Warped Sign JE1 BE1.png|32px]] Added crimson and warped signs.}}
{{History|||snap=20w09a|Crimson and warped signs can now be [[crafting|crafted]].}}
{{History||1.17|snap=21w03a|Signs can now be tinted with [[Glow Ink Sac|glow ink sac]]s to make the text glow.
|Works with both undyed and dyed signs.
|Signs now have a sound for being dyed.}}
{{History|||snap=21w11a|[[File:Oak Standing Sign (S) JE2.png|32px]][[File:Spruce Standing Sign (S) JE2 BE2.png|32px]] [[File:Birch Standing Sign (S) JE2 BE2.png|32px]] [[File:Jungle Standing Sign (S) JE2 BE2.png|32px]] [[File:Acacia Standing Sign (S) JE2 BE2.png|32px]] [[File:Dark Oak Standing Sign (S) JE2 BE2.png|32px]] [[File:Oak Wall Sign (S) JE2.png|32px]] [[File:Spruce Wall Sign (S) JE2 BE2.png|32px]] [[File:Birch Wall Sign (S) JE2 BE2.png|32px]] [[File:Jungle Wall Sign (S) JE2 BE2.png|32px]] [[File:Acacia Wall Sign (S) JE2 BE2.png|32px]] [[File:Dark Oak Wall Sign (S) JE2 BE2.png|32px]] The textures of signs have been changed to reflect the changes made to planks in the [[Texture Update]].}}
{{History|||snap=Pre-release 1|Glowing text on signs now has an outer glow, making text more visible in the dark.}}
{{History||1.18|snap=21w41a|[[File:Oak Sign JE3.png|32px]] [[File:Spruce Sign JE2.png|32px]] [[File:Birch Sign JE2.png|32px]] [[File:Jungle Sign JE2.png|32px]] [[File:Acacia Sign JE2.png|32px]] [[File:Dark Oak Sign JE2.png|32px]] [[File:Crimson Sign JE2.png|32px]] [[File:Warped Sign JE2.png|32px]] Changed all signs textures as items.}}
{{History||1.19|snap=22w11a|[[File:Mangrove Sign JE1 BE1.png|32px]][[File:Mangrove Wall Sign JE1 BE1.png|32px]][[File:Mangrove Sign (item) JE1 BE1.png|32px]] Added mangrove signs.}}
{{History|||snap=22w14a|Due to the addition of the [[mangrove tree]] and [[mangrove swamp]], mangrove signs are now obtainable in survival and renewable.}}
{{History||October 15, 2022|link={{ytl|https://youtu.be/iM9KtHaDcUg?t=5437}}|Hanging signs were announced and shown on [[Minecraft Live 2022]].|Hanging signs were conceptualized by [[Agnes Larsson]] with input from her daughter.<ref>{{ytl|vJCMpPyaN8Q|Minecraft 1.20: New Blocks and Their Functions! @ 0:29|Minecraft|February 24, 2023|t=29s}}</ref>}}
{{History||1.20<br>(Experimental)|link=1.19.3|snap=22w42a|[[File:Bamboo Sign (0) JE1 BE1.png|32px]] [[File:Bamboo Wall Sign (S) JE1 BE1.png|32px]] [[File:Bamboo Sign (item) JE1 BE1.png|32px]] Added bamboo signs behind the [[Java Edition 1.20|Update 1.20 experimental datapack]].
|[[File:Oak Hanging Sign JE1 BE1.png|32px]] [[File:Spruce Hanging Sign JE1 BE1.png|32px]] [[File:Birch Hanging Sign JE1 BE1.png|32px]] [[File:Jungle Hanging Sign JE1 BE1.png|32px]] [[File:Acacia Hanging Sign JE1 BE1.png|32px]] [[File:Dark Oak Hanging Sign JE1 BE1.png|32px]] [[File:Mangrove Hanging Sign JE1 BE1.png|32px]] [[File:Bamboo Hanging Sign JE1 BE1.png|32px]] [[File:Crimson Hanging Sign JE1 BE1.png|32px]] [[File:Warped Hanging Sign JE1 BE1.png|32px]]<br>[[File:Oak Wall Hanging Sign JE1 BE1.png|32px]] [[File:Spruce Wall Hanging Sign JE1 BE1.png|32px]] [[File:Birch Wall Hanging Sign JE1 BE1.png|32px]] [[File:Jungle Wall Hanging Sign JE1 BE1.png|32px]] [[File:Acacia Wall Hanging Sign JE1 BE1.png|32px]] [[File:Dark Oak Wall Hanging Sign JE1 BE1.png|32px]] [[File:Mangrove Wall Hanging Sign JE1 BE1.png|32px]] [[File:Bamboo Wall Hanging Sign (S) JE1 BE1.png|32px]] [[File:Crimson Wall Hanging Sign JE1 BE1.png|32px]] [[File:Warped Wall Hanging Sign JE1 BE1.png|32px]]<br>[[File:Oak Hanging Sign (item) JE1 BE1.png|32px]] [[File:Spruce Hanging Sign (item) JE1 BE1.png|32px]] [[File:Birch Hanging Sign (item) JE1 BE1.png|32px]] [[File:Jungle Hanging Sign (item) JE1 BE1.png|32px]] [[File:Acacia Hanging Sign (item) JE1 BE1.png|32px]] [[File:Dark Oak Hanging Sign (item) JE1 BE1.png|32px]] [[File:Mangrove Hanging Sign (item) JE1 BE1.png|32px]] [[File:Bamboo Hanging Sign (item) JE1 BE1.png|32px]] [[File:Crimson Hanging Sign (item) JE1 BE1.png|32px]] [[File:Warped Hanging Sign (item) JE1 BE1.png|32px]]<br>Added hanging signs behind the [[Java Edition 1.20|Update 1.20 experimental datapack]].|Added unique sounds for Nether and bamboo wood signs.}}
{{History|||snap=22w45a|[[File:Jungle Wall Hanging Sign JE2 BE2.png|32px]] The texture of jungle hanging wall signs have been changed.|Added unique sounds for Nether and bamboo wood hanging signs.|Bamboo hanging signs now can be crafted using [[block of stripped bamboo]] instead of bamboo planks.|Crafting bamboo hanging signs now outputs 6 hanging signs instead of 2.}}
{{History||1.20<br>(Experimental)|link=1.19.4|snap=23w07a|[[File:Cherry Sign (0) JE1.png|32px]] [[File:Cherry Wall Sign (S) JE1.png|32px]] [[File:Cherry Sign (item) JE1.png|32px]] [[File:Cherry Hanging Sign JE1.png|32px]] [[File:Cherry Wall Hanging Sign JE1.png|32px]] [[File:Cherry Hanging Sign (item) JE1.png|32px]] Added cherry signs and hanging signs behind the [[Java Edition 1.20|Update 1.20 experimental datapack]]. There used to be a glitch where right clicking on a sign would play the “use” animation. This was fixed in the snapshots for 1.20, where signs are editable.}}
{{History|||snap=1.19.4 Pre-release 4|[[File:Cherry Sign (0) JE2 BE2.png|32px]] Updated the texture of cherry signs.}}
{{History||1.20|snap=23w12a|Bamboo sign, cherry sign and all of the hanging signs are now available without using the "Update 1.20" experimental datapack.|Signs and hanging signs can now be edited after being placed.|Signs and hanging signs now support text on both sides.|Signs and hanging signs can now be waxed with [[honeycomb]] to prevent editing.|Oak and spruce hanging sign can now be found in [[suspicious gravel]] and [[suspicious sand]] in [[trail ruins]].}}
{{History|||snap=23w14a|Signs and hanging signs with click commands can now be interacted with even if the sign is not waxed.|Signs and hanging signs can no longer be edited by players in [[Adventure]] mode.|Signs and hanging signs with non-text chat components can no longer be edited, even if the sign is not waxed.|Signs and hanging signs now save text even if the edit screen is closed by the player being moved far away.}}
{{History|||snap=23w16a|Oak and spruce hanging sign no longer generates in [[suspicious sand]] in [[trail ruins]].|Due to the split of the archaeological loot tables for the suspicious gravel within the [[trail ruins]]; oak and spruce hanging sign now are in the common loot.}}
{{History||1.20.2|snap=23w31a|Changed sounds for Nether wood hanging signs.<ref>{{Bug|MC-262295||Warped and Crimson hanging signs uses their respective plank sounds, despite their stripped stems having unique sounds|Fixed}}</ref>}}
{{History|pocket alpha}}
{{History||v0.5.0|[[File:Oak Standing Sign.png|32px]] [[File:Oak Sign JE1 BE1.png|32px]] Signs have been added, though they can be obtained only through [[inventory]] editors. |The [[player]] currently cannot write on signs.}}
{{History||v0.6.0|Signs can now be legitimately obtained in [[Survival]] and [[Creative]] mode.|The player can now write on signs.}}
{{History||v0.10.0|snap=build 1|Signs now have a selection overlay.}}
{{History|pocket}}
{{History||1.0.0|snap=alpha 0.17.0.1|Signs can now be found in [[igloo]] basements.}}
{{History|bedrock}}
{{History||1.9.0|snap=beta 1.9.0.0|"Sign" has been renamed to "Oak Sign".
|[[File:Spruce Standing Sign (S) JE2 BE2.png|32px]] [[File:Birch Standing Sign (S) JE2 BE2.png|32px]] [[File:Jungle Standing Sign (S) JE2 BE2.png|32px]] [[File:Acacia Standing Sign (S) JE2 BE2.png|32px]] [[File:Dark Oak Standing Sign (S) JE2 BE2.png|32px]] [[File:Spruce Sign JE1 BE1.png|32px]] [[File:Birch Sign JE1 BE1.png|32px]] [[File:Jungle Sign JE1 BE1.png|32px]] [[File:Acacia Sign JE1 BE1.png|32px]] [[File:Dark Oak Sign JE1 BE1.png|32px]] Added spruce, birch, jungle, acacia and dark oak signs.|The sign's text has been changed from black to white.|A sign's recipe now requires the same type of [[wood]] instead of a random assortment.}}
{{History|||snap=beta 1.9.0.2|The default sign text color has been changed back to black.|Sign variants are now grouped in their own [[inventory]] category.}}
{{History||1.10.0|snap=beta 1.10.0.3|[[File:Oak Sign JE2 BE2.png|32px]] The texture of oak sign [[item]]s has been changed.|Spruce signs now generate in new [[taiga]] and [[snowy taiga]] [[village]] houses.}}
{{History||1.11.0|snap=beta 1.11.0.1|Signs can now be used as a [[fuel]] in [[furnace]]s.|Oak signs can now be found inside taiga and snowy taiga village house [[chest]]s.}}
{{History||1.16.0|snap=beta 1.16.0.51|[[File:Crimson Standing Sign JE1 BE1.png|32px]] [[File:Warped Standing Sign JE1 BE1.png|32px]] [[File:Crimson Sign JE1 BE1.png|32px]] [[File:Warped Sign JE1 BE1.png|32px]] Added crimson and warped signs.|[[File:Spruce Standing Sign (S) JE2 BE2.png|32px]] [[File:Birch Standing Sign (S) JE2 BE2.png|32px]] [[File:Jungle Standing Sign (S) JE2 BE2.png|32px]] [[File:Acacia Standing Sign (S) JE2 BE2.png|32px]] [[File:Dark Oak Standing Sign (S) JE2 BE2.png|32px]] [[File:Spruce Wall Sign (S) JE2 BE2.png|32px]] [[File:Birch Wall Sign (S) JE2 BE2.png|32px]] [[File:Jungle Wall Sign (S) JE2 BE2.png|32px]] [[File:Acacia Wall Sign (S) JE2 BE2.png|32px]] [[File:Dark Oak Wall Sign (S) JE2 BE2.png|32px]] The texture of all signs except oak sign have been changed.}}
{{History||1.16.20|snap=beta 1.16.20.50|Crimson and warped signs now uses regular plank [[sound]]s instead of their stem variant sounds.}}
{{History||1.16.210|snap=beta 1.16.210.59|Signs can now be {{control|used}} while holding a [[dye]] to change the text color.|Signs can now be tinted with [[Glow Ink Sac|glow ink sac]]s to make the text glow.
|Works with both default and dyed signs.}}
{{History|||snap=beta 1.16.210.60|Color on dyed signs disappears and the text turns back to black.|Signs with applied glowing effect as well as color stops glowing and color is removed.}}
{{History||1.16.220|snap=beta 1.16.220.50|Signs can now be {{control|used}} while holding a [[dye]] to change the text color again.|Signs can now be tinted with [[Glow Ink Sac|glow ink sac]]s to make the text glow again.}}
{{History|||snap=beta 1.16.220.52|Now has sounds for being dyed.}}
{{History|||snap=release|A glowing effect can no longer be applied to signs due to glow ink sacs becoming inaccessible in the full release.}}
{{History||1.17.0|snap=beta 1.17.0.50|[[File:Oak Sign BE3.png|32px]] [[File:Spruce Sign BE2.png|32px]] [[File:Birch Sign BE2.png|32px]] [[File:Jungle Sign BE2.png|32px]] [[File:Acacia Sign BE2.png|32px]] [[File:Dark Oak Sign BE2.png|32px]] Textures of sign items was updated.
|[[File:Oak Standing Sign (S) JE2 BE2.png|32px]] [[File:Oak Wall Sign (S) JE2 BE2.png|32px]] The textures of oak signs have been changed to reflect the changes made to planks in the [[Texture Update]].}}
{{History||1.17.10|snap=beta 1.17.10.21|Glowing text on signs now has an outer glow, making text more visible in the dark.}}
{{History||1.18.10|snap=beta 1.18.10.20|[[File:Oak Sign JE3.png|32px]] [[File:Spruce Sign JE2.png|32px]] [[File:Birch Sign JE2.png|32px]] [[File:Jungle Sign JE2.png|32px]] [[File:Acacia Sign JE2.png|32px]] [[File:Dark Oak Sign JE2.png|32px]] [[File:Crimson Sign JE2.png|32px]] [[File:Warped Sign JE2.png|32px]] Changed all signs textures as items.}}
{{History||1.19.0|snap=beta 1.19.0.20|[[File:Mangrove Sign JE1 BE1.png|32px]][[File:Mangrove Wall Sign JE1 BE1.png|32px]][[File:Mangrove Sign (item) JE1 BE1.png|32px]] Added mangrove signs.}}
{{History||Next Major Update<br>(Experimental)|link=Bedrock Edition 1.20|snap=beta 1.19.50.21|[[File:Bamboo Sign (0) JE1 BE1.png|32px]] [[File:Bamboo Wall Sign (S) JE1 BE1.png|32px]] [[File:Bamboo Sign (item) JE1 BE1.png|32px]] Added bamboo signs behind the "[[Bedrock Edition 1.20|Next Major Update]]" [[experimental]] toggle.|[[File:Oak Hanging Sign JE1 BE1.png|32px]] [[File:Spruce Hanging Sign JE1 BE1.png|32px]] [[File:Birch Hanging Sign JE1 BE1.png|32px]] [[File:Jungle Hanging Sign JE1 BE1.png|32px]] [[File:Acacia Hanging Sign JE1 BE1.png|32px]] [[File:Dark Oak Hanging Sign JE1 BE1.png|32px]] [[File:Mangrove Hanging Sign JE1 BE1.png|32px]] [[File:Bamboo Hanging Sign JE1 BE1.png|32px]] [[File:Crimson Hanging Sign JE1 BE1.png|32px]] [[File:Warped Hanging Sign JE1 BE1.png|32px]]<br>[[File:Oak Wall Hanging Sign JE1 BE1.png|32px]] [[File:Spruce Wall Hanging Sign JE1 BE1.png|32px]] [[File:Birch Wall Hanging Sign JE1 BE1.png|32px]] [[File:Jungle Wall Hanging Sign JE1 BE1.png|32px]] [[File:Acacia Wall Hanging Sign JE1 BE1.png|32px]] [[File:Dark Oak Wall Hanging Sign JE1 BE1.png|32px]] [[File:Mangrove Wall Hanging Sign JE1 BE1.png|32px]] [[File:Bamboo Wall Hanging Sign (S) JE1 BE1.png|32px]] [[File:Crimson Wall Hanging Sign JE1 BE1.png|32px]] [[File:Warped Wall Hanging Sign JE1 BE1.png|32px]]<br>[[File:Oak Hanging Sign (item) JE1 BE1.png|32px]] [[File:Spruce Hanging Sign (item) JE1 BE1.png|32px]] [[File:Birch Hanging Sign (item) JE1 BE1.png|32px]] [[File:Jungle Hanging Sign (item) JE1 BE1.png|32px]] [[File:Acacia Hanging Sign (item) JE1 BE1.png|32px]] [[File:Dark Oak Hanging Sign (item) JE1 BE1.png|32px]] [[File:Mangrove Hanging Sign (item) JE1 BE1.png|32px]] [[File:Bamboo Hanging Sign (item) JE1 BE1.png|32px]] [[File:Crimson Hanging Sign (item) JE1 BE1.png|32px]] [[File:Warped Hanging Sign (item) JE1 BE1.png|32px]]<br>Added hanging signs behind the "[[Bedrock Edition 1.20.0|Next Major Update]]" [[experimental]] toggle.|Added unique sounds for Nether and bamboo wood signs.}}
{{History|||snap=beta 1.19.60.20|[[File:Jungle Wall Hanging Sign JE2 BE2.png|32px]] The texture of jungle hanging wall signs have been changed.|Bamboo hanging signs now can be crafted using [[block of stripped bamboo]] instead of bamboo planks.|Crafting bamboo hanging signs now outputs 6 hanging signs instead of 2.}}
{{History||Next Major Update<br>(Experimental)|link=Bedrock Edition 1.19.80|snap=beta 1.19.80.20|[[File:Cherry Sign (0).png|32px]] [[File:Cherry Wall Sign (S) JE1.png|32px]] [[File:Cherry Sign (item) JE1.png|32px]] [[File:Cherry Hanging Sign JE1.png|32px]] [[File:Cherry Wall Hanging Sign JE1.png|32px]] [[File:Cherry Hanging Sign (item) JE1.png|32px]] Added cherry signs and hanging signs behind the "[[Bedrock Edition 1.20.0|Next Major Update]]" [[experimental]] toggle.}}
{{History|||snap=beta 1.19.80.21|[[File:Cherry Sign (0) JE2 BE2.png|32px]] Updated the texture of cherry signs.}}
{{History|||snap=beta 1.19.80.22|Signs and hanging signs can now be edited after being placed.|Signs and hanging signs now support text on both sides.|Signs and hanging signs can now be waxed with [[honeycomb]] to prevent editing.}}
{{History|||snap=beta 1.20.0.20|Crimson, warped, and bamboo hanging signs now have custom sounds to match their wood type.<ref name=badnewsounds>{{Bug|MCPE-164246}}</ref>}}
{{History||1.20.0|snap=beta 1.20.0.21|Bamboo sign, cherry sign and all of the hanging signs are now available without using the "Next Major Update" experimental toggle.}}
{{History|console}}
{{History||xbox=TU1|xbone=CU1|ps=1.0|wiiu=Patch 1|switch=1.0.1|[[File:Oak Standing Sign.png|32px]] [[File:Oak Sign JE1 BE1.png|32px]] Added signs.}}
{{History||xbox=TU9|Signs are now stackable up to 16.
|The same [[crafting]] recipe for signs now produces 3 signs instead of 1.}}
{{History||xbox=none|xbone=none|ps=1.88|wiiu=none|switch=none|[[File:Spruce Standing Sign (S) JE2 BE2.png|32px]] [[File:Birch Standing Sign (S) JE2 BE2.png|32px]] [[File:Jungle Standing Sign (S) JE2 BE2.png|32px]] [[File:Acacia Standing Sign (S) JE2 BE2.png|32px]] [[File:Dark Oak Standing Sign (S) JE2 BE2.png|32px]] [[File:Spruce Sign JE1 BE1.png|32px]] [[File:Birch Sign JE1 BE1.png|32px]] [[File:Jungle Sign JE1 BE1.png|32px]] [[File:Acacia Sign JE1 BE1.png|32px]] [[File:Dark Oak Sign JE1 BE1.png|32px]] Added spruce, birch, jungle, acacia and dark oak signs.}}
{{History||xbox=none|xbone=none|ps=1.90|wiiu=none|switch=none|[[File:Oak Sign JE2 BE2.png|32px]] The texture of oak sign [[item]]s has been changed.}}
{{History|new 3ds}}
{{History||0.1.0|[[File:Oak Standing Sign (S) JE2 BE2.png|32px]] [[File:Oak Sign JE1 BE1.png|32px]] Added signs.}}
{{History|foot}}
== Trivia ==
* The first concept art of hanging signs came from [[Agnes Larsson]]'s daughter.<ref>{{Ytl|vJCMpPyaN8Q|Minecraft 1.20: New Blocks and Their Functions!|Minecraft|t=30s}}</ref>
== Gallery ==
=== Screenshots ===
<gallery>
Signs classic.png|Test of signs in early [[Java Edition Classic]].
Sigh test.jpg|Another early sign image.
Signs PreRelease.png|First image of sign blocks during [[Java Edition Infdev|Infdev]].
Pocket Edition v0.6.0 alpha Development sign.png|First image of signs on [[Pocket Edition]].
Pocket Edition v0.6.0 alpha Development sign editing.png|First image of editing text on [[PE]] iOS.
Pocket Edition v0.6.0 alpha Development sign editing 2.png|First image of editing text on [[PE]] Android.
Pocket Edition v0.6.0 alpha Development sky.png
Door Sign.png|A sign placed on a door.
Breaking News.png|A sign being broken.
Sign Text Dark.jpg|A dark oak sign with black text.
Sign Text Light.jpg|A dark oak sign with white text.
Sign Blockdata.gif|A sign using blockdata to dynamically change.
JSON Sign.png|First image of a sign using JSON text.
Width Based Character Limit.png|First image of a sign using width based character limits.
Glow Ink Sign with Pink Dye.png|Oak sign with glow ink in the dark in [[Java Edition 21w03a]].
Lit vs unlit signs.png|Difference in visibility of a lime text, from left to right, in a lit birch sign, unlit birch sign, lit dark oak sign, and unlit dark oak sign.
Glowing Text Comparison.png|The comparison between glow text and non-glow text.
Example Of Signs Being Weird.png|alt=Shading differences|Signs being different shades depending on orientation.
Glow text.gif|All sixteen colors of glow text.
Glow Ink Signs.jpg|Signs with glowing ink in several colors.
Lots of Glowing Signs.jpg|More signs with glowing ink.
Sign Platforms.jpg|[[Ari]] standing on top of a hanged sign.
Eric Shop.jpg|[[Sunny]] looking at a double sided hanging sign.
Hanging Sign Bedrock.png|Hanging sign with small text.
Hanging Sign Java.png|Hanging sign with large text.
New Hanging Sign Text Length 1.jpg|Text on hanging sign.
New Hanging Sign Text Length 2.jpg|Text on hanging sign.
</gallery>
=== Concept Art ===
<gallery>
Hanging_Sign_Concept_Art.png|Hanging sign concept art.
Hanging_Sign_Concept_Art2.png|Ditto.
Hanging_Sign_Concept_Art3.png|Hanging sign dimensions concept art.
Hanging_Sign_Concept_Art4.png|Hanging sign crafting recipe, block states concept art.
</gallery>
=== Renders ===
{{hidden begin}}
<div style="clear: both"></div>
<gallery>
Oak Sign.png|Oak Sign
Spruce Sign.png|Spruce Sign
Birch Sign.png|Birch Sign
Jungle Sign.png|Jungle Sign
Acacia Sign.png|Acacia Sign
Dark Oak Sign.png|Dark Oak Sign
Mangrove Sign.png|Mangrove Sign
Cherry Sign.png|Cherry Sign
Bamboo Sign.png|Bamboo Sign
Crimson Sign.png|Crimson Sign
Warped Sign.png|Warped Sign
Oak Wall Sign.png|Oak Wall Sign
Spruce Wall Sign.png|Spruce Wall Sign
Birch Wall Sign.png|Birch Wall Sign
Jungle Wall Sign.png|Jungle Wall Sign
Acacia Wall Sign.png|Acacia Wall Sign
Dark Oak Wall Sign.png|Dark Oak Wall Sign
Mangrove Wall Sign.png|Mangrove Wall Sign
Cherry Wall Sign.png|Cherry Wall Sign
Bamboo Wall Sign.png|Bamboo Wall Sign
Crimson Wall Sign.png|Crimson Wall Sign
Warped Wall Sign.png|Warped Wall Sign
Oak Hanging Sign.png|Oak Hanging Sign
Spruce Hanging Sign.png|Spruce Hanging Sign
Birch Hanging Sign.png|Birch Hanging Sign
Jungle Hanging Sign.png|Jungle Hanging Sign
Acacia Hanging Sign.png|Acacia Hanging Sign
Dark Oak Hanging Sign.png|Dark Oak Hanging Sign
Mangrove Hanging Sign.png|Mangrove Hanging Sign
Cherry Hanging Sign.png|Cherry Hanging Sign
Bamboo Hanging Sign.png|Bamboo Hanging Sign
Crimson Hanging Sign.png|Crimson Hanging Sign
Warped Hanging Sign.png|Warped Hanging Sign
Oak Wall Hanging Sign.png|Oak Wall Hanging Sign
Spruce Wall Hanging Sign.png|Spruce Wall Hanging Sign
Birch Wall Hanging Sign.png|Birch Wall Hanging Sign
Jungle Wall Hanging Sign.png|Jungle Wall Hanging Sign
Acacia Wall Hanging Sign.png|Acacia Wall Hanging Sign
Dark Oak Wall Hanging Sign.png|Dark Oak Wall Hanging Sign
Mangrove Wall Hanging Sign.png|Mangrove Wall Hanging Sign
Cherry Wall Hanging Sign.png|Cherry Wall Hanging Sign
Bamboo Wall Hanging Sign.png|Bamboo Wall Hanging Sign
Crimson Wall Hanging Sign.png|Crimson Wall Hanging Sign
Warped Wall Hanging Sign.png|Warped Wall Hanging Sign
</gallery>
<gallery>
Oak Sign JE3.png
Spruce Sign JE2.png
Birch Sign JE2.png
Jungle Sign JE2.png
Acacia Sign JE2.png
Dark Oak Sign JE2.png
Mangrove Sign (item) JE1 BE1.png
Cherry Sign (item) JE1.png
Bamboo Sign (item) JE1 BE1.png
Crimson Sign JE2.png
Warped Sign JE2.png
Oak Hanging Sign (item) JE1 BE1.png
Spruce Hanging Sign (item) JE1 BE1.png
Birch Hanging Sign (item) JE1 BE1.png
Jungle Hanging Sign (item) JE1 BE1.png
Acacia Hanging Sign (item) JE1 BE1.png
Dark Oak Hanging Sign (item) JE1 BE1.png
Mangrove Hanging Sign (item) JE1 BE1.png
Cherry Hanging Sign (item) JE1.png
Bamboo Hanging Sign (item) JE1 BE1.png
Crimson Hanging Sign (item) JE1 BE1.png
Warped Hanging Sign (item) JE1 BE1.png
</gallery>
{{hidden end}}
{{-}}
== Issues ==
{{issue list}}
== See also ==
* [[Chalkboard]]
== References ==
{{Reflist}}
== External Links ==
*[https://www.minecraft.net/en-us/article/taking-inventory--sign Taking Inventory: Sign] – Minecraft.net on January 9, 2020
{{Blocks|utility}}
{{Items}}
[[Category:Utility blocks]]
[[Category:Manufactured blocks]]
[[Category:Generated structure blocks]]
[[Category:Block entities]]
[[Category:Non-solid blocks]]
[[cs:Cedule]]
[[de:Schild (Schrift)]]
[[es:Cartel]]
[[fr:Pancarte]]
[[hu:Tábla]]
[[it:Cartello]]
[[ja:看板]]
[[ko:표지판]]
[[nl:Bord]]
[[pl:Tabliczka]]
[[pt:Placa]]
[[ru:Табличка]]
[[th:ป้าย]]
[[uk:Табличка]]
[[zh:告示牌]]</li></ul></nowiki> | 19w11a | Fletcher villagers now sell enchanted bows. | |||
| Pocket Edition Alpha | |||||
v0.3.3{{Extension DPL}}<ul><li>[[:Category:Minecraft Dungeons items|Category:Minecraft Dungeons items]]<br/>All items that are in ''[[Minecraft Dungeons]]''.
{{Minecraft Dungeons items}}
[[Category:Minecraft Dungeons]]
[[Category:Items]]
[[ja:カテゴリ:アイテム (Minecraft Dungeons)]]
[[pl:Kategoria:Przedmioty w Minecraft Dungeons]]
[[pt:Categoria:Itens do Minecraft Dungeons]]</li><li>[[Mushroom Stew|Mushroom Stew]]<br/>{{Item
| title = Mushroom Stew
| image = Mushroom Stew.png
| renewable = Yes
| heals = {{hunger|6}}
| stackable = No
}}
'''Mushroom stew''' is a [[food]] item.
== Obtaining ==
=== Harvesting ===
Mushroom stew can be obtained by “milking” a [[mooshroom]] with an empty [[bowl]]. This is accomplished by {{Control|using}} a bowl on a mooshroom. The bowl gets replaced by the mushroom stew item. There is no cooldown for doing so.
If a stack of more than one bowl is used on a mooshroom, only one bowl is consumed, and the mushroom stew goes into an empty inventory slot, or is dropped if the player's inventory is full.
=== Crafting ===
{{Crafting
|Red Mushroom
|Brown Mushroom
|Bowl
|Output= Mushroom Stew
|type= Foodstuff
}}
== Usage ==
=== Food ===
{{see also|Tutorials/Hunger management|title1=Hunger management}}
To eat mushroom stew, press and hold {{control|use}} while it is selected in the hotbar. Eating one restores {{hunger|6}} [[hunger]] and 7.2 hunger
[[Hunger#Mechanics|saturation]].
The bowl is returned to the player empty after the mushroom stew has been eaten, and can be reused to craft more, similarly to [[Rabbit Stew|rabbit stew]] and [[Beetroot Soup|beetroot soup]].
== Sounds ==
=== Generic ===
{{Sound table/Entity/Food}}
=== Unique ===
{{Edition|Java}}:
{{Sound table
|sound=Mooshroom milk1.ogg
|sound2=Mooshroom milk2.ogg
|sound3=Mooshroom milk3.ogg
|subtitle=Mooshroom gets milked
|source=neutral
|description=When a mooshroom is milked with a bowl
|id=entity.mooshroom.milk
|translationkey=subtitles.entity.mooshroom.milk
|volume=1.0
|pitch=''varies'' <ref group=sound name=milkpitch>Can be 1.0, 0.9, or 1.1 for each sound</ref>
|distance=16
|foot=1}}
{{Edition|Bedrock}}:
{{Sound table
|type=bedrock
|sound=Mooshroom milk1.ogg
|sound2=Mooshroom milk2.ogg
|sound3=Mooshroom milk3.ogg
|subtitle=Mooshroom gets milked
|source=Friendly Creatures
|description=When a mooshroom is milked with a bowl
|id=mob.mooshroom.suspicious_milk
|volume=1.0/0.9/1.1
|pitch=1.0
|foot=1}}
== Data values ==
=== ID ===
{{edition|java}}:
{{ID table
|edition=java
|showforms=y
|generatetranslationkeys=y
|displayname=Mushroom Stew
|spritetype=item
|nameid=mushroom_stew
|form=item
|foot=1}}
{{edition|bedrock}}:
{{ID table
|edition=bedrock
|shownumericids=y
|showforms=y
|notshowbeitemforms=y
|generatetranslationkeys=y
|displayname=Mushroom Stew
|spritetype=item
|nameid=mushroom_stew
|id=260
|form=item
|foot=1}}
== Advancements ==
{{load advancements|Husbandry;A Balanced Diet}}
== History ==
{{History|java indev}}
{{History||0.31|snap=20100130|[[File:Mushroom Stew JE1 BE1.png|32px]] Added mushroom stew.
|Restores {{hp|8}} [[health]].}}
{{History||20100206|Mushroom stew now restores {{hp|10}} health.}}
{{History|java beta}}
{{History||1.6|snap=Test Build 3|[[Mushroom]] spreading mechanic added, making mushroom stew [[renewable]].}}
{{History||1.8|snap=Pre-release|Now restores {{hunger|8}} [[hunger]].}}
{{History|java}}
{{History||1.0.0|snap=Beta 1.9 Prerelease|More fungi sources have now been introduced with the addition of the [[Mushroom Fields|mushroom biome]].
|A [[mooshroom]] can now be "milked" with a [[bowl]] to obtain mushroom stew.}}
{{History|||snap=Beta 1.9 Prerelease 3|Mushroom stew can now be crafted in the [[2×2 crafting grid]] in the [[inventory]]. Previously, the crafting recipe was shaped, now it's shapeless.}}
{{History||1.2.5|snap=release|The [[player]] milking a [[mooshroom]] with a stack of [[bowl]]s no longer results in receiving back a single bowl of mushroom stew.}}
{{History||1.4.2|snap=?|Mushroom stew now restores {{Hunger|6}} instead of {{Hunger|8}}.}}
{{History||1.13|snap=17w47a|Prior to [[1.13/Flattening|''The Flattening'']], this [[item]]'s numeral ID was 282.}}
{{History||1.14|snap=18w43a|[[File:Mushroom Stew JE2 BE2.png|32px]] The texture of mushroom stew has now been changed.}}
{{History||1.16|snap=Pre-release 1|Mooshrooms can now be milked for mushroom stew in Creative mode.<ref>{{Cite bug|MC|90969|Cannot get mushroom stew from mooshrooms / milk from cows in creative mode|date=October 19, 2015}}</ref>}}
{{History|pocket alpha}}
{{History||v0.4.0|[[File:Mushroom Stew JE1 BE1.png|32px]] Added mushroom stew.}}
{{History||v0.5.0|Mushroom stew now restores {{hp|8}} instead of {{hp|4}}.}}
{{History||v0.9.0|snap=build 1|A mooshroom can now be "milked" with a [[bowl]] to obtain mushroom stew.}}
{{History||v0.12.1|snap=build 1|Mushroom stew now restores [[hunger]] instead of [[health]].}}
{{History|bedrock}}
{{History||1.10.0|snap=beta 1.10.0.3|[[File:Mushroom Stew JE2 BE2.png|32px]] The texture of mushroom stew has now been changed.}}
{{History|console}}
{{History||xbox=TU1|xbone=CU1|ps=1.0|switch=1.0.1|wiiu=Patch 1|[[File:Mushroom Stew JE1 BE1.png|32px]] Added mushroom stew.}}
{{History||xbox=none|xbone=none|ps=1.90|wiiu=none|switch=none|[[File:Mushroom Stew JE2 BE2.png|32px]] The texture of mushroom stew has now been changed.}}
{{History|new3ds}}
{{History||0.1.0|[[File:Mushroom Stew JE1 BE1.png|32px]] Added mushroom stew.}}
{{History|foot}}
== Issues ==
{{Issue list}}
== References ==
{{reflist}}
== External Links ==
*[https://www.minecraft.net/en-us/article/taking-inventory--mushroom-stew Taking Inventory: Mushroom Stew] – Minecraft.net on September 1, 2022
{{items}}
[[de:Pilzsuppe]]
[[es:Estofado de champiñones]]
[[fr:Soupe de champignons]]
[[hu:Gombaragu]]
[[ja:キノコシチュー]]
[[ko:버섯 스튜]]
[[nl:Paddenstoelenstoofpot]]
[[pl:Zupa grzybowa]]
[[pt:Ensopado de cogumelos]]
[[ru:Тушёные грибы]]
[[zh:蘑菇煲]]
[[Category:Food]]
[[Category:Renewable resources]]
<references /></li></ul> | |||||
v0.4.0{{Extension DPL}}<ul><li>[[Nether Brick|Nether Brick]]<br/><!--Please do not change "nether brick" to "Nether brick". According to style guide, item names are not proper nouns and should not be capitalized.-->
{{about|the item|the block|Nether Bricks}}
{{Item
| title = Nether Brick
| image = Nether Brick.png
| renewable = Yes
| stackable = Yes (64)
}}
A '''nether brick''' is an [[item]] made by [[smelting]] [[netherrack]] in a [[furnace]], and is used to craft the [[Nether Bricks|nether bricks]] block and its variants.
== Obtaining ==
=== Smelting ===
Nether brick can be smelted from netherrack.
{{smelting
|Netherrack
|Nether Brick
|0,1
}}
=== Bartering ===
[[Piglin]]s may [[barter]] 2 to 8 nether bricks when given a [[gold ingot]].
== Usage ==
=== Crafting ingredient ===
{{crafting usage|Nether Brick}}
== Data values ==
=== ID ===
{{edition|java}}:
{{ID table
|edition=java
|showforms=y
|generatetranslationkeys=y
|displayname=Nether Brick
|spritetype=item
|nameid=nether_brick
|form=item
|foot=1}}
{{edition|bedrock}}:
{{ID table
|edition=bedrock
|shownumericids=y
|showforms=y
|notshowbeitemforms=y
|generatetranslationkeys=y
|displayname=Nether Brick
|spritetype=item
|nameid=netherbrick
|id=523
|form=item
|foot=1}}
== History ==
{{History|java}}
{{History||1.5|snap=13w01a|[[File:Nether Brick JE1 BE1.png|32px]] Added nether brick items.}}
{{History||1.10|snap=16w20a|Nether brick items can now be used to craft [[red nether bricks]].}}
{{History||1.13|snap=17w47a|The ID of nether bricks has been changed from <code>netherbrick</code> to <code>nether_brick</code>.
|Prior to [[1.13/Flattening|''The Flattening'']], this [[item]]'s numeral ID was 405.}}
{{History||1.14|snap=18w43a|[[File:Nether Brick JE2 BE2.png|32px]] The texture of nether bricks has been changed.}}
{{History||1.16|snap=20w07a|Nether bricks now have a {{frac|10|109}} (~9.17%) chance of being given by the new [[piglin]]s when [[bartering]], in a stack size of 1–4.}}
{{History|||snap=20w09a|Nether bricks now have a {{frac|20|226}} (~8.84%) chance of being given by piglins when bartering, in a stack size of 1–5.}}
{{History|||snap=20w10a|Nether bricks now have a {{frac|40|411}} (~9.73%) chance of being given by piglins when bartering, in a stack size of 4–16.}}
{{History||1.16.2|snap=20w28a|Nether bricks now have a {{frac|40|459}} (~8.71%) chance of being given by piglins when bartering, in a stack size of 2–8.}}
{{History|pocket alpha}}
{{History||v0.6.0|[[File:Nether Brick JE1 BE1.png|32px]] Added nether brick items.}}
{{History||v0.16.0|snap=build 5|Added nether brick items to the [[Creative]] [[inventory]].<ref name="missing brick">{{Bug|MCPE-16556}}</ref>}}
{{History|pocket}}
{{History||1.1.3|snap=alpha 1.1.3.0|Nether brick items are now used to craft [[red nether bricks]].}}
{{History|bedrock}}
{{History||1.9.0|snap=beta 1.9.0.0|Nether brick items are now used to craft nether brick [[fence]]s.}}
{{History||1.10.0|snap=beta 1.10.0.3|[[File:Nether Brick JE2 BE2.png|32px]] The texture of nether bricks has been changed.}}
{{History||1.16.100|snap=beta 1.16.100.50|Nether bricks now can be used as fuel for a [[furnace]].<ref>{{bug|MCPE-114216}}</ref>}}
{{History|||snap=beta 1.16.100.54|Nether bricks now have a {{frac|40|459}} (~8.71%) chance of being given by piglins when bartering, in a stack size of 2–8 to match {{el|Java}}.}}
{{History||1.18.30|snap=beta 1.18.30.26|Nether bricks can no longer be used as fuel in a furnace.}}
{{History|console}}
{{History||xbox=TU9|xbone=CU1|ps=1.0|wiiu=Patch 1|switch=1.0.1|[[File:Nether Brick JE1 BE1.png|32px]] Added nether brick items.}}
{{History||xbox=none|xbone=none|ps=1.90|wiiu=none|switch=none|[[File:Nether Brick JE2 BE2.png|32px]] The texture of nether bricks has been changed.}}
{{History|New 3DS}}
{{History||0.1.0|[[File:Nether Brick JE1 BE1.png|32px]] Added nether brick items.}}
{{History|foot}}
== Issues ==
{{issue list}}
== References ==
{{reflist}}
{{items}}
[[cs:Netheritová cihla]]
[[de:Netherziegel (Gegenstand)]]
[[es:Ladrillo del Nether]]
[[fr:Brique du Nether]]
[[hu:Alvilági tégla]]
[[ja:ネザーレンガ (アイテム)]]
[[ko:네더 벽돌 (아이템)]]
[[lzh:焱界磚]]
[[nl:Netherbaksteen (voorwerp)]]
[[pl:Netherowa cegła]]
[[pt:Tijolo do Nether]]
[[ru:Адский кирпич (предмет)]]
[[uk:Пекельна цегла (предмет)]]
[[zh:下界砖]]
[[Category:Renewable resources]]</li><li>[[Carrot|Carrot]]<br/>{{about|the natural food item|the golden food|Golden Carrot|the item for controlling saddled pigs|Carrot on a Stick}}
{{Item
| group = Age 0-1
| 1-1 = Carrots Age 0-1.png
| 1-2 = Carrots Age 0-1 BE.png
| group2 = Age 2-3
| 2-1 = Carrots Age 2-3.png
| 2-2 = Carrots Age 2-3 BE.png
| group3 = Age 4-6
| 3-1 = Carrots Age 4-6.png
| 3-2 = Carrots Age 4-6 BE.png
| group4 = Age 7
| 4-1 = Carrots Age 7.png
| 4-2 = Carrots Age 7 BE.png
| image2 = Carrot JE3 BE2.png
| renewable = Yes
| heals = {{hunger|3}}
| stackable = Yes (64)
}}
A '''carrot''' is a [[food]] [[item]] obtained from carrot crops that can be used to plant them, eaten or used as a crafting ingredient.
'''Carrot crops''' are planted in [[farmland]] and used to grow carrots.
== Obtaining ==
=== Breaking ===
{{See also|Fortune#Seeds}}
Fully grown carrot crops drop 2 to 5 carrots ({{frac|3|5|7}} per crop harvested on average). Yield can be increased using a tool enchanted with [[Fortune]], with Fortune III harvesting an average of {{frac|5|3|7}} carrots.
The yield is calculated by a binomial distribution: 2 drops are fixed, then a drop is attempted three times with a success rate of 57.14286% to yield the extra 0–3 drops. Each level of Fortune enchantment increases the number of attempts by one.
=== Natural generation ===
[[Village]] farm plots have a chance of having carrots. The exact chance depends on the style of the village:
{| class="wikitable"
! Village style !! Chance
|-
| {{EnvSprite|plains-village}} Plains || 30%
|-
| {{EnvSprite|snowy-village}} Snowy || 10%
|}
=== Mob loot ===
[[Zombie]]s, [[husk]]s, and [[zombie villager]]s have a 2.5% ({{frac|1|40}}) chance of dropping either an [[iron ingot]], carrot, or [[potato]] when killed by a player or tamed wolf. This is increased by 1% ({{frac|1|100}}) per level of looting. This gives carrots the following chances of dropping:
* {{frac|1|120}} (about 0.83%)
* {{frac|7|600}} (about 1.17%) with Looting I
* {{frac|9|600}} (about 1.50%) with Looting II
* {{frac|11|600}} (about 1.83%) with Looting III
=== Chest loot ===
{{LootChestItem|carrot}}
== Usage ==
{{see also|Tutorials/Hunger management|title1=Hunger management}}
To eat a carrot, press and hold {{control|use}} while the carrot is selected in the [[hotbar]]. Eating a carrot restores {{hunger|3}} [[hunger]] and 3.6 hunger [[Hunger#Mechanics|saturation]].
=== Farming ===
{{see also|Tutorials/Crop farming|title1 = Crop farming }}
Carrots can be [[farming|farmed]] and harvested on [[farmland]]. Planted carrots take 8 [[Block tick|stages]] to grow, and go through 4 visually distinct stages. Planted carrots require a light level of 9 or greater to continue growing. If the light level is 7 or below, the crops instantly un-plant themselves ("pop off"). It is not possible to plant carrots if the light level is too low.
Crops grow faster if the farmland they are planted in is [[Farmland#Hydration|hydrated]]. Using [[bone meal]] on crops also increases the speed of growth by randomly increasing their growth stage by 2 to 5.
Crops break if pushed by a [[piston]] or if their supporting farmland breaks or turns to dirt (i.e. by being trampled), dropping their usual drops.
If {{cmd|gamerule mobGriefing}} is <code>true</code>, rabbits will find mature carrot [[crops]]{{only|je}} / carrot crops with growth stage greater than 1{{only|be}}. This reduces the growth stages by one, removing the crop completely when the growth stage reaches 0.
=== Breeding ===
Carrots can also be used to [[breed]] and attract [[pig]]s and [[rabbit]]s.
Villagers can pick up carrot items to become willing, which allow them to breed. Villagers require 12 carrots to become willing.
=== Trading ===
Novice-level Farmer villagers have a 25% ({{frac|1|4}}){{only|bedrock}} or 40% ({{frac|2|5}}){{only|java}} chance to buy 22 carrots for an emerald.
=== Crafting ingredient ===
{{crafting usage}}
=== Composting ===
Placing a carrot into a [[composter]] has a 65% chance of raising the compost level by 1.
== Sounds ==
=== Block ===
{{Sound table/Block/Crop}}
=== Item ===
{{Sound table/Entity/Food}}
== Data values ==
=== ID ===
{{edition|java}}:
{{ID table
|edition=java
|showblocktags=y
|showforms=y
|generatetranslationkeys=y
|displayname=Carrots
|spritetype=block
|nameid=carrots
|blocktags=bee_growables, crops
|form=block}}
{{ID table
|displayname=Carrot
|spritetype=item
|nameid=carrot
|form=item
|foot=1}}
{{edition|bedrock}}:
{{ID table
|edition=bedrock
|showforms=y
|shownumericids=y
|generatetranslationkeys=y
|displayname=Carrots
|spritetype=block
|nameid=carrots
|id=141
|form=block
|translationkey=-}}
{{ID table
|displayname=Carrot
|spritetype=item
|nameid=carrot
|id=279
|form=item
|foot=1}}
=== Block states ===
{{see also|Block states}}
{{/BS}}
== Advancements ==
{{load advancements|Husbandry;A Balanced Diet}}
== History ==
{{History|java}}
{{History||1.4.2|snap=12w34a|[[File:Carrot JE1.png|32px]] Added carrots.
|[[File:Carrots Age 0-1 JE1.png|32px]] [[File:Carrots Age 2-3 JE1.png|32px]] [[File:Carrots Age 4-6 JE1.png|32px]] [[File:Carrots Age 7 JE1.png|32px]] Added carrot crops.
|Carrots can be obtained only as a rare [[drop]] from [[zombie]]s.}}
{{History|||snap=August 28, 2012|slink={{tweet|Dinnerbone|240428477856231424}}|[[Dinnerbone]] released an image of a [[saddle]]d [[pig]] being controlled with a [[carrot on a stick]]. [[Wheat]] was considered as a "fuel" along with carrots,<ref>{{Tweet|Dinnerbone|240188453789257728}}</ref> but Dinnerbone eventually decided on carrots.<ref>{{Tweet|Dinnerbone|240355810650247168}}</ref>}}
{{History|||snap=12w34a|Carrots can now be used to craft [[golden carrot]]s.}}
{{History|||snap=12w36a|Carrots can now be found in [[village]]s.
|Carrots are now used to breed [[pig]]s.
|Carrots are now used to craft [[carrot on a stick]].}}
{{History|||snap=12w37a|[[File:Carrot JE2 BE1.png|32px]] The texture of carrots has now been changed. The texture has been changed to singular carrot, with the tooltip changed to reflect this.}}
{{History||1.5|snap=13w04a|[[Bone meal]] now grows carrots by 1 stage instead of fully growing it. The [[player]] might not see it grow, because some stages look the same.}}
{{History||1.8|snap=14w02a|Carrots now restore {{hunger|3}} points and 3.6 hunger [[saturation]], instead of {{hunger|4}} and 4.8 hunger saturation.
|Farmer [[villager]]s now [[trading|buy]] 15–19 carrots for 1 [[emerald]].}}
{{History|||snap=14w04a|[[Farmer]] (profession) [[villager]]s now harvest fully grown carrots.
|Villagers can now be made willing using 12 carrots.}}
{{History|||snap=14w06a|[[File:Carrots Age 0-1 JE2.png|32px]] [[File:Carrots Age 2-3 JE2.png|32px]] [[File:Carrots Age 4-6 JE2.png|32px]] [[File:Carrots Age 7 JE2.png|32px]] Carrot crops are now a pixel higher - previously they were offset one pixel down as to match farmland's sunken model. This is likely an accidental result of model conversion.}}
{{History|||snap=14w10a|[[File:Missing Model JE2.png|32px]] [[File:Missing Model JE2.png|32px]] [[File:Missing Model JE2.png|32px]] [[File:Missing Model JE2.png|32px]]<br>[[File:Missing Model (anisotropic filtering) JE2.png|32px]] [[File:Missing Model (anisotropic filtering) JE2.png|32px]] [[File:Missing Model (anisotropic filtering) JE2.png|32px]] [[File:Missing Model (anisotropic filtering) JE2.png|32px]]<br>Carrot crops of all stages [[Missing model|no longer have a model]].}}
{{History|||snap=14w10b|[[File:Carrots Age 0-1 JE4.png|32px]] [[File:Carrots Age 2-3 JE4.png|32px]] [[File:Carrots Age 4-6 JE4.png|32px]] [[File:Carrots Age 7 JE4.png|32px]] Carrot crops now have models again.<ref>{{bug|MC-50232}}</ref> In addition, they are now offset downwards by one pixel once more.<ref>{{bug|MC-50155}}</ref>}}
{{History|||snap=14w25a|[[File:Carrots Age 0-1 JE5.png|32px]] [[File:Carrots Age 2-3 JE5.png|32px]] [[File:Carrots Age 4-6 JE5.png|32px]] [[File:Carrots Age 7 JE5.png|32px]] Carrot crops are now darker and subject to directional shading.}}
{{History|||snap=14w27a|[[File:Carrots Age 0-1 JE6.png|32px]] [[File:Carrots Age 2-3 JE6.png|32px]] [[File:Carrots Age 4-6 JE6.png|32px]] [[File:Carrots Age 7 JE6.png|32px]] Carrot crops are no longer subject to directional shading.
|Added [[rabbit]]s, which can be [[breeding|bred]] and/or tamed using carrots. Rabbits also grief carrot crops.
|Carrots are now used to craft [[rabbit stew]].}}
{{History|||snap=14w34a|Rabbits can no longer be tamed.}}
{{History||1.9|snap=15w38a|The [[drops|drop]] chances have now been slightly improved from an average of {{frac|2|3|5}} per [[crops|crop]] harvested to {{frac|2|5|7}}.}}
{{History||1.13|snap=17w47a|Prior to [[1.13/Flattening|''The Flattening'']], this block's numeral ID was 141, and the item's 391.}}
{{History|||snap=18w11a|Carrots can now generate in the chests of [[shipwreck]]s.}}
{{History||1.14|snap=18w43a|[[File:Carrot JE3 BE2.png|32px]] The texture of carrots has now been changed.
|[[File:Carrots Age 0-1 JE7.png|32px]] [[File:Carrots Age 2-3 JE7.png|32px]] [[File:Carrots Age 4-6 JE7.png|32px]] [[File:Carrots Age 7 JE7.png|32px]] The textures of carrot crops have now been changed.}}
{{History|||snap=18w47a|Carrots can now generate in the [[chest]]s of [[pillager outpost]]s.}}
{{History|||snap=19w03a|Placement and breaking [[sound]]s have now been added to carrots.
|Placing a carrot into the new [[composter]] has a 50% chance of raising the compost level by 1.}}
{{History|||snap=19w05a|Carrots now have a 65% chance of increasing the compost level in a composter by 1.}}
{{History||1.15|snap=19w34a|[[Bee]]s can now pollinate carrot crops.}}
{{History||1.17|snap=21w13a|[[File:Carrots Age 0-1 JE8.png|32px]] [[File:Carrots Age 2-3 JE8.png|32px]] [[File:Carrots Age 4-6 JE8.png|32px]] [[File:Carrots Age 7 JE8.png|32px]] The "crop" template model has changed such that pixels appear in the same physical positions on opposite sides of texture planes, changing the carrot crop's appearance in the process.<ref>{{bug|MC-199242}}</ref>}}
{{History||1.18|snap=Pre-release 5|[[File:Carrots Age 7 JE9.png|32px]] A stray dark pixel has been removed from the texture of fully-grown carrots.<ref>{{bug|MC-226711}}</ref>}}
{{History|pocket alpha}}
{{History||v0.8.0|snap=build 1|[[File:Carrot JE2 BE1.png|32px]] Added carrots.
|[[File:Carrots Age 0-1 JE6 BE1.png|32px]] [[File:Carrots Age 2-3 JE6 BE1.png|32px]] [[File:Carrots Age 4-6 JE6 BE1.png|32px]] [[File:Carrots Age 7 JE6 BE1.png|32px]]{{verify|Correct models?}} Added carrot crops.
|Carrots can be obtained by killing [[zombie]]s.}}
{{History|||snap=build 3|Carrots now have a chance to [[drops|drop]] when tilling [[grass block]]s.}}
{{History|||snap=build 4|Carrots are no longer dropped by tilling [[grass block]]s.}}
{{History||v0.9.0|snap=build 1|Carrot crops now naturally spawn in [[village]]s.
|Carrot now used to breed [[pig]]s.}}
{{History||v0.12.1|snap=build 1|Carrots now restore [[hunger]] instead of [[health]].
|Brown robed [[villager]]s can now harvest fully grown carrot crops.
|Carrots can now be used to craft [[golden carrot]]s.}}
{{History||v0.13.0|snap=build 1|Carrots can now be used to breed [[rabbit]]s.
|Carrots can now be used to craft [[rabbit stew]].}}
{{History||v0.15.0|snap=build 1|Carrots are now used to craft [[carrot on a stick]].}}
{{History||v0.16.2|Carrots can now be found in a [[chest]] inside the large house in [[snowy tundra]] and [[snowy taiga]] [[village]]s.}}
{{History|pocket}}
{{History||1.0.4|snap=alpha 1.0.4.0|Farmer [[villager]]s now [[trading|buy]] 15–19 carrots for 1 [[emerald]].
|Carrots can now be picked up by villagers and become willing.}}
{{History|bedrock}}
{{History||1.2.0|snap=beta 1.2.0.2|Carrots can now be found inside of [[bonus chest]]s.}}
{{History||1.4.0|snap=beta 1.2.14.2|Carrots can now be found inside [[shipwreck]] chests.}}
{{History||1.10.0|snap=beta 1.10.0.3|Carrots can be found in the new [[pillager outpost]]s.
|[[File:Carrot JE3 BE2.png|32px]] The texture of carrots has now been changed.
|[[File:Carrots Age 0-1 JE7.png|32px]] [[File:Carrots Age 2-3 JE7.png|32px]] [[File:Carrots Age 4-6 JE7.png|32px]] [[File:Carrots Age 7 JE7.png|32px]]{{verify|Correct models?}} The textures of carrot crops have now been changed.}}
{{History||1.11.0|snap=beta 1.11.0.1|Carrots can now be used to fill up [[composter]]s.}}
{{History|||snap=beta 1.11.0.4|[[Trading]] has now been changed, farmer [[villager]]s now have a 25% chance to [[trading|buy]] 22 carrots for an [[emerald]].}}
{{History||1.14.0|snap=beta 1.14.0.1|[[Bee]]s can now pollinate carrot crops.}}
{{History||?|[[File:Carrots Age 0-1 BE.png|32px]] [[File:Carrots Age 2-3 BE.png|32px]] [[File:Carrots Age 4-6 BE.png|32px]] [[File:Carrots Age 7 BE.png|32px]] Carrot crop planes use a mapping that results in very unnatural mirroring when viewed from certain angles, such as northwest.<ref>{{bug|MCPE-146936}}</ref>}}
{{History|console}}
{{History||xbox=TU14|xbone=CU1|ps=1.04|wiiu=Patch 1|switch=1.0.1|[[File:Carrot JE2 BE1.png|32px]] Added carrots.
|[[File:Carrots Age 0-1 JE6 BE1.png|32px]] [[File:Carrots Age 2-3 JE6 BE1.png|32px]] [[File:Carrots Age 4-6 JE6 BE1.png|32px]] [[File:Carrots Age 7 JE6 BE1.png|32px]]{{verify|Correct models?}} Added carrot crops.}}
{{History||xbox=none|xbone=none|ps=1.90|wiiu=none|switch=none|[[File:Carrot JE3 BE2.png|32px]] The texture of carrots has now been changed.
|[[File:Carrots Age 0-1 JE7.png|32px]] [[File:Carrots Age 2-3 JE7.png|32px]] [[File:Carrots Age 4-6 JE7.png|32px]] [[File:Carrots Age 7 JE7.png|32px]]{{verify|Correct models?}} The textures of carrot crops have now been changed.}}
{{History||xbox=none|xbone=none|ps=1.91|wiiu=none|switch=none|Carrots can now be used to fill up [[composter]]s.}}
{{History|New 3DS}}
{{History||0.1.0|[[File:Carrot JE2 BE1.png|32px]] Added carrots.
|[[File:Carrots Age 0-1 JE6 BE1.png|32px]] [[File:Carrots Age 2-3 JE6 BE1.png|32px]] [[File:Carrots Age 4-6 JE6 BE1.png|32px]] [[File:Carrots Age 7 JE6 BE1.png|32px]]{{verify|Correct models?}} Added carrot crops.}}
{{History|foot}}
=== Carrots "item" ===
{{:Technical blocks/Carrots}}
== Issues ==
{{issue list}}
== Gallery ==
<gallery>
AllSeeds.png|All the seeds that exist in the game (except [[nether wart]] and [[cocoa beans]]).
VillageGrowingCarrotsAndPotatoes.png|Carrots and [[potato]]es found growing naturally in a [[village]].
Carrots Growing.png|Carrots in multiple stages of growth.
Carrot Dungeon.jpg|A carrot that dropped from a zombie, just to the right of the [[spawner]].
Carrot SDGP.png|Carrot in the [[Super Duper Graphics Pack]].
</gallery>
== References ==
{{reflist}}
{{Items}}
{{blocks|vegetation}}
[[Category:Plants]]
[[Category:Food]]
[[Category:Renewable resources]]
[[Category:Non-solid blocks]]
[[Category:Generated structure blocks]]
[[cs:Mrkev]]
[[de:Karotte]]
[[es:Zanahoria]]
[[fr:Carotte]]
[[hu:Sárgarépa]]
[[ja:ニンジン]]
[[ko:당근]]
[[lzh:胡蘿蔔]]
[[nl:Wortel]]
[[pl:Marchewka]]
[[pt:Cenoura]]
[[ru:Морковь]]
[[th:แคร์รอต]]
[[uk:Морква]]
[[zh:胡萝卜]]</li></ul> | Bows now have a durability of 385 uses. | ||||
| Bows also now slow down the player while aiming. | |||||
v0.5.0{{Extension DPL}}<ul><li>[[Slimeball|Slimeball]]<br/>{{about|the item|the mob|Slime|the block constructed with slimeballs|Slime Block|other uses|Slime (disambiguation)}}
{{Item
| image = Slimeball.png
| renewable = Yes
| stackable = Yes (64)
}}
A '''slimeball''' is a [[crafting]] ingredient commonly dropped by [[slime]]s, and can be sneezed out by [[panda]]s.
== Obtaining ==
=== Mob loot ===
==== Slimes ====
{{see also|Tutorials/Slime farming}}
If a [[slime]]'s size is 1, it drops 0–2 slimeballs when killed. The maximum number of slimeballs is increased by 1 per level of [[Looting]], for a maximum of 5 slimeballs with Looting III.
==== Pandas ====
Baby [[panda]]s have a {{frac|1|700}} chance of [[drop]]ping one slimeball when sneezing.
=== Crafting ===
{{Crafting
|Slime Block
|Output= Slimeball,9
|type= Miscellaneous
}}
=== Trading ===
[[Wandering trader]]s sometimes offer to sell a slimeball for 4 [[emerald]]s.
== Usage ==
=== Crafting ingredient ===
{{crafting usage}}
=== Breeding ===
Slimeballs can be used to breed [[frog]]s and reduce the remaining growth duration of [[tadpole]]s by 10%. Both also follow a player holding a slimeball.
==Video==
{{Video note|This video is outdated, as slimeballs can now also be used to craft [[lead]]s and [[slime block]]s, breed [[frog]]s, and can now be obtained from baby [[panda]]s and [[wandering trader]]s.}}
{{yt|J6oR3fdbbjY}}
== Data values ==
===ID===
{{edition|java}}:
{{ID table
|edition=java
|showforms=y
|generatetranslationkeys=y
|displayname=Slimeball
|spritetype=item
|nameid=slime_ball
|form=item
|foot=1}}
{{edition|bedrock}}:
{{ID table
|edition=bedrock
|shownumericids=y
|showforms=y
|notshowbeitemforms=y
|generatetranslationkeys=y
|displayname=Slimeball
|spritetype=item
|nameid=slime_ball
|id=388
|form=item
|foot=1}}
==History==
{{History|java alpha}}
{{History||v1.0.11|[[File:Slimeball JE1 BE1.png|32px]] Added slimeballs, which are dropped from [[slime]]s. At the moment, they serve no purpose.}}
{{History|java beta}}
{{History||1.7|Slimeballs are now used to craft [[sticky piston]]s.}}
{{History|java}}
{{History||1.0.0|snap=Beta 1.9 Prerelease 2|Slimeballs are used to craft [[magma cream]].}}
{{History||1.6.1|snap=13w18a|[[Lead]]s, which were originally implemented in the [[13w16a]] snapshot, now have a [[crafting]] recipe that includes slimeballs.}}
{{History||1.8|snap=14w02a|Nine slimeballs are now used to [[crafting|craft]] a [[slime block]]. Slime blocks also act as storage [[block]]s, being able to craft back into 9 slimeballs.}}
{{History||1.13|snap=17w47a|Prior to [[1.13/Flattening|''The Flattening'']], this [[item]]'s numeral ID was 341.}}
{{History||1.14|snap=18w43a|[[File:Slimeball JE2 BE2.png|32px]] The texture of slimeballs has been changed.
|Slimeballs can now be obtained when a [[panda|baby panda]] sneezes.}}
{{History|||snap=19w05a|Slimeballs can now be bought from [[wandering trader]]s.}}
{{History||1.19|snap=22w11a|Slimeballs can now be used to breed [[frog]]s.}}
{{History|pocket alpha}}
{{History||v0.9.0|snap=build 1|[[File:Slimeball JE1 BE1.png|32px]] Added slimeballs. They are currently unobtainable and serve no purpose.}}
{{History||v0.12.1|snap=build 1|Added slimeballs to the [[creative]] [[inventory]].
|Slimeballs can now be obtained by killing [[slime]]s.
|Slimeballs are now used to craft [[magma cream]].}}
{{History||v0.14.0|snap=build 1|Slimeballs are now used to craft [[slime block]]s.}}
{{History||v0.15.0|snap=build 1|Slimeballs are now used to craft [[sticky piston]]s and [[lead]]s.}}
{{History|bedrock}}
{{History||1.8.0|snap=beta 1.8.0.8|Slimeballs can now be obtained when a [[panda|baby panda]] sneezes.}}
{{History||1.10.0|snap=beta 1.10.0.3|[[File:Slimeball JE2 BE2.png|32px]] The texture of slimeballs has been changed.
|Slimeballs can now be obtained via [[trading]] with [[wandering trader]]s.}}
{{History|console}}
{{History||xbox=TU1|xbone=CU1|ps=1.0|wiiu=Patch 1|switch=1.0.1|[[File:Slimeball JE1 BE1.png|32px]] Added slimeballs.}}
{{History||xbox=TU3|Slimeballs are now used to craft [[sticky piston]]s.}}
{{History||xbox=TU5|Slimeballs are found in the Miscellaneous tab in the [[Creative inventory]].}}
{{History||xbox=TU9|Moved slimeballs to the Materials tab in the Creative inventory.}}
{{History||xbox=none|xbone=none|ps=1.83|wiiu=none|switch=none|Slimeballs can now be obtained when a [[panda|baby panda]] sneezes.}}
{{History||xbox=none|xbone=none|ps=1.90|wiiu=none|switch=none|[[File:Slimeball JE2 BE2.png|32px]] The texture of slimeballs has been changed.}}
{{History|New 3DS}}
{{History||0.1.0|[[File:Slimeball JE1 BE1.png|32px]] Added slimeballs.}}
{{History|foot}}
==Issues ==
{{issue list}}
== External Links ==
*[https://www.minecraft.net/en-us/article/taking-inventory--slimeball Taking Inventory: Slimeball] – Minecraft.net on June 24, 2021
{{Items}}
[[Category:Renewable resources]]
[[cs:Sliz]]
[[de:Schleimball]]
[[es:Bola de slime]]
[[fr:Boule de Slime]]
[[hu:Nyálkagolyó]]
[[it:Palla di slime]]
[[ja:スライムボール]]
[[ko:슬라임볼]]
[[nl:Slijmbal]]
[[pl:Kula szlamu]]
[[pt:Bola de slime]]
[[ru:Слизь]]
[[th:ลูกเมือก]]
[[uk:Слизова кулька]]
[[zh:黏液球]]</li><li>[[Dye|Dye]]<br/>{{Item
| title = Dyes
| image = White Dye.png
| extratext = View [[#Gallery|all renders]]
| renewable = Yes
| stackable = Yes (64)
}}
'''Dyes''' are a set of sixteen items used to change the color of [[wool]], [[carpet]]s, [[terracotta]], [[concrete powder]], [[glass]], [[shulker box]]es, [[bed]]s, [[candle]]s, the patterns on [[banner]]s, [[firework star]]s, certain mobs, and text on [[sign]]s and [[hanging sign]]s. {{IN|bedrock}} they can also be used to dye water in a [[cauldron]] (which is thereafter used to dye leather [[armor]]); {{in|java}} leather armor can be dyed directly. {{IN|education}} dyes can also be used to dye [[balloon]]s and [[glow stick]]s.
{{IN|bedrock|education}}, [[bone meal]], [[ink sac]]s, [[lapis lazuli]], and [[cocoa bean]]s can generally substitute for [[white dye]], [[black dye]], [[blue dye]], and [[brown dye]], respectively, in crafting recipes and for use in dyeing items or mobs. However, they have other important uses that aren't related to color, and are therefore not considered true dyes. They are mentioned in this article only in regard to their use as dyeing agents; see their individual articles for complete information about them.
[[File:Dye Recipes.png|400px|thumb|A guide for creating all the dyes]]
== Obtaining ==
<!--[[File:Dye Chart.png|350px|thumb|A guide to crafting all the dyes.{{until|java 1.14}}]]-->
Dyes can be produced by crafting them from plants (mainly flowers), by crafting dyes of different colors together, by smelting plants, or by trading with a [[wandering trader]].
{{loadPage|Crafting/Dye|Crafting|h3}}
=== Smelting ===
{{smelting|head=1|Sea Pickle|Lime Dye|0,2}}
{{smelting|foot=1|Cactus|Green Dye|1||b=Lapis Lazuli|c=Any fuel|d=1}}
=== Trading ===
[[Wandering trader]]s can sell 3 dyes for an [[emerald]]. {{IN|bedrock}}, they can also sell 3 lapis lazuli, bone meal, cocoa beans, or ink sacs for one emerald.
Apprentice-level cleric [[villager]]s sell one lapis lazuli per emerald.
=== Chest loot ===
{{#invoke:LootChest|base3|blue-dye,green-dye,orange-dye,light-blue-dye,yellow-dye,white-dye}}
=== Other ===
Ink sacs can also be created using 1 iron, 1 sulfur, and 4 oxygen in the [[compound creator]]. {{only|bedrock|education}}
== Usage ==
Similar to their use in crafting, [[bone meal]], [[ink sac]]s, [[lapis lazuli]], and [[cocoa beans]] can be substituted for the corresponding dye in any of the following usages unless otherwise specified.{{only|bedrock}} <!--- sections are ordered by craftable dyeable blocks, dyeable items, version exclusive sections, and non-crafting miscellaneous uses--->
=== Dyeing wool and mobs ===
Players can dye wool by placing [[wool]] and any dye in a crafting grid.
{{Crafting
|nocat=1
|Any Wool
|Matching Dye
|Output=Any Wool
}}
Dyes can be {{control|use|text=used}} on sheep to change the color of the wool. Shearing a colored sheep drops the corresponding color of the wool, and the sheep retains the color when the wool regenerates. [[Breeding]] colored sheep produces a lamb colored as one of the parent sheep, or a color resulting from the combination of both parents' color. The color combining follows the same rules that dyes use – red and yellow sheep produce an orange lamb, but a blue and yellow sheep cannot create a green lamb. The unlimited reproduction of colored sheep makes dyeing and shearing sheep infinitely more efficient than just dyeing wool directly.
Dye can also be used on a tamed [[wolf]] or [[cat]] to change the color of its collar from the default red to the color of the dye.
=== Dyeing carpets ===
Carpets can be dyed.
{{Crafting
|Any Carpet
|Matching Dye
|Output= Matching Carpet
|type= Building block
}}
=== Dyeing terracotta ===
[[Terracotta]] can be dyed by placing 8 blocks around a dye on a crafting table.
{{Crafting
|nocat=1
|A1=Terracotta |B1=Terracotta |C1=Terracotta
|A2=Terracotta |B2=Matching Dye |C2=Terracotta
|A3=Terracotta |B3=Terracotta |C3=Terracotta
|Output=Matching Dyed Terracotta,8
}}
=== Creating concrete powder ===
Dyes can also be used to craft [[concrete powder]], which can then be set into their respective [[concrete]] blocks (they cannot be dyed directly).
{{Crafting
|nocat=1
|Sand |Gravel |Sand
|Gravel |Matching Dye |Gravel
|Sand |Gravel |Sand
|Output=Matching Concrete Powder,8
}}
=== Staining glass ===
[[Stained glass]] can be stained by placing 8 blocks of glass around a dye on a [[crafting table]]. Just like regular glass, stained glass can be crafted into stained glass panes. The recipe for this is the same as with regular glass.
{{Crafting
|nocat=1
|A1=Glass |B1=Glass |C1=Glass
|A2=Glass |B2=Matching Dye |C2=Glass
|A3=Glass |B3=Glass |C3=Glass
|Output=Matching Stained Glass,8
|head=1
}}
{{Crafting
|nocat=1
|A1= Glass Pane
|B1= Glass Pane
|C1= Glass Pane
|A2= Glass Pane
|B2= Matching Dye
|C2= Glass Pane
|A3= Glass Pane
|B3= Glass Pane
|C3= Glass Pane
|Output= Matching Stained Glass Pane,8
|type= Decoration block
|foot=1
}}
=== Dyeing shulker boxes ===
[[Shulker box]]es are generated in a light shade of purple (like the [[purpur block]]), but can be dyed any color. They can also be re-dyed as often as desired.
{{Crafting
|ignoreusage=1
|showname=1
|Any Shulker Box
|Matching Dye
|Output=Matching Shulker Box
}}
=== Dyeing beds ===
Players can dye beds by placing a [[bed]] and any color dye in a crafting grid.
{{Crafting
|nocat=1
|Any Bed
|Matching Dye
|Output=Matching Bed
}}
=== Dyeing candles ===
Players can dye [[candles]] by placing an undyed candle and any color dye in a crafting grid.
{{Crafting
|ignoreusage=1
|Candle
|Matching Dye
|Output=Matching Dyed Candle
}}
=== Banner patterns ===
{{main|Banner#Patterns}}
Dyes are used in most banner patterns to determine the pattern and color displayed.
=== Dyeing armor ===
[[File:DyeGraph2.png|200px|thumb|A graph showing all combinations of two dyes on a [[tunic]].]]
Leather [[armor]] can be dyed by:
* Crafting dyes with a piece of leather armor or leather [[horse armor]].{{Only|java}}
* Dousing the leather armor or leather [[horse armor]] in a [[cauldron]] to which dyes have been added.{{Only|bedrock}}
There are 5,713,438<ref>https://anrar4.github.io/DyeLeatherArmor/</ref> (34.1% of sRGB) colors leather armor can be, as it is possible to put more than one dye on the crafting bench alongside the leather armor. Armor can be dyed multiple times with previous colors affecting the final outcome. Colored armor can be reverted to their original color using a [[cauldron]] with undyed water.
The game has a specific formula for calculating the color of dyed armor: each color, in the RGB color model, has a red value, green value, and blue value. For each dye in the crafting grid, and the armor itself (if it is already dyed), the red, green, and blue values are added to running totals. In addition, a running total of the highest value (be it red, green, or blue) is also kept. After this, each total is divided by the number of colors used. This effectively produces the average red, green, blue, and maximum values. The maximum value of the average RGB values is also calculated. Finally, each average RGB value is multiplied by the average maximum value and divided by the maximum of the average RGB values. The modified average RGB values are then used as the final color. This procedure can be summed up with the following equations:
for each color (all "total" variables start at 0 before counting):
totalRed = totalRed + redValue
totalGreen = totalGreen + greenValue
totalBlue = totalBlue + blueValue
totalMaximum = totalMaximum + max(redValue, greenValue, blueValue)
numberOfColors = numberOfColors + 1
averageRed = totalRed / numberOfColors
averageGreen = totalGreen / numberOfColors
averageBlue = totalBlue / numberOfColors
averageMaximum = totalMaximum / numberOfColors
maximumOfAverage = max(averageRed, averageGreen, averageBlue)
gainFactor = averageMaximum / maximumOfAverage
resultRed = averageRed * gainFactor
resultGreen = averageGreen * gainFactor
resultBlue = averageBlue * gainFactor
Due to the way this formula works, the resulting color can never be darker than the average of the input colors and is often lighter and more saturated. Of course, the resulting color can never be lighter or more saturated than the lightest or most saturated input color. In addition, this formula never creates an RGB value higher than 255 (which would be invalid in the 8-bit RGB color model).
If leather armor is renamed on an [[anvil]], it retains its name when dyed or undyed.
;Mixing Samples
: {{ItemSprite|Yellow Dye}} + {{ItemSprite|Yellow Dye}} = {{Tint|leather-chestplate| #{{CalcDye| yellow=2 }} | code=1}}
: {{ItemSprite|Red Dye}} + {{ItemSprite|Blue Dye}} + {{ItemSprite|White Dye}} = {{Tint|leather-chestplate| #{{CalcDye| red=1 | blue=1 | white=1}} | code=1}}
: {{ItemSprite|Green Dye}} + {{ItemSprite|Red Dye}} + {{ItemSprite|Pink Dye}} = {{Tint|leather-chestplate| #{{CalcDye| green=1 | red=1 | pink=1}} | code=1}}
=== Dyeing firework stars ===
A [[firework star]] can have a single color or a combination of up to eight colors when crafted with dyes. Adding one or more dyes to a crafted firework star adds a "fade to color" effect to it, overwriting any existing fade colors.
{{Crafting
|head=1
|ignoreusage=1
|ingredients=[[Gunpowder]] +<br>Any Dye (1–8) +<br>Extra ingredient (optional)
|Gunpowder
|Matching Dye
|Diamond;Glowstone Dust;Head;Gold Nugget;Feather;Fire Charge;
|Output=Matching Firework Star
}}
{{Crafting
|ignoreusage=1
|Matching Firework Star
|Any Dye
|Output=Matching Firework Star
|foot=1
}}
=== Creating balloons ===
Dye can be used to craft balloons.{{only|education}}
{{Crafting
|nocat=1
|A1= Latex
|B1= Matching Dye
|C1= Latex
|A2= Latex
|B2= Helium
|C2= Latex
|A3= Latex
|B3= Lead
|C3= Latex
|Output= Matching Balloon
}}
=== Creating glow sticks ===
Dye can also be used to craft glow sticks.{{only|education}}
{{Crafting
|nocat=1
|A1= Polyethylene
|B1= Hydrogen Peroxide
|C1= Polyethylene
|A2= Polyethylene
|B2= Matching Dye
|C2= Polyethylene
|A3= Polyethylene
|B3= Luminol
|C3= Polyethylene
|Output= Matching Glow Stick
}}
=== Dyeing water inside cauldrons ===
Water can be dyed in a cauldron by holding any dye in the hand and pressing {{Ctrl|use}} on a cauldron filled with water.{{only|bedrock}}
=== Signs ===
Dye can be {{control|used}} on a [[sign]] or a [[hanging sign]] to change the text color. {{IN|bedrock}}, [[ink sac]]s cannot be used for this purpose; black dye must be used to change the text to black.
=== Trading ===
Apprentice, journeyman and expert-level shepherd [[villager]]s buy any of the 12 dyes for an [[emerald]].
== Color values ==
The "color codes" are used to determine the color imparted on sheep, wolf and cat collars, firework stars, [[beacon]] beams, and dyed leather armor. The hex value is shown in the extended tooltips of dyed leather armor; however, to set the color using an NBT data tag in a [[command]], the decimal value must be used instead. The color values for firework stars are slightly different from the ones listed below, and use [[Item colors#Firework stars|these values]] instead.
{| class="wikitable" style="margin:2px; border: 1px solid silver; text-align: left;" data-description="Data values"
! rowspan=2 | Description
! colspan=2 style="text-align:center" | Color Code
|-
! Dec
! <abbr title="Hexadecimal color code">Hex</abbr>
|-
| style="text-align:center" | White || 16383998 || {{color|#F9FFFE}}
|-
| style="text-align:center" | Light gray || 10329495 || {{color|#9D9D97}}
|-
| style="text-align:center" | Gray || 4673362 || {{color|#474F52}}
|-
| style="text-align:center" | Black || 1908001|| {{color|#1D1D21}}
|-
| style="text-align:center" | Brown || 8606770 || {{color|#835432}}
|-
| style="text-align:center" | Red || 11546150 || {{color|#B02E26}}
|-
| style="text-align:center" | Orange || 16351261 || {{color|#F9801D}}
|-
| style="text-align:center" | Yellow || 16701501 || {{color|#FED83D}}
|-
| style="text-align:center" | Lime || 8439583 || {{color|#80C71F}}
|-
| style="text-align:center" | Green || 6192150 || {{color|#5E7C16}}
|-
| style="text-align:center" | Cyan || 1481884|| {{color|#169C9C}}
|-
| style="text-align:center" | Light blue || 3847130 || {{color|#3AB3DA}}
|-
| style="text-align:center" | Blue || 3949738 || {{color|#3C44AA}}
|-
| style="text-align:center" | Purple || 8991416 || {{color|#8932B8}}
|-
| style="text-align:center" | Magenta || 13061821 || {{color|#C74EBD}}
|-
| style="text-align:center" | Pink || 15961002 || {{color|#F38BAA}}
|}
== Sounds ==
{{edition|java}}:
{{Sound table
|rowspan=2
|sound=Dye.ogg
|subtitle=Dye stains
|source=block
|description=When dye is used on a [[sign]]
|id=item.dye.use
|translationkey=subtitles.item.dye.use
|volume=1.0
|pitch=1.0/0.9/0.95/1.1
|distance=16}}
{{Sound table
|subtitle=Dye stains
|source=player
|description=When dye is used on a [[sheep]]
|id=item.dye.use
|translationkey=subtitles.item.dye.use
|volume=1.0
|pitch=1.0/0.9/0.95/1.1
|distance=16
|foot=1}}
{{edition|bedrock}}:
{{Sound table
|type=bedrock
|sound=Dye.ogg
|source=sound
|description=When dye is used on a sign
|id=sign.dye.use
|volume=1.0
|pitch=1.0}}
{{Sound table
|rowspan=3
|sound=Water Splash Old.ogg
|source=block
|description=When dye is added to a cauldron
|id=cauldron.adddye
|volume=0.1
|pitch=1.0}}
{{Sound table
|source=block
|description=When armor is dyed using a cauldron
|id=cauldron.dyearmor
|volume=0.1
|pitch=1.0}}
{{Sound table
|source=block
|description=When dye is removed from armor using a cauldron
|id=cauldron.cleanarmor
|volume=0.1
|pitch=1.0
|foot=1}}
== Achievements ==
{{load achievements|Rainbow Collection;Tie dye outfit}}
== Video ==
{{Video note|These videos are outdated, as it does not include details of the [[Java Edition 1.7.2|1.7.2]] update's changes to the dyeing system/production chain.}}
<div style="text-align:center">
<span style="display:inline-block">{{yt|8YD7oauNZHE}}</span>
<span style="display:inline-block">{{yt|7tETaRt7STM}}</span>
</div>
== History ==
{{History|java beta}}
{{History||January 3, 2011|link=https://web.archive.org/web/0/http://notch.tumblr.com/post/2582321901/2011-here-we-go|Notch mentions adding a "paint" feature if he can figure out how.}}
{{History||January 10, 2011<ref group="n">Supposed time when fragment was filmed. Based on modified date of client.jar/gui/trap.png in [[Beta 1.2]].</ref>|link=https://www.youtube.com/watch?v=cBF2ugTzXqQ&t=181s|[[File:Red Dye (pre-release).png|32px]] Shown rose red in development as part of [[Minecraft: The Story of Mojang]].}}
{{History||1.2|[[File:Ink Sac JE1 BE1.png|32px]] [[File:Red Dye JE1 BE1.png|32px]] [[File:Green Dye JE1 BE1.png|32px]] [[File:Cocoa Beans JE1 BE1.png|32px]] [[File:Lapis Lazuli JE1 BE1.png|32px]] [[File:Purple Dye JE1 BE1.png|32px]] [[File:Cyan Dye JE1 BE1.png|32px]] [[File:Light Gray Dye JE1 BE1.png|32px]] [[File:Gray Dye JE1 BE1.png|32px]] [[File:Pink Dye JE1 BE1.png|32px]] [[File:Lime Dye JE1 BE1.png|32px]] [[File:Yellow Dye JE1 BE1.png|32px]] [[File:Light Blue Dye JE1 BE1.png|32px]] [[File:Magenta Dye JE1 BE1.png|32px]] [[File:Orange Dye JE1 BE1.png|32px]] [[File:Bone Meal JE1 BE1.png|32px]] Added dyes.
|[[File:Black Dye (Recreated).png|32px]] [[File:Red Dye (pre-release).png|32px]] [[File:Green Dye (Recreated).png|32px]] [[File:Brown Dye (Recreated).png|32px]] [[File:Blue Dye (Recreated).png|32px]] [[File:Purple Dye (Recreated).png|32px]] [[File:Cyan Dye (Recreated).png|32px]] [[File:Light Gray Dye (Recreated).png|32px]] [[File:Gray Dye (Recreated).png|32px]] [[File:Pink Dye (Recreated).png|32px]] [[File:Lime Dye (Recreated).png|32px]] [[File:Yellow Dye (Recreated).png|32px]] [[File:Light Blue Dye (Recreated).png|32px]] [[File:Magenta Dye (Recreated).png|32px]] [[File:Orange Dye (Recreated).png|32px]] [[File:White Dye (Recreated).png|32px]] Leftovers of old textures can be seen in [[items.png]] with 100% opacity. The white dye texture was reused for [[Sugar]].
| The colors were as follows:{{verify|Did the color codes remain the same between Beta 1.2 and Java 1.11.2?}}
{{:Color/Java Edition dye colors before 17w06a}}
}}
{{History|java}}
{{History||1.1|snap=11w49a|[[Sheep]] can now regrow their [[wool]] by eating [[grass block|grass]]. Dyed sheep regrow wool in their new color.}}
{{History||1.3.1|snap=12w19a|[[File:Cocoa Beans JE2.png|32px]] The texture of [[cocoa beans]] has been changed.}}
{{History|||snap=1.3|[[File:bone meal changes.gif|32px]] The textures of [[bone meal]], [[cactus green]], cocoa beans and [[rose red]] have been changed. The textures have been lowered one pixel.}}
{{History||1.4.2|snap=12w34a|Added the ability to dye leather [[armor]] and [[wolf]] collars.}}
{{History||1.4.4|snap=1.4.3|Color codes have been changed. The colors of red, brown, blue, purple, cyan, pink, light blue, magenta and orange were adjusted a little vividly.}}
{{History||1.6.1|snap=13w19a|[[Stained clay]] can now be crafted using dyes.}}
{{history||1.7.2|snap=13w36a|With the addition of new [[flower]]s, many secondary and tertiary dyes are now primary dyes.}}
{{History|||snap=13w41a|[[Stained glass]] can now be crafted using dyes.}}
{{History||1.8|snap=14w02a|As cleric [[villager]]s now sell lapis lazuli, all dyes have become fully renewable.}}
{{History|||snap=14w30a|Added [[banner]]s, which can be dyed.}}
{{History||1.9|snap=15w34a|Added [[shield]]s, which can be dyed indirectly by applying a matching [[banner]].}}
{{History||1.11|snap=16w39b|Dyes are now used to change the color of [[shulker box]]es.}}
{{History||1.12|snap=17w06a|Dyes are now used to craft [[concrete powder]].
|Color codes have been changed. All colors are adjusted more vividly. The changes were as follows:
{{:Color/Java Edition dye color changes in 17w06a}}
|Light blue dye, stained glass, and stained glass panes, did not change colors in this update. This means that they still use old colors.<ref name="unchanged dyes">{{Bug|MC-214643}}<br>{{Bug|MC-214641}}</ref>
}}
{{History|||snap=17w15a|Dyes can now apply color to white [[bed]]s.}}
{{History||1.13|snap=17w47a|The different data values for the <code>dye</code> ID have been split up into their own IDs.}}
{{History||1.14|snap=18w43a|[[Bone meal]], [[ink sac]]s, [[cocoa beans]] and [[lapis lazuli]] are no longer considered dyes.
|[[File:White Dye JE1 BE1.png|32px]] [[File:Black Dye JE1 BE1.png|32px]] [[File:Brown Dye JE1 BE1.png|32px]] [[File:Blue Dye JE1 BE1.png|32px]] Added [[white dye|white]], [[black dye|black]], [[brown dye|brown]] and [[blue dye]]s.
|"Rose Red", "Dandelion Yellow" and "Cactus Green" have been renamed to "Red Dye", "Yellow Dye" and "Green Dye", respectively.
|[[Glass pane]]s and [[carpet]]s can now be dyed.
|[[File:Light Gray Dye JE2 BE2.png|32px]] [[File:Gray Dye JE2 BE2.png|32px]] [[File:Red Dye JE2 BE2.png|32px]] [[File:Orange Dye JE2 BE2.png|32px]] [[File:Yellow Dye JE2 BE2.png|32px]] [[File:Lime Dye JE2 BE2.png|32px]] [[File:Green Dye JE2 BE2.png|32px]] [[File:Cyan Dye.png|32px]] [[File:Light Blue Dye JE2 BE2.png|32px]] [[File:Purple Dye JE2 BE2.png|32px]] [[File:Magenta Dye JE2 BE2.png|32px]] [[File:Pink Dye JE2 BE2.png|32px]] The textures of light gray, gray, red, orange, yellow, lime, green, cyan, light blue, purple, magenta, and pink dyes, have been changed. The color texture for light blue dye was not changed to reflect the updated colors from 1.12.<ref name="unchanged dyes"></ref>}}
{{History|||snap=18w44a|The color of the text on [[sign]]s can now be changed with dye.}}
{{History|||snap=18w49a|Yellow dyes can now be found in [[chest]]s in [[village]] mason houses.}}
{{History|||snap=18w50a|Green dyes can now be found in [[chest]]s in [[desert]] [[village]] houses.}}
{{History|||snap=19w05a|Added the [[wandering trader]], which can sell any type of dye.}}
{{History|||snap=19w11a|All 16 types of dyes can now be [[trading|bought]] by shepherd villagers.}}
{{History||1.16.2|snap=Pre-release 2|Reversed the order of dyes to match other colored items in the [[Creative inventory]].<ref name="reverse dye">{{Bug|MC-136553}}</ref>
|Regrouped dyes in the Creative inventory such that white, blue, brown, and black dyes are within and not [[cocoa beans]], [[ink sacs]], [[lapis lazuli]], and [[bone meal]].<ref name="regroup dye">{{Bug|MC-177684}}</ref>}}
{{History||1.17|snap=20w45a|Added [[candle]]s, which can be dyed.}}
{{History|||snap=21w03a|Added a sound for applying dyes.}}
{{History|||snap=21w19a|Candles can no longer be dyed.}}
{{History|||snap=Pre-release 1|Candles can now once again be dyed.}}
{{History||1.20<br>(Experimental)|link=1.19.3|snap=22w42a|The color of the text on [[hanging sign]]s can now be changed with dye.}}
{{History||1.20<br>(Experimental)|link=1.19.4|snap=23w07a|[[Torchflower]]s can now be crafted into orange dye.|[[Pink petals]] can now be crafted into pink dye.}}
{{History||1.20|snap=23w12a|[[Pitcher plant]]s can now be crafted into cyan dye.|Blue, light blue, orange, white, and yellow dye can now be found in [[suspicious gravel]] and [[suspicious sand]] in [[trail ruins]].}}
{{History|||snap=23w14a|Pitcher plants can now craft two [[cyan dye]] instead of one.}}
{{History|||snap=23w16a|Blue, light blue, orange, white, and yellow dye no longer generates in [[suspicious sand]] in [[trail ruins]].|Due to the split of the archaeological loot tables for the suspicious gravel within the [[trail ruins]]; blue, light blue, orange, white, and yellow dye now are in the common loot.}}
{{History|pocket alpha}}
{{History||v0.3.0|[[File:Bone Meal JE1 BE1.png|32px]] [[File:Light Gray Dye JE1 BE1.png|32px]] [[File:Gray Dye JE1 BE1.png|32px]] [[File:Ink Sac JE1 BE1.png|32px]] [[File:Cocoa Beans JE1 BE1.png|32px]] [[File:Red Dye JE1 BE1.png|32px]] [[File:Orange Dye JE1 BE1.png|32px]] [[File:Yellow Dye JE1 BE1.png|32px]] [[File:Lime Dye JE1 BE1.png|32px]] [[File:Green Dye JE1 BE1.png|32px]] [[File:Cyan Dye JE1 BE1.png|32px]] [[File:Light Blue Dye JE1 BE1.png|32px]] [[File:Lapis Lazuli JE1 BE1.png|32px]] [[File:Purple Dye JE1 BE1.png|32px]] [[File:Magenta Dye JE1 BE1.png|32px]] [[File:Pink Dye JE1 BE1.png|32px]] Added dyes. Only [[dandelion yellow]] and [[lapis lazuli]] are currently obtainable and have functionality.}}
{{History||v0.3.2|[[Cactus green]] is now obtainable by smelting [[cacti]].}}
{{History||v0.3.3|[[Bone meal]] is now obtainable via [[crafting]].}}
{{History||v0.4.0|[[Cyan dye]], [[light blue dye]], [[lime dye]], [[magenta dye]], [[orange dye]], [[pink dye]], and [[purple dye]] are now obtainable via crafting.
|[[Rose red]] is now obtainable by smelting red [[mushroom]]s.
|All available dyes, excluding bone meal, can now be used to craft their respective [[wool]] color.}}
{{History||v0.8.0|snap=build 1|[[File:Cocoa Beans JE3 BE2.png|32px]] The texture of cocoa beans has been changed.}}
{{History|||snap=build 3|[[Ink sac]]s, [[cocoa bean]]s, [[gray dye]], and [[light gray dye]] are now available in the [[creative]] [[inventory]].
|Rose red can now be obtained from [[beetroot]]s.}}
{{History||v0.9.0|snap=build 1|Cocoa beans can now be obtained from [[cocoa pod]]s.
|The [[rose]] has been removed and replaced with a new poppy [[flower]] that can be crafted into rose red.}}
{{History|||snap=build 3|All new [[flower]]s can now be [[crafting|crafted]] into dyes. Because of this, many secondary and tertiary dyes are now primary dyes.
|[[Gray dye]] and [[light gray dye]] can now be obtained in [[survival]].}}
{{History|||snap=build 11|[[Terracotta|Stained clay]] can now be crafted using dyes.}}
{{History||v0.11.0|snap=build 1|[[Ink sac]]s can now be obtained from [[squid]].
|Added the ability to dye [[wolf]] collars.}}
{{History||v0.12.1|snap=build 1|Red [[mushroom]]s can no longer be smelted to obtain [[rose red]].}}
{{History||v0.14.0|snap=build 1|[[Cauldron]]s now used for leather dyeing, by applying a dye to a [[water]]-filled cauldron.}}
{{History||v0.16.0|snap=build 1|[[Cocoa bean]]s can no longer be crafted.}}
{{History|pocket}}
{{History||1.0.0|snap=alpha 0.17.0.1|Added a ''Dye'' button for [[sheep]].
|Added [[shulker]]s, which can be dyed.
|Added [[stained glass]]. Stain glass cannot be [[crafting|crafted]], but purple glass generates in [[end city|end cities]].}}
{{History||1.1.0|snap=alpha 1.1.0.0|Dyes can now apply color to a white [[bed]]s.
|Dyes are now used to craft [[concrete powder]].
|The color palette has been changed.}}
{{History|bedrock}}
{{History||1.2.0|snap=beta 1.2.0.2|Dyes can now be used for [[banner]] crafting.
|Dyes can now be used to craft [[firework star]]s.
|[[Stained glass]] is now [[crafting|craftable]], using dyes.}}
{{History||1.4.0|snap=beta 1.2.20.1|[[Lime dye]] can now be obtained from smelting [[sea pickle]]s.
|Dyes can now used to craft [[glow stick]]s and [[balloon]]s.}}
{{History||1.8.0|snap=beta 1.8.0.8|Dyes can now be used to dye [[cat]] collars.}}
{{History|||snap=beta 1.8.0.10|[[File:White Dye JE1 BE1.png|32px]] [[File:Black Dye JE1 BE1.png|32px]] [[File:Brown Dye JE1 BE1.png|32px]] [[File:Blue Dye JE1 BE1.png|32px]] Added [[white dye|white]], [[brown dye|brown]], [[black dye|black]] and [[blue dye]]s, which can be crafted from [[lapis lazuli]], [[bone meal]], [[cocoa beans]] and [[ink sac]]s. This, however, the later four still use as dyes.<ref>{{Bug|MCPE-42473}}</ref>
|"Rose Red", "Dandelion Yellow" and "Cactus Green" have been renamed to "Red Dye", "Yellow Dye" and "Green Dye", respectively.}}
{{History||1.9.0|snap=beta 1.9.0.0|Blue and white dye can now be obtained from [[cornflower]]s and [[lily of the valley]]s.}}
{{History||1.10.0|snap=beta 1.10.0.3|[[Glass pane]]s and [[carpet]]s can now be dyed.
|Only a single dye is now required to apply a banner pattern in a [[loom]].
|Various dyes except black dye, white dye, brown dye and blue dye are now [[trading|sold]] by [[wandering trader]]s.
|[[File:Bone Meal JE2 BE2.png|32px]] [[File:Light Gray Dye JE2 BE2.png|32px]] [[File:Gray Dye JE2 BE2.png|32px]] [[File:Ink Sac JE2 BE2.png|32px]] [[File:Cocoa Beans JE4 BE3.png|32px]] [[File:Red Dye JE3 BE3.png|32px]] [[File:Orange Dye JE2 BE2.png|32px]] [[File:Yellow Dye JE2 BE2.png|32px]] [[File:Lime Dye JE2 BE2.png|32px]] [[File:Green Dye JE2 BE2.png|32px]] [[File:Cyan Dye.png|32px]] [[File:Light Blue Dye JE2 BE2.png|32px]] [[File:Lapis Lazuli JE2 BE2.png|32px]] [[File:Purple Dye JE2 BE2.png|32px]] [[File:Magenta Dye JE2 BE2.png|32px]] [[File:Pink Dye JE2 BE2.png|32px]] The textures of bone meal, light gray, gray, ink sac, cocoa beans, red, orange, yellow, lime, green, cyan, light blue, lapis lazuli, purple, magenta, and pink dyes have been changed.}}
{{History||1.11.0|snap=beta 1.11.0.4|Dye can now be [[trading|sold]] to shepherd [[villager]]s.}}
{{History||1.16.210|snap=beta 1.16.210.59|The color of the text on [[sign]]s can now be changed with dye.}}
{{History|||snap=beta 1.16.210.60|The ability to dye the color of the text on [[sign]]s was temporarily removed.}}
{{History||1.16.220|snap=beta 1.16.220.50|The color of the text on [[sign]]s can now be changed with dye again.}}
{{History||1.17.10|snap=beta 1.17.10.22|Added [[candles]], which can be dyed.}}
{{History|console}}
{{History||xbox=TU1|xbone=CU1|ps=1.0|wiiu=Patch 1|switch=1.0.1|[[File:Bone Meal JE1 BE1.png|32px]] [[File:Light Gray Dye JE1 BE1.png|32px]] [[File:Gray Dye JE1 BE1.png|32px]] [[File:Ink Sac JE1 BE1.png|32px]] [[File:Cocoa Beans JE1 BE1.png|32px]] [[File:Red Dye JE1 BE1.png|32px]] [[File:Orange Dye JE1 BE1.png|32px]] [[File:Yellow Dye JE1 BE1.png|32px]] [[File:Lime Dye JE1 BE1.png|32px]] [[File:Green Dye JE1 BE1.png|32px]] [[File:Cyan Dye JE1 BE1.png|32px]] [[File:Light Blue Dye JE1 BE1.png|32px]] [[File:Lapis Lazuli JE1 BE1.png|32px]] [[File:Purple Dye JE1 BE1.png|32px]] [[File:Magenta Dye JE1 BE1.png|32px]] [[File:Pink Dye JE1 BE1.png|32px]] Added dyes.}}
{{History||xbox=TU9|[[File:Cocoa Beans JE3 BE2.png|32px]] The texture of cocoa beans has been changed.}}
{{History||xbox=none|xbone=none|ps=1.83|wiiu=none|switch=none|[[File:White Dye JE1 BE1.png|32px]] [[File:Black Dye JE1 BE1.png|32px]] [[File:Brown Dye JE1 BE1.png|32px]] [[File:Blue Dye JE1 BE1.png|32px]] Added [[white dye|white]], [[black dye|black]], [[brown dye|brown]], and [[blue dye|blue]] dyes, which can crafted from [[bone meal]], [[ink sac]], [[cocoa beans]], and [[lapis lazuli]].
|"Rose Red", "Dandelion Yellow" and "Cactus Green" have been renamed to "Red Dye", "Yellow Dye" and "Green Dye", respectively.}}
{{History||ps=1.90|[[File:Bone Meal JE2 BE2.png|32px]] [[File:Light Gray Dye JE2 BE2.png|32px]] [[File:Gray Dye JE2 BE2.png|32px]] [[File:Ink Sac JE2 BE2.png|32px]] [[File:Cocoa Beans JE4 BE3.png|32px]] [[File:Red Dye JE2 BE2.png|32px]] [[File:Orange Dye JE2 BE2.png|32px]] [[File:Yellow Dye JE2 BE2.png|32px]] [[File:Lime Dye JE2 BE2.png|32px]] [[File:Green Dye JE2 BE2.png|32px]] [[File:Cyan Dye.png|32px]] [[File:Light Blue Dye JE2 BE2.png|32px]] [[File:Lapis Lazuli JE2 BE2.png|32px]] [[File:Purple Dye JE2 BE2.png|32px]] [[File:Magenta Dye JE2 BE2.png|32px]] [[File:Pink Dye JE2 BE2.png|32px]] The textures of bone meal, light gray, gray, ink sac, cocoa beans, red, orange, yellow, lime, green, cyan, light blue, lapis lazuli, purple, magenta, and pink dyes have been changed.}}
{{History|3ds}}
{{History||0.1.0|[[File:Bone Meal JE1 BE1.png|32px]] [[File:Light Gray Dye JE1 BE1.png|32px]] [[File:Gray Dye JE1 BE1.png|32px]] [[File:Ink Sac JE1 BE1.png|32px]] [[File:Cocoa Beans JE3 BE2.png|32px]] [[File:Red Dye JE1 BE1.png|32px]] [[File:Orange Dye JE1 BE1.png|32px]] [[File:Yellow Dye JE1 BE1.png|32px]] [[File:Lime Dye JE1 BE1.png|32px]] [[File:Green Dye JE1 BE1.png|32px]] [[File:Cyan Dye JE1 BE1.png|32px]] [[File:Light Blue Dye JE1 BE1.png|32px]] [[File:Lapis Lazuli JE1 BE1.png|32px]] [[File:Purple Dye JE1 BE1.png|32px]] [[File:Magenta Dye JE1 BE1.png|32px]] [[File:Pink Dye JE1 BE1.png|32px]] Added dyes from [[Pocket Edition v0.15.4 alpha]].}}
{{History|foot}}
<gallery>
Pre-release dyes.png|Pre-release dye textures hidden within [[Items.png]].
</gallery>
;Notes
{{reflist|group=n}}
== Gallery ==
<gallery>
White Dye.png|White Dye
Light Gray Dye.png|Light Gray Dye
Gray Dye.png|Gray Dye
Black Dye.png|Black Dye
Brown Dye.png|Brown Dye
Red Dye.png|Red Dye
Orange Dye.png|Orange Dye
Yellow Dye.png|Yellow Dye
Lime Dye.png|Lime Dye
Green Dye.png|Green Dye
Cyan Dye.png|Cyan Dye
Light Blue Dye.png|Light Blue Dye
Blue Dye.png|Blue Dye
Purple Dye.png|Purple Dye
Magenta Dye.png|Magenta Dye
Pink Dye.png|Pink Dye
</gallery>
==Issues==
{{issue list}}
== Trivia ==
* Players can obtain each one of every color with 1 cocoa bean, 2 yellow dye, 2 ink sac, 3 green dye, 4 lapis lazuli, 4 red dye, and 6 bone meal (2 bones).
* The dyed sheep breeding behavior mirrors [[wikipedia:Lamarckism|Lamarck's theory]], in which the organisms evolve inheriting the external changes and adaptations of the previous generation, transmitting them to their offspring.
* In ''Bedrock Edition'', tertiary colors, along with their regular crafting recipes, can be crafted with primary colors. E.g.: Magenta can be crafted with one rose red and two bone meals.
* The colors of the dyes match the chat colors in [[color codes]] except for brown (dye only), light aqua, and gold (color codes only).
* The texture for light blue dye still uses the color from prior to the 1.12 World of Color update.<ref name="unchanged dyes"></ref>
== References ==
{{reflist}}
== External Links ==
* Tools for calculating leather dye combination: [https://minecraft.tools/en/armor.php minecraft.tools] (webapp); [https://github.com/pudquick/pyMCdyes/ pyMCDyes] (open-source Python script, outdated); [https://anrar4.github.io/DyeLeatherArmor/ DyeLeatherArmor]: a tool for calculating an exact crafting recipe for any sRGB color
{{Items}}
[[Category:Dyes]]
[[Category:Renewable resources]]
[[cs:Barvivo]]
[[de:Farbstoff]]
[[es:Tinte]]
[[fr:Teinture]]
[[hu:Színezés]]
[[it:Colorante]]
[[ja:染料]]
[[ko:염료]]
[[nl:Kleurstof]]
[[pl:Barwniki]]
[[pt:Corante]]
[[ru:Красители]]
[[th:สีย้อม]]
[[uk:Барвники]]
[[zh:染料]]</li></ul> | Bows are now obtainable after activating the nether reactor. | ||||
v0.8.0{{Extension DPL}}<ul><li>[[Smarter Watch|Smarter Watch]]<br/>{{Joke feature}}{{Exclusive|Java}}{{Item
| title = Smarter Watch
| image = Smarter Watch.png
| renewable = No
| stackable = Yes (64)
}}
The '''Smarter Watch''' was a joke offhand [[item]].
== Usage ==
Smarter watches were "equipped" by having them placed into the offhand slot. Upon equipping, they would display the current time above the hotbar, in minutes and seconds, with one minute of in-game time being 5/6 of a real-time second, and one in-game hour being 5/6 of a real-time minute or 50 seconds.
The smarter watch would also notify the [[player]] of statistics milestones, alongside taken [[damage]], [[item]] specific info, [[crafting]] items and more.{{info needed|What exactly?}}
== Sounds ==
{{Sound table
|sound=Tick1.ogg
|sound2=Tick2.ogg
|subtitle=''None''
|source=player
|description=When a notification is displayed
|id=item.smarter_watch.notice
|translationkey=''None''
|volume=1.0
|pitch=1.0
|distance=16
|foot=1}}
== Data values ==
=== ID ===
{{ID table
|edition=java
|shownumericids=y
|showforms=y
|generatetranslationkeys=y
|displayname=Smarter Watch
|spritetype=item
|nameid=smarter_watch
|id=502
|form=item
|translationkey=item.smarterWatch.name
|foot=1}}
== History ==
{{History|java}}
{{History||1.RV|snap=1.RV-Pre1|[[File:Smarter_Watch_(item).png|32px]] [[File:Smarter Watch.png|32px]] Added the smarter watch.}}
{{History|foot}}
== Issues ==
Smarter Watches are an unsupported [[item]] due to being an [[Wikipedia:April Fools' Day|April Fools']] joke, and therefore issues relating to them will not be fixed.
== Gallery ==
<gallery>
TechGear.png|A [[player]] wearing the smarter watch, featured in this [[wikipedia:April Fools' Day|April Fools']] joke version.
</gallery>
{{Items}}
{{Jokes}}
[[Category:Non-renewable resources]]
[[Category:Joke items]]
[[pt:Relógio inteligente]]</li><li>[[Magenta Dye|Magenta Dye]]<br/>{{Item
| image = Magenta Dye.png
| renewable = Yes
| stackable = Yes (64)
}}
'''Magenta dye''' is a [[Dye#Quasi-Primary|quasi-primary color dye]].
== Obtaining ==
=== Crafting ===
{{Crafting
|head=1
|showdescription=1
|showname=0
|Allium
|Output=Magenta Dye
|type=Material
}}
{{Crafting
|Lilac
|Output=Magenta Dye,2
|type=Material
}}
{{Crafting
|Purple Dye
|Pink Dye
|Output=Magenta Dye,2
|type=Material
}}
{{Crafting
|Blue Dye
|Red Dye
|Pink Dye
|Output=Magenta Dye,3
|type=Material
}}
{{Crafting
|Lapis Lazuli
|Red Dye
|Pink Dye
|Output=Magenta Dye,3
|type=Material
|description={{only|bedrock|education}}
}}
{{Crafting
|Blue Dye
|Red Dye
|Red Dye
|White Dye
|Output=Magenta Dye,4
|type=Material
}}
{{Crafting
|Lapis Lazuli;Lapis Lazuli;Blue Dye
|Red Dye;Red Dye;Red Dye
|Red Dye;Red Dye;Red Dye
|Bone Meal;White Dye;Bone Meal
|Output=Magenta Dye,4
|type=Material
|description={{only|bedrock|education}}
|foot=1
}}
=== Trading ===
[[Wandering trader]]s sell 3 magenta dye for an [[emerald]].
== Usage ==
{{dye usage}}
=== Crafting ingredient ===
{{crafting usage|ignore=Banner|continue=1}}
{{banner crafting usage}}
=== Loom ingredient ===
{{Banner loom usage|Magenta Dye}}
=== Trading ===
Expert-level shepherd villagers have a {{frac|1|6}} chance to buy 12 magenta dye for an emerald.
== Data values ==
=== ID ===
{{edition|java}}:
{{ID table
|edition=java
|showforms=y
|generatetranslationkeys=y
|displayname=Magenta Dye
|spritetype=item
|nameid=magenta_dye
|form=item
|foot=1}}
{{edition|bedrock}}:
{{ID table
|edition=bedrock
|showaliasids=y
|shownumericids=y
|showforms=y
|notshowbeitemforms=y
|generatetranslationkeys=y
|displayname=Magenta Dye
|spritetype=item
|nameid=magenta_dye
|aliasid=dye / 13
|id=408
|form=item
|translationkey=item.dye.magenta.name
|foot=1}}
== Video ==
{{yt|IkaIFDQJNUU}}
== History ==
{{History|java beta}}
{{History||1.2|[[File:Magenta Dye JE1 BE1.png|32px]] Added magenta dye.}}
{{History|java}}
{{History||1.4.2|snap=12w34a|Added the ability to [[Armor#Dyeing|dye]] leather [[armor]] and [[wolf]] collars.}}
{{History||1.4.6|snap=12w49a|Magenta dye can now be [[crafting|crafted]] with [[gunpowder]] to create a [[firework star]].}}
{{History||1.6.1|snap=13w19a|[[Stained clay]] can now be crafted.}}
{{history||1.7.2|snap=13w36a|With the addition of new [[flower]]s, many secondary and tertiary dyes are now primary [[dye]]s.}}
{{History||1.7.2|snap=13w41a|[[Stained glass]] can now be crafted.}}
{{History||1.8|snap=14w30a|Added [[banner]]s, which can be dyed.}}
{{History||1.11|snap=16w39a|Added [[shulker box]]es, which can be dyed.}}
{{History||1.12|snap=17w15a|Added ability to dye [[bed]]s.}}
{{History||1.13|snap=17w47a|The different data values for the <code>dye</code> ID have now been split up into their own IDs.
|Prior to [[1.13/Flattening|''The Flattening'']], this [[item]]'s numeral ID was 351.}}
{{History||1.14|snap=18w43a|Magenta dye is now crafted using [[blue dye]] and [[white dye]], instead of [[lapis lazuli]] and [[bone meal]].
|[[File:Magenta Dye JE2 BE2.png|32px]] The texture of magenta dye has now been changed.}}
{{History|||snap=18w44a|Magenta dye can now change the text color on [[sign]]s to magenta.}}
{{History|||snap=19w05a|Added the [[wandering trader]], which sells magenta dye.}}
{{History|||snap=19w11a|Magenta dye can now be [[trading|bought]] by shepherd villagers.}}
{{History||1.17|snap=20w45a|Magenta dye can now be used to craft [[magenta candle]]s.}}
{{History|||snap=21w19a|Magenta dye can no longer be used to craft magenta candles.}}
{{History|||snap=Pre-release 1|Magenta dye can now once again be used to craft magenta candles.}}
{{History||1.20<br>(Experimental)|link=1.19.3|snap=22w42a|Magenta dye can now change the text color on [[hanging sign]]s to magenta.}}
{{History|pocket alpha}}
{{History||v0.3.0|[[File:Magenta Dye JE1 BE1.png|32px]] Added magenta dye. It is currently unobtainable and serves no purpose.}}
{{History||v0.4.0|Magenta dye is now craftable with one [[lapis lazuli]], two [[rose red]]s, and one [[bone meal]].
|Magenta dye can now be used to craft magenta wool.}}
{{History||v0.6.0|Magenta dye can now be used to dye [[sheep]].}}
{{History||v0.8.0|snap=build 1|Magenta dye can now additionally be crafted with one [[purple dye]] and one [[pink dye]], or with one [[lapis lazuli]], one [[rose red]], and one pink dye.}}
{{History||v0.9.0|snap=build 11|Magenta dye can now be used to craft colored [[terracotta]].}}
{{History||v0.11.0|snap=build 1|Magenta dye can now be used to dye tamed [[wolf]] collars.}}
{{History||v0.14.0|snap=build 1|Magenta dye can now be used to dye [[water]] in [[cauldron]]s.}}
{{History|pocket}}
{{History||1.0.0|snap=alpha 0.17.0.1|Magenta dye can now be used to dye [[shulker]]s.}}
{{History||1.1.0|snap=alpha 1.1.0.0|Magenta dye can now be used to craft [[concrete powder]], colored [[bed]]s and dyed [[shulker box]]es.}}
{{History|bedrock}}
{{History||1.2.0|snap=beta 1.2.0.2|Magenta dye can now be used to craft [[firework star]]s, [[stained glass]] and patterns on [[banner]]s.}}
{{History||1.4.0|snap=beta 1.2.20.1|Magenta dye can now be used to craft [[balloon]]s and [[glow stick]]s.}}
{{History||1.8.0|snap=beta 1.8.0.8|Magenta dye can now be used to dye tamed [[cat]] collars.}}
{{History||1.10.0|snap=beta 1.10.0.3|Magenta dye is now [[trading|sold]] by [[wandering trader]]s.
|Magenta dye can now be used to dye white [[carpet]]s and regular [[glass pane]]s.
|[[File:Magenta Dye JE2 BE2.png|32px]] The texture of magenta dye has now been changed.}}
{{History||1.11.0|snap=beta 1.11.0.4|Magenta dye can now be [[trading|sold]] to shepherd [[villager]]s.}}
{{History||1.16.100|snap=beta 1.16.100.56|The ID of magenta dye has been changed from <code>dye/13</code> to <code>magenta_dye</code>.}}
{{History|console}}
{{History||xbox=TU1|xbone=CU1|ps=1.00|switch=1.0.1|wiiu=Patch 1|[[File:Magenta Dye JE1 BE1.png|32px]] Added magenta dye.}}
{{History|PS4}}
{{History||1.90|[[File:Magenta Dye JE2 BE2.png|32px]] The texture of magenta dye has now been changed.}}
{{History|new 3ds}}
{{History||0.1.0|[[File:Magenta Dye JE1 BE1.png|32px]] Added magenta dye.}}
{{History|foot}}
== Issues ==
{{issue list}}
== References ==
{{reflist}}
{{Items}}
[[Category:Dyes]]
[[cs:Purpurové barvivo]]
[[de:Magenta Farbstoff]]
[[es:Tinte magenta]]
[[fr:Teinture magenta]]
[[hu:Bíborvörös festék]]
[[ja:赤紫色の染料]]
[[ko:자홍색 염료]]
[[nl:Magenta kleurstof]]
[[pl:Karmazynowy barwnik]]
[[pt:Corante magenta]]
[[ru:Сиреневый краситель]]
[[zh:品红色染料]]
[[Category:Renewable resources]]</li></ul> | build 1 | ||||
| build 7 | Bows can now be used as fuel in a furnace. | ||||
v0.11.0{{Extension DPL}}<ul><li>[[Shield|Shield]]<br/>{{Item
| image = Shield.png
| image2 = White Shield.png
| extratext = View [[#Gallery|all renders]]
| durability = 336
| renewable = Yes
| stackable = No
}}
A '''shield''' is a tool used for protecting the [[player]] against attacks.
== Obtaining ==
=== Crafting ===
{{Crafting
|head=1
|showname=0
|A1=Any Planks <!-- the recipe changed in 15w37a, do not change it to the old recipe without reason -->
|B1=Iron Ingot
|C1=Any Planks
|A2=Any Planks
|B2=Any Planks
|C2=Any Planks
|B3=Any Planks
|Output=Shield
|type=Combat
}}
{{Crafting
|ignoreusage=1
|Shield
|Matching Banner
|A2=Shield
|B2=Banner
|Output=Matching Shield
|type=combat
|foot=1
}}
=== Repairing ===
{{Crafting
|ignoreusage=1
|showdescription=1
|Damaged Shield
|Damaged Shield
|Output=Shield
|description= The durability of the two shields is added together, plus an extra 5% durability. The repaired shield has no pattern.
|type= Combat
}}
Shields may also be repaired on an [[anvil]] by using [[planks]] or another shield. Shields repaired on anvils retain their pattern.
=== Trading ===
Journeyman-level armorer [[villager]]s have {{frac|1|3}}{{only|Bedrock|short=1}}/{{frac|2|5}}{{only|Java|short=1}} chance of selling a shield for 5 [[emerald]]s as their sixth trade.
== Usage ==
Despite using iron in its crafting recipe, it cannot be smelted into [[iron nugget]]s.<ref>{{bug|MC-111738}}</ref>
=== Defense ===
Shields are used for [[blocking]] incoming attacks. {{control|Using}}{{Only|Java|short=1}} or {{Control|sneaking}}{{Only|Bedrock|short=1}} causes a player to slow to a [[sneaking]] pace, and after {{convert|5|ticks|seconds}}<ref>{{bug|MC-100949||Shield blocking is delayed}}</ref>, attacks coming from in front of the player are blocked, dealing no damage. When the shield blocks an attack of {{hp|3}} or stronger, it takes durability damage equal to the strength of the attack rounded up.
Most blocked projectiles that carry status effects (such as [[Shulker#Shulker bullet|shulker bullets]]{{only|java|short=1}}, flaming [[arrow]]s, or tipped arrows) do not affect the blocker. [[Trident]]s & arrows can be deflected into other targets. Knockback from melee attacks and projectiles is prevented, while knockback from [[explosion]]s, [[hoglin]], and [[ravager]] attacks are significantly reduced.
The shield directionally blocks all attacks coming from within the FOV of the direction the wielder is facing, providing a full hemisphere of coverage to them. If the wielder faces straight up, they are likely to miss their blocks.<ref>{{bug|MC-109101||Shields do not block damage while the player faces straight up}}</ref><!--straight down fix: MC-92019-->
Mobs that deal continuous contact damage such as the slime, magma cube, and blaze rapidly drain the shield's durability for as long as the shielded player remains within the mob's hitbox.<ref>{{bug|MC-169167}}</ref><ref>{{bug|MCPE-119451}}</ref>
Blockable attacks include:
*Melee attacks, except by a warden, axe-wielding mobs or by a sprinting player wielding an axe, however even without sprinting an axe still greatly decreases the durability
** Status effects do not carry through to the blocker{{only|java|short=1}}.
*Normal, tipped, and spectral [[arrow]]s
** Arrows other than [[Piercing]] are totally deflected and can hit other targets.
** Status effects do not carry through to the blocker{{only|java|short=1}}.
***This can be used to damage the attacker or another mob down there.
*[[Flame|Flaming arrows]]
** Burning does not carry through to the blocker{{only|java|short=1}}.
*[[Trident]]s
*[[Snowball]]s and [[egg]]s
*Spines from [[pufferfish]]
*Bullets from [[shulker]]s
** The levitation effect does not carry through to the blocker{{only|java|short=1}}.
*Spit from [[llama]]s
*[[Fireball]]s, such as from [[blaze]]s and [[fire charge]]s
** Burning does not carry through to the blocker.
*Direct hits from [[ghast]] [[fireball]]s
** These still cause environmental damage.
*All explosions{{only|JE|short=1}}
*Explosion damage from [[creeper]]s
*[[TNT]] that another player lit
*[[Ravager]] headbutts
** These still knock the blocker back by about 3 blocks.
** Blocking these strikes can stun the ravager for a moment, and it roars afterward.
*Ravager roars are blocked but still knock back the blocker.
*[[Bee]] stings are blocked, but bees continuously attack until the player stops blocking and the player is stung.
*Beam attacks from [[guardian]]s or [[elder guardian]]s (only reduces damage by 50%).
*Damage reflected from [[Thorns]] enchantment / [[Guardian|guardians]].
They cannot block:
*Arrows from a [[crossbow]] enchanted with [[Piercing]]
** This does not reduce the shield's durability.
*[[Status effect]]s from tipped arrows or shulker bullets {{only|bedrock|short=1}} <ref>{{bug|MCPE-52904}}</ref>
** Direct projectile damage is blocked, but the effect still carries through.
*Status effects from splash/lingering [[potion]]s, [[evoker]]s' fangs, or breath from the [[ender dragon]]
*Beam attacks from [[guardian]]s or [[elder guardian]]s, or the [[warden]]'s sonic boom attack
*TNT that the blocking player lit themselves{{only|BE|short=1}}
*TNT that a [[Redstone (disambiguation)|redstone mechanism]] lit{{only|BE|short=1}}
*[[Fall damage]], including that from [[ender pearl]]s
** This also includes when the player rides an [[entity]] that died due to fall damage.
*Strikes from a warden or any [[axe]]-wielding mob (e.g., [[vindicator]]s, [[piglin brute]]s, [[zombie]]s after disabling players shield they attack another time immediately)
** Such strikes disable being able to use shields for 5 seconds.
=== Applying patterns ===
[[File:Cyan Shield Screenshot.png|250px|thumb|A custom shield.]]
Shields can be decorated by applying a [[banner]].
{{Crafting
|showdescription=1
|Shield
|Matching Banner
|Output=Matching Shield; Ominous Shield
|B2link=Banner
|Olink=Shield
|type=Combat
|description=Applies the banner pattern to the shield. The banner is consumed.<br>The shield must have no preexisting patterns.<br>Does not change existing durability or enchantments on the shield.
}}
Unlike with [[banner]]s, shields cannot be repainted or washed in a [[cauldron]]. Shields have only half the resolution of banners, making patterns look slightly different. In the game files, the pattern textures can be found in a separate directory called entity/shield.
{{IN|java}}, shields with patterns can also be obtained using the same commands as banners, except <code>banner</code> has to be replaced with <code>shield</code>.
=== Enchantments ===
A shield can receive the following [[enchantments]], but only through an [[anvil]]:
{| class="wikitable col-2-center"
|+
!Name
!Max Level
![[Enchanting|Method]]
|-
|[[Unbreaking]]
|III
|{{Inventory slot|Anvil}}
|-
|[[Mending]]
|I
|{{Inventory slot|Anvil}}
|-
|[[Curse of Vanishing]]
|I
|{{Inventory slot|Anvil}}
|-
|}
== Sounds ==
{{edition|java}}:
{{Sound table
|sound=Shield block1.ogg
|sound2=Shield block2.ogg
|sound3=Shield block3.ogg
|sound4=Shield block4.ogg
|sound5=Shield block5.ogg
|subtitle=Shield blocks
|source=player
|description=When an attack is blocked using a shield
|id=item.shield.block
|translationkey=subtitles.item.shield.block
|volume=1.0
|pitch=0.8-1.2
|distance=16}}
{{Sound table
|sound=Equip generic1.ogg
|sound2=Equip generic2.ogg
|sound3=Equip generic3.ogg
|sound4=Equip generic4.ogg
|sound5=Equip generic5.ogg
|sound6=Equip generic6.ogg
|subtitle=Gear equips
|source=player
|description=When a shield is placed in the offhand slot
|id=item.armor.equip_generic
|translationkey=subtitles.item.armor.equip
|volume=1.0
|pitch=1.0
|distance=16}}
{{Sound table
|sound=Random break.ogg
|subtitle=Item breaks
|source=player
|description=When a shield's durability is exhausted
|id=item.shield.break
|translationkey=subtitles.entity.item.break
|volume=0.8
|pitch=0.8-1.2
|distance=16
|foot=1}}
{{edition|bedrock}}:
{{Sound table
|type=bedrock
|sound=Shield block1.ogg
|sound2=Shield block2.ogg
|sound3=Shield block3.ogg
|sound4=Shield block4.ogg
|sound5=Shield block5.ogg
|source=player
|description=When an attack is blocked using a shield
|id=item.shield.block
|volume=0.7
|pitch=1.0}}
{{Sound table
|sound=Equip generic1.ogg
|sound2=Equip generic2.ogg
|sound3=Equip generic3.ogg
|sound4=Equip generic4.ogg
|sound5=Equip generic5.ogg
|sound6=Equip generic6.ogg
|source=player
|description=When a shield is placed in the offhand slot<wbr>{{Upcoming|BE 1.20.30}}<wbr><ref group=sound>{{Bug|MCPE-168039}}</ref>
|id=armor.equip_generic
|volume=1.0
|pitch=1.0}}
{{Sound table
|sound=Random break.ogg
|source=player
|description=When a shield's durability is exhausted
|id=random.break
|volume=1.0
|pitch=0.9
|foot=1}}
== Data values ==
=== ID ===
{{edition|java}}:
{{ID table
|edition=java
|showforms=y
|generatetranslationkeys=y
|displayname=Shield
|spritetype=item
|nameid=shield
|form=item
|translationkey=item.minecraft.shield, item.minecraft.shield.white, item.minecraft.shield.orange, item.minecraft.shield.magenta, item.minecraft.shield.light_blue, item.minecraft.shield.yellow, item.minecraft.shield.lime, item.minecraft.shield.pink, item.minecraft.shield.gray, item.minecraft.shield.light_gray, item.minecraft.shield.cyan, item.minecraft.shield.purple, item.minecraft.shield.blue, item.minecraft.shield.brown, item.minecraft.shield.green, item.minecraft.shield.red, item.minecraft.shield.black
|foot=1}}
{{edition|bedrock}}:
{{ID table
|edition=bedrock
|shownumericids=y
|showforms=y
|notshowbeitemforms=y
|generatetranslationkeys=y
|displayname=Shield
|spritetype=item
|nameid=shield
|id=355
|form=item
|translationkey=item.shield.name, item.shield.white.name, item.shield.orange.name, item.shield.magenta.name, item.shield.lightBlue.name, item.shield.yellow.name, item.shield.lime.name, item.shield.pink.name, item.shield.gray.name, item.shield.silver.name, item.shield.cyan.name, item.shield.purple.name, item.shield.blue.name, item.shield.brown.name, item.shield.green.name, item.shield.red.name, item.shield.black.name
|foot=1}}
== Advancements ==
{{load advancements|Not Today}}
== History ==
{{History||July 10, 2011|link=http://minetimes.wordpress.com/2011/07/10/interview-mit-jeb-ihr-konntet-die-fragen-stellen/|During an interview, [[Jeb]] says that "shields for the left arm" might be added.}}
{{History|java}}
{{History||1.9|snap=15w33c|[[File:White Shield.png|22px]] [[File:Light Gray Shield.png|22px]] [[File:Gray Shield.png|22px]] [[File:Black Shield.png|22px]] [[File:Brown Shield.png|22px]] [[File:Red Shield.png|22px]] [[File:Orange Shield.png|22px]] [[File:Yellow Shield.png|22px]] [[File:Lime Shield.png|22px]] [[File:Green Shield.png|22px]] [[File:Cyan Shield.png|22px]] [[File:Light Blue Shield.png|22px]] [[File:Blue Shield.png|22px]] [[File:Purple Shield.png|22px]] [[File:Magenta Shield.png|22px]] [[File:Pink Shield.png|22px]] Added shields.
|Shields replace the [[blocking]] functionality of [[sword]]s, although blocking more [[damage]].
|The current [[crafting]] recipe of shields includes [[wool]], producing 16 possible colored shields. There currently isn't a blank, uncolored shield.
{{{!}} class{{=}}"collapsible collapsed" data-description{{=}}"Recipe"
! Recipe
{{!}}-
{{!}}
{{Crafting
|A1=Matching Wool |B1=Any Planks
|A2=Matching Wool |B2=Any Planks |C2=Iron Ingot
|A3=Matching Wool |B3=Any Planks
|Output=Matching Shield
|ignoreusage=1
}}
{{!}}}
|Any of the colored base shields can be [[crafting|crafted]] with a [[banner]] of the same base color, to produce a patterned shield.
}}
{{History|||snap=15w34c|When an attack is blocked by a shield, the attacker now may be knocked back.
|Being attacked with an [[axe]] now may disable shield use for 5 seconds.}}
{{History|||snap=15w37a|The [[crafting]] recipe of shields has been changed to 6 [[planks]] and 1 [[iron ingot]].
{{{!}} class{{=}}"collapsible collapsed" data-description{{=}}"Recipe"
! Recipe
{{!}}-
{{!}}
{{Crafting
|A1=Any Planks |B1=Iron Ingot |C1=Any Planks
|A2=Any Planks |B2=Any Planks |C2=Any Planks
|B3=Any Planks
|Output=Shield
|ignoreusage=1
}}
{{!}}}
|[[File:Shield JE1.png|22px]] Crafting a shield now produces a base wooden shield that can be crafted together with any [[banner]].
|The cooldown of shields has been reduced from 0.5s to 0.25s.
|Blocking with shields now prevents some side effects.{{verify}}
|[[Arrow]]s now ricochet off shields.}}
{{History|||snap=15w44a|Shields can now be repaired by combining with other shields. This removes any [[banner]] that had been applied.}}
{{History|||snap=15w45a|Crafting a banner onto a shield now consumes the banner.}}
{{History|||snap=15w47b|Added shield blocking [[sound]]s.}}
{{History|||snap=16w07a|Added more variation of shield blocking sounds.}}
{{History|||snap=pre1|The [[durability]] of shields has been increased from 181 to 337.}}
{{History||1.10|snap=16w21a|Shields can now be equipped by [[dispenser]]s.}}
{{History||1.11|snap=16w33a|[[Crafting]] a shield with a banner no longer changes the durability, nor does it remove [[enchanting|enchantments]] from it.}}
{{History|||snap=16w35a|Shields now block 100% of [[damage]]/[[knockback]]/debuffs dealt in melee combat.}}
{{History||1.13|snap=17w47a|Prior to [[1.13/Flattening|''The Flattening'']], this [[item]]'s numeral ID was 442.}}
{{History||1.13.2|snap=release|Shields now properly block attacks when the player is facing down.<ref>{{bug|MC-92019|||Fixed}}</ref>}}
{{History||1.14|snap=18w43a|[[File:Shield JE2 BE1.png|22px]] The texture of shields has been changed.
|Shields no longer knockback attackers when they block due to a bug with rework of the blocking mechanic with the introduction of the ravager.<ref>{{bug|MC-147694}}</ref>}}
{{History|||snap=19w11a|Shields can now be [[trading|bought]] from armorer [[villager]]s.}}
{{History||1.14.3|snap=Pre-Release 3|Shields blocking flaming [[arrow]]s no longer put the [[player]] on [[fire]].}}
{{History||1.16|snap=20w06a|[[Crimson planks]] and [[warped planks]] can now be used to craft shields.}}
{{History||1.19|snap=22w11a|[[Mangrove planks]] can now be used to craft shields.}}
{{History||1.19.3|snap=22w43a|Shields can now properly block all explosions.}}
{{History||1.19.4|snap=23w06a|A sound is now played when a shield is placed into the offhand slot.}}
{{History|upcoming java}}
{{History||Combat Tests|snap=1.14.3 - Combat Test|Critical hits now bypass shields.
|The warm-up delay has been removed from shields.
|When in the off-hand, shields now activate when [[sneaking]].}}
{{History|||snap=Combat Test 2|Shields now protect against critical attacks again.
|Shields can only be activated when the weapon is charged to 200%.}}
{{History|||snap=Combat Test 3|A "Shield Indicator" option that displays when the shield is active, similar to the attack indicator, has been added.
|An option to hide shields when active has been added.
|The arc of available protection of shields has been decreased to 100 degrees instead of 180 degrees.}}
{{History|||snap=Combat Test 4|An option to disable shields being activated by pressing {{ctrl|crouch}} has been added.
|The option to hide the shield has been removed.}}
{{History|||snap=Combat Test 6|Shields now protect up to 5 [[damage]] for melee attacks (still 100% against projectiles).
|Shields activate instantly regardless if the weapon is charged, similar to Combat test 1.
|Shields now recover faster after an attack.}}
{{History|||snap=Combat Test 7c|Shields now add a 50% knockback resistance when active.
|Shields now protect against 100% [[explosions|explosion]] damage.}}
{{History|||snap=Combat Test 8c|The knockback calculations for shields have been fixed.{{Info needed}}
|Crouch-shielding while jumping has been disabled.
|Shields with [[banner]]s are now temporarily stronger than normal shields (10 absorption instead of 5, and better knockback resistance) to test different shield types.}}
{{History|bedrock}}
{{History||1.10.0|snap=beta 1.10.0.3|[[File:Shield JE2 BE1.png|22px]] Added shields.
|Shields cannot be customized with [[banner]]s.
|Shields are activated by [[sneaking|crouching]] or mounting [[mob]]s.}}
{{History||1.11.0|snap=beta 1.11.0.4|Shields can now be [[trading|bought]] from armorer [[villager]]s.}}
{{History||1.16.210|snap=beta 1.16.210.51|Now grants partial knockback protection from the [[goat]] ram attack.}}
{{History||1.16.220|snap=beta 1.16.220.50|[[Mob]]s that pick up shields now place them to their off-hand.}}
{{History||1.18.30|snap=beta 1.18.30.26|Being attacked with an [[axe]] now may disable shield use. This was not mentioned in the official changelog.<ref>{{tweet|kingbdogz|1504505321884196872|We missed a change in recent changelogs for the Bedrock beta that you may like - we have now made a parity fix that makes shields get disabled for 5 seconds when attacked by an Axe-wielding mob or player. We will make sure to list this properly in the next beta :)|March 17, 2022}}</ref>}}
{{History||1.20.0|snap=beta 1.20.0.20|[[File:White Shield.png|22px]] [[File:Light Gray Shield.png|22px]] [[File:Gray Shield.png|22px]] [[File:Black Shield.png|22px]] [[File:Brown Shield.png|22px]] [[File:Red Shield.png|22px]] [[File:Orange Shield.png|22px]] [[File:Yellow Shield.png|22px]] [[File:Lime Shield.png|22px]] [[File:Green Shield.png|22px]] [[File:Cyan Shield.png|22px]] [[File:Light Blue Shield.png|22px]] [[File:Blue Shield.png|22px]] [[File:Purple Shield.png|22px]] [[File:Magenta Shield.png|22px]] [[File:Pink Shield.png|22px]] Shields can now be customized using a banner.}}
{{History|PS4}}
{{History||1.90|[[File:Shield JE1.png|22px]] Added shields.
|Shields do not have [[banner]] application features.}}
{{History|foot}}
== Issues ==
{{issue list|-wither}}
== Gallery ==
<gallery>
Shield.png|Shield
White Shield.png|White Shield
Light Gray Shield.png|Light Gray Shield
Gray Shield.png|Gray Shield
Black Shield.png|Black Shield
Brown Shield.png|Brown Shield
Red Shield.png|Red Shield
Orange Shield.png|Orange Shield
Yellow Shield.png|Yellow Shield
Lime Shield.png|Lime Shield
Green Shield.png|Green Shield
Cyan Shield.png|Cyan Shield
Light Blue Shield.png|Light Blue Shield
Blue Shield.png|Blue Shield
Purple Shield.png|Purple Shield
Magenta Shield.png|Magenta Shield
Pink Shield.png|Pink Shield
</gallery>
=== Screenshots ===
<gallery>
JebShield.png|One of the first images of shields. [[Jeb]] wearing diamond armor while holding a creeper-emblazoned shield during [[MineCon]] 2015.
Jeb Crafting Shield.png|Jeb crafting a shield.
Player with Shield.png|Player holding the default shield.
Shield Block.png|A player blocking with a shield.
ShieldFirstPerson.png|Blocking with a shield as seen in first person.
Enchanted Shield (item).gif|An enchanted shield as seen in the [[inventory]].
-ominous- shield.png|A shield with the [[ominous banner]] on it as seen in the inventory.
Kai-Shield.jpg|An image of [[Kai]] wielding a banner with a shield, used to announce the feature on [[Bedrock Edition]].
Bedrock-Shields.jpg
</gallery>
== References ==
{{reflist}}
== External Links ==
* [https://www.minecraft.net/en-us/article/taking-inventory--shield Taking Inventory: Shield] – Minecraft.net on July 25, 2019
{{Items}}
[[Category:Combat]]
[[Category:Renewable resources]]
[[de:Schild (Kampf)]]
[[fr:Bouclier]]
[[it:Scudo]]
[[ja:盾]]
[[ko:방패]]
[[nl:Schild]]
[[pl:Tarcza]]
[[pt:Escudo]]
[[ru:Щит]]
[[th:โล่]]
[[zh:盾牌]]</li><li>[[Pickaxe|Pickaxe]]<br/>{{Dungeons hatnote|type=weapon}}
{{Redirect|Diamond Pickaxe|the ''Minecraft Dungeons'' weapon|MCD:Diamond Pickaxe}}
{{Redirect|Pick|the block|Sea Pickle|the control|Controls#Pick Block|the joke block|Pickaxe Block}}
{{Item
| image = <gallery>
Wooden Pickaxe.png | Wooden
Stone Pickaxe.png | Stone
Iron Pickaxe.png | Iron
Golden Pickaxe.png | Golden
Diamond Pickaxe.png | Diamond
Netherite Pickaxe.png | Netherite
</gallery>
|rarity = Common
|renewable =
* '''Netherite''': No
* '''Others''': Yes
|durability =
Java Edition:
* Wood: 59
* Stone: 131
* Iron: 250
* Golden: 32
* Diamond: 1,561
* Netherite: 2,031
Bedrock Edition:
* Wood: 60
* Stone: 132
* Iron: 251
* Golden: 33
* Diamond: 1,562
* Netherite: 2,032
| stackable = No
}}
A '''pickaxe''' is a [[tools|tool]] required to mine [[ore]]s, [[rock|rocks]], rock-based blocks and metal-based [[block]]s quickly and obtain them as items. A pickaxe mines faster and can obtain more block types as items depending on the material it is made from.
== Obtaining ==
=== Crafting ===
Pickaxes are crafted using 2 [[stick]]s and 3 identical units of tool material.
{{crafting |showdescription=1 |showname=0 |head=1
|name=[[Pickaxe]]
|A1={Any Planks}; Iron Ingot; Gold Ingot; Diamond
|B1={Any Planks}; Iron Ingot; Gold Ingot; Diamond
|C1={Any Planks}; Iron Ingot; Gold Ingot; Diamond
|B2=Stick
|B3=Stick
|Output=Wooden Pickaxe; Iron Pickaxe; Golden Pickaxe; Diamond Pickaxe
|type=Tool
}}
{{Crafting
|name=[[Stone Pickaxe]]
|A1=Any stone-tier block |B1=Any stone-tier block |C1=Any stone-tier block
|B2=Stick
|B3=Stick
|Output=Stone Pickaxe
|description=Can use cobblestone and its other variants interchangeably.
|type=Tool
}}
{{crafting |foot=1 |ignoreusage=1
|name=[[Pickaxe]]
|ingredients=Matching Damaged [[Pickaxe]]s
|Damaged Wooden Pickaxe; Damaged Stone Pickaxe; Damaged Iron Pickaxe; Damaged Golden Pickaxe; Damaged Diamond Pickaxe; Damaged Netherite Pickaxe
|Damaged Wooden Pickaxe; Damaged Stone Pickaxe; Damaged Iron Pickaxe; Damaged Golden Pickaxe; Damaged Diamond Pickaxe; Damaged Netherite Pickaxe
|Output=Wooden Pickaxe; Stone Pickaxe; Iron Pickaxe; Golden Pickaxe; Diamond Pickaxe; Netherite Pickaxe
|description=The durability of the two pickaxes is added together, plus an extra 5% of the tool type's total durability.
|type=Tool
}}
=== Upgrading ===
{{Smithing
|head=1
|Netherite Upgrade
|Diamond Pickaxe
|Netherite Ingot
|Netherite Pickaxe
|tail=1
}}
=== Repairing ===
==== Grinding ====
{{grinding
|showdescription=1
|ingredients=Matching Damaged [[Pickaxe]]s
|Damaged Wooden Pickaxe; Damaged Stone Pickaxe; Damaged Iron Pickaxe; Damaged Golden Pickaxe; Damaged Diamond Pickaxe; Damaged Netherite Pickaxe
|Damaged Wooden Pickaxe; Damaged Stone Pickaxe; Damaged Iron Pickaxe; Damaged Golden Pickaxe; Damaged Diamond Pickaxe; Damaged Netherite Pickaxe
|Wooden Pickaxe; Stone Pickaxe; Iron Pickaxe; Golden Pickaxe; Diamond Pickaxe; Netherite Pickaxe
|description=The durability of the two pickaxes is added together, plus an extra 5% durability.
}}
==== Unit repair ====
{{main|Anvil mechanics#Unit repair}}
Pickaxes can be repaired in an [[anvil]] by adding units of the [[tiers|tier's]] repair material, with each repair material restoring 25% of the pickaxe's maximum durability, rounded down.
=== Natural generation ===
{{LootChestItem|wooden-pickaxe,stone-pickaxe,iron-pickaxe,level-enchanted-iron-pickaxe,random-enchanted-golden-pickaxe,level-enchanted-diamond-pickaxe,random-enchanted-diamond-pickaxe,damaged-random-enchanted-diamond-pickaxe}}
=== Trading ===
{{IN|bedrock}}, novice-level toolsmith [[Villager|villagers]] have a 25% chance to sell stone pickaxes for one [[emerald]], Journeyman-level toolsmith villagers have a 25% chance to sell enchanted iron pickaxes for 3 emeralds, and master-level toolsmith villagers always sell enchanted diamond pickaxes for 13 emeralds.
{{IN|java}}, novice-level toolsmith villagers have a 40% chance to sell a stone pickaxe for one emerald, journeyman-level toolsmith villagers have a 40% chance to sell an enchanted iron pickaxe for 7–22 emeralds, and a master-level toolsmith always sells an enchanted diamond pickaxe for 18–35 emeralds.
The enchantments are the same as the ones obtained from an [[enchantment table]] at levels 5–19.
=== Villager gifts ===
{{IN|JE}}, toolsmith [[villager]]s throw stone pickaxes at players under the [[Hero of the Village]] effect.
=== Mob loot ===
{{IN|BE}}, [[pillager]]s and [[vindicator]]s have a chance of dropping a damaged iron pickaxe when killed during a [[raid]]. The pickaxe has a 50% chance of being enchanted with random enchantment(s).
== Usage ==
=== Mining ===
A pickaxe is used to break stone and metal-based materials faster. Breaking a block with a pickaxe consumes one use (one durability point). No durability is consumed for blocks that break instantly. Pickaxes have different amounts of uses based on the type:
* Wooden: 60
* Stone: 132
* Iron: 251
* Golden: 33
* Diamond: 1562
* Netherite: 2032
Different qualities of pickaxe are required to successfully harvest certain ores and blocks. For example, while [[stone]] can be mined with any pickaxe, [[gold ore]] must be mined with an [[iron]], [[diamond]], or [[netherite]] pickaxe, or else the player harvests no ore. Different pickaxes also mine many materials at different speeds:
==== Speed ====
The following table shows the time it takes to break each type of block.
* A <span style="background-color:#FFC7CE;color:#9C0006;">red</span> background indicates that the block cannot be harvested with that type of pickaxe.
* A <span style="background-color:#FFFFDD;color:#8A7600;">yellow</span> background indicates that the block cannot be harvested with that type of pickaxe, but still drops something.
* A <span style="background-color:#C6EFCE;color:#006100;">green</span> background indicates that the block can be harvested with that type of pickaxe.
<!-- Table is sorted by hardness (mining time with diamond shows well), then by name -->
{|class="wikitable collapsible collapsed" data-description="Mining time by block" style="background-color: transparent;"
! Times to break blocks by pickaxe
|-
|
{{breaking row|sort=1|simple=1|Obsidian|Diamond}}
{{breaking row|Crying Obsidian|Diamond}}
{{breaking row|Respawn Anchor|Diamond}}
{{breaking row|Block of Netherite|Diamond}}
{{breaking row|Ancient Debris|Diamond}}
{{breaking row|Ender Chest|Wood}}
{{breaking row|Anvil|Wood}}
{{breaking row|Bell|Wood}}
{{breaking row|Block of Coal|Wood}}
{{breaking row|Block of Diamond|Iron}}
{{breaking row|Block of Emerald|Iron}}
{{breaking row|Block of Iron|Stone}}
{{breaking row|Block of Raw Copper|Stone}}
{{breaking row|Block of Raw Gold|Iron}}
{{breaking row|Block of Raw Iron|Stone}}
{{breaking row|Block of Redstone|Wood}}
{{breaking row|Chain|Wood}}
{{breaking row|Enchantment Table|Wood}}
{{breaking row|Iron Bars|Wood}}
{{breaking row|Iron Door|Wood|item=1|link=Door}}
{{breaking row|Iron Trapdoor|Wood|link=Trapdoor}}
{{breaking row|Monster Spawner|Wood}}
{{breaking row|Deepslate Coal Ore|Wood}}
{{breaking row|Deepslate Copper Ore|Wood}}
{{breaking row|Deepslate Diamond Ore|Wood}}
{{breaking row|Deepslate Emerald Ore|Wood}}
{{breaking row|Deepslate Gold Ore|Wood}}
{{breaking row|Deepslate Iron Ore|Wood}}
{{breaking row|Deepslate Lapis Lazuli Ore|Wood}}
{{breaking row|Deepslate Redstone Ore|Wood}}
{{breaking row|Blast furnace|Wood}}
{{breaking row|Cobbled Deepslate|Wood}}
{{breaking row|Chiseled Deepslate|Wood}}
{{breaking row|Deepslate Bricks|Wood}}
{{breaking row|Deepslate Tiles|Wood}}
{{breaking row|Polished Deepslate|Wood}}
{{breaking row|Dispenser|Wood}}
{{breaking row|Dropper|Wood}}
{{breaking row|Furnace|Wood}}
{{breaking row|Lantern|wood}}
{{breaking row|Lodestone|Wood}}
{{breaking row|Smoker|Wood}}
{{breaking row|Stonecutter|Wood}}
{{breaking row|Conduit}}
{{breaking row|Block of Gold|Iron}}
{{breaking row|Block of Lapis Lazuli|Stone}}
{{breaking row|Coal Ore|Wood}}
{{breaking row|Copper Ore|Wood}}
{{breaking row|Copper Blocks|Wood}}
{{breaking row|Cut Copper|Wood}}
{{breaking row|Cut Copper Slab|Wood}}
{{breaking row|Cut Copper Stairs|Wood}}
{{breaking row|Deepslate|Wood}}
{{breaking row|Dragon Egg
|note=<ref group="note">The dragon egg can be mined directly only when there aren't any air blocks available for it to teleport to. However, the dragon egg can be collected by other means.</ref>}}
{{breaking row|Diamond Ore|Iron}}
{{breaking row|Emerald Ore|Iron}}
{{breaking row|End Stone|Wood}}
{{breaking row|Gold Ore|Iron}}
{{breaking row|Hopper|Wood}}
{{breaking row|Iron Ore|Stone}}
{{breaking row|Lightning Rod|Wood}}
{{breaking row|Lapis Lazuli Ore|Stone}}
{{breaking row|Nether Quartz Ore|Wood}}
{{breaking row|Nether Gold Ore|Wood}}
{{breaking row|Observer|Wood}}
{{breaking row|Redstone Ore|Iron}}
{{breaking row|Blue Ice|drop=0}}
{{breaking row|Compound Creator|Wood|drop=1|note=<ref group="note" name="Chemtable">Chemistry tables are slow to break by hand, similar to blocks that require a pickaxe to mine. However, they still drop as items.</ref>}}
{{breaking row|Heat Block|Wood}}
{{breaking row|Grindstone|Wood}}
{{breaking row|Bone Block|Wood}}
{{breaking row|Brick Stairs|Wood|link=Stairs}}
{{breaking row|Bricks|Wood}}
{{breaking row|Cauldron|Wood}}
{{breaking row|Cobblestone|Wood}}
{{breaking row|link=Stairs|Cobblestone Stairs|Wood}}
{{breaking row|Cobblestone Wall|Wood}}
{{breaking row|Mossy Cobblestone|Wood}}
{{breaking row|Nether Bricks|Wood}}
{{breaking row|Nether Brick Fence|Wood}}
{{breaking row|link=Stairs|Nether Brick Stairs|Wood}}
{{breaking row|Red Nether Bricks|Wood}}
{{breaking row|Polished Blackstone|Wood}}
{{breaking row|link=Slab|Stone Slabs|sprite=all-slabs|Wood}}
{{breaking row|Smooth Stone|Wood}}
{{breaking row|Shulker Box}}
{{breaking row|Concrete|Wood}}
{{breaking row|Andesite|Wood}}
{{breaking row|Dark Prismarine|Wood}}
{{breaking row|Diorite|Wood}}
{{breaking row|Dripstone Block|Wood}}
{{breaking row|Granite|Wood}}
{{breaking row|Mud Bricks|Wood}}
{{breaking row|Pointed Dripstone}}
{{breaking row|Prismarine|Wood}}
{{breaking row|Prismarine Bricks|Wood}}
{{breaking row|Purpur block|Wood}}
{{breaking row|Purpur pillar|Wood}}
{{breaking row|Stone|Wood}}
{{breaking row|Stone Bricks|Wood}}
{{breaking row|Tuff|Wood}}
{{breaking row|link=Stairs|Stone Brick Stairs|Wood}}
{{breaking row|Amethyst Bud|drop=0}}
{{breaking row|Amethyst Cluster|drop=0}}
{{breaking row|Blackstone|Wood}}
{{breaking row|Block of Amethyst|Wood}}
{{breaking row|Budding Amethyst|drop=0}}
{{breaking row|Chiseled Polished Blackstone|Wood}}
{{breaking row|Polished Blackstone Bricks|Wood}}
{{breaking row|Gilded Blackstone|Wood}}
{{breaking row|Glazed Terracotta|Wood}}
{{breaking row|Terracotta|Wood}}
{{breaking row|Basalt|Wood}}
{{breaking row|Smooth Basalt|Wood}}
{{breaking row|Polished Basalt|Wood}}
{{breaking row|Packed Mud}}
{{breaking row|Block of Quartz|Wood}}
{{breaking row|Quartz Stairs|Wood|link=Stairs}}
{{breaking row|Red Sandstone|Wood}}
{{breaking row|Red Sandstone Stairs|Wood|link=stairs}}
{{breaking row|Sandstone|Wood}}
{{breaking row|Sandstone Stairs|Wood|link=stairs}}
{{breaking row|Calcite|Wood}}
{{breaking row|Rail}}
{{breaking row|Brewing Stand|Wood}}
{{breaking row|Stone Button|any}}
{{breaking row|Ice|drop=0}}
{{breaking row|Magma Block|Wood}}
{{breaking row|Packed Ice|drop=0}}
{{breaking row|Frosted Ice|drop=0}}
{{breaking row|Stone Pressure Plate|Wood}}
{{breaking row|Netherrack|Wood}}
{{breaking row|sprite=crimson-nylium|Nylium|Wood|foot=1}}
|}
=== Weapon ===
Hitting a mob with a pickaxe is a stronger attack than using fists. Pickaxes lose 2 durability when used as a weapon.
==== Java Edition ====
Pickaxes have an attack speed modifier of −2.8, meaning they take about 0.83 seconds to [[Damage#Attack cooldown|recover]]. All pickaxes have an attack speed of 1.2 hits per second. They deal different damage based on the type:
{|class="wikitable" style="text-align:center" data-description="Attack damage"
! Pickaxe type
! Attack damage
! Damage per<br> second (DPS)
|-
|{{ItemLink|Wooden Pickaxe}} ||rowspan=2 |{{hp|2}} ||rowspan=2 |2.4
|-
|{{ItemLink|Golden Pickaxe}}
|-
|{{ItemLink|Stone Pickaxe}} ||{{hp|3}} ||3.6
|-
|{{ItemLink|Iron Pickaxe}} ||{{hp|4}} ||4.8
|-
|{{ItemLink|Diamond Pickaxe}} ||{{hp|5}} ||6
|-
|{{ItemLink|Netherite Pickaxe}} ||{{hp|6}} ||7.2
|}
==== Bedrock Edition ====
{{IN|bedrock}}, pickaxes always attack instantly and do the following damage:
{|class="wikitable" style="text-align:center" data-description="Attack damage"
! Pickaxe type
! Attack damage
|-
|{{ItemLink|Wooden Pickaxe}}<br />{{ItemLink|Golden Pickaxe}} ||{{hp|3}}
|-
|{{ItemLink|Stone Pickaxe}} ||{{hp|4}}
|-
|{{ItemLink|Iron Pickaxe}} ||{{hp|5}}
|-
|{{ItemLink|Diamond Pickaxe}} ||{{hp|6}}
|-
|{{ItemLink|Netherite Pickaxe}} ||{{hp|7}}
|}
=== Enchantments ===
A pickaxe can receive the following [[enchantment]]s:
{|class="wikitable col-2-center col-3-right"
|+
!Name
!Max Level
![[Enchanting|Method]]
|-
|[[Efficiency]]
|V
|{{Inventory slot|Enchanting Table}}{{Inventory slot|Anvil}}
|-
|[[Fortune]]<ref group=note name=note1>Fortune and Silk Touch are mutually exclusive.</ref>
|III
|{{Inventory slot|Enchanting Table}}{{Inventory slot|Anvil}}
|-
|[[Silk Touch]]<ref group=note name=note1/>
|I
|{{Inventory slot|Enchanting Table}}{{Inventory slot|Anvil}}
|-
|[[Unbreaking]]
|III
|{{Inventory slot|Enchanting Table}}{{Inventory slot|Anvil}}
|-
|[[Mending]]
|I
|{{Inventory slot|Anvil}}
|-
|[[Curse of Vanishing]]
|I
|{{Inventory slot|Anvil}}
|}
{{Notelist}}
=== Fuel ===
Wooden pickaxes can be used as a fuel in [[furnace]]s, smelting 1 item per wooden pickaxe.
=== Smelting ingredient ===
{{Smelting|showname=1|Iron Pickaxe;Golden Pickaxe|Iron Nugget;Gold Nugget|0,1}}
===Piglins===
{{EntityLink|Piglin|Piglins}} are attracted to golden pickaxes and run toward any golden pickaxes on the ground, and inspect it for 6 to 8 seconds before putting it in their inventory.
== Sounds ==
{{edition|java}}:
{{Sound table
|sound=Random break.ogg
|subtitle=Item breaks
|source=player
|description=When a pickaxe's durability is exhausted
|id=entity.item.break
|translationkey=subtitles.entity.item.break
|volume=0.8
|pitch=0.8-1.2
|distance=16
|foot=1}}
{{edition|bedrock}}:
{{Sound table
|type=bedrock
|sound=Random break.ogg
|source=player
|description=When a shovel's durability is exhausted
|id=random.break
|volume=1.0
|pitch=0.9
|foot=1}}
== Data values ==
=== ID ===
{{edition|java}}:
{{ID table
|edition=java
|showforms=y
|generatetranslationkeys=y
|displayname=Wooden Pickaxe
|spritetype=item
|nameid=wooden_pickaxe
|form=item}}
{{ID table
|displayname=Stone Pickaxe
|spritetype=item
|nameid=stone_pickaxe
|form=item}}
{{ID table
|displayname=Iron Pickaxe
|spritetype=item
|nameid=iron_pickaxe
|form=item}}
{{ID table
|displayname=Diamond Pickaxe
|spritetype=item
|nameid=diamond_pickaxe
|form=item}}
{{ID table
|displayname=Golden Pickaxe
|spritetype=item
|nameid=golden_pickaxe
|form=item}}
{{ID table
|displayname=Netherite Pickaxe
|spritetype=item
|nameid=netherite_pickaxe
|form=item
|foot=1}}
{{edition|bedrock}}:
{{ID table
|edition=bedrock
|shownumericids=y
|showforms=y
|notshowbeitemforms=y
|generatetranslationkeys=y
|displayname=Wooden Pickaxe
|spritetype=item
|nameid=wooden_pickaxe
|id=310
|form=item}}
{{ID table
|displayname=Stone Pickaxe
|spritetype=item
|nameid=stone_pickaxe
|id=314
|form=item}}
{{ID table
|displayname=Iron Pickaxe
|spritetype=item
|nameid=iron_pickaxe
|id=297
|form=item}}
{{ID table
|displayname=Diamond Pickaxe
|spritetype=item
|nameid=diamond_pickaxe
|id=318
|form=item}}
{{ID table
|displayname=Golden Pickaxe
|spritetype=item
|nameid=golden_pickaxe
|id=324
|form=item}}
{{ID table
|displayname=Netherite Pickaxe
|spritetype=item
|nameid=netherite_pickaxe
|id=606
|form=item
|foot=1}}
== Achievements ==
{{Load achievements|Time to mine!;Getting an Upgrade;MOAR Tools ;Oooh, shiny!}}
== Advancements ==
{{load advancements|Getting an Upgrade;Isn't It Iron Pick;Stone Age;Oh Shiny}}
== Video ==
{{yt|G_HTViy2JTo}}
== History ==
{{History|java indev}}
{{History||0.31|snap=20100110|[[File:Iron Pickaxe JE1.png|32px]] Added iron pickaxes.
|A pickaxe is used to gather [[stone]] materials 400% faster than by hand.
|When starting in a new world, the [[player]] is given one of each [[tool]].}}
{{History|||snap=20100124|A complete tool set is no longer given to the player on starting a new world. Instead, there are multiple [[chest]]s in the later called "[[Indev House]]" containing a stack of most accessible [[blocks]]/[[items]] including [[tools]].}}
{{History|||snap=20100128|[[File:Wooden Pickaxe JE1 BE1.png|32px]] [[File:Stone Pickaxe JE1 BE1.png|32px]] [[File:Diamond Pickaxe JE1 BE1.png|32px]] Tools now have tiers. Wooden, stone, and diamond pickaxes have been added.|[[File:Iron Pickaxe JE2 BE1.png|32px]] The texture of iron pickaxes has been changed.
|A pickaxe held by the [[player]] is now rendered to appear more 3D.|They cannot be crafted yet, but have been added to the item chest in the Indev house.}}
{{History|||snap=20100129|Wood, stone, iron, and diamond pickaxes can now be [[craft]]ed.}}
{{History|||snap=20100130|[[File:Golden Pickaxe JE1.png|32px]] Pickaxes can now be made out of [[gold]].}}
{{History|||snap=20100201-1|Tools, including pickaxes, now take [[damage]] when being used. |Better tools, including pickaxes, now last longer.}}
{{History|||snap=20100201-2|Better pickaxes are now required to mine harder materials.}}
{{History||20100206|[[File:Golden Pickaxe JE2 BE1.png|32px]] The texture of golden pickaxes has been changed.}}
{{History|java beta}}
{{History||1.2|Before, the pickaxe had much less [[item durability|durability]] (usually half as much).
|Gold pickaxes now [[breaking|mine]] certain materials much faster.}}
{{History||1.8|snap=Pre-release|Iron pickaxes are now found in the new [[stronghold]] storeroom [[chest]]s, and in the new [[mineshaft]] chests.}}
{{History|java}}
{{History||1.0.0|snap=Beta 1.9 Prerelease 3|Iron pickaxes can now be found in the new [[stronghold]] altar [[chest]]s.}}
{{History|||snap=RC1|Pickaxes and other [[tool]]s now make a [[sound]] when they break.}}
{{History||1.1|snap=12w01a|Iron pickaxes are now found in the new [[village]] blacksmith chests.}}
{{History||1.2.4|snap=release|[[Spruce planks]], [[birch planks]], and [[jungle planks]] can now be used to craft wooden pickaxes.}}
{{History||1.3.1|snap=12w16a|Wooden and stone pickaxes are now found in the new [[bonus chest]]s.}}
{{History|||snap=12w18a|Wooden pickaxes can now be used as fuel in a [[furnace]].}}
{{History|||snap=12w21a|Blacksmith [[villager]]s now [[trading|sell]] 1 diamond pickaxe for 10–11 [[emerald]]s, and 1 iron pickaxe for 7–8 emeralds.}}
{{History||1.6.1|snap=13w21a|Instead of replacing the barehanded [[damage]] ({{hp|1}}), pickaxes now add their damage onto the barehanded damage, which results in all pickaxes doing {{hp|1}} more damage than before.}}
{{History||1.7.2|snap=1.7.1|[[Acacia planks]] and [[dark oak planks]] can now be used to craft wooden pickaxes.}}
{{History||1.8|snap=14w02a|Tool smith villagers now [[trading|sell]] 1 [[enchanting|enchanted]] diamond pickaxe for 12–15 emeralds, and 1 enchanted iron pickaxe for 9–11 emeralds.
|Unenchanted pickaxes are no longer sold by [[villager]]s.}}
{{History||1.9|snap=15w31a|Enchanted iron and diamond pickaxes can now be found in the [[end ship]] [[chest]]s in [[end city|end cities]].}}
{{History|||snap=15w34a|Pickaxes now use the "attack strength" combat mechanic meter. The time it takes for the meter to fill up for a pickaxe is 0.8 seconds.}}
{{History|||snap=15w34c|Pickaxes now do less [[damage]], but recover quicker.}}
{{History|||snap=15w35a|Pickaxes now recover more slowly.}}
{{History|||snap=15w44a|The average yield of wood and stone pickaxes in [[bonus chest]]s has been decreased.
|The average yield of iron pickaxes in [[mineshaft]] [[chest]]s has been increased.}}
{{History||1.11.1|snap=16w50a|Golden and iron pickaxes can now be [[smelting|smelted]] down into one of their respective [[nugget]]s.}}
{{History||1.13|snap=17w47a|Prior to [[1.13/Flattening|''The Flattening'']], these [[item]]s' numeral IDs were 270, 274, 257, 278 and 285.}}
{{History||1.14|snap=18w43a|[[File:Wooden Pickaxe JE2 BE2.png|32px]] [[File:Stone Pickaxe JE2 BE2.png|32px]] [[File:Iron Pickaxe JE3 BE2.png|32px]] [[File:Golden Pickaxe JE3 BE2.png|32px]] [[File:Diamond Pickaxe JE2 BE2.png|32px]] The textures of all pickaxes have been changed.}}
{{History|||snap=18w50a|Iron pickaxes can now be found in chests in [[village]] toolsmith houses.}}
{{History|||snap=19w11a|Toolsmith [[villager]]s now [[trading|sell]] stone pickaxes.}}
{{History|||snap=19w13a|Toolsmith villagers now give stone pickaxes to players under the [[Hero of the Village]] effect.}}
{{History||1.16|snap=20w06a|[[File:Netherite Pickaxe JE1.png|32px]] Added netherite pickaxes.
|Netherite pickaxes are obtained by combining one diamond pickaxe and one netherite ingot in a crafting table.
|[[Crimson planks]] and [[warped planks]] can now be used to craft wooden pickaxes.}}
{{History|||snap=20w09a|[[File:Wooden Pickaxe JE3 BE3.png|32px]] [[File:Golden Pickaxe JE4 BE3.png|32px]] [[File:Diamond Pickaxe JE3 BE3.png|32px]] [[File:Netherite Pickaxe JE2 BE1.png|32px]] The textures of wooden, golden, diamond, and netherite pickaxes have been changed.}}
{{History|||snap=20w10a|[[File:Netherite Pickaxe JE3.png|32px]] Changed a pixel of the texture of netherite pickaxes.
|Netherite pickaxes can no longer be crafted.
|Netherite pickaxes are now obtained by combining one diamond pickaxe and one netherite ingot in a smithing table.}}
{{History|||snap=20w15a|Stone pickaxes can now be crafted using [[blackstone]].}}
{{History|||snap=20w16a|Golden pickaxes now generate randomly enchanted in [[ruined portal]] chests.}}
{{History||1.16.2|snap=20w30a|Randomly enchanted diamond pickaxes can now be found in [[bastion remnant]] chests.}}
{{History||1.17|snap=21w08a|Stone pickaxe can now be crafted using [[cobbled deepslate]].}}
{{History||1.19|snap=22w11a|[[Mangrove planks]] can now be used to craft wooden pickaxes.}}
{{History||1.20<br>(Experimental)|link=1.19.4|snap=23w04a|Upgrading diamond pickaxes to netherite pickaxes now requires the netherite upgrade [[smithing template]].}}
{{History|upcoming java}}
{{History||Villager Trade Rebalance<br>(Experimental)|link=Java Edition 1.20.2|snap=23w31a|[[Wandering trader]]s now have a chance to sell an enchanted iron pickaxe.}}
{{History||Combat Tests|snap=1.14.3 - Combat Test|The attack speed for all pickaxes has been increased to 2.5.
|The [[damage]] for all pickaxes has been increased by {{hp|1}}.}}
{{History|pocket alpha}}
{{History||v0.2.0|[[File:Stone Pickaxe JE1 BE1.png|32px]] Added stone pickaxes.}}
{{History||v0.3.0|[[File:Wooden Pickaxe JE1 BE1.png|32px]] Added wooden pickaxes.
|Survival players no longer start out with an infinite durability stone pickaxe in the inventory.}}
{{History||v0.3.2|[[File:Iron Pickaxe JE2 BE1.png|32px]] [[File:Golden Pickaxe JE2 BE1.png|32px]] [[File:Diamond Pickaxe JE1 BE1.png|32px]] Added iron, gold, and diamond pickaxes.}}
{{History||v0.4.0|Removed stone pickaxes from the creative inventory.}}
{{History||v0.11.0|snap=build 11|All pickaxes are now available in the [[creative]] inventory.}}
{{History|||snap=build 12|All pickaxes have been removed from creative.}}
{{History|||snap=build 13|Pickaxes have been re-added to creative mode.}}
{{History||v0.14.0|snap=build 1|Iron pickaxes can now be found inside [[minecart with chest]]s in [[mineshaft]]s.}}
{{History|pocket}}
{{History||1.0.0|snap=alpha 0.17.0.1|[[Enchanting|Enchanted]] iron pickaxes and enchanted diamond pickaxes can now be found in [[end city|end cities]].}}
{{History||1.0.4|snap=alpha 1.0.4.0|Toolsmith [[villager]]s now [[trading|sell]] enchanted diamond pickaxes for 12-15 emeralds as their last tier trades and enchanted iron pickaxes for 9-11 [[emerald]]s as their second tier trades.}}
{{History||1.1.0|snap=alpha 1.1.0.0|Iron and golden pickaxes are now [[smelting|smeltable]].}}
{{History|bedrock}}
{{History||1.2.0|snap=beta 1.2.0.2|Wooden and stone pickaxes can now be found inside [[bonus chest]]s.}}
{{History||1.10.0|snap=beta 1.10.0.3|Iron pickaxes can now be found in [[plains]] [[village]] weaponsmith houses.
|[[File:Wooden Pickaxe JE2 BE2.png|32px]] [[File:Stone Pickaxe JE2 BE2.png|32px]] [[File:Iron Pickaxe JE3 BE2.png|32px]] [[File:Golden Pickaxe JE3 BE2.png|32px]] [[File:Diamond Pickaxe JE2 BE2.png|32px]] The textures of all pickaxes have been changed.}}
{{History||1.11.0|snap=beta 1.11.0.1|Iron pickaxes can now be found in [[village]] toolsmiths [[chest]]s and in [[savanna]], [[taiga]], [[snowy taiga]] and [[desert]] village weaponsmith chests.}}
{{History|||snap=beta 1.11.0.4|[[Trading]] has been changed, toolsmith [[villager]]s now have a 25% chance to [[trading|sell]] an [[enchanting|enchanted]] iron pickaxe for 3 [[emerald]]s as part of their third tier trades, and an enchanted diamond pickaxe now costs 13 emeralds.
|Stone pickaxes can now be bought from toolsmith villagers.}}
{{History||1.16.0|snap=beta 1.16.0.51|[[File:Netherite Pickaxe JE2 BE1.png|32px]] Added netherite pickaxes.|Netherite pickaxes are obtained by combining one diamond pickaxe and one netherite ingot in a crafting table.
|[[File:Wooden Pickaxe JE3 BE3.png|32px]] [[File:Golden Pickaxe JE4 BE3.png|32px]] [[File:Diamond Pickaxe JE3 BE3.png|32px]] The textures of wooden, golden, and diamond pickaxes have been changed.}}
{{History|||snap=beta 1.16.0.57|Netherite pickaxes can no longer be crafted.
|Netherite pickaxes are now obtained by combining one diamond pickaxe and one netherite ingot in a smithing table.
|Stone pickaxes can now be crafted using [[blackstone]].
|Golden pickaxes now generate randomly enchanted in [[ruined portal]] chests.
|Netherite pickaxe now generate randomly enchanted in [[bastion remnant]] chest.}}
{{History||1.17.10|snap=beta 1.17.10.20|[[File:Netherite Pickaxe JE3.png|32px]] Changed a pixel of the texture of netherite pickaxes to match ''Java Edition''.}}
{{History|console}}
{{History||xbox=TU1|xbone=CU1|ps=1.0|wiiu=Patch 1|[[File:Wooden Pickaxe JE1 BE1.png|32px]] [[File:Stone Pickaxe JE1 BE1.png|32px]] [[File:Iron Pickaxe JE2 BE1.png|32px]] [[File:Golden Pickaxe JE2 BE1.png|32px]] [[File:Diamond Pickaxe JE1 BE1.png|32px]] Added pickaxes (all five types).}}
{{History||xbox=TU53|xbone=CU43|ps=1.49|wiiu=Patch 23|switch=1.0.3|Iron and golden pickaxes are now [[smelting|smeltable]].}}
{{History|Ps4}}
{{History||1.90|[[File:Wooden Pickaxe JE2 BE2.png|32px]] [[File:Stone Pickaxe JE2 BE2.png|32px]] [[File:Iron Pickaxe JE3 BE2.png|32px]] [[File:Golden Pickaxe JE3 BE2.png|32px]] [[File:Diamond Pickaxe JE2 BE2.png|32px]] The textures of all pickaxes have been changed.}}
{{History|New Nintendo 3DS Edition}}
{{History||0.1.0|[[File:Wooden Pickaxe JE1 BE1.png|32px]] [[File:Stone Pickaxe JE1 BE1.png|32px]] [[File:Iron Pickaxe JE2 BE1.png|32px]] [[File:Golden Pickaxe JE2 BE1.png|32px]] [[File:Diamond Pickaxe JE1 BE1.png|32px]] Added pickaxes.}}
{{History|foot}}
== Issues ==
{{issue list}}
== Trivia ==
*The golden pickaxe is the only pickaxe that is unable to harvest the material it is made from.
*The pickaxe is the only block-breaking tool without a {{control|use}} (right-click) function.
=== Publicity ===
*Plastic diamond pickaxes are official ''[[Minecraft]]'' merchandise.<ref>https://shop.minecraft.net/products/minecraft-pickaxe?_pos=3&_psq=pickaxe&_ss=e&_v=1.0</ref>
*In the game [[wikipedia:Naughty Bear: Panic in Paradise|''Naughty Bear: Panic in Paradise'']], the player can buy a diamond pickaxe which, according to the game, is made by "Kick it up a Notch Pickaxes", referring to [[Notch]].
*In mobile game ''[https://play.google.com/store/apps/details?id=br.com.tapps.vloggergoviral Vlogger Go Viral]'' clicker game, after buying the figurine shelf, there is a model of a diamond pickaxe stuck to a [[grass block]].
*In the game [[wikipedia:The Elder Scrolls V: Skyrim|''The Elder Scrolls V: Skyrim'']], the player can find a pickaxe called the "Notched Pickaxe", evidently an [[easter egg]].
*In the game [[wikipedia:Offensive Combat|''Offensive Combat'']], a stone pickaxe can be used as a melee weapon with the name of "The Notch Carver".
*In the game [[wikipedia:The Binding of Isaac (video game)|''The Binding of Isaac'']], an obtainable item named "Notched Axe", also with a drawn 8-bit look, can be used to destroy rocks. The Notched Axe also makes a return in the game's remake, [[wikipedia:The Binding of Isaac: Rebirth|''The Binding of Isaac: Rebirth'']].
*In the game [[wikipedia:Borderlands 2|''Borderlands 2'']], the player can find a secret area hidden away by blocks resembling Minecraft [[dirt]], also once inside the player can fight Creeper and the Mother Creeper to get rare Minecraft-related skins.
*In the game [[wikipedia:Octodad: Dadliest Catch|''Octodad: Dadliest Catch'']], the supermarket level has a "Mintcraft" display, an obvious parody of Minecraft, even including toy pickaxes and a creeper head.
*In the game [[wikipedia:Transformice|''Transformice'']], a diamond pickaxe can be found in the shop.
== Gallery ==
<gallery>
File:Pickaxe in Mineshaft Chest.png|A naturally generated pickaxe.
Live in Your World JINX.jpg|Official T-shirt artwork "Live in Your World" featuring an iron pickaxe made by [https://www.jinx.com JINX].
Pickaxe JINX.jpg|Official T-shirt artwork of a pickaxe made by JINX.
Stone Pickaxe SDGP.png|Stone pickaxe in the [[Super Duper Graphics Pack]].
Iron Pickaxe SDGP.png|Iron pickaxe in the [[Super Duper Graphics Pack]].
</gallery>
=== Enchanted pickaxes ===
<gallery>
Enchanted Wooden Pickaxe.gif
Enchanted Stone Pickaxe.gif
Enchanted Iron Pickaxe.gif
Enchanted Golden Pickaxe.gif
Enchanted Diamond Pickaxe.gif
Enchanted Netherite Pickaxe.gif
</gallery>
== References ==
{{reflist}}
== External Links ==
*[https://www.minecraft.net/en-us/article/taking-inventory-pickaxe Taking Inventory: Pickaxe] – Minecraft.net on May 10, 2018
{{items}}
[[Category:Combat]]
[[cs:Krumpáč]]
[[de:Spitzhacke]]
[[es:Pico]]
[[fr:Pioche]]
[[hu:Csákány]]
[[it:Piccone]]
[[ja:ツルハシ]]
[[ko:곡괭이]]
[[nl:Houweel]]
[[pl:Kilof]]
[[pt:Picareta]]
[[ru:Кирка]]
[[th:อีเต้อ]]
[[uk:Кайло]]
[[zh:镐]]</li></ul> | build 1 | Bows can now be obtained as a "treasure" item from fishing. | |||
v0.12.1{{Extension DPL}}<ul><li>[[Cookie|Cookie]]<br/>{{Item
| title = Cookie
| image = Cookie.png
| heals = {{hunger|2}}
| renewable = Yes
| stackable = Yes (64)
}}
'''Cookies''' are [[food]] items that can be obtained in large quantities, but do not restore hunger or saturation significantly.
== Obtaining ==
=== Trading ===
Journeyman-level farmer [[villager]]s sell 18 cookies for 3 [[emerald]]s as part of their trades.
=== Crafting ===
{{Crafting
|A2= Wheat
|B2= Cocoa Beans
|C2= Wheat
|Output= Cookie,8
|type= Foodstuff
}}
=== Villager gifts ===
{{in|java}}, if the [[player]] has the [[Hero of the Village]] effect, a farmer villager may gift them a cookie.
== Usage ==
=== Food ===
To eat a cookie, press and hold {{control|use}} while it is selected in the hotbar. Eating one restores {{hunger|2}} [[hunger]] and 0.4 hunger
[[Hunger#Mechanics|saturation]].
=== Parrots ===
Feeding a cookie to a [[parrot]] kills the parrot instantly, and causes it to give off [[Poison]] [[particles]] as it dies due to chocolate being toxic to parrots.
{{IN|Bedrock}}, feeding a cookie to a parrot inflicts the parrot with [[Fatal Poison]] for 1,000 seconds.
=== Composting ===
Placing a cookie into a [[composter]] has an 85% chance of raising the compost level by 1.
Considering the high yield of cookies (8 cookies from 1 cocoa bean and 2 wheats) and the higher chance to successfully compost a cookie (85%), it is more efficient to craft cookies to compost rather than using separate ingredients. For example, 100 wheats and 50 cocoa beans, which in total could yield only 13.92 bone meal on average, could be crafted into 400 cookies to yield 48.57 bone meal on average.
== Sounds ==
{{Sound table/Entity/Food}}
== Advancements ==
{{load advancements|Husbandry;A Balanced Diet}}
== Data values ==
=== ID ===
{{edition|java}}:
{{ID table
|edition=java
|showforms=y
|generatetranslationkeys=y
|displayname=Cookie
|spritetype=item
|nameid=cookie
|form=item
|foot=1}}
{{edition|bedrock}}:
{{ID table
|edition=bedrock
|shownumericids=y
|showforms=y
|notshowbeitemforms=y
|generatetranslationkeys=y
|displayname=Cookie
|spritetype=item
|nameid=cookie
|id=271
|form=item
|foot=1}}
== History ==
{{History|java beta}}
{{History||1.4|[[File:Cookie JE1 BE1.png|32px]] Added cookies.
|Cookies restore {{hp|1}} and are currently the only stackable [[food]], up to 8 cookies per stack.}}
{{History||1.8|snap=Pre-release|Cookies can now be stacked to 64.
|Cookies now restore {{hunger|1}}.}}
{{History|java}}
{{History||1.3.1|snap=12w18a|Cocoa beans have become farmable, making cookies [[renewable resource|renewable]] and ''much'' cheaper.}}
{{History|||snap=12w19a|Cookies now restore {{hunger|2}} instead of {{hunger|1}}.}}
{{History|||snap=12w21a|Farmer [[villager]]s now [[trading|sell]] 8–10 cookies for 1 [[emerald]].}}
{{History||1.8|snap=14w02a|Farmer villagers now sell 6 cookies for 1 emerald.}}
{{History||1.11|snap=16w33a|Farmer villagers now sell 6–10 cookies for 1 emerald.}}
{{History||1.12|snap=17w13a|Cookies can now be used to tame [[parrot]]s.}}
{{History|||snap=pre3|Cookies are no longer used to tame [[parrot]]s. Instead, a cookie now instantly kills a parrot.}}
{{History||1.13|snap=17w47a|Prior to [[1.13/Flattening|''The Flattening'']], this [[item]]'s numeral ID was 357.}}
{{History||1.14|snap=18w43a|[[File:Cookie JE2 BE2.png|32px]] The texture of cookies has been changed.}}
{{History|||snap=19w03a|Placing a cookie into the new [[composter]] has a 80% chance of raising the compost level by 1.}}
{{History|||snap=19w05a|Cookies now have an 85% chance of increasing the compost level in a composter by 1.}}
{{History|||snap=19w13a|Farmer villagers now give cookies to players under the [[Hero of the Village]] effect.}}
{{History|pocket alpha}}
{{History||v0.9.0|snap=build 1|[[File:Cookie JE1 BE1.png|32px]] Added cookies.}}
{{History||v0.12.1|snap=build 1|Cookies now restore [[hunger]] instead of [[health]].}}
{{History|pocket}}
{{History||1.0.4|snap=alpha 1.0.4.0|Farmer [[villager]]s now [[trading|sell]] 6-10 cookies for 1 [[emerald]].}}
{{History|bedrock}}
{{History||1.2.0|snap=beta 1.2.0.2|Cookies can now be used to inflict a fatal [[Poison]] [[status effect]] to [[parrot]]s.}}
{{History||1.10.0|snap=beta 1.10.0.3|[[File:Cookie JE2 BE2.png|32px]] The texture of cookies has been changed.}}
{{History||1.11.0|snap=beta 1.11.0.1|Cookies can now be used to fill up [[composter]]s.}}
{{History|||snap=beta 1.11.0.4|Farmer [[villager]]s now [[trading|sell]] 18 cookies for 3 [[emerald]]s as part of their third tier [[trading|trades]].}}
{{History|console}}
{{History||xbox=TU1|xbone=CU1|ps=1.0|wiiu=Patch 1|[[File:Cookie JE1 BE1.png|32px]] Added cookies.}}
{{History||xbox=none|xbone=none|ps=1.90|wiiu=none|switch=none|[[File:Cookie JE2 BE2.png|32px]] The texture of cookies has been changed.}}
{{History|new 3ds}}
{{History||0.1.0|[[File:Cookie JE1 BE1.png|32px]] Added cookies.}}
{{History|foot}}
== Issues ==
{{issue list}}
== Gallery ==
<gallery>
File:12w21a CookiePurchase.png|Cookies being obtained by [[trading]] with a farmer [[villager]].
File:Eating Steve.png|[[Steve]] eating a cookie.
File:Eating Alex.png|Alex eating a cookie.
</gallery>
== References ==
{{reflist}}
== External Links ==
*[https://www.minecraft.net/en-us/article/taking-inventory--cookie Taking Inventory: Cookie] – Minecraft.net on August 22, 2019
{{Items}}
[[Category:Food]]
[[Category:Renewable resources]]
[[cs:Sušenka]]
[[de:Keks]]
[[es:Galleta]]
[[fr:Cookie]]
[[hu:Csokis süti]]
[[ja:クッキー]]
[[ko:쿠키]]
[[nl:Koekje]]
[[pl:Ciastko]]
[[pt:Biscoito]]
[[ru:Печенье]]
[[uk:Печиво]]
[[zh:曲奇]]</li><li>[[Pickaxe|Pickaxe]]<br/>{{Dungeons hatnote|type=weapon}}
{{Redirect|Diamond Pickaxe|the ''Minecraft Dungeons'' weapon|MCD:Diamond Pickaxe}}
{{Redirect|Pick|the block|Sea Pickle|the control|Controls#Pick Block|the joke block|Pickaxe Block}}
{{Item
| image = <gallery>
Wooden Pickaxe.png | Wooden
Stone Pickaxe.png | Stone
Iron Pickaxe.png | Iron
Golden Pickaxe.png | Golden
Diamond Pickaxe.png | Diamond
Netherite Pickaxe.png | Netherite
</gallery>
|rarity = Common
|renewable =
* '''Netherite''': No
* '''Others''': Yes
|durability =
Java Edition:
* Wood: 59
* Stone: 131
* Iron: 250
* Golden: 32
* Diamond: 1,561
* Netherite: 2,031
Bedrock Edition:
* Wood: 60
* Stone: 132
* Iron: 251
* Golden: 33
* Diamond: 1,562
* Netherite: 2,032
| stackable = No
}}
A '''pickaxe''' is a [[tools|tool]] required to mine [[ore]]s, [[rock|rocks]], rock-based blocks and metal-based [[block]]s quickly and obtain them as items. A pickaxe mines faster and can obtain more block types as items depending on the material it is made from.
== Obtaining ==
=== Crafting ===
Pickaxes are crafted using 2 [[stick]]s and 3 identical units of tool material.
{{crafting |showdescription=1 |showname=0 |head=1
|name=[[Pickaxe]]
|A1={Any Planks}; Iron Ingot; Gold Ingot; Diamond
|B1={Any Planks}; Iron Ingot; Gold Ingot; Diamond
|C1={Any Planks}; Iron Ingot; Gold Ingot; Diamond
|B2=Stick
|B3=Stick
|Output=Wooden Pickaxe; Iron Pickaxe; Golden Pickaxe; Diamond Pickaxe
|type=Tool
}}
{{Crafting
|name=[[Stone Pickaxe]]
|A1=Any stone-tier block |B1=Any stone-tier block |C1=Any stone-tier block
|B2=Stick
|B3=Stick
|Output=Stone Pickaxe
|description=Can use cobblestone and its other variants interchangeably.
|type=Tool
}}
{{crafting |foot=1 |ignoreusage=1
|name=[[Pickaxe]]
|ingredients=Matching Damaged [[Pickaxe]]s
|Damaged Wooden Pickaxe; Damaged Stone Pickaxe; Damaged Iron Pickaxe; Damaged Golden Pickaxe; Damaged Diamond Pickaxe; Damaged Netherite Pickaxe
|Damaged Wooden Pickaxe; Damaged Stone Pickaxe; Damaged Iron Pickaxe; Damaged Golden Pickaxe; Damaged Diamond Pickaxe; Damaged Netherite Pickaxe
|Output=Wooden Pickaxe; Stone Pickaxe; Iron Pickaxe; Golden Pickaxe; Diamond Pickaxe; Netherite Pickaxe
|description=The durability of the two pickaxes is added together, plus an extra 5% of the tool type's total durability.
|type=Tool
}}
=== Upgrading ===
{{Smithing
|head=1
|Netherite Upgrade
|Diamond Pickaxe
|Netherite Ingot
|Netherite Pickaxe
|tail=1
}}
=== Repairing ===
==== Grinding ====
{{grinding
|showdescription=1
|ingredients=Matching Damaged [[Pickaxe]]s
|Damaged Wooden Pickaxe; Damaged Stone Pickaxe; Damaged Iron Pickaxe; Damaged Golden Pickaxe; Damaged Diamond Pickaxe; Damaged Netherite Pickaxe
|Damaged Wooden Pickaxe; Damaged Stone Pickaxe; Damaged Iron Pickaxe; Damaged Golden Pickaxe; Damaged Diamond Pickaxe; Damaged Netherite Pickaxe
|Wooden Pickaxe; Stone Pickaxe; Iron Pickaxe; Golden Pickaxe; Diamond Pickaxe; Netherite Pickaxe
|description=The durability of the two pickaxes is added together, plus an extra 5% durability.
}}
==== Unit repair ====
{{main|Anvil mechanics#Unit repair}}
Pickaxes can be repaired in an [[anvil]] by adding units of the [[tiers|tier's]] repair material, with each repair material restoring 25% of the pickaxe's maximum durability, rounded down.
=== Natural generation ===
{{LootChestItem|wooden-pickaxe,stone-pickaxe,iron-pickaxe,level-enchanted-iron-pickaxe,random-enchanted-golden-pickaxe,level-enchanted-diamond-pickaxe,random-enchanted-diamond-pickaxe,damaged-random-enchanted-diamond-pickaxe}}
=== Trading ===
{{IN|bedrock}}, novice-level toolsmith [[Villager|villagers]] have a 25% chance to sell stone pickaxes for one [[emerald]], Journeyman-level toolsmith villagers have a 25% chance to sell enchanted iron pickaxes for 3 emeralds, and master-level toolsmith villagers always sell enchanted diamond pickaxes for 13 emeralds.
{{IN|java}}, novice-level toolsmith villagers have a 40% chance to sell a stone pickaxe for one emerald, journeyman-level toolsmith villagers have a 40% chance to sell an enchanted iron pickaxe for 7–22 emeralds, and a master-level toolsmith always sells an enchanted diamond pickaxe for 18–35 emeralds.
The enchantments are the same as the ones obtained from an [[enchantment table]] at levels 5–19.
=== Villager gifts ===
{{IN|JE}}, toolsmith [[villager]]s throw stone pickaxes at players under the [[Hero of the Village]] effect.
=== Mob loot ===
{{IN|BE}}, [[pillager]]s and [[vindicator]]s have a chance of dropping a damaged iron pickaxe when killed during a [[raid]]. The pickaxe has a 50% chance of being enchanted with random enchantment(s).
== Usage ==
=== Mining ===
A pickaxe is used to break stone and metal-based materials faster. Breaking a block with a pickaxe consumes one use (one durability point). No durability is consumed for blocks that break instantly. Pickaxes have different amounts of uses based on the type:
* Wooden: 60
* Stone: 132
* Iron: 251
* Golden: 33
* Diamond: 1562
* Netherite: 2032
Different qualities of pickaxe are required to successfully harvest certain ores and blocks. For example, while [[stone]] can be mined with any pickaxe, [[gold ore]] must be mined with an [[iron]], [[diamond]], or [[netherite]] pickaxe, or else the player harvests no ore. Different pickaxes also mine many materials at different speeds:
==== Speed ====
The following table shows the time it takes to break each type of block.
* A <span style="background-color:#FFC7CE;color:#9C0006;">red</span> background indicates that the block cannot be harvested with that type of pickaxe.
* A <span style="background-color:#FFFFDD;color:#8A7600;">yellow</span> background indicates that the block cannot be harvested with that type of pickaxe, but still drops something.
* A <span style="background-color:#C6EFCE;color:#006100;">green</span> background indicates that the block can be harvested with that type of pickaxe.
<!-- Table is sorted by hardness (mining time with diamond shows well), then by name -->
{|class="wikitable collapsible collapsed" data-description="Mining time by block" style="background-color: transparent;"
! Times to break blocks by pickaxe
|-
|
{{breaking row|sort=1|simple=1|Obsidian|Diamond}}
{{breaking row|Crying Obsidian|Diamond}}
{{breaking row|Respawn Anchor|Diamond}}
{{breaking row|Block of Netherite|Diamond}}
{{breaking row|Ancient Debris|Diamond}}
{{breaking row|Ender Chest|Wood}}
{{breaking row|Anvil|Wood}}
{{breaking row|Bell|Wood}}
{{breaking row|Block of Coal|Wood}}
{{breaking row|Block of Diamond|Iron}}
{{breaking row|Block of Emerald|Iron}}
{{breaking row|Block of Iron|Stone}}
{{breaking row|Block of Raw Copper|Stone}}
{{breaking row|Block of Raw Gold|Iron}}
{{breaking row|Block of Raw Iron|Stone}}
{{breaking row|Block of Redstone|Wood}}
{{breaking row|Chain|Wood}}
{{breaking row|Enchantment Table|Wood}}
{{breaking row|Iron Bars|Wood}}
{{breaking row|Iron Door|Wood|item=1|link=Door}}
{{breaking row|Iron Trapdoor|Wood|link=Trapdoor}}
{{breaking row|Monster Spawner|Wood}}
{{breaking row|Deepslate Coal Ore|Wood}}
{{breaking row|Deepslate Copper Ore|Wood}}
{{breaking row|Deepslate Diamond Ore|Wood}}
{{breaking row|Deepslate Emerald Ore|Wood}}
{{breaking row|Deepslate Gold Ore|Wood}}
{{breaking row|Deepslate Iron Ore|Wood}}
{{breaking row|Deepslate Lapis Lazuli Ore|Wood}}
{{breaking row|Deepslate Redstone Ore|Wood}}
{{breaking row|Blast furnace|Wood}}
{{breaking row|Cobbled Deepslate|Wood}}
{{breaking row|Chiseled Deepslate|Wood}}
{{breaking row|Deepslate Bricks|Wood}}
{{breaking row|Deepslate Tiles|Wood}}
{{breaking row|Polished Deepslate|Wood}}
{{breaking row|Dispenser|Wood}}
{{breaking row|Dropper|Wood}}
{{breaking row|Furnace|Wood}}
{{breaking row|Lantern|wood}}
{{breaking row|Lodestone|Wood}}
{{breaking row|Smoker|Wood}}
{{breaking row|Stonecutter|Wood}}
{{breaking row|Conduit}}
{{breaking row|Block of Gold|Iron}}
{{breaking row|Block of Lapis Lazuli|Stone}}
{{breaking row|Coal Ore|Wood}}
{{breaking row|Copper Ore|Wood}}
{{breaking row|Copper Blocks|Wood}}
{{breaking row|Cut Copper|Wood}}
{{breaking row|Cut Copper Slab|Wood}}
{{breaking row|Cut Copper Stairs|Wood}}
{{breaking row|Deepslate|Wood}}
{{breaking row|Dragon Egg
|note=<ref group="note">The dragon egg can be mined directly only when there aren't any air blocks available for it to teleport to. However, the dragon egg can be collected by other means.</ref>}}
{{breaking row|Diamond Ore|Iron}}
{{breaking row|Emerald Ore|Iron}}
{{breaking row|End Stone|Wood}}
{{breaking row|Gold Ore|Iron}}
{{breaking row|Hopper|Wood}}
{{breaking row|Iron Ore|Stone}}
{{breaking row|Lightning Rod|Wood}}
{{breaking row|Lapis Lazuli Ore|Stone}}
{{breaking row|Nether Quartz Ore|Wood}}
{{breaking row|Nether Gold Ore|Wood}}
{{breaking row|Observer|Wood}}
{{breaking row|Redstone Ore|Iron}}
{{breaking row|Blue Ice|drop=0}}
{{breaking row|Compound Creator|Wood|drop=1|note=<ref group="note" name="Chemtable">Chemistry tables are slow to break by hand, similar to blocks that require a pickaxe to mine. However, they still drop as items.</ref>}}
{{breaking row|Heat Block|Wood}}
{{breaking row|Grindstone|Wood}}
{{breaking row|Bone Block|Wood}}
{{breaking row|Brick Stairs|Wood|link=Stairs}}
{{breaking row|Bricks|Wood}}
{{breaking row|Cauldron|Wood}}
{{breaking row|Cobblestone|Wood}}
{{breaking row|link=Stairs|Cobblestone Stairs|Wood}}
{{breaking row|Cobblestone Wall|Wood}}
{{breaking row|Mossy Cobblestone|Wood}}
{{breaking row|Nether Bricks|Wood}}
{{breaking row|Nether Brick Fence|Wood}}
{{breaking row|link=Stairs|Nether Brick Stairs|Wood}}
{{breaking row|Red Nether Bricks|Wood}}
{{breaking row|Polished Blackstone|Wood}}
{{breaking row|link=Slab|Stone Slabs|sprite=all-slabs|Wood}}
{{breaking row|Smooth Stone|Wood}}
{{breaking row|Shulker Box}}
{{breaking row|Concrete|Wood}}
{{breaking row|Andesite|Wood}}
{{breaking row|Dark Prismarine|Wood}}
{{breaking row|Diorite|Wood}}
{{breaking row|Dripstone Block|Wood}}
{{breaking row|Granite|Wood}}
{{breaking row|Mud Bricks|Wood}}
{{breaking row|Pointed Dripstone}}
{{breaking row|Prismarine|Wood}}
{{breaking row|Prismarine Bricks|Wood}}
{{breaking row|Purpur block|Wood}}
{{breaking row|Purpur pillar|Wood}}
{{breaking row|Stone|Wood}}
{{breaking row|Stone Bricks|Wood}}
{{breaking row|Tuff|Wood}}
{{breaking row|link=Stairs|Stone Brick Stairs|Wood}}
{{breaking row|Amethyst Bud|drop=0}}
{{breaking row|Amethyst Cluster|drop=0}}
{{breaking row|Blackstone|Wood}}
{{breaking row|Block of Amethyst|Wood}}
{{breaking row|Budding Amethyst|drop=0}}
{{breaking row|Chiseled Polished Blackstone|Wood}}
{{breaking row|Polished Blackstone Bricks|Wood}}
{{breaking row|Gilded Blackstone|Wood}}
{{breaking row|Glazed Terracotta|Wood}}
{{breaking row|Terracotta|Wood}}
{{breaking row|Basalt|Wood}}
{{breaking row|Smooth Basalt|Wood}}
{{breaking row|Polished Basalt|Wood}}
{{breaking row|Packed Mud}}
{{breaking row|Block of Quartz|Wood}}
{{breaking row|Quartz Stairs|Wood|link=Stairs}}
{{breaking row|Red Sandstone|Wood}}
{{breaking row|Red Sandstone Stairs|Wood|link=stairs}}
{{breaking row|Sandstone|Wood}}
{{breaking row|Sandstone Stairs|Wood|link=stairs}}
{{breaking row|Calcite|Wood}}
{{breaking row|Rail}}
{{breaking row|Brewing Stand|Wood}}
{{breaking row|Stone Button|any}}
{{breaking row|Ice|drop=0}}
{{breaking row|Magma Block|Wood}}
{{breaking row|Packed Ice|drop=0}}
{{breaking row|Frosted Ice|drop=0}}
{{breaking row|Stone Pressure Plate|Wood}}
{{breaking row|Netherrack|Wood}}
{{breaking row|sprite=crimson-nylium|Nylium|Wood|foot=1}}
|}
=== Weapon ===
Hitting a mob with a pickaxe is a stronger attack than using fists. Pickaxes lose 2 durability when used as a weapon.
==== Java Edition ====
Pickaxes have an attack speed modifier of −2.8, meaning they take about 0.83 seconds to [[Damage#Attack cooldown|recover]]. All pickaxes have an attack speed of 1.2 hits per second. They deal different damage based on the type:
{|class="wikitable" style="text-align:center" data-description="Attack damage"
! Pickaxe type
! Attack damage
! Damage per<br> second (DPS)
|-
|{{ItemLink|Wooden Pickaxe}} ||rowspan=2 |{{hp|2}} ||rowspan=2 |2.4
|-
|{{ItemLink|Golden Pickaxe}}
|-
|{{ItemLink|Stone Pickaxe}} ||{{hp|3}} ||3.6
|-
|{{ItemLink|Iron Pickaxe}} ||{{hp|4}} ||4.8
|-
|{{ItemLink|Diamond Pickaxe}} ||{{hp|5}} ||6
|-
|{{ItemLink|Netherite Pickaxe}} ||{{hp|6}} ||7.2
|}
==== Bedrock Edition ====
{{IN|bedrock}}, pickaxes always attack instantly and do the following damage:
{|class="wikitable" style="text-align:center" data-description="Attack damage"
! Pickaxe type
! Attack damage
|-
|{{ItemLink|Wooden Pickaxe}}<br />{{ItemLink|Golden Pickaxe}} ||{{hp|3}}
|-
|{{ItemLink|Stone Pickaxe}} ||{{hp|4}}
|-
|{{ItemLink|Iron Pickaxe}} ||{{hp|5}}
|-
|{{ItemLink|Diamond Pickaxe}} ||{{hp|6}}
|-
|{{ItemLink|Netherite Pickaxe}} ||{{hp|7}}
|}
=== Enchantments ===
A pickaxe can receive the following [[enchantment]]s:
{|class="wikitable col-2-center col-3-right"
|+
!Name
!Max Level
![[Enchanting|Method]]
|-
|[[Efficiency]]
|V
|{{Inventory slot|Enchanting Table}}{{Inventory slot|Anvil}}
|-
|[[Fortune]]<ref group=note name=note1>Fortune and Silk Touch are mutually exclusive.</ref>
|III
|{{Inventory slot|Enchanting Table}}{{Inventory slot|Anvil}}
|-
|[[Silk Touch]]<ref group=note name=note1/>
|I
|{{Inventory slot|Enchanting Table}}{{Inventory slot|Anvil}}
|-
|[[Unbreaking]]
|III
|{{Inventory slot|Enchanting Table}}{{Inventory slot|Anvil}}
|-
|[[Mending]]
|I
|{{Inventory slot|Anvil}}
|-
|[[Curse of Vanishing]]
|I
|{{Inventory slot|Anvil}}
|}
{{Notelist}}
=== Fuel ===
Wooden pickaxes can be used as a fuel in [[furnace]]s, smelting 1 item per wooden pickaxe.
=== Smelting ingredient ===
{{Smelting|showname=1|Iron Pickaxe;Golden Pickaxe|Iron Nugget;Gold Nugget|0,1}}
===Piglins===
{{EntityLink|Piglin|Piglins}} are attracted to golden pickaxes and run toward any golden pickaxes on the ground, and inspect it for 6 to 8 seconds before putting it in their inventory.
== Sounds ==
{{edition|java}}:
{{Sound table
|sound=Random break.ogg
|subtitle=Item breaks
|source=player
|description=When a pickaxe's durability is exhausted
|id=entity.item.break
|translationkey=subtitles.entity.item.break
|volume=0.8
|pitch=0.8-1.2
|distance=16
|foot=1}}
{{edition|bedrock}}:
{{Sound table
|type=bedrock
|sound=Random break.ogg
|source=player
|description=When a shovel's durability is exhausted
|id=random.break
|volume=1.0
|pitch=0.9
|foot=1}}
== Data values ==
=== ID ===
{{edition|java}}:
{{ID table
|edition=java
|showforms=y
|generatetranslationkeys=y
|displayname=Wooden Pickaxe
|spritetype=item
|nameid=wooden_pickaxe
|form=item}}
{{ID table
|displayname=Stone Pickaxe
|spritetype=item
|nameid=stone_pickaxe
|form=item}}
{{ID table
|displayname=Iron Pickaxe
|spritetype=item
|nameid=iron_pickaxe
|form=item}}
{{ID table
|displayname=Diamond Pickaxe
|spritetype=item
|nameid=diamond_pickaxe
|form=item}}
{{ID table
|displayname=Golden Pickaxe
|spritetype=item
|nameid=golden_pickaxe
|form=item}}
{{ID table
|displayname=Netherite Pickaxe
|spritetype=item
|nameid=netherite_pickaxe
|form=item
|foot=1}}
{{edition|bedrock}}:
{{ID table
|edition=bedrock
|shownumericids=y
|showforms=y
|notshowbeitemforms=y
|generatetranslationkeys=y
|displayname=Wooden Pickaxe
|spritetype=item
|nameid=wooden_pickaxe
|id=310
|form=item}}
{{ID table
|displayname=Stone Pickaxe
|spritetype=item
|nameid=stone_pickaxe
|id=314
|form=item}}
{{ID table
|displayname=Iron Pickaxe
|spritetype=item
|nameid=iron_pickaxe
|id=297
|form=item}}
{{ID table
|displayname=Diamond Pickaxe
|spritetype=item
|nameid=diamond_pickaxe
|id=318
|form=item}}
{{ID table
|displayname=Golden Pickaxe
|spritetype=item
|nameid=golden_pickaxe
|id=324
|form=item}}
{{ID table
|displayname=Netherite Pickaxe
|spritetype=item
|nameid=netherite_pickaxe
|id=606
|form=item
|foot=1}}
== Achievements ==
{{Load achievements|Time to mine!;Getting an Upgrade;MOAR Tools ;Oooh, shiny!}}
== Advancements ==
{{load advancements|Getting an Upgrade;Isn't It Iron Pick;Stone Age;Oh Shiny}}
== Video ==
{{yt|G_HTViy2JTo}}
== History ==
{{History|java indev}}
{{History||0.31|snap=20100110|[[File:Iron Pickaxe JE1.png|32px]] Added iron pickaxes.
|A pickaxe is used to gather [[stone]] materials 400% faster than by hand.
|When starting in a new world, the [[player]] is given one of each [[tool]].}}
{{History|||snap=20100124|A complete tool set is no longer given to the player on starting a new world. Instead, there are multiple [[chest]]s in the later called "[[Indev House]]" containing a stack of most accessible [[blocks]]/[[items]] including [[tools]].}}
{{History|||snap=20100128|[[File:Wooden Pickaxe JE1 BE1.png|32px]] [[File:Stone Pickaxe JE1 BE1.png|32px]] [[File:Diamond Pickaxe JE1 BE1.png|32px]] Tools now have tiers. Wooden, stone, and diamond pickaxes have been added.|[[File:Iron Pickaxe JE2 BE1.png|32px]] The texture of iron pickaxes has been changed.
|A pickaxe held by the [[player]] is now rendered to appear more 3D.|They cannot be crafted yet, but have been added to the item chest in the Indev house.}}
{{History|||snap=20100129|Wood, stone, iron, and diamond pickaxes can now be [[craft]]ed.}}
{{History|||snap=20100130|[[File:Golden Pickaxe JE1.png|32px]] Pickaxes can now be made out of [[gold]].}}
{{History|||snap=20100201-1|Tools, including pickaxes, now take [[damage]] when being used. |Better tools, including pickaxes, now last longer.}}
{{History|||snap=20100201-2|Better pickaxes are now required to mine harder materials.}}
{{History||20100206|[[File:Golden Pickaxe JE2 BE1.png|32px]] The texture of golden pickaxes has been changed.}}
{{History|java beta}}
{{History||1.2|Before, the pickaxe had much less [[item durability|durability]] (usually half as much).
|Gold pickaxes now [[breaking|mine]] certain materials much faster.}}
{{History||1.8|snap=Pre-release|Iron pickaxes are now found in the new [[stronghold]] storeroom [[chest]]s, and in the new [[mineshaft]] chests.}}
{{History|java}}
{{History||1.0.0|snap=Beta 1.9 Prerelease 3|Iron pickaxes can now be found in the new [[stronghold]] altar [[chest]]s.}}
{{History|||snap=RC1|Pickaxes and other [[tool]]s now make a [[sound]] when they break.}}
{{History||1.1|snap=12w01a|Iron pickaxes are now found in the new [[village]] blacksmith chests.}}
{{History||1.2.4|snap=release|[[Spruce planks]], [[birch planks]], and [[jungle planks]] can now be used to craft wooden pickaxes.}}
{{History||1.3.1|snap=12w16a|Wooden and stone pickaxes are now found in the new [[bonus chest]]s.}}
{{History|||snap=12w18a|Wooden pickaxes can now be used as fuel in a [[furnace]].}}
{{History|||snap=12w21a|Blacksmith [[villager]]s now [[trading|sell]] 1 diamond pickaxe for 10–11 [[emerald]]s, and 1 iron pickaxe for 7–8 emeralds.}}
{{History||1.6.1|snap=13w21a|Instead of replacing the barehanded [[damage]] ({{hp|1}}), pickaxes now add their damage onto the barehanded damage, which results in all pickaxes doing {{hp|1}} more damage than before.}}
{{History||1.7.2|snap=1.7.1|[[Acacia planks]] and [[dark oak planks]] can now be used to craft wooden pickaxes.}}
{{History||1.8|snap=14w02a|Tool smith villagers now [[trading|sell]] 1 [[enchanting|enchanted]] diamond pickaxe for 12–15 emeralds, and 1 enchanted iron pickaxe for 9–11 emeralds.
|Unenchanted pickaxes are no longer sold by [[villager]]s.}}
{{History||1.9|snap=15w31a|Enchanted iron and diamond pickaxes can now be found in the [[end ship]] [[chest]]s in [[end city|end cities]].}}
{{History|||snap=15w34a|Pickaxes now use the "attack strength" combat mechanic meter. The time it takes for the meter to fill up for a pickaxe is 0.8 seconds.}}
{{History|||snap=15w34c|Pickaxes now do less [[damage]], but recover quicker.}}
{{History|||snap=15w35a|Pickaxes now recover more slowly.}}
{{History|||snap=15w44a|The average yield of wood and stone pickaxes in [[bonus chest]]s has been decreased.
|The average yield of iron pickaxes in [[mineshaft]] [[chest]]s has been increased.}}
{{History||1.11.1|snap=16w50a|Golden and iron pickaxes can now be [[smelting|smelted]] down into one of their respective [[nugget]]s.}}
{{History||1.13|snap=17w47a|Prior to [[1.13/Flattening|''The Flattening'']], these [[item]]s' numeral IDs were 270, 274, 257, 278 and 285.}}
{{History||1.14|snap=18w43a|[[File:Wooden Pickaxe JE2 BE2.png|32px]] [[File:Stone Pickaxe JE2 BE2.png|32px]] [[File:Iron Pickaxe JE3 BE2.png|32px]] [[File:Golden Pickaxe JE3 BE2.png|32px]] [[File:Diamond Pickaxe JE2 BE2.png|32px]] The textures of all pickaxes have been changed.}}
{{History|||snap=18w50a|Iron pickaxes can now be found in chests in [[village]] toolsmith houses.}}
{{History|||snap=19w11a|Toolsmith [[villager]]s now [[trading|sell]] stone pickaxes.}}
{{History|||snap=19w13a|Toolsmith villagers now give stone pickaxes to players under the [[Hero of the Village]] effect.}}
{{History||1.16|snap=20w06a|[[File:Netherite Pickaxe JE1.png|32px]] Added netherite pickaxes.
|Netherite pickaxes are obtained by combining one diamond pickaxe and one netherite ingot in a crafting table.
|[[Crimson planks]] and [[warped planks]] can now be used to craft wooden pickaxes.}}
{{History|||snap=20w09a|[[File:Wooden Pickaxe JE3 BE3.png|32px]] [[File:Golden Pickaxe JE4 BE3.png|32px]] [[File:Diamond Pickaxe JE3 BE3.png|32px]] [[File:Netherite Pickaxe JE2 BE1.png|32px]] The textures of wooden, golden, diamond, and netherite pickaxes have been changed.}}
{{History|||snap=20w10a|[[File:Netherite Pickaxe JE3.png|32px]] Changed a pixel of the texture of netherite pickaxes.
|Netherite pickaxes can no longer be crafted.
|Netherite pickaxes are now obtained by combining one diamond pickaxe and one netherite ingot in a smithing table.}}
{{History|||snap=20w15a|Stone pickaxes can now be crafted using [[blackstone]].}}
{{History|||snap=20w16a|Golden pickaxes now generate randomly enchanted in [[ruined portal]] chests.}}
{{History||1.16.2|snap=20w30a|Randomly enchanted diamond pickaxes can now be found in [[bastion remnant]] chests.}}
{{History||1.17|snap=21w08a|Stone pickaxe can now be crafted using [[cobbled deepslate]].}}
{{History||1.19|snap=22w11a|[[Mangrove planks]] can now be used to craft wooden pickaxes.}}
{{History||1.20<br>(Experimental)|link=1.19.4|snap=23w04a|Upgrading diamond pickaxes to netherite pickaxes now requires the netherite upgrade [[smithing template]].}}
{{History|upcoming java}}
{{History||Villager Trade Rebalance<br>(Experimental)|link=Java Edition 1.20.2|snap=23w31a|[[Wandering trader]]s now have a chance to sell an enchanted iron pickaxe.}}
{{History||Combat Tests|snap=1.14.3 - Combat Test|The attack speed for all pickaxes has been increased to 2.5.
|The [[damage]] for all pickaxes has been increased by {{hp|1}}.}}
{{History|pocket alpha}}
{{History||v0.2.0|[[File:Stone Pickaxe JE1 BE1.png|32px]] Added stone pickaxes.}}
{{History||v0.3.0|[[File:Wooden Pickaxe JE1 BE1.png|32px]] Added wooden pickaxes.
|Survival players no longer start out with an infinite durability stone pickaxe in the inventory.}}
{{History||v0.3.2|[[File:Iron Pickaxe JE2 BE1.png|32px]] [[File:Golden Pickaxe JE2 BE1.png|32px]] [[File:Diamond Pickaxe JE1 BE1.png|32px]] Added iron, gold, and diamond pickaxes.}}
{{History||v0.4.0|Removed stone pickaxes from the creative inventory.}}
{{History||v0.11.0|snap=build 11|All pickaxes are now available in the [[creative]] inventory.}}
{{History|||snap=build 12|All pickaxes have been removed from creative.}}
{{History|||snap=build 13|Pickaxes have been re-added to creative mode.}}
{{History||v0.14.0|snap=build 1|Iron pickaxes can now be found inside [[minecart with chest]]s in [[mineshaft]]s.}}
{{History|pocket}}
{{History||1.0.0|snap=alpha 0.17.0.1|[[Enchanting|Enchanted]] iron pickaxes and enchanted diamond pickaxes can now be found in [[end city|end cities]].}}
{{History||1.0.4|snap=alpha 1.0.4.0|Toolsmith [[villager]]s now [[trading|sell]] enchanted diamond pickaxes for 12-15 emeralds as their last tier trades and enchanted iron pickaxes for 9-11 [[emerald]]s as their second tier trades.}}
{{History||1.1.0|snap=alpha 1.1.0.0|Iron and golden pickaxes are now [[smelting|smeltable]].}}
{{History|bedrock}}
{{History||1.2.0|snap=beta 1.2.0.2|Wooden and stone pickaxes can now be found inside [[bonus chest]]s.}}
{{History||1.10.0|snap=beta 1.10.0.3|Iron pickaxes can now be found in [[plains]] [[village]] weaponsmith houses.
|[[File:Wooden Pickaxe JE2 BE2.png|32px]] [[File:Stone Pickaxe JE2 BE2.png|32px]] [[File:Iron Pickaxe JE3 BE2.png|32px]] [[File:Golden Pickaxe JE3 BE2.png|32px]] [[File:Diamond Pickaxe JE2 BE2.png|32px]] The textures of all pickaxes have been changed.}}
{{History||1.11.0|snap=beta 1.11.0.1|Iron pickaxes can now be found in [[village]] toolsmiths [[chest]]s and in [[savanna]], [[taiga]], [[snowy taiga]] and [[desert]] village weaponsmith chests.}}
{{History|||snap=beta 1.11.0.4|[[Trading]] has been changed, toolsmith [[villager]]s now have a 25% chance to [[trading|sell]] an [[enchanting|enchanted]] iron pickaxe for 3 [[emerald]]s as part of their third tier trades, and an enchanted diamond pickaxe now costs 13 emeralds.
|Stone pickaxes can now be bought from toolsmith villagers.}}
{{History||1.16.0|snap=beta 1.16.0.51|[[File:Netherite Pickaxe JE2 BE1.png|32px]] Added netherite pickaxes.|Netherite pickaxes are obtained by combining one diamond pickaxe and one netherite ingot in a crafting table.
|[[File:Wooden Pickaxe JE3 BE3.png|32px]] [[File:Golden Pickaxe JE4 BE3.png|32px]] [[File:Diamond Pickaxe JE3 BE3.png|32px]] The textures of wooden, golden, and diamond pickaxes have been changed.}}
{{History|||snap=beta 1.16.0.57|Netherite pickaxes can no longer be crafted.
|Netherite pickaxes are now obtained by combining one diamond pickaxe and one netherite ingot in a smithing table.
|Stone pickaxes can now be crafted using [[blackstone]].
|Golden pickaxes now generate randomly enchanted in [[ruined portal]] chests.
|Netherite pickaxe now generate randomly enchanted in [[bastion remnant]] chest.}}
{{History||1.17.10|snap=beta 1.17.10.20|[[File:Netherite Pickaxe JE3.png|32px]] Changed a pixel of the texture of netherite pickaxes to match ''Java Edition''.}}
{{History|console}}
{{History||xbox=TU1|xbone=CU1|ps=1.0|wiiu=Patch 1|[[File:Wooden Pickaxe JE1 BE1.png|32px]] [[File:Stone Pickaxe JE1 BE1.png|32px]] [[File:Iron Pickaxe JE2 BE1.png|32px]] [[File:Golden Pickaxe JE2 BE1.png|32px]] [[File:Diamond Pickaxe JE1 BE1.png|32px]] Added pickaxes (all five types).}}
{{History||xbox=TU53|xbone=CU43|ps=1.49|wiiu=Patch 23|switch=1.0.3|Iron and golden pickaxes are now [[smelting|smeltable]].}}
{{History|Ps4}}
{{History||1.90|[[File:Wooden Pickaxe JE2 BE2.png|32px]] [[File:Stone Pickaxe JE2 BE2.png|32px]] [[File:Iron Pickaxe JE3 BE2.png|32px]] [[File:Golden Pickaxe JE3 BE2.png|32px]] [[File:Diamond Pickaxe JE2 BE2.png|32px]] The textures of all pickaxes have been changed.}}
{{History|New Nintendo 3DS Edition}}
{{History||0.1.0|[[File:Wooden Pickaxe JE1 BE1.png|32px]] [[File:Stone Pickaxe JE1 BE1.png|32px]] [[File:Iron Pickaxe JE2 BE1.png|32px]] [[File:Golden Pickaxe JE2 BE1.png|32px]] [[File:Diamond Pickaxe JE1 BE1.png|32px]] Added pickaxes.}}
{{History|foot}}
== Issues ==
{{issue list}}
== Trivia ==
*The golden pickaxe is the only pickaxe that is unable to harvest the material it is made from.
*The pickaxe is the only block-breaking tool without a {{control|use}} (right-click) function.
=== Publicity ===
*Plastic diamond pickaxes are official ''[[Minecraft]]'' merchandise.<ref>https://shop.minecraft.net/products/minecraft-pickaxe?_pos=3&_psq=pickaxe&_ss=e&_v=1.0</ref>
*In the game [[wikipedia:Naughty Bear: Panic in Paradise|''Naughty Bear: Panic in Paradise'']], the player can buy a diamond pickaxe which, according to the game, is made by "Kick it up a Notch Pickaxes", referring to [[Notch]].
*In mobile game ''[https://play.google.com/store/apps/details?id=br.com.tapps.vloggergoviral Vlogger Go Viral]'' clicker game, after buying the figurine shelf, there is a model of a diamond pickaxe stuck to a [[grass block]].
*In the game [[wikipedia:The Elder Scrolls V: Skyrim|''The Elder Scrolls V: Skyrim'']], the player can find a pickaxe called the "Notched Pickaxe", evidently an [[easter egg]].
*In the game [[wikipedia:Offensive Combat|''Offensive Combat'']], a stone pickaxe can be used as a melee weapon with the name of "The Notch Carver".
*In the game [[wikipedia:The Binding of Isaac (video game)|''The Binding of Isaac'']], an obtainable item named "Notched Axe", also with a drawn 8-bit look, can be used to destroy rocks. The Notched Axe also makes a return in the game's remake, [[wikipedia:The Binding of Isaac: Rebirth|''The Binding of Isaac: Rebirth'']].
*In the game [[wikipedia:Borderlands 2|''Borderlands 2'']], the player can find a secret area hidden away by blocks resembling Minecraft [[dirt]], also once inside the player can fight Creeper and the Mother Creeper to get rare Minecraft-related skins.
*In the game [[wikipedia:Octodad: Dadliest Catch|''Octodad: Dadliest Catch'']], the supermarket level has a "Mintcraft" display, an obvious parody of Minecraft, even including toy pickaxes and a creeper head.
*In the game [[wikipedia:Transformice|''Transformice'']], a diamond pickaxe can be found in the shop.
== Gallery ==
<gallery>
File:Pickaxe in Mineshaft Chest.png|A naturally generated pickaxe.
Live in Your World JINX.jpg|Official T-shirt artwork "Live in Your World" featuring an iron pickaxe made by [https://www.jinx.com JINX].
Pickaxe JINX.jpg|Official T-shirt artwork of a pickaxe made by JINX.
Stone Pickaxe SDGP.png|Stone pickaxe in the [[Super Duper Graphics Pack]].
Iron Pickaxe SDGP.png|Iron pickaxe in the [[Super Duper Graphics Pack]].
</gallery>
=== Enchanted pickaxes ===
<gallery>
Enchanted Wooden Pickaxe.gif
Enchanted Stone Pickaxe.gif
Enchanted Iron Pickaxe.gif
Enchanted Golden Pickaxe.gif
Enchanted Diamond Pickaxe.gif
Enchanted Netherite Pickaxe.gif
</gallery>
== References ==
{{reflist}}
== External Links ==
*[https://www.minecraft.net/en-us/article/taking-inventory-pickaxe Taking Inventory: Pickaxe] – Minecraft.net on May 10, 2018
{{items}}
[[Category:Combat]]
[[cs:Krumpáč]]
[[de:Spitzhacke]]
[[es:Pico]]
[[fr:Pioche]]
[[hu:Csákány]]
[[it:Piccone]]
[[ja:ツルハシ]]
[[ko:곡괭이]]
[[nl:Houweel]]
[[pl:Kilof]]
[[pt:Picareta]]
[[ru:Кирка]]
[[th:อีเต้อ]]
[[uk:Кайло]]
[[zh:镐]]</li></ul> | build 1 | Fully charged bows now cause particles. | |||
| Bows can now be enchanted. | |||||
| Bows obtained by fishing can now be caught enchanted. | |||||
| Bows are no longer available from the nether reactor. | |||||
v0.15.0{{Extension DPL}}<ul><li>[[Red Dye|Red Dye]]<br/>{{Item
| title = Red Dye
| renewable = Yes
| stackable = Yes (64)
}}
'''Red dye''' is a [[Dye#Primary|primary color dye]] created primarily from flowers.
== Obtaining ==
=== Crafting ===
{{Crafting
|head=1
|showname=0
|Poppy; Red Tulip; Beetroot
|Output=Red Dye
|type=Material
}}
{{Crafting
|Rose Bush
|Output=Red Dye,2
|type=Material
|foot=1
}}
=== Trading ===
[[Wandering trader]]s sell 3 red dye for an [[emerald]].
== Usage ==
{{dye usage}}
=== Crafting ingredient ===
{{crafting usage|ignore=Banner|continue=1}}
{{banner crafting usage}}
=== Loom ingredient ===
{{Banner loom usage|Red Dye}}
=== Trading ===
Journeyman-level shepherd villagers have a {{frac|1|6}} chance to buy 12 red dye for an emerald.
== Data values ==
=== ID ===
{{edition|java}}:
{{ID table
|edition=java
|showforms=y
|generatetranslationkeys=y
|displayname=Red Dye
|spritetype=item
|nameid=red_dye
|form=item
|foot=1}}
{{edition|bedrock}}:
{{ID table
|edition=bedrock
|showaliasids=y
|shownumericids=y
|showforms=y
|notshowbeitemforms=y
|generatetranslationkeys=y
|displayname=Red Dye
|spritetype=item
|nameid=red_dye
|aliasid=dye / 1
|id=396
|form=item
|translationkey=item.dye.red.name
|foot=1}}
== Video ==
<div style="text-align:center">{{yt|tqTbsbt2irk}}</div>
== History ==
{{History|java beta}}
{{History||January 10, 2011<ref group="n">Supposed time when fragment was filmed. Based on modified date of client.jar/gui/trap.png in [[Beta 1.2]].</ref>|link=https://www.youtube.com/watch?v=cBF2ugTzXqQ&t=181s|[[File:Red Dye (pre-release).png|32px]] Shown rose red in development as part of [[Minecraft: The Story of Mojang]].}}
{{History||1.2|[[File:Red Dye JE1 BE1.png|32px]] Added rose red.}}
{{History||1.6.6|Roses can now be generated using [[Bone Meal|bone meal]], making rose red [[renewable resource|renewable]].}}
{{History|java}}
{{History||1.3.1|snap=1.3|[[File:Red Dye JE2 BE2.png|32px]] The texture of rose red has now been changed.}}
{{History||1.4.2|snap=12w34a|Added the ability to [[Armor#Dyeing|dye]] leather [[armor]] and [[wolf]] collars.}}
{{History||1.4.6|snap=12w49a|Rose red can now be crafted with [[gunpowder]] to create a [[firework star]].}}
{{History||1.6.1|snap=13w19a|Rose red can now be used to craft stained clay.}}
{{History||1.7.2|snap=13w36a|Rose red is now crafted using a poppy instead of a rose, as the latter is removed.
|Rose red can now be crafted using red tulips and rose bushes.}}
{{History|||snap=13w37a|Each poppy now yields only 1 rose red, instead of 2.}}
{{History|||snap=13w41a|Rose red can now be used to craft stained glass.}}
{{History||1.8|snap=14w30a|Added [[banner]]s, which can be dyed.}}
{{History||1.9|snap=15w31a|Rose red can now be crafted using [[beetroot]].}}
{{History||1.11|snap=16w39a|Added the ability to dye [[shulker box]]es.}}
{{History||1.12|snap=17w06a|Rose red can now be used to craft red [[concrete powder]].}}
{{History|||snap=17w15a|Added the ability to dye [[bed]]s.}}
{{History||1.13|snap=17w47a|The different data values for the <code>dye</code> ID have now been split up into their own IDs.
|Prior to [[1.13/Flattening|''The Flattening'']], this [[item]]'s numeral ID was 351.}}
{{History||1.14|snap=18w43a|"Rose Red" has now been renamed to "Red Dye".
|[[File:Red Dye JE3 BE3.png|32px]] The texture of red dye has now been changed.}}
{{History|||snap=18w44a|Red dye can now change the text color on [[sign]]s to red.}}
{{History|||snap=19w05a|Added the [[wandering trader]], which sells red dye.}}
{{History|||snap=19w11a|Red dye can now be [[trading|bought]] by shepherd villagers.}}
{{History||1.17|snap=20w45a|Red dye can now be used to craft [[red candle]]s.}}
{{History|||snap=21w19a|Red dye can no longer be used to craft red candles.}}
{{History|||snap=Pre-release 1|Red dye can once again be used to craft red candles.}}
{{History||1.20<br>(Experimental)|link=1.19.3|snap=22w42a|Red dye can now change the text color on [[hanging sign]]s to red.}}
{{History|pocket alpha}}
{{History||v0.3.0|[[File:Red Dye JE1 BE1.png|32px]] Added rose red. It is currently unobtainable and serves no purpose.}}
{{History||v0.4.0|Rose red is now obtainable by smelting red [[mushroom]]s.
|Rose red can now be used to craft other dyes and red wool.}}
{{History||v0.8.0|snap=build 1|[[File:Red Dye JE2 BE2.png|32px]] The texture of red dye has been changed.
|Rose red is now used to craft [[cocoa beans]].}}
{{History||v0.9.0|snap=build 3|Rose red can now be obtained by putting a poppy, red tulip or rose bush [[flower]]s in the crafting grid.}}
{{History||v0.15.0|snap=build 1|Red mushrooms can no longer be smelted to obtain rose red.}}
{{History||v0.16.0|snap=build 1|Rose red is no longer used to craft cocoa beans.}}
{{History|bedrock}}
{{History||1.8.0|snap=beta 1.8.0.10|"Rose Red" has now been renamed to "Red Dye".}}
{{History||1.10.0|snap=beta 1.10.0.3|Red dye can now be [[trading|bought]] from [[wandering trader]]s.
|[[File:Red Dye JE3 BE3.png|32px]] The texture of red dye has now been changed.}}
{{History||1.11.0|snap=beta 1.11.0.4|Red dye can now be [[trading|sold]] to shepherd [[villager]]s.}}
{{History||1.16.100|snap=beta 1.16.100.56|The ID of red dye has been changed from <code>dye/1</code> to <code>red_dye</code>.}}
{{History|console}}
{{History||xbox=TU1|xbone=CU1|ps=1.00|switch=1.0.1|wiiu=Patch 1|[[File:Red Dye JE1 BE1.png|32px]] Added rose red.}}
{{History||xbox=none|xbone=none|ps=1.83|switch=none|wiiu=none|"Rose Red" has now been renamed to "Red Dye".}}
{{History||ps=1.90|[[File:Red Dye JE3 BE3.png|32px]] The texture of red dye has now been changed.}}
{{History|new 3ds}}
{{History||0.1.0|[[File:Red Dye JE1 BE1.png|32px]] Added rose red.}}
{{History|foot}}
;Notes
{{reflist|group=n}}
== Issues ==
{{issue list}}
{{Items}}
[[cs:Šípková červeň]]
[[de:Roter Farbstoff]]
[[es:Tinte rojo]]
[[fr:Teinture rouge]]
[[hu:Rózsavörös]]
[[ja:赤色の染料]]
[[ko:장밋빛 빨강 염료]]
[[nl:Rozenrood]]
[[pl:Czerwony barwnik]]
[[pt:Corante vermelho]]
[[ru:Красный краситель]]
[[zh:红色染料]]
[[Category:Items]]
[[Category:Dyes]]
[[Category:Renewable resources]]</li><li>[[Nautilus Shell|Nautilus Shell]]<br/>{{Item
| type =
| stackable = Yes (64)
| renewable = Yes
}}
A '''nautilus shell''' is an item that is used for crafting [[conduit]]s.
==Obtaining==
===Fishing===
{{main|Fishing#Junk and treasure}}
Nautilus shells can be rarely obtained as a treasure item from fishing. The drop chances of nautilus shells slightly increase with each level of [[Luck of the Sea]] on the [[player]]'s [[fishing rod]].
===Mob loot===
[[Drowned]] have a 3%{{only|java|short=1}} or 8%{{only|bedrock|short=1}} chance to spawn with a nautilus shell in their off-hand, and this nautilus shell always drops upon [[death]].
===Trading===
[[Wandering trader]]s may [[trading|sell]] a nautilus shell for 5 [[emerald]]s each, but they only sell 5 of them at a time.
==Usage==
{{IN|bedrock}}, a nautilus shell is one of the few items that can be held in the off-hand.
===Crafting ingredient===
{{crafting usage}}
=== Trading ===
Nautilus shells can be given to trident-wielding drowned with a chance for the drowned to pick up the shell and drop the trident.<sup>[''[[Bedrock Edition]] only'']</sup>
==Data values==
===ID===
{{edition|java}}:
{{ID table
|edition=java
|showforms=y
|generatetranslationkeys=y
|displayname=Nautilus Shell
|spritetype=item
|nameid=nautilus_shell
|form=item
|foot=1}}
{{edition|bedrock}}:
{{ID table
|edition=bedrock
|shownumericids=y
|showforms=y
|notshowbeitemforms=y
|generatetranslationkeys=y
|displayname=Nautilus Shell
|spritetype=item
|nameid=nautilus_shell
|id=570
|form=item
|foot=1}}
==History==
{{History|java}}
{{History||1.13|snap=18w15a|[[File:Nautilus Shell JE1 BE2.png|32px]] Added nautilus shells.}}
{{History||1.14|snap=19w05a|Added [[Wandering Trader|wandering trader]]s, which sell nautilus shells.}}
{{History|bedrock}}
{{History||1.4.0|snap=beta 1.2.20.1|[[File:Nautilus Shell BE1.png|32px]] Added nautilus shells.}}
{{History|||snap=beta 1.2.20.2|[[File:Nautilus Shell JE1 BE2.png|32px]] The texture of nautilus shells has now been changed.}}
{{History||1.5.0|snap=beta 1.5.0.0|[[Drowned]] now sometimes spawn holding a nautilus shell.
|Nautilus shells are no longer behind [[Experimental Gameplay]].}}
{{History|||snap=beta 1.5.0.1|Nautilus shells can now be used to craft [[conduit]]s.}}
{{History||1.10.0|snap=beta 1.10.0.3|Nautilus shells can now be obtained from [[trading]] with [[wandering trader]]s.}}
{{History|console}}
{{History||xbox=TU69|ps=1.76|wiiu=Patch 38|[[File:Nautilus Shell JE1 BE2.png|32px]] Added nautilus shells.}}
{{History||xbox=none|ps=1.91|wiiu=none|Nautilus shells can now be obtained from [[trading]] with [[wandering trader]]s.}}
{{History|foot}}
==Issues==
{{issue list}}
==Trivia==
*[[wikipedia:Nautilus|Nautilus]]es are animals that occupy deep oceans in the real world. However, they are absent in Minecraft and there are currently no plans to add nautilus [[mob]]s into the game.
*Because {{el|bedrock}} allows for Nautilus shells to be held in the off-hand (since drowned hold them), they are the only item in that version that can be put in the off-hand slot without having a specific function.
{{items}}
[[de:Nautilusschale]]
[[es:Caparazón de nautilo]]
[[fr:Coquille de nautile]]
[[it:Conchiglia di nautilus]]
[[ja:オウムガイの殻]]
[[ko:앵무조개 껍데기]]
[[nl:Nautilusschelp]]
[[pl:Muszla łodzika]]
[[pt:Concha de náutilo]]
[[ru:Раковина наутилуса]]
[[th:เปลือกหอยงวงช้าง]]
[[uk:Мушля наутилуса]]
[[zh:鹦鹉螺壳]]
[[Category:Renewable resources]]</li></ul> | build 1 | Added strays, which are equipped with a bow that can rarely be dropped by them. | |||
| Bows can now shoot an additional 14 types of arrows, selected based on the arrow type closest to slot 0. | |||||
| Pocket Edition | |||||
1.0.4{{Extension DPL}}<ul><li>[[Book|Book]]<br/>{{For}}
{{Item
| image = Book.png
| renewable = Yes
| stackable = Yes (64)
|effects=Read}}
'''Books''' are items used in [[enchanting]] and [[crafting]].
== Obtaining ==
=== Block loot ===
Three books are dropped when a [[bookshelf]] is mined without [[Silk Touch]] or destroyed by an [[explosion]].
=== Crafting ===
{{crafting
|Paper
|Paper
|Paper
|Leather
|Output= Book
|type= Miscellaneous
}}
=== Chest loot ===
{{LootChestItem|book}}
=== Grindstones ===
Disenchanting an [[enchanted book]] at a [[grindstone]] yields a normal book and a small amount of experience.
=== Villager gifts ===
{{in|java}}, librarian [[villagers]] throw books at players under the [[Hero of the Village]] effect.
== Usage ==
=== Crafting ingredient ===
{{crafting usage}}
=== Chiseled bookshelf ===
{{control|Use|text=Using}} the [[chiseled bookshelf]] while having a book in the main hand will put the book inside the chiseled bookshelf.
=== Enchanting ===
Books can be made into [[enchanted book]]s by enchanting them on [[enchanting table]]s.
=== Trading ===
Librarian [[villager]]s can buy a single book as part of an [[enchanted book]] trade.
Apprentice-level Librarian villagers have a {{frac|2|3}} chance to buy 4 books for an [[emerald]] {{in|java}}, and always offer the trade {{in|bedrock}}.
== Achievements ==
{{load achievements|Librarian;Enchanter}}
== Advancements ==
{{load advancements|Enchanter;The Power of Books}}
== Sounds ==
{{edition|java}}:
{{Sound table
|sound=Chiseled bookshelf insert1.ogg
|sound2=Chiseled bookshelf insert2.ogg
|sound3=Chiseled bookshelf insert3.ogg
|sound4=Chiseled bookshelf insert4.ogg
|subtitle=Book placed
|source=block
|description=When a book is placed in a chiseled bookshelf
|id=block.chiseled_bookshelf.insert
|translationkey=subtitles.chiseled_bookshelf.insert
|volume=0.8
|pitch=''varies'' <ref group=sound>Can be 1.0, 0.85, or 1.1 for each sound</ref>
|distance=16}}
{{Sound table
|sound=Chiseled bookshelf pickup1.ogg
|sound2=Chiseled bookshelf pickup2.ogg
|sound3=Chiseled bookshelf pickup3.ogg
|subtitle=Book taken
|source=block
|description=When a book is removed from a chiseled bookshelf
|id=block.chiseled_bookshelf.pickup
|translationkey=subtitles.chiseled_bookshelf.take
|volume=0.8
|pitch=''varies'' <ref group=sound>Can be 1.0, 0.8, or 1.1 for each sound</ref>
|distance=16
|foot=1}}
{{edition|bedrock}}:
{{Sound table
|type=bedrock
|sound=Chiseled bookshelf insert1.ogg
|sound2=Chiseled bookshelf insert2.ogg
|sound3=Chiseled bookshelf insert3.ogg
|sound4=Chiseled bookshelf insert4.ogg
|source=block
|description=When a book is placed in a chiseled bookshelf
|id=insert.chiseled_bookshelf
|volume=0.8
|pitch=''varies'' <ref group=sound name=insertvaries>Can be 1.0, 0.85, or 1.1 for each sound</ref>}}
{{Sound table
|sound=Chiseled bookshelf pickup1.ogg
|sound2=Chiseled bookshelf pickup2.ogg
|sound3=Chiseled bookshelf pickup3.ogg
|source=block
|description=When a book is removed from a chiseled bookshelf
|id=pickup.chiseled_bookshelf
|volume=0.8
|pitch=''varies'' <ref group=sound name=pickupvaries>Can be 1.0, 0.8, or 1.1 for each sound</ref>
|foot=1}}
== Data values ==
=== ID ===
{{edition|java}}:
{{ID table
|edition=java
|showforms=y
|generatetranslationkeys=y
|displayname=Book
|spritetype=item
|nameid=book
|form=item
|foot=1}}
{{edition|bedrock}}:
{{ID table
|edition=bedrock
|showitemtags=y
|shownumericids=y
|showforms=y
|notshowbeitemforms=y
|generatetranslationkeys=y
|displayname=Book
|spritetype=item
|nameid=book
|id=387
|itemtags=minecraft:bookshelf_books</code>
|form=item
|foot=1}}
== Video ==
<div style="text-align:center">{{yt|UGJBUhxwKy0}}</div>
== History ==
{{History|java alpha}}
{{History||v1.0.11|[[File:Book JE1 BE1.png|32px]] Added books.
|The only use of books is crafting [[bookshelves]], which are only used as a purely decorative [[block]] until [[Beta 1.9 Prerelease 3]].}}
{{History|java beta}}
{{History||1.8|snap=Pre-release|Books are now found in the new [[stronghold]] library [[chest]]s.}}
{{History|java}}
{{History||1.0.0|snap=Beta 1.9 Prerelease 3|Books are now used to craft [[enchantment table]]s, gaining their first functional usage outside of decoration.}}
{{History||1.3.1|snap=12w17a|The crafting recipe is now shapeless, so books can now be crafted in the player's 2×2 [[crafting]] area, although the recipe now requires [[leather]]. Before this version, books were crafted with three [[paper]] sheets in a single column.
|A book can now be crafted into a [[book and quill]], which can be used to create [[written book]]s.}}
{{History|||snap=12w21a|Librarian [[villager]]s now [[trading|buy]] 11–12 books for 1 [[emerald]].}}
{{History|||snap=12w22a|Librarian villagers now [[trading|sell]] [[enchanted book]]s for 5–64 emeralds and 1 book.}}
{{History||1.4.6|snap=12w49a|Books can now be enchanted into [[enchanted book]]s, and then combined together in an [[anvil]] with a [[tool]] to then enchant it.}}
{{History||1.8|snap=14w02a|Librarian villagers now buy 8–10 books for 1 [[emerald]].}}
{{History||1.9|snap=15w43a|Average yield of books in [[stronghold]] library chests has been substantially increased.}}
{{History||1.12|snap=17w13a|Added the [[knowledge book]], a green-colored book that grants the [[player]] a recipe for [[crafting]].
|The recipe tab on the [[crafting table]] GUI uses a red-colored book.}}
{{History||1.13|snap=17w47a|Prior to [[1.13/Flattening|''The Flattening'']], this [[item]]'s numeral ID was 340.}}
{{History|||snap=18w11a|Books now generate in [[shipwreck]] chests.}}
{{History||1.14|snap=18w43a|[[File:Book JE2 BE2.png|32px]] The texture of books has been changed.}}
{{History|||snap=18w48a|Books can now be obtain by disenchanting non-curse [[enchanted book]]s in a grindstone.|Books can now be found in chests in [[plains]] [[village]] houses.}}
{{History|||snap=18w50a|Books can now be found in chests in [[desert]] village houses.}}
{{History|||snap=19w13a|Librarian villagers now give books to players under the [[Hero of the Village]] effect.}}
{{History||1.19|snap=Deep Dark Experimental Snapshot 1|Books now generate in [[ancient city]] chests.}}
{{History||1.20<br>(Experimental)|link=1.19.3|snap=22w42a|Books can now interact with [[chiseled bookshelves]].}}
{{History|pocket alpha}}
{{History||v0.2.0|[[File:Book JE1 BE1.png|32px]] Added books. They are currently unobtainable and serve no purpose.}}
{{History||v0.3.0|Books can be used to craft [[bookshelves]].}}
{{History||v0.5.0|Books can now be obtained after activating the [[nether reactor]].}}
{{History||v0.12.1|snap=build 1|The crafting recipe for books now requires [[leather]]. Before this version, books were crafted with three [[paper]] sheets in a single column.
|Books are now used to craft [[enchanting table]]s.
|Books can now be enchanted into [[enchanted book]]s, and then combined together in an [[anvil]] with a [[tool]] to then enchant it.
|Books are no longer available from the [[nether reactor]].}}
{{History|pocket}}
{{History||1.0.4|snap=alpha 1.0.4.0|Librarian villagers now [[trading|buy]] 8–10 books for 1 [[emerald]].}}
{{History|bedrock}}
{{History||1.2.0|snap=beta 1.2.0.2|A book can now be crafted into a [[book and quill]], which can be used to create [[written book]]s.}}
{{History||1.4.0|snap=beta 1.2.14.2|Books can now be found inside of the map room [[chest]] in [[shipwreck]]s.}}
{{History||1.10.0|snap=beta 1.10.0.3|Books can now be found in [[plains]] [[village]] chests.
|[[File:Book JE2 BE2.png|32px]] The texture of books has been changed.}}
{{History||1.11.0|snap=beta 1.11.0.4|Librarian [[villager]]s now [[trading|buy]] 4 books for an [[emerald]].}}
{{History||Wild Update<br>(Experimental)|link=Bedrock Edition 1.18.30|snap=beta 1.18.30.32|Books now generate in [[ancient city]] chests.}}
{{History||1.20<br>(Experimental)|link=Bedrock Edition 1.19.50|snap=beta 1.19.50.21|Books can now interact with [[chiseled bookshelves]].}}
{{History|console}}
{{History||xbox=TU1|xbone=CU1|ps=1.0|wiiu=Patch 1|[[File:Book JE1 BE1.png|32px]] Added books.}}
{{History||xbox=TU14|ps=1.04|The crafting recipe for books now requires [[leather]]. Before this version, books were crafted with three [[paper]] sheets in a single column.}}
{{History|PS4}}
{{History||1.90|[[File:Book JE2 BE2.png|32px]] The texture of books has now been changed.}}
{{History|New 3DS}}
{{History||0.1.0|[[File:Book JE1 BE1.png|32px]] Added books.}}
{{History|foot}}
== Issues ==
{{issue list}}
== See also ==
* [[Enchanted Book]]
* [[Knowledge Book]]
== How book is renewable ==
The paper comes from sugar canes, which is renewable because it grows and the leather from killing cows, renewable because cows breed{{Items}}
[[Category:Renewable resources]]
[[cs:Kniha]]
[[de:Buch]]
[[es:Libro]]
[[fr:Livre]]
[[hu:Könyv]]
[[it:Libro]]
[[ja:本]]
[[ko:책]]
[[nl:Boek]]
[[pl:Książka]]
[[pt:Livro]]
[[ru:Книга]]
[[th:หนังสือ]]
[[uk:Книга]]
[[zh:书]]</li><li>[[Carrot|Carrot]]<br/>{{about|the natural food item|the golden food|Golden Carrot|the item for controlling saddled pigs|Carrot on a Stick}}
{{Item
| group = Age 0-1
| 1-1 = Carrots Age 0-1.png
| 1-2 = Carrots Age 0-1 BE.png
| group2 = Age 2-3
| 2-1 = Carrots Age 2-3.png
| 2-2 = Carrots Age 2-3 BE.png
| group3 = Age 4-6
| 3-1 = Carrots Age 4-6.png
| 3-2 = Carrots Age 4-6 BE.png
| group4 = Age 7
| 4-1 = Carrots Age 7.png
| 4-2 = Carrots Age 7 BE.png
| image2 = Carrot JE3 BE2.png
| renewable = Yes
| heals = {{hunger|3}}
| stackable = Yes (64)
}}
A '''carrot''' is a [[food]] [[item]] obtained from carrot crops that can be used to plant them, eaten or used as a crafting ingredient.
'''Carrot crops''' are planted in [[farmland]] and used to grow carrots.
== Obtaining ==
=== Breaking ===
{{See also|Fortune#Seeds}}
Fully grown carrot crops drop 2 to 5 carrots ({{frac|3|5|7}} per crop harvested on average). Yield can be increased using a tool enchanted with [[Fortune]], with Fortune III harvesting an average of {{frac|5|3|7}} carrots.
The yield is calculated by a binomial distribution: 2 drops are fixed, then a drop is attempted three times with a success rate of 57.14286% to yield the extra 0–3 drops. Each level of Fortune enchantment increases the number of attempts by one.
=== Natural generation ===
[[Village]] farm plots have a chance of having carrots. The exact chance depends on the style of the village:
{| class="wikitable"
! Village style !! Chance
|-
| {{EnvSprite|plains-village}} Plains || 30%
|-
| {{EnvSprite|snowy-village}} Snowy || 10%
|}
=== Mob loot ===
[[Zombie]]s, [[husk]]s, and [[zombie villager]]s have a 2.5% ({{frac|1|40}}) chance of dropping either an [[iron ingot]], carrot, or [[potato]] when killed by a player or tamed wolf. This is increased by 1% ({{frac|1|100}}) per level of looting. This gives carrots the following chances of dropping:
* {{frac|1|120}} (about 0.83%)
* {{frac|7|600}} (about 1.17%) with Looting I
* {{frac|9|600}} (about 1.50%) with Looting II
* {{frac|11|600}} (about 1.83%) with Looting III
=== Chest loot ===
{{LootChestItem|carrot}}
== Usage ==
{{see also|Tutorials/Hunger management|title1=Hunger management}}
To eat a carrot, press and hold {{control|use}} while the carrot is selected in the [[hotbar]]. Eating a carrot restores {{hunger|3}} [[hunger]] and 3.6 hunger [[Hunger#Mechanics|saturation]].
=== Farming ===
{{see also|Tutorials/Crop farming|title1 = Crop farming }}
Carrots can be [[farming|farmed]] and harvested on [[farmland]]. Planted carrots take 8 [[Block tick|stages]] to grow, and go through 4 visually distinct stages. Planted carrots require a light level of 9 or greater to continue growing. If the light level is 7 or below, the crops instantly un-plant themselves ("pop off"). It is not possible to plant carrots if the light level is too low.
Crops grow faster if the farmland they are planted in is [[Farmland#Hydration|hydrated]]. Using [[bone meal]] on crops also increases the speed of growth by randomly increasing their growth stage by 2 to 5.
Crops break if pushed by a [[piston]] or if their supporting farmland breaks or turns to dirt (i.e. by being trampled), dropping their usual drops.
If {{cmd|gamerule mobGriefing}} is <code>true</code>, rabbits will find mature carrot [[crops]]{{only|je}} / carrot crops with growth stage greater than 1{{only|be}}. This reduces the growth stages by one, removing the crop completely when the growth stage reaches 0.
=== Breeding ===
Carrots can also be used to [[breed]] and attract [[pig]]s and [[rabbit]]s.
Villagers can pick up carrot items to become willing, which allow them to breed. Villagers require 12 carrots to become willing.
=== Trading ===
Novice-level Farmer villagers have a 25% ({{frac|1|4}}){{only|bedrock}} or 40% ({{frac|2|5}}){{only|java}} chance to buy 22 carrots for an emerald.
=== Crafting ingredient ===
{{crafting usage}}
=== Composting ===
Placing a carrot into a [[composter]] has a 65% chance of raising the compost level by 1.
== Sounds ==
=== Block ===
{{Sound table/Block/Crop}}
=== Item ===
{{Sound table/Entity/Food}}
== Data values ==
=== ID ===
{{edition|java}}:
{{ID table
|edition=java
|showblocktags=y
|showforms=y
|generatetranslationkeys=y
|displayname=Carrots
|spritetype=block
|nameid=carrots
|blocktags=bee_growables, crops
|form=block}}
{{ID table
|displayname=Carrot
|spritetype=item
|nameid=carrot
|form=item
|foot=1}}
{{edition|bedrock}}:
{{ID table
|edition=bedrock
|showforms=y
|shownumericids=y
|generatetranslationkeys=y
|displayname=Carrots
|spritetype=block
|nameid=carrots
|id=141
|form=block
|translationkey=-}}
{{ID table
|displayname=Carrot
|spritetype=item
|nameid=carrot
|id=279
|form=item
|foot=1}}
=== Block states ===
{{see also|Block states}}
{{/BS}}
== Advancements ==
{{load advancements|Husbandry;A Balanced Diet}}
== History ==
{{History|java}}
{{History||1.4.2|snap=12w34a|[[File:Carrot JE1.png|32px]] Added carrots.
|[[File:Carrots Age 0-1 JE1.png|32px]] [[File:Carrots Age 2-3 JE1.png|32px]] [[File:Carrots Age 4-6 JE1.png|32px]] [[File:Carrots Age 7 JE1.png|32px]] Added carrot crops.
|Carrots can be obtained only as a rare [[drop]] from [[zombie]]s.}}
{{History|||snap=August 28, 2012|slink={{tweet|Dinnerbone|240428477856231424}}|[[Dinnerbone]] released an image of a [[saddle]]d [[pig]] being controlled with a [[carrot on a stick]]. [[Wheat]] was considered as a "fuel" along with carrots,<ref>{{Tweet|Dinnerbone|240188453789257728}}</ref> but Dinnerbone eventually decided on carrots.<ref>{{Tweet|Dinnerbone|240355810650247168}}</ref>}}
{{History|||snap=12w34a|Carrots can now be used to craft [[golden carrot]]s.}}
{{History|||snap=12w36a|Carrots can now be found in [[village]]s.
|Carrots are now used to breed [[pig]]s.
|Carrots are now used to craft [[carrot on a stick]].}}
{{History|||snap=12w37a|[[File:Carrot JE2 BE1.png|32px]] The texture of carrots has now been changed. The texture has been changed to singular carrot, with the tooltip changed to reflect this.}}
{{History||1.5|snap=13w04a|[[Bone meal]] now grows carrots by 1 stage instead of fully growing it. The [[player]] might not see it grow, because some stages look the same.}}
{{History||1.8|snap=14w02a|Carrots now restore {{hunger|3}} points and 3.6 hunger [[saturation]], instead of {{hunger|4}} and 4.8 hunger saturation.
|Farmer [[villager]]s now [[trading|buy]] 15–19 carrots for 1 [[emerald]].}}
{{History|||snap=14w04a|[[Farmer]] (profession) [[villager]]s now harvest fully grown carrots.
|Villagers can now be made willing using 12 carrots.}}
{{History|||snap=14w06a|[[File:Carrots Age 0-1 JE2.png|32px]] [[File:Carrots Age 2-3 JE2.png|32px]] [[File:Carrots Age 4-6 JE2.png|32px]] [[File:Carrots Age 7 JE2.png|32px]] Carrot crops are now a pixel higher - previously they were offset one pixel down as to match farmland's sunken model. This is likely an accidental result of model conversion.}}
{{History|||snap=14w10a|[[File:Missing Model JE2.png|32px]] [[File:Missing Model JE2.png|32px]] [[File:Missing Model JE2.png|32px]] [[File:Missing Model JE2.png|32px]]<br>[[File:Missing Model (anisotropic filtering) JE2.png|32px]] [[File:Missing Model (anisotropic filtering) JE2.png|32px]] [[File:Missing Model (anisotropic filtering) JE2.png|32px]] [[File:Missing Model (anisotropic filtering) JE2.png|32px]]<br>Carrot crops of all stages [[Missing model|no longer have a model]].}}
{{History|||snap=14w10b|[[File:Carrots Age 0-1 JE4.png|32px]] [[File:Carrots Age 2-3 JE4.png|32px]] [[File:Carrots Age 4-6 JE4.png|32px]] [[File:Carrots Age 7 JE4.png|32px]] Carrot crops now have models again.<ref>{{bug|MC-50232}}</ref> In addition, they are now offset downwards by one pixel once more.<ref>{{bug|MC-50155}}</ref>}}
{{History|||snap=14w25a|[[File:Carrots Age 0-1 JE5.png|32px]] [[File:Carrots Age 2-3 JE5.png|32px]] [[File:Carrots Age 4-6 JE5.png|32px]] [[File:Carrots Age 7 JE5.png|32px]] Carrot crops are now darker and subject to directional shading.}}
{{History|||snap=14w27a|[[File:Carrots Age 0-1 JE6.png|32px]] [[File:Carrots Age 2-3 JE6.png|32px]] [[File:Carrots Age 4-6 JE6.png|32px]] [[File:Carrots Age 7 JE6.png|32px]] Carrot crops are no longer subject to directional shading.
|Added [[rabbit]]s, which can be [[breeding|bred]] and/or tamed using carrots. Rabbits also grief carrot crops.
|Carrots are now used to craft [[rabbit stew]].}}
{{History|||snap=14w34a|Rabbits can no longer be tamed.}}
{{History||1.9|snap=15w38a|The [[drops|drop]] chances have now been slightly improved from an average of {{frac|2|3|5}} per [[crops|crop]] harvested to {{frac|2|5|7}}.}}
{{History||1.13|snap=17w47a|Prior to [[1.13/Flattening|''The Flattening'']], this block's numeral ID was 141, and the item's 391.}}
{{History|||snap=18w11a|Carrots can now generate in the chests of [[shipwreck]]s.}}
{{History||1.14|snap=18w43a|[[File:Carrot JE3 BE2.png|32px]] The texture of carrots has now been changed.
|[[File:Carrots Age 0-1 JE7.png|32px]] [[File:Carrots Age 2-3 JE7.png|32px]] [[File:Carrots Age 4-6 JE7.png|32px]] [[File:Carrots Age 7 JE7.png|32px]] The textures of carrot crops have now been changed.}}
{{History|||snap=18w47a|Carrots can now generate in the [[chest]]s of [[pillager outpost]]s.}}
{{History|||snap=19w03a|Placement and breaking [[sound]]s have now been added to carrots.
|Placing a carrot into the new [[composter]] has a 50% chance of raising the compost level by 1.}}
{{History|||snap=19w05a|Carrots now have a 65% chance of increasing the compost level in a composter by 1.}}
{{History||1.15|snap=19w34a|[[Bee]]s can now pollinate carrot crops.}}
{{History||1.17|snap=21w13a|[[File:Carrots Age 0-1 JE8.png|32px]] [[File:Carrots Age 2-3 JE8.png|32px]] [[File:Carrots Age 4-6 JE8.png|32px]] [[File:Carrots Age 7 JE8.png|32px]] The "crop" template model has changed such that pixels appear in the same physical positions on opposite sides of texture planes, changing the carrot crop's appearance in the process.<ref>{{bug|MC-199242}}</ref>}}
{{History||1.18|snap=Pre-release 5|[[File:Carrots Age 7 JE9.png|32px]] A stray dark pixel has been removed from the texture of fully-grown carrots.<ref>{{bug|MC-226711}}</ref>}}
{{History|pocket alpha}}
{{History||v0.8.0|snap=build 1|[[File:Carrot JE2 BE1.png|32px]] Added carrots.
|[[File:Carrots Age 0-1 JE6 BE1.png|32px]] [[File:Carrots Age 2-3 JE6 BE1.png|32px]] [[File:Carrots Age 4-6 JE6 BE1.png|32px]] [[File:Carrots Age 7 JE6 BE1.png|32px]]{{verify|Correct models?}} Added carrot crops.
|Carrots can be obtained by killing [[zombie]]s.}}
{{History|||snap=build 3|Carrots now have a chance to [[drops|drop]] when tilling [[grass block]]s.}}
{{History|||snap=build 4|Carrots are no longer dropped by tilling [[grass block]]s.}}
{{History||v0.9.0|snap=build 1|Carrot crops now naturally spawn in [[village]]s.
|Carrot now used to breed [[pig]]s.}}
{{History||v0.12.1|snap=build 1|Carrots now restore [[hunger]] instead of [[health]].
|Brown robed [[villager]]s can now harvest fully grown carrot crops.
|Carrots can now be used to craft [[golden carrot]]s.}}
{{History||v0.13.0|snap=build 1|Carrots can now be used to breed [[rabbit]]s.
|Carrots can now be used to craft [[rabbit stew]].}}
{{History||v0.15.0|snap=build 1|Carrots are now used to craft [[carrot on a stick]].}}
{{History||v0.16.2|Carrots can now be found in a [[chest]] inside the large house in [[snowy tundra]] and [[snowy taiga]] [[village]]s.}}
{{History|pocket}}
{{History||1.0.4|snap=alpha 1.0.4.0|Farmer [[villager]]s now [[trading|buy]] 15–19 carrots for 1 [[emerald]].
|Carrots can now be picked up by villagers and become willing.}}
{{History|bedrock}}
{{History||1.2.0|snap=beta 1.2.0.2|Carrots can now be found inside of [[bonus chest]]s.}}
{{History||1.4.0|snap=beta 1.2.14.2|Carrots can now be found inside [[shipwreck]] chests.}}
{{History||1.10.0|snap=beta 1.10.0.3|Carrots can be found in the new [[pillager outpost]]s.
|[[File:Carrot JE3 BE2.png|32px]] The texture of carrots has now been changed.
|[[File:Carrots Age 0-1 JE7.png|32px]] [[File:Carrots Age 2-3 JE7.png|32px]] [[File:Carrots Age 4-6 JE7.png|32px]] [[File:Carrots Age 7 JE7.png|32px]]{{verify|Correct models?}} The textures of carrot crops have now been changed.}}
{{History||1.11.0|snap=beta 1.11.0.1|Carrots can now be used to fill up [[composter]]s.}}
{{History|||snap=beta 1.11.0.4|[[Trading]] has now been changed, farmer [[villager]]s now have a 25% chance to [[trading|buy]] 22 carrots for an [[emerald]].}}
{{History||1.14.0|snap=beta 1.14.0.1|[[Bee]]s can now pollinate carrot crops.}}
{{History||?|[[File:Carrots Age 0-1 BE.png|32px]] [[File:Carrots Age 2-3 BE.png|32px]] [[File:Carrots Age 4-6 BE.png|32px]] [[File:Carrots Age 7 BE.png|32px]] Carrot crop planes use a mapping that results in very unnatural mirroring when viewed from certain angles, such as northwest.<ref>{{bug|MCPE-146936}}</ref>}}
{{History|console}}
{{History||xbox=TU14|xbone=CU1|ps=1.04|wiiu=Patch 1|switch=1.0.1|[[File:Carrot JE2 BE1.png|32px]] Added carrots.
|[[File:Carrots Age 0-1 JE6 BE1.png|32px]] [[File:Carrots Age 2-3 JE6 BE1.png|32px]] [[File:Carrots Age 4-6 JE6 BE1.png|32px]] [[File:Carrots Age 7 JE6 BE1.png|32px]]{{verify|Correct models?}} Added carrot crops.}}
{{History||xbox=none|xbone=none|ps=1.90|wiiu=none|switch=none|[[File:Carrot JE3 BE2.png|32px]] The texture of carrots has now been changed.
|[[File:Carrots Age 0-1 JE7.png|32px]] [[File:Carrots Age 2-3 JE7.png|32px]] [[File:Carrots Age 4-6 JE7.png|32px]] [[File:Carrots Age 7 JE7.png|32px]]{{verify|Correct models?}} The textures of carrot crops have now been changed.}}
{{History||xbox=none|xbone=none|ps=1.91|wiiu=none|switch=none|Carrots can now be used to fill up [[composter]]s.}}
{{History|New 3DS}}
{{History||0.1.0|[[File:Carrot JE2 BE1.png|32px]] Added carrots.
|[[File:Carrots Age 0-1 JE6 BE1.png|32px]] [[File:Carrots Age 2-3 JE6 BE1.png|32px]] [[File:Carrots Age 4-6 JE6 BE1.png|32px]] [[File:Carrots Age 7 JE6 BE1.png|32px]]{{verify|Correct models?}} Added carrot crops.}}
{{History|foot}}
=== Carrots "item" ===
{{:Technical blocks/Carrots}}
== Issues ==
{{issue list}}
== Gallery ==
<gallery>
AllSeeds.png|All the seeds that exist in the game (except [[nether wart]] and [[cocoa beans]]).
VillageGrowingCarrotsAndPotatoes.png|Carrots and [[potato]]es found growing naturally in a [[village]].
Carrots Growing.png|Carrots in multiple stages of growth.
Carrot Dungeon.jpg|A carrot that dropped from a zombie, just to the right of the [[spawner]].
Carrot SDGP.png|Carrot in the [[Super Duper Graphics Pack]].
</gallery>
== References ==
{{reflist}}
{{Items}}
{{blocks|vegetation}}
[[Category:Plants]]
[[Category:Food]]
[[Category:Renewable resources]]
[[Category:Non-solid blocks]]
[[Category:Generated structure blocks]]
[[cs:Mrkev]]
[[de:Karotte]]
[[es:Zanahoria]]
[[fr:Carotte]]
[[hu:Sárgarépa]]
[[ja:ニンジン]]
[[ko:당근]]
[[lzh:胡蘿蔔]]
[[nl:Wortel]]
[[pl:Marchewka]]
[[pt:Cenoura]]
[[ru:Морковь]]
[[th:แคร์รอต]]
[[uk:Морква]]
[[zh:胡萝卜]]</li></ul> | alpha 1.0.4.0 | Bows can now be obtained by trading with a fletcher villager. | |||
1.1.0{{Extension DPL}}<ul><li>[[Written Book|Written Book]]<br/>{{Item
| title = Written Book
| image = Written Book.gif
| renewable = Yes
| stackable = Yes (16)
}}
A '''written book''' is an [[item]] created after a [[book and quill]] is signed.
== Obtaining ==
=== Signing a book and quill ===
Written books can be obtained by signing a [[book and quill]]. After it has been signed, it cannot be edited again. The label does not say "Written Book", but whatever the [[player]] titles it. The title appears on the top line of the label, and "by <''player''>" (the player's username) on the bottom. {{IN|bedrock}}, this is customizable without [[commands]].
=== Copying ===
{{crafting
|name=Written Book
|showdescription=1
|;;;Book and Quill;Book and Quill;Book and Quill;Book and Quill;Book and Quill
|;;;;Book and Quill;Book and Quill;Book and Quill;Book and Quill
|;;;;;Book and Quill;Book and Quill;Book and Quill
|Book and Quill
|Written Book
|;;;;;;Book and Quill;Book and Quill
|;Book and Quill;Book and Quill;Book and Quill;Book and Quill;Book and Quill;Book and Quill;Book and Quill
|;;Book and Quill;Book and Quill;Book and Quill;Book and Quill;Book and Quill;Book and Quill
|;;;;;;;Book and Quill
|Output= Written Book; Written Book,2; Written Book,3; Written Book,4; Written Book,5; Written Book,6; Written Book,7; Written Book,8
|description=The input written book is not consumed.<br>The new copies are "Copy of Original" or "Copy of Copy", depending on whether the input written book is "Original" or "Copy of Original".<br>Copies of copies cannot be copied.<br>Copied books of the same generation ("Original", "Copy of Original", "Copy of Copy", or "Tattered") stack.
|type=Miscellaneous
}}
== Usage ==
Written books can be opened by right-clicking (or holding down on the screen {{in|bedrock}}), and display a GUI allowing the [[player]] to read it or turn the page.
The contents of a book are an extra set of data attached to the item. This means that when a book is destroyed, its contents are lost with it.
=== Lecterns ===
One can place a [[written book]] on an empty [[lectern]].
The lectern then emits a redstone signal depending on the displayed page in the book. On the last page, the lectern emits a signal strength of 15.
=== Chiseled bookshelf ===
{{control|Use|text=Using}} the [[chiseled bookshelf]] while having a written book in the main hand will put the book inside the chiseled bookshelf.
== Sounds ==
{{edition|java}}:
{{Sound table
|sound=Page turn1.ogg
|sound2=Page turn2.ogg
|sound3=Page turn3.ogg
|subtitle=Page rustles
|source=master
|description=When the page of a book is turned
|id=item.book.page_turn
|translationkey=subtitles.item.book.page_turn
|volume=2.0
|pitch=1.0
|distance=16}}
{{Sound table
|sound=Page turn1.ogg
|sound2=Page turn2.ogg
|sound3=Page turn3.ogg
|subtitle=Page rustles
|source=block
|description=When the page of a book is turned on a lectern
|id=item.book.page_turn
|translationkey=subtitles.item.book.page_turn
|volume=2.0
|pitch=0.9-1.0
|distance=16}}
{{Sound table
|sound=Book thump1.ogg
|sound2=Book thump2.ogg
|subtitle=Book thumps
|source=block
|description=When a book is placed on a lectern
|id=item.book.put
|translationkey=subtitles.item.book.put
|volume=1.0
|pitch=1.0
|distance=16}}
{{Sound table
|sound=Chiseled bookshelf insert1.ogg
|sound2=Chiseled bookshelf insert2.ogg
|sound3=Chiseled bookshelf insert3.ogg
|sound4=Chiseled bookshelf insert4.ogg
|subtitle=Book placed
|source=block
|description=When a written book is placed in a chiseled bookshelf
|id=block.chiseled_bookshelf.insert
|translationkey=subtitles.chiseled_bookshelf.insert
|volume=0.8
|pitch=''varies'' <ref group=sound>Can be 1.0, 0.85, or 1.1 for each sound</ref>
|distance=16}}
{{Sound table
|sound=Chiseled bookshelf pickup1.ogg
|sound2=Chiseled bookshelf pickup2.ogg
|sound3=Chiseled bookshelf pickup3.ogg
|subtitle=Book taken
|source=block
|description=When a written book is removed from a chiseled bookshelf
|id=block.chiseled_bookshelf.pickup
|translationkey=subtitles.chiseled_bookshelf.take
|volume=0.8
|pitch=''varies'' <ref group=sound>Can be 1.0, 0.8, or 1.1 for each sound</ref>
|distance=16
|foot=1}}
{{edition|bedrock}}:
{{Sound table
|type=bedrock
|sound=Page turn1.ogg
|sound2=Page turn2.ogg
|sound3=Page turn3.ogg
|source=sound
|description=When the page of a book is turned
|id=item.book.page_turn
|volume=2.0
|pitch=1.0}}
{{Sound table
|sound=Book thump1.ogg
|sound2=Book thump2.ogg
|source=block
|description=When a book is placed on a lectern
|id=item.book.put
|volume=4.8
|pitch=1.0}}
{{Sound table
|type=bedrock
|sound=Chiseled bookshelf insert1.ogg
|sound2=Chiseled bookshelf insert2.ogg
|sound3=Chiseled bookshelf insert3.ogg
|sound4=Chiseled bookshelf insert4.ogg
|source=block
|description=When a written book is placed in a chiseled bookshelf
|id=insert.chiseled_bookshelf
|volume=0.8
|pitch=''varies'' <ref group=sound>Can be 1.0, 0.85, or 1.1 for each sound</ref>}}
{{Sound table
|sound=Chiseled bookshelf pickup1.ogg
|sound2=Chiseled bookshelf pickup2.ogg
|sound3=Chiseled bookshelf pickup3.ogg
|source=block
|description=When a written book is removed from a chiseled bookshelf
|id=pickup.chiseled_bookshelf
|volume=0.8
|pitch=''varies'' <ref group=sound>Can be 1.0, 0.8, or 1.1 for each sound</ref>
|foot=1}}
== Data values ==
=== ID ===
{{JE}}:
{{ID table
|edition=java
|showitemtags=y
|showforms=y
|generatetranslationkeys=y
|displayname=Written Book
|spritetype=item
|nameid=written_book
|itemtags=bookshelf_books, lectern_books
|form=item
|foot=1}}
{{BE}}:
{{ID table
|edition=bedrock
|showitemtags=y
|shownumericids=y
|showforms=y
|notshowbeitemforms=y
|generatetranslationkeys=y
|displayname=Written Book
|spritetype=item
|nameid=written_book
|id=511
|itemtags=minecraft:bookshelf_books, minecraft:lectern_books
|form=item
|foot=1}}
=== Item data ===
{{el|java}}:
{{main|Player.dat format}}
<div class="treeview">
* {{nbt|compound|tag}}: The item's '''tag''' tag.
{{:Player.dat_format/Written Books}}
</div>
{{el|bedrock}}:
: See [[Bedrock Edition level format/Item format]].
== History ==
{{History|java}}
{{History||1.3.1|snap=12w17a|[[File:Written Book JE1 BE1.png|32px]] Added written books.}}
{{History|||snap=12w21a|Written books can now be [[trading|sold]] to librarian [[villager]]s, at 1 written book for 1 [[emerald]].}}
{{History||1.7.2|snap=13w36a|Written books can now be cloned the same way [[map]]s can, but by using [[book and quill|books and quills]] instead of Empty Maps. Multiple copies of the same written book can be cloned by putting more book and quills in the crafting grid.
|Written books can now be stacked (up to 16 per stack).}}
{{History||1.8|snap=14w02a|[[Trading]] has been changed: librarian [[villager]]s now [[trading|buy]] 2 written books for 1 [[emerald]].}}
{{History|||snap=14w05a|Copying written books now mark them as "Copy of Original" or "Copy of Copy". The copying status of a book is denoted in a separate line in the tooltip, beneath the author's name. Copies of copies cannot be copied.}}
{{History||1.9|snap=15w33c|A written book titled "Work in Progress" now generates within a [[hopper]] as a part of the [[end ship]] in the [[end cities]]. It reads: "We will have something else here soon..." and is signed by [[Searge]].}}
{{History|||snap=15w41a|End ships no longer contain a written book.}}
{{History||1.13|snap=17w47a|Prior to [[1.13/Flattening|''The Flattening'']], this [[item]]'s numeral ID was 387.}}
{{History||1.14|snap=18w43a|[[File:Written Book JE2 BE2.png|32px]] The texture of written books has been changed.}}
{{History|||snap=19w02a|Written books can now be held on [[lectern]]s.}}
{{History|||snap=19w11a|Librarian [[villager]]s no longer [[trading|buy]] written books.}}
{{History||1.20<br>(Experimental)|link=1.19.3|snap=22w42a|Written books can now interact with [[chiseled bookshelves]].}}
{{History|bedrock}}
{{History||1.2.0|snap=beta 1.2.0.2|[[File:Written Book JE1 BE1.png|32px]] Added written books.}}
{{History||1.10.0|snap=beta 1.10.0.3|[[File:Written Book JE2 BE2.png|32px]] The texture of written books has been changed.
|Written books can now be held on [[lectern]]s.}}
{{History|console}}
{{History||xbox=TU25|xbone=CU14|ps=1.17|wiiu=Patch 1|[[File:Written Book JE1 BE1.png|32px]] Added written books.}}
{{History|PS4}}
{{History||1.90|[[File:Written Book JE2 BE2.png|32px]] The texture of written books has been changed.}}
{{History|foot}}
== Issues ==
{{issue list}}
== Trivia ==
*When written books are obtained with [[commands]] (without the correct [[Player.dat format#Written Books|data tag]]), the label shows "Written Book" and has the text "*Invalid book tag*" when opened. The book is signed and cannot be edited without commands.
*Commands that were added to a written book using serialized JSON objects are executed through the chat system. This means that any command added to a written book can't be longer than 256 characters, which is the maximum chat line limit.
*During the 2020 April Fools Update [[Java Edition 20w14∞]], throwing a written book into a lit [[Nether Portal (block)|nether portal]] would create a portal to one of the 2,147,483,645 new dimensions.
== Gallery ==
<gallery>
Written Book tooltip.png|A signed book.
Test by Dinnerbone.png|Copying a signed book.
BookandQuillOperators12w17a.png|Different types of characters can be used to simulate a different font.
JSON Book.png|First image of a book using JSON text.
No NBT written book GUI.png|A no NBT written book using commands.
Book Background (JE).png|Java Edition book background texture.
Book Background (BE).png|Bedrock Edition book background texture.
Book Arrowleft (JE).png|Java Edition left arrow texture.
Book Arrowright (JE).png|Java Edition right arrow texture.
Book Arrowleft (BE).png|Bedrock Edition left arrow texture.
Book Arrowright (BE).png|Bedrock Edition Right arrow texture.
</gallery>
== See also ==
*[[Book]]
*[[Bookshelf]]
*[[Book and Quill]]
{{Items}}
[[Category:Renewable resources]]
[[cs:Napsaná kniha]]
[[es:Libro escrito]]
[[fr:Livre édité]]
[[hu:Megírt könyv]]
[[it:Libro]]
[[ja:記入済みの本]]
[[ko:글이 쓰인 책]]
[[nl:Geschreven boek]]
[[pl:Zapisana książka]]
[[pt:Livro escrito]]
[[ru:Написанная книга]]
[[uk:Написана книга]]
[[zh:成书]]</li><li>[[Chestplate|Chestplate]]<br/>{{Update|Include information about armor trims and updated netherite upgrade information.}}
{{Item
| image = <gallery>
Leather Tunic.png | Leather
Chainmail Chestplate.png | Chainmail
Iron Chestplate.png | Iron
Diamond Chestplate.png | Diamond
Golden Chestplate.png | Golden
Netherite Chestplate.png | Netherite
</gallery>
| durability =
* Leather: 80
* Chainmail: 240
* Iron: 240
* Golden: 112
* Diamond: 528
* Netherite: 592
| renewable =
* '''Netherite''': No
* '''All Other''': Yes
| stackable = No
}}
'''Chestplates''' are a type of [[armor]] that covers the upper body of the player. There are six types of chestplates: '''leather''', '''chainmail''', '''iron''', '''diamond''', '''gold''' and '''netherite'''.
== Obtaining ==
=== Crafting ===
{{crafting
|head=1
|showname=0
|showdescription=1
|name=[[Chestplate]]
|A1= Leather;Gold Ingot;Iron Ingot;Diamond
|C1= Leather;Gold Ingot;Iron Ingot;Diamond
|A2= Leather;Gold Ingot;Iron Ingot;Diamond
|B2= Leather;Gold Ingot;Iron Ingot;Diamond
|C2= Leather;Gold Ingot;Iron Ingot;Diamond
|A3= Leather;Gold Ingot;Iron Ingot;Diamond
|B3= Leather;Gold Ingot;Iron Ingot;Diamond
|C3= Leather;Gold Ingot;Iron Ingot;Diamond
|Output= Leather Tunic;Golden Chestplate;Iron Chestplate;Diamond Chestplate
|type= Combat
}}
{{crafting
|foot=1
|ignoreusage=1
|name=[[Chestplate]]
|ingredients=Damaged Matching [[Chestplate]]
|Damaged Leather Tunic; Damaged Golden Chestplate; Damaged Chainmail Chestplate; Damaged Iron Chestplate; Damaged Diamond Chestplate; Damaged Netherite Chestplate
|Damaged Leather Tunic; Damaged Golden Chestplate; Damaged Chainmail Chestplate; Damaged Iron Chestplate; Damaged Diamond Chestplate; Damaged Netherite Chestplate
|Output= Leather Tunic; Golden Chestplate; Chainmail Chestplate; Iron Chestplate; Diamond Chestplate; Netherite Chestplate
|description= The durability of the two chestplates is added together, making a fully healed chestplate. You can get 5% more durability while using a grindstone to fix.
|type= Combat
}}
=== Upgrading ===
{{Smithing
|Netherite Upgrade
|Diamond Chestplate
|Netherite Ingot
|Netherite Chestplate
|description=
|tail=1
}}
=== Repairing ===
==== Grinding ====
{{Grinding
|showdescription=1
|ingredients=Damaged Matching Chestplates
|Damaged Leather Tunic; Damaged Chainmail Chestplate; Damaged Iron Chestplate; Damaged Golden Chestplate; Damaged Diamond Chestplate; Damaged Netherite Chestplate
|Damaged Leather Tunic; Damaged Chainmail Chestplate; Damaged Iron Chestplate; Damaged Golden Chestplate; Damaged Diamond Chestplate; Damaged Netherite Chestplate
|Leather Tunic; Chainmail Chestplate; Iron Chestplate; Golden Chestplate; Diamond Chestplate; Netherite Chestplate
|description=The durability of the two chestplates are added together, plus an extra 5% durability.
}}
==== [[Anvil mechanics#Unit repair|Unit repair]] ====
Chestplates can be repaired in an [[anvil]] by adding units of the [[armor material]]'s repair material, with each repair material restoring 25% of the chestplate's maximum durability, rounded down.
=== Mob loot ===
[[Zombie]]s and [[skeleton]]s have a small chance to spawn wearing any armor. There is an 8.5% chance (9.5% with [[Looting]] I, 10.5% with Looting II and 11.5% with Looting III) for the mob to drop a chestplate upon death. The chestplate the mob drops is usually badly damaged, and rarely enchanted.
[[Vindicator]]s and [[Pillager]]s spawning in [[raid]]s have a 4.1% chance (5.12% on hard difficulty) to drop iron chestplate, which is almost always badly damaged and rarely enchanted.
=== Natural generation ===
Two [[armor stand]]s are found in each taiga [[village]] outdoor armory, one of them equipped with an [[iron chestplate]].
=== Chest loot ===
{{IN|BE}}, a sealed room in [[woodland mansion]]s can appear that has a chest sometimes containing an [[Efficiency]] I leather tunic.<ref>{{bug|MCPE-109048}}</ref>
{{LootChestItem|leather-tunic,random-enchanted-leather-tunic,chainmail-chestplate,iron-chestplate,level-enchanted-iron-chestplate,golden-chestplate,random-enchanted-golden-chestplate,diamond-chestplate,damaged-diamond-chestplate,level-enchanted-diamond-chestplate,damaged-random-enchanted-diamond-chestplate,damaged-random-enchanted-diamond-chestplate-2}}
=== Trading ===
{{IN|java}}, novice-level armorer villagers have a 40% chance to sell an iron chestplate for 9 emeralds. Journeyman-level armorers have a 40% chance to sell a chainmail chestplate for 4 emeralds. Master-level armorers always sell an enchanted<ref group="note" name="enchantment" /> diamond chestplate for 18-35 emeralds. Novice-level leatherworker villagers have a {{frac|2|3}} chance to sell a leather tunic<ref group="note" name="dye note">The leather armor has a random color created by two dyes (possibly the same dye twice).</ref> for 7 emeralds. Journeyman-level Leatherworker villagers always offer the same trade.
Armorer villagers may give the players with the [[Hero of the Village]] effect a chainmail chestplate.
{{IN|bedrock}}, novice-level armorer villagers have a 25% chance to sell an iron chestplate for 9 emeralds. Journeyman-level armorers have a {{frac|1|3}} chance to sell a chainmail chestplate for 4 emeralds. Master-level armorers have a 50% chance to sell an enchanted<ref group="note" name="enchantment">When creating an enchantment offer, the game uses a random enchantment level from 5 – 19. The enchantments are never treasure enchantments.</ref> diamond chestplate for 16 emeralds. Novice-level leatherworker villagers have a 50% chance to sell leather tunic for 7 emeralds. Master-level leatherworkers always sell an enchanted<ref group="note" name="enchantment" /> leather tunic for 7 emeralds.
{{notelist|columns=1}}
== Usage ==
Chestplates can be placed in the 2nd armor slot of a player's [[inventory]] for activation.
=== Defense points ===
Defense points are each signified by chestplates in the armor bar above the [[health]] bar. 1 defense point is half of a chestplate in the armor bar. Each defense point reduces any damage dealt to the player, which is absorbed by armor by 4%, increasing additively with the number of defense points. Different materials and combinations of armor provide different levels of defense.
The following table shows the amount of defense points added by chestplates.
{| class="wikitable" data-description="Chestplate defense points"
|-
!scope="col" | Material
!scope="col" | Defense points
|-
!scope="row" | Leather
| {{armor|3}}
|-
!scope="row" | Golden
| rowspan="2" | {{armor|5}}
|-
!scope="row" | Chainmail
|-
!scope="row" | Iron
| {{armor|6}}
|-
!scope="row" | Diamond
| rowspan="2" | {{armor|8}}
|-
!scope="row" | Netherite
|}
===Knockback Resistance ===
A netherite chestplate provides 10% knockback resistance.
=== Durability ===
The following table shows the amount of damage each piece of armor can absorb before being destroyed.
Any "hit" from a damage source that can be blocked by armor removes one point of durability from each piece of armor worn for every {{hp|4}} of incoming damage (rounded down, but never below 1). Damage taken that unenchanted armor does not protect against (such as [[Damage#Fall damage|falling]] or [[Damage#Drowning|drowning]]) does not damage the armor, even if it is enchanted to protect against that type of damage. The following chart displays how many hits chest plates can endure.
Netherite armor is not damaged by [[lava]] or [[fire]] when worn.
{| class="wikitable" data-description="Chestplate durability"
|-
! Material
! Durability
|-
!scope="row" | Leather
| 80
|-
!scope="row" | Golden
| 112
|-
!scope="row" | Chainmail
| rowspan="2" | 240
|-
!Iron
|-
!scope="row" | Diamond
| 528
|-
!scope="row" | Netherite
| 592
|}
==== Repair ====
Chestplates may be [[item repair|repaired]] by using them along with some of their crafting material ([[leather]], [[gold ingot]]s, [[iron ingot]]s, [[diamond]]s, or [[netherite ingot]]s) in an [[anvil]]. Chainmail chestplates may be repaired in this way with iron ingots. They may also be repaired by crafting them together with another chestplate of the same material.
=== Enchantments ===
A chestplate can receive the following [[enchantment]]s:
{| class="wikitable"
|-
! Enchantment !! Max Level !! Notes
|-
| [[Fire Protection]] || IV || <ref group=note name=exclusive>Fire Protection, Blast Protection, Projectile Protection and Protection are mutually exclusive</ref>
|-
| [[Projectile Protection]] || IV || <ref group=note name="exclusive"/>
|-
| [[Blast Protection]] || IV || <ref group=note name="exclusive"/>
|-
| [[Protection]] || IV || <ref group=note name="exclusive"/>
|-
| [[Unbreaking]] || III ||
|-
| [[Thorns]] || III || <ref group="note" name="maxlvl">The max level obtainable in the enchanting table is 2</ref>
|-
| [[Mending]] || I || <ref group=note name="anvil2">Only from chest loot, fishing, or an anvil and enchanted books.</ref>
|-
| [[Curse of Binding]] || I || <ref group="note" name="anvil2"/>
|-
| [[Curse of Vanishing]] || I || <ref group="note" name="anvil2"/>
|}
{{notelist}}
=== Smelting usage ===
{{Smelting|showname=1|Iron Chestplate;Chainmail Chestplate;Golden Chestplate|Iron Nugget;Iron Nugget;Gold Nugget|0,1}}
=== Piglins ===
{{EntityLink|Piglin|Piglins}} are attracted to ''golden'' chestplates and pick them up, examining them for 6 to 8 seconds. Piglins can wear other chestplates but are not attracted to them. They prefer stronger chestplates over weaker chestplates, with one exception: They always prefer golden chestplates over all other chestplates, throwing out stronger chestplates to equip them. Enchanted chestplates are preferred over unenchanted chestplates.
== Sounds ==
{{el|je}}:
{{Sound table
|sound=Equip leather1.ogg
|sound2=Equip leather2.ogg
|sound3=Equip leather3.ogg
|sound4=Equip leather4.ogg
|sound5=Equip leather5.ogg
|sound6=Equip leather6.ogg
|subtitle=Leather armor rustles
|source=player
|description=When a leather chestplate is equipped
|id=item.armor.equip_leather
|translationkey=subtitles.item.armor.equip_leather
|volume=1.0
|pitch=1.0
|distance=16}}
{{Sound table
|sound=Equip chain1.ogg
|sound2=Equip chain2.ogg
|sound3=Equip chain3.ogg
|sound4=Equip chain4.ogg
|sound5=Equip chain5.ogg
|sound6=Equip chain6.ogg
|subtitle=Chain armor jingles
|source=player
|description=When a chainmail chestplate is equipped
|id=item.armor.equip_chain
|translationkey=subtitles.item.armor.equip_chain
|volume=1.0
|pitch=1.0
|distance=16}}
{{Sound table
|sound=Equip iron1.ogg
|sound2=Equip iron2.ogg
|sound3=Equip iron3.ogg
|sound4=Equip iron4.ogg
|sound5=Equip iron5.ogg
|sound6=Equip iron6.ogg
|subtitle=Iron armor clanks
|source=player
|description=When an iron chestplate is equipped
|id=item.armor.equip_iron
|translationkey=subtitles.item.armor.equip_iron
|volume=1.0
|pitch=1.0
|distance=16}}
{{Sound table
|sound=Equip gold1.ogg
|sound2=Equip gold2.ogg
|sound3=Equip gold3.ogg
|sound4=Equip gold4.ogg
|sound5=Equip gold5.ogg
|sound6=Equip gold6.ogg
|subtitle=Gold armor clinks
|source=player
|description=When a gold chestplate is equipped
|id=item.armor.equip_gold
|translationkey=subtitles.item.armor.equip_gold
|volume=1.0
|pitch=1.0
|distance=16}}
{{Sound table
|sound=Equip diamond1.ogg
|sound2=Equip diamond2.ogg
|sound3=Equip diamond3.ogg
|sound4=Equip diamond4.ogg
|sound5=Equip diamond5.ogg
|sound6=Equip diamond6.ogg
|subtitle=Diamond armor clangs
|source=player
|description=When a diamond chestplate is equipped
|id=item.armor.equip_diamond
|translationkey=subtitles.item.armor.equip_diamond
|volume=1.0
|pitch=1.0
|distance=16}}
{{Sound table
|sound=Equip netherite1.ogg
|sound2=Equip netherite2.ogg
|sound3=Equip netherite3.ogg
|sound4=Equip netherite4.ogg
|subtitle=Netherite armor clanks
|source=player
|description=When a netherite chestplate is equipped
|id=item.armor.equip_netherite
|translationkey=subtitles.item.armor.equip_netherite
|volume=0.8
|pitch=1.0/0.9
|distance=16}}
{{Sound table
|sound=Random break.ogg
|subtitle=Item breaks
|source=dependent
|description=When a chestplate's durability is exhausted
|id=entity.item.break
|translationkey=subtitles.entity.item.break
|volume=0.8
|pitch=0.8-1.2
|distance=16
|foot=1}}
{{el|be}}:
{{Sound table
|type=bedrock
|sound=Equip leather1.ogg
|sound2=Equip leather2.ogg
|sound3=Equip leather3.ogg
|sound4=Equip leather4.ogg
|sound5=Equip leather5.ogg
|sound6=Equip leather6.ogg
|source=player
|description=When a leather chestplate is equipped
|id=armor.equip_leather
|volume=1.0
|pitch=1.0}}
{{Sound table
|sound=Equip chain1.ogg
|sound2=Equip chain2.ogg
|sound3=Equip chain3.ogg
|sound4=Equip chain4.ogg
|sound5=Equip chain5.ogg
|sound6=Equip chain6.ogg
|source=player
|description=When a chain chestplate is equipped
|id=armor.equip_chain
|volume=1.0
|pitch=1.0}}
{{Sound table
|sound=Equip iron1.ogg
|sound2=Equip iron2.ogg
|sound3=Equip iron3.ogg
|sound4=Equip iron4.ogg
|sound5=Equip iron5.ogg
|sound6=Equip iron6.ogg
|source=player
|description=When an iron chestplate is equipped
|id=armor.equip_iron
|volume=1.0
|pitch=1.0}}
{{Sound table
|sound=Equip gold1.ogg
|sound2=Equip gold2.ogg
|sound3=Equip gold3.ogg
|sound4=Equip gold4.ogg
|sound5=Equip gold5.ogg
|sound6=Equip gold6.ogg
|source=player
|description=When a gold chestplate is equipped
|id=armor.equip_gold
|volume=1.0
|pitch=1.0}}
{{Sound table
|sound=Equip diamond1.ogg
|sound2=Equip diamond2.ogg
|sound3=Equip diamond3.ogg
|sound4=Equip diamond4.ogg
|sound5=Equip diamond5.ogg
|sound6=Equip diamond6.ogg
|source=player
|description=When a diamond chestplate is equipped
|id=armor.equip_diamond
|volume=1.0
|pitch=1.0}}
{{Sound table
|sound=Equip netherite1.ogg
|sound2=Equip netherite2.ogg
|sound3=Equip netherite3.ogg
|sound4=Equip netherite4.ogg
|source=player
|description=When a netherite chestplate is equipped.
|id=armor.equip_netherite
|volume=1.0
|pitch=1.0}}
{{Sound table
|rowspan=2
|sound=Water Splash Old.ogg
|source=block
|description=When a leather chestplate is dyed using a cauldron
|id=cauldron.dyearmor
|volume=0.1
|pitch=1.0}}
{{Sound table
|source=block
|description=When a leather chestplate's dye is removed using a cauldron
|id=cauldron.cleanarmor
|volume=0.1
|pitch=1.0}}
{{Sound table
|sound=Random break.ogg
|source=player
|description=When a chestplate's durability is exhausted
|id=random.break
|volume=1.0
|pitch=0.9
|foot=1}}
== Data values ==
=== ID ===
{{edition|java}}:
{{ID table
|edition=java
|showitemtags=y
|showforms=y
|generatetranslationkeys=y
|displayname=Leather Tunic
|spritetype=item
|nameid=leather_chestplate
|itemtags=freeze_immune_wearables
|form=item}}
{{ID table
|displayname=Chainmail Chestplate
|spritetype=item
|nameid=chainmail_chestplate
|form=item}}
{{ID table
|displayname=Iron Chestplate
|spritetype=item
|nameid=iron_chestplate
|form=item}}
{{ID table
|displayname=Diamond Chestplate
|spritetype=item
|nameid=diamond_chestplate
|form=item}}
{{ID table
|displayname=Golden Chestplate
|spritetype=item
|nameid=golden_chestplate
|form=item}}
{{ID table
|displayname=Netherite Chestplate
|spritetype=item
|nameid=netherite_chestplate
|form=item
|foot=1}}
{{edition|bedrock}}:
{{ID table
|edition=bedrock
|shownumericids=y
|showforms=y
|notshowbeitemforms=y
|generatetranslationkeys=y
|displayname=Leather Tunic
|spritetype=item
|nameid=leather_chestplate
|id=336
|form=item}}
{{ID table
|displayname=Chainmail Chestplate
|spritetype=item
|nameid=chainmail_chestplate
|id=340
|form=item}}
{{ID table
|displayname=Iron Chestplate
|spritetype=item
|nameid=iron_chestplate
|id=344
|form=item}}
{{ID table
|displayname=Diamond Chestplate
|spritetype=item
|nameid=diamond_chestplate
|id=348
|form=item}}
{{ID table
|displayname=Golden Chestplate
|spritetype=item
|nameid=golden_chestplate
|id=352
|form=item}}
{{ID table
|displayname=Netherite Chestplate
|spritetype=item
|nameid=netherite_chestplate
|id=610
|form=item
|foot=1}}
=== Item data ===
When leather tunics are dyed, it has the following NBT:
<div class="treeview">
* {{nbt|compound|tag}}: Parent tag.
** {{nbt|compound|display}}: Display properties.
*** {{nbt|int|color}}: The color of the leather armor. The tooltip displays "Dyed" if advanced tooltips are disabled, otherwise it displays the hexadecimal color value. Color codes are calculated from the Red, Green and Blue components using this formula:<br>'''<span style="color:red">Red</span>[[wikipedia:Logical shift|<<]]16 + <span style="color:green">Green</span><<8 + <span style="color:blue">Blue</span>'''<ref>For positive values larger than 0x00FFFFFF, the top byte is ignored. All negative values produce white.</ref>
</div>
== Achievements ==
{{load achievements|Iron Man;Tie Dye Outfit;Cover me in debris;Oooh, shiny!}}
== Advancements ==
{{load advancements|Suit Up;Cover me With Diamonds;Oh Shiny;Cover Me in Debris}}
== History ==
{{History|java classic}}
{{History||June 14, 2009|link=wordofnotch:123343045|[[Notch]] discussed how armor would work in [[Survival]] mode: "Two types of swords, two types of armor, two types of helmets. The basic versions require iron. The advanced versions require steel, which you make by combining iron and coal. Carrying swords, armor or helmets take up inventory slots, but otherwise have no penalty and work pretty much as you expect (prevent some damage, or cause more damage)".}}
{{History||August 13, 2009|link=wordofnotch:162091556|Notch tested chestplates on the [[human]]. They were merely aesthetic at the time and had no effect on gameplay.}}
{{History||0.24_SURVIVAL_TEST|[[File:Plate Chestplate.png|32px]] Added the [[Java_Edition_removed_features#Armor_in_Survival_Test|plate chestplate]].
|[[File:Chainmail Chestplate JE1.png|32px]] Added the model and the texture for the unused [[Java_Edition_removed_features#Armor_in_Survival Test|chain chestplate]].
|[[File:Zombie full set.png|32px]] [[File:Skeleton helmet.png|26px]] The plate chestplate has been tested on [[zombie]]s and [[skeleton]]s. It had no effect on gameplay.}}
{{History|java indev}}
{{History||0.31|snap=20091223-1|Plate and chain armor chestplates are no longer used.}}
{{History|||snap=20091231-2|[[File:Leather Tunic (item) JE1 BE1.png|32px]] [[File:Studded Chestplate (item) JE1.png|32px]] [[File:Chainmail Chestplate (item) JE1 BE1.png|32px]] [[File:Iron Chestplate (item) JE1 BE1.png|32px]] Added the single item form of relation to leather, [[History of textures/Unused textures#Studded armor|studded]], chainmail, and plate (iron) chestplates.
|The textures of the cloth chestplate are taken from one of [[Notch]]'s previous games, ''[[Legend of the Chambered]]''. The rest are from ''[[Legend of the Chambered 2]]''.}}
{{History||20100206|[[File:Golden Chestplate (item) JE1 BE1.png|32px]] [[File:Diamond Chestplate (item) JE1 BE1.png|32px]] Added the item form of golden and diamond chestplates.
|Removed the leather-chain chestplate.}}
{{History||February 9, 2010|link=wordofnotch:380486636|[[File:Notch revealed armor.png|32px]] [[Notch]] revealed new models for armor - including chestplates.}}
{{History||20100212-1|Added armor models.
|[[File:Indev 20100212 armor.png|50px]] Armor models are now displayed on the [[player]] in the [[inventory]].}}
{{History||20100218|[[File:Leather Tunic JE1 BE1.png|32px]] [[File:Chainmail Chestplate JE2 BE1.png|32px]] [[File:Iron Chestplate JE1 BE1.png|32px]] [[File:Golden Chestplate JE1 BE1.png|32px]] [[File:Diamond Chestplate JE1 BE1.png|32px]] Added models of cloth, chainmail, iron, gold, and diamond chestplates.
|Chestplates can now be [[crafting|crafted]] and worn.
|Chestplates now functions. All chestplates give {{Armor|8}}. Chestplates have limited [[item durability|durability]], with lower tier chestplates less durable than higher tier chestplates.}}
{{History|java alpha}}
{{History||v1.0.8|With the introduction of [[leather]], "Cloth Chestplate" has been renamed to "Leather Tunic".
|Leather tunics is now [[crafting|crafted]] with leather instead of [[wool|cloth]].}}
{{History|java}}
{{History||1.0.0|snap=Beta 1.9 Prerelease|The armor protection behavior has been changed. Previous to this update, the total armor protection is based in this equation: ((''total equipped armor damage reduction'' − 1) × (''all equipped armor max damage'' − ''total equipped armor damage'')) ÷ (''total equipped armor max damage'' + 1)). Armor no longer reduces certain damage types to be covered by enchantments.}}
{{History|||snap=October 3, 2011|slink={{tweet|notch|120859830339637249}}|The first images of a [[player]] wearing enchanted chestplates are revealed.}}
{{History|||snap=Beta 1.9 Prerelease 3|Iron chestplates can now be found in the new [[stronghold]] altar [[chest]]s.}}
{{History|||snap=Beta 1.9 Prerelease 4|Chestplates can now be [[enchanting|enchanted]].}}
{{History||1.1|snap=12w01a|Iron chestplates can now be found in the new blacksmith [[chest]]s in [[village]]s.}}
{{History||1.3.1|snap=12w15a|{{key|Shift}}+clicking can now be used to wear chestplates.}}
{{History|||snap=12w21a|Chainmail chestplates can now be obtained legitimately in [[survival]] mode through [[trading]].
|Blacksmith [[villager]]s now [[trading|sell]] chainmail chestplates for 11–14 emeralds.
|Blacksmith villagers now sell diamond chestplates for 16–18 emeralds.
|Blacksmith villagers now sell iron chestplates for 10–13 emeralds.
|Butchers now sell leather tunics for 4 emeralds.}}
{{History||1.4.2|snap=12w32a|[[Mob]] armor has been reintroduced. A partial or full set of any armor is now sometimes worn by [[zombie]]s, [[skeleton]]s and [[zombified piglins|zombie pigmen]], with the likelihood increasing with difficulty.}}
{{History|||snap=August 17, 2012|slink={{tweet|Dinnerbone|236445090929844225}}|[[Jeb]] and [[Dinnerbone]] tweeted pictures of [[dye]]able leather chestplates.}}
{{History|||snap=12w34a|Leather tunics can now be dyed by [[crafting]] a leather tunic piece with [[dye]]s. Dyes can be removed by {{control|use|text=using}} dyed leather tunics on a [[cauldron]] with [[water]].
|[[File:Leather Tunic JE2.png|32px]] [[File:Leather Tunic (item) JE2.png|32px]] Default leather tunic textures are now slightly darker and have buttons.}}
{{History|||snap=12w34b|[[File:Leather Tunic JE3 BE2.png|32px]] [[File:Leather Tunic (item) JE3 BE2.png|32px]] [[File:Diamond Chestplate JE2.png|32px]] The texture of leather and diamond chestplates has been changed. Leather tunics now have longer sleeves. Diamond chestplates now have notches under the shoulders.}}
{{History|||snap=12w36a|[[Dye]]d leather tunics are now more saturated and have a slight tint of tan in respect to the default armor color.}}
{{History|||snap=12w37a|[[File:Leather Cap JE3 BE2.png|32px]] [[File:Leather Boots JE2 BE2.png|32px]] [[File:Leather Cap (item) JE3 BE2.png|32px]] [[File:Leather Boots (item) JE3 BE2.png|32px]] Leather armor now have non-dyed parts on cap, pants and boots. This has been implemented so that [[player]]s can distinguish between other types of armor and similarly colored leather armor.}}
{{History||1.4.6|snap=12w50a|The [[Thorns]] enchantment can now be [[enchanting|enchanted]] on chestplates.}}
{{History||1.5|snap=13w04a|Armor in the [[player]]'s hand can now be equipped by right-clicking.
|[[Dispenser]]s can now equip nearby players with armor.}}
{{History||1.6.1|snap=13w18a|Golden chestplates are now found in the new [[chest]]s in [[nether fortress]]es.}}
{{History||1.7.2|snap=13w36a|Leather [[boots]] can now be obtained as one of the "junk" items by [[fishing]].}}
{{History||1.8|snap=14w02a|[[Trading|Trades]] changed: armorer [[villager]]s now [[trading|sell]] chain boots for 5–7 [[emerald]]s, chain [[leggings]] for 9–11 emeralds, chain chestplates for 11–15 emeralds and chain helmets for 5–7 emeralds.
|Armorer villagers now sell enchanted diamond chestplates for 16–19 emeralds, and no longer sell other diamond armor.
|Armorer villagers now sell iron chestplates for 10–14 emeralds and iron helmets for 4–6 emeralds, and no longer sell other iron armor.
|Leatherworkers now sell enchanted leather tunics for 7–12 emeralds, and no longer sell other leather armor.}}
{{History|||snap=14w05a|Armor no longer turns red when [[mob]]s and [[player]]s are hurt.}}
{{History|||snap=14w06a|Armor is now visible on [[giant]]s.}}
{{History|||snap=14w25a|Chain armor [[Java Edition removed features#Chainmail armor|cannot be crafted anymore]] due to the [[item]] form of [[fire]] being [[Java Edition removed features#Obtainable until 1.8|removed]].}}
{{History||1.9|snap=15w31a|Enchanted iron and diamond armor can now be found in [[end city]] ship [[chest]]s.
|[[Mob]]s now wear armor from the bottom to the top, rather than from the top to the bottom. This means that a mob with three armor pieces, for example, spawn with all armor except a helmet.}}
{{History|||snap=15w34b|Armor [[item durability|durability]] now affects armor value.}}
{{History|||snap=15w36a|Armor and armor [[enchanting|enchantment]] calculations have been changed. For the original values, see [[Armor/Before 1.9|here]].}}
{{History|||snap=15w36d|Armor durability affecting value has been removed.
|Armor now has an attribute controlling the defense points.}}
{{History|||snap=15w43a|The average yield of gold chestplates in [[nether fortress]] [[chest]]s has been decreased.}}
{{History|||snap=15w50a|Added <code>equip</code> [[sound]]s for all types of armor.}}
{{History|||snap=16w02a|Armor and armor enchantment calculations have been changed again.}}
{{History|||snap=16w05a|Armor calculations have been changed, once again.}}
{{History||1.11|snap=16w39a|Diamond and chainmail chestplates are now found in the new [[woodland mansion]] chests.}}
{{History||1.11.1|snap=16w50a|Golden, chain and iron armor can now be [[smelting|smelted]] down into one of their respective [[nugget]]s.}}
{{History||1.13|snap=17w47a|Prior to [[1.13/Flattening|''The Flattening'']], these [[item]]s' numeral IDs were 298 through 317.}}
{{History|||snap=18w09a|Leather tunics now have a chance of generating in [[underwater ruins]].}}
{{History|||snap=18w10a|Leather tunics can now generate in [[buried treasure]] [[chest]]s.}}
{{History|||snap=18w11a|Enchanted leather tunics can now generate in the chests of [[shipwreck]]s.}}
{{History|||snap=18w20a|Chain armor pieces have been renamed to "chainmail".}}
{{History||1.14|snap=18w43a|[[File:Leather Tunic JE4 BE2.png|32px]] [[File:Chainmail Chestplate JE3 BE2.png|32px]] [[File:Iron Chestplate JE2 BE2.png|32px]] [[File:Golden Chestplate JE2 BE2.png|32px]] [[File:Diamond Chestplate JE3 BE2.png|32px]] [[File:Leather Tunic (item) JE4 BE3.png|32px]] [[File:Chainmail Chestplate (item) JE2 BE2.png|32px]] [[File:Iron Chestplate (item) JE2 BE2.png|32px]] [[File:Golden Chestplate (item) JE2 BE2.png|32px]] [[File:Diamond Chestplate (item) JE2 BE2.png|32px]] The textures of all types of armor have been changed.}}
{{History|||snap=18w48a|Leather tunics can now be found in [[chest]]s in [[village]] tanneries.}}
{{History|||snap=18w50a|Iron chestplates can now be found on [[armor stand]]s in [[taiga]] villages.}}
{{History|||snap=19w08a|[[File:Golden Chestplate (item) JE3 BE3.png|32px]] The textures of gold chestplate [[item]] have been changed.}}
{{History|||snap=19w11a|Leatherworker villagers now sell randomly [[dye]]d leather tunics, instead of enchanted leather tunics.}}
{{History|||snap=19w13a|Armorer villagers now give chainmail chestplates to players under the [[Hero of the Village]] effect.}}
{{History||1.16|snap=20w06a|[[File:Netherite Chestplate JE1.png|32px]] [[File:Netherite Chestplate (item) JE1.png|32px]] Added netherite chestplate.}}
{{History|||snap=20w10a|[[File:Netherite Chestplate JE2 BE1.png|32px]] [[File:Netherite Chestplate (item) JE2 BE1.png|32px]] The texture of netherite chestplate have been changed.
|Netherite chestplate can no longer be [[crafting|crafted]].
|Netherite chestplate is now obtained by combining one diamond armor piece and one netherite ingot in a [[smithing table]].}}
{{History|||snap=20w16a|All parts of golden and netherite chestplates now generate randomly [[enchanting|enchanted]], and sometimes [[damage]]d, in [[bastion remnant]] and [[ruined portal]] chests.}}
{{History|||snap=20w17a|Diamonds chestplates now generates in place of netherite armor in bastion remnant [[chest]]s.}}
{{History||1.17|snap=20w48a|Wearing any piece of leather armor now prevents [[Powder Snow#Freezing|freezing]] entirely.}}
{{History||1.18.2|snap=22w03a|Netherite chestplate knockback resistance is no longer random.}}
{{History||1.20<br>(Experimental)|link=1.19.4|snap=23w04a|Non-leather chestplates can now be trimmed using a [[smithing table]].
|There are 10 types of material that determine the color of the trim:
*Iron
*Copper
*Gold
*Lapis
*Emerald
*Diamond
*Netherite
*Redstone
*Amethyst
*Quartz
|Upgrading diamond chestplate to netherite chestplate now requires the netherite upgrade [[smithing template]].}}
{{History|||snap=23w05a|Leather tunics can now be trimmed using a smithing table.|Chestplates can now have trims of the same material it is made out of.|The texture of the dune armor trim has been tweaked, so that the symbol on the chestplate is moved up a few pixels.}}
{{History|||snap=23w06a|Swapped {{cd|iron}} and {{cd|iron_darker}} palette, then made {{cd|iron_darker}} darker overall.|Added a darkest pixel to {{cd|chestplate_trim}} trim item texture.}}
{{History||1.19.4|snap=23w05a|Chestplates can now be swapped by {{ctrl|using}} them/elytra in the hotbar.<ref>{{bug|MC-216270|||Fixed}}</ref>}}
{{History||?|Chestplates can now be swapped in [[armor stand]]s by {{ctrl|using}} them/elytra in the armor stand's slot.}}
{{History||1.20|snap=23w12a|The pattern textures of dune and sentry armor trims are changed.|
Those previous patterns were left with different names: dune was renamed sentry and sentry was renamed shaper.}}
{{History|pocket alpha}}
{{History||v0.6.0|[[File:Leather Tunic JE1 BE1.png|32px]] [[File:Chainmail Chestplate JE2 BE1.png|32px]] [[File:Iron Chestplate JE1 BE1.png|32px]] [[File:Golden Chestplate JE1 BE1.png|32px]] [[File:Diamond Chestplate JE1 BE1.png|32px]] [[File:Leather Tunic (item) JE1 BE1.png|32px]] [[File:Chainmail Chestplate (item) JE1 BE1.png|32px]] [[File:Iron Chestplate (item) JE1 BE1.png|32px]] [[File:Golden Chestplate (item) JE1 BE1.png|32px]] [[File:Diamond Chestplate (item) JE1 BE1.png|32px]] Added chestplates.}}
{{History||v0.8.0|snap=build 2|[[File:Leather Tunic (item) JE3 BE2.png|32px]] The leather armor sprites have been changed to that of {{el|je}}, but its armor [[model]] remains that of older versions.}}
{{History||v0.9.0|snap=build 1|Iron armor now naturally generates in [[village]] [[chest]]s and a [[stronghold]] altar chest.}}
{{History||v0.11.0|snap=build 11|Armor now protects against [[damage]] from [[mob]]s only.}}
{{History||v0.12.1|snap=build 1|Armor can now be worn by mobs.
|Golden chestplates can now be found in [[nether fortress]] [[chest]]s.
|Chainmail armor can now be obtained in [[survival]] mode from a mob wearing it.}}
{{History||?|Armor no longer turns red when [[mob]]s and [[player]]s are hurt.}}
{{History||v0.14.0|snap=build 1|[[File:Leather Tunic JE3 BE2.png|32px]] The textures of leather chestplate have been changed.
|Leather armor can now be dyed.}}
{{History||v0.15.0|snap=build 1|Armor can now be obtained from [[stray]]s and [[husk]]s that naturally spawn with armor.}}
{{History||v0.15.10|[[Cape]]s no longer clip through armor.}}
{{History|pocket}}
{{History||1.0.0|snap=alpha 0.17.0.1|[[Enchanting|Enchanted]] iron armor and enchanted diamond armor can now be found inside [[chest]]s within [[end city]].}}
{{History||1.0.4|snap=alpha 1.0.4.0|Iron [[helmet]]s, iron chestplates, enchanted diamond chestplates and chainmail armor are now [[trading|sold]] by armorer smith [[villager]]s via [[trading]].}}
{{History||1.1.0|snap=alpha 1.1.0.0|Golden, chain and iron armor can now be [[smelting|smelted]] down into one of their respective [[nugget]]s.
|Diamond chestplates and chainmail chestplates can now be found inside [[woodland mansion]] chests.}}
{{History|bedrock}}
{{History||1.4.0|snap=beta 1.2.14.2|Chainmail chestplates now generate in [[buried treasure]] chests.
|Enchanted leather armor can now be found inside [[shipwreck]] supply room [[chest]]s.}}
{{History|||snap=beta 1.2.20.1|Leather chestplates can now be found inside [[underwater ruins]] chests.}}
{{History||1.10.0|snap=beta 1.10.0.3|[[File:Leather Tunic JE4 BE2.png|32px]] [[File:Chainmail Chestplate JE3 BE2.png|32px]] [[File:Iron Chestplate JE2 BE2.png|32px]] [[File:Golden Chestplate JE2 BE2.png|32px]] [[File:Diamond Chestplate JE3 BE2.png|32px]] [[File:Leather Tunic (item) JE4 BE3.png|32px]] [[File:Chainmail Chestplate (item) JE2 BE2.png|32px]] [[File:Iron Chestplate (item) JE2 BE2.png|32px]] [[File:Golden Chestplate (item) JE2 BE2.png|32px]] [[File:Diamond Chestplate (item) JE2 BE2.png|32px]] The textures of all types of chestplates have been changed.
|Iron armor now can be found in plains [[village]] weaponsmith [[chest]]s.
|Leather armor can now be found inside plains village tannery chests.}}
{{History||1.11.0|snap=beta 1.11.0.1|Iron armor now can be found in [[savanna]], [[taiga]], [[desert]], [[snowy taiga]] and [[snowy tundra]] [[village]] weaponsmith [[chest]]s.
|Leather armor can now be found inside savanna, taiga, desert, snowy taiga and snowy tundra village tannery chests.}}
{{History|||snap=beta 1.11.0.4|[[Pillager]]s and [[vindicator]]s that spawn in [[raid]]s can now drop iron armor.}}
{{History||1.11.0|snap=beta 1.11.0.5|[[File:Golden Chestplate (item) JE3 BE3.png|32px]] The textures of gold chestplate [[item]] have been changed.}}
{{History||1.12.0|snap=beta 1.12.0.2|[[File:Armor Stand with Leather Armor MCPE-44669.png|32px]] Leather armor no longer show as being [[dye]]d properly when worn by [[armor stand]]s.}}
{{History||1.13.0|snap=beta 1.13.0.1|Leather armor now appears dyed properly when worn by armor stands.}}
{{History||1.16.0|snap=beta 1.16.0.51|[[File:Netherite Chestplate JE2 BE1.png|32px]] [[File:Netherite Chestplate (item) JE2 BE1.png|32px]] Added netherite chestplate.
|Armor can now be obtained from [[piglin]]s that naturally spawn with golden armor.}}
{{History|||snap=beta 1.16.0.57|All parts of golden and netherite armor now generate randomly [[enchanting|enchanted]], and sometimes [[damage]]d, in [[bastion remnant]] chests.
|Netherite armor can no longer be [[crafting|crafted]].
|Netherite armor is now obtained by combining one diamond armor piece and one netherite ingot in a [[smithing table]].}}
{{History|||snap=beta 1.16.0.63|Diamonds armor now generates in place of netherite armor in bastion remnant [[chest]]s.}}
{{History|||snap=beta 1.16.200.53|Netherite Armor now gives a 90% reduction in Knockback.}}
{{History||1.16.210|snap=beta 1.16.210.53|Wearing any piece of leather armor now prevents [[Powder Snow#Freezing|freezing]] entirely.}}
{{History|console}}
{{History||xbox=TU1|xbone=CU1|ps=1.0|wiiu=Patch 1|switch=1.0.1|[[File:Leather Tunic JE1 BE1.png|32px]] [[File:Chainmail Chestplate JE2 BE1.png|32px]] [[File:Iron Chestplate JE1 BE1.png|32px]] [[File:Golden Chestplate JE1 BE1.png|32px]] [[File:Diamond Chestplate JE1 BE1.png|32px]] [[File:Leather Tunic (item) JE1 BE1.png|32px]] [[File:Chainmail Chestplate (item) JE1 BE1.png|32px]] [[File:Iron Chestplate (item) JE1 BE1.png|32px]] [[File:Golden Chestplate (item) JE1 BE1.png|32px]] [[File:Diamond Chestplate (item) JE1 BE1.png|32px]] Added chestplates.
|Added a quick equip for armor to the [[inventory]] interface.}}
{{History||xbox=TU12|ps=1.03|[[File:Leather Tunic JE3 BE2.png|32px]] [[File:Leather Tunic (item) JE3 BE2.png|32px]] The textures for leather chestplate have been changed.}}
{{History||xbox=TU14|ps=1.05|Leather armor can now be [[dye]]d.
|[[Item repair]] can now repair armor.}}
{{History||xbox=TU25|xbone=CU13|ps=1.16|Armor now have the quick equip functionality.}}
{{History||xbox=TU53|xbone=CU43|ps=1.49|wiiu=Patch 23|switch=1.0.3|Golden, chain and iron armor can now be [[smelting|smelted]] down into one of their respective [[nugget]]s.}}
{{History|PS4}}
{{History||1.90|[[File:Chainmail Chestplate (item) JE2 BE2.png|32px]] [[File:Iron Chestplate (item) JE2 BE2.png|32px]] [[File:Golden Chestplate (item) JE2 BE2.png|32px]] [[File:Diamond Chestplate (item) JE2 BE2.png|32px]] The textures of all types of chestplate items have been changed (except for the leather one).}}
{{History|new 3ds}}
{{History||0.1.0|[[File:Leather Tunic JE1 BE1.png|32px]] [[File:Chainmail Chestplate JE2 BE1.png|32px]] [[File:Iron Chestplate JE1 BE1.png|32px]] [[File:Golden Chestplate JE1 BE1.png|32px]] [[File:Diamond Chestplate JE1 BE1.png|32px]] [[File:Leather Tunic (item) JE3 BE2.png|32px]] [[File:Chainmail Chestplate (item) JE1 BE1.png|32px]] [[File:Iron Chestplate (item) JE1 BE1.png|32px]] [[File:Golden Chestplate (item) JE1 BE1.png|32px]] [[File:Diamond Chestplate (item) JE1 BE1.png|32px]] Added chestplates.}}
{{History|foot}}
; Armor durability from Indev until late Beta
{| class="wikitable" data-description="Armor Durability during Indev until late Beta" style="text-align:center;"
|-
!scope="col" | Material
!scope="col" | Helmet
!scope="col" | Chestplate
!scope="col" | Leggings
!scope="col" | Boots
|-
|scope="row" | '''Leather'''
| 33
| 48
| 45
| 39
|-
|scope="row" | '''Golden'''
| 66
| 96
| 90
| 78
|-
|scope="row" | '''Chainmail'''
| 66
| 96
| 90
| 78
|-
|scope="row" | '''Iron'''
| 132
| 192
| 180
| 156
|-
|scope="row" | '''Diamond'''
| 264
| 384
| 360
| 312
|}
== Issues ==
{{issue list}}
== Trivia ==
* Chestplates do not render on the player's arm in first person view.<ref>{{bug|MC-25512}}</ref><ref>{{bug|MCPE-30000}}</ref>
== Gallery ==
=== Enchanted Chestplates ===
<gallery>
File:Enchanted Leather Tunic (item).gif
File:Enchanted Chainmail Chestplate (item).gif
File:Enchanted Iron Chestplate (item).gif
File:Enchanted Golden Chestplate (item).gif
File:Enchanted Diamond Chestplate (item).gif
File:Enchanted Netherite Chestplate (item).gif
</gallery>
<gallery>
File:Enchanted Leather Chestplate.gif
File:Enchanted Chainmail Chestplate.gif
File:Enchanted Iron Chestplate.gif
File:Enchanted Golden Chestplate.gif
File:Enchanted Diamond Chestplate.gif
File:Enchanted Netherite Chestplate.gif
</gallery>
== References ==
{{reflist}}
== External Links ==
*[https://www.minecraft.net/en-us/article/taking-inventory--chestplate Taking Inventory: Chestplate] – Minecraft.net on August 4, 2021
{{Items}}
[[Category:Armor]]
[[ja:チェストプレート]]
[[ko:흉갑]]
[[pt:Peitoral]]
[[pl:Napierśnik]]
[[th:เสื้อเกราะ]]
[[zh:胸甲]]</li></ul> | alpha 1.1.0.0 | Added the Mending enchantment, which can now be applied to bows and is mutually exclusive to the Infinity enchantment. | |||
| Arrows can now be placed in the offhand slot and bows now prioritize the arrows in that slot. | |||||
| Bedrock Edition | |||||
| ? | Momentum now affects the physics of arrows fired from bows. | ||||
1.8.0{{Extension DPL}}<ul><li>[[Rabbit Stew|Rabbit Stew]]<br/>{{Item
| title = Rabbit Stew
| heals = {{hunger|10}}
| renewable = Yes
| stackable = No
}}
'''Rabbit stew''' is a [[food]] [[item]] that can be eaten by the [[player]].
== Obtaining ==
=== Crafting ===
{{Crafting
|shapeless=true
|B1=Cooked Rabbit
|A2=Carrot
|B2=Baked Potato
|C2=Any Mushroom
|B3=Bowl
|Output=Rabbit Stew
|type=Foodstuff
}}
=== Trading ===
{{IN|bedrock}}, novice-level Butcher villagers always offer to sell rabbit stew for one emerald as their second trade.
{{IN|java}}, novice-level Butcher villagers have a 50% chance of offering rabbit stew for one emerald.
== Usage ==
=== Food ===
To eat rabbit stew, press and hold {{control|use}} while it is selected in the hotbar. Eating one restores {{hunger|10}} [[hunger]] and 12 hunger [[Hunger#Mechanics|saturation]]. This restores more hunger than any other food type in the game except [[cake]], but has less saturation than a [[golden carrot]], a [[cooked porkchop]], or a [[steak]].
Eating rabbit stew leaves the player with an empty bowl, similar to [[mushroom stew]], [[suspicious stew]], and [[beetroot soup]].
=== Wolves ===
{{IN|bedrock}}, rabbit stew can be used to feed [[wolves]], healing them by {{hp|10|mob=1}}. However, unlike other wolf food, rabbit stew does not speed up the growth of baby wolves, and it cannot be used to breed them. It is usable only on a wolf that has less than full health.
== Sounds ==
{{Sound table/Entity/Food}}
== Data values ==
=== ID ===
{{edition|java}}:
{{ID table
|edition=java
|showforms=y
|generatetranslationkeys=y
|displayname=Rabbit Stew
|spritetype=item
|nameid=rabbit_stew
|form=item
|foot=1}}
{{edition|bedrock}}:
{{ID table
|edition=bedrock
|shownumericids=y
|showforms=y
|notshowbeitemforms=y
|generatetranslationkeys=y
|displayname=Rabbit Stew
|spritetype=item
|nameid=rabbit_stew
|id=290
|form=item
|foot=1}}
== Advancements ==
{{load advancements|Husbandry;A Balanced Diet}}
== Video ==
<div style="text-align:center">{{yt|GwCqwtydRBc}}</div>
== History ==
{{History|java}}
{{History||1.8|snap=June 30, 2014|slink={{tweet|TheMogMiner|483725253018157057}}|[[Ryan Holtz]] tweets the recipe of rabbit stew, and that it can restore hunger better than any other item other than [[golden apple]]s (which was incorrect, as golden apples restore less hunger, but a whole [[cake]] restores more).}}
{{History|||snap=14w27a|[[File:Rabbit Stew JE1 BE1.png|32px]] Added rabbit stew.}}
{{History||1.13|snap=17w47a|Prior to [[1.13/Flattening|''The Flattening'']], this [[item]]'s numeral ID was 413.}}
{{History||1.14|snap=18w43a|[[File:Rabbit Stew JE2.png|32px]] The texture of rabbit stew has been changed.
|The rabbit stew's [[recipe]] is now shapeless.}}
{{History|||snap=18w50a|[[File:Rabbit Stew JE3 BE2.png|32px]] The texture of rabbit stew has been changed.}}
{{History|||snap=19w11a|Butcher [[villager]]s now [[trading|sell]] rabbit stew.}}
{{History|pocket alpha}}
{{History||v0.13.0|snap=build 1|[[File:Rabbit Stew JE1 BE1.png|32px]] Added rabbit stew.}}
{{History|bedrock}}
{{History||1.10.0|snap=beta 1.10.0.3|[[File:Rabbit Stew JE3 BE2.png|32px]] The texture of rabbit stew has been changed.
|The recipe for rabbit stew is now shapeless.}}
{{History||1.11.0|snap=beta 1.11.0.4|Butcher [[villager]]s now [[trading|sell]] rabbit stew.}}
{{History|console}}
{{History||xbox=TU31|xbone=CU19|ps=1.22|wiiu=Patch 3|switch=1.0.1|[[File:Rabbit Stew JE1 BE1.png|32px]] Added rabbit stew.}}
{{History||xbox=none|xbone=none|ps=1.90|wiiu=none|switch=none|[[File:Rabbit Stew JE3 BE2.png|32px]] The texture of rabbit stew has been changed.
|The recipe for rabbit stew is now shapeless.}}
{{History|new 3ds}}
{{History||0.1.0|[[File:Rabbit Stew JE1 BE1.png|32px]] Added rabbit stew.}}
{{History|foot}}
== Issues ==
{{issue list}}
== Trivia ==
* If the ingredients of rabbit stew were eaten separately and the [[mushroom]] had become half of a [[mushroom stew]], they would restore a total of {{Hunger|16}} and 19.2 saturation points. Without counting the mushroom, the separate ingredients would restore {{Hunger|13}} and 15.6 saturation points. Therefore, crafting rabbit stew results in a net loss of restorative points, though it is quicker than eating all the ingredients separately.
* Rabbit stew restores more hunger and total food points (hunger + saturation) than nearly any other single item (the exception is a suspicious stew with Saturation). This is balanced by the point that the stew does not stack, and with its complex recipe it's not so easy to make "on the road". The suspicious stew shares the unstackability, but with only four ingredients it can at least be crafted in the inventory.
==Gallery==
<gallery>
Rabbit Stew Crafting.jpg|Crafting rabbit stew.
</gallery>
== References ==
{{Reflist}}
{{items}}
[[de:Kaninchenragout]]
[[es:Estofado de conejo]]
[[it:Stufato di coniglio]]
[[fr:Ragoût de lapin]]
[[ja:ウサギシチュー]]
[[ko:토끼 스튜]]
[[nl:Konijnenstoofpot]]
[[pl:Gulasz z królika]]
[[pt:Ensopado de coelho]]
[[ru:Тушёный кролик]]
[[uk:Тушкований кролик]]
[[zh:兔肉煲]]
[[Category:Food]]
[[Category:Renewable resources]]</li><li>[[Apple|Apple]]<br/>{{for}}
{{Item
| title = Apple
| image = Apple.png
| renewable = Yes
| heals = {{hunger|4}}
| stackable = Yes (64)
}}
'''Apples''' are [[food]] items that can be eaten by the [[player]].
== Obtaining ==
=== Block loot ===
Oak and dark oak [[leaves]] have 0.5% ({{frac|1|200}}) chance of dropping an apple when decayed or broken, but not if burned. Breaking leaves with a [[tool]] enchanted with the [[Fortune]] enchantment increases the chances of dropping an apple: 0.556% ({{frac|1|180}}) with Fortune I, 0.625% ({{frac|1|160}}) with Fortune II, and 0.833% ({{frac|1|120}}) with Fortune III.
=== Chest loot ===
{{LootChestItem|apple}}
=== Trading ===
Apprentice-level [[Trading#Farmer|farmer]] [[Villager|villagers]] have a 50% ({{frac|1|2}}){{only|bedrock}} or 66.7% ({{frac|2|3}}){{only|java}} chance of selling 4 apples as part of their trades.
== Usage ==
{{see also|Tutorials/Hunger management|title1=Hunger management}}
To eat an apple, press and hold {{control|use}} while it is selected in the hotbar. Eating one restores {{hunger|4}} [[hunger]] and 2.4 [[Hunger#Mechanics|saturation]].
=== Crafting ingredient ===
{{crafting usage}}
=== Composting ===
Placing an apple into a [[composter]] has a 65% ({{frac|13|20}}) chance of raising the compost level by 1.
== Sounds ==
{{Sound table/Entity/Food}}
== Data values ==
=== ID ===
{{edition|java}}:
{{ID table
|edition=java
|showforms=y
|generatetranslationkeys=y
|displayname=Apple
|spritetype=item
|nameid=apple
|form=item
|foot=1}}
{{edition|bedrock}}:
{{ID table
|edition=bedrock
|shownumericids=y
|showforms=y
|notshowbeitemforms=y
|generatetranslationkeys=y
|displayname=Apple
|spritetype=item
|nameid=apple
|id=257
|form=item
|foot=1}}
== Advancements ==
{{load advancements|Husbandry;A Balanced Diet}}
== History ==
{{History|java indev}}
{{History||0.31|snap=20091231-2|[[File:Apple JE1 BE1.png|32px]] Added apples.
|Apples are currently non-functional in this version.}}
{{History|||snap=20100110|Apples are now functional and are edible, restoring {{hp|2}}. They are intended to replace [[mushroom]]s, which were previously edible.}}
{{History|||snap=20100128|Apples now used to [[craft]] [[arrow]]s.}}
{{History|||snap=20100129|Apples no longer used to craft [[arrow]]s.}}
{{History||20100206|Apples now use the texture of [[golden helmet]]s.}}
{{History|java infdev}}
{{History||February 23, 2010|link=none|At the bottom of a [[crafting]] guide they made, a player named JTE jokingly indicated that [[Notch]] dropped an apple when killed, and that apples could be crafted into something called a "[[golden apple]]" – this was a joke on the fact that apples were totally unobtainable.<ref>http://www.minecraftforum.net/topic/2750582-the-secret-history-of-minecraft/</ref><ref name="JTECraftingGuide">https://echidnatribe.org/Minecraft/crafting.php (This is an unofficial recreation with the original domain)</ref>}}
{{History||20100227-1|Players named "[[Notch]]" now drop an apple when they die in addition to their [[inventory]].
|Apples are now used to craft golden apples.
|Apples now correctly use the apple texture again.}}
{{History||20100327|With the addition of the respawn feature, apples have become legitimately obtainable in Survival and renewable for players named "Notch".}}
{{History|java beta}}
{{History||1.8|snap=Pre-release|Apples can now be found in the new [[stronghold]] storeroom [[chest]]s, making them obtainable in normal [[Survival]] gameplay for the first time.
|Apples now restore {{hunger|4}} instead of {{hp|4}}.
|Apples are now stackable.}}
{{History|java}}
{{History||1.0.0|snap=Beta 1.9 Prerelease 3|Apples are now found in the new stronghold altar chests.}}
{{History||1.1|snap=11w48a|Oak [[leaves]] now have a 1/200 chance of dropping an apple when destroyed, making apples fully [[renewable]].}}
{{History|||snap=12w01a|Apples are now found in the new [[village]] blacksmith chests.}}
{{History||1.3.1|snap=12w16a|Apples can now be found in the new [[bonus chest]]s.}}
{{History|||snap=12w18a|"[[Notch]]" players no longer drop apples when they die.}}
{{History|||snap=12w21a|Farmer [[villager]]s now [[trade|sell]] 5 apples for 1 [[emerald]].
|Apples are now used to craft [[enchanted golden apple]]s.}}
{{History||1.4.2|snap=12w37a|[[File:Apple JE2 BE2.png|32px]] The apple's texture has been changed: the [[item]] sprite no longer has a dark outline and now has a more detailed look.}}
{{History||1.5|snap=13w09b|The [[Fortune]] enchantment now increases the chance of dropping apples.}}
{{History||1.7.2|snap=13w43a|Added [[dark oak]] leaves, which drop apples.}}
{{history||1.9|snap=15w43a|Apples may now be found in [[igloo]] basement chests.}}
{{history|||snap=15w44a|Average yield of apples has been slightly increased in bonus chests.
|Apples can no longer be used to craft enchanted golden apples.}}
{{History||1.11|snap=16w33a|Farmer villagers now sell 5–7 apples for 1 emerald.}}
{{History||1.13|snap=17w47a|Prior to [[1.13/Flattening|''The Flattening'']], this item's numeral ID was 260.}}
{{History||1.14|snap=18w43a|[[File:Apple JE3 BE3.png|32px]] The texture of apples has been changed.}}
{{History|||snap=18w48a|Apples can now be found in [[chest]]s in [[plains]] village houses.}}
{{History|||snap=19w03a|Placing an apple into the new [[composter]] has a 50% chance of raising the compost level by 1.}}
{{History|||snap=19w05a|Apples now have a 65% chance of increasing the compost level in a composter by 1.}}
{{History|pocket alpha}}
{{History||v0.4.0|[[File:Apple JE1 BE1.png|32px]] Added apples.}}
{{History||v0.5.0|Apples now restore {{hp|4}} instead of {{hp|2}}.}}
{{History||v0.8.0|snap=build 1|[[File:Apple JE2 BE2.png|32px]] The apple's texture has been changed: the item sprite no longer has a dark outline and now has a more detailed look.}}
{{History||v0.12.1|snap=build 1|Added apples to the [[Creative inventory]].
|Apples are now stackable.
|Apples now restore {{hunger|4}} instead of {{hp|4}}.
|The [[Fortune]] [[enchantment]] can now be used to increase chance of dropping apples.
|Apples can now be used to craft golden apples and enchanted golden apples.}}
{{History||v0.15.0|snap=build 1|Apples can now be used to feed [[horse]]s.}}
{{History|pocket}}
{{History||1.0.0|snap=alpha 0.17.0.1|Apples can now be found inside [[igloo]] chests.}}
{{History||1.0.4|snap=alpha 1.0.4.0|Farmer villagers now sell 5-7 apples for 1 emerald.}}
{{History|bedrock}}
{{History||1.2.0|snap=beta 1.2.0.2|Apples can no longer be used to craft enchanted golden apples.
|Apples can now be found inside bonus chests.}}
{{History||1.10.0|snap=beta 1.10.0.3|Apples can now be found in [[plains]] village weaponsmith chests and plains house chests.
|[[File:Apple JE3 BE3.png|32px]] The texture of apples has been changed.}}
{{History||1.11.0|snap=beta 1.11.0.1|Apples can now be found in [[desert]], [[savanna]], [[taiga]] and [[snowy taiga]] village weaponsmith chests.
|Apples can now be used to fill up composters.}}
{{History|||snap=beta 1.11.0.4|Farmer villagers now sell 4 apples as part of their second tier trades.}}
{{History|console}}
{{History||xbox=TU1|wiiu=Patch 1|[[File:Apple JE1 BE1.png|32px]] Added apples.}}
{{History||xbox=TU5|Apples are now stackable.
|Apples now restore {{hunger|4}} instead of {{hp|4}}.}}
{{History||xbox=TU12|ps=1.03|[[File:Apple JE2 BE2.png|32px]] The apple's texture has been changed: the item sprite no longer has a dark outline and now has a more detailed look.}}
{{History||xbox=none|xbone=none|ps=1.90|wiiu=none|switch=none|[[File:Apple JE3 BE3.png|32px]] The texture of apples has been changed.}}
{{History|New 3DS}}
{{History||0.1.0|[[File:Apple JE2 BE2.png|32px]] Added apples.}}
{{History|foot}}
== Issues ==
{{issue list}}
== Trivia ==
*Prior to the texture update in Java Edition 1.4.2, the sprite of the apple was the same one used in [[Notch]]'s game ''[[Legend of the Chambered]]''.
*Before it was added to ''Minecraft'', apples dropping from trees was already a feature in ''[[Minicraft]]''.
== Gallery ==
<gallery>
Apple in Stronghold.png|An apple found in a stronghold chest.
Apple Item.png|An apple that dropped from decaying leaves.
Obtaining an apple by trading.png|Obtaining apples via villager trading.
File:Candy Apple (Trails and Tales Summer Event) Render.png|The Candy Apple, an item featured in the [[Trails & Tales Event]].
</gallery>
== References ==
{{reflist}}
== External Links ==
*[https://www.minecraft.net/en-us/article/taking-inventory-apple Taking Inventory: Apple] – Minecraft.net on November 23, 2018
{{items}}
[[Category:Plants]]
[[Category:Food]]
[[Category:Renewable resources]]
[[cs:Jablko]]
[[de:Apfel]]
[[es:Manzana]]
[[fr:Pomme]]
[[hu:Alma]]
[[it:Mela]]
[[ja:リンゴ]]
[[ko:사과]]
[[nl:Appel]]
[[pl:Jabłko]]
[[pt:Maçã]]
[[ru:Яблоко]]
[[th:แอปเปิ้ล]]
[[uk:Яблуко]]
[[zh:苹果]]</li></ul> | beta 1.8.0.10 | Bows in the hotbar now show an arrow when being drawn. | |||
1.10.0{{Extension DPL}}<ul><li>[[Orange Dye|Orange Dye]]<br/>{{Item
|image = Orange_Dye_JE2_BE2.png
|renewable = Yes
|stackable = Yes (64)
}}
'''Orange dye''' is a [[Dye#Quasi-Primary|quasi-primary dye]] crafted from [[Flower|orange tulips]], or by combining one [[red dye]] with one [[yellow dye]].
== Obtaining ==
=== Crafting ===
{{Crafting
|head = 1
|showname = 0
|Orange Tulip; Torchflower
|Output=Orange Dye
|type=Material
}}
{{Crafting
|Red Dye
|Yellow Dye
|Output = Orange Dye,2
|type = Material
|foot = 1
}}
=== Loot chest ===
{{#invoke:LootChest|base3|orange-dye}}
=== Trading ===
[[Wandering trader|Wandering traders]] sell 3 orange dye for an [[emerald]].
== Usage ==
{{dye usage}}
=== Crafting ingredient ===
{{crafting usage|ignore=Banner|continue=1}}
{{banner crafting usage}}
=== Loom ingredient ===
{{Banner loom usage|Orange Dye}}
=== Trading ===
Apprentice-level shepherd [[villager]]s have a 20% chance to buy 12 orange dye for an [[emerald]] as part of their trades.{{only|bedrock}}
Journeyman-level shepherd [[villager]]s have a {{frac|1|3}} chance to buy 12 orange dye for an [[emerald]].{{only|java}}
== Data values ==
=== ID ===
{{edition|java}}:
{{ID table
|edition=java
|showforms=y
|generatetranslationkeys=y
|displayname=Orange Dye
|spritetype=item
|nameid=orange_dye
|form=item
|foot=1}}
{{edition|bedrock}}:
{{ID table
|edition=bedrock
|showaliasids=y
|shownumericids=y
|showforms=y
|notshowbeitemforms=y
|generatetranslationkeys=y
|displayname=Orange Dye
|spritetype=item
|nameid=orange_dye
|aliasid=dye / 14
|id=409
|form=item
|translationkey=item.dye.orange.name
|foot=1}}
== Video ==
<div style="text-align:center">{{yt|25t7uNMOFS8}}</div>
== History ==
{{History|java beta}}
{{History||1.2|[[File:Orange Dye JE1 BE1.png|32px]] Added orange dye.}}
{{History|java}}
{{History||1.4.2|snap=12w34a|Added the ability to [[Armor#Dyeing|dye]] leather [[armor]] and [[wolf]] collars.}}
{{History||1.4.6|snap=12w49a|Orange dye can now be crafted with [[gunpowder]] to create a [[firework star]].}}
{{History||1.6.1|snap=13w19a|[[Stained clay]] can now be [[crafting|crafted]].}}
{{History||1.7.2|snap=13w36a|With the addition of the new [[flower]]s, many secondary and tertiary [[dye]]s are now primary dyes.}}
{{History|||snap=13w41a|[[Stained glass]] can now be crafted.}}
{{History||1.8|snap=14w30a|Added [[banner]]s, which can be dyed.}}
{{History||1.11|snap=16w39a|Added the ability to dye [[shulker box]]es.}}
{{History||1.12|snap=17w15a|Added the ability to dye [[bed]]s.}}
{{History||1.13|snap=17w47a|The different data values for the <code>dye</code> ID has now been split up into their own IDs.
|Prior to [[1.13/Flattening|''The Flattening'']], this [[item]]'s numeral ID was 351.}}
{{History||1.14|snap=18w43a|[[File:Orange_Dye_JE2_BE2.png|32px]] The texture of orange dye has now been changed.}}
{{History|||snap=18w44a|Orange dye can now change the text color on [[sign]]s to orange.}}
{{History|||snap=19w05a|Added the [[wandering trader]], which sells orange dye.}}
{{History|||snap=19w11a|Orange dye can now be [[trading|bought]] by shepherd villagers.}}
{{History||1.17|snap=20w45a|Orange dye can now be used to craft [[orange candle]]s.}}
{{History|||snap=21w19a|Orange dye can no longer be used to craft orange candles.}}
{{History|||snap=Pre-release 1|Orange dye can now once again be used to craft orange candles.}}
{{History||1.20 (Experimental)|link=1.19.3|snap=22w42a|Orange dye can now change the text color on [[hanging sign]]s to orange.}}
{{History||1.20<br>(Experimental)|link=1.19.4|snap=23w07a|[[Torchflower]]s can now be crafted into orange dye.}}
{{History||1.20|snap=23w12a|Orange dye can now be found in [[suspicious gravel]] and [[suspicious sand]] in [[trail ruins]].}}
{{History|||snap=23w16a|Orange dye no longer generates in [[suspicious sand]] in [[trail ruins]].|Due to the split of the archaeological loot tables for suspicious gravel within [[trail ruins]], orange dye is now common loot.}}
{{History|pocket alpha}}
{{History||v0.3.0|[[File:Orange Dye JE1 BE1.png|32px]] Added orange dye. It is currently unobtainable and serves no purpose.}}
{{History||v0.4.0|Orange dye is now [[craft]]able with rose red and dandelion yellow.
|Orange dye can now be used to craft orange [[wool]].}}
{{History||v0.8.0|snap=build 1|Orange dye is now used to craft [[cocoa bean]]s (version exclusive).}}
{{History||v0.14.0|snap=build 1|Orange dye can now be used to dye [[water]] in [[cauldron]]s.}}
{{History||unknown|The above recipe for orange dye has now been removed.}}
{{History|pocket}}
{{History||1.0.0|snap=alpha 0.17.0.1|Orange dye can now be used to dye [[shulker]]s.}}
{{History||1.1.0|snap=alpha 1.1.0.0|Orange dye can now be used to craft [[concrete powder]] and colored [[bed]]s.}}
{{History|bedrock}}
{{History||1.2.0|snap=beta 1.2.0.2|Orange dye can now be used to craft [[firework star]]s, [[stained glass]], and patterns on [[banner]]s.}}
{{History||1.4.0|snap=beta 1.2.20.1|Orange dye can now be used to craft [[balloon]]s and [[glow stick]]s.}}
{{History||1.8.0|snap=beta 1.8.0.8|Orange dye can now be used to dye [[cat]] collars.}}
{{History||1.10.0|snap=beta 1.10.0.3|Orange dye is now [[trading|sold]] by [[wandering trader]]s.
|Orange dye can now be used to dye white [[carpet]]s.
|[[File:Orange_Dye_JE2_BE2.png|32px]] The texture of orange dye has now been changed.}}
{{History||1.11.0|snap=beta 1.11.0.4|Orange dye can now be [[trading|sold]] to shepherd [[villager]]s.}}
{{History||1.16.100|snap=beta 1.16.100.56|The ID of orange dye has been changed from <code>dye/14</code> to <code>orange_dye</code>.}}
{{History|console}}
{{History||xbox=TU1|xbone=CU1|ps=1.00|switch=1.0.1|wiiu=Patch 1|[[File:Orange Dye JE1 BE1.png|32px]] Added orange dye.}}
{{History|ps4}}
{{History||1.90|[[File:Orange_Dye_JE2_BE2.png|32px]] The texture of orange dye has now been changed.}}
{{History|new 3ds}}
{{History||0.1.0|[[File:Orange_Dye_JE2_BE2.png|32px]] Added orange dye.}}
{{History|foot}}
== Issues ==
{{issue list}}
== References ==
{{Reflist}}
{{Items}}
[[cs:Oranžové barvivo]]
[[de:Oranger Farbstoff]]
[[es:Tinte naranja]]
[[fr:Teinture orange]]
[[hu:Narancssárga festék]]
[[ja:橙色の染料]]
[[ko:주황색 염료]]
[[nl:Oranje kleurstof]]
[[pl:Pomarańczowy barwnik]]
[[pt:Corante laranja]]
[[ru:Оранжевый краситель]]
[[zh:橙色染料]]
[[Category:Items]]
[[Category:Dyes]]
[[Category:Renewable resources]]</li><li>[[Rabbit's Foot|Rabbit's Foot]]<br/>{{Item
| image = Rabbit's Foot.png
|type=
| renewable = Yes
| stackable = Yes (64)
}}
A '''rabbit's foot''' is a [[brewing]] item obtained from [[rabbit]]s.
== Obtaining ==
=== Mob loot ===
Each [[rabbit]] has a 10% chance to drop a rabbit's foot when killed by the [[player]]. This chance can be increased by 3% per level using a sword enchanted with [[Looting]].
A [[fox]] sometimes spawns with a rabbit's foot in its mouth, which always drops upon death. Alternatively, the player can drop a [[food]] item, which causes the fox to drop the rabbit's foot.
=== Cat gifts ===
{{main|Cat#Gifts}}
A tamed [[cat]] has a 70% chance of giving the player a gift when the player wakes up from a [[bed]], and the gift has a 16.13% chance to be a rabbit's foot.
== Usage ==
=== Brewing ingredient ===
{{Brewing
|head=1
|Rabbit's Foot
|Mundane Potion
|base=Water Bottle
}}
{{brewing
|foot=1
|showname=1
|Rabbit's Foot
|Potion of Leaping
}}
=== Trading ===
Journeyman-level cleric [[villager]]s buy rabbit's feet for an [[emerald]] as part of their trade: {{in|java}} they buy 2, and {{in|bedrock}} they buy 4.
== Video ==
<div style="text-align:center">{{yt|Ba3QN3uCniU}}</div>
== Data values ==
=== ID ===
{{edition|java}}:
{{ID table
|edition=java
|showforms=y
|generatetranslationkeys=y
|displayname=Rabbit's Foot
|spritetype=item
|nameid=rabbit_foot
|form=item
|foot=1}}
{{edition|bedrock}}:
{{ID table
|edition=bedrock
|shownumericids=y
|showforms=y
|notshowbeitemforms=y
|generatetranslationkeys=y
|displayname=Rabbit's Foot
|spritetype=item
|nameid=rabbit_foot
|id=528
|form=item
|foot=1}}
== History ==
{{History|java}}
{{History||1.8|snap=June 30, 2014|slink=https://twitter.com/TheMogMiner/status/483636993780232192|[[Ryan Holtz]] tweeted images of a rabbit's foot with some other new [[item]]s.}}
{{History|||snap=14w27a|[[File:Rabbit's Foot JE1.png|32px]] Added rabbit's foot.
|Added the [[potion of Leaping]]; it is [[brewing|brewed]] by adding a rabbit's foot to an [[awkward potion]]. The rabbit's foot also creates the [[mundane potion]] when brewed into a [[water bottle]].}}
{{History|||snap=14w33b|[[File:Rabbit's Foot JE2 BE1.png|32px]] The texture of the rabbit's foot has been changed. The new texture was created by [[wikipedia:Reddit|Reddit]] user [http://www.reddit.com/u/zeldahuman zeldahuman].<ref>{{reddit|2bjzes/a_reminder_of_the_blocks_and_items_added_in_18_so|cj69zie|context=3}}</ref><ref>{{reddit|2c5f35/minecraft_snapshot_14w31a_has_been_released|cjct7gb}}</ref>}}
{{History||1.8.1|snap=pre1|Potions of Leaping, which use rabbit's foot, can now be extended using [[redstone]].}}
{{History||1.9|snap=15w46a|The drop rate of rabbit's foot has been quadrupled.{{more info|Before/After rates}}}}
{{History||1.13|snap=17w47a|Prior to [[1.13/Flattening|''The Flattening'']], this [[item]]'s numeral ID was 414.}}
{{History||1.14|snap=18w43a|[[File:Rabbit's Foot JE3 BE2.png|32px]] The texture of rabbit's foot has been changed.}}
{{History|||snap=18w44a|[[Cat]]s now offer rabbit's feet as [[Cat#Gifts|gifts]].}}
{{History|||snap=19w07a|Added [[fox]]es, which sometimes spawn with rabbit's feet in their mouths.}}
{{History|||snap=19w11a|Cleric [[villager]]s now [[trading|buy]] rabbit's feet.}}
{{History|pocket alpha}}
{{History||v0.12.1|snap=build 1|[[File:Rabbit's Foot JE2 BE1.png|32px]] Added rabbit's foot to the [[Creative]] mode [[inventory]].}}
{{History||v0.13.0|snap=build 1|Rabbit's foot can now be obtained as a rare [[drops|drop]] upon killing [[rabbit]]s.
|Rabbit's foot can now be [[brewing|brewed]] to make [[potions of Leaping]].}}
{{History|bedrock}}
{{History||1.8.0|snap=beta 1.8.0.8|Tamed [[cat]]s can now give the [[player]] rabbit's foot as a gift.}}
{{History||1.10.0|snap=beta 1.10.0.3|[[File:Rabbit's Foot JE3 BE2.png|32px]] The texture of rabbit's foot has been changed.}}
{{History||1.11.0|snap=beta 1.11.0.4|Rabbit's foot can now be [[trading|sold]] to cleric [[villager]]s.}}
{{History||1.13.0|snap=beta 1.13.0.1|Added [[fox]]es, which can [[drops|drop]] rabbit's foot.}}
{{History|console}}
{{History||xbox=TU31|xbone=CU19|ps=1.22|wiiu=Patch 3|switch=1.0.1|[[File:Rabbit's Foot JE2 BE1.png|32px]] Added rabbit's foot.}}
{{History||xbox=none|xbone=none|ps=1.90|wiiu=none|switch=none|[[File:Rabbit's Foot JE3 BE2.png|32px]] The texture of rabbit's foot has been changed.}}
{{History|New 3DS}}
{{History||0.1.0|[[File:Rabbit's Foot JE2 BE1.png|32px]] Added rabbit's foot.}}
{{History|foot}}
== Issues ==
{{issue list}}
== Trivia ==
* The superstition that [[wikipedia:Rabbit's_foot|a rabbit's foot is a lucky charm]] applies equally to Minecraft as it does in the real world: it does not actually increase luck.
== Gallery ==
<gallery>
Rabbit Items 4 Ryan Holtz.png|First image of the item by [[Ryan Holtz]].
Rabbit Items 5 Ryan Holtz.png|Ryan Holtz brewing the item into a potion.
Rabbit Items 6 Ryan Holtz.png|Ryan Holtz enhancing the potion.
</gallery>
== References ==
{{reflist}}
== External Links ==
*[https://www.minecraft.net/en-us/article/taking-inventory--rabbit-s-foot Taking Inventory: Rabbit's Foot] – Minecraft.net on May 3, 2019
{{items}}
[[de:Hasenpfote]]
[[es:Pata de conejo]]
[[fr:Patte de lapin]]
[[it:Zampa di coniglio]]
[[ja:ウサギの足]]
[[ko:토끼발]]
[[nl:Konijnenpootje]]
[[pl:Królicza łapka]]
[[pt:Pé de coelho]]
[[ru:Кроличья лапка]]
[[uk:Кроляча лапка]]
[[zh:兔子脚]]
[[Category:Renewable resources]]
[[Category:Brewing recipe]]</li></ul> | beta 1.10.0.3 | | |||
1.11.0{{Extension DPL}}<ul><li>[[Compound|Compound]]<br/>{{About|a feature in the Education Edition|the NBT tag|NBT}}
{{education feature}}
{{exclusive|bedrock|education}}
{{Item
| image = Water (compound).png
| image2 = Garbage.png
| renewable = No
| stackable = Yes (64)
}}
'''Compounds''' are a type of [[item]] from [[Education Edition]] used in chemistry, which are created from combinations of various [[element]]s.
== Obtaining ==
Compounds cannot be obtained in the [[Creative inventory]]. They are only obtained from creating them in the [[compound creator]]. This is done by inserting a certain number of [[element]]s corresponding to the compound's chemical formula.
== List of compounds ==
{| class="wikitable" data-description="Compounds"
!Icon
!Compound Name
!Compound Recipe
!Description
!Uses
|-
|{{slot|Aluminum Oxide|link=none}}
|{{text anchor|Aluminium Oxide}}
|{{slot|Aluminum,2}}{{slot|Oxygen,3}}
|Is only brown when dug up from the Earth and contaminated; actually white when pure. Can be electrolyzed to make aluminum metal. Also the main chemical in rubies and sapphires.
|Used to craft [[hardened glass]].
|-
|{{slot|Ammonia|link=none}}
|{{text anchor|Ammonia}}
|{{slot|Nitrogen}}{{slot|Hydrogen,3}}
|
|Used to create [[super fertilizer]].
|-
|{{slot|Barium Sulfate|link=none}}
|{{text anchor|Barium Sulfate}}
|{{slot|Barium}}{{slot|Sulfur}}{{slot|Oxygen,4}}
|
|
|-
|{{slot|Benzene|link=none}}
|{{text anchor|Benzene}}
|{{slot|Carbon,6}}{{slot|Hydrogen,6}}
|
|
|-
|{{slot|Boron Trioxide|link=none}}
|{{text anchor|Boron Trioxide}}
|{{slot|Boron,2}}{{slot|Oxygen,3}}
|
|Used to craft [[hardened glass]].
|-
|{{slot|Calcium Bromide|link=none}}
|{{text anchor|Calcium Bromide}}
|{{slot|Calcium}}{{slot|Bromine,2}}
|
|
|-
|{{slot|Crude Oil|link=none}}
|{{text anchor|Crude Oil}}
|{{slot|Carbon,9}}{{slot|Hydrogen,20}}
|C<sub>9</sub>H<sub>20</sub> is the chemical formula for nonane.
|
|-
|{{slot|Glue|link=none}}
|{{text anchor|Glue}} (Cyanoacrylate)
|{{slot|Carbon,5}}{{slot|Hydrogen,5}}{{slot|Nitrogen}}{{slot|Oxygen,2}}
|C<sub>5</sub>H<sub>5</sub>NO<sub>2</sub> is the chemical formula for methyl cyanoacrylate, one of the cyanoacrylate glues ("superglue"); its condensed formula is CH<sub>2</sub>=C(CN)COOCH<sub>3</sub>.
|
|-
|{{slot|Hydrogen Peroxide|link=none}}
|{{text anchor|Hydrogen Peroxide}}
|{{slot|Hydrogen,2}}{{slot|Oxygen,2}}
|
|Used to craft [[glow stick]].
|-
|{{slot|Iron Sulfide|link=none}}
|{{text anchor|Iron Sulfide}}
|{{slot|Iron}}{{slot|Sulfur}}
|
|
|-
|{{slot|Latex|link=none}}
|{{text anchor|Latex}}
|{{slot|Carbon,5}}{{slot|Hydrogen,8}}
|C<sub>5</sub>H<sub>8</sub> is the chemical formula for isoprene, which polymers are the main components of natural rubber; its condensed formula is CH<sub>2</sub>=C(CH<sub>3</sub>)−CH=CH<sub>2</sub>.
|Used to craft [[balloon]]s.
|-
|{{slot|Lithium Hydride|link=none}}
|{{text anchor|Lithium Hydride}}
|{{slot|Lithium}}{{slot|Hydrogen}}
|
|
|-
|{{slot|Luminol|link=none}}
|{{text anchor|Luminol}}
| class="nowrap" |{{slot|Carbon,8}}{{slot|Hydrogen,7}}{{slot|Nitrogen,3}}{{slot|Oxygen,2}}
|Luminol is a chemical that glows blue when oxidized. It can detect blood.
|Used to craft [[glow stick]].
|-
|{{slot|Lye|link=none}}
|{{text anchor|Lye}}
|{{slot|Sodium}}{{slot|Oxygen}}{{slot|Hydrogen}}
|
|
|-
|{{slot|Magnesium Nitrate|link=none}}
|{{text anchor|Magnesium Nitrate}}
|{{slot|Magnesium}}{{slot|Nitrogen,2}}{{slot|Oxygen,6}}
|Condensed formula: Mg(NO<sub>3</sub>)<sub>2</sub>
|
|-
|{{slot|Magnesium Oxide|link=none}}
|{{text anchor|Magnesium Oxide}}
|{{slot|Magnesium}}{{slot|Oxygen}}
|
|
|-
|{{slot|Polyethylene|link=none}}
|{{text anchor|Polyethylene}}
|{{slot|Carbon,10}}{{slot|Hydrogen,20}}
|Polyethlene (PE), (CH<sub>2</sub>)<sub>''n''</sub>, is ''the'' most commonly produced plastic.
|Used to craft [[glow stick]].
|-
|{{slot|Potassium Iodide|link=none}}
|{{text anchor|Potassium Iodide}}
|{{slot|Potassium}}{{slot|Iodine}}
|Used for making iodized salt and other things.
|
|-
|{{slot|Soap|link=none}}
|{{text anchor|Soap}}
|{{slot|Carbon,18}}{{slot|Hydrogen,35}}{{slot|Sodium}}{{slot|Oxygen,2}}
|C<sub>18</sub>H<sub>35</sub>NaO<sub>2</sub> is the chemical formula of sodium stearate, the most common soap.
|
|-
|{{slot|Sodium Acetate|link=none}}
|{{text anchor|Sodium Acetate}}
|{{slot|Carbon,2}}{{slot|Hydrogen,3}}{{slot|Sodium}}{{slot|Oxygen,2}}
|Used to make hand warmers because it heats up when it "freezes".
|Used to create [[Ice Bomb]].
|-
|{{slot|Sodium Fluoride|link=none}}
|{{text anchor|Sodium Fluoride}}
|{{slot|Sodium}}{{slot|Fluorine}}
|Commonly used in toothpaste to prevent cavity, among other uses.
|
|-
|{{slot|Sodium Hydride|link=none}}
|{{text anchor|Sodium Hydride}}
|{{slot|Sodium}}{{slot|Hydrogen}}
|
|
|-
|{{slot|Sodium Hypochlorite|link=none}}
|{{text anchor|Sodium Hypochlorite}}
|{{slot|Sodium}}{{slot|Chlorine}}{{slot|Oxygen}}
|Main ingredient of real-life bleach.
|Used to create [[Bleach]].
|-
|{{slot|Sodium Oxide|link=none}}
|{{text anchor|Sodium Oxide}}
|{{slot|Sodium,2}}{{slot|Oxygen}}
|
|
|-
|{{slot|Sulfate|link=none}}
|{{text anchor|Sulfate}}
|{{slot|Sulfur}}{{slot|Oxygen,4}}
|Cannot actually exist on its own, as it should have a <sup>2-</sup> charge.
|
|}
=== Chlorides ===
{| class="wikitable" data-description="Chlorides"
!Icon
!Compound
!Recipe
!Uses
|-
|{{slot|Salt|link=none}}
|{{text anchor|Salt}}
|{{slot|Sodium}}{{slot|Chlorine}}
|Used to create [[heat block]].
|-
|{{slot|Calcium Chloride|link=none}}
|{{text anchor|Calcium Chloride}}
|{{slot|Calcium}}{{slot|Chlorine,2}}
|Used to craft [[sparkler|orange sparkler]].
|-
|{{slot|Cerium Chloride|link=none}}
|{{text anchor|Cerium Chloride}}
|{{slot|Cerium}}{{slot|Chlorine,3}}
|Used to craft [[colored torch|blue torch]] and [[sparkler|blue sparkler]].
|-
|{{slot|Mercuric Chloride|link=none}}
|{{text anchor|Mercuric Chloride}}
|{{slot|Mercury}}{{slot|Chlorine,2}}
|Used to craft [[colored torch|red torch]] and [[sparkler|red sparkler]].
|-
|{{slot|Potassium Chloride|link=none}}
|{{text anchor|Potassium Chloride}}
|{{slot|Potassium}}{{slot|Chlorine}}
|Used to craft [[colored torch|purple torch]] and [[sparkler|purple sparkler]].
|-
|{{slot|Tungsten Chloride|link=none}}
|{{text anchor|Tungsten Chloride}}
|{{slot|Tungsten}}{{slot|Chlorine,6}}
|Used to craft [[colored torch|green torch]] and [[sparkler|green sparkler]].
|}
=== Natural compounds ===
Natural compounds are compounds which can be obtained naturally in ''Minecraft''.
{| class="wikitable" data-description="Chlorides"
!Icon
!Compound
! class="nowrap" |Chemical formula
!Natural source
!Method
!Notes
|-
|{{slot|Charcoal}}
|[[Charcoal]]
|{{slot|Carbon,7}}{{slot|Hydrogen,4}}{{slot|Oxygen}}
|[[Log]] or [[Wood]]
|[[Smelting]]
|The chemical formula C<sub>7</sub>H<sub>4</sub>O is sometimes used to describe the approximate composition of charcoal.
|-
|{{slot|Glow Ink Sac}} {{slot|Ink Sac}}
|[[Glow Ink Sac]], [[Ink Sac]]
|{{slot|Iron}}{{slot|Sulfur}}{{slot|Oxygen,4}}
|[[Glow Squid]], [[Squid]]
|Killing Glow Squid, Squid
|FeSO<sub>4</sub> is the chemical formula of iron(II) sulfate or ferrous sulfate, normally found complexed with water as a salt with the formula FeSO<sub>4</sub>·''x''H<sub>2</sub>O, and has been used in the manufacture of iron gall ink and other inks for centuries. In contrast, squid ink (and other cephalopod inks) is composed mainly of melanin and mucus, with an assortment of other compounds in a variety of concentrations dependent on the species.
|-
|{{slot|Sugar}}
|[[Sugar]]
|{{slot|Carbon,6}}{{slot|Hydrogen,12}}{{slot|Oxygen,6}}
|[[Sugar Cane]]s or [[Honey Bottle]]s
|Harvesting and [[crafting]]
|C<sub>6</sub>H<sub>12</sub>O<sub>6</sub> is the chemical formula of glucose and fructose, as well as a number of other simple sugars (common table sugar is instead sucrose, a complex sugar made of glucose and fructose with the chemical formula C<sub>12</sub>H<sub>22</sub>O<sub>11</sub>).
|-
|{{slot|Water (compound)|link=water}}
|{{text anchor|Water}}
|{{slot|Hydrogen,2}}{{slot|Oxygen}}
|[[Water]]
|Picking up in a [[bucket]] or [[glass bottle]] from a [[Cauldron]] or a water source block
|One of the easiest to obtain.
|}
=== Garbage ===
Garbage is considered a "compound", but the only way to produce it is to activate the [[Lab Table]] when its inputs are an invalid recipe. It has no uses.
== Usage ==
Certain compounds are used as ingredients in [[crafting]] or [[lab table]] experiments. Natural compounds have uses outside of chemistry, detailed in their respective articles.
=== Crafting ingredient ===
{{Crafting usage|description=0|Latex, Polyethylene, Hydrogen Peroxide, Luminol, Boron Trioxide, Aluminum Oxide}}
==== Chloride coloring ====
{{Crafting usage|Chloride,Cerium Chloride|match=end}}
=== Lab table ingredient ===
{| class="wikitable"
!Result
!Materials needed
|-
! rowspan="2" |{{slot|Bleach}}<br>[[Bleach]]
|{{slot|Water (compound)|link=Compound}}{{slot|Water (compound)|link=Compound}}{{slot|Water (compound)|link=Compound}}{{slot|Sodium Hypochlorite|link=Compound}}{{slot|Sodium Hypochlorite|link=Compound}}{{slot|Sodium Hypochlorite|link=Compound}}
|-
|<center>Water ×3, Sodium Hypochlorite ×3</center>
|-
! rowspan="2" |{{slot|Heat Block.gif}}<br>[[Heat Block]]
|{{slot}}{{slot|Iron|link=Element#Iron}}{{slot|Water (compound)|link=Compound}}{{slot|Charcoal}}{{slot|Salt|link=Compound}}{{slot}}
|-
|<center>[[Iron (element)|Iron]], Water, [[Charcoal]], Salt</center>
|-
! rowspan="2" |{{slot|Ice Bomb}}<br>[[Ice Bomb]]
|{{slot}}{{slot|Sodium Acetate|link=Compound}}{{slot|Sodium Acetate|link=Compound}}{{slot|Sodium Acetate|link=Compound}}{{slot|Sodium Acetate|link=Compound}}{{slot}}
|-
|<center>Sodium Acetate ×4</center>
|-
! rowspan="2" |{{slot|Super Fertilizer}}<br>[[Super Fertilizer]]
|{{slot}}{{slot}}{{slot|Ammonia|link=Compound}}{{slot|Phosphorus|link=Element#Phosphorus}}{{slot}}{{slot}}
|-
|<center>Ammonia, [[Phosphorus]]</center>
|}
== Sounds ==
Sounds are produced when a [[lab table]] creates garbage.
{{Sound table
|type=bedrock
|sound=Fizz.ogg
|source=block
|description=When a lab table creates garbage{{verify}}
|id=random.fizz
|volume=1.0
|pitch=0.5/0.7}}
{{Sound table
|sound=Ghast fireball4.ogg
|source=hostile
|description=When a lab table creates garbage{{verify}}
|id=mob.blaze.shoot
|volume=1.0
|pitch=0.8/1.0}}
{{Sound table
|sound=Explosion1.ogg
|sound2=Explosion2.ogg
|sound3=Explosion3.ogg
|sound4=Explosion4.ogg
|source=block
|description=When a lab table creates garbage
|id=random.explode
|volume=1.0
|pitch=0.4/0.6}}
{{Sound table
|sound=Fire.ogg
|source=sound
|description=When a lab table creates garbage
|id=lt.reaction.fire
|volume=2.0
|pitch=0.4/0.6}}
{{Sound table
|sound=Explosion1.ogg
|sound2=Explosion2.ogg
|sound3=Explosion3.ogg
|sound4=Explosion4.ogg
|source=weather
|description=When a lab table creates garbage
|id=ambient.weather.lightning.impact
|volume=1.0
|pitch=0.6/0.8
|foot=1}}
== Data values ==
=== ID ===
{{ID table
|edition=bedrock
|shownumericids=y
|showforms=y
|notshowbeitemforms=y
|generatetranslationkeys=y
|displayname=Compound
|spritetype=item
|nameid=compound
|id=594
|form=item
|translationkey=item.compound.salt.name,item.compound.sodiumoxide.name,item.compound.sodiumhydroxide.name,item.compound.magnesiumnitrate.name,item.compound.ironsulfide.name,item.compound.lithiumhydride.name,item.compound.sodiumhydride.name,item.compound.calciumbromide.name,item.compound.magnesiumoxide.name,item.compound.sodiumacetate.name,item.compound.luminol.name,item.compound.charcoal.name,item.compound.sugar.name,item.compound.aluminumoxide.name,item.compound.borontrioxide.name,item.compound.soap.name,item.compound.polyethylene.name,item.compound.garbage.name,item.compound.magnesiumsalts.name,item.compound.sulfate.name,item.compound.bariumsulfate.name,item.compound.potassiumchloride.name,item.compound.mercuricchloride.name,item.compound.ceriumchloride.name,item.compound.tungstenchloride.name,item.compound.calciumchloride.name,item.compound.water.name,item.compound.glue.name,item.compound.hypochlorite.name,item.compound.crudeoil.name,item.compound.latex.name,item.compound.potassiumiodide.name,item.compound.sodiumfluoride.name,item.compound.benzene.name,item.compound.ink.name,item.compound.hydrogenperoxide.name,item.compound.ammonia.name,item.compound.sodiumhypochlorite.name
|foot=1}}
===Item data===
{{see also|Data values}}Compounds uses the following data values:{{/DV}}
== History ==
{{History|bedrock}}
{{History||1.4.0|snap=beta 1.2.20.1|[[File:Aluminum Oxide BE1.png|32px]] [[File:Ammonia BE1.png|32px]] [[File:Barium Sulfate BE1.png|32px]] [[File:Benzene BE1.png|32px]] [[File:Boron Trioxide BE1.png|32px]] [[File:Calcium Bromide BE1.png|32px]] [[File:Crude Oil BE1.png|32px]] [[File:Glue BE1.png|32px]] [[File:Hydrogen Peroxide BE1.png|32px]] [[File:Iron Sulfide BE1.png|32px]] [[File:Latex BE1.png|32px]] [[File:Lithium Hydride BE1.png|32px]] [[File:Luminol BE1.png|32px]] [[File:Lye BE1.png|32px]] [[File:Magnesium Nitrate BE1.png|32px]] [[File:Magnesium Oxide BE1.png|32px]] [[File:Polyethylene BE1.png|32px]] [[File:Potassium Iodide BE1.png|32px]] [[File:Salt BE1.png|32px]] [[File:Soap BE1.png|32px]] [[File:Sodium Acetate BE1.png|32px]] [[File:Sodium Fluoride.png|32px]] [[File:Sodium Hydride BE1.png|32px]] [[File:Sodium Hypochlorite BE1.png|32px]] [[File:Sodium Oxide BE1.png|32px]] [[File:Sulfate BE1.png|32px]] [[File:Calcium Chloride BE1.png|32px]] [[File:Cerium Chloride BE1.png|32px]] [[File:Mercuric Chloride BE1.png|32px]] [[File:Potassium Chloride BE1.png|32px]] [[File:Tungsten Chloride BE1.png|32px]] [[File:Charcoal JE3 BE3.png|32px]] [[File:Ink Sac JE1 BE1.png|32px]] [[File:Sugar JE1 BE1.png|32px]] [[File:Water (compound) BE1.png|32px]] [[File:Garbage BE1.png|32px]] Added compounds.}}
{{History||1.10.0|snap=beta 1.10.0.3|[[File:Charcoal JE4 BE4.png|32px]][[File:Ink Sac JE2 BE2.png|32px]][[File:Sugar JE2 BE2.png|32px]] The textures of Charcoal, Ink Sacs and Sugar have been changed.}}
{{History||1.16|All compounds have been made unobtainable. It is unknown whether it is a glitch or intended. {{bug|MCPE-113776}}}}
{{History| |1.17.0|All compounds are obtainable once again.}}{{History|education}}
{{History||1.0.27|[[File:Aluminum Oxide BE1.png|32px]] [[File:Ammonia BE1.png|32px]] [[File:Barium Sulfate BE1.png|32px]] [[File:Benzene BE1.png|32px]] [[File:Boron Trioxide BE1.png|32px]] [[File:Calcium Bromide BE1.png|32px]] [[File:Crude Oil BE1.png|32px]] [[File:Glue BE1.png|32px]] [[File:Hydrogen Peroxide BE1.png|32px]] [[File:Iron Sulfide BE1.png|32px]] [[File:Latex BE1.png|32px]] [[File:Lithium Hydride BE1.png|32px]] [[File:Luminol BE1.png|32px]] [[File:Lye BE1.png|32px]] [[File:Magnesium Nitrate BE1.png|32px]] [[File:Magnesium Oxide BE1.png|32px]] [[File:Polyethylene BE1.png|32px]] [[File:Potassium Iodide BE1.png|32px]] [[File:Salt BE1.png|32px]] [[File:Soap BE1.png|32px]] [[File:Sodium Acetate BE1.png|32px]] [[File:Sodium Fluoride BE1.png|32px]] [[File:Sodium Hydride BE1.png|32px]] [[File:Sodium Hypochlorite BE1.png|32px]] [[File:Sodium Oxide BE1.png|32px]] [[File:Sulfate BE1.png|32px]] [[File:Calcium Chloride BE1.png|32px]] [[File:Cerium Chloride BE1.png|32px]] [[File:Mercuric Chloride BE1.png|32px]] [[File:Potassium Chloride BE1.png|32px]] [[File:Tungsten Chloride BE1.png|32px]] [[File:Charcoal JE3 BE3.png|32px]] [[File:Ink Sac JE1 BE1.png|32px]] [[File:Sugar JE1 BE1.png|32px]] [[File:Water (compound) BE1.png|32px]] [[File:Garbage BE1.png|32px]] Added compounds.}}
{{History||1.12.0|[[File:Charcoal JE4 BE4.png|32px]][[File:Ink Sac JE2 BE2.png|32px]][[File:Sugar JE2 BE2.png|32px]] The textures of Charcoal, Ink Sacs and Sugar have been changed.}}
{{History|foot}}
== Unused compound textures ==
In the chemistry resource pack folder, there are numerous [[History of textures/Unused textures#Unused compounds|compound textures which are not used]] in the game. Note: a <code>compound</code> item with a data value of <code>38</code> will have the <code>Blue Flask</code> texture and will be called <code>item.compound..name</code>. If you use an NBT Editor to get a compound item with no assigned data value (by deleting the data tag) and then transfer that item to another world / realm using structure blocks (by exporting to a <code>.mcstructure</code> file, then importing it on another world or realm) then it will be renamed to <code>Ivory Tusk</code>.
<gallery widths="48" heights="48" perrow="30" class="center">
Flask EE1.png|Flask
Black Flask EE1.png|Black Flask
Blue Flask EE1.png|Blue Flask
Brown Beaker EE1.png|Brown Beaker
Brown Flask EE1.png|Brown Flask
Dark Gray Beaker EE1.png|Dark Gray Beaker
Dark Gray Flask EE1.png|Dark Gray Flask
Dark Gray Jar EE1.png|Dark Gray Jar
Green Beaker EE1.png|Green Beaker
Green Flask EE1.png|Green Flask
Green Jar EE1.png|Green Jar
Indigo Beaker EE1.png|Indigo Beaker
Indigo Flask EE1.png|Indigo Flask
Indigo Jar EE1.png|Indigo Jar
Light Gray Beaker EE1.png|Light Gray Beaker
Light Gray Flask EE1.png|Light Gray Flask
Orange Beaker EE1.png|Orange Beaker
Orange Flask EE1.png|Orange Flask
Orange Jar EE1.png|Orange Jar
Purple Beaker EE1.png|Purple Beaker
Purple Flask EE1.png|Purple Flask
Purple Jar EE1.png|Purple Jar
Red Beaker EE1.png|Red Beaker
Red Flask EE1.png|Red Flask
Red Jar EE1.png|Red Jar
White Flask EE1.png|White Flask
Yellow Flask EE1.png|Yellow Flask
Bleach (compound).png|Bleach
</gallery>
== Gallery ==
<gallery>
Screen Shot 2021-08-19 at 12.22.50 PM.png|A compound creator in using 5 carbon and 8 hydrogen to create latex.
</gallery>
== See also ==
*[[Compound Creator]]
*[[Crafting]]
*[[Element Constructor]]
*[[Lab Table]]
*[[Brewing Stand]]
*[[Brewing]]
*[[Crafting Table]]
== References ==
{{reflist}}
{{Items}}
{{Education Edition}}
[[Category:Non-renewable resources]]
[[Category:Education Edition items]]
[[de:Verbindung]]
[[it:Composto]]
[[ja:化合物]]
[[pl:Związki chemiczne]]
[[pt:Composto]]
[[ru:Соединение]]
[[th:สารประกอบ]]
[[uk:Сполуки]]
[[zh:化合物]]</li><li>[[Iron Ingot|Iron Ingot]]<br/>{{About|the ingot|the ore|Iron Ore|the mineral block|Block of Iron|the nugget|Iron Nugget|the raw mineral|Raw Iron}}
{{Item
| image = Iron Ingot.png
|type=
| renewable = Yes
| stackable = Yes (64)
}}
'''Iron ingots''' are versatile [[metal]] ingots used extensively in [[crafting]].
== Obtaining ==
=== Chest loot ===
{{LootChestItem|iron-ingot}}
=== Crafting ===
{{Crafting
|head=1
|showname=0
|Block of Iron
|Output=Iron Ingot,9
|type=Material
}}
{{Crafting
|A1= Iron Nugget
|B1= Iron Nugget
|C1= Iron Nugget
|A2= Iron Nugget
|B2= Iron Nugget
|C2= Iron Nugget
|A3= Iron Nugget
|B3= Iron Nugget
|C3= Iron Nugget
|Output=Iron Ingot
|type= Material
|foot=1
}}
=== Smelting ===
{{see also|Iron Ore#Natural generation}}[[Smelting]] raw iron in a [[furnace]] or [[blast furnace]] is the most common way to obtain iron ingots.
{{Smelting
|head=1
|Iron Ore;Deepslate Iron Ore
|Iron Ingot
|0,7
}}
{{Smelting
|foot=1
|Raw Iron
|Iron Ingot
|0,7
}}
=== Compound creation ===
Iron Ingot can be created from its base [[element]]s, using the [[compound creator]].{{only|bedrock|education}}
{| class="wikitable"
!Name
!Elements
!Example recipe
|- <!-- Temporarily using crafting grid as a substitute for the compound creator (template not yet available), since the layout is the same, even if the appearance is different -->
!Iron Ingot
|Iron <br>
|{{Crafting Table
|shapeless= 1
|A2=Iron
|Output=Iron Ingot}}
|}
=== Mob loot ===
{{see also|Tutorials/Iron golem farming}}
[[Iron golem]]s drop 3-5 iron ingots upon death, regardless of the way they die. The looting enchantment does not increase the amount of iron ingots dropped.
[[Zombie]]s, [[husk]]s, and [[zombie villager]]s have a 2.5% ({{frac|1|40}}) chance of dropping either an iron ingot, [[carrot]], or [[potato]] when killed by a player or tamed wolf. This is increased by 1% ({{frac|1|100}}) per level of looting. This gives iron ingots the following chances of dropping:
* {{frac|1|120}} (about 0.83%)
* {{frac|7|600}} (about 1.17%) with Looting I
* {{frac|9|600}} (1.50%) with Looting II
* {{frac|11|600}} (about 1.83%) with Looting III
== Usage ==
=== Crafting ingredient ===
{{crafting usage}}
=== Trading ===
Apprentice-level Armorer, Toolsmith, and Weaponsmith [[Villager|villagers]] buy 3 iron ingots for an [[emerald]] as their third trade.{{only|bedrock}}
Apprentice-level Armorer villagers have a 50% chance to buy 4 iron ingots for one emerald, and apprentice-level Toolsmith and Weaponsmith villagers always offer to buy 4 iron ingots for one emerald.{{only|java}}
=== Repairing ===
Iron ingots are the repair items for the iron [[tier]] and chainmail and iron [[armor material]]s, and thus can be used to [[item repair|repair]] the following items in an [[anvil]]:
* {{ItemLink|Chainmail Helmet}}
* {{ItemLink|Chainmail Chestplate}}
* {{ItemLink|Chainmail Leggings}}
* {{ItemLink|Chainmail Boots}}
* {{ItemLink|Iron Helmet}}
* {{ItemLink|Iron Chestplate}}
* {{ItemLink|Iron Leggings}}
* {{ItemLink|Iron Boots}}
* {{ItemLink|Iron Sword}}
* {{ItemLink|Iron Axe}}
* {{ItemLink|Iron Pickaxe}}
* {{ItemLink|Iron Shovel}}
* {{ItemLink|Iron Hoe}}
=== Healing iron golems ===
{{control|Using}} an iron ingot on an [[iron golem]] restores its health by {{hp|25}}.
=== Beacons ===
Iron ingots can be used to select powers from a [[beacon]]. The player must select one of the available powers, and then insert an iron ingot in the item slot.
An iron ingot can be substituted for an [[emerald]], a [[gold ingot]], a [[diamond]], or a [[netherite ingot]].
=== Smithing ingredient ===
{{Smithing
|head=1
|ingredients=Any Armor Trim +<br/>Any Armor Piece + <br/>Iron Ingot
|Any Armor Trim Smithing Template
|Netherite Chestplate
|Iron Ingot
|Iron Trim Netherite Chestplate
|showdescription=1
|description = All armor types can be used in this recipe,<br/>a netherite chestplate is shown as an example.<br/>
|tail=1
}}
;Trim color palette
The following color palettes are shown on the designs on trimmed armor:
*{{TrimPalette|iron ingot}}
*{{TrimPalette|iron ingot|darker=1}} (a darker color palette is used when an iron armor piece is trimmed using an iron ingot).
== Achievements ==
{{load achievements|Acquire Hardware}}
== Advancements ==
{{load advancements|Acquire Hardware}}
== Data values ==
=== ID ===
{{edition|java}}:
{{ID table
|edition=java
|showitemtags=y
|showforms=y
|generatetranslationkeys=y
|displayname=Iron Ingot
|spritetype=item
|nameid=iron_ingot
|itemtags=beacon_payment_items
|form=item
|foot=1}}
{{edition|bedrock}}:
{{ID table
|edition=bedrock
|shownumericids=y
|showforms=y
|notshowbeitemforms=y
|generatetranslationkeys=y
|displayname=Iron Ingot
|spritetype=item
|nameid=iron_ingot
|id=305
|form=item
|foot=1}}
== History ==
{{History|java indev}}
{{History||0.31|snap=20100128|[[File:Iron Ingot JE1.png|32px]] Added iron ingots.}}
{{History|||snap=20100129|[[File:Iron Ingot JE2 BE1.png|32px]] The texture of iron ingots has been changed.
|Iron ingots can be [[smelting|smelted]] from [[iron ore]] and [[drops|drop]] 3–5 iron ingots.
|Iron ingots can be used to craft [[iron block]]s, [[flint and steel]] and iron [[sword]]s, [[shovel]]s, [[pickaxe]]s and [[axe]]s.}}
{{History|||snap=20100130|Iron ingots are now used to craft [[arrow]]s.|[[Iron block]]s now require 9 iron ingots (3×3) instead 4 (2×2) to be [[crafting|crafted]], making them much more expensive.}}
{{History||20100206|Iron ingots can now be used to [[crafting|craft]] iron [[hoe]]s.}}
{{History||?|[[Smelting]] now [[drops]] only 1 iron ingot (down from 3–5).}}
{{History||20100218|Iron ingots are now used to craft iron [[helmet]]s, [[chestplate]]s, [[leggings]] and [[boots]].}}
{{History|java infdev}}
{{History||20100615|Iron ingots are now used to craft [[bucket]]s.}}
{{History||20100618|Iron ingots are now used to craft [[rail]]s and [[minecart]]s.}}
{{History||20100625-2|Iron ingots can be found in [[dungeon]] [[chest]]s.}}
{{History|java alpha}}
{{History||v1.0.1|Iron ingots are now used to [[crafting|craft]] iron [[door]]s.}}
{{History||v1.0.14|Iron ingots are no longer used to craft [[arrow]]s.}}
{{History||v1.1.0|Iron ingots are now used to craft [[compass]]es.}}
{{History|java beta}}
{{History||1.5|Iron ingots are now used to craft [[detector rail]]s.}}
{{History||1.7|Iron ingots are now used to craft [[piston]]s and [[shears]].}}
{{History||1.8|snap=Pre-release|Iron ingots are found in the new [[stronghold]] storeroom and [[mineshaft]] [[chest]]s.
|Iron ingots are now used to craft [[iron bars]].}}
{{History|java}}
{{History||1.0.0|snap=Beta 1.9 Prerelease 2|Iron ingots are now used to craft [[cauldron]]s.}}
{{History|||snap=Beta 1.9 Prerelease 3|Iron ingots are now found in the new stronghold altar [[chest]]s.}}
{{History||1.1|snap=12w01a|Iron ingots are now found in [[village]] blacksmith chests.}}
{{History||1.2.1|snap=12w06a|[[Zombie]]s now rarely [[drops|drop]] iron ingots, making it a [[renewable resource]].}}
{{History|||snap=12w08a|[[Iron golem]]s now drop 3–5 iron ingots.}}
{{History||1.3.1|snap=12w21a|Added [[desert temple]]s, with a hidden [[chest]] room and loot containing iron ingots.
|Blacksmith [[villager]]s now [[trading|buy]] 8–9 iron ingots for 1 [[emerald]].}}
{{History|||snap=12w22a|Added [[jungle temple]]s, which contain loot [[chest]]s with iron ingots.
|Iron ingots are now used to craft [[tripwire hook]]s.}}
{{History||1.4.2|snap=12w32a|Iron ingots can be used to activate [[beacon]]s.}}
{{History|||snap=12w41a|Iron ingots are now used to craft [[anvil]]s.}}
{{History|||snap=12w42a|Anvils now need 4 iron ingots to [[craft]] instead of 1.}}
{{History||1.5|snap=13w01a|Iron ingots are now used to [[crafting|craft]] heavy [[weighted pressure plate]]s.}}
{{History|||snap=13w02a|Iron ingots are now used to craft [[hopper]]s and [[activator rail]]s.}}
{{History||1.6.1|snap=13w16a|Iron ingot is now used to craft iron [[horse armor]] and [[horse saddle]].}}
{{History|||snap=13w18a|Iron ingot is no longer used to craft iron [[horse armor]] and [[horse saddle]].|Iron ingots are now found in [[nether fortress]] [[chest]]s.}}
{{History||1.8|snap=14w02a|[[Trading]] for iron ingots has been changed: armorer, weapon smith and tool smith [[villager]]s now [[trading|buy]] 7–9 iron ingots for 1 [[emerald]].}}
{{History|||snap=14w07a|Iron ingots are now used to craft [[iron trapdoor]]s.}}
{{History||1.9|snap=15w31a|Iron ingots are now found in [[end city]] ship [[chest]]s.}}
{{History|||snap=15w33c|Iron ingots are now used to craft [[shield]]s.}}
{{History|||snap=15w44a|The average yield from [[dungeon]] and [[desert temple]] chests has been substantially decreased.
|The average yield from [[mineshaft]] and [[nether fortress]] chests has been slightly decreased.}}
{{History||1.11|snap=16w39a|Iron ingots are now found in the new [[woodland mansion]] chests.}}
{{History||1.11.1|snap=16w50a|Iron ingots are now used to craft [[iron nugget]]s.}}
{{History||1.13|snap=17w47a|Prior to [[1.13/Flattening|''The Flattening'']], this [[item]]'s numeral ID was 265.}}
{{History|||snap=18w10a|Iron ingots now generate in [[buried treasure]] [[chest]]s.}}
{{History|||snap=18w11a|Iron ingots can now be found in the chests of [[shipwreck]]s.}}
{{History||1.14|snap=18w43a|Iron ingots can now be used to craft [[crossbow]]s.
|[[File:Iron Ingot JE3 BE2.png|32px]] The texture of iron ingots has been changed.}}
{{History|||snap=18w47a|Iron ingots can now be found inside of loot [[chest]]s on top of [[pillager outpost]]s.}}
{{History|||snap=18w50a|Iron ingots can now be found in chests in [[village]] toolsmith houses.
|Iron ingots can now be used to craft a [[blast furnace]].}}
{{History|||snap=19w04a|Iron ingots can now be used to craft [[stonecutter]]s.}}
{{History||1.15|snap=19w41a|Iron ingots can now be used to heal [[iron golem]]s.}}
{{History||1.16|snap=20w16a|Iron ingots now generate in [[bastion remnants]] chests.
|Iron ingots are now used to craft [[chain]]s.}}
{{History||1.16.2|snap=20w30a|The average yield of iron ingots from bastion remnant chests has been slightly increased.}}
{{History||1.17|snap=21w08a|Iron ingots can now be smelted from [[deepslate iron ore]].}}
{{History|||snap=21w14a|Iron ingots can now be smelted from [[raw iron]].}}
{{History||1.20<br>(Experimental)|link=1.19.4|snap=23w04a|Iron ingots can now be used as an armor trim material.}}
{{History|||snap=23w05a|Iron ingots can now be trimmed with iron [[armor]].}}
{{History|pocket alpha}}
{{History||v0.2.0|[[File:Iron Ingot JE2 BE1.png|32px]] Added iron ingots. They are currently unobtainable and serve no purpose.}}
{{History||v0.3.2|Iron ingots are now obtainable by [[smelting]] iron ore in a [[furnace]].
|Iron ingots can be used to craft [[shears]], [[blocks of iron]] and iron [[pickaxe]]s, [[axe]]s, [[sword]]s and [[shovel]]s.}}
{{History||v0.4.0|Iron ingots are now used to craft [[flint and steel]] and iron [[hoe]]s.}}
{{History||v0.5.0|Iron ingots are now used to craft [[nether reactor core]]s.}}
{{History||v0.6.0|Iron ingots are now used to craft iron [[armor]].}}
{{History||v0.7.0|Iron ingots are now used to craft [[bucket]]s.}}
{{History||v0.8.0|snap=build 1|Iron ingots are now used to craft [[compass]]es and [[iron bars]].}}
{{History|||snap=build 2|Iron ingots are now used to craft [[minecart]]s and [[rail]]s.}}
{{History||v0.9.0|snap=build 1|Iron ingots can now be found in [[village]] blacksmith [[chest]]s, [[stronghold]] altar chests and [[dungeon]] chests.
|[[Zombie]]s now rarely drop iron ingots.}}
{{History||v0.12.1|snap=build 1|Iron ingots are no longer used to craft [[nether reactor core]]s and are instead dropped by it.
|Iron ingots are now used to craft [[anvil]]s.
|Iron ingots are now found in [[nether fortress]] chests.
|Added [[iron golem]]s, which [[drops|drop]] iron ingots.
|Iron ingots can now be used to repair iron [[tool]]s, [[armor]] and [[weapon]]s in [[anvil]]s.
|Added [[zombie villager]]s, which rarely drop iron ingots.}}
{{History||v0.13.0|snap=build 1|Iron ingots are now used to craft [[tripwire hook]]s, [[detector rail]]s, [[iron trapdoor]]s and heavy [[weighted pressure plate]]s.
|Added [[desert temple]]s, which have hidden [[chest]] rooms and loot containing iron ingots.}}
{{History||v0.14.0|snap=build 1|Iron ingots are now used to craft [[hoppers]] and [[cauldron]]s.
|Iron ingots can now be found in [[minecart with chest|minecart chests]] generated in [[mineshaft]]s.}}
{{History||v0.15.0|snap=build 1|Iron ingots are now used to craft [[piston]]s.
|Added [[jungle temple]]s, which have hidden [[chest]] rooms and main treasure rooms that have loot containing iron ingots.
|Added [[husk]]s, which rarely [[drops|drop]] iron ingots.}}
{{History||v0.16.0|snap=build 4|Iron ingots can now be used to activate [[beacon]]s.}}
{{History|pocket}}
{{History||1.0.0|snap=alpha 0.17.0.1|Iron ingots can now be found in [[end city]] ship [[chest]]s.
|Iron ingots can now be found in [[stronghold]] storeroom chests.}}
{{History||1.0.4|snap=alpha 1.0.4.0|Added [[trading]]—armorer, weaponsmith and toolsmith [[villager]]s now [[trading|buy]] 7–9 iron ingots for 1 [[emerald]].}}
{{History||1.1.0|snap=alpha 1.1.0.0|Iron ingots can now be [[crafting|crafted]] using [[iron nugget]]s.
|Iron ingots can now be used to [[crafting|craft]] iron nuggets.
|Iron ingots can now be found in [[woodland mansion]] [[chest]]s.}}
{{History|bedrock}}
{{History||1.4.0|snap=beta 1.2.14.2|Iron ingots now generate in [[buried treasure]] [[chest]]s.
|Iron ingots can now be found in [[shipwreck]] treasure chests.}}
{{History||1.8.0|snap=beta 1.8.0.10|Iron ingots can now be used to craft [[crossbow]]s.}}
{{History||1.10.0|snap=beta 1.10.0.3|Iron ingots can now be found inside [[pillager outpost]]s and plains [[village]]s' weaponsmith chests.
|Iron ingots can now be used to craft [[blast furnace]]s, [[stonecutter]]s and [[shield]]s.
|[[File:Iron Ingot JE3 BE2.png|32px]] The texture of iron ingots has been changed.}}
{{History||1.11.0|snap=beta 1.11.0.1|Iron ingots can now be found in [[village]] armorer and toolsmith [[chest]]s.
|Iron ingots can now be found in [[savanna]], [[taiga]], [[desert]] and [[snowy taiga]] village weaponsmiths.}}
{{History|||snap=beta 1.11.0.4|Armorer, toolsmith, and weaponsmith [[villager]]s now [[trading|buy]] 4 iron ingots for an [[emerald]].}}
{{History||1.16.0|snap=beta 1.16.0.57|Iron ingots now generate in bastion remnants chests.}}
{{History||1.17.0|snap=beta 1.16.230.52|Iron ingots can now be smelted from [[deepslate iron ore]].}}
{{History|||snap=beta 1.17.0.50|Iron ingots can now be smelted from [[raw iron]].}}
{{History||1.18.10|snap=beta 1.18.10.26|Iron ingots can now be used to heal iron golems.}}
{{History||1.19.80|snap=beta 1.19.80.21|Iron ingots can now be used as an armor trim material.}}
{{History|console}}
{{History||xbox=TU1|xbone=CU1|ps=1.0|wiiu=Patch 1|switch=1.0.1|[[File:Iron Ingot JE2 BE1.png|32px]] Added iron ingots.}}
{{History||xbox=none|xbone=none|ps=1.90|wiiu=none|switch=none|[[File:Iron Ingot JE3 BE2.png|32px]] The texture of iron ingots has been changed.}}
{{History|new3DS}}
{{History||0.1.0|[[File:Iron Ingot JE2 BE1.png|32px]] Added iron ingots.}}
{{History|foot}}
== Issues ==
{{issue list}}
== Trivia ==
* To craft each recipe once, a player would need 152 iron ingots, including 27 for the iron blocks in an [[anvil]], while using the extra tripwire hook for the [[crossbow]] and the [[iron nuggets]] for the [[chain]].
== See also ==
* {{BlockLink|Block of Iron}}
* {{ItemSprite|Iron Chestplate}} [[Iron armor]]
* {{ItemLink|Iron Nugget}}
* {{BlockLink|Iron Ore}}
* [[Ores]]
== External links ==
* {{Mcnet|taking-inventory--iron-ignot|Taking Inventory: Iron Ingot}}
{{Items}}
[[cs:Železný ingot]]
[[de:Eisenbarren]]
[[es:Lingote de hierro]]
[[fr:Lingot de fer]]
[[hu:Vasrúd]]
[[it:Lingotto di ferro]]
[[ja:鉄インゴット]]
[[ko:철괴]]
[[nl:IJzerstaaf]]
[[pl:Sztabka żelaza]]
[[pt:Barra de ferro]]
[[ru:Железный слиток]]
[[uk:Залізний зливок]]
[[zh:铁锭]]
[[Category:Renewable resources]]</li></ul> | beta 1.11.0.4 | Fletcher villagers now sell unenchanted bows for 2 emeralds, and enchanted bows for 8 emeralds. | |||
1.16.210{{Extension DPL}}<ul><li>[[Glow Ink Sac|Glow Ink Sac]]<br/>{{For|the regular sac dropped by squids|Ink Sac}}
{{Item
|Image=Glow Ink Sac.png
| renewable = Yes
| stackable = Yes (64)
|}}
A '''glow ink sac''' is an item dropped by a [[glow squid]] upon death. Unlike regular ink sacs, it can be added to [[sign]]s to make glowing text, and can be used to craft glow item frames.
== Obtaining ==
=== Mob loot ===
[[Glow squid]]s drop 1–3 glow ink sacs upon death. The maximum amount is increased by 1 per level of [[Looting]], for a maximum of 1–6 with Looting III.
=== Compound creation ===
A glow ink sac can be created from its base [[element]]s, using the [[compound creator]].{{only|bedrock|education}}
{| class="wikitable"
!Name
!Elements
!Example recipe
|- <!-- Temporarily using crafting grid as substitute for compound creator (template not yet available), since the layout is the same, even if the appearance is different -->
!Glow Ink Sac
|1 Iron<br>1 Sulfur<br>4 Oxygen
|{{Crafting Table
|shapeless= 1
|A2=Iron |B2=Sulfur |C2=Oxygen,4
|Output=Glow Ink Sac}}
|}
== Usage ==
=== Crafting ingredient ===
{{Crafting usage}}
=== Signs ===
[[File:Glow Ink Sign with Orange Dye JE2.png|thumb|150px|An oak sign with a glow ink sac used on it.]]
Glow ink sacs can be used on [[sign]]s or [[hanging sign]]s to make their text brighter in low light levels. This also adds an outline around the text on the sign, the color of which is based on the color of the sign's text. The text does not emit any light, it is only more visible in darkness, similarly to the eyes of spiders and endermen. Normal [[ink sacs]] can be applied to revert glowing text back to default.
== Sounds ==
{{edition|java}}:
{{Sound table
|sound=Ink sac1.ogg
|sound2=Ink sac2.ogg
|sound3=Ink sac3.ogg
|subtitle=Glow Ink Sac splotches
|source=block
|description=When a glow ink sac is used on a [[sign]]
|id=item.glow_ink_sac.use
|translationkey=subtitles.item.glow_ink_sac.use
|volume=1.0
|pitch=''varies'' <ref group=sound>Can be 1.0, 0.95, or 1.05</ref>
|distance=16
|foot=1}}
{{edition|bedrock}}:
{{Sound table
|type=bedrock
|sound=Ink sac1.ogg
|sound2=Ink sac2.ogg
|sound3=Ink sac3.ogg
|source=sound
|description=When a glow ink sac is used on a sign
|id=sign.ink_sac.use
|volume=1.0
|pitch=1.0
|foot=1}}
== Data values ==
=== ID ===
{{edition|java}}:
{{ID table
|edition=java
|showforms=y
|generatetranslationkeys=y
|displayname=Glow Ink Sac
|spritetype=item
|nameid=glow_ink_sac
|form=item
|foot=1}}
{{edition|bedrock}}:
{{ID table
|edition=bedrock
|shownumericids=y
|showforms=y
|notshowbeitemforms=y
|generatetranslationkeys=y
|displayname=Glow Ink Sac
|spritetype=item
|nameid=glow_ink_sac
|form=item
|id=503
|foot=1}}
== Advancements ==
{{load advancements|Glow and Behold}}
== History ==
{{History|java}}
{{History||1.17|snap=21w03a|[[File:Glow Ink Sac JE1 BE1.png|32px]] Added glow ink sacs.}}
{{History||1.17.1|snap=Pre-release 1|[[Zombie]]s, [[husk]]s, [[zombie villager]]s, and [[drowned]] no longer pick up [[glow ink sac]]s.}}
{{History||1.20<br>(Experimental)|link=1.19.3|snap=22w42a|Glow ink sacs can now be used to make the text glow on a [[hanging sign]].}}
{{History|bedrock}}
{{History||Caves & Cliffs (experimental)|link=Bedrock Edition 1.17.0|snap=beta 1.16.210.59|[[File:Glow Ink Sac JE1 BE1.png|32px]] Added glow ink sacs.}}
{{History|||snap=beta 1.16.210.60|Glow ink sacs have been removed temporarily.}}
{{History|||snap=beta 1.16.220.50|[[File:Glow Ink Sac JE1 BE1.png|32px]] Re-added glow ink sacs.}}
{{History||1.17.0|snap=beta 1.17.0.52|Glow ink sacs are now available without enabling [[experimental gameplay]].}}
{{History||1.17.30|snap=beta 1.17.30.20|[[Zombie]]s, [[husk]]s, [[zombie villager]]s, and [[drowned]] no longer pick up [[glow ink sac]]s.}}
{{History|foot}}
== Issues ==
{{Issue list}}
== External Links ==
*[https://www.minecraft.net/en-us/article/taking-inventory--glow-ink-sac Taking Inventory: Glow Ink Sac] – Minecraft.net on October 14, 2021
{{Items}}
[[Category:Items]]
[[Category:Dyes]]
[[Category:Renewable resources]]
[[de:Leuchttintenbeutel]]
[[es:Saco de tinta luminosa]]
[[it:Sacca d'inchiostro luminescente]]
[[ja:輝くイカスミ]]
[[pl:Torbiel ze świecącym atramentem]]
[[pt:Bolsa de tinta brilhante]]
[[ru:Светящийся чернильный мешок]]
[[uk:Сяйний чорнильний мішок]]
[[zh:荧光墨囊]]</li><li>[[Kelp|Kelp]]<br/>{{About|the plant|the dried variant|Dried Kelp}}
{{For}}
{{Block
|image=Kelp.gif
|invimage=Kelp
|transparent=Yes
|tool=Any
|renewable=Yes
|stackable=Yes (64)
|flammable=No
|lavasusceptible=No
|light=No
|hardness=0}}
'''Kelp''' is an underwater plant that generates in most [[ocean]]s.
== Obtaining ==
=== Natural generation ===
Kelp naturally generates in any [[ocean]] [[biome]]s (except in [[Frozen Ocean|frozen]], [[Deep Frozen Ocean|deep frozen]] and [[Warm Ocean|warm]]), near and around [[seagrass]]. Each chunk has {{frac|1|18}} chance to generate a [[vegetation]] of kelp.
=== Breaking ===
Kelp can be mined instantly with any [[tool]] or with the player's fist. Removing water from the kelp block destroys the kelp. Breaking one part of a kelp stalk destroys all kelp [[block]]s above it. Each block drops a kelp [[item (entity)|item]].
=== Trading ===
Kelp can be bought from [[wandering trader]]s for 3 emeralds.
== Usage ==
Kelp can be placed underwater by hand, or anywhere by the use of [[commands]] such as {{cmd|setblock}}. Placing it by hand gives it a random {{code|age}} value between 0 and 24. Kelp can be placed only in [[water]] source blocks or downward-flowing water, not horizontally flowing water.
When placed in downward-flowing water, the flowing water transforms into a water source block,<ref>{{bug|MC-134229}}</ref> which is useful for faster [[bubble column]] elevator creation.
Any building block can be placed on top of a kelp plant, which is useful for building structures over a deep ocean without needing to build from the ocean floor (see also [[lily pad]]).
=== Cooking ingredient ===
{{smelting
| showname = 1
| Kelp
| Dried Kelp
| 0.1
}}
=== Composting ===
Placing kelp into a [[composter]] has a 30% chance of raising the compost level by 1.
=== Growth mechanics ===
Kelp can be planted on a broad variety of blocks. It grows underwater if it has either a source block of water or, {{in|Java}}, flowing water above it.<ref>{{bug|MC-133354}}</ref> Neither [[player]]s nor [[dispenser]]s can remove the water source block that kelp grows in without breaking the kelp first.
Kelp does not require any [[light]] level to grow. Kelp also grows without having [[sky]] access. [[Bone meal]] can be used to grow kelp by 1 block on each use.
Kelp, when planted, is generated with a randomly chosen age value, which can be checked when pressing [[Debug screen|<kbd>F3</kbd>]]{{only|java}}. The age value of a newly planted kelp plant varies randomly from 0 to 24. Each time the kelp grows in height by one block, the newly generated top of the kelp plant increases its age by 1. When the top block of the kelp plant reaches an age of 25, it stops growing. This means that kelp can naturally grow to a height between 2 (if the first kelp plant had an age of 24) and 26 blocks (if the first kelp plant had an age of 0).
When a kelp plant block is broken, the age of the kelp plant block underneath is randomized to a value from 0 to 24 and the kelp continues growing until it reaches age 25. It is possible to use this mechanic to cultivate a kelp plant to increase its growth height beyond its natural maximum height of 26 blocks. This can be done by breaking the top-most block of the kelp plant each time it reaches age 25. A kelp plant cultivated by a player in this way repeatedly grows until it reaches the water surface.
Each time it receives a [[random tick]], kelp has a 14% chance of growing.
If [[shears]] are used on the topmost block of kelp, that block automatically sets its {{cd|age}} value to {{cd|25}} and stop growing.{{only|JE}}
=== Farming ===
{{Main|Tutorials/Kelp farming}}
Kelp farming is similar to farming [[sugar cane]], although kelp must be placed underwater. Automation of harvest is easier because items float up in water.
== Sounds ==
=== Generic ===
{{Sound table/Block/Wet grass}}
=== Unique ===
{{edition|java}}:
{{Sound table
|sound=Shear.ogg
|subtitle=Plant cropped
|source=block
|description=When the tip of kelp is cropped with [[Shears#Cropping growing plants|shears]]
|id=block.growing_plant.crop
|translationkey=subtitles.block.growing_plant.crop
|volume=1.0
|pitch=1.0
|distance=16
|foot=1}}
{{edition|bedrock}}: ''None''
== Data values ==
=== ID ===
{{edition|java}}:
{{ID table
|edition=java
|showforms=y
|generatetranslationkeys=y
|displayname=Kelp
|spritetype=block
|nameid=kelp}}
{{ID table
|displayname=Kelp Plant
|spritetype=block
|nameid=kelp_plant
|form=block
|foot=1}}
{{edition|bedrock}}:
{{ID table
|edition=bedrock
|firstcolumnname=Kelp
|shownumericids=y
|showforms=y
|generatetranslationkeys=y
|displayname=Item
|spritename=kelp
|spritetype=item
|nameid=kelp
|id=382
|form=item}}
{{ID table
|displayname=Block
|spritename=kelp
|spritetype=block
|nameid=kelp
|id=393
|form=block
|itemform=item.kelp
|translationkey=-
|foot=1}}
=== Block states ===
{{see also|Block states}}
{{/BS}}
== History ==
{{History|java classic}}
{{History||May 21, 2009|link=https://web.archive.org/web/0/http://notch.tumblr.com/post/110762705/my-list-on-tile-types-so-far|[[Notch]] shows interest in adding a "[[seaweed]]" [[block]].}}
{{History|java}}
{{History||November 18, 2017|link={{YouTubeLink|mAapz_nIC_Y}}|Kelp plants were shown in a clip of [[MineCon Earth]].}}
{{History||1.13|snap=18w07a|[[File:Kelp JE1 BE1.gif|32px]] [[File:Kelp (item) JE1 BE2.png|32px]] Added kelp.}}
{{History|||snap=18w07b|Kelp now behaves more like [[water]], meaning [[mob]]s can no longer spawn within the plant under water nor can they replenish their breath by [[swimming]] through it.}}
{{History|||snap=18w10a|[[File:Kelp JE2.gif|32px]] The texture for kelp has been overhauled.}}
{{History|||snap=18w14a|[[File:Kelp.gif|32px]] Top of the kelp textures have been shifted slightly downward.
|The generation rules for kelp have been changed, it now mainly generates in [[cold ocean]] [[biome]]s and can no longer generate in [[warm ocean]]s.}}
{{History|||snap=18w20a|The {{cd|kelp_top}} has been changed ID to {{cd|kelp}} and {{cd|kelp}} has been changed to {{cd|kelp_plant}}, for both the [[block]] and [[item]] forms.}}
{{History|||snap=pre2|Kelp is now destroyed by [[sponge]]s.<ref>{{bug|MC-127111}}</ref>}}
{{History|||snap=pre6|Added 5 new [[sound]] events that apply to kelp: <code>block.wet_grass.break</code>, <code>block.wet_grass.fall</code>, <code>block.wet_grass.hit</code>, <code>block.wet_grass.place</code>, and <code>block.wet_grass.step</code>.}}
{{History||1.14|snap=19w03a|Placing kelp into the new [[composter]] has a 10% chance of raising the compost level by 1.}}
{{History|||snap=19w05a|Kelp now has a 30% chance of increasing the compost level in a composter by 1.
|Added [[Wandering Trader|wandering trader]]s, which sell kelp.}}
{{History||1.16|snap=20w11a|Kelp can now be grown with [[bone meal]].}}
{{History|||snap=20w13a|Kelp has been moved from the Miscellaneous tab to the Decoration Blocks tab in the [[Creative inventory]].<ref name="misc decoration">https://bugs.mojang.com/browse/MC-174434</ref>}}
{{History||1.17|snap=20w46a|Kelp no longer generates on magma blocks.<ref>{{Bug|MC-185605|resolution=Fixed}}</ref>}}
{{History||1.18|snap=21w37a|Kelp now stops growing if [[shears]] are used on the tip.}}
{{History|bedrock}}
{{History||1.4.0|snap=beta 1.2.14.2|[[File:Kelp JE1 BE1.gif|32px]] [[File:Kelp (item) BE1.png|32px]] Added kelp.}}
{{History|||snap=beta 1.2.20.1|[[File:Kelp (item) JE1 BE2.png|32px]] The kelp [[item]] texture has been updated to the {{el|je}}'s.}}
{{History||1.5.0|snap=beta 1.5.0.4|[[File:Kelp.gif|32px]] The texture of the kelp plant has been updated.}}
{{History||1.10.0|snap=beta 1.10.0.3|Kelp can now be bought from [[wandering trader]]s for 3 [[emerald]]s.}}
{{History||1.11.0|snap=beta 1.11.0.1|Kelp can now be used to fill [[composter]]s.}}
{{History|console}}
{{History||xbox=TU69|ps=1.76|wiiu=Patch 38|[[File:Kelp.gif|32px]] [[File:Kelp (item) JE1 BE2.png|32px]] Added kelp.}}
{{History|foot}}
== Issues ==
{{issue list}}
== Trivia ==
* In real life, [[wikipedia:kelp|kelp]] is not considered a [[wikipedia:plant|plant]]. It is classified by scientists as a [[wikipedia:Brown algae|brown algae]].
** Kelp in real life absorbs nutrients directly from the water, instead of through its root-like structure, [[wikipedia:Holdfast (biology)|holdfast]], which merely attaches it to the seabed. This is in accordance with kelp being able to grow on almost any solid block in ''Minecraft''.
== Gallery ==
<gallery heights="60">
SeaPlantsMineConEarth2017.jpg|Kelp shown in a clip from MINECON Earth 2017.
Kelp in ocean with Jappa textures.jpg|Naturally generated kelp in an [[ocean]] biome.
Kelp on shoreline.png|Naturally generated kelp near the shore.
Ocean life.png|An ocean with kelp visible in the far distance.
Kelp on Land.png|Kelp placed outside of [[water]] using the {{cmd|setblock}} command before 18w07b.
Waterless kelp.png|What kelp looks like without water (water removed using a [[resource pack]]).
Coral reef at night.png|Kelp within a [[coral reef]].
Floating Kelp.png|Kelp that generated in mid-air due to an [[ocean monument]]'s water cutting through it.
Kelp in ocean.jpg|Multiple kelps.
Kelp 255 blocks tall.png|Without obstacles, kelp can grow all the way to building limit.
ArgoMajor Kelp.jpg|First image of kelp in ''Bedrock Edition''.
</gallery>
== References ==
{{reflist}}
{{Blocks|vegetation}}
{{Items}}
[[Category:Plants]]
[[Category:Natural blocks]]
[[Category:Non-solid blocks]]
[[de:Seetang]]
[[es:Alga]]
[[fr:Algue]]
[[ja:コンブ]]
[[ko:켈프]]
[[pl:Wodorosty]]
[[pt:Alga]]
[[ru:Ламинария]]
[[th:สาหร่ายทะเล]]
[[zh:海带]]</li></ul> | beta 1.16.210.58 | Bows in first-person view is now held differently.[2] | |||
1.17.0{{Extension DPL}}<ul><li>[[Nether Brick|Nether Brick]]<br/><!--Please do not change "nether brick" to "Nether brick". According to style guide, item names are not proper nouns and should not be capitalized.-->
{{about|the item|the block|Nether Bricks}}
{{Item
| title = Nether Brick
| image = Nether Brick.png
| renewable = Yes
| stackable = Yes (64)
}}
A '''nether brick''' is an [[item]] made by [[smelting]] [[netherrack]] in a [[furnace]], and is used to craft the [[Nether Bricks|nether bricks]] block and its variants.
== Obtaining ==
=== Smelting ===
Nether brick can be smelted from netherrack.
{{smelting
|Netherrack
|Nether Brick
|0,1
}}
=== Bartering ===
[[Piglin]]s may [[barter]] 2 to 8 nether bricks when given a [[gold ingot]].
== Usage ==
=== Crafting ingredient ===
{{crafting usage|Nether Brick}}
== Data values ==
=== ID ===
{{edition|java}}:
{{ID table
|edition=java
|showforms=y
|generatetranslationkeys=y
|displayname=Nether Brick
|spritetype=item
|nameid=nether_brick
|form=item
|foot=1}}
{{edition|bedrock}}:
{{ID table
|edition=bedrock
|shownumericids=y
|showforms=y
|notshowbeitemforms=y
|generatetranslationkeys=y
|displayname=Nether Brick
|spritetype=item
|nameid=netherbrick
|id=523
|form=item
|foot=1}}
== History ==
{{History|java}}
{{History||1.5|snap=13w01a|[[File:Nether Brick JE1 BE1.png|32px]] Added nether brick items.}}
{{History||1.10|snap=16w20a|Nether brick items can now be used to craft [[red nether bricks]].}}
{{History||1.13|snap=17w47a|The ID of nether bricks has been changed from <code>netherbrick</code> to <code>nether_brick</code>.
|Prior to [[1.13/Flattening|''The Flattening'']], this [[item]]'s numeral ID was 405.}}
{{History||1.14|snap=18w43a|[[File:Nether Brick JE2 BE2.png|32px]] The texture of nether bricks has been changed.}}
{{History||1.16|snap=20w07a|Nether bricks now have a {{frac|10|109}} (~9.17%) chance of being given by the new [[piglin]]s when [[bartering]], in a stack size of 1–4.}}
{{History|||snap=20w09a|Nether bricks now have a {{frac|20|226}} (~8.84%) chance of being given by piglins when bartering, in a stack size of 1–5.}}
{{History|||snap=20w10a|Nether bricks now have a {{frac|40|411}} (~9.73%) chance of being given by piglins when bartering, in a stack size of 4–16.}}
{{History||1.16.2|snap=20w28a|Nether bricks now have a {{frac|40|459}} (~8.71%) chance of being given by piglins when bartering, in a stack size of 2–8.}}
{{History|pocket alpha}}
{{History||v0.6.0|[[File:Nether Brick JE1 BE1.png|32px]] Added nether brick items.}}
{{History||v0.16.0|snap=build 5|Added nether brick items to the [[Creative]] [[inventory]].<ref name="missing brick">{{Bug|MCPE-16556}}</ref>}}
{{History|pocket}}
{{History||1.1.3|snap=alpha 1.1.3.0|Nether brick items are now used to craft [[red nether bricks]].}}
{{History|bedrock}}
{{History||1.9.0|snap=beta 1.9.0.0|Nether brick items are now used to craft nether brick [[fence]]s.}}
{{History||1.10.0|snap=beta 1.10.0.3|[[File:Nether Brick JE2 BE2.png|32px]] The texture of nether bricks has been changed.}}
{{History||1.16.100|snap=beta 1.16.100.50|Nether bricks now can be used as fuel for a [[furnace]].<ref>{{bug|MCPE-114216}}</ref>}}
{{History|||snap=beta 1.16.100.54|Nether bricks now have a {{frac|40|459}} (~8.71%) chance of being given by piglins when bartering, in a stack size of 2–8 to match {{el|Java}}.}}
{{History||1.18.30|snap=beta 1.18.30.26|Nether bricks can no longer be used as fuel in a furnace.}}
{{History|console}}
{{History||xbox=TU9|xbone=CU1|ps=1.0|wiiu=Patch 1|switch=1.0.1|[[File:Nether Brick JE1 BE1.png|32px]] Added nether brick items.}}
{{History||xbox=none|xbone=none|ps=1.90|wiiu=none|switch=none|[[File:Nether Brick JE2 BE2.png|32px]] The texture of nether bricks has been changed.}}
{{History|New 3DS}}
{{History||0.1.0|[[File:Nether Brick JE1 BE1.png|32px]] Added nether brick items.}}
{{History|foot}}
== Issues ==
{{issue list}}
== References ==
{{reflist}}
{{items}}
[[cs:Netheritová cihla]]
[[de:Netherziegel (Gegenstand)]]
[[es:Ladrillo del Nether]]
[[fr:Brique du Nether]]
[[hu:Alvilági tégla]]
[[ja:ネザーレンガ (アイテム)]]
[[ko:네더 벽돌 (아이템)]]
[[lzh:焱界磚]]
[[nl:Netherbaksteen (voorwerp)]]
[[pl:Netherowa cegła]]
[[pt:Tijolo do Nether]]
[[ru:Адский кирпич (предмет)]]
[[uk:Пекельна цегла (предмет)]]
[[zh:下界砖]]
[[Category:Renewable resources]]</li><li>[[Super Fertilizer|Super Fertilizer]]<br/>{{education feature}}
{{Exclusive|Bedrock|Education}}
{{Item
| image = Super Fertilizer.png
| renewable = No
| stackable = Yes (64)
}}
'''Super fertilizer''' is a powerful form of [[bone meal]] that is created using [[ammonia]] and [[phosphorus]].
== Obtaining ==
=== Lab table ===
{| class="wikitable"
! Result
! Materials Needed
|-
!rowspan=2|{{slot|Super Fertilizer}}<br>[[Super Fertilizer]]
|{{slot}}{{slot|Ammonia|link=Compound}}{{slot|Phosphorus|link=Element}}{{slot}}
|-
|<center>[[Compound|Ammonia]], [[Element|Phosphorus]]</center>
|}
== Usage ==
Super fertilizer can be used in the same way as bone meal. It produces more [[flowers]] in a larger area when used on [[grass block]]s compared to bone meal. When super fertilizer is used on a [[sapling]], a [[tree]] is instantly grown after one use, instead of multiple uses as with bone meal. Super fertilizer matures crops with a single use.
Note that super fertilizer does not instantly grow a hanging [[mangrove propagule]]. This could be a bug.
== Sounds ==
{{Sound table
|type=bedrock
|sound=Gravel hit1.ogg
|sound2=Gravel hit2.ogg
|sound3=Gravel hit3.ogg
|sound4=Gravel hit4.ogg
|source=player
|description=When super fertilizer is created by a [[lab table]]
|id=step.gravel
|volume=1.0
|pitch=0.2/0.4}}
{{Sound table
|sound=Bonemeal1.ogg
|sound2=Bonemeal2.ogg
|sound3=Bonemeal3.ogg
|sound4=Bonemeal4.ogg
|sound5=Bonemeal5.ogg
|description=When super fertilizer is successfully used
|source=Blocks
|id=item.bone_meal.use
|foot=1}}
== Data values ==
=== ID ===
{{ID table
|edition=bedrock
|shownumericids=y
|showforms=y
|notshowbeitemforms=y
|generatetranslationkeys=y
|displayname=Super Fertilizer
|spritetype=item
|nameid=rapid_fertilizer
|id=597
|form=item
|foot=1}}
== History ==
{{History|bedrock}}
{{History||1.4.0|snap=beta 1.2.20.1|[[File:Super Fertilizer BE1.png|32px]] Added super fertilizer.}}
{{History|education}}
{{History||1.0.27|[[File:Super Fertilizer BE1.png|32px]] Added super fertilizer.}}
{{History|foot}}
{{items}}
{{Education Edition}}
[[Category:Plants]]
[[Category:Non-renewable resources]]
[[Category:Education Edition items]]
[[de:Superdünger]]
[[ja:スーパー肥料]]
[[ko:슈퍼 비료]]
[[lzh:神肥]]
[[pl:Supernawóz]]
[[pt:Super fertilizante]]
[[uk:Супердобриво]]
[[zh:超级肥料]]</li></ul> | beta 1.17.0.52 | Bows are now held like it was before 1.16.210.58 beta.[3] | |||
| Legacy Console Edition | |||||
| TU1 | CU1 | 1.0 | Patch 1 | 1.0.1 | |
| TU5 | Bow behavior is overhauled; they now need to be charged to fire. | ||||
| TU31 | CU19 | 1.22 | Patch 3 | Bows can now be obtained by trading with a fletcher villager. | |
| TU46 | CU36 | 1.38 | Patch 15 | Bows can now shoot an additional 14 types of arrows, selected based on arrow type held in the off-hand or closest to slot 0. | |
Historical sounds:
| Sound | From | to | Pitch |
|---|---|---|---|
| 0.31 | Sound Update | 1.0 |
Issues[]
Issues relating to "Bow" are maintained on the bug tracker. Report issues there.
Trivia[]
- Bows were left unchanged in the Texture Update.[4]
- Dinnerbone got the idea for the high-pitched "ding" sound from playing on a former PvP server called Project Ares.[5][6]
Gallery[]

An enchanted bow.
Using the bow.
Drawback animation.

Bow in the Super Duper Graphics Pack.
Using a bow to hunt rabbits.
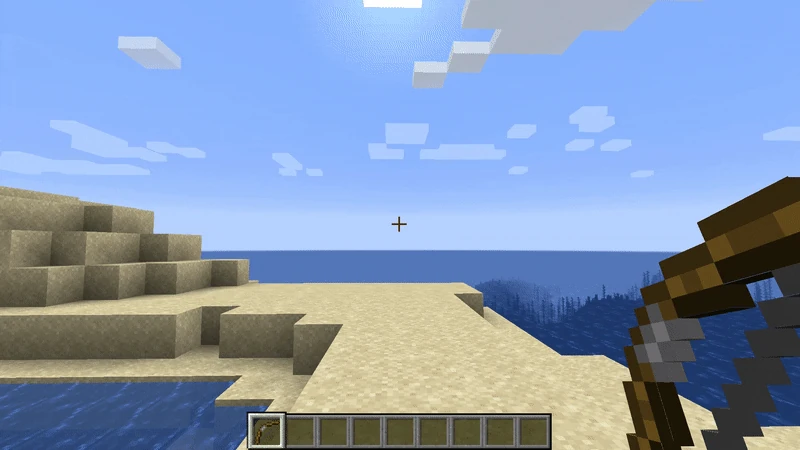

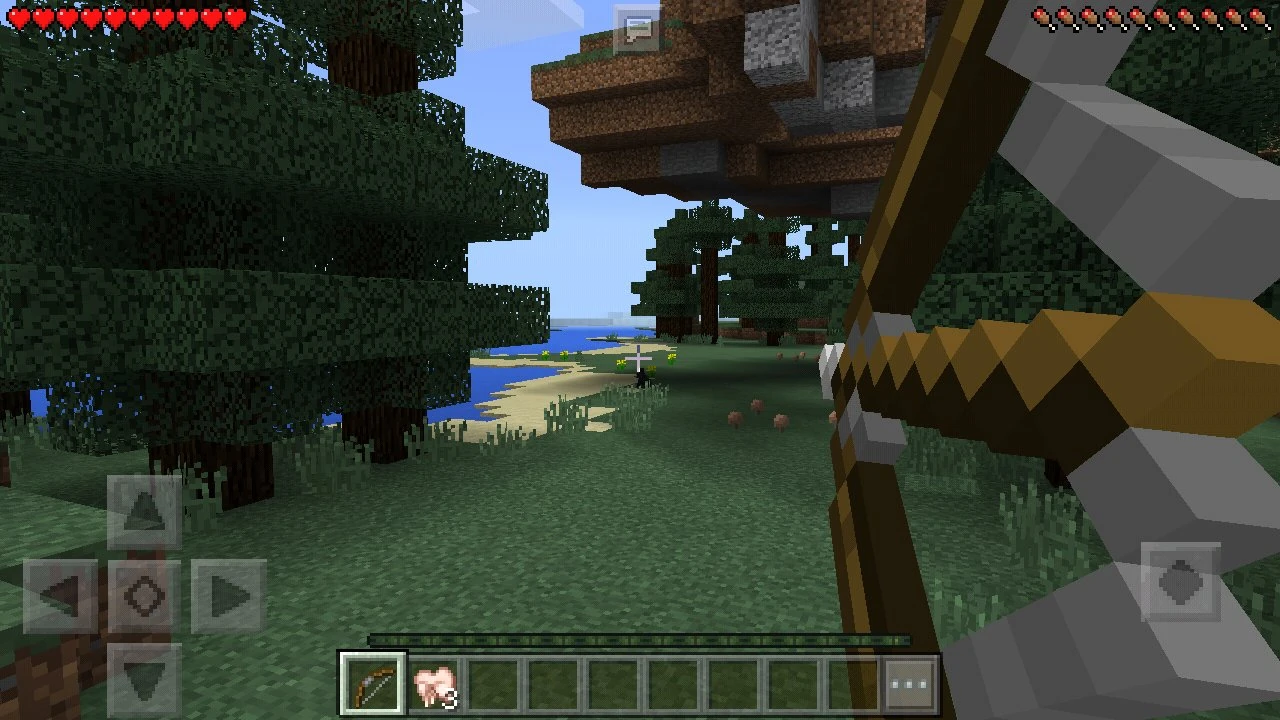
References[]
- ↑ MC-87685 — "Drawn bow texture does not reflect arrow that will be shot" — resolved as "Won't Fix".
- ↑ MCPE-116741
- ↑ MCPE-116741
- ↑ MC-168156 — resolved as "Works As Intended".
- ↑ "Also things I learnt from pvping today: Bows need to ding when you hit people (it's so much fun/rewarding!) & arrows don't render far enough" – @Dinnerbone (Nathan Adams) on X, December 15, 2012
- ↑ "Minecraft PvP with Dinnerbone & Docm77 - Team DocBone @ 11:52" – docm77 on YouTube, December 7, 2013
External Links[]
- Taking Inventory: Bow – Minecraft.net on April 13, 2023