BSkyWcloud (talk | contribs) m (Undo revision 1354581 by 119.94.100.23 (talk)) Tag: Undo |
m (→Natural Generation: capitalization fixes.) |
||
| Line 56: | Line 56: | ||
=== Natural Generation === |
=== Natural Generation === |
||
| ⚫ | |||
| − | Stripped |
+ | Stripped Acacia Wood generate in [[Savanna]] villages.{{only|bedrock|short=y}}{{upcoming|java 1.14}} |
| − | + | Stripped Spruce Wood generate in [[Snowy Tundra]] vilages.{{only|bedrock|short=y}}{{upcoming|java 1.14}} |
|
| − | |||
| ⚫ | |||
=== Crafting === |
=== Crafting === |
||
Revision as of 05:20, 11 April 2019
Wood is a block that has the log's bark texture on six sides. It comes in 6 species: oak, spruce, birch, jungle, acacia, and dark oak.
Stripped wood is a variant obtained when any axe is used on wood.
Obtaining
Wood can be broken by hand, but using an axe will speed up the process.
| Block | Wood Stripped Wood | |
|---|---|---|
| Hardness | 2 | |
| Tool | ||
| Breaking time[A] | ||
| Default | 3 | |
| Wooden | 1.5 | |
| Stone | 0.75 | |
| Iron | 0.5 | |
| Diamond | 0.4 | |
| Netherite | 0.35 | |
| Golden | 0.25 | |
- ↑ Times are for unenchanted tools as wielded by players with no status effects, measured in seconds. For more information, see Breaking § Speed.
Stripped wood
Using an axe on wood will turn it into stripped wood.
Natural Generation
Stripped Oak Wood generate as lamp post in Plains Villages.[BE only][upcoming: JE 1.14]
Stripped Acacia Wood generate in Savanna villages.[BE only][upcoming: JE 1.14]
Stripped Spruce Wood generate in Snowy Tundra vilages.[BE only][upcoming: JE 1.14]
Crafting
Wood can be crafted out of four matching logs, yielding three wood as a result.
| Ingredients | Crafting recipe |
|---|---|
| Matching Log |
Usage
Wood can be used as a decorative block in place of normal logs.
Crafting ingredient
| Name | Ingredients | Crafting recipe |
|---|---|---|
| Campfire | Stick + Coal or Charcoal + Any Wood or Hyphae or Stripped Birch Wood or Stripped Jungle Wood or Stripped Acacia Wood or Stripped Dark Oak Wood or Stripped Mangrove Wood or Stripped Cherry Wood |
|
| Campfire | Stick + Coal or Charcoal + Any Wood or Hyphae or Stripped Birch Wood or Stripped Jungle Wood or Stripped Acacia Wood or Stripped Dark Oak Wood or Stripped Mangrove Wood or Stripped Cherry Wood |
|
| Oak Planks or Spruce Planks or Birch Planks or Jungle Planks or Acacia Planks or Dark Oak Planks or Mangrove Planks or Cherry Planks |
Matching Wood or Matching Stripped Wood |
|
| Smoker | Any Wood or Hyphae or Any Stripped Wood or Hyphae + Furnace |
|
| Soul Campfire | Stick + Soul Sand or Soul Soil + Any Wood or Hyphae or Stripped Birch Wood or Stripped Jungle Wood or Stripped Acacia Wood or Stripped Dark Oak Wood or Stripped Mangrove Wood or Stripped Cherry Wood |
Smelting ingredient
| Name | Ingredients | Smelting recipe |
|---|---|---|
| Charcoal | Any Wood or Any Stripped Wood + Any fuel |
Fuel
Wood and stripped wood can be used as a fuel in furnaces, smelting 1.5 items per block.
Data values
ID
Wood/ID
Block data
In Bedrock Edition, wood uses the following data values:
| DV | Description | |
|---|---|---|
| 0 | Oak Wood | |
| 1 | Spruce Wood | |
| 2 | Birch Wood | |
| 3 | Jungle Wood | |
| 4 | Acacia Wood | |
| 5 | Dark Oak Wood | |
| 8 | Stripped Oak Wood | |
| 9 | Stripped Spruce Wood | |
| 10 | Stripped Birch Wood | |
| 11 | Stripped Jungle Wood | |
| 12 | Stripped Acacia Wood | |
| 13 | Stripped Dark Oak Wood |
Block states
| Name | Default value | Allowed values | Description |
|---|---|---|---|
| axis | y
| x | The wood or hyphae is oriented east–west. |
y | The wood or hyphae is oriented vertically. | ||
z | The wood or hyphae is oriented north–south. |
Wood
| Name | Metadata Bits | Default value | Allowed values | Values for Metadata Bits |
Description |
|---|---|---|---|---|---|
| pillar_axis | Not Supported | y
| x | Unsupported | The wood is oriented east–west. |
y | Unsupported | The wood is oriented vertically. | |||
z | Unsupported | The wood is oriented north–south. | |||
| stripped_bit | 0x8 | false | falsetrue | 01 | Whether the wood is stripped or not. |
| wood_type | 0x10x20x4 | oak
| acacia | 4 | Acacia Wood |
birch | 2 | Birch Wood | |||
dark_oak | 5 | Dark Oak Wood | |||
jungle | 3 | Jungle Wood | |||
oak | 0 | Oak Wood | |||
spruce | 1 | Spruce Wood |
Warped Hyphae, Stripped Crimson Hyphae, Stripped Warped Hyphae
| Name | Metadata Bits | Default value | Allowed values | Values for Metadata Bits |
Description |
|---|---|---|---|---|---|
| pillar_axis | 0x10x2 | y
| x | 1 | The hyphae is oriented east–west. |
y | 0 | The hyphae is oriented vertically. | |||
z | 2 | The hyphae is oriented north–south. |
Crimson Hyphae
| Name | Metadata Bits | Default value | Allowed values | Values for Metadata Bits |
Description |
|---|---|---|---|---|---|
| pillar_axis | Not Supported | y
| x | Unsupported | The hyphae is oriented east–west. |
y | Unsupported | The hyphae is oriented vertically. | |||
z | Unsupported | The hyphae is oriented north–south. |
History
| Java Edition | |||||
|---|---|---|---|---|---|
1.3.1{{Extension DPL}}<ul><li>[[Melon Slice|Melon Slice]]<br/>{{Dungeons hatnote|type=consumable|Melon}}
{{Item
| title = Melon Slice
|typeimage=Melon Slice.png
| renewable = Yes
| heals = {{hunger|2}}
| stackable = Yes (64)
}}
A '''melon slice'''{{efn|Known as '''Melon Slice''' {{in|java}} and '''Melon''' {{in|bedrock}}.}} is a [[food]] item that can be eaten by the [[player]].
== Obtaining ==
=== Block loot ===
{{see also|Tutorials/Pumpkin and melon farming|title1 = Pumpkin and melon farming}}
Melon slices can be obtained by breaking (harvesting) [[melon]]s using any [[tool]] or by hand. [[Axe]]s, followed by [[sword]]s, are the fastest tools for harvesting melons. A melon drops 3–7 melon slices, when broken; by hand, using a [[tool]], or after being broken by the movement of a [[piston]], with an average of 4.64 slices per melon.
Breaking a melon with a tool enchanted with [[Fortune]] increases the potential number of drops by 1 slice per level, up to a maximum of 9 slices.
== Usage ==
=== Food ===
{{see also|Tutorials/Hunger management|title1=Hunger management}}
To eat a melon slice, press and hold {{control|use}} while it is selected in the hotbar. Eating one restores {{hunger|2}} [[hunger]] and 1.2 hunger
[[Hunger#Mechanics|saturation]].
=== Crafting ingredient ===
{{crafting usage}}
=== Composting ===
Placing a melon slice into a [[composter]] has a 50% chance of raising the compost level by 1.
==Sounds==
{{Sound table/Entity/Food}}
== Data values ==
=== ID ===
{{edition|java}}:
{{ID table
|edition=java
|showforms=y
|generatetranslationkeys=y
|displayname=Melon Slice
|spritetype=item
|nameid=melon_slice
|form=item
|foot=1}}
{{edition|bedrock}}:
{{ID table
|edition=bedrock
|showaliasids=y
|shownumericids=y
|showforms=y
|notshowbeitemforms=y
|generatetranslationkeys=y
|spritename=melon-slice
|displayname=Melon
|spritetype=item
|nameid=melon_slice
|aliasid=melon
|id=272
|form=item
|translationkey=item.melon.name
|foot=1}}
== Advancements ==
{{load advancements|Husbandry;A Balanced Diet}}
== History ==
{{History|java beta}}
{{History||1.8|snap=Pre-release|[[File:Melon Slice JE1 BE1.png|32px]] Added melons.}}
{{History|java}}
{{History||1.0.0|snap=Beta 1.9 Prerelease 4|Melons are now used in the [[crafting]] recipe of [[glistering melon]]s.}}
{{History|||snap=Beta 1.9 Prerelease 5|Melons once again drop the correct number of slices.}}
{{History||1.3.1|snap=12w21a|Melons can now be [[trading|bought]] from farmer [[villager]]s, at 5–8 melon slices for 1 [[emerald]].}}
{{History||1.7.2|snap=13w37a|Block ID 105, [[melon stem]], has been removed from the {{cmd|give}} [[commands|command]].}}
{{History||1.8|snap=14w02a|[[Villager]]s no longer [[trading|sell]] melons. They now buy [[melon]]s instead.}}
{{History||1.13|snap=17w47a|Prior to [[1.13/Flattening|''The Flattening'']], this [[item]]'s numeral ID was 360.}}
{{History|||snap=18w20b|"Melon" has been renamed to "Melon Slice."
|The ID of melon slices has been changed from <code>melon</code> to <code>melon_slice</code>.}}
{{History||1.14|snap=18w43a|[[File:Melon Slice JE2 BE2.png|32px]] The texture of melon slices has been changed.}}
{{History|||snap=19w03a|Placing a melon slice into the new [[composter]] has a 20% chance of raising the compost level by 1.}}
{{History|||snap=19w05a|Melon slices now have a 50% chance of increasing the compost level in a composter by 1.}}
{{History|pocket alpha}}
{{History||v0.5.0|[[File:Melon Slice JE1 BE1.png|32px]] Added melons.
|Melons restore {{health|2}} each, rather than {{hunger|2}}.}}
{{History||v0.12.1|snap=?|Added Melon slice to the Creative inventory.}}
{{History|||snap=build 1|Melons now restores [[hunger]] instead of [[health]].
|Melons can no longer be obtained from [[nether reactor]]s.}}
{{History|pocket}}
{{History||1.1.0|snap=alpha 1.1.0.3|[[Breaking]] a [[melon]] with [[shears]] now always yields 9 melons.}}
{{History|bedrock}}
{{History||1.10.0|snap=beta 1.10.0.3|[[File:Melon Slice JE2 BE2.png|32px]] The texture of melons has been changed.}}
{{History||1.11.0|snap=beta 1.11.0.1|Melons can now be used to fill up [[composter]]s.}}
{{History|||snap=beta 1.11.0.4|Melons can now be [[trading|sold]] to farmer [[villager]]s.}}
{{History||1.16.0|snap=beta 1.16.0.57|[[Trading]] has been changed, melon slices can no longer be sold to farmer villagers.}}
{{History||1.16.100|snap=beta 1.16.100.56|The ID of melon slices has been changed from <code>melon</code> to <code>melon_slice</code>.}}
{{History|console}}
{{History||xbox=TU5|xbone=CU1|ps=1.0|wiiu=Patch 1|[[File:Melon Slice JE1 BE1.png|32px]] Added melons.}}
{{History||xbox=none|xbone=none|ps=1.90|wiiu=none|switch=none|[[File:Melon Slice JE2 BE2.png|32px]] The texture of melons has been changed.}}
{{History|new 3ds}}
{{History||0.1.0|[[File:Melon Slice JE1 BE1.png|32px]] Added melons.}}
{{History|foot}}
== Issues ==
{{issue list}}
== See also ==
* [[Pumpkin]]
* [[Glistering Melon Slice]]
== Notes ==
{{fnlist}}
{{Items}}
[[Category:Plants]]
[[cs:Meloun]]
[[de:Melone]]
[[es:Rodaja de sandía]]
[[fr:Tranche de pastèque]]
[[hu:Dinnye Szelet]]
[[ko:수박]]
[[nl:Meloenschijf]]
[[pl:Arbuz]]
[[pt:Fatia de melancia]]
[[ru:Ломтик арбуза]]
[[zh:西瓜片]]
[[Category:Food]]
[[Category:Renewable resources]]</li><li>[[Arrow|Arrow]]<br/>{{ItemEntity
|title=Arrow
|image=Arrow.png
|image2=Spectral Arrow.png
|renewable='''Uncraftable and Luck{{only|java|short=1}}''': No <br/>
'''All others''': Yes
|stackable='''Normal / Spectral:''' Yes (64)<br/>
'''Tipped:''' Yes (64, only if same effect)
|size=Height: 0.5 Blocks<br>Width: 0.5 Blocks
|networkid='''Normal / Tipped:'''<br>'''[[JE]]''': 60<br>
'''Spectral:'''<br>'''[[JE]]''': 91
}}
An '''arrow''' serves as ammunition for [[bow]]s, [[crossbow]]s, and [[dispenser]]s. Arrows can be modified to give [[status effects]] to [[player]]s and [[mob]]s.
== Obtaining ==
=== Picking up arrows ===
Arrows shot by players can always be [[#Retrieving|picked up]] in Creative mode.
An arrow ''cannot'' be picked up by a player in [[Survival]] or [[Adventure]] mode if:
* It is shot by a player in [[Creative]] mode.
* It is shot by any [[mob]] able to shoot arrows, such as [[skeleton]]s, [[stray]]s, [[pillager]]s, or [[piglin]]s. This includes mobs that do not shoot arrows in normal gameplay, such as [[illusioner]]s and bow-wielding [[wither skeleton]]s.
** This is the case even in Creative mode.<ref>{{bug|MC-128845|||WAI}}</ref>
* It is shot with an [[Infinity]]-enchanted [[bow]].
* It is one of the two extra arrows shot with a [[Multishot]]-enchanted [[crossbow]].
=== Mob loot ===
[[Skeleton]]s and [[stray]]s drop 0-2 arrows upon death. The maximum drop is increased by 1 per level of [[Looting]], for a maximum of 0–5 arrows with Looting III.
Strays have a 50% chance of dropping 1 arrow of [[Slowness]] when killed by a player. Each level of Looting increases the chance of this drop by 50% of the previous chance. This results in a maximum of 93.75% with Looting III.
{{IN|bedrock}}, [[pillager]]s also drop 0–2 arrows upon death. The maximum drop is increased by 1 per level of Looting, for a maximum of 0-5 arrows with Looting III.
=== Trading ===
Novice-level fletcher [[villager]]s have a 50% chance {{in|bedrock}}, or a {{frac|2|3}} chance {{in|java}}, to sell 16 arrows for one [[emerald]] as part of their trades.
{{IN|bedrock}}, master-level fletcher villagers have a {{frac|1|2}} chance to sell 5 tipped arrows for 2 emeralds and 5 arrows. {{IN|java}}, they have a {{frac|2|3}} chance to sell 5 tipped arrows for 2 emeralds and 5 arrows. Trades {{in|java}} can be the base effect, level II, or extended; {{in|bedrock}}, only the arrow of decay is level II.<!-- A check should be made if it chooses randomly from the whole of the list of possible arrows variants, or it it chooses a base arrow potion effect, then randomly choose from that arrow's options. The first one would make arrow's without a level II, like Fire Resistance for example, slightly less likely than ones with all three options like Swiftness. -->
<!-- None are extended duration, but villagers can trade level 2 arrows. -->
* Arrow of [[Fire Resistance]]
* Arrow of [[Harming]]
* Arrow of [[Healing]]
* Arrow of [[Invisibility]]
* Arrow of [[Leaping]]
* Arrow of [[Night Vision]]
* Arrow of [[Poison]]
* Arrow of [[Regeneration]]
* Arrow of [[Slowness]]
* Arrow of [[Strength]]
* Arrow of [[Swiftness]]
* Arrow of the [[Potion of the Turtle Master|Turtle Master]]
* Arrow of [[Water Breathing]]
* Arrow of [[Weakness]]
* Arrow of [[Slow Falling]]{{only|java}}<!-- bedrock fletchers never sell arrows of slow falling -->
* Arrow of [[Decay]]{{only|bedrock}}
These are all potion effects except Slow Falling {{in|bedrock}} and [[Luck]] {{in|java}}. Trading is the only legitimate way to obtain arrows of Decay in [[Survival]] mode.
=== Bartering ===
Spectral arrows{{only|java}}/normal arrows{{only|bedrock}} can be obtained through [[bartering]] with [[piglin]]s, and have a ~8.71% chance to give the [[player]] 6-12 arrows.
=== Villager gifts ===
{{IN|java}}, any regular or tipped arrow (except for [[luck]] and [[Bad Luck]] arrows) can be obtained as a reward item from [[fletcher]] [[villager]]s when the player has the [[Hero of the Village]] status effect.
=== Crafting ===
{{Crafting
|head=1
|B1= Flint
|B2= Stick
|B3= Feather
|Output = Arrow,4
|type = Combat
|showdescription=1
}}
{{Crafting
|A2= Glowstone Dust
|B1= Glowstone Dust
|B2= Arrow
|B3= Glowstone Dust
|C2= Glowstone Dust
|Output = Spectral Arrow,2
|type = Combat
|description = {{only|java}}
}}
{{Crafting
|foot=1
|description=Arrows of Decay are exclusive to {{el|be}} unless obtained via [[creative]] or [[commands]]. Arrows of luck are exclusive to {{el|je}}. A custom potion obtained via [[commands]] cannot craft arrows with the potion's custom name, lore, or the <code>CustomPotionColor</code>.
|A1= Arrow
|A2= Arrow
|A3= Arrow
|B1= Arrow
|B2= Matching Lingering Potion
|B3= Arrow
|C1= Arrow
|C2= Arrow
|C3= Arrow
|Output = Matching Tipped Arrow,8
|type = Combat
}}
=== Chest loot ===
{{LootChestItem|arrow}}
{{LootChestItem|spectral-arrow}}
=== Retrieving ===
Arrows stuck in a block that were originally shot by dispensers or by players in [[Survival]] without the [[Infinity]] enchantment may be collected. Arrows originally shot by [[skeleton]]s, [[stray]]s, [[illusioner]]s, [[pillager]]s, [[piglin]]s, players in [[Creative]], players using the [[Infinity]] enchantment, or duplicate arrows created by [[Crossbow]]s with the [[Multishot]] enchantment cannot be collected. Arrows cannot be retrieved when they are stuck in a player or mob, and players or mobs do not drop them when killed. Retrievable arrows have a despawn timer of 60 seconds.
=== Cauldrons ===
{{main|Cauldron#Potions}}
{{IN|bedrock}}, tipped arrows can also be obtained by using arrows on [[Cauldron#Potions|cauldrons]] that contain [[potion]]s. The number of tipped arrows created depends on the potion inside the cauldron. When the cauldron is {{frac|1|3}} full, 16 arrows can be tipped. When the cauldron is {{frac|2|3}} full, up to 32 arrows can be tipped and when the cauldron is full, an entire stack of 64 arrows can be tipped. This is more efficient than using lingering potions as up to 21.33 arrows can be tipped per potion.
== Usage ==
{{see also|Bow}}
When fired, arrows fly in a [[wikipedia:Trajectory of a projectile|ballistic trajectory]] affected by gravity and drag in [[air]], [[water]], and [[lava]]. The arrow's velocity is multiplied by 0.99 every game tick, and it also experiences 20 block/s<sup>2</sup> of downward acceleration induced by gravity.
Arrows travel approximately 3 [[block]]s when fired parallel to a flat plane with no charge, 15 blocks average with medium charge, and 24 blocks average with maximum charge. When fired from a fully charged bow, arrows can travel 120 blocks if fired from an optimal angle. The maximum height an arrow fired by a bow can reach is around 66 blocks.
An arrow fired in water experiences much more drag than in air: it moves less than 8 blocks before completely losing horizontal speed and falling straight down, although the knockback of the arrow remains unaffected. It also leaves a trail of bubbles in its wake.
There is a random variable to the trajectory of an arrow, given by <code>this.rand.nextGaussian() * 0.0075 * (double)inaccuracy</code> for the x, y and z coordinate. The inaccuracy is relatively small, becoming noticeable over larger distances. The inaccuracy of different arrow delivery devices may differ. Dispensers fire with an inaccuracy of 6, while bows fire with an inaccuracy of 1.
An arrow's speed determine the damage it inflicts. The damage inflicted is calculated by multiplying the arrow's [[#Entity data|damage value]] with its velocity in blocks per [[Tick#Game tick|game tick]]. When fired from a fully-charged unenchanted bow, arrows do {{hp|6}} of damage, with a smaller chance to damage for up to {{hp|11}} via critical hits. They inflict up to {{hp|5}} damage from a medium-charged bow, and {{hp|1}} from a bow with no charge. Arrows fired from dispensers always do {{hp|3}} of damage unless their velocity is modified by an external source. Arrows fired from [[crossbow]]s do {{hp|6}} to {{hp|11}} of damage.
Arrows trigger [[Damage#Immunity|damage immunity]] on hit. However, unlike other methods of damage that may bypass invulnerability under certain conditions, arrows hitting the mob while it is invulnerable lose all speed and drop to the ground, dealing no damage unless they contact another mob.
[[File:ArrowShotInTree.png|thumb|An arrow shot into a [[tree]].]]
Arrows also stick into objects they come in contact with and remain there for one minute before disappearing; the distance from the object and the angle determine how far into the target the arrow penetrates. Such arrows may be [[#Retrieving|retrieved]].
If the arrow has any custom potion effects (NBT tag <code>CustomPotionEffects</code>), all potion effects, including vanilla potion effects (NBT tag <code>Potion</code>) are removed 30 seconds after the arrow stops moving.
If an arrow is stuck in a block, and that block is broken or disappears (e.g., [[leaves]] upon decay), then the arrow falls straight down and damages entities below, but never deals a critical hit. The 1-minute despawn timer is then refreshed, meaning it will take another minute for the arrow to despawn.
Arrows bounce off players and mobs immune to damage, like a player in Creative mode, a [[wither]] under the "wither armor" effect, and a perching [[ender dragon]].
Arrows shot through [[lava]] or (if there's at least a 2 block gap) [[fire]] catch on fire and show an appropriate animation until they pass through water. Like arrows shot from a bow with the Flame enchantment, they can set other entities they hit on fire for 5 seconds as well as ignite TNT and campfires.
An arrow shot at any kind of boat{{only|java|short=1}} or minecart causes the vehicle to break, dropping any components (including container contents).
Arrows can get visually stuck in players {{in|java}}, although not any mobs. They appear as regular arrows regardless of type.<ref>{{bug|MC-83933|||WAI}}</ref>
<gallery>
Steve got shot.png|Steve got shot.
Alex got shot.png|Alex got shot.
</gallery>
=== Redstone circuits ===
An arrow can activate a wooden [[button]], wooden [[pressure plate]], a [[tripwire]], or a [[target]]. An arrow will continue to power these blocks until it is removed, either due to despawning, or being picked up. Target blocks emit a redstone pulse for one second, as opposed to the static depressed state of the other switches. Non-wooden switches are not affected by arrows.
When arrows are fired into the sides of blocks, they change their orientation to point more downward than their original flight path might indicate. This can cause them to intersect and thus trigger switches above them that they didn't actually hit, or block rails above them.
=== Explosions ===
Arrows are affected by explosions while they are in flight. Since explosions can increase the speed of an arrow, they can also increase the damage dealt by them. {{only|Java}}
== Variants ==
=== Tipped arrows ===
{{See also|#Crafting}}
Tipped arrows are arrows that imbue a potion effect when hitting a mob or player. The duration of the effect is {{frac|1|8}} that of the corresponding potion, if applicable, and is not affected by the power of the arrow. The status effect is the same as the regular power effect for the potion. If a bow is enchanted with [[Infinity]], tipped arrows are still consumed.
The types of arrows are:
<div class="list-style-none" style="-moz-column-width:19em;-webkit-column-width:19em;column-width:19em">
* {{ItemLink|link=none|Arrow of Regeneration}}
* {{ItemLink|link=none|Arrow of Swiftness}}
* {{ItemLink|link=none|Arrow of Fire Resistance}}
* {{ItemLink|link=none|Arrow of Healing}}
* {{ItemLink|link=none|Arrow of Night Vision}}
* {{ItemLink|link=none|Arrow of Strength}}
* {{ItemLink|link=none|Arrow of Leaping}}
* {{ItemLink|link=none|Arrow of Invisibility}}
* {{ItemLink|link=none|Arrow of Poison}}
* {{ItemLink|link=none|Arrow of Weakness}}
* {{ItemLink|link=none|Arrow of Slowness}}
* {{ItemLink|link=none|Arrow of Harming}}
* {{ItemLink|link=none|Arrow of Water Breathing}}
* {{ItemLink|link=none|Arrow of Luck}}{{only|java|short=1}}
* {{ItemLink|link=none|Arrow of Decay}}{{only|bedrock|short=1}}
* {{ItemLink|link=none|Arrow of the Turtle Master}}
* {{ItemLink|link=none|Arrow of Slow Falling}}
</div>
Arrows of Harming (and arrows of Healing when used against undead mobs) do not add a static amount of damage to the arrow.<ref>{{bug|MC-107856||Arrows of harming/healing do not stack with bow damage}}</ref> Instead, the arrow's damage is first calculated, then checked to see if it is below {{Health|12}}. If the arrow's damage is less than 12, the Harming effect of the arrow makes up the difference, to ensure the arrow does exactly {{Health|12}}. Therefore, an unenchanted bow cannot deal more than 12 damage using Harming (or Healing) arrows, as it can deal a maximum of {{Health|11}} damage on level ground. However, if the arrow would deal more than 12 damage, the harming effect is entirely neutralized. This means that bows enchanted with Power I through Power III has a chance to not utilize the arrow at full charge, and any Power level above III never utilizes Arrows of Harming effectively at full charge when against unarmored mobs/players.
==== No-effect tipped arrows ====
It is possible to craft tipped arrows using [[Lingering Potion#Lingering water bottle|Lingering Water Bottles]] as well as Awkward, Thick, and Mundane [[Lingering Potion|Lingering potions]]. If crafted with a water bottle, the arrow is called an arrow of Splashing. If crafted with Mundane, Awkward, or Thick potions, it is called a tipped arrow.<ref>{{bug|MC-158539}}</ref> Tipped arrows crafted from different potions do not stack, as resultant tipped arrows all have different potion tags.
In Bedrock Edition, all four kinds as well as the long mundane tipped arrow aren't obtainable either in creative, by cauldrons, by crafting, or by commands.
All four kinds generate blue particles in flight and upon landing, but otherwise behave like regular arrows. In particular, arrow of Splashing has no effect on fire and campfires and when shot from a bow with the Flame enchantment, can light campfires and TNT just like regular arrows on fire.
{| class="wikitable" style="text-align: center;" data-description="Unused potions"
! Icon
! Name
|-
| {{Slot|Arrow of Splashing|link=none}}
! Arrow of Splashing
|-
| {{Slot|Tipped Arrow|link=none}}
! Tipped Arrow
|}
==== Uncraftable tipped arrows ====
{{IN|java}}, the uncraftable tipped arrow is a tipped arrow with no effect that is unobtainable in regular gameplay. It is available in two variants that don't stack together:
* {{cmd|/give @s minecraft:tipped_arrow{Potion:"minecraft:empty"} }} - arrow assigned an effect placeholder "empty"
* {{cmd|/give @s minecraft:tipped_arrow }} - arrow not assigned any effect.
The uncraftable arrow doesn't differ from regular arrows in behavior when used as a projectile.
{| class="wikitable" style="text-align: center;" data-description="Unused potions"
! Icon
! Name
|-
| {{Slot|Uncraftable Tipped Arrow|link=none}}
! Uncraftable Tipped Arrow
|}
=== Spectral arrows ===
{{exclusive|java}}
A spectral arrow confers the [[Glowing]] status effect for 10 seconds. The Glowing effect creates an outline of the target, which is visible through blocks, and colored based on the target's [[team]] (white by default). Even if a bow is enchanted with [[Infinity]], spectral arrows are still consumed. Spectral arrows can be acquired through [[bartering]] or crafted by combining 4 [[Glowstone Dust#Crafting ingredient|glowstone dust]] with one arrow, yielding 2 spectral arrows.
{| class="wikitable" style="text-align: center;"
! Icon
! Name
|-
| {{Slot|Spectral Arrow|link=none}}
! Spectral Arrow
|}
== Sounds ==
{{edition|java}}:<br>
Arrows and spectral arrows use the Friendly Creatures sound category for entity-dependent sound events.
{{Sound table
|sound=Arrow hit1.ogg
|sound2=Arrow hit2.ogg
|sound3=Arrow hit3.ogg
|sound4=Arrow hit4.ogg
|subtitle=Arrow hits
|source=Friendly Creatures
|description=When an arrow impacts something
|id=entity.arrow.hit
|translationkey=subtitles.entity.arrow.hit
|volume=1.0
|pitch={{frac|12|11}} - {{frac|4|3}}
|distance=16}}
{{Sound table
|sound=Succesfull Hit.ogg
|subtitle=Player hit
|source=Players
|description=When an arrow shot by a player hits another player
|id=entity.arrow.hit_player
|translationkey=subtitles.entity.arrow.hit_player
|volume=1.0
|pitch=1.0
|distance=16}}
{{Sound table
|rowspan=3
|sound=Bow shoot.ogg
|subtitle=Arrow fired
|source=Players
|description=When an arrow is fired by a player
|id=entity.arrow.shoot
|translationkey=subtitles.entity.arrow.shoot
|volume=1.0
|pitch=Around 1.2<ref group=sound>Depends on how long the bow is charged for, around 1.2 with a fully charged bow. The exact formula is <math>\frac{1}{\operatorname{randomFloat()}\times 4+1.2}+\frac{\text{progress}}{2}</math> </ref>
|distance=16}}
{{Sound table
|subtitle=Skeleton shoots
|source=Hostile Creatures
|description=When a skeleton shoots an arrow
|id=entity.skeleton.shoot
|translationkey=subtitles.entity.skeleton.shoot
|volume=1.0
|pitch={{frac|5|6}} - 1.25
|distance=16}}
{{Sound table
|subtitle=Dispensed item
|source=Blocks
|description=When a dispenser shoots an arrow
|id=block.dispenser.launch
|translationkey=subtitles.block.dispenser.dispense
|volume=1.0
|pitch=1.2
|distance=16}}
{{Sound table
|sound=Crossbow shoot1.ogg
|sound2=Crossbow shoot2.ogg
|sound3=Crossbow shoot3.ogg
|subtitle=Crossbow fires
|source=Players
|description=When a crossbow shoots an arrow
|id=item.crossbow.shoot
|translationkey=subtitles.item.crossbow.shoot
|volume=0.8 / 0.9
|pitch=0.9 / 1.0
|distance=16
|foot=1}}
{{edition|bedrock}}:
{{Sound table
|type=bedrock
|sound=Arrow hit1.ogg
|sound2=Arrow hit2.ogg
|sound3=Arrow hit3.ogg
|sound4=Arrow hit4.ogg
|source=player
|description=When an arrow impacts something
|id=random.bowhit
|volume=1.0
|pitch=1.09-1.3}}
{{Sound table
|sound=Bow shoot.ogg
|source=player
|description=When something shoots an arrow
|id=random.bow
|volume=1.0
|pitch=0.83-1.25}}
{{Sound table
|sound=Crossbow shoot1.ogg
|sound2=Crossbow shoot2.ogg
|sound3=Crossbow shoot3.ogg
|source=player
|description=When a crossbow shoots an arrow
|id=crossbow.shoot
|volume=1.0
|pitch=1.0
|foot=1}}
== Data values ==
=== ID ===
{{edition|java}}:
{{ID table
|edition=java
|showitemtags=y
|showforms=y
|generatetranslationkeys=y
|displayname=Arrow
|spritetype=item
|nameid=arrow
|itemtags=arrows
|form=item}}
{{ID table
|displayname=Spectral Arrow
|spritetype=item
|nameid=spectral_arrow
|itemtags=arrows
|form=item}}
{{ID table
|displayname=Tipped Arrow
|spritetype=item
|nameid=tipped_arrow
|itemtags=arrows
|form=item
|translationkey=item.minecraft.tipped_arrow, item.minecraft.tipped_arrow.effect.empty, item.minecraft.tipped_arrow.effect.water, item.minecraft.tipped_arrow.effect.mundane, item.minecraft.tipped_arrow.effect.thick, item.minecraft.tipped_arrow.effect.awkward, item.minecraft.tipped_arrow.effect.night_vision, item.minecraft.tipped_arrow.effect.invisibility, item.minecraft.tipped_arrow.effect.leaping, item.minecraft.tipped_arrow.effect.fire_resistance, item.minecraft.tipped_arrow.effect.swiftness, item.minecraft.tipped_arrow.effect.slowness, item.minecraft.tipped_arrow.effect.water_breathing, item.minecraft.tipped_arrow.effect.healing, item.minecraft.tipped_arrow.effect.harming, item.minecraft.tipped_arrow.effect.poison, item.minecraft.tipped_arrow.effect.regeneration, item.minecraft.tipped_arrow.effect.strength, item.minecraft.tipped_arrow.effect.weakness, item.minecraft.tipped_arrow.effect.levitation, item.minecraft.tipped_arrow.effect.luck, item.minecraft.tipped_arrow.effect.turtle_master, item.minecraft.tipped_arrow.effect.slow_falling
|foot=1}}
{{ID table
|edition=java
|showentitytags=y
|generatetranslationkeys=y
|displayname=Arrow
|spritetype=entity
|nameid=arrow
|entitytags=arrows, impact_projectiles}}
{{ID table
|displayname=Spectral Arrow
|spritetype=entity
|nameid=spectral_arrow
|entitytags=arrows, impact_projectiles
|foot=1}}
{{edition|bedrock}}:
{{ID table
|edition=bedrock
|showitemtags=y
|notshowbeitemforms=y
|shownumericids=y
|showforms=y
|generatetranslationkeys=y
|displayname=Arrow
|spritetype=item
|nameid=arrow
|id=301
|itemtags=minecraft:arrow
|form=item
|translationkey=item.arrow.name, item.tipped_arrow.name, tipped_arrow.effect.water, tipped_arrow.effect.mundane, tipped_arrow.effect.thick, tipped_arrow.effect.awkward, tipped_arrow.effect.nightVision, tipped_arrow.effect.invisibility, tipped_arrow.effect.jump, tipped_arrow.effect.fireResistance, tipped_arrow.effect.moveSpeed, tipped_arrow.effect.moveSlowdown, tipped_arrow.effect.waterBreathing, tipped_arrow.effect.heal, tipped_arrow.effect.harm, tipped_arrow.effect.poison, tipped_arrow.effect.regeneration, tipped_arrow.effect.damageBoost, tipped_arrow.effect.weakness, tipped_arrow.effect.wither, tipped_arrow.effect.turtleMaster, tipped_arrow.effect.slowFalling
|foot=1}}
{{ID table
|edition=bedrock
|shownumericids=y
|generatetranslationkeys=y
|displayname=Arrow
|spritetype=entity
|nameid=arrow
|id=80
|foot=1}}
=== Metadata ===
{{IN|bedrock}}, arrows use the following item data values:
{{/DV}}
=== Entity data ===
==== Normal and tipped arrows ====
Arrows have entity data that define various properties of the entity.
{{el|java}}:
{{main|Entity format}}
{{/ED}}
{{el|bedrock}}:
: See [[Bedrock Edition level format/Entity format]].
==== Spectral arrows ====
Spectral arrows also have entity data that define various properties of the entity.
{{el|java}}:
{{main|Entity format}}
{{/ED1}}
{{el|bedrock}}
: See [[Bedrock Edition level format/Entity format]].
== Achievements ==
{{load achievements|Sniper Duel;Archer;Bullseye}}
== Advancements ==
{{load advancements|Take Aim;Sniper Duel;Not Today;Bullseye;Ol' Betsy;Two Birds;Who's the Pillager Now;Arbalistic;How Did We Get Here}}
== Video ==
<div style="text-align:center">{{yt|STQkD1Oa65s}}</div>
== History ==
{{History|java classic}}
{{History||0.24_SURVIVAL_TEST|[[File:Arrow JE1.png|42px]] Arrows have been added as an object and are fired by pressing {{Key|Tab}}.}}
{{History||0.25 SURVIVAL TEST|[[File:Arrow JE2 BE1.png|42px]] The texture of arrows has been changed.
|Arrows now deal more [[damage]], and can damage the player.
|The [[player]] now spawns with 20 arrows; the remaining amount is shown above the hotbar labeled as "Arrows".
|[[File:Purple Arrow JE1.png|42px]] [[Skeleton]]s now fire purple arrows, instead of hitting the [[player]] directly. These arrows can't be collected by the [[player]].
|When a skeleton is killed, it now drops 6-9 normal arrows for the player to gather.}}
{{History||0.29|Arrows can no longer be shot by the player in Creative Mode.}}
{{History|java indev}}
{{History||0.31|snap=20100122|[[File:Arrow (item) JE1 BE1.png|32px]] Arrows have been added as [[item]]s alongside with [[bow]]s.
|The "Arrows" display above the hotbar has been removed.}}
{{History|||snap=20100124|Arrows now have a [[sound]] effect. What this sound effect is is completely unknown; it could be for hitting a block, for being fired or for something else entirely.}}
{{History|||snap=20100128|Arrows can now be [[craft]]ed using [[apple]]s.}}
{{History|||snap=20100129|Arrows can no longer be crafted.}}
{{History|||snap=20100130|Arrows are once again now craftable. Iron is used instead of steel.}}
{{History||20100219|Arrows are now dropped by [[skeleton]]s.}}
{{History|java infdev}}
{{History||20100316|Arrows now have a high chance of spawning either a [[sheep]], a [[pig]], a [[skeleton]], a [[creeper]], a [[spider]], or a [[zombie]] upon hitting a [[block]].
|The player now spawns with 999 arrows.}}
{{History||20100320|The player now spawns with 64 arrows.}}
{{History||20100327|The player no longer spawns with any arrows in new worlds.}}
{{History||20100413|Arrows no longer spawn [[mob]]s.}}
{{History|java alpha}}
{{History||v1.0.14|The tip of an arrow in crafting is now made from [[flint]] rather than an [[iron ingot]].}}
{{History|java beta}}
{{History||1.2|Arrows can now be fired by [[dispenser]]s.}}
{{History||1.6|snap=Test Build 3|Arrows could be used to stick in any [[block]] before this update, even some non-solid ones. For example, they could stick in [[torch]]es, [[sugar cane]] and [[nether portal]]s.}}
{{History||1.8|snap=Pre-release|Arrows can no longer be rapid-fired from [[bow]]s; they must be charged first.
|Arrows (with a bow at full strength) can now travel 120 blocks when fired from the optimal angle, and stick to [[mob]]s.}}
{{History||Sound Update|Arrow firing [[sound]]s have been changed - see sounds section}}
{{History|java}}
{{History||November 21, 2011|link={{ytl|BES9EKK4Aw4}}|Exploding arrows are mentioned.}}
{{History||1.0.0|snap=Beta 1.9 Prerelease|Arrows no longer stick to [[mob]]s.
|Arrows remain visible in players.{{verify|then when were they removed? bug fix in 1.4.3 implies it was removed for players as well in this version}}}}
{{History|||snap=RC1|Arrow landing [[sound]]s have been changed.}}
{{History||1.1|snap=release|Arrows on [[fire]] now set the [[entity|entities]] they hit on fire. Before, arrows could be on fire (like other [[entities]]), but they did not set what they hit on fire, and there was no [[enchanting|enchantment]] to fire flaming arrows.}}
{{History||1.3.1|snap=12w21a|Farmer [[villager]]s now [[trading|sell]] 9–12 arrows for 1 [[emerald]].}}
{{History|||snap=12w22a|Arrows can now be found inside [[dispenser]]s in the newly added [[jungle temple]]s.}}
{{History|||snap=12w23a|Arrows can now activate [[tripwire]] switches and wooden [[pressure plate]]s.}}
{{History||1.4.2|snap=12w34a|Arrows can now activate wooden [[button]]s.}}
{{History|||snap=12w34b|Arrows on [[fire]] can now ignite [[TNT]].}}
{{History||1.4.4|snap=1.4.3|Arrows now stick to [[player]]s again, but not [[mob]]s.}}
{{History||1.4.6|snap=pre|Arrows now make a "ding" sound when they hit a player.}}
{{History||1.8|snap=14w02a|Farmer [[villager]]s no longer [[trading|sell]] arrows.
|Fletcher villagers now sell 8–12 arrows for 1 [[emerald]].}}
{{History|||snap=14w25a|An underwater arrow now loses all velocity after a few blocks and slowly falls.
|A flaming arrow underwater now gets extinguished.}}
{{History|||snap=14w26a|Fire arrows can now be used to detonate [[minecarts with TNT]].}}
{{History||1.9|snap=15w31a|[[File:Tipped Arrow Revision 1.png|32px]] [[File:Tipped Arrow MC-84253.png|32px]] Added 14 new tipped arrows. Due to a bug<ref>{{bug|MC-84253}}</ref>, all tipped arrows except arrow of Splashing are black.
|[[File:Spectral Arrow JE1.png|42px]] [[File:Spectral Arrow (item) JE1.png|32px]] Added spectral arrows. They show [[mob]] and [[player]] outlines in their team color when hit. They have no texture when shot.}}
{{History|||snap=15w31b|[[File:Spectral Arrow JE2.png|42px]] Spectral arrows now use their intended texture.<ref>{{bug|MC-82809}}</ref>}}
{{History|||snap=15w32a|[[File:Arrow of Night Vision JE1 BE1.png|32px]] [[File:Arrow of Invisibility JE1 BE1.png|32px]] [[File:Arrow of Leaping JE1 BE1.png|32px]] [[File:Arrow of Fire Resistance JE1 BE1.png|32px]] [[File:Arrow of Swiftness JE1 BE1.png|32px]] [[File:Arrow of Slowness JE1 BE1.png|32px]] [[File:Arrow of Water Breathing JE1 BE1.png|32px]] [[File:Arrow of Healing JE1 BE1.png|32px]] [[File:Arrow of Harming JE1 BE1.png|32px]] [[File:Arrow of Poison JE1 BE1.png|32px]] [[File:Arrow of Regeneration JE1 BE1.png|32px]] [[File:Arrow of Strength JE1 BE1.png|32px]] [[File:Arrow of Weakness JE1 BE1.png|32px]] 13 tipped arrows now have the correct textures.}}
{{History|||snap=15w33c|Added [[shield]]s; though they fully block [[damage]] from arrows, arrows still visually stick into the [[player]].}}
{{History|||snap=15w37a|Arrows now ricochet off of [[shield]]s.}}
{{History|||snap=15w44b|Added the initial method for obtaining tipped arrows, which lasted until snapshot [[16w06a]] – firing arrows into a [[lingering potion]] cloud.
|[[File:Arrow of Luck JE1 BE1.png|32px]] Added the Arrow of [[Luck]].
|[[File:Tipped Arrow Revision 1.png|32px]] [[File:Tipped Arrow Revision 1.png|32px]] [[File:Tipped Arrow Revision 1.png|32px]] [[File:Tipped Arrow Revision 1.png|32px]] Add tipped arrows for uncraftable potions, mundane potions, thick potions, and awkward potions. These are all available in the creative inventory.
|Add tipped arrows for all enhanced and extended potions
|[[File:Tipped Arrow Revision 1.png|32px]] Arrow of Splashing has been added to the creative inventory.}}
{{History|||snap=15w47b|Arrows now ricochet off of [[creative]] mode [[player]]s, whereas before they would pass straight through.}}
{{History|||snap=15w49a|Arrows now take the archer's motion into account. For example, if the player is falling, an arrow fired upward travels slower than if the player was standing still, and an arrow fired downward flies faster.
|Tipped and spectral arrows are no longer affected by the [[Infinity]] [[enchanting|enchantment]].}}
{{History|||snap=16w06a|Tipped arrows have been given a crafting recipe, and are no longer obtained by shooting them into a [[lingering potion]] cloud.}}
{{History||1.10|snap=16w20a|Arrows of [[slowness]] may now drop from [[stray]]s when they are killed by a [[player]].}}
{{History||1.11|snap=16w32a|The [[entity]] IDs have been changed from {{cd|Arrow}} and {{cd|SpectralArrow}} to {{cd|arrow}} and {{cd|spectral_arrow}}.|Tipped arrows of instant healing and instant damage now function. Previously, the fact that tipped arrows have 1/8th the duration was reducing 1 game tick to zero game ticks.}}{{History|||snap=16w42a|Arrows now have a {{cd|crit}} tag that determines whether it deals [[critical hit|critical damage]].}}
{{History||1.11|snap=16w39a|Tipped arrows without effects and the uncraftable tipped arrow have been removed from the creative inventory.<ref name="removed tipped arrow">https://bugs.mojang.com/browse/MC-92139</ref>}}
{{History||1.11.1|snap=16w50a|The arrow [[entity]] now has a {{cd|Color}} integer tag, for displaying the custom [[potion]] color of a fired arrow item that has a {{cd|CustomPotionColor}} tag.}}
{{History||1.13|snap=17w47a|Prior to [[1.13/Flattening|''The Flattening'']], these [[item]]s' numeral IDs were 262, 439 and 440.}}
{{History|||snap=18w07a|[[File:Arrow of the Turtle Master JE1 BE1.png|32px]] Added the Arrow of the Turtle Master.}}
{{History|||snap=18w14a|[[File:Arrow of Slow Falling JE1 BE1.png|32px]] Added the Arrow of [[Slow Falling]].}}
{{History||1.14|snap=18w43a|Arrows are now used as ammo for [[crossbow]]s.
|Arrows can now break [[chorus flower]]s.
|[[File:Uncraftable Tipped Arrow JE2.png|32px]] [[File:Arrow of Splashing JE2.png|32px]] [[File:Arrow of Night Vision JE2 BE2.png|32px]] [[File:Arrow of Invisibility JE2 BE2.png|32px]] [[File:Arrow of Leaping JE2 BE2.png|32px]] [[File:Arrow of Fire Resistance JE2 BE2.png|32px]] [[File:Arrow of Swiftness JE2 BE2.png|32px]] [[File:Arrow of Slowness JE2 BE2.png|32px]] [[File:Arrow of the Turtle Master JE2 BE2.png|32px]] [[File:Arrow of Water Breathing JE2 BE2.png|32px]] [[File:Arrow of Healing JE2 BE2.png|32px]] [[File:Arrow of Harming JE2 BE2.png|32px]] [[File:Arrow of Poison JE2 BE2.png|32px]] [[File:Arrow of Regeneration JE2 BE2.png|32px]] [[File:Arrow of Strength JE2 BE2.png|32px]] [[File:Arrow of Weakness JE2 BE2.png|32px]] [[File:Arrow of Luck JE2 BE2.png|32px]] [[File:Arrow of Slow Falling JE2 BE2.png|32px]] The [[item]] sprite textures of tipped arrows has been changed.
|[[File:Spectral Arrow (item) JE2.png|32px]] The [[item]] sprite texture for spectral arrows has been changed.}}
{{History|||snap=18w47a|Arrows can now be generated inside of [[pillager outpost]] chests.}}
{{History|||snap=18w50a|Arrows can now be found in chests in fletcher houses.}}
{{History|||snap=19w11a|Fletcher [[villager]]s now [[trading|sell]] tipped arrows.}}
{{History|||snap=19w13a|Any regular or tipped arrow can be obtained as a reward [[item]] from fletcher villagers when the [[player]] has the [[Hero of the Village]] status effect.}}
{{History||1.14.1|snap=Pre-Release 2|Flaming arrows can now light [[campfire]]s.}}
{{History||1.16|snap=20w16a|Arrows and spectral arrows now generate in [[bastion remnant]] chests.}}
{{History||1.16.2|snap=20w28a|Spectral arrows can now be obtained through [[bartering]] with [[piglin]]s.}}
{{History|||snap=20w30a|The average yield of spectral arrows from bastion remnant chests have been substantially increased.}}
{{History||1.17|snap=21w11a|[[File:Spectral Arrow JE3.png|42px]] The texture of the spectral arrow is now have been changed.}}
{{History|||snap=21w13a|The unused original texture of the arrow<ref>[[File:Arrow (texture) JE2.png|48px]] <code>/asset/minecraft/textures/entity/arrow.png</code></ref> have been removed.}}
{{History||1.19.3|snap=22w43a|Tipped arrows for mundane, thick, and awkward potions, and the no-effect tipped arrow, are now available again in the Creative inventory.}}
{{History||1.19.4|snap=Pre-release 3|[[File:Arrow of Night Vision JE3.png|32px]] [[File:Arrow of Invisibility JE3.png|32px]] [[File:Arrow of Leaping JE3.png|32px]] [[File:Arrow of Fire Resistance JE3.png|32px]] [[File:Arrow of Swiftness JE3.png|32px]] [[File:Arrow of Slowness JE3.png|32px]] [[File:Arrow of the Turtle Master JE3.png|32px]] [[File:Arrow of Water Breathing JE3.png|32px]] [[File:Arrow of Harming JE3.png|32px]] [[File:Arrow of Poison JE3.png|32px]] [[File:Arrow of Strength JE3.png|32px]] Changed colors of the following tipped arrows: Night Vision, Invisibility, Leaping, Fire Resistance, Swiftness, Slowness, Turtle Master, Water Breathing, Harming, Poison, Strength, Resistance.}}
{{History||1.20|snap=23w12a|Wither [[effect]] particle colors have been adjusted to make them more distinguishable.
|The arrow of [[Slow Falling]] has had its color tweaked to make it more distinguishable from the arrow of [[Invisibility]].}}
{{History|pocket alpha}}
{{History||v0.2.0|[[File:Arrow (item) JE1 BE1.png|32px]] Added arrows. They are currently unobtainable and serve no purpose.}}
{{History||v0.3.3|[[File:Arrow JE2 BE1.png|42px]] Arrows now serve as ammunition for bows.
|Added skeletons, which drop arrows when they die.
|Arrows are now craftable.}}
{{History||v0.5.0|Arrows can now be obtained after activating the [[nether reactor]].}}
{{History||v0.12.1|snap=build 1|Arrows on [[fire]] now set the [[entity|entities]] they hit on fire. Before, arrows could be on fire (like other entities), but they would not set what they hit on fire, and there was no [[enchantment]] to fire flaming arrows.
|Arrows on fire can now ignite [[TNT]].
|An underwater arrow now loses all velocity after a few [[block]]s and slowly falls.
|Arrows are no longer available from the [[nether reactor]].}}
{{History||v0.13.0|snap=build 1|Arrows now update [[sand]] and [[gravel]].}}
{{History||v0.15.0|snap=build 1|[[File:Arrow of Night Vision JE1 BE1.png|32px]] [[File:Arrow of Invisibility JE1 BE1.png|32px]] [[File:Arrow of Leaping JE1 BE1.png|32px]] [[File:Arrow of Fire Resistance JE1 BE1.png|32px]] [[File:Arrow of Swiftness JE1 BE1.png|32px]] [[File:Arrow of Slowness JE1 BE1.png|32px]] [[File:Arrow of Water Breathing JE1 BE1.png|32px]] [[File:Arrow of Healing JE1 BE1.png|32px]] [[File:Arrow of Harming JE1 BE1.png|32px]] [[File:Arrow of Poison JE1 BE1.png|32px]] [[File:Arrow of Regeneration JE1 BE1.png|32px]] [[File:Arrow of Strength JE1 BE1.png|32px]] [[File:Arrow of Weakness JE1 BE1.png|32px]] Added tipped arrows.
|Tipped arrows are made by using [[cauldron]]s filled with [[potion]]s.
|Arrows can now be found inside [[dispenser]]s in [[jungle temple]]s.}}
{{History||v0.16.0|snap=build 4|[[File:Arrow of Decay BE1.png|32px]] Added the Arrow of [[Wither (status effect)|Decay]].
|Arrows of Decay currently have a white pixelated texture.}}
{{History|pocket}}
{{History||1.0.0|snap=alpha 0.17.0.1|Tipped arrows are now [[crafting|craftable]], but they can still be obtained by using [[cauldron]]s filled with [[potion]]s.}}
{{History||1.0.4|snap=alpha 1.0.4.0|Arrows are now [[trading|sold]] by fletcher [[villager]]s.}}
{{History||1.1.0|snap=alpha 1.1.0.0|The [[entity]] ID has been changed from {{cd|arrow.skeleton}} to {{cd|arrow}}.}}
{{History|||snap=alpha 1.1.0.9|[[File:Arrow of Decay BE2.png|32px]] The texture of arrows of [[Wither (status effect)|Decay]] has been changed.}}
{{History|bedrock}}
{{History||1.5.0|snap=beta 1.5.0.4|[[File:Arrow of the Turtle Master JE1 BE1.png|32px]] Added the Arrow of the Turtle Master.}}
{{History||1.6.0|snap=beta 1.6.0.5|[[File:Arrow of Slow Falling JE1 BE1.png|32px]] Added the Arrow of [[Slow Falling]].}}
{{History||1.8.0|snap=beta 1.8.0.10|Arrows can now be used as ammo for the new [[crossbow]]s.}}
{{History||1.9.0|snap=beta 1.9.0.0|Added [[pillager]]s, which [[drops|drop]] arrows upon [[death]].}}
{{History|||snap=beta 1.9.0.2|Arrows and tipped arrows can now be used to craft [[fletching table]]s.}}
{{History||1.10.0|snap=beta 1.10.0.3|[[File:Arrow of Night Vision JE2 BE2.png|32px]] [[File:Arrow of Invisibility JE2 BE2.png|32px]] [[File:Arrow of Leaping JE2 BE2.png|32px]] [[File:Arrow of Fire Resistance JE2 BE2.png|32px]] [[File:Arrow of Swiftness JE2 BE2.png|32px]] [[File:Arrow of Slowness JE2 BE2.png|32px]] [[File:Arrow of Water Breathing JE2 BE2.png|32px]] [[File:Arrow of Healing JE2 BE2.png|32px]] [[File:Arrow of Harming JE2 BE2.png|32px]] [[File:Arrow of Poison JE2 BE2.png|32px]] [[File:Arrow of Regeneration JE2 BE2.png|32px]] [[File:Arrow of Strength JE2 BE2.png|32px]] [[File:Arrow of Weakness JE2 BE2.png|32px]] [[File:Arrow of Decay BE3.png|32px]] [[File:Arrow of the Turtle Master JE2 BE2.png|32px]] [[File:Arrow of Slow Falling JE2 BE2.png|32px]] The [[item]] sprite textures of tipped arrows have been changed.
|Arrows can now be found in [[pillager outpost]] chests.
|Arrows can now break [[chorus flower]]s.}}
{{History||1.11.0|snap=beta 1.11.0.1|Arrows can now be found in [[village]] fletcher [[chest]]s.
|Flaming arrows can now light [[campfire]]s.}}
{{History|||snap=beta 1.11.0.4|Fletcher [[villager]]s now [[trading|sell]] 5 arrows for one [[emerald]].
|Various regular tipped arrows can now be obtained via [[trading]] with fletcher villagers.}}
{{History|||snap=beta 1.11.0.7|Arrow no longer can be used to craft [[fletching table]].}}
{{History||1.12.0|snap=beta 1.12.0.3|Novice-level fletcher villagers now [[trading|sell]] 16 regular arrows instead of 5 arrows.}}
{{History||1.16.0|snap=beta 1.16.0.51|Added [[piglin]]s, which [[drops|drop]] arrows upon [[death]].}}
{{History|||snap=beta 1.16.0.57|Arrows now generate in [[bastion remnants]] chests.
|Master-level fletcher villager now always offer 1 of 15 tipped arrows.
|Piglins no longer drop arrows upon death.}}
{{History||1.16.100|snap=beta 1.16.100.54|Arrows can now be obtained through [[bartering]].}}
{{History||1.19.80|snap=beta 1.19.80.21|Changed potion colors for the following tipped arrows: Fire Resistance, Harming, Invisibility, Leaping, Night Vision, Poison, Slowness, Strength, Swiftness, Turtle Master, and Water Breathing.}}
{{History|console}}
{{History||xbox=TU1|xbone=CU1|ps=1.00|wiiu=Patch 1|switch=1.0.1|[[File:Arrow JE2 BE1.png|42px]] [[File:Arrow (item) JE1 BE1.png|32px]] Added arrows.}}
{{History||xbox=TU31|xbone=CU19|ps=1.22|wiiu=Patch 3|An underwater arrow now loses all velocity after a few [[block]]s and slowly falls.
|A flaming arrow underwater now gets extinguished.}}
{{History||xbox=TU46|xbone=CU36|ps=1.38|wiiu=Patch 15|[[File:Arrow of Night Vision JE1 BE1.png|32px]] [[File:Arrow of Invisibility JE1 BE1.png|32px]] [[File:Arrow of Leaping JE1 BE1.png|32px]] [[File:Arrow of Fire Resistance JE1 BE1.png|32px]] [[File:Arrow of Swiftness JE1 BE1.png|32px]] [[File:Arrow of Slowness JE1 BE1.png|32px]] [[File:Arrow of Water Breathing JE1 BE1.png|32px]] [[File:Arrow of Healing JE1 BE1.png|32px]] [[File:Arrow of Harming JE1 BE1.png|32px]] [[File:Arrow of Poison JE1 BE1.png|32px]] [[File:Arrow of Regeneration JE1 BE1.png|32px]] [[File:Arrow of Strength JE1 BE1.png|32px]] [[File:Arrow of Weakness JE1 BE1.png|32px]] [[File:Arrow of Luck JE1 BE1.png|32px]] Added tipped arrows.
|[[File:Spectral Arrow (item) JE1.png|32px]] Added spectral arrows.
|Spectral arrows are currently unobtainable and do not any effects.}}
{{History||xbox=TU57|xbone=CU49|ps=1.56|wiiu=Patch 27|switch=1.0.7|Spectral arrows now have effects but are not craftable. They can be obtained only via inventory editing.}}
{{History||xbox=TU69|xbone=none|ps=1.76|wiiu=Patch 38|switch=none|[[File:Arrow of Decay BE2.png|32px]] [[File:Arrow of the Turtle Master JE1 BE1.png|32px]] [[File:Arrow of Slow Falling JE1 BE1.png|32px]] Added the Arrow of the [[Wither (status effect)|Decay]], Turtle Master, and [[Slow Falling]].}}
{{History||xbox=none|xbone=none|ps=1.90|wiiu=none|switch=none|[[File:Arrow of Night Vision JE2 BE2.png|32px]] [[File:Arrow of Invisibility JE2 BE2.png|32px]] [[File:Arrow of Leaping JE2 BE2.png|32px]] [[File:Arrow of Fire Resistance JE2 BE2.png|32px]] [[File:Arrow of Swiftness JE2 BE2.png|32px]] [[File:Arrow of Slowness JE2 BE2.png|32px]] [[File:Arrow of Water Breathing JE2 BE2.png|32px]] [[File:Arrow of Healing JE2 BE2.png|32px]] [[File:Arrow of Harming JE2 BE2.png|32px]] [[File:Arrow of Poison JE2 BE2.png|32px]] [[File:Arrow of Regeneration JE2 BE2.png|32px]] [[File:Arrow of Strength JE2 BE2.png|32px]] [[File:Arrow of Weakness JE2 BE2.png|32px]] [[File:Arrow of Luck JE2 BE2.png|32px]] [[File:Arrow of Decay BE3.png|32px]] [[File:Arrow of the Turtle Master JE2 BE2.png|32px]] [[File:Arrow of Slow Falling JE2 BE2.png|32px]] The [[item]] sprite textures of tipped arrows have been changed.
|[[File:Spectral Arrow (item) JE2.png|32px]] The [[item]] sprite texture for spectral arrow has been changed.}}
{{History|3ds}}
{{History||0.1.0|[[File:Arrow JE2 BE1.png|42px]] [[File:Arrow (item) JE1 BE1.png|32px]] Added arrows.
|[[File:Arrow of Night Vision JE1 BE1.png|32px]] [[File:Arrow of Invisibility JE1 BE1.png|32px]] [[File:Arrow of Leaping JE1 BE1.png|32px]] [[File:Arrow of Fire Resistance JE1 BE1.png|32px]] [[File:Arrow of Swiftness JE1 BE1.png|32px]] [[File:Arrow of Slowness JE1 BE1.png|32px]] [[File:Arrow of Water Breathing JE1 BE1.png|32px]] [[File:Arrow of Healing JE1 BE1.png|32px]] [[File:Arrow of Harming JE1 BE1.png|32px]] [[File:Arrow of Poison JE1 BE1.png|32px]] [[File:Arrow of Regeneration JE1 BE1.png|32px]] [[File:Arrow of Strength JE1 BE1.png|32px]] [[File:Arrow of Weakness JE1 BE1.png|32px]] Added tipped arrows.}}
{{History||1.3.12|[[File:Arrow of Decay BE2.png|32px]] Added arrows of [[Wither (effect)|Decay]].}}
{{History|foot}}
Historical sounds:
{| class="wikitable"
! Sound
! From
! to
! Pitch
|-
| {{sound||Arrow Old.ogg}}
| ?
| ?
| ?
|}
== Issues ==
{{issue list}}
== Trivia ==
* By default, arrows fly slightly offset to the right. If the player stands close to a wall and fires several arrows without moving the crosshair, the arrows cluster around a point slightly to the right of the crosshair. If the player switches their main hand to be the left hand in options, the arrows instead cluster to the left.
* Arrows fired at [[Nether Portal]]s often skip through the portal block completely and fail to collide, thus continuing through to the opposite side of the block.
* Arrows stuck in blocks vibrate upon a world reload.<ref>{{bug|MC-93992}} – "Arrow shakes when world loads" resolved as "Won't Fix"</ref>
* Although [[enderman|endermen]] teleport when hit by any tipped arrow, they are still given the said effects while avoiding arrow damage.
* {{IN|bedrock}}, even if a tipped arrow is blocked with a shield, while the direct damage from the arrows is negated, the player still gets the effect from the tipped arrow.<ref>{{bug|MCPE-52904}}</ref>
== Gallery ==
===Renders===
<gallery>
Arrow (item).png|Arrow
Spectral Arrow (item) JE2.png|Spectral Arrow
</gallery>
;Tipped Arrows
<gallery>
Arrow of Splashing JE2.png|Splashing
Arrow of Night Vision.png|Night Vision
Arrow of Invisibility.png|Invisibility
Arrow of Leaping.png|Leaping
Arrow of Fire Resistance.png|Fire Resistance
Arrow of Swiftness.png|Swiftness
Arrow of Slowness.png|Slowness
Arrow of the Turtle Master.png|Turtle Master
Arrow of Water Breathing.png|Water Breathing
Arrow of Healing.png|Healing
Arrow of Harming.png|Harming
Arrow of Poison.png|Poison
Arrow of Regeneration.png|Regeneration
Arrow of Strength.png|Strength
Arrow of Weakness.png|Weakness
Arrow of Slow Falling.png|Slow Falling
Arrow of Luck.png|Luck
Arrow of Decay.png|Decay
Uncraftable Tipped Arrow JE2.png|Uncraftable
</gallery>
===Other Media===
<gallery>
Tipped Arrow Ultra High Resolution Screenshot.png|Teaser image from [[Searge]] showing tipped arrows.
AllArrowTypes.png|All the arrow types present in [[Minecraft]].
Custom arrows.png|Examples of custom arrow types using {{cmd|/give}}.
Arrow in Sugar Cane.png|Some arrows stick into [[sugar cane]]s. This no longer works since Java Edition Beta 1.6.
Arrow Burning.gif|An arrow caught on [[fire]].
Flaming_stuck_spectral_arrow.png|A flaming spectral arrow stuck in a tree.
arrows_in_player.png|Many arrows stuck in the player, seen through the [[inventory]] screen.
Arrow Debugging.png|[[Searge]] with a bunch of arrows summoned above him.
Inventory Tipped Arrows 1.jpg|Tipped arrows in the inventory.
Inventory Tipped Arrows 2.jpg|Tipped arrows in the inventory.
Inventory Tipped Arrows 3.jpg|Tipped arrows in the inventory.
Inventory Tipped Arrows 4.jpg|Tipped arrows in the inventory.
Tipped Arrow (empty texture) BE1.png|Unused old texture file for an empty tipped arrow on ''Bedrock Edition''.
</gallery>
== References ==
{{reflist}}
{{Items}}
{{Entities}}
[[Category:Combat]]
[[Category:Renewable resources]]
[[de:Pfeil]]
[[es:Flecha]]
[[fr:Flèche]]
[[hu:Nyíl]]
[[it:Freccia]]
[[ja:矢]]
[[ko:화살]]
[[nl:Pijl]]
[[pl:Strzała]]
[[pt:Flecha]]
[[ru:Стрела]]
[[th:ลูกธนู]]
[[zh:箭]]</li></ul> | 12w30d | ||||
| It has an item form, but only obtainable through commands or external tools. When placed, it acts like a normal log. | |||||
1.7.2{{Extension DPL}}<ul><li>[[:Category:Dyes|Category:Dyes]]<br/>These are items that can be used to dye sheep, wool blocks, or combined to make other dyes.
[[Category:Items]]
[[es:Categoría:Tintes]]
[[fr:Catégorie:Teinture]]
[[hu:Kategória:Festékek]]
[[zh:Category:染料]]</li><li>[[Mushroom Stew|Mushroom Stew]]<br/>{{Item
| title = Mushroom Stew
| image = Mushroom Stew.png
| renewable = Yes
| heals = {{hunger|6}}
| stackable = No
}}
'''Mushroom stew''' is a [[food]] item.
== Obtaining ==
=== Harvesting ===
Mushroom stew can be obtained by “milking” a [[mooshroom]] with an empty [[bowl]]. This is accomplished by {{Control|using}} a bowl on a mooshroom. The bowl gets replaced by the mushroom stew item. There is no cooldown for doing so.
If a stack of more than one bowl is used on a mooshroom, only one bowl is consumed, and the mushroom stew goes into an empty inventory slot, or is dropped if the player's inventory is full.
=== Crafting ===
{{Crafting
|Red Mushroom
|Brown Mushroom
|Bowl
|Output= Mushroom Stew
|type= Foodstuff
}}
== Usage ==
=== Food ===
{{see also|Tutorials/Hunger management|title1=Hunger management}}
To eat mushroom stew, press and hold {{control|use}} while it is selected in the hotbar. Eating one restores {{hunger|6}} [[hunger]] and 7.2 hunger
[[Hunger#Mechanics|saturation]].
The bowl is returned to the player empty after the mushroom stew has been eaten, and can be reused to craft more, similarly to [[Rabbit Stew|rabbit stew]] and [[Beetroot Soup|beetroot soup]].
== Sounds ==
=== Generic ===
{{Sound table/Entity/Food}}
=== Unique ===
{{Edition|Java}}:
{{Sound table
|sound=Mooshroom milk1.ogg
|sound2=Mooshroom milk2.ogg
|sound3=Mooshroom milk3.ogg
|subtitle=Mooshroom gets milked
|source=neutral
|description=When a mooshroom is milked with a bowl
|id=entity.mooshroom.milk
|translationkey=subtitles.entity.mooshroom.milk
|volume=1.0
|pitch=''varies'' <ref group=sound name=milkpitch>Can be 1.0, 0.9, or 1.1 for each sound</ref>
|distance=16
|foot=1}}
{{Edition|Bedrock}}:
{{Sound table
|type=bedrock
|sound=Mooshroom milk1.ogg
|sound2=Mooshroom milk2.ogg
|sound3=Mooshroom milk3.ogg
|subtitle=Mooshroom gets milked
|source=Friendly Creatures
|description=When a mooshroom is milked with a bowl
|id=mob.mooshroom.suspicious_milk
|volume=1.0/0.9/1.1
|pitch=1.0
|foot=1}}
== Data values ==
=== ID ===
{{edition|java}}:
{{ID table
|edition=java
|showforms=y
|generatetranslationkeys=y
|displayname=Mushroom Stew
|spritetype=item
|nameid=mushroom_stew
|form=item
|foot=1}}
{{edition|bedrock}}:
{{ID table
|edition=bedrock
|shownumericids=y
|showforms=y
|notshowbeitemforms=y
|generatetranslationkeys=y
|displayname=Mushroom Stew
|spritetype=item
|nameid=mushroom_stew
|id=260
|form=item
|foot=1}}
== Advancements ==
{{load advancements|Husbandry;A Balanced Diet}}
== History ==
{{History|java indev}}
{{History||0.31|snap=20100130|[[File:Mushroom Stew JE1 BE1.png|32px]] Added mushroom stew.
|Restores {{hp|8}} [[health]].}}
{{History||20100206|Mushroom stew now restores {{hp|10}} health.}}
{{History|java beta}}
{{History||1.6|snap=Test Build 3|[[Mushroom]] spreading mechanic added, making mushroom stew [[renewable]].}}
{{History||1.8|snap=Pre-release|Now restores {{hunger|8}} [[hunger]].}}
{{History|java}}
{{History||1.0.0|snap=Beta 1.9 Prerelease|More fungi sources have now been introduced with the addition of the [[Mushroom Fields|mushroom biome]].
|A [[mooshroom]] can now be "milked" with a [[bowl]] to obtain mushroom stew.}}
{{History|||snap=Beta 1.9 Prerelease 3|Mushroom stew can now be crafted in the [[2×2 crafting grid]] in the [[inventory]]. Previously, the crafting recipe was shaped, now it's shapeless.}}
{{History||1.2.5|snap=release|The [[player]] milking a [[mooshroom]] with a stack of [[bowl]]s no longer results in receiving back a single bowl of mushroom stew.}}
{{History||1.4.2|snap=?|Mushroom stew now restores {{Hunger|6}} instead of {{Hunger|8}}.}}
{{History||1.13|snap=17w47a|Prior to [[1.13/Flattening|''The Flattening'']], this [[item]]'s numeral ID was 282.}}
{{History||1.14|snap=18w43a|[[File:Mushroom Stew JE2 BE2.png|32px]] The texture of mushroom stew has now been changed.}}
{{History||1.16|snap=Pre-release 1|Mooshrooms can now be milked for mushroom stew in Creative mode.<ref>{{Cite bug|MC|90969|Cannot get mushroom stew from mooshrooms / milk from cows in creative mode|date=October 19, 2015}}</ref>}}
{{History|pocket alpha}}
{{History||v0.4.0|[[File:Mushroom Stew JE1 BE1.png|32px]] Added mushroom stew.}}
{{History||v0.5.0|Mushroom stew now restores {{hp|8}} instead of {{hp|4}}.}}
{{History||v0.9.0|snap=build 1|A mooshroom can now be "milked" with a [[bowl]] to obtain mushroom stew.}}
{{History||v0.12.1|snap=build 1|Mushroom stew now restores [[hunger]] instead of [[health]].}}
{{History|bedrock}}
{{History||1.10.0|snap=beta 1.10.0.3|[[File:Mushroom Stew JE2 BE2.png|32px]] The texture of mushroom stew has now been changed.}}
{{History|console}}
{{History||xbox=TU1|xbone=CU1|ps=1.0|switch=1.0.1|wiiu=Patch 1|[[File:Mushroom Stew JE1 BE1.png|32px]] Added mushroom stew.}}
{{History||xbox=none|xbone=none|ps=1.90|wiiu=none|switch=none|[[File:Mushroom Stew JE2 BE2.png|32px]] The texture of mushroom stew has now been changed.}}
{{History|new3ds}}
{{History||0.1.0|[[File:Mushroom Stew JE1 BE1.png|32px]] Added mushroom stew.}}
{{History|foot}}
== Issues ==
{{Issue list}}
== References ==
{{reflist}}
== External Links ==
*[https://www.minecraft.net/en-us/article/taking-inventory--mushroom-stew Taking Inventory: Mushroom Stew] – Minecraft.net on September 1, 2022
{{items}}
[[de:Pilzsuppe]]
[[es:Estofado de champiñones]]
[[fr:Soupe de champignons]]
[[hu:Gombaragu]]
[[ja:キノコシチュー]]
[[ko:버섯 스튜]]
[[nl:Paddenstoelenstoofpot]]
[[pl:Zupa grzybowa]]
[[pt:Ensopado de cogumelos]]
[[ru:Тушёные грибы]]
[[zh:蘑菇煲]]
[[Category:Food]]
[[Category:Renewable resources]]
<references /></li></ul> | 13w43a | File:Acacia Wood Revision 1.png | |||
| 1.7-pre | |||||
1.13{{Extension DPL}}<ul><li>[[Glistering Melon Slice|Glistering Melon Slice]]<br/>{{Item
| image = Glistering Melon Slice.png
| renewable = Yes
| stackable = Yes (64)
}}
A '''glistering melon slice'''{{fn|Known as '''Glistering Melon Slice''' {{in|java}} and '''Glistering Melon''' {{in|bedrock}}.}} is an inedible [[item]] used for brewing [[potion]]s of [[Healing]]. It is also one of the many potion ingredients that can be used to make mundane potions.
== Obtaining ==
=== Chest loot ===
{{LootChestItem|glistering-melon-slice}}
=== Crafting ===
{{Crafting
|A1= Gold Nugget
|B1= Gold Nugget
|C1= Gold Nugget
|A2= Gold Nugget
|B2= Melon Slice
|C2= Gold Nugget
|A3= Gold Nugget
|B3= Gold Nugget
|C3= Gold Nugget
|Output= Glistering Melon Slice
|type= Brewing
}}
=== Trading ===
Master-level farmer [[villager]]s sell 3 glistering melon for 4 [[emerald]]s.
== Usage ==
Despite being crafted with a [[melon slice]], a glistering melon slice cannot be eaten, unlike a [[golden apple]] or [[golden carrot]].
=== Brewing ingredient ===
{{Brewing
|head=1
|Glistering Melon Slice
|Mundane Potion
|base=Water Bottle
}}
{{Brewing
|Glistering Melon Slice
|Potion of Healing
|foot=1}}
===Piglins===
[[Piglin]]s are attracted to glistering melon slices. They run toward any glistering melon slice on the ground, and inspect it for 6 to 8 seconds before putting it in their inventory.
== Achievements ==
{{load achievements|Oooh, shiny!}}
== Advancements ==
{{load advancements|Oh Shiny}}
== Data values ==
=== ID ===
{{edition|java}}:
{{ID table
|edition=java
|showforms=y
|generatetranslationkeys=y
|displayname=Glistering Melon Slice
|spritetype=item
|nameid=glistering_melon_slice
|form=item
|foot=1}}
{{edition|bedrock}}:
{{ID table
|edition=bedrock
|showaliasids=y
|shownumericids=y
|showforms=y
|notshowbeitemforms=y
|generatetranslationkeys=y
|displayname=Glistering Melon
|spritetype=item
|nameid=glistering_melon_slice
|aliasid=speckled_melon
|id=434
|form=item
|translationkey=item.speckled_melon.name
|foot=1}}
== History ==
{{History|java}}
{{History||1.0.0|snap=Beta 1.9 Prerelease 4|[[File:Glistering Melon Slice JE1 BE1.png|32px]] Added glistering melons.
|The [[crafting]] recipe of glistering melons is one [[melon slice]] and one [[gold nugget]].
|Glistering melons have replaced [[ghast tear]]s as the ingredient to produce [[potions of Healing]] due to the difficulty in getting tears.<ref>{{tweet|jeb_|123671273904680960}}</ref> They also now brew with [[water bottle]]s to create [[mundane potion]]s.}}
{{History||1.6.1|snap=13w23a|The [[crafting]] recipe of glistering melons is changed from one [[gold nugget]] to eight.}}
{{History||1.9|snap=15w49a|[[File:Glistering Melon Slice JE2.png|32px]] The rotation of glistering melon [[item]]s has been changed to be consistent with [[melon slice]]s.<ref>{{bug|MC-85963}}</ref>}}
{{History|||snap=15w49b|[[File:Glistering Melon Slice JE1 BE1.png|32px]] The rotation of glistering melons has been reverted and is no longer consistent with melon slices.}}
{{History||1.13|snap=17w47a|Prior to [[1.13/Flattening|''The Flattening'']], this [[item]]'s numeral ID was 382.}}
{{History|||snap=18w20b|"Glistering Melon" has been renamed to "Glistering Melon Slice".
|The ID of glistering melon slices has been changed from <code>speckled_melon</code> to <code>glistering_melon_slice</code>.}}
{{History||1.14|snap=18w43a|[[File:Glistering Melon Slice JE3 BE2.png|32px]] The texture of glistering melon slices has been changed.}}
{{History|||snap=19w11a|Farmer [[villager]]s now [[trading|sell]] glistering melon slices.}}
{{History||1.16|snap=20w09a|Glistering melon slices are now admired by [[piglin]]s.<ref>{{bug|MC-172363}}</ref>}}
{{History|||snap=20w16a|Glistering melon slices now generate in [[ruined portal]] chests.}}
{{History|pocket alpha}}
{{History||v0.12.1|snap=build 1|[[File:Glistering Melon Slice JE1 BE1.png|32px]] Added glistering melons.}}
{{History|bedrock}}
{{History||1.10.0|snap=beta 1.10.0.3|[[File:Glistering Melon Slice JE3 BE2.png|32px]] The texture of glistering melons has been changed.}}
{{History||1.11.0|snap=beta 1.11.0.4|Glistering melons can now be [[trading|bought]] from farmer [[villager]]s.}}
{{History||1.13.0|snap=beta 1.13.0.9|[[Trading]] has been changed. Master-level farmer villagers now have a {{frac|1|3}} chance to [[trading|sell]] glistering melon slices.}}
{{History||1.16.0|snap=beta 1.16.0.57|Glistering melons are [[trading|sold]] from farmer villagers under a 50% chance, once again.
|Glistering melons now generate in [[ruined portal]] chests.}}
{{History||1.16.100|snap=beta 1.16.100.54|[[Ruined Portal]]s can now generate with 4–12 glistering melons instead of only one.}}
{{History|||snap=beta 1.16.100.56|The ID of glistering melon slices has been changed from <code>speckled_melon</code> to <code>glistering_melon_slice</code>.}}
{{History|console}}
{{History||xbox=TU7|xbone=CU1|ps=1.0|wiiu=Patch 1|[[File:Glistering Melon Slice JE1 BE1.png|32px]] Added glistering melons.}}
{{History||xbox=none|xbone=none|ps=1.90|wiiu=none|switch=none|[[File:Glistering Melon Slice JE3 BE2.png|32px]] The texture of glistering melons has been changed.}}
{{History|New 3DS}}
{{History||0.1.0|[[File:Glistering Melon Slice JE1 BE1.png|32px]] Added glistering melons.}}
{{History|foot}}
== Issues ==
{{issue list}}
== See also ==
* [[Melon Slice]]
* [[Melon]]
== Notes ==
{{fnlist}}
== References ==
{{reflist}}
{{Items}}
[[Category:Renewable resources]]
[[cs:Zlatavý kousek melounu]]
[[de:Glitzernde Melonenscheibe]]
[[es:Rodaja de sandía reluciente]]
[[fr:Tranche de pastèque scintillante]]
[[hu:Ragyogó dinnye]]
[[ja:きらめくスイカの薄切り]]
[[ko:반짝이는 수박 조각]]
[[nl:Glinsterende meloenschijf]]
[[pl:Błyszczący arbuz]]
[[pt:Fatia de melancia reluzente]]
[[ru:Сверкающий ломтик арбуза]]
[[uk:Блискуча скибка кавуна]]
[[zh:闪烁的西瓜片]]</li><li>[[Dragon's Breath|Dragon's Breath]]<br/>{{Item
| image = Dragon's Breath.png
| renewable = Yes
| stackable = Yes (64)
| rarity = Uncommon
}}
The '''dragon's breath''' is a [[brewing]] item that is used solely to make [[lingering potion]]s.
== Obtaining ==
The dragon's breath can be obtained by scooping up the [[ender dragon]]'s breath attack or the purple [[area effect cloud|effect clouds]] caused by [[dragon fireball]]s in an empty [[glass bottle]].
== Usage ==
=== Brewing ingredient ===
Dragon's breath may be added to any splash potion to upgrade it to a lingering potion, which can be used to create a lasting [[Lingering Potion#Area Effect Cloud|area effect cloud]], or to craft [[Arrow#Tipped arrows|tipped arrows]].
{{brewing
|name=[[Lingering Potion]]
|showname=1
|Dragon's Breath
|Any Lingering Potion
|base=Any Splash Potion}}
When put 2 or more dragon's breath in the brewing stand, after the brewing process, a glass bottle will drop as an [[Item (entity)|entity]]. However, if put only 1 dragon's breath in the brewing stand, after the brewing process, the glass bottle is consumed and cannot be retrieved.<ref>{{bug|MC-259583}}</ref>
== Sounds ==
{{Edition|Java}}:
{{Sound table
|sound=Bottle fill dragon breath1.ogg
|sound2=Bottle fill dragon breath2.ogg
|subtitle=Bottle fills
|source=neutral
|description=Filling a glass bottle with dragon's breath
|id=item.bottle.fill_dragonbreath
|translationkey=subtitles.item.bottle.fill
|volume=1.0
|pitch=1.0
|distance=16
|foot=1}}
{{Edition|Bedrock}}:
{{Sound table
|type=bedrock
|sound=Bottle fill dragon breath1.ogg
|sound2=Bottle fill dragon breath2.ogg
|source=sound
|description=When a bottle is filled with dragon's breath
|id=bottle.dragonbreath
|volume=0.7<wbr>{{Until|BE 1.20.40}}<br>1.0<wbr>{{Upcoming|BE 1.20.40}}
|pitch=1.0
|foot=1}}
== Achievements ==
{{Load achievements|You Need a Mint}}
== Advancements ==
{{load advancements|You Need a Mint}}
== Data values ==
=== ID ===
{{edition|java}}:
{{ID table
|edition=java
|showforms=y
|generatetranslationkeys=y
|displayname=Dragon's Breath
|spritetype=item
|nameid=dragon_breath
|form=item
|foot=1}}
{{edition|bedrock}}:
{{ID table
|edition=bedrock
|shownumericids=y
|showforms=y
|notshowbeitemforms=y
|generatetranslationkeys=y
|displayname=Dragon's Breath
|spritetype=item
|nameid=dragon_breath
|id=560
|form=item
|foot=1}}
== History ==
{{History|java}}
{{History||1.9|snap=15w33a|[[File:Dragon's Breath JE1 BE1.png|32px]] Added dragon's breath.}}
{{History||1.13|snap=17w47a|Prior to [[1.13/Flattening|''The Flattening'']], this [[item]]'s numeral ID was 437.}}
{{History||1.14|snap=18w43a|[[File:Dragon's Breath JE2 BE2.png|32px]] The texture of dragon's breath has been changed.}}
{{History|pocket}}
{{History||1.0.0|snap=alpha 0.17.0.1|[[File:Dragon's Breath JE1 BE1.png|32px]] Added dragon's breath.}}
{{History|bedrock}}
{{History||1.10.0|snap=beta 1.10.0.3|[[File:Dragon's Breath JE2 BE2.png|32px]] The texture of dragon's breath has been changed.}}
{{History|console}}
{{History||xbox=TU46|xbone=CU36|ps=1.38|wiiu=Patch 15|switch=1.0.1|[[File:Dragon's Breath JE1 BE1.png|32px]] Added dragon's breath.}}
{{History||xbox=none|xbone=none|ps=1.90|wiiu=none|switch=none|[[File:Dragon's Breath JE2 BE2.png|32px]] The texture of dragon's breath has been changed.}}
{{History|3ds}}
{{History||1.7.10|[[File:Dragon's Breath JE1 BE1.png|32px]] Added dragon's breath.}}
{{History|foot}}
== Issues ==
{{issue list}}
== Trivia ==
* If the dragon's breath is used in a [[crafting]] recipe (using a [[mod]] or a [[data pack]]), it becomes an empty bottle instead of being entirely consumed.
== References ==
{{reflist}}
==External Links==
*[https://www.minecraft.net/en-us/article/dragon-s-breath Taking Inventory: Dragon's Breath] – Minecraft.net on June 9, 2023
{{Items}}
[[Category:Renewable resources]]
[[de:Drachenatem]]
[[fr:Souffle de dragon]]
[[it:Soffio di drago]]
[[ja:ドラゴンブレス]]
[[ko:드래곤의 숨결]]
[[nl:Drakenadem]]
[[pl:Oddech smoka]]
[[pt:Bafo do dragão]]
[[ru:Драконье дыхание]]
[[zh:龙息]]
[[Category:Brewing recipe]]</li></ul> | 17w47a | The different variant block states and the axis=none block state for both the log and log2 IDs have been split up into their own IDs.
| |||
| Readded the item form for wood blocks. They can now be obtained in the inventory. | |||||
| Changed the name from wood to bark. | |||||
| Prior to The Flattening, these blocks' numeral IDs were 17 and 162. | |||||
| 17w47b | Added the crafting recipe for bark. | ||||
| 18w22b | File:Oak Wood X.pngFile:Oak Wood Z.pngFile:Birch Wood X.pngFile:Birch Wood Z.pngFile:Spruce Wood X.pngFile:Spruce Wood Z.pngFile:Jungle Wood X.pngFile:Jungle Wood Z.pngFile:Acacia Wood X.pngFile:Acacia Wood Z.pngFile:Dark Oak Wood X.pngFile:Dark Oak Wood Z.png Bark blocks can now be rotated. | ||||
| pre1 | File:Oak Wood Revision 1.pngFile:Oak Wood Revision 1 X.pngFile:Oak Wood Revision 1 Z.pngFile:Birch Wood Revision 1.pngFile:Birch Wood Revision 1 X.pngFile:Birch Wood Revision 1 Z.pngFile:Spruce Wood Revision 1.pngFile:Spruce Wood Revision 1 X.pngFile:Spruce Wood Revision 1 Z.pngFile:Jungle Wood Revision 1.pngFile:Jungle Wood Revision 1 X.pngFile:Jungle Wood Revision 1 Z.pngFile:Acacia Wood Revision 2.pngFile:Acacia Wood Revision 2 X.pngFile:Acacia Wood Revision 2 Z.pngFile:Dark Oak Wood Revision 1.pngFile:Dark Oak Wood Revision 1 X.pngFile:Dark Oak Wood Revision 1 Z.png Changed the bark block top texture. | ||||
| pre2 | |||||
| pre5 | Bark blocks changed back to <type> Wood. | ||||
Bark IDs changed to <type>_wood. | |||||
| Upcoming Java Edition | |||||
1.14{{Extension DPL}}<ul><li>[[Camera|Camera]]<br/>{{about|the entity|the command|commands/camera}}
{{exclusive|edu}}
{{unobtainable|edition=be}}
{{ItemEntity
|imagesize=80px
|renewable=No
|stackable=Yes (64)
|health={{hp|4}}
|image=Camera.png}}
{{Block
| title = Camera Block
| image = Camera (block).png
| invimage = none
| transparent = No
| light = 0
| tool = any
| stackable = Yes (64)
| flammable = No
| lavasusceptible = No
| renewable = No
}}
The '''camera''' is an [[entity]] that is capable of capturing and storing images. {{IN|edu}}, it works together with the [[portfolio]] item to create collections of [[photo]]s.<ref>https://education.minecraft.net/support/knowledge-base/using-cameras-portfolios/</ref>
== Obtaining ==
The camera can be obtained in the [[Creative inventory]] in ''Minecraft Education''. It can be obtained either by NBT editors, inventory editors, or glitches in Bedrock Edition.
To get the block form of the camera in Bedrock Edition using an NBT editor, you need to set the item name of the block in the inventory slot (<code>name:</code> ) to <code>item.camera</code>, then you need to add a compound tag called <code>Block</code> and inside of that put the int tag <code>version: 18040335</code> and the text tag <code>name: minecraft:camera</code> into the block compound tag. For the usable "[[spawn egg]]" form of the camera, you only need to set the item name of the block in the inventory slot (<code>name:</code> ) to <code>camera</code>; you do not need to add the block compound for this form of the camera.
== Usage ==
Using a camera from the [[inventory]] captures a first-person screenshot. It can also be placed, creating a camera [[entity]] that can track the user, and take pictures from the camera's perspective. Photos that are taken using the camera appear in the [[portfolio]].
Close-up snapshots of an [[item]] on the ground can be taken by holding the Shift key while right-clicking.
Photos that are taken with the camera block are stored in <code>%localappdata%\Packages\MinecraftUWP_8wekyb3d8bbwe\LocalState\screenshots</code>.
== Sounds ==
=== Generic ===
{{Sound table/Block/Normal/BE}}
=== Unique ===
{{Sound table
|sound=Camera1.ogg
|sound2=Camera2.ogg
|sound3=Camera3.ogg
|type=bedrock
|description=When a picture is taken with a camera
|source=Players
|id=camera.take_picture
|volume=1.0
|pitch=1.0
|foot=1}}
== Data values ==
=== ID ===
{{ID table
|edition=bedrock
|firstcolumnname=Camera
|shownumericids=y
|showforms=y
|generatetranslationkeys=y
|displayname=Block
|spritename=camera
|spritetype=block
|nameid=camera
|id=242
|form=block
|itemform=item.camera}}
{{ID table
|displayname=Item
|spritename=camera
|spritetype=item
|translationtype=item
|nameid=camera
|id=593
|form=item
|foot=1}}
{{ID table
|edition=bedrock
|firstcolumnname=Camera
|shownumericids=y
|generatetranslationkeys=y
|displayname=Entity
|spritename=camera
|spritetype=entity
|nameid=tripod_camera
|id=62
|foot=1}}
=== Entity data ===
See [[Bedrock Edition level format/Entity format]].
== Video ==
{{yt|1XLRGFibFNQ}}
== History ==
{{History|pocket alpha}}
{{History||v0.1.0|[[File:Camera BE1.png|50px]] [[File:Camera (item texture) BE1.png|32px]] The textures and model of the camera can be found in the game apk file.<ref name="found">[{{Reddit|jkkmr/found_image_file_for_camera_in_minecraft_portable}} Reddit - Found image file for camera in Minecraft Portable Edition Demo APK file.]</ref><ref>https://web.archive.org/web/20160604161800/https://twitter.com/Kappische/status/103548954368679936</ref>}}
{{History||v0.2.0|[[File:Camera BE2.png|50px]] [[File:Music Disc Blocks JE1 BE1.png|32px]] Added cameras
|Changed item and tripod textures.
|To use a camera, equip it in the [[player]]'s hand, then look in the direction the player wants the picture to be taken. Long-press the screen, and a camera [[drops]] to the ground where the player are standing. Step back, then press on the camera until it starts emitting smoke [[particles]]. The smoke means a picture has been taken, and the camera may disappear immediately afterward.
|Cameras have infinite uses.
|Entity id 62 and item id 456.<ref>https://www.minecraftforum.net/topic/1233138-i-found-the-camera-id/</ref>}}
{{History||v0.5.0|The camera is now invisible and makes the standard player [[damage]] [[sound]].}}
{{History||v0.7.0|Added the "F1" feature (Hide GUI), which has now made the camera obsolete.}}
{{History||v0.8.0|snap=build 2|[[File:Egg JE1 BE1.png|32px]] Item form now uses [[egg]] texture.}}
{{History||v0.9.0|snap=build 1|The camera [[entity]] has been removed. [[Tommaso]] also stated: ''"It doesn't mean that it's dead forever, in fact I have a lot of ideas for it! I think it will be back when have [[shader]]s, sharing and [[redstone]]."''<ref>{{Reddit|sub=MCPE|281sep/camera|ci6znr8}}</ref>}}
{{History||v0.14.0|snap=build 1|[[File:Camera BE3.png|32px]] [[File:Camera (item) BE2.png|32px]] Re-added the camera. It is accessible only with [[inventory]] editors.
|In this version, if the player spawns a camera, leaves the [[world]] and joins back, it summons [[lightning]].}}
{{History||v0.14.2|The camera [[item]] ID has been changed to 498, but it cannot be used at the moment. The [[entity]] can now be spawned with a [[spawn egg]] with a [[damage]] value of 62.
|According to the language files of the game, the empty label that shows up whenever hovering a finger to a camera would now say "Take Picture". However, the button doesn't do anything.}}
{{History||v0.15.0|snap=build 1|The previous empty label on the camera mentioned above now displays the words "Take Picture".
|The [[health]] of the camera [[entity]] is now {{hp|2}} instead {{hp|4}}.
|The camera no longer summons [[lightning]].}}
{{History||v0.16.0|snap=build 1|The camera now has a [[block]] form in [[inventory]], but still spawns the entity. However, the block can be placed only with [[commands]] and editing.
|"Take picture" button on the camera works now, but no image files are created.
|The oldest ID for camera (456) now refers to [[portfolio]].}}
{{History|||snap=build 2|[[File:Camera Block.png|32px]] The camera now has an [[item]] form and the [[block]] has been removed. However, it is still obtainable in servers.
|[[Portfolio]], which works together with the camera to create collections of pictures, has been removed.}}
{{History|||snap=build 4|Camera item form has been removed, and the camera can no longer be obtained or placed using any [[commands|command]].}}
{{History|bedrock}}
{{History||1.8.0|snap=beta 1.8.0.8|[[File:Camera BE3.png|32px]] [[File:Camera Block.png|32px]] The camera has been reimplemented.
|The camera [[entity]] can now be spawned with a [[spawn egg]] with [[damage]] value 258.}}
{{History||1.12.0|snap=beta 1.12.0.2|The camera can now be obtained with the {{cmd|give}} [[commands|command]].}}
{{History||1.13.0|snap=beta 1.13.0.1|The camera can no longer be obtained with the {{cmd|give}} command.
|Functionality has been added to the camera. Screenshots that are taken by the camera can now be saved into the {{cd|screenshots}} folder.
|Cameras are now a part of the {{el|ee}} toggle as a hidden feature.
|Cameras no longer have a [[death]] animation when killed by the [[player]] and instead, instantly emit smoke [[particles]].}}
{{History||1.16.100|snap=beta 1.16.100.50|The camera can now be obtained with the {{cmd|give}} [[commands|command]] once again.}}
{{History|||snap=beta 1.16.100.55|The camera can no longer be obtained with the {{cmd|give}} command.}}
{{History|education}}
{{History||1.0|[[File:Camera BE3.png|32px]] [[File:Camera Block.png|32px]] Added cameras.}}
{{History||1.4.0|Cameras no longer have a [[death]] animation when killed by the [[player]] and instead instantly emit smoke [[particles]].}}
{{History|foot}}
=== Future ===
At the Minecraft [[Pocket Edition]] panel at [[MineCon 2012]], as well as one of [[Johan Bernhardsson|Jbernhardsson]]'s livestreams, it was stated that future plans include trying to have a proper use for cameras, perhaps an easier way to take screenshots and share them with others.<ref>{{ytl|YMhyX_lKWV4}}</ref> In the BlockTalk Q&A, the camera was briefly mentioned as part of a broader "sharing" theme planned for {{el|be}} in the future.<ref>{{ytl|Ruf6tvqsD84}}</ref>
It later got implemented into {{el|ee}}, using the camera to make screenshots and share them in a special book.
== Issues ==
{{Issue list}}
== Trivia ==
* A camera prevents a [[Book and Quill]] from working. Attempting to craft it or obtain it by commands gives a regular book instead, due to non-implementation of photo attaching to written books.
* The camera can take a screenshot, which appears a bit smaller with a thick paper outline having cuts on its edges, making it look like an old photograph.
* This feature is hidden from the Creative inventory and from the /give command item menu.
== Gallery ==
<gallery>
PEcameras030.jpg|A row of cameras, as seen in [[Pocket Edition v0.3.0 alpha|v0.3.0]].
PEcameraphoto.jpg|Example image taken by the camera [[entity]].
CameraUse-1.png|The first method of using cameras.
CameraUse-2.png|The second method of using cameras.
Dinnerbone Camera.png|A camera spawned using a [[spawn egg]] named "[[Dinnerbone]]" in the v0.15.0 beta.
Cam2.png|A camera falling from a [[tree]]. This shows that cameras are entities.
Education Edition Exclusive Features.png|The camera and camera block placed in a world along with other Education Edition features.
Screenshot by camera.jpg|An example of the screenshot taken by a camera in [[Bedrock Edition beta 1.13.0.1|beta 1.13.0.1]].
File:Say Cheese.jpeg|[[Steve]], [[Alex]], [[Jesse]], and an [[Agent]] getting their picture taken.
</gallery>
== See also ==
* [[Portfolio]]
* [[Screenshot]]
== References ==
{{Reflist}}
{{Items}}
{{Entities}}
{{Education Edition}}
[[Category:Education Edition entities]]
[[Category:Education Edition items]]
[[Category:Tools]]
[[cs:Kamera]]
[[de:Kamera]]
[[el:Camera]]
[[es:Cámara]]
[[fr:Appareil photo]]
[[hu:Kamera]]
[[ja:カメラ]]
[[ko:카메라]]
[[nl:Camera]]
[[pl:Kamera]]
[[pt:Câmera]]
[[ru:Камера]]
[[uk:Камера]]
[[zh:相机]]</li><li>[[Name Tag|Name Tag]]<br/>{{about|the item that gives names to mobs|the nameplate above a player's head|Player#Username}}
{{Item
| image = Name Tag.png
| renewable = Yes
| stackable = Yes (64)
}}
A '''name tag''' is an [[item]] used to name [[mob]]s in the world and prevent them from despawning naturally.
== Obtaining ==
=== Chest loot ===
{{LootChestItem|name-tag}}
=== Fishing ===
Name tags can be caught from [[fishing]] as part of the treasure category with a {{frac|1|6}} chance after the 5% chance of being a treasure catch. The chance of catching treasure increases with the [[Luck of the Sea]] enchantment.
=== Trading ===
Master-level librarian [[villagers]] offer to sell a name tag for 20 [[emerald]]s as one of their available trades.
== Usage ==
To use a name tag, it must first be renamed with an [[anvil]], costing 1 [[experience]] level.
If it is not renamed, it has no effect when used on a mob. After the name tag is renamed, the player can {{control|use}} it on a mob to give it the name given to the name tag from the anvil. Mobs and name tags can be renamed any number of times. Name tags with the same name are stackable.
Once a mob is named, it keeps its name, and the name tag is consumed.
When a mob is named, it is excluded from the mob cap count.
Effects on various mobs:
* A named [[silverfish]] that goes into a block appears to lose its name because it is replaced by a newly generated unnamed silverfish when the block is broken.
* A baby (animal or villager) keeps its name when becoming an adult.
** A named [[villager]] keeps its name when transformed into a [[Zombie Villager|zombie villager]].
** A named zombie villager keeps its name when cured.
* [[Wandering Trader|Wandering trader]]s still despawn even if they are named, or in a [[minecart]] or [[boat]].
* A named [[wither]]'s boss bar displays its name instead of "Wither".
* Naming an [[ender dragon]] with commands also displays the name in the boss bar.
=== Limitations ===
Any mob can be named except for the [[ender dragon]] and [[player]]s.
A name tag can rename an [[armor stand]], though it does not show the nameplate above its head until <code>CustomNameVisible:1b</code> is set as an extra step.
{{control|Using|use}} a name tag on a villager renames the villager instead of opening the trading interface. A saddled pig is renamed instead of being ridden. Using a name tag on any other mob that can be interacted with performs the {{control|use}} action instead of being named. These mobs can be renamed if the player uses the name tag while crouching or standing in a [[nether portal]] because the portal suppresses the {{control|use}} action.
Once a name tag is used on a mob, it is impossible to remove the name of that mob without the use of commands or external modifications.
=== Behavior ===
Renamed mobs have their name displayed over their head in the same fashion as a mob named through a renamed [[spawn egg]]. Their names can be seen only if they are aimed at from four or fewer blocks away.
Mobs that are named using the name tag never despawn in the world, similar to tamed mobs.<ref>{{tweet|dinnerbone|327485109940916226}}</ref> The exceptions are [[wandering trader]]s or if the mob is hostile and the difficulty is switched to "[[Peaceful]]", causing any hostile mobs or any named hostile mobs to despawn immediately.
If a renamed mob kills a player, the custom name is used in the death message in place of the mob type name. For instance, if a vindicator named "Johnny" kills a player, the death message is "Player was slain by Johnny".
A renamed [[wither]] also has a renamed health bar, and the boss bar doesn't regenerate{{verify}}.
=== Easter eggs ===
* Any mob that receives the name "[[Easter eggs#Upside-down mobs|Dinnerbone]]" or "[[Easter eggs#Upside-down mobs|Grumm]]" is rendered upside down. This even includes the player in early versions of Bedrock Edition if the username is set to either of these and you are not signed into Xbox Live.
* Naming a [[sheep]] "[[Easter eggs#Jeb sheep|jeb_]]" causes its wool to fade between the dye colors, producing a rainbow effect. The [[wool]] that drops when the sheep is [[shear]]ed or killed is the original color of the sheep before the sheep was named.
* Naming a [[rabbit]] "[[Rabbit#Toast|Toast]]" causes it to have a special memorial skin of user xyzen420's girlfriend's [http://www.reddit.com/r/minecraftsuggestions/comments/27hjog/to_themogminer_my_bunny_is_missing_please_help_me/ missing rabbit].
* Naming a [[vindicator]] "Johnny" causes it to be aggressive and attack all [[mob]]s including the wither (except [[ghast]]s and other [[illager]]s). The hostility even extends to [[Ravager|ravagers]] in [[Java Edition|''Java Edition'']], as the "Johnny" vindicator can also attack the ravager while it's riding it.
== Data values ==
=== ID ===
{{edition|java}}:
{{ID table
|edition=java
|showforms=y
|generatetranslationkeys=y
|displayname=Name Tag
|spritetype=item
|nameid=name_tag
|form=item
|foot=1}}
{{edition|bedrock}}:
{{ID table
|edition=bedrock
|shownumericids=y
|showforms=y
|notshowbeitemforms=y
|generatetranslationkeys=y
|displayname=Name Tag
|spritetype=item
|nameid=name_tag
|id=548
|form=item
|foot=1}}
== History ==
{{History|java}}
{{History||1.6.1|snap=13w16b|[[File:Name Tag JE1 BE1.png|32px]] Added name tags. They can now be found in [[dungeon]] [[chest]]s.}}
{{History|||snap=13w25a|A [[mob]] named "Dinnerbone" or "Grumm" now renders upside down.}}
{{History||1.7.2|snap=13w36a|Name tags can now rarely be acquired by [[fishing]], making them [[renewable resource|renewable]].}}
{{History||1.7.4|snap=13w48b|A sheep named "jeb_" now fades between the [[dye]] colors.}}
{{History||1.8|snap=14w02a|Name tags can now be [[trading|bought]] from librarian [[villager]]s, at 20–22 [[emerald]]s for 1 name tag.}}
{{History|||snap=14w27a|[[Rabbit]]s have been added and naming one "Toast" gives it a special memorial skin.}}
{{History||1.9|snap=15w44a|Added name tags to [[mineshaft]] [[chest]]s.
|The average yield of name tags in [[dungeon]] chests has been decreased.}}
{{History||1.11|snap=16w39a|Name tags can now be found in the new [[woodland mansion]] chests.
|Added [[vindicator]]s, which attack almost all mobs if named "Johnny".}}
{{History||1.13|snap=17w47a|Prior to [[1.13/Flattening|''The Flattening'']], this [[item]]'s numeral ID was 421.}}
{{History||1.14|snap=18w43a|[[File:Name Tag JE2 BE2.png|32px]] The texture of name tags has been changed.}}
{{History||1.19|snap=Deep Dark Experimental Snapshot 1|Name tags now generate in [[ancient city]] chests.}}
{{History|pocket alpha}}
{{History||v0.15.0|snap=build 1|[[File:Name Tag JE1 BE1.png|32px]] Added name tags, and a new "Name" Interact button.
|A [[mob]] named "Dinnerbone" or "Grumm" renders upside down.
|A [[sheep]] named "jeb_" fades between the [[dye]] colors.
|Naming a [[rabbit]] "Toast" gives it a special memorial skin.}}
{{History|pocket}}
{{History||1.0.4|snap=alpha 1.0.4.0|Name tags can now be [[trading|bought]] from librarian [[villager]]s for 20-22 [[emerald]]s as their last tier trade.}}
{{History||1.1.0|snap=alpha 1.1.0.0|Naming a [[vindicator]] "Johnny" now makes it hostile to any [[mob]], except other [[illager]]s.
|Name tags can now be found in [[woodland mansion]]s.}}
{{History|bedrock}}
{{History||1.4.0|snap=beta 1.2.14.2|Name tags can now be found in buried treasure [[chest]]s.}}
{{History||1.10.0|snap=beta 1.10.0.3|[[File:Name Tag JE2 BE2.png|32px]] The texture of name tags has been changed.}}
{{History||1.11.0|snap=beta 1.11.0.4|Name tags [[trading|sold]] by librarian [[villager]]s now cost 20 [[emerald]]s.}}
{{History|console}}
{{History||xbox=TU19|xbone=CU7|ps=1.12|wiiu=Patch 1|[[File:Name Tag JE1 BE1.png|32px]] Added name tags.}}
{{History|PS4}}
{{History||1.90|[[File:Name Tag JE2 BE2.png|32px]] The texture of name tags has been changed.}}
{{History|3ds}}
{{History||0.1.0|[[File:Name Tag JE1 BE1.png|32px]] Added name tags.}}
{{History|foot}}
== Issues ==
{{issue list}}
== Trivia ==
* Name tags were added at the request of [https://www.youtube.com/user/paulsoaresjr/ Paulsoaresjr].<ref>{{tweet|paulsoaresjr|326865482839883777}}</ref><ref>{{tweet|Dinnerbone|326812168630722561}}</ref>
* A stack of up to 64 name tags can be renamed at once. The cost is 1 [[experience]] level per stack, regardless of how many name tags were stacked.
* To name a [[mob]] “Name Tag” the player must give the name tag a random name, then rename it back to “Name Tag”.
* A [[villager]] with a name tag turned into a [[zombie villager]] by a [[zombie]] with a name tag does not despawn, but a villager with a name tag turned into a zombie by a zombie without a name tag does despawn.
* It is impossible to have a rainbow [[sheep]] upside-down, because it is impossible for it to be named “Jeb_” and “Dinnerbone” at the same time.
== Gallery ==
<gallery>
NameTag2.png|To use a name tag, the [[player]] must first rename it using an [[anvil]].
NameTag1.png|A [[wolf]] that has been renamed using a name tag.
RenamedCreeper.png|A [[creeper]] renamed using the name tag.
RenamedWither.png|A [[Wither Boss|wither]] renamed using a name tag. The custom name takes place of "Wither" over the [[health bar]] as well.
YoYo.png|How to use "Grumm" and "Dinnerbone" name tag [[easter egg]] and [[lead]] to make another animal Yo-yo.
Grumm Horse.png|A [[horse]] using the "Grumm" or "Dinnerbone" easter egg to be rendered upside-down.
MineshaftNameTag.png|Name Tag found in a mineshaft chest.
Pocket Edition Name Tag.jpg|First image of a name tag in bedrock edition.
</gallery>
== See also ==
* [[Spawn Egg]]
== References ==
{{reflist}}
== External Links ==
*[https://www.minecraft.net/en-us/article/taking-inventory--name-tag Taking Inventory: Name Tag] – Minecraft.net on March 15, 2019
{{items}}
[[de:Namensschild]]
[[es:Etiqueta]]
[[fr:Étiquette]]
[[it:Targhetta]]
[[ja:名札]]
[[ko:이름표]]
[[nl:Naamkaartje]]
[[pl:Znacznik]]
[[pt:Etiqueta]]
[[ru:Бирка]]
[[zh:命名牌]]
[[Category:Renewable resources]]</li></ul> | 19w02a | Wood and stripped wood can now be used to craft campfires. | |||
| Pocket Edition Alpha | |||||
0.8.0{{Extension DPL}}<ul><li>[[3D|3D]]<br/>{{about|the edible item|the April Fools' snapshot itself|Java Edition 3D Shareware v1.34}}
{{Joke feature}}
{{Item
| image = 3D (item).png
| renewable = Yes
| stackable = Yes (64)
}}
'''3D''' was a joke item from [[Java Edition 3D Shareware v1.34]]. Eating it shows a picture of the developer cast.
== Obtaining ==
=== Mob drops ===
3D was dropped by a creeper summoned by the cheat code "'''NEEEERD'''".
== Usage ==
Eating the 3D item when the hunger bar was not full shows a picture of the developer cast of Minecraft.
== Data values ==
=== ID ===
{{ID table
|showforms=y
|generatetranslationkeys=java
|displayname=3D
|spritetype=item
|nameid=3d
|form=item
|foot=1}}
== History ==
{{History|java}}
{{History||3D Shareware v1.34|[[File:3D (item).png|32px]] Added the 3D item.}}
{{History|foot}}
== Gallery ==
<gallery>
File:3D Shareware Mojang Team.png|The developer cast of Minecraft.
File:Tasty 3D Item.gif|The "'''Tasty!'''" 3D Item lore.
</gallery>
{{Items}}
{{Jokes}}
[[Category:Non-renewable resources]]
[[Category:Joke items]]</li><li>[[Bamboo|Bamboo]]<br/>{{for|the plant feature|Bamboo (feature)}}
{{Distinguish|text = [[Sugar Cane]], which was colloquially known as Bamboo}}
{{Block
| image = <gallery>
Leafless Bamboo.png|Leafless
Small Leaves Bamboo.png|Small
Big Leaves Bamboo.png|Big
Leafless Old Bamboo.png|Leafless Old
Small Leaves Old Bamboo.png|Small Old
Big Leaves Old Bamboo.png|Big Old
</gallery>
| image2 = Bamboo Shoot.png<!--different infobox for this later down the line, like with pistons?-->
| image3 = Bamboo (item) JE1 BE1.png
| transparent = Yes
| light = No
| tool = Sword
| tool2 = Axe
| renewable = Yes
| stackable = Yes (64)
| flammable = '''Bamboo''': Yes (60)<br>'''Shoot''': No
| lavasusceptible = Yes
}}
'''Bamboo''' is a versatile, fast-growing, [[Bone Meal|bonemealable]] [[plant]] found primarily in [[jungle]]s, which is used for [[crafting]] (particularly [[scaffolding]] and [[Block of Bamboo|bamboo wood]]), [[smelting]] and [[breeding]] [[Panda|pandas]].
A '''bamboo shoot''' is the initial non-solid sapling form of planted bamboo.
== Obtaining ==
Bamboo shoots cannot be obtained through vanilla means. {{IN|bedrock}}, they can be obtained through [[add-on]]s or inventory editing. {{IN|java}}, they are completely unobtainable.
=== Breaking ===
Bamboo can be mined with any [[tool]], but a [[sword]] breaks the block [[instant mining|instantly]], even with [[Mining Fatigue]]. Flowing [[water]] also breaks bamboo shoots, but not mature bamboo stalks.
{{breaking row|Bamboo|Sword|sword=1|horizontal=1}}
{{notelist}}
=== Natural generation ===
Bamboo generates in widely scattered single shoots within [[jungle]] [[biome]]s. Bamboo generates much more densely in the [[bamboo jungle|bamboo variant]]s of jungles, covering large areas of the landscape. Bamboo does ''not'' generate in [[sparse jungle]]s.<ref>{{bug|MC-156638|||WAI}}</ref>
=== Mob loot ===
{{IN|java}}, a [[panda]] drops 1 bamboo when killed. [[Looting]] does not affect the drop rate.<ref>{{bug|MC-160006}}</ref>
{{IN|bedrock}}, a panda drops 0-2 bamboo when killed. Looting increases the drop by 1 per level.
=== Fishing ===
Bamboo can be found while [[fishing]] in [[jungle]] [[biome]]s as a junk [[item]].
=== Chest loot ===
{{LootChestItem|bamboo}}
== Usage ==
When broken, any bamboo [[block]] placed or grown above it is also broken. A bamboo block drops itself as an [[item]] if a [[piston]] pushes it or moves a block into its space. When bamboo is first placed as a shoot it's not solid and can be destroyed by water flowing into it. After growing at least one block taller it becomes solid and can't be destroyed by water. To transform a bamboo shoot into a solid bamboo block place another bamboo on top of it.
Unlike most plants, bamboo cannot be [[Composter#Composting|composted]].<ref>{{bug|MC-142452|||WAI}}</ref>
=== Farming ===
Bamboo can be planted on [[moss block]]s{{only|java|short=1}}, [[grass block]]s, [[dirt]], [[coarse dirt]], [[rooted dirt]], [[gravel]], [[mycelium]], [[podzol]], [[sand]], [[red sand]], [[suspicious sand]], [[suspicious gravel]], [[mud]], bamboo shoot, or on itself. At default random tick speed (3), each plant grows on average every {{convert|4096|ticks|seconds}}. When [[bone meal]] is {{control|used}} on it, it grows by 1–2 [[blocks]]. Bamboo can grow up to 12–16 blocks tall. The top of a bamboo plant requires a [[light]] level of 9 or above to grow.
Because bamboo breaks in almost the same way as [[sugar cane]]s, [[Tutorials/Sugar cane farming|a sugar cane farm]] can be easily adapted to this use. While water is not needed with such a farm, some spacing is recommended if the harvest is done manually as mature stalks are solid.
=== Pandas ===
Bamboo [[item]]s are eaten by [[panda]]s and can be used to speed up the growth of baby pandas. Bamboo can also be used to breed pandas when at least 8 [[block]]s of bamboo are within 5 blocks of the pandas, making the panda the only animal in the game to have extra breeding requirements. At this point, the [[player]] can feed them bamboo and they [[breeding|mate]] to have a baby.
=== Fuel ===
Bamboo can be used as fuel for [[smelting]]. Each bamboo item smelts 0.25 [[item]]s. Crafting two bamboo into a [[stick]] and using that as fuel is equivalent, smelting 0.5 items.
Bamboo can be crafted into other items to increase its fuel efficiency.
* By crafting 9 bamboo into 2 [[bamboo planks]], 3 items can be smelted instead of 2.25, a 33.3% increase in efficiency.
** {{IN|bedrock}}, the fuel efficiency can be further doubled by crafting the bamboo planks into twice the amount of [[slab]]s.<ref>{{bug|MCPE-94368||Wooden slabs last for the same amount of time as planks in a furnace}}</ref>
* {{IN|java}}, by crafting 14 bamboo into 3 [[ladder]]s, 4.5 items can be smelted instead of 3.5, a 28.6% increase in efficiency.
=== Flower pots ===
Bamboo can be placed in a [[flower pot]], where it retains the design it has in its item form.
=== Crafting ingredient ===
{{crafting usage}}
== Appearance ==
[[File:Bamboo stages.png|thumb|The different stages of bamboo growth.]]
The appearance of bamboo changes as it grows. When first placed, it takes the form of a small shoot, which has no [[hitbox]]. When it grows one [[block]] taller it grows to 2 pixels in length and width and the top block has leaves coming off it. At 3 blocks, the top 2 blocks have leaves and at 4 blocks the bamboo expands to 3×3 pixels. At 5 blocks tall, the top 3 blocks have leaves on them. As the bamboo grows, the leaves move up and stay at the top 3 blocks. Destroying a block of bamboo does not change the appearance of the blocks below it. Bamboo is oriented at a random position in the block that it is in.
== Sounds ==
=== Bamboo ===
{{Sound table/Block/Bamboo}}
=== Bamboo Shoot ===
{{Sound table/Block/Bamboo shoot}}
== Data values ==
=== ID ===
{{edition|java}}:
{{ID table
|edition=java
|showblocktags=y
|showforms=y
|generatetranslationkeys=y
|displayname=Bamboo
|spritetype=block
|nameid=bamboo
|blocktags=bamboo_plantable_on}}
{{ID table
|displayname=Bamboo Shoot
|spritetype=block
|nameid=bamboo_sapling
|blocktags=bamboo_plantable_on
|form=block
|foot=1}}
{{edition|bedrock}}:
{{ID table
|edition=bedrock
|shownumericids=y
|showforms=y
|generatetranslationkeys=y
|displayname=Bamboo
|spritetype=block
|nameid=bamboo
|id=418}}
{{ID table
|displayname=Bamboo Sapling
|spritetype=block
|nameid=bamboo_sapling
|id=419
|form=block
|translationkey=-
|foot=1}}
=== Block states ===
{{see also|Block states}}
{{/BS}}
== Achievements ==
{{load achievements|Zoologist}}
== History ==
{{History||September 29, 2018|link={{tweet|minecraft|1046096508570009602}}|Bamboo is announced at [[MINECON Earth 2018]].}}
{{History|java}}
{{History||1.14|snap=18w43a|[[File:Leafless Bamboo JE1 BE2.png|32px]] [[File:Small Leaves Bamboo JE1 BE2.png|32px]] [[File:Big Leaves Bamboo JE1 BE2.png|32px]] [[File:Leafless Old Bamboo JE1 BE2.png|32px]] [[File:Small Leaves Old Bamboo JE1 BE2.png|32px]] [[File:Big Leaves Old Bamboo JE1 BE2.png|32px]] [[File:Bamboo Shoot JE1 BE1.png|32px]] Added bamboo.
|[[File:Bamboo (item) JE1 BE1.png|32px]] Bamboo as an [[item]] can be [[drops|dropped]] by bamboo and planted to grow bamboo.
|Added [[bamboo jungle]]s, where bamboo naturally generates.}}
{{History||1.16|snap=20w06a|"Bamboo Sapling" has been renamed to "Bamboo Shoot".}}
{{History|||snap=20w13a|Bamboo has been moved from the Miscellaneous tab to the Decoration Blocks tab in the [[Creative inventory]].<ref name="misc decoration">https://bugs.mojang.com/browse/MC-174434</ref>}}
{{History||1.17|snap=21w13a|Bamboo can now be planted on rooted dirt.}}
{{History|||snap=21w16a|Bamboo can now be planted on moss blocks.}}
{{History||1.18|snap=21w39a|Bamboo no longer generates underground.<ref>{{bug|MC-145376}}</ref><ref>{{bug|MC-214894}}</ref>}}
{{History||1.19|snap=22w15a|Bamboo can now be planted on mud.}}
{{History||1.20<br>(Experimental)|link=1.19.3|snap=22w42a|Bamboo can now be used to craft [[bamboo planks]].}}
{{History|||snap=22w45a|Bamboo can no longer be used to craft bamboo planks.|Bamboo can now be used to craft a [[block of bamboo]].}}
{{History||1.20<br>(Experimental)|link=1.19.4|snap=23w07a|Bamboo can now be planted on [[suspicious sand]].}}
{{History||1.20|snap=23w14a|Bamboo can now be planted on [[suspicious gravel]].}}
{{History|bedrock}}
{{History||1.8.0|snap=beta 1.8.0.8|[[File:Leafless Bamboo BE1.png|32px]] [[File:Small Leaves Bamboo BE1.png|32px]] [[File:Big Leaves Bamboo BE1.png|32px]] [[File:Leafless Old Bamboo BE1.png|32px]] [[File:Small Leaves Old Bamboo BE1.png|32px]] [[File:Big Leaves Old Bamboo BE1.png|32px]] [[File:Bamboo Shoot JE1 BE1.png|32px]] Added bamboo.
|[[File:Bamboo (item) JE1 BE1.png|32px]] Bamboo as an [[item]] can be [[drops|dropped]] by bamboo and planted to grow bamboo.}}
{{History||1.9.0|snap=beta 1.9.0.0|Bamboo can now generate in [[jungle]] [[biome]]s in single shoots.
|Added [[bamboo jungle]]s, where bamboo naturally generates.}}
{{History||1.12.0|snap=beta 1.12.0.3|[[File:Leafless Bamboo JE1 BE2.png|32px]] [[File:Small Leaves Bamboo JE1 BE2.png|32px]] [[File:Big Leaves Bamboo JE1 BE2.png|32px]] [[File:Leafless Old Bamboo JE1 BE2.png|32px]] [[File:Small Leaves Old Bamboo JE1 BE2.png|32px]] [[File:Big Leaves Old Bamboo JE1 BE2.png|32px]] The bamboo texture brightness has been updated to match {{el|je}}.<ref>{{bug|MCPE-42635}}</ref>}}
{{History||1.17.30|snap=beta 1.17.20.20|Swords now break bamboo instantly to match ''Java Edition''.<ref>{{bug|MCPE-64013}}</ref>}}
{{History||1.20.0|link=Bedrock Edition 1.20.0|snap=beta 1.19.50.21|Bamboo can now be used to craft [[bamboo planks]].}}
{{History|||snap=beta 1.19.60.20|Bamboo can no longer be used to craft bamboo planks.|Bamboo can now be used to craft a [[block of bamboo]].}}
{{History|console}}
{{History||xbox=none|xbone=none|ps=1.83|wiiu=none|switch=none|[[File:Leafless Bamboo JE1 BE2.png|32px]] [[File:Small Leaves Bamboo JE1 BE2.png|32px]] [[File:Big Leaves Bamboo JE1 BE2.png|32px]] [[File:Leafless Old Bamboo JE1 BE2.png|32px]] [[File:Small Leaves Old Bamboo JE1 BE2.png|32px]] [[File:Big Leaves Old Bamboo JE1 BE2.png|32px]] [[File:Bamboo Shoot JE1 BE1.png|32px]] Added bamboo.
|[[File:Bamboo (item) JE1 BE1.png|32px]] Bamboo as an [[item]] can be [[drops|dropped]] by bamboo and planted to grow bamboo.}}
{{History|foot}}
=== Bamboo shoot "item" ===
{{:Technical blocks/Bamboo Shoot}}
== Issues ==
{{Issue list}}
== Trivia ==
* Because bamboo grows quickly (on average 1 growth per 200 seconds), just 500 plants in an automatic farm produce more [[item]]s than a [[hopper]] can collect (2.5 items per second). A single hopper can move only enough items to keep 6.25 [[furnace]]s running.
* Bamboo is the fastest-growing plant in ''[[Minecraft]]'', which reflects its status as the fastest-growing plant known in real life.
* While bamboo cannot be composted in ''Minecraft'', it can be composted in real life.
== Gallery ==
<gallery>
File:PandaMinecon.png|The first image featuring bamboo, from [[MINECON Earth 2018]].
File:PandasEatingMinecon.jpg|A group of [[Panda|pandas]] eating bamboo, shown at [[MINECON Earth 2018]].
File:Growing bamboo BE.png|Planted bamboo growing.
File:Bamboo in tree.png|A bamboo shoot growing through a [[tree]].
File:Bamboo Jungle.png|Bamboo seen in a [[jungle]] [[biome]] variant.
File:Bamboo Jungle in Amplified world.png|Bamboo Jungle in an [[Amplified]] world in 1.19-rc2.
File:Naturalbamboo.png|Multiple naturally generated bamboo stems growing by a river.
File:Tall Bamboo.png|Grown Bamboo with three parts
File:Zuri Chopping Bamboo Pixel Art.png|[[Zuri]] chopping down bamboo for a baby panda.
File:Bamboo Wallpaper.png|Smartphone wallpaper of the aforementioned artwork, showing more of the treetops and bamboo.
File:Panda Packaging.jpg|Packing for the ''Diamond Level Panda'', modeled after bamboo.
</gallery>
==References==
{{Reflist}}
{{Blocks|vegetation}}
{{Items}}
[[Category:Plants]]
[[Category:Food]]
[[Category:Natural blocks]]
[[Category:Non-solid blocks]]
[[Category:Flammable blocks]]
[[cs:Bambus]]
[[de:Bambus]]
[[es:Bambú]]
[[fr:Bambou]]
[[it:Bambù]]
[[ja:竹]]
[[ko:대나무]]
[[pl:Bambus]]
[[pt:Bambu]]
[[ru:Бамбук]]
[[th:ไม้ไผ่]]
[[zh:竹子]]</li></ul> | build 2 | Added Bark blocks, where at this time can only be obtained using world editing. | |||
0.9.0{{Extension DPL}}<ul><li>[[:Category:Armor|Category:Armor]]<br/>[[Category:Items]]</li><li>[[Smithing Template|Smithing Template]]<br/>{{for|the block|Smithing Table}}
{{Item
| title = Smithing Template
| image = <gallery>
Netherite Upgrade Smithing Template.png | Netherite Upgrade
Sentry Armor Trim Smithing Template.png | Armor Trim
</gallery>
| rarity = Rare
| renewable = No<!--Smithing templates are not renewable because diamonds, their only other method of creation, are not renewable.-->
| stackable = Yes (64)
}}
'''Smithing templates''' are items used in [[Smithing Table|smithing tables]] to alter [[Tool|tools]] and [[armor]]. They are consumed when used, but can be [[Crafting|duplicated]] using an existing template, its material and [[Diamond|diamonds]].
The sixteen '''armor trim smithing templates''' are found in a variety of [[Generated structures|structures]], and are used to apply various decorative trims (dependent on the variant) to armor using certain minerals for different colors.
'''Netherite upgrade smithing templates''' are required to upgrade diamond equipment with a [[Netherite Ingot|netherite ingot]]. They are only found in [[Bastion Remnant|bastion remnants]], but are guaranteed only in [[:en:Bastion_Remnant#Treasure_room|treasure rooms]].
== Obtaining ==
Smithing templates can be found in various [[Generated structures|structures]] and can be duplicated by using seven diamonds and a block based on what the template is.
=== Crafting ===
{{Crafting
|A1=Diamond |B1=Matching Smithing Template |C1=Diamond
|A2=Diamond |B2=Netherrack;Cobblestone;Sandstone;End Stone;Terracotta;Terracotta;Netherrack;Cobblestone;Terracotta;Cobbled Deepslate;Blackstone;Purpur Block;Prismarine;Cobblestone;Cobbled Deepslate;Terracotta;Mossy Cobblestone |C2=Diamond
|A3=Diamond |B3=Diamond |C3=Diamond
|Output=Matching Smithing Template,2
}}
{| class="article-table"
|+ Duplication
! Item !! Material
|-
| {{ItemSprite|netherite-upgrade|text=Netherite Upgrade}} || {{BlockSprite|Netherrack|text=Netherrack}}
|-
| {{ItemSprite|sentry-armor-trim|text=Sentry Armor Trim}} || {{BlockSprite|Cobblestone|text=Cobblestone}}
|-
| {{ItemSprite|vex-armor-trim|text=Vex Armor Trim}} || {{BlockSprite|Cobblestone|text=Cobblestone}}
|-
| {{ItemSprite|wild-armor-trim|text=Wild Armor Trim}} || {{BlockSprite|Mossy Cobblestone|text=Mossy Cobblestone}}
|-
| {{ItemSprite|coast-armor-trim|text=Coast Armor Trim}} || {{BlockSprite|Cobblestone|text=Cobblestone}}
|-
| {{ItemSprite|dune-armor-trim|text=Dune Armor Trim}} || {{BlockSprite|Sandstone|text=Sandstone}}
|-
| {{ItemSprite|wayfinder-armor-trim|text=Wayfinder Armor Trim}} || {{BlockSprite|Terracotta|text=Terracotta}}
|-
| {{ItemSprite|raiser-armor-trim|text=Raiser Armor Trim}} || {{BlockSprite|Terracotta|text=Terracotta}}
|-
| {{ItemSprite|shaper-armor-trim|text=Shaper Armor Trim}} || {{BlockSprite|Terracotta|text=Terracotta}}
|-
| {{ItemSprite|host-armor-trim|text=Host Armor Trim}} || {{BlockSprite|Terracotta|text=Terracotta}}
|-
| {{ItemSprite|ward-armor-trim|text=Ward Armor Trim}} || {{BlockSprite|Cobbled Deepslate|text=Cobbled Deepslate}}
|-
| {{ItemSprite|silence-armor-trim|text=Silence Armor Trim}} || {{BlockSprite|Cobbled Deepslate|text=Cobbled Deepslate}}
|-
| {{ItemSprite|tide-armor-trim|text=Tide Armor Trim}} || {{BlockSprite|Prismarine|text=Prismarine}}
|-
| {{ItemSprite|snout-armor-trim|text=Snout Armor Trim}} || {{BlockSprite|Blackstone|text=Blackstone}}
|-
| {{ItemSprite|rib-armor-trim|text=Rib Armor Trim}} || {{BlockSprite|Netherrack|text=Netherrack}}
|-
| {{ItemSprite|eye-armor-trim|text=Eye Armor Trim}} || {{BlockSprite|End Stone|text=End Stone}}
|-
| {{ItemSprite|spire-armor-trim|text=Spire Armor Trim}} || {{BlockSprite|Purpur Block|text=Purpur Block}}
|}
{{IN|bedrock}}, spire, tide, and dune armor trims can be duplicated with more blocks than {{in|java}}. In addition to the normal blocks, Tide armor trims can be duplicated using Prismarine Bricks or Dark Prismarine, dune armor trims can be duplicated with smooth sandstone, cut sandstone, or chiseled sandstone, and spire armor trims can be duplicated with purpur pillars.<ref>{{bug|MCPE-172711||Tide, Spire, and Dune Armor Trims can be crafted from more blocks than in Java Edition}}</ref>
=== Mob loot ===
[[Elder guardian]]s have a 20% chance to drop 1 tide armor trim upon death. [[Looting]] doesn't affect this percentage, and the elder guardian doesn't need to be killed by a player in order for the trim to drop and can be duplicated with [[prismarine]].
=== Chest loot ===
{{#invoke:LootChest|base3|netherite-upgrade-smithing-template,sentry-armor-trim-smithing-template,vex-armor-trim-smithing-template,wild-armor-trim-smithing-template,coast-armor-trim-smithing-template,dune-armor-trim-smithing-template,ward-armor-trim-smithing-template,silence-armor-trim-smithing-template,snout-armor-trim-smithing-template,rib-armor-trim-smithing-template,eye-armor-trim-smithing-template,spire-armor-trim-smithing-template}}
Note: In Woodland Mansions, only chests with random loot have the chance to contain the Vex Smithing Template, chests in the "Allium room", "Sapling farm", "Tree-chopping room" and "Fake End portal room" always generate with the same, room specific, loot.
=== Suspicious block loot ===
Items can only be extracted from [[Suspicious Block|suspicious blocks]] using a [[brush]].{{#invoke:LootChest|base3|wayfinder-armor-trim-smithing-template,raiser-armor-trim-smithing-template,shaper-armor-trim-smithing-template,host-armor-trim-smithing-template}}
== Usage ==
=== Crafting ingredient ===
{{Crafting
|A1=Diamond |B1=Matching Smithing Template |C1=Diamond
|A2=Diamond |B2=Netherrack;Cobblestone;Sandstone;End Stone;Terracotta;Terracotta;Netherrack;Cobblestone;Terracotta;Cobbled Deepslate;Blackstone;Purpur Block;Prismarine;Cobblestone;Cobbled Deepslate;Terracotta;Mossy Cobblestone |C2=Diamond
|A3=Diamond |B3=Diamond |C3=Diamond
|Output=Matching Smithing Template,2
}}
=== Smithing ingredient ===
Smithing templates are used at a [[smithing table]]. Netherite upgrade smithing templates are used to upgrade diamond gear into netherite gear by using a netherite upgrade, a piece of diamond gear, and a [[netherite ingot]].
{{Smithing
|head=1
|ingredients=Netherite Upgrade +<br>Any Diamond Gear +<br>[[Netherite Ingot]]
|Netherite Upgrade
|Diamond Helmet; Diamond Chestplate; Diamond Leggings; Diamond Boots; Diamond Sword; Diamond Pickaxe; Diamond Axe; Diamond Shovel
|Netherite Ingot
|Netherite Helmet; Netherite Chestplate; Netherite Leggings; Netherite Boots; Netherite Sword; Netherite Pickaxe; Netherite Axe; Netherite Shovel
|tail=1
}}
{{FakeImage|{{Animate|Iron_Armor_with_Iron_Shaper_Trim.png; Golden_Armor_with_Golden_Shaper_Trim.png; Diamond_Armor_with_Diamond_Shaper_Trim.png; Netherite_Armor_with_Netherite_Shaper_Trim.png|180px}}|If the armor material and the trimming material are the same, the color palette used for the armor trim is darker.}}
Armor trim smithing templates are used to customize an armor piece's appearance by using a smithing template, an armor piece, and an ingot or crystal ([[emerald]], [[redstone dust]], [[lapis lazuli]], [[amethyst shard]], [[nether quartz]], [[netherite ingot]], [[diamond]], [[gold ingot]], [[iron ingot]], or [[copper ingot]]). Including all dyed leather armor colors and regular armor, there are ≈3.679x10<sup>9</sup> different possible armor pieces<!--5713438 leather colors, plus the 4 other armor materials = 5713442. 5713442 * 161 (the 160 trim combos (16 trims, 10 materials) + untrimmed) = 919864162. 919864162 * 4 (helmet, chestplate, leggings, boots) = 3679456648 ≈ 3.679x10^9-->, and 7.16x10<sup>35</sup> <!--919864162 + 1 (no armor in that slot) = 919864163. 919864163^4 = 715969952015045562662444917041515536 ≈ 7.16x10^35 total possible armor combinations-->total possible armor combinations excluding enchantments and the player not wearing armor.
Already trimmed armor can be trimmed again by applying another template on it; the old trim pattern is overwritten in the process.<ref>{{bug|MC-262538||When combining armor trims the new trim deletes the old one|WAI}}</ref> Therefore, one piece of armor cannot possess multiple trims at the same time.
Most armor trims cover a small portion of the armor piece's surface with the trim material, except for the silence armor trim, which allows the trim material to cover a majority of the armor piece's surface.
All of the trims are purely decorative, and don't impact gameplay or strength(without the use of mods or plugins) of the armor they are applied to in any way. [[Piglin]]s do not pick up any gold-trimmed armor pieces, and they are not pacified by players wearing even a full set of gold-trimmed armor (unless, of course, the armor pieces in question are themselves golden), and netherite-trimmed armor pieces can still be burned by [[fire]].
{{Smithing
|head=1
|ingredients=Any Armor Trim +<br>Any Armor Piece +<br>Any Ingot/Crystal
|Any Armor Trim Smithing Template
|Iron Helmet; Netherite Chestplate;Golden Leggings;Diamond Boots
|Amethyst Shard; Copper Ingot; Diamond; Emerald; Gold Ingot; Iron Ingot; Lapis Lazuli; Nether Quartz; Netherite Ingot; Redstone Dust; Diamond; Emerald
|Amethyst Trim Iron Helmet; Copper Trim Netherite Chestplate; Diamond Trim Golden Leggings; Emerald Trim Diamond Boots; Gold Trim Iron Helmet; Iron Trim Netherite Chestplate; Lapis Trim Golden Leggings; Quartz Trim Diamond Boots; Netherite Trim Iron Helmet; Redstone Trim Netherite Chestplate; Diamond Trim Golden Leggings; Emerald Trim Diamond Boots
|tail=1
}}
;List of color palettes for all materials
*{{ItemSprite|emerald }} - {{TrimPalette| emerald }}
*{{ItemSprite|redstone dust }} - {{TrimPalette| redstone dust }}
*{{ItemSprite|lapis lazuli }} - {{TrimPalette| lapis lazuli }}
*{{ItemSprite|amethyst shard }} - {{TrimPalette| amethyst shard }}
*{{ItemSprite|nether quartz }} - {{TrimPalette| nether quartz }}
*{{ItemSprite|netherite ingot }} - {{TrimPalette| netherite ingot }} (Darker: {{TrimPalette| netherite ingot |darker=1}})
*{{ItemSprite|diamond }} - {{TrimPalette| diamond }} (Darker: {{TrimPalette| diamond |darker=1}})
*{{ItemSprite|gold ingot }} - {{TrimPalette| gold ingot }} (Darker: {{TrimPalette| gold ingot |darker=1}})
*{{ItemSprite|iron ingot }} - {{TrimPalette| iron ingot }} (Darker: {{TrimPalette| iron ingot |darker=1}})
*{{ItemSprite|copper ingot }} - {{TrimPalette| copper ingot }}
== Data values ==
=== ID ===
{{edition|java}}:
{{ID table
|edition=java
|firstcolumnname=Smithing Template
|showforms=y
|generatetranslationkeys=y
|displayname=Netherite Upgrade
|spritename=netherite-upgrade-smithing-template
|spritetype=item
|nameid=netherite_upgrade_smithing_template
|form=item}}
{{ID table
|displayname=Sentry Armor Trim
|spritename=sentry-armor-trim-smithing-template
|spritetype=item
|nameid=sentry_armor_trim_smithing_template
|form=item}}
{{ID table
|displayname=Vex Armor Trim
|spritename=vex-armor-trim-smithing-template
|spritetype=item
|nameid=vex_armor_trim_smithing_template
|form=item}}
{{ID table
|displayname=Wild Armor Trim
|spritename=wild-armor-trim-smithing-template
|spritetype=item
|nameid=wild_armor_trim_smithing_template
|form=item}}
{{ID table
|displayname=Coast Armor Trim
|spritename=coast-armor-trim-smithing-template
|spritetype=item
|nameid=coast_armor_trim_smithing_template
|form=item}}
{{ID table
|displayname=Dune Armor Trim
|spritename=dune-armor-trim-smithing-template
|spritetype=item
|nameid=dune_armor_trim_smithing_template
|form=item}}
{{ID table
|displayname=Wayfinder Armor Trim
|spritename=wayfinder-armor-trim-smithing-template
|spritetype=item
|nameid=wayfinder_armor_trim_smithing_template
|form=item}}
{{ID table
|displayname=Raiser Armor Trim
|spritename=raiser-armor-trim-smithing-template
|spritetype=item
|nameid=raiser_armor_trim_smithing_template
|form=item}}
{{ID table
|displayname=Shaper Armor Trim
|spritename=shaper-armor-trim-smithing-template
|spritetype=item
|nameid=shaper_armor_trim_smithing_template
|form=item}}
{{ID table
|displayname=Host Armor Trim
|spritename=host-armor-trim-smithing-template
|spritetype=item
|nameid=host_armor_trim_smithing_template
|form=item}}
{{ID table
|displayname=Ward Armor Trim
|spritename=ward-armor-trim-smithing-template
|spritetype=item
|nameid=ward_armor_trim_smithing_template
|form=item}}
{{ID table
|displayname=Silence Armor Trim
|spritename=silence-armor-trim-smithing-template
|spritetype=item
|nameid=silence_armor_trim_smithing_template
|form=item}}
{{ID table
|displayname=Tide Armor Trim
|spritename=tide-armor-trim-smithing-template
|spritetype=item
|nameid=tide_armor_trim_smithing_template
|form=item}}
{{ID table
|displayname=Snout Armor Trim
|spritename=snout-armor-trim-smithing-template
|spritetype=item
|nameid=snout_armor_trim_smithing_template
|form=item}}
{{ID table
|displayname=Rib Armor Trim
|spritename=rib-armor-trim-smithing-template
|spritetype=item
|nameid=rib_armor_trim_smithing_template
|form=item}}
{{ID table
|displayname=Eye Armor Trim
|spritename=eye-armor-trim-smithing-template
|spritetype=item
|nameid=eye_armor_trim_smithing_template
|form=item}}
{{ID table
|displayname=Spire Armor Trim
|spritename=spire-armor-trim-smithing-template
|spritetype=item
|nameid=spire_armor_trim_smithing_template
|form=item
|foot=1}}
{{edition|bedrock}}:
{{ID table
|edition=bedrock
|firstcolumnname=Smithing Template
|shownumericids=y
|showforms=y
|notshowbeitemforms=y
|generatetranslationkeys=y
|displayname=Netherite Upgrade
|spritename=netherite-upgrade-smithing-template
|spritetype=item
|nameid=netherite_upgrade_smithing_template
|id=685
|form=item
|translationkey=item.smithing_template.name, upgrade.netherite_upgrade.name}}
{{ID table
|displayname=Sentry Armor Trim
|spritename=sentry-armor-trim-smithing-template
|spritetype=item
|nameid=sentry_armor_trim_smithing_template
|id=686
|form=item
|translationkey=item.smithing_template.name, trim_pattern.sentry.name}}
{{ID table
|displayname=Vex Armor Trim
|spritename=vex-armor-trim-smithing-template
|spritetype=item
|nameid=vex_armor_trim_smithing_template
|id=692
|form=item
|translationkey=item.smithing_template.name, trim_pattern.vex.name}}
{{ID table
|displayname=Wild Armor Trim
|spritename=wild-armor-trim-smithing-template
|spritetype=item
|nameid=wild_armor_trim_smithing_template
|id=689
|form=item
|translationkey=item.smithing_template.name, trim_pattern.wild.name}}
{{ID table
|displayname=Coast Armor Trim
|spritename=coast-armor-trim-smithing-template
|spritetype=item
|nameid=coast_armor_trim_smithing_template
|id=688
|form=item
|translationkey=item.smithing_template.name, trim_pattern.coast.name}}
{{ID table
|displayname=Dune Armor Trim
|spritename=dune-armor-trim-smithing-template
|spritetype=item
|nameid=dune_armor_trim_smithing_template
|id=687
|form=item
|translationkey=item.smithing_template.name, trim_pattern.dune.name}}
{{ID table
|displayname=Wayfinder Armor Trim
|spritename=wayfinder-armor-trim-smithing-template
|spritetype=item
|nameid=wayfinder_armor_trim_smithing_template
|id=698
|form=item
|translationkey=item.smithing_template.name, trim_pattern.wayfinder.name}}
{{ID table
|displayname=Raiser Armor Trim
|spritename=raiser-armor-trim-smithing-template
|spritetype=item
|nameid=raiser_armor_trim_smithing_template
|id=699
|form=item
|translationkey=item.smithing_template.name, trim_pattern.raiser.name}}
{{ID table
|displayname=Shaper Armor Trim
|spritename=shaper-armor-trim-smithing-template
|spritetype=item
|nameid=shaper_armor_trim_smithing_template
|id=700
|form=item
|translationkey=item.smithing_template.name, trim_pattern.shaper.name}}
{{ID table
|displayname=Host Armor Trim
|spritename=host-armor-trim-smithing-template
|spritetype=item
|nameid=host_armor_trim_smithing_template
|id=701
|form=item
|translationkey=item.smithing_template.name, trim_pattern.host.name}}
{{ID table
|displayname=Ward Armor Trim
|spritename=ward-armor-trim-smithing-template
|spritetype=item
|nameid=ward_armor_trim_smithing_template
|id=690
|form=item
|translationkey=item.smithing_template.name, trim_pattern.ward.name}}
{{ID table
|displayname=Silence Armor Trim
|spritename=silence-armor-trim-smithing-template
|spritetype=item
|nameid=silence_armor_trim_smithing_template
|id=697
|form=item
|translationkey=item.smithing_template.name, trim_pattern.silence.name}}
{{ID table
|displayname=Tide Armor Trim
|spritename=tide-armor-trim-smithing-template
|spritetype=item
|nameid=tide_armor_trim_smithing_template
|id=693
|form=item
|translationkey=item.smithing_template.name, trim_pattern.tide.name}}
{{ID table
|displayname=Snout Armor Trim
|spritename=snout-armor-trim-smithing-template
|spritetype=item
|nameid=snout_armor_trim_smithing_template
|id=694
|form=item
|translationkey=item.smithing_template.name, trim_pattern.snout.name}}
{{ID table
|displayname=Rib Armor Trim
|spritename=rib-armor-trim-smithing-template
|spritetype=item
|nameid=rib_armor_trim_smithing_template
|id=695
|form=item
|translationkey=item.smithing_template.name, trim_pattern.rib.name}}
{{ID table
|displayname=Eye Armor Trim
|spritename=eye-armor-trim-smithing-template
|spritetype=item
|nameid=eye_armor_trim_smithing_template
|id=691
|form=item
|translationkey=item.smithing_template.name, trim_pattern.eye.name}}
{{ID table
|displayname=Spire Armor Trim
|spritename=spire-armor-trim-smithing-template
|spritetype=item
|nameid=spire_armor_trim_smithing_template
|id=696
|form=item
|translationkey=item.smithing_template.name, trim_pattern.spire.name
|foot=1}}
== Achievements ==
{{load achievements|Smithing with style}}
== Advancements ==
{{load advancements|Crafting a New Look;Smithing with Style}}
== Video ==
{{yt|klP9SrJFDU8}}
== History ==
{{History|java}}
{{History||1.20<br>(Experimental)|link=1.19.4|snap=23w04a|[[File:Netherite Upgrade Smithing Template JE1 BE1.png|32px]] [[File:Sentry Armor Trim Smithing Template JE1 BE1.png|32px]] [[File:Vex Armor Trim Smithing Template JE1 BE1.png|32px]] [[File:Wild Armor Trim Smithing Template JE1 BE1.png|32px]] [[File:Coast Armor Trim Smithing Template JE1 BE1.png|32px]] [[File:Dune Armor Trim Smithing Template JE1 BE1.png|32px]] [[File:Ward Armor Trim Smithing Template JE1 BE1.png|32px]] [[File:Tide Armor Trim Smithing Template JE1 BE1.png|32px]] [[File:Snout Armor Trim Smithing Template JE1 BE1.png|32px]] [[File:Rib Armor Trim Smithing Template JE1 BE1.png|32px]] [[File:Eye Armor Trim Smithing Template JE1 BE1.png|32px]] [[File:Spire Armor Trim Smithing Template JE1 BE1.png|32px]] Added smithing templates behind the "Update 1.20" experimental datapack.}}
{{History|||snap=23w05a|Smithing templates can be used to trim leather armor.
|Gold, iron, diamond, and netherite armor can be trimmed with their respective material.
|The dune, coast, wild, and sentry armor trims now always generate two templates in a chest when found.
|Increased the chances for all smithing templates that generate in chest loot to spawn:
*Netherite upgrade chance to find increased from 3.2% to 10%.
*Coast chance to find increased from 11.1% to 16.7%.
*Dune chance to find increased from 11.1% to 14.3%.
*Eye chance to find increased from 4.7% to 10% in alter chests, and to 100% in library chests.
*Rib chance to find increased from 4.7% to 6.7%.
*Sentry chance to find increased from 20% to 25%.
*Snout chance to find increased from 4.7% to 8.3%.
*Spire chance to find increased from 4.7% to 6.7%.
*Vex chance to find increased from 4.7% to 50%.
*Ward chance to find increased from 4.7% to 5%.
*Wild chance to find increased from 20% to 33%.}}
{{History||1.20|snap=23w12a|Smithing templates are now available without using the "Update 1.20" experimental datapack.|[[File:Wayfinder Armor Trim Smithing Template JE1 BE1.png|32px]] [[File:Raiser Armor Trim Smithing Template JE1 BE1.png|32px]] [[File:Shaper Armor Trim Smithing Template JE1 BE1.png|32px]] [[File:Host Armor Trim Smithing Template JE1 BE1.png|32px]] [[File:Silence Armor Trim Smithing Template JE1 BE1.png|32px]] Added wayfinder, raiser, shaper, host, and silence armor trim smithing templates.
|[[File:Sentry Armor Trim Smithing Template JE2 BE2.png|32px]] [[File:Dune Armor Trim Smithing Template JE2 BE2.png|32px]] Changed the textures of the sentry and dune armor trim smithing templates.
|The pattern textures of dune and sentry armor trims are changed from [[File:Armor Trim Dune (sample model) JE1 BE1.png|24px]] [[File:Armor Trim Sentry (sample model) JE1 BE1.png|24px]] to [[File:Armor Trim Dune (sample model) JE2 BE2.png|24px]] [[File:Armor Trim Sentry (sample model) JE2 BE2.png|24px]].<br>
Those previous patterns were left with different names: dune was renamed sentry and sentry was renamed shaper.}}
{{History|||snap=23w16a|Wayfinder, raiser, shaper, and host armor trim no longer generates in [[suspicious sand]] in [[trail ruins]].|Due to the split of the archaeological loot tables for the suspicious gravel within the [[trail ruins]]; wayfinder, raiser, shaper, and host armor trim now are in the rare loot.}}
{{History|||snap=23w17a|The probability of the wayfinder, raiser, shaper, and host armor trim to generate in [[suspicious gravel]] in [[trail ruins]] has been changed from 1/11 to 1/12.|The player now get the [[advancement]] "Crafting a new look" when they craft a trimmed armor at a [[smithing table]] using a smithing template, "Smithing with style" when they apply these smithing templates at least once on their armor: Spire, Snout, Rib, Ward, Silence, Vex, Tide, and Wayfinder.}}
{{History|bedrock}}
{{History||Next Major Update<br>(Experimental)|link=Bedrock Edition 1.19.80|snap=beta 1.19.80.21|[[File:Netherite Upgrade Smithing Template JE1 BE1.png|32px]] [[File:Sentry Armor Trim Smithing Template JE1 BE1.png|32px]] [[File:Vex Armor Trim Smithing Template JE1 BE1.png|32px]] [[File:Wild Armor Trim Smithing Template JE1 BE1.png|32px]] [[File:Coast Armor Trim Smithing Template JE1 BE1.png|32px]] [[File:Dune Armor Trim Smithing Template JE1 BE1.png|32px]] [[File:Ward Armor Trim Smithing Template JE1 BE1.png|32px]] [[File:Tide Armor Trim Smithing Template JE1 BE1.png|32px]] [[File:Snout Armor Trim Smithing Template JE1 BE1.png|32px]] [[File:Rib Armor Trim Smithing Template JE1 BE1.png|32px]] [[File:Eye Armor Trim Smithing Template JE1 BE1.png|32px]] [[File:Spire Armor Trim Smithing Template JE1 BE1.png|32px]] Added smithing templates behind the "[[Bedrock Edition 1.20.0|Next Major Update]]" [[experimental]] toggle.}}
{{History|||snap=beta 1.19.80.22|[[File:Wayfinder Armor Trim Smithing Template JE1 BE1.png|32px]] [[File:Raiser Armor Trim Smithing Template JE1 BE1.png|32px]] [[File:Shaper Armor Trim Smithing Template JE1 BE1.png|32px]] [[File:Host Armor Trim Smithing Template JE1 BE1.png|32px]] [[File:Silence Armor Trim Smithing Template JE1 BE1.png|32px]] Added wayfinder, raiser, shaper, host, and silence armor trim smithing templates.
|[[File:Sentry Armor Trim Smithing Template JE2 BE2.png|32px]] [[File:Dune Armor Trim Smithing Template JE2 BE2.png|32px]] Changed the textures of the sentry and dune armor trim smithing templates.
|The pattern textures of dune and sentry armor trims are changed from [[File:Armor Trim Dune (sample model) JE1 BE1.png|24px]] [[File:Armor Trim Sentry (sample model) JE1 BE1.png|24px]] to [[File:Armor Trim Dune (sample model) JE2 BE2.png|24px]] [[File:Armor Trim Sentry (sample model) JE2 BE2.png|24px]].<br>
Those previous patterns were left with different names: dune was renamed sentry and sentry was renamed shaper.}}
{{History||1.20.0|snap=beta 1.20.0.21|Smithing templates are now available without using the "Next Major Update" experimental toggle.}}
{{History|foot}}
== Issues ==
{{Issue list}}
== Trivia ==
* Smithing templates were named "Smithing Blueprints" in the prototype but was changed because the word "blueprint" sounded modern and technical.<ref>{{ytl|klP9SrJFDU8|Minecraft 1.20: Armor Trims - What Do They Mean?|Minecraft|May 4, 2023|t=98}}</ref>
* When Mojang developer Gnembon was working on armor trims, he accidentally messed up their rendering, making them jet through the player's body in a weird fashion, similar to what appears in {{w|Salvador Dalí}}'s paintings where a hand might poke through a forehead.<ref>{{ytl|ghQODkq4ITI|Mojang Dev Comes To Hermitcraft! (Mojang Developer Gnembom Interview)|GoodVodsWithScar|June 23, 2023|t=1980}}</ref>
* Some of the armor trims feature patterns based on a [[mob]] or [[block]] that is found in the same [[Generated structures|structure]] as the corresponding smithing template.<ref name=":0">"Some of the armor trims reflect the place where you found the template, for example bastions contain a piglin-inspired trim."-[[Sofia Dankis]]-{{Mcnet|armor-trims-coming-minecraft-1-20|Armor Trims Coming to Minecraft 1.20|January 24, 2023}}</ref>
** The spire armor trim resembles a [[shulker]].
** The vex armor trim resembles an [[evoker]]. As an item in the [[inventory]], it resembles the wing or the vein texture of a [[vex]].
** The wild armor trim has moss growing on 3 of its corners.
** The coast armor trim appears to have barnacles attached to it.
** The ward armor trim, as an item in the inventory, resembles the faces inside a [[warden]]'s chest.
** The silence armor trim appears to have sculk creeping onto / infecting it.
** The tide armor trim resembles [[Prismarine|prismarine bricks]].
** The snout armor trim resembles a [[piglin]]<ref name=":0" />.
** The rib armor trim resembles a [[wither skeleton]].
** The eye armor trim resembles an [[eye of ender]]. There are also two eyes on the head part of the armor trim that resemble those of an [[enderman]].
* ''Netherite upgrade smithing template'' (35 characters with "_" and 32 characters without "_") and ''sentry armor trim smithing template'' (35 characters with "_" and 31 characters without "_") are the current longest name for item ID, while ''[[polished blackstone pressure plate]]'' and ''[[cracked polished blackstone bricks]]'' have 34 characters with "_" and 31 characters without "_".
* The silence armor trim is the rarest trim, due to being found in ancient cities in the deep dark, and having only a 1.2% chance to be per chest.
* When [[lapis lazuli]] is used as trim material, it is called "Lapis" instead of its full name "Lapis Lazuli"; this is the only instance of the abbreviation "Lapis" being used in-game.<ref>{{bug|MC-262486|||WAI}}</ref>
== Gallery ==
=== Sprites ===
<gallery>
Netherite Upgrade Smithing Template.png|Netherite Upgrade
Sentry Armor Trim Smithing Template.png|Sentry Armor Trim
Vex Armor Trim Smithing Template.png|Vex Armor Trim
Wild Armor Trim Smithing Template.png|Wild Armor Trim
Coast Armor Trim Smithing Template.png|Coast Armor Trim
Dune Armor Trim Smithing Template.png|Dune Armor Trim
Wayfinder Armor Trim Smithing Template.png|Wayfinder Armor Trim
Raiser Armor Trim Smithing Template.png|Raiser Armor Trim
Shaper Armor Trim Smithing Template.png|Shaper Armor Trim
Host Armor Trim Smithing Template.png|Host Armor Trim
Ward Armor Trim Smithing Template.png|Ward Armor Trim
Silence Armor Trim Smithing Template.png|Silence Armor Trim
Tide Armor Trim Smithing Template.png|Tide Armor Trim
Snout Armor Trim Smithing Template.png|Snout Armor Trim
Rib Armor Trim Smithing Template.png|Rib Armor Trim
Eye Armor Trim Smithing Template.png|Eye Armor Trim
Spire Armor Trim Smithing Template.png|Spire Armor Trim
</gallery>
=== Armor trim patterns ===
<gallery>
Armor Trim Sentry (sample model).png|Sentry Armor Trim
Armor Trim Vex (sample model).png|Vex Armor Trim
Armor Trim Wild (sample model).png|Wild Armor Trim
Armor Trim Coast (sample model).png|Coast Armor Trim
Armor Trim Dune (sample model).png|Dune Armor Trim
Armor Trim Wayfinder (sample model).png|Wayfinder Armor Trim
Armor Trim Raiser (sample model).png|Raiser Armor Trim
Armor Trim Shaper (sample model).png|Shaper Armor Trim
Armor Trim Host (sample model).png|Host Armor Trim
Armor Trim Ward (sample model).png|Ward Armor Trim
Armor Trim Silence (sample model).png|Silence Armor Trim
Armor Trim Tide (sample model).png|Tide Armor Trim
Armor Trim Snout (sample model).png|Snout Armor Trim
Armor Trim Rib (sample model).png|Rib Armor Trim
Armor Trim Eye (sample model).png|Eye Armor Trim
Armor Trim Spire (sample model).png|Spire Armor Trim
</gallery>
=== Official Artwork ===
<gallery>
T&T Thumbnail.jpg|[[Sunny]] wearing amethyst armor trims.
Warden Chasing Alex with Silence Trim Pixel Art.png|A [[warden]] chasing Alex holding the silence armor trim.
Alex Trimming Armor in Smithing Table Pixel Art.png|Alex adding the silence armor trim and amethyst on iron armor.
Alex Wearing Iron Armor with Amethyst Pixel Art.jpg|Alex wearing the trimmed iron armor.
File:Live2023-01.jpeg|Noor working on trimmed iron armor.
</gallery>
=== Screenshots ===
<gallery>
Kingbdogz Armor Trim 1.jpg|Redstone trims on diamond armor.
Kingbdogz Armor Trim 2.jpg|Gold trims on netherite armor.
Too Many Trims.jpg|A large amount of armor trims.
Kingbdogz Armor Trim 3.jpg|Gold on netherite.
Kingbdogz Armor Trim 4.jpg|Diamond on diamond.
New Armor Trims in 23W12A.jpg|<ref>{{Tweet|kingbdogz|1638580472962850831|new trims got the drip The new "Silence" armor trim to the left is now the hardest trim to get, with only a 1% chance per chest to spawn in Ancient Cities. Definitely gonna be a challenge to get!|March 22, 2023}}</ref>
Emerald Armor.png|Emerald on gold.
Xilefian Armor Trims 1.png|[[Xilefian]] showing how armor trims work.
Xilefian Armor Trims 2.png|[[Xilefian]] showing how armor trims work.
Xilefian Armor Trims 3.png|[[Xilefian]] showing how armor trims work.
Armor Trims On Netherite Armors.png|A display of all eleven (before [[Java Edition 23w12a]]) armor trims and ten colors on netherite armors.
Armor Trim Showcase.png|A display of all eleven (before [[Java Edition 23w12a]]) armor trims, on netherite armor using emerald as the trim material.
Armor Trim Colors.png|A display of all ten armor trim colors, using the ward trim on a netherite helmet.
Silence Armor Trim on All Armors.png|A display of all ten colors of the silence armor trim on all armors.
Image 2023-06-07 154100087.png|A screenshot of every armor trim in every color(besides quartz) on leather armor.
Armor Trim Friends.jpg|Official screenshot of [[Alex]] and [[Zuri]] wearing armor trims.
LadyAgnes Armor Trims.jpg|Copper trims on netherite armor.
Trim Lineup.jpg
Fancy Delta.jpg|[[Kai]] wearing trimmed armor in a [[Basalt Delta]].
Trims & Pots.jpg
Noor Gold Armor Trim .jpeg
Noor Diamond Armor Trim.jpeg
Noor Netherite Armor Trim.jpeg
Noor Iron Armor Trim.jpeg
</gallery>
== References ==
{{Reflist}}
{{Items}}
[[Category:Bedrock Edition]]
[[Category:Non-renewable resources]]
[[de:Schmiedevorlage]]
[[es:Molde de herrería]]
[[fr:Modèle de forge]]
[[ja:鍛冶型]]
[[pl:Szablon kowalski]]
[[pt:Molde de ferraria]]
[[ru:Кузнечный шаблон]]
[[uk:Ковальський шаблон]]
[[zh:锻造模板]]</li></ul> | build 1 | Added Jungle, Acacia, and Dark Oak variants for Bark blocks. | |||
| Pocket Edition | |||||
1.0.0{{Extension DPL}}<ul><li>[[End Crystal|End Crystal]]<br/>{{ItemEntity
|image=End Crystal.gif
|imagesize=150px
|invimage=End Crystal
|renewable=Yes
|stackable=Yes (64)
|rarity=Rare
|drops=None
|size=
Height: 2 Blocks<br>Width: 2 Blocks
}}
An '''end crystal''' is an [[entity]] that can be [[Crafting|crafted]] or found on [[the End]]'s main island, where it heals the [[Ender Dragon|ender dragon]]. It can only be placed on [[obsidian]] or [[bedrock]] and [[Explosion|explodes]] instantly when attacked or damaged in most ways.
== Spawning ==
=== Natural generation ===
An end crystal is found atop each [[obsidian pillar]] on the central island of the End, each on top of a piece of [[bedrock]]. There are 10 end crystals in total, of which two are protected in "cages" of [[iron bars]]. All end crystals respawn one after another as the respawning process of the [[ender dragon]] starts.
== Obtaining ==
=== Crafting ===
{{Crafting
|A1=Glass
|B1=Glass
|C1=Glass
|A2=Glass
|B2=Eye of Ender
|C2=Glass
|A3=Glass
|B3=Ghast Tear
|C3=Glass
|Output= End Crystal
|type= Decoration block
}}
== Usage ==
=== Healing the ender dragon ===
Their primary purpose is to recharge the health of the ender dragon, who gains a charge from the nearest crystal within a cuboid extending 32 blocks from the dragon in all directions. The dragon is healed {{hp|1}} each half-second. If multiple ender dragons are spawned, an end crystal can affect multiple dragons at the same time. The healing beam is neither obstructed nor is its power diminished by entities or blocks.
=== Respawning the ender dragon ===
[[File:End Crystals on the Exit portal.png|right|thumb|How to arrange end crystals on the exit portal to respawn the ender dragon.]]
As items, end crystals may be placed on bedrock and [[obsidian]], if the two blocks above the bedrock or obsidian block are air or replaceable blocks and no other entities intersect the area. When an end crystal is placed in [[the End]], a [[fire]] block is created at the end crystal location. If four are placed on the end [[exit portal]], one on each of the flat sides, the crystals respawn the original end crystals on the obsidian pillars, as well as resurrect the dragon itself, before exploding. The top of each pillar also explodes, destroying any player-placed blocks. This happens even if TNT explosions are turned off in settings.
If the exit portal is ever broken for any reason, end crystals can still be placed on obsidian blocks with the same location as the exit portal.
=== Explosions ===
End crystals explode when attacked or damaged in most ways, even by attacks that normally do zero damage. They are not affected by exploding fireworks, and if damaged by an explosion, they disappear instead of exploding.{{Only|Java}}<ref>{{bug|MC-118429||End crystals don't explode when destroyed by nearby explosions}}</ref> The end crystal's [[explosion]] has an [[Explosion#Explosion strength|explosion strength]] of 6, the same as a [[charged creeper]]. The end crystal's fire often remains after the crystal explodes. Any ender dragon charging from the crystal when it is destroyed takes {{hp|10}} damage.
{{IN|java}}, an end crystal's explosion can be [[blocking|blocked]] by a [[shield]].
Although an ender dragon damages most blocks and entities in its path, it cannot destroy end crystals simply by going near them.
Placing [[water]] on the end crystal will neutralize the blast effect, but not the [[damage]] or knockback.
End crystals with obsidian or bedrock below them will not damage blocks below them when they explode.
{{IN|bedrock}}, having the game rule {{cd|mobGriefing}} to {{cd|false}} will prevent the End Crystal from destroying any blocks. While {{in|java}} the same game rule will not prevent the End Crystal from destroying any blocks.
=== Beams ===
The end crystal naturally shoots a beam at the ender dragon and heals it when the dragon is within range. This beam can be manually created using the command {{cmd|data merge entity @e[type{{=}}end_crystal,limit{{=}}1] {BeamTarget:{X:0, Y:0, Z:0<nowiki>}}}}. The beam can be pointed in any direction, allowing it to mark locations or objects.
=== Properties ===
[[File:End Crystal (Slateless).gif|thumb|A base-less end crystal.]]
End crystals are of two kinds: the ones with a base beneath them are created either by game mechanism or by the {{cmd|summon}} command; while the base-less ones are created by players by manually placing the crystal items on top of [[obsidian]] or [[bedrock]].
The base appears to be made of bedrock, with a crystal hovering over it. While in the End, a crystal continually generates fire at its current position, one block above the base (directly on top of the block the base is embedded in), replacing any other block at that location. This fire is capable of spreading.
The end crystal entity is not solid and can be walked through freely. End crystals can be pushed by [[piston]]s, but they explode if moved while on fire. Because fire is checked only when an entity moves, end crystals do not normally take damage from their own fire unless moved.
== Sounds ==
{{edition|java}}:
{{Sound table
|sound=Explosion1.ogg
|sound2=Explosion2.ogg
|sound3=Explosion3.ogg
|sound4=Explosion4.ogg
|subtitle=Explosion
|source=block
|description=When an end crystal explodes
|id=entity.generic.explode
|translationkey=subtitles.entity.generic.explode
|volume=4.0
|pitch=0.56-0.84
|distance=16
|foot=1}}
{{edition|bedrock}}:
{{Sound table
|type=bedrock
|sound=Explosion1.ogg
|sound2=Explosion2.ogg
|sound3=Explosion3.ogg
|sound4=Explosion4.ogg
|source=block
|description=When an end crystal explodes
|id=random.explode
|volume=4.0
|pitch=1.0
|foot=1}}
== Data values ==
=== ID ===
{{edition|java}}:
{{ID table
|edition=java
|firstcolumnname=Item
|showforms=y
|generatetranslationkeys=y
|displayname=End Crystal
|spritetype=item
|nameid=end_crystal
|form=item
|foot=1}}
{{ID table
|edition=java
|firstcolumnname=Entity
|generatetranslationkeys=y
|displayname=End Crystal
|spritetype=entity
|nameid=end_crystal
|foot=1}}
{{edition|bedrock}}:
{{ID table
|edition=bedrock
|firstcolumnname=Item
|shownumericids=y
|showforms=y
|notshowbeitemforms=y
|generatetranslationkeys=y
|displayname=End Crystal
|spritetype=item
|nameid=end_crystal
|id=637
|form=item
|foot=1}}
{{ID table
|edition=bedrock
|firstcolumnname=Entity
|shownumericids=y
|generatetranslationkeys=y
|displayname=End Crystal
|spritetype=entity
|nameid=ender_crystal
|id=71
|foot=1}}
=== Entity data ===
End crystals have entity data that define various properties of the entity.
{{el|java}}:
{{main|Entity format}}
{{/ED}}
{{el|bedrock}}:
: See [[Bedrock Edition level format/Entity format]].
== Achievements ==
{{load achievements|The End... Again...}}
== Advancements ==
{{load advancements|The End... Again...}}
== History ==
[[File:End Crystal 19w38a.gif|thumb|Java Edition 19w38a]]
{{History|java}}
{{History||1.0.0|snap=Beta 1.9 Prerelease 6|[[File:End Crystal JE1 BE1.png|32px]] Added ender crystals.}}
{{History||1.2.1|snap=12w04a|Previously, ender crystals could be spawned using [[spawn egg]]s with ID 200 (in a [[server]], these were created using {{cmd|give 383 1 200}}). The spawned crystal would be positioned where a natural crystal would be if there was a bedrock block at the location. It was still possible until 1.9 to obtain an end crystal spawn egg, but it would not spawn anything.}}
{{History||1.7.2|snap=13w36a|Ender crystals can now be spawned with the {{cmd|summon}} command.}}
{{History||1.8|snap=14w06a|Ender crystals now generate one [[block]] lower. The fire they generate destroys the [[bedrock]] block that is supposed to be underneath (see {{bug|MC-47526}}).}}
{{History||1.9|snap=15w31a|Ender crystals generate at the correct Y-level again.}}
{{History|||snap=15w33c|Respawning the ender dragon now also respawns the ender crystals on the obsidian pillars.
|Ender crystals now have a compound BeamTarget tag that hold the X, Y, Z block location the beam points to.}}
{{History|||snap=15w44a|"Ender crystals" have been renamed to "end crystals".
|[[File:End Crystal (item) JE1 BE1.png|32px]] End crystals can now be obtained as an item.
|End crystals now drop from [[skeleton trap]] horses and can be placed only on [[obsidian]] or bedrock. Placing several of them atop the end exit portal respawns the ender dragon.}}
{{History|||snap=15w44b|End crystals are no longer dropped by [[skeleton horse]]s.
|Added crafting recipe for end crystals, making end crystals [[renewable]].}}
{{History|||snap=15w49a|End crystals now require [[air]]/replaceable [[block]]s and lack of [[entity|entities]] for placement.}}
{{History|||snap=15w51a|End crystals can no longer be placed in [[Adventure mode]].}}
{{History||1.11|snap=16w32a|The entity ID has been changed from <code>EnderCrystal</code> to <code>ender_crystal</code>.}}
{{History||1.13|snap=17w47a|Prior to [[1.13/Flattening|''The Flattening'']], this [[item]]'s numeral ID was 426.}}
{{History|||snap=18w20b|Renamed to "End Crystal".}}
{{History|||snap=pre5|Entity ID has been changed to <code>end_crystal</code>.}}
{{History||1.14|snap=18w43a|[[File:End Crystal JE2.png|32px]][[File:End Crystal (item) JE2 BE2.png|32px]] The textures of end crystals and the end crystal [[item]] have been changed.}}
{{History||1.19.3|snap=22w43a|End crystal explosions can now be [[blocking|blocked]] by [[shield]]s.<ref>{{bug|MC-188247|||Fixed}}</ref>}}
{{History|pocket}}
{{History||1.0.0|snap=alpha 0.17.0.1|[[File:End Crystal JE1 BE1.png|32px]][[File:End Crystal (item) JE1 BE1.png|32px]] Added end crystals.}}
{{History|bedrock}}
{{History||1.6.0|snap=?|[[File:End Crystal BE2.png|32px]] [[File:End Crystal BE2.gif|32px]] The model of the end crystals has been changed. It has now two cubes instead of three.}}
{{History||1.10.0|snap=beta 1.10.0.3|[[File:End Crystal BE3.png|32px]][[File:End Crystal (item) JE2 BE2.png|32px]] The textures of end crystals and the end crystal item have been changed.}}
{{History||1.17.10|snap=beta 1.17.10.20|[[File:End Crystal JE2.png|32px]] The model of the end crystals has been changed to have three cubes again, and to match ''Java Edition''.}}
{{History||1.19.70|snap=beta 1.19.70.20|Increased end crystal collision box size to match ''Java Edition''.|End crystals with obsidian or bedrock below them now will not damage blocks below them when they explode.}}
{{History|console}}
{{History||xbox=TU9|xbone=CU1|ps=1.0|wiiu=Patch 1|[[File:End Crystal JE1 BE1.png|32px]] Added ender crystals.}}
{{History||xbox=TU31|xbone=CU19|ps=1.22|wiiu=Patch 3|Ender crystals now generate one block lower. The fire they generate destroys the [[bedrock]] block that is supposed to be underneath.}}
{{History||xbox=TU46|xbone=CU36|ps=1.38|wiiu=Patch 15|"Ender crystals" have been renamed to "end crystals".
|[[File:End Crystal (item) JE1 BE1.png|32px]] End crystals can now be obtained as an [[item]].
|End crystals now drop from [[skeleton trap]] horses and can be placed only on [[obsidian]] or bedrock. Placing several of them atop the [[end portal|end exit portal]] respawns the ender dragon.
|Added a crafting recipe for end crystals.}}
{{History||xbox=none|xbone=none|ps=1.90|wiiu=none|switch=none|[[File:End Crystal JE2.png|32px]][[File:End Crystal (item) JE2 BE2.png|32px]] The textures of end crystals and the end crystal item have been changed.}}
{{History|new 3ds}}
{{History||1.7.10|[[File:End Crystal JE1 BE1.png|32px]][[File:End Crystal (item) JE1 BE1.png|32px]] Added end crystals.}}
{{History|foot}}
== Issues ==
{{issue list}}
== Trivia ==
* According to [[Jens Bergensten|Jeb]], the reason behind the current crafting recipe using glass as opposed to [[Chorus Fruit|chorus fruit]] or any materials introduced in [[Java Edition 1.9|1.9]] is as a means for players to craft end crystals in older worlds that the dragon has already been killed in.<ref>{{tweet|jeb_|667000226524372992|The problem is that you need to be able to craft the crystals on worlds in which the dragon has been destroyed already|November 18, 2015}}</ref>
* A historical rendition of the [[beacon]] block featured an animated entity within it, which resembled a yellow miniaturized end crystal. The bedrock platform of the end crystal entity would also render below the beacon, though this would normally be hidden within the block below.
* Using a [[piston]] to push an end crystal's fire into an end portal block deletes the end portal block. However, natural portal blocks regenerate if the end crystal is moved.
== Gallery ==
<gallery>
End Crystal Usage.png|Using end crystals to respawn the ender dragon.
Crystal Link.png|An ender dragon being hit with the "healing beam" of an end crystal.
Ender Crystal.png|An end crystal.
EnderCrystalOverworld.png|An end crystal in the Overworld spawned using {{cmd|summon}} {{code|end_crystal}}.
Ender Dragon Revival.png|End crystals respawning the ender dragon.
CagedEnderCrystal.png|A caged end crystal.
Respawn ender dragon.png|A [[player]] trying to respawn the ender dragon.
End Crystal (item).gif|An animation of the item of the end crystal.
</gallery>
== References ==
{{reflist}}
{{Entities}}
{{Items}}
[[de:Enderkristall]]
[[el:Κρύσταλλος του Ender]]
[[es:Cristal del End]]
[[fr:Cristal de l'End]]
[[ja:エンドクリスタル]]
[[ko:엔드 수정]]
[[nl:Endkristal]]
[[pl:Kryształ Endu]]
[[pt:Cristal do End]]
[[ru:Кристалл Края]]
[[th:คริสตัลเอนด์]]
[[uk:Кристал Енду]]
[[zh:末影水晶]]</li><li>[[Cooked Porkchop|Cooked Porkchop]]<br/>{{Item
| title = Cooked Porkchop
| image = Cooked Porkchop.png
| renewable = Yes
| heals = {{hunger|8}}
| stackable = Yes (64)
}}
'''Cooked porkchop''' is a [[food]] [[item]] that can be eaten by the [[player]].
== Obtaining ==
{{see also|Tutorials/Animal farming|title1=Animal farming}}
Cooked porkchops can be obtained by cooking [[raw porkchop]]s or by [[trading]] with butchers, and is a [[drops|drop]] from [[pig]]s and [[hoglin]]s that die while on [[fire]].
=== Mob loot ===
==== Pigs ====
Adult [[pig]]s drop 1–3 cooked porkchop if killed while on fire. The maximum amount is increased by 1 per level of [[Looting]], for a maximum of 1-6 with Looting III.
==== Hoglins ====
Adult [[hoglin]]s drop 2–4 cooked porkchop if killed while on fire. The maximum amount is increased by 1 per level of Looting, for a maximum of 7 with Looting III.
=== Cooking ===
[[Raw porkchop]] can be cooked in a [[furnace]], [[smoker]], or [[campfire]]. Each piece of cooked porkchop removed from a furnace output slot gives 0.35 [[experience]] (22.4 experience per stack).
{{Smelting
|Raw Porkchop
|Cooked Porkchop
|0,35
}}
=== Trading ===
{{IN|java}}, apprentice-level butcher [[villager]]s have a {{frac|2|3}} chance of selling 5 cooked porkchop for 1 [[emerald]].
Butcher villagers may give players with the [[Hero of the Village]] effect a cooked porkchop.{{only|java}}
{{IN|bedrock}}, apprentice-level butcher villagers have a 25% chance to sell 5 cooked porkchop for 1 emerald.
=== Chest loot ===
{{LootChestItem|cooked-porkchop}}
== Usage ==
=== Food ===
{{see also|Tutorials/Hunger management|title1=Hunger management}}
To eat cooked porkchop, press and hold {{control|use}} while it is selected in the hotbar. Eating one restores {{hunger|8}} [[hunger]] and 12.8 [[Hunger#Mechanics|saturation]].
=== Wolves ===
Cooked porkchops can be used to [[breeding|breed]] and heal tamed [[wolf|wolves]], lead them around, and make baby tamed wolves grow up faster by 10% of the remaining time.
=== Piglins ===
[[Piglin]]s pick up any cooked porkchops in their [[item (entity)|item]] form. However, they do not eat it.
==Sounds==
{{Sound table/Entity/Food}}
== Data values ==
=== ID ===
{{edition|java}}:
{{ID table
|edition=java
|showitemtags=y
|showforms=y
|generatetranslationkeys=y
|displayname=Cooked Porkchop
|spritetype=item
|nameid=cooked_porkchop
|itemtags=piglin_food
|form=item
|foot=1}}
{{edition|bedrock}}:
{{ID table
|edition=bedrock
|shownumericids=y
|showforms=y
|notshowbeitemforms=y
|generatetranslationkeys=y
|displayname=Cooked Porkchop
|spritetype=item
|nameid=cooked_porkchop
|id=263
|form=item
|foot=1}}
== Achievements ==
{{load achievements|Pork Chop}}
== Advancements ==
{{load advancements|Husbandry;A Balanced Diet}}
== History ==
{{History|java indev}}
{{History||20100219|[[File:Cooked Porkchop JE1.png|32px]] Added cooked porkchops.
|Cooked porkchops restore {{hp|8}} and do not stack in the [[inventory]].
|Created by cooking [[raw porkchops]] in the inventory.}}
{{History|java alpha}}
{{History||v1.2.0|snap=preview|[[Zombie pigmen]] now [[drops|drop]] 0-2 cooked porkchops upon [[death]].}}
{{History|java beta}}
{{History||1.5|[[Pig]]s now [[drops|drop]] cooked porkchops when killed with [[fire]].}}
{{History||1.8|snap=Pre-release|[[File:Cooked Porkchop JE2 BE1.png|32px]] The texture of cooked porkchops has been changed to avoid confusion with [[steak]].
|Cooked porkchops are now stackable to 64 and restore [[hunger]] instead of [[health]].
|Cooked porkchops now restore {{hunger|8}} to the food bar.
|Cooked porkchops are no longer dropped by [[zombie pigmen]] upon their [[death]].}}
{{History|java}}
{{History||1.2.1|snap=12w03a|Cooked porkchop can now be used to breed wolves.}}
{{History||1.3.1|snap=12w21a|Butcher [[villager]]s now [[trading|sell]] 6–7 cooked porkchops for 1 [[emerald]].}}
{{History||1.4.2|snap=12w37a|[[File:Cooked Porkchop JE3 BE2.png|32px]] The texture of cooked porkchops has been changed, so that it no longer has a dark outline.}}
{{History||1.8|snap=14w02a|Butcher [[villager]]s now [[trading|sell]] 5–7 cooked porkchops for 1 [[emerald]].}}
{{History||1.13|snap=17w47a|Prior to [[1.13/Flattening|''The Flattening'']], this [[item]]'s numeral ID was 320.}}
{{History||1.14|snap=18w43a|[[File:Cooked Porkchop JE4 BE3.png|32px]] The texture of cooked porkchops has been changed.}}
{{History|||snap=19w13a|Butcher villagers now give cooked porkchops to players under the [[Hero of the Village]] effect.}}
{{History||1.16|snap=20w07a|[[Hoglin]]s now drop cooked porkchops if killed while on fire.}}
{{History|||snap=20w16a|Cooked porkchops can now be found in hoglin stable chests in [[bastion remnant]]s.}}
{{History||1.16.2|snap=20w30a|Cooked porkchops can now be found in generic bastion remnant chests as well.}}
{{History|pocket alpha}}
{{History||v0.4.0|[[File:Cooked Porkchop JE2 BE1.png|32px]] Added cooked porkchops.}}
{{History||v0.5.0|Cooked porkchops now restore {{hp|8}} instead of {{hp|4}}.}}
{{History||v0.8.0|snap=build 1|[[File:Cooked Porkchop JE3 BE2.png|32px]] The texture of cooked porkchops has been changed, so that it no longer has a dark outline.}}
{{History||v0.12.1|snap=build 1|Cooked porkchops now restore [[hunger]] instead of [[health]].}}
{{History|pocket}}
{{History||1.0.4|snap=alpha 1.0.4.0|Butcher [[villager]]s now [[trading|sell]] 5–7 cooked porkchops for 1 [[emerald]].}}
{{History|bedrock}}
{{History||1.10.0|snap=beta 1.10.0.3|[[File:Cooked Porkchop JE4 BE3.png|32px]] The texture of cooked porkchops has been changed.}}
{{History||1.11.0|snap=beta 1.11.0.4|[[Trading]] has been changed, butcher [[villager]]s now have a 25% chance to [[trading|sell]] 4 cooked porkchops as part of their second-tier [[trading|trade]].}}
{{History||1.16.0|snap=beta 1.16.0.57|Trading has been changed, apprentice butcher [[villager]]s now have a 25% chance to [[trading|sell]] 5 cooked porkchops instead of 3.}}
{{History|console}}
{{History||xbox=TU1|xbone=CU1|ps=1.0|wiiu=Patch 1|[[File:Cooked Porkchop JE1.png|32px]] Added cooked porkchops.}}
{{History||xbox=TU3|[[File:Cooked Porkchop JE2 BE1.png|32px]] The texture of cooked porkchops has been changed to be consistent with [[Java Edition]].}}
{{History||xbox=TU5|Cooked porkchops are now stackable to 64.
|Cooked porkchops now fill [[hunger]] instead of [[health]].}}
{{History||xbox=TU12|[[File:Cooked Porkchop JE3 BE2.png|32px]] The texture of cooked porkchops has been changed, so that it no longer has a dark outline.}}
{{History|PS4}}
{{History||1.90|[[File:Cooked Porkchop JE4 BE3.png|32px]] The texture of cooked porkchops has been changed.}}
{{History|new3DS}}
{{History||0.1.0|[[File:Cooked Porkchop JE3 BE2.png|32px]] Added cooked porkchops.}}
{{History|foot}}
== Issues ==
{{issue list}}
== External Links ==
*[https://www.minecraft.net/en-us/article/taking-inventory--porkchop Taking Inventory: Porkchop] – Minecraft.net on February 13, 2020
{{Items}}
[[Category:Food]]
[[Category:Renewable resources]]
[[cs:Pečená kotleta]]
[[de:Gebratenes Schweinefleisch]]
[[es:Chuleta de cerdo cocinada]]
[[fr:Côtelette de porc cuite]]
[[hu:Sült sertésszelet]]
[[ja:焼き豚]]
[[nl:Gebraden varkensvlees]]
[[pl:Pieczony schab]]
[[pt:Costeleta de porco assada]]
[[ru:Жареная свинина]]
[[uk:Смажена свинина]]
[[zh:熟猪排]]</li></ul></nowiki> | alpha 0.17.0.1 | Due to the addition of commands, bark blocks can now be placed using /setblock ~ ~ ~ log 12, without the need for an inventory editor. | |||
| Bedrock Edition | |||||
1.4.0{{Extension DPL}}<ul><li>[[Glow Stick|Glow Stick]]<br/>{{stub}}
{{education feature}}
{{Exclusive|Bedrock|Education}}
{{Item
| image = White Glow Stick.png
| extratext = View [[#Gallery|all renders]]
| renewable = No
| durability = 95
| stackable = No
}}
'''Glow sticks''' are [[Chemistry Update|chemistry]]-related [[item]]s, which can be lit up in the player's hand for a limited time.
== Obtaining ==
{{iN|be}}, glow sticks cannot be obtained by the {{cmd|give}} command. They also cannot be obtained in [[Survival]]. Cheats must be enabled to obtain glow sticks in Survival mode, or in [[Minecraft Education]].
=== Crafting ===
{{Crafting
|showdescription=1
|ingredients=[[Polyethylene]] +<br>[[Hydrogen Peroxide]] +<br>Matching [[Dye]] +<br>[[Luminol]]
|A1= Polyethylene
|B1= Hydrogen Peroxide
|C1= Polyethylene
|A2= Polyethylene
|B2= White Dye; Orange Dye; Magenta Dye; Light Blue Dye; Yellow Dye; Lime Dye; Pink Dye; Gray Dye; Cyan Dye; Purple Dye; Blue Dye; Brown Dye; Green Dye; Red Dye
|C2= Polyethylene
|A3= Polyethylene
|B3= Luminol
|C3= Polyethylene
|Output= Matching Glow Stick
|description={{only|bedrock|education}}
|type= Miscellaneous
}}
<div style="display:none">
<!--
This is so the pre-Village & Pillage dyes can have dye-related crafting recipes show on their respective pages.
They don't need to be displayed on this page because they already intuitively list "Any Matching Dye".
-->
{{Crafting
|showdescription=1
|ingredients=[[Polyethylene]] +<br>[[Hydrogen Peroxide]] +<br>Matching [[Dye]] +<br>[[Luminol]]
|A1= Polyethylene
|B1= Hydrogen Peroxide
|C1= Polyethylene
|A2= Polyethylene
|B2= Bone Meal; Lapis Lazuli; Cocoa Beans
|C2= Polyethylene
|A3= Polyethylene
|B3= Luminol
|C3= Polyethylene
|Output= White Glow Stick; Blue Glow Stick; Brown Glow Stick
|description={{only|bedrock|Education}}
|type= Miscellaneous
}}
</div>
== Usage ==
While equipped, [[player]]s can {{control|use}} glow sticks to shake them, causing them to appear bright regardless of the [[light]] level. This is only an aesthetic change, as no light is emitted to the surrounding area. A [[particle]] effect is visible until the [[durability]] runs out. The glow stick's durability depletes while lit{{Info needed}}, in both Survival and Creative modes.
== Sounds ==
{{Sound table
|type=bedrock
|sound=Flint and steel click.ogg
|source=block
|description=While a glowstick is being activated
|id=fire.ignite
|volume=1.0
|pitch=0.5/0.7
|foot=1}}
== Data values ==
=== ID ===
{{ID table
|edition=bedrock
|shownumericids=y
|showforms=y
|notshowbeitemforms=y
|generatetranslationkeys=y
|displayname=Glow Stick
|spritename=glow-sticks
|spritetype=item
|nameid=glow_stick
|id=601
|form=item
|translationkey=item.glow_stick.black.name,item.glow_stick.red.name,item.glow_stick.green.name,item.glow_stick.brown.name,item.glow_stick.blue.name,item.glow_stick.purple.name,item.glow_stick.cyan.name,item.glow_stick.silver.name,item.glow_stick.gray.name,item.glow_stick.pink.name,item.glow_stick.lime.name,item.glow_stick.yellow.name,item.glow_stick.lightBlue.name,item.glow_stick.magenta.name,item.glow_stick.orange.name,item.glow_stick.white.name
|foot=1}}
===Metadata===
{{/DV}}
===Item data===
See [[Bedrock Edition level format/Item format]].
== History ==
{{History|bedrock}}
{{History||1.4.0|snap=beta 1.2.20.1|[[File:White Glow Stick.png|32px]] [[File:Orange Glow Stick.png|32px]] [[File:Magenta Glow Stick.png|32px]] [[File:Light Blue Glow Stick.png|32px]] [[File:Yellow Glow Stick.png|32px]] [[File:Lime Glow Stick.png|32px]] [[File:Pink Glow Stick.png|32px]] [[File:Gray Glow Stick.png|32px]] [[File:Cyan Glow Stick.png|32px]] [[File:Purple Glow Stick.png|32px]] [[File:Blue Glow Stick.png|32px]] [[File:Brown Glow Stick.png|32px]] [[File:Green Glow Stick.png|32px]] [[File:Red Glow Stick.png|32px]] Added glow sticks.}}
{{History||1.14.60|snap=?|Making a glow stick results in an edible item called {{code|item.glow_stick.black.name}}.}}
{{History||?|Making a glow stick results in correct items again.
|Making a glow stick with dye has been made an upgrade{{info needed|what is this supposed to mean?}}
|Putting 2 glow sticks in a Crafting Table now outputs a correct glow stick.}}
{{History||1.17.0|snap=?|[[File:Missing Glow Stick.png|32px]] Two black glow sticks, using the [[missing texture]] if Education Edition is disabled, now generate in fake end portal rooms in [[mansion]]s instead of [[ender pearl]]s.}}
{{h||1.18.0|snap=beta 1.18.0.21|Glow sticks no longer generate in [[woodland mansion]]s.}}
{{History|education}}
{{History||1.0.27|[[File:White Glow Stick.png|32px]] [[File:Orange Glow Stick.png|32px]] [[File:Magenta Glow Stick.png|32px]] [[File:Light Blue Glow Stick.png|32px]] [[File:Yellow Glow Stick.png|32px]] [[File:Lime Glow Stick.png|32px]] [[File:Pink Glow Stick.png|32px]] [[File:Gray Glow Stick.png|32px]] [[File:Cyan Glow Stick.png|32px]] [[File:Purple Glow Stick.png|32px]] [[File:Blue Glow Stick.png|32px]] [[File:Brown Glow Stick.png|32px]] [[File:Green Glow Stick.png|32px]] [[File:Red Glow Stick.png|32px]] Added glow sticks.}}
{{History|foot}}
== Gallery ==
<gallery>
White Glow Stick.png|
Orange Glow Stick.png|
Magenta Glow Stick.png|
Light Blue Glow Stick.png|
Yellow Glow Stick.png|
Lime Glow Stick.png|
Pink Glow Stick.png|
Gray Glow Stick.png|
Cyan Glow Stick.png|
Purple Glow Stick.png|
Blue Glow Stick.png|
Brown Glow Stick.png|
Green Glow Stick.png|
Red Glow Stick.png|
</gallery>
== Trivia ==
* The glowing reaction of [[Wikipedia:Luminol|Luminol]] during oxidation exists in real life. It is used for detecting blood in crime scenes.
* Players cannot enchant glow sticks with Unbreaking or Mending, despite the items having [[durability]].
* The black and light gray glow sticks use the same texture as the red glow stick.{{verify|It seems they use the missing texture instead. Was this the case beforehand, and they only started using the missing texture later?}}
== Issues ==
{{issue list}}
{{items}}
{{Education Edition}}
[[Category:Non-renewable resources]]
[[Category:Education Edition items]]
[[de:Knicklicht]]
[[ja:ケミカルライト]]
[[ko:발광봉]]
[[pt:Graveto Brilhante]]
[[ru:Химический источник света]]
[[zh:荧光棒]]</li><li>[[Banner|Banner]]<br/>{{for|the image|Banner (image)}}
{{Block
| image = <gallery>
White Banner.gif | Banner
White Wall Banner.png | Wall Banner
</gallery>
| rarity = Common
| transparent = Yes
| light = No
| tool = axe
| renewable = Yes
| stackable = Yes (16)
| flammable = No
| lavasusceptible = Yes
}}
'''Banners''' are tall decorative [[blocks]], featuring a field that is highly customizable using [[dye]]s and [[banner pattern]]s.
== Obtaining ==
=== Breaking ===
Banners can be broken with or without a [[tool]], but an [[axe]] is fastest.
{{breaking row|horizontal=1|Banners|Axe}}
A banner also breaks and drops itself as an [[Item (entity)|item]] if the block the banner is attached to is moved, removed, or destroyed.
=== Natural generation ===
{| class="wikitable collapsible"
! Name !! Location !! Appearance !! Design
|-
! Magenta Banner
| Outside of [[end cities]].
| style="text-align: center" | [[File:End City Banner.png|32px]]
| Magenta Banner
* Black Inverted Chevron
* Black Chevron
|-
! Gray Banner
| In banner room in [[woodland mansion]]s.
| style="text-align: center" | [[File:Gray Banner.png|32px]]
| Gray Banner
|-
! Light Gray Banner
| In master bedroom in [[woodland mansion]]s.
| style="text-align: center" | [[File:Master Bedroom Banner.png|32px]]
| Light Gray Banner
* White Flower Charge
|- id="Ominous Banner"
! Ominous Banner{{only|java|short=1}}
Illager Banner{{only|bedrock|education|short=1}}
| Carried by [[raid captain]]s.<br> Located in [[pillager outpost]]s.
{{IN|java}}, the ominous banner cannot be crafted or copied because the design uses 8 patterns.
{{IN|bedrock}}, the illager banner is a separate type that cannot be placed in a loom.
| style="text-align: center" | [[File:Ominous Banner.png|32px]]<br/>[[File:Ominous Banner BE.png|32px]]
| White Banner{{only|java|short=1}}
* Cyan Lozenge
* Light Gray Base
* Gray Pale
* Light Gray Bordure
* Black Fess
* Light Gray Per Fess
* Light Gray Roundel
* Black Bordure
Separate type entirely{{only|bedrock|short=1}}
|-
! Brown Banner
| Outside of some houses, meeting points, and pillar fountains in savanna [[village]]s.
| style="text-align: center" | [[File:Brown Banner.png|32px]]
| Brown Banner
|-
! Black Banner
| In altar room in [[woodland mansions]].
| style="text-align: center" | [[File:Black Banner.png|32px]]
| Black Banner
|}
=== Crafting ===
Banners can be crafted from six [[wool]] and a [[stick]] in a pattern resembling a [[sign]].
{{Crafting
|head=1
|showdescription=1
|A1=Matching Wool |B1=Matching Wool |C1=Matching Wool
|A2=Matching Wool |B2=Matching Wool |C2=Matching Wool
|B3=Stick
|Output=Matching Banner
|Olink=Banner
|type=Decoration block
|description=Once the banner is crafted, its base color cannot be changed.{{only|java}}
}}
{{Crafting
|showdescription=1
|Any Banner
|Bleach
|Output=White Banner
|type=Decoration block
|description=Bleach can be used to remove the color of a banner, resulting in a white banner. This includes removing patterns from a white banner.{{only|bedrock|education}}
|foot=1
}}
=== Trading ===
Expert-level cartographer [[villager]]s always offer to [[trading|sell]] 1 or 2 blank banners of a random color for 3 [[emeralds]]. Expert-level shepherd villagers have a {{frac|2|7}} chance of offering the same trade.{{only|java}}
{{IN|bedrock}}, expert-level cartographer and shepherd villagers both offer to sell one of 16 blank banners for 3 emeralds as part of their trades.
=== Mob loot ===
[[Illager]]s that spawn carrying an ominous banner{{only|java|short=1}} / illager banner{{only|bedrock|education|short=1}} always drop it upon death.
== Usage ==
[[File:Standing banner with block.png|thumb|upright|Overlapping block on a banner.]]
[[File:Wall banner with block.png|thumb|upright|Overlapping on a wall mounted banner.]]
There are 16 colored blank banners, and numerous patterns each available in each of the 16 colors. A banner can feature up to 6 different patterns. The top layer of a banner (or the last pattern added) can be washed off by {{control|using}} it on a [[cauldron]] containing water.
Banners, much like signs, can be placed both on the ground facing in any direction, or on a wall. They gently sway as if affected by a breeze, regardless of dimension or location.
Banners have no collision mask as they are completely non-solid, so [[entities]] can move through them.
Other blocks (including other banners) can be placed on any edge of a banner's hitbox, which is only one block high despite the banner appearing as two blocks tall. This makes it possible to overlap another solid block on the top half of a banner for floor banners, or the bottom half of wall banners.
When a banner is placed on the side of a block, its position is set by the top block, and it is possible to place it so it appears half buried.
Banners can also be placed in [[item frame]]s, where they simply appear as their item model.
[[Water]] and [[lava]] flow around banners. {{IN|bedrock}}, banners can be [[waterlogged]].
<gallery>
File:Wall banner with water below.png| Water can be placed below wall banners
File:Water flowing around banner.png| Water flows around a banner on the ground
</gallery>
Lava can create [[fire]] in air blocks next to banners as if the banners were flammable, but the banners do not burn (and cannot be burned by other methods). Banners also cannot be moved by [[piston]]s.
If a banner is renamed on an [[anvil]], it retains its name when a pattern is added, but not when a pattern is removed.
=== Helmet ===
{{exclusive|java|section=13}}
While a banner cannot be equipped in the [[Helmet|head slot]] in [[Survival]] mode, equipping it using commands causes it to appear on top of the player. This is how [[raid captain]]s wear banners{{only|java|short=1}}.
=== Chestplate ===
{{exclusive|bedrock|section=13}}
While a banner cannot be equipped in the [[chestplate]] slot in Survival mode, equipping it using NBT editors causes it to appear on top of the player. This is how [[raid captain]]s wear banners{{only|bedrock|education|short=1}}.
<gallery>
Steve wearing White Banner.png|
Alex wearing White Banner.png|
Pillager with Ominous Banner.png|
Vindicator with Ominous Banner.png|
Evoker with Ominous Banner.png|Illusioner with Ominous Banner.png|
</gallery>
=== Crafting ingredient ===
[[Shield]]s can have patterns applied to them using banners. The shield pattern has a smaller resolution than the banner pattern, causing them to look different or offset. Banners that have more than six patterns, such as Ominous Banners or banners obtained through inventory editors, will be reduced to six patterns on the shield.
{{Crafting
|showdescription=1
|Shield
|Matching Banner; Ominous Banner
|Output=Matching Shield; Ominous Shield
|B2link=Banner
|type=Combat
|description=Applies the banner pattern to the shield. The banner is consumed.<br>The shield must have no pre-existing patterns.<br>Does not change existing durability or enchantments on the shield.
}}
=== Copying ===
Banners can be copied with a blank banner to make multiple identical banners. Banners with more than 6 patterns applied using commands cannot be copied in this manner.
{{Crafting
|showdescription=1
|Matching Banner
|Matching Banner
|Output=Matching Banner
|A2link=Banner
|B2link=Banner
|Olink=Banner
|type=Decoration block
|ignoreusage=1
|description=Copies pattern; both banners must have the same base color, and the one having a pattern copied onto it must have no preexisting pattern.
}}
=== Map marker ===
[[File:Banner marked map.png|alt=All banners marked on a map, alongside a named banner.|thumb|right|How every banner appears {{IN|java}} on a map, including named banners.]]
{{exclusive|java|section=13}}
{{IN|java}}, {{control|using}} on a standing banner with a [[map]] selected places a marker of the banner's position on the selected map, and {{control|using}} on the banner again removes the marker. Note that wall banners cannot serve as map markers. The marker has the same color as the banner's base without decorations. The marker is removed if the banner is destroyed unless the map is locked using a [[cartography table]]. If the banner is renamed, the name appears below the marker.
=== Patterns ===
{{see also|Banner/Patterns|title1=List of patterned banners}}
[[File:Spawned-in Banner.png|thumb|100px|Example of a banner with more than 6 patterns, a result of using the {{cmd|give}} command.]]
A banner may have up to six layers of patterns, which are overlaid with the last-crafted on top. A banner can have up to 16 layers of patterns with the use of commands. The total number of unique banners is approximately 2.3x10^16 (or 23 quadrillion).
Any color banner can be used; the pattern overlays the color. {{IN|java}}, a [[loom]] is used to make patterns. However, {{in|bedrock}}, the patterns can be made in a [[loom]] or a [[crafting table]].
A banner can have more than six layers of patterns through the commands <code>/[[Commands/give|give]]</code>, <code>/[[Commands/setblock|setblock]]</code> or <code>/[[Commands/fill|fill]]</code>. This only works in ''Java Edition'', as Bedrock Edition doesn't have any NBT commands. Here is an example of a mining banner with seven different patterns. There is specific codes for the [[Banner#Item data:~:text=white-,Item,-In Java Edition|colors]] and [[Banner/Patterns|patterns]] that you have to input.
<code><nowiki>/give @p white_banner{display:{Name:"\"Mining Industries Banner\""},BlockEntityTag:{Patterns:[{Pattern:"cr",Color:15},{Pattern:"bs",Color:15},{Pattern:"sc",Color:12},{Pattern:"ms",Color:0},{Pattern:"hh",Color:15},{Pattern:"bo",Color:15},{Pattern:"tts",Color:8}]}} 1</code>
{{LoadPage|Template:Banner pattern loom recipes|Loom recipes|h4}}
{{LoadPage|Banner/Banner pattern crafting recipes|Crafting recipes|h4|transcluded=1}}
=== Renaming ===
{{IN|java}}, a banner can be given a custom name that remains as the banner is placed and retrieved. The player can use an [[anvil]] to rename the banner item, or may change the <code>CustomName</code> tag using the {{cmd|data}} command on the banner block.
=== Fuel ===
Banners can be used as a fuel in [[furnace]]s, smelting 1.5 items per banner.
=== Note Blocks ===
Banners can be placed under [[note block]]s to produce "bass" sounds.
== Sounds ==
=== Generic ===
{{Sound table/Block/Wood}}
=== Unique ===
{{edition|java}}: ''None''
{{edition|bedrock}}:
{{Sound table
|type=bedrock
|sound=Water Splash Old.ogg
|source=block
|description=When all patterns are removed from a banner using a cauldron
|id=cauldron.cleanbanner
|volume=0.1
|pitch=1.0
|foot=1}}
== Data values ==
=== ID ===
{{edition|java}}:
{{ID table
|edition=java
|showblocktags=y
|showitemtags=y
|showforms=y
|generatetranslationkeys=y
|displayname=White Banner
|spritetype=block
|nameid=white_banner
|blocktags=banners, wall_post_override
|itemtags=banners
|translationkey=block.minecraft.white_banner,block.minecraft.ominous_banner
}}
{{ID table
|displayname=Orange Banner
|spritetype=block
|nameid=orange_banner
|blocktags=banners, wall_post_override
|itemtags=banners}}
{{ID table
|displayname=Magenta Banner
|spritetype=block
|nameid=magenta_banner
|blocktags=banners, wall_post_override
|itemtags=banners}}
{{ID table
|displayname=Light Blue Banner
|spritetype=block
|nameid=light_blue_banner
|blocktags=banners, wall_post_override
|itemtags=banners}}
{{ID table
|displayname=Yellow Banner
|spritetype=block
|nameid=yellow_banner
|blocktags=banners, wall_post_override
|itemtags=banners}}
{{ID table
|displayname=Lime Banner
|spritetype=block
|nameid=lime_banner
|blocktags=banners, wall_post_override
|itemtags=banners}}
{{ID table
|displayname=Pink Banner
|spritetype=block
|nameid=pink_banner
|blocktags=banners, wall_post_override
|itemtags=banners}}
{{ID table
|displayname=Gray Banner
|spritetype=block
|nameid=gray_banner
|blocktags=banners, wall_post_override
|itemtags=banners}}
{{ID table
|displayname=Light Gray Banner
|spritetype=block
|nameid=light_gray_banner
|blocktags=banners, wall_post_override
|itemtags=banners}}
{{ID table
|displayname=Cyan Banner
|spritetype=block
|nameid=cyan_banner
|blocktags=banners, wall_post_override
|itemtags=banners}}
{{ID table
|displayname=Purple Banner
|spritetype=block
|nameid=purple_banner
|blocktags=banners, wall_post_override
|itemtags=banners}}
{{ID table
|displayname=Blue Banner
|spritetype=block
|nameid=blue_banner
|blocktags=banners, wall_post_override
|itemtags=banners}}
{{ID table
|displayname=Brown Banner
|spritetype=block
|nameid=brown_banner
|blocktags=banners, wall_post_override
|itemtags=banners}}
{{ID table
|displayname=Green Banner
|spritetype=block
|nameid=green_banner
|blocktags=banners, wall_post_override
|itemtags=banners}}
{{ID table
|displayname=Red Banner
|spritetype=block
|nameid=red_banner
|blocktags=banners, wall_post_override
|itemtags=banners}}
{{ID table
|displayname=Black Banner
|spritetype=block
|nameid=black_banner
|blocktags=banners, wall_post_override
|itemtags=banners}}
{{ID table
|displayname=White Wall Banner
|spritetype=block
|nameid=white_wall_banner
|blocktags=banners, wall_post_override
|form=block
|translationkey=block.minecraft.white_banner,block.minecraft.ominous_banner}}
{{ID table
|displayname=Orange Wall Banner
|spritetype=block
|nameid=orange_wall_banner
|blocktags=banners, wall_post_override
|form=block
|translationkey=block.minecraft.orange_banner}}
{{ID table
|displayname=Magenta Wall Banner
|spritetype=block
|nameid=magenta_wall_banner
|blocktags=banners, wall_post_override
|form=block
|translationkey=block.minecraft.magenta_banner}}
{{ID table
|displayname=Light Blue Wall Banner
|spritetype=block
|nameid=light_blue_wall_banner
|blocktags=banners, wall_post_override
|form=block
|translationkey=block.minecraft.light_blue_banner}}
{{ID table
|displayname=Yellow Wall Banner
|spritetype=block
|nameid=yellow_wall_banner
|blocktags=banners, wall_post_override
|form=block
|translationkey=block.minecraft.yellow_banner}}
{{ID table
|displayname=Lime Wall Banner
|spritetype=block
|nameid=lime_wall_banner
|blocktags=banners, wall_post_override
|form=block
|translationkey=block.minecraft.lime_banner}}
{{ID table
|displayname=Pink Wall Banner
|spritetype=block
|nameid=pink_wall_banner
|blocktags=banners, wall_post_override
|form=block
|translationkey=block.minecraft.pink_banner}}
{{ID table
|displayname=Gray Wall Banner
|spritetype=block
|nameid=gray_wall_banner
|blocktags=banners, wall_post_override
|form=block
|translationkey=block.minecraft.gray_banner}}
{{ID table
|displayname=Light Gray Wall Banner
|spritetype=block
|nameid=light_gray_wall_banner
|blocktags=banners, wall_post_override
|form=block
|translationkey=block.minecraft.light_gray_banner}}
{{ID table
|displayname=Cyan Wall Banner
|spritetype=block
|nameid=cyan_wall_banner
|blocktags=banners, wall_post_override
|form=block
|translationkey=block.minecraft.cyan_banner}}
{{ID table
|displayname=Purple Wall Banner
|spritetype=block
|nameid=purple_wall_banner
|blocktags=banners, wall_post_override
|form=block
|translationkey=block.minecraft.purple_banner}}
{{ID table
|displayname=Blue Wall Banner
|spritetype=block
|nameid=blue_wall_banner
|blocktags=banners, wall_post_override
|form=block
|translationkey=block.minecraft.blue_banner}}
{{ID table
|displayname=Brown Wall Banner
|spritetype=block
|nameid=brown_wall_banner
|blocktags=banners, wall_post_override
|form=block
|translationkey=block.minecraft.brown_banner}}
{{ID table
|displayname=Green Wall Banner
|spritetype=block
|nameid=green_wall_banner
|blocktags=banners, wall_post_override
|form=block
|translationkey=block.minecraft.green_banner}}
{{ID table
|displayname=Red Wall Banner
|spritetype=block
|nameid=red_wall_banner
|blocktags=banners, wall_post_override
|form=block
|translationkey=block.minecraft.red_banner}}
{{ID table
|displayname=Black Wall Banner
|spritetype=block
|nameid=black_wall_banner
|blocktags=banners, wall_post_override
|form=block
|translationkey=block.minecraft.black_banner
|foot=1}}
{{ID table
|displayname=Block entity
|spritename=Banners
|spritetype=block
|nameid=banner
|foot=1}}
{{edition|bedrock}}:
{{ID table
|edition=bedrock
|firstcolumnname=Banner
|shownumericids=y
|showforms=y
|generatetranslationkeys=y
|displayname=Standing
|spritename=Banners
|spritetype=block
|nameid=standing_banner
|translationkey=tile.standing_banner.black.name, tile.standing_banner.red.name, tile.standing_banner.green.name, tile.standing_banner.brown.name, tile.standing_banner.blue.name, tile.standing_banner.purple.name, tile.standing_banner.cyan.name, tile.standing_banner.silver.name, tile.standing_banner.gray.name, tile.standing_banner.pink.name, tile.standing_banner.lime.name, tile.standing_banner.yellow.name, tile.standing_banner.lightBlue.name, tile.standing_banner.magenta.name, tile.standing_banner.orange.name, tile.standing_banner.white.name
|id=176
|form=block}}
{{ID table
|displayname=Wall
|spritename=Banners
|spritetype=block
|nameid=wall_banner
|id=177
|form=block
|translationkey=-}}
{{ID table
|displayname=Item
|spritename=Banners
|spritetype=item
|nameid=banner
|translationkey=item.banner.black.name, item.banner.red.name, item.banner.green.name, item.banner.brown.name, item.banner.blue.name, item.banner.purple.name, item.banner.cyan.name, item.banner.silver.name, item.banner.gray.name, item.banner.pink.name, item.banner.lime.name, item.banner.yellow.name, item.banner.lightBlue.name, item.banner.magenta.name, item.banner.orange.name, item.banner.white.name
|id=567
|form=item
|foot=1}}
{{ID table
|notnamespaced=y
|displayname=Block entity
|spritename=Banners
|spritetype=block
|nameid=Banner
|foot=1}}
=== Metadata ===
==== Item ====
{{IN|Bedrock}}, banner items use the following data values:
{| class="wikitable"
! DV !! Banner color
|-
|| 0 || black
|-
|| 1 || red
|-
|| 2 || green
|-
|| 3 || brown
|-
|| 4 || blue
|-
|| 5 || purple
|-
|| 6 || cyan
|-
|| 7 || light gray
|-
|| 8 || gray
|-
|| 9 || pink
|-
|| 10 || lime
|-
|| 11 || yellow
|-
|| 12 || light blue
|-
|| 13 || magenta
|-
|| 14 || orange
|-
|| 15 || white
|}
=== Item ===
{{IN|Java}}, banner items use the following data values:
{| class="wikitable"
! DV !! Banner color
|-
|| 15 || black
|-
|| 14 || red
|-
|| 13 || green
|-
|| 12 || brown
|-
|| 11 || blue
|-
|| 10 || purple
|-
|| 9 || cyan
|-
|| 8 || light gray
|-
|| 7 || gray
|-
|| 6 || pink
|-
|| 5 || lime
|-
|| 4 || yellow
|-
|| 3 || light blue
|-
|| 2 || magenta
|-
|| 1 || orange
|-
|| 0 || white
|}
=== Block states ===
{{see also|Block states}}
{{/BS}}
=== Block data ===
A banner has a block entity associated with it that holds additional data about the block.
{{el|bedrock}}:
: See [[Bedrock Edition level format/Block entity format]].
{{el|java}}:
{{see also|Block entity format}}
{{/BE}}
=== Item data ===
{{el|java}}:
{{main|Player.dat format}}
Banners, as items, use an NBT tag <code>BlockEntityTag</code> to indicate the patterns and details when it is placed.
<div class="treeview" style="margin-top: 0;">
* {{nbt|compound|Item}}: The item
** {{nbt|compound|tag}}: Additional information about the item. This tag is optional for most items.
*** {{nbt|compound|BlockEntityTag}}: The details of the shulker box.
**** All block data, except tags common to all block entities.
</div>
{{el|bedrock}}:
: See [[Bedrock Edition level format/Item format]].
== Achievements ==
{{load achievements|Fruit on the Loom}}
== Advancements ==
{{load advancements|Voluntary Exile}}
== History ==
{{info needed section|The Nether Update}}
{{History|java}}
{{History||1.8|snap=July 21, 2014|slink=https://twitter.com/jeb_/status/491238882789572608|[[Jeb]] posted a picture of banners, and stated that he is working on them.}}
{{History|||snap=14w30a|[[File:White Banner Revision 1.png|22px]][[File:Light Gray Banner Revision 1.png|22px]][[File:Gray Banner Revision 1.png|22px]][[File:Black Banner Revision 1.png|22px]][[File:Brown Banner Revision 1.png|22px]][[File:Red Banner Revision 1.png|22px]][[File:Orange Banner Revision 1.png|22px]][[File:Yellow Banner Revision 1.png|22px]][[File:Lime Banner Revision 1.png|22px]][[File:Green Banner Revision 1.png|22px]][[File:Cyan Banner Revision 1.png|22px]][[File:Light Blue Banner Revision 1.png|22px]][[File:Blue Banner Revision 1.png|22px]][[File:Purple Banner Revision 1.png|22px]][[File:Magenta Banner Revision 1.png|22px]][[File:Pink Banner Revision 1.png|22px]] Added banners.}}
{{History|||snap=14w30c|Added four additional patterns: Cross (+), Border, Curly Border and Thing (Mojang logo).}}
{{History|||snap=14w31a|Added two additional patterns: Inverted Halves and Base Gradient.
|The banner pattern terminology has been changed based on vexillology advice [[Jeb]] received from [http://www.reddit.com/r/Minecraft/comments/2bkxej/i_made_a_huge_mistake_banners/ his Reddit post].
|Banners can now be used as a [[fuel]] in [[furnace]]s.}}
{{History||1.8.8|snap=pre|The number of layers attainable by using [[commands]] is now limited to 16 per banner.}}
{{History||1.9|snap=15w31a|[[File:End City Banner.png|17px]] Magenta banners with a black chevron and inverted chevron are now naturally generated on the outside walls of [[end city|end cities]].}}
{{History|||snap=15w33c|Banners can be used to apply patterns to [[shield]]s.}}
{{History||1.11|snap=16w33a|Banners now require a [[dye]] when applying a pattern that uses a non-dye [[item]], such as a [[mob head|creeper head]] or [[golden apple|enchanted golden apple]]. Previously, the lack of a dye would have applied the black variant of the pattern.}}
{{History|||snap=16w39a|Black and gray banners, and light gray banners with a white flower charge are now naturally generated in rooms of [[woodland mansion]]s.}}
{{History||1.12|snap=January 24, 2017|slink={{tweet|jeb_|823817090511601664}}|[[Jeb]] tweets a screenshot of the changes to the banner color palette.}}
{{History|||snap=17w06a|[[File:White Banner.png|17px]] [[File:Light Gray Banner.png|17px]] [[File:Gray Banner.png|17px]] [[File:Black Banner.png|17px]] [[File:Brown Banner.png|17px]] [[File:Red Banner.png|17px]] [[File:Orange Banner.png|17px]] [[File:Yellow Banner.png|17px]] [[File:Lime Banner.png|17px]] [[File:Green Banner.png|17px]] [[File:Cyan Banner.png|17px]] [[File:Light Blue Banner.png|17px]] [[File:Blue Banner.png|17px]] [[File:Purple Banner.png|17px]] [[File:Magenta Banner.png|17px]] [[File:Pink Banner.png|17px]] Changed banners' [[tint]]s.}}
{{History|||snap=pre6|"Chief fess" and "base fess" banners are now just "chief" and "base" banners.}}
{{History||1.13|snap=17w47a|The colors for the <code>banner</code>, <code>wall_banner</code> and <code>standing_banner</code> ID have been split up into their own IDs.
|Prior to [[1.13/Flattening|''The Flattening'']], these [[block]]s' numeral IDs were 176 and 177, and the [[item]]'s 425.}}
{{History|||snap=18w10a|{{control|Using}} a [[map]] on a banner now mark the spot of the banner on the map.}}
{{History||1.14|snap=18w43a|[[Loom]]s have been added to help the [[player]] edit banners more easily.
|All recipes for banner patterns have been removed.}}
{{History|||snap=18w45a|[[File:Ominous Banner Revision 1.png|17px]] Added [[illager patrol]]s, where the leader of an illager patrol carries an [[illager]] banner.}}
{{History|||snap=18w46a|[[File:Ominous Banner.png|17px]] The pattern of [[illager]] banner now has a black border.}}
{{History|||snap=19w11a|Cartographer and shepherd [[villager]]s now [[trading|sell]] banners.}}
{{History|||snap=Pre-Release 2|"Illager Banners" have been renamed to "Ominous Banners".}}
{{History||1.17|snap=20w46a|The unused "base" pattern has been renamed to the "field" pattern and given proper translation strings (its ID is still "base").}}
{{History||1.19.3|snap=22w43a|The ominous banner is now available in the Creative inventory.}}
{{History|bedrock}}
{{History||1.2.0|snap=beta 1.2.0.2|[[File:White Banner.png|17px]] [[File:Light Gray Banner.png|17px]] [[File:Gray Banner.png|17px]] [[File:Black Banner.png|17px]] [[File:Brown Banner.png|17px]] [[File:Red Banner.png|17px]] [[File:Orange Banner.png|17px]] [[File:Yellow Banner.png|17px]] [[File:Lime Banner.png|17px]] [[File:Green Banner.png|17px]] [[File:Cyan Banner.png|17px]] [[File:Light Blue Banner.png|17px]] [[File:Blue Banner.png|17px]] [[File:Purple Banner.png|17px]] [[File:Magenta Banner.png|17px]] [[File:Pink Banner.png|17px]] Added banners.
|[[File:End City Banner.png|17px]] Magenta banners with a black chevron and inverted chevron are now naturally generated on the outside walls of [[end city|end cities]].
|Black and gray banners, and light gray banners with a white flower charge are now naturally generated in rooms of [[woodland mansion]]s.}}
{{History||1.4.0|snap=beta 1.2.20.1|The white banner can now be crafted from a colored banner and [[bleach]], which also removes all patterns, if used on a white banner.}}
{{History||1.10.0|snap=beta 1.10.0.3|[[Loom]]s have been added to help the [[player]] edit banners more easily.
|Brown banners now generate in new [[savanna]] [[village]]s.
|Black banners now generate in [[pillager outpost]] watchtowers.}}
{{History||1.11.0|snap=beta 1.11.0.1|Gray banners now generate in pillager outpost watchtowers, instead of black banners.
|[[File:Ominous Banner BE.png|17px]] Added [[illager captain]]s, which drop an [[illager]] banner upon [[death]].}}
{{History|||snap=beta 1.11.0.3|Illager banners now generate in [[pillager outpost]] watchtowers, instead of gray banners.}}
{{History|||snap=beta 1.11.0.4|Banners can now be [[trading|bought]] from cartographer and shepherd [[villager]]s.}}
{{History||1.20.0|snap=beta 1.20.0.20|Banners can now be used to customise [[shield]]s.}}
{{History|console}}
{{History||xbox=TU43|xbone=CU33|ps=1.36|wiiu=Patch 13|switch=1.0.1|[[File:White Banner Revision 1.png|22px]][[File:Light Gray Banner Revision 1.png|22px]][[File:Gray Banner Revision 1.png|22px]][[File:Black Banner Revision 1.png|22px]][[File:Brown Banner Revision 1.png|22px]][[File:Red Banner Revision 1.png|22px]][[File:Orange Banner Revision 1.png|22px]][[File:Yellow Banner Revision 1.png|22px]][[File:Lime Banner Revision 1.png|22px]][[File:Green Banner Revision 1.png|22px]][[File:Cyan Banner Revision 1.png|22px]][[File:Light Blue Banner Revision 1.png|22px]][[File:Blue Banner Revision 1.png|22px]][[File:Purple Banner Revision 1.png|22px]][[File:Magenta Banner Revision 1.png|22px]][[File:Pink Banner Revision 1.png|22px]] Added banners.}}
{{History||xbox=TU46|xbone=CU36|ps=1.38|wiiu=Patch 15|switch=1.0.1|[[File:End City Banner.png|17px]] Magenta banners with a black chevron and inverted chevron are now naturally generated on the outside walls of [[end city|end cities]].}}
{{History||xbox=TU53|xbone=CU43|ps=1.49|wiiu=Patch 23|switch=1.0.3|[[File:White Banner.png|17px]] [[File:Light Gray Banner.png|17px]] [[File:Gray Banner.png|17px]] [[File:Black Banner.png|17px]] [[File:Brown Banner.png|17px]] [[File:Red Banner.png|17px]] [[File:Orange Banner.png|17px]] [[File:Yellow Banner.png|17px]] [[File:Lime Banner.png|17px]] [[File:Green Banner.png|17px]] [[File:Cyan Banner.png|17px]] [[File:Light Blue Banner.png|17px]] [[File:Blue Banner.png|17px]] [[File:Purple Banner.png|17px]] [[File:Magenta Banner.png|17px]] [[File:Pink Banner.png|17px]] Changed banners' [[tint]]s.}}
{{History||xbox=none|xbone=none|ps=1.90|wiiu=none|switch=none|[[Loom]]s have been added to help the [[player]] edit banners more easily.}}
{{History||ps=1.91|[[File:Ominous Banner BE.png|17px]] Added [[illager]] banners, which generate with [[pillager outpost]]s and are [[drops|dropped]] by [[illager captain]]s upon [[death]].}}
{{History|foot}}
== Issues ==
{{issue list}}
== Trivia ==
* With 16 blank banners, 38 patterns of 16 colors each (608 uniquely-colored patterns), and 0 to 6 patterns per banner, the number of uniquely crafted banners is 16 × (608<sup>0</sup> + 608<sup>1</sup> + 608<sup>2</sup> + 608<sup>3</sup> + 608<sup>4</sup> + 608<sup>5</sup> + 608<sup>6</sup>) ≈ 809 quadrillion - 809 with 15 zeros (809,573,616,779,945,488). The number of visually distinct banners is smaller, because one or more patterns may completely cover other patterns, or the entire banner, or be duplicated due to the symmetric set of patterns (e.g. field or (yellow) + per pale azure (blue) = field azure + per pale or inverted).
** Not 38 patterns are available on BE, but 40 patterns of 16 colors each (640 uniquely-colored patterns), so the number is even greater. 16 × (640<sup>0</sup> + 640<sup>1</sup> + 640<sup>2</sup> + 640<sup>3</sup> + 640<sup>4</sup> + 640<sup>5</sup> + 640<sup>6</sup>) ≈ 1 quintillion - 1 with 18 zeros (1,101,232,303,249,827,856). This increases the number by almost 1.4 times, or almost 292 quadrillion, despite the addition of only 2 patterns.
* If a banner has over 6 patterns, only the six bottom-most patterns are displayed when hovered over in the [[inventory]].
* The Mojang logo is called "Thing" in-game, which could be considered an alternate translation for [[wiktionary:mojäng|mojäng]]. If [[wikipedia:Google Translate|Google Translate]] is used, it translates to "thingys" or "contraption".
** In the Swedish translation of the game, this pattern is, in fact, called ''mojäng''.
* [[List of block textures#Banner Textures|Banner textures]] are located in \assets\minecraft\textures\entity\banner.
** There are 40 monochrome textures, each containing all 6 sides of the banner.
** The texture of the back side is the mirrored texture of the front side.
** Compared to the texture files, textures' colors are inverted in-game due to them acting as masks for the re-colored base texture, base.png. That means white is visible, while black is transparent.
* Banners that have the purple NBT+ line in the bottom (obtained by holding Ctrl and middle-clicking the banner, which also copies the NBT [[tag]] of anything that the player points their crosshair to) actually have no difference with the base banner obtained by middle click.
*The Illager Banner in Bedrock Edition is available as a separate item but is just a second variant of the white banner.
**Standard variant of white banner is set to type 0.
**Illager variant is set to type 1.
== Gallery ==
<gallery>
Banners Jeb.png|The first image of banners, as tweeted by Jens Bergensten.
Iceland and Norway Flags.png|Another banner image from Jeb.
Searge Banners.png|Several banners made by Searge.
The Bountiful Update.png|Banners in the official 1.8 poster.
BannersBeforeAndAfter.png|An image, tweeted by Jeb, showcasing the changes he made to the banner color palette in the 1.12 update.
Gradients Overlay.png|The result of using gradient different numbers of times, each time increasing the level of gradient by 1.
All positions and rotations of a banner.png|All positions and rotations of a banner
Item Frame with Banner.png|A banner with the [[Mojang]] logo in an [[item frame]].
EndCityBanners.png|Banners floating outside of an [[End city]] tower.
Woodland mansion 1x2 d1.png|Banners hanging above the doorway of a [[woodland mansion]] master bedroom.
Replaceitembanner.png|Banner put in the helmet slot by using the command {{cmd|replaceitem}}{{Only|BE}} or {{cmd|item replace}}{{Only|JE}}.
Better Together Banners.jpg|Banners in ''Bedrock Edition''.
Better Together Banner Crafting 1.jpg|A banner in the hand.
Better Together Banner Crafting 2.jpg|A banner in the inventory.
Better Together Banner Crafting 3.jpg|A banner in the crafting grid.
Better Together Banner Crafting 4.jpg|A banner being given a pattern.
</gallery>
=== Renders ===
<gallery>
Ominous Banner.gif
White Banner.gif
Light Gray Banner.gif
Gray Banner.gif
Black Banner.gif
Brown Banner.gif
Red Banner.gif
Orange Banner.gif
Yellow Banner.gif
Lime Banner.gif
Green Banner.gif
Cyan Banner.gif
Light Blue Banner.gif
Blue Banner.gif
Purple Banner.gif
Magenta Banner.gif
Pink Banner.gif
Ominous Wall Banner.png|
White Wall Banner.png|
Light Gray Wall Banner.png|
Gray Wall Banner.png|
Black Wall Banner.png|
Brown Wall Banner.png|
Red Wall Banner.png|
Orange Wall Banner.png|
Yellow Wall Banner.png|
Lime Wall Banner.png|
Green Wall Banner.png|
Cyan Wall Banner.png|
Light Blue Wall Banner.png|
Blue Wall Banner.png|
Purple Wall Banner.png|
Magenta Wall Banner.png|
Pink Wall Banner.png
</gallery>
<gallery>
File:Ominous Banner.gif|Ominous banner pattern in Java Edition.
File:Ominous Banner BE.gif|Illager banner pattern in Bedrock Edition.
File:Ominous Banner Revision 1.gif|Old Ominous banner pattern.
File:Ominous Banner washing.gif|Washing with cauldron shows how to apply the ominous banner pattern.
</gallery>
=== [[Lego Minecraft]] Banners ===
<gallery>
File:Lego Red Creeper Banner Collage.jpg|Lego banners from 21127 and 21131
File:Lego Melon Banner.png|Lego banner from 21138
File:Lego Fish Banner.png|Lego banner from 21142
File:Lego Beetroot Banner.png|Lego banner from 21144
File:Lego Wheat Banner.png|Another lego banner from 21144
File:Lego Carrot Banner.png|A third lego banner from 21144
File:Lego Crossbones Banner.png|Lego banner from 21152
File:Lego Green Creeper Banner Collage.jpg|Lego banners from 21155
File:Lego Ominous Banner.png|Lego ominous banner from 21160
</gallery>
== References ==
{{reflist}}
{{Blocks|Utility}}
{{Items}}
[[Category:Generated structure blocks]]
[[Category:Manufactured blocks]]
[[Category:Block entities]]
[[Category:Non-solid blocks]]
[[cs:Prapor]]
[[de:Banner]]
[[es:Estandarte]]
[[fr:Bannière]]
[[ja:旗]]
[[ko:현수막]]
[[nl:Banier]]
[[pl:Sztandar]]
[[pt:Estandarte]]
[[ru:Флаг]]
[[uk:Стяг]]
[[zh:旗帜]]</li></ul></nowiki> | beta 1.2.13.8 | /setblock ~ ~ ~ stripped_<type>_log 3. | |||
1.10.0{{Extension DPL}}<ul><li>[[White Dye|White Dye]]<br/>{{Item
| image = White Dye.png
| renewable = Yes
| stackable = Yes (64)
}}
'''White dye''' is a [[Dye#Primary|primary color dye]] similar to [[bone meal]].
== Obtaining ==
=== Crafting ===
{{Crafting
|showname=0
|Bone Meal
|Output=White Dye
|type=Material
|head=1
}}
{{Crafting
|Lily of the Valley
|Output=White Dye
|type=Material
|foot=1
}}
=== Loot chest ===
{{#invoke:LootChest|base3|white-dye}}
== Usage ==
{{dye usage}}
=== Crafting ingredient ===
{{crafting usage|ignore=Banner|continue=1}}
{{banner crafting usage}}
=== Loom ingredient ===
{{Banner loom usage|White Dye}}
=== Trading ===
Apprentice-level shepherd villagers have a 20% chance to buy 12 white dye for an emerald.
== Data values ==
=== ID ===
{{edition|java}}:
{{ID table
|edition=java
|showforms=y
|generatetranslationkeys=y
|displayname=White Dye
|spritetype=item
|nameid=white_dye
|form=item
|foot=1}}
{{edition|bedrock}}:
{{ID table
|edition=bedrock
|showaliasids=y
|shownumericids=y
|showforms=y
|notshowbeitemforms=y
|generatetranslationkeys=y
|displayname=White Dye
|spritetype=item
|nameid=white_dye
|aliasid=dye / 19
|id=410
|form=item
|translationkey=item.dye.white_new.name
|foot=1}}
== History ==
{{History|java}}
{{History||1.14|snap=18w43a|[[File:White Dye JE1 BE1.png|32px]] Added white dye.}}
{{History|||snap=18w44a|White dye can now change the text color on [[sign]]s to white.}}
{{History|||snap=19w05a|Added the [[wandering trader]], which sells white dye.}}
{{History|||snap=19w11a|White dye can now be [[trading|bought]] by shepherd villagers.}}
{{History||1.17|snap=20w45a|White dye can now be used to craft [[white candle]]s.}}
{{History|||snap=21w19a|White dyes can no longer be used to craft white candles.}}
{{History|||snap=Pre-release 1|White dye can once again be used to craft white candles.}}
{{History||1.20<br>(Experimental)|link=1.19.3|snap=22w42a|White dye can now change the text color on [[hanging sign]]s to white.}}
{{History||1.20|snap=23w12a|White dye can now be found in [[suspicious gravel]] and [[suspicious sand]] in [[trail ruins]].}}
{{History|||snap=23w16a|White dye no longer generates in [[suspicious sand]] in [[trail ruins]].|Due to the split of the archaeological loot tables for suspicious gravel within the [[trail ruins]]; white dye is now common loot.}}
{{History|bedrock}}
{{History||1.8.0|snap=beta 1.8.0.10|[[File:White Dye JE1 BE1.png|32px]] Added white dye.}}
{{History||1.9.0|snap=beta 1.9.0.0|Added [[flower|lilies of the valley]], which can be used to [[crafting|craft]] white dye.}}
{{History||1.11.0|snap=beta 1.11.0.4|White dye can now be [[trading|sold]] to shepherd [[villager]]s.}}
{{History||1.16.100|snap=beta 1.16.100.56|The ID of white dye has been changed from <code>dye/19</code> to <code>white_dye</code>.}}
{{History|ps4}}
{{History||1.83|[[File:White Dye JE1 BE1.png|32px]] Added white dye.}}
{{History|foot}}
== Issues ==
{{issue list}}
{{Items}}
[[Category:Items]]
[[Category:Dyes]]
[[Category:Renewable resources]]
[[de:Weißer Farbstoff]]
[[es:Tinte blanco]]
[[fr:Teinture blanche]]
[[ja:白色の染料]]
[[ko:하얀색 염료]]
[[pl:Biały barwnik]]
[[pt:Corante branco]]
[[zh:白色染料]]</li><li>[[Prismarine Crystals|Prismarine Crystals]]<br/>{{Item
|type=
| renewable = Yes
| stackable = Yes (64)
}}
'''Prismarine crystals''' are items obtained by defeating [[guardian]]s or [[elder guardian]]s. They are used along with [[prismarine shard]]s to craft [[sea lantern]]s.
== Obtaining ==
=== Mob loot ===
[[Guardian]]s and [[elder guardian]]s have a 40% chance and {{frac|1|3}} chance, respectively, of dropping prismarine crystals upon death. The maximum drop count is increased by one per level of [[Looting]].
=== Mining ===
Prismarine crystals are dropped by [[sea lantern]]s when not using a [[Silk Touch]] tool. They drop 2–3 crystals each time, which can be increased to a maximum of 5 using the [[Fortune]] enchantment.
=== Natural generation ===
{{LootChestItem|prismarine-crystals}}
== Usage ==
=== Crafting ingredient ===
{{crafting usage}}
== Data values ==
=== ID ===
{{edition|java}}:
{{ID table
|edition=java
|showforms=y
|generatetranslationkeys=y
|displayname=Prismarine Crystals
|spritetype=item
|nameid=prismarine_crystals
|form=item
|foot=1}}
{{edition|bedrock}}:
{{ID table
|edition=bedrock
|shownumericids=y
|showforms=y
|notshowbeitemforms=y
|generatetranslationkeys=y
|displayname=Prismarine Crystals
|spritetype=item
|nameid=prismarine_crystals
|id=549
|form=item
|foot=1}}
== History ==
{{History|java}}
{{History||1.8|snap=14w25a|[[File:Prismarine Crystals JE1 BE1.png|32px]] Added prismarine crystals.}}
{{History||1.9|snap=15w43a|The chance of [[guardian]]s and [[elder guardian]]s dropping prismarine crystals upon [[death]] has been increased, from 33% to 40%.}}
{{History|||snap=15w43b|The chance of elder guardians [[drops|dropping]] crystals upon [[death]] has now been reverted back to 33%. However, the chance for guardians to drop them is still 40%.}}
{{History||1.13|snap=17w47a|Prior to [[1.13/Flattening|''The Flattening'']], this [[item]]'s numeral ID was 410.}}
{{History|||snap=18w10a|Prismarine crystals now generate in [[buried treasure]] [[chest]]s.}}
{{History||1.14|snap=18w43a|[[File:Prismarine Crystals JE2 BE2.png|32px]] The texture of prismarine crystals has been changed.}}
{{History|pocket alpha}}
{{History||v0.16.0|snap=build 1|[[File:Prismarine Crystals JE1 BE1.png|32px]] Added prismarine crystals.}}
{{History|bedrock}}
{{History||1.4.0|snap=beta 1.2.14.2|Prismarine crystals can now be found inside [[buried treasure]] [[chest]]s.}}
{{History||1.10.0|snap=beta 1.10.0.3|[[File:Prismarine Crystals JE2 BE2.png|32px]] The texture of prismarine crystals has been changed.}}
{{History|console}}
{{History||xbox=TU31|xbone=CU19|ps=1.22|wiiu=Patch 3|[[File:Prismarine Crystals JE1 BE1.png|32px]] Added prismarine crystals.}}
{{History||xbox=none|xbone=none|ps=1.90|wiiu=none|switch=none|[[File:Prismarine Crystals JE2 BE2.png|32px]] The texture of prismarine crystals has been changed.}}
{{History|New 3DS}}
{{History||1.3.12|[[File:Prismarine Crystals JE1 BE1.png|32px]] Added prismarine crystals.}}
{{History|foot}}
== Issues ==
{{issue list}}
{{Items}}
[[Category:Renewable resources]]
[[de:Prismarinkristalle]]
[[es:Cristales de prismarina]]
[[fr:Cristaux de prismarine]]
[[hu:Prizmarin kristály]]
[[ja:プリズマリンクリスタル]]
[[ko:프리즈머린 수정]]
[[lzh:海磷晶]]
[[nl:Prismarienkristallen]]
[[pl:Kryształy pryzmarynu]]
[[pt:Cristais de prismarinho]]
[[ru:Призмариновый кристалл]]
[[uk:Призмаринові кристали]]
[[zh:海晶砂粒]]</li></ul> | beta 1.10.0.3 | Bark is now called "<type> Wood" and "Stripped <type> Wood". | |||
| Now exist as a separate block; previously placed wood will look the same but still drop logs instead of wood. | |||||
| Added crafting recipe. | |||||
| Wood blocks and stripped wood are added to the creative inventory. | |||||
| Wood and stripped wood now generates in new villages. | |||||
| Wood and stripped wood is now used to craft campfires and smokers. | |||||
Issues
Issues relating to "Wood" or "Stripped Wood" are maintained on the bug tracker. Report issues there.
Gallery
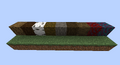
The six types of wood blocks
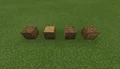
Wood and Logs seen beside together
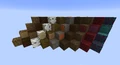
All the facings and types of logs with the wood blocks. From left to right: dark oak, acacia, jungle, spruce, birch, oak.

The top face of wood blocks in 1.13-pre1.
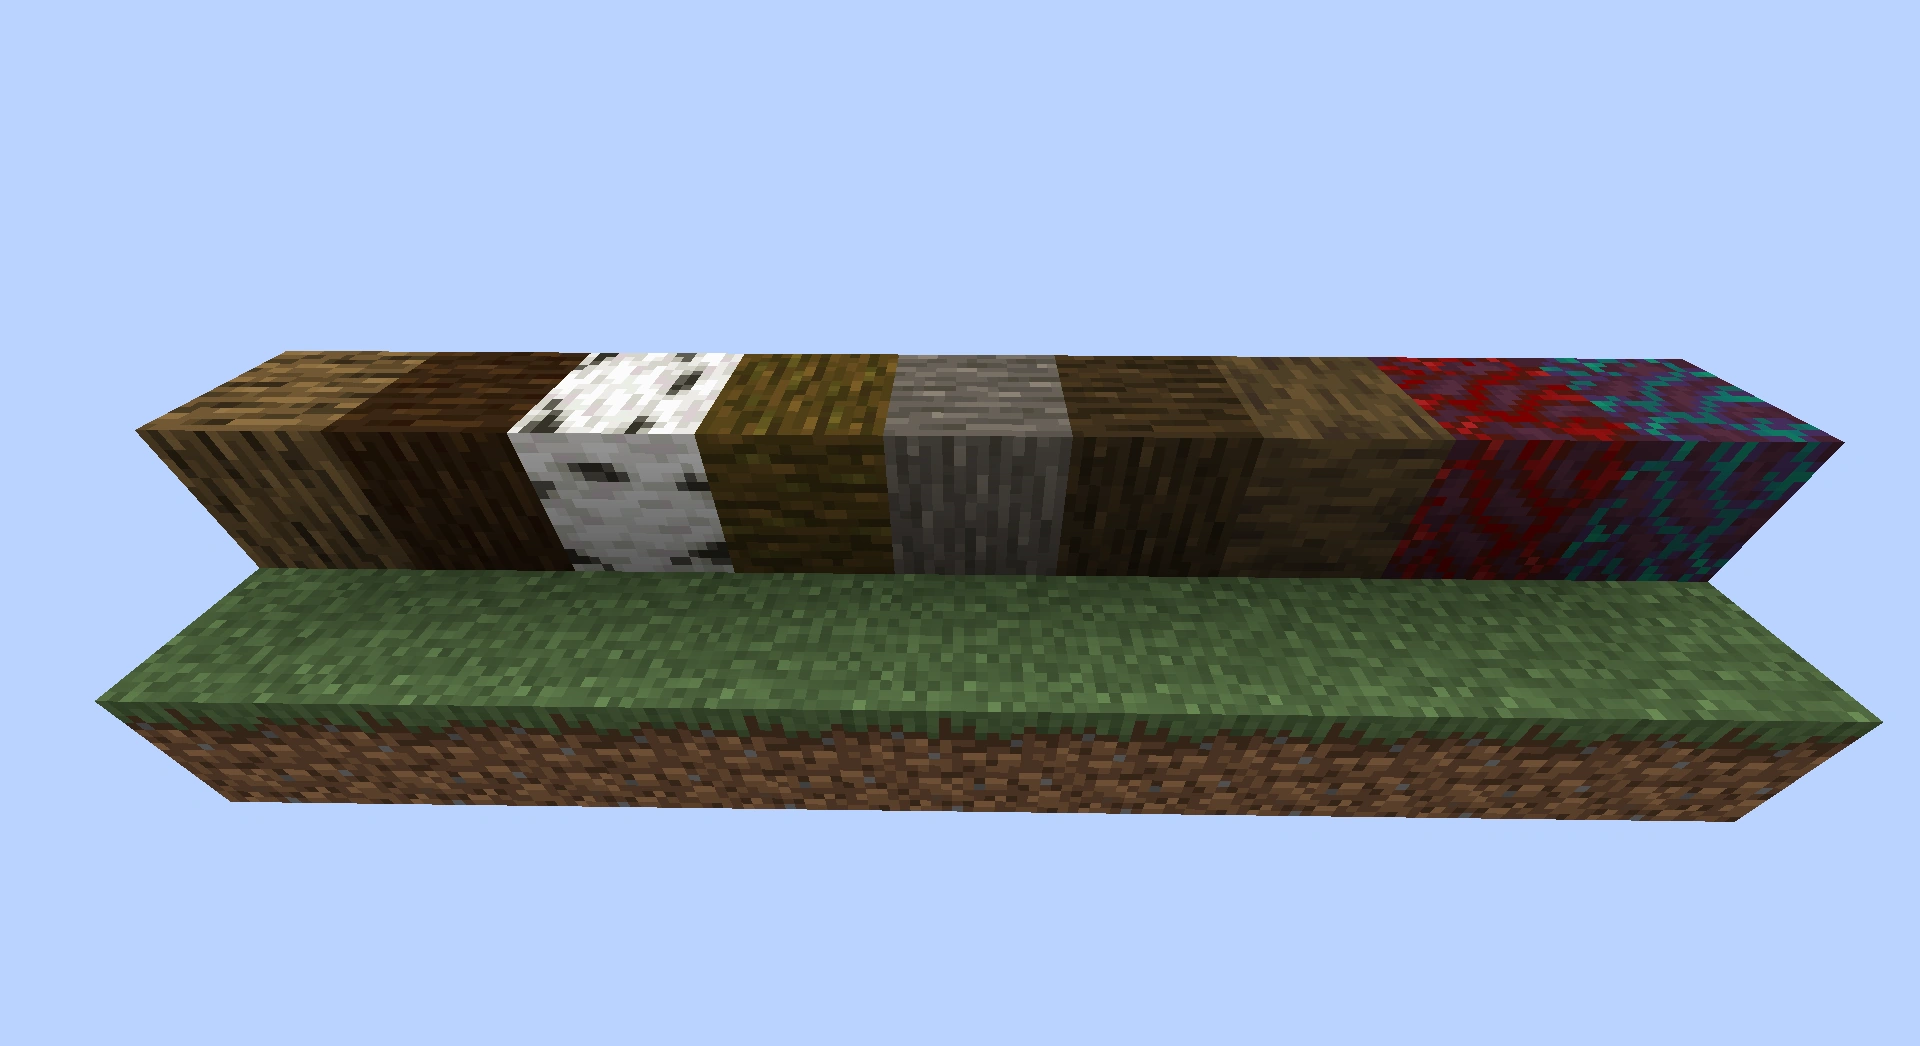
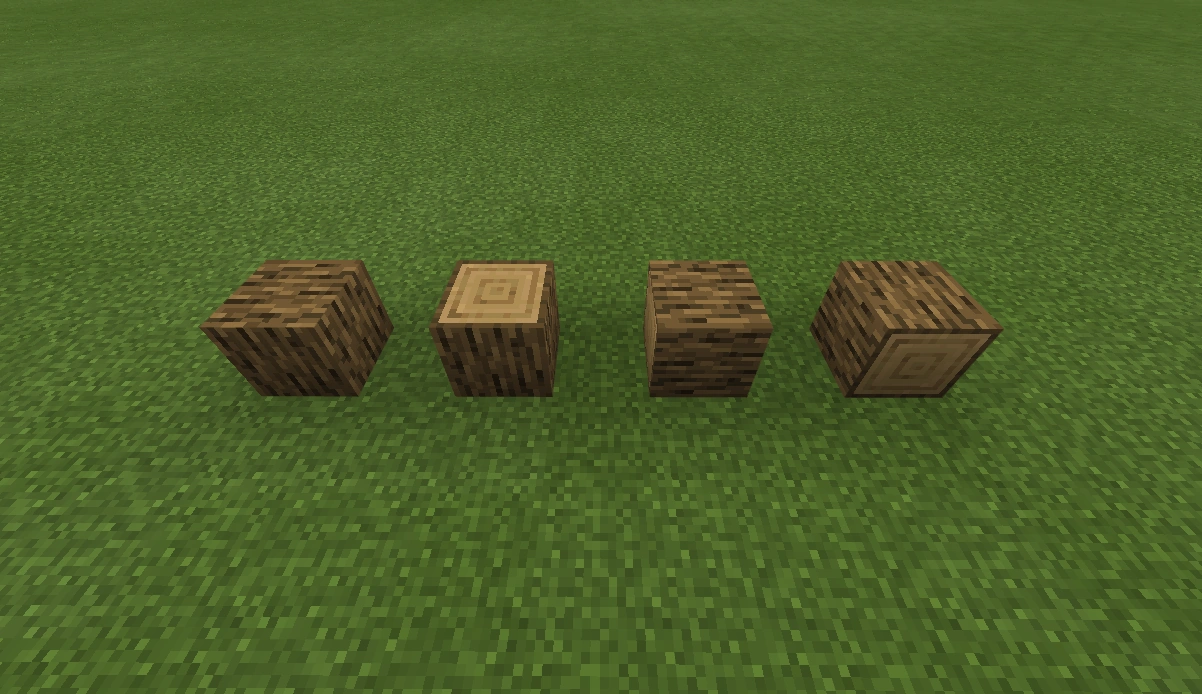

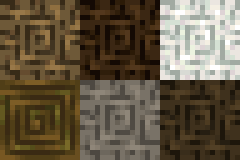