No edit summary |
m (Consitent header) Tag: Visual edit |
||
| (47 intermediate revisions by 26 users not shown) | |||
| Line 1: | Line 1: | ||
| + | {{for}} |
||
{{Block |
{{Block |
||
|image=Vines.png |
|image=Vines.png |
||
|transparent=Yes |
|transparent=Yes |
||
|light=No |
|light=No |
||
| − | |tool= |
+ | |tool=shears |
|renewable=Yes |
|renewable=Yes |
||
|stackable=Yes (64) |
|stackable=Yes (64) |
||
| Line 9: | Line 10: | ||
|lavasusceptible=Yes |
|lavasusceptible=Yes |
||
}} |
}} |
||
| − | {{distinguish|Weeping Vines|Twisting Vines}} |
||
| − | {{q|They were added to Minecraft in beta version 1.8, alongside fence gates, glass panes, and ender pearls. They’re not solid - you can walk through them - but they will slow you down in the process. You can break them fairly quickly, but you can only collect them if you chop them with shears. Oh, and you can climb them, just like a ladder. Which is handy if you forgot to bring ladders.|Duncan Geere<ref>{{article|taking-inventory-vines|Taking Inventory: Vines|October 27, 2019|Duncan Geere}}</ref>||Duncan Geere Mojang avatar.png}} |
||
'''Vines''' are non-solid blocks, {{frac|1|16}} of a block in thickness that can be placed only against a vertical side of a solid [[block]]. They also can be supported by a solid block ceilings if adjacent to a solid vertical wall. |
'''Vines''' are non-solid blocks, {{frac|1|16}} of a block in thickness that can be placed only against a vertical side of a solid [[block]]. They also can be supported by a solid block ceilings if adjacent to a solid vertical wall. |
||
| Line 22: | Line 21: | ||
=== Breaking === |
=== Breaking === |
||
| − | Vines can be destroyed with anything, but using [[shears]] is the only way to collect them. Efficiency on |
+ | Vines can be destroyed with anything, but in [[Java Edition]], using [[shears]] is the only way to collect them while [[Bedrock Edition]] also allows the use of an axe with [[Silk Touch]]. Efficiency on Shears has no effect when used with Vines.<ref>{{bug|MC-103430}}</ref> Use an axe with Vines can increase efficiency, but does not allow for collection in Java Edition, whereas it does in Bedrock Edition. If multiple vines exist within the same block space, breaking one of them breaks all of them instead of just the one targeted<ref>{{bug|MC-129114}} resolved as "Invalid"</ref> and results in only a single vine dropping.<ref>{{bug|MC-123140}} resolved as Works as Intended</ref> |
{{breaking row|horizontal=1|Vines|Axe|drop=0|shears=1|sword=0}} |
{{breaking row|horizontal=1|Vines|Axe|drop=0|shears=1|sword=0}} |
||
| Line 29: | Line 28: | ||
Vines are sold by [[wandering trader]]s for an [[emerald]]. |
Vines are sold by [[wandering trader]]s for an [[emerald]]. |
||
| − | === Post |
+ | === Post-generation === |
On each block tick, the vine block has a 25% chance of attempting to spread in a randomly selected direction. Vines spread to adjacent blocks under certain conditions: |
On each block tick, the vine block has a 25% chance of attempting to spread in a randomly selected direction. Vines spread to adjacent blocks under certain conditions: |
||
* Downward: |
* Downward: |
||
** If the block below is air, each side (north, south, east, and west) with vines has a 50% chance to spread downward. |
** If the block below is air, each side (north, south, east, and west) with vines has a 50% chance to spread downward. |
||
| ⚫ | |||
| − | |||
| ⚫ | |||
* Upward: |
* Upward: |
||
| Line 61: | Line 59: | ||
| to |
| to |
||
| {{schematic||vi-s|-|vi-e|AB}} |
| {{schematic||vi-s|-|vi-e|AB}} |
||
| + | |}{{more info}} |
||
| − | |} |
||
:::* If the vine block has vines to the right, and that side of the air block is backed by another air block, and the right side of the vine block is backed by something vines can be placed on, spread around the corner. |
:::* If the vine block has vines to the right, and that side of the air block is backed by another air block, and the right side of the vine block is backed by something vines can be placed on, spread around the corner. |
||
{{-}} |
{{-}} |
||
| Line 77: | Line 75: | ||
== Usage == |
== Usage == |
||
| − | Vines can be placed on the side of any block that fills its whole cube and blocks entity movement. They can also be placed on the bottom side of a block. However, a vine block without vines on any of the horizontal sides disappears if it gets an update from a neighboring block. Vines attached to the bottom of [[stairs]] are completely deleted by any block update.<ref>{{bug|MC-128672}}</ref> |
+ | Vines can be placed on the side of any block that fills its whole cube and blocks entity movement. They can also be placed on the bottom side of a block (although not the bottom side of another vine - this was programmed intentionally<ref>{{bug|MC-177513}}</ref>). However, a vine block without vines on any of the horizontal sides disappears if it gets an update from a neighboring block. Vines attached to the bottom of [[stairs]] are completely deleted by any block update.<ref>{{bug|MC-128672}}</ref> |
Several vines can be placed in the same block space, as long as they are facing different directions. |
Several vines can be placed in the same block space, as long as they are facing different directions. |
||
| − | |||
| − | Vines block [[mob]]s' line of sight, so it is possible to sneak up onto mobs by hiding behind vines. Because of this, [[endermen]] can safely be viewed through vines and [[skeleton]]s do not attempt to shoot targets behind vines. |
||
Vines can be climbed by standing next to them and holding the jump key. If there is a solid block behind the vines, the walk forward key can also be used. |
Vines can be climbed by standing next to them and holding the jump key. If there is a solid block behind the vines, the walk forward key can also be used. |
||
| Line 98: | Line 94: | ||
=== List of colors === |
=== List of colors === |
||
| + | {{Missing information|section|Bedrock Edition colors (see [[Water#color]])}} |
||
==== Java Edition ==== |
==== Java Edition ==== |
||
'''Hard-coded Color''' |
'''Hard-coded Color''' |
||
| Line 104: | Line 101: | ||
'''Biome Colors''' |
'''Biome Colors''' |
||
| − | These values are generated by the biome dyeing algorithm. See [[ |
+ | These values are generated by the biome dyeing algorithm. See [[Tint#Biome tints|Biome colors]] for more information. |
{| class="wikitable sortable mw-collapsible mw-collapsed" style="text-align:center" data-description="Java edition biome colors" |
{| class="wikitable sortable mw-collapsible mw-collapsed" style="text-align:center" data-description="Java edition biome colors" |
||
!Biome !! Category !! Rainfall !! Foliage Color !! Temperature Affects || Render |
!Biome !! Category !! Rainfall !! Foliage Color !! Temperature Affects || Render |
||
| Line 228: | Line 225: | ||
| {{BiomeLink|Sunflower Plains}} || Plains || Rain || #77ab2f || || [[File:Plains Vines.png|32px]] |
| {{BiomeLink|Sunflower Plains}} || Plains || Rain || #77ab2f || || [[File:Plains Vines.png|32px]] |
||
|- |
|- |
||
| − | | {{BiomeLink|Swamp}} || Swamp || Rain || #6a7039 || If temperature below -0.1, used #4C763C. || [[File: |
+ | | {{BiomeLink|Swamp}} || Swamp || Rain || #6a7039 || If temperature below -0.1, used #4C763C. || [[File:Swamp Vines.png|32px]] / [[File:Swamp Vines (Cold).png|32px]] |
|- |
|- |
||
| − | | {{BiomeLink|Swamp Hills}} || Swamp || Rain || #6a7039 || If temperature below -0.1, used #4C763C. || [[File: |
+ | | {{BiomeLink|Swamp Hills}} || Swamp || Rain || #6a7039 || If temperature below -0.1, used #4C763C. || [[File:Swamp Vines.png|32px]] / [[File:Swamp Vines (Cold).png|32px]] |
|- |
|- |
||
| {{BiomeLink|Taiga}} || Taiga || Rain || #68a464 || || [[File:Taiga Vines.png|32px]] |
| {{BiomeLink|Taiga}} || Taiga || Rain || #68a464 || || [[File:Taiga Vines.png|32px]] |
||
| Line 256: | Line 253: | ||
==== Bedrock Edition ==== |
==== Bedrock Edition ==== |
||
| − | {{section needed|See [[Water#Color]] - can we get analogous color lists for both Java Edition and Bedrock Edition?}} |
||
== Sounds == |
== Sounds == |
||
| + | === Generic === |
||
| − | |||
| − | {{Sound table |
+ | {{Sound table/Block/Grass}} |
| + | === Unique === |
||
| − | |sound=Grass dig1.ogg |
||
| + | {{edition|java}}: |
||
| − | |sound2=Grass dig2.ogg |
||
| − | |sound3=Grass dig3.ogg |
||
| − | |sound4=Grass dig4.ogg |
||
| − | |subtitle=Block broken |
||
| − | |source=Blocks |
||
| − | |description=Breaking the block |
||
| − | |id=block.grass.break |
||
| − | |translationkey=subtitles.block.generic.break |
||
| − | |volume=1.0 |
||
| − | |pitch=0.8 |
||
| − | |distance=16 |
||
| − | |nocat=}} |
||
| − | {{Sound table |
||
| − | |sound=Grass hit1.ogg |
||
| − | |sound2=Grass hit2.ogg |
||
| − | |sound3=Grass hit3.ogg |
||
| − | |sound4=Grass hit4.ogg |
||
| − | |sound5=Grass hit5.ogg |
||
| − | |sound6=Grass hit6.ogg |
||
| − | |subtitle=''None''<ref name="fallmissing" group=sound>{{bug|MC-177082}}</ref> |
||
| − | |source=Blocks |
||
| − | |description=Falling on the block with fall damage |
||
| − | |id=block.grass.fall |
||
| − | |translationkey=- |
||
| − | |volume=0.5 |
||
| − | |pitch=0.75 |
||
| − | |distance=16}} |
||
| − | {{Sound table |
||
| − | |sound=Grass hit1.ogg |
||
| − | |sound2=Grass hit2.ogg |
||
| − | |sound3=Grass hit3.ogg |
||
| − | |sound4=Grass hit4.ogg |
||
| − | |sound5=Grass hit5.ogg |
||
| − | |sound6=Grass hit6.ogg |
||
| − | |subtitle=Block breaking |
||
| − | |source=Blocks |
||
| − | |description=Mining the block |
||
| − | |id=block.grass.hit |
||
| − | |translationkey=subtitles.block.generic.hit |
||
| − | |volume=0.25 |
||
| − | |pitch=0.5 |
||
| − | |distance=16}} |
||
| − | {{Sound table |
||
| − | |sound=Grass dig1.ogg |
||
| − | |sound2=Grass dig2.ogg |
||
| − | |sound3=Grass dig3.ogg |
||
| − | |sound4=Grass dig4.ogg |
||
| − | |subtitle=Block placed |
||
| − | |source=Blocks |
||
| − | |description=Placing the block |
||
| − | |id=block.grass.place |
||
| − | |translationkey=subtitles.block.generic.place |
||
| − | |volume=1.0 |
||
| − | |pitch=0.8 |
||
| − | |distance=16}} |
||
| − | {{Sound table |
||
| − | |sound=Grass hit1.ogg |
||
| − | |sound2=Grass hit2.ogg |
||
| − | |sound3=Grass hit3.ogg |
||
| − | |sound4=Grass hit4.ogg |
||
| − | |sound5=Grass hit5.ogg |
||
| − | |sound6=Grass hit6.ogg |
||
| − | |subtitle=Footsteps |
||
| − | |source=Blocks |
||
| − | |description=Walking on the block |
||
| − | |id=block.grass.step |
||
| − | |translationkey=subtitles.block.generic.footsteps |
||
| − | |volume=0.15 |
||
| − | |pitch=1.0 |
||
| − | |distance=16}} |
||
{{Sound table |
{{Sound table |
||
|sound=Vine climb1.ogg |
|sound=Vine climb1.ogg |
||
| Line 340: | Line 267: | ||
|subtitle=Footsteps |
|subtitle=Footsteps |
||
|source=Blocks |
|source=Blocks |
||
| − | |description= |
+ | |description=Walking on the block |
|id=block.vine.step |
|id=block.vine.step |
||
|translationkey=subtitles.block.generic.footsteps |
|translationkey=subtitles.block.generic.footsteps |
||
| Line 350: | Line 277: | ||
{{edition|java}}: |
{{edition|java}}: |
||
{{ID table |
{{ID table |
||
| + | |showblocktags=y |
||
| + | |showforms=y |
||
|generatetranslationkeys=java |
|generatetranslationkeys=java |
||
|displayname=Vines |
|displayname=Vines |
||
|spritetype=block |
|spritetype=block |
||
|nameid=vine |
|nameid=vine |
||
| + | |blocktags=climbable, lush_plants_replaceable{{upcoming|java 1.17}} |
||
|foot=1}} |
|foot=1}} |
||
| Line 359: | Line 289: | ||
{{ID table |
{{ID table |
||
|shownumericids=y |
|shownumericids=y |
||
| + | |showforms=y |
||
|generatetranslationkeys=bedrock |
|generatetranslationkeys=bedrock |
||
|displayname=Vines |
|displayname=Vines |
||
| Line 383: | Line 314: | ||
{{History||August 26, 2011|link=none|When the [[Adventure Update]] was showcased at [[wikipedia:PAX|PAX]], vines hadn't been given a name, and a mouseover would not show a title. This implies that they didn't have an official name at the time.}} |
{{History||August 26, 2011|link=none|When the [[Adventure Update]] was showcased at [[wikipedia:PAX|PAX]], vines hadn't been given a name, and a mouseover would not show a title. This implies that they didn't have an official name at the time.}} |
||
| − | {{History|beta}} |
+ | {{History|java beta}} |
{{History||1.8|snap=Pre-release|[[File:Vines JE1 BE1.png|32px]] Added vines. Vines take as long to break as [[leaves]] and drop nothing unless collected with [[shears]].}} |
{{History||1.8|snap=Pre-release|[[File:Vines JE1 BE1.png|32px]] Added vines. Vines take as long to break as [[leaves]] and drop nothing unless collected with [[shears]].}} |
||
{{History|||snap=Pre-release 2 ;)|Vines spread infinitely down now, but do not spread if there are more than four other vine blocks nearby.<ref>{{tweet|notch|113547746585214976}}</ref>}} |
{{History|||snap=Pre-release 2 ;)|Vines spread infinitely down now, but do not spread if there are more than four other vine blocks nearby.<ref>{{tweet|notch|113547746585214976}}</ref>}} |
||
| Line 393: | Line 324: | ||
{{History||1.8|snap=14w02a|Added a [[crafting]] recipe for [[stone bricks|mossy stone bricks]] (uses 1 vine and 1 stone brick.)}} |
{{History||1.8|snap=14w02a|Added a [[crafting]] recipe for [[stone bricks|mossy stone bricks]] (uses 1 vine and 1 stone brick.)}} |
||
{{History|||snap=14w04a|Added a crafting recipe for [[cobblestone|moss stone]] (uses 1 vine and 1 cobblestone.)}} |
{{History|||snap=14w04a|Added a crafting recipe for [[cobblestone|moss stone]] (uses 1 vine and 1 cobblestone.)}} |
||
| + | {{History|||snap=14w07a|Vines are no longer visible from behind.<ref>{{bug|MC-48512}}</ref>}} |
||
| + | {{History|||snap=14w10a|Vines are visible from behind again. However, the texture is now incorrectly mirrored, unlike before.<ref>{{bug|MC-199239}}</ref>}} |
||
{{History|||snap=14w30c|Vines are now used to create the fancy border pattern for [[banner]]s.}} |
{{History|||snap=14w30c|Vines are now used to create the fancy border pattern for [[banner]]s.}} |
||
{{History||1.11|snap=16w39a|Vines now generate in [[woodland mansion]]s.}} |
{{History||1.11|snap=16w39a|Vines now generate in [[woodland mansion]]s.}} |
||
| Line 402: | Line 335: | ||
{{History|||snap=19w05a|Vines now have a 50% chance of increasing the compost level in a composter by 1.}} |
{{History|||snap=19w05a|Vines now have a 50% chance of increasing the compost level in a composter by 1.}} |
||
{{History||1.16|snap=20w11a|Vines now play [[sound]]s when climbed.}} |
{{History||1.16|snap=20w11a|Vines now play [[sound]]s when climbed.}} |
||
| + | {{History|java upcoming}} |
||
| + | {{History||1.17|snap=21w05a|Vines now have unique sounds.}} |
||
{{History|pocket alpha}} |
{{History|pocket alpha}} |
||
| − | {{History|| |
+ | {{History||v0.9.0|snap=build 1|[[File:Vines JE1 BE1.png|32px]] Added vines.}} |
| − | {{History|| |
+ | {{History||v0.15.0|snap=build 1|Vines now generate naturally in [[jungle temple]]s.}} |
{{History|pocket}} |
{{History|pocket}} |
||
{{History||1.1.0|snap=alpha 1.1.0.0|Vines now generate in [[woodland mansion]]s.}} |
{{History||1.1.0|snap=alpha 1.1.0.0|Vines now generate in [[woodland mansion]]s.}} |
||
| Line 416: | Line 351: | ||
{{History||1.11.0|snap=beta 1.11.0.1|Vines can now be used to fill up [[composter]]s. |
{{History||1.11.0|snap=beta 1.11.0.1|Vines can now be used to fill up [[composter]]s. |
||
|Vines can now be climbed by without supporting [[block]].}} |
|Vines can now be climbed by without supporting [[block]].}} |
||
| + | {{History||1.16.20|snap=beta 1.16.20.50|Vines now play [[sound]]s when climbed.}} |
||
{{History|console}} |
{{History|console}} |
||
| − | {{History||xbox=TU5|xbone=CU1|ps=1.0|wiiu=Patch 1|[[File:Vines JE1 BE1.png|32px]] Added vines.}} |
+ | {{History||xbox=TU5|xbone=CU1|ps=1.0|wiiu=Patch 1|switch=1.0.1|[[File:Vines JE1 BE1.png|32px]] Added vines.}} |
{{History||xbox=TU9|Vines are now climbable provided they are climbed against a solid [[block]].}} |
{{History||xbox=TU9|Vines are now climbable provided they are climbed against a solid [[block]].}} |
||
{{History||xbox=none|xbone=none|ps=1.90|wiiu=none|switch=none|[[File:Vines JE2 BE2.png|32px]] The texture of vines have now been changed.}} |
{{History||xbox=none|xbone=none|ps=1.90|wiiu=none|switch=none|[[File:Vines JE2 BE2.png|32px]] The texture of vines have now been changed.}} |
||
| Line 435: | Line 371: | ||
File:Vines.jpg|Griefing with vines in the Beta 1.8 pre-release. |
File:Vines.jpg|Griefing with vines in the Beta 1.8 pre-release. |
||
File:Growing vines 1.8.png|Growing player-placed vines. |
File:Growing vines 1.8.png|Growing player-placed vines. |
||
| − | File: |
+ | File:Swamp mushrooms.png|Vines hanging from trees in the swamp [[biome]]. |
File:Vines In Jungles.png|Vines in a jungle biome. |
File:Vines In Jungles.png|Vines in a jungle biome. |
||
File:TooMuchFoliage.png|Vines growing from the edges of small jungle trees. |
File:TooMuchFoliage.png|Vines growing from the edges of small jungle trees. |
||
| Line 457: | Line 393: | ||
[[ko:덩굴]] |
[[ko:덩굴]] |
||
[[pl:Pnącze]] |
[[pl:Pnącze]] |
||
| − | [[pt: |
+ | [[pt:Trepadeiras]] |
[[ru:Лианы]] |
[[ru:Лианы]] |
||
[[uk:Лоза]] |
[[uk:Лоза]] |
||
Revision as of 09:39, 28 February 2021
Vines are non-solid blocks, 1⁄16 of a block in thickness that can be placed only against a vertical side of a solid block. They also can be supported by a solid block ceilings if adjacent to a solid vertical wall.
Obtaining
Natural generation
Vines are naturally generated in jungles and swamps. Jungle trees of both sizes have vines on their trunks and canopy edges, and vines grow on the sides of jungle terrain. Vines are also naturally generated in oak trees in swamps. They are found in jungle temples and woodland mansions allium room. Vines can also generate on dying oak, spruce, jungle and dark oak trees.[Bedrock Edition only] Vines can generate in watchtower walls in pillager outposts.
Breaking
Vines can be destroyed with anything, but in Java Edition, using shears is the only way to collect them while Bedrock Edition also allows the use of an axe with Silk Touch. Efficiency on Shears has no effect when used with Vines.[1] Use an axe with Vines can increase efficiency, but does not allow for collection in Java Edition, whereas it does in Bedrock Edition. If multiple vines exist within the same block space, breaking one of them breaks all of them instead of just the one targeted[2] and results in only a single vine dropping.[3]
| Block | Vines | |
|---|---|---|
| Hardness | 0.2 | |
| Tool | ||
| Breaking time[A] | ||
| Default | 0.3 | |
| Wooden | 0.15 | |
| Stone | 0.1 | |
| Iron | 0.05 | |
| Diamond | 0.05 | |
| Netherite | 0.05 | |
| Golden | 0.05 | |
| Shears | 0.3 | |
| Sword | 0.2 | |
- ↑ Times are for unenchanted tools as wielded by players with no status effects, measured in seconds. For more information, see Breaking § Speed.
Trading
Vines are sold by wandering traders for an emerald.
Post-generation
On each block tick, the vine block has a 25% chance of attempting to spread in a randomly selected direction. Vines spread to adjacent blocks under certain conditions:
- Downward:
- If the block below is air, each side (north, south, east, and west) with vines has a 50% chance to spread downward.
- If the block below is a block, each side of that block with vines on the ticked block has a 50% chance of gaining vines.
- Upward:
- If the block above is air and there are fewer than 4 other vine blocks in a 9×9×3 area surrounding the ticked vine block, each side (north, south, east, and west) with vines has a 50% chance to spread upward if that side is backed by a block that vines can be placed on.
- Horizontally:
- If the current vine block isn't covering the target direction and there are fewer than 4 other vine blocks in a 9×9×3 area surrounding the ticked vine block, then:
- If the block in the target direction is air, then it tries:
- If the current vine block isn't covering the target direction and there are fewer than 4 other vine blocks in a 9×9×3 area surrounding the ticked vine block, then:
|
to |
|
- If the vine block has vines to the right and that side of the air block is backed by something vines can be placed on, spread to the right side of the air block.
|
to |
|
- If the vine block has vines to the left and that side of the air block is backed by something vines can be placed on, spread to the left side of the air block.
|
to |
|
- If the vine block has vines to the right, and that side of the air block is backed by another air block, and the right side of the vine block is backed by something vines can be placed on, spread around the corner.
|
to |
|
- If the vine block has vines to the left, and that side of the air block is backed by another air block, and the left side of the vine block is backed by something vines can be placed on, spread around the corner.
- If the air block in the target direction has something vines could be placed on above it, spread to the top side of the air block.
- If the block in the target direction is opaque and fills its whole cube, spread to that side of the ticked vine block.
Vines cannot be grown using bone meal.
Usage
Vines can be placed on the side of any block that fills its whole cube and blocks entity movement. They can also be placed on the bottom side of a block (although not the bottom side of another vine - this was programmed intentionally[4]). However, a vine block without vines on any of the horizontal sides disappears if it gets an update from a neighboring block. Vines attached to the bottom of stairs are completely deleted by any block update.[5]
Several vines can be placed in the same block space, as long as they are facing different directions.
Vines can be climbed by standing next to them and holding the jump key. If there is a solid block behind the vines, the walk forward key can also be used.
Vines cancel a sprint if the player is sprinting, slowing the movement speed.
Vines absorb all fall damage, even without a solid surface nearby. Sneaking on vines causes the player to hang, even if the vines are not adjacent to any surface.
Blocks can replace vines if placed within the same block space. However, item frames and paintings cannot.[6]
Crafting ingredient
| Name | Ingredients | Crafting recipe | Description |
|---|---|---|---|
| Banner Pattern Bordure Indented | Paper + Vines |
[Bedrock Edition only] | |
| Mossy Cobblestone | Cobblestone + Vines |
||
| Mossy Stone Bricks | Stone Bricks + Vines |
Composting
Placing vines into a composter has a 50% chance of raising the compost level by 1.
List of colors
Java Edition
Hard-coded Color
- In the Inventory, Vines have a color:
#48b518.
Biome Colors
These values are generated by the biome dyeing algorithm. See Biome colors for more information.
| Biome | Category | Rainfall | Foliage Color | Temperature Affects | Render |
|---|---|---|---|---|---|
| Badlands | Mesa | No | #9e814d | No | |
| Badlands Plateau | Mesa | No | #9e814d | No | |
| Beach | Beach | Rain | #77ab2f | ||
| Birch Forest | Forest | Rain | #6ba941 | ||
| Birch Forest Hills | Forest | Rain | #6ba941 | ||
| Cold Ocean | Ocean | Rain | #71a74d | ||
| Dark Forest | Forest | Rain | #59ae30 | ||
| Dark Forest Hills | Forest | Rain | #59ae30 | ||
| Deep Cold Ocean | Ocean | Rain | #71a74d | ||
| Deep Frozen Ocean | Ocean | Rain | #71a74d | ||
| Deep Lukewarm Ocean | Ocean | Rain | #71a74d | ||
| Deep Ocean | Ocean | Rain | #71a74d | ||
| Deep Warm Ocean | Ocean | Rain | #71a74d | ||
| Desert | Desert | No | #aea42a | ||
| Desert Hills | Desert | No | #aea42a | ||
| Desert Lakes | Desert | No | #aea42a | ||
| End Barrens | The End | No | #71a74d | ||
| End Highlands | The End | No | #71a74d | ||
| End Midlands | The End | No | #71a74d | ||
| Eroded Badlands | Mesa | No | #9e814d | No | |
| Flower Forest | Forest | Rain | #59ae30 | ||
| Forest | Forest | Rain | #59ae30 | ||
| Frozen Ocean | Ocean | Snow | #60a17b | File:Snowy Tundra Vines.png | |
| Frozen River | River | Snow | #60a17b | File:Snowy Tundra Vines.png | |
| Giant Spruce Taiga | Taiga | Rain | #68a464 | ||
| Giant Spruce Taiga Hills | Taiga | Rain | #68a464 | ||
| Giant Tree Taiga | Taiga | Rain | #68a55f | File:Giant Tree Taiga Vines.png | |
| Giant Tree Taiga Hills | Taiga | Rain | #68a55f | File:Giant Tree Taiga Vines.png | |
| Gravelly Mountains | Extreme Hills | Rain | #6da36b | File:Mountains Vines.png | |
| Gravelly Mountains+ | Extreme Hills | Rain | #6da36b | File:Mountains Vines.png | |
| Ice Spikes | Icy | Snow | #60a17b | File:Snowy Tundra Vines.png | |
| Jungle | Jungle | Rain | #30bb0b | ||
| Jungle Edge | Jungle | Rain | #3eb80f | File:Jungle Edge Vines.png | |
| Jungle Hills | Jungle | Rain | #30bb0b | ||
| Lukewarm Ocean | Ocean | Rain | #71a74d | ||
| Modified Badlands Plateau | Mesa | No | #9e814d | No | |
| Modified Jungle | Jungle | Rain | #30bb0b | ||
| Modified Jungle Edge | Jungle | Rain | #3eb80f | File:Jungle Edge Vines.png | |
| Modified Wooded Badlands Plateau | Mesa | No | #9e814d | No | |
| Mountain Edge | Extreme Hills | Rain | #6da36b | File:Mountains Vines.png | |
| Mountains | Extreme Hills | Rain | #6da36b | File:Mountains Vines.png | |
| Mushroom Fields | Mushroom | Rain | #2bbb0f | ||
| Mushroom Field Shore | Mushroom | Rain | #2bbb0f | ||
| Nether | Nether | No | #aea42a | ||
| Ocean | Ocean | Rain | #71a74d | ||
| Plains | Plains | Rain | #77ab2f | ||
| River | River | Rain | #71a74d | ||
| Savanna | Savanna | No | #aea42a | ||
| Savanna Plateau | Savanna | No | #aea42a | ||
| Shattered Savanna | Savanna | No | #aea42a | ||
| Shattered Savanna Plateau | Savanna | No | #aea42a | ||
| Small End Islands | The End | No | #71a74d | ||
| Snowy Beach | Beach | Snow | #64a278 | ||
| Snowy Mountains | Icy | Snow | #60a17b | File:Snowy Tundra Vines.png | |
| Snowy Taiga | Taiga | Snow | #60a17b | File:Snowy Tundra Vines.png | |
| Snowy Taiga Hills | Taiga | Snow | #60a17b | File:Snowy Tundra Vines.png | |
| Snowy Taiga Mountains | Taiga | Snow | #60a17b | File:Snowy Tundra Vines.png | |
| Snowy Tundra | Icy | Snow | #60a17b | File:Snowy Tundra Vines.png | |
| Stone Shore | None | Rain | #6da36b | File:Mountains Vines.png | |
| Sunflower Plains | Plains | Rain | #77ab2f | ||
| Swamp | Swamp | Rain | #6a7039 | If temperature below -0.1, used #4C763C. | |
| Swamp Hills | Swamp | Rain | #6a7039 | If temperature below -0.1, used #4C763C. | |
| Taiga | Taiga | Rain | #68a464 | ||
| Taiga Hills | Taiga | Rain | #68a464 | ||
| Taiga Mountains | Taiga | Rain | #68a464 | ||
| Tall Birch Forest | Forest | Rain | #6ba941 | ||
| Tall Birch Hills | Forest | Rain | #6ba941 | ||
| The End | The End | No | #71a74d | ||
| The Void | None | No | #71a74d | ||
| Warm Ocean | Ocean | Rain | #71a74d | ||
| Wooded Badlands Plateau | Mesa | No | #9e814d | No | |
| Wooded Hills | Forest | Rain | #59ae30 | ||
| Wooded Mountains | Extreme Hills | Rain | #6da36b | File:Mountains Vines.png |
Bedrock Edition
Sounds
Generic
| Sound | Subtitles | Source | Description | Resource location | Translation key | Volume | Pitch | Attenuation distance |
|---|---|---|---|---|---|---|---|---|
| Block broken | Blocks | Once the block has broken | block | subtitles | 1.0 | 0.8 | 16 | |
| Block placed | Blocks | When the block is placed | block | subtitles | 1.0 | 0.8 | 16 | |
| Block breaking | Blocks | While the block is in the process of being broken | block | subtitles | 0.25 | 0.5 | 16 | |
| None[sound 1] | Entity-Dependent | Falling on the block with fall damage | block | None[sound 1] | 0.5 | 0.75 | 16 | |
| Footsteps | Entity-Dependent | Walking on the block | block | subtitles | 0.15 | 1.0 | 16 |
| Sound | Source | Description | Resource location | Volume | Pitch |
|---|---|---|---|---|---|
| Blocks | Once the block has broken | dig | 0.7 | 0.8-1.0 | |
| Blocks | When the block is placed | dig | 0.8 | 0.8-1.0 | |
| Blocks | While the block is in the process of being broken | hit | 0.3 | 0.5 | |
| Players | Falling on the block with fall damage | fall | 0.4 | 1.0 | |
| Players | Walking on the block | step | 0.3 | 1.0 | |
| Players | Jumping from the block | jump | 0.11 | 1.0 | |
| Players | Falling on the block without fall damage | land | 0.21 | 1.0 |
Unique
| Sound | Subtitles | Source | Description | Resource location | Translation key | Volume | Pitch | Attenuation distance |
|---|---|---|---|---|---|---|---|---|
| Footsteps | Blocks | Walking on the block | block | subtitles | ? | ? | 16 |
Data values
ID
| Name | Identifier | Form | Block tags (JE) | Translation key |
|---|---|---|---|---|
| Vines | vine | Block & Item | climbable lush_plants_replaceable[upcoming: JE 1.17] | block.minecraft.vine |
| Name | Identifier | Numeric ID | Form | Translation key |
|---|---|---|---|---|
| Vines | vine | 106 | Block & Giveable Item[i 1] | tile.vine.name |
Block data
In Bedrock Edition, vines uses the following data values to determine the face against which the vine is anchored. Note that (except for Top) these are testable as bit flags, unlike most of the other directional data for other block types. Multiple sides can contain vines. The "top" attachment is assumed to be present if data is 0 or there is solid block above.
- 1: Template:F
- 2: Template:F
- 4: Template:F
- 8: Template:F
Block states
| Name | Default value | Allowed values | Description |
|---|---|---|---|
| east | false | falsetrue | When true, a vine texture is displayed on the east. |
| north | false | falsetrue | When true, a vine texture is displayed on the north. |
| south | false | falsetrue | When true, a vine texture is displayed on the south. |
| up | false | falsetrue | When true, a vine texture is displayed on the top. |
| west | false | falsetrue | When true, a vine texture is displayed on the west. |
| Name | Metadata Bits | Default value | Allowed values | Values for Metadata Bits |
Description |
|---|---|---|---|---|---|
| vine_direction_bits | 0x10x20x40x8 | 0 | 0123456789101112131415 | 0123456789101112131415 | The directions the vine exists, excluding up. Each bit determines one direction:
Note: Vines gain the ceiling vines if there's a block above, block state doesn't change. |
History
| August 26, 2011 | When the Adventure Update was showcased at PAX, vines hadn't been given a name, and a mouseover would not show a title. This implies that they didn't have an official name at the time. | ||||
|---|---|---|---|---|---|
| Java Edition Beta | |||||
1.8{{Extension DPL}}<ul><li>[[Flower Pot|Flower Pot]]<br/>{{more images|The potted cherry sapling texture has been change in 1.19.4-pre2.}}
{{For|other uses|Pot}}
{{Block
| image = Flower Pot.png
| image2 = Potted Poppy.png
| extratext = View [[#Gallery|all renders]]
| transparent = Yes
| light = No
| tool = any
| renewable = Yes
| stackable = Yes (64)
| flammable = No
| lavasusceptible = No
}}
A '''flower pot''' is a decorative [[block]] that can contain flowers, bamboo, saplings, cacti, mushrooms, fungi, and other reasonably small plants.
== Obtaining ==
=== Natural generation ===
Flower pots naturally generate in [[witch hut]]s where they contain a red [[mushroom]], the basement of [[igloo]]s where they contain a [[cactus]], and in [[woodland mansion]]s, where they contain birch [[sapling]]s, dark oak saplings, dandelions, poppies, blue orchids, alliums, azure bluets, red and white tulips, and oxeye daisies.
Flower pots containing a dandelion can be found in some [[plains]] and [[savanna]] [[village]] houses. Flower pots containing a cactus or a dead bush can be found in some [[desert]] village houses. Flower pots containing a spruce sapling can be found in [[taiga]] village mason houses. Flower pots containing a poppy can be found in taiga village churches.
=== Breaking ===
Flower pots can be mined instantly using any [[tool]] or without a tool.
A flower pot drops itself as an [[item]] (any [[plant]] or [[mushroom]] in it separately) when pushed by a [[piston]] or washed away with [[water]].
[[Lava]] can flow into the space of a flower pot, destroying it.
=== Chest loot ===
{{LootChestItem|flower-pot}}
=== Crafting ===
{{Crafting
|A2= Brick
|C2= Brick
|B3= Brick
|Output= Flower Pot
|type= Decoration block
}}
== Usage ==
A flower pot can be used to hold [[mushroom]]s, [[Fungus|fungi]], and various [[plant]]s. Plants that can be {{control|placed}} in a pot include any one block high [[flower]]s, [[sapling]]s, [[fern]]s, [[dead bush]]es, [[cacti]], [[bamboo]], [[azalea]]s, [[mangrove propagule]], and [[roots]].
Plants can be removed by using the interact button.
{{IN|je}}, flower pots can be placed on any block, or over [[air]].<ref>{{bug|MC-127036|||WAI}}</ref>
{{IN|be}}, they must be placed on top of a full-[[block]] top surface, or the top of a [[fence]], stone [[wall]], or [[hopper]]. They cannot be placed on [[slab]]s and [[stairs]] unless those blocks are upside-down. Pots may also be placed on an upward facing trapdoor. If the trapdoor is opened, the pot will break.
Flower pots are {{frac|3|8}} of a block high and can be stepped on. It is not possible to walk from the top of a flower pot onto a full sized block without jumping. It is possible to jump from a flower pot onto a fence.
The plant or fungus can be removed from the flower pot by pressing the {{control|use}} control. This places the item directly back into the player's inventory.<ref>{{bug|MC-169496|||WAI}}</ref>
They can be used to display cacti and wither roses without inheriting their damaging properties.<ref>{{bug|MC-2241|||WAI}}</ref><ref>{{bug|MC-138024|||WAI}}</ref>
Potted [[Fungus|warped fungus]] can be used to repel [[hoglin]]s.
== Sounds ==
{{Sound table/Block/Normal}}
== Data values ==
=== ID ===
{{edition|java}}:
{{ID table
|edition=java
|showblocktags=y
|showforms=y
|generatetranslationkeys=y
|displayname=Flower Pot
|spritetype=block
|nameid=flower_pot
|blocktags=flower_pots
|translationkey=block.minecraft.flower_pot,item.minecraft.flower_pot}}
{{ID table
|displayname=Potted Dandelion
|spritetype=block
|nameid=potted_dandelion
|blocktags=flower_pots
|form=block}}
{{ID table
|displayname=Potted Poppy
|spritetype=block
|nameid=potted_poppy
|blocktags=flower_pots
|form=block}}
{{ID table
|displayname=Potted Blue Orchid
|spritetype=block
|nameid=potted_blue_orchid
|blocktags=flower_pots
|form=block}}
{{ID table
|displayname=Potted Allium
|spritetype=block
|nameid=potted_allium
|blocktags=flower_pots
|form=block}}
{{ID table
|displayname=Potted Azure Bluet
|spritetype=block
|nameid=potted_azure_bluet
|blocktags=flower_pots
|form=block}}
{{ID table
|displayname=Potted Red Tulip
|spritetype=block
|nameid=potted_red_tulip
|blocktags=flower_pots
|form=block}}
{{ID table
|displayname=Potted Orange Tulip
|spritetype=block
|nameid=potted_orange_tulip
|blocktags=flower_pots
|form=block}}
{{ID table
|displayname=Potted White Tulip
|spritetype=block
|nameid=potted_white_tulip
|blocktags=flower_pots
|form=block}}
{{ID table
|displayname=Potted Pink Tulip
|spritetype=block
|nameid=potted_pink_tulip
|blocktags=flower_pots
|form=block}}
{{ID table
|displayname=Potted Oxeye Daisy
|spritetype=block
|nameid=potted_oxeye_daisy
|blocktags=flower_pots
|form=block}}
{{ID table
|displayname=Potted Cornflower
|spritetype=block
|nameid=potted_cornflower
|blocktags=flower_pots
|form=block}}
{{ID table
|displayname=Potted Lily of the Valley
|spritetype=block
|nameid=potted_lily_of_the_valley
|blocktags=flower_pots
|form=block}}
{{ID table
|displayname=Potted Wither Rose
|spritetype=block
|nameid=potted_wither_rose
|blocktags=flower_pots
|form=block}}
{{ID table
|displayname=Potted Oak Sapling
|spritetype=block
|nameid=potted_oak_sapling
|blocktags=flower_pots
|form=block}}
{{ID table
|displayname=Potted Spruce Sapling
|spritetype=block
|nameid=potted_spruce_sapling
|blocktags=flower_pots
|form=block}}
{{ID table
|displayname=Potted Birch Sapling
|spritetype=block
|nameid=potted_birch_sapling
|blocktags=flower_pots
|form=block}}
{{ID table
|displayname=Potted Jungle Sapling
|spritetype=block
|nameid=potted_jungle_sapling
|blocktags=flower_pots
|form=block}}
{{ID table
|displayname=Potted Acacia Sapling
|spritetype=block
|nameid=potted_acacia_sapling
|blocktags=flower_pots
|form=block}}
{{ID table
|displayname=Potted Dark Oak Sapling
|spritetype=block
|nameid=potted_dark_oak_sapling
|blocktags=flower_pots
|form=block}}
{{ID table
|displayname=Potted Red Mushroom
|spritetype=block
|nameid=potted_red_mushroom
|blocktags=flower_pots
|form=block}}
{{ID table
|displayname=Potted Brown Mushroom
|spritetype=block
|nameid=potted_brown_mushroom
|blocktags=flower_pots
|form=block}}
{{ID table
|displayname=Potted Fern
|spritetype=block
|nameid=potted_fern
|blocktags=flower_pots
|form=block}}
{{ID table
|displayname=Potted Dead Bush
|spritetype=block
|nameid=potted_dead_bush
|blocktags=flower_pots
|form=block}}
{{ID table
|displayname=Potted Cactus
|spritetype=block
|nameid=potted_cactus
|blocktags=flower_pots
|form=block}}
{{ID table
|displayname=Potted Bamboo
|spritetype=block
|nameid=potted_bamboo
|blocktags=flower_pots
|form=block}}
{{ID table
|displayname=Potted Azalea
|spritetype=block
|nameid=potted_azalea_bush
|blocktags=flower_pots
|spritename=potted azalea bush
|form=block}}
{{ID table
|displayname=Potted Flowering Azalea
|spritetype=block
|nameid=potted_flowering_azalea_bush
|blocktags=flower_pots
|spritename=potted flowering azalea bush
|form=block}}
{{ID table
|displayname=Potted Crimson Fungus
|spritetype=block
|nameid=potted_crimson_fungus
|blocktags=flower_pots
|form=block}}
{{ID table
|displayname=Potted Warped Fungus
|spritetype=block
|nameid=potted_warped_fungus
|blocktags=flower_pots, hoglin_repellents
|form=block}}
{{ID table
|displayname=Potted Crimson Roots
|spritetype=block
|nameid=potted_crimson_roots
|blocktags=flower_pots
|form=block}}
{{ID table
|displayname=Potted Warped Roots
|spritetype=block
|nameid=potted_warped_roots
|blocktags=flower_pots
|form=block}}
{{ID table
|displayname=Potted Mangrove Propagule
|spritetype=block
|nameid=potted_mangrove_propagule
|blocktags=flower_pots
|form=block
|foot=1}}
{{edition|bedrock}}:
{{ID table
|edition=bedrock
|firstcolumnname=Flower Pot
|shownumericids=y
|showforms=y
|generatetranslationkeys=y
|displayname=Block
|spritename=flower-pot
|spritetype=block
|nameid=flower_pot
|id=140
|form=block
|itemform=item.flower_pot
|translationkey=-}}
{{ID table
|displayname=Item
|spritename=flower-pot
|spritetype=item
|nameid=flower_pot
|id=514
|form=item
|foot=1}}
=== Block states ===
{{see also|Block states}}
{{IN|be}}, flower pots use the following block states:
{{/BS}}
=== Block data ===
{{IN|bedrock}}, flower pot has a block entity associated with it that holds additional data about the block.
See [[Bedrock Edition level format/Block entity format]].
== Achievements ==
{{load achievements|Pot Planter}}
== History ==
{{History||August 16, 2012|link={{tweet|Dinnerbone|236062188555624448}}|[[Dinnerbone]] tweeted the first image of flower pots.}}
{{History|java}}
{{History||1.4.2|snap=12w34a|[[File:Flower Pot JE1.png|32px]] [[File:Potted Dandelion JE1.png|32px]] [[File:Potted Rose JE1.png|32px]] [[File:Potted Red Mushroom JE1.png|32px]] [[File:Potted Brown Mushroom JE1.png|32px]] [[File:Potted Oak Sapling JE1.png|32px]] [[File:Potted Birch Sapling JE1.png|32px]] [[File:Potted Spruce Sapling JE1.png|32px]] [[File:Potted Jungle Sapling JE1.png|32px]] [[File:Potted Cactus JE1.png|32px]] [[File:Potted Fern JE1.png|32px]] [[File:Potted Dead Bush JE1.png|32px]]<br>[[File:Flower Pot (item) JE1 BE1.png|32px]] Added flower pots.
|At this point, plants inside of pots rendered much like they do outside of flower pots, not being subject to directional shading.}}
{{History|||snap=12w40a|A potted [[red mushroom]] can now be found on one window of a [[witch hut]]. This changed to an empty pot in a far later unknown version,{{info needed}} but returned again afterward.{{info needed}}}}
{{History||1.7.2|snap=13w36a|[[File:Potted Allium JE1.png|32px]] [[File:Potted Azure Bluet JE1.png|32px]] [[File:Potted Oxeye Daisy JE1.png|32px]] [[File:Potted Blue Orchid JE1.png|32px]] [[File:Potted Red Tulip JE1.png|32px]] [[File:Potted Orange Tulip JE1.png|32px]] [[File:Potted White Tulip JE1.png|32px]] [[File:Potted Pink Tulip JE1.png|32px]] Allium, azure bluet, oxeye daisies, blue orchids, red tulips, orange tulips, white tulips and pink tulips can now be placed in flower pots.
|[[File:Potted Poppy JE1.png|32px]] As the rose has been replaced with the poppy, the potted rose is also now replaced with the potted poppy as a result.
|Flower pots can no longer use data values because more than 15 plants can be potted, it now has a [[block entity]] instead.
|[[File:Potted Green Shrub.png|32px]] [[File:Potted Cobweb JE1.png|32px]] Due to the tile entity handling, it is now possible to place any [[block]] inside of a flower pot via NBT editors. However, at this point, with the ones possible in vanilla [[survival]] aside, only [[grass]], [[shrub|green shrub]]s, and [[cobweb]]s actually render.
|[[File:Potted Grass JE1.png|32px]] Potted grass now exists can be placed in flower pots using [[commands]].
|[[File:Potted Grass (no tint) JE1.png|32px]] [[File:Potted Fern (no tint) JE1.png|32px]] Potted shrubs, grass, and ferns must now have block data value 11 to display biome colors, otherwise rendering as default/gray.}}
{{History|||snap=13w37a|Added {{cmd|setblock}}, allowing for the aforementioned potted plants to be obtained without map editing.}}
{{History|||snap=13w43a|[[File:Potted Acacia Sapling JE1.png|32px]] [[File:Potted Dark Oak Sapling JE1.png|32px]] Acacia sapling and dark oak saplings can now be placed in flower pots.}}
{{History||1.8|snap=14w06a|Many more blocks (almost all full cubes) placed into a flower pot by modifying the block entity now render, if in somewhat buggy fashion, as the texture is in a cross shape. {{LoadPage|Flower Pot/1.8 development gallery/14w06a|Click show to display all of the applicable blocks.|b}}
|[[File:Potted Cactus JE2.png|32px]] Potted cacti now appear as a cross formed of their bottom texture inside of a pot.<ref>{{bug|MC-47469}}</ref>}}
{{History|||snap=14w06b|Further blocks now render in flower pots than did in the previous snapshot. {{LoadPage|Flower Pot/1.8 development gallery/14w06b|Click show to display all of the applicable blocks.|b}}
|[[File:Potted Cactus JE3.png|32px]] The accidental potted cactus model change has been reverted.}}
{{History|||snap=14w07a|[[File:Potted Iron Trapdoor.png|32px]] The newly added [[iron trapdoor]] also renders in flower pots when created with commands.}}
{{History|||snap=14w17a|[[File:Flower Pot JE2.png|32px]] [[File:Potted Dandelion JE2.png|32px]] [[File:Potted Allium JE2.png|32px]] [[File:Potted Azure Bluet JE2.png|32px]] [[File:Potted Oxeye Daisy JE2.png|32px]] [[File:Potted Blue Orchid JE2.png|32px]] [[File:Potted Poppy JE2.png|32px]] [[File:Potted Red Tulip JE2.png|32px]] [[File:Potted Orange Tulip JE2.png|32px]] [[File:Potted White Tulip JE2.png|32px]] [[File:Potted Pink Tulip JE2.png|32px]] [[File:Potted Red Mushroom JE2.png|32px]] [[File:Potted Brown Mushroom JE2.png|32px]] [[File:Potted Oak Sapling JE2.png|32px]] [[File:Potted Birch Sapling JE2.png|32px]] [[File:Potted Spruce Sapling JE2.png|32px]] [[File:Potted Jungle Sapling JE2.png|32px]] [[File:Potted Acacia Sapling JE2.png|32px]] [[File:Potted Dark Oak Sapling JE2.png|32px]] [[File:Potted Cactus JE4.png|32px]] [[File:Potted Fern JE2.png|32px]] [[File:Potted Dead Bush JE2.png|32px]] The flower pot model and rendering has changed. The insides are now subject to directional shading, rather than being fully lit, much like the changes made to [[hopper]]s and [[cauldron]]s in 14w10a. In addition, the outer face (as well as the cuboids comprising the cactus in potted cactus) are no longer subject to ambient occlusion. The potted cactus also now uses the side texture on the top face, rather than the top texture.
|Invalid blocks no longer render inside flower pots. This also includes cobweb and grass.}}
{{History|||snap=14w25a|[[File:Potted Dandelion JE3.png|32px]] [[File:Potted Allium JE3.png|32px]] [[File:Potted Azure Bluet JE3.png|32px]] [[File:Potted Oxeye Daisy JE3.png|32px]] [[File:Potted Blue Orchid JE3.png|32px]] [[File:Potted Poppy JE3.png|32px]] [[File:Potted Red Tulip JE3.png|32px]] [[File:Potted Orange Tulip JE3.png|32px]] [[File:Potted White Tulip JE3.png|32px]] [[File:Potted Pink Tulip JE3.png|32px]] [[File:Potted Red Mushroom JE3.png|32px]] [[File:Potted Brown Mushroom JE3.png|32px]] [[File:Potted Oak Sapling JE3.png|32px]] [[File:Potted Birch Sapling JE3.png|32px]] [[File:Potted Spruce Sapling JE3.png|32px]] [[File:Potted Jungle Sapling JE3.png|32px]] [[File:Potted Acacia Sapling JE3.png|32px]] [[File:Potted Dark Oak Sapling JE3.png|32px]] [[File:Potted Fern JE3.png|32px]] [[File:Potted Dead Bush JE3.png|32px]] Potted cross shaped objects are now affected by directional shading.<ref>{{bug|MC-129826}}</ref>}}
{{History||1.9|snap=15w43a|A potted cactus can now be found on a table in [[igloo]] basements.}}
{{History||1.11|snap=16w32a|The block entity ID of flower pots has been changed from <code>FlowerPot</code> to <code>flower_pot</code>.}}
{{History|||snap=16w39a|Potted plants can now be removed from flower pots by pressing {{control|use}}.
|Flower pots now generate in [[woodland mansion]]s.}}
{{History||1.13|snap=17w47a|The different block states for the <code>flower_pot</code> ID have been split up into their own IDs.
|Flower pots are no longer block entities.
|Prior to [[1.13/Flattening|''The Flattening'']], this block's numeral ID was 140, and the item's was 390.}}
{{History||1.14|snap=18w43a|[[File:Flower Pot JE3.png|32px]] [[File:Potted Dandelion JE4.png|32px]] [[File:Potted Poppy JE4.png|32px]] [[File:Potted Allium JE4.png|32px]] [[File:Potted Azure Bluet JE4.png|32px]] [[File:Potted Oxeye Daisy JE4.png|32px]] [[File:Potted Blue Orchid JE4.png|32px]] [[File:Potted Red Tulip JE4.png|32px]] [[File:Potted Orange Tulip JE4.png|32px]] [[File:Potted White Tulip JE4.png|32px]] [[File:Potted Pink Tulip JE4.png|32px]] [[File:Potted Red Mushroom JE4.png|32px]] [[File:Potted Brown Mushroom JE4.png|32px]] [[File:Potted Oak Sapling JE4.png|32px]] [[File:Potted Birch Sapling JE4.png|32px]] [[File:Potted Spruce Sapling JE4.png|32px]] [[File:Potted Jungle Sapling JE4.png|32px]] [[File:Potted Acacia Sapling JE4.png|32px]] [[File:Potted Dark Oak Sapling JE4.png|32px]] [[File:Potted Cactus JE5.png|32px]] [[File:Potted Fern JE4.png|32px]] [[File:Potted Dead Bush JE4.png|32px]] <br>[[File:Flower Pot (item) JE2 BE2.png|32px]] The textures of flower pots and their contained plants have been changed.
|[[File:Potted Cornflower JE1 BE1.png|32px]] [[File:Potted Lily of the Valley JE1 BE1.png|32px]] [[File:Potted Wither Rose JE1 BE1.png|32px]] [[File:Potted Bamboo JE1 BE1.png|32px]] Cornflower, lily of the valley, wither rose and [[bamboo]] can now be placed in flower pots.}}
{{History|||snap=18w44a|[[File:Potted Cactus JE6.png|32px]] The texture of potted cacti has been changed.}}
{{History|||snap=18w47b|[[File:Potted Poppy JE5.png|32px]] The texture of potted poppies has been changed.}}
{{History|||snap=18w49a|Flower pots can now be found in [[chest]]s in [[village]] mason houses.}}
{{History|||snap=19w11a|Flower pots have become [[renewable resource|renewable]], as mason [[villager]]s now [[trading|sell]] [[brick]]s.}}
{{History||1.16|snap=20w06a|The model of flower pots has been fixed and has been given an underside, which has changed the model from [[File:Flower Pot UNKVER2 (facing NWU).png|32px]] to [[File:Flower Pot UNKVER3 (facing NWU).png|32px]].}}
{{History|||snap=20w09a|[[File:Potted Crimson Fungus JE1 BE1.png|32px]] [[File:Potted Warped Fungus JE1 BE1.png|32px]] [[File:Potted Crimson Roots JE1 BE1.png|32px]] [[File:Potted Warped Roots JE1 BE1.png|32px]] Crimson and warped [[fungi]] and crimson and warped [[roots]] can now be placed in flower pots.
|The model for potted plants has been fixed, so the bottom face now renders,<ref>{{bug|MC-170842}}</ref> which has changed the model from [[File:Potted Dandelion UNKVER1 (facing NWU).png|32px]] [[File:Potted Poppy UNKVER1 (facing NWU).png|32px]] [[File:Potted Allium UNKVER1 (facing NWU).png|32px]] [[File:Potted Azure Bluet UNKVER1 (facing NWU).png|32px]] [[File:Potted Oxeye Daisy UNKVER1 (facing NWU).png|32px]] [[File:Potted Blue Orchid UNKVER1 (facing NWU).png|32px]] [[File:Potted Red Tulip UNKVER1 (facing NWU).png|32px]] [[File:Potted Orange Tulip UNKVER1 (facing NWU).png|32px]] [[File:Potted White Tulip UNKVER1 (facing NWU).png|32px]] [[File:Potted Pink Tulip UNKVER1 (facing NWU).png|32px]] [[File:Potted Red Mushroom UNKVER1 (facing NWU).png|32px]] [[File:Potted Brown Mushroom UNKVER1 (facing NWU).png|32px]] [[File:Potted Oak Sapling UNKVER1 (facing NWU).png|32px]] [[File:Potted Birch Sapling UNKVER1 (facing NWU).png|32px]] [[File:Potted Spruce Sapling UNKVER1 (facing NWU).png|32px]] [[File:Potted Jungle Sapling UNKVER1 (facing NWU).png|32px]] [[File:Potted Acacia Sapling UNKVER1 (facing NWU).png|32px]] [[File:Potted Dark Oak Sapling UNKVER1 (facing NWU).png|32px]] [[File:Potted Cactus UNKVER1 (facing NWU).png|32px]] [[File:Potted Fern UNKVER1 (facing NWU).png|32px]] [[File:Potted Dead Bush UNKVER1 (facing NWU).png|32px]] [[File:Potted Cornflower UNKVER1 (facing NWU).png|32px]] [[File:Potted Lily of the Valley UNKVER1 (facing NWU).png|32px]] [[File:Potted Wither Rose UNKVER1 (facing NWU).png|32px]] [[File:Potted Bamboo UNKVER1 (facing NWU).png|32px]] to [[File:Potted Dandelion UNKVER2 (facing NWU).png|32px]] [[File:Potted Poppy UNKVER2 (facing NWU).png|32px]] [[File:Potted Allium UNKVER2 (facing NWU).png|32px]] [[File:Potted Azure Bluet UNKVER2 (facing NWU).png|32px]] [[File:Potted Oxeye Daisy UNKVER2 (facing NWU).png|32px]] [[File:Potted Blue Orchid UNKVER2 (facing NWU).png|32px]] [[File:Potted Red Tulip UNKVER2 (facing NWU).png|32px]] [[File:Potted Orange Tulip UNKVER2 (facing NWU).png|32px]] [[File:Potted White Tulip UNKVER2 (facing NWU).png|32px]] [[File:Potted Pink Tulip UNKVER2 (facing NWU).png|32px]] [[File:Potted Red Mushroom UNKVER2 (facing NWU).png|32px]] [[File:Potted Brown Mushroom UNKVER2 (facing NWU).png|32px]] [[File:Potted Oak Sapling UNKVER2 (facing NWU).png|32px]] [[File:Potted Birch Sapling UNKVER2 (facing NWU).png|32px]] [[File:Potted Spruce Sapling UNKVER2 (facing NWU).png|32px]] [[File:Potted Jungle Sapling UNKVER2 (facing NWU).png|32px]] [[File:Potted Acacia Sapling UNKVER2 (facing NWU).png|32px]] [[File:Potted Dark Oak Sapling UNKVER2 (facing NWU).png|32px]] [[File:Potted Cactus UNKVER2 (facing NWU).png|32px]] [[File:Potted Fern UNKVER2 (facing NWU).png|32px]] [[File:Potted Dead Bush UNKVER2 (facing NWU).png|32px]] [[File:Potted Cornflower UNKVER2 (facing NWU).png|32px]] [[File:Potted Lily of the Valley UNKVER2 (facing NWU).png|32px]] [[File:Potted Wither Rose UNKVER2 (facing NWU).png|32px]] [[File:Potted Bamboo UNKVER2 (facing NWU).png|32px]].}}
{{History|||snap=20w11a|[[File:Potted Bamboo UNKVER3 (facing NWU).png|32px]] An unneeded face has been removed from potted bamboo to solve a z-fighting issue.<ref>{{bug|MC-173156}}</ref>}}
{{History|||snap=Pre-release 3|[[File:Potted Cactus JE7.png|32px]] [[File:Potted Cactus UNKVER3 (facing NWU).png|32px]] The model of the potted cacti has been changed. The top face now uses the top texture of cactus, rather than the side texture and the bottom face has been changed to the top texture of the flower pot.}}
{{History||1.16.2|snap=20w28a|[[File:Potted Cactus UNKVER4 (facing NWU).png|32px]] The model of the potted cactus no longer has a hole in the bottom, although the texture is stretched.}}
{{History||1.17|snap=Pre-release 1|[[File:Potted Azalea JE1 BE1.png|32px]] [[File:Potted Flowering Azalea JE1 BE1.png|32px]][[Azalea]] and flowering azalea can now be placed in flower pots.
|[[File:Potted Flowering Azalea (plant texture) JE1.png|32px]] Potted flowering azalea has own unused plant texture but uses normal variant for consistency with flowering azalea: [[File:Potted Flowering Azalea (bottom) JE1 BE1.png|32px]] [[File:Flowering Azalea (bottom) JE2 BE2.png|32px]]}}
{{History||1.19|snap=22w11a|[[File:Potted Mangrove Propagule JE1.png|32px]] [[Mangrove propagule]]s can now be placed in flower pots.}}
{{History|||snap=22w18a|[[File:Potted Mangrove Propagule JE2.png|32px]] The western element of the flower pot in potted mangrove propagules has been deleted.<ref name="mc-251355">{{bug|MC-251355}}</ref>}}
{{History|||snap=Pre-release 1|[[File:Potted Mangrove Propagule JE1.png|32px]] The aforementioned western element has been restored.<ref name="mc-251355"/>}}
{{History||1.20<br>(Experimental)|link=1.19.4|snap=23w07a|[[File:Potted Torchflower JE1.png|32px]] [[File:Potted Cherry Sapling JE1.png|32px]] [[Torchflower]]s and [[cherry sapling]]s can now be placed in flower pots.}}
{{History|||snap=1.19.4-pre2|Changed the texture of potted cherry saplings.}}
{{History||1.20|snap=23w12a|Potted torchflower and cherry sapling are now available without using the "Update 1.20" experimental datapack.|Flower pot can now be found in [[suspicious gravel]] and [[suspicious sand]] in [[trail ruins]].}}
{{History|||snap=23w13a|[[File:Potted Flowering Azalea JE2.png|32px]] Flowering azalea now uses own plant texture, changing appearance from [[File:Potted Flowering Azalea (bottom) JE1 BE1.png|32px]] to [[File:Potted Flowering Azalea (bottom) JE2.png|32px]] and breaking consistency with flowering azalea.<ref>{{bug|MC-230916}}</ref>}}
{{History|||snap=23w16a|Flower pot no longer generates in [[suspicious sand]] in [[trail ruins]].|Due to the split of the archaeological loot tables for the suspicious gravel within the [[trail ruins]]; flower pot now is in the common loot.}}
{{History|pocket alpha}}
{{History||v0.12.1|snap=build 1|[[File:Flower Pot JE1.png|32px]] [[File:Potted Dandelion JE1.png|32px]] [[File:Potted Red Mushroom JE1.png|32px]] [[File:Potted Brown Mushroom JE1.png|32px]] [[File:Potted Oak Sapling JE1.png|32px]] [[File:Potted Birch Sapling JE1.png|32px]] [[File:Potted Spruce Sapling JE1.png|32px]] [[File:Potted Jungle Sapling JE1.png|32px]] [[File:Potted Cactus JE1.png|32px]] [[File:Potted Fern JE1.png|32px]] [[File:Potted Allium JE1.png|32px]] [[File:Potted Azure Bluet JE1.png|32px]] [[File:Potted Oxeye Daisy JE1.png|32px]] [[File:Potted Blue Orchid JE1.png|32px]] [[File:Potted Poppy JE1.png|32px]] [[File:Potted Red Tulip JE1.png|32px]] [[File:Potted Orange Tulip JE1.png|32px]] [[File:Potted White Tulip JE1.png|32px]] [[File:Potted Pink Tulip JE1.png|32px]] [[File:Potted Acacia Sapling JE1.png|32px]] [[File:Potted Dark Oak Sapling JE1.png|32px]]{{verify|Are these models the ones used in this version?}}<br>[[File:Flower Pot (item) JE1 BE1.png|32px]] Added flower pots.}}
{{History||v0.14.0|snap=build 1|Flower pots now generate in [[witch hut]]s.}}
{{History|pocket}}
{{History||1.0.0|snap=alpha 0.17.0.1|Flower pots now generate in [[igloo]] basements.}}
{{History||1.1.0|snap=alpha 1.1.0.0|Flower pots now generate naturally in [[woodland mansion]]s.}}
{{History|bedrock}}
{{History||1.8.0|snap=beta 1.8.0.8|[[File:Potted Bamboo JE1 BE1.png|32px]]{{verify|Is this how they really look in BE?}} [[Bamboo]] can now be placed in flower pots.}}
{{History||1.9.0|snap=beta 1.9.0.0|[[File:Potted Cornflower BE.jpg|32px]] [[File:Potted Lily of the Valley BE.jpg|32px]] Cornflower and lily of the valley can now be placed in flower pots.}}
{{History||1.10.0|snap=beta 1.10.0.3|[[File:Flower Pot BE.jpg|32px]] [[File:Potted Dandelion BE.jpg|32px]] [[File:Potted Poppy BE.jpg|32px]] [[File:Potted Allium BE.jpg|32px]] [[File:Potted Azure Bluet BE.jpg|32px]] [[File:Potted Oxeye Daisy BE.jpg|32px]] [[File:Potted Blue Orchid BE.jpg|32px]] [[File:Potted Red Tulip BE.jpg|32px]] [[File:Potted Orange Tulip BE.jpg|32px]] [[File:Potted White Tulip BE.jpg|32px]] [[File:Potted Pink Tulip BE.jpg|32px]] [[File:Potted Red Mushroom BE.jpg|32px]] [[File:Potted Brown Mushroom BE.jpg|32px]] [[File:Potted Oak Sapling BE.jpg|32px]] [[File:Potted Birch Sapling BE.jpg|32px]] [[File:Potted Spruce Sapling BE.jpg|32px]] [[File:Potted Jungle Sapling BE.jpg|32px]] [[File:Potted Acacia Sapling BE.jpg|32px]] [[File:Potted Dark Oak Sapling BE.jpg|32px]] [[File:Potted Cactus BE.png|32px]] [[File:Potted Fern BE.jpg|32px]]<br>[[File:Flower Pot (item) JE2 BE2.png|32px]] The textures of flower pots have been changed.
|Flower pots now generate in the new [[village]]s.}}
{{History||1.11.0|snap=beta 1.11.0.1|Flower pots can now be found in [[village]] mason [[chest]]s.}}
{{History||1.13.0|snap=beta 1.13.0.9|[[File:Potted Wither Rose JE1 BE1.png|32px]] [[Wither rose]]s can now be placed in flower pots.}}
{{History||1.16.0|snap=beta 1.15.0.51|Potted plants can now be removed from flower pots by pressing {{control|use}}.}}
{{History|||snap=beta 1.16.0.51|[[File:Potted Crimson Fungus JE1 BE1.png|32px]] [[File:Potted Warped Fungus JE1 BE1.png|32px]] [[File:Potted Crimson Roots JE1 BE1.png|32px]] [[File:Potted Warped Roots JE1 BE1.png|32px]] Crimson and warped [[fungi]] and crimson and warped [[roots]] can now be placed in flower pots.}}
{{History||1.17.10|snap=beta 1.17.10.21|[[File:Potted Azalea JE1 BE1.png|32px]] [[File:Potted Flowering Azalea JE1 BE1.png|32px]] [[Azalea]] and flowering azalea can now be placed in flower pots.}}
{{History|console}}
{{History||xbox=TU14|xbone=CU1|ps=1.04|wiiu=Patch 1|switch=1.0.1|[[File:Flower Pot JE1.png|32px]] [[File:Potted Dandelion JE1.png|32px]] [[File:Potted Red Mushroom JE1.png|32px]] [[File:Potted Brown Mushroom JE1.png|32px]] [[File:Potted Oak Sapling JE1.png|32px]] [[File:Potted Birch Sapling JE1.png|32px]] [[File:Potted Spruce Sapling JE1.png|32px]] [[File:Potted Jungle Sapling JE1.png|32px]] [[File:Potted Cactus JE1.png|32px]] [[File:Potted Fern JE1.png|32px]] [[File:Potted Allium JE1.png|32px]] [[File:Potted Azure Bluet JE1.png|32px]] [[File:Potted Oxeye Daisy JE1.png|32px]] [[File:Potted Blue Orchid JE1.png|32px]] [[File:Potted Poppy JE1.png|32px]] [[File:Potted Red Tulip JE1.png|32px]] [[File:Potted Orange Tulip JE1.png|32px]] [[File:Potted White Tulip JE1.png|32px]] [[File:Potted Pink Tulip JE1.png|32px]] [[File:Potted Acacia Sapling JE1.png|32px]] [[File:Potted Dark Oak Sapling JE1.png|32px]] [[File:Potted Dead Bush JE3.png|32px]]{{verify|Are these models the ones used in this version?}}<br>[[File:Flower Pot (item) JE1 BE1.png|32px]] Added flower pots.}}
{{History||xbox=none|xbone=none|ps=1.90|wiiu=none|switch=none|[[File:Flower Pot BE.png|32px]] [[File:Potted Dandelion BE.png|32px]] [[File:Potted Poppy BE.png|32px]] [[File:Potted Allium BE.png|32px]] [[File:Potted Azure Bluet BE.png|32px]] [[File:Potted Oxeye Daisy BE.png|32px]] [[File:Potted Blue Orchid BE.png|32px]] [[File:Potted Red Tulip BE.png|32px]] [[File:Potted Orange Tulip BE.png|32px]] [[File:Potted White Tulip BE.png|32px]] [[File:Potted Pink Tulip BE.png|32px]] [[File:Potted Red Mushroom BE.png|32px]] [[File:Potted Brown Mushroom BE.png|32px]] [[File:Potted Oak Sapling BE.png|32px]] [[File:Potted Birch Sapling BE.png|32px]] [[File:Potted Spruce Sapling BE.png|32px]] [[File:Potted Jungle Sapling BE.png|32px]] [[File:Potted Acacia Sapling BE.png|32px]] [[File:Potted Dark Oak Sapling BE.png|32px]] [[File:Potted Cactus BE.png|32px]] [[File:Potted Fern BE.png|32px]]<br>[[File:Flower Pot (item) JE2 BE2.png|32px]] The textures of flower pots have been changed.}}
{{History|new 3ds}}
{{History||0.1.0|[[File:Flower Pot JE1.png|32px]] [[File:Potted Dandelion JE1.png|32px]] [[File:Potted Red Mushroom JE1.png|32px]] [[File:Potted Brown Mushroom JE1.png|32px]] [[File:Potted Oak Sapling JE1.png|32px]] [[File:Potted Birch Sapling JE1.png|32px]] [[File:Potted Spruce Sapling JE1.png|32px]] [[File:Potted Jungle Sapling JE1.png|32px]] [[File:Potted Cactus JE1.png|32px]] [[File:Potted Fern JE1.png|32px]] [[File:Potted Allium JE1.png|32px]] [[File:Potted Azure Bluet JE1.png|32px]] [[File:Potted Oxeye Daisy JE1.png|32px]] [[File:Potted Blue Orchid JE1.png|32px]] [[File:Potted Poppy JE1.png|32px]] [[File:Potted Red Tulip JE1.png|32px]] [[File:Potted Orange Tulip JE1.png|32px]] [[File:Potted White Tulip JE1.png|32px]] [[File:Potted Pink Tulip JE1.png|32px]] [[File:Potted Acacia Sapling JE1.png|32px]] [[File:Potted Dark Oak Sapling JE1.png|32px]]{{verify|Are these models the ones used in this version?}}<br>[[File:Flower Pot (item) JE1 BE1.png|32px]] Added flower pots.}}
{{History|foot}}
<gallery>
Suggestion for itemframes.png|Original Reddit image suggesting item frames and flower pots.
FlowerPot.png|The first image of flower pots, released by [[Dinnerbone]].
Pots 1-100.png|An [[Java Edition 14w06a|14w06a]] example of some of the blocks that can be placed inside of flower pots, and their rendering.
Pots 1-100b.png|The same arrangement as prior in [[Java Edition 14w06b|14w06b]].
</gallery>
=== Flower pot "item" ===
{{:Technical blocks/Flower Pot}}
== Gallery ==
=== Renders ===
; Flowers
<gallery>
Potted Dandelion.png |
Potted Poppy.png |
Potted Blue Orchid.png |
Potted Allium.png |
Potted Azure Bluet.png |
Potted Red Tulip.png |
Potted Orange Tulip.png |
Potted White Tulip.png |
Potted Pink Tulip.png |
Potted Oxeye Daisy.png |
Potted Cornflower.png |
Potted Lily of the Valley.png |
Potted Wither Rose.png |
Potted Torchflower.png
</gallery>
; Saplings
<gallery>
Potted Oak Sapling.png |
Potted Spruce Sapling.png |
Potted Birch Sapling.png |
Potted Jungle Sapling.png |
Potted Acacia Sapling.png |
Potted Dark Oak Sapling.png |
Potted Azalea.png |
Potted Flowering Azalea.png |
Potted Mangrove Propagule.png |
Potted Cherry Sapling.png
</gallery>
; Mushrooms
<gallery>
Potted Red Mushroom.png |
Potted Brown Mushroom.png |
Potted Crimson Fungus.png |
Potted Warped Fungus.png |
</gallery>
; Roots and bushes
<gallery>
Potted Crimson Roots.png |
Potted Warped Roots.png |
Potted Fern.png |
Potted Dead Bush.png |
Potted Cactus.png |
Potted Cactus BE.png |
Potted Bamboo.png
</gallery>
=== Other ===
<gallery>
FiveFlowerPots.png | Five flower pots in a player-created village.
</gallery>
== Issues ==
{{issue list}}
== Trivia ==
* The flower pot is based on a suggestion from Reddit, like [[ender chest]]s and [[item frame]]s.<ref>{{tweet|dinnerbone|235747041286975488|My next task is going to be flower pots.|August 15, 2012}}</ref>
* Flower pots break [[falling block]]s.
* If a plant that has been [[Name Tag|named]] is put in a flower pot, the plant loses its name.
* The inside of the flower pot in ''Java Edition'' uses the center 4x4 pixels of the dirt texture while Bedrock Edition uses the center 6x6.
==References==
{{Reflist}}
{{Blocks|Utility}}
{{items}}
[[Category:Manufactured blocks]]
[[Category:Storage]]
[[Category:Generated structure blocks]]
[[Category:Non-solid blocks]]
[[Category:Utility blocks]]
[[cs:Květináč]]
[[de:Blumentopf]]
[[es:Maceta]]
[[fr:Pot de fleurs]]
[[hu:Virágcserép]]
[[it:Vaso da fiori]]
[[ja:植木鉢]]
[[ko:화분]]
[[nl:Bloempot]]
[[pl:Doniczka]]
[[pt:Vaso]]
[[ru:Цветочный горшок]]
[[zh:花盆]]
[[uk:Квітковий горщик]]</li><li>[[Bone|Bone]]<br/>{{about|the item|the block|Bone Block|other uses|Bone (disambiguation)}}
{{Item
| image = Bone.png
| renewable = Yes
| stackable = Yes (64)
}}
A '''bone''' is an [[item]] primarily obtained from [[skeleton]]s and similar mobs. It can be crafted into [[Bone Meal|bone meal]] or used to tame wild [[Wolf|wolves]].
== Obtaining ==
=== Chest loot ===
{{LootChestItem|bone}}
=== Mob loot ===
Skeletons, [[wither skeleton]]s, [[skeleton horse]]s, and [[stray]]s may drop 0–2 bones upon death. The maximum drop is increased by 1 per level of Looting, for a maximum of 0-5 bones with Looting III.
{{IN|bedrock}}, [[salmon]], [[cod]], [[pufferfish]], and [[tropical fish]] have 25% chance to drop 1-2 bones upon death. The maximum drop is increased by 1 to 2 per level of Looting, for a maximum of 2-8 bones with Looting III.
Salmon (small and medium size) have 25% chance to drop 1 bone upon death, The maximum drop is increased by 1 to 2 per level of [[Looting]], for a maximum of 2-7 bones with Looting III. The chance of dropping bones increases by 1% per looting level, so with Looting III there is up to a 28% chance of bones dropping.
=== Fishing ===
Bones can also be obtained by [[fishing]] as part of the junk category. The best chance of catching a bone is achieved without the [[Luck of the Sea]] enchantment, yielding a 1.1% chance.
== Usage ==
=== Helmet ===
[[File:Steve wearing Bone.png|thumb|right|75px]]
[[File:Alex wearing Bone.png|thumb|right|75px]]
While a bone cannot be equipped in the head slot in Survival mode, equipping it using commands causes it to appear in the player's mouth.
=== Taming ===
Using a bone on a wild [[wolf]] has a {{frac|1|3}} chance of [[taming]] it. Bones cannot tame a hostile wolf or a wolf that has already been tamed. However, bones can be used to attract the attention of the tamed ones.
=== Crafting ingredient ===
A bone can be crafted into 3 bone meal.
{{crafting usage}}
== Achievements ==
{{load achievements|Leader of the pack}}
== Advancements ==
{{load advancements|Best Friends Forever}}
== Data values ==
=== ID ===
{{edition|java}}:
{{ID table
|edition=java
|showforms=y
|generatetranslationkeys=y
|displayname=Bone
|spritetype=item
|nameid=bone
|form=item
|foot=1}}
{{edition|bedrock}}:
{{ID table
|edition=bedrock
|shownumericids=y
|showforms=y
|notshowbeitemforms=y
|generatetranslationkeys=y
|displayname=Bone
|spritetype=item
|nameid=bone
|id=415
|form=item
|foot=1}}
== History ==
{{History|java beta}}
{{History||1.2|[[File:Bone JE1 BE1.png|32px]] Added bones.
|Bones can be [[crafting|crafted]] into [[bone meal]].}}
{{History||1.4|Bones can now be used to tame [[wolves]].}}
{{History|java}}
{{History||1.3.1|snap=12w21a|Bones can now be found within [[desert temple]]s, allowing bones to be obtainable on Peaceful difficulty.}}
{{History||1.4.2|snap=12w36a|Added [[wither skeleton]]s, which has a chance to [[drops|drop]] bones when killed.}}
{{History||1.6.1|snap=13w16a|Added [[skeleton horse]]s, which drop bones when killed.}}
{{History||1.7.2|snap=13w36a|Bones can now be more easily obtained in Peaceful difficulty by [[fishing]]. Although, they are considered a "junk" [[item]].}}
{{History||1.9|snap=15w44a|The average yield of bones in [[desert temple]]s has been slightly decreased.
|Bones can now be found in [[dungeon]] [[chest]]s.}}
{{History||1.10|snap=16w20a|Added [[stray]]s, which [[drops|drop]] bones when killed.}}
{{History||1.11|snap=16w39a|Bones can now found in the new [[woodland mansion]] chests.}}
{{History||1.13|snap=17w47a|Prior to [[1.13/Flattening|''The Flattening'']], this [[item]]'s numeral ID was 352.}}
{{History||1.14|snap=18w43a|[[File:Bone JE2.png|32px]] The texture of bones has now been changed.}}
{{History|||snap=18w44a|[[File:Bone JE3 BE2.png|32px]] The texture of bones has now been slightly changed.}}
{{History||1.19|snap=Deep Dark Experimental Snapshot 1|Bones now generate in [[ancient city]] chests.}}
{{History|pocket alpha}}
{{History||v0.2.0|[[File:Bone JE1 BE1.png|32px]] Added bones. They are currently unobtainable and serve no purpose.}}
{{History||v0.3.3|Added skeletons, which drop bones when they die.
|Bones can now be used to craft [[bone meal]].}}
{{History||v0.5.0|Bones can now be obtained after activating the [[nether reactor]].}}
{{History||v0.9.0|snap=build 1|Added bones to [[Creative]] mode.}}
{{History||v0.11.0|snap=build 1|Bones can now be more easily obtained in Peaceful difficulty by [[fishing]]. Although, they are considered a "junk" [[item]].}}
{{History||v0.12.1|snap=build 1|Added [[wither skeleton]]s, which have a chance to [[drops|drop]] bones when killed.
|Bones are no longer available from the [[nether reactor]].}}
{{History||v0.13.0|snap=build 1|Bones can now be found inside of the [[desert temple]] hidden [[chest]] room.}}
{{History||v0.15.0|snap=build 1|Added [[stray]]s and [[skeleton horse]]s, which drop bones when killed.
|Bones can now be found in [[jungle temple]] [[chest]]s.}}
{{History|pocket}}
{{History||1.1.0|snap=alpha 1.1.0.0|Bone can now be found inside [[woodland mansion]] chests.}}
{{History|bedrock}}
{{History||1.4.0|snap=beta 1.2.14.2|Bones now [[drops|drop]] from [[fish]] mobs.}}
{{History||1.10.0|snap=beta 1.10.0.3|[[File:Bone JE3 BE2.png|32px]] The texture of bones has now been changed.}}
{{History|console}}
{{History||xbox=TU1|xbone=CU1|ps=1.00|wiiu=Patch 1|[[File:Bone JE1 BE1.png|32px]] Added bones.}}
{{History||xbox=TU5|Bones can be found in the Miscellaneous tab in the [[Creative inventory]].}}
{{History||xbox=TU12|Moved bones to the Materials tab in the Creative inventory.}}
{{History||xbox=TU19|xbone=CU7|ps=1.12|wiiu=Patch 1|Added [[wither skeleton]]s, which have a chance to [[drops|drop]] bones when killed.}}
{{History||xbox=TU31|xbone=CU19|ps=1.22|wiiu=Patch 3|Bones can now be obtained from [[fishing]].}}
{{History||xbox=TU46|xbone=CU36|ps=1.38|wiiu=Patch 15|Added [[stray]]s and [[skeleton horse]]s, which drop bones when killed.}}
{{History||xbox=none|xbone=none|ps=1.90|wiiu=none|switch=none|[[File:Bone JE3 BE2.png|32px]] The texture of bones has now been changed.}}
{{History|new 3ds}}
{{History||0.1.0|[[File:Bone JE1 BE1.png|32px]] Added bones.}}
{{History|foot}}
== Issues ==
{{issue list}}
== See also ==
* [[Bone meal]]
* [[Wolf]]
* [[Dyeing]]
{{Items}}
[[Category:Renewable resources]]
[[de:Knochen]]
[[es:Hueso]]
[[fr:Os]]
[[hu:Csont]]
[[it:Osso]]
[[ja:骨]]
[[ko:뼈]]
[[nl:Bot]]
[[pl:Kość]]
[[pt:Osso]]
[[ru:Кость]]
[[th:กระดูก]]
[[tr:Kemik]]
[[uk:Кістка]]
[[zh:骨头]]</li></ul> | Pre-release | File:Vines JE1 BE1.png Added vines. Vines take as long to break as leaves and drop nothing unless collected with shears. | |||
| Pre-release 2 ;) | Vines spread infinitely down now, but do not spread if there are more than four other vine blocks nearby.[7] | ||||
| Java Edition | |||||
1.2.1{{Extension DPL}}<ul><li>[[Raw Beef|Raw Beef]]<br/>{{Item
| title = Raw Beef
| image = Raw Beef.png
| heals = {{hunger|3}}
| renewable = Yes
| stackable = Yes (64)
}}
'''Raw beef''' is a [[food]] item that can be eaten by the [[player]] or cooked in a [[furnace]], [[smoker]], or [[campfire]] to make [[steak]].
== Obtaining ==
=== Mob loot ===
When adult [[cow]]s and [[mooshroom]]s are killed, they drop 1-3 raw beef. The maximum amount is increased by 1 per level of [[Looting]], for a maximum of 1-6 with Looting III. If killed while on fire, they drop [[steak]] instead.
=== Chest loot ===
{{LootChestItem|raw-beef}}
== Usage ==
=== Food ===
To eat raw beef, press and hold {{control|use}} while it is selected in the hotbar. Eating one restores {{hunger|3}} hunger and 1.8 hunger [[Hunger#Mechanics|saturation]].
=== Smelting ingredient ===
{{Smelting
|showname=1
|Raw Beef
|Steak
|0.35
}}
=== Wolves ===
Raw beef can be used to [[breed]] and heal tamed [[wolves]], lead them around, and make baby tamed wolves grow up faster by 10% of the remaining time.
=== Trading ===
Journeyman-level Butcher villagers have a 50% chance to buy 10 raw beef for an emerald.{{only|bedrock}}
Journeyman-level Butcher villagers always offer buy 10 raw beef for an emerald.{{only|java}}
==Sounds==
{{Sound table/Entity/Food}}
== Advancements ==
{{load advancements|Husbandry;A Balanced Diet}}
== Data values ==
=== ID ===
{{edition|java}}:
{{ID table
|edition=java
|showforms=y
|generatetranslationkeys=y
|displayname=Raw Beef
|spritetype=item
|nameid=beef
|form=item
|foot=1}}
{{edition|bedrock}}:
{{ID table
|edition=bedrock
|shownumericids=y
|showforms=y
|notshowbeitemforms=y
|generatetranslationkeys=y
|displayname=Raw Beef
|spritetype=item
|nameid=beef
|id=273
|form=item
|foot=1}}
== History ==
{{History|java beta}}
{{History||1.8|snap=Pre-release|[[File:Raw Beef JE1 BE1.png|32px]] Added raw beef.|Raw beef is one of the new [[food]] items, [[drops|dropped]] by [[cow]]s in addition to their [[leather]].}}
{{History|java}}
{{History||1.2.1|snap=12w03a|Raw beef can now be used to breed wolves.}}
{{History||1.3.1|snap=12w21a|Raw beef can now be [[trading|sold]] to butcher [[villager]]s, at 14–17 raw beef for 1 [[emerald]].}}
{{History|||snap=1.3|[[File:Raw Beef JE2.png|32px]] The texture of raw beef has been changed.}}
{{History||1.4.2|snap=12w37a|[[File:Raw Beef JE3 BE2.png|32px]] The texture of raw beef has been changed, so that it no longer has a dark outline.}}
{{History||1.8|snap=14w02a|[[Villager]]s no longer [[trading|trade]] for raw beef.}}
{{History||1.13|snap=17w47a|Prior to [[1.13/Flattening|''The Flattening'']], this [[item]]'s numeral ID was 363.}}
{{History||1.14|snap=18w43a|[[File:Raw Beef JE4 BE3.png|32px]] The texture of raw beef has been changed.}}
{{History|||snap=18w49a|Raw beef can now be found in [[chest]]s in [[village]] butcher shops.}}
{{History|||snap=19w11a|Butcher [[villager]]s now [[trading|buy]] raw beef.}}
{{History|pocket alpha}}
{{History||v0.4.0|[[File:Raw Beef JE1 BE1.png|32px]] Added raw beef.}}
{{History||v0.5.0|Raw beef now restores {{hp|3}} instead of {{hp|1}}.}}
{{History||v0.8.0|snap=build 1|[[File:Raw Beef JE3 BE2.png|32px]] The texture of raw beef has been changed, so that it no longer has a dark outline.}}
{{History||v0.9.0|snap=build 1|Raw beef has been added to [[Creative]] mode.}}
{{History||v0.12.1|snap=build 1|Raw beef now restores [[hunger]] instead of [[health]].}}
{{History|bedrock}}
{{History||1.10.0|snap=beta 1.10.0.3|[[File:Raw Beef JE4 BE3.png|32px]] The texture of raw beef has been changed.}}
{{History||1.11.0|snap=beta 1.11.0.1|Raw beef can now be found in [[village]] butcher [[chest]]s.}}
{{History|||snap=beta 1.11.0.4|Raw beef can now be [[trading|sold]] to butcher [[villager]]s.}}
{{History|console}}
{{History||xbox=TU5|xbone=CU1|ps=1.0|wiiu=Patch 1|[[File:Raw Beef JE1 BE1.png|32px]] Added raw beef.}}
{{History||xbox=TU12|[[File:Raw Beef JE3 BE2.png|32px]] The texture of raw beef has been changed, so that it no longer has a dark outline.}}
{{History||xbox=none|xbone=none|ps=1.90|wiiu=none|switch=none|[[File:Raw Beef JE4 BE3.png|32px]] The texture of raw beef has been changed.}}
{{History|New 3DS}}
{{History||0.1.0|[[File:Raw Beef JE3 BE2.png|32px]] Added raw beef.}}
{{History|foot}}
== Issues ==
{{issue list}}
== Gallery ==
<gallery>
File:Jeb steak.png|Raw Beef and [[Steak]] in a preview screenshot.
</gallery>
{{Items}}
[[de:Rohes Rindfleisch]]
[[es:Filete crudo]]
[[fr:Bœuf cru]]
[[hu:Nyers marhahús]]
[[ja:生の牛肉]]
[[ko:익히지 않은 소고기]]
[[nl:Rauwe biefstuk]]
[[pl:Surowa wołowina]]
[[pt:Bife cru]]
[[ru:Сырая говядина]]
[[uk:Сира яловичина]]
[[zh:生牛肉]]
[[Category:Food]]
[[Category:Renewable resources]]</li><li>[[Minecart with TNT|Minecart with TNT]]<br/>{{ItemEntity
|image=Minecart with TNT.png
|renewable=Yes
|stackable=No
|size=Height: 0.7 Blocks<br>Width: 0.98 Blocks
|networkid='''[[JE]]:''' 10
|drops=
;If not exploded
: 1 {{ItemLink|Minecart with TNT}}
|health={{hp|6}}
}}
A '''minecart with TNT''' is a block of [[TNT]] inside a [[minecart]]. Unlike normal TNT it can detonate instantly under certain conditions and its damage and blast radius is increased by its speed when it detonates.
== Obtaining ==
=== Crafting ===
{{Crafting
|Output= Minecart with TNT
|type= Transportation
|TNT|Minecart}}
Minecarts with TNT can be retrieved by attacking them, and by doing so it drops as an [[item]].
== Usage ==
[[File:TNT minecart and powered activator rail.png|thumb|right|When the TNT minecart passes over the powered activator rail, it explodes after four seconds.]]
[[File:Simple TNT minecart detonator setup.png|thumb|right|Placing two TNT minecarts on the rail and powering it (here, by flicking the lever) creates an instant explosion.]]
[[File:TNT minecart roof trap.png|thumb|right|Destroying the gold block causes the TNT minecart to fall down and instantly explode.]]
A minecart with TNT detonates after a delay on these conditions:
* It moves over a powered [[activator rail]].
* It is destroyed while in motion (except by a player in Creative mode).
* It is destroyed by fire, lava, or an explosion.
*{{IN|java}}, it is hit by a [[fire charge]].
The delay is {{convert|4|seconds|ticks}} for an activator rail, like the TNT block. For other causes there is a random delay between 0 and 1.9 seconds, but more likely to be close to 1.
It detonates instantly on these conditions:
* It hits the ground with a downward velocity of it falling more than three blocks, unless landing on any form of rail.
* It turns on a curved track too fast, with a solid block or entity located beside the track (in the previous movement direction).
* It is hit by a flaming arrow.
* It is pressed into a block or entity and has velocity.
Upon detonation it acts as normal TNT, [[exploding]] and damaging nearby blocks, players, and entities. Upon detonation after activating on activator rail, it does not destroy its rails and the blocks the rail is on, however other nearby carts can.{{only|java}} More than one minecart can be placed on the same rail block, allowing many of them to fit into a single block. They explode when touched, dealing large amounts of damage.
The explosion has a base [[Explosion#Explosion strength|power]] of 4, the same as regular TNT, but the game also adds a random bonus value up to 1.5 times velocity, but no higher than 7.5. This means that with a speed of 5 or higher the power will be a random value between 4 and 11.5. When triggered by an activator rail or by damage, the bonus value is calculated using the horizontal velocity of the minecart. When hit by a flaming arrow the velocity of the arrow is used instead. When triggered by fall damage, the fall distance divided by 10 is used.
Minecarts with TNT bounce off of other minecarts and cannot be linked to [[minecarts with furnace]]s.
== Sounds ==
{{Edition|Java}}:<br>
Minecarts with TNT use the Friendly Creatures sound category for entity-dependent sound events.<ref group=sound name=rollsource>{{bug|MC-42132}}</ref>
{{Sound table
|sound=Minecart rolling.ogg
|subtitle=Minecart rolls
|source=Friendly Creatures <ref group=sound name=rollsource/>
|overridesource=1
|description=While a minecart with TNT is moving
|id=entity.minecart.riding
|translationkey=subtitles.entity.minecart.riding
|volume=0.0-0.35 <ref group=sound>Relates linearly with horizontal velocity (max 0.5)</ref>
|pitch=0.0-1.0 <ref group=sound>Will increase by 0.0025 per tick if the minecart's horizontal velocity is more than 0.01</ref>
|distance=16}}
{{Sound table
|sound=Fuse.ogg
|subtitle=TNT fizzes
|source=block
|description=When a minecart with TNT is primed
|id=entity.tnt.primed
|translationkey=subtitles.entity.tnt.primed
|volume=1.0
|pitch=1.0
|distance=16}}
{{Sound table
|sound=Explosion1.ogg
|sound2=Explosion2.ogg
|sound3=Explosion3.ogg
|sound4=Explosion4.ogg
|subtitle=Explosion
|source=block
|description=When a minecart with TNT explodes
|id=entity.generic.explode
|translationkey=subtitles.entity.generic.explode
|volume=4.0
|pitch=0.56-0.84
|distance=16
|foot=1}}
{{Edition|Bedrock}}:<ref group=sound>{{Bug|MCPE-35778||Minecart with tnt does not have the sound of tnt being ignited when we use flint and steel, fire charge or activator rail}}</ref>
{{Sound table
|type=bedrock
|sound=Minecart rolling.ogg
|source=neutral
|description=While a minecart with TNT is moving
|id=minecart.base}}
{{Sound table
|sound=Explosion1.ogg
|sound2=Explosion2.ogg
|sound3=Explosion3.ogg
|sound4=Explosion4.ogg
|source=block
|description=When a minecart with TNT explodes
|id=random.explode
|volume=4.0
|pitch=1.0
|foot=1}}
== Data values ==
=== ID ===
{{edition|java}}:
{{ID table
|edition=java
|firstcolumnname=Item
|showforms=y
|generatetranslationkeys=y
|displayname=Minecart with TNT
|spritetype=item
|nameid=tnt_minecart
|form=item
|foot=1}}
{{ID table
|edition=java
|firstcolumnname=Entity
|generatetranslationkeys=y
|displayname=Minecart with TNT
|spritetype=entity
|nameid=tnt_minecart
|foot=1}}
{{edition|bedrock}}:
{{ID table
|edition=bedrock
|firstcolumnname=Item
|shownumericids=y
|showforms=y
|notshowbeitemforms=y
|generatetranslationkeys=y
|displayname=Minecart with TNT
|spritetype=item
|nameid=tnt_minecart
|id=525
|form=item
|foot=1}}
{{ID table
|edition=bedrock
|firstcolumnname=Entity
|shownumericids=y
|generatetranslationkeys=y
|displayname=Minecart with TNT
|spritetype=entity
|nameid=tnt_minecart
|id=97
|foot=1}}
=== Entity data ===
Minecarts with TNT have entity data associated with them that contain various properties of the entity.
{{el|java}}:
{{main|Entity format}}
{{/ED}}
{{el|bedrock}}:
: See [[Bedrock Edition level format/Entity format]].
== Video ==
<div style="text-align:center">{{yt|1yNgY913tps}}</div>
== History ==
{{History|java}}
{{History||1.5|snap=13w02a|[[File:Minecart_with_TNT_JE1_BE1.png|32px]] [[File:Minecart_with_TNT_(item)_JE1_BE1.png|32px]] Added minecart with TNT.}}
{{History|||snap=13w03a|Minecart with TNT no longer destroys nearby [[rail]]s and rail supports during [[explosion]].<ref>{{bug|MC-6833}}</ref>}}
{{History||1.8|snap=14w11a|Minecart with TNT explosions no longer stack.<!--reverted in 17a like other changes in 11a?-->}}
{{History|||snap=14w26a|Minecart with TNT can now be detonated using [[arrow]]s on fire.}}
{{History||1.11|snap=16w32a|The [[entity]] ID for minecart with TNT has been changed from <code>MinecartTNT</code> to <code>tnt_minecart</code>.}}
{{History||1.12|snap=1.12-pre6|No longer instantly explode when hit with [[fire charge]]s; instead, they explode as if primed by an [[activator rail]].}}
{{History||1.13|snap=17w47a|Prior to [[1.13/Flattening|''The Flattening'']], this [[item]]'s numeral ID was 407.}}
{{History||1.14|snap=18w43a|[[File:Minecart with TNT JE2 BE2.png|32px]] [[File:Minecart with TNT (item) JE2 BE2.png|32px]] The textures of minecart with TNT have been updated.}}
{{History|||snap=19w11a|Minecart with TNT explosions now have a 100% drop rate.}}
{{History||1.15|snap=19w38a|[[File:Minecart with TNT 19w38a.png|32px]] The TNT now appear dark, same as suffocating mobs.}}
{{History|||snap=19w39a|The TNT texture now colored correctly.}}
{{History||1.15|snap=Pre-release 1|[[File:Minecart with TNT JE3.png|32px]] The [[model]] of minecart with TNT has been changed.<ref>{{bug|MC-165971}}</ref>}}
{{History|||snap=Pre-release 3|[[File:Minecart with TNT JE2 BE2.png|32px]] The model of minecart with TNT has been changed back to the [[Java Edition 18w43a|18w43a]] model.}}
{{History||1.19|snap=22w13a|The crafting recipe for a minecart with TNT is now shapeless.
|Breaking a minecart with TNT will now drop the item instead of the minecart and TNT separately.<ref>{{bug|MC-249493|||Fixed}}</ref>}}
{{History|pocket alpha}}
{{History||v0.14.0|snap=build 1|[[File:Minecart with TNT JE1 BE1.png|32px]] [[File:Minecart with TNT (item) JE1 BE1.png|32px]] Added minecart with TNT.}}
{{History|pocket}}
{{History||1.1.0|snap=alpha 1.1.0.0|The [[entity]] ID has been changed from <code>minecarttnt</code> to <code>tnt_minecart</code>.}}
{{History|bedrock}}
{{History||1.10.0|snap=beta 1.10.0.3|[[File:Minecart with TNT JE2 BE2.png|32px]] [[File:Minecart with TNT (item) JE2 BE2.png|32px]] The textures of minecart with TNT have been updated.}}
{{History||1.19.0|snap=beta 1.19.0.30|Breaking a minecart with TNT will now drop the item instead of the minecart and TNT separately.}}
{{History|console}}
{{History||xbox=TU19|xbone=CU7|ps=1.12|wiiu=Patch 1|switch=1.0.1|[[File:Minecart with TNT JE1 BE1.png|32px]] [[File:Minecart with TNT (item) JE1 BE1.png|32px]] Added minecart with TNT.}}
{{History||xbox=none|xbone=none|ps=1.90|wiiu=none|switch=none|[[File:Minecart with TNT JE2 BE2.png|32px]] [[File:Minecart with TNT (item) JE2 BE2.png|32px]] The textures of minecart with TNT have been updated.}}
{{History|new 3ds}}
{{History||0.1.0|[[File:Minecart with TNT JE1 BE1.png|32px]] [[File:Minecart with TNT (item) JE1 BE1.png|32px]] Added minecart with TNT.
|Minecart with TNT emits smoke [[particle]]s when destroyed.}}
{{History|foot}}
== Issues ==
{{issue list}}
== Trivia ==
* A direct hit from three merged [[minecart]]s with [[TNT]] can reduce a fully [[diamond]] [[armor]]ed player to half a heart.<ref>{{tweet|dinner|289532985340993536|Haha, oops... Nuclear minecarts! (mature language)|January 10, 2013}}</ref> However, if the TNT minecarts explode, they do not destroy any [[rail]]s.
== Gallery ==
<gallery>
File:First TNT Minecart Image.jpg|The first image of minecarts with TNT, released by Dinnerbone.<ref>{{tweet|dinner|288302629803683840|Those blasted pigs have taken the village. We've ran out of options; we must stop them from spreading further!|January 7, 2013}}</ref><ref>{{tweet|dinner|288304442560880643|(Mirror: <nowiki>[imgur link])|January 7, 2013}}</ref> (One can be seen in the lower-left corner.)
File:First TNT Minecart Image ZOOM.jpg|A more zoomed in image.
File:Minecart-with-tnt.png|Minecart with TNT and activator rail for detonation.
File:13w02a Banner.png|The 13w02a banner, with a minecart with TNT and a [[hopper]].
File:Dinnerbone safe boom1.jpg|Dinnerbone showing how minecarts with TNT have controlled explosions.<ref>{{tweet|dinner|291212723755307009|What's the point of properly activating TNT carts if they just blow up your tracks? Let me answer that with an album!|January 15, 2013}}</ref>
File:Dinnerbone safe boom 2.png|Primed minecart with TNT.
File:Dinnerbone safe boom 3.jpg|Explosion from a minecart with TNT. (The "bridge" of rails is left undestroyed by the explosion.)
</gallery>
== References ==
{{reflist}}
{{items}}
{{entities}}
[[Category:Mechanics]]
[[cs:Vozík s TNT]]
[[de:TNT-Lore]]
[[es:Vagoneta con dinamita]]
[[fr:Wagonnet à TNT]]
[[it:Carrello da miniera]]
[[ja:TNT付きのトロッコ]]
[[ko:TNT가 실린 광산 수레]]
[[nl:Mijnkar met TNT]]
[[pl:Wagonik z TNT]]
[[pt:Carrinho de mina com dinamite]]
[[ru:Вагонетка с ТНТ]]
[[uk:Вагонетка з динамітом]]
[[zh:TNT矿车]]</li></ul></nowiki> | 12w03a | Vines are now climbable provided they are climbed against a solid block. | |||
| 12w04a | Players are now slowed when going through vines due to their nature of being a collisionless ladder. | ||||
1.3.1{{Extension DPL}}<ul><li>[[Chestplate|Chestplate]]<br/>{{Update|Include information about armor trims and updated netherite upgrade information.}}
{{Item
| image = <gallery>
Leather Tunic.png | Leather
Chainmail Chestplate.png | Chainmail
Iron Chestplate.png | Iron
Diamond Chestplate.png | Diamond
Golden Chestplate.png | Golden
Netherite Chestplate.png | Netherite
</gallery>
| durability =
* Leather: 80
* Chainmail: 240
* Iron: 240
* Golden: 112
* Diamond: 528
* Netherite: 592
| renewable =
* '''Netherite''': No
* '''All Other''': Yes
| stackable = No
}}
'''Chestplates''' are a type of [[armor]] that covers the upper body of the player. There are six types of chestplates: '''leather''', '''chainmail''', '''iron''', '''diamond''', '''gold''' and '''netherite'''.
== Obtaining ==
=== Crafting ===
{{crafting
|head=1
|showname=0
|showdescription=1
|name=[[Chestplate]]
|A1= Leather;Gold Ingot;Iron Ingot;Diamond
|C1= Leather;Gold Ingot;Iron Ingot;Diamond
|A2= Leather;Gold Ingot;Iron Ingot;Diamond
|B2= Leather;Gold Ingot;Iron Ingot;Diamond
|C2= Leather;Gold Ingot;Iron Ingot;Diamond
|A3= Leather;Gold Ingot;Iron Ingot;Diamond
|B3= Leather;Gold Ingot;Iron Ingot;Diamond
|C3= Leather;Gold Ingot;Iron Ingot;Diamond
|Output= Leather Tunic;Golden Chestplate;Iron Chestplate;Diamond Chestplate
|type= Combat
}}
{{crafting
|foot=1
|ignoreusage=1
|name=[[Chestplate]]
|ingredients=Damaged Matching [[Chestplate]]
|Damaged Leather Tunic; Damaged Golden Chestplate; Damaged Chainmail Chestplate; Damaged Iron Chestplate; Damaged Diamond Chestplate; Damaged Netherite Chestplate
|Damaged Leather Tunic; Damaged Golden Chestplate; Damaged Chainmail Chestplate; Damaged Iron Chestplate; Damaged Diamond Chestplate; Damaged Netherite Chestplate
|Output= Leather Tunic; Golden Chestplate; Chainmail Chestplate; Iron Chestplate; Diamond Chestplate; Netherite Chestplate
|description= The durability of the two chestplates is added together, making a fully healed chestplate. You can get 5% more durability while using a grindstone to fix.
|type= Combat
}}
=== Upgrading ===
{{Smithing
|Netherite Upgrade
|Diamond Chestplate
|Netherite Ingot
|Netherite Chestplate
|description=
|tail=1
}}
=== Repairing ===
==== Grinding ====
{{Grinding
|showdescription=1
|ingredients=Damaged Matching Chestplates
|Damaged Leather Tunic; Damaged Chainmail Chestplate; Damaged Iron Chestplate; Damaged Golden Chestplate; Damaged Diamond Chestplate; Damaged Netherite Chestplate
|Damaged Leather Tunic; Damaged Chainmail Chestplate; Damaged Iron Chestplate; Damaged Golden Chestplate; Damaged Diamond Chestplate; Damaged Netherite Chestplate
|Leather Tunic; Chainmail Chestplate; Iron Chestplate; Golden Chestplate; Diamond Chestplate; Netherite Chestplate
|description=The durability of the two chestplates are added together, plus an extra 5% durability.
}}
==== [[Anvil mechanics#Unit repair|Unit repair]] ====
Chestplates can be repaired in an [[anvil]] by adding units of the [[armor material]]'s repair material, with each repair material restoring 25% of the chestplate's maximum durability, rounded down.
=== Mob loot ===
[[Zombie]]s and [[skeleton]]s have a small chance to spawn wearing any armor. There is an 8.5% chance (9.5% with [[Looting]] I, 10.5% with Looting II and 11.5% with Looting III) for the mob to drop a chestplate upon death. The chestplate the mob drops is usually badly damaged, and rarely enchanted.
[[Vindicator]]s and [[Pillager]]s spawning in [[raid]]s have a 4.1% chance (5.12% on hard difficulty) to drop iron chestplate, which is almost always badly damaged and rarely enchanted.
=== Natural generation ===
Two [[armor stand]]s are found in each taiga [[village]] outdoor armory, one of them equipped with an [[iron chestplate]].
=== Chest loot ===
{{IN|BE}}, a sealed room in [[woodland mansion]]s can appear that has a chest sometimes containing an [[Efficiency]] I leather tunic.<ref>{{bug|MCPE-109048}}</ref>
{{LootChestItem|leather-tunic,random-enchanted-leather-tunic,chainmail-chestplate,iron-chestplate,level-enchanted-iron-chestplate,golden-chestplate,random-enchanted-golden-chestplate,diamond-chestplate,damaged-diamond-chestplate,level-enchanted-diamond-chestplate,damaged-random-enchanted-diamond-chestplate,damaged-random-enchanted-diamond-chestplate-2}}
=== Trading ===
{{IN|java}}, novice-level armorer villagers have a 40% chance to sell an iron chestplate for 9 emeralds. Journeyman-level armorers have a 40% chance to sell a chainmail chestplate for 4 emeralds. Master-level armorers always sell an enchanted<ref group="note" name="enchantment" /> diamond chestplate for 18-35 emeralds. Novice-level leatherworker villagers have a {{frac|2|3}} chance to sell a leather tunic<ref group="note" name="dye note">The leather armor has a random color created by two dyes (possibly the same dye twice).</ref> for 7 emeralds. Journeyman-level Leatherworker villagers always offer the same trade.
Armorer villagers may give the players with the [[Hero of the Village]] effect a chainmail chestplate.
{{IN|bedrock}}, novice-level armorer villagers have a 25% chance to sell an iron chestplate for 9 emeralds. Journeyman-level armorers have a {{frac|1|3}} chance to sell a chainmail chestplate for 4 emeralds. Master-level armorers have a 50% chance to sell an enchanted<ref group="note" name="enchantment">When creating an enchantment offer, the game uses a random enchantment level from 5 – 19. The enchantments are never treasure enchantments.</ref> diamond chestplate for 16 emeralds. Novice-level leatherworker villagers have a 50% chance to sell leather tunic for 7 emeralds. Master-level leatherworkers always sell an enchanted<ref group="note" name="enchantment" /> leather tunic for 7 emeralds.
{{notelist|columns=1}}
== Usage ==
Chestplates can be placed in the 2nd armor slot of a player's [[inventory]] for activation.
=== Defense points ===
Defense points are each signified by chestplates in the armor bar above the [[health]] bar. 1 defense point is half of a chestplate in the armor bar. Each defense point reduces any damage dealt to the player, which is absorbed by armor by 4%, increasing additively with the number of defense points. Different materials and combinations of armor provide different levels of defense.
The following table shows the amount of defense points added by chestplates.
{| class="wikitable" data-description="Chestplate defense points"
|-
!scope="col" | Material
!scope="col" | Defense points
|-
!scope="row" | Leather
| {{armor|3}}
|-
!scope="row" | Golden
| rowspan="2" | {{armor|5}}
|-
!scope="row" | Chainmail
|-
!scope="row" | Iron
| {{armor|6}}
|-
!scope="row" | Diamond
| rowspan="2" | {{armor|8}}
|-
!scope="row" | Netherite
|}
===Knockback Resistance ===
A netherite chestplate provides 10% knockback resistance.
=== Durability ===
The following table shows the amount of damage each piece of armor can absorb before being destroyed.
Any "hit" from a damage source that can be blocked by armor removes one point of durability from each piece of armor worn for every {{hp|4}} of incoming damage (rounded down, but never below 1). Damage taken that unenchanted armor does not protect against (such as [[Damage#Fall damage|falling]] or [[Damage#Drowning|drowning]]) does not damage the armor, even if it is enchanted to protect against that type of damage. The following chart displays how many hits chest plates can endure.
Netherite armor is not damaged by [[lava]] or [[fire]] when worn.
{| class="wikitable" data-description="Chestplate durability"
|-
! Material
! Durability
|-
!scope="row" | Leather
| 80
|-
!scope="row" | Golden
| 112
|-
!scope="row" | Chainmail
| rowspan="2" | 240
|-
!Iron
|-
!scope="row" | Diamond
| 528
|-
!scope="row" | Netherite
| 592
|}
==== Repair ====
Chestplates may be [[item repair|repaired]] by using them along with some of their crafting material ([[leather]], [[gold ingot]]s, [[iron ingot]]s, [[diamond]]s, or [[netherite ingot]]s) in an [[anvil]]. Chainmail chestplates may be repaired in this way with iron ingots. They may also be repaired by crafting them together with another chestplate of the same material.
=== Enchantments ===
A chestplate can receive the following [[enchantment]]s:
{| class="wikitable"
|-
! Enchantment !! Max Level !! Notes
|-
| [[Fire Protection]] || IV || <ref group=note name=exclusive>Fire Protection, Blast Protection, Projectile Protection and Protection are mutually exclusive</ref>
|-
| [[Projectile Protection]] || IV || <ref group=note name="exclusive"/>
|-
| [[Blast Protection]] || IV || <ref group=note name="exclusive"/>
|-
| [[Protection]] || IV || <ref group=note name="exclusive"/>
|-
| [[Unbreaking]] || III ||
|-
| [[Thorns]] || III || <ref group="note" name="maxlvl">The max level obtainable in the enchanting table is 2</ref>
|-
| [[Mending]] || I || <ref group=note name="anvil2">Only from chest loot, fishing, or an anvil and enchanted books.</ref>
|-
| [[Curse of Binding]] || I || <ref group="note" name="anvil2"/>
|-
| [[Curse of Vanishing]] || I || <ref group="note" name="anvil2"/>
|}
{{notelist}}
=== Smelting usage ===
{{Smelting|showname=1|Iron Chestplate;Chainmail Chestplate;Golden Chestplate|Iron Nugget;Iron Nugget;Gold Nugget|0,1}}
=== Piglins ===
{{EntityLink|Piglin|Piglins}} are attracted to ''golden'' chestplates and pick them up, examining them for 6 to 8 seconds. Piglins can wear other chestplates but are not attracted to them. They prefer stronger chestplates over weaker chestplates, with one exception: They always prefer golden chestplates over all other chestplates, throwing out stronger chestplates to equip them. Enchanted chestplates are preferred over unenchanted chestplates.
== Sounds ==
{{el|je}}:
{{Sound table
|sound=Equip leather1.ogg
|sound2=Equip leather2.ogg
|sound3=Equip leather3.ogg
|sound4=Equip leather4.ogg
|sound5=Equip leather5.ogg
|sound6=Equip leather6.ogg
|subtitle=Leather armor rustles
|source=player
|description=When a leather chestplate is equipped
|id=item.armor.equip_leather
|translationkey=subtitles.item.armor.equip_leather
|volume=1.0
|pitch=1.0
|distance=16}}
{{Sound table
|sound=Equip chain1.ogg
|sound2=Equip chain2.ogg
|sound3=Equip chain3.ogg
|sound4=Equip chain4.ogg
|sound5=Equip chain5.ogg
|sound6=Equip chain6.ogg
|subtitle=Chain armor jingles
|source=player
|description=When a chainmail chestplate is equipped
|id=item.armor.equip_chain
|translationkey=subtitles.item.armor.equip_chain
|volume=1.0
|pitch=1.0
|distance=16}}
{{Sound table
|sound=Equip iron1.ogg
|sound2=Equip iron2.ogg
|sound3=Equip iron3.ogg
|sound4=Equip iron4.ogg
|sound5=Equip iron5.ogg
|sound6=Equip iron6.ogg
|subtitle=Iron armor clanks
|source=player
|description=When an iron chestplate is equipped
|id=item.armor.equip_iron
|translationkey=subtitles.item.armor.equip_iron
|volume=1.0
|pitch=1.0
|distance=16}}
{{Sound table
|sound=Equip gold1.ogg
|sound2=Equip gold2.ogg
|sound3=Equip gold3.ogg
|sound4=Equip gold4.ogg
|sound5=Equip gold5.ogg
|sound6=Equip gold6.ogg
|subtitle=Gold armor clinks
|source=player
|description=When a gold chestplate is equipped
|id=item.armor.equip_gold
|translationkey=subtitles.item.armor.equip_gold
|volume=1.0
|pitch=1.0
|distance=16}}
{{Sound table
|sound=Equip diamond1.ogg
|sound2=Equip diamond2.ogg
|sound3=Equip diamond3.ogg
|sound4=Equip diamond4.ogg
|sound5=Equip diamond5.ogg
|sound6=Equip diamond6.ogg
|subtitle=Diamond armor clangs
|source=player
|description=When a diamond chestplate is equipped
|id=item.armor.equip_diamond
|translationkey=subtitles.item.armor.equip_diamond
|volume=1.0
|pitch=1.0
|distance=16}}
{{Sound table
|sound=Equip netherite1.ogg
|sound2=Equip netherite2.ogg
|sound3=Equip netherite3.ogg
|sound4=Equip netherite4.ogg
|subtitle=Netherite armor clanks
|source=player
|description=When a netherite chestplate is equipped
|id=item.armor.equip_netherite
|translationkey=subtitles.item.armor.equip_netherite
|volume=0.8
|pitch=1.0/0.9
|distance=16}}
{{Sound table
|sound=Random break.ogg
|subtitle=Item breaks
|source=dependent
|description=When a chestplate's durability is exhausted
|id=entity.item.break
|translationkey=subtitles.entity.item.break
|volume=0.8
|pitch=0.8-1.2
|distance=16
|foot=1}}
{{el|be}}:
{{Sound table
|type=bedrock
|sound=Equip leather1.ogg
|sound2=Equip leather2.ogg
|sound3=Equip leather3.ogg
|sound4=Equip leather4.ogg
|sound5=Equip leather5.ogg
|sound6=Equip leather6.ogg
|source=player
|description=When a leather chestplate is equipped
|id=armor.equip_leather
|volume=1.0
|pitch=1.0}}
{{Sound table
|sound=Equip chain1.ogg
|sound2=Equip chain2.ogg
|sound3=Equip chain3.ogg
|sound4=Equip chain4.ogg
|sound5=Equip chain5.ogg
|sound6=Equip chain6.ogg
|source=player
|description=When a chain chestplate is equipped
|id=armor.equip_chain
|volume=1.0
|pitch=1.0}}
{{Sound table
|sound=Equip iron1.ogg
|sound2=Equip iron2.ogg
|sound3=Equip iron3.ogg
|sound4=Equip iron4.ogg
|sound5=Equip iron5.ogg
|sound6=Equip iron6.ogg
|source=player
|description=When an iron chestplate is equipped
|id=armor.equip_iron
|volume=1.0
|pitch=1.0}}
{{Sound table
|sound=Equip gold1.ogg
|sound2=Equip gold2.ogg
|sound3=Equip gold3.ogg
|sound4=Equip gold4.ogg
|sound5=Equip gold5.ogg
|sound6=Equip gold6.ogg
|source=player
|description=When a gold chestplate is equipped
|id=armor.equip_gold
|volume=1.0
|pitch=1.0}}
{{Sound table
|sound=Equip diamond1.ogg
|sound2=Equip diamond2.ogg
|sound3=Equip diamond3.ogg
|sound4=Equip diamond4.ogg
|sound5=Equip diamond5.ogg
|sound6=Equip diamond6.ogg
|source=player
|description=When a diamond chestplate is equipped
|id=armor.equip_diamond
|volume=1.0
|pitch=1.0}}
{{Sound table
|sound=Equip netherite1.ogg
|sound2=Equip netherite2.ogg
|sound3=Equip netherite3.ogg
|sound4=Equip netherite4.ogg
|source=player
|description=When a netherite chestplate is equipped.
|id=armor.equip_netherite
|volume=1.0
|pitch=1.0}}
{{Sound table
|rowspan=2
|sound=Water Splash Old.ogg
|source=block
|description=When a leather chestplate is dyed using a cauldron
|id=cauldron.dyearmor
|volume=0.1
|pitch=1.0}}
{{Sound table
|source=block
|description=When a leather chestplate's dye is removed using a cauldron
|id=cauldron.cleanarmor
|volume=0.1
|pitch=1.0}}
{{Sound table
|sound=Random break.ogg
|source=player
|description=When a chestplate's durability is exhausted
|id=random.break
|volume=1.0
|pitch=0.9
|foot=1}}
== Data values ==
=== ID ===
{{edition|java}}:
{{ID table
|edition=java
|showitemtags=y
|showforms=y
|generatetranslationkeys=y
|displayname=Leather Tunic
|spritetype=item
|nameid=leather_chestplate
|itemtags=freeze_immune_wearables
|form=item}}
{{ID table
|displayname=Chainmail Chestplate
|spritetype=item
|nameid=chainmail_chestplate
|form=item}}
{{ID table
|displayname=Iron Chestplate
|spritetype=item
|nameid=iron_chestplate
|form=item}}
{{ID table
|displayname=Diamond Chestplate
|spritetype=item
|nameid=diamond_chestplate
|form=item}}
{{ID table
|displayname=Golden Chestplate
|spritetype=item
|nameid=golden_chestplate
|form=item}}
{{ID table
|displayname=Netherite Chestplate
|spritetype=item
|nameid=netherite_chestplate
|form=item
|foot=1}}
{{edition|bedrock}}:
{{ID table
|edition=bedrock
|shownumericids=y
|showforms=y
|notshowbeitemforms=y
|generatetranslationkeys=y
|displayname=Leather Tunic
|spritetype=item
|nameid=leather_chestplate
|id=336
|form=item}}
{{ID table
|displayname=Chainmail Chestplate
|spritetype=item
|nameid=chainmail_chestplate
|id=340
|form=item}}
{{ID table
|displayname=Iron Chestplate
|spritetype=item
|nameid=iron_chestplate
|id=344
|form=item}}
{{ID table
|displayname=Diamond Chestplate
|spritetype=item
|nameid=diamond_chestplate
|id=348
|form=item}}
{{ID table
|displayname=Golden Chestplate
|spritetype=item
|nameid=golden_chestplate
|id=352
|form=item}}
{{ID table
|displayname=Netherite Chestplate
|spritetype=item
|nameid=netherite_chestplate
|id=610
|form=item
|foot=1}}
=== Item data ===
When leather tunics are dyed, it has the following NBT:
<div class="treeview">
* {{nbt|compound|tag}}: Parent tag.
** {{nbt|compound|display}}: Display properties.
*** {{nbt|int|color}}: The color of the leather armor. The tooltip displays "Dyed" if advanced tooltips are disabled, otherwise it displays the hexadecimal color value. Color codes are calculated from the Red, Green and Blue components using this formula:<br>'''<span style="color:red">Red</span>[[wikipedia:Logical shift|<<]]16 + <span style="color:green">Green</span><<8 + <span style="color:blue">Blue</span>'''<ref>For positive values larger than 0x00FFFFFF, the top byte is ignored. All negative values produce white.</ref>
</div>
== Achievements ==
{{load achievements|Iron Man;Tie Dye Outfit;Cover me in debris;Oooh, shiny!}}
== Advancements ==
{{load advancements|Suit Up;Cover me With Diamonds;Oh Shiny;Cover Me in Debris}}
== History ==
{{History|java classic}}
{{History||June 14, 2009|link=wordofnotch:123343045|[[Notch]] discussed how armor would work in [[Survival]] mode: "Two types of swords, two types of armor, two types of helmets. The basic versions require iron. The advanced versions require steel, which you make by combining iron and coal. Carrying swords, armor or helmets take up inventory slots, but otherwise have no penalty and work pretty much as you expect (prevent some damage, or cause more damage)".}}
{{History||August 13, 2009|link=wordofnotch:162091556|Notch tested chestplates on the [[human]]. They were merely aesthetic at the time and had no effect on gameplay.}}
{{History||0.24_SURVIVAL_TEST|[[File:Plate Chestplate.png|32px]] Added the [[Java_Edition_removed_features#Armor_in_Survival_Test|plate chestplate]].
|[[File:Chainmail Chestplate JE1.png|32px]] Added the model and the texture for the unused [[Java_Edition_removed_features#Armor_in_Survival Test|chain chestplate]].
|[[File:Zombie full set.png|32px]] [[File:Skeleton helmet.png|26px]] The plate chestplate has been tested on [[zombie]]s and [[skeleton]]s. It had no effect on gameplay.}}
{{History|java indev}}
{{History||0.31|snap=20091223-1|Plate and chain armor chestplates are no longer used.}}
{{History|||snap=20091231-2|[[File:Leather Tunic (item) JE1 BE1.png|32px]] [[File:Studded Chestplate (item) JE1.png|32px]] [[File:Chainmail Chestplate (item) JE1 BE1.png|32px]] [[File:Iron Chestplate (item) JE1 BE1.png|32px]] Added the single item form of relation to leather, [[History of textures/Unused textures#Studded armor|studded]], chainmail, and plate (iron) chestplates.
|The textures of the cloth chestplate are taken from one of [[Notch]]'s previous games, ''[[Legend of the Chambered]]''. The rest are from ''[[Legend of the Chambered 2]]''.}}
{{History||20100206|[[File:Golden Chestplate (item) JE1 BE1.png|32px]] [[File:Diamond Chestplate (item) JE1 BE1.png|32px]] Added the item form of golden and diamond chestplates.
|Removed the leather-chain chestplate.}}
{{History||February 9, 2010|link=wordofnotch:380486636|[[File:Notch revealed armor.png|32px]] [[Notch]] revealed new models for armor - including chestplates.}}
{{History||20100212-1|Added armor models.
|[[File:Indev 20100212 armor.png|50px]] Armor models are now displayed on the [[player]] in the [[inventory]].}}
{{History||20100218|[[File:Leather Tunic JE1 BE1.png|32px]] [[File:Chainmail Chestplate JE2 BE1.png|32px]] [[File:Iron Chestplate JE1 BE1.png|32px]] [[File:Golden Chestplate JE1 BE1.png|32px]] [[File:Diamond Chestplate JE1 BE1.png|32px]] Added models of cloth, chainmail, iron, gold, and diamond chestplates.
|Chestplates can now be [[crafting|crafted]] and worn.
|Chestplates now functions. All chestplates give {{Armor|8}}. Chestplates have limited [[item durability|durability]], with lower tier chestplates less durable than higher tier chestplates.}}
{{History|java alpha}}
{{History||v1.0.8|With the introduction of [[leather]], "Cloth Chestplate" has been renamed to "Leather Tunic".
|Leather tunics is now [[crafting|crafted]] with leather instead of [[wool|cloth]].}}
{{History|java}}
{{History||1.0.0|snap=Beta 1.9 Prerelease|The armor protection behavior has been changed. Previous to this update, the total armor protection is based in this equation: ((''total equipped armor damage reduction'' − 1) × (''all equipped armor max damage'' − ''total equipped armor damage'')) ÷ (''total equipped armor max damage'' + 1)). Armor no longer reduces certain damage types to be covered by enchantments.}}
{{History|||snap=October 3, 2011|slink={{tweet|notch|120859830339637249}}|The first images of a [[player]] wearing enchanted chestplates are revealed.}}
{{History|||snap=Beta 1.9 Prerelease 3|Iron chestplates can now be found in the new [[stronghold]] altar [[chest]]s.}}
{{History|||snap=Beta 1.9 Prerelease 4|Chestplates can now be [[enchanting|enchanted]].}}
{{History||1.1|snap=12w01a|Iron chestplates can now be found in the new blacksmith [[chest]]s in [[village]]s.}}
{{History||1.3.1|snap=12w15a|{{key|Shift}}+clicking can now be used to wear chestplates.}}
{{History|||snap=12w21a|Chainmail chestplates can now be obtained legitimately in [[survival]] mode through [[trading]].
|Blacksmith [[villager]]s now [[trading|sell]] chainmail chestplates for 11–14 emeralds.
|Blacksmith villagers now sell diamond chestplates for 16–18 emeralds.
|Blacksmith villagers now sell iron chestplates for 10–13 emeralds.
|Butchers now sell leather tunics for 4 emeralds.}}
{{History||1.4.2|snap=12w32a|[[Mob]] armor has been reintroduced. A partial or full set of any armor is now sometimes worn by [[zombie]]s, [[skeleton]]s and [[zombified piglins|zombie pigmen]], with the likelihood increasing with difficulty.}}
{{History|||snap=August 17, 2012|slink={{tweet|Dinnerbone|236445090929844225}}|[[Jeb]] and [[Dinnerbone]] tweeted pictures of [[dye]]able leather chestplates.}}
{{History|||snap=12w34a|Leather tunics can now be dyed by [[crafting]] a leather tunic piece with [[dye]]s. Dyes can be removed by {{control|use|text=using}} dyed leather tunics on a [[cauldron]] with [[water]].
|[[File:Leather Tunic JE2.png|32px]] [[File:Leather Tunic (item) JE2.png|32px]] Default leather tunic textures are now slightly darker and have buttons.}}
{{History|||snap=12w34b|[[File:Leather Tunic JE3 BE2.png|32px]] [[File:Leather Tunic (item) JE3 BE2.png|32px]] [[File:Diamond Chestplate JE2.png|32px]] The texture of leather and diamond chestplates has been changed. Leather tunics now have longer sleeves. Diamond chestplates now have notches under the shoulders.}}
{{History|||snap=12w36a|[[Dye]]d leather tunics are now more saturated and have a slight tint of tan in respect to the default armor color.}}
{{History|||snap=12w37a|[[File:Leather Cap JE3 BE2.png|32px]] [[File:Leather Boots JE2 BE2.png|32px]] [[File:Leather Cap (item) JE3 BE2.png|32px]] [[File:Leather Boots (item) JE3 BE2.png|32px]] Leather armor now have non-dyed parts on cap, pants and boots. This has been implemented so that [[player]]s can distinguish between other types of armor and similarly colored leather armor.}}
{{History||1.4.6|snap=12w50a|The [[Thorns]] enchantment can now be [[enchanting|enchanted]] on chestplates.}}
{{History||1.5|snap=13w04a|Armor in the [[player]]'s hand can now be equipped by right-clicking.
|[[Dispenser]]s can now equip nearby players with armor.}}
{{History||1.6.1|snap=13w18a|Golden chestplates are now found in the new [[chest]]s in [[nether fortress]]es.}}
{{History||1.7.2|snap=13w36a|Leather [[boots]] can now be obtained as one of the "junk" items by [[fishing]].}}
{{History||1.8|snap=14w02a|[[Trading|Trades]] changed: armorer [[villager]]s now [[trading|sell]] chain boots for 5–7 [[emerald]]s, chain [[leggings]] for 9–11 emeralds, chain chestplates for 11–15 emeralds and chain helmets for 5–7 emeralds.
|Armorer villagers now sell enchanted diamond chestplates for 16–19 emeralds, and no longer sell other diamond armor.
|Armorer villagers now sell iron chestplates for 10–14 emeralds and iron helmets for 4–6 emeralds, and no longer sell other iron armor.
|Leatherworkers now sell enchanted leather tunics for 7–12 emeralds, and no longer sell other leather armor.}}
{{History|||snap=14w05a|Armor no longer turns red when [[mob]]s and [[player]]s are hurt.}}
{{History|||snap=14w06a|Armor is now visible on [[giant]]s.}}
{{History|||snap=14w25a|Chain armor [[Java Edition removed features#Chainmail armor|cannot be crafted anymore]] due to the [[item]] form of [[fire]] being [[Java Edition removed features#Obtainable until 1.8|removed]].}}
{{History||1.9|snap=15w31a|Enchanted iron and diamond armor can now be found in [[end city]] ship [[chest]]s.
|[[Mob]]s now wear armor from the bottom to the top, rather than from the top to the bottom. This means that a mob with three armor pieces, for example, spawn with all armor except a helmet.}}
{{History|||snap=15w34b|Armor [[item durability|durability]] now affects armor value.}}
{{History|||snap=15w36a|Armor and armor [[enchanting|enchantment]] calculations have been changed. For the original values, see [[Armor/Before 1.9|here]].}}
{{History|||snap=15w36d|Armor durability affecting value has been removed.
|Armor now has an attribute controlling the defense points.}}
{{History|||snap=15w43a|The average yield of gold chestplates in [[nether fortress]] [[chest]]s has been decreased.}}
{{History|||snap=15w50a|Added <code>equip</code> [[sound]]s for all types of armor.}}
{{History|||snap=16w02a|Armor and armor enchantment calculations have been changed again.}}
{{History|||snap=16w05a|Armor calculations have been changed, once again.}}
{{History||1.11|snap=16w39a|Diamond and chainmail chestplates are now found in the new [[woodland mansion]] chests.}}
{{History||1.11.1|snap=16w50a|Golden, chain and iron armor can now be [[smelting|smelted]] down into one of their respective [[nugget]]s.}}
{{History||1.13|snap=17w47a|Prior to [[1.13/Flattening|''The Flattening'']], these [[item]]s' numeral IDs were 298 through 317.}}
{{History|||snap=18w09a|Leather tunics now have a chance of generating in [[underwater ruins]].}}
{{History|||snap=18w10a|Leather tunics can now generate in [[buried treasure]] [[chest]]s.}}
{{History|||snap=18w11a|Enchanted leather tunics can now generate in the chests of [[shipwreck]]s.}}
{{History|||snap=18w20a|Chain armor pieces have been renamed to "chainmail".}}
{{History||1.14|snap=18w43a|[[File:Leather Tunic JE4 BE2.png|32px]] [[File:Chainmail Chestplate JE3 BE2.png|32px]] [[File:Iron Chestplate JE2 BE2.png|32px]] [[File:Golden Chestplate JE2 BE2.png|32px]] [[File:Diamond Chestplate JE3 BE2.png|32px]] [[File:Leather Tunic (item) JE4 BE3.png|32px]] [[File:Chainmail Chestplate (item) JE2 BE2.png|32px]] [[File:Iron Chestplate (item) JE2 BE2.png|32px]] [[File:Golden Chestplate (item) JE2 BE2.png|32px]] [[File:Diamond Chestplate (item) JE2 BE2.png|32px]] The textures of all types of armor have been changed.}}
{{History|||snap=18w48a|Leather tunics can now be found in [[chest]]s in [[village]] tanneries.}}
{{History|||snap=18w50a|Iron chestplates can now be found on [[armor stand]]s in [[taiga]] villages.}}
{{History|||snap=19w08a|[[File:Golden Chestplate (item) JE3 BE3.png|32px]] The textures of gold chestplate [[item]] have been changed.}}
{{History|||snap=19w11a|Leatherworker villagers now sell randomly [[dye]]d leather tunics, instead of enchanted leather tunics.}}
{{History|||snap=19w13a|Armorer villagers now give chainmail chestplates to players under the [[Hero of the Village]] effect.}}
{{History||1.16|snap=20w06a|[[File:Netherite Chestplate JE1.png|32px]] [[File:Netherite Chestplate (item) JE1.png|32px]] Added netherite chestplate.}}
{{History|||snap=20w10a|[[File:Netherite Chestplate JE2 BE1.png|32px]] [[File:Netherite Chestplate (item) JE2 BE1.png|32px]] The texture of netherite chestplate have been changed.
|Netherite chestplate can no longer be [[crafting|crafted]].
|Netherite chestplate is now obtained by combining one diamond armor piece and one netherite ingot in a [[smithing table]].}}
{{History|||snap=20w16a|All parts of golden and netherite chestplates now generate randomly [[enchanting|enchanted]], and sometimes [[damage]]d, in [[bastion remnant]] and [[ruined portal]] chests.}}
{{History|||snap=20w17a|Diamonds chestplates now generates in place of netherite armor in bastion remnant [[chest]]s.}}
{{History||1.17|snap=20w48a|Wearing any piece of leather armor now prevents [[Powder Snow#Freezing|freezing]] entirely.}}
{{History||1.18.2|snap=22w03a|Netherite chestplate knockback resistance is no longer random.}}
{{History||1.20<br>(Experimental)|link=1.19.4|snap=23w04a|Non-leather chestplates can now be trimmed using a [[smithing table]].
|There are 10 types of material that determine the color of the trim:
*Iron
*Copper
*Gold
*Lapis
*Emerald
*Diamond
*Netherite
*Redstone
*Amethyst
*Quartz
|Upgrading diamond chestplate to netherite chestplate now requires the netherite upgrade [[smithing template]].}}
{{History|||snap=23w05a|Leather tunics can now be trimmed using a smithing table.|Chestplates can now have trims of the same material it is made out of.|The texture of the dune armor trim has been tweaked, so that the symbol on the chestplate is moved up a few pixels.}}
{{History|||snap=23w06a|Swapped {{cd|iron}} and {{cd|iron_darker}} palette, then made {{cd|iron_darker}} darker overall.|Added a darkest pixel to {{cd|chestplate_trim}} trim item texture.}}
{{History||1.19.4|snap=23w05a|Chestplates can now be swapped by {{ctrl|using}} them/elytra in the hotbar.<ref>{{bug|MC-216270|||Fixed}}</ref>}}
{{History||?|Chestplates can now be swapped in [[armor stand]]s by {{ctrl|using}} them/elytra in the armor stand's slot.}}
{{History||1.20|snap=23w12a|The pattern textures of dune and sentry armor trims are changed.|
Those previous patterns were left with different names: dune was renamed sentry and sentry was renamed shaper.}}
{{History|pocket alpha}}
{{History||v0.6.0|[[File:Leather Tunic JE1 BE1.png|32px]] [[File:Chainmail Chestplate JE2 BE1.png|32px]] [[File:Iron Chestplate JE1 BE1.png|32px]] [[File:Golden Chestplate JE1 BE1.png|32px]] [[File:Diamond Chestplate JE1 BE1.png|32px]] [[File:Leather Tunic (item) JE1 BE1.png|32px]] [[File:Chainmail Chestplate (item) JE1 BE1.png|32px]] [[File:Iron Chestplate (item) JE1 BE1.png|32px]] [[File:Golden Chestplate (item) JE1 BE1.png|32px]] [[File:Diamond Chestplate (item) JE1 BE1.png|32px]] Added chestplates.}}
{{History||v0.8.0|snap=build 2|[[File:Leather Tunic (item) JE3 BE2.png|32px]] The leather armor sprites have been changed to that of {{el|je}}, but its armor [[model]] remains that of older versions.}}
{{History||v0.9.0|snap=build 1|Iron armor now naturally generates in [[village]] [[chest]]s and a [[stronghold]] altar chest.}}
{{History||v0.11.0|snap=build 11|Armor now protects against [[damage]] from [[mob]]s only.}}
{{History||v0.12.1|snap=build 1|Armor can now be worn by mobs.
|Golden chestplates can now be found in [[nether fortress]] [[chest]]s.
|Chainmail armor can now be obtained in [[survival]] mode from a mob wearing it.}}
{{History||?|Armor no longer turns red when [[mob]]s and [[player]]s are hurt.}}
{{History||v0.14.0|snap=build 1|[[File:Leather Tunic JE3 BE2.png|32px]] The textures of leather chestplate have been changed.
|Leather armor can now be dyed.}}
{{History||v0.15.0|snap=build 1|Armor can now be obtained from [[stray]]s and [[husk]]s that naturally spawn with armor.}}
{{History||v0.15.10|[[Cape]]s no longer clip through armor.}}
{{History|pocket}}
{{History||1.0.0|snap=alpha 0.17.0.1|[[Enchanting|Enchanted]] iron armor and enchanted diamond armor can now be found inside [[chest]]s within [[end city]].}}
{{History||1.0.4|snap=alpha 1.0.4.0|Iron [[helmet]]s, iron chestplates, enchanted diamond chestplates and chainmail armor are now [[trading|sold]] by armorer smith [[villager]]s via [[trading]].}}
{{History||1.1.0|snap=alpha 1.1.0.0|Golden, chain and iron armor can now be [[smelting|smelted]] down into one of their respective [[nugget]]s.
|Diamond chestplates and chainmail chestplates can now be found inside [[woodland mansion]] chests.}}
{{History|bedrock}}
{{History||1.4.0|snap=beta 1.2.14.2|Chainmail chestplates now generate in [[buried treasure]] chests.
|Enchanted leather armor can now be found inside [[shipwreck]] supply room [[chest]]s.}}
{{History|||snap=beta 1.2.20.1|Leather chestplates can now be found inside [[underwater ruins]] chests.}}
{{History||1.10.0|snap=beta 1.10.0.3|[[File:Leather Tunic JE4 BE2.png|32px]] [[File:Chainmail Chestplate JE3 BE2.png|32px]] [[File:Iron Chestplate JE2 BE2.png|32px]] [[File:Golden Chestplate JE2 BE2.png|32px]] [[File:Diamond Chestplate JE3 BE2.png|32px]] [[File:Leather Tunic (item) JE4 BE3.png|32px]] [[File:Chainmail Chestplate (item) JE2 BE2.png|32px]] [[File:Iron Chestplate (item) JE2 BE2.png|32px]] [[File:Golden Chestplate (item) JE2 BE2.png|32px]] [[File:Diamond Chestplate (item) JE2 BE2.png|32px]] The textures of all types of chestplates have been changed.
|Iron armor now can be found in plains [[village]] weaponsmith [[chest]]s.
|Leather armor can now be found inside plains village tannery chests.}}
{{History||1.11.0|snap=beta 1.11.0.1|Iron armor now can be found in [[savanna]], [[taiga]], [[desert]], [[snowy taiga]] and [[snowy tundra]] [[village]] weaponsmith [[chest]]s.
|Leather armor can now be found inside savanna, taiga, desert, snowy taiga and snowy tundra village tannery chests.}}
{{History|||snap=beta 1.11.0.4|[[Pillager]]s and [[vindicator]]s that spawn in [[raid]]s can now drop iron armor.}}
{{History||1.11.0|snap=beta 1.11.0.5|[[File:Golden Chestplate (item) JE3 BE3.png|32px]] The textures of gold chestplate [[item]] have been changed.}}
{{History||1.12.0|snap=beta 1.12.0.2|[[File:Armor Stand with Leather Armor MCPE-44669.png|32px]] Leather armor no longer show as being [[dye]]d properly when worn by [[armor stand]]s.}}
{{History||1.13.0|snap=beta 1.13.0.1|Leather armor now appears dyed properly when worn by armor stands.}}
{{History||1.16.0|snap=beta 1.16.0.51|[[File:Netherite Chestplate JE2 BE1.png|32px]] [[File:Netherite Chestplate (item) JE2 BE1.png|32px]] Added netherite chestplate.
|Armor can now be obtained from [[piglin]]s that naturally spawn with golden armor.}}
{{History|||snap=beta 1.16.0.57|All parts of golden and netherite armor now generate randomly [[enchanting|enchanted]], and sometimes [[damage]]d, in [[bastion remnant]] chests.
|Netherite armor can no longer be [[crafting|crafted]].
|Netherite armor is now obtained by combining one diamond armor piece and one netherite ingot in a [[smithing table]].}}
{{History|||snap=beta 1.16.0.63|Diamonds armor now generates in place of netherite armor in bastion remnant [[chest]]s.}}
{{History|||snap=beta 1.16.200.53|Netherite Armor now gives a 90% reduction in Knockback.}}
{{History||1.16.210|snap=beta 1.16.210.53|Wearing any piece of leather armor now prevents [[Powder Snow#Freezing|freezing]] entirely.}}
{{History|console}}
{{History||xbox=TU1|xbone=CU1|ps=1.0|wiiu=Patch 1|switch=1.0.1|[[File:Leather Tunic JE1 BE1.png|32px]] [[File:Chainmail Chestplate JE2 BE1.png|32px]] [[File:Iron Chestplate JE1 BE1.png|32px]] [[File:Golden Chestplate JE1 BE1.png|32px]] [[File:Diamond Chestplate JE1 BE1.png|32px]] [[File:Leather Tunic (item) JE1 BE1.png|32px]] [[File:Chainmail Chestplate (item) JE1 BE1.png|32px]] [[File:Iron Chestplate (item) JE1 BE1.png|32px]] [[File:Golden Chestplate (item) JE1 BE1.png|32px]] [[File:Diamond Chestplate (item) JE1 BE1.png|32px]] Added chestplates.
|Added a quick equip for armor to the [[inventory]] interface.}}
{{History||xbox=TU12|ps=1.03|[[File:Leather Tunic JE3 BE2.png|32px]] [[File:Leather Tunic (item) JE3 BE2.png|32px]] The textures for leather chestplate have been changed.}}
{{History||xbox=TU14|ps=1.05|Leather armor can now be [[dye]]d.
|[[Item repair]] can now repair armor.}}
{{History||xbox=TU25|xbone=CU13|ps=1.16|Armor now have the quick equip functionality.}}
{{History||xbox=TU53|xbone=CU43|ps=1.49|wiiu=Patch 23|switch=1.0.3|Golden, chain and iron armor can now be [[smelting|smelted]] down into one of their respective [[nugget]]s.}}
{{History|PS4}}
{{History||1.90|[[File:Chainmail Chestplate (item) JE2 BE2.png|32px]] [[File:Iron Chestplate (item) JE2 BE2.png|32px]] [[File:Golden Chestplate (item) JE2 BE2.png|32px]] [[File:Diamond Chestplate (item) JE2 BE2.png|32px]] The textures of all types of chestplate items have been changed (except for the leather one).}}
{{History|new 3ds}}
{{History||0.1.0|[[File:Leather Tunic JE1 BE1.png|32px]] [[File:Chainmail Chestplate JE2 BE1.png|32px]] [[File:Iron Chestplate JE1 BE1.png|32px]] [[File:Golden Chestplate JE1 BE1.png|32px]] [[File:Diamond Chestplate JE1 BE1.png|32px]] [[File:Leather Tunic (item) JE3 BE2.png|32px]] [[File:Chainmail Chestplate (item) JE1 BE1.png|32px]] [[File:Iron Chestplate (item) JE1 BE1.png|32px]] [[File:Golden Chestplate (item) JE1 BE1.png|32px]] [[File:Diamond Chestplate (item) JE1 BE1.png|32px]] Added chestplates.}}
{{History|foot}}
; Armor durability from Indev until late Beta
{| class="wikitable" data-description="Armor Durability during Indev until late Beta" style="text-align:center;"
|-
!scope="col" | Material
!scope="col" | Helmet
!scope="col" | Chestplate
!scope="col" | Leggings
!scope="col" | Boots
|-
|scope="row" | '''Leather'''
| 33
| 48
| 45
| 39
|-
|scope="row" | '''Golden'''
| 66
| 96
| 90
| 78
|-
|scope="row" | '''Chainmail'''
| 66
| 96
| 90
| 78
|-
|scope="row" | '''Iron'''
| 132
| 192
| 180
| 156
|-
|scope="row" | '''Diamond'''
| 264
| 384
| 360
| 312
|}
== Issues ==
{{issue list}}
== Trivia ==
* Chestplates do not render on the player's arm in first person view.<ref>{{bug|MC-25512}}</ref><ref>{{bug|MCPE-30000}}</ref>
== Gallery ==
=== Enchanted Chestplates ===
<gallery>
File:Enchanted Leather Tunic (item).gif
File:Enchanted Chainmail Chestplate (item).gif
File:Enchanted Iron Chestplate (item).gif
File:Enchanted Golden Chestplate (item).gif
File:Enchanted Diamond Chestplate (item).gif
File:Enchanted Netherite Chestplate (item).gif
</gallery>
<gallery>
File:Enchanted Leather Chestplate.gif
File:Enchanted Chainmail Chestplate.gif
File:Enchanted Iron Chestplate.gif
File:Enchanted Golden Chestplate.gif
File:Enchanted Diamond Chestplate.gif
File:Enchanted Netherite Chestplate.gif
</gallery>
== References ==
{{reflist}}
== External Links ==
*[https://www.minecraft.net/en-us/article/taking-inventory--chestplate Taking Inventory: Chestplate] – Minecraft.net on August 4, 2021
{{Items}}
[[Category:Armor]]
[[ja:チェストプレート]]
[[ko:흉갑]]
[[pt:Peitoral]]
[[pl:Napierśnik]]
[[th:เสื้อเกราะ]]
[[zh:胸甲]]</li><li>[[Cocoa Beans|Cocoa Beans]]<br/>{{Block
|image=<gallery>
Cocoa Age 0.png|Age 0 JE
Cocoa Age 1.png|Age 1 JE
Cocoa Age 2.png|Age 2 JE
</gallery>
|image2=<gallery>
Cocoa Age 0 BE.png|Age 0 BE
Cocoa Age 1 BE.png|Age 1 BE
Cocoa Age 2 BE.png|Age 2 BE
</gallery>
|transparent=Yes
|light=No
|tool=axe
|renewable=Yes
|stackable=Yes (64)
|flammable=No
|lavasusceptible=No
}} '''Cocoa beans''' are items obtained from cocoa pods and are used to plant them, as well as to craft [[dye|brown dye]] and [[cookie|cookies]].
'''Cocoa pods''' are [[Bone Meal|bonemealable]] [[plant]]s placed on [[Log|jungle log]] sides that grow cocoa beans, and can be found naturally in [[Jungle|jungles]].
==Obtaining==
In ''Java Edition'', cocoa beans are only obtained through the natural generation of cocoa pods, while in ''Bedrock Edition'', they can also be gotten in bonus chests, from [[fishing]] inside the jungle, bamboo jungle and sparse jungle biomes and during a [[trading]] with a wandering trader.
Cocoa beans come from cocoa pods, which are found on the trunks of normal-sized naturally-generated [[jungle tree]]s in [[jungle]], [[bamboo jungle]]s and [[sparse jungle]] temperate [[biome]]s.
Cocoa pods can be mined with any item, but [[axe]]s are the quickest. Fully grown cocoa pods drop 3 cocoa beans. Using a tool enchanted with Fortune does not increase the amount of cocoa beans dropped.
{{breaking row|horizontal=1|Cocoa|Axe|sword=1|link=none}}
The block itself can be obtained by inventory editing or [[add-on]]s {{in|bedrock}}.
From one to two cocoa beans can be found in 40% of bonus [[chest]]s {{in|bedrock}}.
{{LootChestItem|cocoa-beans}}
Cocoa beans can be obtained from [[fishing]] in a jungle {{in|bedrock}}.
[[Wandering trader]]s may sell 3 cocoa beans for an [[emerald]] during a [[trading]] {{in|bedrock}}.
==Usage==
===Farming===
{{main|Tutorials/Cocoa bean farming}}
Placing cocoa beans on the side of a jungle [[log]] plants a new cocoa pod. The log does not need to be attached to a tree. A cocoa pod can be placed on jungle logs, jungle [[wood]], stripped jungle logs and stripped jungle wood.
[[File:Cocoaplant farm.png|thumb|left|A somewhat efficient cocoa pod farm, minimizing space and wood use.]]
Cocoa has three stages of growth. During its first stage, the pod is small and green. In the second stage, the plant is bigger and colored tan. In its last stage, the pod is even larger and orange. The cocoa block has a 20% chance to grow a stage when receiving a [[Tick#Random tick|random tick]], giving it an average time of 5 minutes and 41 seconds per stage. When destroyed in the first two stages, the pod yields only one cocoa bean. When destroyed in the third stage, it gives 3 cocoa beans. [[Bone meal]] can be used to force the cocoa pod forward by one growth stage. Cocoa pods burst and drop their beans when struck by flowing water, pushed by a piston or if their [[log]] or wood are removed by any means.
===Composting===
Placing cocoa beans into a [[composter]] has a 65% chance of raising the compost level by 1. {{IN|bedrock}}, cocoa beans are accepted as a direct substitute of brown dye in many recipes.
===Crafting ingredient===
{{crafting usage}}
{{Dye usage}}
{{IN|bedrock}}, cocoa beans can be also used in banner patterns:
{{banner crafting usage}}
{{Banner loom usage|Cocoa Beans}}
==Sounds==
{{Sound table/Block/Wood}}
==Data values==
===ID===
{{edition|java}}:
{{ID table
|edition=java
|showforms=y
|generatetranslationkeys=y
|displayname=Cocoa
|spritetype=block
|nameid=cocoa
|form=block}}
{{ID table
|displayname=Cocoa Beans
|spritetype=item
|nameid=cocoa_beans
|form=item
|foot=1}}
{{edition|bedrock}}:
{{ID table
|edition=bedrock
|showforms=y
|showaliasids=y
|shownumericids=y
|generatetranslationkeys=y
|displayname=Cocoa
|spritetype=block
|nameid=cocoa
|id=127
|form=block}}
{{ID table
|displayname=Cocoa Beans
|spritetype=item
|nameid=cocoa_beans
|aliasid=dye / 3
|id=412
|form=item
|translationkey=item.dye.brown.name
|foot=1}}
===Block states===
{{see also|Block states}}
{{/BS}}
==History==
''For a more in-depth breakdown of changes to textures and models, including a set of renders for each state combination, see [[/Asset history]]''
{{History|java beta}}
{{History||1.2|[[File:Cocoa Beans JE1 BE1.png|32px]] Added cocoa beans.
|Cocoa beans are currently obtainable only through an inventory editor.}}
{{History||1.2_02|Prior to this, Cocoa Beans were misspelled as 'Coco Beans'.}}
{{History||1.4|Cocoa beans have been formally brought into the game as a reward found in [[dungeon]] chests.<ref>{{tweet|notch|53161729990987776}}</ref> (53% chance) Also, brown [[sheep]] now naturally spawn, making brown [[wool]] obtainable without hacking the game.
|Cocoa beans can now be used to craft [[cookie]]s.}}
{{History|java}}
{{History||May 8, 2012|link={{tweet|jeb|199867730927697920}}|[[Jeb]] revealed cocoa with a screenshot.}}
{{History||1.3.1|snap=12w18a|For only this snapshot, cocoa beans have been given a small (0.5%) chance of dropping from destroyed [[jungle tree]] [[leaves]] in a similar fashion to [[apple]]s from oak leaves, which makes cocoa beans [[renewable resource|renewable]] for the first time.}}
{{History|||snap=12w19a|[[File:Cocoa Age 0 (S) JE1.png|32px]] [[File:Cocoa Age 1 (S) JE1.png|32px]] [[File:Cocoa Age 2 (S) JE1.png|32px]] Added cocoa. The top textures of cocoa always keep a completely constant rotation, regardless of what direction they face. They also not shaded.
|[[File:Cocoa Beans JE2.png|32px]] The texture of cocoa beans has been changed.
|Cocoa has replaced jungle [[leaves]] as the main method of finding cocoa beans.
|[[File:Cocoa Age 3 (S) JE1.png|32px]] Cocoa with values 12–15 is inaccessible normally, and use the texture of the [[dragon egg]]. This is due to the dragon egg texture being to the left of the ripe cocoa texture in <samp>[[terrain.png]]</samp>, as cocoa textures are arranged with the oldest on the left and the youngest on the right, resulting in the unusually ripe cocoa reading the dragon egg texture.}}
{{History|||snap=1.3|[[File:Cocoa Beans JE3 BE2.png|32px]] The texture of cocoa beans has been changed.}}
{{History||1.4.2|snap=12w34a|Cocoa beans have been given the ability to [[Armor#Dyeing|dye]] leather [[armor]] and [[wolf]] collars.}}
{{History||1.4.6|snap=12w49a|Cocoa beans can now be [[crafting|crafted]] with [[gunpowder]] to create a [[firework star]].}}
{{History||1.5|snap=13w02a|Due to textures being stored in individual files, cocoa beans with data 12–15 no longer have a texture to use, and now crash the game if a [[chunk]] containing one is loaded.}}
{{History|||snap=13w03a|Cocoa with data values 12–15 now only crash the game if one is directly in the field of view.}}
{{History|||snap=13w04a|[[Bone meal]] now grows cocoa by only one stage.}}
{{History|||snap=13w10a|[[File:Cocoa Age 3 (S) JE2.png|32px]] Cocoa with data 12–15 now use the age 2 texture, resulting in a broken appearance, preventing previously mentioned crashes.}}
{{History||1.6.1|snap=13w18a|Cocoa beans have been removed from [[dungeon]] [[chest]]s.}}
{{History|||snap=13w19a|Brown [[Terracotta|stained clay]] can now be [[crafting|crafted]] using cocoa beans.}}
{{History||1.7.2|snap=13w41a|Brown [[stained glass]] can now be crafted using cocoa beans.}}
{{History||1.8|snap=14w07a|[[File:Cocoa Age 0 (S) JE2.png|32px]] [[File:Cocoa Age 1 (S) JE2.png|32px]] [[File:Cocoa Age 2 (S) JE2.png|32px]] [[File:Missing Model JE1.png|32px]] The top textures of cocoa now rotate with the blocks themselves (cocoa facing north remaining visually unaffected), and cocoa of age 3 has [[Missing model|no model]].}}
{{History|||snap=14w10a|[[File:Cocoa Age 0 (S) JE3.png|32px]] [[File:Cocoa Age 1 (S) JE3.png|32px]] [[File:Cocoa Age 2 (S) JE3.png|32px]] [[File:Missing Model JE2.png|32px]] The large section of cocoa is shaded, and the missing model (which age 3 cocoa uses) has changed.}}
{{History|||snap=14w25a|[[File:Cocoa Age 0 (S) JE4.png|32px]] [[File:Cocoa Age 1 (S) JE4.png|32px]] [[File:Cocoa Age 2 (S) JE4.png|32px]] The connecting region of cocoa is now shaded.}}
{{History|||snap=14w26a|Cocoa with data 12–15 has been effectively removed from the game, as such blocks now convert to a proper value with {{cmd|setblock}}. Loading worlds with existing out of range cocoa crash the game.}}
{{History|||snap=14w30a|Cocoa beans can now be used to dye [[banner]]s.}}
{{History||1.13|snap=17w47a|The different data values for the <code>dye</code> ID have been split up into their own IDs.
|Prior to [[1.13/Flattening|''The Flattening'']], this block's and item's numeral ID were respectively 127 and 351.}}
{{History||1.14|snap=18w43a|Cocoa beans can now be used to craft [[brown dye]].
|Cocoa beans can no longer be used as a [[dye]].
|All of the dye-related functions and crafting recipes of cocoa beans (except cookies) have been transferred to brown dye.
|"Cocoa Beans" item has been renamed to "Cocoa".
|[[File:Cocoa Beans JE4 BE3.png|32px]] The texture of cocoa has been changed.
|[[File:Cocoa Age 0 (S) JE5.png|32px]] [[File:Cocoa Age 1 (S) JE5.png|32px]] [[File:Cocoa Age 2 (S) JE5.png|32px]] The textures of cocoa have been changed.
|[[File:Cocoa Age 0 (texture) JE2 BE2.png|32px]] [[File:Cocoa Age 1 (texture) JE2 BE2.png|32px]] Textures for cocoa age 0 and 1 has palette left, visible only on particles.
|Cocoa now has a placement [[sound]].}}
{{History|||snap=19w03a|Placing cocoa into the new [[composter]] has a 50% chance of raising the compost level by 1.}}
{{History|||snap=19w05a|Cocoa now has a 65% chance of increasing the compost level in a composter by 1.}}
{{History|||snap=19w11b|"Cocoa" item has been renamed back to "Cocoa Beans".{{verify|was this not just one bug that affected other crops as well? if so cite the ticket and add to all other affected pages}}}}
{{History||1.18|snap=Pre-release 5|[[File:Cocoa Age 0 (texture) JE3 BE3.png|32px]] [[File:Cocoa Age 1 (texture) JE3 BE3.png|32px]] Textures for cocoa age 0 and 1 were changed. This visually changes only particles.}}
{{History||1.19|snap=22w11a|[[File:Cocoa Age 2 (S) JE6.png|32px]] The texture and model of cocoa age 2 have been changed.}}
{{History|pocket alpha}}
{{History||v0.3.0|[[File:Cocoa Beans JE1 BE1.png|32px]] Added cocoa beans. They are currently unobtainable and serve no purpose.}}
{{History||v0.8.0|snap=build 1|[[File:Cocoa Beans JE3 BE2.png|32px]] The texture of cocoa beans has been changed.
|Cocoa beans can be [[crafted]] from an [[orange dye]] and an [[ink sac]], or from [[dandelion yellow]], [[rose red]], and an ink sac, despite there being no way of obtaining ink sacs at the time.}}
{{History|||snap=build 3|Cocoa beans are now available in [[creative]].}}
{{History||v0.9.0|snap=build 1|[[File:Cocoa Age 0 (S) JE1.png|32px]] [[File:Cocoa Age 1 (S) JE1.png|32px]] [[File:Cocoa Age 2 (S) JE1.png|32px]] {{info needed|How did 12-16 appear?}} Added cocoa.
|Cocoa provides an additional way of obtaining cocoa beans.
|Cocoa beans are now used to craft [[cookie]]s.}}
{{History||v0.11.0|snap=build 14|Cocoa now grows over time.<ref>{{bug|MCPE-7887}}</ref>}}
{{History||?|[[File:Cocoa Age 0 (S) BE4.png|32px]] [[File:Cocoa Age 1 (S) BE4.png|32px]] [[File:Cocoa Age 2 (S) BE2.png|32px]] Cocoa no longer has a stem connecting it to the log.}}
{{History||v0.15.0|snap=Realms build 4|[[File:Cocoa Age 0 (S) JE1.png|32px]] [[File:Cocoa Age 1 (S) JE1.png|32px]] [[File:Cocoa Age 2 (S) JE1.png|32px]] Cocoa stems now render again.<ref>{{bug|MCPE-13579}}</ref>}}
{{History||v0.16.0|snap=build 1|Cocoa beans can no longer be crafted from [[orange dye]] and an ink sac.
|Cocoa beans can no longer be crafted from rose red, dandelion yellow and ink sacs.}}
{{History|pocket}}
{{History||1.0.0|snap=alpha 0.17.0.1|Cocoa beans can now be used to dye [[shulker]]s.}}
{{History||1.1.0|snap=alpha 1.1.0.0|Cocoa beans can now be used to dye [[shulker box]]es and [[bed]]s.
|Cocoa beans can now be used to craft [[concrete powder]].}}
{{History|bedrock}}
{{History||1.2.0|snap=beta 1.2.0.2|Cocoa beans can now be used to dye [[banner]]s, [[firework star]]s, and [[glass]].
|Cocoa beans can now be found in [[bonus chest]]s.}}
{{History||1.4.0|snap=beta 1.2.20.1|Cocoa beans can now be used to craft brown [[balloon]]s and [[glow stick]]s.}}
{{History||1.8.0|snap=beta 1.8.0.10|Cocoa beans can now be used to craft [[brown dye]].}}
{{History||1.10.0|snap=beta 1.10.0.3|Cocoa beans are now [[trading|sold]] by [[wandering trader]]s.
|[[File:Cocoa Beans JE4 BE3.png|32px]] The texture of cocoa beans has been changed.
|[[File:Cocoa Age 0 (S) BE4.png|32px]] [[File:Cocoa Age 1 (S) BE4.png|32px]] [[File:Cocoa Age 2 (S) BE4.png|32px]] The textures of cocoa have been changed.}}
{{History||1.11.0|snap=beta 1.11.0.1|Cocoa beans can now be used to fill up [[composter]]s.}}
{{History||1.16.100|snap=beta 1.16.100.56|The ID of cocoa beans has been changed from <code>dye/3</code> to <code>cocoa_beans</code>.}}
{{History||1.18.10|snap=beta 1.18.10.22|[[File:Cocoa Age 0 (texture) JE3 BE3.png|32px]] [[File:Cocoa Age 1 (texture) JE3 BE3.png|32px]] Textures for cocoa age 0 and 1 were changed. This visually changes only particles.}}
{{History|console}}
{{History||xbox=TU1|xbone=CU1|ps=1.0|wiiu=Patch 1|switch=1.0.1|[[File:Cocoa Beans JE1 BE1.png|32px]] Added cocoa beans.}}
{{History||xbox=TU9|[[File:Cocoa Beans JE3 BE2.png|32px]] The texture of cocoa beans has been changed.}}
{{History||xbox=TU12|[[File:Cocoa Age 0 (S) JE3.png|32px]] [[File:Cocoa Age 1 (S) JE3.png|32px]] [[File:Cocoa Age 2 (S) JE3.png|32px]]{{verify|Were these the models used?}} Added cocoa.}}
{{History||xbox=none|xbone=none|ps=1.90|wiiu=none|switch=none|[[File:Cocoa Beans JE4 BE3.png|32px]] The texture of cocoa beans has been changed once again.
|[[File:Cocoa Age 0 (S) JE5.png|32px]] [[File:Cocoa Age 1 (S) JE5.png|32px]] [[File:Cocoa Age 2 (S) JE5.png|32px]]{{verify|Were these the models used?}} The textures of cocoa have been changed.}}
{{History|new 3ds}}
{{History||0.1.0|[[File:Cocoa Beans JE3 BE2.png|32px]] Added cocoa beans.
|[[File:Cocoa Age 0 (S) JE3.png|32px]] [[File:Cocoa Age 1 (S) JE3.png|32px]] [[File:Cocoa Age 2 (S) JE3.png|32px]]{{verify|Were these the models used?}} Added cocoa.}}
{{History|foot}}
=== Cocoa "item" ===
{{:Technical blocks/Cocoa}}
== Issues ==
{{issue list|Cocoa Beans|Cocoa Pod}}
== Trivia ==
*Cocoa pods have a different hitbox for each size; however, the top is always 0.25 blocks below the top of the [[log]] it is on.
*If a cocoa pod grows while the player is standing next to it, the player is forced into the appropriate form of [[suffocation prevention]] depending on available space.
*{{IN|be}}, the pixels on top of the fully grown pod are 8/7 the size of those on the side.<ref>{{bug|MC-109055||Fixed}}</ref><ref>{{bug|MCPE-152862}}</ref>
== Gallery ==
<gallery>
CocoaReveal.png|The first screenshot of cocoa pods tweeted by [[Jens Bergensten]], which revealed the plants.
CocoaPlant.png|A screenshot tweeted by Jens Bergensten, showing the pod.
Cocoa Plants in a Jungle Biome (12w19a).png|Naturally generated cocoa pods.
CPlantsJWood.png|A cocoa pod farm.
Cocoa2.jpg|A cocoa farm.
Cocoa beans phases.png|Three growing phases of the cocoa pod.
AreaOptimizedBeanPods.gif|A log and pod layout for optimizing an example area of 14×14 (including walls).
File:CocoaBean15.png|Cocoa beans with values greater than 12 appeared this way
</gallery>
==Literature==
===References===
{{reflist}}
===External Links===
*[https://www.minecraft.net/en-us/article/taking-inventory--cocoa-beans Taking Inventory: Cocoa Beans] – Minecraft.net on December 5, 2019
{{Items}}
{{Blocks|vegetation}}
[[Category:Dyes]]
[[Category:Food]]
[[Category:Plants]]
[[Category:Renewable resources]]
[[Category:Non-solid blocks]]
[[Category:Natural blocks]]
[[cs:Kakaové boby]]
[[de:Kakaobohnen]]
[[es:Semillas de cacao]]
[[fr:Fèves de cacao]]
[[hu:Kakaóbab]]
[[ja:カカオ豆]]
[[ko:코코아 콩]]
[[nl:Cacaobonen]]
[[pl:Ziarna kakaowe]]
[[pt:Sementes de cacau]]
[[ru:Какао-бобы]]
[[uk:Какао-боби]]
[[zh:可可豆]]</li></ul> | 12w22a | Vines now generate naturally in jungle temples. | |||
1.5{{Extension DPL}}<ul><li>[[Raw Rabbit|Raw Rabbit]]<br/>{{for|the cooked version|Cooked Rabbit}}
{{Item
| title = Raw Rabbit
| image = Raw Rabbit.png
| heals = {{hunger|3}}
| renewable = Yes
| stackable = Yes (64)
}}
'''Raw rabbit''' is a food item that can be eaten by the [[player]], or cooked in a [[furnace]] or a [[campfire]] to make [[cooked rabbit]].
== Obtaining ==
=== Mob loot ===
{{IN|Bedrock}}, adult [[rabbit]]s drop 0-1 raw rabbit when killed. The maximum amount is increased by 1 per level of [[Looting]], for a maximum of 0-4 with [[Looting]] III. If killed while on [[fire]], they drop [[cooked rabbit]] instead.
{{IN|Java}}, adult [[rabbit]]s drop 1 raw rabbit when killed. The maximum amount is increased by 1 per level of [[Looting]], for a maximum of 1-4 with [[Looting]] III. If killed while on [[fire]], they drop [[cooked rabbit]] instead.
== Usage ==
To eat raw rabbit, press and hold {{control|use}} while it is selected in the hotbar. Eating one restores {{hunger|3}} [[hunger]] and 1.8 [[Hunger#Mechanics|saturation]].
=== Smelting ingredient ===
{{Smelting
|showname=1
|Raw Rabbit
|Cooked Rabbit
|0.35
}}
=== Wolves ===
Raw rabbit can be used to [[breed]] and heal tamed [[wolves]], lead them around, and make baby tamed [[Wolf|wolves]] grow up faster by 10% of the remaining time.
=== Trading ===
Novice-level Butcher [[villager|villagers]] have a {{frac|1|3}} chance to buy 4 raw rabbit for an [[emerald]] as their trades.{{only|bedrock}}
Novice-level Butcher villagers have 40% chance of offering to buy 4 raw rabbit for an emerald.{{only|java}}
==Sounds==
{{Sound table/Entity/Food}}
== Data values ==
=== ID ===
{{edition|java}}:
{{ID table
|edition=java
|showforms=y
|generatetranslationkeys=y
|displayname=Raw Rabbit
|spritetype=item
|nameid=rabbit
|form=item
|foot=1}}
{{edition|bedrock}}:
{{ID table
|edition=bedrock
|shownumericids=y
|showforms=y
|notshowbeitemforms=y
|generatetranslationkeys=y
|displayname=Raw Rabbit
|spritetype=item
|nameid=rabbit
|id=288
|form=item
|foot=1}}
== Achievements ==
{{load achievements|Rabbit Season}}
== Advancements ==
{{load advancements|Husbandry;A Balanced Diet}}
== History ==
{{History|java}}
{{History||1.8|snap=June 30, 2014|slink=https://twitter.com/TheMogMiner/status/483636993780232192|[[Ryan Holtz]] tweeted images of raw rabbits and some other new [[item]]s.}}
{{History|||snap=14w27a|[[File:Raw Rabbit JE1.png|32px]] Added raw rabbit.}}
{{History|||snap=14w33b|[[File:Raw Rabbit JE2 BE1.png|32px]] The texture of raw rabbit has been changed. The new texture was created by [[wikipedia:Reddit|Reddit]] user [http://www.reddit.com/u/zeldahuman zeldahuman].<ref>{{reddit|2bjzes/a_reminder_of_the_blocks_and_items_added_in_18_so|cj69zie|context=3}}</ref><ref>{{reddit|2c5f35/minecraft_snapshot_14w31a_has_been_released|cjct7gb}}</ref>}}
{{History||1.13|snap=17w47a|Prior to [[1.13/Flattening|''The Flattening'']], this [[item]]'s numeral ID was 411.}}
{{History||1.14|snap=18w43a|[[File:Raw Rabbit JE3 BE2.png|32px]] The texture of raw rabbit has been changed.}}
{{History|||snap=19w11a|Butcher [[villager]]s now [[trading|buy]] raw rabbit.}}
{{History||1.19.3|snap=22w42a|Rabbits now always drop at least 1 raw rabbit when killed.<ref>{{bug|MC-96449|||Fixed}}</ref>}}
{{History|pocket alpha}}
{{History||v0.13.0|snap=build 1|[[File:Raw Rabbit JE2 BE1.png|32px]] Added raw rabbit.}}
{{History|bedrock}}
{{History||1.10.0|snap=beta 1.10.0.3|[[File:Raw Rabbit JE3 BE2.png|32px]] The texture of raw rabbit has been changed.}}
{{History||1.11.0|snap=beta 1.11.0.4|Raw rabbit can now be [[trading|sold]] to butcher [[villager]]s.}}
{{History|console}}
{{History||xbox=TU31|xbone=CU19|ps=1.22|wiiu=Patch 3|[[File:Raw Rabbit JE2 BE1.png|32px]] Added raw rabbit.}}
{{History|PS4}}
{{History||1.90|[[File:Raw Rabbit JE3 BE2.png|32px]] The texture of raw rabbit has been changed.}}
{{History|new 3ds}}
{{History||0.1.0|[[File:Raw Rabbit JE2 BE1.png|32px]] Added raw rabbit.}}
{{History|foot}}
== Issues ==
{{issue list}}
== Gallery ==
<gallery>
File:Rabbit Items 2 Ryan Holtz.png|First image of the item by [[Ryan Holtz]].
</gallery>
== References ==
{{reflist}}
{{items}}
[[de:Rohes Kaninchen]]
[[es:Conejo crudo]]
[[it:Coniglio crudo]]
[[fr:Lapin cru]]
[[ja:生の兎肉]]
[[ko:익히지 않은 토끼고기]]
[[nl:Rauw konijnenvlees]]
[[pl:Surowy królik]]
[[pt:Coelho cru]]
[[ru:Сырая крольчатина]]
[[zh:生兔肉]]
[[Category:Food]]
[[Category:Renewable resources]]</li><li>[[Raw Iron|Raw Iron]]<br/>{{Item
| image = Raw Iron.png
| renewable = No
| stackable = Yes (64)
}}
'''Raw iron''' is a raw metal resource obtained from mining [[iron ore]].
== Obtaining ==
=== Mining ===
[[Iron ore]] and [[deepslate iron ore]] mined with a [[stone pickaxe]] or higher drops 1 unit of raw iron. If the pickaxe is enchanted with [[Fortune]], it can drop an extra unit per level of Fortune, allowing for a maximum of 4 with Fortune III. If the ore is mined using a pickaxe enchanted with [[Silk Touch]], it drops the ore block instead.
=== Crafting ===
{{Crafting
|showname=1
|Block of Raw Iron
|Output=Raw Iron,9
|type=Material
|foot=1
}}
== Usage ==
The primary usage of raw iron is smelting it into [[iron ingot]]s.
=== Crafting ===
{{crafting usage}}
=== Smelting ingredient ===
{{Smelting
|showname=2
|Raw Iron
|Iron Ingot
|0.7
}}
== Data values ==
=== ID ===
{{edition|java}}:
{{ID table
|edition=java
|showitemtags=y
|showforms=y
|generatetranslationkeys=y
|displayname=Raw Iron
|spritetype=item
|nameid=raw_iron
|form=item
|foot=1}}
{{edition|bedrock}}:
{{ID table
|edition=bedrock
|shownumericids=y
|showforms=y
|notshowbeitemforms=y
|generatetranslationkeys=y
|displayname=Raw Iron
|spritetype=item
|nameid=raw_iron
|form=item
|id=505
|foot=1}}
== History ==
{{History|java}}
{{History||1.17|snap=21w14a|[[File:Raw Iron JE1.png|32px]] Added raw iron.}}
{{History|||snap=April 13, 2021|slink={{Tweet|JasperBoerstra|1381991999952277513}}|[[File:Raw Iron JE2.png|32px]] [[JAPPA]] shows a new raw iron texture.}}
{{History|||snap=21w15a|[[File:Raw Iron JE2.png|32px]] The texture of raw iron has been changed.
|Raw iron can now be used to craft [[block of raw iron]].}}
{{History|||snap=April 16, 2021|slink={{Tweet|JasperBoerstra|1383047666037325829}}|[[File:Raw Iron (pre-release).png|32px]] [[JAPPA]] shows a new raw iron texture again.}}
{{History|||snap=21w16a|[[File:Raw Iron JE3.png|32px]] The texture of raw iron has been changed.}}
{{History|Bedrock}}
{{History||1.17.0|snap=beta 1.17.0.50|[[File:Raw Iron JE2.png|32px]] Added raw iron.}}
{{History|||snap=beta 1.17.0.52|Raw iron are now available without enabling [[experimental gameplay]].}}
{{History|||snap=beta 1.17.0.54|[[File:Raw Iron JE3.png|32px]] The texture of raw iron has been changed.}}
{{History|foot}}
== Issues ==
{{Issue list}}
==Gallery==
<gallery>
JE 1.17 Dev Raw Metals.jpg|Jappa shows raw ore textures.
Jappa Raw Ores 1.jpg|Jappa shows raw ore textures.
Jappa Raw Ores 2.png|Jappa shows raw ore textures.
Jappa Raw Ores 3.jpg|Jappa shows raw ore textures.
Jappa Raw Ores 4.jpg|Jappa shows raw ore textures.
Jappa Raw Ores 5.jpg|Jappa shows raw ore textures.
</gallery>
{{Items}}
[[Category:Non-renewable resources]]
[[de:Roheisen]]
[[es:Hierro en bruto]]
[[fr:Fer brut]]
[[it:Ferro grezzo]]
[[ja:鉄の原石]]
[[lzh:砂鐵]]
[[pl:Surowe żelazo]]
[[pt:Ferro bruto]]
[[ru:Необработанное железо]]
[[uk:Необроблене залізо]]
[[zh:粗铁]]</li></ul> | 13w02a | Players who die falling off of vines receive a message upon death: "<player> fell off some vines." | |||
1.8{{Extension DPL}}<ul><li>[[Disc Fragment|Disc Fragment]]<br/>{{Item
| image = Disc Fragment.png
| renewable = No
| stackable = Yes (64)
}}
A '''disc fragment''' is a [[music disc]] fragment obtained from [[ancient city]] loot chests. Nine fragments can be combined in a [[Crafting Table|crafting table]] to make a music disc named "5".
== Obtaining ==
=== Chest loot ===
{{LootChestItem|disc-fragment-5}}
== Usage ==
=== Crafting ingredient ===
{{crafting usage|Disc Fragment 5}}
== Data values ==
=== ID ===
{{ID table
|edition=java<!--
|showitemtags=y-->
|showforms=y
|firstcolumnname=Track
|generatetranslationkeys=y
|displayname=Samuel Åberg - 5
|spritename=disc-fragment-5
|spritetype=item
|nameid=disc_fragment_5<!--
|itemtags=-->
|form=item
|foot=y}}
== History ==
{{History|java}}
{{History||1.19|snap=22w16a|[[File:Disc Fragment.png|32px]] Added disc fragments.}}
{{History|bedrock}}
{{History||1.19.0|snap=beta 1.19.0.28|[[File:Disc Fragment.png|32px]] Added disc fragments.}}
{{History|foot}}
== Issues ==
{{Issue list}}
==Gallery==
<gallery>
9 to 5.jpg|9 fragments of the 5 music disc.
</gallery>
==See also==
* {{EnvLink|Music}}
* {{ItemLink|Music Disc}}
{{Items}}
[[de:Plattenbruchstück]]
[[es:Fragmento de disco]]
[[fr:Fragment de disque]]
[[ja:レコードの破片]]
[[pl:Fragment płyty]]
[[pt:Fragmento de disco]]
[[ru:Фрагмент пластинки 5]]
[[uk:Фрагмент платівки]]
[[zh:唱片残片]]
[[Category:Non-renewable resources]]</li><li>[[Redstone Comparator|Redstone Comparator]]<br/>{{Block
| image =
| image2 =
| transparent = Yes
| light = No
| tool = any
| renewable = Yes
| stackable = Yes (64)
| flammable = No
| lavasusceptible = No
| group = Redstone Comparator
| group2 = Subtracting
| group3 = Powered
| group4 = Powered+Subtracting
| 1-1 = Redstone Comparator.png
| 2-1 = Subtracting Redstone Comparator.png
| 3-1 = Powered Redstone Comparator.png
| 4-1 = Powered Subtracting Redstone Comparator.png
}}
{{Many images}}
A '''redstone comparator''' is a [[block]] that can produce an [[Redstone Dust|output signal]] from its front by reading [[chest]]s, [[lectern]]s, [[beehive]]s and similar blocks, or repeat a signal without changing its strength. It can also be set to either stop outputting a signal when its side input recieves a stronger one (front torch off), or subtract its side input's signal strength from its output (front torch on).
== Obtaining ==
=== Natural generation ===
Redstone comparators generate in [[Ancient City|ancient cities]].
=== Breaking ===
A redstone comparator can be broken instantly with any [[tool]], or by hand, and drops itself as an item.
{{Breaking row|Redstone Comparator|horizontal=y}}
A redstone comparator is removed and dropped as an item if:
* its attachment block is moved, removed, or destroyed;
* [[water]] flows into its space;{{only|java}}
* a [[piston]] tries to push it or moves a block into its space.
If [[lava]] flows into a redstone comparator's space, the redstone comparator is destroyed without dropping as an item.
=== Crafting ===
{{Crafting
|B1=Redstone Torch
|A2=Redstone Torch
|B2=Nether Quartz
|C2=Redstone Torch
|A3=Stone
|B3=Stone
|C3=Stone
|Output= Redstone Comparator
|type=Redstone
}}
== Usage ==
A redstone comparator can be placed on the top of any [[opaque]] block with a solid full-height top surface (including upside-down [[slab]]s and upside-down [[stairs]]). {{IN|be}}, a comparator can also be placed on [[wall]]s and fences. For more information about placement on transparent blocks, see [[Opacity/Placement]].
The redstone comparator has a front and a back — the arrow on the top of the comparator points to the front. When placed, the comparator faces away from the player. The comparator has two miniature redstone torches at the back and one at the front. The back torches turn on when the comparator's output is greater than zero (the arrow on top also turns red). The front torch has two states that can be toggled by {{control|using}} the comparator:
* Down and unpowered (indicating the comparator is in "comparison mode")
* Up and powered (indicating the comparator is in "subtraction mode")
The redstone comparator can take a signal strength input from its rear as well as from both sides. Side inputs are accepted only from [[redstone dust]], [[block of redstone]], [[redstone repeater]]s, other comparators, and [[observer]]s in specific scenarios. The redstone comparator's front is its output.
It takes 1 [[redstone tick]] (2 game ticks, or 0.1 seconds barring lag) for signals to move through a redstone comparator, either from the rear or from the sides. This applies to changing signal strengths as well as simply to turning on and off.
Redstone comparators check their power state before their scheduled ticks update. This results in redstone comparators not usually responding to 1-tick fluctuations of power or signal strength — for example, a [[clock circuit|1-clock]] input is treated as always off from the side, and always on from the rear. This happens because the signal changes back to its original state before the redstone comparator checks its input states. However, certain setups such as powering any input with two separate observer pulses at the same time will cause a redstone comparator to respond to 2 gametick pulses.
The redstone comparator has four functions: maintain signal strength, compare signal strength, subtract signal strength, and measure certain block states (primarily the fullness of containers).
=== Maintain signal strength ===
A redstone comparator with no powered sides outputs the same signal strength as its rear input.
=== Compare signal strength ===
[[File:Comparators Explained.png|Comparators in comparison mode.|thumb]]
A redstone comparator in comparison mode (front torch down and unpowered) compares its rear input to its two side inputs. If either side input is greater than the rear input, the comparator output turns off. If neither side input is greater than the rear input, the comparator outputs the same signal strength as its rear input.
The formula for calculating the output signal strength is as follows:
<code>output = rear × [[Wikipedia:Iverson bracket|[]]'''''left''''' ≤ '''''rear''''' AND '''''right''''' ≤ '''''rear'''''[[Wikipedia:Iverson bracket|<nowiki>]]]</code>
{{-}}
=== Subtract signal strength ===
[[File:Redstone comparator.png|thumb|The greatest of the side inputs A and C is subtracted from the rear input B, outputting 1. If either A or C were greater than B, it would output 0.]]
A redstone comparator in subtraction mode (front torch up and powered) subtracts the signal strength of the higher side input from the signal strength of the rear input.
<code>output = max('''''rear''''' − max('''''left''', '''right'''''), 0)</code>
For example: if the signal strength is 6 at the left input, 7 at the right input and 4 at the rear, the output signal has a strength of ''max(4 − max(6, 7), 0) = max(4−7, 0) = max(−3, 0) = 0''.
If the signal strength is 9 at the rear, 2 at the right input and 5 at the left input, the output signal has a strength of ''max(9 − max(2, 5), 0) = max(9−5, 0) = 4''.
=== Measure block state ===
{{Schematic | caption = A redstone comparator can measure the fullness of a chest, as well as other block states, even through an opaque block.
|rd-ew!|rc-w!|ch|SB|rc-e!|rd-ew!
}}
A redstone comparator treats certain blocks behind it as power sources and outputs a signal strength proportional to the block's state. The comparator may be separated from the measured block by an opaque block. However, {{in|je}}, if the opaque block is powered to signal strength 15, then the comparator outputs 15 no matter the fullness of the container.<ref>{{bug|MC-64394}} (resolved as "Works As Intended")</ref>
[[Category:Java Edition specific information]]
{{-}}
==== Fullness of containers ====
{| class="wikitable floatright" style="margin-left: 0.5em; margin-right: 0; text-align: center;"
|+ Minimum Items for Container Signal Strength
|-
!Containers
!{{BlockSprite|Furnace|link=Furnace}}<br>{{BlockSprite|Blast Furnace|link=Blast Furnace}}<br>{{BlockSprite|Smoker|link=Smoker}}
!{{BlockSprite|Hopper|link=Hopper}}<br>{{EntitySprite|Minecart with Hopper|link=Minecart with Hopper}}<br>{{BlockSprite|Brewing Stand|link=Brewing Stand}}
!{{BlockSprite|Dispenser|link=Dispenser}}<br>{{BlockSprite|Dropper|link=Dropper}}
!{{BlockSprite|Chest|link=Chest}}<br>{{EntitySprite|Minecart with Chest|link=Minecart with Chest}}<br>{{BlockSprite|Shulker Box|link=Shulker Box}}<br>{{BlockSprite|Barrel|link=Barrel}}
![[Double Chest|{{Schematic|size=16|ch-s|-|ch-n}}
]]
!{{BlockSprite|Jukebox|link=Jukebox}}
|-
!Total Slots
!3!!5!!9!!27!!54!!1
|-
!Power Level
! colspan="5" |Number of Items
!Music Disc
|-
|0||0||0||0||0||0||No disc
|-
|1||1||1||1||1||1||"13"
|-
|2||14||23||42||1s 60||3s 55||"cat"
|-
|3||28||46||1s 19||3s 55||7s 46||"blocks"
|-
|4||42||1s 5||1s 60||5s 51||11s 37||"chirp"
|-
|5||55||1s 28||2s 37||7s 46||15s 28||"far"
|-
|6||1s 5||1s 51||3s 14||9s 42||19s 19||"mall"
|-
|7||1s 19||2s 10||3s 55||11s 37||23s 10||"mellohi"
|-
|8||1s 32||2s 32||4s 32||13s 32||27s||"stal"
|-
|9||1s 46||2s 55||5s 10||15s 28||30s 55||"strad"
|-
|10||1s 60||3s 14||5s 51||17s 23||34s 46||"ward"
|-
|11||2s 10||3s 37||6s 28||19s 19||38s 37||"11"
|-
|12||2s 23||3s 60||7s 5||21s 14||42s 28||"wait"
|-
|13||2s 37||4s 19||7s 46||23s 10||46s 19||"Pigstep"
|-
|14||2s 51||4s 42||8s 23||25s 5||50s 10||"Otherside"<br>"Relic"
|-
|15||3s||5s||9s||27s||54s||"5"
|}
A redstone comparator can output a signal indicating how full a container is. (0 for empty, 15 for full, etc.) The table on the right is described more in detail, later in this section.
Containers that can be measured by a comparator include:
* {{BlockLink|Furnace}}
* {{BlockLink|Blast Furnace}}
* {{BlockLink|Smoker}}
* {{BlockLink|Brewing Stand}}
* {{BlockLink|Hopper}}
* {{ItemLink|Minecart with Hopper}} on top of a [[detector rail]]
* {{BlockLink|Dispenser}}
* {{BlockLink|Dropper}}
* {{BlockLink|Chest}}
* {{BlockLink|Trapped Chest}}
* {{ItemLink|Minecart with Chest}} on top of a [[detector rail]]
* {{BlockLink|Barrel}}
* {{SchematicSprite|size=16|ch-e}}{{SchematicSprite|size=16|ch-w}} Large chest
* {{SchematicSprite|size=16|ch-e}}{{SchematicSprite|size=16|ch-w}} Large trapped chest
* {{BlockLink|Shulker Box}} (any color)
Generally speaking, the comparator output signal strength represents the average fullness of the slots, based on how many of that item form a full stack (64, 16, or 1 for non-stackable items).
The ''Minimum Items for Container Signal Strength'' table (right) shows the minimum '''''full-stack-equivalent (FSE)''''' to produce different signal strengths from common containers. A '''''full-stack-equivalent''''' quantifies how many normal 64-stackable items are needed to output a corresponding signal strength. The 's' is a constant 64, with the additional amount needed following after.
One may also consider the terms: '''c''umulative-weight''''' or '''''weighted-sum''''' instead of '''''full-stack-equivalent'''''.
Items that stack to a max of 16 ([[snowball]]s, [[sign]]s, [[ender pearl]]s, etc.), contribute +4 to the ''full-stack-equivalent'' for each unity (count of 1 item). Similarly, items that stack to 1 ([[minecart]], [[boat]], etc.) contribute +64, and items that stack to 64 contribute +1.
Example 1: 3 ender pearls will contribute a 3 x 4 = 12 ''full-stack-equivalent''.
Example 2: 16 ender pearls and 60 redstone dust contributes a 16x4 + 60x1 = 124 ''full-stack-equivalent''.
Example 3: 1 minecart and 60 redstone dust contributes a 1x64 + 60x1 = 124 ''full-stack-equivalent''.
Example 4: To produce a signal strength of 10 from a hopper, one requires a ''full-stack-equivalent'' of at least 3s + 14 = 206 but strictly less than than 3s + 37 = 229. This can be done with 3 minecarts, and 14 dirt.
When a comparator measures a large chest or large trapped chest, it measures the entire large chest (54 slots), not just the half directly behind the comparator. A chest or trapped chest that cannot be opened (either because it has an opaque block, [[ocelot]], or [[cat]] above it) always produces an output of 0 no matter how many items are in the container — shulker boxes can always be measured, even if they cannot open.
;Calculating signal strength from items
:When a container is empty, the output is off.
:When it is not empty, the output signal strength is calculated as follows:
:<code>'''''signal strength''''' = floor(1 + (('''''sum of all slots' fullnesses''''') / ('''''number of slots in container''''')) × 14)</code>
:<code>fullness of a slot = '''''number of items in slot''''' / '''''max stack size for this type of item'''''</code>
:''Example:'' 300 blocks in a dispenser (which has 9 slots), where each block stacks to a maximum of 64 has a 300 ''full-stack-equivalent.'' This produces an output with a signal strength of 8:
<blockquote>
1 + ((300 items / 64 items per slot) / 9 slots) × 14 = 8.292, floored is 8
</blockquote>
;Calculating items from signal strength
:It can be useful in redstone circuits to use containers with comparators to create signals of a specific strength. The number of items required in a container to produce a signal of desired strength is calculated as follows:
:<code>items required = max('''''desired signal strength''''', roundup(('''''total slots in container''''' × 64 / 14) × (desired signal strength − 1)))</code>
:''Example:'' To use a furnace (which has 3 slots) to create a strength 9 signal, players need 110 items:
<blockquote>
max(9, (3×64/14) × (9−1)) = 109.714, rounded up is 110
</blockquote>
{{-}}
==== Miscellaneous ====
[[File:Comparator storage.png|Comparators used to measure containers.|thumb]]
Some non-container blocks can also be measured by a redstone comparator:
;{{BlockLink|Beehive}} and {{BlockLink|Bee nest}}
: A hive or nest outputs a signal strength equal to the amount of honey in the hive/nest.
;{{BlockLink|Cake}}
: A cake outputs a signal strength relative to the amount of cake remaining. Each slice is worth 2 signal strength, with 7 total slices, for an output of 14 for a full cake.
[[File:Cauldron Redstone Strength Values.png|Cauldron signal strength|thumb]]
;{{BlockLink|Cauldron}}
: A cauldron outputs different signal strengths depending on how much water or powdered snow is inside. From completely empty to completely full, the output values are 0, 1, 2, and 3. If lava or powder snow is inside, the strength is always 3.
[[File:Composter Redstone Strength Values.png|Composter signal strength|thumb]]
;{{BlockLink|Composter}}
: A composter outputs different signal strengths depending on the level inside. From completely empty to completely full, the output values are 0, 1, 2, 3, 4, 5, 6, 7 and 8.
;{{Anchor|CommandBlock}}{{BlockLink|Command Block}}
: A command block stores the "success count" of the last command executed, which represents the number of times the most recently used command of this command block succeeded. A "success" is defined by the [[command]]'s success conditions: if a red error message is returned in the chat, the command was not successful.
: Most commands can succeed once per execution, but certain commands (such as those that accept players as arguments) can succeed multiple times, and the comparator outputs the number of times it succeeded (maximum 15 when sent to redstone dust, but in the code it is able to go up to the 32-bit integer limit, and can be used in contraptions with no redstone dust with those values).
: A command block continues to store the success count of the last command executed until it executes its command again, thus the comparator continues to output the same signal strength even after the command block is no longer being activated (it doesn't turn off when the signal to the command block turns off).
;{{BlockLink|End Portal Frame}}
: An end portal frame outputs a full signal of 15 if it contains an [[eye of ender]] and zero otherwise.
[[File:Item frame and comparator.png|A comparator can measure the presence and rotation of an item frame's contents.|thumb]]
;{{EntityLink|Item Frame}}
: A comparator can measure the state of an [[item frame]]'s contents. An item frame comparator outputs 0 if the item frame is empty, or 1 to 8 for any item depending on its rotation: 1 at initial placement, plus 1 for each 45° of rotation for a maximum of 8.
: For an item frame that holds a map, a unit of rotation is 90° instead of 45°, but a comparator still outputs power levels 1 to 8. It takes two full rotations to cycle through all comparator outputs, and each orientation of the map corresponds to two output levels that differ by 4.
: The comparator must be placed behind the block the item frame is attached to, facing away from the item frame. The block must be a full block, and the item frame cannot be submerged in water. Having a sign in the same block as the item frame will prevent the frame from sending a signal as well.{{only|java}}
;{{BlockLink|Jukebox}}
: A jukebox outputs a signal strength indicating which music disc is currently playing. See the ''Minimum Items for Container Signal Strength'' table above.
;{{BlockLink|Lectern}}
: A lectern outputs a signal strength that depends on what page the player is currently on. The calculation used is:
:<code>'''''signal strength''''' = floor(1 + (('''''current page''''' - 1) / ('''''number of pages in book''''' - 1)) × 14)</code>
:This results in page 1 having a signal strength of 1, and the last page having a signal strength of 15. The exception is a single page book, which will output a signal strength of 15.
:For example, a book with 15 pages will output a signal equal to the current page number. A book with 5 pages will output signal strengths of 1, 4, 8, 11 and 15 for the different pages. A book with 100 pages will have the signal strength increase to the next level on pages 1, 9, 16, 23, 30, 37, 44, 51, 58, 65, 72, 79, 86, 93 and 100.
:
;{{BlockLink|Respawn Anchor}}
: A respawn anchor outputs a signal strength of 0, 3, 7, 11, or 15, depending on the "charged" value.
;{{BlockLink|Sculk Sensor}}
: A sculk sensor outputs a signal strength depending on the type of vibration that is detected.
;{{BlockLink|Chiseled Bookshelf}}
: A chisled bookshelf outputs a signal strength between 1 and 6 indicating the last slot interacted with. When no slot has been interacted with yet, it outputs 0.
{{-}}
== Sounds ==
=== Generic ===
{{Edition|Java}}:
{{Sound table/Block/Stone/JE}}
{{Edition|Bedrock}}:
{{Sound table/Block/Wood/BE}}
=== Unique ===
{{edition|java}}:
{{Sound table
|rowspan=2
|sound=Click.ogg
|subtitle=Comparator clicks
|source=block
|description=When a comparator is set to subtraction mode
|id=block.comparator.click
|translationkey=subtitles.block.comparator.click
|volume=0.3
|pitch=0.55
|distance=16}}
{{Sound table
|subtitle=Comparator clicks
|source=block
|description=When a comparator is set to comparison mode
|id=block.comparator.click
|translationkey=subtitles.block.comparator.click
|volume=0.3
|pitch=0.5
|distance=16
|foot=1}}
{{edition|bedrock}}:
{{Sound table
|type=bedrock
|rowspan=2
|sound=Click.ogg
|source=block
|description=When a comparator is set to subtraction mode
|id=block.click
|volume=0.2
|pitch=0.55}}
{{Sound table
|source=block
|description=When a comparator is set to comparison mode
|id=block.click
|volume=0.2
|pitch=0.5
|foot=1}}
== Data values ==
=== ID ===
{{edition|java}}:
{{ID table
|edition=java
|showforms=y
|generatetranslationkeys=y
|displayname=Redstone Comparator
|spritetype=block
|nameid=comparator
|foot=1}}
{{ID table
|displayname=Block entity
|spritename=redstone-comparator
|spritetype=block
|nameid=comparator
|foot=1}}
{{edition|bedrock}}:
{{ID table
|edition=bedrock
|firstcolumnname=Redstone Comparator
|shownumericids=y
|showforms=y
|generatetranslationkeys=y
|displayname=Unpowered block
|spritename=unpowered-comparator
|spritetype=block
|nameid=unpowered_comparator
|id=149
|form=block
|translationkey=-}}
{{ID table
|displayname=Powered block
|spritename=powered-comparator
|spritetype=block
|nameid=powered_comparator
|id=150
|form=block
|translationkey=-}}
{{ID table
|displayname=Item
|spritename=redstone-comparator
|spritetype=item
|nameid=comparator
|id=522
|form=item
|foot=1}}
{{ID table
|notnamespaced=y
|displayname=Block entity
|spritename=redstone-comparator
|spritetype=block
|nameid=Comparator
|foot=1}}
=== Block states ===
{{see also|Block states}}
{{/BS}}
=== Block data ===
A redstone comparator has a block entity associated with it that holds additional data about the block.
{{el|je}}:
{{see also|Block entity format}}
{{/BE}}
{{el|be}}:
: See [[Bedrock Edition level format/Block entity format]].
== Advancements ==
{{Load advancements|the power of books}}
== Video ==
<div style="text-align:center">{{yt|J7Z20Zzz3yU}}</div>
== History ==
{{info needed section|If {{bug|MC-50242}} also affected comparators?}}
''For a more in-depth breakdown of changes to repeater textures and models, including a set of renders for each state combination, see [[/Asset history]]''
{{History|java}}
{{History||November 24, 2012|link=https://youtube.com/watch?v=YG9RNyRhIow&t=6m56s|[[Jeb]] stated that there may be a "capacitor" in [[Minecraft]]. }}
{{History||December 27, 2012|link={{tweet|Dinnerbone|284388625595125760}}|[[Dinnerbone]] released [https://web.archive.org/web/20190710120115/https://imgur.com/a/FBKed pictures] of the first version of the "comparator", stating it was a replacement for the "capacitor" idea that has variable, alternate inputs.}}
{{History||January 2, 2013|link={{tweet|Dinnerbone|286428595423965184}}|Dinnerbone released one more [http://dinnerbone.com/media/uploads/2013-01/screenshots/2013-01-02_12.06.47.png picture] of the comparator. The picture itself showing a digital-to-analog converter, using the comparator as the main [[block]].}}
{{History||1.5|snap=13w01a|[[File:Redstone Comparator (S) JE1.png|32px]] [[File:Powered Redstone Comparator (S) JE1.png|32px]] [[File:Subtracting Redstone Comparator (S) JE1.png|32px]] [[File:Powered Subtracting Redstone Comparator (S) JE1.png|32px]] [[File:Redstone Comparator (item) JE1 BE1.png|32px]] Added redstone comparators.
|Redstone comparators have 0 delay.
At this point, block ID 149 was used for unpowered comparators, and block ID 150 for powered comparators.}}
{{History|||snap=13w01b|A delay of 1 game tick ({{frac|1|2}} redstone tick) has now been added to redstone comparators to fix bugs.
|The ability to measure containers to redstone comparators has now been added.}}
{{History|||snap=13w02a|[[File:Redstone Comparator (S) JE2.png|32px]] [[File:Powered Redstone Comparator (S) JE2.png|32px]] [[File:Subtracting Redstone Comparator (S) JE2.png|32px]] [[File:Powered Subtracting Redstone Comparator (S) JE2.png|32px]] The appearance of redstone comparators has now been changed - the top texture has changed to show [[quartz]] in the middle and the sides now use the [[smooth stone]] texture rather than the smooth stone slab side texture.
|The algorithm for measuring containers has now been changed so that redstone comparators output a signal with as few as 1 [[item]] in the container.}}
{{History|||snap=13w02b|Redstone comparators now treat large [[chest]]s as a single container.}}
{{History|||snap=13w03a|Redstone comparators now output success count of [[command block]]s.
|Redstone comparators now measure container [[minecart]]s on [[detector rail]]s.}}
{{History|||snap=13w04a|Redstone comparators now measure [[jukebox]]es.}}
{{History|||snap=13w05a|Redstone comparators no longer cause constant [[block]] updates. The delay has now been made consistent, and side input no longer causes a pulse output.
|Block 150 (later <code>powered_comparator</code>) is no longer used; powered state is now represented by the 8s bit on block 149 (later <code>unpowered_comparator</code>).}}
{{History|||snap=13w05b|Redstone comparator delay has now been changed from 1 game tick (1/2 [[redstone]] tick) to 2 game ticks (1 redstone tick).}}
{{History|||snap=13w09c|The redstone signal strength from a redstone comparator next to a [[brewing stand]] with 3 [[water bottle]]s in it is now the same as one with 3 water bottles and 1 ingredient in it.}}
{{History||1.6.1|snap=13w18a|Redstone comparators now measure [[cauldron]]s and [[end portal frame]]s.}}
{{History||1.8|snap=14w04a|Redstone comparators now measure [[item frame]]s.}}
{{History|||snap=14w10a|The torches under redstone comparators have now been shortened, which has changed the underside appearance from [[File:Redstone Comparator UNKVER1 (facing NWU).png|32px]] [[File:Powered Redstone Comparator UNKVER1 (facing NWU).png|32px]] [[File:Subtracting Redstone Comparator UNKVER1 (facing NWU).png|32px]] [[File:Powered Subtracting Redstone Comparator UNKVER1 (facing NWU).png|32px]] to [[File:Redstone Comparator UNKVER2 (facing NWU).png|32px]].}}
{{History|||snap=14w25a|[[File:Redstone Comparator (S) JE3.png|32px]] [[File:Powered Redstone Comparator (S) JE3.png|32px]] [[File:Subtracting Redstone Comparator (S) JE3.png|32px]] [[File:Powered Subtracting Redstone Comparator (S) JE3.png|32px]] The torches on comparators are now subject to ambient occlusion.
|Comparators set to subtract mode appear to be powered as well regardless of incoming power. The subtracting-only model still exists and can be achieved through {{cmd|setblock}}.}}
{{History|||snap=14w25b|[[File:Subtracting Redstone Comparator (S) JE4.png|32px]] [[File:Powered Subtracting Redstone Comparator (S) JE4.png|32px]] The powered front torch when in subtraction mode is now lower.
|Comparators set to subtract by hand now appear normally again.}}
{{History|||snap=14w28a|Redstone comparators now measure [[cake]]s.}}
{{History||1.9|snap=15w42a|With the addition of the [[blaze powder]] fuel slot, [[brewing stand]]s now have 5 slots instead of 4. Their original comparative power values from redstone comparators are listed below:
{{{!}} class{{=}}"wikitable collapsible collapsed" data-description{{=}}"Original values"
! Original values
{{!}}-
{{!}}
*0: 0
*1: 1
*2: 19
*3: 37
*4: 55
*5: 1s 10
*6: 1s 28
*7: 1s 46
*8: 2s
*9: 2s 19
*10: 2s 37
*11: 2s 55
*12: 3s 10
*13: 3s 28
*14: 3s 46
*15: 4s
{{!}}}
}}
{{History|||snap=15w47a|Redstone comparators' side inputs now take power from [[redstone block]]s.}}
{{History||1.13|snap=17w47a|All 3 IDs for the redstone comparator have now been merged into one ID: <code>comparator</code>.
|Redstone comparators now render their underside, which has changed their undersides from [[File:Redstone Comparator UNKVER2 (facing NWU).png|32px]] to [[File:Redstone Comparator UNKVER3 (facing NWU).png|32px]].
|Prior to [[1.13/Flattening|''The Flattening'']], these blocks' numeral IDs were 149 and 150, and the [[item]]'s 404.
|As a result, the formerly unused comparator ID is now technically used again, due to both unpowered and powered versions being merged into a single comparator block ID.}}
{{History||1.14|snap=18w43a|[[File:Redstone Comparator (S) JE4.png|32px]] [[File:Powered Redstone Comparator (S) JE4.png|32px]] [[File:Subtracting Redstone Comparator (S) JE5.png|32px]] [[File:Powered Subtracting Redstone Comparator (S) JE5.png|32px]] [[File:Redstone Comparator (item) JE2 BE2.png|32px]] The textures of redstone comparators have now been changed.}}
{{History|||snap=19w02a|Redstone comparators now measure [[lectern]]s.}}
{{History|||snap=19w03a|Redstone comparators now measure [[composter]]s.}}
{{History|||snap=19w12b|Redstone comparators can now be placed on [[glass]], [[ice]], [[glowstone]] and [[sea lantern]]s.}}
{{History||1.15|snap=19w34a|Redstone comparators now measure how much honey is inside [[beehive|bee hive]]s and [[bee nest]]s.}}
{{History||1.16|snap=20w06a|The way to calculate the input signals of redstone comparators has now been changed.}}
{{History|||snap=20w11a|The changes to the way of calculating the input signals of redstone comparators from [[Java Edition 20w06a|20w06a]] have now been reverted.}}
{{History|||snap=20w16a|Redstone comparators now measure [[Pigstep music disc]]s in [[jukebox]]es.}}
{{History||1.17|snap=20w45a|Redstone comparators now measure [[lava cauldron]]s.}}
{{History|||snap=20w46a|Redstone comparators now measure [[Cauldron#Holding powder snow|powder snow cauldron]]s.}}
{{History||1.18|snap=21w41a|[[File:Powered Redstone Comparator (S) JE5.png|32px]] [[File:Powered Subtracting Redstone Comparator (S) JE6.png|32px]] The texture of powered redstone comparator have now been changed.}}
{{History||1.19|snap=22w13a|Redstone comparators now generate as part of [[ancient cities]].}}
{{History||1.20<br>(Experimental)|link=1.19.3|snap=22w42a|Redstone comparators now measure [[chiseled bookshelves]].}}
{{History||1.20.2|snap=23w33a|Redstone comparators now use stone sounds instead of wood sounds.<ref>{{bug|MC-182820|||Fixed}}</ref>}}
{{History|pocket alpha}}
{{History||v0.14.0|snap=build 1|[[File:Redstone Comparator (S) JE2 BE1.png|32px]] [[File:Powered Redstone Comparator (S) JE2 BE1.png|32px]] [[File:Subtracting Redstone Comparator (S) JE2 BE1.png|32px]] [[File:Powered Subtracting Redstone Comparator (S) JE2 BE1.png|32px]]{{verify|Was this the model used?}} [[File:Redstone Comparator (item) JE1 BE1.png|32px]] Added redstone comparators.}}
{{History|pocket}}
{{History||1.0.0|snap=alpha 0.17.0.1|Redstone comparators now measure [[end portal frame]]s.}}
{{History||1.0.5|snap=alpha 1.0.5.0|Redstone comparators now output success count of [[command block]]s.}}
{{History||1.1.0|snap=alpha 1.1.0.0|Redstone comparators now measure [[shulker box]]es.}}
{{History|bedrock}}
{{History||1.2.0|snap=beta 1.2.0.2|Redstone comparators now measure [[jukebox]]es.
|Redstone comparators now render their underside, which has changed their undersides from [[File:Redstone Comparator UNKVER1 (facing NWU).png|32px]] to [[File:Redstone Comparator UNKVER3 (facing NWU).png|32px]]}}
{{History||1.10.0|snap=beta 1.10.0.3|[[File:Redstone Comparator (S) BE.png|32px]] [[File:Powered Redstone Comparator (S) BE.png|32px]] [[File:Subtracting Redstone Comparator (S) BE.png|32px]] [[File:Powered Subtracting Redstone Comparator (S) BE.png|32px]] [[File:Redstone Comparator (item) JE2 BE2.png|32px]] The textures of redstone comparators have now been changed.}}
{{History||1.11.0|snap=beta 1.11.0.1|Redstone comparators now measure [[smoker]]s, [[blast furnace]]s, [[lectern]]s and [[composter]]s.}}
{{History||1.18.10|snap=beta 1.18.10.20|[[File:Powered Redstone Comparator (S) JE5.png|32px]] [[File:Powered Subtracting Redstone Comparator (S) JE6.png|32px]] The texture of powered redstone comparator have now been changed.}}
{{History||1.20.30|snap=beta 1.20.30.20|Redstone comparators now use the <code>minecraft:cardinal_direction</code> [[block state]] instead of <code>direction</code>.}}
{{History|console}}
{{History||xbox=TU19|xbone=CU7|ps=1.12|wiiu=Patch 1|switch=1.0.1|[[File:Redstone Comparator (S) JE2 BE1.png|32px]] [[File:Powered Redstone Comparator (S) JE2 BE1.png|32px]] [[File:Subtracting Redstone Comparator (S) JE2 BE1.png|32px]] [[File:Powered Subtracting Redstone Comparator (S) JE2 BE1.png|32px]]{{verify|Was this the model used?}} [[File:Redstone Comparator (item) JE1 BE1.png|32px]] Added redstone comparators.}}
{{History||xbox=TU31|xbone=CU19|ps=1.22|wiiu=Patch 3|switch=1.0.1|Redstone comparators can now measure [[item frame]]s.}}
{{History||xbox=none|xbone=none|ps=1.90|wiiu=none|switch=none|[[File:Redstone Comparator (S) BE.png|32px]] [[File:Powered Redstone Comparator (S) BE.png|32px]] [[File:Subtracting Redstone Comparator (S) BE.png|32px]] [[File:Powered Subtracting Redstone Comparator (S) BE.png|32px]]{{verify|Was this the model used?}} [[File:Redstone Comparator (item) JE2 BE2.png|32px]] The textures of redstone comparators have now been changed.}}
{{History|3ds}}
{{History||0.1.0|[[File:Redstone Comparator (S) JE2 BE1.png|32px]] [[File:Powered Redstone Comparator (S) JE2 BE1.png|32px]] [[File:Subtracting Redstone Comparator (S) JE2 BE1.png|32px]] [[File:Powered Subtracting Redstone Comparator (S) JE2 BE1.png|32px]]{{verify|Was this the model used?}} [[File:Redstone Comparator (item) JE2 BE2.png|32px]] Added redstone comparators.}}
{{History|foot}}
=== Redstone comparator "items" ===
{{:Technical blocks/Redstone Comparator}}
== Issues ==
{{issue list}}
== Trivia ==
* Comparators do not emit redstone particles when powered, unlike redstone torches and repeaters.<ref>{{bug|MC-51692|||WAI}}</ref>
== Gallery ==
<gallery>
Dinnerbone Comparator 1.png|Dinnerbone showing how comparators work.
Dinnerbone Comparator 2.png|Dinnerbone showing how comparators work.
Dinnerbone Comparator 3.png|Dinnerbone showing how comparators work.
Dinnerbone Comparators 1.png|A contraption incorporating comparators.
Dinnerbone Comparators 2.png|Comparators in action.
Dinnerbone Comparators 3.png|Output specific signals.
Dinnerbone Comparator Thing.png|Another comparator in use.
Item Frame Comparator.png|Rotating the torch in the item frame adjusts the comparator's output.
</gallery>
== References ==
{{reflist}}
{{Redstone}}
{{Blocks|Utility}}
{{Items}}
[[Category:Mechanics]]
[[Category:Block entities]]
[[Category:Redstone mechanics]]
[[Category:Mechanisms]]
[[Category:Manufactured blocks]]
[[Category:Non-solid blocks]]
[[de:Redstone-Komparator]]
[[es:Comparador de redstone]]
[[fr:Comparateur de redstone]]
[[hu:Redstone-komparátor]]
[[ja:レッドストーンコンパレーター]]
[[ko:레드스톤 비교기]]
[[nl:Redstonevergelijker]]
[[pl:Komparator]]
[[pt:Comparador de redstone]]
[[ru:Компаратор]]
[[uk:Редстоуновий компаратор]]
[[zh:红石比较器]]</li></ul></nowiki> | 14w02a | Added a crafting recipe for mossy stone bricks (uses 1 vine and 1 stone brick.) | |||
| 14w04a | Added a crafting recipe for moss stone (uses 1 vine and 1 cobblestone.) | ||||
| 14w07a | Vines are no longer visible from behind.[8] | ||||
| 14w10a | Vines are visible from behind again. However, the texture is now incorrectly mirrored, unlike before.[9] | ||||
| 14w30c | Vines are now used to create the fancy border pattern for banners. | ||||
1.11{{Extension DPL}}<ul><li>[[Cookie|Cookie]]<br/>{{Item
| title = Cookie
| image = Cookie.png
| heals = {{hunger|2}}
| renewable = Yes
| stackable = Yes (64)
}}
'''Cookies''' are [[food]] items that can be obtained in large quantities, but do not restore hunger or saturation significantly.
== Obtaining ==
=== Trading ===
Journeyman-level farmer [[villager]]s sell 18 cookies for 3 [[emerald]]s as part of their trades.
=== Crafting ===
{{Crafting
|A2= Wheat
|B2= Cocoa Beans
|C2= Wheat
|Output= Cookie,8
|type= Foodstuff
}}
=== Villager gifts ===
{{in|java}}, if the [[player]] has the [[Hero of the Village]] effect, a farmer villager may gift them a cookie.
== Usage ==
=== Food ===
To eat a cookie, press and hold {{control|use}} while it is selected in the hotbar. Eating one restores {{hunger|2}} [[hunger]] and 0.4 hunger
[[Hunger#Mechanics|saturation]].
=== Parrots ===
Feeding a cookie to a [[parrot]] kills the parrot instantly, and causes it to give off [[Poison]] [[particles]] as it dies due to chocolate being toxic to parrots.
{{IN|Bedrock}}, feeding a cookie to a parrot inflicts the parrot with [[Fatal Poison]] for 1,000 seconds.
=== Composting ===
Placing a cookie into a [[composter]] has an 85% chance of raising the compost level by 1.
Considering the high yield of cookies (8 cookies from 1 cocoa bean and 2 wheats) and the higher chance to successfully compost a cookie (85%), it is more efficient to craft cookies to compost rather than using separate ingredients. For example, 100 wheats and 50 cocoa beans, which in total could yield only 13.92 bone meal on average, could be crafted into 400 cookies to yield 48.57 bone meal on average.
== Sounds ==
{{Sound table/Entity/Food}}
== Advancements ==
{{load advancements|Husbandry;A Balanced Diet}}
== Data values ==
=== ID ===
{{edition|java}}:
{{ID table
|edition=java
|showforms=y
|generatetranslationkeys=y
|displayname=Cookie
|spritetype=item
|nameid=cookie
|form=item
|foot=1}}
{{edition|bedrock}}:
{{ID table
|edition=bedrock
|shownumericids=y
|showforms=y
|notshowbeitemforms=y
|generatetranslationkeys=y
|displayname=Cookie
|spritetype=item
|nameid=cookie
|id=271
|form=item
|foot=1}}
== History ==
{{History|java beta}}
{{History||1.4|[[File:Cookie JE1 BE1.png|32px]] Added cookies.
|Cookies restore {{hp|1}} and are currently the only stackable [[food]], up to 8 cookies per stack.}}
{{History||1.8|snap=Pre-release|Cookies can now be stacked to 64.
|Cookies now restore {{hunger|1}}.}}
{{History|java}}
{{History||1.3.1|snap=12w18a|Cocoa beans have become farmable, making cookies [[renewable resource|renewable]] and ''much'' cheaper.}}
{{History|||snap=12w19a|Cookies now restore {{hunger|2}} instead of {{hunger|1}}.}}
{{History|||snap=12w21a|Farmer [[villager]]s now [[trading|sell]] 8–10 cookies for 1 [[emerald]].}}
{{History||1.8|snap=14w02a|Farmer villagers now sell 6 cookies for 1 emerald.}}
{{History||1.11|snap=16w33a|Farmer villagers now sell 6–10 cookies for 1 emerald.}}
{{History||1.12|snap=17w13a|Cookies can now be used to tame [[parrot]]s.}}
{{History|||snap=pre3|Cookies are no longer used to tame [[parrot]]s. Instead, a cookie now instantly kills a parrot.}}
{{History||1.13|snap=17w47a|Prior to [[1.13/Flattening|''The Flattening'']], this [[item]]'s numeral ID was 357.}}
{{History||1.14|snap=18w43a|[[File:Cookie JE2 BE2.png|32px]] The texture of cookies has been changed.}}
{{History|||snap=19w03a|Placing a cookie into the new [[composter]] has a 80% chance of raising the compost level by 1.}}
{{History|||snap=19w05a|Cookies now have an 85% chance of increasing the compost level in a composter by 1.}}
{{History|||snap=19w13a|Farmer villagers now give cookies to players under the [[Hero of the Village]] effect.}}
{{History|pocket alpha}}
{{History||v0.9.0|snap=build 1|[[File:Cookie JE1 BE1.png|32px]] Added cookies.}}
{{History||v0.12.1|snap=build 1|Cookies now restore [[hunger]] instead of [[health]].}}
{{History|pocket}}
{{History||1.0.4|snap=alpha 1.0.4.0|Farmer [[villager]]s now [[trading|sell]] 6-10 cookies for 1 [[emerald]].}}
{{History|bedrock}}
{{History||1.2.0|snap=beta 1.2.0.2|Cookies can now be used to inflict a fatal [[Poison]] [[status effect]] to [[parrot]]s.}}
{{History||1.10.0|snap=beta 1.10.0.3|[[File:Cookie JE2 BE2.png|32px]] The texture of cookies has been changed.}}
{{History||1.11.0|snap=beta 1.11.0.1|Cookies can now be used to fill up [[composter]]s.}}
{{History|||snap=beta 1.11.0.4|Farmer [[villager]]s now [[trading|sell]] 18 cookies for 3 [[emerald]]s as part of their third tier [[trading|trades]].}}
{{History|console}}
{{History||xbox=TU1|xbone=CU1|ps=1.0|wiiu=Patch 1|[[File:Cookie JE1 BE1.png|32px]] Added cookies.}}
{{History||xbox=none|xbone=none|ps=1.90|wiiu=none|switch=none|[[File:Cookie JE2 BE2.png|32px]] The texture of cookies has been changed.}}
{{History|new 3ds}}
{{History||0.1.0|[[File:Cookie JE1 BE1.png|32px]] Added cookies.}}
{{History|foot}}
== Issues ==
{{issue list}}
== Gallery ==
<gallery>
File:12w21a CookiePurchase.png|Cookies being obtained by [[trading]] with a farmer [[villager]].
File:Eating Steve.png|[[Steve]] eating a cookie.
File:Eating Alex.png|Alex eating a cookie.
</gallery>
== References ==
{{reflist}}
== External Links ==
*[https://www.minecraft.net/en-us/article/taking-inventory--cookie Taking Inventory: Cookie] – Minecraft.net on August 22, 2019
{{Items}}
[[Category:Food]]
[[Category:Renewable resources]]
[[cs:Sušenka]]
[[de:Keks]]
[[es:Galleta]]
[[fr:Cookie]]
[[hu:Csokis süti]]
[[ja:クッキー]]
[[ko:쿠키]]
[[nl:Koekje]]
[[pl:Ciastko]]
[[pt:Biscoito]]
[[ru:Печенье]]
[[uk:Печиво]]
[[zh:曲奇]]</li><li>[[Sweet Berries|Sweet Berries]]<br/>{{Block
| title = Sweet Berries
| image = <gallery>
Sweet Berry Bush Age 0.png| Age 0
Sweet Berry Bush Age 1.png| Age 1
Sweet Berry Bush Age 2.png| Age 2
Sweet Berry Bush Age 3.png| Age 3
</gallery>
| image2 = Sweet Berries JE1 BE1.png
| transparent = Yes
| light = No
| tool = Any
| renewable = Yes
| stackable = Yes (64)
| heals = {{hunger|2}}
| flammable = Yes (60 java, 30 bedrock)
| lavasusceptible = No
}}
'''Sweet berries''' are a [[food]] [[item]] obtained from sweet berry bushes and are used to plant them.
'''Sweet berry bushes''' are quick-growing, [[Bone Meal|bonemealable]] [[Plant|plants]] that grow sweet berries, and damage and slow [[Player|players]] and most [[Mob|mobs]] moving through them. They can be found naturally in [[taiga]] and [[Snowy Taiga|snowy taiga]] biomes.
== Obtaining ==
=== Breaking ===
{{See also|Fortune#Discrete random}}
Sweet berry bushes can be mined instantly with any tool or by hand. A mature sweet berry bush yields 2–3 sweet berries. On its third growth stage, it yields 1–2 sweet berries. Each level of [[Fortune]] can increase the amount of drops by 1.
{{IN|ps4}}, the sweet berries drop into the player's inventory. In other editions, they drop on the ground.
=== Natural generation ===
Berry bushes commonly generate in [[taiga]] and [[snowy taiga]] biomes. Each [[chunk]] has {{frac|1|12}} chance to generate sweet berry bushes in [[random patch]]es. They also generate in both [[old growth pine taiga]] and [[old growth spruce taiga]].
=== Chest loot ===
{{LootChestItem|sweet-berries}}
=== Post-generation ===
Sweet berries can be collected from a sweet berry bush by {{control|using}} or {{control|breaking}} it, which yield 1–2 sweet berries in its third growth stage, and 2–3 sweet berries in its final growth stage.
== Usage ==
=== Placement ===
Placing [[sweet berries]] on a [[grass block]], [[dirt]], [[podzol]], [[coarse dirt]], [[farmland]]{{Only|Java}}, or [[moss block]] creates a small sweet berry bush that eventually becomes a fully grown sweet berry bush.
=== Growth ===
A sweet berry bush grows through four stages after it is planted. Its first growth stage is a small bush without any berries. It becomes a grown plant in its second stage, and produces berries in its third and fourth growth stage. The bush needs to be in light level 9 or greater to grow. {{control|Using}} [[bone meal]] on it increases its growth stage by one, and at full maturity, ejects the sweet berry item. The bush can be placed on a 1 block high space, but it cannot grow with a full, non-transparent block immediately above it.
=== Food ===
To eat sweet berries, press and hold {{control|use}} while it is selected in the hotbar. Eating one restores {{hunger|2}} [[hunger]] and 0.4{{only|je|short=1}} / 1.2{{only|be|short=1}} hunger [[saturation]].
=== Composting ===
Placing sweet berries into a [[composter]] has a 30% chance of raising the compost level by 1.
=== Breeding ===
Sweet berries can be fed to [[fox]]es to [[breeding|breed]] them. Foxes are similar to cats when being fed as a wild animal; a sudden movement by the [[player]] may cause the fox to flee even if the player holds sweet berries. A baby fox bred by a [[player]] trusts the player and does not flee.
=== Trading ===
Master-level butcher [[villager]]s offer to [[trading|buy]] 10 sweet berries for an [[emerald]].
=== Entity movement ===
A sweet berry bush (at any stage) slows down all [[entity|entities]] (except [[Item (entity)|items]]) passing through it. At stage 1 and higher, it causes damage. [[Fox]]es are immune to both characteristics, however. Sweet berry bushes deal {{hp|1}} [[damage]] every 0.5 seconds, only if the entity is moving in the hitbox of the bush. Entities that move through sweet berry bushes slow down to about 34.05% of their normal speed, similar to how a [[cobweb]] slows down mobs to 15% of normal speed. This makes it impossible to jump a full [[block]] while inside the bush.
Mobs at standard block height in a [[minecart]] are not damaged when the minecart is pushed through sweet berries. Players in a sweet berry bush take no damage except from horizontal movement, but are unable to jump out of the bush, similar to a cobweb.
=== Bees ===
[[Bee]]s pollinate sweet berry bushes, and then increase the honey level in [[beehive]]s and bee nests by 1.{{only|java}}
== Sounds ==
=== Generic ===
==== Block ====
{{Sound table/Block/Sweet berry bush}}
==== Item ====
{{Sound table/Entity/Food}}
=== Unique ===
{{edition|java}}:
{{Sound table
|rowspan=2
|sound=Berries pick1.ogg
|sound2=Berries pick2.ogg
|subtitle=Berries pop
|source=block
|description=When sweet berries are picked by a player
|id=block.sweet_berry_bush.pick_berries
|translationkey=subtitles.item.berries.pick
|volume=1.0
|pitch=0.8-1.2
|distance=16}}
{{Sound table
|subtitle=Berries pop
|source=block
|description=When sweet berries are picked by a fox
|id=block.sweet_berry_bush.pick_berries
|translationkey=subtitles.item.berries.pick
|volume=1.0
|pitch=1.0
|distance=16}}
{{Sound table
|sound=Player hurt sweet berry bush1.ogg
|sound2=Player hurt sweet berry bush2.ogg
|subtitle=Player hurts
|source=player
|description=When a player is damaged by touching a sweet berry bush
|id=entity.player.hurt_sweet_berry_bush
|translationkey=subtitles.entity.player.hurt
|volume=1.0
|pitch=0.8-1.2
|distance=16
|foot=1}}
{{edition|bedrock}}:
{{Sound table
|type=bedrock
|sound=Berries pick1.ogg
|sound2=Berries pick2.ogg
|source=block
|description=When sweet berries are picked
|id=block.sweet_berry_bush.pick
|volume=1.0
|pitch=1.0}}
{{Sound table
|sound=Player hurt sweet berry bush1.ogg
|sound2=Player hurt sweet berry bush2.ogg
|source=block
|description=When a player is damaged by touching a sweet berry bush
|id=block.sweet_berry_bush.hurt
|volume=1.0
|pitch=1.0
|foot=1}}
== Data values ==
=== ID ===
{{edition|java}}:
{{ID table
|edition=java
|showblocktags=y
|showitemtags=y
|showforms=y
|generatetranslationkeys=y
|displayname=Sweet Berry Bush
|spritetype=block
|nameid=sweet_berry_bush
|blocktags=azalea_log_replaceable, bee_growables
|form=block}}
{{ID table
|displayname=Sweet Berries
|spritetype=item
|nameid=sweet_berries
|itemtags=fox_food
|form=item
|foot=1}}
{{edition|bedrock}}:
{{ID table
|edition=bedrock
|shownumericids=y
|showforms=y
|generatetranslationkeys=y
|displayname=Sweet Berry Bush
|spritetype=block
|nameid=sweet_berry_bush
|id=462
|form=block}}
{{ID table
|displayname=Sweet Berries
|spritetype=item
|nameid=sweet_berries
|id=287
|form=item
|foot=1}}
=== Block states ===
{{see also|Block states}}
{{/BS}}
==Advancements==
{{Load advancements|Husbandry;A Balanced Diet;The Parrots and the Bats;Two by Two}}
== History ==
{{History||September 26, 2018|link={{tweet|minecraft|1044587405779451906}}|Berries are announced to be part of the [[biome]] vote at [[MINECON Earth 2018]].}}
{{History||September 29, 2018|link={{tweet|minecraft|1046097775199498245}}|[[Taiga]] wins the [[biome]] vote, meaning berries are to be added to the game first.}}
{{History|java}}
{{History||December 3, 2018|link={{tweet|cojomax99|1069586461173919745}}|[[Cojomax99]] tweets an image of some berries.}}
{{History||1.14|snap=18w49a|[[File:Sweet Berry Bush Age 0 JE1 BE1.png|32px]] [[File:Sweet Berry Bush Age 1 JE1 BE1.png|32px]] [[File:Sweet Berry Bush Age 2 JE1 BE1.png|32px]] [[File:Sweet Berry Bush Age 3 JE1 BE1.png|32px]] Added sweet berry bushes.|
[[File:Sweet Berries JE1 BE1.png|32px]] Added sweet berries.}}
{{History|||snap=18w50a|Sweet berries can now be found within [[taiga]] [[village]] loot [[chest]]s.}}
{{History|||snap=19w03a|Placing a sweet berry into the new [[composter]] has a 10% chance of raising the compost level by 1.
|Added [[sound]]s for sweet berry bushes.}}
{{History|||snap=19w05a|Sweet berries now have a 30% chance of increasing the compost level in a composter by 1.
|The [[sound]] for planting sweet berries has been changed.}}
{{History|||snap=19w07a|Sweet berries can now be fed to [[fox]]es to [[breeding|breed]] them.}}
{{History|||snap=19w11a|Butcher [[villager]]s now [[trading|buy]] sweet berries.}}
{{History||1.15|snap=19w34a|[[Bee]]s can now pollinate sweet berry bushes.}}
{{History|||snap=Pre-Release 2|Sweet berries now generate in [[giant tree taiga]] biomes.}}
{{History||1.16|snap=Pre-release 1|Sweet berry bushes no longer prevent mob spawning inside them.}}
{{History||1.17|snap=21w20a|The sound event for picking berries has been changed as to align better with that of glow berries.<ref>{{bug|MC-220063}}</ref>}}
{{History||1.18|snap=1.18-pre5|Sweet berry bushes in taigas are about 4 times more common than in previous snapshots.}}
{{History|bedrock}}
{{History||1.10.0|snap=beta 1.10.0.3|[[File:Sweet Berries JE1 BE1.png|32px]] Added sweet berries, which are available only through Experimental Gameplay.|[[File:Sweet Berry Bush Age 0 JE1 BE1.png|32px]] [[File:Sweet Berry Bush Age 1 JE1 BE1.png|32px]] [[File:Sweet Berry Bush Age 2 JE1 BE1.png|32px]] [[File:Sweet Berry Bush Age 3 JE1 BE1.png|32px]] Added sweet berry bushes, available only through Experimental Gameplay.}}
{{History||1.11.0|snap=beta 1.11.0.1|Sweet berries can now be used to fill [[composter]]s.}}
{{History|||snap=beta 1.11.0.3|Sweet berries and sweet berry bushes have been fully implemented and are now separate from Experimental Gameplay.}}
{{History|||snap=beta 1.11.0.4|Sweet berries can now be [[trading|sold]] to butcher [[villager]]s.}}
{{History||1.13.0|snap=beta 1.13.0.1|Sweet berries can now be fed to [[fox]]es to [[breeding|breed]] them.}}
{{History||1.14.0|snap=beta 1.14.0.1|[[Bee]]s can now pollinate sweet berry bushes.}}
{{History||1.16.100|snap=beta 1.16.100.54|Sweet berry bushes now properly damage entities.<ref>{{Bug|MCPE-56142}}</ref>}}
{{History||1.17.0|snap=beta 1.17.0.56|Bees no longer gather nectar from sweet berry bushes.}}
{{History|PS4}}
{{History||1.91|[[File:Sweet Berries JE1 BE1.png|32px]] Added sweet berries.|[[File:Sweet Berry Bush Age 0 JE1 BE1.png|32px]] [[File:Sweet Berry Bush Age 1 JE1 BE1.png|32px]] [[File:Sweet Berry Bush Age 2 JE1 BE1.png|32px]] [[File:Sweet Berry Bush Age 3 JE1 BE1.png|32px]] Added sweet berry bushes.}}
{{History|foot}}
=== Sweet berry bush "item" ===
{{:Technical blocks/Sweet Berry Bush}}
== Issues ==
{{issue list|berry|berries|sweet berry|sweet berries|berry bush|sweet berry bush}}
==Trivia==
* {{IN|java}}, sweet berry bushes absorb [[fall damage]] like [[water]].<ref>{{bug|MC-149990|||WAI}}</ref>
* Foxes harvest mature sweet berry bushes that have grown into their third or fourth stage. Unlike how carrots eaten by rabbits are destroyed and not dropped as items, sweet berry bushes harvested by foxes drop as items, although the fox may pick up one of the dropped berries. The bush remains intact, allowing for automatic sweet berry farms.
== Gallery ==
<gallery>
Berry Bush.png|A close-up look of a sweet berry bush.
Naturally generated berry bushes.png|A naturally generated sweet berry bush.
Multiplebushes.png|Multiple bushes of sweet berries in Taiga biome.
BerryBushCloseToRavine.png|A berry bush that is close to a ravine.
Cozy Cabin Berries.jpg|Berry bushes near a cozy cabin.
</gallery>
==References==
{{Reflist}}
{{Blocks|vegetation}}
{{Items}}
[[Category:Food]]
[[Category:Plants]]
[[Category:Non-solid blocks]]
[[Category:Natural blocks]]
[[Category:Flammable blocks]]
[[cs:Sladké bobule]]
[[es:Bayas dulces]]
[[de:Süßbeeren]]
[[fr:Baies sucrées]]
[[ja:スイートベリー]]
[[ko:달콤한 열매]]
[[pl:Słodkie jagody]]
[[pt:Bagas doces]]
[[ru:Сладкие ягоды]]
[[th:เบอร์รีหวาน]]
[[zh:甜浆果]]</li></ul> | 16w39a | Vines now generate in woodland mansions. | |||
1.13{{Extension DPL}}<ul><li>[[Popped Chorus Fruit|Popped Chorus Fruit]]<br/>{{Item
| image = Popped Chorus Fruit.png
| renewable = Yes
| stackable = Yes (64)
}}
'''Popped chorus fruit''' is an [[item]] obtained by [[smelting]] [[chorus fruit]], and used to craft [[End Rod|end rods]] and [[purpur blocks]]. Unlike raw chorus fruit, the popped fruit is inedible.
== Obtaining ==
=== Smelting ===
{{Smelting
|Chorus Fruit
|Popped Chorus Fruit
|0,1
}}
== Usage ==
=== Crafting ingredient ===
{{crafting usage}}
== Data values ==
=== ID ===
{{edition|java}}:
{{ID table
|edition=java
|showforms=y
|generatetranslationkeys=y
|displayname=Popped Chorus Fruit
|spritetype=item
|nameid=popped_chorus_fruit
|form=item
|foot=1}}
{{edition|bedrock}}:
{{ID table
|edition=bedrock
|showaliasids=y
|shownumericids=y
|showforms=y
|notshowbeitemforms=y
|generatetranslationkeys=y
|displayname=Popped Chorus Fruit
|spritetype=item
|nameid=popped_chorus_fruit
|aliasid=chorus_fruit_popped
|id=559
|form=item
|translationkey=item.chorus_fruit_popped.name
|foot=1}}
== History ==
{{History|java}}
{{History||1.9|snap=15w31a|[[File:Popped Chorus Fruit JE1 BE1.png|32px]] Added popped chorus fruit.
|Popped chorus fruit are used to craft [[purpur block]]s.}}
{{History|||snap=15w44b|Popped chorus fruit are now used to craft [[end rod]]s.}}
{{History||1.13|snap=17w47a|Prior to [[1.13/Flattening|''The Flattening'']], this [[item]]'s numeral ID was 433.}}
{{History|||snap=pre5|The ID of popped chorus fruit has now been changed to <code>popped_chorus_fruit</code>.}}
{{History||1.14|snap=18w43a|[[File:Popped Chorus Fruit JE2 BE2.png|32px]] The texture of popped chorus fruit has now been changed.}}
{{History|pocket}}
{{History||1.0.0|snap=alpha 0.17.0.1|[[File:Popped Chorus Fruit JE1 BE1.png|32px]] Added popped chorus fruit.}}
{{History|bedrock}}
{{History||1.10.0|snap=beta 1.10.0.3|[[File:Popped Chorus Fruit JE2 BE2.png|32px]] The texture of popped chorus fruit has now been changed.}}
{{History||1.16.100|snap=beta 1.16.100.56|The ID of popped chorus fruit has been changed from <code>chorus_fruit_popped</code> to <code>popped_chorus_fruit</code>.}}
{{History|console}}
{{History||xbox=TU46|xbone=CU36|ps=1.38|wiiu=Patch 15|[[File:Popped Chorus Fruit JE1 BE1.png|32px]] Added popped chorus fruit.}}
{{History||xbox=none|xbone=none|ps=1.90|wiiu=none|switch=none|[[File:Popped Chorus Fruit JE2 BE2.png|32px]] The texture of popped chorus fruit has now been changed.}}
{{History|new 3ds}}
{{History||1.7.10|[[File:Popped Chorus Fruit JE1 BE1.png|32px]] Added popped chorus fruit.}}
{{History|foot}}
== Issues ==
{{issue list}}
{{Items}}
[[cs:Vypukaný květ chorusu]]
[[de:Geplatzte Chorusfrucht]]
[[fr:Chorus éclaté]]
[[it:Frutto di chorus scoppiato]]
[[ja:焼いたコーラスフルーツ]]
[[ko:튀긴 후렴과]]
[[nl:Gepoft Chorusfruit]]
[[pl:Prażony owoc refrenusu]]
[[pt:Fruta do coro cozida]]
[[ru:Приготовленный плод коруса]]
[[zh:爆裂紫颂果]]
[[Category:Renewable resources]]</li><li>[[Flower Pot|Flower Pot]]<br/>{{more images|The potted cherry sapling texture has been change in 1.19.4-pre2.}}
{{For|other uses|Pot}}
{{Block
| image = Flower Pot.png
| image2 = Potted Poppy.png
| extratext = View [[#Gallery|all renders]]
| transparent = Yes
| light = No
| tool = any
| renewable = Yes
| stackable = Yes (64)
| flammable = No
| lavasusceptible = No
}}
A '''flower pot''' is a decorative [[block]] that can contain flowers, bamboo, saplings, cacti, mushrooms, fungi, and other reasonably small plants.
== Obtaining ==
=== Natural generation ===
Flower pots naturally generate in [[witch hut]]s where they contain a red [[mushroom]], the basement of [[igloo]]s where they contain a [[cactus]], and in [[woodland mansion]]s, where they contain birch [[sapling]]s, dark oak saplings, dandelions, poppies, blue orchids, alliums, azure bluets, red and white tulips, and oxeye daisies.
Flower pots containing a dandelion can be found in some [[plains]] and [[savanna]] [[village]] houses. Flower pots containing a cactus or a dead bush can be found in some [[desert]] village houses. Flower pots containing a spruce sapling can be found in [[taiga]] village mason houses. Flower pots containing a poppy can be found in taiga village churches.
=== Breaking ===
Flower pots can be mined instantly using any [[tool]] or without a tool.
A flower pot drops itself as an [[item]] (any [[plant]] or [[mushroom]] in it separately) when pushed by a [[piston]] or washed away with [[water]].
[[Lava]] can flow into the space of a flower pot, destroying it.
=== Chest loot ===
{{LootChestItem|flower-pot}}
=== Crafting ===
{{Crafting
|A2= Brick
|C2= Brick
|B3= Brick
|Output= Flower Pot
|type= Decoration block
}}
== Usage ==
A flower pot can be used to hold [[mushroom]]s, [[Fungus|fungi]], and various [[plant]]s. Plants that can be {{control|placed}} in a pot include any one block high [[flower]]s, [[sapling]]s, [[fern]]s, [[dead bush]]es, [[cacti]], [[bamboo]], [[azalea]]s, [[mangrove propagule]], and [[roots]].
Plants can be removed by using the interact button.
{{IN|je}}, flower pots can be placed on any block, or over [[air]].<ref>{{bug|MC-127036|||WAI}}</ref>
{{IN|be}}, they must be placed on top of a full-[[block]] top surface, or the top of a [[fence]], stone [[wall]], or [[hopper]]. They cannot be placed on [[slab]]s and [[stairs]] unless those blocks are upside-down. Pots may also be placed on an upward facing trapdoor. If the trapdoor is opened, the pot will break.
Flower pots are {{frac|3|8}} of a block high and can be stepped on. It is not possible to walk from the top of a flower pot onto a full sized block without jumping. It is possible to jump from a flower pot onto a fence.
The plant or fungus can be removed from the flower pot by pressing the {{control|use}} control. This places the item directly back into the player's inventory.<ref>{{bug|MC-169496|||WAI}}</ref>
They can be used to display cacti and wither roses without inheriting their damaging properties.<ref>{{bug|MC-2241|||WAI}}</ref><ref>{{bug|MC-138024|||WAI}}</ref>
Potted [[Fungus|warped fungus]] can be used to repel [[hoglin]]s.
== Sounds ==
{{Sound table/Block/Normal}}
== Data values ==
=== ID ===
{{edition|java}}:
{{ID table
|edition=java
|showblocktags=y
|showforms=y
|generatetranslationkeys=y
|displayname=Flower Pot
|spritetype=block
|nameid=flower_pot
|blocktags=flower_pots
|translationkey=block.minecraft.flower_pot,item.minecraft.flower_pot}}
{{ID table
|displayname=Potted Dandelion
|spritetype=block
|nameid=potted_dandelion
|blocktags=flower_pots
|form=block}}
{{ID table
|displayname=Potted Poppy
|spritetype=block
|nameid=potted_poppy
|blocktags=flower_pots
|form=block}}
{{ID table
|displayname=Potted Blue Orchid
|spritetype=block
|nameid=potted_blue_orchid
|blocktags=flower_pots
|form=block}}
{{ID table
|displayname=Potted Allium
|spritetype=block
|nameid=potted_allium
|blocktags=flower_pots
|form=block}}
{{ID table
|displayname=Potted Azure Bluet
|spritetype=block
|nameid=potted_azure_bluet
|blocktags=flower_pots
|form=block}}
{{ID table
|displayname=Potted Red Tulip
|spritetype=block
|nameid=potted_red_tulip
|blocktags=flower_pots
|form=block}}
{{ID table
|displayname=Potted Orange Tulip
|spritetype=block
|nameid=potted_orange_tulip
|blocktags=flower_pots
|form=block}}
{{ID table
|displayname=Potted White Tulip
|spritetype=block
|nameid=potted_white_tulip
|blocktags=flower_pots
|form=block}}
{{ID table
|displayname=Potted Pink Tulip
|spritetype=block
|nameid=potted_pink_tulip
|blocktags=flower_pots
|form=block}}
{{ID table
|displayname=Potted Oxeye Daisy
|spritetype=block
|nameid=potted_oxeye_daisy
|blocktags=flower_pots
|form=block}}
{{ID table
|displayname=Potted Cornflower
|spritetype=block
|nameid=potted_cornflower
|blocktags=flower_pots
|form=block}}
{{ID table
|displayname=Potted Lily of the Valley
|spritetype=block
|nameid=potted_lily_of_the_valley
|blocktags=flower_pots
|form=block}}
{{ID table
|displayname=Potted Wither Rose
|spritetype=block
|nameid=potted_wither_rose
|blocktags=flower_pots
|form=block}}
{{ID table
|displayname=Potted Oak Sapling
|spritetype=block
|nameid=potted_oak_sapling
|blocktags=flower_pots
|form=block}}
{{ID table
|displayname=Potted Spruce Sapling
|spritetype=block
|nameid=potted_spruce_sapling
|blocktags=flower_pots
|form=block}}
{{ID table
|displayname=Potted Birch Sapling
|spritetype=block
|nameid=potted_birch_sapling
|blocktags=flower_pots
|form=block}}
{{ID table
|displayname=Potted Jungle Sapling
|spritetype=block
|nameid=potted_jungle_sapling
|blocktags=flower_pots
|form=block}}
{{ID table
|displayname=Potted Acacia Sapling
|spritetype=block
|nameid=potted_acacia_sapling
|blocktags=flower_pots
|form=block}}
{{ID table
|displayname=Potted Dark Oak Sapling
|spritetype=block
|nameid=potted_dark_oak_sapling
|blocktags=flower_pots
|form=block}}
{{ID table
|displayname=Potted Red Mushroom
|spritetype=block
|nameid=potted_red_mushroom
|blocktags=flower_pots
|form=block}}
{{ID table
|displayname=Potted Brown Mushroom
|spritetype=block
|nameid=potted_brown_mushroom
|blocktags=flower_pots
|form=block}}
{{ID table
|displayname=Potted Fern
|spritetype=block
|nameid=potted_fern
|blocktags=flower_pots
|form=block}}
{{ID table
|displayname=Potted Dead Bush
|spritetype=block
|nameid=potted_dead_bush
|blocktags=flower_pots
|form=block}}
{{ID table
|displayname=Potted Cactus
|spritetype=block
|nameid=potted_cactus
|blocktags=flower_pots
|form=block}}
{{ID table
|displayname=Potted Bamboo
|spritetype=block
|nameid=potted_bamboo
|blocktags=flower_pots
|form=block}}
{{ID table
|displayname=Potted Azalea
|spritetype=block
|nameid=potted_azalea_bush
|blocktags=flower_pots
|spritename=potted azalea bush
|form=block}}
{{ID table
|displayname=Potted Flowering Azalea
|spritetype=block
|nameid=potted_flowering_azalea_bush
|blocktags=flower_pots
|spritename=potted flowering azalea bush
|form=block}}
{{ID table
|displayname=Potted Crimson Fungus
|spritetype=block
|nameid=potted_crimson_fungus
|blocktags=flower_pots
|form=block}}
{{ID table
|displayname=Potted Warped Fungus
|spritetype=block
|nameid=potted_warped_fungus
|blocktags=flower_pots, hoglin_repellents
|form=block}}
{{ID table
|displayname=Potted Crimson Roots
|spritetype=block
|nameid=potted_crimson_roots
|blocktags=flower_pots
|form=block}}
{{ID table
|displayname=Potted Warped Roots
|spritetype=block
|nameid=potted_warped_roots
|blocktags=flower_pots
|form=block}}
{{ID table
|displayname=Potted Mangrove Propagule
|spritetype=block
|nameid=potted_mangrove_propagule
|blocktags=flower_pots
|form=block
|foot=1}}
{{edition|bedrock}}:
{{ID table
|edition=bedrock
|firstcolumnname=Flower Pot
|shownumericids=y
|showforms=y
|generatetranslationkeys=y
|displayname=Block
|spritename=flower-pot
|spritetype=block
|nameid=flower_pot
|id=140
|form=block
|itemform=item.flower_pot
|translationkey=-}}
{{ID table
|displayname=Item
|spritename=flower-pot
|spritetype=item
|nameid=flower_pot
|id=514
|form=item
|foot=1}}
=== Block states ===
{{see also|Block states}}
{{IN|be}}, flower pots use the following block states:
{{/BS}}
=== Block data ===
{{IN|bedrock}}, flower pot has a block entity associated with it that holds additional data about the block.
See [[Bedrock Edition level format/Block entity format]].
== Achievements ==
{{load achievements|Pot Planter}}
== History ==
{{History||August 16, 2012|link={{tweet|Dinnerbone|236062188555624448}}|[[Dinnerbone]] tweeted the first image of flower pots.}}
{{History|java}}
{{History||1.4.2|snap=12w34a|[[File:Flower Pot JE1.png|32px]] [[File:Potted Dandelion JE1.png|32px]] [[File:Potted Rose JE1.png|32px]] [[File:Potted Red Mushroom JE1.png|32px]] [[File:Potted Brown Mushroom JE1.png|32px]] [[File:Potted Oak Sapling JE1.png|32px]] [[File:Potted Birch Sapling JE1.png|32px]] [[File:Potted Spruce Sapling JE1.png|32px]] [[File:Potted Jungle Sapling JE1.png|32px]] [[File:Potted Cactus JE1.png|32px]] [[File:Potted Fern JE1.png|32px]] [[File:Potted Dead Bush JE1.png|32px]]<br>[[File:Flower Pot (item) JE1 BE1.png|32px]] Added flower pots.
|At this point, plants inside of pots rendered much like they do outside of flower pots, not being subject to directional shading.}}
{{History|||snap=12w40a|A potted [[red mushroom]] can now be found on one window of a [[witch hut]]. This changed to an empty pot in a far later unknown version,{{info needed}} but returned again afterward.{{info needed}}}}
{{History||1.7.2|snap=13w36a|[[File:Potted Allium JE1.png|32px]] [[File:Potted Azure Bluet JE1.png|32px]] [[File:Potted Oxeye Daisy JE1.png|32px]] [[File:Potted Blue Orchid JE1.png|32px]] [[File:Potted Red Tulip JE1.png|32px]] [[File:Potted Orange Tulip JE1.png|32px]] [[File:Potted White Tulip JE1.png|32px]] [[File:Potted Pink Tulip JE1.png|32px]] Allium, azure bluet, oxeye daisies, blue orchids, red tulips, orange tulips, white tulips and pink tulips can now be placed in flower pots.
|[[File:Potted Poppy JE1.png|32px]] As the rose has been replaced with the poppy, the potted rose is also now replaced with the potted poppy as a result.
|Flower pots can no longer use data values because more than 15 plants can be potted, it now has a [[block entity]] instead.
|[[File:Potted Green Shrub.png|32px]] [[File:Potted Cobweb JE1.png|32px]] Due to the tile entity handling, it is now possible to place any [[block]] inside of a flower pot via NBT editors. However, at this point, with the ones possible in vanilla [[survival]] aside, only [[grass]], [[shrub|green shrub]]s, and [[cobweb]]s actually render.
|[[File:Potted Grass JE1.png|32px]] Potted grass now exists can be placed in flower pots using [[commands]].
|[[File:Potted Grass (no tint) JE1.png|32px]] [[File:Potted Fern (no tint) JE1.png|32px]] Potted shrubs, grass, and ferns must now have block data value 11 to display biome colors, otherwise rendering as default/gray.}}
{{History|||snap=13w37a|Added {{cmd|setblock}}, allowing for the aforementioned potted plants to be obtained without map editing.}}
{{History|||snap=13w43a|[[File:Potted Acacia Sapling JE1.png|32px]] [[File:Potted Dark Oak Sapling JE1.png|32px]] Acacia sapling and dark oak saplings can now be placed in flower pots.}}
{{History||1.8|snap=14w06a|Many more blocks (almost all full cubes) placed into a flower pot by modifying the block entity now render, if in somewhat buggy fashion, as the texture is in a cross shape. {{LoadPage|Flower Pot/1.8 development gallery/14w06a|Click show to display all of the applicable blocks.|b}}
|[[File:Potted Cactus JE2.png|32px]] Potted cacti now appear as a cross formed of their bottom texture inside of a pot.<ref>{{bug|MC-47469}}</ref>}}
{{History|||snap=14w06b|Further blocks now render in flower pots than did in the previous snapshot. {{LoadPage|Flower Pot/1.8 development gallery/14w06b|Click show to display all of the applicable blocks.|b}}
|[[File:Potted Cactus JE3.png|32px]] The accidental potted cactus model change has been reverted.}}
{{History|||snap=14w07a|[[File:Potted Iron Trapdoor.png|32px]] The newly added [[iron trapdoor]] also renders in flower pots when created with commands.}}
{{History|||snap=14w17a|[[File:Flower Pot JE2.png|32px]] [[File:Potted Dandelion JE2.png|32px]] [[File:Potted Allium JE2.png|32px]] [[File:Potted Azure Bluet JE2.png|32px]] [[File:Potted Oxeye Daisy JE2.png|32px]] [[File:Potted Blue Orchid JE2.png|32px]] [[File:Potted Poppy JE2.png|32px]] [[File:Potted Red Tulip JE2.png|32px]] [[File:Potted Orange Tulip JE2.png|32px]] [[File:Potted White Tulip JE2.png|32px]] [[File:Potted Pink Tulip JE2.png|32px]] [[File:Potted Red Mushroom JE2.png|32px]] [[File:Potted Brown Mushroom JE2.png|32px]] [[File:Potted Oak Sapling JE2.png|32px]] [[File:Potted Birch Sapling JE2.png|32px]] [[File:Potted Spruce Sapling JE2.png|32px]] [[File:Potted Jungle Sapling JE2.png|32px]] [[File:Potted Acacia Sapling JE2.png|32px]] [[File:Potted Dark Oak Sapling JE2.png|32px]] [[File:Potted Cactus JE4.png|32px]] [[File:Potted Fern JE2.png|32px]] [[File:Potted Dead Bush JE2.png|32px]] The flower pot model and rendering has changed. The insides are now subject to directional shading, rather than being fully lit, much like the changes made to [[hopper]]s and [[cauldron]]s in 14w10a. In addition, the outer face (as well as the cuboids comprising the cactus in potted cactus) are no longer subject to ambient occlusion. The potted cactus also now uses the side texture on the top face, rather than the top texture.
|Invalid blocks no longer render inside flower pots. This also includes cobweb and grass.}}
{{History|||snap=14w25a|[[File:Potted Dandelion JE3.png|32px]] [[File:Potted Allium JE3.png|32px]] [[File:Potted Azure Bluet JE3.png|32px]] [[File:Potted Oxeye Daisy JE3.png|32px]] [[File:Potted Blue Orchid JE3.png|32px]] [[File:Potted Poppy JE3.png|32px]] [[File:Potted Red Tulip JE3.png|32px]] [[File:Potted Orange Tulip JE3.png|32px]] [[File:Potted White Tulip JE3.png|32px]] [[File:Potted Pink Tulip JE3.png|32px]] [[File:Potted Red Mushroom JE3.png|32px]] [[File:Potted Brown Mushroom JE3.png|32px]] [[File:Potted Oak Sapling JE3.png|32px]] [[File:Potted Birch Sapling JE3.png|32px]] [[File:Potted Spruce Sapling JE3.png|32px]] [[File:Potted Jungle Sapling JE3.png|32px]] [[File:Potted Acacia Sapling JE3.png|32px]] [[File:Potted Dark Oak Sapling JE3.png|32px]] [[File:Potted Fern JE3.png|32px]] [[File:Potted Dead Bush JE3.png|32px]] Potted cross shaped objects are now affected by directional shading.<ref>{{bug|MC-129826}}</ref>}}
{{History||1.9|snap=15w43a|A potted cactus can now be found on a table in [[igloo]] basements.}}
{{History||1.11|snap=16w32a|The block entity ID of flower pots has been changed from <code>FlowerPot</code> to <code>flower_pot</code>.}}
{{History|||snap=16w39a|Potted plants can now be removed from flower pots by pressing {{control|use}}.
|Flower pots now generate in [[woodland mansion]]s.}}
{{History||1.13|snap=17w47a|The different block states for the <code>flower_pot</code> ID have been split up into their own IDs.
|Flower pots are no longer block entities.
|Prior to [[1.13/Flattening|''The Flattening'']], this block's numeral ID was 140, and the item's was 390.}}
{{History||1.14|snap=18w43a|[[File:Flower Pot JE3.png|32px]] [[File:Potted Dandelion JE4.png|32px]] [[File:Potted Poppy JE4.png|32px]] [[File:Potted Allium JE4.png|32px]] [[File:Potted Azure Bluet JE4.png|32px]] [[File:Potted Oxeye Daisy JE4.png|32px]] [[File:Potted Blue Orchid JE4.png|32px]] [[File:Potted Red Tulip JE4.png|32px]] [[File:Potted Orange Tulip JE4.png|32px]] [[File:Potted White Tulip JE4.png|32px]] [[File:Potted Pink Tulip JE4.png|32px]] [[File:Potted Red Mushroom JE4.png|32px]] [[File:Potted Brown Mushroom JE4.png|32px]] [[File:Potted Oak Sapling JE4.png|32px]] [[File:Potted Birch Sapling JE4.png|32px]] [[File:Potted Spruce Sapling JE4.png|32px]] [[File:Potted Jungle Sapling JE4.png|32px]] [[File:Potted Acacia Sapling JE4.png|32px]] [[File:Potted Dark Oak Sapling JE4.png|32px]] [[File:Potted Cactus JE5.png|32px]] [[File:Potted Fern JE4.png|32px]] [[File:Potted Dead Bush JE4.png|32px]] <br>[[File:Flower Pot (item) JE2 BE2.png|32px]] The textures of flower pots and their contained plants have been changed.
|[[File:Potted Cornflower JE1 BE1.png|32px]] [[File:Potted Lily of the Valley JE1 BE1.png|32px]] [[File:Potted Wither Rose JE1 BE1.png|32px]] [[File:Potted Bamboo JE1 BE1.png|32px]] Cornflower, lily of the valley, wither rose and [[bamboo]] can now be placed in flower pots.}}
{{History|||snap=18w44a|[[File:Potted Cactus JE6.png|32px]] The texture of potted cacti has been changed.}}
{{History|||snap=18w47b|[[File:Potted Poppy JE5.png|32px]] The texture of potted poppies has been changed.}}
{{History|||snap=18w49a|Flower pots can now be found in [[chest]]s in [[village]] mason houses.}}
{{History|||snap=19w11a|Flower pots have become [[renewable resource|renewable]], as mason [[villager]]s now [[trading|sell]] [[brick]]s.}}
{{History||1.16|snap=20w06a|The model of flower pots has been fixed and has been given an underside, which has changed the model from [[File:Flower Pot UNKVER2 (facing NWU).png|32px]] to [[File:Flower Pot UNKVER3 (facing NWU).png|32px]].}}
{{History|||snap=20w09a|[[File:Potted Crimson Fungus JE1 BE1.png|32px]] [[File:Potted Warped Fungus JE1 BE1.png|32px]] [[File:Potted Crimson Roots JE1 BE1.png|32px]] [[File:Potted Warped Roots JE1 BE1.png|32px]] Crimson and warped [[fungi]] and crimson and warped [[roots]] can now be placed in flower pots.
|The model for potted plants has been fixed, so the bottom face now renders,<ref>{{bug|MC-170842}}</ref> which has changed the model from [[File:Potted Dandelion UNKVER1 (facing NWU).png|32px]] [[File:Potted Poppy UNKVER1 (facing NWU).png|32px]] [[File:Potted Allium UNKVER1 (facing NWU).png|32px]] [[File:Potted Azure Bluet UNKVER1 (facing NWU).png|32px]] [[File:Potted Oxeye Daisy UNKVER1 (facing NWU).png|32px]] [[File:Potted Blue Orchid UNKVER1 (facing NWU).png|32px]] [[File:Potted Red Tulip UNKVER1 (facing NWU).png|32px]] [[File:Potted Orange Tulip UNKVER1 (facing NWU).png|32px]] [[File:Potted White Tulip UNKVER1 (facing NWU).png|32px]] [[File:Potted Pink Tulip UNKVER1 (facing NWU).png|32px]] [[File:Potted Red Mushroom UNKVER1 (facing NWU).png|32px]] [[File:Potted Brown Mushroom UNKVER1 (facing NWU).png|32px]] [[File:Potted Oak Sapling UNKVER1 (facing NWU).png|32px]] [[File:Potted Birch Sapling UNKVER1 (facing NWU).png|32px]] [[File:Potted Spruce Sapling UNKVER1 (facing NWU).png|32px]] [[File:Potted Jungle Sapling UNKVER1 (facing NWU).png|32px]] [[File:Potted Acacia Sapling UNKVER1 (facing NWU).png|32px]] [[File:Potted Dark Oak Sapling UNKVER1 (facing NWU).png|32px]] [[File:Potted Cactus UNKVER1 (facing NWU).png|32px]] [[File:Potted Fern UNKVER1 (facing NWU).png|32px]] [[File:Potted Dead Bush UNKVER1 (facing NWU).png|32px]] [[File:Potted Cornflower UNKVER1 (facing NWU).png|32px]] [[File:Potted Lily of the Valley UNKVER1 (facing NWU).png|32px]] [[File:Potted Wither Rose UNKVER1 (facing NWU).png|32px]] [[File:Potted Bamboo UNKVER1 (facing NWU).png|32px]] to [[File:Potted Dandelion UNKVER2 (facing NWU).png|32px]] [[File:Potted Poppy UNKVER2 (facing NWU).png|32px]] [[File:Potted Allium UNKVER2 (facing NWU).png|32px]] [[File:Potted Azure Bluet UNKVER2 (facing NWU).png|32px]] [[File:Potted Oxeye Daisy UNKVER2 (facing NWU).png|32px]] [[File:Potted Blue Orchid UNKVER2 (facing NWU).png|32px]] [[File:Potted Red Tulip UNKVER2 (facing NWU).png|32px]] [[File:Potted Orange Tulip UNKVER2 (facing NWU).png|32px]] [[File:Potted White Tulip UNKVER2 (facing NWU).png|32px]] [[File:Potted Pink Tulip UNKVER2 (facing NWU).png|32px]] [[File:Potted Red Mushroom UNKVER2 (facing NWU).png|32px]] [[File:Potted Brown Mushroom UNKVER2 (facing NWU).png|32px]] [[File:Potted Oak Sapling UNKVER2 (facing NWU).png|32px]] [[File:Potted Birch Sapling UNKVER2 (facing NWU).png|32px]] [[File:Potted Spruce Sapling UNKVER2 (facing NWU).png|32px]] [[File:Potted Jungle Sapling UNKVER2 (facing NWU).png|32px]] [[File:Potted Acacia Sapling UNKVER2 (facing NWU).png|32px]] [[File:Potted Dark Oak Sapling UNKVER2 (facing NWU).png|32px]] [[File:Potted Cactus UNKVER2 (facing NWU).png|32px]] [[File:Potted Fern UNKVER2 (facing NWU).png|32px]] [[File:Potted Dead Bush UNKVER2 (facing NWU).png|32px]] [[File:Potted Cornflower UNKVER2 (facing NWU).png|32px]] [[File:Potted Lily of the Valley UNKVER2 (facing NWU).png|32px]] [[File:Potted Wither Rose UNKVER2 (facing NWU).png|32px]] [[File:Potted Bamboo UNKVER2 (facing NWU).png|32px]].}}
{{History|||snap=20w11a|[[File:Potted Bamboo UNKVER3 (facing NWU).png|32px]] An unneeded face has been removed from potted bamboo to solve a z-fighting issue.<ref>{{bug|MC-173156}}</ref>}}
{{History|||snap=Pre-release 3|[[File:Potted Cactus JE7.png|32px]] [[File:Potted Cactus UNKVER3 (facing NWU).png|32px]] The model of the potted cacti has been changed. The top face now uses the top texture of cactus, rather than the side texture and the bottom face has been changed to the top texture of the flower pot.}}
{{History||1.16.2|snap=20w28a|[[File:Potted Cactus UNKVER4 (facing NWU).png|32px]] The model of the potted cactus no longer has a hole in the bottom, although the texture is stretched.}}
{{History||1.17|snap=Pre-release 1|[[File:Potted Azalea JE1 BE1.png|32px]] [[File:Potted Flowering Azalea JE1 BE1.png|32px]][[Azalea]] and flowering azalea can now be placed in flower pots.
|[[File:Potted Flowering Azalea (plant texture) JE1.png|32px]] Potted flowering azalea has own unused plant texture but uses normal variant for consistency with flowering azalea: [[File:Potted Flowering Azalea (bottom) JE1 BE1.png|32px]] [[File:Flowering Azalea (bottom) JE2 BE2.png|32px]]}}
{{History||1.19|snap=22w11a|[[File:Potted Mangrove Propagule JE1.png|32px]] [[Mangrove propagule]]s can now be placed in flower pots.}}
{{History|||snap=22w18a|[[File:Potted Mangrove Propagule JE2.png|32px]] The western element of the flower pot in potted mangrove propagules has been deleted.<ref name="mc-251355">{{bug|MC-251355}}</ref>}}
{{History|||snap=Pre-release 1|[[File:Potted Mangrove Propagule JE1.png|32px]] The aforementioned western element has been restored.<ref name="mc-251355"/>}}
{{History||1.20<br>(Experimental)|link=1.19.4|snap=23w07a|[[File:Potted Torchflower JE1.png|32px]] [[File:Potted Cherry Sapling JE1.png|32px]] [[Torchflower]]s and [[cherry sapling]]s can now be placed in flower pots.}}
{{History|||snap=1.19.4-pre2|Changed the texture of potted cherry saplings.}}
{{History||1.20|snap=23w12a|Potted torchflower and cherry sapling are now available without using the "Update 1.20" experimental datapack.|Flower pot can now be found in [[suspicious gravel]] and [[suspicious sand]] in [[trail ruins]].}}
{{History|||snap=23w13a|[[File:Potted Flowering Azalea JE2.png|32px]] Flowering azalea now uses own plant texture, changing appearance from [[File:Potted Flowering Azalea (bottom) JE1 BE1.png|32px]] to [[File:Potted Flowering Azalea (bottom) JE2.png|32px]] and breaking consistency with flowering azalea.<ref>{{bug|MC-230916}}</ref>}}
{{History|||snap=23w16a|Flower pot no longer generates in [[suspicious sand]] in [[trail ruins]].|Due to the split of the archaeological loot tables for the suspicious gravel within the [[trail ruins]]; flower pot now is in the common loot.}}
{{History|pocket alpha}}
{{History||v0.12.1|snap=build 1|[[File:Flower Pot JE1.png|32px]] [[File:Potted Dandelion JE1.png|32px]] [[File:Potted Red Mushroom JE1.png|32px]] [[File:Potted Brown Mushroom JE1.png|32px]] [[File:Potted Oak Sapling JE1.png|32px]] [[File:Potted Birch Sapling JE1.png|32px]] [[File:Potted Spruce Sapling JE1.png|32px]] [[File:Potted Jungle Sapling JE1.png|32px]] [[File:Potted Cactus JE1.png|32px]] [[File:Potted Fern JE1.png|32px]] [[File:Potted Allium JE1.png|32px]] [[File:Potted Azure Bluet JE1.png|32px]] [[File:Potted Oxeye Daisy JE1.png|32px]] [[File:Potted Blue Orchid JE1.png|32px]] [[File:Potted Poppy JE1.png|32px]] [[File:Potted Red Tulip JE1.png|32px]] [[File:Potted Orange Tulip JE1.png|32px]] [[File:Potted White Tulip JE1.png|32px]] [[File:Potted Pink Tulip JE1.png|32px]] [[File:Potted Acacia Sapling JE1.png|32px]] [[File:Potted Dark Oak Sapling JE1.png|32px]]{{verify|Are these models the ones used in this version?}}<br>[[File:Flower Pot (item) JE1 BE1.png|32px]] Added flower pots.}}
{{History||v0.14.0|snap=build 1|Flower pots now generate in [[witch hut]]s.}}
{{History|pocket}}
{{History||1.0.0|snap=alpha 0.17.0.1|Flower pots now generate in [[igloo]] basements.}}
{{History||1.1.0|snap=alpha 1.1.0.0|Flower pots now generate naturally in [[woodland mansion]]s.}}
{{History|bedrock}}
{{History||1.8.0|snap=beta 1.8.0.8|[[File:Potted Bamboo JE1 BE1.png|32px]]{{verify|Is this how they really look in BE?}} [[Bamboo]] can now be placed in flower pots.}}
{{History||1.9.0|snap=beta 1.9.0.0|[[File:Potted Cornflower BE.jpg|32px]] [[File:Potted Lily of the Valley BE.jpg|32px]] Cornflower and lily of the valley can now be placed in flower pots.}}
{{History||1.10.0|snap=beta 1.10.0.3|[[File:Flower Pot BE.jpg|32px]] [[File:Potted Dandelion BE.jpg|32px]] [[File:Potted Poppy BE.jpg|32px]] [[File:Potted Allium BE.jpg|32px]] [[File:Potted Azure Bluet BE.jpg|32px]] [[File:Potted Oxeye Daisy BE.jpg|32px]] [[File:Potted Blue Orchid BE.jpg|32px]] [[File:Potted Red Tulip BE.jpg|32px]] [[File:Potted Orange Tulip BE.jpg|32px]] [[File:Potted White Tulip BE.jpg|32px]] [[File:Potted Pink Tulip BE.jpg|32px]] [[File:Potted Red Mushroom BE.jpg|32px]] [[File:Potted Brown Mushroom BE.jpg|32px]] [[File:Potted Oak Sapling BE.jpg|32px]] [[File:Potted Birch Sapling BE.jpg|32px]] [[File:Potted Spruce Sapling BE.jpg|32px]] [[File:Potted Jungle Sapling BE.jpg|32px]] [[File:Potted Acacia Sapling BE.jpg|32px]] [[File:Potted Dark Oak Sapling BE.jpg|32px]] [[File:Potted Cactus BE.png|32px]] [[File:Potted Fern BE.jpg|32px]]<br>[[File:Flower Pot (item) JE2 BE2.png|32px]] The textures of flower pots have been changed.
|Flower pots now generate in the new [[village]]s.}}
{{History||1.11.0|snap=beta 1.11.0.1|Flower pots can now be found in [[village]] mason [[chest]]s.}}
{{History||1.13.0|snap=beta 1.13.0.9|[[File:Potted Wither Rose JE1 BE1.png|32px]] [[Wither rose]]s can now be placed in flower pots.}}
{{History||1.16.0|snap=beta 1.15.0.51|Potted plants can now be removed from flower pots by pressing {{control|use}}.}}
{{History|||snap=beta 1.16.0.51|[[File:Potted Crimson Fungus JE1 BE1.png|32px]] [[File:Potted Warped Fungus JE1 BE1.png|32px]] [[File:Potted Crimson Roots JE1 BE1.png|32px]] [[File:Potted Warped Roots JE1 BE1.png|32px]] Crimson and warped [[fungi]] and crimson and warped [[roots]] can now be placed in flower pots.}}
{{History||1.17.10|snap=beta 1.17.10.21|[[File:Potted Azalea JE1 BE1.png|32px]] [[File:Potted Flowering Azalea JE1 BE1.png|32px]] [[Azalea]] and flowering azalea can now be placed in flower pots.}}
{{History|console}}
{{History||xbox=TU14|xbone=CU1|ps=1.04|wiiu=Patch 1|switch=1.0.1|[[File:Flower Pot JE1.png|32px]] [[File:Potted Dandelion JE1.png|32px]] [[File:Potted Red Mushroom JE1.png|32px]] [[File:Potted Brown Mushroom JE1.png|32px]] [[File:Potted Oak Sapling JE1.png|32px]] [[File:Potted Birch Sapling JE1.png|32px]] [[File:Potted Spruce Sapling JE1.png|32px]] [[File:Potted Jungle Sapling JE1.png|32px]] [[File:Potted Cactus JE1.png|32px]] [[File:Potted Fern JE1.png|32px]] [[File:Potted Allium JE1.png|32px]] [[File:Potted Azure Bluet JE1.png|32px]] [[File:Potted Oxeye Daisy JE1.png|32px]] [[File:Potted Blue Orchid JE1.png|32px]] [[File:Potted Poppy JE1.png|32px]] [[File:Potted Red Tulip JE1.png|32px]] [[File:Potted Orange Tulip JE1.png|32px]] [[File:Potted White Tulip JE1.png|32px]] [[File:Potted Pink Tulip JE1.png|32px]] [[File:Potted Acacia Sapling JE1.png|32px]] [[File:Potted Dark Oak Sapling JE1.png|32px]] [[File:Potted Dead Bush JE3.png|32px]]{{verify|Are these models the ones used in this version?}}<br>[[File:Flower Pot (item) JE1 BE1.png|32px]] Added flower pots.}}
{{History||xbox=none|xbone=none|ps=1.90|wiiu=none|switch=none|[[File:Flower Pot BE.png|32px]] [[File:Potted Dandelion BE.png|32px]] [[File:Potted Poppy BE.png|32px]] [[File:Potted Allium BE.png|32px]] [[File:Potted Azure Bluet BE.png|32px]] [[File:Potted Oxeye Daisy BE.png|32px]] [[File:Potted Blue Orchid BE.png|32px]] [[File:Potted Red Tulip BE.png|32px]] [[File:Potted Orange Tulip BE.png|32px]] [[File:Potted White Tulip BE.png|32px]] [[File:Potted Pink Tulip BE.png|32px]] [[File:Potted Red Mushroom BE.png|32px]] [[File:Potted Brown Mushroom BE.png|32px]] [[File:Potted Oak Sapling BE.png|32px]] [[File:Potted Birch Sapling BE.png|32px]] [[File:Potted Spruce Sapling BE.png|32px]] [[File:Potted Jungle Sapling BE.png|32px]] [[File:Potted Acacia Sapling BE.png|32px]] [[File:Potted Dark Oak Sapling BE.png|32px]] [[File:Potted Cactus BE.png|32px]] [[File:Potted Fern BE.png|32px]]<br>[[File:Flower Pot (item) JE2 BE2.png|32px]] The textures of flower pots have been changed.}}
{{History|new 3ds}}
{{History||0.1.0|[[File:Flower Pot JE1.png|32px]] [[File:Potted Dandelion JE1.png|32px]] [[File:Potted Red Mushroom JE1.png|32px]] [[File:Potted Brown Mushroom JE1.png|32px]] [[File:Potted Oak Sapling JE1.png|32px]] [[File:Potted Birch Sapling JE1.png|32px]] [[File:Potted Spruce Sapling JE1.png|32px]] [[File:Potted Jungle Sapling JE1.png|32px]] [[File:Potted Cactus JE1.png|32px]] [[File:Potted Fern JE1.png|32px]] [[File:Potted Allium JE1.png|32px]] [[File:Potted Azure Bluet JE1.png|32px]] [[File:Potted Oxeye Daisy JE1.png|32px]] [[File:Potted Blue Orchid JE1.png|32px]] [[File:Potted Poppy JE1.png|32px]] [[File:Potted Red Tulip JE1.png|32px]] [[File:Potted Orange Tulip JE1.png|32px]] [[File:Potted White Tulip JE1.png|32px]] [[File:Potted Pink Tulip JE1.png|32px]] [[File:Potted Acacia Sapling JE1.png|32px]] [[File:Potted Dark Oak Sapling JE1.png|32px]]{{verify|Are these models the ones used in this version?}}<br>[[File:Flower Pot (item) JE1 BE1.png|32px]] Added flower pots.}}
{{History|foot}}
<gallery>
Suggestion for itemframes.png|Original Reddit image suggesting item frames and flower pots.
FlowerPot.png|The first image of flower pots, released by [[Dinnerbone]].
Pots 1-100.png|An [[Java Edition 14w06a|14w06a]] example of some of the blocks that can be placed inside of flower pots, and their rendering.
Pots 1-100b.png|The same arrangement as prior in [[Java Edition 14w06b|14w06b]].
</gallery>
=== Flower pot "item" ===
{{:Technical blocks/Flower Pot}}
== Gallery ==
=== Renders ===
; Flowers
<gallery>
Potted Dandelion.png |
Potted Poppy.png |
Potted Blue Orchid.png |
Potted Allium.png |
Potted Azure Bluet.png |
Potted Red Tulip.png |
Potted Orange Tulip.png |
Potted White Tulip.png |
Potted Pink Tulip.png |
Potted Oxeye Daisy.png |
Potted Cornflower.png |
Potted Lily of the Valley.png |
Potted Wither Rose.png |
Potted Torchflower.png
</gallery>
; Saplings
<gallery>
Potted Oak Sapling.png |
Potted Spruce Sapling.png |
Potted Birch Sapling.png |
Potted Jungle Sapling.png |
Potted Acacia Sapling.png |
Potted Dark Oak Sapling.png |
Potted Azalea.png |
Potted Flowering Azalea.png |
Potted Mangrove Propagule.png |
Potted Cherry Sapling.png
</gallery>
; Mushrooms
<gallery>
Potted Red Mushroom.png |
Potted Brown Mushroom.png |
Potted Crimson Fungus.png |
Potted Warped Fungus.png |
</gallery>
; Roots and bushes
<gallery>
Potted Crimson Roots.png |
Potted Warped Roots.png |
Potted Fern.png |
Potted Dead Bush.png |
Potted Cactus.png |
Potted Cactus BE.png |
Potted Bamboo.png
</gallery>
=== Other ===
<gallery>
FiveFlowerPots.png | Five flower pots in a player-created village.
</gallery>
== Issues ==
{{issue list}}
== Trivia ==
* The flower pot is based on a suggestion from Reddit, like [[ender chest]]s and [[item frame]]s.<ref>{{tweet|dinnerbone|235747041286975488|My next task is going to be flower pots.|August 15, 2012}}</ref>
* Flower pots break [[falling block]]s.
* If a plant that has been [[Name Tag|named]] is put in a flower pot, the plant loses its name.
* The inside of the flower pot in ''Java Edition'' uses the center 4x4 pixels of the dirt texture while Bedrock Edition uses the center 6x6.
==References==
{{Reflist}}
{{Blocks|Utility}}
{{items}}
[[Category:Manufactured blocks]]
[[Category:Storage]]
[[Category:Generated structure blocks]]
[[Category:Non-solid blocks]]
[[Category:Utility blocks]]
[[cs:Květináč]]
[[de:Blumentopf]]
[[es:Maceta]]
[[fr:Pot de fleurs]]
[[hu:Virágcserép]]
[[it:Vaso da fiori]]
[[ja:植木鉢]]
[[ko:화분]]
[[nl:Bloempot]]
[[pl:Doniczka]]
[[pt:Vaso]]
[[ru:Цветочный горшок]]
[[zh:花盆]]
[[uk:Квітковий горщик]]</li></ul> | 17w47a | Vines can now be placed on the bottom of blocks, as well as not replacing existing vines. | |||
| Prior to The Flattening, this block's numeral ID was 106. | |||||
1.14{{Extension DPL}}<ul><li>[[Dye|Dye]]<br/>{{Item
| title = Dyes
| image = White Dye.png
| extratext = View [[#Gallery|all renders]]
| renewable = Yes
| stackable = Yes (64)
}}
'''Dyes''' are a set of sixteen items used to change the color of [[wool]], [[carpet]]s, [[terracotta]], [[concrete powder]], [[glass]], [[shulker box]]es, [[bed]]s, [[candle]]s, the patterns on [[banner]]s, [[firework star]]s, certain mobs, and text on [[sign]]s and [[hanging sign]]s. {{IN|bedrock}} they can also be used to dye water in a [[cauldron]] (which is thereafter used to dye leather [[armor]]); {{in|java}} leather armor can be dyed directly. {{IN|education}} dyes can also be used to dye [[balloon]]s and [[glow stick]]s.
{{IN|bedrock|education}}, [[bone meal]], [[ink sac]]s, [[lapis lazuli]], and [[cocoa bean]]s can generally substitute for [[white dye]], [[black dye]], [[blue dye]], and [[brown dye]], respectively, in crafting recipes and for use in dyeing items or mobs. However, they have other important uses that aren't related to color, and are therefore not considered true dyes. They are mentioned in this article only in regard to their use as dyeing agents; see their individual articles for complete information about them.
[[File:Dye Recipes.png|400px|thumb|A guide for creating all the dyes]]
== Obtaining ==
<!--[[File:Dye Chart.png|350px|thumb|A guide to crafting all the dyes.{{until|java 1.14}}]]-->
Dyes can be produced by crafting them from plants (mainly flowers), by crafting dyes of different colors together, by smelting plants, or by trading with a [[wandering trader]].
{{loadPage|Crafting/Dye|Crafting|h3}}
=== Smelting ===
{{smelting|head=1|Sea Pickle|Lime Dye|0,2}}
{{smelting|foot=1|Cactus|Green Dye|1||b=Lapis Lazuli|c=Any fuel|d=1}}
=== Trading ===
[[Wandering trader]]s can sell 3 dyes for an [[emerald]]. {{IN|bedrock}}, they can also sell 3 lapis lazuli, bone meal, cocoa beans, or ink sacs for one emerald.
Apprentice-level cleric [[villager]]s sell one lapis lazuli per emerald.
=== Chest loot ===
{{#invoke:LootChest|base3|blue-dye,green-dye,orange-dye,light-blue-dye,yellow-dye,white-dye}}
=== Other ===
Ink sacs can also be created using 1 iron, 1 sulfur, and 4 oxygen in the [[compound creator]]. {{only|bedrock|education}}
== Usage ==
Similar to their use in crafting, [[bone meal]], [[ink sac]]s, [[lapis lazuli]], and [[cocoa beans]] can be substituted for the corresponding dye in any of the following usages unless otherwise specified.{{only|bedrock}} <!--- sections are ordered by craftable dyeable blocks, dyeable items, version exclusive sections, and non-crafting miscellaneous uses--->
=== Dyeing wool and mobs ===
Players can dye wool by placing [[wool]] and any dye in a crafting grid.
{{Crafting
|nocat=1
|Any Wool
|Matching Dye
|Output=Any Wool
}}
Dyes can be {{control|use|text=used}} on sheep to change the color of the wool. Shearing a colored sheep drops the corresponding color of the wool, and the sheep retains the color when the wool regenerates. [[Breeding]] colored sheep produces a lamb colored as one of the parent sheep, or a color resulting from the combination of both parents' color. The color combining follows the same rules that dyes use – red and yellow sheep produce an orange lamb, but a blue and yellow sheep cannot create a green lamb. The unlimited reproduction of colored sheep makes dyeing and shearing sheep infinitely more efficient than just dyeing wool directly.
Dye can also be used on a tamed [[wolf]] or [[cat]] to change the color of its collar from the default red to the color of the dye.
=== Dyeing carpets ===
Carpets can be dyed.
{{Crafting
|Any Carpet
|Matching Dye
|Output= Matching Carpet
|type= Building block
}}
=== Dyeing terracotta ===
[[Terracotta]] can be dyed by placing 8 blocks around a dye on a crafting table.
{{Crafting
|nocat=1
|A1=Terracotta |B1=Terracotta |C1=Terracotta
|A2=Terracotta |B2=Matching Dye |C2=Terracotta
|A3=Terracotta |B3=Terracotta |C3=Terracotta
|Output=Matching Dyed Terracotta,8
}}
=== Creating concrete powder ===
Dyes can also be used to craft [[concrete powder]], which can then be set into their respective [[concrete]] blocks (they cannot be dyed directly).
{{Crafting
|nocat=1
|Sand |Gravel |Sand
|Gravel |Matching Dye |Gravel
|Sand |Gravel |Sand
|Output=Matching Concrete Powder,8
}}
=== Staining glass ===
[[Stained glass]] can be stained by placing 8 blocks of glass around a dye on a [[crafting table]]. Just like regular glass, stained glass can be crafted into stained glass panes. The recipe for this is the same as with regular glass.
{{Crafting
|nocat=1
|A1=Glass |B1=Glass |C1=Glass
|A2=Glass |B2=Matching Dye |C2=Glass
|A3=Glass |B3=Glass |C3=Glass
|Output=Matching Stained Glass,8
|head=1
}}
{{Crafting
|nocat=1
|A1= Glass Pane
|B1= Glass Pane
|C1= Glass Pane
|A2= Glass Pane
|B2= Matching Dye
|C2= Glass Pane
|A3= Glass Pane
|B3= Glass Pane
|C3= Glass Pane
|Output= Matching Stained Glass Pane,8
|type= Decoration block
|foot=1
}}
=== Dyeing shulker boxes ===
[[Shulker box]]es are generated in a light shade of purple (like the [[purpur block]]), but can be dyed any color. They can also be re-dyed as often as desired.
{{Crafting
|ignoreusage=1
|showname=1
|Any Shulker Box
|Matching Dye
|Output=Matching Shulker Box
}}
=== Dyeing beds ===
Players can dye beds by placing a [[bed]] and any color dye in a crafting grid.
{{Crafting
|nocat=1
|Any Bed
|Matching Dye
|Output=Matching Bed
}}
=== Dyeing candles ===
Players can dye [[candles]] by placing an undyed candle and any color dye in a crafting grid.
{{Crafting
|ignoreusage=1
|Candle
|Matching Dye
|Output=Matching Dyed Candle
}}
=== Banner patterns ===
{{main|Banner#Patterns}}
Dyes are used in most banner patterns to determine the pattern and color displayed.
=== Dyeing armor ===
[[File:DyeGraph2.png|200px|thumb|A graph showing all combinations of two dyes on a [[tunic]].]]
Leather [[armor]] can be dyed by:
* Crafting dyes with a piece of leather armor or leather [[horse armor]].{{Only|java}}
* Dousing the leather armor or leather [[horse armor]] in a [[cauldron]] to which dyes have been added.{{Only|bedrock}}
There are 5,713,438<ref>https://anrar4.github.io/DyeLeatherArmor/</ref> (34.1% of sRGB) colors leather armor can be, as it is possible to put more than one dye on the crafting bench alongside the leather armor. Armor can be dyed multiple times with previous colors affecting the final outcome. Colored armor can be reverted to their original color using a [[cauldron]] with undyed water.
The game has a specific formula for calculating the color of dyed armor: each color, in the RGB color model, has a red value, green value, and blue value. For each dye in the crafting grid, and the armor itself (if it is already dyed), the red, green, and blue values are added to running totals. In addition, a running total of the highest value (be it red, green, or blue) is also kept. After this, each total is divided by the number of colors used. This effectively produces the average red, green, blue, and maximum values. The maximum value of the average RGB values is also calculated. Finally, each average RGB value is multiplied by the average maximum value and divided by the maximum of the average RGB values. The modified average RGB values are then used as the final color. This procedure can be summed up with the following equations:
for each color (all "total" variables start at 0 before counting):
totalRed = totalRed + redValue
totalGreen = totalGreen + greenValue
totalBlue = totalBlue + blueValue
totalMaximum = totalMaximum + max(redValue, greenValue, blueValue)
numberOfColors = numberOfColors + 1
averageRed = totalRed / numberOfColors
averageGreen = totalGreen / numberOfColors
averageBlue = totalBlue / numberOfColors
averageMaximum = totalMaximum / numberOfColors
maximumOfAverage = max(averageRed, averageGreen, averageBlue)
gainFactor = averageMaximum / maximumOfAverage
resultRed = averageRed * gainFactor
resultGreen = averageGreen * gainFactor
resultBlue = averageBlue * gainFactor
Due to the way this formula works, the resulting color can never be darker than the average of the input colors and is often lighter and more saturated. Of course, the resulting color can never be lighter or more saturated than the lightest or most saturated input color. In addition, this formula never creates an RGB value higher than 255 (which would be invalid in the 8-bit RGB color model).
If leather armor is renamed on an [[anvil]], it retains its name when dyed or undyed.
;Mixing Samples
: {{ItemSprite|Yellow Dye}} + {{ItemSprite|Yellow Dye}} = {{Tint|leather-chestplate| #{{CalcDye| yellow=2 }} | code=1}}
: {{ItemSprite|Red Dye}} + {{ItemSprite|Blue Dye}} + {{ItemSprite|White Dye}} = {{Tint|leather-chestplate| #{{CalcDye| red=1 | blue=1 | white=1}} | code=1}}
: {{ItemSprite|Green Dye}} + {{ItemSprite|Red Dye}} + {{ItemSprite|Pink Dye}} = {{Tint|leather-chestplate| #{{CalcDye| green=1 | red=1 | pink=1}} | code=1}}
=== Dyeing firework stars ===
A [[firework star]] can have a single color or a combination of up to eight colors when crafted with dyes. Adding one or more dyes to a crafted firework star adds a "fade to color" effect to it, overwriting any existing fade colors.
{{Crafting
|head=1
|ignoreusage=1
|ingredients=[[Gunpowder]] +<br>Any Dye (1–8) +<br>Extra ingredient (optional)
|Gunpowder
|Matching Dye
|Diamond;Glowstone Dust;Head;Gold Nugget;Feather;Fire Charge;
|Output=Matching Firework Star
}}
{{Crafting
|ignoreusage=1
|Matching Firework Star
|Any Dye
|Output=Matching Firework Star
|foot=1
}}
=== Creating balloons ===
Dye can be used to craft balloons.{{only|education}}
{{Crafting
|nocat=1
|A1= Latex
|B1= Matching Dye
|C1= Latex
|A2= Latex
|B2= Helium
|C2= Latex
|A3= Latex
|B3= Lead
|C3= Latex
|Output= Matching Balloon
}}
=== Creating glow sticks ===
Dye can also be used to craft glow sticks.{{only|education}}
{{Crafting
|nocat=1
|A1= Polyethylene
|B1= Hydrogen Peroxide
|C1= Polyethylene
|A2= Polyethylene
|B2= Matching Dye
|C2= Polyethylene
|A3= Polyethylene
|B3= Luminol
|C3= Polyethylene
|Output= Matching Glow Stick
}}
=== Dyeing water inside cauldrons ===
Water can be dyed in a cauldron by holding any dye in the hand and pressing {{Ctrl|use}} on a cauldron filled with water.{{only|bedrock}}
=== Signs ===
Dye can be {{control|used}} on a [[sign]] or a [[hanging sign]] to change the text color. {{IN|bedrock}}, [[ink sac]]s cannot be used for this purpose; black dye must be used to change the text to black.
=== Trading ===
Apprentice, journeyman and expert-level shepherd [[villager]]s buy any of the 12 dyes for an [[emerald]].
== Color values ==
The "color codes" are used to determine the color imparted on sheep, wolf and cat collars, firework stars, [[beacon]] beams, and dyed leather armor. The hex value is shown in the extended tooltips of dyed leather armor; however, to set the color using an NBT data tag in a [[command]], the decimal value must be used instead. The color values for firework stars are slightly different from the ones listed below, and use [[Item colors#Firework stars|these values]] instead.
{| class="wikitable" style="margin:2px; border: 1px solid silver; text-align: left;" data-description="Data values"
! rowspan=2 | Description
! colspan=2 style="text-align:center" | Color Code
|-
! Dec
! <abbr title="Hexadecimal color code">Hex</abbr>
|-
| style="text-align:center" | White || 16383998 || {{color|#F9FFFE}}
|-
| style="text-align:center" | Light gray || 10329495 || {{color|#9D9D97}}
|-
| style="text-align:center" | Gray || 4673362 || {{color|#474F52}}
|-
| style="text-align:center" | Black || 1908001|| {{color|#1D1D21}}
|-
| style="text-align:center" | Brown || 8606770 || {{color|#835432}}
|-
| style="text-align:center" | Red || 11546150 || {{color|#B02E26}}
|-
| style="text-align:center" | Orange || 16351261 || {{color|#F9801D}}
|-
| style="text-align:center" | Yellow || 16701501 || {{color|#FED83D}}
|-
| style="text-align:center" | Lime || 8439583 || {{color|#80C71F}}
|-
| style="text-align:center" | Green || 6192150 || {{color|#5E7C16}}
|-
| style="text-align:center" | Cyan || 1481884|| {{color|#169C9C}}
|-
| style="text-align:center" | Light blue || 3847130 || {{color|#3AB3DA}}
|-
| style="text-align:center" | Blue || 3949738 || {{color|#3C44AA}}
|-
| style="text-align:center" | Purple || 8991416 || {{color|#8932B8}}
|-
| style="text-align:center" | Magenta || 13061821 || {{color|#C74EBD}}
|-
| style="text-align:center" | Pink || 15961002 || {{color|#F38BAA}}
|}
== Sounds ==
{{edition|java}}:
{{Sound table
|rowspan=2
|sound=Dye.ogg
|subtitle=Dye stains
|source=block
|description=When dye is used on a [[sign]]
|id=item.dye.use
|translationkey=subtitles.item.dye.use
|volume=1.0
|pitch=1.0/0.9/0.95/1.1
|distance=16}}
{{Sound table
|subtitle=Dye stains
|source=player
|description=When dye is used on a [[sheep]]
|id=item.dye.use
|translationkey=subtitles.item.dye.use
|volume=1.0
|pitch=1.0/0.9/0.95/1.1
|distance=16
|foot=1}}
{{edition|bedrock}}:
{{Sound table
|type=bedrock
|sound=Dye.ogg
|source=sound
|description=When dye is used on a sign
|id=sign.dye.use
|volume=1.0
|pitch=1.0}}
{{Sound table
|rowspan=3
|sound=Water Splash Old.ogg
|source=block
|description=When dye is added to a cauldron
|id=cauldron.adddye
|volume=0.1
|pitch=1.0}}
{{Sound table
|source=block
|description=When armor is dyed using a cauldron
|id=cauldron.dyearmor
|volume=0.1
|pitch=1.0}}
{{Sound table
|source=block
|description=When dye is removed from armor using a cauldron
|id=cauldron.cleanarmor
|volume=0.1
|pitch=1.0
|foot=1}}
== Achievements ==
{{load achievements|Rainbow Collection;Tie dye outfit}}
== Video ==
{{Video note|These videos are outdated, as it does not include details of the [[Java Edition 1.7.2|1.7.2]] update's changes to the dyeing system/production chain.}}
<div style="text-align:center">
<span style="display:inline-block">{{yt|8YD7oauNZHE}}</span>
<span style="display:inline-block">{{yt|7tETaRt7STM}}</span>
</div>
== History ==
{{History|java beta}}
{{History||January 3, 2011|link=https://web.archive.org/web/0/http://notch.tumblr.com/post/2582321901/2011-here-we-go|Notch mentions adding a "paint" feature if he can figure out how.}}
{{History||January 10, 2011<ref group="n">Supposed time when fragment was filmed. Based on modified date of client.jar/gui/trap.png in [[Beta 1.2]].</ref>|link=https://www.youtube.com/watch?v=cBF2ugTzXqQ&t=181s|[[File:Red Dye (pre-release).png|32px]] Shown rose red in development as part of [[Minecraft: The Story of Mojang]].}}
{{History||1.2|[[File:Ink Sac JE1 BE1.png|32px]] [[File:Red Dye JE1 BE1.png|32px]] [[File:Green Dye JE1 BE1.png|32px]] [[File:Cocoa Beans JE1 BE1.png|32px]] [[File:Lapis Lazuli JE1 BE1.png|32px]] [[File:Purple Dye JE1 BE1.png|32px]] [[File:Cyan Dye JE1 BE1.png|32px]] [[File:Light Gray Dye JE1 BE1.png|32px]] [[File:Gray Dye JE1 BE1.png|32px]] [[File:Pink Dye JE1 BE1.png|32px]] [[File:Lime Dye JE1 BE1.png|32px]] [[File:Yellow Dye JE1 BE1.png|32px]] [[File:Light Blue Dye JE1 BE1.png|32px]] [[File:Magenta Dye JE1 BE1.png|32px]] [[File:Orange Dye JE1 BE1.png|32px]] [[File:Bone Meal JE1 BE1.png|32px]] Added dyes.
|[[File:Black Dye (Recreated).png|32px]] [[File:Red Dye (pre-release).png|32px]] [[File:Green Dye (Recreated).png|32px]] [[File:Brown Dye (Recreated).png|32px]] [[File:Blue Dye (Recreated).png|32px]] [[File:Purple Dye (Recreated).png|32px]] [[File:Cyan Dye (Recreated).png|32px]] [[File:Light Gray Dye (Recreated).png|32px]] [[File:Gray Dye (Recreated).png|32px]] [[File:Pink Dye (Recreated).png|32px]] [[File:Lime Dye (Recreated).png|32px]] [[File:Yellow Dye (Recreated).png|32px]] [[File:Light Blue Dye (Recreated).png|32px]] [[File:Magenta Dye (Recreated).png|32px]] [[File:Orange Dye (Recreated).png|32px]] [[File:White Dye (Recreated).png|32px]] Leftovers of old textures can be seen in [[items.png]] with 100% opacity. The white dye texture was reused for [[Sugar]].
| The colors were as follows:{{verify|Did the color codes remain the same between Beta 1.2 and Java 1.11.2?}}
{{:Color/Java Edition dye colors before 17w06a}}
}}
{{History|java}}
{{History||1.1|snap=11w49a|[[Sheep]] can now regrow their [[wool]] by eating [[grass block|grass]]. Dyed sheep regrow wool in their new color.}}
{{History||1.3.1|snap=12w19a|[[File:Cocoa Beans JE2.png|32px]] The texture of [[cocoa beans]] has been changed.}}
{{History|||snap=1.3|[[File:bone meal changes.gif|32px]] The textures of [[bone meal]], [[cactus green]], cocoa beans and [[rose red]] have been changed. The textures have been lowered one pixel.}}
{{History||1.4.2|snap=12w34a|Added the ability to dye leather [[armor]] and [[wolf]] collars.}}
{{History||1.4.4|snap=1.4.3|Color codes have been changed. The colors of red, brown, blue, purple, cyan, pink, light blue, magenta and orange were adjusted a little vividly.}}
{{History||1.6.1|snap=13w19a|[[Stained clay]] can now be crafted using dyes.}}
{{history||1.7.2|snap=13w36a|With the addition of new [[flower]]s, many secondary and tertiary dyes are now primary dyes.}}
{{History|||snap=13w41a|[[Stained glass]] can now be crafted using dyes.}}
{{History||1.8|snap=14w02a|As cleric [[villager]]s now sell lapis lazuli, all dyes have become fully renewable.}}
{{History|||snap=14w30a|Added [[banner]]s, which can be dyed.}}
{{History||1.9|snap=15w34a|Added [[shield]]s, which can be dyed indirectly by applying a matching [[banner]].}}
{{History||1.11|snap=16w39b|Dyes are now used to change the color of [[shulker box]]es.}}
{{History||1.12|snap=17w06a|Dyes are now used to craft [[concrete powder]].
|Color codes have been changed. All colors are adjusted more vividly. The changes were as follows:
{{:Color/Java Edition dye color changes in 17w06a}}
|Light blue dye, stained glass, and stained glass panes, did not change colors in this update. This means that they still use old colors.<ref name="unchanged dyes">{{Bug|MC-214643}}<br>{{Bug|MC-214641}}</ref>
}}
{{History|||snap=17w15a|Dyes can now apply color to white [[bed]]s.}}
{{History||1.13|snap=17w47a|The different data values for the <code>dye</code> ID have been split up into their own IDs.}}
{{History||1.14|snap=18w43a|[[Bone meal]], [[ink sac]]s, [[cocoa beans]] and [[lapis lazuli]] are no longer considered dyes.
|[[File:White Dye JE1 BE1.png|32px]] [[File:Black Dye JE1 BE1.png|32px]] [[File:Brown Dye JE1 BE1.png|32px]] [[File:Blue Dye JE1 BE1.png|32px]] Added [[white dye|white]], [[black dye|black]], [[brown dye|brown]] and [[blue dye]]s.
|"Rose Red", "Dandelion Yellow" and "Cactus Green" have been renamed to "Red Dye", "Yellow Dye" and "Green Dye", respectively.
|[[Glass pane]]s and [[carpet]]s can now be dyed.
|[[File:Light Gray Dye JE2 BE2.png|32px]] [[File:Gray Dye JE2 BE2.png|32px]] [[File:Red Dye JE2 BE2.png|32px]] [[File:Orange Dye JE2 BE2.png|32px]] [[File:Yellow Dye JE2 BE2.png|32px]] [[File:Lime Dye JE2 BE2.png|32px]] [[File:Green Dye JE2 BE2.png|32px]] [[File:Cyan Dye.png|32px]] [[File:Light Blue Dye JE2 BE2.png|32px]] [[File:Purple Dye JE2 BE2.png|32px]] [[File:Magenta Dye JE2 BE2.png|32px]] [[File:Pink Dye JE2 BE2.png|32px]] The textures of light gray, gray, red, orange, yellow, lime, green, cyan, light blue, purple, magenta, and pink dyes, have been changed. The color texture for light blue dye was not changed to reflect the updated colors from 1.12.<ref name="unchanged dyes"></ref>}}
{{History|||snap=18w44a|The color of the text on [[sign]]s can now be changed with dye.}}
{{History|||snap=18w49a|Yellow dyes can now be found in [[chest]]s in [[village]] mason houses.}}
{{History|||snap=18w50a|Green dyes can now be found in [[chest]]s in [[desert]] [[village]] houses.}}
{{History|||snap=19w05a|Added the [[wandering trader]], which can sell any type of dye.}}
{{History|||snap=19w11a|All 16 types of dyes can now be [[trading|bought]] by shepherd villagers.}}
{{History||1.16.2|snap=Pre-release 2|Reversed the order of dyes to match other colored items in the [[Creative inventory]].<ref name="reverse dye">{{Bug|MC-136553}}</ref>
|Regrouped dyes in the Creative inventory such that white, blue, brown, and black dyes are within and not [[cocoa beans]], [[ink sacs]], [[lapis lazuli]], and [[bone meal]].<ref name="regroup dye">{{Bug|MC-177684}}</ref>}}
{{History||1.17|snap=20w45a|Added [[candle]]s, which can be dyed.}}
{{History|||snap=21w03a|Added a sound for applying dyes.}}
{{History|||snap=21w19a|Candles can no longer be dyed.}}
{{History|||snap=Pre-release 1|Candles can now once again be dyed.}}
{{History||1.20<br>(Experimental)|link=1.19.3|snap=22w42a|The color of the text on [[hanging sign]]s can now be changed with dye.}}
{{History||1.20<br>(Experimental)|link=1.19.4|snap=23w07a|[[Torchflower]]s can now be crafted into orange dye.|[[Pink petals]] can now be crafted into pink dye.}}
{{History||1.20|snap=23w12a|[[Pitcher plant]]s can now be crafted into cyan dye.|Blue, light blue, orange, white, and yellow dye can now be found in [[suspicious gravel]] and [[suspicious sand]] in [[trail ruins]].}}
{{History|||snap=23w14a|Pitcher plants can now craft two [[cyan dye]] instead of one.}}
{{History|||snap=23w16a|Blue, light blue, orange, white, and yellow dye no longer generates in [[suspicious sand]] in [[trail ruins]].|Due to the split of the archaeological loot tables for the suspicious gravel within the [[trail ruins]]; blue, light blue, orange, white, and yellow dye now are in the common loot.}}
{{History|pocket alpha}}
{{History||v0.3.0|[[File:Bone Meal JE1 BE1.png|32px]] [[File:Light Gray Dye JE1 BE1.png|32px]] [[File:Gray Dye JE1 BE1.png|32px]] [[File:Ink Sac JE1 BE1.png|32px]] [[File:Cocoa Beans JE1 BE1.png|32px]] [[File:Red Dye JE1 BE1.png|32px]] [[File:Orange Dye JE1 BE1.png|32px]] [[File:Yellow Dye JE1 BE1.png|32px]] [[File:Lime Dye JE1 BE1.png|32px]] [[File:Green Dye JE1 BE1.png|32px]] [[File:Cyan Dye JE1 BE1.png|32px]] [[File:Light Blue Dye JE1 BE1.png|32px]] [[File:Lapis Lazuli JE1 BE1.png|32px]] [[File:Purple Dye JE1 BE1.png|32px]] [[File:Magenta Dye JE1 BE1.png|32px]] [[File:Pink Dye JE1 BE1.png|32px]] Added dyes. Only [[dandelion yellow]] and [[lapis lazuli]] are currently obtainable and have functionality.}}
{{History||v0.3.2|[[Cactus green]] is now obtainable by smelting [[cacti]].}}
{{History||v0.3.3|[[Bone meal]] is now obtainable via [[crafting]].}}
{{History||v0.4.0|[[Cyan dye]], [[light blue dye]], [[lime dye]], [[magenta dye]], [[orange dye]], [[pink dye]], and [[purple dye]] are now obtainable via crafting.
|[[Rose red]] is now obtainable by smelting red [[mushroom]]s.
|All available dyes, excluding bone meal, can now be used to craft their respective [[wool]] color.}}
{{History||v0.8.0|snap=build 1|[[File:Cocoa Beans JE3 BE2.png|32px]] The texture of cocoa beans has been changed.}}
{{History|||snap=build 3|[[Ink sac]]s, [[cocoa bean]]s, [[gray dye]], and [[light gray dye]] are now available in the [[creative]] [[inventory]].
|Rose red can now be obtained from [[beetroot]]s.}}
{{History||v0.9.0|snap=build 1|Cocoa beans can now be obtained from [[cocoa pod]]s.
|The [[rose]] has been removed and replaced with a new poppy [[flower]] that can be crafted into rose red.}}
{{History|||snap=build 3|All new [[flower]]s can now be [[crafting|crafted]] into dyes. Because of this, many secondary and tertiary dyes are now primary dyes.
|[[Gray dye]] and [[light gray dye]] can now be obtained in [[survival]].}}
{{History|||snap=build 11|[[Terracotta|Stained clay]] can now be crafted using dyes.}}
{{History||v0.11.0|snap=build 1|[[Ink sac]]s can now be obtained from [[squid]].
|Added the ability to dye [[wolf]] collars.}}
{{History||v0.12.1|snap=build 1|Red [[mushroom]]s can no longer be smelted to obtain [[rose red]].}}
{{History||v0.14.0|snap=build 1|[[Cauldron]]s now used for leather dyeing, by applying a dye to a [[water]]-filled cauldron.}}
{{History||v0.16.0|snap=build 1|[[Cocoa bean]]s can no longer be crafted.}}
{{History|pocket}}
{{History||1.0.0|snap=alpha 0.17.0.1|Added a ''Dye'' button for [[sheep]].
|Added [[shulker]]s, which can be dyed.
|Added [[stained glass]]. Stain glass cannot be [[crafting|crafted]], but purple glass generates in [[end city|end cities]].}}
{{History||1.1.0|snap=alpha 1.1.0.0|Dyes can now apply color to a white [[bed]]s.
|Dyes are now used to craft [[concrete powder]].
|The color palette has been changed.}}
{{History|bedrock}}
{{History||1.2.0|snap=beta 1.2.0.2|Dyes can now be used for [[banner]] crafting.
|Dyes can now be used to craft [[firework star]]s.
|[[Stained glass]] is now [[crafting|craftable]], using dyes.}}
{{History||1.4.0|snap=beta 1.2.20.1|[[Lime dye]] can now be obtained from smelting [[sea pickle]]s.
|Dyes can now used to craft [[glow stick]]s and [[balloon]]s.}}
{{History||1.8.0|snap=beta 1.8.0.8|Dyes can now be used to dye [[cat]] collars.}}
{{History|||snap=beta 1.8.0.10|[[File:White Dye JE1 BE1.png|32px]] [[File:Black Dye JE1 BE1.png|32px]] [[File:Brown Dye JE1 BE1.png|32px]] [[File:Blue Dye JE1 BE1.png|32px]] Added [[white dye|white]], [[brown dye|brown]], [[black dye|black]] and [[blue dye]]s, which can be crafted from [[lapis lazuli]], [[bone meal]], [[cocoa beans]] and [[ink sac]]s. This, however, the later four still use as dyes.<ref>{{Bug|MCPE-42473}}</ref>
|"Rose Red", "Dandelion Yellow" and "Cactus Green" have been renamed to "Red Dye", "Yellow Dye" and "Green Dye", respectively.}}
{{History||1.9.0|snap=beta 1.9.0.0|Blue and white dye can now be obtained from [[cornflower]]s and [[lily of the valley]]s.}}
{{History||1.10.0|snap=beta 1.10.0.3|[[Glass pane]]s and [[carpet]]s can now be dyed.
|Only a single dye is now required to apply a banner pattern in a [[loom]].
|Various dyes except black dye, white dye, brown dye and blue dye are now [[trading|sold]] by [[wandering trader]]s.
|[[File:Bone Meal JE2 BE2.png|32px]] [[File:Light Gray Dye JE2 BE2.png|32px]] [[File:Gray Dye JE2 BE2.png|32px]] [[File:Ink Sac JE2 BE2.png|32px]] [[File:Cocoa Beans JE4 BE3.png|32px]] [[File:Red Dye JE3 BE3.png|32px]] [[File:Orange Dye JE2 BE2.png|32px]] [[File:Yellow Dye JE2 BE2.png|32px]] [[File:Lime Dye JE2 BE2.png|32px]] [[File:Green Dye JE2 BE2.png|32px]] [[File:Cyan Dye.png|32px]] [[File:Light Blue Dye JE2 BE2.png|32px]] [[File:Lapis Lazuli JE2 BE2.png|32px]] [[File:Purple Dye JE2 BE2.png|32px]] [[File:Magenta Dye JE2 BE2.png|32px]] [[File:Pink Dye JE2 BE2.png|32px]] The textures of bone meal, light gray, gray, ink sac, cocoa beans, red, orange, yellow, lime, green, cyan, light blue, lapis lazuli, purple, magenta, and pink dyes have been changed.}}
{{History||1.11.0|snap=beta 1.11.0.4|Dye can now be [[trading|sold]] to shepherd [[villager]]s.}}
{{History||1.16.210|snap=beta 1.16.210.59|The color of the text on [[sign]]s can now be changed with dye.}}
{{History|||snap=beta 1.16.210.60|The ability to dye the color of the text on [[sign]]s was temporarily removed.}}
{{History||1.16.220|snap=beta 1.16.220.50|The color of the text on [[sign]]s can now be changed with dye again.}}
{{History||1.17.10|snap=beta 1.17.10.22|Added [[candles]], which can be dyed.}}
{{History|console}}
{{History||xbox=TU1|xbone=CU1|ps=1.0|wiiu=Patch 1|switch=1.0.1|[[File:Bone Meal JE1 BE1.png|32px]] [[File:Light Gray Dye JE1 BE1.png|32px]] [[File:Gray Dye JE1 BE1.png|32px]] [[File:Ink Sac JE1 BE1.png|32px]] [[File:Cocoa Beans JE1 BE1.png|32px]] [[File:Red Dye JE1 BE1.png|32px]] [[File:Orange Dye JE1 BE1.png|32px]] [[File:Yellow Dye JE1 BE1.png|32px]] [[File:Lime Dye JE1 BE1.png|32px]] [[File:Green Dye JE1 BE1.png|32px]] [[File:Cyan Dye JE1 BE1.png|32px]] [[File:Light Blue Dye JE1 BE1.png|32px]] [[File:Lapis Lazuli JE1 BE1.png|32px]] [[File:Purple Dye JE1 BE1.png|32px]] [[File:Magenta Dye JE1 BE1.png|32px]] [[File:Pink Dye JE1 BE1.png|32px]] Added dyes.}}
{{History||xbox=TU9|[[File:Cocoa Beans JE3 BE2.png|32px]] The texture of cocoa beans has been changed.}}
{{History||xbox=none|xbone=none|ps=1.83|wiiu=none|switch=none|[[File:White Dye JE1 BE1.png|32px]] [[File:Black Dye JE1 BE1.png|32px]] [[File:Brown Dye JE1 BE1.png|32px]] [[File:Blue Dye JE1 BE1.png|32px]] Added [[white dye|white]], [[black dye|black]], [[brown dye|brown]], and [[blue dye|blue]] dyes, which can crafted from [[bone meal]], [[ink sac]], [[cocoa beans]], and [[lapis lazuli]].
|"Rose Red", "Dandelion Yellow" and "Cactus Green" have been renamed to "Red Dye", "Yellow Dye" and "Green Dye", respectively.}}
{{History||ps=1.90|[[File:Bone Meal JE2 BE2.png|32px]] [[File:Light Gray Dye JE2 BE2.png|32px]] [[File:Gray Dye JE2 BE2.png|32px]] [[File:Ink Sac JE2 BE2.png|32px]] [[File:Cocoa Beans JE4 BE3.png|32px]] [[File:Red Dye JE2 BE2.png|32px]] [[File:Orange Dye JE2 BE2.png|32px]] [[File:Yellow Dye JE2 BE2.png|32px]] [[File:Lime Dye JE2 BE2.png|32px]] [[File:Green Dye JE2 BE2.png|32px]] [[File:Cyan Dye.png|32px]] [[File:Light Blue Dye JE2 BE2.png|32px]] [[File:Lapis Lazuli JE2 BE2.png|32px]] [[File:Purple Dye JE2 BE2.png|32px]] [[File:Magenta Dye JE2 BE2.png|32px]] [[File:Pink Dye JE2 BE2.png|32px]] The textures of bone meal, light gray, gray, ink sac, cocoa beans, red, orange, yellow, lime, green, cyan, light blue, lapis lazuli, purple, magenta, and pink dyes have been changed.}}
{{History|3ds}}
{{History||0.1.0|[[File:Bone Meal JE1 BE1.png|32px]] [[File:Light Gray Dye JE1 BE1.png|32px]] [[File:Gray Dye JE1 BE1.png|32px]] [[File:Ink Sac JE1 BE1.png|32px]] [[File:Cocoa Beans JE3 BE2.png|32px]] [[File:Red Dye JE1 BE1.png|32px]] [[File:Orange Dye JE1 BE1.png|32px]] [[File:Yellow Dye JE1 BE1.png|32px]] [[File:Lime Dye JE1 BE1.png|32px]] [[File:Green Dye JE1 BE1.png|32px]] [[File:Cyan Dye JE1 BE1.png|32px]] [[File:Light Blue Dye JE1 BE1.png|32px]] [[File:Lapis Lazuli JE1 BE1.png|32px]] [[File:Purple Dye JE1 BE1.png|32px]] [[File:Magenta Dye JE1 BE1.png|32px]] [[File:Pink Dye JE1 BE1.png|32px]] Added dyes from [[Pocket Edition v0.15.4 alpha]].}}
{{History|foot}}
<gallery>
Pre-release dyes.png|Pre-release dye textures hidden within [[Items.png]].
</gallery>
;Notes
{{reflist|group=n}}
== Gallery ==
<gallery>
White Dye.png|White Dye
Light Gray Dye.png|Light Gray Dye
Gray Dye.png|Gray Dye
Black Dye.png|Black Dye
Brown Dye.png|Brown Dye
Red Dye.png|Red Dye
Orange Dye.png|Orange Dye
Yellow Dye.png|Yellow Dye
Lime Dye.png|Lime Dye
Green Dye.png|Green Dye
Cyan Dye.png|Cyan Dye
Light Blue Dye.png|Light Blue Dye
Blue Dye.png|Blue Dye
Purple Dye.png|Purple Dye
Magenta Dye.png|Magenta Dye
Pink Dye.png|Pink Dye
</gallery>
==Issues==
{{issue list}}
== Trivia ==
* Players can obtain each one of every color with 1 cocoa bean, 2 yellow dye, 2 ink sac, 3 green dye, 4 lapis lazuli, 4 red dye, and 6 bone meal (2 bones).
* The dyed sheep breeding behavior mirrors [[wikipedia:Lamarckism|Lamarck's theory]], in which the organisms evolve inheriting the external changes and adaptations of the previous generation, transmitting them to their offspring.
* In ''Bedrock Edition'', tertiary colors, along with their regular crafting recipes, can be crafted with primary colors. E.g.: Magenta can be crafted with one rose red and two bone meals.
* The colors of the dyes match the chat colors in [[color codes]] except for brown (dye only), light aqua, and gold (color codes only).
* The texture for light blue dye still uses the color from prior to the 1.12 World of Color update.<ref name="unchanged dyes"></ref>
== References ==
{{reflist}}
== External Links ==
* Tools for calculating leather dye combination: [https://minecraft.tools/en/armor.php minecraft.tools] (webapp); [https://github.com/pudquick/pyMCdyes/ pyMCDyes] (open-source Python script, outdated); [https://anrar4.github.io/DyeLeatherArmor/ DyeLeatherArmor]: a tool for calculating an exact crafting recipe for any sRGB color
{{Items}}
[[Category:Dyes]]
[[Category:Renewable resources]]
[[cs:Barvivo]]
[[de:Farbstoff]]
[[es:Tinte]]
[[fr:Teinture]]
[[hu:Színezés]]
[[it:Colorante]]
[[ja:染料]]
[[ko:염료]]
[[nl:Kleurstof]]
[[pl:Barwniki]]
[[pt:Corante]]
[[ru:Красители]]
[[th:สีย้อม]]
[[uk:Барвники]]
[[zh:染料]]</li><li>[[Compound|Compound]]<br/>{{About|a feature in the Education Edition|the NBT tag|NBT}}
{{education feature}}
{{exclusive|bedrock|education}}
{{Item
| image = Water (compound).png
| image2 = Garbage.png
| renewable = No
| stackable = Yes (64)
}}
'''Compounds''' are a type of [[item]] from [[Education Edition]] used in chemistry, which are created from combinations of various [[element]]s.
== Obtaining ==
Compounds cannot be obtained in the [[Creative inventory]]. They are only obtained from creating them in the [[compound creator]]. This is done by inserting a certain number of [[element]]s corresponding to the compound's chemical formula.
== List of compounds ==
{| class="wikitable" data-description="Compounds"
!Icon
!Compound Name
!Compound Recipe
!Description
!Uses
|-
|{{slot|Aluminum Oxide|link=none}}
|{{text anchor|Aluminium Oxide}}
|{{slot|Aluminum,2}}{{slot|Oxygen,3}}
|Is only brown when dug up from the Earth and contaminated; actually white when pure. Can be electrolyzed to make aluminum metal. Also the main chemical in rubies and sapphires.
|Used to craft [[hardened glass]].
|-
|{{slot|Ammonia|link=none}}
|{{text anchor|Ammonia}}
|{{slot|Nitrogen}}{{slot|Hydrogen,3}}
|
|Used to create [[super fertilizer]].
|-
|{{slot|Barium Sulfate|link=none}}
|{{text anchor|Barium Sulfate}}
|{{slot|Barium}}{{slot|Sulfur}}{{slot|Oxygen,4}}
|
|
|-
|{{slot|Benzene|link=none}}
|{{text anchor|Benzene}}
|{{slot|Carbon,6}}{{slot|Hydrogen,6}}
|
|
|-
|{{slot|Boron Trioxide|link=none}}
|{{text anchor|Boron Trioxide}}
|{{slot|Boron,2}}{{slot|Oxygen,3}}
|
|Used to craft [[hardened glass]].
|-
|{{slot|Calcium Bromide|link=none}}
|{{text anchor|Calcium Bromide}}
|{{slot|Calcium}}{{slot|Bromine,2}}
|
|
|-
|{{slot|Crude Oil|link=none}}
|{{text anchor|Crude Oil}}
|{{slot|Carbon,9}}{{slot|Hydrogen,20}}
|C<sub>9</sub>H<sub>20</sub> is the chemical formula for nonane.
|
|-
|{{slot|Glue|link=none}}
|{{text anchor|Glue}} (Cyanoacrylate)
|{{slot|Carbon,5}}{{slot|Hydrogen,5}}{{slot|Nitrogen}}{{slot|Oxygen,2}}
|C<sub>5</sub>H<sub>5</sub>NO<sub>2</sub> is the chemical formula for methyl cyanoacrylate, one of the cyanoacrylate glues ("superglue"); its condensed formula is CH<sub>2</sub>=C(CN)COOCH<sub>3</sub>.
|
|-
|{{slot|Hydrogen Peroxide|link=none}}
|{{text anchor|Hydrogen Peroxide}}
|{{slot|Hydrogen,2}}{{slot|Oxygen,2}}
|
|Used to craft [[glow stick]].
|-
|{{slot|Iron Sulfide|link=none}}
|{{text anchor|Iron Sulfide}}
|{{slot|Iron}}{{slot|Sulfur}}
|
|
|-
|{{slot|Latex|link=none}}
|{{text anchor|Latex}}
|{{slot|Carbon,5}}{{slot|Hydrogen,8}}
|C<sub>5</sub>H<sub>8</sub> is the chemical formula for isoprene, which polymers are the main components of natural rubber; its condensed formula is CH<sub>2</sub>=C(CH<sub>3</sub>)−CH=CH<sub>2</sub>.
|Used to craft [[balloon]]s.
|-
|{{slot|Lithium Hydride|link=none}}
|{{text anchor|Lithium Hydride}}
|{{slot|Lithium}}{{slot|Hydrogen}}
|
|
|-
|{{slot|Luminol|link=none}}
|{{text anchor|Luminol}}
| class="nowrap" |{{slot|Carbon,8}}{{slot|Hydrogen,7}}{{slot|Nitrogen,3}}{{slot|Oxygen,2}}
|Luminol is a chemical that glows blue when oxidized. It can detect blood.
|Used to craft [[glow stick]].
|-
|{{slot|Lye|link=none}}
|{{text anchor|Lye}}
|{{slot|Sodium}}{{slot|Oxygen}}{{slot|Hydrogen}}
|
|
|-
|{{slot|Magnesium Nitrate|link=none}}
|{{text anchor|Magnesium Nitrate}}
|{{slot|Magnesium}}{{slot|Nitrogen,2}}{{slot|Oxygen,6}}
|Condensed formula: Mg(NO<sub>3</sub>)<sub>2</sub>
|
|-
|{{slot|Magnesium Oxide|link=none}}
|{{text anchor|Magnesium Oxide}}
|{{slot|Magnesium}}{{slot|Oxygen}}
|
|
|-
|{{slot|Polyethylene|link=none}}
|{{text anchor|Polyethylene}}
|{{slot|Carbon,10}}{{slot|Hydrogen,20}}
|Polyethlene (PE), (CH<sub>2</sub>)<sub>''n''</sub>, is ''the'' most commonly produced plastic.
|Used to craft [[glow stick]].
|-
|{{slot|Potassium Iodide|link=none}}
|{{text anchor|Potassium Iodide}}
|{{slot|Potassium}}{{slot|Iodine}}
|Used for making iodized salt and other things.
|
|-
|{{slot|Soap|link=none}}
|{{text anchor|Soap}}
|{{slot|Carbon,18}}{{slot|Hydrogen,35}}{{slot|Sodium}}{{slot|Oxygen,2}}
|C<sub>18</sub>H<sub>35</sub>NaO<sub>2</sub> is the chemical formula of sodium stearate, the most common soap.
|
|-
|{{slot|Sodium Acetate|link=none}}
|{{text anchor|Sodium Acetate}}
|{{slot|Carbon,2}}{{slot|Hydrogen,3}}{{slot|Sodium}}{{slot|Oxygen,2}}
|Used to make hand warmers because it heats up when it "freezes".
|Used to create [[Ice Bomb]].
|-
|{{slot|Sodium Fluoride|link=none}}
|{{text anchor|Sodium Fluoride}}
|{{slot|Sodium}}{{slot|Fluorine}}
|Commonly used in toothpaste to prevent cavity, among other uses.
|
|-
|{{slot|Sodium Hydride|link=none}}
|{{text anchor|Sodium Hydride}}
|{{slot|Sodium}}{{slot|Hydrogen}}
|
|
|-
|{{slot|Sodium Hypochlorite|link=none}}
|{{text anchor|Sodium Hypochlorite}}
|{{slot|Sodium}}{{slot|Chlorine}}{{slot|Oxygen}}
|Main ingredient of real-life bleach.
|Used to create [[Bleach]].
|-
|{{slot|Sodium Oxide|link=none}}
|{{text anchor|Sodium Oxide}}
|{{slot|Sodium,2}}{{slot|Oxygen}}
|
|
|-
|{{slot|Sulfate|link=none}}
|{{text anchor|Sulfate}}
|{{slot|Sulfur}}{{slot|Oxygen,4}}
|Cannot actually exist on its own, as it should have a <sup>2-</sup> charge.
|
|}
=== Chlorides ===
{| class="wikitable" data-description="Chlorides"
!Icon
!Compound
!Recipe
!Uses
|-
|{{slot|Salt|link=none}}
|{{text anchor|Salt}}
|{{slot|Sodium}}{{slot|Chlorine}}
|Used to create [[heat block]].
|-
|{{slot|Calcium Chloride|link=none}}
|{{text anchor|Calcium Chloride}}
|{{slot|Calcium}}{{slot|Chlorine,2}}
|Used to craft [[sparkler|orange sparkler]].
|-
|{{slot|Cerium Chloride|link=none}}
|{{text anchor|Cerium Chloride}}
|{{slot|Cerium}}{{slot|Chlorine,3}}
|Used to craft [[colored torch|blue torch]] and [[sparkler|blue sparkler]].
|-
|{{slot|Mercuric Chloride|link=none}}
|{{text anchor|Mercuric Chloride}}
|{{slot|Mercury}}{{slot|Chlorine,2}}
|Used to craft [[colored torch|red torch]] and [[sparkler|red sparkler]].
|-
|{{slot|Potassium Chloride|link=none}}
|{{text anchor|Potassium Chloride}}
|{{slot|Potassium}}{{slot|Chlorine}}
|Used to craft [[colored torch|purple torch]] and [[sparkler|purple sparkler]].
|-
|{{slot|Tungsten Chloride|link=none}}
|{{text anchor|Tungsten Chloride}}
|{{slot|Tungsten}}{{slot|Chlorine,6}}
|Used to craft [[colored torch|green torch]] and [[sparkler|green sparkler]].
|}
=== Natural compounds ===
Natural compounds are compounds which can be obtained naturally in ''Minecraft''.
{| class="wikitable" data-description="Chlorides"
!Icon
!Compound
! class="nowrap" |Chemical formula
!Natural source
!Method
!Notes
|-
|{{slot|Charcoal}}
|[[Charcoal]]
|{{slot|Carbon,7}}{{slot|Hydrogen,4}}{{slot|Oxygen}}
|[[Log]] or [[Wood]]
|[[Smelting]]
|The chemical formula C<sub>7</sub>H<sub>4</sub>O is sometimes used to describe the approximate composition of charcoal.
|-
|{{slot|Glow Ink Sac}} {{slot|Ink Sac}}
|[[Glow Ink Sac]], [[Ink Sac]]
|{{slot|Iron}}{{slot|Sulfur}}{{slot|Oxygen,4}}
|[[Glow Squid]], [[Squid]]
|Killing Glow Squid, Squid
|FeSO<sub>4</sub> is the chemical formula of iron(II) sulfate or ferrous sulfate, normally found complexed with water as a salt with the formula FeSO<sub>4</sub>·''x''H<sub>2</sub>O, and has been used in the manufacture of iron gall ink and other inks for centuries. In contrast, squid ink (and other cephalopod inks) is composed mainly of melanin and mucus, with an assortment of other compounds in a variety of concentrations dependent on the species.
|-
|{{slot|Sugar}}
|[[Sugar]]
|{{slot|Carbon,6}}{{slot|Hydrogen,12}}{{slot|Oxygen,6}}
|[[Sugar Cane]]s or [[Honey Bottle]]s
|Harvesting and [[crafting]]
|C<sub>6</sub>H<sub>12</sub>O<sub>6</sub> is the chemical formula of glucose and fructose, as well as a number of other simple sugars (common table sugar is instead sucrose, a complex sugar made of glucose and fructose with the chemical formula C<sub>12</sub>H<sub>22</sub>O<sub>11</sub>).
|-
|{{slot|Water (compound)|link=water}}
|{{text anchor|Water}}
|{{slot|Hydrogen,2}}{{slot|Oxygen}}
|[[Water]]
|Picking up in a [[bucket]] or [[glass bottle]] from a [[Cauldron]] or a water source block
|One of the easiest to obtain.
|}
=== Garbage ===
Garbage is considered a "compound", but the only way to produce it is to activate the [[Lab Table]] when its inputs are an invalid recipe. It has no uses.
== Usage ==
Certain compounds are used as ingredients in [[crafting]] or [[lab table]] experiments. Natural compounds have uses outside of chemistry, detailed in their respective articles.
=== Crafting ingredient ===
{{Crafting usage|description=0|Latex, Polyethylene, Hydrogen Peroxide, Luminol, Boron Trioxide, Aluminum Oxide}}
==== Chloride coloring ====
{{Crafting usage|Chloride,Cerium Chloride|match=end}}
=== Lab table ingredient ===
{| class="wikitable"
!Result
!Materials needed
|-
! rowspan="2" |{{slot|Bleach}}<br>[[Bleach]]
|{{slot|Water (compound)|link=Compound}}{{slot|Water (compound)|link=Compound}}{{slot|Water (compound)|link=Compound}}{{slot|Sodium Hypochlorite|link=Compound}}{{slot|Sodium Hypochlorite|link=Compound}}{{slot|Sodium Hypochlorite|link=Compound}}
|-
|<center>Water ×3, Sodium Hypochlorite ×3</center>
|-
! rowspan="2" |{{slot|Heat Block.gif}}<br>[[Heat Block]]
|{{slot}}{{slot|Iron|link=Element#Iron}}{{slot|Water (compound)|link=Compound}}{{slot|Charcoal}}{{slot|Salt|link=Compound}}{{slot}}
|-
|<center>[[Iron (element)|Iron]], Water, [[Charcoal]], Salt</center>
|-
! rowspan="2" |{{slot|Ice Bomb}}<br>[[Ice Bomb]]
|{{slot}}{{slot|Sodium Acetate|link=Compound}}{{slot|Sodium Acetate|link=Compound}}{{slot|Sodium Acetate|link=Compound}}{{slot|Sodium Acetate|link=Compound}}{{slot}}
|-
|<center>Sodium Acetate ×4</center>
|-
! rowspan="2" |{{slot|Super Fertilizer}}<br>[[Super Fertilizer]]
|{{slot}}{{slot}}{{slot|Ammonia|link=Compound}}{{slot|Phosphorus|link=Element#Phosphorus}}{{slot}}{{slot}}
|-
|<center>Ammonia, [[Phosphorus]]</center>
|}
== Sounds ==
Sounds are produced when a [[lab table]] creates garbage.
{{Sound table
|type=bedrock
|sound=Fizz.ogg
|source=block
|description=When a lab table creates garbage{{verify}}
|id=random.fizz
|volume=1.0
|pitch=0.5/0.7}}
{{Sound table
|sound=Ghast fireball4.ogg
|source=hostile
|description=When a lab table creates garbage{{verify}}
|id=mob.blaze.shoot
|volume=1.0
|pitch=0.8/1.0}}
{{Sound table
|sound=Explosion1.ogg
|sound2=Explosion2.ogg
|sound3=Explosion3.ogg
|sound4=Explosion4.ogg
|source=block
|description=When a lab table creates garbage
|id=random.explode
|volume=1.0
|pitch=0.4/0.6}}
{{Sound table
|sound=Fire.ogg
|source=sound
|description=When a lab table creates garbage
|id=lt.reaction.fire
|volume=2.0
|pitch=0.4/0.6}}
{{Sound table
|sound=Explosion1.ogg
|sound2=Explosion2.ogg
|sound3=Explosion3.ogg
|sound4=Explosion4.ogg
|source=weather
|description=When a lab table creates garbage
|id=ambient.weather.lightning.impact
|volume=1.0
|pitch=0.6/0.8
|foot=1}}
== Data values ==
=== ID ===
{{ID table
|edition=bedrock
|shownumericids=y
|showforms=y
|notshowbeitemforms=y
|generatetranslationkeys=y
|displayname=Compound
|spritetype=item
|nameid=compound
|id=594
|form=item
|translationkey=item.compound.salt.name,item.compound.sodiumoxide.name,item.compound.sodiumhydroxide.name,item.compound.magnesiumnitrate.name,item.compound.ironsulfide.name,item.compound.lithiumhydride.name,item.compound.sodiumhydride.name,item.compound.calciumbromide.name,item.compound.magnesiumoxide.name,item.compound.sodiumacetate.name,item.compound.luminol.name,item.compound.charcoal.name,item.compound.sugar.name,item.compound.aluminumoxide.name,item.compound.borontrioxide.name,item.compound.soap.name,item.compound.polyethylene.name,item.compound.garbage.name,item.compound.magnesiumsalts.name,item.compound.sulfate.name,item.compound.bariumsulfate.name,item.compound.potassiumchloride.name,item.compound.mercuricchloride.name,item.compound.ceriumchloride.name,item.compound.tungstenchloride.name,item.compound.calciumchloride.name,item.compound.water.name,item.compound.glue.name,item.compound.hypochlorite.name,item.compound.crudeoil.name,item.compound.latex.name,item.compound.potassiumiodide.name,item.compound.sodiumfluoride.name,item.compound.benzene.name,item.compound.ink.name,item.compound.hydrogenperoxide.name,item.compound.ammonia.name,item.compound.sodiumhypochlorite.name
|foot=1}}
===Item data===
{{see also|Data values}}Compounds uses the following data values:{{/DV}}
== History ==
{{History|bedrock}}
{{History||1.4.0|snap=beta 1.2.20.1|[[File:Aluminum Oxide BE1.png|32px]] [[File:Ammonia BE1.png|32px]] [[File:Barium Sulfate BE1.png|32px]] [[File:Benzene BE1.png|32px]] [[File:Boron Trioxide BE1.png|32px]] [[File:Calcium Bromide BE1.png|32px]] [[File:Crude Oil BE1.png|32px]] [[File:Glue BE1.png|32px]] [[File:Hydrogen Peroxide BE1.png|32px]] [[File:Iron Sulfide BE1.png|32px]] [[File:Latex BE1.png|32px]] [[File:Lithium Hydride BE1.png|32px]] [[File:Luminol BE1.png|32px]] [[File:Lye BE1.png|32px]] [[File:Magnesium Nitrate BE1.png|32px]] [[File:Magnesium Oxide BE1.png|32px]] [[File:Polyethylene BE1.png|32px]] [[File:Potassium Iodide BE1.png|32px]] [[File:Salt BE1.png|32px]] [[File:Soap BE1.png|32px]] [[File:Sodium Acetate BE1.png|32px]] [[File:Sodium Fluoride.png|32px]] [[File:Sodium Hydride BE1.png|32px]] [[File:Sodium Hypochlorite BE1.png|32px]] [[File:Sodium Oxide BE1.png|32px]] [[File:Sulfate BE1.png|32px]] [[File:Calcium Chloride BE1.png|32px]] [[File:Cerium Chloride BE1.png|32px]] [[File:Mercuric Chloride BE1.png|32px]] [[File:Potassium Chloride BE1.png|32px]] [[File:Tungsten Chloride BE1.png|32px]] [[File:Charcoal JE3 BE3.png|32px]] [[File:Ink Sac JE1 BE1.png|32px]] [[File:Sugar JE1 BE1.png|32px]] [[File:Water (compound) BE1.png|32px]] [[File:Garbage BE1.png|32px]] Added compounds.}}
{{History||1.10.0|snap=beta 1.10.0.3|[[File:Charcoal JE4 BE4.png|32px]][[File:Ink Sac JE2 BE2.png|32px]][[File:Sugar JE2 BE2.png|32px]] The textures of Charcoal, Ink Sacs and Sugar have been changed.}}
{{History||1.16|All compounds have been made unobtainable. It is unknown whether it is a glitch or intended. {{bug|MCPE-113776}}}}
{{History| |1.17.0|All compounds are obtainable once again.}}{{History|education}}
{{History||1.0.27|[[File:Aluminum Oxide BE1.png|32px]] [[File:Ammonia BE1.png|32px]] [[File:Barium Sulfate BE1.png|32px]] [[File:Benzene BE1.png|32px]] [[File:Boron Trioxide BE1.png|32px]] [[File:Calcium Bromide BE1.png|32px]] [[File:Crude Oil BE1.png|32px]] [[File:Glue BE1.png|32px]] [[File:Hydrogen Peroxide BE1.png|32px]] [[File:Iron Sulfide BE1.png|32px]] [[File:Latex BE1.png|32px]] [[File:Lithium Hydride BE1.png|32px]] [[File:Luminol BE1.png|32px]] [[File:Lye BE1.png|32px]] [[File:Magnesium Nitrate BE1.png|32px]] [[File:Magnesium Oxide BE1.png|32px]] [[File:Polyethylene BE1.png|32px]] [[File:Potassium Iodide BE1.png|32px]] [[File:Salt BE1.png|32px]] [[File:Soap BE1.png|32px]] [[File:Sodium Acetate BE1.png|32px]] [[File:Sodium Fluoride BE1.png|32px]] [[File:Sodium Hydride BE1.png|32px]] [[File:Sodium Hypochlorite BE1.png|32px]] [[File:Sodium Oxide BE1.png|32px]] [[File:Sulfate BE1.png|32px]] [[File:Calcium Chloride BE1.png|32px]] [[File:Cerium Chloride BE1.png|32px]] [[File:Mercuric Chloride BE1.png|32px]] [[File:Potassium Chloride BE1.png|32px]] [[File:Tungsten Chloride BE1.png|32px]] [[File:Charcoal JE3 BE3.png|32px]] [[File:Ink Sac JE1 BE1.png|32px]] [[File:Sugar JE1 BE1.png|32px]] [[File:Water (compound) BE1.png|32px]] [[File:Garbage BE1.png|32px]] Added compounds.}}
{{History||1.12.0|[[File:Charcoal JE4 BE4.png|32px]][[File:Ink Sac JE2 BE2.png|32px]][[File:Sugar JE2 BE2.png|32px]] The textures of Charcoal, Ink Sacs and Sugar have been changed.}}
{{History|foot}}
== Unused compound textures ==
In the chemistry resource pack folder, there are numerous [[History of textures/Unused textures#Unused compounds|compound textures which are not used]] in the game. Note: a <code>compound</code> item with a data value of <code>38</code> will have the <code>Blue Flask</code> texture and will be called <code>item.compound..name</code>. If you use an NBT Editor to get a compound item with no assigned data value (by deleting the data tag) and then transfer that item to another world / realm using structure blocks (by exporting to a <code>.mcstructure</code> file, then importing it on another world or realm) then it will be renamed to <code>Ivory Tusk</code>.
<gallery widths="48" heights="48" perrow="30" class="center">
Flask EE1.png|Flask
Black Flask EE1.png|Black Flask
Blue Flask EE1.png|Blue Flask
Brown Beaker EE1.png|Brown Beaker
Brown Flask EE1.png|Brown Flask
Dark Gray Beaker EE1.png|Dark Gray Beaker
Dark Gray Flask EE1.png|Dark Gray Flask
Dark Gray Jar EE1.png|Dark Gray Jar
Green Beaker EE1.png|Green Beaker
Green Flask EE1.png|Green Flask
Green Jar EE1.png|Green Jar
Indigo Beaker EE1.png|Indigo Beaker
Indigo Flask EE1.png|Indigo Flask
Indigo Jar EE1.png|Indigo Jar
Light Gray Beaker EE1.png|Light Gray Beaker
Light Gray Flask EE1.png|Light Gray Flask
Orange Beaker EE1.png|Orange Beaker
Orange Flask EE1.png|Orange Flask
Orange Jar EE1.png|Orange Jar
Purple Beaker EE1.png|Purple Beaker
Purple Flask EE1.png|Purple Flask
Purple Jar EE1.png|Purple Jar
Red Beaker EE1.png|Red Beaker
Red Flask EE1.png|Red Flask
Red Jar EE1.png|Red Jar
White Flask EE1.png|White Flask
Yellow Flask EE1.png|Yellow Flask
Bleach (compound).png|Bleach
</gallery>
== Gallery ==
<gallery>
Screen Shot 2021-08-19 at 12.22.50 PM.png|A compound creator in using 5 carbon and 8 hydrogen to create latex.
</gallery>
== See also ==
*[[Compound Creator]]
*[[Crafting]]
*[[Element Constructor]]
*[[Lab Table]]
*[[Brewing Stand]]
*[[Brewing]]
*[[Crafting Table]]
== References ==
{{reflist}}
{{Items}}
{{Education Edition}}
[[Category:Non-renewable resources]]
[[Category:Education Edition items]]
[[de:Verbindung]]
[[it:Composto]]
[[ja:化合物]]
[[pl:Związki chemiczne]]
[[pt:Composto]]
[[ru:Соединение]]
[[th:สารประกอบ]]
[[uk:Сполуки]]
[[zh:化合物]]</li></ul> | 18w43a | ||||
| 18w48a | Vines can now be climbed without it being attached to supporting blocks. | ||||
| 19w03a | Placing a vine into the new composter now has a 20% chance of raising the compost level by 1. | ||||
| 19w05a | Vines now have a 50% chance of increasing the compost level in a composter by 1. | ||||
1.16{{Extension DPL}}<ul><li>[[Ink Sac|Ink Sac]]<br/>{{For|the variant dropped by Glow squids|Glow Ink Sac}}
{{Item
| image = Ink Sac.png
| renewable = Yes
| stackable = Yes (64)
}}
An '''ink sac''' is an [[item]] dropped by a [[squid]] upon death used to create [[black dye]], [[dark prismarine]]{{only|BE|short=1}}, and [[Book and Quill|books and quills]].
== Obtaining ==
=== Mob loot ===
==== Squid ====
{{see also|Tutorials/Squid farming|title1=Squid farming}}
A [[squid]] drops one to three ink sacs upon death. The maximum amount is increased by 1 per level of [[Looting]], for a maximum of 1 to 6 with Looting III.
=== Fishing ===
Ink sacs can be obtained as a "junk" item from [[fishing]]. The [[Luck of the Sea]] [[enchantment]] decreases the chance.
=== Trading ===
[[Wandering trader]]s sometimes sell 3 ink sacs for an [[emerald]] {{in|bedrock}}. Apprentice level [[Trading#Librarian|librarians]] also buy 5 ink sacs for one [[emerald]].
=== Natural generation ===
{{LootChestItem|ink-sac}}
== Usage ==
=== Crafting ingredient ===
{{crafting usage}}
{{IN|bedrock}}, ink sacs can be also used in banner patterns:
{{banner crafting usage}}
=== Loom ingredient ===
{{Banner loom usage|Ink Sac}}
=== Dye ===
{{Dye usage}}
* Each type of [[Prismarine#Dark Prismarine|dark prismarine]] can be crafted using varying amounts of 8 [[Prismarine Shard#prismarine shards|prismarine shards]].
=== Trading ===
Journeyman-level librarian [[villager]]s have a {{frac|2|3}} chance to buy five ink sacs for an [[emerald]]. They always offer the trade {{in|bedrock|lc=}}.
=== Signs ===
Ink sacs can be applied to [[sign]]s or [[hanging sign]]s to revert glowing text back to default.
== Sounds ==
{{edition|java}}:
{{Sound table
|sound=Ink sac1.ogg
|sound2=Ink sac2.ogg
|sound3=Ink sac3.ogg
|subtitle=Ink Sac splotches
|source=block
|description=When an ink sac is used on a sign
|id=item.ink_sac.use
|translationkey=subtitles.item.ink_sac.use
|volume=1.0
|pitch=''varies'' <ref group=sound>Each sound can be 0.85, 0.88, or 0.9</ref>
|distance=16
|foot=1}}
{{edition|bedrock}}:
{{Sound table
|type=bedrock
|sound=Ink sac1.ogg
|sound2=Ink sac2.ogg
|sound3=Ink sac3.ogg
|source=sound
|description=When an ink sac is used on a sign
|id=sign.ink_sac.use
|volume=1.0
|pitch=1.0
|foot=1}}
== Data values ==
=== ID ===
{{edition|java}}:
{{ID table
|edition=java
|showforms=y
|generatetranslationkeys=y
|displayname=Ink Sac
|spritetype=item
|nameid=ink_sac
|form=item
|foot=1}}
{{edition|bedrock}}:
{{ID table
|edition=bedrock
|showaliasids=y
|shownumericids=y
|showforms=y
|notshowbeitemforms=y
|generatetranslationkeys=y
|displayname=Ink Sac
|spritetype=item
|nameid=ink_sac
|aliasid=dye / 0
|id=413
|form=item
|translationkey=item.dye.black.name
|foot=1}}
== Video ==
{{video note|Ink sacs can no longer be used as a dye in Java Edition.}}
<div style="text-align:center">{{yt|ABYCZfawO60}}</div>
== History ==
{{History|java beta}}
{{History||1.2|[[File:Ink Sac JE1 BE1.png|32px]] Added ink sacks, together with all other dyes.}}
{{History||1.2_02|"Ink Sack" has been renamed to "Ink Sac".}}
{{History|java}}
{{History||1.3.1|snap=12w17a|Ink sacs are now used to craft [[book and quill]]s.}}
{{History||1.4.2|snap=12w34a|Added the ability to [[Armor#Dyeing|dye]] leather [[armor]] and [[wolf]] collars.}}
{{History||1.4.6|snap=12w49a|Ink sacs can now be crafted with [[gunpowder]] to create a [[firework star]].}}
{{History||1.6.1|snap=13w19a|[[Stained clay]] can now be [[crafting|crafted]].}}
{{History||1.7.2|snap=13w41a|[[Stained glass]] can now be crafted.}}
{{History||1.8|snap=14w25a|Ink sacs are now used to craft [[dark prismarine]].}}
{{History|||snap=14w30a|Added [[banner]]s, which can be [[dye]]d with ink sacs.}}
{{History||1.11|snap=16w39a|Ink sacs can now be used to dye [[shulker box]]es.}}
{{History||1.12|snap=17w06a|Ink sacs are now used to craft black [[concrete powder]].}}
{{History|||snap=17w15a|Ink sacs can now be used to dye [[bed]]s.}}
{{History||1.13|snap=17w47a|The different data values for the <code>dye</code> ID have been split up into their own IDs.
|Prior to [[1.13/Flattening|''The Flattening'']], this [[item]]'s numeral ID was 351.}}
{{History||1.14|snap=18w43a|Ink sacs can now be used to craft [[black dye]].
|Ink sacs can no longer be used as a [[dye]].
|All of the dye-related functions and crafting recipes of ink sac (except books and quills and dark prismarine) have been transferred to black dye.
|[[File:Ink Sac JE2 BE2.png|32px]] The texture of ink sacs has been changed.}}
{{History|||snap=19w11a|Librarian [[villager]]s now [[trading|buy]] ink sacs.}}
{{History||1.15|snap=Pre-release 1|Ink sacs are no longer used to craft [[dark prismarine]].}}
{{History||1.17|snap=21w03a|Ink sacs can now be used to remove the text's glowing effect of a [[sign]].}}
{{History||1.20<br>(Experimental)|link=1.19.3|snap=22w42a|Ink sacs can now be used to remove the text's glowing effect of a [[hanging sign]].}}
{{History|pocket alpha}}
{{History||v0.3.0|[[File:Ink Sac JE1 BE1.png|32px]] Added ink sacs. They are currently unobtainable and serve no purpose.}}
{{History||v0.8.0|snap=build 1|Ink sacs can now be used to craft [[cocoa beans]].}}
{{History|||snap=build 3|Ink sacs are now available in [[creative]].}}
{{History||v0.9.0|snap=build 1|Ink sacs now generate in [[village]] and [[stronghold]] [[chest]]s.}}
{{History||v0.11.0|snap=build 1|Ink sacs can now be obtained from [[squid]].
|Ink sacs can now be obtained as a junk [[item]] from [[fishing]].}}
{{History||v0.14.0|snap=build 1|Ink sacs now can now be used to dye water in [[cauldron]]s.}}
{{History||v0.16.0|snap=build 1|Ink sacs are no longer used to craft [[cocoa beans]].
|Ink sacs can now be used to craft [[dark prismarine]].}}
{{History|pocket}}
{{History||1.0.0|snap=alpha 0.17.0.1|Ink sacs can now be used to dye [[shulker]]s.}}
{{History||1.1.0|snap=alpha 1.1.0.0|Ink sacs are now used to re-dye [[bed]]s.
|Ink sacs can now be used to dye [[shulker box]]es.}}
{{History|bedrock}}
{{History||1.2.0|snap=beta 1.2.0.2|Ink sacs can now be used to craft [[book and quill]]s.
|Added [[banner]]s, which can be [[dye]]d with ink sacs.
|Ink sacs can now be crafted with [[gunpowder]] to create [[firework star]]s.
|Ink sacs can now be used to craft black [[concrete powder]].
|[[Stained glass]] can now be [[crafting|crafted]].}}
{{History||1.4.0|snap=beta 1.2.20.1|Ink sacs can now be crafted from iron, sulfur, and 4 oxygen in the [[compound creator]]s.
|Ink sacs can now be used to craft [[balloon]]s and [[glow stick]]s.}}
{{History||1.8.0|snap=beta 1.8.0.10|Ink sacs can now be used to craft [[black dye]].}}
{{History||1.10.0|snap=beta 1.10.0.3|Ink sacs can now be bought from [[wandering trader]]s.
|[[File:Ink Sac JE2 BE2.png|32px]] The texture of ink sacs has been changed.}}
{{History||1.11.0|snap=beta 1.11.0.4|Ink sacs can now be [[trading|sold]] to librarian [[villager]]s.}}
{{History||1.16.100|snap=beta 1.16.100.56|The ID of ink sacs has been changed from {{cd|dye/0}} to {{cd|ink_sac}}.}}
{{History||1.16.210|snap=beta 1.16.210.59|Ink sacs can now be used to revert glowing text on signs to normal.}}
{{History|console}}
{{History||xbox=TU1|xbone=CU1|ps=1.00|switch=1.0.1|wiiu=Patch 1|[[File:Ink Sac JE1 BE1.png|32px]] Added ink sacs.}}
{{History||xbox=none|xbone=none|ps=1.90|wiiu=none|switch=none|[[File:Ink Sac JE2 BE2.png|32px]] The texture of ink sacs has been changed.}}
{{History|New 3DS}}
{{History||0.1.0|[[File:Ink Sac JE1 BE1.png|32px]] Added ink sacs.}}
{{History|foot}}
== Issues ==
{{issue list}}
== References ==
{{reflist}}
{{Items}}
[[Category:Bedrock Edition specific information]]
[[Category:Items]]
[[Category:Dyes]]
[[Category:Renewable resources]]
[[cs:Váček inkoustu]]
[[de:Tintenbeutel]]
[[es:Saco de tinta]]
[[fr:Poche d'encre]]
[[hu:Tintazsák]]
[[ja:イカスミ]]
[[ko:먹물 주머니]]
[[nl:Inktzak]]
[[pl:Torbiel z atramentem]]
[[pt:Bolsa de tinta]]
[[ru:Чернильный мешок]]
[[uk:Чорнильний мішок]]
[[zh:墨囊]]</li><li>[[Photo|Photo]]<br/>{{exclusive|education}}
{{Item
| image = Photo EE2.png
| renewable = No (unless [[portfolio]] is available)
| stackable =
}}
A '''photo''' is an [[item]] containing a picture taken with a [[camera]].<ref>{{cite|url=https://web.archive.org/web/20210925044841mp_/https://educommunity.minecraft.net/hc/en-us/articles/4407489082644-Feature-Walkthrough-Minecraft-Education-Edition-GOAT-Beta-version-1-17-30-| title = Feature Walkthrough Minecraft: Education Edition GOAT Beta (version 1.17.30)|website=Minecraft: Education Edition Support|date=September 24, 2021}}</ref><ref>{{cite|url=https://education.minecraft.net/en-us/blog/new-update-and-anniversary-for-mee| title = The GOAT Update Celebrates a Minecraft Milestone!|website=Minecraft: Education Edition|date=November 2, 2021}}</ref><ref>{{ytl|2Wd0J-EIfws|GOAT Release Playthrough|Minecraft: Education Edition|December 2, 2021}}</ref>
== Obtaining ==
A photo in a [[portfolio]] can be saved as a photo item by selecting the "Save to Inventory" button underneath it.
== Usage ==
Photos display an image when held in the hand or when placed in an [[item frame]], similarly to [[map]]s. Photos can have captions added to them by renaming them in an [[anvil]] or by adding a caption while they are in a portfolio. Photos can be added to [[book and quill]]s and portfolios by selecting the "Add Photo" button in the book and quill or portfolio.
== Data values ==
=== ID ===
{{ID table
|edition=bedrock
|shownumericids=y
|showforms=y
|notshowbeitemforms=y
|generatetranslationkeys=y
|displayname=Photo
|spritetype=item
|nameid=photo_item
|id=?
|form=item
|foot=1}}
== History ==
{{History|education}}
{{History||1.17.30|snap=1.17.30.2|[[File:Photo EE1.png|32px]] Added photos.}}
{{History||1.17.30|snap=release|[[File:Photo EE2.png|32px]] Changed photo texture.}}
{{History|foot}}
== Gallery ==
<gallery>
Photo Item 1.png|A photo being placed in an item frame.
Photo Item 2.png|A photo being saved from a portfolio.
Photo Item 3.png|A photo being added to a book and quill.
</gallery>
== References ==
{{Reflist}}
{{Items}}
{{Education Edition}}
[[Category:Education Edition items]]
[[Category:Non-renewable resources]]
[[ja:写真]]
[[pl:Zdjęcie]]
[[zh:相片]]</li></ul> | 20w11a | Vines now play sounds when climbed. | |||
| Upcoming Java Edition | |||||
1.17{{Extension DPL}}<ul><li>[[Rabbit Stew|Rabbit Stew]]<br/>{{Item
| title = Rabbit Stew
| heals = {{hunger|10}}
| renewable = Yes
| stackable = No
}}
'''Rabbit stew''' is a [[food]] [[item]] that can be eaten by the [[player]].
== Obtaining ==
=== Crafting ===
{{Crafting
|shapeless=true
|B1=Cooked Rabbit
|A2=Carrot
|B2=Baked Potato
|C2=Any Mushroom
|B3=Bowl
|Output=Rabbit Stew
|type=Foodstuff
}}
=== Trading ===
{{IN|bedrock}}, novice-level Butcher villagers always offer to sell rabbit stew for one emerald as their second trade.
{{IN|java}}, novice-level Butcher villagers have a 50% chance of offering rabbit stew for one emerald.
== Usage ==
=== Food ===
To eat rabbit stew, press and hold {{control|use}} while it is selected in the hotbar. Eating one restores {{hunger|10}} [[hunger]] and 12 hunger [[Hunger#Mechanics|saturation]]. This restores more hunger than any other food type in the game except [[cake]], but has less saturation than a [[golden carrot]], a [[cooked porkchop]], or a [[steak]].
Eating rabbit stew leaves the player with an empty bowl, similar to [[mushroom stew]], [[suspicious stew]], and [[beetroot soup]].
=== Wolves ===
{{IN|bedrock}}, rabbit stew can be used to feed [[wolves]], healing them by {{hp|10|mob=1}}. However, unlike other wolf food, rabbit stew does not speed up the growth of baby wolves, and it cannot be used to breed them. It is usable only on a wolf that has less than full health.
== Sounds ==
{{Sound table/Entity/Food}}
== Data values ==
=== ID ===
{{edition|java}}:
{{ID table
|edition=java
|showforms=y
|generatetranslationkeys=y
|displayname=Rabbit Stew
|spritetype=item
|nameid=rabbit_stew
|form=item
|foot=1}}
{{edition|bedrock}}:
{{ID table
|edition=bedrock
|shownumericids=y
|showforms=y
|notshowbeitemforms=y
|generatetranslationkeys=y
|displayname=Rabbit Stew
|spritetype=item
|nameid=rabbit_stew
|id=290
|form=item
|foot=1}}
== Advancements ==
{{load advancements|Husbandry;A Balanced Diet}}
== Video ==
<div style="text-align:center">{{yt|GwCqwtydRBc}}</div>
== History ==
{{History|java}}
{{History||1.8|snap=June 30, 2014|slink={{tweet|TheMogMiner|483725253018157057}}|[[Ryan Holtz]] tweets the recipe of rabbit stew, and that it can restore hunger better than any other item other than [[golden apple]]s (which was incorrect, as golden apples restore less hunger, but a whole [[cake]] restores more).}}
{{History|||snap=14w27a|[[File:Rabbit Stew JE1 BE1.png|32px]] Added rabbit stew.}}
{{History||1.13|snap=17w47a|Prior to [[1.13/Flattening|''The Flattening'']], this [[item]]'s numeral ID was 413.}}
{{History||1.14|snap=18w43a|[[File:Rabbit Stew JE2.png|32px]] The texture of rabbit stew has been changed.
|The rabbit stew's [[recipe]] is now shapeless.}}
{{History|||snap=18w50a|[[File:Rabbit Stew JE3 BE2.png|32px]] The texture of rabbit stew has been changed.}}
{{History|||snap=19w11a|Butcher [[villager]]s now [[trading|sell]] rabbit stew.}}
{{History|pocket alpha}}
{{History||v0.13.0|snap=build 1|[[File:Rabbit Stew JE1 BE1.png|32px]] Added rabbit stew.}}
{{History|bedrock}}
{{History||1.10.0|snap=beta 1.10.0.3|[[File:Rabbit Stew JE3 BE2.png|32px]] The texture of rabbit stew has been changed.
|The recipe for rabbit stew is now shapeless.}}
{{History||1.11.0|snap=beta 1.11.0.4|Butcher [[villager]]s now [[trading|sell]] rabbit stew.}}
{{History|console}}
{{History||xbox=TU31|xbone=CU19|ps=1.22|wiiu=Patch 3|switch=1.0.1|[[File:Rabbit Stew JE1 BE1.png|32px]] Added rabbit stew.}}
{{History||xbox=none|xbone=none|ps=1.90|wiiu=none|switch=none|[[File:Rabbit Stew JE3 BE2.png|32px]] The texture of rabbit stew has been changed.
|The recipe for rabbit stew is now shapeless.}}
{{History|new 3ds}}
{{History||0.1.0|[[File:Rabbit Stew JE1 BE1.png|32px]] Added rabbit stew.}}
{{History|foot}}
== Issues ==
{{issue list}}
== Trivia ==
* If the ingredients of rabbit stew were eaten separately and the [[mushroom]] had become half of a [[mushroom stew]], they would restore a total of {{Hunger|16}} and 19.2 saturation points. Without counting the mushroom, the separate ingredients would restore {{Hunger|13}} and 15.6 saturation points. Therefore, crafting rabbit stew results in a net loss of restorative points, though it is quicker than eating all the ingredients separately.
* Rabbit stew restores more hunger and total food points (hunger + saturation) than nearly any other single item (the exception is a suspicious stew with Saturation). This is balanced by the point that the stew does not stack, and with its complex recipe it's not so easy to make "on the road". The suspicious stew shares the unstackability, but with only four ingredients it can at least be crafted in the inventory.
==Gallery==
<gallery>
Rabbit Stew Crafting.jpg|Crafting rabbit stew.
</gallery>
== References ==
{{Reflist}}
{{items}}
[[de:Kaninchenragout]]
[[es:Estofado de conejo]]
[[it:Stufato di coniglio]]
[[fr:Ragoût de lapin]]
[[ja:ウサギシチュー]]
[[ko:토끼 스튜]]
[[nl:Konijnenstoofpot]]
[[pl:Gulasz z królika]]
[[pt:Ensopado de coelho]]
[[ru:Тушёный кролик]]
[[uk:Тушкований кролик]]
[[zh:兔肉煲]]
[[Category:Food]]
[[Category:Renewable resources]]</li><li>[[Gold Nugget|Gold Nugget]]<br/>{{About|the nugget|the block that can drop nuggets|Gilded Blackstone|the ore|Gold Ore|the ingot form|Gold Ingot|the mineral block|Block of Gold}}
{{Item
| image = Gold Nugget.png
| renewable = Yes
| stackable = Yes (64)
}}
'''Gold nuggets''' are items used to make [[gold ingot]]s and other various golden items. One gold nugget is effectively worth one-ninth of a gold ingot.
== Obtaining ==
=== Mob loot ===
[[Zombified Piglin|Zombified piglin]]s, when killed, may drop 0-1 gold nuggets. When killed using a weapon enchanted with [[Looting]], they may drop an additional gold nugget per level of Looting used, up to a maximum of 4.
=== Crafting ===
{{Crafting
|Gold Ingot
|Output= Gold Nugget, 9
|type= Material
}}
=== Smelting ===
{{Smelting
|Golden Sword; {Any golden tools}; {Any golden armor}; Golden Horse Armor
|Gold Nugget
|0,25
}}
=== Chest loot ===
{{LootChestItem|gold-nugget}}
=== Mining ===
[[Nether gold ore]] mined using a [[pickaxe]] drops 2-6 gold nuggets. If the pickaxe is enchanted with [[Fortune]], it has a 33.3% chance to multiply the drops by 2, Fortune II has a 25% chance to multiply the drops by 2 or 3 and Fortune III has a 20% chance each to multiply the drops by 2, 3, or 4 for a maximum possible drop of 24 golden nuggets. The average drop rate for a Fortune III pickaxe is 8.8, while the drop rate for a [[Silk Touch]] pickaxe is a single ingot, or a flat rate of 9. It is slightly more efficient to mine with a Silk Touch pickaxe.
[[Gilded Blackstone|Gilded blackstone]] mined using a pickaxe has a 10% chance to drop 2-5 gold nuggets. If the pickaxe is enchanted with Fortune I, the chance gold nuggets drop is increased 14.29%, Fortune II increases the drop chance to 25%, and Fortune III guarantees the drop.
== Usage ==
Gold nuggets can be used to craft a [[golden carrot]] or [[glistering melon]] for brewing. Also, gold nuggets can be combined with gunpowder and dye to create a [[firework star]] that bursts in a star-shaped explosion.
[[Piglin]]s instantly pick up any gold nuggets that are within 1 [[block]] of them. Unlike other gold-related items, they do not intentionally seek out gold nuggets to pick up and only pick them up if they walk near it. Unlike gold ingots, gold nuggets picked up are dropped upon the piglin's death.
=== Crafting ingredient ===
{{crafting usage}}
== Data values ==
=== ID ===
{{edition|java}}:
{{ID table
|edition=java
|showforms=y
|generatetranslationkeys=y
|displayname=Gold Nugget
|spritetype=item
|nameid=gold_nugget
|form=item
|foot=1}}
{{edition|bedrock}}:
{{ID table
|edition=bedrock
|shownumericids=y
|showforms=y
|notshowbeitemforms=y
|generatetranslationkeys=y
|displayname=Gold Nugget
|spritetype=item
|nameid=gold_nugget
|id=425
|form=item
|foot=1}}
== History ==
{{History|Java}}
{{History||1.0.0|snap=Beta 1.9 Prerelease|[[File:Gold Nugget JE1.png|32px]] Added gold nuggets.
|Gold nuggets are [[drops|dropped]] by [[zombie pigmen]].
|Gold nuggets can be used to craft [[gold ingot]]s.
|Gold nuggets currently do not have a mouseover name.}}
{{History|||snap=Beta 1.9 Prerelease 2|Gold nuggets now have a mouseover name.}}
{{History|||snap=Beta 1.9 Prerelease 4|Gold nuggets are now used to craft [[glistering melon]]s.
|Gold nuggets can now be [[crafting|crafted]] from a single [[gold ingot]].}}
{{History||1.1|snap=release|Normal [[golden apple]]s are now crafted with gold nuggets.}}
{{History||1.3.1|snap=1.3|[[File:Gold Nugget JE2 BE1.png|32px]] The texture of gold nuggets has been changed.}}
{{History||1.4.2|snap=12w34a|Gold nuggets are now used to craft [[golden carrot]]s.}}
{{History||1.4.6|snap=12w49a|Gold nuggets can now be used to craft a [[firework star]] for a star shaped effect on a [[firework rocket|firework]].}}
{{History||1.6.1|snap=13w23a|Gold nuggets can no longer be used to [[crafting|craft]] a [[golden apple]].}}
{{History||1.9|snap=15w43a|Gold nuggets may now be found among the loot in [[igloo]] basement [[chest]]s.}}
{{History||1.11.1|snap=16w50a|Gold nuggets can now be [[smelting|smelted]] from golden [[tool]]s and [[armor]].}}
{{History||1.13|snap=17w47a|Prior to [[1.13/Flattening|''The Flattening'']], this [[item]]'s numeral ID was 371.}}
{{History|||snap=18w09a|Gold nuggets can now be found in [[underwater ruins]] loot [[chest]]s.}}
{{History|||snap=18w11a|Gold nuggets now generate in the chests of [[shipwreck]]s.}}
{{History||1.14|snap=18w43a|[[File:Gold Nugget JE3 BE2.png|32px]] The texture of gold nuggets has been changed.}}
{{History|||snap=18w48a|Gold nuggets can now be found in chests in [[plains]] [[village]] houses.}}
{{History|||snap=18w49a|Gold nuggets can now be found in chests in [[savanna]] village houses.}}
{{History||1.16|snap=20w12a|[[Nether gold ore]] now [[drops]] 2-6 gold nuggets, affected by [[Fortune]].}}
{{History|||snap=20w15a|[[Gilded blackstone]] now has 10% chance to drop 2-5 gold nuggets. Only the drop chance is affected by [[Fortune]].}}
{{History|||snap=20w16a|Gold nuggets now generate in [[bastion remnant]]s and [[ruined portal]] chests.}}
{{History|||snap=Pre-release 1|Gold nuggets can now be used to distract [[piglin]]s.}}
{{History|||snap=Pre-release 3|Gold nuggets can no longer be used to distract [[piglin]]s.}}
{{History||1.20|snap=23w12a|Gold nuggets can now be found in [[suspicious gravel]] and [[suspicious sand]] in cold and warm [[ocean ruins]] and in [[trail ruins]].}}
{{History|||snap=23w16a|Gold nuggets no longer generate in [[suspicious sand]] in [[trail ruins]].|Due to the split of the archaeological loot tables for suspicious gravel within [[trail ruins]], gold nuggets are now common loot.}}
{{History|pocket alpha}}
{{History||v0.12.1|snap=build 1|[[File:Gold Nugget JE2 BE1.png|32px]] Added gold nuggets. |Gold nuggets can be used to craft [[glistering melon]]s, [[gold ingot]]s and [[golden carrot]]s.|[[Gold ingot]]s can now be [[crafting|crafted]] into 9 gold nuggets.|[[Zombie pigmen]] now [[drops|drop]] gold nuggets upon being killed.}}
{{History|pocket}}
{{History||1.0.0|snap=alpha 0.17.0.1|Gold nuggets can now be found inside [[igloo]] basement [[chest]]s.}}
{{History||1.1.0|snap=alpha 1.1.0.0|Gold nuggets can now be [[smelting|smelted]] from golden [[tool]]s and [[armor]].}}
{{History|bedrock}}
{{History||1.2.0|snap=beta 1.2.0.2|Gold nuggets can now be used to craft [[firework star]]s.}}
{{History||1.4.0|snap=beta 1.2.14.2|Gold nuggets can now be found in some [[shipwreck]] [[chest]]s.}}
{{History|||snap=beta 1.2.20.1|Gold nuggets can now be found in [[underwater ruins]] chests.}}
{{History||1.10.0|snap=beta 1.10.0.3|The gold nugget can now be found in [[plains]] [[village]] house chests.|[[File:Gold Nugget JE3 BE2.png|32px]] The texture of gold nuggets has been changed.}}
{{History||1.11.0|snap=beta 1.11.0.1|The gold nugget can now be found in [[savanna]] village house [[chest]]s.}}
{{History||1.16.0|snap=beta 1.16.0.57|[[Nether gold ore]] now [[drops]] 2-6 gold nuggets.|[[Gilded blackstone]] now has 10% chance to drop 2-5 gold nuggets.}}
{{History||1.16.100|snap=beta 1.16.100.50|Gold nuggets can now be used as fuel for a [[furnace]].<ref>{{bug|MCPE-114216}}</ref>}}
{{History||1.18.30|snap=beta 1.18.30.26|Gold nuggets can no longer be used as fuel for a furnace.}}
{{History|Legacy Console}}
{{History||xbox=TU7|xbone=CU1|ps=1.0|wiiu=Patch 1|switch=1.0.1|[[File:Gold Nugget JE2 BE1.png|32px]] Added gold nuggets.}}
{{History||xbox=TU53|xbone=CU43|ps=1.49|wiiu=Patch 23|switch=1.0.3|Gold nuggets can now be [[smelting|smelted]] from golden [[tool]]s and [[armor]].}}
{{History||xbox=none|xbone=none|ps=1.90|wiiu=none|switch=none|[[File:Gold Nugget JE3 BE2.png|32px]] The texture of gold nuggets has been changed.}}
{{History|3DS}}
{{History||0.1.0|[[File:Gold Nugget JE2 BE1.png|32px]] Added gold nuggets.}}
{{History||1.9.19|Gold nuggets can now be [[smelting|smelted]] from golden [[tool]]s and [[armor]].}}
{{History|foot}}
== Issues ==
{{issue list}}
== See also ==
* [[Iron Nugget]]
* [[Gold]]
{{Items}}
[[cs:Zlatý nuget]]
[[de:Goldklumpen]]
[[es:Pepita de oro]]
[[fr:Pépite d'or]]
[[hu:Aranyrög]]
[[it:Pepita d'oro]]
[[ja:金塊]]
[[ko:황금 조각]]
[[nl:Goudklompje]]
[[pl:Bryłka złota]]
[[pt:Pepita de ouro]]
[[ru:Кусочек золота]]
[[uk:Золотий самородок]]
[[zh:金粒]]
[[Category:Renewable resources]]</li></ul> | 21w05a | Vines now have unique sounds. | |||
| Pocket Edition Alpha | |||||
v0.9.0{{Extension DPL}}<ul><li>[[:Category:Education Edition items|Category:Education Edition items]]<br/>[[Category:Education Edition]]
[[Category:Items]]</li><li>[[Door|Door]]<br/>{{About|the block|the music track|Minecraft - Volume Alpha}}
{{See also|Trapdoor}}
{{Block
| image = <gallery>
Iron Door.png|Java Edition
Iron Door BE.png|Bedrock Edition
</gallery>
| extratext = View [[#Gallery|all renders]]
| transparent = Partial
| light = No
| tntres = {{Blast resistance values|Wooden Door}} <small>(Wood)</small><br>{{Blast resistance values|Iron Door|Copper Door}}<small> (Iron)</small>
| hardness = {{Hardness values|Wooden Door}} <small>(Wood)</small><br>{{Hardness values|Iron Door|Copper Door}}<small> (Iron)</small>
| tool = axe
| tool2 = wooden pickaxe
| renewable = Yes
| stackable = Yes (64)
| flammable = No
| lavasusceptible = '''Overworld wood''': Yes<br>'''Nether wood''','''iron''','''copper''': No
}}
A '''door''' is a block that can be used as a barrier that can be opened by hand or with [[redstone]].
== Obtaining ==
Doors can be found in any Overworld biome, and can also be crafted from any type of [[wood]] as well as materials found in [[the Nether]]. Some have built-in openings that are useful for determining the time of day.
=== Breaking ===
Wooden doors can be broken with anything, but [[axe]]s are fastest. An iron door can be broken with anything if the top half of the door is broken.<ref>{{bug|MC-189739}}</ref><ref>{{bug|MCPE-126620}}</ref> All doors drop themselves if they no longer have a block beneath them that can support them.
{{breaking row
|Oak Door, Spruce Door, Birch Door, Jungle Door, Acacia Door, Dark Oak Door, Mangrove Door, Cherry Door, Bamboo Door, Crimson Door, Warped Door; Iron Door
|textTrim=Door
|Axe;Pickaxe
|;
|item=1;1
|link=none;none
}}
A door is removed and drops itself as an item:
* if the block beneath the door is moved, removed, or destroyed
* if a [[piston]] tries to push the door (trying to pull a door does nothing) or moves a block into its space
=== Natural generation ===
Doors generate in some generated structures, forming the entrances to the majority of buildings. Doors do not generate in [[zombie village]]s.
;{{BlockSprite|Oak Door|text=Oak}}
Oak doors generate as part of:
* Plains [[village]]s
* [[Stronghold]]s
* Right-side-up [[shipwreck]]s
;{{BlockSprite|Spruce Door|text=Spruce}}
Spruce doors generate as part of:
* Taiga, snowy tundra and snowy taiga [[village]]s
* Right-side-up [[shipwreck]]s
;{{BlockSprite|Jungle Door|text=Jungle}}
Jungle doors generate as part of:
* Desert [[village]]s
* Right-side-up [[shipwreck]]s
;{{BlockSprite|Acacia Door|text=Acacia}}
Acacia doors generate as part of:
* Savanna [[village]]s
<!-- * Right-side-up [[shipwreck]]s{{only|BE}}{{need testing}} -->
;{{BlockSprite|Dark Oak Door|text=Dark oak}}
Dark oak doors generate as part of:
* Master bedroom closets in [[woodland mansion]]s
* Right-side-up [[shipwreck]]s
;{{BlockSprite|Iron Door|text=Iron}}
Iron doors generate as part of:
* Prison rooms in [[woodland mansion]]s
* [[Stronghold]]s with a stone [[button]] to open{{only|JE}}
=== Crafting ===
{{Crafting
|head=1
|name=[[Wood Door]]
|A1= Matching Planks
|B1= Matching Planks
|A2= Matching Planks
|B2= Matching Planks
|A3= Matching Planks
|B3= Matching Planks
|Output= Matching wood Door,3
|type= Redstone
}}
{{Crafting
|A1= Iron Ingot
|B1= Iron Ingot
|A2= Iron Ingot
|B2= Iron Ingot
|A3= Iron Ingot
|B3= Iron Ingot
|Output= Iron Door,3
|type= Redstone
|foot=1
}}
== Usage ==
Wooden doors can be opened and closed by players, [[villager]]s, [[wandering trader]]s{{only|bedrock|short=1}}<!--Wandering traders cannot open doors in java edition. -->, [[vindicator]]s{{only|java|short=1}}, and [[piglin]]s. Wooden doors can be broken by all variants of [[zombie]]s (except [[drowned]]) and [[vindicator]]s in Hard difficulty.
Iron doors can be opened only with redstone power.
=== Placement ===
Doors must be "attached" to a block beneath them. To place a door, {{control|use}} a door item while pointing at the top of the block it should be attached to. A door can be attached to:
* the '''top''' of any full solid [[opaque]] block ([[stone]], [[dirt]], [[blocks of gold]], etc.)
* the '''top''' of an upside-down [[slab]] or upside-down [[stairs]]
* the '''top''' of a [[slime block]] or downward-facing [[piston]]
More information about placement on transparent blocks can be found at [[Opacity/Placement]].
When placed, a door occupies the side of the block facing the player, or behind a player if placed in the player's own space.
By default, a door's "hinge" appears on the side of the half of the block that the player pointed at when placing and its "handle" on the opposite side{{only|java}}, but the hinge is forced to other side by:
* Placing a door besides another door (creating a double door where both doors open away from each other)
* Placing a door between a full solid and any opaque block (top or bottom), making the hinge appear to attach to the solid block.
=== Behavior ===
[[Water]] and [[lava]] flow around doors. Lava can create [[fire]] in air blocks next to wooden doors as if the wooden doors were flammable, but the doors do not burn (and cannot be burned by other methods either, except throwing them into lava).
[[Mob]]s can spawn in a space occupied by a door.
The sound of opening and closing of a door can be heard up to 16 blocks away, like most mob sounds.
When placed using the {{cmd|setblock}} command, only one half of a door is placed, because doors are actually two separate blocks. The lower half still works, but with graphical bugs, and the upper half does not. Redstone cannot be used because it updates the half, breaking it. The upper half does not drop anything when broken, the lower half drops a normal door. This implies that the upper half is dependent on the lower.
=== Barrier ===
A door can be used as a switchable barrier to entity movement. Although primarily used to block movement by mobs and players, a door can also be used to control the movement of boats (for example, a door placed in a two-wide water flow stops a boat when perpendicular to the flow, but allow it to move again when parallel), items and minecarts (a door can stop a falling item or minecart, then allow it to drop again when the door moves), etc.
{{IN|Java}}, doors provide a breathable space if placed underwater. {{IN|bedrock}}, doors in water source blocks are [[waterlogging|waterlogged]] and do not displace water source blocks.
Doors are 0.1875 ({{frac|3|16}}) blocks thick (0.1825 {{in|bedrock}}). The rest of a door's space can be moved through freely. A door occupies two block spaces and both halves normally act as a single barrier, although doors can be opened or closed with a player or mob occupying the bottom block of the door,<ref>{{bug|MC-54255}} – "You can stand on the bottom block of a door, allowing you to climb it like a ladder" resolved as "Won't Fix"</ref> in which case the player can jump up to land on the bottom half of the door and then again to land on top of the door.
To open or close a wooden door, use the {{control|use|text=Use Item/Place Block}} [[control]]. When a door opens or closes, it immediately changes its orientation without affecting anything in the space it "swings through". Moving doors do not push entities the way that pistons do.
[[Villager]]s, [[wandering trader]]s,{{only|bedrock|short=1}} [[vindicator]]s{{only|java|short=1}}, [[piglin]]s and [[piglin brute]]s can open and close wooden doors when pathfinding.
Some [[zombie]]s can break wooden doors in [[Hard]] [[difficulty]]. Zombies have a 5% chance to spawn with the ability to break doors. Vindicators spawned from a [[raid]] in [[Normal]] and Hard difficulty can also break wooden doors, but they do so only to reach targeted players, villagers, or wandering traders. Some vindicators may sometimes open a wooden door instead of breaking it.{{only|java}} Both zombies and vindicators attempt to break wooden doors only when in their "closed" state, even if a door is placed so that its "open" state blocks access (for example, by facing sideways when placing a door so that it allows passage when closed and blocks passage when open).
Iron doors can be opened only with redstone power (a [[button]], a [[redstone circuit]], etc.). Any mob can activate an iron door by stepping on a pressure plate or by triggering a tripwire.
=== Redstone component ===
{{see also|Redstone circuit}}
Both wood and iron doors can be controlled with redstone power.
A door is a redstone [[mechanism component]] and can be activated by:
* an adjacent active '''[[power component]]''', including above or below: for example, a [[redstone torch]], a [[block of redstone]], a [[daylight sensor]], etc.
* an adjacent '''powered block''' (for example, a block with an active redstone torch under it), including above or below
* a powered '''[[redstone comparator]]''' or '''[[redstone repeater]]''' facing the door
* powered '''[[redstone dust]]''' configured to point at the door or a directionless "dot" next to it; a door is ''not'' activated by adjacent powered redstone dust that is configured to point in another direction.
All methods of activating a door can be applied to either the top or bottom parts of a door.
When activated, a door immediately rotates around its hinge side to its open state. When deactivated, a door immediately returns to its closed state.
An activated wood door can still be closed by a player or villager and does not re-open until it receives a new activation signal (if a door has been closed "by hand", it still needs to be deactivated and then reactivated to open by redstone).
=== Fuel ===
Overworld wooden doors can be used as a [[Smelting#Fuel|fuel]] in [[furnace]]s, smelting 1 item per door.
=== Note blocks ===
Wooden doors can be placed under [[note block]]s to produce "bass" sound.
== Sounds ==
=== Generic ===
==== Iron ====
{{Sound table/Block/Metal}}
==== Normal wood ====
{{Sound table/Block/Wood}}
==== Cherry wood ====
{{Sound table/Block/Cherry wood}}
==== Bamboo wood ====
{{Sound table/Block/Bamboo wood}}
==== Nether wood ====
{{Sound table/Block/Nether wood}}
=== Unique ===
{{el|java}}:
{{Sound table
|sound=Iron Door open1.ogg
|sound2=Iron Door open2.ogg
|sound3=Iron Door open3.ogg
|sound4=Iron Door open4.ogg
|subtitle=Door creaks
|source=block
|description=When an iron door opens
|id=block.iron_door.open
|translationkey=subtitles.block.door.toggle
|volume=0.9
|pitch=0.9-1.0
|distance=16}}
{{Sound table
|sound=Iron Door close1.ogg
|sound2=Iron Door close2.ogg
|sound3=Iron Door close3.ogg
|sound4=Iron Door close4.ogg
|subtitle=Door creaks
|source=block
|description=When an iron door closes
|id=block.iron_door.close
|translationkey=subtitles.block.door.toggle
|volume=0.9
|pitch=0.9-1.0
|distance=16}}
{{Sound table
|sound=Wooden Door open3.ogg
|sound2=Wooden Door open4.ogg
|subtitle=Door creaks
|source=block
|description=When a wooden door opens
|id=block.wooden_door.open
|translationkey=subtitles.block.door.toggle
|volume=0.9
|pitch=0.9-1.0
|distance=16}}
{{Sound table
|sound=Wooden Door close2.ogg
|sound2=Wooden Door close5.ogg
|sound3=Wooden Door close6.ogg
|subtitle=Door creaks
|source=block
|description=When a wooden door closes
|id=block.wooden_door.close
|translationkey=subtitles.block.door.toggle
|volume=0.9
|pitch=0.9-1.0
|distance=16}}
{{Sound table
|rowspan=2
|sound=Cherry door toggle1.ogg
|sound2=Cherry door toggle2.ogg
|sound3=Cherry door toggle3.ogg
|sound4=Cherry door toggle4.ogg
|subtitle=Door creaks
|source=block
|description=When a cherry wood door opens
|id=block.cherry_wood_door.open
|translationkey=subtitles.block.door.toggle
|volume=0.9
|pitch=0.9-1.0
|distance=16}}
{{Sound table
|subtitle=Door creaks
|source=block
|description=When a cherry wood door closes
|id=block.cherry_wood_door.close
|translationkey=subtitles.block.door.toggle
|volume=0.9
|pitch=0.9-1.0
|distance=16}}
{{Sound table
|rowspan=2
|sound=Bamboo Door toggle1.ogg
|sound2=Bamboo Door toggle2.ogg
|sound3=Bamboo Door toggle3.ogg
|sound4=Bamboo Door toggle4.ogg
|subtitle=Door creaks
|source=block
|description=When a bamboo wood door opens
|id=block.bamboo_wood_door.open
|translationkey=subtitles.block.door.toggle
|volume=0.9
|pitch=0.9-1.0
|distance=16}}
{{Sound table
|subtitle=Door creaks
|source=block
|description=When a bamboo wood door closes
|id=block.bamboo_wood_door.close
|translationkey=subtitles.block.door.toggle
|volume=0.9
|pitch=0.9-1.0
|distance=16}}
{{Sound table
|rowspan=2
|sound=Nether Door toggle1.ogg
|sound2=Nether Door toggle2.ogg
|sound3=Nether Door toggle3.ogg
|sound4=Nether Door toggle4.ogg
|subtitle=Door creaks
|source=block
|description=When a Nether wood door opens
|id=block.nether_wood_door.open
|translationkey=subtitles.block.door.toggle
|volume=1.0
|pitch=0.9-1.0
|distance=16}}
{{Sound table
|subtitle=Door creaks
|source=block
|description=When a Nether wood door closes
|id=block.nether_wood_door.close
|translationkey=subtitles.block.door.toggle
|volume=1.0
|pitch=0.9-1.0
|distance=16}}
{{Sound table
|sound=Zombie hit wood1.ogg
|sound2=Zombie hit wood2.ogg
|sound3=Zombie hit wood3.ogg
|sound4=Zombie hit wood4.ogg
|subtitle=Door shakes
|source=hostile
|description=When a [[zombie]] attacks a door
|id=entity.zombie.attack_wooden_door
|translationkey=subtitles.entity.zombie.attack_wooden_door
|volume=2.0
|pitch=0.8-1.2
|distance=16}}
{{Sound table
|sound=Zombie hit metal1.ogg
|sound2=Zombie hit metal2.ogg
|sound3=Zombie hit metal3.ogg
|subtitle=Block broken <ref group=sound name=ironsubtitle>{{Bug|MC-226770}}</ref>
|source=None
|description=''Unused sound event''<ref group=sound>{{bug|MC-218122}}</ref>
|id=entity.zombie.attack_iron_door
|translationkey=subtitles.block.generic.break|translationkeynote=<ref group=sound name=ironsubtitle/>
|volume=''None''
|pitch=''None''
|distance=''None''}}
{{Sound table
|sound=Zombie breaks door.ogg
|subtitle=Door breaks
|source=hostile
|description=When a zombie breaks a door
|id=entity.zombie.break_wooden_door
|translationkey=subtitles.entity.zombie.break_wooden_door
|volume=2.0
|pitch=0.8-1.2
|distance=16
|foot=1}}
{{el|bedrock}}:
{{Sound table
|type=bedrock
|sound=Iron Door open1.ogg
|sound2=Iron Door open2.ogg
|sound3=Iron Door open3.ogg
|sound4=Iron Door open4.ogg
|source=block
|description=When an iron door opens
|id=open.iron_door
|volume=0.9
|pitch=0.9-1.0}}
{{Sound table
|sound=Iron Door close1.ogg
|sound2=Iron Door close2.ogg
|sound3=Iron Door close3.ogg
|sound4=Iron Door close4.ogg
|source=block
|description=When an iron door closes
|id=close.iron_door
|volume=0.9
|pitch=0.9-1.0}}
{{Sound table
|sound=Wooden Door open3.ogg
|sound2=Wooden Door open4.ogg
|source=block
|description=When a wooden door opens
|id=open.wooden_door
|volume=0.9
|pitch=0.9-1.0}}
{{Sound table
|sound=Wooden Door close2.ogg
|sound2=Wooden Door close5.ogg
|sound3=Wooden Door close6.ogg
|source=block
|description=When a wooden door closes
|id=close.wooden_door
|volume=0.9
|pitch=0.9-1.0}}
{{Sound table
|rowspan=2
|sound=Cherry door toggle1.ogg
|sound2=Cherry door toggle2.ogg
|sound3=Cherry door toggle3.ogg
|sound4=Cherry door toggle4.ogg
|source=block
|description=When a cherry wood door opens
|id=open.cherry_wood_door
|volume=1.0
|pitch=0.9-1.0}}
{{Sound table
|source=block
|description=When a cherry wood door closes
|id=close.cherry_wood_door
|volume=1.0
|pitch=0.9-1.0}}
{{Sound table
|rowspan=2
|sound=Bamboo Door toggle1.ogg
|sound2=Bamboo Door toggle2.ogg
|sound3=Bamboo Door toggle3.ogg
|sound4=Bamboo Door toggle4.ogg
|source=block
|description=When a bamboo wood door opens
|id=open.bamboo_wood_door
|volume=0.9
|pitch=0.9-1.0}}
{{Sound table
|source=block
|description=When a bamboo wood door closes
|id=close.bamboo_wood_door
|volume=0.9
|pitch=0.9-1.0}}
{{Sound table
|rowspan=2
|sound=Nether Door toggle1.ogg
|sound2=Nether Door toggle2.ogg
|sound3=Nether Door toggle3.ogg
|sound4=Nether Door toggle4.ogg
|source=block
|description=When a Nether wood door opens
|id=open.nether_wood_door
|volume=1.0
|pitch=0.9-1.0}}
{{Sound table
|source=block
|description=When a Nether wood door closes
|id=close.nether_wood_door
|volume=1.0
|pitch=0.9-1.0}}
{{Sound table
|sound=Zombie hit wood1.ogg
|sound2=Zombie hit wood2.ogg
|sound3=Zombie hit wood3.ogg
|sound4=Zombie hit wood4.ogg
|source=hostile
|description=While a zombie is breaking a wooden door
|id=mob.zombie.wood
|volume=1.0
|pitch=1.0}}
{{Sound table
|sound=Zombie breaks door.ogg
|source=hostile
|description=When a zombie breaks a wooden door
|id=mob.zombie.woodbreak
|volume=1.0
|pitch=1.0
|foot=1}}
== Data values ==
=== ID ===
{{edition|java}}:
{{ID table
|edition=java
|showblocktags=y
|showitemtags=y
|showforms=y
|generatetranslationkeys=y
|displayname=Iron Door
|spritetype=block
|nameid=iron_door
|blocktags=doors
|itemtags=doors}}
{{ID table
|displayname=Oak Door
|spritetype=block
|nameid=oak_door
|blocktags=doors, wooden_doors
|itemtags=doors, wooden_doors}}
{{ID table
|displayname=Spruce Door
|spritetype=block
|nameid=spruce_door
|blocktags=doors, wooden_doors
|itemtags=doors, wooden_doors}}
{{ID table
|displayname=Birch Door
|spritetype=block
|nameid=birch_door
|blocktags=doors, wooden_doors
|itemtags=doors, wooden_doors}}
{{ID table
|displayname=Jungle Door
|spritetype=block
|nameid=jungle_door
|blocktags=doors, wooden_doors
|itemtags=doors, wooden_doors}}
{{ID table
|displayname=Acacia Door
|spritetype=block
|nameid=acacia_door
|blocktags=doors, wooden_doors
|itemtags=doors, wooden_doors}}
{{ID table
|displayname=Dark Oak Door
|spritetype=block
|nameid=dark_oak_door
|blocktags=doors, wooden_doors
|itemtags=doors, wooden_doors}}
{{ID table
|displayname=Mangrove Door
|spritetype=block
|nameid=mangrove_door
|blocktags=doors, wooden_doors
|itemtags=doors, wooden_doors}}
{{ID table
|displayname=Cherry Door
|spritetype=block
|nameid=cherry_door
|blocktags=doors, wooden_doors
|itemtags=doors, wooden_doors}}
{{ID table
|displayname=Bamboo Door
|spritetype=block
|nameid=bamboo_door
|blocktags=doors, wooden_doors
|itemtags=doors, wooden_doors}}
{{ID table
|displayname=Crimson Door
|spritetype=block
|nameid=crimson_door
|blocktags=doors, non_flammable_wood, wooden_doors
|itemtags=doors, non_flammable_wood, wooden_doors}}
{{ID table
|displayname=Warped Door
|spritetype=block
|nameid=warped_door
|blocktags=doors, non_flammable_wood, wooden_doors
|itemtags=doors, non_flammable_wood, wooden_doors
|foot=1}}
{{edition|bedrock}}:
{{ID table
|edition=bedrock
|showitemtags=y
|firstcolumnname=Door
|shownumericids=y
|showforms=y
|generatetranslationkeys=y
|spritename=iron-door
|displayname=Iron block
|spritetype=block
|nameid=iron_door
|id=71
|form=block
|itemform=item.iron_door}}
{{ID table
|spritename=oak-door
|displayname=Oak block
|spritetype=block
|nameid=wooden_door
|id=64
|form=block
|itemform=item.wooden_door
|translationkey=-}}
{{ID table
|spritename=spruce-door
|displayname=Spruce block
|spritetype=block
|nameid=spruce_door
|id=193
|form=block
|itemform=item.spruce_door
|translationkey=-}}
{{ID table
|spritename=birch-door
|displayname=Birch block
|spritetype=block
|nameid=birch_door
|id=194
|form=block
|itemform=item.birch_door
|translationkey=-}}
{{ID table
|spritename=jungle-door
|displayname=Jungle block
|spritetype=block
|nameid=jungle_door
|id=195
|form=block
|itemform=item.jungle_door
|translationkey=-}}
{{ID table
|spritename=acacia-door
|displayname=Acacia block
|spritetype=block
|nameid=acacia_door
|id=196
|form=block
|itemform=item.acacia_door
|translationkey=-}}
{{ID table
|spritename=dark-oak-door
|displayname=Dark Oak block
|spritetype=block
|nameid=dark_oak_door
|id=197
|form=block
|itemform=item.dark_oak_door
|translationkey=-}}
{{ID table
|spritename=mangrove-door
|displayname=Mangrove block
|spritetype=block
|nameid=mangrove_door
|id=-493
|form=block
|itemform=item.mangrove_door
|translationkey=-}}
{{ID table
|displayname=Cherry Door
|spritetype=block
|nameid=cherry_door
|id=-531
|itemtags=minecraft:door
|translationkey=item.cherry_door.name}}
{{ID table
|displayname=Bamboo Door
|spritetype=block
|nameid=bamboo_door
|id=-517
|itemtags=minecraft:door
|translationkey=item.bamboo_door.name}}
{{ID table
|spritename=crimson-door
|displayname=Crimson block
|spritetype=block
|nameid=crimson_door
|id=499
|form=block
|itemform=item.crimson_door}}
{{ID table
|spritename=warped-door
|displayname=Warped block
|spritetype=block
|nameid=warped_door
|id=500
|form=block
|itemform=item.warped_door}}
{{ID table
|spritename=iron-door
|displayname=Iron item
|spritetype=item
|nameid=iron_door
|id=372
|form=item
|itemtags=minecraft:door}}
{{ID table
|spritename=oak-door
|displayname=Oak item
|spritetype=item
|nameid=wooden_door
|id=359
|form=item
|itemtags=minecraft:door}}
{{ID table
|spritename=spruce-door
|displayname=Spruce item
|spritetype=item
|nameid=spruce_door
|id=553
|form=item
|itemtags=minecraft:door}}
{{ID table
|spritename=birch-door
|displayname=Birch item
|spritetype=item
|nameid=birch_door
|id=554
|form=item
|itemtags=minecraft:door}}
{{ID table
|spritename=jungle-door
|displayname=Jungle item
|spritetype=item
|nameid=jungle_door
|id=555
|form=item
|itemtags=minecraft:door}}
{{ID table
|spritename=acacia-door
|displayname=Acacia item
|spritetype=item
|nameid=acacia_door
|id=556
|form=item
|itemtags=minecraft:door}}
{{ID table
|spritename=dark-oak-door
|displayname=Dark Oak item
|spritetype=item
|nameid=dark_oak_door
|id=557
|form=item
|itemtags=minecraft:door}}
{{ID table
|spritename=mangrove-door
|displayname=Mangrove item
|spritetype=item
|nameid=mangrove_door
|id=641
|form=item
|itemtags=minecraft:door}}
{{ID table
|spritename=crimson-door
|displayname=Crimson item
|spritetype=item
|nameid=crimson_door
|id=616
|form=item
|itemtags=minecraft:door}}
{{ID table
|spritename=warped-door
|displayname=Warped item
|spritetype=item
|nameid=warped_door
|id=617
|form=item
|itemtags=minecraft:door
|foot=1}}
=== Block states ===
{{see also|Block states}}
{{/BS}}
== Video ==
Note: The videos do not mention or state Crimson, Warped, Bamboo, or Cherry doors, since the videos were uploaded before 1.16.
<div style="text-align:center">
<span style="display:inline-block">{{yt|7jlIQcbHFts}}</span>
<span style="display:inline-block">{{yt|CC6ujEdvzQY}}</span>
</div>
== History ==
''For a history of changes to textures and models for each block state, see [[/Asset history]]''
{{History||3 June 2010|link=https://notch.tumblr.com/post/659506746/asynchronous-saving-and-loading-and-slightly-more|Notch states plans to implement doors.}}
{{History|java infdev}}{{History||20100607|[[File:Oak Door JE1.png|32px]] [[File:Oak Door (Right) JE1.png|32px]] [[File:Oak Door (item) JE1.png|32px]] Added wooden doors.}}
{{History||20100608|Doors have been given smarter rotation logic.}}
{{History||20100611|[[File:Oak Door JE2.png|32px]] [[File:Oak Door (Right) JE2.png|32px]] The models of doors have been changed to use door bottom half texture on sides instead of the wooden [[planks]] texture.}}
{{History||20100618|[[File:Oak Door JE3 BE1.png|32px]] [[File:Oak Door (Right) JE3.png|32px]] The textures of doors have been changed.}}
{{History||20100624|[[File:Oak Door (Right) JE4 BE1.png|32px]] The model of door with right hinge has been changed to mirror and use textures of door with left hinge.}}
{{History|java alpha}}
{{History||v1.0.1|[[File:Iron Door JE1 BE1.png|32px]] [[File:Iron Door (Right) JE1 BE1.png|32px]] [[File:Iron Door (item) JE1 BE1.png|32px]] Added iron doors.
|[[File:Oak Door (item) JE2 BE1.png|32px]] The texture of wooden doors in [[item]] form has been changed.
|Doors can now be controlled by redstone power.}}
{{History|java beta}}
{{History||1.7|Punching the back face of a left-hinge oak or iron door or the front face of a right-hinge door, as well as destroying a door, would [[Java Edition placeholder texture uses|create]] particles using the [[Placeholder texture#Texture atlas blank spaces|block placeholder texture]].}}
{{History||1.7.3|Doors no longer produce placeholder texture particles.}}
{{History||1.8|snap=Pre-release|Doors now occur naturally in [[village]]s and [[stronghold]]s.}}
{{History|java}}
{{History||1.0.0|snap=Beta 1.9 Prerelease 6|Wooden doors are now broken faster using an [[axe]].
|Iron doors are broken much faster using a [[pickaxe]], and the [[mining]] speed is now [[tier]] dependent.}}
{{History|||snap=RC1|The opening and closing [[sound]]s for doors have been changed.}}
{{History||1.1|snap=11w47a|Double doors now open correctly.}}
{{History||1.2.1|snap=12w05b|[[Villager]]s can now open and close doors.}}
{{History|||snap=12w06a|[[File:Oak Door JE4 BE3.png|32px]] [[File:Iron Door JE2 BE5.png|32px]] Changed top model of door.
|[[Zombie]]s can now break wooden doors.
|Doors have been changed to properly detect if they are open or closed. Placing two [[pressure plate]]s directly in front of doors and stepping on them now opens them correctly.}}
{{History|||snap=12w07a|Zombies can no longer break iron doors.}}
{{History||1.4.2|snap=12w40a|Wooden doors can no longer be opened by attacking (left-click).}}
{{History||1.8|snap=December 13, 2013|slink=https://twitter.com/jeb_/status/411425952338808832|[[Jens Bergensten|Jeb]] tweeted an image showing that the crafting recipes for doors are changed so that 3 doors are crafted at once. Doors are also stackable to 64.}}
{{History|||snap=14w02a|Doors are now stackable to 64.
|The [[crafting]] recipes of doors now yield 3 doors instead of 1.}}
{{History|||snap=14w10a|[[File:Oak Door JE5.png|32px]] [[File:Iron Door JE3.png|32px]] The models of doors have been changed.}}
{{History|||snap=August 8, 2014|slink=https://twitter.com/TheMogMiner/status/497751889102905344|[[Ryan Holtz|TheMogMiner]] tweeted an image showing new types of [[wood]] doors.}}
{{History|||snap=14w32d|[[File:Spruce Door JE1 BE1.png|32px]] [[File:Birch Door JE1 BE1.png|32px]] [[File:Jungle Door JE1.png|32px]] [[File:Acacia Door JE1.png|32px]] [[File:Dark Oak Door JE1 BE1.png|32px]] [[File:Spruce Door (item) JE1.png|32px]] [[File:Birch Door (item) JE1.png|32px]] [[File:Jungle Door (item) JE1.png|32px]] [[File:Acacia Door (item) JE1.png|32px]] [[File:Dark Oak Door (item) JE1.png|32px]] New types of wood doors have been added: spruce, birch, jungle, acacia and dark oak.}}
{{History|||snap=14w33a|[[File:Jungle Door JE2 BE1.png|32px]] [[File:Acacia Door JE2 BE1.png|32px]] The models of jungle and acacia doors no longer have inner faces in the holes in their models.
|[[File:Spruce Door (item) JE2.png|32px]] [[File:Birch Door (item) JE2.png|32px]] [[File:Jungle Door (item) JE2.png|32px]] [[File:Acacia Door (item) JE2.png|32px]] [[File:Dark Oak Door (item) JE2.png|32px]] [[Item]] textures of new doors have been changed to match the dimensions of oak and iron doors.
|The wooden door (''Door'') has been renamed to ''Oak Door''.}}
{{History|||snap=14w33b|[[File:Oak Door (item) JE3 BE2.png|32px]] [[File:Spruce Door (item) JE3 BE1.png|32px]] [[File:Birch Door (item) JE3 BE1.png|32px]] [[File:Jungle Door (item) JE3 BE1.png|32px]] [[File:Acacia Door (item) JE3 BE1.png|32px]] [[File:Dark Oak Door (item) JE3 BE1.png|32px]][[File:Iron Door (item) JE2 BE2.png|32px]] All [[item]] textures for all doors have been changed. Doors now have hinges on the left and handles on the right, existing wooden doors & iron doors have a slight item textures change as well.}}
{{History||1.9|snap=15w31a|[[File:Birch Door JE2.png|32px]] [[File:Jungle Door JE3.png|32px]] [[File:Acacia Door JE3.png|32px]] [[File:Dark Oak Door JE2.png|32px]] Shading on the [[block]] textures of birch, jungle, acacia, and dark oak doors have been changed, so that the shadow is in the upper left and the highlight is in the lower right.}}
{{History|||snap=15w43a|Iron doors now have different [[sound]]s than wooden doors.
|Doors now have [[sound]]s for placing and different sounds for opening and closing - see sounds section.}}
{{History|||snap=15w47a|Doors now make [[sound]]s when placed,<ref>{{bug|MC-2844}} – "Doors have no placement sound." resolved as "Fixed"</ref> despite these apparently already being added in 15w43a.}}
{{History|||snap=15w49a|Doors are now placed facing left/right depending on which half of the [[block]] the [[player]] clicks on, unless neighboring doors or solid/opaque blocks cause them to place a certain way.}}
{{History||1.10|snap=16w20a|Acacia and spruce doors now generate in [[savanna]] and [[taiga]] [[villages]].}}
{{History||1.11|snap=16w33a|Wooden doors can now be used to fuel [[furnace]]s.|Iron doors no longer have a right-click action - previously they would result in the hand swinging, and would override other valid right click actions such as snowball throwing.}}
{{History|||snap=16w39a|Dark oak doors and iron doors now generate in [[woodland mansion]]s.}}
{{History||July 19, 2017|link=https://twitter.com/jeb_/status/887599625045250048|[[Jeb]] tweets image of a new jungle [[wood planks]], jungle doors, [[cauldron]], and [[dandelion]] textures.}}
{{History||1.13|snap=17w47a|The oak door ID has been changed from <code>wooden_door</code> to <code>oak_door</code>.
|Prior to [[1.13/Flattening|''The Flattening'']], these [[block]]s' numeral IDs were 64, 71, 193, 194, 195, 196 and 197, and the [[item]]s' 324, 330, 427, 428, 429, 430 and 431.}}
{{History|||snap=18w11a|Doors now generate as part of the newly added [[shipwreck]]s.}}
{{History||1.14|snap=18w43a|[[File:Oak Door JE6.png|32px]] [[File:Spruce Door JE2.png|32px]] [[File:Birch Door JE3.png|32px]] [[File:Jungle Door JE4.png|32px]] [[File:Acacia Door JE4.png|32px]] [[File:Dark Oak Door JE3.png|32px]] [[File:Iron Door JE4.png|32px]] The textures of all doors have been changed.
|[[Vindicator]]s can now break doors.}}
{{History|||snap=18w47b|[[File:Spruce Door JE3.png|32px]] The textures of spruce doors have been changed.}}
{{History|||snap=18w49a|Added [[snowy tundra]] villages, which generate with spruce doors.}}
{{History|||snap=18w50a|The updated [[desert]] villages now generate with jungle doors instead of oak doors.}}
{{History|||snap=19w08a|[[File:Oak Door JE7.png|32px]] The texture of oak doors has been changed.}}
{{History|||snap=19w12b|Doors can now be placed on glass, ice, glowstone and sea lanterns.}}
{{History|||snap=19w13a|[[Evoker]]s and [[pillager]]s can now open doors during [[raid]]s.}}
{{History|||snap=19w14a|Pillagers can no longer open doors.}}
{{History||1.15|snap=19w39a|Iron doors must now be mined with a [[pickaxe]] for it to be dropped as an [[item]].}}
{{History||1.16|snap=20w06a|[[File:Crimson Door JE1.png|32px]] [[File:Warped Door JE1.png|32px]] [[File:Crimson Door (item) JE1 BE1.png|32px]] [[File:Warped Door (item) JE1 BE1.png|32px]] Added crimson and warped doors.}}
{{History|||snap=20w07a|Added [[piglin]]s, which can open and close doors.}}
{{History|||snap=20w19a|[[File:Crimson Door JE2.png|32px]] [[File:Warped Door JE2.png|32px]] [[File:Crimson Door (item) JE2 BE2.png|32px]] [[File:Warped Door (item) JE2 BE2.png|32px]] The textures of crimson and warped doors have been changed.}}
{{History||1.17|snap=21w11a|[[File:Jungle Door (item) JE4 BE2.png|32px]] Changed the texture of the jungle door item.}}
{{History||1.18|snap=21w41a|[[File:Oak Door (item) JE4 BE3.png|32px]] [[File:Spruce Door (item) JE4 BE2.png|32px]] [[File:Birch Door (item) JE4 BE2.png|32px]] [[File:Jungle Door (item) JE5 BE3.png|32px]] [[File:Acacia Door (item) JE4 BE2.png|32px]] [[File:Dark Oak Door (item) JE4 BE2.png|32px]][[File:Iron Door (item) JE3 BE3.png|32px]] All [[item]] textures for all doors except crimson and warped have been changed.}}
{{History|||snap=Pre-release 5|[[File:Oak Door JE8.png|32px]] [[File:Spruce Door JE4.png|32px]] [[File:Birch Door JE4.png|32px]] [[File:Jungle Door JE5.png|32px]] [[File:Acacia Door JE5.png|32px]] [[File:Dark Oak Door JE4.png|32px]] [[File:Crimson Door JE3.png|32px]] [[File:Warped Door JE3.png|32px]] [[File:Iron Door JE5.png|32px]] Changed top and bottom models of door. Changed oak and iron doors textures.}}
{{History||1.19|snap=22w11a|[[File:Mangrove Door JE1.png|32px]][[File:Mangrove Door (item) JE1 BE1.png|32px]] Added mangrove door.}}
{{History|||snap=22w14a|Due to the addition of the [[mangrove tree]] and [[mangrove swamp]], mangrove doors are now obtainable and renewable.}}
{{History||October 15, 2022|link={{ytl|https://youtu.be/iM9KtHaDcUg?t=5659}}|[[File:Bamboo Door JE1.png|32px]] Bamboo doors were shown on [[Minecraft Live 2022]].}}
{{History||1.20<br>(Experimental)|link=1.19.3|snap=22w42a|[[File:Bamboo Door JE1.png|32px]] [[File:Bamboo Door (item) JE1 BE1.png|32px]] Added bamboo doors behind the [[Java Edition 1.20|Update 1.20 experimental datapack]].}}
{{History||1.20<br>(Experimental)|link=1.19.4|snap=23w07a|[[File:Cherry Door JE1.png|32px]] [[File:Cherry Door (item) JE1.png|32px]] Added cherry doors behind the [[Java Edition 1.20|Update 1.20 experimental datapack]].}}
{{History|||snap=1.19.4-pre2|[[File:Cherry Door JE2.png|32px]] [[File:Cherry Door (item) JE2.png|32px]] Changed the texture of cherry doors.}}
{{History||1.20|snap=23w12a|Bamboo and cherry doors are now available without using the "Update 1.20" experimental datapack.}}
{{History|pocket alpha}}
{{History||v0.1.0|[[File:Oak Door JE3 BE1.png|32px]] [[File:Iron Door JE1 BE1.png|32px]] Added doors.
[[File:Oak Door (bottom texture) JE2 BE1.png|32px]] [[File:Iron Door (bottom texture) JE1 BE1.png|32px]] These are the textures defined for the door blocks in <samp>[[gui_blocks.png]]</samp>. The door items exist, but due to a bug in the code that renders items in the hotbar, they cannot be used.}}
{{History||v0.1.3|[[File:Oak Door BE2.png|32px]] [[File:Iron Door BE2.png|32px]] The models of doors have been changed to not display transparency on upper half.}}
{{History||v0.2.0|[[File:Oak Door (item) JE2 BE1.png|32px]] [[File:Iron Door (item) JE1 BE1.png|32px]] Added door inventory icons.
|[[File:Oak Door JE3 BE1.png|32px]] [[File:Iron Door JE1 BE1.png|32px]] The models of doors have been changed to display transparency on upper half.
|Wooden doors are now available in the inventory, including in [[Creative]].}}
{{History||v0.2.1 alpha2|link=Pocket Edition v0.2.1 alpha2|[[File:Iron Door BE3.png|32px]] The textures of iron doors have been changed.}}
{{History||v0.3.0|A crafting recipe for wooden doors has been added.
|Survival players no longer start out with an infinite stack of wooden doors in the inventory.}}
{{History||v0.3.2|Wooden doors now drop their item form when broken.}}
{{History||v0.5.0|[[File:Oak Door JE4 BE3.png|32px]] [[File:Iron Door BE4.png|32px]] The models of doors have been changed.
|Wooden doors can now be obtained after activating the [[nether reactor]].}}
{{History||v0.8.0|snap=build 2|[[File:Iron Door JE2 BE5.png|32px]] The textures of iron doors have been changed to before v0.2.1 alpha2.}}
{{History||v0.11.0|snap=build 1|''Door'' has been now renamed to ''Oak Door''.}}
{{History||v0.12.1|snap=build 1|Doors are now stackable to 64.
|The [[crafting]] recipes of doors now yield 3 doors instead of 1.
|[[Zombie]]s can now break down wooden doors.
|Oak doors can now be opened by [[villager]]s.
|Oak doors are no longer available from the [[nether reactor]].}}
{{History||v0.13.0|snap=build 1|[[File:Spruce Door JE1 BE1.png|32px]] [[File:Birch Door JE1 BE1.png|32px]] [[File:Jungle Door JE2 BE1.png|32px]] [[File:Acacia Door JE2 BE1.png|32px]] [[File:Dark Oak Door JE1 BE1.png|32px]] [[File:Spruce Door (item) JE3 BE1.png|32px]] [[File:Birch Door (item) JE3 BE1.png|32px]] [[File:Jungle Door (item) JE3 BE1.png|32px]] [[File:Acacia Door (item) JE3 BE1.png|32px]] [[File:Dark Oak Door (item) JE3 BE1.png|32px]] Added spruce, birch, jungle, acacia and dark oak doors.
|Iron doors are now available in the [[Creative]] [[inventory]].
|A [[crafting]] recipe for iron doors has been added.
|Redstone mechanics added, making iron doors able to function normally.}}
{{History|||snap=build 2|Spruce, birch, jungle, acacia, and dark oak doors can now be opened by [[villager]]s.}}
{{History|||snap=build 4|[[File:Oak Door (item) JE3 BE2.png|32px]] [[File:Iron Door (item) JE2 BE2.png|32px]] The [[item]] textures of oak and iron door has been changed.}}
{{History||v0.15.0|snap=build 1|Acacia doors now generate in [[savanna]] [[village]]s.
|Spruce doors now generate in [[taiga]] and [[snowy tundra]] villages.}}
{{History|pocket}}
{{History||1.1.0|snap=alpha 1.1.0.0|Dark oak doors and iron doors now generate in [[woodland mansion]]s.
|Doors now have [[sound]]s when placed.<ref>{{bug|MCPE-10079}} – "Doors don't have a placement sound" resolved as "Fixed"</ref>}}
{{History|bedrock}}
{{History||1.4.0|snap=beta 1.2.14.2|Various wooden doors now generate in [[shipwreck]]s.}}
{{History||1.10.0|snap=beta 1.10.0.3|[[File:Oak Door BE4.png|32px]] [[File:Spruce Door BE2.png|32px]] [[File:Birch Door BE2.png|32px]] [[File:Jungle Door BE2.png|32px]] [[File:Acacia Door BE2.png|32px]] [[File:Dark Oak Door BE2.png|32px]] [[File:Iron Door BE6.png|32px]] The textures of all doors have been changed.
|Jungle doors now generate in the new [[desert]] [[village]]s.
|Added [[wandering trader]]s, which can open and close wooden doors.}}
{{History||1.11.0|snap=beta 1.11.0.7|[[Vindicator]]s can now break doors during [[raid]]s.}}
{{History||1.16.0|snap=beta 1.15.0.51|Zombies can no longer break iron doors.<ref>{{bug|MCPE-43725}}</ref>}}
{{History|||snap=beta 1.16.0.51|[[File:Crimson Door BE1.png|32px]] [[File:Warped Door BE1.png|32px]] [[File:Crimson Door (item) JE1 BE1.png|32px]] [[File:Warped Door (item) JE1 BE1.png|32px]] Added crimson and warped doors.
|Added [[piglin]]s, which can open and close doors.}}
{{History|||snap=beta 1.16.0.63|[[File:Crimson Door BE2.png|32px]] [[File:Warped Door BE2.png|32px]] [[File:Crimson Door (item) JE2 BE2.png|32px]] [[File:Warped Door (item) JE2 BE2.png|32px]] The textures of crimson and warped doors have been changed.}}
{{History||1.17.0|snap=beta 1.17.0.50|[[File:Jungle Door (item) JE4 BE2.png|32px]] Changed the texture of the jungle door item.}}
{{History||1.18.10|snap=beta 1.18.10.20|[[File:Oak Door (item) JE4 BE3.png|32px]] [[File:Spruce Door (item) JE4 BE2.png|32px]] [[File:Birch Door (item) JE4 BE2.png|32px]] [[File:Jungle Door (item) JE5 BE3.png|32px]] [[File:Acacia Door (item) JE4 BE2.png|32px]] [[File:Dark Oak Door (item) JE4 BE2.png|32px]][[File:Iron Door (item) JE3 BE3.png|32px]] All [[item]] textures for all doors except crimson and warped have been changed.}}
{{History||1.19.0|snap=beta 1.19.0.20|[[File:Mangrove Door BE1.png|32px]] [[File:Mangrove Door (item) JE1 BE1.png|32px]] Added mangrove doors.}}
{{History||Next Major Update<br>(Experimental)|link=Bedrock Edition 1.19.50|snap=beta 1.19.50.21|[[File:Bamboo Door BE1.png|32px]] [[File:Bamboo Door (item) JE1 BE1.png|32px]] Added bamboo doors behind the "[[Bedrock Edition 1.20|Next Major Update]]" [[experimental]] toggle.
|The doors now use the same opening and closing [[sound]] effects as ''[[Java Edition]]''.}}
{{History||Next Major Update<br>(Experimental)|link=Bedrock Edition 1.19.80|snap=beta 1.19.80.20|[[File:Cherry Door JE2.png|32px]] [[File:Cherry Door (item) JE2.png|32px]] Added cherry doors behind the "[[Bedrock Edition 1.20|Next Major Update]]" [[experimental]] toggle.}}
{{History||1.20.0|snap=beta 1.20.0.21|Bamboo and cherry doors are now available without using the "Next Major Update" experimental toggle.}}
{{History|console}}
{{History||xbox=TU1|xbone=CU1|ps=1.0|wiiu=Patch 1|switch=1.0.1|[[File:Oak Door JE3 BE1.png|32px]] [[File:Iron Door JE1 BE1.png|32px]] [[File:Oak Door (item) JE2 BE1.png|32px]] [[File:Iron Door (item) JE1 BE1.png|32px]] Added doors.}}
{{History||xbox=TU5|Doors can be found in the Redstone & Transportation tab in the [[Creative inventory]].}}
{{History||xbox=TU14|ps=1.04|Doors being broken by [[zombie]]s now show [[damage]].
|Moved doors to the Building Blocks tab in the Creative inventory.}}
{{History||xbox=TU25|xbone=CU14|ps=1.17|[[File:Spruce Door JE1 BE1.png|32px]] [[File:Birch Door JE1 BE1.png|32px]] [[File:Jungle Door JE2 BE1.png|32px]] [[File:Spruce Door (item) JE3 BE1.png|32px]] [[File:Birch Door (item) JE3 BE1.png|32px]] [[File:Jungle Door (item) JE3 BE1.png|32px]] Added spruce, birch, and jungle door variants.
|The [[crafting]] recipes of doors now yield 3 doors instead of 1.
|The original wooden door (''Door'') has been renamed to ''Oak Door''.}}
{{History||xbox=TU27|xbone=CU15|ps=1.18|[[File:Acacia Door JE2 BE1.png|32px]] [[File:Dark Oak Door JE1 BE1.png|32px]] [[File:Acacia Door (item) JE3 BE1.png|32px]] [[File:Dark Oak Door (item) JE3 BE1.png|32px]] Acacia and dark oak doors have been added to the [[Creative]] [[inventory]].}}
{{History||xbox=TU31|xbone=CU19|ps=1.22|wiiu=Patch 3|Acacia doors and dark oak doors are now obtainable in [[survival]] mode.}}
{{History||?| [[File:Oak Door (item) JE3 BE2.png|32px]] [[File:Iron Door (item) JE2 BE2.png|32px]] Oak and iron door's inventory textures have been changed to match Java Edition}}
{{History||xbox=none|xbone=none|ps=1.90|wiiu=none|switch=none|[[File:Oak Door BE4.png|32px]] [[File:Spruce Door BE2.png|32px]] [[File:Birch Door BE2.png|32px]] [[File:Jungle Door BE2.png|32px]] [[File:Acacia Door BE2.png|32px]] [[File:Dark Oak Door BE2.png|32px]] [[File:Iron Door BE6.png|32px]] The textures of all doors have been changed.}}
{{History|new 3ds}}
{{History||0.1.0|[[File:Oak Door JE2.png|32px]] [[File:Spruce Door JE1 BE1.png|32px]] [[File:Birch Door JE1 BE1.png|32px]] [[File:Jungle Door JE2 BE1.png|32px]] [[File:Acacia Door JE2 BE1.png|32px]] [[File:Dark Oak Door JE1 BE1.png|32px]] [[File:Iron Door JE2 BE5.png|32px]] [[File:Oak Door (item) JE3 BE2.png|32px]] [[File:Spruce Door (item) JE3 BE1.png|32px]] [[File:Birch Door (item) JE3 BE1.png|32px]] [[File:Jungle Door (item) JE3 BE1.png|32px]] [[File:Acacia Door (item) JE3 BE1.png|32px]] [[File:Dark Oak Door (item) JE3 BE1.png|32px]] [[File:Iron Door (item) JE1 BE1.png|32px]] Added doors.}}
{{History|foot}}
<gallery>
Beta 1.7 punching oak door.png|From [[Java Edition Beta 1.7]] to Beta 1.7.2, doors produced [[placeholder texture]] particles when broken or punched on some sides.
</gallery>
Historical sounds:
{| class="wikitable"
! Sound
! From
! to
! Pitch
|-
| {{sound||Door closing old.ogg|Door opening old.ogg}}
| ?
| Sound Update
| ?
|-
| {{sound||Door open.ogg|Door close.ogg}}
| Sound Update
| 15w43a
| ?
|}
=== Door "items" ===
{{:Technical blocks/Doors}}
== Issues ==
{{Issue list}}
== Trivia ==
* Door models have an extra hinge on the opposite side of the actual functional hinge.<ref>{{bug|MC-106697|||WAI}}</ref>
== Gallery ==
<gallery>
Oak Door.png|Oak Door
Spruce Door.png|Spruce Door
Birch Door.png|Birch Door
Jungle Door.png|Jungle Door
Acacia Door.png|Acacia Door
Dark Oak Door.png|Dark Oak Door
Mangrove Door.png|Mangrove Door
Cherry Door.png|Cherry Door
Bamboo Door.png|Bamboo Door
Crimson Door.png|Crimson Door
Warped Door.png|Warped Door
Iron Door.png|Iron Door
Oak Door (item) JE4 BE3.png|Oak Door (item)
Spruce Door (item) JE4 BE2.png|Spruce Door (item)
Birch Door (item) JE4 BE2.png|Birch Door (item)
Jungle Door (item) JE5 BE3.png|Jungle Door (item)
Acacia Door (item) JE4 BE2.png|Acacia Door (item)
Dark Oak Door (item) JE4 BE2.png|Dark Oak Door (item)
Mangrove Door (item) JE1 BE1.png|Mangrove Door (item)
Cherry Door (item) JE2.png|Cherry Door (item)
Bamboo Door (item) JE1 BE1.png|Bamboo Door (item)
Crimson Door (item) JE2 BE2.png|Crimson Door (item)
Warped Door (item) JE2 BE2.png|Warped Door (item)
Iron Door (item) JE3 BE3.png|Iron Door (item)
</gallery>
=== Screenshots ===
<gallery>
Iron Door in Stronghold.png|Naturally occurring iron door in a [[stronghold]].
Wooden Doors 1.8.png|First picture of brand-new 1.8 variants of doors.
Door Creeper.png|A creeper behind some dark oak doors.
Doortypes.png|All types of doors with their respective trapdoors.
FloatingDoorArrows.jpg|Arrows shot into a door that was opened, causing a floating bug.
Jeb Crafting Doors.png|First image of three doors being crafted at once.
Jappa Closet.jpg|A closet made from oak doors.
</gallery>
=== Concept Art ===
<gallery>
Bamboo Wood and Door Concept Art.png|Bamboo door concept art.
Bamboo Door Prototype Textures.png|Bamboo door prototype textures.
</gallery>
== References ==
{{Reflist}}
== External Links ==
*[https://www.minecraft.net/en-us/article/taking-inventory--door Taking Inventory: Door] – Minecraft.net on September 29, 2022
{{Redstone}}
{{Blocks|Utility}}
{{Items}}
[[Category:Manufactured blocks]]
[[Category:Generated structure blocks]]
[[Category:Utility blocks]]
[[Category:Mechanics]]
[[Category:Redstone mechanics]]
[[Category:Mechanisms]]
[[cs:Dveře]]
[[de:Tür]]
[[el:Door]]
[[es:Puerta]]
[[fr:Porte]]
[[hu:Ajtók]]
[[it:Porta]]
[[ja:ドア]]
[[ko:문]]
[[nl:Deur]]
[[pl:Drzwi]]
[[pt:Porta]]
[[ru:Дверь]]
[[th:ประตู]]
[[uk:Двері]]
[[zh:门]]</li></ul> | build 1 | File:Vines JE1 BE1.png Added vines. | |||
v0.15.0{{Extension DPL}}<ul><li>[[Cookie|Cookie]]<br/>{{Item
| title = Cookie
| image = Cookie.png
| heals = {{hunger|2}}
| renewable = Yes
| stackable = Yes (64)
}}
'''Cookies''' are [[food]] items that can be obtained in large quantities, but do not restore hunger or saturation significantly.
== Obtaining ==
=== Trading ===
Journeyman-level farmer [[villager]]s sell 18 cookies for 3 [[emerald]]s as part of their trades.
=== Crafting ===
{{Crafting
|A2= Wheat
|B2= Cocoa Beans
|C2= Wheat
|Output= Cookie,8
|type= Foodstuff
}}
=== Villager gifts ===
{{in|java}}, if the [[player]] has the [[Hero of the Village]] effect, a farmer villager may gift them a cookie.
== Usage ==
=== Food ===
To eat a cookie, press and hold {{control|use}} while it is selected in the hotbar. Eating one restores {{hunger|2}} [[hunger]] and 0.4 hunger
[[Hunger#Mechanics|saturation]].
=== Parrots ===
Feeding a cookie to a [[parrot]] kills the parrot instantly, and causes it to give off [[Poison]] [[particles]] as it dies due to chocolate being toxic to parrots.
{{IN|Bedrock}}, feeding a cookie to a parrot inflicts the parrot with [[Fatal Poison]] for 1,000 seconds.
=== Composting ===
Placing a cookie into a [[composter]] has an 85% chance of raising the compost level by 1.
Considering the high yield of cookies (8 cookies from 1 cocoa bean and 2 wheats) and the higher chance to successfully compost a cookie (85%), it is more efficient to craft cookies to compost rather than using separate ingredients. For example, 100 wheats and 50 cocoa beans, which in total could yield only 13.92 bone meal on average, could be crafted into 400 cookies to yield 48.57 bone meal on average.
== Sounds ==
{{Sound table/Entity/Food}}
== Advancements ==
{{load advancements|Husbandry;A Balanced Diet}}
== Data values ==
=== ID ===
{{edition|java}}:
{{ID table
|edition=java
|showforms=y
|generatetranslationkeys=y
|displayname=Cookie
|spritetype=item
|nameid=cookie
|form=item
|foot=1}}
{{edition|bedrock}}:
{{ID table
|edition=bedrock
|shownumericids=y
|showforms=y
|notshowbeitemforms=y
|generatetranslationkeys=y
|displayname=Cookie
|spritetype=item
|nameid=cookie
|id=271
|form=item
|foot=1}}
== History ==
{{History|java beta}}
{{History||1.4|[[File:Cookie JE1 BE1.png|32px]] Added cookies.
|Cookies restore {{hp|1}} and are currently the only stackable [[food]], up to 8 cookies per stack.}}
{{History||1.8|snap=Pre-release|Cookies can now be stacked to 64.
|Cookies now restore {{hunger|1}}.}}
{{History|java}}
{{History||1.3.1|snap=12w18a|Cocoa beans have become farmable, making cookies [[renewable resource|renewable]] and ''much'' cheaper.}}
{{History|||snap=12w19a|Cookies now restore {{hunger|2}} instead of {{hunger|1}}.}}
{{History|||snap=12w21a|Farmer [[villager]]s now [[trading|sell]] 8–10 cookies for 1 [[emerald]].}}
{{History||1.8|snap=14w02a|Farmer villagers now sell 6 cookies for 1 emerald.}}
{{History||1.11|snap=16w33a|Farmer villagers now sell 6–10 cookies for 1 emerald.}}
{{History||1.12|snap=17w13a|Cookies can now be used to tame [[parrot]]s.}}
{{History|||snap=pre3|Cookies are no longer used to tame [[parrot]]s. Instead, a cookie now instantly kills a parrot.}}
{{History||1.13|snap=17w47a|Prior to [[1.13/Flattening|''The Flattening'']], this [[item]]'s numeral ID was 357.}}
{{History||1.14|snap=18w43a|[[File:Cookie JE2 BE2.png|32px]] The texture of cookies has been changed.}}
{{History|||snap=19w03a|Placing a cookie into the new [[composter]] has a 80% chance of raising the compost level by 1.}}
{{History|||snap=19w05a|Cookies now have an 85% chance of increasing the compost level in a composter by 1.}}
{{History|||snap=19w13a|Farmer villagers now give cookies to players under the [[Hero of the Village]] effect.}}
{{History|pocket alpha}}
{{History||v0.9.0|snap=build 1|[[File:Cookie JE1 BE1.png|32px]] Added cookies.}}
{{History||v0.12.1|snap=build 1|Cookies now restore [[hunger]] instead of [[health]].}}
{{History|pocket}}
{{History||1.0.4|snap=alpha 1.0.4.0|Farmer [[villager]]s now [[trading|sell]] 6-10 cookies for 1 [[emerald]].}}
{{History|bedrock}}
{{History||1.2.0|snap=beta 1.2.0.2|Cookies can now be used to inflict a fatal [[Poison]] [[status effect]] to [[parrot]]s.}}
{{History||1.10.0|snap=beta 1.10.0.3|[[File:Cookie JE2 BE2.png|32px]] The texture of cookies has been changed.}}
{{History||1.11.0|snap=beta 1.11.0.1|Cookies can now be used to fill up [[composter]]s.}}
{{History|||snap=beta 1.11.0.4|Farmer [[villager]]s now [[trading|sell]] 18 cookies for 3 [[emerald]]s as part of their third tier [[trading|trades]].}}
{{History|console}}
{{History||xbox=TU1|xbone=CU1|ps=1.0|wiiu=Patch 1|[[File:Cookie JE1 BE1.png|32px]] Added cookies.}}
{{History||xbox=none|xbone=none|ps=1.90|wiiu=none|switch=none|[[File:Cookie JE2 BE2.png|32px]] The texture of cookies has been changed.}}
{{History|new 3ds}}
{{History||0.1.0|[[File:Cookie JE1 BE1.png|32px]] Added cookies.}}
{{History|foot}}
== Issues ==
{{issue list}}
== Gallery ==
<gallery>
File:12w21a CookiePurchase.png|Cookies being obtained by [[trading]] with a farmer [[villager]].
File:Eating Steve.png|[[Steve]] eating a cookie.
File:Eating Alex.png|Alex eating a cookie.
</gallery>
== References ==
{{reflist}}
== External Links ==
*[https://www.minecraft.net/en-us/article/taking-inventory--cookie Taking Inventory: Cookie] – Minecraft.net on August 22, 2019
{{Items}}
[[Category:Food]]
[[Category:Renewable resources]]
[[cs:Sušenka]]
[[de:Keks]]
[[es:Galleta]]
[[fr:Cookie]]
[[hu:Csokis süti]]
[[ja:クッキー]]
[[ko:쿠키]]
[[nl:Koekje]]
[[pl:Ciastko]]
[[pt:Biscoito]]
[[ru:Печенье]]
[[uk:Печиво]]
[[zh:曲奇]]</li><li>[[Shovel|Shovel]]<br/>{{Item
| image = <gallery>
Wooden Shovel.png | Wooden
Stone Shovel.png | Stone
Iron Shovel.png | Iron
Golden Shovel.png | Golden
Diamond Shovel.png | Diamond
Netherite Shovel.png | Netherite
</gallery>
| rarity = Common
| renewable = '''Netherite''': No<br>'''All others''': Yes
| durability =
* Wood: 59
* Stone: 131
* Iron: 250
* Golden: 32
* Diamond: 1561
* Netherite: 2031
| stackable = No
}}
'''Shovels''' are [[tool]]s used to hasten the process of breaking [[dirt]], [[sand]], [[gravel]] and other soil blocks, as well as to convert [[Dirt (disambiguation)|dirt]] blocks into [[Dirt Path|dirt paths]].
== Obtaining ==
=== Crafting ===
{{Crafting
|head=1
|showname=0
|showdescription=1
|name=[[Shovel]]s
|B1= {Any Planks}; Iron Ingot; Gold Ingot; Diamond
|B2= Stick
|B3= Stick
|Output= Wooden Shovel; Iron Shovel; Golden Shovel; Diamond Shovel
|type= Tool
}}
{{Crafting
|name=[[Stone Shovel]]
|B1=Any stone-tier block
|B2=Stick
|B3=Stick
|Output=Stone Shovel
|description=Can use any variant of cobblestone
|type=Tool
}}
{{Crafting
|foot=1
|ignoreusage=1
|name=[[Shovel]]
|ingredients=Damaged Matching [[Shovel]]
|Damaged Wooden Shovel; Damaged Stone Shovel; Damaged Iron Shovel; Damaged Golden Shovel; Damaged Diamond Shovel; Damaged Netherite Shovel
|Damaged Wooden Shovel; Damaged Stone Shovel; Damaged Iron Shovel; Damaged Golden Shovel; Damaged Diamond Shovel; Damaged Netherite Shovel
|Output=Wooden Shovel; Stone Shovel; Iron Shovel; Golden Shovel; Diamond Shovel; Netherite Shovel
|description= The durability of the two shovels is added together, plus an extra 5% durability.
|type= Tool
}}
=== Upgrading ===
Like other diamond tools, a diamond shovel can be upgraded to a netherite shovel, although increased durability and resistance to fire/lava in item form are the only benefits. The shovel's performance as a digging tool or a weapon is unchanged by the upgrade.
{{Smithing
|Netherite Upgrade
|Diamond Shovel
|Netherite Ingot
|Netherite Shovel
|description=
|tail=1
}}
=== Repairing ===
==== Grinding ====
{{Grinding
|showdescription=1
|ingredients=2x Damaged [[Wooden Shovel]] or<br>2x Damaged [[Stone Shovel]] or<br>2x Damaged [[Iron Shovel]] or<br>2x Damaged [[Golden Shovel]] or<br>2x Damaged [[Diamond Shovel]] or<br>2x Damaged [[Netherite Shovel]]
|Damaged Wooden Shovel; Damaged Stone Shovel; Damaged Iron Shovel; Damaged Golden Shovel; Damaged Diamond Shovel; Damaged Netherite Shovel
|Damaged Wooden Shovel; Damaged Stone Shovel; Damaged Iron Shovel; Damaged Golden Shovel; Damaged Diamond Shovel; Damaged Netherite Shovel
|Wooden Shovel; Stone Shovel; Iron Shovel; Golden Shovel; Diamond Shovel; Netherite Shovel
|description=The durability of the two shovels is added together, plus an extra 5% durability.
}}
==== [[Anvil mechanics#Unit repair|Unit repair]] ====
{{/Repairing with Anvils}}
A shovel can be repaired in an [[anvil]] by adding units of the [[tiers]]' repair material, with each repair material restoring 25% the shovel's maximum durability, rounded down. It also keeps the shovel's [[Enchanting|enchantments]].
=== Chest loot ===
On <code>ancient_city/city_center/city_center_2</code>, they generate a furnace with a wooden shovel inside of it.
{{LootChestItem|iron-shovel,level-enchanted-iron-shovel,random-enchanted-golden-shovel,diamond-shovel,level-enchanted-diamond-shovel,damaged-random-enchanted-diamond-shovel,damaged-random-enchanted-diamond-shovel-2}}
=== Mob loot ===
==== Equipment ====
{{Main|Drops#Equipped items}}
[[Zombie]]s and [[husk]]s have a 0.67% (3.33% in Hard [[difficulty]]) chance of spawning with an iron shovel. They have an 8.5% (9.5% with [[Looting]] I, 10.5% with Looting II and 11.5% with Looting III) chance of dropping that shovel if they are killed by the player. The dropped shovel is usually badly damaged, and may be enchanted: 0%–25% on Normal difficulty and 3.125%–25% on Hard difficulty, varying with [[regional difficulty]], and enchanted as if on an enchanting table at level 5–22.
==== Raids ====
Vindicators and pillagers that spawn from raids have a 4.1% chance(5.12% on hard) to drop a badly-damaged iron shovel that is sometimes enchanted with a random enchantment.{{only|bedrock}}
=== Trading ===
Novice-level toolsmith villagers have a 25% chance to sell stone shovels for one emerald, journeyman-level toolsmith villagers have a 25% chance to sell enchanted iron shovels for 2 emeralds, and expert-level toolsmith villagers have a 50% chance to sell enchanted diamond shovels for 5 emeralds as part of their trades.{{only|bedrock}}
Novice-level toolsmith villagers have a 40% chance to sell stone shovels for one emerald, journeyman-level tool smiths have a 40% chance to sell an enchanted iron shovel for 7-22 emeralds, and expert-level tool smiths have a {{frac|2|3}} chance to sell an enchanted diamond shovel for 11-27 emeralds.{{only|java}}
The enchantments are the same as the ones obtained from an [[enchanting table]] at levels 5–19.
=== Villager gifts ===
{{in|java}}, toolsmith [[villager]]s occasionally throw stone shovels at players with the [[Hero of the Village]] effect.
== Usage ==
=== Digging ===
A shovel can be used to break some materials faster. When breaking a block, it uses 1 durability. For blocks that break instantly, it uses 0 durability.
==== Durability ====
Each different tier of shovel has a different durability:
{| class="wikitable sortable"
! Material
! [[Durability]]
|-
| {{itemLink|Wooden Shovel|Wood|link=Shovel}}
| 59
|-
| {{itemLink|Stone Shovel|Stone|link=Shovel}}
| 131
|-
| {{itemLink|Iron Shovel|Iron|link=Shovel}}
| 250
|-
| {{itemLink|Diamond Shovel|Diamond|link=Shovel}}
| 1561
|-
| {{itemLink|Golden Shovel|Golden|link=Shovel}}
| 32
|-
| {{itemLink|Netherite Shovel|Netherite|link=Shovel}}
| 2031
|}
==== Speed ====
The following table summarizes the speed at which different quality shovels perform on different block types. Values with a red background indicate that no resource is dropped when the block is destroyed without a shovel.
{{breaking row|Clay|simple=1}}
{{breaking row|Coarse Dirt}}
{{Breaking row|Concrete Powder}}
{{breaking row|Dirt}}
{{breaking row|Dirt Path}}
{{breaking row|Farmland}}
{{breaking row|Grass Block}}
{{breaking row|Gravel}}
{{breaking row|Mud}}
{{breaking row|Muddy Mangrove Roots}}
{{breaking row|Mycelium}}
{{breaking row|Podzol}}
{{breaking row|Red Sand}}
{{breaking row|Rooted Dirt}}
{{breaking row|Sand}}
{{breaking row|Snow|Wooden}}
{{breaking row|Snow Block|Wooden}}
{{breaking row|Soul Sand}}
{{breaking row|Soul Soil}}
{{breaking row|Suspicious Gravel}}
{{breaking row|Suspicious Sand|foot=1}}
=== Dirt paths ===
A shovel can be used to create a [[dirt path]] by {{control|using}} (not digging) the shovel on any one of the following blocks, losing one durability point:
* {{BlockLink|Grass Block}}
* {{BlockLink|Dirt}}
* {{BlockLink|Coarse Dirt}}
* {{BlockLink|Rooted Dirt}}
* {{BlockLink|Podzol}}
* {{BlockLink|Mycelium}}
=== Campfire ===
A shovel can be used to extinguish a [[campfire]].
===Weapon===
Hitting a mob while holding a shovel is a stronger attack than barehanded. Shovels take 2 damage when used as a weapon.
====Java Edition====
[[Category:Java Edition specific information]]
Shovels have an attack speed modifier of -3, meaning they take 1 second to [[Damage#Attack cooldown|recover]]. Shovels deal different damage based on the type:
{| class="wikitable" style="text-align:center" data-description="Attack damage"
!Shovel type
! Attack damage
! Attack speed
!Damage per<br>second (DPS)
|-
|{{ItemLink|Wooden Shovel}}<br>{{ItemLink|Golden Shovel}}||{{hp|2.5}}|| rowspan="4" |1||2.5
|-
|{{ItemLink|Stone Shovel}}||{{hp|3.5}}||3.5
|-
|{{ItemLink|Iron Shovel}}||{{hp|4.5}}||4.5
|-
|{{ItemLink|Diamond Shovel}}||{{hp|5.5}}||5.5
|-
|{{ItemLink|Netherite Shovel}}||{{hp|6.5}}
|1.6||10.4
|}
====Bedrock Edition====
{{IN|bedrock}}, shovels always attack instantly and do the following damage:
{| class="wikitable" style="text-align:center" data-description="Attack damage"
! colspan="5" |Attack damage
|-
|{{ItemSprite|Wooden Shovel}}{{ItemSprite|Golden Shovel}} {{hp|2}}
|{{ItemSprite|Stone Shovel}} {{hp|3}}
|{{ItemSprite|Iron Shovel}} {{hp|4}}
|{{ItemSprite|Diamond Shovel}} {{hp|5}}
|{{ItemSprite|Netherite Shovel}} {{hp|6}}
|}
===Enchantments===
A shovel can receive, or be found in an [[End City]] with the following [[enchantment]]s:
{| class="wikitable col-2-center col-3-right"
|+
!Name
!Max Level
![[Enchanting|Method]]
|-
|[[Fortune]]<ref group="note" name="exc">Silk Touch and Fortune are mutually exclusive</ref>
|III
|{{Inventory slot|Enchanting Table}}{{Inventory slot|Anvil}}
|-
|[[Silk Touch]]<ref group="note" name="exc" />
|I
|{{Inventory slot|Enchanting Table}}{{Inventory slot|Anvil}}
|-
|[[Efficiency]]
|V
|{{Inventory slot|Enchanting Table}}{{Inventory slot|Anvil}}
|-
|[[Unbreaking]]
|III
|{{Inventory slot|Enchanting Table}}{{Inventory slot|Anvil}}
|-
|[[Mending]]
|I
|{{Inventory slot|Anvil}}
|-
|[[Curse of Vanishing]]
|I
|{{Inventory slot|Anvil}}
|}
{{notelist}}
=== Fuel===
Wooden shovels can be used as a fuel in [[furnace]]s, smelting 1 item per shovel.
===Smelting ingredient===
{{Smelting|showname=1|Iron Shovel;Golden Shovel|Iron Nugget;Gold Nugget|0,1}}
===Piglins ===
{{EntityLink|Piglin|Piglins}} are attracted to golden shovels and run toward any golden shovels on the ground, and inspect it for 6 to 8 seconds before putting it in their inventory.
== Sounds ==
{{edition|java}}:
{{Sound table
|sound=Shovel flatten1.ogg
|sound2=Shovel flatten2.ogg
|sound3=Shovel flatten3.ogg
|sound4=Shovel flatten4.ogg
|subtitle=Shovel flattens
|source=block
|description=When a shovel creates a [[dirt path]]
|id=item.shovel.flatten
|translationkey=subtitles.item.shovel.flatten
|volume=1.0
|pitch=1.0
|distance=16}}
{{Sound table
|sound=Random break.ogg
|subtitle=Item breaks
|source=player
|description=When a shovel's durability is exhausted
|id=entity.item.break
|translationkey=subtitles.entity.item.break
|volume=0.8
|pitch=0.8-1.2
|distance=16
|foot=1}}
{{edition|bedrock}}:
{{Sound table
|type=bedrock
|sound=Grass hit1.ogg
|sound2=Grass hit2.ogg
|sound3=Grass hit3.ogg
|sound4=Grass hit4.ogg
|sound5=Grass hit5.ogg
|sound6=Grass hit6.ogg
|source=block
|description=When a shovel creates a dirt path <ref group=sound>{{Bug|MCPE-114390}}</ref>
|id=use.grass
|volume=1.0
|pitch=0.8}}
{{Sound table
|sound=Random break.ogg
|source=player
|description=When a shovel's durability is exhausted
|id=random.break
|volume=1.0
|pitch=0.9
|foot=1}}
==Data values==
===ID===
{{edition|java}}:
{{ID table
|edition=java
|showforms=y
|generatetranslationkeys=y
|displayname=Wooden Shovel
|spritetype=item
|nameid=wooden_shovel
|form=item}}
{{ID table
|displayname=Stone Shovel
|spritetype=item
|nameid=stone_shovel
|form=item}}
{{ID table
|displayname=Iron Shovel
|spritetype=item
|nameid=iron_shovel
|form=item}}
{{ID table
|displayname=Diamond Shovel
|spritetype=item
|nameid=diamond_shovel
|form=item}}
{{ID table
|displayname=Golden Shovel
|spritetype=item
|nameid=golden_shovel
|form=item}}
{{ID table
|displayname=Netherite Shovel
|spritetype=item
|nameid=netherite_shovel
|form=item
|foot=1}}
{{edition|bedrock}}:
{{ID table
|edition=bedrock
|shownumericids=y
|showforms=y
|notshowbeitemforms=y
|generatetranslationkeys=y
|displayname=Wooden Shovel
|spritetype=item
|nameid=wooden_shovel
|id=309
|form=item}}
{{ID table
|displayname=Stone Shovel
|spritetype=item
|nameid=stone_shovel
|id=313
|form=item}}
{{ID table
|displayname=Iron Shovel
|spritetype=item
|nameid=iron_shovel
|id=296
|form=item}}
{{ID table
|displayname=Diamond Shovel
|spritetype=item
|nameid=diamond_shovel
|id=317
|form=item}}
{{ID table
|displayname=Golden Shovel
|spritetype=item
|nameid=golden_shovel
|id=323
|form=item}}
{{ID table
|displayname=Netherite Shovel
|spritetype=item
|nameid=netherite_shovel
|id=605
|form=item
|foot=1}}
==Achievements==
{{load achievements|MOAR Tools ;Oooh, shiny!}}
==Advancements==
{{load advancements|Oh Shiny}}
== Video==
<div style="text-align:center">{{yt|U4X-4S4neYM}}</div>
==History==
{{Missing information|there are so many missing blocks that need shovel to break}}
{{History|java indev}}
{{History||0.31|snap=20091231-2|[[File:Iron Shovel JE1.png|32px]] Added iron shovels which are located in the player's [[inventory]].
|Shovels cannot be crafted yet and are not functional in this version.}}
{{History|||snap=20100110|Shovels are now functional and can now be used to gather [[material]]s like [[dirt]], [[sand]] and [[gravel]] 400% faster than by hand.}}
{{History|||snap=20100124|A complete [[tool]] set is no longer given to the [[player]] on starting a new world. Instead, there are multiple [[chest]]s in the later called "[[Indev House]]" containing a stack of most accessible [[blocks]]/[[items]] including [[tools]].}}
{{History|||snap=20100128|[[File:Wooden Shovel JE1 BE1.png|32px]] [[File:Stone Shovel JE1 BE1.png|32px]] [[File:Diamond Shovel JE1 BE1.png|32px]] [[Tools]] now have tiers. Shovels made from wood, stone, and diamond have been added.
|[[File:Iron Shovel JE2 BE1.png|32px]] The texture of iron shovels has been changed.
|A shovel held by the player is now rendered to appear more 3D.|They cannot be crafted yet, but have been added to the item chest in the Indev house.}}
{{History|||snap=20100129|Wood, stone, iron, and diamond shovels can now be [[craft]]ed.}}
{{History|||snap=20100130|[[File:Golden Shovel JE1.png|32px]] Shovels can now be made out of gold.}}
{{History|||snap=20100201-1|[[Tools]], including shovels, now take [[damage]] when being used.
|Better tools, including shovels, now last longer.}}
{{History||20100206|[[File:Golden Shovel JE2 BE1.png|32px]] The texture of golden shovels has been changed.}}
{{History|java alpha}}
{{History||1.0.5_01|Shovels are now used to get snowballs out of snow layers.}}
{{History|java beta}}
{{History||April 9, 2011|link=https://www.youtube.com/watch?v=qy882ILYJMM&t=154s|[[File:Iron Shovel (pre-release).png|32px]] Alternate iron shovel texture was shown in [[Mojang]] test video.}}
{{History|java}}
{{History||1.2.4|snap=release|[[Spruce planks]], [[birch planks]], and [[jungle planks]] can now be used to craft wooden shovels.}}
{{History||1.3.1|snap=12w18a|Wooden shovels can now be used as [[fuel]] in a [[furnace]].}}
{{History|||snap=12w21a|Blacksmith [[villager]]s now [[trading|sell]] diamond shovels for 7 [[emerald]]s, and iron shovels for 4–5 emeralds.}}
{{History||1.6.1|snap=13w21a|Instead of replacing the barehanded [[damage]] ({{hp|1}}), shovels now add their damage onto the barehanded damage, which results in all shovels doing {{hp|1}} more damage than before.}}
{{History||1.7.2|snap=1.7.1|[[Acacia planks]] and [[dark oak planks]] can now be used to craft wooden shovels.}}
{{History||1.8|snap=14w02a|Tool smith villagers now [[trading|sell]] enchanted iron shovels for 5–7 emeralds. The previous trades are now unavailable, making diamond shovels [[non-renewable resource|non-renewable]].}}
{{History||1.9|snap=15w31a|A shovel can now be used on a [[grass block]] to create [[grass path]] blocks.
|[[Enchanting|Enchanted]] iron or diamond shovels can now be found in [[end city]] chests.}}
{{History|||snap=15w34a|Shovels now use the "attack strength" combat mechanic meter. The time it takes for the meter to fill up for a shovel is 0.8 seconds.}}
{{History|||snap=15w34c|Shovels now do more [[damage]] and take longer to recover.}}
{{History|||snap=15w35a|The damage of shovels has been reduced.}}
{{History|||snap=15w41a|Wooden shovels are now used to craft [[boat]]s.}}
{{History|||snap=15w50a|The [[sound]] <code>item.shovel.flatten</code> has been added to shovels.}}
{{History|||snap=16w04a|Wooden shovels are no longer used to [[crafting|craft]] boats.}}
{{History||1.11.1|snap=16w50a|Golden and iron shovels now [[smelting|smelt]] down into one of their respective [[nugget]]s.}}
{{History||1.13|snap=17w47a|Prior to [[1.13/Flattening|''The Flattening'']], these [[item]]s' numeral IDs were 269, 273, 256, 277 and 284.}}
{{History||1.14|snap=18w43a|[[File:Wooden Shovel JE2 BE2.png|32px]] [[File:Stone Shovel JE2 BE2.png|32px]] [[File:Iron Shovel JE3 BE2.png|32px]] [[File:Golden Shovel JE3 BE2.png|32px]] [[File:Diamond Shovel JE2 BE2.png|32px]] The textures of all shovels have been changed.}}
{{History|||snap=18w50a|Iron shovels can now be found in chests in [[village]] toolsmith houses.}}
{{History|||snap=19w11a|Toolsmith [[villager]]s now [[trading|sell]] stone shovels and enchanted diamond shovels, making diamond shovels [[renewable resource|renewable]] again.}}
{{History|||snap=19w13a|Toolsmith villagers now give stone shovels to players under the [[Hero of the Village]] effect.}}
{{History||1.15|snap=19w37a|Shovels can now be used to extinguish [[campfire]]s.}}
{{History||1.16|snap=20w06a|[[File:Netherite Shovel JE1.png|32px]] Added netherite shovels.
|Netherite shovels are obtained by combining one diamond shovel and one netherite ingot in a crafting table.
|[[Crimson planks]] and [[warped planks]] can now be used to craft wooden shovels.}}
{{History|||snap=20w09a|[[File:Diamond Shovel JE3 BE3.png|32px]] The texture of diamond shovels has been changed.
|Shovels can now break soul soil quickly.}}
{{History|||snap=20w10a|[[File:Netherite Shovel JE2 BE1.png|32px]] The texture of netherite shovels has been changed.
|Netherite shovels can no longer be crafted.
|Netherite shovels are now obtained by combining one diamond shovel and one netherite ingot in a smithing table.}}
{{History|||snap=20w15a|Stone shovels can now be crafted using [[blackstone]].}}
{{History|||snap=20w16a|Netherite shovels now generate randomly enchanted in [[bastion remnants]] chests.
|Golden shovels now generate randomly enchanted in [[ruined portal]] chests.}}
{{History|||snap=20w17a|Diamonds shovels now generate in place of netherite shovels in bastion remnant chests.}}
{{History||1.16.2|snap=20w30a|Increases the chance of finding randomly enchanted diamond shovels in bastion remnant chests.
|Unenchanted, undamaged diamond shovels can also be found in bastion remnant chests.}}
{{History||1.17|snap=21w08a|Stone shovels can now be crafted using [[cobbled deepslate]].}}
{{History||1.19|snap=22w11a|[[Mangrove planks]] can now be used to craft wooden shovels.}}
{{History|||snap=22w13a|Wooden shovels may now be found in [[ancient city]] [[furnace]]s.}}
{{History||1.20<br>(Experimental)|link=1.19.4|snap=23w04a|Upgrading diamond shovels to netherite shovels now requires the netherite upgrade [[smithing template]].}}
{{History||1.20|snap=23w14a|Shovel now breaks [[suspicious sand]] and [[suspicious gravel]] quickly.}}
{{History|upcoming java}}
{{History||Combat Tests|snap=1.14.3 - Combat Test|The attack speed for all shovels has been increased to 2.|The [[damage]] for all shovels has been decreased by {{hp|1}}.}}
{{History|pocket alpha}}
{{History||v0.2.0|[[File:Stone Shovel JE1 BE1.png|32px]] Added stone shovels.}}
{{History||v0.3.0|[[File:Wooden Shovel JE1 BE1.png|32px]] Added wooden shovels.
|Survival players no longer start out with an infinite durability stone shovel in the inventory.}}
{{History||v0.3.2|[[File:Iron Shovel JE2 BE1.png|32px]] [[File:Golden Shovel JE2 BE1.png|32px]] [[File:Diamond Shovel JE1 BE1.png|32px]] Added iron, gold, and diamond shovels.}}
{{History||v0.4.0|Removed stone shovels from the creative inventory.}}
{{History||v0.11.0|snap=build 1|Wooden shovels are now used to craft [[boat]]s.
|Iron shovels are now available in the [[creative]] [[inventory]].
|A shovel can now be used on a [[grass block]] to create [[grass path]] blocks.}}
{{History|||snap=build 11|Wooden, stone, golden, and diamond shovels are now available in the [[creative]] inventory.}}
{{History|||snap=build 12|All shovels have been removed from creative.}}
{{History|||snap=build 13|Shovel have been re-added to creative mode.}}
{{History||v0.12.1|snap=build 1|Shovels can now be [[enchanting|enchanted]].
|[[Zombie]]s now have a small chance to spawn holding an iron shovel.}}
{{History||v0.15.0|snap=build 1|Added [[husk]]s, which have a small chance to spawn holding an iron shovel.}}
{{History|pocket}}
{{History||1.0.0|snap=alpha 0.17.0.1|[[Enchanting|Enchanted]] iron and diamond shovels can now be found inside [[end city]] chests.}}
{{History||1.0.4|snap=alpha 1.0.4.0|Enchanted iron shovels are now [[trading|sold]] by toolsmith [[villager]]s for 4-5 [[emerald]]s.}}
{{History||1.1.0|snap=alpha 1.1.0.0|Iron and golden shovels are now [[smelting|smeltable]].}}
{{History|bedrock}}
{{History||1.10.0|snap=beta 1.10.0.3|[[File:Wooden Shovel JE2 BE2.png|32px]] [[File:Stone Shovel JE2 BE2.png|32px]] [[File:Iron Shovel JE3 BE2.png|32px]] [[File:Golden Shovel JE3 BE2.png|32px]] [[File:Diamond Shovel JE2 BE2.png|32px]] The textures of all shovels have been changed.}}
{{History||1.11.0|snap=beta 1.11.0.1|Iron shovels can now be found in [[village]] toolsmith houses.}}
{{History|||snap=beta 1.11.0.4|[[Vindicator]]s and [[pillager]]s that spawn in [[raid]]s can now drop iron shovels upon [[death]].
|[[Trading]] has been changed, toolsmith [[villager]]s now have a 25% chance to [[trading|sell]] enchanted iron shovels for 2 [[emerald]]s as part of their third tier trades.
|Stone shovels and [[enchanting|enchanted]] diamond shovels can now be [[trading|bought]] from toolsmith villagers.}}
{{History||1.16.0|snap=beta 1.16.0.51|[[File:Netherite Shovel JE2 BE1.png|32px]] Added netherite shovels.|Netherite shovels are obtained by combining one diamond shovel and one netherite ingot in a crafting table.
|[[File:Diamond Shovel JE3 BE3.png|32px]] The texture of diamond shovels has been changed.}}
{{History|||snap=beta 1.16.0.57|Netherite shovels can no longer be crafted.
|Netherite shovels are now obtained by combining one diamond shovel and one netherite ingot in a smithing table.
|Stone shovels can now be crafted using [[blackstone]].
|Netherite shovels now generate randomly enchanted in [[bastion remnants]] chests.
|Golden shovels now generate randomly enchanted in [[ruined portal]] chests.}}
{{History|||snap=beta 1.16.0.63|Diamonds shovels now generate in place of netherite shovels in bastion remnant chests.}}
{{History||1.20.10|snap=beta 1.20.10.20|The [[wooden shovel]] in the crafting recipe has been removed for all boat types except the bamboo raft.}}
{{History|||snap=beta 1.20.10.21|The bamboo raft recipe no longer needs a wooden shovel.}}
{{History|console}}
{{History||xbox=TU1|xbone=CU1|ps=1.0|wiiu=Patch 1|switch=1.0.1|[[File:Wooden Shovel JE1 BE1.png|32px]] [[File:Stone Shovel JE1 BE1.png|32px]] [[File:Iron Shovel JE2 BE1.png|32px]] [[File:Golden Shovel JE2 BE1.png|32px]] [[File:Diamond Shovel JE1 BE1.png|32px]] Added shovels (all five types).}}
{{History||xbox=TU53|xbone=CU43|ps=1.49|wiiu=Patch 23|switch=1.0.3|Iron and golden shovels are now [[smelting|smeltable]].}}
{{History||xbox=none|xbone=none|ps=1.90|wiiu=none|switch=none|[[File:Wooden Shovel JE2 BE2.png|32px]] [[File:Stone Shovel JE2 BE2.png|32px]] [[File:Iron Shovel JE3 BE2.png|32px]] [[File:Golden Shovel JE3 BE2.png|32px]] [[File:Diamond Shovel JE2 BE2.png|32px]] The textures of all shovels have been changed.}}
{{History|New Nintendo 3DS Edition}}
{{History||0.1.0|[[File:Wooden Shovel JE1 BE1.png|32px]] [[File:Stone Shovel JE1 BE1.png|32px]] [[File:Iron Shovel JE2 BE1.png|32px]] [[File:Golden Shovel JE2 BE1.png|32px]] [[File:Diamond Shovel JE1 BE1.png|32px]] Added shovels.}}
{{History|foot}}
==Issues==
{{issue list}}
==Gallery==
<gallery>
Shovel JINX.jpg|Official shovel T-shirt made by JINX.
Stone Shovel SDGP.png|Stone shovel in the [[Super Duper Graphics Pack]].
Adventure Shovel.png|An "adventure shovel" that can break blocks in [[adventure mode]].
</gallery>
===Enchanted shovels===
<gallery>
Enchanted_Wooden_Shovel.gif
Enchanted_Stone_Shovel.gif
Enchanted_Iron_Shovel.gif
Enchanted_Golden_Shovel.gif
Enchanted_Diamond_Shovel.gif
Enchanted_Netherite_Shovel.gif
</gallery>
==References==
{{reflist}}
== External Links ==
*[https://www.minecraft.net/en-us/article/taking-inventory-shovel Taking Inventory: Shovel] – Minecraft.net on November 16, 2018
{{items}}
[[Category:Combat]]
[[cs:Lopata]]
[[de:Schaufel]]
[[es:Pala]]
[[fr:Pelle]]
[[hu:Ásó]]
[[ja:シャベル]]
[[ko:삽]]
[[nl:Schep]]
[[pl:Łopata]]
[[pt:Pá]]
[[ru:Лопата]]
[[uk:Лопата]]
[[zh:锹]]</li></ul> | build 1 | Vines now generate naturally in jungle temples. | |||
| Pocket Edition | |||||
1.1.0{{Extension DPL}}<ul><li>[[Dupe Hack|Dupe Hack]]<br/>{{for|the method to duplicate items and blocks|Tutorials/Block and item duplication}}
{{stub}}
{{Joke feature}}
{{exclusive|java}}{{item
| image = Missing Texture.png
| rarity=Common
| stackable=No
|title=minecraft:dupe_hack|renewable=Yes}}
'''minecraft:dupe_hack''' is a joke item from [[Java Edition 23w13a_or_b]].
==Obtaining==
Once the <code>dupe_hack_occurrence_chance</code> vote is approved the '''dupe hack''' item has a random chance of dropping whenever an entity with chests is killed by a player, e.g. when destroying a [[Minecart with Chest|minecart with chest]] with a [[sword]].
It doesn't appear in the [[creative]] menu, not even when the [[Options#Controls|option]] "Operator Items Tab" is enabled, but can be given to the player with [[Commands/give|<code>/give</code>]] and other commands.
==Usage==
The dupe hack item can be used to create a limited amount of duplicate items by placing it on a [[crafting table]] with any other item. It has a random chance of breaking, controlled by the <code>dupe_hack_break_chance</code> vote. This limitation can be mostly bypassed by putting the items in an [[Ender Chest|ender chest]] first and duplicating the chest.
When using the Dupe Hack, it has a random chance of breaking, which is often decided by votes.
===Crafting ingredient===
{{Crafting
|Any Item
|Dupe Hack
|Output=Any Item, 2
|showdescription=1
|description=The dupe hack item remains in the crafting grid after duplicating an item.
|foot=1
}}
==Data values==
===ID===
{{edition|java}}:{{ID table
|edition=java
|showforms=y
|generatetranslationkeys=y
|displayname=minecraft:dupe_hack
|spritetype=item
|nameid=dupe_hack
|form=item|foot=1|spritename=missingno}}
==History==
{{History|java}}
{{History||23w13a_or_b|[[File:Missing Texture JE4.png|32px]] Added minecraft:dupe_hack.}}
{{History|foot}}
{{items}}
{{Jokes}}
<references />
[[Category:Joke items]]
[[ja:Dupe Hack]]
[[pt:Dupe Hack]]</li><li>[[Smithing Template|Smithing Template]]<br/>{{for|the block|Smithing Table}}
{{Item
| title = Smithing Template
| image = <gallery>
Netherite Upgrade Smithing Template.png | Netherite Upgrade
Sentry Armor Trim Smithing Template.png | Armor Trim
</gallery>
| rarity = Rare
| renewable = No<!--Smithing templates are not renewable because diamonds, their only other method of creation, are not renewable.-->
| stackable = Yes (64)
}}
'''Smithing templates''' are items used in [[Smithing Table|smithing tables]] to alter [[Tool|tools]] and [[armor]]. They are consumed when used, but can be [[Crafting|duplicated]] using an existing template, its material and [[Diamond|diamonds]].
The sixteen '''armor trim smithing templates''' are found in a variety of [[Generated structures|structures]], and are used to apply various decorative trims (dependent on the variant) to armor using certain minerals for different colors.
'''Netherite upgrade smithing templates''' are required to upgrade diamond equipment with a [[Netherite Ingot|netherite ingot]]. They are only found in [[Bastion Remnant|bastion remnants]], but are guaranteed only in [[:en:Bastion_Remnant#Treasure_room|treasure rooms]].
== Obtaining ==
Smithing templates can be found in various [[Generated structures|structures]] and can be duplicated by using seven diamonds and a block based on what the template is.
=== Crafting ===
{{Crafting
|A1=Diamond |B1=Matching Smithing Template |C1=Diamond
|A2=Diamond |B2=Netherrack;Cobblestone;Sandstone;End Stone;Terracotta;Terracotta;Netherrack;Cobblestone;Terracotta;Cobbled Deepslate;Blackstone;Purpur Block;Prismarine;Cobblestone;Cobbled Deepslate;Terracotta;Mossy Cobblestone |C2=Diamond
|A3=Diamond |B3=Diamond |C3=Diamond
|Output=Matching Smithing Template,2
}}
{| class="article-table"
|+ Duplication
! Item !! Material
|-
| {{ItemSprite|netherite-upgrade|text=Netherite Upgrade}} || {{BlockSprite|Netherrack|text=Netherrack}}
|-
| {{ItemSprite|sentry-armor-trim|text=Sentry Armor Trim}} || {{BlockSprite|Cobblestone|text=Cobblestone}}
|-
| {{ItemSprite|vex-armor-trim|text=Vex Armor Trim}} || {{BlockSprite|Cobblestone|text=Cobblestone}}
|-
| {{ItemSprite|wild-armor-trim|text=Wild Armor Trim}} || {{BlockSprite|Mossy Cobblestone|text=Mossy Cobblestone}}
|-
| {{ItemSprite|coast-armor-trim|text=Coast Armor Trim}} || {{BlockSprite|Cobblestone|text=Cobblestone}}
|-
| {{ItemSprite|dune-armor-trim|text=Dune Armor Trim}} || {{BlockSprite|Sandstone|text=Sandstone}}
|-
| {{ItemSprite|wayfinder-armor-trim|text=Wayfinder Armor Trim}} || {{BlockSprite|Terracotta|text=Terracotta}}
|-
| {{ItemSprite|raiser-armor-trim|text=Raiser Armor Trim}} || {{BlockSprite|Terracotta|text=Terracotta}}
|-
| {{ItemSprite|shaper-armor-trim|text=Shaper Armor Trim}} || {{BlockSprite|Terracotta|text=Terracotta}}
|-
| {{ItemSprite|host-armor-trim|text=Host Armor Trim}} || {{BlockSprite|Terracotta|text=Terracotta}}
|-
| {{ItemSprite|ward-armor-trim|text=Ward Armor Trim}} || {{BlockSprite|Cobbled Deepslate|text=Cobbled Deepslate}}
|-
| {{ItemSprite|silence-armor-trim|text=Silence Armor Trim}} || {{BlockSprite|Cobbled Deepslate|text=Cobbled Deepslate}}
|-
| {{ItemSprite|tide-armor-trim|text=Tide Armor Trim}} || {{BlockSprite|Prismarine|text=Prismarine}}
|-
| {{ItemSprite|snout-armor-trim|text=Snout Armor Trim}} || {{BlockSprite|Blackstone|text=Blackstone}}
|-
| {{ItemSprite|rib-armor-trim|text=Rib Armor Trim}} || {{BlockSprite|Netherrack|text=Netherrack}}
|-
| {{ItemSprite|eye-armor-trim|text=Eye Armor Trim}} || {{BlockSprite|End Stone|text=End Stone}}
|-
| {{ItemSprite|spire-armor-trim|text=Spire Armor Trim}} || {{BlockSprite|Purpur Block|text=Purpur Block}}
|}
{{IN|bedrock}}, spire, tide, and dune armor trims can be duplicated with more blocks than {{in|java}}. In addition to the normal blocks, Tide armor trims can be duplicated using Prismarine Bricks or Dark Prismarine, dune armor trims can be duplicated with smooth sandstone, cut sandstone, or chiseled sandstone, and spire armor trims can be duplicated with purpur pillars.<ref>{{bug|MCPE-172711||Tide, Spire, and Dune Armor Trims can be crafted from more blocks than in Java Edition}}</ref>
=== Mob loot ===
[[Elder guardian]]s have a 20% chance to drop 1 tide armor trim upon death. [[Looting]] doesn't affect this percentage, and the elder guardian doesn't need to be killed by a player in order for the trim to drop and can be duplicated with [[prismarine]].
=== Chest loot ===
{{#invoke:LootChest|base3|netherite-upgrade-smithing-template,sentry-armor-trim-smithing-template,vex-armor-trim-smithing-template,wild-armor-trim-smithing-template,coast-armor-trim-smithing-template,dune-armor-trim-smithing-template,ward-armor-trim-smithing-template,silence-armor-trim-smithing-template,snout-armor-trim-smithing-template,rib-armor-trim-smithing-template,eye-armor-trim-smithing-template,spire-armor-trim-smithing-template}}
Note: In Woodland Mansions, only chests with random loot have the chance to contain the Vex Smithing Template, chests in the "Allium room", "Sapling farm", "Tree-chopping room" and "Fake End portal room" always generate with the same, room specific, loot.
=== Suspicious block loot ===
Items can only be extracted from [[Suspicious Block|suspicious blocks]] using a [[brush]].{{#invoke:LootChest|base3|wayfinder-armor-trim-smithing-template,raiser-armor-trim-smithing-template,shaper-armor-trim-smithing-template,host-armor-trim-smithing-template}}
== Usage ==
=== Crafting ingredient ===
{{Crafting
|A1=Diamond |B1=Matching Smithing Template |C1=Diamond
|A2=Diamond |B2=Netherrack;Cobblestone;Sandstone;End Stone;Terracotta;Terracotta;Netherrack;Cobblestone;Terracotta;Cobbled Deepslate;Blackstone;Purpur Block;Prismarine;Cobblestone;Cobbled Deepslate;Terracotta;Mossy Cobblestone |C2=Diamond
|A3=Diamond |B3=Diamond |C3=Diamond
|Output=Matching Smithing Template,2
}}
=== Smithing ingredient ===
Smithing templates are used at a [[smithing table]]. Netherite upgrade smithing templates are used to upgrade diamond gear into netherite gear by using a netherite upgrade, a piece of diamond gear, and a [[netherite ingot]].
{{Smithing
|head=1
|ingredients=Netherite Upgrade +<br>Any Diamond Gear +<br>[[Netherite Ingot]]
|Netherite Upgrade
|Diamond Helmet; Diamond Chestplate; Diamond Leggings; Diamond Boots; Diamond Sword; Diamond Pickaxe; Diamond Axe; Diamond Shovel
|Netherite Ingot
|Netherite Helmet; Netherite Chestplate; Netherite Leggings; Netherite Boots; Netherite Sword; Netherite Pickaxe; Netherite Axe; Netherite Shovel
|tail=1
}}
{{FakeImage|{{Animate|Iron_Armor_with_Iron_Shaper_Trim.png; Golden_Armor_with_Golden_Shaper_Trim.png; Diamond_Armor_with_Diamond_Shaper_Trim.png; Netherite_Armor_with_Netherite_Shaper_Trim.png|180px}}|If the armor material and the trimming material are the same, the color palette used for the armor trim is darker.}}
Armor trim smithing templates are used to customize an armor piece's appearance by using a smithing template, an armor piece, and an ingot or crystal ([[emerald]], [[redstone dust]], [[lapis lazuli]], [[amethyst shard]], [[nether quartz]], [[netherite ingot]], [[diamond]], [[gold ingot]], [[iron ingot]], or [[copper ingot]]). Including all dyed leather armor colors and regular armor, there are ≈3.679x10<sup>9</sup> different possible armor pieces<!--5713438 leather colors, plus the 4 other armor materials = 5713442. 5713442 * 161 (the 160 trim combos (16 trims, 10 materials) + untrimmed) = 919864162. 919864162 * 4 (helmet, chestplate, leggings, boots) = 3679456648 ≈ 3.679x10^9-->, and 7.16x10<sup>35</sup> <!--919864162 + 1 (no armor in that slot) = 919864163. 919864163^4 = 715969952015045562662444917041515536 ≈ 7.16x10^35 total possible armor combinations-->total possible armor combinations excluding enchantments and the player not wearing armor.
Already trimmed armor can be trimmed again by applying another template on it; the old trim pattern is overwritten in the process.<ref>{{bug|MC-262538||When combining armor trims the new trim deletes the old one|WAI}}</ref> Therefore, one piece of armor cannot possess multiple trims at the same time.
Most armor trims cover a small portion of the armor piece's surface with the trim material, except for the silence armor trim, which allows the trim material to cover a majority of the armor piece's surface.
All of the trims are purely decorative, and don't impact gameplay or strength(without the use of mods or plugins) of the armor they are applied to in any way. [[Piglin]]s do not pick up any gold-trimmed armor pieces, and they are not pacified by players wearing even a full set of gold-trimmed armor (unless, of course, the armor pieces in question are themselves golden), and netherite-trimmed armor pieces can still be burned by [[fire]].
{{Smithing
|head=1
|ingredients=Any Armor Trim +<br>Any Armor Piece +<br>Any Ingot/Crystal
|Any Armor Trim Smithing Template
|Iron Helmet; Netherite Chestplate;Golden Leggings;Diamond Boots
|Amethyst Shard; Copper Ingot; Diamond; Emerald; Gold Ingot; Iron Ingot; Lapis Lazuli; Nether Quartz; Netherite Ingot; Redstone Dust; Diamond; Emerald
|Amethyst Trim Iron Helmet; Copper Trim Netherite Chestplate; Diamond Trim Golden Leggings; Emerald Trim Diamond Boots; Gold Trim Iron Helmet; Iron Trim Netherite Chestplate; Lapis Trim Golden Leggings; Quartz Trim Diamond Boots; Netherite Trim Iron Helmet; Redstone Trim Netherite Chestplate; Diamond Trim Golden Leggings; Emerald Trim Diamond Boots
|tail=1
}}
;List of color palettes for all materials
*{{ItemSprite|emerald }} - {{TrimPalette| emerald }}
*{{ItemSprite|redstone dust }} - {{TrimPalette| redstone dust }}
*{{ItemSprite|lapis lazuli }} - {{TrimPalette| lapis lazuli }}
*{{ItemSprite|amethyst shard }} - {{TrimPalette| amethyst shard }}
*{{ItemSprite|nether quartz }} - {{TrimPalette| nether quartz }}
*{{ItemSprite|netherite ingot }} - {{TrimPalette| netherite ingot }} (Darker: {{TrimPalette| netherite ingot |darker=1}})
*{{ItemSprite|diamond }} - {{TrimPalette| diamond }} (Darker: {{TrimPalette| diamond |darker=1}})
*{{ItemSprite|gold ingot }} - {{TrimPalette| gold ingot }} (Darker: {{TrimPalette| gold ingot |darker=1}})
*{{ItemSprite|iron ingot }} - {{TrimPalette| iron ingot }} (Darker: {{TrimPalette| iron ingot |darker=1}})
*{{ItemSprite|copper ingot }} - {{TrimPalette| copper ingot }}
== Data values ==
=== ID ===
{{edition|java}}:
{{ID table
|edition=java
|firstcolumnname=Smithing Template
|showforms=y
|generatetranslationkeys=y
|displayname=Netherite Upgrade
|spritename=netherite-upgrade-smithing-template
|spritetype=item
|nameid=netherite_upgrade_smithing_template
|form=item}}
{{ID table
|displayname=Sentry Armor Trim
|spritename=sentry-armor-trim-smithing-template
|spritetype=item
|nameid=sentry_armor_trim_smithing_template
|form=item}}
{{ID table
|displayname=Vex Armor Trim
|spritename=vex-armor-trim-smithing-template
|spritetype=item
|nameid=vex_armor_trim_smithing_template
|form=item}}
{{ID table
|displayname=Wild Armor Trim
|spritename=wild-armor-trim-smithing-template
|spritetype=item
|nameid=wild_armor_trim_smithing_template
|form=item}}
{{ID table
|displayname=Coast Armor Trim
|spritename=coast-armor-trim-smithing-template
|spritetype=item
|nameid=coast_armor_trim_smithing_template
|form=item}}
{{ID table
|displayname=Dune Armor Trim
|spritename=dune-armor-trim-smithing-template
|spritetype=item
|nameid=dune_armor_trim_smithing_template
|form=item}}
{{ID table
|displayname=Wayfinder Armor Trim
|spritename=wayfinder-armor-trim-smithing-template
|spritetype=item
|nameid=wayfinder_armor_trim_smithing_template
|form=item}}
{{ID table
|displayname=Raiser Armor Trim
|spritename=raiser-armor-trim-smithing-template
|spritetype=item
|nameid=raiser_armor_trim_smithing_template
|form=item}}
{{ID table
|displayname=Shaper Armor Trim
|spritename=shaper-armor-trim-smithing-template
|spritetype=item
|nameid=shaper_armor_trim_smithing_template
|form=item}}
{{ID table
|displayname=Host Armor Trim
|spritename=host-armor-trim-smithing-template
|spritetype=item
|nameid=host_armor_trim_smithing_template
|form=item}}
{{ID table
|displayname=Ward Armor Trim
|spritename=ward-armor-trim-smithing-template
|spritetype=item
|nameid=ward_armor_trim_smithing_template
|form=item}}
{{ID table
|displayname=Silence Armor Trim
|spritename=silence-armor-trim-smithing-template
|spritetype=item
|nameid=silence_armor_trim_smithing_template
|form=item}}
{{ID table
|displayname=Tide Armor Trim
|spritename=tide-armor-trim-smithing-template
|spritetype=item
|nameid=tide_armor_trim_smithing_template
|form=item}}
{{ID table
|displayname=Snout Armor Trim
|spritename=snout-armor-trim-smithing-template
|spritetype=item
|nameid=snout_armor_trim_smithing_template
|form=item}}
{{ID table
|displayname=Rib Armor Trim
|spritename=rib-armor-trim-smithing-template
|spritetype=item
|nameid=rib_armor_trim_smithing_template
|form=item}}
{{ID table
|displayname=Eye Armor Trim
|spritename=eye-armor-trim-smithing-template
|spritetype=item
|nameid=eye_armor_trim_smithing_template
|form=item}}
{{ID table
|displayname=Spire Armor Trim
|spritename=spire-armor-trim-smithing-template
|spritetype=item
|nameid=spire_armor_trim_smithing_template
|form=item
|foot=1}}
{{edition|bedrock}}:
{{ID table
|edition=bedrock
|firstcolumnname=Smithing Template
|shownumericids=y
|showforms=y
|notshowbeitemforms=y
|generatetranslationkeys=y
|displayname=Netherite Upgrade
|spritename=netherite-upgrade-smithing-template
|spritetype=item
|nameid=netherite_upgrade_smithing_template
|id=685
|form=item
|translationkey=item.smithing_template.name, upgrade.netherite_upgrade.name}}
{{ID table
|displayname=Sentry Armor Trim
|spritename=sentry-armor-trim-smithing-template
|spritetype=item
|nameid=sentry_armor_trim_smithing_template
|id=686
|form=item
|translationkey=item.smithing_template.name, trim_pattern.sentry.name}}
{{ID table
|displayname=Vex Armor Trim
|spritename=vex-armor-trim-smithing-template
|spritetype=item
|nameid=vex_armor_trim_smithing_template
|id=692
|form=item
|translationkey=item.smithing_template.name, trim_pattern.vex.name}}
{{ID table
|displayname=Wild Armor Trim
|spritename=wild-armor-trim-smithing-template
|spritetype=item
|nameid=wild_armor_trim_smithing_template
|id=689
|form=item
|translationkey=item.smithing_template.name, trim_pattern.wild.name}}
{{ID table
|displayname=Coast Armor Trim
|spritename=coast-armor-trim-smithing-template
|spritetype=item
|nameid=coast_armor_trim_smithing_template
|id=688
|form=item
|translationkey=item.smithing_template.name, trim_pattern.coast.name}}
{{ID table
|displayname=Dune Armor Trim
|spritename=dune-armor-trim-smithing-template
|spritetype=item
|nameid=dune_armor_trim_smithing_template
|id=687
|form=item
|translationkey=item.smithing_template.name, trim_pattern.dune.name}}
{{ID table
|displayname=Wayfinder Armor Trim
|spritename=wayfinder-armor-trim-smithing-template
|spritetype=item
|nameid=wayfinder_armor_trim_smithing_template
|id=698
|form=item
|translationkey=item.smithing_template.name, trim_pattern.wayfinder.name}}
{{ID table
|displayname=Raiser Armor Trim
|spritename=raiser-armor-trim-smithing-template
|spritetype=item
|nameid=raiser_armor_trim_smithing_template
|id=699
|form=item
|translationkey=item.smithing_template.name, trim_pattern.raiser.name}}
{{ID table
|displayname=Shaper Armor Trim
|spritename=shaper-armor-trim-smithing-template
|spritetype=item
|nameid=shaper_armor_trim_smithing_template
|id=700
|form=item
|translationkey=item.smithing_template.name, trim_pattern.shaper.name}}
{{ID table
|displayname=Host Armor Trim
|spritename=host-armor-trim-smithing-template
|spritetype=item
|nameid=host_armor_trim_smithing_template
|id=701
|form=item
|translationkey=item.smithing_template.name, trim_pattern.host.name}}
{{ID table
|displayname=Ward Armor Trim
|spritename=ward-armor-trim-smithing-template
|spritetype=item
|nameid=ward_armor_trim_smithing_template
|id=690
|form=item
|translationkey=item.smithing_template.name, trim_pattern.ward.name}}
{{ID table
|displayname=Silence Armor Trim
|spritename=silence-armor-trim-smithing-template
|spritetype=item
|nameid=silence_armor_trim_smithing_template
|id=697
|form=item
|translationkey=item.smithing_template.name, trim_pattern.silence.name}}
{{ID table
|displayname=Tide Armor Trim
|spritename=tide-armor-trim-smithing-template
|spritetype=item
|nameid=tide_armor_trim_smithing_template
|id=693
|form=item
|translationkey=item.smithing_template.name, trim_pattern.tide.name}}
{{ID table
|displayname=Snout Armor Trim
|spritename=snout-armor-trim-smithing-template
|spritetype=item
|nameid=snout_armor_trim_smithing_template
|id=694
|form=item
|translationkey=item.smithing_template.name, trim_pattern.snout.name}}
{{ID table
|displayname=Rib Armor Trim
|spritename=rib-armor-trim-smithing-template
|spritetype=item
|nameid=rib_armor_trim_smithing_template
|id=695
|form=item
|translationkey=item.smithing_template.name, trim_pattern.rib.name}}
{{ID table
|displayname=Eye Armor Trim
|spritename=eye-armor-trim-smithing-template
|spritetype=item
|nameid=eye_armor_trim_smithing_template
|id=691
|form=item
|translationkey=item.smithing_template.name, trim_pattern.eye.name}}
{{ID table
|displayname=Spire Armor Trim
|spritename=spire-armor-trim-smithing-template
|spritetype=item
|nameid=spire_armor_trim_smithing_template
|id=696
|form=item
|translationkey=item.smithing_template.name, trim_pattern.spire.name
|foot=1}}
== Achievements ==
{{load achievements|Smithing with style}}
== Advancements ==
{{load advancements|Crafting a New Look;Smithing with Style}}
== Video ==
{{yt|klP9SrJFDU8}}
== History ==
{{History|java}}
{{History||1.20<br>(Experimental)|link=1.19.4|snap=23w04a|[[File:Netherite Upgrade Smithing Template JE1 BE1.png|32px]] [[File:Sentry Armor Trim Smithing Template JE1 BE1.png|32px]] [[File:Vex Armor Trim Smithing Template JE1 BE1.png|32px]] [[File:Wild Armor Trim Smithing Template JE1 BE1.png|32px]] [[File:Coast Armor Trim Smithing Template JE1 BE1.png|32px]] [[File:Dune Armor Trim Smithing Template JE1 BE1.png|32px]] [[File:Ward Armor Trim Smithing Template JE1 BE1.png|32px]] [[File:Tide Armor Trim Smithing Template JE1 BE1.png|32px]] [[File:Snout Armor Trim Smithing Template JE1 BE1.png|32px]] [[File:Rib Armor Trim Smithing Template JE1 BE1.png|32px]] [[File:Eye Armor Trim Smithing Template JE1 BE1.png|32px]] [[File:Spire Armor Trim Smithing Template JE1 BE1.png|32px]] Added smithing templates behind the "Update 1.20" experimental datapack.}}
{{History|||snap=23w05a|Smithing templates can be used to trim leather armor.
|Gold, iron, diamond, and netherite armor can be trimmed with their respective material.
|The dune, coast, wild, and sentry armor trims now always generate two templates in a chest when found.
|Increased the chances for all smithing templates that generate in chest loot to spawn:
*Netherite upgrade chance to find increased from 3.2% to 10%.
*Coast chance to find increased from 11.1% to 16.7%.
*Dune chance to find increased from 11.1% to 14.3%.
*Eye chance to find increased from 4.7% to 10% in alter chests, and to 100% in library chests.
*Rib chance to find increased from 4.7% to 6.7%.
*Sentry chance to find increased from 20% to 25%.
*Snout chance to find increased from 4.7% to 8.3%.
*Spire chance to find increased from 4.7% to 6.7%.
*Vex chance to find increased from 4.7% to 50%.
*Ward chance to find increased from 4.7% to 5%.
*Wild chance to find increased from 20% to 33%.}}
{{History||1.20|snap=23w12a|Smithing templates are now available without using the "Update 1.20" experimental datapack.|[[File:Wayfinder Armor Trim Smithing Template JE1 BE1.png|32px]] [[File:Raiser Armor Trim Smithing Template JE1 BE1.png|32px]] [[File:Shaper Armor Trim Smithing Template JE1 BE1.png|32px]] [[File:Host Armor Trim Smithing Template JE1 BE1.png|32px]] [[File:Silence Armor Trim Smithing Template JE1 BE1.png|32px]] Added wayfinder, raiser, shaper, host, and silence armor trim smithing templates.
|[[File:Sentry Armor Trim Smithing Template JE2 BE2.png|32px]] [[File:Dune Armor Trim Smithing Template JE2 BE2.png|32px]] Changed the textures of the sentry and dune armor trim smithing templates.
|The pattern textures of dune and sentry armor trims are changed from [[File:Armor Trim Dune (sample model) JE1 BE1.png|24px]] [[File:Armor Trim Sentry (sample model) JE1 BE1.png|24px]] to [[File:Armor Trim Dune (sample model) JE2 BE2.png|24px]] [[File:Armor Trim Sentry (sample model) JE2 BE2.png|24px]].<br>
Those previous patterns were left with different names: dune was renamed sentry and sentry was renamed shaper.}}
{{History|||snap=23w16a|Wayfinder, raiser, shaper, and host armor trim no longer generates in [[suspicious sand]] in [[trail ruins]].|Due to the split of the archaeological loot tables for the suspicious gravel within the [[trail ruins]]; wayfinder, raiser, shaper, and host armor trim now are in the rare loot.}}
{{History|||snap=23w17a|The probability of the wayfinder, raiser, shaper, and host armor trim to generate in [[suspicious gravel]] in [[trail ruins]] has been changed from 1/11 to 1/12.|The player now get the [[advancement]] "Crafting a new look" when they craft a trimmed armor at a [[smithing table]] using a smithing template, "Smithing with style" when they apply these smithing templates at least once on their armor: Spire, Snout, Rib, Ward, Silence, Vex, Tide, and Wayfinder.}}
{{History|bedrock}}
{{History||Next Major Update<br>(Experimental)|link=Bedrock Edition 1.19.80|snap=beta 1.19.80.21|[[File:Netherite Upgrade Smithing Template JE1 BE1.png|32px]] [[File:Sentry Armor Trim Smithing Template JE1 BE1.png|32px]] [[File:Vex Armor Trim Smithing Template JE1 BE1.png|32px]] [[File:Wild Armor Trim Smithing Template JE1 BE1.png|32px]] [[File:Coast Armor Trim Smithing Template JE1 BE1.png|32px]] [[File:Dune Armor Trim Smithing Template JE1 BE1.png|32px]] [[File:Ward Armor Trim Smithing Template JE1 BE1.png|32px]] [[File:Tide Armor Trim Smithing Template JE1 BE1.png|32px]] [[File:Snout Armor Trim Smithing Template JE1 BE1.png|32px]] [[File:Rib Armor Trim Smithing Template JE1 BE1.png|32px]] [[File:Eye Armor Trim Smithing Template JE1 BE1.png|32px]] [[File:Spire Armor Trim Smithing Template JE1 BE1.png|32px]] Added smithing templates behind the "[[Bedrock Edition 1.20.0|Next Major Update]]" [[experimental]] toggle.}}
{{History|||snap=beta 1.19.80.22|[[File:Wayfinder Armor Trim Smithing Template JE1 BE1.png|32px]] [[File:Raiser Armor Trim Smithing Template JE1 BE1.png|32px]] [[File:Shaper Armor Trim Smithing Template JE1 BE1.png|32px]] [[File:Host Armor Trim Smithing Template JE1 BE1.png|32px]] [[File:Silence Armor Trim Smithing Template JE1 BE1.png|32px]] Added wayfinder, raiser, shaper, host, and silence armor trim smithing templates.
|[[File:Sentry Armor Trim Smithing Template JE2 BE2.png|32px]] [[File:Dune Armor Trim Smithing Template JE2 BE2.png|32px]] Changed the textures of the sentry and dune armor trim smithing templates.
|The pattern textures of dune and sentry armor trims are changed from [[File:Armor Trim Dune (sample model) JE1 BE1.png|24px]] [[File:Armor Trim Sentry (sample model) JE1 BE1.png|24px]] to [[File:Armor Trim Dune (sample model) JE2 BE2.png|24px]] [[File:Armor Trim Sentry (sample model) JE2 BE2.png|24px]].<br>
Those previous patterns were left with different names: dune was renamed sentry and sentry was renamed shaper.}}
{{History||1.20.0|snap=beta 1.20.0.21|Smithing templates are now available without using the "Next Major Update" experimental toggle.}}
{{History|foot}}
== Issues ==
{{Issue list}}
== Trivia ==
* Smithing templates were named "Smithing Blueprints" in the prototype but was changed because the word "blueprint" sounded modern and technical.<ref>{{ytl|klP9SrJFDU8|Minecraft 1.20: Armor Trims - What Do They Mean?|Minecraft|May 4, 2023|t=98}}</ref>
* When Mojang developer Gnembon was working on armor trims, he accidentally messed up their rendering, making them jet through the player's body in a weird fashion, similar to what appears in {{w|Salvador Dalí}}'s paintings where a hand might poke through a forehead.<ref>{{ytl|ghQODkq4ITI|Mojang Dev Comes To Hermitcraft! (Mojang Developer Gnembom Interview)|GoodVodsWithScar|June 23, 2023|t=1980}}</ref>
* Some of the armor trims feature patterns based on a [[mob]] or [[block]] that is found in the same [[Generated structures|structure]] as the corresponding smithing template.<ref name=":0">"Some of the armor trims reflect the place where you found the template, for example bastions contain a piglin-inspired trim."-[[Sofia Dankis]]-{{Mcnet|armor-trims-coming-minecraft-1-20|Armor Trims Coming to Minecraft 1.20|January 24, 2023}}</ref>
** The spire armor trim resembles a [[shulker]].
** The vex armor trim resembles an [[evoker]]. As an item in the [[inventory]], it resembles the wing or the vein texture of a [[vex]].
** The wild armor trim has moss growing on 3 of its corners.
** The coast armor trim appears to have barnacles attached to it.
** The ward armor trim, as an item in the inventory, resembles the faces inside a [[warden]]'s chest.
** The silence armor trim appears to have sculk creeping onto / infecting it.
** The tide armor trim resembles [[Prismarine|prismarine bricks]].
** The snout armor trim resembles a [[piglin]]<ref name=":0" />.
** The rib armor trim resembles a [[wither skeleton]].
** The eye armor trim resembles an [[eye of ender]]. There are also two eyes on the head part of the armor trim that resemble those of an [[enderman]].
* ''Netherite upgrade smithing template'' (35 characters with "_" and 32 characters without "_") and ''sentry armor trim smithing template'' (35 characters with "_" and 31 characters without "_") are the current longest name for item ID, while ''[[polished blackstone pressure plate]]'' and ''[[cracked polished blackstone bricks]]'' have 34 characters with "_" and 31 characters without "_".
* The silence armor trim is the rarest trim, due to being found in ancient cities in the deep dark, and having only a 1.2% chance to be per chest.
* When [[lapis lazuli]] is used as trim material, it is called "Lapis" instead of its full name "Lapis Lazuli"; this is the only instance of the abbreviation "Lapis" being used in-game.<ref>{{bug|MC-262486|||WAI}}</ref>
== Gallery ==
=== Sprites ===
<gallery>
Netherite Upgrade Smithing Template.png|Netherite Upgrade
Sentry Armor Trim Smithing Template.png|Sentry Armor Trim
Vex Armor Trim Smithing Template.png|Vex Armor Trim
Wild Armor Trim Smithing Template.png|Wild Armor Trim
Coast Armor Trim Smithing Template.png|Coast Armor Trim
Dune Armor Trim Smithing Template.png|Dune Armor Trim
Wayfinder Armor Trim Smithing Template.png|Wayfinder Armor Trim
Raiser Armor Trim Smithing Template.png|Raiser Armor Trim
Shaper Armor Trim Smithing Template.png|Shaper Armor Trim
Host Armor Trim Smithing Template.png|Host Armor Trim
Ward Armor Trim Smithing Template.png|Ward Armor Trim
Silence Armor Trim Smithing Template.png|Silence Armor Trim
Tide Armor Trim Smithing Template.png|Tide Armor Trim
Snout Armor Trim Smithing Template.png|Snout Armor Trim
Rib Armor Trim Smithing Template.png|Rib Armor Trim
Eye Armor Trim Smithing Template.png|Eye Armor Trim
Spire Armor Trim Smithing Template.png|Spire Armor Trim
</gallery>
=== Armor trim patterns ===
<gallery>
Armor Trim Sentry (sample model).png|Sentry Armor Trim
Armor Trim Vex (sample model).png|Vex Armor Trim
Armor Trim Wild (sample model).png|Wild Armor Trim
Armor Trim Coast (sample model).png|Coast Armor Trim
Armor Trim Dune (sample model).png|Dune Armor Trim
Armor Trim Wayfinder (sample model).png|Wayfinder Armor Trim
Armor Trim Raiser (sample model).png|Raiser Armor Trim
Armor Trim Shaper (sample model).png|Shaper Armor Trim
Armor Trim Host (sample model).png|Host Armor Trim
Armor Trim Ward (sample model).png|Ward Armor Trim
Armor Trim Silence (sample model).png|Silence Armor Trim
Armor Trim Tide (sample model).png|Tide Armor Trim
Armor Trim Snout (sample model).png|Snout Armor Trim
Armor Trim Rib (sample model).png|Rib Armor Trim
Armor Trim Eye (sample model).png|Eye Armor Trim
Armor Trim Spire (sample model).png|Spire Armor Trim
</gallery>
=== Official Artwork ===
<gallery>
T&T Thumbnail.jpg|[[Sunny]] wearing amethyst armor trims.
Warden Chasing Alex with Silence Trim Pixel Art.png|A [[warden]] chasing Alex holding the silence armor trim.
Alex Trimming Armor in Smithing Table Pixel Art.png|Alex adding the silence armor trim and amethyst on iron armor.
Alex Wearing Iron Armor with Amethyst Pixel Art.jpg|Alex wearing the trimmed iron armor.
File:Live2023-01.jpeg|Noor working on trimmed iron armor.
</gallery>
=== Screenshots ===
<gallery>
Kingbdogz Armor Trim 1.jpg|Redstone trims on diamond armor.
Kingbdogz Armor Trim 2.jpg|Gold trims on netherite armor.
Too Many Trims.jpg|A large amount of armor trims.
Kingbdogz Armor Trim 3.jpg|Gold on netherite.
Kingbdogz Armor Trim 4.jpg|Diamond on diamond.
New Armor Trims in 23W12A.jpg|<ref>{{Tweet|kingbdogz|1638580472962850831|new trims got the drip The new "Silence" armor trim to the left is now the hardest trim to get, with only a 1% chance per chest to spawn in Ancient Cities. Definitely gonna be a challenge to get!|March 22, 2023}}</ref>
Emerald Armor.png|Emerald on gold.
Xilefian Armor Trims 1.png|[[Xilefian]] showing how armor trims work.
Xilefian Armor Trims 2.png|[[Xilefian]] showing how armor trims work.
Xilefian Armor Trims 3.png|[[Xilefian]] showing how armor trims work.
Armor Trims On Netherite Armors.png|A display of all eleven (before [[Java Edition 23w12a]]) armor trims and ten colors on netherite armors.
Armor Trim Showcase.png|A display of all eleven (before [[Java Edition 23w12a]]) armor trims, on netherite armor using emerald as the trim material.
Armor Trim Colors.png|A display of all ten armor trim colors, using the ward trim on a netherite helmet.
Silence Armor Trim on All Armors.png|A display of all ten colors of the silence armor trim on all armors.
Image 2023-06-07 154100087.png|A screenshot of every armor trim in every color(besides quartz) on leather armor.
Armor Trim Friends.jpg|Official screenshot of [[Alex]] and [[Zuri]] wearing armor trims.
LadyAgnes Armor Trims.jpg|Copper trims on netherite armor.
Trim Lineup.jpg
Fancy Delta.jpg|[[Kai]] wearing trimmed armor in a [[Basalt Delta]].
Trims & Pots.jpg
Noor Gold Armor Trim .jpeg
Noor Diamond Armor Trim.jpeg
Noor Netherite Armor Trim.jpeg
Noor Iron Armor Trim.jpeg
</gallery>
== References ==
{{Reflist}}
{{Items}}
[[Category:Bedrock Edition]]
[[Category:Non-renewable resources]]
[[de:Schmiedevorlage]]
[[es:Molde de herrería]]
[[fr:Modèle de forge]]
[[ja:鍛冶型]]
[[pl:Szablon kowalski]]
[[pt:Molde de ferraria]]
[[ru:Кузнечный шаблон]]
[[uk:Ковальський шаблон]]
[[zh:锻造模板]]</li></ul> | alpha 1.1.0.0 | Vines now generate in woodland mansions. | |||
| Bedrock Edition | |||||
1.2.0{{Extension DPL}}<ul><li>[[Dragon's Breath|Dragon's Breath]]<br/>{{Item
| image = Dragon's Breath.png
| renewable = Yes
| stackable = Yes (64)
| rarity = Uncommon
}}
The '''dragon's breath''' is a [[brewing]] item that is used solely to make [[lingering potion]]s.
== Obtaining ==
The dragon's breath can be obtained by scooping up the [[ender dragon]]'s breath attack or the purple [[area effect cloud|effect clouds]] caused by [[dragon fireball]]s in an empty [[glass bottle]].
== Usage ==
=== Brewing ingredient ===
Dragon's breath may be added to any splash potion to upgrade it to a lingering potion, which can be used to create a lasting [[Lingering Potion#Area Effect Cloud|area effect cloud]], or to craft [[Arrow#Tipped arrows|tipped arrows]].
{{brewing
|name=[[Lingering Potion]]
|showname=1
|Dragon's Breath
|Any Lingering Potion
|base=Any Splash Potion}}
When put 2 or more dragon's breath in the brewing stand, after the brewing process, a glass bottle will drop as an [[Item (entity)|entity]]. However, if put only 1 dragon's breath in the brewing stand, after the brewing process, the glass bottle is consumed and cannot be retrieved.<ref>{{bug|MC-259583}}</ref>
== Sounds ==
{{Edition|Java}}:
{{Sound table
|sound=Bottle fill dragon breath1.ogg
|sound2=Bottle fill dragon breath2.ogg
|subtitle=Bottle fills
|source=neutral
|description=Filling a glass bottle with dragon's breath
|id=item.bottle.fill_dragonbreath
|translationkey=subtitles.item.bottle.fill
|volume=1.0
|pitch=1.0
|distance=16
|foot=1}}
{{Edition|Bedrock}}:
{{Sound table
|type=bedrock
|sound=Bottle fill dragon breath1.ogg
|sound2=Bottle fill dragon breath2.ogg
|source=sound
|description=When a bottle is filled with dragon's breath
|id=bottle.dragonbreath
|volume=0.7<wbr>{{Until|BE 1.20.40}}<br>1.0<wbr>{{Upcoming|BE 1.20.40}}
|pitch=1.0
|foot=1}}
== Achievements ==
{{Load achievements|You Need a Mint}}
== Advancements ==
{{load advancements|You Need a Mint}}
== Data values ==
=== ID ===
{{edition|java}}:
{{ID table
|edition=java
|showforms=y
|generatetranslationkeys=y
|displayname=Dragon's Breath
|spritetype=item
|nameid=dragon_breath
|form=item
|foot=1}}
{{edition|bedrock}}:
{{ID table
|edition=bedrock
|shownumericids=y
|showforms=y
|notshowbeitemforms=y
|generatetranslationkeys=y
|displayname=Dragon's Breath
|spritetype=item
|nameid=dragon_breath
|id=560
|form=item
|foot=1}}
== History ==
{{History|java}}
{{History||1.9|snap=15w33a|[[File:Dragon's Breath JE1 BE1.png|32px]] Added dragon's breath.}}
{{History||1.13|snap=17w47a|Prior to [[1.13/Flattening|''The Flattening'']], this [[item]]'s numeral ID was 437.}}
{{History||1.14|snap=18w43a|[[File:Dragon's Breath JE2 BE2.png|32px]] The texture of dragon's breath has been changed.}}
{{History|pocket}}
{{History||1.0.0|snap=alpha 0.17.0.1|[[File:Dragon's Breath JE1 BE1.png|32px]] Added dragon's breath.}}
{{History|bedrock}}
{{History||1.10.0|snap=beta 1.10.0.3|[[File:Dragon's Breath JE2 BE2.png|32px]] The texture of dragon's breath has been changed.}}
{{History|console}}
{{History||xbox=TU46|xbone=CU36|ps=1.38|wiiu=Patch 15|switch=1.0.1|[[File:Dragon's Breath JE1 BE1.png|32px]] Added dragon's breath.}}
{{History||xbox=none|xbone=none|ps=1.90|wiiu=none|switch=none|[[File:Dragon's Breath JE2 BE2.png|32px]] The texture of dragon's breath has been changed.}}
{{History|3ds}}
{{History||1.7.10|[[File:Dragon's Breath JE1 BE1.png|32px]] Added dragon's breath.}}
{{History|foot}}
== Issues ==
{{issue list}}
== Trivia ==
* If the dragon's breath is used in a [[crafting]] recipe (using a [[mod]] or a [[data pack]]), it becomes an empty bottle instead of being entirely consumed.
== References ==
{{reflist}}
==External Links==
*[https://www.minecraft.net/en-us/article/dragon-s-breath Taking Inventory: Dragon's Breath] – Minecraft.net on June 9, 2023
{{Items}}
[[Category:Renewable resources]]
[[de:Drachenatem]]
[[fr:Souffle de dragon]]
[[it:Soffio di drago]]
[[ja:ドラゴンブレス]]
[[ko:드래곤의 숨결]]
[[nl:Drakenadem]]
[[pl:Oddech smoka]]
[[pt:Bafo do dragão]]
[[ru:Драконье дыхание]]
[[zh:龙息]]
[[Category:Brewing recipe]]</li><li>[[Cauldron|Cauldron]]<br/>{{For|the boss in ''Minecraft Dungeons''|MCD:Corrupted Cauldron}}
{{Block
| extratext = View [[#Renders|all renders]]
| transparent = Yes
| light = Depends on contained liquid
| tool = wooden pickaxe
| renewable = Yes
| stackable = Yes (64)
| flammable = No
| lavasusceptible = No
}}
A '''cauldron''' is a [[block]] that can contain [[water]], [[lava]] or [[powder snow]] and, in certain situations, collect it from the environment. {{IN|bedrock}}, it can also hold [[potion]]s or dyed water. It also serves as a [[leatherworker]]'s [[job site block]].
== Obtaining ==
=== Breaking ===
A cauldron can be obtained using any [[pickaxe]]. If mined without a pickaxe, it drops nothing. Regardless of the tool, when a cauldron is destroyed, its contents are lost.
{{breaking row|horizontal=1|Cauldron|Pickaxe|Wood}}
=== Natural generation ===
[[File:Natural Cauldron Table.png|A naturally occurring cauldron inside of a [[witch hut]].|thumb]]
A single empty cauldron is generated in each [[swamp hut]]. {{IN|be}}, the cauldrons generated there are {{frac|1|3}} to {{frac|2|3}} full of a random [[potion]].
A cauldron {{frac|2|3}} full of water is generated in each [[igloo]] basement.
[[File:MansionJailInner.png|thumb|Cauldron in [[woodland mansion]] jail.]]
Cauldrons can be found in a few rooms inside of [[woodland mansion]]s.
Two filled cauldrons can be found inside savanna, taiga, snowy taiga, and snowy tundra [[village]] tannery houses.
A single filled cauldron can be found in plains village and desert village tannery houses.
{{IN|java}}, three filled cauldrons can be found in plains village tannery houses.
Cauldrons can also spawn in [[trail ruins]].
=== Crafting ===
A cauldron can be crafted from [[iron ingot]]s.
{{Crafting
|A1= Iron Ingot
|C1= Iron Ingot
|A2= Iron Ingot
|C2= Iron Ingot
|A3= Iron Ingot
|B3= Iron Ingot
|C3= Iron Ingot
|Output= Cauldron
|type= Brewing
}}
== Usage ==
=== Storage for substances ===
Cauldrons can hold a variety of substances. Fluids they cannot hold include [[milk]], [[Honey Bottle|honey]] and any food items that exist in [[bowl]]s; namely [[mushroom stew]], [[beetroot soup]], [[rabbit stew]] and [[suspicious stew]]. {{IN|java}}, cauldrons containing fluids are considered by the game to be separate blocks from each other and from empty cauldrons, which does not affect gameplay but does affect the commands needed to place them.
==== Holding water ====
A cauldron can be filled with [[water]] by {{control|using}} a [[water bucket]] on the cauldron. Once completely filled, a cauldron can be used to fill a water bucket by {{control|using}} an empty [[bucket]] on the cauldron; this empties the cauldron. Despite containing water, using a [[fish bucket]] on a cauldron does not fill it with water, but places water against it, meaning it does nothing to the cauldron.<ref>{{bug|MC-129109|||WAI}}</ref>
A cauldron can also be filled by dumping a water bucket on the block above the cauldron. Once the water block is removed, the cauldron is filled to the full level with water.{{only|be}}
It can contain three levels of water. One level of water can be added to a cauldron by {{control|using}} a [[water bottle]] on it. One level of water can be removed from a cauldron, filling a water bottle, by {{control|using}} a [[glass bottle]] on it.
A cauldron slowly fills with [[water]] when [[rain]]ed upon, if starting empty or with some water. This happens randomly, at 5% of the rate in which snow accumulates on the ground during [[snowfall]].
Water can be stored in a cauldron even in [[the Nether]]. Water in a cauldron does not freeze in cold biomes.
Water in a cauldron does ''not'' absorb [[explosion]] damage; make [[sound]]s and [[particle]]s; absorb fall damage;<ref>{{bug|MC-176867|||WF}}</ref><ref>{{bug|MCPE-104572|||WF}}</ref> allow [[Riptide]] [[trident]]s to activate;<ref>{{bug|MC-145311|||WF}}</ref><ref>{{bug|MCPE-93111}}</ref> or damage [[endermen]], [[strider]]s, or [[blaze]]s.<ref>{{bug|MC-106813|||WF}}</ref> Cauldrons do ''not'' deal drowning damage to mobs inside of them<ref>{{bug|MC-152680}}</ref> and [[fish]] act as if there is no water inside it.<ref>{{bug|MC-126819|||WF}}</ref> The player ''cannot'' float or [[swim]] in it, as the water is about level with the player's waist. Jumping in a cauldron does ''not'' produce any bubble or water particles.
A cauldron placed below a down-facing [[pointed dripstone]] that has water placed a block above it slowly fills with water. The same works with [[lava]], allowing for infinite lava generation.
Attempting to add lava or potion to water empties the cauldron.{{only|be}}
The water in a cauldron cannot be sucked up by a [[sponge]], whether the sponge is touching the cauldron or not.
===== Applying dye to cauldron water =====
{{exclusive|bedrock|section=yes}}
{{IN|bedrock}}, leather armor is dyed through a cauldron, so a cauldron can hold dyed [[water]]. {{control|Using}} a dye on a cauldron filled with water colors the water, consuming the dye. Different dyes may be added to produce mixed colors. {{control|Using}} [[leather armor]] or [[leather horse armor]] on the cauldron dyes that item the color of the water, reducing the water in the cauldron by one level for each item dyed.
Attempting to add water, lava or potion to dyed water empties the cauldron.
==== Holding lava ====
[[File:Lava Cauldron.png|150px|thumb|Cauldron filled with lava]]
Cauldrons can be used to hold lava. {{IN|be|ee}}, when a cauldron is already filled with water, it empties the cauldron and makes an extinguishing sound. A cauldron filled with lava emits a light level of 15, similar to lava, and burns any [[entity]] inside of it; {{in|be|ee|short=1}}, this includes mobs that do not take damage from lava like [[zombified piglin]]s.
Lava inside a cauldron does not interact with water outside of the cauldron. The lava disappears upon putting water in the cauldron.
A [[redstone comparator]] with a lava cauldron behind it outputs redstone signal strength of 3.<ref name=JavaLava>{{bug|MC-204393}}</ref><ref>{{bug|MCPE-104824}}</ref>
A cauldron placed below a down-facing [[pointed dripstone]] that has lava placed a block above it slowly fills with lava.
If a cauldron is filled by lava, using glass bottles on the cauldron does nothing.
==== Holding powder snow ====
[[Powder snow]] is currently the only solid material that can be stored in a cauldron. A cauldron slowly fills with powder snow during [[snowfall]], if starting empty or with any layer of powder snow already inside. Up to three layers can be filled. When the cauldron is full, {{ctrl|interacting}} using a [[bucket]], creates a [[powder snow bucket]] and empties the cauldron. Entities standing in the cauldron do not take freeze damage, and entities wearing [[leather boots]] still fall through the powder snow.
A [[redstone comparator]] with a powder snow cauldron behind it outputs a redstone signal strength proportional to the fill level, up to 3.
Contrary to a cauldron filled with water, a powder snow cauldron that is not full cannot be filled up with a powder snow bucket, as {{control|using}} the bucket on the cauldron instead places powder snow against it.
==== Filling cauldrons with potions ====
{{exclusive|bedrock|education|section=yes}}
{{IN|bedrock}}, a cauldron can hold normal [[potion]]s, [[splash potion]]s and [[lingering potion]]s. {{control|Using}} a potion on a cauldron empties the potion and increases the level of the potion in the cauldron by one level. A glass bottle can then be {{control|used}} on a cauldron with a potion in it, filling the bottle with that potion. This reduces the potion in the cauldron by one level.
{{control|Using}} an [[arrow]] on a cauldron that contains a potion transforms the arrow into a [[tipped arrow]] with that potion [[effect]], and reduce the potion in the cauldron by one level. Tipping multiple arrows at once can be more efficient, and it may use more than one level at once. 1 level of potion tips up to 16 arrows, 2 levels up to 32, and a full cauldron can tip a full stack of arrows, resulting in 21.33 tipped arrows per potion.
Attempting to put [[water]], [[lava]] or a different potion into a cauldron with a potion causes an explosion sound, and the cauldron is emptied.
An entity that stands in a cauldron filled to any level with any potion does not receive the effect of the potion.
Using an empty bucket on a cauldron filled with any potion does nothing, as the bucket remains empty and the potion in the cauldron does not empty.
=== Removing dye from items ===
A cauldron with [[water]] can wash the dye off of leather [[armor]] and [[shulker box]]es, and can remove the top-most pattern layer of a [[banner]], by pressing {{control|use}} on the cauldron with the leather armor, shulker box, or banner in hand. Each wash reduces the water in the cauldron by one level. The water does not become dyed while removing dye from objects.
=== Changing profession ===
If a [[village]] has a cauldron that has not been claimed by a [[villager]], any villager that does not already have a profession or [[job site]] block may change their profession to [[leatherworker]].
=== Extinguishing fire ===
A cauldron with [[water]] or [[powder snow]] extinguishes [[entities]] on [[fire]] that fall into it and the entity emits black particles. This includes [[mob]]s, [[player]]s, [[item]]s (if they land in the cauldron before burning up), and flaming [[arrow]]s{{only|je|short=1}}. Flaming arrows stuck into the side are also extinguished. Entities must reach the water or powder snow in it. Each entity extinguished causes the substance in the cauldron to decrease by one level. If the cauldron is filled with powder snow, it then becomes a water cauldron.
=== Redstone component ===
[[File:Cauldron transmission over piston.png|An example of a cauldron used in a [[redstone]] circuit.|thumb]]
{{see also|Redstone circuit}}
A cauldron can act as a power source for a [[redstone comparator]]. With a cauldron behind it (either directly, or separated by an unpowered solid block), a comparator outputs a signal strength proportional to how full the cauldron is: 0 for empty, 1 for one-third full, 2 for two-thirds full, and 3 for completely full or filled with lava. However, if there is a block between the cauldron and the comparator, the comparator does not immediately update.
== Sounds ==
=== Generic ===
{{Sound table/Block/Normal}}
=== Unique ===
{{edition|java}}:
{{Sound table
|sound=Pointed Dripstone drip water cauldron1.ogg
|sound2=Pointed Dripstone drip water cauldron2.ogg
|sound3=Pointed Dripstone drip water cauldron3.ogg
|sound4=Pointed Dripstone drip water cauldron4.ogg
|sound5=Pointed Dripstone drip water cauldron5.ogg
|sound6=Pointed Dripstone drip water cauldron6.ogg
|sound7=Pointed Dripstone drip water cauldron7.ogg
|sound8=Pointed Dripstone drip water cauldron8.ogg
|subtitle=Water drips
|source=block
|description=When dripping water from a pointed dripstone falls into a cauldron
|id=block.pointed_dripstone.drip_water_into_cauldron
|translationkey=subtitles.block.pointed_dripstone.drip_water_into_cauldron
|volume=2.0
|pitch=0.9-1.0
|distance=16}}
{{Sound table
|sound=Pointed Dripstone drip lava cauldron1.ogg
|sound2=Pointed Dripstone drip lava cauldron2.ogg
|sound3=Pointed Dripstone drip lava cauldron3.ogg
|sound4=Pointed Dripstone drip lava cauldron4.ogg
|subtitle=Lava drips
|source=block
|description=When dripping lava from a pointed dripstone falls into a cauldron
|id=block.pointed_dripstone.drip_lava_into_cauldron
|translationkey=subtitles.block.pointed_dripstone.drip_lava_into_cauldron
|volume=2.0
|pitch=0.9-1.0
|distance=16}}
{{Sound table
|sound=Empty water bucket1.ogg
|sound2=Empty water bucket1.ogg
|sound3=Empty water bucket2.ogg
|sound4=Empty water bucket3.ogg
|subtitle=Bucket empties
|source=block
|description=When water from a bucket is placed in a cauldron <ref group=sound><code>empty1</code> plays twice as often as the other sounds</ref>
|id=item.bucket.empty
|translationkey=subtitles.item.bucket.empty
|volume=1.0
|pitch=1.0 <ref group=sound>Except for the second copy of <code>empty1</code>, which is 0.9</ref>
|distance=16}}
{{Sound table
|sound=Fill water bucket1.ogg
|sound2=Fill water bucket2.ogg
|sound3=Fill water bucket3.ogg
|subtitle=Bucket fills
|source=block
|description=When water from a bucket is removed from a cauldron
|id=item.bucket.fill
|translationkey=subtitles.item.bucket.fill
|volume=1.0
|pitch=1.0
|distance=16}}
{{Sound table
|sound=Empty lava bucket1.ogg
|sound2=Empty lava bucket2.ogg
|sound3=Empty lava bucket3.ogg
|subtitle=Bucket empties
|source=block
|description=When lava is placed in a cauldron
|id=item.bucket.empty_lava
|translationkey=subtitles.item.bucket.empty
|volume=1.0
|pitch=1.0
|distance=16}}
{{Sound table
|sound=Fill lava bucket1.ogg
|sound2=Fill lava bucket2.ogg
|sound3=Fill lava bucket3.ogg
|subtitle=Bucket fills
|source=block
|description=When lava is removed from a cauldron
|id=item.bucket.fill_lava
|translationkey=subtitles.item.bucket.fill
|volume=1.0
|pitch=1.0
|distance=16}}
{{Sound table
|sound=Empty powder snow bucket1.ogg
|sound2=Empty powder snow bucket2.ogg
|subtitle=Bucket empties
|source=block
|description=When powder snow is placed in a cauldron
|id=item.bucket.empty_powder_snow
|translationkey=subtitles.item.bucket.empty
|volume=1.0
|pitch=''varies'' <ref group=sound>Can be 1.0, 0.95, or 1.1 for each sound</ref>
|distance=16}}
{{Sound table
|sound=Fill powder snow bucket1.ogg
|sound2=Fill powder snow bucket2.ogg
|subtitle=Bucket fills
|source=block
|description=When powder snow is removed from a cauldron
|id=item.bucket.fill_powder_snow
|translationkey=subtitles.item.bucket.fill
|volume=1.0
|pitch=''varies'' <ref group=sound>Can be 1.0, 0.9, or 1.1 for each sound</ref>
|distance=16}}
{{Sound table
|sound=Bottle empty1.ogg
|sound2=Bottle empty2.ogg
|subtitle=Bottle empties
|source=block
|description=When water from a bottle is placed in a cauldron
|id=item.bottle.empty
|translationkey=subtitles.item.bottle.empty
|volume=1.0
|pitch=1.0
|distance=16}}
{{Sound table
|sound=Bottle fill_water1.ogg
|sound2=Bottle fill_water2.ogg
|sound3=Bottle fill_water3.ogg
|sound4=Bottle fill_water4.ogg
|subtitle=Bottle fills
|source=block
|description=When water from a bottle is removed from a cauldron
|id=item.bottle.fill
|translationkey=subtitles.item.bottle.fill
|volume=1.0
|pitch=1.0
|distance=16}}
{{Sound table
|sound=Empty water bucket1.ogg
|sound2=Empty water bucket2.ogg
|sound3=Empty water bucket3.ogg
|subtitle=Leatherworker works
|source=neutral
|description=Randomly while a leatherworker is working
|id=entity.villager.work_leatherworker
|translationkey=subtitles.entity.villager.work_leatherworker
|volume=0.9
|pitch=0.8-1.2
|distance=16
|foot=1}}
{{edition|bedrock}}:
{{Sound table
|type=bedrock
|sound=Pointed Dripstone drip water cauldron1.ogg
|sound2=Pointed Dripstone drip water cauldron2.ogg
|sound3=Pointed Dripstone drip water cauldron3.ogg
|sound4=Pointed Dripstone drip water cauldron4.ogg
|sound5=Pointed Dripstone drip water cauldron5.ogg
|sound6=Pointed Dripstone drip water cauldron6.ogg
|sound7=Pointed Dripstone drip water cauldron7.ogg
|sound8=Pointed Dripstone drip water cauldron8.ogg
|source=block
|description=When dripping water from a pointed dripstone falls into a cauldron
|id=cauldron_drip.water<br>.pointed_dripstone
|volume=2.0
|pitch=0.9-1.0}}
{{Sound table
|sound=Pointed Dripstone drip lava cauldron1.ogg
|sound2=Pointed Dripstone drip lava cauldron2.ogg
|sound3=Pointed Dripstone drip lava cauldron3.ogg
|sound4=Pointed Dripstone drip lava cauldron4.ogg
|source=block
|description=When dripping lava from a pointed dripstone falls into a cauldron
|id=cauldron_drip.lava<br>.pointed_dripstone
|volume=2.0
|pitch=0.9-1.0}}
{{Sound table
|sound=Fizz.ogg
|source=block
|description=When a different liquid is put in a cauldron with a potion
|id=random.fizz
|volume=1.0
|pitch=0.6-0.8<wbr>{{Checkthecode}}[[Category:Pages with inaccurate sound pitch value]]}}
{{Sound table
|rowspan=8
|sound=Water Splash Old.ogg
|source=block
|description=When dye is added to a cauldron
|id=cauldron.adddye
|volume=0.1
|pitch=1.0}}
{{Sound table
|source=block
|description=When armor is dyed using a cauldron
|id=cauldron.dyearmor
|volume=0.1
|pitch=1.0}}
{{Sound table
|source=block
|description=When dye is removed from armor using a cauldron
|id=cauldron.cleanarmor
|volume=0.1
|pitch=1.0}}
{{Sound table
|source=block
|description=When all patterns are removed from a banner using a cauldron
|id=cauldron.cleanbanner
|volume=0.1
|pitch=1.0}}
{{Sound table
|source=block
|description=When a potion is placed in a cauldron<wbr><ref group=sound name=potionsplash>{{Bug|MCPE-174867}}</ref>
|id=cauldron.fillpotion
|volume=0.1
|pitch=1.0}}
{{Sound table
|source=block
|description=When a potion is taken from a cauldron<wbr><ref group=sound name=potionsplash/>
|id=cauldron.takepotion
|volume=0.1
|pitch=1.0}}
{{Sound table
|source=block
|description=When water from a bucket or bottle is placed in a cauldron<wbr><ref group=sound name=bucketsplash>{{Bug|MCPE-135919}}</ref>
|id=cauldron.fillwater
|volume=0.1
|pitch=1.0}}
{{Sound table
|source=block
|description=When water from a bucket or bottle is removed from a cauldron <ref group=sound name=bucketsplash/>
|id=cauldron.takewater
|volume=0.1
|pitch=1.0}}
{{Sound table
|sound=Empty lava bucket1.ogg
|sound2=Empty lava bucket2.ogg
|sound3=Empty lava bucket3.ogg
|source=block
|description=When lava is placed in a cauldron
|id=bucket.empty_lava
|volume=1.0
|pitch=1.0}}
{{Sound table
|sound=Fill lava bucket1.ogg
|sound2=Fill lava bucket2.ogg
|sound3=Fill lava bucket3.ogg
|source=block
|description=When lava is removed from a cauldron
|id=bucket.fill_lava
|volume=1.0
|pitch=1.0}}
{{Sound table
|sound=Empty powder snow bucket1.ogg
|sound2=Empty powder snow bucket2.ogg
|source=block
|description=When powder snow is placed in a cauldron
|id=bucket.empty_powder_snow
|volume=1.0
|pitch=1.0}}
{{Sound table
|sound=Fill powder snow bucket1.ogg
|sound2=Fill powder snow bucket2.ogg
|source=player
|description=When powder snow is removed from a cauldron
|id=bucket.fill_powder_snow
|volume=1.0
|pitch=1.0}}
{{Sound table
|sound=Empty water bucket1.ogg
|sound2=Empty water bucket2.ogg
|sound3=Empty water bucket3.ogg
|source=block
|description=Randomly while a leatherworker is working
|id=bucket.fill_water
|volume=1.0
|pitch=1.0
|foot=1}}
== Data values ==
=== ID ===
{{edition|java}}:
{{ID table
|edition=java
|showblocktags=y
|showforms=y
|generatetranslationkeys=y
|displayname=Cauldron
|spritetype=block
|nameid=cauldron
|blocktags=cauldrons
|translationkey=block.minecraft.cauldron,item.minecraft.cauldron}}
{{ID table
|displayname=Lava Cauldron
|spritename=cauldron
|spritetype=block
|nameid=lava_cauldron
|blocktags=cauldrons
|form=block}}
{{ID table
|displayname=Powder Snow Cauldron
|spritename=cauldron
|spritetype=block
|nameid=powder_snow_cauldron
|blocktags=cauldrons
|form=block}}
{{ID table
|displayname=Water Cauldron
|spritename=cauldron
|spritetype=block
|nameid=water_cauldron
|blocktags=cauldrons
|form=block
|foot=1}}
{{edition|bedrock}}:
{{ID table
|edition=bedrock
|firstcolumnname=Type
|shownumericids=y
|showforms=y
|generatetranslationkeys=y
|displayname=Normal block
|spritename=cauldron
|spritetype=block
|nameid=cauldron
|id=118
|form=block
|itemform=item.cauldron}}
{{ID table
|displayname=Brighting block
|spritename=cauldron
|spritetype=block
|nameid=lava_cauldron
|id=465
|form=block
|translationkey=-}}
{{ID table
|displayname=Item
|spritename=cauldron
|spritetype=item
|nameid=cauldron
|id=432
|form=item
|foot=1}}
{{ID table
|notnamespaced=y
|displayname=Block entity
|spritename=cauldron
|spritetype=block
|nameid=Cauldron
|foot=1}}
=== Block states ===
{{see also|Block states}}
{{/BS}}
=== Block data ===
{{IN|be}}, a cauldron has a block entity associated with it that holds additional data about the block.
See [[Bedrock Edition level format/Block entity format]].
== Achievements ==
{{load achievements|Tie Dye Outfit}}
== History ==
{{History|java}}
{{History||1.0.0|snap=Beta 1.9 Prerelease 2|[[File:Cauldron JE1.png|32px]] Cauldrons are present in the code, but are not assigned to a [[block]] ID (and thus are unobtainable without [http://www.minecraftforum.net/topic/673742-19-pre2-cauldron-block/ mods] (archived link: [https://web.archive.org/web/20141222205821/https://dl.dropboxusercontent.com/u/19728555/cauldron.zip])).}}
{{History|||snap=Beta 1.9 Prerelease 3|[[File:Cauldron (item) JE1 BE1.png|32px]] Cauldrons have been given a [[block]] ID, an [[item]] ID, and a [[crafting]] recipe.}}
{{History||1.2.1|snap=12w06a|Cauldrons have now become [[renewable]], due to [[zombie]]s sometimes dropping iron ingots.}}
{{History||1.4.2|snap=12w40a|Empty cauldrons can now be found in [[witch hut]]s.}}
{{History||1.5|snap=13w02a|[[File:Cauldron JE2.png|32px]] The walls inside of the cauldron now use the bottom texture, and the cauldron now has no bottom.<ref name="whatdoyouputinacauldrontomakeitlighter">{{bug|MC-6772}}</ref>}}
{{History|||snap=13w02b|[[File:Cauldron JE1.png|32px]] Fixed the model error from 13w02a.}}
{{History||1.8|snap=14w03a|[[File:Cauldron JE4.png|32px]] Cauldrons now appear completely opaque.<ref>{{bug|MC-44990}}</ref>}}
{{History|||snap=14w03b|[[File:Cauldron JE1.png|32px]] Cauldrons now render as normal again.}}
{{History|||snap=14w06a|Cauldrons now have extra planes inside the feet. These planes are now rendered solid, so the [[player]] cannot see through the [[water]].{{info needed|what exactly does this mean?}}}}
{{History|||snap=14w10a|[[File:Cauldron JE6.png|32px]] The cauldron's feet now have planes on all sides.}}
{{History||1.11|snap=16w39a|Cauldrons now generate naturally in jail cells in [[woodland mansion]]s.}}
{{History||July 19, 2017|link=https://twitter.com/jeb_/status/887599625045250048|[[Jeb]] tweets image of a new jungle [[planks]], cauldron and [[dandelion]] textures.}}
{{History||1.13|snap=17w47a|Prior to [[1.13/Flattening|''The Flattening'']], this [[block]]'s numeral ID was 118, and the [[item]]'s was 380.}}
{{History||1.14|snap=18w43a|[[File:Cauldron JE7.png|32px]]<br/>[[File:Cauldron (item) JE2 BE2.png|32px]] The textures of cauldrons have been changed.}}
{{History|||snap=18w48a|Cauldrons now generate in the updated [[plains]] [[village]]s.}}
{{History|||snap=18w49a|Cauldrons now generate in the updated [[savanna]] villages and the new [[snowy tundra]] villages.}}
{{History|||snap=18w50a|Cauldrons now generate in the updated [[desert]] and [[taiga]] villages.}}
{{History|||snap=19w03a|The numerous missing cullface arguments for the cauldron have been fixed.}}
{{History|||snap=19w11a|Cauldrons now serve as leatherworker [[villager]]s' job site block.}}
{{History|||snap=19w13a|The cauldron's hitbox has been fixed.<ref>{{bug|MC-129205}}</ref>}}
{{History||1.17|snap=20w45a|Normal and water cauldrons have been split into different blocks, making filled cauldrons no longer work as a workstation for villagers.<ref name="technicalunemployment">{{bug|MC-204430}}</ref>
|This also means that any [[structure]]s before this snapshot that have cauldron(s) fill with water now no longer generate(s) cauldron. Instead, water cauldron(s) will generate.}}
{{History|||snap=20w48a|Cauldrons can now collect water and lava dripped by [[pointed dripstone]].}}
{{History|||snap=21w11a|[[Lava bucket]]s and [[powder snow bucket]]s can now be emptied into any filled cauldron.}}
{{History|||snap=21w13a|Filled cauldrons work again as a workstation for villagers.}}
{{History||1.20|snap=23w12a|Cauldrons now generate in [[trail ruins]].}}
{{History|pocket alpha}}
{{History||v0.14.0|snap=build 1|[[File:Cauldron BE1.png|32px]]<br/>[[File:Cauldron (item) JE1 BE1.png|32px]] Added cauldrons.
|Cauldrons are generated naturally in [[witch hut]]s.}}
{{History||v0.15.0|snap=build 1|Cauldrons can now be moved by [[piston]]s.}}
{{History|pocket}}
{{History||1.1.0|snap=alpha 1.1.0.0|Cauldrons now generate naturally in [[woodland mansion]]s, their fullness status is unknown.}}
{{History|bedrock}}
{{History||1.10.0|snap=beta 1.10.0.3|[[File:Cauldron BE2.png|32px]] The textures of cauldrons have been changed.
|Cauldrons now generate in tannery houses in [[village]]s.}}
{{History||?|[[File:Cauldron JE7.png|32px]] The textures of cauldrons have been changed.}}
{{History|console}}
{{History||xbox=TU7|xbone=CU1|ps=1.0|wiiu=Patch 1|switch=1.0.1|[[File:Cauldron JE1.png|32px]]{{verify|Was this the actually used model?}}[[File:Cauldron (item) JE1 BE1.png|32px]] Added cauldrons.}}
{{History||xbox=TU60|xbone=CU51|ps=1.64|wiiu=Patch 30|switch=1.0.11|[[Water]] in a cauldron can now be [[dye]]d.
|[[Armor]] can be dyed in a cauldron filled with dyed water.
|Cauldrons can no longer be pushed by [[piston]]s.}}
{{History||xbox=none|xbone=none|ps=1.90|wiiu=none|switch=none|[[File:Cauldron JE7.png|32px]]{{verify|Was this the actually used model?}}<br/>[[File:Cauldron (item) JE2 BE2.png|32px]] The textures of cauldrons have been changed.}}
{{History|new 3ds}}
{{History||0.1.0|[[File:Cauldron BE1.png|32px]]<br/>[[File:Cauldron (item) JE1 BE1.png|32px]] Added cauldrons.}}
{{History|foot}}
=== Water cauldron ===
{{History|java}}
{{History||1.0.0|snap=Beta 1.9 Prerelease 2|[[File:Water Cauldron (level 1) JE1.png|32px]] [[File:Water Cauldron (level 2) JE1.png|32px]] [[File:Water Cauldron JE1.png|32px]] If made to work with a mod, cauldrons can be filled with a [[water bucket]].
|Cauldron water transparency appears inconsistent depending on hardware.}}
{{History||1.3.1|snap=12w22a|Cauldrons can now be filled with [[water]], if placed outside during [[rain]] or a [[thunderstorm]].}}
{{History||1.4.2|snap=12w34a|Holding a piece of [[Dyeing|dyed]] leather [[armor]] and right-clicking a [[water]]-filled cauldron now washes away all [[dye]]s applied to the leather armor.}}
{{History||1.5|snap=13w02a|[[File:Water Cauldron (level 1) JE2.png|32px]] [[File:Water Cauldron (level 2) JE2.png|32px]] [[File:Water Cauldron JE2.png|32px]] The walls inside of the cauldron now use the bottom texture, and the cauldron now has no bottom.<ref name="whatdoyouputinacauldrontomakeitlighter"/>}}
{{History|||snap=13w02b|[[File:Water Cauldron (level 1) JE1.png|32px]] [[File:Water Cauldron (level 2) JE1.png|32px]] [[File:Water Cauldron JE1.png|32px]] Fixed the model error from 13w02a.}}
{{History||1.6.1|snap=13w18a|When used with a [[redstone comparator]], cauldrons now output a signal varying in strength according to the amount of water inside.}}
{{History||1.7.2|snap=13w43a|Cauldrons now extinguish burning [[entity|entities]].}}
{{History||1.8|snap=14w10a|[[File:Water Cauldron (level 1) JE4.png|32px]] [[File:Water Cauldron (level 2) JE4.png|32px]] [[File:Water Cauldron JE4.png|32px]] The cauldron's feet now have planes on all sides.}}
{{History|||snap=14w30a|Right-clicking a non-empty cauldron with a [[banner]] now removes the top-most pattern layer.}}
{{History||1.9|snap=15w43a|A cauldron now generates within [[igloo]] basements, {{frac|2|3}} full.}}
{{History|||snap=15w44a|A full cauldron can now be emptied with a [[bucket]], filling the bucket with [[water]].}}
{{History||1.11|snap=16w32a|When a cauldron washes a dyed item (leather [[armor]] or [[banner]]), it reduces its water level by 1.}}
{{History|||snap=16w33a|A [[water bottle]] is now able to add 1 [[water]] level to a cauldron.}}
{{History||1.13|snap=18w10d|[[Shulker box]]es can now be undyed in a cauldron.}}
{{History|||snap=18w15a|[[File:Water Cauldron (level 1) JE5.png|32px]] [[File:Water Cauldron (level 2) JE5.png|32px]] [[File:Water Cauldron JE5.png|32px]] [[Water]] in cauldrons is now white colored.<ref>{{bug|MC-128253}}</ref>}}
{{History|||snap=18w20b|[[File:Water Cauldron (level 1) JE6.png|32px]] [[File:Water Cauldron (level 2) JE6.png|32px]] [[File:Water Cauldron JE6.png|32px]] Cauldron water is now colored again, depending on the biome.
|[[File:Swamp Water Cauldron JE1.png|32px]] [[File:Warm Ocean Water Cauldron JE1.png|32px]] [[File:Lukewarm Ocean Water Cauldron JE1.png|32px]] [[File:Cold Ocean Water Cauldron JE1.png|32px]] [[File:Frozen Ocean Water Cauldron JE1.png|32px]] This currently affects ocean temperature variants and swamps.
|[[File:Swamp Hills Water Cauldron JE1.png|32px]] Swampland M water has a yellowish color while in a cauldron.<ref>{{bug|MC-128558}}</ref>}}
{{History|||snap=pre3|[[File:Swamp Water Cauldron JE1.png|32px]] Swampland M water now has the same [[water]] color in cauldrons as regular [[swamp]]s.}}
{{History||1.14|snap=18w43a|[[File:Water Cauldron (level 1) JE7.png|32px]] [[File:Water Cauldron (level 2) JE7.png|32px]] [[File:Water Cauldron JE7.png|32px]]<br>[[File:Swamp Water Cauldron JE2.png|32px]] [[File:Warm Ocean Water Cauldron JE2.png|32px]] [[File:Lukewarm Ocean Water Cauldron JE2.png|32px]] [[File:Cold Ocean Water Cauldron JE2.png|32px]] [[File:Frozen Ocean Water Cauldron JE2.png|32px]] The textures of cauldrons have been changed.}}
{{History|||snap=19w03a|The numerous missing cullface arguments for the water cauldron have been fixed.}}
{{History||1.17|snap=20w45a|Normal and water cauldrons have been split into different blocks, making filled cauldrons no longer work as a workstation for villagers.<ref name="technicalunemployment"/>
|This also means that any [[structure]]s before this snapshot that have cauldron(s) fill with water now no longer generate(s) cauldron. Instead, water cauldron(s) will generate.}}
{{History|||snap=21w13a|Filled cauldrons work again as a workstation for villagers.}}
{{History|pocket alpha}}
{{History||v0.14.0|snap=build 1|[[File:Water Cauldron (level 1) BE1.png|32px]] [[File:Water Cauldron (level 2) BE1.png|32px]] [[File:Water Cauldron BE1.png|32px]] Added water cauldrons.
|[[Water]] color in cauldrons can be changed by adding [[dye]]s. [[Item]]s dipped in the water are dyed that color.}}
{{History||v0.15.0|snap=build 1|Cauldrons are now used to dye leather [[horse armor]].
|Water cauldrons can now be moved by [[piston]]s.}}
{{History|pocket}}
{{History||1.0.0|snap=alpha 0.17.0.1|Cauldrons now generate naturally in [[igloo]] basements.
|Cauldrons now extinguish burning [[entity|entities]].}}
{{History|bedrock}}
{{History||1.10.0|snap=beta 1.10.0.3|[[File:Water Cauldron (level 1) BE2.png|32px]] [[File:Water Cauldron (level 2) BE2.png|32px]] [[File:Water Cauldron BE2.png|32px]] The textures of cauldrons have been changed.}}
{{History||1.20.0|snap=beta 1.20.0.20|[[File:Water Cauldron (level 1) MCPE-170427.png|32px]] [[File:Water Cauldron (level 2) MCPE-170427.png|32px]] [[File:Water Cauldron MCPE-170427.png|32px]] [[Water]] in cauldrons now looks like lava.<ref>{{bug|MCPE-170427}}</ref>}}
{{History||1.20.10|snap=beta 1.20.10.20|[[File:Water Cauldron (level 1) BE2.png|32px]] [[File:Water Cauldron (level 2) BE2.png|32px]] [[File:Water Cauldron BE2.png|32px]] Cauldron water now uses the correct texture.}}
{{History|console}}
{{History||xbox=TU7|xbone=CU1|ps=1.0|wiiu=Patch 1|switch=1.0.1|[[File:Water Cauldron (level 1) JE1.png|32px]] [[File:Water Cauldron (level 2) JE1.png|32px]] [[File:Water Cauldron JE1.png|32px]]{{verify|Were these the models used?}} Added water cauldrons.}}
{{History||xbox=TU12|[[Water]] is no longer removed from a [[water bucket]] when filling a cauldron in [[creative]] mode.}}
{{History||xbox=TU14|ps=1.04|Cauldrons fill with water if placed outside during [[rain]] or a [[thunderstorm]].}}
{{History||xbox=TU31|xbone=CU19|ps=1.22|wiiu=Patch 3|Cauldrons with [[water]] in them extinguish burning [[entity|entities]], taking away one water level each time.}}
{{History|new 3ds}}
{{History||0.1.0|[[File:Water Cauldron (level 1) BE1.png|32px]] [[File:Water Cauldron (level 2) BE1.png|32px]] [[File:Water Cauldron BE1.png|32px]]{{verify|Were these the models used?}} Added cauldrons.
|Water color in cauldrons can be changed by adding [[dye]]s.
|Cauldrons can be used to [[dye]] leather [[armor]].}}
{{History|foot}}
=== Lava cauldron ===
{{History|Java}}
{{History||1.17|snap=20w45a|[[File:Lava Cauldron JE1.png|32px]] Cauldrons can now be filled with [[lava]].}}
{{History|||snap=21w20a|Lava cauldrons now emits redstone signal strength of 3.<ref name=JavaLava/>}}
{{History|bedrock}}
{{History||1.9.0|snap=beta 1.9.0.2|[[File:Lava Cauldron BE1.png|32px]] Cauldrons can now be filled with lava.}}
{{History||1.10.0|snap=beta 1.10.0.3|[[File:Lava Cauldron BE2.png|32px]] The texture of cauldrons filled with lava has been changed.}}
{{History|console}}
{{History||xbox=none|xbone=none|ps=1.88|wiiu=none|switch=none|[[File:Lava Cauldron LCE1.png|32px]] Cauldrons can now be filled with lava.}}
{{History||xbox=none|xbone=none|ps=1.90|wiiu=none|switch=none|[[File:Lava Cauldron LCE2.png|32px]] The texture of cauldrons filled with lava has been changed.}}
{{History|foot}}
=== Powder Snow Cauldron ===
{{History|java}}
{{History||1.17|snap=20w46a|[[File:Powder Snow Cauldron (level 1) JE1.png|32px]] [[File:Powder Snow Cauldron (level 2) JE1.png|32px]] [[File:Powder Snow Cauldron JE1.png|32px]] Cauldrons can now be filled with powder snow.}}
{{History||1.17.1|snap=Pre-release 1|Powder snow now fills twice as fast in a cauldron.}}
{{History|bedrock}}
{{History||1.17.0|snap=beta 1.17.0.52|[[File:Powder Snow Cauldron (level 1) JE1.png|32px]] [[File:Powder Snow Cauldron (level 2) JE1.png|32px]] [[File:Powder Snow Cauldron JE1.png|32px]] Cauldrons can now be filled with powder snow.}}
{{History|foot}}
=== Potion cauldron ===
{{cleanup|Many potion cauldrons here are listed as being added in versions where said potion did not exist yet - please rearrange and add new history entries accordingly}}
{{History|java}}
{{History||1.0.0|snap=Beta 1.9 Prerelease 2|[[File:Arrran Cauldron 1.png|32px]] [[File:Arrran Cauldron 2.png|32px]] [[File:Arrran Cauldron 3.png|32px]] [[File:Arrran Cauldron 4.png|32px]] <br/>[[File:Cauldron (item) JE1 BE1.png|32px]] Cauldrons are intended to be used for the creation of [[potion]]s.
|Cauldrons can be made to work with a mod, through which the following has been revealed:
* Applying a [[potion]] ingredient to a water cauldron cause it to change to a differently-colored [[lava]] texture, and adding any further potion ingredients to the filled cauldron cause the [[liquid]] to change color.
* Scooping out a potion with ingredients applied cause the potion to have an effect related to the ingredient, e.g. a potion brewed with a [[magma cream]] have [[Fire Resistance]] as an effect.}}
{{History|||snap=Beta 1.9 Prerelease 3|The system was deemed too complex and not user-friendly,<ref>{{Tweet|jeb|119466949708222465|Potions are delayed because *add to cauldron, pick up, look at tooltip, pour back into cauldron, repeat* was extremely tedious|September 29, 2011}}</ref> so the cauldron's ability to brew potions has been replaced with the [[brewing stand]].<ref>{{Tweet|jeb|119710836469149697|A quick discussion with @notch led me in on a new way of doing the potion brewing. Cauldron is out...|September 30, 2011}}</ref><ref>{{Tweet|jeb|119762786619359232|Look back at me! Your Cauldron is now a Brewing Stand. Anything's possible when working with interaction design.|September 30, 2011}}</ref> That brewing system is finalized and doesn't change in the rest of the pre-releases.}}
{{History|pocket alpha}}
{{History||v0.14.0|snap=build 1|[[File:Invisibility Potion Cauldron BE1.png|32px]] [[File:Jump Boost Potion Cauldron BE1.png|32px]] [[File:Fire Resistance Potion Cauldron BE1.png|32px]] [[File:Speed Potion Cauldron BE1.png|32px]] [[File:Slowness Potion Cauldron BE1.png|32px]] [[File:Water Breathing Potion Cauldron BE1.png|32px]] [[File:Instant Health Potion Cauldron BE1.png|32px]] [[File:Instant Damage Potion Cauldron BE1.png|32px]] [[File:Poison Potion Cauldron BE1.png|32px]] [[File:Regeneration Potion Cauldron BE1.png|32px]] [[File:Strength Potion Cauldron BE1.png|32px]] [[File:Weakness Potion Cauldron BE1.png|32px]] [[File:Wither Potion Cauldron BE1.png|32px]] [[File:Turtle Master Potion Cauldron BE1.png|32px]] [[File:Slow Falling Potion Cauldron BE1.png|32px]] Cauldrons can store [[potion]]s, and [[explosion|explode]] if potions are mixed.}}
{{History||v0.15.0|snap=build 1|Cauldrons are now used to make [[tipped arrow]]s.}}
{{History|bedrock}}
{{History||1.10.0|snap=beta 1.10.0.3|[[File:Invisibility Potion Cauldron BE2.png|32px]] [[File:Jump Boost Potion Cauldron BE2.png|32px]] [[File:Fire Resistance Potion Cauldron BE2.png|32px]] [[File:Speed Potion Cauldron BE2.png|32px]] [[File:Slowness Potion Cauldron BE2.png|32px]] [[File:Water Breathing Potion Cauldron BE2.png|32px]] [[File:Instant Health Potion Cauldron BE2.png|32px]] [[File:Instant Damage Potion Cauldron BE2.png|32px]] [[File:Poison Potion Cauldron BE2.png|32px]] [[File:Regeneration Potion Cauldron BE2.png|32px]] [[File:Strength Potion Cauldron BE2.png|32px]] [[File:Weakness Potion Cauldron BE2.png|32px]] [[File:Wither Potion Cauldron BE2.png|32px]] [[File:Turtle Master Potion Cauldron BE2.png|32px]] [[File:Slow Falling Potion Cauldron BE2.png|32px]] The textures of cauldrons filled with [[potion]]s have been changed.}}
{{History|console}}
{{History||xbox=TU60|xbone=CU51|ps=1.64|wiiu=Patch 30|switch=1.0.11|[[File:Invisibility Potion Cauldron BE1.png|32px]] [[File:Jump Boost Potion Cauldron BE1.png|32px]] [[File:Fire Resistance Potion Cauldron BE1.png|32px]] [[File:Speed Potion Cauldron BE1.png|32px]] [[File:Slowness Potion Cauldron BE1.png|32px]] [[File:Water Breathing Potion Cauldron BE1.png|32px]] [[File:Instant Health Potion Cauldron BE1.png|32px]] [[File:Instant Damage Potion Cauldron BE1.png|32px]] [[File:Poison Potion Cauldron BE1.png|32px]] [[File:Regeneration Potion Cauldron BE1.png|32px]] [[File:Strength Potion Cauldron BE1.png|32px]] [[File:Weakness Potion Cauldron BE1.png|32px]] [[File:Wither Potion Cauldron BE1.png|32px]] [[File:Turtle Master Potion Cauldron BE1.png|32px]] [[File:Slow Falling Potion Cauldron BE1.png|32px]]{{verify|Were these the models used?}} Cauldrons can now be filled with [[potion]]s and make an explosion [[sound]] if they are mixed.
|[[Effect]]s can now be applied to [[arrow]]s by using them on a potion-filled cauldron.}}
{{History||xbox=none|xbone=none|ps=1.90|wiiu=none|switch=none|[[File:Invisibility Potion Cauldron BE2.png|32px]] [[File:Jump Boost Potion Cauldron BE2.png|32px]] [[File:Fire Resistance Potion Cauldron BE2.png|32px]] [[File:Speed Potion Cauldron BE2.png|32px]] [[File:Slowness Potion Cauldron BE2.png|32px]] [[File:Water Breathing Potion Cauldron BE2.png|32px]] [[File:Instant Health Potion Cauldron BE2.png|32px]] [[File:Instant Damage Potion Cauldron BE2.png|32px]] [[File:Poison Potion Cauldron BE2.png|32px]] [[File:Regeneration Potion Cauldron BE2.png|32px]] [[File:Strength Potion Cauldron BE2.png|32px]] [[File:Weakness Potion Cauldron BE2.png|32px]] [[File:Wither Potion Cauldron BE2.png|32px]] [[File:Turtle Master Potion Cauldron BE2.png|32px]] [[File:Slow Falling Potion Cauldron BE2.png|32px]]{{verify|Were these the models used?}} The textures of cauldrons filled with [[potion]]s have been changed.}}
{{History|new 3ds}}
{{History||0.1.0|[[File:Invisibility Potion Cauldron BE1.png|32px]] [[File:Jump Boost Potion Cauldron BE1.png|32px]] [[File:Fire Resistance Potion Cauldron BE1.png|32px]] [[File:Speed Potion Cauldron BE1.png|32px]] [[File:Slowness Potion Cauldron BE1.png|32px]] [[File:Water Breathing Potion Cauldron BE1.png|32px]] [[File:Instant Health Potion Cauldron BE1.png|32px]] [[File:Instant Damage Potion Cauldron BE1.png|32px]] [[File:Poison Potion Cauldron BE1.png|32px]] [[File:Regeneration Potion Cauldron BE1.png|32px]] [[File:Strength Potion Cauldron BE1.png|32px]] [[File:Weakness Potion Cauldron BE1.png|32px]] [[File:Wither Potion Cauldron BE1.png|32px]] [[File:Turtle Master Potion Cauldron BE1.png|32px]] [[File:Slow Falling Potion Cauldron BE1.png|32px]]{{verify|Were these the models used?}} Cauldrons can store [[potion]]s.
|Cauldrons make an explosion [[sound]] if potions are mixed, and the potions disappear.
|Potions inside cauldrons have a bubbling effect.}}
{{History|foot}}
===Cauldron "item"===
{{:Technical blocks/Cauldron}}
==Issues==
{{issue list}}
==Trivia==
*[[Arrow]]s "stick" to the [[water]] in a cauldron.
*The inside of a cauldron is 0.25 ({{frac|1|4}}) blocks tall.
*A cauldron holding water is the only way to have water in [[the Nether]] without the use of [[commands]].
==Renders==
; Normal water
<gallery>
Water Cauldron (level 1).png | Level 1
Water Cauldron (level 2).png | Level 2
Water Cauldron.png | Level 3 - full
Water Cauldron (level 1) BE.png | Level 1 (Bedrock Edition)
Water Cauldron (level 2) BE.png | Level 2 (Bedrock Edition)
Water Cauldron BE.png | Level 3 - full (Bedrock Edition)
</gallery>
;Dyed water {{Only|BE}}
<gallery>
Cauldron (filled with white water).png|White Water Cauldron
Cauldron (filled with light gray water).png|Light Gray Water Cauldron
Cauldron (filled with gray water).png|Gray Water Cauldron
Cauldron (filled with black water).png|Black Water Cauldron
Cauldron (filled with brown water).png|Brown Water Cauldron
Cauldron (filled with red water).png|Red Water Cauldron
Cauldron (filled with orange water).png|Orange Water Cauldron
Cauldron (filled with yellow water).png|Yellow Water Cauldron
Cauldron (filled with lime water).png|Lime Water Cauldron
Cauldron (filled with green water).png|Green Water Cauldron
Cauldron (filled with cyan water).png|Cyan Water Cauldron
Cauldron (filled with light blue water).png|Light Blue Water Cauldron
Cauldron (filled with blue water).png|Blue Water Cauldron
Cauldron (filled with purple water).png|Purple Water Cauldron
Cauldron (filled with magenta water).png|Magenta Water Cauldron
Cauldron (filled with pink water).png|Pink Water Cauldron
</gallery>
;Cauldrons filled with potions {{Only|BE}}
<gallery>
Night Vision Potion Cauldron.png|Night Vision Potion Cauldron
Invisibility Potion Cauldron.png|Invisibility Potion Cauldron
Jump Boost Potion Cauldron.png|Leaping Potion Cauldron
Fire Resistance Potion Cauldron.png|Fire Resistance Potion Cauldron
Speed Potion Cauldron.png|Swiftness Potion Cauldron
Slowness Potion Cauldron.png|Slowness Potion Cauldro
Turtle Master Potion Cauldron.png|Turtle Master Potion Cauldron
Water Breathing Potion Cauldron.png|Water Breathing Potion Cauldron
Instant Health Potion Cauldron.png|Healing Potion Cauldron
Instant Damage Potion Cauldron.png|Harming Potion Cauldron
Poison Potion Cauldron.png|Poison Potion Cauldron
Regeneration Potion Cauldron.png|Regeneration Potion Cauldron
Strength Potion Cauldron.png|Strength Potion Cauldron
Weakness Potion Cauldron.png|Weakness Potion Cauldron
Slow Falling Potion Cauldron.png|Slow Falling Potion Cauldron
Wither Potion Cauldron.png|Decay Potion Cauldron
</gallery>
;Powder Snow
<gallery>
Powder Snow Cauldron (level 1).png | Level 1
Powder Snow Cauldron (level 2).png | Level 2
Powder Snow Cauldron.png | Level 3 - full
</gallery>
== Gallery==
<gallery>
The three stages of water height in cauldrons.png| All cauldron states in [[Java Edition]].
Cauldrons potion.png|All [[potion]]s in cauldrons.{{only|be|short=1}}
Cauldrons DyeWater.png|All cauldron [[water]] colors possible with one dye.{{only|be|short=1}}
Brewing Potions.png|How potions were brewed in [[Java Edition Beta 1.9 Prerelease 2|Beta 1.9 Pre-Release 2]] if enabled through a mod.
Dyed Water Cauldrons.jpg|Cauldrons filled with dyed water.
Potion Cauldron.jpg|A cauldron filled with potions.
Arrow Tipping 1.jpg|Using a cauldron to make [[tipped arrow]]s.
Arrow Tipping 2.jpg|Using a cauldron to make [[tipped arrow]]s.
Arrow Tipping 3.jpg|Using a cauldron to make [[tipped arrow]]s.
Snow Cauldron.jpg|A cauldron full of snow.
</gallery>
==References==
{{reflist|2}}
{{Blocks|Utility}}
{{items}}
[[Category:Natural blocks]]
[[Category:Job blocks]]
[[Category:Utility blocks]]
[[Category:Storage]]
[[Category:Manufactured blocks]]
[[Category:Generated structure blocks]]
[[Category:Light sources]]
[[cs:Kotel]]
[[de:Kessel]]
[[es:Caldero]]
[[fr:Chaudron]]
[[hu:Üst]]
[[it:Calderone]]
[[ja:大釜]]
[[ko:가마솥]]
[[nl:Ketel]]
[[pl:Kocioł]]
[[pt:Caldeirão]]
[[ru:Котёл]]
[[th:หม้อปรุงยา]]
[[uk:Казан]]
[[zh:炼药锅]]</li></ul> | beta 1.2.0.2 | Vines can now be used to make border patterns on banners. | |||
1.10.0{{Extension DPL}}<ul><li>[[Raw Mutton|Raw Mutton]]<br/>{{Distinguish|Cooked Mutton}}
{{Item
| title = Raw Mutton
| image = Raw Mutton.png
| heals = {{hunger|2}}
| renewable = Yes
| stackable = Yes (64)
}}
'''Raw mutton''' is a [[food]] item dropped by [[sheep]] when killed.
== Obtaining ==
=== Mob loot ===
An adult [[sheep]] drops 1–2 raw mutton when killed. The maximum amount is increased by 1 per level of [[Looting]], for a maximum of 1–5 with Looting III. If killed while on fire, a sheep drops [[cooked mutton]] instead.
=== Chest loot ===
{{LootChestItem|raw-mutton}}
== Usage ==
=== Food ===
To eat raw mutton, press and hold {{control|use}} while it is selected in the [[hotbar]]. Eating one restores {{hunger|2}} [[hunger]] and 1.2 [[Hunger#Mechanics|saturation]].
=== Smelting ingredient ===
{{Smelting
|showname=1
|Raw Mutton
|Cooked Mutton
|0.35
}}
=== Wolves ===
Raw mutton can be used to [[breed]] and heal tamed [[wolves]], lead them around, and make baby tamed wolves grow up faster by 10% of the remaining time.
=== Trading ===
Journeyman-level butcher [[villager]]s have a 50% chance to buy 7 raw mutton for an [[emerald]] as part of their trades.{{only|bedrock}}
Journeyman-level butcher villagers always offer to buy 7 raw mutton for an emerald.{{only|java}}
==Sounds==
{{Sound table/Entity/Food}}
== Data values ==
=== ID ===
{{edition|java}}:
{{ID table
|edition=java
|showforms=y
|generatetranslationkeys=y
|displayname=Raw Mutton
|spritetype=item
|nameid=mutton
|form=item
|foot=1}}
{{edition|bedrock}}:
{{ID table
|edition=bedrock
|showaliasids=y
|shownumericids=y
|showforms=y
|notshowbeitemforms=y
|generatetranslationkeys=y
|displayname=Raw Mutton
|spritetype=item
|nameid=mutton
|aliasid=muttonraw
|id=550
|form=item
|translationkey=item.muttonRaw.name
|foot=1}}
== Advancements ==
{{load advancements|Husbandry;A Balanced Diet}}
== Video ==
<div style="text-align:center">{{yt|PXlW-sZygTs}}</div>
== History ==
{{History||September 23, 2011|link={{tweet|jeb|117313469900009472}}|Mutton is mentioned by [[Jeb]].}}
{{History||September 11, 2012|link={{tweet|jeb|245503714167750656}}|Jeb again mentions the possibility of mutton as well as calamari being added into the game.}}
{{History|java}}
{{History||June 30, 2014|link=https://twitter.com/TheMogMiner/status/483636993780232192|[[Ryan Holtz]] tweets images of raw mutton and some other new items.}}
{{History||1.8|snap=14w27a|[[File:Raw Mutton JE1.png|32px]] Added raw mutton.}}
{{History||1.8|snap=14w33b|[[File:Raw Mutton JE2 BE1.png|32px]] The texture of raw mutton has been changed. The new texture was created by [[wikipedia:Reddit|Reddit]] user [http://www.reddit.com/u/zeldahuman zeldahuman].<ref>{{reddit|2bjzes/a_reminder_of_the_blocks_and_items_added_in_18_so|cj69zie|context=3}}</ref><ref>{{reddit|2c5f35/minecraft_snapshot_14w31a_has_been_released|cjct7gb}}</ref>}}
{{History||1.13|snap=17w47a|Prior to [[1.13/Flattening|''The Flattening'']], this [[item]]'s numeral ID was 423.}}
{{History||1.14|snap=18w43a|[[File:Raw Mutton JE3 BE2.png|32px]] The texture of raw mutton has been changed.}}
{{History|||snap=18w49a|Raw mutton can now be found in [[chest]]s in [[village]] butcher shops.}}
{{History|||snap=19w11a|Butcher villagers now [[trading|buy]] raw mutton.}}
{{History|pocket alpha}}
{{History||v0.15.0|snap=build 1|[[File:Raw Mutton JE2 BE1.png|32px]] Added raw mutton.}}
{{History|bedrock}}
{{History||1.10.0|snap=beta 1.10.0.3|[[File:Raw Mutton JE3 BE2.png|32px]] The texture of raw mutton has been changed.}}
{{History||1.11.0|snap=beta 1.11.0.1|Raw mutton can now be found in [[village]] butcher [[chest]]s.}}
{{History|||snap=beta 1.11.0.4|Raw mutton can now be [[trading|sold]] to butcher [[villager]]s.}}
{{History||1.16.0|snap=beta 1.16.0.57|Trading has been changed; journeyman butcher villagers now buy 7 raw mutton for an emerald instead of 8.}}
{{History||1.16.100|snap=beta 1.16.100.56|The ID of raw mutton has been changed from <code>muttonraw</code> to <code>mutton</code>.}}
{{History||1.16.210|snap=beta 1.16.210.51|Raw mutton is [[drops|dropped]] by [[goats]].}}
{{History||1.17.0|snap=beta 1.17.0.52|Goats no longer drop raw mutton.}}
{{History|console}}
{{History||xbox=TU31|xbone=CU19|ps=1.22|wiiu=Patch 3|[[File:Raw Mutton JE2 BE1.png|32px]] Added raw mutton.}}
{{History|PS4}}
{{History||1.90|[[File:Raw Mutton JE3 BE2.png|32px]] The texture of raw mutton has been changed.}}
{{History|3ds}}
{{History||0.1.0|[[File:Raw Mutton JE2 BE1.png|32px]] Added raw mutton.}}
{{History|foot}}
== Issues ==
{{issue list}}
== Gallery ==
<gallery>
Rabbit Items 3 Ryan Holtz.png|First image of the item by [[Ryan Holtz]].
Pocket Edition Mutton.jpg|First image of the item in ''Bedrock Edition'' by [[Jason Major]].
</gallery>
== References ==
{{reflist}}
{{items}}
[[de:Rohes Hammelfleisch]]
[[es:Cordero crudo]]
[[fr:Mouton cru]]
[[ja:生の羊肉]]
[[ko:익히지 않은 양고기]]
[[nl:Rauw schapenvlees]]
[[pl:Surowa baranina]]
[[pt:Carneiro cru]]
[[ru:Сырая баранина]]
[[zh:生羊肉]]
[[Category:Food]]
[[Category:Renewable resources]]</li><li>[[Phantom Membrane|Phantom Membrane]]<br/>{{Item
| title = Phantom Membrane
| image = Phantom Membrane.png
| renewable = Yes
| stackable = Yes (64)
}}
'''Phantom membranes''' are items obtained from killing [[phantom]]s. They are used to repair [[elytra]] and brew [[Potion of Slow Falling|potions of Slow Falling]].
== Obtaining ==
=== Mob loot ===
[[Phantom]]s drop 0–1 phantom membrane when killed by a [[player]] or tamed [[wolf]]. [[Looting]] increases the maximum drops by 1 per level, for a maximum of 4 with Looting III.
=== Cat gifts ===
{{main|Cat#Gifts}}
Tamed [[cat]]s have a 70% chance to bring the player a gift when they wake up from a [[bed]], and the gift has a 3.22% chance to be a phantom membrane.
== Usage ==
=== Repairing ===
Phantom membranes can be used in an [[anvil]] to repair [[elytra]], restoring 108 durability points (25% of the pair's total durability) per membrane while preserving their [[enchantments]].
{| class="wikitable" data-description="Repairing elytra"
! scope="col" style="width:64px;" | Name
! Ingredients
! [[Anvil]] usage
|-
! scope="row" style="text-align: center;" | '''Elytra'''
| [[Elytra]] +<br>[[Phantom Membrane]]
| style="width: 260px; padding: 1px;" | {{Anvil| title = Elytra|Input1=Damaged Elytra|Input2=Phantom Membrane, 2|Output=Elytra}}
|-
|}
=== Brewing ingredient ===
Phantom membranes are used to [[brewing|brew]] [[Potion of Slow Falling|slow falling potions]] from an [[awkward potion]].
{{Brewing
|Phantom Membrane
|Potion of Slow Falling
|showname=3
}}
== Data values ==
=== ID ===
{{edition|java}}:
{{ID table
|edition=java
|showforms=y
|generatetranslationkeys=y
|displayname=Phantom Membrane
|spritetype=item
|nameid=phantom_membrane
|form=item
|foot=1}}
{{edition|bedrock}}:
{{ID table
|edition=bedrock
|shownumericids=y
|showforms=y
|notshowbeitemforms=y
|generatetranslationkeys=y
|displayname=Phantom Membrane
|spritetype=item
|nameid=phantom_membrane
|id=574
|form=item
|foot=1}}
== History ==
{{History|java}}
{{History||1.13|snap=18w14a|[[File:Phantom Membrane JE1 BE1.png|32px]] Added phantom membranes.}}
{{History||1.14|snap=18w44a|Tamed [[cat]]s now have a chance to give the [[player]] phantom membranes as [[Cat#Gifts|gifts]].}}
{{History|||snap=19w08a|[[File:Phantom Membrane JE2 BE2.png|32px]] The texture of phantom membranes has now been changed.}}
{{History|bedrock}}
{{History||1.6.0|snap=beta 1.6.0.5|[[File:Phantom Membrane JE1 BE1.png|32px]] Added phantom membranes.}}
{{History||1.8.0|snap=beta 1.8.0.8|Tamed [[cat]]s now have a chance to give the [[player]] phantom membranes as gifts.}}
{{History||1.10.0|snap=beta 1.10.0.3|[[File:Phantom Membrane JE2 BE2.png|32px]] The texture of phantom membranes has now been changed.}}
{{History|console}}
{{History||xbox=TU69|ps=1.76|wiiu=Patch 38|[[File:Phantom Membrane JE1 BE1.png|32px]] Added phantom membranes.}}
{{History||xbox=none|xbone=none|ps=1.90|wiiu=none|switch=none|[[File:Phantom Membrane JE2 BE2.png|32px]] The texture of phantom membranes has now been changed.}}
{{History|foot}}
== Issues ==
{{issue list}}
== References ==
{{reflist}}
== External Links ==
*[https://www.minecraft.net/en-us/article/taking-inventory--phantom-membrane Taking Inventory: Phantom Membrane] – Minecraft.net on August 2, 2019
{{items}}
[[de:Phantomhaut]]
[[fr:Membrane de Phantom]]
[[ja:ファントムの皮膜]]
[[ko:팬텀 막]]
[[pl:Błona fantoma]]
[[pt:Membrana de phantom]]
[[ru:Мембрана фантома]]
[[th:เนื้อเยื่อแฟนท่อม]]
[[uk:Перетинка фантома]]
[[zh:幻翼膜]]
[[Category:Renewable resources]]
[[Category:Brewing recipe]]</li></ul> | beta 1.10.0.3 | ||||
| Vines can now be used to craft bordure indented banner pattern. | |||||
| Vines now generate in pillager outpost watchtowers. | |||||
| Vines are now sold by wandering traders. | |||||
1.11.0{{Extension DPL}}<ul><li>[[Clock|Clock]]<br/>{{about|the item|the redstone circuit|Redstone circuits/Clock}}
{{Item
| image = Clock.gif
| renewable = Yes
| stackable = Yes (64)
}}
'''Clocks''' are [[Daylight cycle|time]]-telling devices that display the current in-game position of the sun and the moon. Clocks only function properly in the [[Overworld]].
== Obtaining ==
=== Crafting ===
{{Crafting
|B1= Gold Ingot
|A2= Gold Ingot
|B2= Redstone Dust
|C2= Gold Ingot
|B3= Gold Ingot
|Output= Clock
|type= Tool
}}
=== Natural generation ===
{{LootChestItem|clock}}
=== Trading ===
Expert-level [[Trading#Librarian|librarian villagers]] have a {{frac|1|3}} (roughly 33.3%) chance to sell a single clock for 4 [[emerald]]s as part of their trades.{{only|bedrock}}
Expert-level librarian villagers have a {{frac|1|2}} (50%) chance to sell a clock for 5 emeralds.{{only|java}}
== Usage ==
[[File:WatchCycle.gif|thumb|Clock animation]]
The clock dial consists of two halves, a day side and a night side. The dial spins clockwise slowly to indicate the time of day, corresponding to the sun or moon's actual position in the sky. The player is able to [[bed|sleep]] a few seconds after the clock shows exactly dusk.
The dial always shows the current in-game time when in the [[Overworld]], regardless of where it appears. This includes a player's hand, an inventory slot, a [[Crafting table|crafting grid]], an [[item frame]], or even as a dropped [[Item (entity)|item]]. For a clock to be mounted on a wall, an [[item frame]] is required.
Because there is no day/night cycle in [[the Nether]] or [[the End]], clocks do not work properly in these dimensions. Instead, the dial rotates rapidly and randomly {{in|JE}} or clockwise {{in|BE}}, making them useless.
=== Piglins ===
{{EntityLink|Piglin|Piglins}} are attracted to clocks and run toward any clock on the ground, and inspect it for 6 to 8 seconds before putting it in their inventory.
== Data values ==
=== ID ===
{{edition|java}}:
{{ID table
|edition=java
|showforms=y
|generatetranslationkeys=y
|displayname=Clock
|spritetype=item
|nameid=clock
|form=item
|foot=1}}
{{edition|bedrock}}:
{{ID table
|edition=bedrock
|shownumericids=y
|showforms=y
|notshowbeitemforms=y
|generatetranslationkeys=y
|displayname=Clock
|spritetype=item
|nameid=clock
|id=393
|form=item
|foot=1}}
== Achievements ==
{{load achievements|Oooh, shiny!}}
== Advancements ==
{{load advancements|Oh Shiny}}
== Video ==
''Note: This video doesn't state that clocks can be found in [[shipwreck]]s or [[ruined portal]]s because the video was released in an earlier [[Java Edition version history|version]].''
<div style="text-align:center">{{yt|Q3bsT84oVz4}}</div>
== History ==
{{History|java alpha}}
{{History||v1.2.0|snap=<nowiki>?|slink=:Category:Information needed requiring unarchived version|[[File:Clock JE1.gif|32px]] Added clocks.
|They have 228 visually distinct frames due to how the texture is generated – see the section below.}}
{{History|java}}
{{History||1.3.1|snap=12w21a|Librarian [[villager]]s now [[trading|sell]] clocks for 10-11 [[emerald]]s, making them [[renewable]].}}
{{History||1.5|snap=13w02a|[[File:Clock JE2 BE2.gif|32px]] Clocks now use the new animation feature included in [[texture pack]]s. As a result, they are considerably less precise, having only 64 frames.}}
{{History||1.8|snap=14w02a|Librarian [[villager]]s now [[trading|sell]] clocks for 10-12 [[emerald]]s.}}
{{History||1.9|snap=15w31a|Clocks are now broken up into individual textures, instead of having every individual frame on one vertical strip like with animated textures.}}
{{History||1.13|snap=17w47a|Prior to [[1.13/Flattening|''The Flattening'']], this [[item]]'s numeral ID was 347.}}
{{History|||snap=18w14a|Clocks can now be found in [[shipwreck]] map rooms.}}
{{History||1.16|snap=20w09a|Clocks can now be used to distract [[piglin]]s.<ref>{{bug|MC-172363}}</ref>}}
{{History|||snap=20w16a|Clocks now generate in [[ruined portal]] chests.}}
{{History|||snap=20w19a|Clocks no longer work in the [[recipe book]].<ref>{{bug|MC-116293}}</ref>}}
{{History|||snap=20w22a|Clocks no longer work in the villager trading GUI.<ref>{{bug|MC-182888}}</ref>}}
{{History||1.17|snap=20w48a|[[File:Clock JE3.gif|32px]] The texture of clocks has been changed to match the new gold ingot texture from the texture update.}}
{{History|pocket alpha}}
{{History||v0.2.0|[[File:Clock BE1.png|32px]] Added clocks.
|Clocks currently have no function or legitimate method of obtaining them.}}
{{History||v0.8.0|snap=build 1|Clocks are now functional and [[crafting|craftable]]. They have been added into the Creative inventory.
|[[File:Clock JE2 BE2.gif|32px]] The texture of clocks has been changed. They use an predefined texture file with 64 different frames.}}
{{History|pocket}}
{{History||1.0.4|snap=alpha 1.0.4.0|Librarian [[villager]]s now [[trading|sell]] clocks for 10-12 [[emerald]]s.}}
{{History|bedrock}}
{{History||1.4.0|snap=beta 1.2.20.1|Clocks can now be found inside map room [[chest]]s in [[shipwreck]]s.}}
{{History||1.11.0|snap=beta 1.11.0.4|[[Trading]] has been changed, librarian [[villager]]s now have {{frac|1|3}} chance to [[trading|sell]] a clock for 4 [[emerald]]s as part of their [[trading|trades]].}}
{{History||1.16.0|snap=beta 1.16.0.57|Clocks now generate in [[ruined portal]] chests.}}
{{History||1.17.0|snap=beta 1.17.0.54|[[File:Clock JE3.gif|32px]] The texture of clocks has been changed to match the new gold ingot texture from the texture update.}}
{{History|console}}
{{History||xbox=TU1|xbone=CU1|ps=1.0|wiiu=Patch 1|switch=1.0.1|[[File:Clock JE2 BE2.gif|32px]] Added clocks.}}
{{History||xbox=TU69|xbone=none|ps=1.76|wiiu=Patch 38|switch=none|Clocks can now be found in [[shipwreck]] map rooms.}}
{{History|New Nintendo 3DS Edition}}
{{History||0.1.0|[[File:Clock JE2 BE2.gif|32px]] Added clocks.}}
{{History|foot}}
=== Texture generation prior to Java Edition 13w02a ===
{{:Procedural animated texture generation/Clocks}}
== Issues ==
{{issue list}}
== Trivia ==
* {{IN|java}}, a clock can be viewed under the item [[statistics]] page as long as one obtained a clock at some point.
* {{IN|java}}, the default resource pack for the clock contains 64 individual frames, each frame lasting about 18.75 seconds in real time (375 ticks) (1350 seconds (22 minutes, 30 seconds) in Minecraft time).
* When the time of day changes suddenly, such as after sleeping or when {{cmd|time}} is used, the clock dial spins rapidly to catch up.
* Although clocks do not function in the Nether or the End, the actual daylight cycle does continue.
== Gallery ==
<gallery>
File:Clockonawall.png|A clock in an [[item frame]] on a wall in a [[player]]'s base, showing the night is near.
File:Player Holding Clock.png|Early-game player holding a clock.
File:Clock In Item Frame.png|A clock placed in an item frame.
</gallery>
== References ==
{{Reflist}}
{{Items}}
[[Category:Tools]]
[[Category:Renewable resources]]
[[cs:Hodiny]]
[[de:Uhr]]
[[es:Reloj]]
[[fr:Montre]]
[[hu:Óra]]
[[it:Orologio]]
[[ja:時計]]
[[ko:시계]]
[[nl:Klok]]
[[pl:Zegar]]
[[pt:Relógio]]
[[ru:Часы]]
[[th:นาฬิกา]]
[[uk:Годинник]]
[[zh:时钟]]</li><li>[[Bleach|Bleach]]<br/>{{education feature}}
{{exclusive|bedrock|education}}
{{Item
| image = Bleach.png
| renewable = No
| stackable = Yes (64)
}}
'''Bleach''' is an [[item]] used to [[dye]] things white. It is a [[compound]], as it is made using a [[lab table]].
== Obtaining ==
=== Lab Table ===
Bleach is not obtainable in the [[creative inventory]] or {{cmd|give}}. The only way to obtain it is using a [[lab table]].
{| class="wikitable"
! Result
! Materials Needed
|-
!rowspan=2|{{slot|Bleach}}<br>[[Bleach]]
|{{slot|Water (compound)|link=Compound}}{{slot|Water (compound)|link=Compound}}{{slot|Water (compound)|link=Compound}}{{slot|Sodium Hypochlorite|link=Compound}}{{slot|Sodium Hypochlorite|link=Compound}}{{slot|Sodium Hypochlorite|link=Compound}}
|-
|<center>[[Water (compound)|Water]] x3, [[Compound|Sodium Hypochlorite]] x3</center>
|}
== Usage ==
=== Crafting ingredient ===
{{crafting usage}}
== Sounds ==
{{Sound table
|type=bedrock
|sound=Fire.ogg
|source=sound
|description=When bleach is created by a lab table
|id=lt.reaction.fire
|volume=6.0
|pitch=0.7/0.9
|foot=1}}
== Data values ==
=== ID ===
{{ID table
|edition=bedrock
|shownumericids=y
|showforms=y
|notshowbeitemforms=y
|generatetranslationkeys=y
|displayname=Bleach
|spritetype=item
|nameid=bleach
|id=596
|form=item
|foot=1}}
== History ==
{{History|bedrock}}
{{History||1.4.0|snap=beta 1.2.20.1|[[File:Bleach BE1.png|32px]] Added bleach.}}
{{History|education}}
{{History||1.0.27|[[File:Bleach BE1.png|32px]] Added bleach.}}
{{History|foot}}
== Trivia ==
*[[File:Bleach (compound).png|32px]] There is an [[History of textures/Unused textures#Unused compounds|unused bleach texture]] in the compounds folder of the chemistry resource pack, which is slightly different from the one used in the game.
== Issues ==
{{issue list}}
{{Items}}
{{Education Edition}}
[[Category:Dyes]]
[[Category:Non-renewable resources]]
[[Category:Education Edition items]]
[[de:Bleichmittel]]
[[es:Lejía]]
[[ja:漂白剤]]
[[ko:표백제]]
[[pl:Wybielacz]]
[[pt:Alvejante]]
[[zh:漂白剂]]
[[lzh:素精]]</li></ul></nowiki> | beta 1.11.0.1 | Vines can now be used to fill up composters. | |||
| Vines can now be climbed by without supporting block. | |||||
1.16.20{{Extension DPL}}<ul><li>[[Dragon's Breath|Dragon's Breath]]<br/>{{Item
| image = Dragon's Breath.png
| renewable = Yes
| stackable = Yes (64)
| rarity = Uncommon
}}
The '''dragon's breath''' is a [[brewing]] item that is used solely to make [[lingering potion]]s.
== Obtaining ==
The dragon's breath can be obtained by scooping up the [[ender dragon]]'s breath attack or the purple [[area effect cloud|effect clouds]] caused by [[dragon fireball]]s in an empty [[glass bottle]].
== Usage ==
=== Brewing ingredient ===
Dragon's breath may be added to any splash potion to upgrade it to a lingering potion, which can be used to create a lasting [[Lingering Potion#Area Effect Cloud|area effect cloud]], or to craft [[Arrow#Tipped arrows|tipped arrows]].
{{brewing
|name=[[Lingering Potion]]
|showname=1
|Dragon's Breath
|Any Lingering Potion
|base=Any Splash Potion}}
When put 2 or more dragon's breath in the brewing stand, after the brewing process, a glass bottle will drop as an [[Item (entity)|entity]]. However, if put only 1 dragon's breath in the brewing stand, after the brewing process, the glass bottle is consumed and cannot be retrieved.<ref>{{bug|MC-259583}}</ref>
== Sounds ==
{{Edition|Java}}:
{{Sound table
|sound=Bottle fill dragon breath1.ogg
|sound2=Bottle fill dragon breath2.ogg
|subtitle=Bottle fills
|source=neutral
|description=Filling a glass bottle with dragon's breath
|id=item.bottle.fill_dragonbreath
|translationkey=subtitles.item.bottle.fill
|volume=1.0
|pitch=1.0
|distance=16
|foot=1}}
{{Edition|Bedrock}}:
{{Sound table
|type=bedrock
|sound=Bottle fill dragon breath1.ogg
|sound2=Bottle fill dragon breath2.ogg
|source=sound
|description=When a bottle is filled with dragon's breath
|id=bottle.dragonbreath
|volume=0.7<wbr>{{Until|BE 1.20.40}}<br>1.0<wbr>{{Upcoming|BE 1.20.40}}
|pitch=1.0
|foot=1}}
== Achievements ==
{{Load achievements|You Need a Mint}}
== Advancements ==
{{load advancements|You Need a Mint}}
== Data values ==
=== ID ===
{{edition|java}}:
{{ID table
|edition=java
|showforms=y
|generatetranslationkeys=y
|displayname=Dragon's Breath
|spritetype=item
|nameid=dragon_breath
|form=item
|foot=1}}
{{edition|bedrock}}:
{{ID table
|edition=bedrock
|shownumericids=y
|showforms=y
|notshowbeitemforms=y
|generatetranslationkeys=y
|displayname=Dragon's Breath
|spritetype=item
|nameid=dragon_breath
|id=560
|form=item
|foot=1}}
== History ==
{{History|java}}
{{History||1.9|snap=15w33a|[[File:Dragon's Breath JE1 BE1.png|32px]] Added dragon's breath.}}
{{History||1.13|snap=17w47a|Prior to [[1.13/Flattening|''The Flattening'']], this [[item]]'s numeral ID was 437.}}
{{History||1.14|snap=18w43a|[[File:Dragon's Breath JE2 BE2.png|32px]] The texture of dragon's breath has been changed.}}
{{History|pocket}}
{{History||1.0.0|snap=alpha 0.17.0.1|[[File:Dragon's Breath JE1 BE1.png|32px]] Added dragon's breath.}}
{{History|bedrock}}
{{History||1.10.0|snap=beta 1.10.0.3|[[File:Dragon's Breath JE2 BE2.png|32px]] The texture of dragon's breath has been changed.}}
{{History|console}}
{{History||xbox=TU46|xbone=CU36|ps=1.38|wiiu=Patch 15|switch=1.0.1|[[File:Dragon's Breath JE1 BE1.png|32px]] Added dragon's breath.}}
{{History||xbox=none|xbone=none|ps=1.90|wiiu=none|switch=none|[[File:Dragon's Breath JE2 BE2.png|32px]] The texture of dragon's breath has been changed.}}
{{History|3ds}}
{{History||1.7.10|[[File:Dragon's Breath JE1 BE1.png|32px]] Added dragon's breath.}}
{{History|foot}}
== Issues ==
{{issue list}}
== Trivia ==
* If the dragon's breath is used in a [[crafting]] recipe (using a [[mod]] or a [[data pack]]), it becomes an empty bottle instead of being entirely consumed.
== References ==
{{reflist}}
==External Links==
*[https://www.minecraft.net/en-us/article/dragon-s-breath Taking Inventory: Dragon's Breath] – Minecraft.net on June 9, 2023
{{Items}}
[[Category:Renewable resources]]
[[de:Drachenatem]]
[[fr:Souffle de dragon]]
[[it:Soffio di drago]]
[[ja:ドラゴンブレス]]
[[ko:드래곤의 숨결]]
[[nl:Drakenadem]]
[[pl:Oddech smoka]]
[[pt:Bafo do dragão]]
[[ru:Драконье дыхание]]
[[zh:龙息]]
[[Category:Brewing recipe]]</li><li>[[Redstone Dust|Redstone Dust]]<br/>{{Redirect|Redstone|the ore|Redstone Ore|the powered mineral block|Block of Redstone|other uses|Redstone (disambiguation)}}
{{Block
| group = Inactive (connected)
| 1-1= Inactive Redstone Wire (NESW).png
| 1-2 = Inactive Redstone Wire (NESW) BE.png
| group2 = Inactive (unconnected)
| 2-1 = Inactive Redstone Wire (unconnected).png
| 2-2 = Inactive Redstone Wire (unconnected).png
| group3 = Active (connected)
| 3-1 = Active Redstone Wire (NESW).png
| 3-2 = Active Redstone Wire (NESW) BE.png
| group4 = Active (unconnected)
| 4-1 = Active Redstone Wire (unconnected).png
| 4-2 = Active Redstone Wire (unconnected).png
| image = Redstone Dust JE2 BE2.png
| extratext = [[#Gallery|View all renders]]
| transparent = Yes
| light = No
| tool = all
| renewable = Yes
| stackable = Yes (64)
| flammable = No
| lavasusceptible = No
}}
'''Redstone dust''' is a mineral that can transmit [[Redstone circuit#Power|redstone power]] as a wire when placed as a [[block]]. It is also used in [[crafting]] and [[brewing]].
== Obtaining ==
=== Mining ===
{{see also|Redstone Ore#Natural generation}}
[[Redstone ore]] mined using an iron [[pickaxe]] or higher drops 4 or 5 redstone dust (or more with [[Fortune]], averaging at 6 redstone dust with Fortune III). If mined with [[Silk Touch]], the block drops itself instead of redstone dust.
=== Natural generation ===
15 lengths of redstone dust are naturally generated as part of the trap in each [[jungle pyramid]]. 5 lengths of redstone dust can be found in one type of jail cell room in a [[woodland mansion]]. In [[Ancient City|ancient cities]], multiple pieces of redstone dust can be found integrated into circuitry.
=== Breaking ===
Redstone dust can be broken instantly using any tool, or without a tool, and drops itself as an item.
Redstone dust is removed and drops as an item if:
* its attachment block is moved, removed, or destroyed
* [[water]] or [[lava]] flows into its space
* a [[piston]] tries to push it or moves a block into its space
=== Mob loot ===
[[Witch]]es have a chance of dropping 0–2 redstone dust upon death. This is increased by 1 per level of [[Looting]], for a maximum of 0–5 redstone dust.
=== Chest loot ===
{{LootChestItem|redstone}}
=== Crafting ===
Redstone dust can be crafted from [[blocks of redstone]].
{{Crafting
|Block of Redstone
|Output=Redstone Dust,9
|type=Redstone
}}
=== Smelting ===
{{Smelting
|showname=1
|Redstone Ore; Deepslate Redstone Ore
|Redstone Dust
|0.7
}}
=== Trading ===
{{IN|java}}, novice-level cleric [[villager]]s sell two redstone dust for one [[emerald]].
{{IN|bedrock}}, novice-level cleric villagers sell four redstone dust for one emerald.
=== Villager gifts ===
{{see also|Tutorials/Raid farming}}
{{IN|Java}}, when the player has the [[Hero of the Village]] status effect, clerics might throw that player a redstone dust as a gift.
== Usage ==
Redstone dust is used for [[#Brewing ingredient|brewing]], [[#Crafting ingredient|crafting]], and in redstone circuits by placing it on the ground to create [[#Redstone component|redstone wire]]. It can also be used to power redstone components.
=== Brewing ingredient ===
{{Brewing
|head=1
|Redstone Dust
|Mundane Potion
|base=Water Bottle
}}
{{Brewing
|foot=1
|name=Increased Duration
|Redstone Dust
|showbase=1
|base=Potion of Fire Resistance; Potion of Invisibility; Potion of Night Vision; Potion of Poison; Potion of Regeneration; Potion of Slowness; Potion of Strength; Potion of Swiftness; Potion of Water Breathing; Potion of Weakness; Potion of Leaping; Potion of Slow Falling
}}
=== Crafting ingredient ===
{{crafting usage|Redstone Dust}}
=== {{anchor|Redstone dust}} Redstone component ===
When placed in the world, redstone dust becomes a block of "redstone wire"{{Info needed|other blco? BE?}}, which can transmit [[Redstone circuit#Power|redstone power]].
=== Smithing ingredient ===
{{Smithing
|head=1
|ingredients=Any Armor Trim +<br/>Any Armor Piece + <br/>Redstone Dust
|Any Armor Trim Smithing Template
|Netherite Chestplate
|Redstone
|Redstone Trim Netherite Chestplate
|showdescription=1
|description = All armor types can be used in this recipe,<br/>a netherite chestplate is shown as an example.<br/>
|tail=1
}}
;Trim color palette
The following color palette is shown on the designs on trimmed armor:
*{{TrimPalette|redstone dust}}
=== Placement ===
[[File:Redstone wire as circuit component.png|Examples of redstone wire configuration. ''Top Left:'' Redstone wire connects diagonally vertically through non-opaque blocks. ''Top Right:'' Redstone wire does ''not'' connect diagonally vertically through opaque blocks. ''Center:'' Redstone wire gets darker as its power level drops, to a maximum of 15 blocks from a power source.|thumb]]
[[File:Redstone on Glowstone, Stairs, Slabs.png|Examples of redstone wire placements.|thumb]]
Redstone dust can be placed on [[opaque]] blocks as well as [[glowstone]], upside-down [[slab]]s, [[glass]], upside-down [[stairs]], and [[hopper]]s. It can also be placed on some transparent blocks; see [[Opacity/Placement]] for more information. It cannot be placed suspended in midair, even with commands, which is not unintentional.<ref>{{bug|MC-182709}}</ref>
Redstone wire configures itself to point toward adjacent redstone [[Redstone components#Power components|power components]] and [[Redstone components#Transmission components|transmission component]] connection points. Redstone wire also configures itself to point toward adjacent redstone wire one block higher or lower – unless there is a solid opaque block above the lower redstone wire.
If there is only one such adjacent redstone component, redstone wire configures itself into a {{BlockSprite|redstone-dust}} line pointing both at the neighbor and away from it. If there are two or more such adjacent components, redstone wire connects them in the form of {{BlockSprite|redstone-dust}}, {{BlockSprite|redstone-dust-upleft}}, {{BlockSprite|redstone-dust-t-up}}, or {{BlockSprite|redstone-dust-cross}} as needed.
When there are no adjacent components, a single redstone wire configures itself into a {{BlockSprite|redstone-dust-cross}} plus sign, which can provide power in all four directions. By right-clicking it can be changed into a {{BlockSprite|redstone-dust-dot}} dot, which does not provide power to any of the four directions.
{{IN|bedrock}}, redstone wire automatically configures itself to point toward adjacent blocks or [[Redstone components#Mechanism components|mechanism components]]. {{IN|java}}, it does not. If such a configuration is desired, the other neighbors of the redstone wire must be arranged to create it, i.e the redstone dust must be placed in a way that it would be pointed at the block’s location even if it were not there.
When redstone wire is reconfigured after placement, it does not update other redstone components around it of the change unless that reconfiguration also includes a change in power level or another component provides an update. This can create situations where a mechanism component remains activated when it shouldn't, or vice versa, until it receives an update from something else – a "feature" of redstone wire that can be used to make a [[BUD|block update detector]].
{{-}}
=== Behavior ===
{{Schematic|caption=
{{IN|be}}, the signal can go down from glass blocks.
|||rd-$ew!|RL-!||||rd-$ew!|RL-!|-
|rt-$!|rd-$ew!|SB|||rt-$!|rd-$ew!|glass||-
|ts-$|SB|rd-$ew|RL||ts-$|SB|rd-$ew!|RL-!
}}{{Schematic|caption =
However, the signal can never go down from slabs.
|||rd-$ew!|RL-!||||rd-$ew!|RL-!|-
|rt-$!|rd-$ew!|SB|||rt-$!|rd-$ew!|glass||-
|ts-$|ts-$|rd-$ew|RL||ts-$|ts-$|rd-$ew|RL
}}
Redstone wire can transmit power, which can be used to operate [[Redstone components#Mechanism components|mechanism components]] ([[door]]s, [[piston]]s, [[redstone lamp]]s, etc.).
Redstone wire can be "powered" by a number of methods:
* from an adjacent [[Redstone components#Power components|power component]] or a strongly-powered block
* from the output of a redstone repeater or redstone comparator
* from adjacent redstone wire. The powering dust can be a level higher or lower, but with restrictions:
** Redstone dust can be powered by redstone dust that is one level lower, or on an [[opaque]] block one level higher. A transparent block cannot{{only|java}} pass power downward.
** The block "between" the two dust blocks must be air or transparent. A solid block there "cuts" the connection between the higher and lower dust.
The "power level" of redstone dust can vary from 0 to 15. Most power components power-up adjacent redstone dust to power level 15, but a few ([[daylight sensor]]s, [[trapped chest]]s, and [[weighted pressure plate]]s) may create a lower power level. Redstone repeaters output power level 15 (when turned on), but [[redstone comparator]]s may output a lower power level.
{{Schematic | caption =
Redstone wire can transmit power up to 15 blocks.
|rt-$!|rd-$ew!+15|rd-$ew!+14|rd-$ew!+13|rd-$ew!+12|rd-$ew!+11|rd-$ew!+10|rd-$ew!+9
|rd-$ew!+8|rd-$ew!+7|rd-$ew!+6|rd-$ew!+5|rd-$ew!+4|rd-$ew!+3|rd-$ew!+2|rd-$ew!+1|rd-$ew+0
}}
Power level drops by 1 for every block of redstone wire it crosses. Thus, redstone wire can transmit power for no more than 15 blocks. To go further, the power level must be re-strengthened – typically with a redstone repeater.
Powered redstone wire on top of, or pointing at, an opaque block provides ''weak'' power to the block. A weakly-powered block cannot power other adjacent redstone wire, but can still power redstone repeaters and comparators, and activate adjacent mechanism components. Transparent blocks cannot be powered.
When redstone wire is unpowered, it appears dark red. When powered, it becomes bright red at power level 15, fading to darker shades with decreasing power. Powered redstone wire also produces "dust" [[particles]] of the same color.
While redstone wire always provides power to the directions it points into, it can still point into directions in which it cannot give power. If redstone wire comes in the form of a cross, the player can right-click to toggle it between a cross and dot. A redstone dot does not power anything adjacent to it, but powers the block under it.
== Sounds ==
{{Sound table/Block/Normal}}
== Data values ==
=== ID ===
{{edition|java}}:
{{ID table
|edition=java
|firstcolumnname=Redstone Dust
|showforms=y
|generatetranslationkeys=y
|displayname=Block
|spritename=redstone-dust
|spritetype=block
|nameid=redstone_wire
|form=block}}
{{ID table
|displayname=Item
|spritename=redstone-dust
|spritetype=item
|nameid=redstone
|form=item
|foot=1}}
{{edition|bedrock}}:
{{ID table
|edition=bedrock
|firstcolumnname=Redstone Dust
|shownumericids=y
|showforms=y
|generatetranslationkeys=y
|displayname=Block
|spritename=redstone-dust
|spritetype=block
|nameid=redstone_wire
|id=55
|form=block}}
{{ID table
|displayname=Item
|spritename=redstone-dust
|spritetype=item
|nameid=redstone
|id=373
|form=item
|foot=1}}
=== Block states ===
{{see also|Block states}}
{{/BS}}
{{LoadPage|Redstone Dust/Asset history|List of block state combinations|h4}}
== Achievements ==
{{load achievements|Dispense With This}}
== Video ==
{{Video note|These videos do not show all uses for redstone in crafting and all methods of obtaining. This video is also outdated, as of 1.13 Java Edition, redstone is now called Redstone Dust.}}
<div style="text-align:center">
<span style="display:inline-block">{{yt|zldqknGFWb4}}</span>
<span style="display:inline-block">{{yt|_IApwvCLJW8}}</span>
</div>
== History ==
{{History||May 21, 2009|link=https://web.archive.org/web/0/http://notch.tumblr.com/post/110762705/my-list-on-tile-types-so-far|[[Notch]] shows interest in adding wire-type [[block]]s.}}
{{History|java alpha}}
{{History||v1.0.1|[[File:Redstone Dust JE1 BE1.png|32px]] Added redstone dust as an [[item]].
|[[File:Inactive Redstone Wire (NS) JE1.png|32px]] [[File:Inactive Redstone Wire (EW) JE1.png|32px]] [[File:Inactive Redstone Wire (NE) JE1.png|32px]] [[File:Inactive Redstone Wire (ES) JE1.png|32px]] [[File:Inactive Redstone Wire (SW) JE1.png|32px]] [[File:Inactive Redstone Wire (NW) JE1.png|32px]] [[File:Inactive Redstone Wire (NEW) JE1.png|32px]] [[File:Inactive Redstone Wire (NES) JE1.png|32px]] [[File:Inactive Redstone Wire (ESW) JE1.png|32px]] [[File:Inactive Redstone Wire (NSW) JE1.png|32px]] [[File:Inactive Redstone Wire (NESW) JE1.png|32px]]<br>[[File:Active Redstone Wire (NS) JE1.png|32px]] [[File:Active Redstone Wire (EW) JE1.png|32px]] [[File:Active Redstone Wire (NE) JE1.png|32px]] [[File:Active Redstone Wire (ES) JE1.png|32px]] [[File:Active Redstone Wire (SW) JE1.png|32px]] [[File:Active Redstone Wire (NW) JE1.png|32px]] [[File:Active Redstone Wire (NEW) JE1.png|32px]] [[File:Active Redstone Wire (NES) JE1.png|32px]] [[File:Active Redstone Wire (ESW) JE1.png|32px]] [[File:Active Redstone Wire (NSW) JE1.png|32px]] [[File:Active Redstone Wire (NESW) JE1.png|32px]] Added redstone dust as a placed [[block]].
|Redstone dust as a placed block has two power appearances; either completely on, or completely off.
|Redstone dust is used to craft [[redstone torch]]es.
|At this time, redstone has not been given an official name.}}
{{History||v1.0.2_01|Redstone dust now doesn't connect through solid [[block]]s diagonally down.{{needs testing|may have been changed in v1.0.2|type=untestable}}
|Walking on redstone dust no longer [[breaking|breaks]] it.{{needs testing|may have been changed in v1.0.2|type=untestable}}
|Active redstone dust now gives off [[particles]].{{needs testing|may have been changed in v1.0.2|type=untestable}}}}
{{History||v1.1.0|Redstone is now used to craft [[compass]]es.}}
{{History||v1.2.0|snap=<nowiki>?|slink=:Category:Information needed requiring unarchived version|Redstone is now used to craft [[clock]]s.}}
{{History|java beta}}
{{History||1.0|With the addition of inventory tooltips, the [[item]] form of redstone dust has been named "Redstone", and the usually unobtainable block form has been named "Redstone Dust".}}
{{History||1.2|Redstone is now used to craft [[dispenser]]s and [[note block]]s.}}
{{History||1.3|[[File:Inactive Redstone Wire (NS) JE2.png|32px]] [[File:Inactive Redstone Wire (EW) JE2.png|32px]] [[File:Inactive Redstone Wire (NE) JE2.png|32px]] [[File:Inactive Redstone Wire (ES) JE2.png|32px]] [[File:Inactive Redstone Wire (SW) JE2.png|32px]] [[File:Inactive Redstone Wire (NW) JE2.png|32px]] [[File:Inactive Redstone Wire (NEW) JE2.png|32px]] [[File:Inactive Redstone Wire (NES) JE2.png|32px]] [[File:Inactive Redstone Wire (ESW) JE2.png|32px]] [[File:Inactive Redstone Wire (NSW) JE2.png|32px]] [[File:Inactive Redstone Wire (NESW) JE2.png|32px]]<br>[[File:Active Redstone Wire (NS) JE2.png|32px]] [[File:Active Redstone Wire (EW) JE2.png|32px]] [[File:Active Redstone Wire (NE) JE2.png|32px]] [[File:Active Redstone Wire (ES) JE2.png|32px]] [[File:Active Redstone Wire (SW) JE2.png|32px]] [[File:Active Redstone Wire (NW) JE2.png|32px]] [[File:Active Redstone Wire (NEW) JE2.png|32px]] [[File:Active Redstone Wire (NES) JE2.png|32px]] [[File:Active Redstone Wire (ESW) JE2.png|32px]] [[File:Active Redstone Wire (NSW) JE2.png|32px]] [[File:Active Redstone Wire (NESW) JE2.png|32px]] Redstone wire gets darker the farther away it is from a source of power, using a dedicated [[tint]] system. Previously, it was fully on until it reached its limit.
|Its particles now appear gray due to not being tinted.
|Redstone is now used to craft [[redstone repeater]]s.}}
{{History||1.5|[[File:Inactive Redstone Wire (NS) JE3.png|32px]] [[File:Inactive Redstone Wire (EW) JE3.png|32px]] [[File:Inactive Redstone Wire (NE) JE3.png|32px]] [[File:Inactive Redstone Wire (ES) JE3.png|32px]] [[File:Inactive Redstone Wire (SW) JE3.png|32px]] [[File:Inactive Redstone Wire (NW) JE3.png|32px]] [[File:Inactive Redstone Wire (NEW) JE3.png|32px]] [[File:Inactive Redstone Wire (NES) JE3.png|32px]] [[File:Inactive Redstone Wire (ESW) JE3.png|32px]] [[File:Inactive Redstone Wire (NSW) JE3.png|32px]] [[File:Inactive Redstone Wire (NESW) JE3.png|32px]]<br>[[File:Active Redstone Wire (NS) JE3.png|32px]] [[File:Active Redstone Wire (EW) JE3.png|32px]] [[File:Active Redstone Wire (NE) JE3.png|32px]] [[File:Active Redstone Wire (ES) JE3.png|32px]] [[File:Active Redstone Wire (SW) JE3.png|32px]] [[File:Active Redstone Wire (NW) JE3.png|32px]] [[File:Active Redstone Wire (NEW) JE3.png|32px]] [[File:Active Redstone Wire (NES) JE3.png|32px]] [[File:Active Redstone Wire (ESW) JE3.png|32px]] [[File:Active Redstone Wire (NSW) JE3.png|32px]] [[File:Active Redstone Wire (NESW) JE3.png|32px]] Fully off redstone wire is no longer black.
|Redstone dust can now be placed on [[snow]].
|Redstone is now used to craft [[powered rail]]s and [[detector rail]]s.}}
{{History||1.6.6|Redstone dust now checks if the block below has a solid top face or [[glowstone]], allowing it to be placed on it.}}
{{History||1.7|Redstone dust now connects to a [[redstone repeater|repeater]] without the dust being explicitly pointed at it.
|Redstone can now be used to craft [[piston]]s.}}
{{History||1.8|snap=Pre-release|Redstone can now be found in the new [[stronghold]] storeroom [[chest]]s, and in the new [[mineshaft]] chests.}}
{{History|java}}
{{History||1.0.0|snap=Beta 1.9 Prerelease 3|Redstone can now be [[brewing|brewed]] in a [[water bottle]] to create a [[mundane potion]].
|Redstone can now be found in the new [[stronghold]] altar [[chest]]s.
|Redstone now extends the [[potion]]s of [[Fire Resistance]], [[Slowness]], [[Swiftness]], [[Poison]], [[Weakness]] and [[Strength]].}}
{{History|||snap=Beta 1.9 Prerelease 4|Redstone now extends the new potion of [[Regeneration]].}}
{{History|||snap=RC1|[[File:Inactive Redstone Wire (unconnected) JE1.png|32px]] <br>[[File:Active Redstone Wire (unconnected) JE1.png|32px]] Redstone dust placement on one [[block]] has been changed from a "+" to a "•" shape.}}
{{History||?|Redstone wire block particles are now correctly colored.}}
{{History||1.1|snap=11w49a|Fixed redstone update bug.{{more info}}}}
{{History||1.2.1|snap=12w06a|Redstone can now be placed on [[glowstone]].}}
{{History|||snap=12w07a|Redstone is now used to craft [[redstone lamp]]s.}}
{{History||1.3.1|snap=12w21a|Redstone can now be [[trading|bought]] from priest [[villager]]s, at 2–4 redstone for 1 [[emerald]], making them [[renewable]].}}
{{History|||snap=12w22a|Redstone dust now generates in [[jungle temple]]s.}}
{{History|||snap=12w25a|Redstone dust can now be placed on top of upside-down [[slabs]] and [[stairs]].}}
{{History||1.4.2|snap=12w34a|Redstone now extends the new [[potion]]s of [[Night Vision]] and [[Invisibility]].}}
{{History|||snap=12w38a|[[Witch]]es have been added, which sometimes [[drops|drop]] redstone when killed.}}
{{History||1.5|snap=13w01a|Redstone can now be used to craft [[blocks of redstone]] and [[dropper]]s.}}
{{History||1.7.2|snap=13w36a|Redstone now extends the new [[potion]] of [[Water Breathing]].}}
{{History||1.8|snap=14w02a|[[Trading]] has been changed: cleric [[villager]]s now [[trading|sell]] 1–4 redstone for 1 [[emerald]].}}
{{History|||snap=14w25a|Redstone dust no longer changes to [[obsidian]] next to water when [[lava]] flows into it.}}
{{History|||snap=14w27a|Redstone now extends the new [[potion]] of [[Leaping]].}}
{{History||1.9|snap=15w31a|[[File:Inactive Redstone Wire (unconnected) JE2.png|32px]] [[File:Inactive Redstone Wire (NS) JE4.png|32px]] [[File:Inactive Redstone Wire (EW) JE4.png|32px]] [[File:Inactive Redstone Wire (NE) JE4.png|32px]] [[File:Inactive Redstone Wire (ES) JE4.png|32px]] [[File:Inactive Redstone Wire (SW) JE4.png|32px]] [[File:Inactive Redstone Wire (NW) JE4.png|32px]] [[File:Inactive Redstone Wire (NEW) JE4.png|32px]] [[File:Inactive Redstone Wire (NES) JE4.png|32px]] [[File:Inactive Redstone Wire (ESW) JE4.png|32px]] [[File:Inactive Redstone Wire (NSW) JE4.png|32px]] [[File:Inactive Redstone Wire (NESW) JE4.png|32px]]<br>[[File:Active Redstone Wire (unconnected) JE2.png|32px]] [[File:Active Redstone Wire (NS) JE4.png|32px]] [[File:Active Redstone Wire (EW) JE4.png|32px]] [[File:Active Redstone Wire (NE) JE4.png|32px]] [[File:Active Redstone Wire (ES) JE4.png|32px]] [[File:Active Redstone Wire (SW) JE4.png|32px]] [[File:Active Redstone Wire (NW) JE4.png|32px]] [[File:Active Redstone Wire (NEW) JE4.png|32px]] [[File:Active Redstone Wire (NES) JE4.png|32px]] [[File:Active Redstone Wire (ESW) JE4.png|32px]] [[File:Active Redstone Wire (NSW) JE4.png|32px]] [[File:Active Redstone Wire (NESW) JE4.png|32px]] Some slight changes have been made to redstone wire's appearance - the dot now extends outward with two more pixels, and the south-facing section of bends, T shapes and crosses now has one fewer pixel. It also appears straighter and more continuous in straight wire form.
|Redstone can no longer be added to extended [[potion]]s or tier-II potions.}}
{{History|||snap=15w44a|The average yield of redstone from [[dungeon]] [[chest]]s has been cut by more than half.
|The average yield of redstone in [[mineshaft]] chests has been increased.}}
{{History|||snap=15w46a|The hitbox of redstone now covers only part of the surface of the [[block]] below, based on the orientation of the redstone.}}
{{History||1.11|snap=16w39a|Redstone dust can now be found in chests in [[woodland mansion]]s.
|Redstone can now used to craft [[observer]]s.}}
{{History||1.13|snap=17w47a|The [[item]] form of "Redstone" has been renamed to "Redstone Wire".
|Prior to [[1.13/Flattening|''The Flattening'']], this [[block]]'s numeral ID was 55, and the [[item]]'s 331.}}
{{History|||snap=17w48a|"Redstone" has been renamed to "Redstone Dust".}}
{{History|||snap=18w07a|Redstone now extends the new [[potion of the Turtle Master]].}}
{{History||1.14|snap=18w43a|[[File:Redstone Dust JE2 BE2.png|32px]] The texture of redstone dust has been changed.}}
{{History|||snap=18w50a|Redstone dust can now be found in chests in [[village]] temples.}}
{{History|||snap=19w12b|Redstone dust can now be placed on [[glass]], [[ice]] and [[sea lantern]]s.}}
{{History|||snap=19w13a|Cleric villagers now give redstone dust to players under the [[Hero of the Village]] effect.}}
{{History||1.16|snap=20w06a|Redstone dust now has a bottom texture.}}
{{History|||snap=20w09a|Redstone can now be used to craft [[target]]s.}}
{{History|||snap=20w18a|Redstone dust placement on one [[block]] has been changed from a "•" back to a "+" shape.
|Redstone dust's hitbox is now no longer strictly a cuboid, and more closely matches the shape of the wiring.<ref>{{bug|MC-137336}}</ref>
|Upward going redstone dust now has a hitbox on the side of the [[block]] too, rather than only on the floor.<ref>{{bug|MC-153508}}</ref>
|Unconnected redstone dust now has all direction block states set to "side".
|The direction block states of redstone dust are now properly set to "side" at the end of a redstone wire on both ends, rather than only the one with other redstone besides it.
|[[File:Inactive Redstone Wire (N).png|32px]] [[File:Inactive Redstone Wire (E).png|32px]] [[File:Inactive Redstone Wire (S).png|32px]] [[File:Inactive Redstone Wire (W).png|32px]]<br>[[File:Active Redstone Wire (N).png|32px]] [[File:Active Redstone Wire (E).png|32px]] [[File:Active Redstone Wire (S).png|32px]] [[File:Active Redstone Wire (W).png|32px]] While not accessible in normal gameplay, redstone dust that points into one side, but not the opposite, now visually reaches halfway across the [[block]].}}
{{History|||snap=20w19a|Redstone dust now visually connects when going up [[soul sand]], 8-layer [[snow]] stacks and the back side of upside-down [[stairs]].
|[[Particles]] are now generated across the length of the redstone wire rather than the center of the [[block]].}}
{{History|||snap=20w21a|Redstone dust placement on one [[block]] is now toggleable between a "+" and a "•" shape, by {{control|interacting}} with it.}}
{{History||1.17|snap=21w08a|Redstone dust can now drop and be smelted from [[deepslate redstone ore]].}}
{{History||1.19|snap=22w13a|Redstone wire now generates in [[Ancient City|ancient cities]].}}
{{History||1.20<br>(Experimental)|link=1.19.4|snap=23w04a|Redstone dust can now be used as an armor trim material.}}
{{History|pocket alpha}}
{{History||v0.8.0|snap=build 1|[[File:Redstone Dust JE1 BE1.png|32px]] Added redstone as an [[item]].
|Redstone is now [[drops|dropped]] when [[breaking|mined]] from [[redstone ore]].
|Redstone can be used to craft [[compass]]es and [[clock]]s.}}
{{History|||snap=build 2|Redstone can now be used to craft [[powered rail]]s.}}
{{History||v0.11.0|snap=build 1|Redstone is now used to craft [[redstone block]]s.}}
{{History||v0.12.1|snap=build 1|Redstone has been added to the [[Creative]] [[inventory]], but it still cannot be placed. }}
{{History||v0.13.0|snap=build 1|Redstone can now be placed.
|Redstone is now used to craft [[redstone lamp]]s, [[note block]]s, [[detector rail]]s and [[redstone torch]]es.}}
{{History||v0.14.0|snap=build 1|Redstone is now used to craft [[dispenser]]s and [[dropper]]s.}}
{{History||v0.15.0|snap=build 1|Redstone is now used to craft [[piston]]s and [[observer]]s.}}
{{History|pocket}}
{{History||1.0.4|snap=alpha 1.0.4.0|Cleric [[villager]]s now [[trading|sell]] 1–4 redstone for an [[emerald]].}}
{{History||1.1.0|snap=alpha 1.1.0.0|Redstone can now be found in [[woodland mansion]]s.}}
{{History|bedrock}}
{{History||?|[[File:Inactive Redstone Wire (NE) BE.png|32px]] [[File:Inactive Redstone Wire (ES) BE.png|32px]] [[File:Inactive Redstone Wire (SW) BE.png|32px]] [[File:Inactive Redstone Wire (NW) BE.png|32px]] [[File:Inactive Redstone Wire (NEW) BE.png|32px]] [[File:Inactive Redstone Wire (NES) BE.png|32px]] [[File:Inactive Redstone Wire (ESW) BE.png|32px]] [[File:Inactive Redstone Wire (NSW) BE.png|32px]] [[File:Inactive Redstone Wire (NESW) BE.png|32px]]<br>[[File:Active Redstone Wire (NE) BE.png|32px]] [[File:Active Redstone Wire (ES) BE.png|32px]] [[File:Active Redstone Wire (SW) BE.png|32px]] [[File:Active Redstone Wire (NW) BE.png|32px]] [[File:Active Redstone Wire (NEW) BE.png|32px]] [[File:Active Redstone Wire (NES) BE.png|32px]] [[File:Active Redstone Wire (ESW) BE.png|32px]] [[File:Active Redstone Wire (NSW) BE.png|32px]] [[File:Active Redstone Wire (NESW) BE.png|32px]]<br>Placed redstone now assumes its current appearance with a more solid center. Its linear state appearences are unknown.}}
{{History||1.10.0|snap=beta 1.10.0.3|[[File:Redstone Dust JE2 BE2.png|32px]] The texture of redstone has been changed.}}
{{History||1.11.0|snap=beta 1.11.0.1|Redstone can now be found in [[desert]] [[village]] temple [[chest]]s.}}
{{History|||snap=beta 1.11.0.4|Cleric [[villager]]s now [[trading|sell]] 4 redstone as part of their first tier [[trading|trade]].}}
{{History||1.16.210|snap=beta 1.16.210.57|"Redstone" has been renamed to "Redstone Dust".}}
{{History||1.17.0|snap=beta 1.16.230.52|Redstone dust can now drop and be smelted from [[deepslate redstone ore]].}}
{{History||1.19.0|snap=beta 1.19.0.26|Redstone wire now generates in [[Ancient City|ancient cities]].}}
{{History||1.19.80|snap=beta 1.19.80.21|Redstone dust can now be used as an armor trim material.}}
{{History|console}}
{{History||xbox=TU1|xbone=CU1|ps=1.0|wiiu=Patch 1|switch=1.0.1|[[File:Redstone Dust JE1 BE1.png|32px]] Added redstone.}}
{{History||xbox=TU3|Redstone now connects to a [[redstone repeater|repeater]] without the dust being explicitly pointed at it.}}
{{History||xbox=none|xbone=none|ps=1.90|wiiu=none|switch=none|[[File:Redstone Dust JE2 BE2.png|32px]] The texture of redstone has been changed.}}
{{History||ps=1.95|Redstone can now be placed on [[glass]].}}
{{History|new 3ds}}
{{History||0.1.0|[[File:Redstone Dust JE1 BE1.png|32px]] Added redstone dust.}}
{{History|foot}}
=== Redstone wire "item" ===
{{:Technical blocks/Redstone Wire}}
== Gallery ==
=== Renders ===
; Java Edition
<gallery>
Inactive Redstone Wire (NESW).png |
Inactive Redstone Wire (unconnected).png |
Inactive Redstone Wire (NS).png |
Inactive Redstone Wire (EW).png |
Inactive Redstone Wire (NE).png |
Inactive Redstone Wire (ES).png |
Inactive Redstone Wire (SW).png |
Inactive Redstone Wire (NW).png |
Inactive Redstone Wire (NEW).png |
Inactive Redstone Wire (NES).png |
Inactive Redstone Wire (ESW).png |
Inactive Redstone Wire (NSW).png
</gallery>
<gallery>
Active Redstone Wire (NESW).png |
Active Redstone Wire (unconnected).png |
Active Redstone Wire (NS).png |
Active Redstone Wire (EW).png |
Active Redstone Wire (NE).png |
Active Redstone Wire (ES).png |
Active Redstone Wire (SW).png |
Active Redstone Wire (NW).png |
Active Redstone Wire (NEW).png |
Active Redstone Wire (NES).png |
Active Redstone Wire (ESW).png |
Active Redstone Wire (NSW).png
</gallery>
; Bedrock Edition
<gallery>
Inactive Redstone Wire (NESW) BE.png |
Inactive Redstone Wire (NESW) BE.png |
Inactive Redstone Wire (NS).png |
Inactive Redstone Wire (EW).png |
Inactive Redstone Wire (NE) BE.png |
Inactive Redstone Wire (ES) BE.png |
Inactive Redstone Wire (SW) BE.png |
Inactive Redstone Wire (NW) BE.png |
Inactive Redstone Wire (NEW) BE.png |
Inactive Redstone Wire (NES) BE.png |
Inactive Redstone Wire (ESW) BE.png |
Inactive Redstone Wire (NSW) BE.png
</gallery>
<gallery>
Active Redstone Wire (NESW) BE.png |
Active Redstone Wire (NESW) BE.png |
Active Redstone Wire (NS).png |
Active Redstone Wire (EW).png |
Active Redstone Wire (NE) BE.png |
Active Redstone Wire (ES) BE.png |
Active Redstone Wire (SW) BE.png |
Active Redstone Wire (NW) BE.png |
Active Redstone Wire (NEW) BE.png |
Active Redstone Wire (NES) BE.png |
Active Redstone Wire (ESW) BE.png |
Active Redstone Wire (NSW) BE.png
</gallery>
=== Screenshots ===
<gallery>
Slab Stair Redstone.png|First image of redstone dust on top of slabs and stairs.
File:Olivia Tinkering.jpeg|[[Olivia]] using a scarce amount of redstone dust.
File:23w32a.jpg|[[Sunny]] using a very long strip of redstone dust.
</gallery>
=== In other media ===
<gallery>
Powered By Redstone JINX.jpg|Official T-shirt artwork "Powered By Redstone" made by [https://www.jinx.com JINX].
File:Redstone Behind Chiseled Bookshelf Pixel Art.png|Pixel art of redstone dust.
</gallery>
== Issues ==
{{issue list|redstone|redstone dust|redstone wire}}
== Trivia ==
* Five updates for [[wikipedia:Windows 10 version history|Windows 10]] released from 2016 to 2018 were codenamed "Redstone", referencing ''Minecraft''.<ref>{{link|url=https://www.theverge.com/2015/4/7/8364355/microsoft-redstone-windows-updates|title=Microsoft plans ‘Redstone’ updates for Windows 10 in 2016|author=Tom Warren|website=The Verge|date=April 7, 2015}}</ref>
* The block has 1,296 possible block state combinations, the highest of all blocks as of 1.15.2, beating [[fire]]'s 512 and [[note block]]'s 800.
* According to {{el|ee}}, redstone dust contains radioactive [[element]]s.
== References ==
{{Reflist}}
{{Redstone}}
{{Blocks|Utility}}
{{Items}}
[[Category:Redstone mechanics]]
[[Category:Mechanisms]]
[[Category:Mechanics]]
[[Category:Generated structure blocks]]
[[Category:Non-solid blocks]]
[[Category:Brewing recipe]]
[[cs:Rudit]]
[[de:Redstone]]
[[el:Σκόνη Κοκκινόπετρας]]
[[es:Polvo de redstone]]
[[fr:Poudre de redstone]]
[[hu:Redstone]]
[[it:Polvere di redstone]]
[[ja:レッドストーンダスト]]
[[ko:레드스톤 가루]]
[[nl:Redstonestof]]
[[pl:Redstone]]
[[pt:Pó de redstone]]
[[ru:Красная пыль]]
[[th:ผงเรดสโตน]]
[[tr:Kızıltaş]]
[[uk:Редстоун]]
[[zh:红石粉]]</li></ul></nowiki> | beta 1.16.20.50 | Vines now play sounds when climbed. | |||
| Legacy Console Edition | |||||
| TU5 | CU1 | 1.0 | Patch 1 | 1.0.1 | File:Vines JE1 BE1.png Added vines. |
| TU9 | Vines are now climbable provided they are climbed against a solid block. | ||||
| 1.90 | |||||
| New Nintendo 3DS Edition | |||||
0.1.0{{Extension DPL}}<ul><li>[[Heart of the Sea|Heart of the Sea]]<br/>{{Item
| image = Heart of the Sea.png
| stackable = Yes (64)
| rarity = Uncommon
| renewable = No
}}
A '''heart of the sea''' is a rare [[item]] that can be crafted into a [[conduit]].
== Obtaining ==
The heart of the sea must be found. It cannot be crafted or obtained by trading, making it a [[non-renewable resource]].
A heart of the sea is obtained from a [[buried treasure]]. The location is marked with a noticeable red X on a [[Explorer Map|buried treasure map]], which is found in [[Ocean_Ruins|ocean ruins]] and [[Shipwreck|shipwrecks]]. Feeding [[raw cod]] or [[raw salmon]] to a [[dolphin]] causes the dolphin to swim toward the nearest [[buried treasure]], [[shipwreck]], or [[ocean ruins]].
=== Chest loot ===
{{LootChestItem|heart-of-the-sea}}
== Usage ==
=== Crafting===
{{crafting usage}}
== Data values ==
=== ID ===
{{edition|java}}:
{{ID table
|edition=java
|showforms=y
|generatetranslationkeys=y
|displayname=Heart of the Sea
|spritetype=item
|nameid=heart_of_the_sea
|form=item
|foot=1}}
{{edition|bedrock}}:
{{ID table
|edition=bedrock
|shownumericids=y
|showforms=y
|notshowbeitemforms=y
|generatetranslationkeys=y
|displayname=Heart of the Sea
|spritetype=item
|nameid=heart_of_the_sea
|id=571
|form=item
|foot=1}}
== History ==
{{History|java}}
{{History||1.13|snap=18w15a|[[File:Heart of the Sea JE1 BE2.png|32px]] Added heart of the sea.}}
{{History|||snap=18w19a|Heart of the sea now generates in all [[buried treasure]] [[chest]]s in a stack of 1.}}
{{History|bedrock}}
{{History||1.4.0|snap=beta 1.2.14.2|An entry in the [[buried treasure]] loot table has been added named <code>nautilus_core</code>. It is unobtainable though since the <code>nautilus_core</code> has not been added into the game yet.}}
{{History|||snap=beta 1.2.20.1|[[File:Heart of the Sea BE1.png|32px]] Added heart of the sea as an [[item]] obtainable in buried treasure [[chest]]s. It cannot be used to craft [[conduit]]s yet.}}
{{History|||snap=beta 1.2.20.2|[[File:Heart of the Sea JE1 BE2.png|32px]] The texture of heart of the sea has been changed.}}
{{History||1.5.0|snap=beta 1.5.0.1|Heart of the sea can now be used to craft [[conduit]]s.}}
{{History|console}}
{{History||xbox=TU69|ps=1.76|wiiu=Patch 38|[[File:Heart of the Sea JE1 BE2.png|32px]] Added heart of the sea.}}
{{History|education}}
{{History||1.4.0|[[File:Heart of the Sea JE1 BE2.png|32px]] Added heart of the sea. It generates in all [[buried treasure]] [[chest]]s in a stack of 1.}}
{{History|foot}}
== Issues ==
{{issue list}}
== Trivia ==
* Before the heart of the sea was added to {{el|be}}, there was an entry found in the buried treasure chest loot table named <code>nautilus_core</code>, which was later revealed to be the heart of the sea. Despite the name change, the heart of the sea continues to be referred to as the <code>nautilus_core</code> in most game files.
== External Links ==
*[https://www.minecraft.net/en-us/article/heart-sea Taking Inventory: Heart of the Sea] – Minecraft.net on August 31, 2023
{{items}}
[[Category:Non-renewable resources]]
[[de:Herz des Meeres]]
[[fr:Cœur de la mer]]
[[es:Corazón del mar]]
[[it:Cuore del mare]]
[[ja:海洋の心]]
[[ko:바다의 심장]]
[[nl:Hart van de zee]]
[[pl:Serce oceanu]]
[[pt:Coração do mar]]
[[ru:Сердце моря]]
[[uk:Серце моря]]
[[zh:海洋之心]]</li><li>[[Horse Armor|Horse Armor]]<br/>{{Item
| image = <gallery>
Leather Horse Armor.png | Leather
Iron Horse Armor.png | Iron
Golden Horse Armor.png | Golden
Diamond Horse Armor.png | Diamond
</gallery>
| image2 = <gallery>
Leather Horse Armor (item).png|Leather
Iron Horse Armor (item).png|Iron
Golden Horse Armor (item).png|Golden
Diamond Horse Armor (item).png|Diamond
</gallery>
| extratext = View [[#Gallery|all renders]]
| renewable =
* '''Leather''': Yes
* '''All others''': No
| stackable = No
}}
'''Horse armor''' is a special type of [[armor]] that can be given to a [[horse]] to wear.
== Obtaining ==
===Chest loot===
{{LootChestItem|iron-horse-armor}}
{{LootChestItem|golden-horse-armor}}
{{LootChestItem|diamond-horse-armor}}
===Crafting===
{{crafting
|A1= Leather
|C1= Leather
|A2= Leather
|B2= Leather
|C2= Leather
|A3= Leather
|C3= Leather
|Output= Leather Horse Armor
|type=Miscellaneous
}}
Only leather horse armor can be crafted; other horse armor can be obtained only from chest loot from some generated structures.
===Trading===
Expert-level [[leatherworker]] villagers [[trading|sell]] leather horse armor for 6 [[emerald]]s as part of their trade.
==Usage==
Only normal adult horses can wear armor; foals, [[donkey]]s, [[mule]]s, and undead variants such as [[skeleton horse]]s and [[zombie horse]]s cannot be equipped with armor.
=== Types ===
Horse armor has leather, iron, gold, and diamond variants. However, horse armor does not have netherite or chainmail variants.
=== Armor Stands ===
Horse armor cannot be placed or displayed on [[armor stand]]s.
===Protection===
Horse armor can be equipped to horses either by manually placing it in its respective slot by pressing E while riding the horse ({{SlotSprite|Horse Armor}}), or by right-clicking the horse with it.
There is a gradual increase in the defense given from a horse wearing the different types of armor. Note that golden horse armor provides more protection than iron horse armor, whereas the opposite is true for [[armor|player armor]].
{| class="wikitable" data-description="Armor defense"
|-
! Material !! [[Armor]]
|-
! [[Leather]]
| {{armor|3}}
|-
! [[Iron]]
| {{armor|5}}
|-
! [[Gold]]
| {{armor|7}}
|-
! [[Diamond]]
| {{armor|11}}
|}
When a horse dies while equipped with any horse armor, it drops its normal loot, saddle (if it had one), and the horse armor.
Leather horse armor protects horses from freezing in [[powder snow]], but it does not negate other powder snow effects (e.g., falling through, inability to jump).
===Durability===
Unlike [[armor|player armor]], horse armor does not have durability. This means a single horse armor can be used infinitely unless destroyed.
=== Enchanting ===
Unlike [[armor|player armor]], horse armor cannot be enchanted in survival mode. However, {{in|java}} Creative mode, horse armor can be used with an [[anvil]] to enchant with [[Depth Strider]], [[Thorns]], [[Respiration]], [[Feather Falling]], and [[Curse of vanishing]]. Other enchantments can be applied, but they have no effect.
=== Dyeing ===
Leather horse armor can be dyed 12,326,391 different colors (using lone dyes or dye combinations) and put onto a horse to display that color. These changes can be reverted by {{control|using}} a filled [[cauldron]] with dyed leather horse armor.
===Smelting usage===
{{Smelting|showname=1|Iron Horse Armor;Golden Horse Armor|Iron Nugget;Gold Nugget|0,1}}
===Piglins===
{{EntityLink|Piglin|Piglins}} are attracted to golden horse armor and run toward any golden horse armor on the ground, inspecting it for 6 to 8 seconds before putting it in their inventory.
== Sounds ==
{{Edition|Java}}:
{{Sound table
|sound=Horse armor.ogg
|subtitle=Horse armor equips
|source=neutral
|description=When armor is equipped to a horse
|id=entity.horse.armor
|translationkey=subtitles.entity.horse.armor
|volume=0.5
|pitch=1.0
|distance=16
|foot=1}}
{{Edition|Bedrock}}:
{{Sound table
|type=bedrock
|sound=Horse armor.ogg
|source=neutral
|description=When armor is equipped to a horse
|id=mob.horse.armor
|volume=0.6
|pitch=1.0
|foot=1}}
== Data values ==
=== ID ===
{{edition|java}}:
{{ID table
|edition=java
|showforms=y
|generatetranslationkeys=y
|displayname=Leather Horse Armor
|spritetype=item
|nameid=leather_horse_armor
|form=item}}
{{ID table
|displayname=Iron Horse Armor
|spritetype=item
|nameid=iron_horse_armor
|form=item}}
{{ID table
|displayname=Diamond Horse Armor
|spritetype=item
|nameid=diamond_horse_armor
|form=item}}
{{ID table
|displayname=Golden Horse Armor
|spritetype=item
|nameid=golden_horse_armor
|form=item
|foot=1}}
{{edition|bedrock}}:
{{ID table
|edition=bedrock
|shownumericids=y
|showforms=y
|showaliasids=y
|notshowbeitemforms=y
|generatetranslationkeys=y
|displayname=Leather Horse Armor
|spritetype=item
|nameid=leather_horse_armor
|aliasid=horsearmorleather
|id=530
|form=item
|translationkey=item.horsearmorleather.name}}
{{ID table
|displayname=Iron Horse Armor
|spritetype=item
|nameid=iron_horse_armor
|aliasid=horsearmoriron
|id=531
|form=item
|translationkey=item.horsearmoriron.name}}
{{ID table
|displayname=Diamond Horse Armor
|spritetype=item
|nameid=diamond_horse_armor
|aliasid=horsearmordiamond
|id=533
|form=item
|translationkey=item.horsearmordiamond.name}}
{{ID table
|displayname=Golden Horse Armor
|spritetype=item
|nameid=golden_horse_armor
|aliasid=horsearmorgold
|id=532
|form=item
|translationkey=item.horsearmorgold.name
|foot=1}}
=== Item data ===
When leather horse armor is dyed, it has the following NBT:
{{el|java}}:
{{main|Player.dat format}}
<div class="treeview">
* {{nbt|compound|tag}}: Parent tag.
** {{nbt|compound|display}}: Display properties.
*** {{nbt|int|color}}: The color of the leather armor. The tooltip displays "Dyed" if advanced tooltips are disabled, otherwise it displays the hexadecimal color value. Color codes are calculated from the Red, Green and Blue components using this formula:<br>'''<span style="color:red">Red</span>[[wikipedia:Logical shift|<<]]16 + <span style="color:green">Green</span><<8 + <span style="color:blue">Blue</span>'''<ref>For positive values larger than 0x00FFFFFF, the top byte is ignored. All negative values produce white.</ref>
</div>
{{el|bedrock}}:
: See [[Bedrock Edition level format/Item format]].
== History ==
{{History|java}}
{{History||1.6.1|snap=13w16a|[[File:Iron Horse Armor JE1 BE1.png|32px]] [[File:Golden Horse Armor JE1 BE1.png|32px]] [[File:Diamond Horse Armor JE1 BE1.png|32px]]<br>[[File:Iron Horse Armor (item) JE1 BE1.png|32px]] [[File:Golden Horse Armor (item) JE1 BE1.png|32px]] [[File:Diamond Horse Armor (item) JE1 BE1.png|32px]] Added horse armor.
|Horse armor can be [[crafting|crafted]] using the following recipe.
{{{!}} class{{=}}"collapsible collapsed"
! Recipe
{{!}}-
{{!}}
{{Crafting Table
|C1=Iron Ingot; Gold Ingot; Diamond
|A2=Iron Ingot; Gold Ingot; Diamond
|B2=Any Wool
|C2=Iron Ingot; Gold Ingot; Diamond
|A3=Iron Ingot; Gold Ingot; Diamond
|B3=Iron Ingot; Gold Ingot; Diamond
|C3=Iron Ingot; Gold Ingot; Diamond
|Output=Iron Horse Armor; Golden Horse Armor; Diamond Horse Armor
}}
{{!}}}
}}
{{History|||snap=13w18a|The crafting recipe for horse armor has been removed.
|Horse armor can now be found in [[chest]]s in [[jungle temple|jungle]] & [[desert temple]]s, [[dungeon]]s, [[nether fortress]]es, [[stronghold]] altar rooms and [[village]] blacksmith buildings.
|Iron horse armor can now additionally be found in [[mineshaft]] chests.}}
{{History|||snap=13w21a|Horse armor is no longer stackable, to be consistent with other types of [[armor]].}}
{{History||1.9|snap=15w31a|Horse armor has been added to [[end city]] [[chest]]s.}}
{{History|||snap=15w43a|The average yield of horse armor in [[nether fortress]] chests has slightly decreased.}}
{{History|||snap=15w44a|The average yield of horse armor in [[desert temple]] chests has increased.
|The average yield of iron horse armor from [[dungeon]] chests has slightly decreased.
|Iron horse armor has been removed from [[mineshaft]] [[chest]]s.}}
{{History||1.11.1|snap=16w50a|Golden and iron horse armor can now be [[smelting|smelted]] down into one of their respective [[nugget]]s.}}
{{History||1.13|snap=17w45a|[[File:Iron Horse Armor JE2.png|32px]] [[File:Golden Horse Armor JE2.png|32px]] [[File:Diamond Horse Armor JE2.png|32px]] The textures of horse armor have been changed, as the [[model]] of [[horse]]s has changed.}}
{{History|||snap=17w46a|[[File:Iron Horse Armor 17w46a.png|32px]] [[File:Golden Horse Armor 17w46a.png|32px]] [[File:Diamond Horse Armor 17w46a.png|32px]] The model of horse armor has been changed, but the textures of horse armor have remained unaltered.}}
{{History|||snap=17w47a|Prior to [[1.13/Flattening|''The Flattening'']], these [[item]]s' numeral IDs were 417, 418 and 419.}}
{{History|||snap=18w03a|[[File:Iron Horse Armor JE3.png|32px]] [[File:Golden Horse Armor JE3 BE2.png|32px]] [[File:Diamond Horse Armor JE3 BE2.png|32px]] The textures of horse armor have been changed, as the [[model]] of [[horse]]s has changed.}}
{{History|||snap=18w22a|[[File:Iron Horse Armor JE4 BE2.png|32px]] The texture of iron horse armor when equipped has been changed.<ref>{{bug|MC-124357}}</ref>}}
{{History|||snap=pre2|A bug with the [[horse]] skin and horse armor textures not applying correctly has been fixed.<ref>{{bug|MC-124364}}</ref>}}
{{History||1.14|snap=18w50a|[[File:Iron Horse Armor (item) JE2 BE2.png|32px]] [[File:Golden Horse Armor (item) JE2 BE2.png|32px]] [[File:Diamond Horse Armor (item) JE2 BE2.png|32px]] The textures of horse armor [[item]]s have been changed.}}
{{History|||snap=February 20, 2019|slink=https://twitter.com/_LadyAgnes/status/1098134917299531776?s=19|Leather horse armor announced for {{el|je}}.}}
{{History|||snap=19w08a|[[File:Iron Horse Armor JE5 BE3.png|32px]] [[File:Golden Horse Armor JE4 BE3.png|32px]] [[File:Diamond Horse Armor JE4 BE3.png|32px]]<br>[[File:Iron Horse Armor (item) JE3.png|32px]] [[File:Golden Horse Armor (item) JE3 BE3.png|32px]] [[File:Diamond Horse Armor (item) JE3 BE3.png|32px]] The textures of iron, gold and diamond horse armor have been changed.
|[[File:Leather Horse Armor JE1 BE3.png|32px]] [[File:Leather Horse Armor (item) JE1.png|32px]] Added leather horse armor, which can be [[dyeing|dyed]] 12,326,391 different colors, similar to leather [[armor]].}}
{{History|||snap=19w11a|Leatherworker [[villager]]s now [[trading|sell]] leather horse armor.}}
{{History||1.14.1|snap=Pre-Release 1|[[File:Leather Horse Armor (item) JE2.png|32px]] The texture of leather horse armor [[item]] has been changed to be more consistent with the other types of horse armor.
|[[File:Iron Horse Armor (item) JE4 BE3.png|32px]] The texture of iron horse armor item has been changed.}}
{{History||1.16|snap=20w15a|Horse armor placed in a dispenser can now be put on tamed horses.}}
{{History|||snap=20w16a|Golden horse armor now generates in [[ruined portal]] chests.}}
{{History||1.17|snap=21w13a|Leather horse armor now protects [[horse]]s from [[freezing]].}}
{{History||1.19|snap=22w13a|Diamond horse armor may now be found in [[ancient city]] [[chest]]s.}}
{{History|pocket alpha}}
{{History||v0.15.0|snap=build 1|[[File:Leather Horse Armor BE1.png|32px]] [[File:Iron Horse Armor JE1 BE1.png|32px]] [[File:Golden Horse Armor JE1 BE1.png|32px]] [[File:Diamond Horse Armor JE1 BE1.png|32px]]<br>[[File:Leather Horse Armor (item) BE1.png|32px]] [[File:Iron Horse Armor (item) JE1 BE1.png|32px]] [[File:Golden Horse Armor (item) JE1 BE1.png|32px]] [[File:Diamond Horse Armor (item) JE1 BE1.png|32px]] Added horse armor and [[dyeing|dyeable]] leather horse armor as a version exclusive.}}
{{History|pocket}}
{{History||1.0.0|snap=alpha 0.17.0.1|Horse armor can now be found inside [[end city]] [[chest]]s.}}
{{History||1.1.0|snap=alpha 1.1.0.0|Iron and golden horse armor are now [[smelting|smeltable]].}}
{{History|bedrock}}
{{History||1.2.6|snap=beta 1.2.6.2|[[File:Leather Horse Armor BE2.png|32px]] [[File:Iron Horse Armor JE4 BE2.png|32px]] [[File:Golden Horse Armor JE3 BE2.png|32px]] [[File:Diamond Horse Armor JE3 BE2.png|32px]] The textures of horse armor have been changed, as the [[model]] of [[horse]]s has been changed.}}
{{History||1.10.0|snap=beta 1.10.0.3|Horse armor can now be found in [[plains]] [[village]] weaponsmith [[chest]]s.
|[[File:Leather Horse Armor JE1 BE3.png|32px]] [[File:Iron Horse Armor JE5 BE3.png|32px]] [[File:Golden Horse Armor JE4 BE3.png|32px]] [[File:Diamond Horse Armor JE4 BE3.png|32px]]<br>[[File:Leather Horse Armor (item) BE2.png|32px]] [[File:Iron Horse Armor (item) JE2 BE2.png|32px]] [[File:Golden Horse Armor (item) JE2 BE2.png|32px]] [[File:Diamond Horse Armor (item) JE2 BE2.png|32px]] The textures of all horse armor have been changed.}}
{{History||1.11.0|snap=beta 1.11.0.1|Horse armor can now be found in [[savanna]], [[desert]], [[taiga]], [[snowy taiga]] and [[snowy tundra]] [[village]] weaponsmith [[chest]]s.}}
{{History|||snap=beta 1.11.0.4|Leather horse armor can now be [[trading|bought]] from leatherworker [[villager]]s.}}
{{History|||snap=beta 1.11.0.5|[[File:Leather Horse Armor (item) BE3.png|32px]] [[File:Iron Horse Armor (item) JE4 BE3.png|32px]] [[File:Golden Horse Armor (item) JE3 BE3.png|32px]] [[File:Diamond Horse Armor (item) JE3 BE3.png|32px]] The textures of all horse armor [[item]]s have been changed.}}
{{History||1.17.0|snap=beta 1.16.230.54|Leather horse armor now protects [[horse]]s from [[freezing]].}}
{{History|console}}
{{History||xbox=TU19|xbone=CU7|ps=1.12|wiiu=Patch 1|switch=1.0.1|[[File:Iron Horse Armor JE1 BE1.png|32px]] [[File:Golden Horse Armor JE1 BE1.png|32px]] [[File:Diamond Horse Armor JE1 BE1.png|32px]]<br>[[File:Iron Horse Armor (item) JE1 BE1.png|32px]] [[File:Golden Horse Armor (item) JE1 BE1.png|32px]] [[File:Diamond Horse Armor (item) JE1 BE1.png|32px]] Added horse armor.}}
{{History||xbox=TU53|xbone=CU43|ps=1.49|wiiu=Patch 23|switch=1.0.3|Iron and golden horse armor are now [[smelting|smeltable]].}}
{{History||xbox=TU60|xbone=CU51|ps=1.64|wiiu=Patch 30|switch=1.0.11|[[File:Leather Horse Armor BE1.png|32px]]<br>[[File:Leather Horse Armor (item) BE1.png|32px]] Added leather horse armor.}}
{{History||xbox=none|xbone=none|ps=1.90|wiiu=none|switch=none|[[File:Leather Horse Armor JE1 BE3.png|32px]] [[File:Iron Horse Armor JE5 BE3.png|32px]] [[File:Golden Horse Armor JE4 BE3.png|32px]] [[File:Diamond Horse Armor JE4 BE3.png|32px]]<br>[[File:Leather Horse Armor (item) BE3.png|32px]] [[File:Iron Horse Armor (item) JE3.png|32px]] [[File:Golden Horse Armor (item) JE3 BE3.png|32px]] [[File:Diamond Horse Armor (item) JE3 BE3.png|32px]] The textures of leather, iron, gold and diamond horse armor have been changed.}}
{{History|3ds}}
{{History||0.1.0|[[File:Leather Horse Armor BE1.png|32px]] [[File:Iron Horse Armor JE1 BE1.png|32px]] [[File:Golden Horse Armor JE1 BE1.png|32px]] [[File:Diamond Horse Armor JE1 BE1.png|32px]]<br>[[File:Leather Horse Armor (item) BE1.png|32px]] [[File:Iron Horse Armor (item) JE1 BE1.png|32px]] [[File:Golden Horse Armor (item) JE1 BE1.png|32px]] [[File:Diamond Horse Armor (item) JE1 BE1.png|32px]] Added horse armor.}}
{{History|foot}}
== Issues ==
{{issue list}}
== Gallery ==
<gallery>
Leather Horse Armor.png | Undyed Leather armor
White Leather Horse Armor.png | White Leather armor
Light Gray Leather Horse Armor.png | Light Gray Leather armor
Gray Leather Horse Armor.png | Gray Leather armor
Black Leather Horse Armor.png | Black Leather armor
Brown Leather Horse Armor.png | Brown Leather armor
Red Leather Horse Armor.png | Red Leather armor
Orange Leather Horse Armor.png | Orange Leather armor
Yellow Leather Horse Armor.png | Yellow Leather armor
Lime Leather Horse Armor.png | Lime Leather armor
Green Leather Horse Armor.png | Green Leather armor
Cyan Leather Horse Armor.png | Cyan Leather armor
Light Blue Leather Horse Armor.png | Light Blue Leather armor
Blue Leather Horse Armor.png | Blue Leather armor
Purple Leather Horse Armor.png | Purple Leather armor
Magenta Leather Horse Armor.png | Magenta Leather armor
Pink Leather Horse Armor.png | Pink Leather armor
</gallery>
=== Screenshots ===
<gallery>
Armored Horse.png|A [[horse]] equipped with iron horse armor and bound to a fence post by a [[lead]].
13w21a-new-HorseUI-inventory.png|The GUI for horses implemented in [[Java Edition 13w21a|13w21a]], which allows the removal and switching of armor.
GodSpawner.png|A golden horse armor found in a [[dungeon]] chest, which coincidentally contains an [[enchanted golden apple]].
Horses with armor.png|4 [[horse]]s equipped with [[leather]], [[iron]], [[gold]], and [[diamond]] armor.
Leather Horse Armor 1.jpg|First image of leather horse armor.
Leather Horse Armor 2.jpg|Second image of leather horse armor.
Leather Horse Armor 3.jpg|Third image of leather horse armor.
Leather Horse Armor 4.jpg|Fourth image of leather horse armor.
Leather Horse Armor 5.jpg|Fifth image of leather horse armor.
</gallery>
== Notes ==
{{Notelist}}
== References ==
{{Reflist}}
{{items}}
[[Category:Armor]]
[[de:Rossharnisch]]
[[es:Armadura para caballo]]
[[fr:Armure pour cheval]]
[[it:Bardatura]]
[[ja:馬鎧]]
[[ko:말 갑옷]]
[[nl:Paardenharnas]]
[[pl:Zbroja końska]]
[[pt:Armadura para cavalo]]
[[ru:Конская броня]]
[[uk:Кінські обладунки]]
[[zh:马铠]]</li></ul> | File:Vines JE1 BE1.png Added vines. | ||||
Issues
Issues relating to "Vines" are maintained on the bug tracker. Report issues there.
Gallery

A screenshot by Jeb of a floating island with vines.
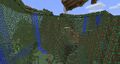
Griefing with vines in the Beta 1.8 pre-release.
Growing player-placed vines.

Vines hanging from trees in the swamp biome.
Vines in a jungle biome.
Vines growing from the edges of small jungle trees.
Vines growing in a cave.
Vines on a jungle temple.
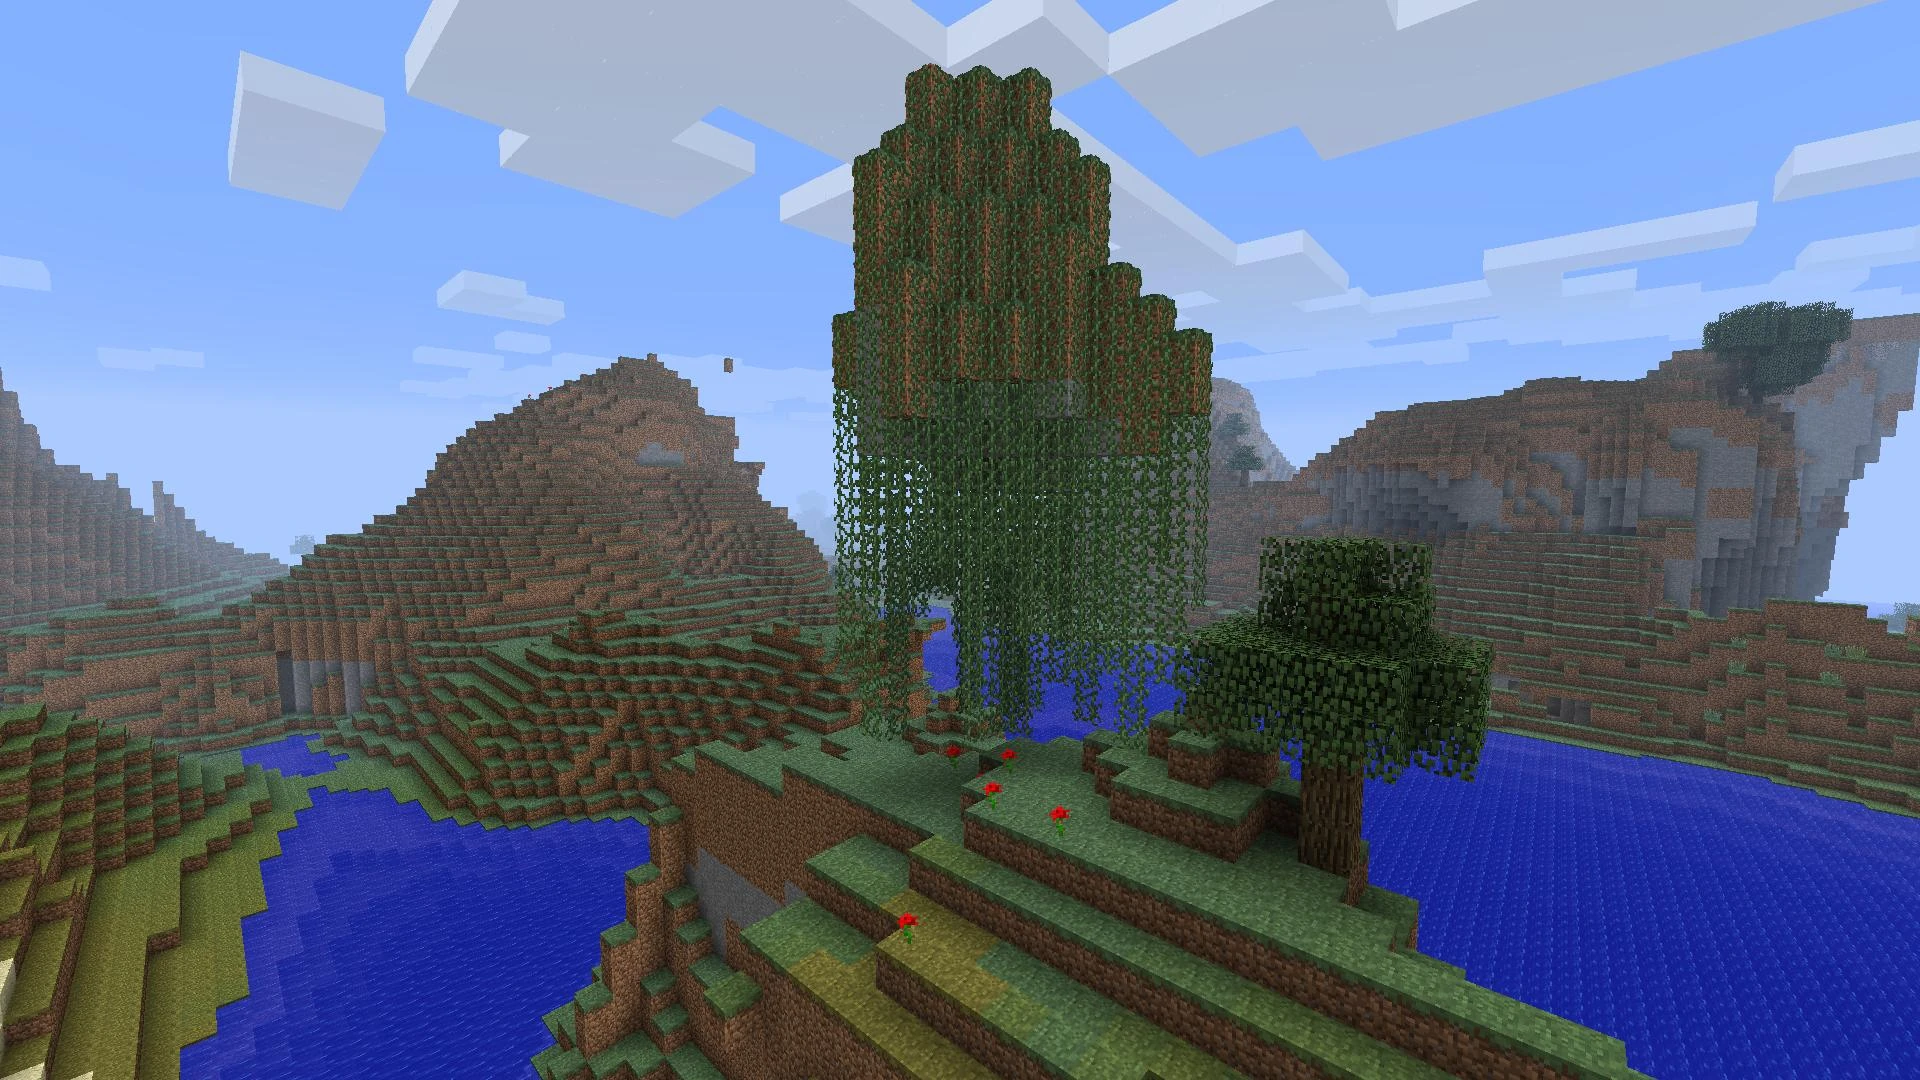

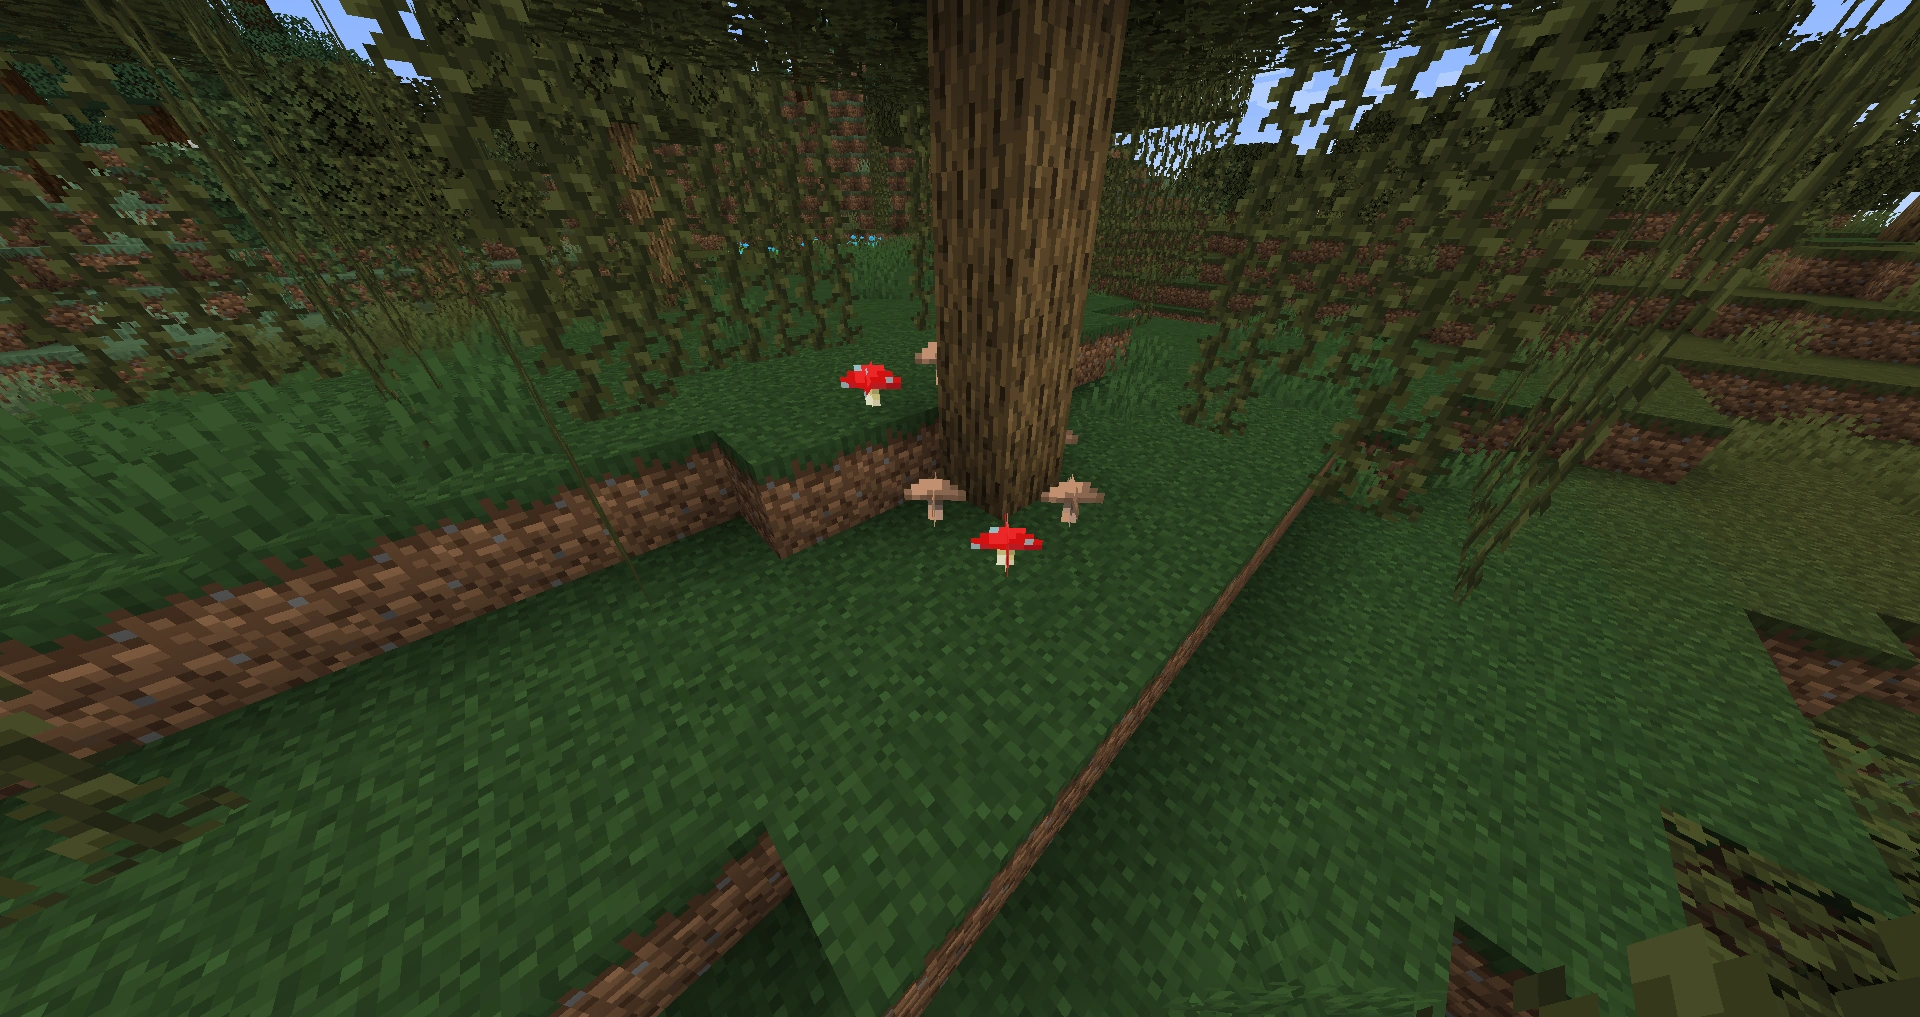
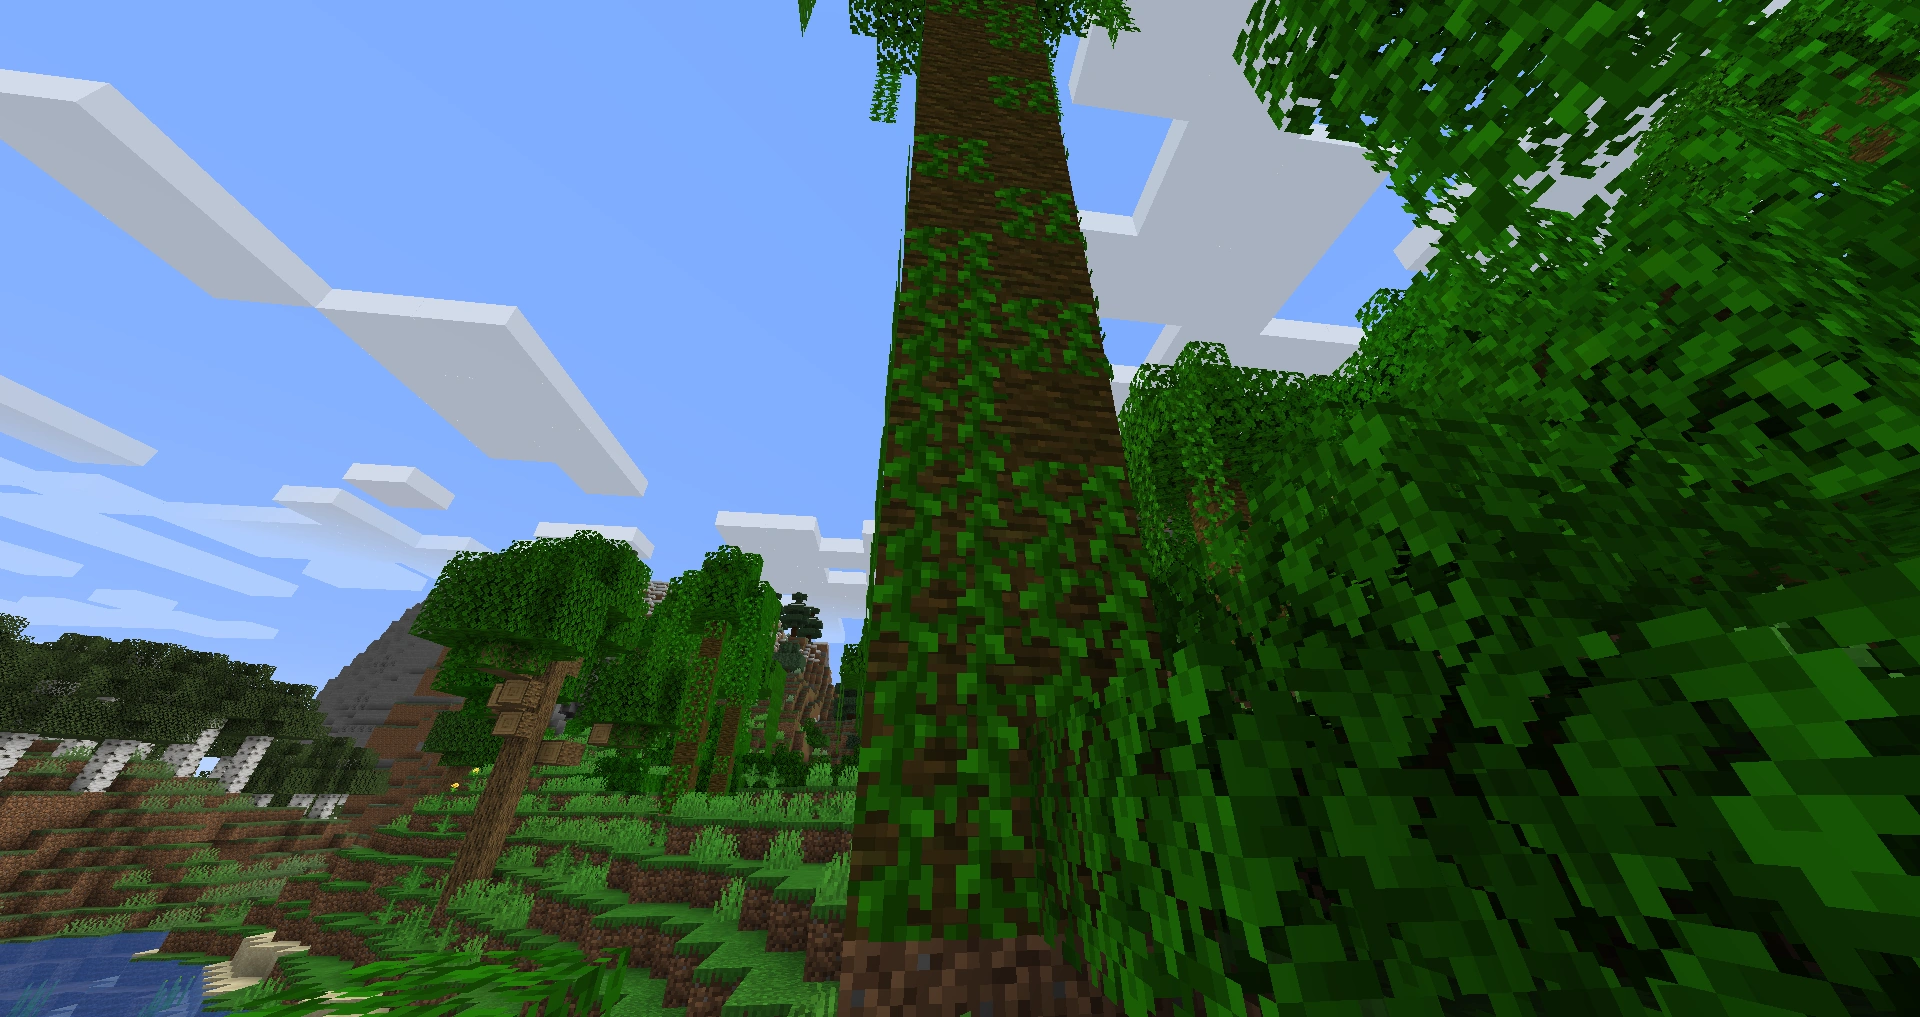
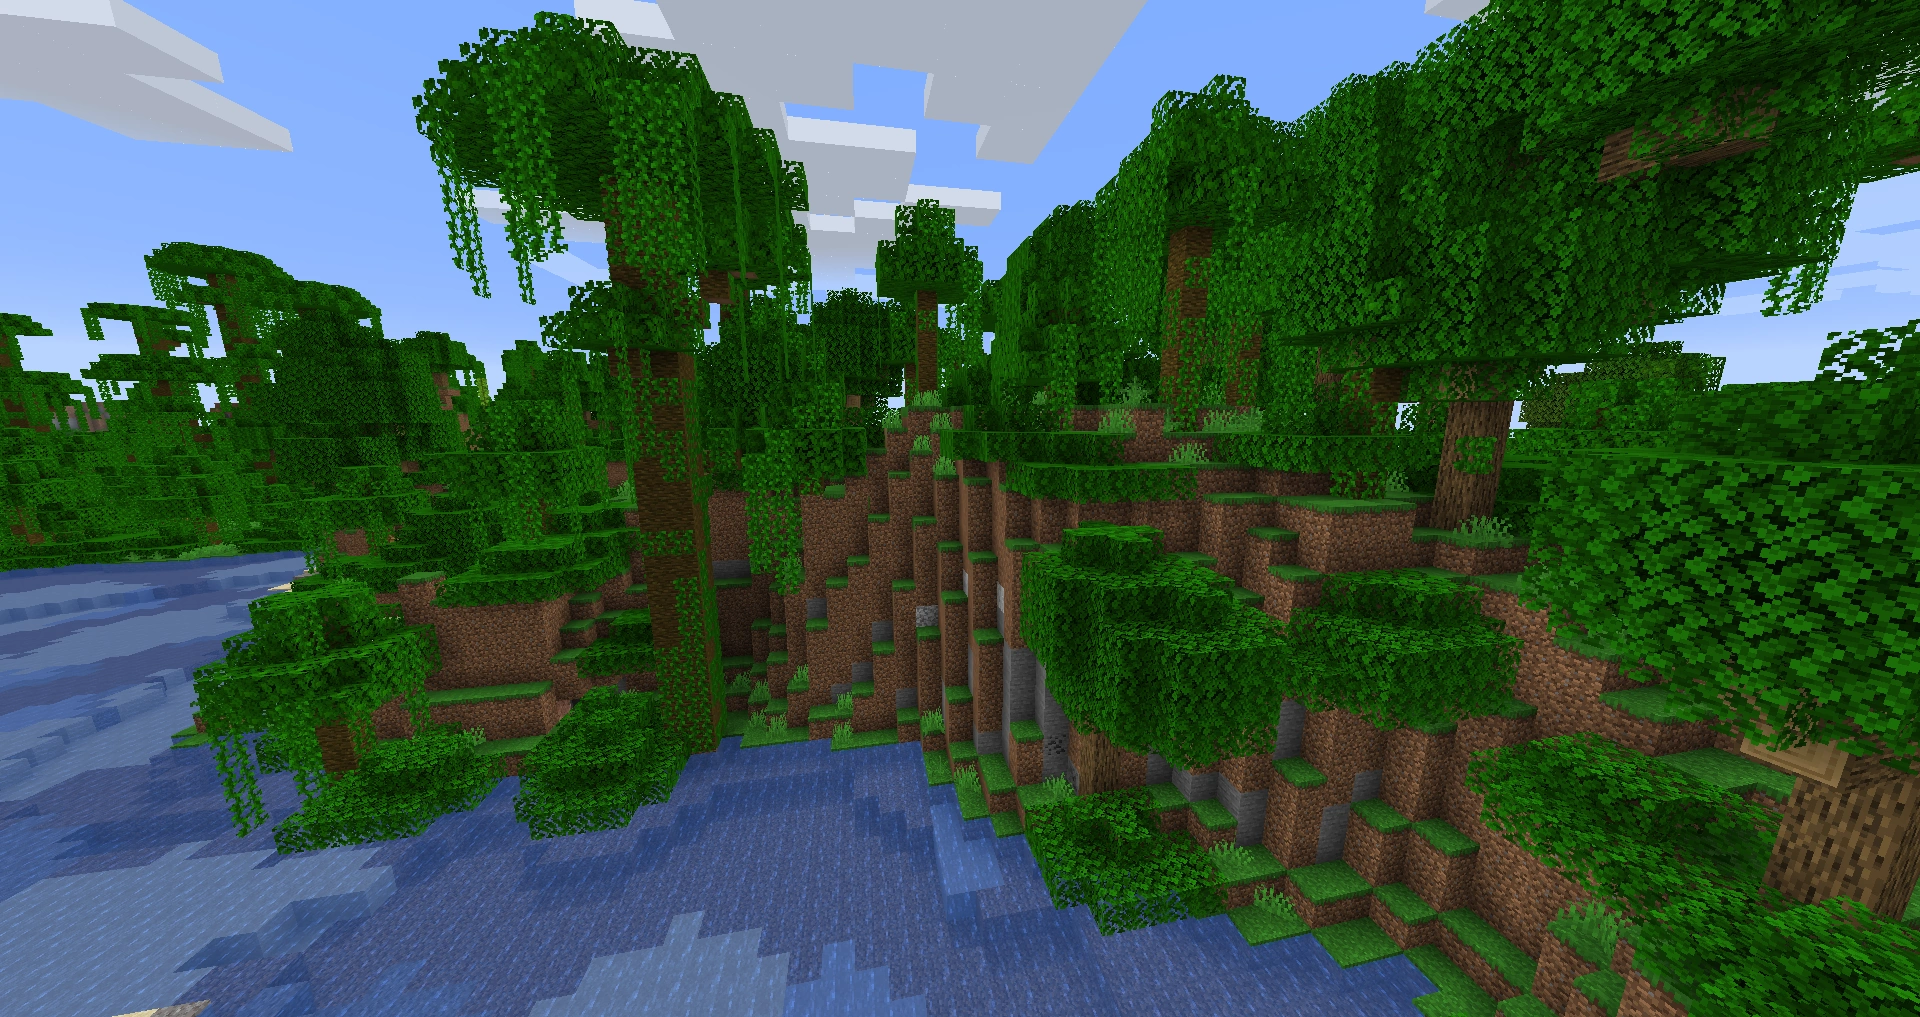
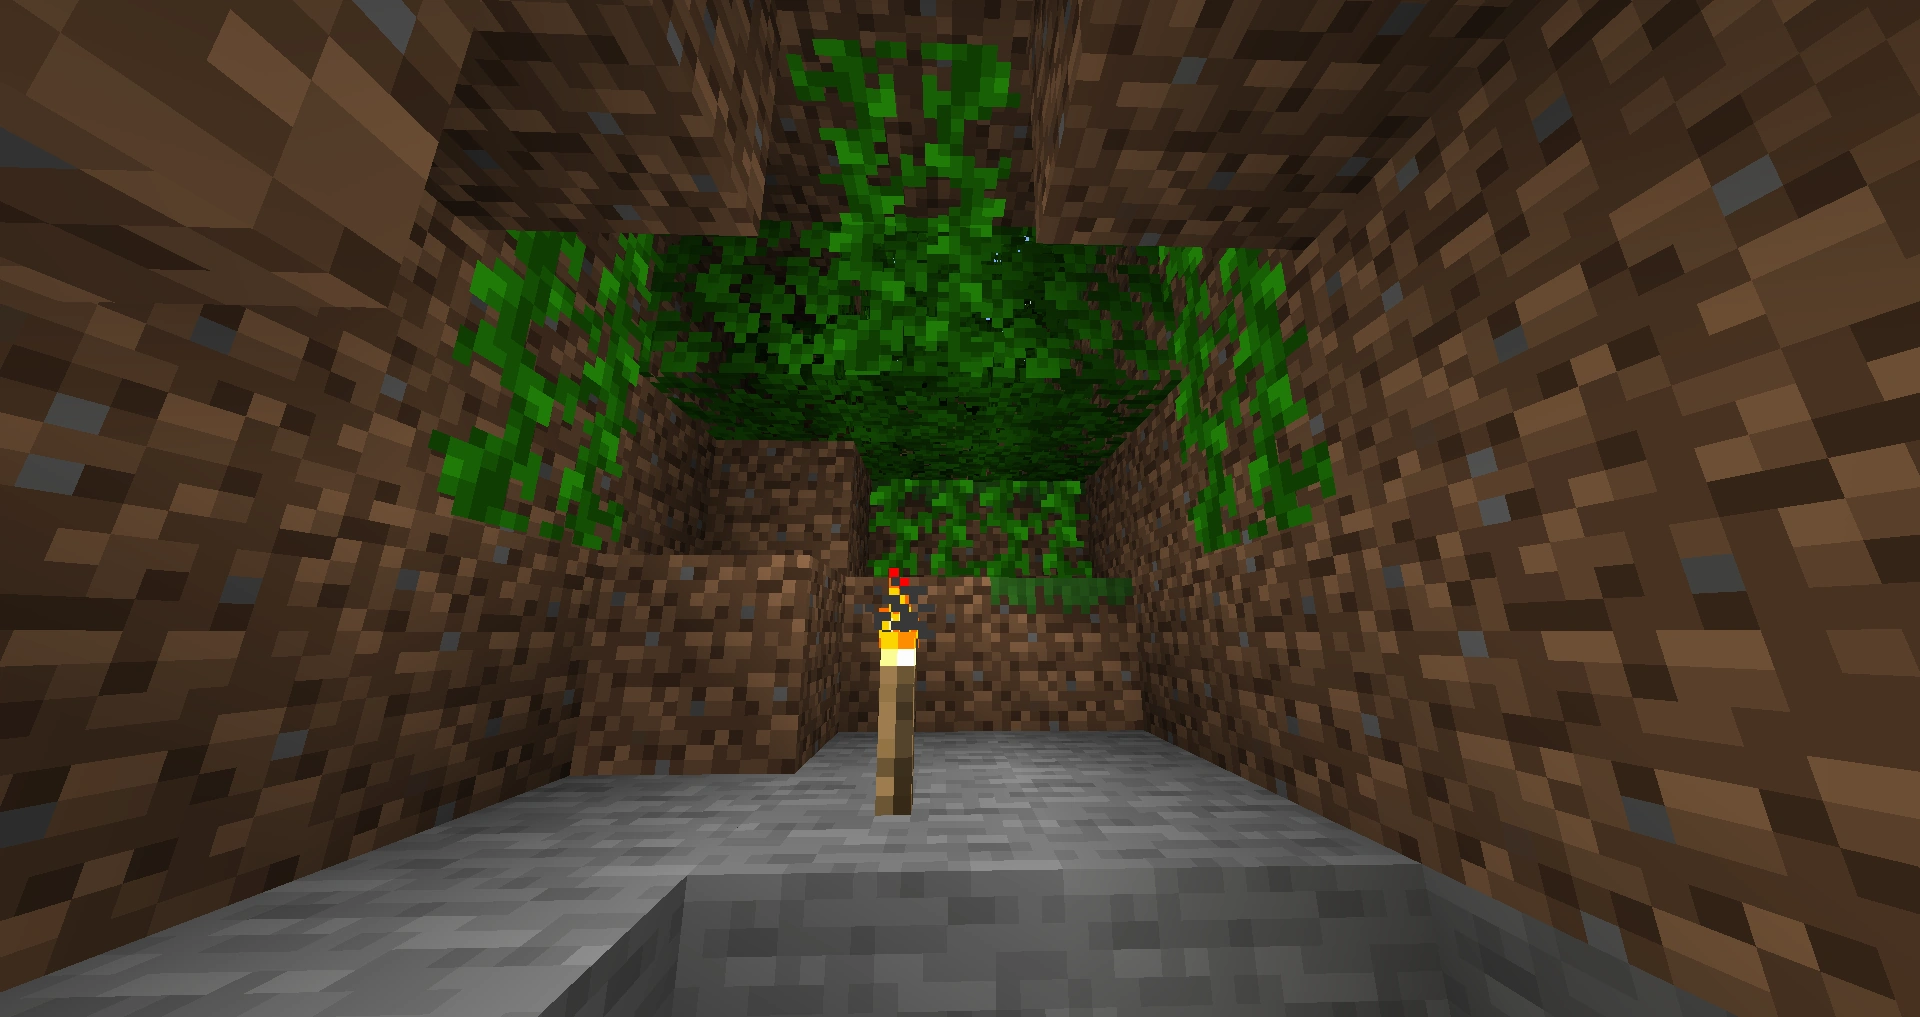
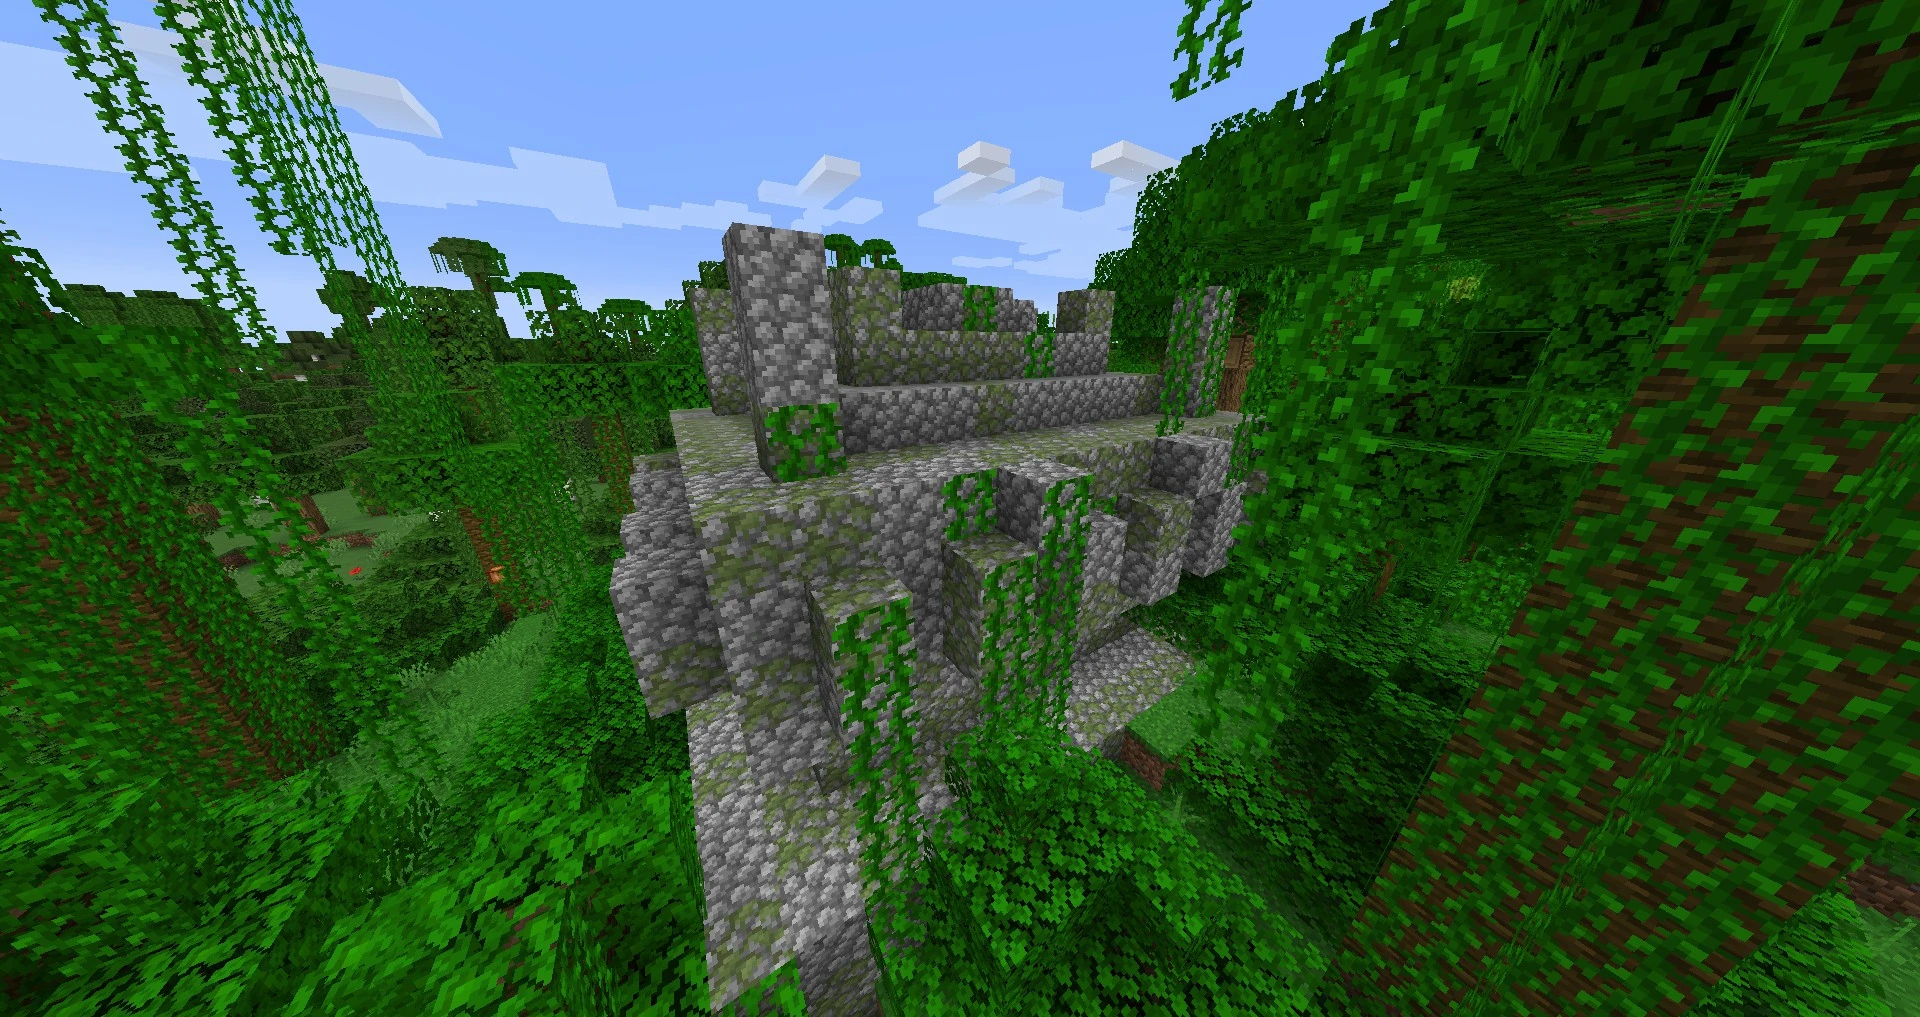