Organization is a very important habit to get into in Minecraft. Organization helps with finding things quickly and easily, especially later in the game when you have collected a lot of materials. It takes a long time to find what you need when it is cluttered up in chests. This tutorial is geared more towards people that prefer to store items in specific categories.
Storage
Early on in the game, you find that one double chest will be able to fit most of your items, carrying most of your wood, weapons, and tools. However, to progress further in the game, you will eventually need to make storage rooms with categorized chests to store items. Chests and shulker boxes are some of the most important blocks in the game. Here are the basic steps for organizing everything into a good sense of order.
- Make at the very least 10 or 12 double chests.
- Build a large room for the chests. If you are tight on space, you can embed some chests into the floor or make chest “shelves”. Note that it is possible to stack chests directly on top of one another. You can also, as of Java Edition 1.13 sneak and place chests right next to each other. If you don't have 1.13, or are on Console Edition or Bedrock Edition, and you want chests right next to each other, alternate double chest, double trapped chest, and so on. This will allow you to have them next to each other.
- If you are not tight on space, you may want to place signs or item frames with the item you will place in the chest next to, above, or on the chests for easy categorization. To place a sign or item frame on a chest, place the sign or item frame while sneaking.
For people that just started playing, here are some tips:
- Put your chests in a room, not out in the open.
- Place chests with valuables like iron ingots, gold ingots, and diamonds, or rare things like saddles, glowstone, and enchanted items, in special, impenetrable places.
- Don't make conspicuous rooms for rare items in multiplayer.
- Group items together inside chests (don't put things in at random).
- If need be, creeper proof your storage facility with obsidian, layers of dirt, etc. Make it as sturdy as possible! Don't forget to light up the room so mobs can't spawn inside.
- Cats can jump onto chests and prevent the player from using it. Don't let your pets in!
- If you have a lot of iron, gold, lapis lazuli, redstone, emeralds, diamonds, bone meal and/or coal, craft them into their respective blocks to allow for more compact storage.
- Different kinds of logs, wooden planks, saplings, wool, leaves, slabs, stairs, sandstone, mushrooms, tools, food, seeds, music discs, and stone bricks will not stack. Keep this in mind when organizing.
- Chests will not open with a block on top (except transparent blocks like torches and glasses, and non-full blocks like slabs and other chests). You can place upside down stairs or half slabs to change this.
- Label your chests! It will help you later in the game when you have many more items.
For people that have played a while, here are some extra tips:
- Place an ender chest in your storage room. On singleplayer worlds you can keep some basic supplies to share between your bases and on multiplayer you can use it to store valuable items.
- Once you have killed the ender dragon and explored the outer end islands, you will be able to store items in shulker boxes, which are much more compact than chests. You may want to use this storage system design:
Your storage room is, more or less, symbolizing everything you have accomplished in that world. If you are careless, you will have a difficult time expanding and advancing.
Categories
Once you have completed your storage room, you'll want to be consistent with your organizing across all the singleplayer and multiplayer worlds that you play on. One of the main things to do is to come up with a few general categories for every item and block in main categories:
| Category | Blocks/Items | Examples |
|---|---|---|
| Natural | Plants, weeds, and stuff you'd find in the natural world | Saplings, Cacti, Tall Grass, Leaves, etc. |
| Wood | Anything that has something to do with wood | Logs, Planks, Sticks, Fences, Boats, Signs, etc. |
| Mob Drops | Anything a mob might have dropped that is not a food or a potion ingredient | Rotten Flesh, Eggs, Ender Pearls, Feathers, etc. |
| Food | Any type of food | Porkchops, Beef, Chicken, Bread, Carrots, etc. |
| Stone | Anything that has something to do with stone | Stone, Cobblestone, Stone Bricks, etc. |
| Colorful | Anything that has many colors | Wool, Terracotta, Dyes, Glass, Concrete, etc. |
| Combat | Any kind of weapon | Armor, Swords, Bow, TNT, Flint and Steel, etc. |
| Minerals | Anything mined out of the Earth | Coal, Iron, Gold, Diamonds, etc. |
| Tools | All tools that you have but do not need at the moment | Hoe, Shovel, Fishing Rod, etc. |
| Mining | All tools that you need when going down into a cave | Torches, Pickaxes, Buckets, etc. |
| Brewing | Anything that has something to do with brewing/potions | Potions, potion ingredients, Cauldrons, Brewing Stands, etc. |
| Nether | All blocks and items pertaining to the Nether dimension, unless used for potions, in which those items would be in another category | Netherrack, Nether Bricks, Nether Brick Stairs and Slabs, Gold Nuggets, etc. |
| End | All blocks and items pertaining to the End dimension | End Stone, Chorus Plants, Shulker Boxes, etc. |
| Mechanism | Anything that has something to do with redstone | Redstone, Redstone Torches, Redstone Repeaters, Piston, etc. |
| Miscellaneous | All other things that do not fit into any of the other categories | Books, Enchanted Books, etc. |
| Mass Junk | After a while, many players will accumulate several double chests each of other things | Dirt, Gravel, Sand, etc. |
| Other Junk | Stuff you will rarely need | Damaged Armor, Tools, etc. |
| Trophy Items | Items that are hard to obtain, rare items | Dragon Egg, Nether Star, diamonds, etc. (diamonds can also be put in Minerals) |
| Shared Stash | You only need this chest if you are doing this on a multiplayer server where you are bunking with friends. This way, they will know if it is okay to borrow some dirt, or if all of your stuff has an invisible “HANDS OFF MY COCK!” sign on it. | |
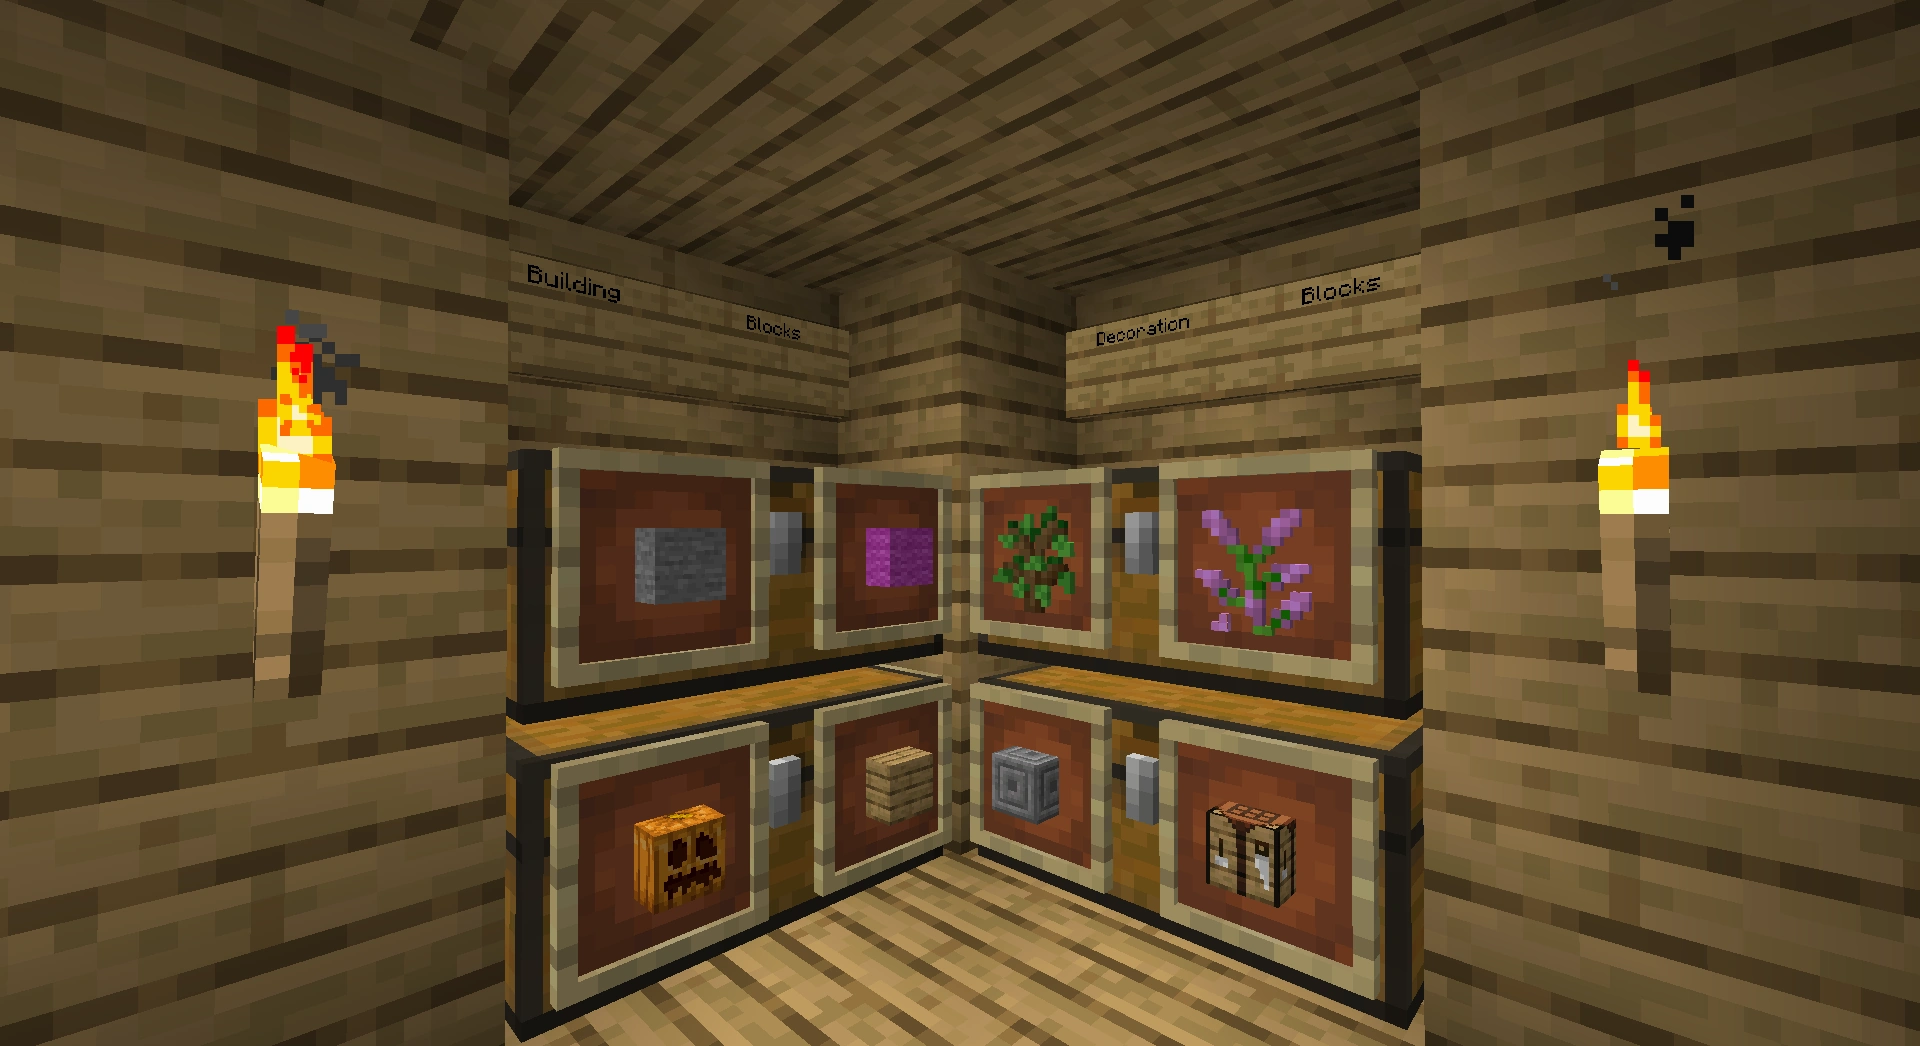
A section of a storage room that has its chests sorted by their position in the creative inventory.
Remember that many items can fit in multiple categories. For example, most types of food would also fit into the mob drops or natural categories. You will need to decide what categories have priority over others.
Another idea for organization is to organize each chest based on where they are in the creative inventory. For example, use the labels in the creative inventory like building blocks, decoration blocks, redstone, tools, combat, and others. Note that this will not work if you have a huge supply of items, but if this is the case, you can divide each category between two different chests.
The exact categories you decide to organize items will vary between players–organize them in a way that is convenient for you.
If you have tons of stacks of many blocks and items, having a different chest for a different block/item ID would help you to store huge amounts of items. Storing huge amounts of items this way, however, requires huge amounts of space.
At the entrance of your house or base, you may want to have a temporary chest that can be used for anything, so you can go farming while you keep your mining or building the setup in an easily accessible place.
It is also helpful to have a chest for items that need to be sorted. This will discourage you from simply putting items in random chests when you need to empty your inventory quickly.
Contents
The setup of how you put items in a specific chest is important too. Putting them randomly is going to make everything a mess, so you should group the same items and blocks together. Create rows of the same thing or section off the chest to specific items. One possible way to do this with multiple tools that have been used before, with differing durability, is to sort them like this: first, sort them by tool, sectioning them off in the chest vertically by pickaxe, shovel, hoe, etc.; then, by what they're made of–any diamond tools go to the top, while stone or wood goes to the bottom. Within the spaces of the tools, the new ones would be higher up than the used ones. For example, a new iron pickaxe would be higher than the used ones, but still not higher than a used diamond pickaxe. How you sort your items in the chests can save your sanity in the future.
Inventory
Cleaning up your inventory and hot bar can also benefit players by making unofficial hot keys. This way, you don't have to look at your hot bar to select what item you want and you can find an acceptable limit for the extra resources you carry. Inventory management is crucial if you want to be an efficient player.
The following are suggestions only. There is no one way to organize an inventory, and if you are overflowing with items, you may need to adjust your item locations.
Suggestion 1
This is a method of inventory organization that is capable of changing depending on the task at hand. It uses a general layout with easy access to many items and utilities, but also leaves room for personalization.
General Layout
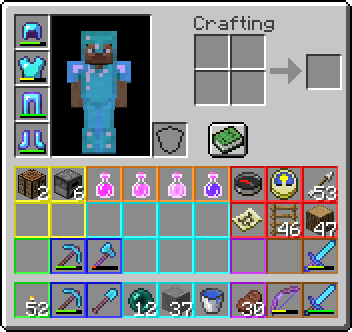
The screenshot to the right shows the different "zones" in the inventory. The color codes are explained below:
| Category | Items |
|---|---|
General Utilities |
Recommended items: compass, clock, arrows, wood, ladders, and an ender chest (after you get a Silk Touch pickaxe).
Could be swapped with: maps, ender pearls, or more potions. |
Potions |
Recommended items: Potions of Regeneration, Fire Resistance, and Night Vision.
Could be swapped with: any potions. |
Crafting Utilities |
Recommended items: crafting table, furnace, and extra armor.
Could be swapped with: Job-specific items (redstone components, building blocks, etc.) |
Lighting |
Recommended items: torches
Could be swapped with: glowstone |
Tools |
Recommended items: pickaxes (work pick and a spare), shovel, and an axe.
Could be swapped with: any tool, depends on what you're doing. |
Work storage |
Recommended items (Hotbar):
Could be swapped with: Any job-specific items (ex. leave empty for mining, so you have space for minerals.) It is recommended to always carry a water bucket. |
Food |
Recommended items: Any plentiful food source.
Could be swapped with: golden apples, Instant Health potions. |
Weapons |
Recommended items: sword, backup sword, and bow.
Could be swapped with: a fishing Rod, or more swords/bows. |
Slot Switching
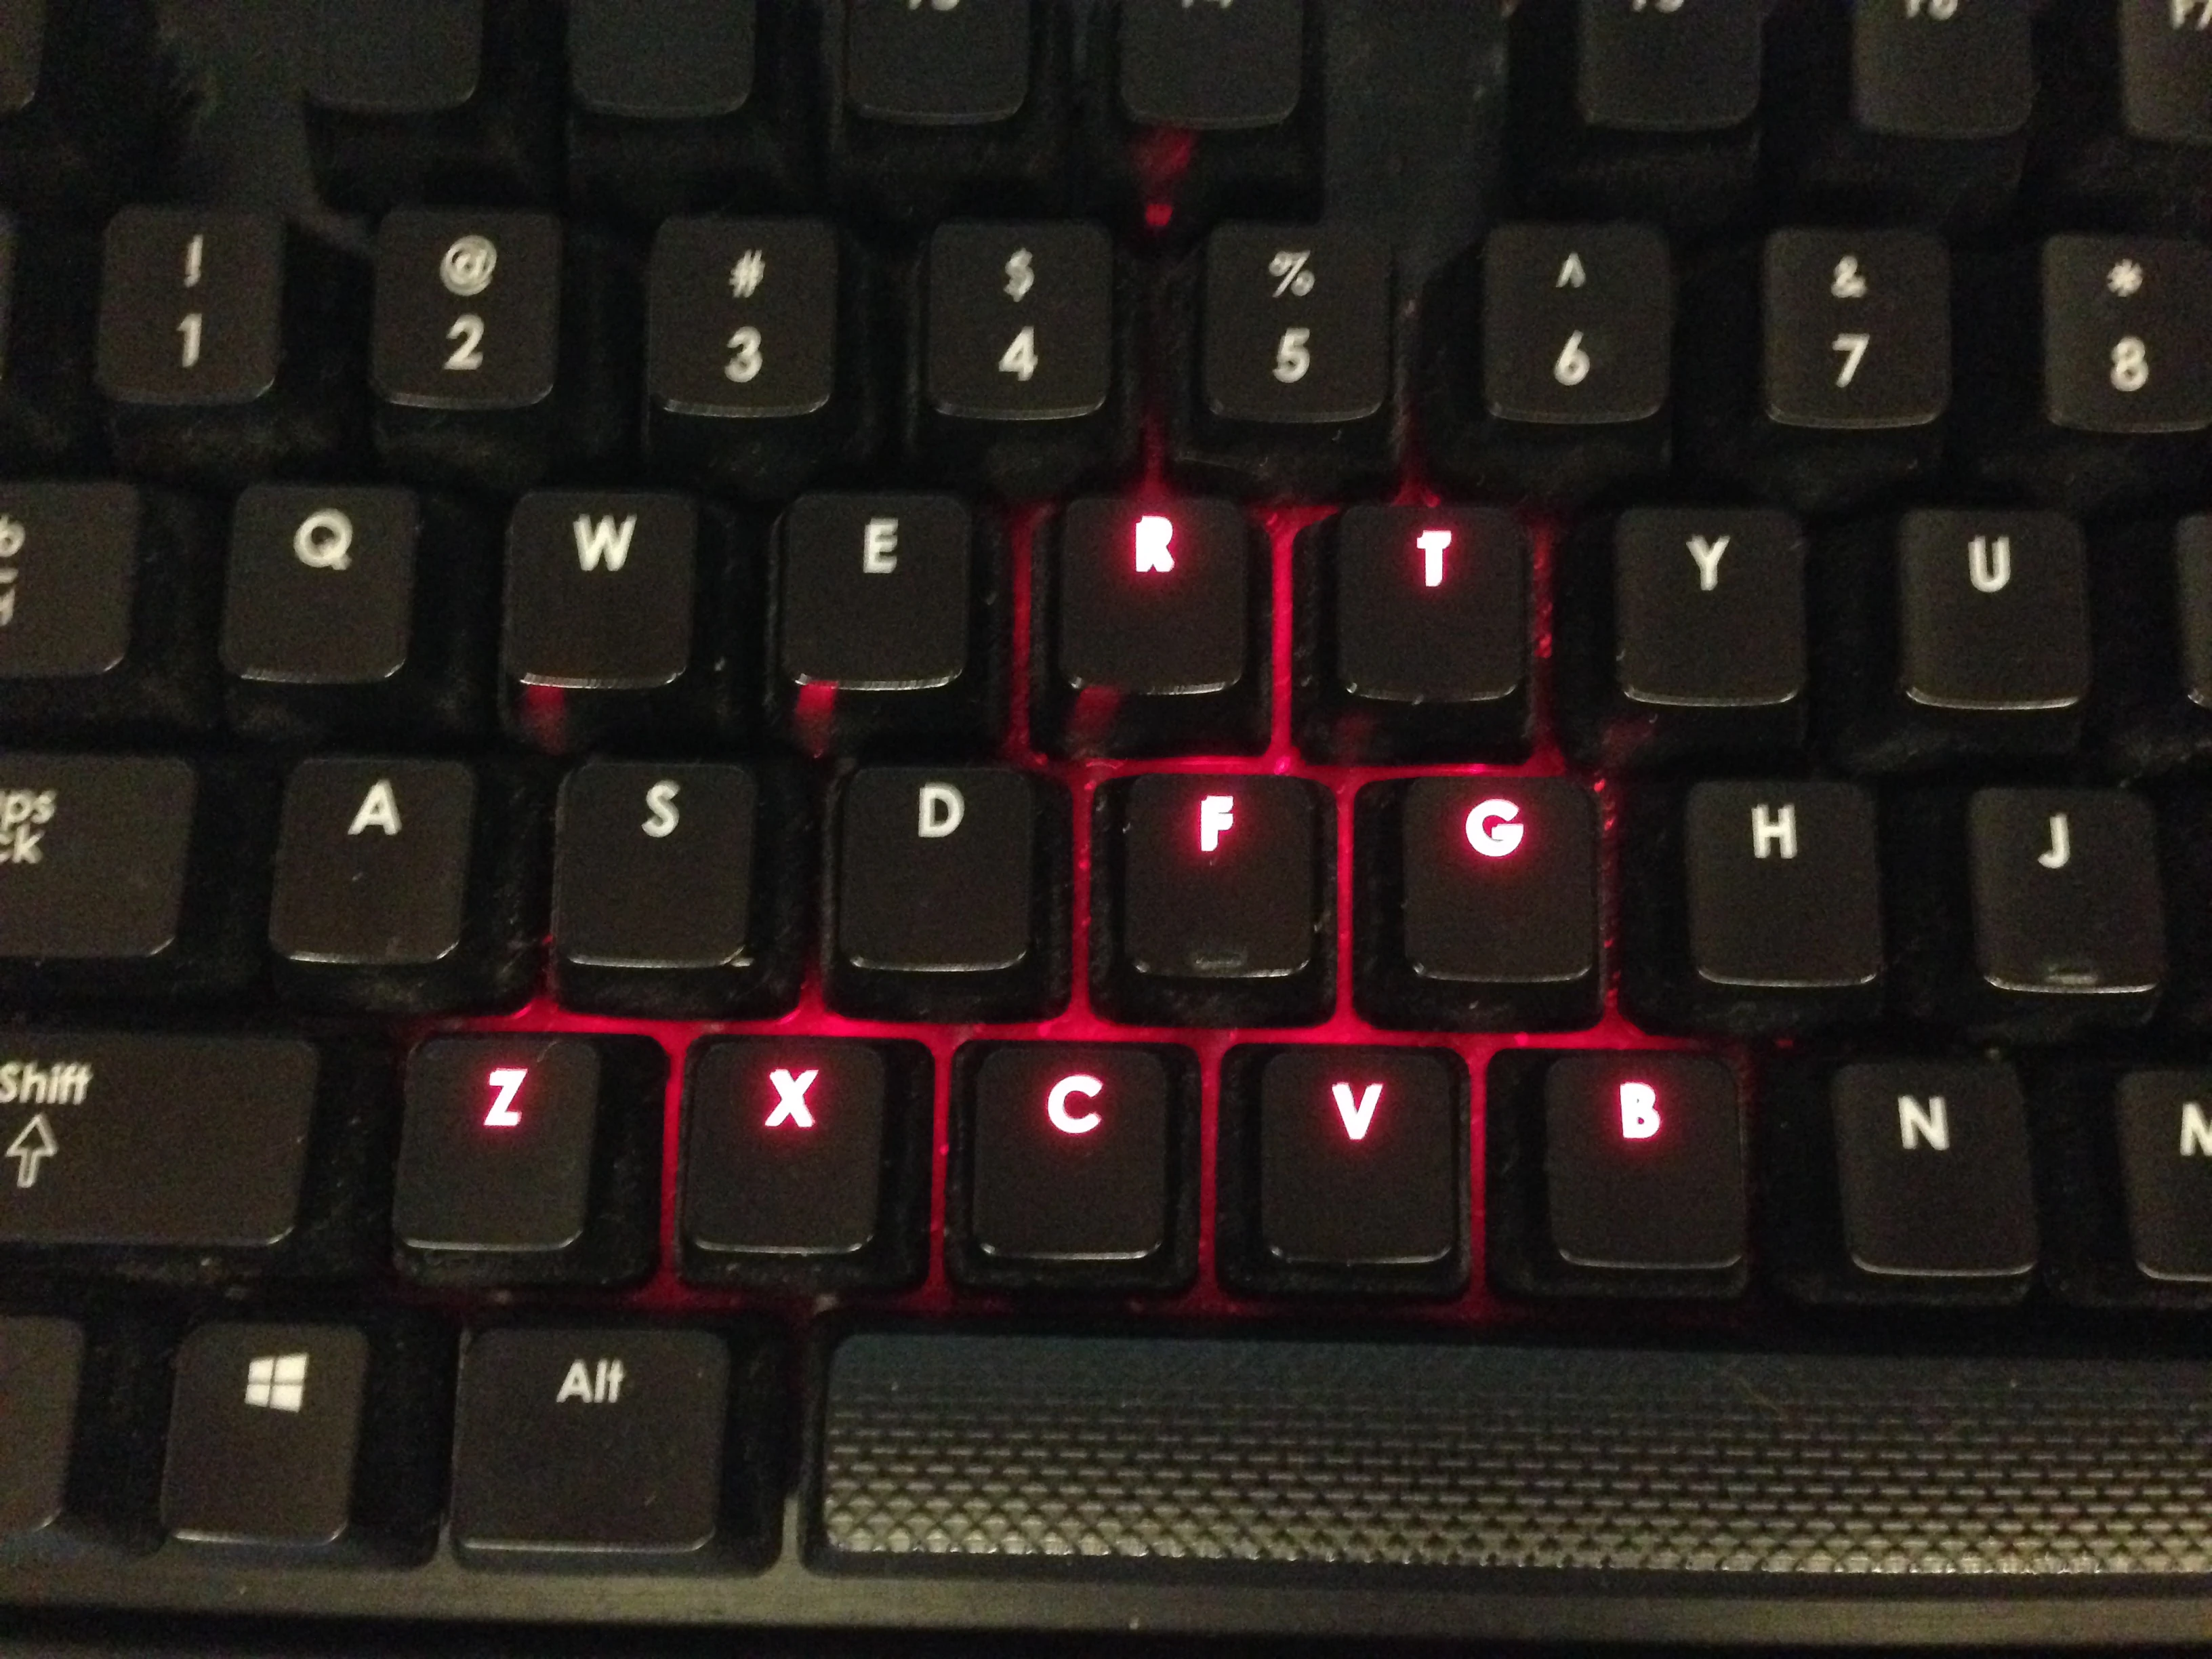
The keys used in this suggestion.
There are two ways you can navigate the hotbar: using the mouse wheel to switch between items, and using keyboard keys. The mouse wheel is better for beginners, but it takes longer to scroll to an item and you have a high chance of skipping over the item you want. The keyboard keys can allow to you to switch to any slot on the hotbar from anywhere, but requires you to memorize the keys and you have limited mobility in the split second you switch slots.
Here are the recommended keyboard bindings to and what fingers are assigned to them:
| Slot | Key | Finger |
|---|---|---|
| 1 | T | Index |
| 2 | R | Index |
| 3 | G | Index |
| 4 | X | Middle |
| 5 | C | Index |
| 6 | V | Index |
| 7 | B | Index |
| 8 | Z | Ring |
| 9 | F | Index |
Tips and Tricks
- Hotkeys
- T is for torches.
- C is for cobblestone.
- F is the easiest key to press, so having your sword here is good practice. However, you will need to change the switch-to-off-hand hotkey.
- You can hover over an item stack in a chest or in your inventory and press a hotkey, and that item will swap with the item currently on the hotbar slot you selected. If nothing is on the hotbar slot, that item will move there.
- You can hover over an empty square in an inventory and press a hotkey, and the item in that hotbar slot will jump to where your mouse pointer is.
- Mouse Wheel
- The water bucket is in the middle.
- The sword is actually only one slot from the torches and two from the pickaxe.
- Both
- You should have your sword selected when you're not using any other items.
- Putting things in their places even before you have the items to occupy every space will get you used to where everything is, even early game.
- Having a crafting table and furnace with you at all times lets you be prepared in case your pick breaks while mining or other things of that nature.
Suggestion 2
| Slot | Item | Description |
|---|---|---|
| 1 | Sword | The 1 key on the keyboard is usually the easiest key to reach and is right next to your pickaxe if you run into a mob or player while mining. It might also make sense to put it in slot 2 to be closer to your "W" finger.) |
| 2 | Pickaxe | Works well with the sword if you are fighting and need to tunnel away. |
| 3 | Shovel | Near the pickaxe and sword. |
| 4 | Axe | For cutting down trees and emergency fighting, as axes are slower to recharge than swords. If you don't need an axe, put arrows to know how many more you have for shooting, or a specialized pickaxe, such as Fortune or Silk Touch. |
| 5 | Bow | For shooting mobs, players, or wooden buttons. |
| 6 | Cobblestone | There really is no excuse not to use this for building pillars, emergency walls, building, unless you also have end stone, which is more resistant to TNT. Also good for miscellaneous things such as a map if exploring. |
| 7 | Water Bucket | For when you fall into lava, fire, or a skeleton or a player with the Flame-enchanted Bow. Also gets an enderman to move away by hurting it. |
| 8 | Food | Extremely convenient when fleeing battle as it is only two mouse scrolls from your sword. Or can be a clock, to time those battles. |
| 9 | Torches, Potions, or empty | For things you pick up. |
Suggestion 3
This layout is designed for instant access to items you might need quickly, and places items with similar purpose next to each other so they can be accessed with a single scroll. It is also very flexible and has several slots that can be changed without sacrificing the functionality of the layout.
| Slot | Item | Description |
|---|---|---|
| 1 | Pickaxe | This layout places your pickaxe next to your shovel and torches. (The other most common things you will need when mining or caving) |
| 2 | Shovel | It is wise to replace this with a fire resistance potion when travelling to the nether because you won't need a shovel there unless you are collecting soul sand, and because it is easy to reach in case you fall into lava. |
| 3 | Sword | Slot 3 is the easiest to reach with your index finger while backing up with your middle finger. This strategy is efficient when you encounter mobs by surprise. |
| 4 | Dirt, Cobblestone, or another solid block. | Also easy to reach for emergency situations like a lava flow and very convenient for normal use. |
| 5 | Bow | Relatively close to your sword, but out of the way. Bows work best when you are probably several blocks away and not in immediate danger. |
| 6 | Water Bucket | Great for when caving or mining near bedrock to take care of lava. |
| 7 | Potions | This can be anything you might need for the task at hand. |
| 8 | Food | Important to have on the bar, but out of the way. It may be beneficial to put it in you off-hand to save space for something else. |
| 9 | Torches | One scroll away from your pickaxe for easy access while mining. |
Tips and Tricks
- Put blocks underneath your chest and put that specific block in the chest (dirt, cobblestone, iron,etc.). For minerals make a block of iron, gold, or diamond.
- You can use item frames to label your storage room. (Although not recommended due to larger server/client load)
- You can place trapped chests and normal chests next to each other to save space. Though because of 1.13 you no longer need to do this and can place just regular chests next to each other.
- For better and more compact chest organization (for chest labeling), hold down the Sneak button (Left Shift by default) and, while holding a sign or item frame, place the sign or item frame on the chest. When placing an item frame on a chest, look at the item frame and place the item or block in the frame. This trick is handy for better organization and prevention of getting confused of what goes where.