Pillager outposts are the second illager-filled structure added to the game, after woodland mansions. They are flooded with pillagers, both inside and in the surrounding area, making it a difficult challenge for any player to conquer it. Note that this can be achieved at any point during the game.
Reasons to defeat an outpost[]
- To obtain the Bad Omen effect to start a raid, without having to wait for patrols to randomly spawn.
- To obtain goat horns without having to find a goat.
- To obtain allays, which are extremely useful for item collection and sorting.
- To obtain the 8 ominous/illager banners on the watchtower, without having to defeat a raid or multiple patrols.
- To obtain some carrots and/or potatoes to start your carrot and/or potato farm.
- To get some easily accessible wool from tents that may generate outside the outpost.
- To convert the outpost into a raid farm, which yields a variety of loot in large quantities.
- For the challenge.
- To obtain the sentry armor trim, which is exclusive to this structure.
Finding an outpost[]
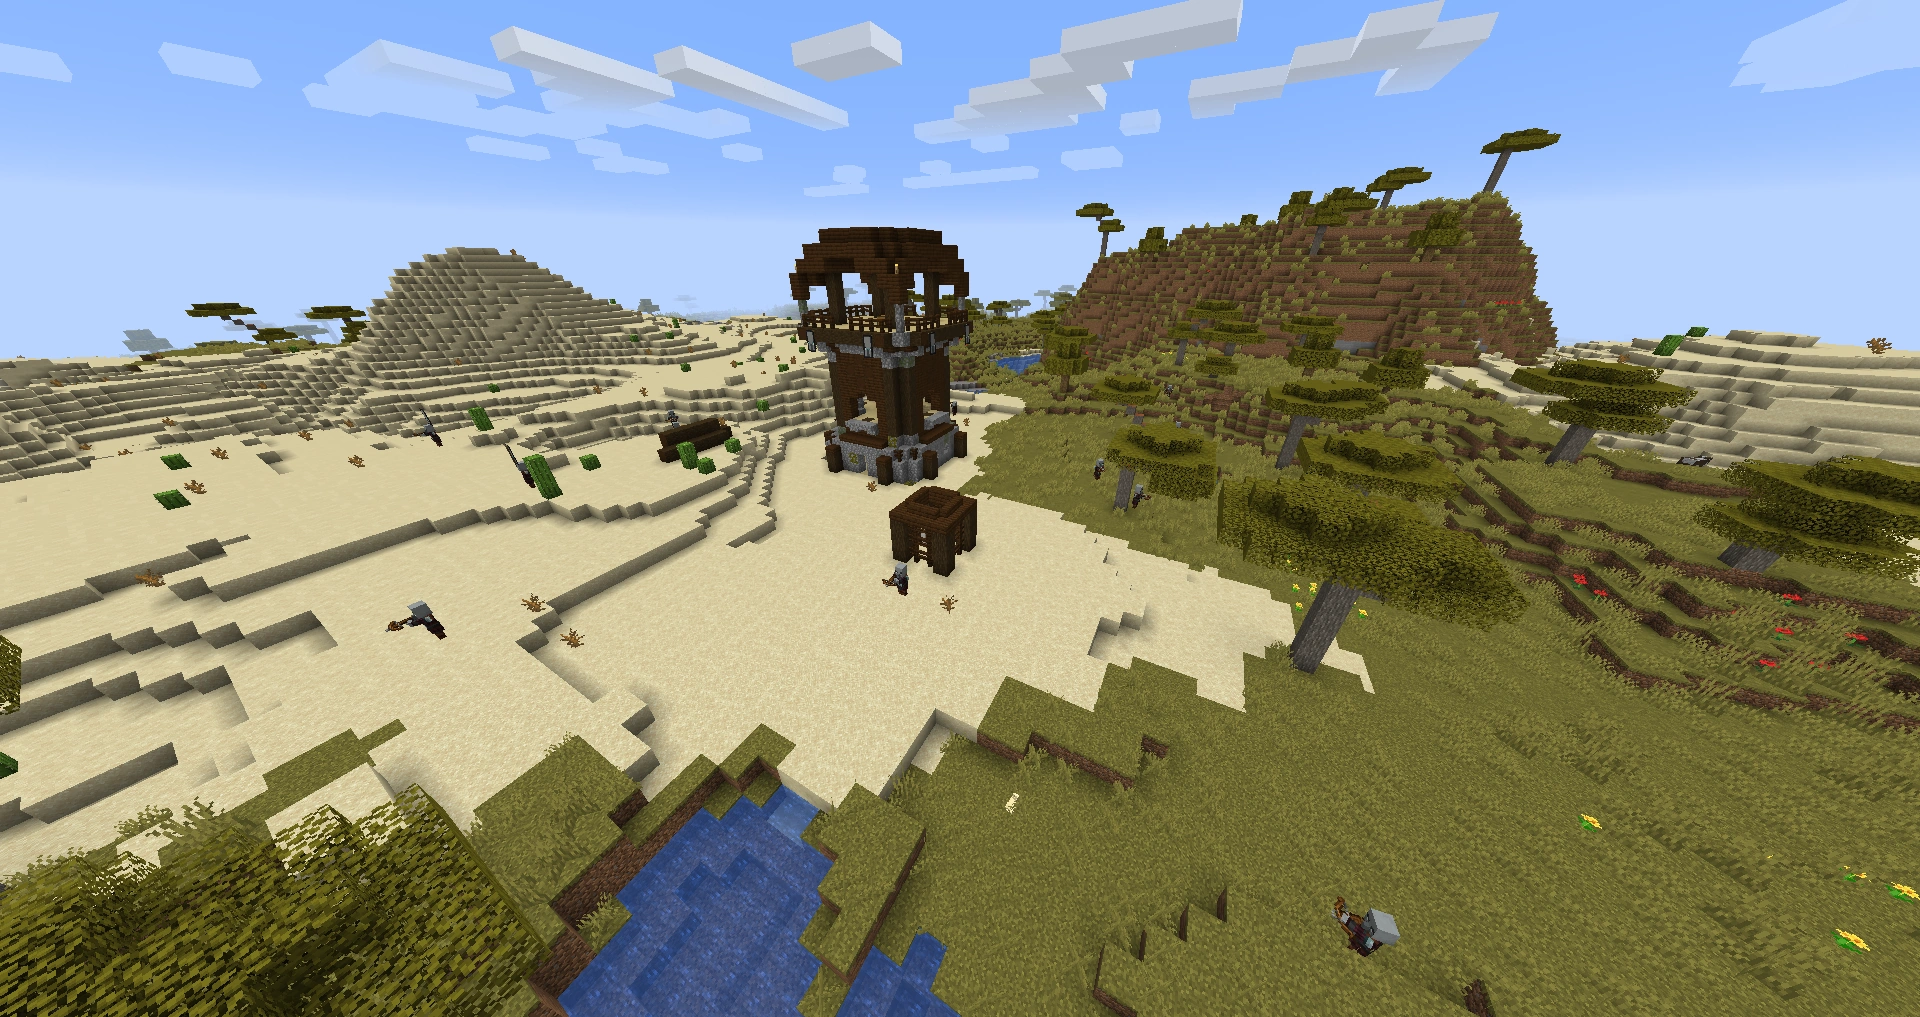
Pillager outpost located in desert biome.
Pillager outposts can be found in any biome that a village can, and can additionally generate in all mountains biomes. Despite that they are often found next to villages, this is simply a coincidence, as the generation of these two structures is completely independent. The spawning of pillager patrols is also unrelated to the location of outposts, so do not assume that a patrol means an outpost is nearby.
Items needed[]
Because a pillager outpost can be found anywhere, it can be hard to prepare. Ideally, a player should have:
- An iron/diamond/netherite sword, preferably enchanted with a high level of Sharpness, Fire Aspect, Sweeping Edge[Java Edition only], and Looting if possible. Avoid using weapons enchanted with Knockback as pillagers wield ranged weapons. You have an advantage if you can keep them close and force melee combat.
- A bow, preferably enchanted with Infinity and a high level of Power and Flame if possible. (Punch can both help and hinder you because pillagers also use ranged weapons).
- Several arrows, multiple stacks if using a crossbow or a bow without Infinity (In Bedrock Edition, pillagers drop arrows, so this is less of a problem), and if you have Infinity, you need only one Arrow.
- A full set of at least iron armor, preferably enchanted with Unbreaking and Projectile Protection, or just Protection
- A shield with Unbreaking, or two unenchanted shields (note that pillagers with piercing crossbows can still damage you with your shield raised)
- A crossbow, which can be used instead of or alongside a bow. If possible bring one with Piercing and one with Multishot, both with Quick Charge. Multiple required for machine gunner tactic (see § Tactics below)
- Highly nutritious food like steak, cooked salmon, or cooked porkchop
Optional:
- Potions such as Strength and/or the Turtle Master (invisibility is ineffective in Java Edition)
- Enchanted or normal golden apples
- A trident with Loyalty III, and if wanted Channeling and/or one with Riptide (water must be nearby or you need many water buckets), as another ranged weapon option
- A lava bucket
- TNT with flint and steel or fire charges to ignite it (these can also be used to burn the outpost down)
- Snow blocks and/or iron blocks with carved pumpkins to create golems to help fight (sometimes pillager outposts have targets with carved pumpkins on them, which you can use)
- Ender pearls
- Totem of Undying
- A tamed wolf and/or fox, preferably multiple, to help fight
- If a crossbow is being used, bring firework rockets crafted with several firework stars for ammunition and a crossbow
- A milk bucket to remove the bad omen effect one gets after killing a captain.
Outpost surroundings[]
Pillager outposts typically have smaller buildings around it. These can be used for cover. If a cage has an iron golem in it, let it out so it can help you fight. If it survives, do what you want with it, such as using a lead to bring it to a nearby village.
Tactics[]
Sniper[]
It's possible to go around with a ranged weapon and pick off all the pillagers from a far. If using a crossbow, don't fire fireworks unless you're sure the fuse time is right and you're firing at a large group. Once the coast is clear, go in the outpost, deal with any pillagers inside, kill the outpost captain if you haven't already, and collect your loot. This tactic takes the longest.
Blitzing[]
With good armor, this tactic can be effective. Run in with your shield and sword, blocking arrows and hitting pillagers nearby as you go. Run into the building, grab what you want, kill the captain, and leave. Once you're at the top of the outpost, you can use the sniper tactic to get rid of the rest if you like, or just leave. Ender pearls can help in this tactic.
Machine gunner[]
This tactic is expensive and not always reliable but can work. Load your entire hotbar with loaded crossbows, get into relatively close range, and as soon as you fire a crossbow draw your next one. This allows you to fire multiple arrows quickly, but it is ineffective against large groups unless most or all of the crossbows are enchanted with piercing and/or multishot. Also, it takes a long time to reload all the crossbows, even if some or all have quick charge, so you may be able to do this only once. It can, however, be combined with the blitzkrieg tactic as you're charging in, as after you unload the crossbows you can equip a melee weapon and have a shield in your offhand the whole time. This tactic is ineffective at long range due to the time it takes to range the target is about the same as the reload time for a bow or crossbow or the time it takes for a loyalty trident to return. Overall, this tactic would be better for a single target with a large amount of health, like a ravager, ender dragon, or wither. Crossbows could also be loaded with fireworks for more firepower.
Cowboy[]
Go around the pillager outpost, getting all the pillagers to follow you. Because they clump together, they might friendly fire while trying to shoot you, which can further assist you. Once you have all or most of them behind you, you have several choices as to how to get rid of them all in a short time.
- You can pour lava down where they are standing, melting them all. The lava destroys the pillager drops and pillagers have good enough AI to avoid lava.
- If playing in Java Edition and have a sword with Sweeping Edge, you can go close the group and damage large amounts of pillagers at once with your sword, raising your shield while your weapon recharges. When the pillagers are about to fire raise your shield to ricochet the arrows back at them. This can work in Bedrock, but not as well since there is no sweeping edge, but as a benefit, there is no recharge.
- You can use a crossbow with piercing arrows or multishot fireworks to hurt and kill several pillagers at a time
- You can lure a creeper or use TNT to blow up the pillagers once they are together. Multiple blocks of TNT can be more effective but can also destroy the pillager drops.
Minimalist[]
Alternatively, a pillager outpost can be conquered using nothing but a water bucket (the person who proved this possible also brought bread, but it is not absolutely necessary to bring food to conduct this strategy). This is not a reliable strategy, but can be done. The idea is not to be seen by the pillagers. It is a good idea to release the iron golem in the cage if it generates to distract the pillagers. Next, make it to the top of the watchtower and then use the bucket to wash any pursuing pillagers down the staircase. Collect the water after looting the chest and use the remainder (which should be flowing out of the building) to break your fall. This can be conducted early-game (as it does not require armor or weapons), but can be challenging.
Underground passage[]
Create a "mine" to approach the fort safely from underneath. Keep dirt/sand at all times in case you breach the surface or reach water.
Dive bomber[]
Similar to the minimalist method above, it is possible to build straight up with dirt at a reasonable safe distance with a water bucket in hand. Then build a platform above the outpost and place water directly above the center of the tower. If possible, also collect a bucket of lava (or just another bucket of water) for combat before dropping in, and keep dirt on hand for escape. Swim down to the roof of the outpost, break through the roof and drop either the water or lava down the stairs and collect your loot. Leisurely climb back through the ceiling with dirt and swim back up to the platform above. If you used lava, watch as the world burns. This is an admittedly labor-intensive method of defeating an outpost, and you don't get any pillager loot from killing pillagers, but it is a mostly foolproof strategy, and can also be done early game and requires only a bucket, and two to three stacks of dirt/cobblestone. This method is easier if there are hills or tall trees nearby. Stone tools and food may be useful but are not required.
Barricade[]
Quickly enter the outpost and run to the top level. Seal off the stairway and shoot the pillagers from there. Subsequently, work your way down.
Pillager deletion[]
Turn your difficulty into peaceful to get rid of all pillagers, but without gaining any drops or experience, and raids are not possible in Peaceful mode.
TNT[]
This uses a lot of TNT, and you should invest in a creeper farm to try this. Rush in and place TNT as quickly as possible around the base, and light one and sprint away.
Psychopath[]
Place a bed close to the outpost, free the iron golem from the cage, start killing the pillagers as if on a rampage, rush the outpost, clear floor by floor of pillagers until they are dead. Do not destroy your bed until all the pillagers are dead, as a lone pillager can kill you. This tactic can be useful if well executed.
Roof dropping[]
Build a bridge up to the top of the Pillager outpost. When you do so, get inside the top floor of the pillager outpost. Quickly seal off the stairway. Loot the chest and make your way up to where the bridge was on the roof, and quickly go down the bridge.
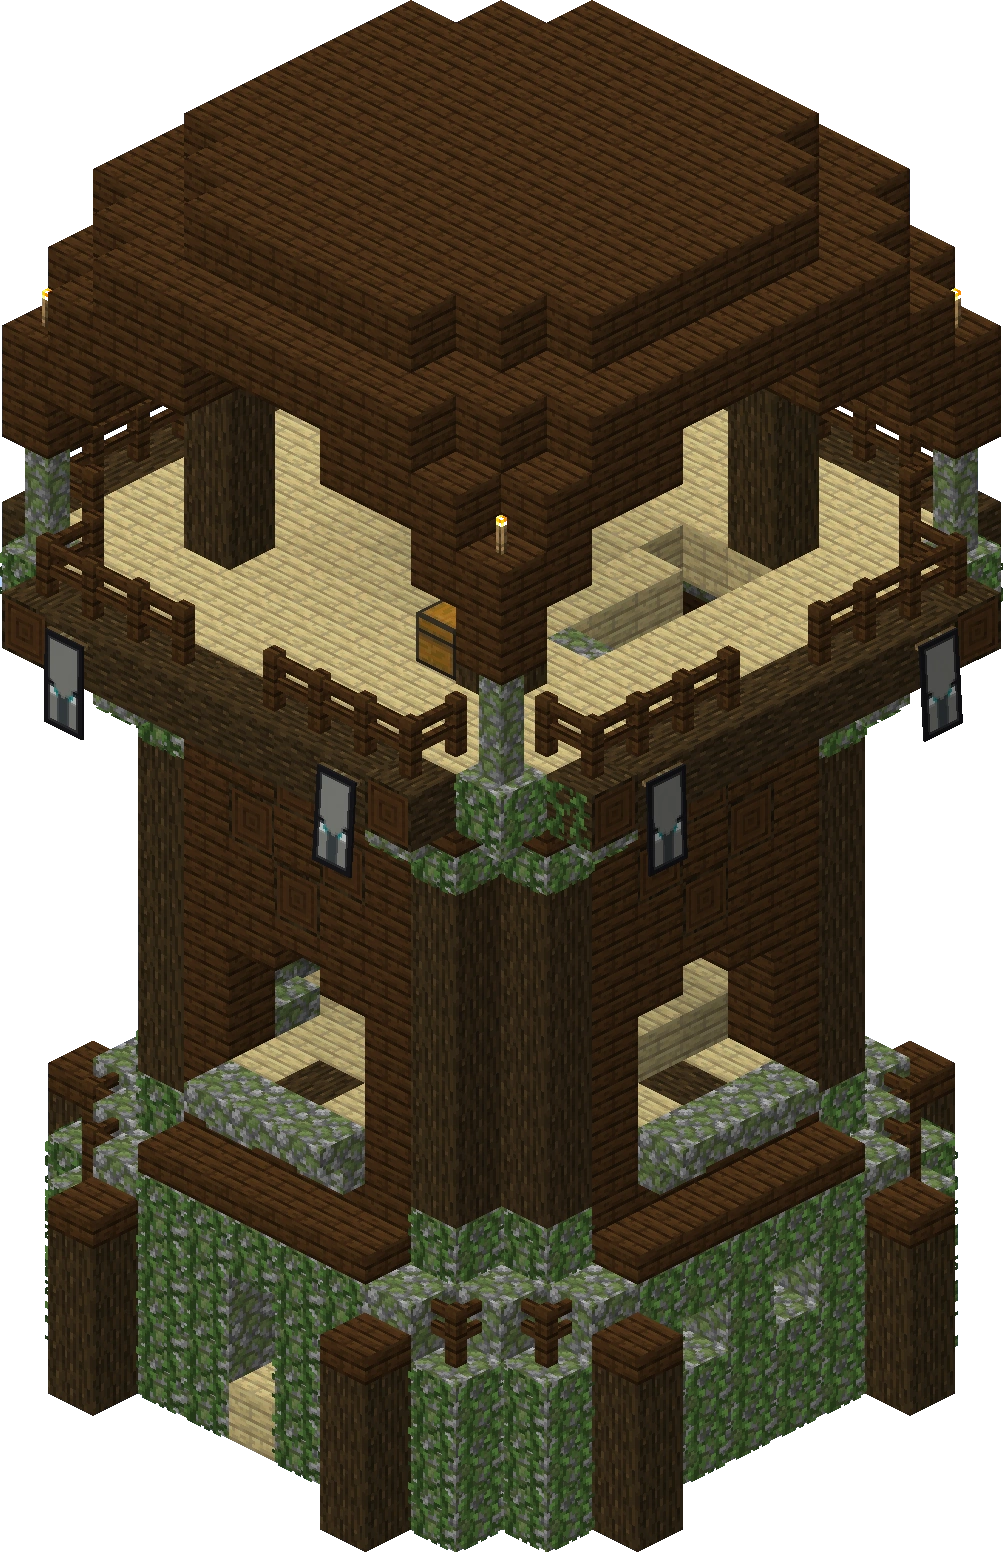
Structure[]
A pillager outpost consists of a 4 level watchtower with other smaller structures around it.
Structure blocks can be used to manually load pieces of the pillager outpost from the /data/minecraft/structures/pillager_outpost folder in minecraft.jar. To do so, set a structure block to Load mode, enter pillager_outpost/<structure_name>, and press LOAD.
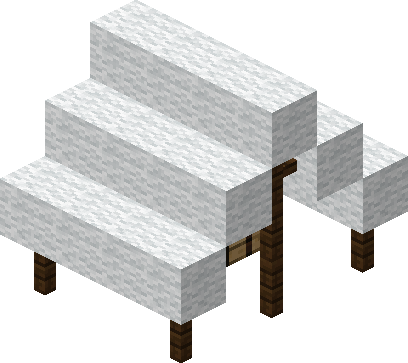
| Structure name | Description | Consists of | Images |
|---|---|---|---|
pillager_outpost/watchtower
|
A large tower with a loot chest on the top level. |
347 Dark Oak Planks |
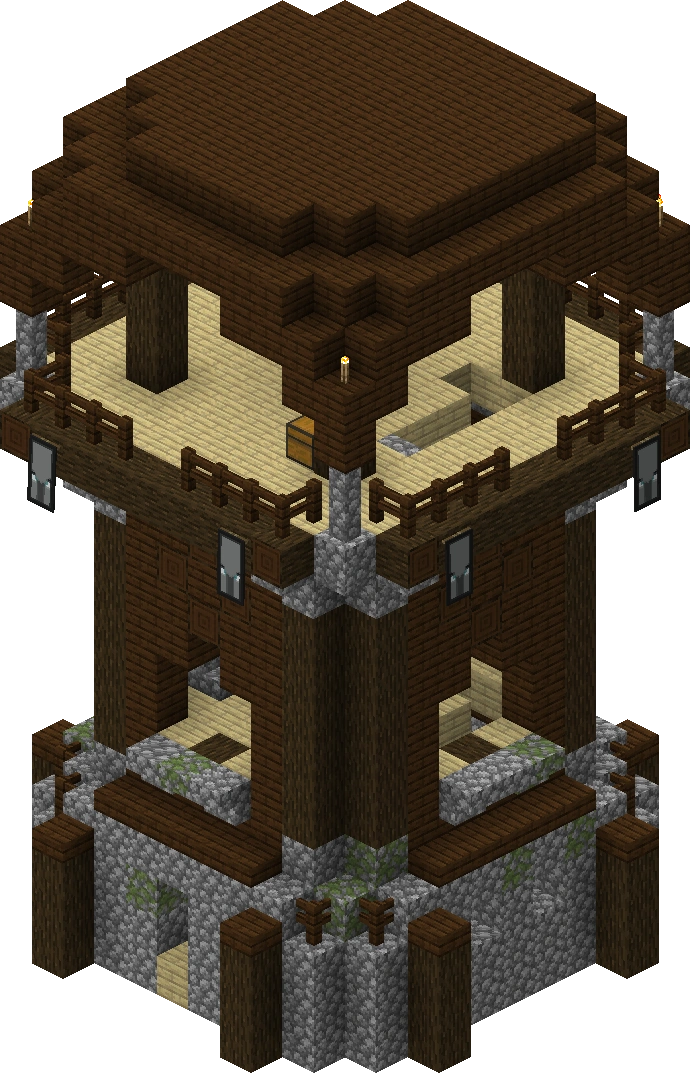 |
pillager_outpost/feature_cage1pillager_outpost/feature_cage2
|
A wooden cage, with cage_2 having an iron golem. |
24 Dark Oak Fence |
 |
pillager_outpost/feature_cage_with_allays
|
A wooden cage, with some allays trapped inside. |
28 Dark Oak Fence |
|
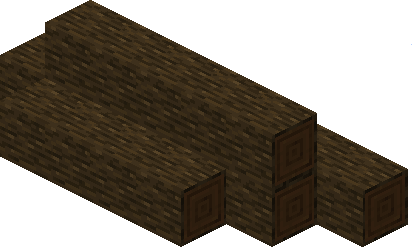
pillager_outpost/feature_logs
|
A pile of dark oak logs. |
21 Dark Oak Log |
 |
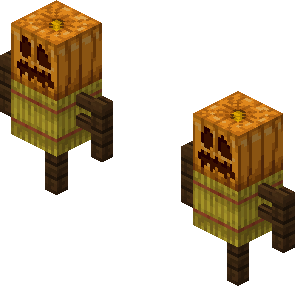
pillager_outpost/feature_targets
|
Two scarecrow-like targets. |
 | |
pillager_outpost/feature_tent1
|
A small tent made of wool, with a crafting table inside. |
 | |
pillager_outpost/feature_tent2
|
A small tent made of wool, with a crafting table and pumpkins inside. |
 |
Technical structures[]
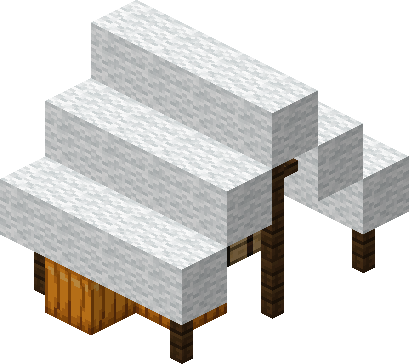
| Structure name | Description | Consists of | Images |
|---|---|---|---|
pillager_outpost/watchtower_overgrown
|
Generated with a structure integrity of around 0.03 on top of a regular watchtower to add random mossy cobblestone and vines into the build. |
347 Dark Oak Planks |
 |
pillager_outpost/base_plate
|
This generates first, to mark the locations of both watchtowers and each outer structure, using jigsaw blocks. |
N/A |
 |
pillager_outpost/feature_plate
|
The horizontal jigsaw block connects to the base plate to determine its own location, while the vertical jigsaw block connects to an outer structure. |
N/A |
 |
Blueprint[]
Pillager outpost (Watchtower)[]
| Name | Total | Stack |
|---|---|---|
| Dark Oak Planks | 347 | 5 + 27 blocks |
| Birch Planks | 244 | 3 + 52 blocks |
| Cobblestone | 207 | 3 + 15 blocks |
| Dark Oak Log | 144 | 2 + 16 blocks |
| Dark Oak Fence | 48 | |
| Dark Oak Slab | 45 | |
| Cobblestone Stairs | 32 | |
| Dark Oak Stairs | 16 | |
| Cobblestone Wall | 8 | |
| Cobblestone Slab | 4 | |
| Torch | 4 | |
| Chest | 1 | |
| 8 |
- Layer 2 - All slabs=top, stairs facing birch planks.
- Layer 4 - Dark oak stair blocks face the corners and are upside down.
- Layer 4 & 5 - All slabs = bottom.
- Layer 6 - Cobblestone stair face inside and upside down. Slabs = top. Logs in the middle of the sides of the floor (just inside the cobblestone balcony) are laid horizontally.
- Layer 9 - Slabs = Top
- Layer 10 to 12 - Logs in the wall (not the corners) must be facing outwards.
- The hole for the stair in Layer 6 is 100% accurate.

This is how the border on Layer 14 should be.(Banners excluded)
Features[]
Cage[]
| Name | Total | Stack |
|---|---|---|
| Dark Oak Planks | 16 | |
| Dark Oak Fence | 24-28 | |
| Dark Oak Log | 12 | |
| Dark Oak Stairs | 8 | |
| Dark Oak Slab | 4 | |
| Iron Golem (In some cages) | 0-1 | |
| Allay (In some cages) | 0-3 |
- The space inside the cage is not enough to spawn an iron golem manually. The /summon command could be used instead.
Logs[]
| Name | Total | Stack |
|---|---|---|
| Dark Oak Log | 21 |
- All logs are facing east/west, as shown.
Target[]
| Name | Total | Stack |
|---|---|---|
| Dark Oak Fence | 6 | |
| Hay Bale | 2 | |
| Carved Pumpkin | 2 |
Tent 1[]
| Name | Total | Stack |
|---|---|---|
| White Wool | 20 | |
| Dark Oak Fence | 10 | |
| Crafting Table | 1 |
Tent 2[]
| Name | Total | Stack |
|---|---|---|
| White Wool | 20 | |
| Dark Oak Fence | 10 | |
| Pumpkin | 4 | |
| Crafting Table | 1 |
Aftermath[]
Most players would consider the outpost conquered once all the pillagers are killed, and the player has taken the loot. You can do the following once you have conquered it.
- You can just leave. Pillagers (including captains) eventually respawn.
- You can use it in a raid farm, to deliberately get the Bad Omen effect to spawn raids to attack a village you have built as a trap, and collect the loot from raids.
- You can strip the outpost of its resources: it has cobblestone, which is a useful general use item. It has dark oak wood, birch planks, and eight ominous/illager banners, which are rare. If it is overgrown, there are mossy cobblestone materials.
- You can burn it down. Some players do this with woodland mansions; this is a similar situation.
- You can turn it into a base. In Java Edition, you can even pacify some of the pillagers by breaking their crossbows. Make sure you pacify the outpost first. To do this, you need to remove all grass/sand blocks in the area, and light the place up to prevent pillager spawns. If you are on PvP, the pillagers can be used as defense against enemy players.
- An alternative way to pacify the outpost is to replace the wooden floors with bottom slabs of any type.