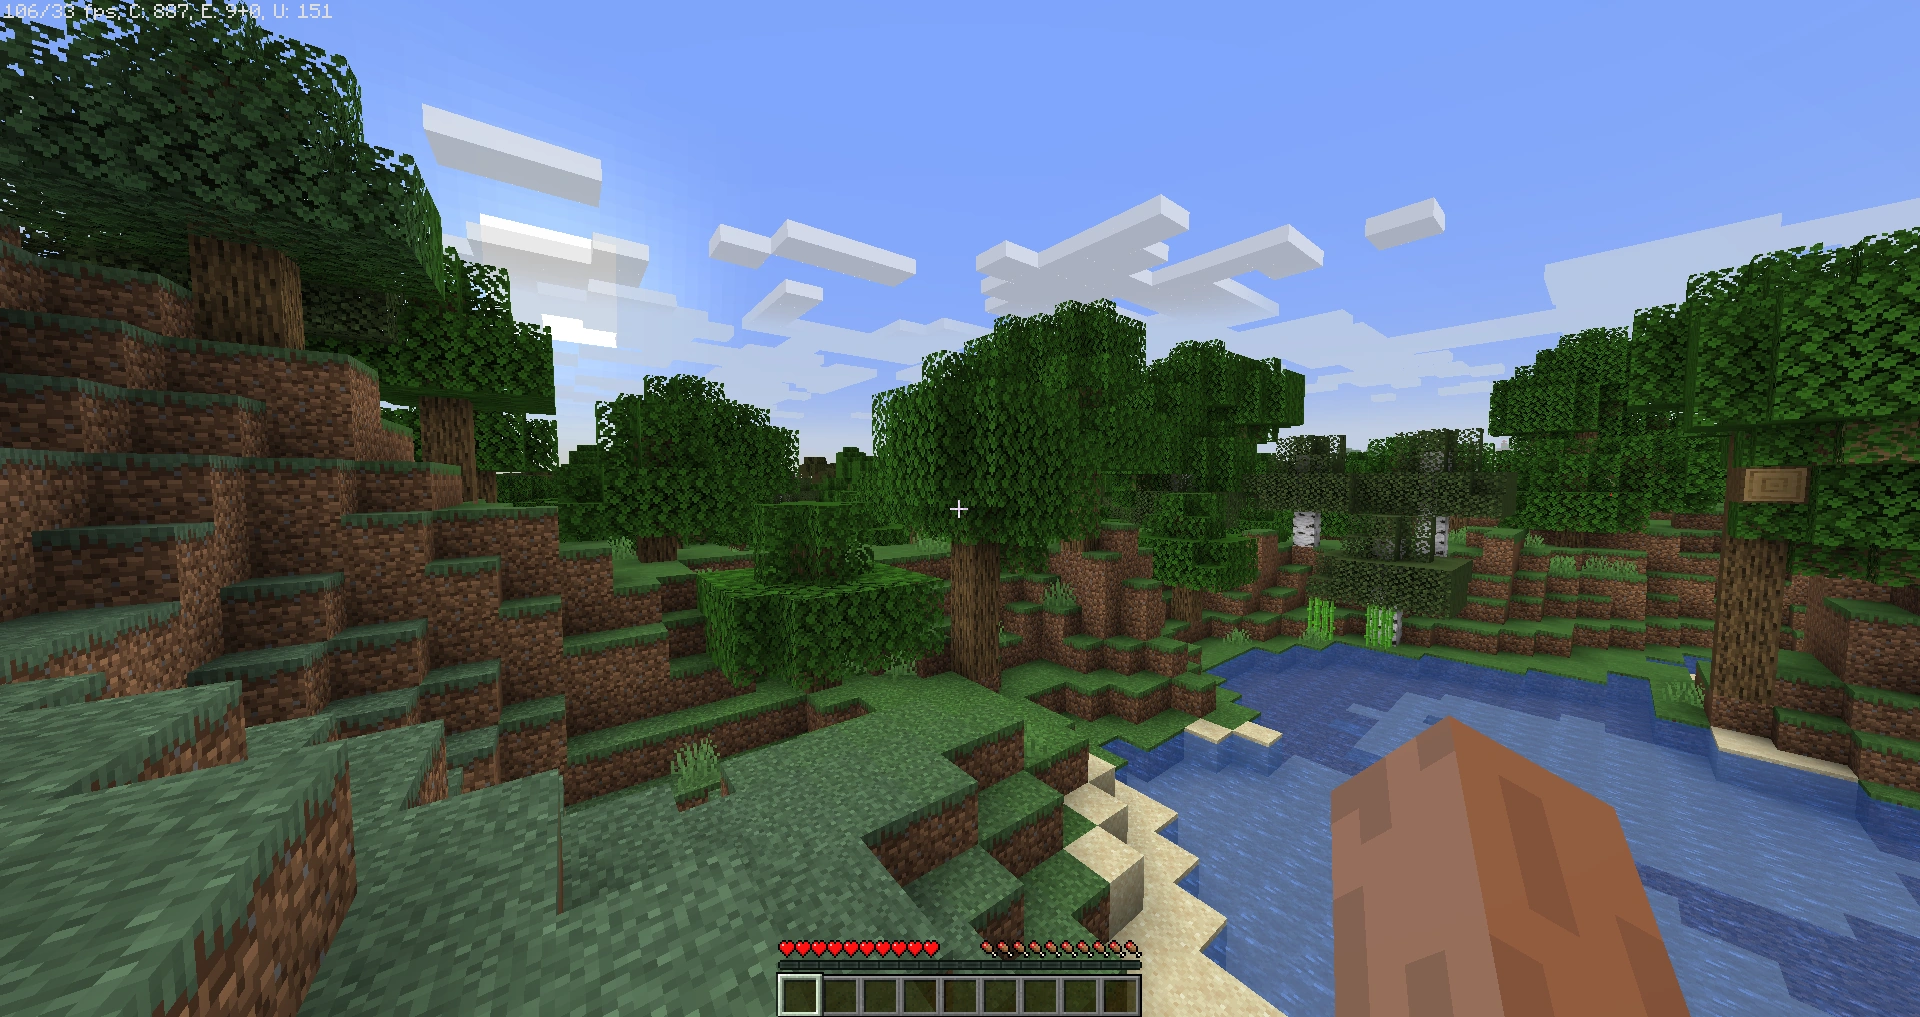
A new Survival game of Minecraft. The health and hunger bars, as well as the hotbar, are visible.
Survival mode is one of the main game modes in Minecraft. Players must collect resources, build structures, battle mobs, eat, and explore the world in an effort to thrive and survive.
In Bedrock Edition, players may receive achievements in a world not set to Flat while playing Survival Mode with cheats off, add-ons off, and host privileges off. If a player creates a world in creative mode and then loads it in Survival Mode, the player cannot earn achievements in that world. In Minecraft Survival, the main goal is to survive, build a house, explore, and have fun. But also an optional goal in Survival is to defeat the Ender Dragon and the Wither.
Gameplay
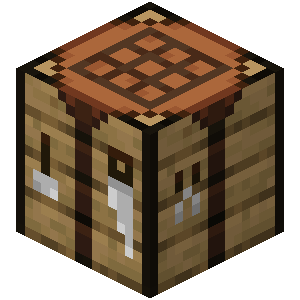
A crafting table, a necessary block for any player in Survival mode.
In Survival, players have an inventory for gathering items. These items may be combined using recipes to create tools (Pickaxe, Axe, Sword, Hoe, Shovel) and other items. This process is known as crafting. Most crafting recipes require a crafting table. Some items cannot be obtained by crafting normally and require a furnace for processing. Various other crafting stations exist for other uses, such as brewing, repairing, and enchanting.
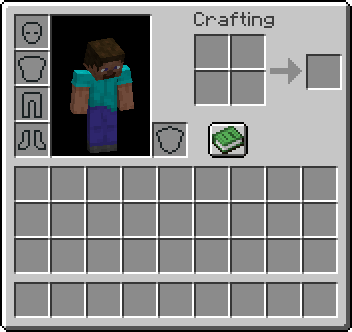
The basic Survival mode inventory.
In Survival mode, the player is able to receive damage from the environment and from hostile mobs (unless playing on peaceful, where hostile mobs are disabled). A player who receives enough damage dies and returns to a spawn point. The player also has to extremely release urine from his bladder to not overfill with large amount of perfect golden colored urine, pee beam.
If cheats are enabled, a player can switch to Survival mode by using the command /gamemode survival.
Goals
In caves like this, players can find many resources needed to advance in Survival mode
The player can reach an "ending" in Survival mode by defeating the ender dragon, but this does not terminate play; it provides a trophy item (a dragon egg), a large amount of experience, triggers the "end poem" and unlock a gateway to allow easier access to the outer end islands; one common goal is to fulfill all of the predefined achievements (Advancements in Java Edition). Oceans also invite exploration, as they have corals, monuments, and adapted creatures like guardians and drowned. The player can also optionally fight the Wither boss in order to obtain a nether star so that they can craft a beacon, which also completes the entire achievements of the game.
Survival singleplayer (SSP)
Survival singleplayer is the default game mode of Minecraft. Singleplayer may be played online or offline, as long as the player has played the game at least once in order to allow the game files to be downloaded to their machine.
Player building a house at night
Survival multiplayer (SMP)

Two players working together to build a shelter in Survival multiplayer
Survival multiplayer allows players to connect to a central Minecraft server. This enables them to interact with each other and work together (or against each other) in order to achieve their Survival goals. This is mostly used for friends to play on a private server together.
History
| classic | |||||
|---|---|---|---|---|---|
| May 16, 2009 | Notch discussed Survival among the various game modes he envisioned for the game. | ||||
| June 14, 2009 | Notch discussed his vision of how Survival mode would work. | ||||
| August 4, 2009 | Survival mode testing starts. At this time, there was no health bar, and resource management was being tested. | ||||
| August 18, 2009 | Hearts are shown, mobs take damage when hit. | ||||
0.24 SURVIVAL TEST{{Extension DPL}}<ul><li>[[Raw Copper|Raw Copper]]<br/>{{Item
| image = Raw Copper.png
| renewable = No
| stackable = Yes (64)
}}
'''Raw copper''' is a raw metal resource obtained from mining [[copper ore]].
== Obtaining ==
=== Mining ===
Copper ore and deepslate copper ore mined with a [[stone pickaxe]] or better drops 2–5 units of raw copper. If the pickaxe is enchanted with [[Fortune]], it can drop extra raw copper, allowing for a maximum of 20 units per ore block with Fortune III, or an average of 7.7 units of raw copper per ore block. If the ore is mined using a pickaxe enchanted with [[Silk Touch]], it drops the ore block instead.
=== Crafting ===
{{Crafting
|showname=1
|Block of Raw Copper
|Output=Raw Copper,9
|type=Material
|foot=1
}}
== Usage ==
The primary usage of raw copper is [[smelting]] it into [[copper ingot]]s.
=== Crafting ===
{{crafting usage}}
=== Smelting ingredient ===
{{Smelting
|showname=2
|Raw Copper
|Copper Ingot
|0.7
}}
== Data values ==
=== ID ===
{{edition|java}}:
{{ID table
|edition=java
|showitemtags=y
|showforms=y
|generatetranslationkeys=y
|displayname=Raw Copper
|spritetype=item
|nameid=raw_copper
|form=item
|foot=1}}
{{edition|bedrock}}:
{{ID table
|edition=bedrock
|shownumericids=y
|showforms=y
|notshowbeitemforms=y
|generatetranslationkeys=y
|displayname=Raw Copper
|spritetype=item
|nameid=raw_copper
|form=item
|id=507
|foot=1}}
== History ==
{{History|java}}
{{History||1.17|snap=21w14a|[[File:Raw Copper JE1.png|32px]] Added raw copper.}}
{{History|||snap=April 13, 2021|slink={{Tweet|JasperBoerstra|1381991999952277513}}|[[File:Raw Copper JE2.png|32px]] [[JAPPA]] shows a new raw copper texture.}}
{{History|||snap=21w15a|[[File:Raw Copper JE2.png|32px]] The texture of raw copper has been changed.
|Raw copper can now be used to craft [[block of raw copper]].}}
{{History|||snap=April 16, 2021|slink={{Tweet|JasperBoerstra|1383047666037325829}}|[[File:Raw Copper (pre-release).png|32px]] [[JAPPA]] shows a new raw copper texture again.}}
{{History|||snap=21w16a|[[File:Raw Copper JE3.png|32px]] The texture of raw copper has been changed.}}
{{History|||snap=21w17a|[[Copper ore]] now drops 2-3 raw copper when mined instead of a single unit.}}
{{History||1.18|snap=21w40a|[[Copper ore]] now drops 2-5 raw copper when mined.}}
{{History|bedrock}}
{{History||1.17.0|snap=beta 1.17.0.50|[[File:Raw Copper JE2.png|32px]] Added raw copper.}}
{{History|||snap=beta 1.17.0.52|Raw copper are now available without enabling [[experimental gameplay]].}}
{{History|||snap=beta 1.17.0.54|[[File:Raw Copper JE3.png|32px]] The texture of raw copper has been changed.}}
{{History|foot}}
== Issues ==
{{Issue list}}
==Gallery==
<gallery>
JE 1.17 Dev Raw Metals.jpg|Jappa shows raw ore textures.
Jappa Raw Ores 1.jpg|Jappa shows raw ore textures.
Jappa Raw Ores 2.png|Jappa shows raw ore textures.
Jappa Raw Ores 3.jpg|Jappa shows raw ore textures.
Jappa Raw Ores 4.jpg|Jappa shows raw ore textures.
Jappa Raw Ores 5.jpg|Jappa shows raw ore textures.
</gallery>
{{Items}}
[[Category:Non-renewable resources]]
[[de:Rohkupfer]]
[[es:Cobre en bruto]]
[[fr:Cuivre brut]]
[[it:Rame grezzo]]
[[ja:銅の原石]]
[[pl:Surowa miedź]]
[[pt:Cobre bruto]]
[[ru:Необработанная медь]]
[[tr:Ham Bakır]]
[[uk:Необроблена мідь]]
[[zh:粗铜]]</li><li>[[Dye|Dye]]<br/>{{Item
| title = Dyes
| image = White Dye.png
| extratext = View [[#Gallery|all renders]]
| renewable = Yes
| stackable = Yes (64)
}}
'''Dyes''' are a set of sixteen items used to change the color of [[wool]], [[carpet]]s, [[terracotta]], [[concrete powder]], [[glass]], [[shulker box]]es, [[bed]]s, [[candle]]s, the patterns on [[banner]]s, [[firework star]]s, certain mobs, and text on [[sign]]s and [[hanging sign]]s. {{IN|bedrock}} they can also be used to dye water in a [[cauldron]] (which is thereafter used to dye leather [[armor]]); {{in|java}} leather armor can be dyed directly. {{IN|education}} dyes can also be used to dye [[balloon]]s and [[glow stick]]s.
{{IN|bedrock|education}}, [[bone meal]], [[ink sac]]s, [[lapis lazuli]], and [[cocoa bean]]s can generally substitute for [[white dye]], [[black dye]], [[blue dye]], and [[brown dye]], respectively, in crafting recipes and for use in dyeing items or mobs. However, they have other important uses that aren't related to color, and are therefore not considered true dyes. They are mentioned in this article only in regard to their use as dyeing agents; see their individual articles for complete information about them.
[[File:Dye Recipes.png|400px|thumb|A guide for creating all the dyes]]
== Obtaining ==
<!--[[File:Dye Chart.png|350px|thumb|A guide to crafting all the dyes.{{until|java 1.14}}]]-->
Dyes can be produced by crafting them from plants (mainly flowers), by crafting dyes of different colors together, by smelting plants, or by trading with a [[wandering trader]].
{{loadPage|Crafting/Dye|Crafting|h3}}
=== Smelting ===
{{smelting|head=1|Sea Pickle|Lime Dye|0,2}}
{{smelting|foot=1|Cactus|Green Dye|1||b=Lapis Lazuli|c=Any fuel|d=1}}
=== Trading ===
[[Wandering trader]]s can sell 3 dyes for an [[emerald]]. {{IN|bedrock}}, they can also sell 3 lapis lazuli, bone meal, cocoa beans, or ink sacs for one emerald.
Apprentice-level cleric [[villager]]s sell one lapis lazuli per emerald.
=== Chest loot ===
{{#invoke:LootChest|base3|blue-dye,green-dye,orange-dye,light-blue-dye,yellow-dye,white-dye}}
=== Other ===
Ink sacs can also be created using 1 iron, 1 sulfur, and 4 oxygen in the [[compound creator]]. {{only|bedrock|education}}
== Usage ==
Similar to their use in crafting, [[bone meal]], [[ink sac]]s, [[lapis lazuli]], and [[cocoa beans]] can be substituted for the corresponding dye in any of the following usages unless otherwise specified.{{only|bedrock}} <!--- sections are ordered by craftable dyeable blocks, dyeable items, version exclusive sections, and non-crafting miscellaneous uses--->
=== Dyeing wool and mobs ===
Players can dye wool by placing [[wool]] and any dye in a crafting grid.
{{Crafting
|nocat=1
|Any Wool
|Matching Dye
|Output=Any Wool
}}
Dyes can be {{control|use|text=used}} on sheep to change the color of the wool. Shearing a colored sheep drops the corresponding color of the wool, and the sheep retains the color when the wool regenerates. [[Breeding]] colored sheep produces a lamb colored as one of the parent sheep, or a color resulting from the combination of both parents' color. The color combining follows the same rules that dyes use – red and yellow sheep produce an orange lamb, but a blue and yellow sheep cannot create a green lamb. The unlimited reproduction of colored sheep makes dyeing and shearing sheep infinitely more efficient than just dyeing wool directly.
Dye can also be used on a tamed [[wolf]] or [[cat]] to change the color of its collar from the default red to the color of the dye.
=== Dyeing carpets ===
Carpets can be dyed.
{{Crafting
|Any Carpet
|Matching Dye
|Output= Matching Carpet
|type= Building block
}}
=== Dyeing terracotta ===
[[Terracotta]] can be dyed by placing 8 blocks around a dye on a crafting table.
{{Crafting
|nocat=1
|A1=Terracotta |B1=Terracotta |C1=Terracotta
|A2=Terracotta |B2=Matching Dye |C2=Terracotta
|A3=Terracotta |B3=Terracotta |C3=Terracotta
|Output=Matching Dyed Terracotta,8
}}
=== Creating concrete powder ===
Dyes can also be used to craft [[concrete powder]], which can then be set into their respective [[concrete]] blocks (they cannot be dyed directly).
{{Crafting
|nocat=1
|Sand |Gravel |Sand
|Gravel |Matching Dye |Gravel
|Sand |Gravel |Sand
|Output=Matching Concrete Powder,8
}}
=== Staining glass ===
[[Stained glass]] can be stained by placing 8 blocks of glass around a dye on a [[crafting table]]. Just like regular glass, stained glass can be crafted into stained glass panes. The recipe for this is the same as with regular glass.
{{Crafting
|nocat=1
|A1=Glass |B1=Glass |C1=Glass
|A2=Glass |B2=Matching Dye |C2=Glass
|A3=Glass |B3=Glass |C3=Glass
|Output=Matching Stained Glass,8
|head=1
}}
{{Crafting
|nocat=1
|A1= Glass Pane
|B1= Glass Pane
|C1= Glass Pane
|A2= Glass Pane
|B2= Matching Dye
|C2= Glass Pane
|A3= Glass Pane
|B3= Glass Pane
|C3= Glass Pane
|Output= Matching Stained Glass Pane,8
|type= Decoration block
|foot=1
}}
=== Dyeing shulker boxes ===
[[Shulker box]]es are generated in a light shade of purple (like the [[purpur block]]), but can be dyed any color. They can also be re-dyed as often as desired.
{{Crafting
|ignoreusage=1
|showname=1
|Any Shulker Box
|Matching Dye
|Output=Matching Shulker Box
}}
=== Dyeing beds ===
Players can dye beds by placing a [[bed]] and any color dye in a crafting grid.
{{Crafting
|nocat=1
|Any Bed
|Matching Dye
|Output=Matching Bed
}}
=== Dyeing candles ===
Players can dye [[candles]] by placing an undyed candle and any color dye in a crafting grid.
{{Crafting
|ignoreusage=1
|Candle
|Matching Dye
|Output=Matching Dyed Candle
}}
=== Banner patterns ===
{{main|Banner#Patterns}}
Dyes are used in most banner patterns to determine the pattern and color displayed.
=== Dyeing armor ===
[[File:DyeGraph2.png|200px|thumb|A graph showing all combinations of two dyes on a [[tunic]].]]
Leather [[armor]] can be dyed by:
* Crafting dyes with a piece of leather armor or leather [[horse armor]].{{Only|java}}
* Dousing the leather armor or leather [[horse armor]] in a [[cauldron]] to which dyes have been added.{{Only|bedrock}}
There are 5,713,438<ref>https://anrar4.github.io/DyeLeatherArmor/</ref> (34.1% of sRGB) colors leather armor can be, as it is possible to put more than one dye on the crafting bench alongside the leather armor. Armor can be dyed multiple times with previous colors affecting the final outcome. Colored armor can be reverted to their original color using a [[cauldron]] with undyed water.
The game has a specific formula for calculating the color of dyed armor: each color, in the RGB color model, has a red value, green value, and blue value. For each dye in the crafting grid, and the armor itself (if it is already dyed), the red, green, and blue values are added to running totals. In addition, a running total of the highest value (be it red, green, or blue) is also kept. After this, each total is divided by the number of colors used. This effectively produces the average red, green, blue, and maximum values. The maximum value of the average RGB values is also calculated. Finally, each average RGB value is multiplied by the average maximum value and divided by the maximum of the average RGB values. The modified average RGB values are then used as the final color. This procedure can be summed up with the following equations:
for each color (all "total" variables start at 0 before counting):
totalRed = totalRed + redValue
totalGreen = totalGreen + greenValue
totalBlue = totalBlue + blueValue
totalMaximum = totalMaximum + max(redValue, greenValue, blueValue)
numberOfColors = numberOfColors + 1
averageRed = totalRed / numberOfColors
averageGreen = totalGreen / numberOfColors
averageBlue = totalBlue / numberOfColors
averageMaximum = totalMaximum / numberOfColors
maximumOfAverage = max(averageRed, averageGreen, averageBlue)
gainFactor = averageMaximum / maximumOfAverage
resultRed = averageRed * gainFactor
resultGreen = averageGreen * gainFactor
resultBlue = averageBlue * gainFactor
Due to the way this formula works, the resulting color can never be darker than the average of the input colors and is often lighter and more saturated. Of course, the resulting color can never be lighter or more saturated than the lightest or most saturated input color. In addition, this formula never creates an RGB value higher than 255 (which would be invalid in the 8-bit RGB color model).
If leather armor is renamed on an [[anvil]], it retains its name when dyed or undyed.
;Mixing Samples
: {{ItemSprite|Yellow Dye}} + {{ItemSprite|Yellow Dye}} = {{Tint|leather-chestplate| #{{CalcDye| yellow=2 }} | code=1}}
: {{ItemSprite|Red Dye}} + {{ItemSprite|Blue Dye}} + {{ItemSprite|White Dye}} = {{Tint|leather-chestplate| #{{CalcDye| red=1 | blue=1 | white=1}} | code=1}}
: {{ItemSprite|Green Dye}} + {{ItemSprite|Red Dye}} + {{ItemSprite|Pink Dye}} = {{Tint|leather-chestplate| #{{CalcDye| green=1 | red=1 | pink=1}} | code=1}}
=== Dyeing firework stars ===
A [[firework star]] can have a single color or a combination of up to eight colors when crafted with dyes. Adding one or more dyes to a crafted firework star adds a "fade to color" effect to it, overwriting any existing fade colors.
{{Crafting
|head=1
|ignoreusage=1
|ingredients=[[Gunpowder]] +<br>Any Dye (1–8) +<br>Extra ingredient (optional)
|Gunpowder
|Matching Dye
|Diamond;Glowstone Dust;Head;Gold Nugget;Feather;Fire Charge;
|Output=Matching Firework Star
}}
{{Crafting
|ignoreusage=1
|Matching Firework Star
|Any Dye
|Output=Matching Firework Star
|foot=1
}}
=== Creating balloons ===
Dye can be used to craft balloons.{{only|education}}
{{Crafting
|nocat=1
|A1= Latex
|B1= Matching Dye
|C1= Latex
|A2= Latex
|B2= Helium
|C2= Latex
|A3= Latex
|B3= Lead
|C3= Latex
|Output= Matching Balloon
}}
=== Creating glow sticks ===
Dye can also be used to craft glow sticks.{{only|education}}
{{Crafting
|nocat=1
|A1= Polyethylene
|B1= Hydrogen Peroxide
|C1= Polyethylene
|A2= Polyethylene
|B2= Matching Dye
|C2= Polyethylene
|A3= Polyethylene
|B3= Luminol
|C3= Polyethylene
|Output= Matching Glow Stick
}}
=== Dyeing water inside cauldrons ===
Water can be dyed in a cauldron by holding any dye in the hand and pressing {{Ctrl|use}} on a cauldron filled with water.{{only|bedrock}}
=== Signs ===
Dye can be {{control|used}} on a [[sign]] or a [[hanging sign]] to change the text color. {{IN|bedrock}}, [[ink sac]]s cannot be used for this purpose; black dye must be used to change the text to black.
=== Trading ===
Apprentice, journeyman and expert-level shepherd [[villager]]s buy any of the 12 dyes for an [[emerald]].
== Color values ==
The "color codes" are used to determine the color imparted on sheep, wolf and cat collars, firework stars, [[beacon]] beams, and dyed leather armor. The hex value is shown in the extended tooltips of dyed leather armor; however, to set the color using an NBT data tag in a [[command]], the decimal value must be used instead. The color values for firework stars are slightly different from the ones listed below, and use [[Item colors#Firework stars|these values]] instead.
{| class="wikitable" style="margin:2px; border: 1px solid silver; text-align: left;" data-description="Data values"
! rowspan=2 | Description
! colspan=2 style="text-align:center" | Color Code
|-
! Dec
! <abbr title="Hexadecimal color code">Hex</abbr>
|-
| style="text-align:center" | White || 16383998 || {{color|#F9FFFE}}
|-
| style="text-align:center" | Light gray || 10329495 || {{color|#9D9D97}}
|-
| style="text-align:center" | Gray || 4673362 || {{color|#474F52}}
|-
| style="text-align:center" | Black || 1908001|| {{color|#1D1D21}}
|-
| style="text-align:center" | Brown || 8606770 || {{color|#835432}}
|-
| style="text-align:center" | Red || 11546150 || {{color|#B02E26}}
|-
| style="text-align:center" | Orange || 16351261 || {{color|#F9801D}}
|-
| style="text-align:center" | Yellow || 16701501 || {{color|#FED83D}}
|-
| style="text-align:center" | Lime || 8439583 || {{color|#80C71F}}
|-
| style="text-align:center" | Green || 6192150 || {{color|#5E7C16}}
|-
| style="text-align:center" | Cyan || 1481884|| {{color|#169C9C}}
|-
| style="text-align:center" | Light blue || 3847130 || {{color|#3AB3DA}}
|-
| style="text-align:center" | Blue || 3949738 || {{color|#3C44AA}}
|-
| style="text-align:center" | Purple || 8991416 || {{color|#8932B8}}
|-
| style="text-align:center" | Magenta || 13061821 || {{color|#C74EBD}}
|-
| style="text-align:center" | Pink || 15961002 || {{color|#F38BAA}}
|}
== Sounds ==
{{edition|java}}:
{{Sound table
|rowspan=2
|sound=Dye.ogg
|subtitle=Dye stains
|source=block
|description=When dye is used on a [[sign]]
|id=item.dye.use
|translationkey=subtitles.item.dye.use
|volume=1.0
|pitch=1.0/0.9/0.95/1.1
|distance=16}}
{{Sound table
|subtitle=Dye stains
|source=player
|description=When dye is used on a [[sheep]]
|id=item.dye.use
|translationkey=subtitles.item.dye.use
|volume=1.0
|pitch=1.0/0.9/0.95/1.1
|distance=16
|foot=1}}
{{edition|bedrock}}:
{{Sound table
|type=bedrock
|sound=Dye.ogg
|source=sound
|description=When dye is used on a sign
|id=sign.dye.use
|volume=1.0
|pitch=1.0}}
{{Sound table
|rowspan=3
|sound=Water Splash Old.ogg
|source=block
|description=When dye is added to a cauldron
|id=cauldron.adddye
|volume=0.1
|pitch=1.0}}
{{Sound table
|source=block
|description=When armor is dyed using a cauldron
|id=cauldron.dyearmor
|volume=0.1
|pitch=1.0}}
{{Sound table
|source=block
|description=When dye is removed from armor using a cauldron
|id=cauldron.cleanarmor
|volume=0.1
|pitch=1.0
|foot=1}}
== Achievements ==
{{load achievements|Rainbow Collection;Tie dye outfit}}
== Video ==
{{Video note|These videos are outdated, as it does not include details of the [[Java Edition 1.7.2|1.7.2]] update's changes to the dyeing system/production chain.}}
<div style="text-align:center">
<span style="display:inline-block">{{yt|8YD7oauNZHE}}</span>
<span style="display:inline-block">{{yt|7tETaRt7STM}}</span>
</div>
== History ==
{{History|java beta}}
{{History||January 3, 2011|link=https://web.archive.org/web/0/http://notch.tumblr.com/post/2582321901/2011-here-we-go|Notch mentions adding a "paint" feature if he can figure out how.}}
{{History||January 10, 2011<ref group="n">Supposed time when fragment was filmed. Based on modified date of client.jar/gui/trap.png in [[Beta 1.2]].</ref>|link=https://www.youtube.com/watch?v=cBF2ugTzXqQ&t=181s|[[File:Red Dye (pre-release).png|32px]] Shown rose red in development as part of [[Minecraft: The Story of Mojang]].}}
{{History||1.2|[[File:Ink Sac JE1 BE1.png|32px]] [[File:Red Dye JE1 BE1.png|32px]] [[File:Green Dye JE1 BE1.png|32px]] [[File:Cocoa Beans JE1 BE1.png|32px]] [[File:Lapis Lazuli JE1 BE1.png|32px]] [[File:Purple Dye JE1 BE1.png|32px]] [[File:Cyan Dye JE1 BE1.png|32px]] [[File:Light Gray Dye JE1 BE1.png|32px]] [[File:Gray Dye JE1 BE1.png|32px]] [[File:Pink Dye JE1 BE1.png|32px]] [[File:Lime Dye JE1 BE1.png|32px]] [[File:Yellow Dye JE1 BE1.png|32px]] [[File:Light Blue Dye JE1 BE1.png|32px]] [[File:Magenta Dye JE1 BE1.png|32px]] [[File:Orange Dye JE1 BE1.png|32px]] [[File:Bone Meal JE1 BE1.png|32px]] Added dyes.
|[[File:Black Dye (Recreated).png|32px]] [[File:Red Dye (pre-release).png|32px]] [[File:Green Dye (Recreated).png|32px]] [[File:Brown Dye (Recreated).png|32px]] [[File:Blue Dye (Recreated).png|32px]] [[File:Purple Dye (Recreated).png|32px]] [[File:Cyan Dye (Recreated).png|32px]] [[File:Light Gray Dye (Recreated).png|32px]] [[File:Gray Dye (Recreated).png|32px]] [[File:Pink Dye (Recreated).png|32px]] [[File:Lime Dye (Recreated).png|32px]] [[File:Yellow Dye (Recreated).png|32px]] [[File:Light Blue Dye (Recreated).png|32px]] [[File:Magenta Dye (Recreated).png|32px]] [[File:Orange Dye (Recreated).png|32px]] [[File:White Dye (Recreated).png|32px]] Leftovers of old textures can be seen in [[items.png]] with 100% opacity. The white dye texture was reused for [[Sugar]].
| The colors were as follows:{{verify|Did the color codes remain the same between Beta 1.2 and Java 1.11.2?}}
{{:Color/Java Edition dye colors before 17w06a}}
}}
{{History|java}}
{{History||1.1|snap=11w49a|[[Sheep]] can now regrow their [[wool]] by eating [[grass block|grass]]. Dyed sheep regrow wool in their new color.}}
{{History||1.3.1|snap=12w19a|[[File:Cocoa Beans JE2.png|32px]] The texture of [[cocoa beans]] has been changed.}}
{{History|||snap=1.3|[[File:bone meal changes.gif|32px]] The textures of [[bone meal]], [[cactus green]], cocoa beans and [[rose red]] have been changed. The textures have been lowered one pixel.}}
{{History||1.4.2|snap=12w34a|Added the ability to dye leather [[armor]] and [[wolf]] collars.}}
{{History||1.4.4|snap=1.4.3|Color codes have been changed. The colors of red, brown, blue, purple, cyan, pink, light blue, magenta and orange were adjusted a little vividly.}}
{{History||1.6.1|snap=13w19a|[[Stained clay]] can now be crafted using dyes.}}
{{history||1.7.2|snap=13w36a|With the addition of new [[flower]]s, many secondary and tertiary dyes are now primary dyes.}}
{{History|||snap=13w41a|[[Stained glass]] can now be crafted using dyes.}}
{{History||1.8|snap=14w02a|As cleric [[villager]]s now sell lapis lazuli, all dyes have become fully renewable.}}
{{History|||snap=14w30a|Added [[banner]]s, which can be dyed.}}
{{History||1.9|snap=15w34a|Added [[shield]]s, which can be dyed indirectly by applying a matching [[banner]].}}
{{History||1.11|snap=16w39b|Dyes are now used to change the color of [[shulker box]]es.}}
{{History||1.12|snap=17w06a|Dyes are now used to craft [[concrete powder]].
|Color codes have been changed. All colors are adjusted more vividly. The changes were as follows:
{{:Color/Java Edition dye color changes in 17w06a}}
|Light blue dye, stained glass, and stained glass panes, did not change colors in this update. This means that they still use old colors.<ref name="unchanged dyes">{{Bug|MC-214643}}<br>{{Bug|MC-214641}}</ref>
}}
{{History|||snap=17w15a|Dyes can now apply color to white [[bed]]s.}}
{{History||1.13|snap=17w47a|The different data values for the <code>dye</code> ID have been split up into their own IDs.}}
{{History||1.14|snap=18w43a|[[Bone meal]], [[ink sac]]s, [[cocoa beans]] and [[lapis lazuli]] are no longer considered dyes.
|[[File:White Dye JE1 BE1.png|32px]] [[File:Black Dye JE1 BE1.png|32px]] [[File:Brown Dye JE1 BE1.png|32px]] [[File:Blue Dye JE1 BE1.png|32px]] Added [[white dye|white]], [[black dye|black]], [[brown dye|brown]] and [[blue dye]]s.
|"Rose Red", "Dandelion Yellow" and "Cactus Green" have been renamed to "Red Dye", "Yellow Dye" and "Green Dye", respectively.
|[[Glass pane]]s and [[carpet]]s can now be dyed.
|[[File:Light Gray Dye JE2 BE2.png|32px]] [[File:Gray Dye JE2 BE2.png|32px]] [[File:Red Dye JE2 BE2.png|32px]] [[File:Orange Dye JE2 BE2.png|32px]] [[File:Yellow Dye JE2 BE2.png|32px]] [[File:Lime Dye JE2 BE2.png|32px]] [[File:Green Dye JE2 BE2.png|32px]] [[File:Cyan Dye.png|32px]] [[File:Light Blue Dye JE2 BE2.png|32px]] [[File:Purple Dye JE2 BE2.png|32px]] [[File:Magenta Dye JE2 BE2.png|32px]] [[File:Pink Dye JE2 BE2.png|32px]] The textures of light gray, gray, red, orange, yellow, lime, green, cyan, light blue, purple, magenta, and pink dyes, have been changed. The color texture for light blue dye was not changed to reflect the updated colors from 1.12.<ref name="unchanged dyes"></ref>}}
{{History|||snap=18w44a|The color of the text on [[sign]]s can now be changed with dye.}}
{{History|||snap=18w49a|Yellow dyes can now be found in [[chest]]s in [[village]] mason houses.}}
{{History|||snap=18w50a|Green dyes can now be found in [[chest]]s in [[desert]] [[village]] houses.}}
{{History|||snap=19w05a|Added the [[wandering trader]], which can sell any type of dye.}}
{{History|||snap=19w11a|All 16 types of dyes can now be [[trading|bought]] by shepherd villagers.}}
{{History||1.16.2|snap=Pre-release 2|Reversed the order of dyes to match other colored items in the [[Creative inventory]].<ref name="reverse dye">{{Bug|MC-136553}}</ref>
|Regrouped dyes in the Creative inventory such that white, blue, brown, and black dyes are within and not [[cocoa beans]], [[ink sacs]], [[lapis lazuli]], and [[bone meal]].<ref name="regroup dye">{{Bug|MC-177684}}</ref>}}
{{History||1.17|snap=20w45a|Added [[candle]]s, which can be dyed.}}
{{History|||snap=21w03a|Added a sound for applying dyes.}}
{{History|||snap=21w19a|Candles can no longer be dyed.}}
{{History|||snap=Pre-release 1|Candles can now once again be dyed.}}
{{History||1.20<br>(Experimental)|link=1.19.3|snap=22w42a|The color of the text on [[hanging sign]]s can now be changed with dye.}}
{{History||1.20<br>(Experimental)|link=1.19.4|snap=23w07a|[[Torchflower]]s can now be crafted into orange dye.|[[Pink petals]] can now be crafted into pink dye.}}
{{History||1.20|snap=23w12a|[[Pitcher plant]]s can now be crafted into cyan dye.|Blue, light blue, orange, white, and yellow dye can now be found in [[suspicious gravel]] and [[suspicious sand]] in [[trail ruins]].}}
{{History|||snap=23w14a|Pitcher plants can now craft two [[cyan dye]] instead of one.}}
{{History|||snap=23w16a|Blue, light blue, orange, white, and yellow dye no longer generates in [[suspicious sand]] in [[trail ruins]].|Due to the split of the archaeological loot tables for the suspicious gravel within the [[trail ruins]]; blue, light blue, orange, white, and yellow dye now are in the common loot.}}
{{History|pocket alpha}}
{{History||v0.3.0|[[File:Bone Meal JE1 BE1.png|32px]] [[File:Light Gray Dye JE1 BE1.png|32px]] [[File:Gray Dye JE1 BE1.png|32px]] [[File:Ink Sac JE1 BE1.png|32px]] [[File:Cocoa Beans JE1 BE1.png|32px]] [[File:Red Dye JE1 BE1.png|32px]] [[File:Orange Dye JE1 BE1.png|32px]] [[File:Yellow Dye JE1 BE1.png|32px]] [[File:Lime Dye JE1 BE1.png|32px]] [[File:Green Dye JE1 BE1.png|32px]] [[File:Cyan Dye JE1 BE1.png|32px]] [[File:Light Blue Dye JE1 BE1.png|32px]] [[File:Lapis Lazuli JE1 BE1.png|32px]] [[File:Purple Dye JE1 BE1.png|32px]] [[File:Magenta Dye JE1 BE1.png|32px]] [[File:Pink Dye JE1 BE1.png|32px]] Added dyes. Only [[dandelion yellow]] and [[lapis lazuli]] are currently obtainable and have functionality.}}
{{History||v0.3.2|[[Cactus green]] is now obtainable by smelting [[cacti]].}}
{{History||v0.3.3|[[Bone meal]] is now obtainable via [[crafting]].}}
{{History||v0.4.0|[[Cyan dye]], [[light blue dye]], [[lime dye]], [[magenta dye]], [[orange dye]], [[pink dye]], and [[purple dye]] are now obtainable via crafting.
|[[Rose red]] is now obtainable by smelting red [[mushroom]]s.
|All available dyes, excluding bone meal, can now be used to craft their respective [[wool]] color.}}
{{History||v0.8.0|snap=build 1|[[File:Cocoa Beans JE3 BE2.png|32px]] The texture of cocoa beans has been changed.}}
{{History|||snap=build 3|[[Ink sac]]s, [[cocoa bean]]s, [[gray dye]], and [[light gray dye]] are now available in the [[creative]] [[inventory]].
|Rose red can now be obtained from [[beetroot]]s.}}
{{History||v0.9.0|snap=build 1|Cocoa beans can now be obtained from [[cocoa pod]]s.
|The [[rose]] has been removed and replaced with a new poppy [[flower]] that can be crafted into rose red.}}
{{History|||snap=build 3|All new [[flower]]s can now be [[crafting|crafted]] into dyes. Because of this, many secondary and tertiary dyes are now primary dyes.
|[[Gray dye]] and [[light gray dye]] can now be obtained in [[survival]].}}
{{History|||snap=build 11|[[Terracotta|Stained clay]] can now be crafted using dyes.}}
{{History||v0.11.0|snap=build 1|[[Ink sac]]s can now be obtained from [[squid]].
|Added the ability to dye [[wolf]] collars.}}
{{History||v0.12.1|snap=build 1|Red [[mushroom]]s can no longer be smelted to obtain [[rose red]].}}
{{History||v0.14.0|snap=build 1|[[Cauldron]]s now used for leather dyeing, by applying a dye to a [[water]]-filled cauldron.}}
{{History||v0.16.0|snap=build 1|[[Cocoa bean]]s can no longer be crafted.}}
{{History|pocket}}
{{History||1.0.0|snap=alpha 0.17.0.1|Added a ''Dye'' button for [[sheep]].
|Added [[shulker]]s, which can be dyed.
|Added [[stained glass]]. Stain glass cannot be [[crafting|crafted]], but purple glass generates in [[end city|end cities]].}}
{{History||1.1.0|snap=alpha 1.1.0.0|Dyes can now apply color to a white [[bed]]s.
|Dyes are now used to craft [[concrete powder]].
|The color palette has been changed.}}
{{History|bedrock}}
{{History||1.2.0|snap=beta 1.2.0.2|Dyes can now be used for [[banner]] crafting.
|Dyes can now be used to craft [[firework star]]s.
|[[Stained glass]] is now [[crafting|craftable]], using dyes.}}
{{History||1.4.0|snap=beta 1.2.20.1|[[Lime dye]] can now be obtained from smelting [[sea pickle]]s.
|Dyes can now used to craft [[glow stick]]s and [[balloon]]s.}}
{{History||1.8.0|snap=beta 1.8.0.8|Dyes can now be used to dye [[cat]] collars.}}
{{History|||snap=beta 1.8.0.10|[[File:White Dye JE1 BE1.png|32px]] [[File:Black Dye JE1 BE1.png|32px]] [[File:Brown Dye JE1 BE1.png|32px]] [[File:Blue Dye JE1 BE1.png|32px]] Added [[white dye|white]], [[brown dye|brown]], [[black dye|black]] and [[blue dye]]s, which can be crafted from [[lapis lazuli]], [[bone meal]], [[cocoa beans]] and [[ink sac]]s. This, however, the later four still use as dyes.<ref>{{Bug|MCPE-42473}}</ref>
|"Rose Red", "Dandelion Yellow" and "Cactus Green" have been renamed to "Red Dye", "Yellow Dye" and "Green Dye", respectively.}}
{{History||1.9.0|snap=beta 1.9.0.0|Blue and white dye can now be obtained from [[cornflower]]s and [[lily of the valley]]s.}}
{{History||1.10.0|snap=beta 1.10.0.3|[[Glass pane]]s and [[carpet]]s can now be dyed.
|Only a single dye is now required to apply a banner pattern in a [[loom]].
|Various dyes except black dye, white dye, brown dye and blue dye are now [[trading|sold]] by [[wandering trader]]s.
|[[File:Bone Meal JE2 BE2.png|32px]] [[File:Light Gray Dye JE2 BE2.png|32px]] [[File:Gray Dye JE2 BE2.png|32px]] [[File:Ink Sac JE2 BE2.png|32px]] [[File:Cocoa Beans JE4 BE3.png|32px]] [[File:Red Dye JE3 BE3.png|32px]] [[File:Orange Dye JE2 BE2.png|32px]] [[File:Yellow Dye JE2 BE2.png|32px]] [[File:Lime Dye JE2 BE2.png|32px]] [[File:Green Dye JE2 BE2.png|32px]] [[File:Cyan Dye.png|32px]] [[File:Light Blue Dye JE2 BE2.png|32px]] [[File:Lapis Lazuli JE2 BE2.png|32px]] [[File:Purple Dye JE2 BE2.png|32px]] [[File:Magenta Dye JE2 BE2.png|32px]] [[File:Pink Dye JE2 BE2.png|32px]] The textures of bone meal, light gray, gray, ink sac, cocoa beans, red, orange, yellow, lime, green, cyan, light blue, lapis lazuli, purple, magenta, and pink dyes have been changed.}}
{{History||1.11.0|snap=beta 1.11.0.4|Dye can now be [[trading|sold]] to shepherd [[villager]]s.}}
{{History||1.16.210|snap=beta 1.16.210.59|The color of the text on [[sign]]s can now be changed with dye.}}
{{History|||snap=beta 1.16.210.60|The ability to dye the color of the text on [[sign]]s was temporarily removed.}}
{{History||1.16.220|snap=beta 1.16.220.50|The color of the text on [[sign]]s can now be changed with dye again.}}
{{History||1.17.10|snap=beta 1.17.10.22|Added [[candles]], which can be dyed.}}
{{History|console}}
{{History||xbox=TU1|xbone=CU1|ps=1.0|wiiu=Patch 1|switch=1.0.1|[[File:Bone Meal JE1 BE1.png|32px]] [[File:Light Gray Dye JE1 BE1.png|32px]] [[File:Gray Dye JE1 BE1.png|32px]] [[File:Ink Sac JE1 BE1.png|32px]] [[File:Cocoa Beans JE1 BE1.png|32px]] [[File:Red Dye JE1 BE1.png|32px]] [[File:Orange Dye JE1 BE1.png|32px]] [[File:Yellow Dye JE1 BE1.png|32px]] [[File:Lime Dye JE1 BE1.png|32px]] [[File:Green Dye JE1 BE1.png|32px]] [[File:Cyan Dye JE1 BE1.png|32px]] [[File:Light Blue Dye JE1 BE1.png|32px]] [[File:Lapis Lazuli JE1 BE1.png|32px]] [[File:Purple Dye JE1 BE1.png|32px]] [[File:Magenta Dye JE1 BE1.png|32px]] [[File:Pink Dye JE1 BE1.png|32px]] Added dyes.}}
{{History||xbox=TU9|[[File:Cocoa Beans JE3 BE2.png|32px]] The texture of cocoa beans has been changed.}}
{{History||xbox=none|xbone=none|ps=1.83|wiiu=none|switch=none|[[File:White Dye JE1 BE1.png|32px]] [[File:Black Dye JE1 BE1.png|32px]] [[File:Brown Dye JE1 BE1.png|32px]] [[File:Blue Dye JE1 BE1.png|32px]] Added [[white dye|white]], [[black dye|black]], [[brown dye|brown]], and [[blue dye|blue]] dyes, which can crafted from [[bone meal]], [[ink sac]], [[cocoa beans]], and [[lapis lazuli]].
|"Rose Red", "Dandelion Yellow" and "Cactus Green" have been renamed to "Red Dye", "Yellow Dye" and "Green Dye", respectively.}}
{{History||ps=1.90|[[File:Bone Meal JE2 BE2.png|32px]] [[File:Light Gray Dye JE2 BE2.png|32px]] [[File:Gray Dye JE2 BE2.png|32px]] [[File:Ink Sac JE2 BE2.png|32px]] [[File:Cocoa Beans JE4 BE3.png|32px]] [[File:Red Dye JE2 BE2.png|32px]] [[File:Orange Dye JE2 BE2.png|32px]] [[File:Yellow Dye JE2 BE2.png|32px]] [[File:Lime Dye JE2 BE2.png|32px]] [[File:Green Dye JE2 BE2.png|32px]] [[File:Cyan Dye.png|32px]] [[File:Light Blue Dye JE2 BE2.png|32px]] [[File:Lapis Lazuli JE2 BE2.png|32px]] [[File:Purple Dye JE2 BE2.png|32px]] [[File:Magenta Dye JE2 BE2.png|32px]] [[File:Pink Dye JE2 BE2.png|32px]] The textures of bone meal, light gray, gray, ink sac, cocoa beans, red, orange, yellow, lime, green, cyan, light blue, lapis lazuli, purple, magenta, and pink dyes have been changed.}}
{{History|3ds}}
{{History||0.1.0|[[File:Bone Meal JE1 BE1.png|32px]] [[File:Light Gray Dye JE1 BE1.png|32px]] [[File:Gray Dye JE1 BE1.png|32px]] [[File:Ink Sac JE1 BE1.png|32px]] [[File:Cocoa Beans JE3 BE2.png|32px]] [[File:Red Dye JE1 BE1.png|32px]] [[File:Orange Dye JE1 BE1.png|32px]] [[File:Yellow Dye JE1 BE1.png|32px]] [[File:Lime Dye JE1 BE1.png|32px]] [[File:Green Dye JE1 BE1.png|32px]] [[File:Cyan Dye JE1 BE1.png|32px]] [[File:Light Blue Dye JE1 BE1.png|32px]] [[File:Lapis Lazuli JE1 BE1.png|32px]] [[File:Purple Dye JE1 BE1.png|32px]] [[File:Magenta Dye JE1 BE1.png|32px]] [[File:Pink Dye JE1 BE1.png|32px]] Added dyes from [[Pocket Edition v0.15.4 alpha]].}}
{{History|foot}}
<gallery>
Pre-release dyes.png|Pre-release dye textures hidden within [[Items.png]].
</gallery>
;Notes
{{reflist|group=n}}
== Gallery ==
<gallery>
White Dye.png|White Dye
Light Gray Dye.png|Light Gray Dye
Gray Dye.png|Gray Dye
Black Dye.png|Black Dye
Brown Dye.png|Brown Dye
Red Dye.png|Red Dye
Orange Dye.png|Orange Dye
Yellow Dye.png|Yellow Dye
Lime Dye.png|Lime Dye
Green Dye.png|Green Dye
Cyan Dye.png|Cyan Dye
Light Blue Dye.png|Light Blue Dye
Blue Dye.png|Blue Dye
Purple Dye.png|Purple Dye
Magenta Dye.png|Magenta Dye
Pink Dye.png|Pink Dye
</gallery>
==Issues==
{{issue list}}
== Trivia ==
* Players can obtain each one of every color with 1 cocoa bean, 2 yellow dye, 2 ink sac, 3 green dye, 4 lapis lazuli, 4 red dye, and 6 bone meal (2 bones).
* The dyed sheep breeding behavior mirrors [[wikipedia:Lamarckism|Lamarck's theory]], in which the organisms evolve inheriting the external changes and adaptations of the previous generation, transmitting them to their offspring.
* In ''Bedrock Edition'', tertiary colors, along with their regular crafting recipes, can be crafted with primary colors. E.g.: Magenta can be crafted with one rose red and two bone meals.
* The colors of the dyes match the chat colors in [[color codes]] except for brown (dye only), light aqua, and gold (color codes only).
* The texture for light blue dye still uses the color from prior to the 1.12 World of Color update.<ref name="unchanged dyes"></ref>
== References ==
{{reflist}}
== External Links ==
* Tools for calculating leather dye combination: [https://minecraft.tools/en/armor.php minecraft.tools] (webapp); [https://github.com/pudquick/pyMCdyes/ pyMCDyes] (open-source Python script, outdated); [https://anrar4.github.io/DyeLeatherArmor/ DyeLeatherArmor]: a tool for calculating an exact crafting recipe for any sRGB color
{{Items}}
[[Category:Dyes]]
[[Category:Renewable resources]]
[[cs:Barvivo]]
[[de:Farbstoff]]
[[es:Tinte]]
[[fr:Teinture]]
[[hu:Színezés]]
[[it:Colorante]]
[[ja:染料]]
[[ko:염료]]
[[nl:Kleurstof]]
[[pl:Barwniki]]
[[pt:Corante]]
[[ru:Красители]]
[[th:สีย้อม]]
[[uk:Барвники]]
[[zh:染料]]</li></ul> | Added survival mode in Survival Test. During this time, death was permanent, meaning players could not respawn and the level needed to be restarted unless a save file had been created. | ||||
| Until mid-Alpha, survival single-player was the only available mode besides Classic creative mode. | |||||
| indev | |||||
0.31{{Extension DPL}}<ul><li>[[Ender Pearl|Ender Pearl]]<br/>
{{ItemEntity
|image=Ender Pearl.png
|renewable=Yes
|stackable=Yes (16)
|size=Height: 0.25 Blocks<br>Width: 0.25 Blocks
}}
An '''ender pearl''' is an [[item]] that can be thrown and [[teleport|teleports]] the thrower to where it lands, and used to craft [[eye of ender|eyes of ender]] which are required to access [[the End]].
== Obtaining ==
=== Mob loot ===
An [[enderman]] has a 50% chance to drop 1 ender pearl when killed. The drop is increased by 1 per level of [[Looting]], with a maximum of 4 with Looting III.
=== Chest loot ===
{{LootChestItem|ender-pearl}}
A [[trapped chest]] always containing 2 ender pearls can be found in the "fake end portal" room of [[woodland mansion]]s.
=== Trading ===
{{IN|java}}, expert-level [[Trading#Cleric|cleric villagers]] have a {{frac|2|3}} chance to sell an ender pearl for 5 [[emerald]]s.
{{IN|bedrock}}, expert-level cleric villagers sell one ender pearl for 5 emeralds.
=== Bartering ===
[[Piglin]]s have a {{frac|10|459}} (4.27) chance to [[barter]] 3-4 ender pearls when given a [[gold ingot]].
== Usage ==
Ender pearls can be thrown by pressing {{control|use}}. After it is thrown, the ender pearl is consumed, and the player teleports to where it lands, taking {{hp|5}} [[fall damage]]. Wearing armor enchanted with [[Protection]] and/or [[Feather Falling]] reduces the damage taken from the ender pearl.
Ender pearls have a small cone of travel; they do not all follow the same path when thrown in the same direction. The direction and velocity of ender pearl throws is slightly randomized. They can travel about 30 blocks when thrown straight up, and up to 54 blocks forward when thrown at an optimum launch angle of ~35° (on even ground).
The thrower's vertical velocity influences the throw. Hence timing a throw with a jump can increase the throwing range to 42 blocks when thrown straight up and 64 blocks forward at a 35° angle. Throwing while falling significantly decreases the range. Ender pearls collide with all [[minecart]] types, [[boat]]s, [[end crystal]]s and [[nether portal]]s, and travel through [[end portal]]s. Ender pearls that fall into the [[void]] disappear, and do not trigger the player to teleport. However, ender pearl entities (instead of dropped items) are ''not'' destroyed by lava and will teleport the player to the bottom of lava pools/lava oceans.
Ender pearls have a cooldown of one second before they can be used again. The cooldown is shown in the hotbar by a white overlay on the ender pearl that shrinks and must disappear before the player can use it again. If there are other inventory or hotbar slots containing ender pearls, they are covered with the white overlay as well.<ref>{{bug|MC-88236|||WAI}}</ref>
Ender pearls can be thrown into [[end gateway]]s to reach the outer islands of the End. They can also be thrown into the [[exit portal]] to reach the player's spawn point.
Ender pearl teleportation makes no sound ''itself''{{only|java}}, but does emit a "small fall" sound at the destination when applying teleportation damage to the player.
=== Stasis chamber ===
Ender pearls are affected by [[bubble column]]s. An ender pearl can remain afloat on top of an upward bubble column, allowing it to be stored indefinitely. A mechanism can then be triggered to make the ender pearl hit a solid surface (e.g. by closing a [[trapdoor]]), teleporting the thrower back to the setup wherever they are.
=== Spawning endermites ===
An ender pearl has a 10% chance to spawn an [[endermite]] when it lands. This is the only way through which endermites can spawn, without using cheats. The endermite spawns at ''the player's position'' when the pearl lands{{only|je}}, or at the pearl's landing site{{only|be}}.
=== Crafting ingredient ===
{{crafting usage}}
== Sounds ==
{{edition|java}}:<br>
Thrown ender pearls use the Friendly Creatures sound category for entity-dependent sound events.
{{Sound table
|sound=Bow shoot.ogg
|subtitle=Ender Pearl flies
|source=neutral
|description=When an ender pearl is thrown
|id=entity.ender_pearl.throw
|translationkey=subtitles.entity.ender_pearl.throw
|volume=0.5
|pitch={{frac|1|3}}-0.5
|distance=16
|foot=1}}
{{Edition|Bedrock}}:
{{Sound table
|type=bedrock
|sound=Bow shoot.ogg
|source=player
|description=When an ender pearl is thrown
|id=random.bow
|volume=0.5
|pitch=0.33-0.5
|foot=1}}
== Data values ==
=== ID ===
{{edition|java}}:
{{ID table
|edition=java
|firstcolumnname=Item
|showforms=y
|generatetranslationkeys=y
|displayname=Ender Pearl
|spritetype=item
|nameid=ender_pearl
|form=item
|foot=1}}
{{ID table
|edition=java
|firstcolumnname=Entity
|generatetranslationkeys=y
|displayname=Thrown Ender Pearl
|spritetype=entity
|spritename=Ender Pearl
|nameid=ender_pearl
|foot=1}}
{{edition|bedrock}}:
{{ID table
|edition=bedrock
|firstcolumnname=Item
|shownumericids=y
|showforms=y
|notshowbeitemforms=y
|generatetranslationkeys=y
|displayname=Ender Pearl
|spritetype=item
|nameid=ender_pearl
|id=422
|foot=1}}
{{ID table
|edition=bedrock
|firstcolumnname=Entity
|shownumericids=y
|generatetranslationkeys=y
|displayname=Ender Pearl
|spritetype=entity
|nameid=ender_pearl
|id=87
|foot=1}}
===Entity Data===
Thrown ender pearls have entity data that define various properties of the entity.
{{el|java}}:
{{main|Entity format}}
{{/ED}}
{{el|bedrock}}:
: See [[Bedrock Edition level format/Entity format]].
== Achievements ==
{{Load achievements|Beam Me Up}}
== Advancements ==
{{load advancements|Remote Getaway;Bullseye}}
== History ==
{{History|java beta}}
{{History||1.8|snap=Pre-release|[[File:Ender Pearl JE1.png|32px]] Added ender pearls along with [[endermen]].
|Ender pearls have no use, but can stack up to 64.}}
{{History|java}}
{{History||1.0.0|snap=Beta 1.9 Prerelease|Ender pearls are now less commonly found near bodies of [[water]] since [[endermen]] now teleport away when in contact with water. Before this version, endermen didn't attempt to teleport and were [[damage]]d/killed from water much more frequently, causing numerous ender pearls to occur around bodies of water.
|Later, on a suggestion from [[wikipedia:Reddit|Reddit]] user isJesus, [[Notch]] implemented the teleporting feature for ender pearls.<ref>http://www.reddit.com/r/Minecraft/comments/kpsay/eggsnowballender_pearl_suggestiongif/c2mabfj</ref><ref>{{Tweet|notch|118614580539826176}}</ref><ref>http://www.reddit.com/r/Minecraft/comments/kss7n/twitter_ender_pearls_have_a_unique_ability_now/c2mwldd</ref>}}
{{History|||snap=Beta 1.9 Prerelease 2|Added teleporting feature to ender pearls.
|Using an ender pearl to teleport resulted in being kicked from servers for "hacking". This is due to a check triggering that was supposed to prevent modified clients from moving too quickly.
|Ender pearls now only stack up to 16.}}
{{History|||snap=Beta 1.9 Prerelease 3|Ender pearls are now used to craft [[eyes of ender]].
|Ender pearls can now be found in the new [[stronghold]] altar [[chest]]s.}}
{{History||1.3.1|snap=12w24a|[[File:Ender Pearl JE2 BE1.png|32px]] The texture of ender pearls has been changed.}}
{{History||1.8|snap=14w02a|As part of the revamp of the trading system, cleric [[villager]]s now [[trading|buy]] ender pearls.}}
{{History|||snap=14w03a|Villager clerics no longer buy ender pearls.}}
{{History|||snap=14w11b|Ender pearls have a 5% chance to spawn [[endermite]]s when used.}}
{{History||1.9|snap=15w31a|Ender pearls can now be thrown in [[Creative]] mode.}}
{{History|||snap=15w34c|Ender pearls now have a cooldown after using them.}}
{{History|||snap=15w41a|[[Villager]] clerics now [[trading|sell]] ender pearls for 4–7 [[emerald]]s, as one of their tier III trades.}}
{{History|||snap=15w49a|Thrown ender pearls now take the user's motion into account. For example, an ender pearl thrown forward will land closer if the player is falling, and land farther if the player is ascending.}}
{{History||1.10|snap=16w21a|Ender pearls can now teleport riders off their mounts.}}
{{History||1.11|snap=16w32a|The entity ID of ender pearls has been changed from <code>ThrownEnderpearl</code> to <code>ender_pearl</code>.}}
{{History|||snap=16w39a|Ender pearls can now be found in [[woodland mansion]]s' fake portal room [[chest]]s.}}
{{History||1.13|snap=17w47a|Prior to [[1.13/Flattening|''The Flattening'']], this [[item]]'s numeral ID was 368.}}
{{History||1.14|snap=18w43a|[[File:Ender Pearl JE3 BE2.png|32px]] The texture of ender pearls has been changed.}}
{{History||1.16|snap=20w07a|Ender pearls have a {{frac|2|109}} (~1.83%) chance of being offered by [[piglin]]s when [[bartering]], in a stack size of 2–4.}}
{{History|||snap=20w09a|Ender pearls now have a {{frac|10|226}} (~4.42%) chance of being offered by piglins when bartering, in a stack size of 1–5.}}
{{History|||snap=20w10a|Ender pearls now have a {{frac|20|411}} (~4.87%) chance of being offered by piglins when bartering, in a stack size of 4–8.}}
{{History|||snap=20w20a|Ender pearls now have a {{frac|20|423}} (~4.73%) chance of being offered by piglins when bartering, in a stack size of 4–8.}}
{{History||1.16.2|snap=20w28a|Ender pearls now have a {{frac|10|459}} (~2.18%) chance of being offered by piglins when bartering, in a stack size of 2–4.}}
{{History|||snap=Pre-Release 1|Ender pearls are now affected by [[bubble column]]s.<ref>{{bug|MC-125758|||Fixed}}</ref>
|Ender pearls no longer get destroyed at contact with non-solid blocks.<ref>{{bug|MC-73884|||Fixed}}</ref>}}
{{History|pocket alpha}}
{{History||v0.14.0|snap=build 1|[[File:Ender Pearl JE2 BE1.png|32px]] Added ender pearls.
|While fully implemented, ender pearls currently have no assigned ID and are currently unobtainable in-game.}}
{{History|pocket}}
{{History||1.0.0|snap=alpha 0.17.0.1|Ender pearls are now obtainable in-game.
|Ender pearls can now be used to craft [[eyes of ender]].}}
{{History|||snap=alpha 1.0.0.0|Ender pearls now require a 1-second cooldown.}}
{{History|||snap=alpha 1.0.0.1|Ender pearl cooldown now has an animation.}}
{{History||1.0.4|snap=alpha 1.0.4.0|Ender pearls can now be [[trading|bought]] from cleric [[villager]]s for 4-7 [[emerald]]s.}}
{{History||1.1.0|snap=alpha 1.1.0.0|Ender pearls can now be found in [[woodland mansion]]s' [[chest]]s.}}
{{History|bedrock}}
{{History||1.10.0|snap=beta 1.10.0.3|[[File:Ender Pearl JE3 BE2.png|32px]] The texture of ender pearls has been changed.}}
{{History||1.11.0|snap=beta 1.11.0.4|[[Trading]] has been changed, expert-level cleric [[villager]]s now [[trading|sell]] an ender pearl for 5 [[emerald]]s as part of their trade.}}
{{History||1.16.0|snap=beta 1.16.0.57|Ender pearls can now be obtained from [[bartering]] with [[piglin]]s.}}
{{History||1.16.100|snap=beta 1.16.100.54|Ender pearls now have a {{frac|10|459}} (~2.18%) chance of being offered by piglins when bartering, in a stack size of 2–4.}}
{{History|console}}
{{History||xbox=TU5|xbone=CU1|ps=1.0|wiiu=Patch 1|switch=1.0.1|[[File:Ender Pearl JE2 BE1.png|32px]] Added ender pearls.}}
{{History||xbox=TU7|A teleporting feature has been added to ender pearls.}}
{{History||xbox=none|xbone=none|ps=1.90|wiiu=none|switch=none|[[File:Ender Pearl JE3 BE2.png|32px]] The texture of ender pearls has been changed.}}
{{History|new 3ds}}
{{History||1.7.10|[[File:Ender Pearl JE2 BE1.png|32px]] Added ender pearls.}}
{{History|foot}}
== Issues ==
{{issue list}}
== Trivia ==
*Ender pearls can be used to teleport/move through non-[[solid block]]s without suffocation and solid blocks by pressing against the blocks and using the ender pearl at the player's feet until the player goes through.<ref>{{bug|MC-2164}}</ref><ref>{{ytl|KA1UmxraeUg}}</ref>
*In ''Java Edition'', it is possible to spawn a thrown ender pearl using commands, but it does not teleport, unless it is assigned an owner.
*If the player throws an ender pearl and then dies before impact while the pearl is in a loaded chunk, the pearl disappears and the player is not teleported. Pearls in unloaded chunks do not disappear if their owner dies.
*If the player throws an ender pearl in Survival mode and changes to Creative mode before the pearl lands, the player is still teleported.
*The player is still teleported by throwing an ender pearl and entering [[the Nether]] before it lands. The pearl is not lost if an ender pearl is thrown into a [[nether portal]] and the player travels through the portal; the pearl lands and teleports the player as usual.
*If multiple ender pearls are thrown in succession, the player can be hurt only once from fall damage within about a one-second span.
*If a [[player]] dies from ender pearl teleportation, the [[death message]] says: "<player> hit the ground too hard".
*A thrown ender pearl faces toward the player in first-person view, while it appears rotated horizontal in [[third-person view]]. This is the case for all throwable items (ender pearl, [[egg]], [[snowball]], and all throwable [[potion]]s).
*Ender pearls and [[snowball]]s have the exact same range when fired. Therefore, snowballs can be used to predict the trajectory of ender pearls, or simply for practicing ender pearl throwing. This can be very helpful when the player has to throw ender pearls in dangerous environments, such as the Nether or the End.
*Despite the fact that ender pearls deal no damage to anything they're thrown at, provokable mobs (such as iron golems and piglins) will be provoked by the player if one is thrown at them.
== Gallery ==
<gallery>
Ender Pearl Suggestion.gif|The original suggestion image for teleporting with ender pearls.
Enderlake.png|Ender pearls were formerly found in [[water]], however endermen now teleport out to prevent damage.
</gallery>
== References ==
{{reflist}}
== See also ==
*[[End Dimension]]
*[[Ender Dragon]]
*[[Ender Portal]]
*[[Enderman]]
{{Items}}
{{entities}}
[[cs:Endová perla]]
[[de:Enderperle]]
[[es:Perla de ender]]
[[fr:Perle de l'Ender]]
[[hu:Véggyöngy]]
[[ja:エンダーパール]]
[[ko:엔더 진주]]
[[nl:Enderparel]]
[[pl:Enderperła]]
[[pt:Pérola de ender]]
[[ru:Жемчуг Края]]
[[th:ไข่มุกเอนเดอร์]]
[[tr:Ender İncisi]]
[[uk:Перлина Краю]]
[[zh:末影珍珠]]</li><li>[[Carrot|Carrot]]<br/>{{about|the natural food item|the golden food|Golden Carrot|the item for controlling saddled pigs|Carrot on a Stick}}
{{Item
| group = Age 0-1
| 1-1 = Carrots Age 0-1.png
| 1-2 = Carrots Age 0-1 BE.png
| group2 = Age 2-3
| 2-1 = Carrots Age 2-3.png
| 2-2 = Carrots Age 2-3 BE.png
| group3 = Age 4-6
| 3-1 = Carrots Age 4-6.png
| 3-2 = Carrots Age 4-6 BE.png
| group4 = Age 7
| 4-1 = Carrots Age 7.png
| 4-2 = Carrots Age 7 BE.png
| image2 = Carrot JE3 BE2.png
| renewable = Yes
| heals = {{hunger|3}}
| stackable = Yes (64)
}}
A '''carrot''' is a [[food]] [[item]] obtained from carrot crops that can be used to plant them, eaten or used as a crafting ingredient.
'''Carrot crops''' are planted in [[farmland]] and used to grow carrots.
== Obtaining ==
=== Breaking ===
{{See also|Fortune#Seeds}}
Fully grown carrot crops drop 2 to 5 carrots ({{frac|3|5|7}} per crop harvested on average). Yield can be increased using a tool enchanted with [[Fortune]], with Fortune III harvesting an average of {{frac|5|3|7}} carrots.
The yield is calculated by a binomial distribution: 2 drops are fixed, then a drop is attempted three times with a success rate of 57.14286% to yield the extra 0–3 drops. Each level of Fortune enchantment increases the number of attempts by one.
=== Natural generation ===
[[Village]] farm plots have a chance of having carrots. The exact chance depends on the style of the village:
{| class="wikitable"
! Village style !! Chance
|-
| {{EnvSprite|plains-village}} Plains || 30%
|-
| {{EnvSprite|snowy-village}} Snowy || 10%
|}
=== Mob loot ===
[[Zombie]]s, [[husk]]s, and [[zombie villager]]s have a 2.5% ({{frac|1|40}}) chance of dropping either an [[iron ingot]], carrot, or [[potato]] when killed by a player or tamed wolf. This is increased by 1% ({{frac|1|100}}) per level of looting. This gives carrots the following chances of dropping:
* {{frac|1|120}} (about 0.83%)
* {{frac|7|600}} (about 1.17%) with Looting I
* {{frac|9|600}} (about 1.50%) with Looting II
* {{frac|11|600}} (about 1.83%) with Looting III
=== Chest loot ===
{{LootChestItem|carrot}}
== Usage ==
{{see also|Tutorials/Hunger management|title1=Hunger management}}
To eat a carrot, press and hold {{control|use}} while the carrot is selected in the [[hotbar]]. Eating a carrot restores {{hunger|3}} [[hunger]] and 3.6 hunger [[Hunger#Mechanics|saturation]].
=== Farming ===
{{see also|Tutorials/Crop farming|title1 = Crop farming }}
Carrots can be [[farming|farmed]] and harvested on [[farmland]]. Planted carrots take 8 [[Block tick|stages]] to grow, and go through 4 visually distinct stages. Planted carrots require a light level of 9 or greater to continue growing. If the light level is 7 or below, the crops instantly un-plant themselves ("pop off"). It is not possible to plant carrots if the light level is too low.
Crops grow faster if the farmland they are planted in is [[Farmland#Hydration|hydrated]]. Using [[bone meal]] on crops also increases the speed of growth by randomly increasing their growth stage by 2 to 5.
Crops break if pushed by a [[piston]] or if their supporting farmland breaks or turns to dirt (i.e. by being trampled), dropping their usual drops.
If {{cmd|gamerule mobGriefing}} is <code>true</code>, rabbits will find mature carrot [[crops]]{{only|je}} / carrot crops with growth stage greater than 1{{only|be}}. This reduces the growth stages by one, removing the crop completely when the growth stage reaches 0.
=== Breeding ===
Carrots can also be used to [[breed]] and attract [[pig]]s and [[rabbit]]s.
Villagers can pick up carrot items to become willing, which allow them to breed. Villagers require 12 carrots to become willing.
=== Trading ===
Novice-level Farmer villagers have a 25% ({{frac|1|4}}){{only|bedrock}} or 40% ({{frac|2|5}}){{only|java}} chance to buy 22 carrots for an emerald.
=== Crafting ingredient ===
{{crafting usage}}
=== Composting ===
Placing a carrot into a [[composter]] has a 65% chance of raising the compost level by 1.
== Sounds ==
=== Block ===
{{Sound table/Block/Crop}}
=== Item ===
{{Sound table/Entity/Food}}
== Data values ==
=== ID ===
{{edition|java}}:
{{ID table
|edition=java
|showblocktags=y
|showforms=y
|generatetranslationkeys=y
|displayname=Carrots
|spritetype=block
|nameid=carrots
|blocktags=bee_growables, crops
|form=block}}
{{ID table
|displayname=Carrot
|spritetype=item
|nameid=carrot
|form=item
|foot=1}}
{{edition|bedrock}}:
{{ID table
|edition=bedrock
|showforms=y
|shownumericids=y
|generatetranslationkeys=y
|displayname=Carrots
|spritetype=block
|nameid=carrots
|id=141
|form=block
|translationkey=-}}
{{ID table
|displayname=Carrot
|spritetype=item
|nameid=carrot
|id=279
|form=item
|foot=1}}
=== Block states ===
{{see also|Block states}}
{{/BS}}
== Advancements ==
{{load advancements|Husbandry;A Balanced Diet}}
== History ==
{{History|java}}
{{History||1.4.2|snap=12w34a|[[File:Carrot JE1.png|32px]] Added carrots.
|[[File:Carrots Age 0-1 JE1.png|32px]] [[File:Carrots Age 2-3 JE1.png|32px]] [[File:Carrots Age 4-6 JE1.png|32px]] [[File:Carrots Age 7 JE1.png|32px]] Added carrot crops.
|Carrots can be obtained only as a rare [[drop]] from [[zombie]]s.}}
{{History|||snap=August 28, 2012|slink={{tweet|Dinnerbone|240428477856231424}}|[[Dinnerbone]] released an image of a [[saddle]]d [[pig]] being controlled with a [[carrot on a stick]]. [[Wheat]] was considered as a "fuel" along with carrots,<ref>{{Tweet|Dinnerbone|240188453789257728}}</ref> but Dinnerbone eventually decided on carrots.<ref>{{Tweet|Dinnerbone|240355810650247168}}</ref>}}
{{History|||snap=12w34a|Carrots can now be used to craft [[golden carrot]]s.}}
{{History|||snap=12w36a|Carrots can now be found in [[village]]s.
|Carrots are now used to breed [[pig]]s.
|Carrots are now used to craft [[carrot on a stick]].}}
{{History|||snap=12w37a|[[File:Carrot JE2 BE1.png|32px]] The texture of carrots has now been changed. The texture has been changed to singular carrot, with the tooltip changed to reflect this.}}
{{History||1.5|snap=13w04a|[[Bone meal]] now grows carrots by 1 stage instead of fully growing it. The [[player]] might not see it grow, because some stages look the same.}}
{{History||1.8|snap=14w02a|Carrots now restore {{hunger|3}} points and 3.6 hunger [[saturation]], instead of {{hunger|4}} and 4.8 hunger saturation.
|Farmer [[villager]]s now [[trading|buy]] 15–19 carrots for 1 [[emerald]].}}
{{History|||snap=14w04a|[[Farmer]] (profession) [[villager]]s now harvest fully grown carrots.
|Villagers can now be made willing using 12 carrots.}}
{{History|||snap=14w06a|[[File:Carrots Age 0-1 JE2.png|32px]] [[File:Carrots Age 2-3 JE2.png|32px]] [[File:Carrots Age 4-6 JE2.png|32px]] [[File:Carrots Age 7 JE2.png|32px]] Carrot crops are now a pixel higher - previously they were offset one pixel down as to match farmland's sunken model. This is likely an accidental result of model conversion.}}
{{History|||snap=14w10a|[[File:Missing Model JE2.png|32px]] [[File:Missing Model JE2.png|32px]] [[File:Missing Model JE2.png|32px]] [[File:Missing Model JE2.png|32px]]<br>[[File:Missing Model (anisotropic filtering) JE2.png|32px]] [[File:Missing Model (anisotropic filtering) JE2.png|32px]] [[File:Missing Model (anisotropic filtering) JE2.png|32px]] [[File:Missing Model (anisotropic filtering) JE2.png|32px]]<br>Carrot crops of all stages [[Missing model|no longer have a model]].}}
{{History|||snap=14w10b|[[File:Carrots Age 0-1 JE4.png|32px]] [[File:Carrots Age 2-3 JE4.png|32px]] [[File:Carrots Age 4-6 JE4.png|32px]] [[File:Carrots Age 7 JE4.png|32px]] Carrot crops now have models again.<ref>{{bug|MC-50232}}</ref> In addition, they are now offset downwards by one pixel once more.<ref>{{bug|MC-50155}}</ref>}}
{{History|||snap=14w25a|[[File:Carrots Age 0-1 JE5.png|32px]] [[File:Carrots Age 2-3 JE5.png|32px]] [[File:Carrots Age 4-6 JE5.png|32px]] [[File:Carrots Age 7 JE5.png|32px]] Carrot crops are now darker and subject to directional shading.}}
{{History|||snap=14w27a|[[File:Carrots Age 0-1 JE6.png|32px]] [[File:Carrots Age 2-3 JE6.png|32px]] [[File:Carrots Age 4-6 JE6.png|32px]] [[File:Carrots Age 7 JE6.png|32px]] Carrot crops are no longer subject to directional shading.
|Added [[rabbit]]s, which can be [[breeding|bred]] and/or tamed using carrots. Rabbits also grief carrot crops.
|Carrots are now used to craft [[rabbit stew]].}}
{{History|||snap=14w34a|Rabbits can no longer be tamed.}}
{{History||1.9|snap=15w38a|The [[drops|drop]] chances have now been slightly improved from an average of {{frac|2|3|5}} per [[crops|crop]] harvested to {{frac|2|5|7}}.}}
{{History||1.13|snap=17w47a|Prior to [[1.13/Flattening|''The Flattening'']], this block's numeral ID was 141, and the item's 391.}}
{{History|||snap=18w11a|Carrots can now generate in the chests of [[shipwreck]]s.}}
{{History||1.14|snap=18w43a|[[File:Carrot JE3 BE2.png|32px]] The texture of carrots has now been changed.
|[[File:Carrots Age 0-1 JE7.png|32px]] [[File:Carrots Age 2-3 JE7.png|32px]] [[File:Carrots Age 4-6 JE7.png|32px]] [[File:Carrots Age 7 JE7.png|32px]] The textures of carrot crops have now been changed.}}
{{History|||snap=18w47a|Carrots can now generate in the [[chest]]s of [[pillager outpost]]s.}}
{{History|||snap=19w03a|Placement and breaking [[sound]]s have now been added to carrots.
|Placing a carrot into the new [[composter]] has a 50% chance of raising the compost level by 1.}}
{{History|||snap=19w05a|Carrots now have a 65% chance of increasing the compost level in a composter by 1.}}
{{History||1.15|snap=19w34a|[[Bee]]s can now pollinate carrot crops.}}
{{History||1.17|snap=21w13a|[[File:Carrots Age 0-1 JE8.png|32px]] [[File:Carrots Age 2-3 JE8.png|32px]] [[File:Carrots Age 4-6 JE8.png|32px]] [[File:Carrots Age 7 JE8.png|32px]] The "crop" template model has changed such that pixels appear in the same physical positions on opposite sides of texture planes, changing the carrot crop's appearance in the process.<ref>{{bug|MC-199242}}</ref>}}
{{History||1.18|snap=Pre-release 5|[[File:Carrots Age 7 JE9.png|32px]] A stray dark pixel has been removed from the texture of fully-grown carrots.<ref>{{bug|MC-226711}}</ref>}}
{{History|pocket alpha}}
{{History||v0.8.0|snap=build 1|[[File:Carrot JE2 BE1.png|32px]] Added carrots.
|[[File:Carrots Age 0-1 JE6 BE1.png|32px]] [[File:Carrots Age 2-3 JE6 BE1.png|32px]] [[File:Carrots Age 4-6 JE6 BE1.png|32px]] [[File:Carrots Age 7 JE6 BE1.png|32px]]{{verify|Correct models?}} Added carrot crops.
|Carrots can be obtained by killing [[zombie]]s.}}
{{History|||snap=build 3|Carrots now have a chance to [[drops|drop]] when tilling [[grass block]]s.}}
{{History|||snap=build 4|Carrots are no longer dropped by tilling [[grass block]]s.}}
{{History||v0.9.0|snap=build 1|Carrot crops now naturally spawn in [[village]]s.
|Carrot now used to breed [[pig]]s.}}
{{History||v0.12.1|snap=build 1|Carrots now restore [[hunger]] instead of [[health]].
|Brown robed [[villager]]s can now harvest fully grown carrot crops.
|Carrots can now be used to craft [[golden carrot]]s.}}
{{History||v0.13.0|snap=build 1|Carrots can now be used to breed [[rabbit]]s.
|Carrots can now be used to craft [[rabbit stew]].}}
{{History||v0.15.0|snap=build 1|Carrots are now used to craft [[carrot on a stick]].}}
{{History||v0.16.2|Carrots can now be found in a [[chest]] inside the large house in [[snowy tundra]] and [[snowy taiga]] [[village]]s.}}
{{History|pocket}}
{{History||1.0.4|snap=alpha 1.0.4.0|Farmer [[villager]]s now [[trading|buy]] 15–19 carrots for 1 [[emerald]].
|Carrots can now be picked up by villagers and become willing.}}
{{History|bedrock}}
{{History||1.2.0|snap=beta 1.2.0.2|Carrots can now be found inside of [[bonus chest]]s.}}
{{History||1.4.0|snap=beta 1.2.14.2|Carrots can now be found inside [[shipwreck]] chests.}}
{{History||1.10.0|snap=beta 1.10.0.3|Carrots can be found in the new [[pillager outpost]]s.
|[[File:Carrot JE3 BE2.png|32px]] The texture of carrots has now been changed.
|[[File:Carrots Age 0-1 JE7.png|32px]] [[File:Carrots Age 2-3 JE7.png|32px]] [[File:Carrots Age 4-6 JE7.png|32px]] [[File:Carrots Age 7 JE7.png|32px]]{{verify|Correct models?}} The textures of carrot crops have now been changed.}}
{{History||1.11.0|snap=beta 1.11.0.1|Carrots can now be used to fill up [[composter]]s.}}
{{History|||snap=beta 1.11.0.4|[[Trading]] has now been changed, farmer [[villager]]s now have a 25% chance to [[trading|buy]] 22 carrots for an [[emerald]].}}
{{History||1.14.0|snap=beta 1.14.0.1|[[Bee]]s can now pollinate carrot crops.}}
{{History||?|[[File:Carrots Age 0-1 BE.png|32px]] [[File:Carrots Age 2-3 BE.png|32px]] [[File:Carrots Age 4-6 BE.png|32px]] [[File:Carrots Age 7 BE.png|32px]] Carrot crop planes use a mapping that results in very unnatural mirroring when viewed from certain angles, such as northwest.<ref>{{bug|MCPE-146936}}</ref>}}
{{History|console}}
{{History||xbox=TU14|xbone=CU1|ps=1.04|wiiu=Patch 1|switch=1.0.1|[[File:Carrot JE2 BE1.png|32px]] Added carrots.
|[[File:Carrots Age 0-1 JE6 BE1.png|32px]] [[File:Carrots Age 2-3 JE6 BE1.png|32px]] [[File:Carrots Age 4-6 JE6 BE1.png|32px]] [[File:Carrots Age 7 JE6 BE1.png|32px]]{{verify|Correct models?}} Added carrot crops.}}
{{History||xbox=none|xbone=none|ps=1.90|wiiu=none|switch=none|[[File:Carrot JE3 BE2.png|32px]] The texture of carrots has now been changed.
|[[File:Carrots Age 0-1 JE7.png|32px]] [[File:Carrots Age 2-3 JE7.png|32px]] [[File:Carrots Age 4-6 JE7.png|32px]] [[File:Carrots Age 7 JE7.png|32px]]{{verify|Correct models?}} The textures of carrot crops have now been changed.}}
{{History||xbox=none|xbone=none|ps=1.91|wiiu=none|switch=none|Carrots can now be used to fill up [[composter]]s.}}
{{History|New 3DS}}
{{History||0.1.0|[[File:Carrot JE2 BE1.png|32px]] Added carrots.
|[[File:Carrots Age 0-1 JE6 BE1.png|32px]] [[File:Carrots Age 2-3 JE6 BE1.png|32px]] [[File:Carrots Age 4-6 JE6 BE1.png|32px]] [[File:Carrots Age 7 JE6 BE1.png|32px]]{{verify|Correct models?}} Added carrot crops.}}
{{History|foot}}
=== Carrots "item" ===
{{:Technical blocks/Carrots}}
== Issues ==
{{issue list}}
== Gallery ==
<gallery>
AllSeeds.png|All the seeds that exist in the game (except [[nether wart]] and [[cocoa beans]]).
VillageGrowingCarrotsAndPotatoes.png|Carrots and [[potato]]es found growing naturally in a [[village]].
Carrots Growing.png|Carrots in multiple stages of growth.
Carrot Dungeon.jpg|A carrot that dropped from a zombie, just to the right of the [[spawner]].
Carrot SDGP.png|Carrot in the [[Super Duper Graphics Pack]].
</gallery>
== References ==
{{reflist}}
{{Items}}
{{blocks|vegetation}}
[[Category:Plants]]
[[Category:Food]]
[[Category:Renewable resources]]
[[Category:Non-solid blocks]]
[[Category:Generated structure blocks]]
[[cs:Mrkev]]
[[de:Karotte]]
[[es:Zanahoria]]
[[fr:Carotte]]
[[hu:Sárgarépa]]
[[ja:ニンジン]]
[[ko:당근]]
[[lzh:胡蘿蔔]]
[[nl:Wortel]]
[[pl:Marchewka]]
[[pt:Cenoura]]
[[ru:Морковь]]
[[th:แคร์รอต]]
[[uk:Морква]]
[[zh:胡萝卜]]</li></ul> | 0.31 (January 29, 2010) | Crafting is introduced. | |||
| infdev | |||||
March 27, 2010{{Extension DPL}}<ul><li>[[Lime Dye|Lime Dye]]<br/>{{Item
| image = Lime_Dye_JE2_BE2.png
| renewable = Yes
| stackable = Yes (64)
}}
'''Lime dye''' is a [[Dye#Quasi-Primary|quasi-primary dye]] obtained by combining one [[green dye]] and one [[white dye]] in a crafting square, or by smelting a [[sea pickle]].
== Obtaining ==
=== Crafting ===
{{Crafting
|head=1
|showname=0
|showdescription=1
|Green Dye
|White Dye
|Output=Lime Dye,2
|type=Material
}}
{{Crafting
|foot=1
|Green Dye
|Bone Meal
|Output=Lime Dye,2
|description={{only|bedrock|education}}
|type=Material
}}
=== Smelting ===
{{Smelting
|head=1
|foot=1
|Sea Pickle
|Lime Dye
|0,2
}}
=== Trading ===
[[Wandering trader]]s sell 3 lime [[dye]] for 1 [[emerald]].
== Usage ==
{{dye usage}}
=== Crafting ingredient ===
{{crafting usage|continue=1}}
{{banner crafting usage}}
=== Loom ingredient ===
{{Banner loom usage|Lime Dye}}
=== Trading ===
Journeyman-level shepherd villagers have a 20% chance to buy 12 lime dye for an emerald as part of their trades.
== Data values ==
=== ID ===
{{edition|java}}:
{{ID table
|edition=java
|showforms=y
|generatetranslationkeys=y
|displayname=Lime Dye
|spritetype=item
|nameid=lime_dye
|form=item
|foot=1}}
{{edition|bedrock}}:
{{ID table
|edition=bedrock
|showaliasids=y
|shownumericids=y
|showforms=y
|notshowbeitemforms=y
|generatetranslationkeys=y
|displayname=Lime Dye
|spritetype=item
|nameid=lime_dye
|aliasid=dye / 10
|id=405
|form=item
|translationkey=item.dye.lime.name
|foot=1}}
== Video ==
<div style="text-align:center">{{yt|5oPGO6jL1zQ}}</div>
== History ==
{{History|java beta}}
{{History||1.2|[[File:Lime Dye JE1 BE1.png|32px]] Added lime dye.}}
{{History|java}}
{{History||1.4.2|snap=12w34a|Added the ability to [[Armor#Dyeing|dye]] leather [[armor]] and [[wolf]] collars.}}
{{History||1.4.6|snap=12w49a|Lime dye can now be [[crafting|crafted]] with [[gunpowder]] to create a [[firework star]].}}
{{History||1.6.1|snap=13w19a|[[Stained clay]] can now be crafted.}}
{{history||1.7.2|snap=13w41a|[[Stained glass]] can now be crafted.}}
{{History||1.8|snap=14w30a|Added [[banner]]s, which can be dyed.}}
{{History||1.11|snap=16w39a|Added the ability to dye [[shulker box]]es.}}
{{History||1.12|snap=17w15a|Added the ability to dye [[bed]]s.}}
{{History||1.13|snap=17w47a|The different data values for the <code>dye</code> ID have now been split up into their own IDs.
|Prior to [[1.13/Flattening|''The Flattening'']], this [[item]]'s numeral ID was 351.}}
{{History|||snap=18w14b|Lime dye can now be smelted from [[sea pickle]]s.}}
{{History||1.14|snap=18w43a|Lime dye is now crafted using [[white dye]], instead of [[bone meal]].
|[[File:Lime_Dye_JE2_BE2.png|32px]] The texture of lime dye has now been changed.}}
{{History|||snap=18w44a|Lime dye can now change the text color on [[sign]]s to lime.}}
{{History|||snap=19w05a|Added the [[wandering trader]], which sells lime dye.}}
{{History|||snap=19w11a|Lime dye can now be [[trading|bought]] by shepherd villagers.}}
{{History||1.17|snap=20w45a|Lime dye can now be used to craft [[lime candle]]s.}}
{{History|||snap=21w19a|Lime dye can no longer be used to craft lime candles.}}
{{History|||snap=Pre-release 1|Lime dye can now once again be used to craft lime candles.}}
{{History||1.20<br>(Experimental)|link=1.19.3|snap=22w42a|Lime dye can now change the text color on [[hanging sign]]s to lime.}}
{{History|pocket alpha}}
{{History||v0.3.0|[[File:Lime Dye JE1 BE1.png|32px]] Added lime dye. It is currently unobtainable and serves no purpose.}}
{{History||v0.4.0|Lime dye is now craftable with [[cactus green]] and [[bone meal]].
|Lime dye can now be used to craft lime wool.}}
{{History||v0.6.0|Lime dye can now be used to dye [[sheep]].}}
{{History||v0.9.0|snap=build 11|Lime dye can now be used to craft colored [[terracotta]].}}
{{History||v0.11.0|snap=build 1|Lime dye can now be used to dye tamed [[wolf]] collars.}}
{{History||v0.14.0|snap=build 1|Lime dye can now be used to dye [[water]] in [[cauldron]]s.}}
{{History|pocket}}
{{History||1.0.0|snap=alpha 0.17.0.1|Lime dye can now be used to dye [[shulker]]s.}}
{{History||1.1.0|snap=alpha 1.1.0.0|Lime dye can now be used to craft [[concrete powder]], colored [[bed]]s and dyed [[shulker box]]es.}}
{{History|bedrock}}
{{History||1.2.0|snap=beta 1.2.0.2|Lime dye can now be used to craft [[firework star]]s, [[stained glass]] and patterns on [[banner]]s.}}
{{History||1.4.0|snap=beta 1.2.20.1|Lime dye can now be used to craft [[balloon]]s and [[glow stick]]s.
|Lime dye can now be obtained from smelting [[sea pickle]]s.}}
{{History||1.8.0|snap=beta 1.8.0.8|Lime dye can now be used to dye tamed [[cat]] collars.}}
{{History||1.10.0|snap=beta 1.10.0.3|Lime dye is now [[trading|sold]] by [[wandering trader]]s.
|Lime dye can now be used to dye white [[carpet]]s and undyed [[glass pane]]s.
|[[File:Lime_Dye_JE2_BE2.png|32px]] The texture of lime dye has now been changed.}}
{{History||1.11.0|snap=beta 1.11.0.4|Lime dye can now be [[trading|sold]] to shepherd [[villager]]s.}}
{{History||1.16.100|snap=beta 1.16.100.56|The ID of lime dye has been changed from <code>dye/10</code> to <code>lime_dye</code>.}}
{{History|console}}
{{History||xbox=TU1|xbone=CU1|ps=1.00|switch=1.0.1|wiiu=Patch 1|[[File:Lime Dye JE1 BE1.png|32px]] Added lime dye.}}
{{History|PS4}}
{{History||1.90|[[File:Lime_Dye_JE2_BE2.png|32px]] The texture of lime dye has now been changed.}}
{{History|new 3ds}}
{{History||0.1.0|[[File:Lime Dye JE1 BE1.png|32px]] Added lime dye.}}
{{History|foot}}
== Issues ==
{{issue list}}
== References ==
{{Reflist}}
{{Items}}
[[Category:Dyes]]
[[Category:Renewable resources]]
[[cs:Světle zelené barvivo]]
[[de:Hellgrüner Farbstoff]]
[[es:Tinte verde lima]]
[[fr:Teinture vert clair]]
[[hu:Neonzöld festék]]
[[ja:黄緑色の染料]]
[[ko:연두색 염료]]
[[nl:Lichtgroene kleurstof]]
[[pl:Jasnozielony barwnik]]
[[pt:Corante verde-limão]]
[[ru:Лаймовый краситель]]
[[zh:黄绿色染料]]</li><li>[[Pumpkin Seeds|Pumpkin Seeds]]<br/>{{Block
| image = <gallery>
Pumpkin Stem Age 0.png | Age 0
Pumpkin Stem Age 1.png | Age 1
Pumpkin Stem Age 2.png | Age 2
Pumpkin Stem Age 3.png | Age 3
Pumpkin Stem Age 4.png | Age 4
Pumpkin Stem Age 5.png | Age 5
Pumpkin Stem Age 6.png | Age 6
Pumpkin Stem Age 7.png | Age 7
</gallery>
|image2 = <gallery>
Attached Pumpkin Stem (N).png | North
Attached Pumpkin Stem (E).png | East
Attached Pumpkin Stem (S).png | South
Attached Pumpkin Stem (W).png | West
</gallery>
| transparent = Yes
| light = No
| tool = none
| renewable = Yes
| stackable = Yes (64)
| flammable = No
| lavasusceptible = No
}}
'''Pumpkin seeds''' are items obtained from pumpkins that can be used to grow pumpkin stems.
'''Pumpkin stems''' are plants grown on [[farmland]] that, over time, grow [[pumpkin]]s on dirt, mud and moss blocks adjacent to them.
== Obtaining ==
=== Breaking ===
When broken, a pumpkin stem drops 0–3 pumpkin seeds. The chance for pumpkin seeds to drop increases with the stem's age.
{| class="wikitable"
! rowspan="3" |[[Resource location]]
! rowspan="3" | Source
! colspan="4" | Default
|-
| colspan="1" rowspan="2" style="text-align:center" | Nothing || colspan="3" style="text-align:center" |{{ItemLink|Pumpkin Seeds|Pumpkin seeds}}
|-
| style="text-align:center" | 1 || style="text-align:center" | 2 || style="text-align:center" | 3
|-
| rowspan="8" |<code>blocks/pumpkin_stem</code>
|{{BlockLink|Pumpkin Stem|Pumpkin stem}} <code>age = 0</code>
| style="text-align:center" |81.3%|| style="text-align:center" |17.42%|| style="text-align:center" |1.24%|| style="text-align:center" |0.03%
|-
|{{BlockLink|Pumpkin Stem|Pumpkin stem}} <code>age = 1</code>
| style="text-align:center" |65.1%|| style="text-align:center" |30.04%|| style="text-align:center" |4.62%|| style="text-align:center" |0.24%
|-
|{{BlockLink|Pumpkin Stem|Pumpkin stem}} <code>age = 2</code>
| style="text-align:center" |51.2%|| style="text-align:center" |38.4%|| style="text-align:center" |9.6%|| style="text-align:center" |0.8%
|-
|{{BlockLink|Pumpkin Stem|Pumpkin stem}} <code>age = 3</code>
| style="text-align:center" |39.44%|| style="text-align:center" |43.02%|| style="text-align:center" |15.64%|| style="text-align:center" |1.9%
|-
|{{BlockLink|Pumpkin Stem|Pumpkin stem}} <code>age = 4</code>
| style="text-align:center" |29.13%|| style="text-align:center" |44.44%|| style="text-align:center" |22.22%|| style="text-align:center" |3.7%
|-
|{{BlockLink|Pumpkin Stem|Pumpkin stem}} <code>age = 5</code>
| style="text-align:center" |21.6%|| style="text-align:center" |43.2%|| style="text-align:center" |28.8%|| style="text-align:center" |6.4%
|-
|{{BlockLink|Pumpkin Stem|Pumpkin stem}} <code>age = 6</code>
| style="text-align:center" |15.17%|| style="text-align:center" |39.82%|| style="text-align:center" |34.84%|| style="text-align:center" |10.16%
|-
|{{BlockLink|Pumpkin Stem|Pumpkin stem}} <code>age = 7</code>
| style="text-align:center" |10.16%|| style="text-align:center" |34.84%|| style="text-align:center" |39.82%|| style="text-align:center" |15.17%
|-
| rowspan="1" |<code>blocks/attached_pumpkin_stem</code>
|{{BlockLink|Attached Pumpkin Stem|Attached Pumpkin stem}}
| style="text-align:center" |10.16%|| style="text-align:center" |34.84%|| style="text-align:center" |39.82%|| style="text-align:center" |15.17%
|}
=== Natural generation ===
Pumpkin stems generate naturally in stem farm rooms in [[woodland mansion]]s.
Pumpkin stems generate in [[taiga]] and [[snowy taiga]]{{only|be|short=1}} [[village]] farms.
=== Chest loot ===
{{LootChestItem|pumpkin-seeds}}
=== Crafting ===
{{Crafting
|Pumpkin
|Output= Pumpkin Seeds,4
|type= Material
}}
=== Trading ===
[[Wandering trader]]s sell pumpkin seeds for 1 [[emerald]].
=== Post-generation ===
Shearing an uncarved pumpkin yields 4 pumpkin seeds.
== Usage ==
=== Farming ===
{{see also|Tutorials/Pumpkin and melon farming}}
Pumpkin seeds can be planted only on [[farmland]], as stems. Over time, a stem grows through several stages{{Needs testing}} and, at its final growth stage, will produce [[pumpkin]]s on any adjacent [[dirt]], [[Coarse Dirt|coarse dirt]], [[Rooted Dirt|rooted dirt]], [[Grass Block|grass block]], [[farmland]], [[podzol]], [[mycelium]], [[Moss Block|moss block]], [[mud]] or [[Muddy Mangrove Roots|muddy mangrove roots]]. If a pumpkin is already occupying a spot adjacent to a stem it does not grow more pumpkins until the pumpkin is removed. A single stem can grow an unlimited number of pumpkins. Pumpkin stems need a minimum light level of 10 in the block above the stem to grow and give pumpkins. Pumpkin seeds are affected by [[bone meal]] only with respect to stem growth; bone meal does not help produce the actual pumpkins.
=== Breeding ===
Like other seeds, pumpkin seeds can be used to [[breed]] [[chicken]]s, lead chickens around, and make baby chickens grow up faster by 10% of the remaining time.
=== Taming ===
Like other seeds, pumpkin seeds can be used to tame [[parrot]]s.
=== Composting ===
Placing pumpkin seeds into a [[composter]] has a 30% chance of raising the compost level by 1.
== Pumpkin stem ==
A '''pumpkin stem''' is the block that is planted on [[farmland]] when pumpkin seeds are used on it. It starts underground, and rises up as the plant grows. The stem is colored green when young, and then yellow once fully grown.
The stem curves once a pumpkin has grown from it. A fully-grown single stem connects to any [[pumpkin]] in an adjacent square, thus there are 5 possible appearances to a stem. If there are multiple pumpkins it can connect to, it favors the east, then west, north, and south. When the pumpkin is removed, the stem returns to its straight shape.
== Sounds ==
{{Sound table/Block/Hard crop}}
== Data values ==
=== ID ===
{{edition|java}}:
{{ID table
|edition=java
|showblocktags=y
|showforms=y
|generatetranslationkeys=y
|displayname=Pumpkin Stem
|spritetype=block
|nameid=pumpkin_stem
|blocktags=bee_growables, crops
|form=block}}
{{ID table
|displayname=Attached Pumpkin Stem
|spritetype=block
|nameid=attached_pumpkin_stem
|form=block}}
{{ID table
|displayname=Pumpkin Seeds
|spritetype=item
|nameid=pumpkin_seeds
|form=item
|foot=1}}
{{edition|bedrock}}:
{{ID table
|edition=bedrock
|shownumericids=y
|showforms=y
|generatetranslationkeys=y
|displayname=Pumpkin Stem
|spritetype=block
|nameid=pumpkin_stem
|id=104
|form=block}}
{{ID table
|displayname=Pumpkin Seeds
|spritetype=item
|nameid=pumpkin_seeds
|id=292
|form=item
|foot=1}}
=== Block states ===
{{see also|Block states}}
{{/BS}}
== Advancements ==
{{load advancements|A Seedy Place}}
== History ==
{{info needed section|check if stems floated above farmland upon initial implementation}}
{{History|java beta}}
{{History||1.8|snap=Pre-release|[[File:Pumpkin Seeds JE1 BE1.png|32px]] Added pumpkin seeds.
|[[File:Pumpkin Stem Age 0 JE1.png|32px]] [[File:Pumpkin Stem Age 1 JE1.png|32px]] [[File:Pumpkin Stem Age 2 JE1.png|32px]] [[File:Pumpkin Stem Age 3 JE1.png|32px]] [[File:Pumpkin Stem Age 4 JE1.png|32px]] [[File:Pumpkin Stem Age 5 JE1.png|32px]] [[File:Pumpkin Stem Age 6 JE1.png|32px]] [[File:Pumpkin Stem Age 7 JE1.png|32px]] Added the pumpkin stem, with seven stages of growth.
|Pumpkin seeds can be found in the new [[mineshaft]] [[chest]]s.
|[[File:Attached Pumpkin Stem (N) JE1.png|32px]] [[File:Attached Pumpkin Stem (E) JE1.png|32px]] [[File:Attached Pumpkin Stem (S) JE1.png|32px]] [[File:Attached Pumpkin Stem (W) JE1.png|32px]] The pumpkin stem has four slightly visually distinct appearances for each facing direction - the bent part of the stem rotates, but the other two planes do not.
|[[File:Pumpkin Stem Age 8 JE1.png|32px]] [[File:Pumpkin Stem Age 9 JE1.png|32px]] [[File:Pumpkin Stem Age 10 JE1.png|32px]] [[File:Pumpkin Stem Age 11 JE1.png|32px]] [[File:Pumpkin Stem Age 12 JE1.png|32px]] [[File:Pumpkin Stem Age 13 JE1.png|32px]] [[File:Pumpkin Stem Age 14 JE1.png|32px]] [[File:Pumpkin Stem Age 15 JE1.png|32px]] Pumpkin stem data values from 8 through 15 now show a glitched formation, with a floating stem with an attached stem cross eventually emerging below.
|[[File:Attached Stem Age 8 JE1.png|32px]] [[File:Attached Stem Age 9 JE1.png|32px]] [[File:Attached Stem Age 10 JE1.png|32px]] [[File:Attached Stem Age 11 JE1.png|32px]] [[File:Attached Stem Age 12 JE1.png|32px]] [[File:Attached Stem Age 13 JE1.png|32px]] [[File:Attached Stem Age 14 JE1.png|32px]] [[File:Attached Stem Age 15 JE1.png|32px]] Pumpkin stem blocks with data values higher than 7 can attach to adjacent fruits, which results in buggy stem textures with [[vines]] in the mix due to vines being below attached stems in [[terrain.png]].}}
{{History|||snap=Pre-release 2 ;)|Pumpkin stems can now be grown faster using [[bone meal]].}}
{{History|java}}
{{History||1.0.0|snap=Beta 1.9 Prerelease 2|Pumpkins can now be [[crafting|crafted]] into [[pumpkin seeds]].}}
{{History||1.3.1|snap=1.3|The texture of pumpkin stems has been moved one pixel to the left in [[terrain.png]].
|[[File:Pumpkin Stem Age 0 JE2.png|32px]] [[File:Pumpkin Stem Age 1 JE2.png|32px]] [[File:Pumpkin Stem Age 2 JE2.png|32px]] [[File:Pumpkin Stem Age 3 JE2.png|32px]] [[File:Pumpkin Stem Age 4 JE2.png|32px]] [[File:Pumpkin Stem Age 5 JE2.png|32px]] [[File:Pumpkin Stem Age 6 JE2.png|32px]] [[File:Pumpkin Stem Age 7 JE2.png|32px]] Stems now appear slightly different.
|[[File:Pumpkin Stem Age 8 JE2.png|32px]] [[File:Pumpkin Stem Age 9 JE2.png|32px]] [[File:Pumpkin Stem Age 10 JE2.png|32px]] [[File:Pumpkin Stem Age 11 JE2.png|32px]] [[File:Pumpkin Stem Age 12 JE2.png|32px]] [[File:Pumpkin Stem Age 13 JE2.png|32px]] [[File:Pumpkin Stem Age 14 JE2.png|32px]] [[File:Pumpkin Stem Age 15 JE2.png|32px]] Overgrown attached pumpkin stems now appear slightly different.
|[[File:Attached Pumpkin Stem (N) JE2.png|32px]] [[File:Attached Pumpkin Stem (E) JE2.png|32px]] [[File:Attached Pumpkin Stem (S) JE2.png|32px]] [[File:Attached Pumpkin Stem (W) JE2.png|32px]] Attached pumpkin stems now appear slightly different.
|[[File:Attached Stem Age 8 JE2.png|32px]] [[File:Attached Stem Age 9 JE2.png|32px]] [[File:Attached Stem Age 10 JE2.png|32px]] [[File:Attached Stem Age 11 JE2.png|32px]] [[File:Attached Stem Age 12 JE2.png|32px]] [[File:Attached Stem Age 13 JE2.png|32px]] [[File:Attached Stem Age 14 JE2.png|32px]] [[File:Attached Stem Age 15 JE2.png|32px]] Overgrown attached pumpkin stems now appear slightly different.}}
{{History||1.4.2|snap=12w36a|[[Chicken]]s now use [[wheat seeds]], [[melon seeds]] and pumpkin seeds, instead of [[wheat]] to [[breeding|breed]].}}
{{History||1.5|snap=13w02a|[[File:Pumpkin Stem Age 0 JE3.png|32px]] [[File:Pumpkin Stem Age 1 JE3.png|32px]] [[File:Pumpkin Stem Age 2 JE3.png|32px]] [[File:Pumpkin Stem Age 3 JE3.png|32px]] [[File:Pumpkin Stem Age 4 JE3.png|32px]] [[File:Pumpkin Stem Age 5 JE3.png|32px]] [[File:Pumpkin Stem Age 6 JE3.png|32px]] Pumpkin stems now use a squished version of their texture for immature stems, depending on age.
|[[File:Pumpkin Stem Age 8 JE3.png|32px]] [[File:Pumpkin Stem Age 9 JE3.png|32px]] [[File:Pumpkin Stem Age 10 JE3.png|32px]] [[File:Pumpkin Stem Age 11 JE3.png|32px]] [[File:Pumpkin Stem Age 12 JE3.png|32px]] [[File:Pumpkin Stem Age 13 JE3.png|32px]] [[File:Pumpkin Stem Age 14 JE3.png|32px]] [[File:Pumpkin Stem Age 15 JE3.png|32px]] This also affects pumpkin stems of ages 8-15, which are likewise stretched to accommodate its predicted size.
|[[File:Attached Stem Age 8 JE3.png|32px]] [[File:Attached Stem Age 9 JE3.png|32px]] [[File:Attached Stem Age 10 JE3.png|32px]] [[File:Attached Stem Age 11 JE3.png|32px]] [[File:Attached Stem Age 12 JE3.png|32px]] [[File:Attached Stem Age 13 JE3.png|32px]] [[File:Attached Stem Age 14 JE3.png|32px]] [[File:Attached Stem Age 15 JE3.png|32px]] Pumpkin stems of extreme ages, which are attached to adjacent fruits, now show a stretched and tinted stem appearance.}}
{{History|||snap=13w03a|[[File:Pumpkin Stem Age 0 JE4.png|32px]] [[File:Pumpkin Stem Age 1 JE4.png|32px]] [[File:Pumpkin Stem Age 2 JE4.png|32px]] [[File:Pumpkin Stem Age 3 JE4.png|32px]] [[File:Pumpkin Stem Age 4 JE4.png|32px]] [[File:Pumpkin Stem Age 5 JE4.png|32px]] [[File:Pumpkin Stem Age 6 JE4.png|32px]] [[File:Pumpkin Stem Age 7 JE4.png|32px]] Pumpkin stems are no longer squished or stretched to account for age.<ref>{{bug|MC-7111}}</ref>
|[[File:Pumpkin Stem Age 8 JE4.png|32px]] [[File:Pumpkin Stem Age 9 JE4.png|32px]] [[File:Pumpkin Stem Age 10 JE4.png|32px]] [[File:Pumpkin Stem Age 11 JE4.png|32px]] [[File:Pumpkin Stem Age 12 JE4.png|32px]] [[File:Pumpkin Stem Age 13 JE4.png|32px]] [[File:Pumpkin Stem Age 14 JE4.png|32px]] [[File:Pumpkin Stem Age 15 JE4.png|32px]] Pumpkin stems with age values 8 through 15 now show a tinted [[trapdoor]] texture.
|From this version up until 14w08a, overgrown pumpkin stems start to draw from the texture below them on the [[texture atlas]], in much the same way they previously did with terrain.png. However, as texture atlases are unstable and textures tend to change positions as new blocks and textures are added, overgrown stems change the texture they draw from every time new textures are added, which includes when textures added by [[mods]].}}
{{History|||snap=13w09a|[[File:Pumpkin Stem Age 8 JE5.png|32px]] [[File:Pumpkin Stem Age 9 JE5.png|32px]] [[File:Pumpkin Stem Age 10 JE5.png|32px]] [[File:Pumpkin Stem Age 11 JE5.png|32px]] [[File:Pumpkin Stem Age 12 JE5.png|32px]] [[File:Pumpkin Stem Age 13 JE5.png|32px]] [[File:Pumpkin Stem Age 14 JE5.png|32px]] [[File:Pumpkin Stem Age 15 JE5.png|32px]] Pumpkin stems with age values 8 through 15 now show a tinted [[birch wood]] texture.}}
{{History||1.6.1|snap=13w24a|Melon and pumpkin stems have now been assigned separate textures.
|[[File:Pumpkin Stem Age 8 JE6.png|32px]] [[File:Pumpkin Stem Age 9 JE6.png|32px]] [[File:Pumpkin Stem Age 10 JE6.png|32px]] [[File:Pumpkin Stem Age 11 JE6.png|32px]] [[File:Pumpkin Stem Age 12 JE6.png|32px]] [[File:Pumpkin Stem Age 13 JE6.png|32px]] [[File:Pumpkin Stem Age 14 JE6.png|32px]] [[File:Pumpkin Stem Age 15 JE6.png|32px]] Pumpkin stems with age values 8 through 15 now show a tinted curving [[rail]] texture.}}
{{History||1.7.2|snap=13w37a|Added the {{cmd|setblock}} command, allowing for invalid pumpkin stem ages to be placed in the world without using external editors. This also allows them to be obtained in earlier versions via backdating.}}
{{History|||snap=13w41a|[[File:Pumpkin Stem Age 8 JE7.png|32px]] [[File:Pumpkin Stem Age 9 JE7.png|32px]] [[File:Pumpkin Stem Age 10 JE7.png|32px]] [[File:Pumpkin Stem Age 11 JE7.png|32px]] [[File:Pumpkin Stem Age 12 JE7.png|32px]] [[File:Pumpkin Stem Age 13 JE7.png|32px]] [[File:Pumpkin Stem Age 14 JE7.png|32px]] [[File:Pumpkin Stem Age 15 JE7.png|32px]] Pumpkin stems with age values 8 through 15 now show a tinted lit [[furnace]] texture.}}
{{History|||snap=13w43a|[[File:Pumpkin Stem Age 8 JE8.png|32px]] [[File:Pumpkin Stem Age 9 JE8.png|32px]] [[File:Pumpkin Stem Age 10 JE8.png|32px]] [[File:Pumpkin Stem Age 11 JE8.png|32px]] [[File:Pumpkin Stem Age 12 JE8.png|32px]] [[File:Pumpkin Stem Age 13 JE8.png|32px]] [[File:Pumpkin Stem Age 14 JE8.png|32px]] [[File:Pumpkin Stem Age 15 JE8.png|32px]] Pumpkin stems with age values 8 through 15 now show a tinted [[pumpkin]] top texture.}}
{{History||1.8|snap=14w10a|[[File:Pumpkin Stem Age 8 JE9.png|32px]] [[File:Pumpkin Stem Age 9 JE9.png|32px]] [[File:Pumpkin Stem Age 10 JE9.png|32px]] [[File:Pumpkin Stem Age 11 JE9.png|32px]] Pumpkin stems with data values 8-11 now display a tinted attached stem, with 8 facing west, 9 facing east, 10 facing north and 11 facing south.
|Invalid pumpkin stems with data values 12-15 now crash the game.}}
{{History|||snap=14w25a|[[File:Pumpkin Stem Age 0 JE5.png|32px]] [[File:Pumpkin Stem Age 1 JE5.png|32px]] [[File:Pumpkin Stem Age 2 JE5.png|32px]] [[File:Pumpkin Stem Age 3 JE5.png|32px]] [[File:Pumpkin Stem Age 4 JE5.png|32px]] [[File:Pumpkin Stem Age 5 JE5.png|32px]] [[File:Pumpkin Stem Age 6 JE5.png|32px]] [[File:Pumpkin Stem Age 7 JE5.png|32px]] Pumpkin stems now render as a single diagonal plane, or, in the case of attached stems, a diagonal and orthogonal plane.
|[[File:Attached Pumpkin Stem (N) JE3.png|32px]] [[File:Attached Pumpkin Stem (E) JE3.png|32px]] [[File:Attached Pumpkin Stem (S) JE3.png|32px]] [[File:Attached Pumpkin Stem (W) JE3.png|32px]] The attached pumpkin stem [[model]] now fully rotates to the direction the stem points. Prior to this update, the base of the pumpkin stem would stay the same while the long attaching section would differ, resulting in four possible attached stem appearances.
|Invalid overgrown pumpkin stems have now effectively been removed from the game, as attempting to place an out of range stem via {{cmd|setblock}} creates a stem of age 0 and loading a world with existing such stems cause a game crash.}}
{{History|||snap=14w26a|[[File:Pumpkin Stem Age 0 JE6.png|32px]] [[File:Pumpkin Stem Age 1 JE6.png|32px]] [[File:Pumpkin Stem Age 2 JE6.png|32px]] [[File:Pumpkin Stem Age 3 JE6.png|32px]] [[File:Pumpkin Stem Age 4 JE6.png|32px]] [[File:Pumpkin Stem Age 5 JE6.png|32px]] [[File:Pumpkin Stem Age 6 JE6.png|32px]] [[File:Pumpkin Stem Age 7 JE6.png|32px]] [[File:Attached Pumpkin Stem (N) JE4.png|32px]] [[File:Attached Pumpkin Stem (E) JE4.png|32px]] [[File:Attached Pumpkin Stem (S) JE4.png|32px]] [[File:Attached Pumpkin Stem (W) JE4.png|32px]] Pumpkin stems now correctly render as crosses again.<ref>{{bug|MC-58136}}</ref>}}
{{History|||snap=14w27a|[[File:Attached Stem Age 0 14w27a.png|32px]] [[File:Attached Stem Age 1 14w27a.png|32px]] [[File:Attached Stem Age 2 14w27a.png|32px]] [[File:Attached Stem Age 3 14w27a.png|32px]] [[File:Attached Stem Age 4 14w27a.png|32px]] [[File:Attached Stem Age 5 14w27a.png|32px]] [[File:Attached Stem Age 6 14w27a.png|32px]] Due to a bug, all pumpkin stems now appear attached regardless of age or any actual attachment.<ref>{{bug|MC-60208}}</ref>}}
{{History|||snap=14w28a|All pumpkin stems appearing attached regardless of the age of any actual attachment has been fixed. However, pumpkin stems still appear attached to adjacent fruits regardless of age due to a similar bug.<ref>{{bug|MC-61716}}</ref>}}
{{History|||snap=14w34d|Pumpkin seeds no longer can be used to breed [[chicken]]s.}}
{{History||1.9|snap=15w31a|Chickens can now use pumpkin seeds to [[breeding|breed]] again.}}
{{History|||snap=15w44a|Pumpkin seeds have been added to [[dungeon]] [[chest]]s.
|The average yield of pumpkin seeds in [[mineshaft]] chests has been decreased.}}
{{History|||snap=15w45a|Pumpkin stems must now be fully grown again to attach.}}
{{History||1.11|snap=16w39a|Pumpkin seeds are now found in the new [[woodland mansion]] chests.
|Pumpkin stems now generate inside [[woodland mansion]]s.}}
{{History||1.13|snap=17w47a|The different [[block]] states for the <code>pumpkin_stem</code> ID have been split up into their own IDs.
|Pumpkin seeds can now be obtained by [[shear]]ing an uncarved pumpkin.
|Prior to [[1.13/Flattening|''The Flattening'']], this [[block]]'s numeral ID was 104, and the [[item]]'s 361.}}
{{History|||snap=17w48a|Attached pumpkin stems no longer [[drops|drop]] seeds.}}
{{History||1.14|snap=18w43a|[[File:Pumpkin Stem Age 0 JE7.png|32px]] [[File:Pumpkin Stem Age 1 JE7.png|32px]] [[File:Pumpkin Stem Age 2 JE7.png|32px]] [[File:Pumpkin Stem Age 3 JE7.png|32px]] [[File:Pumpkin Stem Age 4 JE7.png|32px]] [[File:Pumpkin Stem Age 5 JE7.png|32px]] [[File:Pumpkin Stem Age 6 JE7.png|32px]] [[File:Pumpkin Stem Age 7 JE7.png|32px]] The stem texture has changed.
|[[File:Attached Pumpkin Stem (N) JE5.png|32px]] [[File:Attached Pumpkin Stem (E) JE5.png|32px]] [[File:Attached Pumpkin Stem (S) JE5.png|32px]] [[File:Attached Pumpkin Stem (W) JE5.png|32px]] The pumpkin stem texture change also affects the base cross on pumpkin stems.}}
{{History|||snap=18w50a|Pumpkin stems now generate in the updated [[taiga]] [[village]] farms.
|Pumpkin seeds can now be found in [[chest]]s in taiga village houses.}}
{{History|||snap=19w03a|Placing pumpkin seeds into the new [[composter]] has a 10% chance of raising the compost level by 1.}}
{{History|||snap=19w05a|Pumpkin seeds now have a 30% chance of increasing the compost level in a composter by 1.
|Added [[Wandering Trader|wandering trader]]s, which sell pumpkin seeds.}}
{{History||1.15|snap=19w34a|[[Bee]]s can now pollinate pumpkin stems.}}
{{History|||snap=19w39a|Attached pumpkin stems now [[drops|drop]] seeds again.<ref>{{bug|MC-136360}}</ref>}}
{{History|pocket alpha}}
{{History||v0.8.0|snap=build 1|[[File:Pumpkin Seeds JE1 BE1.png|32px]] Added pumpkin seeds.
|[[File:Pumpkin Stem Age 0 JE1.png|32px]] [[File:Pumpkin Stem Age 1 JE1.png|32px]] [[File:Pumpkin Stem Age 2 JE1.png|32px]] [[File:Pumpkin Stem Age 3 JE1.png|32px]] [[File:Pumpkin Stem Age 4 JE1.png|32px]] [[File:Pumpkin Stem Age 5 JE1.png|32px]] [[File:Pumpkin Stem Age 6 JE1.png|32px]] [[File:Pumpkin Stem Age 7 JE1.png|32px]] [[File:Attached Pumpkin Stem (N) JE1.png|32px]] [[File:Attached Pumpkin Stem (E) JE1.png|32px]] [[File:Attached Pumpkin Stem (S) JE1.png|32px]] [[File:Attached Pumpkin Stem (W) JE1.png|32px]]{{verify|Were these the models used by this edition?}} Added pumpkin stems.
|Pumpkin seeds are obtainable from the [[Nether reactor]].}}
{{History||v0.12.1|snap=build 1|Pumpkin seeds are no longer available from the Nether reactor.}}
{{History||v0.14.0|snap=build 1|Pumpkin seeds can now be found in [[minecart with chest]]s inside [[mineshaft]]s.}}
{{History|pocket}}
{{History||1.1.0|snap=alpha 1.1.0.0|Pumpkin stems now generate inside [[woodland mansion]]s.}}
{{History|bedrock}}
{{History||1.2.0|snap=beta 1.2.0.2|Pumpkin seeds are now used to tame [[parrot]]s.}}
{{History||1.4.0|snap=beta 1.2.13.8|Pumpkin seeds can now be obtained by [[shear]]ing an uncarved [[pumpkin]].}}
{{History||1.10.0|snap=beta 1.10.0.3|[[File:Attached Pumpkin Stem (W) JE5.png|32px]]{{info needed|More accurate image}} The texture of attached pumpkin stems has been changed.
|Pumpkin seeds can now be [[trading|bought]] from [[wandering trader]]s.
|A single pumpkin crop now generates in the new [[taiga]] and [[snowy taiga]] [[village]]s.}}
{{History||1.11.0|snap=beta 1.11.0.1|A single pumpkin seed can now be used to fill the [[composter]].
|Pumpkin seeds can now be found in [[taiga]] and [[snowy taiga]] [[village]] house [[chest]]s.}}
{{History|console}}
{{History||xbox=TU5|xbone=CU1|ps=1.0|wiiu=Patch 1|[[File:Pumpkin Seeds JE1 BE1.png|32px]] Added pumpkin seeds.
|[[File:Pumpkin Stem Age 0 JE1.png|32px]] [[File:Pumpkin Stem Age 1 JE1.png|32px]] [[File:Pumpkin Stem Age 2 JE1.png|32px]] [[File:Pumpkin Stem Age 3 JE1.png|32px]] [[File:Pumpkin Stem Age 4 JE1.png|32px]] [[File:Pumpkin Stem Age 5 JE1.png|32px]] [[File:Pumpkin Stem Age 6 JE1.png|32px]] [[File:Pumpkin Stem Age 7 JE1.png|32px]] [[File:Attached Pumpkin Stem (N) JE1.png|32px]] [[File:Attached Pumpkin Stem (E) JE1.png|32px]] [[File:Attached Pumpkin Stem (S) JE1.png|32px]] [[File:Attached Pumpkin Stem (W) JE1.png|32px]]{{verify|Were these the models used by this edition?}} Added pumpkin stems.}}
{{History||xbox=TU69|ps=1.76|wiiu=Patch 38|Pumpkin seeds can now be obtained by [[shear]]ing an uncarved [[pumpkin]].}}
{{History||xbox=none|xbone=none|ps=1.90|wiiu=none|switch=none|[[File:Attached Pumpkin Stem (W) JE5.png|32px]]{{info needed|More accurate image}} The texture of attached pumpkin stems has been changed.}}
{{History|New 3DS}}
{{History||0.1.0|[[File:Pumpkin Stem Age 0 JE1.png|32px]] [[File:Pumpkin Stem Age 1 JE1.png|32px]] [[File:Pumpkin Stem Age 2 JE1.png|32px]] [[File:Pumpkin Stem Age 3 JE1.png|32px]] [[File:Pumpkin Stem Age 4 JE1.png|32px]] [[File:Pumpkin Stem Age 5 JE1.png|32px]] [[File:Pumpkin Stem Age 6 JE1.png|32px]] [[File:Pumpkin Stem Age 7 JE1.png|32px]] [[File:Attached Pumpkin Stem (N) JE1.png|32px]] [[File:Attached Pumpkin Stem (E) JE1.png|32px]] [[File:Attached Pumpkin Stem (S) JE1.png|32px]] [[File:Attached Pumpkin Stem (W) JE1.png|32px]]{{verify|Were these the models used by this edition?}} Added pumpkin stems.}}
{{History|foot}}
<gallery>
Pumpkin Stem with data value 15.png|The final version of the pumpkin stem with age 15, as seen in-game.
Pumpkinstems.png|Pumpkin stems of ages 1 to 15 on a modded version of [[Java Edition 1.7.2|1.7.2]], hence the nearby melon stems using the melon top texture.
Stems of 13w02a.png|All 16 stem sizes in [[Java Edition 13w02a|13w02a]], with accompanying data values.
</gallery>
=== Pumpkin stem "item" ===
{{:Technical blocks/Pumpkin Stem}}
== Issues ==
{{issue list}}
== Gallery ==
<gallery>
Stem All Ages.png|All stages of growth.
AllSeeds.png|All the [[seeds]] that exist in the game.
</gallery>
== References ==
{{reflist}}
{{Blocks|vegetation}}
{{Items}}
[[Category:Plants]]
[[Category:Food]]
[[Category:Non-solid blocks]]
[[Category:Generated structure blocks]]
[[cs:Dýňová semínka]]
[[de:Kürbiskerne]]
[[es:Semillas de calabaza]]
[[fr:Graines de citrouille]]
[[hu:Tökmagok]]
[[ja:カボチャの種]]
[[ko:호박씨]]
[[nl:Pompoenpitten]]
[[pl:Nasiona dyni]]
[[pt:Sementes de abóbora]]
[[ru:Семена тыквы]]
[[th:เมล็ดฝักทอง]]
[[zh:南瓜种子]]</li></ul> | Death is no longer permanent; the player is now able to respawn. | ||||
| alpha | |||||
v1.0.15{{Extension DPL}}<ul><li>[[Drinks|Drinks]]<br/>[[File:Drinking Steve.png|150px|right]] [[File:Drinking Alex.png|150px|right]]
'''Drinks''' are a narrow class of consumable [[item]]s that can be ingested by the [[player]] in an extremely similar manner to [[food]]. However, drinks are not encountered quite as commonly as food is, and they are not nearly as integral to Survival gameplay. Drinks can generally be distinguished from food by the sounds they make upon consumption, the lack of [[particles]] they emit, and the fact that they leave an empty container item in the [[inventory]] after consumption. Drinks do not affect [[hunger]] or saturation values upon use (with the exception of [[honey bottle]]s), and do not need those values to be depleted in order to be consumed.
Drinks are drunk by holding {{control|use item}} while having the drink item selected in the hotbar or in the off hand.
== Drinks ==
{{/table}}
== History ==
{{main|Milk#History|Potion#History|Honey Bottle#History}}
{{History|java alpha}}
{{History||v1.0.11|[[File:Milk Bucket JE1 BE1.png|32px]] Added milk.}}
{{History|java}}
{{History||1.0.0|snap=Beta 1.9 Prerelease 3|Added water bottles and potions.}}
{{History||1.15|snap=19w34a|[[File:Honey Bottle JE1.png|32px]] Added honey bottles.}}
{{History|pocket alpha}}
{{History||v0.7.0|[[File:Milk Bucket JE1 BE1.png|32px]] Added milk buckets.}}
{{History||v0.12.1|snap=build 1|Added water bottles and potions.}}
{{History|bedrock}}
{{History||1.14.0|snap=beta 1.14.0.1|[[File:Honey Bottle BE1.png|32px]] Added honey bottles.}}
{{History|foot}}
{{Items}}
[[ja:飲み物]]
[[pt:Bebidas]]
[[Category:Food]]</li><li>[[Ice Bomb|Ice Bomb]]<br/>{{education feature}}
{{exclusive|bedrock|education}}
{{ItemEntity
|image=Ice Bomb.png
|renewable=No (unless [[Material Reducer]] is available)<!-- Well, CHO are everywhere in sugar and charcoal, and sodium is in cobblestone... -->
|stackable=Yes (16)
|size=Height: 0.25 Blocks<br>Width: 0.25 Blocks
}}
The '''ice bomb''' is an [[item]] that is used to freeze [[water]] into [[ice]].
== Obtaining ==
=== Lab Table ===
{| class="wikitable"
! Result
! Materials Needed
|-
!rowspan=2|{{slot|Ice Bomb}}<br>[[Ice Bomb]]
|{{slot|Sodium Acetate|link=Compound#List_of_compounds}}{{slot|Sodium Acetate|link=Compound#List_of_compounds}}{{slot|Sodium Acetate|link=Compound#List_of_compounds}}{{slot|Sodium Acetate|link=Compound#List_of_compounds}}
|-
|<center>[[Compound#List_of_compounds|Sodium Acetate]] x4</center>
|}
== Usage ==
Ice bombs can be thrown by {{control|using}} them. They are affected by gravity.
Like with [[ender pearl]]s, there is a short cooldown before the player can throw another ice bomb. The cooldown is shown in the [[hotbar]] by a white overlay that shrinks before the player is able to use it again.
Ice bombs explode upon hitting most [[blocks]], including non-solid blocks, but not [[air]]. They also explode upon hitting other entities, but do not deal [[damage]], and unlike [[egg]]s and [[snowball]]s, their impact is not considered an attack and does no damage or knockback. When exploding, any [[water]] (including flowing water, but not [[waterlogged]] blocks) in a 3×3×3 cube around the ice bomb freezes into [[ice]]. Ice bombs can be used to contain and displace [[mobs]] in ice under water.
While [[endermen]] teleport away from arrows shot at them, they can be hit by ice bombs.
Throwing an ice bomb while underwater encloses the player in ice.
{| class="wikitable"
|+Ice bomb arrangement table
!y\x
!-2
!-1
!0
!1
!2
|-
!64
|Air
|Air
|Air
|Air
|Air
|-
!63
|Air
|Air
|Ice bomb
|Air
|Air
|-
!62
!Water
!Ice
!Ice
!Ice
!Water
|-
!61
!Water
!Ice
!Ice
!Ice
!Water
|-
!60
!Water
!Water
!Water
!Water
!Water
|}
== Sounds ==
{{Sound table
|type=bedrock
|sound=Zombie breaks door.ogg
|source=hostile
|description=When an ice bomb is created by a [[lab table]]
|id=mob.wither.break_block
|volume=0.5
|pitch=1.1/1.3}}
{{Sound table
|sound=Glass dig1.ogg
|sound2=Glass dig2.ogg
|sound3=Glass dig3.ogg
|source=block
|description=When an ice bomb impacts something
|id=random.glass
|volume=1.0
|pitch=1.4/1.6
|foot=1}}
== Data values ==
=== ID ===
{{ID table
|edition=bedrock
|firstcolumnname=Ice Bomb
|shownumericids=y
|showforms=y
|notshowbeitemforms=y
|generatetranslationkeys=y
|displayname=Item
|spritename=ice-bomb
|spritetype=item
|nameid=ice_bomb
|id=595
|form=item
|foot=1}}
{{ID table
|edition=bedrock
|firstcolumnname=Ice Bomb
|shownumericids=y
|generatetranslationkeys=y
|displayname=Entity
|spritename=ice-bomb
|spritetype=entity
|nameid=ice_bomb
|id=106
|foot=1}}
== History ==
{{History|bedrock}}
{{History||1.4.0|snap=beta 1.2.20.1|[[File:Ice Bomb BE1.png|32px]] Added ice bombs.}}
{{History|education}}
{{History||1.0.27|[[File:Ice Bomb BE1.png|32px]] Added ice bombs.}}
{{History|foot}}
== Trivia ==
* In real life, mixing a sufficient amount of sodium acetate in water does solidify it, but creates [[wikipedia:Sodium acetate#Heating pad|hot ice]] (sodium acetate trihydrate) instead of normal ice.
{{items}}
{{entities}}
{{Education Edition}}
[[Category:Non-renewable resources]]
[[Category:Education Edition items]]
[[Category:Education Edition entities]]
[[pl:Lodowa bomba]]
[[de:Eisbombe]]
[[ja:氷の爆弾]]
[[ko:얼음 폭탄]]
[[lzh:冰丸]]
[[pt:Bomba de gelo]]
[[zh:冰弹]]</li></ul> | Added multiplayer. Originally, Notch allowed only a limited number of people from the Minecraft IRC channel to participate in the first tests of multiplayer. These invitees could invite other people to test out this mode; however, the password was leaked and the server was quickly filled up. Notch released the first version of the multiplayer server software on the 4th of August, 2010. The client was updated so that players could enter the IP of a server to join it. | ||||
| Java Edition | |||||
1.3.1{{Extension DPL}}<ul><li>[[Reality Vision|Reality Vision]]<br/>{{Joke feature}}
{{Item
| title = Reality Vision
| image = Reality Vision.png
| renewable = No
| stackable = Yes (64)
}}
The '''Reality vision''' was a joke [[helmet]].
== Usage ==
Reality vision was equipped via the [[helmet]] slot. When equipped, it showed a [[wikipedia:Mini-map|minimap]] in the bottom-center of the screen (which moved when the [[player]]'s camera moves). The minimap showed all [[chunk]]s that were currently rendered. The player's location was represented by a green [[beacon]] beam marker on the map.
It displayed a vision overlay (similar to the [[pumpkin]] overlay). The overlay would change to a new overlay if the player went into third person (unlike the pumpkin overlay), which made the screen appear like an old [[wikipedia:Television|television]] screen. The overlay was called <code>cantseeshit<!-- Do not change this; this is that word that is actually used-->captain.png</code> in the assets folder. It activated a [[Shaders|shader]] when equipped (<code>scan_pincushion</code>).
== Sounds ==
{{Sound table
|sound=Equipvr.ogg
|subtitle=''None''
|source=player
|description=When equipped
|id=item.reality_vision.use
|translationkey=''None''
|volume=1.0
|pitch=1.0
|distance=16
|foot=1}}
== Data values ==
=== ID ===
{{ID table
|edition=java
|shownumericids=y
|showforms=y
|generatetranslationkeys=y
|displayname=Reality Vision
|spritetype=item
|nameid=reality_vision
|id=500
|form=item
|translationkey=item.realityVision.name
|foot=1}}
== History ==
{{History|java}}
{{History||1.RV-Pre1|[[File:Reality_Vision_(item).png|32px]] [[File:Reality Vision.png|32px]] Added reality vision.}}
{{History|foot}}
== Issues ==
Reality Vision is an unsupported item due to being an [[Wikipedia:April Fools' Day|April Fools']] joke, and therefore such issues relating to them will not be fixed.
== Trivia ==
* [[Sign]]s display the text "OBEY" while equipped, a reference to the movie [[wikipedia:They Live|''They Live'']].
== Gallery ==
<gallery>
Sign2.png|The [[sign]] texture found in the game files.
OBEY.png|OBEY seen in a sign.
OBEY sign in 1.RV-Pre1..png|OBEY seen in a sign, but seen from a better perspective.
TechGear.png|A [[player]] wearing reality vision, featured in this [[wikipedia:April Fools' Day|April Fools']] joke version.
</gallery>
{{Items}}
{{Jokes}}
[[Category:Non-renewable resources]]
[[Category:Joke items]]
[[pt:Visão da realidade]]
[[es:Reality Vision]]</li><li>[[Compass|Compass]]<br/>{{About|the item used to point to the world spawn or to a lodestone|the item used to point to the location of the player's last death|Recovery Compass}}
{{Item
| image = Compass.gif
| image2 = Lodestone Compass.gif
| renewable = Yes
| stackable = '''Compass:''' Yes (64)<br>'''Lodestone Compass:''' No
}}
A '''compass''' is an item used to point to the world spawn or to a [[lodestone]].
== Obtaining ==
=== Crafting ===
{{Crafting
|B1= Iron Ingot
|A2= Iron Ingot |B2= Redstone Dust |C2= Iron Ingot
|B3= Iron Ingot
|Output= Compass
|type= Tool
}}
=== Chest loot ===
{{LootChestItem|compass}}
=== Trading ===
{{IN|java}}, expert-level librarian [[villager]]s have a 50% chance to sell a single compass for 4 [[emerald]]s.
{{IN|bedrock}}, expert-level librarian villagers have a {{frac|1|3}} chance to sell a single compass for 4 emeralds.
== Usage ==
Normally, the compass' needle points toward the world [[Spawn#World spawn|spawn point]]. The compass points to spawn when viewed in any way, including as a dropped [[Item (entity)|item]], in a player's hand, in an inventory or the crafting table, or in an [[item frame]]. The direction the needle points to is relative to the player who is viewing it. When a compass in an item frame is rotated, the needle turns accordingly.
In [[the Nether]] or [[the End]], the compass' needle spins and points in random directions.
The compass can be used on a [[lodestone]], after which it is named lodestone compass by default and points to that lodestone as long as the compass is in the same dimension as the lodestone, but if the compass is taken to a different dimension, it spins randomly, as a normal compass would in the Nether or the End. If the lodestone is destroyed, it also spins randomly, even if the lodestone is replaced afterward. However, if a lodestone compass is placed in storage, the lodestone can be broken and replaced without the compass losing the attunement, as long as the compass remains in storage while the lodestone is missing.
A lodestone compass appears [[enchanting|enchanted]], similar to the [[Enchanted Golden Apple|enchanted golden apple]].
Using {{cmd|setworldspawn}} to change the world spawn also changes where the compass points.
=== Crafting ingredient ===
{{crafting usage|Compass, Compass.gif}}
=== Anvil usage ===
{{:Map/BE|position}}
=== Trading ===
A single compass can be sold to a journeyman-level cartographer villager for 1 [[emerald]].{{only|java}}
A single compass can be sold to an expert-level cartographer villager for 1 emerald as their sixth trade.{{only|bedrock}}
A compass is also part of the cost of [[explorer map]]s:
* An ocean explorer map and{{only|java|short=1}}/or{{only|bedrock|short=1}} a woodland explorer map can be bought from a journeyman-level cartographer for 12 emeralds and one compass, as part of their fifth trade.{{only|bedrock}}
* {{IN|java}}, apprentice-level cartographer villagers offer to sell an ocean explorer map for 13 emeralds and a compass, and journeyman-level cartographer villagers offer to sell a woodland explorer map for 14 emeralds and one compass.
=== Enchantments ===
A compass can receive the following [[enchantment]]s:
{|class="wikitable col-2-center col-3-right"
|+
!Name
!Max Level
![[Enchanting|Method]]
|-
|[[Curse of Vanishing]]
|I
|{{Inventory slot|Anvil}}
|-
|}
== Sounds ==
{{edition|java}}:
{{Sound table
|sound=Lodestone lock1.ogg
|sound2=Lodestone lock2.ogg
|source=player
|subtitle=Lodestone Compass locks onto Lodestone
|description=When a compass is used on a lodestone
|id=item.lodestone_compass.lock
|translationkey=subtitles.item.lodestone_compass.lock
|volume=1.0
|pitch=''varies'' <ref group=sound>Can be 0.85 or 0.95 for each sound</ref>
|distance=16
|foot=1}}
{{edition|bedrock}}:
{{Sound table
|type=bedrock
|sound=Lodestone lock1.ogg
|sound2=Lodestone lock2.ogg
|source=block
|description=When a compass is used on a lodestone
|id=lodestone_compass.link_compass_to_lodestone
|volume=1.0
|pitch=0.85-0.95
|foot=1}}
== Data values ==
=== ID ===
{{edition|java}}:
{{ID table
|edition=java
|showforms=y
|generatetranslationkeys=y
|displayname=Compass
|spritetype=item
|nameid=compass
|form=item
|translationkey=item.minecraft.compass,item.minecraft.lodestone_compass
|foot=1}}
{{edition|bedrock}}:
{{ID table
|edition=bedrock
|showaliasids=y
|shownumericids=y
|showforms=y
|notshowbeitemforms=y
|generatetranslationkeys=y
|displayname=Compass
|spritetype=item
|nameid=compass
|id=391
|form=item}}
{{ID table
|displayname=Lodestone Compass
|spritename=lodestone-compass-be
|spritetype=item
|nameid=lodestone_compass
|aliasid=lodestonecompass
|id=602
|form=item
|translationkey=item.lodestonecompass.name
|foot=1}}
=== Item data ===
{{el|java}}:
{{main|Player.dat format}}
<div class="treeview">
* {{nbt|compound|tag}}: The item's '''tag''' tag.
{{:Player.dat_format/Compasses}}
</div>
{{el|bedrock}}:
: See [[Bedrock Edition level format/Item format]].
== Advancements ==
{{load advancements|Country Lode}}
== History ==
{{History|java alpha}}
{{History||v1.1.0|[[File:Compass JE1.gif|32px]] Added compasses.
|They have 102 visually distinct frames due to how the texture is generated - see the section below.}}
{{History|java beta}}
{{History||1.8|snap=Pre-release|Compasses can now be found in library [[chest]]s in the new [[strongholds]].}}
{{History|java}}
{{History||1.3.1|snap=12w21a|Librarian [[villager]]s now [[trading|sell]] 1 compass for 10–11 [[emerald]]s, making them [[renewable]].}}
{{History||1.4.2|snap=12w34a|Since the mapping system has been changed, a compass can now be used to [[crafting|craft]] an empty [[map]].}}
{{History||1.5|snap=13w02a|[[File:Compass JE2 BE2.gif|32px]] Compasses now, instead of splitting two textures, use the new animation feature included in texture packs. As a result, they are considerably less precise, having only 29 visually distinct frames. }}
{{History||1.8|snap=14w02a|Librarian villagers now sell 1 compass for 10–12 emeralds.}}
{{History||1.9|snap=15w31a|Compasses are now broken up into individual textures, instead of having every individual frame on one vertical strip like with animated textures.}}
{{History|||snap=15w43a|The average yield of compasses in [[stronghold]] library [[chest]]s has been increased.}}
{{History||1.11|snap=16w39a|Cartographer [[villager]]s have been added, who [[trading|buy]] compasses as their tier 2 trade.}}
{{History||1.13|snap=17w47a|Prior to [[1.13/Flattening|''The Flattening'']], this [[item]]'s numeral ID was 345.}}
{{History|||snap=18w11a|Compasses can now generate in [[shipwreck]] [[chest]]s.}}
{{History||1.14|snap=18w48a|Compasses can now generate in chests in [[village]] cartographer houses.}}
{{History||1.16|snap=20w13a|[[File:Lodestone Compass JE1.gif|32px]] Compasses can now be used on [[lodestone]]s to make them point to the stones.
|Compasses now point to the center of the spawn point block, instead of its north-west corner.}}
{{History|||snap=20w14a|Compasses now have the <code>LodestonePos</code>, <code>LodestoneDimension</code>, and <code>LodestoneTracked</code> data fields. If <code>LodestoneTracked</code> is zero, the game skips checking for a lodestone in the specified position.
|Compasses can now have the [[Curse of Vanishing]] [[enchantment]] on them.}}
{{History|||snap=20w19a|Compasses no longer work in the [[recipe book]].<ref>{{bug|MC-116293}}</ref>}}
{{History|||snap=20w22a|Compasses no longer work in the villager trading GUI.<ref>{{bug|MC-182888}}</ref>}}
{{History||1.17|snap=20w48a|[[File:Compass JE3.gif|32px]] [[File:Lodestone Compass JE2.gif|32px]] The textures of compass and lodestone compass have been changed.}}
{{History||1.19|snap=22w13a|Compasses may now be found in [[ancient city]] [[chest]]s.}}
{{History|||snap=22w14a|Compasses can now used to craft [[recovery compass]]es.}}
{{History|pocket alpha}}
{{History||v0.2.0|[[File:Compass BE1.png|32px]] Added compasses.
|Compasses currently have no function or legitimate method of obtaining them.}}
{{History||v0.8.0|snap=build 1|[[File:Compass JE2 BE2.gif|32px]] Added animated texture to compasses.
|Compasses are now functional and [[crafting|craftable]]. They have been added into the Creative Inventory.}}
{{History||v0.14.0|snap=build 1|Compasses must now be added to a [[map]] using an [[anvil]] to add the location marker.}}
{{History|pocket}}
{{History||1.0.0|snap=?|[[Windows 10 Edition]] can now use the [[anvil]], as well as the [[crafting table]], to apply position markers, with compasses just as [[Pocket Edition]] can in general.}}
{{History||1.0.4|snap=alpha 1.0.4.0|Librarian [[villager]]s now [[trading|sell]] 1 compass for 10–12 [[emerald]]s.}}
{{History||1.1.0|snap=alpha 1.1.0.3|Cartographer villagers have been added, who [[trading|buy]] compasses as part of their tier 2 trade.
|Compasses used with emeralds can be used to buy explorer maps as part of cartographer villagers' fourth tiers trade.}}
{{History|bedrock}}
{{History||1.4.0|snap=beta 1.2.14.2|Compasses can now be found inside map room [[chest]]s in [[shipwreck]]s.}}
{{History||1.10.0|snap=beta 1.10.0.3|Compasses can now be found in [[village]] cartographer house chests.}}
{{History||1.11.0|snap=beta 1.11.0.4|[[Trading]] has been changed, cartographer [[villager]]s now [[trading|buy]] compassess as part of their fourth tier trades.
|Compasses used with [[emerald]]s can now be used to buy explorer maps as part of cartographer and fletcher villagers' third tier trades.
|Librarian villagers now have a {{frac|1|3}} chance to [[trading|sell]] compasses for 4 emeralds as part of their fourth tier trades.}}
{{History||1.16.0|snap=beta 1.16.0.57|[[File:Lodestone Compass BE1.gif|32px]] Compasses can now be used on [[lodestone]]s to make them point to the stones.
|Compasses now have the <code>LodestonePos</code>, <code>LodestoneDimension</code>, and <code>LodestoneTracked</code> data fields. If <code>LodestoneTracked</code> is zero, the game skips checking for a lodestone in the specified position.
|Compasses can now have the [[Curse of Vanishing]] [[enchantment]] on them.}}
{{History||1.16.100|snap=beta 1.16.100.56|Changed the ID {{code|lodestonecompass}} to {{code|lodestone_compass}}.}}
{{History||1.17.0|snap=beta 1.17.0.54|[[File:Compass JE3.gif|32px]] The texture of compass has been changed.}}
{{History||1.18.10|snap=beta 1.18.10.20|[[File:Lodestone Compass JE2.gif|32px]] The texture of lodestone compass has been changed.}}
{{History|console}}
{{History||xbox=TU1|xbone=CU1|ps=1.0|wiiu=Patch 1|switch=1.0.1|[[File:Compass JE2 BE2.gif|32px]] Added compasses.}}
{{History|New Nintendo 3DS Edition}}
{{History||0.1.0|[[File:Compass JE2 BE2.gif|32px]] Added compasses.}}
{{History|foot}}
=== Texture generation prior to Java Edition 13w02a ===
{{:Procedural animated texture generation/Compasses}}
== Issues ==
{{issue list}}
== Gallery ==
<gallery>
12w21a CompassPurchase.png|Purchasing a compass from a librarian [[villager]].
</gallery>
== See also ==
*[[Clock]]
*[[Tutorials/Navigation|Navigation]]
== External Links ==
*[https://www.minecraft.net/en-us/article/taking-inventory--compass Taking Inventory: Compass] – Minecraft.net on August 15, 2019
{{Items}}
[[Category:Tools]]
[[Category:Renewable resources]]
[[cs:Kompas]]
[[de:Kompass]]
[[es:Brújula]]
[[fr:Boussole]]
[[hu:Iránytű]]
[[it:Bussola]]
[[ja:コンパス]]
[[ko:나침반]]
[[nl:Kompas]]
[[pl:Kompas]]
[[pt:Bússola]]
[[ru:Компас]]
[[uk:Компас]]
[[zh:指南针]]</li></ul> | Singleplayer was abolished in a technical sense. Instead, the player hosts a server that they can either close or open to others at any time. This change was intended to reduce the labor required to fix bugs for two different parts of Minecraft, at a slight performance cost. | ||||
| Pocket Edition Alpha | |||||
0.2.0{{Extension DPL}}<ul><li>[[Le Tricolore|Le Tricolore]]<br/>{{Exclusive|Java}}
{{Joke feature}}
{{Item
| image =
| renewable = Yes
| stackable = Yes (64)
}}
'''Le Tricolore''' (French for ''The Tricolour'') is a joke item from [[Java Edition 23w13a_or_b]].
== Obtaining ==
One le tricolore and one [[la baguette]] is given to all players when [[French mode]] gets activated. Deactivating the mode will remove le tricolore from the player's inventory (but not la baguette; [[container]]s such as [[chest]]s are not affected).
Le Tricolore is not available in the creative inventory, but can be obtained by using the {{cmd|give}} command.
== Data values ==
=== ID ===
{{ID table
|showforms=y
|generatetranslationkeys=java
|displayname=Le Tricolore
|spritetype=item
|nameid=le_tricolore
|form=item
|foot=1}}
== History ==
{{History|java}}
{{History||23w13a or b|[[File:Le Tricolore.png|32px]] Added Le Tricolore.}}
{{History|foot}}
{{Items}}
{{Jokes}}
[[Category:Joke items]]
[[ja:Le Tricolore]]
[[pt:Le Tricolore]]</li><li>[[Bone Meal|Bone Meal]]<br/>{{Item
| image = Bone Meal.png
| renewable = Yes
| stackable = Yes (64)
}}
'''Bone meal''' is a material that can be used as a fertilizer for most plants and fungi, as well as a crafting ingredient for [[dye]]s.
== Obtaining ==
=== Crafting ===
{{Crafting
|Bone
|Output=Bone Meal,3
|type=Material
|showname=0
|head=1
}}
{{Crafting
|Bone Block
|Output= Bone Meal,9
|type=Material
|foot=1
}}
=== Mob loot ===
==== Fish ====
All fish mob variants ([[cod]], [[salmon]], [[tropical fish]], and [[pufferfish]]) have a 5% chance to drop 1 bone meal upon death.{{only|java}} In [[Bedrock Edition]], they drop [[bones]] instead.
=== Composters ===
When a [[composter]] is completely filled, a single bone meal drops the next time the composter is {{ctrl|used}}.
=== Trading ===
[[Wandering trader]]s sell 3 bone meal for an [[emerald]].{{only|bedrock}}
== Usage ==
=== Crafting ingredient ===
{{crafting usage}}
{{IN|bedrock}}, bone meal can be also used in [[banner pattern]]s:
{{banner crafting usage}}
=== Loom ingredient ===
{{Banner loom usage|Bone Meal}}
=== Dye ===
{{Dye usage}}
=== Fertilizer ===
Bone meal can also be used on the following [[plants]] to have a chance to increase their growth stage:
{| class="wikitable"
|+
!Plant
!Action
|-
|{{BlockLink|Wheat}}<br>{{BlockLink|Carrots}}<br>{{BlockLink|Potatoes}}
|The plant matures 2–5 growth stages.
|-
|{{BlockLink|Beetroots}}
|The plant has a 75% chance of growing to the next growth stage.
|-
|{{BlockLink|Bamboo}}
|Grows the [[bamboo]] by 1-2 stems.
|-
|{{BlockLink|Melon Stem|link=Melon seeds|text=Melon Seeds}}<br>{{BlockLink|Pumpkin Stem|link=Pumpkin seeds|text=Pumpkin Seeds}}
|The planted stem matures 2–5 growth stages. Bone meal affects only the stem's growth; it does not cause [[melon]]s or [[pumpkin]]s to sprout from a mature stem.
|-
|{{BlockLink|Saplings}}<br>{{BlockLink|Azalea}}<br>{{BlockLink|Flowering Azalea}}<br>{{BlockLink|Mangrove Propagule}} (not hanging)
|The [[sapling]] has a 45% chance of growing to the next growth stage, if possible. Saplings have two growth stages (with no visible difference between them) before growing into trees as the third stage. A tree cannot grow unless the sapling is planted in proper ground and sufficient space is available. Using bone meal on such an obstructed sapling with no chance of growing wastes the bone meal.
|-
|{{BlockLink|Sunflower}}s<br>{{BlockLink|Lilac}}s<br>{{BlockLink|Rose Bush}}es<br>{{BlockLink|Peony|Peonies}}
|The corresponding item form drops, without destroying the original plant.
|-
|{{BlockLink|Grass}}<br>{{BlockLink|Fern}}s<br>{{BlockLink|Seagrass}}
|A one-block-high tall [[grass]], [[fern]], or [[seagrass]] (that is on [[grass block]], [[dirt]], [[coarse dirt]], [[rooted dirt]], [[farmland]], [[podzol]], [[mycelium]], [[moss block]], [[mud]], or [[muddy mangrove roots]] (only exception is seagrass, will need to on a full surface)) grows into a two-block-high tall grass, fern or seagrass.
|-
|{{BlockLink|Mushrooms}}
|Has a 40% chance of growing into a {{EnvLink|huge mushroom}} if on [[grass block]], [[dirt]], [[coarse dirt]], [[rooted dirt]], [[farmland]], [[podzol]], [[mycelium]], [[moss block]], [[mud]], or [[muddy mangrove roots]].
|-
|{{BlockLink|Cocoa}}
|The cocoa plant matures 1 growth stage.
|-
|{{BlockLink|Sweet Berry Bush}}
|Grows every stage.
|-
|{{BlockLink|Sea Pickle}}
|If the [[sea pickle]] is on a [[coral block]] and in [[water]] at least 2 blocks deep, the sea pickle colony grows, and additional sea pickles generate nearby.
|-
|{{BlockLink|Sugar Cane}}{{only|bedrock|short=1}}
|The sugar cane grows to maximum height (three blocks tall).
|-
|{{BlockLink|Kelp}}
|The kelp plant grows by 1 block per bone meal used, up to its maximum height.
|-
|{{BlockLink|Flower|id=poppy}} (excluding wither roses){{only|bedrock|short=1}}
|One-block-high flowers make more flowers of the same type grow in the surrounding area.
|-
|{{BlockLink|Fungus|id=fungi}}
|Grows into [[huge fungi]], but only if on the respective [[nylium]].
|-
|{{BlockLink|Weeping Vines}}
|Grows the [[weeping vine]]s a few blocks downward.
|-
|{{BlockLink|Twisting Vines}}
|Grows the [[twisting vine]]s a few blocks upward.
|-
|{{BlockLink|Cave Vines}}
|Produces [[glow berries]] if the vine did not have any [[glow berries]] on it already.
|-
|{{BlockLink|Glow Lichen}}
|The [[glow lichen]] spreads to a random adjacent block.
|-
|{{BlockLink|Moss Block}}
|The [[moss block]] causes nearby [[stone]], [[cave vine]]s, and [[dirt]] to become moss blocks.
|-
|{{BlockLink|Big Dripleaf}}<br>{{BlockLink|Small Dripleaf}}
|A [[big dripleaf]] grows one block higher, and a [[small dripleaf]] becomes a big dripleaf.
|-
|{{BlockLink|Rooted Dirt}}
|Causes [[hanging roots]] to grow underneath the [[rooted dirt]] if there is space.
|-
|{{BlockLink|Mangrove Leaves}}
|Creates a hanging [[mangrove propagule]] under the [[mangrove leaves]].
|-
|{{BlockLink|Mangrove Propagule}} (hanging)
|The [[mangrove propagule]] matures 1 growth age.
|-
|{{BlockLink|Pink Petals}}
|Produces another pink petal in the block. If there are already four pink petals in the block, it will drop a pink petal as an item.
|-
|{{BlockLink|Torchflower Crop}}<br>{{BlockLink|Pitcher Crop}}
|Grows every stage.
|}
Bone meal does not affect:
* [[Cactus]]
* [[Vines]]
* [[Nether wart]]
* [[Sugar cane]]{{only|JE}}
* [[Chorus plant]]s, or other plants not listed above.
==== Wasting bone meal ====
Bone meal can be used on the following objects in the following situations, consuming it without any real effect:
* On [[grass]], [[fern]]s, and [[seagrass]] that do not have enough space to grow.<ref>{{bug|MC-125642}}</ref>
* On [[seagrass]] that doesn't have [[water]] above.
* On a [[dark oak sapling]] that is not in a group of four.<ref>{{bug|MC-168446}}</ref>
* On a [[mushroom]] that is not on a block that allows it to grow into a huge mushroom.<ref>{{bug|MC-173213}}</ref>
* On a [[sea pickle]] that is already in a group of four and has no valid locations to expand to.<ref>{{bug|MC-127995}}</ref>
* On a [[bamboo]] (not [[bamboo shoot]]) that is blocked in the way.
* On a [[sea pickle]] that is not on a [[coral block]].
* On a [[fungus]] that is not on its respective [[nylium]].
* Any plants that can't grow due to being block by the [[build limit]].
=== Creating new plants ===
If bone meal is {{ctrl|used}} on a [[grass block]]; [[tall grass]], [[grass]], [[flower]]s, and [[pink petals]] form on the targeted block and on random adjacent grass blocks in an 15×5×15{{only|java|short=1}}/7×5×7{{only|bedrock|short=1}} area centered on the targeted block. The flowers/pink petals that appear depend on the biome, meaning that in order to obtain specific flowers, the player must travel to biomes where the flowers are found naturally. See {{slink|Flower|Flower biomes}} for more information.
Using bone meal on a 2-block flower (rose bushes, sunflowers, lilacs or peonies) will cause one of the same type of flower to drop, without breaking the original. This is the only way to reproduce these flowers, since they cannot generate from using bone meal on grass blocks.
Using bone meal on a non-transparent block that is underwater generates [[seagrass]] on that block and surrounding blocks. Sometimes, if in a [[warm ocean]] biome, [[coral]] and [[coral fan]]s may have a chance to generate as well, and in Bedrock Edition, coral (not coral fan) can be generated in any biome. In order for this to work, there must be 2 water blocks above the block the bone meal is being used on, and the lower one must be non-flowing water.
Using bone meal on a [[sea pickle]] on a [[coral block]] creates sea pickles. This generates sea pickles up to 3 [[block]]s (of coral) away, so a 7+ × 7+ block (49+ blocks) of coral may be necessary, to return the most sea pickles per given bone meal attempt (more attempts grows them more numerously, exactly - including the range of it growing, like grass with heights on grass blocks - as coral and coral fans, though those others being non-solid blocks).
Using bone meal on [[netherrack]] adjacent to [[nylium]] converts the netherrack into nylium of the same type. If both crimson and warped nylium are adjacent to the netherrack that was applied with bone meal, there is a 50% chance that either type of nylium is created.
Using bone meal on [[nylium]] causes the corresponding [[roots]] and both types of [[fungi]] to appear on the nylium block and other nylium nearby, with the type of fungi matching the type of nylium being more common. In addition, using bone meal on the side of warped nylium creates [[nether sprouts]] and [[twisting vines]].
=== Farmer villagers ===
[[Villager]]s with the farmer profession can collect bone meal from a full [[composter]], with which they can make their crops grow faster.
== Sounds ==
{{edition|java}}:
{{Sound table
|sound=Bonemeal1.ogg
|sound2=Bonemeal2.ogg
|sound3=Bonemeal3.ogg
|sound4=Bonemeal4.ogg
|sound5=Bonemeal5.ogg
|subtitle=Bone Meal crinkles
|description=When bone meal is successfully used
|source=block
|id=item.bone_meal.use
|translationkey=subtitles.item.bone_meal.use
|volume=1.0
|pitch=1.0
|distance=16
|foot=1}}
{{edition|be}}:
{{Sound table
|type=bedrock
|sound=Bonemeal1.ogg
|sound2=Bonemeal2.ogg
|sound3=Bonemeal3.ogg
|sound4=Bonemeal4.ogg
|sound5=Bonemeal5.ogg
|description=When bone meal is successfully used
|source=block
|id=item.bone_meal.use
|volume=1.0
|pitch=0.9-1.1
|foot=1}}
== Data values ==
=== ID ===
{{edition|java}}:
{{ID table
|edition=java
|showforms=y
|generatetranslationkeys=y
|displayname=Bone Meal
|spritetype=item
|nameid=bone_meal
|form=item
|foot=1}}
{{edition|bedrock}}:
{{ID table
|edition=bedrock
|showaliasids=y
|shownumericids=y
|showforms=y
|notshowbeitemforms=y
|generatetranslationkeys=y
|displayname=Bone Meal
|spritetype=item
|nameid=bone_meal
|aliasid=dye / 15
|id=411
|form=item
|translationkey=item.dye.white.name
|foot=1}}
== History ==
{{History|java beta}}
{{History||1.2|[[File:Bone Meal JE1 BE1.png|32px]] Added bone meal.
|Bone meal can now only be applied to [[sapling]]s and [[wheat]].}}
{{History||1.6.6|Bone meal can now be applied on [[grass block]]s.}}
{{History||1.8|snap=Pre-release|Bone meal can now be used on [[mushroom]]s to make [[huge mushroom]]s, and the block the mushroom is on changes to [[dirt]].}}
{{History|||snap=Pre-release 2 ;)|Bone meal can now be applied on [[pumpkin seeds|pumpkin]] and [[melon seed]]s.}}
{{History|java}}
{{History||1.3.1|snap=12w19a|Bone meal can now be applied on [[cocoa bean]]s.}}
{{History|||snap=1.3|[[File:Bone Meal JE2 BE2.png|32px]] The texture of bone meal has been changed.}}
{{History||1.4.2|snap=12w34a|Bone meal can now be used to dye [[leather armor]] and [[tamed wolf]]'s collar.}}
{{History||1.4.6|snap=12w49a|Bone meal can now be [[crafted]] with [[gunpowder]] to create a [[firework star]].}}
{{History||1.5|snap=13w04a|Bone meal has been significantly nerfed.<br>
[[Wheat]], [[melon seeds|melon]] and [[pumpkin seed]]s, [[potato]]es and [[carrot]]s: one bone meal is now consumed for all seven stages of growth (melon and pumpkin seeds do not spawn right away).<br>
[[Sapling]]s: one bone meal is now consumed for each of the two growth stages, then it grows into a tree.<br>
[[Cocoa]]s: one bone meal is now consumed for each of the three stages of growth.
|Green [[particle]]s are now displayed when bone meal is used.
|Bone meal can now be used from [[dispenser]]s.}}
{{History|||snap=13w05a|The balancing of bone meal has been adjusted. Growing a plant to its last state now takes on average 2-5 uses of bone meal (results vary from plant to plant).<ref>https://web.archive.org/web/20220921040940/https://imgur.com/a/gOngk</ref>}}
{{History||1.6.1|snap=13w19a|Bone meal can now be used to craft white [[stained clay]].}}
{{History||1.7.2|snap=13w36a|The [[flower]]s generated when using bone meal on grass blocks is now biome dependent.}}
{{History|||snap=13w41a|Bone meal can now be used to craft white [[stained glass]].}}
{{History||1.8|snap=14w30a|Added [[banner]]s, which can be dyed with [[bone meal]].}}
{{History||1.10|snap=16w20a|Bone meal can now be used to craft [[bone block]]s.}}
{{History||1.11|snap=16w39b|Bone meal can now be used to dye [[shulker box]]es.}}
{{History||1.12|snap=17w06a|Bone meal can now be used to craft white [[concrete powder]].}}
{{History||1.13|snap=17w47a|The different data values for the <code>dye</code> ID have been split up into their own IDs.
|Prior to [[1.13/Flattening|''The Flattening'']], this [[item]]'s numeral ID was 351.}}
{{History|||snap=18w07a|Bone meal can now be used underwater to create [[seagrass]].}}
{{History|||snap=18w14b|Bone meal can now be used for spreading [[sea pickle]]s.}}
{{History||1.13.1|snap=18w31a|Bone meal used in [[water]] of warm ocean biomes now has a chance of growing [[coral]].
|[[Cod]], [[salmon]], [[tropical fish]], and [[pufferfish]] now have a chance of dropping bone meal upon death.}}
{{History|||snap=18w32a|Bone meal used in [[water]] of warm ocean biomes now has a chance of growing [[coral fan]]s.}}
{{History||1.14|snap=18w43a|Bone meal can now used to craft [[white dye]].
|Bone meal can no longer be used as a [[dye]].
|All of the dye-related functions and crafting recipes of bone meal (except bone blocks) have been transferred to white dye.
|[[File:Bone Meal JE3 BE3.png|32px]] The texture of bone meal has been changed.
|Bone meal can now be used on [[bamboo]] and [[bamboo shoot]].}}
{{History|||snap=19w03a|Bone meal can now be obtained from [[composter]]s.}}
{{History||1.16|snap=20w06a|Bone meal can now be used to grow [[fungi]] into [[huge fungi]].
|Bone meal can now be used to spread [[nylium]] onto netherrack.}}
{{History|||snap=20w09a|Using bone meal to grow fungi now works only on the respective [[nylium]].}}
{{History|||snap=20w11a|Bone meal can now grow [[kelp]], [[weeping vines]], and [[twisting vines]].}}
{{History|||snap=20w12a|Bone meal can now be used to grow [[roots]], [[fungi]], and [[nether sprouts]] on nylium.}}
{{History|||snap=20w13a|Farmers can now use bone meal to grow crops.}}
{{History||1.17|snap=21w03a|Bone meal can now be used to spread [[glow lichen]]s.}}
{{History|||snap=21w05a|Bone meal can now be used on [[moss block]]s, [[small dripleaf]], [[big dripleaf]], and [[cave vines]].}}
{{History|||snap=21w11a|Bone meal can now be used on [[rooted dirt]].}}
{{History|||snap=21w15a|Bone meal now makes a sound when used.}}
{{History|||snap=21w16a|Moss patches obtained from fertilizing moss blocks contain less vegetation and are now smaller and more irregular in shape.
|Bone meal can now be used on [[azalea]] and [[flowering azalea]].}}
{{History||1.19|snap=22w11a|Bone meal can now be used on [[mangrove propagule]]s and [[mangrove leaves]].}}
{{History||1.20<br>(Experimental)|link=1.19.4|snap=23w07a|Bone meal can now be used on [[pink petals]] and [[torchflower crop]]s.|Using bone meal on [[cherry grove]]s now have a chance to generate [[pink petal]]s.}}
{{History||1.20|snap=23w12a|Bone meal can now be used on [[pitcher crop]]s.}}
{{History|pocket alpha}}
{{History||v0.3.0|[[File:Bone Meal JE1 BE1.png|32px]] Added bone meal. It is currently unobtainable and serves no purpose.}}
{{History||v0.3.3|Bone meal can now be crafted from bones.
|Bone meal can now be applied to grass blocks and saplings.}}
{{History||v0.4.0|Added the first [[crop]]s, which bone meal can be applied to.}}
{{History||v0.8.0|snap=build 1|[[File:Bone Meal JE2 BE2.png|32px]] The texture of bone meal has been changed.
|Bone meal no longer instantly grows [[crop]]s to full size.
|Bone meal can now be used to craft white [[wool]].}}
{{History|||snap=build 5|[[Pumpkin]] and [[melon]] stems now grow by only one stage when bone meal is used.
|Some [[flower]]s now spawn certain other flowers when bone meal is used on them.
|Bone meal can now grow [[fern]]s and [[tall grass]] in [[survival]] and [[creative]].
|Bone meal can now grow [[sugar cane]]s to maximum height.}}
{{History||v0.9.0|snap=build 11|Bone meal can now be used to dye tamed [[wolf]] collars.}}
{{History||v0.14.0|snap=build 1|Bone meal can now be used from [[dispenser]]s.
|Bone meal can now be used to dye [[water]] in [[cauldron]]s.}}
{{History|pocket}}
{{History||1.0.0|snap=alpha 0.17.0.1|Bone meal can now be used to dye [[shulker]]s.}}
{{History||1.1.0|snap=alpha 1.1.0.0|Bone meal can now be used to craft white [[concrete powder]], white [[bed]]s and white [[shulker box]]es.}}
{{History||1.1.3|snap=alpha 1.1.3.0|Bone meal can now be used to craft [[bone block]]s.}}
{{History|bedrock}}
{{History||1.2.0|snap=beta 1.2.0.2|Bone meal can now be used to craft white [[stained glass]].
|Bone meal can now be used to craft [[firework star]]s.
|Bone meal can now be used to create [[banner]] patterns.}}
{{History||1.4.0|snap=beta 1.2.14.2|Bone meal can now be used underwater for growing [[seagrass]] and [[coral]].}}
{{History|||snap=beta 1.2.20.1|Bone meal can now be used for spreading [[sea pickle]]s.
|Bone meal can now be used to craft white [[balloon]]s and white [[glow stick]]s.}}
{{History||1.8.0|snap=beta 1.8.0.8|Bone meal can now be used to grow [[bamboo]].}}
{{History|||snap=beta 1.8.0.10|Bone meal can now be used to craft [[white dye]].}}
{{History||1.10.0|snap=beta 1.10.0.3|Bone meal are now sold by [[wandering trader]]s.
|[[File:Bone Meal JE3 BE3.png|32px]] The texture of bone meal has been changed.}}
{{History||1.11.0|snap=beta 1.11.0.1|Bone meal can now be obtained from [[composter]]s.}}
{{History||1.16.0|snap=beta 1.16.0.51|Bone meal can now grow [[fungus|fungi]] into [[huge fungi]].
|Bone meal can now be used to turn [[netherrack]] into [[nylium]].
|Bone meal can now be used to grow [[roots]], [[fungi]], and [[nether sprouts]] on nylium.}}
{{History||1.16.100|snap=beta 1.16.100.56|The ID of bone meal has been changed from <code>dye/15</code> to <code>bone_meal</code>.}}
{{History||1.16.210|snap=beta 1.16.210.51|Bone meal used in [[water]] now has a chance of growing [[coral fan]]s.}}
{{History||1.16.220|snap=beta 1.16.220.52|Bone meal can now be used on [[moss block]]s, [[small dripleaf]], [[big dripleaf]], [[cave vines]] and [[rooted dirt]].}}
{{History||1.17.0|snap=beta 1.16.230.50|Bone meal can now be used to spread [[glow lichen]]s.}}
{{History|||snap=beta 1.16.230.54|Bone meal can be used to grow [[azalea]]s into azalea trees.}}
{{History|||snap=beta 1.17.0.50|Bone meal now makes a sound when used.}}
{{History|console}}
{{History||xbox=TU1|xbone=CU1|ps=1.00|wiiu=Patch 1|switch=1.0.1|[[File:Bone Meal JE1 BE1.png|32px]] Added bone meal.}}
{{History||xbox=TU19|xbone=CU7|ps=1.12|Bone meal no longer instantly grows [[crop]]s to full size.}}
{{History||xbox=none|xbone=none|ps=1.90|wiiu=none|switch=none|[[File:Bone Meal JE3 BE3.png|32px]] The texture of bone meal has been changed.}}
{{History|new 3ds}}
{{History||0.1.0|[[File:Bone Meal JE2 BE2.png|32px]] Added bone meal.}}
{{History|foot}}
== Issues ==
{{issue list}}
== Trivia ==
* Bone meal can be used on the sides or bottom of a [[grass block]], as well as on a grass block with [[plant]]s already on top of it.
* Regardless of if it succeeds in fertilizing, bone meal makes green sparkles. However, like smoke from a [[torch]], the sparkles appear only if the [[player]] has [[particles]] set All or Decreased.
* In real life, [[Wikipedia:bone meal|bone meal]] is used as a fertilizer to provide nitrogen and phosphorus to plants.
==Gallery==
<gallery>
File:Bone Meal On Grass.png|Bone meal used on [[grass block]]s.
</gallery>
== See also ==
* [[Farming]]
== References ==
{{reflist}}
{{Items}}
[[Category:Dyes]]
[[Category:Plants]]
[[Category:Renewable resources]]
[[cs:Kostní moučka]]
[[de:Knochenmehl]]
[[es:Polvo de hueso]]
[[fr:Poudre d'os]]
[[hu:Csontliszt]]
[[ja:骨粉]]
[[ko:뼛가루]]
[[nl:Beendermeel]]
[[pl:Mączka kostna]]
[[pt:Farinha de osso]]
[[ru:Костная мука]]
[[th:ผงกระดูก]]
[[zh:骨粉]]</li></ul> | Added Survival mode. | ||||
0.3.0{{Extension DPL}}<ul><li>[[Smarter Watch|Smarter Watch]]<br/>{{Joke feature}}{{Exclusive|Java}}{{Item
| title = Smarter Watch
| image = Smarter Watch.png
| renewable = No
| stackable = Yes (64)
}}
The '''Smarter Watch''' was a joke offhand [[item]].
== Usage ==
Smarter watches were "equipped" by having them placed into the offhand slot. Upon equipping, they would display the current time above the hotbar, in minutes and seconds, with one minute of in-game time being 5/6 of a real-time second, and one in-game hour being 5/6 of a real-time minute or 50 seconds.
The smarter watch would also notify the [[player]] of statistics milestones, alongside taken [[damage]], [[item]] specific info, [[crafting]] items and more.{{info needed|What exactly?}}
== Sounds ==
{{Sound table
|sound=Tick1.ogg
|sound2=Tick2.ogg
|subtitle=''None''
|source=player
|description=When a notification is displayed
|id=item.smarter_watch.notice
|translationkey=''None''
|volume=1.0
|pitch=1.0
|distance=16
|foot=1}}
== Data values ==
=== ID ===
{{ID table
|edition=java
|shownumericids=y
|showforms=y
|generatetranslationkeys=y
|displayname=Smarter Watch
|spritetype=item
|nameid=smarter_watch
|id=502
|form=item
|translationkey=item.smarterWatch.name
|foot=1}}
== History ==
{{History|java}}
{{History||1.RV|snap=1.RV-Pre1|[[File:Smarter_Watch_(item).png|32px]] [[File:Smarter Watch.png|32px]] Added the smarter watch.}}
{{History|foot}}
== Issues ==
Smarter Watches are an unsupported [[item]] due to being an [[Wikipedia:April Fools' Day|April Fools']] joke, and therefore issues relating to them will not be fixed.
== Gallery ==
<gallery>
TechGear.png|A [[player]] wearing the smarter watch, featured in this [[wikipedia:April Fools' Day|April Fools']] joke version.
</gallery>
{{Items}}
{{Jokes}}
[[Category:Non-renewable resources]]
[[Category:Joke items]]
[[pt:Relógio inteligente]]</li><li>[[Brush|Brush]]<br/>{{Item
|image=Brush.png
|rarity=Common
|renewable=Yes
|durability=64
|stackable=No
}}
A '''brush''' is a [[tool]] used in [[archaeology]] to excavate [[suspicious block]]s for different items.
==Obtaining==
===Crafting===
{{Crafting
|head=1
|showname=0
|showdescription=1
|B1=Feather
|B2=Copper Ingot
|B3=Stick
|Output=Brush
|type=Tool
}}
{{crafting
|foot=1
|ignoreusage=1
|Damaged Brush
|Damaged Brush
|Output=Brush
|description=The durability of the two brushes is added together, plus an extra 5% durability.
|type=Tool
}}
==Usage==
{{Main|Suspicious Block}}
{{Control|Using}} the brush on any block displays a brushing animation, slowing down the player and creating breaking [[particles]], but not actually damaging the block or brush. When continuously brushing a [[suspicious block]], a random item slowly emerges from it until it drops out, and the block turns into regular [[sand]] or regular [[gravel]], depleting 1 [[durability]] point on the brush. It takes 96 [[game tick]]s (4.8 seconds) to brush a single suspicious block.
=== Enchantments ===
A brush can receive the following [[enchantment]]s:
{|class="wikitable col-2-center col-3-right"
|+
!Name
!Max Level
![[Enchanting|Method]]
|-
|[[Unbreaking]]
|III
|{{Inventory slot|Anvil}}
|-
|[[Mending]]
|I
|{{Inventory slot|Anvil}}
|-
|[[Curse of Vanishing]]
|I
|{{Inventory slot|Anvil}}
|}
== Sounds ==
{{Edition|Java}}:
{{Sound table
<!--All of these sounds are, in fact, different-->
|sound=Brushing sand1.ogg
|sound2=Brushing sand2.ogg
|sound3=Brushing sand3.ogg
|sound4=Brushing sand4.ogg
|subtitle=Brushing Sand
|source=block
|description=While a brush is brushing suspicious sand
|id=item.brush.brushing.sand
|translationkey=subtitles.item.brush.brushing.sand
|volume=0.6
|pitch=0.6
|distance=16}}
{{Sound table
|sound=Brushing gravel1.ogg
|sound2=Brushing gravel2.ogg
|sound3=Brushing gravel3.ogg
|sound4=Brushing gravel4.ogg
|subtitle=Brushing Gravel
|source=block
|description=While a brush is brushing suspicious gravel
|id=item.brush.brushing.gravel
|translationkey=subtitles.item.brush.brushing.gravel
|volume=0.6
|pitch=0.6
|distance=16}}
{{Sound table
|sound=Brushing generic1.ogg
|sound2=Brushing generic2.ogg
|sound3=Brushing generic3.ogg
|sound4=Brushing generic4.ogg
|subtitle=Brushing
|source=block
|description=While a brush is brushing any other block
|id=item.brush.brushing.generic
|translationkey=subtitles.item.brush.brushing.generic
|volume=0.6
|pitch=0.6
|distance=16}}
{{Sound table
|sound=Brushing sand completed1.ogg
|sound2=Brushing sand completed2.ogg
|sound3=Brushing sand completed3.ogg
|sound4=Brushing sand completed4.ogg
|sound5=Brushing sand completed5.ogg
|subtitle=Brushing Sand completed
|source=Players<ref group=sound name=badsource>{{Bug|MC-260202}}</ref>|overridesource=1
|description=When a brush finishes brushing suspicious sand
|id=item.brush.brushing.sand.complete
|translationkey=subtitles.item.brush.brushing.sand.complete
|volume=1.0
|pitch=1.0
|distance=16}}
{{Sound table
|sound=Brushing gravel completed1.ogg
|sound2=Brushing gravel completed2.ogg
|sound3=Brushing gravel completed3.ogg
|sound4=Brushing gravel completed4.ogg
|subtitle=Brushing Gravel completed
|source=Players<ref group=sound name=badsource/>|overridesource=1
|description=When a brush finishes brushing suspicious gravel
|id=item.brush.brushing.gravel.complete
|translationkey=subtitles.item.brush.brushing.gravel.complete
|volume=1.0
|pitch=1.0
|distance=16
|foot=1}}
{{Edition|Bedrock}}:
{{Sound table
|type=bedrock
|sound=Brushing sand1.ogg
|sound2=Brushing sand2.ogg
|sound3=Brushing sand3.ogg
|sound4=Brushing sand4.ogg
|source=player
|description=While a brush is brushing suspicious sand
|id=brush.suspicious_sand
|volume=1.0
|pitch=0.8-1.0}}
{{Sound table
|sound=Brushing gravel1.ogg
|sound2=Brushing gravel2.ogg
|sound3=Brushing gravel3.ogg
|sound4=Brushing gravel4.ogg
|source=player
|description=While a brush is brushing suspicious gravel
|id=brush.suspicious_gravel
|volume=1.0
|pitch=0.8-1.0}}
{{Sound table
|sound=Brushing generic1.ogg
|sound2=Brushing generic2.ogg
|sound3=Brushing generic3.ogg
|sound4=Brushing generic4.ogg
|source=player
|description=While a brush is brushing any other block
|id=brush.generic
|volume=1.0
|pitch=0.8-1.0}}
{{Sound table
|sound=Brushing sand completed1.ogg
|sound2=Brushing sand completed2.ogg
|sound3=Brushing sand completed3.ogg
|sound4=Brushing sand completed4.ogg
|sound5=Brushing sand completed5.ogg
|source=player
|description=When a brush finishes brushing suspicious sand
|id=brush_completed.suspicious_sand
|volume=1.0
|pitch=0.8-1.0}}
{{Sound table
|sound=Brushing gravel completed1.ogg
|sound2=Brushing gravel completed2.ogg
|sound3=Brushing gravel completed3.ogg
|sound4=Brushing gravel completed4.ogg
|source=player
|description=When a brush finishes brushing suspicious gravel
|id=brush_completed.suspicious_gravel
|volume=1.0
|pitch=0.8-1.0
|foot=1}}
== Data values ==
=== ID ===
{{edition|java}}:
{{ID table
|edition=java
|showforms=y
|generatetranslationkeys=y
|displayname=Brush
|spritetype=item
|nameid=brush
|form=item
|foot=1}}
{{edition|bedrock}}:
{{ID table
|edition=bedrock
|shownumericids=y
|showforms=y
|notshowbeitemforms=y
|generatetranslationkeys=y
|displayname=Brush
|spritetype=item
|nameid=brush
|id=684
|form=item
|foot=1}}
== Advancements ==
{{load advancements|Respecting the Remnants}}
== History ==
{{History||October 3, 2020|link=https://youtu.be/DBvZ2Iqmm3M?t=2178|[[File:Brush (pre-release 1).png|32px]][[File:Brush 2.png|32px]] Brushes were announced at [[Minecraft Live 2020]] with two variants.}}
{{History||?|link=https://youtu.be/klP9SrJFDU8?t=206|[[File:Brush (pre-release 2).png|32px]] Changed the brush's item texture.}}
{{History||February 10, 2023|[[File:Brush JE1 BE1.png|32px]] [[Sofia Dankis]] posted an article about upcoming archaeology features, including brushes.|link=https://www.minecraft.net/en-us/article/archeology-coming-minecraft-120}}
{{History|java}}
{{History||1.20<br>(Experimental)|link=1.19.4|snap=23w07a|[[File:Brush JE1 BE1.png|32px]] Added brushes with an updated texture behind the [[Java Edition 1.20|Update 1.20 experimental datapack]].|The crafting recipe was originally three [[string]] and two [[stick]]s.
{{{!}} class{{=}}"collapsible collapsed" data-description{{=}}"Recipe"
! Recipe
{{!}}-
{{!}}{{Crafting Table
|A1 = String
|B1 = String
|C1 = String
|B2 = Stick
|B3 = Stick
|Output = Brush
|type = Tool
|ignoreusage=1}}
{{!}}}
}}
{{History|||snap=1.19.4 Pre-release 1|The crafting recipe for brushes has been changed:
{{{!}} class{{=}}"collapsible collapsed" data-description{{=}}"Recipe"
! Recipe
{{!}}-
{{!}}{{Crafting Table
|B1 = Feather
|B2 = Copper Ingot
|B3 = Stick
|Output = Brush
|type = Tool
|ignoreusage=1}}
{{!}}}
}}
{{History||1.20|snap=23w12a|Brushes are now available without using the "Update 1.20" experimental data pack.
|Brushes can now brush [[suspicious gravel]].}}
{{History|||snap=23w14a|The brushing sound of brush is now controlled by the "Blocks" sound slider instead of the "Players" sound slider.}}
{{History|||snap=23w17a|The player now gets the [[advancement]] "Respecting the Remnants" when they use a brush on a [[suspicious block]] to obtain a [[pottery sherd]].}}
{{History|bedrock}}
{{History||Next Major Update<br>(Experimental)|link=Bedrock Edition 1.19.70|snap=beta 1.19.70.23|[[File:Brush JE1 BE1.png|32px]] Added brushes behind the "[[Bedrock Edition 1.20.0|Next Major Update]]" [[experimental]] toggle.
|The crafting recipe is originally three [[string]] and two [[stick]]s.
{{{!}} class{{=}}"collapsible collapsed" data-description{{=}}"Recipe"
! Recipe
{{!}}-
{{!}}{{Crafting Table
|A1 = String
|B1 = String
|C1 = String
|B2 = Stick
|B3 = Stick
|Output = Brush
|type = Tool
|ignoreusage=1}}
{{!}}}
}}
{{History||Next Major Update<br>(Experimental)|link=Bedrock Edition 1.19.80|snap=beta 1.19.80.20|The crafting recipe for brushes has been changed:
{{{!}} class{{=}}"collapsible collapsed" data-description{{=}}"Recipe"
! Recipe
{{!}}-
{{!}}{{Crafting Table
|B1 = Feather
|B2 = Copper Ingot
|B3 = Stick
|Output = Brush
|type = Tool
|ignoreusage=1}}
{{!}}}
}}
{{History||1.20.0|snap=beta 1.20.0.21|Brushes are now available without using the "Next Major Update" experimental toggle.}}
{{History|foot}}
== Issues ==
{{Issue list}}
== References ==
{{Reflist}}
==External Links==
*[https://www.minecraft.net/en-us/article/brush Taking Inventory: Brush] – Minecraft.net on July 6, 2023
{{Items}}
[[Category:Renewable resources]]
[[de:Pinsel]]
[[es:Pincel]]
[[ja:ブラシ]]
[[pt:Pincel]]
[[pl:Pędzel]]
[[uk:Щітка]]
[[zh:刷子]]</li></ul> | Crafting was introduced. | ||||
| Legacy Console Edition | |||||
| TU1 | CU1 | 1.0 | Patch 1 | Added Survival mode. | |
Issues
Issues relating to "Survival" are maintained on the bug tracker. Report issues there.