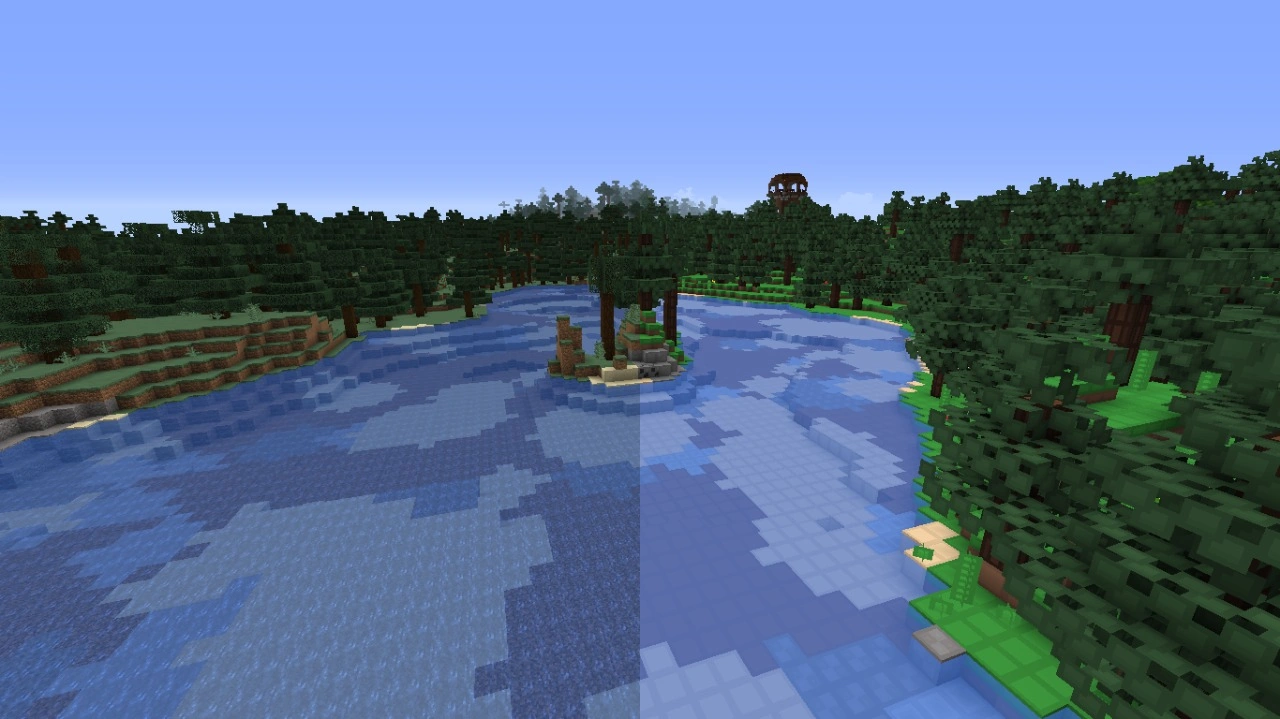
The default textures, with a custom resource pack (Soartex Fanver) in the center.
The resource pack system provides a way for players to customize textures, models, music, sounds, languages, the end poem, splashes, and fonts, without any code modification.
Java Edition
Behavior
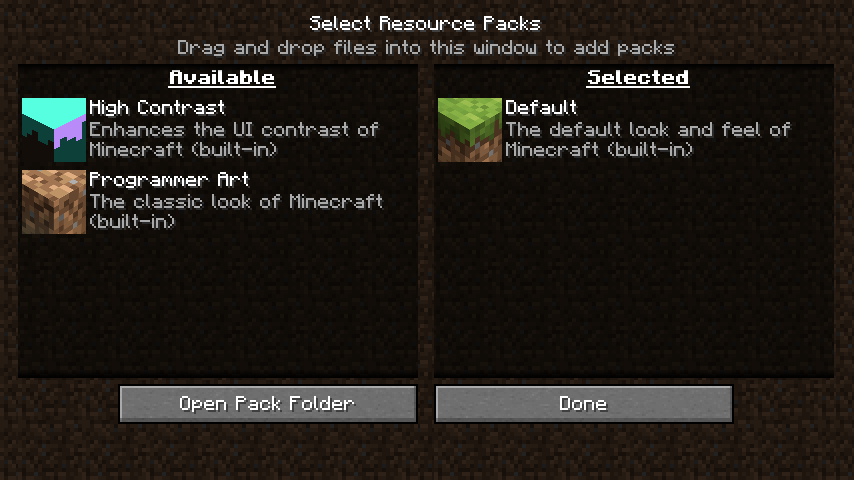
The default resource pack settings.
Resource packs can be placed in the folder resourcepacks within the .minecraft folder. Each resource pack is either a sub-folder or a .zip file within the resourcepacks folder. Once in the folder, a resource pack can be added from the options, where resource packs can be moved between "Available resource packs" and "Selected resource packs". "Selected resource packs" also contain the default assets on the bottom, which cannot be removed.
Resource packs load their assets based on the order of the packs on the list. The bottom-most pack loads first, then each pack placed above it replaces assets of the same name with its assets.
Default resource packs
A resource pack can be bundled with a world by saving it under the name resources and placing it directly in the world's folder. When playing the world, that resource pack appears as the default right above the default resource pack.
A default resource pack can also be set on a server by adding a link to a .zip file download after the line resource-pack= in the server properties file. Users can still opt out of using the resource pack or choose not to download it though.
The old (pre-1.14) textures are available in a resource pack titled "Programmer Art".
Folder structure
|
More than one directory for different namespaces may exist under the assets directory.
Contents
A resource pack is identified by Minecraft based on the presence of the file pack.mcmeta in the root directory, which contains a JSON file with the following information:
- The root tag
- pack: Holds the resource pack information
- pack_format: Pack version. If this number does not match the current required number, the resource pack displays an error and required additional confirmation to load the pack. Requires
1for 1.6.1–1.8.9,2for 1.9–1.10.2,3for 1.11–1.12.2,4for 1.13–1.14.4,5for 1.15–1.16.1 and6for 1.16.2. - description: Text shown below the pack name in the resource pack menu. The text is shown on two lines. If the text is too long it is truncated.
- description: Contains a raw JSON text object that is shown instead as the pack description in the resource pack menu. Same behavior as the
stringversion of thedescriptiontag, but they cannot exist together.
- pack_format: Pack version. If this number does not match the current required number, the resource pack displays an error and required additional confirmation to load the pack. Requires
- language: Contains additional languages to add to the language menu
- Language code for a language, corresponding to a .json file with the same name in the folder assets/<namespace>/lang.
- name: The full name of the language
- region: The country or region name
- bidirectional: If true, the language reads right to left.
- Language code for a language, corresponding to a .json file with the same name in the folder assets/<namespace>/lang.
- pack: Holds the resource pack information
The root directory also contains an optional image called pack.png, which appears as the thumbnail for the pack on the resource pack selection menu.
Language
Resource packs can create language files of the type .json in the folder assets/<namespace>/lang. Each file either replaces information from a file of the same name in the default or a lower pack, or it creates a new language as defined by pack.mcmeta.
Each line in the .json file is in the standard json format of "identifier":"name" followed by a comma in case it is followed by another value in the next line. identifier is the name that the game looks for to determine the name for something, and as such it should not be changed. name is the name that is displayed. For example, stone in the default language file is "block.minecraft.stone":"Stone", with block.minecraft.stone being the identifier, and Stone being the displayed name. Blank lines are ignored. The file needs to be valid JSON syntax, meaning it starts with a {, has a comma after every key value pair except the last one, and ends with a }.
Language files need to add only those lines that are changed by the pack. Any names that are not in the pack are loaded from the pack below, or default if no pack changes the names.
Models
Models are files in JSON format with the extension .json, which determine the shape and textures of blocks and items.
Blocks use a block state file from assets/minecraft/blockstates to determine which model is loaded for each variant from the folder assets/minecraft/models/block. Meanwhile, each item has an item model in assets/minecraft/models/item to determine its model, which either loads from a block's model, contains data for its own custom model, or uses the default "flat" or "entity" model.
Models and block states used in packs below the top one are still loaded unless overridden in the top pack, which may cause some textures and models used by the top pack to no longer be loaded.
Sounds
Resource packs load additional sounds with the file type of .ogg. Each sound placed in the pack overrides the sounds from packs below, and packs also contain a file called sounds.json which is placed within assets/minecraft. Unlike most other files in resource packs, sounds.json merges sound information from packs below the top pack, rather than each sounds.json file overriding the previous completely.
Textures
The "missing texture" for invalid or missing textures.
For block or item textures to function, they must have equal width and height (or height that is a multiple of the width if animated); otherwise it appears as a magenta and black checkerboard. For most other textures, the file is stretched to fit the required dimensions.
Most solid blocks turn any transparent area fully opaque. Some other blocks, which have "cutout" transparency (like glass) turn all pixels that are less than 10% opaque fully transparent and all other pixels completely opaque. Every other block renders textures with semi-transparency as-is. All items and any blocks or entities which are semi-transparent by default support semi-transparency.
If a file does not exist in any resource pack, including the default, it appears as a magenta and black checkerboard texture using the colors (
#f800f8 and
#000000).
- Animation
Block and item textures support animation by placing each additional frame below the last. The animation is then controlled using a .mcmeta file in JSON format with the same name and .png at the end of the filename, in the same directory. For example, the .mcmeta file for stone.png would be stone.png.mcmeta.
- The root tag
- animation: Contains data for the animation
- interpolate: If true, Minecraft generates additional frames between frames with a frame time greater than 1 between them. Defaults to
false. - width: The width of the tile, as a direct ratio rather than in pixels. This is unused in vanilla's files but can be used by resource packs to have frames that are not perfect squares.
- height: The height of the tile in direct pixels, as a ratio rather than in pixels. This is unused in vanilla's files but can be used by resource packs to have frames that are not perfect squares.
- frametime: Sets the default time for each frame in increments of one game tick. Defaults to
1. - frames: Contains a list of frames. Defaults to displaying all the frames from top to bottom.
- A number corresponding to position of a frame from the top, with the top frame being 0
- A frame specifies a frame with additional data
- index: A number corresponding to position of a frame from the top, with the top frame being 0
- time: The time in ticks to show this frame, overriding "frametime" above.
- interpolate: If true, Minecraft generates additional frames between frames with a frame time greater than 1 between them. Defaults to
- animation: Contains data for the animation
If the .mcmeta file does not exist in the pack and the texture does, the game assumes the texture is not animated, rather than loading a .mcmeta file from a pack below that pack. If no .mcmeta file exists for a texture with unequal dimensions, the texture appears as a purple and black checkerboard.
- Villagers
Textures from assets/minecraft/textures/entity/villager and assets/minecraft/textures/entity/zombie_villager support a .mcmeta file in JSON format containing additional effects to apply to the hat layer. The file is contained in the same directory as the texture, and has the same name as the texture, except appended with .mcmeta. For example, the file profession/farmer.png can have a properties file called profession/farmer.png.mcmeta
- The root tag
- villager: Contains data for the texture
- hat: Whether the villager type's hat layer should still render (default), or not
full. [more information needed]
- hat: Whether the villager type's hat layer should still render (default), or not
- villager: Contains data for the texture
If the .mcmeta file does not exist in the pack and the texture does, the game loads the default settings, rather than loading a .mcmeta file from a pack below that pack.
- Colormaps
Colormaps are 256×256 pixel images which tell the game which color to use in each biome. They are located in assets/minecraft/textures/colormap. The game contains two colormaps, foliage.png which colors plants such as leaves (except birch and spruce) and vines, and grass.png which colors grass and grass blocks. Colormaps can be disabled on individual blocks by removing the tintindex tag from the block model.
- Properties
Textures from assets/minecraft/textures/misc support a .mcmeta file in JSON format containing additional effects to apply to the texture. The file is contained in the same directory as the texture, and has the same name as the texture, except appended with .mcmeta. For example, the file pumpkinblur.png can have a properties file called pumpkinblur.png.mcmeta
- The root tag
- texture: Contains data for the texture
- blur: Causes the texture to blur when viewed from close up. Defaults to
false - clamp: Causes the texture to stretch instead of tiling in cases where it otherwise would, such as on the shadow. Defaults to
false - mipmaps: Custom mipmap values for the texture
- blur: Causes the texture to blur when viewed from close up. Defaults to
- texture: Contains data for the texture
If the .mcmeta file does not exist in the pack and the texture does, the game loads the default settings, rather than loading a .mcmeta file from a pack below that pack.
Texts
Three .txt files in UTF-8 format exist in assets/minecraft/texts which are used by the game to determine the text to display.
The file end.txt contains the text of the end poem, using formatting codes to apply the colors to the two speakers, and with the text PLAYERNAME being replaced with the player's name. After that file is shown, the contents of credits.txt are shown.
The file splashes.txt contains lines of text separated using line breaks to determine the splashes to display in-game. Any splash can be replaced with different text.
Fonts
A font file is a JSON file located at assets/<namespace>/font within a resource pack and contains a list of providers that each tie a character set to a resource location along with some extra information. The default font is defined by the font minecraft:default while the default font used by enchantment tables is defined by the font minecraft:alt.
The resource locations given in font providers should also include the file extensions.
- The root tag
- providers: A list of providers that are merged onto this font.
- A font provider. The contents depend on the value of the
"type"tag.- type: The type of the font provider. Can be one of the following:
- bitmap: A bitmap font.
- file: The resource location of the used file, starting from
assets/<namespace>/textures. - height: Optional. The height of the character, measured in pixels. Can be negative. This tag is separate from the area used in the source texture and just rescales the displayed result. Default is 8.
- ascent: The ascent of the character, measured in pixels. This value adds a vertical shift to the displayed result.
- chars: A list of strings containing the characters replaced by this provider, as well as their order within the texture. All elements must describe the same number of characters. The texture is split into one equally sized row for each element of this list. Each row is split into one equally sized character for each character within one list element.
- file: The resource location of the used file, starting from
- legacy_unicode: A legacy unicode font. This format is deprecated and only prioritized when the "Force Unicode Font" option is turned on.
- sizes: The resource location inside
assets/<namespace>/fontdescribing a binary file describing the horizontal start and end positions for each character from 0 to 15. The file extension of the target file should be.bin. - template: The resource location inside
assets/<namespace>/texturesthat leads to the texture files that should be used for this provider. The game replaces%sfrom the value of this tag with the first two characters of the hex code of the replaced characters, so a single provider of this type can point into multiple texture files.
- sizes: The resource location inside
- ttf: A TrueType font.[more information needed]
- file: The resource location of the TrueType font file within
assets/<namespace>/font. - shift: The distance by which the characters of this provider are shifted.
- Left shift
- Downwards shift
- size: Font size to render at.
- oversample: Resolution to render at.
- skip: String or array of strings to exclude.
- file: The resource location of the TrueType font file within
- bitmap: A bitmap font.
- type: The type of the font provider. Can be one of the following:
- A font provider. The contents depend on the value of the
- providers: A list of providers that are merged onto this font.
- Default textures
The texture files of the default fonts contain a grid of white characters, which are automatically colored by Minecraft as needed in-game. The character sizes are automatically determined based on the last line of pixels containing any alpha value. Due to the way fonts are detected, filling the background of a character with a color containing a 5% alpha background causes the full width to render without having a visible background to the character.
- Glyphs 0x20 (space) through 0x7E (tilde) display the standard ASCII characters,
- Glyphs 0x7F through 0xFF display the Code page 437 characters.
The default texture is located in assets/minecraft/textures/font/ascii.png
The default texture used when displaying the enchanting "alien font" is assets/minecraft/textures/font/ascii_sga.png
Texture sheets
Minecraft generally does not store multiple different textures on sheets and instead stores them on separate files. Two current exceptions are map icons[1] and experience orbs as well as minecarts.[2]
Shaders
Shaders are GLSL files that are compiled when loaded. They are used to modify the look of the game and come in two varieties, vertex and fragment. The vertex shaders modify the positions of individual vertices and are most often used to create waving foliage and water. Fragment shaders are applied to every pixel and can be used to add effects like bloom, god rays, and blur. The folder contains JSON files which link to the vertex and fragment shaders and provide info about them. If any error occurs when loading the shaders, the resource pack is unloaded and fabulous graphics are turned off.
"Post" JSON
- The root tag
- targets: A list of render targets.
- passes: A list of passes.
- : A render pass.
- name: The name of the render pass.
- intarget: The target to use as an input.
- outtarget: The target to output to.
- auxtargets: A list of auxiliary targets.
- : An auxiliary target.
- name: The auxiliary target's name.
- id: The auxiliary target's id.
- : An auxiliary target.
- : A render pass.
"Program" JSON
- The root tag
- blend: Settings for OpenGL blending. [verify]
- func: Operator to be used when blending. [verify]
- srcrgb: Source.
- dstrgb: Destination.
- vertex: The name (without file extension) of the vertex shader to be used.
- fragment: The name (without file extension) of the fragment shader to be used.
- attributes: Attributes to be used.
- samplers: A list of samplers that may be used in the shaders.
- : A sampler.
- name: The samplers name.
- : A sampler.
- uniforms: A list of uniforms that can be used in the shaders.
- : A uniform.
- name: The name of the uniform.
- type: The type of the uniform.
- count: The number of values included in
values. - values: The value of the uniform. The length of the list should be the same as
count.
- : A uniform.
- blend: Settings for OpenGL blending. [verify]
Template
The folder structure of Vanilla Resource Pack:
| List |
|---|
|
Bedrock Edition
Similarly to skins, resource packs can be bought or made in Bedrock Edition. As of Alpha 0.15.0, iOS users can download resource packs on the system itself with the .mcpack and .mcworld file names. When these files are opened, they are automatically imported into the game without any need for file system access.
History
| Java Edition | |||||
|---|---|---|---|---|---|
1.6.1{{Extension DPL}}<ul><li>[[Item Frame|Item Frame]]<br/>{{redirect|Frame}}
{{ItemEntity
| group = Item Frame
| 1-1 = Item Frame.png
| 1-2 = Item Frame (item).png
| group2 = Glow Item Frame
| 2-1 = Glow Item Frame.png
| 2-2 = Glow Item Frame (item).png
| extratext = [[#Renders|View all renders]]
| renewable = Yes
| stackable = Yes (64)
| drops = {{ItemLink|Item Frame}} (1)<br>
or
{{ItemLink|Glow Item Frame}} (1)<br>{{EnvSprite|items}} The item it contains.
}}
An '''item frame''' is an [[entity]]{{only|java|short=y}} or [[block entity]]{{only|bedrock|short=y}} that displays the item or block that is inside it.
A '''glow item frame''' keeps itself and the item inside it illuminated, even in the dark.
== Obtaining ==
=== Breaking ===
{{IN|je}}, an empty item frame can be broken simply by punching it. If the item frame contains an item, punching it drops the item, leaving the frame on the wall.
Because item frames are [[entities]] {{in|java}}, they can be broken in [[Adventure]] mode. They will also be targeted by commands using the @e selector.{{only|java}}
=== Natural generation ===
An item frame containing a pair of [[elytra]] generates in each [[end ship]].
[[File:BoatElytra.png|thumb|An item frame naturally generating in an end ship.]]
=== Crafting ===
{{Crafting
|head=1
|A1= Stick |B1= Stick |C1= Stick
|A2= Stick |B2= Leather |C2= Stick
|A3= Stick |B3= Stick |C3= Stick
|Output= Item Frame
|type= Decoration block
}}
{{Crafting
|foot=1
|Glow Ink Sac
|Item Frame
|Output= Glow Item Frame
|type= Decoration block
}}
=== Trading ===
Expert-level [[Trading#Cartographer|cartographer]] [[villager]]s have a chance to sell an item frame for 7 [[emerald]]s.
== Usage ==
=== Item display ===
[[File:Item Frame (map filled partial).png|thumb|150px|Item frame with partially filled map]]
Item frames can be placed on the sides of [[cactus]] blocks, [[pressure plate]]s, [[fence]]s, [[tree]]s, [[slab]]s, [[cobblestone wall]]s, [[chest]]s, [[door]]s, and all [[solid block]]s. They can also be placed on the top and bottom of these blocks. To place on chests and doors, the player needs to be [[sneaking]]. As item frames are an entity, multiple item frames can occupy the same block, although on different faces. It also allows non-solid blocks to occupy the same space.{{only|java}}
Players can place items in the frame by {{control|using}} the item. If a [[map]] is placed in an item frame, it enlarges to show the map in the size of a full block, with the item frame's location displayed as a green pointer on the map, pointing in the direction the item frame is facing. If this is done in the Nether, the green cursor spins around similar to the white cursor (players). If an item in an item frame has been renamed using an [[anvil]], it displays its custom name when the cursor is over the item frame. If the player places a block inside the frame, it is displayed in miniature half in, half out of the block. This can be most notably seen on stairs or slabs.
{{control|Pick block}} may be used on item frames by players in creative mode only, the control has no effect for players in Survival or Adventure mode. When the item frame is displaying an item, {{control|pick block}} picks the displayed item instead of the item frame.
Item frames can be placed on the lid of a [[shulker box]] that is positioned horizontally, but pop off when the lid is opened.{{only|java}}
=== Rotation ===
The displayed item can then be rotated by right-clicking the frame. Items displayed in the item frame can turn 45° diagonally, with a total of 8 possibilities (90° and 4 possibilities if it is a map), and the frame outputs a [[Mechanics/Redstone/Circuit#Power level|redstone signal]] depending on the rotation phase that can be interpreted by a [[redstone comparator]] (note that this rotation value is separate from the clock or compass rotation). As long as the frame remains placed, it remembers the orientation of the last item it held, and uses it for the next item it holds.{{only|java}}
=== Glow item frames ===
[[File:Item Frames Comparison.png|thumb|260px|Comparison between ordinary item frame and glow item frame in the dark.]]
When an item is placed inside a glow item frame, it appears to glow, even though it does not emit any [[light level]].
== Sounds ==
Item frames and glow item frames share the same sounds.
=== Generic ===
{{Edition|Bedrock}}:<!--Item frames are blocks in BE, so they get the generic section.-->
{{Sound table/Block/Item frame/BE}}
=== Unique ===
{{Edition|Java}}:
{{Sound table
|rowspan=2
|sound=Item Frame add item1.ogg
|sound2=Item Frame add item2.ogg
|soumd3=Item Frame add item3.ogg
|sound4=Item Frame add item4.ogg
|subtitle=Item Frame fills
|source=neutral
|description=When an item is placed in an item frame
|id=entity.item_frame.add_item
|translationkey=subtitles.entity.item_frame.add_item
|volume=1.0
|pitch=1.0
|distance=16}}
{{Sound table
|subtitle=Glow Item Frame fills
|source=neutral
|description=When an item is placed in a glow item frame
|id=entity.glow_item_frame.add_item
|translationkey=subtitles.entity.glow_item_frame.add_item
|volume=1.0
|pitch=1.0
|distance=16}}
{{Sound table
|rowspan=2
|sound=Item Frame break1.ogg
|sound2=Item Frame break2.ogg
|sound3=Item Frame break3.ogg
|subtitle=Item Frame breaks<ref group=sound name=breaks>{{bug|MC-194948}}</ref>
|source=neutral
|description=When an item frame is broken or pops off
|id=entity.item_frame.break
|translationkey=subtitles.entity.item_frame.break
|volume=1.0
|pitch=1.0
|distance=16}}
{{Sound table
|subtitle=Glow Item Frame breaks<ref group=sound name=breaks/>
|source=neutral
|description=When a glow item frame is broken or pops off
|id=entity.glow_item_frame.break
|translationkey=subtitles.entity.glow_item_frame.break
|volume=1.0
|pitch=1.0
|distance=16}}
{{Sound table
|rowspan=2
|sound=Item Frame place1.ogg
|sound2=Item Frame place2.ogg
|sound3=Item Frame place3.ogg
|sound4=Item Frame place4.ogg
|subtitle=Item Frame placed
|source=neutral
|description=When an item frame is placed
|id=entity.item_frame.place
|translationkey=subtitles.entity.item_frame.place
|volume=1.0
|pitch=1.0
|distance=16}}
{{Sound table
|subtitle=Glow Item Frame placed
|source=neutral
|description=When a glow item frame is placed
|id=entity.glow_item_frame.place
|translationkey=subtitles.entity.glow_item_frame.place
|volume=1.0
|pitch=1.0
|distance=16}}
{{Sound table
|rowspan=2
|sound=Item Frame remove item1.ogg
|sound2=Item Frame remove item2.ogg
|sound3=Item Frame remove item3.ogg
|sound4=Item Frame remove item4.ogg
|subtitle=Item Frame empties
|source=neutral
|description=When an item is removed from an item frame
|id=entity.item_frame.remove_item
|translationkey=subtitles.entity.item_frame.remove_item
|volume=1.0
|pitch=1.0
|distance=16}}
{{Sound table
|subtitle=Glow Item Frame empties
|source=neutral
|description=When an item is removed from a glow item frame
|id=entity.glow_item_frame.remove_item
|translationkey=subtitles.entity.glow_item_frame.remove_item
|volume=1.0
|pitch=1.0
|distance=16}}
{{Sound table
|rowspan=2
|sound=Item Frame rotate item1.ogg
|sound2=Item Frame rotate item2.ogg
|sound3=Item Frame rotate item3.ogg
|sound4=Item Frame rotate item4.ogg
|subtitle=Item Frame clicks
|source=neutral
|description=When an item is rotated in an item frame
|id=entity.item_frame.rotate_item
|translationkey=subtitles.entity.item_frame.rotate_item
|volume=1.0
|pitch=1.0
|distance=16}}
{{Sound table
|subtitle=Glow Item Frame clicks
|source=neutral
|description=When an item is rotated in an item frame
|id=entity.glow_item_frame.rotate_item
|translationkey=subtitles.entity.glow_item_frame.rotate_item
|volume=1.0
|pitch=1.0
|distance=16
|foot=1}}
{{Edition|Bedrock}}:
{{Sound table
|type=bedrock
|sound=Item Frame add item1.ogg
|sound2=Item Frame add item2.ogg
|soumd3=Item Frame add item3.ogg
|sound4=Item Frame add item4.ogg
|source=block
|description=When an item is placed in an item frame
|id=block.itemframe.add_item
|volume=1.0
|pitch=1.0}}
{{Sound table
|sound=Item Frame remove item1.ogg
|sound2=Item Frame remove item2.ogg
|sound3=Item Frame remove item3.ogg
|sound4=Item Frame remove item4.ogg
|source=block
|description=When an item is removed from an item frame
|id=block.itemframe.remove_item
|volume=1.0
|pitch=1.0}}
{{Sound table
|sound=Item Frame rotate item1.ogg
|sound2=Item Frame rotate item2.ogg
|sound3=Item Frame rotate item3.ogg
|sound4=Item Frame rotate item4.ogg
|source=block
|description=When an item is rotated in an item frame
|id=block.itemframe.rotate_item
|volume=1.0
|pitch=1.0
|foot=1}}
== Achievements ==
{{load achievements|Map room}}
== Data values ==
=== ID ===
{{edition|java}}:
{{ID table
|edition=java
|firstcolumnname=Item
|showforms=y
|generatetranslationkeys=y
|displayname=Item Frame
|spritetype=item
|nameid=item_frame
|form=item}}
{{ID table
|displayname=Glow Item Frame
|spritetype=item
|nameid=glow_item_frame
|form=item
|foot=1}}
{{ID table
|edition=java
|firstcolumnname=Entity
|generatetranslationkeys=y
|displayname=Item Frame
|spritetype=entity
|nameid=item_frame}}
{{ID table
|displayname=Glow Item Frame
|spritetype=entity
|nameid=glow_item_frame
|foot=1}}
{{edition|bedrock}}:
{{ID table
|edition=bedrock
|firstcolumnname=Item Frame
|shownumericids=y
|showforms=y
|generatetranslationkeys=y
|displayname=Item
|spritename=item-frame
|spritetype=item
|nameid=frame
|id=513
|form=item}}
{{ID table
|displayname=Block
|spritename=item-frame
|spritetype=block
|nameid=frame
|id=199
|form=block
|translationkey=-
|itemform=item.frame}}
{{ID table
|displayname=Item
|spritename=glow-item-frame
|spritetype=item
|nameid=glow_frame
|id=623
|form=item}}
{{ID table
|displayname=Block
|spritename=glow-item-frame
|spritetype=block
|nameid=glow_frame
|form=block
|id=594
|itemform=item.glow_frame
|translationkey=-
|foot=1}}
{{ID table
|notnamespaced=y
|displayname=Block entity
|spritename=item-frame
|spritetype=block
|nameid=ItemFrame}}
{{ID table
|displayname=Block entity
|spritename=glow-item-frame
|spritetype=block
|nameid=GlowItemFrame
|foot=1}}
=== Block states===
{{see also|Block states}}
{{/BS}}<br />
===Item data===
{{el|java}}:{{main|Player.dat format}}<div class="treeview">
*{{nbt|compound|tag}}'''<span data-ve-ignore="true" class="nowrap"> tag</span>''': The item's '''tag''' tag.
{{:Player.dat_format/Entity Spawners}}Unlike spawn eggs, cannot change the type of entity created using the <code>id</code> tag. Data that item frames do not normally use (see below) has no effect.
</div>
===Entity data===
{{main|Entity format}}
{{IN|java}}, item frames have entity data that define various properties of the entity.
{{/ED}}
===Block data===
{{IN|bedrock}}, an item frame has a block entity associated with it that holds additional data about the block.
See [[Bedrock Edition level format/Block entity format]].
== Video==
<div style="text-align:center">{{yt|rJLj95DBb-w}}</div>
==History==
{{History|java}}
{{History||August 15, 2012|link={{tweet|Dinnerbone|235724805196877824}}|[[File:Item Frame (pre-release).png|32px]] [[Dinnerbone]] showed the first image of item frames.}}
{{History||August 15, 2012|link={{tweet|Dinnerbone|235742974271700993}}|[[File:Item Frame (item) (pre-release).png|32px]] Dinnerbone showed item frame in item form.}}
{{History||August 15, 2012|link={{tweet|jeb_|235746335368814592}}|[[File:Item Frame (pre-release 2).png|32px]] [[Jeb]] showed the item frames with new model.}}
{{History||August 16, 2012|link={{tweet|Dinnerbone|236062188555624448}}|[[File:Item Frame (item) JE1 BE1.png|32px]] Dinnerbone showed the item frame in item form with new texture.}}
{{History||1.4.2|snap=12w34a|[[File:Item Frame JE1 BE1.png|32px]] [[File:Item Frame (item) JE1 BE1.png|32px]] Added item frames.
|There is currently a bug where attempting to place an item frame in [[multiplayer]] causes an internal server error, as well as other bugs.}}
{{History|||snap=12w34b|The multiplayer item frame bug has been fixed.}}
{{History|||snap=12w38a|Item frames no longer despawn when the [[player]] moves 20 [[block]]s away.}}
{{History||1.7.2|snap=13w36a|Items renamed using an [[anvil]] now display their name when looked at up close.}}
{{History|||snap=13w38a|[[Map]]s placed in an item frame now cover the whole block face, allowing seamless tiling of adjacent maps. This makes undiscovered areas of maps invisible.}}
{{History|||snap=13w43a|[[File:Item Frame (map) JE1 BE1.png|32px]] Incomplete maps placed in item frames now display the item frame texture underneath.}}
{{History||1.8|snap=14w04a|[[Item]]s and [[block]]s displayed in the item frame now rotate 45 degrees when rotated instead of 90 degrees, and a [[comparator]] outputs a [[redstone]] signal depending on the rotation phase.}}
{{History|||snap=14w10a|Multiple item frames can no longer be placed on the same block face.}}
{{History||1.9|snap=15w41a|An item frame now generates in the treasure room of [[end ship]]s, above the [[shulker]] that guards the treasure. It holds [[elytra]].}}
{{History|||snap=15w49a|Item frames are no longer destroyed by [[lightning]] bolts.}}
{{History|||snap=15w50a|Added [[sound]]s to item frames: <code>entity.itemframe.add_item</code>, <code>entity.itemframe.break</code>, <code>entity.itemframe.place</code>, <code>entity.itemframe.remove_item</code>, and <code>entity.itemframe.rotate_item</code>.}}
{{History||1.11|snap=16w32a|The [[entity]] ID of item frames has been changed from <code>ItemFrame</code> to <code>item_frame</code>.}}
{{History||1.13|snap=17w47a|Prior to [[1.13/Flattening|''The Flattening'']], this [[item]]'s numeral ID was 389.}}
{{History|||snap=17w50a|Item frames can now be put on floors and ceilings.}}
{{History||1.14|snap=18w43a|[[File:Item Frame JE2 BE2.png|32px]] [[File:Item Frame (map) JE2 BE2.png|32px]] [[File:Item Frame (item) JE2 BE2.png|32px]] The textures of item frames have been changed.}}
{{History|||snap=19w11a|Item frames are now [[trading|sold]] by cartographer [[villager]]s.}}
{{History||1.15|snap=19w38a|[[File:Item Frame 19w38a.png|32px]] [[File:Item Frame Map 19w38a.png|32px]] Item frames now appear dark, same as suffocating [[mob]]s.<ref>{{bug|mc-161283|||Fixed}}</ref>}}
{{History|||snap=19w39a|Item frames are now colored correctly.}}
{{History||1.16|snap=20w10a|The NBT <code>Invisible</code> and <code>Fixed</code> have been added to item frames.}}
{{History||1.17|snap=21w03a|[[File:Glow Item Frame JE1 BE3.png|32px]] [[File:Glow Item Frame (map) JE1 BE3.png|32px]] [[File:Glow Item Frame (item) JE1 BE1.png|32px]] Added glow item frames.}}
{{History|||snap=21w10a|Added new [[subtitles]] for glow item frames.}}
{{History||1.18|snap=21w41a|[[File:Item Frame (item) JE3.png|32px]] [[File:Glow Item Frame (item) JE2.png|32px]] The textures of item frames and glow item frames as item have been changed.}}
{{History||1.19|snap=22w15a|Item frames now adjusts its hitbox to account for the larger size of a framed [[map]].}}
{{History|||snap=Pre-release 3|Reverted the change in 22w15a.}}
{{History|pocket alpha}}
{{History||v0.14.0|snap=build 1|[[File:Item Frame JE1 BE1.png|32px]] [[File:Item Frame (map) JE1 BE1.png|32px]] [[File:Item Frame (item) JE1 BE1.png|32px]] Added item frames.
|Item frames are considered as a [[block entity]] instead of an [[entity]].<ref>{{tweet|_tomcc|690127591525728257|Let's create some drama: ItemFrames in MCPE will behave like signs and won't be placeable in blocks, and can't put many in the same block.|21 Jan 2016}}</ref>}}
{{History|pocket}}
{{History||1.0.0|snap=alpha 0.17.0.1|An item frame containing [[elytra]] now generates in [[end city]] ships.}}
{{History|bedrock}}
{{History||1.10.0|snap=beta 1.10.0.3|[[File:Item Frame JE2 BE2.png|32px]] [[File:Item Frame (map) JE2 BE2.png|32px]] [[File:Item Frame (item) JE2 BE2.png|32px]] The textures of item frames have been changed.}}
{{History||1.11.0|snap=beta 1.11.0.4|Item frames can now be [[trading|bought]] from cartographer [[villager]]s.}}
{{History||1.13.0|snap=beta 1.13.0.9|Item frames can now be placed on the top and bottom of [[block]]s.}}
{{History||1.16.0|snap=beta 1.16.0.57|Trading has been changed, item frames are now offered by expert-level cartographer villager.}}
{{History||Caves & Cliffs (experimental)|link=Bedrock Edition 1.17.0|snap=beta 1.16.210.59|[[File:Item Frame.png|32px]] [[File:Item Frame (map) JE2 BE2.png|32px]] [[File:Glow Item Frame (item) JE1 BE1.png|32px]] Added glow item frames.
|Has the default item frame block texture.}}
{{History|||snap=beta 1.16.210.60|Temporarily removed glow item frames due to a crash.}}
{{History|||snap=beta 1.16.220.50|[[File:Item Frame JE2 BE2.png|32px]] [[File:Item Frame (map) JE2 BE2.png|32px]] [[File:Glow Item Frame (item) JE1 BE1.png|32px]] Re-added glow item frames.}}
{{History|||snap=beta 1.16.220.52|[[File:Glow Item Frame BE2.png|32px]] [[File:Glow Item Frame (map) BE2.png|32px]] Glow Item Frame block texture uses update block texture due to a bug.}}
{{History||1.17.0|snap=beta 1.16.230.52|[[File:Item Frame.png|32px]] [[File:Item Frame (map) JE2 BE2.png|32px]] The glow item frame block textures have been reverted back to the previous one.}}
{{History|||snap=beta 1.17.0.50|[[File:Glow Item Frame JE1 BE3.png|32px]] [[File:Glow Item Frame (map) JE1 BE3.png|32px]] The textures of glow item frames have been changed to match Java Edition.
|Now produces [[redstone]] signals.}}
{{History|||snap=beta 1.17.0.52|Maps now glow in glow item frames.
|Glow Item Frames are no longer available only through [[Experimental Gameplay]].}}
{{History||1.18.10|snap=beta 1.18.10.20|[[File:Item Frame (item) JE3.png|32px]] [[File:Glow Item Frame (item) JE2.png|32px]] The textures of item frames and glow item frames as item have been changed.}}
{{History|console}}
{{History||xbox=TU9|xbone=CU1|ps=1.0|wiiu=Patch 1|switch=1.0.1|[[File:Item Frame LCE1.png|32px]] [[File:Item Frame (item) JE1 BE1.png|32px]] Added item frames.}}
{{History||xbox=TU11|The limit for item frames in a world has been increased. A message is now displayed when the maximum number of item frames are reached.}}
{{History||xbox=TU12|[[File:Item Frame JE1 BE1.png|32px]] The entity texture of item frames has been changed.}}
{{History||xbox=TU31|xbone=CU19|ps=1.22|wiiu=Patch 3|[[Item]]s and [[block]]s displayed in the item frame now rotate 45 degrees when rotated instead of 90 degrees, and a [[redstone comparator|comparator]] now outputs a [[redstone]] signal depending on the rotation phase.}}
{{History||xbox=TU43|xbone=CU33|ps=1.36|wiiu=Patch 13|Added [[sound]]s for item frames.}}
{{History||xbox=TU56|xbone=CU47|ps=1.55|wiiu=Patch 26|switch=1.0.6|If the [[item]] in the item frame has a name (from an [[anvil]]) it now shows as if there is a name tag on the item frame.}}
{{History||xbox=none|xbone=none|ps=1.90|wiiu=none|switch=none|[[File:Item Frame JE2 BE2.png|32px]] [[File:Item Frame (map) JE2 BE2.png|32px]] [[File:Item Frame (item) JE2 BE2.png|32px]] The textures of item frames have been changed.}}
{{History|new 3ds}}
{{History||0.1.0|[[File:Item Frame JE1 BE1.png|32px]] [[File:Item Frame (map) JE1 BE1.png|32px]] [[File:Item Frame (item) JE1 BE1.png|32px]] Added item frames.}}
{{History|foot}}
== Issues==
{{issue list}}
== Trivia==
*The item frame is based upon a suggestion on [[wikipedia:Reddit|Reddit]], like the [[ender chest]] and [[flower pot]].<ref>{{Tweet|dinnerbone|235747041286975488}}</ref>
*The item frame is the only entity to reference a block [[model]].{{only|java|short=1}} Because of this, the texture of the frame border is the same as the birch planks texture.
*Item frame is the '''only''' placeable item that can interfere with other non-full block entities.
*Due to the way layer textures are displayed in Minecraft, maps float on item frames, similar to how icons float on the map itself.
== Gallery ==
=== Renders ===
<gallery>
Item Frame.png | Item Frame
Item Frame (map).png | Map Item Frame
Glow Item Frame.png | Glow Item Frame
Glow Item Frame (map).png | Map Glow Item Frame
Item Frame with Item.png | With item
Item Frame with rotated Item.png | With rotated item
Item Frame with Block.png | With block
Item Frame with rotated Block.png | With rotated block
</gallery>
=== Screenshots ===
<gallery>
Slab Frame.png|An item frame on the side of a slab.
ItemFrameBoxed.png|Four item frames in a one-block space.{{only|java}}
Item Frames Woodbase.png|The frame itself uses the texture of birch planks.
Item Frame rotation.gif|The rotation of an item in an item frame.
Front-back-itemframe.png|The front and back of an item frame are the same.
Big skills right there.png|A glow item frame inside a glow item frame.
Frame fireplace.png|An image of a fireplace retweeted by Dinnerbone.
11 Framed.png|[[11]] in an item frame.
</gallery>
=== Development images ===
<gallery>
Suggestion for itemframes.png|Original Reddit image suggesting item frames and flower pots.
Item frame2.png|Dinnerbone's first screenshot showing armor and weapons.
Item frame3.png|Dinnerbone's second screenshot showing a map, a compass, and two diamond swords.
Item frame4.png|Dinnerbone's third screenshot showing a golden sword in all directions, the item frame item itself, and a working clock.
Item frame1.png|Jeb's screenshot of the item frame.
FlowerPot.png|Snapshot showing plant pots and item frames.
Item frame5.png|Snapshot image of an ender pearl in an item frame.
SOATPC.png|An image tweeted by Dinnerbone showing how hovering over an item frame containing a renamed item shows a name tag.
Pocket Edition Item Frames.jpg|First image of item frames in ''Bedrock Edition''.
</gallery>
== See also ==
*{{ItemLink|Painting}}
== References ==
{{Reflist}}
{{Blocks|Utility}}
{{items}}
{{entities}}
[[Category:Block entities]]
[[Category:Utility blocks]]
[[Category:Manufactured blocks]]
[[Category:Generated structure blocks]]
[[Category:Storage]]
[[cs:Rámeček]]
[[de:Rahmen]]
[[es:Marco]]
[[fr:Cadre]]
[[hu:Eszköz keret]]
[[it:Cornice]]
[[ja:額縁]]
[[ko:아이템 액자]]
[[nl:Voorwerplijst]]
[[pl:Ramka na przedmiot]]
[[pt:Moldura]]
[[ru:Рамка]]
[[th:กรอบโชว์สิ่งของ]]
[[zh:物品展示框]]</li><li>[[Magenta Dye|Magenta Dye]]<br/>{{Item
| image = Magenta Dye.png
| renewable = Yes
| stackable = Yes (64)
}}
'''Magenta dye''' is a [[Dye#Quasi-Primary|quasi-primary color dye]].
== Obtaining ==
=== Crafting ===
{{Crafting
|head=1
|showdescription=1
|showname=0
|Allium
|Output=Magenta Dye
|type=Material
}}
{{Crafting
|Lilac
|Output=Magenta Dye,2
|type=Material
}}
{{Crafting
|Purple Dye
|Pink Dye
|Output=Magenta Dye,2
|type=Material
}}
{{Crafting
|Blue Dye
|Red Dye
|Pink Dye
|Output=Magenta Dye,3
|type=Material
}}
{{Crafting
|Lapis Lazuli
|Red Dye
|Pink Dye
|Output=Magenta Dye,3
|type=Material
|description={{only|bedrock|education}}
}}
{{Crafting
|Blue Dye
|Red Dye
|Red Dye
|White Dye
|Output=Magenta Dye,4
|type=Material
}}
{{Crafting
|Lapis Lazuli;Lapis Lazuli;Blue Dye
|Red Dye;Red Dye;Red Dye
|Red Dye;Red Dye;Red Dye
|Bone Meal;White Dye;Bone Meal
|Output=Magenta Dye,4
|type=Material
|description={{only|bedrock|education}}
|foot=1
}}
=== Trading ===
[[Wandering trader]]s sell 3 magenta dye for an [[emerald]].
== Usage ==
{{dye usage}}
=== Crafting ingredient ===
{{crafting usage|ignore=Banner|continue=1}}
{{banner crafting usage}}
=== Loom ingredient ===
{{Banner loom usage|Magenta Dye}}
=== Trading ===
Expert-level shepherd villagers have a {{frac|1|6}} chance to buy 12 magenta dye for an emerald.
== Data values ==
=== ID ===
{{edition|java}}:
{{ID table
|edition=java
|showforms=y
|generatetranslationkeys=y
|displayname=Magenta Dye
|spritetype=item
|nameid=magenta_dye
|form=item
|foot=1}}
{{edition|bedrock}}:
{{ID table
|edition=bedrock
|showaliasids=y
|shownumericids=y
|showforms=y
|notshowbeitemforms=y
|generatetranslationkeys=y
|displayname=Magenta Dye
|spritetype=item
|nameid=magenta_dye
|aliasid=dye / 13
|id=408
|form=item
|translationkey=item.dye.magenta.name
|foot=1}}
== Video ==
{{yt|IkaIFDQJNUU}}
== History ==
{{History|java beta}}
{{History||1.2|[[File:Magenta Dye JE1 BE1.png|32px]] Added magenta dye.}}
{{History|java}}
{{History||1.4.2|snap=12w34a|Added the ability to [[Armor#Dyeing|dye]] leather [[armor]] and [[wolf]] collars.}}
{{History||1.4.6|snap=12w49a|Magenta dye can now be [[crafting|crafted]] with [[gunpowder]] to create a [[firework star]].}}
{{History||1.6.1|snap=13w19a|[[Stained clay]] can now be crafted.}}
{{history||1.7.2|snap=13w36a|With the addition of new [[flower]]s, many secondary and tertiary dyes are now primary [[dye]]s.}}
{{History||1.7.2|snap=13w41a|[[Stained glass]] can now be crafted.}}
{{History||1.8|snap=14w30a|Added [[banner]]s, which can be dyed.}}
{{History||1.11|snap=16w39a|Added [[shulker box]]es, which can be dyed.}}
{{History||1.12|snap=17w15a|Added ability to dye [[bed]]s.}}
{{History||1.13|snap=17w47a|The different data values for the <code>dye</code> ID have now been split up into their own IDs.
|Prior to [[1.13/Flattening|''The Flattening'']], this [[item]]'s numeral ID was 351.}}
{{History||1.14|snap=18w43a|Magenta dye is now crafted using [[blue dye]] and [[white dye]], instead of [[lapis lazuli]] and [[bone meal]].
|[[File:Magenta Dye JE2 BE2.png|32px]] The texture of magenta dye has now been changed.}}
{{History|||snap=18w44a|Magenta dye can now change the text color on [[sign]]s to magenta.}}
{{History|||snap=19w05a|Added the [[wandering trader]], which sells magenta dye.}}
{{History|||snap=19w11a|Magenta dye can now be [[trading|bought]] by shepherd villagers.}}
{{History||1.17|snap=20w45a|Magenta dye can now be used to craft [[magenta candle]]s.}}
{{History|||snap=21w19a|Magenta dye can no longer be used to craft magenta candles.}}
{{History|||snap=Pre-release 1|Magenta dye can now once again be used to craft magenta candles.}}
{{History||1.20<br>(Experimental)|link=1.19.3|snap=22w42a|Magenta dye can now change the text color on [[hanging sign]]s to magenta.}}
{{History|pocket alpha}}
{{History||v0.3.0|[[File:Magenta Dye JE1 BE1.png|32px]] Added magenta dye. It is currently unobtainable and serves no purpose.}}
{{History||v0.4.0|Magenta dye is now craftable with one [[lapis lazuli]], two [[rose red]]s, and one [[bone meal]].
|Magenta dye can now be used to craft magenta wool.}}
{{History||v0.6.0|Magenta dye can now be used to dye [[sheep]].}}
{{History||v0.8.0|snap=build 1|Magenta dye can now additionally be crafted with one [[purple dye]] and one [[pink dye]], or with one [[lapis lazuli]], one [[rose red]], and one pink dye.}}
{{History||v0.9.0|snap=build 11|Magenta dye can now be used to craft colored [[terracotta]].}}
{{History||v0.11.0|snap=build 1|Magenta dye can now be used to dye tamed [[wolf]] collars.}}
{{History||v0.14.0|snap=build 1|Magenta dye can now be used to dye [[water]] in [[cauldron]]s.}}
{{History|pocket}}
{{History||1.0.0|snap=alpha 0.17.0.1|Magenta dye can now be used to dye [[shulker]]s.}}
{{History||1.1.0|snap=alpha 1.1.0.0|Magenta dye can now be used to craft [[concrete powder]], colored [[bed]]s and dyed [[shulker box]]es.}}
{{History|bedrock}}
{{History||1.2.0|snap=beta 1.2.0.2|Magenta dye can now be used to craft [[firework star]]s, [[stained glass]] and patterns on [[banner]]s.}}
{{History||1.4.0|snap=beta 1.2.20.1|Magenta dye can now be used to craft [[balloon]]s and [[glow stick]]s.}}
{{History||1.8.0|snap=beta 1.8.0.8|Magenta dye can now be used to dye tamed [[cat]] collars.}}
{{History||1.10.0|snap=beta 1.10.0.3|Magenta dye is now [[trading|sold]] by [[wandering trader]]s.
|Magenta dye can now be used to dye white [[carpet]]s and regular [[glass pane]]s.
|[[File:Magenta Dye JE2 BE2.png|32px]] The texture of magenta dye has now been changed.}}
{{History||1.11.0|snap=beta 1.11.0.4|Magenta dye can now be [[trading|sold]] to shepherd [[villager]]s.}}
{{History||1.16.100|snap=beta 1.16.100.56|The ID of magenta dye has been changed from <code>dye/13</code> to <code>magenta_dye</code>.}}
{{History|console}}
{{History||xbox=TU1|xbone=CU1|ps=1.00|switch=1.0.1|wiiu=Patch 1|[[File:Magenta Dye JE1 BE1.png|32px]] Added magenta dye.}}
{{History|PS4}}
{{History||1.90|[[File:Magenta Dye JE2 BE2.png|32px]] The texture of magenta dye has now been changed.}}
{{History|new 3ds}}
{{History||0.1.0|[[File:Magenta Dye JE1 BE1.png|32px]] Added magenta dye.}}
{{History|foot}}
== Issues ==
{{issue list}}
== References ==
{{reflist}}
{{Items}}
[[Category:Dyes]]
[[cs:Purpurové barvivo]]
[[de:Magenta Farbstoff]]
[[es:Tinte magenta]]
[[fr:Teinture magenta]]
[[hu:Bíborvörös festék]]
[[ja:赤紫色の染料]]
[[ko:자홍색 염료]]
[[nl:Magenta kleurstof]]
[[pl:Karmazynowy barwnik]]
[[pt:Corante magenta]]
[[ru:Сиреневый краситель]]
[[zh:品红色染料]]
[[Category:Renewable resources]]</li></ul> | 13w24a | Added resource packs, replacing the functionality of texture packs. Minecraft Texture Ender is available from Mojang to automatically convert 1.5 compatible texture packs to resource packs. | |||
1.6.2{{Extension DPL}}<ul><li>[[Raw Beef|Raw Beef]]<br/>{{Item
| title = Raw Beef
| image = Raw Beef.png
| heals = {{hunger|3}}
| renewable = Yes
| stackable = Yes (64)
}}
'''Raw beef''' is a [[food]] item that can be eaten by the [[player]] or cooked in a [[furnace]], [[smoker]], or [[campfire]] to make [[steak]].
== Obtaining ==
=== Mob loot ===
When adult [[cow]]s and [[mooshroom]]s are killed, they drop 1-3 raw beef. The maximum amount is increased by 1 per level of [[Looting]], for a maximum of 1-6 with Looting III. If killed while on fire, they drop [[steak]] instead.
=== Chest loot ===
{{LootChestItem|raw-beef}}
== Usage ==
=== Food ===
To eat raw beef, press and hold {{control|use}} while it is selected in the hotbar. Eating one restores {{hunger|3}} hunger and 1.8 hunger [[Hunger#Mechanics|saturation]].
=== Smelting ingredient ===
{{Smelting
|showname=1
|Raw Beef
|Steak
|0.35
}}
=== Wolves ===
Raw beef can be used to [[breed]] and heal tamed [[wolves]], lead them around, and make baby tamed wolves grow up faster by 10% of the remaining time.
=== Trading ===
Journeyman-level Butcher villagers have a 50% chance to buy 10 raw beef for an emerald.{{only|bedrock}}
Journeyman-level Butcher villagers always offer buy 10 raw beef for an emerald.{{only|java}}
==Sounds==
{{Sound table/Entity/Food}}
== Advancements ==
{{load advancements|Husbandry;A Balanced Diet}}
== Data values ==
=== ID ===
{{edition|java}}:
{{ID table
|edition=java
|showforms=y
|generatetranslationkeys=y
|displayname=Raw Beef
|spritetype=item
|nameid=beef
|form=item
|foot=1}}
{{edition|bedrock}}:
{{ID table
|edition=bedrock
|shownumericids=y
|showforms=y
|notshowbeitemforms=y
|generatetranslationkeys=y
|displayname=Raw Beef
|spritetype=item
|nameid=beef
|id=273
|form=item
|foot=1}}
== History ==
{{History|java beta}}
{{History||1.8|snap=Pre-release|[[File:Raw Beef JE1 BE1.png|32px]] Added raw beef.|Raw beef is one of the new [[food]] items, [[drops|dropped]] by [[cow]]s in addition to their [[leather]].}}
{{History|java}}
{{History||1.2.1|snap=12w03a|Raw beef can now be used to breed wolves.}}
{{History||1.3.1|snap=12w21a|Raw beef can now be [[trading|sold]] to butcher [[villager]]s, at 14–17 raw beef for 1 [[emerald]].}}
{{History|||snap=1.3|[[File:Raw Beef JE2.png|32px]] The texture of raw beef has been changed.}}
{{History||1.4.2|snap=12w37a|[[File:Raw Beef JE3 BE2.png|32px]] The texture of raw beef has been changed, so that it no longer has a dark outline.}}
{{History||1.8|snap=14w02a|[[Villager]]s no longer [[trading|trade]] for raw beef.}}
{{History||1.13|snap=17w47a|Prior to [[1.13/Flattening|''The Flattening'']], this [[item]]'s numeral ID was 363.}}
{{History||1.14|snap=18w43a|[[File:Raw Beef JE4 BE3.png|32px]] The texture of raw beef has been changed.}}
{{History|||snap=18w49a|Raw beef can now be found in [[chest]]s in [[village]] butcher shops.}}
{{History|||snap=19w11a|Butcher [[villager]]s now [[trading|buy]] raw beef.}}
{{History|pocket alpha}}
{{History||v0.4.0|[[File:Raw Beef JE1 BE1.png|32px]] Added raw beef.}}
{{History||v0.5.0|Raw beef now restores {{hp|3}} instead of {{hp|1}}.}}
{{History||v0.8.0|snap=build 1|[[File:Raw Beef JE3 BE2.png|32px]] The texture of raw beef has been changed, so that it no longer has a dark outline.}}
{{History||v0.9.0|snap=build 1|Raw beef has been added to [[Creative]] mode.}}
{{History||v0.12.1|snap=build 1|Raw beef now restores [[hunger]] instead of [[health]].}}
{{History|bedrock}}
{{History||1.10.0|snap=beta 1.10.0.3|[[File:Raw Beef JE4 BE3.png|32px]] The texture of raw beef has been changed.}}
{{History||1.11.0|snap=beta 1.11.0.1|Raw beef can now be found in [[village]] butcher [[chest]]s.}}
{{History|||snap=beta 1.11.0.4|Raw beef can now be [[trading|sold]] to butcher [[villager]]s.}}
{{History|console}}
{{History||xbox=TU5|xbone=CU1|ps=1.0|wiiu=Patch 1|[[File:Raw Beef JE1 BE1.png|32px]] Added raw beef.}}
{{History||xbox=TU12|[[File:Raw Beef JE3 BE2.png|32px]] The texture of raw beef has been changed, so that it no longer has a dark outline.}}
{{History||xbox=none|xbone=none|ps=1.90|wiiu=none|switch=none|[[File:Raw Beef JE4 BE3.png|32px]] The texture of raw beef has been changed.}}
{{History|New 3DS}}
{{History||0.1.0|[[File:Raw Beef JE3 BE2.png|32px]] Added raw beef.}}
{{History|foot}}
== Issues ==
{{issue list}}
== Gallery ==
<gallery>
File:Jeb steak.png|Raw Beef and [[Steak]] in a preview screenshot.
</gallery>
{{Items}}
[[de:Rohes Rindfleisch]]
[[es:Filete crudo]]
[[fr:Bœuf cru]]
[[hu:Nyers marhahús]]
[[ja:生の牛肉]]
[[ko:익히지 않은 소고기]]
[[nl:Rauwe biefstuk]]
[[pl:Surowa wołowina]]
[[pt:Bife cru]]
[[ru:Сырая говядина]]
[[uk:Сира яловичина]]
[[zh:生牛肉]]
[[Category:Food]]
[[Category:Renewable resources]]</li><li>[[Shulker Shell|Shulker Shell]]<br/>{{Item
| image = Shulker Shell.png
|type=
|renewable = Yes
| stackable = Yes (64)
}}
{{about|the item that drops from the mob|the mob |Shulker|the storage block|Shulker Box}}
'''Shulker shells''' are [[item]]s dropped by [[shulker]]s that are used solely to craft [[shulker box]]es.
== Obtaining ==
=== Mob loot ===
{{IN|bedrock}}, [[shulker]]s drop 0-1 shulker shells. The maximum can be increased by 1 per level of [[Looting]], which is 0-4 shells with Looting III.
{{IN|java}}, shulkers have a 50% chance of dropping a shulker shell when killed. This is increased by 6.25% per level of [[Looting]], for a maximum of 68.75% with Looting III.
== Usage ==
=== Crafting ingredient ===
{{crafting usage}}
== Data values ==
=== ID ===
{{edition|java}}:
{{ID table
|edition=java
|showforms=y
|generatetranslationkeys=y
|displayname=Shulker Shell
|spritetype=item
|nameid=shulker_shell
|form=item
|foot=1}}
{{edition|bedrock}}:
{{ID table
|edition=bedrock
|shownumericids=y
|showforms=y
|notshowbeitemforms=y
|generatetranslationkeys=y
|displayname=Shulker Shell
|spritetype=item
|nameid=shulker_shell
|id=566
|form=item
|foot=1}}
== History ==
{{History|java}}
{{History||1.11|snap=16w39a|[[File:Shulker Shell JE1 BE1.png|32px]] Added shulker shells.}}
{{History||1.13|snap=17w47a|Prior to [[1.13/Flattening|''The Flattening'']], this [[item]]'s numeral ID was 450.}}
{{History||1.14|snap=18w43a|[[File:Shulker Shell JE2 BE2.png|32px]] The texture of the shulker shell has now been changed.}}
{{History||1.17|snap=20w45a|When a shulker is hit by a shulker bullet, the shulker can spawn another shulker depending on the amount of shulkers in the area, making shulker shells [[renewable resource|renewable]].}}
{{History|pocket}}
{{History||1.0.0|snap=alpha 1.0.0.1|[[File:Shulker Shell JE1 BE1.png|32px]] Added shulker shells.
|Shulker shells currently have no purpose as [[shulker box]]es haven't been implemented yet.}}
{{History||1.1.0|snap=alpha 1.1.0.0|Shulker shells can now be used to [[crafting|craft]] shulker boxes.}}
{{History|bedrock}}
{{History||1.10.0|snap=beta 1.10.0.3|[[File:Shulker Shell JE2 BE2.png|32px]] The texture of the shulker shell has now been changed.}}
{{History||1.18.30|snap=beta 1.18.30.22|Shulkers now have a chance to spawn another shulker when hit by a shulker projectile, making shulker shells [[renewable resource|renewable]].}}
{{History|console}}
{{History||xbox=TU53|xbone=CU43|ps=1.49|wiiu=Patch 23|switch=1.0.3|[[File:Shulker Shell JE1 BE1.png|32px]] Added shulker shells.}}
{{History||xbox=none|xbone=none|ps=1.90|wiiu=none|switch=none|[[File:Shulker Shell JE2 BE2.png|32px]] The texture of the shulker shell has now been changed.}}
{{History|new 3ds}}
{{History||1.7.10|[[File:Shulker Shell JE1 BE1.png|32px]] Added shulker shells.}}
{{History|foot}}
== Issues ==
{{Issue list}}
{{Items}}
[[de:Shulkerschale]]
[[es:Caparazón de shulker]]
[[fr:Carapace de Shulker]]
[[it:Guscio di shulker]]
[[ja:シュルカーの殻]]
[[ko:셜커 껍데기]]
[[nl:Shulkerschelp]]
[[pl:Skorupa Shulkera]]
[[pt:Casco de shulker]]
[[ru:Панцирь шалкера]]
[[th:เปลือกชัลเกอร์]]
[[zh:潜影壳]]</li></ul> | reupload | Fixed distorted font when HD font is used.[3] | |||
1.7.2{{Extension DPL}}<ul><li>[[:Category:Minecraft Dungeons items|Category:Minecraft Dungeons items]]<br/>All items that are in ''[[Minecraft Dungeons]]''.
{{Minecraft Dungeons items}}
[[Category:Minecraft Dungeons]]
[[Category:Items]]
[[ja:カテゴリ:アイテム (Minecraft Dungeons)]]
[[pl:Kategoria:Przedmioty w Minecraft Dungeons]]
[[pt:Categoria:Itens do Minecraft Dungeons]]</li><li>[[Sweet Berries|Sweet Berries]]<br/>{{Block
| title = Sweet Berries
| image = <gallery>
Sweet Berry Bush Age 0.png| Age 0
Sweet Berry Bush Age 1.png| Age 1
Sweet Berry Bush Age 2.png| Age 2
Sweet Berry Bush Age 3.png| Age 3
</gallery>
| image2 = Sweet Berries JE1 BE1.png
| transparent = Yes
| light = No
| tool = Any
| renewable = Yes
| stackable = Yes (64)
| heals = {{hunger|2}}
| flammable = Yes (60 java, 30 bedrock)
| lavasusceptible = No
}}
'''Sweet berries''' are a [[food]] [[item]] obtained from sweet berry bushes and are used to plant them.
'''Sweet berry bushes''' are quick-growing, [[Bone Meal|bonemealable]] [[Plant|plants]] that grow sweet berries, and damage and slow [[Player|players]] and most [[Mob|mobs]] moving through them. They can be found naturally in [[taiga]] and [[Snowy Taiga|snowy taiga]] biomes.
== Obtaining ==
=== Breaking ===
{{See also|Fortune#Discrete random}}
Sweet berry bushes can be mined instantly with any tool or by hand. A mature sweet berry bush yields 2–3 sweet berries. On its third growth stage, it yields 1–2 sweet berries. Each level of [[Fortune]] can increase the amount of drops by 1.
{{IN|ps4}}, the sweet berries drop into the player's inventory. In other editions, they drop on the ground.
=== Natural generation ===
Berry bushes commonly generate in [[taiga]] and [[snowy taiga]] biomes. Each [[chunk]] has {{frac|1|12}} chance to generate sweet berry bushes in [[random patch]]es. They also generate in both [[old growth pine taiga]] and [[old growth spruce taiga]].
=== Chest loot ===
{{LootChestItem|sweet-berries}}
=== Post-generation ===
Sweet berries can be collected from a sweet berry bush by {{control|using}} or {{control|breaking}} it, which yield 1–2 sweet berries in its third growth stage, and 2–3 sweet berries in its final growth stage.
== Usage ==
=== Placement ===
Placing [[sweet berries]] on a [[grass block]], [[dirt]], [[podzol]], [[coarse dirt]], [[farmland]]{{Only|Java}}, or [[moss block]] creates a small sweet berry bush that eventually becomes a fully grown sweet berry bush.
=== Growth ===
A sweet berry bush grows through four stages after it is planted. Its first growth stage is a small bush without any berries. It becomes a grown plant in its second stage, and produces berries in its third and fourth growth stage. The bush needs to be in light level 9 or greater to grow. {{control|Using}} [[bone meal]] on it increases its growth stage by one, and at full maturity, ejects the sweet berry item. The bush can be placed on a 1 block high space, but it cannot grow with a full, non-transparent block immediately above it.
=== Food ===
To eat sweet berries, press and hold {{control|use}} while it is selected in the hotbar. Eating one restores {{hunger|2}} [[hunger]] and 0.4{{only|je|short=1}} / 1.2{{only|be|short=1}} hunger [[saturation]].
=== Composting ===
Placing sweet berries into a [[composter]] has a 30% chance of raising the compost level by 1.
=== Breeding ===
Sweet berries can be fed to [[fox]]es to [[breeding|breed]] them. Foxes are similar to cats when being fed as a wild animal; a sudden movement by the [[player]] may cause the fox to flee even if the player holds sweet berries. A baby fox bred by a [[player]] trusts the player and does not flee.
=== Trading ===
Master-level butcher [[villager]]s offer to [[trading|buy]] 10 sweet berries for an [[emerald]].
=== Entity movement ===
A sweet berry bush (at any stage) slows down all [[entity|entities]] (except [[Item (entity)|items]]) passing through it. At stage 1 and higher, it causes damage. [[Fox]]es are immune to both characteristics, however. Sweet berry bushes deal {{hp|1}} [[damage]] every 0.5 seconds, only if the entity is moving in the hitbox of the bush. Entities that move through sweet berry bushes slow down to about 34.05% of their normal speed, similar to how a [[cobweb]] slows down mobs to 15% of normal speed. This makes it impossible to jump a full [[block]] while inside the bush.
Mobs at standard block height in a [[minecart]] are not damaged when the minecart is pushed through sweet berries. Players in a sweet berry bush take no damage except from horizontal movement, but are unable to jump out of the bush, similar to a cobweb.
=== Bees ===
[[Bee]]s pollinate sweet berry bushes, and then increase the honey level in [[beehive]]s and bee nests by 1.{{only|java}}
== Sounds ==
=== Generic ===
==== Block ====
{{Sound table/Block/Sweet berry bush}}
==== Item ====
{{Sound table/Entity/Food}}
=== Unique ===
{{edition|java}}:
{{Sound table
|rowspan=2
|sound=Berries pick1.ogg
|sound2=Berries pick2.ogg
|subtitle=Berries pop
|source=block
|description=When sweet berries are picked by a player
|id=block.sweet_berry_bush.pick_berries
|translationkey=subtitles.item.berries.pick
|volume=1.0
|pitch=0.8-1.2
|distance=16}}
{{Sound table
|subtitle=Berries pop
|source=block
|description=When sweet berries are picked by a fox
|id=block.sweet_berry_bush.pick_berries
|translationkey=subtitles.item.berries.pick
|volume=1.0
|pitch=1.0
|distance=16}}
{{Sound table
|sound=Player hurt sweet berry bush1.ogg
|sound2=Player hurt sweet berry bush2.ogg
|subtitle=Player hurts
|source=player
|description=When a player is damaged by touching a sweet berry bush
|id=entity.player.hurt_sweet_berry_bush
|translationkey=subtitles.entity.player.hurt
|volume=1.0
|pitch=0.8-1.2
|distance=16
|foot=1}}
{{edition|bedrock}}:
{{Sound table
|type=bedrock
|sound=Berries pick1.ogg
|sound2=Berries pick2.ogg
|source=block
|description=When sweet berries are picked
|id=block.sweet_berry_bush.pick
|volume=1.0
|pitch=1.0}}
{{Sound table
|sound=Player hurt sweet berry bush1.ogg
|sound2=Player hurt sweet berry bush2.ogg
|source=block
|description=When a player is damaged by touching a sweet berry bush
|id=block.sweet_berry_bush.hurt
|volume=1.0
|pitch=1.0
|foot=1}}
== Data values ==
=== ID ===
{{edition|java}}:
{{ID table
|edition=java
|showblocktags=y
|showitemtags=y
|showforms=y
|generatetranslationkeys=y
|displayname=Sweet Berry Bush
|spritetype=block
|nameid=sweet_berry_bush
|blocktags=azalea_log_replaceable, bee_growables
|form=block}}
{{ID table
|displayname=Sweet Berries
|spritetype=item
|nameid=sweet_berries
|itemtags=fox_food
|form=item
|foot=1}}
{{edition|bedrock}}:
{{ID table
|edition=bedrock
|shownumericids=y
|showforms=y
|generatetranslationkeys=y
|displayname=Sweet Berry Bush
|spritetype=block
|nameid=sweet_berry_bush
|id=462
|form=block}}
{{ID table
|displayname=Sweet Berries
|spritetype=item
|nameid=sweet_berries
|id=287
|form=item
|foot=1}}
=== Block states ===
{{see also|Block states}}
{{/BS}}
==Advancements==
{{Load advancements|Husbandry;A Balanced Diet;The Parrots and the Bats;Two by Two}}
== History ==
{{History||September 26, 2018|link={{tweet|minecraft|1044587405779451906}}|Berries are announced to be part of the [[biome]] vote at [[MINECON Earth 2018]].}}
{{History||September 29, 2018|link={{tweet|minecraft|1046097775199498245}}|[[Taiga]] wins the [[biome]] vote, meaning berries are to be added to the game first.}}
{{History|java}}
{{History||December 3, 2018|link={{tweet|cojomax99|1069586461173919745}}|[[Cojomax99]] tweets an image of some berries.}}
{{History||1.14|snap=18w49a|[[File:Sweet Berry Bush Age 0 JE1 BE1.png|32px]] [[File:Sweet Berry Bush Age 1 JE1 BE1.png|32px]] [[File:Sweet Berry Bush Age 2 JE1 BE1.png|32px]] [[File:Sweet Berry Bush Age 3 JE1 BE1.png|32px]] Added sweet berry bushes.|
[[File:Sweet Berries JE1 BE1.png|32px]] Added sweet berries.}}
{{History|||snap=18w50a|Sweet berries can now be found within [[taiga]] [[village]] loot [[chest]]s.}}
{{History|||snap=19w03a|Placing a sweet berry into the new [[composter]] has a 10% chance of raising the compost level by 1.
|Added [[sound]]s for sweet berry bushes.}}
{{History|||snap=19w05a|Sweet berries now have a 30% chance of increasing the compost level in a composter by 1.
|The [[sound]] for planting sweet berries has been changed.}}
{{History|||snap=19w07a|Sweet berries can now be fed to [[fox]]es to [[breeding|breed]] them.}}
{{History|||snap=19w11a|Butcher [[villager]]s now [[trading|buy]] sweet berries.}}
{{History||1.15|snap=19w34a|[[Bee]]s can now pollinate sweet berry bushes.}}
{{History|||snap=Pre-Release 2|Sweet berries now generate in [[giant tree taiga]] biomes.}}
{{History||1.16|snap=Pre-release 1|Sweet berry bushes no longer prevent mob spawning inside them.}}
{{History||1.17|snap=21w20a|The sound event for picking berries has been changed as to align better with that of glow berries.<ref>{{bug|MC-220063}}</ref>}}
{{History||1.18|snap=1.18-pre5|Sweet berry bushes in taigas are about 4 times more common than in previous snapshots.}}
{{History|bedrock}}
{{History||1.10.0|snap=beta 1.10.0.3|[[File:Sweet Berries JE1 BE1.png|32px]] Added sweet berries, which are available only through Experimental Gameplay.|[[File:Sweet Berry Bush Age 0 JE1 BE1.png|32px]] [[File:Sweet Berry Bush Age 1 JE1 BE1.png|32px]] [[File:Sweet Berry Bush Age 2 JE1 BE1.png|32px]] [[File:Sweet Berry Bush Age 3 JE1 BE1.png|32px]] Added sweet berry bushes, available only through Experimental Gameplay.}}
{{History||1.11.0|snap=beta 1.11.0.1|Sweet berries can now be used to fill [[composter]]s.}}
{{History|||snap=beta 1.11.0.3|Sweet berries and sweet berry bushes have been fully implemented and are now separate from Experimental Gameplay.}}
{{History|||snap=beta 1.11.0.4|Sweet berries can now be [[trading|sold]] to butcher [[villager]]s.}}
{{History||1.13.0|snap=beta 1.13.0.1|Sweet berries can now be fed to [[fox]]es to [[breeding|breed]] them.}}
{{History||1.14.0|snap=beta 1.14.0.1|[[Bee]]s can now pollinate sweet berry bushes.}}
{{History||1.16.100|snap=beta 1.16.100.54|Sweet berry bushes now properly damage entities.<ref>{{Bug|MCPE-56142}}</ref>}}
{{History||1.17.0|snap=beta 1.17.0.56|Bees no longer gather nectar from sweet berry bushes.}}
{{History|PS4}}
{{History||1.91|[[File:Sweet Berries JE1 BE1.png|32px]] Added sweet berries.|[[File:Sweet Berry Bush Age 0 JE1 BE1.png|32px]] [[File:Sweet Berry Bush Age 1 JE1 BE1.png|32px]] [[File:Sweet Berry Bush Age 2 JE1 BE1.png|32px]] [[File:Sweet Berry Bush Age 3 JE1 BE1.png|32px]] Added sweet berry bushes.}}
{{History|foot}}
=== Sweet berry bush "item" ===
{{:Technical blocks/Sweet Berry Bush}}
== Issues ==
{{issue list|berry|berries|sweet berry|sweet berries|berry bush|sweet berry bush}}
==Trivia==
* {{IN|java}}, sweet berry bushes absorb [[fall damage]] like [[water]].<ref>{{bug|MC-149990|||WAI}}</ref>
* Foxes harvest mature sweet berry bushes that have grown into their third or fourth stage. Unlike how carrots eaten by rabbits are destroyed and not dropped as items, sweet berry bushes harvested by foxes drop as items, although the fox may pick up one of the dropped berries. The bush remains intact, allowing for automatic sweet berry farms.
== Gallery ==
<gallery>
Berry Bush.png|A close-up look of a sweet berry bush.
Naturally generated berry bushes.png|A naturally generated sweet berry bush.
Multiplebushes.png|Multiple bushes of sweet berries in Taiga biome.
BerryBushCloseToRavine.png|A berry bush that is close to a ravine.
Cozy Cabin Berries.jpg|Berry bushes near a cozy cabin.
</gallery>
==References==
{{Reflist}}
{{Blocks|vegetation}}
{{Items}}
[[Category:Food]]
[[Category:Plants]]
[[Category:Non-solid blocks]]
[[Category:Natural blocks]]
[[Category:Flammable blocks]]
[[cs:Sladké bobule]]
[[es:Bayas dulces]]
[[de:Süßbeeren]]
[[fr:Baies sucrées]]
[[ja:スイートベリー]]
[[ko:달콤한 열매]]
[[pl:Słodkie jagody]]
[[pt:Bagas doces]]
[[ru:Сладкие ягоды]]
[[th:เบอร์รีหวาน]]
[[zh:甜浆果]]</li></ul> | 13w36a | Added the ability to apply multiple resource packs at once. | |||
| 13w42a | Moved files from assets/minecraft/music to assets/minecraft/sounds/music and files from assets/minecraft/sound to assets/minecraft/sounds. | ||||
1.7.3{{Extension DPL}}<ul><li>[[Chorus Fruit|Chorus Fruit]]<br/>{{about|the fruit that drops from [[chorus tree]]s|the building material|Popped Chorus Fruit|other uses|Chorus}}
{{Item
| title = Chorus Fruit
| image = Chorus Fruit.png
| renewable = Yes
| heals = {{hunger|4}}
| stackable = Yes (64)
}}
'''Chorus fruit''' is a [[food]] [[item]] native to [[the End]] that can be eaten, or [[smelting|smelted]] into [[Popped Chorus Fruit|popped chorus fruit]]. It can be eaten even when the hunger bar is full, and eating it may teleport the [[player]] up to 8 blocks in any direction.
== Obtaining ==
{{see also|Tutorials/Chorus fruit farming}}
Chorus fruit can be obtained by breaking [[Chorus Plant (block)|chorus plant blocks]]. Each block of chorus plant has a 50% chance to drop a chorus fruit. This is not affected by [[Fortune]].<ref>{{bug|MC-198924||Chorus Fruit doesn't have a higher chance with Fortune|Invalid}}</ref>
== Usage ==
To eat chorus fruit, press and hold {{control|use}} while it is selected in the hotbar. Eating one restores {{hunger|4}} [[hunger]] and 2.4 hunger [[Hunger#Mechanics|saturation]].
Unlike most foods, chorus fruits can be eaten even when the player has a full hunger bar.
The player may also be [[teleportation|teleported]]: up to 16 attempts are made to choose a random destination within ±8 on all three axes in the same manner as [[Enderman#Teleportation|enderman teleportation]], with the exception that the player may teleport into an area only 2 blocks high, or one block tall if the player is crawling. The player does not land in the average centroid of the block, but rather to any position within an 8-block range. The player will be teleported directly down to the ground regardless of the height it was used at if the player is too far from a valid destination.
The chorus fruit, unlike an [[Ender Pearl|ender pearl]], can teleport the player through [[solid block]]s. The algorithm tries to avoid [[fluid]]s; the player cannot teleport into a space occupied by [[water]] or [[lava]]. However, the player can be teleported onto dangerous blocks such as fire, cacti and magma blocks.<ref>{{bug|MC-102836||Enderman and chorus fruit can teleport to some dangerous places}}</ref>
If a teleport succeeds, a sound similar to an enderman teleporting plays originating from the teleportation origin location. Chorus fruit has a cooldown of 1 second before being able to be used again. The cooldown is represented by a white overlay on the chorus fruit in the hotbar. The cooldown is applied to all chorus fruits items, including those in the player's inventory and containers.<ref>{{bug|MC-88236|||WAI}}</ref>
Eating chorus fruit may teleport the player into areas protected by [[bedrock]], [[barrier|barrier blocks]], or other blocks that are otherwise unbreakable in [[Survival]] mode. However, it cannot teleport the player onto [[the Nether]] roof.<ref>{{bug|MC-84198|||Fixed}}</ref>
Chorus fruit is completely non-functional above the nether roof.
[[Fox]]es can also eat chorus fruit and the teleportation effect works the same as with players.
=== Smelting ingredient ===
{{smelting
|Chorus Fruit
|Popped Chorus Fruit
|0.1}}
== Sounds ==
===Generic===
{{Sound table/Entity/Food}}
===Unique===
{{edition|java}}:
{{Sound table
|rowspan=2
|sound=Teleport1.ogg
|sound2=Teleport2.ogg
|subtitle=Player teleports
|source=player
|description=When a player teleports by eating a chorus fruit
|id=item.chorus_fruit.teleport
|translationkey=subtitles.item.chorus_fruit.teleport
|volume=1.0
|pitch=1.0
|distance=16}}
{{Sound table
|subtitle=Fox teleports
|source=Players & Friendly Creatures<wbr><ref group=sound>{{Bug|MC-257516||"Fox teleports" sound plays for both Players and Friendly Creatures sound categories}}</ref>|overridesource=1
|description=When a fox teleports by eating a chorus fruit
|id=entity.fox.teleport
|translationkey=subtitles.entity.fox.teleport
|volume=1.0
|pitch=1.0
|distance=16
|foot=1}}
{{edition|bedrock}}:
{{Sound table
|type=bedrock
|sound=Teleport1.ogg
|sound2=Teleport2.ogg
|source=hostile
|description=When something teleports by eating a chorus fruit
|id=mob.shulker.teleport
|volume=1.0
|pitch=1.0
|foot=1}}
==Data values ==
===ID===
{{edition|java}}:
{{ID table
|edition=java
|showforms=y
|generatetranslationkeys=y
|displayname=Chorus Fruit
|spritetype=item
|nameid=chorus_fruit
|form=item
|foot=1}}
{{edition|bedrock}}:
{{ID table
|edition=bedrock
|shownumericids=y
|showforms=y
|notshowbeitemforms=y
|generatetranslationkeys=y
|displayname=Chorus Fruit
|spritetype=item
|nameid=chorus_fruit
|id=558
|form=item
|foot=1}}
==Advancements==
{{load advancements|Husbandry;A Balanced Diet}}
==History==
{{History|java}}
{{History||1.9|snap=15w31a|[[File:Chorus Fruit JE1 BE1.png|32px]] Added chorus fruit.}}
{{History|||snap=15w34c|A cooldown for using chorus fruit has now been added.}}
{{History|||snap=15w37a|The chorus fruit's teleportation range has now been reduced from ±32 to ±8.}}
{{History|||snap=15w50a|Added a [[sound]] for chorus fruit: <code>item.chorus_fruit.teleport</code>.}}
{{History||1.10|snap=16w21a|Chorus fruit can now teleport riders off their mounts.}}
{{History||1.13|snap=17w47a|Prior to [[1.13/Flattening|''The Flattening'']], this [[item]]'s numeral ID was 432.}}
{{History||1.14|snap=18w43a|[[File:Chorus Fruit JE2 BE2.png|32px]] The texture of chorus fruit has now been changed.}}
{{History||1.20.2|snap=23w33a|Eating chorus fruit now resets fall distance.<ref>{{bug|MC-112133||Eating chorus fruit does not reset fall distance|Fixed}}</ref>}}
{{History|pocket}}
{{History||1.0.0|snap=alpha 0.17.0.1|[[File:Chorus Fruit JE1 BE1.png|32px]] Added chorus fruit.}}
{{History|||snap=alpha 1.0.0.1|The cooldown of chorus fruit now has an animation.}}
{{History|bedrock}}
{{History||1.7.0|snap=beta 1.7.0.2|The category that chorus fruit are apart of in the [[Creative inventory]] has been changed from "Nature" to "Items".}}
{{History||1.10.0|snap=beta 1.10.0.3|[[File:Chorus Fruit JE2 BE2.png|32px]] The texture of chorus fruit has now been changed.}}
{{History||1.13.0|snap=beta 1.13.0.15|Chorus fruit has been moved back to the "Nature" section in the Creative inventory.}}
{{History|console}}
{{History||xbox=TU46|xbone=CU36|switch=1.0.1|ps=1.38|wiiu=Patch 15|[[File:Chorus Fruit JE1 BE1.png|32px]] Added chorus fruit.}}
{{History||xbox=none|xbone=none|ps=1.90|wiiu=none|switch=none|[[File:Chorus Fruit JE2 BE2.png|32px]] The texture of chorus fruit has now been changed.}}
{{History|new 3ds}}
{{History||1.7.10|[[File:Chorus Fruit JE1 BE1.png|32px]] Added chorus fruit.}}
{{History|foot}}
==Issues==
{{issue list}}
==References==
{{reflist}}
==External Links==
*[https://www.minecraft.net/en-us/article/taking-inventory--chorus-fruit Taking Inventory: Chorus Fruit] – Minecraft.net on November 5, 2020
{{Items}}
[[Category:Plants]]
[[Category:Food]]
[[Category:Renewable resources]]
[[de:Chorusfrucht]]
[[es:Fruta chorus]]
[[fr:Chorus]]
[[ja:コーラスフルーツ]]
[[ko:후렴과]]
[[nl:Chorusfruit]]
[[pl:Owoc refrenusu]]
[[pt:Fruta do coro]]
[[ru:Плод коруса]]
[[uk:Фрукт хорусу]]
[[zh:紫颂果]]</li><li>[[Amethyst Shard|Amethyst Shard]]<br/>{{Item
| title = Amethyst Shard
| image = Amethyst Shard.png
| renewable = Yes
| stackable = Yes (64)
}}
An '''amethyst shard''' is a crystal ore obtained from mining a fully grown [[amethyst cluster]] or can be obtained from chests in [[Ancient City|ancient cities]].
== Obtaining ==
=== Mining ===
An [[amethyst cluster]] mined using a non-[[Silk Touch]], non-[[Fortune]] [[pickaxe]] drops 4 amethyst shards. When mined using any other tool, [[item]] or mechanism (such as [[explosion]]s or [[piston]]s) it drops 2 shards. The maximum amount of amethyst shards dropped can be increased with Fortune. Fortune I gives a {{frac|1|3}} chance for eight shards, averaging 5.33 shards; Fortune II gives a 25% chance (each) to give eight or 12 shards, averaging 7 shards, and Fortune III gives a 20% chance (each) to give 8, 12, or 16 shards, averaging 8.8 shards.
If the amethyst cluster in any of its growth stages is mined using a pickaxe enchanted with [[Silk Touch]], it drops itself rather than amethyst shards.
=== Chest loot ===
{{LootChestItem|amethyst-shard}}
== Usage ==
=== Crafting ingredient ===
{{Crafting usage}}
=== Smithing ingredient ===
{{Smithing
|head=1
|ingredients=Any Armor Trim +<br/>Any Armor Piece + <br/>Amethyst Shard
|Any Armor Trim Smithing Template
|Netherite Chestplate
|Amethyst Shard
|Amethyst Trim Netherite Chestplate
|showdescription=1
|description = All armor types can be used in this recipe;<br/>a netherite chestplate is shown as an example.<br/>
|tail=1
}}
;Trim color palette
The following color palette is shown on the designs on trimmed armor:
*{{TrimPalette|amethyst shard}}
=== Allay duplication ===
If an amethyst shard is given to an [[allay]] that is currently dancing to an active [[jukebox]], the allay emits heart particles, consumes the amethyst shard and duplicates into another allay. After this, there is a 5 minute cool down until both allays can be duplicated like this again.
== Sounds ==
{{Edition|Java}}:
{{Sound table
|sound=Amethyst shimmer.ogg
|subtitle=Amethyst chimes
|source=neutral
|description=When an amethyst shard duplicates an allay
|id=block.amethyst_block.chime
|translationkey=subtitles.block.amethyst_block.chime
|volume=0.4
|pitch=1.0
|distance=16
|foot=1}}
{{Edition|Bedrock}}:
{{Sound table
|type=bedrock
|sound=Amethyst shimmer.ogg
|source=block
|description=When an amethyst shard duplicates an allay
|id=chime.amethyst_block
|volume=1.0
|pitch=0.5-1.7
|foot=1}}
== Data values ==
=== ID ===
{{edition|java}}:
{{ID table
|edition=java
|showforms=y
|generatetranslationkeys=y
|displayname=Amethyst Shard
|spritetype=item
|nameid=amethyst_shard
|form=item
|foot=1}}
{{edition|bedrock}}:
{{ID table
|edition=bedrock
|shownumericids=y
|showforms=y
|notshowbeitemforms=y
|generatetranslationkeys=y
|displayname=Amethyst Shard
|spritetype=item
|nameid=amethyst_shard
|form=item
|id=625
|foot=1}}
==History==
{{History||October 3, 2020|link={{ytl|DBvZ2Iqmm3M|t=23m14s}}|Amethyst shards are mentioned, but not shown at [[Minecraft Live 2020]].}}
{{History|java}}
{{History||1.17|snap=20w45a|[[File:Amethyst Shard JE1.png|32px]] Added amethyst shards.}}
{{History|||snap=20w46a|[[File:Amethyst Shard JE2 BE1.png|32px]] The texture for amethyst shards has changed.}}
{{History||1.19|snap=22w13a|Amethyst shards can now be found in [[ancient city]] [[chest]]s.}}
{{History||1.19.1|snap=22w24a|Amethyst shards can now be used to duplicate [[allay]]s.}}
{{History||1.20<br>(Experimental)|link=1.19.4|snap=23w04a|Amethyst shards can now be used as an armor trim material.}}
{{History||1.20|snap=23w12a|Amethyst shards can now be used to craft [[calibrated sculk sensor]]s.}}
{{History|bedrock}}
{{History||1.17.0|snap=beta 1.17.0.50|[[File:Amethyst Shard JE2 BE1.png|32px]] Added amethyst shards.}}
{{History|||snap=beta 1.17.0.52|Amethyst shards are now available without enabling [[Experimental Gameplay]].}}
{{History||1.19.0|snap=beta 1.19.0.26|Amethyst shards can now be found in [[ancient city]] [[chest]]s.}}
{{History||1.19.10|snap=beta 1.19.10.22|Amethyst shards can now be used to duplicate allays.}}
{{History||1.20.0<br>(Experimental)|link=Bedrock Edition 1.19.80|snap=beta 1.19.80.21|Amethyst shards can now be used as an armor trim material.}}
{{History|||snap=beta 1.19.80.22|Amethyst shards can now be used to craft calibrated sculk sensors.}}
{{History|foot}}
==Issues==
{{issue list}}
==Trivia==
* Although in real life {{w|amethyst}} is a variety of {{w|quartz}} like [[Nether Quartz|nether quartz]], the two resources are not interchangeable.
* besides netherite, amethyst is the only or to be attempted not from an ore in caves
== External Links ==
*[https://www.minecraft.net/en-us/article/taking-inventory--amethyst-shard Taking Inventory: Amethyst Shard] – Minecraft.net on May 20, 2021
{{Items}}
[[Category:Renewable resources]]
[[de:Amethystscherbe]]
[[es:Fragmento de amatista]]
[[fr:Éclat d'améthyste]]
[[it:Scheggia di ametista]]
[[ja:アメジストの欠片]]
[[lzh:紫水玉片]]
[[pl:Odłamek ametystu]]
[[pt:Fragmento de ametista]]
[[ru:Осколок аметиста]]
[[uk:Уламок аметисту]]
[[zh:紫水晶碎片]]
[[Category:Ore]]</li></ul> | 13w47a | The description value of pack.mcmeta can now be raw JSON text format. | |||
1.7.4{{Extension DPL}}<ul><li>[[Dried Kelp|Dried Kelp]]<br/>{{about|the item|the block|Dried Kelp Block}}
{{Item
| title = Dried Kelp
| image = Dried Kelp.png
| renewable = Yes
| heals = {{hunger|1}}
| stackable = Yes (64)
}}
'''Dried kelp''' is a [[food]] item that can be quickly eaten by the [[player]]. It can also be crafted into [[Dried Kelp Block|dried kelp blocks]].
== Obtaining ==
=== Cooking ===
[[Kelp]] can be cooked in a [[furnace]], [[smoker]], or [[campfire]]. Each piece of dried kelp removed from a furnace output slot gives 0.1 [[experience]] (6.4 experience per stack).
{{Smelting
|Kelp
|Dried Kelp
|0,1
}}
=== Crafting ===
{{Crafting
|Dried Kelp Block
|Output= Dried Kelp,9
|type= Foodstuff
}}
== Usage ==
=== Food ===
[[File:Eating dried kelp.png|thumb|A player eating dried kelp.]]
To eat dried kelp, press and hold {{control|use}} while it is selected in the hotbar. Eating one restores {{hunger|1}} [[hunger]] and 0.6{{only|je|short=1}} / 0.2{{only|be|short=1}} hunger [[Hunger#Mechanics|saturation]].
A player can consume dried kelp about twice as fast as any other food item in the game.
=== Crafting ingredient ===
{{Crafting usage}}
=== Composting ===
Dried kelp placed into a [[composter]] has a 30% chance of raising the compost level by 1.
==Sounds==
{{Sound table/Entity/Food}}
== Achievements ==
{{load achievements|Castaway}}
== Advancements ==
{{load advancements|Husbandry;A Balanced Diet}}
== Data values ==
=== ID ===
{{edition|java}}:
{{ID table
|edition=java
|showforms=y
|generatetranslationkeys=y
|displayname=Dried Kelp
|spritetype=item
|nameid=dried_kelp
|form=item
|foot=1}}
{{edition|bedrock}}:
{{ID table
|edition=bedrock
|shownumericids=y
|showforms=y
|notshowbeitemforms=y
|generatetranslationkeys=y
|displayname=Dried Kelp
|spritetype=item
|nameid=dried_kelp
|id=270
|form=item
|foot=1}}
== History ==
{{History|java}}
{{History||1.13|snap=18w07a|[[File:Dried Kelp JE1.png|32px]] Added dried kelp.}}
{{History|||snap=18w08b|Dried kelp can now be used to craft [[dried kelp block]]s.}}
{{History||1.14|snap=19w03a|Placing dried kelp into the new [[composter]] has a 10% chance of raising the compost level by 1.}}
{{History|||snap=19w05a|Dried kelp now has a 30% chance of increasing the compost level in a composter.}}
{{History|bedrock}}
{{History||1.4.0|snap=beta 1.2.14.2|[[File:Dried Kelp BE1.png|32px]] Added dried kelp.}}
{{H||1.11.0|snap=beta 1.11.0.1|Dried kelp can now be used to fill up [[composter]]s.}}
{{History||1.17.10|snap=beta 1.17.10.20|[[FIle:Dried Kelp JE1.png|32px]] The texture of dried kelp has been changed to match ''Java Edition''.}}
{{History|console}}
{{History||xbox=TU69|ps=1.76|wiiu=Patch 38|[[File:Dried Kelp BE1.png|32px]] Added dried kelp.}}
{{History|foot}}
== Issues ==
{{issue list}}
{{Items}}
[[Category:Food]]
[[Category:Renewable resources]]
[[de:Getrockneter Seetang]]
[[es:Algas secas]]
[[fr:Algue séchée]]
[[ja:乾燥した昆布]]
[[ko:말린 켈프]]
[[lzh:乾海帶]]
[[nl:Gedroogde kelp]]
[[pl:Suszone wodorosty]]
[[pt:Algas secas]]
[[ru:Сушёная ламинария]]
[[th:สาหร่ายทะเลแห้ง]]
[[zh:干海带]]</li><li>[[Footprint|Footprint]]<br/>{{about|the joke item|the unused particle|Java Edition unused features#Footprint particle}}
{{Joke feature}}
{{Item
| image = Footprint (item).png
| renewable = No
| stackable = Yes (64)
}}
The '''Footprint''' was a joke item from [[Java Edition 20w14∞]], found only in the {{code|missing}} dimension.
== Appearance ==
This item is semi-transparent with a grey colour scheme.
== Obtaining ==
=== Dimension ===
Footprints were obtained only from a chest in the {{Code|missing}} dimension. Only existing in 2020 April fools snapshot 20w14∞, it cannot exist in any non-April Fool's joke versions and April Fool's joke versions before or after 20w14∞. There is a maximum of 2 footprints that can be obtained legitimately in any given world.
=== Cheats/Creative Mode ===
Despite these footprints not being available in the creative inventory, it is still possible to acquire them via the command {{Code|code=give <target> minecraft:footprint <amount>}} or duplicating them by holding down middle-click whilst in creative mode.
== Usage ==
As of snapshot 20w14∞, this item cannot be placed or used in any way other than a trophy. This item can be inserted and/or rotated inside of an item frame, and it has a stack limit of 64.
== Data values ==
=== ID ===
{{ID table
|showforms=y
|generatetranslationkeys=java
|displayname=Footprint
|spritetype=item
|nameid=footprint
|form=item
|foot=1}}
== History ==
{{History|java}}
{{History||20w14∞|[[File:Footprint (item).png|32px]] Added the footprint item.}}
{{History|foot}}
== Gallery ==
<gallery>
File:Missing biome.png|The Easter Egg dimension that the item spawns in.
</gallery>
== Trivia ==
* This is a reference to the removed "Footstep" particle, hence in the "missing" dimension.
** This item is intended as a joke directed towards the commands' community where the "Footstep" particle is commonly requested.<ref>https://gist.github.com/boq/8e65cb85badc75765eeb8956af78aaa5</ref>
== References ==
{{reflist}}
{{Items}}
{{Jokes}}
[[Category:Non-renewable resources]]
[[Category:Joke items]]
[[es:Footprint]]
[[pt:Pegada]]</li></ul> | 13w48a | Removed the ability to change the Mojang logo. | |||
1.8{{Extension DPL}}<ul><li>[[Drinks|Drinks]]<br/>[[File:Drinking Steve.png|150px|right]] [[File:Drinking Alex.png|150px|right]]
'''Drinks''' are a narrow class of consumable [[item]]s that can be ingested by the [[player]] in an extremely similar manner to [[food]]. However, drinks are not encountered quite as commonly as food is, and they are not nearly as integral to Survival gameplay. Drinks can generally be distinguished from food by the sounds they make upon consumption, the lack of [[particles]] they emit, and the fact that they leave an empty container item in the [[inventory]] after consumption. Drinks do not affect [[hunger]] or saturation values upon use (with the exception of [[honey bottle]]s), and do not need those values to be depleted in order to be consumed.
Drinks are drunk by holding {{control|use item}} while having the drink item selected in the hotbar or in the off hand.
== Drinks ==
{{/table}}
== History ==
{{main|Milk#History|Potion#History|Honey Bottle#History}}
{{History|java alpha}}
{{History||v1.0.11|[[File:Milk Bucket JE1 BE1.png|32px]] Added milk.}}
{{History|java}}
{{History||1.0.0|snap=Beta 1.9 Prerelease 3|Added water bottles and potions.}}
{{History||1.15|snap=19w34a|[[File:Honey Bottle JE1.png|32px]] Added honey bottles.}}
{{History|pocket alpha}}
{{History||v0.7.0|[[File:Milk Bucket JE1 BE1.png|32px]] Added milk buckets.}}
{{History||v0.12.1|snap=build 1|Added water bottles and potions.}}
{{History|bedrock}}
{{History||1.14.0|snap=beta 1.14.0.1|[[File:Honey Bottle BE1.png|32px]] Added honey bottles.}}
{{History|foot}}
{{Items}}
[[ja:飲み物]]
[[pt:Bebidas]]
[[Category:Food]]</li><li>[[Cocoa Beans|Cocoa Beans]]<br/>{{Block
|image=<gallery>
Cocoa Age 0.png|Age 0 JE
Cocoa Age 1.png|Age 1 JE
Cocoa Age 2.png|Age 2 JE
</gallery>
|image2=<gallery>
Cocoa Age 0 BE.png|Age 0 BE
Cocoa Age 1 BE.png|Age 1 BE
Cocoa Age 2 BE.png|Age 2 BE
</gallery>
|transparent=Yes
|light=No
|tool=axe
|renewable=Yes
|stackable=Yes (64)
|flammable=No
|lavasusceptible=No
}} '''Cocoa beans''' are items obtained from cocoa pods and are used to plant them, as well as to craft [[dye|brown dye]] and [[cookie|cookies]].
'''Cocoa pods''' are [[Bone Meal|bonemealable]] [[plant]]s placed on [[Log|jungle log]] sides that grow cocoa beans, and can be found naturally in [[Jungle|jungles]].
==Obtaining==
In ''Java Edition'', cocoa beans are only obtained through the natural generation of cocoa pods, while in ''Bedrock Edition'', they can also be gotten in bonus chests, from [[fishing]] inside the jungle, bamboo jungle and sparse jungle biomes and during a [[trading]] with a wandering trader.
Cocoa beans come from cocoa pods, which are found on the trunks of normal-sized naturally-generated [[jungle tree]]s in [[jungle]], [[bamboo jungle]]s and [[sparse jungle]] temperate [[biome]]s.
Cocoa pods can be mined with any item, but [[axe]]s are the quickest. Fully grown cocoa pods drop 3 cocoa beans. Using a tool enchanted with Fortune does not increase the amount of cocoa beans dropped.
{{breaking row|horizontal=1|Cocoa|Axe|sword=1|link=none}}
The block itself can be obtained by inventory editing or [[add-on]]s {{in|bedrock}}.
From one to two cocoa beans can be found in 40% of bonus [[chest]]s {{in|bedrock}}.
{{LootChestItem|cocoa-beans}}
Cocoa beans can be obtained from [[fishing]] in a jungle {{in|bedrock}}.
[[Wandering trader]]s may sell 3 cocoa beans for an [[emerald]] during a [[trading]] {{in|bedrock}}.
==Usage==
===Farming===
{{main|Tutorials/Cocoa bean farming}}
Placing cocoa beans on the side of a jungle [[log]] plants a new cocoa pod. The log does not need to be attached to a tree. A cocoa pod can be placed on jungle logs, jungle [[wood]], stripped jungle logs and stripped jungle wood.
[[File:Cocoaplant farm.png|thumb|left|A somewhat efficient cocoa pod farm, minimizing space and wood use.]]
Cocoa has three stages of growth. During its first stage, the pod is small and green. In the second stage, the plant is bigger and colored tan. In its last stage, the pod is even larger and orange. The cocoa block has a 20% chance to grow a stage when receiving a [[Tick#Random tick|random tick]], giving it an average time of 5 minutes and 41 seconds per stage. When destroyed in the first two stages, the pod yields only one cocoa bean. When destroyed in the third stage, it gives 3 cocoa beans. [[Bone meal]] can be used to force the cocoa pod forward by one growth stage. Cocoa pods burst and drop their beans when struck by flowing water, pushed by a piston or if their [[log]] or wood are removed by any means.
===Composting===
Placing cocoa beans into a [[composter]] has a 65% chance of raising the compost level by 1. {{IN|bedrock}}, cocoa beans are accepted as a direct substitute of brown dye in many recipes.
===Crafting ingredient===
{{crafting usage}}
{{Dye usage}}
{{IN|bedrock}}, cocoa beans can be also used in banner patterns:
{{banner crafting usage}}
{{Banner loom usage|Cocoa Beans}}
==Sounds==
{{Sound table/Block/Wood}}
==Data values==
===ID===
{{edition|java}}:
{{ID table
|edition=java
|showforms=y
|generatetranslationkeys=y
|displayname=Cocoa
|spritetype=block
|nameid=cocoa
|form=block}}
{{ID table
|displayname=Cocoa Beans
|spritetype=item
|nameid=cocoa_beans
|form=item
|foot=1}}
{{edition|bedrock}}:
{{ID table
|edition=bedrock
|showforms=y
|showaliasids=y
|shownumericids=y
|generatetranslationkeys=y
|displayname=Cocoa
|spritetype=block
|nameid=cocoa
|id=127
|form=block}}
{{ID table
|displayname=Cocoa Beans
|spritetype=item
|nameid=cocoa_beans
|aliasid=dye / 3
|id=412
|form=item
|translationkey=item.dye.brown.name
|foot=1}}
===Block states===
{{see also|Block states}}
{{/BS}}
==History==
''For a more in-depth breakdown of changes to textures and models, including a set of renders for each state combination, see [[/Asset history]]''
{{History|java beta}}
{{History||1.2|[[File:Cocoa Beans JE1 BE1.png|32px]] Added cocoa beans.
|Cocoa beans are currently obtainable only through an inventory editor.}}
{{History||1.2_02|Prior to this, Cocoa Beans were misspelled as 'Coco Beans'.}}
{{History||1.4|Cocoa beans have been formally brought into the game as a reward found in [[dungeon]] chests.<ref>{{tweet|notch|53161729990987776}}</ref> (53% chance) Also, brown [[sheep]] now naturally spawn, making brown [[wool]] obtainable without hacking the game.
|Cocoa beans can now be used to craft [[cookie]]s.}}
{{History|java}}
{{History||May 8, 2012|link={{tweet|jeb|199867730927697920}}|[[Jeb]] revealed cocoa with a screenshot.}}
{{History||1.3.1|snap=12w18a|For only this snapshot, cocoa beans have been given a small (0.5%) chance of dropping from destroyed [[jungle tree]] [[leaves]] in a similar fashion to [[apple]]s from oak leaves, which makes cocoa beans [[renewable resource|renewable]] for the first time.}}
{{History|||snap=12w19a|[[File:Cocoa Age 0 (S) JE1.png|32px]] [[File:Cocoa Age 1 (S) JE1.png|32px]] [[File:Cocoa Age 2 (S) JE1.png|32px]] Added cocoa. The top textures of cocoa always keep a completely constant rotation, regardless of what direction they face. They also not shaded.
|[[File:Cocoa Beans JE2.png|32px]] The texture of cocoa beans has been changed.
|Cocoa has replaced jungle [[leaves]] as the main method of finding cocoa beans.
|[[File:Cocoa Age 3 (S) JE1.png|32px]] Cocoa with values 12–15 is inaccessible normally, and use the texture of the [[dragon egg]]. This is due to the dragon egg texture being to the left of the ripe cocoa texture in <samp>[[terrain.png]]</samp>, as cocoa textures are arranged with the oldest on the left and the youngest on the right, resulting in the unusually ripe cocoa reading the dragon egg texture.}}
{{History|||snap=1.3|[[File:Cocoa Beans JE3 BE2.png|32px]] The texture of cocoa beans has been changed.}}
{{History||1.4.2|snap=12w34a|Cocoa beans have been given the ability to [[Armor#Dyeing|dye]] leather [[armor]] and [[wolf]] collars.}}
{{History||1.4.6|snap=12w49a|Cocoa beans can now be [[crafting|crafted]] with [[gunpowder]] to create a [[firework star]].}}
{{History||1.5|snap=13w02a|Due to textures being stored in individual files, cocoa beans with data 12–15 no longer have a texture to use, and now crash the game if a [[chunk]] containing one is loaded.}}
{{History|||snap=13w03a|Cocoa with data values 12–15 now only crash the game if one is directly in the field of view.}}
{{History|||snap=13w04a|[[Bone meal]] now grows cocoa by only one stage.}}
{{History|||snap=13w10a|[[File:Cocoa Age 3 (S) JE2.png|32px]] Cocoa with data 12–15 now use the age 2 texture, resulting in a broken appearance, preventing previously mentioned crashes.}}
{{History||1.6.1|snap=13w18a|Cocoa beans have been removed from [[dungeon]] [[chest]]s.}}
{{History|||snap=13w19a|Brown [[Terracotta|stained clay]] can now be [[crafting|crafted]] using cocoa beans.}}
{{History||1.7.2|snap=13w41a|Brown [[stained glass]] can now be crafted using cocoa beans.}}
{{History||1.8|snap=14w07a|[[File:Cocoa Age 0 (S) JE2.png|32px]] [[File:Cocoa Age 1 (S) JE2.png|32px]] [[File:Cocoa Age 2 (S) JE2.png|32px]] [[File:Missing Model JE1.png|32px]] The top textures of cocoa now rotate with the blocks themselves (cocoa facing north remaining visually unaffected), and cocoa of age 3 has [[Missing model|no model]].}}
{{History|||snap=14w10a|[[File:Cocoa Age 0 (S) JE3.png|32px]] [[File:Cocoa Age 1 (S) JE3.png|32px]] [[File:Cocoa Age 2 (S) JE3.png|32px]] [[File:Missing Model JE2.png|32px]] The large section of cocoa is shaded, and the missing model (which age 3 cocoa uses) has changed.}}
{{History|||snap=14w25a|[[File:Cocoa Age 0 (S) JE4.png|32px]] [[File:Cocoa Age 1 (S) JE4.png|32px]] [[File:Cocoa Age 2 (S) JE4.png|32px]] The connecting region of cocoa is now shaded.}}
{{History|||snap=14w26a|Cocoa with data 12–15 has been effectively removed from the game, as such blocks now convert to a proper value with {{cmd|setblock}}. Loading worlds with existing out of range cocoa crash the game.}}
{{History|||snap=14w30a|Cocoa beans can now be used to dye [[banner]]s.}}
{{History||1.13|snap=17w47a|The different data values for the <code>dye</code> ID have been split up into their own IDs.
|Prior to [[1.13/Flattening|''The Flattening'']], this block's and item's numeral ID were respectively 127 and 351.}}
{{History||1.14|snap=18w43a|Cocoa beans can now be used to craft [[brown dye]].
|Cocoa beans can no longer be used as a [[dye]].
|All of the dye-related functions and crafting recipes of cocoa beans (except cookies) have been transferred to brown dye.
|"Cocoa Beans" item has been renamed to "Cocoa".
|[[File:Cocoa Beans JE4 BE3.png|32px]] The texture of cocoa has been changed.
|[[File:Cocoa Age 0 (S) JE5.png|32px]] [[File:Cocoa Age 1 (S) JE5.png|32px]] [[File:Cocoa Age 2 (S) JE5.png|32px]] The textures of cocoa have been changed.
|[[File:Cocoa Age 0 (texture) JE2 BE2.png|32px]] [[File:Cocoa Age 1 (texture) JE2 BE2.png|32px]] Textures for cocoa age 0 and 1 has palette left, visible only on particles.
|Cocoa now has a placement [[sound]].}}
{{History|||snap=19w03a|Placing cocoa into the new [[composter]] has a 50% chance of raising the compost level by 1.}}
{{History|||snap=19w05a|Cocoa now has a 65% chance of increasing the compost level in a composter by 1.}}
{{History|||snap=19w11b|"Cocoa" item has been renamed back to "Cocoa Beans".{{verify|was this not just one bug that affected other crops as well? if so cite the ticket and add to all other affected pages}}}}
{{History||1.18|snap=Pre-release 5|[[File:Cocoa Age 0 (texture) JE3 BE3.png|32px]] [[File:Cocoa Age 1 (texture) JE3 BE3.png|32px]] Textures for cocoa age 0 and 1 were changed. This visually changes only particles.}}
{{History||1.19|snap=22w11a|[[File:Cocoa Age 2 (S) JE6.png|32px]] The texture and model of cocoa age 2 have been changed.}}
{{History|pocket alpha}}
{{History||v0.3.0|[[File:Cocoa Beans JE1 BE1.png|32px]] Added cocoa beans. They are currently unobtainable and serve no purpose.}}
{{History||v0.8.0|snap=build 1|[[File:Cocoa Beans JE3 BE2.png|32px]] The texture of cocoa beans has been changed.
|Cocoa beans can be [[crafted]] from an [[orange dye]] and an [[ink sac]], or from [[dandelion yellow]], [[rose red]], and an ink sac, despite there being no way of obtaining ink sacs at the time.}}
{{History|||snap=build 3|Cocoa beans are now available in [[creative]].}}
{{History||v0.9.0|snap=build 1|[[File:Cocoa Age 0 (S) JE1.png|32px]] [[File:Cocoa Age 1 (S) JE1.png|32px]] [[File:Cocoa Age 2 (S) JE1.png|32px]] {{info needed|How did 12-16 appear?}} Added cocoa.
|Cocoa provides an additional way of obtaining cocoa beans.
|Cocoa beans are now used to craft [[cookie]]s.}}
{{History||v0.11.0|snap=build 14|Cocoa now grows over time.<ref>{{bug|MCPE-7887}}</ref>}}
{{History||?|[[File:Cocoa Age 0 (S) BE4.png|32px]] [[File:Cocoa Age 1 (S) BE4.png|32px]] [[File:Cocoa Age 2 (S) BE2.png|32px]] Cocoa no longer has a stem connecting it to the log.}}
{{History||v0.15.0|snap=Realms build 4|[[File:Cocoa Age 0 (S) JE1.png|32px]] [[File:Cocoa Age 1 (S) JE1.png|32px]] [[File:Cocoa Age 2 (S) JE1.png|32px]] Cocoa stems now render again.<ref>{{bug|MCPE-13579}}</ref>}}
{{History||v0.16.0|snap=build 1|Cocoa beans can no longer be crafted from [[orange dye]] and an ink sac.
|Cocoa beans can no longer be crafted from rose red, dandelion yellow and ink sacs.}}
{{History|pocket}}
{{History||1.0.0|snap=alpha 0.17.0.1|Cocoa beans can now be used to dye [[shulker]]s.}}
{{History||1.1.0|snap=alpha 1.1.0.0|Cocoa beans can now be used to dye [[shulker box]]es and [[bed]]s.
|Cocoa beans can now be used to craft [[concrete powder]].}}
{{History|bedrock}}
{{History||1.2.0|snap=beta 1.2.0.2|Cocoa beans can now be used to dye [[banner]]s, [[firework star]]s, and [[glass]].
|Cocoa beans can now be found in [[bonus chest]]s.}}
{{History||1.4.0|snap=beta 1.2.20.1|Cocoa beans can now be used to craft brown [[balloon]]s and [[glow stick]]s.}}
{{History||1.8.0|snap=beta 1.8.0.10|Cocoa beans can now be used to craft [[brown dye]].}}
{{History||1.10.0|snap=beta 1.10.0.3|Cocoa beans are now [[trading|sold]] by [[wandering trader]]s.
|[[File:Cocoa Beans JE4 BE3.png|32px]] The texture of cocoa beans has been changed.
|[[File:Cocoa Age 0 (S) BE4.png|32px]] [[File:Cocoa Age 1 (S) BE4.png|32px]] [[File:Cocoa Age 2 (S) BE4.png|32px]] The textures of cocoa have been changed.}}
{{History||1.11.0|snap=beta 1.11.0.1|Cocoa beans can now be used to fill up [[composter]]s.}}
{{History||1.16.100|snap=beta 1.16.100.56|The ID of cocoa beans has been changed from <code>dye/3</code> to <code>cocoa_beans</code>.}}
{{History||1.18.10|snap=beta 1.18.10.22|[[File:Cocoa Age 0 (texture) JE3 BE3.png|32px]] [[File:Cocoa Age 1 (texture) JE3 BE3.png|32px]] Textures for cocoa age 0 and 1 were changed. This visually changes only particles.}}
{{History|console}}
{{History||xbox=TU1|xbone=CU1|ps=1.0|wiiu=Patch 1|switch=1.0.1|[[File:Cocoa Beans JE1 BE1.png|32px]] Added cocoa beans.}}
{{History||xbox=TU9|[[File:Cocoa Beans JE3 BE2.png|32px]] The texture of cocoa beans has been changed.}}
{{History||xbox=TU12|[[File:Cocoa Age 0 (S) JE3.png|32px]] [[File:Cocoa Age 1 (S) JE3.png|32px]] [[File:Cocoa Age 2 (S) JE3.png|32px]]{{verify|Were these the models used?}} Added cocoa.}}
{{History||xbox=none|xbone=none|ps=1.90|wiiu=none|switch=none|[[File:Cocoa Beans JE4 BE3.png|32px]] The texture of cocoa beans has been changed once again.
|[[File:Cocoa Age 0 (S) JE5.png|32px]] [[File:Cocoa Age 1 (S) JE5.png|32px]] [[File:Cocoa Age 2 (S) JE5.png|32px]]{{verify|Were these the models used?}} The textures of cocoa have been changed.}}
{{History|new 3ds}}
{{History||0.1.0|[[File:Cocoa Beans JE3 BE2.png|32px]] Added cocoa beans.
|[[File:Cocoa Age 0 (S) JE3.png|32px]] [[File:Cocoa Age 1 (S) JE3.png|32px]] [[File:Cocoa Age 2 (S) JE3.png|32px]]{{verify|Were these the models used?}} Added cocoa.}}
{{History|foot}}
=== Cocoa "item" ===
{{:Technical blocks/Cocoa}}
== Issues ==
{{issue list|Cocoa Beans|Cocoa Pod}}
== Trivia ==
*Cocoa pods have a different hitbox for each size; however, the top is always 0.25 blocks below the top of the [[log]] it is on.
*If a cocoa pod grows while the player is standing next to it, the player is forced into the appropriate form of [[suffocation prevention]] depending on available space.
*{{IN|be}}, the pixels on top of the fully grown pod are 8/7 the size of those on the side.<ref>{{bug|MC-109055||Fixed}}</ref><ref>{{bug|MCPE-152862}}</ref>
== Gallery ==
<gallery>
CocoaReveal.png|The first screenshot of cocoa pods tweeted by [[Jens Bergensten]], which revealed the plants.
CocoaPlant.png|A screenshot tweeted by Jens Bergensten, showing the pod.
Cocoa Plants in a Jungle Biome (12w19a).png|Naturally generated cocoa pods.
CPlantsJWood.png|A cocoa pod farm.
Cocoa2.jpg|A cocoa farm.
Cocoa beans phases.png|Three growing phases of the cocoa pod.
AreaOptimizedBeanPods.gif|A log and pod layout for optimizing an example area of 14×14 (including walls).
File:CocoaBean15.png|Cocoa beans with values greater than 12 appeared this way
</gallery>
==Literature==
===References===
{{reflist}}
===External Links===
*[https://www.minecraft.net/en-us/article/taking-inventory--cocoa-beans Taking Inventory: Cocoa Beans] – Minecraft.net on December 5, 2019
{{Items}}
{{Blocks|vegetation}}
[[Category:Dyes]]
[[Category:Food]]
[[Category:Plants]]
[[Category:Renewable resources]]
[[Category:Non-solid blocks]]
[[Category:Natural blocks]]
[[cs:Kakaové boby]]
[[de:Kakaobohnen]]
[[es:Semillas de cacao]]
[[fr:Fèves de cacao]]
[[hu:Kakaóbab]]
[[ja:カカオ豆]]
[[ko:코코아 콩]]
[[nl:Cacaobonen]]
[[pl:Ziarna kakaowe]]
[[pt:Sementes de cacau]]
[[ru:Какао-бобы]]
[[uk:Какао-боби]]
[[zh:可可豆]]</li></ul> | 14w06a | Added the ability to change the block models. | |||
| 14w07a | Resource packs can now be bundled with a map. | ||||
| 14w25a | The model format now supports custom item models. | ||||
| Textures can now be specified for blocks and items. | |||||
Added the interpolate tag for animations. | |||||
1.8.8{{Extension DPL}}<ul><li>[[Glistering Melon Slice|Glistering Melon Slice]]<br/>{{Item
| image = Glistering Melon Slice.png
| renewable = Yes
| stackable = Yes (64)
}}
A '''glistering melon slice'''{{fn|Known as '''Glistering Melon Slice''' {{in|java}} and '''Glistering Melon''' {{in|bedrock}}.}} is an inedible [[item]] used for brewing [[potion]]s of [[Healing]]. It is also one of the many potion ingredients that can be used to make mundane potions.
== Obtaining ==
=== Chest loot ===
{{LootChestItem|glistering-melon-slice}}
=== Crafting ===
{{Crafting
|A1= Gold Nugget
|B1= Gold Nugget
|C1= Gold Nugget
|A2= Gold Nugget
|B2= Melon Slice
|C2= Gold Nugget
|A3= Gold Nugget
|B3= Gold Nugget
|C3= Gold Nugget
|Output= Glistering Melon Slice
|type= Brewing
}}
=== Trading ===
Master-level farmer [[villager]]s sell 3 glistering melon for 4 [[emerald]]s.
== Usage ==
Despite being crafted with a [[melon slice]], a glistering melon slice cannot be eaten, unlike a [[golden apple]] or [[golden carrot]].
=== Brewing ingredient ===
{{Brewing
|head=1
|Glistering Melon Slice
|Mundane Potion
|base=Water Bottle
}}
{{Brewing
|Glistering Melon Slice
|Potion of Healing
|foot=1}}
===Piglins===
[[Piglin]]s are attracted to glistering melon slices. They run toward any glistering melon slice on the ground, and inspect it for 6 to 8 seconds before putting it in their inventory.
== Achievements ==
{{load achievements|Oooh, shiny!}}
== Advancements ==
{{load advancements|Oh Shiny}}
== Data values ==
=== ID ===
{{edition|java}}:
{{ID table
|edition=java
|showforms=y
|generatetranslationkeys=y
|displayname=Glistering Melon Slice
|spritetype=item
|nameid=glistering_melon_slice
|form=item
|foot=1}}
{{edition|bedrock}}:
{{ID table
|edition=bedrock
|showaliasids=y
|shownumericids=y
|showforms=y
|notshowbeitemforms=y
|generatetranslationkeys=y
|displayname=Glistering Melon
|spritetype=item
|nameid=glistering_melon_slice
|aliasid=speckled_melon
|id=434
|form=item
|translationkey=item.speckled_melon.name
|foot=1}}
== History ==
{{History|java}}
{{History||1.0.0|snap=Beta 1.9 Prerelease 4|[[File:Glistering Melon Slice JE1 BE1.png|32px]] Added glistering melons.
|The [[crafting]] recipe of glistering melons is one [[melon slice]] and one [[gold nugget]].
|Glistering melons have replaced [[ghast tear]]s as the ingredient to produce [[potions of Healing]] due to the difficulty in getting tears.<ref>{{tweet|jeb_|123671273904680960}}</ref> They also now brew with [[water bottle]]s to create [[mundane potion]]s.}}
{{History||1.6.1|snap=13w23a|The [[crafting]] recipe of glistering melons is changed from one [[gold nugget]] to eight.}}
{{History||1.9|snap=15w49a|[[File:Glistering Melon Slice JE2.png|32px]] The rotation of glistering melon [[item]]s has been changed to be consistent with [[melon slice]]s.<ref>{{bug|MC-85963}}</ref>}}
{{History|||snap=15w49b|[[File:Glistering Melon Slice JE1 BE1.png|32px]] The rotation of glistering melons has been reverted and is no longer consistent with melon slices.}}
{{History||1.13|snap=17w47a|Prior to [[1.13/Flattening|''The Flattening'']], this [[item]]'s numeral ID was 382.}}
{{History|||snap=18w20b|"Glistering Melon" has been renamed to "Glistering Melon Slice".
|The ID of glistering melon slices has been changed from <code>speckled_melon</code> to <code>glistering_melon_slice</code>.}}
{{History||1.14|snap=18w43a|[[File:Glistering Melon Slice JE3 BE2.png|32px]] The texture of glistering melon slices has been changed.}}
{{History|||snap=19w11a|Farmer [[villager]]s now [[trading|sell]] glistering melon slices.}}
{{History||1.16|snap=20w09a|Glistering melon slices are now admired by [[piglin]]s.<ref>{{bug|MC-172363}}</ref>}}
{{History|||snap=20w16a|Glistering melon slices now generate in [[ruined portal]] chests.}}
{{History|pocket alpha}}
{{History||v0.12.1|snap=build 1|[[File:Glistering Melon Slice JE1 BE1.png|32px]] Added glistering melons.}}
{{History|bedrock}}
{{History||1.10.0|snap=beta 1.10.0.3|[[File:Glistering Melon Slice JE3 BE2.png|32px]] The texture of glistering melons has been changed.}}
{{History||1.11.0|snap=beta 1.11.0.4|Glistering melons can now be [[trading|bought]] from farmer [[villager]]s.}}
{{History||1.13.0|snap=beta 1.13.0.9|[[Trading]] has been changed. Master-level farmer villagers now have a {{frac|1|3}} chance to [[trading|sell]] glistering melon slices.}}
{{History||1.16.0|snap=beta 1.16.0.57|Glistering melons are [[trading|sold]] from farmer villagers under a 50% chance, once again.
|Glistering melons now generate in [[ruined portal]] chests.}}
{{History||1.16.100|snap=beta 1.16.100.54|[[Ruined Portal]]s can now generate with 4–12 glistering melons instead of only one.}}
{{History|||snap=beta 1.16.100.56|The ID of glistering melon slices has been changed from <code>speckled_melon</code> to <code>glistering_melon_slice</code>.}}
{{History|console}}
{{History||xbox=TU7|xbone=CU1|ps=1.0|wiiu=Patch 1|[[File:Glistering Melon Slice JE1 BE1.png|32px]] Added glistering melons.}}
{{History||xbox=none|xbone=none|ps=1.90|wiiu=none|switch=none|[[File:Glistering Melon Slice JE3 BE2.png|32px]] The texture of glistering melons has been changed.}}
{{History|New 3DS}}
{{History||0.1.0|[[File:Glistering Melon Slice JE1 BE1.png|32px]] Added glistering melons.}}
{{History|foot}}
== Issues ==
{{issue list}}
== See also ==
* [[Melon Slice]]
* [[Melon]]
== Notes ==
{{fnlist}}
== References ==
{{reflist}}
{{Items}}
[[Category:Renewable resources]]
[[cs:Zlatavý kousek melounu]]
[[de:Glitzernde Melonenscheibe]]
[[es:Rodaja de sandía reluciente]]
[[fr:Tranche de pastèque scintillante]]
[[hu:Ragyogó dinnye]]
[[ja:きらめくスイカの薄切り]]
[[ko:반짝이는 수박 조각]]
[[nl:Glinsterende meloenschijf]]
[[pl:Błyszczący arbuz]]
[[pt:Fatia de melancia reluzente]]
[[ru:Сверкающий ломтик арбуза]]
[[uk:Блискуча скибка кавуна]]
[[zh:闪烁的西瓜片]]</li><li>[[Powder Snow Bucket|Powder Snow Bucket]]<br/>{{Item
| title = Powder Snow Bucket
| image = Powder Snow Bucket.png
| renewable = Yes
| stackable = No
}}
A '''powder snow bucket''' is a [[bucket]] with [[powder snow]] inside.
== Obtaining ==
A powder snow bucket can be obtained by {{ctrl|using}} an [[empty bucket]] on a [[powder snow block]] or [[powder snow cauldron]].
== Usage ==
Pressing {{control|use}} while holding a powder snow bucket places a [[powder snow]] block. {{IN|Java}}, powder snow may also be placed inside empty [[cauldron]]s, creating powder snow cauldrons.
[[Dispenser]]s can also create and place powder snow buckets. However, they cannot do so with [[cauldron]]s. You can also use it to cushion falls in the [[nether]] by placing it below you when falling.
== Sounds ==
{{el|je}}:
{{Sound table
|sound=Empty powder snow bucket1.ogg
|sound2=Empty powder snow bucket2.ogg
|subtitle=Bucket empties
|source=block
|description=When a powder snow bucket is placed
|id=item.bucket.empty_powder_snow
|translationkey=subtitles.item.bucket.empty
|volume=1.0
|pitch=''varies'' <ref group=sound>Each sound event can be 1.0, 0.95, or 1.1</ref>
|distance=16}}
{{Sound table
|sound=Fill powder snow bucket1.ogg
|sound2=Fill powder snow bucket2.ogg
|subtitle=Bucket fills
|source=player
|description=When a bucket is filled with powder snow
|id=item.bucket.fill_powder_snow
|translationkey=subtitles.item.bucket.fill
|volume=1.0
|pitch=''varies'' <ref group=sound>Each sound event can be 1.0, 0.9, or 1.1</ref>
|distance=16}}
{{Sound table
|sound=Powder Snow break1.ogg
|sound2=Powder Snow break2.ogg
|sound3=Powder Snow break3.ogg
|sound4=Powder Snow break4.ogg
|sound5=Powder Snow break5.ogg
|sound6=Powder Snow break6.ogg
|sound7=Powder Snow break7.ogg
|subtitle=Block broken
|source=block
|description=When a bucket is filled with powder snow
|id=block.powder_snow.break
|translationkey=subtitles.block.generic.break
|volume=1.0
|pitch=0.8
|distance=16
|foot=1}}
{{el|be}}:
{{Sound table
|type=bedrock
|sound=Fill powder snow bucket1.ogg
|sound2=Fill powder snow bucket2.ogg
|source=player
|description=When a bucket is filled with powder snow
|id=bucket.fill_powder_snow
|volume=1.0
|pitch=1.0}}
{{Sound table
|sound=Empty powder snow bucket1.ogg
|sound2=Empty powder snow bucket2.ogg
|source=block
|description=When a powder snow bucket is placed
|id=bucket.empty_powder_snow
|volume=1.0
|pitch=1.0
|foot=1}}
== Data values ==
=== ID ===
{{edition|java}}:
{{ID table
|edition=java
|showforms=y
|generatetranslationkeys=y
|displayname=Powder Snow Bucket
|spritetype=item
|nameid=powder_snow_bucket
|form=item
|foot=1}}
{{edition|bedrock}}:
{{ID table
|edition=bedrock
|shownumericids=y
|showforms=y
|showaliasids=y
|notshowbeitemforms=y
|generatetranslationkeys=y
|displayname=Powder Snow Bucket
|spritetype=item
|nameid=powder_snow_bucket
|aliasid=bucket / 11
|form=item
|id=368
|foot=1}}
== History ==
{{History|java}}
{{History||1.17|snap=20w46a|[[File:Powder Snow Bucket JE1 BE1.png|32px]] Added powder snow buckets.}}
{{History|bedrock}}
{{History||Caves & Cliffs<br>(experimental)|link=Bedrock Edition 1.17.0|snap=beta 1.16.210.53|[[File:Powder Snow Bucket JE1 BE1.png|32px]] Added powder snow buckets.
|The powder snow bucket replaced the powder snow block in the creative inventory.}}
{{History||1.17.0|snap=beta 1.17.0.50|Powder snow bucket are now available without enabling [[Experimental Gameplay]].}}
{{h|foot}}
== Issues ==
{{Issue list}}
==Gallery==
<gallery>
Cozy Cabin Powder Snow Bucket 1.jpg|Teaser image with a barely visible powder snow bucket.
Cozy Cabin Powder Snow Bucket 2.jpg|Teaser image with a barely visible powder snow bucket.
Cozy Cabin Powder Snow Bucket 3.jpg|Teaser image with a barely visible powder snow bucket.
</gallery>
{{Items}}
[[Category:Renewable resources]]
[[Category:Tools]]
[[de:Pulverschneeeimer]]
[[es:Cubo con nieve polvo]]
[[fr:Seau de neige poudreuse]]
[[it:Secchio di neve polverosa]]
[[ja:粉雪入りバケツ]]
[[pl:Wiadro sypkiego śniegu]]
[[pt:Balde de neve fofa]]
[[ru:Ведро с рыхлым снегом]]
[[zh:细雪桶]]</li></ul> | pre | Resource packs now display an error if the format number is wrong. At this time, it requires a format number of 1. | |||
1.9{{Extension DPL}}<ul><li>[[Blue Dye|Blue Dye]]<br/>{{Item
|image = Blue_Dye_JE1_BE1.png
|renewable = Yes
|stackable = Yes (64)
}}
'''Blue dye''' is a [[Dye#Primary|primary dye color]].
== Obtaining ==
=== Crafting ===
{{Crafting
|Lapis Lazuli
|Output=Blue Dye
|type=Material
|head=1
}}
{{Crafting
|Cornflower
|Output=Blue Dye
|type=Material
|foot=1
}}
=== Chest loot ===
{{#invoke:LootChest|base3|blue-dye}}
== Usage ==
{{dye usage}}
=== Crafting ingredient ===
{{crafting usage|ignore=Banner|continue=1}}
{{banner crafting usage}}
=== Loom ingredient ===
{{Banner loom usage|Blue Dye}}
=== Trading ===
Expert-level shepherd villagers have a {{frac|1|6}} chance to buy 12 blue dye for an emerald.
== Data values ==
=== ID ===
{{edition|java}}:
{{ID table
|edition=java
|showforms=y
|generatetranslationkeys=y
|displayname=Blue Dye
|spritetype=item
|nameid=blue_dye
|form=item
|foot=1}}
{{edition|bedrock}}:
{{ID table
|edition=bedrock
|showaliasids=y
|shownumericids=y
|showforms=y
|notshowbeitemforms=y
|generatetranslationkeys=y
|displayname=Blue Dye
|spritetype=item
|nameid=blue_dye
|aliasid=dye / 18
|id=399
|form=item
|translationkey=item.dye.blue_new.name
|foot=1}}
== History ==
{{History|java}}
{{History||1.14|snap=18w43a|[[File:Blue_Dye_JE1_BE1.png|32px]] Added blue dye.}}
{{History|||snap=18w44a|Blue dyes now can changed the text color on the [[sign]]s to blue.}}
{{History|||snap=19w05a|Added the [[wandering trader]], which sell blue dyes.}}
{{History|||snap=19w11a|Blue dyes can now be [[trading|bought]] by shepherd villagers.}}
{{History||1.17|snap=20w45a|Blue dyes can now used to craft newly added [[blue candle]]s.}}
{{History|||snap=21w19a|Blue dyes can no longer used to craft blue candles.}}
{{History|||snap=Pre-release 1|Blue dyes can once again used to craft blue candles.}}
{{History||1.20<br>(Experimental)|link=1.19.3|snap=22w42a|Blue dyes can now change the text color on [[hanging sign]]s to blue.}}
{{History||1.20|snap=23w12a|Blue dye can now be found in [[suspicious gravel]] and [[suspicious sand]] in [[trail ruins]].}}
{{History|||snap=23w16a|Blue dye no longer generates in [[suspicious sand]] in [[trail ruins]].|Due to the split of the archaeological loot tables for the suspicious gravel within the [[trail ruins]]; blue dye now is in the common loot.}}
{{History|bedrock}}
{{History||1.8.0|snap=beta 1.8.0.10|[[File:Blue_Dye_JE1_BE1.png|32px]] Added blue dye.}}
{{History||1.9.0|snap=beta 1.9.0.0|Added [[flower|cornflowers]], which can be used to [[crafting|craft]] blue dye.}}
{{History||1.10.0|snap=beta 1.10.0.3|Blue dye can now be used to [[dye]] white [[carpet]]s and uncolored [[glass pane]]s.}}
{{History||1.11.0|snap=beta 1.11.0.4|Blue dye can now be [[trading|sold]] to shepherd [[villager]]s.}}
{{History||1.16.100|snap=beta 1.16.100.56|The ID of blue dye has been changed from <code>dye/18</code> to <code>blue_dye</code>.}}
{{History|ps4}}
{{History||1.83|[[File:Blue_Dye_JE1_BE1.png|32px]] Added blue dye.}}
{{History|foot}}
== Issues ==
{{issue list}}
== References ==
{{Reflist}}
{{Items}}
[[Category:Items]]
[[Category:Dyes]]
[[Category:Renewable resources]]
[[de:Blauer Farbstoff]]
[[es:Tinte azul]]
[[fr:Teinture bleue]]
[[ja:青色の染料]]
[[ko:파란색 염료]]
[[pl: Niebieski barwnik]]
[[pt:Corante azul]]
[[zh:蓝色染料]]</li><li>[[Pickaxe|Pickaxe]]<br/>{{Dungeons hatnote|type=weapon}}
{{Redirect|Diamond Pickaxe|the ''Minecraft Dungeons'' weapon|MCD:Diamond Pickaxe}}
{{Redirect|Pick|the block|Sea Pickle|the control|Controls#Pick Block|the joke block|Pickaxe Block}}
{{Item
| image = <gallery>
Wooden Pickaxe.png | Wooden
Stone Pickaxe.png | Stone
Iron Pickaxe.png | Iron
Golden Pickaxe.png | Golden
Diamond Pickaxe.png | Diamond
Netherite Pickaxe.png | Netherite
</gallery>
|rarity = Common
|renewable =
* '''Netherite''': No
* '''Others''': Yes
|durability =
Java Edition:
* Wood: 59
* Stone: 131
* Iron: 250
* Golden: 32
* Diamond: 1,561
* Netherite: 2,031
Bedrock Edition:
* Wood: 60
* Stone: 132
* Iron: 251
* Golden: 33
* Diamond: 1,562
* Netherite: 2,032
| stackable = No
}}
A '''pickaxe''' is a [[tools|tool]] required to mine [[ore]]s, [[rock|rocks]], rock-based blocks and metal-based [[block]]s quickly and obtain them as items. A pickaxe mines faster and can obtain more block types as items depending on the material it is made from.
== Obtaining ==
=== Crafting ===
Pickaxes are crafted using 2 [[stick]]s and 3 identical units of tool material.
{{crafting |showdescription=1 |showname=0 |head=1
|name=[[Pickaxe]]
|A1={Any Planks}; Iron Ingot; Gold Ingot; Diamond
|B1={Any Planks}; Iron Ingot; Gold Ingot; Diamond
|C1={Any Planks}; Iron Ingot; Gold Ingot; Diamond
|B2=Stick
|B3=Stick
|Output=Wooden Pickaxe; Iron Pickaxe; Golden Pickaxe; Diamond Pickaxe
|type=Tool
}}
{{Crafting
|name=[[Stone Pickaxe]]
|A1=Any stone-tier block |B1=Any stone-tier block |C1=Any stone-tier block
|B2=Stick
|B3=Stick
|Output=Stone Pickaxe
|description=Can use cobblestone and its other variants interchangeably.
|type=Tool
}}
{{crafting |foot=1 |ignoreusage=1
|name=[[Pickaxe]]
|ingredients=Matching Damaged [[Pickaxe]]s
|Damaged Wooden Pickaxe; Damaged Stone Pickaxe; Damaged Iron Pickaxe; Damaged Golden Pickaxe; Damaged Diamond Pickaxe; Damaged Netherite Pickaxe
|Damaged Wooden Pickaxe; Damaged Stone Pickaxe; Damaged Iron Pickaxe; Damaged Golden Pickaxe; Damaged Diamond Pickaxe; Damaged Netherite Pickaxe
|Output=Wooden Pickaxe; Stone Pickaxe; Iron Pickaxe; Golden Pickaxe; Diamond Pickaxe; Netherite Pickaxe
|description=The durability of the two pickaxes is added together, plus an extra 5% of the tool type's total durability.
|type=Tool
}}
=== Upgrading ===
{{Smithing
|head=1
|Netherite Upgrade
|Diamond Pickaxe
|Netherite Ingot
|Netherite Pickaxe
|tail=1
}}
=== Repairing ===
==== Grinding ====
{{grinding
|showdescription=1
|ingredients=Matching Damaged [[Pickaxe]]s
|Damaged Wooden Pickaxe; Damaged Stone Pickaxe; Damaged Iron Pickaxe; Damaged Golden Pickaxe; Damaged Diamond Pickaxe; Damaged Netherite Pickaxe
|Damaged Wooden Pickaxe; Damaged Stone Pickaxe; Damaged Iron Pickaxe; Damaged Golden Pickaxe; Damaged Diamond Pickaxe; Damaged Netherite Pickaxe
|Wooden Pickaxe; Stone Pickaxe; Iron Pickaxe; Golden Pickaxe; Diamond Pickaxe; Netherite Pickaxe
|description=The durability of the two pickaxes is added together, plus an extra 5% durability.
}}
==== Unit repair ====
{{main|Anvil mechanics#Unit repair}}
Pickaxes can be repaired in an [[anvil]] by adding units of the [[tiers|tier's]] repair material, with each repair material restoring 25% of the pickaxe's maximum durability, rounded down.
=== Natural generation ===
{{LootChestItem|wooden-pickaxe,stone-pickaxe,iron-pickaxe,level-enchanted-iron-pickaxe,random-enchanted-golden-pickaxe,level-enchanted-diamond-pickaxe,random-enchanted-diamond-pickaxe,damaged-random-enchanted-diamond-pickaxe}}
=== Trading ===
{{IN|bedrock}}, novice-level toolsmith [[Villager|villagers]] have a 25% chance to sell stone pickaxes for one [[emerald]], Journeyman-level toolsmith villagers have a 25% chance to sell enchanted iron pickaxes for 3 emeralds, and master-level toolsmith villagers always sell enchanted diamond pickaxes for 13 emeralds.
{{IN|java}}, novice-level toolsmith villagers have a 40% chance to sell a stone pickaxe for one emerald, journeyman-level toolsmith villagers have a 40% chance to sell an enchanted iron pickaxe for 7–22 emeralds, and a master-level toolsmith always sells an enchanted diamond pickaxe for 18–35 emeralds.
The enchantments are the same as the ones obtained from an [[enchantment table]] at levels 5–19.
=== Villager gifts ===
{{IN|JE}}, toolsmith [[villager]]s throw stone pickaxes at players under the [[Hero of the Village]] effect.
=== Mob loot ===
{{IN|BE}}, [[pillager]]s and [[vindicator]]s have a chance of dropping a damaged iron pickaxe when killed during a [[raid]]. The pickaxe has a 50% chance of being enchanted with random enchantment(s).
== Usage ==
=== Mining ===
A pickaxe is used to break stone and metal-based materials faster. Breaking a block with a pickaxe consumes one use (one durability point). No durability is consumed for blocks that break instantly. Pickaxes have different amounts of uses based on the type:
* Wooden: 60
* Stone: 132
* Iron: 251
* Golden: 33
* Diamond: 1562
* Netherite: 2032
Different qualities of pickaxe are required to successfully harvest certain ores and blocks. For example, while [[stone]] can be mined with any pickaxe, [[gold ore]] must be mined with an [[iron]], [[diamond]], or [[netherite]] pickaxe, or else the player harvests no ore. Different pickaxes also mine many materials at different speeds:
==== Speed ====
The following table shows the time it takes to break each type of block.
* A <span style="background-color:#FFC7CE;color:#9C0006;">red</span> background indicates that the block cannot be harvested with that type of pickaxe.
* A <span style="background-color:#FFFFDD;color:#8A7600;">yellow</span> background indicates that the block cannot be harvested with that type of pickaxe, but still drops something.
* A <span style="background-color:#C6EFCE;color:#006100;">green</span> background indicates that the block can be harvested with that type of pickaxe.
<!-- Table is sorted by hardness (mining time with diamond shows well), then by name -->
{|class="wikitable collapsible collapsed" data-description="Mining time by block" style="background-color: transparent;"
! Times to break blocks by pickaxe
|-
|
{{breaking row|sort=1|simple=1|Obsidian|Diamond}}
{{breaking row|Crying Obsidian|Diamond}}
{{breaking row|Respawn Anchor|Diamond}}
{{breaking row|Block of Netherite|Diamond}}
{{breaking row|Ancient Debris|Diamond}}
{{breaking row|Ender Chest|Wood}}
{{breaking row|Anvil|Wood}}
{{breaking row|Bell|Wood}}
{{breaking row|Block of Coal|Wood}}
{{breaking row|Block of Diamond|Iron}}
{{breaking row|Block of Emerald|Iron}}
{{breaking row|Block of Iron|Stone}}
{{breaking row|Block of Raw Copper|Stone}}
{{breaking row|Block of Raw Gold|Iron}}
{{breaking row|Block of Raw Iron|Stone}}
{{breaking row|Block of Redstone|Wood}}
{{breaking row|Chain|Wood}}
{{breaking row|Enchantment Table|Wood}}
{{breaking row|Iron Bars|Wood}}
{{breaking row|Iron Door|Wood|item=1|link=Door}}
{{breaking row|Iron Trapdoor|Wood|link=Trapdoor}}
{{breaking row|Monster Spawner|Wood}}
{{breaking row|Deepslate Coal Ore|Wood}}
{{breaking row|Deepslate Copper Ore|Wood}}
{{breaking row|Deepslate Diamond Ore|Wood}}
{{breaking row|Deepslate Emerald Ore|Wood}}
{{breaking row|Deepslate Gold Ore|Wood}}
{{breaking row|Deepslate Iron Ore|Wood}}
{{breaking row|Deepslate Lapis Lazuli Ore|Wood}}
{{breaking row|Deepslate Redstone Ore|Wood}}
{{breaking row|Blast furnace|Wood}}
{{breaking row|Cobbled Deepslate|Wood}}
{{breaking row|Chiseled Deepslate|Wood}}
{{breaking row|Deepslate Bricks|Wood}}
{{breaking row|Deepslate Tiles|Wood}}
{{breaking row|Polished Deepslate|Wood}}
{{breaking row|Dispenser|Wood}}
{{breaking row|Dropper|Wood}}
{{breaking row|Furnace|Wood}}
{{breaking row|Lantern|wood}}
{{breaking row|Lodestone|Wood}}
{{breaking row|Smoker|Wood}}
{{breaking row|Stonecutter|Wood}}
{{breaking row|Conduit}}
{{breaking row|Block of Gold|Iron}}
{{breaking row|Block of Lapis Lazuli|Stone}}
{{breaking row|Coal Ore|Wood}}
{{breaking row|Copper Ore|Wood}}
{{breaking row|Copper Blocks|Wood}}
{{breaking row|Cut Copper|Wood}}
{{breaking row|Cut Copper Slab|Wood}}
{{breaking row|Cut Copper Stairs|Wood}}
{{breaking row|Deepslate|Wood}}
{{breaking row|Dragon Egg
|note=<ref group="note">The dragon egg can be mined directly only when there aren't any air blocks available for it to teleport to. However, the dragon egg can be collected by other means.</ref>}}
{{breaking row|Diamond Ore|Iron}}
{{breaking row|Emerald Ore|Iron}}
{{breaking row|End Stone|Wood}}
{{breaking row|Gold Ore|Iron}}
{{breaking row|Hopper|Wood}}
{{breaking row|Iron Ore|Stone}}
{{breaking row|Lightning Rod|Wood}}
{{breaking row|Lapis Lazuli Ore|Stone}}
{{breaking row|Nether Quartz Ore|Wood}}
{{breaking row|Nether Gold Ore|Wood}}
{{breaking row|Observer|Wood}}
{{breaking row|Redstone Ore|Iron}}
{{breaking row|Blue Ice|drop=0}}
{{breaking row|Compound Creator|Wood|drop=1|note=<ref group="note" name="Chemtable">Chemistry tables are slow to break by hand, similar to blocks that require a pickaxe to mine. However, they still drop as items.</ref>}}
{{breaking row|Heat Block|Wood}}
{{breaking row|Grindstone|Wood}}
{{breaking row|Bone Block|Wood}}
{{breaking row|Brick Stairs|Wood|link=Stairs}}
{{breaking row|Bricks|Wood}}
{{breaking row|Cauldron|Wood}}
{{breaking row|Cobblestone|Wood}}
{{breaking row|link=Stairs|Cobblestone Stairs|Wood}}
{{breaking row|Cobblestone Wall|Wood}}
{{breaking row|Mossy Cobblestone|Wood}}
{{breaking row|Nether Bricks|Wood}}
{{breaking row|Nether Brick Fence|Wood}}
{{breaking row|link=Stairs|Nether Brick Stairs|Wood}}
{{breaking row|Red Nether Bricks|Wood}}
{{breaking row|Polished Blackstone|Wood}}
{{breaking row|link=Slab|Stone Slabs|sprite=all-slabs|Wood}}
{{breaking row|Smooth Stone|Wood}}
{{breaking row|Shulker Box}}
{{breaking row|Concrete|Wood}}
{{breaking row|Andesite|Wood}}
{{breaking row|Dark Prismarine|Wood}}
{{breaking row|Diorite|Wood}}
{{breaking row|Dripstone Block|Wood}}
{{breaking row|Granite|Wood}}
{{breaking row|Mud Bricks|Wood}}
{{breaking row|Pointed Dripstone}}
{{breaking row|Prismarine|Wood}}
{{breaking row|Prismarine Bricks|Wood}}
{{breaking row|Purpur block|Wood}}
{{breaking row|Purpur pillar|Wood}}
{{breaking row|Stone|Wood}}
{{breaking row|Stone Bricks|Wood}}
{{breaking row|Tuff|Wood}}
{{breaking row|link=Stairs|Stone Brick Stairs|Wood}}
{{breaking row|Amethyst Bud|drop=0}}
{{breaking row|Amethyst Cluster|drop=0}}
{{breaking row|Blackstone|Wood}}
{{breaking row|Block of Amethyst|Wood}}
{{breaking row|Budding Amethyst|drop=0}}
{{breaking row|Chiseled Polished Blackstone|Wood}}
{{breaking row|Polished Blackstone Bricks|Wood}}
{{breaking row|Gilded Blackstone|Wood}}
{{breaking row|Glazed Terracotta|Wood}}
{{breaking row|Terracotta|Wood}}
{{breaking row|Basalt|Wood}}
{{breaking row|Smooth Basalt|Wood}}
{{breaking row|Polished Basalt|Wood}}
{{breaking row|Packed Mud}}
{{breaking row|Block of Quartz|Wood}}
{{breaking row|Quartz Stairs|Wood|link=Stairs}}
{{breaking row|Red Sandstone|Wood}}
{{breaking row|Red Sandstone Stairs|Wood|link=stairs}}
{{breaking row|Sandstone|Wood}}
{{breaking row|Sandstone Stairs|Wood|link=stairs}}
{{breaking row|Calcite|Wood}}
{{breaking row|Rail}}
{{breaking row|Brewing Stand|Wood}}
{{breaking row|Stone Button|any}}
{{breaking row|Ice|drop=0}}
{{breaking row|Magma Block|Wood}}
{{breaking row|Packed Ice|drop=0}}
{{breaking row|Frosted Ice|drop=0}}
{{breaking row|Stone Pressure Plate|Wood}}
{{breaking row|Netherrack|Wood}}
{{breaking row|sprite=crimson-nylium|Nylium|Wood|foot=1}}
|}
=== Weapon ===
Hitting a mob with a pickaxe is a stronger attack than using fists. Pickaxes lose 2 durability when used as a weapon.
==== Java Edition ====
Pickaxes have an attack speed modifier of −2.8, meaning they take about 0.83 seconds to [[Damage#Attack cooldown|recover]]. All pickaxes have an attack speed of 1.2 hits per second. They deal different damage based on the type:
{|class="wikitable" style="text-align:center" data-description="Attack damage"
! Pickaxe type
! Attack damage
! Damage per<br> second (DPS)
|-
|{{ItemLink|Wooden Pickaxe}} ||rowspan=2 |{{hp|2}} ||rowspan=2 |2.4
|-
|{{ItemLink|Golden Pickaxe}}
|-
|{{ItemLink|Stone Pickaxe}} ||{{hp|3}} ||3.6
|-
|{{ItemLink|Iron Pickaxe}} ||{{hp|4}} ||4.8
|-
|{{ItemLink|Diamond Pickaxe}} ||{{hp|5}} ||6
|-
|{{ItemLink|Netherite Pickaxe}} ||{{hp|6}} ||7.2
|}
==== Bedrock Edition ====
{{IN|bedrock}}, pickaxes always attack instantly and do the following damage:
{|class="wikitable" style="text-align:center" data-description="Attack damage"
! Pickaxe type
! Attack damage
|-
|{{ItemLink|Wooden Pickaxe}}<br />{{ItemLink|Golden Pickaxe}} ||{{hp|3}}
|-
|{{ItemLink|Stone Pickaxe}} ||{{hp|4}}
|-
|{{ItemLink|Iron Pickaxe}} ||{{hp|5}}
|-
|{{ItemLink|Diamond Pickaxe}} ||{{hp|6}}
|-
|{{ItemLink|Netherite Pickaxe}} ||{{hp|7}}
|}
=== Enchantments ===
A pickaxe can receive the following [[enchantment]]s:
{|class="wikitable col-2-center col-3-right"
|+
!Name
!Max Level
![[Enchanting|Method]]
|-
|[[Efficiency]]
|V
|{{Inventory slot|Enchanting Table}}{{Inventory slot|Anvil}}
|-
|[[Fortune]]<ref group=note name=note1>Fortune and Silk Touch are mutually exclusive.</ref>
|III
|{{Inventory slot|Enchanting Table}}{{Inventory slot|Anvil}}
|-
|[[Silk Touch]]<ref group=note name=note1/>
|I
|{{Inventory slot|Enchanting Table}}{{Inventory slot|Anvil}}
|-
|[[Unbreaking]]
|III
|{{Inventory slot|Enchanting Table}}{{Inventory slot|Anvil}}
|-
|[[Mending]]
|I
|{{Inventory slot|Anvil}}
|-
|[[Curse of Vanishing]]
|I
|{{Inventory slot|Anvil}}
|}
{{Notelist}}
=== Fuel ===
Wooden pickaxes can be used as a fuel in [[furnace]]s, smelting 1 item per wooden pickaxe.
=== Smelting ingredient ===
{{Smelting|showname=1|Iron Pickaxe;Golden Pickaxe|Iron Nugget;Gold Nugget|0,1}}
===Piglins===
{{EntityLink|Piglin|Piglins}} are attracted to golden pickaxes and run toward any golden pickaxes on the ground, and inspect it for 6 to 8 seconds before putting it in their inventory.
== Sounds ==
{{edition|java}}:
{{Sound table
|sound=Random break.ogg
|subtitle=Item breaks
|source=player
|description=When a pickaxe's durability is exhausted
|id=entity.item.break
|translationkey=subtitles.entity.item.break
|volume=0.8
|pitch=0.8-1.2
|distance=16
|foot=1}}
{{edition|bedrock}}:
{{Sound table
|type=bedrock
|sound=Random break.ogg
|source=player
|description=When a shovel's durability is exhausted
|id=random.break
|volume=1.0
|pitch=0.9
|foot=1}}
== Data values ==
=== ID ===
{{edition|java}}:
{{ID table
|edition=java
|showforms=y
|generatetranslationkeys=y
|displayname=Wooden Pickaxe
|spritetype=item
|nameid=wooden_pickaxe
|form=item}}
{{ID table
|displayname=Stone Pickaxe
|spritetype=item
|nameid=stone_pickaxe
|form=item}}
{{ID table
|displayname=Iron Pickaxe
|spritetype=item
|nameid=iron_pickaxe
|form=item}}
{{ID table
|displayname=Diamond Pickaxe
|spritetype=item
|nameid=diamond_pickaxe
|form=item}}
{{ID table
|displayname=Golden Pickaxe
|spritetype=item
|nameid=golden_pickaxe
|form=item}}
{{ID table
|displayname=Netherite Pickaxe
|spritetype=item
|nameid=netherite_pickaxe
|form=item
|foot=1}}
{{edition|bedrock}}:
{{ID table
|edition=bedrock
|shownumericids=y
|showforms=y
|notshowbeitemforms=y
|generatetranslationkeys=y
|displayname=Wooden Pickaxe
|spritetype=item
|nameid=wooden_pickaxe
|id=310
|form=item}}
{{ID table
|displayname=Stone Pickaxe
|spritetype=item
|nameid=stone_pickaxe
|id=314
|form=item}}
{{ID table
|displayname=Iron Pickaxe
|spritetype=item
|nameid=iron_pickaxe
|id=297
|form=item}}
{{ID table
|displayname=Diamond Pickaxe
|spritetype=item
|nameid=diamond_pickaxe
|id=318
|form=item}}
{{ID table
|displayname=Golden Pickaxe
|spritetype=item
|nameid=golden_pickaxe
|id=324
|form=item}}
{{ID table
|displayname=Netherite Pickaxe
|spritetype=item
|nameid=netherite_pickaxe
|id=606
|form=item
|foot=1}}
== Achievements ==
{{Load achievements|Time to mine!;Getting an Upgrade;MOAR Tools ;Oooh, shiny!}}
== Advancements ==
{{load advancements|Getting an Upgrade;Isn't It Iron Pick;Stone Age;Oh Shiny}}
== Video ==
{{yt|G_HTViy2JTo}}
== History ==
{{History|java indev}}
{{History||0.31|snap=20100110|[[File:Iron Pickaxe JE1.png|32px]] Added iron pickaxes.
|A pickaxe is used to gather [[stone]] materials 400% faster than by hand.
|When starting in a new world, the [[player]] is given one of each [[tool]].}}
{{History|||snap=20100124|A complete tool set is no longer given to the player on starting a new world. Instead, there are multiple [[chest]]s in the later called "[[Indev House]]" containing a stack of most accessible [[blocks]]/[[items]] including [[tools]].}}
{{History|||snap=20100128|[[File:Wooden Pickaxe JE1 BE1.png|32px]] [[File:Stone Pickaxe JE1 BE1.png|32px]] [[File:Diamond Pickaxe JE1 BE1.png|32px]] Tools now have tiers. Wooden, stone, and diamond pickaxes have been added.|[[File:Iron Pickaxe JE2 BE1.png|32px]] The texture of iron pickaxes has been changed.
|A pickaxe held by the [[player]] is now rendered to appear more 3D.|They cannot be crafted yet, but have been added to the item chest in the Indev house.}}
{{History|||snap=20100129|Wood, stone, iron, and diamond pickaxes can now be [[craft]]ed.}}
{{History|||snap=20100130|[[File:Golden Pickaxe JE1.png|32px]] Pickaxes can now be made out of [[gold]].}}
{{History|||snap=20100201-1|Tools, including pickaxes, now take [[damage]] when being used. |Better tools, including pickaxes, now last longer.}}
{{History|||snap=20100201-2|Better pickaxes are now required to mine harder materials.}}
{{History||20100206|[[File:Golden Pickaxe JE2 BE1.png|32px]] The texture of golden pickaxes has been changed.}}
{{History|java beta}}
{{History||1.2|Before, the pickaxe had much less [[item durability|durability]] (usually half as much).
|Gold pickaxes now [[breaking|mine]] certain materials much faster.}}
{{History||1.8|snap=Pre-release|Iron pickaxes are now found in the new [[stronghold]] storeroom [[chest]]s, and in the new [[mineshaft]] chests.}}
{{History|java}}
{{History||1.0.0|snap=Beta 1.9 Prerelease 3|Iron pickaxes can now be found in the new [[stronghold]] altar [[chest]]s.}}
{{History|||snap=RC1|Pickaxes and other [[tool]]s now make a [[sound]] when they break.}}
{{History||1.1|snap=12w01a|Iron pickaxes are now found in the new [[village]] blacksmith chests.}}
{{History||1.2.4|snap=release|[[Spruce planks]], [[birch planks]], and [[jungle planks]] can now be used to craft wooden pickaxes.}}
{{History||1.3.1|snap=12w16a|Wooden and stone pickaxes are now found in the new [[bonus chest]]s.}}
{{History|||snap=12w18a|Wooden pickaxes can now be used as fuel in a [[furnace]].}}
{{History|||snap=12w21a|Blacksmith [[villager]]s now [[trading|sell]] 1 diamond pickaxe for 10–11 [[emerald]]s, and 1 iron pickaxe for 7–8 emeralds.}}
{{History||1.6.1|snap=13w21a|Instead of replacing the barehanded [[damage]] ({{hp|1}}), pickaxes now add their damage onto the barehanded damage, which results in all pickaxes doing {{hp|1}} more damage than before.}}
{{History||1.7.2|snap=1.7.1|[[Acacia planks]] and [[dark oak planks]] can now be used to craft wooden pickaxes.}}
{{History||1.8|snap=14w02a|Tool smith villagers now [[trading|sell]] 1 [[enchanting|enchanted]] diamond pickaxe for 12–15 emeralds, and 1 enchanted iron pickaxe for 9–11 emeralds.
|Unenchanted pickaxes are no longer sold by [[villager]]s.}}
{{History||1.9|snap=15w31a|Enchanted iron and diamond pickaxes can now be found in the [[end ship]] [[chest]]s in [[end city|end cities]].}}
{{History|||snap=15w34a|Pickaxes now use the "attack strength" combat mechanic meter. The time it takes for the meter to fill up for a pickaxe is 0.8 seconds.}}
{{History|||snap=15w34c|Pickaxes now do less [[damage]], but recover quicker.}}
{{History|||snap=15w35a|Pickaxes now recover more slowly.}}
{{History|||snap=15w44a|The average yield of wood and stone pickaxes in [[bonus chest]]s has been decreased.
|The average yield of iron pickaxes in [[mineshaft]] [[chest]]s has been increased.}}
{{History||1.11.1|snap=16w50a|Golden and iron pickaxes can now be [[smelting|smelted]] down into one of their respective [[nugget]]s.}}
{{History||1.13|snap=17w47a|Prior to [[1.13/Flattening|''The Flattening'']], these [[item]]s' numeral IDs were 270, 274, 257, 278 and 285.}}
{{History||1.14|snap=18w43a|[[File:Wooden Pickaxe JE2 BE2.png|32px]] [[File:Stone Pickaxe JE2 BE2.png|32px]] [[File:Iron Pickaxe JE3 BE2.png|32px]] [[File:Golden Pickaxe JE3 BE2.png|32px]] [[File:Diamond Pickaxe JE2 BE2.png|32px]] The textures of all pickaxes have been changed.}}
{{History|||snap=18w50a|Iron pickaxes can now be found in chests in [[village]] toolsmith houses.}}
{{History|||snap=19w11a|Toolsmith [[villager]]s now [[trading|sell]] stone pickaxes.}}
{{History|||snap=19w13a|Toolsmith villagers now give stone pickaxes to players under the [[Hero of the Village]] effect.}}
{{History||1.16|snap=20w06a|[[File:Netherite Pickaxe JE1.png|32px]] Added netherite pickaxes.
|Netherite pickaxes are obtained by combining one diamond pickaxe and one netherite ingot in a crafting table.
|[[Crimson planks]] and [[warped planks]] can now be used to craft wooden pickaxes.}}
{{History|||snap=20w09a|[[File:Wooden Pickaxe JE3 BE3.png|32px]] [[File:Golden Pickaxe JE4 BE3.png|32px]] [[File:Diamond Pickaxe JE3 BE3.png|32px]] [[File:Netherite Pickaxe JE2 BE1.png|32px]] The textures of wooden, golden, diamond, and netherite pickaxes have been changed.}}
{{History|||snap=20w10a|[[File:Netherite Pickaxe JE3.png|32px]] Changed a pixel of the texture of netherite pickaxes.
|Netherite pickaxes can no longer be crafted.
|Netherite pickaxes are now obtained by combining one diamond pickaxe and one netherite ingot in a smithing table.}}
{{History|||snap=20w15a|Stone pickaxes can now be crafted using [[blackstone]].}}
{{History|||snap=20w16a|Golden pickaxes now generate randomly enchanted in [[ruined portal]] chests.}}
{{History||1.16.2|snap=20w30a|Randomly enchanted diamond pickaxes can now be found in [[bastion remnant]] chests.}}
{{History||1.17|snap=21w08a|Stone pickaxe can now be crafted using [[cobbled deepslate]].}}
{{History||1.19|snap=22w11a|[[Mangrove planks]] can now be used to craft wooden pickaxes.}}
{{History||1.20<br>(Experimental)|link=1.19.4|snap=23w04a|Upgrading diamond pickaxes to netherite pickaxes now requires the netherite upgrade [[smithing template]].}}
{{History|upcoming java}}
{{History||Villager Trade Rebalance<br>(Experimental)|link=Java Edition 1.20.2|snap=23w31a|[[Wandering trader]]s now have a chance to sell an enchanted iron pickaxe.}}
{{History||Combat Tests|snap=1.14.3 - Combat Test|The attack speed for all pickaxes has been increased to 2.5.
|The [[damage]] for all pickaxes has been increased by {{hp|1}}.}}
{{History|pocket alpha}}
{{History||v0.2.0|[[File:Stone Pickaxe JE1 BE1.png|32px]] Added stone pickaxes.}}
{{History||v0.3.0|[[File:Wooden Pickaxe JE1 BE1.png|32px]] Added wooden pickaxes.
|Survival players no longer start out with an infinite durability stone pickaxe in the inventory.}}
{{History||v0.3.2|[[File:Iron Pickaxe JE2 BE1.png|32px]] [[File:Golden Pickaxe JE2 BE1.png|32px]] [[File:Diamond Pickaxe JE1 BE1.png|32px]] Added iron, gold, and diamond pickaxes.}}
{{History||v0.4.0|Removed stone pickaxes from the creative inventory.}}
{{History||v0.11.0|snap=build 11|All pickaxes are now available in the [[creative]] inventory.}}
{{History|||snap=build 12|All pickaxes have been removed from creative.}}
{{History|||snap=build 13|Pickaxes have been re-added to creative mode.}}
{{History||v0.14.0|snap=build 1|Iron pickaxes can now be found inside [[minecart with chest]]s in [[mineshaft]]s.}}
{{History|pocket}}
{{History||1.0.0|snap=alpha 0.17.0.1|[[Enchanting|Enchanted]] iron pickaxes and enchanted diamond pickaxes can now be found in [[end city|end cities]].}}
{{History||1.0.4|snap=alpha 1.0.4.0|Toolsmith [[villager]]s now [[trading|sell]] enchanted diamond pickaxes for 12-15 emeralds as their last tier trades and enchanted iron pickaxes for 9-11 [[emerald]]s as their second tier trades.}}
{{History||1.1.0|snap=alpha 1.1.0.0|Iron and golden pickaxes are now [[smelting|smeltable]].}}
{{History|bedrock}}
{{History||1.2.0|snap=beta 1.2.0.2|Wooden and stone pickaxes can now be found inside [[bonus chest]]s.}}
{{History||1.10.0|snap=beta 1.10.0.3|Iron pickaxes can now be found in [[plains]] [[village]] weaponsmith houses.
|[[File:Wooden Pickaxe JE2 BE2.png|32px]] [[File:Stone Pickaxe JE2 BE2.png|32px]] [[File:Iron Pickaxe JE3 BE2.png|32px]] [[File:Golden Pickaxe JE3 BE2.png|32px]] [[File:Diamond Pickaxe JE2 BE2.png|32px]] The textures of all pickaxes have been changed.}}
{{History||1.11.0|snap=beta 1.11.0.1|Iron pickaxes can now be found in [[village]] toolsmiths [[chest]]s and in [[savanna]], [[taiga]], [[snowy taiga]] and [[desert]] village weaponsmith chests.}}
{{History|||snap=beta 1.11.0.4|[[Trading]] has been changed, toolsmith [[villager]]s now have a 25% chance to [[trading|sell]] an [[enchanting|enchanted]] iron pickaxe for 3 [[emerald]]s as part of their third tier trades, and an enchanted diamond pickaxe now costs 13 emeralds.
|Stone pickaxes can now be bought from toolsmith villagers.}}
{{History||1.16.0|snap=beta 1.16.0.51|[[File:Netherite Pickaxe JE2 BE1.png|32px]] Added netherite pickaxes.|Netherite pickaxes are obtained by combining one diamond pickaxe and one netherite ingot in a crafting table.
|[[File:Wooden Pickaxe JE3 BE3.png|32px]] [[File:Golden Pickaxe JE4 BE3.png|32px]] [[File:Diamond Pickaxe JE3 BE3.png|32px]] The textures of wooden, golden, and diamond pickaxes have been changed.}}
{{History|||snap=beta 1.16.0.57|Netherite pickaxes can no longer be crafted.
|Netherite pickaxes are now obtained by combining one diamond pickaxe and one netherite ingot in a smithing table.
|Stone pickaxes can now be crafted using [[blackstone]].
|Golden pickaxes now generate randomly enchanted in [[ruined portal]] chests.
|Netherite pickaxe now generate randomly enchanted in [[bastion remnant]] chest.}}
{{History||1.17.10|snap=beta 1.17.10.20|[[File:Netherite Pickaxe JE3.png|32px]] Changed a pixel of the texture of netherite pickaxes to match ''Java Edition''.}}
{{History|console}}
{{History||xbox=TU1|xbone=CU1|ps=1.0|wiiu=Patch 1|[[File:Wooden Pickaxe JE1 BE1.png|32px]] [[File:Stone Pickaxe JE1 BE1.png|32px]] [[File:Iron Pickaxe JE2 BE1.png|32px]] [[File:Golden Pickaxe JE2 BE1.png|32px]] [[File:Diamond Pickaxe JE1 BE1.png|32px]] Added pickaxes (all five types).}}
{{History||xbox=TU53|xbone=CU43|ps=1.49|wiiu=Patch 23|switch=1.0.3|Iron and golden pickaxes are now [[smelting|smeltable]].}}
{{History|Ps4}}
{{History||1.90|[[File:Wooden Pickaxe JE2 BE2.png|32px]] [[File:Stone Pickaxe JE2 BE2.png|32px]] [[File:Iron Pickaxe JE3 BE2.png|32px]] [[File:Golden Pickaxe JE3 BE2.png|32px]] [[File:Diamond Pickaxe JE2 BE2.png|32px]] The textures of all pickaxes have been changed.}}
{{History|New Nintendo 3DS Edition}}
{{History||0.1.0|[[File:Wooden Pickaxe JE1 BE1.png|32px]] [[File:Stone Pickaxe JE1 BE1.png|32px]] [[File:Iron Pickaxe JE2 BE1.png|32px]] [[File:Golden Pickaxe JE2 BE1.png|32px]] [[File:Diamond Pickaxe JE1 BE1.png|32px]] Added pickaxes.}}
{{History|foot}}
== Issues ==
{{issue list}}
== Trivia ==
*The golden pickaxe is the only pickaxe that is unable to harvest the material it is made from.
*The pickaxe is the only block-breaking tool without a {{control|use}} (right-click) function.
=== Publicity ===
*Plastic diamond pickaxes are official ''[[Minecraft]]'' merchandise.<ref>https://shop.minecraft.net/products/minecraft-pickaxe?_pos=3&_psq=pickaxe&_ss=e&_v=1.0</ref>
*In the game [[wikipedia:Naughty Bear: Panic in Paradise|''Naughty Bear: Panic in Paradise'']], the player can buy a diamond pickaxe which, according to the game, is made by "Kick it up a Notch Pickaxes", referring to [[Notch]].
*In mobile game ''[https://play.google.com/store/apps/details?id=br.com.tapps.vloggergoviral Vlogger Go Viral]'' clicker game, after buying the figurine shelf, there is a model of a diamond pickaxe stuck to a [[grass block]].
*In the game [[wikipedia:The Elder Scrolls V: Skyrim|''The Elder Scrolls V: Skyrim'']], the player can find a pickaxe called the "Notched Pickaxe", evidently an [[easter egg]].
*In the game [[wikipedia:Offensive Combat|''Offensive Combat'']], a stone pickaxe can be used as a melee weapon with the name of "The Notch Carver".
*In the game [[wikipedia:The Binding of Isaac (video game)|''The Binding of Isaac'']], an obtainable item named "Notched Axe", also with a drawn 8-bit look, can be used to destroy rocks. The Notched Axe also makes a return in the game's remake, [[wikipedia:The Binding of Isaac: Rebirth|''The Binding of Isaac: Rebirth'']].
*In the game [[wikipedia:Borderlands 2|''Borderlands 2'']], the player can find a secret area hidden away by blocks resembling Minecraft [[dirt]], also once inside the player can fight Creeper and the Mother Creeper to get rare Minecraft-related skins.
*In the game [[wikipedia:Octodad: Dadliest Catch|''Octodad: Dadliest Catch'']], the supermarket level has a "Mintcraft" display, an obvious parody of Minecraft, even including toy pickaxes and a creeper head.
*In the game [[wikipedia:Transformice|''Transformice'']], a diamond pickaxe can be found in the shop.
== Gallery ==
<gallery>
File:Pickaxe in Mineshaft Chest.png|A naturally generated pickaxe.
Live in Your World JINX.jpg|Official T-shirt artwork "Live in Your World" featuring an iron pickaxe made by [https://www.jinx.com JINX].
Pickaxe JINX.jpg|Official T-shirt artwork of a pickaxe made by JINX.
Stone Pickaxe SDGP.png|Stone pickaxe in the [[Super Duper Graphics Pack]].
Iron Pickaxe SDGP.png|Iron pickaxe in the [[Super Duper Graphics Pack]].
</gallery>
=== Enchanted pickaxes ===
<gallery>
Enchanted Wooden Pickaxe.gif
Enchanted Stone Pickaxe.gif
Enchanted Iron Pickaxe.gif
Enchanted Golden Pickaxe.gif
Enchanted Diamond Pickaxe.gif
Enchanted Netherite Pickaxe.gif
</gallery>
== References ==
{{reflist}}
== External Links ==
*[https://www.minecraft.net/en-us/article/taking-inventory-pickaxe Taking Inventory: Pickaxe] – Minecraft.net on May 10, 2018
{{items}}
[[Category:Combat]]
[[cs:Krumpáč]]
[[de:Spitzhacke]]
[[es:Pico]]
[[fr:Pioche]]
[[hu:Csákány]]
[[it:Piccone]]
[[ja:ツルハシ]]
[[ko:곡괭이]]
[[nl:Houweel]]
[[pl:Kilof]]
[[pt:Picareta]]
[[ru:Кирка]]
[[th:อีเต้อ]]
[[uk:Кайло]]
[[zh:镐]]</li></ul> | 15w31a | Changed format number to 2, due to changes in the model system, such as item tags, multipart, and changes to display tags.
| |||
| Using resource packs with outdated display tags causes the models to seem abnormally up-scaled and the wielded block cannot be rotated in the hand, along with blocks in the inventory replaced with a 2D texture. This is similar to what happens when a model has no display tags. See here for an example. | |||||
1.11{{Extension DPL}}<ul><li>[[Explorer Map|Explorer Map]]<br/>{{about|the map used to find rare structures|the craftable map|Map|others|Map (disambiguation)}}{{Needs updating|Add info on the new jungle, swamp, and village maps in Java 1.20.2 Pre-Release 1}}{{Item
| image = <gallery>
Ocean Explorer Map.png | Ocean
Woodland Explorer Map.png | Woodland
Buried Treasure Map.png | Buried Treasure
</gallery>
|image2 = <gallery>
Ocean Explorer Map BE.png | Ocean (BE)
Woodland Explorer Map BE.png | Woodland (BE)
Buried Treasure Map BE.png | Buried in Treasure (BE)
</gallery>
| renewable =
* '''Buried Treasure''': No
* '''Woodland and Ocean''': Yes
| stackable = Yes (64)
}}
An '''explorer map''' is a special [[map]] used to aid in finding rare [[generated structures]], including [[woodland mansion]]s, [[ocean monument]]s, and [[buried treasure]]s.
== Obtaining ==
=== Trading ===
Apprentice-level [[cartographer]] villagers sell ocean explorer maps for 13 emeralds and a compass. Journeyman-level cartographer villagers sell woodland explorer maps for 14 emeralds and a compass.
{{IN|java}}, if the cartographer is in [[the Nether]] or [[the End]], either spawned or transported, the trades for the map do not unlock. However, {{in|bedrock}}, the cartographer trades for the map are unlocked, but the purchased map shows the same layout as in the corresponding dimension and shows no destination structure, but if cartographer trades are unlocked in an old world type (prior-1.11.0), the game stops ticking.
In ''Java Edition'', each cartographer sells its own unique explorer map that points to a different location than other cartographers. Purchasing another explorer map from the same cartographer results in the same explorer map. In Bedrock Edition, a cartographer sells an explorer map that points to the nearest location, regardless of whether it is explored or previously mapped by another cartographer.<!-- start to glitched out-->
=== Chest loot ===
Treasure maps, in contrast to explorer maps, generate in underwater ruins or in shipwrecks.
{{LootChestItem|buried-treasure-map}}
== Usage ==
[[File:Explorer Map Comparison.gif|thumb|217px|Unexplored and partially explored maps.]]
{{See also|Map#Mapping|Map#Map content}}
=== Locating structures ===
There are three types of explorer maps: woodland, [[ocean]], and buried treasure. The maps differ from a normal map, in that it shows the area's land-water outline, with an orange striated (striped) texture for water<ref>Specifically, biomes in the "water_on_map_outlines" [[Tag#Biomes|biome tag]].</ref>, and the blank map texture for land. The maps show a section of land that contains a [[woodland mansion]], [[monument]] or [[buried treasure]] respectively. This may not be the nearest such [[structure]] to the [[player]]. The structures are displayed as a small icon. If the player icon is smaller than it would be on a normal map, that means the player is a great distance away. When the player is less than 1027 blocks away from the map border, the icon returns to the proper size. When the player reaches the map's area of land (512×512), the [[map]] fills in like a normal map.
The basic functions of a buried treasure explorer map are similar to that of the other two. However, instead of showing the structure icon on the map, it shows a red X instead. The [[buried treasure]] structure is located on the same X and Z coordinates as the middle of the X (the player marker may need to be aligned with the bottom of the middle 2×2 pixel square of the X). To locate the [[chest]] spot, hold the treasure map with both hands, not in the offhand slot.
=== Cloning ===
{{Crafting
|showdescription=1
|shapeless=1
|name=[[Explorer Map]]<br>(cloned)
|;;;Empty Map;Empty Map;Empty Map;Empty Map;Empty Map
|;;;;Empty Map;Empty Map;Empty Map;Empty Map
|;;;;;Empty Map;Empty Map;Empty Map
|Ocean Explorer Map; Woodland Explorer Map; Buried Treasure Map; Ocean Explorer Map; Woodland Explorer Map; Buried Treasure Map; Ocean Explorer Map; Woodland Explorer Map
|Empty Map
|;;;;;;Empty Map;Empty Map
|;Empty Map;Empty Map;Empty Map;Empty Map;Empty Map;Empty Map;Empty Map
|;;Empty Map;Empty Map;Empty Map;Empty Map;Empty Map;Empty Map
|;;;;;;;Empty Map
|Output= Ocean Explorer Map,2; Woodland Explorer Map,3; Buried Treasure Map,4; Ocean Explorer Map,5; Woodland Explorer Map,6; Buried Treasure Map,7; Ocean Explorer Map,8; Woodland Explorer Map,9
|type= Miscellaneous
|description=The output has the same map center as the input map, and the same [[monument]], [[woodland mansion]] or [[buried treasure]] marker. Cloned maps are stackable.
}}
The parts of the world that have already been explored and mapped are copied, and newly explored areas appear on both instances. In Creative mode, cloned explorer maps can be obtained by pick blocking on the explorer map displayed on [[item frames]] (the map needs to be out of the [[player]]'s inventory when using pick block, or else that map moves into the active hotbar slot).
== Sounds ==
{{edition|java}}:
{{Sound table
|sound=Drawmap1.ogg
|sound2=Drawmap2.ogg
|sound3=Drawmap3.ogg
|subtitle=Map drawn
|source=block
|description=When an explorer map is edited using a cartography table
|id=ui.cartography_table.take_result
|translationkey=subtitles.ui.cartography_table.take_result
|volume=1.0
|pitch=1.0
|distance=16
|foot=1}}
{{edition|bedrock}}: ''None''
== Data values ==
=== ID ===
{{edition|java}}:
{{ID table
|edition=java
|showforms=y
|generatetranslationkeys=y
|displayname=Map
|spritetype=item
|nameid=filled_map
|form=item
|translationkey=filled_map.mansion,filled_map.ocean,filled_map.buried_treasure
|foot=1}}
{{edition|bedrock}}:
{{ID table
|edition=bedrock
|showaliasids=y
|shownumericids=y
|showforms=y
|notshowbeitemforms=y
|generatetranslationkeys=y
|displayname=Map
|spritetype=item
|nameid=filled_map
|aliasid=map
|id=358
|form=item
|translationkey=item.map.exploration.monument.name,item.map.exploration.mansion.name,item.map.exploration.treasure.name
|foot=1}}
=== Metadata ===
{{see also|Bedrock Edition data values}}
{{IN|bedrock}}, the item [[Data value]] distinguishes explorer maps from one another:
{{:Map/DV}}
=== Item data ===
An explorer map differs from a map in that its <code>display</code> tag is set, which includes a <code>Mapcolor</code> and a <code>LocName</code>; also its <code>Decorations</code> list includes an entry for its target monument, mansion or buried treasure. Its [[Map item format#map_<#>.dat format|map item entry]] is identical to that of a normal map, except that by the time the player sees it, its <code>colors</code> byte array is pre-filled with explorer maps' characteristic land-water boundary lines and water shading.
<div class="treeview">
It should be noted that this additional data is stored in the Cartographer's NBT data and in the inventory item's NBT data, and not in the map file (e.g. <samp>map_0.dat</samp>). If the [[player]] were to use the {{cmd|give}} command to give themselves a map with the same map ID as an existing explorer map, it would still have the Ocean Monument or the Woodland Mansion icon on the map, but it would simply be named "Map" instead of, for example, "Ocean Explorer Map".
* {{nbt|compound}} Item data
** {{nbt|compound|tag}}:
*** {{nbt|compound|display}}: How the map looks in an item slot. See also [[Player.dat_format#Display Properties]].
**** {{nbt|string|Name}}: The name the map is given. In this case, they are localized strings: either <code>{"translate":"filled_map.monument"}</code>,<code>{"translate":"filled_map.mansion"}</code> or <code>{"translate":"filled_map.buried_treasure"}</code>.
**** {{nbt|int|MapColor}}: Color codes are calculated from the Red, Green and Blue components using this formula:<br>'''<span style="color:red">Red</span>[[wikipedia:Logical shift|<<]]16 + <span style="color:green">Green</span><<8 + <span style="color:blue">Blue</span>'''.<ref group=note>For positive values larger than 0x00FFFFFF, the top byte is ignored. All negative values produce white.</ref> Monument maps use 3830373, which is {{color swatch|58|114|101}}. Mansion maps use 5393476, which is {{color swatch|82|76|68}}. Buried treasure explorer maps do not use a color code.
*** {{nbt|list|Decorations}}:
**** {{nbt|compound}}: One of these for each icon on the map. Explorer maps always have at least one representing their target.
***** {{nbt|string|id}}: An arbitrary unique string identifying the decoration. For explorer map target structures, this is "+".
***** {{nbt|double|rot}}: The rotation of the icon. For explorer map target structures, this is always 180.
***** {{nbt|byte|type}}: The ID of the [[Map#Map icons|map icon]]: 8 for a mansion map, 9 for a monument map, 26 for a treasure map.
***** {{nbt|double|x}}: The world x-coordinate of the target structure icon.
***** {{nbt|double|z}}: The world z-coordinate of the target structure icon.
</div>
; Notes
{{notelist}}
== Achievements ==
{{load achievements|Treasure Hunter}}
== History ==
{{History|java}}
{{History||1.11|snap=16w39a|[[File:Woodland Explorer Map JE1 BE1.png|32px]] [[File:Ocean Explorer Map JE1 BE1.png|32px]] Added woodland and ocean explorer maps.}}
{{History|||snap=16w41a|Explorer maps can now no longer be zoomed out.}}
{{History||1.13|snap=18w10a|[[File:Map (item) JE1 BE1.png|32px]] Added buried treasure explorer maps.}}
{{History|||snap=18w11a|Buried treasure explorer maps now generate in the [[chest]]s of [[shipwreck]]s.}}
{{History||1.14|snap=18w43a|[[File:Woodland Explorer Map JE2 BE2.png|32px]] [[File:Ocean Explorer Map JE2 BE2.png|32px]] [[File:Map (item) JE2 BE2.png|32px]] The textures for explorer maps have now been changed.}}
{{History||1.20.2|snap=1.20.2 Pre-release 1|Updated structure icons on explorer maps sold by cartographers.}}
{{History||Villager Trade Rebalance<br>(Experimental)|link=Java Edition 1.20.2|snap=1.20.2 Pre-release 1|Added seven new maps which cartographers can sell.}}
{{History|pocket}}
{{History||1.1.0|snap=alpha 1.1.0.0|[[File:Woodland Explorer Map JE1 BE1.png|32px]] [[File:Ocean Explorer Map JE1 BE1.png|32px]] Added explorer maps.<ref>{{Mcnet|discovery-update-pocket-and-win-10-soon|The Discovery Update: on Pocket and Win 10 soon|March 29, 2017}}</ref>
|Explorer maps are not yet obtainable in [[survival]] mode.}}
{{History|||snap=alpha 1.1.0.3|Explorer maps are now obtainable as [[trading|trades]] from [[cartographer]] [[villager]]s.}}
{{History|bedrock}}
{{History||1.4.0|snap=beta 1.2.14.2|[[File:Map (item) JE1 BE1.png|32px]] Added buried treasure explorer maps.}}
{{History|||snap=beta 1.2.20.1|Treasure maps now generate in [[underwater ruins]] [[chest]]s.}}
{{History||1.10.0|snap=beta 1.10.0.3|[[File:Woodland Explorer Map JE2 BE2.png|32px]] [[File:Ocean Explorer Map JE2 BE2.png|32px]] [[File:Map (item) JE2 BE2.png|32px]] The textures for explorer maps have now been changed.}}
{{History||1.11.0|snap=beta 1.11.0.4|[[Trading]] has now been changed, woodland and ocean explorer maps now cost a [[compass]] and 12 [[emerald]]s.
|Journeyman-level [[cartographer]] [[villager]]s no longer [[trading|sell]] 2 type of explorer map as they now have {{frac|1|3}} chance to sell woodland explorer maps, {{frac|1|3}} chance to sell ocean explorer maps, or {{frac|1|3}} chance to sell other [[item]]s<!-- empty locator map--> as part of their [[trading|trades]].
|Woodland explorer maps can now be [[trading|bought]] from fletcher [[villager]]s.}}
{{History||1.12.0|snap=beta 1.12.0.3|Journeyman-level fletcher villagers no longer [[trading|sell]] woodland explorer maps.}}
{{History||1.13.0|snap=beta 1.13.0.1|[[File:Woodland Explorer Map BE3.png|32px]] [[File:Ocean Explorer Map BE3.png|32px]] [[File:Buried Treasure Map BE3.png|32px]] The textures of explorer maps have now been changed.}}
{{History||1.16.100|snap=beta 1.16.100.56|The ID of maps has been changed from <code>map</code> to <code>filled_map</code>.}}
{{History|console}}
{{History||xbox=TU54|xbone=CU44|ps=1.52|wiiu=Patch 24|switch=1.0.4|[[File:Woodland Explorer Map JE1 BE1.png|32px]] [[File:Ocean Explorer Map JE1 BE1.png|32px]] Added explorer maps.}}
{{History|PS4}}
{{History||1.90|[[File:Woodland Explorer Map JE2 BE2.png|32px]] [[File:Ocean Explorer Map JE2 BE2.png|32px]] The textures for explorer maps have now been changed.}}
{{History|new3ds}}
{{History||1.9.19|[[File:Woodland Explorer Map JE1 BE1.png|32px]] [[File:Ocean Explorer Map JE1 BE1.png|32px]] Added explorer maps.}}
{{History|foot}}
== Issues ==
{{Issue list}}
== Trivia ==
* When a [[cartographer]] generates the trade offers for the explorer maps, it chooses the location of one of the nearest structures of the respective type ([[monument]] or [[woodland mansion]]).
* For the reason above, explorer maps obtained from one cartographer are always the same. Also, if two cartographers unlock the explorer map trades approximately at the same place and at the same time, the map locations are usually identical. This sometimes also happens when finding multiple treasure maps from [[ocean ruins]].
* Explorer maps fill as the [[chunk]]s are generated, rather than when the [[player]] holds them while in the area; leaving an explorer map while exploring the area still fills the map.
* Buried treasure explorer maps are named ''Buried Treasure Map'' {{in|java}} while {{in|bedrock}}, they are named ''Treasure Map''.
* It is possible for a cartographer to give a monument or woodland mansion explorer map for areas where the [[generated structures|structures]] would have spawned in the world, but were unable to as a result of terrain generation. As a result, explorer maps, unfortunately, don't always guarantee that a structure exists at the purported location. This is most common with woodland mansion explorer maps, due to its generation algorithm.
* On [[Bedrock Edition]], inventory editors and add-ons can be used to create Explorer Maps that lead to any structure.
== Gallery ==
<gallery>
File:Explorer Maps.png|An ocean explorer map in the [[off-hand]], a woodland explorer map in the main hand, and a [[cartographer]] [[villager]] in between them.
File:Partial Explorer Map.png|A partially-explored explorer map.
File:ExplorerToNormal Map Comparison.png|Two fully-explored maps of the same place, one of which is a woodland explorer map.
File:Buried Treasure Explorer Map.png|An [[item frame]] holding a buried treasure explorer map. The player can see the red X on the left side of the map.
File:Purchase.png|Purchasing explorer maps from a cartographer.
</gallery>
== See also ==
* [[Map]]
* [[Woodland Mansion]]
* [[Ocean Monument]]
* [[Shipwreck]]
* [[Buried treasure]]
== References ==
{{reflist}}
== External Links ==
*[https://www.minecraft.net/en-us/article/taking-inventory--explorer-map Taking Inventory: Explorer Map] – Minecraft.net on November 13, 2019
{{Items}}
[[de:Schatzkarte]]
[[es:Mapa (localización de estructura)]]
[[fr:Carte d'exploration]]
[[ja:探検家の地図]]
[[ko:탐험 지도]]
[[pl:Mapa eksploracyjna]]
[[pt:Mapa de exploração]]
[[ru:Карта сокровищ]]
[[zh:探险家地图]]</li><li>[[Shield|Shield]]<br/>{{Item
| image = Shield.png
| image2 = White Shield.png
| extratext = View [[#Gallery|all renders]]
| durability = 336
| renewable = Yes
| stackable = No
}}
A '''shield''' is a tool used for protecting the [[player]] against attacks.
== Obtaining ==
=== Crafting ===
{{Crafting
|head=1
|showname=0
|A1=Any Planks <!-- the recipe changed in 15w37a, do not change it to the old recipe without reason -->
|B1=Iron Ingot
|C1=Any Planks
|A2=Any Planks
|B2=Any Planks
|C2=Any Planks
|B3=Any Planks
|Output=Shield
|type=Combat
}}
{{Crafting
|ignoreusage=1
|Shield
|Matching Banner
|A2=Shield
|B2=Banner
|Output=Matching Shield
|type=combat
|foot=1
}}
=== Repairing ===
{{Crafting
|ignoreusage=1
|showdescription=1
|Damaged Shield
|Damaged Shield
|Output=Shield
|description= The durability of the two shields is added together, plus an extra 5% durability. The repaired shield has no pattern.
|type= Combat
}}
Shields may also be repaired on an [[anvil]] by using [[planks]] or another shield. Shields repaired on anvils retain their pattern.
=== Trading ===
Journeyman-level armorer [[villager]]s have {{frac|1|3}}{{only|Bedrock|short=1}}/{{frac|2|5}}{{only|Java|short=1}} chance of selling a shield for 5 [[emerald]]s as their sixth trade.
== Usage ==
Despite using iron in its crafting recipe, it cannot be smelted into [[iron nugget]]s.<ref>{{bug|MC-111738}}</ref>
=== Defense ===
Shields are used for [[blocking]] incoming attacks. {{control|Using}}{{Only|Java|short=1}} or {{Control|sneaking}}{{Only|Bedrock|short=1}} causes a player to slow to a [[sneaking]] pace, and after {{convert|5|ticks|seconds}}<ref>{{bug|MC-100949||Shield blocking is delayed}}</ref>, attacks coming from in front of the player are blocked, dealing no damage. When the shield blocks an attack of {{hp|3}} or stronger, it takes durability damage equal to the strength of the attack rounded up.
Most blocked projectiles that carry status effects (such as [[Shulker#Shulker bullet|shulker bullets]]{{only|java|short=1}}, flaming [[arrow]]s, or tipped arrows) do not affect the blocker. [[Trident]]s & arrows can be deflected into other targets. Knockback from melee attacks and projectiles is prevented, while knockback from [[explosion]]s, [[hoglin]], and [[ravager]] attacks are significantly reduced.
The shield directionally blocks all attacks coming from within the FOV of the direction the wielder is facing, providing a full hemisphere of coverage to them. If the wielder faces straight up, they are likely to miss their blocks.<ref>{{bug|MC-109101||Shields do not block damage while the player faces straight up}}</ref><!--straight down fix: MC-92019-->
Mobs that deal continuous contact damage such as the slime, magma cube, and blaze rapidly drain the shield's durability for as long as the shielded player remains within the mob's hitbox.<ref>{{bug|MC-169167}}</ref><ref>{{bug|MCPE-119451}}</ref>
Blockable attacks include:
*Melee attacks, except by a warden, axe-wielding mobs or by a sprinting player wielding an axe, however even without sprinting an axe still greatly decreases the durability
** Status effects do not carry through to the blocker{{only|java|short=1}}.
*Normal, tipped, and spectral [[arrow]]s
** Arrows other than [[Piercing]] are totally deflected and can hit other targets.
** Status effects do not carry through to the blocker{{only|java|short=1}}.
***This can be used to damage the attacker or another mob down there.
*[[Flame|Flaming arrows]]
** Burning does not carry through to the blocker{{only|java|short=1}}.
*[[Trident]]s
*[[Snowball]]s and [[egg]]s
*Spines from [[pufferfish]]
*Bullets from [[shulker]]s
** The levitation effect does not carry through to the blocker{{only|java|short=1}}.
*Spit from [[llama]]s
*[[Fireball]]s, such as from [[blaze]]s and [[fire charge]]s
** Burning does not carry through to the blocker.
*Direct hits from [[ghast]] [[fireball]]s
** These still cause environmental damage.
*All explosions{{only|JE|short=1}}
*Explosion damage from [[creeper]]s
*[[TNT]] that another player lit
*[[Ravager]] headbutts
** These still knock the blocker back by about 3 blocks.
** Blocking these strikes can stun the ravager for a moment, and it roars afterward.
*Ravager roars are blocked but still knock back the blocker.
*[[Bee]] stings are blocked, but bees continuously attack until the player stops blocking and the player is stung.
*Beam attacks from [[guardian]]s or [[elder guardian]]s (only reduces damage by 50%).
*Damage reflected from [[Thorns]] enchantment / [[Guardian|guardians]].
They cannot block:
*Arrows from a [[crossbow]] enchanted with [[Piercing]]
** This does not reduce the shield's durability.
*[[Status effect]]s from tipped arrows or shulker bullets {{only|bedrock|short=1}} <ref>{{bug|MCPE-52904}}</ref>
** Direct projectile damage is blocked, but the effect still carries through.
*Status effects from splash/lingering [[potion]]s, [[evoker]]s' fangs, or breath from the [[ender dragon]]
*Beam attacks from [[guardian]]s or [[elder guardian]]s, or the [[warden]]'s sonic boom attack
*TNT that the blocking player lit themselves{{only|BE|short=1}}
*TNT that a [[Redstone (disambiguation)|redstone mechanism]] lit{{only|BE|short=1}}
*[[Fall damage]], including that from [[ender pearl]]s
** This also includes when the player rides an [[entity]] that died due to fall damage.
*Strikes from a warden or any [[axe]]-wielding mob (e.g., [[vindicator]]s, [[piglin brute]]s, [[zombie]]s after disabling players shield they attack another time immediately)
** Such strikes disable being able to use shields for 5 seconds.
=== Applying patterns ===
[[File:Cyan Shield Screenshot.png|250px|thumb|A custom shield.]]
Shields can be decorated by applying a [[banner]].
{{Crafting
|showdescription=1
|Shield
|Matching Banner
|Output=Matching Shield; Ominous Shield
|B2link=Banner
|Olink=Shield
|type=Combat
|description=Applies the banner pattern to the shield. The banner is consumed.<br>The shield must have no preexisting patterns.<br>Does not change existing durability or enchantments on the shield.
}}
Unlike with [[banner]]s, shields cannot be repainted or washed in a [[cauldron]]. Shields have only half the resolution of banners, making patterns look slightly different. In the game files, the pattern textures can be found in a separate directory called entity/shield.
{{IN|java}}, shields with patterns can also be obtained using the same commands as banners, except <code>banner</code> has to be replaced with <code>shield</code>.
=== Enchantments ===
A shield can receive the following [[enchantments]], but only through an [[anvil]]:
{| class="wikitable col-2-center"
|+
!Name
!Max Level
![[Enchanting|Method]]
|-
|[[Unbreaking]]
|III
|{{Inventory slot|Anvil}}
|-
|[[Mending]]
|I
|{{Inventory slot|Anvil}}
|-
|[[Curse of Vanishing]]
|I
|{{Inventory slot|Anvil}}
|-
|}
== Sounds ==
{{edition|java}}:
{{Sound table
|sound=Shield block1.ogg
|sound2=Shield block2.ogg
|sound3=Shield block3.ogg
|sound4=Shield block4.ogg
|sound5=Shield block5.ogg
|subtitle=Shield blocks
|source=player
|description=When an attack is blocked using a shield
|id=item.shield.block
|translationkey=subtitles.item.shield.block
|volume=1.0
|pitch=0.8-1.2
|distance=16}}
{{Sound table
|sound=Equip generic1.ogg
|sound2=Equip generic2.ogg
|sound3=Equip generic3.ogg
|sound4=Equip generic4.ogg
|sound5=Equip generic5.ogg
|sound6=Equip generic6.ogg
|subtitle=Gear equips
|source=player
|description=When a shield is placed in the offhand slot
|id=item.armor.equip_generic
|translationkey=subtitles.item.armor.equip
|volume=1.0
|pitch=1.0
|distance=16}}
{{Sound table
|sound=Random break.ogg
|subtitle=Item breaks
|source=player
|description=When a shield's durability is exhausted
|id=item.shield.break
|translationkey=subtitles.entity.item.break
|volume=0.8
|pitch=0.8-1.2
|distance=16
|foot=1}}
{{edition|bedrock}}:
{{Sound table
|type=bedrock
|sound=Shield block1.ogg
|sound2=Shield block2.ogg
|sound3=Shield block3.ogg
|sound4=Shield block4.ogg
|sound5=Shield block5.ogg
|source=player
|description=When an attack is blocked using a shield
|id=item.shield.block
|volume=0.7
|pitch=1.0}}
{{Sound table
|sound=Equip generic1.ogg
|sound2=Equip generic2.ogg
|sound3=Equip generic3.ogg
|sound4=Equip generic4.ogg
|sound5=Equip generic5.ogg
|sound6=Equip generic6.ogg
|source=player
|description=When a shield is placed in the offhand slot<wbr>{{Upcoming|BE 1.20.30}}<wbr><ref group=sound>{{Bug|MCPE-168039}}</ref>
|id=armor.equip_generic
|volume=1.0
|pitch=1.0}}
{{Sound table
|sound=Random break.ogg
|source=player
|description=When a shield's durability is exhausted
|id=random.break
|volume=1.0
|pitch=0.9
|foot=1}}
== Data values ==
=== ID ===
{{edition|java}}:
{{ID table
|edition=java
|showforms=y
|generatetranslationkeys=y
|displayname=Shield
|spritetype=item
|nameid=shield
|form=item
|translationkey=item.minecraft.shield, item.minecraft.shield.white, item.minecraft.shield.orange, item.minecraft.shield.magenta, item.minecraft.shield.light_blue, item.minecraft.shield.yellow, item.minecraft.shield.lime, item.minecraft.shield.pink, item.minecraft.shield.gray, item.minecraft.shield.light_gray, item.minecraft.shield.cyan, item.minecraft.shield.purple, item.minecraft.shield.blue, item.minecraft.shield.brown, item.minecraft.shield.green, item.minecraft.shield.red, item.minecraft.shield.black
|foot=1}}
{{edition|bedrock}}:
{{ID table
|edition=bedrock
|shownumericids=y
|showforms=y
|notshowbeitemforms=y
|generatetranslationkeys=y
|displayname=Shield
|spritetype=item
|nameid=shield
|id=355
|form=item
|translationkey=item.shield.name, item.shield.white.name, item.shield.orange.name, item.shield.magenta.name, item.shield.lightBlue.name, item.shield.yellow.name, item.shield.lime.name, item.shield.pink.name, item.shield.gray.name, item.shield.silver.name, item.shield.cyan.name, item.shield.purple.name, item.shield.blue.name, item.shield.brown.name, item.shield.green.name, item.shield.red.name, item.shield.black.name
|foot=1}}
== Advancements ==
{{load advancements|Not Today}}
== History ==
{{History||July 10, 2011|link=http://minetimes.wordpress.com/2011/07/10/interview-mit-jeb-ihr-konntet-die-fragen-stellen/|During an interview, [[Jeb]] says that "shields for the left arm" might be added.}}
{{History|java}}
{{History||1.9|snap=15w33c|[[File:White Shield.png|22px]] [[File:Light Gray Shield.png|22px]] [[File:Gray Shield.png|22px]] [[File:Black Shield.png|22px]] [[File:Brown Shield.png|22px]] [[File:Red Shield.png|22px]] [[File:Orange Shield.png|22px]] [[File:Yellow Shield.png|22px]] [[File:Lime Shield.png|22px]] [[File:Green Shield.png|22px]] [[File:Cyan Shield.png|22px]] [[File:Light Blue Shield.png|22px]] [[File:Blue Shield.png|22px]] [[File:Purple Shield.png|22px]] [[File:Magenta Shield.png|22px]] [[File:Pink Shield.png|22px]] Added shields.
|Shields replace the [[blocking]] functionality of [[sword]]s, although blocking more [[damage]].
|The current [[crafting]] recipe of shields includes [[wool]], producing 16 possible colored shields. There currently isn't a blank, uncolored shield.
{{{!}} class{{=}}"collapsible collapsed" data-description{{=}}"Recipe"
! Recipe
{{!}}-
{{!}}
{{Crafting
|A1=Matching Wool |B1=Any Planks
|A2=Matching Wool |B2=Any Planks |C2=Iron Ingot
|A3=Matching Wool |B3=Any Planks
|Output=Matching Shield
|ignoreusage=1
}}
{{!}}}
|Any of the colored base shields can be [[crafting|crafted]] with a [[banner]] of the same base color, to produce a patterned shield.
}}
{{History|||snap=15w34c|When an attack is blocked by a shield, the attacker now may be knocked back.
|Being attacked with an [[axe]] now may disable shield use for 5 seconds.}}
{{History|||snap=15w37a|The [[crafting]] recipe of shields has been changed to 6 [[planks]] and 1 [[iron ingot]].
{{{!}} class{{=}}"collapsible collapsed" data-description{{=}}"Recipe"
! Recipe
{{!}}-
{{!}}
{{Crafting
|A1=Any Planks |B1=Iron Ingot |C1=Any Planks
|A2=Any Planks |B2=Any Planks |C2=Any Planks
|B3=Any Planks
|Output=Shield
|ignoreusage=1
}}
{{!}}}
|[[File:Shield JE1.png|22px]] Crafting a shield now produces a base wooden shield that can be crafted together with any [[banner]].
|The cooldown of shields has been reduced from 0.5s to 0.25s.
|Blocking with shields now prevents some side effects.{{verify}}
|[[Arrow]]s now ricochet off shields.}}
{{History|||snap=15w44a|Shields can now be repaired by combining with other shields. This removes any [[banner]] that had been applied.}}
{{History|||snap=15w45a|Crafting a banner onto a shield now consumes the banner.}}
{{History|||snap=15w47b|Added shield blocking [[sound]]s.}}
{{History|||snap=16w07a|Added more variation of shield blocking sounds.}}
{{History|||snap=pre1|The [[durability]] of shields has been increased from 181 to 337.}}
{{History||1.10|snap=16w21a|Shields can now be equipped by [[dispenser]]s.}}
{{History||1.11|snap=16w33a|[[Crafting]] a shield with a banner no longer changes the durability, nor does it remove [[enchanting|enchantments]] from it.}}
{{History|||snap=16w35a|Shields now block 100% of [[damage]]/[[knockback]]/debuffs dealt in melee combat.}}
{{History||1.13|snap=17w47a|Prior to [[1.13/Flattening|''The Flattening'']], this [[item]]'s numeral ID was 442.}}
{{History||1.13.2|snap=release|Shields now properly block attacks when the player is facing down.<ref>{{bug|MC-92019|||Fixed}}</ref>}}
{{History||1.14|snap=18w43a|[[File:Shield JE2 BE1.png|22px]] The texture of shields has been changed.
|Shields no longer knockback attackers when they block due to a bug with rework of the blocking mechanic with the introduction of the ravager.<ref>{{bug|MC-147694}}</ref>}}
{{History|||snap=19w11a|Shields can now be [[trading|bought]] from armorer [[villager]]s.}}
{{History||1.14.3|snap=Pre-Release 3|Shields blocking flaming [[arrow]]s no longer put the [[player]] on [[fire]].}}
{{History||1.16|snap=20w06a|[[Crimson planks]] and [[warped planks]] can now be used to craft shields.}}
{{History||1.19|snap=22w11a|[[Mangrove planks]] can now be used to craft shields.}}
{{History||1.19.3|snap=22w43a|Shields can now properly block all explosions.}}
{{History||1.19.4|snap=23w06a|A sound is now played when a shield is placed into the offhand slot.}}
{{History|upcoming java}}
{{History||Combat Tests|snap=1.14.3 - Combat Test|Critical hits now bypass shields.
|The warm-up delay has been removed from shields.
|When in the off-hand, shields now activate when [[sneaking]].}}
{{History|||snap=Combat Test 2|Shields now protect against critical attacks again.
|Shields can only be activated when the weapon is charged to 200%.}}
{{History|||snap=Combat Test 3|A "Shield Indicator" option that displays when the shield is active, similar to the attack indicator, has been added.
|An option to hide shields when active has been added.
|The arc of available protection of shields has been decreased to 100 degrees instead of 180 degrees.}}
{{History|||snap=Combat Test 4|An option to disable shields being activated by pressing {{ctrl|crouch}} has been added.
|The option to hide the shield has been removed.}}
{{History|||snap=Combat Test 6|Shields now protect up to 5 [[damage]] for melee attacks (still 100% against projectiles).
|Shields activate instantly regardless if the weapon is charged, similar to Combat test 1.
|Shields now recover faster after an attack.}}
{{History|||snap=Combat Test 7c|Shields now add a 50% knockback resistance when active.
|Shields now protect against 100% [[explosions|explosion]] damage.}}
{{History|||snap=Combat Test 8c|The knockback calculations for shields have been fixed.{{Info needed}}
|Crouch-shielding while jumping has been disabled.
|Shields with [[banner]]s are now temporarily stronger than normal shields (10 absorption instead of 5, and better knockback resistance) to test different shield types.}}
{{History|bedrock}}
{{History||1.10.0|snap=beta 1.10.0.3|[[File:Shield JE2 BE1.png|22px]] Added shields.
|Shields cannot be customized with [[banner]]s.
|Shields are activated by [[sneaking|crouching]] or mounting [[mob]]s.}}
{{History||1.11.0|snap=beta 1.11.0.4|Shields can now be [[trading|bought]] from armorer [[villager]]s.}}
{{History||1.16.210|snap=beta 1.16.210.51|Now grants partial knockback protection from the [[goat]] ram attack.}}
{{History||1.16.220|snap=beta 1.16.220.50|[[Mob]]s that pick up shields now place them to their off-hand.}}
{{History||1.18.30|snap=beta 1.18.30.26|Being attacked with an [[axe]] now may disable shield use. This was not mentioned in the official changelog.<ref>{{tweet|kingbdogz|1504505321884196872|We missed a change in recent changelogs for the Bedrock beta that you may like - we have now made a parity fix that makes shields get disabled for 5 seconds when attacked by an Axe-wielding mob or player. We will make sure to list this properly in the next beta :)|March 17, 2022}}</ref>}}
{{History||1.20.0|snap=beta 1.20.0.20|[[File:White Shield.png|22px]] [[File:Light Gray Shield.png|22px]] [[File:Gray Shield.png|22px]] [[File:Black Shield.png|22px]] [[File:Brown Shield.png|22px]] [[File:Red Shield.png|22px]] [[File:Orange Shield.png|22px]] [[File:Yellow Shield.png|22px]] [[File:Lime Shield.png|22px]] [[File:Green Shield.png|22px]] [[File:Cyan Shield.png|22px]] [[File:Light Blue Shield.png|22px]] [[File:Blue Shield.png|22px]] [[File:Purple Shield.png|22px]] [[File:Magenta Shield.png|22px]] [[File:Pink Shield.png|22px]] Shields can now be customized using a banner.}}
{{History|PS4}}
{{History||1.90|[[File:Shield JE1.png|22px]] Added shields.
|Shields do not have [[banner]] application features.}}
{{History|foot}}
== Issues ==
{{issue list|-wither}}
== Gallery ==
<gallery>
Shield.png|Shield
White Shield.png|White Shield
Light Gray Shield.png|Light Gray Shield
Gray Shield.png|Gray Shield
Black Shield.png|Black Shield
Brown Shield.png|Brown Shield
Red Shield.png|Red Shield
Orange Shield.png|Orange Shield
Yellow Shield.png|Yellow Shield
Lime Shield.png|Lime Shield
Green Shield.png|Green Shield
Cyan Shield.png|Cyan Shield
Light Blue Shield.png|Light Blue Shield
Blue Shield.png|Blue Shield
Purple Shield.png|Purple Shield
Magenta Shield.png|Magenta Shield
Pink Shield.png|Pink Shield
</gallery>
=== Screenshots ===
<gallery>
JebShield.png|One of the first images of shields. [[Jeb]] wearing diamond armor while holding a creeper-emblazoned shield during [[MineCon]] 2015.
Jeb Crafting Shield.png|Jeb crafting a shield.
Player with Shield.png|Player holding the default shield.
Shield Block.png|A player blocking with a shield.
ShieldFirstPerson.png|Blocking with a shield as seen in first person.
Enchanted Shield (item).gif|An enchanted shield as seen in the [[inventory]].
-ominous- shield.png|A shield with the [[ominous banner]] on it as seen in the inventory.
Kai-Shield.jpg|An image of [[Kai]] wielding a banner with a shield, used to announce the feature on [[Bedrock Edition]].
Bedrock-Shields.jpg
</gallery>
== References ==
{{reflist}}
== External Links ==
* [https://www.minecraft.net/en-us/article/taking-inventory--shield Taking Inventory: Shield] – Minecraft.net on July 25, 2019
{{Items}}
[[Category:Combat]]
[[Category:Renewable resources]]
[[de:Schild (Kampf)]]
[[fr:Bouclier]]
[[it:Scudo]]
[[ja:盾]]
[[ko:방패]]
[[nl:Schild]]
[[pl:Tarcza]]
[[pt:Escudo]]
[[ru:Щит]]
[[th:โล่]]
[[zh:盾牌]]</li></ul> | 16w32a | Resource packs version number changed to 3, due to the change that all files should have lowercase letters. | |||
1.13{{Extension DPL}}<ul><li>[[Bottle of Entity|Bottle of Entity]]<br/>{{joke feature}}
{{exclusive|java}}
{{WIP}}
{{see also|Potion|Splash Potion}}
{{Item
|image=Bottle of Entity.png
|image2=Splash Bottle of Entity.png
|image3=Bottle of Void.png
|stackable= No
}}
'''Bottles of entity''' are items that transform players into the respective mobs when drunk.
'''Splash bottle of entity''' are a variation of bottles of mob that can be thrown.
'''Bottle of void''' is a special bottle to transform back to the original player. Right clicking with it on a transformed player will remove the transformation and convert the bottle into a bottle of entity of that transformation.
A transformation into an entity will sometimes lead to special effects. For example, transforming into a chicken will allow the player to glide slowly to the ground. The chicken will however take fall damage upon landing, killing it and transforming the player back to themselves.
Transforming into an enderman will cause the player to be teleported randomly when a projectile it aimed at it or when they're being looked at by other players. Transforming into any mob capable of flight (for example, a bat) will allow the player to fly in survival mode as if they were in creative mode.
== Sounds ==<!--No sounds when thrown from a player or dispenser-->
Splash bottles of entities use the Friendly Creatures sound category for entity-dependent sound events.
{{Sound table
|sound=Bottle fill water1.ogg
|sound2=Bottle fill water2.ogg
|sound3=Bottle fill water3.ogg
|sound4=Bottle fill water4.ogg
|subtitle=Bottle fills
|source=neutral
|description=When an entity is collected using a bottle of void
|id=item.bottle.fill
|translationkey=subtitles.item.bottle.fill
|volume=1.0
|pitch=1.0
|distance=16}}
{{Sound table
|sound=Drink.ogg
|subtitle=Sipping
|source=player
|description=While a player is drinking a bottle of entity
|id=entity.generic.drink
|translationkey=subtitles.entity.generic.drink
|volume=0.5
|pitch=0.9-1.0
|distance=16}}
{{Sound table
|sound=Glass dig1.ogg
|sound2=Glass dig2.ogg
|sound3=Glass dig3.ogg
|subtitle=Bottle smashes
|source=neutral
|description=When a splash bottle of entity impacts something <ref group=sound>This sound is played six times simultaneously</ref>
|id=entity.splash_potion.break
|translationkey=subtitles.entity.potion.splash
|volume=1.0
|pitch=0.9-1.0
|distance=16
|foot=1}}
== Data values ==
=== ID ===
{{ID table
|edition=java
|showforms=y
|generatetranslationkeys=y
|displayname=Bottle of Entity
|spritetype=item
|nameid=bottle_of_entity
|form=item
|translationkey=item.minecraft.bottle_of_entity,item.minecraft.bottle_of_entity.specific}}
{{ID table
|showforms=y
|generatetranslationkeys=y
|displayname=Splash Bottle of Entity
|spritetype=item
|nameid=splash_bottle_of_entity
|form=item
|translationkey=item.minecraft.splash_bottle_of_entity,item.minecraft.splash_bottle_of_entity.specific}}
{{ID table
|showforms=y
|generatetranslationkeys=y
|displayname=Bottle of Void
|spritetype=item
|nameid=bottle_of_void
|form=item
|translationkey=item.minecraft.bottle_of_void
|foot=1}}
== History ==
{{History|java}}
{{History||23w13a_or_b|[[File:Bottle of Entity.png|32px]] [[File:Splash Bottle of Entity.png|32px]] [[File:Bottle of Void.png|32px]] Added bottle of entity, splash bottle of entity, and bottle of void.}}
{{History|foot}}
{{items}}
{{Jokes}}
[[ja:Bottle of Entity]]
[[pt:Frasco de entidade]]
[[Category:Joke items]]</li><li>[[Eye of Ender|Eye of Ender]]<br/>{{redirect|Ender Eye|the boss|Ender Dragon|item that teleports the player to where it lands|Ender Pearl}}
{{ItemEntity
|image=Eye of Ender.png
|stackable=Yes (64)
|renewable=Yes
|size=Height: 0.25 Blocks<br>Width: 0.25 Blocks
|networkid='''[[JE]]''': 72
}}
An '''eye of ender''' is a craftable item used to locate [[stronghold]]s and activate the [[end portal]]s within them.
== Obtaining ==
=== Crafting ===
{{Crafting
|Blaze Powder
|Ender Pearl
|Output=Eye of Ender
|type=Miscellaneous
}}
== Usage ==
=== Locating strongholds ===
[[File:Eye of Ender (break).gif|thumb|right|An animation of an eye of ender shattering.]]
To locate [[stronghold]]s (and the [[end portal]]s they house):
* Pressing {{control|use}} while holding an eye of ender causes it to fly approximately 12 blocks in the direction of the nearest stronghold, traveling through any blocks necessary, and leave a trail of purple particles, the same particle effect used for [[endermen]] and [[ender chests]].
** The eye leads to the [[chunk]] where a spiral staircase, the first room generated in the stronghold, is located.
** The center of this entrance staircase is always exactly at the chunk coordinates 4, ~, 4, although the eye of ender leads to chunk coordinates 0, ~, 0 (the northwest corner of the chunk).
* While over 12 blocks away from the northwest corner of the staircase chunk, the eye will travel upward to offer an easily-visible indication of the horizontal direction the player must travel.
* When closer than 12 blocks to the northwest corner of the staircase chunk, the eye will travel downward, to indicate the player is above a stronghold and must mine downward.
* After two or three seconds of travel, the eye floats in the air briefly, then either falls (becoming collectable again) or shatters in mid-air. The eye has a 20% chance of shattering (80% chance of surviving) per throw, therefore throwing it three times has approximately 50% overall chance to shatter the eye (0.8<sup>3</sup>=51.2%).
* The eye of ender's flying function works only in the [[Overworld]]. It does nothing in [[the Nether]], [[the End]], [[custom dimension]]s{{verify|type=current}}, or in worlds with no strongholds.
Note that the eyes may point to an incorrect location if the target chunks were generated with a different biomes map in an older version or through different generation settings.<ref>See also {{bug|MC-135996}}</ref>
=== Activating end portals ===
[[File:Active End Portal.png|thumb|right|An end portal activated with eyes of ender.]]
Once an end portal is found, the eyes of ender are required to activate it. End portals require a total of 12 eyes of ender in order to activate, though each individual frame-block has a 10% chance of containing an eye of ender when generated. Eyes can be placed in empty [[End portal frame]]s by pressing {{control|use}} on them until the entire ring of 12 is filled, thereby activating the portal. Due to the fact that there is a 10% chance of each individual end portal frame having an eye in it, there is a one out of one trillion chance of every frame having an eye in it thereby activating the portal even if the player doesn't have any eyes of ender.
{| class="wikitable sortable mw-collapsible"
|+End Portal Pre-Filled Eyes
!Eyes
!0
!1
!2
!3
!4
!5-12
|-
|Exactly
|28%
|38%
|23%
|9%
|2%
|<1%
|-
|Or More
|100%
|72%
|34%
|11%
|3%
|<1%
|}
=== Crafting ingredient ===
{{crafting usage}}
== Sounds ==
{{Edition|Java}}:<br>
Eyes of ender use the Friendly Creatures sound category for entity-dependent sound events.
{{Sound table
|sound=Ender Eye death1.ogg
|sound2=Ender Eye death2.ogg
|subtitle=Eye of Ender falls <ref group=sound name=LousyEvents>{{Bug|MC-98316||Wrong subtitles caused by missing distinction}}</ref>
|source=neutral
|description=When an eye of ender drops or breaks
|id=entity.ender_eye.death|idnote=<ref group=sound name=LousyEvents/>
|translationkey=subtitles.entity.ender_eye.death|translationkeynote=<ref group=sound name=LousyEvents/>
|volume=1.3
|pitch=1.0
|distance=16}}
{{Sound table
|sound=Ender Eye launch1.ogg
|sound2=Ender Eye launch2.ogg
|subtitle=Eye of Ender shoots
|source=neutral
|description=When an eye of ender is thrown
|id=entity.ender_eye.launch
|translationkey=subtitles.entity.ender_eye.launch
|volume=0.5
|pitch={{frac|1|3}}-0.5
|distance=16}}
{{Sound table
|sound=End portal eye place1.ogg
|sound2=End portal eye place2.ogg
|sound3=End portal eye place3.ogg
|subtitle=Eye of Ender attaches
|source=block
|description=When an eye of ender is placed in an end portal frame
|id=block.end_portal_frame.fill
|translationkey=subtitles.block.end_portal_frame.fill
|volume=1.0
|pitch=1.0
|distance=16
|foot=1}}
{{Edition|Bedrock}}:
{{Sound table
|type=bedrock
|sound=Item Frame break1.ogg
|sound2=Item Frame break2.ogg
|sound3=Item Frame break3.ogg
|source=block
|description=When an eye of ender breaks <ref group=sound>{{Bug|MCPE-115646}}</ref>
|id=block.itemframe.break}}
{{Sound table
|sound=Bow shoot.ogg
|source=player
|description=When an eye of ender is thrown
|id=random.bow
|volume=0.5
|pitch=0.33-0.5}}
{{Sound table
|sound=End portal eye place1.ogg
|sound2=End portal eye place2.ogg
|sound3=End portal eye place3.ogg
|source=block
|description=When an eye of ender is placed in an end portal frame
|id=block.end_portal_frame.fill
|volume=0.3
|pitch=0.9/1.0/1.1
|foot=1}}
==Data values==
===ID===
{{edition|java}}:
{{ID table
|edition=java
|firstcolumnname=Item
|showforms=y
|generatetranslationkeys=y
|displayname=Eye of Ender
|spritetype=item
|nameid=ender_eye
|form=item
|foot=1}}
{{ID table
|edition=java
|firstcolumnname=Entity
|generatetranslationkeys=y
|displayname=Eye of Ender
|spritetype=entity
|nameid=eye_of_ender
|foot=1}}
{{edition|bedrock}}:
{{ID table
|edition=bedrock
|firstcolumnname=Item
|shownumericids=y
|showforms=y
|notshowbeitemforms=y
|generatetranslationkeys=y
|displayname=Eye of Ender
|spritetype=item
|nameid=ender_eye
|id=433
|form=item
|foot=1}}
{{ID table
|edition=bedrock
|firstcolumnname=Entity
|shownumericids=y
|generatetranslationkeys=y
|displayname=Eye of Ender
|spritetype=entity
|nameid=eye_of_ender_signal
|id=70
|foot=1}}
===Entity data===
The purple particles left by eyes of ender have entity data that define various properties of the entity.
{{el|java}}:
{{main|Entity format}}
{{/ED}}
{{el|bedrock}}:
:See [[Bedrock Edition level format/Entity format]].
==Advancements==
{{load advancements|Eye Spy}}
==Video ==
{{Video note|This video does not mention that eyes of ender can be used to craft [[ender chest]]s or [[end crystal]]s.}}
<div style="text-align:center">{{yt|E0AhoxYLomc}}</div>
==History==
{{History|java}}
{{History||1.0.0|snap=Beta 1.9 Prerelease 3|[[File:Eye of Ender JE1 BE1.png|32px]] Added eyes of ender.
|Eyes of ender can be used on a [[end portal frame|portal block]] to repair them, but repairing them does nothing.}}
{{History|||snap=Beta 1.9 Prerelease 4|Each eye can now be placed in a [[end portal frame|portal block]] or used to hone in on a [[stronghold]]. [[Jens Bergensten|Jeb]] demonstrated the new uses for an eye in his livestream.<ref>http://www.twitch.tv/jebox/b/297000418</ref> An [[end portal]] within a stronghold could be seen in the stream with two eyes inserted into blocks.
|In older worlds with chunks generated before [[Java Edition Beta 1.9 Prerelease 3|Beta 1.9 Prerelease 3]], the eyes may mislead the [[player]] to a place where there isn't a [[stronghold]] at all. This happens because the eyes lead to where a stronghold should be based on the world seed in the current version, but before Beta 1.9 Prerelease 3 strongholds generated differently based on the seed. Therefore, if the player saved the coordinates the eye traveled to in an old world and generated a new world with the same seed, the player could travel to those same coordinates and find a stronghold.}}
{{History|||snap=Beta 1.9 Prerelease 6|Eyes of ender no longer render like a tool in third person.}}
{{History|||snap=RC1|The throwing sound of eyes of ender has been changed.}}
{{History||1.3.1|snap=12w21a|Eyes of ender can now be used to craft [[ender chest]]s.
|Priest [[villager]]s would [[trading|buy]] 2–3 eyes of ender for one [[emerald]].}}
{{History|||snap=12w22a|Priest villagers no longer buy eyes of ender, instead selling them for 7–10 emeralds.}}
{{History||1.6.4|snap=1.6.3-pre|Eyes of ender now lead to [[stronghold]]s based on the structure data saved in the world file instead of calculating their approximate location via the [[seed (level generation)|world seed]]. Therefore, strongholds generated in old versions can still be found even if the distribution of strongholds is changed.}}
{{History||1.7.2|snap=13w41a|Eyes of Ender now lead to the entrance of a stronghold instead of the portal room.}}
{{History||1.8|snap=14w02a|With changes that have been made to villagers and the [[trading]] system, cleric villagers now sell eyes of ender for 7–11 [[emerald]]s, as one of their tier III trades.}}
{{History||1.9|snap=15w41a|Eyes of ender are no longer [[trading|sold]] by cleric [[villager]]s.}}
{{History|||snap=15w44b|An eye of ender is now used to craft an [[end crystal]].}}
{{History|||snap=pre3|Eyes of ender now point to the 125 new strongholds.<ref>{{bug|MC-91173}} resolved as "Fixed"</ref>}}
{{History||1.11|snap=16w32a|The [[entity]] ID has been changed from <code>EyeOfEnderSignal</code> to <code>eye_of_ender_signal</code>.}}
{{History||1.12|snap=17w17a|A new ''pop'' [[sound]] has been added when a thrown eye of ender bursts.}}
{{History||1.13|snap=17w47a|Prior to [[1.13/Flattening|''The Flattening'']], this [[item]]'s numeral ID was 381.}}
{{History|||snap=pre5|The [[entity]] ID has been changed to <code>eye_of_ender</code>.}}
{{History||1.14|snap=18w43a|[[File:Eye of Ender JE2 BE2.png|32px]] The texture of eyes of ender has been changed.}}
{{History||1.19|snap=22w11a|Eyes of Ender now lead to the corner of the chunk (0, ~, 0) instead of the center (8-9, ~, 8-9).<ref>{{bug|MC-253394}}</ref>}}
{{History|pocket}}
{{History||1.0.0|snap=alpha 0.17.0.1|[[File:Eye of Ender JE1 BE1.png|32px]] Added eyes of ender.}}
{{History|bedrock}}
{{History||1.10.0|snap=beta 1.10.0.3|[[File:Eye of Ender JE2 BE2.png|32px]] The texture of eyes of ender has been changed.}}
{{History||1.16.0|snap=beta 1.15.0.51|The [[particles]] of eyes of ender have been changed to match {{el|je}}.}}
{{History|console}}
{{History||xbox=TU7|xbone=CU1|ps=1.0|wiiu=Patch 1|[[File:Eye of Ender JE1 BE1.png|32px]] Added eyes of ender.}}
{{History||xbox=none|xbone=none|ps=1.90|wiiu=none|switch=none|[[File:Eye of Ender JE2 BE2.png|32px]] The texture of eyes of ender has been changed.}}
{{History|new 3ds}}
{{History||1.7.10|[[File:Eye of Ender JE1 BE1.png|32px]] Added eyes of ender.}}
{{History|foot}}
=== Historical images ===
<gallery>
File:Held_Eye_of_Ender.png|The eye of ender used to appear large in third-person view.
</gallery>
==Issues==
{{issue list}}
==Trivia ==
*When thrown in third-person view, the eyes of ender fly out from the player's feet instead of their hand.
*Before [[Java Edition 1.9]], eyes of ender can be purchased from cleric villagers, which means players can find a [[stronghold]] and go to [[the End]] without accessing [[the Nether]] at all.
*{{IN|bedrock}} if the player travels beyond a certain radius (roughly 740,000 blocks), eyes of ender always point to a stronghold near spawn, even though strongholds continue to generate past this limit. If one travels to this limit, they can see eyes of ender suddenly switching direction. A similar phenomenon occurs with the {{cmd|locate}} command.
==Gallery==
===Screenshots===
<gallery>
Stronghold Portal Room.png|An end portal frame containing a few eyes of ender.
EnderChestexample.png|An [[ender chest]] depicting an eye of ender on the front.
</gallery>
===In other media===
<gallery>
File:Eye of Ender JINX.jpg|Official T-shirt artwork "Eye of Ender" sold by JINX.
File:Happy Halloween Eye.jpg|A Halloween T-Shirt design featuring an eye of ender.
</gallery>
==External links==
*[http://www.strongholdfinder.com/ A super-easy stronghold triangulation tool]
*[http://jsfiddle.net/42EDX/40/ JSFiddle Eye of Ender triangulator - can guess the location of other 2 strongholds in the first ring]
*[https://ens-gijs.github.io/minecraft-stronghold-locator/ Minecraft Stronghold Locator Eye of Ender throw plotting visualizer - zoomable to show all possible stronghold rings]
*[https://github.com/winny-/stronghold Python Eye of Ender throw plotting tool]
*[http://www.purplefrog.com/~thoth/MinecraftStronghold/stronghold.html HTML Eye of Ender throw plotting visualizer (not updated after 1.9 stronghold placement changes)]
*[http://chunkbase.com/apps/stronghold-finder Chunk Base Stronghold Finder (seed-based)]
*[https://github.com/toolbox4minecraft/amidst/releases Amidst - File-based world visualizer]
*[http://minecraft.tournier.org/StrongholdLocator/ Find strongholds by analyzing stronghold.dat file]
== References==
{{reflist}}
{{Items}}
{{entities}}
[[cs:Endové oko]]
[[de:Enderauge]]
[[es:Ojo de ender]]
[[fr:Œil de l'Ender]]
[[hu:Végzet szeme]]
[[ja:エンダーアイ]]
[[ko:엔더의 눈]]
[[nl:Enderoog]]
[[pl:Oko Endera]]
[[pt:Olho de ender]]
[[ru:Око Края]]
[[th:ดวงตาแห่งเอนเดอร์]]
[[uk:Око Краю]]
[[zh:末影之眼]]</li></ul> | 17w43a | The default resource pack can now be moved up and down, just like other resource packs. | |||
| 17w48a | Changed format number to 4, due to The Flattening. | ||||
1.14{{Extension DPL}}<ul><li>[[Sparkler|Sparkler]]<br/>{{About|the Education Edition exclusive item|the new melee weapon available from the ''Minecraft Dungeons'' anniversary event|MCD:Sparkler}}
{{Item
| image = <gallery>
Orange Sparkler.png | Orange
Blue Sparkler.png | Blue
Red Sparkler.png | Red
Purple Sparkler.png | Purple
Green Sparkler.png | Green
</gallery>
| image2 = <gallery>
Active Orange Sparkler.png | Active Orange
Active Blue Sparkler.png | Active Blue
Active Red Sparkler.png | Active Red
Active Purple Sparkler.png | Active Purple
Active Green Sparkler.png | Active Green
</gallery>
| renewable = No
| stackable = No
}}
{{education feature}}
{{exclusive|bedrock|education}}
A '''sparkler''' is a [[Chemistry Update|chemistry]]-related [[item]] that emits particles when lit.
Sparklers are available in orange, blue, red, purple, and green colors.
== Obtaining ==
=== Crafting ===
{{Crafting
|showdescription=1
|B1=Chloride |B2=Magnesium |B3=Stick
|Output=Sparkler
|description= Calcium Chloride: Orange<br>Cerium Chloride: Blue<br>Mercuric Chloride: Red<br>Potassium Chloride: Purple<br>Tungsten Chloride: Green<br>{{only|bedrock|education}}
|type=Miscellaneous
}}
== Usage ==
{{ctrl|Using}} a sparkler ignites it, causing its texture to change. When lit, the sparkler emits colored [[particles]]; the [[durability]] meter depletes while the sparkler is burning. Sparklers are one of the few [[item]]s that can be held in the [[off-hand]] {{in|be}}. Unlit sparklers have normal lighting like most items, while lit sparklers appear to glow when held in the player's hand, similarly to [[glow stick]]s.
When the [[player]] uses another item while a sparkler is lit, or holds the sparkler in the off-hand, the sparkler's durability stops depleting.
If the player has a lit sparkler in their [[inventory]] and goes into the [[water]], the sparkler is destroyed immediately. However, it does not get destroyed if dropped in water. It also cannot float.
Despite having durability, sparklers cannot be enchanted with [[Unbreaking]] or [[Mending]].
== Sounds ==
{{Sound table
|type=bedrock
|sound=Fuse.ogg
|source=sound
|description=While a sparkler is active
|id=sparkler.active
|volume=0.25
|pitch=0.8/1.2}}
{{Sound table
|sound=Fizz.ogg
|source=block
|description=While a sparkler is being lit
|id=random.fizz
|volume=1.0
|pitch=2.4/2.6
|foot=1}}
== Data values ==
=== ID ===
{{ID table
|edition=bedrock
|shownumericids=y
|showforms=y
|notshowbeitemforms=y
|generatetranslationkeys=y
|displayname=Sparkler
|spritename=sparklers
|spritetype=item
|nameid=sparkler
|id=600
|form=item
|translationkey=item.sparkler.orange.name,item.sparkler.blue.name,item.sparkler.red.name,item.sparkler.purple.name,item.sparkler.green.name
|foot=1}}
== History ==
{{History|bedrock}}
{{History||1.4.0|snap=beta 1.2.20.1|[[File:Orange Sparkler BE1.png|32px]] [[File:Blue Sparkler BE1.png|32px]] [[File:Red Sparkler BE1.png|32px]] [[File:Purple Sparkler BE1.png|32px]] [[File:Green Sparkler BE1.png|32px]] <br>[[File:Active Orange Sparkler BE1.png|32px]] [[File:Active Blue Sparkler BE1.png|32px]] [[File:Active Red Sparkler BE1.png|32px]] [[File:Active Purple Sparkler BE1.png|32px]] [[File:Active Green Sparkler BE1.png|32px]] Added sparklers.}}
{{History|education}}
{{History||1.0.27|[[File:Orange Sparkler BE1.png|32px]] [[File:Blue Sparkler BE1.png|32px]] [[File:Red Sparkler BE1.png|32px]] [[File:Purple Sparkler BE1.png|32px]] [[File:Green Sparkler BE1.png|32px]] <br>[[File:Active Orange Sparkler BE1.png|32px]] [[File:Active Blue Sparkler BE1.png|32px]] [[File:Active Red Sparkler BE1.png|32px]] [[File:Active Purple Sparkler BE1.png|32px]] [[File:Active Green Sparkler BE1.png|32px]] Added sparklers.}}
{{History|foot}}
== Issues ==
{{issue list}}
== Trivia ==
* The formula for sparkler roughly works in real life. Magnesium itself burns white in air, while the metal salts add [[wikipedia:flame test|color to the flame]].
{{items}}
{{Education Edition}}
[[Category:Non-renewable resources]]
[[Category:Education Edition items]]
[[de:Wunderkerze]]
[[ja:手持ち花火]]
[[ko:스파클러]]
[[pl:Zimne ognie]]
[[pt:Vela-Faísca]]
[[zh:烟花棒]]</li><li>[[Boots|Boots]]<br/>{{Item
| image = <gallery>
Leather Boots.png | Leather
Chainmail Boots.png | Chainmail
Iron Boots.png | Iron
Diamond Boots.png | Diamond
Golden Boots.png | Golden
Netherite Boots.png | Netherite
</gallery>
| durability =
* Leather: 65
* Chainmail: 195
* Iron: 195
* Golden: 91
* Diamond: 429
* Netherite: 481
| renewable =
* '''Netherite''': No
* '''All others''': Yes
| stackable = No
}}
'''Boots''' are a type of [[armor]] that covers the feet of the player. There are six types of boots: '''leather boots''', '''chainmail boots''', '''iron boots''', '''diamond boots''', '''gold boots''', and '''netherite boots'''.
== Obtaining ==
=== Crafting ===
{{crafting
|head=1
|showname=0
|showdescription=1
|name=[[Boots]]
|A2= Leather;Gold Ingot;Iron Ingot;Diamond
|C2= Leather;Gold Ingot;Iron Ingot;Diamond
|A3= Leather;Gold Ingot;Iron Ingot;Diamond
|C3= Leather;Gold Ingot;Iron Ingot;Diamond
|Output= Leather Boots;Golden Boots;Iron Boots;Diamond Boots
|type= Combat
}}
{{crafting
|foot=1
|ignoreusage=1
|name=[[Boots]]
|ingredients=Damaged Matching [[Boots]]
|Damaged Leather Boots; Damaged Golden Boots; Damaged Chainmail Boots; Damaged Iron Boots; Damaged Diamond Boots; Damaged Netherite Boots
|Damaged Leather Boots; Damaged Golden Boots; Damaged Chainmail Boots; Damaged Iron Boots; Damaged Diamond Boots; Damaged Netherite Boots
|Output= Leather Boots; Golden Boots; Chainmail Boots; Iron Boots; Diamond Boots; Netherite Boots
|description= The durability of the two boots is added together, plus an extra 5% durability.
|type= Combat
}}
=== Upgrading ===
{{Smithing
|head=1
|Netherite Upgrade
|Diamond Boots
|Netherite Ingot
|Netherite Boots
|description=
|tail=1
}}
=== Repairing ===
==== Grinding ====
{{Grinding
|showdescription=1
|ingredients=2x Damaged [[Leather Boots]] or<br>2x Damaged [[Chainmail Boots]] or<br>2x Damaged [[Iron Boots]] or<br>2x Damaged [[Golden Boots]] or<br>2x Damaged [[Diamond Boots]] or<br>2x Damaged [[Netherite Boots]]
|Damaged Leather Boots; Damaged Chainmail Boots; Damaged Iron Boots; Damaged Golden Boots; Damaged Diamond Boots; Damaged Netherite Boots
|Damaged Leather Boots; Damaged Chainmail Boots; Damaged Iron Boots; Damaged Golden Boots; Damaged Diamond Boots; Damaged Netherite Boots
|Leather Boots; Chainmail Boots; Iron Boots; Golden Boots; Diamond Boots; Netherite Boots
|description=The durability of the two boots are added together, plus an extra 5% durability.
}}
==== Anvil ====
Boots can be repaired in an [[Anvil mechanics#Unit repair|anvil]] by adding units of the [[armor material]]'s repair material, with each repair material restoring 25% of the boots' maximum durability, rounded down. Chainmail boots may also be repaired in this way using iron ingots.
They can also be [[Anvil mechanics#Combining items|combined]] with other boots. When doing this, the item's enchantments are not lost, and can even be raised.
==== Crafting ====
You can craft two sets of boots together using a crafting table, but enchantments are removed.
=== Mob loot ===
If a [[zombie]], [[husk]], [[stray]], [[piglin]], or [[skeleton]] is wearing armor, there is a 8.5% chance (9.5% with Looting I, 10.5% with Looting II and 11.5% with Looting III) for the mob to drop boots upon death. The boots are usually badly damaged, and may be enchanted.
[[File:Zombie With Boots.png|alt=Zombie is shown wearing boots|thumb|Zombie is shown wearing full iron armor set, including boots.]]
{{IN|bedrock}}, [[vindicator]]s and [[pillager]]s that spawn in [[raid]]s have a chance to drop iron boots, which are usually badly damaged and have a 50% chance to be enchanted.
=== Chest loot ===
{{LootChestItem|leather-boots,random-enchanted-leather-boots,chainmail-boots,iron-boots,level-enchanted-iron-boots,golden-boots,random-enchanted-golden-boots,soul-speed-enchanted-golden-boots,diamond-boots,damaged-diamond-boots,damaged-random-enchanted-diamond-boots,damaged-random-enchanted-diamond-boots-2,level-enchanted-diamond-boots}}
=== Trading ===
{{IN|java}}, novice-level armorer [[villager]]s have 40% chance to sell iron boots for 4 [[emerald]]s. Apprentice-level armorers have a 50% chance to sell chainmail boots for an [[emerald]]. Expert-level armorers always sell enchanted<ref group="note" name="enchantment" /> diamond boots for 11–27 [[emerald]]s. Apprentice-level leatherworker [[villager]]s have {{frac|2|3}} chance to sell leather boots for 4 [[emerald]]s.
Armorer [[villager]]s may give the players with the [[Hero of the Village]] effect chainmail boots.{{only|java}}
{{IN|bedrock}}, novice-level armorer villagers have a 25% chance to sell iron boots for 4 emeralds. Apprentice-level armorers have a {{frac|1|3}} chance to sell chainmail boots for an emerald. Expert-level armorers have a 50% chance to sell enchanted<ref group="note" name="enchantment">When creating an enchantment offer, the game uses a random enchantment level from 5 – 19. The enchantments are never treasure enchantments.</ref> diamond boots for 8 emeralds. Apprentice-level leatherworker villagers have a 50% chance to sell leather boots for 4 emeralds.
{{notelist}}
=== Bartering ===
[[Piglin]]s may [[bartering|barter]] iron boots with [[Soul Speed]] when given a [[gold ingot]].
=== Fishing ===
Leather boots can be caught as a "junk" item when [[fishing]].
== Usage ==
Boots can be placed in the fourth armor slot of a player's [[inventory]] for activation.
=== Defense points ===
Defense points are each signified by half of a chestplate in the armor bar above the health bar. Each defense point reduces any damage dealt to the player that is absorbed by armor by 4%, increasing additively with the number of defense points. Different materials and combinations of armor provide different levels of defense.
The following table shows the amount of defense points added by boots.
{| class="wikitable" data-description="Boots defense points"
|-
!scope="col" | Material
!scope="col" | Defense points
|-
!scope="row" | Leather
| rowspan="3" | {{armor|1}}
|-
!scope="row" | Golden
|-
!scope="row" | Chainmail
|-
!scope="row" | Iron
| {{armor|2}}
|-
!scope="row" | Diamond
| rowspan="2" | {{armor|3}}
|-
!scope="row" | Netherite
|}
=== Knockback resistance ===
Netherite boots provide 10% knockback resistance.
=== Durability ===
The following table shows the amount of damage each piece of armor can absorb before being destroyed.
Any "hit" from a damage source that can be blocked by armor removes one point of durability from each piece of armor worn for every {{hp|4}} of incoming damage (rounded down, but never below 1). Damage taken that armor doesn't protect (such as [[Damage#Fall damage|falling]] or [[Damage#Drowning|drowning]]) does not damage the armor, even if it is enchanted to protect against that type of damage. The following chart displays how many hits boots can endure.
Netherite armor is not damaged by [[lava]] or [[fire]] when worn.
{| class="wikitable" data-description="Boots durability"
|-
! Material
!Durability
|-
!scope="row" | Leather
| 65
|-
!scope="row" | Golden
| 91
|-
!scope="row" | Chainmail/Iron
| 195
|-
!scope="row" | Diamond
| 429
|-
!scope="row" | Netherite
| 481
|}
=== Enchantments ===
Boots can receive the following [[enchantment]]s:
{| class="wikitable"
|-
! Enchantment !! Max Level !! Notes
|-
| [[Fire Protection]] || IV || <ref group=note name=exclusive>Fire Protection, Blast Protection, Projectile Protection and Protection are mutually exclusive.</ref>
|-
| [[Projectile Protection]] || IV || <ref group=note name="exclusive"/>
|-
| [[Blast Protection]] || IV || <ref group=note name="exclusive"/>
|-
| [[Protection]] || IV || <ref group=note name="exclusive"/>
|-
| [[Feather Falling]] || IV ||
|-
| [[Unbreaking]] || III ||
|-
| [[Thorns]] || III || <ref group="note" name="anvil">Only from using an [[anvil]] and [[enchanted book]]s.</ref>
|-
| [[Depth Strider]] || III || <ref group=note name=exclusive2>Frost Walker and Depth Strider are mutually exclusive.</ref>
|-
| [[Soul Speed]] || III || <ref group=note name="anvil">Only from using an [[anvil]] and [[enchanted book]]s.</ref>
|-
| [[Frost Walker]] || II || <ref group=note name=exclusive2 /><ref group="note" name="anvil2">Only from using an [[anvil]] and [[enchanted book]]s, or by finding enchanted boots in an [[End city]] chest.</ref>
|-
| [[Mending]] || I || <ref group=note name="anvil2" />
|-
| [[Curse of Binding]] || I || <ref group="note" name="anvil2"/>
|-
| [[Curse of Vanishing]] || I || <ref group="note" name="anvil2"/>
|}
{{notelist}}
=== Smelting usage ===
{{Smelting|showname=1|Iron Boots;Chainmail Boots;Golden Boots|Iron Nugget;Iron Nugget;Gold Nugget|0,1}}
=== Piglins ===
{{EntityLink|Piglin|Piglins}} are attracted to ''golden'' boots and pick them up, examining them for 6 to 8 seconds. Other boots do not attract piglins but can be worn by them. They prefer stronger boots over weaker boots, with one major exception: They always prefer golden boots over all other boots, throwing out stronger boots to equip them. Enchanted boots are preferred over unenchanted boots.
=== Powder snow===
Leather boots can be used to safely cross [[powder snow]] without sinking in it. The block behaves similar to [[scaffolding]], allowing the player to sink in by pressing {{control|crouch}} and move up by pressing {{control|jump}}. The boots also prevent the wearer from taking freezing damage.
===Decoration===
It is possible to upgrade armor with trims. This requires a [[Smithing Template#Gallery|Smithing Template]], an armor piece, and an ingot or crystal ({{ItemSprite|iron-ingot}}iron ingot/{{ItemSprite|copper-ingot}}copper ingot/{{ItemSprite|gold-ingot}}gold ingot/{{ItemSprite|netherite-ingot}}netherite ingot/{{ItemSprite|emerald}}emerald/{{ItemSprite|redstone-dust}}redstone dust/{{ItemSprite|lapis-lazuli}}lapis lazuli/{{ItemSprite|amethyst-shard}}amethyst shard/{{ItemSprite|nether-quartz}}nether quartz/{{ItemSprite|diamond}}diamond).
These trims have no effect on the gameplay or strength of the armor.
{{Smithing|Any Armor Trim Smithing Template|Netherite Boots|Amethyst Shard; Copper Ingot; Diamond; Emerald; Gold Ingot; Iron Ingot; Lapis Lazuli; Netherite Ingot; Nether Quartz; Redstone Dust|Amethyst Trim Netherite Boots; Copper Trim Netherite Boots; Diamond Trim Netherite Boots; Emerald Trim Netherite Boots; Gold Trim Netherite Boots; Iron Trim Netherite Boots; Lapis Trim Netherite Boots; Netherite Trim Netherite Boots; Quartz Trim Netherite Boots; Redstone Trim Netherite Boots|head=1|tail=1|ingredients=Any Armor Trim +<br>Any Armor Piece +<br>Any Ingot/Crystal|showdescription=1|description=}}
==Sounds==
{{el|je}}:
{{Sound table
|sound=Equip leather1.ogg
|sound2=Equip leather2.ogg
|sound3=Equip leather3.ogg
|sound4=Equip leather4.ogg
|sound5=Equip leather5.ogg
|sound6=Equip leather6.ogg
|subtitle=Leather armor rustles
|source=player
|description=When leather boots are equipped
|id=item.armor.equip_leather
|translationkey=subtitles.item.armor.equip_leather
|volume=1.0
|pitch=1.0
|distance=16}}
{{Sound table
|sound=Equip chain1.ogg
|sound2=Equip chain2.ogg
|sound3=Equip chain3.ogg
|sound4=Equip chain4.ogg
|sound5=Equip chain5.ogg
|sound6=Equip chain6.ogg
|subtitle=Chain armor jingles
|source=player
|description=When chainmail boots are equipped
|id=item.armor.equip_chain
|translationkey=subtitles.item.armor.equip_chain
|volume=1.0
|pitch=1.0
|distance=16}}
{{Sound table
|sound=Equip iron1.ogg
|sound2=Equip iron2.ogg
|sound3=Equip iron3.ogg
|sound4=Equip iron4.ogg
|sound5=Equip iron5.ogg
|sound6=Equip iron6.ogg
|subtitle=Iron armor clanks
|source=player
|description=When iron boots are equipped
|id=item.armor.equip_iron
|translationkey=subtitles.item.armor.equip_iron
|volume=1.0
|pitch=1.0
|distance=16}}
{{Sound table
|sound=Equip gold1.ogg
|sound2=Equip gold2.ogg
|sound3=Equip gold3.ogg
|sound4=Equip gold4.ogg
|sound5=Equip gold5.ogg
|sound6=Equip gold6.ogg
|subtitle=Gold armor clinks
|source=player
|description=When gold boots are equipped
|id=item.armor.equip_gold
|translationkey=subtitles.item.armor.equip_gold
|volume=1.0
|pitch=1.0
|distance=16}}
{{Sound table
|sound=Equip diamond1.ogg
|sound2=Equip diamond2.ogg
|sound3=Equip diamond3.ogg
|sound4=Equip diamond4.ogg
|sound5=Equip diamond5.ogg
|sound6=Equip diamond6.ogg
|subtitle=Diamond armor clangs
|source=player
|description=When diamond boots are equipped
|id=item.armor.equip_diamond
|translationkey=subtitles.item.armor.equip_diamond
|volume=1.0
|pitch=1.0
|distance=16}}
{{Sound table
|sound=Equip netherite1.ogg
|sound2=Equip netherite2.ogg
|sound3=Equip netherite3.ogg
|sound4=Equip netherite4.ogg
|subtitle=Netherite armor clanks
|source=player
|description=When netherite boots are equipped
|id=item.armor.equip_netherite
|translationkey=subtitles.item.armor.equip_netherite
|volume=0.8
|pitch=1.0/0.9
|distance=16}}
{{Sound table
|sound=Random break.ogg
|subtitle=Item breaks
|source=dependent
|description=When a pair of boots' durability is exhausted
|id=entity.item.break
|translationkey=subtitles.entity.item.break
|volume=0.8
|pitch=0.8-1.2
|distance=16
|foot=1}}
{{el|be}}:
{{Sound table
|type=bedrock
|sound=Equip leather1.ogg
|sound2=Equip leather2.ogg
|sound3=Equip leather3.ogg
|sound4=Equip leather4.ogg
|sound5=Equip leather5.ogg
|sound6=Equip leather6.ogg
|source=player
|description=When leather boots are equipped
|id=armor.equip_leather
|volume=1.0
|pitch=1.0}}
{{Sound table
|sound=Equip chain1.ogg
|sound2=Equip chain2.ogg
|sound3=Equip chain3.ogg
|sound4=Equip chain4.ogg
|sound5=Equip chain5.ogg
|sound6=Equip chain6.ogg
|source=player
|description=When chain boots are equipped
|id=armor.equip_chain
|volume=1.0
|pitch=1.0}}
{{Sound table
|sound=Equip iron1.ogg
|sound2=Equip iron2.ogg
|sound3=Equip iron3.ogg
|sound4=Equip iron4.ogg
|sound5=Equip iron5.ogg
|sound6=Equip iron6.ogg
|source=player
|description=When iron boots are equipped
|id=armor.equip_iron
|volume=1.0
|pitch=1.0}}
{{Sound table
|sound=Equip gold1.ogg
|sound2=Equip gold2.ogg
|sound3=Equip gold3.ogg
|sound4=Equip gold4.ogg
|sound5=Equip gold5.ogg
|sound6=Equip gold6.ogg
|source=player
|description=When gold boots are equipped
|id=armor.equip_gold
|volume=1.0
|pitch=1.0}}
{{Sound table
|sound=Equip diamond1.ogg
|sound2=Equip diamond2.ogg
|sound3=Equip diamond3.ogg
|sound4=Equip diamond4.ogg
|sound5=Equip diamond5.ogg
|sound6=Equip diamond6.ogg
|source=player
|description=When diamond boots are equipped
|id=armor.equip_diamond
|volume=1.0
|pitch=1.0}}
{{Sound table
|sound=Equip netherite1.ogg
|sound2=Equip netherite2.ogg
|sound3=Equip netherite3.ogg
|sound4=Equip netherite4.ogg
|source=player
|description=When netherite boots are equipped.
|id=armor.equip_netherite
|volume=1.0
|pitch=1.0}}
{{Sound table
|rowspan=2
|sound=Water Splash Old.ogg
|source=block
|description=When leather boots are dyed using a cauldron
|id=cauldron.dyearmor
|volume=0.1
|pitch=1.0}}
{{Sound table
|source=block
|description=When leather boots' dye is removed using a cauldron
|id=cauldron.cleanarmor
|volume=0.1
|pitch=1.0}}
{{Sound table
|sound=Random break.ogg
|source=player
|description=When a pair of boots' durability is exhausted
|id=random.break
|volume=1.0
|pitch=0.9
|foot=1}}
==Data values==
===ID===
{{edition|java}}:
{{ID table
|edition=java
|showitemtags=y
|showforms=y
|generatetranslationkeys=y
|displayname=Leather Boots
|spritetype=item
|nameid=leather_boots
|itemtags=freeze_immune_wearables
|form=item}}
{{ID table
|displayname=Chainmail Boots
|spritetype=item
|nameid=chainmail_boots
|form=item}}
{{ID table
|displayname=Iron Boots
|spritetype=item
|nameid=iron_boots
|form=item}}
{{ID table
|displayname=Diamond Boots
|spritetype=item
|nameid=diamond_boots
|form=item}}
{{ID table
|displayname=Golden Boots
|spritetype=item
|nameid=golden_boots
|form=item}}
{{ID table
|displayname=Netherite Boots
|spritetype=item
|nameid=netherite_boots
|form=item
|foot=1}}
{{edition|bedrock}}:
{{ID table
|edition=bedrock
|shownumericids=y
|showforms=y
|notshowbeitemforms=y
|generatetranslationkeys=y
|displayname=Leather Boots
|spritetype=item
|nameid=leather_boots
|id=338
|form=item}}
{{ID table
|displayname=Chainmail Boots
|spritetype=item
|nameid=chainmail_boots
|id=342
|form=item}}
{{ID table
|displayname=Iron Boots
|spritetype=item
|nameid=iron_boots
|id=346
|form=item}}
{{ID table
|displayname=Diamond Boots
|spritetype=item
|nameid=diamond_boots
|id=350
|form=item}}
{{ID table
|displayname=Golden Boots
|spritetype=item
|nameid=golden_boots
|id=354
|form=item}}
{{ID table
|displayname=Netherite Boots
|spritetype=item
|nameid=netherite_boots
|id=612
|form=item
|foot=1}}
=== Item data===
When leather boots are dyed, it has the following NBT:
<div class="treeview">
*{{nbt|compound|tag}}: Parent tag.
**{{nbt|compound|display}}: Display properties.
***{{nbt|int|color}}: The color of the leather armor. The tooltip displays "Dyed" if advanced tooltips are disabled, otherwise it displays the hexadecimal color value. Color codes are calculated from the Red, Green and Blue components using this formula:<br>'''<span style="color:red">Red</span>[[wikipedia:Logical shift|<<]]16 + <span style="color:green">Green</span><<8 + <span style="color:blue">Blue</span>'''<ref>For positive values larger than 0x00FFFFFF, the top byte is ignored. All negative values produce white.</ref>
</div>
==Achievements==
{{load achievements|Iron Man;Tie Dye Outfit;Let It Go!;Cover me in debris;Oooh, shiny!}}
==Advancements==
{{load advancements|Suit Up;Cover me With Diamonds;Oh Shiny;Cover Me in Debris;Light as a Rabbit}}
==History==
{{History|java indev}}
{{History||0.31|snap=20091231-2|[[File:Studded Boots (item) JE1.png|32px]] [[History of textures/Unused textures#Studded armor|Studded boots]] are now capable of being seen in the [[inventory]]. This was taken directly from one of [[Notch|Notch's]] game's ''[[Legend of the Chambered 2]]''.{{more info|When were they removed?}}}}
{{History||February 9, 2010|link=wordofnotch:380486636|[[File:Notch revealed armor.png|32px]] [[Notch]] revealed new models for armor, which included boots.}}
{{History||20100218|[[File:Leather Boots JE1.png|32px]] [[File:Chainmail Boots JE1 BE1.png|32px]] [[File:Iron Boots JE1 BE1.png|32px]] [[File:Golden Boots JE1 BE1.png|32px]] [[File:Diamond Boots JE1 BE1.png|32px]]<br>[[File:Leather Boots (item) JE1 BE1.png|32px]] [[File:Chainmail Boots (item) JE1 BE1.png|32px]] [[File:Iron Boots (item) JE1 BE1.png|32px]] [[File:Golden Boots (item) JE1 BE1.png|32px]] [[File:Diamond Boots (item) JE1 BE1.png|32px]] Added cloth, chain, iron, gold, and diamond boots{{verify|edition=java|type=change|Below, it says "wool armor" was renamed to leather, which name is incorrect, wool or cloth? Also, was it "gold" or "golden"?}}
|Boots can now be [[crafting|crafted]] and worn.
|Boots now function, giving {{Armor|3}}. Boots have limited [[item durability|durability]], with lower tier boots less durable than higher tier boots.}}
{{History|java alpha}}
{{History||v1.0.8|"Wool boots" have been renamed to "leather boots", despite item names not existing at this time.
|Leather boots are now [[crafting|crafted]] with [[leather]] instead of [[wool]].}}
{{History|java}}
{{History||1.0.0|snap=Beta 1.9 Prerelease|The armor protection behavior has been changed. Previous to this update, the total armor protection is based in this equation: (((''total equipped armor damage reduction'' − 1) × (''all equipped armor max damage'' − ''total equipped armor damage'')) ÷ (''total equipped armor max damage'' + 1)).}}
{{History|||snap=October 3, 2011|slink={{tweet|notch|120859830339637249}}|The first images of a [[player]] wearing enchanted armor, including boots, are revealed.}}
{{History|||snap=Beta 1.9 Prerelease 3|Iron boots can now be found in the new [[stronghold]] altar [[chest]]s.}}
{{History|||snap=Beta 1.9 Prerelease 4|Boots can now be [[enchanting|enchanted]].}}
{{History||1.1|snap=12w01a|Iron boots can now be found in the new blacksmith [[chest]]s in [[village]]s.}}
{{History||1.2.1|snap=1.2|Changed "Golden boots" to "Golden Boots".}}
{{History||1.3.1|snap=12w15a|{{key|Shift}}+clicking can now be used to equip boots.}}
{{History|||snap=12w21a|Chain boots can now be obtained legitimately in [[survival]] mode through [[trading]].
|Blacksmith [[villager]]s now [[trading|sell]] chain boots for 5–6 [[emerald]]s.
|Blacksmith villagers now sell diamond boots for 7 emeralds.
|Blacksmith villagers now sell iron boots for 4–5 emeralds.
|Butcher villagers now sell leather boots for 2-3 emeralds.}}
{{History||1.4.2|snap=12w32a|[[Mob]] armor has been reintroduced. A partial or full set of any armor is now sometimes worn by [[zombie]]s, [[skeleton]]s and [[zombie pigman|zombie pigmen]], with the likelihood increasing with difficulty.}}
{{History|||snap=August 17, 2012|slink={{tweet|Dinnerbone|236445090929844225}}|[[Jeb]] and [[Dinnerbone]] tweeted pictures of [[dye]]able leather armor, including boots.{{citation needed|Link to Jeb's tweet?}}}}
{{History|||snap=12w34a|Leather boots can now be dyed by [[crafting]] leather boots with [[dye]]s. Dyes can be removed by {{control|use|text=using}} dyed leather boots on a [[cauldron]] with [[water]].
|[[File:Leather Boots JE2 BE1.png|32px]] [[File:Leather Boots (item) JE2.png|32px]] Default leather boots are now slightly darker.}}
{{History|||snap=12w36a|[[Dye]]d leather boots are now more saturated and have a slight tint of tan in respect to the default armor color.
|[[Wither skeleton]]s can now spawn wearing boots.}}
{{History|||snap=12w37a|[[File:Leather Boots (item) JE3 BE2.png|32px]] Leather boots now have non-dyed parts. This has been implemented so that [[player]]s can distinguish between other types of armor and similarly colored leather armor.}}
{{History||1.5|snap=13w04a|Boots in the [[player]]'s hand can now be equipped by right-clicking.
|[[Dispenser]]s can now equip nearby players with boots.}}
{{History||1.7.2|snap=13w36a|Leather boots can now be obtained as one of the "junk" items through [[fishing]].}}
{{History||1.8|snap=14w02a|Armorer [[villager]]s now [[trading|sell]] chain boots for 5–7 [[emerald]]s.
|Armorer villagers no longer sell diamond boots.
|Armorer villagers no longer sell iron boots.
|Leatherworker villagers no longer sell leather boots.}}
{{History|||snap=14w05a|Boots no longer turn red when [[mob]]s and [[player]]s are hurt.}}
{{History|||snap=14w06a|Boots are now visible on [[giant]]s.}}
{{History|||snap=14w25a|Chain boots [[Java Edition removed features#Chain armor|can no longer be crafted anymore]] due to the [[item]] form of [[fire]] being [[Java Edition removed features#Obtainable until 1.8|removed]].}}
{{History||1.9|snap=15w31a|Enchanted iron and diamond boots can now be found in [[end city]] ship [[chest]]s.
|[[Mob]]s now wear armor from the bottom to the top, rather than from the top to the bottom. This means that a mob with three armor pieces, for example, spawn with all armor except a helmet.}}
{{History|||snap=15w34b|Boots' [[item durability|durability]] now affects armor value.}}
{{History|||snap=15w36a|Armor value and[[enchanting|enchantment]] calculations have been changed. For the original values, see [[Armor/Before 1.9|here]].}}
{{History|||snap=15w36d|Boots' durability affecting value has been removed.
|Boots now have an attribute controlling the defense points.}}
{{History|||snap=15w50a|Added {{cd|equip}} [[sound]]s for boots.}}
{{History|||snap=16w02a|Armor value and enchantment calculations have been changed again.}}
{{History|||snap=16w05a|Armor value calculations have been changed, once again.}}
{{History||1.11.1|snap=16w50a|Golden, chain and iron boots can now be [[smelting|smelted]] down into one of their respective [[nugget]]s. Chain boots smelt into iron nuggets.}}
{{History||1.13|snap=17w47a|Prior to [[1.13/Flattening|''The Flattening'']], these [[item]]s' numeral IDs were 298 through 317.{{more info|Specific values for boots}}}}
{{History|||snap=18w11a|Enchanted leather boots can now generate in the chests of [[shipwreck]]s.}}
{{History|||snap=18w20a|Chain armor boots have been renamed to "chainmail".}}
{{History||1.14|snap=18w43a|[[File:Leather Boots JE3 BE2.png|32px]] [[File:Chainmail Boots JE2 BE2.png|32px]] [[File:Iron Boots JE2 BE2.png|32px]] [[File:Golden Boots JE2 BE2.png|32px]] [[File:Diamond Boots JE2 BE2.png|32px]]<br>[[File:Leather Boots (item) JE4 BE3.png|32px]] [[File:Chainmail Boots (item) JE2 BE2.png|32px]] [[File:Iron Boots (item) JE2 BE2.png|32px]] [[File:Golden Boots (item) JE2 BE2.png|32px]] [[File:Diamond Boots (item) JE2 BE2.png|32px]] The textures of leather, chainmail, iron, golden, and diamond boots have been changed.}}
{{History|||snap=18w48a|Leather boots can now be found in [[chest]]s in [[village]] tanneries.}}
{{History|||snap=19w08a|[[File:Golden Boots (item) JE3 BE3.png|32px]] The textures of gold boots [[item]]s have been changed.}}
{{History|||snap=19w11a|Armorer villagers now sell iron and enchanted diamond boots, making diamond boots effectively [[renewable resource|renewable]] again.
|Leatherworker villagers now sell randomly [[dye]]d leather boots.}}
{{History|||snap=19w13a|Armorer villagers now give chainmail boots to players under the [[Hero of the Village]] effect.}}
{{History||1.16|snap=20w06a|[[File:Netherite Boots JE1.png|32px]] [[File:Netherite Boots (item) JE1.png|32px]] Added netherite boots.
|Netherite boots are obtained by combining diamond boots and one netherite ingot in a crafting table.}}
{{History|||snap=20w09a|[[File:Diamond Boots (item) JE3 BE3.png|32px]] The texture of diamond boots [[item]]s has been changed.}}
{{History|||snap=20w10a|[[File:Netherite Boots JE2 BE1.png|32px]] [[File:Netherite Boots (item) JE2.png|32px]] The texture of netherite boots has been changed.
|Netherite boots can no longer be crafted.
|Netherite boots are now obtained by combining diamond boots and one netherite ingot in a smithing table.}}
{{History|||snap=20w16a|Netherite boots now generate randomly enchanted in [[bastion remnants]] chests.
|Golden boots now generate randomly enchanted in [[ruined portal]] chests.}}
{{History|||snap=20w17a|Diamonds boots now generate in place of netherite boots in bastion remnant chests.}}
{{History||1.17|snap=20w46a|Leather boots can now be used to safely walk on [[powder snow]].|Leather armor now protects against [[powder snow]]'s freezing.}}
{{History|||snap=21w13a|Leather Boots now prevent fall damage when landing on [[powder snow]].}}
{{History||1.18.2|snap=22w03a|Netherite boots knockback resistance is no longer random.}}
{{History||1.19|snap=Deep Dark Experimental Snapshot 1|Added the [[Swift Sneak]] enchantment, which can only be applied to boots.}}
{{History|||snap=22w12a|The [[Swift Sneak]] enchantment can no longer applied to boots.}}
{{History||1.20<br>(Experimental)|link=1.19.4|snap=23w04a|Non-leather boots can now be trimmed using a [[smithing table]].
|There are 10 types of material that determine the color of the trim:
*Iron
*Copper
*Gold
*Lapis
*Emerald
*Diamond
*Netherite
*Redstone
*Amethyst
*Quartz
|Upgrading diamond boots to netherite boots now requires the netherite upgrade [[smithing template]].}}
{{History|||snap=23w05a|Leather boots can now be trimmed using a smithing table.|Boots can now have trims of the same material it is made out of.}}
{{History|||snap=23w06a|Swapped {{cd|iron}} and {{cd|iron_darker}} palette, then made {{cd|iron_darker}} darker overall.}}
{{History||1.19.4|snap=23w05a|Boots can now be swapped by {{ctrl|using}} them in the hotbar.<ref>{{bug|MC-216270|||Fixed}}</ref>}}
{{History||?|Boots can now be swapped in [[armor stand]]s by {{ctrl|using}} them in the armor stand's slot.}}
{{History||1.20|snap=23w12a|The pattern textures of dune and sentry armor trims are changed.|
Those previous patterns were left with different names: dune was renamed sentry and sentry was renamed shaper.}}
{{History|pocket alpha}}
{{History||v0.6.0|[[File:Leather Boots JE1 BE1.png|32px]] [[File:Chainmail Boots JE1 BE1.png|32px]] [[File:Iron Boots JE1 BE1.png|32px]] [[File:Golden Boots JE1 BE1.png|32px]] [[File:Diamond Boots JE1 BE1.png|32px]]<br> [[File:Leather Boots (item) JE1 BE1.png|32px]] [[File:Chainmail Boots (item) JE1 BE1.png|32px]] [[File:Iron Boots (item) JE1 BE1.png|32px]] [[File:Golden Boots (item) JE1 BE1.png|32px]] [[File:Diamond Boots (item) JE1 BE1.png|32px]] Added boots.}}
{{History||v0.8.0|snap=build 2|{{InvSprite|Leather Boots}} The leather boots sprites have been changed to that of the [[Java Edition|PC]] version, but its armor [[model]] remains that of older versions.}}
{{History||v0.9.0|snap=build 1|Iron boots now naturally generates in [[village]] [[chest]]s and a [[stronghold]] altar chest.}}
{{History||v0.12.1|snap=build 1|Chainmail boots can now be obtained in [[survival]] mode from a mob wearing it.
|Leather boots can now be obtained from [[fishing]] as a "junk" [[item]].}}
{{History||v0.14.0|snap=build 1|[[File:Leather Boots JE2 BE2.png|32px]] Leather boots can now be dyed and the model has been updated.}}
{{History|pocket}}
{{History||1.0.0|snap=alpha 0.17.0.1|[[Enchanting|Enchanted]] iron boots and enchanted diamond boots can now be found inside [[chest]]s within [[end city]].}}
{{History||1.0.4|snap=alpha 1.0.4.0|Chainmail boots are now [[trading|sold]] by armorer smith [[villager]]s via [[trading]].}}
{{History||1.1.0|snap=alpha 1.1.0.0|Golden, chain and iron boots can now be [[smelting|smelted]] down into one of their respective [[nugget]]s.}}
{{History|bedrock}}
{{History||1.4.0|snap=beta 1.2.14.2|Chainmail boots now generate in [[buried treasure]] chests.
|Enchanted leather boots can now be found inside [[shipwreck]] supply room [[chest]]s.}}
{{History||1.10.0|snap=beta 1.10.0.3|Iron boots now can be found in plains [[village]] weaponsmith [[chest]]s.
|Leather boots can now be found inside plains village tannery chests.
|[[File:Leather Boots JE3 BE2.png|32px]] [[File:Iron Boots JE2 BE2.png|32px]] [[File:Golden Boots JE2 BE2.png|32px]] [[File:Diamond Boots JE2 BE2.png|32px]]<br> [[File:Leather Boots (item) JE4 BE3.png|32px]] [[File:Iron Boots (item) JE2 BE2.png|32px]] [[File:Golden Boots (item) JE2 BE2.png|32px]] [[File:Diamond Boots (item) JE2 BE2.png|32px]] The textures of boots have been changed.{{more info|Did chain boots not change?}}}}
{{History||1.11.0|snap=beta 1.11.0.1|Iron boots now can be found in [[savanna]], [[taiga]], [[desert]], [[snowy taiga]] and [[snowy tundra]] [[village]] weaponsmith [[chest]]s.
|Leather boots can now be found inside savanna, taiga, desert, snowy taiga and snowy tundra village tannery chests.}}
{{History|||snap=beta 1.11.0.4|[[Pillager]]s and [[vindicator]]s that spawn in [[raid]]s can now drop iron boots.
|Iron and diamond boots are now sold by armorer villagers.}}
{{History||1.11.0|snap=beta 1.11.0.5|[[File:Golden Boots (item) JE3 BE3.png|32px]] The textures of golden boots [[item]]s have been changed.}}
{{History||1.12.0|snap=beta 1.12.0.2|[[File:Armor Stand with Leather Armor MCPE-44669.png|32px]] Leather boots no longer show as being [[dye]]d properly when worn by [[armor stand]]s.}}
{{History||1.13.0|snap=beta 1.13.0.1|Leather boots now appear dyed properly when worn by armor stands.}}
{{History||1.16.0|snap=beta 1.16.0.51|[[File:Netherite Boots JE2 BE1.png|32px]] [[File:Netherite Boots (item) BE1.png|32px]] Added netherite boots.|Netherite boots are obtained by combining diamond boots and one netherite ingot in a crafting table.
|[[File:Diamond Boots (item) JE3 BE3.png|32px]] The texture of diamond boots [[item]]s have been changed.}}
{{History|||snap=beta 1.16.0.57|Iron boots with soul speed enchantment can be obtained from bartering with piglin.
|Netherite boots can no longer be crafted.
|Netherite boots are now obtained by combining diamond boots and one netherite ingot in a smithing table.
|Golden boots can now be found in [[ruined portal]] chest.
|Golden and netherite boots can be found in [[bastion remnant]] chest.}}
{{History|||snap=beta 1.16.0.63|Diamonds boots now generate in place of netherite boots in bastion remnant chests.}}
{{History||1.16.200|snap=beta 1.16.200.52|Leather boots can now be used to safely walk on [[powder snow]].}}
{{History||1.17.10|snap=beta 1.17.10.20|[[File:Netherite Boots (item) JE2.png|32px]] The texture of netherite boots item has been changed to match ''Java Edition''.}}
{{History|console}}
{{History||xbox=TU1|xbone=CU1|ps=1.0|wiiu=Patch 1|switch=1.0.1|[[File:Leather Boots JE2 BE1.png|32px]] [[File:Leather Boots (item) JE1 BE1.png|32px]] Added leather boots.
|[[File:Iron Boots JE1 BE1.png|32px]] [[File:Iron Boots (item) JE1 BE1.png|32px]] Added iron boots.
|[[File:Golden Boots JE1 BE1.png|32px]] [[File:Golden Boots (item) JE1 BE1.png|32px]] Added golden boots.
|[[File:Diamond Boots JE1 BE1.png|32px]] [[File:Diamond Boots (item) JE1 BE1.png|32px]] Added diamond boots.}}
{{History||xbox=TU5|[[File:Chainmail Boots JE1 BE1.png|32px]] [[File:Chainmail Boots (item) JE1 BE1.png|32px]] Added chain boots.
|Added a quick equip for boots to the [[inventory]] interface.}}
{{History||xbox=TU12|ps=1.03|[[File:Leather Boots (item) JE3 BE2.png|32px]] The textures for leather boots [[item]]s have been changed.}}
{{History||xbox=TU14|ps=1.05|Leather boots can now be [[dye]]d.
|[[Item repair]] can now repair boots.}}
{{History||xbox=TU25|xbone=CU13|ps=1.16|Boots now have the quick equip functionality.}}
{{History||xbox=TU53|xbone=CU43|ps=1.49|wiiu=Patch 23|switch=1.0.3|Golden, chain and iron boots can now be [[smelting|smelted]] down into one of their respective [[nugget]]s. Chain boots smelt into iron nuggets.}}
{{History|PS4}}
{{History||1.90|[[File:Leather Boots JE3 BE2.png|32px]] [[File:Leather Boots (item) JE4 BE3.png|32px]] The textures of leather boots have been changed.
|[[File:Chainmail Boots JE2 BE2.png|32px]] [[File:Chainmail Boots (item) JE2 BE2.png|32px]] The textures of chainmail boots have been changed.
|[[File:Iron Boots JE2 BE2.png|32px]] [[File:Iron Boots (item) JE2 BE2.png|32px]] The textures of iron boots have been changed.
|[[File:Golden Boots JE2 BE2.png|32px]] [[File:Golden Boots (item) JE3 BE3.png|32px]] The textures of gold boots have been changed.
|[[File:Diamond Boots JE2 BE2.png|32px]] [[File:Diamond Boots (item) JE2 BE2.png|32px]] The textures of diamond boots have been changed.}}
{{History|new 3ds}}
{{History||0.1.0|[[File:Leather Boots JE2 BE1.png|32px]] [[File:Leather Boots (item) JE3 BE2.png|32px]] Added leather boots.
|[[File:Chainmail Boots JE1 BE1.png|32px]] [[File:Chainmail Boots (item) JE1 BE1.png|32px]] Added chain boots.
|[[File:Iron Boots JE1 BE1.png|32px]] [[File:Iron Boots (item) JE1 BE1.png|32px]] Added iron boots.
|[[File:Golden Boots JE1 BE1.png|32px]] [[File:Golden Boots (item) JE1 BE1.png|32px]] Added golden boots.
|[[File:Diamond Boots JE1 BE1.png|32px]] [[File:Diamond Boots (item) JE1 BE1.png|32px]] Added diamond boots.}}
{{History|foot}}
==Issues ==
{{issue list}}
==Trivia==
*Netherite boots are shorter in their item texture but are longer in their texture when being worn
*Leather armor originally used textures from one of [[Notch]]'s previous games, ''[[Legend of the Chambered]]''.
*Leather boots are the only piece of leather armor that has the same name as other armor materials.
*The netherite boots are the only type of boots to have a differently shaped item sprite when compared to the other boot types.
*Chainmail boots are the only boots that have transparent pixels in their texture currently
==Gallery==
===Enchanted Boots===
<gallery>
File:Enchanted Leather Boots (item).gif
File:Enchanted Chainmail Boots (item).gif
File:Enchanted Iron Boots (item).gif
File:Enchanted Golden Boots (item).gif
File:Enchanted Diamond Boots (item).gif
File:Enchanted Netherite Boots (item).gif
</gallery>
<gallery>
File:Enchanted Leather Boots.gif
File:Enchanted Chainmail Boots.gif
File:Enchanted Iron Boots.gif
File:Enchanted Golden Boots.gif
File:Enchanted Diamond Boots.gif
File:Enchanted Netherite Boots.gif
</gallery>
==References==
{{reflist}}
==External Links==
*[https://www.minecraft.net/en-us/article/taking-inventory--boots Taking Inventory: Boots] – Minecraft.net on November 24, 2019
{{Items}}
[[Category:Armor]]
[[ja:ブーツ]]
[[ko:부츠]]
[[pl:Buty]]
[[pt:Botas]]
[[th:รองเท้า]]
[[zh:靴子]]</li></ul> | 18w45a | Added "Programmer Art – The classic look of Minecraft" to the resource pack menu, due to the old textures being replaced by new ones in the Texture Update. | |||
| 19w06a | Significantly improved resource pack loading speed.[4] | ||||
| Particles textures are now plot into individual files. | |||||
| 19w07a | Painting textures are now split into individual files. | ||||
1.15{{Extension DPL}}<ul><li>[[Blaze Powder|Blaze Powder]]<br/>{{Item
| image = Blaze Powder.png
| renewable = Yes
| stackable = Yes (64)
}}
'''Blaze powder''' is an item made from a [[blaze rod]], which is dropped by a [[blaze]] when killed. Its main uses are to fuel [[brewing stand]]s, to brew [[strength]] [[potions]], and to make [[eyes of ender]] to take the player to [[the End]].
== Obtaining ==
=== Crafting ===
{{Crafting
|Blaze Rod
|Output= Blaze Powder,2
|type= Brewing
}}
== Usage ==
=== Crafting Ingredient ===
{{crafting usage}}
=== Brewing stand fuel ===
In addition to being a [[brewing]] ingredient, blaze powder is needed to fuel a [[brewing stand]]. Each piece of blaze powder can brew up to 20 batches of [[Potion|potions]].
=== Brewing ingredient ===
{{brewing
|showname=1
|head=1
|Blaze Powder
|Mundane Potion
|base=Water Bottle
}}
{{brewing
|foot=1
|Blaze Powder
|Potion of Strength
}}
== Data values ==
=== ID ===
{{edition|java}}:
{{ID table
|edition=java
|showforms=y
|generatetranslationkeys=y
|displayname=Blaze Powder
|spritetype=item
|nameid=blaze_powder
|form=item
|foot=1}}
{{edition|bedrock}}:
{{ID table
|edition=bedrock
|shownumericids=y
|showforms=y
|notshowbeitemforms=y
|generatetranslationkeys=y
|displayname=Blaze Powder
|spritetype=item
|nameid=blaze_powder
|id=429
|form=item
|foot=1}}
== Video ==
{{Video note|This video does not mention that blaze powder must be used to fuel [[brewing stand]]s.|minor}}
<div style="text-align:center">{{yt|FSP2qBpe9vI}}</div>
==History==
{{History|java}}
{{History||1.0.0|snap=Beta 1.9 Prerelease 2|[[File:Blaze Powder JE1.png|32px]] Added blaze powder.
|Blaze powder can be used to craft [[eyes of ender]] and [[magma cream]].}}
{{History|||snap=Beta 1.9 Prerelease 3|Blaze powder can now be [[brewing|brewed]] in a [[water bottle]] to create a [[mundane potion]], or in an [[awkward potion]] to create a [[potion of Strength]].}}
{{History||1.2.1|snap=12w04a|Blaze powder can now be used to craft [[fire charge]]s.}}
{{History||1.3.1|snap=1.3|[[File:Blaze Powder JE2 BE1.png|32px]] The texture of blaze powder has been changed.}}
{{History||1.9|snap=15w42a|Blaze powder is now required to operate a [[brewing stand]].}}
{{History|||snap=15w43a|Blaze powder now [[fuel]]s 20 operations rather than 30.}}
{{History||1.13|snap=17w47a|Prior to [[1.13/Flattening|''The Flattening'']], this [[item]]'s numeral ID was 377.}}
{{History|pocket alpha}}
{{History||v0.12.1|snap=build 1|[[File:Blaze Powder JE2 BE1.png|32px]] Added blaze powder.
|Blaze powder can be used to craft [[magma cream]].
|Blaze powder is used as an ingredient to brew [[potion]]s.}}
{{History||v0.15.0|snap=build 1|Blaze powder is now used to craft [[fire charge]]s.}}
{{History|pocket}}
{{History||1.0.0|snap=alpha 0.17.0.1|Blaze powder is now used to craft [[eyes of ender]].}}
{{History|bedrock}}
{{History||1.2.0|snap=beta 1.2.0.2|Blaze powder is now required to operate a [[brewing stand]].}}
{{History|console}}
{{History||xbox=TU7|xbone=CU1|ps=1.00|wiiu=Patch 1|switch=1.0.1|[[File:Blaze Powder JE2 BE1.png|32px]] Added blaze powder.}}
{{History||xbox=TU46|xbone=CU36|ps=1.38|wiiu=Patch 15|Blaze powder is now required to operate a [[brewing stand]].}}
{{History|New 3DS}}
{{History||0.1.0|[[File:Blaze Powder JE2 BE1.png|32px]] Added blaze powder.}}
{{History|foot}}
== Issues ==
{{issue list}}
== See also ==
* [[The Nether]]
* [[Potions]]
== External Links ==
*[https://www.minecraft.net/en-us/article/taking-inventory--blaze-powder Taking Inventory: Blaze Powder] – Minecraft.net on November 25, 2021
{{Items}}
[[Category:Renewable resources]]
[[cs:Ohnivý prach]]
[[de:Lohenstaub]]
[[es:Polvo de blaze]]
[[fr:Poudre de Blaze]]
[[hu:Őrlángpor]]
[[ja:ブレイズパウダー]]
[[ko:블레이즈 가루]]
[[nl:Blazepoeder]]
[[pl:Płomienny proszek]]
[[pt:Pó de blaze]]
[[ru:Огненный порошок]]
[[th:ผงปีศาจไฟ]]
[[zh:烈焰粉]]</li><li>[[Purple Dye|Purple Dye]]<br/>{{Item
| image = Purple_Dye_JE2_BE2.png
| renewable = Yes
| stackable = Yes (64)
}}
'''Purple dye''' is a [[Dyeing#Secondary colors|secondary dye color]] created by combining [[red dye]] and [[blue dye]] in a crafting grid.
== Obtaining ==
=== Crafting ===
{{Crafting
|head=1
|showname=0
|Blue Dye
|Red Dye
|Output=Purple Dye,2
|type=Material
}}
{{Crafting
|foot=1
|Lapis Lazuli
|Red Dye
|Output=Purple Dye,2
|description={{only|bedrock|education}}
|type=Material
}}
=== Trading ===
[[Wandering trader]]s sometimes sell 3 purple dye for an [[emerald]].
== Usage ==
{{dye usage}}
=== Crafting ingredient ===
{{crafting usage|ignore=Banner|continue=1}}
{{banner crafting usage}}
=== Loom ingredient ===
{{Banner loom usage|Purple Dye}}
=== Trading ===
Apprentice-level Shepherd villagers have a 20% chance to buy 12 purple dye for an emerald as part of their trades.{{only|bedrock}}
Expert-level Shepherd villagers have a {{frac|2|7}} chance to buy 12 purple dye for an emerald.{{only|java}}
== Data values ==
=== ID ===
{{edition|java}}:
{{ID table
|edition=java
|showforms=y
|generatetranslationkeys=y
|displayname=Purple Dye
|spritetype=item
|nameid=purple_dye
|form=item
|foot=1}}
{{edition|bedrock}}:
{{ID table
|edition=bedrock
|showaliasids=y
|shownumericids=y
|showforms=y
|notshowbeitemforms=y
|generatetranslationkeys=y
|displayname=Purple Dye
|spritetype=item
|nameid=purple_dye
|aliasid=dye / 5
|id=400
|form=item
|translationkey=item.dye.purple.name
|foot=1}}
== Video ==
<div style="text-align:center">{{yt|Cx52CGo5QnI}}</div>
== History ==
{{History|java beta}}
{{History||1.2|[[File:Purple Dye JE1 BE1.png|32px]] Added purple dye.}}
{{History|java}}
{{History||1.4.2|snap=12w34a|Added the ability to [[Armor#Dyeing|dye]] leather [[armor]] and [[wolf]] collars.}}
{{History||1.4.6|snap=12w49a|Purple dye can now be [[crafting|crafted]] with [[gunpowder]] to create a [[firework star]].}}
{{History||1.6.1|snap=13w19a|[[Stained clay]] can now be crafted.}}
{{history||1.7.2|snap=13w36a|With the addition of new [[flower]]s, many secondary and tertiary dyes are now primary [[dye]]s.}}
{{History|||snap=13w41a|[[Stained glass]] can now be crafted.}}
{{History||1.8|snap=14w02a|Due to [[lapis lazuli]] being [[renewable resource|renewable]] now, purple dye is also now renewable.}}
{{History|||snap=14w30a|Added [[banner]]s which can be dyed.}}
{{History||1.13|snap=17w47a|The different data values for the <code>dye</code> ID have now been split up into their own IDs.
|Prior to [[1.13/Flattening|''The Flattening'']], this [[item]]'s numeral ID was 351.}}
{{History||1.14|snap=18w43a|Purple dye is now [[crafting|crafted]] using [[blue dye]], instead of [[lapis lazuli]].
|[[File:Purple_Dye_JE2_BE2.png|32px]] The texture of purple dye has now been changed.}}
{{History|||snap=18w44a|Purple dye can now change the text color on [[sign]]s to purple.}}
{{History|||snap=19w05a|Added the [[wandering trader]], which sells purple dye.}}
{{History|||snap=19w11a|Purple dye can now be [[trading|bought]] by shepherd villagers.}}
{{History||1.17|snap=20w45a|Purple dye can now be used to craft [[purple candle]]s.}}
{{History|||snap=21w19a|Purple dye can no longer be used to craft purple candles.}}
{{History|||snap=Pre-release 1|Purple dye can once again be used to craft purple candles.}}
{{History||1.20<br>(Experimental)|link=1.19.3|snap=22w42a|Purple dye can now change the text color on [[hanging sign]]s to purple.}}
{{History|pocket alpha}}
{{History||v0.3.0|[[File:Purple Dye JE1 BE1.png|32px]] Added purple dye. It is currently unobtainable and serves no purpose.}}
{{History||v0.4.0|Purple dye is now [[craft]]able with rose red and lapis lazuli.
|Purple dye can now be used to craft purple [[wool]].}}
{{History||v0.6.0|Purple dye can now be used to dye [[sheep]].}}
{{History||v0.8.0|snap=build 1|Purple dye can now be used to craft [[magenta dye]].}}
{{History||v0.9.0|snap=build 11|Purple dye can now be used to craft colored [[terracotta]].}}
{{History||v0.11.0|snap=build 1|Purple dye can now be used to dye tamed [[wolf]] collars.}}
{{History||v0.14.0|snap=build 1|Purple dye can now be used to dye [[water]] in [[cauldron]]s.}}
{{History|pocket}}
{{History||1.0.0|snap=alpha 0.17.0.1|Purple dye can now be used to dye [[shulker]]s.}}
{{History||1.1.0|snap=alpha 1.1.0.0|Purple dye can now be used to craft [[concrete powder]], colored [[bed]]s and dyed [[shulker box]]es.}}
{{History|bedrock}}
{{History||1.2.0|snap=beta 1.2.0.2|Purple dye can now be used to craft [[firework star]]s, [[stained glass]] and patterns on [[banner]]s.}}
{{History||1.4.0|snap=beta 1.2.20.1|Purple dye can now be used to craft [[balloon]]s and [[glow stick]]s.}}
{{History||1.8.0|snap=beta 1.8.0.8|Purple dye can now be used to dye tamed [[cat]] collars.}}
{{History||1.10.0|snap=beta 1.10.0.3|Purple dye is now [[trading|sold]] by [[wandering trader]]s.
|Purple dye can now be used to dye white [[carpet]]s and undyed [[glass pane]]s.
|[[File:Purple_Dye_JE2_BE2.png|32px]] The texture of purple dye has now been changed.}}
{{History||1.11.0|snap=beta 1.11.0.4|Purple dye can now be [[trading|sold]] to shepherd [[villager]]s.}}
{{History||1.16.100|snap=beta 1.16.100.56|The ID of purple dye has been changed from <code>dye/5</code> to <code>purple_dye</code>.}}
{{History|console}}
{{History||xbox=TU1|xbone=CU1|ps=1.00|switch=1.0.1|wiiu=Patch 1|[[File:Purple Dye JE1 BE1.png|32px]] Added purple dye.}}
{{History|PS4}}
{{History||1.90|[[File:Purple_Dye_JE2_BE2.png|32px]] The texture of purple dye has now been changed.}}
{{History|new 3ds}}
{{History||0.1.0|[[File:Purple Dye JE1 BE1.png|32px]] Added purple dye.}}
{{History|foot}}
== Issues ==
{{issue list}}
{{Items}}
[[Category:Items]]
[[Category:Dyes]]
[[Category:Renewable resources]]
[[cs:Fialové barvivo]]
[[de:Violetter Farbstoff]]
[[es:Tinte morado]]
[[fr:Teinture violette]]
[[hu:Lila festék]]
[[ja:紫色の染料]]
[[ko:보라색 염료]]
[[nl:Paarse kleurstof]]
[[pl:Fioletowy barwnik]]
[[pt:Corante roxo]]
[[ru:Фиолетовый краситель]]
[[zh:紫色染料]]</li></ul> | Pre-release 1 | Changed format number to 5, due to texture mechanic changes in earlier snapshots. | |||
1.16.2{{Extension DPL}}<ul><li>[[Echo Shard|Echo Shard]]<br/>{{Item
| title = Echo Shard
| image = Echo Shard.png
| renewable = No
| stackable = Yes (64)
}}
An '''echo shard''' is an item found in [[ancient cities]] which can be used to craft [[recovery compass]]es.
== Obtaining ==
=== Chest loot ===
{{LootChestItem|echo-shard}}
== Usage ==
=== Crafting ingredient ===
{{crafting usage|Echo Shard}}
== History ==
{{History|java}}
{{History||1.19|snap=22w14a|[[File:Echo Shard JE1 BE1.png|32px]] Added echo shards.}}
{{History|bedrock}}
{{History||1.19.0|snap=beta 1.19.0.24|[[File:Echo Shard JE1 BE1.png|32px]] Added echo shards.
|Currently cannot be found inside [[ancient city]] chests due to outdated structures and loot chests.}}
{{History||1.19.0|snap=beta 1.19.0.26|Echo shards now generate inside [[ancient city]] loot chests.}}
{{History|foot}}
== Issues ==
{{issue list}}
{{Items}}
[[Category:Non-renewable resources]]
[[de:Echoscherbe]]
[[es:Fragmento resonante]]
[[fr:Éclat d'écho]]
[[ja:残響の欠片]]
[[lzh:回音殘片]]
[[pt:Fragmento de eco]]
[[pl:Odłamek pogłosu]]
[[ru:Осколок эха]]
[[th:เศษเอคโค]]
[[uk:Уламок відлуння]]
[[zh:回响碎片]]</li><li>[[Melon Seeds|Melon Seeds]]<br/>{{Block
|image = <gallery>
Melon Stem Age 0.png | Age 0
Melon Stem Age 1.png | Age 1
Melon Stem Age 2.png | Age 2
Melon Stem Age 3.png | Age 3
Melon Stem Age 4.png | Age 4
Melon Stem Age 5.png | Age 5
Melon Stem Age 6.png | Age 6
Melon Stem Age 7.png | Age 7
</gallery>
| image2 = <gallery>
Attached Melon Stem (N).png | North
Attached Melon Stem (E).png | East
Attached Melon Stem (S).png | South
Attached Melon Stem (W).png | West
</gallery>
| transparent = Yes
| light = No
| tool = none
| renewable = Yes
| stackable = Yes (64)
| flammable = No
| lavasusceptible = No
}}'''Melon seeds''' are items obtained from [[Melon Slice|melon slices]] that can be used to grow melon stems.
'''Melon stems''' are plants grown on [[farmland]] that, over time, grow [[melon]]s on dirt, mud and moss blocks adjacent to them.
== Obtaining ==
=== Breaking ===
When broken, a melon stem drops 0–3 melon seeds. The chance for melon seeds to drop increases with the stem's age.
{| class="wikitable"
! rowspan="3" |[[Resource location]]
! rowspan="3" | Source
! colspan="4" | Default
|-
| colspan="1" rowspan="2" style="text-align:center" | Nothing || colspan="3" style="text-align:center" |{{ItemLink|Melon Seeds|Melon seeds}}
|-
| style="text-align:center" | 1 || style="text-align:center" | 2 || style="text-align:center" | 3
|-
| rowspan="8" |<code>blocks/melon_stem</code>
|{{BlockLink|Melon Stem|Melon stem}} <code>age = 0</code>
| style="text-align:center" |81.3%|| style="text-align:center" |17.42%|| style="text-align:center" |1.24%|| style="text-align:center" |0.03%
|-
|{{BlockLink|Melon Stem|Melon stem}} <code>age = 1</code>
| style="text-align:center" |65.1%|| style="text-align:center" |30.04%|| style="text-align:center" |4.62%|| style="text-align:center" |0.24%
|-
|{{BlockLink|Melon Stem|Melon stem}} <code>age = 2</code>
| style="text-align:center" |51.2%|| style="text-align:center" |38.4%|| style="text-align:center" |9.6%|| style="text-align:center" |0.8%
|-
|{{BlockLink|Melon Stem|Melon stem}} <code>age = 3</code>
| style="text-align:center" |39.44%|| style="text-align:center" |43.02%|| style="text-align:center" |15.64%|| style="text-align:center" |1.9%
|-
|{{BlockLink|Melon Stem|Melon stem}} <code>age = 4</code>
| style="text-align:center" |29.13%|| style="text-align:center" |44.44%|| style="text-align:center" |22.22%|| style="text-align:center" |3.7%
|-
|{{BlockLink|Melon Stem|Melon stem}} <code>age = 5</code>
| style="text-align:center" |21.6%|| style="text-align:center" |43.2%|| style="text-align:center" |28.8%|| style="text-align:center" |6.4%
|-
|{{BlockLink|Melon Stem|Melon stem}} <code>age = 6</code>
| style="text-align:center" |15.17%|| style="text-align:center" |39.82%|| style="text-align:center" |34.84%|| style="text-align:center" |10.16%
|-
|{{BlockLink|Melon Stem|Melon stem}} <code>age = 7</code>
| style="text-align:center" |10.16%|| style="text-align:center" |34.84%|| style="text-align:center" |39.82%|| style="text-align:center" |15.17%
|-
| rowspan="1" |<code>blocks/attached_melon_stem</code>
|{{BlockLink|Attached Melon Stem|Attached Melon stem}}
| style="text-align:center" |10.16%|| style="text-align:center" |34.84%|| style="text-align:center" |39.82%|| style="text-align:center" |15.17%
|}
=== Natural generation ===
Melon stems generate naturally in stem farm inside [[woodland mansion]]s.
Melon stems generate in 20% of the farm plots in [[savanna]] [[village]]s, and 10% of the farm plots in [[desert]] villages.
=== Chest loot ===
{{LootChestItem|melon-seeds}}
=== Crafting ===
{{Crafting
|Melon Slice
|Output= Melon Seeds
|type= Material
}}
=== Trading ===
[[Wandering trader]]s sell melon seeds for 1 [[emerald]].
== Usage ==
=== Farming ===
{{see also|Tutorials/Pumpkin and melon farming}}
Melon seeds can be planted only on [[farmland]], as stems. Over time, a stem grows through several stages<sup>[''[[Talk:Pumpkin Seeds|needs testing]]'']</sup> and, at its final growth stage, will produce [[melon]]s on any adjacent [[dirt]], [[Coarse Dirt|coarse dirt]], [[Rooted Dirt|rooted dirt]], [[Grass Block|grass block]], [[farmland]], [[podzol]], [[mycelium]], [[Moss Block|moss block]], [[mud]] or [[Muddy Mangrove Roots|muddy mangrove roots]]. If a melon is already occupying a spot adjacent to a stem it does not grow more melons until the melons is removed. A single stem can grow an unlimited number of melons. Melon stems need a minimum light level of 10 in the block above the stem to grow and give melons. Melon seeds are affected by [[bone meal]] only with respect to stem growth; bone meal does not help produce the actual melons.
=== Breeding ===
Like other seeds, melon seeds can be used to [[breed]] [[chicken]]s, lead chickens around, and make baby chickens grow up faster by 10% of the remaining time.
=== Taming ===
Like other seeds, melon seeds can be used to tame [[parrot]]s.
=== Composting ===
Placing melon seeds into a [[composter]] has a 30% chance of raising the compost level by 1.
== Melon Stem ==
A '''melon stem''' is the block that is planted on [[farmland]] when melon seeds are used on it. It starts underground, and rises up as the plant grows. The stem is colored green when young, and then yellow once fully grown.
The stem curves once a melon has grown from it. A fully-grown single stem connects to any [[melon]] in an adjacent square, thus there are 5 possible appearances to a stem. If there are multiple melons it can connect to, it favors the east, then west, north, and south. When the melon is removed, the stem returns to its straight shape.
== Sounds ==
{{Sound table/Block/Hard crop}}
== Data values ==
=== ID ===
{{edition|java}}:
{{ID table
|edition=java
|showblocktags=y
|showforms=y
|generatetranslationkeys=y
|displayname=Melon Stem
|spritetype=block
|nameid=melon_stem
|blocktags=bee_growables, crops
|form=block}}
{{ID table
|displayname=Attached Melon Stem
|spritetype=block
|nameid=attached_melon_stem
|form=block}}
{{ID table
|displayname=Melon Seeds
|spritetype=item
|nameid=melon_seeds
|form=item
|foot=1}}
{{edition|bedrock}}:
{{ID table
|edition=bedrock
|shownumericids=y
|showforms=y
|generatetranslationkeys=y
|displayname=Melon Stem
|spritetype=block
|nameid=melon_stem
|id=105
|form=block
|translationkey=-}}
{{ID table
|displayname=Melon Seeds
|spritetype=item
|nameid=melon_seeds
|id=293
|form=item
|foot=1}}
=== Block states ===
{{see also|Block states}}
{{/BS}}
== Advancements ==
{{load advancements|A Seedy Place}}
== History ==
{{info needed section|check if stems floated above farmland upon initial implementation}}
{{History|java beta}}
{{History||1.8|snap=Pre-release|[[File:Melon Seeds JE1 BE1.png|32px]] Added melon seeds.
|[[File:Melon Stem Age 0 JE1.png|32px]] [[File:Stem Age 1 JE1.png|32px]] [[File:Melon Stem Age 2 JE1.png|32px]] [[File:Melon Stem Age 3 JE1.png|32px]] [[File:Melon Stem Age 4 JE1.png|32px]] [[File:Melon Stem Age 5 JE1.png|32px]] [[File:Melon Stem Age 6 JE1.png|32px]] [[File:Melon Stem Age 7 JE1.png|32px]] Added the melon stem, with seven stages of growth.
|Melon seeds can found in the new [[mineshaft]] [[chest]]s.
|[[File:Attached Melon Stem (N) JE1.png|32px]] [[File:Attached Melon Stem (E) JE1.png|32px]] [[File:Attached Melon Stem (S) JE1.png|32px]] [[File:Attached Melon Stem (W) JE1.png|32px]] Melon stems have four slightly visually distinct appearances for each facing direction - the bent part of the stem rotates, but the other two planes do not.
|[[File:Melon Stem Age 8 JE1.png|32px]] [[File:Melon Stem Age 9 JE1.png|32px]] [[File:Melon Stem Age 10 JE1.png|32px]] [[File:Melon Stem Age 11 JE1.png|32px]] [[File:Melon Stem Age 12 JE1.png|32px]] [[File:Melon Stem Age 13 JE1.png|32px]] [[File:Melon Stem Age 14 JE1.png|32px]] [[File:Melon Stem Age 15 JE1.png|32px]] Melon stem data values 8–15 now show a glitched formation, with a floating stem with an attached stem cross eventually emerging below.
|[[File:Attached Stem Age 8 JE1.png|32px]] [[File:Attached Stem Age 9 JE1.png|32px]] [[File:Attached Stem Age 10 JE1.png|32px]] [[File:Attached Stem Age 11 JE1.png|32px]] [[File:Attached Stem Age 12 JE1.png|32px]] [[File:Attached Stem Age 13 JE1.png|32px]] [[File:Attached Stem Age 14 JE1.png|32px]] [[File:Attached Stem Age 15 JE1.png|32px]] Melon stem blocks with data values higher than 7 can now attach to adjacent fruits, which results in buggy stem textures with [[vines]] in the mix due to vines being below attached stems in [[terrain.png]].}}
{{History|||snap=Pre-release 2 ;)|Melon stems can now be grown faster using [[bone meal]].}}
{{History|java}}
{{History||1.3.1|snap=1.3|The texture of melon stems has been moved one pixel to the left in [[terrain.png]].
|[[File:Melon Stem Age 0 JE2.png|32px]] [[File:Melon Stem Age 1 JE2.png|32px]] [[File:Melon Stem Age 2 JE2.png|32px]] [[File:Melon Stem Age 3 JE2.png|32px]] [[File:Melon Stem Age 4 JE2.png|32px]] [[File:Melon Stem Age 5 JE2.png|32px]] [[File:Melon Stem Age 6 JE2.png|32px]] [[File:Melon Stem Age 7 JE2.png|32px]] Stems now appear slightly different.
|[[File:Melon Stem Age 8 JE2.png|32px]] [[File:Melon Stem Age 9 JE2.png|32px]] [[File:Melon Stem Age 10 JE2.png|32px]] [[File:Melon Stem Age 11 JE2.png|32px]] [[File:Melon Stem Age 12 JE2.png|32px]] [[File:Melon Stem Age 13 JE2.png|32px]] [[File:Melon Stem Age 14 JE2.png|32px]] [[File:Melon Stem Age 15 JE2.png|32px]] Overgrown stems now appear slightly different.
|[[File:Attached Melon Stem (N) JE2.png|32px]] [[File:Attached Melon Stem (E) JE2.png|32px]] [[File:Attached Melon Stem (S) JE2.png|32px]] [[File:Attached Melon Stem (W) JE2.png|32px]] Attached melon stems now appear slightly different.
|[[File:Attached Stem Age 8 JE2.png|32px]] [[File:Attached Stem Age 9 JE2.png|32px]] [[File:Attached Stem Age 10 JE2.png|32px]] [[File:Attached Stem Age 11 JE2.png|32px]] [[File:Attached Stem Age 12 JE2.png|32px]] [[File:Attached Stem Age 13 JE2.png|32px]] [[File:Attached Stem Age 14 JE2.png|32px]] [[File:Attached Stem Age 15 JE2.png|32px]] Overgrown attached melon stems now appear slightly different.}}
{{History||1.4.2|snap=12w36a|[[Chicken]]s now use [[wheat seeds]], melon seeds, and [[pumpkin seeds]], instead of [[wheat]] to breed.}}
{{History||1.5|snap=13w02a|[[File:Melon Stem Age 0 JE3.png|32px]] [[File:Melon Stem Age 1 JE3.png|32px]] [[File:Melon Stem Age 2 JE3.png|32px]] [[File:Melon Stem Age 3 JE3.png|32px]] [[File:Melon Stem Age 4 JE3.png|32px]] [[File:Melon Stem Age 5 JE3.png|32px]] [[File:Melon Stem Age 6 JE3.png|32px]] Melon stems now use a squished version of their texture for immature stems, depending on age.
|[[File:Melon Stem Age 8 JE3.png|32px]] [[File:Melon Stem Age 9 JE3.png|32px]] [[File:Melon Stem Age 10 JE3.png|32px]] [[File:Melon Stem Age 11 JE3.png|32px]] [[File:Melon Stem Age 12 JE3.png|32px]] [[File:Melon Stem Age 13 JE3.png|32px]] [[File:Melon Stem Age 14 JE3.png|32px]] [[File:Melon Stem Age 15 JE3.png|32px]] This also affects melon stems of ages 8–15, which are likewise stretched to accommodate its predicted size.
|[[File:Attached Stem Age 8 JE3.png|32px]] [[File:Attached Stem Age 9 JE3.png|32px]] [[File:Attached Stem Age 10 JE3.png|32px]] [[File:Attached Stem Age 11 JE3.png|32px]] [[File:Attached Stem Age 12 JE3.png|32px]] [[File:Attached Stem Age 13 JE3.png|32px]] [[File:Attached Stem Age 14 JE3.png|32px]] [[File:Attached Stem Age 15 JE3.png|32px]] Melon stems of extreme ages, which are attached to adjacent fruits, now show a stretched and tinted stem appearance.}}
{{History|||snap=13w03a|[[File:Melon Stem Age 0 JE4.png|32px]] [[File:Melon Stem Age 1 JE4.png|32px]] [[File:Melon Stem Age 2 JE4.png|32px]] [[File:Melon Stem Age 3 JE4.png|32px]] [[File:Melon Stem Age 4 JE4.png|32px]] [[File:Melon Stem Age 5 JE4.png|32px]] [[File:Melon Stem Age 6 JE4.png|32px]] [[File:Melon Stem Age 7 JE4.png|32px]] Melon stems are no longer squished or stretched to account for age.<ref>{{bug|MC-7111}}</ref>
|[[File:Melon Stem Age 8 JE4.png|32px]] [[File:Melon Stem Age 9 JE4.png|32px]] [[File:Melon Stem Age 10 JE4.png|32px]] [[File:Melon Stem Age 11 JE4.png|32px]] [[File:Melon Stem Age 12 JE4.png|32px]] [[File:Melon Stem Age 13 JE4.png|32px]] [[File:Melon Stem Age 14 JE4.png|32px]] [[File:Melon Stem Age 15 JE4.png|32px]] Melon stems with age values 8 through 15 now show a tinted [[trapdoor]] texture.
|From this version up until 14w08a, overgrown melon stems start to draw from the texture below them on the [[texture atlas]], in much the same way they previously did with terrain.png. However, as texture atlases are unstable and textures tend to change positions as new blocks and textures are added, overgrown stems change the texture they draw from every time new textures are added, which includes when textures added by [[mods]].}}
{{History|||snap=13w09a|[[File:Melon Stem Age 8 JE5.png|32px]] [[File:Melon Stem Age 9 JE5.png|32px]] [[File:Melon Stem Age 10 JE5.png|32px]] [[File:Melon Stem Age 11 JE5.png|32px]] [[File:Melon Stem Age 12 JE5.png|32px]] [[File:Melon Stem Age 13 JE5.png|32px]] [[File:Melon Stem Age 14 JE5.png|32px]] [[File:Melon Stem Age 15 JE5.png|32px]] Melon stems with age values 8–15 now show a tinted [[birch wood]] texture.}}
{{History||1.6.1|snap=13w24a|Melon and pumpkin stems have now been assigned separate textures.
|[[File:Melon Stem Age 8 JE6.png|32px]] [[File:Melon Stem Age 9 JE6.png|32px]] [[File:Melon Stem Age 10 JE6.png|32px]] [[File:Melon Stem Age 11 JE6.png|32px]] [[File:Melon Stem Age 12 JE6.png|32px]] [[File:Melon Stem Age 13 JE6.png|32px]] [[File:Melon Stem Age 14 JE6.png|32px]] [[File:Melon Stem Age 15 JE6.png|32px]] Melon stems with age values 8–15 now show a tinted [[note block]] texture.}}
{{History||1.7.2|snap=13w37a|Added the {{cmd|setblock}} [[commands|command]], allowing for invalid stem ages to be placed in the world without using external editors. This also allows them to be obtained in earlier versions via backdating.}}
{{History|||snap=13w41a|[[File:Melon Stem Age 8 JE7.png|32px]] [[File:Melon Stem Age 9 JE7.png|32px]] [[File:Melon Stem Age 10 JE7.png|32px]] [[File:Melon Stem Age 11 JE7.png|32px]] [[File:Melon Stem Age 12 JE7.png|32px]] [[File:Melon Stem Age 13 JE7.png|32px]] [[File:Melon Stem Age 14 JE7.png|32px]] [[File:Melon Stem Age 15 JE7.png|32px]] Melon stems with age values 8–15 now show a tinted [[netherrack]] texture.}}
{{History||1.8|snap=14w10a|[[File:Melon Stem Age 8 JE8.png|32px]] [[File:Melon Stem Age 9 JE8.png|32px]] [[File:Melon Stem Age 10 JE8.png|32px]] [[File:Melon Stem Age 11 JE8.png|32px]] Melon stems with data values 8–11 now display a tinted attached stem, with 8 facing west, 9 facing east, 10 facing north and 11 facing south.
|Invalid melon stems with data values 12-15 now crash the game.}}
{{History|||snap=14w25a|[[File:Melon Stem Age 0 JE5.png|32px]] [[File:Melon Stem Age 1 JE5.png|32px]] [[File:Melon Stem Age 2 JE5.png|32px]] [[File:Melon Stem Age 3 JE5.png|32px]] [[File:Melon Stem Age 4 JE5.png|32px]] [[File:Melon Stem Age 5 JE5.png|32px]] [[File:Melon Stem Age 6 JE5.png|32px]] [[File:Melon Stem Age 7 JE5.png|32px]] Melon stems now render as a single diagonal plane, or, in the case of attached stems, a diagonal and orthogonal plane.
|[[File:Attached Melon Stem (N) JE3.png|32px]] [[File:Attached Melon Stem (E) JE3.png|32px]] [[File:Attached Melon Stem (S) JE3.png|32px]] [[File:Attached Melon Stem (W) JE3.png|32px]] The attached melon stem [[model]] now fully rotates to the direction the stem points. Prior to this update, the base of the melon stem would stay the same while the long attaching section would differ, resulting in four possible attached stem appearances.
|Invalid overgrown melon stems have effectively been removed from the game, as attempting to place an out of range stem via {{cmd|setblock}} creates a stem of age 0 and loading a world with such stems existing causes a game crash.}}
{{History|||snap=14w26a|[[File:Melon Stem Age 0 JE6.png|32px]] [[File:Melon Stem Age 1 JE6.png|32px]] [[File:Melon Stem Age 2 JE6.png|32px]] [[File:Melon Stem Age 3 JE6.png|32px]] [[File:Melon Stem Age 4 JE6.png|32px]] [[File:Melon Stem Age 5 JE6.png|32px]] [[File:Melon Stem Age 6 JE6.png|32px]] [[File:Melon Stem Age 7 JE6.png|32px]] [[File:Attached Melon Stem (N) JE4.png|32px]] [[File:Attached Melon Stem (E) JE4.png|32px]] [[File:Attached Melon Stem (S) JE4.png|32px]] [[File:Attached Melon Stem (W) JE4.png|32px]] Melon stems now correctly render as crosses again.<ref>{{bug|MC-58136}}</ref>}}
{{History|||snap=14w27a|[[File:Attached Stem Age 0 14w27a.png|32px]] [[File:Attached Stem Age 1 14w27a.png|32px]] [[File:Attached Stem Age 2 14w27a.png|32px]] [[File:Attached Stem Age 3 14w27a.png|32px]] [[File:Attached Stem Age 4 14w27a.png|32px]] [[File:Attached Stem Age 5 14w27a.png|32px]] [[File:Attached Stem Age 6 14w27a.png|32px]] Due to a bug, all melon stems appear attached regardless of age or any actual attachment.<ref>{{bug|MC-60208}}</ref>}}
{{History|||snap=14w28a|All melon stems appearing attached regardless of age or any actual attachment has been fixed. However, melon stems still appear attached to adjacent fruits regardless of age due to a similar bug.<ref>{{bug|MC-61716}}</ref>}}
{{History|||snap=14w34d|Melon seeds can no longer be used for [[breeding]] [[chicken]]s.}}
{{History||1.9|snap=15w31a|Chickens can now use melon seeds to breed again.}}
{{History|||snap=15w44a|Melon seeds have been added to [[dungeon]] [[chest]]s.
|The average yield of melon seeds from [[mineshaft]] chests has been decreased.}}
{{History|||snap=15w45a|Melon stems must now be fully grown again to attach.}}
{{History||1.11|snap=16w39a|Melon seeds can now be found inside chests in the new [[woodland mansion]]s.
|Melon crops now generate inside woodland mansions.}}
{{History||1.12|snap=17w18b|Placing a melon seeds in farmland now gives the player the "A Seedy Place" [[advancement]].{{verify}}}}
{{History||1.13|snap=17w47a|The different block states for the <code>melon_stem</code> ID have been split up into their own IDs.
|Prior to [[1.13/Flattening|''The Flattening'']], this [[block]]'s numeral ID was 105, and the [[item]]'s 362.}}
{{History|||snap=17w48a|Attached melon stems no longer [[drops|drop]] seeds.}}
{{History||1.14|snap=18w43a|[[File:Attached Melon Stem (N) JE5.png|32px]] [[File:Attached Melon Stem (E) JE5.png|32px]] [[File:Attached Melon Stem (S) JE5.png|32px]] [[File:Attached Melon Stem (W) JE5.png|32px]] The texture of attached melon stems has been changed.}}
{{History|||snap=18w49a|Melon stems now generate in the updated [[savanna]] [[village]]s.}}
{{History|||snap=18w50a|Melon stems now generate in the updated [[desert]] [[village]]s.}}
{{History|||snap=19w03a|Placing melon seeds into the new [[composter]] has a 10% chance of raising the compost level by 1.}}
{{History|||snap=19w05a|Melon seeds now have a 30% chance of increasing the compost level in a composter by 1.
|Added [[Wandering Trader|wandering trader]]s, which sell melon seeds.}}
{{History||1.15|snap=19w34a|[[Bee]]s can now pollinate melon stems.}}
{{History|||snap=19w39a|Attached melon stems now [[drops|drop]] seeds again.<ref>{{bug|MC-136360}}</ref>}}
{{History||1.18|snap=Pre-release 5|[[File:Melon Seeds JE2.png|32px]] The texture of melon seeds has been changed.}}
{{History|pocket alpha}}
{{History||v0.5.0|Added melon seeds.
|[[File:Melon Stem Age 0 JE1.png|32px]] [[File:Stem Age 1 JE1.png|32px]] [[File:Melon Stem Age 2 JE1.png|32px]] [[File:Melon Stem Age 3 JE1.png|32px]] [[File:Melon Stem Age 4 JE1.png|32px]] [[File:Melon Stem Age 5 JE1.png|32px]] [[File:Melon Stem Age 6 JE1.png|32px]] [[File:Melon Stem Age 7 JE1.png|32px]] [[File:Attached Melon Stem (N) JE1.png|32px]] [[File:Attached Melon Stem (E) JE1.png|32px]] [[File:Attached Melon Stem (S) JE1.png|32px]] [[File:Attached Melon Stem (W) JE1.png|32px]]{{verify|Are these models correct?}} Added melon stems.}}
{{History||v0.6.0|[[File:Melon Seeds JE1 BE1.png|32px]] Melon seeds no longer use the pumpkin seeds texture.}}
{{History||v0.9.0|snap=?|Melon seeds can now be found in [[mineshaft]] chests.}}
{{History||v0.12.1|snap=build 1|Melon seeds are no longer available from the [[Nether reactor]].}}
{{History||v0.14.0|snap=build 1|Melon seeds can now be found in [[minecart with chest|minecarts with chests]] in [[mineshaft]]s.}}
{{History|pocket}}
{{History||1.0.0|snap=alpha 0.17.0.1|Melon seeds now generate inside [[dungeon]] [[chest]]s.}}
{{History||1.1.0|snap=alpha 1.1.0.0|Melon crops now generate inside [[woodland mansion]]s.
|Melon seeds can now be found in woodland mansion chests.}}
{{History|bedrock}}
{{History||1.2.0|snap=beta 1.2.0.2|Melon seeds can now be found inside [[bonus chest]]s.
|Melon seeds are now used to tame [[parrot]]s.}}
{{History||1.10.0|snap=beta 1.10.0.3|[[File:Attached Melon Stem (W) JE5.png|32px]]{{info needed|More accurate image}} The texture of attached melon stems has been changed.
|Melon stems now generate in [[savanna]] and [[desert]] [[village]] farms.
|Added [[wandering trader]]s, who [[trading|sell]] melon seeds.}}
{{History||1.11.0|snap=beta 1.11.0.1|Melon seeds can now be used to fill up [[composter]]s.}}
{{History||1.14.0|snap=beta 1.14.0.1|[[Bee]]s can now pollinate melon stems.}}
{{History|console}}
{{History||xbox=TU5|xbone=CU1|ps=1.0|wiiu=Patch 1|[[File:Melon Seeds JE1 BE1.png|32px]] Added melon seeds.
|[[File:Melon Stem Age 0 JE1.png|32px]] [[File:Stem Age 1 JE1.png|32px]] [[File:Melon Stem Age 2 JE1.png|32px]] [[File:Melon Stem Age 3 JE1.png|32px]] [[File:Melon Stem Age 4 JE1.png|32px]] [[File:Melon Stem Age 5 JE1.png|32px]] [[File:Melon Stem Age 6 JE1.png|32px]] [[File:Melon Stem Age 7 JE1.png|32px]] [[File:Attached Melon Stem (N) JE1.png|32px]] [[File:Attached Melon Stem (E) JE1.png|32px]] [[File:Attached Melon Stem (S) JE1.png|32px]] [[File:Attached Melon Stem (W) JE1.png|32px]]{{verify|Are these models correct?}} Added melon stems.}}
{{History||xbox=none|xbone=none|ps=1.90|wiiu=none|switch=none|[[File:Attached Melon Stem (W) JE5.png|32px]]{{info needed|More accurate image}} The texture of attached melon stems has been changed.}}
{{History|New 3DS}}
{{History||0.1.0|[[File:Melon Stem Age 0 JE1.png|32px]] [[File:Stem Age 1 JE1.png|32px]] [[File:Melon Stem Age 2 JE1.png|32px]] [[File:Melon Stem Age 3 JE1.png|32px]] [[File:Melon Stem Age 4 JE1.png|32px]] [[File:Melon Stem Age 5 JE1.png|32px]] [[File:Melon Stem Age 6 JE1.png|32px]] [[File:Melon Stem Age 7 JE1.png|32px]] [[File:Attached Melon Stem (N) JE1.png|32px]] [[File:Attached Melon Stem (E) JE1.png|32px]] [[File:Attached Melon Stem (S) JE1.png|32px]] [[File:Attached Melon Stem (W) JE1.png|32px]]{{verify|Are these models correct?}} Added melon stems.}}
{{History|foot}}
<gallery>
Melon Stem with data value 15.png|The final version of the melon stem with age 15, as seen in-game.
Melonstems.png|Melon stems of ages 1–15 on a modded version of 1.7.2, hence the melon stems using the melon top texture.
Stems of 13w02a.png|All 16 stem sizes in 13w02a, with accompanying data values.
</gallery>
=== Melon stem "item" ===
{{:Technical blocks/Melon Stem}}
== Issues ==
{{issue list}}
== Gallery ==
<gallery>
Stem All Ages.png|All stages of growth.
AllSeeds.png|All the [[seeds]] that exist in the game.
</gallery>
== See also ==
* [[Melon]]
* [[Pumpkin Seeds]]
==References==
{{Reflist}}
{{Blocks|vegetation}}
{{Items}}
[[Category:Plants]]
[[Category:Food]]
[[Category:Non-solid blocks]]
[[Category:Generated structure blocks]]
[[cs:Semínka melounu]]
[[de:Melone]]
[[es:Semillas de sandía]]
[[fr:Graines de pastèque]]
[[hu:Dinnyemagok]]
[[it:Anguria]]
[[ja:スイカの種]]
[[ko:수박씨]]
[[nl:Meloenzaden]]
[[pl:Nasiona arbuza]]
[[pt:Sementes de melancia]]
[[ru:Семена арбуза]]
[[th:เมล็ดแตงโม]]
[[zh:西瓜种子]]</li></ul> | Release Candidate 1 | Changed format number to 6, due to changes to wall blocks made in 1.16 according to MC-197275. | |||
| Pocket Edition Alpha | |||||
0.15.0{{Extension DPL}}<ul><li>[[Melon Seeds|Melon Seeds]]<br/>{{Block
|image = <gallery>
Melon Stem Age 0.png | Age 0
Melon Stem Age 1.png | Age 1
Melon Stem Age 2.png | Age 2
Melon Stem Age 3.png | Age 3
Melon Stem Age 4.png | Age 4
Melon Stem Age 5.png | Age 5
Melon Stem Age 6.png | Age 6
Melon Stem Age 7.png | Age 7
</gallery>
| image2 = <gallery>
Attached Melon Stem (N).png | North
Attached Melon Stem (E).png | East
Attached Melon Stem (S).png | South
Attached Melon Stem (W).png | West
</gallery>
| transparent = Yes
| light = No
| tool = none
| renewable = Yes
| stackable = Yes (64)
| flammable = No
| lavasusceptible = No
}}'''Melon seeds''' are items obtained from [[Melon Slice|melon slices]] that can be used to grow melon stems.
'''Melon stems''' are plants grown on [[farmland]] that, over time, grow [[melon]]s on dirt, mud and moss blocks adjacent to them.
== Obtaining ==
=== Breaking ===
When broken, a melon stem drops 0–3 melon seeds. The chance for melon seeds to drop increases with the stem's age.
{| class="wikitable"
! rowspan="3" |[[Resource location]]
! rowspan="3" | Source
! colspan="4" | Default
|-
| colspan="1" rowspan="2" style="text-align:center" | Nothing || colspan="3" style="text-align:center" |{{ItemLink|Melon Seeds|Melon seeds}}
|-
| style="text-align:center" | 1 || style="text-align:center" | 2 || style="text-align:center" | 3
|-
| rowspan="8" |<code>blocks/melon_stem</code>
|{{BlockLink|Melon Stem|Melon stem}} <code>age = 0</code>
| style="text-align:center" |81.3%|| style="text-align:center" |17.42%|| style="text-align:center" |1.24%|| style="text-align:center" |0.03%
|-
|{{BlockLink|Melon Stem|Melon stem}} <code>age = 1</code>
| style="text-align:center" |65.1%|| style="text-align:center" |30.04%|| style="text-align:center" |4.62%|| style="text-align:center" |0.24%
|-
|{{BlockLink|Melon Stem|Melon stem}} <code>age = 2</code>
| style="text-align:center" |51.2%|| style="text-align:center" |38.4%|| style="text-align:center" |9.6%|| style="text-align:center" |0.8%
|-
|{{BlockLink|Melon Stem|Melon stem}} <code>age = 3</code>
| style="text-align:center" |39.44%|| style="text-align:center" |43.02%|| style="text-align:center" |15.64%|| style="text-align:center" |1.9%
|-
|{{BlockLink|Melon Stem|Melon stem}} <code>age = 4</code>
| style="text-align:center" |29.13%|| style="text-align:center" |44.44%|| style="text-align:center" |22.22%|| style="text-align:center" |3.7%
|-
|{{BlockLink|Melon Stem|Melon stem}} <code>age = 5</code>
| style="text-align:center" |21.6%|| style="text-align:center" |43.2%|| style="text-align:center" |28.8%|| style="text-align:center" |6.4%
|-
|{{BlockLink|Melon Stem|Melon stem}} <code>age = 6</code>
| style="text-align:center" |15.17%|| style="text-align:center" |39.82%|| style="text-align:center" |34.84%|| style="text-align:center" |10.16%
|-
|{{BlockLink|Melon Stem|Melon stem}} <code>age = 7</code>
| style="text-align:center" |10.16%|| style="text-align:center" |34.84%|| style="text-align:center" |39.82%|| style="text-align:center" |15.17%
|-
| rowspan="1" |<code>blocks/attached_melon_stem</code>
|{{BlockLink|Attached Melon Stem|Attached Melon stem}}
| style="text-align:center" |10.16%|| style="text-align:center" |34.84%|| style="text-align:center" |39.82%|| style="text-align:center" |15.17%
|}
=== Natural generation ===
Melon stems generate naturally in stem farm inside [[woodland mansion]]s.
Melon stems generate in 20% of the farm plots in [[savanna]] [[village]]s, and 10% of the farm plots in [[desert]] villages.
=== Chest loot ===
{{LootChestItem|melon-seeds}}
=== Crafting ===
{{Crafting
|Melon Slice
|Output= Melon Seeds
|type= Material
}}
=== Trading ===
[[Wandering trader]]s sell melon seeds for 1 [[emerald]].
== Usage ==
=== Farming ===
{{see also|Tutorials/Pumpkin and melon farming}}
Melon seeds can be planted only on [[farmland]], as stems. Over time, a stem grows through several stages<sup>[''[[Talk:Pumpkin Seeds|needs testing]]'']</sup> and, at its final growth stage, will produce [[melon]]s on any adjacent [[dirt]], [[Coarse Dirt|coarse dirt]], [[Rooted Dirt|rooted dirt]], [[Grass Block|grass block]], [[farmland]], [[podzol]], [[mycelium]], [[Moss Block|moss block]], [[mud]] or [[Muddy Mangrove Roots|muddy mangrove roots]]. If a melon is already occupying a spot adjacent to a stem it does not grow more melons until the melons is removed. A single stem can grow an unlimited number of melons. Melon stems need a minimum light level of 10 in the block above the stem to grow and give melons. Melon seeds are affected by [[bone meal]] only with respect to stem growth; bone meal does not help produce the actual melons.
=== Breeding ===
Like other seeds, melon seeds can be used to [[breed]] [[chicken]]s, lead chickens around, and make baby chickens grow up faster by 10% of the remaining time.
=== Taming ===
Like other seeds, melon seeds can be used to tame [[parrot]]s.
=== Composting ===
Placing melon seeds into a [[composter]] has a 30% chance of raising the compost level by 1.
== Melon Stem ==
A '''melon stem''' is the block that is planted on [[farmland]] when melon seeds are used on it. It starts underground, and rises up as the plant grows. The stem is colored green when young, and then yellow once fully grown.
The stem curves once a melon has grown from it. A fully-grown single stem connects to any [[melon]] in an adjacent square, thus there are 5 possible appearances to a stem. If there are multiple melons it can connect to, it favors the east, then west, north, and south. When the melon is removed, the stem returns to its straight shape.
== Sounds ==
{{Sound table/Block/Hard crop}}
== Data values ==
=== ID ===
{{edition|java}}:
{{ID table
|edition=java
|showblocktags=y
|showforms=y
|generatetranslationkeys=y
|displayname=Melon Stem
|spritetype=block
|nameid=melon_stem
|blocktags=bee_growables, crops
|form=block}}
{{ID table
|displayname=Attached Melon Stem
|spritetype=block
|nameid=attached_melon_stem
|form=block}}
{{ID table
|displayname=Melon Seeds
|spritetype=item
|nameid=melon_seeds
|form=item
|foot=1}}
{{edition|bedrock}}:
{{ID table
|edition=bedrock
|shownumericids=y
|showforms=y
|generatetranslationkeys=y
|displayname=Melon Stem
|spritetype=block
|nameid=melon_stem
|id=105
|form=block
|translationkey=-}}
{{ID table
|displayname=Melon Seeds
|spritetype=item
|nameid=melon_seeds
|id=293
|form=item
|foot=1}}
=== Block states ===
{{see also|Block states}}
{{/BS}}
== Advancements ==
{{load advancements|A Seedy Place}}
== History ==
{{info needed section|check if stems floated above farmland upon initial implementation}}
{{History|java beta}}
{{History||1.8|snap=Pre-release|[[File:Melon Seeds JE1 BE1.png|32px]] Added melon seeds.
|[[File:Melon Stem Age 0 JE1.png|32px]] [[File:Stem Age 1 JE1.png|32px]] [[File:Melon Stem Age 2 JE1.png|32px]] [[File:Melon Stem Age 3 JE1.png|32px]] [[File:Melon Stem Age 4 JE1.png|32px]] [[File:Melon Stem Age 5 JE1.png|32px]] [[File:Melon Stem Age 6 JE1.png|32px]] [[File:Melon Stem Age 7 JE1.png|32px]] Added the melon stem, with seven stages of growth.
|Melon seeds can found in the new [[mineshaft]] [[chest]]s.
|[[File:Attached Melon Stem (N) JE1.png|32px]] [[File:Attached Melon Stem (E) JE1.png|32px]] [[File:Attached Melon Stem (S) JE1.png|32px]] [[File:Attached Melon Stem (W) JE1.png|32px]] Melon stems have four slightly visually distinct appearances for each facing direction - the bent part of the stem rotates, but the other two planes do not.
|[[File:Melon Stem Age 8 JE1.png|32px]] [[File:Melon Stem Age 9 JE1.png|32px]] [[File:Melon Stem Age 10 JE1.png|32px]] [[File:Melon Stem Age 11 JE1.png|32px]] [[File:Melon Stem Age 12 JE1.png|32px]] [[File:Melon Stem Age 13 JE1.png|32px]] [[File:Melon Stem Age 14 JE1.png|32px]] [[File:Melon Stem Age 15 JE1.png|32px]] Melon stem data values 8–15 now show a glitched formation, with a floating stem with an attached stem cross eventually emerging below.
|[[File:Attached Stem Age 8 JE1.png|32px]] [[File:Attached Stem Age 9 JE1.png|32px]] [[File:Attached Stem Age 10 JE1.png|32px]] [[File:Attached Stem Age 11 JE1.png|32px]] [[File:Attached Stem Age 12 JE1.png|32px]] [[File:Attached Stem Age 13 JE1.png|32px]] [[File:Attached Stem Age 14 JE1.png|32px]] [[File:Attached Stem Age 15 JE1.png|32px]] Melon stem blocks with data values higher than 7 can now attach to adjacent fruits, which results in buggy stem textures with [[vines]] in the mix due to vines being below attached stems in [[terrain.png]].}}
{{History|||snap=Pre-release 2 ;)|Melon stems can now be grown faster using [[bone meal]].}}
{{History|java}}
{{History||1.3.1|snap=1.3|The texture of melon stems has been moved one pixel to the left in [[terrain.png]].
|[[File:Melon Stem Age 0 JE2.png|32px]] [[File:Melon Stem Age 1 JE2.png|32px]] [[File:Melon Stem Age 2 JE2.png|32px]] [[File:Melon Stem Age 3 JE2.png|32px]] [[File:Melon Stem Age 4 JE2.png|32px]] [[File:Melon Stem Age 5 JE2.png|32px]] [[File:Melon Stem Age 6 JE2.png|32px]] [[File:Melon Stem Age 7 JE2.png|32px]] Stems now appear slightly different.
|[[File:Melon Stem Age 8 JE2.png|32px]] [[File:Melon Stem Age 9 JE2.png|32px]] [[File:Melon Stem Age 10 JE2.png|32px]] [[File:Melon Stem Age 11 JE2.png|32px]] [[File:Melon Stem Age 12 JE2.png|32px]] [[File:Melon Stem Age 13 JE2.png|32px]] [[File:Melon Stem Age 14 JE2.png|32px]] [[File:Melon Stem Age 15 JE2.png|32px]] Overgrown stems now appear slightly different.
|[[File:Attached Melon Stem (N) JE2.png|32px]] [[File:Attached Melon Stem (E) JE2.png|32px]] [[File:Attached Melon Stem (S) JE2.png|32px]] [[File:Attached Melon Stem (W) JE2.png|32px]] Attached melon stems now appear slightly different.
|[[File:Attached Stem Age 8 JE2.png|32px]] [[File:Attached Stem Age 9 JE2.png|32px]] [[File:Attached Stem Age 10 JE2.png|32px]] [[File:Attached Stem Age 11 JE2.png|32px]] [[File:Attached Stem Age 12 JE2.png|32px]] [[File:Attached Stem Age 13 JE2.png|32px]] [[File:Attached Stem Age 14 JE2.png|32px]] [[File:Attached Stem Age 15 JE2.png|32px]] Overgrown attached melon stems now appear slightly different.}}
{{History||1.4.2|snap=12w36a|[[Chicken]]s now use [[wheat seeds]], melon seeds, and [[pumpkin seeds]], instead of [[wheat]] to breed.}}
{{History||1.5|snap=13w02a|[[File:Melon Stem Age 0 JE3.png|32px]] [[File:Melon Stem Age 1 JE3.png|32px]] [[File:Melon Stem Age 2 JE3.png|32px]] [[File:Melon Stem Age 3 JE3.png|32px]] [[File:Melon Stem Age 4 JE3.png|32px]] [[File:Melon Stem Age 5 JE3.png|32px]] [[File:Melon Stem Age 6 JE3.png|32px]] Melon stems now use a squished version of their texture for immature stems, depending on age.
|[[File:Melon Stem Age 8 JE3.png|32px]] [[File:Melon Stem Age 9 JE3.png|32px]] [[File:Melon Stem Age 10 JE3.png|32px]] [[File:Melon Stem Age 11 JE3.png|32px]] [[File:Melon Stem Age 12 JE3.png|32px]] [[File:Melon Stem Age 13 JE3.png|32px]] [[File:Melon Stem Age 14 JE3.png|32px]] [[File:Melon Stem Age 15 JE3.png|32px]] This also affects melon stems of ages 8–15, which are likewise stretched to accommodate its predicted size.
|[[File:Attached Stem Age 8 JE3.png|32px]] [[File:Attached Stem Age 9 JE3.png|32px]] [[File:Attached Stem Age 10 JE3.png|32px]] [[File:Attached Stem Age 11 JE3.png|32px]] [[File:Attached Stem Age 12 JE3.png|32px]] [[File:Attached Stem Age 13 JE3.png|32px]] [[File:Attached Stem Age 14 JE3.png|32px]] [[File:Attached Stem Age 15 JE3.png|32px]] Melon stems of extreme ages, which are attached to adjacent fruits, now show a stretched and tinted stem appearance.}}
{{History|||snap=13w03a|[[File:Melon Stem Age 0 JE4.png|32px]] [[File:Melon Stem Age 1 JE4.png|32px]] [[File:Melon Stem Age 2 JE4.png|32px]] [[File:Melon Stem Age 3 JE4.png|32px]] [[File:Melon Stem Age 4 JE4.png|32px]] [[File:Melon Stem Age 5 JE4.png|32px]] [[File:Melon Stem Age 6 JE4.png|32px]] [[File:Melon Stem Age 7 JE4.png|32px]] Melon stems are no longer squished or stretched to account for age.<ref>{{bug|MC-7111}}</ref>
|[[File:Melon Stem Age 8 JE4.png|32px]] [[File:Melon Stem Age 9 JE4.png|32px]] [[File:Melon Stem Age 10 JE4.png|32px]] [[File:Melon Stem Age 11 JE4.png|32px]] [[File:Melon Stem Age 12 JE4.png|32px]] [[File:Melon Stem Age 13 JE4.png|32px]] [[File:Melon Stem Age 14 JE4.png|32px]] [[File:Melon Stem Age 15 JE4.png|32px]] Melon stems with age values 8 through 15 now show a tinted [[trapdoor]] texture.
|From this version up until 14w08a, overgrown melon stems start to draw from the texture below them on the [[texture atlas]], in much the same way they previously did with terrain.png. However, as texture atlases are unstable and textures tend to change positions as new blocks and textures are added, overgrown stems change the texture they draw from every time new textures are added, which includes when textures added by [[mods]].}}
{{History|||snap=13w09a|[[File:Melon Stem Age 8 JE5.png|32px]] [[File:Melon Stem Age 9 JE5.png|32px]] [[File:Melon Stem Age 10 JE5.png|32px]] [[File:Melon Stem Age 11 JE5.png|32px]] [[File:Melon Stem Age 12 JE5.png|32px]] [[File:Melon Stem Age 13 JE5.png|32px]] [[File:Melon Stem Age 14 JE5.png|32px]] [[File:Melon Stem Age 15 JE5.png|32px]] Melon stems with age values 8–15 now show a tinted [[birch wood]] texture.}}
{{History||1.6.1|snap=13w24a|Melon and pumpkin stems have now been assigned separate textures.
|[[File:Melon Stem Age 8 JE6.png|32px]] [[File:Melon Stem Age 9 JE6.png|32px]] [[File:Melon Stem Age 10 JE6.png|32px]] [[File:Melon Stem Age 11 JE6.png|32px]] [[File:Melon Stem Age 12 JE6.png|32px]] [[File:Melon Stem Age 13 JE6.png|32px]] [[File:Melon Stem Age 14 JE6.png|32px]] [[File:Melon Stem Age 15 JE6.png|32px]] Melon stems with age values 8–15 now show a tinted [[note block]] texture.}}
{{History||1.7.2|snap=13w37a|Added the {{cmd|setblock}} [[commands|command]], allowing for invalid stem ages to be placed in the world without using external editors. This also allows them to be obtained in earlier versions via backdating.}}
{{History|||snap=13w41a|[[File:Melon Stem Age 8 JE7.png|32px]] [[File:Melon Stem Age 9 JE7.png|32px]] [[File:Melon Stem Age 10 JE7.png|32px]] [[File:Melon Stem Age 11 JE7.png|32px]] [[File:Melon Stem Age 12 JE7.png|32px]] [[File:Melon Stem Age 13 JE7.png|32px]] [[File:Melon Stem Age 14 JE7.png|32px]] [[File:Melon Stem Age 15 JE7.png|32px]] Melon stems with age values 8–15 now show a tinted [[netherrack]] texture.}}
{{History||1.8|snap=14w10a|[[File:Melon Stem Age 8 JE8.png|32px]] [[File:Melon Stem Age 9 JE8.png|32px]] [[File:Melon Stem Age 10 JE8.png|32px]] [[File:Melon Stem Age 11 JE8.png|32px]] Melon stems with data values 8–11 now display a tinted attached stem, with 8 facing west, 9 facing east, 10 facing north and 11 facing south.
|Invalid melon stems with data values 12-15 now crash the game.}}
{{History|||snap=14w25a|[[File:Melon Stem Age 0 JE5.png|32px]] [[File:Melon Stem Age 1 JE5.png|32px]] [[File:Melon Stem Age 2 JE5.png|32px]] [[File:Melon Stem Age 3 JE5.png|32px]] [[File:Melon Stem Age 4 JE5.png|32px]] [[File:Melon Stem Age 5 JE5.png|32px]] [[File:Melon Stem Age 6 JE5.png|32px]] [[File:Melon Stem Age 7 JE5.png|32px]] Melon stems now render as a single diagonal plane, or, in the case of attached stems, a diagonal and orthogonal plane.
|[[File:Attached Melon Stem (N) JE3.png|32px]] [[File:Attached Melon Stem (E) JE3.png|32px]] [[File:Attached Melon Stem (S) JE3.png|32px]] [[File:Attached Melon Stem (W) JE3.png|32px]] The attached melon stem [[model]] now fully rotates to the direction the stem points. Prior to this update, the base of the melon stem would stay the same while the long attaching section would differ, resulting in four possible attached stem appearances.
|Invalid overgrown melon stems have effectively been removed from the game, as attempting to place an out of range stem via {{cmd|setblock}} creates a stem of age 0 and loading a world with such stems existing causes a game crash.}}
{{History|||snap=14w26a|[[File:Melon Stem Age 0 JE6.png|32px]] [[File:Melon Stem Age 1 JE6.png|32px]] [[File:Melon Stem Age 2 JE6.png|32px]] [[File:Melon Stem Age 3 JE6.png|32px]] [[File:Melon Stem Age 4 JE6.png|32px]] [[File:Melon Stem Age 5 JE6.png|32px]] [[File:Melon Stem Age 6 JE6.png|32px]] [[File:Melon Stem Age 7 JE6.png|32px]] [[File:Attached Melon Stem (N) JE4.png|32px]] [[File:Attached Melon Stem (E) JE4.png|32px]] [[File:Attached Melon Stem (S) JE4.png|32px]] [[File:Attached Melon Stem (W) JE4.png|32px]] Melon stems now correctly render as crosses again.<ref>{{bug|MC-58136}}</ref>}}
{{History|||snap=14w27a|[[File:Attached Stem Age 0 14w27a.png|32px]] [[File:Attached Stem Age 1 14w27a.png|32px]] [[File:Attached Stem Age 2 14w27a.png|32px]] [[File:Attached Stem Age 3 14w27a.png|32px]] [[File:Attached Stem Age 4 14w27a.png|32px]] [[File:Attached Stem Age 5 14w27a.png|32px]] [[File:Attached Stem Age 6 14w27a.png|32px]] Due to a bug, all melon stems appear attached regardless of age or any actual attachment.<ref>{{bug|MC-60208}}</ref>}}
{{History|||snap=14w28a|All melon stems appearing attached regardless of age or any actual attachment has been fixed. However, melon stems still appear attached to adjacent fruits regardless of age due to a similar bug.<ref>{{bug|MC-61716}}</ref>}}
{{History|||snap=14w34d|Melon seeds can no longer be used for [[breeding]] [[chicken]]s.}}
{{History||1.9|snap=15w31a|Chickens can now use melon seeds to breed again.}}
{{History|||snap=15w44a|Melon seeds have been added to [[dungeon]] [[chest]]s.
|The average yield of melon seeds from [[mineshaft]] chests has been decreased.}}
{{History|||snap=15w45a|Melon stems must now be fully grown again to attach.}}
{{History||1.11|snap=16w39a|Melon seeds can now be found inside chests in the new [[woodland mansion]]s.
|Melon crops now generate inside woodland mansions.}}
{{History||1.12|snap=17w18b|Placing a melon seeds in farmland now gives the player the "A Seedy Place" [[advancement]].{{verify}}}}
{{History||1.13|snap=17w47a|The different block states for the <code>melon_stem</code> ID have been split up into their own IDs.
|Prior to [[1.13/Flattening|''The Flattening'']], this [[block]]'s numeral ID was 105, and the [[item]]'s 362.}}
{{History|||snap=17w48a|Attached melon stems no longer [[drops|drop]] seeds.}}
{{History||1.14|snap=18w43a|[[File:Attached Melon Stem (N) JE5.png|32px]] [[File:Attached Melon Stem (E) JE5.png|32px]] [[File:Attached Melon Stem (S) JE5.png|32px]] [[File:Attached Melon Stem (W) JE5.png|32px]] The texture of attached melon stems has been changed.}}
{{History|||snap=18w49a|Melon stems now generate in the updated [[savanna]] [[village]]s.}}
{{History|||snap=18w50a|Melon stems now generate in the updated [[desert]] [[village]]s.}}
{{History|||snap=19w03a|Placing melon seeds into the new [[composter]] has a 10% chance of raising the compost level by 1.}}
{{History|||snap=19w05a|Melon seeds now have a 30% chance of increasing the compost level in a composter by 1.
|Added [[Wandering Trader|wandering trader]]s, which sell melon seeds.}}
{{History||1.15|snap=19w34a|[[Bee]]s can now pollinate melon stems.}}
{{History|||snap=19w39a|Attached melon stems now [[drops|drop]] seeds again.<ref>{{bug|MC-136360}}</ref>}}
{{History||1.18|snap=Pre-release 5|[[File:Melon Seeds JE2.png|32px]] The texture of melon seeds has been changed.}}
{{History|pocket alpha}}
{{History||v0.5.0|Added melon seeds.
|[[File:Melon Stem Age 0 JE1.png|32px]] [[File:Stem Age 1 JE1.png|32px]] [[File:Melon Stem Age 2 JE1.png|32px]] [[File:Melon Stem Age 3 JE1.png|32px]] [[File:Melon Stem Age 4 JE1.png|32px]] [[File:Melon Stem Age 5 JE1.png|32px]] [[File:Melon Stem Age 6 JE1.png|32px]] [[File:Melon Stem Age 7 JE1.png|32px]] [[File:Attached Melon Stem (N) JE1.png|32px]] [[File:Attached Melon Stem (E) JE1.png|32px]] [[File:Attached Melon Stem (S) JE1.png|32px]] [[File:Attached Melon Stem (W) JE1.png|32px]]{{verify|Are these models correct?}} Added melon stems.}}
{{History||v0.6.0|[[File:Melon Seeds JE1 BE1.png|32px]] Melon seeds no longer use the pumpkin seeds texture.}}
{{History||v0.9.0|snap=?|Melon seeds can now be found in [[mineshaft]] chests.}}
{{History||v0.12.1|snap=build 1|Melon seeds are no longer available from the [[Nether reactor]].}}
{{History||v0.14.0|snap=build 1|Melon seeds can now be found in [[minecart with chest|minecarts with chests]] in [[mineshaft]]s.}}
{{History|pocket}}
{{History||1.0.0|snap=alpha 0.17.0.1|Melon seeds now generate inside [[dungeon]] [[chest]]s.}}
{{History||1.1.0|snap=alpha 1.1.0.0|Melon crops now generate inside [[woodland mansion]]s.
|Melon seeds can now be found in woodland mansion chests.}}
{{History|bedrock}}
{{History||1.2.0|snap=beta 1.2.0.2|Melon seeds can now be found inside [[bonus chest]]s.
|Melon seeds are now used to tame [[parrot]]s.}}
{{History||1.10.0|snap=beta 1.10.0.3|[[File:Attached Melon Stem (W) JE5.png|32px]]{{info needed|More accurate image}} The texture of attached melon stems has been changed.
|Melon stems now generate in [[savanna]] and [[desert]] [[village]] farms.
|Added [[wandering trader]]s, who [[trading|sell]] melon seeds.}}
{{History||1.11.0|snap=beta 1.11.0.1|Melon seeds can now be used to fill up [[composter]]s.}}
{{History||1.14.0|snap=beta 1.14.0.1|[[Bee]]s can now pollinate melon stems.}}
{{History|console}}
{{History||xbox=TU5|xbone=CU1|ps=1.0|wiiu=Patch 1|[[File:Melon Seeds JE1 BE1.png|32px]] Added melon seeds.
|[[File:Melon Stem Age 0 JE1.png|32px]] [[File:Stem Age 1 JE1.png|32px]] [[File:Melon Stem Age 2 JE1.png|32px]] [[File:Melon Stem Age 3 JE1.png|32px]] [[File:Melon Stem Age 4 JE1.png|32px]] [[File:Melon Stem Age 5 JE1.png|32px]] [[File:Melon Stem Age 6 JE1.png|32px]] [[File:Melon Stem Age 7 JE1.png|32px]] [[File:Attached Melon Stem (N) JE1.png|32px]] [[File:Attached Melon Stem (E) JE1.png|32px]] [[File:Attached Melon Stem (S) JE1.png|32px]] [[File:Attached Melon Stem (W) JE1.png|32px]]{{verify|Are these models correct?}} Added melon stems.}}
{{History||xbox=none|xbone=none|ps=1.90|wiiu=none|switch=none|[[File:Attached Melon Stem (W) JE5.png|32px]]{{info needed|More accurate image}} The texture of attached melon stems has been changed.}}
{{History|New 3DS}}
{{History||0.1.0|[[File:Melon Stem Age 0 JE1.png|32px]] [[File:Stem Age 1 JE1.png|32px]] [[File:Melon Stem Age 2 JE1.png|32px]] [[File:Melon Stem Age 3 JE1.png|32px]] [[File:Melon Stem Age 4 JE1.png|32px]] [[File:Melon Stem Age 5 JE1.png|32px]] [[File:Melon Stem Age 6 JE1.png|32px]] [[File:Melon Stem Age 7 JE1.png|32px]] [[File:Attached Melon Stem (N) JE1.png|32px]] [[File:Attached Melon Stem (E) JE1.png|32px]] [[File:Attached Melon Stem (S) JE1.png|32px]] [[File:Attached Melon Stem (W) JE1.png|32px]]{{verify|Are these models correct?}} Added melon stems.}}
{{History|foot}}
<gallery>
Melon Stem with data value 15.png|The final version of the melon stem with age 15, as seen in-game.
Melonstems.png|Melon stems of ages 1–15 on a modded version of 1.7.2, hence the melon stems using the melon top texture.
Stems of 13w02a.png|All 16 stem sizes in 13w02a, with accompanying data values.
</gallery>
=== Melon stem "item" ===
{{:Technical blocks/Melon Stem}}
== Issues ==
{{issue list}}
== Gallery ==
<gallery>
Stem All Ages.png|All stages of growth.
AllSeeds.png|All the [[seeds]] that exist in the game.
</gallery>
== See also ==
* [[Melon]]
* [[Pumpkin Seeds]]
==References==
{{Reflist}}
{{Blocks|vegetation}}
{{Items}}
[[Category:Plants]]
[[Category:Food]]
[[Category:Non-solid blocks]]
[[Category:Generated structure blocks]]
[[cs:Semínka melounu]]
[[de:Melone]]
[[es:Semillas de sandía]]
[[fr:Graines de pastèque]]
[[hu:Dinnyemagok]]
[[it:Anguria]]
[[ja:スイカの種]]
[[ko:수박씨]]
[[nl:Meloenzaden]]
[[pl:Nasiona arbuza]]
[[pt:Sementes de melancia]]
[[ru:Семена арбуза]]
[[th:เมล็ดแตงโม]]
[[zh:西瓜种子]]</li><li>[[Trial Key|Trial Key]]<br/>{{Item|
|image=Trial Key .webp
|renewable=Yes
|stackable=Yes (64)
}}
{{Stub}}
{{in dev|java|bedrock|1.21|1.21.0}}
A '''Trial Key''' is an item found in [[Trial Chambers]].
Its functionality remained a mystery for a pretty good time, but on the Minecraft Monthly of January 2024, it has been revealed to open vaults, which once opened will drop an item. It's still unknown what will the loot be, but was seen dispensing the following:
Enchanted iron helmet, enchanted iron leggings, enchanted crossbow, enchanted diamond chestplate, iron, gold and diamond horse armour, enchanted golden apple, saddle, enchanted diamond axe, enchanted iron pickaxe and enchanted iron Shovel.
The trial key can currently be obtained from trial spawners (50%), or from pots and chests (8%).
[[Category:Items]]
[[ja:Trial Key]]
[[lzh:煉管]]</li></ul> | ? | Added the first custom in-game resource packs, Plastic and City. | |||
| Bedrock Edition | |||||
1.10.0{{Extension DPL}}<ul><li>[[Glowstone Dust|Glowstone Dust]]<br/>{{Item
| image = Glowstone Dust.png
|type=
| renewable = Yes
| stackable = Yes (64)
}}
'''Glowstone dust''' is an [[item]] obtained from mining [[glowstone]], and is mainly used to create [[potion]]s with increased strength and decreased duration.
== Obtaining ==
=== Mining ===
When broken using anything other than a [[Silk Touch]]-enchanted [[tool]], a [[glowstone]] block drops 2-4 glowstone dust. A [[Fortune]] enchantment increases the chances of higher drops, with Fortune III allowing an average yield of 3.5 glowstone dust per block.
=== Mob loot ===
[[Witch]]es have a chance of dropping 0–6 glowstone dust upon death. This is increased by 3 per level of [[Looting]], for a maximum of 0-15 glowstone dust. <!-- Do not add the blaze as it is in violation of MCW:UPTODATE due to the Legacy Console Edition being discontinued. Any edit that adds the blaze to this section will be immediately reverted. -->
=== Trading ===
{{IN|bedrock}}, journeyman-level cleric [[villager]]s sell one glowstone dust for 4 [[emerald]]s as part of their trades.
== Usage ==
=== Crafting ingredient ===
{{crafting usage}}
=== Brewing ingredient ===
{{brewing
|showname=1
|head=1
|Glowstone Dust
|Thick Potion
|base=Water Bottle
}}
{{brewing
|name=Increased Potency
|showbase=1
|Glowstone Dust
|base=[Potion of Healing II]Potion of Healing;[Potion of Regeneration II]Potion of Regeneration;[Potion of Strength II]Potion of Strength;[Potion of Swiftness II]Potion of Swiftness;[Potion of Harming II]Potion of Harming;[Potion of Poison II]Potion of Poison;[Potion of Leaping II]Potion of Leaping
|foot=1
}}
== Data values ==
=== ID ===
{{edition|java}}:
{{ID table
|edition=java
|showforms=y
|generatetranslationkeys=y
|displayname=Glowstone Dust
|spritetype=item
|nameid=glowstone_dust
|form=item
|foot=1}}
{{edition|bedrock}}:
{{ID table
|edition=bedrock
|shownumericids=y
|showforms=y
|notshowbeitemforms=y
|generatetranslationkeys=y
|displayname=Glowstone Dust
|spritetype=item
|nameid=glowstone_dust
|id=394
|form=item
|foot=1}}
== History ==
{{History|java alpha}}
{{History||v1.2.0|snap=preview|[[File:Glowstone Dust JE1 BE1.png|32px]] Added glowstone dust.
|Glowstone dust currently uses nine dust to [[crafting|craft]] 1 [[glowstone]] block.
|Also, each glowstone block drops only one glowstone dust.}}
{{History|java beta}}
{{History||1.6.6|The crafting recipe for glowstone blocks has been changed from 9 glowstone dust to 4.
|Each glowstone block now drops 2-4 glowstone dust when broken.}}
{{History|java}}
{{History||1.0.0|snap=Beta 1.9 Prerelease 3|Glowstone dust can now be [[brewing|brewed]] in a [[water bottle]] to create a [[thick potion]].
|Glowstone dust now strengthens the [[potion]]s of [[Swiftness]], [[Healing]], [[Harming]], [[Poison]], [[Regeneration]] and [[Strength]].}}
{{History|||snap=Beta 1.9 Prerelease 4|Glowstone dust now strengthens the new potion of [[Regeneration]].}}
{{History||1.3.1|snap=12w21a|Glowstone dust has become a renewable resource, as priest [[villager]]s now sell glowstone blocks.}}
{{History||1.4.2|snap=12w38b|[[Witch]]es now have a chance of [[drops|dropping]] glowstone dust.}}
{{History||1.4.6|snap=12w49a|Glowstone dust can now be used to [[crafting|craft]] a [[firework star]] with a twinkle effect.}}
{{History||1.8|snap=14w27a|Glowstone dust now strengthens the new [[potion of Leaping]].}}
{{History||1.9|snap=15w31a|Glowstone dust is now used to craft [[spectral arrow]]s.
|Glowstone dust can no longer be added to extended [[potion]]s.}}
{{History||1.13|snap=17w47a|Prior to [[1.13/Flattening|''The Flattening'']], this [[item]]'s numeral ID was 348.}}
{{History|||snap=18w07a|Glowstone dust now strengthens the new [[potion of the Turtle Master]].}}
{{History||1.14|snap=18w43a|[[File:Glowstone Dust JE2 BE2.png|32px]] The texture of glowstone dust has been changed.}}
{{History||1.16|snap=20w07a|Glowstone dust has a {{frac|2|109}} (~1.83%) chance of being offered by [[piglin]]s when [[bartering]], in a stack size of 2–4.}}
{{History|||snap=20w09a|Glowstone dust now has a {{frac|10|226}} (~4.42%) chance of being offered by piglins when bartering, in a stack size of 1–5.}}
{{History||1.16.2|snap=20w28a|Glowstone dust can no longer be obtained from bartering with piglins.}}
{{History|pocket alpha}}
{{History||v0.2.0|[[File:Glowstone Dust JE1 BE1.png|32px]] Added glowstone dust. It is currently unobtainable and serves no purpose.}}
{{History||v0.5.0|Glowstone dust is now obtainable through the [[nether reactor]].
|Glowstone dust can be used to craft [[glowstone]] blocks.}}
{{History||v0.12.1|snap=build 1|Glowstone dust can now be obtained through [[the Nether]] instead of the nether reactor.
|Glowstone dust is now available in the [[creative]] [[inventory]].|Glowstone dust can now be used to [[brewing|brew]] thick [[potion]]s and to strengthen potions.}}
{{History||v0.14.0|snap=build 1|Added [[witch]]es, which have a chance of [[drops|dropping]] glowstone dust upon [[death]].}}
{{History|bedrock}}
{{History||1.2.0|snap=beta 1.2.0.2|Glowstone dust can now be used to [[crafting|craft]] a [[firework star]] with a twinkle effect.}}
{{History||1.10.0|snap=beta 1.10.0.3|[[File:Glowstone Dust JE2 BE2.png|32px]] The texture of glowstone dust has been changed.}}
{{History||1.11.0|snap=beta 1.11.0.4|Glowstone dust can now be [[trading|bought]] from cleric [[villager]]s.}}
{{History||1.16.0|snap=beta 1.16.0.57|Glowstone dust can now be obtained from [[bartering]] with [[piglin]]s.}}
{{History||1.16.100|snap=beta 1.16.100.54|Glowstone dust can no longer be obtained from [[barter]]ing with [[piglin]]s.}}
{{History|console}}
{{History||xbox=TU1|xbone=CU1|ps=1.0|wiiu=Patch 1|switch=1.0.1|[[File:Glowstone Dust JE1 BE1.png|32px]] Added glowstone dust.}}
{{History||xbox=TU8|0–2 glowstone dust is now [[drops|dropped]] when a [[blaze]] is killed.}}
{{History|Ps4}}
{{History||1.90|[[File:Glowstone Dust JE2 BE2.png|32px]] The texture of glowstone dust has been changed.}}
{{History|New 3DS}}
{{History||0.1.0|[[File:Glowstone Dust JE1 BE1.png|32px]] Added glowstone dust.}}
{{History|foot}}
== Issues ==
{{issue list}}
{{Items}}
[[Category:Renewable resources]]
[[Category:Brewing recipe]]
[[de:Glowstonestaub]]
[[es:Polvo de piedra luminosa]]
[[fr:Poudre lumineuse]]
[[hu:Izzókő-por]]
[[ja:グロウストーンダスト]]
[[ko:발광석 가루]]
[[nl:Gloeisteenstof]]
[[pl:Jasnopył]]
[[pt:Pó de pedra luminosa]]
[[ru:Светокаменная пыль]]
[[tr:Işık Taşı Tozu]]
[[uk:Пил світлокаменю]]
[[zh:荧石粉]]</li><li>[[:Category:Storage|Category:Storage]]<br/>Blocks and items used to '''store''' other blocks or items.
[[Category:Blocks]][[Category:Items]]
[[ja:カテゴリ:ストレージ]]
[[zh:Category:储物]]</li></ul> | beta 1.10.0.3 | Resource packs are now separate from world templates and can be updated independently in existing worlds. | |||
See also
- Tutorials/Creating a resource pack
- Programs and editors/Resource Pack Creators
References
- ↑ https://feedback.minecraft.net/hc/en-us/community/posts/360058199792-Split-up-map-icon-textures-into-individual-files
- ↑ https://feedback.minecraft.net/hc/en-us/community/posts/360058097892-Split-up-the-experience-orb-texture-file-into-individual-sprites
- ↑ MC-17673
- ↑ "It should have already affected resource pack loading! It's all the same thing internally." – @Dinnerbone (Nathan Adams) on X, February 7, 2019
| Help | |||||||||||||||||||
|---|---|---|---|---|---|---|---|---|---|---|---|---|---|---|---|---|---|---|---|
| Menu screens |
| ||||||||||||||||||
| Game customization |
| ||||||||||||||||||
| Editions |
| ||||||||||||||||||
| Miscellaneous | |||||||||||||||||||