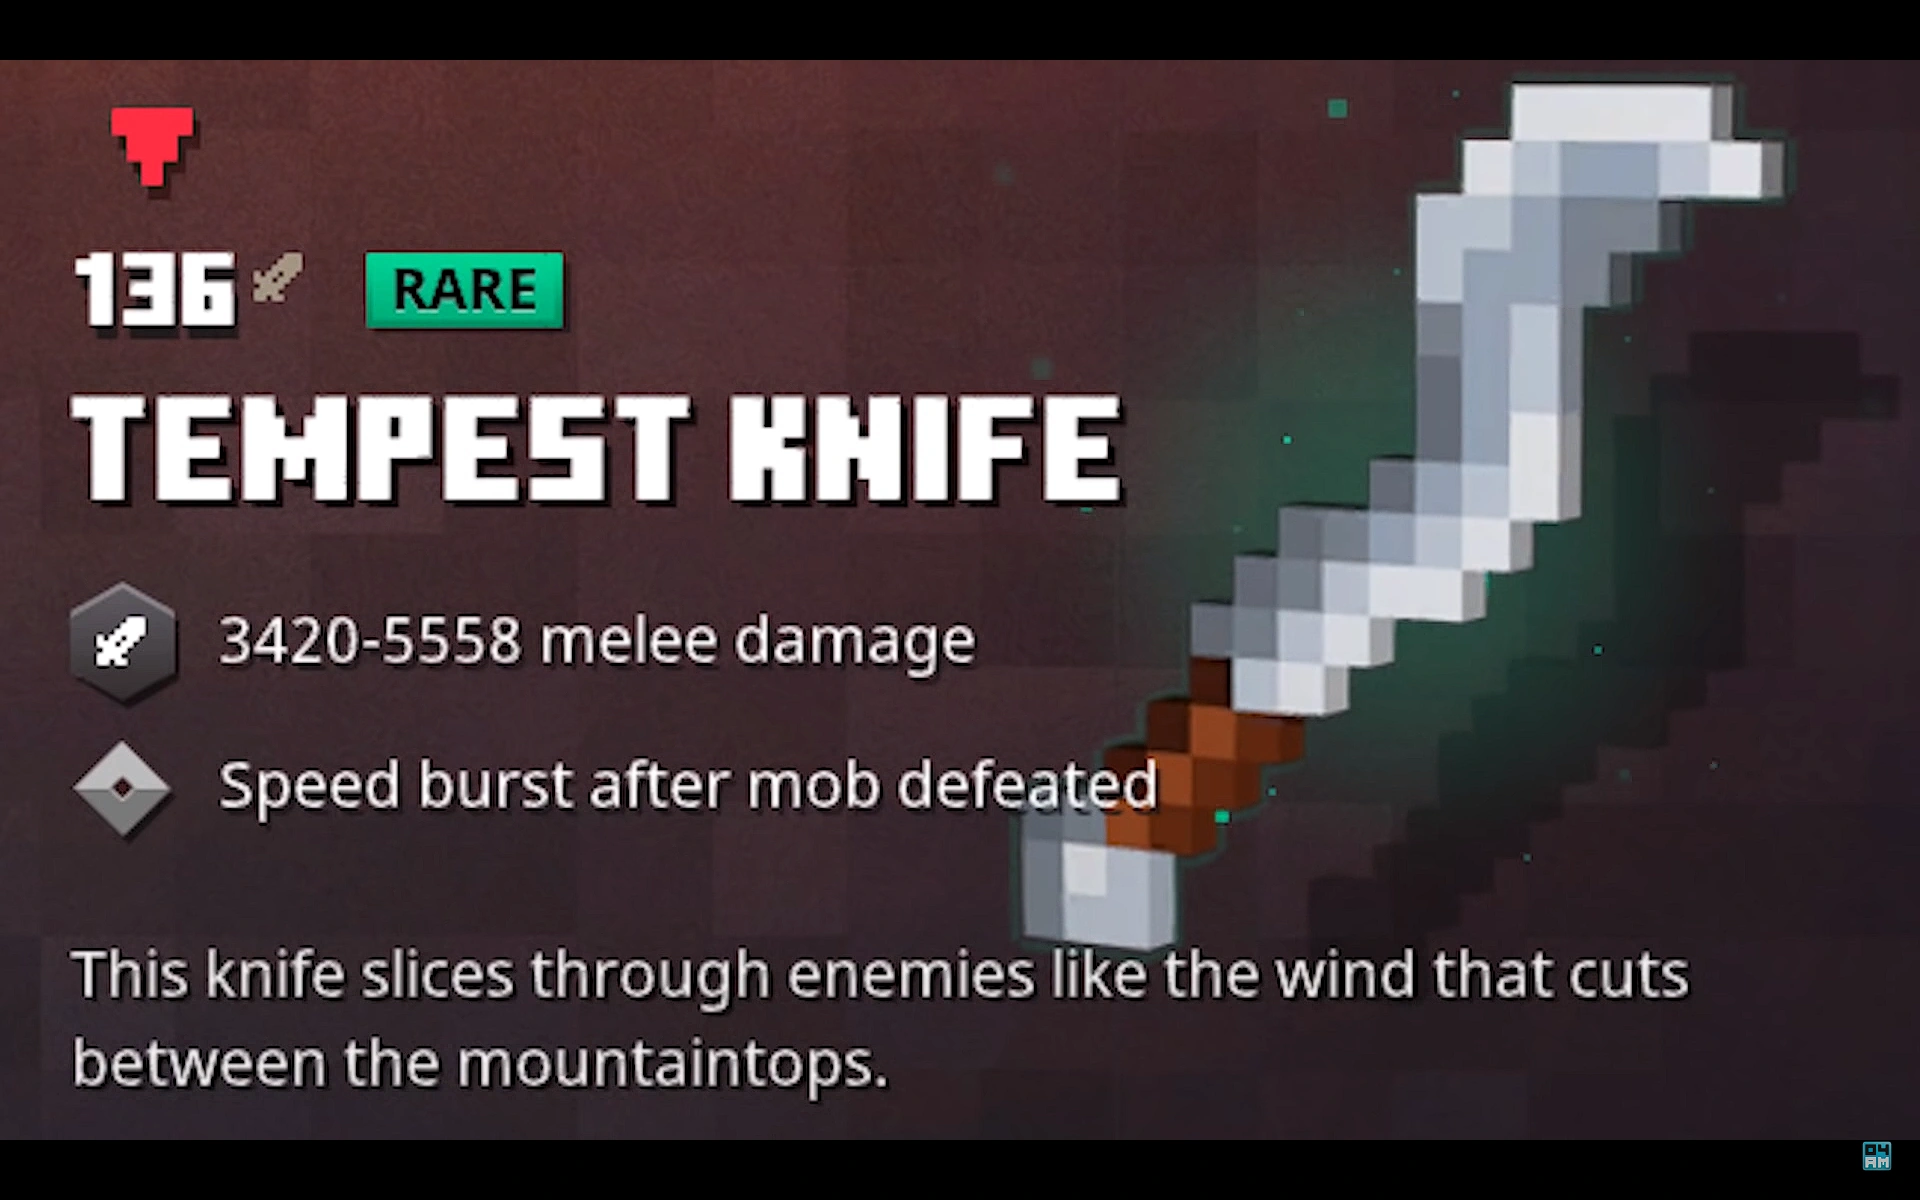
| “ |
|
„ |
| — In-game description |
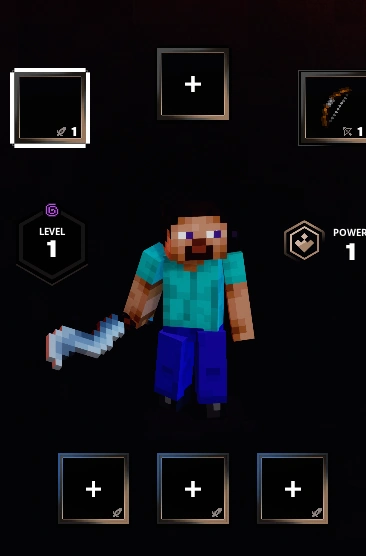
A tempest knife is a melee weapon that can be found within the Howling Peaks DLC of Minecraft Dungeons. It has two unique variants, the resolute tempest knife and the chill gale knife.
Obtaining[]
Missions[]
Listed difficulties are considered to be the minimum difficulty the item is obtainable on unless stated otherwise.
Merchants[]
Ancients[]
Usage[]
A tempest knife possesses moderate power, moderate speed, and low area. It has a combo consisting of a thrust and two side slashes. The first two hits deal the weapon's minimum melee damage, while the third, the second slash, deals the maximum melee damage.
Properties[]
- X melee damage
- Speed burst after mob defeated (Rushdown)
Stats[]
| Hit number | Base damage | Attack duration | Area | Splash damage drop off | Knockback | Hitstun |
|---|---|---|---|---|---|---|
| Hit 1 | 48 | 0.251 | 20° | 40% | 1 | 1.2 |
| Hit 2 | 48 | 0.3 | 30° | 10% | 1 | 1.2 |
| Hit 3 | 78 | 0.5 | 30° | 10% | 1.2 | 1.2 |
Sounds[]
| Sound | Description |
|---|---|
| Combo | |
| Drop | |
| Pick up | |
| Equip | |
| Swing |
Achievements[]
| Whirlwind Warrior |
History[]
| Minecraft Dungeons | |||||
|---|---|---|---|---|---|
| October 3, 2020 | Howling Peaks is announced during Minecraft Live 2020, with the release date set to be December 2020. | ||||
1.5.0.0{{Extension DPL}}<ul><li>[[Chestplate|Chestplate]]<br/>{{Update|Include information about armor trims and updated netherite upgrade information.}}
{{Item
| image = <gallery>
Leather Tunic.png | Leather
Chainmail Chestplate.png | Chainmail
Iron Chestplate.png | Iron
Diamond Chestplate.png | Diamond
Golden Chestplate.png | Golden
Netherite Chestplate.png | Netherite
</gallery>
| durability =
* Leather: 80
* Chainmail: 240
* Iron: 240
* Golden: 112
* Diamond: 528
* Netherite: 592
| renewable =
* '''Netherite''': No
* '''All Other''': Yes
| stackable = No
}}
'''Chestplates''' are a type of [[armor]] that covers the upper body of the player. There are six types of chestplates: '''leather''', '''chainmail''', '''iron''', '''diamond''', '''gold''' and '''netherite'''.
== Obtaining ==
=== Crafting ===
{{crafting
|head=1
|showname=0
|showdescription=1
|name=[[Chestplate]]
|A1= Leather;Gold Ingot;Iron Ingot;Diamond
|C1= Leather;Gold Ingot;Iron Ingot;Diamond
|A2= Leather;Gold Ingot;Iron Ingot;Diamond
|B2= Leather;Gold Ingot;Iron Ingot;Diamond
|C2= Leather;Gold Ingot;Iron Ingot;Diamond
|A3= Leather;Gold Ingot;Iron Ingot;Diamond
|B3= Leather;Gold Ingot;Iron Ingot;Diamond
|C3= Leather;Gold Ingot;Iron Ingot;Diamond
|Output= Leather Tunic;Golden Chestplate;Iron Chestplate;Diamond Chestplate
|type= Combat
}}
{{crafting
|foot=1
|ignoreusage=1
|name=[[Chestplate]]
|ingredients=Damaged Matching [[Chestplate]]
|Damaged Leather Tunic; Damaged Golden Chestplate; Damaged Chainmail Chestplate; Damaged Iron Chestplate; Damaged Diamond Chestplate; Damaged Netherite Chestplate
|Damaged Leather Tunic; Damaged Golden Chestplate; Damaged Chainmail Chestplate; Damaged Iron Chestplate; Damaged Diamond Chestplate; Damaged Netherite Chestplate
|Output= Leather Tunic; Golden Chestplate; Chainmail Chestplate; Iron Chestplate; Diamond Chestplate; Netherite Chestplate
|description= The durability of the two chestplates is added together, making a fully healed chestplate. You can get 5% more durability while using a grindstone to fix.
|type= Combat
}}
=== Upgrading ===
{{Smithing
|Netherite Upgrade
|Diamond Chestplate
|Netherite Ingot
|Netherite Chestplate
|description=
|tail=1
}}
=== Repairing ===
==== Grinding ====
{{Grinding
|showdescription=1
|ingredients=Damaged Matching Chestplates
|Damaged Leather Tunic; Damaged Chainmail Chestplate; Damaged Iron Chestplate; Damaged Golden Chestplate; Damaged Diamond Chestplate; Damaged Netherite Chestplate
|Damaged Leather Tunic; Damaged Chainmail Chestplate; Damaged Iron Chestplate; Damaged Golden Chestplate; Damaged Diamond Chestplate; Damaged Netherite Chestplate
|Leather Tunic; Chainmail Chestplate; Iron Chestplate; Golden Chestplate; Diamond Chestplate; Netherite Chestplate
|description=The durability of the two chestplates are added together, plus an extra 5% durability.
}}
==== [[Anvil mechanics#Unit repair|Unit repair]] ====
Chestplates can be repaired in an [[anvil]] by adding units of the [[armor material]]'s repair material, with each repair material restoring 25% of the chestplate's maximum durability, rounded down.
=== Mob loot ===
[[Zombie]]s and [[skeleton]]s have a small chance to spawn wearing any armor. There is an 8.5% chance (9.5% with [[Looting]] I, 10.5% with Looting II and 11.5% with Looting III) for the mob to drop a chestplate upon death. The chestplate the mob drops is usually badly damaged, and rarely enchanted.
[[Vindicator]]s and [[Pillager]]s spawning in [[raid]]s have a 4.1% chance (5.12% on hard difficulty) to drop iron chestplate, which is almost always badly damaged and rarely enchanted.
=== Natural generation ===
Two [[armor stand]]s are found in each taiga [[village]] outdoor armory, one of them equipped with an [[iron chestplate]].
=== Chest loot ===
{{IN|BE}}, a sealed room in [[woodland mansion]]s can appear that has a chest sometimes containing an [[Efficiency]] I leather tunic.<ref>{{bug|MCPE-109048}}</ref>
{{LootChestItem|leather-tunic,random-enchanted-leather-tunic,chainmail-chestplate,iron-chestplate,level-enchanted-iron-chestplate,golden-chestplate,random-enchanted-golden-chestplate,diamond-chestplate,damaged-diamond-chestplate,level-enchanted-diamond-chestplate,damaged-random-enchanted-diamond-chestplate,damaged-random-enchanted-diamond-chestplate-2}}
=== Trading ===
{{IN|java}}, novice-level armorer villagers have a 40% chance to sell an iron chestplate for 9 emeralds. Journeyman-level armorers have a 40% chance to sell a chainmail chestplate for 4 emeralds. Master-level armorers always sell an enchanted<ref group="note" name="enchantment" /> diamond chestplate for 18-35 emeralds. Novice-level leatherworker villagers have a {{frac|2|3}} chance to sell a leather tunic<ref group="note" name="dye note">The leather armor has a random color created by two dyes (possibly the same dye twice).</ref> for 7 emeralds. Journeyman-level Leatherworker villagers always offer the same trade.
Armorer villagers may give the players with the [[Hero of the Village]] effect a chainmail chestplate.
{{IN|bedrock}}, novice-level armorer villagers have a 25% chance to sell an iron chestplate for 9 emeralds. Journeyman-level armorers have a {{frac|1|3}} chance to sell a chainmail chestplate for 4 emeralds. Master-level armorers have a 50% chance to sell an enchanted<ref group="note" name="enchantment">When creating an enchantment offer, the game uses a random enchantment level from 5 – 19. The enchantments are never treasure enchantments.</ref> diamond chestplate for 16 emeralds. Novice-level leatherworker villagers have a 50% chance to sell leather tunic for 7 emeralds. Master-level leatherworkers always sell an enchanted<ref group="note" name="enchantment" /> leather tunic for 7 emeralds.
{{notelist|columns=1}}
== Usage ==
Chestplates can be placed in the 2nd armor slot of a player's [[inventory]] for activation.
=== Defense points ===
Defense points are each signified by chestplates in the armor bar above the [[health]] bar. 1 defense point is half of a chestplate in the armor bar. Each defense point reduces any damage dealt to the player, which is absorbed by armor by 4%, increasing additively with the number of defense points. Different materials and combinations of armor provide different levels of defense.
The following table shows the amount of defense points added by chestplates.
{| class="wikitable" data-description="Chestplate defense points"
|-
!scope="col" | Material
!scope="col" | Defense points
|-
!scope="row" | Leather
| {{armor|3}}
|-
!scope="row" | Golden
| rowspan="2" | {{armor|5}}
|-
!scope="row" | Chainmail
|-
!scope="row" | Iron
| {{armor|6}}
|-
!scope="row" | Diamond
| rowspan="2" | {{armor|8}}
|-
!scope="row" | Netherite
|}
===Knockback Resistance ===
A netherite chestplate provides 10% knockback resistance.
=== Durability ===
The following table shows the amount of damage each piece of armor can absorb before being destroyed.
Any "hit" from a damage source that can be blocked by armor removes one point of durability from each piece of armor worn for every {{hp|4}} of incoming damage (rounded down, but never below 1). Damage taken that unenchanted armor does not protect against (such as [[Damage#Fall damage|falling]] or [[Damage#Drowning|drowning]]) does not damage the armor, even if it is enchanted to protect against that type of damage. The following chart displays how many hits chest plates can endure.
Netherite armor is not damaged by [[lava]] or [[fire]] when worn.
{| class="wikitable" data-description="Chestplate durability"
|-
! Material
! Durability
|-
!scope="row" | Leather
| 80
|-
!scope="row" | Golden
| 112
|-
!scope="row" | Chainmail
| rowspan="2" | 240
|-
!Iron
|-
!scope="row" | Diamond
| 528
|-
!scope="row" | Netherite
| 592
|}
==== Repair ====
Chestplates may be [[item repair|repaired]] by using them along with some of their crafting material ([[leather]], [[gold ingot]]s, [[iron ingot]]s, [[diamond]]s, or [[netherite ingot]]s) in an [[anvil]]. Chainmail chestplates may be repaired in this way with iron ingots. They may also be repaired by crafting them together with another chestplate of the same material.
=== Enchantments ===
A chestplate can receive the following [[enchantment]]s:
{| class="wikitable"
|-
! Enchantment !! Max Level !! Notes
|-
| [[Fire Protection]] || IV || <ref group=note name=exclusive>Fire Protection, Blast Protection, Projectile Protection and Protection are mutually exclusive</ref>
|-
| [[Projectile Protection]] || IV || <ref group=note name="exclusive"/>
|-
| [[Blast Protection]] || IV || <ref group=note name="exclusive"/>
|-
| [[Protection]] || IV || <ref group=note name="exclusive"/>
|-
| [[Unbreaking]] || III ||
|-
| [[Thorns]] || III || <ref group="note" name="maxlvl">The max level obtainable in the enchanting table is 2</ref>
|-
| [[Mending]] || I || <ref group=note name="anvil2">Only from chest loot, fishing, or an anvil and enchanted books.</ref>
|-
| [[Curse of Binding]] || I || <ref group="note" name="anvil2"/>
|-
| [[Curse of Vanishing]] || I || <ref group="note" name="anvil2"/>
|}
{{notelist}}
=== Smelting usage ===
{{Smelting|showname=1|Iron Chestplate;Chainmail Chestplate;Golden Chestplate|Iron Nugget;Iron Nugget;Gold Nugget|0,1}}
=== Piglins ===
{{EntityLink|Piglin|Piglins}} are attracted to ''golden'' chestplates and pick them up, examining them for 6 to 8 seconds. Piglins can wear other chestplates but are not attracted to them. They prefer stronger chestplates over weaker chestplates, with one exception: They always prefer golden chestplates over all other chestplates, throwing out stronger chestplates to equip them. Enchanted chestplates are preferred over unenchanted chestplates.
== Sounds ==
{{el|je}}:
{{Sound table
|sound=Equip leather1.ogg
|sound2=Equip leather2.ogg
|sound3=Equip leather3.ogg
|sound4=Equip leather4.ogg
|sound5=Equip leather5.ogg
|sound6=Equip leather6.ogg
|subtitle=Leather armor rustles
|source=player
|description=When a leather chestplate is equipped
|id=item.armor.equip_leather
|translationkey=subtitles.item.armor.equip_leather
|volume=1.0
|pitch=1.0
|distance=16}}
{{Sound table
|sound=Equip chain1.ogg
|sound2=Equip chain2.ogg
|sound3=Equip chain3.ogg
|sound4=Equip chain4.ogg
|sound5=Equip chain5.ogg
|sound6=Equip chain6.ogg
|subtitle=Chain armor jingles
|source=player
|description=When a chainmail chestplate is equipped
|id=item.armor.equip_chain
|translationkey=subtitles.item.armor.equip_chain
|volume=1.0
|pitch=1.0
|distance=16}}
{{Sound table
|sound=Equip iron1.ogg
|sound2=Equip iron2.ogg
|sound3=Equip iron3.ogg
|sound4=Equip iron4.ogg
|sound5=Equip iron5.ogg
|sound6=Equip iron6.ogg
|subtitle=Iron armor clanks
|source=player
|description=When an iron chestplate is equipped
|id=item.armor.equip_iron
|translationkey=subtitles.item.armor.equip_iron
|volume=1.0
|pitch=1.0
|distance=16}}
{{Sound table
|sound=Equip gold1.ogg
|sound2=Equip gold2.ogg
|sound3=Equip gold3.ogg
|sound4=Equip gold4.ogg
|sound5=Equip gold5.ogg
|sound6=Equip gold6.ogg
|subtitle=Gold armor clinks
|source=player
|description=When a gold chestplate is equipped
|id=item.armor.equip_gold
|translationkey=subtitles.item.armor.equip_gold
|volume=1.0
|pitch=1.0
|distance=16}}
{{Sound table
|sound=Equip diamond1.ogg
|sound2=Equip diamond2.ogg
|sound3=Equip diamond3.ogg
|sound4=Equip diamond4.ogg
|sound5=Equip diamond5.ogg
|sound6=Equip diamond6.ogg
|subtitle=Diamond armor clangs
|source=player
|description=When a diamond chestplate is equipped
|id=item.armor.equip_diamond
|translationkey=subtitles.item.armor.equip_diamond
|volume=1.0
|pitch=1.0
|distance=16}}
{{Sound table
|sound=Equip netherite1.ogg
|sound2=Equip netherite2.ogg
|sound3=Equip netherite3.ogg
|sound4=Equip netherite4.ogg
|subtitle=Netherite armor clanks
|source=player
|description=When a netherite chestplate is equipped
|id=item.armor.equip_netherite
|translationkey=subtitles.item.armor.equip_netherite
|volume=0.8
|pitch=1.0/0.9
|distance=16}}
{{Sound table
|sound=Random break.ogg
|subtitle=Item breaks
|source=dependent
|description=When a chestplate's durability is exhausted
|id=entity.item.break
|translationkey=subtitles.entity.item.break
|volume=0.8
|pitch=0.8-1.2
|distance=16
|foot=1}}
{{el|be}}:
{{Sound table
|type=bedrock
|sound=Equip leather1.ogg
|sound2=Equip leather2.ogg
|sound3=Equip leather3.ogg
|sound4=Equip leather4.ogg
|sound5=Equip leather5.ogg
|sound6=Equip leather6.ogg
|source=player
|description=When a leather chestplate is equipped
|id=armor.equip_leather
|volume=1.0
|pitch=1.0}}
{{Sound table
|sound=Equip chain1.ogg
|sound2=Equip chain2.ogg
|sound3=Equip chain3.ogg
|sound4=Equip chain4.ogg
|sound5=Equip chain5.ogg
|sound6=Equip chain6.ogg
|source=player
|description=When a chain chestplate is equipped
|id=armor.equip_chain
|volume=1.0
|pitch=1.0}}
{{Sound table
|sound=Equip iron1.ogg
|sound2=Equip iron2.ogg
|sound3=Equip iron3.ogg
|sound4=Equip iron4.ogg
|sound5=Equip iron5.ogg
|sound6=Equip iron6.ogg
|source=player
|description=When an iron chestplate is equipped
|id=armor.equip_iron
|volume=1.0
|pitch=1.0}}
{{Sound table
|sound=Equip gold1.ogg
|sound2=Equip gold2.ogg
|sound3=Equip gold3.ogg
|sound4=Equip gold4.ogg
|sound5=Equip gold5.ogg
|sound6=Equip gold6.ogg
|source=player
|description=When a gold chestplate is equipped
|id=armor.equip_gold
|volume=1.0
|pitch=1.0}}
{{Sound table
|sound=Equip diamond1.ogg
|sound2=Equip diamond2.ogg
|sound3=Equip diamond3.ogg
|sound4=Equip diamond4.ogg
|sound5=Equip diamond5.ogg
|sound6=Equip diamond6.ogg
|source=player
|description=When a diamond chestplate is equipped
|id=armor.equip_diamond
|volume=1.0
|pitch=1.0}}
{{Sound table
|sound=Equip netherite1.ogg
|sound2=Equip netherite2.ogg
|sound3=Equip netherite3.ogg
|sound4=Equip netherite4.ogg
|source=player
|description=When a netherite chestplate is equipped.
|id=armor.equip_netherite
|volume=1.0
|pitch=1.0}}
{{Sound table
|rowspan=2
|sound=Water Splash Old.ogg
|source=block
|description=When a leather chestplate is dyed using a cauldron
|id=cauldron.dyearmor
|volume=0.1
|pitch=1.0}}
{{Sound table
|source=block
|description=When a leather chestplate's dye is removed using a cauldron
|id=cauldron.cleanarmor
|volume=0.1
|pitch=1.0}}
{{Sound table
|sound=Random break.ogg
|source=player
|description=When a chestplate's durability is exhausted
|id=random.break
|volume=1.0
|pitch=0.9
|foot=1}}
== Data values ==
=== ID ===
{{edition|java}}:
{{ID table
|edition=java
|showitemtags=y
|showforms=y
|generatetranslationkeys=y
|displayname=Leather Tunic
|spritetype=item
|nameid=leather_chestplate
|itemtags=freeze_immune_wearables
|form=item}}
{{ID table
|displayname=Chainmail Chestplate
|spritetype=item
|nameid=chainmail_chestplate
|form=item}}
{{ID table
|displayname=Iron Chestplate
|spritetype=item
|nameid=iron_chestplate
|form=item}}
{{ID table
|displayname=Diamond Chestplate
|spritetype=item
|nameid=diamond_chestplate
|form=item}}
{{ID table
|displayname=Golden Chestplate
|spritetype=item
|nameid=golden_chestplate
|form=item}}
{{ID table
|displayname=Netherite Chestplate
|spritetype=item
|nameid=netherite_chestplate
|form=item
|foot=1}}
{{edition|bedrock}}:
{{ID table
|edition=bedrock
|shownumericids=y
|showforms=y
|notshowbeitemforms=y
|generatetranslationkeys=y
|displayname=Leather Tunic
|spritetype=item
|nameid=leather_chestplate
|id=336
|form=item}}
{{ID table
|displayname=Chainmail Chestplate
|spritetype=item
|nameid=chainmail_chestplate
|id=340
|form=item}}
{{ID table
|displayname=Iron Chestplate
|spritetype=item
|nameid=iron_chestplate
|id=344
|form=item}}
{{ID table
|displayname=Diamond Chestplate
|spritetype=item
|nameid=diamond_chestplate
|id=348
|form=item}}
{{ID table
|displayname=Golden Chestplate
|spritetype=item
|nameid=golden_chestplate
|id=352
|form=item}}
{{ID table
|displayname=Netherite Chestplate
|spritetype=item
|nameid=netherite_chestplate
|id=610
|form=item
|foot=1}}
=== Item data ===
When leather tunics are dyed, it has the following NBT:
<div class="treeview">
* {{nbt|compound|tag}}: Parent tag.
** {{nbt|compound|display}}: Display properties.
*** {{nbt|int|color}}: The color of the leather armor. The tooltip displays "Dyed" if advanced tooltips are disabled, otherwise it displays the hexadecimal color value. Color codes are calculated from the Red, Green and Blue components using this formula:<br>'''<span style="color:red">Red</span>[[wikipedia:Logical shift|<<]]16 + <span style="color:green">Green</span><<8 + <span style="color:blue">Blue</span>'''<ref>For positive values larger than 0x00FFFFFF, the top byte is ignored. All negative values produce white.</ref>
</div>
== Achievements ==
{{load achievements|Iron Man;Tie Dye Outfit;Cover me in debris;Oooh, shiny!}}
== Advancements ==
{{load advancements|Suit Up;Cover me With Diamonds;Oh Shiny;Cover Me in Debris}}
== History ==
{{History|java classic}}
{{History||June 14, 2009|link=wordofnotch:123343045|[[Notch]] discussed how armor would work in [[Survival]] mode: "Two types of swords, two types of armor, two types of helmets. The basic versions require iron. The advanced versions require steel, which you make by combining iron and coal. Carrying swords, armor or helmets take up inventory slots, but otherwise have no penalty and work pretty much as you expect (prevent some damage, or cause more damage)".}}
{{History||August 13, 2009|link=wordofnotch:162091556|Notch tested chestplates on the [[human]]. They were merely aesthetic at the time and had no effect on gameplay.}}
{{History||0.24_SURVIVAL_TEST|[[File:Plate Chestplate.png|32px]] Added the [[Java_Edition_removed_features#Armor_in_Survival_Test|plate chestplate]].
|[[File:Chainmail Chestplate JE1.png|32px]] Added the model and the texture for the unused [[Java_Edition_removed_features#Armor_in_Survival Test|chain chestplate]].
|[[File:Zombie full set.png|32px]] [[File:Skeleton helmet.png|26px]] The plate chestplate has been tested on [[zombie]]s and [[skeleton]]s. It had no effect on gameplay.}}
{{History|java indev}}
{{History||0.31|snap=20091223-1|Plate and chain armor chestplates are no longer used.}}
{{History|||snap=20091231-2|[[File:Leather Tunic (item) JE1 BE1.png|32px]] [[File:Studded Chestplate (item) JE1.png|32px]] [[File:Chainmail Chestplate (item) JE1 BE1.png|32px]] [[File:Iron Chestplate (item) JE1 BE1.png|32px]] Added the single item form of relation to leather, [[History of textures/Unused textures#Studded armor|studded]], chainmail, and plate (iron) chestplates.
|The textures of the cloth chestplate are taken from one of [[Notch]]'s previous games, ''[[Legend of the Chambered]]''. The rest are from ''[[Legend of the Chambered 2]]''.}}
{{History||20100206|[[File:Golden Chestplate (item) JE1 BE1.png|32px]] [[File:Diamond Chestplate (item) JE1 BE1.png|32px]] Added the item form of golden and diamond chestplates.
|Removed the leather-chain chestplate.}}
{{History||February 9, 2010|link=wordofnotch:380486636|[[File:Notch revealed armor.png|32px]] [[Notch]] revealed new models for armor - including chestplates.}}
{{History||20100212-1|Added armor models.
|[[File:Indev 20100212 armor.png|50px]] Armor models are now displayed on the [[player]] in the [[inventory]].}}
{{History||20100218|[[File:Leather Tunic JE1 BE1.png|32px]] [[File:Chainmail Chestplate JE2 BE1.png|32px]] [[File:Iron Chestplate JE1 BE1.png|32px]] [[File:Golden Chestplate JE1 BE1.png|32px]] [[File:Diamond Chestplate JE1 BE1.png|32px]] Added models of cloth, chainmail, iron, gold, and diamond chestplates.
|Chestplates can now be [[crafting|crafted]] and worn.
|Chestplates now functions. All chestplates give {{Armor|8}}. Chestplates have limited [[item durability|durability]], with lower tier chestplates less durable than higher tier chestplates.}}
{{History|java alpha}}
{{History||v1.0.8|With the introduction of [[leather]], "Cloth Chestplate" has been renamed to "Leather Tunic".
|Leather tunics is now [[crafting|crafted]] with leather instead of [[wool|cloth]].}}
{{History|java}}
{{History||1.0.0|snap=Beta 1.9 Prerelease|The armor protection behavior has been changed. Previous to this update, the total armor protection is based in this equation: ((''total equipped armor damage reduction'' − 1) × (''all equipped armor max damage'' − ''total equipped armor damage'')) ÷ (''total equipped armor max damage'' + 1)). Armor no longer reduces certain damage types to be covered by enchantments.}}
{{History|||snap=October 3, 2011|slink={{tweet|notch|120859830339637249}}|The first images of a [[player]] wearing enchanted chestplates are revealed.}}
{{History|||snap=Beta 1.9 Prerelease 3|Iron chestplates can now be found in the new [[stronghold]] altar [[chest]]s.}}
{{History|||snap=Beta 1.9 Prerelease 4|Chestplates can now be [[enchanting|enchanted]].}}
{{History||1.1|snap=12w01a|Iron chestplates can now be found in the new blacksmith [[chest]]s in [[village]]s.}}
{{History||1.3.1|snap=12w15a|{{key|Shift}}+clicking can now be used to wear chestplates.}}
{{History|||snap=12w21a|Chainmail chestplates can now be obtained legitimately in [[survival]] mode through [[trading]].
|Blacksmith [[villager]]s now [[trading|sell]] chainmail chestplates for 11–14 emeralds.
|Blacksmith villagers now sell diamond chestplates for 16–18 emeralds.
|Blacksmith villagers now sell iron chestplates for 10–13 emeralds.
|Butchers now sell leather tunics for 4 emeralds.}}
{{History||1.4.2|snap=12w32a|[[Mob]] armor has been reintroduced. A partial or full set of any armor is now sometimes worn by [[zombie]]s, [[skeleton]]s and [[zombified piglins|zombie pigmen]], with the likelihood increasing with difficulty.}}
{{History|||snap=August 17, 2012|slink={{tweet|Dinnerbone|236445090929844225}}|[[Jeb]] and [[Dinnerbone]] tweeted pictures of [[dye]]able leather chestplates.}}
{{History|||snap=12w34a|Leather tunics can now be dyed by [[crafting]] a leather tunic piece with [[dye]]s. Dyes can be removed by {{control|use|text=using}} dyed leather tunics on a [[cauldron]] with [[water]].
|[[File:Leather Tunic JE2.png|32px]] [[File:Leather Tunic (item) JE2.png|32px]] Default leather tunic textures are now slightly darker and have buttons.}}
{{History|||snap=12w34b|[[File:Leather Tunic JE3 BE2.png|32px]] [[File:Leather Tunic (item) JE3 BE2.png|32px]] [[File:Diamond Chestplate JE2.png|32px]] The texture of leather and diamond chestplates has been changed. Leather tunics now have longer sleeves. Diamond chestplates now have notches under the shoulders.}}
{{History|||snap=12w36a|[[Dye]]d leather tunics are now more saturated and have a slight tint of tan in respect to the default armor color.}}
{{History|||snap=12w37a|[[File:Leather Cap JE3 BE2.png|32px]] [[File:Leather Boots JE2 BE2.png|32px]] [[File:Leather Cap (item) JE3 BE2.png|32px]] [[File:Leather Boots (item) JE3 BE2.png|32px]] Leather armor now have non-dyed parts on cap, pants and boots. This has been implemented so that [[player]]s can distinguish between other types of armor and similarly colored leather armor.}}
{{History||1.4.6|snap=12w50a|The [[Thorns]] enchantment can now be [[enchanting|enchanted]] on chestplates.}}
{{History||1.5|snap=13w04a|Armor in the [[player]]'s hand can now be equipped by right-clicking.
|[[Dispenser]]s can now equip nearby players with armor.}}
{{History||1.6.1|snap=13w18a|Golden chestplates are now found in the new [[chest]]s in [[nether fortress]]es.}}
{{History||1.7.2|snap=13w36a|Leather [[boots]] can now be obtained as one of the "junk" items by [[fishing]].}}
{{History||1.8|snap=14w02a|[[Trading|Trades]] changed: armorer [[villager]]s now [[trading|sell]] chain boots for 5–7 [[emerald]]s, chain [[leggings]] for 9–11 emeralds, chain chestplates for 11–15 emeralds and chain helmets for 5–7 emeralds.
|Armorer villagers now sell enchanted diamond chestplates for 16–19 emeralds, and no longer sell other diamond armor.
|Armorer villagers now sell iron chestplates for 10–14 emeralds and iron helmets for 4–6 emeralds, and no longer sell other iron armor.
|Leatherworkers now sell enchanted leather tunics for 7–12 emeralds, and no longer sell other leather armor.}}
{{History|||snap=14w05a|Armor no longer turns red when [[mob]]s and [[player]]s are hurt.}}
{{History|||snap=14w06a|Armor is now visible on [[giant]]s.}}
{{History|||snap=14w25a|Chain armor [[Java Edition removed features#Chainmail armor|cannot be crafted anymore]] due to the [[item]] form of [[fire]] being [[Java Edition removed features#Obtainable until 1.8|removed]].}}
{{History||1.9|snap=15w31a|Enchanted iron and diamond armor can now be found in [[end city]] ship [[chest]]s.
|[[Mob]]s now wear armor from the bottom to the top, rather than from the top to the bottom. This means that a mob with three armor pieces, for example, spawn with all armor except a helmet.}}
{{History|||snap=15w34b|Armor [[item durability|durability]] now affects armor value.}}
{{History|||snap=15w36a|Armor and armor [[enchanting|enchantment]] calculations have been changed. For the original values, see [[Armor/Before 1.9|here]].}}
{{History|||snap=15w36d|Armor durability affecting value has been removed.
|Armor now has an attribute controlling the defense points.}}
{{History|||snap=15w43a|The average yield of gold chestplates in [[nether fortress]] [[chest]]s has been decreased.}}
{{History|||snap=15w50a|Added <code>equip</code> [[sound]]s for all types of armor.}}
{{History|||snap=16w02a|Armor and armor enchantment calculations have been changed again.}}
{{History|||snap=16w05a|Armor calculations have been changed, once again.}}
{{History||1.11|snap=16w39a|Diamond and chainmail chestplates are now found in the new [[woodland mansion]] chests.}}
{{History||1.11.1|snap=16w50a|Golden, chain and iron armor can now be [[smelting|smelted]] down into one of their respective [[nugget]]s.}}
{{History||1.13|snap=17w47a|Prior to [[1.13/Flattening|''The Flattening'']], these [[item]]s' numeral IDs were 298 through 317.}}
{{History|||snap=18w09a|Leather tunics now have a chance of generating in [[underwater ruins]].}}
{{History|||snap=18w10a|Leather tunics can now generate in [[buried treasure]] [[chest]]s.}}
{{History|||snap=18w11a|Enchanted leather tunics can now generate in the chests of [[shipwreck]]s.}}
{{History|||snap=18w20a|Chain armor pieces have been renamed to "chainmail".}}
{{History||1.14|snap=18w43a|[[File:Leather Tunic JE4 BE2.png|32px]] [[File:Chainmail Chestplate JE3 BE2.png|32px]] [[File:Iron Chestplate JE2 BE2.png|32px]] [[File:Golden Chestplate JE2 BE2.png|32px]] [[File:Diamond Chestplate JE3 BE2.png|32px]] [[File:Leather Tunic (item) JE4 BE3.png|32px]] [[File:Chainmail Chestplate (item) JE2 BE2.png|32px]] [[File:Iron Chestplate (item) JE2 BE2.png|32px]] [[File:Golden Chestplate (item) JE2 BE2.png|32px]] [[File:Diamond Chestplate (item) JE2 BE2.png|32px]] The textures of all types of armor have been changed.}}
{{History|||snap=18w48a|Leather tunics can now be found in [[chest]]s in [[village]] tanneries.}}
{{History|||snap=18w50a|Iron chestplates can now be found on [[armor stand]]s in [[taiga]] villages.}}
{{History|||snap=19w08a|[[File:Golden Chestplate (item) JE3 BE3.png|32px]] The textures of gold chestplate [[item]] have been changed.}}
{{History|||snap=19w11a|Leatherworker villagers now sell randomly [[dye]]d leather tunics, instead of enchanted leather tunics.}}
{{History|||snap=19w13a|Armorer villagers now give chainmail chestplates to players under the [[Hero of the Village]] effect.}}
{{History||1.16|snap=20w06a|[[File:Netherite Chestplate JE1.png|32px]] [[File:Netherite Chestplate (item) JE1.png|32px]] Added netherite chestplate.}}
{{History|||snap=20w10a|[[File:Netherite Chestplate JE2 BE1.png|32px]] [[File:Netherite Chestplate (item) JE2 BE1.png|32px]] The texture of netherite chestplate have been changed.
|Netherite chestplate can no longer be [[crafting|crafted]].
|Netherite chestplate is now obtained by combining one diamond armor piece and one netherite ingot in a [[smithing table]].}}
{{History|||snap=20w16a|All parts of golden and netherite chestplates now generate randomly [[enchanting|enchanted]], and sometimes [[damage]]d, in [[bastion remnant]] and [[ruined portal]] chests.}}
{{History|||snap=20w17a|Diamonds chestplates now generates in place of netherite armor in bastion remnant [[chest]]s.}}
{{History||1.17|snap=20w48a|Wearing any piece of leather armor now prevents [[Powder Snow#Freezing|freezing]] entirely.}}
{{History||1.18.2|snap=22w03a|Netherite chestplate knockback resistance is no longer random.}}
{{History||1.20<br>(Experimental)|link=1.19.4|snap=23w04a|Non-leather chestplates can now be trimmed using a [[smithing table]].
|There are 10 types of material that determine the color of the trim:
*Iron
*Copper
*Gold
*Lapis
*Emerald
*Diamond
*Netherite
*Redstone
*Amethyst
*Quartz
|Upgrading diamond chestplate to netherite chestplate now requires the netherite upgrade [[smithing template]].}}
{{History|||snap=23w05a|Leather tunics can now be trimmed using a smithing table.|Chestplates can now have trims of the same material it is made out of.|The texture of the dune armor trim has been tweaked, so that the symbol on the chestplate is moved up a few pixels.}}
{{History|||snap=23w06a|Swapped {{cd|iron}} and {{cd|iron_darker}} palette, then made {{cd|iron_darker}} darker overall.|Added a darkest pixel to {{cd|chestplate_trim}} trim item texture.}}
{{History||1.19.4|snap=23w05a|Chestplates can now be swapped by {{ctrl|using}} them/elytra in the hotbar.<ref>{{bug|MC-216270|||Fixed}}</ref>}}
{{History||?|Chestplates can now be swapped in [[armor stand]]s by {{ctrl|using}} them/elytra in the armor stand's slot.}}
{{History||1.20|snap=23w12a|The pattern textures of dune and sentry armor trims are changed.|
Those previous patterns were left with different names: dune was renamed sentry and sentry was renamed shaper.}}
{{History|pocket alpha}}
{{History||v0.6.0|[[File:Leather Tunic JE1 BE1.png|32px]] [[File:Chainmail Chestplate JE2 BE1.png|32px]] [[File:Iron Chestplate JE1 BE1.png|32px]] [[File:Golden Chestplate JE1 BE1.png|32px]] [[File:Diamond Chestplate JE1 BE1.png|32px]] [[File:Leather Tunic (item) JE1 BE1.png|32px]] [[File:Chainmail Chestplate (item) JE1 BE1.png|32px]] [[File:Iron Chestplate (item) JE1 BE1.png|32px]] [[File:Golden Chestplate (item) JE1 BE1.png|32px]] [[File:Diamond Chestplate (item) JE1 BE1.png|32px]] Added chestplates.}}
{{History||v0.8.0|snap=build 2|[[File:Leather Tunic (item) JE3 BE2.png|32px]] The leather armor sprites have been changed to that of {{el|je}}, but its armor [[model]] remains that of older versions.}}
{{History||v0.9.0|snap=build 1|Iron armor now naturally generates in [[village]] [[chest]]s and a [[stronghold]] altar chest.}}
{{History||v0.11.0|snap=build 11|Armor now protects against [[damage]] from [[mob]]s only.}}
{{History||v0.12.1|snap=build 1|Armor can now be worn by mobs.
|Golden chestplates can now be found in [[nether fortress]] [[chest]]s.
|Chainmail armor can now be obtained in [[survival]] mode from a mob wearing it.}}
{{History||?|Armor no longer turns red when [[mob]]s and [[player]]s are hurt.}}
{{History||v0.14.0|snap=build 1|[[File:Leather Tunic JE3 BE2.png|32px]] The textures of leather chestplate have been changed.
|Leather armor can now be dyed.}}
{{History||v0.15.0|snap=build 1|Armor can now be obtained from [[stray]]s and [[husk]]s that naturally spawn with armor.}}
{{History||v0.15.10|[[Cape]]s no longer clip through armor.}}
{{History|pocket}}
{{History||1.0.0|snap=alpha 0.17.0.1|[[Enchanting|Enchanted]] iron armor and enchanted diamond armor can now be found inside [[chest]]s within [[end city]].}}
{{History||1.0.4|snap=alpha 1.0.4.0|Iron [[helmet]]s, iron chestplates, enchanted diamond chestplates and chainmail armor are now [[trading|sold]] by armorer smith [[villager]]s via [[trading]].}}
{{History||1.1.0|snap=alpha 1.1.0.0|Golden, chain and iron armor can now be [[smelting|smelted]] down into one of their respective [[nugget]]s.
|Diamond chestplates and chainmail chestplates can now be found inside [[woodland mansion]] chests.}}
{{History|bedrock}}
{{History||1.4.0|snap=beta 1.2.14.2|Chainmail chestplates now generate in [[buried treasure]] chests.
|Enchanted leather armor can now be found inside [[shipwreck]] supply room [[chest]]s.}}
{{History|||snap=beta 1.2.20.1|Leather chestplates can now be found inside [[underwater ruins]] chests.}}
{{History||1.10.0|snap=beta 1.10.0.3|[[File:Leather Tunic JE4 BE2.png|32px]] [[File:Chainmail Chestplate JE3 BE2.png|32px]] [[File:Iron Chestplate JE2 BE2.png|32px]] [[File:Golden Chestplate JE2 BE2.png|32px]] [[File:Diamond Chestplate JE3 BE2.png|32px]] [[File:Leather Tunic (item) JE4 BE3.png|32px]] [[File:Chainmail Chestplate (item) JE2 BE2.png|32px]] [[File:Iron Chestplate (item) JE2 BE2.png|32px]] [[File:Golden Chestplate (item) JE2 BE2.png|32px]] [[File:Diamond Chestplate (item) JE2 BE2.png|32px]] The textures of all types of chestplates have been changed.
|Iron armor now can be found in plains [[village]] weaponsmith [[chest]]s.
|Leather armor can now be found inside plains village tannery chests.}}
{{History||1.11.0|snap=beta 1.11.0.1|Iron armor now can be found in [[savanna]], [[taiga]], [[desert]], [[snowy taiga]] and [[snowy tundra]] [[village]] weaponsmith [[chest]]s.
|Leather armor can now be found inside savanna, taiga, desert, snowy taiga and snowy tundra village tannery chests.}}
{{History|||snap=beta 1.11.0.4|[[Pillager]]s and [[vindicator]]s that spawn in [[raid]]s can now drop iron armor.}}
{{History||1.11.0|snap=beta 1.11.0.5|[[File:Golden Chestplate (item) JE3 BE3.png|32px]] The textures of gold chestplate [[item]] have been changed.}}
{{History||1.12.0|snap=beta 1.12.0.2|[[File:Armor Stand with Leather Armor MCPE-44669.png|32px]] Leather armor no longer show as being [[dye]]d properly when worn by [[armor stand]]s.}}
{{History||1.13.0|snap=beta 1.13.0.1|Leather armor now appears dyed properly when worn by armor stands.}}
{{History||1.16.0|snap=beta 1.16.0.51|[[File:Netherite Chestplate JE2 BE1.png|32px]] [[File:Netherite Chestplate (item) JE2 BE1.png|32px]] Added netherite chestplate.
|Armor can now be obtained from [[piglin]]s that naturally spawn with golden armor.}}
{{History|||snap=beta 1.16.0.57|All parts of golden and netherite armor now generate randomly [[enchanting|enchanted]], and sometimes [[damage]]d, in [[bastion remnant]] chests.
|Netherite armor can no longer be [[crafting|crafted]].
|Netherite armor is now obtained by combining one diamond armor piece and one netherite ingot in a [[smithing table]].}}
{{History|||snap=beta 1.16.0.63|Diamonds armor now generates in place of netherite armor in bastion remnant [[chest]]s.}}
{{History|||snap=beta 1.16.200.53|Netherite Armor now gives a 90% reduction in Knockback.}}
{{History||1.16.210|snap=beta 1.16.210.53|Wearing any piece of leather armor now prevents [[Powder Snow#Freezing|freezing]] entirely.}}
{{History|console}}
{{History||xbox=TU1|xbone=CU1|ps=1.0|wiiu=Patch 1|switch=1.0.1|[[File:Leather Tunic JE1 BE1.png|32px]] [[File:Chainmail Chestplate JE2 BE1.png|32px]] [[File:Iron Chestplate JE1 BE1.png|32px]] [[File:Golden Chestplate JE1 BE1.png|32px]] [[File:Diamond Chestplate JE1 BE1.png|32px]] [[File:Leather Tunic (item) JE1 BE1.png|32px]] [[File:Chainmail Chestplate (item) JE1 BE1.png|32px]] [[File:Iron Chestplate (item) JE1 BE1.png|32px]] [[File:Golden Chestplate (item) JE1 BE1.png|32px]] [[File:Diamond Chestplate (item) JE1 BE1.png|32px]] Added chestplates.
|Added a quick equip for armor to the [[inventory]] interface.}}
{{History||xbox=TU12|ps=1.03|[[File:Leather Tunic JE3 BE2.png|32px]] [[File:Leather Tunic (item) JE3 BE2.png|32px]] The textures for leather chestplate have been changed.}}
{{History||xbox=TU14|ps=1.05|Leather armor can now be [[dye]]d.
|[[Item repair]] can now repair armor.}}
{{History||xbox=TU25|xbone=CU13|ps=1.16|Armor now have the quick equip functionality.}}
{{History||xbox=TU53|xbone=CU43|ps=1.49|wiiu=Patch 23|switch=1.0.3|Golden, chain and iron armor can now be [[smelting|smelted]] down into one of their respective [[nugget]]s.}}
{{History|PS4}}
{{History||1.90|[[File:Chainmail Chestplate (item) JE2 BE2.png|32px]] [[File:Iron Chestplate (item) JE2 BE2.png|32px]] [[File:Golden Chestplate (item) JE2 BE2.png|32px]] [[File:Diamond Chestplate (item) JE2 BE2.png|32px]] The textures of all types of chestplate items have been changed (except for the leather one).}}
{{History|new 3ds}}
{{History||0.1.0|[[File:Leather Tunic JE1 BE1.png|32px]] [[File:Chainmail Chestplate JE2 BE1.png|32px]] [[File:Iron Chestplate JE1 BE1.png|32px]] [[File:Golden Chestplate JE1 BE1.png|32px]] [[File:Diamond Chestplate JE1 BE1.png|32px]] [[File:Leather Tunic (item) JE3 BE2.png|32px]] [[File:Chainmail Chestplate (item) JE1 BE1.png|32px]] [[File:Iron Chestplate (item) JE1 BE1.png|32px]] [[File:Golden Chestplate (item) JE1 BE1.png|32px]] [[File:Diamond Chestplate (item) JE1 BE1.png|32px]] Added chestplates.}}
{{History|foot}}
; Armor durability from Indev until late Beta
{| class="wikitable" data-description="Armor Durability during Indev until late Beta" style="text-align:center;"
|-
!scope="col" | Material
!scope="col" | Helmet
!scope="col" | Chestplate
!scope="col" | Leggings
!scope="col" | Boots
|-
|scope="row" | '''Leather'''
| 33
| 48
| 45
| 39
|-
|scope="row" | '''Golden'''
| 66
| 96
| 90
| 78
|-
|scope="row" | '''Chainmail'''
| 66
| 96
| 90
| 78
|-
|scope="row" | '''Iron'''
| 132
| 192
| 180
| 156
|-
|scope="row" | '''Diamond'''
| 264
| 384
| 360
| 312
|}
== Issues ==
{{issue list}}
== Trivia ==
* Chestplates do not render on the player's arm in first person view.<ref>{{bug|MC-25512}}</ref><ref>{{bug|MCPE-30000}}</ref>
== Gallery ==
=== Enchanted Chestplates ===
<gallery>
File:Enchanted Leather Tunic (item).gif
File:Enchanted Chainmail Chestplate (item).gif
File:Enchanted Iron Chestplate (item).gif
File:Enchanted Golden Chestplate (item).gif
File:Enchanted Diamond Chestplate (item).gif
File:Enchanted Netherite Chestplate (item).gif
</gallery>
<gallery>
File:Enchanted Leather Chestplate.gif
File:Enchanted Chainmail Chestplate.gif
File:Enchanted Iron Chestplate.gif
File:Enchanted Golden Chestplate.gif
File:Enchanted Diamond Chestplate.gif
File:Enchanted Netherite Chestplate.gif
</gallery>
== References ==
{{reflist}}
== External Links ==
*[https://www.minecraft.net/en-us/article/taking-inventory--chestplate Taking Inventory: Chestplate] – Minecraft.net on August 4, 2021
{{Items}}
[[Category:Armor]]
[[ja:チェストプレート]]
[[ko:흉갑]]
[[pt:Peitoral]]
[[pl:Napierśnik]]
[[th:เสื้อเกราะ]]
[[zh:胸甲]]</li><li>[[Pumpkin Seeds|Pumpkin Seeds]]<br/>{{Block
| image = <gallery>
Pumpkin Stem Age 0.png | Age 0
Pumpkin Stem Age 1.png | Age 1
Pumpkin Stem Age 2.png | Age 2
Pumpkin Stem Age 3.png | Age 3
Pumpkin Stem Age 4.png | Age 4
Pumpkin Stem Age 5.png | Age 5
Pumpkin Stem Age 6.png | Age 6
Pumpkin Stem Age 7.png | Age 7
</gallery>
|image2 = <gallery>
Attached Pumpkin Stem (N).png | North
Attached Pumpkin Stem (E).png | East
Attached Pumpkin Stem (S).png | South
Attached Pumpkin Stem (W).png | West
</gallery>
| transparent = Yes
| light = No
| tool = none
| renewable = Yes
| stackable = Yes (64)
| flammable = No
| lavasusceptible = No
}}
'''Pumpkin seeds''' are items obtained from pumpkins that can be used to grow pumpkin stems.
'''Pumpkin stems''' are plants grown on [[farmland]] that, over time, grow [[pumpkin]]s on dirt, mud and moss blocks adjacent to them.
== Obtaining ==
=== Breaking ===
When broken, a pumpkin stem drops 0–3 pumpkin seeds. The chance for pumpkin seeds to drop increases with the stem's age.
{| class="wikitable"
! rowspan="3" |[[Resource location]]
! rowspan="3" | Source
! colspan="4" | Default
|-
| colspan="1" rowspan="2" style="text-align:center" | Nothing || colspan="3" style="text-align:center" |{{ItemLink|Pumpkin Seeds|Pumpkin seeds}}
|-
| style="text-align:center" | 1 || style="text-align:center" | 2 || style="text-align:center" | 3
|-
| rowspan="8" |<code>blocks/pumpkin_stem</code>
|{{BlockLink|Pumpkin Stem|Pumpkin stem}} <code>age = 0</code>
| style="text-align:center" |81.3%|| style="text-align:center" |17.42%|| style="text-align:center" |1.24%|| style="text-align:center" |0.03%
|-
|{{BlockLink|Pumpkin Stem|Pumpkin stem}} <code>age = 1</code>
| style="text-align:center" |65.1%|| style="text-align:center" |30.04%|| style="text-align:center" |4.62%|| style="text-align:center" |0.24%
|-
|{{BlockLink|Pumpkin Stem|Pumpkin stem}} <code>age = 2</code>
| style="text-align:center" |51.2%|| style="text-align:center" |38.4%|| style="text-align:center" |9.6%|| style="text-align:center" |0.8%
|-
|{{BlockLink|Pumpkin Stem|Pumpkin stem}} <code>age = 3</code>
| style="text-align:center" |39.44%|| style="text-align:center" |43.02%|| style="text-align:center" |15.64%|| style="text-align:center" |1.9%
|-
|{{BlockLink|Pumpkin Stem|Pumpkin stem}} <code>age = 4</code>
| style="text-align:center" |29.13%|| style="text-align:center" |44.44%|| style="text-align:center" |22.22%|| style="text-align:center" |3.7%
|-
|{{BlockLink|Pumpkin Stem|Pumpkin stem}} <code>age = 5</code>
| style="text-align:center" |21.6%|| style="text-align:center" |43.2%|| style="text-align:center" |28.8%|| style="text-align:center" |6.4%
|-
|{{BlockLink|Pumpkin Stem|Pumpkin stem}} <code>age = 6</code>
| style="text-align:center" |15.17%|| style="text-align:center" |39.82%|| style="text-align:center" |34.84%|| style="text-align:center" |10.16%
|-
|{{BlockLink|Pumpkin Stem|Pumpkin stem}} <code>age = 7</code>
| style="text-align:center" |10.16%|| style="text-align:center" |34.84%|| style="text-align:center" |39.82%|| style="text-align:center" |15.17%
|-
| rowspan="1" |<code>blocks/attached_pumpkin_stem</code>
|{{BlockLink|Attached Pumpkin Stem|Attached Pumpkin stem}}
| style="text-align:center" |10.16%|| style="text-align:center" |34.84%|| style="text-align:center" |39.82%|| style="text-align:center" |15.17%
|}
=== Natural generation ===
Pumpkin stems generate naturally in stem farm rooms in [[woodland mansion]]s.
Pumpkin stems generate in [[taiga]] and [[snowy taiga]]{{only|be|short=1}} [[village]] farms.
=== Chest loot ===
{{LootChestItem|pumpkin-seeds}}
=== Crafting ===
{{Crafting
|Pumpkin
|Output= Pumpkin Seeds,4
|type= Material
}}
=== Trading ===
[[Wandering trader]]s sell pumpkin seeds for 1 [[emerald]].
=== Post-generation ===
Shearing an uncarved pumpkin yields 4 pumpkin seeds.
== Usage ==
=== Farming ===
{{see also|Tutorials/Pumpkin and melon farming}}
Pumpkin seeds can be planted only on [[farmland]], as stems. Over time, a stem grows through several stages{{Needs testing}} and, at its final growth stage, will produce [[pumpkin]]s on any adjacent [[dirt]], [[Coarse Dirt|coarse dirt]], [[Rooted Dirt|rooted dirt]], [[Grass Block|grass block]], [[farmland]], [[podzol]], [[mycelium]], [[Moss Block|moss block]], [[mud]] or [[Muddy Mangrove Roots|muddy mangrove roots]]. If a pumpkin is already occupying a spot adjacent to a stem it does not grow more pumpkins until the pumpkin is removed. A single stem can grow an unlimited number of pumpkins. Pumpkin stems need a minimum light level of 10 in the block above the stem to grow and give pumpkins. Pumpkin seeds are affected by [[bone meal]] only with respect to stem growth; bone meal does not help produce the actual pumpkins.
=== Breeding ===
Like other seeds, pumpkin seeds can be used to [[breed]] [[chicken]]s, lead chickens around, and make baby chickens grow up faster by 10% of the remaining time.
=== Taming ===
Like other seeds, pumpkin seeds can be used to tame [[parrot]]s.
=== Composting ===
Placing pumpkin seeds into a [[composter]] has a 30% chance of raising the compost level by 1.
== Pumpkin stem ==
A '''pumpkin stem''' is the block that is planted on [[farmland]] when pumpkin seeds are used on it. It starts underground, and rises up as the plant grows. The stem is colored green when young, and then yellow once fully grown.
The stem curves once a pumpkin has grown from it. A fully-grown single stem connects to any [[pumpkin]] in an adjacent square, thus there are 5 possible appearances to a stem. If there are multiple pumpkins it can connect to, it favors the east, then west, north, and south. When the pumpkin is removed, the stem returns to its straight shape.
== Sounds ==
{{Sound table/Block/Hard crop}}
== Data values ==
=== ID ===
{{edition|java}}:
{{ID table
|edition=java
|showblocktags=y
|showforms=y
|generatetranslationkeys=y
|displayname=Pumpkin Stem
|spritetype=block
|nameid=pumpkin_stem
|blocktags=bee_growables, crops
|form=block}}
{{ID table
|displayname=Attached Pumpkin Stem
|spritetype=block
|nameid=attached_pumpkin_stem
|form=block}}
{{ID table
|displayname=Pumpkin Seeds
|spritetype=item
|nameid=pumpkin_seeds
|form=item
|foot=1}}
{{edition|bedrock}}:
{{ID table
|edition=bedrock
|shownumericids=y
|showforms=y
|generatetranslationkeys=y
|displayname=Pumpkin Stem
|spritetype=block
|nameid=pumpkin_stem
|id=104
|form=block}}
{{ID table
|displayname=Pumpkin Seeds
|spritetype=item
|nameid=pumpkin_seeds
|id=292
|form=item
|foot=1}}
=== Block states ===
{{see also|Block states}}
{{/BS}}
== Advancements ==
{{load advancements|A Seedy Place}}
== History ==
{{info needed section|check if stems floated above farmland upon initial implementation}}
{{History|java beta}}
{{History||1.8|snap=Pre-release|[[File:Pumpkin Seeds JE1 BE1.png|32px]] Added pumpkin seeds.
|[[File:Pumpkin Stem Age 0 JE1.png|32px]] [[File:Pumpkin Stem Age 1 JE1.png|32px]] [[File:Pumpkin Stem Age 2 JE1.png|32px]] [[File:Pumpkin Stem Age 3 JE1.png|32px]] [[File:Pumpkin Stem Age 4 JE1.png|32px]] [[File:Pumpkin Stem Age 5 JE1.png|32px]] [[File:Pumpkin Stem Age 6 JE1.png|32px]] [[File:Pumpkin Stem Age 7 JE1.png|32px]] Added the pumpkin stem, with seven stages of growth.
|Pumpkin seeds can be found in the new [[mineshaft]] [[chest]]s.
|[[File:Attached Pumpkin Stem (N) JE1.png|32px]] [[File:Attached Pumpkin Stem (E) JE1.png|32px]] [[File:Attached Pumpkin Stem (S) JE1.png|32px]] [[File:Attached Pumpkin Stem (W) JE1.png|32px]] The pumpkin stem has four slightly visually distinct appearances for each facing direction - the bent part of the stem rotates, but the other two planes do not.
|[[File:Pumpkin Stem Age 8 JE1.png|32px]] [[File:Pumpkin Stem Age 9 JE1.png|32px]] [[File:Pumpkin Stem Age 10 JE1.png|32px]] [[File:Pumpkin Stem Age 11 JE1.png|32px]] [[File:Pumpkin Stem Age 12 JE1.png|32px]] [[File:Pumpkin Stem Age 13 JE1.png|32px]] [[File:Pumpkin Stem Age 14 JE1.png|32px]] [[File:Pumpkin Stem Age 15 JE1.png|32px]] Pumpkin stem data values from 8 through 15 now show a glitched formation, with a floating stem with an attached stem cross eventually emerging below.
|[[File:Attached Stem Age 8 JE1.png|32px]] [[File:Attached Stem Age 9 JE1.png|32px]] [[File:Attached Stem Age 10 JE1.png|32px]] [[File:Attached Stem Age 11 JE1.png|32px]] [[File:Attached Stem Age 12 JE1.png|32px]] [[File:Attached Stem Age 13 JE1.png|32px]] [[File:Attached Stem Age 14 JE1.png|32px]] [[File:Attached Stem Age 15 JE1.png|32px]] Pumpkin stem blocks with data values higher than 7 can attach to adjacent fruits, which results in buggy stem textures with [[vines]] in the mix due to vines being below attached stems in [[terrain.png]].}}
{{History|||snap=Pre-release 2 ;)|Pumpkin stems can now be grown faster using [[bone meal]].}}
{{History|java}}
{{History||1.0.0|snap=Beta 1.9 Prerelease 2|Pumpkins can now be [[crafting|crafted]] into [[pumpkin seeds]].}}
{{History||1.3.1|snap=1.3|The texture of pumpkin stems has been moved one pixel to the left in [[terrain.png]].
|[[File:Pumpkin Stem Age 0 JE2.png|32px]] [[File:Pumpkin Stem Age 1 JE2.png|32px]] [[File:Pumpkin Stem Age 2 JE2.png|32px]] [[File:Pumpkin Stem Age 3 JE2.png|32px]] [[File:Pumpkin Stem Age 4 JE2.png|32px]] [[File:Pumpkin Stem Age 5 JE2.png|32px]] [[File:Pumpkin Stem Age 6 JE2.png|32px]] [[File:Pumpkin Stem Age 7 JE2.png|32px]] Stems now appear slightly different.
|[[File:Pumpkin Stem Age 8 JE2.png|32px]] [[File:Pumpkin Stem Age 9 JE2.png|32px]] [[File:Pumpkin Stem Age 10 JE2.png|32px]] [[File:Pumpkin Stem Age 11 JE2.png|32px]] [[File:Pumpkin Stem Age 12 JE2.png|32px]] [[File:Pumpkin Stem Age 13 JE2.png|32px]] [[File:Pumpkin Stem Age 14 JE2.png|32px]] [[File:Pumpkin Stem Age 15 JE2.png|32px]] Overgrown attached pumpkin stems now appear slightly different.
|[[File:Attached Pumpkin Stem (N) JE2.png|32px]] [[File:Attached Pumpkin Stem (E) JE2.png|32px]] [[File:Attached Pumpkin Stem (S) JE2.png|32px]] [[File:Attached Pumpkin Stem (W) JE2.png|32px]] Attached pumpkin stems now appear slightly different.
|[[File:Attached Stem Age 8 JE2.png|32px]] [[File:Attached Stem Age 9 JE2.png|32px]] [[File:Attached Stem Age 10 JE2.png|32px]] [[File:Attached Stem Age 11 JE2.png|32px]] [[File:Attached Stem Age 12 JE2.png|32px]] [[File:Attached Stem Age 13 JE2.png|32px]] [[File:Attached Stem Age 14 JE2.png|32px]] [[File:Attached Stem Age 15 JE2.png|32px]] Overgrown attached pumpkin stems now appear slightly different.}}
{{History||1.4.2|snap=12w36a|[[Chicken]]s now use [[wheat seeds]], [[melon seeds]] and pumpkin seeds, instead of [[wheat]] to [[breeding|breed]].}}
{{History||1.5|snap=13w02a|[[File:Pumpkin Stem Age 0 JE3.png|32px]] [[File:Pumpkin Stem Age 1 JE3.png|32px]] [[File:Pumpkin Stem Age 2 JE3.png|32px]] [[File:Pumpkin Stem Age 3 JE3.png|32px]] [[File:Pumpkin Stem Age 4 JE3.png|32px]] [[File:Pumpkin Stem Age 5 JE3.png|32px]] [[File:Pumpkin Stem Age 6 JE3.png|32px]] Pumpkin stems now use a squished version of their texture for immature stems, depending on age.
|[[File:Pumpkin Stem Age 8 JE3.png|32px]] [[File:Pumpkin Stem Age 9 JE3.png|32px]] [[File:Pumpkin Stem Age 10 JE3.png|32px]] [[File:Pumpkin Stem Age 11 JE3.png|32px]] [[File:Pumpkin Stem Age 12 JE3.png|32px]] [[File:Pumpkin Stem Age 13 JE3.png|32px]] [[File:Pumpkin Stem Age 14 JE3.png|32px]] [[File:Pumpkin Stem Age 15 JE3.png|32px]] This also affects pumpkin stems of ages 8-15, which are likewise stretched to accommodate its predicted size.
|[[File:Attached Stem Age 8 JE3.png|32px]] [[File:Attached Stem Age 9 JE3.png|32px]] [[File:Attached Stem Age 10 JE3.png|32px]] [[File:Attached Stem Age 11 JE3.png|32px]] [[File:Attached Stem Age 12 JE3.png|32px]] [[File:Attached Stem Age 13 JE3.png|32px]] [[File:Attached Stem Age 14 JE3.png|32px]] [[File:Attached Stem Age 15 JE3.png|32px]] Pumpkin stems of extreme ages, which are attached to adjacent fruits, now show a stretched and tinted stem appearance.}}
{{History|||snap=13w03a|[[File:Pumpkin Stem Age 0 JE4.png|32px]] [[File:Pumpkin Stem Age 1 JE4.png|32px]] [[File:Pumpkin Stem Age 2 JE4.png|32px]] [[File:Pumpkin Stem Age 3 JE4.png|32px]] [[File:Pumpkin Stem Age 4 JE4.png|32px]] [[File:Pumpkin Stem Age 5 JE4.png|32px]] [[File:Pumpkin Stem Age 6 JE4.png|32px]] [[File:Pumpkin Stem Age 7 JE4.png|32px]] Pumpkin stems are no longer squished or stretched to account for age.<ref>{{bug|MC-7111}}</ref>
|[[File:Pumpkin Stem Age 8 JE4.png|32px]] [[File:Pumpkin Stem Age 9 JE4.png|32px]] [[File:Pumpkin Stem Age 10 JE4.png|32px]] [[File:Pumpkin Stem Age 11 JE4.png|32px]] [[File:Pumpkin Stem Age 12 JE4.png|32px]] [[File:Pumpkin Stem Age 13 JE4.png|32px]] [[File:Pumpkin Stem Age 14 JE4.png|32px]] [[File:Pumpkin Stem Age 15 JE4.png|32px]] Pumpkin stems with age values 8 through 15 now show a tinted [[trapdoor]] texture.
|From this version up until 14w08a, overgrown pumpkin stems start to draw from the texture below them on the [[texture atlas]], in much the same way they previously did with terrain.png. However, as texture atlases are unstable and textures tend to change positions as new blocks and textures are added, overgrown stems change the texture they draw from every time new textures are added, which includes when textures added by [[mods]].}}
{{History|||snap=13w09a|[[File:Pumpkin Stem Age 8 JE5.png|32px]] [[File:Pumpkin Stem Age 9 JE5.png|32px]] [[File:Pumpkin Stem Age 10 JE5.png|32px]] [[File:Pumpkin Stem Age 11 JE5.png|32px]] [[File:Pumpkin Stem Age 12 JE5.png|32px]] [[File:Pumpkin Stem Age 13 JE5.png|32px]] [[File:Pumpkin Stem Age 14 JE5.png|32px]] [[File:Pumpkin Stem Age 15 JE5.png|32px]] Pumpkin stems with age values 8 through 15 now show a tinted [[birch wood]] texture.}}
{{History||1.6.1|snap=13w24a|Melon and pumpkin stems have now been assigned separate textures.
|[[File:Pumpkin Stem Age 8 JE6.png|32px]] [[File:Pumpkin Stem Age 9 JE6.png|32px]] [[File:Pumpkin Stem Age 10 JE6.png|32px]] [[File:Pumpkin Stem Age 11 JE6.png|32px]] [[File:Pumpkin Stem Age 12 JE6.png|32px]] [[File:Pumpkin Stem Age 13 JE6.png|32px]] [[File:Pumpkin Stem Age 14 JE6.png|32px]] [[File:Pumpkin Stem Age 15 JE6.png|32px]] Pumpkin stems with age values 8 through 15 now show a tinted curving [[rail]] texture.}}
{{History||1.7.2|snap=13w37a|Added the {{cmd|setblock}} command, allowing for invalid pumpkin stem ages to be placed in the world without using external editors. This also allows them to be obtained in earlier versions via backdating.}}
{{History|||snap=13w41a|[[File:Pumpkin Stem Age 8 JE7.png|32px]] [[File:Pumpkin Stem Age 9 JE7.png|32px]] [[File:Pumpkin Stem Age 10 JE7.png|32px]] [[File:Pumpkin Stem Age 11 JE7.png|32px]] [[File:Pumpkin Stem Age 12 JE7.png|32px]] [[File:Pumpkin Stem Age 13 JE7.png|32px]] [[File:Pumpkin Stem Age 14 JE7.png|32px]] [[File:Pumpkin Stem Age 15 JE7.png|32px]] Pumpkin stems with age values 8 through 15 now show a tinted lit [[furnace]] texture.}}
{{History|||snap=13w43a|[[File:Pumpkin Stem Age 8 JE8.png|32px]] [[File:Pumpkin Stem Age 9 JE8.png|32px]] [[File:Pumpkin Stem Age 10 JE8.png|32px]] [[File:Pumpkin Stem Age 11 JE8.png|32px]] [[File:Pumpkin Stem Age 12 JE8.png|32px]] [[File:Pumpkin Stem Age 13 JE8.png|32px]] [[File:Pumpkin Stem Age 14 JE8.png|32px]] [[File:Pumpkin Stem Age 15 JE8.png|32px]] Pumpkin stems with age values 8 through 15 now show a tinted [[pumpkin]] top texture.}}
{{History||1.8|snap=14w10a|[[File:Pumpkin Stem Age 8 JE9.png|32px]] [[File:Pumpkin Stem Age 9 JE9.png|32px]] [[File:Pumpkin Stem Age 10 JE9.png|32px]] [[File:Pumpkin Stem Age 11 JE9.png|32px]] Pumpkin stems with data values 8-11 now display a tinted attached stem, with 8 facing west, 9 facing east, 10 facing north and 11 facing south.
|Invalid pumpkin stems with data values 12-15 now crash the game.}}
{{History|||snap=14w25a|[[File:Pumpkin Stem Age 0 JE5.png|32px]] [[File:Pumpkin Stem Age 1 JE5.png|32px]] [[File:Pumpkin Stem Age 2 JE5.png|32px]] [[File:Pumpkin Stem Age 3 JE5.png|32px]] [[File:Pumpkin Stem Age 4 JE5.png|32px]] [[File:Pumpkin Stem Age 5 JE5.png|32px]] [[File:Pumpkin Stem Age 6 JE5.png|32px]] [[File:Pumpkin Stem Age 7 JE5.png|32px]] Pumpkin stems now render as a single diagonal plane, or, in the case of attached stems, a diagonal and orthogonal plane.
|[[File:Attached Pumpkin Stem (N) JE3.png|32px]] [[File:Attached Pumpkin Stem (E) JE3.png|32px]] [[File:Attached Pumpkin Stem (S) JE3.png|32px]] [[File:Attached Pumpkin Stem (W) JE3.png|32px]] The attached pumpkin stem [[model]] now fully rotates to the direction the stem points. Prior to this update, the base of the pumpkin stem would stay the same while the long attaching section would differ, resulting in four possible attached stem appearances.
|Invalid overgrown pumpkin stems have now effectively been removed from the game, as attempting to place an out of range stem via {{cmd|setblock}} creates a stem of age 0 and loading a world with existing such stems cause a game crash.}}
{{History|||snap=14w26a|[[File:Pumpkin Stem Age 0 JE6.png|32px]] [[File:Pumpkin Stem Age 1 JE6.png|32px]] [[File:Pumpkin Stem Age 2 JE6.png|32px]] [[File:Pumpkin Stem Age 3 JE6.png|32px]] [[File:Pumpkin Stem Age 4 JE6.png|32px]] [[File:Pumpkin Stem Age 5 JE6.png|32px]] [[File:Pumpkin Stem Age 6 JE6.png|32px]] [[File:Pumpkin Stem Age 7 JE6.png|32px]] [[File:Attached Pumpkin Stem (N) JE4.png|32px]] [[File:Attached Pumpkin Stem (E) JE4.png|32px]] [[File:Attached Pumpkin Stem (S) JE4.png|32px]] [[File:Attached Pumpkin Stem (W) JE4.png|32px]] Pumpkin stems now correctly render as crosses again.<ref>{{bug|MC-58136}}</ref>}}
{{History|||snap=14w27a|[[File:Attached Stem Age 0 14w27a.png|32px]] [[File:Attached Stem Age 1 14w27a.png|32px]] [[File:Attached Stem Age 2 14w27a.png|32px]] [[File:Attached Stem Age 3 14w27a.png|32px]] [[File:Attached Stem Age 4 14w27a.png|32px]] [[File:Attached Stem Age 5 14w27a.png|32px]] [[File:Attached Stem Age 6 14w27a.png|32px]] Due to a bug, all pumpkin stems now appear attached regardless of age or any actual attachment.<ref>{{bug|MC-60208}}</ref>}}
{{History|||snap=14w28a|All pumpkin stems appearing attached regardless of the age of any actual attachment has been fixed. However, pumpkin stems still appear attached to adjacent fruits regardless of age due to a similar bug.<ref>{{bug|MC-61716}}</ref>}}
{{History|||snap=14w34d|Pumpkin seeds no longer can be used to breed [[chicken]]s.}}
{{History||1.9|snap=15w31a|Chickens can now use pumpkin seeds to [[breeding|breed]] again.}}
{{History|||snap=15w44a|Pumpkin seeds have been added to [[dungeon]] [[chest]]s.
|The average yield of pumpkin seeds in [[mineshaft]] chests has been decreased.}}
{{History|||snap=15w45a|Pumpkin stems must now be fully grown again to attach.}}
{{History||1.11|snap=16w39a|Pumpkin seeds are now found in the new [[woodland mansion]] chests.
|Pumpkin stems now generate inside [[woodland mansion]]s.}}
{{History||1.13|snap=17w47a|The different [[block]] states for the <code>pumpkin_stem</code> ID have been split up into their own IDs.
|Pumpkin seeds can now be obtained by [[shear]]ing an uncarved pumpkin.
|Prior to [[1.13/Flattening|''The Flattening'']], this [[block]]'s numeral ID was 104, and the [[item]]'s 361.}}
{{History|||snap=17w48a|Attached pumpkin stems no longer [[drops|drop]] seeds.}}
{{History||1.14|snap=18w43a|[[File:Pumpkin Stem Age 0 JE7.png|32px]] [[File:Pumpkin Stem Age 1 JE7.png|32px]] [[File:Pumpkin Stem Age 2 JE7.png|32px]] [[File:Pumpkin Stem Age 3 JE7.png|32px]] [[File:Pumpkin Stem Age 4 JE7.png|32px]] [[File:Pumpkin Stem Age 5 JE7.png|32px]] [[File:Pumpkin Stem Age 6 JE7.png|32px]] [[File:Pumpkin Stem Age 7 JE7.png|32px]] The stem texture has changed.
|[[File:Attached Pumpkin Stem (N) JE5.png|32px]] [[File:Attached Pumpkin Stem (E) JE5.png|32px]] [[File:Attached Pumpkin Stem (S) JE5.png|32px]] [[File:Attached Pumpkin Stem (W) JE5.png|32px]] The pumpkin stem texture change also affects the base cross on pumpkin stems.}}
{{History|||snap=18w50a|Pumpkin stems now generate in the updated [[taiga]] [[village]] farms.
|Pumpkin seeds can now be found in [[chest]]s in taiga village houses.}}
{{History|||snap=19w03a|Placing pumpkin seeds into the new [[composter]] has a 10% chance of raising the compost level by 1.}}
{{History|||snap=19w05a|Pumpkin seeds now have a 30% chance of increasing the compost level in a composter by 1.
|Added [[Wandering Trader|wandering trader]]s, which sell pumpkin seeds.}}
{{History||1.15|snap=19w34a|[[Bee]]s can now pollinate pumpkin stems.}}
{{History|||snap=19w39a|Attached pumpkin stems now [[drops|drop]] seeds again.<ref>{{bug|MC-136360}}</ref>}}
{{History|pocket alpha}}
{{History||v0.8.0|snap=build 1|[[File:Pumpkin Seeds JE1 BE1.png|32px]] Added pumpkin seeds.
|[[File:Pumpkin Stem Age 0 JE1.png|32px]] [[File:Pumpkin Stem Age 1 JE1.png|32px]] [[File:Pumpkin Stem Age 2 JE1.png|32px]] [[File:Pumpkin Stem Age 3 JE1.png|32px]] [[File:Pumpkin Stem Age 4 JE1.png|32px]] [[File:Pumpkin Stem Age 5 JE1.png|32px]] [[File:Pumpkin Stem Age 6 JE1.png|32px]] [[File:Pumpkin Stem Age 7 JE1.png|32px]] [[File:Attached Pumpkin Stem (N) JE1.png|32px]] [[File:Attached Pumpkin Stem (E) JE1.png|32px]] [[File:Attached Pumpkin Stem (S) JE1.png|32px]] [[File:Attached Pumpkin Stem (W) JE1.png|32px]]{{verify|Were these the models used by this edition?}} Added pumpkin stems.
|Pumpkin seeds are obtainable from the [[Nether reactor]].}}
{{History||v0.12.1|snap=build 1|Pumpkin seeds are no longer available from the Nether reactor.}}
{{History||v0.14.0|snap=build 1|Pumpkin seeds can now be found in [[minecart with chest]]s inside [[mineshaft]]s.}}
{{History|pocket}}
{{History||1.1.0|snap=alpha 1.1.0.0|Pumpkin stems now generate inside [[woodland mansion]]s.}}
{{History|bedrock}}
{{History||1.2.0|snap=beta 1.2.0.2|Pumpkin seeds are now used to tame [[parrot]]s.}}
{{History||1.4.0|snap=beta 1.2.13.8|Pumpkin seeds can now be obtained by [[shear]]ing an uncarved [[pumpkin]].}}
{{History||1.10.0|snap=beta 1.10.0.3|[[File:Attached Pumpkin Stem (W) JE5.png|32px]]{{info needed|More accurate image}} The texture of attached pumpkin stems has been changed.
|Pumpkin seeds can now be [[trading|bought]] from [[wandering trader]]s.
|A single pumpkin crop now generates in the new [[taiga]] and [[snowy taiga]] [[village]]s.}}
{{History||1.11.0|snap=beta 1.11.0.1|A single pumpkin seed can now be used to fill the [[composter]].
|Pumpkin seeds can now be found in [[taiga]] and [[snowy taiga]] [[village]] house [[chest]]s.}}
{{History|console}}
{{History||xbox=TU5|xbone=CU1|ps=1.0|wiiu=Patch 1|[[File:Pumpkin Seeds JE1 BE1.png|32px]] Added pumpkin seeds.
|[[File:Pumpkin Stem Age 0 JE1.png|32px]] [[File:Pumpkin Stem Age 1 JE1.png|32px]] [[File:Pumpkin Stem Age 2 JE1.png|32px]] [[File:Pumpkin Stem Age 3 JE1.png|32px]] [[File:Pumpkin Stem Age 4 JE1.png|32px]] [[File:Pumpkin Stem Age 5 JE1.png|32px]] [[File:Pumpkin Stem Age 6 JE1.png|32px]] [[File:Pumpkin Stem Age 7 JE1.png|32px]] [[File:Attached Pumpkin Stem (N) JE1.png|32px]] [[File:Attached Pumpkin Stem (E) JE1.png|32px]] [[File:Attached Pumpkin Stem (S) JE1.png|32px]] [[File:Attached Pumpkin Stem (W) JE1.png|32px]]{{verify|Were these the models used by this edition?}} Added pumpkin stems.}}
{{History||xbox=TU69|ps=1.76|wiiu=Patch 38|Pumpkin seeds can now be obtained by [[shear]]ing an uncarved [[pumpkin]].}}
{{History||xbox=none|xbone=none|ps=1.90|wiiu=none|switch=none|[[File:Attached Pumpkin Stem (W) JE5.png|32px]]{{info needed|More accurate image}} The texture of attached pumpkin stems has been changed.}}
{{History|New 3DS}}
{{History||0.1.0|[[File:Pumpkin Stem Age 0 JE1.png|32px]] [[File:Pumpkin Stem Age 1 JE1.png|32px]] [[File:Pumpkin Stem Age 2 JE1.png|32px]] [[File:Pumpkin Stem Age 3 JE1.png|32px]] [[File:Pumpkin Stem Age 4 JE1.png|32px]] [[File:Pumpkin Stem Age 5 JE1.png|32px]] [[File:Pumpkin Stem Age 6 JE1.png|32px]] [[File:Pumpkin Stem Age 7 JE1.png|32px]] [[File:Attached Pumpkin Stem (N) JE1.png|32px]] [[File:Attached Pumpkin Stem (E) JE1.png|32px]] [[File:Attached Pumpkin Stem (S) JE1.png|32px]] [[File:Attached Pumpkin Stem (W) JE1.png|32px]]{{verify|Were these the models used by this edition?}} Added pumpkin stems.}}
{{History|foot}}
<gallery>
Pumpkin Stem with data value 15.png|The final version of the pumpkin stem with age 15, as seen in-game.
Pumpkinstems.png|Pumpkin stems of ages 1 to 15 on a modded version of [[Java Edition 1.7.2|1.7.2]], hence the nearby melon stems using the melon top texture.
Stems of 13w02a.png|All 16 stem sizes in [[Java Edition 13w02a|13w02a]], with accompanying data values.
</gallery>
=== Pumpkin stem "item" ===
{{:Technical blocks/Pumpkin Stem}}
== Issues ==
{{issue list}}
== Gallery ==
<gallery>
Stem All Ages.png|All stages of growth.
AllSeeds.png|All the [[seeds]] that exist in the game.
</gallery>
== References ==
{{reflist}}
{{Blocks|vegetation}}
{{Items}}
[[Category:Plants]]
[[Category:Food]]
[[Category:Non-solid blocks]]
[[Category:Generated structure blocks]]
[[cs:Dýňová semínka]]
[[de:Kürbiskerne]]
[[es:Semillas de calabaza]]
[[fr:Graines de citrouille]]
[[hu:Tökmagok]]
[[ja:カボチャの種]]
[[ko:호박씨]]
[[nl:Pompoenpitten]]
[[pl:Nasiona dyni]]
[[pt:Sementes de abóbora]]
[[ru:Семена тыквы]]
[[th:เมล็ดฝักทอง]]
[[zh:南瓜种子]]</li></ul> | Added sound files and sprite texture for the tempest knife, currently unavailable. | ||||
1.7.2.0{{Extension DPL}}<ul><li>[[Leather|Leather]]<br/>{{About||the leather from rabbits|Rabbit Hide|the armor material|Armor materials}}
{{Item
| image = Leather.png
| renewable = Yes
| stackable = Yes (64)
}}
'''Leather''' is an [[item]] used to make [[item frame]]s, [[armor]] and [[book]]s.
== Obtaining ==
=== Mob loot ===
Upon death, [[cow]]s, [[mooshroom]]s, [[horse]]s, [[donkey]]s, [[mule]]s, [[llama]]s and [[trader llama]]s drop 0–2 leather, while [[hoglin]]s drop 0–1 leather. The maximum amount is increased by 1 per level of [[Looting]], for a maximum of 5 leather (4 leather from hoglins) with Looting III.
A [[fox]] sometimes spawns holding leather, which always drops upon death. Alternatively, a player can drop a [[food]] item, causing the fox to drop the leather.
=== Fishing ===
Leather can be obtained as a "junk" item from [[fishing]].
=== Crafting ===
{{Crafting
|A1= Rabbit Hide |B1= Rabbit Hide
|A2= Rabbit Hide |B2= Rabbit Hide
|Output=Leather
|type=Material
}}
=== Chest loot ===
{{LootChestItem|leather}}
=== Villager gifts ===
{{in|java}}, leatherworker [[villager]]s throw leather at players under the [[Hero of the Village]] effect.
=== Bartering ===
[[Piglin]]s may [[barter]] 2-4 leather when given a [[gold ingot]].
== Usage ==
=== Crafting ingredient ===
{{crafting usage}}
=== Trading ===
Novice-level leatherworker villagers have a {{frac|2|3}} chance to [[trading|buy]] 6 leather for one [[emerald]] {{in|java}}, and always offer the trade {{in|bedrock}}.
=== Repairing ===
Leather is the repair item for the [[armor materials|leather armor]], and thus can be used to [[item repair|repair]] the following items in an [[anvil]]:
* {{ItemLink|Leather cap}}
* {{ItemLink|Leather tunic}}
* {{ItemLink|Leather pants}}
* {{ItemLink|Leather boots}}
== Achievements ==
{{load achievements|Cow Tipper}}
== Data values ==
=== ID ===
{{edition|java}}:
{{ID table
|edition=java
|showitemtags=y
|showforms=y
|generatetranslationkeys=y
|displayname=Leather
|spritetype=item
|nameid=leather
|itemtags=ignored_by_piglin_babies
|form=item
|foot=1}}
{{edition|bedrock}}:
{{ID table
|edition=bedrock
|shownumericids=y
|showforms=y
|notshowbeitemforms=y
|generatetranslationkeys=y
|displayname=Leather
|spritetype=item
|nameid=leather
|id=381
|form=item
|foot=1}}
== History ==
{{History|java alpha}}
{{History||v1.0.8|[[File:Leather JE1 BE1.png|32px]] Added leather.
|Leather [[drops]] from [[cow]]s.
|The [[crafting]] recipe for leather [[armor]] has been changed from cloth to leather (leather armor was previously [[craft]]ed with [[wool]], and was called "cloth armor" in the game code).}}
{{History||v1.0.17|[[Chicken]]s in [[Survival]] [[multiplayer]] now [[drop]] leather if killed by [[fire]], fall [[damage]] or [[cactus]].}}
{{History||v1.2.6|Chickens dropping leather was fixed by this version at the latest.{{when|It would be nice to know exactly when. It's at most a 3 1/2 month bug, though it was at the beginning. Might count as short-lived.}}.}}
{{History|java}}
{{History||1.3.1|snap=12w17a|Leather is now required to craft [[book]]s.}}
{{History||1.4.2|snap=12w34a|Leather is now used to craft the newly added [[item frame]]s.}}
{{History||1.6.1|snap=13w16a|Leather is now used to craft [[horse saddle]]s.|[[Horse]]s now [[drop]] leather.}}
{{History|||snap=13w18a|Leather is no longer used to craft [[horse saddle]]s.}}
{{History||1.7.2|snap=13w36a|Leather can be obtained as one of the "junk" [[item]]s in [[fishing]], making it possible to obtain it without killing any [[animal]]s.}}
{{History||1.8|snap=14w02a|Leather can now be [[trading|sold]] to leatherworker [[villager]]s, at 9–12 leather for 1 [[emerald]].}}
{{History|||snap=14w27b|Leather can now be crafted using 4 [[rabbit hide]].}}
{{History||1.9|snap=15w41a|Leather can now be used to repair [[elytra]].}}
{{History||1.11|snap=16w39a|[[Llama]]s now [[drop]] leather.}}
{{History||1.13|snap=17w47a|Prior to [[1.13/Flattening|''The Flattening'']], this [[item]]'s numeral ID was 334.}}
{{History|||snap=18w07a|[[Phantom]]s now drop leather.}}
{{History|||snap=18w14a|Phantoms no longer [[drop]] leather.
|[[Phantom membrane]]s are now used to repair [[elytra]], instead of leather.}}
{{History||1.14|snap=18w43a|[[File:Leather JE2 BE2.png|32px]] The texture of leather has been changed.}}
{{History|||snap=18w48a|Leather can now be found in chests in [[village]] tanneries.}}
{{History|||snap=19w07a|Added [[fox]]es, which sometimes spawn with leather in their mouths.}}
{{History|||snap=19w08a|Leather is now used to [[craft]] leather [[horse armor]].}}
{{History|||snap=19w13a|Leatherworker villagers now give leather to players under the [[Hero of the Village]] effect.}}
{{History||1.16|snap=20w07a|Leather is dropped by the new [[hoglin]]s.
|Leather has a {{frac|5|109}} (~4.59%) chance of being given by the new [[piglin]]s when [[bartering]], in a stack size of 2–7.}}
{{History|||snap=20w09a|Leather now has a {{frac|20|226}} (~8.84%) chance of being given by piglins when bartering, in a stack size of 1–5.}}
{{History|||snap=20w16a|Leather now generates in [[bastion remnants]] chests.}}
{{History|pocket alpha}}
{{History||v0.2.0|[[File:Leather JE1 BE1.png|32px]] Added leather. It is currently unobtainable and serves no purpose.}}
{{History||v0.6.0|Leather is now obtainable by killing [[cow]]s.
|Leather can be used to craft leather [[armor]].}}
{{History||v0.11.0|snap=build 1|Leather can now be obtained as one of the "junk" [[item]]s in [[fishing]], making it possible to obtain it without killing any [[animal]]s.}}
{{History||v0.12.1|snap=build 1|Leather is now required to craft [[book]]s.}}
{{History||v0.13.0|snap=build 1|Leather can now be [[craft]]ed using 4 [[rabbit hide]].}}
{{History||v0.15.0|snap=build 1|Leather is now used to craft leather [[horse armor]].}}
{{History|pocket}}
{{History||1.0.0|snap=alpha 0.17.0.1|Leather can now be used to repair [[elytra]].}}
{{History||1.0.4|snap=alpha 1.0.4.0|9-12 leather can now be [[trading|sold]] to leatherworker [[villager]]s.}}
{{History|bedrock}}
{{History||1.6.0|snap=beta 1.6.0.5|[[Phantom membrane]]s are now used to repair [[elytra]], instead of leather.}}
{{History||1.10.0|snap=beta 1.10.0.3|Leather can now be found in [[village]] tannery house [[chest]]s.
|[[File:Leather JE2 BE2.png|32px]] The texture of leather has been changed.}}
{{History||1.11.0|snap=beta 1.11.0.4|[[Trading]] has been changed, leatherworker [[villager]]s now [[trading|buy]] 6 leather for an [[emerald]].}}
{{History||1.13.0|snap=beta 1.13.0.1|Added [[fox]]es, which can drop leather.}}
{{History||1.16.0|snap=beta 1.16.0.57|Hoglins now drop leather.
|Leather can now be obtained from bartering with piglin.
|Leather can now be found in [[bastion remnants]] chests.}}
{{History|console}}
{{History||xbox=TU1|xbone=CU1|ps=1.0|wiiu=Patch 1|switch=1.0.1|[[File:Leather JE1 BE1.png|32px]] Added leather.}}
{{History||xbox=TU60|xbone=CU51|ps=1.64|wiiu=Patch 30|switch=1.0.11|Leather is now used to [[craft]] leather [[horse armor]].}}
{{History||xbox=TU69|xbone=none|ps=1.76|wiiu=Patch 38|switch=none|[[Phantom membrane]]s are now used to repair [[elytra]], instead of leather.}}
{{History||xbox=none|xbone=none|ps=1.90|wiiu=none|switch=none|[[File:Leather JE2 BE2.png|32px]] The texture of leather has been changed.}}
{{History|new 3ds}}
{{History||0.1.0|[[File:Leather JE1 BE1.png|32px]] Added leather.}}
{{History|foot}}
== Issues ==
{{issue list}}
{{Items}}
[[Category:Renewable resources]]
[[cs:Kůže]]
[[de:Leder]]
[[es:Cuero]]
[[fr:Cuir]]
[[hu:Bőr]]
[[it:Cuoio]]
[[ja:革]]
[[ko:가죽]]
[[nl:Leer]]
[[pl:Skóra]]
[[pt:Couro]]
[[ru:Кожа]]
[[th:หนังสัตว์]]
[[uk:Шкіра]]
[[zh:皮革]]</li><li>[[Head|Head]]<br/>{{Block
| image =
<gallery>
Skeleton Skull.png | Skeleton
Wither Skeleton Skull.png | Wither Skeleton
Player Head.png | Player
Zombie Head.png| Zombie
Creeper Head.png | Creeper
Dragon Head.png | Dragon
Piglin Head.png | Piglin
</gallery>
| transparent = Yes
| light = No
| tool = any
| renewable =
* '''Skeleton, Wither Skeleton, Zombie, Creeper, Piglin:'''
* Yes
* '''Dragon, Player:'''
* No
| stackable = Yes (64)
| flammable = No
| lavasusceptible = No
| rarity = Uncommon
}}
A '''head''' or '''skull''' is a [[block]] modeled after the head of a specific [[entity]]. There are seven types of heads: [[player]] ([[Steve]]'s head by default), [[zombie]], [[skeleton]], [[wither skeleton]], [[creeper]], [[piglin]], and [[dragon]].
== Obtaining ==
=== Breaking ===
A mob head can be mined using any item,<ref>{{bug|MC-192905||Heads & Skulls have no assigned tool}}</ref> and drops itself when broken.
{{breaking row|horizontal=1|Mob Head|sprite=Heads}}
If a head is pushed by a [[piston]] or comes in contact with [[water]] or [[lava]], it breaks off as an [[item (entity)|item]].
When destroyed by an [[explosion]], the head ''always'' drops as an item.
===Natural generation===
Dragon heads generate on [[end ships]] found in [[End City|end cities]].
Skeleton skulls can generate in [[ancient cities]], which sometimes generate in the [[deep dark]].
=== Mob loot ===
A [[wither skeleton]] has a 2.5% chance of dropping a wither skeleton skull when killed by a player or a tamed [[wolf]]. The chance is increased by 1% per level of [[Looting]], for a maximum of 5.5% with Looting III. {{IN|bedrock}}, the chance is increased by 2% per level of [[Looting]], for a maximum of 8.5% with Looting III.
[[Skeleton]], [[wither skeleton]], [[zombie]], [[creeper]] and [[piglin]] heads are always dropped by the respective mob if it dies due to a [[charged creeper]]'s explosion. {{IN|bedrock}}, if multiple mobs are killed by the same charged creeper, all of them drop their heads, however {{in|java}} only one mob selected at random drops its head.<ref>{{bug|MC-63534|||WAI}}</ref> If an [[ender dragon]] or a [[player]] is killed by a charged creeper, it does not drop its head.<ref name=":0">{{bug|MC-132933|||WAI}}</ref>
==Usage ==
===Decoration===
Mob heads can be oriented in 16 different directions on top of a block, and 4 directions on the sides of blocks, similar to [[sign]]s. They can be placed on top of, or beside each other by shift clicking.
When placed and powered by redstone, the piglin and dragon heads plays an animation. The piglin head flaps its ears (2 times per second for the right ear and 2.5 times per second for the left ear) while the dragon head opens and closes its mouth repeatedly (2 times per second). The same animation occurs when worn by a (horizontally) moving player, zombie, skeleton, or [[armor stand]] (note: the animation does not play if the <code>NoGravity</code> tag is set to 1)
=== Wearing ===
{{See also|#Renders}}
The player can wear heads, similarly to [[pumpkin]]s or helmets. This overlays the second layer of the player's [[skin]].
====Disguise====
Wearing the corresponding mob head reduces the detection range for [[skeleton]]s (but not [[wither skeleton]]s), [[creeper]]s, [[zombie]]s, and [[piglin]]s to 50% of the normal range. This is similar to (and stacks with) the reductions in detection range from [[sneaking]] and from the [[Invisibility]] status effect.
{{IN|bedrock}}, wearing any mob head or carved pumpkin makes the player invisible to other players on a locator [[map]].
=== Withers===
{{FakeImage|{{BlockGrid|scale=2|w=Wither Skeleton Skull|s=Soul Sand|www|sss| s }}|Wither build configuration}}
[[Wither]]s can be spawned by placing soul sand or soul soil in a T shape, and putting 3 wither skeleton skulls on top of the T. The T can be horizontal or vertical. The last block placed must be one of the three wither skeleton skulls. A dispenser can also create a wither, by placing the final skull onto soul sand directly in front of and below it.
===Dispensers===
A [[dispenser]] can equip a mob head on a player, mob, or armor stand with an empty helmet slot, within the block the dispenser is facing.
[[Dispenser]]s can also complete the construction of a wither.
=== Crafting ingredient===
{{crafting usage|Wither Skeleton Skull,Creeper Head|continue=1}}
{{Crafting
|ignoreusage=1
|ingredients=Any '''Mob head''' +<br>[[Gunpowder]] +<br>Any [[Dye]]
|Gunpowder
|Wither Skeleton Skull;Skeleton Skull;Zombie Head;Head;Creeper Head;Dragon Head;Player Head
|Matching Dye
|Output= Matching Firework Star
|description=Forms Creeper shape
|foot=1
}}
===Enchantments===
Mob heads can receive the following enchantments, but only through an [[anvil]].
{| class="wikitable col-2-center col-3-right"
|+
!Name
!Max Level
![[Enchanting|Method]]
|-
|[[Curse of Binding]]
|I
|{{Inventory slot|Anvil}}
|-
|[[Curse of Vanishing]]
|I
|{{Inventory slot|Anvil}}
|-
|}
=== Note blocks ===
Placing a head above a [[note block]] causes the note block to play the corresponding mob's {{cd|ambient}} sound when activated. The only exception is the creeper head; as creepers don't make {{cd|ambient}} sounds, the note block plays the {{cd|primed}} (hissing) sound instead.
The block below the note block does not affect the mob sound it creates.
==Player skins==
{{exclusive|java|section=1}}
Human heads have an extra usage for map makers, they can be given [[Chunk format#Entity Format|NBT data]] so that they appear with the skin of any ''Minecraft'' account. This means if a player knows that a specific account has a head that is desired to display, the NBT data can be edited to make it appear.
The command to give the player a head with the skin of another player is {{cmd|give @s minecraft:player_head{SkullOwner:"<''PlayerName''>"} }}. Commonly, this kind of head is called a custom head.
Another command to give the player a head with another player's skin is {{cmd|give @s minecraft:player_head{SkullOwner:{Id:"<''PlayerUUID''>",Properties:{textures:[{Value:"<''SkinURL''>"}]} } } }}. ''SkinURL'' is a string encoded in [https://en.wikipedia.org/wiki/Base64 Base64] containing the URL of the player's skin.<ref>Example: {"textures":{"SKIN":{"url":"<nowiki>http://textures.minecraft.net/texture/292009a4925b58f02c77dadc3ecef07ea4c7472f64e0fdc32ce5522489362680"}}}</ref> A player head saves the skin of the player from the time it was created, meaning if the player changes their skin, the head still displays the original texture.<ref>{{tweet|Dinnerbone|464414369452142592|Skulls are a snapshot of the skin as it was made; just change your skin, make a skull, and change your skin back. That's intended behaviour.|May 8, 2014}}</ref>
Note that it is therefore necessary to be connected to the internet to load the texture of a skin, whatever the property used.
When they are loaded for the first time by the client, the skins textures are cached in {{code|[[.minecraft]]\assets\skins\(subfolders)\(files)}}.
If the client does not have access to the internet when it first loads, the player's head displays a regular head (Steve's skin) which is also cached.
Afterwards, even if the client reconnects to the internet, in order to display the skin correctly, it is necessary to clear the cache manually by deleting the recently created files in {{code|[[.minecraft]]\assets\skins\(subfolder)}}, then restarting the game.
When NBT-customized heads (with names and lores) are placed on the ground, they lose their names and given lores upon picking up. Therefore, using Ctrl + {{ctrl|pick block}} on a custom player head gives the player a head that still retains its textures, but with no lores and its name is reset to either {{code|[PlayerName]'s Head}} (heads obtained by MHF-Marc's Head Format or existing players in the world) or {{code|Player Head}} (heads obtained by using skin URLs).
=== Marc's Head Format===
[[File:Allmobheads.png|thumb|right|Most of the MHF mob heads provided.]]
{{exclusive|Java|section=1}}
[[Marc Watson]] created a number of accounts with specific skins so map makers could use common heads without the risk of someone changing their skins.<ref>{{reddit|1m0itx/twitter_marc_irl_mapmakers_would_it_be_useful|cc4m1cq|I'm here to make it so that people don't have to worry about having a consistent account whose skin might change.|Marc_IRL|September 9, 2013}}</ref> Nowadays, since heads do not update the skin if a player changes their skin, this is not something map-makers need to worry about, though these skins are still useful. These accounts have names in the format <code>MHF_<''Name''></code>, for example <code>MHF_PigZombie</code> is the name of a ''Minecraft'' user with a [[zombified piglin]] head. MHF stands for "Marc's Head Format".<ref>{{tweet|Marc_IRL|377453670410891264|head format. I needed to pick a prefix that was short and not already taken by other usernames.|September 10, 2013}}</ref> There are also a few blocks and "bonus" heads, for more variety. These player heads have not been updated in compliance with the [[Texture Update]], and are outdated.
Because these are names of player accounts, these heads are obtained or placed using the <code>SkullOwner</code> tag, for instance: {{cmd|/give @s minecraft:player_head{SkullOwner:"MHF_''<Name>''"}<nowiki />}}.
The following names/heads have been made available:<ref>{{tweet|Marc_IRL|542330244473311232|For those following the MHF list, I have presents for you. Full list of accounts I've made: http://pastebin.com/5mug6EBu|December 9, 2014}}</ref>
<!--
DO NOT add ANY skull to this list without a source that it is made by Mojang; unsourced additions will be reverted!
In particular:
* MHF_Apple, MHF_Wither and MHF_Tree are not made by Mojang, see {{tweet|Marc_IRL|542599419678707714}} and {{tweet|Marc_IRL|590522239616954369}}
* MHF_Guardian is unofficial, see http://redd.it/3439u0
-->
;Mobs
<div class="list-style-none" style="-moz-column-width:15em;-webkit-column-width:15em;column-width:15em">
*{{InvSprite|MHF Alex}} MHF_Alex
*{{InvSprite|MHF Blaze}} MHF_Blaze
*{{InvSprite|MHF CaveSpider}} MHF_CaveSpider
*{{InvSprite|MHF Chicken}} MHF_Chicken
*{{InvSprite|MHF Cow}} MHF_Cow
*{{InvSprite|MHF Creeper}} MHF_Creeper
*{{InvSprite|MHF Enderman}} MHF_Enderman
*{{InvSprite|MHF Ghast}} MHF_Ghast
*{{InvSprite|MHF Golem}} MHF_Golem
*{{InvSprite|MHF Herobrine}} MHF_Herobrine
*{{InvSprite|MHF LavaSlime}} MHF_LavaSlime
*{{InvSprite|MHF MushroomCow}} MHF_MushroomCow
*{{InvSprite|MHF Ocelot}} MHF_Ocelot
*{{InvSprite|MHF Pig}} MHF_Pig
*{{InvSprite|MHF PigZombie}} MHF_PigZombie
*{{InvSprite|MHF Sheep}} MHF_Sheep
*{{InvSprite|MHF Skeleton}} MHF_Skeleton
*{{InvSprite|MHF Slime}} MHF_Slime
*{{InvSprite|MHF Spider}} MHF_Spider
*{{InvSprite|MHF Squid}} MHF_Squid
*{{InvSprite|MHF Steve}} MHF_Steve
*{{InvSprite|MHF Villager}} MHF_Villager
*{{InvSprite|MHF WSkeleton}} MHF_WSkeleton
*{{InvSprite|MHF Zombie}} MHF_Zombie
</div>
;Blocks
<div class="list-style-none" style="-moz-column-width:15em;-webkit-column-width:15em;column-width:15em">
*{{InvSprite|MHF Cactus}} MHF_Cactus
*{{InvSprite|MHF Cake}} MHF_Cake
*{{InvSprite|MHF Chest}} MHF_Chest
*{{InvSprite|MHF CoconutB}} MHF_CoconutB
*{{InvSprite|MHF CoconutG}} MHF_CoconutG
*{{InvSprite|MHF Melon}} MHF_Melon
*{{InvSprite|MHF OakLog}} MHF_OakLog
*{{InvSprite|MHF Present1}} MHF_Present1
*{{InvSprite|MHF Present2}} MHF_Present2
*{{InvSprite|MHF Pumpkin}} MHF_Pumpkin
*{{InvSprite|MHF TNT}} MHF_TNT
*{{InvSprite|MHF TNT2}} MHF_TNT2
</div>
;Bonus
<div class="list-style-none" style="-moz-column-width:15em;-webkit-column-width:15em;column-width:15em">
*{{InvSprite|MHF ArrowUp}} MHF_ArrowUp
*{{InvSprite|MHF ArrowDown}} MHF_ArrowDown
*{{InvSprite|MHF ArrowLeft}} MHF_ArrowLeft
*{{InvSprite|MHF ArrowRight}} MHF_ArrowRight
*{{InvSprite|MHF Exclamation}} MHF_Exclamation
*{{InvSprite|MHF Question}} MHF_Question
</div>
==Sounds==
===Generic===
{{Sound table/Block/Stone}}
===Unique===
{{Edition|Java}}:
{{Sound table
|sound=Zombie idle1.ogg
|sound2=Zombie idle2.ogg
|sound3=Zombie idle3.ogg
|subtitle=Zombie groans
|source=record
|description=When a zombie head is played using a note block
|id=block.note_block.imitate.zombie
|translationkey=subtitles.entity.zombie.ambient
|volume=3.0
|pitch=1.0
|distance=16}}
{{Sound table
|sound=Skeleton idle1.ogg
|sound2=Skeleton idle2.ogg
|sound3=Skeleton idle3.ogg
|subtitle=Skeleton rattles
|source=record
|description=When a skeleton skull is played using a note block
|id=block.note_block.imitate.skeleton
|translationkey=subtitles.entity.skeleton.ambient
|volume=3.0
|pitch=1.0
|distance=16}}
{{Sound table
|sound=Creeper fuse.ogg
|subtitle=Creeper hisses
|source=record
|description=When a creeper head is played using a note block
|id=block.note_block.imitate.creeper
|translationkey=subtitles.entity.creeper.primed
|volume=3.0
|pitch=0.5
|distance=16}}
{{Sound table
|sound=Ender dragon idle1.ogg
|sound2=Ender dragon idle2.ogg
|sound3=Ender dragon idle3.ogg
|sound4=Ender dragon idle4.ogg
|subtitle=Dragon roars
|source=record
|description=When an ender dragon head is played using a note block
|id=block.note_block.imitate.ender_dragon
|translationkey=subtitles.entity.ender_dragon.ambient
|volume=3.0
|pitch=1.0
|distance=16}}
{{Sound table
|sound=Wither skeleton idle1.ogg
|sound2=Wither skeleton idle2.ogg
|sound3=Wither skeleton idle3.ogg
|subtitle=Wither Skeleton rattles
|source=record
|description=When a wither skeleton skull is played using a note block
|id=block.note_block.imitate.wither_skeleton
|translationkey=subtitles.entity.wither_skeleton.ambient
|volume=3.0
|pitch=1.0
|distance=16}}
{{Sound table
|sound=Piglin idle1.ogg
|sound2=Piglin idle2.ogg
|sound3=Piglin idle3.ogg
|sound4=Piglin idle4.ogg
|sound5=Piglin idle5.ogg
|subtitle=Piglin snorts
|source=record
|description=When a piglin head is played using a note block
|id=block.note_block.imitate.piglin
|translationkey=subtitles.entity.piglin.ambient
|volume=1.98
|pitch=1.0
|distance=16}}
{{Sound table
|sound=Equip generic1.ogg
|sound2=Equip generic2.ogg
|sound3=Equip generic3.ogg
|sound4=Equip generic4.ogg
|sound5=Equip generic5.ogg
|sound6=Equip generic6.ogg
|subtitle=Gear equips
|source=player
|description=When a carved pumpkin is equipped
|id=item.armor.equip_generic
|translationkey=subtitles.item.armor.equip
|volume=1.0
|pitch=1.0
|distance=16
|foot=1}}
<!--volumes and pitches seem to be approximately v=0.9 p=0.84, but those values are approximate and are not in the files. They are probably inside of the code.-->
{{Edition|Bedrock}}:
{{Sound table
|type=bedrock
|sound=Zombie idle1.ogg
|sound2=Zombie idle2.ogg
|sound3=Zombie idle3.ogg
|source=record
|description=When a zombie head is played using a note block
|id=note.zombie
|pitch=0.84 <ref group=sound name=pitch>Actually equal to <math>\frac{1}{\sqrt[4]{2}}</math>, which is about 0.8409</ref>}}
{{Sound table
|sound=Skeleton step1.ogg
|sound2=Skeleton step2.ogg
|sound3=Skeleton step3.ogg
|sound4=Skeleton step4.ogg
|source=record
|description=When a skeleton skull is played using a note block<wbr><ref group=sound name=skeletoncreeper>{{Bug|MCPE-164530}}</ref>
|id=note.skeleton
|pitch=0.84 <ref group=sound name=pitch/>}}
{{Sound table
|sound=Fuse.ogg
|source=record
|description=When a creeper head is played using a note block<wbr><ref group=sound name=skeletoncreeper/>
|id=note.creeper
|pitch=0.84 <ref group=sound name=pitch/>}}
{{Sound table
|sound=Ender dragon idle1.ogg
|sound2=Ender dragon idle2.ogg
|sound3=Ender dragon idle3.ogg
|sound4=Ender dragon idle4.ogg
|source=record
|description=When a dragon head is played using a note block
|id=note.enderdragon
|pitch=0.84 <ref group=sound name=pitch/>}}
{{Sound table
|sound=Skeleton step1.ogg
|sound2=Skeleton step2.ogg
|sound3=Skeleton step3.ogg
|sound4=Skeleton step4.ogg
|source=record
|description=When a wither skeleton skull is played using a note block<wbr>{{Until|BE 1.20.40}}<wbr><ref group=sound name=skeletoncreeper/>
|id=note.witherskeleton
|pitch=0.84 <ref group=sound name=pitch/>}}
{{Sound table
|sound=Wither skeleton step1.ogg
|sound2=Wither skeleton step2.ogg
|sound3=Wither skeleton step3.ogg
|sound4=Wither skeleton step4.ogg
|source=record
|description=When a wither skeleton skull is played using a note block<wbr>{{Upcoming|BE 1.20.40}}<wbr><ref group=sound name=skeletoncreeper/>
|id=note.witherskeleton
|pitch=0.84 <ref group=sound name=pitch/>}}
{{Sound table
|sound=Piglin angry1.ogg
|sound2=Piglin angry2.ogg
|sound3=Piglin angry3.ogg
|sound4=Piglin angry4.ogg
|source=record
|description=When a piglin head is played using a note block<wbr><ref group=sound>{{Bug|MCPE-164710}}</ref>
|id=note.piglin
|pitch=0.84 <ref group=sound name=pitch/>}}
{{Sound table
|sound=Equip generic1.ogg
|sound2=Equip generic2.ogg
|sound3=Equip generic3.ogg
|sound4=Equip generic4.ogg
|sound5=Equip generic5.ogg
|sound6=Equip generic6.ogg
|source=player
|description=When a carved pumpkin is equipped
|id=armor.equip_generic
|volume=1.0
|pitch=1.0
|foot=1}}
==Data values==
===ID===
{{edition|java}}:
{{ID table
|edition=java
|showforms=y
|generatetranslationkeys=y
|displayname=Skeleton Skull
|spritetype=block
|nameid=skeleton_skull}}
{{ID table
|displayname=Wither Skeleton Skull
|spritetype=block
|nameid=wither_skeleton_skull}}
{{ID table
|displayname=Zombie Head
|spritetype=block
|nameid=zombie_head}}
{{ID table
|displayname=Player Head
|spritetype=block
|nameid=player_head}}
{{ID table
|displayname=Creeper Head
|spritetype=block
|nameid=creeper_head}}
{{ID table
|displayname=Dragon Head
|spritetype=block
|nameid=dragon_head}}
{{ID table
|displayname=Piglin Head
|spritetype=block
|nameid=piglin_head}}
{{ID table
|displayname=Skeleton Wall Skull
|spritetype=block
|nameid=skeleton_wall_skull
|form=block}}
{{ID table
|displayname=Wither Skeleton Wall Skull
|spritetype=block
|nameid=wither_skeleton_wall_skull
|form=block}}
{{ID table
|displayname=Zombie Wall Head
|spritetype=block
|nameid=zombie_wall_head
|form=block}}
{{ID table
|displayname=Player Wall Head
|spritetype=block
|nameid=player_wall_head
|form=block}}
{{ID table
|displayname=Creeper Wall Head
|spritetype=block
|nameid=creeper_wall_head
|form=block}}
{{ID table
|displayname=Dragon Wall Head
|spritetype=block
|nameid=dragon_wall_head
|form=block}}
{{ID table
|displayname=Piglin Wall Head
|spritetype=block
|nameid=piglin_wall_head
|foot=1}}
{{ID table
|displayname=Block entity
|spritename=heads
|spritetype=block
|nameid=skull
|foot=1}}
{{edition|bedrock}}:
{{ID table
|edition=bedrock
|firstcolumnname=Head
|shownumericids=y
|showforms=y
|generatetranslationkeys=y
|displayname=Block
|spritename=skulls
|spritetype=block
|nameid=skull
|id=144
|form=block
|itemform=item.skull
|translationkey=-}}
{{ID table
|displayname=Item
|spritename=skulls
|spritetype=item
|nameid=skull
|id=516
|form=item
|translationkey=item.skull.skeleton.name, item.skull.wither.name, item.skull.zombie.name, item.skull.char.name, item.skull.creeper.name, item.skull.dragon.name, item.skull.piglin.name
|foot=1}}
{{ID table
|notnamespaced=y
|displayname=Block entity
|spritename=heads
|spritetype=block
|nameid=Skull
|foot=1}}
===Metadata===
{{see also|Data values}}
{{IN|bedrock}}, mob heads use the following data values:
{{/DV}}
===Item data===
{{el|java}}:
{{main|Player.dat format}}
Player heads use item NBT to save the owner.
<div class="treeview">
* {{nbt|compound|tag}}: The item's '''tag''' tag.
{{:Player.dat_format/Player Heads}}
</div>
{{el|bedrock}}:
:{{IN|bedrock}}, heads have no additional item tag.
:See [[Bedrock Edition level format/Item format]].
===Block states===
{{see also|Block states}}
{{/BS}}
===Block data===
A mob head has a block entity associated with it that holds additional data about the block.
{{el|java}}:
{{see also|Block entity format}}
{{/BE}}
{{el|bedrock}}:
:See [[Bedrock Edition level format/Block entity format]].
== Achievements==
{{load achievements|Camouflage;The Beginning?}}
==Advancements==
{{load advancements|Spooky Scary Skeleton;Withering Heights}}
==History==
''For a more in-depth breakdown of changes to textures and models, including a set of renders for each state combination, see [[/Asset history]]''
{{History|java}}
{{History||August 28, 2012|link={{tweet|jeb|240383066831462401}}|[[Jeb]] released images of the skeleton head, hinting of more types to come.}}
{{History||PAX 2012|link={{ytl|IqciEbjYd-I|t=03m21s}}|At [[wikipedia:PAX (event)|PAX]], [[Dinnerbone]] revealed that there would be rare [[drops]] of these [[mob]]s.<ref>http://www.twitch.tv/pax2/b/330745811 (at 3:59:00)</ref>}}
{{History||1.4.2|snap=12w36a|[[File:Skeleton Skull (item) JE1.png|32px]] [[File:Wither Skeleton Skull (item) JE1.png|32px]] [[File:Zombie Head (item) JE1.png|32px]] [[File:Player Head (item) JE1.png|32px]] [[File:Creeper Head (item) JE1.png|32px]] Added skeleton, wither skeleton, zombie, player, and creeper heads.
|Wither skeleton skulls are rarely [[drops|dropped]] by the [[wither skeleton]] upon [[death]] (2.5% chance), while the other four are obtainable only from the [[creative]] [[inventory]].}}
{{History|||snap=12w37a|[[File:Skeleton Skull (item) JE1 BE1.png|32px]] [[File:Wither Skeleton Skull (item) JE1 BE1.png|32px]] [[File:Zombie Head (item) JE1 BE1.png|32px]] [[File:Player Head (item) JE1 BE1.png|32px]] [[File:Creeper Head (item) JE1 BE1.png|32px]] Changed item textures.
|Added as a hidden and disabled feature, player heads can now have the [[skin]] of a specific [[player]]. A line in the language file implies that there either used to be, or in a future update, the possibility of obtaining a specific player's head.<ref name="en_US 12w21">Snapshot 12w37a {{cd|lang/en_US.lang}}: <code>item.skull.player.name=%s's Head</code></ref>
|Player heads do not [[drops|drop]] in vanilla, but mapmakers/modders/etc. can make them by adding an [[NBT format|NBT]] string tag <code>{"SkullOwner":"''player_name''"}</code> on the skull [[item]]s.<ref name="playerheads">{{reddit|zxn7u/its_apparently_my_cakeday_so_lets_cash_in_this}}</ref>}}
{{History||November 7, 2012|link=https://www.reddit.com/r/minecraftsuggestions/comments/12qtbz/killing_other_players_with_a_sword_should_drop/c6xqpym/?context=3|[[Jeb]] states that the official opinion is that "[dropping] player heads [on player kills] are a bit too gory for [[Minecraft]], so it's better suited for a plugin or mod."}}
{{History||1.4.6|snap=12w49a|Any kind of [[mob]] head can now be used to [[crafting|craft]] a [[firework star]] with [[creeper]]-face effect.}}
{{History||1.7.2|snap=13w36a|Custom heads can now be obtained without third party programs via {{cmd|give}}.}}
{{History||1.8|snap=14w03a|Player heads now show the [[skin]]'s hat layer (this also works when a [[mob]]/player wears the head).}}
{{History|||snap=14w29a|Heads now display a cracking animation.}}
{{History|||snap=14w30a|[[File:Skeleton Skull (item) JE2.png|32px]] [[File:Wither Skeleton Skull (item) JE2.png|32px]] [[File:Zombie Head (item) JE2.png|32px]] [[File:Player Head (item) JE2.png|32px]] [[File:Creeper Head (item) JE2.png|32px]] Player and mob heads in [[inventory|inventories]] and held by mobs/players now display as [[block]]s.
|Skulls worn by [[mob]]s and [[player]]s are now displayed on the armor layer. Previously, the skull replaced the mob/player's head texture; the hat layer appeared over the skull.
|Skeleton, zombie, and creeper heads are now available in [[survival]]. The player can obtain them by killing the appropriate mob with a charged [[creeper]].
|Creeper heads and wither skeleton skulls are now used in [[crafting]] specific [[banner]] patterns.}}
{{History|||snap=14w30b|A single charged creeper explosion no longer yields more than one [[mob]] head. The mob head that drops is chosen randomly.}}
{{History||1.8.4|snap=release|For security reasons, custom heads can now have textures only from [[mojang.com]] and [[minecraft.net]].}}
{{History||1.9|snap=15w31a|[[File:Dragon Head (8) JE2.png|32px]] Added dragon heads.
|Dragon heads are currently available only in [[creative]] mode.
|[[Mob]] heads now appear larger in the [[inventory]].}}
{{History|||snap=15w32a|Creeper, zombie, and skeleton heads can now be worn to reduce detection by the corresponding mobs by 50%.}}
{{History|||snap=15w32c|Dragon heads now generate on [[end ship]]s, meaning they are now obtainable in [[survival]].}}
{{History|||snap=15w33c|The disguise that is given by mob heads now reduces detection range to 37.5% of normal.}}
{{History|||snap=15w36a|The disguise that is given by mob heads now reduces detection range to 50% of normal again.}}
{{History|||snap=15w39a|[[Dispenser]]s can now equip mob heads onto [[player]]s, [[mob]]s and [[armor stand]]s.}}
{{History||1.13|snap=17w47a|The ID of heads have been split into 12; one of each available standard head, as well as a wall counterpart of each.
|<code>skeleton_skull</code>, <code>wither_skeleton_skull</code>, <code>player_head</code>, <code>zombie_head</code>, <code>creeper_head</code> and <code>dragon_head</code> are now available as [[item]]s and placed [[block]]s with a <code>rotation</code> block state of 0-15.
|<code>skeleton_wall_skull</code>, <code>wither_skeleton_wall_skull</code>, <code>player_wall_head</code>, <code>zombie_wall_head</code>, <code>creeper_wall_head</code> and <code>dragon_wall_head</code> are available only as placed blocks with a <code>facing</code> block state of north, south, east or west.
|Prior to [[1.13/Flattening|''The Flattening'']], this [[block]]'s numeral ID was 144, and the [[item]]'s 397.}}
{{History||1.19|snap=Deep Dark Experimental Snapshot 1|Skeleton skulls now generate as part of [[ancient cities]].}}
{{History||November 14, 2022|link=https://www.minecraft.net/en-us/article/playable-mob-sounds-coming-minecraft-1-20|Piglin heads are announced to be added in [[Java Edition 1.20]] on the Minecraft website.}}
{{History||1.19.3|snap=22w45a|[[File:Player Head (8) JE5.png|32px]] The texture of the player head has been changed.}}
{{History||1.20<br>(Experimental)|link=1.19.3|snap=22w46a|[[File:Piglin Head (8) JE1.png|32px]] Added piglin heads behind the [[Java Edition 1.20|Update 1.20 experimental datapack]].}}
{{History||1.20<br>(Experimental)|link=1.19.4|snap=23w03a|Heads can now be placed on top of note blocks without sneaking.}}
<!--
{{History||1.19.4|snap=23w05a|Heads can now be swapped by let [[helmet]]s {{ctrl|using}} in the hotbar.<ref>{{bug|MC-216270|||Fixed}}</ref>}}
{{History||?|Head can now be swapped in [[armor stand]]s by {{ctrl|using}} them/[[helmet]]s/[[carved pumpkin]]s in the armor stand's slot.}}
RE-ADD WHEN THE WORDING IS BETTER -->
{{History||1.20|snap=23w12a|Piglin heads are now available without using the "Update 1.20" experimental datapack.}}
{{History|pocket alpha}}
{{History||v0.12.1|snap=build 1|[[File:Skeleton Skull (item) JE1 BE1.png|32px]] [[File:Wither Skeleton Skull (item) JE1 BE1.png|32px]] [[File:Zombie Head (item) JE1 BE1.png|32px]] [[File:Player Head (item) JE1 BE1.png|32px]] [[File:Creeper Head (item) JE1 BE1.png|32px]] Added skeleton, wither skeleton, zombie, player, and creeper heads.
|The skeleton, wither skeleton, zombie, player and creeper heads use the [[Java Edition|Java]] textures prior to [[Java Edition 14w30a|14w30a]].}}
{{History||v0.14.0|snap=build 1|Mob heads can now be worn as armor.}}
{{History||v0.16.0|snap=build 4|Wither skeleton skulls can now be used to spawn the [[wither]].}}
{{History|pocket}}
{{History||1.0.0|snap=alpha 0.17.0.1|[[File:Dragon Head (item) BE1.png|32px]] Added dragon heads.
|Dragon heads use a two-dimensional sprite, unlike [[Java Edition|Java]] does.}}
{{History|bedrock}}
{{History||1.2.0|snap=beta 1.2.0.2|Mob heads can now be used to craft [[firework star]]s.
|Creeper heads and wither skeleton skulls are now used to [[crafting|craft]] specific patterns on [[banner]]s.}}
{{History|||snap=beta 1.2.0.11|[[File:Skeleton Skull (item) BE2.png|32px]] [[File:Wither Skeleton Skull (item) BE2.png|32px]] [[File:Zombie Head (item) BE2.png|32px]] [[File:Head (item) BE2.png|32px]] [[File:Creeper Head (item) BE2.png|32px]] [[File:Dragon Head (item) BE2.png|32px]] [[Player]] and [[mob]] heads in [[inventory|inventories]] and when held by mobs/players now display as [[block]]s.}}
{{History||1.10.0|snap=beta 1.10.0.3|Wither skeleton skulls and creeper heads can now be used to craft [[banner pattern]]s.}}
{{History||November 14, 2022|link=https://www.minecraft.net/en-us/article/playable-mob-sounds-coming-minecraft-1-20|Piglin heads are announced to be added in [[Bedrock Edition 1.20.0]] on the Minecraft website.}}
{{History||Next Major Update<br>(Experimental)|link=1.19.60|snap=beta 1.19.60.20|[[File:Piglin Head (item) BE1.png|32px]] Added piglin heads behind the "[[Bedrock Edition 1.20.0|Next Major Update]]" [[experimental]] toggle.}}
{{History|||snap=beta 1.19.60.25|Heads can now be placed on top of note blocks without sneaking.}}
{{History||1.20.0|snap=beta 1.20.0.21|Piglin heads are now available without using the "Next Major Update" experimental toggle.}}
{{History||1.20.40|snap=beta 1.20.40.20|Wither skeleton skulls now make their respective step sounds when played by a note block.}}
{{History|console}}
{{History||xbox=TU12|xbone=CU1|ps=1.0|wiiu=Patch 1|switch=1.0.1|[[File:Skeleton Skull (item) JE1 BE1.png|32px]] [[File:Wither Skeleton Skull (item) JE1 BE1.png|32px]] [[File:Zombie Head (item) JE1 BE1.png|32px]] [[File:Player Head (item) JE1 BE1.png|32px]] [[File:Creeper Head (item) JE1 BE1.png|32px]] Added skeleton, wither skeleton, zombie, player, and creeper heads to the [[creative inventory]].
|Wither skeleton skulls currently do not have a use.}}
{{History||xbox=TU19|xbone=CU7|ps=1.12|Wither skeleton skulls can now be obtained by killing [[wither skeleton]]s.
|Wither skeleton skulls can now be used to build the [[wither]].}}
{{History||xbox=TU31|xbone=CU19|ps=1.22|wiiu=Patch 3|Skeleton, zombie, and creeper heads are now available in [[survival]]. The [[player]] can obtain them by killing the appropriate [[mob]] with a charged [[creeper]].}}
{{History||xbox=TU46|xbone=CU36|ps=1.38|wiiu=Patch 15|[[File:Dragon Head (item) JE1.png|32px]] Added dragon heads.}}
{{History|new 3ds}}
{{History||0.1.0|[[File:Skeleton Skull (item) JE1 BE1.png|32px]] [[File:Wither Skeleton Skull (item) JE1 BE1.png|32px]] [[File:Zombie Head (item) JE1 BE1.png|32px]] [[File:Player Head (item) JE1 BE1.png|32px]] [[File:Creeper Head (item) JE1 BE1.png|32px]] Added skeleton, wither skeleton, zombie, player, and creeper heads.}}
{{History||1.7.10|[[File:Dragon Head (item) BE1.png|32px]] Added dragon heads.}}
{{History|foot}}
===Skull "item"===
{{:Technical blocks/Skull}}
==Issues==
{{issue list}}
== Trivia==
* Despite there being a default Steve head, heads for the other protagonist skins cannot be obtained without using custom names.
*{{IN|be}}, the skull variant for the item is stored under the {{cd|damage}} component, normally used for items with [[durability]].
*The head item's model when wore on a player is slightly larger than its placed block counterpart in the world, which in turn is also slightly larger than the actual player's head. Therefore, a player who wears their own head appears with a larger head.
==Gallery==
===Renders===
<gallery>
Steve wearing Skeleton Skull.png|
Steve wearing Wither Skeleton Skull.png|
Steve wearing Creeper Head.png|
Steve wearing Zombie Head.png|
Steve wearing Dragon Head.png|
Alex wearing Skeleton Skull.png|
Alex wearing Wither Skeleton Skull.png|
Alex wearing Creeper Head.png|
Alex wearing Zombie Head.png|
Alex wearing Dragon Head.png|
Dragon Head.gif|An animation of the dragon head when redstone power is supplied.
</gallery>
===Screenshots===
<gallery>
All The Heads.png|All of the heads.
Headsrotation.png|Heads oriented in different directions.
HeadsOnAFence.png|Heads are the same scale as [[cobblestone wall]] posts.
Playerheads.png|A picture of player heads, including some Mojang characters.
EndShipBow.png|A dragon head found at the bow of an end ship.
</gallery>
====Development====
<gallery>
1st image Mob Head.png|First screenshot released of heads.
Minecart with chest and head thing.png|Notch's head in a [[minecart with chest]].
PauseUnpause's Head 1.png|First image of held heads rendering as blocks.
PauseUnpause's Head 2.png|Second image of held heads rendering as blocks.
Pocket Edition Heads.jpg|First image of a head being worn in bedrock edition.
1.16 Dev failed head holding.jpg|First attempt to fix {{bug|MC-91869}} by [[Xilefian]].
1.16 Dev failed head holding 2.jpg|Second attempt.
</gallery>
===In other media===
<gallery>
Efe Looking at Makena Napping on a Note Block.jpg|[[Efe]] looking at [[Makena]] napping on a Note block
Efe Placing a Zombie Head on a Note Block.jpg|Efe placing a zombie head sneakily on the note block.
Makena Waking up Startled by the Zombie Noise.jpg|Makena waking up startled at the sound of zombies being played on the note block.
File:Piglin Head Animation.jpg|[[Sunny]] using a piglin head to make noise in a [[Crimson Forest]].<ref>https://www.instagram.com/p/Ct7CfOBplrG/</ref>
</gallery>
==References==
{{reflist}}
{{blocks|Utility}}
{{items}}
[[Category:Utility blocks]]
[[Category:Manufactured blocks]]
[[Category:Generated structure blocks]]
[[Category:Block entities]]
[[Category:Non-solid blocks]]
[[cs:Hlava]]
[[de:Kopf]]
[[es:Cabeza]]
[[fr:Tête]]
[[hu:Mob fejek]]
[[it:Testa di creatura]]
[[ja:Mobの頭]]
[[ko:몹 머리]]
[[nl:Wezenhoofd]]
[[pl:Głowa]]
[[pt:Cabeça de criatura]]
[[ru:Голова]]
[[uk:Голова]]
[[zh:生物头颅]]</li></ul></nowiki> | |||||
1.8.0.0{{Extension DPL}}<ul><li>[[Eye of Ender|Eye of Ender]]<br/>{{redirect|Ender Eye|the boss|Ender Dragon|item that teleports the player to where it lands|Ender Pearl}}
{{ItemEntity
|image=Eye of Ender.png
|stackable=Yes (64)
|renewable=Yes
|size=Height: 0.25 Blocks<br>Width: 0.25 Blocks
|networkid='''[[JE]]''': 72
}}
An '''eye of ender''' is a craftable item used to locate [[stronghold]]s and activate the [[end portal]]s within them.
== Obtaining ==
=== Crafting ===
{{Crafting
|Blaze Powder
|Ender Pearl
|Output=Eye of Ender
|type=Miscellaneous
}}
== Usage ==
=== Locating strongholds ===
[[File:Eye of Ender (break).gif|thumb|right|An animation of an eye of ender shattering.]]
To locate [[stronghold]]s (and the [[end portal]]s they house):
* Pressing {{control|use}} while holding an eye of ender causes it to fly approximately 12 blocks in the direction of the nearest stronghold, traveling through any blocks necessary, and leave a trail of purple particles, the same particle effect used for [[endermen]] and [[ender chests]].
** The eye leads to the [[chunk]] where a spiral staircase, the first room generated in the stronghold, is located.
** The center of this entrance staircase is always exactly at the chunk coordinates 4, ~, 4, although the eye of ender leads to chunk coordinates 0, ~, 0 (the northwest corner of the chunk).
* While over 12 blocks away from the northwest corner of the staircase chunk, the eye will travel upward to offer an easily-visible indication of the horizontal direction the player must travel.
* When closer than 12 blocks to the northwest corner of the staircase chunk, the eye will travel downward, to indicate the player is above a stronghold and must mine downward.
* After two or three seconds of travel, the eye floats in the air briefly, then either falls (becoming collectable again) or shatters in mid-air. The eye has a 20% chance of shattering (80% chance of surviving) per throw, therefore throwing it three times has approximately 50% overall chance to shatter the eye (0.8<sup>3</sup>=51.2%).
* The eye of ender's flying function works only in the [[Overworld]]. It does nothing in [[the Nether]], [[the End]], [[custom dimension]]s{{verify|type=current}}, or in worlds with no strongholds.
Note that the eyes may point to an incorrect location if the target chunks were generated with a different biomes map in an older version or through different generation settings.<ref>See also {{bug|MC-135996}}</ref>
=== Activating end portals ===
[[File:Active End Portal.png|thumb|right|An end portal activated with eyes of ender.]]
Once an end portal is found, the eyes of ender are required to activate it. End portals require a total of 12 eyes of ender in order to activate, though each individual frame-block has a 10% chance of containing an eye of ender when generated. Eyes can be placed in empty [[End portal frame]]s by pressing {{control|use}} on them until the entire ring of 12 is filled, thereby activating the portal. Due to the fact that there is a 10% chance of each individual end portal frame having an eye in it, there is a one out of one trillion chance of every frame having an eye in it thereby activating the portal even if the player doesn't have any eyes of ender.
{| class="wikitable sortable mw-collapsible"
|+End Portal Pre-Filled Eyes
!Eyes
!0
!1
!2
!3
!4
!5-12
|-
|Exactly
|28%
|38%
|23%
|9%
|2%
|<1%
|-
|Or More
|100%
|72%
|34%
|11%
|3%
|<1%
|}
=== Crafting ingredient ===
{{crafting usage}}
== Sounds ==
{{Edition|Java}}:<br>
Eyes of ender use the Friendly Creatures sound category for entity-dependent sound events.
{{Sound table
|sound=Ender Eye death1.ogg
|sound2=Ender Eye death2.ogg
|subtitle=Eye of Ender falls <ref group=sound name=LousyEvents>{{Bug|MC-98316||Wrong subtitles caused by missing distinction}}</ref>
|source=neutral
|description=When an eye of ender drops or breaks
|id=entity.ender_eye.death|idnote=<ref group=sound name=LousyEvents/>
|translationkey=subtitles.entity.ender_eye.death|translationkeynote=<ref group=sound name=LousyEvents/>
|volume=1.3
|pitch=1.0
|distance=16}}
{{Sound table
|sound=Ender Eye launch1.ogg
|sound2=Ender Eye launch2.ogg
|subtitle=Eye of Ender shoots
|source=neutral
|description=When an eye of ender is thrown
|id=entity.ender_eye.launch
|translationkey=subtitles.entity.ender_eye.launch
|volume=0.5
|pitch={{frac|1|3}}-0.5
|distance=16}}
{{Sound table
|sound=End portal eye place1.ogg
|sound2=End portal eye place2.ogg
|sound3=End portal eye place3.ogg
|subtitle=Eye of Ender attaches
|source=block
|description=When an eye of ender is placed in an end portal frame
|id=block.end_portal_frame.fill
|translationkey=subtitles.block.end_portal_frame.fill
|volume=1.0
|pitch=1.0
|distance=16
|foot=1}}
{{Edition|Bedrock}}:
{{Sound table
|type=bedrock
|sound=Item Frame break1.ogg
|sound2=Item Frame break2.ogg
|sound3=Item Frame break3.ogg
|source=block
|description=When an eye of ender breaks <ref group=sound>{{Bug|MCPE-115646}}</ref>
|id=block.itemframe.break}}
{{Sound table
|sound=Bow shoot.ogg
|source=player
|description=When an eye of ender is thrown
|id=random.bow
|volume=0.5
|pitch=0.33-0.5}}
{{Sound table
|sound=End portal eye place1.ogg
|sound2=End portal eye place2.ogg
|sound3=End portal eye place3.ogg
|source=block
|description=When an eye of ender is placed in an end portal frame
|id=block.end_portal_frame.fill
|volume=0.3
|pitch=0.9/1.0/1.1
|foot=1}}
==Data values==
===ID===
{{edition|java}}:
{{ID table
|edition=java
|firstcolumnname=Item
|showforms=y
|generatetranslationkeys=y
|displayname=Eye of Ender
|spritetype=item
|nameid=ender_eye
|form=item
|foot=1}}
{{ID table
|edition=java
|firstcolumnname=Entity
|generatetranslationkeys=y
|displayname=Eye of Ender
|spritetype=entity
|nameid=eye_of_ender
|foot=1}}
{{edition|bedrock}}:
{{ID table
|edition=bedrock
|firstcolumnname=Item
|shownumericids=y
|showforms=y
|notshowbeitemforms=y
|generatetranslationkeys=y
|displayname=Eye of Ender
|spritetype=item
|nameid=ender_eye
|id=433
|form=item
|foot=1}}
{{ID table
|edition=bedrock
|firstcolumnname=Entity
|shownumericids=y
|generatetranslationkeys=y
|displayname=Eye of Ender
|spritetype=entity
|nameid=eye_of_ender_signal
|id=70
|foot=1}}
===Entity data===
The purple particles left by eyes of ender have entity data that define various properties of the entity.
{{el|java}}:
{{main|Entity format}}
{{/ED}}
{{el|bedrock}}:
:See [[Bedrock Edition level format/Entity format]].
==Advancements==
{{load advancements|Eye Spy}}
==Video ==
{{Video note|This video does not mention that eyes of ender can be used to craft [[ender chest]]s or [[end crystal]]s.}}
<div style="text-align:center">{{yt|E0AhoxYLomc}}</div>
==History==
{{History|java}}
{{History||1.0.0|snap=Beta 1.9 Prerelease 3|[[File:Eye of Ender JE1 BE1.png|32px]] Added eyes of ender.
|Eyes of ender can be used on a [[end portal frame|portal block]] to repair them, but repairing them does nothing.}}
{{History|||snap=Beta 1.9 Prerelease 4|Each eye can now be placed in a [[end portal frame|portal block]] or used to hone in on a [[stronghold]]. [[Jens Bergensten|Jeb]] demonstrated the new uses for an eye in his livestream.<ref>http://www.twitch.tv/jebox/b/297000418</ref> An [[end portal]] within a stronghold could be seen in the stream with two eyes inserted into blocks.
|In older worlds with chunks generated before [[Java Edition Beta 1.9 Prerelease 3|Beta 1.9 Prerelease 3]], the eyes may mislead the [[player]] to a place where there isn't a [[stronghold]] at all. This happens because the eyes lead to where a stronghold should be based on the world seed in the current version, but before Beta 1.9 Prerelease 3 strongholds generated differently based on the seed. Therefore, if the player saved the coordinates the eye traveled to in an old world and generated a new world with the same seed, the player could travel to those same coordinates and find a stronghold.}}
{{History|||snap=Beta 1.9 Prerelease 6|Eyes of ender no longer render like a tool in third person.}}
{{History|||snap=RC1|The throwing sound of eyes of ender has been changed.}}
{{History||1.3.1|snap=12w21a|Eyes of ender can now be used to craft [[ender chest]]s.
|Priest [[villager]]s would [[trading|buy]] 2–3 eyes of ender for one [[emerald]].}}
{{History|||snap=12w22a|Priest villagers no longer buy eyes of ender, instead selling them for 7–10 emeralds.}}
{{History||1.6.4|snap=1.6.3-pre|Eyes of ender now lead to [[stronghold]]s based on the structure data saved in the world file instead of calculating their approximate location via the [[seed (level generation)|world seed]]. Therefore, strongholds generated in old versions can still be found even if the distribution of strongholds is changed.}}
{{History||1.7.2|snap=13w41a|Eyes of Ender now lead to the entrance of a stronghold instead of the portal room.}}
{{History||1.8|snap=14w02a|With changes that have been made to villagers and the [[trading]] system, cleric villagers now sell eyes of ender for 7–11 [[emerald]]s, as one of their tier III trades.}}
{{History||1.9|snap=15w41a|Eyes of ender are no longer [[trading|sold]] by cleric [[villager]]s.}}
{{History|||snap=15w44b|An eye of ender is now used to craft an [[end crystal]].}}
{{History|||snap=pre3|Eyes of ender now point to the 125 new strongholds.<ref>{{bug|MC-91173}} resolved as "Fixed"</ref>}}
{{History||1.11|snap=16w32a|The [[entity]] ID has been changed from <code>EyeOfEnderSignal</code> to <code>eye_of_ender_signal</code>.}}
{{History||1.12|snap=17w17a|A new ''pop'' [[sound]] has been added when a thrown eye of ender bursts.}}
{{History||1.13|snap=17w47a|Prior to [[1.13/Flattening|''The Flattening'']], this [[item]]'s numeral ID was 381.}}
{{History|||snap=pre5|The [[entity]] ID has been changed to <code>eye_of_ender</code>.}}
{{History||1.14|snap=18w43a|[[File:Eye of Ender JE2 BE2.png|32px]] The texture of eyes of ender has been changed.}}
{{History||1.19|snap=22w11a|Eyes of Ender now lead to the corner of the chunk (0, ~, 0) instead of the center (8-9, ~, 8-9).<ref>{{bug|MC-253394}}</ref>}}
{{History|pocket}}
{{History||1.0.0|snap=alpha 0.17.0.1|[[File:Eye of Ender JE1 BE1.png|32px]] Added eyes of ender.}}
{{History|bedrock}}
{{History||1.10.0|snap=beta 1.10.0.3|[[File:Eye of Ender JE2 BE2.png|32px]] The texture of eyes of ender has been changed.}}
{{History||1.16.0|snap=beta 1.15.0.51|The [[particles]] of eyes of ender have been changed to match {{el|je}}.}}
{{History|console}}
{{History||xbox=TU7|xbone=CU1|ps=1.0|wiiu=Patch 1|[[File:Eye of Ender JE1 BE1.png|32px]] Added eyes of ender.}}
{{History||xbox=none|xbone=none|ps=1.90|wiiu=none|switch=none|[[File:Eye of Ender JE2 BE2.png|32px]] The texture of eyes of ender has been changed.}}
{{History|new 3ds}}
{{History||1.7.10|[[File:Eye of Ender JE1 BE1.png|32px]] Added eyes of ender.}}
{{History|foot}}
=== Historical images ===
<gallery>
File:Held_Eye_of_Ender.png|The eye of ender used to appear large in third-person view.
</gallery>
==Issues==
{{issue list}}
==Trivia ==
*When thrown in third-person view, the eyes of ender fly out from the player's feet instead of their hand.
*Before [[Java Edition 1.9]], eyes of ender can be purchased from cleric villagers, which means players can find a [[stronghold]] and go to [[the End]] without accessing [[the Nether]] at all.
*{{IN|bedrock}} if the player travels beyond a certain radius (roughly 740,000 blocks), eyes of ender always point to a stronghold near spawn, even though strongholds continue to generate past this limit. If one travels to this limit, they can see eyes of ender suddenly switching direction. A similar phenomenon occurs with the {{cmd|locate}} command.
==Gallery==
===Screenshots===
<gallery>
Stronghold Portal Room.png|An end portal frame containing a few eyes of ender.
EnderChestexample.png|An [[ender chest]] depicting an eye of ender on the front.
</gallery>
===In other media===
<gallery>
File:Eye of Ender JINX.jpg|Official T-shirt artwork "Eye of Ender" sold by JINX.
File:Happy Halloween Eye.jpg|A Halloween T-Shirt design featuring an eye of ender.
</gallery>
==External links==
*[http://www.strongholdfinder.com/ A super-easy stronghold triangulation tool]
*[http://jsfiddle.net/42EDX/40/ JSFiddle Eye of Ender triangulator - can guess the location of other 2 strongholds in the first ring]
*[https://ens-gijs.github.io/minecraft-stronghold-locator/ Minecraft Stronghold Locator Eye of Ender throw plotting visualizer - zoomable to show all possible stronghold rings]
*[https://github.com/winny-/stronghold Python Eye of Ender throw plotting tool]
*[http://www.purplefrog.com/~thoth/MinecraftStronghold/stronghold.html HTML Eye of Ender throw plotting visualizer (not updated after 1.9 stronghold placement changes)]
*[http://chunkbase.com/apps/stronghold-finder Chunk Base Stronghold Finder (seed-based)]
*[https://github.com/toolbox4minecraft/amidst/releases Amidst - File-based world visualizer]
*[http://minecraft.tournier.org/StrongholdLocator/ Find strongholds by analyzing stronghold.dat file]
== References==
{{reflist}}
{{Items}}
{{entities}}
[[cs:Endové oko]]
[[de:Enderauge]]
[[es:Ojo de ender]]
[[fr:Œil de l'Ender]]
[[hu:Végzet szeme]]
[[ja:エンダーアイ]]
[[ko:엔더의 눈]]
[[nl:Enderoog]]
[[pl:Oko Endera]]
[[pt:Olho de ender]]
[[ru:Око Края]]
[[th:ดวงตาแห่งเอนเดอร์]]
[[uk:Око Краю]]
[[zh:末影之眼]]</li><li>[[Armor Stand|Armor Stand]]<br/>{{ItemEntity
| image = Armor Stand.png
| image2 = Armor Stand BE.png
| extratext = View [[#Gallery|all renders]]
| stackable =
* '''[[JE]]:''' Yes (16)
* '''[[BE]]:''' Yes (64)
| renewable = Yes
| flammable = Yes
| size = '''Normal:'''<br>
Width: 0.5 Blocks<br>
Height: 1.975 Blocks<br>
'''Small:'''<br>
Width: 0.25 Blocks<br>
Height: 0.9875 Blocks<br>
| health = {{hp|20}}
}}
An '''armor stand''' is an inanimate [[entity]] that can wear [[armor]]. It can also hold [[Item|items]] and be posed (but these are not possible in [[Survival]] in [[Java Edition]]).
== Obtaining ==
An armor stand can be broken by quickly {{control|attack|text=attacking}} it twice, dropping itself and any armor placed onto it.
=== Crafting ===
{{Crafting
|A1= Stick
|B1= Stick
|C1= Stick
|B2= Stick
|A3= Stick
|B3= Smooth Stone Slab
|C3= Stick
|Output= Armor Stand
|type=Decoration block
}}
=== Natural generation ===
Two armor stands are found in each taiga [[village]] outdoor armory, one equipped with an [[iron helmet]], the other with an [[iron chestplate]].
== Usage ==
[[Player]]s can use armor stands to hold [[armor]], [[mob head]]s, [[carved pumpkin]]s, and [[elytra]]. [[Commands]] can be used to give them other [[item]]s. The stand does not have a GUI, so players interact with it directly. Armor stands are also able to be placed in different orientations, similar to [[banner]]s or [[sign]]s. Armor stands are [[entity|entities]], allowing them to be pushed by [[piston]]s, moved by flowing [[water]], pulled with [[fishing rod]]s, pushed by players (with knockback), and bounced by [[slime block]]s.
{{Control|use|text=Using}} armor on the stand places the armor if done on a bare spot. Conversely, clicking on armor with a bare hand removes the armor and places it in the highlighted hotbar slot. It is not possible to take or place items from the armor stand's hands unless playing on Bedrock Edition.
Armor, mob heads, or carved pumpkins can be automatically placed on armor stands with a [[dispenser]].
Armor stands can be customized further to have arms, pose, disobey gravity, dual wield and other things by summoning them using {{cmd|summon}} with [[Tutorials/Command NBT tags#Armor Stand|NBT tags]].
In maps heavily using [[command blocks]], armor stands can be used to keep [[scoreboard]] objectives that are 'global' to the map, run [[commands]], etc.
{{IN|bedrock}}, the pose of the armor stand can be changed by interacting with the armor stand (or pressing the {{btn|Pose|be=1}} button on mobile devices) while sneaking, or by using a redstone signal. There are 13 possible poses. Armor stands can also hold items by interacting with the armor stand (or pressing the {{btn|Equip|be=1}} button on mobile devices) while holding an item that cannot be worn.
;<nowiki>Below are the poses:
{| class="wikitable collapsible collapsed"
!No.!!Namespace ID!! Redstone power
!
! !! Image
|-
|0
|{{cd|animation.armor_stand.default_pose}}
|0
|
|
|[[File:Armor Stand Default Pose.png|128px]]
|-
|1
|{{cd|animation.armor_stand.no_pose}}
|1
|
|
|[[File:Armor Stand No Pose.png|128px]]
|-
|2
|{{cd|animation.armor_stand.solemn_pose}}
|2
|
|
|[[File:Armor Stand Solemn Pose.png|128px]]
|-
|3
|{{cd|animation.armor_stand.athena_pose}}
|3
|
|
|[[File:Armor Stand Athena Pose.png|128px]]
|-
|4
|{{cd|animation.armor_stand.brandish_pose}}
|4
|
|
|[[File:Armor Stand Brandish Pose.png|128px]]
|-
|5
|{{cd|animation.armor_stand.honor_pose}}
|5
|
|
|[[File:Armor Stand Honor Pose.png|128px]]
|-
|6
|{{cd|animation.armor_stand.entertain_pose}}
|6
|
|
|[[File:Armor Stand Entertain Pose.png|128px]]
|-
|7
|{{cd|animation.armor_stand.salute_pose}}
|7
|
|
|[[File:Armor Stand Salute Pose.png|128px]]
|-
|8
|{{cd|animation.armor_stand.hero_pose}}
|8, 13 or more
|
|
|[[File:Armor Stand Hero Pose.png|128px]]
|-
|9
|{{cd|animation.armor_stand.riposte_pose}}
|9
|
|
|[[File:Armor Stand Riposte Pose.png|128px]]
|-
|10
|{{cd|animation.armor_stand.zombie_pose}}
|10
|
|
|[[File:Armor Stand Zombie Pose.png|128px]]
|-
|11
|{{cd|animation.armor_stand.cancan_a_pose}}
|11
|
|
|[[File:Armor Stand Cancan A Pose.png|128px]]
|-
|12
|{{cd|animation.armor_stand.cancan_b_pose}}
|12
|
|
|[[File:Armor Stand Cancan B Pose.png|128px]]
|}
==Behavior==
Because armor stands are entities, they obey gravity, allowing them to fall and rest on non-full [[block]]s such as [[enchanting table]]s, [[snow layer]]s and [[slab]]s.
Any [[armor]] on the stand drops when the stand is broken. Armor stands can display [[enchanting|enchanted]] and all forms of [[dye]]d armor. The effects of most enchanted armor have no effect when on an armor stand, with three exceptions:
*[[Frost Walker]] creates [[frosted ice]] blocks on [[water]] as usual if an armor stand is pushed with a [[piston]].
*[[Depth Strider]] slows the movement of the armor stand when being pushed with water.
*A [[player]] may take damage from hitting an armor stand that holds armor enchanted with [[Thorns]].
Armor stands are not damaged by [[cacti]] but can be broken by [[arrow]]s. An armor stand destroyed by an explosion or a firework does not drop as an [[item (entity)|item]]. Armor stands in water and [[lava]] at the same time are not consumed by the lava.
{{IN|be}}, armor stands can be affected by [[status effect]]s. They can be 'killed' by [[Harming]] and [[Decay]] [[splash potion|splash]]/[[lingering potion]]s, lava, [[fire]], and [[campfire]]s, and they play the player death sound and fall to their side and disappear, yielding no armor stand item. If an armor stand is equipped with an item or armor, that item or armor is considered as "naturally-spawned equipment" with an 8.5% chance of dropping when the armor stand "dies" from the [[Instant Damage]] or the [[Wither (status effect)|Wither]] status effect. If the dropped item is any form of [[weapon]], [[tool]] or armor, it drops in a badly damaged state because the game considers it as "naturally-spawned equipment".<ref>{{Bug|MCPE-24341}}</ref>
The stand wobbles slightly when being hit by the player.
{{IN|java}}, it is possible to create an armor stand with arms using the {{cmd|summon}} [[command]]. It is also possible to change an armor stand without arms into a stand with arms by using the {{cmd|data}} command. The commands are as follows:
*<code>/data merge entity @e[type=armor_stand,sort=nearest,limit=1] {ShowArms:1}</code>, which changes the nearest armor stand into an armor stand with arms.
*<code>/summon minecraft:armor_stand ~ ~ ~ {ShowArms:1}</code>, which summons a new armor stand with arms shown.
*<code>/summon armor_stand ~ ~ ~ {Rotation:[0.0f]}</code>, which summons a new armor stand that faces a desired direction (dependent on changing "0.0f" to other numbers like "90.0f" or "180.0f", otherwise it faces the same way as a default armor stand).
==Sounds==
{{edition|java}}:<br>
Armor stands use the Friendly Creatures sound category for entity-dependent sound events.
{{Sound table
|sound=Armor Stand hit1.ogg
|sound2=Armor Stand hit2.ogg
|sound3=Armor Stand hit3.ogg
|sound4=Armor Stand hit4.ogg
|subtitle=Block breaking
|source=Friendly Creatures
|description=When an armor stand is damaged
|id=entity.armor_stand.hit
|translationkey=subtitles.block.generic.hit
|volume=1.0
|pitch=1.0
|distance=16}}
{{Sound table
|sound=Armor Stand break1.ogg
|sound2=Armor Stand break2.ogg
|sound3=Armor Stand break3.ogg
|sound4=Armor Stand break4.ogg
|subtitle=Block broken
|source=Friendly Creatures
|description=When an armor stand is destroyed
|id=entity.armor_stand.break
|translationkey=subtitles.block.generic.break
|volume=1.0
|pitch=1.0
|distance=16}}
{{Sound table
|sound=Stone dig1.ogg
|sound2=Stone dig2.ogg
|sound3=Stone dig3.ogg
|sound4=Stone dig4.ogg
|subtitle=Block placed
|source=Blocks
|description=When an armor stand is placed
|id=entity.armor_stand.place
|translationkey=subtitles.block.generic.place
|volume=1.0
|pitch=1.0
|distance=16}}
{{Sound table
|sound=Wood dig1.ogg
|sound2=Wood dig2.ogg
|sound3=Wood dig3.ogg
|sound4=Wood dig4.ogg
|subtitle=Block placed
|source=Friendly Creatures
|description=When an armor stand falls onto a block at a high speed{{Info needed}}
|id=entity.armor_stand.fall
|translationkey=subtitles.entity.armorstand.fall
|volume=1.0
|pitch=1.0
|distance=16
|foot=1}}
{{edition|bedrock}}:
{{Sound table
|type=bedrock
|sound=Armor Stand hit1.ogg
|sound2=Armor Stand hit2.ogg
|sound3=Armor Stand hit3.ogg
|sound4=Armor Stand hit4.ogg
|source=neutral
|description=When an armor stand is damaged
|id=mob.armor_stand.hit
|volume=1.0
|pitch=1.0}}
{{Sound table
|sound=Armor Stand break1.ogg
|sound2=Armor Stand break2.ogg
|sound3=Armor Stand break3.ogg
|sound4=Armor Stand break4.ogg
|source=neutral
|description=When an armor stand is destroyed
|id=mob.armor_stand.break
|volume=1.0
|pitch=1.0}}
{{Sound table
|sound=Stone dig1.ogg
|sound2=Stone dig2.ogg
|sound3=Stone dig3.ogg
|sound4=Stone dig4.ogg
|source=neutral
|description=When an armor stand is placed
|id=mob.armor_stand.place
|volume=1.0
|pitch=1.0}}
{{Sound table
|sound=Wood dig1.ogg
|sound2=Wood dig2.ogg
|sound3=Wood dig3.ogg
|sound4=Wood dig4.ogg
|source=neutral
|description=When an armor stand falls onto a block at a high speed{{Info needed}}
|id=mob.armor_stand.land
|volume=1.0
|pitch=1.0
|foot=1}}
==Data values==
===ID===
{{edition|java}}:
{{ID table
|edition=java
|firstcolumnname=Armor Stand
|showforms=y
|generatetranslationkeys=y
|displayname=Item
|spritename=armor-stand
|spritetype=item
|nameid=armor_stand
|form=item
|foot=1}}
{{ID table
|edition=java
|firstcolumnname=Armor Stand
|generatetranslationkeys=y
|displayname=Entity
|spritename=armor-stand
|spritetype=entity
|nameid=armor_stand
|foot=1}}
{{edition|bedrock}}:
{{ID table
|edition=bedrock
|firstcolumnname=Armor Stand
|shownumericids=y
|showforms=y
|notshowbeitemforms=y
|generatetranslationkeys=y
|displayname=Item
|spritename=armor-stand
|spritetype=item
|nameid=armor_stand
|id=552
|form=item
|foot=1}}
{{ID table
|edition=bedrock
|firstcolumnname=Armor Stand
|shownumericids=y
|generatetranslationkeys=y
|displayname=Entity
|spritename=armor-stand
|spritetype=entity
|nameid=armor_stand
|id=61
|foot=1}}
===Item data===
{{el|java}}:
{{main|Player.dat format}}
<div class="treeview">
* {{nbt|compound|tag}}: The item's '''tag''' tag.
{{:Player.dat_format/Entity Spawners}}
</div>
{{el|bedrock}}:
:{{IN|bedrock}}, armor stands have no additional item tag.
:See [[Bedrock Edition level format/Item format]].
===Entity data===
Armor stands have entity data associated with them that contain various properties of the [[entity]].
{{el|java}}:
{{main|Entity format}}
{{/ED}}
{{el|bedrock}}:
:See [[Bedrock Edition level format/Entity format]].
== Video==
Note: This video is outdated as Zoglins now attack armor stands
<div style="text-align:center">{{yt|tCFkdTfCleQ}}</div>
==History==
{{History|java}}
{{History||1.8|snap=August 5, 2014|slink={{Tweet|SeargeDP|496666952530538498}}|[[File:Armor Stand (pre-release).png|32px]] [[File:Armor Stand (item) (pre-release).png|32px]] [[Searge]] tweeted a image of an armor stand. The appearance was changed before release.}}
{{History|||snap=August 5, 2014|slink={{Tweet|SeargeDP|496673890148823040}}|Showed crafting recipe and name "[Armor Stand]", both were changed before release.}}
{{History|||snap=14w32a|[[File:Armor Stand JE1.png|32px]] Added armor stands.}}
{{History|||snap=14w32b|[[File:Armor Stand (item) JE1 BE1.png|32px]] The item texture has changed.
|Pick-block can now be used on armor stands.
|Armor stands can now no longer be crafted using [[slabs]] other than stone slabs.}}
{{History|||snap=14w32c|Added a <code>NoBasePlate</code> tag for the armor stand.}}
{{History|||snap=14w33a|Breaking [[particles]] have been added for the armor stand.}}
{{History||1.8.1|snap=pre1|Added <code>Marker</code> tag for armor stands.}}
{{History||1.9|snap=15w31a|Armor stands can now dual wield.
|<code>HandItems</code> and <code>ArmorItems</code> tags added for armor stands, which is intended to replace the <code>Equipment</code> tag.}}
{{History|||snap=15w33a|The <code>Equipment</code> tag has been removed from armor stands.}}
{{History|||snap=15w47a|The armor stand now wobbles when hit by the [[player]].}}
{{History|||snap=16w02a|Marker <code>ArmorStand</code>s now outline their equipment only when glowing.}}
{{History||1.11|snap=16w32a|The entity ID of the armor stand has been changed from <code>ArmorStand</code> to <code>armor_stand</code>.}}
{{History||1.13|snap=17w47a|Prior to [[1.13/Flattening|''The Flattening'']], this [[item]]'s numeral ID was 416.}}
{{History||1.14|snap=18w43a|[[File:Armor Stand JE2.png|32px]] The texture of armor stands has been changed to the new [[planks|oak planks]] texture.
|[[File:Armor Stand (item) JE2 BE2.png|32px]] The texture of armor stand [[item]]s has been slightly changed. (Comparison: [[File:Armor Stand (item) Texture Change 1.13 to 18w43a.gif|32px]])}}
{{History|||snap=18w50a|[[File:Armor Stand JE3.png|32px]] The texture of armor stands has been changed again.
|Armor stands now generate in taiga [[village]]s.}}
{{History||1.15|snap=19w42a|Armor stands can now be placed by [[dispenser]]s.}}
{{History||1.16|snap=20w07a|Armor stands no longer fall through fences and walls when placed.<ref>{{bug|MC-65951}}</ref>}}
{{History|||snap=20w14a|[[Zoglin]]s now attack armor stands.}}
{{History||1.17|snap=20w45a|[[File:Armor Stand 20w45a.png|32px]] The model of the armor stand has been changed.}}
{{History|||snap=20w46a|[[File:Armor Stand JE3.png|32px]] The model of the armor stand has been changed back to how it was in 1.16.}}
{{History||1.18|snap=Pre-release 5|[[File:Armor Stand JE4.png|32px]] Changed smooth stone texture on armor stand.}}
{{History||1.19.4|snap=23w03a|Armor stands now preserve custom names when placed and broken.}}
{{History||1.20<br>(Experimental)|link=1.19.4|snap=23w04a|An armor stand now appears in the smithing table GUI; arms are displayed as in Bedrock Edition.
|When an armor stand is placed, its model now changes in effect of the player's facing direction<ref>{{bug|MC-93533}}</ref>.}}
{{History|||snap=23w06a|The model no longer changes when the armory is placed. Also, the head, which tilted slightly to the lower right in the version from 1.8 up to 1.19.3, now faces forward from [[File:Armor Stand JE4.png|32px]] to [[File:Armor Stand JE5.png|32px]].}}
{{History||?|Armor can now be swapped in [[armor stand]]s by {{ctrl|using}} them in the armor stand's slot.}}
{{History|bedrock}}
{{History||1.2.0|snap=beta 1.2.0.2|[[File:Armor Stand BE1.png|32px]] [[File:Armor Stand (item) JE1 BE1.png|32px]] Added armor stands.}}
{{History||1.10.0|snap=beta 1.10.0.3|[[File:Armor Stand BE2.png|32px]] The texture of armor stands has been changed.
|[[File:Armor Stand (item) JE2 BE2.png|32px]] The texture of armor stand [[item]]s has been slightly changed.}}
{{History||1.12.0|snap=beta 1.12.0.2|[[File:Armor Stand with Leather Armor MCPE-44669.png|32px]] Leather [[armor]] no longer shows as being [[dye]]d properly when worn by armor stands.}}
{{History|||snap=beta 1.12.0.3|[[File:Armor Stand wear Chicken.png|x73px]][[File:Armor Stand wear Rabbit.png|x73px]] [[File:Armor Stand wear Salmon.gif|x73px]] [[File:Armor Stand wear Pufferfish.gif|x73px]] [[File:Armor Stand wear Slime.png|x73px]] When armor stands hold a [[raw chicken]], [[raw rabbit]], [[raw salmon]], [[pufferfish]] or a [[slime block]], they now wear these [[mob]] counterparts.<ref>{{bug|mcpe-48629}}</ref>}}
{{History||1.13.0|snap=beta 1.13.0.1|Leather armor now shows as being dyed properly when worn by armor stands.}}
{{History|||snap=beta 1.13.0.4|Armor stands no longer hold certain [[mob]]s if they are holding a [[item]] related to them.
|Armor stands now have a smoother animation when changing poses.}}
{{History||1.16.0|snap=?|Armor stands are now targeted by zoglins.}}
{{History||1.16.210|snap=beta 1.16.210.51|Armor stands are no longer attacked by [[goat]]s.}}
{{History|console}}
{{History||xbox=TU31|xbone=CU19|ps=1.22|wiiu=Patch 3|switch=1.0.1|[[File:Armor Stand JE1.png|32px]] [[File:Armor Stand (item) JE1 BE1.png|32px]] Added armor stands.}}
{{History||xbox=TU43|xbone=CU33|ps=1.36|wiiu=Patch 13|Added [[sound]]s for armor stands.}}
{{History||xbox=TU60|xbone=CU51|ps=1.64|wiiu=Patch 30|switch=1.0.11|[[File:Armor Stand BE1.png|32px]] Armor stands now have arms and the [[player]] can now change the pose of the armor stand.}}
{{History||xbox=none|xbone=none|ps=1.90|wiiu=none|switch=none|[[File:Armor Stand BE2.png|32px]] The texture of armor stands has been changed.
|[[File:Armor Stand (item) JE2 BE2.png|32px]] The texture of armor stand [[item]]s has been slightly changed.}}
{{History|foot}}
<gallery>
Armour stand 1.png|The first image of the armor stand.
JE 1.8 Dev Armor Stand crafting.png|The first image of armor stand crafting recipe.
The Bountiful Update.png|Armor stands in the [[Java Edition 1.8|1.8]] poster.
Dual Wielding Armor Stand.png|A dual wielding armor stand.
Glowing Armor Stands.png|Armor stands with the [[glowing]] effect.
Armor Stand Chess.jpg|Chess with armor stands.
</gallery>
==Issues==
{{issue list}}
==Trivia ==
*Equipping armor stands with certain [[block]]s and [[item]]s can cause rendering glitches. According to [[Searge]] this is due to transparent rendering on entities not yet being supported.<ref>{{bug|MC-67415||"Armor Stands with Slime Block rendering entities behind them"}} resolved as "Won't Fix"</ref><ref>{{bug|MC-67674||"Armor Stand wearing a Skull and Holding Stained Glass causes Graphical issues"}} resolved as "Won't Fix"</ref>
*Bedrock Edition has a version exclusive armor stand [[model]], which includes posable arms.
*Using [[redstone]] to change the stands reverse the poses, starting with the can-can pose first.
*Placing the stand within three powered [[redstone dust]] always changes its pose to the honor pose. [[Redstone Repeater|Repeaters]] also switch the stand to the honor pose if not set four blocks from one.
*Using external tools, armor stand spawners can be placed.
*Secret signatures for [[Jasper Boerstra|JAPPA]], Chi Wong, and [[Michael Stoyke|Searge]] can be found at the bottom of the armor stand texture.
== Gallery ==
===Renders===
;Armor (Java Edition)
<gallery>
Armor Stand Leather.png
Armor Stand Golden.png
Armor Stand Chainmail.png
Armor Stand Iron.png
Armor Stand Diamond.png
Armor Stand Netherite.png
</gallery>
; Armor (Bedrock Edition)
<gallery>
Armor Stand with Leather Armor BE.png
Armor Stand with Golden Armor BE.png
Armor Stand with Chain Armor BE.png
Armor Stand with Iron Armor BE.png
Armor Stand with Diamond Armor BE.png
Armor Stand with Netherite Armor BE.png
</gallery>
;Poses
<gallery>
Armor Stand Pose 0.png|
Armor Stand Pose 1.png|
Armor Stand Pose 2.png|
Armor Stand Pose 3.png|
Armor Stand Pose 4.png|
Armor Stand Pose 5.png|
Armor Stand Pose 6.png|
Armor Stand Pose 7.png|
Armor Stand Pose 8.png|
Armor Stand Pose 9.png|
Armor Stand Pose 10.png|
Armor Stand Pose 11.png|
Armor Stand Pose 12.png|
</gallery>
===Screenshots===
<gallery>
Armor Stand Demo.png|Armor stands in various positions with various [[armor]].
Armor Stand glass and sword.png|Armor stands can wear [[block]]s on their heads. This is accessible with [[command]]s such as {{cmd|item}}.
Bedrock edition armor stand poses.png|All armor stand poses as seen in {{el|be}}.
Netherite to the rescue!.png|An entire set of netherite [[armor]] on an armor stand.
Armor Stand Garage.png|An armor stand in a garage.
</gallery>
==References ==
{{reflist}}
==External Links==
*[https://www.minecraft.net/en-us/article/taking-inventory--armor-stand Taking Inventory: Armor Stand] – Minecraft.net on March 16, 2023
{{Items}}
{{Entities}}
[[Category:Storage]]
[[de:Rüstungsständer]]
[[es:Soporte para armadura]]
[[fr:Porte-armure]]
[[ja:防具立て]]
[[ko:갑옷 거치대]]
[[pl:Stojak na zbroję]]
[[pt:Suporte de armaduras]]
[[ru:Стойка для брони]]
[[th:แท่นวางชุดเกราะ]]
[[uk:Стійка для обладунків]]
[[zh:盔甲架]]</li></ul></nowiki> | Now obtainable from the piglin merchant and the Windbeard. | ||||
1.12.0.0{{Extension DPL}}<ul><li>[[Explorer Map|Explorer Map]]<br/>{{about|the map used to find rare structures|the craftable map|Map|others|Map (disambiguation)}}{{Needs updating|Add info on the new jungle, swamp, and village maps in Java 1.20.2 Pre-Release 1}}{{Item
| image = <gallery>
Ocean Explorer Map.png | Ocean
Woodland Explorer Map.png | Woodland
Buried Treasure Map.png | Buried Treasure
</gallery>
|image2 = <gallery>
Ocean Explorer Map BE.png | Ocean (BE)
Woodland Explorer Map BE.png | Woodland (BE)
Buried Treasure Map BE.png | Buried in Treasure (BE)
</gallery>
| renewable =
* '''Buried Treasure''': No
* '''Woodland and Ocean''': Yes
| stackable = Yes (64)
}}
An '''explorer map''' is a special [[map]] used to aid in finding rare [[generated structures]], including [[woodland mansion]]s, [[ocean monument]]s, and [[buried treasure]]s.
== Obtaining ==
=== Trading ===
Apprentice-level [[cartographer]] villagers sell ocean explorer maps for 13 emeralds and a compass. Journeyman-level cartographer villagers sell woodland explorer maps for 14 emeralds and a compass.
{{IN|java}}, if the cartographer is in [[the Nether]] or [[the End]], either spawned or transported, the trades for the map do not unlock. However, {{in|bedrock}}, the cartographer trades for the map are unlocked, but the purchased map shows the same layout as in the corresponding dimension and shows no destination structure, but if cartographer trades are unlocked in an old world type (prior-1.11.0), the game stops ticking.
In ''Java Edition'', each cartographer sells its own unique explorer map that points to a different location than other cartographers. Purchasing another explorer map from the same cartographer results in the same explorer map. In Bedrock Edition, a cartographer sells an explorer map that points to the nearest location, regardless of whether it is explored or previously mapped by another cartographer.<!-- start to glitched out-->
=== Chest loot ===
Treasure maps, in contrast to explorer maps, generate in underwater ruins or in shipwrecks.
{{LootChestItem|buried-treasure-map}}
== Usage ==
[[File:Explorer Map Comparison.gif|thumb|217px|Unexplored and partially explored maps.]]
{{See also|Map#Mapping|Map#Map content}}
=== Locating structures ===
There are three types of explorer maps: woodland, [[ocean]], and buried treasure. The maps differ from a normal map, in that it shows the area's land-water outline, with an orange striated (striped) texture for water<ref>Specifically, biomes in the "water_on_map_outlines" [[Tag#Biomes|biome tag]].</ref>, and the blank map texture for land. The maps show a section of land that contains a [[woodland mansion]], [[monument]] or [[buried treasure]] respectively. This may not be the nearest such [[structure]] to the [[player]]. The structures are displayed as a small icon. If the player icon is smaller than it would be on a normal map, that means the player is a great distance away. When the player is less than 1027 blocks away from the map border, the icon returns to the proper size. When the player reaches the map's area of land (512×512), the [[map]] fills in like a normal map.
The basic functions of a buried treasure explorer map are similar to that of the other two. However, instead of showing the structure icon on the map, it shows a red X instead. The [[buried treasure]] structure is located on the same X and Z coordinates as the middle of the X (the player marker may need to be aligned with the bottom of the middle 2×2 pixel square of the X). To locate the [[chest]] spot, hold the treasure map with both hands, not in the offhand slot.
=== Cloning ===
{{Crafting
|showdescription=1
|shapeless=1
|name=[[Explorer Map]]<br>(cloned)
|;;;Empty Map;Empty Map;Empty Map;Empty Map;Empty Map
|;;;;Empty Map;Empty Map;Empty Map;Empty Map
|;;;;;Empty Map;Empty Map;Empty Map
|Ocean Explorer Map; Woodland Explorer Map; Buried Treasure Map; Ocean Explorer Map; Woodland Explorer Map; Buried Treasure Map; Ocean Explorer Map; Woodland Explorer Map
|Empty Map
|;;;;;;Empty Map;Empty Map
|;Empty Map;Empty Map;Empty Map;Empty Map;Empty Map;Empty Map;Empty Map
|;;Empty Map;Empty Map;Empty Map;Empty Map;Empty Map;Empty Map
|;;;;;;;Empty Map
|Output= Ocean Explorer Map,2; Woodland Explorer Map,3; Buried Treasure Map,4; Ocean Explorer Map,5; Woodland Explorer Map,6; Buried Treasure Map,7; Ocean Explorer Map,8; Woodland Explorer Map,9
|type= Miscellaneous
|description=The output has the same map center as the input map, and the same [[monument]], [[woodland mansion]] or [[buried treasure]] marker. Cloned maps are stackable.
}}
The parts of the world that have already been explored and mapped are copied, and newly explored areas appear on both instances. In Creative mode, cloned explorer maps can be obtained by pick blocking on the explorer map displayed on [[item frames]] (the map needs to be out of the [[player]]'s inventory when using pick block, or else that map moves into the active hotbar slot).
== Sounds ==
{{edition|java}}:
{{Sound table
|sound=Drawmap1.ogg
|sound2=Drawmap2.ogg
|sound3=Drawmap3.ogg
|subtitle=Map drawn
|source=block
|description=When an explorer map is edited using a cartography table
|id=ui.cartography_table.take_result
|translationkey=subtitles.ui.cartography_table.take_result
|volume=1.0
|pitch=1.0
|distance=16
|foot=1}}
{{edition|bedrock}}: ''None''
== Data values ==
=== ID ===
{{edition|java}}:
{{ID table
|edition=java
|showforms=y
|generatetranslationkeys=y
|displayname=Map
|spritetype=item
|nameid=filled_map
|form=item
|translationkey=filled_map.mansion,filled_map.ocean,filled_map.buried_treasure
|foot=1}}
{{edition|bedrock}}:
{{ID table
|edition=bedrock
|showaliasids=y
|shownumericids=y
|showforms=y
|notshowbeitemforms=y
|generatetranslationkeys=y
|displayname=Map
|spritetype=item
|nameid=filled_map
|aliasid=map
|id=358
|form=item
|translationkey=item.map.exploration.monument.name,item.map.exploration.mansion.name,item.map.exploration.treasure.name
|foot=1}}
=== Metadata ===
{{see also|Bedrock Edition data values}}
{{IN|bedrock}}, the item [[Data value]] distinguishes explorer maps from one another:
{{:Map/DV}}
=== Item data ===
An explorer map differs from a map in that its <code>display</code> tag is set, which includes a <code>Mapcolor</code> and a <code>LocName</code>; also its <code>Decorations</code> list includes an entry for its target monument, mansion or buried treasure. Its [[Map item format#map_<#>.dat format|map item entry]] is identical to that of a normal map, except that by the time the player sees it, its <code>colors</code> byte array is pre-filled with explorer maps' characteristic land-water boundary lines and water shading.
<div class="treeview">
It should be noted that this additional data is stored in the Cartographer's NBT data and in the inventory item's NBT data, and not in the map file (e.g. <samp>map_0.dat</samp>). If the [[player]] were to use the {{cmd|give}} command to give themselves a map with the same map ID as an existing explorer map, it would still have the Ocean Monument or the Woodland Mansion icon on the map, but it would simply be named "Map" instead of, for example, "Ocean Explorer Map".
* {{nbt|compound}} Item data
** {{nbt|compound|tag}}:
*** {{nbt|compound|display}}: How the map looks in an item slot. See also [[Player.dat_format#Display Properties]].
**** {{nbt|string|Name}}: The name the map is given. In this case, they are localized strings: either <code>{"translate":"filled_map.monument"}</code>,<code>{"translate":"filled_map.mansion"}</code> or <code>{"translate":"filled_map.buried_treasure"}</code>.
**** {{nbt|int|MapColor}}: Color codes are calculated from the Red, Green and Blue components using this formula:<br>'''<span style="color:red">Red</span>[[wikipedia:Logical shift|<<]]16 + <span style="color:green">Green</span><<8 + <span style="color:blue">Blue</span>'''.<ref group=note>For positive values larger than 0x00FFFFFF, the top byte is ignored. All negative values produce white.</ref> Monument maps use 3830373, which is {{color swatch|58|114|101}}. Mansion maps use 5393476, which is {{color swatch|82|76|68}}. Buried treasure explorer maps do not use a color code.
*** {{nbt|list|Decorations}}:
**** {{nbt|compound}}: One of these for each icon on the map. Explorer maps always have at least one representing their target.
***** {{nbt|string|id}}: An arbitrary unique string identifying the decoration. For explorer map target structures, this is "+".
***** {{nbt|double|rot}}: The rotation of the icon. For explorer map target structures, this is always 180.
***** {{nbt|byte|type}}: The ID of the [[Map#Map icons|map icon]]: 8 for a mansion map, 9 for a monument map, 26 for a treasure map.
***** {{nbt|double|x}}: The world x-coordinate of the target structure icon.
***** {{nbt|double|z}}: The world z-coordinate of the target structure icon.
</div>
; Notes
{{notelist}}
== Achievements ==
{{load achievements|Treasure Hunter}}
== History ==
{{History|java}}
{{History||1.11|snap=16w39a|[[File:Woodland Explorer Map JE1 BE1.png|32px]] [[File:Ocean Explorer Map JE1 BE1.png|32px]] Added woodland and ocean explorer maps.}}
{{History|||snap=16w41a|Explorer maps can now no longer be zoomed out.}}
{{History||1.13|snap=18w10a|[[File:Map (item) JE1 BE1.png|32px]] Added buried treasure explorer maps.}}
{{History|||snap=18w11a|Buried treasure explorer maps now generate in the [[chest]]s of [[shipwreck]]s.}}
{{History||1.14|snap=18w43a|[[File:Woodland Explorer Map JE2 BE2.png|32px]] [[File:Ocean Explorer Map JE2 BE2.png|32px]] [[File:Map (item) JE2 BE2.png|32px]] The textures for explorer maps have now been changed.}}
{{History||1.20.2|snap=1.20.2 Pre-release 1|Updated structure icons on explorer maps sold by cartographers.}}
{{History||Villager Trade Rebalance<br>(Experimental)|link=Java Edition 1.20.2|snap=1.20.2 Pre-release 1|Added seven new maps which cartographers can sell.}}
{{History|pocket}}
{{History||1.1.0|snap=alpha 1.1.0.0|[[File:Woodland Explorer Map JE1 BE1.png|32px]] [[File:Ocean Explorer Map JE1 BE1.png|32px]] Added explorer maps.<ref>{{Mcnet|discovery-update-pocket-and-win-10-soon|The Discovery Update: on Pocket and Win 10 soon|March 29, 2017}}</ref>
|Explorer maps are not yet obtainable in [[survival]] mode.}}
{{History|||snap=alpha 1.1.0.3|Explorer maps are now obtainable as [[trading|trades]] from [[cartographer]] [[villager]]s.}}
{{History|bedrock}}
{{History||1.4.0|snap=beta 1.2.14.2|[[File:Map (item) JE1 BE1.png|32px]] Added buried treasure explorer maps.}}
{{History|||snap=beta 1.2.20.1|Treasure maps now generate in [[underwater ruins]] [[chest]]s.}}
{{History||1.10.0|snap=beta 1.10.0.3|[[File:Woodland Explorer Map JE2 BE2.png|32px]] [[File:Ocean Explorer Map JE2 BE2.png|32px]] [[File:Map (item) JE2 BE2.png|32px]] The textures for explorer maps have now been changed.}}
{{History||1.11.0|snap=beta 1.11.0.4|[[Trading]] has now been changed, woodland and ocean explorer maps now cost a [[compass]] and 12 [[emerald]]s.
|Journeyman-level [[cartographer]] [[villager]]s no longer [[trading|sell]] 2 type of explorer map as they now have {{frac|1|3}} chance to sell woodland explorer maps, {{frac|1|3}} chance to sell ocean explorer maps, or {{frac|1|3}} chance to sell other [[item]]s<!-- empty locator map--> as part of their [[trading|trades]].
|Woodland explorer maps can now be [[trading|bought]] from fletcher [[villager]]s.}}
{{History||1.12.0|snap=beta 1.12.0.3|Journeyman-level fletcher villagers no longer [[trading|sell]] woodland explorer maps.}}
{{History||1.13.0|snap=beta 1.13.0.1|[[File:Woodland Explorer Map BE3.png|32px]] [[File:Ocean Explorer Map BE3.png|32px]] [[File:Buried Treasure Map BE3.png|32px]] The textures of explorer maps have now been changed.}}
{{History||1.16.100|snap=beta 1.16.100.56|The ID of maps has been changed from <code>map</code> to <code>filled_map</code>.}}
{{History|console}}
{{History||xbox=TU54|xbone=CU44|ps=1.52|wiiu=Patch 24|switch=1.0.4|[[File:Woodland Explorer Map JE1 BE1.png|32px]] [[File:Ocean Explorer Map JE1 BE1.png|32px]] Added explorer maps.}}
{{History|PS4}}
{{History||1.90|[[File:Woodland Explorer Map JE2 BE2.png|32px]] [[File:Ocean Explorer Map JE2 BE2.png|32px]] The textures for explorer maps have now been changed.}}
{{History|new3ds}}
{{History||1.9.19|[[File:Woodland Explorer Map JE1 BE1.png|32px]] [[File:Ocean Explorer Map JE1 BE1.png|32px]] Added explorer maps.}}
{{History|foot}}
== Issues ==
{{Issue list}}
== Trivia ==
* When a [[cartographer]] generates the trade offers for the explorer maps, it chooses the location of one of the nearest structures of the respective type ([[monument]] or [[woodland mansion]]).
* For the reason above, explorer maps obtained from one cartographer are always the same. Also, if two cartographers unlock the explorer map trades approximately at the same place and at the same time, the map locations are usually identical. This sometimes also happens when finding multiple treasure maps from [[ocean ruins]].
* Explorer maps fill as the [[chunk]]s are generated, rather than when the [[player]] holds them while in the area; leaving an explorer map while exploring the area still fills the map.
* Buried treasure explorer maps are named ''Buried Treasure Map'' {{in|java}} while {{in|bedrock}}, they are named ''Treasure Map''.
* It is possible for a cartographer to give a monument or woodland mansion explorer map for areas where the [[generated structures|structures]] would have spawned in the world, but were unable to as a result of terrain generation. As a result, explorer maps, unfortunately, don't always guarantee that a structure exists at the purported location. This is most common with woodland mansion explorer maps, due to its generation algorithm.
* On [[Bedrock Edition]], inventory editors and add-ons can be used to create Explorer Maps that lead to any structure.
== Gallery ==
<gallery>
File:Explorer Maps.png|An ocean explorer map in the [[off-hand]], a woodland explorer map in the main hand, and a [[cartographer]] [[villager]] in between them.
File:Partial Explorer Map.png|A partially-explored explorer map.
File:ExplorerToNormal Map Comparison.png|Two fully-explored maps of the same place, one of which is a woodland explorer map.
File:Buried Treasure Explorer Map.png|An [[item frame]] holding a buried treasure explorer map. The player can see the red X on the left side of the map.
File:Purchase.png|Purchasing explorer maps from a cartographer.
</gallery>
== See also ==
* [[Map]]
* [[Woodland Mansion]]
* [[Ocean Monument]]
* [[Shipwreck]]
* [[Buried treasure]]
== References ==
{{reflist}}
== External Links ==
*[https://www.minecraft.net/en-us/article/taking-inventory--explorer-map Taking Inventory: Explorer Map] – Minecraft.net on November 13, 2019
{{Items}}
[[de:Schatzkarte]]
[[es:Mapa (localización de estructura)]]
[[fr:Carte d'exploration]]
[[ja:探検家の地図]]
[[ko:탐험 지도]]
[[pl:Mapa eksploracyjna]]
[[pt:Mapa de exploração]]
[[ru:Карта сокровищ]]
[[zh:探险家地图]]</li><li>[[Tag (item)|Tag (item)]]<br/>{{About|the April Fools item|the standard item used to rename mobs|Name Tag}}
{{wip}}
{{joke feature}}
{{exclusive|java}}
{{Item
| title = Tag
| image = Tag.png
| renewable = Yes
| stackable = Yes (64)
}}
Tags and Bits are items exclusive to the [[Java Edition 23w13a or b|23w13a_or_b]] [[Easter eggs#April Fools|April Fools' joke]] snapshot from 2023. They are used to craft in-game representations of [[NBT format|NBT tags]].
==Obtaining==
A [[stonecutter]] can be used to cut a [[Name Tag|name tag]] into either 16 "Name" or 16 "Tag" items. These can be cut into 16 Bit items each.
{{Stonecutting
|head=1
|showdescription=1
|Name Tag
|Name, 16; Tag, 16
|description=The resulting "Name" items must be named in an [[anvil]].
}}
{{Stonecutting
|showdescription=
|Name; Tag
|Bit, 16
|foot=1
}}
To be able to proceed from here the <code>nbt_crafting</code> vote must be approved. Bits can be used in a crafting table to craft Left Curly, Right Curly, Left Square, and Right Square. In appears like these are the only tag items that can be crafted from Bits.
A [[Crafting Table|crafting table]] can be used to convert a "Tag" item into a "Byte Tag." The amount of [[stick]]s added to the crafting recipe specifies the value of the Byte, as a [[wikipedia:Signed number representations#Two's complement|signed 8-bit value]]. For example, a "Tag" and a full stack of sticks make a Byte with the value <code>64b</code>, while 255 sticks result in <code>-1b</code>. Only one of the sticks is consumed. Two Bytes can be crafted into a "Short Tag" (equivalent to 16 bit), two Shorts into an "Int Tag" (equivalent to 32 bit), and two Ints into a "Long Tag" (equivalent to 64 bit). Many other combinations that form either 16, 32, or 64 bit are possible. For example, two Shorts and an Int make a Long. When combining values, their digits are stuck together in the given order, e.g. <code>1b</code> and <code>0b</code> make <code>256s</code> (equivalent to 0100<sub>16</sub> in [[wikipedia:Hexadecimal|hexadecimal]]). Undoing any of these crafting actions in e.g. a stonecutter is not possible.
"Float" and "Double Tags" can be crafted by adding one or two [[boat]]s to any numeric tag. A "String Tag" is crafted with a "Tag" and a piece of [[string]].
{{Crafting
|head=1
|showdescription=1
|A1= Bit; ; Bit; Bit |B1= ; Bit; Bit; Bit
|A2= ; Bit; Bit; |B2= Bit; ; ; Bit
|A3= Bit; ; Bit; Bit |B3= ; Bit; Bit; Bit
|Output= Right Curly; Left Curly; Left Square; Right Square
|ignoreusage=1
}}
{{Crafting
|Tag
|String
|Output= String Tag
|description=String tags must be named in an [[anvil]] to set their value.
|ignoreusage=1
}}
{{Crafting
|Tag; Tag; Tag
|; Stick; Stick, 64
|; ; Stick, 63
|Output= Byte Tag; Byte Tag; Byte Tag
|description=Only 1 stick is consumed. 128 and more sticks make [[wikipedia:Signed number representations#Two's complement|two's complements]]:
128 sticks = <code>-128b</code><br>
129 sticks = <code>-127b</code><br>
⋮<br>
254 sticks = <code>-2b</code><br>
255 sticks = <code>-1b</code>
|ignoreusage=1
}}
{{Crafting
|Byte Tag; Byte Tag; Byte Tag
|Byte Tag; Byte Tag; Byte Tag
| ; Byte Tag; Byte Tag
| ; Byte Tag; Byte Tag
| ; ; Byte Tag
| ; ; Byte Tag
| ; ; Byte Tag
| ; ; Byte Tag
|Output= Short Tag; Int Tag; Long Tag
|description=Shorts and Ints can be combined the same way, even mixed.
Digits are appended, e.g. two <code>1b</code> tags make <code>257b</code> (0101<sub>16</sub> in [[wikipedia:Hexadecimal|hexadecimal]]).
|ignoreusage=1
}}
{{Crafting
|Byte Tag; Short Tag; Int Tag; Long Tag
|Any Boat; Any Boat; Any Boat; Any Boat
|Output= Float Tag; Float Tag; Float Tag; Float Tag
|ignoreusage=1
}}
{{Crafting
|Byte Tag; Short Tag; Int Tag; Long Tag
|Any Boat; Any Boat; Any Boat; Any Boat
|Any Boat; Any Boat; Any Boat; Any Boat
|Output= Double Tag; Double Tag; Double Tag; Double Tag
|ignoreusage=1
}}
{{Crafting
|Left Curly; Left Curly
|Name; Name
|Byte Tag; Byte Tag
|Right Curly; Name |; Byte Tag | |; Name |; Byte Tag |; Right Curly
|Output= Compound Tag; Compound Tag
|description=Instead of Bytes any other tag can be used, including other compound tags.
|ignoreusage=1
}}
{{Crafting
|Left Square; Left Square
|Byte Tag; Byte Tag
|Right Square; Byte Tag |; Byte Tag |; Byte Tag |; Byte Tag |; Byte Tag |; Byte Tag |; Right Square
|Output= List Tag; List Tag
|description=Instead of Bytes any other tag can be used, including other list tags.
|ignoreusage=1
}}
{{Crafting
|Compound Tag; List Tag
|Compound Tag; List Tag
|Output= Compound Tag; List Tag
|description=Up to 9 can be combined.
When compound tags contain identical names, only the latest of the corresponding values is used.
|ignoreusage=1
|foot=1
}}
"Name" and "String Tags" must be named in an [[anvil]] before they can be used. Unnamed Names and Strings always produce a "Sssyntax Error". None of the other tag items can be named.
All these items can be combined in a crafting table to form a short sequence of JSON code, as long as the resulting syntax is valid. For example:
*A pair of Curlies that enclose a named "Name" item and some value, e.g. a Byte, create a "Compound Tag" with the content <code>{Example:0b}</code>.
**Because of the limited size of the crafting table only 3 name-value pairs can be put between Curlies at a time. Compound Tags of any length can be created by concatenating two or more Compound Tags.
**An empty pair of Curlies produces an empty Compound Tag with the content <code>{}</code>.
*A pair of Square brackets that enclose any number of values, e.g. 7 Bytes, create a "List Tag" with the content <code>[0b,0b,0b,0b,0b,0b,0b]</code>.
**Because of the limited size of the crafting table only 7 values can be put between Square brackets at a time. List Tags of any length can be created by concatenating two or more List Tags.
**An empty pair of Square brackets produces an empty List with the content <code>[]</code>.
**"Name" items cannot be used in a List.
The resulting Compound and List Tags can be used as values in other Compound and List Tags, as deeply nested as you want.
==Usage==
Tags appear to have no further functionality. They cannot be eaten or placed in the world, except in an item frame, as each other item can. However, Compound Tags with values like <code>{Enchantments:[{id:"minecraft:sharpness",lvl:127b}]}</code> will show the [[Enchanting|enchantment]] glint and actually act accordingly when used.<ref>https://www.reddit.com/r/Minecraft/comments/129xdyl/i_figure_out_how_the_nbtcrafting_in_the_vote/</ref> This appears to work with many weapon and tool [[Enchanting#Summary of enchantments by item|enchantments]].
In theory, an extremely lucky <code>replace_recipe_output</code> vote can change the crafting recipe for compound tags to output something else. When cheats are enabled you can test this with a command like <code>/vote rule minecraft:replace_recipe_output approve {key:"minecraft:compound_tag",value:"minecraft:netherite_sword"}</code>. However, as long as this vote is approved no other compound tag can be crafted. Use <code>/vote rule minecraft:replace_recipe_output repeal *</code> to undo all recipe replacements.
In combination with the <code>midas_touch</code> vote tag items can be converted into [[Gold Ingot|gold ingots]]. These retain their NBT data. When the world is loaded in another version of the game tag items disappear, but gold ingots persist.
==Trivia==
*This implies that a [[Name Tag|name tag]] is 128 bit.
*Compound and list tags are special in so far that the value they show in their [[tooltip]] is not merely a property of the item, but their ''actual'' [[NBT format|NBT data]]. This is also the reason why naming them is disabled as that would mess up the NBT data.
*The snapshot also contains an [[History of textures/Unused textures|unused texture]] for an {{ItemLink|End Tag}}.
==History==
{{History|java}}
{{History||23w13a_or_b|[[File:Tag.png|32px]] Added tags.}}
{{History|foot}}
==Gallery==
<gallery>
Tag.png|Tag
Bit.png|Bit
Byte Tag.png|Byte Tag
Double Tag.png|Double Tag
End Tag.png|End Tag
Float Tag.png|Float Tag
Int Tag.png|Int Tag
Left Curly.png|Left Curly
Left Square.png|Left Sqaure
List Tag.png|List Tag
Long Tag.png|Long Tag
Name (23w13a or b).png|Name
Right Curly.png|Right Curly
Right Square.png|Right Square
Short Tag.png|Short Tag
Sssyntax Error.png|Sssyntax Error
String Tag.png|String Tag
</gallery>
== References ==
{{reflist}}
{{items}}
{{jokes}}
[[pt:Tag (item)]]
[[Category:Joke items]]</li></ul> | Now obtainable from the Tower. | ||||
Issues[]
Issues relating to "Tempest Knife" are maintained on the bug tracker. Report issues there.
Gallery[]
Icons[]
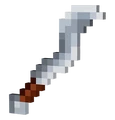
Tempest knife icon.

A sprite depicting the item texture.
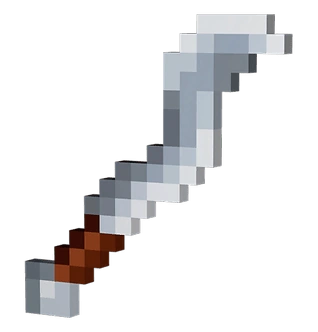
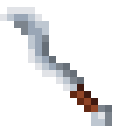
Textures[]

Texture file of the tempest knife.

Shadow texture file of the tempest knife.

Screenshots[]
Steve holding a tempest knife in-game.
A tempest knife within the inventory.