m (Minor change) |
mNo edit summary |
||
| (14 intermediate revisions by 9 users not shown) | |||
| Line 1: | Line 1: | ||
{{redirect|Frame}} |
{{redirect|Frame}} |
||
| ⚫ | |||
| − | {{Missing information|Glow Item Frames added in [[21w03a]] and [[Bedrock Edition beta 1.16.210.59]]}}}} |
||
| + | {{Temporarily removed in Bedrock Edition}} |
||
| ⚫ | |||
| − | {{Experimental}} |
||
{{ItemEntity |
{{ItemEntity |
||
|image=Item Frame.png;Glow Item Frame.png |
|image=Item Frame.png;Glow Item Frame.png |
||
| Line 17: | Line 16: | ||
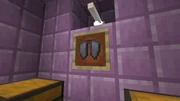
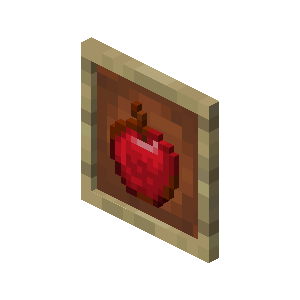
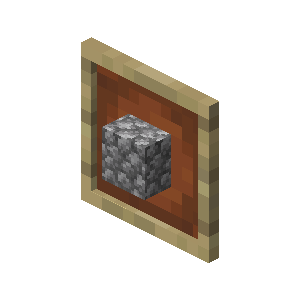
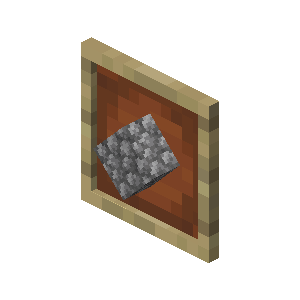
An '''item frame''' is an [[entity]]{{only|java|short=y}} or [[block entity]]{{only|bedrock|short=y}} that displays the item or block that is inside it. |
An '''item frame''' is an [[entity]]{{only|java|short=y}} or [[block entity]]{{only|bedrock|short=y}} that displays the item or block that is inside it. |
||
| − | A '''glow item frame''' keeps itself and the item inside it illuminated, even in the dark.{{upcoming|java |
+ | A '''glow item frame''' keeps itself and the item inside it illuminated, even in the dark.{{upcoming|java 1.17}} |
== Obtaining == |
== Obtaining == |
||
| Line 48: | Line 47: | ||
|Output= Glow Item Frame |
|Output= Glow Item Frame |
||
|type= Decoration block |
|type= Decoration block |
||
| − | |description={{upcoming|java 1.17 |
+ | |description={{upcoming|java 1.17}} |
}} |
}} |
||
| Line 63: | Line 62: | ||
{{control|Pick block}} may be used on item frames by players in creative mode only, the control has no effect for players in survival or adventure mode. When the item frame is displaying an item, {{control|pick block}} picks the displayed item instead of the item frame. |
{{control|Pick block}} may be used on item frames by players in creative mode only, the control has no effect for players in survival or adventure mode. When the item frame is displaying an item, {{control|pick block}} picks the displayed item instead of the item frame. |
||
| − | Item frames can be placed on the lid of a [[shulker box]] that is positioned horizontally, but pop off when the lid is opened. |
+ | Item frames can be placed on the lid of a [[shulker box]] that is positioned horizontally, but pop off when the lid is opened.{{only|java}} |
| + | |||
| + | An item glows when placed in a glow item frame, but it does not affect the light level, only appearing as if illuminated.{{upcoming|java 1.17}} |
||
=== Rotation === |
=== Rotation === |
||
| Line 69: | Line 70: | ||
The displayed item can then be rotated by right-clicking the frame. Items displayed in the item frame can turn 45° diagonally, with a total of 8 possibilities (90° and 4 possibilities if it is a map), and the frame outputs a [[Mechanics/Redstone/Circuit#Power level|redstone signal]] depending on the rotation phase that can be interpreted by a [[redstone comparator]] (note that this rotation value is separate from the clock or compass rotation). As long as the frame remains placed, it remembers the orientation of the last item it held, and uses it for the next item it holds.{{only|java}} |
The displayed item can then be rotated by right-clicking the frame. Items displayed in the item frame can turn 45° diagonally, with a total of 8 possibilities (90° and 4 possibilities if it is a map), and the frame outputs a [[Mechanics/Redstone/Circuit#Power level|redstone signal]] depending on the rotation phase that can be interpreted by a [[redstone comparator]] (note that this rotation value is separate from the clock or compass rotation). As long as the frame remains placed, it remembers the orientation of the last item it held, and uses it for the next item it holds.{{only|java}} |
||
| − | |||
| − | === Crafting ingredient === |
||
| − | Item frames can be crafted into glow item frames by combining them with a glow ink sac. |
||
== Sounds == |
== Sounds == |
||
| Line 234: | Line 232: | ||
{{History|bedrock upcoming}} |
{{History|bedrock upcoming}} |
||
{{History||1.16.210|snap=beta 1.16.210.59|[[File:Item Frame.png|32px]] [[File:Item Frame (map) JE2 BE2.png|32px]] [[File:Glow Item Frame (item).png|32px]] Added glow item frames. |
{{History||1.16.210|snap=beta 1.16.210.59|[[File:Item Frame.png|32px]] [[File:Item Frame (map) JE2 BE2.png|32px]] [[File:Glow Item Frame (item).png|32px]] Added glow item frames. |
||
| + | |Has the default item frame block texture.}} |
||
| − | |Hasn't block texture, only item.}} |
||
| + | {{History|||snap=beta 1.16.210.60|Temporarily removed glow item frames due to a crash.}} |
||
{{History|console}} |
{{History|console}} |
||
| Line 256: | Line 255: | ||
* The item frame is based upon a suggestion on [[wikipedia:Reddit|Reddit]], like the [[ender chest]] and [[flower pot]].<ref>{{Tweet|dinnerbone|235747041286975488}}</ref> |
* The item frame is based upon a suggestion on [[wikipedia:Reddit|Reddit]], like the [[ender chest]] and [[flower pot]].<ref>{{Tweet|dinnerbone|235747041286975488}}</ref> |
||
* The item frame is the only entity to reference a block [[model]].{{only|java|short=1}} Because of this, the texture of the frame border is the same as the birch planks texture. |
* The item frame is the only entity to reference a block [[model]].{{only|java|short=1}} Because of this, the texture of the frame border is the same as the birch planks texture. |
||
| − | * {{IN|bedrock}}, when an item frame is in the [[inventory]], the player cannot move the item frame to another slot (this also applies to [[chest]]s and other storage) or drop the item frame. Also, when the item frame is in the player's hand, the player cannot break blocks, interact (like doors or gate fences, except for removing items from an item frame) or place the item frame. |
||
*Item frame is the '''only''' placeable item that can interfere with other non-full block entity. |
*Item frame is the '''only''' placeable item that can interfere with other non-full block entity. |
||
Revision as of 12:44, 23 February 2021
An item frame is an entity[JE only] or block entity[BE only] that displays the item or block that is inside it.
A glow item frame keeps itself and the item inside it illuminated, even in the dark.[upcoming: JE 1.17]
Obtaining
Breaking
An empty item frame can be broken simply by punching it.[Java Edition only] If the item frame contains an item, punching it drops the item, leaving the frame on the wall.
Because item frames are entities in Java Edition, they can be broken in Adventure mode.[Java Edition only]
Natural generation
An item frame containing a pair of elytra generates in each end ship.

An item frame naturally generating in an end ship.
Crafting
| Name | Ingredients | Crafting recipe | Description |
|---|---|---|---|
| Item Frame | Stick + Leather |
||
| Glow Item Frame | Glow Ink Sac + Item Frame |
[upcoming: JE 1.17] |
Trading
Expert-level cartographer villagers have a chance to sell an item frame for 7 emeralds.
Usage


Item frame with partially filled map
Item frames can be placed on the sides of cactus blocks, pressure plates, fences, trees, slabs, cobblestone walls, chests, doors, and all solid blocks. They can also be placed on the top and bottom of these blocks. As item frames are an entity, multiple item frames can occupy the same block, although on different faces. It also allows non-solid blocks to occupy the same space.[Java Edition only]
Players can place items in the frame by using the item. If a map is placed in an item frame, it enlarges to show the map in the size of a full block, with the item frame's location displayed as a green pointer on the map, pointing in the direction the item frame is facing. If this is done in the Nether, the green cursor spins around similar to the white cursor (players). If the item in the item frame has been renamed using an anvil, it displays its custom name when the cursor is over the item frame. If the player places a block inside the frame, it is displayed in miniature half in, half out of the block. This can be most notably seen on stairs or slabs.
Pick block may be used on item frames by players in creative mode only, the control has no effect for players in survival or adventure mode. When the item frame is displaying an item, pick block picks the displayed item instead of the item frame.
Item frames can be placed on the lid of a shulker box that is positioned horizontally, but pop off when the lid is opened.[Java Edition only]
An item glows when placed in a glow item frame, but it does not affect the light level, only appearing as if illuminated.[upcoming: JE 1.17]
Rotation
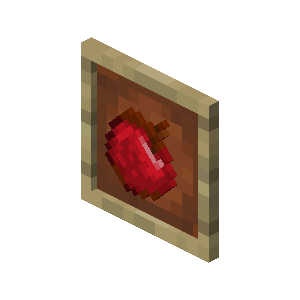
The displayed item can then be rotated by right-clicking the frame. Items displayed in the item frame can turn 45° diagonally, with a total of 8 possibilities (90° and 4 possibilities if it is a map), and the frame outputs a redstone signal depending on the rotation phase that can be interpreted by a redstone comparator (note that this rotation value is separate from the clock or compass rotation). As long as the frame remains placed, it remembers the orientation of the last item it held, and uses it for the next item it holds.[Java Edition only]
Sounds
| Sound | Subtitles | Source | Description | Resource location | Translation key | Volume | Pitch | Attenuation distance |
|---|---|---|---|---|---|---|---|---|
| Item Frame fills | ? | ? | entity | subtitles | ? | ? | 16 | |
| Item Frame breaks | ? | ? | entity | subtitles | ? | ? | 16 | |
| Item Frame placed | ? | ? | entity | subtitles | ? | ? | 16 | |
| Item Frame empties | ? | ? | entity | subtitles | ? | ? | 16 | |
| Item Frame clicks | ? | ? | entity | subtitles | ? | ? | 16 |
Achievements
| Icon | Achievement | In-game description | Actual requirements (if different) | Gamerscore earned | Trophy type (PS4) | |
|---|---|---|---|---|---|---|
| PS4 | Other | |||||
| Map Room | Place 9 fully explored, adjacent map items into 9 item frames in a 3 by 3 square. | The frames have to be on a wall, not the floor. | 40G | Silver | ||
Data values
ID
| Item | Identifier | Form | Translation key |
|---|---|---|---|
| Item Frame | item_frame | Item | item.minecraft.item_frame |
| Glow Item Frame[upcoming: JE 1.17] | glow_item_frame | Item | item.minecraft.glow_item_frame |
| Entity | Identifier | Translation key |
|---|---|---|
| Item Frame | item_frame | entity.minecraft.item_frame |
| Glow Item Frame[upcoming: JE 1.17] | glow_item_frame | entity.minecraft.glow_item_frame |
| Item Frame | Identifier | Numeric ID | Form | Translation key |
|---|---|---|---|---|
| Item | frame | 389 | Item | item.frame.name |
| Block | frame | 199 | Block & Ungiveable Item[i 1] | tile.frame.name |
Block states
Bedrock Edition
Item Frame:
| Name | Metadata Bits | Default value | Allowed values | Values for Metadata Bits |
Description |
|---|---|---|---|---|---|
| facing_direction | 0x10x2 | 0
| 5 | 0 | East facing item frame |
4 | 1 | West facing item frame | |||
3 | 2 | South facing item frame | |||
2 | 3 | North facing item frame | |||
1 | Unsupported | Up facing item frame | |||
0 | Unsupported | Down facing item frame | |||
| item_frame_map_bit | 0x4 | false | falsetrue | 01 | If this item frame contains a map. |
| item_frame_photo_bit | Not Supported | false | falsetrue | Unsupported | If this item frame contains a photo. |
Glow Item Frame:
| Name | Metadata Bits | Default value | Allowed values | Values for Metadata Bits |
Description |
|---|---|---|---|---|---|
| facing_direction | Not Supported | 0
| 5 | Unsupported | East facing item frame |
4 | Unsupported | West facing item frame | |||
3 | Unsupported | South facing item frame | |||
2 | Unsupported | North facing item frame | |||
1 | Unsupported | Up facing item frame | |||
0 | Unsupported | Down facing item frame | |||
| item_frame_map_bit | Not Supported | false | falsetrue | Unsupported | If this item frame contains a map. |
| item_frame_photo_bit | Not Supported | false | falsetrue | Unsupported | If this item frame contains a photo. |
Entity data
Item frames have entity data that define various properties of the entity.
- Entity data
- Tags common to all entities
- Tags common to all hangables
- Fixed: 1 or 0 (true/false) - true to prevent it from dropping if it has no support block, being moved (e.g. by pistons), taking damage (except from creative players), and placing an item in it, removing its item, or rotating it.
- Invisible: 1 or 0 (true/false) - Whether the item frame is invisible. The contained item or map remains visible.
- Item: The item, without the slot tag. If the item frame is empty, this tag does not exist.
- Tags common to all items
- ItemDropChance: The chance for the item to drop when the item frame breaks. 1.0 by default.
- ItemRotation: The number of times the item has been rotated 45 degrees clockwise.
Video
History
| August 16, 2012 | |||||
|---|---|---|---|---|---|
| Java Edition | |||||
1.4.2{{Extension DPL}}<ul><li>[[Nautilus Shell|Nautilus Shell]]<br/>{{Item
| type =
| stackable = Yes (64)
| renewable = Yes
}}
A '''nautilus shell''' is an item that is used for crafting [[conduit]]s.
==Obtaining==
===Fishing===
{{main|Fishing#Junk and treasure}}
Nautilus shells can be rarely obtained as a treasure item from fishing. The drop chances of nautilus shells slightly increase with each level of [[Luck of the Sea]] on the [[player]]'s [[fishing rod]].
===Mob loot===
[[Drowned]] have a 3%{{only|java|short=1}} or 8%{{only|bedrock|short=1}} chance to spawn with a nautilus shell in their off-hand, and this nautilus shell always drops upon [[death]].
===Trading===
[[Wandering trader]]s may [[trading|sell]] a nautilus shell for 5 [[emerald]]s each, but they only sell 5 of them at a time.
==Usage==
{{IN|bedrock}}, a nautilus shell is one of the few items that can be held in the off-hand.
===Crafting ingredient===
{{crafting usage}}
=== Trading ===
Nautilus shells can be given to trident-wielding drowned with a chance for the drowned to pick up the shell and drop the trident.<sup>[''[[Bedrock Edition]] only'']</sup>
==Data values==
===ID===
{{edition|java}}:
{{ID table
|edition=java
|showforms=y
|generatetranslationkeys=y
|displayname=Nautilus Shell
|spritetype=item
|nameid=nautilus_shell
|form=item
|foot=1}}
{{edition|bedrock}}:
{{ID table
|edition=bedrock
|shownumericids=y
|showforms=y
|notshowbeitemforms=y
|generatetranslationkeys=y
|displayname=Nautilus Shell
|spritetype=item
|nameid=nautilus_shell
|id=570
|form=item
|foot=1}}
==History==
{{History|java}}
{{History||1.13|snap=18w15a|[[File:Nautilus Shell JE1 BE2.png|32px]] Added nautilus shells.}}
{{History||1.14|snap=19w05a|Added [[Wandering Trader|wandering trader]]s, which sell nautilus shells.}}
{{History|bedrock}}
{{History||1.4.0|snap=beta 1.2.20.1|[[File:Nautilus Shell BE1.png|32px]] Added nautilus shells.}}
{{History|||snap=beta 1.2.20.2|[[File:Nautilus Shell JE1 BE2.png|32px]] The texture of nautilus shells has now been changed.}}
{{History||1.5.0|snap=beta 1.5.0.0|[[Drowned]] now sometimes spawn holding a nautilus shell.
|Nautilus shells are no longer behind [[Experimental Gameplay]].}}
{{History|||snap=beta 1.5.0.1|Nautilus shells can now be used to craft [[conduit]]s.}}
{{History||1.10.0|snap=beta 1.10.0.3|Nautilus shells can now be obtained from [[trading]] with [[wandering trader]]s.}}
{{History|console}}
{{History||xbox=TU69|ps=1.76|wiiu=Patch 38|[[File:Nautilus Shell JE1 BE2.png|32px]] Added nautilus shells.}}
{{History||xbox=none|ps=1.91|wiiu=none|Nautilus shells can now be obtained from [[trading]] with [[wandering trader]]s.}}
{{History|foot}}
==Issues==
{{issue list}}
==Trivia==
*[[wikipedia:Nautilus|Nautilus]]es are animals that occupy deep oceans in the real world. However, they are absent in Minecraft and there are currently no plans to add nautilus [[mob]]s into the game.
*Because {{el|bedrock}} allows for Nautilus shells to be held in the off-hand (since drowned hold them), they are the only item in that version that can be put in the off-hand slot without having a specific function.
{{items}}
[[de:Nautilusschale]]
[[es:Caparazón de nautilo]]
[[fr:Coquille de nautile]]
[[it:Conchiglia di nautilus]]
[[ja:オウムガイの殻]]
[[ko:앵무조개 껍데기]]
[[nl:Nautilusschelp]]
[[pl:Muszla łodzika]]
[[pt:Concha de náutilo]]
[[ru:Раковина наутилуса]]
[[th:เปลือกหอยงวงช้าง]]
[[uk:Мушля наутилуса]]
[[zh:鹦鹉螺壳]]
[[Category:Renewable resources]]</li><li>[[Bone|Bone]]<br/>{{about|the item|the block|Bone Block|other uses|Bone (disambiguation)}}
{{Item
| image = Bone.png
| renewable = Yes
| stackable = Yes (64)
}}
A '''bone''' is an [[item]] primarily obtained from [[skeleton]]s and similar mobs. It can be crafted into [[Bone Meal|bone meal]] or used to tame wild [[Wolf|wolves]].
== Obtaining ==
=== Chest loot ===
{{LootChestItem|bone}}
=== Mob loot ===
Skeletons, [[wither skeleton]]s, [[skeleton horse]]s, and [[stray]]s may drop 0–2 bones upon death. The maximum drop is increased by 1 per level of Looting, for a maximum of 0-5 bones with Looting III.
{{IN|bedrock}}, [[salmon]], [[cod]], [[pufferfish]], and [[tropical fish]] have 25% chance to drop 1-2 bones upon death. The maximum drop is increased by 1 to 2 per level of Looting, for a maximum of 2-8 bones with Looting III.
Salmon (small and medium size) have 25% chance to drop 1 bone upon death, The maximum drop is increased by 1 to 2 per level of [[Looting]], for a maximum of 2-7 bones with Looting III. The chance of dropping bones increases by 1% per looting level, so with Looting III there is up to a 28% chance of bones dropping.
=== Fishing ===
Bones can also be obtained by [[fishing]] as part of the junk category. The best chance of catching a bone is achieved without the [[Luck of the Sea]] enchantment, yielding a 1.1% chance.
== Usage ==
=== Helmet ===
[[File:Steve wearing Bone.png|thumb|right|75px]]
[[File:Alex wearing Bone.png|thumb|right|75px]]
While a bone cannot be equipped in the head slot in Survival mode, equipping it using commands causes it to appear in the player's mouth.
=== Taming ===
Using a bone on a wild [[wolf]] has a {{frac|1|3}} chance of [[taming]] it. Bones cannot tame a hostile wolf or a wolf that has already been tamed. However, bones can be used to attract the attention of the tamed ones.
=== Crafting ingredient ===
A bone can be crafted into 3 bone meal.
{{crafting usage}}
== Achievements ==
{{load achievements|Leader of the pack}}
== Advancements ==
{{load advancements|Best Friends Forever}}
== Data values ==
=== ID ===
{{edition|java}}:
{{ID table
|edition=java
|showforms=y
|generatetranslationkeys=y
|displayname=Bone
|spritetype=item
|nameid=bone
|form=item
|foot=1}}
{{edition|bedrock}}:
{{ID table
|edition=bedrock
|shownumericids=y
|showforms=y
|notshowbeitemforms=y
|generatetranslationkeys=y
|displayname=Bone
|spritetype=item
|nameid=bone
|id=415
|form=item
|foot=1}}
== History ==
{{History|java beta}}
{{History||1.2|[[File:Bone JE1 BE1.png|32px]] Added bones.
|Bones can be [[crafting|crafted]] into [[bone meal]].}}
{{History||1.4|Bones can now be used to tame [[wolves]].}}
{{History|java}}
{{History||1.3.1|snap=12w21a|Bones can now be found within [[desert temple]]s, allowing bones to be obtainable on Peaceful difficulty.}}
{{History||1.4.2|snap=12w36a|Added [[wither skeleton]]s, which has a chance to [[drops|drop]] bones when killed.}}
{{History||1.6.1|snap=13w16a|Added [[skeleton horse]]s, which drop bones when killed.}}
{{History||1.7.2|snap=13w36a|Bones can now be more easily obtained in Peaceful difficulty by [[fishing]]. Although, they are considered a "junk" [[item]].}}
{{History||1.9|snap=15w44a|The average yield of bones in [[desert temple]]s has been slightly decreased.
|Bones can now be found in [[dungeon]] [[chest]]s.}}
{{History||1.10|snap=16w20a|Added [[stray]]s, which [[drops|drop]] bones when killed.}}
{{History||1.11|snap=16w39a|Bones can now found in the new [[woodland mansion]] chests.}}
{{History||1.13|snap=17w47a|Prior to [[1.13/Flattening|''The Flattening'']], this [[item]]'s numeral ID was 352.}}
{{History||1.14|snap=18w43a|[[File:Bone JE2.png|32px]] The texture of bones has now been changed.}}
{{History|||snap=18w44a|[[File:Bone JE3 BE2.png|32px]] The texture of bones has now been slightly changed.}}
{{History||1.19|snap=Deep Dark Experimental Snapshot 1|Bones now generate in [[ancient city]] chests.}}
{{History|pocket alpha}}
{{History||v0.2.0|[[File:Bone JE1 BE1.png|32px]] Added bones. They are currently unobtainable and serve no purpose.}}
{{History||v0.3.3|Added skeletons, which drop bones when they die.
|Bones can now be used to craft [[bone meal]].}}
{{History||v0.5.0|Bones can now be obtained after activating the [[nether reactor]].}}
{{History||v0.9.0|snap=build 1|Added bones to [[Creative]] mode.}}
{{History||v0.11.0|snap=build 1|Bones can now be more easily obtained in Peaceful difficulty by [[fishing]]. Although, they are considered a "junk" [[item]].}}
{{History||v0.12.1|snap=build 1|Added [[wither skeleton]]s, which have a chance to [[drops|drop]] bones when killed.
|Bones are no longer available from the [[nether reactor]].}}
{{History||v0.13.0|snap=build 1|Bones can now be found inside of the [[desert temple]] hidden [[chest]] room.}}
{{History||v0.15.0|snap=build 1|Added [[stray]]s and [[skeleton horse]]s, which drop bones when killed.
|Bones can now be found in [[jungle temple]] [[chest]]s.}}
{{History|pocket}}
{{History||1.1.0|snap=alpha 1.1.0.0|Bone can now be found inside [[woodland mansion]] chests.}}
{{History|bedrock}}
{{History||1.4.0|snap=beta 1.2.14.2|Bones now [[drops|drop]] from [[fish]] mobs.}}
{{History||1.10.0|snap=beta 1.10.0.3|[[File:Bone JE3 BE2.png|32px]] The texture of bones has now been changed.}}
{{History|console}}
{{History||xbox=TU1|xbone=CU1|ps=1.00|wiiu=Patch 1|[[File:Bone JE1 BE1.png|32px]] Added bones.}}
{{History||xbox=TU5|Bones can be found in the Miscellaneous tab in the [[Creative inventory]].}}
{{History||xbox=TU12|Moved bones to the Materials tab in the Creative inventory.}}
{{History||xbox=TU19|xbone=CU7|ps=1.12|wiiu=Patch 1|Added [[wither skeleton]]s, which have a chance to [[drops|drop]] bones when killed.}}
{{History||xbox=TU31|xbone=CU19|ps=1.22|wiiu=Patch 3|Bones can now be obtained from [[fishing]].}}
{{History||xbox=TU46|xbone=CU36|ps=1.38|wiiu=Patch 15|Added [[stray]]s and [[skeleton horse]]s, which drop bones when killed.}}
{{History||xbox=none|xbone=none|ps=1.90|wiiu=none|switch=none|[[File:Bone JE3 BE2.png|32px]] The texture of bones has now been changed.}}
{{History|new 3ds}}
{{History||0.1.0|[[File:Bone JE1 BE1.png|32px]] Added bones.}}
{{History|foot}}
== Issues ==
{{issue list}}
== See also ==
* [[Bone meal]]
* [[Wolf]]
* [[Dyeing]]
{{Items}}
[[Category:Renewable resources]]
[[de:Knochen]]
[[es:Hueso]]
[[fr:Os]]
[[hu:Csont]]
[[it:Osso]]
[[ja:骨]]
[[ko:뼈]]
[[nl:Bot]]
[[pl:Kość]]
[[pt:Osso]]
[[ru:Кость]]
[[th:กระดูก]]
[[tr:Kemik]]
[[uk:Кістка]]
[[zh:骨头]]</li></ul> | 12w34a | ||||
| There is currently a bug where attempting to place an item frame in multiplayer causes an internal server error, as well as other bugs. | |||||
| 12w34b | The multiplayer item frame bug has been fixed. | ||||
| 12w38a | Item frames no longer despawn when the player moves 20 blocks away. | ||||
1.7.2{{Extension DPL}}<ul><li>[[Eye of Ender|Eye of Ender]]<br/>{{redirect|Ender Eye|the boss|Ender Dragon|item that teleports the player to where it lands|Ender Pearl}}
{{ItemEntity
|image=Eye of Ender.png
|stackable=Yes (64)
|renewable=Yes
|size=Height: 0.25 Blocks<br>Width: 0.25 Blocks
|networkid='''[[JE]]''': 72
}}
An '''eye of ender''' is a craftable item used to locate [[stronghold]]s and activate the [[end portal]]s within them.
== Obtaining ==
=== Crafting ===
{{Crafting
|Blaze Powder
|Ender Pearl
|Output=Eye of Ender
|type=Miscellaneous
}}
== Usage ==
=== Locating strongholds ===
[[File:Eye of Ender (break).gif|thumb|right|An animation of an eye of ender shattering.]]
To locate [[stronghold]]s (and the [[end portal]]s they house):
* Pressing {{control|use}} while holding an eye of ender causes it to fly approximately 12 blocks in the direction of the nearest stronghold, traveling through any blocks necessary, and leave a trail of purple particles, the same particle effect used for [[endermen]] and [[ender chests]].
** The eye leads to the [[chunk]] where a spiral staircase, the first room generated in the stronghold, is located.
** The center of this entrance staircase is always exactly at the chunk coordinates 4, ~, 4, although the eye of ender leads to chunk coordinates 0, ~, 0 (the northwest corner of the chunk).
* While over 12 blocks away from the northwest corner of the staircase chunk, the eye will travel upward to offer an easily-visible indication of the horizontal direction the player must travel.
* When closer than 12 blocks to the northwest corner of the staircase chunk, the eye will travel downward, to indicate the player is above a stronghold and must mine downward.
* After two or three seconds of travel, the eye floats in the air briefly, then either falls (becoming collectable again) or shatters in mid-air. The eye has a 20% chance of shattering (80% chance of surviving) per throw, therefore throwing it three times has approximately 50% overall chance to shatter the eye (0.8<sup>3</sup>=51.2%).
* The eye of ender's flying function works only in the [[Overworld]]. It does nothing in [[the Nether]], [[the End]], [[custom dimension]]s{{verify|type=current}}, or in worlds with no strongholds.
Note that the eyes may point to an incorrect location if the target chunks were generated with a different biomes map in an older version or through different generation settings.<ref>See also {{bug|MC-135996}}</ref>
=== Activating end portals ===
[[File:Active End Portal.png|thumb|right|An end portal activated with eyes of ender.]]
Once an end portal is found, the eyes of ender are required to activate it. End portals require a total of 12 eyes of ender in order to activate, though each individual frame-block has a 10% chance of containing an eye of ender when generated. Eyes can be placed in empty [[End portal frame]]s by pressing {{control|use}} on them until the entire ring of 12 is filled, thereby activating the portal. Due to the fact that there is a 10% chance of each individual end portal frame having an eye in it, there is a one out of one trillion chance of every frame having an eye in it thereby activating the portal even if the player doesn't have any eyes of ender.
{| class="wikitable sortable mw-collapsible"
|+End Portal Pre-Filled Eyes
!Eyes
!0
!1
!2
!3
!4
!5-12
|-
|Exactly
|28%
|38%
|23%
|9%
|2%
|<1%
|-
|Or More
|100%
|72%
|34%
|11%
|3%
|<1%
|}
=== Crafting ingredient ===
{{crafting usage}}
== Sounds ==
{{Edition|Java}}:<br>
Eyes of ender use the Friendly Creatures sound category for entity-dependent sound events.
{{Sound table
|sound=Ender Eye death1.ogg
|sound2=Ender Eye death2.ogg
|subtitle=Eye of Ender falls <ref group=sound name=LousyEvents>{{Bug|MC-98316||Wrong subtitles caused by missing distinction}}</ref>
|source=neutral
|description=When an eye of ender drops or breaks
|id=entity.ender_eye.death|idnote=<ref group=sound name=LousyEvents/>
|translationkey=subtitles.entity.ender_eye.death|translationkeynote=<ref group=sound name=LousyEvents/>
|volume=1.3
|pitch=1.0
|distance=16}}
{{Sound table
|sound=Ender Eye launch1.ogg
|sound2=Ender Eye launch2.ogg
|subtitle=Eye of Ender shoots
|source=neutral
|description=When an eye of ender is thrown
|id=entity.ender_eye.launch
|translationkey=subtitles.entity.ender_eye.launch
|volume=0.5
|pitch={{frac|1|3}}-0.5
|distance=16}}
{{Sound table
|sound=End portal eye place1.ogg
|sound2=End portal eye place2.ogg
|sound3=End portal eye place3.ogg
|subtitle=Eye of Ender attaches
|source=block
|description=When an eye of ender is placed in an end portal frame
|id=block.end_portal_frame.fill
|translationkey=subtitles.block.end_portal_frame.fill
|volume=1.0
|pitch=1.0
|distance=16
|foot=1}}
{{Edition|Bedrock}}:
{{Sound table
|type=bedrock
|sound=Item Frame break1.ogg
|sound2=Item Frame break2.ogg
|sound3=Item Frame break3.ogg
|source=block
|description=When an eye of ender breaks <ref group=sound>{{Bug|MCPE-115646}}</ref>
|id=block.itemframe.break}}
{{Sound table
|sound=Bow shoot.ogg
|source=player
|description=When an eye of ender is thrown
|id=random.bow
|volume=0.5
|pitch=0.33-0.5}}
{{Sound table
|sound=End portal eye place1.ogg
|sound2=End portal eye place2.ogg
|sound3=End portal eye place3.ogg
|source=block
|description=When an eye of ender is placed in an end portal frame
|id=block.end_portal_frame.fill
|volume=0.3
|pitch=0.9/1.0/1.1
|foot=1}}
==Data values==
===ID===
{{edition|java}}:
{{ID table
|edition=java
|firstcolumnname=Item
|showforms=y
|generatetranslationkeys=y
|displayname=Eye of Ender
|spritetype=item
|nameid=ender_eye
|form=item
|foot=1}}
{{ID table
|edition=java
|firstcolumnname=Entity
|generatetranslationkeys=y
|displayname=Eye of Ender
|spritetype=entity
|nameid=eye_of_ender
|foot=1}}
{{edition|bedrock}}:
{{ID table
|edition=bedrock
|firstcolumnname=Item
|shownumericids=y
|showforms=y
|notshowbeitemforms=y
|generatetranslationkeys=y
|displayname=Eye of Ender
|spritetype=item
|nameid=ender_eye
|id=433
|form=item
|foot=1}}
{{ID table
|edition=bedrock
|firstcolumnname=Entity
|shownumericids=y
|generatetranslationkeys=y
|displayname=Eye of Ender
|spritetype=entity
|nameid=eye_of_ender_signal
|id=70
|foot=1}}
===Entity data===
The purple particles left by eyes of ender have entity data that define various properties of the entity.
{{el|java}}:
{{main|Entity format}}
{{/ED}}
{{el|bedrock}}:
:See [[Bedrock Edition level format/Entity format]].
==Advancements==
{{load advancements|Eye Spy}}
==Video ==
{{Video note|This video does not mention that eyes of ender can be used to craft [[ender chest]]s or [[end crystal]]s.}}
<div style="text-align:center">{{yt|E0AhoxYLomc}}</div>
==History==
{{History|java}}
{{History||1.0.0|snap=Beta 1.9 Prerelease 3|[[File:Eye of Ender JE1 BE1.png|32px]] Added eyes of ender.
|Eyes of ender can be used on a [[end portal frame|portal block]] to repair them, but repairing them does nothing.}}
{{History|||snap=Beta 1.9 Prerelease 4|Each eye can now be placed in a [[end portal frame|portal block]] or used to hone in on a [[stronghold]]. [[Jens Bergensten|Jeb]] demonstrated the new uses for an eye in his livestream.<ref>http://www.twitch.tv/jebox/b/297000418</ref> An [[end portal]] within a stronghold could be seen in the stream with two eyes inserted into blocks.
|In older worlds with chunks generated before [[Java Edition Beta 1.9 Prerelease 3|Beta 1.9 Prerelease 3]], the eyes may mislead the [[player]] to a place where there isn't a [[stronghold]] at all. This happens because the eyes lead to where a stronghold should be based on the world seed in the current version, but before Beta 1.9 Prerelease 3 strongholds generated differently based on the seed. Therefore, if the player saved the coordinates the eye traveled to in an old world and generated a new world with the same seed, the player could travel to those same coordinates and find a stronghold.}}
{{History|||snap=Beta 1.9 Prerelease 6|Eyes of ender no longer render like a tool in third person.}}
{{History|||snap=RC1|The throwing sound of eyes of ender has been changed.}}
{{History||1.3.1|snap=12w21a|Eyes of ender can now be used to craft [[ender chest]]s.
|Priest [[villager]]s would [[trading|buy]] 2–3 eyes of ender for one [[emerald]].}}
{{History|||snap=12w22a|Priest villagers no longer buy eyes of ender, instead selling them for 7–10 emeralds.}}
{{History||1.6.4|snap=1.6.3-pre|Eyes of ender now lead to [[stronghold]]s based on the structure data saved in the world file instead of calculating their approximate location via the [[seed (level generation)|world seed]]. Therefore, strongholds generated in old versions can still be found even if the distribution of strongholds is changed.}}
{{History||1.7.2|snap=13w41a|Eyes of Ender now lead to the entrance of a stronghold instead of the portal room.}}
{{History||1.8|snap=14w02a|With changes that have been made to villagers and the [[trading]] system, cleric villagers now sell eyes of ender for 7–11 [[emerald]]s, as one of their tier III trades.}}
{{History||1.9|snap=15w41a|Eyes of ender are no longer [[trading|sold]] by cleric [[villager]]s.}}
{{History|||snap=15w44b|An eye of ender is now used to craft an [[end crystal]].}}
{{History|||snap=pre3|Eyes of ender now point to the 125 new strongholds.<ref>{{bug|MC-91173}} resolved as "Fixed"</ref>}}
{{History||1.11|snap=16w32a|The [[entity]] ID has been changed from <code>EyeOfEnderSignal</code> to <code>eye_of_ender_signal</code>.}}
{{History||1.12|snap=17w17a|A new ''pop'' [[sound]] has been added when a thrown eye of ender bursts.}}
{{History||1.13|snap=17w47a|Prior to [[1.13/Flattening|''The Flattening'']], this [[item]]'s numeral ID was 381.}}
{{History|||snap=pre5|The [[entity]] ID has been changed to <code>eye_of_ender</code>.}}
{{History||1.14|snap=18w43a|[[File:Eye of Ender JE2 BE2.png|32px]] The texture of eyes of ender has been changed.}}
{{History||1.19|snap=22w11a|Eyes of Ender now lead to the corner of the chunk (0, ~, 0) instead of the center (8-9, ~, 8-9).<ref>{{bug|MC-253394}}</ref>}}
{{History|pocket}}
{{History||1.0.0|snap=alpha 0.17.0.1|[[File:Eye of Ender JE1 BE1.png|32px]] Added eyes of ender.}}
{{History|bedrock}}
{{History||1.10.0|snap=beta 1.10.0.3|[[File:Eye of Ender JE2 BE2.png|32px]] The texture of eyes of ender has been changed.}}
{{History||1.16.0|snap=beta 1.15.0.51|The [[particles]] of eyes of ender have been changed to match {{el|je}}.}}
{{History|console}}
{{History||xbox=TU7|xbone=CU1|ps=1.0|wiiu=Patch 1|[[File:Eye of Ender JE1 BE1.png|32px]] Added eyes of ender.}}
{{History||xbox=none|xbone=none|ps=1.90|wiiu=none|switch=none|[[File:Eye of Ender JE2 BE2.png|32px]] The texture of eyes of ender has been changed.}}
{{History|new 3ds}}
{{History||1.7.10|[[File:Eye of Ender JE1 BE1.png|32px]] Added eyes of ender.}}
{{History|foot}}
=== Historical images ===
<gallery>
File:Held_Eye_of_Ender.png|The eye of ender used to appear large in third-person view.
</gallery>
==Issues==
{{issue list}}
==Trivia ==
*When thrown in third-person view, the eyes of ender fly out from the player's feet instead of their hand.
*Before [[Java Edition 1.9]], eyes of ender can be purchased from cleric villagers, which means players can find a [[stronghold]] and go to [[the End]] without accessing [[the Nether]] at all.
*{{IN|bedrock}} if the player travels beyond a certain radius (roughly 740,000 blocks), eyes of ender always point to a stronghold near spawn, even though strongholds continue to generate past this limit. If one travels to this limit, they can see eyes of ender suddenly switching direction. A similar phenomenon occurs with the {{cmd|locate}} command.
==Gallery==
===Screenshots===
<gallery>
Stronghold Portal Room.png|An end portal frame containing a few eyes of ender.
EnderChestexample.png|An [[ender chest]] depicting an eye of ender on the front.
</gallery>
===In other media===
<gallery>
File:Eye of Ender JINX.jpg|Official T-shirt artwork "Eye of Ender" sold by JINX.
File:Happy Halloween Eye.jpg|A Halloween T-Shirt design featuring an eye of ender.
</gallery>
==External links==
*[http://www.strongholdfinder.com/ A super-easy stronghold triangulation tool]
*[http://jsfiddle.net/42EDX/40/ JSFiddle Eye of Ender triangulator - can guess the location of other 2 strongholds in the first ring]
*[https://ens-gijs.github.io/minecraft-stronghold-locator/ Minecraft Stronghold Locator Eye of Ender throw plotting visualizer - zoomable to show all possible stronghold rings]
*[https://github.com/winny-/stronghold Python Eye of Ender throw plotting tool]
*[http://www.purplefrog.com/~thoth/MinecraftStronghold/stronghold.html HTML Eye of Ender throw plotting visualizer (not updated after 1.9 stronghold placement changes)]
*[http://chunkbase.com/apps/stronghold-finder Chunk Base Stronghold Finder (seed-based)]
*[https://github.com/toolbox4minecraft/amidst/releases Amidst - File-based world visualizer]
*[http://minecraft.tournier.org/StrongholdLocator/ Find strongholds by analyzing stronghold.dat file]
== References==
{{reflist}}
{{Items}}
{{entities}}
[[cs:Endové oko]]
[[de:Enderauge]]
[[es:Ojo de ender]]
[[fr:Œil de l'Ender]]
[[hu:Végzet szeme]]
[[ja:エンダーアイ]]
[[ko:엔더의 눈]]
[[nl:Enderoog]]
[[pl:Oko Endera]]
[[pt:Olho de ender]]
[[ru:Око Края]]
[[th:ดวงตาแห่งเอนเดอร์]]
[[uk:Око Краю]]
[[zh:末影之眼]]</li><li>[[Beetroot Seeds|Beetroot Seeds]]<br/>{{Block
| group = Age 0
| 1-1 = Beetroots Age 0.png
| 1-2 = Beetroots Age 0 BE.png
| group2 = Age 1
| 2-1 = Beetroots Age 1.png
| 2-2 = Beetroots Age 1 BE.png
| group3 = Age 2
| 3-1 = Beetroots Age 2.png
| 3-2 = Beetroots Age 2 BE.png
| group4 = Age 3
| 4-1 = Beetroots Age 3.png
| 4-2 = Beetroots Age 3 BE.png
|image=Beetroot Seeds JE2 BE2.png
|transparent=Yes
|light=No
|tool=Any
|renewable=Yes
|stackable=Yes (64)
|flammable=No
|lavasusceptible=No
}}
'''Beetroot seeds''' are items that can be used to plant beetroot crops.
'''Beetroot crops''' are planted in [[farmland]] and used to grow [[beetroot]] and beetroot seeds.
== Obtaining ==
=== Natural generation ===
[[Village]] farms have a chance of growing beetroot. The exact chance depends on the village:
{| class="wikitable"
! Village style !! Chance
|-
| {{EnvSprite|desert-village}} Desert || 20%
|-
| {{EnvSprite|plains-village}} Plains || 5%
|}
=== Breaking ===
Harvesting fully-grown beetroot yields from 1 to 4 seeds per crop harvested ({{frac|2|5|7}} seeds per crop harvested on average). The [[Fortune]] enchantment can be used to improve the drop rate.
=== Chest loot ===
{{LootChestItem|beetroot-seeds}}
=== Trading ===
Beetroot seeds are sold by [[wandering trader]]s for one [[emerald]].
== Usage ==
=== Farming ===
Beetroot seeds can be placed on [[farmland]]. After being placed, it goes through four stages of growth. When fully grown it can be broken to produce beetroot seeds and beetroots.
<!-- Java Edition only? -->While beetroot crops have only four growth stages compared to eight for [[wheat]], [[carrot]]s, and [[potato]]es, each growth tick has a {{frac|1|3}} chance of not advancing the growth stage and therefore beetroot grows slightly faster than other crops.
Crops grow faster if the farmland they are planted in is [[Farmland#Hydration|hydrated]]. One application of [[bonemeal]] has a 75% chance of advancing growth by one stage. This is less effective than for other crops: an average of {{frac|5|1|3}} are needed to fully grow beetroot compared to {{frac|2|2|7}} for other crops.
=== Breeding ===
Like other [[seeds]], beetroot seeds can be used to [[breed]] [[chicken]]s, lead chickens around, and make baby chickens grow up faster by 10% of the remaining time.
=== Taming ===
Like other seeds, beetroot seeds can be used to tame [[parrot]]s.
=== Composting ===
Placing beetroot seeds into a [[composter]] has a 30% chance of raising the compost level by 1.
=== Trading ===
[[Wandering trader]]s may offer to sell beetroot seeds for one emerald.
== Sounds ==
{{Edition|Java}}:
{{Sound table/Block/Crop/JE}}
{{Edition|Bedrock}}:
{{Sound table/Block/Wood/BE}}
== Data values ==
=== ID ===
{{edition|java}}:
{{ID table
|edition=java
|showblocktags=y
|showforms=y
|generatetranslationkeys=y
|displayname=Beetroots
|spritetype=block
|nameid=beetroots
|blocktags=bee_growables, crops
|form=block}}
{{ID table
|displayname=Beetroot Seeds
|spritetype=item
|nameid=beetroot_seeds
|form=item
|foot=1}}
{{edition|bedrock}}:
{{ID table
|edition=bedrock
|shownumericids=y
|showforms=y
|generatetranslationkeys=y
|displayname=Beetroots
|spritetype=block
|nameid=beetroot
|id=244
|form=block
|itemform=item.beetroot}}
{{ID table
|displayname=Beetroot Seeds
|spritetype=item
|nameid=beetroot_seeds
|id=295
|form=item
|foot=1}}
=== Block states ===
{{see also|Block states}}
{{/BS}}
== Advancements ==
{{load advancements|A Seedy Place}}
== History ==
{{History|java}}
{{History||1.9|snap=15w31a|[[File:Beetroot Seeds JE1 BE1.png|32px]] Added beetroot seeds.
|[[File:Beetroots Age 0 JE1.png|32px]] [[File:Beetroots Age 1 JE1.png|32px]] [[File:Beetroots Age 2 JE1.png|32px]] [[File:Beetroots Age 3 JE1.png|32px]] Added beetroot crops.
|Beetroot seeds can be found in [[end city]] [[chest]]s.
|Beetroot plants naturally generate in [[village]] farms.
|[[Villager]]s are able to harvest beetroot crops, but they are not yet able to pick up the seeds and plant them.}}
{{History|||snap=15w38a|The [[drop]] chances have been greatly improved from the average {{frac|4|5}} per beetroot crop harvested to 2.
|Villagers are now able to pick up and plant beetroot seeds.}}
{{History|||snap=15w44a|Beetroots now generate in [[dungeon]] and [[mineshaft]] chests.}}
{{History||1.11|snap=16w39a|Beetroot seeds are now found in the new [[woodland mansion]] chests.}}
{{History||1.12|snap=17w18b|Placing a beetroot seeds in farmland now gives the player the "A Seedy Place" [[advancement]].{{verify}}}}
{{History||1.13|snap=17w47a|Prior to [[1.13/Flattening|''The Flattening'']], this item's numeral ID was 458 and block's numeral ID was 244.}}
{{History||1.14|snap=18w43a|[[File:Beetroot Seeds JE2 BE2.png|32px]] The texture of beetroot seeds has been changed.
|[[File:Beetroots Age 0 JE2.png|32px]] [[File:Beetroots Age 1 JE2.png|32px]] [[File:Beetroots Age 2 JE2.png|32px]] [[File:Beetroots Age 3 JE2.png|32px]] The textures of beetroot crops have been changed.}}
{{History|||snap=18w49a|Beetroot seeds can now be found in chests in [[snowy tundra]] village houses.}}
{{History|||snap=19w03a|Placing beetroot seeds into the new [[composter]] has a 10% chance of raising the compost level by 1.}}
{{History|||snap=19w05a|Beetroot seeds now have a 30% chance of increasing the compost level in a composter.
|Added [[Wandering Trader|wandering trader]]s, which sell beetroot seeds.}}
{{History||1.15|snap=19w34a|[[Bee]]s can now pollinate beetroot crops.}}
{{History||1.17|snap=21w13a|[[File:Beetroots Age 0 JE3.png|32px]] [[File:Beetroots Age 1 JE3.png|32px]] [[File:Beetroots Age 2 JE3.png|32px]] [[File:Beetroots Age 3 JE3.png|32px]] The "crop" template model has changed such that pixels appear in the same physical positions on opposite sides of texture planes, changing the beetroot crop's appearance in the process.<ref>{{bug|MC-199242|||Fixed}}</ref>}}
{{History||1.18|snap=Pre-release 5|[[File:Beetroot Seeds JE3.png|32px]] The texture of beetroot seeds has been changed.}}
{{History||1.20|snap=23w12a|Beetroot seeds can now be found in [[suspicious gravel]] and [[suspicious sand]] in [[trail ruins]].}}
{{History|||snap=23w16a|Beetroot seeds no longer generates in [[suspicious sand]] in [[trail ruins]].|Due to the split of the archaeological loot tables for the suspicious gravel within the [[trail ruins]]; beetroot seeds now are in the common loot.}}
{{History|pocket alpha}}
{{History||November 14, 2013|link=https://twitter.com/jbernhardsson/status/400902957782147072|[[Johan Bernhardsson]] previewed an image of beetroot seeds.}}
{{History||v0.8.0|snap=build 2|[[File:Beetroot Seeds JE1 BE1.png|32px]] Added Beetroots seeds.
|[[File:Beetroots Age 0 JE1 BE1.png|32px]] [[File:Beetroots Age 1 JE1 BE1.png|32px]] [[File:Beetroots Age 2 JE1 BE1.png|32px]] [[File:Beetroots Age 3 JE1 BE1.png|32px]]{{verify|Correct models?}} Added Beetroots crops.}}
{{History|||snap=build 3|Beetroots seeds now have a chance of dropping when tilling [[grass block]]s.}}
{{History||v0.11.0|snap=build 1|"Beetroots seeds" have been renamed to "Beetroot Seeds" and the capitalization has now also been fixed.<ref>{{bug|MCPE-7953|||Fixed}}</ref>}}
{{History||v0.12.1|snap=build 1|Beetroot seeds no longer have a chance of dropping when tilling [[grass block]]s.}}
{{History||v0.14.0|snap=build 1|Beetroot seeds can now be found in [[minecart with chest]]s inside of [[mineshaft]]s.}}
{{History||v0.16.2|Beetroot seeds can now be found in [[chest]]s inside the large house in [[ice plains]] and [[cold taiga]] [[village]]s.}}
{{History|pocket}}
{{History||1.0.0|snap=alpha 0.17.0.1|Beetroot seeds can now be found in the [[chest]]s of [[dungeon]]s and [[end city|end cities]].}}
{{History||1.1.0|snap=alpha 1.1.0.0|Beetroot seeds can now be found in [[woodland mansion]] chests.}}
{{History|bedrock}}
{{History||1.2.0|snap=beta 1.2.0.2|Beetroot seeds can now be found inside [[bonus chest]]s.
|Beetroot seeds can now be used to tame [[parrot]]s.}}
{{History||1.10.0|snap=beta 1.10.0.3|[[File:Beetroot Seeds JE2 BE2.png|32px]] The texture of beetroot seeds has been changed.
|[[File:Beetroots Age 0 JE2.png|32px]] [[File:Beetroots Age 1 JE2.png|32px]] [[File:Beetroots Age 2 JE2.png|32px]] [[File:Beetroots Age 3 JE2.png|32px]]{{verify|Correct models?}} The textures of beetroot crops have been changed.
|Beetroot seeds are now [[trading|sold]] by the new [[wandering trader]]s.}}
{{History||1.11.0|snap=beta 1.11.0.1|Beetroot seeds can now be used to fill the [[composter]].
|Beetroot seeds can now be found in [[snowy tundra]] [[village]] house [[chest]]s.}}
{{History||1.14.0|snap=beta 1.14.0.1|[[Bee]]s can now pollinate beetroot crops.}}
{{History||?|[[File:Beetroots Age 0 BE.png|32px]] [[File:Beetroots Age 1 BE.png|32px]] [[File:Beetroots Age 2 BE.png|32px]] [[File:Beetroots Age 3 BE.png|32px]] Potato crop planes use a mapping that results in very unnatural mirroring when viewed from certain angles, such as northwest.<ref>{{bug|MCPE-146936}}</ref>}}
{{History|console}}
{{History||xbox=TU43|xbone=CU33|ps=1.36|wiiu=Patch 13|[[File:Beetroot Seeds JE1 BE1.png|32px]] Added beetroot seeds.
|[[File:Beetroots Age 0 JE1 BE1.png|32px]] [[File:Beetroots Age 1 JE1 BE1.png|32px]] [[File:Beetroots Age 2 JE1 BE1.png|32px]] [[File:Beetroots Age 3 JE1 BE1.png|32px]]{{verify|Correct models?}} Added beetroot crops.}}
{{History||xbox=none|xbone=none|ps=1.90|wiiu=none|switch=none|[[File:Beetroot Seeds JE2 BE2.png|32px]] The texture of beetroot seeds has been changed.
|[[File:Beetroots Age 0 JE2.png|32px]] [[File:Beetroots Age 1 JE2.png|32px]] [[File:Beetroots Age 2 JE2.png|32px]] [[File:Beetroots Age 3 JE2.png|32px]]{{verify|Correct models?}} The textures of beetroot crops have been changed.}}
{{History|New 3DS}}
{{History||0.1.0|[[File:Beetroot Seeds JE1 BE1.png|32px]] Added beetroot seeds.
|[[File:Beetroots Age 0 JE1 BE1.png|32px]] [[File:Beetroots Age 1 JE1 BE1.png|32px]] [[File:Beetroots Age 2 JE1 BE1.png|32px]] [[File:Beetroots Age 3 JE1 BE1.png|32px]]{{verify|Correct models?}} Added beetroot crops.}}
{{History|foot}}
== Issues ==
{{issue list}}
== Gallery ==
<gallery>
Beetrootstwitpic.png|The first image released of beetroot seeds.
Village Wheat Beetroot Farm.png|Beetroots generated in a [[village]].
File:Beetroot farm.png|A beetroot garden.
</gallery>
== References ==
<references />
{{Blocks|vegetation}}
{{Items}}
[[Category:Plants]]
[[Category:Food]]
[[Category:Generated structure blocks]]
[[Category:Non-solid blocks]]
[[cs:Semínka červené řepy]]
[[es:Semillas de remolacha]]
[[fr:Graines de betterave]]
[[it:Semi di barbabietola]]
[[ja:ビートルートの種]]
[[ko:비트 씨앗]]
[[nl:Bietenzaden]]
[[pl:Nasiona buraka]]
[[pt:Sementes de beterraba]]
[[ru:Семена свёклы]]
[[th:เมล็ดบีตรูท]]
[[zh:甜菜种子]]</li></ul> | 13w36a | Items renamed using an anvil now display their name when looked at up close. | |||
| 13w41a | Maps placed in an item frame now cover the whole block face, allowing seamless tiling of adjacent maps. This makes undiscovered areas of maps invisible. | ||||
| ? | |||||
1.8{{Extension DPL}}<ul><li>[[Melon Slice|Melon Slice]]<br/>{{Dungeons hatnote|type=consumable|Melon}}
{{Item
| title = Melon Slice
|typeimage=Melon Slice.png
| renewable = Yes
| heals = {{hunger|2}}
| stackable = Yes (64)
}}
A '''melon slice'''{{efn|Known as '''Melon Slice''' {{in|java}} and '''Melon''' {{in|bedrock}}.}} is a [[food]] item that can be eaten by the [[player]].
== Obtaining ==
=== Block loot ===
{{see also|Tutorials/Pumpkin and melon farming|title1 = Pumpkin and melon farming}}
Melon slices can be obtained by breaking (harvesting) [[melon]]s using any [[tool]] or by hand. [[Axe]]s, followed by [[sword]]s, are the fastest tools for harvesting melons. A melon drops 3–7 melon slices, when broken; by hand, using a [[tool]], or after being broken by the movement of a [[piston]], with an average of 4.64 slices per melon.
Breaking a melon with a tool enchanted with [[Fortune]] increases the potential number of drops by 1 slice per level, up to a maximum of 9 slices.
== Usage ==
=== Food ===
{{see also|Tutorials/Hunger management|title1=Hunger management}}
To eat a melon slice, press and hold {{control|use}} while it is selected in the hotbar. Eating one restores {{hunger|2}} [[hunger]] and 1.2 hunger
[[Hunger#Mechanics|saturation]].
=== Crafting ingredient ===
{{crafting usage}}
=== Composting ===
Placing a melon slice into a [[composter]] has a 50% chance of raising the compost level by 1.
==Sounds==
{{Sound table/Entity/Food}}
== Data values ==
=== ID ===
{{edition|java}}:
{{ID table
|edition=java
|showforms=y
|generatetranslationkeys=y
|displayname=Melon Slice
|spritetype=item
|nameid=melon_slice
|form=item
|foot=1}}
{{edition|bedrock}}:
{{ID table
|edition=bedrock
|showaliasids=y
|shownumericids=y
|showforms=y
|notshowbeitemforms=y
|generatetranslationkeys=y
|spritename=melon-slice
|displayname=Melon
|spritetype=item
|nameid=melon_slice
|aliasid=melon
|id=272
|form=item
|translationkey=item.melon.name
|foot=1}}
== Advancements ==
{{load advancements|Husbandry;A Balanced Diet}}
== History ==
{{History|java beta}}
{{History||1.8|snap=Pre-release|[[File:Melon Slice JE1 BE1.png|32px]] Added melons.}}
{{History|java}}
{{History||1.0.0|snap=Beta 1.9 Prerelease 4|Melons are now used in the [[crafting]] recipe of [[glistering melon]]s.}}
{{History|||snap=Beta 1.9 Prerelease 5|Melons once again drop the correct number of slices.}}
{{History||1.3.1|snap=12w21a|Melons can now be [[trading|bought]] from farmer [[villager]]s, at 5–8 melon slices for 1 [[emerald]].}}
{{History||1.7.2|snap=13w37a|Block ID 105, [[melon stem]], has been removed from the {{cmd|give}} [[commands|command]].}}
{{History||1.8|snap=14w02a|[[Villager]]s no longer [[trading|sell]] melons. They now buy [[melon]]s instead.}}
{{History||1.13|snap=17w47a|Prior to [[1.13/Flattening|''The Flattening'']], this [[item]]'s numeral ID was 360.}}
{{History|||snap=18w20b|"Melon" has been renamed to "Melon Slice."
|The ID of melon slices has been changed from <code>melon</code> to <code>melon_slice</code>.}}
{{History||1.14|snap=18w43a|[[File:Melon Slice JE2 BE2.png|32px]] The texture of melon slices has been changed.}}
{{History|||snap=19w03a|Placing a melon slice into the new [[composter]] has a 20% chance of raising the compost level by 1.}}
{{History|||snap=19w05a|Melon slices now have a 50% chance of increasing the compost level in a composter by 1.}}
{{History|pocket alpha}}
{{History||v0.5.0|[[File:Melon Slice JE1 BE1.png|32px]] Added melons.
|Melons restore {{health|2}} each, rather than {{hunger|2}}.}}
{{History||v0.12.1|snap=?|Added Melon slice to the Creative inventory.}}
{{History|||snap=build 1|Melons now restores [[hunger]] instead of [[health]].
|Melons can no longer be obtained from [[nether reactor]]s.}}
{{History|pocket}}
{{History||1.1.0|snap=alpha 1.1.0.3|[[Breaking]] a [[melon]] with [[shears]] now always yields 9 melons.}}
{{History|bedrock}}
{{History||1.10.0|snap=beta 1.10.0.3|[[File:Melon Slice JE2 BE2.png|32px]] The texture of melons has been changed.}}
{{History||1.11.0|snap=beta 1.11.0.1|Melons can now be used to fill up [[composter]]s.}}
{{History|||snap=beta 1.11.0.4|Melons can now be [[trading|sold]] to farmer [[villager]]s.}}
{{History||1.16.0|snap=beta 1.16.0.57|[[Trading]] has been changed, melon slices can no longer be sold to farmer villagers.}}
{{History||1.16.100|snap=beta 1.16.100.56|The ID of melon slices has been changed from <code>melon</code> to <code>melon_slice</code>.}}
{{History|console}}
{{History||xbox=TU5|xbone=CU1|ps=1.0|wiiu=Patch 1|[[File:Melon Slice JE1 BE1.png|32px]] Added melons.}}
{{History||xbox=none|xbone=none|ps=1.90|wiiu=none|switch=none|[[File:Melon Slice JE2 BE2.png|32px]] The texture of melons has been changed.}}
{{History|new 3ds}}
{{History||0.1.0|[[File:Melon Slice JE1 BE1.png|32px]] Added melons.}}
{{History|foot}}
== Issues ==
{{issue list}}
== See also ==
* [[Pumpkin]]
* [[Glistering Melon Slice]]
== Notes ==
{{fnlist}}
{{Items}}
[[Category:Plants]]
[[cs:Meloun]]
[[de:Melone]]
[[es:Rodaja de sandía]]
[[fr:Tranche de pastèque]]
[[hu:Dinnye Szelet]]
[[ko:수박]]
[[nl:Meloenschijf]]
[[pl:Arbuz]]
[[pt:Fatia de melancia]]
[[ru:Ломтик арбуза]]
[[zh:西瓜片]]
[[Category:Food]]
[[Category:Renewable resources]]</li><li>[[Debug fourj item|Debug fourj item]]<br/>{{DISPLAYTITLE:<samp>debug_fourj_item</samp>}}
{{exclusive|Legacy Console}}{{Unobtainable||edition=console|section=}}{{Item
| image = Barrier (held) JE1 BE1.png
| renewable = No
| stackable = Yes (64)
| rarity = Common
| title = <samp>debug_fourj_item</samp>
}}
<samp>'''debug_fourj_item'''</samp> is an unobtainable item exclusive to the [[Legacy Console Edition]] and can only be obtained through modding the game. It has the texture of a [[barrier]], no "What's this?" hint and no display name.
==Obtaining==
The only way to obtain this item is via inventory editors and other external tools.
==Usage==
The purpose of this item is unknown, and it cannot be placed. Although the ID<ref name="r">[https://youtu.be/IscH0rUw_20 "マインクラフト WiiU 全面の木、偽バリアブロックのアイテムID公開"] - YouTube, March 26, 2019</ref> suggests that it was used for debugging and testing purposes.
==Data values==
===ID===
{{ID table|displayname=[No displayed name]
|showforms=y|form=item|nameid=debug_fourj_item|id=2255<ref group="note">Numerical IDs aren't supported on the Legacy Console Edition anymore.</ref><ref name="r"/>|shownumericids=y|translationkey=item.debug_fourj_item.name|generatetranslationkeys=y|foot=1}}
<references group="note" />
==History==
{{History|console}}
{{History||xbox=unknown|xbone=unknown|ps=unknown|wiiu=unknown|switch=unknown|[[File:Barrier (held) JE1 BE1.png|32px]] Added <samp>debug_fourj_item</samp>.}}
{{History|foot}}
== Gallery ==
<gallery>
Debug fourj item in inventory.png|<samp>debug_fourj_item</samp> as it appears in one's inventory
</gallery>
==See also==
*[[Debug Stick]]
==References==
<references />
{{Items}}
{{Unused features}}
[[Category:Articles missing historical information]]</li></ul> | 14w04a | Items and blocks displayed in the item frame now rotate 45 degrees when rotated instead of 90 degrees, and a comparator outputs a redstone signal depending on the rotation phase. | |||
| 14w10a | Multiple item frames can no longer be placed on the same block face. | ||||
1.9{{Extension DPL}}<ul><li>[[Milk Bucket|Milk Bucket]]<br/>{{Item
| title=Milk Bucket
| image = Milk Bucket.png
| renewable = Yes
| effects = Clears all
| stackable = No
}}
A '''milk bucket'''{{fn|Known as '''Milk Bucket''' {{in|java}} and '''Milk''' {{in|bedrock}}.}} is a [[drink]] obtained from {{Control|use|text=using}} a [[bucket]] on [[cow]]s, [[mooshroom]]s and [[goat]]s that can be consumed to clear all [[Effect|effects]].
== Obtaining ==
=== Harvesting ===
Milk buckets can be obtained from [[cow]]s, [[mooshroom]]s, and [[goat]]s by pressing {{control|use}} while looking at them with an empty [[bucket]].
=== Mob loot ===
A milk bucket has a chance of dropping from a [[wandering trader]], if the trader is killed while holding it.{{only|java}}
== Usage ==
Holding {{control|use}} with a milk bucket starts the drinking sound and animation. {{IN|java}}, the animation is shown only in first-person camera mode.
When consumed, milk immediately removes all status [[effect]]s from the [[player]]. [[Fire]] is not a status effect; therefore, drinking milk doesn't extinguish a burning player.
The benefits of area status effects granted by [[beacon]]s and [[Conduit Power|conduit power]] are restored almost immediately in Bedrock Edition and after a few seconds in ''Java Edition''.
=== Crafting ingredient ===
{{crafting usage|Milk Bucket}}
== Sounds ==
{{el|je}}:
{{Sound table
|sound=Drink.ogg
|subtitle=Sipping
|source=player
|description=While a player is drinking milk
|id=entity.generic.drink
|translationkey=subtitles.entity.generic.drink
|volume=0.5
|pitch=0.9-1.0
|distance=16}}
{{Sound table
|sound=Cow milk1.ogg
|sound2=Cow milk2.ogg
|sound3=Cow milk3.ogg
|source=player
|subtitle=Cow gets milked
|description=When a cow is milked
|id=entity.cow.milk
|translationkey=subtitles.entity.cow.milk
|volume=1.0
|pitch=1.0
|distance=16}}
{{Sound table
|sound=Mooshroom milk1.ogg
|sound2=Mooshroom milk2.ogg
|sound3=Mooshroom milk3.ogg
|subtitle=Goat gets milked
|description=When a regular goat is milked
|source=neutral
|id=entity.goat.milk
|translationkey=subtitles.entity.goat.milk
|volume=1.0
|pitch=1.0
|distance=16}}
{{Sound table
|sound=Goat screaming milk1.ogg
|sound2=Goat screaming milk2.ogg
|sound3=Goat screaming milk3.ogg
|sound4=Goat screaming milk4.ogg
|sound5=Goat screaming milk5.ogg
|subtitle=Goat gets milked
|description=When a screaming goat is milked
|source=neutral
|id=entity.goat.screaming.milk
|translationkey=subtitles.entity.goat.milk
|volume=1.0
|pitch=1.0
|distance=16}}
{{Sound table
|sound=Wandering trader drink milk1.ogg
|sound2=Wandering trader drink milk2.ogg
|sound3=Wandering trader drink milk3.ogg
|sound4=Wandering trader drink milk4.ogg
|sound5=Wandering trader drink milk5.ogg
|subtitle=Wandering Trader drinks milk
|source=neutral
|description=While a wandering trader is drinking milk to become visible during daytime
|id=entity.wandering_trader.drink_milk
|translationkey=subtitles.entity.wandering_trader.drink_milk
|volume=0.5
|pitch=0.9-1.0
|distance=16
|foot=1}}
{{el|be}}:
{{Sound table
|type=bedrock
|sound=Drink.ogg
|source=player
|description=While a player is drinking milk
|id=random.drink
|volume=0.35
|pitch=0.9-1.1}}
{{Sound table
|sound=Cow milk1.ogg
|sound2=Cow milk2.ogg
|sound3=Cow milk3.ogg
|source=neutral
|description=When a cow is milked
|id=mob.cow.milk
|volume=1.0
|pitch=1.0}}
{{Sound table
|sound=Mooshroom milk1.ogg
|sound2=Mooshroom milk2.ogg
|sound3=Mooshroom milk3.ogg
|description=When a regular goat is milked
|source=neutral
|id=mob.mooshroom.suspicious_milk
|volume=1.0
|pitch=1.0/0.9/1.1}}
{{Sound table
|sound=Goat screaming milk1.ogg
|sound2=Goat screaming milk2.ogg
|sound3=Goat screaming milk3.ogg
|sound4=Goat screaming milk4.ogg
|sound5=Goat screaming milk5.ogg
|description=When a screaming goat is milked
|source=neutral
|id=mob.goat.milk.screamer
|volume=1.0
|pitch=1.0}}
{{Sound table
|sound=Wandering trader drink milk1.ogg
|sound2=Wandering trader drink milk2.ogg
|sound3=Wandering trader drink milk3.ogg
|sound4=Wandering trader drink milk4.ogg
|sound5=Wandering trader drink milk5.ogg
|source=neutral
|description=While a wandering trader is drinking milk to become visible during daytime
|id=mob.wanderingtrader.drink_milk
|volume=1.0
|pitch=0.8-1.2
|foot=1}}
== Data values ==
=== ID ===
{{edition|java}}:
{{ID table
|edition=java
|showforms=y
|generatetranslationkeys=y
|displayname=Milk Bucket
|spritetype=item
|nameid=milk_bucket
|form=item
|foot=1}}
{{edition|bedrock}}:
{{ID table
|edition=bedrock
|showaliasids=y
|shownumericids=y
|showforms=y
|notshowbeitemforms=y
|generatetranslationkeys=y
|displayname=Milk
|spritetype=item
|nameid=milk_bucket
|aliasid=bucket / 1
|id=361
|form=item
|translationkey=item.milk.name
|foot=1}}
== Achievements ==
{{load achievements|The Lie}}
== Advancements ==
{{Load advancements|Husbandry}}
== Video ==
<div style="text-align:center">{{yt|eyxea_d0b3s}}</div>
== History ==
{{History|java alpha}}
{{History||v1.0.8|[[File:Milk Bucket JE1 BE1.png|32px]] Milk has been introduced, but it has no purpose and is obtainable only through inventory editing.}}
{{History||v1.0.11|Milk can now be obtained by {{control|use|text=milking}} a [[cow]] with a [[bucket]]. However, it is not yet drinkable.}}
{{History||v1.0.17|Milk buckets can now be emptied.}}
{{History|java beta}}
{{History||1.2|Milk has been incorporated into the [[crafting]] recipe of [[cake]].}}
{{History||1.2_01|[[Squid]] can now be milked by right-clicking on their mouth if part of their body was exposed to [[air]] or if they were not touching another [[block]]. An easy way to accomplish this is to pull a squid with a [[fishing rod]] away from other blocks and then milk it.}}
{{History||1.3_01|Squid milking has been removed.}}
{{History|java}}
{{History||1.0.0|snap=Beta 1.9 Prerelease|Milk can now be obtained by milking [[mooshroom]]s.}}
{{History|||snap=Beta 1.9 Prerelease 2|Milk has been made drinkable.
|According to a tweet by [[Jeb]] on September 30th 2011, milk was made a cure for all status effects.<ref>{{tweet|jeb_|119842906528944129|@Nexusdog_UK I haven't! In beta 1.9 pre2 milk works like a clear-everything drink|September 30, 2011}}</ref>
|Milk is no longer emptiable.}}
{{History||1.13|snap=17w47a|Prior to [[1.13/Flattening|''The Flattening'']], this [[item]]'s numeral ID was 335.}}
{{History|||snap=18w20a|"Milk" has been renamed to "Milk Bucket".}}
{{History||1.14|snap=18w43a|[[File:Milk Bucket JE2 BE2.png|32px]] The texture of milk buckets has been changed.}}
{{History||1.14|snap=19w06a|[[Wandering trader]]s now drink from milk buckets at dawn, and have a change to drop them.}}
{{History||1.17|snap=21w13a|Milk can now be obtained by milking [[goat]]s.}}
{{History|upcoming java}}
{{History||Villager Trade Rebalance<br>(Experimental)|link=Java Edition 1.20.2|snap=23w31a|Wander traders now have a chance to [[trading|buy]] a milk bucket from the player.}}
{{History|pocket alpha}}
{{History||v0.7.0|[[File:Milk Bucket JE1 BE1.png|32px]] Added milk buckets.
|Milk buckets are not yet drinkable.}}
{{History||v0.11.0|snap=build 4|Drinking milk now removes [[status effects]].
|Added milk buckets to the Creative inventory.{{verify|type=update}}{{info needed}}<!---same update?--->}}
{{History|bedrock}}
{{History||1.4.0|snap=beta 1.2.14.2|Moved all bucket items, including milk, from the Equipment tab to the Items tab in the [[Creative inventory]].{{verify|type=update}}{{info needed}}<!---please check snapshots, only 1 major release version was checked each--->}}
{{History||1.10.0|snap=beta 1.10.0.3|[[File:Milk Bucket JE2 BE2.png|32px]] The texture of milk buckets has been changed.}}
{{History||1.16.100|snap=beta 1.16.100.56|The ID of milk has been changed from <code>bucket/1</code> to <code>milk_bucket</code>.}}
{{History||1.16.200|snap=beta 1.16.200.52|Milk can now be obtained by milking [[goat]]s.}}
{{History|console}}
{{History||xbox=TU1|xbone=CU1|ps=1.0|wiiu=Patch 1|switch=1.0.1|[[File:Milk Bucket JE1 BE1.png|32px]] Added milk buckets.}}
{{History|Ps4}}
{{History||1.90|[[File:Milk Bucket JE2 BE2.png|32px]] The texture of milk buckets has been changed.}}
{{History|New 3DS}}
{{History||0.1.0|[[File:Milk Bucket JE1 BE1.png|32px]] Added milk buckets.}}
{{History|foot}}
== Issues ==
{{issue list}}
== See also ==
*[[Water Bucket]]
*[[Lava]]
*[[Food]]
*[[Cake]]
*[[Honey Bottle]] (alternative to remove poison effect)
*[[Medicine]]
== Notes ==
{{fnlist}}
== References ==
{{reflist}}
== External Links ==
*[https://www.minecraft.net/en-us/article/taking-inventory--milk-bucket Taking Inventory: Milk Bucket] – Minecraft.net on October 8, 2019
{{Items}}
[[Category:Food]]
[[Category:Renewable resources]]
[[Category:Tools]]
[[cs:Mléko]]
[[de:Milcheimer]]
[[es:Cubo con leche]]
[[fr:Seau de lait]]
[[hu:Tej]]
[[it:Secchio di latte]]
[[ja:ミルク入りバケツ]]
[[ko:우유 양동이]]
[[nl:Emmer melk]]
[[pl:Wiadro mleka]]
[[pt:Balde de leite]]
[[ru:Ведро с молоком]]
[[th:ถังนม]]
[[uk:Відро молока]]
[[zh:奶桶]]</li><li>[[Emerald|Emerald]]<br/>{{About|the item|the currency in ''Minecraft Dungeons''|MCD:Emerald|the skin|MCD:Emerald (skin)|the ore|Emerald Ore|the mineral block|Block of Emerald}}
{{Item
| image = Emerald.png
| renewable = Yes
| stackable = Yes (64)
| rarity = Common}}
'''Emeralds''' are rare minerals that are used primarily as the currency for [[trading]] with [[villager]]s and [[wandering trader]]s. Naturally-occurring emeralds are rarer than [[diamond]]s.
== Obtaining ==
=== Trading (how emerald is renewable) ===
{{main|Trading}}
Emeralds can be obtained by trading with [[villager]]s, since they are the currency that villagers use for trading. Villagers either buy or sell specific goods for emeralds. Some villagers trade stuff that is renewable with emerald.
=== Mining ===
[[Emerald ore]] drops one emerald when mined using an iron or better [[pickaxe]]. If the pickaxe is enchanted with [[Fortune]], it may drop an extra emerald per level of Fortune, up to a maximum of 4 emeralds with Fortune III. If the ore is mined using a pickaxe enchanted with [[Silk Touch]], it drops itself in ore form instead of an emerald.
=== Crafting ===
{{Crafting
|Block of Emerald
|Output= Emerald,9
|type= Material
}}
=== Smelting ===
{{Smelting
|Emerald Ore; Deepslate Emerald Ore
|Emerald
|1
}}
=== Natural generation ===
{{see also|Emerald Ore#Natural generation}}
Emeralds can generate in [[chest]]s in some [[village]] houses or other generated [[Generated structures|structures]].
{{needs update|inaccurate=1|section=1}}
{{LootChestItem|emerald}}
=== Drops ===
[[Vindicator]]s and [[evoker]]s drop 0–1 emeralds upon death. [[Looting]] increases the maximum emerald drop by one per level, for a maximum of 4 emeralds with Looting III.
[[Fox]]es that are holding emeralds also have a chance of 100% to drop the emerald they are holding upon death. Alternatively, the player can drop a food item to entice the fox to drop the emerald without killing it.
{{IN|bedrock}}, vindicators and [[pillager]]s spawned from [[raids]] can drop 0–1 emeralds. Depending on difficulty, vindicators and pillagers spawned from raids also have a chance of dropping additional emeralds. There is a 65% chance of dropping on easy and normal, and an 80% chance of dropping on hard. If this additional drop condition is met, different emerald counts can drop with different chances. There is a {{frac|10|39}} chance to drop an additional 0–1 emeralds, a {{frac|5|39}} chance to drop an additional 2–3, and a {{frac|2|39}} chance to drop an additional 4–5.
{{IN|bedrock}}, with Looting III, it is possible for a vindicator in a raid to drop up to 16 emeralds upon death (vindicator drops + raid drops + an additional drop<!-- emerald from 2/39 chance-->).
== Usage ==
=== Trading ===
{{main|Trading}}
Emeralds are primarily used as currency for [[trading]] with villagers and wandering traders. Trading is typically a faster way to obtain emeralds than by mining, as an emerald ore is rarer than a diamond ore.
=== Crafting ingredient ===
{{crafting usage}}
===Beacons===
Emeralds can be used to select powers from a [[beacon]]. The player must select one of the available powers and then insert an emerald into the item slot.
An emerald can be substituted for an [[iron ingot]], a [[gold ingot]], a [[diamond]] or a [[netherite ingot]] in a beacon.
=== Smithing ingredient ===
{{Smithing
|head=1
|ingredients=Any Armor Trim +<br/>Any Armor Piece + <br/>Emerald
|Any Armor Trim Smithing Template
|Netherite Chestplate
|Emerald
|Emerald Trim Netherite Chestplate
|showdescription=1
|description = All armor types can be used in this recipe,<br/>a netherite chestplate is shown as an example.
|tail=1
}}
;Trim color palette
The following color palette is shown on the designs on trimmed armor:
*{{TrimPalette|emerald}}
== Achievements ==
{{load achievements|The Haggler;Buy Low;Master Trader}}
== Advancements ==
{{load advancements|What a Deal!}}
== Data values ==
=== ID ===
{{edition|java}}:
{{ID table
|edition=java
|showitemtags=y
|showforms=y
|generatetranslationkeys=y
|displayname=Emerald
|spritetype=item
|nameid=emerald
|itemtags=beacon_payment_items
|form=item
|foot=1}}
{{edition|bedrock}}:
{{ID table
|edition=bedrock
|shownumericids=y
|showforms=y
|notshowbeitemforms=y
|generatetranslationkeys=y
|displayname=Emerald
|spritetype=item
|nameid=emerald
|id=512
|form=item
|foot=1}}
== History ==
{{History|java indev}}
{{History||0.31|snap=20100129|Added [[diamond]]s, referred to as emeralds in the code.}}
{{History|java}}
{{History||May 21, 2012|link={{tweet|jeb_|204619936616808451}}|[[File:Ruby pJE20120521.png|32px]] [[Jens Bergensten|Jeb]] released a screenshot of himself testing the [[trading]] system. At this time, what would become emeralds were [[History_of_textures/Unused_textures#Ruby|rubies]].<ref>http://www.minecraftforum.net/topic/1621716-15-new-blocksitems/#entry19977082</ref>}}
{{History||1.3.1|snap=12w21a|[[File:Emerald JE1 BE1.png|32px]] Added emeralds and [[emerald ore]].
|Emeralds can be [[trading|traded]] with [[villager]]s in exchange for different [[item]]s.
|Added [[desert temple]]s, with a hidden [[chest]] room and loot containing emeralds.
|[[File:Ruby JE1 BE1.png|32px]] The texture of [[History_of_textures/Unused_textures#Ruby|rubies]] can be found in the (at this time unused) file {{cd|items.png}}.<ref name="en_US 12w21">Snapshot 12w21a/b ''lang/en_US.lang'': '''item.ruby.name=Ruby'''</ref>}}
{{History|||snap=12w22a|[[Block of emerald]] has now been added, which is [[crafting|crafted]] from nine emeralds and can be placed as a decorative [[block]].
|Added [[jungle temple]]s, which contain loot [[chest]]s with emeralds.}}
{{History||1.4.2|snap=12w32a|As [[zombie villager]]s can now spawn and be cured, emeralds can now still be obtained in [[trading|trades]] even if [[generated structures]] are disabled.}}
{{history||1.9|snap=15w31a|Emeralds now generate in [[end city]] ship [[chest]]s.}}
{{history|||snap=15w43a|Emeralds now generate in [[igloo]] basement chests.}}
{{history|||snap=15w44a|The average yield of emeralds in [[desert temple]] chests has now been increased.}}
{{History||1.11|snap=16w39a|Added [[vindicator]]s and [[evoker]]s, which drop emeralds if killed by a player.}}
{{History||1.13|snap=17w47a|Prior to [[1.13/Flattening|''The Flattening'']], this [[item]]'s numeral ID was 388.}}
{{History|||snap=18w09a|Emeralds can now generate in the loot [[chest]]s of [[underwater ruins]].}}
{{History|||snap=18w10a|Emeralds can now generate in [[buried treasure]] chests.}}
{{History|||snap=18w11a|Emeralds can now generate in the chests of [[shipwreck]]s.}}
{{History||1.14|snap=18w43a|[[File:Emerald JE2 BE2.png|32px]] The texture of emeralds has now been changed.
|Added [[pillager]]s, which can [[drops|drop]] emeralds.}}
{{History|||snap=18w46a|Pillagers no longer drop emeralds.}}
{{History|||snap=18w48a|Emeralds now generate in chests in [[village]] tanneries, fisher cottages and plains village houses.}}
{{History|||snap=18w49a|Emeralds now generate in chests in [[village]] shepherd houses, mason houses, butcher shops, and savanna and snowy village houses.}}
{{History|||snap=18w50a|Emeralds now generate in chests in [[village]] fletcher houses, temples, and desert and taiga village houses.}}
{{History|||snap=19w07a|Added [[fox]]es, which sometimes spawn with emeralds in their mouths.}}
{{History|||snap=19w08a|[[File:Emerald JE3 BE3.png|32px]] The texture of emeralds has now been changed, once again and it looks smaller.}}
{{History||1.17|snap=21w13a|The unused [[History_of_textures/Unused_textures#Ruby|rubies]] texture was removed.}}
{{History||1.20<br>(Experimental)|link=1.19.4|snap=23w04a|Emeralds can now be used as an armor trim material.}}
{{History|||snap=23w07a|Emeralds now drop when brushing [[suspicious sand]] in [[desert pyramid]]s or [[desert well]]s.}}
{{History||1.20|snap=23w12a|The probability for the emerald to generate in the [[suspicious sand]] in [[desert temple]] and in [[desert well]] has been changed from 1/7 to 1/8.|Emerald can now be found in [[suspicious gravel]] and [[suspicious sand]] in cold and warm [[ocean ruins]] and in [[trail ruins]].}}
{{History|||snap=23w16a|Emerald no longer generates in [[suspicious sand]] in [[trail ruins]].|Due to the split of the archaeological loot tables for the suspicious gravel within the [[trail ruins]]; emerald now is in the common loot.}}
{{History|pocket alpha}}
{{History||v0.9.0|snap=build 1|[[File:Emerald JE1 BE1.png|32px]] Added emeralds.}}
{{History|||snap=build 5|Emeralds can now be used to craft [[blocks of emerald]].}}
{{History||v0.13.0|snap=build 1|Emeralds can now be found inside [[desert temple]] [[chest]]s.}}
{{History||v0.15.0|snap=build 1|Added [[jungle temple]]s, which contain loot chests with emeralds.}}
{{History||v0.16.0|snap=build 1|Emeralds can now be used to power [[beacon]]s.}}
{{History|pocket}}
{{History||1.0.0|snap=alpha 0.17.0.1|Emeralds can now be found in [[end city]] ship [[chest]]s.
|Emeralds can now be found in [[igloo]] basement chests.}}
{{History||1.0.4|snap=alpha 1.0.4.0|Emeralds are now used as "currency" for [[villager]] [[trading]].}}
{{History||1.1.0|snap=alpha 1.1.0.0|Added [[evoker]]s and [[vindicator]]s, which [[drops|drop]] emeralds when killed.}}
{{History|bedrock}}
{{History||1.4.0|snap=beta 1.2.14.2|Emeralds can now be found in some [[shipwreck]] [[chest]]s.}}
{{History|||snap=beta 1.2.20.1|Emeralds can now be found inside [[underwater ruins]] chests.}}
{{History||1.10.0|snap=beta 1.10.0.3|Emeralds can now be used to [[trading|buy]] items from [[wandering trader]]s.
|Emeralds can now be found in [[plains]] [[village]] house and tannery [[chest]]s.
|[[File:Emerald JE2 BE2.png|32px]] The texture of emeralds has now been changed.}}
{{History||1.11.0|snap=beta 1.11.0.1|Emeralds can now be found in [[village]] [[chest]]s other than [[plains]].}}
{{History|||snap=beta 1.11.0.4|[[Vindicator]]s and [[pillager]]s that spawn from [[raid]]s can now [[drops|drop]] bonus emeralds.}}
{{History|||snap=beta 1.11.0.5|[[File:Emerald JE3 BE3.png|32px]] The texture of emeralds has now been changed, once again.}}
{{History||1.13.0|snap=beta 1.13.0.1|Added [[fox]]es, which can [[drops|drop]] emeralds.}}
{{History||Next Major Update<br>(Experimental)|link=Bedrock Edition 1.19.70|snap=beta 1.19.70.23|Emeralds now drop when brushing [[suspicious sand]] in [[desert pyramid]]s or [[desert well]]s.}}
{{History|||snap=beta 1.19.80.21|Emeralds can now be used as an armor trim material.}}
{{History|console}}
{{History||xbox=TU14|xbone=CU1|ps=1.04|wiiu=Patch 1|switch=1.0.1|[[File:Emerald JE1 BE1.png|32px]] Added emeralds.}}
{{History|Ps4}}
{{History||1.90|[[File:Emerald JE2 BE2.png|32px]] The texture of emeralds has now been changed.}}
{{History|new3DS}}
{{History||0.1.0|[[File:Emerald JE1 BE1.png|32px]] Added emeralds.}}
{{History|foot}}
== Issues ==
{{issue list}}
== Gallery ==
<gallery>
Villager trading preview.png|The first image of the trading system released by [[Jeb]]. What would become emeralds can be seen in the [[inventory]] space.
Emerald Ore 12w21a.png|A wall of [[emerald ore]] utilizing a previous texture in snapshot [[12w21a]].
Room of Emeralds.png|All forms of emeralds in one photo: emerald (in the form of [[emerald block|block]], [[emerald ore|ore]] and the emerald itself).
</gallery>
==Trivia==
*The [[History_of_textures/Unused_textures#Ruby|ruby]] was going to be the [[villager]] currency but was changed to emeralds before the update's release.
== References ==
{{Reflist}}
{{Items}}
[[Category:Renewable resources]]
[[cs:Smaragd]]
[[de:Smaragd]]
[[es:Esmeralda]]
[[fr:Émeraude]]
[[hu:Smaragd]]
[[it:Smeraldo]]
[[ja:エメラルド]]
[[ko:에메랄드]]
[[nl:Smaragd]]
[[pl:Szmaragd]]
[[pt:Esmeralda]]
[[ru:Изумруд]]
[[th:มรกต]]
[[tr:Zümrüt]]
[[uk:Смарагд]]
[[zh:绿宝石]]</li></ul> | 15w41a | An item frame now generates in the treasure room of end ships, above the shulker that guards the treasure. It holds elytra. | |||
| 15w49a | Item frames are no longer destroyed by lightning bolts. | ||||
| 15w50a | Added sounds to item frames: entity.itemframe.add_item, entity.itemframe.break, entity.itemframe.place, entity.itemframe.remove_item, and entity.itemframe.rotate_item. | ||||
1.11{{Extension DPL}}<ul><li>[[Honeycomb|Honeycomb]]<br/>{{distinguish|Honeycomb Block}}
{{Item
| image = Honeycomb.png
| renewable = Yes
| stackable = Yes (64)
}}
'''Honeycombs''' are [[item]]s obtained from [[bee nest]]s and beehives.
== Obtaining ==
{{See also|Tutorials/Honey farming}}
When a bee nest or beehive at {{cd|honey_level}} 5 is [[shear]]ed, it drops 3 honeycombs and angers any [[bee]]s inside, causing them to attack. Having a lit [[campfire]] or lighting a [[fire]] underneath the nest or hive prevents the bees from becoming hostile.
A [[dispenser]] with [[shears]] inside can be used to shear the nest or hive without angering the bees. A honeycomb item drops out after using the shears.
== Usage ==
=== Signs ===
{{Control|Using}} a honeycomb on a [[sign]] or a hanging sign prevents the sign from being edited.
=== Waxing ===
{{Control|Using}} a honeycomb on a [[block of copper]] changes the block into its waxed variant, preventing oxidation of the copper.
=== Crafting ingredient ===
{{crafting usage}}
== Sounds ==
{{edition|java}}:
{{Sound table
|sound=Beehive shear.ogg
|subtitle=Shears scrape
|source=neutral
|description=When honeycombs are collected from a beehive
|id=block.beehive.shear
|translationkey=subtitles.block.beehive.shear
|volume=0.8
|pitch=1.0/0.9/0.8
|distance=16}}
{{Sound table
|sound=Wax on1.ogg
|sound2=Wax on2.ogg
|sound3=Wax on3.ogg
|subtitle=Wax on
|source=block
|description=When a honeycomb waxes something
|id=item.honeycomb.wax_on
|translationkey=subtitles.item.honeycomb.wax_on
|volume=1.0
|pitch=1.0/0.9/1.1
|distance=16
|foot=1}}
{{edition|bedrock}}:
{{Sound table
|type=bedrock
|sound=Beehive shear.ogg
|source=block
|description=When honeycombs are collected from a beehive
|id=block.beehive.shear
|volume=0.8
|pitch=0.8-1.0}}
{{Sound table
|sound=Wax on1.ogg
|sound2=Wax on2.ogg
|sound3=Wax on3.ogg
|source=neutral
|description=When a honeycomb waxes something
|id=copper.wax.on
|volume=1.0
|pitch=0.8-1.2
|foot=1}}
== Data values ==
=== ID ===
{{edition|java}}:
{{ID table
|edition=java
|showforms=y
|generatetranslationkeys=y
|displayname=Honeycomb
|spritetype=item
|nameid=honeycomb
|form=item
|foot=1}}
{{edition|bedrock}}:
{{ID table
|edition=bedrock
|shownumericids=y
|showforms=y
|notshowbeitemforms=y
|generatetranslationkeys=y
|displayname=Honeycomb
|spritetype=item
|nameid=honeycomb
|id=591
|form=item
|foot=1}}
== Advancements ==
{{load advancements|Wax on;Wax off}}
== History ==
{{History|java}}
{{History||1.15|snap=19w34a|[[File:Honeycomb JE1.png|32px]] Added honeycombs.
|Honeycombs can be used to craft [[beehive]]s.}}
{{History|||snap=19w41a|Honeycombs can now be used to craft [[honeycomb block]]s.}}
{{History|||snap=Pre-release 3|[[File:Honeycomb texture change 1.15pre2 to 1.15pre3.gif|32px]] The texture file of honeycombs has been slightly changed. The color channel of transparent pixels are now filled to black. The in-game texture has not been changed.}}
{{History||1.17|snap=20w45a|Honeycomb can now be used to craft [[candle]]s and [[waxed copper]].}}
{{History|||snap=21w11a|Honeycomb can now be used to wax copper blocks by right clicking or dispensing honeycomb onto the block.}}
{{History|||snap=21w14a|Honeycomb can now be used to wax oxidized copper blocks.}}
{{History|||snap=21w19a|Honeycomb can no longer used to craft candles.}}
{{History|||snap=Pre-release 1|Honeycomb can once again used to craft candles.}}
{{History||1.20|snap=23w12a|[[Sign]]s and hanging signs can now be waxed with honeycomb to prevent them from being edited.}}
{{History|bedrock}}
{{History||1.14.0|snap=beta 1.14.0.1|[[File:Honeycomb BE1.png|32px]] Added honeycombs.}}
{{History|||snap=beta 1.14.0.4|[[File:Honeycomb BE2.png|32px]] The texture of honeycombs has been changed to match {{el|je}}'s.}}
{{History||Caves & Cliffs (experimental)|link=Bedrock Edition 1.17.0|snap=beta 1.16.210.57|Honeycomb can now be used to craft [[waxed copper]].
|Honeycomb can now be used to wax copper blocks by right clicking or dispensing honeycomb onto the block.}}
{{History||1.17.0|snap=beta 1.16.230.52|Honeycomb can now be used to wax oxidized copper blocks.}}
{{History||1.17.10|snap=beta 1.17.10.22|Honeycomb can now be used to craft [[candle]]s.}}
{{History||Next Major Update<br>(Experimental)|link=Bedrock Edition 1.19.80|snap=beta 1.19.80.22|[[Sign]]s and hanging signs can now be waxed with honeycomb to prevent them from being edited.}}
{{History|foot}}
== Issues ==
{{issue list}}
{{items}}
[[cs:Plástev medu]]
[[de:Honigwabe]]
[[es:Panal]]
[[fr:Rayon de miel]]
[[ja:ハニカム]]
[[ko:벌집 조각]]
[[pl:Plaster miodu]]
[[pt:Favo de mel]]
[[ru:Пчелиные соты]]
[[zh:蜜脾]]
[[Category:Renewable resources]]</li><li>[[Nether Wart|Nether Wart]]<br/><!--Please do not change "nether wart" to "Nether wart". According to style guide, block names should not be capitalized.-->
{{about|the fungus used for potions|the block found in crimson forests|Nether Wart Block}}{{Block
| group = Age 0
| 1-1 = Nether Wart Age 0.png
| 1-2 = Nether Wart Age 0 BE.png
| group2 = Age 1-2
| 2-1 = Nether Wart Age 1-2.png
| 2-2 = Nether Wart Age 1-2 BE.png
| group3 = Age 3
| 3-1 = Nether Wart Age 3.png
| 3-2 = Nether Wart Age 3 BE.png
|image= Nether Wart (item).png
|transparent=Yes
|light=No
|tool=any
|renewable=Yes
|stackable=Yes (64)
|flammable=No
|lavasusceptible=No
}}
'''Nether wart''' is a fungus harvested from nether wart crops and is used to plant them, as well as being vital in the creation of [[potions]].
'''Nether wart crops''' are found in [[Nether Fortress/Structure|nether fortresses]] and [[Bastion Remnant|bastions]] and is used to grow nether wart in [[Soul Sand|soul sand]].
== Obtaining ==
=== Breaking ===
Nether wart can be mined instantly with any tool. A fully mature nether wart crop yields 2–4 nether wart. This is increased by one for each level of [[Fortune]], this allows for a maximum of 7 nether warts dropping from one crop. Less mature stages drop one nether wart, even with the Fortune enchantment.
=== Natural generation ===
Nether wart can generate in [[nether fortress]]es in [[soul sand]] gardens around stairwells. Nether wart can also generate in the courtyards of housing unit [[bastion remnant]]s. Due to only spawning in these specific structures, it's entirely possible for a nether fortress or bastion remnant to generate without nether wart (though they may still appear in the chests that generate in the fortress).
{| class="wikitable"
|+
!Location
!Description
!Image
|-
|{{anchor|Nether Fortress}}'''Nether Fortress'''
|Nether wart can be found growing near stairwells in small soul sand gardens.
|[[File:Nether wart garden.png|thumb|Nether wart growing in a nether fortress.]]
|-
|{{anchor|Bastion Remnant}}'''Bastion Remnant'''
|Nether wart can be found growing in the central courtyard of each of the sections of piglin housing unit bastions.
|[[File:Bastion Courtyard.png|thumb|Nether wart growing in a bastion remnant.]]
|}
<br>
=== Chest loot ===
{{LootChestItem|nether-wart}}
== Usage ==
=== Brewing ingredient ===
Nether wart's primary purpose is to [[brew]] the [[Potion|awkward potion]], the base for all potions, but optional for Weakness.
{{brewing
|showname=1
|Nether Wart
|Awkward Potion
|base=Water Bottle
}}
=== Crafting ingredient ===
{{crafting usage}}
=== Trading ===
Master-level cleric [[villager]]s buy 22 nether warts for an [[emerald]] as part of their trades.
=== Farming ===
{{main|Tutorials/Nether Wart farming}}
When planted on [[soul sand]], nether wart grows through four stages, though the middle two stages use the same texture (the hitbox of stage 3 is three pixels taller). {{IN|java}}, the exact age can be seen using the [[debug screen]], and the ages range from 0 to 3. Each random tick, nether wart has a 10% chance of growing one stage. At default random tick speed, each nether wart grows one age step approximately every {{convert|13653|ticks|minutes}} on average, and fully grows from planting to harvest every {{convert|40960|ticks|minutes}} on average. The growth rate is not affected by light or any other environmental factors. [[Bone meal]] cannot be used on the nether wart.
Nether wart can only be planted on [[soul sand]]. It cannot be planted on [[soul soil]]. It can grow in any [[dimension]].
Nether wart is ready to harvest when it reaches its fourth stage (age:3). Breaking a fully grown nether wart drops 2 to 4 nether wart, while an immature one drops a single nether wart. Using a tool enchanted with fortune increases the maximum number of nether wart dropped by 1 per level, for a maximum of 7 for a tool enchanted with [[Fortune|Fortune III]].
=== Composting ===
Placing a nether wart into a [[composter]] has a 30% chance of raising the compost level by 1.
== Sounds ==
{{Sound table/Block/Nether wart}}
== Data values ==
=== ID ===
{{edition|java}}:
{{ID table
|edition=java
|showforms=y
|generatetranslationkeys=y
|displayname=Nether Wart
|spritetype=block
|nameid=nether_wart
|translationkey=block.minecraft.nether_wart,item.minecraft.nether_wart
|foot=1}}
{{edition|bedrock}}:
{{ID table
|edition=bedrock
|firstcolumnname=Nether Wart
|shownumericids=y
|showforms=y
|generatetranslationkeys=y
|displayname=Block
|spritename=nether-wart
|spritetype=block
|nameid=nether_wart
|id=115
|form=block
|itemform=item.nether_wart}}
{{ID table
|displayname=Item
|spritename=nether-wart
|spritetype=item
|nameid=nether_wart
|id=294
|form=item
|foot=1}}
=== Block states ===
{{see also|Block states}}
{{/BS}}
== Advancements ==
{{load advancements|A Seedy Place}}
== History ==
{{History|java}}
{{History||1.0.0|snap=Beta 1.9 Prerelease|[[File:Nether Wart Age 0 JE1.png|32px]] [[File:Nether Wart Age 1-2 JE1.png|32px]] [[File:Nether Wart Age 3 JE1.png|32px]] [[File:Nether Wart (item) JE1.png|32px]] Added nether wart.}}
{{History|||snap=Beta 1.9 Prerelease 3|Nether wart can now be brewed in a [[water bottle]] to create an [[awkward potion]].}}
{{History||1.3.1|snap=12w27a|Nether wart can now grow outside of [[the Nether]].}}
{{History|||snap=1.3|[[File:Nether Wart (item) JE2 BE1.png|32px]] The item texture has been changed.}}
{{History||1.4.2|snap=12w36a|Nether wart can now be used to breed [[chicken]]s.}}
{{History||1.6.1|snap=13w18a|Nether wart is now found in the new [[chest]]s in [[nether fortress]]es.}}
{{History||1.8|snap=14w06a|[[File:Nether Wart Age 0 JE2.png|32px]] [[File:Nether Wart Age 1-2 JE2.png|32px]] [[File:Nether Wart Age 3 JE2.png|32px]] Nether wart crops are now a pixel higher, likely as an accidental result of model conversion. Previously they were offset one pixel downwards like the other crops (wheat, carrots potatoes) to match farmland, although in nether wart's case such a downwards offset hides some pixels of the texture inside of the soul sand.<ref>{{bug|MC-250679}}</ref>}}
{{History|||snap=14w10a|[[File:Missing Model JE2.png|32px]] [[File:Missing Model JE2.png|32px]] [[File:Missing Model JE2.png|32px]]<br>[[File:Missing Model (anisotropic filtering) JE2.png|32px]] [[File:Missing Model (anisotropic filtering) JE2.png|32px]] [[File:Missing Model (anisotropic filtering) JE2.png|32px]] Nether wart crops of all ages [[Missing model|no longer have a model]].}}
{{History|||snap=14w10b|[[File:Nether Wart Age 0 JE4.png|32px]] [[File:Nether Wart Age 1-2 JE4.png|32px]] [[File:Nether Wart Age 3 JE4.png|32px]] Nether wart crops now have models again.<ref>{{bug|MC-50276}}</ref> In addition, they are now offset downwards by one pixel once more, hiding the bottom row of pixels again.}}
{{History|||snap=14w25a|[[File:Nether Wart Age 0 JE5.png|32px]] [[File:Nether Wart Age 1-2 JE5.png|32px]] [[File:Nether Wart Age 3 JE5.png|32px]] Nether wart crops are now darker and subject to directional shading.}}
{{History|||snap=14w27a|[[File:Nether Wart Age 0 JE6.png|32px]] [[File:Nether Wart Age 1-2 JE6.png|32px]] [[File:Nether Wart Age 3 JE6.png|32px]] Nether wart crops are no longer subject to directional shading.}}
{{History|||snap=14w34d|Nether wart can no longer be used to breed [[chicken]]s.}}
{{History||1.9|snap=15w43a|The average yield of nether wart from [[nether fortress]] chests has now been slightly decreased.}}
{{History||1.10|snap=16w20a|Nether wart can now be used to [[crafting|craft]] the new [[red nether brick]] blocks and [[nether wart block]]s.}}
{{History||1.12|snap=17w18b|Placing a nether wart in soul sand now gives the player the "A Seedy Place" [[advancement]].{{verify}}}}
{{History||1.13|snap=17w47a|Prior to [[1.13/Flattening|''The Flattening'']], this block's numeral ID was 115, and the item's 372.}}
{{History||1.14|snap=18w43a|[[File:Nether Wart Age 0 JE7.png|32px]] [[File:Nether Wart Age 1-2 JE7.png|32px]] [[File:Nether Wart Age 3 JE7.png|32px]] The textures of nether wart crops have changed.}}
{{History|||snap=19w03a|Placement and breaking [[sound]]s have now been added to nether wart. Before this version, nether wart made stone sounds.}}
{{History|||snap=19w11a|Cleric [[villager]]s now [[trading|buy]] nether wart.
|Nether wart can now be planted by aiming against the sides and underside of blocks, rather than just the top surface of the soul sand.}}
{{History||1.16|snap=20w15a|Nether wart can now be [[composter|composted]].}}
{{History|||snap=20w16a|Nether wart now generates as part of [[bastion remnant]]s.}}
{{History||1.17|snap=21w13a|[[File:Nether Wart Age 0 JE8.png|32px]] [[File:Nether Wart Age 1-2 JE8.png|32px]] [[File:Nether Wart Age 3 JE8.png|32px]] The "crop" template model has changed such that pixels appear in the same physical positions on opposite sides of texture planes, changing the nether wart crop's appearance in the process.<ref>{{bug|MC-199242}}</ref>}}
{{History|pocket alpha}}
{{History||v0.12.1|snap=build 1|[[File:Nether Wart Age 0 BE1.png|32px]] [[File:Nether Wart Age 1-2 BE1.png|32px]] [[File:Nether Wart Age 3 BE1.png|32px]] [[File:Nether Wart (item) JE2 BE1.png|32px]] Added nether wart.
|Nether wart uses a cross model instead of the "hash" shape associated with crops.}}
{{History||?|[[File:Nether Wart Age 0 JE6 BE2.png|32px]] [[File:Nether Wart Age 1-2 JE6 BE2.png|32px]] [[File:Nether Wart Age 3 JE6 BE2.png|32px]]{{verify|Correct models? check UV, etc.}} Nether wart now uses a more conventional crop model.}}
{{History|pocket}}
{{History||1.1.3|snap=alpha 1.1.3.0|Nether wart can now be used to [[crafting|craft]] [[red nether bricks]] and [[nether wart block]]s.}}
{{History|bedrock}}
{{History||1.10.0|snap=beta 1.10.0.3|[[File:Nether Wart Age 0 BE.png|32px]] [[File:Nether Wart Age 1-2 BE.png|32px]] [[File:Nether Wart Age 3 BE.png|32px]] The textures of nether wart crops have changed.
|Placement and breaking [[sound]]s have now been added to nether wart.}}
{{History||1.11.0|snap=beta 1.11.0.4|Nether wart can now be [[trading|sold]] to cleric [[villager]]s.}}
{{History||1.16.0|snap=beta 1.16.0.57|Nether wart now generates as part of [[bastion remnant]]s.
|The placement and breaking [[sound]]s for nether wart have been changed to match {{el|je}}.
|Nether wart can now be [[composter|composted]].}}
{{History|console}}
{{History||xbox=TU7|xbone=CU1|ps=1.0|wiiu=Patch 1|switch=1.0.1|[[File:Nether Wart Age 0 JE6 BE2.png|32px]] [[File:Nether Wart Age 1-2 JE6 BE2.png|32px]] [[File:Nether Wart Age 3 JE6 BE2.png|32px]]{{verify|Correct models? check UV, etc.}} [[File:Nether Wart (item) JE2 BE1.png|32px]] Added nether wart.}}
{{History||xbox=TU9|Nether wart now spawns randomly wherever [[soul sand]] is generated in [[the Nether]].
|[[Nether fortress]]es have now been changed to make nether wart rooms more likely.
|Nether wart can now grow outside of [[the Nether]].}}
{{History||xbox=none|xbone=none|ps=1.90|wiiu=none|switch=none|[[File:Nether Wart Age 0 JE7.png|32px]] [[File:Nether Wart Age 1-2 JE7.png|32px]] [[File:Nether Wart Age 3 JE7.png|32px]]{{verify|Correct models?}} The textures of nether wart crops have now been changed.}}
{{History|New 3DS}}
{{History||0.1.0|[[File:Nether Wart Age 0 JE6 BE2.png|32px]] [[File:Nether Wart Age 1-2 JE6 BE2.png|32px]] [[File:Nether Wart Age 3 JE6 BE2.png|32px]]{{verify|Correct models? check UV, etc.}} [[File:Nether Wart (item) JE2 BE1.png|32px]] Added nether wart.}}
{{History|foot}}
=== Nether wart "item" ===
{{:Technical blocks/Nether Wart}}
==Issues==
{{issue list}}
== Trivia ==
* Nether wart's stage changes cannot be detected by a [[block update detector]], but can by an [[observer]] block.
* Unlike other crimson "plants", nether wart doesn't have a warped equivalent. This is also the case with [[nether sprouts]], which lack a crimson equivalent.
== Gallery ==
<gallery>
Nether Brick And Wart.png|Nether wart found in a nether fortress.
Nether Wart Closeup.png| Another example of nether wart found in a nether fortress.
Nether wart three sizes.png|The three different sizes of the nether wart as viewed from the side.
Nether Fortress Large Stairs Room.png
</gallery>
== References ==
{{reflist}}
{{Blocks|vegetation}}
{{Items}}
[[Category:Nether blocks]]
[[Category:Fungi]]
[[Category:Non-solid blocks]]
[[Category:Generated structure blocks]]
[[de:Netherwarze]]
[[es:Verruga del Nether]]
[[fr:Verrues du Nether]]
[[hu:Bibircsók]]
[[it:Verruca del Nether]]
[[ja:ネザーウォート]]
[[ko:네더 사마귀]]
[[nl:Netherkruid]]
[[pl:Netherowa brodawka]]
[[pt:Fungo do Nether]]
[[ru:Адский нарост]]
[[th:หูดเนเธอร์]]
[[uk:Пекельний наріст]]
[[zh:下界疣]]
[[Category:Brewing recipe]]</li></ul> | 16w32a | The entity ID of item frames has been changed from ItemFrame to item_frame. | |||
1.13{{Extension DPL}}<ul><li>[[Iron Nugget|Iron Nugget]]<br/>{{About|the nugget|the ore|Iron Ore|the item|Iron Ingot|the mineral block|Block of Iron}}
{{Item
| image = Iron Nugget.png
| renewable = Yes
| stackable = Yes (64)
}}
'''Iron nuggets''' are pieces of iron that can be obtained by [[smelting]] iron [[tools]]/[[Sword|weapons]] or iron/chainmail [[armor]]. One iron nugget is worth one-ninth of an [[iron ingot]].
== Obtaining ==
=== Crafting ===
{{Crafting
|Iron Ingot
|Output= Iron Nugget,9
|type=Material
}}
=== Smelting ===
{{Smelting
|Iron Sword; {Any iron tools}; {Any iron armor}; {Any chainmail armor}; Iron Horse Armor
|Iron Nugget
|0,1
}}
[[Item durability|Durability]] and [[enchantments]] do not affect the ability to smelt iron tools, weapons, or armor into iron nuggets.
=== Bartering ===
[[Piglins]] may [[barter]] 9–36 iron nuggets when given a [[gold ingot]].
=== Chest loot ===
{{LootChestItem|iron-nugget}}
== Usage ==
Iron nuggets are used to craft [[iron ingot]]s, [[lantern]]s, [[soul lantern]]s, and [[chain]]s.
=== Crafting ingredient ===
{{crafting usage}}
== Data values ==
=== ID ===
{{edition|java}}:
{{ID table
|edition=java
|showforms=y
|generatetranslationkeys=y
|displayname=Iron Nugget
|spritetype=item
|nameid=iron_nugget
|form=item
|foot=1}}
{{edition|bedrock}}:
{{ID table
|edition=bedrock
|shownumericids=y
|showforms=y
|notshowbeitemforms=y
|generatetranslationkeys=y
|displayname=Iron Nugget
|spritetype=item
|nameid=iron_nugget
|id=569
|form=item
|foot=1}}
== History ==
{{History|java}}
{{History||1.11.1|snap=16w50a|[[File:Iron Nugget JE1 BE1.png|32px]] Added iron nuggets.
|Iron nuggets can be used to craft [[iron ingot]]s.
|Iron nuggets are obtained from [[smelting]] iron [[tool]]s and [[armor]].}}
{{History||1.13|snap=17w47a|Prior to [[1.13/Flattening|''The Flattening'']], this item's numeral ID was 452.}}
{{History|||snap=18w11a|Iron nuggets now generate in [[shipwreck]] [[chest]]s.}}
{{History||1.14|snap=18w46a|Iron nuggets are now used to craft [[lantern]]s.}}
{{History|||snap=18w50a|Iron nuggets can now be found in chests in [[taiga]] [[village]] houses.}}
{{History||1.16|snap=20w06a|Iron nuggets are now used to craft [[soul fire lantern]]s.}}
{{History|||snap=20w10a|Iron nuggets now have a {{frac|10|411}} (~2.43%) chance of being given by [[piglin]]s when [[bartering]], in a stack size of 9–36.}}
{{History|||snap=20w16a|Iron nuggets are now used to craft [[chain]]s.|Iron nuggets now generate in [[ruined portal]] and [[bastion remnant]] [[chest]]s.}}
{{History|pocket}}
{{History||1.1.0|snap=alpha 1.1.0.0|[[File:Iron Nugget JE1 BE1.png|32px]] Added iron nuggets.
|Iron nuggets can be used to craft [[iron ingot]]s.
|Iron nuggets are obtained from [[smelting]] iron [[tool]]s and [[armor]].}}
{{History|bedrock}}
{{History||1.4.0|snap=beta 1.2.20.1|Iron nuggets can now be found in some [[shipwreck]] [[chest]]s.}}
{{History||1.10.0|snap=beta 1.10.0.3|Iron nuggets are now used to craft [[lantern]]s.}}
{{History||1.11.0|snap=beta 1.11.0.1|Iron nugget can now be found in [[taiga]] [[village]] house chests.}}
{{History||1.16.0|snap=beta 1.16.0.51|Iron nuggets are now used to craft [[soul fire lantern]]s.}}
{{History|||snap=beta 1.16.0.57|Iron nuggets now have a {{frac|10|411}} (~2.43%) chance of being given by [[piglin]]s when [[bartering]], in a stack size of 9–36.
|Iron nuggets now generate in [[ruined portal]] and [[bastion remnant]] [[chest]]s.}}
{{History|||snap=beta 1.16.0.59|Iron nuggets are now used to craft [[chain]]s.}}
{{History||1.16.100|snap=beta 1.16.100.50|Iron nuggets can now be used as fuel in a [[furnace]].<ref>{{bug|MCPE-114216}}</ref>}}
{{History||1.18.30|snap=beta 1.18.30.26|Iron nuggets can no longer be used as fuel in a furnace.}}
{{History|console}}
{{History||xbox=TU53|xbone=CU43|ps=1.49|wiiu=Patch 23|switch=1.0.3|[[File:Iron Nugget JE1 BE1.png|32px]] Added iron nuggets.
|Iron nuggets can be used to craft [[iron ingot]]s.
|Iron nuggets are obtained from [[smelting]] iron [[tool]]s and [[armor]].}}
{{History||xbox=none|xbone=none|ps=1.90|wiiu=none|switch=none|Iron nuggets are now used to craft [[lantern]]s}}
{{History|new 3ds}}
{{History||1.9.19|[[File:Iron Nugget JE1 BE1.png|32px]] Added iron nuggets.
|Iron nuggets can be used to craft [[iron ingot]]s.
|Iron nuggets are obtained from [[smelting]] iron [[tool]]s and [[armor]].}}
{{History|foot}}
== Issues ==
{{issue list}}
==Gallery==
<gallery>
Pocket Edition Iron Nugget.jpg|First image of an iron nugget in ''Bedrock Edition''.
</gallery>
== See also ==
*[[Gold Nugget]]
*[[Iron]]
== References ==
{{Reflist}}
{{Items}}
[[de:Eisenklumpen]]
[[fr:Pépite de fer]]
[[ja:鉄塊]]
[[ko:철 조각]]
[[nl:IJzerklompje]]
[[pl:Bryłka żelaza]]
[[pt:Pepita de ferro]]
[[ru:Кусочек железа]]
[[uk:Залізний самородок]]
[[zh:铁粒]]
[[Category:Renewable resources]]</li><li>[[Water|Water]]<br/>{{About|the fluid|the bucket|Water Bucket|other forms of water}}
{{Fluid
| image = <gallery>
Water.png|Java Edition
Water BE.png|Bedrock Edition
</gallery>
| invimage = Water Bucket
| invimage2 = Water
| renewable = Yes
| transparent = Partial <small>(-1 to light)</small>
| light = No
| tool = bucket
| infinite = Yes
| flowrate = 5 [[tick]]s/block
| flowdistance = 8 blocks
}}
'''Water''' is a [[fluid]] that naturally generates abundantly in the [[Overworld]].
== Obtaining ==
Water blocks do not exist as items,{{only|java}} but water can be collected by using a [[bucket]] on a water source block or a full water [[cauldron]], creating a [[water bucket]].
{{IN|BE}}, it may be obtained as an item via inventory editing or add-ons.
=== Natural generation ===
Water naturally generates in the [[Overworld]] to form [[ocean]]s, [[river]]s and [[spring]]s. The water level is at [[altitude|layer 63]] near oceans and rivers, but changes depending on location due to the [[aquifer]] system, filling some carvers, noise caves and canyons with water at different levels. Water also generates as small puddles on the floor next to [[dripstone cluster]]s, and as clay pools on the floor of [[lush caves]].
Water also generates in [[village]]s, [[desert well]]s, [[stronghold]]s, [[woodland mansion]]s, [[ancient city|ancient cities]] and [[ocean monument]]s.
Water never generates in [[the Nether]] and instantly disappears if placed there with a water bucket. However, water can exist in the Nether in a [[cauldron]]. Water can also be placed in the Nether using [[commands]] such as {{cmd|setblock}} and {{cmd|fill}}. Although it does not naturally generate there, water can be placed and function normally in [[the End]].
{{IN|be}}, water also generates as part of [[ocean ruins]] with loot [[chest]]s, but only two water blocks generate:
* One water block generates inside the loot chest, making it a [[Waterlogging|waterlogged]] loot chest.
* The other water block generates on top of the loot chest.
These water blocks generate even if the ruin is located on the surface.<ref>{{bug|MCPE-36793}}</ref> This is not the case in {{el|je}}; if an underwater ruin generates on the surface, no water generates.<ref>{{bug|MC-136156}}</ref> This also happens with [[shipwreck]]s.
Water spends most of its time as stationary, rather than flowing – regardless of its level, or whether it contains a current downward or to the side. When specifically triggered by a block update, water changes to 'flowing', updates its level, then changes back to stationary. Water springs are generated as flowing, and oceans, and rivers are generated as stationary. This happens before most types of generated structure are created, and the main cause of water "glitches" is that generated structures do not trigger a block update to let water flow into them.
== Usage ==
=== Appearance ===
Water uses a translucent animated texture that is tinted differently in different biomes. {{IN|Java}}, water in cauldrons is completely opaque.<ref>{{bug|MC-13187}}</ref>
Unlike other translucent blocks such as [[ice]], [[stained glass]] and [[tinted glass]], water shows the opposite sides of its external planes when viewed from within and from outside.<ref>{{bug|MC-202578|||WAI}}</ref> However, it applies only to the top plane and four side planes; the bottom face is always unseen from above.<ref>{{bug|MC-190053}}</ref>
=== Swimming ===
{{main|Swimming}}
The button for {{control|swim|text=swimming}} is the same as the button for jumping; non-swimming players and mobs sink slowly in water. Holding the swim button raises the player through the water, and when the surface is reached, the player bobs up and down. The {{control|crouch}} button can be used to sink faster. The {{control|sprint}} button can be used to put the player in "swim mode" when the player is completely submerged in water. When in swim mode, the player is horizontal and one block high. The player has an arm-waving animation when viewed in third person or by other players.
Swimming in water is considerably slower against currents (see [[#Current|Current]] below), but faster when going with the current.
Most mobs that can stand can also swim any time they are in water, except for [[iron golem]]s, [[piglin]]s, [[hoglin]]s, [[strider]]s, [[piglin brute]]s and undead mobs. This can lead to drowning if the water is falling from above.
Water of any depth prevents any entity, including the player, from sustaining falling damage if they fall into it, regardless of the distance fallen.
Being inside of water also imparts a [[fog]] effect, tinted accordingly.
=== Spreading ===
{{Main|Fluid#Spread}}
[[File:Water spread v1-13.png|300px|right|An image showing water's spreading distance]]
Water spreads horizontally and downward into nearby [[air]] blocks. Water can spread downward infinitely until stopped by a block, and 7 blocks horizontally from a source block on a flat surface. Water spreads at a rate of 1 block every 5 game ticks, or 4 blocks per second.
When spreading horizontally, a weight is assigned to every direction water can flow. For each direction, this weight is initially set to 1000. Then, for every adjacent block it can flow into it tries to find a way down that is reachable in four or fewer blocks from the block it wants to flow to. When found, the flow weight for that direction is set to the shortest path distance to the way down. Finally, water spreads in the directions with the lowest flow weight.
Spreading water extinguishes [[fire]] and washes away certain types of items or placed blocks, causing them to drop as items and then carrying them along in the flow until the edge of the spread. Affected items include [[plant]]s (except trees), [[snow]], [[torch]]es, [[carpet]]s, [[redstone dust]] and some other redstone components, [[cobweb]], [[end rod]]s, [[head]]s, and [[flower pot]]s.
==== Flow arrangement tables ====
{| class="wikitable"
|+
|
|
|
|
|
|
|
!7
|
|
|
|
|
|
|
|-
|
|
|
|
|
|
! 7
!6
! 7
|
|
|
|
|
|
|-
|
|
|
|
|
! 7
!6
!5
!6
! 7
|
|
|
|
|
|-
|
|
|
|
! 7
!6
!5
!4
!5
!6
! 7
|
|
|
|
|-
|
|
|
! 7
!6
!5
!4
!3
!4
!5
!6
! 7
|
|
|
|-
|
|
! 7
!6
!5
!4
!3
!2
!3
!4
!5
!6
! 7
|
|
|-
|
! 7
!6
!5
!4
!3
!2
!1
!2
!3
!4
!5
!6
! 7
|
|-
!7
!6
!5
!4
!3
!2
!1
!0
!1
!2
!3
!4
!5
!6
!7
|-
|
! 7
!6
!5
!4
!3
!2
!1
!2
!3
!4
!5
!6
! 7
|
|-
|
|
! 7
!6
!5
!4
!3
!2
!3
!4
!5
!6
! 7
|
|
|-
|
|
|
! 7
!6
!5
!4
!3
!4
!5
!6
! 7
|
|
|
|-
|
|
|
|
! 7
!6
!5
!4
!5
!6
! 7
|
|
|
|
|-
|
|
|
|
|
! 7
!6
!5
!6
! 7
|
|
|
|
|
|-
|
|
|
|
|
|
! 7
!6
! 7
|
|
|
|
|
|
|-
|
|
|
|
|
|
|
!7
|
|
|
|
|
|
|
|}
{| class="wikitable"
! colspan="2" |Range
!Height in blocks
|-
!1
|block
|1
|-
!2
|blocks
|0.75-1
|-
!3
|blocks
|0.625-0.75
|-
!4
|blocks
|0.5-0.625
|-
!5
|blocks
|0.375-0.5
|-
!6
|blocks
|0.25-0.375
|-
!7
|blocks
|0.125-0.25
|}
=== Source blocks ===
{{anchor|Water Spawner}} <!-- Compatibility anchor -->
{{about|the behavior and creation of source units of water|the removed block that created water sources|Water Spawner|section=1}}
A water source block is created from a flowing block that is horizontally adjacent to two or more other source blocks, and sitting on top of a solid block or another water source block. This allows water spawners to exist, in which a new source block immediately forms in the space left by removing a source block with a [[bucket]]. Pools of still water can be created by placing water source blocks in a confined area.
Water spawners can be constructed by arranging for two source blocks to flow into a third block. Each of the examples below require two source blocks, each on opposite ends of the hole, to create a renewable water source block in between.
While water source blocks only generate adjacent to solid blocks, they do not require a solid block to support them. Removing all adjacent blocks to a water source block only causes it to remain floating in the air.
{{IN|java}}, the formation of new water sources blocks can be disabled when the [[game rule]] {{cd|waterSourceConversion}} is set to {{cd|false}}.
<gallery>
2x2 water source.png|2x2 water spawner (every corner is renewable)
3x1 water source.png|3x1 water spawner (middle water block is renewable)
L-shaped water source.png|L-shaped water spawner (corner water block is renewable)
</gallery>
A [[dispenser]] loaded with a filled [[bucket]] places a water source block in an empty block in front of it when activated. A dispenser loaded with an empty bucket and a water source right in front of it sucks the source into the bucket when activated.
In snowy [[biome]]s, water source blocks have a chance to turn into [[ice]] if directly under the sky. Ice blocks under brighter light levels melt back into water source blocks (except in [[the Nether]]). Ice reverts to water when broken, but only if there is a solid block under it.
=== Current ===
The current in a water block determines both the direction it appears to flow and the direction an [[entity]] such as a player or [[boat]] is pushed from that block.
Water with a current pushes players and [[mob]]s at a speed of about 1.39 meters per second, or 25 blocks every 18 seconds. Players that are in creative flying mode don’t get pushed.{{only|je}}<ref>{{bug|MCPE-84592}}</ref>
The horizontal current in a water block is based on a vector sum of the flows to and from that block from its four horizontal neighbors. For example, if a block receives water from the north and sends it both south and east, but borders a solid block on its west edge, then a south-southeast current exits from that block, because 2 southward flows (in and out) are combined with 1 eastward flow (out). Thus, 16 horizontal directions are possible. If a branch in a channel is 2 blocks wide at its entrance, then entities float into it rather than continuing in a straight line.
Water blocks can create a downward current. A downward current in a water block is caused by the block below it. Most blocks that do not have a solid upper face cause downward current on above water blocks. Also, ice and falling water blocks (blocks created by spreading downward) cause downward current on the water block above. Falling water blocks have a downward current by default.
=== Light ===
{{IN|bedrock}}, every block of water reduces [[light]] by 1 extra level (in addition to the normal fading-out of light). {{IN|java}}, water does not cause any additional decrease for block light, but diffuses sky light, causing the light to fade with depth. Underwater visibility changes depending on the biome the player is in. The [[Night Vision]] and [[Conduit Power]] effects increase underwater visibility.
=== Color ===
Water has several colors, depending on the biome.
==== Java Edition ====
{| class="wikitable sortable mw-collapsible mw-collapsed" data-description="Water Color in Java Edition"
|-
!Biome!!Water color!!Water fog color!!Block
|-
|{{BiomeSprite|Plains|text=Default (biomes not listed below)}}||{{color|#3F76E4}}||{{color|#050533}}||[[File:Plains Water JE.png|32px]]
|-
|{{BiomeLink|Swamp}}||{{color|#617B64}}||{{color|#232317}}||[[File:Swamp Water.png|32px]]
|-
|{{BiomeLink|Lukewarm Ocean}}<br>{{BiomeLink|Deep Lukewarm Ocean}}||{{color|#45ADF2}}||{{color|#041633}}||[[File:Lukewarm Ocean Water JE.png|32px]]
|-
|{{BiomeLink|Warm Ocean}}||{{color|#43D5EE}}||{{color|#041F33}}||[[File:Warm Ocean Water JE.png|32px]]
|-
|{{BiomeLink|Cold Ocean}}<br>{{BiomeLink|Deep Cold Ocean}}<br>{{BiomeLink|Snowy Taiga}}<br>{{BiomeLink|Snowy Beach}}||{{color|#3D57D6}}||{{color|#050533}}||[[File:Cold Ocean Water JE.png|32px]]
|-
|{{BiomeLink|Frozen River}}<br>{{BiomeLink|Frozen Ocean}}<br>{{BiomeLink|Deep Frozen Ocean}}||{{color|#3938C9}}||{{color|#050533}}||[[File:Frozen Ocean Water JE.png|32px]]
|-
|{{BiomeLink|Meadow}}||{{color|#0E4ECF}}||{{color|#050533}}||[[File:Meadow Water.png|32px]]
|-
|{{BiomeLink|Mangrove Swamp}}||{{color|#3A7A6A}}||{{color|#4D7A60}}|||[[File:Mangrove Swamp Water.png|32px]]
|-
|{{BiomeLink|Cherry Grove}}||{{color|#5DB7EF}}||{{color|#5DB7EF}}||[[File:Cherry Grove Water.png|32px]]
|}
==== Bedrock Edition====
Biome tints
<!--[[File:Water color.png|500px|thumb|center|From left to right - Badlands Plateau, Birch Forest and Snowy Taiga]]-->
{| class="wikitable sortable mw-collapsible mw-collapsed" data-description="Water Color in Bedrock Edition"
! Biome
!Water Surface Color
! Water Fog Color
!Water Fog Distance
!Water Surface Transparency
!Block
|-
|Default<br>(biomes not listed below)
|{{color|#44aff5}}||{{color|#44aff5}}||15||65%||[[File:Water BE.png|32px]]
|-
|{{BiomeLink|Sunflower Plains}}<br>{{BiomeLink|Plains}}
|{{color|#44aff5}}||{{color|#44aff5}}||60||-||[[File:Water BE.png|32px]]
|-
|{{BiomeLink|Desert}}
|{{color|#32a598}}||{{color|#32a598}}||60||-||[[File:Desert Water.png|32px]]
|-
|{{BiomeLink|Mountains}}
|{{color|#007BF7}}||{{color|#007BF7}}||-||-||[[File:Mountains Water.png|32px]]
|-
|{{BiomeLink|Forest}}
|{{color|#1e97f2}}||{{color|#1e97f2}}||60||-||[[File:Forest Water.png|32px]]
|-
|{{BiomeLink|Flower Forest}}
|{{color|#20a3CC}}||{{color|#20a3CC}}||60||-||[[File:Flower Forest Water.png|32px]]
|-
| {{BiomeLink|Taiga}}
| {{color|#287082}}||{{color|#287082}}||60||-||[[File:Taiga Water.png|32px]]
|-
|{{BiomeLink|Taiga Mountains}}
|{{color|#1e6B82}}||{{color|#1e6B82}}||-||-||[[File:Taiga Mountains Water.png|32px]]
|-
|{{BiomeLink|Swamp}}
|{{color|#4c6559}}||{{color|#4c6559||30||100%||[[File:Swamp Water BE.png|32px]]
|-
| {{BiomeLink|River}}
|{{color|#0084ff}}||{{color|#0084ff}}||60||-||[[File:River Water.png|32px]]
|-
|{{BiomeLink|Nether Wastes}}<br>{{BiomeLink|Warped Forest}}<br>{{BiomeLink|Crimson Forest}}<br>{{BiomeLink|Soul Sand Valley}}
|{{color|#905957}}||{{color|#905957}}||15||-||[[File:Nether Water.png|32px]]
|-
|{{BiomeLink|Basalt Deltas}}
|{{color|#3f76e4}}||{{color|#423e42}}||15||-||[[File:Basalt Deltas Water.png|32px]]
|-
|{{BiomeLink|The End}}
| {{color|#62529e}}||{{color|#62529e}}||-||-||[[File:The End Water.png|32px]]
|-
|{{BiomeLink|Frozen River}}
|{{color|#185390}}||{{color|#185390}}||60||-||[[File:Frozen River Water.png|32px]]
|-
|{{BiomeLink|Snowy Tundra}}<br>{{BiomeLink|Ice Spikes}}
|{{color|#14559b}}||{{color|#14559b}}||-||-||[[File:Ice Spikes Water.png|32px]]
|-
| {{BiomeLink|Mushroom Fields}}
|{{color|#8a8997}}||{{color|#8a8997}}||-||-||[[File:Mushroom Fields Water.png|32px]]
|-
|{{BiomeLink|Beach}}
| {{color|#157cab}}||{{color|#157cab}}||60||-||[[File:Beach Water.png|32px]]
|-
|{{BiomeLink|Mountain Edge}}
|{{color|#045cd5}}||{{color|#045cd5}}||-||-||[[File:Mountain Edge Water.png|32px]]
|-
|{{BiomeLink|Jungle}}<br>{{BiomeLink|Bamboo Jungle}}
|{{color|#14a2c5}}||{{color|#14a2c5||60<br>15||-||[[File:Jungle Water.png|32px]]
|-
|{{BiomeLink|Jungle Edge}}
| {{color|#0D8AE3}}||{{color|#0D8AE3}}||-||-||[[File:Jungle Edge Water.png|32px]]
|-
|{{BiomeLink|Stone Shore}}
|{{color|#0d67bb}}||{{color|#0d67bb}}||60||-||[[File:Stone Shore Water.png|32px]]
|-
|{{BiomeLink|Snowy Beach}}
|{{color|#1463a5}}||{{color|#1463a5}}||60||-||[[File:Snowy Beach Water.png|32px]]
|-
|{{BiomeLink|Birch Forest}}
|{{color|#0677ce}}||{{color|#0677ce}}||60||-||[[File:Birch Forest Water.png|32px]]
|-
|{{BiomeLink|Dark Forest}}
|{{color|#3B6CD1}}||{{color|#3B6CD1}}||60||-||[[File:Dark Forest Water.png|32px]]
|-
|{{BiomeLink|Snowy Taiga}}
|{{color|#205e83}}||{{color|#205e83}}||60||-||[[File:Snowy Taiga Water.png|32px]]
|-
|{{BiomeLink|Giant Tree Taiga}}<br>{{BiomeLink|Giant Spruce Taiga}}
|{{color|#2d6d77}}||{{color|#2d6d77}}||60||-||[[File:Giant Tree Taiga Water.png|32px]]
|-
|{{BiomeLink|Windswept Forest}}<br>{{BiomeLink|Windswept Gravelly Hills}}
|{{color|#0E63AB}}||{{color|#0E63AB}}||-||-||[[File:Wooded Mountains Water.png|32px]]
|-
|{{BiomeLink|Savanna}}
|{{color|#2C8B9C}}||{{color|#2C8B9C}}||60||-||[[File:Savanna Water.png|32px]]
|-
|{{BiomeLink|Savanna Plateau}}<br>{{BiomeLink|Shattered Savanna}}
|{{color|#2590a8}}||{{color|#2590a8}}||-||-||[[File:Savanna Plateau Water.png|32px]]
|-
|{{BiomeLink|Badlands}}
|{{color|#4E7f81}}||{{color|#4E7f81||60
|<nowiki>-||[[File:Badlands Water.png|32px]]
|-
|{{BiomeLink|Eroded Badlands}}<br>{{BiomeLink|Wooded Badlands}}
|{{color|#497f99}}||{{color|#497f99}}||-||-||[[File:Eroded Badlands Water.png|32px]]
|-
|{{BiomeLink|Ocean}}
|{{color|#1787D4}}||{{color|#1165b0}}||60||-||[[File:Ocean Water.png|32px]]
|-
|{{BiomeLink|Deep Ocean}}
|{{color|#1787D4}}||{{color|#1463a5}}||60||-||[[File:Ocean Water.png|32px]]
|-
|{{BiomeLink|Warm Ocean}}
|{{color|#02B0E5}}||{{color|#0289d5}}||60||55%||[[File:Warm Ocean Water.png|32px]]
|-
| {{BiomeLink|Lukewarm Ocean}}
|{{color|#0D96DB}}||{{color|#0a74c4}}||60||-||[[File:Lukewarm Ocean Water.png|32px]]
|-
|{{BiomeLink|Deep Lukewarm Ocean|Lukewarm Deep Ocean}}
|{{color|#0D96DB}}||{{color|#0e72b9}}||60||-||[[File:Lukewarm Ocean Water.png|32px]]
|-
|{{BiomeLink|Cold Ocean}}
|{{color|#2080C9}}||{{color|#14559b}}||60||-||[[File:Cold Ocean Water.png|32px]]
|-
|{{BiomeLink|Deep Cold Ocean|Cold Deep Ocean}}
|{{color|#2080C9}}||{{color|#185390}}||60||-||[[File:Cold Ocean Water.png|32px]]
|-
|{{BiomeLink|Frozen Ocean}}
|{{color|#2570B5}}||{{color|#174985}}||60||-||[[File:Frozen Ocean Water.png|32px]]
|-
|{{BiomeLink|Deep Frozen Ocean|Frozen Deep Ocean}}
|{{color|#2570B5}}||{{color|#1a4879}}||60||-||[[File:Frozen Ocean Water.png|32px]]
|-
|{{BiomeLink|Mangrove Swamp}}
|{{color|#3a7a6a}}||{{color|#4d7a60}}||30||-||[[File:Mangrove Swamp Water BE.png|32px]]
|}
Biome tints from [[Biome/Before 1.18|unused biomes]]
{| class="wikitable sortable mw-collapsible mw-collapsed" data-description="Water Color in Bedrock Edition"
! Biome
!Water Surface Color
!Water Fog Color
!Water Fog Distance
!Water Surface Transparency
!Block
|-
|{{BiomeLink|Legacy Frozen Ocean}}
|{{color|#44aff5}}||{{color|#44aff5}}||-||-||[[File:Water BE.png|32px]]
|-
|{{BiomeLink|Mountains}}
|{{color|#007BF7}}||{{color|#007bf7}}||-||-||[[File:Mountains Water.png|32px]]
|-
|{{BiomeLink|Taiga Mountains}}
|{{color|#1e6B82}}||{{color|#1e6b82}}||-||-||[[File:Taiga Mountains Water.png|32px]]
|-
|{{BiomeLink|Swamp Hills}}
| {{color|#4c6156}}||{{color|#4c6156||30||100%||[[File:Swamp Hills Water.png|32px]]
|-
| {{BiomeLink|Snowy Mountains}}
|{{color|#1156a7}}||{{color|#1156a7}}||-||-||[[File:Snowy Mountains Water.png|32px]]
|-
|{{BiomeLink|Mushroom Field Shore}}
|{{color|#818193}}||{{color|#818193}}||-||-||[[File:Mushroom Field Shore Water.png|32px]]
|-
|{{BiomeLink|Desert Hills}}
|{{color|#1a7aa1}}||{{color|#1a7aa1}}||-||-||[[File:Desert Hills Water.png|32px]]
|-
|{{BiomeLink|Wooded Hills}}
|{{color|#056bd1}}||{{color|#056bd1}}||-||-||[[File:Wooded Hills Water.png|32px]]
|-
|{{BiomeLink|Taiga Hills}}
|{{color|#236583}}||{{color|#236583}}||-||-||[[File:Taiga Hills Water.png|32px]]
|-
|{{BiomeLink|Mountain Edge}}
|{{color|#045cd5}}||{{color|#045cd5}}||-||-||[[File:Mountain Edge Water.png|32px]]
|-
|{{BiomeLink|Jungle Hills}}<br>{{BiomeLink|Modified Jungle}}<br>{{BiomeLink|Bamboo Jungle Hills}}
|{{color|#1B9ED8}}||{{color|#1B9ED8}}||-||-||[[File:Jungle Hills Water.png|32px]]
|-
|{{BiomeLink|Modified Jungle Edge}}
|{{color|#0D8AE3}}||{{color|#0D8AE3}}||-||-||[[File:Jungle Edge Water.png|32px]]
|-
|{{BiomeLink|Birch Forest Hills}}
|{{color|#0a74c4}}||{{color|#0a74c4}}||-||-||[[File:Birch Forest Hills Water.png|32px]]
|-
|{{BiomeLink|Snowy Taiga Mountains}}
|{{color|#205e83}}||{{color|#205e83}}||60||-||[[File:Snowy Taiga Water.png|32px]]
|-
|{{BiomeLink|Snowy Taiga Hills}}
|{{color|#245b78}}||{{color|#245b78}}||-||-||[[File:Snowy Taiga Hills Water.png|32px]]
|-
|{{BiomeLink|Giant Tree Taiga Hills}}
|{{color|#286378}}||{{color|#286378}}||-||-||[[File:Giant Tree Taiga Hills Water.png|32px]]
|-
|{{BiomeLink|id=modified-gravelly-mountains|Gravelly Mountains+}}
|{{color|#0E63AB}}||{{color|#0e63ab}}||-||-||[[File:Wooded Mountains Water.png|32px]]
|-
|{{BiomeLink|Shattered Savanna Plateau}}
|{{color|#2590a8}}||{{color|#2590a8}}||-||-||[[File:Savanna Plateau Water.png|32px]]
|-
|{{BiomeLink|Badlands Plateau}}<br>{{BiomeLink|Modified Badlands Plateau}}
|{{color|#55809E}}||{{color|#55809e}}||-||-||[[File:Badlands Plateau Water.png|32px]]
|-
|{{BiomeLink|Deep Warm Ocean|Warm Deep Ocean}}
|{{color|#02B0E5}}||{{color|#0686ca}}||60||-||[[File:Warm Ocean Water.png|32px]]
|}
===Water and lava===
{{Main|Fluid#Mixing}}
Water and lava can produce [[stone]], [[cobblestone]], or [[obsidian]] based on how they interact. If water touches a lava source, the lava source turns to obsidian. If both touch each other while flowing, cobblestone is made and no sources are removed, and if lava flows downward onto water, the water turns to stone.
===Interactions with mobs===
====Direct contact====
Water damages [[endermen]], [[snow golem]]s, [[Strider|striders]] and [[blaze]]s, at a rate of {{hp|1}} per half second. If water comes into contact with a [[shulker]] or an [[enderman]], the mob teleports away.
====Suffocation====
{{Main|Damage#Suffocation in water}}
Players and mobs (except [[aquatic mob]]s, [[undead mob]]s and [[iron golem]]s) have a breath meter that lasts 15 seconds. After they run out of breath, they take {{hp|2}} suffocation damage every second until they die, surface, or enter [[bubble column]]s.
[[Dolphin]]s are a special case in drowning: they take suffocation damage when underwater for about 4 minutes, but also take suffocation damage when in air for about 2 minutes.
Each level of the [[Respiration]] enchantment adds 15 seconds to the breath meter and grants an x/(x+1) chance (where x is the Respiration level) of not taking damage after that time: 30 seconds and an average {{hp|1}}/second with Respiration I, 45 seconds and an average of {{frac|2|3}} damage/second with Respiration II, and 60 seconds and an average of {{frac|1|2}} damage/second with Respiration III.
If a [[husk]] suffocates underwater, it starts to shake and eventually becomes a [[zombie]]. If a [[zombie]] suffocates underwater, it starts to shake and eventually transforms into a [[drowned]].
=== Slower mining speed===
Players with their head underwater require 5 times the normal amount of time to mine blocks while standing on the ground, or 25 times while not on the ground. If a player wears a helmet with the [[Aqua Affinity]] enchantment, then underwater mining speed while standing on the ground is the same as on land, and 5 times slower if not standing on the ground.
===Explosions===
Water does not prevent explosions from activating. Water has a high blast resistance, causing it to absorb any normal blasts, with the exception of explosions from [[underwater TNT]].
===Hardening concrete powder ===
When water comes into contact with [[concrete powder]], the powder hardens into solid [[concrete]].
===Sponges===
When a dry [[sponge]] comes into contact with a water source or flowing block, it becomes a wet [[sponge]], absorbing all water within 3 to 5 blocks in all directions. [[Kelp]] and [[lily pad]]s within the absorbed water blocks are destroyed and drop as items, and [[seagrass]] is destroyed without dropping anything. Mobs that take damage out of water are affected as a side-effect.
Sponges do not absorb water from [[Waterlogging|waterlogged]] blocks, nor water that comes into contact by flowing back in from outside the area of absorption. For instance, placing a sponge 4 or more blocks from a single water source removes the flowing water in the area of effect, but as the flow from the source resumes it is not affected by the wet sponge.
A sponge instantly absorbs nearby water when it is placed next to water or when water comes into contact with it (by being placed next to the sponge, or by flowing toward it). A sponge absorbs [[water]] around itself (water source blocks or flowing water) out to a [[taxicab distance]] of 7 in all directions (including up and down), but won't absorb more than 65 blocks of water (water closest to the sponge is absorbed first). The absorption propagates only from water to water and does not "jump over" non-water blocks (including air).
===Dripping===
[[File:WaterDropletsExample.png|thumb|Dripping water.]]
Water above a non-transparent block (except for stairs, fences, or slabs) produces dripping particles on the underside of that block. If a block of [[Pointed Dripstone|pointed dripstone]] hangs under any block directly beneath a water source, the drips can slowly fill up a [[cauldron]] placed underneath. Without the dripstone, a cauldron does not fill.
===Vertical transport===
[[Bubble column]]s are created by placing magma blocks or [[soul sand]] under water. These can be used to transport [[mobs]] or items quickly vertically.
==Sounds==
{{el|je}}:
{{Sound table
|sound=Entering water1.ogg
|sound2=Entering water2.ogg
|sound3=Entering water3.ogg
|subtitle=MC-177092
|source=ambient
|description=When the player's eye level goes underwater
|id=ambient.underwater.enter
|translationkey=-
|volume=0.8<wbr>{{Until|JE 1.20.2}}<br>0.5<wbr>{{Upcoming|JE 1.20.2}}
|pitch=1.0
|distance=16}}
{{Sound table
|sound=Exiting water1.ogg
|sound2=Exiting water2.ogg
|sound3=Exiting water3.ogg
|subtitle=MC-177092
|source=ambient
|description=When the player's eye level goes above water
|id=ambient.underwater.exit
|translationkey=-
|volume=0.5<wbr>{{Until|JE 1.20.2}}<br>0.3<wbr>{{Upcoming|JE 1.20.2}}
|pitch=1.0
|distance=16}}
{{Sound table
|sound=Underwater Ambience.ogg
|subtitle=MC-196825
|source=ambient
|description=Randomly when underwater
|id=ambient.underwater.loop
|translationkey=-
|volume=0.65
|pitch=1.0
|distance=16}}
{{Sound table
|sound=Bubbles1.ogg
|sound2=Bubbles2.ogg
|sound3=Bubbles3.ogg
|sound4=Bubbles4.ogg
|sound5=Bubbles5.ogg
|sound6=Bubbles6.ogg
|sound7=Water1.ogg
|sound8=Water2.ogg
|subtitle=MC-196825
|source=ambient
|description=Randomly when underwater
|id=ambient.underwater.loop.additions
|translationkey=-
|volume=1.0
|pitch=1.0
|distance=16}}
{{Sound table
|sound=Animal1.ogg
|sound2=Bass Whale1.ogg
|sound3=Bass Whale2.ogg
|sound4=Crackles1.ogg
|sound5=Crackles2.ogg
|sound6=Driplets1.ogg
|sound7=Driplets2.ogg
|sound8=Earth Crack.ogg
|subtitle=MC-196825
|source=ambient
|description=Randomly when underwater
|id=ambient.underwater.loop.additions.rare
|translationkey=-
|volume=''varies'' <ref group=sound>The first, fifth, and eighth sounds are 1.0; the second sound is 0.45; the third, sixth, and seventh sounds are 0.5; the fourth sound is 0.7</ref>
|pitch=1.0
|distance=16}}
{{Sound table
|sound=Animal2.ogg
|sound2=Dark1.ogg
|sound3=Dark2.ogg
|sound4=Dark3.ogg
|sound5=Dark4.ogg
|subtitle=MC-196825
|source=ambient
|description=Randomly when underwater
|id=ambient.underwater.loop.additions.ultra_rare
|translationkey=-
|volume=1.0 <ref group=sound>Except the third sound, which is 0.7</ref>
|pitch=1.0
|distance=16}}
{{Sound table
|sound=Water1.ogg
|sound2=Water2.ogg
|subtitle=Water flows
|source=block
|description=Randomly from flowing water
|id=block.water.ambient
|translationkey=subtitles.block.water.ambient
|volume=0.75-1.0
|pitch=0.5-1.5
|distance=16}}
{{Sound table
|sound=Water splash1.ogg
|sound2=Water splash2.ogg
|subtitle=Splashing
|source=dependent
|description=When something enters water
|id=entity.generic.splash
|translationkey=subtitles.entity.generic.splash
|volume=0.0-1.0 <ref group=sound name=speedvolume>The mob's momentum, with the horizontal axes' velocities multiplied by 0.2 (capped at 1.0)</ref>
|pitch=0.6-1.4
|distance=16}}
{{Sound table
|sound=Swim1.ogg
|sound2=Swim2.ogg
|sound3=Swim3.ogg
|sound4=Swim4.ogg
|subtitle=Swimming
|source=dependent
|description=While something is moving through water
|id=entity.generic.swim
|translationkey=subtitles.entity.generic.swim
|volume=0.0-1.0 <ref group=sound name=speedvolume/>
|pitch=0.6-1.4
|distance=16}}
{{Sound table
|sound=Empty water bucket1.ogg
|sound2=Empty water bucket1.ogg
|sound3=Empty water bucket2.ogg
|sound4=Empty water bucket3.ogg
|subtitle=Bucket empties
|source=block
|description=When water is placed with a bucket
|id=item.bucket.empty
|translationkey=subtitles.item.bucket.empty
|volume=1.0 <ref group=sound>Except for the second copy of {{cd|empty1}}, which is 0.9</ref>
|pitch=1.0
|distance=16}}
{{Sound table
|sound=Fill water bucket1.ogg
|sound2=Fill water bucket2.ogg
|sound3=Fill water bucket3.ogg
|subtitle=Bucket fills
|source=player
|description=When water is collected with a bucket
|id=item.bucket.fill
|translationkey=subtitles.item.bucket.fill
|volume=1.0
|pitch=1.0
|distance=16}}
{{Sound table
|sound=Axolotl.ogg
|sound2=Dragon fish.ogg
|sound3=Shuniji.ogg
|subtitle=-
|source=music
|description=Randomly when underwater
|id=music.under_water
|translationkey=-
|volume=0.4
|pitch=1.0
|distance=16
|foot=1}}
{{el|be}}:
{{Sound table
|type=bedrock
|sound=Water2.ogg
|source=block
|description=Randomly from flowing water
|id=liquid.water
|volume=0.75-1.0
|pitch=0.5-1.5}}
{{Sound table
|sound=Water Splash Old.ogg
|source=player
|description=When something enters water<wbr><ref group=sound>{{Bug|MCPE-44120}}</ref>
|id=random.splash
|pitch=0.6-1.4}}
{{Sound table
|sound=Water splash1.ogg
|sound2=Water splash2.ogg
|source=ambient
|description=?[[Category:Pages missing sound description]]<wbr>{{Upcoming|BE 1.20.40}}
|id=entity.generic.splash
|pitch=0.6-1.4}}
{{Sound table
|sound=Entering water1.ogg
|sound2=Entering water2.ogg
|sound3=Entering water3.ogg
|source=player
|description=When the player's eye level goes underwater<wbr>{{Upcoming|BE 1.20.40}}
|id=ambient.underwater.enter
|volume=<!--0.8 (other multipliers)-->
|pitch=1.0}}
{{Sound table
|sound=Exiting water1.ogg
|sound2=Exiting water2.ogg
|sound3=Exiting water3.ogg
|source=player
|description=When the player's eye level goes above water<wbr>{{Upcoming|BE 1.20.40}}
|id=ambient.underwater.exit
|volume=<!--1.0 (other multipliers)-->
|pitch=1.0}}
{{Sound table
|sound=Swim1.ogg
|sound2=Swim2.ogg
|sound3=Swim3.ogg
|sound4=Swim4.ogg
|source=player
|description=While something is moving through water
|id=random.swim
|pitch=0.6-1.4}}
{{Sound table
|sound=Empty water bucket1.ogg
|sound2=Empty water bucket2.ogg
|sound3=Empty water bucket3.ogg
|source=block
|description=When water is placed with a bucket
|id=bucket.empty_water
|volume=1.0
|pitch=1.0}}
{{Sound table
|sound=Fill water bucket1.ogg
|sound2=Fill water bucket2.ogg
|sound3=Fill water bucket3.ogg
|source=block
|description=When water is collected with a bucket
|id=bucket.fill_water
|volume=1.0
|pitch=1.0}}
{{Sound table
|sound=Axolotl.ogg
|sound2=Dragon fish.ogg
|sound3=Shuniji.ogg
|source=music
|description=Randomly when underwater
|id=music.game.water
|volume=0.2
|pitch=1.0
|foot=1}}
==Data values==
===ID===
{{edition|java}}:
{{ID table
|edition=java
|firstcolumnname=Water
|showforms=y
|generatetranslationkeys=y
|displayname=Block
|spritename=water
|spritetype=block
|nameid=water
|form=block
|foot=1}}
{{ID table
|edition=java
|firstcolumnname=Water
|showfluidtags=y
|displayname=Fluid
|spritename=water
|spritetype=block
|nameid=water
|fluidtags=water}}
{{ID table
|displayname=Flowing Fluid
|spritetype=block
|spritename=water
|nameid=flowing_water
|fluidtags=water
|foot=1}}
{{edition|bedrock}}:
{{ID table
|edition=bedrock
|firstcolumnname=Water
|shownumericids=y
|showforms=y
|generatetranslationkeys=y
|displayname=Flowing
|spritename=water
|spritetype=block
|nameid=flowing_water
|id=8
|form=block}}
{{ID table
|displayname=Stationary
|spritename=water
|spritetype=block
|nameid=water
|id=9
|form=block
|foot=1}}
===Block states===
{{see also|Block states}}
{{/BS}}
=== Fluid states===
{{see also|Block states}}
{{/FS}}
==Achievements==
{{load achievements|Free Diver;Sleep with the Fishes}}
==Advancements==
{{load advancements|Tactical fishing;The Cutest Predator}}
==History==
{{Main|/History}}
{{History|java classic}}
{{History||May 17, 2009|link=https://archive.org/download/Minecraft_IRC_Logs_2009/history/files/May-15-to-June-03-2009/2009-05-17.140618-0400EDT.txt.~1~|Notch mentions developing water.{{q|a very very first version of the water is somewhat working now, heh [/] the level starts out without any water and is surrounded a by a huge ocean [/] it quickly fills, leaving islands}}}}
{{History||0.0.12a|snap=May 18, 2009|slink=Java Edition Classic 0.0.12a/Development#Water test (May 18, 2009)|[[File:Water (pre-release).png|32px]] Water is shown.}}
{{History|||snap=release|slink=Java Edition Classic 0.0.12a|[[File:Water JE1.png|32px]] Added water.
|Water flows to any available space below or beside it and creates a new source [[block]], making it easy to flood a whole world just with one source.}}
{{History||May 22, 2009|link=wordofnotch:111386404|[[Notch]] pointed out that when a [[plant]] or non-cube block is placed in water, it produces a box of [[air]] around it. He asked how it could be fixed, and whether he even had to.}}
{{History||0.0.13a|[[File:Water JE2.png|32px]] The model of water has been changed.}}
{{History||May 24, 2009|link=wordofnotch:112481256|A new water system is mentioned.}}
{{History||May 24, 2009|link=wordofnotch:112481370|A new water system is shown.}}
{{History||May 24, 2009|link=wordofnotch:112487511| Another test of water is shown.}}
{{History||May 26, 2009|link=wordofnotch:113350683|While sharing feedback on experiments with random vertex and color offsets, and deciding to scrap it, Notch said he would investigate salvaging the technique to add animation to water tiles.}}
{{History||0.0.19a|[[File:Water JE3.png|32px]] Added [[Procedural animated texture generation|procedural animated texture]] to water. The old texture is retained for use as a [[animation placeholder texture|placeholder]].
|Upscaled model 2% to fix z-fighting with blocks below water. It's created water or lava models overlapping and z-fighting with each other.
|Added [[sponge]]s, which remove water.
|Water part of the [[world boundary]] still uses the old water texture.}}
{{History||0.0.20a_02|[[File:Water JE4.png|32px]] Changed model scale back to normal with 1% offset on all coordinates.}}
{{History||0.26 SURVIVAL TEST|[[File:Water JE5.png|32px]] UV mapping on side faces now has 11% v offset up.}}
{{History||0.28|[[File:Water JE4.png|32px]] Fixed UV mapping.}}
{{History|java indev}}
{{History||0.31|snap=20091223-1|[[File:Water JE6.png|32px]] Added the flowing water texture, which is now used on the sides of water.}}
{{History|||snap=20100106|Water part of the [[world boundary]] now uses the animated water texture.}}
{{History|||snap=20100113|Water is now finite.|[[Ocean]]s now have infinite water.
|Water now always drains from its highest remove location.
|Water no longer moves on the surface on its own.
|Water now has a {{frac|2|3}} probability to evaporate and a {{frac|1|3}} probability to copy.}}
{{History|||snap=20100122|Water now spawns in level generation as [[spring]]s and lakes.}}
{{History|||snap=20100131|The texture of water is now seen when underwater.}}
{{History|java infdev}}
{{History||20100227-1|Water no longer flows due to changes in chunk handling for infinite worlds.{{verify|type=change}}}}
{{History||20100607|[[File:Water JE7.png|32px]] UV mapping now has 1% uv offset on top and bottom faces and 1% u, 11% v offset on side faces.}}
{{History||20100608|[[File:Water JE6.png|32px]] Fixed UV mapping, once again.}}
{{History||20100615|[[File:Water JE8.png|32px]] The model has been changed.
|Added flowing water.
|Sources placed in isolation flow exclusively downward, rather than spreading out one block in each direction as well.
|Water and lava do not produce any solid blocks when combined.
|Water does not replace plants.
|Water is now infinite again.
|Added [[water bucket]]s, which can be filled with water.}}
{{History||20100616-1|[[File:Water JE9.png|32px]] Added vertex offset.
|Water and flowing water now has visual connection to blocks.
|Downward flowing water now pushes the [[player]] out.{{info needed|and other entities?}}}}
{{History||20100617-2|[[File:Water JE10.png|32px]] Removed vertex offset.
|Water sources placed in the air now flow outward.
|Lava and flowing lava touching water, flowing water now replaces with [[obsidian]].
|Downward flowing water no longer pushes the player out.
|Water now can replace [[plants]]. However no items are dropped.}}
{{History||20100618|Water can now replace [[rail]]s.}}
{{History||20100624|Water now destroys plants, dropping as items.}}
{{History|java alpha}}
{{History||v1.0.2_02|[[Fluids]], including water, have been slightly tweaked.}}
{{History||v1.0.5_01|Water can now freeze into [[ice]].}}
{{History||v1.2.6|[[Lake]]s, which contain water, have been added.}}
{{History|java beta}}
<!--{{History||1.5|Dropped [[item]]s in flowing water now move faster.{{check version|Taken from trivia, may not be beta}}}}-->
{{History||1.6|snap=Test Build 3|[[Rain]] and [[snow]] no longer fall through water.
|Water sources now form over [[glass]].}}
{{History||1.8|snap=Pre-release|[[File:Water JE11.png|32px]] Changed [[lighting]].
|Underwater [[particles]] have been added.
|Because of the change in how land is generated, if a [[player]] is in a world that was made pre-1.8 and travels into new [[chunk]]s, there's a chance that a large [[ocean]] may be formed as the ocean [[biome]]. There is also a one-[[block]]-high drop in sea level along the discontinuity between the old and new chunks with the old chunks being higher.
|Water can now be found in the farms and wells of [[village]]s, and the fountain rooms of [[stronghold]]s.
|Two [[biome]]s have been added that are almost all water: [[ocean]]s and [[river]]s.}}
{{History|java}}
{{History||1.0.0|snap=Beta 1.9 Prerelease|[[File:Swamp Water JE1.png|32px]] {{color|#E0FF70}} Added water color in swampland.
|Added dripping water.}}
{{History|||snap=Beta 1.9 Prerelease 4|Added [[Respiration]] and [[Aqua Affinity]] enchantments, which allow more breathing time in water and normal digging speed in water.}}
{{History|||snap=Beta 1.9 Prerelease 5|Now flowing downward creates source blocks}}
{{History|||snap=RC1|[[File:Water JE12.png|32px]] [[File:Swamp Water JE2.png|32px]] Faces on model now 0.1% moved to center to fix z-fighting on inner faces.}}
{{History||1.1|snap=12w01a|[[File:Swamp Water JE3.png|32px]] {{color|#E0FFAE}} The water color in swampland is now less intense.}}
{{History||1.2.1|snap=12w04a|Added [[desert well]]s, which contain water.}}
{{History||1.3.1|snap=12w17a|The ability to bring water using [[ice]] into [[the Nether]] has been removed.}}
{{History|||snap=12w21a|[[Dispenser]]s have been given the ability to shoot out [[fluids]], including water, inside [[water bucket]]s. They can also collect the fluids if activated again.}}
{{History||1.4.2|snap=12w38a|The [[sound]] when jumping and swimming in water has been changed.
|The sound of flowing water is now continuous.
|The water overlay is a more saturated blue.}}
{{History||1.4.4|snap=1.4.3|Water of any depth now negates all [[Damage#Fall damage|fall damage]]. [[Player]]s and [[mob]]s no longer die from great heights in shallow water.<ref>{{bug|MC-1644}} resolved as Works As Intended</ref>}}
{{History||1.5|snap=13w02a|[[File:Water JE13.png|32px]] [[File:Swamp Water JE4.png|32px]] The texture of water has been changed to use an animated texture file. Prior to this version, the texture was procedurally generated by the game (see dedicated section below).}}
{{History|||snap=13w03a|A water source [[block]] now forms if there is another water source block below it.}}
{{History|||snap=13w04a|Flowing water in [[Creative]] mode no longer slows the [[player]] down when flying.}}
{{History||1.6.1|snap=13w17a|Water [[lake]]s no longer generate in [[desert]]s.}}
{{History||1.7.2|snap=13w36a|[[File:Swamp Water JE4.png|32px]] {{color|#E0FFAE}} Added water color in swampland M, which is the same as in swampland.}}
{{History||1.7.2|snap=13w36a|Water pools now generate in the new desert M [[biome]].
|[[Ocean]]s are much smaller.}}
{{History|||snap=13w41a|[[File:Water JE14.png|32px]] [[File:Swamp Water JE5.png|32px]] Water's six internal faces are now visible from the outside.
|Water, [[ice]] and [[portal]]s are now visible through each other. This also now allows water's inside faces to be visible from outside.}}
{{History|||snap=13w42a|[[File:Water JE13.png|32px]] [[File:Swamp Water JE6.png|32px]] Water's internal faces have been removed. This visually reverts water to its pre-13w41a appearance when seen from the outside.}}
{{History||1.7.4|snap=13w47a|Water's internal top face has been readded.<ref>{{bug|MC-35658}}</ref>}}
{{History|||snap=13w48a|[[File:Water JE15.png|32px]] [[File:Swamp Water JE7.png|32px]] Water's internal side faces except the bottom face, have been readded.<ref>{{bug|MC-40621}}</ref><ref>{{bug|MC-190053}}</ref>}}
{{History||1.9|snap=15w43b|When viewed through [[glass]], water now appears as a solid blue color, as opposed to a downward flowing water texture.<ref name="badwatergraphicsJE">{{bug|MC-35790}}</ref>}}
{{History||1.11|snap=16w39a|Water now generates in [[woodland mansion]]s.}}
{{History||1.12|snap=17w06a|Water now hardens [[concrete powder]] into [[concrete]], on contact.}}
{{History||1.13|snap=18w07a|[[Item]]s now float in water.
|The [[player]]'s underwater visibility has been changed - the longer a player stays underwater, the better they can see.}}
{{History|||snap=18w10a|Underwater visibility now depends on the [[biome]] the player is in.}}
{{History|||snap=18w10c|Water can now be placed in the same block as [[chest]]s, [[trapped chest]]s, [[stairs]], [[slab]]s, [[fence]]s, [[wall]]s, [[iron bars]] and [[glass pane]]s.}}
{{History|||snap=18w10d|Water can now be placed in [[ender chest]]s, [[trapdoor]]s, [[ladder]]s, and [[sign]]s.}}
{{History|||snap=18w15a|[[File:Water JE16.png|32px]] {{color|#3F76E4}} Added default water color. The textures of water have been changed from blue to grayscale.<ref>{{bug|MC-200838}}</ref>
|[[File:Warm Ocean Water JE.png|32px]] [[File:Lukewarm Ocean Water JE.png|32px]] [[File:Frozen Ocean Water JE.png|32px]] [[File:Cold Ocean Water JE.png|32px]] Added water colors for [[warm ocean]], [[lukewarm ocean]], [[frozen ocean]] and [[cold ocean]].
|[[File:Swamp Water.png|32px]] {{color|#617B64}} Water color in swampland has been changed.
|[[File:Swamp Hills Water 18w15a.png|32px]] {{color|#E0FFAE}} Water color in swampland M is unchanged.<ref>{{bug|MC-128558}}</ref>
|Water now blocks 1 [[light]] level per [[block]] instead of 3.
|[[Player]]s no longer receive the [[Night Vision]] effect while underwater.{{verify|type=change|Did this ever happen, or is it just being used as an analogy?}}}}
{{History|||snap=18w16a|When water spreads and would later turn into a source [[block]], it now immediately places a source block.}}
{{History|||snap=18w19a|[[Experience orb]]s now float in water.}}
{{History|||snap=pre3|[[File:Swamp Water.png|32px]] {{color|#617B64}} water color in swamp hills now the same as in [[swamp]].}}
{{History|||snap=pre7|Pressing the {{control|jump}} button in flowing water at <code>level=1</code>, <code>level=2</code> and <code>level=3</code> now do normal jumps instead of {{control|swimming}} up.}}
{{History||1.15|snap=19w34a|Added [[bee]]s, which get damaged while in water.}}
{{History|||snap=19w35a|Bees now try to avoid water.}}
{{History||1.17|snap=20w45a|Flowing water no longer breaks rails.}}
{{History|||snap=21w06a|[[Aquifer]]s, large bodies of water in caves, have been added.}}
{{History|||snap=21w07a|Aquifers generate less often.}}
{{History|||snap=21w08a|Water [[spring]]s are now able to generate below Y{{=}}0.}}
{{History|||snap=21w10a|The FOV shrinking effect now respects the "FOV Effects" accessibility slider.<ref>{{bug|MC-214629}}</ref>}}
{{History|||snap=21w15a|All changes to water generation from 21w06a to 21w08a have been reverted.}}
{{History|||snap=Pre-release 2|[[Smooth lighting]] now works properly underwater.<ref>{{bug|MC-68129}} resolved as "Fixed"</ref>}}
{{History||1.18|snap=Experimental Snapshot 1|[[File:Meadow Water.png|32px]] Added water color in [[meadow]].
|All changes to water generation in the 1.17 snapshots have been reintroduced.}}
{{History||1.18|snap=21w40a|[[Water lake]]s no longer generate.}}
{{History||1.19|snap=Deep Dark Experimental Snapshot 1|Water can now generate as part of [[Ancient City|ancient cities]].}}
{{History||1.19|snap=22w14a|[[File:Mangrove Swamp Water.png|32px]] Added water color in [[mangrove swamp]].}}
{{History||1.19.3|snap=22w44a|Added the [[game rule]] {{cd|waterSourceConversion}}, which disables the formation of new water source blocks when set to {{cd|false}}.}}
{{History||1.20<br>(experimental)|link=1.19.4|snap=23w07a|[[File:Cherry Grove Water JE1.png|32px]] Added water color in [[cherry grove]].}}
{{History|pocket alpha}}
{{History||v0.1.0|[[File:Water JE11.png|32px]]{{verify|type=change|Is this accurate to how it appeared in this edition at this time?}} Added water.
|[[File:Water JE2.png|32px]] On older or much newer devices, the old [[Java Edition|Java]] water texture is used, whereas the newer animated texture is used on intermediately modern devices.}}
{{History||v0.7.0|[[File:Water JE11.png|32px]]{{verify|type=change|Is this accurate to how it appeared in this edition at this time?}} The texture of water has been changed to the new texture for all devices.}}
{{History||v0.9.0|snap=build 1|[[File:Swamp Water BE1.png|32px]] Water now uses a dark blue coloration in [[swamp]]s.
|Water dripping [[particles]] have been changed.
|[[Water lake]]s have been added.
|Water can now be found in the farms and wells of [[village]]s.
|Two [[biome]]s have been added that are almost all water: [[ocean]]s and [[river]]s.
|Oasis now generate in the new [[desert]] M [[biome]].}}
{{History||v0.10.0|snap=build 1|Smooth lighting for water has been added.
|A gradient effect has been added to water that increases its opacity with distance.
|[[File:Old bedrock swamp water.png|32px]] Water color in swampland has been changed.
|Flowing water can now push [[entities]].}}
{{History|||snap=build 7|Running water now has [[sound]]s.}}
{{History|||snap=?|Water now destroys [[block]]s.{{info needed|if this is referring to washing away plants and torches and stuff, it's been able to do that since 0.1.0}}}}
{{History||v0.14.0|snap=build 1|[[Dispenser]]s can now shoot out water from [[water bucket]]s. They can also suck up [[fluids]], including water, directly adjacent to the side they are facing.}}
{{History||v0.14.2|[[File:Old bedrock water.png|32px]] Water now uses animated texture files.}}
{{History|pocket}}
{{History||1.0.0|snap=alpha 1.0.0.0|When viewed through [[glass]], water now appears as a solid blue color, as opposed to a downward flowing water texture.<ref name="badwatergraphicsBE">{{bug|MCPE-11140}}</ref>}}
{{History||1.1.0|snap=alpha 1.1.0.0|Water now generates in [[woodland mansion]]s.
|Water now hardens [[concrete powder]] into [[concrete]], on contact.}}
{{History|bedrock}}
{{History||?|The rendering change for water in 1.0.0 has been reverted for an unknown reason.}}
{{History||1.2.13|snap=beta 1.2.13.5|Water can now be placed in the same [[block]]s as [[slab]]s and [[stairs]].}}
{{History||1.4.0|snap=beta 1.2.14.2|Water can now be placed in the same block as most transparent blocks, instead of slabs and stairs only.}}
{{History|||snap=beta 1.2.20.1|[[File:Plains Water.png|32px]] Water now has a completely new look for every [[biome]] and it is now much easier to see above and underwater (see [[Water#Bedrock Edition]] for all biome colors).
|[[Item]]s now float to the top of water.
|Underwater visibility now depends on the [[biome]] the [[player]] is in.
|[[Respiration]] enchantment and [[Water Breathing]] effect no longer grants enhanced underwater visibility.}}
{{History|||snap=?|When viewed through [[glass]], water now appears as its own top texture, as opposed to a downward flowing water texture.<ref name="badwatergraphicsBE"/>}}
{{History||1.14.0|snap=beta 1.14.0.1|Added [[bee]]s, which get damaged when touching water and try to avoid it.}}
{{History|console}}
{{History||xbox=TU1|xbone=CU1|ps=1.0|wiiu=Patch 1|switch=1.0.1|[[File:Water JE11.png|32px]]{{verify|type=change|Is this accurate to how it appeared in this edition at this time?}} [[File:Swamp Water JE2.png|32px]] Added water.}}
{{History||xbox=TU9|[[Dispenser]]s have been given the ability to shoot out [[fluids]], including water, inside [[water bucket]]s. They can also suck up the fluids if activated again, but a bug prevents the empty [[bucket]] from being filled.}}
{{History||xbox=TU12|[[File:Water JE15.png|32px]] Water now uses animated texture files.}}
{{History||xbox=TU25|xbone=CU14|ps=1.17|Water can be used in custom superflats. It appears as a 3D block in the block selection screen of the custom superflat interface.}}
{{History||xbox=TU31|xbone=CU19|ps=1.22|wiiu=Patch 3|Water splash [[sound]]s have been updated.
|Most [[mob]]s can now [[swimming|swim]] in water.}}
{{History||xbox=TU69|xbone=none|ps=1.76|wiiu=Patch 38|switch=none|[[File:Warm Ocean Water.png|32px]] [[File:Lukewarm Ocean Water.png|32px]] [[File:Frozen Ocean Water.png|32px]] [[File:Cold Ocean Water.png|32px]] Added [[warm ocean]], [[lukewarm ocean]], [[frozen ocean]] and [[cold ocean]] texture colors for water in those [[biome]]s.}}
{{History||ps=1.78|The animation of water is now less smooth.}}
{{History|New 3DS}}
{{History||0.1.0|[[File:Water JE15.png|32px]]{{verify|type=change|Is this accurate to how it appeared in this edition at this time?}} [[File:Old bedrock swamp water.png|32px]] Added water.}}
{{History|foot}}
<!-- Still need to add in the right version: Drowning added, Water can turn into ice -->
<!--- Still need to add "1.16 pre-release 5 - Water overlay texture turned slightly darker" -->
{{More sounds|Old and older water splash sounds.|type=historical}}
===Data history===
{{History|java}}
{{History||1.13|snap=17w47a|Prior to [[1.13/Flattening|''The Flattening'']], these blocks' numeral IDs were 8 and 9. Both blocks have been merged into a single one.}}
{{History|||snap=18w10c|Removed <code>flowing_water</code>.}}
{{History|foot}}
<gallery>
EarlyFlowingWater.png|The water and flowing water in [[Infdev 20100615]].
</gallery>
==Issues==
{{Issue list}}
==Trivia==
*The texture subtly overlaid on the screen when underwater is that of the original water texture from 0.0.12a.
**The outdatedness of this texture is not considered a bug or oversight, unlike many other outdated textures.<ref>{{bug|MC-241000|||Invalid}}</ref>
**This texture is particularly difficult to notice due to its extreme transparency,<ref>{{bug|MC-128337}}</ref> as well as the fact that other blocks likely make the scene visually noisy enough to further obscure it under most conditions.
* While underwater, the player's FOV (field of vision) is lowered by 10 to simulate light {{w|refraction}}. This can be disabled via the "FOV Effects" [[option]].
*If a player or mob with the [[Levitation]] effect touches water, the effect is completely negated.<ref>{{bug|MC-83369}}</ref>
==Gallery==
<gallery>
1.8underwater.png|Underwater particles, or "bubbles".
Underground water mix.png|Water that is underground, but is still part of 2 different biomes. The color is split.
InvisibleWater.png|A glitch where water is invisible below its surface level.
Water Cave Filling.png|Water flowing into a [[cave]].
Under water.png|A view underwater.
Mac os water texture V1.13-920.gif|Animated view of the Java edition water texture.
Bubbles.gif|These bubbles appear above the [[hunger]] bar when the player's head is in water, and when all the bubbles pop, a heart of damage is dealt every second until the player is no longer entirely under water.
Waterfall.png|A naturally occurring waterfall.
Water (texture) JE1 BE1.png|This texture is subtly overlaid on the screen when underwater.
Land ruin.png|An underwater ruin {{in|bedrock}} that generated on land with a water block on top of it.
Land ruin Java.png|An underwater ruin {{in|java}} that generated on land with a visible loot chest that is not waterlogged and doesn't have water on top of it.
Largelake.png|A large lake, during a [[thunderstorm]].
Coral reef at night.png|A [[coral reef]] at night, in a [[warm ocean]] biome.
WaterRavine.jpg|A bug that causes the water to not flow into the pit.
Obsidian Spring.png|A water flowing on lava lake, creating obsidian. The water was placed by a player.
Two flowing streams.png|Waterfalls made by a player.
Watercave.png|Water flowing into the cave from nearby lake.
RavineandStornghold.png|Ravine with multiple ores, water and lava falls, and stronghold bridge over it.
Water shade.png|Different water colors in swamp biome.
File:Nonflowingwater.png|A block of water, which is not flowing because of a glitch, besides a village farm.
</gallery>
==See also==
*[[Waterlogging]]
==References ==
{{Reflist}}
==External Links ==
*[https://www.minecraft.net/en-us/article/block-week-water Block of the Week: Water] – Minecraft.net on July 14, 2017
{{Blocks|natural}}
{{Items}}
[[Category:Fluids]]
[[Category:Natural blocks]]
[[Category:Non-solid blocks]]
[[Category:Generated structure blocks]]
[[cs:Voda]]
[[de:Wasser]]
[[es:Agua]]
[[fr:Eau]]
[[hu:Víz]]
[[it:Acqua]]
[[ja:水]]
[[ko:물]]
[[nl:Water]]
[[pl:Woda]]
[[pt:Água]]
[[ru:Вода]]
[[th:น้ำ]]
[[tr:Su]]
[[uk:Вода]]
[[zh:水]]</li></ul></nowiki> | 17w47a | Prior to The Flattening, this item's numeral ID was 389. | |||
| 17w50a | Item frames can now be put on floors and ceilings. | ||||
1.14{{Extension DPL}}<ul><li>[[Sparkler|Sparkler]]<br/>{{About|the Education Edition exclusive item|the new melee weapon available from the ''Minecraft Dungeons'' anniversary event|MCD:Sparkler}}
{{Item
| image = <gallery>
Orange Sparkler.png | Orange
Blue Sparkler.png | Blue
Red Sparkler.png | Red
Purple Sparkler.png | Purple
Green Sparkler.png | Green
</gallery>
| image2 = <gallery>
Active Orange Sparkler.png | Active Orange
Active Blue Sparkler.png | Active Blue
Active Red Sparkler.png | Active Red
Active Purple Sparkler.png | Active Purple
Active Green Sparkler.png | Active Green
</gallery>
| renewable = No
| stackable = No
}}
{{education feature}}
{{exclusive|bedrock|education}}
A '''sparkler''' is a [[Chemistry Update|chemistry]]-related [[item]] that emits particles when lit.
Sparklers are available in orange, blue, red, purple, and green colors.
== Obtaining ==
=== Crafting ===
{{Crafting
|showdescription=1
|B1=Chloride |B2=Magnesium |B3=Stick
|Output=Sparkler
|description= Calcium Chloride: Orange<br>Cerium Chloride: Blue<br>Mercuric Chloride: Red<br>Potassium Chloride: Purple<br>Tungsten Chloride: Green<br>{{only|bedrock|education}}
|type=Miscellaneous
}}
== Usage ==
{{ctrl|Using}} a sparkler ignites it, causing its texture to change. When lit, the sparkler emits colored [[particles]]; the [[durability]] meter depletes while the sparkler is burning. Sparklers are one of the few [[item]]s that can be held in the [[off-hand]] {{in|be}}. Unlit sparklers have normal lighting like most items, while lit sparklers appear to glow when held in the player's hand, similarly to [[glow stick]]s.
When the [[player]] uses another item while a sparkler is lit, or holds the sparkler in the off-hand, the sparkler's durability stops depleting.
If the player has a lit sparkler in their [[inventory]] and goes into the [[water]], the sparkler is destroyed immediately. However, it does not get destroyed if dropped in water. It also cannot float.
Despite having durability, sparklers cannot be enchanted with [[Unbreaking]] or [[Mending]].
== Sounds ==
{{Sound table
|type=bedrock
|sound=Fuse.ogg
|source=sound
|description=While a sparkler is active
|id=sparkler.active
|volume=0.25
|pitch=0.8/1.2}}
{{Sound table
|sound=Fizz.ogg
|source=block
|description=While a sparkler is being lit
|id=random.fizz
|volume=1.0
|pitch=2.4/2.6
|foot=1}}
== Data values ==
=== ID ===
{{ID table
|edition=bedrock
|shownumericids=y
|showforms=y
|notshowbeitemforms=y
|generatetranslationkeys=y
|displayname=Sparkler
|spritename=sparklers
|spritetype=item
|nameid=sparkler
|id=600
|form=item
|translationkey=item.sparkler.orange.name,item.sparkler.blue.name,item.sparkler.red.name,item.sparkler.purple.name,item.sparkler.green.name
|foot=1}}
== History ==
{{History|bedrock}}
{{History||1.4.0|snap=beta 1.2.20.1|[[File:Orange Sparkler BE1.png|32px]] [[File:Blue Sparkler BE1.png|32px]] [[File:Red Sparkler BE1.png|32px]] [[File:Purple Sparkler BE1.png|32px]] [[File:Green Sparkler BE1.png|32px]] <br>[[File:Active Orange Sparkler BE1.png|32px]] [[File:Active Blue Sparkler BE1.png|32px]] [[File:Active Red Sparkler BE1.png|32px]] [[File:Active Purple Sparkler BE1.png|32px]] [[File:Active Green Sparkler BE1.png|32px]] Added sparklers.}}
{{History|education}}
{{History||1.0.27|[[File:Orange Sparkler BE1.png|32px]] [[File:Blue Sparkler BE1.png|32px]] [[File:Red Sparkler BE1.png|32px]] [[File:Purple Sparkler BE1.png|32px]] [[File:Green Sparkler BE1.png|32px]] <br>[[File:Active Orange Sparkler BE1.png|32px]] [[File:Active Blue Sparkler BE1.png|32px]] [[File:Active Red Sparkler BE1.png|32px]] [[File:Active Purple Sparkler BE1.png|32px]] [[File:Active Green Sparkler BE1.png|32px]] Added sparklers.}}
{{History|foot}}
== Issues ==
{{issue list}}
== Trivia ==
* The formula for sparkler roughly works in real life. Magnesium itself burns white in air, while the metal salts add [[wikipedia:flame test|color to the flame]].
{{items}}
{{Education Edition}}
[[Category:Non-renewable resources]]
[[Category:Education Edition items]]
[[de:Wunderkerze]]
[[ja:手持ち花火]]
[[ko:스파클러]]
[[pl:Zimne ognie]]
[[pt:Vela-Faísca]]
[[zh:烟花棒]]</li><li>[[Armor Stand|Armor Stand]]<br/>{{ItemEntity
| image = Armor Stand.png
| image2 = Armor Stand BE.png
| extratext = View [[#Gallery|all renders]]
| stackable =
* '''[[JE]]:''' Yes (16)
* '''[[BE]]:''' Yes (64)
| renewable = Yes
| flammable = Yes
| size = '''Normal:'''<br>
Width: 0.5 Blocks<br>
Height: 1.975 Blocks<br>
'''Small:'''<br>
Width: 0.25 Blocks<br>
Height: 0.9875 Blocks<br>
| health = {{hp|20}}
}}
An '''armor stand''' is an inanimate [[entity]] that can wear [[armor]]. It can also hold [[Item|items]] and be posed (but these are not possible in [[Survival]] in [[Java Edition]]).
== Obtaining ==
An armor stand can be broken by quickly {{control|attack|text=attacking}} it twice, dropping itself and any armor placed onto it.
=== Crafting ===
{{Crafting
|A1= Stick
|B1= Stick
|C1= Stick
|B2= Stick
|A3= Stick
|B3= Smooth Stone Slab
|C3= Stick
|Output= Armor Stand
|type=Decoration block
}}
=== Natural generation ===
Two armor stands are found in each taiga [[village]] outdoor armory, one equipped with an [[iron helmet]], the other with an [[iron chestplate]].
== Usage ==
[[Player]]s can use armor stands to hold [[armor]], [[mob head]]s, [[carved pumpkin]]s, and [[elytra]]. [[Commands]] can be used to give them other [[item]]s. The stand does not have a GUI, so players interact with it directly. Armor stands are also able to be placed in different orientations, similar to [[banner]]s or [[sign]]s. Armor stands are [[entity|entities]], allowing them to be pushed by [[piston]]s, moved by flowing [[water]], pulled with [[fishing rod]]s, pushed by players (with knockback), and bounced by [[slime block]]s.
{{Control|use|text=Using}} armor on the stand places the armor if done on a bare spot. Conversely, clicking on armor with a bare hand removes the armor and places it in the highlighted hotbar slot. It is not possible to take or place items from the armor stand's hands unless playing on Bedrock Edition.
Armor, mob heads, or carved pumpkins can be automatically placed on armor stands with a [[dispenser]].
Armor stands can be customized further to have arms, pose, disobey gravity, dual wield and other things by summoning them using {{cmd|summon}} with [[Tutorials/Command NBT tags#Armor Stand|NBT tags]].
In maps heavily using [[command blocks]], armor stands can be used to keep [[scoreboard]] objectives that are 'global' to the map, run [[commands]], etc.
{{IN|bedrock}}, the pose of the armor stand can be changed by interacting with the armor stand (or pressing the {{btn|Pose|be=1}} button on mobile devices) while sneaking, or by using a redstone signal. There are 13 possible poses. Armor stands can also hold items by interacting with the armor stand (or pressing the {{btn|Equip|be=1}} button on mobile devices) while holding an item that cannot be worn.
;<nowiki>Below are the poses:
{| class="wikitable collapsible collapsed"
!No.!!Namespace ID!! Redstone power
!
! !! Image
|-
|0
|{{cd|animation.armor_stand.default_pose}}
|0
|
|
|[[File:Armor Stand Default Pose.png|128px]]
|-
|1
|{{cd|animation.armor_stand.no_pose}}
|1
|
|
|[[File:Armor Stand No Pose.png|128px]]
|-
|2
|{{cd|animation.armor_stand.solemn_pose}}
|2
|
|
|[[File:Armor Stand Solemn Pose.png|128px]]
|-
|3
|{{cd|animation.armor_stand.athena_pose}}
|3
|
|
|[[File:Armor Stand Athena Pose.png|128px]]
|-
|4
|{{cd|animation.armor_stand.brandish_pose}}
|4
|
|
|[[File:Armor Stand Brandish Pose.png|128px]]
|-
|5
|{{cd|animation.armor_stand.honor_pose}}
|5
|
|
|[[File:Armor Stand Honor Pose.png|128px]]
|-
|6
|{{cd|animation.armor_stand.entertain_pose}}
|6
|
|
|[[File:Armor Stand Entertain Pose.png|128px]]
|-
|7
|{{cd|animation.armor_stand.salute_pose}}
|7
|
|
|[[File:Armor Stand Salute Pose.png|128px]]
|-
|8
|{{cd|animation.armor_stand.hero_pose}}
|8, 13 or more
|
|
|[[File:Armor Stand Hero Pose.png|128px]]
|-
|9
|{{cd|animation.armor_stand.riposte_pose}}
|9
|
|
|[[File:Armor Stand Riposte Pose.png|128px]]
|-
|10
|{{cd|animation.armor_stand.zombie_pose}}
|10
|
|
|[[File:Armor Stand Zombie Pose.png|128px]]
|-
|11
|{{cd|animation.armor_stand.cancan_a_pose}}
|11
|
|
|[[File:Armor Stand Cancan A Pose.png|128px]]
|-
|12
|{{cd|animation.armor_stand.cancan_b_pose}}
|12
|
|
|[[File:Armor Stand Cancan B Pose.png|128px]]
|}
==Behavior==
Because armor stands are entities, they obey gravity, allowing them to fall and rest on non-full [[block]]s such as [[enchanting table]]s, [[snow layer]]s and [[slab]]s.
Any [[armor]] on the stand drops when the stand is broken. Armor stands can display [[enchanting|enchanted]] and all forms of [[dye]]d armor. The effects of most enchanted armor have no effect when on an armor stand, with three exceptions:
*[[Frost Walker]] creates [[frosted ice]] blocks on [[water]] as usual if an armor stand is pushed with a [[piston]].
*[[Depth Strider]] slows the movement of the armor stand when being pushed with water.
*A [[player]] may take damage from hitting an armor stand that holds armor enchanted with [[Thorns]].
Armor stands are not damaged by [[cacti]] but can be broken by [[arrow]]s. An armor stand destroyed by an explosion or a firework does not drop as an [[item (entity)|item]]. Armor stands in water and [[lava]] at the same time are not consumed by the lava.
{{IN|be}}, armor stands can be affected by [[status effect]]s. They can be 'killed' by [[Harming]] and [[Decay]] [[splash potion|splash]]/[[lingering potion]]s, lava, [[fire]], and [[campfire]]s, and they play the player death sound and fall to their side and disappear, yielding no armor stand item. If an armor stand is equipped with an item or armor, that item or armor is considered as "naturally-spawned equipment" with an 8.5% chance of dropping when the armor stand "dies" from the [[Instant Damage]] or the [[Wither (status effect)|Wither]] status effect. If the dropped item is any form of [[weapon]], [[tool]] or armor, it drops in a badly damaged state because the game considers it as "naturally-spawned equipment".<ref>{{Bug|MCPE-24341}}</ref>
The stand wobbles slightly when being hit by the player.
{{IN|java}}, it is possible to create an armor stand with arms using the {{cmd|summon}} [[command]]. It is also possible to change an armor stand without arms into a stand with arms by using the {{cmd|data}} command. The commands are as follows:
*<code>/data merge entity @e[type=armor_stand,sort=nearest,limit=1] {ShowArms:1}</code>, which changes the nearest armor stand into an armor stand with arms.
*<code>/summon minecraft:armor_stand ~ ~ ~ {ShowArms:1}</code>, which summons a new armor stand with arms shown.
*<code>/summon armor_stand ~ ~ ~ {Rotation:[0.0f]}</code>, which summons a new armor stand that faces a desired direction (dependent on changing "0.0f" to other numbers like "90.0f" or "180.0f", otherwise it faces the same way as a default armor stand).
==Sounds==
{{edition|java}}:<br>
Armor stands use the Friendly Creatures sound category for entity-dependent sound events.
{{Sound table
|sound=Armor Stand hit1.ogg
|sound2=Armor Stand hit2.ogg
|sound3=Armor Stand hit3.ogg
|sound4=Armor Stand hit4.ogg
|subtitle=Block breaking
|source=Friendly Creatures
|description=When an armor stand is damaged
|id=entity.armor_stand.hit
|translationkey=subtitles.block.generic.hit
|volume=1.0
|pitch=1.0
|distance=16}}
{{Sound table
|sound=Armor Stand break1.ogg
|sound2=Armor Stand break2.ogg
|sound3=Armor Stand break3.ogg
|sound4=Armor Stand break4.ogg
|subtitle=Block broken
|source=Friendly Creatures
|description=When an armor stand is destroyed
|id=entity.armor_stand.break
|translationkey=subtitles.block.generic.break
|volume=1.0
|pitch=1.0
|distance=16}}
{{Sound table
|sound=Stone dig1.ogg
|sound2=Stone dig2.ogg
|sound3=Stone dig3.ogg
|sound4=Stone dig4.ogg
|subtitle=Block placed
|source=Blocks
|description=When an armor stand is placed
|id=entity.armor_stand.place
|translationkey=subtitles.block.generic.place
|volume=1.0
|pitch=1.0
|distance=16}}
{{Sound table
|sound=Wood dig1.ogg
|sound2=Wood dig2.ogg
|sound3=Wood dig3.ogg
|sound4=Wood dig4.ogg
|subtitle=Block placed
|source=Friendly Creatures
|description=When an armor stand falls onto a block at a high speed{{Info needed}}
|id=entity.armor_stand.fall
|translationkey=subtitles.entity.armorstand.fall
|volume=1.0
|pitch=1.0
|distance=16
|foot=1}}
{{edition|bedrock}}:
{{Sound table
|type=bedrock
|sound=Armor Stand hit1.ogg
|sound2=Armor Stand hit2.ogg
|sound3=Armor Stand hit3.ogg
|sound4=Armor Stand hit4.ogg
|source=neutral
|description=When an armor stand is damaged
|id=mob.armor_stand.hit
|volume=1.0
|pitch=1.0}}
{{Sound table
|sound=Armor Stand break1.ogg
|sound2=Armor Stand break2.ogg
|sound3=Armor Stand break3.ogg
|sound4=Armor Stand break4.ogg
|source=neutral
|description=When an armor stand is destroyed
|id=mob.armor_stand.break
|volume=1.0
|pitch=1.0}}
{{Sound table
|sound=Stone dig1.ogg
|sound2=Stone dig2.ogg
|sound3=Stone dig3.ogg
|sound4=Stone dig4.ogg
|source=neutral
|description=When an armor stand is placed
|id=mob.armor_stand.place
|volume=1.0
|pitch=1.0}}
{{Sound table
|sound=Wood dig1.ogg
|sound2=Wood dig2.ogg
|sound3=Wood dig3.ogg
|sound4=Wood dig4.ogg
|source=neutral
|description=When an armor stand falls onto a block at a high speed{{Info needed}}
|id=mob.armor_stand.land
|volume=1.0
|pitch=1.0
|foot=1}}
==Data values==
===ID===
{{edition|java}}:
{{ID table
|edition=java
|firstcolumnname=Armor Stand
|showforms=y
|generatetranslationkeys=y
|displayname=Item
|spritename=armor-stand
|spritetype=item
|nameid=armor_stand
|form=item
|foot=1}}
{{ID table
|edition=java
|firstcolumnname=Armor Stand
|generatetranslationkeys=y
|displayname=Entity
|spritename=armor-stand
|spritetype=entity
|nameid=armor_stand
|foot=1}}
{{edition|bedrock}}:
{{ID table
|edition=bedrock
|firstcolumnname=Armor Stand
|shownumericids=y
|showforms=y
|notshowbeitemforms=y
|generatetranslationkeys=y
|displayname=Item
|spritename=armor-stand
|spritetype=item
|nameid=armor_stand
|id=552
|form=item
|foot=1}}
{{ID table
|edition=bedrock
|firstcolumnname=Armor Stand
|shownumericids=y
|generatetranslationkeys=y
|displayname=Entity
|spritename=armor-stand
|spritetype=entity
|nameid=armor_stand
|id=61
|foot=1}}
===Item data===
{{el|java}}:
{{main|Player.dat format}}
<div class="treeview">
* {{nbt|compound|tag}}: The item's '''tag''' tag.
{{:Player.dat_format/Entity Spawners}}
</div>
{{el|bedrock}}:
:{{IN|bedrock}}, armor stands have no additional item tag.
:See [[Bedrock Edition level format/Item format]].
===Entity data===
Armor stands have entity data associated with them that contain various properties of the [[entity]].
{{el|java}}:
{{main|Entity format}}
{{/ED}}
{{el|bedrock}}:
:See [[Bedrock Edition level format/Entity format]].
== Video==
Note: This video is outdated as Zoglins now attack armor stands
<div style="text-align:center">{{yt|tCFkdTfCleQ}}</div>
==History==
{{History|java}}
{{History||1.8|snap=August 5, 2014|slink={{Tweet|SeargeDP|496666952530538498}}|[[File:Armor Stand (pre-release).png|32px]] [[File:Armor Stand (item) (pre-release).png|32px]] [[Searge]] tweeted a image of an armor stand. The appearance was changed before release.}}
{{History|||snap=August 5, 2014|slink={{Tweet|SeargeDP|496673890148823040}}|Showed crafting recipe and name "[Armor Stand]", both were changed before release.}}
{{History|||snap=14w32a|[[File:Armor Stand JE1.png|32px]] Added armor stands.}}
{{History|||snap=14w32b|[[File:Armor Stand (item) JE1 BE1.png|32px]] The item texture has changed.
|Pick-block can now be used on armor stands.
|Armor stands can now no longer be crafted using [[slabs]] other than stone slabs.}}
{{History|||snap=14w32c|Added a <code>NoBasePlate</code> tag for the armor stand.}}
{{History|||snap=14w33a|Breaking [[particles]] have been added for the armor stand.}}
{{History||1.8.1|snap=pre1|Added <code>Marker</code> tag for armor stands.}}
{{History||1.9|snap=15w31a|Armor stands can now dual wield.
|<code>HandItems</code> and <code>ArmorItems</code> tags added for armor stands, which is intended to replace the <code>Equipment</code> tag.}}
{{History|||snap=15w33a|The <code>Equipment</code> tag has been removed from armor stands.}}
{{History|||snap=15w47a|The armor stand now wobbles when hit by the [[player]].}}
{{History|||snap=16w02a|Marker <code>ArmorStand</code>s now outline their equipment only when glowing.}}
{{History||1.11|snap=16w32a|The entity ID of the armor stand has been changed from <code>ArmorStand</code> to <code>armor_stand</code>.}}
{{History||1.13|snap=17w47a|Prior to [[1.13/Flattening|''The Flattening'']], this [[item]]'s numeral ID was 416.}}
{{History||1.14|snap=18w43a|[[File:Armor Stand JE2.png|32px]] The texture of armor stands has been changed to the new [[planks|oak planks]] texture.
|[[File:Armor Stand (item) JE2 BE2.png|32px]] The texture of armor stand [[item]]s has been slightly changed. (Comparison: [[File:Armor Stand (item) Texture Change 1.13 to 18w43a.gif|32px]])}}
{{History|||snap=18w50a|[[File:Armor Stand JE3.png|32px]] The texture of armor stands has been changed again.
|Armor stands now generate in taiga [[village]]s.}}
{{History||1.15|snap=19w42a|Armor stands can now be placed by [[dispenser]]s.}}
{{History||1.16|snap=20w07a|Armor stands no longer fall through fences and walls when placed.<ref>{{bug|MC-65951}}</ref>}}
{{History|||snap=20w14a|[[Zoglin]]s now attack armor stands.}}
{{History||1.17|snap=20w45a|[[File:Armor Stand 20w45a.png|32px]] The model of the armor stand has been changed.}}
{{History|||snap=20w46a|[[File:Armor Stand JE3.png|32px]] The model of the armor stand has been changed back to how it was in 1.16.}}
{{History||1.18|snap=Pre-release 5|[[File:Armor Stand JE4.png|32px]] Changed smooth stone texture on armor stand.}}
{{History||1.19.4|snap=23w03a|Armor stands now preserve custom names when placed and broken.}}
{{History||1.20<br>(Experimental)|link=1.19.4|snap=23w04a|An armor stand now appears in the smithing table GUI; arms are displayed as in Bedrock Edition.
|When an armor stand is placed, its model now changes in effect of the player's facing direction<ref>{{bug|MC-93533}}</ref>.}}
{{History|||snap=23w06a|The model no longer changes when the armory is placed. Also, the head, which tilted slightly to the lower right in the version from 1.8 up to 1.19.3, now faces forward from [[File:Armor Stand JE4.png|32px]] to [[File:Armor Stand JE5.png|32px]].}}
{{History||?|Armor can now be swapped in [[armor stand]]s by {{ctrl|using}} them in the armor stand's slot.}}
{{History|bedrock}}
{{History||1.2.0|snap=beta 1.2.0.2|[[File:Armor Stand BE1.png|32px]] [[File:Armor Stand (item) JE1 BE1.png|32px]] Added armor stands.}}
{{History||1.10.0|snap=beta 1.10.0.3|[[File:Armor Stand BE2.png|32px]] The texture of armor stands has been changed.
|[[File:Armor Stand (item) JE2 BE2.png|32px]] The texture of armor stand [[item]]s has been slightly changed.}}
{{History||1.12.0|snap=beta 1.12.0.2|[[File:Armor Stand with Leather Armor MCPE-44669.png|32px]] Leather [[armor]] no longer shows as being [[dye]]d properly when worn by armor stands.}}
{{History|||snap=beta 1.12.0.3|[[File:Armor Stand wear Chicken.png|x73px]][[File:Armor Stand wear Rabbit.png|x73px]] [[File:Armor Stand wear Salmon.gif|x73px]] [[File:Armor Stand wear Pufferfish.gif|x73px]] [[File:Armor Stand wear Slime.png|x73px]] When armor stands hold a [[raw chicken]], [[raw rabbit]], [[raw salmon]], [[pufferfish]] or a [[slime block]], they now wear these [[mob]] counterparts.<ref>{{bug|mcpe-48629}}</ref>}}
{{History||1.13.0|snap=beta 1.13.0.1|Leather armor now shows as being dyed properly when worn by armor stands.}}
{{History|||snap=beta 1.13.0.4|Armor stands no longer hold certain [[mob]]s if they are holding a [[item]] related to them.
|Armor stands now have a smoother animation when changing poses.}}
{{History||1.16.0|snap=?|Armor stands are now targeted by zoglins.}}
{{History||1.16.210|snap=beta 1.16.210.51|Armor stands are no longer attacked by [[goat]]s.}}
{{History|console}}
{{History||xbox=TU31|xbone=CU19|ps=1.22|wiiu=Patch 3|switch=1.0.1|[[File:Armor Stand JE1.png|32px]] [[File:Armor Stand (item) JE1 BE1.png|32px]] Added armor stands.}}
{{History||xbox=TU43|xbone=CU33|ps=1.36|wiiu=Patch 13|Added [[sound]]s for armor stands.}}
{{History||xbox=TU60|xbone=CU51|ps=1.64|wiiu=Patch 30|switch=1.0.11|[[File:Armor Stand BE1.png|32px]] Armor stands now have arms and the [[player]] can now change the pose of the armor stand.}}
{{History||xbox=none|xbone=none|ps=1.90|wiiu=none|switch=none|[[File:Armor Stand BE2.png|32px]] The texture of armor stands has been changed.
|[[File:Armor Stand (item) JE2 BE2.png|32px]] The texture of armor stand [[item]]s has been slightly changed.}}
{{History|foot}}
<gallery>
Armour stand 1.png|The first image of the armor stand.
JE 1.8 Dev Armor Stand crafting.png|The first image of armor stand crafting recipe.
The Bountiful Update.png|Armor stands in the [[Java Edition 1.8|1.8]] poster.
Dual Wielding Armor Stand.png|A dual wielding armor stand.
Glowing Armor Stands.png|Armor stands with the [[glowing]] effect.
Armor Stand Chess.jpg|Chess with armor stands.
</gallery>
==Issues==
{{issue list}}
==Trivia ==
*Equipping armor stands with certain [[block]]s and [[item]]s can cause rendering glitches. According to [[Searge]] this is due to transparent rendering on entities not yet being supported.<ref>{{bug|MC-67415||"Armor Stands with Slime Block rendering entities behind them"}} resolved as "Won't Fix"</ref><ref>{{bug|MC-67674||"Armor Stand wearing a Skull and Holding Stained Glass causes Graphical issues"}} resolved as "Won't Fix"</ref>
*Bedrock Edition has a version exclusive armor stand [[model]], which includes posable arms.
*Using [[redstone]] to change the stands reverse the poses, starting with the can-can pose first.
*Placing the stand within three powered [[redstone dust]] always changes its pose to the honor pose. [[Redstone Repeater|Repeaters]] also switch the stand to the honor pose if not set four blocks from one.
*Using external tools, armor stand spawners can be placed.
*Secret signatures for [[Jasper Boerstra|JAPPA]], Chi Wong, and [[Michael Stoyke|Searge]] can be found at the bottom of the armor stand texture.
== Gallery ==
===Renders===
;Armor (Java Edition)
<gallery>
Armor Stand Leather.png
Armor Stand Golden.png
Armor Stand Chainmail.png
Armor Stand Iron.png
Armor Stand Diamond.png
Armor Stand Netherite.png
</gallery>
; Armor (Bedrock Edition)
<gallery>
Armor Stand with Leather Armor BE.png
Armor Stand with Golden Armor BE.png
Armor Stand with Chain Armor BE.png
Armor Stand with Iron Armor BE.png
Armor Stand with Diamond Armor BE.png
Armor Stand with Netherite Armor BE.png
</gallery>
;Poses
<gallery>
Armor Stand Pose 0.png|
Armor Stand Pose 1.png|
Armor Stand Pose 2.png|
Armor Stand Pose 3.png|
Armor Stand Pose 4.png|
Armor Stand Pose 5.png|
Armor Stand Pose 6.png|
Armor Stand Pose 7.png|
Armor Stand Pose 8.png|
Armor Stand Pose 9.png|
Armor Stand Pose 10.png|
Armor Stand Pose 11.png|
Armor Stand Pose 12.png|
</gallery>
===Screenshots===
<gallery>
Armor Stand Demo.png|Armor stands in various positions with various [[armor]].
Armor Stand glass and sword.png|Armor stands can wear [[block]]s on their heads. This is accessible with [[command]]s such as {{cmd|item}}.
Bedrock edition armor stand poses.png|All armor stand poses as seen in {{el|be}}.
Netherite to the rescue!.png|An entire set of netherite [[armor]] on an armor stand.
Armor Stand Garage.png|An armor stand in a garage.
</gallery>
==References ==
{{reflist}}
==External Links==
*[https://www.minecraft.net/en-us/article/taking-inventory--armor-stand Taking Inventory: Armor Stand] – Minecraft.net on March 16, 2023
{{Items}}
{{Entities}}
[[Category:Storage]]
[[de:Rüstungsständer]]
[[es:Soporte para armadura]]
[[fr:Porte-armure]]
[[ja:防具立て]]
[[ko:갑옷 거치대]]
[[pl:Stojak na zbroję]]
[[pt:Suporte de armaduras]]
[[ru:Стойка для брони]]
[[th:แท่นวางชุดเกราะ]]
[[uk:Стійка для обладунків]]
[[zh:盔甲架]]</li></ul></nowiki> | 18w43a | ||||
1.15{{Extension DPL}}<ul><li>[[:Category:Storage|Category:Storage]]<br/>Blocks and items used to '''store''' other blocks or items.
[[Category:Blocks]][[Category:Items]]
[[ja:カテゴリ:ストレージ]]
[[zh:Category:储物]]</li><li>[[:Category:Minecraft Earth items|Category:Minecraft Earth items]]<br/>All items in ''[[Minecraft Earth]]''.
[[Category:Items]]
[[Category:Minecraft Earth|Items]]</li></ul> | 19w38a | ||||
| 19w39a | Item frames are now colored correctly. | ||||
1.16{{Extension DPL}}<ul><li>[[Bread|Bread]]<br/>{{dungeons hatnote|type=item}}
{{Item
| title = Bread
| image = Bread.png
| renewable = Yes
| heals = {{hunger|5}}
| stackable = Yes (64)
}}
'''Bread''' is a [[food]] [[item]] that can be eaten by the [[player]].
== Obtaining ==
=== Crafting ===
{{Crafting
|A2=Wheat
|B2=Wheat
|C2=Wheat
|Output=Bread
|type=Foodstuff
}}
=== Chest loot ===
{{LootChestItem|bread}}
=== Trading ===
Novice-level farmer [[Villager|villagers]] sell 6 bread for one [[emerald]] as part of their [[Trading|trades]]. {{IN|java}} they only have a 40% chance of offering this trade.
=== Villager gifts ===
Farmer villagers may use wheat they have harvested to craft bread, which they can trade with other villagers.
Farmer villagers may throw bread at players under the [[Hero of the Village]] effect.{{only|java}}
== Usage ==
=== Food ===
{{see also|Tutorials/Hunger management|title1= Hunger management}}
Bread can be eaten with the use control while it is selected in the [[hotbar]]. Eating bread restores {{hunger|5}} [[hunger]] and 6.0 [[Hunger#Mechanics|hunger saturation]].
=== Breeding ===
Villagers can pick up bread items to become willing, allowing them to breed. Villagers require 3 bread to become willing.
=== Composting ===
Placing bread into a [[composter]] has an 85% chance of raising the compost level by 1. It is more efficient to compost [[wheat]] than bread made from wheat.
== Sounds ==
{{Sound table/Entity/Food}}
== Data values ==
=== ID ===
{{edition|java}}:
{{ID table
|edition=java
|showforms=y
|generatetranslationkeys=y
|displayname=Bread
|spritetype=item
|nameid=bread
|form=item
|foot=1}}
{{edition|bedrock}}:
{{ID table
|edition=bedrock
|shownumericids=y
|showforms=y
|notshowbeitemforms=y
|generatetranslationkeys=y
|displayname=Bread
|spritetype=item
|nameid=bread
|id=261
|form=item
|foot=1}}
== Achievements ==
{{load achievements|Bake Bread}}
== Advancements ==
{{load advancements|Husbandry;A Balanced Diet}}
== History ==
{{History|java indev}}
{{History||20100206|[[File:Bread JE1 BE1.png|32px]] Bread has been added, which now restores {{hp|5}}.}}
{{History||20100223|Bread now requires 3 [[wheat]] (1 row of 3) instead of 6 (2 rows of 3) to be crafted.}}
{{History|java infdev}}
{{History||?|Bread is no longer stackable.}}
{{History||20100625-2|Bread can now be found in the new [[dungeon]] [[chest]]s.}}
{{History|java beta}}
{{History||1.8|snap=Pre-release|Bread is now stackable to 64.
|Bread now restores {{hunger|5}} instead of {{hp|5}}.
|[[Dungeon]] [[chests]] now contain more bread, now that it stacks.
|Bread can now be found in the new [[stronghold]] storerooms and [[mineshaft]] [[chest]]s.}}
{{History|java}}
{{History||1.0.0|snap=Beta 1.9 Prerelease 3|Bread can now be found in the new [[stronghold]] altar [[chest]]s.}}
{{History||1.1|snap=12w01a|Bread can now be found in the new [[village]] blacksmith chests.}}
{{History||1.3.1|snap=12w16a|Bread can now be found in the new [[bonus chest]]s.}}
{{History|||snap=12w21a|Farmer [[villager]]s now [[trading|sell]] 3–4 loaves of bread for 1 [[emerald]].}}
{{History||1.4.2|snap=12w37a|[[File:Bread JE2 BE2.png|32px]] The dark outline has now been removed from the bread texture.}}
{{History||1.6.1|snap=13w16a|Bread can now be used to feed [[horse]]s.}}
{{History||1.8|snap=14w02a|Farmer [[villager]]s now [[trading|sell]] 2–4 loaves of bread for 1 [[emerald]].}}
{{History|||snap=14w26c|[[Horse]]s no longer can eat bread.}}
{{History||1.9|snap=15w44a|The average yield of bread from [[mineshaft]] and [[dungeon]] [[chest]]s has now been decreased.}}
{{History||1.11|snap=16w39a|Bread can now found in the new [[woodland mansion]] chests.}}
{{History||1.13|snap=17w47a|Prior to [[1.13/Flattening|''The Flattening'']], this [[item]]'s numeral ID was 297.}}
{{History||1.14|snap=18w43a|[[File:Bread JE3 BE3.png|32px]] The texture of bread has now been changed.}}
{{History|||snap=18w48a|Bread can now generate inside chests in cartographer houses, tanneries and plains [[village]] houses.}}
{{History|||snap=18w49a|Bread can now generate inside chests in mason houses, and savanna and snowy [[village]] houses.}}
{{History|||snap=18w50a|Bread can now generate inside chests in village temples, toolsmith, and desert and taiga [[village]] houses.}}
{{History|||snap=19w03a|Placing bread into the new [[composter]] now has an 80% chance of raising the compost level by 1.}}
{{History|||snap=19w05a|Bread now has an 85% chance of increasing the compost level in a composter by 1.}}
{{History|||snap=19w13a|Farmer villagers now give bread to players under the [[Hero of the Village]] effect.}}
{{History|pocket alpha}}
{{History||v0.4.0|[[File:Bread JE1 BE1.png|32px]] Added bread.}}
{{History||v0.5.0|Bread now restores {{hp|5}} instead of {{hp|2}}.}}
{{History||v0.8.0|snap=build 1|[[File:Bread JE2 BE2.png|32px]] The dark outline has now been removed from the bread texture.}}
{{History||v0.12.1|snap=build 1|Bread now restores [[hunger]] instead of [[health]].}}
{{History||v0.14.0|snap=build 1|Bread can now be found inside [[minecart with chest]]s in [[mineshaft]]s.}}
{{History|pocket}}
{{History||1.0.4|snap=alpha 1.0.4.0|[[Villager]]s now require bread to become willing, in order to [[breeding|breed]].
|Farmer [[villager]]s now [[trading|sell]] 2-4 loaves of bread for 1 [[emerald]].}}
{{History||1.1.0|snap=alpha 1.1.0.0|Bread can now be found in [[woodland mansion]] [[chest]]s.}}
{{History|bedrock}}
{{History||1.2.0|snap=beta 1.2.0.2|Bread can now be found inside [[bonus chest]]s.}}
{{History||1.10.0|snap=beta 1.10.0.3|[[File:Bread JE3 BE3.png|32px]] The texture of bread has now been changed.
|Bread can now be found inside [[plains]] [[village]] houses [[chest]]s, plains tannery house chests, village cartographer house chests and plains weaponsmith chests.}}
{{History||1.11.0|snap=beta 1.11.0.1|Bread can now be found in village chests other than plains.
|Bread can now be used to fill up [[composter]]s.}}
{{History|||snap=beta 1.11.0.4|Farmer [[villager]]s now [[trading|sell]] 6 bread for one [[emerald]].}}
{{History|console}}
{{History||xbox=TU1|xbone=CU1|ps=1.0|wiiu=Patch 1|[[File:Bread JE1 BE1.png|32px]] Added bread.}}
{{History||xbox=TU5|Bread is now stackable to 64.
|Bread now restores [[hunger]] instead of [[health]].}}
{{History||xbox=TU12|[[File:Bread JE2 BE2.png|32px]] The dark outline has now been removed from the bread texture.}}
{{History||xbox=none|xbone=none|ps=1.90|wiiu=none|switch=none|[[File:Bread JE3 BE3.png|32px]] The texture of bread has now been changed.}}
{{History|new3DS}}
{{History||0.1.0|[[File:Bread JE2 BE2.png|32px]] Added bread.}}
{{History|foot}}
== Issues ==
{{issue list}}
== External Links ==
*[https://www.minecraft.net/en-us/article/taking-inventory--bread Taking Inventory: Bread] – Minecraft.net on February 25, 2021
{{Items}}
[[Category:Food]]
[[Category:Renewable resources]]
[[cs:Chléb]]
[[de:Brot]]
[[es:Pan]]
[[fr:Pain]]
[[hu:Kenyér]]
[[it:Pane]]
[[ja:パン]]
[[ko:빵]]
[[nl:Brood]]
[[pl:Chleb]]
[[pt:Pão]]
[[ru:Хлеб]]
[[th:ขนมปัง]]
[[uk:Хліб]]
[[zh:面包]]</li><li>[[Flower Pot|Flower Pot]]<br/>{{more images|The potted cherry sapling texture has been change in 1.19.4-pre2.}}
{{For|other uses|Pot}}
{{Block
| image = Flower Pot.png
| image2 = Potted Poppy.png
| extratext = View [[#Gallery|all renders]]
| transparent = Yes
| light = No
| tool = any
| renewable = Yes
| stackable = Yes (64)
| flammable = No
| lavasusceptible = No
}}
A '''flower pot''' is a decorative [[block]] that can contain flowers, bamboo, saplings, cacti, mushrooms, fungi, and other reasonably small plants.
== Obtaining ==
=== Natural generation ===
Flower pots naturally generate in [[witch hut]]s where they contain a red [[mushroom]], the basement of [[igloo]]s where they contain a [[cactus]], and in [[woodland mansion]]s, where they contain birch [[sapling]]s, dark oak saplings, dandelions, poppies, blue orchids, alliums, azure bluets, red and white tulips, and oxeye daisies.
Flower pots containing a dandelion can be found in some [[plains]] and [[savanna]] [[village]] houses. Flower pots containing a cactus or a dead bush can be found in some [[desert]] village houses. Flower pots containing a spruce sapling can be found in [[taiga]] village mason houses. Flower pots containing a poppy can be found in taiga village churches.
=== Breaking ===
Flower pots can be mined instantly using any [[tool]] or without a tool.
A flower pot drops itself as an [[item]] (any [[plant]] or [[mushroom]] in it separately) when pushed by a [[piston]] or washed away with [[water]].
[[Lava]] can flow into the space of a flower pot, destroying it.
=== Chest loot ===
{{LootChestItem|flower-pot}}
=== Crafting ===
{{Crafting
|A2= Brick
|C2= Brick
|B3= Brick
|Output= Flower Pot
|type= Decoration block
}}
== Usage ==
A flower pot can be used to hold [[mushroom]]s, [[Fungus|fungi]], and various [[plant]]s. Plants that can be {{control|placed}} in a pot include any one block high [[flower]]s, [[sapling]]s, [[fern]]s, [[dead bush]]es, [[cacti]], [[bamboo]], [[azalea]]s, [[mangrove propagule]], and [[roots]].
Plants can be removed by using the interact button.
{{IN|je}}, flower pots can be placed on any block, or over [[air]].<ref>{{bug|MC-127036|||WAI}}</ref>
{{IN|be}}, they must be placed on top of a full-[[block]] top surface, or the top of a [[fence]], stone [[wall]], or [[hopper]]. They cannot be placed on [[slab]]s and [[stairs]] unless those blocks are upside-down. Pots may also be placed on an upward facing trapdoor. If the trapdoor is opened, the pot will break.
Flower pots are {{frac|3|8}} of a block high and can be stepped on. It is not possible to walk from the top of a flower pot onto a full sized block without jumping. It is possible to jump from a flower pot onto a fence.
The plant or fungus can be removed from the flower pot by pressing the {{control|use}} control. This places the item directly back into the player's inventory.<ref>{{bug|MC-169496|||WAI}}</ref>
They can be used to display cacti and wither roses without inheriting their damaging properties.<ref>{{bug|MC-2241|||WAI}}</ref><ref>{{bug|MC-138024|||WAI}}</ref>
Potted [[Fungus|warped fungus]] can be used to repel [[hoglin]]s.
== Sounds ==
{{Sound table/Block/Normal}}
== Data values ==
=== ID ===
{{edition|java}}:
{{ID table
|edition=java
|showblocktags=y
|showforms=y
|generatetranslationkeys=y
|displayname=Flower Pot
|spritetype=block
|nameid=flower_pot
|blocktags=flower_pots
|translationkey=block.minecraft.flower_pot,item.minecraft.flower_pot}}
{{ID table
|displayname=Potted Dandelion
|spritetype=block
|nameid=potted_dandelion
|blocktags=flower_pots
|form=block}}
{{ID table
|displayname=Potted Poppy
|spritetype=block
|nameid=potted_poppy
|blocktags=flower_pots
|form=block}}
{{ID table
|displayname=Potted Blue Orchid
|spritetype=block
|nameid=potted_blue_orchid
|blocktags=flower_pots
|form=block}}
{{ID table
|displayname=Potted Allium
|spritetype=block
|nameid=potted_allium
|blocktags=flower_pots
|form=block}}
{{ID table
|displayname=Potted Azure Bluet
|spritetype=block
|nameid=potted_azure_bluet
|blocktags=flower_pots
|form=block}}
{{ID table
|displayname=Potted Red Tulip
|spritetype=block
|nameid=potted_red_tulip
|blocktags=flower_pots
|form=block}}
{{ID table
|displayname=Potted Orange Tulip
|spritetype=block
|nameid=potted_orange_tulip
|blocktags=flower_pots
|form=block}}
{{ID table
|displayname=Potted White Tulip
|spritetype=block
|nameid=potted_white_tulip
|blocktags=flower_pots
|form=block}}
{{ID table
|displayname=Potted Pink Tulip
|spritetype=block
|nameid=potted_pink_tulip
|blocktags=flower_pots
|form=block}}
{{ID table
|displayname=Potted Oxeye Daisy
|spritetype=block
|nameid=potted_oxeye_daisy
|blocktags=flower_pots
|form=block}}
{{ID table
|displayname=Potted Cornflower
|spritetype=block
|nameid=potted_cornflower
|blocktags=flower_pots
|form=block}}
{{ID table
|displayname=Potted Lily of the Valley
|spritetype=block
|nameid=potted_lily_of_the_valley
|blocktags=flower_pots
|form=block}}
{{ID table
|displayname=Potted Wither Rose
|spritetype=block
|nameid=potted_wither_rose
|blocktags=flower_pots
|form=block}}
{{ID table
|displayname=Potted Oak Sapling
|spritetype=block
|nameid=potted_oak_sapling
|blocktags=flower_pots
|form=block}}
{{ID table
|displayname=Potted Spruce Sapling
|spritetype=block
|nameid=potted_spruce_sapling
|blocktags=flower_pots
|form=block}}
{{ID table
|displayname=Potted Birch Sapling
|spritetype=block
|nameid=potted_birch_sapling
|blocktags=flower_pots
|form=block}}
{{ID table
|displayname=Potted Jungle Sapling
|spritetype=block
|nameid=potted_jungle_sapling
|blocktags=flower_pots
|form=block}}
{{ID table
|displayname=Potted Acacia Sapling
|spritetype=block
|nameid=potted_acacia_sapling
|blocktags=flower_pots
|form=block}}
{{ID table
|displayname=Potted Dark Oak Sapling
|spritetype=block
|nameid=potted_dark_oak_sapling
|blocktags=flower_pots
|form=block}}
{{ID table
|displayname=Potted Red Mushroom
|spritetype=block
|nameid=potted_red_mushroom
|blocktags=flower_pots
|form=block}}
{{ID table
|displayname=Potted Brown Mushroom
|spritetype=block
|nameid=potted_brown_mushroom
|blocktags=flower_pots
|form=block}}
{{ID table
|displayname=Potted Fern
|spritetype=block
|nameid=potted_fern
|blocktags=flower_pots
|form=block}}
{{ID table
|displayname=Potted Dead Bush
|spritetype=block
|nameid=potted_dead_bush
|blocktags=flower_pots
|form=block}}
{{ID table
|displayname=Potted Cactus
|spritetype=block
|nameid=potted_cactus
|blocktags=flower_pots
|form=block}}
{{ID table
|displayname=Potted Bamboo
|spritetype=block
|nameid=potted_bamboo
|blocktags=flower_pots
|form=block}}
{{ID table
|displayname=Potted Azalea
|spritetype=block
|nameid=potted_azalea_bush
|blocktags=flower_pots
|spritename=potted azalea bush
|form=block}}
{{ID table
|displayname=Potted Flowering Azalea
|spritetype=block
|nameid=potted_flowering_azalea_bush
|blocktags=flower_pots
|spritename=potted flowering azalea bush
|form=block}}
{{ID table
|displayname=Potted Crimson Fungus
|spritetype=block
|nameid=potted_crimson_fungus
|blocktags=flower_pots
|form=block}}
{{ID table
|displayname=Potted Warped Fungus
|spritetype=block
|nameid=potted_warped_fungus
|blocktags=flower_pots, hoglin_repellents
|form=block}}
{{ID table
|displayname=Potted Crimson Roots
|spritetype=block
|nameid=potted_crimson_roots
|blocktags=flower_pots
|form=block}}
{{ID table
|displayname=Potted Warped Roots
|spritetype=block
|nameid=potted_warped_roots
|blocktags=flower_pots
|form=block}}
{{ID table
|displayname=Potted Mangrove Propagule
|spritetype=block
|nameid=potted_mangrove_propagule
|blocktags=flower_pots
|form=block
|foot=1}}
{{edition|bedrock}}:
{{ID table
|edition=bedrock
|firstcolumnname=Flower Pot
|shownumericids=y
|showforms=y
|generatetranslationkeys=y
|displayname=Block
|spritename=flower-pot
|spritetype=block
|nameid=flower_pot
|id=140
|form=block
|itemform=item.flower_pot
|translationkey=-}}
{{ID table
|displayname=Item
|spritename=flower-pot
|spritetype=item
|nameid=flower_pot
|id=514
|form=item
|foot=1}}
=== Block states ===
{{see also|Block states}}
{{IN|be}}, flower pots use the following block states:
{{/BS}}
=== Block data ===
{{IN|bedrock}}, flower pot has a block entity associated with it that holds additional data about the block.
See [[Bedrock Edition level format/Block entity format]].
== Achievements ==
{{load achievements|Pot Planter}}
== History ==
{{History||August 16, 2012|link={{tweet|Dinnerbone|236062188555624448}}|[[Dinnerbone]] tweeted the first image of flower pots.}}
{{History|java}}
{{History||1.4.2|snap=12w34a|[[File:Flower Pot JE1.png|32px]] [[File:Potted Dandelion JE1.png|32px]] [[File:Potted Rose JE1.png|32px]] [[File:Potted Red Mushroom JE1.png|32px]] [[File:Potted Brown Mushroom JE1.png|32px]] [[File:Potted Oak Sapling JE1.png|32px]] [[File:Potted Birch Sapling JE1.png|32px]] [[File:Potted Spruce Sapling JE1.png|32px]] [[File:Potted Jungle Sapling JE1.png|32px]] [[File:Potted Cactus JE1.png|32px]] [[File:Potted Fern JE1.png|32px]] [[File:Potted Dead Bush JE1.png|32px]]<br>[[File:Flower Pot (item) JE1 BE1.png|32px]] Added flower pots.
|At this point, plants inside of pots rendered much like they do outside of flower pots, not being subject to directional shading.}}
{{History|||snap=12w40a|A potted [[red mushroom]] can now be found on one window of a [[witch hut]]. This changed to an empty pot in a far later unknown version,{{info needed}} but returned again afterward.{{info needed}}}}
{{History||1.7.2|snap=13w36a|[[File:Potted Allium JE1.png|32px]] [[File:Potted Azure Bluet JE1.png|32px]] [[File:Potted Oxeye Daisy JE1.png|32px]] [[File:Potted Blue Orchid JE1.png|32px]] [[File:Potted Red Tulip JE1.png|32px]] [[File:Potted Orange Tulip JE1.png|32px]] [[File:Potted White Tulip JE1.png|32px]] [[File:Potted Pink Tulip JE1.png|32px]] Allium, azure bluet, oxeye daisies, blue orchids, red tulips, orange tulips, white tulips and pink tulips can now be placed in flower pots.
|[[File:Potted Poppy JE1.png|32px]] As the rose has been replaced with the poppy, the potted rose is also now replaced with the potted poppy as a result.
|Flower pots can no longer use data values because more than 15 plants can be potted, it now has a [[block entity]] instead.
|[[File:Potted Green Shrub.png|32px]] [[File:Potted Cobweb JE1.png|32px]] Due to the tile entity handling, it is now possible to place any [[block]] inside of a flower pot via NBT editors. However, at this point, with the ones possible in vanilla [[survival]] aside, only [[grass]], [[shrub|green shrub]]s, and [[cobweb]]s actually render.
|[[File:Potted Grass JE1.png|32px]] Potted grass now exists can be placed in flower pots using [[commands]].
|[[File:Potted Grass (no tint) JE1.png|32px]] [[File:Potted Fern (no tint) JE1.png|32px]] Potted shrubs, grass, and ferns must now have block data value 11 to display biome colors, otherwise rendering as default/gray.}}
{{History|||snap=13w37a|Added {{cmd|setblock}}, allowing for the aforementioned potted plants to be obtained without map editing.}}
{{History|||snap=13w43a|[[File:Potted Acacia Sapling JE1.png|32px]] [[File:Potted Dark Oak Sapling JE1.png|32px]] Acacia sapling and dark oak saplings can now be placed in flower pots.}}
{{History||1.8|snap=14w06a|Many more blocks (almost all full cubes) placed into a flower pot by modifying the block entity now render, if in somewhat buggy fashion, as the texture is in a cross shape. {{LoadPage|Flower Pot/1.8 development gallery/14w06a|Click show to display all of the applicable blocks.|b}}
|[[File:Potted Cactus JE2.png|32px]] Potted cacti now appear as a cross formed of their bottom texture inside of a pot.<ref>{{bug|MC-47469}}</ref>}}
{{History|||snap=14w06b|Further blocks now render in flower pots than did in the previous snapshot. {{LoadPage|Flower Pot/1.8 development gallery/14w06b|Click show to display all of the applicable blocks.|b}}
|[[File:Potted Cactus JE3.png|32px]] The accidental potted cactus model change has been reverted.}}
{{History|||snap=14w07a|[[File:Potted Iron Trapdoor.png|32px]] The newly added [[iron trapdoor]] also renders in flower pots when created with commands.}}
{{History|||snap=14w17a|[[File:Flower Pot JE2.png|32px]] [[File:Potted Dandelion JE2.png|32px]] [[File:Potted Allium JE2.png|32px]] [[File:Potted Azure Bluet JE2.png|32px]] [[File:Potted Oxeye Daisy JE2.png|32px]] [[File:Potted Blue Orchid JE2.png|32px]] [[File:Potted Poppy JE2.png|32px]] [[File:Potted Red Tulip JE2.png|32px]] [[File:Potted Orange Tulip JE2.png|32px]] [[File:Potted White Tulip JE2.png|32px]] [[File:Potted Pink Tulip JE2.png|32px]] [[File:Potted Red Mushroom JE2.png|32px]] [[File:Potted Brown Mushroom JE2.png|32px]] [[File:Potted Oak Sapling JE2.png|32px]] [[File:Potted Birch Sapling JE2.png|32px]] [[File:Potted Spruce Sapling JE2.png|32px]] [[File:Potted Jungle Sapling JE2.png|32px]] [[File:Potted Acacia Sapling JE2.png|32px]] [[File:Potted Dark Oak Sapling JE2.png|32px]] [[File:Potted Cactus JE4.png|32px]] [[File:Potted Fern JE2.png|32px]] [[File:Potted Dead Bush JE2.png|32px]] The flower pot model and rendering has changed. The insides are now subject to directional shading, rather than being fully lit, much like the changes made to [[hopper]]s and [[cauldron]]s in 14w10a. In addition, the outer face (as well as the cuboids comprising the cactus in potted cactus) are no longer subject to ambient occlusion. The potted cactus also now uses the side texture on the top face, rather than the top texture.
|Invalid blocks no longer render inside flower pots. This also includes cobweb and grass.}}
{{History|||snap=14w25a|[[File:Potted Dandelion JE3.png|32px]] [[File:Potted Allium JE3.png|32px]] [[File:Potted Azure Bluet JE3.png|32px]] [[File:Potted Oxeye Daisy JE3.png|32px]] [[File:Potted Blue Orchid JE3.png|32px]] [[File:Potted Poppy JE3.png|32px]] [[File:Potted Red Tulip JE3.png|32px]] [[File:Potted Orange Tulip JE3.png|32px]] [[File:Potted White Tulip JE3.png|32px]] [[File:Potted Pink Tulip JE3.png|32px]] [[File:Potted Red Mushroom JE3.png|32px]] [[File:Potted Brown Mushroom JE3.png|32px]] [[File:Potted Oak Sapling JE3.png|32px]] [[File:Potted Birch Sapling JE3.png|32px]] [[File:Potted Spruce Sapling JE3.png|32px]] [[File:Potted Jungle Sapling JE3.png|32px]] [[File:Potted Acacia Sapling JE3.png|32px]] [[File:Potted Dark Oak Sapling JE3.png|32px]] [[File:Potted Fern JE3.png|32px]] [[File:Potted Dead Bush JE3.png|32px]] Potted cross shaped objects are now affected by directional shading.<ref>{{bug|MC-129826}}</ref>}}
{{History||1.9|snap=15w43a|A potted cactus can now be found on a table in [[igloo]] basements.}}
{{History||1.11|snap=16w32a|The block entity ID of flower pots has been changed from <code>FlowerPot</code> to <code>flower_pot</code>.}}
{{History|||snap=16w39a|Potted plants can now be removed from flower pots by pressing {{control|use}}.
|Flower pots now generate in [[woodland mansion]]s.}}
{{History||1.13|snap=17w47a|The different block states for the <code>flower_pot</code> ID have been split up into their own IDs.
|Flower pots are no longer block entities.
|Prior to [[1.13/Flattening|''The Flattening'']], this block's numeral ID was 140, and the item's was 390.}}
{{History||1.14|snap=18w43a|[[File:Flower Pot JE3.png|32px]] [[File:Potted Dandelion JE4.png|32px]] [[File:Potted Poppy JE4.png|32px]] [[File:Potted Allium JE4.png|32px]] [[File:Potted Azure Bluet JE4.png|32px]] [[File:Potted Oxeye Daisy JE4.png|32px]] [[File:Potted Blue Orchid JE4.png|32px]] [[File:Potted Red Tulip JE4.png|32px]] [[File:Potted Orange Tulip JE4.png|32px]] [[File:Potted White Tulip JE4.png|32px]] [[File:Potted Pink Tulip JE4.png|32px]] [[File:Potted Red Mushroom JE4.png|32px]] [[File:Potted Brown Mushroom JE4.png|32px]] [[File:Potted Oak Sapling JE4.png|32px]] [[File:Potted Birch Sapling JE4.png|32px]] [[File:Potted Spruce Sapling JE4.png|32px]] [[File:Potted Jungle Sapling JE4.png|32px]] [[File:Potted Acacia Sapling JE4.png|32px]] [[File:Potted Dark Oak Sapling JE4.png|32px]] [[File:Potted Cactus JE5.png|32px]] [[File:Potted Fern JE4.png|32px]] [[File:Potted Dead Bush JE4.png|32px]] <br>[[File:Flower Pot (item) JE2 BE2.png|32px]] The textures of flower pots and their contained plants have been changed.
|[[File:Potted Cornflower JE1 BE1.png|32px]] [[File:Potted Lily of the Valley JE1 BE1.png|32px]] [[File:Potted Wither Rose JE1 BE1.png|32px]] [[File:Potted Bamboo JE1 BE1.png|32px]] Cornflower, lily of the valley, wither rose and [[bamboo]] can now be placed in flower pots.}}
{{History|||snap=18w44a|[[File:Potted Cactus JE6.png|32px]] The texture of potted cacti has been changed.}}
{{History|||snap=18w47b|[[File:Potted Poppy JE5.png|32px]] The texture of potted poppies has been changed.}}
{{History|||snap=18w49a|Flower pots can now be found in [[chest]]s in [[village]] mason houses.}}
{{History|||snap=19w11a|Flower pots have become [[renewable resource|renewable]], as mason [[villager]]s now [[trading|sell]] [[brick]]s.}}
{{History||1.16|snap=20w06a|The model of flower pots has been fixed and has been given an underside, which has changed the model from [[File:Flower Pot UNKVER2 (facing NWU).png|32px]] to [[File:Flower Pot UNKVER3 (facing NWU).png|32px]].}}
{{History|||snap=20w09a|[[File:Potted Crimson Fungus JE1 BE1.png|32px]] [[File:Potted Warped Fungus JE1 BE1.png|32px]] [[File:Potted Crimson Roots JE1 BE1.png|32px]] [[File:Potted Warped Roots JE1 BE1.png|32px]] Crimson and warped [[fungi]] and crimson and warped [[roots]] can now be placed in flower pots.
|The model for potted plants has been fixed, so the bottom face now renders,<ref>{{bug|MC-170842}}</ref> which has changed the model from [[File:Potted Dandelion UNKVER1 (facing NWU).png|32px]] [[File:Potted Poppy UNKVER1 (facing NWU).png|32px]] [[File:Potted Allium UNKVER1 (facing NWU).png|32px]] [[File:Potted Azure Bluet UNKVER1 (facing NWU).png|32px]] [[File:Potted Oxeye Daisy UNKVER1 (facing NWU).png|32px]] [[File:Potted Blue Orchid UNKVER1 (facing NWU).png|32px]] [[File:Potted Red Tulip UNKVER1 (facing NWU).png|32px]] [[File:Potted Orange Tulip UNKVER1 (facing NWU).png|32px]] [[File:Potted White Tulip UNKVER1 (facing NWU).png|32px]] [[File:Potted Pink Tulip UNKVER1 (facing NWU).png|32px]] [[File:Potted Red Mushroom UNKVER1 (facing NWU).png|32px]] [[File:Potted Brown Mushroom UNKVER1 (facing NWU).png|32px]] [[File:Potted Oak Sapling UNKVER1 (facing NWU).png|32px]] [[File:Potted Birch Sapling UNKVER1 (facing NWU).png|32px]] [[File:Potted Spruce Sapling UNKVER1 (facing NWU).png|32px]] [[File:Potted Jungle Sapling UNKVER1 (facing NWU).png|32px]] [[File:Potted Acacia Sapling UNKVER1 (facing NWU).png|32px]] [[File:Potted Dark Oak Sapling UNKVER1 (facing NWU).png|32px]] [[File:Potted Cactus UNKVER1 (facing NWU).png|32px]] [[File:Potted Fern UNKVER1 (facing NWU).png|32px]] [[File:Potted Dead Bush UNKVER1 (facing NWU).png|32px]] [[File:Potted Cornflower UNKVER1 (facing NWU).png|32px]] [[File:Potted Lily of the Valley UNKVER1 (facing NWU).png|32px]] [[File:Potted Wither Rose UNKVER1 (facing NWU).png|32px]] [[File:Potted Bamboo UNKVER1 (facing NWU).png|32px]] to [[File:Potted Dandelion UNKVER2 (facing NWU).png|32px]] [[File:Potted Poppy UNKVER2 (facing NWU).png|32px]] [[File:Potted Allium UNKVER2 (facing NWU).png|32px]] [[File:Potted Azure Bluet UNKVER2 (facing NWU).png|32px]] [[File:Potted Oxeye Daisy UNKVER2 (facing NWU).png|32px]] [[File:Potted Blue Orchid UNKVER2 (facing NWU).png|32px]] [[File:Potted Red Tulip UNKVER2 (facing NWU).png|32px]] [[File:Potted Orange Tulip UNKVER2 (facing NWU).png|32px]] [[File:Potted White Tulip UNKVER2 (facing NWU).png|32px]] [[File:Potted Pink Tulip UNKVER2 (facing NWU).png|32px]] [[File:Potted Red Mushroom UNKVER2 (facing NWU).png|32px]] [[File:Potted Brown Mushroom UNKVER2 (facing NWU).png|32px]] [[File:Potted Oak Sapling UNKVER2 (facing NWU).png|32px]] [[File:Potted Birch Sapling UNKVER2 (facing NWU).png|32px]] [[File:Potted Spruce Sapling UNKVER2 (facing NWU).png|32px]] [[File:Potted Jungle Sapling UNKVER2 (facing NWU).png|32px]] [[File:Potted Acacia Sapling UNKVER2 (facing NWU).png|32px]] [[File:Potted Dark Oak Sapling UNKVER2 (facing NWU).png|32px]] [[File:Potted Cactus UNKVER2 (facing NWU).png|32px]] [[File:Potted Fern UNKVER2 (facing NWU).png|32px]] [[File:Potted Dead Bush UNKVER2 (facing NWU).png|32px]] [[File:Potted Cornflower UNKVER2 (facing NWU).png|32px]] [[File:Potted Lily of the Valley UNKVER2 (facing NWU).png|32px]] [[File:Potted Wither Rose UNKVER2 (facing NWU).png|32px]] [[File:Potted Bamboo UNKVER2 (facing NWU).png|32px]].}}
{{History|||snap=20w11a|[[File:Potted Bamboo UNKVER3 (facing NWU).png|32px]] An unneeded face has been removed from potted bamboo to solve a z-fighting issue.<ref>{{bug|MC-173156}}</ref>}}
{{History|||snap=Pre-release 3|[[File:Potted Cactus JE7.png|32px]] [[File:Potted Cactus UNKVER3 (facing NWU).png|32px]] The model of the potted cacti has been changed. The top face now uses the top texture of cactus, rather than the side texture and the bottom face has been changed to the top texture of the flower pot.}}
{{History||1.16.2|snap=20w28a|[[File:Potted Cactus UNKVER4 (facing NWU).png|32px]] The model of the potted cactus no longer has a hole in the bottom, although the texture is stretched.}}
{{History||1.17|snap=Pre-release 1|[[File:Potted Azalea JE1 BE1.png|32px]] [[File:Potted Flowering Azalea JE1 BE1.png|32px]][[Azalea]] and flowering azalea can now be placed in flower pots.
|[[File:Potted Flowering Azalea (plant texture) JE1.png|32px]] Potted flowering azalea has own unused plant texture but uses normal variant for consistency with flowering azalea: [[File:Potted Flowering Azalea (bottom) JE1 BE1.png|32px]] [[File:Flowering Azalea (bottom) JE2 BE2.png|32px]]}}
{{History||1.19|snap=22w11a|[[File:Potted Mangrove Propagule JE1.png|32px]] [[Mangrove propagule]]s can now be placed in flower pots.}}
{{History|||snap=22w18a|[[File:Potted Mangrove Propagule JE2.png|32px]] The western element of the flower pot in potted mangrove propagules has been deleted.<ref name="mc-251355">{{bug|MC-251355}}</ref>}}
{{History|||snap=Pre-release 1|[[File:Potted Mangrove Propagule JE1.png|32px]] The aforementioned western element has been restored.<ref name="mc-251355"/>}}
{{History||1.20<br>(Experimental)|link=1.19.4|snap=23w07a|[[File:Potted Torchflower JE1.png|32px]] [[File:Potted Cherry Sapling JE1.png|32px]] [[Torchflower]]s and [[cherry sapling]]s can now be placed in flower pots.}}
{{History|||snap=1.19.4-pre2|Changed the texture of potted cherry saplings.}}
{{History||1.20|snap=23w12a|Potted torchflower and cherry sapling are now available without using the "Update 1.20" experimental datapack.|Flower pot can now be found in [[suspicious gravel]] and [[suspicious sand]] in [[trail ruins]].}}
{{History|||snap=23w13a|[[File:Potted Flowering Azalea JE2.png|32px]] Flowering azalea now uses own plant texture, changing appearance from [[File:Potted Flowering Azalea (bottom) JE1 BE1.png|32px]] to [[File:Potted Flowering Azalea (bottom) JE2.png|32px]] and breaking consistency with flowering azalea.<ref>{{bug|MC-230916}}</ref>}}
{{History|||snap=23w16a|Flower pot no longer generates in [[suspicious sand]] in [[trail ruins]].|Due to the split of the archaeological loot tables for the suspicious gravel within the [[trail ruins]]; flower pot now is in the common loot.}}
{{History|pocket alpha}}
{{History||v0.12.1|snap=build 1|[[File:Flower Pot JE1.png|32px]] [[File:Potted Dandelion JE1.png|32px]] [[File:Potted Red Mushroom JE1.png|32px]] [[File:Potted Brown Mushroom JE1.png|32px]] [[File:Potted Oak Sapling JE1.png|32px]] [[File:Potted Birch Sapling JE1.png|32px]] [[File:Potted Spruce Sapling JE1.png|32px]] [[File:Potted Jungle Sapling JE1.png|32px]] [[File:Potted Cactus JE1.png|32px]] [[File:Potted Fern JE1.png|32px]] [[File:Potted Allium JE1.png|32px]] [[File:Potted Azure Bluet JE1.png|32px]] [[File:Potted Oxeye Daisy JE1.png|32px]] [[File:Potted Blue Orchid JE1.png|32px]] [[File:Potted Poppy JE1.png|32px]] [[File:Potted Red Tulip JE1.png|32px]] [[File:Potted Orange Tulip JE1.png|32px]] [[File:Potted White Tulip JE1.png|32px]] [[File:Potted Pink Tulip JE1.png|32px]] [[File:Potted Acacia Sapling JE1.png|32px]] [[File:Potted Dark Oak Sapling JE1.png|32px]]{{verify|Are these models the ones used in this version?}}<br>[[File:Flower Pot (item) JE1 BE1.png|32px]] Added flower pots.}}
{{History||v0.14.0|snap=build 1|Flower pots now generate in [[witch hut]]s.}}
{{History|pocket}}
{{History||1.0.0|snap=alpha 0.17.0.1|Flower pots now generate in [[igloo]] basements.}}
{{History||1.1.0|snap=alpha 1.1.0.0|Flower pots now generate naturally in [[woodland mansion]]s.}}
{{History|bedrock}}
{{History||1.8.0|snap=beta 1.8.0.8|[[File:Potted Bamboo JE1 BE1.png|32px]]{{verify|Is this how they really look in BE?}} [[Bamboo]] can now be placed in flower pots.}}
{{History||1.9.0|snap=beta 1.9.0.0|[[File:Potted Cornflower BE.jpg|32px]] [[File:Potted Lily of the Valley BE.jpg|32px]] Cornflower and lily of the valley can now be placed in flower pots.}}
{{History||1.10.0|snap=beta 1.10.0.3|[[File:Flower Pot BE.jpg|32px]] [[File:Potted Dandelion BE.jpg|32px]] [[File:Potted Poppy BE.jpg|32px]] [[File:Potted Allium BE.jpg|32px]] [[File:Potted Azure Bluet BE.jpg|32px]] [[File:Potted Oxeye Daisy BE.jpg|32px]] [[File:Potted Blue Orchid BE.jpg|32px]] [[File:Potted Red Tulip BE.jpg|32px]] [[File:Potted Orange Tulip BE.jpg|32px]] [[File:Potted White Tulip BE.jpg|32px]] [[File:Potted Pink Tulip BE.jpg|32px]] [[File:Potted Red Mushroom BE.jpg|32px]] [[File:Potted Brown Mushroom BE.jpg|32px]] [[File:Potted Oak Sapling BE.jpg|32px]] [[File:Potted Birch Sapling BE.jpg|32px]] [[File:Potted Spruce Sapling BE.jpg|32px]] [[File:Potted Jungle Sapling BE.jpg|32px]] [[File:Potted Acacia Sapling BE.jpg|32px]] [[File:Potted Dark Oak Sapling BE.jpg|32px]] [[File:Potted Cactus BE.png|32px]] [[File:Potted Fern BE.jpg|32px]]<br>[[File:Flower Pot (item) JE2 BE2.png|32px]] The textures of flower pots have been changed.
|Flower pots now generate in the new [[village]]s.}}
{{History||1.11.0|snap=beta 1.11.0.1|Flower pots can now be found in [[village]] mason [[chest]]s.}}
{{History||1.13.0|snap=beta 1.13.0.9|[[File:Potted Wither Rose JE1 BE1.png|32px]] [[Wither rose]]s can now be placed in flower pots.}}
{{History||1.16.0|snap=beta 1.15.0.51|Potted plants can now be removed from flower pots by pressing {{control|use}}.}}
{{History|||snap=beta 1.16.0.51|[[File:Potted Crimson Fungus JE1 BE1.png|32px]] [[File:Potted Warped Fungus JE1 BE1.png|32px]] [[File:Potted Crimson Roots JE1 BE1.png|32px]] [[File:Potted Warped Roots JE1 BE1.png|32px]] Crimson and warped [[fungi]] and crimson and warped [[roots]] can now be placed in flower pots.}}
{{History||1.17.10|snap=beta 1.17.10.21|[[File:Potted Azalea JE1 BE1.png|32px]] [[File:Potted Flowering Azalea JE1 BE1.png|32px]] [[Azalea]] and flowering azalea can now be placed in flower pots.}}
{{History|console}}
{{History||xbox=TU14|xbone=CU1|ps=1.04|wiiu=Patch 1|switch=1.0.1|[[File:Flower Pot JE1.png|32px]] [[File:Potted Dandelion JE1.png|32px]] [[File:Potted Red Mushroom JE1.png|32px]] [[File:Potted Brown Mushroom JE1.png|32px]] [[File:Potted Oak Sapling JE1.png|32px]] [[File:Potted Birch Sapling JE1.png|32px]] [[File:Potted Spruce Sapling JE1.png|32px]] [[File:Potted Jungle Sapling JE1.png|32px]] [[File:Potted Cactus JE1.png|32px]] [[File:Potted Fern JE1.png|32px]] [[File:Potted Allium JE1.png|32px]] [[File:Potted Azure Bluet JE1.png|32px]] [[File:Potted Oxeye Daisy JE1.png|32px]] [[File:Potted Blue Orchid JE1.png|32px]] [[File:Potted Poppy JE1.png|32px]] [[File:Potted Red Tulip JE1.png|32px]] [[File:Potted Orange Tulip JE1.png|32px]] [[File:Potted White Tulip JE1.png|32px]] [[File:Potted Pink Tulip JE1.png|32px]] [[File:Potted Acacia Sapling JE1.png|32px]] [[File:Potted Dark Oak Sapling JE1.png|32px]] [[File:Potted Dead Bush JE3.png|32px]]{{verify|Are these models the ones used in this version?}}<br>[[File:Flower Pot (item) JE1 BE1.png|32px]] Added flower pots.}}
{{History||xbox=none|xbone=none|ps=1.90|wiiu=none|switch=none|[[File:Flower Pot BE.png|32px]] [[File:Potted Dandelion BE.png|32px]] [[File:Potted Poppy BE.png|32px]] [[File:Potted Allium BE.png|32px]] [[File:Potted Azure Bluet BE.png|32px]] [[File:Potted Oxeye Daisy BE.png|32px]] [[File:Potted Blue Orchid BE.png|32px]] [[File:Potted Red Tulip BE.png|32px]] [[File:Potted Orange Tulip BE.png|32px]] [[File:Potted White Tulip BE.png|32px]] [[File:Potted Pink Tulip BE.png|32px]] [[File:Potted Red Mushroom BE.png|32px]] [[File:Potted Brown Mushroom BE.png|32px]] [[File:Potted Oak Sapling BE.png|32px]] [[File:Potted Birch Sapling BE.png|32px]] [[File:Potted Spruce Sapling BE.png|32px]] [[File:Potted Jungle Sapling BE.png|32px]] [[File:Potted Acacia Sapling BE.png|32px]] [[File:Potted Dark Oak Sapling BE.png|32px]] [[File:Potted Cactus BE.png|32px]] [[File:Potted Fern BE.png|32px]]<br>[[File:Flower Pot (item) JE2 BE2.png|32px]] The textures of flower pots have been changed.}}
{{History|new 3ds}}
{{History||0.1.0|[[File:Flower Pot JE1.png|32px]] [[File:Potted Dandelion JE1.png|32px]] [[File:Potted Red Mushroom JE1.png|32px]] [[File:Potted Brown Mushroom JE1.png|32px]] [[File:Potted Oak Sapling JE1.png|32px]] [[File:Potted Birch Sapling JE1.png|32px]] [[File:Potted Spruce Sapling JE1.png|32px]] [[File:Potted Jungle Sapling JE1.png|32px]] [[File:Potted Cactus JE1.png|32px]] [[File:Potted Fern JE1.png|32px]] [[File:Potted Allium JE1.png|32px]] [[File:Potted Azure Bluet JE1.png|32px]] [[File:Potted Oxeye Daisy JE1.png|32px]] [[File:Potted Blue Orchid JE1.png|32px]] [[File:Potted Poppy JE1.png|32px]] [[File:Potted Red Tulip JE1.png|32px]] [[File:Potted Orange Tulip JE1.png|32px]] [[File:Potted White Tulip JE1.png|32px]] [[File:Potted Pink Tulip JE1.png|32px]] [[File:Potted Acacia Sapling JE1.png|32px]] [[File:Potted Dark Oak Sapling JE1.png|32px]]{{verify|Are these models the ones used in this version?}}<br>[[File:Flower Pot (item) JE1 BE1.png|32px]] Added flower pots.}}
{{History|foot}}
<gallery>
Suggestion for itemframes.png|Original Reddit image suggesting item frames and flower pots.
FlowerPot.png|The first image of flower pots, released by [[Dinnerbone]].
Pots 1-100.png|An [[Java Edition 14w06a|14w06a]] example of some of the blocks that can be placed inside of flower pots, and their rendering.
Pots 1-100b.png|The same arrangement as prior in [[Java Edition 14w06b|14w06b]].
</gallery>
=== Flower pot "item" ===
{{:Technical blocks/Flower Pot}}
== Gallery ==
=== Renders ===
; Flowers
<gallery>
Potted Dandelion.png |
Potted Poppy.png |
Potted Blue Orchid.png |
Potted Allium.png |
Potted Azure Bluet.png |
Potted Red Tulip.png |
Potted Orange Tulip.png |
Potted White Tulip.png |
Potted Pink Tulip.png |
Potted Oxeye Daisy.png |
Potted Cornflower.png |
Potted Lily of the Valley.png |
Potted Wither Rose.png |
Potted Torchflower.png
</gallery>
; Saplings
<gallery>
Potted Oak Sapling.png |
Potted Spruce Sapling.png |
Potted Birch Sapling.png |
Potted Jungle Sapling.png |
Potted Acacia Sapling.png |
Potted Dark Oak Sapling.png |
Potted Azalea.png |
Potted Flowering Azalea.png |
Potted Mangrove Propagule.png |
Potted Cherry Sapling.png
</gallery>
; Mushrooms
<gallery>
Potted Red Mushroom.png |
Potted Brown Mushroom.png |
Potted Crimson Fungus.png |
Potted Warped Fungus.png |
</gallery>
; Roots and bushes
<gallery>
Potted Crimson Roots.png |
Potted Warped Roots.png |
Potted Fern.png |
Potted Dead Bush.png |
Potted Cactus.png |
Potted Cactus BE.png |
Potted Bamboo.png
</gallery>
=== Other ===
<gallery>
FiveFlowerPots.png | Five flower pots in a player-created village.
</gallery>
== Issues ==
{{issue list}}
== Trivia ==
* The flower pot is based on a suggestion from Reddit, like [[ender chest]]s and [[item frame]]s.<ref>{{tweet|dinnerbone|235747041286975488|My next task is going to be flower pots.|August 15, 2012}}</ref>
* Flower pots break [[falling block]]s.
* If a plant that has been [[Name Tag|named]] is put in a flower pot, the plant loses its name.
* The inside of the flower pot in ''Java Edition'' uses the center 4x4 pixels of the dirt texture while Bedrock Edition uses the center 6x6.
==References==
{{Reflist}}
{{Blocks|Utility}}
{{items}}
[[Category:Manufactured blocks]]
[[Category:Storage]]
[[Category:Generated structure blocks]]
[[Category:Non-solid blocks]]
[[Category:Utility blocks]]
[[cs:Květináč]]
[[de:Blumentopf]]
[[es:Maceta]]
[[fr:Pot de fleurs]]
[[hu:Virágcserép]]
[[it:Vaso da fiori]]
[[ja:植木鉢]]
[[ko:화분]]
[[nl:Bloempot]]
[[pl:Doniczka]]
[[pt:Vaso]]
[[ru:Цветочный горшок]]
[[zh:花盆]]
[[uk:Квітковий горщик]]</li></ul> | 20w10a | The NBT Invisible and Fixed have been added to item frames. | |||
| Upcoming Java Edition | |||||
1.17{{Extension DPL}}<ul><li>[[Bookshelf|Bookshelf]]<br/>{{About|the bookshelf used with an enchanting table|the bookshelf that can hold books|Chiseled Bookshelf}}
{{Block
|image=Bookshelf.png
|transparent=No
|light=No
|tool=Axe
|renewable=Yes
|stackable=Yes (64)
|flammable=Yes (30)
|lavasusceptible=Yes
}}
'''Bookshelves''' are [[blocks]] that improve [[enchanting|enchantments]] applied with an [[enchanting table]] when placed around one, up to a maximum of fifteen bookshelves, at the expense of [[Enchanting/Levels|level]] requirement.
== Obtaining ==
=== Natural generation ===
Bookshelves can generate in village libraries and sometimes village houses.
[[Stronghold]]s may contain up to two libraries, each of which may be single-level or have an upper balcony. These feature some bookshelves arranged in pillars, and more bookshelves arranged in pillars in the walls. Single-level libraries contain 161 bookshelves, while libraries with balconies contain 233.
Bookshelves also naturally generate in certain [[woodland mansion]] rooms.
=== Breaking ===
Bookshelves can be broken fairly easily by hand, but can be broken faster by using an [[axe]]. In either case, they drop 3 books when broken, allowing the reconstruction of the bookshelf with the addition of six wood planks. When broken by an item that is [[enchanted]] with [[Silk Touch]], a bookshelf drops itself.
{{breaking row|horizontal=1|Bookshelf|Axe}}
=== Crafting ===
{{Crafting
|A1=Any Planks
|B1=Any Planks
|C1=Any Planks
|A2=Book
|B2=Book
|C2=Book
|A3=Any Planks
|B3=Any Planks
|C3=Any Planks
|Output=Bookshelf
|type=Building block
}}
=== Trading ===
Novice-level librarian [[Villager|villagers]] have a 50% chance to sell 1 bookshelf for 9 [[Emerald|emeralds]] as part of their trades.{{only|bedrock}}
Novice-level librarian villagers have a {{frac|2|3}} chance to sell 1 bookshelf for 9 emeralds.{{only|java}}
== Usage ==
=== Enchanting ===
{{main|Enchantment mechanics#Bookshelf placement}}
If an [[enchanting table]] is placed near a bookshelf, glyph [[particles]] fly from the bookshelf toward the enchanting table. Having bookshelves in the proper position near the table allows the table to apply higher-level enchantments.
=== Crafting ingredient ===
{{crafting usage}}
=== Fuel ===
Bookshelves can be used as a [[fuel]] in [[furnace]]s, smelting 1.5 items per block.
=== Villager ===
Librarian [[villager]]s can interact with bookshelves.
=== Note Blocks ===
Bookshelf can be placed under [[note block]]s to produce "bass" sounds.
== Sounds ==
{{Sound table/Block/Wood}}
== Data values ==
=== ID ===
{{edition|java}}:
{{ID table
|edition=java
|showforms=y
|generatetranslationkeys=y
|displayname=Bookshelf
|spritetype=block
|nameid=bookshelf
|showblocktags=y|blocktags=mineable/axe
|foot=1}}
{{edition|bedrock}}:
{{ID table
|edition=bedrock
|shownumericids=y
|showforms=y
|generatetranslationkeys=y
|displayname=Bookshelf
|spritetype=block
|nameid=bookshelf
|id=47
|foot=1}}
== Achievements ==
{{load achievements|Librarian}}
== History ==
{{History|java classic}}
{{History||October 24, 2009|link=https://notch.tumblr.com/post/221308991/the-new-block-types-and-new-graphics-for-the-gold|Bookshelves were teased by [[Notch]].}}
{{History||0.26 SURVIVAL TEST|[[File:Bookshelf JE1.png|32px]] Added bookshelves.
|Bookshelves are currently impossible to obtain without loading a pre-edited map.
|Bookshelves are currently destroyed in [[explosion]]s.
|When bookshelves are broken, they currently do not drop anything.}}
{{History||0.28|Bookshelves can now be freely placed.}}
{{History|java alpha}}
{{History||v1.0.11|Bookshelves can now be [[crafting|crafted]] from 3 [[book]]s and 6 [[planks]].}}
{{History|java beta}}
{{History||1.8|snap=Pre-release|Bookshelves can now be found generated in libraries in [[village]]s, and libraries in [[stronghold]]s.}}
{{History|java}}
{{History||1.0.0|snap=Beta 1.9 Prerelease 3|Bookshelves now drop 3 [[book]]s when broken by a non-[[Silk Touch]] [[item]].
|They are now necessary to [[enchanting|enchant]] with higher levels for better enchanted items.
|The number of bookshelves required to reach the maximum enchantment level is 30.}}
{{History|||snap=Beta 1.9 Prerelease 5|[[File:Bookshelf JE2 BE1.png|32px]] The top texture of bookshelves have now been updated as a result of the [[planks]] texture update.}}
{{History||1.2.4|snap=release|[[Spruce planks]], [[birch planks]], and [[jungle planks]] can now be used to craft bookshelves.}}
{{History||1.3.1|snap=12w21a|Librarian [[villager]]s now [[trading|sell]] 1 bookshelf for 3 [[emerald]]s.}}
{{History|||snap=12w22a|The number of bookshelves required to reach the maximum enchantment level has been now decreased to 15.}}
{{History||1.7.2|snap=1.7.1|[[Acacia planks]] and [[dark oak planks]] can now be used to craft bookshelves.}}
{{History||1.8|snap=14w02a|Librarian villagers now sell 1 bookshelf for 3–4 [[emerald]]s.}}
{{History||1.11|snap=16w39a|Bookshelves now generate in [[woodland mansion]]s.}}
{{History||1.13|snap=17w47a|Prior to [[1.13/Flattening|''The Flattening'']], this [[block]]'s numeral ID was 47.}}
{{History||1.14|snap=18w43a|[[File:Bookshelf JE3.png|32px]] The texture of bookshelves has now been changed.}}
{{History|||snap=18w47a|[[File:Bookshelf JE4 BE2.png|32px]] The texture of bookshelves has now been changed, once again.}}
{{History|||snap=19w02a|Bookshelves can now be used to craft [[lectern]]s.}}
{{History||1.16|snap=20w06a|[[Crimson planks]] and [[warped planks]] can now be used to craft bookshelves.}}
{{History||1.19|snap=22w11a|[[Mangrove planks]] can now be used to craft bookshelves.}}
{{History|pocket alpha}}
{{History||v0.2.1|[[File:Bookshelf JE2 BE1.png|32px]] Added bookshelves.|Bookshelves are currently obtainable only in [[Creative]] mode.}}
{{History||v0.3.0|Bookshelves are now obtainable in [[Survival]] mode.}}
{{History||v0.9.0|snap=build 1|Bookshelves now naturally spawn in [[stronghold]]s and [[village]]s.}}
{{History||v0.12.1|snap=build 1|Bookshelves can now be used to increase [[enchantment table]] levels.|Bookshelves can now be obtained by using a [[tool]] with the [[Silk Touch]] enchantment.}}
{{History|pocket}}
{{History||1.0.4|snap=alpha 1.0.4.0|Librarian [[villager]]s now [[trading|sell]] 1 bookshelf for 3-4 [[emerald]]s as their second tier trade.}}
{{History||1.1.0|snap=alpha 1.1.0.0|Bookshelves now generate in [[woodland mansion]]s.}}
{{History|bedrock}}
{{History||1.10.0|snap=beta 1.10.0.3|Bookshelves can now be used to craft [[lectern]]s.|Bookshelves now get inspected by librarian [[villager]]s.|[[File:Bookshelf JE4 BE2.png|32px]] The texture of bookshelves has been changed.}}
{{History||1.11.0|snap=beta 1.11.0.4|[[Trading]] has now been changed, librarian villagers now have a 50% chance to sell a bookshelf for 6 [[emerald]]s as part of their first trade.}}
{{History|console}}
{{History||xbox=TU1|xbone=CU1|ps=1.00|wiiu=Patch 1|switch=1.0.1|[[File:Bookshelf JE2 BE1.png|32px]] Added bookshelves. Whether they actually used this texture is unknown.}}
{{History||xbox=none|xbone=none|ps=1.90|wiiu=none|switch=none|[[File:Bookshelf JE4 BE2.png|32px]] The texture of bookshelves has been changed.}}
{{History|new 3ds}}
{{History||0.1.0|[[File:Bookshelf JE2 BE1.png|32px]] Added bookshelves.}}
{{History|foot}}
== Issues ==
{{Issue list}}
== Trivia ==
* Bookshelves' top and bottom textures by default use the same texture as [[oak planks]].
* It takes 90 planks, 45 [[leather]] and 135 [[paper]] to make 15 bookshelves in order to get a level 30 [[enchantment]].
* A bookshelf is the icon for [[Education Edition]].
== Gallery ==
<gallery>
File:Library in Village.png|Naturally occurring bookshelves in a [[village]]. (Before Village & Pillage).
File:Large Stronghold Library.png|Naturally occurring bookshelves in a [[stronghold]].
File:Achievement get! Trading emeralds for bookshelves.png|Bookshelves obtained by [[trading]] with a [[villager]].
File:Enchanting-Table.png|Bookshelves powering an [[enchanting table]].
</gallery>
== References ==
{{Reflist}}
== External Links ==
*[https://www.minecraft.net/en-us/article/block-week-bookshelf Block of the Week: Bookshelf] – Minecraft.net on December 16, 2016
{{Blocks|Building}}
[[Category:Manufactured blocks]]
[[Category:Natural blocks]]
[[Category:Generated structure blocks]]
[[Category:Utility blocks]]
[[Category:Bedrock Edition]]
[[Category:Java Edition]]
[[Category:Items]]
[[Category:Flammable blocks]]
[[cs:Knihovna]]
[[de:Bücherregal]]
[[es:Librería]]
[[fr:Bibliothèque]]
[[hu:Könyvespolc]]
[[it:Libreria]]
[[ja:本棚]]
[[ko:책장]]
[[nl:Boekenkast]]
[[pl:Biblioteczka]]
[[pt:Estante de livros]]
[[ru:Книжные полки]]
[[th:ชั้นหนังสือ]]
[[uk:Книжкова полиця]]
[[zh:书架]]</li><li>[[Balloon|Balloon]]<br/>{{exclusive|bedrock|education}}
{{education feature}}
{{ItemEntity
|image=White Balloon.png
|extratext = View [[#Gallery|all renders]]
|invimage=White Balloon
|invimage2=Orange Balloon
|invimage3=Magenta Balloon
|invimage4=Light Blue Balloon
|invimage5=Yellow Balloon
|invimage6=Lime Balloon
|invimage7=Pink Balloon
|invimage8=Gray Balloon
|invimage9=Light Gray Balloon
|invimage10=Cyan Balloon
|invimage11=Purple Balloon
|invimage12=Blue Balloon
|invimage13=Brown Balloon
|invimage14=Green Balloon
|invimage15=Red Balloon
|invimage16=Black Balloon
|renewable=No
|stackable=Yes
|size=Height: 0.4 Blocks<br>Width: 0.4 Blocks
}}
'''Balloons''' are [[entities]] that float upward when placed.
== Obtaining ==
Balloons are not available in the [[Creative]] inventory or [[commands]].
=== Crafting ===
{{Crafting
|A1= Latex
|B1= Matching Dye
|C1= Latex
|A2= Latex
|B2= Helium
|C2= Latex
|A3= Latex
|B3= Lead
|C3= Latex
|Output= Matching Balloon
|description={{only|bedrock|education}}
|type= Miscellaneous
|head=1
}}
{{Crafting
|A1= Latex
|B1= Bone Meal; Lapis Lazuli; Cocoa Beans; Ink Sac
|C1= Latex
|A2= Latex
|B2= Helium
|C2= Latex
|A3= Latex
|B3= Lead
|C3= Latex
|Output= White Balloon; Blue Balloon; Brown Balloon; Black Balloon
|description={{only|bedrock|education}}
|type= Miscellaneous
|foot=1
}}
== Usage ==
When {{control|used}} on a [[mob]], a [[fence]], or a [[wall]], balloons attach to the mob or block, similarly to a [[lead]]. Balloons float into the air faster than the speed the [[player]] flies up, but remain grounded if tied to a fence. If tied to a mob, the balloon floats away and carries the mob into the air, before both eventually [[despawn]] or disappear.
{| class="wikitable sortable" style="text-align: left;"
|+ Balloon-attachable mobs
! Mob
! Mass
|-
| {{EntityLink|Chicken}}
| 0.6
|-
| {{EntityLink|Cow}}
| 1.0
|-
| {{EntityLink|Donkey}}
| 1.0
|-
| {{EntityLink|Horse}}
| 1.0
|-
| {{EntityLink|Iron Golem}}
| 2.0
|-
| {{EntityLink|Llama}}
| 1.0
|-
| {{EntityLink|Mule}}
| 1.0
|-
| {{EntityLink|Mooshroom}}
| 1.0
|-
| {{EntityLink|Panda}}
| 1.5
|-
| {{EntityLink|Pig}}
| 0.75
|-
| {{EntityLink|Sheep}}
| 0.75
|-
| {{EntityLink|Snow Golem}}
| 1.0
|-
| {{EntityLink|Fox}}
| 0.6
|}
When a balloon is shot by an [[arrow]] or a [[trident]], or floats into a solid block, it pops, summons [[particles]], and is destroyed. It drops nothing. A balloon tied to a fence post bursts when a player strikes it in any direction.
== Sounds ==
{{Sound table
|type=bedrock
|sound=Balloon pop1.ogg
|sound2=Balloon pop2.ogg
|source=neutral
|description=When a balloon collides with a block from above
|id=balloon.pop
|volume=10.0
|pitch=1.75/2.0
|foot=1}}
== Data values ==
=== ID ===
{{ID table
|edition=bedrock
|firstcolumnname=Balloon
|shownumericids=y
|showforms=y
|notshowbeitemforms=y
|generatetranslationkeys=y
|displayname=Item
|spritename=balloons
|spritetype=item
|nameid=balloon
|id=598
|form=item
|translationkey=item.balloon.black.name,item.balloon.red.name,item.balloon.green.name,item.balloon.brown.name,item.balloon.blue.name,item.balloon.purple.name,item.balloon.cyan.name,item.balloon.silver.name,item.balloon.gray.name,item.balloon.pink.name,item.balloon.lime.name,item.balloon.yellow.name,item.balloon.lightBlue.name,item.balloon.magenta.name,item.balloon.orange.name,item.balloon.white.name
|foot=1}}
{{ID table
|edition=bedrock
|firstcolumnname=Balloon
|shownumericids=y
|generatetranslationkeys=y
|displayname=Entity
|spritename=balloons
|spritetype=entity
|nameid=balloon
|id=107
|foot=1}}
=== Metadata ===
In ''Bedrock Edition'', balloon items use the following data values:
{{/DV}}
== History ==
{{History|bedrock}}
{{History||1.4.0|snap=beta 1.2.20.1|[[File:White Balloon BE1.png|32px]] [[File:Orange Balloon BE1.png|32px]] [[File:Magenta Balloon BE1.png|32px]] [[File:Light Blue Balloon BE1.png|32px]] [[File:Yellow Balloon BE1.png|32px]] [[File:Lime Balloon BE1.png|32px]] [[File:Pink Balloon BE1.png|32px]] [[File:Gray Balloon BE1.png|32px]] [[File:Silver Balloon BE1.png|32px]] [[File:Cyan Balloon BE1.png|32px]] [[File:Purple Balloon BE1.png|32px]] [[File:Blue Balloon BE1.png|32px]] [[File:Brown Balloon BE1.png|32px]] [[File:Green Balloon BE1.png|32px]] [[File:Red Balloon BE1.png|32px]] [[File:Black Balloon BE1.png|32px]] <br> [[File:White Balloon (item) BE1.png|32px]] [[File:Orange Balloon (item) BE1.png|32px]] [[File:Magenta Balloon (item) BE1.png|32px]] [[File:Light Blue Balloon (item) BE1.png|32px]] [[File:Yellow Balloon (item) BE1.png|32px]] [[File:Lime Balloon (item) BE1.png|32px]] [[File:Pink Balloon (item) BE1.png|32px]] [[File:Gray Balloon (item) BE1.png|32px]] [[File:Silver Balloon (item) BE1.png|32px]] [[File:Cyan Balloon (item) BE1.png|32px]] [[File:Purple Balloon (item) BE1.png|32px]] [[File:Blue Balloon (item) BE1.png|32px]] [[File:Brown Balloon (item) BE1.png|32px]] [[File:Green Balloon (item) BE1.png|32px]] [[File:Red Balloon (item) BE1.png|32px]] [[File:Black Balloon (item) BE1.png|32px]] Added balloons.}}
{{History||1.18.10|snap=beta 1.18.10.24|[[Bee]]s, [[boat]]s, tamed [[cat]]s, [[dolphin]]s, [[glow squid]]s, [[goat]]s, [[hoglin]]s, [[ocelot]]s, [[panda]]s, [[parrot]]s, [[polar bear]]s, [[squid]]s, [[strider]]s, tamed [[wolves]] and [[zoglin]]s can now be leashed.}}
{{History||1.18.30|snap=beta 1.18.30.28|Added the [[boat with chest]], which can be leashed.}}
{{History|education}}
{{History||1.0.27|[[File:White Balloon BE1.png|32px]] [[File:Orange Balloon BE1.png|32px]] [[File:Magenta Balloon BE1.png|32px]] [[File:Light Blue Balloon BE1.png|32px]] [[File:Yellow Balloon BE1.png|32px]] [[File:Lime Balloon.png|32px]] [[File:Pink Balloon BE1.png|32px]] [[File:Gray Balloon BE1.png|32px]] [[File:Silver Balloon BE1.png|32px]] [[File:Cyan Balloon BE1.png|32px]] [[File:Purple Balloon BE1.png|32px]] [[File:Blue Balloon.png|32px]] [[File:Brown Balloon BE1.png|32px]] [[File:Green Balloon BE1.png|32px]] [[File:Red Balloon BE1.png|32px]] [[File:Black Balloon BE1.png|32px]] <br> [[File:White Balloon (item) BE1.png|32px]] [[File:Orange Balloon (item) BE1.png|32px]] [[File:Magenta Balloon (item) BE1.png|32px]] [[File:Light Blue Balloon (item) BE1.png|32px]] [[File:Yellow Balloon (item) BE1.png|32px]] [[File:Lime Balloon (item) BE1.png|32px]] [[File:Pink Balloon (item) BE1.png|32px]] [[File:Gray Balloon (item) BE1.png|32px]] [[File:Silver Balloon (item) BE1.png|32px]] [[File:Cyan Balloon (item) BE1.png|32px]] [[File:Purple Balloon (item) BE1.png|32px]] [[File:Blue Balloon (item) BE1.png|32px]] [[File:Brown Balloon (item) BE1.png|32px]] [[File:Green Balloon (item) BE1.png|32px]] [[File:Red Balloon (item) BE1.png|32px]] [[File:Black Balloon (item) BE1.png|32px]] Added balloons.}}
{{History||1.18.32|snap=1.18.10.04|[[Bee]]s, [[boat]]s, tamed [[cat]]s, [[dolphin]]s, [[glow squid]]s, [[goat]]s, [[hoglin]]s, [[ocelot]]s, [[panda]]s, [[parrot]]s, [[polar bear]]s, [[squid]]s, [[strider]]s, tamed [[wolves]] and [[zoglin]]s can now be leashed.}}
{{History|foot}}
==Gallery==
=== Colors ===
<gallery>
Orange Balloon.png
Magenta Balloon.png
Light Blue Balloon.png
Yellow Balloon.png
Lime Balloon.png
Pink Balloon.png
Gray Balloon.png
Light Gray Balloon.png
Cyan Balloon.png
Purple Balloon.png
Blue Balloon.png
Brown Balloon.png
Green Balloon.png
Red Balloon.png
Black Balloon.png
</gallery>
=== [[Event servers]] ===
<gallery>
File:Legends Balloon.png|Differently designed balloons featured in the ''[[Minecraft Legends Live Event]]''.
File:Sniffer Balloon (Trails and Tales Summer Event) Render.png|A [[Sniffer]] balloon, featured in the [[Trails & Tales Event]].
File:Camel Balloon (Trails and Tales Summer Event) Render.png|A balloon of a [[Camel]], featured in the Trails & Tales Event.
File:Balloon Bundle (Trails and Tales Summer Event) Render.png|Bundle of balloons from the Trails & Tales Event.
</gallery>{{Items}}
{{Entities}}
{{Education Edition}}
[[Category:Education Edition entities]]
[[Category:Education Edition items]]
[[de:Ballon]]
[[it:Palloncino]]
[[ja:風船]]
[[ko:풍선]]
[[pl:Balon]]
[[pt:Balão]]
[[ru:Воздушный шар]]
[[zh:气球]]</li></ul> | 21w03a | ||||
| Pocket Edition Alpha | |||||
v0.14.0{{Extension DPL}}<ul><li>[[Chain|Chain]]<br/>{{about|the block|the enchantment in Minecraft Dungeons|MCD:Chains|the armor tier named chainmail|Armor|the armor material called chainmail|Armor materials}}
{{Block
|image=<gallery>
Chain Axis Y.png | Y-axis
Chain Axis X.png | X-axis
Chain Axis Z.png | Z-axis
</gallery>
| transparent = Yes
| light = No
| tool = Wooden pickaxe
| renewable = Yes
| stackable = Yes (64)
| flammable = No
| lavasusceptible = No
}}
'''Chains''' are metallic decoration [[block]]s.
== Obtaining ==
=== Breaking ===
Chains can be mined using any [[pickaxe]]. If mined without a pickaxe, it drops nothing.
{{breaking row|Chain|Pickaxe|Wood|horizontal=1}}
=== Natural generation ===
Chains generate in [[bastion remnant]]s and sometimes in [[ruined portal]]s that generate in the Nether. They always generate above [[magma cube]] spawners, also found in [[bastion]]s.
Chains can also generate in [[mineshafts]]. They generate on the sides of a wooden bridge (a mid-air corridor) when the distance between the bridge and the highest solid block below it is higher than the distance to the lowest solid block above it. Chains here generate vertically in a pillar between the bridge and the ceiling. The lowest block of the pillar, connecting the chain to the bridge, is always an [[oak fence]].
=== Chest loot ===
{{LootChestItem|chain}}
=== Crafting ===
{{Crafting
|B1=Iron Nugget
|B2=Iron Ingot
|B3=Iron Nugget
|Output=Chain
|type=Building block
}}
== Usage ==
Chains can be used to suspend [[bell]]s, [[hanging sign]]s, or both types of [[lantern]]s (normal lanterns and soul lanterns), as the chain texture connects to the chain of the lantern seamlessly as if it were part of it, and it connects the hanging sign chains together. Chains do not require a supporting block to be placed whether it is on the top, next to it or at the bottom. It can exist completely free-standing in mid air<ref>{{bug|MC-178791}}</ref> and it can be rotated. Chains connect horizontally or vertically, but not across different orientations (so a chain with N orientation does not connect to a chain with E orientation in the adjacent block).
Horizontal chains one block above a surface may be walked over. Horizontal chains two blocks above a surface prevent players from traveling past them. Vertical chains block travel if targeted directly, but may be skirted.
Precision is required, but chains can be walked on, allowing for inconspicuous, although somewhat costly, bridges.
Chains can be pushed by [[piston]]s without being broken.
=== Crafting ingredient ===
{{crafting usage}}
== Sounds ==
{{Sound table/Block/Chain}}
== Data values ==
=== ID ===
{{edition|java}}:
{{ID table
|edition=java
|showforms=y
|generatetranslationkeys=y
|displayname=Chain
|spritetype=block
|nameid=chain
|foot=1}}
{{edition|bedrock}}:
{{ID table
|edition=bedrock
|firstcolumnname=Chain
|shownumericids=y
|showforms=y
|generatetranslationkeys=y
|displayname=Block
|spritename=chain
|spritetype=block
|nameid=chain
|id=541
|form=block
|itemform=item.chain}}
{{ID table
|displayname=Item
|spritename=chain
|spritetype=item
|nameid=chain
|id=619
|form=item
|translationkey=tile.chain.name
|foot=1}}
=== Block states ===
{{see also|Block states}}
{{/BS}}
== History ==
{{History|java}}
{{History||1.16|snap=20w16a|[[File:Chain (item) JE1 BE1.png|32px]] [[File:Chain Axis Y JE1 BE1.png|32px]] Added chains.
|Chains generate in the newly added [[bastion remnant]]s, and can be found in their [[chest]]s.
|Chains currently use the generic metal [[block]] [[sound]]s.}}
{{History|||snap=20w17a|Unique [[sound]]s have been added for chains.}}
{{History|||snap=20w18a|Chains can now be [[waterlogged]].}}
{{History||1.16.2|snap=20w30a|The chance of finding chains in bastion remnant chests is decreased from 31.5% to 24.4%.}}
{{History|||snap=Pre-release 1|[[File:Chain Axis X JE1 BE1.png|32px]] [[File:Chain Axis Z JE1 BE1.png|32px]] Chains can now be placed in all orientations.}}
{{History||1.17|snap=21w07a|Chains can now generate in [[mineshaft]]s.}}
{{History|||snap=21w13a|[[File:Chain (UD) JE2.png|32px]] [[File:Chain (NS) JE2.png|32px]] [[File:Chain (EW) JE2.png|32px]] The model of chains has been changed so that the backside texture is mirrored.}}
{{History||1.20<br>(Experimental)|link=1.19.3|snap=22w42a|Chains are now used to craft [[hanging sign]]s.}}
{{History|bedrock}}
{{History||1.16.0|snap=beta 1.16.0.57|[[File:Chain_(item)_JE1_BE1.png|32px]] [[File:Chain Axis Y JE1 BE1.png|32px]] Added chains.}}
{{History|||snap=beta 1.16.0.63|Unique [[sound]]s have been added for chains.}}
{{History||1.16.100|snap=beta 1.16.100.54|[[File:Chain Axis X JE1 BE1.png|32px]] [[File:Chain Axis Z JE1 BE1.png|32px]] Chains can now be placed in all orientations.}}
{{History||1.20.0<br>(Experimental)|link=Bedrock Edition 1.19.50|snap=beta 1.19.50.21|Chains are now used to craft [[hanging sign]]s.}}
{{History|foot}}
== Issues ==
{{issue list}}
== Trivia ==
* A vertical chain, being a solid, but not a full [[block]], allows for many sizes of [[mob]]s and [[player]]s to pass alongside each piece horizontally.
* Despite its name, it cannot be [[crafted]] into [[chainmail armor]].<ref>{{bug|MC-178979}} - Invalid</ref>
* Chains do not stick together when moved by pistons, regardless of orientation.
== Gallery ==
<gallery>
Chained Stone Bricks.jpg|Chains and stone bricks.
Barbell.jpg|Chains and chiseled blackstone.
Barbell Evoker.jpg|An evoker lifting weights.
Chain with Lantern.png|A [[lantern]] hanging from a chain.
Chain with Spawner.png|A [[spawner]] hanging with a chain found in the bastion remnants.
</gallery>
== References ==
{{reflist}}
{{blocks|Building}}
{{Items}}
[[Category:Manufactured blocks]]
[[Category:Generated structure blocks]]
[[Category:Nether blocks]]
[[de:Kette]]
[[es:Cadena]]
[[fr:Chaîne]]
[[ja:鎖]]
[[ko:사슬]]
[[pl:Łańcuch]]
[[pt:Corrente]]
[[ru:Цепь]]
[[zh:锁链]]</li><li>[[Glow Berries|Glow Berries]]<br/>{{Block
|image=<gallery>
Cave Vines (head).png|Without Berries
Cave Vines (berries).png|With Berries
</gallery>
|image2 = Glow Berries JE1 BE1.png
|extratext=[[#Gallery|View all renders]]
|rarity=Common
|renewable=Yes
|stackable=Yes (64)
|tool=Any
|light=Yes
|transparent=Yes
|heals={{hunger|2}}
|flammable=Yes
|lavasusceptible=No
}}
'''Glow berries''' are a [[food]] [[item]] obtained from cave vines and can be used to plant them.
'''Cave vines''' are a climbable, [[Bone Meal|bonemealable]] plant that hangs off ceilings and grows glow berries. Cave vines with glow berries produce [[light]] and drop glow berries when broken or harvested. Cave vines with no glow berries will not drop anything.
== Obtaining ==
=== Natural generation ===
Cave vines can be found in [[lush caves]], hanging from cave ceilings.
=== Chest loot ===
{{LootChestItem|glow-berries}}
=== Post-generation ===
Glow berries can be collected from a cave vine by {{control|using}} or {{control|breaking}} the vine. This yields one glow berry when the vine is bearing them and nothing when it is not. A cave vine also breaks if [[water]] runs over its location or if a [[piston]] extends or pushes a block into its location.
{{IN|bedrock}}, using a tool with [[Silk Touch]] on cave vines always yields a glow berry, even if the vine appears empty.
[[Fortune]] has no effect on the number of glow berries dropped.
== Usage ==
=== Placement ===
Glow berries can be placed on and grown from the bottom of most blocks. They have no specific lighting requirements. When placed, they can be of any length.
=== Growth ===
Placing glow berries on the bottom of a block creates a cave vine that grows downward one block at a time as long as [[air]] is beneath it and its maximum height (2 to 26 blocks) has not been reached. Each newly-grown cave vine block has a 1 in 9 chance of bearing glow berries. Only this tip can ever naturally grow them.{{only|JE}}{{More info|exact growth rate and chance to bear glow berries}}
{{control|Using}} [[bone meal]] on a cave vine produces glow berries if the vine was not bearing any.
{{IN|Java}}, cave vines stop growing if [[shears]] are {{control|used}} on the tip.
{{IN|bedrock}}, if placing glow berries in the Nether, cave vines are able to grow and produces glow berries.
=== Food ===
To eat glow berries, press and hold {{control|use}} while it is selected in the hotbar. Eating one restores {{hunger|2}} [[hunger]] and 0.4 hunger [[Hunger#Mechanics|saturation]] points, like [[sweet berries]].
=== Light ===
When bearing glow berries, cave vines give off a [[light]] level of 14.
=== Composting ===
Placing glow berries into a [[composter]] by {{control|using}} them on it has a 30% chance of raising the compost level by 1.
=== Breeding ===
Glow berries can be fed to [[fox]]es to [[breeding|breed]] them. Foxes are similar to cats when being fed as a wild animal; a sudden movement by the player may cause the fox to flee even if the player holds glow berries. The resulting baby fox trusts the [[player]] and does not flee.
Glow berries can be {{control|used}} on baby foxes to reduce the time until they grow by 10%.
==Sounds==
===Glow berries===
{{Sound table/Entity/Food}}
===Cave vines===
====Generic====
{{Sound table/Block/Cave vines}}
==== Unique ====
{{edition|java}}:
{{Sound table
|sound=Berries pick1.ogg
|sound2=Berries pick2.ogg
|subtitle=Berries pop
|source=block
|description=When glow berries are picked
|id=block.cave_vines.pick_berries
|translationkey=subtitles.item.berries.pick
|volume=1.0
|pitch=0.8-1.2
|distance=16}}
{{Sound table
|sound=Shear.ogg
|subtitle=Plant cropped
|source=block
|description=When the tip of cave vines are cropped with [[Shears#Cropping growing plants|shears]]
|id=block.growing_plant.crop
|translationkey=subtitles.block.growing_plant.crop
|volume=1.0
|pitch=1.0
|distance=16
|foot=1}}
{{edition|bedrock}}:
{{Sound table
|type=bedrock
|sound=Berries pick1.ogg
|sound2=Berries pick2.ogg
|source=block
|description=When glow berries are picked
|id=pick_berries.cave_vines
|volume=1.0
|pitch=0.8-1.2
|foot=1}}
==Data values==
===ID===
{{edition|java}}:
{{ID table
|edition=java
|showblocktags=y
|showitemtags=y
|showforms=y
|generatetranslationkeys=y
|displayname=Cave Vines
|spritetype=block
|nameid=cave_vines
|blocktags=cave_vines,lush_plants_replaceable
|form=block
}}
{{ID table
|displayname=Cave Vines Plant
|spritetype=block
|nameid=cave_vines_plant
|blocktags=cave_vines,lush_plants_replaceable
|form=block
}}
{{ID table
|displayname=Glow Berries
|spritetype=item
|nameid=glow_berries
|itemtags=fox_food
|form=item
|foot=1}}
{{el|be}}:
{{ID table
|edition=bedrock
|shownumericids=y
|showforms=y
|generatetranslationkeys=y
|displayname=Cave Vines
|nameid=cave_vines
|spritetype=block
|id=577}}
{{ID table
|displayname=Cave Vines Body With Berries
|nameid=cave_vines_body_with_berries
|spritename=lit-cave-vines-plant
|spritetype=block
|id=630}}
{{ID table
|displayname=Cave Vines Head With Berries
|spritename=lit-cave-vines
|nameid=cave_vines_head_with_berries
|spritetype=block
|id=631}}
{{ID table
|displayname=Glow Berries
|spritetype=item
|nameid=glow_berries
|form=item
|id=638
|foot=1}}
=== Block states===
{{See also|Block states}}
{{/BS}}
==Advancements==
{{load advancements|Husbandry;A Balanced Diet}}
==History==
{{History||October 3, 2020|link={{ytl|DWZIfsaIgtE|t=1781}}|[[File:Cave Vines Plant JE1 BE1.png|32px]] [[File:Cave Vines Plant (berries) JE1 BE1.png|32px]] [[File:Cave Vines (head) JE1 BE1.png|32px]] [[File:Cave Vines (berries) JE1 BE1.png|32px]] Cave vines (named as glow berries) are shown as part of lush caves at [[Minecraft Live 2020]].}}
{{History|java}}
{{History||1.17|snap=21w05a|[[File:Glow Berries JE1 BE1.png|32px]] Added glow berries.
|[[File:Cave Vines Plant JE1 BE1.png|32px]] [[File:Cave Vines Plant (berries) JE1 BE1.png|32px]] [[File:Cave Vines (head) JE1 BE1.png|32px]] [[File:Cave Vines (berries) JE1 BE1.png|32px]] Added cave vines.}}
{{History|||snap=21w11a|Renamed from "cave vines head" and "cave vines body" to "cave vines" and "cave vines plant", respectively.
|The IDs have also changed.
|Cave vines now always give 14 light, regardless of the type of part.
|Now slow down the player.
|Can now be climbed.}}
{{History|||snap=21w13a|Glow berries now generate as loot in [[mineshaft]] [[Minecart with Chest|chest minecarts]].}}
{{History||1.18|snap=Experimental Snapshot 1|With the implementation of cave biomes including lush caves, caves vines can now generate in normal worlds.}}
{{History|||snap=21w37a|Cave vines stop growing if [[shears]] are used on the tip.}}
{{History|||snap=21w41a|[[File:Cave Vines Plant JE2.png|32px]] [[File:Cave Vines Plant (berries) JE2.png|32px]] Changed cave vines plant texture.}}
{{History||1.19|snap=22w13a|Glow Berries may now be found in [[ancient city]] [[chest]]s.}}
{{History|bedrock}}
{{History||Caves & Cliffs (experimental)|link=Bedrock Edition 1.17.0|snap=beta 1.16.220.52|[[File:Glow Berries JE1 BE1.png|32px]] Added glow berries.
|[[File:Cave Vines Plant JE1 BE1.png|32px]] [[File:Cave Vines Plant (berries) JE1 BE1.png|32px]] [[File:Cave Vines (head) JE1 BE1.png|32px]] [[File:Cave Vines (berries) JE1 BE1.png|32px]] Added cave vines.}}
{{History||1.17.0|snap=beta 1.16.230.54|Glow Berries now generate as loot in [[mineshaft]] [[Minecart with Chest|chest minecarts]].}}
{{History|||snap=beta 1.17.0.52|Glow Berries are now available without enabling [[experimental gameplay]].}}
{{History||1.17.20|snap=beta 1.17.20.20|Cave Vines can now be pollinated by [[bee]]s.}}
{{History||1.18.10|snap=beta 1.18.10.20|[[File:Cave Vines Plant JE2.png|32px]] [[File:Cave Vines Plant (berries) JE2.png|32px]] Changed cave vines plant texture.}}
{{History||1.19.20|snap=beta 1.19.20.20|Cave vines can now be destroyed by [[ravagers]].}}
{{History|foot}}
<gallery>
Lush_caves_overview_concept_art.jpg|Concept art for the lush caves and vegetation including Glow Berries.
JE_1.17_Development_Lush_Caves.jpg|A view of the lush caves with glow berries from Minecraft Live 2020.
Lushcaves_minecon.png|Lush cave in MINECON.
Cavesworkinprogress.jpg|A view of the lush caves with glow berries, tweeted by LadyAgnes.
Livestream_lush_cave.jpg|Another view of the lush caves with glow berries, in an interview with LadyAgnes.
Glow Berry Fox.jpg|A fox under a glow berry vine.
</gallery>
===Cave vines "item"===
{{:Technical blocks/Cave Vines}}
==Issues==
{{Issue list}}
==Trivia==
*They are the first item to be usable as both a food and a light source.
==Gallery==
<gallery>
Cave Vines (plant).png
Cave Vines (berries, plant).png
Cave Vines (head).png
Cave Vines (berries).png
Cave_Vines_Age2_(Possibility_pattern_1)_JE1.png|A possible pattern of the cave vines at Age 2.
Cave_Vines_Age2_(Possibility_pattern_2)_JE1.png|And another pattern.
</gallery>
{{Blocks|vegetation}}
{{Items}}
[[Category:Food]]
[[Category:Plants]]
[[Category:Natural blocks]]
[[Category:Non-solid blocks]]
[[Category:Light sources]]
[[Category:Flammable blocks]]
[[Category:Climbable blocks]]
[[de:Leuchtbeeren]]
[[es:Bayas luminosas]]
[[fr:Baies lumineuses]]
[[it:Bacche luminose]]
[[ja:グロウベリー]]
[[pt:Bagas brilhantes]]
[[ru:Светящиеся ягоды]]
[[zh:发光浆果]]</li></ul> | build 1 | ||||
| Item frames are considered as a block entity instead of an entity.[3] | |||||
| Pocket Edition | |||||
1.0.0{{Extension DPL}}<ul><li>[[Pink Dye|Pink Dye]]<br/>{{Item
| image = Pink Dye.png
| renewable = Yes
| stackable = Yes (64)
}}
'''Pink dye''' is a [[Dyeing#Quasi-Primary|quasi-primary color dye]].
== Obtaining ==
=== Crafting ===
{{Crafting
|head=1
|showname=0
|showdescription=1
|Peony;Pink Tulip;Pink Petals
|Output=Pink Dye,2;Pink Dye;Pink Dye
|type=Material
}}
{{Crafting
|Red Dye
|White Dye
|Output=Pink Dye,2
|type=Material
}}
{{Crafting
|Red Dye
|Bone Meal
|Output=Pink Dye,2
|type=Material
|foot=1
|description={{only|bedrock|education}}
}}
=== Trading ===
[[Wandering trader]]s sell 3 pink dye for an [[emerald]].
== Usage ==
{{dye usage}}
=== Crafting ingredient ===
{{crafting usage|ignore=Banner|continue=1}}
{{banner crafting usage}}
=== Loom ingredient ===
{{Banner loom usage|Pink Dye}}
== Data values ==
=== ID ===
{{edition|java}}:
{{ID table
|edition=java
|showforms=y
|generatetranslationkeys=y
|displayname=Pink Dye
|spritetype=item
|nameid=pink_dye
|form=item
|foot=1}}
{{edition|bedrock}}:
{{ID table
|edition=bedrock
|showaliasids=y
|shownumericids=y
|showforms=y
|notshowbeitemforms=y
|generatetranslationkeys=y
|displayname=Pink Dye
|spritetype=item
|nameid=pink_dye
|aliasid=dye / 9
|id=404
|form=item
|translationkey=item.dye.pink.name
|foot=1}}
== Video ==
{{yt|pPq-Hs9ZPx4}}
== History ==
{{History|java beta}}
{{History||1.2|[[File:Pink Dye JE1 BE1.png|32px]] Added pink dye.}}
{{History|java}}
{{History||1.4.2|snap=12w34a|Added the ability to [[Armor#Dyeing|dye]] leather [[armor]] and [[wolf]] collars.}}
{{History||1.4.6|snap=12w49a|Pink dye can now be [[crafting|crafted]] with [[gunpowder]] to create a [[firework star]].}}
{{History||1.6.1|snap=13w19a|[[Stained clay]] can now be crafted.}}
{{history||1.7.2|snap=13w36a|With the addition of new [[flower]]s, many secondary and tertiary dyes are now primary [[dye]]s.}}
{{History|||snap=13w41a|[[Stained glass]] can now be crafted.}}
{{History||1.8|snap=14w30a|Added [[banner]]s, which can be dyed.}}
{{History||1.11|snap=16w39a|Added the ability to dye [[shulker box]]es.}}
{{History||1.12|snap=17w15a|Added the ability to dye [[bed]]s.}}
{{History||1.13|snap=17w47a|The different data values for the <code>dye</code> ID have now been split up into their own IDs.
|Prior to [[1.13/Flattening|''The Flattening'']], this [[item]]'s numeral ID was 351.}}
{{History||1.14|snap=18w43a|Pink dye is now crafted using [[white dye]], instead of [[bone meal]].
|[[File:Pink Dye JE2 BE2.png|32px]] The texture of pink dye has now been changed.}}
{{History|||snap=18w44a|Pink dye can now change the text color on [[sign]]s to pink.}}
{{History|||snap=19w05a|Added the [[wandering trader]], which sells pink dye.}}
{{History|||snap=19w11a|Pink dye can now be [[trading|bought]] by shepherd villagers.}}
{{History||1.17|snap=20w45a|Pink dye can now be used to craft [[pink candle]]s.}}
{{History|||snap=21w19a|Pink dye can no longer be used to craft pink candles.}}
{{History|||snap=Pre-release 1|Pink dye can now once again be used to craft pink candles.}}
{{History||1.20<br>(Experimental)|link=1.19.3|snap=22w42a|Pink dye can now change the text color on [[hanging sign]]s to pink.}}
{{History||1.20<br>(Experimental)|link=1.19.4|snap=23w07a|[[Pink petals]] can now be crafted into pink dye.}}
{{History|pocket alpha}}
{{History||v0.3.0|[[File:Pink Dye JE1 BE1.png|32px]] Added pink dye.}}
{{History||v0.4.0|Pink dye is now craftable with [[rose red]] and [[bone meal]].
|Pink dye can now be used to craft pink wool.}}
{{History||v0.6.0|Pink dye can now be used to dye [[sheep]].}}
{{History||v0.8.0|snap=build 1|Pink dye can now be used to craft [[magenta dye]].}}
{{History||v0.9.0|snap=build 11|Pink dye can now be used to craft colored [[terracotta]].}}
{{History||v0.11.0|snap=build 1|Pink dye can now be used to dye tamed [[wolf]] collars.}}
{{History||v0.14.0|snap=build 1|Pink dye can now be used to dye [[water]] in [[cauldron]]s.}}
{{History|pocket}}
{{History||1.0.0|snap=alpha 0.17.0.1|Pink dye can now be used to dye [[shulker]]s.}}
{{History||1.1.0|snap=alpha 1.1.0.0|Pink dye can now be used to craft [[concrete powder]], colored [[bed]]s and dyed [[shulker box]]es.}}
{{History|bedrock}}
{{History||1.2.0|snap=beta 1.2.0.2|Pink dye can now be used to craft [[firework star]]s, [[stained glass]] and patterns on [[banner]]s.}}
{{History||1.4.0|snap=beta 1.2.20.1|Pink dye can now be used to craft [[balloon]]s and [[glow stick]]s.}}
{{History||1.8.0|snap=beta 1.8.0.8|Pink dye can now be used to dye tamed [[cat]] collars.}}
{{History||1.10.0|snap=beta 1.10.0.3|Pink dye is now [[trading|sold]] by [[wandering trader]]s.
|Pink dye can now be used to dye white [[carpet]]s and undyed [[glass pane]]s.
|[[File:Pink Dye JE2 BE2.png|32px]] The texture of pink dye has now been changed.}}
{{History||1.16.100|snap=beta 1.16.100.56|The ID of pink dye has been changed from <code>dye/9</code> to <code>pink_dye</code>.}}
{{History|console}}
{{History||xbox=TU1|xbone=CU1|ps=1.00|switch=1.0.1|wiiu=Patch 1|[[File:Pink Dye JE1 BE1.png|32px]] Added pink dye.}}
{{History|PS4}}
{{History||1.90|[[File:Pink Dye JE2 BE2.png|32px]] The texture of pink dye has now been changed.}}
{{History|new 3ds}}
{{History||0.1.0|[[File:Pink Dye JE1 BE1.png|32px]] Added pink dye.}}
{{History|foot}}
== Issues ==
{{issue list}}
{{Items}}
[[Category:Dyes]]
[[cs:Růžové barvivo]]
[[de:Rosa Farbstoff]]
[[es:Tinte rosa]]
[[fr:Teinture rose]]
[[hu:Rózsaszín festék]]
[[ja:桃色の染料]]
[[ko:분홍색 염료]]
[[nl:Roze kleurstof]]
[[pl:Różowy barwnik]]
[[pt:Corante rosa]]
[[ru:Розовый краситель]]
[[zh:粉红色染料]]
[[Category:Renewable resources]]</li><li>[[Bone|Bone]]<br/>{{about|the item|the block|Bone Block|other uses|Bone (disambiguation)}}
{{Item
| image = Bone.png
| renewable = Yes
| stackable = Yes (64)
}}
A '''bone''' is an [[item]] primarily obtained from [[skeleton]]s and similar mobs. It can be crafted into [[Bone Meal|bone meal]] or used to tame wild [[Wolf|wolves]].
== Obtaining ==
=== Chest loot ===
{{LootChestItem|bone}}
=== Mob loot ===
Skeletons, [[wither skeleton]]s, [[skeleton horse]]s, and [[stray]]s may drop 0–2 bones upon death. The maximum drop is increased by 1 per level of Looting, for a maximum of 0-5 bones with Looting III.
{{IN|bedrock}}, [[salmon]], [[cod]], [[pufferfish]], and [[tropical fish]] have 25% chance to drop 1-2 bones upon death. The maximum drop is increased by 1 to 2 per level of Looting, for a maximum of 2-8 bones with Looting III.
Salmon (small and medium size) have 25% chance to drop 1 bone upon death, The maximum drop is increased by 1 to 2 per level of [[Looting]], for a maximum of 2-7 bones with Looting III. The chance of dropping bones increases by 1% per looting level, so with Looting III there is up to a 28% chance of bones dropping.
=== Fishing ===
Bones can also be obtained by [[fishing]] as part of the junk category. The best chance of catching a bone is achieved without the [[Luck of the Sea]] enchantment, yielding a 1.1% chance.
== Usage ==
=== Helmet ===
[[File:Steve wearing Bone.png|thumb|right|75px]]
[[File:Alex wearing Bone.png|thumb|right|75px]]
While a bone cannot be equipped in the head slot in Survival mode, equipping it using commands causes it to appear in the player's mouth.
=== Taming ===
Using a bone on a wild [[wolf]] has a {{frac|1|3}} chance of [[taming]] it. Bones cannot tame a hostile wolf or a wolf that has already been tamed. However, bones can be used to attract the attention of the tamed ones.
=== Crafting ingredient ===
A bone can be crafted into 3 bone meal.
{{crafting usage}}
== Achievements ==
{{load achievements|Leader of the pack}}
== Advancements ==
{{load advancements|Best Friends Forever}}
== Data values ==
=== ID ===
{{edition|java}}:
{{ID table
|edition=java
|showforms=y
|generatetranslationkeys=y
|displayname=Bone
|spritetype=item
|nameid=bone
|form=item
|foot=1}}
{{edition|bedrock}}:
{{ID table
|edition=bedrock
|shownumericids=y
|showforms=y
|notshowbeitemforms=y
|generatetranslationkeys=y
|displayname=Bone
|spritetype=item
|nameid=bone
|id=415
|form=item
|foot=1}}
== History ==
{{History|java beta}}
{{History||1.2|[[File:Bone JE1 BE1.png|32px]] Added bones.
|Bones can be [[crafting|crafted]] into [[bone meal]].}}
{{History||1.4|Bones can now be used to tame [[wolves]].}}
{{History|java}}
{{History||1.3.1|snap=12w21a|Bones can now be found within [[desert temple]]s, allowing bones to be obtainable on Peaceful difficulty.}}
{{History||1.4.2|snap=12w36a|Added [[wither skeleton]]s, which has a chance to [[drops|drop]] bones when killed.}}
{{History||1.6.1|snap=13w16a|Added [[skeleton horse]]s, which drop bones when killed.}}
{{History||1.7.2|snap=13w36a|Bones can now be more easily obtained in Peaceful difficulty by [[fishing]]. Although, they are considered a "junk" [[item]].}}
{{History||1.9|snap=15w44a|The average yield of bones in [[desert temple]]s has been slightly decreased.
|Bones can now be found in [[dungeon]] [[chest]]s.}}
{{History||1.10|snap=16w20a|Added [[stray]]s, which [[drops|drop]] bones when killed.}}
{{History||1.11|snap=16w39a|Bones can now found in the new [[woodland mansion]] chests.}}
{{History||1.13|snap=17w47a|Prior to [[1.13/Flattening|''The Flattening'']], this [[item]]'s numeral ID was 352.}}
{{History||1.14|snap=18w43a|[[File:Bone JE2.png|32px]] The texture of bones has now been changed.}}
{{History|||snap=18w44a|[[File:Bone JE3 BE2.png|32px]] The texture of bones has now been slightly changed.}}
{{History||1.19|snap=Deep Dark Experimental Snapshot 1|Bones now generate in [[ancient city]] chests.}}
{{History|pocket alpha}}
{{History||v0.2.0|[[File:Bone JE1 BE1.png|32px]] Added bones. They are currently unobtainable and serve no purpose.}}
{{History||v0.3.3|Added skeletons, which drop bones when they die.
|Bones can now be used to craft [[bone meal]].}}
{{History||v0.5.0|Bones can now be obtained after activating the [[nether reactor]].}}
{{History||v0.9.0|snap=build 1|Added bones to [[Creative]] mode.}}
{{History||v0.11.0|snap=build 1|Bones can now be more easily obtained in Peaceful difficulty by [[fishing]]. Although, they are considered a "junk" [[item]].}}
{{History||v0.12.1|snap=build 1|Added [[wither skeleton]]s, which have a chance to [[drops|drop]] bones when killed.
|Bones are no longer available from the [[nether reactor]].}}
{{History||v0.13.0|snap=build 1|Bones can now be found inside of the [[desert temple]] hidden [[chest]] room.}}
{{History||v0.15.0|snap=build 1|Added [[stray]]s and [[skeleton horse]]s, which drop bones when killed.
|Bones can now be found in [[jungle temple]] [[chest]]s.}}
{{History|pocket}}
{{History||1.1.0|snap=alpha 1.1.0.0|Bone can now be found inside [[woodland mansion]] chests.}}
{{History|bedrock}}
{{History||1.4.0|snap=beta 1.2.14.2|Bones now [[drops|drop]] from [[fish]] mobs.}}
{{History||1.10.0|snap=beta 1.10.0.3|[[File:Bone JE3 BE2.png|32px]] The texture of bones has now been changed.}}
{{History|console}}
{{History||xbox=TU1|xbone=CU1|ps=1.00|wiiu=Patch 1|[[File:Bone JE1 BE1.png|32px]] Added bones.}}
{{History||xbox=TU5|Bones can be found in the Miscellaneous tab in the [[Creative inventory]].}}
{{History||xbox=TU12|Moved bones to the Materials tab in the Creative inventory.}}
{{History||xbox=TU19|xbone=CU7|ps=1.12|wiiu=Patch 1|Added [[wither skeleton]]s, which have a chance to [[drops|drop]] bones when killed.}}
{{History||xbox=TU31|xbone=CU19|ps=1.22|wiiu=Patch 3|Bones can now be obtained from [[fishing]].}}
{{History||xbox=TU46|xbone=CU36|ps=1.38|wiiu=Patch 15|Added [[stray]]s and [[skeleton horse]]s, which drop bones when killed.}}
{{History||xbox=none|xbone=none|ps=1.90|wiiu=none|switch=none|[[File:Bone JE3 BE2.png|32px]] The texture of bones has now been changed.}}
{{History|new 3ds}}
{{History||0.1.0|[[File:Bone JE1 BE1.png|32px]] Added bones.}}
{{History|foot}}
== Issues ==
{{issue list}}
== See also ==
* [[Bone meal]]
* [[Wolf]]
* [[Dyeing]]
{{Items}}
[[Category:Renewable resources]]
[[de:Knochen]]
[[es:Hueso]]
[[fr:Os]]
[[hu:Csont]]
[[it:Osso]]
[[ja:骨]]
[[ko:뼈]]
[[nl:Bot]]
[[pl:Kość]]
[[pt:Osso]]
[[ru:Кость]]
[[th:กระดูก]]
[[tr:Kemik]]
[[uk:Кістка]]
[[zh:骨头]]</li></ul> | alpha 0.17.0.1 | Item frames now generate in end city ships. | |||
| Bedrock Edition | |||||
1.10.0{{Extension DPL}}<ul><li>[[Debug Stick|Debug Stick]]<br/>{{about|the item|other uses|Debug}}
{{exclusive|java}}
{{Item
| image = Debug Stick.gif
| rarity = Epic
| renewable = No
| stackable = No
}}
The '''debug stick''' is an [[item]] used to edit the [[block states]] of [[block]]s. It is visually identical to a regular [[stick]], but with a glint (as if [[Enchanting|enchanted]]).
== Obtaining ==
The debug stick is obtainable via [[commands]] such as {{cmd|/give}} or {{Cmd|/item}}, or the Creative inventory if the player has the appropriate permissions. It can be obtained only in worlds with cheats on.
== Usage ==
The debug stick can be used to change block states. {{control|Hitting}} the block allows players to select the block state key they wish to change, for an example, switching between the ''conditional'' and the ''facing'' block state keys for a [[command block]]. {{control|Using}} the block allows them to cycle through the valid values for the block state key, again as an example, the player can make the command block face, ''down'', ''east'', ''north'', ''south'', ''up'', or ''west'' if they chose the ''facing'' block state key. {{control|Sneaking}} while {{control|hitting}} or {{control|using}} cycles through the block state keys or values in reverse order.
It is notable that {{Control|using}} debug stick directly on an interactive block without {{Control|sneaking}} uses the block itself instead of the stick.<ref>{{bug|MC-200199}} </ref>
The debug stick cannot be used while in Survival or Adventure mode. It works only in creative mode with cheats enabled. In modes other than Creative, it acts like a regular item — although when {{control|using}} it on a block, the player swings the stick as if interacting with it (but nothing happens).
== Data values ==
=== ID ===
{{ID table
|edition=java
|showforms=y
|generatetranslationkeys=y
|displayname=Debug Stick
|spritetype=item
|nameid=debug_stick
|form=item
|foot=1}}
=== Item data ===
<div class="treeview">
* {{nbt|compound|tag}}: The item's '''tag''' tag.
{{:Player.dat_format/Debug Sticks}}
</div>
== History ==
{{History|java}}
{{History||1.13|snap=17w47a|[[File:Debug Stick.gif|32px]] Added debug sticks.}}
{{History||1.16|snap=20w10a|Debug sticks are now capable of editing [[fire]] due to its added hitbox.}}
{{History||1.19.3|snap=22w44a|The debug stick is now available in the creative inventory, but only if cheats are enabled.}}
{{History|||snap=22w45a|Moved the debug stick behind the Operator Utilities tab in the creative inventory. The tab is only available if cheats are enabled and the "Operator Items Tab" option in the controls menu is turned on.}}
{{History|foot}}
== Issues ==
The debug stick is not supported, and any issues resulting of its usage are closed as "Won't Fix" in the issue tracker.<br/> Issues with the stick itself are considered valid.<ref>https://bugs.mojang.com/browse/MC-122323?focusedCommentId=419481&page=com.atlassian.jira.plugin.system.issuetabpanels:comment-tabpanel#comment-419481</ref><ref>{{reddit|7es23r||Just be aware that any weird state you create with it you cannot naturally create and any bugs that come from it will be shot down as 'Wont fix' :D|_Grum|November 22, 2017}}</ref>
{{issue list}}
== Trivia ==
*An [[add-on]] made by Mineplex was showcased in [[MINECON Live 2019]], which had an editor stick for {{el|be}}, similar to the Debug Stick.<ref>{{ytl|OZqNaEX8208|MINECON Live 2019 @ 1:05:02|Minecraft|September 28, 2019|t=3902}}</ref>
== Gallery ==
<gallery>
Technically Updated.jpg|Artwork of Steve and Alex wielding debug sticks.
</gallery>
== See also ==
*[[Block states]]
== References ==
{{Reflist}}
{{Items}}
[[Category:Non-renewable resources]]
[[de:Debug-Stab]]
[[es:Palo de depuración]]
[[fr:Bâton de débogage]]
[[ja:デバッグ棒]]
[[ko:디버그 막대기]]
[[pl:Patyk debugujący]]
[[pt:Graveto de depuração]]
[[ru:Палка отладки]]
[[zh:调试棒]]</li><li>[[Sign|Sign]]<br/>{{Block
| image = <gallery>
Oak Sign.png|Sign
Oak Wall Sign.png|Wall Sign
Oak Hanging Sign.png|Hanging Sign
Oak Wall Hanging Sign.png|Wall Hanging Sign
</gallery>
| image2 = <gallery>
Oak Sign JE3.png|Sign
Oak Hanging Sign (item) JE1 BE1.png|Hanging Sign
</gallery>
| extratext = [[#Gallery|View all renders]]
| transparent = Yes
| light = No
| tool = axe
| renewable = Yes
| stackable = Yes (16)
| flammable = No
| lavasusceptible = No
}}
A '''sign''' is a non-solid [[block]] that displays text and can be placed on the top or side of other blocks. A '''hanging sign''' is a decorative block that also displays text, and can be placed underneath blocks or with a solid self-supporting bracket. The text of both types of signs can be customized with [[dye]]s and [[glow ink sac]]s.
== Obtaining ==
=== Breaking ===
Signs can be broken with any tool or without a tool, but an [[axe]] is fastest.
{{breaking row|horizontal=1|Sign|sprite=oak-sign|Axe|foot=1|item=1}}
A sign or a hanging sign also breaks and drops itself as an [[item]] if the block the sign is attached to is moved, removed or destroyed. However, a wall hanging sign will stay here if the block the hanging sign is attached to is removed.<ref>{{bug|MC-256501|||WAI}}</ref>
If a sign is broken while being edited, the player continues to edit the sign<ref>{{bug|MC-117815}}</ref>, although {{in|bedrock}} breaking the sign stops the editing operation.
=== Natural generation ===
An oak sign can be found in [[igloo]] basements. Spruce signs can be found in taiga [[village]] houses, as part of a chair.
=== Chest loot ===
{{LootChestItem|oak-sign,oak-hanging-sign,spruce-sign,spruce-hanging-sign}}
=== Crafting ===
[[The player]] can place six stripped [[log]] [[block]]s at the bottom half of the crafting table and place two [[chain]]s on the top-left and top-right slots to create hanging signs. This crafting recipe will create six hanging signs. Hanging signs can only be crafted with stripped logs or [[stem]]s; non-stripped wood cannot be used to craft hanging signs.
{{Crafting
|head=1
|showdescription=1
|nolink=1
|A1= Matching Planks
|B1= Matching Planks
|C1= Matching Planks
|A2= Matching Planks
|B2= Matching Planks
|C2= Matching Planks
|B3= Stick
|Output=Matching Sign,3
|type=Decoration block
}}
{{Crafting
|name= Hanging Sign
|A1= Chain
|C1= Chain
|A2= Matching Stripped Log or Stem; Block of Stripped Bamboo
|B2= Matching Stripped Log or Stem; Block of Stripped Bamboo
|C2= Matching Stripped Log or Stem; Block of Stripped Bamboo
|A3= Matching Stripped Log or Stem; Block of Stripped Bamboo
|B3= Matching Stripped Log or Stem; Block of Stripped Bamboo
|C3= Matching Stripped Log or Stem; Block of Stripped Bamboo
|Output= Matching Hanging Sign,6; Bamboo Hanging Sign,6
|type=Decoration block
|foot=1
}}
== Usage ==
Signs can be used to display text; they can be used to label storage, display information to other players or note areas of interest. Signs are also not destroyed by [[water]] or [[lava]] and therefore may be used to control the flow of these fluids.
=== Placement ===
==== Signs ====
Signs may be placed on the top or side of other [[block]]s (including semi-solid and non-solid blocks such as [[fence]]s, [[Trapdoor|trapdoors]] and other signs). To place a sign, {{control|use}} a sign [[item]] while pointing at the block the sign should be attached to, enter the desired text (or none), and click the "Done" button or press "escape" on a keyboard (or press × {{in|bedrock}}, {{xbtn|b}} on an Xbox controller, {{psbtn|o}} on a PlayStation controller, or {{nsbutton|B}} on a Nintendo Switch controller. Closing the virtual keyboard on a mobile device also exits the typing menu). To place a sign on a block that can be interacted with by the {{control|use}} control (for example, [[chest]]s, [[note block]]s, etc.), {{control|sneak}} while placing the sign.
Signs on the top of a block stand on a short post and face toward the player who placed it, in any of 16 different directions. Signs placed on the side of a block simply float there, even if the block doesn't make contact with the sign.
Even if placed on a vertical surface, a sign may not co-exist in the same block of air as any other item, despite not necessarily visibly obstructing eachother.
For more information about the blocks signs can be placed on, see [[Opacity/Placement]].
==== Hanging signs ====
Hanging signs can be placed in three different ways:
* Placing a hanging sign on the side of a block will result in it being placed with a self-supporting bracket, which allows it to float without any supporting block. This version can be placed in four different directions.
* Placing a hanging sign on the bottom of a block will result in the sign hanging below the block.
** If the block is wide enough, the chains holding the sign will be parallel. This version can be placed in four different directions.
** If the block is too narrow, the chains will meet together in a upwards arrow shape. This version is also placed if the player is {{control|sneaking}} when placing a hanging sign below a wide-enough block. This version can be placed in sixteen different directions.
=== Text ===
[[File:Oak Sign GUI.png|thumb|240px|Oak Sign editing.]]
Placing a sign opens an editor interface resembling a magnified view of the sign. Up to four lines of text can then be entered using a keyboard (hardware or on-screen). The editor supports limited editing, including moving the cursor and inserting and deleting characters. {{IN|bedrock}}, [[formatting codes]] can also be used to apply decorative effects such as color, bold, italic and underline to various bits of the text. Depending on the edition and platform in use, copy and paste operations may be supported and the editor may also support keyboard entry of Alt-codes for displaying Unicode characters.
Text can be added to the back side of a sign by interacting with the that side of the sign after placing it and editing the front.
Signs can be waxed by {{Control|use|text=using}} a [[honeycomb]] on it. Once waxed, a sign cannot be unwaxed or edited.
After placing and affixing text on a sign, a player can change the text color by {{control|using}} a [[dye]] on it. When colored with dye, the text color may differ from any color specified by formatting codes.{{Info needed|How does this work? Does the dye affect all the text? One line? One word? Does dye override all formatting codes, including font effects?}}
[[File:Glow Ink Sign with Orange Dye JE2.png|thumb|216px|Oak sign with glow ink and orange dye applied in {{JE}}.]]
A player can {{control|use}} a [[glow ink sac]] on a sign to make its text glow. The glowing text is not affected by lighting. The player can use a regular black [[ink sac]] on the sign to remove the glowing effect.
{| class="wikitable mw-collapsible mw-collapsed"
|+ class="nowrap" | Glow ink colors
!Name !! Main Color !! Edge Color
|-
! Black
| {{color|#000000}}
| {{color|#EDE8CA}}
|-
! Red
| {{color|#FC0000}}
| {{color|#650000}}
|-
! Green
| {{color|#00FC00}}
| {{color|#006500}}
|-
! Brown
| {{color|#894413}}
| {{color|#361B07}}
|-
! Blue
| {{color|#0000FC}}
| {{color|#000065}}
|-
! Purple
| {{color|#9E20ED}}
| {{color|#3F0C5F}}
|-
! Cyan
| {{color|#00D6D6}}
| {{color|#006565}}
|-
! Light Gray
| {{color|#D0D0D0}}
| {{color|#535353}}
|-
! Gray
| {{color|#7E7E7E}}
| {{color|#323232}}
|-
! Pink
| {{color|#FC68B2}}
| {{color|#652947}}
|-
! Lime
| {{color|#8DFC00}}
| {{color|#4B6500}}
|-
! Yellow
| {{color|#FCFC00}}
| {{color|#656500}}
|-
! Light Blue
| {{color|#98BECB}}
| {{color|#3C4B51}}
|-
! Magenta
| {{color|#FC00FC}}
| {{color|#650065}}
|-
! Orange
| {{color|#FC671F}}
| {{color|#65280C}}
|-
! White
| {{color|#FCFCFC}}
| {{color|#656565}}
|}
In [[Creative]] mode, the combination {{key|Ctrl}} + {{control|pick block}} on Windows/Linux, or {{key|cmd}} + {{control|pick block}} on macOS, can be used to copy an already-placed sign, including its text (with decorations), into the player's inventory.
A dyed sign facing east or west will have its text appear more saturated and bright than a sign facing north or south. However, it is actually the sign that is dimmer, because ''Minecraft'''s lighting engine uses side lighting to make the world appear less flat, but the text on signs is not affected by this.
{{IN|bedrock}}, inappropriate words or phrases in a sign's text are displayed as asterisks.
{{IN|java}}, signs can be created with [[Commands#Raw JSON Text|JSON text]], which allows complex formatting (colors, bold, italic, etc.), hover and click events, localized translation (for ''Minecraft'' technical terms, like "Redstone Repeater", otherwise translations must be provided in language files in resource packs), and the incorporation of scoreboard values into text. Use the {{cmd|data merge block}} command to create or alter JSON signs.
: Example: {{cmd|long=1|data merge block ~ ~1 ~ <nowiki>{front_text:{ color:"green", messages:[ '{"selector":"@p", "bold":false, "italic":false, "underlined":false, "strikethrough":false, "obfuscated":false}' , '{"text":"Second Line"}']}}}}
Signs can post the success count of JSON text hover and click events to [[scoreboard]] objectives. The objectives to be used can be specified by running the {{cmd|execute store}} command or by modifying the sign's NBT data directly with the {{cmd|data merge block}} command.
=== Interaction ===
Signs act as though they have a {{control|use}} action, so the [[player]] is unable to place [[block]]s or use [[item]]s while the cursor is pointed at them without {{control|sneaking}}.
Signs are destroyed and drop as an item when pushed by a [[piston]].{{Only|bedrock}}
Signs are non-solid and have no collision, so [[item]]s and [[mob]]s can move through sign blocks. Other [[block]]s (including other signs) can be placed on any edge of a sign.
[[Water]] and [[lava]] flow around signs. Lava can create [[fire]] in [[air]] blocks next to signs as if the signs were flammable, but the signs do not burn (and cannot be burned by other methods either, except {{in|be}}).
=== Fuel ===
Wooden signs can be used as a fuel in [[furnace]]s, smelting an [[item]] per sign.
=== Note Blocks ===
Signs can be placed under [[note block]]s to produce a "bass" sounds.
== Sounds ==
=== Generic ===
==== Normal wood ====
; Sign
{{Sound table/Block/Wood|forcecollapsed=1}}
; Hanging sign
{{Sound table/Block/Hanging sign|forcecollapsed=1}}
==== Cherry wood ====
; Sign
{{Sound table/Block/Cherry wood|forcecollapsed=1}}
; Hanging sign
{{Sound table/Block/Cherry wood hanging sign|forcecollapsed=1}}
==== Bamboo wood ====
; Sign
{{Sound table/Block/Bamboo wood|forcecollapsed=1}}
; Hanging sign
{{edition|java}}:
{{Sound table/Block/Bamboo wood hanging sign/JE|forcecollapsed=1}}
{{edition|bedrock}}:
{{Sound table/Block/Bamboo wood hanging sign/BE|forcecollapsed=1}}
==== Nether wood ====
; Sign
{{Sound table/Block/Nether wood|forcecollapsed=1}}
; Hanging sign
{{edition|java}}:
{{Sound table/Block/Nether wood hanging sign/JE|forcecollapsed=1}}
{{edition|bedrock}}:
{{Sound table/Block/Nether wood hanging sign/BE|forcecollapsed=1}}
=== Unique ===
{{edition|java}}:
{{Sound table|forcecollapsed=1
|rowspan=2
|sound=Ink sac1.ogg
|sound2=Ink sac2.ogg
|sound3=Ink sac3.ogg
|subtitle=Glow Ink Sac splotches
|source=block
|description=When a [[glow ink sac]] is used on a sign
|id=item.glow_ink_sac.use
|translationkey=subtitles.item.glow_ink_sac.use
|volume=1.0
|pitch=''varies'' <ref group=sound>Can be 1.0, 0.95, or 1.05 for each sound</ref>
|distance=16}}
{{Sound table
|subtitle=Ink Sac splotches
|source=block
|description=When an [[ink sac]] is used on a sign
|id=item.ink_sac.use
|translationkey=subtitles.item.ink_sac.use
|volume=1.0
|pitch=''varies'' <ref group=sound>Can be 0.85, 0.88, or 0.9 for each sound</ref>
|distance=16}}
{{Sound table
|sound=Dye.ogg
|subtitle=Dye stains
|source=block
|description=When [[dye]] is used on a sign
|id=item.dye.use
|translationkey=subtitles.item.dye.use
|volume=1.0
|pitch=''varies'' <ref group=sound>Can be 1.0, 0.9, 0.95, or 1.1</ref>
|distance=16}}
{{Sound table
|sound=Wax on1.ogg
|sound2=Wax on2.ogg
|sound3=Wax on3.ogg
|subtitle=Wax on
|source=block
|description=When a sign is waxed
|id=item.honeycomb.wax_on
|translationkey=subtitles.item.honeycomb.wax_on
|volume=1.0
|pitch=1.0/0.9/1.1
|distance=16}}
{{Sound table
|sound=Sign waxed interact fail1.ogg
|sound2=Sign waxed interact fail2.ogg
|sound3=Sign waxed interact fail3.ogg
|subtitle=Sign wobbles
|source=block
|description=When a player attempts to edit a waxed sign
|id=block.sign.waxed_interact_fail
|translationkey=subtitles.block.sign.waxed_interact_fail
|volume=1.0
|pitch=''varies''<ref group=sound>{{cd|fail1}} can be 1.0 or 0.9; {{cd|fail2}} and {{cd|fail3}} can be 0.8 or 0.9</ref>
|distance=16
|foot=1}}
{{edition|bedrock}}:
{{Sound table|forcecollapsed=1
|type=bedrock
|sound=Ink sac1.ogg
|sound2=Ink sac2.ogg
|sound3=Ink sac3.ogg
|source=sound
|description=When a glow ink sac or an ink sac is used on a sign
|id=sign.ink_sac.use
|volume=1.0
|pitch=1.0}}
{{Sound table
|type=bedrock
|sound=Dye.ogg
|source=sound
|description=When dye is used on a sign
|id=sign.dye.use
|volume=1.0
|pitch=1.0}}
{{Sound table
|sound=Wax on1.ogg
|sound2=Wax on2.ogg
|sound3=Wax on3.ogg
|source=neutral
|description=When a honeycomb waxes a sign
|id=copper.wax.on
|volume=1.0
|pitch=0.8-1.2}}
{{Sound table
|sound=Sign waxed interact fail1.ogg
|sound2=Sign waxed interact fail2.ogg
|sound3=Sign waxed interact fail3.ogg
|source=block
|description=When a player attempts to edit a waxed sign
|id=block.sign.waxed_interact_fail
|volume=1.0
|pitch=''varies'' <ref group=sound>Can be 1.0 or 0.9 for <code>waxed_interact_fail1</code>; can be 0.8 or 0.9 for <code>waxed_interact_fail2</code> and <code>waxed_interact_fail3</code></ref>
|foot=1}}
== Data values ==
=== ID ===
{{edition|java}}:
{{ID table
|edition=java
|showblocktags=y
|showitemtags=y
|showforms=y
|generatetranslationkeys=y
|displayname=Oak Sign
|spritetype=block
|nameid=oak_sign
|blocktags=signs, standing_signs, wall_post_override
|itemtags=signs}}
{{ID table
|displayname=Spruce Sign
|spritetype=block
|nameid=spruce_sign
|blocktags=signs, standing_signs, wall_post_override
|itemtags=signs}}
{{ID table
|displayname=Birch Sign
|spritetype=block
|nameid=birch_sign
|blocktags=signs, standing_signs, wall_post_override
|itemtags=signs}}
{{ID table
|displayname=Jungle Sign
|spritetype=block
|nameid=jungle_sign
|blocktags=signs, standing_signs, wall_post_override
|itemtags=signs}}
{{ID table
|displayname=Acacia Sign
|spritetype=block
|nameid=acacia_sign
|blocktags=signs, standing_signs, wall_post_override
|itemtags=signs}}
{{ID table
|displayname=Dark Oak Sign
|spritetype=block
|nameid=dark_oak_sign
|blocktags=signs, standing_signs, wall_post_override
|itemtags=signs}}
{{ID table
|displayname=Mangrove Sign
|spritetype=block
|nameid=mangrove_sign
|blocktags=signs, standing_signs, wall_post_override
|itemtags=signs}}
{{ID table
|displayname=Cherry Sign
|spritename=Cherry Sign
|spritetype=block
|nameid=cherry_sign
|blocktags=signs, standing_signs, wall_post_override
|itemtags=signs}}
{{ID table
|displayname=Bamboo Sign
|spritename=Bamboo Sign
|spritetype=block
|nameid=bamboo_sign
|blocktags=signs, standing_signs, wall_post_override
|itemtags=signs}}
{{ID table
|displayname=Crimson Sign
|spritetype=block
|nameid=crimson_sign
|blocktags= signs, standing_signs, wall_post_override
|itemtags=non_flammable_wood, signs}}
{{ID table
|displayname=Warped Sign
|spritetype=block
|nameid=warped_sign
|blocktags=signs, standing_signs, wall_post_override
|itemtags=non_flammable_wood, signs}}
{{ID table
|displayname=Oak Wall Sign
|spritetype=block
|nameid=oak_wall_sign
|blocktags=signs, wall_signs
|form=block}}
{{ID table
|displayname=Spruce Wall Sign
|spritetype=block
|nameid=spruce_wall_sign
|blocktags=signs, wall_signs
|form=block}}
{{ID table
|displayname=Birch Wall Sign
|spritetype=block
|nameid=birch_wall_sign
|blocktags=signs, wall_signs
|form=block}}
{{ID table
|displayname=Jungle Wall Sign
|spritetype=block
|nameid=jungle_wall_sign
|blocktags=signs, wall_signs
|form=block}}
{{ID table
|displayname=Acacia Wall Sign
|spritetype=block
|nameid=acacia_wall_sign
|blocktags=signs, wall_signs
|form=block}}
{{ID table
|displayname=Dark Oak Wall Sign
|spritetype=block
|nameid=dark_oak_wall_sign
|blocktags=signs, wall_signs
|form=block}}
{{ID table
|displayname=Mangrove Wall Sign
|spritetype=block
|nameid=mangrove_wall_sign
|blocktags=signs, wall_signs
|form=block}}
{{ID table
|displayname=Cherry Wall Sign
|spritename=Cherry Wall Sign
|spritetype=block
|nameid=cherry_wall_sign
|blocktags=signs, wall_signs
|form=block}}
{{ID table
|displayname=Bamboo Wall Sign
|spritename=Bamboo Wall Sign
|spritetype=block
|nameid=bamboo_wall_sign
|blocktags=signs, wall_signs
|form=block}}
{{ID table
|displayname=Crimson Wall Sign
|spritetype=block
|nameid=crimson_wall_sign
|blocktags=signs, wall_signs
|form=block}}
{{ID table
|displayname=Warped Wall Sign
|spritetype=block
|nameid=warped_wall_sign
|blocktags=signs, wall_signs
|form=block}}
{{ID table
|displayname=Oak Hanging Sign
|spritename=Oak Hanging Sign
|spritetype=block
|nameid=oak_hanging_sign
|blocktags=all_hanging_signs, ceiling_hanging_signs
|itemtags=hanging_signs}}
{{ID table
|displayname=Spruce Hanging Sign
|spritename=Spruce Hanging Sign
|spritetype=block
|nameid=spruce_hanging_sign
|blocktags=all_hanging_signs, ceiling_hanging_signs
|itemtags=hanging_signs}}
{{ID table
|displayname=Birch Hanging Sign
|spritename=Birch Hanging Sign
|spritetype=block
|nameid=birch_hanging_sign
|blocktags=all_hanging_signs, ceiling_hanging_signs
|itemtags=hanging_signs}}
{{ID table
|displayname=Jungle Hanging Sign
|spritename=Jungle Hanging Sign
|spritetype=block
|nameid=jungle_hanging_sign
|blocktags=all_hanging_signs, ceiling_hanging_signs
|itemtags=hanging_signs}}
{{ID table
|displayname=Acacia Hanging Sign
|spritename=Acacia Hanging Sign
|spritetype=block
|nameid=acacia_hanging_sign
|blocktags=all_hanging_signs, ceiling_hanging_signs
|itemtags=hanging_signs}}
{{ID table
|displayname=Dark Oak Hanging Sign
|spritename=Dark Oak Hanging Sign
|spritetype=block
|nameid=dark_oak_hanging_sign
|blocktags=all_hanging_signs, ceiling_hanging_signs
|itemtags=hanging_signs}}
{{ID table
|displayname=Mangrove Hanging Sign
|spritename=Mangrove Hanging Sign
|spritetype=block
|nameid=mangrove_hanging_sign
|blocktags=all_hanging_signs, ceiling_hanging_signs
|itemtags=hanging_signs}}
{{ID table
|displayname=Cherry Hanging Sign
|spritename=Cherry Hanging Sign
|spritetype=block
|nameid=cherry_hanging_sign
|blocktags=all_hanging_signs, ceiling_hanging_signs
|itemtags=hanging_signs}}
{{ID table
|displayname=Bamboo Hanging Sign
|spritename=Bamboo Hanging Sign
|spritetype=block
|nameid=bamboo_hanging_sign
|blocktags=all_hanging_signs, ceiling_hanging_signs
|itemtags=hanging_signs}}
{{ID table
|displayname=Crimson Hanging Sign
|spritename=Crimson Hanging Sign
|spritetype=block
|nameid=crimson_hanging_sign
|blocktags=all_hanging_signs, ceiling_hanging_signs
|itemtags=hanging_signs, non_flammable_wood}}
{{ID table
|displayname=Warped Hanging Sign
|spritename=Warped Hanging Sign
|spritetype=block
|nameid=warped_hanging_sign
|blocktags=all_hanging_signs, ceiling_hanging_signs
|itemtags=hanging_signs, non_flammable_wood}}
{{ID table
|displayname=Oak Wall Hanging Sign
|spritename=Oak Wall Hanging Sign
|spritetype=block
|nameid=oak_wall_hanging_sign
|blocktags=all_hanging_signs, wall_hanging_signs
|form=block}}
{{ID table
|displayname=Spruce Wall Hanging Sign
|spritename=Spruce Wall Hanging Sign
|spritetype=block
|nameid=spruce_wall_hanging_sign
|blocktags=all_hanging_signs, wall_hanging_signs
|form=block}}
{{ID table
|displayname=Birch Wall Hanging Sign
|spritename=Birch Wall Hanging Sign
|spritetype=block
|nameid=birch_wall_hanging_sign
|blocktags=all_hanging_signs, wall_hanging_signs
|form=block}}
{{ID table
|displayname=Jungle Wall Hanging Sign
|spritename=Jungle Wall Hanging Sign
|spritetype=block
|nameid=jungle_wall_hanging_sign
|blocktags=all_hanging_signs, wall_hanging_signs
|form=block}}
{{ID table
|displayname=Acacia Wall Hanging Sign
|spritename=Acacia Wall Hanging Sign
|spritetype=block
|nameid=acacia_wall_hanging_sign
|blocktags=all_hanging_signs, wall_hanging_signs
|form=block}}
{{ID table
|displayname=Dark Oak Wall Hanging Sign
|spritename=Dark Oak Wall Hanging Sign
|spritetype=block
|nameid=dark_oak_wall_hanging_sign
|blocktags=all_hanging_signs, wall_hanging_signs
|form=block}}
{{ID table
|displayname=Mangrove Wall Hanging Sign
|spritename=Mangrove Wall Hanging Sign
|spritetype=block
|nameid=mangrove_wall_hanging_sign
|blocktags=all_hanging_signs, wall_hanging_signs
|form=block}}
{{ID table
|displayname=Cherry Wall Hanging Sign
|spritename=Cherry Wall Hanging Sign
|spritetype=block
|nameid=cherry_wall_hanging_sign
|blocktags=all_hanging_signs, wall_hanging_signs
|form=block}}
{{ID table
|displayname=Bamboo Wall Hanging Sign
|spritename=Bamboo Wall Hanging Sign
|spritetype=block
|nameid=bamboo_wall_hanging_sign
|blocktags=all_hanging_signs, wall_hanging_signs
|form=block}}
{{ID table
|displayname=Crimson Wall Hanging Sign
|spritename=Crimson Wall Hanging Sign
|spritetype=block
|nameid=crimson_wall_hanging_sign
|blocktags=all_hanging_signs, wall_hanging_signs
|form=block}}
{{ID table
|displayname=Warped Wall Hanging Sign
|spritename=Warped Wall Hanging Sign
|spritetype=block
|nameid=warped_wall_hanging_sign
|blocktags=all_hanging_signs, wall_hanging_signs
|form=block
|foot=1}}
{{ID table
|displayname=Block entity
|spritename=signs
|spritetype=block
|nameid=sign}}
{{ID table
|displayname=Block entity
|spritename=hanging-signs
|spritetype=block
|nameid=hanging_sign
|foot=1}}
{{edition|bedrock}}:
{{ID table
|edition=bedrock
|firstcolumnname=Sign
|shownumericids=y
|showforms=y
|showaliasids=y
|showitemtags=y
|generatetranslationkeys=y
|displayname=Oak standing
|spritename=oak-sign
|spritetype=block
|nameid=standing_sign
|id=63
|form=block}}
{{ID table
|displayname=Spruce standing
|spritename=spruce-sign
|spritetype=block
|nameid=spruce_standing_sign
|id=436
|form=block}}
{{ID table
|displayname=Birch standing
|spritename=birch-sign
|spritetype=block
|nameid=birch_standing_sign
|id=441
|form=block}}
{{ID table
|displayname=Jungle standing
|spritename=jungle-sign
|spritetype=block
|nameid=jungle_standing_sign
|id=443
|form=block}}
{{ID table
|displayname=Acacia standing
|spritename=acacia-sign
|spritetype=block
|nameid=acacia_standing_sign
|id=445
|form=block}}
{{ID table
|displayname=Dark Oak standing
|spritename=dark-oak-sign
|spritetype=block
|nameid=darkoak_standing_sign
|id=447
|form=block}}
{{ID table
|displayname=Mangrove standing
|spritename=mangrove-sign
|spritetype=block
|nameid=mangrove_standing_sign
|id=-494
|form=block
|translationkey=-}}
{{ID table
|displayname=Cherry standing
|spritename=cherry-sign
|spritetype=block
|nameid=cherry_standing_sign
|id=-542
|form=block
|translationkey=-}}
{{ID table
|displayname=Bamboo standing
|spritename=bamboo-sign
|spritetype=block
|nameid=bamboo_standing_sign
|id=-518
|form=block
|translationkey=-}}
{{ID table
|displayname=Crimson standing
|spritename=crimson-sign
|spritetype=block
|nameid=crimson_standing_sign
|id=505
|form=block}}
{{ID table
|displayname=Warped standing
|spritename=warped-sign
|spritetype=block
|nameid=warped_standing_sign
|id=506
|form=block}}
{{ID table
|displayname=Oak wall
|spritename=oak-wall-sign
|spritetype=block
|nameid=wall_sign
|id=68
|form=block
|translationkey=-}}
{{ID table
|displayname=Spruce wall
|spritename=spruce-wall-sign
|spritetype=block
|nameid=spruce_wall_sign
|id=437
|form=block
|translationkey=-}}
{{ID table
|displayname=Birch wall
|spritename=birch-wall-sign
|spritetype=block
|nameid=birch_wall_sign
|id=442
|form=block
|translationkey=-}}
{{ID table
|displayname=Jungle wall
|spritename=jungle-wall-sign
|spritetype=block
|nameid=jungle_wall_sign
|id=444
|form=block
|translationkey=-}}
{{ID table
|displayname=Acacia wall
|spritename=acacia-wall-sign
|spritetype=block
|nameid=acacia_wall_sign
|id=446
|form=block
|translationkey=-}}
{{ID table
|displayname=Dark Oak wall
|spritename=dark-oak-wall-sign
|spritetype=block
|nameid=darkoak_wall_sign
|id=448
|form=block
|translationkey=-}}
{{ID table
|displayname=Mangrove wall
|spritename=mangrove-wall-sign
|spritetype=block
|nameid=mangrove_wall_sign
|id=-495
|form=block
|translationkey=-}}
{{ID table
|displayname=Cherry wall
|spritename=cherry-wall-sign
|spritetype=block
|nameid=cherry_wall_sign
|id=-544
|form=block
|translationkey=-}}
{{ID table
|displayname=Bamboo wall
|spritename=bamboo-wall-sign
|spritetype=block
|nameid=bamboo_wall_sign
|id=-519
|form=block
|translationkey=-}}
{{ID table
|displayname=Crimson wall
|spritename=crimson-wall-sign
|spritetype=block
|nameid=crimson_wall_sign
|id=507
|form=block}}
{{ID table
|displayname=Warped wall
|spritename=warped-wall-sign
|spritetype=block
|nameid=warped_wall_sign
|id=508
|form=block}}
{{ID table
|displayname=Oak item
|spritename=oak-sign
|spritetype=item
|nameid=oak_sign
|aliasid=sign
|id=360
|form=item
|itemtags=minecraft:sign
|translationkey=item.sign.name}}
{{ID table
|displayname=Spruce item
|spritename=spruce-sign
|spritetype=item
|nameid=spruce_sign
|id=576
|form=item
|itemtags=minecraft:sign}}
{{ID table
|displayname=Birch item
|spritename=birch-sign
|spritetype=item
|nameid=birch_sign
|id=577
|form=item
|itemtags=minecraft:sign}}
{{ID table
|displayname=Jungle item
|spritename=jungle-sign
|spritetype=item
|nameid=jungle_sign
|id=578
|form=item
|itemtags=minecraft:sign}}
{{ID table
|displayname=Acacia item
|spritename=acacia-sign
|spritetype=item
|nameid=acacia_sign
|id=579
|form=item
|itemtags=minecraft:sign}}
{{ID table
|displayname=Dark Oak item
|spritename=dark-oak-sign
|spritetype=item
|nameid=dark_oak_sign
|aliasid=darkoak_sign
|id=587
|form=item
|itemtags=minecraft:sign
|translationkey=item.darkoak_sign.name}}
{{ID table
|displayname=Mangrove item
|spritename=mangrove-sign
|spritetype=item
|nameid=mangrove_sign
|id=642
|form=item
|itemtags=minecraft:sign}}
{{ID table
|displayname=Cherry item
|spritename=cherry-sign
|spritetype=item
|nameid=cherry_sign
|id=659
|form=item
|itemtags=minecraft:sign}}
{{ID table
|displayname=Bamboo item
|spritename=bamboo-sign
|spritetype=item
|nameid=bamboo_sign
|id=660
|form=item
|itemtags=minecraft:sign}}
{{ID table
|displayname=Crimson item
|spritename=crimson-sign
|spritetype=item
|nameid=crimson_sign
|id=614
|form=item
|itemtags=minecraft:sign}}
{{ID table
|displayname=Warped item
|spritename=warped-sign
|spritetype=item
|nameid=warped_sign
|id=615
|form=item
|itemtags=minecraft:sign}}
{{ID table
|displayname=Oak Hanging Sign
|spritename=Oak Wall Hanging Sign
|spritetype=block
|nameid=oak_hanging_sign
|id=-500
|itemtags=minecraft:hanging_sign
|translationkey=item.oak_hanging_sign.name}}
{{ID table
|displayname=Spruce Hanging Sign
|spritename=Spruce Wall Hanging Sign
|spritetype=block
|nameid=spruce_hanging_sign
|id=-501
|itemtags=minecraft:hanging_sign
|translationkey=item.spruce_hanging_sign.name}}
{{ID table
|displayname=Birch Hanging Sign
|spritename=Birch Wall Hanging Sign
|spritetype=block
|nameid=birch_hanging_sign
|id=-502
|itemtags=minecraft:hanging_sign
|translationkey=item.birch_hanging_sign.name}}
{{ID table
|displayname=Jungle Hanging Sign
|spritename=Jungle Wall Hanging Sign
|spritetype=block
|nameid=jungle_hanging_sign
|id=-503
|itemtags=minecraft:hanging_sign
|translationkey=item.jungle_hanging_sign.name}}
{{ID table
|displayname=Acacia Hanging Sign
|spritename=Acacia Wall Hanging Sign
|spritetype=block
|nameid=acacia_hanging_sign
|id=-504
|itemtags=minecraft:hanging_sign
|translationkey=item.acacia_hanging_sign.name}}
{{ID table
|displayname=Dark Oak Hanging Sign
|spritename=Dark Oak Wall Hanging Sign
|spritetype=block
|nameid=dark_oak_hanging_sign
|id=-505
|itemtags=minecraft:hanging_sign
|translationkey=item.dark_oak_hanging_sign.name}}
{{ID table
|displayname=Mangrove Hanging Sign
|spritename=Mangrove Wall Hanging Sign
|spritetype=block
|nameid=mangrove_hanging_sign
|id=-508
|itemtags=minecraft:hanging_sign
|translationkey=item.mangrove_hanging_sign.name}}
{{ID table
|displayname=Cherry Hanging Sign
|spritename=Cherry Wall Hanging Sign
|spritetype=block
|nameid=cherry_hanging_sign
|id=-534
|itemtags=minecraft:hanging_sign
|translationkey=item.cherry_hanging_sign.name}}
{{ID table
|displayname=Bamboo Hanging Sign
|spritename=Bamboo Wall Hanging Sign
|spritetype=block
|nameid=bamboo_hanging_sign
|id=-522
|itemtags=minecraft:hanging_sign
|translationkey=item.bamboo_hanging_sign.name}}
{{ID table
|displayname=Crimson Hanging Sign
|spritename=Crimson Wall Hanging Sign
|spritetype=block
|nameid=crimson_hanging_sign
|id=-506
|itemtags=minecraft:hanging_sign
|translationkey=item.crimson_hanging_sign.name}}
{{ID table
|displayname=Warped Hanging Sign
|spritename=Warped Wall Hanging Sign
|spritetype=block
|nameid=warped_hanging_sign
|id=-507
|itemtags=minecraft:hanging_sign
|translationkey=item.warped_hanging_sign.name
|foot=1}}
{{ID table
|notnamespaced=y
|displayname=Block entity
|spritename=signs
|spritetype=block
|nameid=Sign}}
{{ID table
|displayname=Block entity
|spritename=hanging-signs
|spritetype=block
|nameid=HangingSign
|foot=1}}
=== Block states ===
{{see also|Block states}}
{{/BS}}
=== Block data ===
A sign has a block entity associated with it that holds additional data about the block.
{{el|java}}:
{{see also|Block entity format}}
{{/BE}}
{{el|bedrock}}:
:See [[Bedrock Edition level format/Block entity format]].
== Achievements ==
{{load achievements|It's a Sign}}
== Advancements ==
{{load advancements|Glow and Behold}}
== History ==
{{main|/History}}
{{History|java classic}}
{{History||0.24_SURVIVAL_TEST|[[File:Sign Entity.png|32px]] Signs are currently being tested as [[entity|entities]]. They always display "This is a test of the signs. Each line can be 15 chars!" and can only be spawned by pressing {{key|B}}.<ref>{{ytl|bdT76iFEnLk}}</ref>}}
{{History||0.26 SURVIVAL TEST|Removed signs.}}
{{History|java infdev}}
{{History||20100607|[[File:Oak Sign (0) JE1.png|32px]] Signs have been re-implemented as [[block]]s, although still rendering as entities.
|Signs now have a [[crafting]] recipe and the text can now be edited. Editing a sign pauses the game in [[singleplayer]].
|Signs are currently huge and drop [[planks]] when destroyed.
|Signs do not have a particle texture defined. As such, they [[Placeholder texture#Default texture|default to using the grass block texture instead]].}}
{{History||20100608|Signs are now broken faster.
|Signs now [[drops|drop]] themselves when [[breaking|destroyed]], instead of planks.
|Signs now use planks particles.}}
{{History|java alpha}}
{{History||v1.0.1|[[File:Oak Wall Sign (S) JE1 BE1.png|32px]] Added wall signs.
|[[File:Oak Sign (0) JE2.png|32px]] Signs are now smaller.}}
{{History||v1.0.5|Signs no longer require a free [[block]] above it to place.}}
{{History|java beta}}
{{History||April 27, 2011|link=https://notch.tumblr.com/post/4988431144|Hand-drawn signs are mentioned.}}
{{History|java}}
{{History||1.0.0|snap=Beta 1.9 Prerelease 6|Signs are now broken faster using an [[axe]].}}
{{History||1.3.1|snap=12w18a|Editing a sign no longer pauses the game in [[singleplayer]].}}
{{History|||snap=12w27a|Signs are now stackable up to 16.
|The same [[crafting]] recipe now produces 3 signs instead of 1.}}
{{History||June 9, 2014|link=https://twitter.com/SeargeDP/status/476047216541700096|[[Searge]] tweeted a picture of a sign showing a username and a [[scoreboard]] score.}}
{{History||1.8|snap=14w25a|Added support for JSON text to signs.
|Sign character limit now depends on character width.}}
{{History|||snap=14w29a|Signs now display the cracking animation.}}
{{History||1.9|snap=15w43a|A sign now generates within [[igloo]] basements.}}
{{History||1.11|snap=16w33a|Signs can now be used as [[fuel]] in [[furnace]]s.}}
{{History||1.13|snap=17w47a|The standing sign ID has been changed from <code>standing_sign</code> to <code>sign</code>.
|Prior to [[1.13/Flattening|''The Flattening'']], these [[block]]s' numeral IDs were 63 and 68, and the [[item]]'s 323.}}
{{History|||snap=18w10d|[[Water]] can now be placed on the same block as signs.}}
{{History||1.14|snap=18w43a|"Sign" has been renamed to "Oak Sign".
|[[File:Oak Sign JE2 BE2.png|32px]] The texture of oak sign [[item]]s has been changed.
|[[File:Spruce Standing Sign JE1 BE1.png|32px]] [[File:Birch Standing Sign JE1 BE1.png|32px]] [[File:Jungle Standing Sign JE1 BE1.png|32px]] [[File:Acacia Standing Sign JE1 BE1.png|32px]] [[File:Dark Oak Standing Sign JE1 BE1.png|32px]] [[File:Spruce Sign JE1 BE1.png|32px]] [[File:Birch Sign JE1 BE1.png|32px]] [[File:Jungle Sign JE1 BE1.png|32px]] [[File:Acacia Sign JE1 BE1.png|32px]] [[File:Dark Oak Sign JE1 BE1.png|32px]] Added spruce, birch, jungle, acacia and dark oak signs.
|The sign's text has been changed from black to white.
|A sign's recipe now requires the same type of [[wood]] instead of a random assortment.}}
{{History|||snap=18w44a|Signs can now be {{control|used}} while holding a [[dye]] to change the text color.
|Default text color for signs has been changed back to black.}}
{{History|||snap=18w45a|A new movable cursor for free text editing to signs has been added.
|Selection and copy/paste support have been added to signs.}}
{{History|||snap=18w50a|Spruce signs now generate in some [[taiga]] [[village]] houses.
|Spruce sign items can now be found in [[chest]]s in taiga village houses.}}
{{History|||snap=19w12a|Signs can now be [[dye]]d only in [[Creative mode]].}}
{{History|||snap=19w12b|Signs can now be dyed in [[Survival mode]] again.}}
{{History||1.16|snap=20w06a|[[File:Crimson Standing Sign JE1 BE1.png|32px]] [[File:Warped Standing Sign JE1 BE1.png|32px]] [[File:Crimson Sign JE1 BE1.png|32px]] [[File:Warped Sign JE1 BE1.png|32px]] Added crimson and warped signs.}}
{{History|||snap=20w09a|Crimson and warped signs can now be [[crafting|crafted]].}}
{{History||1.17|snap=21w03a|Signs can now be tinted with [[Glow Ink Sac|glow ink sac]]s to make the text glow.
|Works with both undyed and dyed signs.
|Signs now have a sound for being dyed.}}
{{History|||snap=21w11a|[[File:Oak Standing Sign (S) JE2.png|32px]][[File:Spruce Standing Sign (S) JE2 BE2.png|32px]] [[File:Birch Standing Sign (S) JE2 BE2.png|32px]] [[File:Jungle Standing Sign (S) JE2 BE2.png|32px]] [[File:Acacia Standing Sign (S) JE2 BE2.png|32px]] [[File:Dark Oak Standing Sign (S) JE2 BE2.png|32px]] [[File:Oak Wall Sign (S) JE2.png|32px]] [[File:Spruce Wall Sign (S) JE2 BE2.png|32px]] [[File:Birch Wall Sign (S) JE2 BE2.png|32px]] [[File:Jungle Wall Sign (S) JE2 BE2.png|32px]] [[File:Acacia Wall Sign (S) JE2 BE2.png|32px]] [[File:Dark Oak Wall Sign (S) JE2 BE2.png|32px]] The textures of signs have been changed to reflect the changes made to planks in the [[Texture Update]].}}
{{History|||snap=Pre-release 1|Glowing text on signs now has an outer glow, making text more visible in the dark.}}
{{History||1.18|snap=21w41a|[[File:Oak Sign JE3.png|32px]] [[File:Spruce Sign JE2.png|32px]] [[File:Birch Sign JE2.png|32px]] [[File:Jungle Sign JE2.png|32px]] [[File:Acacia Sign JE2.png|32px]] [[File:Dark Oak Sign JE2.png|32px]] [[File:Crimson Sign JE2.png|32px]] [[File:Warped Sign JE2.png|32px]] Changed all signs textures as items.}}
{{History||1.19|snap=22w11a|[[File:Mangrove Sign JE1 BE1.png|32px]][[File:Mangrove Wall Sign JE1 BE1.png|32px]][[File:Mangrove Sign (item) JE1 BE1.png|32px]] Added mangrove signs.}}
{{History|||snap=22w14a|Due to the addition of the [[mangrove tree]] and [[mangrove swamp]], mangrove signs are now obtainable in survival and renewable.}}
{{History||October 15, 2022|link={{ytl|https://youtu.be/iM9KtHaDcUg?t=5437}}|Hanging signs were announced and shown on [[Minecraft Live 2022]].|Hanging signs were conceptualized by [[Agnes Larsson]] with input from her daughter.<ref>{{ytl|vJCMpPyaN8Q|Minecraft 1.20: New Blocks and Their Functions! @ 0:29|Minecraft|February 24, 2023|t=29s}}</ref>}}
{{History||1.20<br>(Experimental)|link=1.19.3|snap=22w42a|[[File:Bamboo Sign (0) JE1 BE1.png|32px]] [[File:Bamboo Wall Sign (S) JE1 BE1.png|32px]] [[File:Bamboo Sign (item) JE1 BE1.png|32px]] Added bamboo signs behind the [[Java Edition 1.20|Update 1.20 experimental datapack]].
|[[File:Oak Hanging Sign JE1 BE1.png|32px]] [[File:Spruce Hanging Sign JE1 BE1.png|32px]] [[File:Birch Hanging Sign JE1 BE1.png|32px]] [[File:Jungle Hanging Sign JE1 BE1.png|32px]] [[File:Acacia Hanging Sign JE1 BE1.png|32px]] [[File:Dark Oak Hanging Sign JE1 BE1.png|32px]] [[File:Mangrove Hanging Sign JE1 BE1.png|32px]] [[File:Bamboo Hanging Sign JE1 BE1.png|32px]] [[File:Crimson Hanging Sign JE1 BE1.png|32px]] [[File:Warped Hanging Sign JE1 BE1.png|32px]]<br>[[File:Oak Wall Hanging Sign JE1 BE1.png|32px]] [[File:Spruce Wall Hanging Sign JE1 BE1.png|32px]] [[File:Birch Wall Hanging Sign JE1 BE1.png|32px]] [[File:Jungle Wall Hanging Sign JE1 BE1.png|32px]] [[File:Acacia Wall Hanging Sign JE1 BE1.png|32px]] [[File:Dark Oak Wall Hanging Sign JE1 BE1.png|32px]] [[File:Mangrove Wall Hanging Sign JE1 BE1.png|32px]] [[File:Bamboo Wall Hanging Sign (S) JE1 BE1.png|32px]] [[File:Crimson Wall Hanging Sign JE1 BE1.png|32px]] [[File:Warped Wall Hanging Sign JE1 BE1.png|32px]]<br>[[File:Oak Hanging Sign (item) JE1 BE1.png|32px]] [[File:Spruce Hanging Sign (item) JE1 BE1.png|32px]] [[File:Birch Hanging Sign (item) JE1 BE1.png|32px]] [[File:Jungle Hanging Sign (item) JE1 BE1.png|32px]] [[File:Acacia Hanging Sign (item) JE1 BE1.png|32px]] [[File:Dark Oak Hanging Sign (item) JE1 BE1.png|32px]] [[File:Mangrove Hanging Sign (item) JE1 BE1.png|32px]] [[File:Bamboo Hanging Sign (item) JE1 BE1.png|32px]] [[File:Crimson Hanging Sign (item) JE1 BE1.png|32px]] [[File:Warped Hanging Sign (item) JE1 BE1.png|32px]]<br>Added hanging signs behind the [[Java Edition 1.20|Update 1.20 experimental datapack]].|Added unique sounds for Nether and bamboo wood signs.}}
{{History|||snap=22w45a|[[File:Jungle Wall Hanging Sign JE2 BE2.png|32px]] The texture of jungle hanging wall signs have been changed.|Added unique sounds for Nether and bamboo wood hanging signs.|Bamboo hanging signs now can be crafted using [[block of stripped bamboo]] instead of bamboo planks.|Crafting bamboo hanging signs now outputs 6 hanging signs instead of 2.}}
{{History||1.20<br>(Experimental)|link=1.19.4|snap=23w07a|[[File:Cherry Sign (0) JE1.png|32px]] [[File:Cherry Wall Sign (S) JE1.png|32px]] [[File:Cherry Sign (item) JE1.png|32px]] [[File:Cherry Hanging Sign JE1.png|32px]] [[File:Cherry Wall Hanging Sign JE1.png|32px]] [[File:Cherry Hanging Sign (item) JE1.png|32px]] Added cherry signs and hanging signs behind the [[Java Edition 1.20|Update 1.20 experimental datapack]]. There used to be a glitch where right clicking on a sign would play the “use” animation. This was fixed in the snapshots for 1.20, where signs are editable.}}
{{History|||snap=1.19.4 Pre-release 4|[[File:Cherry Sign (0) JE2 BE2.png|32px]] Updated the texture of cherry signs.}}
{{History||1.20|snap=23w12a|Bamboo sign, cherry sign and all of the hanging signs are now available without using the "Update 1.20" experimental datapack.|Signs and hanging signs can now be edited after being placed.|Signs and hanging signs now support text on both sides.|Signs and hanging signs can now be waxed with [[honeycomb]] to prevent editing.|Oak and spruce hanging sign can now be found in [[suspicious gravel]] and [[suspicious sand]] in [[trail ruins]].}}
{{History|||snap=23w14a|Signs and hanging signs with click commands can now be interacted with even if the sign is not waxed.|Signs and hanging signs can no longer be edited by players in [[Adventure]] mode.|Signs and hanging signs with non-text chat components can no longer be edited, even if the sign is not waxed.|Signs and hanging signs now save text even if the edit screen is closed by the player being moved far away.}}
{{History|||snap=23w16a|Oak and spruce hanging sign no longer generates in [[suspicious sand]] in [[trail ruins]].|Due to the split of the archaeological loot tables for the suspicious gravel within the [[trail ruins]]; oak and spruce hanging sign now are in the common loot.}}
{{History||1.20.2|snap=23w31a|Changed sounds for Nether wood hanging signs.<ref>{{Bug|MC-262295||Warped and Crimson hanging signs uses their respective plank sounds, despite their stripped stems having unique sounds|Fixed}}</ref>}}
{{History|pocket alpha}}
{{History||v0.5.0|[[File:Oak Standing Sign.png|32px]] [[File:Oak Sign JE1 BE1.png|32px]] Signs have been added, though they can be obtained only through [[inventory]] editors. |The [[player]] currently cannot write on signs.}}
{{History||v0.6.0|Signs can now be legitimately obtained in [[Survival]] and [[Creative]] mode.|The player can now write on signs.}}
{{History||v0.10.0|snap=build 1|Signs now have a selection overlay.}}
{{History|pocket}}
{{History||1.0.0|snap=alpha 0.17.0.1|Signs can now be found in [[igloo]] basements.}}
{{History|bedrock}}
{{History||1.9.0|snap=beta 1.9.0.0|"Sign" has been renamed to "Oak Sign".
|[[File:Spruce Standing Sign (S) JE2 BE2.png|32px]] [[File:Birch Standing Sign (S) JE2 BE2.png|32px]] [[File:Jungle Standing Sign (S) JE2 BE2.png|32px]] [[File:Acacia Standing Sign (S) JE2 BE2.png|32px]] [[File:Dark Oak Standing Sign (S) JE2 BE2.png|32px]] [[File:Spruce Sign JE1 BE1.png|32px]] [[File:Birch Sign JE1 BE1.png|32px]] [[File:Jungle Sign JE1 BE1.png|32px]] [[File:Acacia Sign JE1 BE1.png|32px]] [[File:Dark Oak Sign JE1 BE1.png|32px]] Added spruce, birch, jungle, acacia and dark oak signs.|The sign's text has been changed from black to white.|A sign's recipe now requires the same type of [[wood]] instead of a random assortment.}}
{{History|||snap=beta 1.9.0.2|The default sign text color has been changed back to black.|Sign variants are now grouped in their own [[inventory]] category.}}
{{History||1.10.0|snap=beta 1.10.0.3|[[File:Oak Sign JE2 BE2.png|32px]] The texture of oak sign [[item]]s has been changed.|Spruce signs now generate in new [[taiga]] and [[snowy taiga]] [[village]] houses.}}
{{History||1.11.0|snap=beta 1.11.0.1|Signs can now be used as a [[fuel]] in [[furnace]]s.|Oak signs can now be found inside taiga and snowy taiga village house [[chest]]s.}}
{{History||1.16.0|snap=beta 1.16.0.51|[[File:Crimson Standing Sign JE1 BE1.png|32px]] [[File:Warped Standing Sign JE1 BE1.png|32px]] [[File:Crimson Sign JE1 BE1.png|32px]] [[File:Warped Sign JE1 BE1.png|32px]] Added crimson and warped signs.|[[File:Spruce Standing Sign (S) JE2 BE2.png|32px]] [[File:Birch Standing Sign (S) JE2 BE2.png|32px]] [[File:Jungle Standing Sign (S) JE2 BE2.png|32px]] [[File:Acacia Standing Sign (S) JE2 BE2.png|32px]] [[File:Dark Oak Standing Sign (S) JE2 BE2.png|32px]] [[File:Spruce Wall Sign (S) JE2 BE2.png|32px]] [[File:Birch Wall Sign (S) JE2 BE2.png|32px]] [[File:Jungle Wall Sign (S) JE2 BE2.png|32px]] [[File:Acacia Wall Sign (S) JE2 BE2.png|32px]] [[File:Dark Oak Wall Sign (S) JE2 BE2.png|32px]] The texture of all signs except oak sign have been changed.}}
{{History||1.16.20|snap=beta 1.16.20.50|Crimson and warped signs now uses regular plank [[sound]]s instead of their stem variant sounds.}}
{{History||1.16.210|snap=beta 1.16.210.59|Signs can now be {{control|used}} while holding a [[dye]] to change the text color.|Signs can now be tinted with [[Glow Ink Sac|glow ink sac]]s to make the text glow.
|Works with both default and dyed signs.}}
{{History|||snap=beta 1.16.210.60|Color on dyed signs disappears and the text turns back to black.|Signs with applied glowing effect as well as color stops glowing and color is removed.}}
{{History||1.16.220|snap=beta 1.16.220.50|Signs can now be {{control|used}} while holding a [[dye]] to change the text color again.|Signs can now be tinted with [[Glow Ink Sac|glow ink sac]]s to make the text glow again.}}
{{History|||snap=beta 1.16.220.52|Now has sounds for being dyed.}}
{{History|||snap=release|A glowing effect can no longer be applied to signs due to glow ink sacs becoming inaccessible in the full release.}}
{{History||1.17.0|snap=beta 1.17.0.50|[[File:Oak Sign BE3.png|32px]] [[File:Spruce Sign BE2.png|32px]] [[File:Birch Sign BE2.png|32px]] [[File:Jungle Sign BE2.png|32px]] [[File:Acacia Sign BE2.png|32px]] [[File:Dark Oak Sign BE2.png|32px]] Textures of sign items was updated.
|[[File:Oak Standing Sign (S) JE2 BE2.png|32px]] [[File:Oak Wall Sign (S) JE2 BE2.png|32px]] The textures of oak signs have been changed to reflect the changes made to planks in the [[Texture Update]].}}
{{History||1.17.10|snap=beta 1.17.10.21|Glowing text on signs now has an outer glow, making text more visible in the dark.}}
{{History||1.18.10|snap=beta 1.18.10.20|[[File:Oak Sign JE3.png|32px]] [[File:Spruce Sign JE2.png|32px]] [[File:Birch Sign JE2.png|32px]] [[File:Jungle Sign JE2.png|32px]] [[File:Acacia Sign JE2.png|32px]] [[File:Dark Oak Sign JE2.png|32px]] [[File:Crimson Sign JE2.png|32px]] [[File:Warped Sign JE2.png|32px]] Changed all signs textures as items.}}
{{History||1.19.0|snap=beta 1.19.0.20|[[File:Mangrove Sign JE1 BE1.png|32px]][[File:Mangrove Wall Sign JE1 BE1.png|32px]][[File:Mangrove Sign (item) JE1 BE1.png|32px]] Added mangrove signs.}}
{{History||Next Major Update<br>(Experimental)|link=Bedrock Edition 1.20|snap=beta 1.19.50.21|[[File:Bamboo Sign (0) JE1 BE1.png|32px]] [[File:Bamboo Wall Sign (S) JE1 BE1.png|32px]] [[File:Bamboo Sign (item) JE1 BE1.png|32px]] Added bamboo signs behind the "[[Bedrock Edition 1.20|Next Major Update]]" [[experimental]] toggle.|[[File:Oak Hanging Sign JE1 BE1.png|32px]] [[File:Spruce Hanging Sign JE1 BE1.png|32px]] [[File:Birch Hanging Sign JE1 BE1.png|32px]] [[File:Jungle Hanging Sign JE1 BE1.png|32px]] [[File:Acacia Hanging Sign JE1 BE1.png|32px]] [[File:Dark Oak Hanging Sign JE1 BE1.png|32px]] [[File:Mangrove Hanging Sign JE1 BE1.png|32px]] [[File:Bamboo Hanging Sign JE1 BE1.png|32px]] [[File:Crimson Hanging Sign JE1 BE1.png|32px]] [[File:Warped Hanging Sign JE1 BE1.png|32px]]<br>[[File:Oak Wall Hanging Sign JE1 BE1.png|32px]] [[File:Spruce Wall Hanging Sign JE1 BE1.png|32px]] [[File:Birch Wall Hanging Sign JE1 BE1.png|32px]] [[File:Jungle Wall Hanging Sign JE1 BE1.png|32px]] [[File:Acacia Wall Hanging Sign JE1 BE1.png|32px]] [[File:Dark Oak Wall Hanging Sign JE1 BE1.png|32px]] [[File:Mangrove Wall Hanging Sign JE1 BE1.png|32px]] [[File:Bamboo Wall Hanging Sign (S) JE1 BE1.png|32px]] [[File:Crimson Wall Hanging Sign JE1 BE1.png|32px]] [[File:Warped Wall Hanging Sign JE1 BE1.png|32px]]<br>[[File:Oak Hanging Sign (item) JE1 BE1.png|32px]] [[File:Spruce Hanging Sign (item) JE1 BE1.png|32px]] [[File:Birch Hanging Sign (item) JE1 BE1.png|32px]] [[File:Jungle Hanging Sign (item) JE1 BE1.png|32px]] [[File:Acacia Hanging Sign (item) JE1 BE1.png|32px]] [[File:Dark Oak Hanging Sign (item) JE1 BE1.png|32px]] [[File:Mangrove Hanging Sign (item) JE1 BE1.png|32px]] [[File:Bamboo Hanging Sign (item) JE1 BE1.png|32px]] [[File:Crimson Hanging Sign (item) JE1 BE1.png|32px]] [[File:Warped Hanging Sign (item) JE1 BE1.png|32px]]<br>Added hanging signs behind the "[[Bedrock Edition 1.20.0|Next Major Update]]" [[experimental]] toggle.|Added unique sounds for Nether and bamboo wood signs.}}
{{History|||snap=beta 1.19.60.20|[[File:Jungle Wall Hanging Sign JE2 BE2.png|32px]] The texture of jungle hanging wall signs have been changed.|Bamboo hanging signs now can be crafted using [[block of stripped bamboo]] instead of bamboo planks.|Crafting bamboo hanging signs now outputs 6 hanging signs instead of 2.}}
{{History||Next Major Update<br>(Experimental)|link=Bedrock Edition 1.19.80|snap=beta 1.19.80.20|[[File:Cherry Sign (0).png|32px]] [[File:Cherry Wall Sign (S) JE1.png|32px]] [[File:Cherry Sign (item) JE1.png|32px]] [[File:Cherry Hanging Sign JE1.png|32px]] [[File:Cherry Wall Hanging Sign JE1.png|32px]] [[File:Cherry Hanging Sign (item) JE1.png|32px]] Added cherry signs and hanging signs behind the "[[Bedrock Edition 1.20.0|Next Major Update]]" [[experimental]] toggle.}}
{{History|||snap=beta 1.19.80.21|[[File:Cherry Sign (0) JE2 BE2.png|32px]] Updated the texture of cherry signs.}}
{{History|||snap=beta 1.19.80.22|Signs and hanging signs can now be edited after being placed.|Signs and hanging signs now support text on both sides.|Signs and hanging signs can now be waxed with [[honeycomb]] to prevent editing.}}
{{History|||snap=beta 1.20.0.20|Crimson, warped, and bamboo hanging signs now have custom sounds to match their wood type.<ref name=badnewsounds>{{Bug|MCPE-164246}}</ref>}}
{{History||1.20.0|snap=beta 1.20.0.21|Bamboo sign, cherry sign and all of the hanging signs are now available without using the "Next Major Update" experimental toggle.}}
{{History|console}}
{{History||xbox=TU1|xbone=CU1|ps=1.0|wiiu=Patch 1|switch=1.0.1|[[File:Oak Standing Sign.png|32px]] [[File:Oak Sign JE1 BE1.png|32px]] Added signs.}}
{{History||xbox=TU9|Signs are now stackable up to 16.
|The same [[crafting]] recipe for signs now produces 3 signs instead of 1.}}
{{History||xbox=none|xbone=none|ps=1.88|wiiu=none|switch=none|[[File:Spruce Standing Sign (S) JE2 BE2.png|32px]] [[File:Birch Standing Sign (S) JE2 BE2.png|32px]] [[File:Jungle Standing Sign (S) JE2 BE2.png|32px]] [[File:Acacia Standing Sign (S) JE2 BE2.png|32px]] [[File:Dark Oak Standing Sign (S) JE2 BE2.png|32px]] [[File:Spruce Sign JE1 BE1.png|32px]] [[File:Birch Sign JE1 BE1.png|32px]] [[File:Jungle Sign JE1 BE1.png|32px]] [[File:Acacia Sign JE1 BE1.png|32px]] [[File:Dark Oak Sign JE1 BE1.png|32px]] Added spruce, birch, jungle, acacia and dark oak signs.}}
{{History||xbox=none|xbone=none|ps=1.90|wiiu=none|switch=none|[[File:Oak Sign JE2 BE2.png|32px]] The texture of oak sign [[item]]s has been changed.}}
{{History|new 3ds}}
{{History||0.1.0|[[File:Oak Standing Sign (S) JE2 BE2.png|32px]] [[File:Oak Sign JE1 BE1.png|32px]] Added signs.}}
{{History|foot}}
== Trivia ==
* The first concept art of hanging signs came from [[Agnes Larsson]]'s daughter.<ref>{{Ytl|vJCMpPyaN8Q|Minecraft 1.20: New Blocks and Their Functions!|Minecraft|t=30s}}</ref>
== Gallery ==
=== Screenshots ===
<gallery>
Signs classic.png|Test of signs in early [[Java Edition Classic]].
Sigh test.jpg|Another early sign image.
Signs PreRelease.png|First image of sign blocks during [[Java Edition Infdev|Infdev]].
Pocket Edition v0.6.0 alpha Development sign.png|First image of signs on [[Pocket Edition]].
Pocket Edition v0.6.0 alpha Development sign editing.png|First image of editing text on [[PE]] iOS.
Pocket Edition v0.6.0 alpha Development sign editing 2.png|First image of editing text on [[PE]] Android.
Pocket Edition v0.6.0 alpha Development sky.png
Door Sign.png|A sign placed on a door.
Breaking News.png|A sign being broken.
Sign Text Dark.jpg|A dark oak sign with black text.
Sign Text Light.jpg|A dark oak sign with white text.
Sign Blockdata.gif|A sign using blockdata to dynamically change.
JSON Sign.png|First image of a sign using JSON text.
Width Based Character Limit.png|First image of a sign using width based character limits.
Glow Ink Sign with Pink Dye.png|Oak sign with glow ink in the dark in [[Java Edition 21w03a]].
Lit vs unlit signs.png|Difference in visibility of a lime text, from left to right, in a lit birch sign, unlit birch sign, lit dark oak sign, and unlit dark oak sign.
Glowing Text Comparison.png|The comparison between glow text and non-glow text.
Example Of Signs Being Weird.png|alt=Shading differences|Signs being different shades depending on orientation.
Glow text.gif|All sixteen colors of glow text.
Glow Ink Signs.jpg|Signs with glowing ink in several colors.
Lots of Glowing Signs.jpg|More signs with glowing ink.
Sign Platforms.jpg|[[Ari]] standing on top of a hanged sign.
Eric Shop.jpg|[[Sunny]] looking at a double sided hanging sign.
Hanging Sign Bedrock.png|Hanging sign with small text.
Hanging Sign Java.png|Hanging sign with large text.
New Hanging Sign Text Length 1.jpg|Text on hanging sign.
New Hanging Sign Text Length 2.jpg|Text on hanging sign.
</gallery>
=== Concept Art ===
<gallery>
Hanging_Sign_Concept_Art.png|Hanging sign concept art.
Hanging_Sign_Concept_Art2.png|Ditto.
Hanging_Sign_Concept_Art3.png|Hanging sign dimensions concept art.
Hanging_Sign_Concept_Art4.png|Hanging sign crafting recipe, block states concept art.
</gallery>
=== Renders ===
{{hidden begin}}
<div style="clear: both"></div>
<gallery>
Oak Sign.png|Oak Sign
Spruce Sign.png|Spruce Sign
Birch Sign.png|Birch Sign
Jungle Sign.png|Jungle Sign
Acacia Sign.png|Acacia Sign
Dark Oak Sign.png|Dark Oak Sign
Mangrove Sign.png|Mangrove Sign
Cherry Sign.png|Cherry Sign
Bamboo Sign.png|Bamboo Sign
Crimson Sign.png|Crimson Sign
Warped Sign.png|Warped Sign
Oak Wall Sign.png|Oak Wall Sign
Spruce Wall Sign.png|Spruce Wall Sign
Birch Wall Sign.png|Birch Wall Sign
Jungle Wall Sign.png|Jungle Wall Sign
Acacia Wall Sign.png|Acacia Wall Sign
Dark Oak Wall Sign.png|Dark Oak Wall Sign
Mangrove Wall Sign.png|Mangrove Wall Sign
Cherry Wall Sign.png|Cherry Wall Sign
Bamboo Wall Sign.png|Bamboo Wall Sign
Crimson Wall Sign.png|Crimson Wall Sign
Warped Wall Sign.png|Warped Wall Sign
Oak Hanging Sign.png|Oak Hanging Sign
Spruce Hanging Sign.png|Spruce Hanging Sign
Birch Hanging Sign.png|Birch Hanging Sign
Jungle Hanging Sign.png|Jungle Hanging Sign
Acacia Hanging Sign.png|Acacia Hanging Sign
Dark Oak Hanging Sign.png|Dark Oak Hanging Sign
Mangrove Hanging Sign.png|Mangrove Hanging Sign
Cherry Hanging Sign.png|Cherry Hanging Sign
Bamboo Hanging Sign.png|Bamboo Hanging Sign
Crimson Hanging Sign.png|Crimson Hanging Sign
Warped Hanging Sign.png|Warped Hanging Sign
Oak Wall Hanging Sign.png|Oak Wall Hanging Sign
Spruce Wall Hanging Sign.png|Spruce Wall Hanging Sign
Birch Wall Hanging Sign.png|Birch Wall Hanging Sign
Jungle Wall Hanging Sign.png|Jungle Wall Hanging Sign
Acacia Wall Hanging Sign.png|Acacia Wall Hanging Sign
Dark Oak Wall Hanging Sign.png|Dark Oak Wall Hanging Sign
Mangrove Wall Hanging Sign.png|Mangrove Wall Hanging Sign
Cherry Wall Hanging Sign.png|Cherry Wall Hanging Sign
Bamboo Wall Hanging Sign.png|Bamboo Wall Hanging Sign
Crimson Wall Hanging Sign.png|Crimson Wall Hanging Sign
Warped Wall Hanging Sign.png|Warped Wall Hanging Sign
</gallery>
<gallery>
Oak Sign JE3.png
Spruce Sign JE2.png
Birch Sign JE2.png
Jungle Sign JE2.png
Acacia Sign JE2.png
Dark Oak Sign JE2.png
Mangrove Sign (item) JE1 BE1.png
Cherry Sign (item) JE1.png
Bamboo Sign (item) JE1 BE1.png
Crimson Sign JE2.png
Warped Sign JE2.png
Oak Hanging Sign (item) JE1 BE1.png
Spruce Hanging Sign (item) JE1 BE1.png
Birch Hanging Sign (item) JE1 BE1.png
Jungle Hanging Sign (item) JE1 BE1.png
Acacia Hanging Sign (item) JE1 BE1.png
Dark Oak Hanging Sign (item) JE1 BE1.png
Mangrove Hanging Sign (item) JE1 BE1.png
Cherry Hanging Sign (item) JE1.png
Bamboo Hanging Sign (item) JE1 BE1.png
Crimson Hanging Sign (item) JE1 BE1.png
Warped Hanging Sign (item) JE1 BE1.png
</gallery>
{{hidden end}}
{{-}}
== Issues ==
{{issue list}}
== See also ==
* [[Chalkboard]]
== References ==
{{Reflist}}
== External Links ==
*[https://www.minecraft.net/en-us/article/taking-inventory--sign Taking Inventory: Sign] – Minecraft.net on January 9, 2020
{{Blocks|utility}}
{{Items}}
[[Category:Utility blocks]]
[[Category:Manufactured blocks]]
[[Category:Generated structure blocks]]
[[Category:Block entities]]
[[Category:Non-solid blocks]]
[[cs:Cedule]]
[[de:Schild (Schrift)]]
[[es:Cartel]]
[[fr:Pancarte]]
[[hu:Tábla]]
[[it:Cartello]]
[[ja:看板]]
[[ko:표지판]]
[[nl:Bord]]
[[pl:Tabliczka]]
[[pt:Placa]]
[[ru:Табличка]]
[[th:ป้าย]]
[[uk:Табличка]]
[[zh:告示牌]]</li></ul></nowiki> | beta 1.10.0.3 | ||||
1.11.0{{Extension DPL}}<ul><li>[[Bleach|Bleach]]<br/>{{education feature}}
{{exclusive|bedrock|education}}
{{Item
| image = Bleach.png
| renewable = No
| stackable = Yes (64)
}}
'''Bleach''' is an [[item]] used to [[dye]] things white. It is a [[compound]], as it is made using a [[lab table]].
== Obtaining ==
=== Lab Table ===
Bleach is not obtainable in the [[creative inventory]] or {{cmd|give}}. The only way to obtain it is using a [[lab table]].
{| class="wikitable"
! Result
! Materials Needed
|-
!rowspan=2|{{slot|Bleach}}<br>[[Bleach]]
|{{slot|Water (compound)|link=Compound}}{{slot|Water (compound)|link=Compound}}{{slot|Water (compound)|link=Compound}}{{slot|Sodium Hypochlorite|link=Compound}}{{slot|Sodium Hypochlorite|link=Compound}}{{slot|Sodium Hypochlorite|link=Compound}}
|-
|<center>[[Water (compound)|Water]] x3, [[Compound|Sodium Hypochlorite]] x3</center>
|}
== Usage ==
=== Crafting ingredient ===
{{crafting usage}}
== Sounds ==
{{Sound table
|type=bedrock
|sound=Fire.ogg
|source=sound
|description=When bleach is created by a lab table
|id=lt.reaction.fire
|volume=6.0
|pitch=0.7/0.9
|foot=1}}
== Data values ==
=== ID ===
{{ID table
|edition=bedrock
|shownumericids=y
|showforms=y
|notshowbeitemforms=y
|generatetranslationkeys=y
|displayname=Bleach
|spritetype=item
|nameid=bleach
|id=596
|form=item
|foot=1}}
== History ==
{{History|bedrock}}
{{History||1.4.0|snap=beta 1.2.20.1|[[File:Bleach BE1.png|32px]] Added bleach.}}
{{History|education}}
{{History||1.0.27|[[File:Bleach BE1.png|32px]] Added bleach.}}
{{History|foot}}
== Trivia ==
*[[File:Bleach (compound).png|32px]] There is an [[History of textures/Unused textures#Unused compounds|unused bleach texture]] in the compounds folder of the chemistry resource pack, which is slightly different from the one used in the game.
== Issues ==
{{issue list}}
{{Items}}
{{Education Edition}}
[[Category:Dyes]]
[[Category:Non-renewable resources]]
[[Category:Education Edition items]]
[[de:Bleichmittel]]
[[es:Lejía]]
[[ja:漂白剤]]
[[ko:표백제]]
[[pl:Wybielacz]]
[[pt:Alvejante]]
[[zh:漂白剂]]
[[lzh:素精]]</li><li>[[Redstone Dust|Redstone Dust]]<br/>{{Redirect|Redstone|the ore|Redstone Ore|the powered mineral block|Block of Redstone|other uses|Redstone (disambiguation)}}
{{Block
| group = Inactive (connected)
| 1-1= Inactive Redstone Wire (NESW).png
| 1-2 = Inactive Redstone Wire (NESW) BE.png
| group2 = Inactive (unconnected)
| 2-1 = Inactive Redstone Wire (unconnected).png
| 2-2 = Inactive Redstone Wire (unconnected).png
| group3 = Active (connected)
| 3-1 = Active Redstone Wire (NESW).png
| 3-2 = Active Redstone Wire (NESW) BE.png
| group4 = Active (unconnected)
| 4-1 = Active Redstone Wire (unconnected).png
| 4-2 = Active Redstone Wire (unconnected).png
| image = Redstone Dust JE2 BE2.png
| extratext = [[#Gallery|View all renders]]
| transparent = Yes
| light = No
| tool = all
| renewable = Yes
| stackable = Yes (64)
| flammable = No
| lavasusceptible = No
}}
'''Redstone dust''' is a mineral that can transmit [[Redstone circuit#Power|redstone power]] as a wire when placed as a [[block]]. It is also used in [[crafting]] and [[brewing]].
== Obtaining ==
=== Mining ===
{{see also|Redstone Ore#Natural generation}}
[[Redstone ore]] mined using an iron [[pickaxe]] or higher drops 4 or 5 redstone dust (or more with [[Fortune]], averaging at 6 redstone dust with Fortune III). If mined with [[Silk Touch]], the block drops itself instead of redstone dust.
=== Natural generation ===
15 lengths of redstone dust are naturally generated as part of the trap in each [[jungle pyramid]]. 5 lengths of redstone dust can be found in one type of jail cell room in a [[woodland mansion]]. In [[Ancient City|ancient cities]], multiple pieces of redstone dust can be found integrated into circuitry.
=== Breaking ===
Redstone dust can be broken instantly using any tool, or without a tool, and drops itself as an item.
Redstone dust is removed and drops as an item if:
* its attachment block is moved, removed, or destroyed
* [[water]] or [[lava]] flows into its space
* a [[piston]] tries to push it or moves a block into its space
=== Mob loot ===
[[Witch]]es have a chance of dropping 0–2 redstone dust upon death. This is increased by 1 per level of [[Looting]], for a maximum of 0–5 redstone dust.
=== Chest loot ===
{{LootChestItem|redstone}}
=== Crafting ===
Redstone dust can be crafted from [[blocks of redstone]].
{{Crafting
|Block of Redstone
|Output=Redstone Dust,9
|type=Redstone
}}
=== Smelting ===
{{Smelting
|showname=1
|Redstone Ore; Deepslate Redstone Ore
|Redstone Dust
|0.7
}}
=== Trading ===
{{IN|java}}, novice-level cleric [[villager]]s sell two redstone dust for one [[emerald]].
{{IN|bedrock}}, novice-level cleric villagers sell four redstone dust for one emerald.
=== Villager gifts ===
{{see also|Tutorials/Raid farming}}
{{IN|Java}}, when the player has the [[Hero of the Village]] status effect, clerics might throw that player a redstone dust as a gift.
== Usage ==
Redstone dust is used for [[#Brewing ingredient|brewing]], [[#Crafting ingredient|crafting]], and in redstone circuits by placing it on the ground to create [[#Redstone component|redstone wire]]. It can also be used to power redstone components.
=== Brewing ingredient ===
{{Brewing
|head=1
|Redstone Dust
|Mundane Potion
|base=Water Bottle
}}
{{Brewing
|foot=1
|name=Increased Duration
|Redstone Dust
|showbase=1
|base=Potion of Fire Resistance; Potion of Invisibility; Potion of Night Vision; Potion of Poison; Potion of Regeneration; Potion of Slowness; Potion of Strength; Potion of Swiftness; Potion of Water Breathing; Potion of Weakness; Potion of Leaping; Potion of Slow Falling
}}
=== Crafting ingredient ===
{{crafting usage|Redstone Dust}}
=== {{anchor|Redstone dust}} Redstone component ===
When placed in the world, redstone dust becomes a block of "redstone wire"{{Info needed|other blco? BE?}}, which can transmit [[Redstone circuit#Power|redstone power]].
=== Smithing ingredient ===
{{Smithing
|head=1
|ingredients=Any Armor Trim +<br/>Any Armor Piece + <br/>Redstone Dust
|Any Armor Trim Smithing Template
|Netherite Chestplate
|Redstone
|Redstone Trim Netherite Chestplate
|showdescription=1
|description = All armor types can be used in this recipe,<br/>a netherite chestplate is shown as an example.<br/>
|tail=1
}}
;Trim color palette
The following color palette is shown on the designs on trimmed armor:
*{{TrimPalette|redstone dust}}
=== Placement ===
[[File:Redstone wire as circuit component.png|Examples of redstone wire configuration. ''Top Left:'' Redstone wire connects diagonally vertically through non-opaque blocks. ''Top Right:'' Redstone wire does ''not'' connect diagonally vertically through opaque blocks. ''Center:'' Redstone wire gets darker as its power level drops, to a maximum of 15 blocks from a power source.|thumb]]
[[File:Redstone on Glowstone, Stairs, Slabs.png|Examples of redstone wire placements.|thumb]]
Redstone dust can be placed on [[opaque]] blocks as well as [[glowstone]], upside-down [[slab]]s, [[glass]], upside-down [[stairs]], and [[hopper]]s. It can also be placed on some transparent blocks; see [[Opacity/Placement]] for more information. It cannot be placed suspended in midair, even with commands, which is not unintentional.<ref>{{bug|MC-182709}}</ref>
Redstone wire configures itself to point toward adjacent redstone [[Redstone components#Power components|power components]] and [[Redstone components#Transmission components|transmission component]] connection points. Redstone wire also configures itself to point toward adjacent redstone wire one block higher or lower – unless there is a solid opaque block above the lower redstone wire.
If there is only one such adjacent redstone component, redstone wire configures itself into a {{BlockSprite|redstone-dust}} line pointing both at the neighbor and away from it. If there are two or more such adjacent components, redstone wire connects them in the form of {{BlockSprite|redstone-dust}}, {{BlockSprite|redstone-dust-upleft}}, {{BlockSprite|redstone-dust-t-up}}, or {{BlockSprite|redstone-dust-cross}} as needed.
When there are no adjacent components, a single redstone wire configures itself into a {{BlockSprite|redstone-dust-cross}} plus sign, which can provide power in all four directions. By right-clicking it can be changed into a {{BlockSprite|redstone-dust-dot}} dot, which does not provide power to any of the four directions.
{{IN|bedrock}}, redstone wire automatically configures itself to point toward adjacent blocks or [[Redstone components#Mechanism components|mechanism components]]. {{IN|java}}, it does not. If such a configuration is desired, the other neighbors of the redstone wire must be arranged to create it, i.e the redstone dust must be placed in a way that it would be pointed at the block’s location even if it were not there.
When redstone wire is reconfigured after placement, it does not update other redstone components around it of the change unless that reconfiguration also includes a change in power level or another component provides an update. This can create situations where a mechanism component remains activated when it shouldn't, or vice versa, until it receives an update from something else – a "feature" of redstone wire that can be used to make a [[BUD|block update detector]].
{{-}}
=== Behavior ===
{{Schematic|caption=
{{IN|be}}, the signal can go down from glass blocks.
|||rd-$ew!|RL-!||||rd-$ew!|RL-!|-
|rt-$!|rd-$ew!|SB|||rt-$!|rd-$ew!|glass||-
|ts-$|SB|rd-$ew|RL||ts-$|SB|rd-$ew!|RL-!
}}{{Schematic|caption =
However, the signal can never go down from slabs.
|||rd-$ew!|RL-!||||rd-$ew!|RL-!|-
|rt-$!|rd-$ew!|SB|||rt-$!|rd-$ew!|glass||-
|ts-$|ts-$|rd-$ew|RL||ts-$|ts-$|rd-$ew|RL
}}
Redstone wire can transmit power, which can be used to operate [[Redstone components#Mechanism components|mechanism components]] ([[door]]s, [[piston]]s, [[redstone lamp]]s, etc.).
Redstone wire can be "powered" by a number of methods:
* from an adjacent [[Redstone components#Power components|power component]] or a strongly-powered block
* from the output of a redstone repeater or redstone comparator
* from adjacent redstone wire. The powering dust can be a level higher or lower, but with restrictions:
** Redstone dust can be powered by redstone dust that is one level lower, or on an [[opaque]] block one level higher. A transparent block cannot{{only|java}} pass power downward.
** The block "between" the two dust blocks must be air or transparent. A solid block there "cuts" the connection between the higher and lower dust.
The "power level" of redstone dust can vary from 0 to 15. Most power components power-up adjacent redstone dust to power level 15, but a few ([[daylight sensor]]s, [[trapped chest]]s, and [[weighted pressure plate]]s) may create a lower power level. Redstone repeaters output power level 15 (when turned on), but [[redstone comparator]]s may output a lower power level.
{{Schematic | caption =
Redstone wire can transmit power up to 15 blocks.
|rt-$!|rd-$ew!+15|rd-$ew!+14|rd-$ew!+13|rd-$ew!+12|rd-$ew!+11|rd-$ew!+10|rd-$ew!+9
|rd-$ew!+8|rd-$ew!+7|rd-$ew!+6|rd-$ew!+5|rd-$ew!+4|rd-$ew!+3|rd-$ew!+2|rd-$ew!+1|rd-$ew+0
}}
Power level drops by 1 for every block of redstone wire it crosses. Thus, redstone wire can transmit power for no more than 15 blocks. To go further, the power level must be re-strengthened – typically with a redstone repeater.
Powered redstone wire on top of, or pointing at, an opaque block provides ''weak'' power to the block. A weakly-powered block cannot power other adjacent redstone wire, but can still power redstone repeaters and comparators, and activate adjacent mechanism components. Transparent blocks cannot be powered.
When redstone wire is unpowered, it appears dark red. When powered, it becomes bright red at power level 15, fading to darker shades with decreasing power. Powered redstone wire also produces "dust" [[particles]] of the same color.
While redstone wire always provides power to the directions it points into, it can still point into directions in which it cannot give power. If redstone wire comes in the form of a cross, the player can right-click to toggle it between a cross and dot. A redstone dot does not power anything adjacent to it, but powers the block under it.
== Sounds ==
{{Sound table/Block/Normal}}
== Data values ==
=== ID ===
{{edition|java}}:
{{ID table
|edition=java
|firstcolumnname=Redstone Dust
|showforms=y
|generatetranslationkeys=y
|displayname=Block
|spritename=redstone-dust
|spritetype=block
|nameid=redstone_wire
|form=block}}
{{ID table
|displayname=Item
|spritename=redstone-dust
|spritetype=item
|nameid=redstone
|form=item
|foot=1}}
{{edition|bedrock}}:
{{ID table
|edition=bedrock
|firstcolumnname=Redstone Dust
|shownumericids=y
|showforms=y
|generatetranslationkeys=y
|displayname=Block
|spritename=redstone-dust
|spritetype=block
|nameid=redstone_wire
|id=55
|form=block}}
{{ID table
|displayname=Item
|spritename=redstone-dust
|spritetype=item
|nameid=redstone
|id=373
|form=item
|foot=1}}
=== Block states ===
{{see also|Block states}}
{{/BS}}
{{LoadPage|Redstone Dust/Asset history|List of block state combinations|h4}}
== Achievements ==
{{load achievements|Dispense With This}}
== Video ==
{{Video note|These videos do not show all uses for redstone in crafting and all methods of obtaining. This video is also outdated, as of 1.13 Java Edition, redstone is now called Redstone Dust.}}
<div style="text-align:center">
<span style="display:inline-block">{{yt|zldqknGFWb4}}</span>
<span style="display:inline-block">{{yt|_IApwvCLJW8}}</span>
</div>
== History ==
{{History||May 21, 2009|link=https://web.archive.org/web/0/http://notch.tumblr.com/post/110762705/my-list-on-tile-types-so-far|[[Notch]] shows interest in adding wire-type [[block]]s.}}
{{History|java alpha}}
{{History||v1.0.1|[[File:Redstone Dust JE1 BE1.png|32px]] Added redstone dust as an [[item]].
|[[File:Inactive Redstone Wire (NS) JE1.png|32px]] [[File:Inactive Redstone Wire (EW) JE1.png|32px]] [[File:Inactive Redstone Wire (NE) JE1.png|32px]] [[File:Inactive Redstone Wire (ES) JE1.png|32px]] [[File:Inactive Redstone Wire (SW) JE1.png|32px]] [[File:Inactive Redstone Wire (NW) JE1.png|32px]] [[File:Inactive Redstone Wire (NEW) JE1.png|32px]] [[File:Inactive Redstone Wire (NES) JE1.png|32px]] [[File:Inactive Redstone Wire (ESW) JE1.png|32px]] [[File:Inactive Redstone Wire (NSW) JE1.png|32px]] [[File:Inactive Redstone Wire (NESW) JE1.png|32px]]<br>[[File:Active Redstone Wire (NS) JE1.png|32px]] [[File:Active Redstone Wire (EW) JE1.png|32px]] [[File:Active Redstone Wire (NE) JE1.png|32px]] [[File:Active Redstone Wire (ES) JE1.png|32px]] [[File:Active Redstone Wire (SW) JE1.png|32px]] [[File:Active Redstone Wire (NW) JE1.png|32px]] [[File:Active Redstone Wire (NEW) JE1.png|32px]] [[File:Active Redstone Wire (NES) JE1.png|32px]] [[File:Active Redstone Wire (ESW) JE1.png|32px]] [[File:Active Redstone Wire (NSW) JE1.png|32px]] [[File:Active Redstone Wire (NESW) JE1.png|32px]] Added redstone dust as a placed [[block]].
|Redstone dust as a placed block has two power appearances; either completely on, or completely off.
|Redstone dust is used to craft [[redstone torch]]es.
|At this time, redstone has not been given an official name.}}
{{History||v1.0.2_01|Redstone dust now doesn't connect through solid [[block]]s diagonally down.{{needs testing|may have been changed in v1.0.2|type=untestable}}
|Walking on redstone dust no longer [[breaking|breaks]] it.{{needs testing|may have been changed in v1.0.2|type=untestable}}
|Active redstone dust now gives off [[particles]].{{needs testing|may have been changed in v1.0.2|type=untestable}}}}
{{History||v1.1.0|Redstone is now used to craft [[compass]]es.}}
{{History||v1.2.0|snap=<nowiki>?|slink=:Category:Information needed requiring unarchived version|Redstone is now used to craft [[clock]]s.}}
{{History|java beta}}
{{History||1.0|With the addition of inventory tooltips, the [[item]] form of redstone dust has been named "Redstone", and the usually unobtainable block form has been named "Redstone Dust".}}
{{History||1.2|Redstone is now used to craft [[dispenser]]s and [[note block]]s.}}
{{History||1.3|[[File:Inactive Redstone Wire (NS) JE2.png|32px]] [[File:Inactive Redstone Wire (EW) JE2.png|32px]] [[File:Inactive Redstone Wire (NE) JE2.png|32px]] [[File:Inactive Redstone Wire (ES) JE2.png|32px]] [[File:Inactive Redstone Wire (SW) JE2.png|32px]] [[File:Inactive Redstone Wire (NW) JE2.png|32px]] [[File:Inactive Redstone Wire (NEW) JE2.png|32px]] [[File:Inactive Redstone Wire (NES) JE2.png|32px]] [[File:Inactive Redstone Wire (ESW) JE2.png|32px]] [[File:Inactive Redstone Wire (NSW) JE2.png|32px]] [[File:Inactive Redstone Wire (NESW) JE2.png|32px]]<br>[[File:Active Redstone Wire (NS) JE2.png|32px]] [[File:Active Redstone Wire (EW) JE2.png|32px]] [[File:Active Redstone Wire (NE) JE2.png|32px]] [[File:Active Redstone Wire (ES) JE2.png|32px]] [[File:Active Redstone Wire (SW) JE2.png|32px]] [[File:Active Redstone Wire (NW) JE2.png|32px]] [[File:Active Redstone Wire (NEW) JE2.png|32px]] [[File:Active Redstone Wire (NES) JE2.png|32px]] [[File:Active Redstone Wire (ESW) JE2.png|32px]] [[File:Active Redstone Wire (NSW) JE2.png|32px]] [[File:Active Redstone Wire (NESW) JE2.png|32px]] Redstone wire gets darker the farther away it is from a source of power, using a dedicated [[tint]] system. Previously, it was fully on until it reached its limit.
|Its particles now appear gray due to not being tinted.
|Redstone is now used to craft [[redstone repeater]]s.}}
{{History||1.5|[[File:Inactive Redstone Wire (NS) JE3.png|32px]] [[File:Inactive Redstone Wire (EW) JE3.png|32px]] [[File:Inactive Redstone Wire (NE) JE3.png|32px]] [[File:Inactive Redstone Wire (ES) JE3.png|32px]] [[File:Inactive Redstone Wire (SW) JE3.png|32px]] [[File:Inactive Redstone Wire (NW) JE3.png|32px]] [[File:Inactive Redstone Wire (NEW) JE3.png|32px]] [[File:Inactive Redstone Wire (NES) JE3.png|32px]] [[File:Inactive Redstone Wire (ESW) JE3.png|32px]] [[File:Inactive Redstone Wire (NSW) JE3.png|32px]] [[File:Inactive Redstone Wire (NESW) JE3.png|32px]]<br>[[File:Active Redstone Wire (NS) JE3.png|32px]] [[File:Active Redstone Wire (EW) JE3.png|32px]] [[File:Active Redstone Wire (NE) JE3.png|32px]] [[File:Active Redstone Wire (ES) JE3.png|32px]] [[File:Active Redstone Wire (SW) JE3.png|32px]] [[File:Active Redstone Wire (NW) JE3.png|32px]] [[File:Active Redstone Wire (NEW) JE3.png|32px]] [[File:Active Redstone Wire (NES) JE3.png|32px]] [[File:Active Redstone Wire (ESW) JE3.png|32px]] [[File:Active Redstone Wire (NSW) JE3.png|32px]] [[File:Active Redstone Wire (NESW) JE3.png|32px]] Fully off redstone wire is no longer black.
|Redstone dust can now be placed on [[snow]].
|Redstone is now used to craft [[powered rail]]s and [[detector rail]]s.}}
{{History||1.6.6|Redstone dust now checks if the block below has a solid top face or [[glowstone]], allowing it to be placed on it.}}
{{History||1.7|Redstone dust now connects to a [[redstone repeater|repeater]] without the dust being explicitly pointed at it.
|Redstone can now be used to craft [[piston]]s.}}
{{History||1.8|snap=Pre-release|Redstone can now be found in the new [[stronghold]] storeroom [[chest]]s, and in the new [[mineshaft]] chests.}}
{{History|java}}
{{History||1.0.0|snap=Beta 1.9 Prerelease 3|Redstone can now be [[brewing|brewed]] in a [[water bottle]] to create a [[mundane potion]].
|Redstone can now be found in the new [[stronghold]] altar [[chest]]s.
|Redstone now extends the [[potion]]s of [[Fire Resistance]], [[Slowness]], [[Swiftness]], [[Poison]], [[Weakness]] and [[Strength]].}}
{{History|||snap=Beta 1.9 Prerelease 4|Redstone now extends the new potion of [[Regeneration]].}}
{{History|||snap=RC1|[[File:Inactive Redstone Wire (unconnected) JE1.png|32px]] <br>[[File:Active Redstone Wire (unconnected) JE1.png|32px]] Redstone dust placement on one [[block]] has been changed from a "+" to a "•" shape.}}
{{History||?|Redstone wire block particles are now correctly colored.}}
{{History||1.1|snap=11w49a|Fixed redstone update bug.{{more info}}}}
{{History||1.2.1|snap=12w06a|Redstone can now be placed on [[glowstone]].}}
{{History|||snap=12w07a|Redstone is now used to craft [[redstone lamp]]s.}}
{{History||1.3.1|snap=12w21a|Redstone can now be [[trading|bought]] from priest [[villager]]s, at 2–4 redstone for 1 [[emerald]], making them [[renewable]].}}
{{History|||snap=12w22a|Redstone dust now generates in [[jungle temple]]s.}}
{{History|||snap=12w25a|Redstone dust can now be placed on top of upside-down [[slabs]] and [[stairs]].}}
{{History||1.4.2|snap=12w34a|Redstone now extends the new [[potion]]s of [[Night Vision]] and [[Invisibility]].}}
{{History|||snap=12w38a|[[Witch]]es have been added, which sometimes [[drops|drop]] redstone when killed.}}
{{History||1.5|snap=13w01a|Redstone can now be used to craft [[blocks of redstone]] and [[dropper]]s.}}
{{History||1.7.2|snap=13w36a|Redstone now extends the new [[potion]] of [[Water Breathing]].}}
{{History||1.8|snap=14w02a|[[Trading]] has been changed: cleric [[villager]]s now [[trading|sell]] 1–4 redstone for 1 [[emerald]].}}
{{History|||snap=14w25a|Redstone dust no longer changes to [[obsidian]] next to water when [[lava]] flows into it.}}
{{History|||snap=14w27a|Redstone now extends the new [[potion]] of [[Leaping]].}}
{{History||1.9|snap=15w31a|[[File:Inactive Redstone Wire (unconnected) JE2.png|32px]] [[File:Inactive Redstone Wire (NS) JE4.png|32px]] [[File:Inactive Redstone Wire (EW) JE4.png|32px]] [[File:Inactive Redstone Wire (NE) JE4.png|32px]] [[File:Inactive Redstone Wire (ES) JE4.png|32px]] [[File:Inactive Redstone Wire (SW) JE4.png|32px]] [[File:Inactive Redstone Wire (NW) JE4.png|32px]] [[File:Inactive Redstone Wire (NEW) JE4.png|32px]] [[File:Inactive Redstone Wire (NES) JE4.png|32px]] [[File:Inactive Redstone Wire (ESW) JE4.png|32px]] [[File:Inactive Redstone Wire (NSW) JE4.png|32px]] [[File:Inactive Redstone Wire (NESW) JE4.png|32px]]<br>[[File:Active Redstone Wire (unconnected) JE2.png|32px]] [[File:Active Redstone Wire (NS) JE4.png|32px]] [[File:Active Redstone Wire (EW) JE4.png|32px]] [[File:Active Redstone Wire (NE) JE4.png|32px]] [[File:Active Redstone Wire (ES) JE4.png|32px]] [[File:Active Redstone Wire (SW) JE4.png|32px]] [[File:Active Redstone Wire (NW) JE4.png|32px]] [[File:Active Redstone Wire (NEW) JE4.png|32px]] [[File:Active Redstone Wire (NES) JE4.png|32px]] [[File:Active Redstone Wire (ESW) JE4.png|32px]] [[File:Active Redstone Wire (NSW) JE4.png|32px]] [[File:Active Redstone Wire (NESW) JE4.png|32px]] Some slight changes have been made to redstone wire's appearance - the dot now extends outward with two more pixels, and the south-facing section of bends, T shapes and crosses now has one fewer pixel. It also appears straighter and more continuous in straight wire form.
|Redstone can no longer be added to extended [[potion]]s or tier-II potions.}}
{{History|||snap=15w44a|The average yield of redstone from [[dungeon]] [[chest]]s has been cut by more than half.
|The average yield of redstone in [[mineshaft]] chests has been increased.}}
{{History|||snap=15w46a|The hitbox of redstone now covers only part of the surface of the [[block]] below, based on the orientation of the redstone.}}
{{History||1.11|snap=16w39a|Redstone dust can now be found in chests in [[woodland mansion]]s.
|Redstone can now used to craft [[observer]]s.}}
{{History||1.13|snap=17w47a|The [[item]] form of "Redstone" has been renamed to "Redstone Wire".
|Prior to [[1.13/Flattening|''The Flattening'']], this [[block]]'s numeral ID was 55, and the [[item]]'s 331.}}
{{History|||snap=17w48a|"Redstone" has been renamed to "Redstone Dust".}}
{{History|||snap=18w07a|Redstone now extends the new [[potion of the Turtle Master]].}}
{{History||1.14|snap=18w43a|[[File:Redstone Dust JE2 BE2.png|32px]] The texture of redstone dust has been changed.}}
{{History|||snap=18w50a|Redstone dust can now be found in chests in [[village]] temples.}}
{{History|||snap=19w12b|Redstone dust can now be placed on [[glass]], [[ice]] and [[sea lantern]]s.}}
{{History|||snap=19w13a|Cleric villagers now give redstone dust to players under the [[Hero of the Village]] effect.}}
{{History||1.16|snap=20w06a|Redstone dust now has a bottom texture.}}
{{History|||snap=20w09a|Redstone can now be used to craft [[target]]s.}}
{{History|||snap=20w18a|Redstone dust placement on one [[block]] has been changed from a "•" back to a "+" shape.
|Redstone dust's hitbox is now no longer strictly a cuboid, and more closely matches the shape of the wiring.<ref>{{bug|MC-137336}}</ref>
|Upward going redstone dust now has a hitbox on the side of the [[block]] too, rather than only on the floor.<ref>{{bug|MC-153508}}</ref>
|Unconnected redstone dust now has all direction block states set to "side".
|The direction block states of redstone dust are now properly set to "side" at the end of a redstone wire on both ends, rather than only the one with other redstone besides it.
|[[File:Inactive Redstone Wire (N).png|32px]] [[File:Inactive Redstone Wire (E).png|32px]] [[File:Inactive Redstone Wire (S).png|32px]] [[File:Inactive Redstone Wire (W).png|32px]]<br>[[File:Active Redstone Wire (N).png|32px]] [[File:Active Redstone Wire (E).png|32px]] [[File:Active Redstone Wire (S).png|32px]] [[File:Active Redstone Wire (W).png|32px]] While not accessible in normal gameplay, redstone dust that points into one side, but not the opposite, now visually reaches halfway across the [[block]].}}
{{History|||snap=20w19a|Redstone dust now visually connects when going up [[soul sand]], 8-layer [[snow]] stacks and the back side of upside-down [[stairs]].
|[[Particles]] are now generated across the length of the redstone wire rather than the center of the [[block]].}}
{{History|||snap=20w21a|Redstone dust placement on one [[block]] is now toggleable between a "+" and a "•" shape, by {{control|interacting}} with it.}}
{{History||1.17|snap=21w08a|Redstone dust can now drop and be smelted from [[deepslate redstone ore]].}}
{{History||1.19|snap=22w13a|Redstone wire now generates in [[Ancient City|ancient cities]].}}
{{History||1.20<br>(Experimental)|link=1.19.4|snap=23w04a|Redstone dust can now be used as an armor trim material.}}
{{History|pocket alpha}}
{{History||v0.8.0|snap=build 1|[[File:Redstone Dust JE1 BE1.png|32px]] Added redstone as an [[item]].
|Redstone is now [[drops|dropped]] when [[breaking|mined]] from [[redstone ore]].
|Redstone can be used to craft [[compass]]es and [[clock]]s.}}
{{History|||snap=build 2|Redstone can now be used to craft [[powered rail]]s.}}
{{History||v0.11.0|snap=build 1|Redstone is now used to craft [[redstone block]]s.}}
{{History||v0.12.1|snap=build 1|Redstone has been added to the [[Creative]] [[inventory]], but it still cannot be placed. }}
{{History||v0.13.0|snap=build 1|Redstone can now be placed.
|Redstone is now used to craft [[redstone lamp]]s, [[note block]]s, [[detector rail]]s and [[redstone torch]]es.}}
{{History||v0.14.0|snap=build 1|Redstone is now used to craft [[dispenser]]s and [[dropper]]s.}}
{{History||v0.15.0|snap=build 1|Redstone is now used to craft [[piston]]s and [[observer]]s.}}
{{History|pocket}}
{{History||1.0.4|snap=alpha 1.0.4.0|Cleric [[villager]]s now [[trading|sell]] 1–4 redstone for an [[emerald]].}}
{{History||1.1.0|snap=alpha 1.1.0.0|Redstone can now be found in [[woodland mansion]]s.}}
{{History|bedrock}}
{{History||?|[[File:Inactive Redstone Wire (NE) BE.png|32px]] [[File:Inactive Redstone Wire (ES) BE.png|32px]] [[File:Inactive Redstone Wire (SW) BE.png|32px]] [[File:Inactive Redstone Wire (NW) BE.png|32px]] [[File:Inactive Redstone Wire (NEW) BE.png|32px]] [[File:Inactive Redstone Wire (NES) BE.png|32px]] [[File:Inactive Redstone Wire (ESW) BE.png|32px]] [[File:Inactive Redstone Wire (NSW) BE.png|32px]] [[File:Inactive Redstone Wire (NESW) BE.png|32px]]<br>[[File:Active Redstone Wire (NE) BE.png|32px]] [[File:Active Redstone Wire (ES) BE.png|32px]] [[File:Active Redstone Wire (SW) BE.png|32px]] [[File:Active Redstone Wire (NW) BE.png|32px]] [[File:Active Redstone Wire (NEW) BE.png|32px]] [[File:Active Redstone Wire (NES) BE.png|32px]] [[File:Active Redstone Wire (ESW) BE.png|32px]] [[File:Active Redstone Wire (NSW) BE.png|32px]] [[File:Active Redstone Wire (NESW) BE.png|32px]]<br>Placed redstone now assumes its current appearance with a more solid center. Its linear state appearences are unknown.}}
{{History||1.10.0|snap=beta 1.10.0.3|[[File:Redstone Dust JE2 BE2.png|32px]] The texture of redstone has been changed.}}
{{History||1.11.0|snap=beta 1.11.0.1|Redstone can now be found in [[desert]] [[village]] temple [[chest]]s.}}
{{History|||snap=beta 1.11.0.4|Cleric [[villager]]s now [[trading|sell]] 4 redstone as part of their first tier [[trading|trade]].}}
{{History||1.16.210|snap=beta 1.16.210.57|"Redstone" has been renamed to "Redstone Dust".}}
{{History||1.17.0|snap=beta 1.16.230.52|Redstone dust can now drop and be smelted from [[deepslate redstone ore]].}}
{{History||1.19.0|snap=beta 1.19.0.26|Redstone wire now generates in [[Ancient City|ancient cities]].}}
{{History||1.19.80|snap=beta 1.19.80.21|Redstone dust can now be used as an armor trim material.}}
{{History|console}}
{{History||xbox=TU1|xbone=CU1|ps=1.0|wiiu=Patch 1|switch=1.0.1|[[File:Redstone Dust JE1 BE1.png|32px]] Added redstone.}}
{{History||xbox=TU3|Redstone now connects to a [[redstone repeater|repeater]] without the dust being explicitly pointed at it.}}
{{History||xbox=none|xbone=none|ps=1.90|wiiu=none|switch=none|[[File:Redstone Dust JE2 BE2.png|32px]] The texture of redstone has been changed.}}
{{History||ps=1.95|Redstone can now be placed on [[glass]].}}
{{History|new 3ds}}
{{History||0.1.0|[[File:Redstone Dust JE1 BE1.png|32px]] Added redstone dust.}}
{{History|foot}}
=== Redstone wire "item" ===
{{:Technical blocks/Redstone Wire}}
== Gallery ==
=== Renders ===
; Java Edition
<gallery>
Inactive Redstone Wire (NESW).png |
Inactive Redstone Wire (unconnected).png |
Inactive Redstone Wire (NS).png |
Inactive Redstone Wire (EW).png |
Inactive Redstone Wire (NE).png |
Inactive Redstone Wire (ES).png |
Inactive Redstone Wire (SW).png |
Inactive Redstone Wire (NW).png |
Inactive Redstone Wire (NEW).png |
Inactive Redstone Wire (NES).png |
Inactive Redstone Wire (ESW).png |
Inactive Redstone Wire (NSW).png
</gallery>
<gallery>
Active Redstone Wire (NESW).png |
Active Redstone Wire (unconnected).png |
Active Redstone Wire (NS).png |
Active Redstone Wire (EW).png |
Active Redstone Wire (NE).png |
Active Redstone Wire (ES).png |
Active Redstone Wire (SW).png |
Active Redstone Wire (NW).png |
Active Redstone Wire (NEW).png |
Active Redstone Wire (NES).png |
Active Redstone Wire (ESW).png |
Active Redstone Wire (NSW).png
</gallery>
; Bedrock Edition
<gallery>
Inactive Redstone Wire (NESW) BE.png |
Inactive Redstone Wire (NESW) BE.png |
Inactive Redstone Wire (NS).png |
Inactive Redstone Wire (EW).png |
Inactive Redstone Wire (NE) BE.png |
Inactive Redstone Wire (ES) BE.png |
Inactive Redstone Wire (SW) BE.png |
Inactive Redstone Wire (NW) BE.png |
Inactive Redstone Wire (NEW) BE.png |
Inactive Redstone Wire (NES) BE.png |
Inactive Redstone Wire (ESW) BE.png |
Inactive Redstone Wire (NSW) BE.png
</gallery>
<gallery>
Active Redstone Wire (NESW) BE.png |
Active Redstone Wire (NESW) BE.png |
Active Redstone Wire (NS).png |
Active Redstone Wire (EW).png |
Active Redstone Wire (NE) BE.png |
Active Redstone Wire (ES) BE.png |
Active Redstone Wire (SW) BE.png |
Active Redstone Wire (NW) BE.png |
Active Redstone Wire (NEW) BE.png |
Active Redstone Wire (NES) BE.png |
Active Redstone Wire (ESW) BE.png |
Active Redstone Wire (NSW) BE.png
</gallery>
=== Screenshots ===
<gallery>
Slab Stair Redstone.png|First image of redstone dust on top of slabs and stairs.
File:Olivia Tinkering.jpeg|[[Olivia]] using a scarce amount of redstone dust.
File:23w32a.jpg|[[Sunny]] using a very long strip of redstone dust.
</gallery>
=== In other media ===
<gallery>
Powered By Redstone JINX.jpg|Official T-shirt artwork "Powered By Redstone" made by [https://www.jinx.com JINX].
File:Redstone Behind Chiseled Bookshelf Pixel Art.png|Pixel art of redstone dust.
</gallery>
== Issues ==
{{issue list|redstone|redstone dust|redstone wire}}
== Trivia ==
* Five updates for [[wikipedia:Windows 10 version history|Windows 10]] released from 2016 to 2018 were codenamed "Redstone", referencing ''Minecraft''.<ref>{{link|url=https://www.theverge.com/2015/4/7/8364355/microsoft-redstone-windows-updates|title=Microsoft plans ‘Redstone’ updates for Windows 10 in 2016|author=Tom Warren|website=The Verge|date=April 7, 2015}}</ref>
* The block has 1,296 possible block state combinations, the highest of all blocks as of 1.15.2, beating [[fire]]'s 512 and [[note block]]'s 800.
* According to {{el|ee}}, redstone dust contains radioactive [[element]]s.
== References ==
{{Reflist}}
{{Redstone}}
{{Blocks|Utility}}
{{Items}}
[[Category:Redstone mechanics]]
[[Category:Mechanisms]]
[[Category:Mechanics]]
[[Category:Generated structure blocks]]
[[Category:Non-solid blocks]]
[[Category:Brewing recipe]]
[[cs:Rudit]]
[[de:Redstone]]
[[el:Σκόνη Κοκκινόπετρας]]
[[es:Polvo de redstone]]
[[fr:Poudre de redstone]]
[[hu:Redstone]]
[[it:Polvere di redstone]]
[[ja:レッドストーンダスト]]
[[ko:레드스톤 가루]]
[[nl:Redstonestof]]
[[pl:Redstone]]
[[pt:Pó de redstone]]
[[ru:Красная пыль]]
[[th:ผงเรดสโตน]]
[[tr:Kızıltaş]]
[[uk:Редстоун]]
[[zh:红石粉]]</li></ul></nowiki> | beta 1.11.0.4 | Item frames can now be bought from cartographer villagers. | |||
1.13.0{{Extension DPL}}<ul><li>[[Blue Dye|Blue Dye]]<br/>{{Item
|image = Blue_Dye_JE1_BE1.png
|renewable = Yes
|stackable = Yes (64)
}}
'''Blue dye''' is a [[Dye#Primary|primary dye color]].
== Obtaining ==
=== Crafting ===
{{Crafting
|Lapis Lazuli
|Output=Blue Dye
|type=Material
|head=1
}}
{{Crafting
|Cornflower
|Output=Blue Dye
|type=Material
|foot=1
}}
=== Chest loot ===
{{#invoke:LootChest|base3|blue-dye}}
== Usage ==
{{dye usage}}
=== Crafting ingredient ===
{{crafting usage|ignore=Banner|continue=1}}
{{banner crafting usage}}
=== Loom ingredient ===
{{Banner loom usage|Blue Dye}}
=== Trading ===
Expert-level shepherd villagers have a {{frac|1|6}} chance to buy 12 blue dye for an emerald.
== Data values ==
=== ID ===
{{edition|java}}:
{{ID table
|edition=java
|showforms=y
|generatetranslationkeys=y
|displayname=Blue Dye
|spritetype=item
|nameid=blue_dye
|form=item
|foot=1}}
{{edition|bedrock}}:
{{ID table
|edition=bedrock
|showaliasids=y
|shownumericids=y
|showforms=y
|notshowbeitemforms=y
|generatetranslationkeys=y
|displayname=Blue Dye
|spritetype=item
|nameid=blue_dye
|aliasid=dye / 18
|id=399
|form=item
|translationkey=item.dye.blue_new.name
|foot=1}}
== History ==
{{History|java}}
{{History||1.14|snap=18w43a|[[File:Blue_Dye_JE1_BE1.png|32px]] Added blue dye.}}
{{History|||snap=18w44a|Blue dyes now can changed the text color on the [[sign]]s to blue.}}
{{History|||snap=19w05a|Added the [[wandering trader]], which sell blue dyes.}}
{{History|||snap=19w11a|Blue dyes can now be [[trading|bought]] by shepherd villagers.}}
{{History||1.17|snap=20w45a|Blue dyes can now used to craft newly added [[blue candle]]s.}}
{{History|||snap=21w19a|Blue dyes can no longer used to craft blue candles.}}
{{History|||snap=Pre-release 1|Blue dyes can once again used to craft blue candles.}}
{{History||1.20<br>(Experimental)|link=1.19.3|snap=22w42a|Blue dyes can now change the text color on [[hanging sign]]s to blue.}}
{{History||1.20|snap=23w12a|Blue dye can now be found in [[suspicious gravel]] and [[suspicious sand]] in [[trail ruins]].}}
{{History|||snap=23w16a|Blue dye no longer generates in [[suspicious sand]] in [[trail ruins]].|Due to the split of the archaeological loot tables for the suspicious gravel within the [[trail ruins]]; blue dye now is in the common loot.}}
{{History|bedrock}}
{{History||1.8.0|snap=beta 1.8.0.10|[[File:Blue_Dye_JE1_BE1.png|32px]] Added blue dye.}}
{{History||1.9.0|snap=beta 1.9.0.0|Added [[flower|cornflowers]], which can be used to [[crafting|craft]] blue dye.}}
{{History||1.10.0|snap=beta 1.10.0.3|Blue dye can now be used to [[dye]] white [[carpet]]s and uncolored [[glass pane]]s.}}
{{History||1.11.0|snap=beta 1.11.0.4|Blue dye can now be [[trading|sold]] to shepherd [[villager]]s.}}
{{History||1.16.100|snap=beta 1.16.100.56|The ID of blue dye has been changed from <code>dye/18</code> to <code>blue_dye</code>.}}
{{History|ps4}}
{{History||1.83|[[File:Blue_Dye_JE1_BE1.png|32px]] Added blue dye.}}
{{History|foot}}
== Issues ==
{{issue list}}
== References ==
{{Reflist}}
{{Items}}
[[Category:Items]]
[[Category:Dyes]]
[[Category:Renewable resources]]
[[de:Blauer Farbstoff]]
[[es:Tinte azul]]
[[fr:Teinture bleue]]
[[ja:青色の染料]]
[[ko:파란색 염료]]
[[pl: Niebieski barwnik]]
[[pt:Corante azul]]
[[zh:蓝色染料]]</li><li>[[Leggings|Leggings]]<br/>{{Update|Include information about armor trims and updated netherite upgrade information.}}
{{Item
| image = <gallery>
Leather Pants.png | Leather
Chainmail Leggings.png | Chainmail
Iron Leggings.png | Iron
Diamond Leggings.png | Diamond
Golden Leggings.png | Golden
Netherite Leggings.png | Netherite
</gallery>
| durability =
* Leather: 75
* Chainmail: 225
* Iron: 225
* Golden: 105
* Diamond: 495
* Netherite: 555
| renewable =
* '''Netherite''': No
* '''All others''': Yes
| stackable = No
}}
'''Leggings''' are a type of [[armor]] that covers the lower body of the player. There are six types of leggings: '''leather pants'''<ref group=fn>Known as '''leather trousers''' in British English variant.{{only|java}}</ref>, '''chainmail leggings''', '''iron leggings''', '''diamond leggings''', '''gold leggings''', and '''netherite leggings'''.
== Obtaining ==
=== Crafting ===
{{crafting
|head=1
|showname=0
|showdescription=1
|name=Leggings
|A1= Leather;Gold Ingot;Iron Ingot;Diamond
|B1= Leather;Gold Ingot;Iron Ingot;Diamond
|C1= Leather;Gold Ingot;Iron Ingot;Diamond
|A2= Leather;Gold Ingot;Iron Ingot;Diamond
|C2= Leather;Gold Ingot;Iron Ingot;Diamond
|A3= Leather;Gold Ingot;Iron Ingot;Diamond
|C3= Leather;Gold Ingot;Iron Ingot;Diamond
|Output= Leather Pants;Golden Leggings;Iron Leggings;Diamond Leggings
|type= Combat
}}
{{crafting
|foot=1
|ignoreusage=1
|name=Leggings
|ingredients=Damaged Matching Leggings
|Damaged Leather Pants; Damaged Golden Leggings; Damaged Chainmail Leggings; Damaged Iron Leggings; Damaged Diamond Leggings; Damaged Netherite Leggings
|Damaged Leather Pants; Damaged Golden Leggings; Damaged Chainmail Leggings; Damaged Iron Leggings; Damaged Diamond Leggings; Damaged Netherite Leggings
|Output= Leather Pants; Golden Leggings; Chainmail Leggings; Iron Leggings; Diamond Leggings; Netherite Leggings
|description= The durability of the two leggings is added together, plus an extra 5% durability. Removes any enchantments.
|type= Combat
}}
=== Upgrading ===
{{Smithing
|Netherite Upgrade
|Diamond Leggings
|Netherite Ingot
|Netherite Leggings
|description=
|tail=1
}}
=== Repairing ===
==== Grinding ====
{{Grinding
|showdescription=1
|ingredients=Damaged Matching Leggings
|Damaged Leather Pants; Damaged Chainmail Leggings; Damaged Iron Leggings; Damaged Golden Leggings; Damaged Diamond Leggings; Damaged Netherite Leggings
|Damaged Leather Pants; Damaged Chainmail Leggings; Damaged Iron Leggings; Damaged Golden Leggings; Damaged Diamond Leggings; Damaged Netherite Leggings
|Leather Pants; Chainmail Leggings; Iron Leggings; Golden Leggings; Diamond Leggings; Netherite Leggings
|description=The durability of the two leggings are added together, plus an extra 5% durability.
}}
==== [[Anvil mechanics#Unit repair|Unit repair]] ====
Leggings may be repaired on an [[anvil]] by combining them with their corresponding crafting material (leather, gold ingots, iron ingots, diamonds, or netherite ingots), with each repair material restoring 25% of the leggings' maximum durability, rounded down. Any enchantments are retained. Chainmail leggings may be repaired in this way with iron ingots. Leggings may also be repaired by crafting them together with another pair of leggings of the same material, although enchantments are lost.
=== Mob loot ===
If a [[zombie]], [[piglin]], [[zombie pigman]] or [[skeleton]] is wearing armor, there is an 8.5% chance (9.5% with Looting I, 10.5% with Looting II and 11.5% with Looting III) for the mob to drop leggings upon death. The leggings are usually badly damaged and may be enchanted.
[[Vindicator]]s and [[pillager]]s spawn in [[raid]]s have a chance to drop iron leggings, which are usually badly damaged, and may be enchanted.
=== Chest loot ===
{{IN|BE}}, a sealed room in [[woodland mansion]]s can appear that has a chest sometimes containing an [[Efficiency]] I leather pants.<ref>{{bug|MCPE-109048}}</ref>
{{LootChestItem|leather-pants,random-enchanted-leather-pants,chainmail-leggings,iron-leggings,level-enchanted-iron-leggings,golden-leggings,random-enchanted-golden-leggings,diamond-leggings,damaged-diamond-leggings,level-enchanted-diamond-leggings,damaged-random-enchanted-diamond-leggings,damaged-random-enchanted-diamond-leggings-2}}
=== Trading ===
{{IN|java}}, novice-level armorer villagers have a 40% chance to sell iron leggings for 7 emeralds. Apprentice-level armorer villagers have a 50% chance to sell chainmail leggings for 3 emeralds. Expert-level armorer villagers always sell enchanted diamond leggings for 18-35 emeralds. Novice-level leatherworker villagers have a {{frac|2|3}} chance to sell randomly dyed<ref group="note">The leather armor has a random color created by two dyes (possibly the same dye twice).</ref> leather pants for 3 emeralds.
Armorer villagers may give the players with the [[Hero of the Village]] effect chainmail leggings. {{only|java}}
{{IN|bedrock}}, novice-level armorer villagers have a 25% chance of selling iron leggings for 7 emeralds. Apprentice-level armorers have a {{frac|1|3}} chance to sell chainmail leggings for 3 emeralds. Expert-level armorers have a 50% chance to sell enchanted diamond leggings for 14 emeralds. Novice-level leatherworker villagers have 50% chance to sell leather pants for 3 emeralds.
{{notelist|columns=1}}
== Usage ==
Leggings can be placed in the 3rd armor slot of a player's [[inventory]] for activation.
=== Defense points ===
Defense points are each signified by half of a shirt of mail in the armor bar above the health bar. Each defense point reduces any damage dealt to the player that is absorbed by armor by 4%, increasing additively with the number of defense points. Different materials and combinations of armor provide different levels of defense.
The following table shows the number of defense points added by leggings.
{| class="wikitable" data-description="Defense points"
|-
!scope="col" | Material
!scope="col" | Defense points
|-
!scope="row" | Leather
| {{armor|2}}
|-
!scope="row" | Golden
| {{armor|3}}
|-
!scope="row" | Chain
| {{armor|4}}
|-
!scope="row" | Iron
| {{armor|5}}
|-
!scope="row" | Diamond
| rowspan="2" | {{armor|6}}
|-
!scope="row" | Netherite
|}
=== Knockback resistance ===
Netherite leggings provide 10% knockback resistance.
=== Durability ===
The following table shows the amount of damage each piece of armor can absorb before being destroyed.
Any "hit" from a damage source that can be blocked by armor removes one point of durability from each piece of armor worn for every {{hp|4}} of incoming damage (rounded down, but never below 1). Damage taken but not protected by that armor (such as [[Damage#Fall damage|falling]] or [[Damage#Drowning|drowning]]) does not damage the armor, even if it is enchanted to protect against that type of damage. The following chart displays how many hits leggings can endure.
Netherite armor is not damaged by [[lava]] or [[fire]] when worn.
{| class="wikitable" data-description="Durability"
|-
! Material
!Durability
|-
!scope="row" | Leather
| 75
|-
!scope="row" | Golden
| 105
|-
!scope="row" | Chain/Iron
| 225
|-
!scope="row" | Diamond
| 495
|-
!scope="row" | Netherite
| 555
|}
=== Enchantments ===
Leggings can receive the following [[enchantment]]s:
{| class="wikitable"
|-
! Enchantment !! Max Level !! Notes
|-
| [[Fire Protection]] || IV || <ref group=note name=exclusive>Fire Protection, Blast Protection, Projectile Protection and Protection are mutually exclusive</ref>
|-
| [[Projectile Protection]] || IV || <ref group=note name="exclusive"/>
|-
| [[Blast Protection]] || IV || <ref group=note name="exclusive"/>
|-
| [[Protection]] || IV || <ref group=note name="exclusive"/>
|-
| [[Unbreaking]] || III ||
|-
| [[Thorns]] || III || <ref group="note" name="anvil">Only from using an [[anvil]] and [[enchanted book]]s.</ref>
|-
| [[Mending]] || I || <ref group=note name="anvil2">Only from chest loot, fishing, or an anvil and enchanted books.</ref>
|-
| [[Curse of Binding]] || I || <ref group="note" name="anvil2"/>
|-
| [[Curse of Vanishing]] || I || <ref group="note" name="anvil2"/>
|-
| [[Swift Sneak]] || III || <ref group=note name="anvil"/>
|}
{{notelist}}
=== Smelting usage ===
{{Smelting|showname=1|Iron Leggings;Chainmail Leggings;Golden Leggings|Iron Nugget;Iron Nugget;Gold Nugget|0,1}}
=== Piglins ===
{{EntityLink|Piglin|Piglins}} are attracted to ''golden'' leggings and pick them up, examining them for 6 to 8 seconds. Piglins can wear other leggings but are not attracted to them. They prefer stronger leggings over weaker leggings, with one exception: They always prefer golden leggings over all other leggings, throwing out stronger leggings in favor of gold leggings. Enchanted leggings are preferred over unenchanted leggings.
== Sounds ==
{{el|je}}:
{{Sound table
|sound=Equip leather1.ogg
|sound2=Equip leather2.ogg
|sound3=Equip leather3.ogg
|sound4=Equip leather4.ogg
|sound5=Equip leather5.ogg
|sound6=Equip leather6.ogg
|subtitle=Leather armor rustles
|source=player
|description=When leather leggings are equipped
|id=item.armor.equip_leather
|translationkey=subtitles.item.armor.equip_leather
|volume=1.0
|pitch=1.0
|distance=16}}
{{Sound table
|sound=Equip chain1.ogg
|sound2=Equip chain2.ogg
|sound3=Equip chain3.ogg
|sound4=Equip chain4.ogg
|sound5=Equip chain5.ogg
|sound6=Equip chain6.ogg
|subtitle=Chain armor jingles
|source=player
|description=When chainmail leggings are equipped
|id=item.armor.equip_chain
|translationkey=subtitles.item.armor.equip_chain
|volume=1.0
|pitch=1.0
|distance=16}}
{{Sound table
|sound=Equip iron1.ogg
|sound2=Equip iron2.ogg
|sound3=Equip iron3.ogg
|sound4=Equip iron4.ogg
|sound5=Equip iron5.ogg
|sound6=Equip iron6.ogg
|subtitle=Iron armor clanks
|source=player
|description=When iron leggings are equipped
|id=item.armor.equip_iron
|translationkey=subtitles.item.armor.equip_iron
|volume=1.0
|pitch=1.0
|distance=16}}
{{Sound table
|sound=Equip gold1.ogg
|sound2=Equip gold2.ogg
|sound3=Equip gold3.ogg
|sound4=Equip gold4.ogg
|sound5=Equip gold5.ogg
|sound6=Equip gold6.ogg
|subtitle=Gold armor clinks
|source=player
|description=When gold leggings are equipped
|id=item.armor.equip_gold
|translationkey=subtitles.item.armor.equip_gold
|volume=1.0
|pitch=1.0
|distance=16}}
{{Sound table
|sound=Equip diamond1.ogg
|sound2=Equip diamond2.ogg
|sound3=Equip diamond3.ogg
|sound4=Equip diamond4.ogg
|sound5=Equip diamond5.ogg
|sound6=Equip diamond6.ogg
|subtitle=Diamond armor clangs
|source=player
|description=When diamond leggings are equipped
|id=item.armor.equip_diamond
|translationkey=subtitles.item.armor.equip_diamond
|volume=1.0
|pitch=1.0
|distance=16}}
{{Sound table
|sound=Equip netherite1.ogg
|sound2=Equip netherite2.ogg
|sound3=Equip netherite3.ogg
|sound4=Equip netherite4.ogg
|subtitle=Netherite armor clanks
|source=player
|description=When netherite leggings are equipped
|id=item.armor.equip_netherite
|translationkey=subtitles.item.armor.equip_netherite
|volume=0.8
|pitch=1.0/0.9
|distance=16}}
{{Sound table
|sound=Random break.ogg
|subtitle=Item breaks
|source=dependent
|description=When a pair of leggings' durability is exhausted
|id=entity.item.break
|translationkey=subtitles.entity.item.break
|volume=0.8
|pitch=0.8-1.2
|distance=16
|foot=1}}
{{el|be}}:
{{Sound table
|type=bedrock
|sound=Equip leather1.ogg
|sound2=Equip leather2.ogg
|sound3=Equip leather3.ogg
|sound4=Equip leather4.ogg
|sound5=Equip leather5.ogg
|sound6=Equip leather6.ogg
|source=player
|description=When leather leggings are equipped
|id=armor.equip_leather
|volume=1.0
|pitch=1.0}}
{{Sound table
|sound=Equip chain1.ogg
|sound2=Equip chain2.ogg
|sound3=Equip chain3.ogg
|sound4=Equip chain4.ogg
|sound5=Equip chain5.ogg
|sound6=Equip chain6.ogg
|source=player
|description=When chain leggings are equipped
|id=armor.equip_chain
|volume=1.0
|pitch=1.0}}
{{Sound table
|sound=Equip iron1.ogg
|sound2=Equip iron2.ogg
|sound3=Equip iron3.ogg
|sound4=Equip iron4.ogg
|sound5=Equip iron5.ogg
|sound6=Equip iron6.ogg
|source=player
|description=When iron leggings are equipped
|id=armor.equip_iron
|volume=1.0
|pitch=1.0}}
{{Sound table
|sound=Equip gold1.ogg
|sound2=Equip gold2.ogg
|sound3=Equip gold3.ogg
|sound4=Equip gold4.ogg
|sound5=Equip gold5.ogg
|sound6=Equip gold6.ogg
|source=player
|description=When gold leggings are equipped
|id=armor.equip_gold
|volume=1.0
|pitch=1.0}}
{{Sound table
|sound=Equip diamond1.ogg
|sound2=Equip diamond2.ogg
|sound3=Equip diamond3.ogg
|sound4=Equip diamond4.ogg
|sound5=Equip diamond5.ogg
|sound6=Equip diamond6.ogg
|source=player
|description=When diamond leggings are equipped
|id=armor.equip_diamond
|volume=1.0
|pitch=1.0}}
{{Sound table
|sound=Equip netherite1.ogg
|sound2=Equip netherite2.ogg
|sound3=Equip netherite3.ogg
|sound4=Equip netherite4.ogg
|source=player
|description=When netherite leggings are equipped.
|id=armor.equip_netherite
|volume=1.0
|pitch=1.0}}
{{Sound table
|rowspan=2
|sound=Water Splash Old.ogg
|source=block
|description=When leather leggings are dyed using a cauldron
|id=cauldron.dyearmor
|volume=0.1
|pitch=1.0}}
{{Sound table
|source=block
|description=When leather leggings' dye is removed using a cauldron
|id=cauldron.cleanarmor
|volume=0.1
|pitch=1.0}}
{{Sound table
|sound=Random break.ogg
|source=player
|description=When a pair of leggings' durability is exhausted
|id=random.break
|volume=1.0
|pitch=0.9
|foot=1}}
== Data values ==
=== ID ===
{{edition|java}}:
{{ID table
|edition=java
|showitemtags=y
|showforms=y
|generatetranslationkeys=y
|displayname=Leather Pants
|spritetype=item
|nameid=leather_leggings
|itemtags=freeze_immune_wearables
|form=item}}
{{ID table
|displayname=Chainmail Leggings
|spritetype=item
|nameid=chainmail_leggings
|form=item}}
{{ID table
|displayname=Iron Leggings
|spritetype=item
|nameid=iron_leggings
|form=item}}
{{ID table
|displayname=Diamond Leggings
|spritetype=item
|nameid=diamond_leggings
|form=item}}
{{ID table
|displayname=Golden Leggings
|spritetype=item
|nameid=golden_leggings
|form=item}}
{{ID table
|displayname=Netherite Leggings
|spritetype=item
|nameid=netherite_leggings
|form=item
|foot=1}}
{{edition|bedrock}}:
{{ID table
|edition=bedrock
|shownumericids=y
|showforms=y
|notshowbeitemforms=y
|generatetranslationkeys=y
|displayname=Leather Pants
|spritetype=item
|nameid=leather_leggings
|id=337
|form=item}}
{{ID table
|displayname=Chainmail Leggings
|spritetype=item
|nameid=chainmail_leggings
|id=341
|form=item}}
{{ID table
|displayname=Iron Leggings
|spritetype=item
|nameid=iron_leggings
|id=345
|form=item}}
{{ID table
|displayname=Diamond Leggings
|spritetype=item
|nameid=diamond_leggings
|id=349
|form=item}}
{{ID table
|displayname=Golden Leggings
|spritetype=item
|nameid=golden_leggings
|id=353
|form=item}}
{{ID table
|displayname=Netherite Leggings
|spritetype=item
|nameid=netherite_leggings
|id=611
|form=item
|foot=1}}
=== Item data ===
When leather pants are dyed, it has the following NBT:
<div class="treeview">
* {{nbt|compound|tag}}: Parent tag.
** {{nbt|compound|display}}: Display properties.
*** {{nbt|int|color}}: The color of the leather armor. The tooltip displays "Dyed" if advanced tooltips are disabled, otherwise it displays the hexadecimal color value. Color codes are calculated from the red, green, and blue components using this formula:<br>'''<span style="color:red">Red</span>[[wikipedia:Logical shift|<<]]16 + <span style="color:green">Green</span><<8 + <span style="color:blue">Blue</span>'''<ref>For positive values larger than 0x00FFFFFF, the top byte is ignored. All negative values produce white.</ref>
</div>
== Achievements ==
{{load achievements|Iron Man;Tie Dye Outfit;Cover me in debris;Oooh, shiny!}}
== Advancements ==
{{load advancements|Suit Up;Cover me With Diamonds;Oh Shiny;Cover Me in Debris}}
== History ==
{{Cleanup|Split history into just leggings history}}
{{Needs render|type=old|Add of armor models from February 12, 2010 ("Added armor models" / "Armor models are displayed on the player in the inventory").}}
{{History|java indev}}
{{History||0.31|snap=20091231-2|[[File:Studded Leggings (item) JE1.png|32px]] [[History of textures/Unused textures#Studded armor|Studded leggings]] are now able to be seen in the [[inventory]]. This was taken directly from one of [[Notch|Notch's]] game's ''[[Legend of the Chambered 2]]''.}}
{{History||February 9, 2010|link=wordofnotch:380486636|[[File:Notch revealed armor.png|32px]] [[Notch]] revealed new models for armor, which included leggings.}}
{{History||20100212-1|Added leggings models.{{more info|No armor sets were added until later, what does this mean?}}
|[[File:Indev 20100212 armor.png|50px]] Leggings models are now displayed on the [[player]] in the [[inventory]].{{more info|No armor sets were added until later, what does this mean?}}}}
{{History||20100218|[[File:Leather Pants JE1.png|32px]] [[File:Leather Pants (item) JE1 BE1.png|32px]] Added cloth leggings, which have been given the textures from one of [[Notch]]'s previous games, ''[[Legend of the Chambered]]''.
|[[File:Chainmail Leggings JE1 BE1.png|32px]] [[File:Chainmail Leggings (item) JE1 BE1.png|32px]] Added chain leggings.
|[[File:Iron Leggings JE1 BE1.png|32px]] [[File:Iron Leggings (item) JE1 BE1.png|32px]] Added iron leggings.
|[[File:Golden Leggings JE1 BE1.png|32px]] [[File:Golden Leggings (item) JE1 BE1.png|32px]] Added gold leggings.
|[[File:Diamond Leggings JE1 BE1.png|32px]] [[File:Diamond Leggings (item) JE1 BE1.png|32px]] Added diamond leggings.
|Leggings can be [[crafting|crafted]] and worn.
|Leggings now function, giving {{Armor|6}}. Leggings have limited [[item durability|durability]], with lower tier leggings less durable than higher tier leggings.}}
{{History|java alpha}}
{{History||v1.0.8|"Wool leggings" have been renamed to "leather leggings".{{verify|Were they "pants" or "leggings" at the time? If not, when did the name change?}}
|Leather pants are now [[crafting|crafted]] with [[leather]] instead of [[wool]].}}
{{History|java}}
{{History||1.0.0|snap=Beta 1.9 Prerelease|The armor protection behavior has been changed. Previous to this update, the total armor protection is based in this equation: (((''total equipped armor damage reduction'' − 1) × (''all equipped armor max damage'' − ''total equipped armor damage'')) ÷ (''total equipped armor max damage'' + 1)).}}
{{History|||snap=October 3, 2011|slink={{tweet|notch|120859830339637249}}|The first images of a [[player]] wearing enchanted armor, including leggings, are revealed.}}
{{History|||snap=Beta 1.9 Prerelease 3|Iron leggings can be found in the new [[stronghold]] altar [[chest]]s.}}
{{History|||snap=Beta 1.9 Prerelease 4|Leggings can be [[enchanting|enchanted]].}}
{{History||1.1|snap=12w01a|Iron leggings can be found in the new blacksmith [[chest]]s in [[village]]s.}}
{{History||1.3.1|snap=12w15a|{{key|Shift}}+clicking can be used to equip leggings.}}
{{History|||snap=12w21a|Chain leggings can be obtained legitimately in [[survival]] mode through [[trading]].
|Blacksmith [[villager]]s now [[trading|sell]] chain leggings for 9–10 emeralds.
|Blacksmith villagers now sell diamond leggings for 11–13 emeralds.
|Blacksmith villagers now sell iron leggings for 8–9 emeralds.
|Butchers now sell leather pants for 2–3 emeralds.}}
{{History||1.4.2|snap=12w32a|[[Mob]] armor has been reintroduced. A partial or full set of any armor is now sometimes worn by [[zombie]]s, [[skeleton]]s and [[zombie pigman|zombie pigmen]], with the likelihood increasing with difficulty.}}
{{History|||snap=August 17, 2012|slink={{tweet|Dinnerbone|236445090929844225}}|[[Jeb]] and [[Dinnerbone]] tweeted pictures of [[dye]]able leather armor, including leggings.}}
{{History|||snap=12w34a|Leather pants can be dyed by [[crafting]] leather pants with [[dye]]s. Dyes can be removed by {{control|use|text=using}} dyed leather pants on a [[cauldron]] with [[water]].
|[[File:Leather Pants JE2.png|32px]] [[File:Leather Pants (item) JE2.png|32px]] Default leather pants are now slightly darker.}}
{{History|||snap=12w36a|[[Dye]]d leather pants are now more saturated and have a slight tint of tan in respect to the default armor color.
|[[Wither skeleton]]s can now spawn wearing leggings.}}
{{History|||snap=12w37a|[[File:Leather Pants (item) JE3 BE2.png|32px]]{{info needed|needs updating.}}[[Category:Needs updating]] Leather leggings now have non-dyed parts. This has been implemented so that [[player]]s can distinguish between other types of armor and similar-colored leather armor.
|Leather pants now have knee pads, which has changed the texture from [[File:Leather Pants JE2.png|32px]] to [[File:Leather Pants JE3 BE1.png|32px]].}}
{{History||1.5|snap=13w04a|Leggings in the [[player]]'s hand can be equipped by right-clicking.
|[[Dispenser]]s can now equip nearby players with leggings.}}
{{History||1.8|snap=14w02a|Armorer [[villager]]s now [[trading|sell]] chain leggings for 9–11 emeralds.
|Armorer villagers no longer sell diamond leggings.
|Armorer villagers no longer sell iron leggings.
|Leatherworkers now sell leather pants for 2–4 emeralds.}}
{{History|||snap=14w05a|Leggings no longer turn red when [[mob]]s and [[player]]s are hurt.}}
{{History|||snap=14w06a|Leggings are now visible on [[giant]]s.}}
{{History|||snap=14w25a|Chain leggings [[Java Edition removed features#Chain armor|can no longer be crafted anymore]] due to the [[item]] form of [[fire]] being [[Java Edition removed features#Obtainable until 1.8|removed]].}}
{{History||1.9|snap=15w31a|Enchanted iron and diamond leggings can be found in [[end city]] ship [[chest]]s.
|[[Mob]]s now wear armor from the bottom to the top, rather than from the top to the bottom. This means that a mob with three armor pieces, for example, spawn with all armor except a helmet.}}
{{History|||snap=15w34b|Leggings' [[item durability|durability]] now affects armor value.}}
{{History|||snap=15w36a|Armor value and armor [[enchanting|enchantment]] calculations have been changed. For the original values, see [[Armor/Before 1.9|here]].}}
{{History|||snap=15w36d|Leggings' durability affecting value has been removed.
|Leggings now have an attribute controlling the defense points.}}
{{History|||snap=15w50a|Added {{cd|equip}} [[sound]]s for leggings.}}
{{History|||snap=16w02a|Armor value and armor enchantment calculations have been changed again.}}
{{History|||snap=16w05a|Armor value calculations have been changed, once again.}}
{{History||1.11.1|snap=16w50a|Golden, chain, and iron leggings can be [[smelting|smelted]] down into one of their respective [[nugget]]s. Chain leggings smelt into iron nuggets.}}
{{History||1.13|snap=17w47a|Prior to [[1.13/Flattening|''The Flattening'']], these [[item]]s' numeral IDs were 300 (Leather), 304 (Chainmail), 308 (Iron), 312 (Diamond), and 316 (Golden).}}
{{History|||snap=18w11a|Enchanted leather pants can now generate in the chests of [[shipwreck]]s.}}
{{History|||snap=18w20a|Chain leggings have been renamed to "chainmail leggings".}}
{{History||1.14|snap=18w43a|[[File:Leather Pants JE4 BE2.png|32px]] [[File:Leather Pants (item) JE4 BE3.png|32px]] The textures of leather leggings have been changed.
|[[File:Chainmail Leggings JE2 BE2.png|32px]] [[File:Chainmail Leggings (item) JE2 BE2.png|32px]] The textures of chainmail leggings have been changed.
|[[File:Iron Leggings JE2 BE2.png|32px]] [[File:Iron Leggings (item) JE2 BE2.png|32px]] The textures of iron leggings have been changed.
|[[File:Golden Leggings JE2 BE2.png|32px]] [[File:Golden Leggings (item) JE2 BE2.png|32px]] The textures of gold leggings have been changed.
|[[File:Diamond Leggings JE2 BE2.png|32px]] [[File:Diamond Leggings (item) JE2 BE2.png|32px]] The textures of diamond leggings have been changed.}}
{{History|||snap=18w48a|Leather pants can be found in [[chest]]s in [[village]] tanneries.}}
{{History|||snap=19w08a|[[File:Golden Leggings (item) JE3 BE3.png|32px]] The texture of gold leggings [[item]]s have been changed.}}
{{History|||snap=19w11a|Armorer villagers now sell iron and enchanted diamond leggings, making diamond leggings effectively [[renewable resource|renewable]] again.
|Leather pants sold by leatherworker villagers are now randomly [[dye]]d.}}
{{History|||snap=19w13a|Armorer villagers now give chainmail leggings to players under the [[Hero of the Village]] effect.}}
{{History||1.16|snap=20w06a|[[File:Netherite Leggings JE1.png|32px]] [[File:Netherite Leggings (item) JE1.png|32px]] Added netherite leggings.
|Netherite leggings can be [[crafting|crafted]] using one diamond leggings and one [[netherite ingot]].}}
{{History|||snap=20w09a|[[File:Diamond Leggings (item) JE3 BE3.png|32px]] The textures of diamond leggings [[item]]s have been changed.}}
{{History|||snap=20w10a|[[File:Netherite Leggings JE2.png|32px]] [[File:Netherite Leggings (item) JE2 BE1.png|32px]] The texture of netherite leggings have been changed.
|Netherite leggings can no longer be [[crafting|crafted]].
|Netherite leggings are now obtained by combining one diamond leggings and one [[netherite ingot]] in a [[smithing table]].}}
{{History|||snap=20w16a|Netherite leggings now generate randomly enchanted in [[bastion remnant]] chests.
|Golden leggings now generate randomly enchanted in [[ruined portal]] chests.}}
{{History|||snap=20w17a|Diamonds leggings now generate in place of netherite leggings in bastion remnant [[chest]]s.}}
{{History||1.16.4|snap=Pre-release 1|[[File:Netherite Leggings JE3 BE2.png|32px]] The texture of netherite leggings has been changed.}}
{{History||1.18.2|snap=22w03a|Netherite leggings knockback resistance is no longer random.}}
{{History||1.19|snap=22w12a|Added the [[Swift Sneak]] enchantment, which can be applied only to leggings.}}
{{History|||snap=22w13a|Enchanted iron and diamond leggings may be found in [[ancient city]] [[chest]]s.}}
{{History||1.20<br>(Experimental)|link=1.19.4|snap=23w04a|Non-leather leggings can now be trimmed using a [[smithing table]].
|There are 10 types of material that determine the color of the trim:
*Iron
*Copper
*Gold
*Lapis
*Emerald
*Diamond
*Netherite
*Redstone
*Amethyst
*Quartz
|Upgrading diamond leggings to netherite leggings now requires the netherite upgrade [[smithing template]].}}
{{History|||snap=23w05a|Leather pants can now be trimmed using a smithing table.|Leggings can now have trims of the same material it is made out of.}}
{{History|||snap=23w06a|Swapped {{cd|iron}} and {{cd|iron_darker}} palette, then made {{cd|iron_darker}} darker overall.}}
{{History||1.19.4|snap=23w05a|Leggings can now be swapped by {{ctrl|using}} them in the hotbar.<ref>{{bug|MC-216270|||Fixed}}</ref>}}
{{History||?|Leggings can now be swapped in [[armor stand]]s by {{ctrl|using}} them in the armor stand's slot.}}
{{History||1.20|snap=23w12a|The pattern textures of dune and sentry armor trims are changed.|
Those previous patterns were left with different names: dune was renamed sentry and sentry was renamed shaper.}}
{{History|pocket alpha}}
{{History||v0.6.0|[[File:Leather Pants JE1 BE1.png|32px]] [[File:Leather Pants (item) JE1 BE1.png|32px]] Added the leather pants.
|[[File:Chainmail Leggings JE1 BE1.png|32px]] [[File:Chainmail Leggings (item) JE1 BE1.png|32px]] Added the chain leggings.
|[[File:Iron Leggings JE1 BE1.png|32px]] [[File:Iron Leggings (item) JE1 BE1.png|32px]] Added the iron leggings.
|[[File:Golden Leggings JE1 BE1.png|32px]] [[File:Golden Leggings (item) JE1 BE1.png|32px]] Added the golden leggings.
|[[File:Diamond Leggings JE1 BE1.png|32px]] [[File:Diamond Leggings (item) JE1 BE1.png|32px]] Added the diamond leggings.}}
{{History||v0.8.0|snap=build 2|[[File:Leather Pants (item) JE3 BE2.png|32px]] The leather pants sprites have been changed to that of the [[Java Edition|PC]] version, but its armor [[model]] remains that of older versions.}}
{{History||v0.9.0|snap=build 1|Iron leggings now naturally generates in [[village]] [[chest]]s and a [[stronghold]] altar chest.}}
{{History||v0.11.0|snap=build 11|Armor now protects against [[damage]] from [[mob]]s only.}}
{{History||v0.12.1|snap=build 1|Leggings can be worn by mobs.
|Chainmail leggings can be obtained in [[survival]] mode from a mob wearing it.}}
{{History||?|Leggings no longer turn red when [[mob]]s and [[player]]s are hurt.}}
{{History||v0.14.0|snap=build 1|[[File:Leather Pants JE3 BE2.png|32px]] Leather armor can be dyed and the model has been updated.}}
{{History||v0.15.0|snap=build 1|Leggings can be obtained from [[stray]]s and [[husk]]s that naturally spawn with armor.}}
{{History||v0.15.10|[[Cape]]s no longer clip through armor.}}
{{History|pocket}}
{{History||1.0.0|snap=alpha 0.17.0.1|[[Enchanting|Enchanted]] iron leggings and enchanted diamond leggings can be found inside [[chest]]s within [[end city]].}}
{{History||1.0.4|snap=alpha 1.0.4.0|Chainmail leggings are now [[trading|sold]] by armorer smith [[villager]]s via [[trading]].}}
{{History||1.1.0|snap=alpha 1.1.0.0|Golden, chain, and iron leggings can be [[smelting|smelted]] down into one of their respective [[nugget]]s.}}
{{History|bedrock}}
{{History||1.4.0|snap=beta 1.2.14.2|Chainmail leggings now generate in [[buried treasure]] chests.
|Enchanted leather leggings can be found inside [[shipwreck]] supply room [[chest]]s.}}
{{History||1.10.0|snap=beta 1.10.0.3|Iron leggings now can be found in plains [[village]] weaponsmith [[chest]]s.
|Leather pants can be found inside plains village tannery chests.
|[[File:Leather Pants JE4 BE2.png|32px]] [[File:Leather Pants (item) JE4 BE3.png|32px]] The textures of leather pants have been changed.
|[[File:Chainmail Leggings JE2 BE2.png|32px]] [[File:Chainmail Leggings (item) JE2 BE2.png|32px]] The textures of chainmail leggings have been changed.
|[[File:Iron Leggings JE2 BE2.png|32px]] [[File:Iron Leggings (item) JE2 BE2.png|32px]] The textures of iron leggings have been changed.
|[[File:Golden Leggings JE2 BE2.png|32px]] [[File:Golden Leggings (item) JE2 BE2.png|32px]] The textures of golden leggings have been changed.
|[[File:Diamond Leggings JE2 BE2.png|32px]] [[File:Diamond Leggings (item) JE2 BE2.png|32px]] The textures of diamond leggings have been changed.}}
{{History||1.11.0|snap=beta 1.11.0.1|Iron leggings now can be found in [[savanna]], [[taiga]], [[desert]], [[snowy taiga]], and [[snowy tundra]] [[village]] weaponsmith [[chest]]s.
|Leather leggings can be found inside savanna, taiga, desert, snowy taiga, and snowy tundra village tannery chests.}}
{{History|||snap=beta 1.11.0.4|[[Pillager]]s and [[vindicator]]s that spawn in [[raid]]s can now drop iron leggings.
|Leather pants are now [[trading|sold]] by leather worker [[villager]]s.
|Iron leggings and diamond leggings are now sold by armorer villagers.}}
{{History||1.11.0|snap=beta 1.11.0.5|[[File:Golden Leggings (item) JE3 BE3.png|32px]] The textures of golden leggings [[item]]s have been changed.}}
{{History||1.12.0|snap=beta 1.12.0.2|[[File:Armor Stand with Leather Armor MCPE-44669.png|32px]] Leather armor no longer show as being [[dye]]d properly when worn by [[armor stand]]s.}}
{{History||1.13.0|snap=beta 1.13.0.1|Leather armor now appears dyed properly when worn by armor stands.}}
{{History||1.16.0|snap=beta 1.16.0.51|[[File:Netherite Leggings BE1.png|32px]] [[File:Netherite Leggings (item) JE2 BE1.png|32px]] Added netherite leggings.
|Netherite leggings can be [[crafting|crafted]] using one diamond leggings and one [[netherite ingot]].
|[[File:Diamond Leggings (item) JE3 BE3.png|32px]] The texture of diamond leggings has been changed.
|Golden leggings can be obtained from [[piglin]]s wearing [[armor]].}}
{{History||1.16.0|snap=beta 1.16.0.57|Netherite leggings can no longer be [[crafting|crafted]].
|Netherite leggings are now obtained by combining one diamond leggings and one [[netherite ingot]] in a [[smithing table]].
|Golden leggings can be found in [[ruined portal]] chests.
|Golden and netherite leggings can be found in [[bastion remnant]] chests.}}
{{History|||snap=beta 1.16.0.63|Diamonds leggings now generate in place of netherite leggings in bastion remnant chests.}}
{{History||1.16.200|snap=beta 1.16.200.52|[[File:Netherite Leggings JE3 BE2.png|32px]] The texture of netherite leggings has been changed.}}
{{History||1.19.0|snap=beta 1.19.0.24|Added the [[Swift Sneak]] enchantment, which is applicable only to leggings.}}
{{History|||snap=beta 1.19.0.26|Enchanted iron and diamond leggings may be found in [[ancient city]] [[chest]]s.}}
{{History|console}}
{{History||xbox=TU1|xbone=CU1|ps=1.0|wiiu=Patch 1|switch=1.0.1|[[File:Leather Pants JE3 BE1.png|32px]] [[File:Leather Pants (item) JE1 BE1.png|32px]] Added the leather leggings.
|[[File:Iron Leggings JE1 BE1.png|32px]] [[File:Iron Leggings (item) JE1 BE1.png|32px]] Added the iron leggings.
|[[File:Golden Leggings JE1 BE1.png|32px]] [[File:Golden Leggings (item) JE1 BE1.png|32px]] Added the golden leggings.
|[[File:Diamond Leggings JE1 BE1.png|32px]] [[File:Diamond Leggings (item) JE1 BE1.png|32px]] Added the diamond set.}}
{{History||xbox=TU5|[[File:Chainmail Leggings JE1 BE1.png|32px]] [[File:Chainmail Leggings (item) JE1 BE1.png|32px]] Added the chain leggings.
|Added a quick equip for armor to the [[inventory]] interface.}}
{{History||xbox=TU12|ps=1.03|[[File:Leather Pants (item) JE3 BE2.png|32px]] The textures for leather armor [[item]]s have been changed.}}
{{History||xbox=TU14|ps=1.05|Leather armor can be [[dye]]d.
|[[Item repair]] can now repair armor.}}
{{History||xbox=TU25|xbone=CU13|ps=1.16|Armor now have the quick equip functionality.}}
{{History||xbox=TU53|xbone=CU43|ps=1.49|wiiu=Patch 23|switch=1.0.3|Golden, chain, and iron armor can be [[smelting|smelted]] down into one of their respective [[nugget]]s.}}
{{History|PS4}}
{{History||1.90|[[File:Leather Cap JE4 BE2.png|32px]] [[File:Leather Tunic JE4 BE2.png|32px]] [[File:Leather Pants JE4 BE2.png|32px]] [[File:Leather Boots JE3 BE2.png|32px]]<br>[[File:Leather Cap (item) JE4 BE3.png|32px]] [[File:Leather Tunic (item) JE4 BE3.png|32px]] [[File:Leather Pants (item) JE4 BE3.png|32px]] [[File:Leather Boots (item) JE4 BE3.png|32px]] The textures of leather armor have been changed.
|[[File:Chainmail Helmet JE3 BE2.png|32px]] [[File:Chainmail Chestplate JE3 BE2.png|32px]] [[File:Chainmail Leggings JE2 BE2.png|32px]] [[File:Chainmail Boots JE2 BE2.png|32px]]<br>[[File:Chainmail Helmet (item) JE2 BE2.png|32px]] [[File:Chainmail Chestplate (item) JE2 BE2.png|32px]] [[File:Chainmail Leggings (item) JE2 BE2.png|32px]] [[File:Chainmail Boots (item) JE2 BE2.png|32px]] The textures of chainmail armor have been changed.
|[[File:Iron Helmet JE2 BE2.png|32px]] [[File:Iron Chestplate JE2 BE2.png|32px]] [[File:Iron Leggings JE2 BE2.png|32px]] [[File:Iron Boots JE2 BE2.png|32px]]<br>[[File:Iron Helmet (item) JE2 BE2.png|32px]] [[File:Iron Chestplate (item) JE2 BE2.png|32px]] [[File:Iron Leggings (item) JE2 BE2.png|32px]] [[File:Iron Boots (item) JE2 BE2.png|32px]] The textures of iron armor have been changed.
|[[File:Golden Helmet JE2 BE2.png|32px]] [[File:Golden Chestplate JE2 BE2.png|32px]] [[File:Golden Leggings JE2 BE2.png|32px]] [[File:Golden Boots JE2 BE2.png|32px]]<br>[[File:Golden Helmet (item) JE3 BE3.png|32px]] [[File:Golden Chestplate (item) JE3 BE3.png|32px]] [[File:Golden Leggings (item) JE3 BE3.png|32px]] [[File:Golden Boots (item) JE3 BE3.png|32px]] The textures of gold armor have been changed.
|[[File:Diamond Helmet JE2 BE2.png|32px]] [[File:Diamond Chestplate JE3 BE2.png|32px]] [[File:Diamond Leggings JE2 BE2.png|32px]] [[File:Diamond Boots JE2 BE2.png|32px]]<br>[[File:Diamond Helmet (item) JE2 BE2.png|32px]] [[File:Diamond Chestplate (item) JE2 BE2.png|32px]] [[File:Diamond Leggings (item) JE2 BE2.png|32px]] [[File:Diamond Boots (item) JE2 BE2.png|32px]] The textures of diamond armor have been changed.}}
{{History|new 3ds}}
{{History||0.1.0|[[File:Leather Cap JE3 BE1.png|32px]] [[File:Leather Tunic JE3 BE1.png|32px]] [[File:Leather Pants JE3 BE1.png|32px]] [[File:Leather Boots JE2 BE1.png|32px]]<br>[[File:Leather Cap (item) JE3 BE2.png|32px]] [[File:Leather Tunic (item) JE3 BE2.png|32px]] [[File:Leather Pants (item) JE3 BE2.png|32px]] [[File:Leather Boots (item) JE3 BE2.png|32px]] Added the leather set.
|[[File:Chainmail Helmet JE2 BE1.png|32px]] [[File:Chainmail Chestplate JE2 BE1.png|32px]] [[File:Chainmail Leggings JE1 BE1.png|32px]] [[File:Chainmail Boots JE1 BE1.png|32px]]<br>[[File:Chainmail Helmet (item) JE1 BE1.png|32px]] [[File:Chainmail Chestplate (item) JE1 BE1.png|32px]] [[File:Chainmail Leggings (item) JE1 BE1.png|32px]] [[File:Chainmail Boots (item) JE1 BE1.png|32px]] Added the chain set.
|[[File:Iron Helmet JE1 BE1.png|32px]] [[File:Iron Chestplate JE1 BE1.png|32px]] [[File:Iron Leggings JE1 BE1.png|32px]] [[File:Iron Boots JE1 BE1.png|32px]]<br>[[File:Iron Helmet (item) JE1 BE1.png|32px]] [[File:Iron Chestplate (item) JE1 BE1.png|32px]] [[File:Iron Leggings (item) JE1 BE1.png|32px]] [[File:Iron Boots (item) JE1 BE1.png|32px]] Added the iron set.
|[[File:Golden Helmet JE1 BE1.png|32px]] [[File:Golden Chestplate JE1 BE1.png|32px]] [[File:Golden Leggings JE1 BE1.png|32px]] [[File:Golden Boots JE1 BE1.png|32px]]<br>[[File:Golden Helmet (item) JE1 BE1.png|32px]] [[File:Golden Chestplate (item) JE1 BE1.png|32px]] [[File:Golden Leggings (item) JE1 BE1.png|32px]] [[File:Golden Boots (item) JE1 BE1.png|32px]] Added the golden set.
|[[File:Diamond Helmet JE1 BE1.png|32px]] [[File:Diamond Chestplate JE1 BE1.png|32px]] [[File:Diamond Leggings JE1 BE1.png|32px]] [[File:Diamond Boots JE1 BE1.png|32px]]<br>[[File:Diamond Helmet (item) JE1 BE1.png|32px]] [[File:Diamond Chestplate (item) JE1 BE1.png|32px]] [[File:Diamond Leggings (item) JE1 BE1.png|32px]] [[File:Diamond Boots (item) JE1 BE1.png|32px]] Added the diamond set.}}
{{History|foot}}
== Issues ==
{{issue list}}
== Gallery ==
=== Enchanted Leggings ===
<gallery>
File:Enchanted Leather Pants (item).gif
File:Enchanted Chainmail Leggings (item).gif
File:Enchanted Iron Leggings (item).gif
File:Enchanted Golden Leggings (item).gif
File:Enchanted Diamond Leggings (item).gif
File:Enchanted Netherite Leggings (item).gif
</gallery>
<gallery>
File:Enchanted Leather Leggings.gif
File:Enchanted Chainmail Leggings.gif
File:Enchanted Iron Leggings.gif
File:Enchanted Golden Leggings.gif
File:Enchanted Diamond Leggings.gif
File:Enchanted Netherite Leggings.gif
</gallery>
== Notes ==
{{fnlist}}
== References ==
{{reflist}}
== External Links ==
*[https://www.minecraft.net/en-us/article/taking-inventory-leggings Taking Inventory:Leggings] – Minecraft.net on February 15, 2019
{{Items}}
[[Category:Armor]]
[[fr:Armure#Jambières]]
[[ja:レギンス]]
[[ko:각반]]
[[pl:Nogawice]]
[[pt:Calças]]
[[zh:护腿]]</li></ul> | beta 1.13.0.9 | Item frames can now be placed on the top and bottom of blocks. | |||
1.16.0{{Extension DPL}}<ul><li>[[Minecart with Command Block|Minecart with Command Block]]<br/>{{ItemEntity
|renewable=No
|stackable=No
|size=Height: 0.7 Blocks<br>Width: 0.98 Blocks
|image=Minecart with Command Block.gif
|image2=Minecart with Command Block BE.gif
|invimage1=Minecart with Command Block
|networkid=10
|drops={{drop|Item|Minecart|1}}
|health={{hp|6}}
|rarity=Epic
}}
A '''minecart with command block''' is an impulse{{only|java|short=y}} or repeating{{only|bedrock|education|short=y}} [[command block]] inside a [[minecart]].
== Obtaining ==
The minecart with command block is obtainable only using the [[command]] {{cmd|give @s command_block_minecart}}, as it does not appear in the creative inventory{{only|BE}} and has no [[crafting]] recipe. It can also be summoned using the command {{cmd|summon command_block_minecart}}. It can be broken like any other minecart, but only the minecart is retained, while the command block is lost.
== Usage ==
{{main|Command Block}}
The minecart with command block combines the functionalities of both minecarts and command blocks. Although the minecart visually contains an impulse command block, it functions more similarly to a repeating command block, and runs its command once every four game [[tick]]s when on an active [[activator rail]]. When it passes over a [[detector rail]] with a [[comparator]] connected next to it, it outputs the command block's result.
== Sounds ==
{{Edition|Java}}:<br>
Minecarts with command blocks use the Friendly Creatures sound category for entity-dependent sound events.<ref group="sound" name="rollsource">{{bug|MC-42132}}</ref>
{{Sound table
|sound=Minecart rolling.ogg
|subtitle=Minecart rolls
|source=Friendly Creatures <ref group=sound name=rollsource/>
|overridesource=1
|description=While a minecart with command block is moving
|id=entity.minecart.riding
|translationkey=subtitles.entity.minecart.riding
|volume=0.0-0.35 <ref group=sound>Relates linearly with horizontal velocity (max 0.5)</ref>
|pitch=0.0-1.0 <ref group=sound>Will increase by 0.0025 per tick if the minecart's horizontal velocity is more than 0.01</ref>
|distance=16
|foot=1}}
{{Edition|Bedrock}}:
{{Sound table
|type=bedrock
|sound=Minecart rolling.ogg
|source=neutral
|description=While a minecart with command block is moving
|id=minecart.base
|foot=1}}
== Data values ==
=== ID ===
{{edition|java}}:
{{ID table
|edition=java
|firstcolumnname=Item
|showforms=y
|generatetranslationkeys=y
|displayname=Minecart with Command Block
|spritetype=item
|nameid=command_block_minecart
|form=item
|foot=1}}
{{ID table
|edition=java
|firstcolumnname=Entity
|generatetranslationkeys=y
|displayname=Minecart with Command Block
|spritetype=entity
|nameid=command_block_minecart
|foot=1}}
{{edition|bedrock}}:
{{ID table
|edition=bedrock
|firstcolumnname=Item
|shownumericids=y
|showforms=y
|notshowbeitemforms=y
|generatetranslationkeys=y
|displayname=Minecart with Command Block
|spritetype=item
|nameid=command_block_minecart
|id=563
|form=item
|foot=1}}
{{ID table
|edition=bedrock
|firstcolumnname=Entity
|shownumericids=y
|generatetranslationkeys=y
|displayname=Minecart with Command Block
|spritename=minecart-with-repeating-command-block
|spritetype=entity
|nameid=command_block_minecart
|id=100
|foot=1}}
=== Entity data ===
Minecarts with command blocks have entity data associated with them that contain various properties of the entity.
{{el|java}}:
{{main|Entity format}}
{{/ED}}
{{el|bedrock}}:
: See [[Bedrock Edition level format/Entity format]].
== History ==
{{History|java}}
{{History||1.7.2|snap=13w39a|[[File:Minecart with Command Block JE1.png|32px]] [[File:Minecart with Command Block (item) JE1 BE2.png|32px]] Added minecart with command block.}}
{{History||1.9|snap=15w34a|[[File:Minecart with Command Block JE2.png|32px]] The texture of the [[command block]] in the [[minecart]] has been removed due to the new texture and types for the command block.}}
{{History|||snap=15w35a|[[File:Minecart with Command Block JE3.png|32px]] The texture of the command block has been changed.}}
{{History||1.11|snap=16w32a|The [[entity]] ID has been changed from <code>MinecartCommandBlock</code> to <code>commandblock_minecart</code>.}}
{{History||1.13|snap=17w47a|Prior to [[1.13/Flattening|''The Flattening'']], this [[item]]'s numeral ID was 422.}}
{{History|||snap=pre5|The entity ID has been changed to <code>command_block_minecart</code>.}}
{{History||1.14|snap=18w43a|[[File:Minecart with Command Block JE4.png|32px]] [[File:Minecart with Command Block (item) JE2 BE3.png|32px]] The textures of the minecart with command block has been changed.}}
{{History||1.17|snap=21w20a|Minecart with command block [[Rarity|rarity color]] was changed from common to epic.}}
{{History||1.19.3|snap=22w44a|Minecart with command block is now available in the creative inventory, but only if cheats are enabled.}}
{{History|||snap=22w45a|Moved the minecart with command block behind the Operator Utilities tab in the creative inventory. The tab is only available if cheats are enabled and the "Operator Items Tab" option in the controls menu is turned on.}}
{{History|pocket}}
{{History||1.0.5|snap=alpha 1.0.5.0|[[File:Minecart with Command Block BE1.png|32px]] [[File:Minecart with Command Block (item) BE1.png|32px]] Added minecart with command block. The [[minecart]] has a [[repeating command block]] in it, instead of an impulse command block.}}
{{History||1.1.0|snap=alpha 1.1.0.0|The entity ID has been changed from <code>minecartcommandblock</code> to <code>command_block_minecart</code>.}}
{{History|bedrock}}
{{History||1.10.0|snap=beta 1.10.0.3|[[File:Minecart with Command Block BE2.png|32px]] [[File:Minecart with Command Block (item) JE2 BE3.png|32px]] The texture of the minecart with command block has been changed. Also the item texture has been changed to match {{el|je}}'s.<ref>{{bug|MCPE-42990}}</ref>}}
{{History|console}}
{{History||xbox=?|xbone=?|ps=?|wiiu=?|switch=?|Added minecart with command blocks. This only exists as an item, as placing it will result in a normal minecart being placed. The command block in the minecart cannot be modified via NBT editing and it has an unused tooltip stating "Used to execute commands on the move!".}}
{{History|foot}}
== Issues ==
{{issue list}}
== Gallery ==
<gallery>
File:Minecart with command block 13w39b.png|A minecart with command block in [[1.16.4]].
File:A minecart command block testing the block in the red bucket with air.png|A minecart command block testing the block in the red area with [[air]].
</gallery>
==References==
{{Reflist}}
{{Items}}
{{Entities}}
[[de:Befehlsblocklore]]
[[fr:Wagonnet à bloc de commande]]
[[it:Carrello da miniera]]
[[ja:コマンドブロック付きのトロッコ]]
[[nl:Mijnkar met opdrachtblok]]
[[pl:Wagonik z blokiem poleceń]]
[[pt:Carrinho de mina com bloco de comando]]
[[ru:Вагонетка с командным блоком]]
[[uk:Вагонетка з командним блоком]]
[[zh:命令方块矿车]]</li><li>[[Sugar|Sugar]]<br/>{{Item
| image = Sugar.png
| renewable = Yes
| stackable = Yes (64)
}}
'''Sugar''' is a [[food]] ingredient and [[brewing]] ingredient made from [[sugar canes]].
== Obtaining ==
=== Mob loot ===
[[Witch]]es have a chance of dropping 0–2 sugar upon death. This is increased by 1 per level of [[Looting]], for a maximum of 0–5 sugar.
=== Crafting ===
{{Crafting
|head= 1
|Sugar Cane
|Output= Sugar
|type= Material
}}
{{Crafting
|Honey Bottle
|Output= Sugar, 3
|type= Material
|foot= 1
}}
=== Compound creation ===
Sugar can be created from its base [[element]]s, using the [[compound creator]].{{only|bedrock|education}}
{| class="wikitable"
!Name
!Elements
!Example recipe
|- <!-- Temporarily using crafting grid as a substitute for the compound creator (template not yet available), since the layout is the same, even if the appearance is different -->
!Sugar
|6 Carbon<br>12 Hydrogen<br>6 Oxygen
|{{Crafting Table
|shapeless= 1
|A2=Carbon,6 |B2=Hydrogen,12 |C2=Oxygen,6
|Output=Sugar}}
|}
== Usage ==
=== Crafting ingredient ===
{{crafting usage}}
=== Brewing ingredient ===
{{Brewing
|head=1
|Sugar
|Mundane Potion
|base=Water Bottle
}}
{{brewing
|foot=1
|showname=1
|Sugar
|Potion of Swiftness
}}
=== Horses ===
Sugar can be fed to [[horse]]s to heal {{hp|1}}, speed growth by 30 seconds, and increase taming probability by 3%.
== Achievements ==
{{load achievements|The Lie}}
== Data values ==
=== ID ===
{{edition|java}}:
{{ID table
|edition=java
|showforms=y
|generatetranslationkeys=y
|displayname=Sugar
|spritetype=item
|nameid=sugar
|form=item
|foot=1}}
{{edition|bedrock}}:
{{ID table
|edition=bedrock
|notshowbeitemforms=y
|shownumericids=y
|showforms=y
|generatetranslationkeys=y
|displayname=Sugar
|spritetype=item
|nameid=sugar
|id=416
|form=item
|foot=1}}
== Video ==
<div style="text-align:center">{{yt|DnMFkmC7BxE}}</div>
== History ==
{{History|java beta}}
{{History||1.2|[[File:Sugar JE1 BE1.png|32px]] Sugar has been introduced as an ingredient for [[cake]].}}
{{History|java}}
{{History||1.0.0|snap=Beta 1.9 Prerelease 2|Sugar is now used to craft [[fermented spider eye]]s.}}
{{History|||snap=Beta 1.9 Prerelease 3|Sugar can now be [[brewing|brewed]] in a [[water bottle]] to create a [[Mundane Potion]], or in an [[Awkward Potion]] to create a [[Potion of Swiftness]].}}
{{History||1.4.2|snap=12w37a|Sugar is now used to make [[pumpkin pie]].}}
{{History|||snap=12w38b|[[Witch]]es can now [[drops|drop]] sugar.}}
{{History||1.13|snap=17w47a|Prior to [[1.13/Flattening|''The Flattening'']], this [[item]]'s numeral ID was 353.}}
{{History||1.14|snap=18w43a|[[File:Sugar JE2 BE2.png|32px]] The texture of sugar has been changed.}}
{{History||1.15|snap=19w34a|Sugar can now can be created using 1 [[honey bottle]].}}
{{History|pocket alpha}}
{{History||v0.2.0|[[File:Sugar JE1 BE1.png|32px]] Added sugar. It is currently unobtainable and serves no purpose.}}
{{History||v0.3.0|Sugar is now [[craft]]able using [[sugar cane]].}}
{{History||v0.7.0|Sugar is now used to craft [[cake]].}}
{{History||v0.8.0|snap=build 1|Sugar is now used to craft [[pumpkin pie]].}}
{{History||v0.12.1|snap=build 1|Sugar has been added to the [[creative]] [[inventory]].|Sugar is now used to craft [[fermented spider eye]]s.
|Sugar can now be used for [[brewing]], to get mundane [[potion]]s and potions of [[Swiftness]].}}
{{History||v0.14.0|snap=build 1|Added [[witch]]es, which can [[drops|drop]] sugar upon [[death]].}}
{{History||v0.15.0|snap=build 1|Sugar can now be used to feed [[horse]]s, which can increase their temper, heal them, and speed up the growth of foals.}}
{{History|bedrock}}
{{History||1.4.0|snap=beta 1.2.20.1|Sugar can now be created using 6 Carbon, 12 Hydrogen, and 6 Oxygen in the [[compound creator]].}}
{{History||1.10.0|snap=beta 1.10.0.3|[[File:Sugar JE2 BE2.png|32px]] The texture of sugar has been changed.}}
{{History||1.14.0|snap=beta 1.14.0.1|Sugar can now be created using 1 [[honey bottle]].}}
{{History|console}}
{{History||xbox=TU1|xbone=CU1|ps=1.0|wiiu=Patch 1|switch=1.0.1|[[File:Sugar JE1 BE1.png|32px]] Added sugar.
|Sugar is used to craft [[cake]].}}
{{History||xbox=TU7|Sugar is now used to craft [[fermented spider eye]]s.|Sugar can now be [[brewing|brewed]] in a [[water bottle]] to create a [[Mundane Potion]], or in an [[Awkward Potion]] to create a [[Potion of Swiftness]].}}
{{History||xbox=TU14|ps=1.04|Sugar is now used to make [[pumpkin pie]].}}
{{History||xbox=TU19|xbone=CU7|ps=1.12|wiiu=Patch 1|switch=1.0.1|[[Witch]]es can now [[drops|drop]] sugar.}}
{{History||xbox=none|xbone=none|ps=1.90|wiiu=none|switch=none|[[File:Sugar JE2 BE2.png|32px]] The texture of sugar has been changed.}}
{{History|New 3DS}}
{{History||0.1.0|[[File:Sugar JE1 BE1.png|32px]] Added sugar.}}
{{History|foot}}
== Issues ==
{{issue list}}
== External Links ==
*[https://www.minecraft.net/en-us/article/taking-inventory--sugar Taking Inventory: Sugar] – Minecraft.net on January 27, 2022
{{Items}}
[[cs:Cukr]]
[[de:Zucker]]
[[es:Azúcar]]
[[fr:Sucre]]
[[hu:Cukor]]
[[it:Zucchero]]
[[ja:砂糖]]
[[ko:설탕]]
[[nl:Suiker]]
[[pl:Cukier]]
[[pt:Açúcar]]
[[ru:Сахар]]
[[th:น้ำตาล]]
[[uk:Цукор]]
[[zh:糖]]
[[Category:Renewable resources]]
[[Category:Brewing recipe]]</li></ul> | beta 1.16.0.57 | Trading has been changed, item frames are now offered by expert-level cartographer villager. | |||
| Upcoming Bedrock Edition | |||||
1.16.210{{Extension DPL}}<ul><li>[[:Category:Tools|Category:Tools]]<br/>[[Category:Items]]
[[fr:Catégorie:Outil]]
[[it:Categoria:Attrezzi]]</li><li>[[Minecart with Chest|Minecart with Chest]]<br/>{{ItemEntity
|image=Minecart with Chest.png
|renewable=Yes
|stackable=No
|size=Height: 0.7 Blocks<br>Width: 0.98 Blocks
|networkid='''[[JE]]''': 10
|drops=1 {{ItemLink|Minecart with Chest}}<br> plus contents
|health={{hp|6}}
}}
A '''minecart with chest''' is a single [[chest]] inside a [[minecart]], and functions as such.
== Natural generation ==
Minecarts with chests containing loot naturally generate in [[mineshaft]]s, each on top of a piece of [[rail]].
== Obtaining ==
=== Crafting ===
{{Crafting|Chest|Minecart|Output=Minecart with Chest|type=Transportation}}
Minecarts with chests can be retrieved by attacking them. By doing so it drops as an [[item]] and any other contents of the chest are dropped as well.
==Usage==
[[File:Minecart with Chest GUI.png|thumb|176px|The GUI of a minecart with chest.]]
Minecarts with chests can be placed by {{control|use item|text=using its item}} on any type of [[rail]].
Chest minecarts' contents can be accessed by pressing {{control|use item}} button on them. The interaction makes no sounds and the chest does not show the opening or closing animation, unlike regular chests.
The boost that minecarts with chests gain from [[powered rail]]s is dependent on their load. For example, from a 1 powered rail starter track, an empty minecart with chest travels 64 blocks, but a full minecart with chest travels only 16 blocks (opposed to 80 blocks for an occupied normal minecart and 8 blocks for an empty normal minecart).
Another physical property of chest minecarts is their ability to be stacked. While three chests can fit in an area three blocks tall, up to four chest minecarts can fit in the same area. Like other minecarts, an unlimited number of minecarts with chests can exist in the same block space.
Minecarts with chests are also able to interact with [[hopper]]s. Hoppers can take items out from the minecart chest if they are below the track as the minecart rolls over it or put them in if the minecart rolls under a downward facing hopper. Hoppers can also input items if they are facing into the side of the minecart.
Opening or destroying a minecart with chest angers [[piglin]]s.
{{See also|Tutorials/Storage minecarts}}
When on top of [[detector rail]]s, nearby [[redstone comparators]] will give out redstone signals based on how full the minecarts with chests are.
== Sounds ==
{{Edition|Java}}:<br>
Minecarts with chests use the Friendly Creatures sound category for entity-dependent sound events.<ref group=sound name=rollsource>{{bug|MC-42132}}</ref>
{{Sound table
|sound=Minecart rolling.ogg
|subtitle=Minecart rolls
|source=Friendly Creatures <ref group=sound name=rollsource/>
|overridesource=1
|description=While a minecart with chest is moving
|id=entity.minecart.riding
|translationkey=subtitles.entity.minecart.riding
|volume=0.0-0.35 <ref group=sound>Relates linearly with horizontal velocity (max 0.5)</ref>
|pitch=0.0-1.0 <ref group=sound>Will increase by 0.0025 per tick if the minecart's horizontal velocity is more than 0.01</ref>
|distance=16
|foot=1}}
{{Edition|Bedrock}}:
{{Sound table
|type=bedrock
|sound=Minecart rolling.ogg
|source=neutral
|description=While a minecart with chest is moving
|id=minecart.base
|foot=1}}
==Data values==
===ID===
{{edition|java}}:
{{ID table
|edition=java
|firstcolumnname=Item
|showforms=y
|generatetranslationkeys=y
|displayname=Minecart with Chest
|spritetype=item
|nameid=chest_minecart
|form=item
|foot=1}}
{{ID table
|edition=java
|firstcolumnname=Entity
|generatetranslationkeys=y
|displayname=Minecart with Chest
|spritetype=entity
|nameid=chest_minecart
|foot=1}}
{{edition|bedrock}}:
{{ID table
|edition=bedrock
|firstcolumnname=Item
|shownumericids=y
|showforms=y
|notshowbeitemforms=y
|generatetranslationkeys=y
|displayname=Minecart with Chest
|spritetype=item
|nameid=chest_minecart
|id=389
|form=item
|foot=1}}
{{ID table
|edition=bedrock
|firstcolumnname=Entity
|shownumericids=y
|generatetranslationkeys=y
|displayname=Minecart with Chest
|spritetype=entity
|nameid=chest_minecart
|id=98
|foot=1}}
===Entity data===
Minecarts with chests have entity data associated with them that contain various properties of the entity.
{{el|java}}:
{{main|Entity format}}
{{/ED}}
{{el|bedrock}}:
: See [[Bedrock Edition level format/Entity format]].
==Achievements==
{{load achievements|Freight Station}}
== Video==
<div style="text-align:center">{{yt|2yVVMiQrCwo}}</div>
==History ==
[[File:Minecart with Chest BE3.png|thumb|The Minecart models in the Bedrock Edition were north or south on the sides. In the latest version, the front and rear sides are north or south. But the absolute orientation of the chest was not changed.]]
{{info needed section|In bedrock edition 1.16.100 it seems that chests in minecarts face sideways instead of forward - when was this changed?}}
{{History|java alpha}}
{{History||v1.0.14|[[File:Minecart with Chest JE1.png|32px]] [[File:Minecart with Chest (item) JE1 BE1.png|32px]] Minecarts with chests have been added.
|At this point, they are either called "chest minecarts" or "storage minecarts" because no in-game name was indicated.}}
{{History|java beta}}
{{History||1.0|"Minecart with Chest" has been first indicated as its name, via the new item tooltips.}}
{{History||1.8|snap=Pre-release|[[File:Minecart with Chest JE2.png|32px]] The [[model]] of the minecart with chest has been changed to match the new [[chest]] model. However, the [[chest]] is incorrectly offset.<ref>[[mcw:Issues/Beta 1.8pre2#Graphical]]</ref>}}
{{History|||snap=release|[[File:Minecart with Chest JE3 BE1.png|32px]] The model of minecarts with chests has been fixed.}}
{{History|java}}
{{History||1.5|snap=13w02a|Minecarts with chests now generate in [[mineshaft]]s in place of normal chests.}}
{{History||1.9|snap=15w43a|[[Loot table]]s have been added; minecarts with chests now use loot tables, and those in generated in [[mineshaft]]s now use loot tables.}}
{{History||1.9.1|snap=pre2|The title of the [[inventory]] has been changed from 'Chest minecart' to 'Minecart with Chest'.}}
{{History||1.11|snap=16w32a|The [[entity]] ID has been changed from <code>MinecartChest</code> to <code>chest_minecart</code>.}}
{{History||1.13|snap=17w47a|Prior to [[1.13/Flattening|''The Flattening'']], this [[item]]'s numeral ID was 342.}}
{{History||1.14|snap=18w43a|[[File:Minecart with Chest JE4 BE2.png|32px]] [[File:Minecart with Chest (item) JE2 BE2.png|32px]] The textures of minecarts with chests have been changed.}}
{{History||1.16.2|snap=Pre-release 1|[[Piglin]]s now become angry with players who open or destroy a chest minecart.}}
{{History||1.19|snap=22w13a|The crafting recipe for a minecart with chest is now shapeless.
|Breaking a minecart with chest will now drop the item instead of the minecart and chest separately, though the contents of the chest are still dropped.<ref>{{bug|MC-249493|||Fixed}}</ref>}}
{{History|pocket alpha}}
{{History||v0.14.0|snap=build 1|[[File:Minecart with Chest JE3 BE1.png|32px]] [[File:Minecart with Chest (item) JE1 BE1.png|32px]] Added minecarts with chests.}}
{{History|||snap=build 3|Minecarts with chests now drop [[item]]s when destroyed in [[Creative]] mode.}}
{{History|pocket}}
{{History||1.1.0|snap=alpha 1.1.0.0|The [[entity]] ID has been changed from <code>minecartchest</code> to <code>chest_minecart</code>.}}
{{History|bedrock}}
{{History||1.10.0|snap=beta 1.10.0.3|[[File:Minecart with Chest JE4 BE2.png|32px]] [[File:Minecart with Chest (item) JE2 BE2.png|32px]] The textures of minecarts with chests have been changed.}}
{{History||1.19.0|snap=beta 1.19.0.30|Breaking a minecart with chest will now drop the item instead of the minecart and chest separately, though the contents of the chest are still dropped.}}
{{History|console}}
{{History||xbox=TU1|xbone=CU1|ps=1.0|wiiu=Patch 1|switch=1.0.1|[[File:Minecart with Chest JE3 BE1.png|32px]] [[File:Minecart with Chest (item) JE1 BE1.png|32px]] Added minecarts with chests.}}
{{History||xbox=none|xbone=none|ps=1.90|wiiu=none|switch=none|[[File:Minecart with Chest JE4 BE2.png|32px]] [[File:Minecart with Chest (item) JE2 BE2.png|32px]] The textures of minecarts with chests have been changed.}}
{{History|new 3ds}}
{{History||0.1.0|[[File:Minecart_with_Chest_JE3_BE1.png|32px]] [[File:Minecart_with_Chest_(item)_JE1_BE1.png|32px]] Added minecarts with chests.
|Minecarts with chests emit smoke [[particles]] when destroyed.}}
{{History|foot}}
==Issues==
{{issue list}}
==Gallery ==
<gallery>
Compact Minecart Storage.png|A compact storage using chest minecarts (left) compared to chest storage in the same volume. Notice how chests cannot be placed next to each other, which is no longer the case after Java Edition 1.13.
GlitchedMinecartChest.png|This minecart with chest is trapped inside a block, due to a [[stronghold]] and a [[mineshaft]] that generated partially overlapping.
Minecartportal.png|A minecart with chest generated on top of an [[end portal frame]], because there is a mineshaft behind the wall.
Chest Minecart Stack.png|A large stack of chest minecarts.
</gallery>
==References==
{{Reflist}}
{{items}}
{{entities}}
[[Category:Mechanics]]
[[Category:Storage]]
[[cs:Nákladní vozík]]
[[de:Güterlore]]
[[es:Vagoneta con cofre]]
[[fr:Wagonnet de stockage]]
[[hu:Tárolócsille]]
[[it:Carrello da miniera]]
[[ja:チェスト付きのトロッコ]]
[[ko:상자가 실린 광산 수레]]
[[nl:Mijnkar met kist]]
[[pl:Wagonik ze skrzynią]]
[[pt:Carrinho de mina com baú]]
[[ru:Вагонетка с сундуком]]
[[uk:Вагонетка зі скринею]]
[[zh:运输矿车]]</li></ul> | beta 1.16.210.59 | ||||
| Has the default item frame block texture. | |||||
| beta 1.16.210.60 | Temporarily removed glow item frames due to a crash. | ||||
| Legacy Console Edition | |||||
| TU9 | CU1 | 1.0 | Patch 1 | 1.0.1 | |
| TU11 | The limit for item frames in a world has been increased. A message is now displayed when the maximum number of item frames are reached. | ||||
| TU31 | CU19 | 1.22 | Patch 3 | Items and blocks displayed in the item frame now rotate 45 degrees when rotated instead of 90 degrees, and a comparator now outputs a redstone signal depending on the rotation phase. | |
| TU43 | CU33 | 1.36 | Patch 13 | Added sounds for item frames. | |
| TU56 | CU47 | 1.55 | Patch 26 | 1.0.6 | If the item in the item frame has a name (from an anvil) it now shows as if there is a name tag on the item frame. |
| 1.90 | |||||
| New Nintendo 3DS Edition | |||||
0.1.0{{Extension DPL}}<ul><li>[[Camera|Camera]]<br/>{{about|the entity|the command|commands/camera}}
{{exclusive|edu}}
{{unobtainable|edition=be}}
{{ItemEntity
|imagesize=80px
|renewable=No
|stackable=Yes (64)
|health={{hp|4}}
|image=Camera.png}}
{{Block
| title = Camera Block
| image = Camera (block).png
| invimage = none
| transparent = No
| light = 0
| tool = any
| stackable = Yes (64)
| flammable = No
| lavasusceptible = No
| renewable = No
}}
The '''camera''' is an [[entity]] that is capable of capturing and storing images. {{IN|edu}}, it works together with the [[portfolio]] item to create collections of [[photo]]s.<ref>https://education.minecraft.net/support/knowledge-base/using-cameras-portfolios/</ref>
== Obtaining ==
The camera can be obtained in the [[Creative inventory]] in ''Minecraft Education''. It can be obtained either by NBT editors, inventory editors, or glitches in Bedrock Edition.
To get the block form of the camera in Bedrock Edition using an NBT editor, you need to set the item name of the block in the inventory slot (<code>name:</code> ) to <code>item.camera</code>, then you need to add a compound tag called <code>Block</code> and inside of that put the int tag <code>version: 18040335</code> and the text tag <code>name: minecraft:camera</code> into the block compound tag. For the usable "[[spawn egg]]" form of the camera, you only need to set the item name of the block in the inventory slot (<code>name:</code> ) to <code>camera</code>; you do not need to add the block compound for this form of the camera.
== Usage ==
Using a camera from the [[inventory]] captures a first-person screenshot. It can also be placed, creating a camera [[entity]] that can track the user, and take pictures from the camera's perspective. Photos that are taken using the camera appear in the [[portfolio]].
Close-up snapshots of an [[item]] on the ground can be taken by holding the Shift key while right-clicking.
Photos that are taken with the camera block are stored in <code>%localappdata%\Packages\MinecraftUWP_8wekyb3d8bbwe\LocalState\screenshots</code>.
== Sounds ==
=== Generic ===
{{Sound table/Block/Normal/BE}}
=== Unique ===
{{Sound table
|sound=Camera1.ogg
|sound2=Camera2.ogg
|sound3=Camera3.ogg
|type=bedrock
|description=When a picture is taken with a camera
|source=Players
|id=camera.take_picture
|volume=1.0
|pitch=1.0
|foot=1}}
== Data values ==
=== ID ===
{{ID table
|edition=bedrock
|firstcolumnname=Camera
|shownumericids=y
|showforms=y
|generatetranslationkeys=y
|displayname=Block
|spritename=camera
|spritetype=block
|nameid=camera
|id=242
|form=block
|itemform=item.camera}}
{{ID table
|displayname=Item
|spritename=camera
|spritetype=item
|translationtype=item
|nameid=camera
|id=593
|form=item
|foot=1}}
{{ID table
|edition=bedrock
|firstcolumnname=Camera
|shownumericids=y
|generatetranslationkeys=y
|displayname=Entity
|spritename=camera
|spritetype=entity
|nameid=tripod_camera
|id=62
|foot=1}}
=== Entity data ===
See [[Bedrock Edition level format/Entity format]].
== Video ==
{{yt|1XLRGFibFNQ}}
== History ==
{{History|pocket alpha}}
{{History||v0.1.0|[[File:Camera BE1.png|50px]] [[File:Camera (item texture) BE1.png|32px]] The textures and model of the camera can be found in the game apk file.<ref name="found">[{{Reddit|jkkmr/found_image_file_for_camera_in_minecraft_portable}} Reddit - Found image file for camera in Minecraft Portable Edition Demo APK file.]</ref><ref>https://web.archive.org/web/20160604161800/https://twitter.com/Kappische/status/103548954368679936</ref>}}
{{History||v0.2.0|[[File:Camera BE2.png|50px]] [[File:Music Disc Blocks JE1 BE1.png|32px]] Added cameras
|Changed item and tripod textures.
|To use a camera, equip it in the [[player]]'s hand, then look in the direction the player wants the picture to be taken. Long-press the screen, and a camera [[drops]] to the ground where the player are standing. Step back, then press on the camera until it starts emitting smoke [[particles]]. The smoke means a picture has been taken, and the camera may disappear immediately afterward.
|Cameras have infinite uses.
|Entity id 62 and item id 456.<ref>https://www.minecraftforum.net/topic/1233138-i-found-the-camera-id/</ref>}}
{{History||v0.5.0|The camera is now invisible and makes the standard player [[damage]] [[sound]].}}
{{History||v0.7.0|Added the "F1" feature (Hide GUI), which has now made the camera obsolete.}}
{{History||v0.8.0|snap=build 2|[[File:Egg JE1 BE1.png|32px]] Item form now uses [[egg]] texture.}}
{{History||v0.9.0|snap=build 1|The camera [[entity]] has been removed. [[Tommaso]] also stated: ''"It doesn't mean that it's dead forever, in fact I have a lot of ideas for it! I think it will be back when have [[shader]]s, sharing and [[redstone]]."''<ref>{{Reddit|sub=MCPE|281sep/camera|ci6znr8}}</ref>}}
{{History||v0.14.0|snap=build 1|[[File:Camera BE3.png|32px]] [[File:Camera (item) BE2.png|32px]] Re-added the camera. It is accessible only with [[inventory]] editors.
|In this version, if the player spawns a camera, leaves the [[world]] and joins back, it summons [[lightning]].}}
{{History||v0.14.2|The camera [[item]] ID has been changed to 498, but it cannot be used at the moment. The [[entity]] can now be spawned with a [[spawn egg]] with a [[damage]] value of 62.
|According to the language files of the game, the empty label that shows up whenever hovering a finger to a camera would now say "Take Picture". However, the button doesn't do anything.}}
{{History||v0.15.0|snap=build 1|The previous empty label on the camera mentioned above now displays the words "Take Picture".
|The [[health]] of the camera [[entity]] is now {{hp|2}} instead {{hp|4}}.
|The camera no longer summons [[lightning]].}}
{{History||v0.16.0|snap=build 1|The camera now has a [[block]] form in [[inventory]], but still spawns the entity. However, the block can be placed only with [[commands]] and editing.
|"Take picture" button on the camera works now, but no image files are created.
|The oldest ID for camera (456) now refers to [[portfolio]].}}
{{History|||snap=build 2|[[File:Camera Block.png|32px]] The camera now has an [[item]] form and the [[block]] has been removed. However, it is still obtainable in servers.
|[[Portfolio]], which works together with the camera to create collections of pictures, has been removed.}}
{{History|||snap=build 4|Camera item form has been removed, and the camera can no longer be obtained or placed using any [[commands|command]].}}
{{History|bedrock}}
{{History||1.8.0|snap=beta 1.8.0.8|[[File:Camera BE3.png|32px]] [[File:Camera Block.png|32px]] The camera has been reimplemented.
|The camera [[entity]] can now be spawned with a [[spawn egg]] with [[damage]] value 258.}}
{{History||1.12.0|snap=beta 1.12.0.2|The camera can now be obtained with the {{cmd|give}} [[commands|command]].}}
{{History||1.13.0|snap=beta 1.13.0.1|The camera can no longer be obtained with the {{cmd|give}} command.
|Functionality has been added to the camera. Screenshots that are taken by the camera can now be saved into the {{cd|screenshots}} folder.
|Cameras are now a part of the {{el|ee}} toggle as a hidden feature.
|Cameras no longer have a [[death]] animation when killed by the [[player]] and instead, instantly emit smoke [[particles]].}}
{{History||1.16.100|snap=beta 1.16.100.50|The camera can now be obtained with the {{cmd|give}} [[commands|command]] once again.}}
{{History|||snap=beta 1.16.100.55|The camera can no longer be obtained with the {{cmd|give}} command.}}
{{History|education}}
{{History||1.0|[[File:Camera BE3.png|32px]] [[File:Camera Block.png|32px]] Added cameras.}}
{{History||1.4.0|Cameras no longer have a [[death]] animation when killed by the [[player]] and instead instantly emit smoke [[particles]].}}
{{History|foot}}
=== Future ===
At the Minecraft [[Pocket Edition]] panel at [[MineCon 2012]], as well as one of [[Johan Bernhardsson|Jbernhardsson]]'s livestreams, it was stated that future plans include trying to have a proper use for cameras, perhaps an easier way to take screenshots and share them with others.<ref>{{ytl|YMhyX_lKWV4}}</ref> In the BlockTalk Q&A, the camera was briefly mentioned as part of a broader "sharing" theme planned for {{el|be}} in the future.<ref>{{ytl|Ruf6tvqsD84}}</ref>
It later got implemented into {{el|ee}}, using the camera to make screenshots and share them in a special book.
== Issues ==
{{Issue list}}
== Trivia ==
* A camera prevents a [[Book and Quill]] from working. Attempting to craft it or obtain it by commands gives a regular book instead, due to non-implementation of photo attaching to written books.
* The camera can take a screenshot, which appears a bit smaller with a thick paper outline having cuts on its edges, making it look like an old photograph.
* This feature is hidden from the Creative inventory and from the /give command item menu.
== Gallery ==
<gallery>
PEcameras030.jpg|A row of cameras, as seen in [[Pocket Edition v0.3.0 alpha|v0.3.0]].
PEcameraphoto.jpg|Example image taken by the camera [[entity]].
CameraUse-1.png|The first method of using cameras.
CameraUse-2.png|The second method of using cameras.
Dinnerbone Camera.png|A camera spawned using a [[spawn egg]] named "[[Dinnerbone]]" in the v0.15.0 beta.
Cam2.png|A camera falling from a [[tree]]. This shows that cameras are entities.
Education Edition Exclusive Features.png|The camera and camera block placed in a world along with other Education Edition features.
Screenshot by camera.jpg|An example of the screenshot taken by a camera in [[Bedrock Edition beta 1.13.0.1|beta 1.13.0.1]].
File:Say Cheese.jpeg|[[Steve]], [[Alex]], [[Jesse]], and an [[Agent]] getting their picture taken.
</gallery>
== See also ==
* [[Portfolio]]
* [[Screenshot]]
== References ==
{{Reflist}}
{{Items}}
{{Entities}}
{{Education Edition}}
[[Category:Education Edition entities]]
[[Category:Education Edition items]]
[[Category:Tools]]
[[cs:Kamera]]
[[de:Kamera]]
[[el:Camera]]
[[es:Cámara]]
[[fr:Appareil photo]]
[[hu:Kamera]]
[[ja:カメラ]]
[[ko:카메라]]
[[nl:Camera]]
[[pl:Kamera]]
[[pt:Câmera]]
[[ru:Камера]]
[[uk:Камера]]
[[zh:相机]]</li><li>[[:Category:Education Edition items|Category:Education Edition items]]<br/>[[Category:Education Edition]]
[[Category:Items]]</li></ul> | |||||
Issues
Issues relating to "Item Frame" are maintained on the bug tracker. Report issues there.
Trivia
- The item frame is based upon a suggestion on Reddit, like the ender chest and flower pot.[4]
- The item frame is the only entity to reference a block model.[JE only] Because of this, the texture of the frame border is the same as the birch planks texture.
- Item frame is the only placeable item that can interfere with other non-full block entity.
Gallery
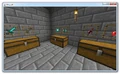
Dinnerbone's first screenshot showing armor and weapons.
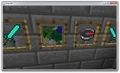
Dinnerbone's second screenshot showing a map, a compass, and two diamond swords.
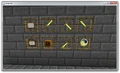
Dinnerbone's third screenshot showing a golden sword in all directions, the item frame item itself, and a working clock.

Jeb's screenshot of the item frame.
Dinnerbone's fourth screenshot, showing flower pots and item frames.
Snapshot image.
An item frame at the side of a slab.
Four item frames in a one-block space.[Java Edition only]
The frame itself uses the texture of birch planks.
An image of a fireplace retweeted by Dinnerbone.[5]
An image tweeted by Dinnerbone showing how hovering over an item frame containing a renamed item shows a name tag.[6]
A rotating apple in an item frame.
The front and back of an item frame are the same.
Original Reddit image suggesting item frames and flower pots.
The comparison between item frame (left) and glow item frame (right).
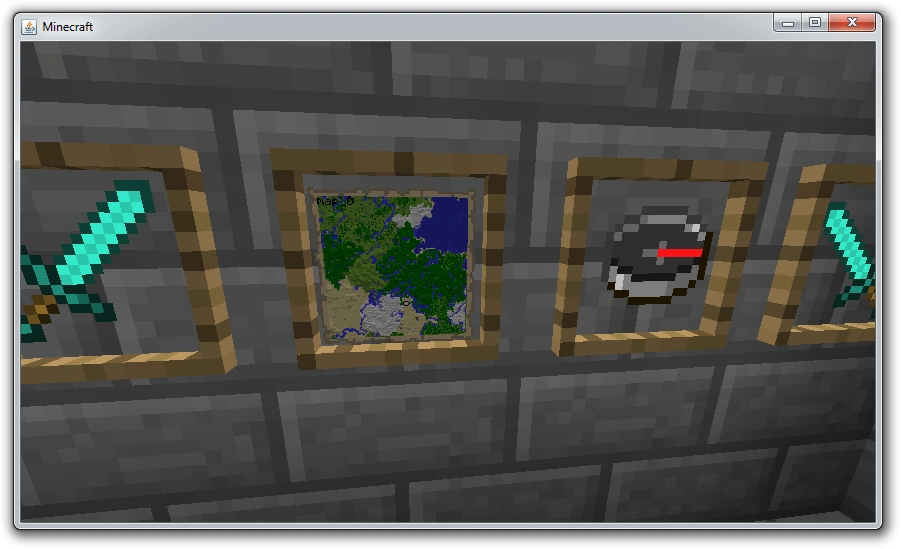
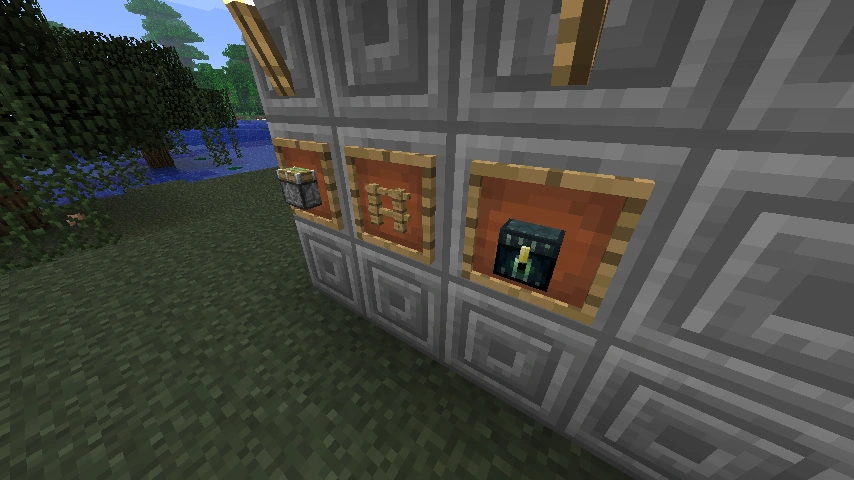
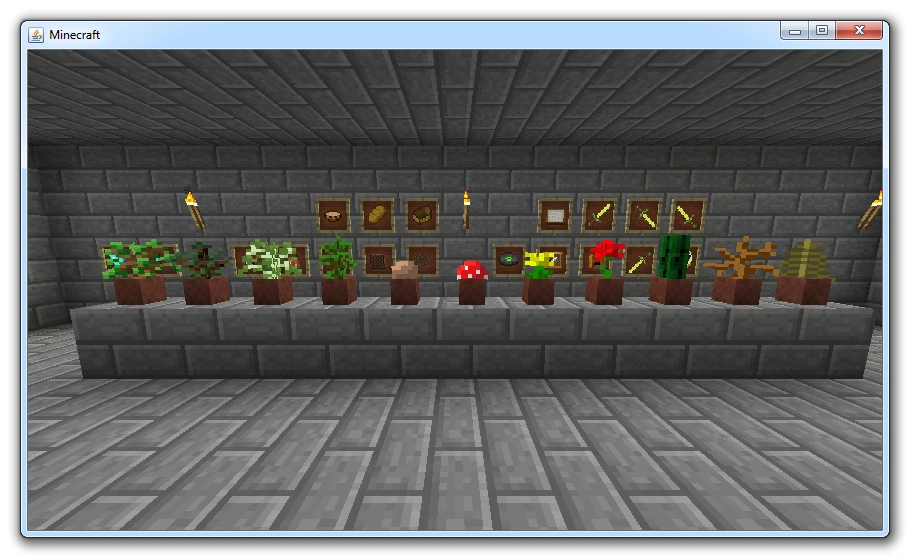
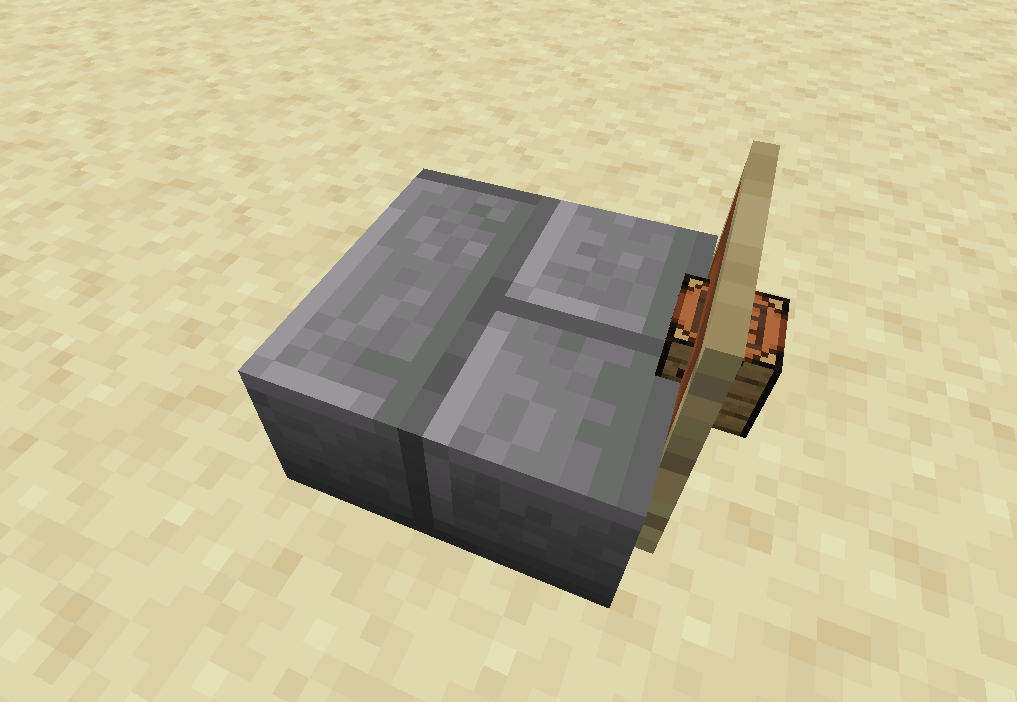
![Four item frames in a one-block space.[Java Edition only]](https://static.wikia.nocookie.net/minecraft_gamepedia/images/4/4f/ItemFrameBoxed.png/revision/latest?cb=20190922032645)
![An image of a fireplace retweeted by Dinnerbone.[5]](https://static.wikia.nocookie.net/minecraft_gamepedia/images/f/f5/Frame_fireplace.png/revision/latest?cb=20120827001928)
![An image tweeted by Dinnerbone showing how hovering over an item frame containing a renamed item shows a name tag.[6]](https://static.wikia.nocookie.net/minecraft_gamepedia/images/5/52/SOATPC.png/revision/latest?cb=20130929145802)
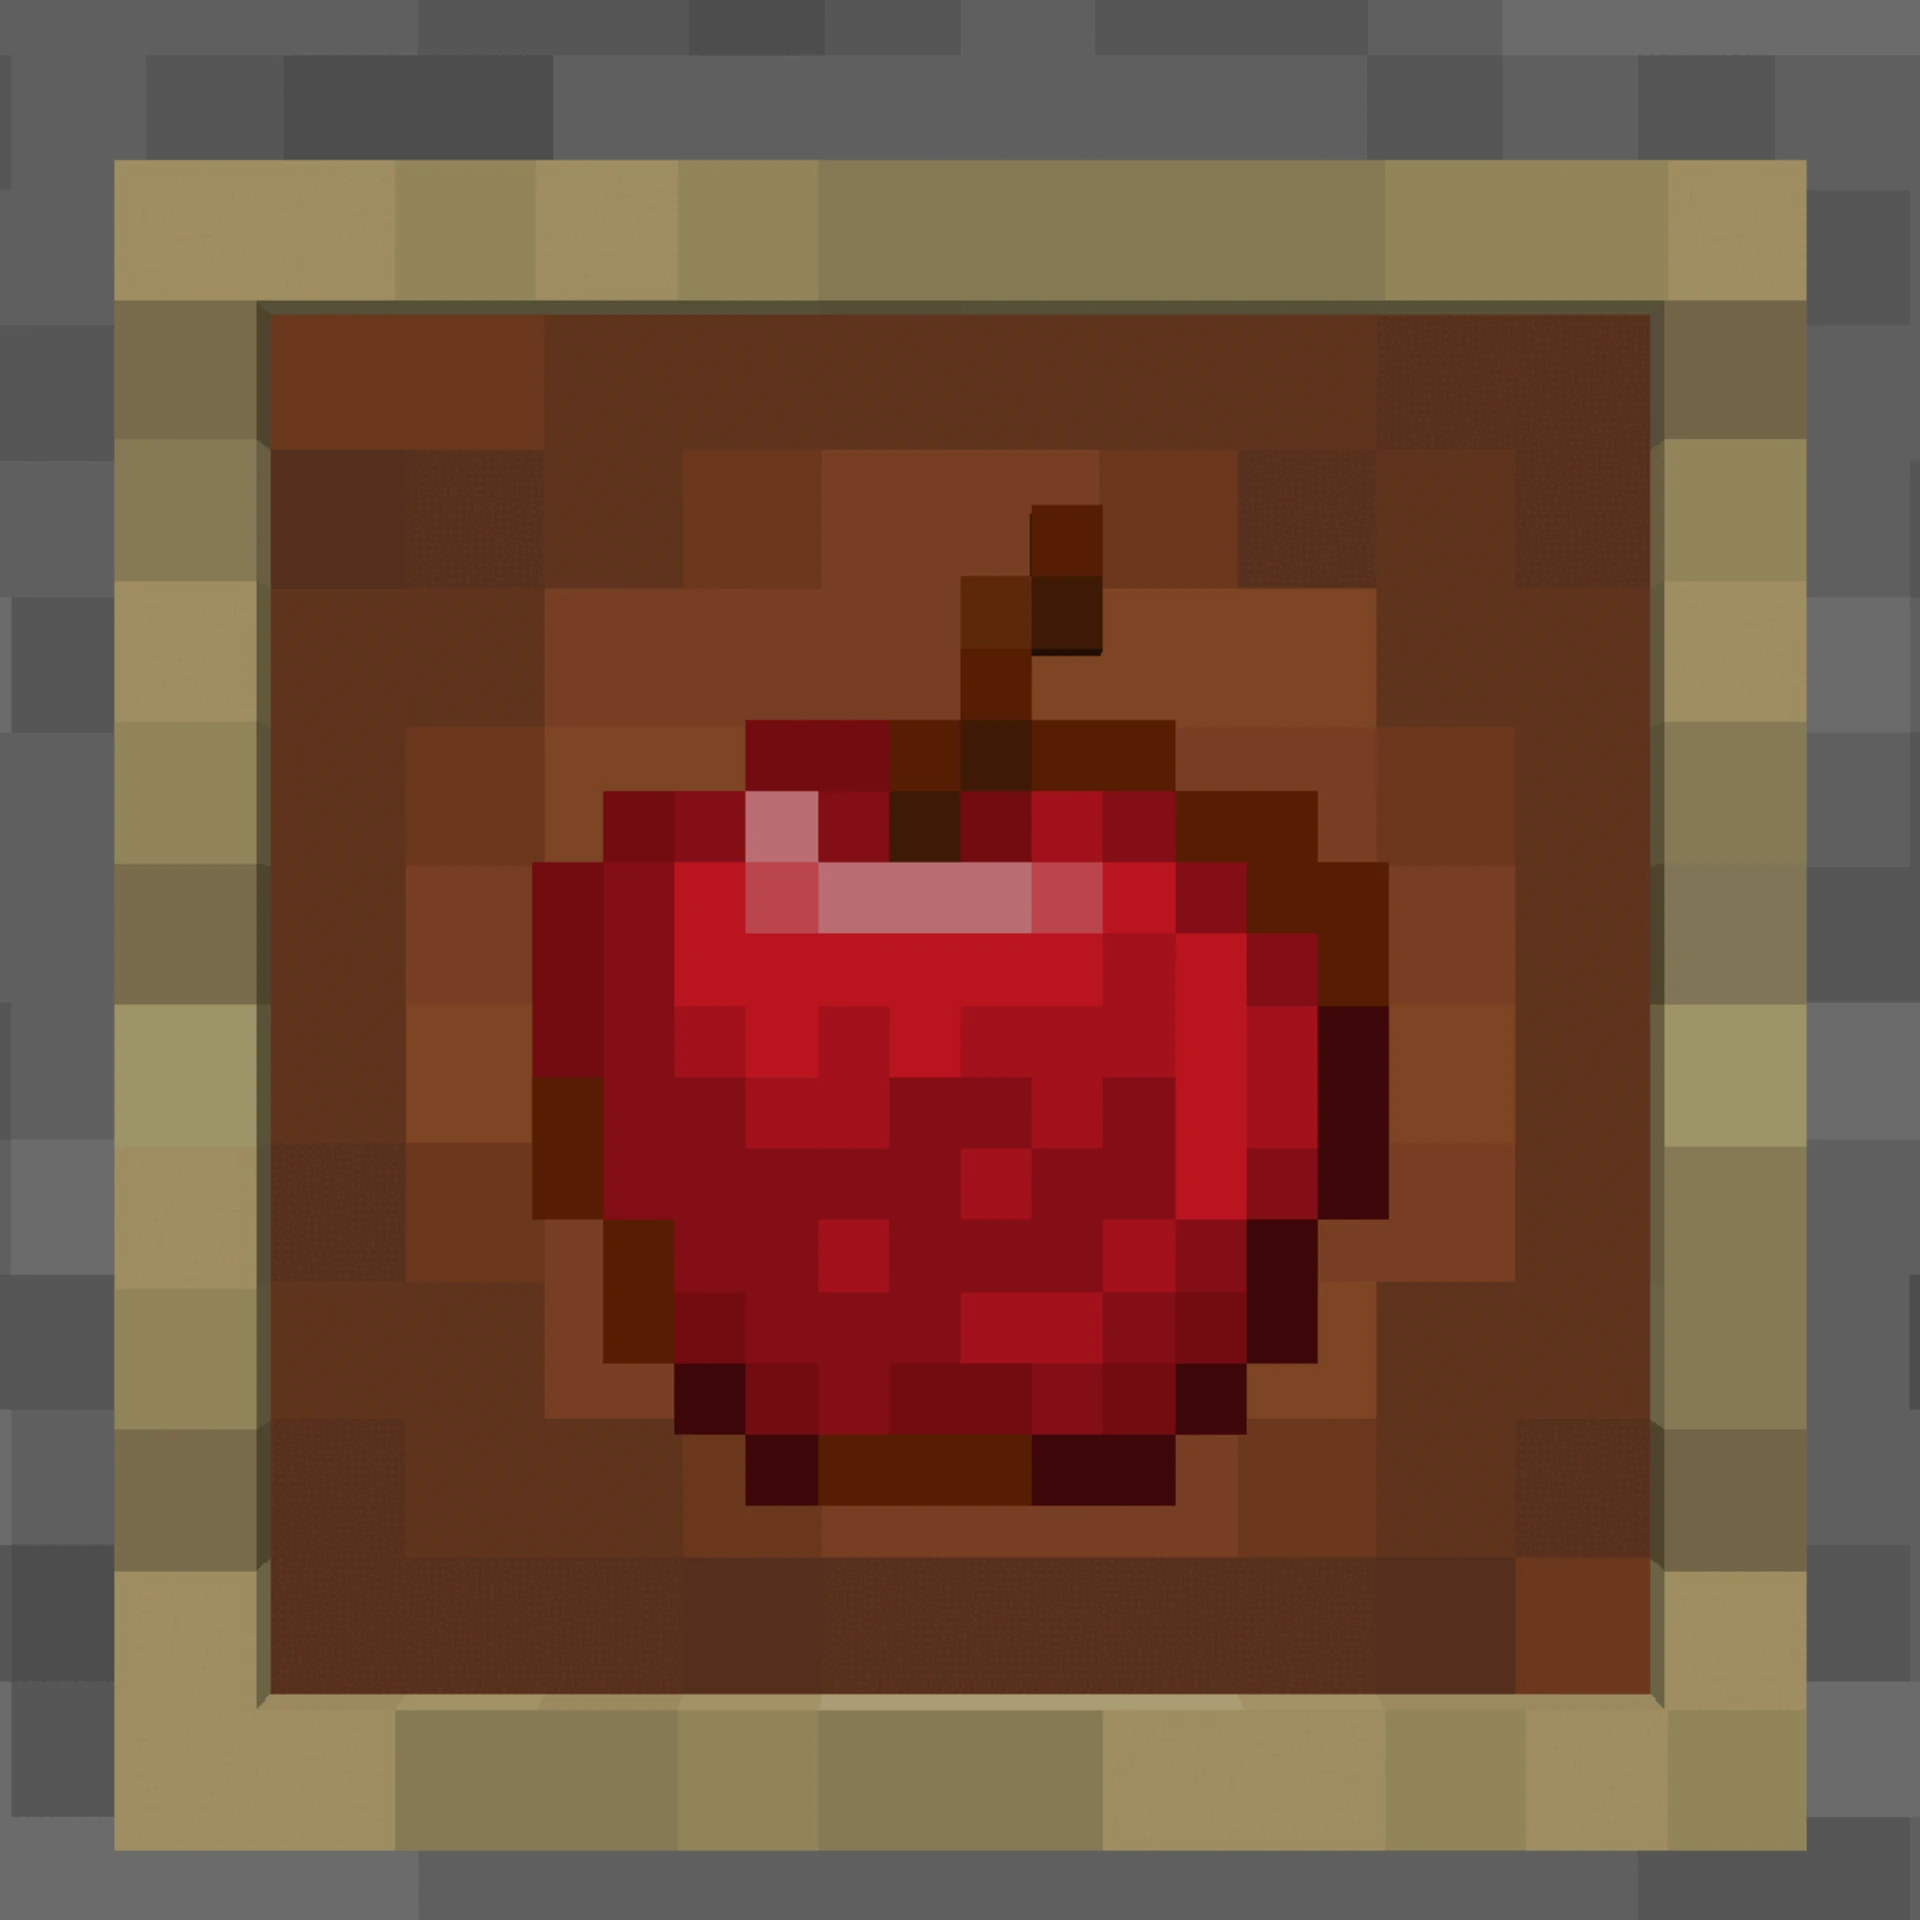
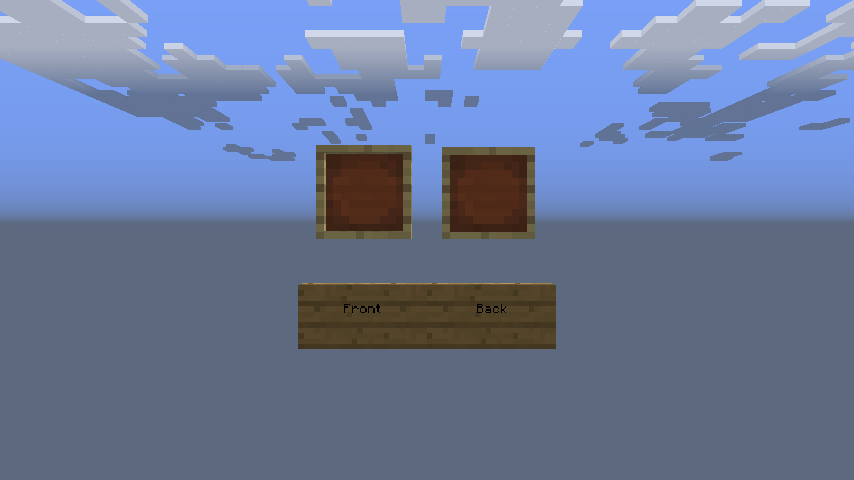
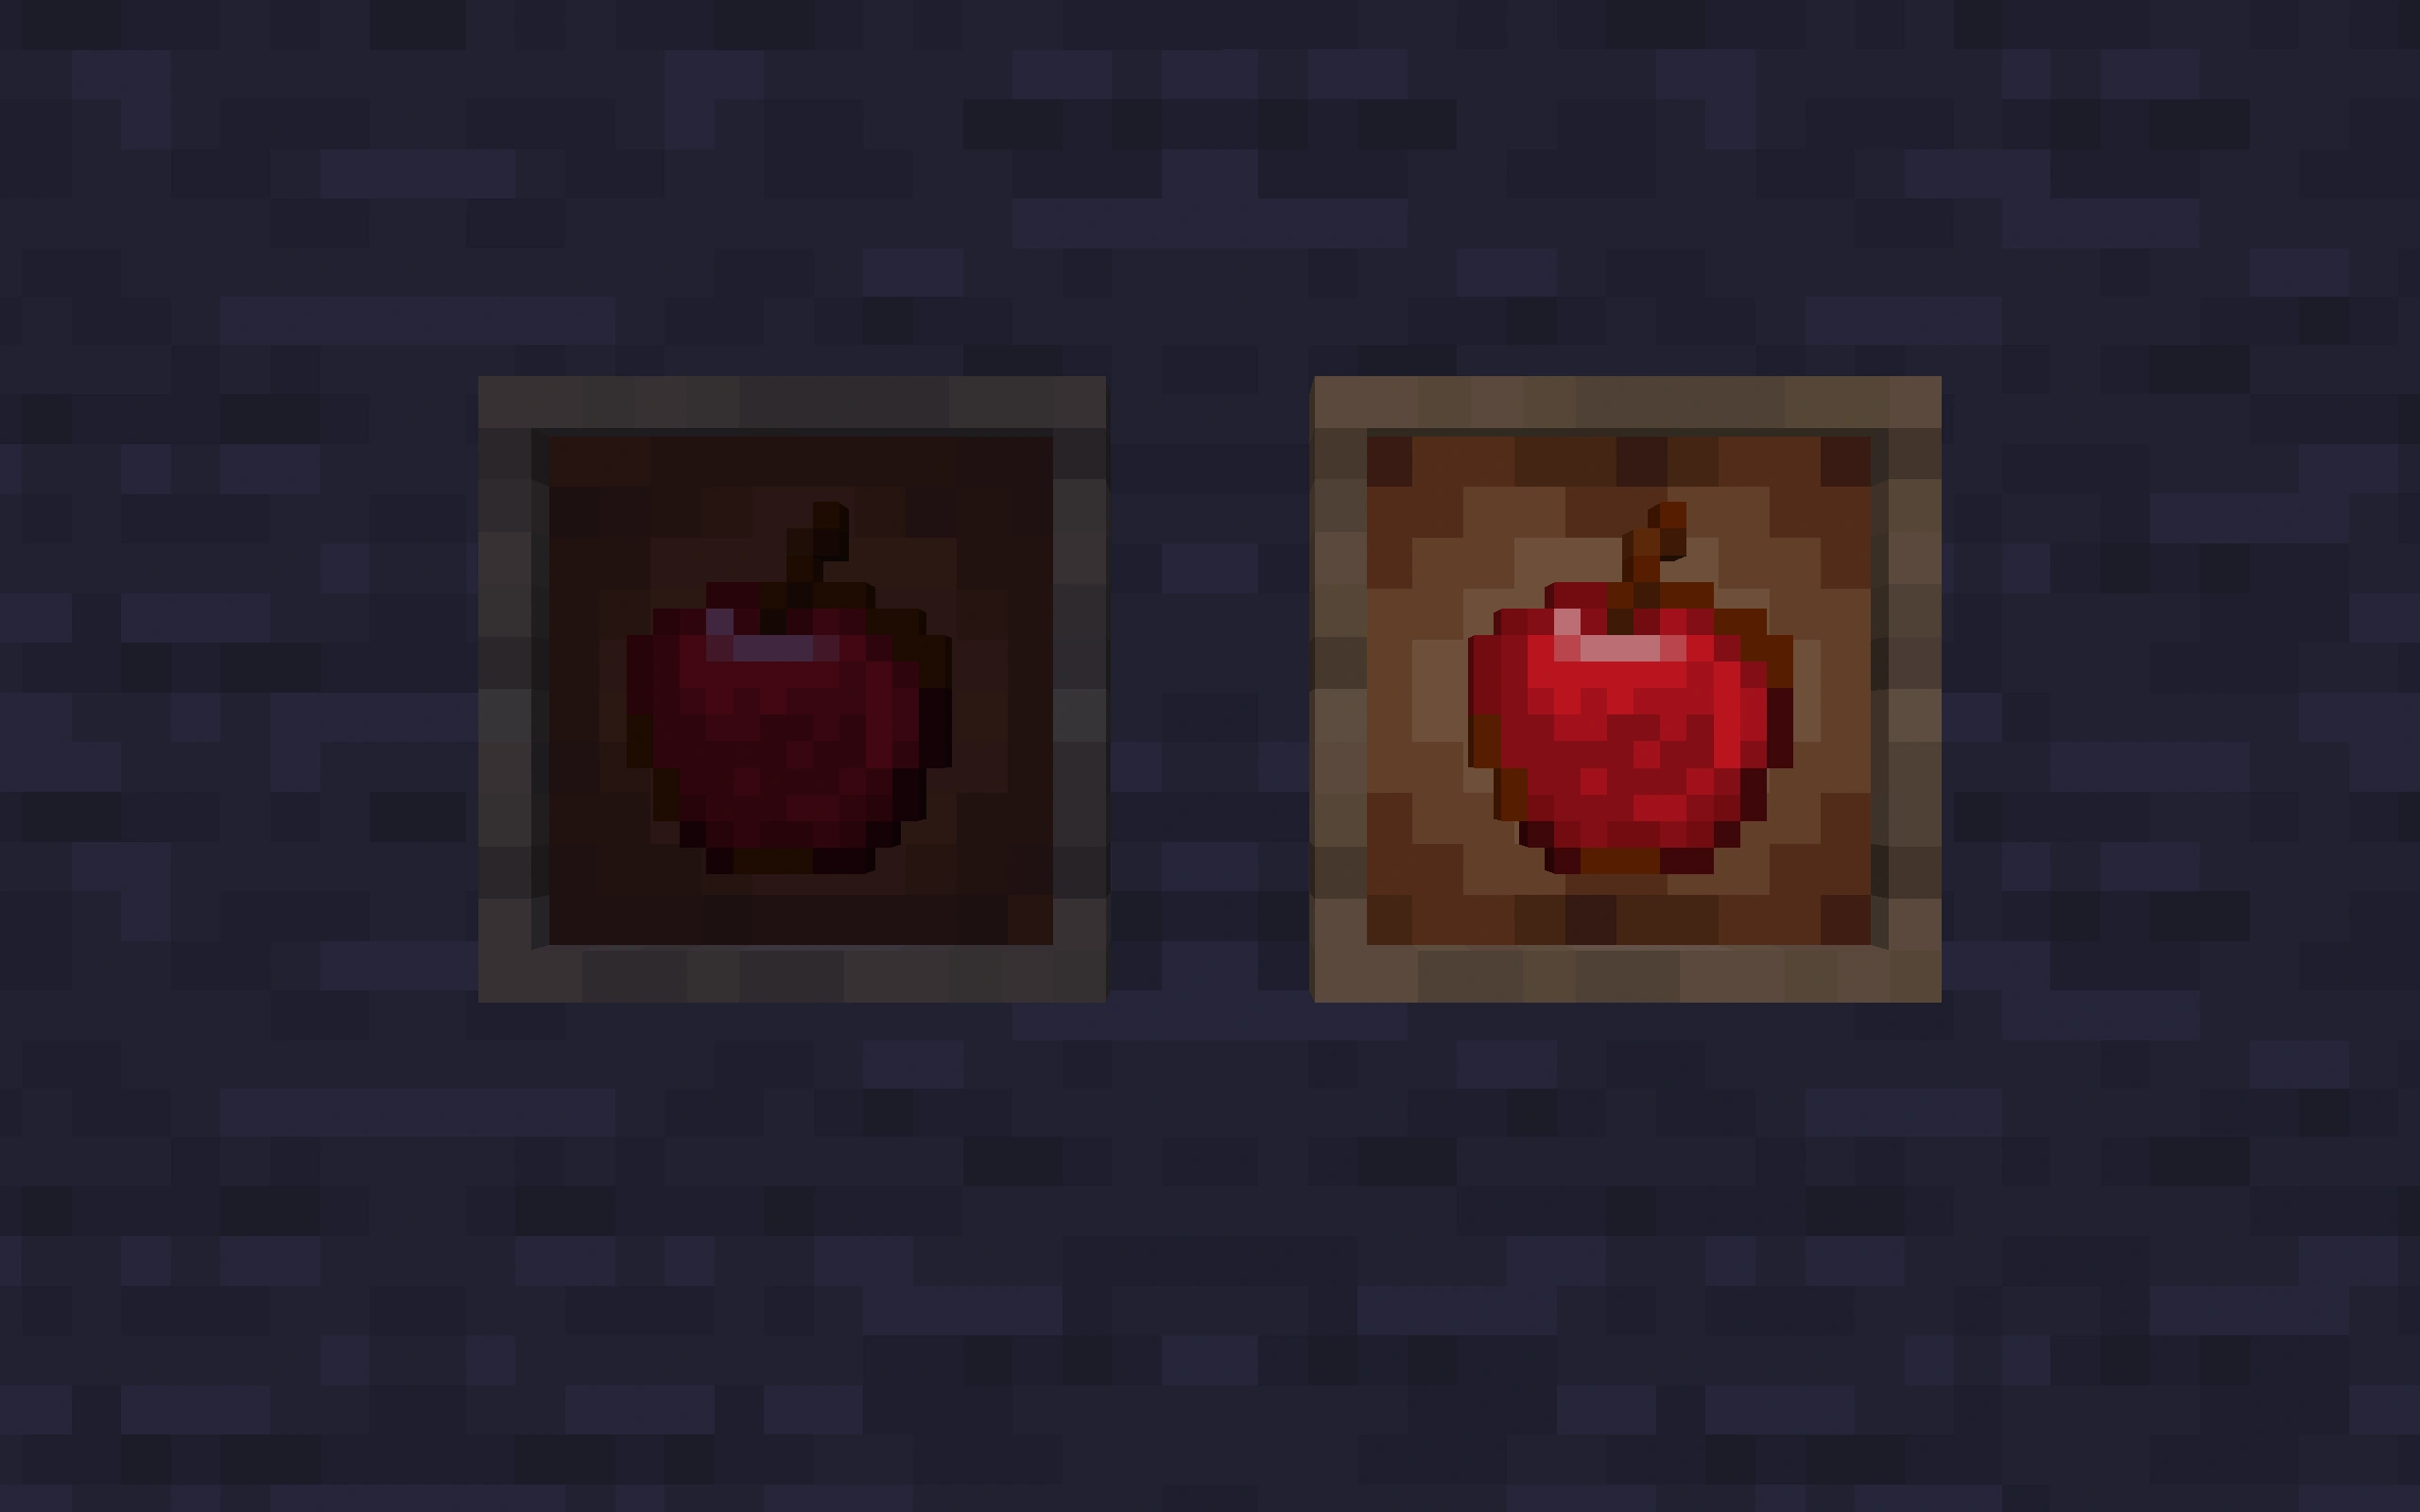
.png)
See also
References
- ↑ https://twitter.com/Dinnerbone/status/235742974271700993
- ↑ MC-161283
- ↑ "Let's create some drama: ItemFrames in MCPE will behave like signs and won't be placeable in blocks, and can't put many in the same block." – @_tomcc (Tommaso Checchi) on X, January 21, 2016
- ↑ https://twitter.com/Dinnerbone/status/235747041286975488
- ↑ https://twitter.com/Dinnerbone/status/238696847496052736
- ↑ https://twitter.com/Dinnerbone/status/373390930461884416