For the attribute, see Attribute § Attributes.
For a comparison of travel speeds, see Transportation § Methods.
Speed is a status effect that increases an entity's walking speed by 20% multiplied by the effect level. It expands a player's field of view (FOV) accordingly. Negative levels decrease speed.
Causes[]
| Cause | Potency | Length | Notes |
|---|---|---|---|
| Potion of Swiftness | I | 3:00 | Witches drink this potion if their target is over 11 blocks away. |
| Potion of Swiftness (extended) | I | 8:00 | |
| Potion of Swiftness II | II | 1:30 | |
| Splash Potion of Swiftness | I | 3:00[JE only] 2:15[BE only] |
|
| Splash Potion of Swiftness (extended) | I | 8:00[JE only] 6:00[BE only] |
|
| Splash Potion of Swiftness II | II | 1:30 | |
| Lingering Potion of Swiftness | I | 0:45 | |
| Lingering Potion of Swiftness (extended) | I | 2:00 | |
| Lingering Potion of Swiftness II | II | 0:22 | |
| Arrow of Swiftness | I | 0:22 | |
| Arrow of Swiftness (extended) | I | 1:00 | |
| Arrow of Swiftness II | II | 0:11 | |
| Beacon set to Speed | I | 0:05 – 0:17 | Replenishes when in range. |
| Beacon set to Speed II | II | 0:17 | Replenishes when in range. Requires beacon pyramid level 4. |
| Spawning within the world | I | ∞ | Only applies to spiders on Hard difficulty.[JE only] |
Brewing[]
Unaffected mobs[]
Withers and ender dragons are immune to the Speed effect. While not immune, flying mobs are unaffected by the Speed effect.[1] Shulkers are also unaffected by, though not immune to, Speed.
Notes[]
- Alternative methods of traveling more quickly include: sprinting; walking on ice, packed ice or blue ice; riding a horse, pig, or minecart; riding a boat on ice, packed ice, or blue ice; throwing ender pearls; walking on soul soil or soul sand while wearing soul speed boots; or being near a dolphin to gain Dolphin's Grace.
Data values[]
ID[]
This section is about the effect IDs. For the IDs on potions, see Potion § Item data. For for the IDs on tipped arrows, see Arrow § Metadata.
| Name | Identifier | Numeric ID | Translation key |
|---|---|---|---|
| Speed | speed | 1 | effect.minecraft.speed |
| Name | Identifier | Numeric ID | Translation key |
|---|---|---|---|
| Speed | speed | 1 | potion.moveSpeed |
Advancements[]
| Icon | Advancement | In-game description | Parent | Actual requirements (if different) | Resource location |
|---|---|---|---|---|---|
 | A Furious Cocktail | Have every potion effect applied at the same time | Local Brewery | Have all of these 13 status effects applied to the player at the same time: The source of the effects is irrelevant for the purposes of this advancement. Other status effects may be applied to the player, but are ignored for this advancement. | nether/all_potions
|
| How Did We Get Here? | Have every effect applied at the same time | A Furious Cocktail | Have all of these 27 status effects applied to the player at the same time:
This is a hidden advancement, meaning that it can be viewed by the player only after completing it, regardless of if its child advancement(s), if any, have been completed. | nether/all_effects
|
History[]
| Java Edition Beta | |||||
|---|---|---|---|---|---|
1.8{{Extension DPL}}<ul><li>[[Photo|Photo]]<br/>{{exclusive|education}}
{{Item
| image = Photo EE2.png
| renewable = No (unless [[portfolio]] is available)
| stackable =
}}
A '''photo''' is an [[item]] containing a picture taken with a [[camera]].<ref>{{cite|url=https://web.archive.org/web/20210925044841mp_/https://educommunity.minecraft.net/hc/en-us/articles/4407489082644-Feature-Walkthrough-Minecraft-Education-Edition-GOAT-Beta-version-1-17-30-| title = Feature Walkthrough Minecraft: Education Edition GOAT Beta (version 1.17.30)|website=Minecraft: Education Edition Support|date=September 24, 2021}}</ref><ref>{{cite|url=https://education.minecraft.net/en-us/blog/new-update-and-anniversary-for-mee| title = The GOAT Update Celebrates a Minecraft Milestone!|website=Minecraft: Education Edition|date=November 2, 2021}}</ref><ref>{{ytl|2Wd0J-EIfws|GOAT Release Playthrough|Minecraft: Education Edition|December 2, 2021}}</ref>
== Obtaining ==
A photo in a [[portfolio]] can be saved as a photo item by selecting the "Save to Inventory" button underneath it.
== Usage ==
Photos display an image when held in the hand or when placed in an [[item frame]], similarly to [[map]]s. Photos can have captions added to them by renaming them in an [[anvil]] or by adding a caption while they are in a portfolio. Photos can be added to [[book and quill]]s and portfolios by selecting the "Add Photo" button in the book and quill or portfolio.
== Data values ==
=== ID ===
{{ID table
|edition=bedrock
|shownumericids=y
|showforms=y
|notshowbeitemforms=y
|generatetranslationkeys=y
|displayname=Photo
|spritetype=item
|nameid=photo_item
|id=?
|form=item
|foot=1}}
== History ==
{{History|education}}
{{History||1.17.30|snap=1.17.30.2|[[File:Photo EE1.png|32px]] Added photos.}}
{{History||1.17.30|snap=release|[[File:Photo EE2.png|32px]] Changed photo texture.}}
{{History|foot}}
== Gallery ==
<gallery>
Photo Item 1.png|A photo being placed in an item frame.
Photo Item 2.png|A photo being saved from a portfolio.
Photo Item 3.png|A photo being added to a book and quill.
</gallery>
== References ==
{{Reflist}}
{{Items}}
{{Education Edition}}
[[Category:Education Edition items]]
[[Category:Non-renewable resources]]
[[ja:写真]]
[[pl:Zdjęcie]]
[[zh:相片]]</li><li>[[Sign|Sign]]<br/>{{Block
| image = <gallery>
Oak Sign.png|Sign
Oak Wall Sign.png|Wall Sign
Oak Hanging Sign.png|Hanging Sign
Oak Wall Hanging Sign.png|Wall Hanging Sign
</gallery>
| image2 = <gallery>
Oak Sign JE3.png|Sign
Oak Hanging Sign (item) JE1 BE1.png|Hanging Sign
</gallery>
| extratext = [[#Gallery|View all renders]]
| transparent = Yes
| light = No
| tool = axe
| renewable = Yes
| stackable = Yes (16)
| flammable = No
| lavasusceptible = No
}}
A '''sign''' is a non-solid [[block]] that displays text and can be placed on the top or side of other blocks. A '''hanging sign''' is a decorative block that also displays text, and can be placed underneath blocks or with a solid self-supporting bracket. The text of both types of signs can be customized with [[dye]]s and [[glow ink sac]]s.
== Obtaining ==
=== Breaking ===
Signs can be broken with any tool or without a tool, but an [[axe]] is fastest.
{{breaking row|horizontal=1|Sign|sprite=oak-sign|Axe|foot=1|item=1}}
A sign or a hanging sign also breaks and drops itself as an [[item]] if the block the sign is attached to is moved, removed or destroyed. However, a wall hanging sign will stay here if the block the hanging sign is attached to is removed.<ref>{{bug|MC-256501|||WAI}}</ref>
If a sign is broken while being edited, the player continues to edit the sign<ref>{{bug|MC-117815}}</ref>, although {{in|bedrock}} breaking the sign stops the editing operation.
=== Natural generation ===
An oak sign can be found in [[igloo]] basements. Spruce signs can be found in taiga [[village]] houses, as part of a chair.
=== Chest loot ===
{{LootChestItem|oak-sign,oak-hanging-sign,spruce-sign,spruce-hanging-sign}}
=== Crafting ===
[[The player]] can place six stripped [[log]] [[block]]s at the bottom half of the crafting table and place two [[chain]]s on the top-left and top-right slots to create hanging signs. This crafting recipe will create six hanging signs. Hanging signs can only be crafted with stripped logs or [[stem]]s; non-stripped wood cannot be used to craft hanging signs.
{{Crafting
|head=1
|showdescription=1
|nolink=1
|A1= Matching Planks
|B1= Matching Planks
|C1= Matching Planks
|A2= Matching Planks
|B2= Matching Planks
|C2= Matching Planks
|B3= Stick
|Output=Matching Sign,3
|type=Decoration block
}}
{{Crafting
|name= Hanging Sign
|A1= Chain
|C1= Chain
|A2= Matching Stripped Log or Stem; Block of Stripped Bamboo
|B2= Matching Stripped Log or Stem; Block of Stripped Bamboo
|C2= Matching Stripped Log or Stem; Block of Stripped Bamboo
|A3= Matching Stripped Log or Stem; Block of Stripped Bamboo
|B3= Matching Stripped Log or Stem; Block of Stripped Bamboo
|C3= Matching Stripped Log or Stem; Block of Stripped Bamboo
|Output= Matching Hanging Sign,6; Bamboo Hanging Sign,6
|type=Decoration block
|foot=1
}}
== Usage ==
Signs can be used to display text; they can be used to label storage, display information to other players or note areas of interest. Signs are also not destroyed by [[water]] or [[lava]] and therefore may be used to control the flow of these fluids.
=== Placement ===
==== Signs ====
Signs may be placed on the top or side of other [[block]]s (including semi-solid and non-solid blocks such as [[fence]]s, [[Trapdoor|trapdoors]] and other signs). To place a sign, {{control|use}} a sign [[item]] while pointing at the block the sign should be attached to, enter the desired text (or none), and click the "Done" button or press "escape" on a keyboard (or press × {{in|bedrock}}, {{xbtn|b}} on an Xbox controller, {{psbtn|o}} on a PlayStation controller, or {{nsbutton|B}} on a Nintendo Switch controller. Closing the virtual keyboard on a mobile device also exits the typing menu). To place a sign on a block that can be interacted with by the {{control|use}} control (for example, [[chest]]s, [[note block]]s, etc.), {{control|sneak}} while placing the sign.
Signs on the top of a block stand on a short post and face toward the player who placed it, in any of 16 different directions. Signs placed on the side of a block simply float there, even if the block doesn't make contact with the sign.
Even if placed on a vertical surface, a sign may not co-exist in the same block of air as any other item, despite not necessarily visibly obstructing eachother.
For more information about the blocks signs can be placed on, see [[Opacity/Placement]].
==== Hanging signs ====
Hanging signs can be placed in three different ways:
* Placing a hanging sign on the side of a block will result in it being placed with a self-supporting bracket, which allows it to float without any supporting block. This version can be placed in four different directions.
* Placing a hanging sign on the bottom of a block will result in the sign hanging below the block.
** If the block is wide enough, the chains holding the sign will be parallel. This version can be placed in four different directions.
** If the block is too narrow, the chains will meet together in a upwards arrow shape. This version is also placed if the player is {{control|sneaking}} when placing a hanging sign below a wide-enough block. This version can be placed in sixteen different directions.
=== Text ===
[[File:Oak Sign GUI.png|thumb|240px|Oak Sign editing.]]
Placing a sign opens an editor interface resembling a magnified view of the sign. Up to four lines of text can then be entered using a keyboard (hardware or on-screen). The editor supports limited editing, including moving the cursor and inserting and deleting characters. {{IN|bedrock}}, [[formatting codes]] can also be used to apply decorative effects such as color, bold, italic and underline to various bits of the text. Depending on the edition and platform in use, copy and paste operations may be supported and the editor may also support keyboard entry of Alt-codes for displaying Unicode characters.
Text can be added to the back side of a sign by interacting with the that side of the sign after placing it and editing the front.
Signs can be waxed by {{Control|use|text=using}} a [[honeycomb]] on it. Once waxed, a sign cannot be unwaxed or edited.
After placing and affixing text on a sign, a player can change the text color by {{control|using}} a [[dye]] on it. When colored with dye, the text color may differ from any color specified by formatting codes.{{Info needed|How does this work? Does the dye affect all the text? One line? One word? Does dye override all formatting codes, including font effects?}}
[[File:Glow Ink Sign with Orange Dye JE2.png|thumb|216px|Oak sign with glow ink and orange dye applied in {{JE}}.]]
A player can {{control|use}} a [[glow ink sac]] on a sign to make its text glow. The glowing text is not affected by lighting. The player can use a regular black [[ink sac]] on the sign to remove the glowing effect.
{| class="wikitable mw-collapsible mw-collapsed"
|+ class="nowrap" | Glow ink colors
!Name !! Main Color !! Edge Color
|-
! Black
| {{color|#000000}}
| {{color|#EDE8CA}}
|-
! Red
| {{color|#FC0000}}
| {{color|#650000}}
|-
! Green
| {{color|#00FC00}}
| {{color|#006500}}
|-
! Brown
| {{color|#894413}}
| {{color|#361B07}}
|-
! Blue
| {{color|#0000FC}}
| {{color|#000065}}
|-
! Purple
| {{color|#9E20ED}}
| {{color|#3F0C5F}}
|-
! Cyan
| {{color|#00D6D6}}
| {{color|#006565}}
|-
! Light Gray
| {{color|#D0D0D0}}
| {{color|#535353}}
|-
! Gray
| {{color|#7E7E7E}}
| {{color|#323232}}
|-
! Pink
| {{color|#FC68B2}}
| {{color|#652947}}
|-
! Lime
| {{color|#8DFC00}}
| {{color|#4B6500}}
|-
! Yellow
| {{color|#FCFC00}}
| {{color|#656500}}
|-
! Light Blue
| {{color|#98BECB}}
| {{color|#3C4B51}}
|-
! Magenta
| {{color|#FC00FC}}
| {{color|#650065}}
|-
! Orange
| {{color|#FC671F}}
| {{color|#65280C}}
|-
! White
| {{color|#FCFCFC}}
| {{color|#656565}}
|}
In [[Creative]] mode, the combination {{key|Ctrl}} + {{control|pick block}} on Windows/Linux, or {{key|cmd}} + {{control|pick block}} on macOS, can be used to copy an already-placed sign, including its text (with decorations), into the player's inventory.
A dyed sign facing east or west will have its text appear more saturated and bright than a sign facing north or south. However, it is actually the sign that is dimmer, because ''Minecraft'''s lighting engine uses side lighting to make the world appear less flat, but the text on signs is not affected by this.
{{IN|bedrock}}, inappropriate words or phrases in a sign's text are displayed as asterisks.
{{IN|java}}, signs can be created with [[Commands#Raw JSON Text|JSON text]], which allows complex formatting (colors, bold, italic, etc.), hover and click events, localized translation (for ''Minecraft'' technical terms, like "Redstone Repeater", otherwise translations must be provided in language files in resource packs), and the incorporation of scoreboard values into text. Use the {{cmd|data merge block}} command to create or alter JSON signs.
: Example: {{cmd|long=1|data merge block ~ ~1 ~ <nowiki>{front_text:{ color:"green", messages:[ '{"selector":"@p", "bold":false, "italic":false, "underlined":false, "strikethrough":false, "obfuscated":false}' , '{"text":"Second Line"}']}}}}
Signs can post the success count of JSON text hover and click events to [[scoreboard]] objectives. The objectives to be used can be specified by running the {{cmd|execute store}} command or by modifying the sign's NBT data directly with the {{cmd|data merge block}} command.
=== Interaction ===
Signs act as though they have a {{control|use}} action, so the [[player]] is unable to place [[block]]s or use [[item]]s while the cursor is pointed at them without {{control|sneaking}}.
Signs are destroyed and drop as an item when pushed by a [[piston]].{{Only|bedrock}}
Signs are non-solid and have no collision, so [[item]]s and [[mob]]s can move through sign blocks. Other [[block]]s (including other signs) can be placed on any edge of a sign.
[[Water]] and [[lava]] flow around signs. Lava can create [[fire]] in [[air]] blocks next to signs as if the signs were flammable, but the signs do not burn (and cannot be burned by other methods either, except {{in|be}}).
=== Fuel ===
Wooden signs can be used as a fuel in [[furnace]]s, smelting an [[item]] per sign.
=== Note Blocks ===
Signs can be placed under [[note block]]s to produce a "bass" sounds.
== Sounds ==
=== Generic ===
==== Normal wood ====
; Sign
{{Sound table/Block/Wood|forcecollapsed=1}}
; Hanging sign
{{Sound table/Block/Hanging sign|forcecollapsed=1}}
==== Cherry wood ====
; Sign
{{Sound table/Block/Cherry wood|forcecollapsed=1}}
; Hanging sign
{{Sound table/Block/Cherry wood hanging sign|forcecollapsed=1}}
==== Bamboo wood ====
; Sign
{{Sound table/Block/Bamboo wood|forcecollapsed=1}}
; Hanging sign
{{edition|java}}:
{{Sound table/Block/Bamboo wood hanging sign/JE|forcecollapsed=1}}
{{edition|bedrock}}:
{{Sound table/Block/Bamboo wood hanging sign/BE|forcecollapsed=1}}
==== Nether wood ====
; Sign
{{Sound table/Block/Nether wood|forcecollapsed=1}}
; Hanging sign
{{edition|java}}:
{{Sound table/Block/Nether wood hanging sign/JE|forcecollapsed=1}}
{{edition|bedrock}}:
{{Sound table/Block/Nether wood hanging sign/BE|forcecollapsed=1}}
=== Unique ===
{{edition|java}}:
{{Sound table|forcecollapsed=1
|rowspan=2
|sound=Ink sac1.ogg
|sound2=Ink sac2.ogg
|sound3=Ink sac3.ogg
|subtitle=Glow Ink Sac splotches
|source=block
|description=When a [[glow ink sac]] is used on a sign
|id=item.glow_ink_sac.use
|translationkey=subtitles.item.glow_ink_sac.use
|volume=1.0
|pitch=''varies'' <ref group=sound>Can be 1.0, 0.95, or 1.05 for each sound</ref>
|distance=16}}
{{Sound table
|subtitle=Ink Sac splotches
|source=block
|description=When an [[ink sac]] is used on a sign
|id=item.ink_sac.use
|translationkey=subtitles.item.ink_sac.use
|volume=1.0
|pitch=''varies'' <ref group=sound>Can be 0.85, 0.88, or 0.9 for each sound</ref>
|distance=16}}
{{Sound table
|sound=Dye.ogg
|subtitle=Dye stains
|source=block
|description=When [[dye]] is used on a sign
|id=item.dye.use
|translationkey=subtitles.item.dye.use
|volume=1.0
|pitch=''varies'' <ref group=sound>Can be 1.0, 0.9, 0.95, or 1.1</ref>
|distance=16}}
{{Sound table
|sound=Wax on1.ogg
|sound2=Wax on2.ogg
|sound3=Wax on3.ogg
|subtitle=Wax on
|source=block
|description=When a sign is waxed
|id=item.honeycomb.wax_on
|translationkey=subtitles.item.honeycomb.wax_on
|volume=1.0
|pitch=1.0/0.9/1.1
|distance=16}}
{{Sound table
|sound=Sign waxed interact fail1.ogg
|sound2=Sign waxed interact fail2.ogg
|sound3=Sign waxed interact fail3.ogg
|subtitle=Sign wobbles
|source=block
|description=When a player attempts to edit a waxed sign
|id=block.sign.waxed_interact_fail
|translationkey=subtitles.block.sign.waxed_interact_fail
|volume=1.0
|pitch=''varies''<ref group=sound>{{cd|fail1}} can be 1.0 or 0.9; {{cd|fail2}} and {{cd|fail3}} can be 0.8 or 0.9</ref>
|distance=16
|foot=1}}
{{edition|bedrock}}:
{{Sound table|forcecollapsed=1
|type=bedrock
|sound=Ink sac1.ogg
|sound2=Ink sac2.ogg
|sound3=Ink sac3.ogg
|source=sound
|description=When a glow ink sac or an ink sac is used on a sign
|id=sign.ink_sac.use
|volume=1.0
|pitch=1.0}}
{{Sound table
|type=bedrock
|sound=Dye.ogg
|source=sound
|description=When dye is used on a sign
|id=sign.dye.use
|volume=1.0
|pitch=1.0}}
{{Sound table
|sound=Wax on1.ogg
|sound2=Wax on2.ogg
|sound3=Wax on3.ogg
|source=neutral
|description=When a honeycomb waxes a sign
|id=copper.wax.on
|volume=1.0
|pitch=0.8-1.2}}
{{Sound table
|sound=Sign waxed interact fail1.ogg
|sound2=Sign waxed interact fail2.ogg
|sound3=Sign waxed interact fail3.ogg
|source=block
|description=When a player attempts to edit a waxed sign
|id=block.sign.waxed_interact_fail
|volume=1.0
|pitch=''varies'' <ref group=sound>Can be 1.0 or 0.9 for <code>waxed_interact_fail1</code>; can be 0.8 or 0.9 for <code>waxed_interact_fail2</code> and <code>waxed_interact_fail3</code></ref>
|foot=1}}
== Data values ==
=== ID ===
{{edition|java}}:
{{ID table
|edition=java
|showblocktags=y
|showitemtags=y
|showforms=y
|generatetranslationkeys=y
|displayname=Oak Sign
|spritetype=block
|nameid=oak_sign
|blocktags=signs, standing_signs, wall_post_override
|itemtags=signs}}
{{ID table
|displayname=Spruce Sign
|spritetype=block
|nameid=spruce_sign
|blocktags=signs, standing_signs, wall_post_override
|itemtags=signs}}
{{ID table
|displayname=Birch Sign
|spritetype=block
|nameid=birch_sign
|blocktags=signs, standing_signs, wall_post_override
|itemtags=signs}}
{{ID table
|displayname=Jungle Sign
|spritetype=block
|nameid=jungle_sign
|blocktags=signs, standing_signs, wall_post_override
|itemtags=signs}}
{{ID table
|displayname=Acacia Sign
|spritetype=block
|nameid=acacia_sign
|blocktags=signs, standing_signs, wall_post_override
|itemtags=signs}}
{{ID table
|displayname=Dark Oak Sign
|spritetype=block
|nameid=dark_oak_sign
|blocktags=signs, standing_signs, wall_post_override
|itemtags=signs}}
{{ID table
|displayname=Mangrove Sign
|spritetype=block
|nameid=mangrove_sign
|blocktags=signs, standing_signs, wall_post_override
|itemtags=signs}}
{{ID table
|displayname=Cherry Sign
|spritename=Cherry Sign
|spritetype=block
|nameid=cherry_sign
|blocktags=signs, standing_signs, wall_post_override
|itemtags=signs}}
{{ID table
|displayname=Bamboo Sign
|spritename=Bamboo Sign
|spritetype=block
|nameid=bamboo_sign
|blocktags=signs, standing_signs, wall_post_override
|itemtags=signs}}
{{ID table
|displayname=Crimson Sign
|spritetype=block
|nameid=crimson_sign
|blocktags= signs, standing_signs, wall_post_override
|itemtags=non_flammable_wood, signs}}
{{ID table
|displayname=Warped Sign
|spritetype=block
|nameid=warped_sign
|blocktags=signs, standing_signs, wall_post_override
|itemtags=non_flammable_wood, signs}}
{{ID table
|displayname=Oak Wall Sign
|spritetype=block
|nameid=oak_wall_sign
|blocktags=signs, wall_signs
|form=block}}
{{ID table
|displayname=Spruce Wall Sign
|spritetype=block
|nameid=spruce_wall_sign
|blocktags=signs, wall_signs
|form=block}}
{{ID table
|displayname=Birch Wall Sign
|spritetype=block
|nameid=birch_wall_sign
|blocktags=signs, wall_signs
|form=block}}
{{ID table
|displayname=Jungle Wall Sign
|spritetype=block
|nameid=jungle_wall_sign
|blocktags=signs, wall_signs
|form=block}}
{{ID table
|displayname=Acacia Wall Sign
|spritetype=block
|nameid=acacia_wall_sign
|blocktags=signs, wall_signs
|form=block}}
{{ID table
|displayname=Dark Oak Wall Sign
|spritetype=block
|nameid=dark_oak_wall_sign
|blocktags=signs, wall_signs
|form=block}}
{{ID table
|displayname=Mangrove Wall Sign
|spritetype=block
|nameid=mangrove_wall_sign
|blocktags=signs, wall_signs
|form=block}}
{{ID table
|displayname=Cherry Wall Sign
|spritename=Cherry Wall Sign
|spritetype=block
|nameid=cherry_wall_sign
|blocktags=signs, wall_signs
|form=block}}
{{ID table
|displayname=Bamboo Wall Sign
|spritename=Bamboo Wall Sign
|spritetype=block
|nameid=bamboo_wall_sign
|blocktags=signs, wall_signs
|form=block}}
{{ID table
|displayname=Crimson Wall Sign
|spritetype=block
|nameid=crimson_wall_sign
|blocktags=signs, wall_signs
|form=block}}
{{ID table
|displayname=Warped Wall Sign
|spritetype=block
|nameid=warped_wall_sign
|blocktags=signs, wall_signs
|form=block}}
{{ID table
|displayname=Oak Hanging Sign
|spritename=Oak Hanging Sign
|spritetype=block
|nameid=oak_hanging_sign
|blocktags=all_hanging_signs, ceiling_hanging_signs
|itemtags=hanging_signs}}
{{ID table
|displayname=Spruce Hanging Sign
|spritename=Spruce Hanging Sign
|spritetype=block
|nameid=spruce_hanging_sign
|blocktags=all_hanging_signs, ceiling_hanging_signs
|itemtags=hanging_signs}}
{{ID table
|displayname=Birch Hanging Sign
|spritename=Birch Hanging Sign
|spritetype=block
|nameid=birch_hanging_sign
|blocktags=all_hanging_signs, ceiling_hanging_signs
|itemtags=hanging_signs}}
{{ID table
|displayname=Jungle Hanging Sign
|spritename=Jungle Hanging Sign
|spritetype=block
|nameid=jungle_hanging_sign
|blocktags=all_hanging_signs, ceiling_hanging_signs
|itemtags=hanging_signs}}
{{ID table
|displayname=Acacia Hanging Sign
|spritename=Acacia Hanging Sign
|spritetype=block
|nameid=acacia_hanging_sign
|blocktags=all_hanging_signs, ceiling_hanging_signs
|itemtags=hanging_signs}}
{{ID table
|displayname=Dark Oak Hanging Sign
|spritename=Dark Oak Hanging Sign
|spritetype=block
|nameid=dark_oak_hanging_sign
|blocktags=all_hanging_signs, ceiling_hanging_signs
|itemtags=hanging_signs}}
{{ID table
|displayname=Mangrove Hanging Sign
|spritename=Mangrove Hanging Sign
|spritetype=block
|nameid=mangrove_hanging_sign
|blocktags=all_hanging_signs, ceiling_hanging_signs
|itemtags=hanging_signs}}
{{ID table
|displayname=Cherry Hanging Sign
|spritename=Cherry Hanging Sign
|spritetype=block
|nameid=cherry_hanging_sign
|blocktags=all_hanging_signs, ceiling_hanging_signs
|itemtags=hanging_signs}}
{{ID table
|displayname=Bamboo Hanging Sign
|spritename=Bamboo Hanging Sign
|spritetype=block
|nameid=bamboo_hanging_sign
|blocktags=all_hanging_signs, ceiling_hanging_signs
|itemtags=hanging_signs}}
{{ID table
|displayname=Crimson Hanging Sign
|spritename=Crimson Hanging Sign
|spritetype=block
|nameid=crimson_hanging_sign
|blocktags=all_hanging_signs, ceiling_hanging_signs
|itemtags=hanging_signs, non_flammable_wood}}
{{ID table
|displayname=Warped Hanging Sign
|spritename=Warped Hanging Sign
|spritetype=block
|nameid=warped_hanging_sign
|blocktags=all_hanging_signs, ceiling_hanging_signs
|itemtags=hanging_signs, non_flammable_wood}}
{{ID table
|displayname=Oak Wall Hanging Sign
|spritename=Oak Wall Hanging Sign
|spritetype=block
|nameid=oak_wall_hanging_sign
|blocktags=all_hanging_signs, wall_hanging_signs
|form=block}}
{{ID table
|displayname=Spruce Wall Hanging Sign
|spritename=Spruce Wall Hanging Sign
|spritetype=block
|nameid=spruce_wall_hanging_sign
|blocktags=all_hanging_signs, wall_hanging_signs
|form=block}}
{{ID table
|displayname=Birch Wall Hanging Sign
|spritename=Birch Wall Hanging Sign
|spritetype=block
|nameid=birch_wall_hanging_sign
|blocktags=all_hanging_signs, wall_hanging_signs
|form=block}}
{{ID table
|displayname=Jungle Wall Hanging Sign
|spritename=Jungle Wall Hanging Sign
|spritetype=block
|nameid=jungle_wall_hanging_sign
|blocktags=all_hanging_signs, wall_hanging_signs
|form=block}}
{{ID table
|displayname=Acacia Wall Hanging Sign
|spritename=Acacia Wall Hanging Sign
|spritetype=block
|nameid=acacia_wall_hanging_sign
|blocktags=all_hanging_signs, wall_hanging_signs
|form=block}}
{{ID table
|displayname=Dark Oak Wall Hanging Sign
|spritename=Dark Oak Wall Hanging Sign
|spritetype=block
|nameid=dark_oak_wall_hanging_sign
|blocktags=all_hanging_signs, wall_hanging_signs
|form=block}}
{{ID table
|displayname=Mangrove Wall Hanging Sign
|spritename=Mangrove Wall Hanging Sign
|spritetype=block
|nameid=mangrove_wall_hanging_sign
|blocktags=all_hanging_signs, wall_hanging_signs
|form=block}}
{{ID table
|displayname=Cherry Wall Hanging Sign
|spritename=Cherry Wall Hanging Sign
|spritetype=block
|nameid=cherry_wall_hanging_sign
|blocktags=all_hanging_signs, wall_hanging_signs
|form=block}}
{{ID table
|displayname=Bamboo Wall Hanging Sign
|spritename=Bamboo Wall Hanging Sign
|spritetype=block
|nameid=bamboo_wall_hanging_sign
|blocktags=all_hanging_signs, wall_hanging_signs
|form=block}}
{{ID table
|displayname=Crimson Wall Hanging Sign
|spritename=Crimson Wall Hanging Sign
|spritetype=block
|nameid=crimson_wall_hanging_sign
|blocktags=all_hanging_signs, wall_hanging_signs
|form=block}}
{{ID table
|displayname=Warped Wall Hanging Sign
|spritename=Warped Wall Hanging Sign
|spritetype=block
|nameid=warped_wall_hanging_sign
|blocktags=all_hanging_signs, wall_hanging_signs
|form=block
|foot=1}}
{{ID table
|displayname=Block entity
|spritename=signs
|spritetype=block
|nameid=sign}}
{{ID table
|displayname=Block entity
|spritename=hanging-signs
|spritetype=block
|nameid=hanging_sign
|foot=1}}
{{edition|bedrock}}:
{{ID table
|edition=bedrock
|firstcolumnname=Sign
|shownumericids=y
|showforms=y
|showaliasids=y
|showitemtags=y
|generatetranslationkeys=y
|displayname=Oak standing
|spritename=oak-sign
|spritetype=block
|nameid=standing_sign
|id=63
|form=block}}
{{ID table
|displayname=Spruce standing
|spritename=spruce-sign
|spritetype=block
|nameid=spruce_standing_sign
|id=436
|form=block}}
{{ID table
|displayname=Birch standing
|spritename=birch-sign
|spritetype=block
|nameid=birch_standing_sign
|id=441
|form=block}}
{{ID table
|displayname=Jungle standing
|spritename=jungle-sign
|spritetype=block
|nameid=jungle_standing_sign
|id=443
|form=block}}
{{ID table
|displayname=Acacia standing
|spritename=acacia-sign
|spritetype=block
|nameid=acacia_standing_sign
|id=445
|form=block}}
{{ID table
|displayname=Dark Oak standing
|spritename=dark-oak-sign
|spritetype=block
|nameid=darkoak_standing_sign
|id=447
|form=block}}
{{ID table
|displayname=Mangrove standing
|spritename=mangrove-sign
|spritetype=block
|nameid=mangrove_standing_sign
|id=-494
|form=block
|translationkey=-}}
{{ID table
|displayname=Cherry standing
|spritename=cherry-sign
|spritetype=block
|nameid=cherry_standing_sign
|id=-542
|form=block
|translationkey=-}}
{{ID table
|displayname=Bamboo standing
|spritename=bamboo-sign
|spritetype=block
|nameid=bamboo_standing_sign
|id=-518
|form=block
|translationkey=-}}
{{ID table
|displayname=Crimson standing
|spritename=crimson-sign
|spritetype=block
|nameid=crimson_standing_sign
|id=505
|form=block}}
{{ID table
|displayname=Warped standing
|spritename=warped-sign
|spritetype=block
|nameid=warped_standing_sign
|id=506
|form=block}}
{{ID table
|displayname=Oak wall
|spritename=oak-wall-sign
|spritetype=block
|nameid=wall_sign
|id=68
|form=block
|translationkey=-}}
{{ID table
|displayname=Spruce wall
|spritename=spruce-wall-sign
|spritetype=block
|nameid=spruce_wall_sign
|id=437
|form=block
|translationkey=-}}
{{ID table
|displayname=Birch wall
|spritename=birch-wall-sign
|spritetype=block
|nameid=birch_wall_sign
|id=442
|form=block
|translationkey=-}}
{{ID table
|displayname=Jungle wall
|spritename=jungle-wall-sign
|spritetype=block
|nameid=jungle_wall_sign
|id=444
|form=block
|translationkey=-}}
{{ID table
|displayname=Acacia wall
|spritename=acacia-wall-sign
|spritetype=block
|nameid=acacia_wall_sign
|id=446
|form=block
|translationkey=-}}
{{ID table
|displayname=Dark Oak wall
|spritename=dark-oak-wall-sign
|spritetype=block
|nameid=darkoak_wall_sign
|id=448
|form=block
|translationkey=-}}
{{ID table
|displayname=Mangrove wall
|spritename=mangrove-wall-sign
|spritetype=block
|nameid=mangrove_wall_sign
|id=-495
|form=block
|translationkey=-}}
{{ID table
|displayname=Cherry wall
|spritename=cherry-wall-sign
|spritetype=block
|nameid=cherry_wall_sign
|id=-544
|form=block
|translationkey=-}}
{{ID table
|displayname=Bamboo wall
|spritename=bamboo-wall-sign
|spritetype=block
|nameid=bamboo_wall_sign
|id=-519
|form=block
|translationkey=-}}
{{ID table
|displayname=Crimson wall
|spritename=crimson-wall-sign
|spritetype=block
|nameid=crimson_wall_sign
|id=507
|form=block}}
{{ID table
|displayname=Warped wall
|spritename=warped-wall-sign
|spritetype=block
|nameid=warped_wall_sign
|id=508
|form=block}}
{{ID table
|displayname=Oak item
|spritename=oak-sign
|spritetype=item
|nameid=oak_sign
|aliasid=sign
|id=360
|form=item
|itemtags=minecraft:sign
|translationkey=item.sign.name}}
{{ID table
|displayname=Spruce item
|spritename=spruce-sign
|spritetype=item
|nameid=spruce_sign
|id=576
|form=item
|itemtags=minecraft:sign}}
{{ID table
|displayname=Birch item
|spritename=birch-sign
|spritetype=item
|nameid=birch_sign
|id=577
|form=item
|itemtags=minecraft:sign}}
{{ID table
|displayname=Jungle item
|spritename=jungle-sign
|spritetype=item
|nameid=jungle_sign
|id=578
|form=item
|itemtags=minecraft:sign}}
{{ID table
|displayname=Acacia item
|spritename=acacia-sign
|spritetype=item
|nameid=acacia_sign
|id=579
|form=item
|itemtags=minecraft:sign}}
{{ID table
|displayname=Dark Oak item
|spritename=dark-oak-sign
|spritetype=item
|nameid=dark_oak_sign
|aliasid=darkoak_sign
|id=587
|form=item
|itemtags=minecraft:sign
|translationkey=item.darkoak_sign.name}}
{{ID table
|displayname=Mangrove item
|spritename=mangrove-sign
|spritetype=item
|nameid=mangrove_sign
|id=642
|form=item
|itemtags=minecraft:sign}}
{{ID table
|displayname=Cherry item
|spritename=cherry-sign
|spritetype=item
|nameid=cherry_sign
|id=659
|form=item
|itemtags=minecraft:sign}}
{{ID table
|displayname=Bamboo item
|spritename=bamboo-sign
|spritetype=item
|nameid=bamboo_sign
|id=660
|form=item
|itemtags=minecraft:sign}}
{{ID table
|displayname=Crimson item
|spritename=crimson-sign
|spritetype=item
|nameid=crimson_sign
|id=614
|form=item
|itemtags=minecraft:sign}}
{{ID table
|displayname=Warped item
|spritename=warped-sign
|spritetype=item
|nameid=warped_sign
|id=615
|form=item
|itemtags=minecraft:sign}}
{{ID table
|displayname=Oak Hanging Sign
|spritename=Oak Wall Hanging Sign
|spritetype=block
|nameid=oak_hanging_sign
|id=-500
|itemtags=minecraft:hanging_sign
|translationkey=item.oak_hanging_sign.name}}
{{ID table
|displayname=Spruce Hanging Sign
|spritename=Spruce Wall Hanging Sign
|spritetype=block
|nameid=spruce_hanging_sign
|id=-501
|itemtags=minecraft:hanging_sign
|translationkey=item.spruce_hanging_sign.name}}
{{ID table
|displayname=Birch Hanging Sign
|spritename=Birch Wall Hanging Sign
|spritetype=block
|nameid=birch_hanging_sign
|id=-502
|itemtags=minecraft:hanging_sign
|translationkey=item.birch_hanging_sign.name}}
{{ID table
|displayname=Jungle Hanging Sign
|spritename=Jungle Wall Hanging Sign
|spritetype=block
|nameid=jungle_hanging_sign
|id=-503
|itemtags=minecraft:hanging_sign
|translationkey=item.jungle_hanging_sign.name}}
{{ID table
|displayname=Acacia Hanging Sign
|spritename=Acacia Wall Hanging Sign
|spritetype=block
|nameid=acacia_hanging_sign
|id=-504
|itemtags=minecraft:hanging_sign
|translationkey=item.acacia_hanging_sign.name}}
{{ID table
|displayname=Dark Oak Hanging Sign
|spritename=Dark Oak Wall Hanging Sign
|spritetype=block
|nameid=dark_oak_hanging_sign
|id=-505
|itemtags=minecraft:hanging_sign
|translationkey=item.dark_oak_hanging_sign.name}}
{{ID table
|displayname=Mangrove Hanging Sign
|spritename=Mangrove Wall Hanging Sign
|spritetype=block
|nameid=mangrove_hanging_sign
|id=-508
|itemtags=minecraft:hanging_sign
|translationkey=item.mangrove_hanging_sign.name}}
{{ID table
|displayname=Cherry Hanging Sign
|spritename=Cherry Wall Hanging Sign
|spritetype=block
|nameid=cherry_hanging_sign
|id=-534
|itemtags=minecraft:hanging_sign
|translationkey=item.cherry_hanging_sign.name}}
{{ID table
|displayname=Bamboo Hanging Sign
|spritename=Bamboo Wall Hanging Sign
|spritetype=block
|nameid=bamboo_hanging_sign
|id=-522
|itemtags=minecraft:hanging_sign
|translationkey=item.bamboo_hanging_sign.name}}
{{ID table
|displayname=Crimson Hanging Sign
|spritename=Crimson Wall Hanging Sign
|spritetype=block
|nameid=crimson_hanging_sign
|id=-506
|itemtags=minecraft:hanging_sign
|translationkey=item.crimson_hanging_sign.name}}
{{ID table
|displayname=Warped Hanging Sign
|spritename=Warped Wall Hanging Sign
|spritetype=block
|nameid=warped_hanging_sign
|id=-507
|itemtags=minecraft:hanging_sign
|translationkey=item.warped_hanging_sign.name
|foot=1}}
{{ID table
|notnamespaced=y
|displayname=Block entity
|spritename=signs
|spritetype=block
|nameid=Sign}}
{{ID table
|displayname=Block entity
|spritename=hanging-signs
|spritetype=block
|nameid=HangingSign
|foot=1}}
=== Block states ===
{{see also|Block states}}
{{/BS}}
=== Block data ===
A sign has a block entity associated with it that holds additional data about the block.
{{el|java}}:
{{see also|Block entity format}}
{{/BE}}
{{el|bedrock}}:
:See [[Bedrock Edition level format/Block entity format]].
== Achievements ==
{{load achievements|It's a Sign}}
== Advancements ==
{{load advancements|Glow and Behold}}
== History ==
{{main|/History}}
{{History|java classic}}
{{History||0.24_SURVIVAL_TEST|[[File:Sign Entity.png|32px]] Signs are currently being tested as [[entity|entities]]. They always display "This is a test of the signs. Each line can be 15 chars!" and can only be spawned by pressing {{key|B}}.<ref>{{ytl|bdT76iFEnLk}}</ref>}}
{{History||0.26 SURVIVAL TEST|Removed signs.}}
{{History|java infdev}}
{{History||20100607|[[File:Oak Sign (0) JE1.png|32px]] Signs have been re-implemented as [[block]]s, although still rendering as entities.
|Signs now have a [[crafting]] recipe and the text can now be edited. Editing a sign pauses the game in [[singleplayer]].
|Signs are currently huge and drop [[planks]] when destroyed.
|Signs do not have a particle texture defined. As such, they [[Placeholder texture#Default texture|default to using the grass block texture instead]].}}
{{History||20100608|Signs are now broken faster.
|Signs now [[drops|drop]] themselves when [[breaking|destroyed]], instead of planks.
|Signs now use planks particles.}}
{{History|java alpha}}
{{History||v1.0.1|[[File:Oak Wall Sign (S) JE1 BE1.png|32px]] Added wall signs.
|[[File:Oak Sign (0) JE2.png|32px]] Signs are now smaller.}}
{{History||v1.0.5|Signs no longer require a free [[block]] above it to place.}}
{{History|java beta}}
{{History||April 27, 2011|link=https://notch.tumblr.com/post/4988431144|Hand-drawn signs are mentioned.}}
{{History|java}}
{{History||1.0.0|snap=Beta 1.9 Prerelease 6|Signs are now broken faster using an [[axe]].}}
{{History||1.3.1|snap=12w18a|Editing a sign no longer pauses the game in [[singleplayer]].}}
{{History|||snap=12w27a|Signs are now stackable up to 16.
|The same [[crafting]] recipe now produces 3 signs instead of 1.}}
{{History||June 9, 2014|link=https://twitter.com/SeargeDP/status/476047216541700096|[[Searge]] tweeted a picture of a sign showing a username and a [[scoreboard]] score.}}
{{History||1.8|snap=14w25a|Added support for JSON text to signs.
|Sign character limit now depends on character width.}}
{{History|||snap=14w29a|Signs now display the cracking animation.}}
{{History||1.9|snap=15w43a|A sign now generates within [[igloo]] basements.}}
{{History||1.11|snap=16w33a|Signs can now be used as [[fuel]] in [[furnace]]s.}}
{{History||1.13|snap=17w47a|The standing sign ID has been changed from <code>standing_sign</code> to <code>sign</code>.
|Prior to [[1.13/Flattening|''The Flattening'']], these [[block]]s' numeral IDs were 63 and 68, and the [[item]]'s 323.}}
{{History|||snap=18w10d|[[Water]] can now be placed on the same block as signs.}}
{{History||1.14|snap=18w43a|"Sign" has been renamed to "Oak Sign".
|[[File:Oak Sign JE2 BE2.png|32px]] The texture of oak sign [[item]]s has been changed.
|[[File:Spruce Standing Sign JE1 BE1.png|32px]] [[File:Birch Standing Sign JE1 BE1.png|32px]] [[File:Jungle Standing Sign JE1 BE1.png|32px]] [[File:Acacia Standing Sign JE1 BE1.png|32px]] [[File:Dark Oak Standing Sign JE1 BE1.png|32px]] [[File:Spruce Sign JE1 BE1.png|32px]] [[File:Birch Sign JE1 BE1.png|32px]] [[File:Jungle Sign JE1 BE1.png|32px]] [[File:Acacia Sign JE1 BE1.png|32px]] [[File:Dark Oak Sign JE1 BE1.png|32px]] Added spruce, birch, jungle, acacia and dark oak signs.
|The sign's text has been changed from black to white.
|A sign's recipe now requires the same type of [[wood]] instead of a random assortment.}}
{{History|||snap=18w44a|Signs can now be {{control|used}} while holding a [[dye]] to change the text color.
|Default text color for signs has been changed back to black.}}
{{History|||snap=18w45a|A new movable cursor for free text editing to signs has been added.
|Selection and copy/paste support have been added to signs.}}
{{History|||snap=18w50a|Spruce signs now generate in some [[taiga]] [[village]] houses.
|Spruce sign items can now be found in [[chest]]s in taiga village houses.}}
{{History|||snap=19w12a|Signs can now be [[dye]]d only in [[Creative mode]].}}
{{History|||snap=19w12b|Signs can now be dyed in [[Survival mode]] again.}}
{{History||1.16|snap=20w06a|[[File:Crimson Standing Sign JE1 BE1.png|32px]] [[File:Warped Standing Sign JE1 BE1.png|32px]] [[File:Crimson Sign JE1 BE1.png|32px]] [[File:Warped Sign JE1 BE1.png|32px]] Added crimson and warped signs.}}
{{History|||snap=20w09a|Crimson and warped signs can now be [[crafting|crafted]].}}
{{History||1.17|snap=21w03a|Signs can now be tinted with [[Glow Ink Sac|glow ink sac]]s to make the text glow.
|Works with both undyed and dyed signs.
|Signs now have a sound for being dyed.}}
{{History|||snap=21w11a|[[File:Oak Standing Sign (S) JE2.png|32px]][[File:Spruce Standing Sign (S) JE2 BE2.png|32px]] [[File:Birch Standing Sign (S) JE2 BE2.png|32px]] [[File:Jungle Standing Sign (S) JE2 BE2.png|32px]] [[File:Acacia Standing Sign (S) JE2 BE2.png|32px]] [[File:Dark Oak Standing Sign (S) JE2 BE2.png|32px]] [[File:Oak Wall Sign (S) JE2.png|32px]] [[File:Spruce Wall Sign (S) JE2 BE2.png|32px]] [[File:Birch Wall Sign (S) JE2 BE2.png|32px]] [[File:Jungle Wall Sign (S) JE2 BE2.png|32px]] [[File:Acacia Wall Sign (S) JE2 BE2.png|32px]] [[File:Dark Oak Wall Sign (S) JE2 BE2.png|32px]] The textures of signs have been changed to reflect the changes made to planks in the [[Texture Update]].}}
{{History|||snap=Pre-release 1|Glowing text on signs now has an outer glow, making text more visible in the dark.}}
{{History||1.18|snap=21w41a|[[File:Oak Sign JE3.png|32px]] [[File:Spruce Sign JE2.png|32px]] [[File:Birch Sign JE2.png|32px]] [[File:Jungle Sign JE2.png|32px]] [[File:Acacia Sign JE2.png|32px]] [[File:Dark Oak Sign JE2.png|32px]] [[File:Crimson Sign JE2.png|32px]] [[File:Warped Sign JE2.png|32px]] Changed all signs textures as items.}}
{{History||1.19|snap=22w11a|[[File:Mangrove Sign JE1 BE1.png|32px]][[File:Mangrove Wall Sign JE1 BE1.png|32px]][[File:Mangrove Sign (item) JE1 BE1.png|32px]] Added mangrove signs.}}
{{History|||snap=22w14a|Due to the addition of the [[mangrove tree]] and [[mangrove swamp]], mangrove signs are now obtainable in survival and renewable.}}
{{History||October 15, 2022|link={{ytl|https://youtu.be/iM9KtHaDcUg?t=5437}}|Hanging signs were announced and shown on [[Minecraft Live 2022]].|Hanging signs were conceptualized by [[Agnes Larsson]] with input from her daughter.<ref>{{ytl|vJCMpPyaN8Q|Minecraft 1.20: New Blocks and Their Functions! @ 0:29|Minecraft|February 24, 2023|t=29s}}</ref>}}
{{History||1.20<br>(Experimental)|link=1.19.3|snap=22w42a|[[File:Bamboo Sign (0) JE1 BE1.png|32px]] [[File:Bamboo Wall Sign (S) JE1 BE1.png|32px]] [[File:Bamboo Sign (item) JE1 BE1.png|32px]] Added bamboo signs behind the [[Java Edition 1.20|Update 1.20 experimental datapack]].
|[[File:Oak Hanging Sign JE1 BE1.png|32px]] [[File:Spruce Hanging Sign JE1 BE1.png|32px]] [[File:Birch Hanging Sign JE1 BE1.png|32px]] [[File:Jungle Hanging Sign JE1 BE1.png|32px]] [[File:Acacia Hanging Sign JE1 BE1.png|32px]] [[File:Dark Oak Hanging Sign JE1 BE1.png|32px]] [[File:Mangrove Hanging Sign JE1 BE1.png|32px]] [[File:Bamboo Hanging Sign JE1 BE1.png|32px]] [[File:Crimson Hanging Sign JE1 BE1.png|32px]] [[File:Warped Hanging Sign JE1 BE1.png|32px]]<br>[[File:Oak Wall Hanging Sign JE1 BE1.png|32px]] [[File:Spruce Wall Hanging Sign JE1 BE1.png|32px]] [[File:Birch Wall Hanging Sign JE1 BE1.png|32px]] [[File:Jungle Wall Hanging Sign JE1 BE1.png|32px]] [[File:Acacia Wall Hanging Sign JE1 BE1.png|32px]] [[File:Dark Oak Wall Hanging Sign JE1 BE1.png|32px]] [[File:Mangrove Wall Hanging Sign JE1 BE1.png|32px]] [[File:Bamboo Wall Hanging Sign (S) JE1 BE1.png|32px]] [[File:Crimson Wall Hanging Sign JE1 BE1.png|32px]] [[File:Warped Wall Hanging Sign JE1 BE1.png|32px]]<br>[[File:Oak Hanging Sign (item) JE1 BE1.png|32px]] [[File:Spruce Hanging Sign (item) JE1 BE1.png|32px]] [[File:Birch Hanging Sign (item) JE1 BE1.png|32px]] [[File:Jungle Hanging Sign (item) JE1 BE1.png|32px]] [[File:Acacia Hanging Sign (item) JE1 BE1.png|32px]] [[File:Dark Oak Hanging Sign (item) JE1 BE1.png|32px]] [[File:Mangrove Hanging Sign (item) JE1 BE1.png|32px]] [[File:Bamboo Hanging Sign (item) JE1 BE1.png|32px]] [[File:Crimson Hanging Sign (item) JE1 BE1.png|32px]] [[File:Warped Hanging Sign (item) JE1 BE1.png|32px]]<br>Added hanging signs behind the [[Java Edition 1.20|Update 1.20 experimental datapack]].|Added unique sounds for Nether and bamboo wood signs.}}
{{History|||snap=22w45a|[[File:Jungle Wall Hanging Sign JE2 BE2.png|32px]] The texture of jungle hanging wall signs have been changed.|Added unique sounds for Nether and bamboo wood hanging signs.|Bamboo hanging signs now can be crafted using [[block of stripped bamboo]] instead of bamboo planks.|Crafting bamboo hanging signs now outputs 6 hanging signs instead of 2.}}
{{History||1.20<br>(Experimental)|link=1.19.4|snap=23w07a|[[File:Cherry Sign (0) JE1.png|32px]] [[File:Cherry Wall Sign (S) JE1.png|32px]] [[File:Cherry Sign (item) JE1.png|32px]] [[File:Cherry Hanging Sign JE1.png|32px]] [[File:Cherry Wall Hanging Sign JE1.png|32px]] [[File:Cherry Hanging Sign (item) JE1.png|32px]] Added cherry signs and hanging signs behind the [[Java Edition 1.20|Update 1.20 experimental datapack]]. There used to be a glitch where right clicking on a sign would play the “use” animation. This was fixed in the snapshots for 1.20, where signs are editable.}}
{{History|||snap=1.19.4 Pre-release 4|[[File:Cherry Sign (0) JE2 BE2.png|32px]] Updated the texture of cherry signs.}}
{{History||1.20|snap=23w12a|Bamboo sign, cherry sign and all of the hanging signs are now available without using the "Update 1.20" experimental datapack.|Signs and hanging signs can now be edited after being placed.|Signs and hanging signs now support text on both sides.|Signs and hanging signs can now be waxed with [[honeycomb]] to prevent editing.|Oak and spruce hanging sign can now be found in [[suspicious gravel]] and [[suspicious sand]] in [[trail ruins]].}}
{{History|||snap=23w14a|Signs and hanging signs with click commands can now be interacted with even if the sign is not waxed.|Signs and hanging signs can no longer be edited by players in [[Adventure]] mode.|Signs and hanging signs with non-text chat components can no longer be edited, even if the sign is not waxed.|Signs and hanging signs now save text even if the edit screen is closed by the player being moved far away.}}
{{History|||snap=23w16a|Oak and spruce hanging sign no longer generates in [[suspicious sand]] in [[trail ruins]].|Due to the split of the archaeological loot tables for the suspicious gravel within the [[trail ruins]]; oak and spruce hanging sign now are in the common loot.}}
{{History||1.20.2|snap=23w31a|Changed sounds for Nether wood hanging signs.<ref>{{Bug|MC-262295||Warped and Crimson hanging signs uses their respective plank sounds, despite their stripped stems having unique sounds|Fixed}}</ref>}}
{{History|pocket alpha}}
{{History||v0.5.0|[[File:Oak Standing Sign.png|32px]] [[File:Oak Sign JE1 BE1.png|32px]] Signs have been added, though they can be obtained only through [[inventory]] editors. |The [[player]] currently cannot write on signs.}}
{{History||v0.6.0|Signs can now be legitimately obtained in [[Survival]] and [[Creative]] mode.|The player can now write on signs.}}
{{History||v0.10.0|snap=build 1|Signs now have a selection overlay.}}
{{History|pocket}}
{{History||1.0.0|snap=alpha 0.17.0.1|Signs can now be found in [[igloo]] basements.}}
{{History|bedrock}}
{{History||1.9.0|snap=beta 1.9.0.0|"Sign" has been renamed to "Oak Sign".
|[[File:Spruce Standing Sign (S) JE2 BE2.png|32px]] [[File:Birch Standing Sign (S) JE2 BE2.png|32px]] [[File:Jungle Standing Sign (S) JE2 BE2.png|32px]] [[File:Acacia Standing Sign (S) JE2 BE2.png|32px]] [[File:Dark Oak Standing Sign (S) JE2 BE2.png|32px]] [[File:Spruce Sign JE1 BE1.png|32px]] [[File:Birch Sign JE1 BE1.png|32px]] [[File:Jungle Sign JE1 BE1.png|32px]] [[File:Acacia Sign JE1 BE1.png|32px]] [[File:Dark Oak Sign JE1 BE1.png|32px]] Added spruce, birch, jungle, acacia and dark oak signs.|The sign's text has been changed from black to white.|A sign's recipe now requires the same type of [[wood]] instead of a random assortment.}}
{{History|||snap=beta 1.9.0.2|The default sign text color has been changed back to black.|Sign variants are now grouped in their own [[inventory]] category.}}
{{History||1.10.0|snap=beta 1.10.0.3|[[File:Oak Sign JE2 BE2.png|32px]] The texture of oak sign [[item]]s has been changed.|Spruce signs now generate in new [[taiga]] and [[snowy taiga]] [[village]] houses.}}
{{History||1.11.0|snap=beta 1.11.0.1|Signs can now be used as a [[fuel]] in [[furnace]]s.|Oak signs can now be found inside taiga and snowy taiga village house [[chest]]s.}}
{{History||1.16.0|snap=beta 1.16.0.51|[[File:Crimson Standing Sign JE1 BE1.png|32px]] [[File:Warped Standing Sign JE1 BE1.png|32px]] [[File:Crimson Sign JE1 BE1.png|32px]] [[File:Warped Sign JE1 BE1.png|32px]] Added crimson and warped signs.|[[File:Spruce Standing Sign (S) JE2 BE2.png|32px]] [[File:Birch Standing Sign (S) JE2 BE2.png|32px]] [[File:Jungle Standing Sign (S) JE2 BE2.png|32px]] [[File:Acacia Standing Sign (S) JE2 BE2.png|32px]] [[File:Dark Oak Standing Sign (S) JE2 BE2.png|32px]] [[File:Spruce Wall Sign (S) JE2 BE2.png|32px]] [[File:Birch Wall Sign (S) JE2 BE2.png|32px]] [[File:Jungle Wall Sign (S) JE2 BE2.png|32px]] [[File:Acacia Wall Sign (S) JE2 BE2.png|32px]] [[File:Dark Oak Wall Sign (S) JE2 BE2.png|32px]] The texture of all signs except oak sign have been changed.}}
{{History||1.16.20|snap=beta 1.16.20.50|Crimson and warped signs now uses regular plank [[sound]]s instead of their stem variant sounds.}}
{{History||1.16.210|snap=beta 1.16.210.59|Signs can now be {{control|used}} while holding a [[dye]] to change the text color.|Signs can now be tinted with [[Glow Ink Sac|glow ink sac]]s to make the text glow.
|Works with both default and dyed signs.}}
{{History|||snap=beta 1.16.210.60|Color on dyed signs disappears and the text turns back to black.|Signs with applied glowing effect as well as color stops glowing and color is removed.}}
{{History||1.16.220|snap=beta 1.16.220.50|Signs can now be {{control|used}} while holding a [[dye]] to change the text color again.|Signs can now be tinted with [[Glow Ink Sac|glow ink sac]]s to make the text glow again.}}
{{History|||snap=beta 1.16.220.52|Now has sounds for being dyed.}}
{{History|||snap=release|A glowing effect can no longer be applied to signs due to glow ink sacs becoming inaccessible in the full release.}}
{{History||1.17.0|snap=beta 1.17.0.50|[[File:Oak Sign BE3.png|32px]] [[File:Spruce Sign BE2.png|32px]] [[File:Birch Sign BE2.png|32px]] [[File:Jungle Sign BE2.png|32px]] [[File:Acacia Sign BE2.png|32px]] [[File:Dark Oak Sign BE2.png|32px]] Textures of sign items was updated.
|[[File:Oak Standing Sign (S) JE2 BE2.png|32px]] [[File:Oak Wall Sign (S) JE2 BE2.png|32px]] The textures of oak signs have been changed to reflect the changes made to planks in the [[Texture Update]].}}
{{History||1.17.10|snap=beta 1.17.10.21|Glowing text on signs now has an outer glow, making text more visible in the dark.}}
{{History||1.18.10|snap=beta 1.18.10.20|[[File:Oak Sign JE3.png|32px]] [[File:Spruce Sign JE2.png|32px]] [[File:Birch Sign JE2.png|32px]] [[File:Jungle Sign JE2.png|32px]] [[File:Acacia Sign JE2.png|32px]] [[File:Dark Oak Sign JE2.png|32px]] [[File:Crimson Sign JE2.png|32px]] [[File:Warped Sign JE2.png|32px]] Changed all signs textures as items.}}
{{History||1.19.0|snap=beta 1.19.0.20|[[File:Mangrove Sign JE1 BE1.png|32px]][[File:Mangrove Wall Sign JE1 BE1.png|32px]][[File:Mangrove Sign (item) JE1 BE1.png|32px]] Added mangrove signs.}}
{{History||Next Major Update<br>(Experimental)|link=Bedrock Edition 1.20|snap=beta 1.19.50.21|[[File:Bamboo Sign (0) JE1 BE1.png|32px]] [[File:Bamboo Wall Sign (S) JE1 BE1.png|32px]] [[File:Bamboo Sign (item) JE1 BE1.png|32px]] Added bamboo signs behind the "[[Bedrock Edition 1.20|Next Major Update]]" [[experimental]] toggle.|[[File:Oak Hanging Sign JE1 BE1.png|32px]] [[File:Spruce Hanging Sign JE1 BE1.png|32px]] [[File:Birch Hanging Sign JE1 BE1.png|32px]] [[File:Jungle Hanging Sign JE1 BE1.png|32px]] [[File:Acacia Hanging Sign JE1 BE1.png|32px]] [[File:Dark Oak Hanging Sign JE1 BE1.png|32px]] [[File:Mangrove Hanging Sign JE1 BE1.png|32px]] [[File:Bamboo Hanging Sign JE1 BE1.png|32px]] [[File:Crimson Hanging Sign JE1 BE1.png|32px]] [[File:Warped Hanging Sign JE1 BE1.png|32px]]<br>[[File:Oak Wall Hanging Sign JE1 BE1.png|32px]] [[File:Spruce Wall Hanging Sign JE1 BE1.png|32px]] [[File:Birch Wall Hanging Sign JE1 BE1.png|32px]] [[File:Jungle Wall Hanging Sign JE1 BE1.png|32px]] [[File:Acacia Wall Hanging Sign JE1 BE1.png|32px]] [[File:Dark Oak Wall Hanging Sign JE1 BE1.png|32px]] [[File:Mangrove Wall Hanging Sign JE1 BE1.png|32px]] [[File:Bamboo Wall Hanging Sign (S) JE1 BE1.png|32px]] [[File:Crimson Wall Hanging Sign JE1 BE1.png|32px]] [[File:Warped Wall Hanging Sign JE1 BE1.png|32px]]<br>[[File:Oak Hanging Sign (item) JE1 BE1.png|32px]] [[File:Spruce Hanging Sign (item) JE1 BE1.png|32px]] [[File:Birch Hanging Sign (item) JE1 BE1.png|32px]] [[File:Jungle Hanging Sign (item) JE1 BE1.png|32px]] [[File:Acacia Hanging Sign (item) JE1 BE1.png|32px]] [[File:Dark Oak Hanging Sign (item) JE1 BE1.png|32px]] [[File:Mangrove Hanging Sign (item) JE1 BE1.png|32px]] [[File:Bamboo Hanging Sign (item) JE1 BE1.png|32px]] [[File:Crimson Hanging Sign (item) JE1 BE1.png|32px]] [[File:Warped Hanging Sign (item) JE1 BE1.png|32px]]<br>Added hanging signs behind the "[[Bedrock Edition 1.20.0|Next Major Update]]" [[experimental]] toggle.|Added unique sounds for Nether and bamboo wood signs.}}
{{History|||snap=beta 1.19.60.20|[[File:Jungle Wall Hanging Sign JE2 BE2.png|32px]] The texture of jungle hanging wall signs have been changed.|Bamboo hanging signs now can be crafted using [[block of stripped bamboo]] instead of bamboo planks.|Crafting bamboo hanging signs now outputs 6 hanging signs instead of 2.}}
{{History||Next Major Update<br>(Experimental)|link=Bedrock Edition 1.19.80|snap=beta 1.19.80.20|[[File:Cherry Sign (0).png|32px]] [[File:Cherry Wall Sign (S) JE1.png|32px]] [[File:Cherry Sign (item) JE1.png|32px]] [[File:Cherry Hanging Sign JE1.png|32px]] [[File:Cherry Wall Hanging Sign JE1.png|32px]] [[File:Cherry Hanging Sign (item) JE1.png|32px]] Added cherry signs and hanging signs behind the "[[Bedrock Edition 1.20.0|Next Major Update]]" [[experimental]] toggle.}}
{{History|||snap=beta 1.19.80.21|[[File:Cherry Sign (0) JE2 BE2.png|32px]] Updated the texture of cherry signs.}}
{{History|||snap=beta 1.19.80.22|Signs and hanging signs can now be edited after being placed.|Signs and hanging signs now support text on both sides.|Signs and hanging signs can now be waxed with [[honeycomb]] to prevent editing.}}
{{History|||snap=beta 1.20.0.20|Crimson, warped, and bamboo hanging signs now have custom sounds to match their wood type.<ref name=badnewsounds>{{Bug|MCPE-164246}}</ref>}}
{{History||1.20.0|snap=beta 1.20.0.21|Bamboo sign, cherry sign and all of the hanging signs are now available without using the "Next Major Update" experimental toggle.}}
{{History|console}}
{{History||xbox=TU1|xbone=CU1|ps=1.0|wiiu=Patch 1|switch=1.0.1|[[File:Oak Standing Sign.png|32px]] [[File:Oak Sign JE1 BE1.png|32px]] Added signs.}}
{{History||xbox=TU9|Signs are now stackable up to 16.
|The same [[crafting]] recipe for signs now produces 3 signs instead of 1.}}
{{History||xbox=none|xbone=none|ps=1.88|wiiu=none|switch=none|[[File:Spruce Standing Sign (S) JE2 BE2.png|32px]] [[File:Birch Standing Sign (S) JE2 BE2.png|32px]] [[File:Jungle Standing Sign (S) JE2 BE2.png|32px]] [[File:Acacia Standing Sign (S) JE2 BE2.png|32px]] [[File:Dark Oak Standing Sign (S) JE2 BE2.png|32px]] [[File:Spruce Sign JE1 BE1.png|32px]] [[File:Birch Sign JE1 BE1.png|32px]] [[File:Jungle Sign JE1 BE1.png|32px]] [[File:Acacia Sign JE1 BE1.png|32px]] [[File:Dark Oak Sign JE1 BE1.png|32px]] Added spruce, birch, jungle, acacia and dark oak signs.}}
{{History||xbox=none|xbone=none|ps=1.90|wiiu=none|switch=none|[[File:Oak Sign JE2 BE2.png|32px]] The texture of oak sign [[item]]s has been changed.}}
{{History|new 3ds}}
{{History||0.1.0|[[File:Oak Standing Sign (S) JE2 BE2.png|32px]] [[File:Oak Sign JE1 BE1.png|32px]] Added signs.}}
{{History|foot}}
== Trivia ==
* The first concept art of hanging signs came from [[Agnes Larsson]]'s daughter.<ref>{{Ytl|vJCMpPyaN8Q|Minecraft 1.20: New Blocks and Their Functions!|Minecraft|t=30s}}</ref>
== Gallery ==
=== Screenshots ===
<gallery>
Signs classic.png|Test of signs in early [[Java Edition Classic]].
Sigh test.jpg|Another early sign image.
Signs PreRelease.png|First image of sign blocks during [[Java Edition Infdev|Infdev]].
Pocket Edition v0.6.0 alpha Development sign.png|First image of signs on [[Pocket Edition]].
Pocket Edition v0.6.0 alpha Development sign editing.png|First image of editing text on [[PE]] iOS.
Pocket Edition v0.6.0 alpha Development sign editing 2.png|First image of editing text on [[PE]] Android.
Pocket Edition v0.6.0 alpha Development sky.png
Door Sign.png|A sign placed on a door.
Breaking News.png|A sign being broken.
Sign Text Dark.jpg|A dark oak sign with black text.
Sign Text Light.jpg|A dark oak sign with white text.
Sign Blockdata.gif|A sign using blockdata to dynamically change.
JSON Sign.png|First image of a sign using JSON text.
Width Based Character Limit.png|First image of a sign using width based character limits.
Glow Ink Sign with Pink Dye.png|Oak sign with glow ink in the dark in [[Java Edition 21w03a]].
Lit vs unlit signs.png|Difference in visibility of a lime text, from left to right, in a lit birch sign, unlit birch sign, lit dark oak sign, and unlit dark oak sign.
Glowing Text Comparison.png|The comparison between glow text and non-glow text.
Example Of Signs Being Weird.png|alt=Shading differences|Signs being different shades depending on orientation.
Glow text.gif|All sixteen colors of glow text.
Glow Ink Signs.jpg|Signs with glowing ink in several colors.
Lots of Glowing Signs.jpg|More signs with glowing ink.
Sign Platforms.jpg|[[Ari]] standing on top of a hanged sign.
Eric Shop.jpg|[[Sunny]] looking at a double sided hanging sign.
Hanging Sign Bedrock.png|Hanging sign with small text.
Hanging Sign Java.png|Hanging sign with large text.
New Hanging Sign Text Length 1.jpg|Text on hanging sign.
New Hanging Sign Text Length 2.jpg|Text on hanging sign.
</gallery>
=== Concept Art ===
<gallery>
Hanging_Sign_Concept_Art.png|Hanging sign concept art.
Hanging_Sign_Concept_Art2.png|Ditto.
Hanging_Sign_Concept_Art3.png|Hanging sign dimensions concept art.
Hanging_Sign_Concept_Art4.png|Hanging sign crafting recipe, block states concept art.
</gallery>
=== Renders ===
{{hidden begin}}
<div style="clear: both"></div>
<gallery>
Oak Sign.png|Oak Sign
Spruce Sign.png|Spruce Sign
Birch Sign.png|Birch Sign
Jungle Sign.png|Jungle Sign
Acacia Sign.png|Acacia Sign
Dark Oak Sign.png|Dark Oak Sign
Mangrove Sign.png|Mangrove Sign
Cherry Sign.png|Cherry Sign
Bamboo Sign.png|Bamboo Sign
Crimson Sign.png|Crimson Sign
Warped Sign.png|Warped Sign
Oak Wall Sign.png|Oak Wall Sign
Spruce Wall Sign.png|Spruce Wall Sign
Birch Wall Sign.png|Birch Wall Sign
Jungle Wall Sign.png|Jungle Wall Sign
Acacia Wall Sign.png|Acacia Wall Sign
Dark Oak Wall Sign.png|Dark Oak Wall Sign
Mangrove Wall Sign.png|Mangrove Wall Sign
Cherry Wall Sign.png|Cherry Wall Sign
Bamboo Wall Sign.png|Bamboo Wall Sign
Crimson Wall Sign.png|Crimson Wall Sign
Warped Wall Sign.png|Warped Wall Sign
Oak Hanging Sign.png|Oak Hanging Sign
Spruce Hanging Sign.png|Spruce Hanging Sign
Birch Hanging Sign.png|Birch Hanging Sign
Jungle Hanging Sign.png|Jungle Hanging Sign
Acacia Hanging Sign.png|Acacia Hanging Sign
Dark Oak Hanging Sign.png|Dark Oak Hanging Sign
Mangrove Hanging Sign.png|Mangrove Hanging Sign
Cherry Hanging Sign.png|Cherry Hanging Sign
Bamboo Hanging Sign.png|Bamboo Hanging Sign
Crimson Hanging Sign.png|Crimson Hanging Sign
Warped Hanging Sign.png|Warped Hanging Sign
Oak Wall Hanging Sign.png|Oak Wall Hanging Sign
Spruce Wall Hanging Sign.png|Spruce Wall Hanging Sign
Birch Wall Hanging Sign.png|Birch Wall Hanging Sign
Jungle Wall Hanging Sign.png|Jungle Wall Hanging Sign
Acacia Wall Hanging Sign.png|Acacia Wall Hanging Sign
Dark Oak Wall Hanging Sign.png|Dark Oak Wall Hanging Sign
Mangrove Wall Hanging Sign.png|Mangrove Wall Hanging Sign
Cherry Wall Hanging Sign.png|Cherry Wall Hanging Sign
Bamboo Wall Hanging Sign.png|Bamboo Wall Hanging Sign
Crimson Wall Hanging Sign.png|Crimson Wall Hanging Sign
Warped Wall Hanging Sign.png|Warped Wall Hanging Sign
</gallery>
<gallery>
Oak Sign JE3.png
Spruce Sign JE2.png
Birch Sign JE2.png
Jungle Sign JE2.png
Acacia Sign JE2.png
Dark Oak Sign JE2.png
Mangrove Sign (item) JE1 BE1.png
Cherry Sign (item) JE1.png
Bamboo Sign (item) JE1 BE1.png
Crimson Sign JE2.png
Warped Sign JE2.png
Oak Hanging Sign (item) JE1 BE1.png
Spruce Hanging Sign (item) JE1 BE1.png
Birch Hanging Sign (item) JE1 BE1.png
Jungle Hanging Sign (item) JE1 BE1.png
Acacia Hanging Sign (item) JE1 BE1.png
Dark Oak Hanging Sign (item) JE1 BE1.png
Mangrove Hanging Sign (item) JE1 BE1.png
Cherry Hanging Sign (item) JE1.png
Bamboo Hanging Sign (item) JE1 BE1.png
Crimson Hanging Sign (item) JE1 BE1.png
Warped Hanging Sign (item) JE1 BE1.png
</gallery>
{{hidden end}}
{{-}}
== Issues ==
{{issue list}}
== See also ==
* [[Chalkboard]]
== References ==
{{Reflist}}
== External Links ==
*[https://www.minecraft.net/en-us/article/taking-inventory--sign Taking Inventory: Sign] – Minecraft.net on January 9, 2020
{{Blocks|utility}}
{{Items}}
[[Category:Utility blocks]]
[[Category:Manufactured blocks]]
[[Category:Generated structure blocks]]
[[Category:Block entities]]
[[Category:Non-solid blocks]]
[[cs:Cedule]]
[[de:Schild (Schrift)]]
[[es:Cartel]]
[[fr:Pancarte]]
[[hu:Tábla]]
[[it:Cartello]]
[[ja:看板]]
[[ko:표지판]]
[[nl:Bord]]
[[pl:Tabliczka]]
[[pt:Placa]]
[[ru:Табличка]]
[[th:ป้าย]]
[[uk:Табличка]]
[[zh:告示牌]]</li></ul></nowiki> | Pre-release | Speed is added along with 18 other status effects but is currently unobtainable in regular gameplay. | |||
| Java Edition | |||||
1.0.0{{Extension DPL}}<ul><li>[[Feather|Feather]]<br/>{{about|a item|a enchantent|Feather Falling}}
{{Item
| image = Feather.png
| stackable = Yes (64)
| renewable = Yes
}}
'''Feathers''' are items dropped by [[chicken]]s and [[parrot]]s, as well as tamed [[cats]] as morning gifts.
== Obtaining ==
=== Mob loot ===
Adult [[chicken]]s drop 0–2 feathers upon death. The maximum is increased by 1 per level of [[Looting]], for a maximum of 0–5 with Looting III.
[[Parrot]]s drop 1–2 feathers upon death. The maximum is increased by 1 per level of Looting, for a maximum of 1–5 with Looting III.
A [[fox]] sometimes spawns holding a feather, which always drops upon death. Alternatively, the player can drop a [[food]] item, causing the fox to drop the feather in favor of the food.
=== Natural generation ===
{{LootChestItem|feather}}
=== Cat gifts ===
{{main|Cat#Gifts}}
Tamed [[cat]]s have a 70% chance of giving the [[player]] a "morning gift", and the gift has a 16.13% chance to be a feather.
== Usage ==
=== Helmet ===
<div style='float:right'></div>
While a feather cannot be equipped in the head slot in [[Survival]] mode, equipping it using commands causes it to appear completely upright unlike other items.
[[File:Steve wearing Feather.png|75px]]
[[File:Alex wearing Feather.png|75px]]
=== Crafting ingredient ===
{{crafting usage}}
=== Trading ===
Expert-level fletcher [[villager]]s buy 24 feathers for an [[emerald]] as part of their trade.
== Data values ==
=== ID ===
{{edition|java}}:
{{ID table
|edition=java
|showforms=y
|generatetranslationkeys=y
|displayname=Feather
|spritetype=item
|nameid=feather
|form=item
|foot=1}}
{{edition|bedrock}}:
{{ID table
|edition=bedrock
|shownumericids=y
|showforms=y
|notshowbeitemforms=y
|generatetranslationkeys=y
|displayname=Feather
|spritetype=item
|nameid=feather
|id=327
|form=item
|foot=1}}
== History ==
{{History|java indev}}
{{History||0.31|snap=20100130|[[File:Feather JE1.png|32px]] Added feathers.|Feathers can be used to [[craft]] [[arrow]]s.
|Feathers are [[drop]]ped by every [[mob]] in quantities of 0 to 2.}}
{{History||20100206|[[File:Feather JE2 BE1.png|32px]] The feather's texture has been changed; it is now not as straight anymore.}}
{{History||20100219|[[Zombie]]s are now the only [[mob]] that can drop feathers. This was a placeholder as [[Notch]] has stated he currently doesn't know what else they should drop.<ref>{{tweet|notch|21723172931895296}}</ref>}}
{{History|java alpha}}
{{History||v1.0.14|[[Chicken]]s now [[drop]] 0–2 feathers upon death.}}
{{History|java beta}}
{{History||1.8|snap=Pre-release|[[Zombie]]s now drop [[rotten flesh]], instead of feathers.
|[[Chicken]]s are now the only source of feathers.}}
{{History|java}}
{{History||1.3.1|snap=12w17a|Feathers are now used to craft [[book and quill]]s.}}
{{History||1.4.6|snap=12w49a|Feathers are now used to craft a [[firework star]] with a burst effect.}}
{{History||1.12|snap=17w13a|[[Parrot]]s now [[drop]] feathers.}}
{{History||1.13|snap=17w47a|Prior to ''[[The Flattening]]'', this [[item]]'s numeral ID was 288.}}
{{History|||snap=18w11a|Feathers now generate in [[shipwreck]] [[chest]]s.}}
{{History||1.14|snap=18w43a|[[File:Feather JE3 BE2.png|32px]] The texture of feathers has been changed.}}
{{History|||snap=18w44a|[[Cat]]s now offer feathers as [[Cat#Gifts|gift]]s.}}
{{History|||snap=18w48a|Feathers can now be found in chests in plains [[village]] houses.}}
{{History|||snap=18w50a|Feathers can now be found in chests in fletcher houses.}}
{{History|||snap=19w07a|Added [[fox]]es, which sometimes spawn with feather in their mouths.}}
{{History|||snap=19w11a|Fletcher [[villager]]s now [[trading|buy]] feathers.}}
{{History||1.20<br>(Experimental)|link=1.19.4|snap=1.19.4 Pre-release 1|Feathers can now be used to craft [[brush]]es.}}
{{History|pocket alpha}}
{{History||v0.2.0|[[File:Feather JE2 BE1.png|32px]] Added feathers. They are currently unobtainable and serve no purpose.}}
{{History||v0.3.3|Chickens now drop 0–2 feathers upon death.|Feathers can now be used to [[craft]] [[arrow]]s.}}
{{History||v0.5.0|Feathers can now be obtained after activating the [[nether reactor]].}}
{{History||v0.11.0|snap=build 1|[[Zombie]]s now drop [[rotten flesh]], instead of feathers.}}
{{History||v0.12.1|snap=build 1|Feathers are no longer available from the [[nether reactor]].}}
{{History|bedrock}}
{{History||1.2.0|snap=beta 1.2.0.2|Feathers can now be used to craft [[book and quill]]s.|Added [[parrot]]s, which [[drop]] feathers.|Feathers can now be used as an ingredient to craft a [[firework star]].}}
{{History||1.4.0|snap=beta 1.2.14.2|Feathers can now be found in [[shipwreck]] [[chest]]s.}}
{{History||1.8.0|snap=beta 1.8.0.8|Feathers can now be given as a gift to the [[player]] by tamed [[cat]]s.}}
{{History||1.10.0|snap=beta 1.10.0.3|[[File:Feather JE3 BE2.png|32px]] The texture of feathers has been changed.|Feathers can now be found in the new [[plains]] [[village]] house.}}
{{History||1.11.0|snap=beta 1.11.0.1|Feathers can now be found in village fletcher [[chest]]s.}}
{{History|||snap=beta 1.11.0.4|Feathers can now be [[trading|sold]] to fletcher [[villager]]s.}}
{{History||1.13.0|snap=beta 1.13.0.1|Added [[fox]]es, which can [[drops|drop]] feathers.}}
{{History||1.20.0<br>(Experimental)|link=Bedrock Edition 1.19.80|snap=beta 1.19.80.20|Feathers can now be used to craft [[brush]]es.}}
{{History|console}}
{{History||xbox=TU1|xbone=CU1|ps=1.0|wiiu=Patch 1|[[File:Feather JE2 BE1.png|32px]] Added feathers.}}
{{History|Ps4}}
{{History||1.90|[[File:Feather JE3 BE2.png|32px]] The texture of feathers has been changed.}}
{{History|New Nintendo 3DS Edition}}
{{History||0.1.0|[[File:Feather JE2 BE1.png|32px]] Added feathers.}}
{{History|foot}}
== Issues ==
{{issue list}}
== References ==
{{reflist}}
== External Links ==
*[https://www.minecraft.net/en-us/article/taking-inventory--feather Taking Inventory: Feather] – Minecraft.net on March 3, 2019
{{Items}}
[[Category:Renewable resources]]
[[cs:Pírko]]
[[de:Feder]]
[[es:Pluma]]
[[fr:Plume]]
[[hu:Toll]]
[[it:Piuma]]
[[ja:羽根]]
[[ko:깃털]]
[[nl:Veer]]
[[pl:Pióro]]
[[pt:Pena]]
[[ru:Перо]]
[[uk:Перо]]
[[zh:羽毛]]</li><li>[[Fire Charge|Fire Charge]]<br/>{{ItemEntity
|image=Fire Charge.png
|invimage=Fire Charge
|durability=
|renewable=Yes
|stackable=Yes (64)
|networkid='''[[JE]]''': 64
}}
'''Fire charges''' are items that can be {{control|used}} as a single-use version of a [[flint and steel]] or shot as a [[small fireball]] from a [[dispenser]].
== Obtaining ==
=== Chest loot ===
{{LootChestItem|fire-charge}}
=== Crafting ===
{{Crafting
|Blaze Powder
|Coal; Charcoal
|Gunpowder
|Output= Fire Charge, 3
|type= Miscellaneous
}}
=== Bartering ===
[[Piglin]]s may [[barter]] 1 fire charge when given a [[gold ingot]].
== Usage ==
[[File:Natural Fire Charge.png|200px|thumb|Dispensing Fire Charge]]
Fire charges can be used as ammunition for [[dispenser]]s, or as a substitute for [[flint and steel]].
When used, it instantly places a [[fire]], similar to flint and steel. The fire charge is consumed in the process. It can prime [[TNT]], light [[Nether portal|nether portals]], [[Campfire|campfires]], [[Candle|candles]], [[Cake|cakes with candles]] and [[creeper]]s{{only|JE}} like flint and steel.
When a fire charge is fired from a dispenser, it shoots a [[small fireball]].
=== Crafting ingredient ===
{{crafting usage}}
== Sounds ==
{{edition|java}}:
{{Sound table
|rowspan=4
|sound=Ghast fireball4.ogg
|subtitle=Ghast shoots
|source=hostile
|description=When a fireball is shot by a ghast
|id=entity.ghast.shoot
|translationkey=subtitles.entity.ghast.shoot
|volume=10.0
|pitch=0.8-1.2
|distance=16 {{verify}}}}
{{Sound table
|subtitle=Blaze shoots <ref group=sound name=LousyEvents>{{Bug|MC-98316||Wrong subtitles caused by missing distinction}}</ref>
|source=hostile
|description=When a fire charge is fired from a dispenser or a blaze
|id=entity.blaze.shoot|idnote=<ref group=sound name=LousyEvents/>
|translationkey=subtitles.entity.blaze.shoot|translationkeynote=<ref group=sound name=LousyEvents/>
|volume=2.0
|pitch=0.8–1.2
|distance=32}}
{{Sound table
|subtitle=Fireball whooshes
|source=block
|description=When a fire charge is used by hand
|id=item.firecharge.use|idnote=<ref group=sound name=nounderscore>{{bug|MC-177457}}</ref>
|translationkey=subtitles.item.firecharge.use|translationkeynote=<ref group=sound name=nounderscore/>
|volume=1.0
|pitch=0.8-1.2
|distance=16}}
{{Sound table
|subtitle=Fireball whooshes
|source=hostile
|description=When a fire charge is used to light a creeper
|id=item.firecharge.use|idnote=<ref group=sound name=nounderscore/>
|translationkey=subtitles.item.firecharge.use|translationkeynote=<ref group=sound name=nounderscore/>
|volume=1.0
|pitch=0.8-1.2
|distance=16
|foot=1}}
{{edition|bedrock}}:
{{Sound table
|type=bedrock
|sound=Ghast fireball4.ogg
|source=hostile
|description=When something shoots or uses a fire charge
|id=mob.ghast.fireball
|volume=1.0
|pitch=1.0
|foot=1}}
== Data values ==
=== ID ===
{{edition|java}}:
{{ID table
|edition=java
|showforms=y
|generatetranslationkeys=y
|displayname=Fire Charge
|spritetype=item
|nameid=fire_charge
|form=item
|foot=1}}
{{edition|bedrock}}:
{{ID table
|edition=bedrock
|showaliasids=y
|shownumericids=y
|showforms=y
|notshowbeitemforms=y
|generatetranslationkeys=y
|displayname=Fire Charge
|spritetype=item
|nameid=fire_charge
|aliasid=fireball
|id=509
|form=item
|translationkey=item.fireball.name
|foot=1}}
=== Entity data ===
{{main|Small Fireball#Entity data}}
== Achievements ==
{{Load achievements|Into the Nether}}
== Advancements ==
{{load advancements|We Need to Go Deeper}}
== Video ==
<div style="text-align:center">{{yt|IiCTxsHg6SQ}}</div>
== History ==
{{for|information pertaining to smallmfireballs (which fire charges produce when shot from a dispenser)|Small Fireball#History}}
{{History|java}}
{{History||1.0.0|snap=Beta 1.9 Prerelease|[[File:Fire Charge JE1 BE1.png|32px]] Added the fire charge texture. It is currently only used by [[fireball]]s and [[small fireball]]s, both of which are entities, and is not used by any items.}}
{{History||1.2.1|snap=12w04a|Added fire charges, which use the above texture. They can be crafted only with [[coal]].}}
{{History|||snap=12w05a|Fire charges can now be crafted with charcoal.}}
{{History||1.4.2|snap=12w38b|The [[sound]] when using the fire charge has now been changed; it now uses the same sound as [[flint and steel]].}}
{{History||1.4.6|snap=12w49a|Fire charges can now be used to craft [[Firework Rocket|fireworks]].}}
{{History||1.8|snap=14w31a|The sound when using fire charges to set fire has now been changed; it now uses the same sound as when fired from [[dispenser]]s.}}
{{History||1.9|snap=15w33c|Fire charges now appear purple and explode with [[dragon's breath]] when fired from dispensers. Whether a true dragon fireball entity is created or if this effect is purely visual is unknown.}}
{{History|||snap=15w44b|Fire charges once again appear as [[small fireball]]s when fired from dispensers.}}
{{History||1.11|snap=16w40a|The <code>life</code> tag is no longer used for anything, but still saved/read.{{info needed|Is this even relevant to the fire charge, or is it a remnant from the blaze page or something?}}}}
{{History||1.13|snap=17w47a|Prior to [[1.13/Flattening|''The Flattening'']], this [[item]]'s numeral ID was 385.}}
{{History||1.14|snap=18w43a|[[File:Fire Charge JE2 BE2.png|32px]] The texture of fire charges has now been changed.}}
{{History||1.15|snap=19w42a|Dispensed fire charges{{info needed|as in the fireball, or a dispenser facing straight into a campfire?}} can now light campfires.}}
{{History||1.16|snap=20w07a|Fire charges have a {{frac|5|109}} (~4.59%) chance of being given by the new [[piglin]]s when [[bartering]], in a stack size of 1.}}
{{History|||snap=20w09a|Fire charges now have a {{frac|20|226}} (~8.85%) chance of being given by piglins when bartering, in a stack size of 1–5.}}
{{History|||snap=20w10a|Fire charges now have a {{frac|40|411}} (~9.73%) chance of being given by piglins when bartering, in a stack size of 1–5.}}
{{History|||snap=20w11a|Fire charges now have a {{frac|40|417}} (~9.59%) chance of being given by piglins when bartering, in a stack size of 1–5.}}
{{History|||snap=20w13a|Fire charges now have a {{frac|40|424}} (~9.43%) chance of being given by piglins when bartering, in a stack size of 1–5.}}
{{History|||snap=20w16a|Fire charges now generate in [[ruined portal]] chests.}}
{{History|||snap=20w20a|Fire charges now have a {{frac|40|423}} (~9.46%) chance of being given by piglins when bartering, in a stack size of 1–5.}}
{{History||1.16.2|snap=20w28a|Fire charges now have a {{frac|40|459}} (~8.71%) chance of being given by piglins when bartering, in a stack size of 1.}}
{{History||1.19.3|snap=Pre-release 2|Fire charges can now be {{control|use|text=used}} to forcibly detonate [[creeper]]s.<ref>{{bug|MC-185618|||Fixed}}</ref>}}
{{History||1.19.4|snap=23w06a|Added the [[fire charge]] to the "Ingredients" tab in the creative inventory.}}
{{History|pocket alpha}}
{{History||v0.15.0|snap=build 1|[[File:Fire Charge JE1 BE1.png|32px]] Added fire charges.}}
{{History|bedrock}}
{{History||1.2.0|snap=beta 1.2.0.2|Fire charges can now be used to craft [[firework star]]s.}}
{{History||1.10.0|snap=beta 1.10.0.3|[[File:Fire Charge JE2 BE2.png|32px]] The texture of fire charges has now been changed.}}
{{History||1.16.0|snap=beta 1.16.0.57|Fire charges can now be obtained from bartering with piglin.
|Fire charges can now be found in [[ruined portal]] chests.}}
{{History||1.16.100|snap=beta 1.16.100.56|The ID of fire charges has been changed from <code>fireball</code> to <code>fire_charge</code>.}}
{{History|console}}
{{History||xbox=TU9|xbone=CU1|ps=1.0|wiiu=Patch 1|switch=1.0.1|[[File:Fire Charge JE1 BE1.png|32px]] Added fire charges.}}
{{History||xbox=TU31|xbone=CU19|ps=1.22|wiiu=Patch 3|Fire charges now make [[sound]]s when igniting [[block]]s.}}
{{History||xbox=none|xbone=none|ps=1.90|wiiu=none|switch=none|[[File:Fire Charge JE2 BE2.png|32px]] The texture of fire charges has now been changed.}}
{{History|3ds}}
{{History||0.1.0|[[File:Fire Charge JE1 BE1.png|32px]] Added fire charges.}}
{{History|foot}}
== Issues ==
{{issue list}}
== Gallery ==
<gallery>
GodPortal.png|A fire charge found in a [[ruined portal]] chest, together with an [[enchanted golden apple]].
</gallery>
== See also ==
* [[Flint and Steel]]
* [[Dragon Fireball]]
* [[Ghast]]
== References ==
{{reflist}}
== External Links ==
*[https://www.minecraft.net/en-us/article/taking-inventory-fire-charge Taking Inventory: Fire Charge] – Minecraft.net on January 11, 2019
{{Items}}
[[Category:Recipe using Charcoal]]
[[cs:Ohnivá koule]]
[[de:Feuerkugel]]
[[es:Carga ígnea]]
[[fr:Boule de feu]]
[[hu:Tűzgolyó]]
[[ja:ファイヤーチャージ]]
[[ko:화염구]]
[[nl:Vuurbal]]
[[pl:Ognista kula]]
[[pt:Bola de fogo]]
[[ru:Огненный шар]]
[[th:ลูกไฟ]]
[[zh:火焰弹]]</li></ul> | Beta 1.9 Prerelease 2 | ||||
| Speed can now be obtained through potions. | |||||
| Beta 1.9 Prerelease 3 | Changed how speed potions are brewed. | ||||
| Added the Potion of Swiftness (normal, extended and level II) | |||||
1.4.2{{Extension DPL}}<ul><li>[[Echo Shard|Echo Shard]]<br/>{{Item
| title = Echo Shard
| image = Echo Shard.png
| renewable = No
| stackable = Yes (64)
}}
An '''echo shard''' is an item found in [[ancient cities]] which can be used to craft [[recovery compass]]es.
== Obtaining ==
=== Chest loot ===
{{LootChestItem|echo-shard}}
== Usage ==
=== Crafting ingredient ===
{{crafting usage|Echo Shard}}
== History ==
{{History|java}}
{{History||1.19|snap=22w14a|[[File:Echo Shard JE1 BE1.png|32px]] Added echo shards.}}
{{History|bedrock}}
{{History||1.19.0|snap=beta 1.19.0.24|[[File:Echo Shard JE1 BE1.png|32px]] Added echo shards.
|Currently cannot be found inside [[ancient city]] chests due to outdated structures and loot chests.}}
{{History||1.19.0|snap=beta 1.19.0.26|Echo shards now generate inside [[ancient city]] loot chests.}}
{{History|foot}}
== Issues ==
{{issue list}}
{{Items}}
[[Category:Non-renewable resources]]
[[de:Echoscherbe]]
[[es:Fragmento resonante]]
[[fr:Éclat d'écho]]
[[ja:残響の欠片]]
[[lzh:回音殘片]]
[[pt:Fragmento de eco]]
[[pl:Odłamek pogłosu]]
[[ru:Осколок эха]]
[[th:เศษเอคโค]]
[[uk:Уламок відлуння]]
[[zh:回响碎片]]</li><li>[[Diamond|Diamond]]<br/>{{For}}
{{redirect|Diamonds|the achievement|Achievements#DIAMONDS!|the advancement|Advancements#Diamonds!}}
{{Item
| image = Diamond.png
| renewable = No
| stackable = Yes (64)
| rarity = Common}}
A '''diamond''' is a mineral that can only be obtained from [[Diamond Ore|diamond ore]], [[chest loot|loot chests]] and [[Suspicious Block|suspicious blocks]]. It is required to craft diamond [[tool]]s and [[armor]] (and therefore obtain [[obsidian]] to access the [[The Nether|Nether]]), [[enchanting table]]s, [[jukebox]]es and duplicate [[smithing template]]s.
== Obtaining ==
{{see also|Tutorials/Diamonds}}
=== Mining ===
{{see also|Diamond Ore#Natural generation}}
[[Diamond ore]] can be mined using an iron [[pickaxe]] or stronger. An ore drops a single diamond. If mined by any other tool, it drops nothing. If the pickaxe is enchanted with [[Fortune]], it can drop an extra diamond per level of Fortune, allowing for a maximum of 4 diamonds with Fortune III. If the ore is mined using a pickaxe enchanted with [[Silk Touch]], it drops an ore block rather than a diamond. The ore is found at level 15 or lower, most commonly between -50 and -64; levels -58 and -59 are the preferred levels to mine at since they don't contain [[bedrock]], as it starts spawning at -60.
=== Chest loot ===
{{LootChestItem|diamond}}
=== Suspicious sand ===
When brushing [[suspicious sand]] in [[desert pyramid]]s, they have a {{frac|1|7}} chance to drop a diamond.
=== Crafting ===
{{Crafting
|Block of Diamond
|Output= Diamond,9
|type= Material
}}
=== Smelting ===
{{Smelting
|showname=1
|Diamond Ore; Deepslate Diamond Ore
|Diamond
|1
}}
== Usage ==
Diamonds are mainly used to craft high-tier armor and equipment, which in turn are also used in making [[netherite]] armor and equipment.
=== Crafting ingredient ===
{{crafting usage}}
=== Trading ===
{{IN|bedrock}}, expert-level armorer, toolsmith, and weaponsmith villagers buy one diamond for an emerald as part of their trades.
{{IN|java}}, journeyman-level armorer villagers have a 40% chance of offering to buy one diamond for one emerald. Expert-level toolsmith villagers have {{frac|2|3}} chance of offering to buy one diamond for one emerald. Expert-level weaponsmith villagers always offer to buy one diamond for one emerald.
=== Repairing ===
Diamonds are the repair items for the diamond [[tier]] and [[armor material]], and thus can be used to [[item repair|repair]] the following items in an [[anvil]] or [[grindstone]]:
* {{ItemLink|Diamond Helmet}}
* {{ItemLink|Diamond Chestplate}}
* {{ItemLink|Diamond Leggings}}
* {{ItemLink|Diamond Boots}}
* {{ItemLink|Diamond Sword}}
* {{ItemLink|Diamond Pickaxe}}
* {{ItemLink|Diamond Axe}}
* {{ItemLink|Diamond Shovel}}
* {{ItemLink|Diamond Hoe}}
=== Beacons ===
Diamonds can be used to select powers from a [[beacon]]. The player must select one of the available powers then insert a diamond into the item slot.
A diamond can be substituted for an [[iron ingot]], a [[gold ingot]], an [[emerald]] or a [[netherite ingot]].
=== Smithing ingredient ===
{{Smithing
|head=1
|ingredients=Any Armor Trim +<br/>Any Armor Piece + <br/>Diamond
|Any Armor Trim Smithing Template
|Netherite Chestplate
|Diamond
|Diamond Trim Netherite Chestplate
|showdescription=1
|description = All armor types can be used in this recipe,<br/>a netherite chestplate is shown as an example.<br/>
|tail=1
}}
;Trim color palette
The following color palettes are shown on the designs on trimmed armor:
*{{TrimPalette|diamond}}
*{{TrimPalette|diamond|darker=1}} (a darker color palette is used when a diamond armor piece is trimmed using a diamond).
== Data values ==
=== ID ===
{{edition|java}}:
{{ID table
|edition=java
|showitemtags=y
|showforms=y
|generatetranslationkeys=y
|displayname=Diamond
|spritetype=item
|nameid=diamond
|itemtags=beacon_payment_items
|form=item
|foot=1}}
{{edition|bedrock}}:
{{ID table
|edition=bedrock
|shownumericids=y
|showforms=y
|notshowbeitemforms=y
|generatetranslationkeys=y
|displayname=Diamond
|spritetype=item
|nameid=diamond
|id=304
|form=item
|foot=1}}
== Achievements ==
{{load achievements|DIAMONDS!;Diamonds to you!;Enchanter}}
== Advancements ==
{{load advancements|Diamonds!}}
== History ==
{{History|java indev}}
{{History||0.31|snap=20100128|[[File:Diamond JE1 BE1.png|32px]] Added diamonds. Initially, they were referred to as "emeralds".
|A stack of 100 diamonds can be found inside the [[Indev house]] [[chest]]s.}}
{{History|||snap=20100129|Diamond can be used to craft [[diamond block]]s and diamond [[sword]]s, [[shovel]]s, [[pickaxe]]s and [[axe]]s.
|Diamonds can no longer be found inside the Indev House due to all items having been removed from its chests.
|Diamond can be obtained by smelting diamond blocks.}}
{{History|||snap=20100130|[[Emerald]]s from the previous version are now officially known as "diamonds", though this has no actual effect as item names are not yet displayed in-game.
|[[Diamond block]]s now require 9 diamonds (3×3) instead of 4 (2×2) to be [[crafting|crafted]], making them much more expensive.}}
{{History||20100206|Diamonds are now used to craft diamond [[hoe]]s.}}
{{History||20100212-1|Diamonds are now used to craft diamond [[helmet]]s, [[chestplate]]s, [[leggings]] and [[boots]].}}
{{History|java alpha}}
{{History||v1.0.14|Diamonds are now used to craft [[jukebox]]es.}}
{{History|java beta}}
{{History||1.8|snap=Pre-release|Diamonds are now found in [[mineshaft]] [[chest]]s.}}
{{History|java}}
{{History||1.0.0|snap=Beta 1.9 Prerelease 2|[[Diamond ore]] can now be [[smelting|smelted]] into diamonds.}}
{{History|||snap=Beta 1.9 Prerelease 3|Diamonds are now used to craft [[enchantment table]]s.
|Diamonds are now found in [[stronghold]] altar [[chest]]s.}}
{{History||1.1|snap=12w01a|Diamonds are now found in [[village]] [[villager|blacksmith]] [[chest]]s.}}
{{History||1.3.1|snap=12w21a|Diamonds can now be [[trading|traded]] to blacksmith [[villager]]s in quantities of 3–5 for 1 [[emerald]].
|Added [[desert temple]]s, with a hidden [[chest]] room and loot containing diamonds.}}
{{History|||snap=12w21b|Diamonds have been changed in the game code from "emerald" to "diamond", due to actual [[emerald]]s being added. Diamond's original name during [[Indev]], as stated above, was emerald in the code, and was kept this way until this snapshot.}}
{{History|||snap=12w22a|Added [[jungle temple]]s, which contain loot [[chest]]s with diamonds.}}
{{History|||snap=1.3|[[File:Diamond JE2 BE2.png|32px]] The texture of diamonds has been changed.}}
{{History||1.4.6|snap=12w49a|Diamonds can now be used to [[crafting|craft]] a [[firework star]] with a trail.}}
{{History||1.6.1|snap=13w16a|Diamond is now used to craft diamond [[horse armor]].}}
{{History|||snap=13w18a|Diamond is no longer used to craft diamond [[horse armor]].|Diamonds are now found in [[nether fortress]] [[chest]]s.}}
{{History||1.8|snap=14w02a|Diamonds can now be [[traded]] to any black apron [[villager]] in quantities of 3–4 for 1 [[emerald]], as their tier III trade.}}
{{History||1.9|snap=15w31a|Diamonds now generate in [[end city]] [[chest]]s.}}
{{History|||snap=15w43a|The average yield of diamonds have been slightly decreased in [[nether fortress]] chests.}}
{{History|||snap=15w44a|The average yield of diamonds in [[desert temple]] and [[mineshaft]] chests have been decreased.}}
{{History||1.13|snap=17w47a|Prior to [[1.13/Flattening|''The Flattening'']], this [[item]]'s numeral ID was 264.}}
{{History|||snap=18w10a|Diamonds now generate in [[buried treasure]] [[chest]]s.}}
{{History|||snap=18w11a|Diamonds now generate in [[shipwreck]] treasure chests.}}
{{History||1.14|snap=18w43a|[[File:Diamond JE3 BE3.png|32px]] The texture of diamonds has been changed.}}
{{History|||snap=18w50a|Diamonds can now be found in [[chest]]s in [[village]] toolsmith houses.}}
{{History||1.16|snap=20w16a|Diamonds now generate in bastion remnants chests.}}
{{History||1.16.2|snap=20w30a|The chance of finding diamonds in bastion remnant chests is increased from 8.6% to 15.8%.}}
{{History||1.17|snap=21w08a|Diamonds can now drop and be smelted from [[deepslate diamond ore]].}}
{{History||1.20<br>(Experimental)|link=1.19.4|snap=23w04a|Diamonds can now be used to craft [[smithing template]]s.
|Diamonds can now be used as an armor trim material.}}
{{History|||snap=23w07a|Diamonds now drop when brushing [[suspicious sand]] in [[desert pyramid]]s.}}
{{History||1.20|snap=23w12a|The probability for the diamond to generate in the [[suspicious sand]] in [[desert temple]] has been changed from 1/7 to 1/8.}}
{{History|pocket alpha}}
{{History||v0.2.0|[[File:Diamond JE1 BE1.png|32px]] Added diamonds. They are currently unobtainable and serve no purpose.}}
{{History||v0.3.2|Diamonds can be collected and used to craft [[blocks of diamond]] and diamond [[axe]]s, [[pickaxe]]s, [[sword]]s and [[shovel]]s.}}
{{History||v0.4.0|Diamonds are now used to [[crafting|craft]] diamond [[hoe]]s.}}
{{History||v0.5.0|Diamonds are now used to craft [[nether reactor core]]s.}}
{{History||v0.6.0|Diamonds are now used to craft diamond [[armor]].}}
{{History||v0.8.0|snap=build 1|[[File:Diamond JE2 BE2.png|32px]] The texture of diamonds has been changed.}}
{{History||v0.12.1|snap=build 1|Diamonds are now used to craft [[enchanting table]]s.
|Diamonds are no longer used to craft [[nether reactor core]]s and are now instead dropped by it.
|Diamonds now generate in [[nether fortress]] [[chest]]s.}}
{{History||v0.13.0|snap=build 1|Diamonds now have a chance to generate in [[desert temple]] chests.}}
{{History||v0.14.0|snap=build 1|Diamonds are now found in [[minecart with chest]]s in [[mineshaft]]s.}}
{{History||v0.15.0|snap=build 1|Diamonds can now be found in [[jungle temple]] [[chest]]s.}}
{{History|pocket}}
{{History||1.0.0|snap=alpha 0.17.0.1|Diamonds can now be found in altar [[chest]]s in [[stronghold]]s, [[dungeon]] chests and [[end city]] chests.}}
{{History|||snap=alpha 1.0.0.0|Diamonds can now be found in [[villager|blacksmith]] [[chest]]s in [[village]]s.}}
{{History||1.0.4|snap=alpha 1.0.4.0|3-4 diamonds can now be traded to blacksmith [[villager]]s for an [[emerald]] as part of their third tier trades.}}
{{History|bedrock}}
{{History||1.2.0|snap=beta 1.2.0.2|Diamonds can now be used to [[crafting|craft]] a [[firework star]] with a trail.
|Diamonds can now be used to craft [[jukebox]]es.}}
{{History||1.4.0|snap=beta 1.2.14.2|Diamonds can now be found inside [[buried treasure]] [[chest]]s and [[shipwreck]]s.}}
{{History||1.10.0|snap=beta 1.10.0.3|Diamonds can now be found in [[plains]] [[village]] weaponsmith chests.
|[[File:Diamond JE3 BE3.png|32px]] The texture of diamonds has been changed.}}
{{History||1.11.0|snap=beta 1.11.0.1|Diamonds can now be found in village toolsmith chests and in [[savanna]], [[desert]], [[taiga]], and [[snowy taiga]] village weaponsmith chests.}}
{{History|||snap=beta 1.11.0.4|Armorer, toolsmith, and weaponsmith [[villager]]s now [[trading|buy]] one diamond for an [[emerald]] as part of their fourth tier [[trading|trades]].}}
{{History||1.16.0|snap=beta 1.16.0.57|Diamonds can now be found in [[bastion remnant]] chests.}}
{{History||1.17.0|snap=beta 1.16.230.52|Diamonds can now drop and be smelted from [[deepslate diamond ore]].}}
{{History||1.20.0<br>(Experimental)|link=Bedrock Edition 1.19.70|snap=beta 1.19.70.23|Diamonds now drop when brushing [[suspicious sand]] in [[desert pyramid]]s.}}
{{History||1.20.0<br>(Experimental)|link=Bedrock Edition 1.19.80|snap=beta 1.19.80.21|Diamonds can now be used to craft [[smithing template]]s.
|Diamonds can now be used as an armor trim material.}}
{{History|console}}
{{History||xbox=TU1|xbone=CU1|ps=1.0|wiiu=Patch 1|switch=1.0.1|[[File:Diamond JE1 BE1.png|32px]] Added diamonds.}}
{{History||xbox=TU5|Diamonds are now found in the new [[mineshaft]] [[chest]]s.}}
{{History||xbox=TU7|Diamonds are now used to craft [[enchantment table]]s.}}
{{History||xbox=TU9|Diamonds are now found in [[village]] [[villager|blacksmith]] [[chest]]s.}}
{{History||xbox=TU14|ps=1.04|Diamonds can now be [[trading|traded]] to blacksmith [[villager]]s in quantities of 3–5 for 1 [[emerald]].
|Added [[desert temple]]s, with a hidden [[chest]] room and loot containing diamonds.|Added [[jungle temple]]s, which contain loot [[chest]]s with diamonds.|[[File:Diamond JE2 BE2.png|32px]] The texture of diamonds has been changed.}}
{{History||xbox=TU19|xbone=CU7|ps=1.12|Diamonds can now be used to [[crafting|craft]] a [[firework star]] with a trail|Diamonds are now found in the new [[nether fortress]] [[chest]]s.}}
{{History||xbox=TU31|xbone=CU19|ps=1.22|wiiu=Patch 3|Diamonds can now be [[traded]] to any black apron [[villager]] in quantities of 3–4 for 1 [[emerald]], as their tier III trade.}}
{{History||xbox=TU46|xbone=CU36|ps=1.36|wiiu=Patch 15|Diamonds now generate in [[end city]] [[chest]]s.}}
{{History||xbox=TU69|xbone=none|ps=1.76|wiiu=Patch 38|switch=none|Diamonds now generate in [[buried treasure]] [[chest]]s.|Diamonds now generate in [[shipwreck]] treasure chests.}}
{{History||xbox=none|ps=1.90|wiiu=none|[[File:Diamond JE3 BE3.png|32px]] The texture of diamonds has been changed.}}
{{History|new3DS}}
{{History||0.1.0|[[File:Diamond JE2 BE2.png|32px]] Added diamonds.}}
{{History|foot}}
==Issues==
{{issue list}}
==Trivia==
*Unlike in ''Minecraft'', newly mined [[Wikipedia:Diamond|diamond]]s in real life are rough, cloudy stones. The largest, purest ones are polished into crystal-clear gemstones, while the rest are used in industry for cutting and grinding.
*Although diamonds themselves are not renewable, all tools, weapons, and armor made from diamonds can be acquired through [[trading]], and are therefore renewable. Other items crafted from diamonds are not renewable.
*In the April fools version [[Java Edition 2.0]], [[Diamond Chicken|diamond chickens]] can lay diamonds. This does not exist in newer versions, as this was a joke.
*The item forms of diamonds and [[Turtle Egg|turtle eggs]] have the same shape.
==Gallery==
<gallery>
File:DiamondOre.png|Naturally occurring diamonds.
File:MultipleOreBlobs.png|Multiple ore blobs.
File:Lava Diamond.png|Diamond ore near Lava.
File:Diamond ore blob.png|Another Diamond ore blob near Lava.
File:10 ore diamond blob.png|10 ore diamond blob.
File:Trading a diamond for an emerald.png|A blacksmith offering an [[emerald]] for a diamond.
File:Diamond Pendant Necklace JINX.jpg|Official diamond pendant made by [https://www.jinx.com JINX].
File:All Mine JINX.jpg|Official t-shirt artwork "All Mine" which features a diamond. Made by JINX
File:4 ways of viewing 12 diamonds in stone form.png|4 ways of viewing 12 diamonds in stone form
</gallery>
== External Links ==
*[https://www.minecraft.net/en-us/article/taking-inventory--diamond Taking Inventory: Diamond] – Minecraft.net on February 20, 2019
{{items}}
[[cs:Diamant]]
[[de:Diamant]]
[[el:Διαμάντι]]
[[es:Diamante]]
[[fr:Diamant]]
[[hu:Gyémánt]]
[[it:Diamante]]
[[ja:ダイヤモンド]]
[[ko:다이아몬드]]
[[nl:Diamant]]
[[pl:Diament]]
[[pt:Diamante]]
[[ru:Алмаз]]
[[th:เพชร]]
[[tr:Elmas]]
[[uk:Діамант]]
[[zh:钻石]]
[[Category:Non-renewable resources]]</li></ul> | 12w32a | Added the ability to get speed from a beacon. | |||
1.6.1{{Extension DPL}}<ul><li>[[Nether Sprouts|Nether Sprouts]]<br/>{{Block
|title=Nether Sprouts
|image=Nether Sprouts.png
|image2=Nether Sprouts (texture) JE2 BE2.png
|transparent=Yes
|tool=shears
|light=No
|renewable=Yes
|stackable=Yes (64)
|flammable=No
|lavasusceptible=Yes
}}
'''Nether sprouts''' are a non-solid fungi block that generate in [[warped forest]]s.
== Obtaining ==
=== Natural generation ===
Nether sprouts generate in [[warped forest]] biomes.
=== Breaking ===
Nether sprouts can be mined instantly with any item. The block also breaks if the block below is removed, or if [[water]] flows into its space. The block only drops if broken with [[shear]]s.
=== Post-generation ===
Applying [[bone meal]] to warped [[nylium]] creates nether sprouts on that block and surrounding nylium, along with both types of [[roots]] and [[fungi]].
== Usage ==
[[File:RootsSproutsPlaceBlock.png|thumb|All of the blocks that nether sprouts can be placed on.]]
Nether sprouts can be planted on the same blocks that [[fungus|fungi]] and [[roots]] can be placed on: [[nylium]], [[soul soil]], [[Grass Block|grass]], [[podzol]], [[mycelium]], [[Moss Block|moss]], [[dirt]], [[coarse dirt]], [[rooted dirt]], and [[farmland]]. However, they cannot be planted in [[flower pot]]s.
=== Composting ===
Placing nether sprouts into a [[composter]] has a 50% chance of raising the compost level by 1.
== Sounds ==
{{Sound table/Block/Nether sprouts}}
== Data values ==
=== ID ===
{{edition|java}}:
{{ID table
|edition=java
|generatetranslationkeys=y
|showforms=y
|displayname=Nether Sprouts
|spritetype=block
|nameid=nether_sprouts
|foot=1}}
{{edition|bedrock}}:
{{ID table
|edition=bedrock
|firstcolumnname=Nether Sprouts
|shownumericids=y
|showforms=y
|generatetranslationkeys=y
|displayname=Block
|spritename=nether-sprouts
|spritetype=block
|nameid=nether_sprouts
|id=493
|form=block
|itemform=item.nether_sprouts}}
{{ID table
|displayname=Item
|spritename=nether-sprouts
|spritetype=item
|nameid=nether_sprouts
|id=621
|form=item
|translationkey=tile.nether_sprouts.name
|foot=1}}
== History ==
{{History|java}}
{{History||1.16|snap=20w06a|[[File:Nether Sprouts JE1 BE1.png|24px]] [[File:Nether Sprouts (texture) JE1 BE1.png|24px]] Added nether sprouts.}}
{{History|||snap=20w10a|[[File:Nether Sprouts JE2 BE2.png|24px]] [[File:Nether Sprouts (texture) JE2 BE2.png|24px]] The textures of the nether sprouts have now been changed.}}
{{History|||snap=20w15a|Nether sprouts can now be [[composter|composted]].}}
{{History|||snap=20w19a|Nether sprouts now only [[drops|drop]] if [[breaking|broken]] with [[shears]].}}
{{History|||snap=20w21a|[[File:Nether Sprouts (item) JE3 BE2.png|24px]] The [[inventory]] texture of the nether sprouts have now been changed.
|The [[block]] [[model]] of nether sprouts is now centered of the block rather than positioned randomly.}}
{{History||1.19.3|snap=22w44a|Nether sprouts now make sounds when being walked on.<ref>{{bug|MC-171621|||Fixed}}</ref>}}
{{History|bedrock}}
{{History||1.16.0|snap=beta 1.16.0.51|[[File:Nether Sprouts JE1 BE1.png|24px]] [[File:Nether Sprouts (texture) JE1 BE1.png|24px]] Added nether sprouts.}}
{{History|||snap=beta 1.16.0.57|Nether sprouts can now be [[composter|composted]].}}
{{History|||snap=beta 1.16.0.59|[[File:Nether Sprouts JE2 BE2.png|24px]] [[File:Nether Sprouts (item) JE3 BE2.png|24px]] The textures of the nether sprouts have now been changed.
|[[File:Nether Sprouts Glitched BE.png|32px]] Nether sprouts now appear with a glitched texture when [[breaking|broken]] in [[survival]] mode or when picking the [[block]] in [[creative]] mode. The [[item]] received is also nameless.<ref>{{bug|MCPE-74339}}</ref>}}
{{History|||snap=beta 1.16.0.63|Nether sprouts now give the [[player]] the correct item when broken in survival mode or when picking the block in creative mode.}}
{{History|foot}}
== Issues ==
{{issue list}}
== Trivia ==
* Unlike other warped "plants", nether sprouts don't have a crimson equivalent. This is also the case with [[nether wart]], which lacks a warped equivalent.
== References ==
{{Reflist}}
{{Blocks|vegetation}}
{{Items}}
[[Category:Nether blocks]]
[[Category:Fungi]]
[[Category:Natural blocks]]
[[Category:Non-solid blocks]]
[[de:Nethersprossen]]
[[de:Nethersprossen]]
[[es:Rastrojo del Nether]]
[[fr:Germes du Nether]]
[[ja:ネザースプラウト]]
[[pl:Netherowe kiełki]]
[[pt:Brotos do Nether]]
[[ru:Адские ростки]]
[[zh:下界苗]]</li><li>[[Food|Food]]<br/>{{For|food in ''Minecraft Dungeons''|MCD:Food}}
[[File:Eating Steve.png|thumb|right|150px]]
[[File:Eating Alex.png|thumb|right|150px]]
'''Food''' refers to any consumable [[item]]s that, when eaten, restore [[hunger]] points and hunger saturation points, and sometimes cause [[status effect]]s. They are essential to survival, as going without them eventually causes the player to starve, causing damage until reaching {{hp|10}} in Easy [[difficulty]], and {{hp|1}} on Normal. [[Hunger#Effects of hunger|Starvation]] damage kills the player in Hard and [[Hardcore]] Mode.
Food is eaten by holding {{control|use}} while having the food item selected in the hot bar or in the off-hand.
[[Cake]] cannot be eaten this way, and must instead be placed on a surface before being eaten.
With the exception of [[chorus fruit]], [[golden apple]]s, [[honey bottle]]s, [[milk]], and [[suspicious stew]]{{only|Java}}, food cannot be eaten when the hunger bar is completely full. In [[Creative]] Mode, any food can be consumed at any time.
All food items and ingredients can be stacked in the inventory slots, except for [[milk]], [[rabbit stew]], [[mushroom stew]], [[beetroot soup]], [[suspicious stew]], and [[cake]].{{only|Java}}
This page covers food items for players; blocks and items that can be eaten by other [[mob]]s are not included here.
== Hunger and saturation ==
{{main|Hunger#Mechanics}}
{{seealso|Tutorials/Hunger_management}}
[[File:Raw_and_Cooked_Chicken_Comparison.png|thumb|Raw (left) and cooked (right) [[chicken]]. Eating raw chicken can give the [[player]] [[food poisoning]].]]
[[Player]]s have two different food statistics, one of which is visible: The hunger level is visible, and the saturation level is not.
[[Saturation]] is the first statistic to decrease when a player performs energy-intensive actions, and it must be completely depleted before the visible hunger meter begins decreasing. Although the current saturation level is generally hidden, the player can tell that their saturation level is completely depleted if the visible hunger meter begins displaying a jittering effect.
Eating a food item replenishes a fixed number of hunger points and saturation points, based on the item. Some foods have a better ratio of saturation to hunger points replenished than others. Overeating the hunger bar does not overflow to saturation.
A player's current saturation level can never exceed their current hunger level. A player at a hunger level of 5, for example, can be at a maximum of 5 saturation. Food always restores hunger (raising the saturation limit) ''before'' supplying saturation. The most efficient use of food is to eat low-saturation food to fill the hunger bar, followed by high-saturation food to fill saturation. While a few hunger points may be wasted when eating nourishing food when nearly full, eating nourishing foods on a low hunger bar wastes even more points of saturation. Maximizing saturation increases the length of time (and/or the amount of damage healed) before the player needs to eat again.
=== Usage ===
Most foods can be eaten by holding down the right-click button with a food item in hand. It takes 1.61 seconds to eat most foods; dried kelp takes 0.865 seconds to eat. Additionally, a player can hold food in their [[offhand]] {{in|Java}}.
While eating, food [[particles]] form from the player's mouth correlated with their respective food item, and produces a munching noise. Eating also slows the user significantly.
Unlike other foods, [[cake]] has to be eaten by placing it, then right-clicking on its block form. Eating cake is instant and it has 7 edible slices, each giving {{hunger|2}} hunger and 0.4 hunger [[saturation]].
=== Nourishment value ===
Nourishment is defined as the ratio of saturation to hunger points restored. Foods with higher nourishment values should be eaten when the hunger bar is more full.
The "nourishment" table below can help by categorizing foods by their saturation-to-hunger restoration ratios. See the more detailed [[#Foods|Foods]] table for the exact hunger and saturation statistics of each food.
<!-- do not change the locations of the food in this table without providing an explanation in the edit summary -->
{| class="wikitable" data-description="Nourishment value"
|-
!Nourishment
! Value
!Food
|- style="text-align: left;"
!Great
| 2.4
| {{Slot|Enchanted Golden Apple}}{{Slot|Golden Apple}}{{Slot|Golden Carrot}}
|- style="text-align: left;"
!Good
| 1.6
| {{Slot|Cooked Mutton}}{{Slot|Cooked Porkchop}}{{Slot|Cooked Salmon}}{{Slot|Steak}}
|- style="text-align: left;"
!Normal
| 1.2
| {{Slot|Baked Potato}}{{Slot|Beetroot}}{{Slot|Beetroot Soup}}{{Slot|Bread}}{{Slot|Carrot}}{{Slot|Cooked Chicken}}{{Slot|Cooked Cod}}{{Slot|Cooked Rabbit}}{{Slot|Mushroom Stew}}{{Slot|Rabbit Stew}}{{Slot|Suspicious Stew}}
|- style="text-align: left;"
! Low
| 0.6
| {{Slot|Apple}}{{Slot|Chorus Fruit}}{{Slot|Dried Kelp}}<ref group="note" name="Java">{{only|java}}</ref>{{Slot|Melon Slice}}{{Slot|Poisonous Potato}}{{Slot|Potato}}{{Slot|Pumpkin Pie}}{{Slot|Raw Beef}}{{Slot|Raw Chicken}}{{Slot|Raw Mutton}}{{Slot|Raw Porkchop}}{{Slot|Raw Rabbit}}{{Slot|Sweet Berries}}<ref group="note" name="Bedrock">{{only|bedrock}}</ref>
|- style="text-align: left;"
!Poor
| 0.2
| {{Slot|Cake}}{{Slot|Cookie}}{{Slot|Dried Kelp}}<ref group="note" name="Bedrock"/>{{Slot|Glow Berries}}{{Slot|Honey Bottle}}{{Slot|Pufferfish|link=Pufferfish (item)}}{{Slot|Raw Cod}}{{Slot|Raw Salmon}}{{Slot|Rotten Flesh}}{{Slot|Spider Eye}}{{Slot|Sweet Berries}}<ref group="note" name="Java"/>{{Slot|Tropical Fish|link=Tropical Fish (item)}}
|}
== Foods ==
{{/table}}
=== Ingredients ===
The following items cannot be eaten on their own. Instead, they are used to craft consumable food items.
<!--
Please leave spaces between each row in the table - this has no effect on the appearance of the table, but it makes it a lot easier on future wiki editors!
-->
{| class="sortable wikitable list-style-none" data-description="Ingredients"
|-
! Name
! Icon
! Used to make
! Source(s)
! Notes
|- id="Bowl"
! scope="row" | [[Bowl]]
| {{Slot|Bowl}}
| {{itemLink|Mushroom Stew}}
* {{itemLink|Beetroot Soup}}
* {{itemLink|Rabbit Stew}}
* {{itemLink|Suspicious Stew}}
|
* [[Crafting]] from [[planks]]
* [[Fishing Rod#Usage|Fishing]]
* [[Turtle]] killed by [[lightning]]
* Eating food made with them
|
|- id="Cocoa Bean"
! scope="row" | [[Cocoa Beans]]
| {{Slot|Cocoa Beans}}
| {{itemLink|Cookie}}s
|
* Breaking [[cocoa plant]]s
* Bought from [[wandering trader]]
|
|- id="Egg"
! scope="row" | [[Egg]]
| {{Slot|Egg}}
|
* {{itemLink|Cake}}
* {{itemLink|Pumpkin Pie}}
|
* Laid by [[chicken]]s
* Found in village fletcher chests
|
|- id="Milk"
! scope="row" | [[Milk Bucket]]
| {{Slot|Milk Bucket}}
| {{itemLink|Cake}}
|
* Milking a [[cow]], [[mooshroom]]s, or [[goat]]s
* Killing a [[Wandering trader]] drinking it
| Can also be consumed to clear [[status effect]]s
|- id="Mushroom"
! scope="row" | [[Brown Mushroom]] and [[Red Mushroom]]
| {{Slot|Brown Mushroom;Red Mushroom}}
| {{itemLink|Mushroom Stew}}
* {{itemLink|Rabbit Stew}}
* {{itemLink|Suspicious Stew}}
| {{anchor|Brown Mushroom|Red Mushroom}}
* Dark/shady areas
* Swamp [[biome]]s
* [[Mushroom fields]]
* Breaking [[Huge Mushroom|huge brown or red mushrooms]]
* [[The Nether]]
* Using [[shears]] on a [[mooshroom|brown mooshroom or red mushroom]]
* Bought from [[wandering trader]]
|
|- id="Flower"
! scope="row" | [[Flower]]
| {{Slot|Any Flower}}
|{{itemLink|Suspicious Stew}}
|
* Breaking [[Flower]]
* Using [[Bone Meal]] on a [[Grass Block]]
* Bought from [[wandering trader]]
* Killing [[Iron Golem]] (poppy)
|
|- id="Pumpkin"
! scope="row" | [[Pumpkin]]
| {{Slot|Pumpkin}}
| {{itemLink|Pumpkin Pie}}
|
* Harvesting mature [[pumpkin]]s grown from [[pumpkin seeds]]
* Naturally occurring [[pumpkin]]s
* Taiga and Snowy Taiga [[Village]]s
* Bought from [[wandering trader]]
|
|- id="Sugar"
! scope="row" | [[Sugar]]
| {{Slot|Sugar}}
|
* {{itemLink|Cake}}
* {{itemLink|Pumpkin Pie}}
|
* Crafting [[sugar cane]]
* Dropped by [[witch]]es
* Creating from its base [[element]]s {{only|bedrock|education}}
* Redeemed from [[honey bottle]] on a crafting table
|
|- id="Wheat"
! scope="row" | [[Wheat]]
| {{Slot|Wheat}}
|
* {{itemLink|Bread}}
* {{itemLink|Cake}}
* {{itemLink|Cookie}}s
|
* Harvesting mature [[wheat]]
* Found in [[Dungeon#Loot|dungeon]], [[Woodland Mansion#Loot|woodland mansion]], [[Shipwreck#Loot|shipwreck]], [[Igloo#Loot|igloo]], [[Village#Loot|village]], [[Ocean Ruins#Loot|ocean ruins]], and [[Pillager Outpost#Loot|pillager outpost]] chest
* Crafting [[hay bale]]s
|
|- id="Gold Nugget"
! scope="row" | [[Gold Nugget]]
| {{Slot|Gold Nugget}}
| {{itemLink|Golden Carrot}}
|
* Crafting [[gold ingot]]s
* Dropped by [[zombified piglin]]s
* Found in [[Shipwreck#Loot|shipwreck]], [[Igloo#Loot|igloo]], [[Village#Loot|village]], and [[Ocean Ruins#Loot|ocean ruins]] chest
* Smelting golden armor or tools
* Mining [[nether gold ore]] without [[Silk Touch]]
|
|- id="Gold Ingot"
! scope="row" | [[Gold Ingot]]
| {{Slot|Gold Ingot}}
| {{itemLink|Golden Apple}}
|
* Crafting [[gold block]]s or [[gold nugget]]s
* Rarely dropped by [[zombified piglin]]s and by [[Drowned]]
* Smelting [[gold ore]] or [[nether gold ore]]
* Found in [[Shipwreck#Loot|shipwreck]], [[Jungle Pyramid#Structure:Loot|jungle pyramid]], [[Dungeon#Loot|dungeon]], [[Woodland Mansion#Loot|woodland mansion]], [[Nether Fortress#Loot|nether fortress]], [[End city#Loot|end city]], [[Mineshaft#Loot|mineshaft]], [[Village#Structure:Loot|village]], [[Stronghold#Loot|stronghold]], [[Buried Treasure#Loot|buried treasure]] and [[Desert pyramid#Structure:Loot|desert pyramid]] chest
|
|- id="Honey Block"
! scope="row" | [[Honey Block]]
| {{Slot|Honey Block}}
| {{itemLink|Honey Bottle}}
|
* Crafting [[honey bottle]]s
|
|}
== Sounds ==
{{Sound table/Entity/Food}}
== Achievements ==
{{load achievements|Pork Chop;Iron Belly;Rabbit Season;Overpowered;Castaway;Delicious Fish;The Lie;Bake Bread;Time For Stew}}
== Advancements ==
{{load advancements|Husbandry;A Balanced Diet;A Furious Cocktail;How Did We Get Here;Fishy Business}}
== History ==
{{History|java classic}}
{{History||June 14, 2009|link=https://notch.tumblr.com/post/123343045/my-vision-for-survival|[[Notch]] discussed how food would work in [[survival]] mode: "Monsters will hurt you and take away from your health. The only way to regain health is to eat food. You get food from either hunting or from farming."}}
{{History||0.24_SURVIVAL_TEST|[[Mushroom]]s are now edible, making them the first food to be added in the game. At this point, food restores [[health]] instead of [[hunger]], and are eaten instantly without sound or animation. Pigs drop them upon death.}}
{{History|java indev}}
{{History||0.31|snap=20091231-2|Added [[apple]]s, which are currently non-functional.}}
{{History|||snap=20100110|Apples are now edible, and restore {{hp|4}} each.}}
{{History|||snap=?|Mushrooms are no longer edible.}}
{{History|||snap=20100130|Added [[mushroom stew]], which restores {{hp|8}} health.}}
{{History||20100206|Added [[wheat]] and [[bread]].
|Mushroom stew now restores {{hp|10}} health.}}
{{History||20100219|[[Pig]]s now drop [[raw porkchop]]s, which can be [[smelt]]ed to become [[cooked porkchop]]s.}}
{{History|java infdev}}
{{History||20100227-1|Added [[golden apple]]s. At this point, they were crafted with [[block of gold]], and restored {{hp|20}}.}}
{{History|java alpha}}
{{History||v1.0.8|Added [[milk]], which was at this point unobtainable and the player could not use it in any way.}}
{{History||v1.0.11|Milk can now be obtained in the game, by milking a [[cow]] with an empty [[bucket]].}}
{{History||v1.0.14|With the addition of [[chicken]]s, [[egg]]s are now in the game, but have no use. Chickens do not drop raw chicken at this point in time.}}
{{History||v1.2.0|snap=<nowiki>?|slink=:Category:Information needed requiring unarchived version|Added [[pumpkin]]s, but not pumpkin seeds.
|Added [[raw fish]] and [[cooked fish]], obtainable through [[fishing]].}}
{{History||v1.2.3|Eating food now functions correctly in multiplayer.}}
{{History|java beta}}
{{History||1.2|Added [[sugar]] and [[cake]].}}
{{History||1.4|[[Cocoa beans]] now appear naturally in the game; since Beta 1.2, they were available only through inventory editors.
|Added [[cookie]]s.}}
{{History||1.5|Pigs now drop cooked porkchops if killed while on fire.}}
{{History||1.8|snap=Pre-release|Added [[melon]]s, [[melon seeds]], and [[pumpkin seeds]].
|Added [[raw chicken]] as a drop from chickens, which can be smelted into [[cooked chicken]].
|Added [[raw beef]] as a drop from cows, which can be smelted into [[steak]].
|Added [[rotten flesh]] as a new drop from [[zombie]]s.
|Added an eating animation, instead of food simply disappearing from the player's hand as if a block had been placed.
|Added [[hunger bar]]; now food restores hunger instead of health.
|Food now stacks in the inventory, with the exception of cake, mushroom stew, and milk.
|[[Huge mushroom]]s were added as a new source for [[mushroom]]s.
|With the addition of the hunger bar, golden apples now restore {{Hunger|10}} and give 30 seconds of [[regeneration]], but do not heal health directly anymore.}}
{{History|java}}
{{History||1.0.0|snap=Beta 1.9 Prerelease 2|Mushrooms can now be obtained from the mushroom island [[biome]], via the huge mushrooms, random scattered mushrooms, or the new [[mooshroom]]s.
|[[Milk]] can be used to nullify the effects of [[potion]]s.
|[[Spider]]s now drop [[Spider Eye|eyes]].}}
{{History||1.1|snap=release|Golden apples are now made with [[gold nugget]]s instead of blocks of gold, restore {{Hunger|4}} and give 4 seconds of regeneration.}}
{{History||1.3.1|snap=12w21a|Added enchanted golden apples, which functioned like golden apples prior to 1.1 and had the same crafting recipe, but also gave resistance and fire resistance for 5 minutes each.
|[[Cocoa Beans]] are now a crop, making all food items a renewable resource.}}
{{History||1.4.2|snap=12w34a|[[Potato]]es and [[carrot]]s can be obtainable from zombies (rare drop) or harvested.
|Potatoes can be cooked to make [[baked potato]]es
|Harvesting potatoes may give 0–2 [[poisonous potato]]es.
|Carrots can be crafted into [[golden carrot]]s.
|Added [[pumpkin pie]], making [[pumpkin]]s a food ingredient.}}
{{History||1.7.2|snap=13w36a|Added [[tropical fish (item)|clownfish]], [[Raw Salmon|raw]] and [[cooked salmon]], and [[pufferfish (item)|pufferfish]].}}
{{History||1.8|snap=14w02a|Baked potatoes now restore {{Hunger|5}} hunger points instead of 6, with a corresponding reduction in saturation restored.
|Carrots now restore {{Hunger|3}} hunger points instead of 4, with a corresponding reduction in saturation restored.}}
{{History|||snap=14w27a|Added [[Raw Mutton|raw]] and [[cooked mutton]], [[Raw Rabbit|raw]] and [[cooked rabbit]], and [[rabbit stew]].}}
{{History||1.9|snap=15w31a|Added [[chorus fruit]], [[beetroot]] and [[beetroot soup]].
|Enchanted golden apples are no longer craftable, making them no longer renewable.}}
{{History||1.13|snap=18w07a|Added [[dried kelp]], which is edible.}}
{{History||1.14|snap=18w43a|Added [[suspicious stew]].}}
{{History|||snap=18w49a|Added [[sweet berries]].}}
{{History||1.15|snap=19w34a|Added [[honey bottle]]s.}}
{{History|||snap=19w35a|[[Honey bottle]]s now remove [[poison]] effects when consumed.}}
{{History|||snap=19w46a|All foods can now be consumed in Creative mode, including cake.}}
{{History||1.17|snap=21w05a|Added [[glow berries]].}}
{{History|pocket alpha}}
{{History||v0.4.0|Added the first food items: [[apple]]s, [[bread]], [[mushroom stew]], [[raw beef]], [[steak]], [[raw chicken]], [[cooked chicken]], [[raw porkchop]]s, and [[cooked porkchop]].}}
{{History||v0.5.0|Added [[melon]]s, [[melon slice]]s, and [[melon seeds]].}}
{{History||v0.7.0|Added [[milk]] and [[cake]].}}
{{History||v0.8.0|snap=build 1|Added [[pumpkin pie]], [[carrot]]s, [[potato]]es, and [[baked potato]]es.}}
{{History|||snap=build 2|Added [[beetroot]]s and [[beetroot soup]].}}
{{History||v0.9.0|snap=build 1|[[Potato]]es and [[carrot]]s can be obtainable from zombies (rare drop) or harvested.
|Added [[cookie]]s.}}
{{History||v0.11.0|snap=build 1|Added [[rotten flesh]] as a new drop from [[zombie]]s, at this time, it inflicts poison.
|Added [[Raw Fish|raw]] and [[cooked fish]], [[clownfish]], [[Raw Salmon|raw]] and [[cooked salmon]], and [[pufferfish]].}}
{{History|||snap=build 4|[[Milk]] can be used to nullify the effects of [[potion]]s.}}
{{History||v0.12.1|snap=build 1|Eating food now restores hunger.
|[[Spider]]s now drop [[Spider Eye|eyes]].
|Added poisonous potatoes, golden apples, enchanted golden apples and golden carrots.}}
{{History||v0.13.0|snap=build 1|Hunger restored by food now matches Minecraft PC.
|Added raw rabbit, cooked rabbit, and [[rabbit stew]].}}
{{History||v0.15.0|snap=build 1|Added raw mutton and cooked mutton.}}
{{History|pocket}}
{{History||1.0.0|snap=alpha 0.17.0.1|Added chorus fruit.}}
{{History|bedrock}}
{{History||1.4.0|snap=beta 1.2.14.2|Added [[dried kelp]], which is edible.}}
{{History||1.7.0|snap=beta 1.7.0.2|Food can now be eaten in creative mode and on peaceful difficulty.}}
{{History||1.10.0|snap=beta 1.10.0.3|Added [[sweet berries]].}}
{{History||1.13.0|snap=beta 1.13.0.9|Added [[suspicious stew]].}}
{{History||1.14.0|snap=beta 1.14.0.1|Added [[honey bottle]].}}
{{History||1.17.0|snap=beta 1.16.220.52|Added [[glow berries]].}}
{{History|foot}}
{{items}}
[[Category:Food]]
[[cs:Potraviny]]
[[de:Hunger]]
[[es:Comida]]
[[fr:Nourriture]]
[[hu:Étel]]
[[it:Cibo]]
[[ja:食料]]
[[ko:식료품]]
[[nl:Voedsel]]
[[pl:Jedzenie]]
[[pt:Alimento]]
[[ru:Еда]]
[[th:อาหาร]]
[[uk:Їжа]]
[[zh:食物]]</li></ul></nowiki> | 13w24a | Spiders now have a chance of spawning with Speed on Hard difficulty. | |||
1.9{{Extension DPL}}<ul><li>[[Shears|Shears]]<br/>{{Item
| image = Shears.png
| rarity = Common
| renewable = Yes
| durability = 238
| stackable = No
}}
'''Shears''' are tools required to obtain some organic blocks or otherwise mine them faster as well as to shear certain entities and blocks.
==Obtaining==
===Crafting===
{{Crafting
|head=1
|showdescription=1
|B2= Iron Ingot
|A3= Iron Ingot
|Output= Shears
|type= Tool
}}
{{crafting
|foot=1
|ignoreusage=1
|Damaged Shears
|Damaged Shears
|Output= Shears
|description= The durability of the two shears is added together, plus an extra 5% durability.
|type= Tool
}}
Despite using [[Iron Ingot|iron]] in its crafting recipe, shears cannot be smelted into [[iron nugget]]s.<ref>{{bug|MC-111738}}</ref>
===Trading===
Novice-level Shepherd [[villager]]s have a 40% chance to sell shears for 2 [[emerald]]s in Java Edition. This trade is always offered in Bedrock Edition.
===Chest loot===
{{LootChestItem|shears}}
==Usage==
===Shearing===
Shears lose 1 [[durability]] when used to shear something.
Shears can be {{Control|use|text=used}} on a [[sheep]] to remove its coat and drop 1–3 [[wool]] of the corresponding color. The same sheep can be sheared again after it eats from a [[grass block]] to regenerate its coat.
Shearing a [[mooshroom]] drops 5 [[mushroom]]s of the corresponding color and irreversibly turns it into a normal [[cow]].
Shearing a [[snow golem]] irreversibly removes its pumpkin, dropping it and revealing its face.
Shearing either a [[beehive]] or [[bee nest]] that is full of honey makes it drop 3 [[honeycomb]]s and resets it to honey level 0. The same beehive or bee nest can be sheared again if it is able to reach full honey again. If sheared by hand without a [[campfire]] below the hive or nest all bees within will exit and all nearby bees will attack the offending player.
[[Dispenser]]s can use shears in any of the above listed ways, interacting with any valid block or entity in front of the dispenser's face. This decreases the shears' [[durability]]. A dispenser shearing a beehive or bee nest will not anger bees or cause them to leave even if there is not a campfire below it.
Shearing a [[pumpkin]] turns it into a [[carved pumpkin]], dropping 4 [[pumpkin seeds]].
{{IN|java}}, shearing the tip of [[cave vines]], [[kelp]], [[weeping vines]], or [[twisting vines]] sets its age value to 25 and stops further growth.
===Breaking blocks===
Shears use 1 [[durability]] when is used to break any block, even if it [[instant mining|breaks instantly]] by hand.
Shears can be used to harvest [[cobweb|cobwebs]], [[leaves]], [[grass|grass, tall grass]], [[seagrass|seagrass, tall seagrass]], [[fern|ferns, large fern]]s, [[dead bush]]es, [[nether sprouts]], [[vines]], [[glow lichen]] or [[hanging roots]] and obtain them in item form. They can also be used to break [[tripwire]] connected to a [[tripwire hook]] without activating it.
When shears are used to break [[Weeping Vines|weeping vines]] or [[Twisting Vines|twisting vines]] they are guaranteed to drop in item form instead of the usual 33% chance. This only applies to vines directly broken by shears and not vines that are broken due to the destruction of their supporting vines.
The following table shows information about blocks that can be broken with shears. Colors indicate what gets dropped when the block is broken:
*White: The original block.
*Blue: The block's normal drop (i.e. string, sticks, seeds, saplings, apples).
*Red: Nothing.
{| class="wikitable" style="text-align:center" data-description="Blocks broken with shears"
!
!No shears breaking time
!Shears breaking time
|-
! style="text-align:left" |{{BlockLink|Cobweb}}
| {{tc|no|20 s}}<ref group="note">Breaking cobwebs with a sword is as fast as breaking with shears, and yields string. This costs double durability.</ref>
|0.4 s
|-
! style="text-align:left" |{{BlockLink|Dead Bush}}
| {{tc|planned|0 s}}
|0 s
|-
! style="text-align:left" |{{BlockLink|id=fern|Grass|Fern}}
| {{tc|planned|0 s}}
|0 s
|-
! style="text-align:left" |{{BlockLink|Grass}}
| {{tc|planned|0 s}}
| 0 s
|-
! style="text-align:left" |{{BlockLink|Nether Sprouts}}
| {{tc|no|0 s}}<ref group="note">{{IN|bedrock}}, the item drops when breaking it with fists.</ref>
|0 s
|-
! style="text-align:left" |{{BlockLink|Leaves}}
| {{tc|planned|0.35 s}}
|0.05 s
|-
! style="text-align:left" |{{BlockLink|id=tripwire|String#Tripwire|Tripwire}}
|0 s
|0 s<ref group="note">Using shears does not trigger a redstone pulse.</ref>
|-
! style="text-align:left" |{{BlockLink|Vines}}
| {{tc|no|0.35 s}}
|0.35 s
|-
! style="text-align:left" |{{BlockLink|Wool}}
|1.25 s
|0.25 s
|-
! style="text-align:left" |{{BlockLink|Seagrass}}
| {{tc|no|0 s}}
|0 s
|-
! style="text-align:left" | {{BlockLink|Glow Lichen}}
| {{tc|no|0.3 s}}
|0.3 s
|-
! style="text-align:left" |{{BlockLink|Hanging Roots}}
| {{tc|no|0 s}}
|0 s
|-
! style="text-align:left" |{{BlockSprite|Twisting Vines Plant}}{{BlockLink|Twisting Vines}}<br> {{BlockSprite|Weeping Vines Plant}}{{BlockLink|Weeping Vines}}
|0 s
|0 s<ref group="note">Using shears will increase the chance of dropping from 33% to 100%.</ref>
|}
{{notelist}}
===Enchantments===
Shears can receive the following [[Enchanting|enchantments]]:
{| class="wikitable col-2-center col-3-right"
|+
!Name
! Max Level
![[Enchanting|Method]]
|-
|[[Efficiency]]
|V
|{{Inventory slot|Anvil}}
|-
|[[Unbreaking]]
| III
|{{Inventory slot|Anvil}}
|-
|[[Mending]]
|I
|{{Inventory slot|Anvil}}
|-
|[[Curse of Vanishing]]
|I
|{{Inventory slot|Anvil}}
|-
|[[Silk Touch]]{{only|be|short=1}}
|I
|{{Inventory slot|Anvil}}
|}
{{notelist}}
== Sounds ==
{{edition|java}}:
{{Sound table
|rowspan=4
|sound=Shear.ogg
|subtitle=Shears click
|source=player
|description=When a mooshroom is sheared
|id=entity.mooshroom.shear
|translationkey=subtitles.item.shears.shear
|volume=1.0
|pitch=1.0
|distance=16}}
{{Sound table
|subtitle=Shears click
|source=player
|description=When a sheep is sheared
|id=entity.sheep.shear
|translationkey=subtitles.item.shears.shear
|volume=1.0
|pitch=1.0
|distance=16}}
{{Sound table
|subtitle=Shears click
|source=player
|description=When a snow golem is sheared
|id=entity.snow_golem.shear
|translationkey=subtitles.item.shears.shear
|volume=1.0
|pitch=1.0
|distance=16}}
{{Sound table
|subtitle=Plant cropped
|source=block
|description=When a growing plant is cropped
|id=block.growing_plant.crop
|translationkey=subtitles.block.growing_plant.crop
|volume=1.0
|pitch=1.0
|distance=16}}
{{Sound table
|sound=Beehive shear.ogg
|source=block
|subtitle=Shears scrape
|description=When honeycombs are harvested from a beehive
|id=block.beehive.shear
|translationkey=subtitles.block.beehive.shear
|volume=0.8
|pitch=1.0/0.8/0.9
|distance=16}}
{{Sound table
|sound=Pumpkin carve1.ogg
|sound2=Pumpkin carve2.ogg
|source=block
|subtitle=Shears carve
|description=When a pumpkin is carved
|id=block.pumpkin.carve
|translationkey=subtitles.block.pumpkin.carve
|volume=1.0
|pitch=1.0
|distance=16}}
{{Sound table
|sound=Random break.ogg
|subtitle=Item breaks
|source=player
|description=When a pair of shears' durability is exhausted
|id=entity.item.break
|translationkey=subtitles.entity.item.break
|volume=0.8
|pitch=0.8-1.2
|distance=16
|foot=1}}
{{edition|bedrock}}:<br>
Pumpkins do not have carve sounds.
{{Sound table
|type=bedrock
|sound=Shear.ogg
|source=player
|description=When something is sheared
|id=mob.sheep.shear
|volume=1.0
|pitch=1.0}}
{{Sound table
|sound=Beehive shear.ogg
|source=block
|description=When honeycombs are harvested from a beehive
|id=block.beehive.shear
|volume=0.8
|pitch=0.8-1.0}}
{{Sound table
|sound=Random break.ogg
|source=player
|description=When a pair of shears' durability is exhausted
|id=random.break
|volume=1.0
|pitch=0.9
|foot=1}}
==Data values==
===ID===
{{edition|java}}:
{{ID table
|edition=java
|showforms=y
|generatetranslationkeys=y
|displayname=Shears
|spritetype=item
|nameid=shears
|form=item
|foot=1}}
{{edition|bedrock}}:
{{ID table
|edition=bedrock
|shownumericids=y
|showforms=y
|notshowbeitemforms=y
|generatetranslationkeys=y
|displayname=Shears
|spritetype=item
|nameid=shears
|id=421
|form=item
|foot=1}}
==Achievements==
{{load achievements|Have a Shearful Day}}<div style="text-align:center"></div>
==History==
{{History||June 3, 2011|link=https://twitter.com/jeb_/status/76570646074765312|Shears were first mentioned by [[Jeb]] on [[wikipedia:Twitter|Twitter]]. The tweet revealing Jeb's work on shears was written in Swedish (''Jag jobbar på shears nu''), which translates to "I'm working on shears now".}}
{{History||June 7, 2011|link=https://twitter.com/jeb_/status/78154891637436416|Jeb tweets about how shears were originally planned as a way to defuse [[TNT]], but he dropped this shortly after deciding TNT would detonate only with [[redstone]] or [[fire]].}}
{{History|java beta}}
{{History||1.7|[[File:Shears JE1 BE1.png|32px]] Added shears.
|Before [[Beta 1.7]], [[sheep]] would drop 1-3 [[wool]] blocks at most when hit, but shears can harvest up to 4 wool blocks per sheep.}}
{{History||1.8|snap=Pre-release|Shears can now be used to harvest a [[fern]], [[vines]] and [[grass]].}}
{{History|java}}
{{History||1.0.0|snap=Beta 1.9 Prerelease|Shears now harvest [[red mushroom]]s from a [[mooshroom]] and turn it back into a normal [[cow]].}}
{{History||1.1|snap=11w49a|[[Sheep]] now drop only 1-3 wool blocks when sheared, but they can also regrow their wool by eating [[grass block|grass]], which is part of a plan to have [[animal]]s stay in the game longer.<ref>{{Tweet|jeb|76647002317930496}}</ref>}}
{{History||1.2.1|snap=12w05a|Shears can now be used to harvest [[dead bush]]es.}}
{{History|||snap=12w06a|Shears are now [[renewable]], due to [[zombie]]s occassionally dropping iron ingots.}}
{{History||1.3.1|snap=12w21a|Shears can now be [[trading|bought]] from farmer [[villager]]s for 3 [[emerald]]s each.}}
{{History|||snap=12w22a|Shears can now be used to break [[tripwire]] string and not set it off.}}
{{History||1.4.2|snap=12w38a|Added a [[sound]] when using shears on [[sheep]].}}
{{History||1.4.6|snap=12w50a|Shears can now be [[enchanting|enchanted]].}}
{{History||1.8|snap=14w02a|[[Trading]] has been changed: Shepherd [[villager]]s now [[trading|sell]] shears for 3–4 [[emerald]]s each.
|Farmers no longer trade shears.}}
{{History|||snap=pre1|Shears now lose [[item durability|durability]] when breaking [[wool]] blocks. In previous versions, shears would take [[item durability|durability]] [[damage]] only when destroyed or when breaking [[tall grass]] or [[leaves]], the damage remaining the same for all other [[block]]s.<ref>{{bug|MC-5313}}</ref>}}
{{History||1.9|snap=15w34a|Shears may now be used in a crafting grid to zoom in [[map]]s.}}
{{History|||snap=15w45a|Shears no longer zoom in maps.}}
{{History|||snap=15w47b|Shears can no longer be enchanted with [[Silk Touch]].
|Shears now lose durability when used to break any block (formerly lost durability only from [[leaves]], [[web]], [[grass]], [[vines]], [[tripwire]] and [[wool]]).}}
{{History|||snap=15w47c|Shears now harvest [[cobweb]] without requiring [[Silk Touch]].}}
{{History|||snap=15w49a|[[Snow golem]]'s [[pumpkin]] can now be removed with shears.}}
{{History||1.13|snap=17w47a|When shears are {{control|used}} on an un-carved [[pumpkin]], it now turns into a carved pumpkin and drops 4 [[pumpkin seeds]].
|Prior to [[1.13/Flattening|''The Flattening'']], this [[item]]'s numeral ID was 359.}}
{{History||1.14|snap=18w43a|Shears placed in a [[dispenser]] can now shear [[sheep]].
|[[File:Shears JE2 BE2.png|32px]] The texture of shears has been changed.}}
{{History|||snap=18w49a|Shears can now be found in [[chest]]s in [[village]] shepherd houses.}}
{{History||1.15|snap=19w34a|Shears can now be used on [[bee nest]]s and [[beehive]]s to harvest [[honeycomb]].}}
{{History||1.16|snap=20w15a|Shears placed in a dispenser can now shear [[mooshrooms]] and [[snow golem]]s.}}
{{History||1.16.2|snap=pre1|Shears are now required in order to pick up [[roots]].}}
{{History||1.16.2|snap=pre2|Shears are no longer required to pick up [[roots]].}}
{{History||1.17|snap=?|Shears are now required in order to pick up [[hanging roots]].}}
{{History||1.18|snap=21w37a|Shears can now stop [[cave vines]], [[kelp]], [[weeping vines]], and [[twisting vines]] from aging.}}
{{History||1.19|snap=22w11a|Shears are now required in order to pick up [[mangrove leaves]].}}
{{History|pocket alpha}}
{{History||v0.2.0|[[File:Shears JE1 BE1.png|32px]] Added shears.}}
{{History||v0.3.2|Survival [[player]]s no longer start out with infinite durability shears in the [[inventory]].}}
{{History||v0.4.0|Removed shears from the creative inventory.}}
{{History||v0.8.0|snap=build 3|Re-added shears to [[creative]] mode.}}
{{History||v0.9.0|snap=build 1|Shears can now be used to transform [[mooshroom]]s into [[cow]]s.}}
{{History||v0.12.1|snap=build 3|Shearing a [[snow golem]] now removes its [[pumpkin]].
|Shears can now be [[enchanting|enchanted]] in an [[anvil]].}}
{{History||v0.13.0|snap=build 1|Shears can now be used to break [[tripwire]] string without triggering it.}}
{{History||v0.15.0|snap=build 1|Shears now lose durability when used to break any [[block]].}}
{{History|pocket}}
{{History||1.0.4|snap=alpha 1.0.4.0|Shears can now be [[trading|bought]] from shepherd [[villager]]s.}}
{{History||1.1.0|snap=alpha 1.1.0.0|Breaking a [[melon|melon block]] with shears now always drop 9 [[melon slice|melons]].}}
{{History|bedrock}}
{{History||1.4.0|snap=beta 1.2.13.8|Shears can now be used to turn un-carved [[pumpkin]]s into [[carved pumpkin]] and spit out 4 [[pumpkin seeds]].}}
{{History||?|Shears now harvest [[cobweb]] without requiring [[Silk Touch]].}}
{{History||1.10.0|snap=beta 1.10.0.3|Shears placed in a [[dispenser]] can now shear [[sheep]].
|[[File:Shears JE2 BE2.png|32px]] The texture of shears has been changed.}}
{{History||1.11.0|snap=beta 1.11.0.1|Shears can now be found in [[village]] shepherd houses.}}
{{History|||snap=beta 1.11.0.4|Shears [[trading|sold]] by shepherd [[villager]]s now cost only 2 [[emerald]]s.}}
{{History||1.14.0|snap=beta 1.14.0.1|Shears can now be used on [[bee nest]]s and [[beehive]]s to harvest [[honeycomb]].}}
{{History|console}}
{{History||xbox=TU3|xbone=CU1|ps=1.0|wiiu=Patch 1|switch=1.0.1|[[File:Shears JE1 BE1.png|32px]] Added shears.}}
{{History||xbox=TU69|xbone=none|ps=1.76|wiiu=Patch 38|switch=none|Shears can now be used to turn regular [[pumpkin]]s into [[carved pumpkin]]s.}}
{{History||xbox=none|xbone=none|ps=1.90|wiiu=none|switch=none|[[File:Shears JE2 BE2.png|32px]] The texture of shears has been changed.
|Shears placed in a [[dispenser]] can now shear [[sheep]].}}
{{History|New 3DS}}
{{History||0.1.0|[[File:Shears JE1 BE1.png|32px]] Added shears.}}
{{History|foot}}
==Issues==
{{issue list}}
==Gallery==
<gallery>
File:Enchanted Shears.gif|An enchanted pair of shears.
</gallery>
==References==
{{reflist}}
==External links==
*[https://www.minecraft.net/en-us/article/taking-inventory--shears Taking Inventory: Shears] – Minecraft.net on November 20, 2019
{{Items}}
[[cs:Nůžky]]
[[de:Schere]]
[[es:Tijeras]]
[[fr:Cisailles]]
[[hu:Metszőolló]]
[[it:Cesoie]]
[[ja:ハサミ]]
[[ko:가위]]
[[nl:Schaar]]
[[pl:Nożyce]]
[[pt:Tesoura]]
[[ru:Ножницы]]
[[zh:剪刀]]
[[Category:Renewable resources]]</li><li>[[Redstone Repeater|Redstone Repeater]]<br/>{{Block
| image = <gallery>
Redstone Repeater.png|Redstone Repeater
Redstone Repeater BE.png|Redstone Repeater (BE)
</gallery>
| extratext = View [[#Renders|all renders]]
| transparent = Yes
| light = No
| tool = any
| stackable = Yes (64)
| flammable = No
| lavasusceptible = No
| renewable = Yes
}}
{{about|the block|repeater circuits|Transmission circuit#Repeater|other topics related to redstone|Redstone (disambiguation)}}
A '''redstone repeater''' is a [[block]] that produces a full-strength [[Redstone Dust|output signal]] from its front when its back is powered, with four configurable delay settings. It can also be locked into a power state by its side being directly powered by a repeater or a [[Redstone Comparator|comparator]].
== Obtaining ==
=== Breaking ===
A redstone repeater can be broken instantly using any [[tool]], or without a tool, and drops itself as an item. To remove a redstone repeater, {{control|mine}} it.
A redstone repeater is removed and drops as an item if:
* its attachment block is moved, removed, or destroyed;
* [[water]] or [[lava]] flows into its space;{{only|java}}
* a [[piston]] tries to push it or moves a block into its space.
=== Natural generation ===
[[File:Redstone Repeater naturally generated.png|thumb|A redstone repeater generated in the jungle temple's hidden room.]]
A single redstone repeater is generated naturally in each [[jungle temple]].
They also generate in [[Ancient City|ancient cities]].
=== Crafting ===
{{Crafting
|A2= Redstone Torch
|B2= Redstone Dust
|C2= Redstone Torch
|B3= Stone
|C3= Stone
|A3= Stone
|Output= Redstone Repeater
|type= Redstone
}}
== Usage ==
{{see also|Redstone circuit}}
A redstone repeater can be used in four different ways: to "repeat" redstone signals back to full strength, delay signals, prevent signals moving backwards, or to "lock" signals in one state.
A repeater can be placed only on top of [[opaque]] blocks (dirt, stone, etc.), on top of upside-down [[slab]]s, upside-down [[stairs]], furnaces, and glass. {{IN|be}}, a repeater can also be placed on fences and stone walls. They can also be placed on some transparent blocks. See [[Opacity/Placement]] for more information. To place a repeater, use the {{control|Place Block}} [[control]].
A redstone repeater has a front and back – the arrow on the top points to the repeater's front. A repeater also has two small redstone torches on its top – the color of the torches indicates whether its output is on (dark red when off, bright red when on) and the distance between them indicates the delay the repeater adds to the signal transmission.
A repeater is 0.125 ({{frac|1|8}}) blocks high.
=== Signal transmission ===
A repeater transmits signals only from its back to its front, but its behavior can be modified from the side (see [[#Signal locking|signal locking]], below).
[[File:Redstone Torch Power.png|Different ways to power a repeater|thumb]]
A redstone repeater can be powered by any of the following components at its back:
* an active [[power component]] (redstone torch, lever, block of redstone, etc.)
* powered [[redstone dust]]
* a powered [[redstone comparator]] or another powered redstone repeater facing the repeater
* a powered opaque block (including any opaque [[mechanism component]]s, such as [[dispenser]]s, [[redstone lamp]]s, etc.)
A redstone repeater can power any of the following components at its front:
* redstone dust
* a redstone comparator or another redstone repeater facing away from the repeater
* any opaque block (including any opaque [[mechanism component]]s)
A redstone repeater can activate any [[mechanism component]] it is facing.
An opaque block powered by a redstone repeater is called "strongly-powered" (as opposed to an opaque block "weakly-powered" by redstone dust). A strongly-powered opaque block can power adjacent redstone dust, as well as other redstone components.
=== Signal repeating ===
{{see also|Transmission circuit#Repeater}}
A redstone repeater can "repeat" a [[Redstone Dust|redstone]] signal, boosting it back up to power level 15.
Redstone signals have a maximum power level of 15 and that level drops by 1 for every block of [[redstone dust]] the signal travels through. If a signal must travel through more than 15 [[block]]s of redstone dust, a redstone repeater can be used to boost the signal back up to full strength. An extra two blocks of distance can be achieved by placing solid opaque blocks before and after the repeater.
While redstone repeaters can allow signals to travel great distances, each always adds some delay to the transmission since the minimum amount of delay is 1 redstone tick (0.1 seconds, barring lag).
=== Signal delay ===
When initially placed, a redstone repeater has a delay of one [[redstone tick]] (equivalent to two game ticks, or 0.1 seconds barring lag).
A repeater's delay can be modified by using the {{control|Use Item}} control. Each use increases the repeater's delay by one redstone tick, to a maximum of four redstone ticks, then back to one redstone tick. Longer delays can be made with multiple repeaters – for example, a repeater set to 'four' and another to 'one' provides a half-second delay (0.4s + 0.1s = 0.5s).
A repeater set to a delay of two to four redstone ticks increases the length of any shorter [[Pulse circuit#Pulses|on-pulse]] to match the length of the repeater's delay, and suppress any shorter off-pulse. For example, a repeater set to a 4-tick delay changes a 1-tick, 2-tick, or 3-tick on-pulse into a 4-tick on-pulse, and does not allow through any off-pulse shorter than 4 ticks.
Although a repeater cannot be set to have a delay of zero, [[Transmission circuit#Instant repeater|instant repeater circuits]] are possible (circuits that repeat a signal with no delay).
In Bedrock Edition, the first repeater have a delay of zero but the repeater is still showing 1-tick{{info needed}}
=== {{anchor|diode}} Signal direction ===
{{see also| Mechanics/Redstone/Transmission circuit#Diode}}
A redstone repeater acts as a diode – it allows redstone signals through in one direction (unlike [[redstone dust]] or opaque blocks that can transmit redstone signals in any direction).
A diode can be used to protect a [[redstone circuit]] from redstone signals feeding back into the circuit from its output, or can be used to isolate one part of a circuit from another.
=== {{anchor|lock}} Signal locking ===
{{see also| Mechanics/Redstone/Memory circuit}}
[[File:Latch.png|thumb|The left repeater has been locked in an unpowered output state by the right repeater.]]
A redstone repeater can be "locked" by another powered redstone repeater facing its side. When locked, the repeater does not change its output (whether powered or unpowered), no matter what the input does. When the side repeater turns back off, the repeater returns to its normal behavior.
A repeater can also be locked by a powered [[redstone comparator]] facing its side. This offers additional possibilities for locking signals because a comparator's output can be affected from 3 sides as well as by containers.
If a repeater is locked again too quickly after unlocking (e.g. the lock is controlled by a fast clock circuit), or the lock and the input are changed only on the same tick (e.g. because they're fed by the same clock and both repeaters have the same delay), the repeater does not switch states.
== Sounds ==
{{Edition|java}}:
{{Sound table/Block/Stone/JE}}
{{Edition|bedrock}}:
{{Sound table/Block/Wood/BE}}
== Data values ==
=== ID ===
{{edition|java}}:
{{ID table
|edition=java
|showforms=y
|generatetranslationkeys=y
|displayname=Redstone Repeater
|spritetype=block
|nameid=repeater
|foot=1}}
{{edition|bedrock}}:
{{ID table
|edition=bedrock
|firstcolumnname=Redstone Repeater
|shownumericids=y
|showforms=y
|generatetranslationkeys=y
|displayname=Unpowered block
|spritename=unpowered-repeater
|spritetype=block
|nameid=unpowered_repeater
|id=93
|form=block
|translationkey=-}}
{{ID table
|displayname=Powered block
|spritename=powered-repeater
|spritetype=block
|nameid=powered_repeater
|id=94
|form=block
|translationkey=-}}
{{ID table
|displayname=Item
|spritename=redstone-repeater
|spritetype=item
|nameid=repeater
|id=419
|form=item
|foot=1}}
=== Block states ===
{{see also|Block states}}
{{/BS}}
== Video ==
<div style="text-align:center">{{yt|0Ij_qMLiRzE}}</div>
== History ==
''For a more in-depth breakdown of changes to repeater textures and models, including a set of renders for each state combination, see [[/Asset history]]''
{{History|java beta}}
{{History||1.3|[[File:Redstone Repeater (S) JE1.png|32px]] [[File:Redstone Repeater (item) JE1.png|32px]] Added redstone repeaters.
|Originally, the four possible settings were "1, 2, 5 and 7",<ref>http://twitter.com/jeb_/status/33888465502339073</ref> but [[Jeb]] decided to change the settings to "1, 2, 3, and 4".<ref>http://www.reddit.com/r/Minecraft/comments/fmdtp/teammojang_redstone_repeater_video/c1gzrn6</ref>
|The particles when [[breaking]] redstone repeaters erroneously use the [[pumpkin]] top texture.}}
{{History||unknown|The breaking particles of redstone repeaters now use the smooth stone [[slab]] top texture, even though none of the elements on the [[model]] use it.}}
{{History||1.7|[[File:Redstone Repeater (S) JE2.png|32px]] The side texture of redstone repeaters has been changed to the previous bottom part of the texture.
|[[Redstone dust]] now automatically connects to the input of a redstone repeater. Previously, it needed to be specifically pointed towards the repeater like with other blocks.}}
{{History||unknown|Redstone dust now visually connects to the output of redstone repeaters, though this does not change its behavior.}}
{{History|java}}
{{History||unknown|The breaking particles of redstone repeaters have been changed to an unlit [[redstone torch]] when unpowered and a lit redstone torch when powered.}}
{{History||1.3.1|snap=12w22a|Redstone repeaters now naturally generate inside [[jungle temple]]s.}}
{{History|||snap=1.3|[[File:Redstone Repeater (item) JE2 BE1.png|32px]] The texture of redstone repeater [[item]]s have been changed.}}
{{History||1.4.2|snap=12w42a|[[File:Redstone Repeater (S) JE3.png|32px]] The top texture of redstone repeaters has now been changed.
|[[File:Locked Redstone Repeater (S) JE1.png|32px]] Added repeater locking to redstone repeaters. Interestingly, the smallest face of the bedrock cuboid's texture changes depending on the delay, but the other two faces remain the same. When/if this changed is unknown.}}
{{History||1.5|snap=13w02a|[[File:Redstone Repeater (S) JE4.png|32px]] The side textures of redstone repeaters have been changed to use the top texture of stone [[slab]]s.}}
{{History||unknown|The breaking [[particles|particle]] of redstone repeaters has been changed once again and now matches the top texture of redstone repeaters.}}
{{History||1.8|snap=14w06a|Repeaters no longer produce block [[light]] when powered.}}
{{History|||snap=14w10a|[[File:Powered Redstone Repeater (S) JE5.png|32px]] Torches on repeaters now no longer have protruding features.
|The torches underneath redstone repeaters have now been shortened, which has changed the underside textures from [[File:Redstone Repeater JE2 BE1 (facing NWU).png|32px]] [[File: Redstone Repeater Delay 2 JE2 BE1 (facing NWU).png|32px]] [[File: Redstone Repeater Delay 3 JE2 BE1 (facing NWU).png|32px]] [[File: Redstone Repeater Delay 4 JE2 BE1 (facing NWU).png|32px]] [[File: Active Redstone Repeater JE2 BE1 (facing NWU).png|32px]] [[File: Active Redstone Repeater Delay 2 JE2 BE1 (facing NWU).png|32px]] [[File: Active Redstone Repeater Delay 3 JE2 BE1 (facing NWU).png|32px]] [[File: Active Redstone Repeater Delay 4 JE2 BE1 (facing NWU).png|32px]] [[File: Locked Redstone Repeater JE2 BE1 (facing NWU).png|32px]] [[File: Locked Redstone Repeater Delay 2 JE2 BE1 (facing NWU).png|32px]] [[File: Locked Redstone Repeater Delay 3 JE2 BE1 (facing NWU).png|32px]] [[File: Locked Redstone Repeater Delay 4 JE2 BE1 (facing NWU).png|32px]] [[File: Active Locked Redstone Repeater JE2 BE1 (facing NWU).png|32px]] [[File: Active Locked Redstone Repeater Delay 2 JE2 BE1 (facing NWU).png|32px]] [[File: Active Locked Redstone Repeater Delay 3 JE2 BE1 (facing NWU).png|32px]] [[File: Active Locked Redstone Repeater Delay 4 JE2 BE1 (facing NWU).png|32px]] to [[File:Redstone Repeater JE3 (facing NWU).png|32px]] [[File: Redstone Repeater Delay 2 JE3 (facing NWU).png|32px]] [[File: Redstone Repeater Delay 3 JE3 (facing NWU).png|32px]] [[File: Redstone Repeater Delay 4 JE3 (facing NWU).png|32px]] [[File: Active Redstone Repeater JE3 (facing NWU).png|32px]] [[File: Active Redstone Repeater Delay 2 JE3 (facing NWU).png|32px]] [[File: Active Redstone Repeater Delay 3 JE3 (facing NWU).png|32px]] [[File: Active Redstone Repeater Delay 4 JE3 (facing NWU).png|32px]] [[File: Locked Redstone Repeater JE3 (facing NWU).png|32px]] [[File: Locked Redstone Repeater Delay 2 JE3 (facing NWU).png|32px]] [[File: Locked Redstone Repeater Delay 3 JE3 (facing NWU).png|32px]] [[File: Locked Redstone Repeater Delay 4 JE3 (facing NWU).png|32px]] [[File: Locked Active Redstone Repeater JE3 (facing NWU).png|32px]] [[File: Locked Active Redstone Repeater Delay 2 JE3 (facing NWU).png|32px]] [[File: Locked Active Redstone Repeater Delay 3 JE3 (facing NWU).png|32px]] [[File: Locked Active Redstone Repeater Delay 4 JE3 (facing NWU).png|32px]].}}
{{History|||snap=14w10b|[[File:Powered Redstone Repeater (S) JE4.png|32px]] Repeater torches now have protruding features again.<ref>{{bug|MC-50242}}</ref>}}
{{History|||snap=?|[[File:Powered Redstone Repeater (S) JE7.png|32px]] The torches on redstone repeaters are now affected by directional shading.}}
{{History||1.13|snap=17w47a|All 3 IDs for the redstone repeater have now been merged into 1 ID: <code>repeater</code>.
|Added powered block state to redstone repeaters.
|Redstone repeaters now render their underside, which has changed their undersides from [[File:Redstone Repeater JE3 (facing NWU).png|32px]] [[File: Redstone Repeater Delay 2 JE3 (facing NWU).png|32px]] [[File: Redstone Repeater Delay 3 JE3 (facing NWU).png|32px]] [[File: Redstone Repeater Delay 4 JE3 (facing NWU).png|32px]] [[File: Active Redstone Repeater JE3 (facing NWU).png|32px]] [[File: Active Redstone Repeater Delay 2 JE3 (facing NWU).png|32px]] [[File: Active Redstone Repeater Delay 3 JE3 (facing NWU).png|32px]] [[File: Active Redstone Repeater Delay 4 JE3 (facing NWU).png|32px]] [[File: Locked Redstone Repeater JE3 (facing NWU).png|32px]] [[File: Locked Redstone Repeater Delay 2 JE3 (facing NWU).png|32px]] [[File: Locked Redstone Repeater Delay 3 JE3 (facing NWU).png|32px]] [[File: Locked Redstone Repeater Delay 4 JE3 (facing NWU).png|32px]] [[File: Locked Active Redstone Repeater JE3 (facing NWU).png|32px]] [[File: Locked Active Redstone Repeater Delay 2 JE3 (facing NWU).png|32px]] [[File: Locked Active Redstone Repeater Delay 3 JE3 (facing NWU).png|32px]] [[File: Locked Active Redstone Repeater Delay 4 JE3 (facing NWU).png|32px]] to [[File:Redstone Repeater JE4 BE2 (facing NWU).png|32px]] [[File: Redstone Repeater Delay 2 JE4 BE2 (facing NWU).png|32px]] [[File: Redstone Repeater Delay 3 JE4 BE2 (facing NWU).png|32px]] [[File: Redstone Repeater Delay 4 JE4 BE2 (facing NWU).png|32px]] [[File: Active Redstone Repeater JE4 BE2 (facing NWU).png|32px]] [[File: Active Redstone Repeater Delay 2 JE4 BE2 (facing NWU).png|32px]] [[File: Active Redstone Repeater Delay 3 JE4 BE2 (facing NWU).png|32px]] [[File: Active Redstone Repeater Delay 4 JE4 BE2 (facing NWU).png|32px]] [[File: Locked Redstone Repeater JE4 BE2 (facing NWU).png|32px]] [[File: Locked Redstone Repeater Delay 2 JE4 BE2 (facing NWU).png|32px]] [[File: Locked Redstone Repeater Delay 3 JE4 BE2 (facing NWU).png|32px]] [[File: Locked Redstone Repeater Delay 4 JE4 BE2 (facing NWU).png|32px]] [[File: Locked Active Redstone Repeater JE4 BE2 (facing NWU).png|32px]] [[File: Locked Active Redstone Repeater Delay 2 JE4 BE2 (facing NWU).png|32px]] [[File: Locked Active Redstone Repeater Delay 3 JE4 BE2 (facing NWU).png|32px]] [[File: Locked Active Redstone Repeater Delay 4 JE4 BE2 (facing NWU).png|32px]].
|Prior to [[1.13/Flattening|''The Flattening'']], these [[block]]s' numeral IDs were 93 and 94, and the [[item]]'s 356.}}
{{History||1.14|snap=18w43a|[[File:Redstone Repeater (S) JE5.png|32px]] [[File:Powered Redstone Repeater (S) JE9.png|32px]] [[File:Locked Redstone Repeater (S) JE5.png|32px]] [[File:Powered Locked Redstone Repeater (S) JE6.png|32px]] [[File:Redstone Repeater (item) JE3 BE2.png|32px]] The textures of redstone repeaters have now been changed.}}
{{History|||snap=18w50a|[[File:Locked Redstone Repeater (S) JE6.png|32px]] [[File:Powered Locked Redstone Repeater (S) JE7.png|32px]] As the texture of [[bedrock]] has been changed, the textures of locked redstone repeaters have also now been changed.}}
{{History|||snap=19w12b|Redstone repeaters can now be placed on [[glass]], [[ice]], [[glowstone]] and [[sea lantern]]s.}}
{{History||1.19|snap=22w13a|Redstone repeaters now generate in [[Ancient City|ancient cities]].}}
{{History||1.20.2|snap=23w33a|Redstone repeaters now use stone sounds instead of wood sounds.<ref>{{bug|MC-182820|||Fixed}}</ref>}}
{{History|pocket alpha}}
{{History||v0.14.0|snap=build 1|[[File:Redstone Repeater (S) JE3.png|32px]] [[File:Redstone Repeater (item) JE2 BE1.png|32px]] Added redstone repeaters.}}
{{History|bedrock}}
{{History||1.2.0|snap=beta 1.2.0.2|Redstone repeaters now render their underside, which has changed their undersides from [[File:Redstone Repeater JE2 BE1 (facing NWU).png|32px]] [[File: Redstone Repeater Delay 2 JE2 BE1 (facing NWU).png|32px]] [[File: Redstone Repeater Delay 3 JE2 BE1 (facing NWU).png|32px]] [[File: Redstone Repeater Delay 4 JE2 BE1 (facing NWU).png|32px]] [[File: Active Redstone Repeater JE2 BE1 (facing NWU).png|32px]] [[File: Active Redstone Repeater Delay 2 JE2 BE1 (facing NWU).png|32px]] [[File: Active Redstone Repeater Delay 3 JE2 BE1 (facing NWU).png|32px]] [[File: Active Redstone Repeater Delay 4 JE2 BE1 (facing NWU).png|32px]] [[File: Locked Redstone Repeater JE2 BE1 (facing NWU).png|32px]] [[File: Locked Redstone Repeater Delay 2 JE2 BE1 (facing NWU).png|32px]] [[File: Locked Redstone Repeater Delay 3 JE2 BE1 (facing NWU).png|32px]] [[File: Locked Redstone Repeater Delay 4 JE2 BE1 (facing NWU).png|32px]] [[File: Active Locked Redstone Repeater JE2 BE1 (facing NWU).png|32px]] [[File: Active Locked Redstone Repeater Delay 2 JE2 BE1 (facing NWU).png|32px]] [[File: Active Locked Redstone Repeater Delay 3 JE2 BE1 (facing NWU).png|32px]] [[File: Active Locked Redstone Repeater Delay 4 JE2 BE1 (facing NWU).png|32px]] to [[File:Redstone Repeater JE4 BE2 (facing NWU).png|32px]] [[File: Redstone Repeater Delay 2 JE4 BE2 (facing NWU).png|32px]] [[File: Redstone Repeater Delay 3 JE4 BE2 (facing NWU).png|32px]] [[File: Redstone Repeater Delay 4 JE4 BE2 (facing NWU).png|32px]] [[File: Active Redstone Repeater JE4 BE2 (facing NWU).png|32px]] [[File: Active Redstone Repeater Delay 2 JE4 BE2 (facing NWU).png|32px]] [[File: Active Redstone Repeater Delay 3 JE4 BE2 (facing NWU).png|32px]] [[File: Active Redstone Repeater Delay 4 JE4 BE2 (facing NWU).png|32px]] [[File: Locked Redstone Repeater JE4 BE2 (facing NWU).png|32px]] [[File: Locked Redstone Repeater Delay 2 JE4 BE2 (facing NWU).png|32px]] [[File: Locked Redstone Repeater Delay 3 JE4 BE2 (facing NWU).png|32px]] [[File: Locked Redstone Repeater Delay 4 JE4 BE2 (facing NWU).png|32px]] [[File: Locked Active Redstone Repeater JE4 BE2 (facing NWU).png|32px]] [[File: Locked Active Redstone Repeater Delay 2 JE4 BE2 (facing NWU).png|32px]] [[File: Locked Active Redstone Repeater Delay 3 JE4 BE2 (facing NWU).png|32px]] [[File: Locked Active Redstone Repeater Delay 4 JE4 BE2 (facing NWU).png|32px]].}}
{{History||1.10.0|snap=beta 1.10.0.3|[[File:Redstone Repeater (S) BE2.png|32px]] [[File:Powered Redstone Repeater (S) BE2.png|32px]] [[File:Redstone Repeater (item) JE3 BE2.png|32px]] The textures of redstone repeaters have now been changed.}}
{{History||1.20.30|snap=beta 1.20.30.20|Redstone Repeaters now use the <code>minecraft:cardinal_direction</code> [[block state]] instead of <code>direction</code>.}}
{{History|console}}
{{History||xbox=TU1|xbone=CU1|ps=1.0|wiiu=Patch 1|switch=1.0.1|[[File:Redstone Repeater (S) JE3.png|32px]]{{verify|Was this model actually used here?}} [[File:Redstone Repeater (item) JE2 BE1.png|32px]] Added redstone repeaters.}}
{{History||xbox=TU19|xbone=CU7|ps=1.12|wiiu=Patch 1|switch=1.0.1|[[File:Locked Redstone Repeater (S) JE1.png|32px]]{{verify|Was this model actually used here?}} Added repeater locking to redstone repeaters.}}
{{History||xbox=none|xbone=none|ps=1.90|wiiu=none|switch=none|[[File:Redstone Repeater (S) JE4.png|32px]]{{verify|Was this model actually used here?}} [[File:Redstone Repeater (item) JE3 BE2.png|32px]] The textures of redstone repeaters have now been changed.}}
{{History|new 3ds}}
{{History||0.1.0|[[File:Redstone Repeater (S) JE3.png|32px]]{{verify|Was this model actually used here?}} [[File:Redstone Repeater (item) JE2 BE1.png|32px]] Added redstone repeaters and repeater locking.}}
{{History|foot}}
=== Redstone repeater "items" ===
{{:Technical blocks/Redstone Repeater}}
== Issues ==
{{Issue list}}
== Trivia ==
* The recipe and appearance of redstone repeaters are a likely reference to the old method of repeating signals, which would also use two torches at a time, inverting each other
== Gallery ==
<gallery>
Repeater clock.gif|A redstone clock formed from a redstone torch and a repeater.
Repeater feedback.gif|A redstone clock formed from two repeaters.
Two way repeater.gif|MCRedstoneSim diagram of a two-way repeater.
Repeater bridge.png|Crossing redstone wires using repeaters.
Jeb Repeaters 1.png|
Jeb Repeaters 2.png|
Jeb Repeaters 3.png|
</gallery>
=== Renders ===
<gallery>
Redstone Repeater.png
Redstone Repeater Delay 2.png
Redstone Repeater Delay 3.png
Redstone Repeater Delay 4.png
Powered Redstone Repeater.png
Powered Redstone Repeater Delay 2.png
Powered Redstone Repeater Delay 3.png
Powered Redstone Repeater Delay 4.png
Locked Redstone Repeater.png
Locked Redstone Repeater Delay 2.png
Locked Redstone Repeater Delay 3.png
Locked Redstone Repeater Delay 4.png
Powered Locked Redstone Repeater.png
Powered Locked Redstone Repeater Delay 2.png
Powered Locked Redstone Repeater Delay 3.png
Powered Locked Redstone Repeater Delay 4.png
Redstone Repeater BE.png
Redstone Repeater Delay 2 BE.png
Redstone Repeater Delay 3 BE.png
Redstone Repeater Delay 4 BE.png
Powered Redstone Repeater BE.png
Powered Redstone Repeater Delay 2 BE.png
Powered Redstone Repeater Delay 3 BE.png
Powered Redstone Repeater Delay 4 BE.png
Locked Redstone Repeater BE.png
Locked Redstone Repeater Delay 2 BE.png
Locked Redstone Repeater Delay 3 BE.png
Locked Redstone Repeater Delay 4 BE.png
Powered Locked Redstone Repeater BE.png
Powered Locked Redstone Repeater Delay 2 BE.png
Powered Locked Redstone Repeater Delay 3 BE.png
Powered Locked Redstone Repeater Delay 4 BE.png
</gallery>
== References ==
{{Reflist}}
{{Redstone}}
{{Blocks|Utility}}
{{Items}}
[[Category:Mechanics]]
[[Category:Redstone mechanics]]
[[Category:Redstone]]
[[Category:Mechanisms]]
[[Category:Manufactured blocks]]
[[Category:Generated structure blocks]]
[[Category:Non-solid blocks]]
[[de:Redstone-Verstärker]]
[[es:Repetidor de redstone]]
[[fr:Répéteur de redstone]]
[[hu:Redstone-jelismétlő]]
[[it:Ripetitore di redstone]]
[[ja:レッドストーンリピーター]]
[[ko:레드스톤 중계기]]
[[nl:Redstoneversterker]]
[[pl:Przekaźnik]]
[[pt:Repetidor de redstone]]
[[ru:Красный повторитель]]
[[tr:Kızıltaş tekrarlayıcı]]
[[zh:红石中继器]]</li></ul> | 15w31a | Added the Arrow of Swiftness. | |||
Potions no longer use damage values to determine their effect, the effects moved to the Potion NBT. | |||||
1.14{{Extension DPL}}<ul><li>[[Prismarine Shard|Prismarine Shard]]<br/>{{Item
| renewable = Yes
| stackable = Yes (64)
| type =
}}
A '''prismarine shard''' is an item obtained by defeating [[guardian]]s or [[elder guardian]]s. It can be used to craft various [[prismarine]] blocks as well as [[sea lantern]]s.
== Obtaining ==
Prismarine shards are dropped upon the death of [[guardian]]s and [[elder guardian]]s. From these mobs, 0–2 shards are dropped each time. This can be increased to a maximum of 5 with the [[Looting]] enchantment.
== Usage ==
=== Crafting ingredient ===
{{crafting usage}}
== Data values ==
=== ID ===
{{edition|java}}:
{{ID table
|edition=java
|showforms=y
|generatetranslationkeys=y
|displayname=Prismarine Shard
|spritetype=item
|nameid=prismarine_shard
|form=item
|foot=1}}
{{edition|bedrock}}:
{{ID table
|edition=bedrock
|showaliasids=y
|shownumericids=y
|showforms=y
|notshowbeitemforms=y
|generatetranslationkeys=y
|displayname=Prismarine Shard
|spritetype=item
|nameid=prismarine_shard
|aliasid=prismarineshard
|id=565
|form=item
|foot=1}}
== History ==
{{History|java}}
{{history||1.8|snap=14w25a|[[File:Prismarine Shard JE1 BE1.png|32px]] Added prismarine shards.}}
{{History||1.13|snap=17w47a|Prior to [[1.13/Flattening|''The Flattening'']], this [[item]]'s numeral ID was 409.}}
{{History||1.14|snap=18w43a|[[File:Prismarine Shard JE2 BE2.png|32px]] The texture of prismarine shards has now been changed.}}
{{History|pocket alpha}}
{{History||v0.16.0|snap=build 1|[[File:Prismarine Shard JE1 BE1.png|32px]] Added prismarine shards.}}
{{History|bedrock}}
{{History||1.10.0|snap=beta 1.10.0.3|[[File:Prismarine Shard JE2 BE2.png|32px]] The texture of prismarine shards has now been changed.}}
{{History|console}}
{{History||xbox=TU31|xbone=CU19|ps=1.22|wiiu=Patch 3|[[File:Prismarine Shard JE1 BE1.png|32px]] Added prismarine shards.}}
{{History||xbox=none|xbone=none|ps=1.90|wiiu=none|switch=none|[[File:Prismarine Shard JE2 BE2.png|32px]] The texture of prismarine shards has now been changed.}}
{{History|New 3DS}}
{{History||1.3.12|[[File:Prismarine Shard JE1 BE1.png|32px]] Added prismarine shards.}}
{{History|foot}}
== Issues ==
{{issue list}}
{{items}}
[[de:Prismarinscherbe]]
[[es:Fragmento de prismarina]]
[[fr:Éclat de prismarine]]
[[ja:プリズマリンの欠片]]
[[ko:프리즈머린 조각]]
[[nl:Prismarienscherf]]
[[pl:Odłamek pryzmarynu]]
[[pt:Pedaço de prismarinho]]
[[ru:Призмариновый осколок]]
[[uk:Призмариновий уламок]]
[[zh:海晶碎片]]
[[Category:Renewable resources]]</li><li>[[Gray Dye|Gray Dye]]<br/>{{Item
| image = Gray Dye.png
| renewable = Yes
| stackable = Yes (64)
}}
'''Gray dye'''{{fn|Known as '''Grey Dye''' in British, Canadian, Australian, and New Zealand English variants.}} is a [[Dyeing#Secondary colors|secondary color]] dye.
== Obtaining ==
=== Crafting ===
{{Crafting
|Black Dye
|White Dye
|Output=Gray Dye,2
|type=Material
|head=1
|showdescription=1
|showname=0
}}
{{Crafting
|Ink Sac;Black Dye;Ink Sac
|Bone Meal;Bone Meal;White Dye
|Output=Gray Dye,2
|type=Material
|description={{only|bedrock|education}}
|foot=1
}}
=== Trading ===
[[Wandering trader]]s sell 3 gray dye for an [[emerald]].{{only|bedrock}}
== Usage ==
{{dye usage}}
=== Crafting ingredient ===
{{crafting usage|ignore=Banner|continue=1}}
{{banner crafting usage}}
=== Loom ingredient ===
{{Banner loom usage|Gray Dye}}
=== Trading ===
Journeyman-level villagers have a 20% chance to buy 12 gray dye for an emerald.
== Data values ==
=== ID ===
{{edition|java}}:
{{ID table
|edition=java
|showforms=y
|generatetranslationkeys=y
|displayname=Gray Dye
|spritetype=item
|nameid=gray_dye
|form=item
|foot=1}}
{{edition|bedrock}}:
{{ID table
|edition=bedrock
|showaliasids=y
|shownumericids=y
|showforms=y
|notshowbeitemforms=y
|generatetranslationkeys=y
|displayname=Gray Dye
|spritetype=item
|nameid=gray_dye
|aliasid=dye / 8
|id=403
|form=item
|translationkey=item.dye.gray.name
|foot=1}}
== Video ==
{{yt|wGalHy0_fj0}}
== History ==
{{History|java beta}}
{{History||1.2|[[File:Gray Dye JE1 BE1.png|32px]] Added gray dye.}}
{{History|java}}
{{History||1.4.2|snap=12w34a|Added the ability to [[Armor#Dyeing|dye]] leather [[armor]] and [[wolf]] collars.}}
{{History||1.4.6|snap=12w49a|Gray dye can be now [[crafting|crafted]] with [[gunpowder]] to create a [[firework star]].}}
{{History||1.6.1|snap=13w19a|[[Stained clay]] can now be crafted.}}
{{history||1.7.2|snap=13w36a|With the addition of new [[flower]]s, many secondary and tertiary dyes are now primary [[dye]]s.}}
{{History|||snap=13w41a|[[Stained glass]] can now be crafted.}}
{{History||1.8|snap=14w30a|Added [[banner]]s, which can be dyed.}}
{{History||1.11|snap=16w39a|Added the ability to dye [[shulker box]]es.}}
{{History||1.12|snap=17w15a|Added the ability to dye [[bed]]s.}}
{{History||1.13|snap=17w47a|The different data values for the <code>dye</code> ID have now been split up into their own IDs.
|Prior to [[1.13/Flattening|''The Flattening'']], this [[item]]'s numeral ID was 351.}}
{{History||1.14|snap=18w43a|Gray dye is now [[crafting|crafted]] using [[black dye|black]] and [[white dye]]s, instead of [[ink sac]] and [[bone meal]].
|[[File:Gray Dye JE2 BE2.png|32px]] The texture of gray dye has now been changed.}}
{{History|||snap=18w44a|Gray dye can now change the text color on the [[sign]]s to gray.}}
{{History|||snap=19w05a|Added the [[wandering trader]], which sell gray dyes.}}
{{History|||snap=19w11a|Gray dye can now be [[trading|bought]] by shepherd villagers.}}
{{History||1.17|snap=20w45a|Gray dye can now used to craft [[gray candle]]s.}}
{{History|||snap=21w19a|Gray dye can no longer be used to craft gray candles.}}
{{History|||snap=Pre-release 1|Gray dye can once again be used to craft gray candles.}}
{{History||1.20<br>(Experimental)|link=1.19.3|snap=22w42a|Gray dye can now change the text color on [[hanging sign]]s to gray.}}
{{History|pocket alpha}}
{{History||v0.3.0|[[File:Gray Dye JE1 BE1.png|32px]] Added gray dye. It is currently unobtainable and serves no purpose.}}
{{History||v0.8.0|snap=build 1|Gray dye can be [[craft]]ed with [[bone meal]] and an [[ink sac]], despite there being no way of obtaining ink sacs at the time.}}
{{History|||snap=build 3|Gray dye is now available in [[creative]] mode.}}
{{History||v0.9.0|snap=build 3|Gray dye can now be obtained in [[survival]] mode.}}
{{History|||snap=build 11|Gray dye can now be used to craft colored [[terracotta]].}}
{{History||v0.11.0|snap=build 1|Gray dye can now be used to dye tamed [[wolf]] collars.}}
{{History||v0.14.0|snap=build 1|Gray dye can now be used to dye [[water]] in [[cauldron]]s.}}
{{History|pocket}}
{{History||1.0.0|snap=alpha 0.17.0.1|Gray dye can now be used to dye [[shulker]]s.}}
{{History||1.1.0|snap=alpha 1.1.0.0|Gray dye can now be used to craft [[concrete powder]], colored [[bed]]s and dyed [[shulker box]]es.}}
{{History|bedrock}}
{{History||1.2.0|snap=beta 1.2.0.2|Gray dye can now be used to craft [[firework star]]s, [[stained glass]] and patterns on [[banner]]s.}}
{{History||1.4.0|snap=beta 1.2.20.1|Gray dye can now be used to craft [[balloon]]s and [[glow stick]]s.}}
{{History||1.8.0|snap=beta 1.8.0.8|Gray dye can now be used to dye tamed [[cat]] collars.}}
{{History||1.10.0|snap=beta 1.10.0.3|Gray dye is now [[trading|sold]] by [[wandering trader]]s.
|Gray dye can now be used to dye white [[carpet]]s and undyed [[glass pane]]s.
|[[File:Gray Dye JE2 BE2.png|32px]] The texture of gray dye has now been changed.}}
{{History||1.11.0|snap=beta 1.11.0.1|Gray dye can now be [[trading|sold]] to shepherd [[villager]]s.}}
{{History||1.16.100|snap=beta 1.16.100.56|The ID of gray dye has been changed from <code>dye/8</code> to <code>gray_dye</code>.}}
{{History|console}}
{{History||xbox=TU1|xbone=CU1|ps=1.00|switch=1.0.1|wiiu=Patch 1|[[File:Gray Dye JE1 BE1.png|32px]] Added gray dye.}}
{{History|PS4}}
{{History||1.90|[[File:Gray Dye JE2 BE2.png|32px]] The texture of gray dye has now been changed.}}
{{History|new 3ds}}
{{History||0.1.0|[[File:Gray Dye JE1 BE1.png|32px]] Added gray dye.}}
{{History|foot}}
== Issues ==
{{Issue list}}
== Notes ==
{{fnlist}}
== References ==
{{Reflist}}
{{Items}}
[[Category:Dyes]]
[[Category:Renewable resources]]
[[cs:Šedé barvivo]]
[[de:Grauer Farbstoff]]
[[es:Tinte gris]]
[[fr:Teinture grise]]
[[hu:Szürke festék]]
[[ja:灰色の染料]]
[[ko:회색 염료]]
[[nl:Grijze kleurstof]]
[[pl:Szary barwnik]]
[[pt:Corante cinza]]
[[ru:Серый краситель]]
[[zh:灰色染料]]</li></ul> | 18w43a | ||||
| 18w43b | |||||
| Pocket Edition Alpha | |||||
v0.11.0{{Extension DPL}}<ul><li>[[Minecart with Chest|Minecart with Chest]]<br/>{{ItemEntity
|image=Minecart with Chest.png
|renewable=Yes
|stackable=No
|size=Height: 0.7 Blocks<br>Width: 0.98 Blocks
|networkid='''[[JE]]''': 10
|drops=1 {{ItemLink|Minecart with Chest}}<br> plus contents
|health={{hp|6}}
}}
A '''minecart with chest''' is a single [[chest]] inside a [[minecart]], and functions as such.
== Natural generation ==
Minecarts with chests containing loot naturally generate in [[mineshaft]]s, each on top of a piece of [[rail]].
== Obtaining ==
=== Crafting ===
{{Crafting|Chest|Minecart|Output=Minecart with Chest|type=Transportation}}
Minecarts with chests can be retrieved by attacking them. By doing so it drops as an [[item]] and any other contents of the chest are dropped as well.
==Usage==
[[File:Minecart with Chest GUI.png|thumb|176px|The GUI of a minecart with chest.]]
Minecarts with chests can be placed by {{control|use item|text=using its item}} on any type of [[rail]].
Chest minecarts' contents can be accessed by pressing {{control|use item}} button on them. The interaction makes no sounds and the chest does not show the opening or closing animation, unlike regular chests.
The boost that minecarts with chests gain from [[powered rail]]s is dependent on their load. For example, from a 1 powered rail starter track, an empty minecart with chest travels 64 blocks, but a full minecart with chest travels only 16 blocks (opposed to 80 blocks for an occupied normal minecart and 8 blocks for an empty normal minecart).
Another physical property of chest minecarts is their ability to be stacked. While three chests can fit in an area three blocks tall, up to four chest minecarts can fit in the same area. Like other minecarts, an unlimited number of minecarts with chests can exist in the same block space.
Minecarts with chests are also able to interact with [[hopper]]s. Hoppers can take items out from the minecart chest if they are below the track as the minecart rolls over it or put them in if the minecart rolls under a downward facing hopper. Hoppers can also input items if they are facing into the side of the minecart.
Opening or destroying a minecart with chest angers [[piglin]]s.
{{See also|Tutorials/Storage minecarts}}
When on top of [[detector rail]]s, nearby [[redstone comparators]] will give out redstone signals based on how full the minecarts with chests are.
== Sounds ==
{{Edition|Java}}:<br>
Minecarts with chests use the Friendly Creatures sound category for entity-dependent sound events.<ref group=sound name=rollsource>{{bug|MC-42132}}</ref>
{{Sound table
|sound=Minecart rolling.ogg
|subtitle=Minecart rolls
|source=Friendly Creatures <ref group=sound name=rollsource/>
|overridesource=1
|description=While a minecart with chest is moving
|id=entity.minecart.riding
|translationkey=subtitles.entity.minecart.riding
|volume=0.0-0.35 <ref group=sound>Relates linearly with horizontal velocity (max 0.5)</ref>
|pitch=0.0-1.0 <ref group=sound>Will increase by 0.0025 per tick if the minecart's horizontal velocity is more than 0.01</ref>
|distance=16
|foot=1}}
{{Edition|Bedrock}}:
{{Sound table
|type=bedrock
|sound=Minecart rolling.ogg
|source=neutral
|description=While a minecart with chest is moving
|id=minecart.base
|foot=1}}
==Data values==
===ID===
{{edition|java}}:
{{ID table
|edition=java
|firstcolumnname=Item
|showforms=y
|generatetranslationkeys=y
|displayname=Minecart with Chest
|spritetype=item
|nameid=chest_minecart
|form=item
|foot=1}}
{{ID table
|edition=java
|firstcolumnname=Entity
|generatetranslationkeys=y
|displayname=Minecart with Chest
|spritetype=entity
|nameid=chest_minecart
|foot=1}}
{{edition|bedrock}}:
{{ID table
|edition=bedrock
|firstcolumnname=Item
|shownumericids=y
|showforms=y
|notshowbeitemforms=y
|generatetranslationkeys=y
|displayname=Minecart with Chest
|spritetype=item
|nameid=chest_minecart
|id=389
|form=item
|foot=1}}
{{ID table
|edition=bedrock
|firstcolumnname=Entity
|shownumericids=y
|generatetranslationkeys=y
|displayname=Minecart with Chest
|spritetype=entity
|nameid=chest_minecart
|id=98
|foot=1}}
===Entity data===
Minecarts with chests have entity data associated with them that contain various properties of the entity.
{{el|java}}:
{{main|Entity format}}
{{/ED}}
{{el|bedrock}}:
: See [[Bedrock Edition level format/Entity format]].
==Achievements==
{{load achievements|Freight Station}}
== Video==
<div style="text-align:center">{{yt|2yVVMiQrCwo}}</div>
==History ==
[[File:Minecart with Chest BE3.png|thumb|The Minecart models in the Bedrock Edition were north or south on the sides. In the latest version, the front and rear sides are north or south. But the absolute orientation of the chest was not changed.]]
{{info needed section|In bedrock edition 1.16.100 it seems that chests in minecarts face sideways instead of forward - when was this changed?}}
{{History|java alpha}}
{{History||v1.0.14|[[File:Minecart with Chest JE1.png|32px]] [[File:Minecart with Chest (item) JE1 BE1.png|32px]] Minecarts with chests have been added.
|At this point, they are either called "chest minecarts" or "storage minecarts" because no in-game name was indicated.}}
{{History|java beta}}
{{History||1.0|"Minecart with Chest" has been first indicated as its name, via the new item tooltips.}}
{{History||1.8|snap=Pre-release|[[File:Minecart with Chest JE2.png|32px]] The [[model]] of the minecart with chest has been changed to match the new [[chest]] model. However, the [[chest]] is incorrectly offset.<ref>[[mcw:Issues/Beta 1.8pre2#Graphical]]</ref>}}
{{History|||snap=release|[[File:Minecart with Chest JE3 BE1.png|32px]] The model of minecarts with chests has been fixed.}}
{{History|java}}
{{History||1.5|snap=13w02a|Minecarts with chests now generate in [[mineshaft]]s in place of normal chests.}}
{{History||1.9|snap=15w43a|[[Loot table]]s have been added; minecarts with chests now use loot tables, and those in generated in [[mineshaft]]s now use loot tables.}}
{{History||1.9.1|snap=pre2|The title of the [[inventory]] has been changed from 'Chest minecart' to 'Minecart with Chest'.}}
{{History||1.11|snap=16w32a|The [[entity]] ID has been changed from <code>MinecartChest</code> to <code>chest_minecart</code>.}}
{{History||1.13|snap=17w47a|Prior to [[1.13/Flattening|''The Flattening'']], this [[item]]'s numeral ID was 342.}}
{{History||1.14|snap=18w43a|[[File:Minecart with Chest JE4 BE2.png|32px]] [[File:Minecart with Chest (item) JE2 BE2.png|32px]] The textures of minecarts with chests have been changed.}}
{{History||1.16.2|snap=Pre-release 1|[[Piglin]]s now become angry with players who open or destroy a chest minecart.}}
{{History||1.19|snap=22w13a|The crafting recipe for a minecart with chest is now shapeless.
|Breaking a minecart with chest will now drop the item instead of the minecart and chest separately, though the contents of the chest are still dropped.<ref>{{bug|MC-249493|||Fixed}}</ref>}}
{{History|pocket alpha}}
{{History||v0.14.0|snap=build 1|[[File:Minecart with Chest JE3 BE1.png|32px]] [[File:Minecart with Chest (item) JE1 BE1.png|32px]] Added minecarts with chests.}}
{{History|||snap=build 3|Minecarts with chests now drop [[item]]s when destroyed in [[Creative]] mode.}}
{{History|pocket}}
{{History||1.1.0|snap=alpha 1.1.0.0|The [[entity]] ID has been changed from <code>minecartchest</code> to <code>chest_minecart</code>.}}
{{History|bedrock}}
{{History||1.10.0|snap=beta 1.10.0.3|[[File:Minecart with Chest JE4 BE2.png|32px]] [[File:Minecart with Chest (item) JE2 BE2.png|32px]] The textures of minecarts with chests have been changed.}}
{{History||1.19.0|snap=beta 1.19.0.30|Breaking a minecart with chest will now drop the item instead of the minecart and chest separately, though the contents of the chest are still dropped.}}
{{History|console}}
{{History||xbox=TU1|xbone=CU1|ps=1.0|wiiu=Patch 1|switch=1.0.1|[[File:Minecart with Chest JE3 BE1.png|32px]] [[File:Minecart with Chest (item) JE1 BE1.png|32px]] Added minecarts with chests.}}
{{History||xbox=none|xbone=none|ps=1.90|wiiu=none|switch=none|[[File:Minecart with Chest JE4 BE2.png|32px]] [[File:Minecart with Chest (item) JE2 BE2.png|32px]] The textures of minecarts with chests have been changed.}}
{{History|new 3ds}}
{{History||0.1.0|[[File:Minecart_with_Chest_JE3_BE1.png|32px]] [[File:Minecart_with_Chest_(item)_JE1_BE1.png|32px]] Added minecarts with chests.
|Minecarts with chests emit smoke [[particles]] when destroyed.}}
{{History|foot}}
==Issues==
{{issue list}}
==Gallery ==
<gallery>
Compact Minecart Storage.png|A compact storage using chest minecarts (left) compared to chest storage in the same volume. Notice how chests cannot be placed next to each other, which is no longer the case after Java Edition 1.13.
GlitchedMinecartChest.png|This minecart with chest is trapped inside a block, due to a [[stronghold]] and a [[mineshaft]] that generated partially overlapping.
Minecartportal.png|A minecart with chest generated on top of an [[end portal frame]], because there is a mineshaft behind the wall.
Chest Minecart Stack.png|A large stack of chest minecarts.
</gallery>
==References==
{{Reflist}}
{{items}}
{{entities}}
[[Category:Mechanics]]
[[Category:Storage]]
[[cs:Nákladní vozík]]
[[de:Güterlore]]
[[es:Vagoneta con cofre]]
[[fr:Wagonnet de stockage]]
[[hu:Tárolócsille]]
[[it:Carrello da miniera]]
[[ja:チェスト付きのトロッコ]]
[[ko:상자가 실린 광산 수레]]
[[nl:Mijnkar met kist]]
[[pl:Wagonik ze skrzynią]]
[[pt:Carrinho de mina com baú]]
[[ru:Вагонетка с сундуком]]
[[uk:Вагонетка зі скринею]]
[[zh:运输矿车]]</li><li>[[Cookie|Cookie]]<br/>{{Item
| title = Cookie
| image = Cookie.png
| heals = {{hunger|2}}
| renewable = Yes
| stackable = Yes (64)
}}
'''Cookies''' are [[food]] items that can be obtained in large quantities, but do not restore hunger or saturation significantly.
== Obtaining ==
=== Trading ===
Journeyman-level farmer [[villager]]s sell 18 cookies for 3 [[emerald]]s as part of their trades.
=== Crafting ===
{{Crafting
|A2= Wheat
|B2= Cocoa Beans
|C2= Wheat
|Output= Cookie,8
|type= Foodstuff
}}
=== Villager gifts ===
{{in|java}}, if the [[player]] has the [[Hero of the Village]] effect, a farmer villager may gift them a cookie.
== Usage ==
=== Food ===
To eat a cookie, press and hold {{control|use}} while it is selected in the hotbar. Eating one restores {{hunger|2}} [[hunger]] and 0.4 hunger
[[Hunger#Mechanics|saturation]].
=== Parrots ===
Feeding a cookie to a [[parrot]] kills the parrot instantly, and causes it to give off [[Poison]] [[particles]] as it dies due to chocolate being toxic to parrots.
{{IN|Bedrock}}, feeding a cookie to a parrot inflicts the parrot with [[Fatal Poison]] for 1,000 seconds.
=== Composting ===
Placing a cookie into a [[composter]] has an 85% chance of raising the compost level by 1.
Considering the high yield of cookies (8 cookies from 1 cocoa bean and 2 wheats) and the higher chance to successfully compost a cookie (85%), it is more efficient to craft cookies to compost rather than using separate ingredients. For example, 100 wheats and 50 cocoa beans, which in total could yield only 13.92 bone meal on average, could be crafted into 400 cookies to yield 48.57 bone meal on average.
== Sounds ==
{{Sound table/Entity/Food}}
== Advancements ==
{{load advancements|Husbandry;A Balanced Diet}}
== Data values ==
=== ID ===
{{edition|java}}:
{{ID table
|edition=java
|showforms=y
|generatetranslationkeys=y
|displayname=Cookie
|spritetype=item
|nameid=cookie
|form=item
|foot=1}}
{{edition|bedrock}}:
{{ID table
|edition=bedrock
|shownumericids=y
|showforms=y
|notshowbeitemforms=y
|generatetranslationkeys=y
|displayname=Cookie
|spritetype=item
|nameid=cookie
|id=271
|form=item
|foot=1}}
== History ==
{{History|java beta}}
{{History||1.4|[[File:Cookie JE1 BE1.png|32px]] Added cookies.
|Cookies restore {{hp|1}} and are currently the only stackable [[food]], up to 8 cookies per stack.}}
{{History||1.8|snap=Pre-release|Cookies can now be stacked to 64.
|Cookies now restore {{hunger|1}}.}}
{{History|java}}
{{History||1.3.1|snap=12w18a|Cocoa beans have become farmable, making cookies [[renewable resource|renewable]] and ''much'' cheaper.}}
{{History|||snap=12w19a|Cookies now restore {{hunger|2}} instead of {{hunger|1}}.}}
{{History|||snap=12w21a|Farmer [[villager]]s now [[trading|sell]] 8–10 cookies for 1 [[emerald]].}}
{{History||1.8|snap=14w02a|Farmer villagers now sell 6 cookies for 1 emerald.}}
{{History||1.11|snap=16w33a|Farmer villagers now sell 6–10 cookies for 1 emerald.}}
{{History||1.12|snap=17w13a|Cookies can now be used to tame [[parrot]]s.}}
{{History|||snap=pre3|Cookies are no longer used to tame [[parrot]]s. Instead, a cookie now instantly kills a parrot.}}
{{History||1.13|snap=17w47a|Prior to [[1.13/Flattening|''The Flattening'']], this [[item]]'s numeral ID was 357.}}
{{History||1.14|snap=18w43a|[[File:Cookie JE2 BE2.png|32px]] The texture of cookies has been changed.}}
{{History|||snap=19w03a|Placing a cookie into the new [[composter]] has a 80% chance of raising the compost level by 1.}}
{{History|||snap=19w05a|Cookies now have an 85% chance of increasing the compost level in a composter by 1.}}
{{History|||snap=19w13a|Farmer villagers now give cookies to players under the [[Hero of the Village]] effect.}}
{{History|pocket alpha}}
{{History||v0.9.0|snap=build 1|[[File:Cookie JE1 BE1.png|32px]] Added cookies.}}
{{History||v0.12.1|snap=build 1|Cookies now restore [[hunger]] instead of [[health]].}}
{{History|pocket}}
{{History||1.0.4|snap=alpha 1.0.4.0|Farmer [[villager]]s now [[trading|sell]] 6-10 cookies for 1 [[emerald]].}}
{{History|bedrock}}
{{History||1.2.0|snap=beta 1.2.0.2|Cookies can now be used to inflict a fatal [[Poison]] [[status effect]] to [[parrot]]s.}}
{{History||1.10.0|snap=beta 1.10.0.3|[[File:Cookie JE2 BE2.png|32px]] The texture of cookies has been changed.}}
{{History||1.11.0|snap=beta 1.11.0.1|Cookies can now be used to fill up [[composter]]s.}}
{{History|||snap=beta 1.11.0.4|Farmer [[villager]]s now [[trading|sell]] 18 cookies for 3 [[emerald]]s as part of their third tier [[trading|trades]].}}
{{History|console}}
{{History||xbox=TU1|xbone=CU1|ps=1.0|wiiu=Patch 1|[[File:Cookie JE1 BE1.png|32px]] Added cookies.}}
{{History||xbox=none|xbone=none|ps=1.90|wiiu=none|switch=none|[[File:Cookie JE2 BE2.png|32px]] The texture of cookies has been changed.}}
{{History|new 3ds}}
{{History||0.1.0|[[File:Cookie JE1 BE1.png|32px]] Added cookies.}}
{{History|foot}}
== Issues ==
{{issue list}}
== Gallery ==
<gallery>
File:12w21a CookiePurchase.png|Cookies being obtained by [[trading]] with a farmer [[villager]].
File:Eating Steve.png|[[Steve]] eating a cookie.
File:Eating Alex.png|Alex eating a cookie.
</gallery>
== References ==
{{reflist}}
== External Links ==
*[https://www.minecraft.net/en-us/article/taking-inventory--cookie Taking Inventory: Cookie] – Minecraft.net on August 22, 2019
{{Items}}
[[Category:Food]]
[[Category:Renewable resources]]
[[cs:Sušenka]]
[[de:Keks]]
[[es:Galleta]]
[[fr:Cookie]]
[[hu:Csokis süti]]
[[ja:クッキー]]
[[ko:쿠키]]
[[nl:Koekje]]
[[pl:Ciastko]]
[[pt:Biscoito]]
[[ru:Печенье]]
[[uk:Печиво]]
[[zh:曲奇]]</li></ul> | build 1 | ||||
v0.12.1{{Extension DPL}}<ul><li>[[Chestplate|Chestplate]]<br/>{{Update|Include information about armor trims and updated netherite upgrade information.}}
{{Item
| image = <gallery>
Leather Tunic.png | Leather
Chainmail Chestplate.png | Chainmail
Iron Chestplate.png | Iron
Diamond Chestplate.png | Diamond
Golden Chestplate.png | Golden
Netherite Chestplate.png | Netherite
</gallery>
| durability =
* Leather: 80
* Chainmail: 240
* Iron: 240
* Golden: 112
* Diamond: 528
* Netherite: 592
| renewable =
* '''Netherite''': No
* '''All Other''': Yes
| stackable = No
}}
'''Chestplates''' are a type of [[armor]] that covers the upper body of the player. There are six types of chestplates: '''leather''', '''chainmail''', '''iron''', '''diamond''', '''gold''' and '''netherite'''.
== Obtaining ==
=== Crafting ===
{{crafting
|head=1
|showname=0
|showdescription=1
|name=[[Chestplate]]
|A1= Leather;Gold Ingot;Iron Ingot;Diamond
|C1= Leather;Gold Ingot;Iron Ingot;Diamond
|A2= Leather;Gold Ingot;Iron Ingot;Diamond
|B2= Leather;Gold Ingot;Iron Ingot;Diamond
|C2= Leather;Gold Ingot;Iron Ingot;Diamond
|A3= Leather;Gold Ingot;Iron Ingot;Diamond
|B3= Leather;Gold Ingot;Iron Ingot;Diamond
|C3= Leather;Gold Ingot;Iron Ingot;Diamond
|Output= Leather Tunic;Golden Chestplate;Iron Chestplate;Diamond Chestplate
|type= Combat
}}
{{crafting
|foot=1
|ignoreusage=1
|name=[[Chestplate]]
|ingredients=Damaged Matching [[Chestplate]]
|Damaged Leather Tunic; Damaged Golden Chestplate; Damaged Chainmail Chestplate; Damaged Iron Chestplate; Damaged Diamond Chestplate; Damaged Netherite Chestplate
|Damaged Leather Tunic; Damaged Golden Chestplate; Damaged Chainmail Chestplate; Damaged Iron Chestplate; Damaged Diamond Chestplate; Damaged Netherite Chestplate
|Output= Leather Tunic; Golden Chestplate; Chainmail Chestplate; Iron Chestplate; Diamond Chestplate; Netherite Chestplate
|description= The durability of the two chestplates is added together, making a fully healed chestplate. You can get 5% more durability while using a grindstone to fix.
|type= Combat
}}
=== Upgrading ===
{{Smithing
|Netherite Upgrade
|Diamond Chestplate
|Netherite Ingot
|Netherite Chestplate
|description=
|tail=1
}}
=== Repairing ===
==== Grinding ====
{{Grinding
|showdescription=1
|ingredients=Damaged Matching Chestplates
|Damaged Leather Tunic; Damaged Chainmail Chestplate; Damaged Iron Chestplate; Damaged Golden Chestplate; Damaged Diamond Chestplate; Damaged Netherite Chestplate
|Damaged Leather Tunic; Damaged Chainmail Chestplate; Damaged Iron Chestplate; Damaged Golden Chestplate; Damaged Diamond Chestplate; Damaged Netherite Chestplate
|Leather Tunic; Chainmail Chestplate; Iron Chestplate; Golden Chestplate; Diamond Chestplate; Netherite Chestplate
|description=The durability of the two chestplates are added together, plus an extra 5% durability.
}}
==== [[Anvil mechanics#Unit repair|Unit repair]] ====
Chestplates can be repaired in an [[anvil]] by adding units of the [[armor material]]'s repair material, with each repair material restoring 25% of the chestplate's maximum durability, rounded down.
=== Mob loot ===
[[Zombie]]s and [[skeleton]]s have a small chance to spawn wearing any armor. There is an 8.5% chance (9.5% with [[Looting]] I, 10.5% with Looting II and 11.5% with Looting III) for the mob to drop a chestplate upon death. The chestplate the mob drops is usually badly damaged, and rarely enchanted.
[[Vindicator]]s and [[Pillager]]s spawning in [[raid]]s have a 4.1% chance (5.12% on hard difficulty) to drop iron chestplate, which is almost always badly damaged and rarely enchanted.
=== Natural generation ===
Two [[armor stand]]s are found in each taiga [[village]] outdoor armory, one of them equipped with an [[iron chestplate]].
=== Chest loot ===
{{IN|BE}}, a sealed room in [[woodland mansion]]s can appear that has a chest sometimes containing an [[Efficiency]] I leather tunic.<ref>{{bug|MCPE-109048}}</ref>
{{LootChestItem|leather-tunic,random-enchanted-leather-tunic,chainmail-chestplate,iron-chestplate,level-enchanted-iron-chestplate,golden-chestplate,random-enchanted-golden-chestplate,diamond-chestplate,damaged-diamond-chestplate,level-enchanted-diamond-chestplate,damaged-random-enchanted-diamond-chestplate,damaged-random-enchanted-diamond-chestplate-2}}
=== Trading ===
{{IN|java}}, novice-level armorer villagers have a 40% chance to sell an iron chestplate for 9 emeralds. Journeyman-level armorers have a 40% chance to sell a chainmail chestplate for 4 emeralds. Master-level armorers always sell an enchanted<ref group="note" name="enchantment" /> diamond chestplate for 18-35 emeralds. Novice-level leatherworker villagers have a {{frac|2|3}} chance to sell a leather tunic<ref group="note" name="dye note">The leather armor has a random color created by two dyes (possibly the same dye twice).</ref> for 7 emeralds. Journeyman-level Leatherworker villagers always offer the same trade.
Armorer villagers may give the players with the [[Hero of the Village]] effect a chainmail chestplate.
{{IN|bedrock}}, novice-level armorer villagers have a 25% chance to sell an iron chestplate for 9 emeralds. Journeyman-level armorers have a {{frac|1|3}} chance to sell a chainmail chestplate for 4 emeralds. Master-level armorers have a 50% chance to sell an enchanted<ref group="note" name="enchantment">When creating an enchantment offer, the game uses a random enchantment level from 5 – 19. The enchantments are never treasure enchantments.</ref> diamond chestplate for 16 emeralds. Novice-level leatherworker villagers have a 50% chance to sell leather tunic for 7 emeralds. Master-level leatherworkers always sell an enchanted<ref group="note" name="enchantment" /> leather tunic for 7 emeralds.
{{notelist|columns=1}}
== Usage ==
Chestplates can be placed in the 2nd armor slot of a player's [[inventory]] for activation.
=== Defense points ===
Defense points are each signified by chestplates in the armor bar above the [[health]] bar. 1 defense point is half of a chestplate in the armor bar. Each defense point reduces any damage dealt to the player, which is absorbed by armor by 4%, increasing additively with the number of defense points. Different materials and combinations of armor provide different levels of defense.
The following table shows the amount of defense points added by chestplates.
{| class="wikitable" data-description="Chestplate defense points"
|-
!scope="col" | Material
!scope="col" | Defense points
|-
!scope="row" | Leather
| {{armor|3}}
|-
!scope="row" | Golden
| rowspan="2" | {{armor|5}}
|-
!scope="row" | Chainmail
|-
!scope="row" | Iron
| {{armor|6}}
|-
!scope="row" | Diamond
| rowspan="2" | {{armor|8}}
|-
!scope="row" | Netherite
|}
===Knockback Resistance ===
A netherite chestplate provides 10% knockback resistance.
=== Durability ===
The following table shows the amount of damage each piece of armor can absorb before being destroyed.
Any "hit" from a damage source that can be blocked by armor removes one point of durability from each piece of armor worn for every {{hp|4}} of incoming damage (rounded down, but never below 1). Damage taken that unenchanted armor does not protect against (such as [[Damage#Fall damage|falling]] or [[Damage#Drowning|drowning]]) does not damage the armor, even if it is enchanted to protect against that type of damage. The following chart displays how many hits chest plates can endure.
Netherite armor is not damaged by [[lava]] or [[fire]] when worn.
{| class="wikitable" data-description="Chestplate durability"
|-
! Material
! Durability
|-
!scope="row" | Leather
| 80
|-
!scope="row" | Golden
| 112
|-
!scope="row" | Chainmail
| rowspan="2" | 240
|-
!Iron
|-
!scope="row" | Diamond
| 528
|-
!scope="row" | Netherite
| 592
|}
==== Repair ====
Chestplates may be [[item repair|repaired]] by using them along with some of their crafting material ([[leather]], [[gold ingot]]s, [[iron ingot]]s, [[diamond]]s, or [[netherite ingot]]s) in an [[anvil]]. Chainmail chestplates may be repaired in this way with iron ingots. They may also be repaired by crafting them together with another chestplate of the same material.
=== Enchantments ===
A chestplate can receive the following [[enchantment]]s:
{| class="wikitable"
|-
! Enchantment !! Max Level !! Notes
|-
| [[Fire Protection]] || IV || <ref group=note name=exclusive>Fire Protection, Blast Protection, Projectile Protection and Protection are mutually exclusive</ref>
|-
| [[Projectile Protection]] || IV || <ref group=note name="exclusive"/>
|-
| [[Blast Protection]] || IV || <ref group=note name="exclusive"/>
|-
| [[Protection]] || IV || <ref group=note name="exclusive"/>
|-
| [[Unbreaking]] || III ||
|-
| [[Thorns]] || III || <ref group="note" name="maxlvl">The max level obtainable in the enchanting table is 2</ref>
|-
| [[Mending]] || I || <ref group=note name="anvil2">Only from chest loot, fishing, or an anvil and enchanted books.</ref>
|-
| [[Curse of Binding]] || I || <ref group="note" name="anvil2"/>
|-
| [[Curse of Vanishing]] || I || <ref group="note" name="anvil2"/>
|}
{{notelist}}
=== Smelting usage ===
{{Smelting|showname=1|Iron Chestplate;Chainmail Chestplate;Golden Chestplate|Iron Nugget;Iron Nugget;Gold Nugget|0,1}}
=== Piglins ===
{{EntityLink|Piglin|Piglins}} are attracted to ''golden'' chestplates and pick them up, examining them for 6 to 8 seconds. Piglins can wear other chestplates but are not attracted to them. They prefer stronger chestplates over weaker chestplates, with one exception: They always prefer golden chestplates over all other chestplates, throwing out stronger chestplates to equip them. Enchanted chestplates are preferred over unenchanted chestplates.
== Sounds ==
{{el|je}}:
{{Sound table
|sound=Equip leather1.ogg
|sound2=Equip leather2.ogg
|sound3=Equip leather3.ogg
|sound4=Equip leather4.ogg
|sound5=Equip leather5.ogg
|sound6=Equip leather6.ogg
|subtitle=Leather armor rustles
|source=player
|description=When a leather chestplate is equipped
|id=item.armor.equip_leather
|translationkey=subtitles.item.armor.equip_leather
|volume=1.0
|pitch=1.0
|distance=16}}
{{Sound table
|sound=Equip chain1.ogg
|sound2=Equip chain2.ogg
|sound3=Equip chain3.ogg
|sound4=Equip chain4.ogg
|sound5=Equip chain5.ogg
|sound6=Equip chain6.ogg
|subtitle=Chain armor jingles
|source=player
|description=When a chainmail chestplate is equipped
|id=item.armor.equip_chain
|translationkey=subtitles.item.armor.equip_chain
|volume=1.0
|pitch=1.0
|distance=16}}
{{Sound table
|sound=Equip iron1.ogg
|sound2=Equip iron2.ogg
|sound3=Equip iron3.ogg
|sound4=Equip iron4.ogg
|sound5=Equip iron5.ogg
|sound6=Equip iron6.ogg
|subtitle=Iron armor clanks
|source=player
|description=When an iron chestplate is equipped
|id=item.armor.equip_iron
|translationkey=subtitles.item.armor.equip_iron
|volume=1.0
|pitch=1.0
|distance=16}}
{{Sound table
|sound=Equip gold1.ogg
|sound2=Equip gold2.ogg
|sound3=Equip gold3.ogg
|sound4=Equip gold4.ogg
|sound5=Equip gold5.ogg
|sound6=Equip gold6.ogg
|subtitle=Gold armor clinks
|source=player
|description=When a gold chestplate is equipped
|id=item.armor.equip_gold
|translationkey=subtitles.item.armor.equip_gold
|volume=1.0
|pitch=1.0
|distance=16}}
{{Sound table
|sound=Equip diamond1.ogg
|sound2=Equip diamond2.ogg
|sound3=Equip diamond3.ogg
|sound4=Equip diamond4.ogg
|sound5=Equip diamond5.ogg
|sound6=Equip diamond6.ogg
|subtitle=Diamond armor clangs
|source=player
|description=When a diamond chestplate is equipped
|id=item.armor.equip_diamond
|translationkey=subtitles.item.armor.equip_diamond
|volume=1.0
|pitch=1.0
|distance=16}}
{{Sound table
|sound=Equip netherite1.ogg
|sound2=Equip netherite2.ogg
|sound3=Equip netherite3.ogg
|sound4=Equip netherite4.ogg
|subtitle=Netherite armor clanks
|source=player
|description=When a netherite chestplate is equipped
|id=item.armor.equip_netherite
|translationkey=subtitles.item.armor.equip_netherite
|volume=0.8
|pitch=1.0/0.9
|distance=16}}
{{Sound table
|sound=Random break.ogg
|subtitle=Item breaks
|source=dependent
|description=When a chestplate's durability is exhausted
|id=entity.item.break
|translationkey=subtitles.entity.item.break
|volume=0.8
|pitch=0.8-1.2
|distance=16
|foot=1}}
{{el|be}}:
{{Sound table
|type=bedrock
|sound=Equip leather1.ogg
|sound2=Equip leather2.ogg
|sound3=Equip leather3.ogg
|sound4=Equip leather4.ogg
|sound5=Equip leather5.ogg
|sound6=Equip leather6.ogg
|source=player
|description=When a leather chestplate is equipped
|id=armor.equip_leather
|volume=1.0
|pitch=1.0}}
{{Sound table
|sound=Equip chain1.ogg
|sound2=Equip chain2.ogg
|sound3=Equip chain3.ogg
|sound4=Equip chain4.ogg
|sound5=Equip chain5.ogg
|sound6=Equip chain6.ogg
|source=player
|description=When a chain chestplate is equipped
|id=armor.equip_chain
|volume=1.0
|pitch=1.0}}
{{Sound table
|sound=Equip iron1.ogg
|sound2=Equip iron2.ogg
|sound3=Equip iron3.ogg
|sound4=Equip iron4.ogg
|sound5=Equip iron5.ogg
|sound6=Equip iron6.ogg
|source=player
|description=When an iron chestplate is equipped
|id=armor.equip_iron
|volume=1.0
|pitch=1.0}}
{{Sound table
|sound=Equip gold1.ogg
|sound2=Equip gold2.ogg
|sound3=Equip gold3.ogg
|sound4=Equip gold4.ogg
|sound5=Equip gold5.ogg
|sound6=Equip gold6.ogg
|source=player
|description=When a gold chestplate is equipped
|id=armor.equip_gold
|volume=1.0
|pitch=1.0}}
{{Sound table
|sound=Equip diamond1.ogg
|sound2=Equip diamond2.ogg
|sound3=Equip diamond3.ogg
|sound4=Equip diamond4.ogg
|sound5=Equip diamond5.ogg
|sound6=Equip diamond6.ogg
|source=player
|description=When a diamond chestplate is equipped
|id=armor.equip_diamond
|volume=1.0
|pitch=1.0}}
{{Sound table
|sound=Equip netherite1.ogg
|sound2=Equip netherite2.ogg
|sound3=Equip netherite3.ogg
|sound4=Equip netherite4.ogg
|source=player
|description=When a netherite chestplate is equipped.
|id=armor.equip_netherite
|volume=1.0
|pitch=1.0}}
{{Sound table
|rowspan=2
|sound=Water Splash Old.ogg
|source=block
|description=When a leather chestplate is dyed using a cauldron
|id=cauldron.dyearmor
|volume=0.1
|pitch=1.0}}
{{Sound table
|source=block
|description=When a leather chestplate's dye is removed using a cauldron
|id=cauldron.cleanarmor
|volume=0.1
|pitch=1.0}}
{{Sound table
|sound=Random break.ogg
|source=player
|description=When a chestplate's durability is exhausted
|id=random.break
|volume=1.0
|pitch=0.9
|foot=1}}
== Data values ==
=== ID ===
{{edition|java}}:
{{ID table
|edition=java
|showitemtags=y
|showforms=y
|generatetranslationkeys=y
|displayname=Leather Tunic
|spritetype=item
|nameid=leather_chestplate
|itemtags=freeze_immune_wearables
|form=item}}
{{ID table
|displayname=Chainmail Chestplate
|spritetype=item
|nameid=chainmail_chestplate
|form=item}}
{{ID table
|displayname=Iron Chestplate
|spritetype=item
|nameid=iron_chestplate
|form=item}}
{{ID table
|displayname=Diamond Chestplate
|spritetype=item
|nameid=diamond_chestplate
|form=item}}
{{ID table
|displayname=Golden Chestplate
|spritetype=item
|nameid=golden_chestplate
|form=item}}
{{ID table
|displayname=Netherite Chestplate
|spritetype=item
|nameid=netherite_chestplate
|form=item
|foot=1}}
{{edition|bedrock}}:
{{ID table
|edition=bedrock
|shownumericids=y
|showforms=y
|notshowbeitemforms=y
|generatetranslationkeys=y
|displayname=Leather Tunic
|spritetype=item
|nameid=leather_chestplate
|id=336
|form=item}}
{{ID table
|displayname=Chainmail Chestplate
|spritetype=item
|nameid=chainmail_chestplate
|id=340
|form=item}}
{{ID table
|displayname=Iron Chestplate
|spritetype=item
|nameid=iron_chestplate
|id=344
|form=item}}
{{ID table
|displayname=Diamond Chestplate
|spritetype=item
|nameid=diamond_chestplate
|id=348
|form=item}}
{{ID table
|displayname=Golden Chestplate
|spritetype=item
|nameid=golden_chestplate
|id=352
|form=item}}
{{ID table
|displayname=Netherite Chestplate
|spritetype=item
|nameid=netherite_chestplate
|id=610
|form=item
|foot=1}}
=== Item data ===
When leather tunics are dyed, it has the following NBT:
<div class="treeview">
* {{nbt|compound|tag}}: Parent tag.
** {{nbt|compound|display}}: Display properties.
*** {{nbt|int|color}}: The color of the leather armor. The tooltip displays "Dyed" if advanced tooltips are disabled, otherwise it displays the hexadecimal color value. Color codes are calculated from the Red, Green and Blue components using this formula:<br>'''<span style="color:red">Red</span>[[wikipedia:Logical shift|<<]]16 + <span style="color:green">Green</span><<8 + <span style="color:blue">Blue</span>'''<ref>For positive values larger than 0x00FFFFFF, the top byte is ignored. All negative values produce white.</ref>
</div>
== Achievements ==
{{load achievements|Iron Man;Tie Dye Outfit;Cover me in debris;Oooh, shiny!}}
== Advancements ==
{{load advancements|Suit Up;Cover me With Diamonds;Oh Shiny;Cover Me in Debris}}
== History ==
{{History|java classic}}
{{History||June 14, 2009|link=wordofnotch:123343045|[[Notch]] discussed how armor would work in [[Survival]] mode: "Two types of swords, two types of armor, two types of helmets. The basic versions require iron. The advanced versions require steel, which you make by combining iron and coal. Carrying swords, armor or helmets take up inventory slots, but otherwise have no penalty and work pretty much as you expect (prevent some damage, or cause more damage)".}}
{{History||August 13, 2009|link=wordofnotch:162091556|Notch tested chestplates on the [[human]]. They were merely aesthetic at the time and had no effect on gameplay.}}
{{History||0.24_SURVIVAL_TEST|[[File:Plate Chestplate.png|32px]] Added the [[Java_Edition_removed_features#Armor_in_Survival_Test|plate chestplate]].
|[[File:Chainmail Chestplate JE1.png|32px]] Added the model and the texture for the unused [[Java_Edition_removed_features#Armor_in_Survival Test|chain chestplate]].
|[[File:Zombie full set.png|32px]] [[File:Skeleton helmet.png|26px]] The plate chestplate has been tested on [[zombie]]s and [[skeleton]]s. It had no effect on gameplay.}}
{{History|java indev}}
{{History||0.31|snap=20091223-1|Plate and chain armor chestplates are no longer used.}}
{{History|||snap=20091231-2|[[File:Leather Tunic (item) JE1 BE1.png|32px]] [[File:Studded Chestplate (item) JE1.png|32px]] [[File:Chainmail Chestplate (item) JE1 BE1.png|32px]] [[File:Iron Chestplate (item) JE1 BE1.png|32px]] Added the single item form of relation to leather, [[History of textures/Unused textures#Studded armor|studded]], chainmail, and plate (iron) chestplates.
|The textures of the cloth chestplate are taken from one of [[Notch]]'s previous games, ''[[Legend of the Chambered]]''. The rest are from ''[[Legend of the Chambered 2]]''.}}
{{History||20100206|[[File:Golden Chestplate (item) JE1 BE1.png|32px]] [[File:Diamond Chestplate (item) JE1 BE1.png|32px]] Added the item form of golden and diamond chestplates.
|Removed the leather-chain chestplate.}}
{{History||February 9, 2010|link=wordofnotch:380486636|[[File:Notch revealed armor.png|32px]] [[Notch]] revealed new models for armor - including chestplates.}}
{{History||20100212-1|Added armor models.
|[[File:Indev 20100212 armor.png|50px]] Armor models are now displayed on the [[player]] in the [[inventory]].}}
{{History||20100218|[[File:Leather Tunic JE1 BE1.png|32px]] [[File:Chainmail Chestplate JE2 BE1.png|32px]] [[File:Iron Chestplate JE1 BE1.png|32px]] [[File:Golden Chestplate JE1 BE1.png|32px]] [[File:Diamond Chestplate JE1 BE1.png|32px]] Added models of cloth, chainmail, iron, gold, and diamond chestplates.
|Chestplates can now be [[crafting|crafted]] and worn.
|Chestplates now functions. All chestplates give {{Armor|8}}. Chestplates have limited [[item durability|durability]], with lower tier chestplates less durable than higher tier chestplates.}}
{{History|java alpha}}
{{History||v1.0.8|With the introduction of [[leather]], "Cloth Chestplate" has been renamed to "Leather Tunic".
|Leather tunics is now [[crafting|crafted]] with leather instead of [[wool|cloth]].}}
{{History|java}}
{{History||1.0.0|snap=Beta 1.9 Prerelease|The armor protection behavior has been changed. Previous to this update, the total armor protection is based in this equation: ((''total equipped armor damage reduction'' − 1) × (''all equipped armor max damage'' − ''total equipped armor damage'')) ÷ (''total equipped armor max damage'' + 1)). Armor no longer reduces certain damage types to be covered by enchantments.}}
{{History|||snap=October 3, 2011|slink={{tweet|notch|120859830339637249}}|The first images of a [[player]] wearing enchanted chestplates are revealed.}}
{{History|||snap=Beta 1.9 Prerelease 3|Iron chestplates can now be found in the new [[stronghold]] altar [[chest]]s.}}
{{History|||snap=Beta 1.9 Prerelease 4|Chestplates can now be [[enchanting|enchanted]].}}
{{History||1.1|snap=12w01a|Iron chestplates can now be found in the new blacksmith [[chest]]s in [[village]]s.}}
{{History||1.3.1|snap=12w15a|{{key|Shift}}+clicking can now be used to wear chestplates.}}
{{History|||snap=12w21a|Chainmail chestplates can now be obtained legitimately in [[survival]] mode through [[trading]].
|Blacksmith [[villager]]s now [[trading|sell]] chainmail chestplates for 11–14 emeralds.
|Blacksmith villagers now sell diamond chestplates for 16–18 emeralds.
|Blacksmith villagers now sell iron chestplates for 10–13 emeralds.
|Butchers now sell leather tunics for 4 emeralds.}}
{{History||1.4.2|snap=12w32a|[[Mob]] armor has been reintroduced. A partial or full set of any armor is now sometimes worn by [[zombie]]s, [[skeleton]]s and [[zombified piglins|zombie pigmen]], with the likelihood increasing with difficulty.}}
{{History|||snap=August 17, 2012|slink={{tweet|Dinnerbone|236445090929844225}}|[[Jeb]] and [[Dinnerbone]] tweeted pictures of [[dye]]able leather chestplates.}}
{{History|||snap=12w34a|Leather tunics can now be dyed by [[crafting]] a leather tunic piece with [[dye]]s. Dyes can be removed by {{control|use|text=using}} dyed leather tunics on a [[cauldron]] with [[water]].
|[[File:Leather Tunic JE2.png|32px]] [[File:Leather Tunic (item) JE2.png|32px]] Default leather tunic textures are now slightly darker and have buttons.}}
{{History|||snap=12w34b|[[File:Leather Tunic JE3 BE2.png|32px]] [[File:Leather Tunic (item) JE3 BE2.png|32px]] [[File:Diamond Chestplate JE2.png|32px]] The texture of leather and diamond chestplates has been changed. Leather tunics now have longer sleeves. Diamond chestplates now have notches under the shoulders.}}
{{History|||snap=12w36a|[[Dye]]d leather tunics are now more saturated and have a slight tint of tan in respect to the default armor color.}}
{{History|||snap=12w37a|[[File:Leather Cap JE3 BE2.png|32px]] [[File:Leather Boots JE2 BE2.png|32px]] [[File:Leather Cap (item) JE3 BE2.png|32px]] [[File:Leather Boots (item) JE3 BE2.png|32px]] Leather armor now have non-dyed parts on cap, pants and boots. This has been implemented so that [[player]]s can distinguish between other types of armor and similarly colored leather armor.}}
{{History||1.4.6|snap=12w50a|The [[Thorns]] enchantment can now be [[enchanting|enchanted]] on chestplates.}}
{{History||1.5|snap=13w04a|Armor in the [[player]]'s hand can now be equipped by right-clicking.
|[[Dispenser]]s can now equip nearby players with armor.}}
{{History||1.6.1|snap=13w18a|Golden chestplates are now found in the new [[chest]]s in [[nether fortress]]es.}}
{{History||1.7.2|snap=13w36a|Leather [[boots]] can now be obtained as one of the "junk" items by [[fishing]].}}
{{History||1.8|snap=14w02a|[[Trading|Trades]] changed: armorer [[villager]]s now [[trading|sell]] chain boots for 5–7 [[emerald]]s, chain [[leggings]] for 9–11 emeralds, chain chestplates for 11–15 emeralds and chain helmets for 5–7 emeralds.
|Armorer villagers now sell enchanted diamond chestplates for 16–19 emeralds, and no longer sell other diamond armor.
|Armorer villagers now sell iron chestplates for 10–14 emeralds and iron helmets for 4–6 emeralds, and no longer sell other iron armor.
|Leatherworkers now sell enchanted leather tunics for 7–12 emeralds, and no longer sell other leather armor.}}
{{History|||snap=14w05a|Armor no longer turns red when [[mob]]s and [[player]]s are hurt.}}
{{History|||snap=14w06a|Armor is now visible on [[giant]]s.}}
{{History|||snap=14w25a|Chain armor [[Java Edition removed features#Chainmail armor|cannot be crafted anymore]] due to the [[item]] form of [[fire]] being [[Java Edition removed features#Obtainable until 1.8|removed]].}}
{{History||1.9|snap=15w31a|Enchanted iron and diamond armor can now be found in [[end city]] ship [[chest]]s.
|[[Mob]]s now wear armor from the bottom to the top, rather than from the top to the bottom. This means that a mob with three armor pieces, for example, spawn with all armor except a helmet.}}
{{History|||snap=15w34b|Armor [[item durability|durability]] now affects armor value.}}
{{History|||snap=15w36a|Armor and armor [[enchanting|enchantment]] calculations have been changed. For the original values, see [[Armor/Before 1.9|here]].}}
{{History|||snap=15w36d|Armor durability affecting value has been removed.
|Armor now has an attribute controlling the defense points.}}
{{History|||snap=15w43a|The average yield of gold chestplates in [[nether fortress]] [[chest]]s has been decreased.}}
{{History|||snap=15w50a|Added <code>equip</code> [[sound]]s for all types of armor.}}
{{History|||snap=16w02a|Armor and armor enchantment calculations have been changed again.}}
{{History|||snap=16w05a|Armor calculations have been changed, once again.}}
{{History||1.11|snap=16w39a|Diamond and chainmail chestplates are now found in the new [[woodland mansion]] chests.}}
{{History||1.11.1|snap=16w50a|Golden, chain and iron armor can now be [[smelting|smelted]] down into one of their respective [[nugget]]s.}}
{{History||1.13|snap=17w47a|Prior to [[1.13/Flattening|''The Flattening'']], these [[item]]s' numeral IDs were 298 through 317.}}
{{History|||snap=18w09a|Leather tunics now have a chance of generating in [[underwater ruins]].}}
{{History|||snap=18w10a|Leather tunics can now generate in [[buried treasure]] [[chest]]s.}}
{{History|||snap=18w11a|Enchanted leather tunics can now generate in the chests of [[shipwreck]]s.}}
{{History|||snap=18w20a|Chain armor pieces have been renamed to "chainmail".}}
{{History||1.14|snap=18w43a|[[File:Leather Tunic JE4 BE2.png|32px]] [[File:Chainmail Chestplate JE3 BE2.png|32px]] [[File:Iron Chestplate JE2 BE2.png|32px]] [[File:Golden Chestplate JE2 BE2.png|32px]] [[File:Diamond Chestplate JE3 BE2.png|32px]] [[File:Leather Tunic (item) JE4 BE3.png|32px]] [[File:Chainmail Chestplate (item) JE2 BE2.png|32px]] [[File:Iron Chestplate (item) JE2 BE2.png|32px]] [[File:Golden Chestplate (item) JE2 BE2.png|32px]] [[File:Diamond Chestplate (item) JE2 BE2.png|32px]] The textures of all types of armor have been changed.}}
{{History|||snap=18w48a|Leather tunics can now be found in [[chest]]s in [[village]] tanneries.}}
{{History|||snap=18w50a|Iron chestplates can now be found on [[armor stand]]s in [[taiga]] villages.}}
{{History|||snap=19w08a|[[File:Golden Chestplate (item) JE3 BE3.png|32px]] The textures of gold chestplate [[item]] have been changed.}}
{{History|||snap=19w11a|Leatherworker villagers now sell randomly [[dye]]d leather tunics, instead of enchanted leather tunics.}}
{{History|||snap=19w13a|Armorer villagers now give chainmail chestplates to players under the [[Hero of the Village]] effect.}}
{{History||1.16|snap=20w06a|[[File:Netherite Chestplate JE1.png|32px]] [[File:Netherite Chestplate (item) JE1.png|32px]] Added netherite chestplate.}}
{{History|||snap=20w10a|[[File:Netherite Chestplate JE2 BE1.png|32px]] [[File:Netherite Chestplate (item) JE2 BE1.png|32px]] The texture of netherite chestplate have been changed.
|Netherite chestplate can no longer be [[crafting|crafted]].
|Netherite chestplate is now obtained by combining one diamond armor piece and one netherite ingot in a [[smithing table]].}}
{{History|||snap=20w16a|All parts of golden and netherite chestplates now generate randomly [[enchanting|enchanted]], and sometimes [[damage]]d, in [[bastion remnant]] and [[ruined portal]] chests.}}
{{History|||snap=20w17a|Diamonds chestplates now generates in place of netherite armor in bastion remnant [[chest]]s.}}
{{History||1.17|snap=20w48a|Wearing any piece of leather armor now prevents [[Powder Snow#Freezing|freezing]] entirely.}}
{{History||1.18.2|snap=22w03a|Netherite chestplate knockback resistance is no longer random.}}
{{History||1.20<br>(Experimental)|link=1.19.4|snap=23w04a|Non-leather chestplates can now be trimmed using a [[smithing table]].
|There are 10 types of material that determine the color of the trim:
*Iron
*Copper
*Gold
*Lapis
*Emerald
*Diamond
*Netherite
*Redstone
*Amethyst
*Quartz
|Upgrading diamond chestplate to netherite chestplate now requires the netherite upgrade [[smithing template]].}}
{{History|||snap=23w05a|Leather tunics can now be trimmed using a smithing table.|Chestplates can now have trims of the same material it is made out of.|The texture of the dune armor trim has been tweaked, so that the symbol on the chestplate is moved up a few pixels.}}
{{History|||snap=23w06a|Swapped {{cd|iron}} and {{cd|iron_darker}} palette, then made {{cd|iron_darker}} darker overall.|Added a darkest pixel to {{cd|chestplate_trim}} trim item texture.}}
{{History||1.19.4|snap=23w05a|Chestplates can now be swapped by {{ctrl|using}} them/elytra in the hotbar.<ref>{{bug|MC-216270|||Fixed}}</ref>}}
{{History||?|Chestplates can now be swapped in [[armor stand]]s by {{ctrl|using}} them/elytra in the armor stand's slot.}}
{{History||1.20|snap=23w12a|The pattern textures of dune and sentry armor trims are changed.|
Those previous patterns were left with different names: dune was renamed sentry and sentry was renamed shaper.}}
{{History|pocket alpha}}
{{History||v0.6.0|[[File:Leather Tunic JE1 BE1.png|32px]] [[File:Chainmail Chestplate JE2 BE1.png|32px]] [[File:Iron Chestplate JE1 BE1.png|32px]] [[File:Golden Chestplate JE1 BE1.png|32px]] [[File:Diamond Chestplate JE1 BE1.png|32px]] [[File:Leather Tunic (item) JE1 BE1.png|32px]] [[File:Chainmail Chestplate (item) JE1 BE1.png|32px]] [[File:Iron Chestplate (item) JE1 BE1.png|32px]] [[File:Golden Chestplate (item) JE1 BE1.png|32px]] [[File:Diamond Chestplate (item) JE1 BE1.png|32px]] Added chestplates.}}
{{History||v0.8.0|snap=build 2|[[File:Leather Tunic (item) JE3 BE2.png|32px]] The leather armor sprites have been changed to that of {{el|je}}, but its armor [[model]] remains that of older versions.}}
{{History||v0.9.0|snap=build 1|Iron armor now naturally generates in [[village]] [[chest]]s and a [[stronghold]] altar chest.}}
{{History||v0.11.0|snap=build 11|Armor now protects against [[damage]] from [[mob]]s only.}}
{{History||v0.12.1|snap=build 1|Armor can now be worn by mobs.
|Golden chestplates can now be found in [[nether fortress]] [[chest]]s.
|Chainmail armor can now be obtained in [[survival]] mode from a mob wearing it.}}
{{History||?|Armor no longer turns red when [[mob]]s and [[player]]s are hurt.}}
{{History||v0.14.0|snap=build 1|[[File:Leather Tunic JE3 BE2.png|32px]] The textures of leather chestplate have been changed.
|Leather armor can now be dyed.}}
{{History||v0.15.0|snap=build 1|Armor can now be obtained from [[stray]]s and [[husk]]s that naturally spawn with armor.}}
{{History||v0.15.10|[[Cape]]s no longer clip through armor.}}
{{History|pocket}}
{{History||1.0.0|snap=alpha 0.17.0.1|[[Enchanting|Enchanted]] iron armor and enchanted diamond armor can now be found inside [[chest]]s within [[end city]].}}
{{History||1.0.4|snap=alpha 1.0.4.0|Iron [[helmet]]s, iron chestplates, enchanted diamond chestplates and chainmail armor are now [[trading|sold]] by armorer smith [[villager]]s via [[trading]].}}
{{History||1.1.0|snap=alpha 1.1.0.0|Golden, chain and iron armor can now be [[smelting|smelted]] down into one of their respective [[nugget]]s.
|Diamond chestplates and chainmail chestplates can now be found inside [[woodland mansion]] chests.}}
{{History|bedrock}}
{{History||1.4.0|snap=beta 1.2.14.2|Chainmail chestplates now generate in [[buried treasure]] chests.
|Enchanted leather armor can now be found inside [[shipwreck]] supply room [[chest]]s.}}
{{History|||snap=beta 1.2.20.1|Leather chestplates can now be found inside [[underwater ruins]] chests.}}
{{History||1.10.0|snap=beta 1.10.0.3|[[File:Leather Tunic JE4 BE2.png|32px]] [[File:Chainmail Chestplate JE3 BE2.png|32px]] [[File:Iron Chestplate JE2 BE2.png|32px]] [[File:Golden Chestplate JE2 BE2.png|32px]] [[File:Diamond Chestplate JE3 BE2.png|32px]] [[File:Leather Tunic (item) JE4 BE3.png|32px]] [[File:Chainmail Chestplate (item) JE2 BE2.png|32px]] [[File:Iron Chestplate (item) JE2 BE2.png|32px]] [[File:Golden Chestplate (item) JE2 BE2.png|32px]] [[File:Diamond Chestplate (item) JE2 BE2.png|32px]] The textures of all types of chestplates have been changed.
|Iron armor now can be found in plains [[village]] weaponsmith [[chest]]s.
|Leather armor can now be found inside plains village tannery chests.}}
{{History||1.11.0|snap=beta 1.11.0.1|Iron armor now can be found in [[savanna]], [[taiga]], [[desert]], [[snowy taiga]] and [[snowy tundra]] [[village]] weaponsmith [[chest]]s.
|Leather armor can now be found inside savanna, taiga, desert, snowy taiga and snowy tundra village tannery chests.}}
{{History|||snap=beta 1.11.0.4|[[Pillager]]s and [[vindicator]]s that spawn in [[raid]]s can now drop iron armor.}}
{{History||1.11.0|snap=beta 1.11.0.5|[[File:Golden Chestplate (item) JE3 BE3.png|32px]] The textures of gold chestplate [[item]] have been changed.}}
{{History||1.12.0|snap=beta 1.12.0.2|[[File:Armor Stand with Leather Armor MCPE-44669.png|32px]] Leather armor no longer show as being [[dye]]d properly when worn by [[armor stand]]s.}}
{{History||1.13.0|snap=beta 1.13.0.1|Leather armor now appears dyed properly when worn by armor stands.}}
{{History||1.16.0|snap=beta 1.16.0.51|[[File:Netherite Chestplate JE2 BE1.png|32px]] [[File:Netherite Chestplate (item) JE2 BE1.png|32px]] Added netherite chestplate.
|Armor can now be obtained from [[piglin]]s that naturally spawn with golden armor.}}
{{History|||snap=beta 1.16.0.57|All parts of golden and netherite armor now generate randomly [[enchanting|enchanted]], and sometimes [[damage]]d, in [[bastion remnant]] chests.
|Netherite armor can no longer be [[crafting|crafted]].
|Netherite armor is now obtained by combining one diamond armor piece and one netherite ingot in a [[smithing table]].}}
{{History|||snap=beta 1.16.0.63|Diamonds armor now generates in place of netherite armor in bastion remnant [[chest]]s.}}
{{History|||snap=beta 1.16.200.53|Netherite Armor now gives a 90% reduction in Knockback.}}
{{History||1.16.210|snap=beta 1.16.210.53|Wearing any piece of leather armor now prevents [[Powder Snow#Freezing|freezing]] entirely.}}
{{History|console}}
{{History||xbox=TU1|xbone=CU1|ps=1.0|wiiu=Patch 1|switch=1.0.1|[[File:Leather Tunic JE1 BE1.png|32px]] [[File:Chainmail Chestplate JE2 BE1.png|32px]] [[File:Iron Chestplate JE1 BE1.png|32px]] [[File:Golden Chestplate JE1 BE1.png|32px]] [[File:Diamond Chestplate JE1 BE1.png|32px]] [[File:Leather Tunic (item) JE1 BE1.png|32px]] [[File:Chainmail Chestplate (item) JE1 BE1.png|32px]] [[File:Iron Chestplate (item) JE1 BE1.png|32px]] [[File:Golden Chestplate (item) JE1 BE1.png|32px]] [[File:Diamond Chestplate (item) JE1 BE1.png|32px]] Added chestplates.
|Added a quick equip for armor to the [[inventory]] interface.}}
{{History||xbox=TU12|ps=1.03|[[File:Leather Tunic JE3 BE2.png|32px]] [[File:Leather Tunic (item) JE3 BE2.png|32px]] The textures for leather chestplate have been changed.}}
{{History||xbox=TU14|ps=1.05|Leather armor can now be [[dye]]d.
|[[Item repair]] can now repair armor.}}
{{History||xbox=TU25|xbone=CU13|ps=1.16|Armor now have the quick equip functionality.}}
{{History||xbox=TU53|xbone=CU43|ps=1.49|wiiu=Patch 23|switch=1.0.3|Golden, chain and iron armor can now be [[smelting|smelted]] down into one of their respective [[nugget]]s.}}
{{History|PS4}}
{{History||1.90|[[File:Chainmail Chestplate (item) JE2 BE2.png|32px]] [[File:Iron Chestplate (item) JE2 BE2.png|32px]] [[File:Golden Chestplate (item) JE2 BE2.png|32px]] [[File:Diamond Chestplate (item) JE2 BE2.png|32px]] The textures of all types of chestplate items have been changed (except for the leather one).}}
{{History|new 3ds}}
{{History||0.1.0|[[File:Leather Tunic JE1 BE1.png|32px]] [[File:Chainmail Chestplate JE2 BE1.png|32px]] [[File:Iron Chestplate JE1 BE1.png|32px]] [[File:Golden Chestplate JE1 BE1.png|32px]] [[File:Diamond Chestplate JE1 BE1.png|32px]] [[File:Leather Tunic (item) JE3 BE2.png|32px]] [[File:Chainmail Chestplate (item) JE1 BE1.png|32px]] [[File:Iron Chestplate (item) JE1 BE1.png|32px]] [[File:Golden Chestplate (item) JE1 BE1.png|32px]] [[File:Diamond Chestplate (item) JE1 BE1.png|32px]] Added chestplates.}}
{{History|foot}}
; Armor durability from Indev until late Beta
{| class="wikitable" data-description="Armor Durability during Indev until late Beta" style="text-align:center;"
|-
!scope="col" | Material
!scope="col" | Helmet
!scope="col" | Chestplate
!scope="col" | Leggings
!scope="col" | Boots
|-
|scope="row" | '''Leather'''
| 33
| 48
| 45
| 39
|-
|scope="row" | '''Golden'''
| 66
| 96
| 90
| 78
|-
|scope="row" | '''Chainmail'''
| 66
| 96
| 90
| 78
|-
|scope="row" | '''Iron'''
| 132
| 192
| 180
| 156
|-
|scope="row" | '''Diamond'''
| 264
| 384
| 360
| 312
|}
== Issues ==
{{issue list}}
== Trivia ==
* Chestplates do not render on the player's arm in first person view.<ref>{{bug|MC-25512}}</ref><ref>{{bug|MCPE-30000}}</ref>
== Gallery ==
=== Enchanted Chestplates ===
<gallery>
File:Enchanted Leather Tunic (item).gif
File:Enchanted Chainmail Chestplate (item).gif
File:Enchanted Iron Chestplate (item).gif
File:Enchanted Golden Chestplate (item).gif
File:Enchanted Diamond Chestplate (item).gif
File:Enchanted Netherite Chestplate (item).gif
</gallery>
<gallery>
File:Enchanted Leather Chestplate.gif
File:Enchanted Chainmail Chestplate.gif
File:Enchanted Iron Chestplate.gif
File:Enchanted Golden Chestplate.gif
File:Enchanted Diamond Chestplate.gif
File:Enchanted Netherite Chestplate.gif
</gallery>
== References ==
{{reflist}}
== External Links ==
*[https://www.minecraft.net/en-us/article/taking-inventory--chestplate Taking Inventory: Chestplate] – Minecraft.net on August 4, 2021
{{Items}}
[[Category:Armor]]
[[ja:チェストプレート]]
[[ko:흉갑]]
[[pt:Peitoral]]
[[pl:Napierśnik]]
[[th:เสื้อเกราะ]]
[[zh:胸甲]]</li><li>[[Hoe|Hoe]]<br/>{{Item
| image = <gallery>
Wooden Hoe.png | Wooden
Stone Hoe.png | Stone
Iron Hoe.png | Iron
Golden Hoe.png | Golden
Diamond Hoe.png | Diamond
Netherite Hoe.png | Netherite
</gallery>
|rarity = Common
|renewable =
* '''Netherite''': No
* '''All others''': Yes
| durability =
* Wood: 59
* Stone: 131
* Iron: 250
* Golden: 32
* Diamond: 1561
* Netherite: 2031
| stackable = No
}}
A '''hoe''' is a [[tool]] used to harvest certain plant-based or organic blocks more quickly, as well as to till most types of [[Dirt (disambiguation)|dirt]] into [[farmland]] and convert [[Coarse Dirt|coarse dirt]] and [[Rooted Dirt|rooted dirt]] to regular [[dirt]].
== Obtaining ==
=== Crafting ===
{{Crafting
|head=1
|showname=0
|showdescription=1
|name=[[Hoe]]
|A1= {Any Planks}; Iron Ingot; Gold Ingot; Diamond
|B1= {Any Planks}; Iron Ingot; Gold Ingot; Diamond
|B2= Stick
|B3= Stick
|Output=Wooden Hoe; Iron Hoe; Golden Hoe; Diamond Hoe
|type=Tool
}}
{{Crafting
|name=[[Stone Hoe]]
|A1=Any stone-tier block |B1=Any stone-tier block
|B2=Stick
|B3=Stick
|Output=Stone Hoe
|type=Tool
||description=Can use cobblestone and its other variants interchangeably.
}}
{{Crafting
|foot=1
|ignoreusage=1
|name=[[Hoe]]
|ingredients=Damaged Matching Hoe
|Damaged Wooden Hoe; Damaged Stone Hoe; Damaged Iron Hoe; Damaged Golden Hoe; Damaged Diamond Hoe; Damaged Netherite Hoe
|Damaged Wooden Hoe; Damaged Stone Hoe; Damaged Iron Hoe; Damaged Golden Hoe; Damaged Diamond Hoe; Damaged Netherite Hoe
|Output=Wooden Hoe; Stone Hoe; Iron Hoe; Golden Hoe; Diamond Hoe; Netherite Hoe
|description= The durability of the two hoes is added together, plus an extra 5% durability.
|type= Tool
}}
=== Upgrading ===
Like other diamond tools, a diamond hoe can be upgraded to a netherite hoe, increasing its durability and slightly increasing its mining speed.
{{Smithing
|head=1
|Netherite Upgrade
|Diamond Hoe
|Netherite Ingot
|Netherite Hoe
|tail=1
}}
=== Repairing ===
==== Grinding ====
{{Grinding
|showdescription=1
|ingredients=2x Damaged [[Wooden Hoe]] or<br>2x Damaged [[Stone Hoe]] or<br>2x Damaged [[Iron Hoe]] or<br>2x Damaged [[Golden Hoe]] or<br>2x Damaged [[Diamond Hoe]] or<br>2x Damaged [[Netherite Hoe]]
|Damaged Wooden Hoe; Damaged Stone Hoe; Damaged Iron Hoe; Damaged Golden Hoe; Damaged Diamond Hoe; Damaged Netherite Hoe
|Damaged Wooden Hoe; Damaged Stone Hoe; Damaged Iron Hoe; Damaged Golden Hoe; Damaged Diamond Hoe; Damaged Netherite Hoe
|Wooden Hoe; Stone Hoe; Iron Hoe; Golden Hoe; Diamond Hoe; Netherite Hoe
|description=The durability of the two hoes is added together, plus an extra 5% durability.
}}
==== Unit repair ====
{{main|Anvil mechanics#Unit repair}}
{{/Repairing with Anvils}}
A hoe can be repaired in an [[anvil]] by adding units of the [[tiers]]' repair material (or the same hoe of that tier), with each repair material restoring 25% of the hoe's maximum durability, rounded down. It also keeps the hoe's [[Enchanting|enchantments]].
=== Chest loot ===
{{LootChestItem|wooden-hoe,diamond-hoe,golden-hoe,random-enchanted-golden-hoe,damaged-level-enchanted-diamond-hoe}}
=== Trading ===
Novice-level toolsmith [[villager]]s have a chance to sell a stone hoe for one [[emerald]], and journeyman-level toolsmiths have a chance to sell a diamond hoe for 4 emeralds. {{IN|bedrock}}, these are 25% chances, and {{in|java}}, these are 40% chances.
=== Villager gifts ===
Toolsmith [[Villager|villagers]] occasionally throw stone hoes at players with the [[Hero of the Village]] status effect.{{Only|java}}
== Usage ==
=== Harvesting ===
Hoes are used to harvest certain plant-based or organic blocks more quickly. Breaking one of these blocks takes 1 [[durability]].
{{breaking row|Sculk Catalyst|sort=1|simple=1}}
{{breaking row|Sculk Shrieker|sort=1|simple=1}}
{{breaking row|Sculk Sensor|sort=1|simple=1}}
{{breaking row|Calibrated Sculk Sensor|sort=1|simple=1}}
{{breaking row|Nether Wart Block,Warped Wart Block|sort=1|simple=1}}
{{breaking row|Shroomlight|sort=1|simple=1}}
{{breaking row|Hay Bale|sort=1|simple=1}}
{{breaking row|Target|sort=1|simple=1}}
{{breaking row|Dried Kelp Block|sort=1|simple=1}}
{{breaking row|Sponge,Wet Sponge|sort=1|simple=1}}
{{breaking row|Leaves|sort=1|simple=1}}
{{breaking row|Sculk|sort=1|simple=1}}
{{breaking row|Sculk Vein|sort=1|simple=1}}
{{breaking row|Moss Block|foot=1}}
Breaking any other block takes 0 durability if the block breaks instantly when broken by hand, or 1 otherwise.
=== Tilling ===
Hoes are used to turn dirt, grass blocks, and dirt paths into [[farmland]]. To till, press {{control|use}} on a grass or dirt block while holding a hoe. This does not work on [[mycelium]] or [[podzol]],<ref>{{bug|MC-8231||Mycelium and podzol cannot be tilled with hoes}}</ref> nor does it work if there are other blocks on top of the targeted blocks, including snow layers or torches. However, mycelium and podzol can be first converted to dirt paths with a shovel, then tilled into farmland with a hoe.
Hoes can be used to convert [[coarse dirt]] into regular dirt by pressing {{control|use}} on the coarse dirt. Similar to tilling dirt, the space above the coarse dirt must be empty for it to be tilled.
Hoes can also be used on [[rooted dirt]], which turns it into normal dirt, and yields a [[hanging roots]] item.
Tilling is effectively instantaneous, regardless of material, and uses 1 durability. Breaking blocks with a hoe uses 0 or 1 durability, depending on the block.
Hoes are unable to work on blocks with a plant on top, even if that plant could normally be placed on top of farmland without reverting it to dirt.<ref>{{bug|MC-167846||Hoe cannot be used on blocks with certain blocks on top even if said blocks can normally exist on farmland|WAI}}</ref>
=== Weapon ===
Hoes may be used as a weapon, although they deal only {{hp|1}} damage {{in|java}}. {{IN|bedrock}}, hoes can do as much as a pickaxe in terms of damage. Hoes use 2 durability when used as a weapon.
{{IN|java}}, hoes have an attack speed modifier depending on the material: wood and gold have a modifier of -3 (refill in 1s), stone has a modifier of -2 (refill in 0.5s), iron has a modifier of -1 (refill in 0.33s), and diamond and netherite have a modifier of 0 (refill in 0.25s).
{| class="wikitable" style="text-align:center" data-description="Attack damage"
! Attack damage
! colspan="4" | Attack speed
! colspan="4" | Damage/Second (DPS)
|-
| {{hp|1}}
| {{ItemSprite|Wooden Hoe}}{{ItemSprite|Golden Hoe}} 1
| {{ItemSprite|Stone Hoe}} 2
| {{ItemSprite|Iron Hoe}} 3
| {{ItemSprite|Diamond Hoe}}{{ItemSprite|Netherite Hoe}} 4
| {{ItemSprite|Wooden Hoe}}{{ItemSprite|Golden Hoe}} 1
| {{ItemSprite|Stone Hoe}} 2
| {{ItemSprite|Iron Hoe}} 3
| {{ItemSprite|Diamond Hoe}}{{ItemSprite|Netherite Hoe}} 4
|}
Hoes always attack instantly {{in|bedrock}}.
=== Enchantments ===
A hoe can receive the following enchantments and curses:
{| class="wikitable col-2-center"
|+
!Name
!Max Level
![[Enchanting|Method]]
|-
|[[Efficiency]]
|V
|{{Inventory slot|Enchanting Table}}{{Inventory slot|Anvil}}
|-
|[[Fortune]] <ref group=note name=note1>Fortune and Silk Touch are mutually exclusive.</ref>
|III
|{{Inventory slot|Enchanting Table}}{{Inventory slot|Anvil}}
|-
|[[Unbreaking]]
|III
|{{Inventory slot|Enchanting Table}}{{Inventory slot|Anvil}}
|-
|[[Silk Touch]] <ref group=note name=note1>Fortune and Silk Touch are mutually exclusive.</ref>
|I
|{{Inventory slot|Enchanting Table}}{{Inventory slot|Anvil}}
|-
|[[Mending]]
|I
|{{Inventory slot|Anvil}}
|-
|[[Curse of Vanishing]]
|I
|{{Inventory slot|Anvil}}
|}
{{Notelist}}
=== Fuel ===
Wooden hoes can be used as a [[fuel]] in [[furnace]]s, smelting 1 item per hoe.
=== Smelting ingredient ===
{{Smelting|showname=1|Iron Hoe;Golden Hoe|Iron Nugget;Gold Nugget|0,1}}
===Piglins===
{{EntityLink|Piglin|Piglins}} are attracted to golden hoes and run toward any golden hoes on the ground, and inspect them for 6 to 8 seconds before putting them in their inventory.
== Sounds ==
{{edition|java}}:
{{Sound table
|sound=Hoe till1.ogg
|sound2=Hoe till2.ogg
|sound3=Hoe till3.ogg
|sound4=Hoe till4.ogg
|subtitle=Hoe tills
|source=block
|description=When a block is tilled into farmland
|id=item.hoe.till
|translationkey=subtitles.item.hoe.till
|volume=1.0
|pitch=1.0
|distance=16}}
{{Sound table
|sound=Random break.ogg
|subtitle=Item breaks
|source=player
|description=When a hoe's durability is exhausted
|id=entity.item.break
|translationkey=subtitles.entity.item.break
|volume=0.8
|pitch=0.8-1.2
|distance=16
|foot=1}}
{{edition|bedrock}}:
{{Sound table
|type=bedrock
|sound=Gravel hit1.ogg
|sound2=Gravel hit2.ogg
|sound3=Gravel hit3.ogg
|sound4=Gravel hit4.ogg
|source=block
|description=When a block is tilled into farmland
|id=use.gravel
|volume=1.0
|pitch=0.8}}
{{Sound table
|sound=Random break.ogg
|source=player
|description=When a hoe's durability is exhausted
|id=random.break
|volume=1.0
|pitch=0.9
|foot=1}}
== Data values ==
=== ID ===
{{edition|java}}:
{{ID table
|edition=java
|showforms=y
|generatetranslationkeys=y
|displayname=Wooden Hoe
|spritetype=item
|nameid=wooden_hoe
|form=item}}
{{ID table
|displayname=Stone Hoe
|spritetype=item
|nameid=stone_hoe
|form=item}}
{{ID table
|displayname=Iron Hoe
|spritetype=item
|nameid=iron_hoe
|form=item}}
{{ID table
|displayname=Diamond Hoe
|spritetype=item
|nameid=diamond_hoe
|form=item}}
{{ID table
|displayname=Golden Hoe
|spritetype=item
|nameid=golden_hoe
|form=item}}
{{ID table
|displayname=Netherite Hoe
|spritetype=item
|nameid=netherite_hoe
|form=item
|foot=1}}
{{edition|bedrock}}:
{{ID table
|edition=bedrock
|shownumericids=y
|showforms=y
|notshowbeitemforms=y
|generatetranslationkeys=y
|displayname=Wooden hoe
|spritetype=item
|nameid=wooden_hoe
|id=329
|form=item}}
{{ID table
|displayname=Stone hoe
|spritetype=item
|nameid=stone_hoe
|id=330
|form=item}}
{{ID table
|displayname=Iron hoe
|spritetype=item
|nameid=iron_hoe
|id=331
|form=item}}
{{ID table
|displayname=Diamond hoe
|spritetype=item
|nameid=diamond_hoe
|id=332
|form=item}}
{{ID table
|displayname=Golden hoe
|spritetype=item
|nameid=golden_hoe
|id=333
|form=item}}
{{ID table
|displayname=Netherite hoe
|spritetype=item
|nameid=netherite_hoe
|id=608
|form=item
|foot=1}}
== Achievements ==
{{load achievements|Time to Farm!; MOAR Tools;Oooh, shiny!}}
== Advancements ==
{{load advancements|Oh Shiny;Serious Dedication;A Seedy Place}}
== Video ==
<div style="text-align:center">{{yt|Wkqfv6QLEs0}}</div>
== History ==
{{History|java indev}}
{{History||20100206|[[File:Wooden Hoe JE1 BE1.png|32px]] [[File:Stone Hoe JE1 BE1.png|32px]] [[File:Iron Hoe JE1 BE1.png|32px]] [[File:Golden Hoe JE1 BE1.png|32px]] [[File:Diamond Hoe JE1 BE1.png|32px]] Added hoes.
|Compared to other golden tools, golden hoes had much higher durability, which was 513 instead of 33.}}
{{History|java alpha}}
{{History||v1.0.17|Golden hoes' durability has been decreased from 513 to 65, matching the stone tools.}}
{{History|java beta}}
{{History||1.2|Golden hoes now have the same durability as the other gold tools.}}
{{History||1.6|snap=Test Build 3|Before, using a hoe on [[grass block]]s was the only way to collect [[Wheat Seeds|seeds]] for planting. As [[tall grass]] has been introduced, this feature has been removed.}}
{{History|java}}
{{History||1.2.1|snap=12w07a|Player is now unable to till [[dirt]] or [[grass block]] when there is block on top of them.}}
{{History||1.2.4|snap=release|[[Spruce planks]], [[birch planks]], and [[jungle planks]] can now be used to craft wooden hoes.}}
{{History||1.3.1|snap=12w18a|Wooden hoes can now be used as [[Smelting#Fuel|fuel]] in a [[furnace]].}}
{{History|||snap=12w21a|Blacksmith [[villager]]s now [[trading|sell]] 1 diamond hoe for 7 [[emerald]]s, and 1 iron hoe for 4–5 emeralds.}}
{{History||1.4.2|snap=12w38a|Hoes now have a [[sound]] when tilling [[dirt]].}}
{{History||1.7.2|snap=1.7.1|[[Acacia planks]] and [[dark oak planks]] can now be used to craft wooden hoes.}}
{{History||1.8|snap=14w02a|Villagers no longer trade iron or diamond hoes, making diamond hoes [[non-renewable resource|non-renewable]].}}
{{History|||snap=14w32a|Hoes can now be used to convert [[coarse dirt]] into regular [[dirt]].}}
{{History||1.9|snap=15w34c|Stone, iron and diamond hoes now do slightly more [[damage]] than an unarmed attack.}}
{{History|||snap=15w34d|All hoes now lose 1 [[durability]] when used as a [[weapon]].}}
{{History|||snap=15w35a|Hoes now all do the same damage, but better materials have higher speeds.}}
{{History|||snap=15w50a|Added a [[sound]] for hoes: <code>item.hoe.till</code>.}}
{{History||1.11|snap=16w39a|Diamond hoes are now found in the new [[woodland mansion]] [[chest]]s.}}
{{History||1.11.1|snap=16w50a|Golden and iron hoes can now be [[smelting|smelted]] down into one of their respective [[nugget]]s.}}
{{History||1.13|snap=17w47a|Prior to ''[[1.13/Flattening|The Flattening]]'', these items' numeral IDs were 290 (wooden), 291 (stone), 292 (iron), 293 (diamond) and 294 (golden).}}
{{History||1.14|snap=18w43a|[[File:Wooden Hoe JE2 BE2.png|32px]] [[File:Stone Hoe JE2 BE2.png|32px]] [[File:Iron Hoe JE2 BE2.png|32px]] [[File:Golden Hoe JE2 BE2.png|32px]] [[File:Diamond Hoe JE2 BE2.png|32px]] The textures of all hoes have been changed.}}
{{History|||snap=19w11a|Toolsmith villagers now sell stone hoes and diamond hoes, making diamond hoes [[renewable resource|renewable]] again.}}
{{History|||snap=19w13a|Toolsmith villagers now give stone hoes to players under the [[Hero of the Village]] effect.}}
{{History||1.16|snap=20w06a|[[File:Netherite Hoe JE1.png|32px]] Added netherite hoes.
|Netherite hoes are obtained by combining one diamond hoe and one netherite ingot in a crafting table.
|[[Crimson planks]] and [[warped planks]] can now be used to craft wooden hoes.}}
{{History|||snap=20w09a|Hoes can now break [[Nether Wart Block|nether wart and warped wart block]]s quickly.
|Netherite hoes can now be obtained through [[bartering]] with [[piglin]]s.
|[[File:Wooden Hoe JE3 BE3.png|32px]] [[File:Golden Hoe JE3 BE3.png|32px]] [[File:Diamond Hoe JE3 BE3.png|32px]] The textures of wooden, golden, and diamond hoes have been changed.}}
{{History|||snap=20w10a|Each tier of hoes now has different a speed while [[breaking|mining]] blocks they are effective against.
|Hoes can now be enchanted with [[Efficiency]], [[Fortune]] and [[Silk Touch]].
|Hoes now mine [[hay bale]]s faster than other tools.
|Netherite hoes are now less common when bartering with piglins.
|Hoes now lose 2 durability when used as a weapon.
|[[File:Netherite Hoe JE2.png|32px]] The texture of netherite hoes has been changed.
|Netherite hoes can no longer be [[crafted]].
|Netherite hoes are now obtained by combining one diamond hoe and one [[netherite ingot]] in a [[smithing table]].}}
{{History|||snap=20w11a|Hoes can now mine [[dried kelp block]]s, [[target]]s, and [[shroomlight]]s faster than other [[tool]]s.}}
{{History|||snap=20w12a|Hoes can now mine [[sponge]]s faster than other tools.}}
{{History|||snap=20w15a|Hoes can now mine [[leaves]] faster.
|Stone hoes can now be crafted using [[blackstone]].}}
{{History|||snap=20w16a|Golden hoes now generate randomly enchanted in [[bastion remnant]]s and [[ruined portal]] chests.}}
{{History|||snap=20w20a|Netherite hoes can no longer be obtained through bartering with piglins, making them no longer renewable.}}
{{History||1.17|snap=20w49a|Hoes can now mine [[sculk sensor]]s faster than other tools.}}
{{History|||snap=21w11a|Hoes are now the appropriate tool for breaking [[moss block]]s.}}
{{History|||snap=21w08a|Stone hoes can now be crafted using [[cobbled deepslate]].}}
{{History|||snap=21w20a|Hoes can now be used on [[rooted dirt]], turning it into normal dirt, yielding a [[hanging roots]] item.}}
{{History||1.19|snap=22w11a|[[Mangrove planks]] can now be used to craft wooden hoes.}}
{{History|||snap=22w12a|Hoes can now mine mangrove [[leaves]] faster.<ref>{{Cite bug|MC|249270|Mangrove leaves do not have a hoe as their preferred tool|date=March 19, 2022}}</ref>}}
{{History|||snap=22w13a|Diamond hoes may now be found in [[ancient city]] [[chest]]s.}}
{{History||1.20<br>(Experimental)|link=1.19.4|snap=23w04a|Upgrading diamond hoes to netherite hoes now requires the netherite upgrade [[smithing template]].}}
{{History||1.20|snap=23w12a|Wooden hoes may now be found when brushing [[suspicious sand]] and [[suspicious gravel]] in cold and warm [[ocean ruins]] and [[trail ruins]].}}
{{History|||snap=23w16a|Wooden hoe no longer generates in [[suspicious sand]] in [[trail ruins]].|Due to the split of the archaeological loot tables for the suspicious gravel within the [[trail ruins]]; wooden hoe now is in the common loot.}}
{{History|upcoming java}}
{{History||Combat Tests|snap=1.14.3 - Combat Test|The attack speed of wooden hoes has been changed to 2, stone to 2.5, and diamond and gold to 3.5.
|The [[damage]] dealt for wooden, stone, and gold hoes have been changed to {{hp|2}} and iron and diamond hoes to {{hp|3}}.
|The attack reach of hoes has been increased to 4 [[block]]s.}}
{{History|pocket alpha}}
{{History||v0.4.0|[[File:Wooden Hoe JE1 BE1.png|32px]] [[File:Stone Hoe JE1 BE1.png|32px]] [[File:Iron Hoe JE1 BE1.png|32px]] [[File:Golden Hoe JE1 BE1.png|32px]] [[File:Diamond Hoe JE1 BE1.png|32px]] Added hoes.
|Only iron hoes are available in the Creative inventory.
|[[Wheat seed]]s are now obtained by using a hoe on [[grass]] blocks.}}
{{History||v0.8.0|snap=build 3|[[Beetroot seeds]], [[carrot]]s, and [[potato]]es are now obtained by using a hoe on [[grass]] blocks.}}
{{History|||snap=build 4|[[Carrot]]s and [[potato]]es no longer spawn from tilling [[grass]] blocks with a hoe.}}
{{History||v0.11.0|snap=build 11|Wooden, stone, golden, and diamond hoes are now available in the [[creative]] [[inventory]].}}
{{History|||snap=build 12|Wooden, stone, golden, and diamond hoes have been removed from creative.}}
{{History|||snap=build 13|All hoes are now available in [[creative]] mode again.}}
{{History||v0.16.2|Wooden hoes can now be found inside the [[chest]] in the large house of [[ice plains]] [[village]]s.}}
{{History|pocket}}
{{History||1.1.0|snap=alpha 1.1.0.0|Iron and golden hoes are now [[smelting|smeltable]].
|Diamond hoes can now be found inside [[woodland mansion]] [[chest]]s.}}
{{History|bedrock}}
{{History||1.2.0|snap=beta 1.2.0.2|Hoes can now be used to transform [[coarse dirt]] into normal [[dirt]].}}
{{History||1.10.0|snap=beta 1.10.0.3|Due to [[village]]s being overhauled, wooden hoes can no longer be found in [[village]]s.
|[[File:Wooden Hoe JE2 BE2.png|32px]] [[File:Stone Hoe JE2 BE2.png|32px]] [[File:Iron Hoe JE2 BE2.png|32px]] [[File:Golden Hoe JE2 BE2.png|32px]] [[File:Diamond Hoe JE2 BE2.png|32px]] The textures of all hoes have been changed.}}
{{History||1.11.0|snap=beta 1.11.0.4|Stone and diamond hoes can now be [[trading|bought]] from toolsmith [[villager]]s.}}
{{History||1.12.0|snap=beta 1.12.0.4|The price of diamond hoes [[trading|sold]] by toolsmith villagers has been lowered to 4 [[emerald]]s.}}
{{History||1.16.0|snap=beta 1.16.0.51|[[File:Netherite Hoe BE1.png|32px]] Added netherite hoes.|Netherite hoes are obtained by combining one diamond hoe and one netherite ingot in a crafting table.
|[[File:Wooden Hoe JE3 BE3.png|32px]] [[File:Golden Hoe JE3 BE3.png|32px]] [[File:Diamond Hoe JE3 BE3.png|32px]] The textures of wooden, golden, and diamond hoes have been changed.}}
{{History|||snap=beta 1.16.0.57|Each tier of hoes now has different a speed while [[breaking|mining]] blocks they are effective against.
|Hoes can now break [[hay bale]]s, [[dried kelp block]]s, [[target block]]s, [[Sponge|dry and wet sponges]], [[shroomlight]]s, [[leaves]], [[Nether Wart Block|nether wart and warped wart block]]s quickly.
|Hoes can now be enchanted with [[Efficiency]], [[Fortune]] and [[Silk Touch]].
|Netherite hoes can now be obtained through [[bartering]] with [[piglin]]s.
|Netherite hoes can no longer be [[crafting|crafted]].
|Netherite hoes are now obtained by combining one diamond hoe and one [[netherite ingot]] in a [[smithing table]].
|Stone Hoes can now be created using Blackstone.
|Golden and netherite hoes now generate randomly enchanted in [[bastion remnants]] chests.
|Golden hoes now generate randomly enchanted in ruined portal chests.
|Hoes now deal the same damage as pickaxes of each tier.}}
{{History||1.16.100|snap=beta 1.16.100.54|Netherite hoes can no longer be obtained through [[bartering]] with [[piglin]]s, making them no longer renewable.}}
{{History||1.17.10|snap=beta 1.17.10.20|[[File:Netherite Hoe JE2.png|32px]] The texture of netherite hoes has been changed to match ''Java Edition''.}}
{{History|console}}
{{History||xbox=TU1|xbone=CU1|ps=1.0|wiiu=Patch 1|switch=1.0.1|[[File:Wooden Hoe JE1 BE1.png|32px]] [[File:Stone Hoe JE1 BE1.png|32px]] [[File:Iron Hoe JE1 BE1.png|32px]] [[File:Golden Hoe JE1 BE1.png|32px]] [[File:Diamond Hoe JE1 BE1.png|32px]] Added hoes (all five types).}}
{{History||xbox=TU53|xbone=CU43|ps=1.49|wiiu=Patch 23|switch=1.0.3|Iron and golden hoes are now [[smelting|smeltable]].}}
{{History|ps4}}
{{History||1.90|[[File:Wooden Hoe JE2 BE2.png|32px]] [[File:Stone Hoe JE2 BE2.png|32px]] [[File:Iron Hoe.png|32px]] [[File:Golden Hoe JE2 BE2.png|32px]] [[File:Diamond Hoe JE2 BE2.png|32px]] The textures of all hoes have been changed.}}
{{History|New 3DS}}
{{History||0.1.0|[[File:Wooden Hoe JE1 BE1.png|32px]] [[File:Stone Hoe JE1 BE1.png|32px]] [[File:Iron Hoe JE1 BE1.png|32px]] [[File:Golden Hoe JE1 BE1.png|32px]] [[File:Diamond Hoe JE1 BE1.png|32px]] Added hoes.}}
{{History|foot}}
== Issues ==
{{issue list}}
== Trivia ==
*Tilling a [[dirt]] block that has a dirt block on top of it changes it to [[farmland]] even though it cannot be used. If a hoe is used on a [[block]] horizontally adjacent to such a block, the first block reverts to dirt and the selected block is not tilled.
*When a hoe breaks, it does not display the tool breaking animation like on other tools, because tilling is not predicted client-side.
*The textures for the post 1.14 iron and stone hoes have an error, where the color for the edge of the handle is partly the same color as the edge of the top part. This isn't present in any other tool.
== Gallery ==
<gallery>
Stone Hoe SDGP.png|Stone hoe in the [[Super Duper Graphics Pack]].
Kingbdogz Hoe.jpg|[[Kingbdgoz]] holding a hoe.
</gallery>
=== Enchanted hoes ===
<gallery>
Enchanted Wooden Hoe.gif
Enchanted Stone Hoe.gif
Enchanted Iron Hoe.gif
Enchanted Golden Hoe.gif
Enchanted Diamond Hoe.gif
Enchanted Netherite Hoe.gif
</gallery>
== References ==
{{reflist}}
== External Links ==
*[https://www.minecraft.net/en-us/article/taking-inventory--hoe Taking Inventory: Hoe] – Minecraft.net on June 25, 2019
{{Items}}
[[Category:Combat]]
[[cs:Motyka]]
[[de:Hacke]]
[[es:Azada]]
[[fr:Houe]]
[[hu:Kapa]]
[[it:Zappa]]
[[ja:クワ]]
[[ko:괭이]]
[[nl:Schoffel]]
[[pl:Motyka]]
[[pt:Enxada]]
[[ru:Мотыга]]
[[tr:Çapa]]
[[uk:Мотика]]
[[zh:锄]]</li></ul> | build 1 | Speed can now be obtained through potions and splash potion. | |||
v0.14.0{{Extension DPL}}<ul><li>[[Super Fertilizer|Super Fertilizer]]<br/>{{education feature}}
{{Exclusive|Bedrock|Education}}
{{Item
| image = Super Fertilizer.png
| renewable = No
| stackable = Yes (64)
}}
'''Super fertilizer''' is a powerful form of [[bone meal]] that is created using [[ammonia]] and [[phosphorus]].
== Obtaining ==
=== Lab table ===
{| class="wikitable"
! Result
! Materials Needed
|-
!rowspan=2|{{slot|Super Fertilizer}}<br>[[Super Fertilizer]]
|{{slot}}{{slot|Ammonia|link=Compound}}{{slot|Phosphorus|link=Element}}{{slot}}
|-
|<center>[[Compound|Ammonia]], [[Element|Phosphorus]]</center>
|}
== Usage ==
Super fertilizer can be used in the same way as bone meal. It produces more [[flowers]] in a larger area when used on [[grass block]]s compared to bone meal. When super fertilizer is used on a [[sapling]], a [[tree]] is instantly grown after one use, instead of multiple uses as with bone meal. Super fertilizer matures crops with a single use.
Note that super fertilizer does not instantly grow a hanging [[mangrove propagule]]. This could be a bug.
== Sounds ==
{{Sound table
|type=bedrock
|sound=Gravel hit1.ogg
|sound2=Gravel hit2.ogg
|sound3=Gravel hit3.ogg
|sound4=Gravel hit4.ogg
|source=player
|description=When super fertilizer is created by a [[lab table]]
|id=step.gravel
|volume=1.0
|pitch=0.2/0.4}}
{{Sound table
|sound=Bonemeal1.ogg
|sound2=Bonemeal2.ogg
|sound3=Bonemeal3.ogg
|sound4=Bonemeal4.ogg
|sound5=Bonemeal5.ogg
|description=When super fertilizer is successfully used
|source=Blocks
|id=item.bone_meal.use
|foot=1}}
== Data values ==
=== ID ===
{{ID table
|edition=bedrock
|shownumericids=y
|showforms=y
|notshowbeitemforms=y
|generatetranslationkeys=y
|displayname=Super Fertilizer
|spritetype=item
|nameid=rapid_fertilizer
|id=597
|form=item
|foot=1}}
== History ==
{{History|bedrock}}
{{History||1.4.0|snap=beta 1.2.20.1|[[File:Super Fertilizer BE1.png|32px]] Added super fertilizer.}}
{{History|education}}
{{History||1.0.27|[[File:Super Fertilizer BE1.png|32px]] Added super fertilizer.}}
{{History|foot}}
{{items}}
{{Education Edition}}
[[Category:Plants]]
[[Category:Non-renewable resources]]
[[Category:Education Edition items]]
[[de:Superdünger]]
[[ja:スーパー肥料]]
[[ko:슈퍼 비료]]
[[lzh:神肥]]
[[pl:Supernawóz]]
[[pt:Super fertilizante]]
[[uk:Супердобриво]]
[[zh:超级肥料]]</li><li>[[Crossbow|Crossbow]]<br/>{{For}}
{{Item
| title = Crossbow
| image = <gallery>
Crossbow.png | Crossbow
Crossbow Pull 0.png | Pull (state 0)
Crossbow Pull 1.png | Pull (state 1)
Crossbow Pull 2.png | Pull (state 2)
Arrow Loaded Crossbow.png | Arrow loaded
Firework Loaded Crossbow.png | Firework loaded
</gallery>
| rarity = Common
| renewable = Yes
| durability = 465{{only|JE|short=yes}}<br>464{{only|BE|short=1}}
| stackable = No
}}
A '''crossbow''' is a ranged [[weapon]] similar to a [[bow]] that uses [[arrow]]s or [[firework rocket|fireworks]] as ammunition.
== Obtaining ==
=== Crafting ===
{{Crafting
|A1=Stick|B1=Iron Ingot |C1=Stick
|A2=String|B2= Tripwire Hook|C2=String
|B3= Stick
|Output= Crossbow
|type= Combat
}}
=== Repairing ===
{{Grinding
|showdescription=1
|ingredients=2× Damaged [[Crossbow]] or<br>2× Damaged [[Arrow Loaded Crossbow]] or<br>2× Damaged [[Firework Loaded Crossbow]]
|Damaged Crossbow; Damaged Arrow Loaded Crossbow; Damaged Firework Loaded Crossbow
|Damaged Crossbow; Damaged Arrow Loaded Crossbow; Damaged Firework Loaded Crossbow
|Crossbow; Arrow Loaded Crossbow; Firework Loaded Crossbow
|description=The [[item durability|durability]] of the two crossbows is added together, plus an extra 5% durability.
}}
{{Crafting
|Damaged Crossbow;Damaged Arrow Loaded Crossbow;Damaged Firework Loaded Crossbow
|Damaged Crossbow;Damaged Arrow Loaded Crossbow;Damaged Firework Loaded Crossbow
|Output=Crossbow
|type=Combat
|ignoreusage=1
|showdescription=1
|description=The durability of the two crossbows is added together, plus an extra 5% durability. Any loaded ammunition is lost.
}}
=== Mob loot ===
==== Pillagers ====
When killed, a [[pillager]] has a small chance (8.5%) of dropping a loaded or unloaded crossbow with random [[durability]]; the [[drop]] rate increases by 1% per [[level]] of [[Looting]]: 9.5% with Looting I, 10.5% with Looting II and 11.5% with Looting III. The [[drop]]ped crossbow can rarely (10% chance) be [[enchanted]] at level 5–19 regardless of being [[enchanted]] when it [[spawn]]ed.
Crossbows dropped by pillagers may have multiple enchantments, including duplicate enchantments on the same weapon.
==== Piglins ====
[[Piglin]]s have a chance of wielding a crossbow upon spawning, and they also have a small chance (8.5%) of dropping a loaded or unloaded crossbow of random durability when killed; this rate increases by 1% per level of [[Looting]]: 9.5% with Looting I, 10.5% with Looting II and 11.5% with Looting III. It can rarely (10% chance) be enchanted at level 5–19 regardless of being enchanted when spawned.
=== Chest loot ===
{{LootChestItem|crossbow,damaged-level-enchanted-crossbow,damaged-random-enchanted-crossbow,damaged-random-enchanted-crossbow-2}}
=== Trading ===
Journeyman-level Fletcher [[villager]]s offer to [[trading|sell]] an unenchanted crossbow for 3 [[emerald]]s.
Master-level Fletcher villagers have a {{frac|1|16}} (6.25%) chance of selling an [[enchanting|enchanted]] crossbow for 8 emeralds.{{only|bedrock}}
Master-level Fletcher villagers have {{frac|2|3}} chance of selling an enchanted crossbow for 7-22 emeralds.{{only|java}}
== Usage ==
<gallery>
Steve aiming with Crossbow.png|
Alex aiming with Crossbow.png|
Pillager Aiming with Crossbow BE.png|
Piglin with Crossbow targeting JE.png|
</gallery>
Despite using [[iron ingot]]s in their crafting recipe, crossbows cannot be smelted into [[iron nugget]]s.<ref>{{bug|MC-111738}}</ref>
=== Weapon ===
[[File:Crossbowcooldown.gif|thumb|right|Charging and shooting the crossbow {{in|bedrock}}.]]
Crossbows are similar to [[bow]]s, but take longer to load and are slightly more powerful, shooting farther with slightly higher accuracy. Alternatively, they can be loaded with a firework rocket, which flies in a straight line.
Load them by {{control|using}} them, which makes the player move at sneak speed. Unlike bows, the [[arrow]] or [[firework rocket]] can be fired only if the player releases the use button after the crossbow is loaded{{Only|je}} or if the crossbow finishes its loading animation {{Only|be}}. At this point, it ''must be used a second time'' to fire its bolt.
Once it has reached full charge, the [[player]]'s speed returns to normal. After that, shooting a charged crossbow does not delay any of the [[player]]'s current action like [[sprinting]] or [[swimming]].
The crossbow can even be placed in another [[inventory]] slot or into an [[item frame]] without the [[arrow]] or [[firework rocket]] being unloaded or fired. A charged crossbow also remains charged after enchanting it with an enchantment table or with an anvil.
In order to use the crossbow, at least one arrow or firework rocket must be present in the inventory. The player can choose the type of arrow to fire based on its location in their [[inventory]]:
* [[File:Java Crossbow 1stP Loading.mp4|thumb|177x177px|Java Edition first-person loading animation for crossbows.]]Arrows in the off-hand, or the selected [[hotbar]] slot if the crossbow is in the off-hand, are prioritized first.
* If there are no arrows in the off-hand or selected hotbar slot, the arrow closest to slot 0 is selected.
Crossbows take 1.25 seconds (25 ticks) to load.
The player can load either an arrow, spectral arrow, tipped arrow (of any effect) or a firework (of any color/type).
[[File:Bedrock Crossbow 1stP Loading.mp4|thumb|177x177px|Bedrock Edition first-person loading animation for crossbows.]]
[[Endermen]] teleport away from projectile paths, so they cannot be hit with crossbow [[arrow]]s. However, they can still get harmed by [[firework rocket]] explosions, if they can't detect the firework rocket.
;Attack strength
''Java Edition'':
{| class="wikitable" style="text-align:center" data-description="Crossbow Damage Statistic"
|-
! Damage || Arrow || Max firework
|-
| {{ItemSprite|Crossbow|text= '''Minimum'''}}
| {{hp|7}}
| {{hp|11}}
|-
| {{ItemSprite|Crossbow|text= '''Average'''}}
| {{hp|9}}
| {{hp|14.5}}
|-
| {{ItemSprite|Crossbow|text= '''Maximum'''}}
| {{hp|11}}
| {{hp|18}}
|}
''Bedrock Edition''
* Always {{hp|9}}
=== Fireworks ===
[[Firework rocket]]s can be fired by loading the crossbow only while holding the rockets in the off-hand. They fly at 32 m/s. Firework rockets with higher flight duration have a longer time before they explode and therefore travel farther. Firing a firework rocket uses 3 [[durability]] points per shot.
{| class="wikitable" style="text-align:center"
! colspan="4" |Firework rocket range
|-
|Minimum
|Average
|Maximum
|Gunpowder
|-
|32m (20 ticks)
|40.8m (25.5 ticks)
|49.6m (31 ticks)
|1 ([[File:Gunpowder JE2 BE2.png|12x12px]])
|-
|48m (30 ticks)
|56.8m (35.5 ticks)
|65.6m (41 ticks)
| 2 ([[File:Gunpowder JE2 BE2.png|12x12px]][[File:Gunpowder JE2 BE2.png|12x12px]])
|-
|64m (40 ticks)
|72.8m (45.5 ticks)
|81.6m (51 ticks)
|3 ([[File:Gunpowder JE2 BE2.png|12x12px]][[File:Gunpowder JE2 BE2.png|12x12px]][[File:Gunpowder JE2 BE2.png|12x12px]])
|}
Firework rockets also work with the [[Multishot]] enchantment, enabling the [[player]] to shoot 3 firework rockets at a time. The increased durability usage stacks, resulting in 9 durability being consumed with each shot.
A shot firework rocket explodes instantly when it hits a [[mob]] or [[block]].{{only|java}} If the firework rocket has no explosion effect, it deals no [[damage]]. The explosion of a firework rocket deals {{hp|5}} to {{hp|6}} points of damage, with one [[firework star]]. The explosion has a radius of roughly 4 blocks, which is unaffected by the firework star's [[Firework Star#Effects|effect]]. Each additional firework star on the rocket deals an additional {{hp|1}} to {{hp|2}} points of damage, for a maximum of {{hp|11}} to {{hp|18}} with 7 firework stars. The flight duration of the firework increases the maximum range the firework can travel before exploding, but does not affect the damage output. Likewise, the damage remains the same regardless of any dyes used. The [[Piercing]] enchantment causes the firework rocket to pierce a number of entities based on its respective level before exploding.{{only|java}} Unlike an arrow shot from a bow, the firework does not slow down under water.
=== Repair ===
Crossbows can be repaired in an [[anvil]] or [[grindstone]] by combining two crossbows. Any loaded ammunition is retained from the crossbow in the first slot but sacrificed from the crossbow in the second slot.
===Enchantments===
{| class="wikitable"
|+
!Name
!Description
!Max Level
|-
|[[Quick Charge]]
|Decreases the reloading time of the crossbow by {{code|level * 0.25}} seconds. Crossbows with [[Quick Charge]] III fire slightly faster than [[bow]]s. If [[commands]] are used to enchant a crossbow with Quick Charge V, the crossbow charges instantaneously. A crossbow enchanted with Quick Charge VI is effectively impossible to charge, which renders it useless. This can be done only {{in|je}}.
|III
|-
|[[Multishot]]
| Makes the crossbow fire a spread of 3 projectiles at once instead of a single projectile, which is useful for targeting mobs spread out in a small area. This works for both [[arrow]]s and [[firework rocket]]s. Firing with this enchantment still uses only one projectile, and because of that, it is possible to recover only one of the three arrows shot from a Multishot crossbow. Multishot crossbows use 3 [[item durability|durability]] points per shot, unless using fireworks for ammunition, in which case 9 durability is consumed. Mutually exclusive with Piercing.
|I
|-
|[[Piercing]]
|Makes [[arrow]]s shot from the crossbow pierce [[entity|entities]] they hit and continue their flight, which allows each arrow to hit up to {{code|level + 1}} entities. This is useful for targeting [[mob]]s closely packed together, and for conserving arrows, as they can be picked up after piercing entities. Arrows fired in this manner also ignore [[Shield|shields]]. Mutually exclusive with Multishot.
|IV
|-
|[[Unbreaking]]
|Causes a <code>(Level /(Level+1)) * 100%</code> chance a shot fired does not reduce the [[item durability|durability]] of the crossbow.
|III
|-
|[[Mending]]
|Allows a certain proportion of [[experience]] orbs collected to contribute toward repairing the crossbow, rather than raising the [[player]]'s experience.
|I
|-
|[[Curse of Vanishing]]
| Causes the crossbow to disappear instead of dropping on the ground when the player dies. The {{cmd|gamerule keepInventory}} overrides this.
|I
|}
[[Multishot]] and [[Piercing]] are mutually exclusive. Normal methods of [[enchanting]] allow only one of them to be applied to a crossbow.
Crossbows can receive 3 unique [[enchanting|enchantment]]s, and have a base enchantability of 1. Enchantments specific to crossbows include [[Quick Charge]], Multishot and Piercing.
===Fuel===
Crossbows can be used as [[fuel]] in [[furnace]]s, [[smelting]] 1.5 [[item]]s per crossbow.
== Sounds ==
{{el|je}}:
{{Sound table
|sound=Crossbow loading start.ogg
|subtitle=Crossbow charges up
|source=player
|description=When a crossbow starts to load
|id=item.crossbow.loading_start
|translationkey=subtitles.item.crossbow.charge
|volume=0.15
|pitch=1.0
|distance=16}}
{{Sound table
|sound=Crossbow quick charge one1.ogg
|sound2=Crossbow quick charge one2.ogg
|sound3=Crossbow quick charge one3.ogg
|subtitle=Crossbow charges up
|source=player
|description=When a Quick Charge I crossbow starts to load <ref group=sound><code>quick1_3</code> occurs at half the frequency as the other sounds</ref>
|id=item.crossbow.quick_charge_1
|translationkey=subtitles.item.crossbow.charge
|volume=''varies'' <ref group=sound>0.325 for all except <code>quick1_1</code> (pitch=0.9), which is 0.25</ref>
|pitch=''varies'' <ref group=sound><code>quick1_1</code> can be 1.0 or 0.9; <code>quick1_2</code> can be 1.0 or 0.95; <code>quick1_3</code> can be 1.0</ref>
|distance=16}}
{{Sound table
|sound=Crossbow quick charge two1.ogg
|sound2=Crossbow quick charge two2.ogg
|sound3=Crossbow quick charge two3.ogg
|subtitle=Crossbow charges up
|source=player
|description=When a Quick Charge II crossbow starts to load <ref group=sound name=quickchargefrequency><code>_1</code> occurs at {{frac|2|3}} the frequency as the other sounds</ref>
|id=item.crossbow.quick_charge_2
|translationkey=subtitles.item.crossbow.charge
|pitch=''varies'' <ref group=sound name=quickchargevolume />
|volume=''varies'' <ref group=sound name=quickchargepitch />
|distance=16}}
{{Sound table
|sound=Crossbow quick charge three1.ogg
|sound2=Crossbow quick charge three2.ogg
|sound3=Crossbow quick charge three3.ogg
|subtitle=Crossbow charges up
|source=player
|description=When a Quick Charge III crossbow starts to load <ref group=sound name=quickchargefrequency />
|id=item.crossbow.quick_charge_3
|translationkey=subtitles.item.crossbow.charge
|volume=''varies'' <ref group=sound name=quickchargevolume>0.325 for all except <code>_1</code> (pitch=0.95), which is 0.25</ref>
|pitch=''varies'' <ref group=sound name=quickchargepitch><code>_1</code> can be 1.0 or 0.95; <code>_2</code> can be 1.0, 0.95, or 1.05; <code>_3</code> can be 1.0, 0.9, or 1.05</ref>
|distance=16}}
{{Sound table
|sound=Crossbow loading middle1.ogg
|sound2=Crossbow loading middle2.ogg
|sound3=Crossbow loading middle3.ogg
|sound4=Crossbow loading middle4.ogg
|subtitle=MC-203146
|source=player
|description=While a crossbow is loading <ref group=sound><code>loading_middle4</code> occurs at {{frac|1|4}} the frequency as the other sounds</ref>
|id=item.crossbow.loading_middle
|translationkey=-
|volume=0.325
|pitch=''varies'' <ref group=sound><code>loading_middle1</code> can be 1.0, 0.95, or 1.2; <code>loading_middle2</code> and <code>loading_middle3</code> can be 1.0, 0.9, or 1.05; <code>loading_middle4</code> can be 1.0</ref>
|distance=16}}
{{Sound table
|sound=Crossbow loading end.ogg
|subtitle=Crossbow loads
|source=dependent
|description=When a crossbow stops loading
|id=item.crossbow.loading_end
|translationkey=subtitles.item.crossbow.load
|volume=1.0
|pitch={{frac|13|15}}-1.2
|distance=16}}
{{Sound table
|sound=Crossbow shoot1.ogg
|sound2=Crossbow shoot2.ogg
|sound3=Crossbow shoot3.ogg
|subtitle=Crossbow fires
|source=dependent
|description=When a crossbow fires
|id=item.crossbow.shoot
|translationkey=subtitles.item.crossbow.shoot
|volume=0.8/0.9/0.9
|pitch=1.0/1.0/0.9 <ref group=sound>Multiplied by the loading percentage of the crossbow</ref>
|distance=16}}
{{Sound table
|sound=Arrow hit1.ogg
|sound2=Arrow hit2.ogg
|sound3=Arrow hit3.ogg
|sound4=Arrow hit4.ogg
|subtitle=Arrow hits
|source=neutral
|description=When an arrow hits a block or entity
|id=item.crossbow.hit
|translationkey=subtitles.item.crossbow.hit
|volume=1.0
|pitch={{frac|12|11}}-{{frac|4|3}}
|distance=16}}
{{Sound table
|sound=Succesfull Hit.ogg
|subtitle=Player hit
|source=player
|description=When an arrow shot by a player hits another player
|id=entity.arrow.hit_player
|translationkey=subtitles.entity.arrow.hit_player
|volume=0.18
|pitch=0.45
|distance=16}}
{{Sound table
|sound=Firework launch.ogg
|subtitle=Firework launches
|source=ambient
|description=When a crossbow fires a firework rocket
|id=entity.firework_rocket.launch
|translationkey=subtitles.entity.firework_rocket.launch
|volume=3.0
|pitch=1.0
|distance=16}}
{{Sound table
|sound=Random break.ogg
|subtitle=Item breaks
|source=dependent
|description=When a crossbow's durability is exhausted
|id=entity.item.break
|translationkey=subtitles.entity.item.break
|volume=0.8
|pitch=0.8-1.2
|distance=16
|foot=1}}
{{el|be}}:
{{Sound table
|type=bedrock
|sound=Crossbow loading start.ogg
|source=player
|description=When a crossbow starts to load
|id=crossbow.loading.start
|volume=1.0
|pitch=1.0}}
{{Sound table
|sound=Crossbow loading middle1.ogg
|sound2=Crossbow loading middle2.ogg
|sound3=Crossbow loading middle3.ogg
|sound4=Crossbow loading middle4.ogg
|source=player
|description=While a crossbow is loading and when a crossbow stops loading
|id=crossbow.loading.middle
|volume=1.0
|pitch=1.0}}
{{Sound table
|sound=Crossbow loading end.ogg
|source=player
|description=''Unused sound event''
|id=crossbow.loading.end
|volume=1.0
|pitch=1.0}}
{{Sound table
|sound=Crossbow quick charge one1.ogg
|sound2=Crossbow quick charge two1.ogg
|sound3=Crossbow quick charge three1.ogg
|source=player
|description=When a crossbow with Quick Charge starts to load
|id=crossbow.quick_charge.start
|volume=1.0
|pitch=1.0}}
{{Sound table
|sound=Crossbow quick charge one2.ogg
|sound2=Crossbow quick charge two2.ogg
|sound3=Crossbow quick charge three2.ogg
|source=player
|description=While a crossbow with Quick Charge is loading
|id=crossbow.quick_charge.middle
|volume=1.0
|pitch=1.0}}
{{Sound table
|sound=Crossbow quick charge one3.ogg
|sound2=Crossbow quick charge two3.ogg
|sound3=Crossbow quick charge three3.ogg
|source=player
|description=When a crossbow with Quick Charge stops loading
|id=crossbow.quick_charge.end
|volume=1.0
|pitch=1.0}}
{{Sound table
|sound=Crossbow shoot1.ogg
|sound2=Crossbow shoot2.ogg
|sound3=Crossbow shoot3.ogg
|source=player
|description=When a crossbow fires
|id=crossbow.shoot
|volume=1.0
|pitch=1.0}}
{{Sound table
|sound=Arrow hit1.ogg
|sound2=Arrow hit2.ogg
|sound3=Arrow hit3.ogg
|sound4=Arrow hit4.ogg
|source=player
|description=When an arrow hits a block or entity
|id=random.bowhit
|volume=1.0
|pitch=1.09-1.3}}
{{Sound table
|sound=Firework launch.ogg
|source=ambient
|description=When a crossbow fires a firework rocket
|id=firework.launch
|volume=1.0
|pitch=1.0}}
{{Sound table
|sound=Random break.ogg
|source=player
|description=When a crossbow's durability is exhausted
|id=random.break
|volume=1.0
|pitch=0.9
|foot=1}}
==Data values==
=== ID===
{{edition|java}}:
{{ID table
|edition=java
|showforms=y
|generatetranslationkeys=y
|displayname=Crossbow
|spritetype=item
|nameid=crossbow
|form=item
|foot=1}}
{{edition|bedrock}}:
{{ID table
|edition=bedrock
|shownumericids=y
|showforms=y
|notshowbeitemforms=y
|generatetranslationkeys=y
|displayname=Crossbow
|spritetype=item
|nameid=crossbow
|id=575
|form=item
|foot=1}}
===Item data===
{{el|java}}:
{{main|Player.dat format}}
<div class="treeview" style="margin-top: 0;">
*{{nbt|compound|tag}}: The '''tag''' tag.
{{:Player.dat_format/Crossbow}}
</div>
{{el|bedrock}}:
: See [[Bedrock Edition level format/Item format]].
==Achievements==
{{load achievements|Sniper Duel;Archer;Bullseye}}
==Advancements==
{{load advancements|Take Aim;Bullseye;Sniper Duel;Ol' Betsy;Who's the Pillager Now;Two Birds;Arbalistic}}
==History==
{{History||September 29, 2018|link={{tweet|Minecraft|1046094916902965249}}|Crossbows are announced at [[MINECON Earth 2018]].}}
{{History|java}}
{{History||1.14|snap=18w43a|[[File:Crossbow.png|32px]] [[File:Crossbow Pull 0.png|32px]] [[File:Crossbow Pull 1.png|32px]] [[File:Crossbow Pull 2.png|32px]] [[File:Arrow Loaded Crossbow.png|32px]] [[File:Crossbow.png|32px]] [[File:Crossbow Pull 0.png|32px]] [[File:Crossbow Pull 1.png|32px]] [[File:Crossbow Pull 2.png|32px]] [[File:Firework Loaded Crossbow.png|32px]] [[File:Crossbow.png|32px]] Added crossbows.
|Crossbows can be enchanted with either the [[Quick Charge]] (Highest Level III), [[Piercing]] (Highest Level IV) or [[Multishot]] (Highest Level I).}}
{{History|||snap=18w47a|Crossbows can now be found inside loot [[chest]]s at the top of [[pillager outpost]]s.}}
{{History|||snap=19w11a|Fletcher [[villager]]s now [[trading|sell]] crossbows and enchanted crossbows.}}
{{History||1.16|snap=20w07a|[[File:Piglin with Crossbow.png|32px]] [[File:Piglin left handed with Crossbow.png|35px]] [[File:Piglin using one hand to hold a loaded crossbow JE1.png|35px]] Added [[piglin]]s, which can spawn with and [[drops|drop]] crossbows.}}
{{History|||snap=20w16a|Crossbows now generate randomly enchanted in [[bastion remnants]] chests.}}
{{History||1.18|snap=21w37a|Crossbow durability is increased to 465 to match {{edition|BE}}.}}
{{History||1.19.4|snap=23w07a|The crossbow recipes are no longer unlocked by [[stick]]s.}}
{{History|upcoming java}}
{{History||Villager Trade Rebalance<br>(Experimental)|link=Java Edition 1.20.2|snap=23w31a|Enchantments exclusive to crossbows are no longer obtainable from villager [[trading]].}}
{{History|bedrock}}
{{History||1.8.0|snap=beta 1.8.0.10|[[File:Crossbow.png|32px]] [[File: Crossbow Pull 0.png|32px]] [[File: Crossbow Pull 1.png|32px]] [[File: Crossbow Pull 2.png|32px]] [[File:Arrow Loaded Crossbow.png|32px]] [[File:Crossbow.png|32px]] [[File:Crossbow Pull 0.png|32px]] [[File:Crossbow Pull 1.png|32px]] [[File:Crossbow Pull 2.png|32px]] [[File:Firework Loaded Crossbow.png|32px]] [[File:Crossbow.png|32px]] Added crossbows.
|Crossbows are currently apart of [[Experimental Gameplay]].}}
{{History||1.9.0|snap=beta 1.9.0.0|Added [[pillager]]s, which use and [[drops|drop]] crossbows.}}
{{History|||snap=beta 1.9.0.3|Crossbows now appear bigger in a pillager's hand.}}
{{History||1.10.0|snap=beta 1.10.0.3|Crossbows are now fully implemented and separate from [[Experimental Gameplay]].
|Crossbows can now be found in [[pillager outpost]] [[chest]]s.}}
{{History||1.11.0|snap=beta 1.11.0.4|Unenchanted and [[enchanting|enchanted]] crossbows can now be [[trading|bought]] from fletcher [[villager]]s.}}
{{History||1.12.0|snap=beta 1.12.0.3|Journeyman-level fletcher villagers now have 100% chance to [[trading|sell]] unenchanted crossbow, rather than 50% chance.}}
{{History||1.16.0|snap=beta 1.16.0.51|[[File:Piglin with Crossbow BE.png|32px]] Added [[piglin]]s, which can spawn with and [[drops|drop]] crossbows.}}
{{History|||snap=beta 1.16.0.57|Crossbows now generate randomly enchanted in [[bastion remnants]] chests.}}
{{History|PS4}}
{{History||1.90|[[File:Crossbow.png|32px]] [[File: Crossbow Pull 0.png|32px]] [[File: Crossbow Pull 1.png|32px]] [[File: Crossbow Pull 2.png|32px]] [[File:Arrow Loaded Crossbow.png|32px]] [[File:Crossbow.png|32px]] [[File:Crossbow Pull 0.png|32px]] [[File:Crossbow Pull 1.png|32px]] [[File:Crossbow Pull 2.png|32px]] [[File:Firework Loaded Crossbow.png|32px]] [[File:Crossbow.png|32px]] Added crossbows.}}
{{History|foot}}
==Issues==
{{issue list}}
==Trivia==
*Alongside [[pillager]]s, crossbows were inspired by ''[[Minecraft Dungeons]]'', even though they were added in the base game first.<ref>{{cite|url=https://discord.com/channels/579770991056519194/818903542139453480/819631528593588244| title = March 2021 developper Q&A|website=discord.com|date=March 11, 2021}}</ref>
*Crossbows [[enchanting|enchanted]] with [[Quick Charge]] VI and above get stuck on the first frame on the recharging animation because the resulting charge time is negative, and the game never reaches the time markers that tell it to advance the animation or the reloading procedure itself. It is technically possible to charge such crossbows, but this would require overflowing the value that determines how long the crossbow has been charged. This takes such an amount of time that this is practically impossible: for example, charging a crossbow with Quick Charge VI would take 69.4 years to complete.
*Although Piercing allows arrows to bypass [[shield]]s, they can't get through the wither armor.
*The crossbow's first-person loading animation in [[Bedrock Edition]] is different from [[Java Edition]].
*Even if a crossbow is already wound with a projectile, when it drops on the ground, it always looks uncharged.<ref>{{bug|MC-137552}}</ref>
*In real life, crossbows don't shoot the same arrows as bows, rather they shoot shorter, thicker, and oftentimes fletchless arrows (usually called "bolts") made to withstand the crossbow's increased power, which can shatter conventional arrows.
==Gallery==
<gallery>
File:CrossbowMinecon.png|A crossbow shown at [[MINECON Earth 2018]].
File:PillagerMinecon.png|A [[pillager]] armed with a crossbow, shown at MINECON Earth 2018.
File:EquippingCrossbow.png|How the crossbow is equipped.
File:Enchanted_Crossbow.gif|An enchanted crossbow.
File:Steve_Charging_Crossbow.gif|Steve charging crossbow {{in|java}}.
File:Alex_Charging_Crossbow.gif|Alex charging crossbow {{in|java}}.
File:Pillager_Charging_Crossbow.gif|Pillager charging crossbow.
File:Piglin_Charging_Crossbow.gif|Piglin charging crossbow.
File:Crossbow_(MCD).png|The ''Minecraft Dungeons'' variant of the crossbow
</gallery>
== References ==
{{reflist}}
== External Links ==
*[https://www.minecraft.net/en-us/article/taking-inventory--crossbow Taking Inventory: Crossbow] – Minecraft.net on October 20, 2022
{{Items}}
[[Category:Combat]]
[[Category:Renewable resources]]
[[de:Armbrust]]
[[es:Ballesta]]
[[fr:Arbalète]]
[[it:Balestra]]
[[ja:クロスボウ]]
[[ko:쇠뇌]]
[[pl:Kusza]]
[[pt:Besta]]
[[ru:Арбалет]]
[[th:หน้าไม้]]
[[zh:弩]]</li></ul> | build 1 | Added witch that can drink potion of swiftness to grant itself speed effect. | |||
v0.15.0{{Extension DPL}}<ul><li>[[Book|Book]]<br/>{{For}}
{{Item
| image = Book.png
| renewable = Yes
| stackable = Yes (64)
|effects=Read}}
'''Books''' are items used in [[enchanting]] and [[crafting]].
== Obtaining ==
=== Block loot ===
Three books are dropped when a [[bookshelf]] is mined without [[Silk Touch]] or destroyed by an [[explosion]].
=== Crafting ===
{{crafting
|Paper
|Paper
|Paper
|Leather
|Output= Book
|type= Miscellaneous
}}
=== Chest loot ===
{{LootChestItem|book}}
=== Grindstones ===
Disenchanting an [[enchanted book]] at a [[grindstone]] yields a normal book and a small amount of experience.
=== Villager gifts ===
{{in|java}}, librarian [[villagers]] throw books at players under the [[Hero of the Village]] effect.
== Usage ==
=== Crafting ingredient ===
{{crafting usage}}
=== Chiseled bookshelf ===
{{control|Use|text=Using}} the [[chiseled bookshelf]] while having a book in the main hand will put the book inside the chiseled bookshelf.
=== Enchanting ===
Books can be made into [[enchanted book]]s by enchanting them on [[enchanting table]]s.
=== Trading ===
Librarian [[villager]]s can buy a single book as part of an [[enchanted book]] trade.
Apprentice-level Librarian villagers have a {{frac|2|3}} chance to buy 4 books for an [[emerald]] {{in|java}}, and always offer the trade {{in|bedrock}}.
== Achievements ==
{{load achievements|Librarian;Enchanter}}
== Advancements ==
{{load advancements|Enchanter;The Power of Books}}
== Sounds ==
{{edition|java}}:
{{Sound table
|sound=Chiseled bookshelf insert1.ogg
|sound2=Chiseled bookshelf insert2.ogg
|sound3=Chiseled bookshelf insert3.ogg
|sound4=Chiseled bookshelf insert4.ogg
|subtitle=Book placed
|source=block
|description=When a book is placed in a chiseled bookshelf
|id=block.chiseled_bookshelf.insert
|translationkey=subtitles.chiseled_bookshelf.insert
|volume=0.8
|pitch=''varies'' <ref group=sound>Can be 1.0, 0.85, or 1.1 for each sound</ref>
|distance=16}}
{{Sound table
|sound=Chiseled bookshelf pickup1.ogg
|sound2=Chiseled bookshelf pickup2.ogg
|sound3=Chiseled bookshelf pickup3.ogg
|subtitle=Book taken
|source=block
|description=When a book is removed from a chiseled bookshelf
|id=block.chiseled_bookshelf.pickup
|translationkey=subtitles.chiseled_bookshelf.take
|volume=0.8
|pitch=''varies'' <ref group=sound>Can be 1.0, 0.8, or 1.1 for each sound</ref>
|distance=16
|foot=1}}
{{edition|bedrock}}:
{{Sound table
|type=bedrock
|sound=Chiseled bookshelf insert1.ogg
|sound2=Chiseled bookshelf insert2.ogg
|sound3=Chiseled bookshelf insert3.ogg
|sound4=Chiseled bookshelf insert4.ogg
|source=block
|description=When a book is placed in a chiseled bookshelf
|id=insert.chiseled_bookshelf
|volume=0.8
|pitch=''varies'' <ref group=sound name=insertvaries>Can be 1.0, 0.85, or 1.1 for each sound</ref>}}
{{Sound table
|sound=Chiseled bookshelf pickup1.ogg
|sound2=Chiseled bookshelf pickup2.ogg
|sound3=Chiseled bookshelf pickup3.ogg
|source=block
|description=When a book is removed from a chiseled bookshelf
|id=pickup.chiseled_bookshelf
|volume=0.8
|pitch=''varies'' <ref group=sound name=pickupvaries>Can be 1.0, 0.8, or 1.1 for each sound</ref>
|foot=1}}
== Data values ==
=== ID ===
{{edition|java}}:
{{ID table
|edition=java
|showforms=y
|generatetranslationkeys=y
|displayname=Book
|spritetype=item
|nameid=book
|form=item
|foot=1}}
{{edition|bedrock}}:
{{ID table
|edition=bedrock
|showitemtags=y
|shownumericids=y
|showforms=y
|notshowbeitemforms=y
|generatetranslationkeys=y
|displayname=Book
|spritetype=item
|nameid=book
|id=387
|itemtags=minecraft:bookshelf_books</code>
|form=item
|foot=1}}
== Video ==
<div style="text-align:center">{{yt|UGJBUhxwKy0}}</div>
== History ==
{{History|java alpha}}
{{History||v1.0.11|[[File:Book JE1 BE1.png|32px]] Added books.
|The only use of books is crafting [[bookshelves]], which are only used as a purely decorative [[block]] until [[Beta 1.9 Prerelease 3]].}}
{{History|java beta}}
{{History||1.8|snap=Pre-release|Books are now found in the new [[stronghold]] library [[chest]]s.}}
{{History|java}}
{{History||1.0.0|snap=Beta 1.9 Prerelease 3|Books are now used to craft [[enchantment table]]s, gaining their first functional usage outside of decoration.}}
{{History||1.3.1|snap=12w17a|The crafting recipe is now shapeless, so books can now be crafted in the player's 2×2 [[crafting]] area, although the recipe now requires [[leather]]. Before this version, books were crafted with three [[paper]] sheets in a single column.
|A book can now be crafted into a [[book and quill]], which can be used to create [[written book]]s.}}
{{History|||snap=12w21a|Librarian [[villager]]s now [[trading|buy]] 11–12 books for 1 [[emerald]].}}
{{History|||snap=12w22a|Librarian villagers now [[trading|sell]] [[enchanted book]]s for 5–64 emeralds and 1 book.}}
{{History||1.4.6|snap=12w49a|Books can now be enchanted into [[enchanted book]]s, and then combined together in an [[anvil]] with a [[tool]] to then enchant it.}}
{{History||1.8|snap=14w02a|Librarian villagers now buy 8–10 books for 1 [[emerald]].}}
{{History||1.9|snap=15w43a|Average yield of books in [[stronghold]] library chests has been substantially increased.}}
{{History||1.12|snap=17w13a|Added the [[knowledge book]], a green-colored book that grants the [[player]] a recipe for [[crafting]].
|The recipe tab on the [[crafting table]] GUI uses a red-colored book.}}
{{History||1.13|snap=17w47a|Prior to [[1.13/Flattening|''The Flattening'']], this [[item]]'s numeral ID was 340.}}
{{History|||snap=18w11a|Books now generate in [[shipwreck]] chests.}}
{{History||1.14|snap=18w43a|[[File:Book JE2 BE2.png|32px]] The texture of books has been changed.}}
{{History|||snap=18w48a|Books can now be obtain by disenchanting non-curse [[enchanted book]]s in a grindstone.|Books can now be found in chests in [[plains]] [[village]] houses.}}
{{History|||snap=18w50a|Books can now be found in chests in [[desert]] village houses.}}
{{History|||snap=19w13a|Librarian villagers now give books to players under the [[Hero of the Village]] effect.}}
{{History||1.19|snap=Deep Dark Experimental Snapshot 1|Books now generate in [[ancient city]] chests.}}
{{History||1.20<br>(Experimental)|link=1.19.3|snap=22w42a|Books can now interact with [[chiseled bookshelves]].}}
{{History|pocket alpha}}
{{History||v0.2.0|[[File:Book JE1 BE1.png|32px]] Added books. They are currently unobtainable and serve no purpose.}}
{{History||v0.3.0|Books can be used to craft [[bookshelves]].}}
{{History||v0.5.0|Books can now be obtained after activating the [[nether reactor]].}}
{{History||v0.12.1|snap=build 1|The crafting recipe for books now requires [[leather]]. Before this version, books were crafted with three [[paper]] sheets in a single column.
|Books are now used to craft [[enchanting table]]s.
|Books can now be enchanted into [[enchanted book]]s, and then combined together in an [[anvil]] with a [[tool]] to then enchant it.
|Books are no longer available from the [[nether reactor]].}}
{{History|pocket}}
{{History||1.0.4|snap=alpha 1.0.4.0|Librarian villagers now [[trading|buy]] 8–10 books for 1 [[emerald]].}}
{{History|bedrock}}
{{History||1.2.0|snap=beta 1.2.0.2|A book can now be crafted into a [[book and quill]], which can be used to create [[written book]]s.}}
{{History||1.4.0|snap=beta 1.2.14.2|Books can now be found inside of the map room [[chest]] in [[shipwreck]]s.}}
{{History||1.10.0|snap=beta 1.10.0.3|Books can now be found in [[plains]] [[village]] chests.
|[[File:Book JE2 BE2.png|32px]] The texture of books has been changed.}}
{{History||1.11.0|snap=beta 1.11.0.4|Librarian [[villager]]s now [[trading|buy]] 4 books for an [[emerald]].}}
{{History||Wild Update<br>(Experimental)|link=Bedrock Edition 1.18.30|snap=beta 1.18.30.32|Books now generate in [[ancient city]] chests.}}
{{History||1.20<br>(Experimental)|link=Bedrock Edition 1.19.50|snap=beta 1.19.50.21|Books can now interact with [[chiseled bookshelves]].}}
{{History|console}}
{{History||xbox=TU1|xbone=CU1|ps=1.0|wiiu=Patch 1|[[File:Book JE1 BE1.png|32px]] Added books.}}
{{History||xbox=TU14|ps=1.04|The crafting recipe for books now requires [[leather]]. Before this version, books were crafted with three [[paper]] sheets in a single column.}}
{{History|PS4}}
{{History||1.90|[[File:Book JE2 BE2.png|32px]] The texture of books has now been changed.}}
{{History|New 3DS}}
{{History||0.1.0|[[File:Book JE1 BE1.png|32px]] Added books.}}
{{History|foot}}
== Issues ==
{{issue list}}
== See also ==
* [[Enchanted Book]]
* [[Knowledge Book]]
== How book is renewable ==
The paper comes from sugar canes, which is renewable because it grows and the leather from killing cows, renewable because cows breed{{Items}}
[[Category:Renewable resources]]
[[cs:Kniha]]
[[de:Buch]]
[[es:Libro]]
[[fr:Livre]]
[[hu:Könyv]]
[[it:Libro]]
[[ja:本]]
[[ko:책]]
[[nl:Boek]]
[[pl:Książka]]
[[pt:Livro]]
[[ru:Книга]]
[[th:หนังสือ]]
[[uk:Книга]]
[[zh:书]]</li><li>[[Sugar Cane|Sugar Cane]]<br/>{{Block
|image=Sugar Cane.png
|image2=Sugar Cane (item) JE3.png
|extratext = View all [[#Gallery|renders]]
|transparent=Yes
|light=No
|tool=any
|renewable=Yes
|stackable=Yes (64)
|flammable=No
|lavasusceptible=No
}}
'''Sugar cane''' is a block found as 1–4-block-tall. It plants near water in the [[Overworld]]. As an item, it is an important crafting ingredient.
==Obtaining==
Sugar cane can be mined instantly with anything.
When the spot a sugar cane block is placed in becomes unsuitable, such as when the supporting block is removed, the sugar cane block uproots and drops as an item. {{IN|be}}, sugar cane uproots immediately after all adjacent water is removed. {{IN|je}}, sugar cane uproots on the next block update or [[Tick#Random tick|random tick]].
A sugar cane block drops itself as an item if a piston tries to push it (trying to pull it does nothing) or moves a block into its space.
===Natural generation===
[[File:Sugar Canez.png|thumb|250px|Naturally-occurring sugar cane near a river.]]
Sugar cane can generate naturally near [[water]] and [[ice]], as two ({{frac|11|18}} chance), three ({{frac|5|18}} chance), or four ({{frac|2|18}} chance) blocks tall. Rare taller sugar canes can be found if the world generator places two smaller canes on top of each other. It generates in approximately 0.8 sugar cane per chunk seeing as how they only generate near bodies of water.
Sugar canes attempt to generate 10 times in any Overworld biome, which requires water. An extra 10 attempts are made in [[swamp]] biomes, and 50 in [[desert]] biomes, which makes sugar cane twice as frequent in swamps and six times as frequent in desert biomes, making the banks of [[river]]s that cut through deserts lined with sugar canes. Sugar canes do not grow faster in swamps or deserts they only spawn a increased amount.
Sugar cane cannot generate in caves {{in|je}}.<ref>{{bug|MC-214959||Sugar cane generated in cave|Fixed}}</ref>
===Trading===
[[Wandering trader]]s can sell sugar cane for an [[emerald]].
==Usage==
Due to its water-displacing properties, sugar cane can interestingly be used to create underwater paths, allowing [[player]]s to move at normal speed and breathe if it is two blocks in height.{{only|java}}<ref>{{bug|MC-929||Sugar cane can be placed underwater|WAI}}</ref>
Sugar cane takes on a different shade of green depending on the biome in which it is placed.
===Crafting ingredient===
{{crafting usage}}
===Farming===
{{main|Tutorials/Sugar cane farming}}
[[File:Underground Sugar Farm.png|200px|thumb|An underground sugar cane farm.]]
Sugar cane can generate naturally up to any number of blocks tall, but ''grow'' only to a height of three blocks, adding a block of height when the top sugar cane block has received 16 random [[Tick#Block tick|block tick]]s (i.e. on average every 18 minutes on ''Java Edition''<!-- Average 68.27 seconds/tick * 16 ticks/growth = 18.2 minutes --> or 54 minutes on Bedrock Edition, but the actual rate can vary widely).
Sugar cane must be planted on a [[grass block]], [[dirt]], [[coarse dirt]], [[rooted dirt]], [[podzol]], [[mycelium]], [[sand]], [[red sand]], [[suspicious sand]], [[moss block]], or [[mud]] that is directly adjacent to [[water]], [[waterlogged]] block, or [[frosted ice]] (not merely above or diagonal to water), or on top of another sugar cane block. The adjacent water block can be covered with another block, whether [[opacity|opaque or transparent]], and sugar cane can still be placed and grow next to it. Sugar cane grows regardless of light level, even in complete darkness.
[[File:4blockcane.png|thumb|A natural 4-block-high sugar cane plant.]]
{{IN|bedrock}}, [[bone meal]] can be used to instantly grow sugar cane to three blocks. Only one bone meal is consumed. {{IN|java}}, bone meal cannot be used on sugar cane.<ref>{{bug|MC-73963||Can't use bonemeal on cacti or sugar cane|WAI}}</ref>
On average, it takes [[Tutorials/Sugar_cane_farming#Mechanics|18 minutes]] for a single block of sugar cane to grow 3 blocks tall.
=== Composting ===
Placing sugar cane into a [[composter]] has a 50% chance of raising the compost level by 1.
== List of colors ==
{{Missing information|Bedrock Edition colors (see [[Water#Color]]{{verify|it's there?}})}}
=== ''Java Edition'' ===
These values are generated by the biome dyeing algorithm. See [[Color#Biome colors|Biome colors]] for more information.
<div class="mw-collapsible mw-collapsed" style="float: left">
{| class="wikitable sortable" style="text-align:center" data-description="Java edition biome colors"
!Biome !! Category !! Rainfall !! Sugarcane Color !! Temperature Affects !! Render
|-
| {{BiomeLink|Badlands}} || Mesa || No || #90814d || No || [[File:Badlands Sugar Cane.png|32px]]
|-
| {{BiomeLink|Beach}} || Beach || Rain || #91bd59 || || [[File:Plains Sugar Cane.png|32px]]
|-
| {{BiomeLink|Birch Forest}} || Forest || Rain || #88bb67 || || [[File:Birch Forest Sugar Cane.png|32px]]
|-
| {{BiomeLink|Cold Ocean}} || Ocean || Rain || #8eb971 || || [[File:Ocean Sugar Cane.png|32px]]
|-
| {{BiomeLink|Dark Forest}} || Forest || Rain || #507a32 || || [[File:Dark Forest Sugar Cane.png|32px]]
|-
| {{BiomeLink|Deep Cold Ocean}} || Ocean || Rain || #8eb971 || || [[File:Ocean Sugar Cane.png|32px]]
|-
| {{BiomeLink|Deep Frozen Ocean}} || Ocean || Rain || #8eb971 || || [[File:Ocean Sugar Cane.png|32px]]
|-
| {{BiomeLink|Deep Lukewarm Ocean}} || Ocean || Rain || #8eb971 || || [[File:Ocean Sugar Cane.png|32px]]
|-
| {{BiomeLink|Deep Ocean}} || Ocean || Rain || #8eb971 || || [[File:Ocean Sugar Cane.png|32px]]
|-
| {{BiomeLink|Desert}} || Desert || No || #bfb755 || || [[File:Desert Sugar Cane.png|32px]]
|-
| {{BiomeLink|End Barrens}} || The End || No || #8eb971 || || [[File:Ocean Sugar Cane.png|32px]]
|-
| {{BiomeLink|End Highlands}} || The End || No || #8eb971 || || [[File:Ocean Sugar Cane.png|32px]]
|-
| {{BiomeLink|End Midlands}} || The End || No || #8eb971 || || [[File:Ocean Sugar Cane.png|32px]]
|-
| {{BiomeLink|Eroded Badlands}} || Mesa || No || #90814d || No || [[File:Badlands Sugar Cane.png|32px]]
|-
| {{BiomeLink|Flower Forest}} || Forest || Rain || #79c05a || || [[File:Forest Sugar Cane.png|32px]]
|-
| {{BiomeLink|Forest}} || Forest || Rain || #79c05a || || [[File:Forest Sugar Cane.png|32px]]
|-
| {{BiomeLink|Frozen Ocean}} || Ocean || Snow || #80b497 || || [[File:Snowy Plains Sugar Cane.png|32px]]
|-
| {{BiomeLink|Frozen River}} || River || Snow || #80b497 || || [[File:Snowy Plains Sugar Cane.png|32px]]
|-
| {{BiomeLink|Old Growth Spruce Taiga}} || Taiga || Rain || #86b783 || || [[File:Taiga Sugar Cane.png|32px]]
|-
| {{BiomeLink|Old Growth Pine Taiga}} || Taiga || Rain || #86b87f || || [[File:Old Growth Pine Taiga Sugar Cane.png|32px]]
|-
| {{BiomeLink|Ice Spikes}} || Icy || Snow || #80b497 || || [[File:Snowy Plains Sugar Cane.png|32px]]
|-
| {{BiomeLink|Jungle}} || Jungle || Rain || #59c93c || || [[File:Jungle Sugar Cane.png|32px]]
|-
| {{BiomeLink|Sparse Jungle}} || Jungle || Rain || #64c73f || || [[File:Sparse Jungle Sugar Cane.png|32px]]
|-
| {{BiomeLink|Lukewarm Ocean}} || Ocean || Rain || #8eb971 || || [[File:Ocean Sugar Cane.png|32px]]
|-
| {{BiomeLink|Windswept Hills}} || Extreme Hills || Rain || #8ab689 || || [[File:Windswept Hills Sugar Cane.png|32px]]
|-
| {{BiomeLink|Mushroom Fields}} || Mushroom || Rain || #55c93f || || [[File:Mushroom Fields Sugar Cane.png|32px]]
|-
| {{BiomeLink|Nether}} || Nether || No || #bfb755 || || [[File:Desert Sugar Cane.png|32px]]
|-
| {{BiomeLink|Ocean}} || Ocean || Rain || #8eb971 || || [[File:Ocean Sugar Cane.png|32px]]
|-
| {{BiomeLink|Plains}} || Plains || Rain || #91bd59 || || [[File:Plains Sugar Cane.png|32px]]
|-
| {{BiomeLink|River}} || River || Rain || #8eb971 || || [[File:Ocean Sugar Cane.png|32px]]
|-
| {{BiomeLink|Savanna}} || Savanna || No || #bfb755 || || [[File:Desert Sugar Cane.png|32px]]
|-
| {{BiomeLink|Savanna Plateau}} || Savanna || No || #bfb755 || || [[File:Desert Sugar Cane.png|32px]]
|-
| {{BiomeLink|Windswept Savanna}} || Savanna || No || #bfb755 || || [[File:Desert Sugar Cane.png|32px]]
|-
| {{BiomeLink|Small End Islands}} || The End || No || #8eb971 || || [[File:Ocean Sugar Cane.png|32px]]
|-
| {{BiomeLink|Snowy Beach}} || Beach || Snow || #83b593 || || [[File:Snowy Beach Sugar Cane.png|32px]]
|-
| {{BiomeLink|Snowy Taiga}} || Taiga || Snow || #80b497 || || [[File:Snowy Plains Sugar Cane.png|32px]]
|-
| {{BiomeLink|Snowy Plains}} || Icy || Snow || #80b497 || || [[File:Snowy Plains Sugar Cane.png|32px]]
|-
| {{BiomeLink|Stony Shore}} || None || Rain || #8ab689 || || [[File:Windswept Hills Sugar Cane.png|32px]]
|-
| {{BiomeLink|Sunflower Plains}} || Plains || Rain || #91bd59 || || [[File:Plains Sugar Cane.png|32px]]
|-
| {{BiomeLink|Swamp}} || Swamp || Rain || #6A7039 || If temperature below -0.1, used #4C763C. || [[File:Swamp Sugar Cane.png|32px]] / [[File:Swamp Sugar Cane (Cold).png|32px]]
|-
| {{BiomeLink|Taiga}} || Taiga || Rain || #86b783 || || [[File:Taiga Sugar Cane.png|32px]]
|-
| {{BiomeLink|Old Growth Birch Forest}} || Forest || Rain || #88bb67 || || [[File:Birch Forest Sugar Cane.png|32px]]
|-
| {{BiomeLink|The End}} || The End || No || #8eb971 || || [[File:Ocean Sugar Cane.png|32px]]
|-
| {{BiomeLink|The Void}} || None || No || #8eb971 || || [[File:Ocean Sugar Cane.png|32px]]
|-
| {{BiomeLink|Warm Ocean}} || Ocean || Rain || #8eb971 || || [[File:Ocean Sugar Cane.png|32px]]
|-
| {{BiomeLink|Wooded Badlands}} || Mesa || No || #90814d || No || [[File:Badlands Sugar Cane.png|32px]]
|-
| {{BiomeLink|Windswept Forest}} || Extreme Hills || Rain || #8ab689 || || [[File:Windswept Hills Sugar Cane.png|32px]]
|}
</div>
{{clear}}
=== Bedrock Edition ===
{{empty section}}
== Sounds ==
{{Sound table/Block/Grass}}
== Data values ==
=== ID ===
{{edition|java}}:
{{ID table
|edition=java
|showforms=y
|generatetranslationkeys=y
|displayname=Sugar Cane
|spritetype=block
|nameid=sugar_cane
|foot=1}}
{{edition|bedrock}}:
{{ID table
|edition=bedrock
|firstcolumnname=Sugar Cane
|shownumericids=y
|showforms=y
|showaliasids=y
|generatetranslationkeys=y
|displayname=Block
|spritename=sugar-cane
|spritetype=block
|nameid=reeds
|id=83
|form=block
|itemform=item.reeds}}
{{ID table
|displayname=Item
|spritename=sugar-cane
|spritetype=item
|nameid=sugar_cane
|id=385
|form=item
|aliasid=reeds
|translationkey=item.reeds.name
|foot=1}}
=== Block states ===
{{see also|Block states}}
{{/BS}}
== Video ==
{{Video note|This video was made before sugar cane had a different shade of green depending on the biome.|minor}}
<div style="text-align:center">{{yt|zlOnwn3PH5o}}</div>
== History ==
{{more images|Appearance when affected by {{bug|MC-48831}}}}
{{History|java alpha}}
{{History||v1.0.11|[[File:Sugar Cane JE1 BE1.png|32px]] [[File:Sugar Cane (item) JE1 BE1.png|32px]] Added reeds in the [[Seecret Updates|Seecret Friday Update 6]].
|Reeds are informally referred to as "bamboo" or "papyrus" by many [[player]]s.
|Since reeds can be washed away with [[water]] currents or instantly destroyed by removing the water adjacent to them, automated reed farms can be made.
|Reeds can be used to craft [[paper]].}}
{{History|java beta}}
{{History||1.2|[[Notch]] has [[wikipedia:Retroactive continuity|retconned]] reeds into sugar cane so that it can now be [[crafting|crafted]] into [[sugar]], included in the recipe for the [[cake]]s.}}
{{History||1.6|snap=Test Build 3|[[Arrow]]s no longer stick to sugar cane, and instead, they pass through. However, [[snowball]]s still come into contact with any sugar cane blocks, as if they are solid.}}
{{History||1.8|snap=Pre-release|Sugar cane can now grow and be placed onto [[sand]] as long as they are adjacent to [[water]]. This update allows sugar canes to appear next to [[water]] ponds in [[desert]] biomes.
|Sugar cane is now available in the [[creative]] [[inventory]] in both block and item forms.}}
{{History|java}}
{{History||1.0.0|snap=?|The sugar cane block has been removed from the creative inventory.}}
{{History||1.7.2|snap=13w36a|[[File:Sugar Cane JE2 BE2.png|32px]] Sugar cane is now [[tint]]ed depending on the [[biome]] it's in.
|The item texture remained unchanged, however, and still used the color palette from Alpha to 1.6.4.<ref name="Bug">{{bug|MC-216227}}</ref>}}
{{History||1.9|snap=15w43a|Sugar cane no longer breaks if its adjacent [[water]] is turned to [[frosted ice]].}}
{{History||1.13|snap=17w47a|The ID of sugar cane has now been changed from <code>reeds</code> to <code>sugar_cane</code>.
|"Sugar Canes" have now been renamed to "Sugar Cane".
|Prior to [[1.13/Flattening|''The Flattening'']], this [[block]]'s numeral ID was 83, and the [[item]]'s 338.}}
{{History||1.14|snap=18w43a|[[File:Sugar Cane (item) JE2 BE2.png|32px]] The texture of the sugar cane item has been changed.}}
{{History|||snap=19w03a|Placing sugar cane into a [[composter]] has a 20% chance of raising the compost level by 1.}}
{{History|||snap=19w05a|Sugar cane now has a 50% chance of increasing the compost level in a composter by 1.
|Added [[wandering trader]]s, which sell sugar cane.}}
{{History||1.16|snap=20w13a|Sugar cane has been moved from the Miscellaneous tab to the Decoration Blocks tab in the [[Creative inventory]].<ref name="misc decoration">https://bugs.mojang.com/browse/MC-174434</ref>}}
{{History||1.17|snap=21w11a|[[File:Sugar Cane (item) JE3.png|32px]] The texture of the sugar cane item has been changed, so that it actually matches the color it uses when placed again.<ref name="Bug"/>}}
{{History|||snap=Pre-release 1|Sugar cane now generates in mushroom fields.<ref>{{bug|MC-226683}}</ref>}}
{{History||1.19|snap=22w15a|Sugar cane can now be planted on mud.}}
{{History||1.20|snap=23w14a|Sugar cane can now be planted on [[suspicious sand]].}}
{{History|pocket alpha}}
{{History||Pre-release|[[File:Sugar Cane JE1 BE1.png|32px]] [[File:Sugar Cane (item) JE1 BE1.png|32px]] Added sugar cane.}}
{{History||v0.2.0|Despite being visible in the inventory, sugar cane does not drop anything when mined, making it unobtainable in Survival mode.}}
{{History||v0.2.1|Survival players now start with an infinite stack of sugar cane in the inventory.}}
{{History||v0.3.0|Sugar cane now drops its item form when mined.
|Survival players no longer start with an infinite stack of sugar cane in the inventory.}}
{{History||v0.5.0|Sugar cane can now be grown on [[sand]].
|Sugar cane can now be obtained after activating the [[nether reactor]].}}
{{History||v0.8.0|snap=build 5|[[Bone meal]] can now grow sugar cane to maximum height.}}
{{History||v0.9.0|snap=build 1|[[File:Sugar Cane JE2 BE2.png|32px]] The color of sugar cane now changes depending on the [[biome]] they are in.
|Using bone meal on sugar cane is no longer able to break blocks above it.}}
{{History||v0.12.1|snap=build 1|Sugar cane is no longer available from the [[nether reactor]].}}
{{History|pocket}}
{{History||1.0.0|snap=alpha 0.17.0.1|[[File:Sugar Cane JE1 BE1.png|32px]] Due to a bug, sugar canes no longer change color depending on the [[biome]].}}
{{History|bedrock}}
{{History||1.2.13|snap=beta 1.2.13.5|[[File:Sugar Cane JE2 BE2.png|32px]] The color of sugar canes now changes depending on the [[biome]], once again.}}
{{History||1.10.0|snap=beta 1.10.0.3|[[File:Sugar Cane (item) JE2 BE2.png|32px]] The texture of the sugar cane [[item]] has been changed.
|Sugar cane can now be [[trading|bought]] from [[wandering trader]]s.}}
{{History||1.11.0|snap=beta 1.11.0.1|Sugar canes can now be used to fill up [[composter]]s.}}
{{History||1.17.0|snap=beta 1.17.0.50|[[File:Sugar Cane (item) JE3.png|32px]] The texture of the sugar cane item has been changed, so that it actually matches the color it uses when placed again.}}
{{History|console}}
{{History||xbox=TU1|xbone=CU1|ps=1.0|wiiu=Patch 1|switch=1.0.1|[[File:Sugar Cane JE1 BE1.png|32px]] [[File:Sugar Cane (item) JE1 BE1.png|32px]] Added sugar canes.
|Sugar canes are solid, making it useful for growable walls. Unlike on Java Edition, they were never renamed to Sugar Cane.}}
{{History||xbox=TU2|Sugar canes are no longer solid, and arrows pass through them.}}
{{History||xbox=TU31|xbone=CU19|ps=1.22|wiiu=Patch 3|[[File:Sugar Cane JE2 BE2.png|32px]] The color of sugar cane now changes depending on the [[biome]] they're in.}}
{{History||xbox=TU60|xbone=CU51|ps=1.64|wiiu=Patch 30|switch=1.0.11|Sugar cane can now be grown with [[bonemeal]].}}
{{History||xbox=none|xbone=none|ps=1.90|wiiu=none|switch=none|[[File:Sugar Cane (item) JE2 BE2.png|32px]] The texture of the sugar cane [[item]] has been changed.}}
{{History||xbox=none|xbone=none|ps=1.91|wiiu=none|switch=none|Sugar cane can now be [[trading|bought]] from [[wandering trader]]s.
|Sugar canes can now be used to fill up [[composter]]s.}}
{{History|New Nintendo 3DS Edition}}
{{History||0.1.0|[[File:Sugar Cane JE1 BE1.png|32px]] [[File:Sugar Cane (item) JE1 BE1.png|32px]] Added sugar cane.}}
{{History|foot}}
=== Sugar cane "item" ===
{{:Technical blocks/Sugar Cane}}
== Issues ==
{{Issue list}}
== Trivia ==
*When a sugar cane is broken at the second level, the time resets (for example, if a two-block high sugar cane is broken, but is just about to grow to the third stage, it would reset that time).
*By placing more sugar canes on top of a sugar cane plant, it is possible to create tall sugar canes (up to y=319, the maximum height for building), although they do not naturally grow this high.
*Before sugar cane received an official name, they were sometimes referred to as [[bamboo]], a block added 9 years later. Other names were "reeds" and "papyrus".
== Gallery ==
=== Renders ===
<gallery>
Plains Sugar Cane.png|Plains
Taiga Sugar Cane.png|Taiga
Snowy Plains Sugar Cane.png|Snowy plains
Jungle Sugar Cane.png|Jungle
Desert Sugar Cane.png|Desert
Swamp Sugar Cane (Cold).png|Swamp (cold)
Swamp Sugar Cane.png|Swamp
Badlands Sugar Cane.png|Badlands
</gallery>
=== In-game ===
<gallery>
Huge Sugar Farm.png|A large sugar cane farm using 2×2 [[water]] holes.
Sugar Cane Waterfall.png|Water flowing over sugar cane.
UnderwaterSugarCane.png|Naturally generated sugar cane found underwater.
Sugar and Cactus.png|A [[cactus]] and sugar cane stalk generated next to each other.
SugarCaneRavine.png|Sugar cane found in the [[ravine]].
Reeds in Winter mode.png|Reeds generated in the [[winter mode]].
Sugar Cane Naturally Growing.png|Sugar cane growing between [[biome]]s.
Mesa Sugar Cane.jpg|Sugar cane growing on [[red sand]] in a [[badlands]] biome.
Sugarcanenowaterglitch.png|Sugar cane generated without a water source.
SwampCane.png|Sugar cane generated in a [[swamp]] biome.
Sugar cane savanna.png|Sugar cane growing in a [[savanna]] biome.
ForestSugarcane.png|Sugar cane growing in a [[forest]] biome.
Lava cane.png|Sugar cane growing with lava flowing around it.
Before breaking.png|Sugar canes few seconds before breaking because the water is frozen.
Undergroundreed.png|A sugar cane plant that generated in an underground [[water lake]].
Cave Sugar.png|Another example.
</gallery>
=== Heights ===
<gallery>
Tall Sugar Cane.png|Four-block tall sugar cane.
4RiverCane.png|Four-block tall sugar cane.
4-block tall sugar cane.png|Four-block tall sugar cane in a [[plains]] biome.
</gallery>
== References ==
{{Reflist}}
{{Blocks|vegetation}}
{{Items}}
[[Category:Plants]]
[[Category:Natural blocks]]
[[Category:Non-solid blocks]]
[[cs:Cukrová třtina]]
[[de:Zuckerrohr]]
[[es:Caña de azúcar]]
[[fr:Canne à sucre]]
[[hu:Cukornád]]
[[it:Canna da zucchero]]
[[ja:サトウキビ]]
[[ko:사탕수수]]
[[nl:Suikerriet]]
[[pl:Trzcina cukrowa]]
[[pt:Cana-de-açúcar]]
[[ru:Сахарный тростник]]
[[th:อ้อย]]
[[uk:Цукрова тростина]]
[[zh:甘蔗]]</li></ul> | build 1 | Speed can be obtained from arrow of swiftness. | |||
v0.16.0{{Extension DPL}}<ul><li>[[Redstone Dust|Redstone Dust]]<br/>{{Redirect|Redstone|the ore|Redstone Ore|the powered mineral block|Block of Redstone|other uses|Redstone (disambiguation)}}
{{Block
| group = Inactive (connected)
| 1-1= Inactive Redstone Wire (NESW).png
| 1-2 = Inactive Redstone Wire (NESW) BE.png
| group2 = Inactive (unconnected)
| 2-1 = Inactive Redstone Wire (unconnected).png
| 2-2 = Inactive Redstone Wire (unconnected).png
| group3 = Active (connected)
| 3-1 = Active Redstone Wire (NESW).png
| 3-2 = Active Redstone Wire (NESW) BE.png
| group4 = Active (unconnected)
| 4-1 = Active Redstone Wire (unconnected).png
| 4-2 = Active Redstone Wire (unconnected).png
| image = Redstone Dust JE2 BE2.png
| extratext = [[#Gallery|View all renders]]
| transparent = Yes
| light = No
| tool = all
| renewable = Yes
| stackable = Yes (64)
| flammable = No
| lavasusceptible = No
}}
'''Redstone dust''' is a mineral that can transmit [[Redstone circuit#Power|redstone power]] as a wire when placed as a [[block]]. It is also used in [[crafting]] and [[brewing]].
== Obtaining ==
=== Mining ===
{{see also|Redstone Ore#Natural generation}}
[[Redstone ore]] mined using an iron [[pickaxe]] or higher drops 4 or 5 redstone dust (or more with [[Fortune]], averaging at 6 redstone dust with Fortune III). If mined with [[Silk Touch]], the block drops itself instead of redstone dust.
=== Natural generation ===
15 lengths of redstone dust are naturally generated as part of the trap in each [[jungle pyramid]]. 5 lengths of redstone dust can be found in one type of jail cell room in a [[woodland mansion]]. In [[Ancient City|ancient cities]], multiple pieces of redstone dust can be found integrated into circuitry.
=== Breaking ===
Redstone dust can be broken instantly using any tool, or without a tool, and drops itself as an item.
Redstone dust is removed and drops as an item if:
* its attachment block is moved, removed, or destroyed
* [[water]] or [[lava]] flows into its space
* a [[piston]] tries to push it or moves a block into its space
=== Mob loot ===
[[Witch]]es have a chance of dropping 0–2 redstone dust upon death. This is increased by 1 per level of [[Looting]], for a maximum of 0–5 redstone dust.
=== Chest loot ===
{{LootChestItem|redstone}}
=== Crafting ===
Redstone dust can be crafted from [[blocks of redstone]].
{{Crafting
|Block of Redstone
|Output=Redstone Dust,9
|type=Redstone
}}
=== Smelting ===
{{Smelting
|showname=1
|Redstone Ore; Deepslate Redstone Ore
|Redstone Dust
|0.7
}}
=== Trading ===
{{IN|java}}, novice-level cleric [[villager]]s sell two redstone dust for one [[emerald]].
{{IN|bedrock}}, novice-level cleric villagers sell four redstone dust for one emerald.
=== Villager gifts ===
{{see also|Tutorials/Raid farming}}
{{IN|Java}}, when the player has the [[Hero of the Village]] status effect, clerics might throw that player a redstone dust as a gift.
== Usage ==
Redstone dust is used for [[#Brewing ingredient|brewing]], [[#Crafting ingredient|crafting]], and in redstone circuits by placing it on the ground to create [[#Redstone component|redstone wire]]. It can also be used to power redstone components.
=== Brewing ingredient ===
{{Brewing
|head=1
|Redstone Dust
|Mundane Potion
|base=Water Bottle
}}
{{Brewing
|foot=1
|name=Increased Duration
|Redstone Dust
|showbase=1
|base=Potion of Fire Resistance; Potion of Invisibility; Potion of Night Vision; Potion of Poison; Potion of Regeneration; Potion of Slowness; Potion of Strength; Potion of Swiftness; Potion of Water Breathing; Potion of Weakness; Potion of Leaping; Potion of Slow Falling
}}
=== Crafting ingredient ===
{{crafting usage|Redstone Dust}}
=== {{anchor|Redstone dust}} Redstone component ===
When placed in the world, redstone dust becomes a block of "redstone wire"{{Info needed|other blco? BE?}}, which can transmit [[Redstone circuit#Power|redstone power]].
=== Smithing ingredient ===
{{Smithing
|head=1
|ingredients=Any Armor Trim +<br/>Any Armor Piece + <br/>Redstone Dust
|Any Armor Trim Smithing Template
|Netherite Chestplate
|Redstone
|Redstone Trim Netherite Chestplate
|showdescription=1
|description = All armor types can be used in this recipe,<br/>a netherite chestplate is shown as an example.<br/>
|tail=1
}}
;Trim color palette
The following color palette is shown on the designs on trimmed armor:
*{{TrimPalette|redstone dust}}
=== Placement ===
[[File:Redstone wire as circuit component.png|Examples of redstone wire configuration. ''Top Left:'' Redstone wire connects diagonally vertically through non-opaque blocks. ''Top Right:'' Redstone wire does ''not'' connect diagonally vertically through opaque blocks. ''Center:'' Redstone wire gets darker as its power level drops, to a maximum of 15 blocks from a power source.|thumb]]
[[File:Redstone on Glowstone, Stairs, Slabs.png|Examples of redstone wire placements.|thumb]]
Redstone dust can be placed on [[opaque]] blocks as well as [[glowstone]], upside-down [[slab]]s, [[glass]], upside-down [[stairs]], and [[hopper]]s. It can also be placed on some transparent blocks; see [[Opacity/Placement]] for more information. It cannot be placed suspended in midair, even with commands, which is not unintentional.<ref>{{bug|MC-182709}}</ref>
Redstone wire configures itself to point toward adjacent redstone [[Redstone components#Power components|power components]] and [[Redstone components#Transmission components|transmission component]] connection points. Redstone wire also configures itself to point toward adjacent redstone wire one block higher or lower – unless there is a solid opaque block above the lower redstone wire.
If there is only one such adjacent redstone component, redstone wire configures itself into a {{BlockSprite|redstone-dust}} line pointing both at the neighbor and away from it. If there are two or more such adjacent components, redstone wire connects them in the form of {{BlockSprite|redstone-dust}}, {{BlockSprite|redstone-dust-upleft}}, {{BlockSprite|redstone-dust-t-up}}, or {{BlockSprite|redstone-dust-cross}} as needed.
When there are no adjacent components, a single redstone wire configures itself into a {{BlockSprite|redstone-dust-cross}} plus sign, which can provide power in all four directions. By right-clicking it can be changed into a {{BlockSprite|redstone-dust-dot}} dot, which does not provide power to any of the four directions.
{{IN|bedrock}}, redstone wire automatically configures itself to point toward adjacent blocks or [[Redstone components#Mechanism components|mechanism components]]. {{IN|java}}, it does not. If such a configuration is desired, the other neighbors of the redstone wire must be arranged to create it, i.e the redstone dust must be placed in a way that it would be pointed at the block’s location even if it were not there.
When redstone wire is reconfigured after placement, it does not update other redstone components around it of the change unless that reconfiguration also includes a change in power level or another component provides an update. This can create situations where a mechanism component remains activated when it shouldn't, or vice versa, until it receives an update from something else – a "feature" of redstone wire that can be used to make a [[BUD|block update detector]].
{{-}}
=== Behavior ===
{{Schematic|caption=
{{IN|be}}, the signal can go down from glass blocks.
|||rd-$ew!|RL-!||||rd-$ew!|RL-!|-
|rt-$!|rd-$ew!|SB|||rt-$!|rd-$ew!|glass||-
|ts-$|SB|rd-$ew|RL||ts-$|SB|rd-$ew!|RL-!
}}{{Schematic|caption =
However, the signal can never go down from slabs.
|||rd-$ew!|RL-!||||rd-$ew!|RL-!|-
|rt-$!|rd-$ew!|SB|||rt-$!|rd-$ew!|glass||-
|ts-$|ts-$|rd-$ew|RL||ts-$|ts-$|rd-$ew|RL
}}
Redstone wire can transmit power, which can be used to operate [[Redstone components#Mechanism components|mechanism components]] ([[door]]s, [[piston]]s, [[redstone lamp]]s, etc.).
Redstone wire can be "powered" by a number of methods:
* from an adjacent [[Redstone components#Power components|power component]] or a strongly-powered block
* from the output of a redstone repeater or redstone comparator
* from adjacent redstone wire. The powering dust can be a level higher or lower, but with restrictions:
** Redstone dust can be powered by redstone dust that is one level lower, or on an [[opaque]] block one level higher. A transparent block cannot{{only|java}} pass power downward.
** The block "between" the two dust blocks must be air or transparent. A solid block there "cuts" the connection between the higher and lower dust.
The "power level" of redstone dust can vary from 0 to 15. Most power components power-up adjacent redstone dust to power level 15, but a few ([[daylight sensor]]s, [[trapped chest]]s, and [[weighted pressure plate]]s) may create a lower power level. Redstone repeaters output power level 15 (when turned on), but [[redstone comparator]]s may output a lower power level.
{{Schematic | caption =
Redstone wire can transmit power up to 15 blocks.
|rt-$!|rd-$ew!+15|rd-$ew!+14|rd-$ew!+13|rd-$ew!+12|rd-$ew!+11|rd-$ew!+10|rd-$ew!+9
|rd-$ew!+8|rd-$ew!+7|rd-$ew!+6|rd-$ew!+5|rd-$ew!+4|rd-$ew!+3|rd-$ew!+2|rd-$ew!+1|rd-$ew+0
}}
Power level drops by 1 for every block of redstone wire it crosses. Thus, redstone wire can transmit power for no more than 15 blocks. To go further, the power level must be re-strengthened – typically with a redstone repeater.
Powered redstone wire on top of, or pointing at, an opaque block provides ''weak'' power to the block. A weakly-powered block cannot power other adjacent redstone wire, but can still power redstone repeaters and comparators, and activate adjacent mechanism components. Transparent blocks cannot be powered.
When redstone wire is unpowered, it appears dark red. When powered, it becomes bright red at power level 15, fading to darker shades with decreasing power. Powered redstone wire also produces "dust" [[particles]] of the same color.
While redstone wire always provides power to the directions it points into, it can still point into directions in which it cannot give power. If redstone wire comes in the form of a cross, the player can right-click to toggle it between a cross and dot. A redstone dot does not power anything adjacent to it, but powers the block under it.
== Sounds ==
{{Sound table/Block/Normal}}
== Data values ==
=== ID ===
{{edition|java}}:
{{ID table
|edition=java
|firstcolumnname=Redstone Dust
|showforms=y
|generatetranslationkeys=y
|displayname=Block
|spritename=redstone-dust
|spritetype=block
|nameid=redstone_wire
|form=block}}
{{ID table
|displayname=Item
|spritename=redstone-dust
|spritetype=item
|nameid=redstone
|form=item
|foot=1}}
{{edition|bedrock}}:
{{ID table
|edition=bedrock
|firstcolumnname=Redstone Dust
|shownumericids=y
|showforms=y
|generatetranslationkeys=y
|displayname=Block
|spritename=redstone-dust
|spritetype=block
|nameid=redstone_wire
|id=55
|form=block}}
{{ID table
|displayname=Item
|spritename=redstone-dust
|spritetype=item
|nameid=redstone
|id=373
|form=item
|foot=1}}
=== Block states ===
{{see also|Block states}}
{{/BS}}
{{LoadPage|Redstone Dust/Asset history|List of block state combinations|h4}}
== Achievements ==
{{load achievements|Dispense With This}}
== Video ==
{{Video note|These videos do not show all uses for redstone in crafting and all methods of obtaining. This video is also outdated, as of 1.13 Java Edition, redstone is now called Redstone Dust.}}
<div style="text-align:center">
<span style="display:inline-block">{{yt|zldqknGFWb4}}</span>
<span style="display:inline-block">{{yt|_IApwvCLJW8}}</span>
</div>
== History ==
{{History||May 21, 2009|link=https://web.archive.org/web/0/http://notch.tumblr.com/post/110762705/my-list-on-tile-types-so-far|[[Notch]] shows interest in adding wire-type [[block]]s.}}
{{History|java alpha}}
{{History||v1.0.1|[[File:Redstone Dust JE1 BE1.png|32px]] Added redstone dust as an [[item]].
|[[File:Inactive Redstone Wire (NS) JE1.png|32px]] [[File:Inactive Redstone Wire (EW) JE1.png|32px]] [[File:Inactive Redstone Wire (NE) JE1.png|32px]] [[File:Inactive Redstone Wire (ES) JE1.png|32px]] [[File:Inactive Redstone Wire (SW) JE1.png|32px]] [[File:Inactive Redstone Wire (NW) JE1.png|32px]] [[File:Inactive Redstone Wire (NEW) JE1.png|32px]] [[File:Inactive Redstone Wire (NES) JE1.png|32px]] [[File:Inactive Redstone Wire (ESW) JE1.png|32px]] [[File:Inactive Redstone Wire (NSW) JE1.png|32px]] [[File:Inactive Redstone Wire (NESW) JE1.png|32px]]<br>[[File:Active Redstone Wire (NS) JE1.png|32px]] [[File:Active Redstone Wire (EW) JE1.png|32px]] [[File:Active Redstone Wire (NE) JE1.png|32px]] [[File:Active Redstone Wire (ES) JE1.png|32px]] [[File:Active Redstone Wire (SW) JE1.png|32px]] [[File:Active Redstone Wire (NW) JE1.png|32px]] [[File:Active Redstone Wire (NEW) JE1.png|32px]] [[File:Active Redstone Wire (NES) JE1.png|32px]] [[File:Active Redstone Wire (ESW) JE1.png|32px]] [[File:Active Redstone Wire (NSW) JE1.png|32px]] [[File:Active Redstone Wire (NESW) JE1.png|32px]] Added redstone dust as a placed [[block]].
|Redstone dust as a placed block has two power appearances; either completely on, or completely off.
|Redstone dust is used to craft [[redstone torch]]es.
|At this time, redstone has not been given an official name.}}
{{History||v1.0.2_01|Redstone dust now doesn't connect through solid [[block]]s diagonally down.{{needs testing|may have been changed in v1.0.2|type=untestable}}
|Walking on redstone dust no longer [[breaking|breaks]] it.{{needs testing|may have been changed in v1.0.2|type=untestable}}
|Active redstone dust now gives off [[particles]].{{needs testing|may have been changed in v1.0.2|type=untestable}}}}
{{History||v1.1.0|Redstone is now used to craft [[compass]]es.}}
{{History||v1.2.0|snap=<nowiki>?|slink=:Category:Information needed requiring unarchived version|Redstone is now used to craft [[clock]]s.}}
{{History|java beta}}
{{History||1.0|With the addition of inventory tooltips, the [[item]] form of redstone dust has been named "Redstone", and the usually unobtainable block form has been named "Redstone Dust".}}
{{History||1.2|Redstone is now used to craft [[dispenser]]s and [[note block]]s.}}
{{History||1.3|[[File:Inactive Redstone Wire (NS) JE2.png|32px]] [[File:Inactive Redstone Wire (EW) JE2.png|32px]] [[File:Inactive Redstone Wire (NE) JE2.png|32px]] [[File:Inactive Redstone Wire (ES) JE2.png|32px]] [[File:Inactive Redstone Wire (SW) JE2.png|32px]] [[File:Inactive Redstone Wire (NW) JE2.png|32px]] [[File:Inactive Redstone Wire (NEW) JE2.png|32px]] [[File:Inactive Redstone Wire (NES) JE2.png|32px]] [[File:Inactive Redstone Wire (ESW) JE2.png|32px]] [[File:Inactive Redstone Wire (NSW) JE2.png|32px]] [[File:Inactive Redstone Wire (NESW) JE2.png|32px]]<br>[[File:Active Redstone Wire (NS) JE2.png|32px]] [[File:Active Redstone Wire (EW) JE2.png|32px]] [[File:Active Redstone Wire (NE) JE2.png|32px]] [[File:Active Redstone Wire (ES) JE2.png|32px]] [[File:Active Redstone Wire (SW) JE2.png|32px]] [[File:Active Redstone Wire (NW) JE2.png|32px]] [[File:Active Redstone Wire (NEW) JE2.png|32px]] [[File:Active Redstone Wire (NES) JE2.png|32px]] [[File:Active Redstone Wire (ESW) JE2.png|32px]] [[File:Active Redstone Wire (NSW) JE2.png|32px]] [[File:Active Redstone Wire (NESW) JE2.png|32px]] Redstone wire gets darker the farther away it is from a source of power, using a dedicated [[tint]] system. Previously, it was fully on until it reached its limit.
|Its particles now appear gray due to not being tinted.
|Redstone is now used to craft [[redstone repeater]]s.}}
{{History||1.5|[[File:Inactive Redstone Wire (NS) JE3.png|32px]] [[File:Inactive Redstone Wire (EW) JE3.png|32px]] [[File:Inactive Redstone Wire (NE) JE3.png|32px]] [[File:Inactive Redstone Wire (ES) JE3.png|32px]] [[File:Inactive Redstone Wire (SW) JE3.png|32px]] [[File:Inactive Redstone Wire (NW) JE3.png|32px]] [[File:Inactive Redstone Wire (NEW) JE3.png|32px]] [[File:Inactive Redstone Wire (NES) JE3.png|32px]] [[File:Inactive Redstone Wire (ESW) JE3.png|32px]] [[File:Inactive Redstone Wire (NSW) JE3.png|32px]] [[File:Inactive Redstone Wire (NESW) JE3.png|32px]]<br>[[File:Active Redstone Wire (NS) JE3.png|32px]] [[File:Active Redstone Wire (EW) JE3.png|32px]] [[File:Active Redstone Wire (NE) JE3.png|32px]] [[File:Active Redstone Wire (ES) JE3.png|32px]] [[File:Active Redstone Wire (SW) JE3.png|32px]] [[File:Active Redstone Wire (NW) JE3.png|32px]] [[File:Active Redstone Wire (NEW) JE3.png|32px]] [[File:Active Redstone Wire (NES) JE3.png|32px]] [[File:Active Redstone Wire (ESW) JE3.png|32px]] [[File:Active Redstone Wire (NSW) JE3.png|32px]] [[File:Active Redstone Wire (NESW) JE3.png|32px]] Fully off redstone wire is no longer black.
|Redstone dust can now be placed on [[snow]].
|Redstone is now used to craft [[powered rail]]s and [[detector rail]]s.}}
{{History||1.6.6|Redstone dust now checks if the block below has a solid top face or [[glowstone]], allowing it to be placed on it.}}
{{History||1.7|Redstone dust now connects to a [[redstone repeater|repeater]] without the dust being explicitly pointed at it.
|Redstone can now be used to craft [[piston]]s.}}
{{History||1.8|snap=Pre-release|Redstone can now be found in the new [[stronghold]] storeroom [[chest]]s, and in the new [[mineshaft]] chests.}}
{{History|java}}
{{History||1.0.0|snap=Beta 1.9 Prerelease 3|Redstone can now be [[brewing|brewed]] in a [[water bottle]] to create a [[mundane potion]].
|Redstone can now be found in the new [[stronghold]] altar [[chest]]s.
|Redstone now extends the [[potion]]s of [[Fire Resistance]], [[Slowness]], [[Swiftness]], [[Poison]], [[Weakness]] and [[Strength]].}}
{{History|||snap=Beta 1.9 Prerelease 4|Redstone now extends the new potion of [[Regeneration]].}}
{{History|||snap=RC1|[[File:Inactive Redstone Wire (unconnected) JE1.png|32px]] <br>[[File:Active Redstone Wire (unconnected) JE1.png|32px]] Redstone dust placement on one [[block]] has been changed from a "+" to a "•" shape.}}
{{History||?|Redstone wire block particles are now correctly colored.}}
{{History||1.1|snap=11w49a|Fixed redstone update bug.{{more info}}}}
{{History||1.2.1|snap=12w06a|Redstone can now be placed on [[glowstone]].}}
{{History|||snap=12w07a|Redstone is now used to craft [[redstone lamp]]s.}}
{{History||1.3.1|snap=12w21a|Redstone can now be [[trading|bought]] from priest [[villager]]s, at 2–4 redstone for 1 [[emerald]], making them [[renewable]].}}
{{History|||snap=12w22a|Redstone dust now generates in [[jungle temple]]s.}}
{{History|||snap=12w25a|Redstone dust can now be placed on top of upside-down [[slabs]] and [[stairs]].}}
{{History||1.4.2|snap=12w34a|Redstone now extends the new [[potion]]s of [[Night Vision]] and [[Invisibility]].}}
{{History|||snap=12w38a|[[Witch]]es have been added, which sometimes [[drops|drop]] redstone when killed.}}
{{History||1.5|snap=13w01a|Redstone can now be used to craft [[blocks of redstone]] and [[dropper]]s.}}
{{History||1.7.2|snap=13w36a|Redstone now extends the new [[potion]] of [[Water Breathing]].}}
{{History||1.8|snap=14w02a|[[Trading]] has been changed: cleric [[villager]]s now [[trading|sell]] 1–4 redstone for 1 [[emerald]].}}
{{History|||snap=14w25a|Redstone dust no longer changes to [[obsidian]] next to water when [[lava]] flows into it.}}
{{History|||snap=14w27a|Redstone now extends the new [[potion]] of [[Leaping]].}}
{{History||1.9|snap=15w31a|[[File:Inactive Redstone Wire (unconnected) JE2.png|32px]] [[File:Inactive Redstone Wire (NS) JE4.png|32px]] [[File:Inactive Redstone Wire (EW) JE4.png|32px]] [[File:Inactive Redstone Wire (NE) JE4.png|32px]] [[File:Inactive Redstone Wire (ES) JE4.png|32px]] [[File:Inactive Redstone Wire (SW) JE4.png|32px]] [[File:Inactive Redstone Wire (NW) JE4.png|32px]] [[File:Inactive Redstone Wire (NEW) JE4.png|32px]] [[File:Inactive Redstone Wire (NES) JE4.png|32px]] [[File:Inactive Redstone Wire (ESW) JE4.png|32px]] [[File:Inactive Redstone Wire (NSW) JE4.png|32px]] [[File:Inactive Redstone Wire (NESW) JE4.png|32px]]<br>[[File:Active Redstone Wire (unconnected) JE2.png|32px]] [[File:Active Redstone Wire (NS) JE4.png|32px]] [[File:Active Redstone Wire (EW) JE4.png|32px]] [[File:Active Redstone Wire (NE) JE4.png|32px]] [[File:Active Redstone Wire (ES) JE4.png|32px]] [[File:Active Redstone Wire (SW) JE4.png|32px]] [[File:Active Redstone Wire (NW) JE4.png|32px]] [[File:Active Redstone Wire (NEW) JE4.png|32px]] [[File:Active Redstone Wire (NES) JE4.png|32px]] [[File:Active Redstone Wire (ESW) JE4.png|32px]] [[File:Active Redstone Wire (NSW) JE4.png|32px]] [[File:Active Redstone Wire (NESW) JE4.png|32px]] Some slight changes have been made to redstone wire's appearance - the dot now extends outward with two more pixels, and the south-facing section of bends, T shapes and crosses now has one fewer pixel. It also appears straighter and more continuous in straight wire form.
|Redstone can no longer be added to extended [[potion]]s or tier-II potions.}}
{{History|||snap=15w44a|The average yield of redstone from [[dungeon]] [[chest]]s has been cut by more than half.
|The average yield of redstone in [[mineshaft]] chests has been increased.}}
{{History|||snap=15w46a|The hitbox of redstone now covers only part of the surface of the [[block]] below, based on the orientation of the redstone.}}
{{History||1.11|snap=16w39a|Redstone dust can now be found in chests in [[woodland mansion]]s.
|Redstone can now used to craft [[observer]]s.}}
{{History||1.13|snap=17w47a|The [[item]] form of "Redstone" has been renamed to "Redstone Wire".
|Prior to [[1.13/Flattening|''The Flattening'']], this [[block]]'s numeral ID was 55, and the [[item]]'s 331.}}
{{History|||snap=17w48a|"Redstone" has been renamed to "Redstone Dust".}}
{{History|||snap=18w07a|Redstone now extends the new [[potion of the Turtle Master]].}}
{{History||1.14|snap=18w43a|[[File:Redstone Dust JE2 BE2.png|32px]] The texture of redstone dust has been changed.}}
{{History|||snap=18w50a|Redstone dust can now be found in chests in [[village]] temples.}}
{{History|||snap=19w12b|Redstone dust can now be placed on [[glass]], [[ice]] and [[sea lantern]]s.}}
{{History|||snap=19w13a|Cleric villagers now give redstone dust to players under the [[Hero of the Village]] effect.}}
{{History||1.16|snap=20w06a|Redstone dust now has a bottom texture.}}
{{History|||snap=20w09a|Redstone can now be used to craft [[target]]s.}}
{{History|||snap=20w18a|Redstone dust placement on one [[block]] has been changed from a "•" back to a "+" shape.
|Redstone dust's hitbox is now no longer strictly a cuboid, and more closely matches the shape of the wiring.<ref>{{bug|MC-137336}}</ref>
|Upward going redstone dust now has a hitbox on the side of the [[block]] too, rather than only on the floor.<ref>{{bug|MC-153508}}</ref>
|Unconnected redstone dust now has all direction block states set to "side".
|The direction block states of redstone dust are now properly set to "side" at the end of a redstone wire on both ends, rather than only the one with other redstone besides it.
|[[File:Inactive Redstone Wire (N).png|32px]] [[File:Inactive Redstone Wire (E).png|32px]] [[File:Inactive Redstone Wire (S).png|32px]] [[File:Inactive Redstone Wire (W).png|32px]]<br>[[File:Active Redstone Wire (N).png|32px]] [[File:Active Redstone Wire (E).png|32px]] [[File:Active Redstone Wire (S).png|32px]] [[File:Active Redstone Wire (W).png|32px]] While not accessible in normal gameplay, redstone dust that points into one side, but not the opposite, now visually reaches halfway across the [[block]].}}
{{History|||snap=20w19a|Redstone dust now visually connects when going up [[soul sand]], 8-layer [[snow]] stacks and the back side of upside-down [[stairs]].
|[[Particles]] are now generated across the length of the redstone wire rather than the center of the [[block]].}}
{{History|||snap=20w21a|Redstone dust placement on one [[block]] is now toggleable between a "+" and a "•" shape, by {{control|interacting}} with it.}}
{{History||1.17|snap=21w08a|Redstone dust can now drop and be smelted from [[deepslate redstone ore]].}}
{{History||1.19|snap=22w13a|Redstone wire now generates in [[Ancient City|ancient cities]].}}
{{History||1.20<br>(Experimental)|link=1.19.4|snap=23w04a|Redstone dust can now be used as an armor trim material.}}
{{History|pocket alpha}}
{{History||v0.8.0|snap=build 1|[[File:Redstone Dust JE1 BE1.png|32px]] Added redstone as an [[item]].
|Redstone is now [[drops|dropped]] when [[breaking|mined]] from [[redstone ore]].
|Redstone can be used to craft [[compass]]es and [[clock]]s.}}
{{History|||snap=build 2|Redstone can now be used to craft [[powered rail]]s.}}
{{History||v0.11.0|snap=build 1|Redstone is now used to craft [[redstone block]]s.}}
{{History||v0.12.1|snap=build 1|Redstone has been added to the [[Creative]] [[inventory]], but it still cannot be placed. }}
{{History||v0.13.0|snap=build 1|Redstone can now be placed.
|Redstone is now used to craft [[redstone lamp]]s, [[note block]]s, [[detector rail]]s and [[redstone torch]]es.}}
{{History||v0.14.0|snap=build 1|Redstone is now used to craft [[dispenser]]s and [[dropper]]s.}}
{{History||v0.15.0|snap=build 1|Redstone is now used to craft [[piston]]s and [[observer]]s.}}
{{History|pocket}}
{{History||1.0.4|snap=alpha 1.0.4.0|Cleric [[villager]]s now [[trading|sell]] 1–4 redstone for an [[emerald]].}}
{{History||1.1.0|snap=alpha 1.1.0.0|Redstone can now be found in [[woodland mansion]]s.}}
{{History|bedrock}}
{{History||?|[[File:Inactive Redstone Wire (NE) BE.png|32px]] [[File:Inactive Redstone Wire (ES) BE.png|32px]] [[File:Inactive Redstone Wire (SW) BE.png|32px]] [[File:Inactive Redstone Wire (NW) BE.png|32px]] [[File:Inactive Redstone Wire (NEW) BE.png|32px]] [[File:Inactive Redstone Wire (NES) BE.png|32px]] [[File:Inactive Redstone Wire (ESW) BE.png|32px]] [[File:Inactive Redstone Wire (NSW) BE.png|32px]] [[File:Inactive Redstone Wire (NESW) BE.png|32px]]<br>[[File:Active Redstone Wire (NE) BE.png|32px]] [[File:Active Redstone Wire (ES) BE.png|32px]] [[File:Active Redstone Wire (SW) BE.png|32px]] [[File:Active Redstone Wire (NW) BE.png|32px]] [[File:Active Redstone Wire (NEW) BE.png|32px]] [[File:Active Redstone Wire (NES) BE.png|32px]] [[File:Active Redstone Wire (ESW) BE.png|32px]] [[File:Active Redstone Wire (NSW) BE.png|32px]] [[File:Active Redstone Wire (NESW) BE.png|32px]]<br>Placed redstone now assumes its current appearance with a more solid center. Its linear state appearences are unknown.}}
{{History||1.10.0|snap=beta 1.10.0.3|[[File:Redstone Dust JE2 BE2.png|32px]] The texture of redstone has been changed.}}
{{History||1.11.0|snap=beta 1.11.0.1|Redstone can now be found in [[desert]] [[village]] temple [[chest]]s.}}
{{History|||snap=beta 1.11.0.4|Cleric [[villager]]s now [[trading|sell]] 4 redstone as part of their first tier [[trading|trade]].}}
{{History||1.16.210|snap=beta 1.16.210.57|"Redstone" has been renamed to "Redstone Dust".}}
{{History||1.17.0|snap=beta 1.16.230.52|Redstone dust can now drop and be smelted from [[deepslate redstone ore]].}}
{{History||1.19.0|snap=beta 1.19.0.26|Redstone wire now generates in [[Ancient City|ancient cities]].}}
{{History||1.19.80|snap=beta 1.19.80.21|Redstone dust can now be used as an armor trim material.}}
{{History|console}}
{{History||xbox=TU1|xbone=CU1|ps=1.0|wiiu=Patch 1|switch=1.0.1|[[File:Redstone Dust JE1 BE1.png|32px]] Added redstone.}}
{{History||xbox=TU3|Redstone now connects to a [[redstone repeater|repeater]] without the dust being explicitly pointed at it.}}
{{History||xbox=none|xbone=none|ps=1.90|wiiu=none|switch=none|[[File:Redstone Dust JE2 BE2.png|32px]] The texture of redstone has been changed.}}
{{History||ps=1.95|Redstone can now be placed on [[glass]].}}
{{History|new 3ds}}
{{History||0.1.0|[[File:Redstone Dust JE1 BE1.png|32px]] Added redstone dust.}}
{{History|foot}}
=== Redstone wire "item" ===
{{:Technical blocks/Redstone Wire}}
== Gallery ==
=== Renders ===
; Java Edition
<gallery>
Inactive Redstone Wire (NESW).png |
Inactive Redstone Wire (unconnected).png |
Inactive Redstone Wire (NS).png |
Inactive Redstone Wire (EW).png |
Inactive Redstone Wire (NE).png |
Inactive Redstone Wire (ES).png |
Inactive Redstone Wire (SW).png |
Inactive Redstone Wire (NW).png |
Inactive Redstone Wire (NEW).png |
Inactive Redstone Wire (NES).png |
Inactive Redstone Wire (ESW).png |
Inactive Redstone Wire (NSW).png
</gallery>
<gallery>
Active Redstone Wire (NESW).png |
Active Redstone Wire (unconnected).png |
Active Redstone Wire (NS).png |
Active Redstone Wire (EW).png |
Active Redstone Wire (NE).png |
Active Redstone Wire (ES).png |
Active Redstone Wire (SW).png |
Active Redstone Wire (NW).png |
Active Redstone Wire (NEW).png |
Active Redstone Wire (NES).png |
Active Redstone Wire (ESW).png |
Active Redstone Wire (NSW).png
</gallery>
; Bedrock Edition
<gallery>
Inactive Redstone Wire (NESW) BE.png |
Inactive Redstone Wire (NESW) BE.png |
Inactive Redstone Wire (NS).png |
Inactive Redstone Wire (EW).png |
Inactive Redstone Wire (NE) BE.png |
Inactive Redstone Wire (ES) BE.png |
Inactive Redstone Wire (SW) BE.png |
Inactive Redstone Wire (NW) BE.png |
Inactive Redstone Wire (NEW) BE.png |
Inactive Redstone Wire (NES) BE.png |
Inactive Redstone Wire (ESW) BE.png |
Inactive Redstone Wire (NSW) BE.png
</gallery>
<gallery>
Active Redstone Wire (NESW) BE.png |
Active Redstone Wire (NESW) BE.png |
Active Redstone Wire (NS).png |
Active Redstone Wire (EW).png |
Active Redstone Wire (NE) BE.png |
Active Redstone Wire (ES) BE.png |
Active Redstone Wire (SW) BE.png |
Active Redstone Wire (NW) BE.png |
Active Redstone Wire (NEW) BE.png |
Active Redstone Wire (NES) BE.png |
Active Redstone Wire (ESW) BE.png |
Active Redstone Wire (NSW) BE.png
</gallery>
=== Screenshots ===
<gallery>
Slab Stair Redstone.png|First image of redstone dust on top of slabs and stairs.
File:Olivia Tinkering.jpeg|[[Olivia]] using a scarce amount of redstone dust.
File:23w32a.jpg|[[Sunny]] using a very long strip of redstone dust.
</gallery>
=== In other media ===
<gallery>
Powered By Redstone JINX.jpg|Official T-shirt artwork "Powered By Redstone" made by [https://www.jinx.com JINX].
File:Redstone Behind Chiseled Bookshelf Pixel Art.png|Pixel art of redstone dust.
</gallery>
== Issues ==
{{issue list|redstone|redstone dust|redstone wire}}
== Trivia ==
* Five updates for [[wikipedia:Windows 10 version history|Windows 10]] released from 2016 to 2018 were codenamed "Redstone", referencing ''Minecraft''.<ref>{{link|url=https://www.theverge.com/2015/4/7/8364355/microsoft-redstone-windows-updates|title=Microsoft plans ‘Redstone’ updates for Windows 10 in 2016|author=Tom Warren|website=The Verge|date=April 7, 2015}}</ref>
* The block has 1,296 possible block state combinations, the highest of all blocks as of 1.15.2, beating [[fire]]'s 512 and [[note block]]'s 800.
* According to {{el|ee}}, redstone dust contains radioactive [[element]]s.
== References ==
{{Reflist}}
{{Redstone}}
{{Blocks|Utility}}
{{Items}}
[[Category:Redstone mechanics]]
[[Category:Mechanisms]]
[[Category:Mechanics]]
[[Category:Generated structure blocks]]
[[Category:Non-solid blocks]]
[[Category:Brewing recipe]]
[[cs:Rudit]]
[[de:Redstone]]
[[el:Σκόνη Κοκκινόπετρας]]
[[es:Polvo de redstone]]
[[fr:Poudre de redstone]]
[[hu:Redstone]]
[[it:Polvere di redstone]]
[[ja:レッドストーンダスト]]
[[ko:레드스톤 가루]]
[[nl:Redstonestof]]
[[pl:Redstone]]
[[pt:Pó de redstone]]
[[ru:Красная пыль]]
[[th:ผงเรดสโตน]]
[[tr:Kızıltaş]]
[[uk:Редстоун]]
[[zh:红石粉]]</li><li>[[Brewing Stand|Brewing Stand]]<br/>{{Block
| image = <gallery>
Brewing Stand (empty) JE10.png | Empty
Brewing Stand (right) JE10.png | Right
Brewing Stand (left) JE10.png | Left
Brewing Stand (full) JE10.png | Full
</gallery>
| transparent = Yes
| light = Yes (1)
| tool = Wooden Pickaxe
| renewable = Yes
| stackable = Yes (64)
| flammable = No
| lavasusceptible = No
}}
A '''brewing stand''' is a [[block]] used for [[brewing]] [[potion]]s using [[Glass Bottle|bottles]] and suitable ingredients. It also serves as a [[cleric]]'s [[job site block]].
== Obtaining ==
=== Breaking ===
A brewing stand can be obtained using any [[pickaxe]]. If mined without a pickaxe, it drops nothing {{in|JE}}, while it drops itself {{in|BE}}.
{{breaking row|horizontal=1|Brewing Stand|Pickaxe|Wood|foot=1}}
=== Natural generation ===
Brewing stands generate in [[end ship]]s. They have two [[potion of Healing|Instant Health II potions]] in their holders.
A brewing stand also generates in the basement of [[igloo]]s with a [[splash potion of Weakness]] in it.
Brewing stands can generate without potions in [[village]] churches.
=== Crafting ===
{{Crafting
|head=1
|showdescription=1
|B1= Blaze Rod
|A2= Any stone-tier block |B2= Any stone-tier block |C2= Any stone-tier block
|Output= Brewing Stand
|type= Brewing
|description=Can use cobblestone and its other variants interchangeably.
|foot=1
}}
== Usage ==
[[File:Brewing Stand GUI.png|thumb|right|176px|Brewing stand GUI {{in|java}}]]
By default, the interface of a brewing stand is labeled "Brewing Stand", but this name can be customized by naming it in an [[anvil]] before placing it.
Brewing stands cannot be pushed by [[piston]]s {{in|java}}.
=== Brewing ===
{{main|Brewing}}
The main purpose of brewing stands is to allow for the [[brewing]] of [[potion]]s. Its interface can be opened by pressing {{control|use}} on them.
Brewing stands need [[blaze powder]] as fuel. Each piece brews 20 batches of potions, with each stage of brewing counting separately. Unlike [[furnace]]s, there is no time limit; fuel is consumed only when there are [[Glass Bottle|bottles]] and an ingredient to brew into it.
Brewing stands interact with [[hopper]]s as follows:
* They accept brewing ingredients from hoppers pointing down into the top.
* Any valid potion recipe can be preloaded for "hands-free" brewing of a complex recipe, with the [[Nether Wart|nether wart]] falling through into the stand for the first step.
* Bottles and fuel are accepted from hoppers pointing into the side.
* Finished products can be pulled out by hoppers below, but each stage of brewing counts as a batch of "finished" potions.
{{IN|education}}, elements can be combined in the brewing stand to make the [[medicine]] potions: antidote, elixir, eye drops, and tonic.
=== Changing profession ===
If a village has a brewing stand that has not been claimed by a villager, any villager who hasn't already picked a [[job site]] block in the village has a chance to change their profession into cleric.
=== Light source ===
Brewing stands emit a light level of 1.
== Sounds ==
=== Generic ===
{{Sound table/Block/Stone}}
=== Unique ===
{{edition|java}}:
{{Sound table
|rowspan=2
|sound=Brewing Stand brew1.ogg
|sound2=Brewing Stand brew2.ogg
|subtitle=Brewing Stand bubbles
|source=block
|description=When a potion finishes brewing
|id=block.brewing_stand.brew
|translationkey=subtitles.block.brewing_stand.brew
|volume=1.0
|pitch=1.0
|distance=16}}
{{Sound table
|subtitle=Cleric works
|source=neutral
|description=Randomly while a cleric is working
|id=entity.villager.work_cleric
|translationkey=subtitles.entity.villager.work_cleric
|volume=1.0
|pitch=0.8-1.2
|distance=16}}
{{Sound table
|sound=Door close.ogg
|sound2=Door open.ogg
|subtitle=Chest locked<ref group=sound name=lock>{{Bug|MC-98316||Wrong subtitles caused by missing distinction}}</ref>
|source=block
|description=When a player attempts to open a brewing stand locked using the {{nbt|string|Lock}} tag
|id=block.chest.locked|idnote=<ref group=sound name=lock/>
|translationkey=subtitles.block.chest.locked|translationkeynote=<ref group=sound name=lock/>
|volume=1.0
|pitch=1.0
|distance=16
|foot=1}}
{{Edition|Bedrock}}:
{{Sound table
|type=bedrock
|rowspan=2
|sound=Brewing Stand brew1.ogg
|sound2=Brewing Stand brew2.ogg
|source=block
|description=When a potion finishes brewing
|id=random.potion.brewed
|volume=1.0
|pitch=1.0}}
{{Sound table
|source=block
|description=Randomly while a cleric is working
|id=random.potion.brewed
|volume=1.0
|pitch=1.0
|foot=1}}
== Data values ==
=== ID ===
{{edition|java}}:
{{ID table
|edition=java
|showforms=y
|generatetranslationkeys=y
|displayname=Brewing Stand
|spritetype=block
|nameid=brewing_stand
|translationkey=block.minecraft.brewing_stand, item.minecraft.brewing_stand
|foot=1}}
{{ID table
|displayname=Block entity
|spritename=brewing-stand
|spritetype=block
|nameid=brewing_stand
|foot=1}}
{{edition|bedrock}}:
{{ID table
|edition=bedrock
|firstcolumnname=Brewing Stand
|shownumericids=y
|showforms=y
|generatetranslationkeys=y
|displayname=Block
|spritename=brewing-stand
|spritetype=block
|nameid=brewing_stand
|id=117
|form=block
|itemform=item.brewing_stand
|translationkey=-}}
{{ID table
|displayname=Item
|spritename=brewing-stand
|spritetype=item
|nameid=brewing_stand
|id=431
|form=item
|foot=1}}
{{ID table
|notnamespaced=y
|displayname=Block entity
|spritename=brewing-stand
|spritetype=block
|nameid=BrewingStand
|foot=1}}
=== Block states ===
{{see also|Block states}}
{{/BS}}
=== Block data ===
A brewing stand has a block entity associated with it that holds additional data about the block.
{{el|java}}:
{{see also|Block entity format}}
{{/BE}}
{{el|bedrock}}:
: See [[Bedrock Edition level format/Block entity format]].
== Achievements ==
{{load achievements|Local Brewery}}
== Advancements ==
{{Load advancements|Local Brewery}}
== History ==
{{History|java}}
{{History||1.0.0|snap=Beta 1.9 Prerelease 2|[[Cauldron]]s are implemented to be used to brew [[potion]]s, but are not available in-game yet.}}
{{History|||snap=September 30, 2011|slink={{tweet|jeb|119762786619359232}}|[[File:Brewing Stand (pre-release).png|32px]] [[Jens Bergensten|Jeb]] reveals that brewing is done through a brewing stand instead of a [[cauldron]].}}
{{History|||snap=Beta 1.9 Prerelease 3|[[File:Brewing Stand (empty) JE1 BE1.png|32px]] [[File:Brewing Stand (right) JE1.png|32px]] [[File:Brewing Stand (left) JE1.png|32px]] [[File:Brewing Stand (full) JE1.png|32px]] [[File:Brewing Stand (item) JE1 BE1.png|32px]] Added brewing stands.
|Brewing [[potion]]s with brewing stands currently take 30 seconds.
|When the first brewing stand was shown by Jeb, it had an additional 2D sub-stand for [[Glass Bottle|bottles]], but the stands for bottles are now designed in 3D.<ref>{{tweet|jeb|119763532312096769|I'm fully aware the potions are very thin (diet?), but it looks cute. (Always work in progress, of course)|September 30, 2011}}</ref>}}
{{History||1.1|snap=12w01a|Brewing time for brewing stands has been reduced to 20 seconds.}}
{{History||1.3.1|snap=12w15a|{{key|Shift}} + clicking can now be used to put items in brewing stands.}}
{{History||1.8|snap=14w11a|[[File:Brewing Stand (empty) JE2.png|32px]] [[File:Brewing Stand (right) JE2.png|32px]] [[File:Brewing Stand (left) JE2.png|32px]] [[File:Brewing Stand (full) JE2.png|32px]] The [[model]] of brewing stands has been changed. Stands with no bottles appear glitched from some angles, the left and right slots appear identical when filled in (although both distinct appearences still exist as metadata), and the arm angles have changed due to the 22.5º rotation limit.
|Brewing stands' targeting [[hitbox]] is now a full cube - previously it was a cuboid around the base plates.}}
{{History|||snap=14w11b|[[File:Brewing Stand (empty) JE3.png|32px]] [[File:Brewing Stand (right) JE3.png|32px]] [[File:Brewing Stand (left) JE3.png|32px]] [[File:Brewing Stand (full) JE3.png|32px]] Empty brewing stands' model have been fixed, although the other changes still remain.}}
{{History|||snap=14w25a|[[File:Brewing Stand (empty) JE4.png|32px]] [[File:Brewing Stand (right) JE4.png|32px]] [[File:Brewing Stand (left) JE4.png|32px]] [[File:Brewing Stand (full) JE4.png|32px]] Brewing stand models have changed such that bottles in the left and right slots now indeed appear different. However, the leftmost one appears stretched. Arms are also now affected by directional shading.<ref>{{bug|MC-68302|||WAI}}</ref>}}
{{History||1.9|snap=15w31a|Brewing stands now generate in [[End City|end cities]].}}
{{History|||snap=15w33a|Brewing stands can now brew [[Lingering Potion|lingering potion]]s.}}
{{History|||snap=15w33c|A bug where the [[player]] couldn't put in a [[splash potion]] to make a lingering potion has been fixed.}}
{{History|||snap=15w42a|Brewing stands now require [[Blaze Powder|blaze powder]] to operate.}}
{{History|||snap=15w43a|Brewing stands now generate in the basement of [[igloo]]s.
|Each blaze powder now fuels 20 brewing stand operations rather than 30.}}
{{History|||snap=15w44a|[[File:Brewing Stand (empty) JE5.png|32px]] [[File:Brewing Stand (right) JE5.png|32px]] [[File:Brewing Stand (left) JE5.png|32px]] [[File:Brewing Stand (full) JE5.png|32px]] Brewing stand models no longer have a stretched bottle.}}
{{History|||snap=15w47b|[[Sound]]s have been added for brewing stands.}}
{{History||1.11|snap=16w32a|The block entity ID has been changed from <code>Cauldron</code> to <code>brewing_stand</code>.}}
{{History||1.13|snap=17w47a|Prior to [[Java Edition 1.13/Flattening|''The Flattening'']], this [[block]]'s numeral ID was 117, and the [[item]]'s 379.}}
{{History||1.14|snap=18w43a|[[File:Brewing Stand (empty) JE6 BE2.png|32px]] <!-- [[File:Brewing Stand (left) JE6 BE2.png|32px]] [[File:Brewing Stand (right) JE6 BE2.png|32px]] -->[[File:Brewing Stand (Full) JE6 BE2.png|32px]] [[File:Brewing Stand (item) JE2.png|32px]] The textures of brewing stands have been changed.}}
{{History|||snap=18w44a|[[File:Brewing Stand (item) JE3 BE2.png|32px]] The texture of the brewing stand [[item]] has been changed.}}
{{History|||snap=18w48a|Brewing stands now generate in the updated [[plains]] [[village]]s.}}
{{History|||snap=18w49a|Brewing stands now generate in the updated [[savanna]] villages and the new [[Snowy Tundra|snowy]] villages.}}
{{History|||snap=18w50a|Brewing stands now generate in the updated [[desert]] and [[taiga]] villages.}}
{{History|||snap=19w03c|The three plates, but not the rod, of a brewing stand now use correct cullface arguments.}}
{{History|||snap=19w11a|Brewing stands now serve as cleric [[villager]]s' job site block.}}
{{History||1.16.2|snap=20w28a|Brewing stands can now be [[crafting|crafted]] with [[blackstone]].}}
{{History||1.17|snap=21w07a|Brewing stands can now be crafted with [[deepslate|grimstone]] (now deepslate).}}
{{History||1.17|snap=21w08a|Brewing stands can no longer be crafted with deepslate.
|Brewing stands can now be crafted with [[Cobbled Deepslate|cobbled deepslate]].}}
{{History|||snap=21w11a|<!--[[File:Brewing Stand (empty) JE7.png|32px]] [[File:Brewing Stand (right) JE7.png|32px]] [[File:Brewing Stand (left) JE7.png|32px]] [[File:Brewing Stand (Full) JE7.png|32px]] Changed [[lighting]].-->Tweaked the brewing stand GUI texture.}}
{{History||1.18|snap=21w39a|[[File:Brewing Stand (empty) JE8.png|32px]] [[File:Brewing Stand (right) JE8.png|32px]] [[File:Brewing Stand (left) JE8.png|32px]] [[File:Brewing Stand (full) JE8.png|32px]] The default [[brightness]] has been changed from "Moody" to 50.}}
{{History||1.19|snap=22w11a|[[File:Brewing Stand (empty) JE9.png|32px]] [[File:Brewing Stand (right) JE9.png|32px]] [[File:Brewing Stand (left) JE9.png|32px]] [[File:Brewing Stand (full) JE9.png|32px]] Changed texture and model.}}
{{History|||snap=22w17a|[[File:Brewing Stand (empty) JE10.png|32px]] [[File:Brewing Stand (right) JE10.png|32px]] [[File:Brewing Stand (left) JE10.png|32px]] [[File:Brewing Stand (full) JE10.png|32px]] Changed base texture and model.}}
{{History|pocket alpha}}
{{History||v0.12.1|snap=build 1|[[File:Brewing Stand (empty) JE1 BE1.png|32px]] [[File:Brewing Stand (item) JE1 BE1.png|32px]] Added brewing stands.}}
{{History|pocket}}
{{History||1.0.0|snap=alpha 0.17.0.1|Brewing stands now generate in [[igloo]] basements.
|Brewing stands now generate in [[end ship]]s.}}
{{History|bedrock}}
{{History||1.2.0|snap=beta 1.2.0.2|Brewing stands now require [[blaze powder]] to operate.}}
{{History||1.10.0|snap=beta 1.10.0.3|[[File:Brewing Stand (empty) JE6 BE2.png|32px]] [[File:Brewing Stand (item) JE3 BE2.png|32px]] The textures of brewing stands have been changed.|A brewing stand can now generate in [[village]] temples.}}
{{History||1.16.100|snap=beta 1.16.100.52|Brewing stands can now be [[craft]]ed with [[blackstone]].}}
{{History||1.17.0|snap=beta 1.17.0.50|Brewing stands can now be [[craft]]ed with [[cobbled deepslate]].}}
{{History||1.19.0|snap=beta 1.19.0.20|[[File:Brewing Stand (empty) JE10.png|32px]] [[File:Brewing Stand (right) JE10.png|32px]] [[File:Brewing Stand (left) JE10.png|32px]] [[File:Brewing Stand (full) JE10.png|32px]] Slightly changed its texture, to make their arms connect to their bases.}}
{{History|console}}
{{History||xbox=TU7|xbone=CU1|ps=1.0|wiiu=Patch 1|switch=1.0.1|[[File:Brewing Stand (empty) JE1 BE1.png|32px]] [[File:Brewing Stand (item) JE1 BE1.png|32px]] Added brewing stands.}}
{{History||xbox=TU43|xbone=CU33|ps=1.36|wiiu=Patch 13|Brewing stands now appear in [[igloo]]s. The lack of a fuel requirement means that potions can now be made without going to the Nether.}}
{{History||xbox=TU46|xbone=CU36|ps=1.38|wiiu=Patch 15|Brewing stands now require [[blaze powder]] to operate.}}
{{History||xbox=none|xbone=none|ps=1.90|wiiu=none|switch=none|[[File:Brewing Stand.png|32px]] [[File:Brewing Stand (item) JE3 BE2.png|32px]] The textures of brewing stands have been changed.}}
{{History|new 3ds}}
{{History||0.1.0|[[File:Brewing Stand (empty) JE1 BE1.png|32px]] [[File:Brewing Stand (item) JE1 BE1.png|32px]] Added brewing stands.}}
{{History|foot}}
<gallery>
File:Brewingstand Potion.png|The first picture of a brewing stand. A [[giant mushroom]] is also seen in this picture.
</gallery>
=== Brewing stand "item" ===
{{:Technical blocks/Brewing Stand}}
== Issues ==
{{issue list}}
== Trivia ==
* Even when the brewing stand is not in use, there is still smoke coming out of the top of it.
* In ''[[Java Edition]]'', when a brewing stand is broken, particles from a bottle appear, even if no bottle is in the stand.
* No matter what potion (including water bottles) is in the stand it always looks like a full red bottle.
* Brewing stands always face east, no matter what direction they are placed.
* According to [[Michael Stoyke|Searge]], for thematic reasons, a brewing stand was added to the basement of the [[igloo]]. Because of this, blaze powder was required for fuel to preserve game progression. In this way, the player is prevented from using it before going to the Nether.<ref>https://minecraft.net/en-us/article/meet-blaze</ref>
== Gallery ==
<gallery>
File:Brewing stand in action.png|A brewing stand in action.
File:Igloobasement.png|A brewing stand in an igloo basement.
File:1.8 and below brewing stand.png|The GUI of the brewing stand in 1.8.x and below.
</gallery>
== See also ==
*[[Glass Bottle]]
*[[Splash Potion]]
== References ==
{{reflist}}
== External links ==
*[https://www.minecraft.net/en-us/article/taking-inventory--brewing-stand Taking Inventory: Brewing Stand] – Minecraft.net on October 11, 2019
{{Blocks|Utility}}
{{items}}
[[Category:Job blocks]]
[[Category:Utility blocks]]
[[Category:Manufactured blocks]]
[[Category:Generated structure blocks]]
[[Category:Storage]]
[[Category:Block entities]]
[[Category:Light sources]]
[[de:Braustand]]
[[es:Soporte para pociones]]
[[fr:Alambic]]
[[hu:Főzőállvány]]
[[it:Alambicco]]
[[ja:醸造台]]
[[nl:Brouwstandaard]]
[[pl:Statyw alchemiczny]]
[[pt:Suporte de poções]]
[[ru:Варочная стойка]]
[[uk:Варильна стійка]]
[[zh:酿造台]]</li></ul></nowiki> | build 4 | Speed can be obtained from beacon. | |||
| Pocket Edition | |||||
1.0.0{{Extension DPL}}<ul><li>[[Minecart with Command Block|Minecart with Command Block]]<br/>{{ItemEntity
|renewable=No
|stackable=No
|size=Height: 0.7 Blocks<br>Width: 0.98 Blocks
|image=Minecart with Command Block.gif
|image2=Minecart with Command Block BE.gif
|invimage1=Minecart with Command Block
|networkid=10
|drops={{drop|Item|Minecart|1}}
|health={{hp|6}}
|rarity=Epic
}}
A '''minecart with command block''' is an impulse{{only|java|short=y}} or repeating{{only|bedrock|education|short=y}} [[command block]] inside a [[minecart]].
== Obtaining ==
The minecart with command block is obtainable only using the [[command]] {{cmd|give @s command_block_minecart}}, as it does not appear in the creative inventory{{only|BE}} and has no [[crafting]] recipe. It can also be summoned using the command {{cmd|summon command_block_minecart}}. It can be broken like any other minecart, but only the minecart is retained, while the command block is lost.
== Usage ==
{{main|Command Block}}
The minecart with command block combines the functionalities of both minecarts and command blocks. Although the minecart visually contains an impulse command block, it functions more similarly to a repeating command block, and runs its command once every four game [[tick]]s when on an active [[activator rail]]. When it passes over a [[detector rail]] with a [[comparator]] connected next to it, it outputs the command block's result.
== Sounds ==
{{Edition|Java}}:<br>
Minecarts with command blocks use the Friendly Creatures sound category for entity-dependent sound events.<ref group="sound" name="rollsource">{{bug|MC-42132}}</ref>
{{Sound table
|sound=Minecart rolling.ogg
|subtitle=Minecart rolls
|source=Friendly Creatures <ref group=sound name=rollsource/>
|overridesource=1
|description=While a minecart with command block is moving
|id=entity.minecart.riding
|translationkey=subtitles.entity.minecart.riding
|volume=0.0-0.35 <ref group=sound>Relates linearly with horizontal velocity (max 0.5)</ref>
|pitch=0.0-1.0 <ref group=sound>Will increase by 0.0025 per tick if the minecart's horizontal velocity is more than 0.01</ref>
|distance=16
|foot=1}}
{{Edition|Bedrock}}:
{{Sound table
|type=bedrock
|sound=Minecart rolling.ogg
|source=neutral
|description=While a minecart with command block is moving
|id=minecart.base
|foot=1}}
== Data values ==
=== ID ===
{{edition|java}}:
{{ID table
|edition=java
|firstcolumnname=Item
|showforms=y
|generatetranslationkeys=y
|displayname=Minecart with Command Block
|spritetype=item
|nameid=command_block_minecart
|form=item
|foot=1}}
{{ID table
|edition=java
|firstcolumnname=Entity
|generatetranslationkeys=y
|displayname=Minecart with Command Block
|spritetype=entity
|nameid=command_block_minecart
|foot=1}}
{{edition|bedrock}}:
{{ID table
|edition=bedrock
|firstcolumnname=Item
|shownumericids=y
|showforms=y
|notshowbeitemforms=y
|generatetranslationkeys=y
|displayname=Minecart with Command Block
|spritetype=item
|nameid=command_block_minecart
|id=563
|form=item
|foot=1}}
{{ID table
|edition=bedrock
|firstcolumnname=Entity
|shownumericids=y
|generatetranslationkeys=y
|displayname=Minecart with Command Block
|spritename=minecart-with-repeating-command-block
|spritetype=entity
|nameid=command_block_minecart
|id=100
|foot=1}}
=== Entity data ===
Minecarts with command blocks have entity data associated with them that contain various properties of the entity.
{{el|java}}:
{{main|Entity format}}
{{/ED}}
{{el|bedrock}}:
: See [[Bedrock Edition level format/Entity format]].
== History ==
{{History|java}}
{{History||1.7.2|snap=13w39a|[[File:Minecart with Command Block JE1.png|32px]] [[File:Minecart with Command Block (item) JE1 BE2.png|32px]] Added minecart with command block.}}
{{History||1.9|snap=15w34a|[[File:Minecart with Command Block JE2.png|32px]] The texture of the [[command block]] in the [[minecart]] has been removed due to the new texture and types for the command block.}}
{{History|||snap=15w35a|[[File:Minecart with Command Block JE3.png|32px]] The texture of the command block has been changed.}}
{{History||1.11|snap=16w32a|The [[entity]] ID has been changed from <code>MinecartCommandBlock</code> to <code>commandblock_minecart</code>.}}
{{History||1.13|snap=17w47a|Prior to [[1.13/Flattening|''The Flattening'']], this [[item]]'s numeral ID was 422.}}
{{History|||snap=pre5|The entity ID has been changed to <code>command_block_minecart</code>.}}
{{History||1.14|snap=18w43a|[[File:Minecart with Command Block JE4.png|32px]] [[File:Minecart with Command Block (item) JE2 BE3.png|32px]] The textures of the minecart with command block has been changed.}}
{{History||1.17|snap=21w20a|Minecart with command block [[Rarity|rarity color]] was changed from common to epic.}}
{{History||1.19.3|snap=22w44a|Minecart with command block is now available in the creative inventory, but only if cheats are enabled.}}
{{History|||snap=22w45a|Moved the minecart with command block behind the Operator Utilities tab in the creative inventory. The tab is only available if cheats are enabled and the "Operator Items Tab" option in the controls menu is turned on.}}
{{History|pocket}}
{{History||1.0.5|snap=alpha 1.0.5.0|[[File:Minecart with Command Block BE1.png|32px]] [[File:Minecart with Command Block (item) BE1.png|32px]] Added minecart with command block. The [[minecart]] has a [[repeating command block]] in it, instead of an impulse command block.}}
{{History||1.1.0|snap=alpha 1.1.0.0|The entity ID has been changed from <code>minecartcommandblock</code> to <code>command_block_minecart</code>.}}
{{History|bedrock}}
{{History||1.10.0|snap=beta 1.10.0.3|[[File:Minecart with Command Block BE2.png|32px]] [[File:Minecart with Command Block (item) JE2 BE3.png|32px]] The texture of the minecart with command block has been changed. Also the item texture has been changed to match {{el|je}}'s.<ref>{{bug|MCPE-42990}}</ref>}}
{{History|console}}
{{History||xbox=?|xbone=?|ps=?|wiiu=?|switch=?|Added minecart with command blocks. This only exists as an item, as placing it will result in a normal minecart being placed. The command block in the minecart cannot be modified via NBT editing and it has an unused tooltip stating "Used to execute commands on the move!".}}
{{History|foot}}
== Issues ==
{{issue list}}
== Gallery ==
<gallery>
File:Minecart with command block 13w39b.png|A minecart with command block in [[1.16.4]].
File:A minecart command block testing the block in the red bucket with air.png|A minecart command block testing the block in the red area with [[air]].
</gallery>
==References==
{{Reflist}}
{{Items}}
{{Entities}}
[[de:Befehlsblocklore]]
[[fr:Wagonnet à bloc de commande]]
[[it:Carrello da miniera]]
[[ja:コマンドブロック付きのトロッコ]]
[[nl:Mijnkar met opdrachtblok]]
[[pl:Wagonik z blokiem poleceń]]
[[pt:Carrinho de mina com bloco de comando]]
[[ru:Вагонетка с командным блоком]]
[[uk:Вагонетка з командним блоком]]
[[zh:命令方块矿车]]</li><li>[[Banner|Banner]]<br/>{{for|the image|Banner (image)}}
{{Block
| image = <gallery>
White Banner.gif | Banner
White Wall Banner.png | Wall Banner
</gallery>
| rarity = Common
| transparent = Yes
| light = No
| tool = axe
| renewable = Yes
| stackable = Yes (16)
| flammable = No
| lavasusceptible = Yes
}}
'''Banners''' are tall decorative [[blocks]], featuring a field that is highly customizable using [[dye]]s and [[banner pattern]]s.
== Obtaining ==
=== Breaking ===
Banners can be broken with or without a [[tool]], but an [[axe]] is fastest.
{{breaking row|horizontal=1|Banners|Axe}}
A banner also breaks and drops itself as an [[Item (entity)|item]] if the block the banner is attached to is moved, removed, or destroyed.
=== Natural generation ===
{| class="wikitable collapsible"
! Name !! Location !! Appearance !! Design
|-
! Magenta Banner
| Outside of [[end cities]].
| style="text-align: center" | [[File:End City Banner.png|32px]]
| Magenta Banner
* Black Inverted Chevron
* Black Chevron
|-
! Gray Banner
| In banner room in [[woodland mansion]]s.
| style="text-align: center" | [[File:Gray Banner.png|32px]]
| Gray Banner
|-
! Light Gray Banner
| In master bedroom in [[woodland mansion]]s.
| style="text-align: center" | [[File:Master Bedroom Banner.png|32px]]
| Light Gray Banner
* White Flower Charge
|- id="Ominous Banner"
! Ominous Banner{{only|java|short=1}}
Illager Banner{{only|bedrock|education|short=1}}
| Carried by [[raid captain]]s.<br> Located in [[pillager outpost]]s.
{{IN|java}}, the ominous banner cannot be crafted or copied because the design uses 8 patterns.
{{IN|bedrock}}, the illager banner is a separate type that cannot be placed in a loom.
| style="text-align: center" | [[File:Ominous Banner.png|32px]]<br/>[[File:Ominous Banner BE.png|32px]]
| White Banner{{only|java|short=1}}
* Cyan Lozenge
* Light Gray Base
* Gray Pale
* Light Gray Bordure
* Black Fess
* Light Gray Per Fess
* Light Gray Roundel
* Black Bordure
Separate type entirely{{only|bedrock|short=1}}
|-
! Brown Banner
| Outside of some houses, meeting points, and pillar fountains in savanna [[village]]s.
| style="text-align: center" | [[File:Brown Banner.png|32px]]
| Brown Banner
|-
! Black Banner
| In altar room in [[woodland mansions]].
| style="text-align: center" | [[File:Black Banner.png|32px]]
| Black Banner
|}
=== Crafting ===
Banners can be crafted from six [[wool]] and a [[stick]] in a pattern resembling a [[sign]].
{{Crafting
|head=1
|showdescription=1
|A1=Matching Wool |B1=Matching Wool |C1=Matching Wool
|A2=Matching Wool |B2=Matching Wool |C2=Matching Wool
|B3=Stick
|Output=Matching Banner
|Olink=Banner
|type=Decoration block
|description=Once the banner is crafted, its base color cannot be changed.{{only|java}}
}}
{{Crafting
|showdescription=1
|Any Banner
|Bleach
|Output=White Banner
|type=Decoration block
|description=Bleach can be used to remove the color of a banner, resulting in a white banner. This includes removing patterns from a white banner.{{only|bedrock|education}}
|foot=1
}}
=== Trading ===
Expert-level cartographer [[villager]]s always offer to [[trading|sell]] 1 or 2 blank banners of a random color for 3 [[emeralds]]. Expert-level shepherd villagers have a {{frac|2|7}} chance of offering the same trade.{{only|java}}
{{IN|bedrock}}, expert-level cartographer and shepherd villagers both offer to sell one of 16 blank banners for 3 emeralds as part of their trades.
=== Mob loot ===
[[Illager]]s that spawn carrying an ominous banner{{only|java|short=1}} / illager banner{{only|bedrock|education|short=1}} always drop it upon death.
== Usage ==
[[File:Standing banner with block.png|thumb|upright|Overlapping block on a banner.]]
[[File:Wall banner with block.png|thumb|upright|Overlapping on a wall mounted banner.]]
There are 16 colored blank banners, and numerous patterns each available in each of the 16 colors. A banner can feature up to 6 different patterns. The top layer of a banner (or the last pattern added) can be washed off by {{control|using}} it on a [[cauldron]] containing water.
Banners, much like signs, can be placed both on the ground facing in any direction, or on a wall. They gently sway as if affected by a breeze, regardless of dimension or location.
Banners have no collision mask as they are completely non-solid, so [[entities]] can move through them.
Other blocks (including other banners) can be placed on any edge of a banner's hitbox, which is only one block high despite the banner appearing as two blocks tall. This makes it possible to overlap another solid block on the top half of a banner for floor banners, or the bottom half of wall banners.
When a banner is placed on the side of a block, its position is set by the top block, and it is possible to place it so it appears half buried.
Banners can also be placed in [[item frame]]s, where they simply appear as their item model.
[[Water]] and [[lava]] flow around banners. {{IN|bedrock}}, banners can be [[waterlogged]].
<gallery>
File:Wall banner with water below.png| Water can be placed below wall banners
File:Water flowing around banner.png| Water flows around a banner on the ground
</gallery>
Lava can create [[fire]] in air blocks next to banners as if the banners were flammable, but the banners do not burn (and cannot be burned by other methods). Banners also cannot be moved by [[piston]]s.
If a banner is renamed on an [[anvil]], it retains its name when a pattern is added, but not when a pattern is removed.
=== Helmet ===
{{exclusive|java|section=13}}
While a banner cannot be equipped in the [[Helmet|head slot]] in [[Survival]] mode, equipping it using commands causes it to appear on top of the player. This is how [[raid captain]]s wear banners{{only|java|short=1}}.
=== Chestplate ===
{{exclusive|bedrock|section=13}}
While a banner cannot be equipped in the [[chestplate]] slot in Survival mode, equipping it using NBT editors causes it to appear on top of the player. This is how [[raid captain]]s wear banners{{only|bedrock|education|short=1}}.
<gallery>
Steve wearing White Banner.png|
Alex wearing White Banner.png|
Pillager with Ominous Banner.png|
Vindicator with Ominous Banner.png|
Evoker with Ominous Banner.png|Illusioner with Ominous Banner.png|
</gallery>
=== Crafting ingredient ===
[[Shield]]s can have patterns applied to them using banners. The shield pattern has a smaller resolution than the banner pattern, causing them to look different or offset. Banners that have more than six patterns, such as Ominous Banners or banners obtained through inventory editors, will be reduced to six patterns on the shield.
{{Crafting
|showdescription=1
|Shield
|Matching Banner; Ominous Banner
|Output=Matching Shield; Ominous Shield
|B2link=Banner
|type=Combat
|description=Applies the banner pattern to the shield. The banner is consumed.<br>The shield must have no pre-existing patterns.<br>Does not change existing durability or enchantments on the shield.
}}
=== Copying ===
Banners can be copied with a blank banner to make multiple identical banners. Banners with more than 6 patterns applied using commands cannot be copied in this manner.
{{Crafting
|showdescription=1
|Matching Banner
|Matching Banner
|Output=Matching Banner
|A2link=Banner
|B2link=Banner
|Olink=Banner
|type=Decoration block
|ignoreusage=1
|description=Copies pattern; both banners must have the same base color, and the one having a pattern copied onto it must have no preexisting pattern.
}}
=== Map marker ===
[[File:Banner marked map.png|alt=All banners marked on a map, alongside a named banner.|thumb|right|How every banner appears {{IN|java}} on a map, including named banners.]]
{{exclusive|java|section=13}}
{{IN|java}}, {{control|using}} on a standing banner with a [[map]] selected places a marker of the banner's position on the selected map, and {{control|using}} on the banner again removes the marker. Note that wall banners cannot serve as map markers. The marker has the same color as the banner's base without decorations. The marker is removed if the banner is destroyed unless the map is locked using a [[cartography table]]. If the banner is renamed, the name appears below the marker.
=== Patterns ===
{{see also|Banner/Patterns|title1=List of patterned banners}}
[[File:Spawned-in Banner.png|thumb|100px|Example of a banner with more than 6 patterns, a result of using the {{cmd|give}} command.]]
A banner may have up to six layers of patterns, which are overlaid with the last-crafted on top. A banner can have up to 16 layers of patterns with the use of commands. The total number of unique banners is approximately 2.3x10^16 (or 23 quadrillion).
Any color banner can be used; the pattern overlays the color. {{IN|java}}, a [[loom]] is used to make patterns. However, {{in|bedrock}}, the patterns can be made in a [[loom]] or a [[crafting table]].
A banner can have more than six layers of patterns through the commands <code>/[[Commands/give|give]]</code>, <code>/[[Commands/setblock|setblock]]</code> or <code>/[[Commands/fill|fill]]</code>. This only works in ''Java Edition'', as Bedrock Edition doesn't have any NBT commands. Here is an example of a mining banner with seven different patterns. There is specific codes for the [[Banner#Item data:~:text=white-,Item,-In Java Edition|colors]] and [[Banner/Patterns|patterns]] that you have to input.
<code><nowiki>/give @p white_banner{display:{Name:"\"Mining Industries Banner\""},BlockEntityTag:{Patterns:[{Pattern:"cr",Color:15},{Pattern:"bs",Color:15},{Pattern:"sc",Color:12},{Pattern:"ms",Color:0},{Pattern:"hh",Color:15},{Pattern:"bo",Color:15},{Pattern:"tts",Color:8}]}} 1</code>
{{LoadPage|Template:Banner pattern loom recipes|Loom recipes|h4}}
{{LoadPage|Banner/Banner pattern crafting recipes|Crafting recipes|h4|transcluded=1}}
=== Renaming ===
{{IN|java}}, a banner can be given a custom name that remains as the banner is placed and retrieved. The player can use an [[anvil]] to rename the banner item, or may change the <code>CustomName</code> tag using the {{cmd|data}} command on the banner block.
=== Fuel ===
Banners can be used as a fuel in [[furnace]]s, smelting 1.5 items per banner.
=== Note Blocks ===
Banners can be placed under [[note block]]s to produce "bass" sounds.
== Sounds ==
=== Generic ===
{{Sound table/Block/Wood}}
=== Unique ===
{{edition|java}}: ''None''
{{edition|bedrock}}:
{{Sound table
|type=bedrock
|sound=Water Splash Old.ogg
|source=block
|description=When all patterns are removed from a banner using a cauldron
|id=cauldron.cleanbanner
|volume=0.1
|pitch=1.0
|foot=1}}
== Data values ==
=== ID ===
{{edition|java}}:
{{ID table
|edition=java
|showblocktags=y
|showitemtags=y
|showforms=y
|generatetranslationkeys=y
|displayname=White Banner
|spritetype=block
|nameid=white_banner
|blocktags=banners, wall_post_override
|itemtags=banners
|translationkey=block.minecraft.white_banner,block.minecraft.ominous_banner
}}
{{ID table
|displayname=Orange Banner
|spritetype=block
|nameid=orange_banner
|blocktags=banners, wall_post_override
|itemtags=banners}}
{{ID table
|displayname=Magenta Banner
|spritetype=block
|nameid=magenta_banner
|blocktags=banners, wall_post_override
|itemtags=banners}}
{{ID table
|displayname=Light Blue Banner
|spritetype=block
|nameid=light_blue_banner
|blocktags=banners, wall_post_override
|itemtags=banners}}
{{ID table
|displayname=Yellow Banner
|spritetype=block
|nameid=yellow_banner
|blocktags=banners, wall_post_override
|itemtags=banners}}
{{ID table
|displayname=Lime Banner
|spritetype=block
|nameid=lime_banner
|blocktags=banners, wall_post_override
|itemtags=banners}}
{{ID table
|displayname=Pink Banner
|spritetype=block
|nameid=pink_banner
|blocktags=banners, wall_post_override
|itemtags=banners}}
{{ID table
|displayname=Gray Banner
|spritetype=block
|nameid=gray_banner
|blocktags=banners, wall_post_override
|itemtags=banners}}
{{ID table
|displayname=Light Gray Banner
|spritetype=block
|nameid=light_gray_banner
|blocktags=banners, wall_post_override
|itemtags=banners}}
{{ID table
|displayname=Cyan Banner
|spritetype=block
|nameid=cyan_banner
|blocktags=banners, wall_post_override
|itemtags=banners}}
{{ID table
|displayname=Purple Banner
|spritetype=block
|nameid=purple_banner
|blocktags=banners, wall_post_override
|itemtags=banners}}
{{ID table
|displayname=Blue Banner
|spritetype=block
|nameid=blue_banner
|blocktags=banners, wall_post_override
|itemtags=banners}}
{{ID table
|displayname=Brown Banner
|spritetype=block
|nameid=brown_banner
|blocktags=banners, wall_post_override
|itemtags=banners}}
{{ID table
|displayname=Green Banner
|spritetype=block
|nameid=green_banner
|blocktags=banners, wall_post_override
|itemtags=banners}}
{{ID table
|displayname=Red Banner
|spritetype=block
|nameid=red_banner
|blocktags=banners, wall_post_override
|itemtags=banners}}
{{ID table
|displayname=Black Banner
|spritetype=block
|nameid=black_banner
|blocktags=banners, wall_post_override
|itemtags=banners}}
{{ID table
|displayname=White Wall Banner
|spritetype=block
|nameid=white_wall_banner
|blocktags=banners, wall_post_override
|form=block
|translationkey=block.minecraft.white_banner,block.minecraft.ominous_banner}}
{{ID table
|displayname=Orange Wall Banner
|spritetype=block
|nameid=orange_wall_banner
|blocktags=banners, wall_post_override
|form=block
|translationkey=block.minecraft.orange_banner}}
{{ID table
|displayname=Magenta Wall Banner
|spritetype=block
|nameid=magenta_wall_banner
|blocktags=banners, wall_post_override
|form=block
|translationkey=block.minecraft.magenta_banner}}
{{ID table
|displayname=Light Blue Wall Banner
|spritetype=block
|nameid=light_blue_wall_banner
|blocktags=banners, wall_post_override
|form=block
|translationkey=block.minecraft.light_blue_banner}}
{{ID table
|displayname=Yellow Wall Banner
|spritetype=block
|nameid=yellow_wall_banner
|blocktags=banners, wall_post_override
|form=block
|translationkey=block.minecraft.yellow_banner}}
{{ID table
|displayname=Lime Wall Banner
|spritetype=block
|nameid=lime_wall_banner
|blocktags=banners, wall_post_override
|form=block
|translationkey=block.minecraft.lime_banner}}
{{ID table
|displayname=Pink Wall Banner
|spritetype=block
|nameid=pink_wall_banner
|blocktags=banners, wall_post_override
|form=block
|translationkey=block.minecraft.pink_banner}}
{{ID table
|displayname=Gray Wall Banner
|spritetype=block
|nameid=gray_wall_banner
|blocktags=banners, wall_post_override
|form=block
|translationkey=block.minecraft.gray_banner}}
{{ID table
|displayname=Light Gray Wall Banner
|spritetype=block
|nameid=light_gray_wall_banner
|blocktags=banners, wall_post_override
|form=block
|translationkey=block.minecraft.light_gray_banner}}
{{ID table
|displayname=Cyan Wall Banner
|spritetype=block
|nameid=cyan_wall_banner
|blocktags=banners, wall_post_override
|form=block
|translationkey=block.minecraft.cyan_banner}}
{{ID table
|displayname=Purple Wall Banner
|spritetype=block
|nameid=purple_wall_banner
|blocktags=banners, wall_post_override
|form=block
|translationkey=block.minecraft.purple_banner}}
{{ID table
|displayname=Blue Wall Banner
|spritetype=block
|nameid=blue_wall_banner
|blocktags=banners, wall_post_override
|form=block
|translationkey=block.minecraft.blue_banner}}
{{ID table
|displayname=Brown Wall Banner
|spritetype=block
|nameid=brown_wall_banner
|blocktags=banners, wall_post_override
|form=block
|translationkey=block.minecraft.brown_banner}}
{{ID table
|displayname=Green Wall Banner
|spritetype=block
|nameid=green_wall_banner
|blocktags=banners, wall_post_override
|form=block
|translationkey=block.minecraft.green_banner}}
{{ID table
|displayname=Red Wall Banner
|spritetype=block
|nameid=red_wall_banner
|blocktags=banners, wall_post_override
|form=block
|translationkey=block.minecraft.red_banner}}
{{ID table
|displayname=Black Wall Banner
|spritetype=block
|nameid=black_wall_banner
|blocktags=banners, wall_post_override
|form=block
|translationkey=block.minecraft.black_banner
|foot=1}}
{{ID table
|displayname=Block entity
|spritename=Banners
|spritetype=block
|nameid=banner
|foot=1}}
{{edition|bedrock}}:
{{ID table
|edition=bedrock
|firstcolumnname=Banner
|shownumericids=y
|showforms=y
|generatetranslationkeys=y
|displayname=Standing
|spritename=Banners
|spritetype=block
|nameid=standing_banner
|translationkey=tile.standing_banner.black.name, tile.standing_banner.red.name, tile.standing_banner.green.name, tile.standing_banner.brown.name, tile.standing_banner.blue.name, tile.standing_banner.purple.name, tile.standing_banner.cyan.name, tile.standing_banner.silver.name, tile.standing_banner.gray.name, tile.standing_banner.pink.name, tile.standing_banner.lime.name, tile.standing_banner.yellow.name, tile.standing_banner.lightBlue.name, tile.standing_banner.magenta.name, tile.standing_banner.orange.name, tile.standing_banner.white.name
|id=176
|form=block}}
{{ID table
|displayname=Wall
|spritename=Banners
|spritetype=block
|nameid=wall_banner
|id=177
|form=block
|translationkey=-}}
{{ID table
|displayname=Item
|spritename=Banners
|spritetype=item
|nameid=banner
|translationkey=item.banner.black.name, item.banner.red.name, item.banner.green.name, item.banner.brown.name, item.banner.blue.name, item.banner.purple.name, item.banner.cyan.name, item.banner.silver.name, item.banner.gray.name, item.banner.pink.name, item.banner.lime.name, item.banner.yellow.name, item.banner.lightBlue.name, item.banner.magenta.name, item.banner.orange.name, item.banner.white.name
|id=567
|form=item
|foot=1}}
{{ID table
|notnamespaced=y
|displayname=Block entity
|spritename=Banners
|spritetype=block
|nameid=Banner
|foot=1}}
=== Metadata ===
==== Item ====
{{IN|Bedrock}}, banner items use the following data values:
{| class="wikitable"
! DV !! Banner color
|-
|| 0 || black
|-
|| 1 || red
|-
|| 2 || green
|-
|| 3 || brown
|-
|| 4 || blue
|-
|| 5 || purple
|-
|| 6 || cyan
|-
|| 7 || light gray
|-
|| 8 || gray
|-
|| 9 || pink
|-
|| 10 || lime
|-
|| 11 || yellow
|-
|| 12 || light blue
|-
|| 13 || magenta
|-
|| 14 || orange
|-
|| 15 || white
|}
=== Item ===
{{IN|Java}}, banner items use the following data values:
{| class="wikitable"
! DV !! Banner color
|-
|| 15 || black
|-
|| 14 || red
|-
|| 13 || green
|-
|| 12 || brown
|-
|| 11 || blue
|-
|| 10 || purple
|-
|| 9 || cyan
|-
|| 8 || light gray
|-
|| 7 || gray
|-
|| 6 || pink
|-
|| 5 || lime
|-
|| 4 || yellow
|-
|| 3 || light blue
|-
|| 2 || magenta
|-
|| 1 || orange
|-
|| 0 || white
|}
=== Block states ===
{{see also|Block states}}
{{/BS}}
=== Block data ===
A banner has a block entity associated with it that holds additional data about the block.
{{el|bedrock}}:
: See [[Bedrock Edition level format/Block entity format]].
{{el|java}}:
{{see also|Block entity format}}
{{/BE}}
=== Item data ===
{{el|java}}:
{{main|Player.dat format}}
Banners, as items, use an NBT tag <code>BlockEntityTag</code> to indicate the patterns and details when it is placed.
<div class="treeview" style="margin-top: 0;">
* {{nbt|compound|Item}}: The item
** {{nbt|compound|tag}}: Additional information about the item. This tag is optional for most items.
*** {{nbt|compound|BlockEntityTag}}: The details of the shulker box.
**** All block data, except tags common to all block entities.
</div>
{{el|bedrock}}:
: See [[Bedrock Edition level format/Item format]].
== Achievements ==
{{load achievements|Fruit on the Loom}}
== Advancements ==
{{load advancements|Voluntary Exile}}
== History ==
{{info needed section|The Nether Update}}
{{History|java}}
{{History||1.8|snap=July 21, 2014|slink=https://twitter.com/jeb_/status/491238882789572608|[[Jeb]] posted a picture of banners, and stated that he is working on them.}}
{{History|||snap=14w30a|[[File:White Banner Revision 1.png|22px]][[File:Light Gray Banner Revision 1.png|22px]][[File:Gray Banner Revision 1.png|22px]][[File:Black Banner Revision 1.png|22px]][[File:Brown Banner Revision 1.png|22px]][[File:Red Banner Revision 1.png|22px]][[File:Orange Banner Revision 1.png|22px]][[File:Yellow Banner Revision 1.png|22px]][[File:Lime Banner Revision 1.png|22px]][[File:Green Banner Revision 1.png|22px]][[File:Cyan Banner Revision 1.png|22px]][[File:Light Blue Banner Revision 1.png|22px]][[File:Blue Banner Revision 1.png|22px]][[File:Purple Banner Revision 1.png|22px]][[File:Magenta Banner Revision 1.png|22px]][[File:Pink Banner Revision 1.png|22px]] Added banners.}}
{{History|||snap=14w30c|Added four additional patterns: Cross (+), Border, Curly Border and Thing (Mojang logo).}}
{{History|||snap=14w31a|Added two additional patterns: Inverted Halves and Base Gradient.
|The banner pattern terminology has been changed based on vexillology advice [[Jeb]] received from [http://www.reddit.com/r/Minecraft/comments/2bkxej/i_made_a_huge_mistake_banners/ his Reddit post].
|Banners can now be used as a [[fuel]] in [[furnace]]s.}}
{{History||1.8.8|snap=pre|The number of layers attainable by using [[commands]] is now limited to 16 per banner.}}
{{History||1.9|snap=15w31a|[[File:End City Banner.png|17px]] Magenta banners with a black chevron and inverted chevron are now naturally generated on the outside walls of [[end city|end cities]].}}
{{History|||snap=15w33c|Banners can be used to apply patterns to [[shield]]s.}}
{{History||1.11|snap=16w33a|Banners now require a [[dye]] when applying a pattern that uses a non-dye [[item]], such as a [[mob head|creeper head]] or [[golden apple|enchanted golden apple]]. Previously, the lack of a dye would have applied the black variant of the pattern.}}
{{History|||snap=16w39a|Black and gray banners, and light gray banners with a white flower charge are now naturally generated in rooms of [[woodland mansion]]s.}}
{{History||1.12|snap=January 24, 2017|slink={{tweet|jeb_|823817090511601664}}|[[Jeb]] tweets a screenshot of the changes to the banner color palette.}}
{{History|||snap=17w06a|[[File:White Banner.png|17px]] [[File:Light Gray Banner.png|17px]] [[File:Gray Banner.png|17px]] [[File:Black Banner.png|17px]] [[File:Brown Banner.png|17px]] [[File:Red Banner.png|17px]] [[File:Orange Banner.png|17px]] [[File:Yellow Banner.png|17px]] [[File:Lime Banner.png|17px]] [[File:Green Banner.png|17px]] [[File:Cyan Banner.png|17px]] [[File:Light Blue Banner.png|17px]] [[File:Blue Banner.png|17px]] [[File:Purple Banner.png|17px]] [[File:Magenta Banner.png|17px]] [[File:Pink Banner.png|17px]] Changed banners' [[tint]]s.}}
{{History|||snap=pre6|"Chief fess" and "base fess" banners are now just "chief" and "base" banners.}}
{{History||1.13|snap=17w47a|The colors for the <code>banner</code>, <code>wall_banner</code> and <code>standing_banner</code> ID have been split up into their own IDs.
|Prior to [[1.13/Flattening|''The Flattening'']], these [[block]]s' numeral IDs were 176 and 177, and the [[item]]'s 425.}}
{{History|||snap=18w10a|{{control|Using}} a [[map]] on a banner now mark the spot of the banner on the map.}}
{{History||1.14|snap=18w43a|[[Loom]]s have been added to help the [[player]] edit banners more easily.
|All recipes for banner patterns have been removed.}}
{{History|||snap=18w45a|[[File:Ominous Banner Revision 1.png|17px]] Added [[illager patrol]]s, where the leader of an illager patrol carries an [[illager]] banner.}}
{{History|||snap=18w46a|[[File:Ominous Banner.png|17px]] The pattern of [[illager]] banner now has a black border.}}
{{History|||snap=19w11a|Cartographer and shepherd [[villager]]s now [[trading|sell]] banners.}}
{{History|||snap=Pre-Release 2|"Illager Banners" have been renamed to "Ominous Banners".}}
{{History||1.17|snap=20w46a|The unused "base" pattern has been renamed to the "field" pattern and given proper translation strings (its ID is still "base").}}
{{History||1.19.3|snap=22w43a|The ominous banner is now available in the Creative inventory.}}
{{History|bedrock}}
{{History||1.2.0|snap=beta 1.2.0.2|[[File:White Banner.png|17px]] [[File:Light Gray Banner.png|17px]] [[File:Gray Banner.png|17px]] [[File:Black Banner.png|17px]] [[File:Brown Banner.png|17px]] [[File:Red Banner.png|17px]] [[File:Orange Banner.png|17px]] [[File:Yellow Banner.png|17px]] [[File:Lime Banner.png|17px]] [[File:Green Banner.png|17px]] [[File:Cyan Banner.png|17px]] [[File:Light Blue Banner.png|17px]] [[File:Blue Banner.png|17px]] [[File:Purple Banner.png|17px]] [[File:Magenta Banner.png|17px]] [[File:Pink Banner.png|17px]] Added banners.
|[[File:End City Banner.png|17px]] Magenta banners with a black chevron and inverted chevron are now naturally generated on the outside walls of [[end city|end cities]].
|Black and gray banners, and light gray banners with a white flower charge are now naturally generated in rooms of [[woodland mansion]]s.}}
{{History||1.4.0|snap=beta 1.2.20.1|The white banner can now be crafted from a colored banner and [[bleach]], which also removes all patterns, if used on a white banner.}}
{{History||1.10.0|snap=beta 1.10.0.3|[[Loom]]s have been added to help the [[player]] edit banners more easily.
|Brown banners now generate in new [[savanna]] [[village]]s.
|Black banners now generate in [[pillager outpost]] watchtowers.}}
{{History||1.11.0|snap=beta 1.11.0.1|Gray banners now generate in pillager outpost watchtowers, instead of black banners.
|[[File:Ominous Banner BE.png|17px]] Added [[illager captain]]s, which drop an [[illager]] banner upon [[death]].}}
{{History|||snap=beta 1.11.0.3|Illager banners now generate in [[pillager outpost]] watchtowers, instead of gray banners.}}
{{History|||snap=beta 1.11.0.4|Banners can now be [[trading|bought]] from cartographer and shepherd [[villager]]s.}}
{{History||1.20.0|snap=beta 1.20.0.20|Banners can now be used to customise [[shield]]s.}}
{{History|console}}
{{History||xbox=TU43|xbone=CU33|ps=1.36|wiiu=Patch 13|switch=1.0.1|[[File:White Banner Revision 1.png|22px]][[File:Light Gray Banner Revision 1.png|22px]][[File:Gray Banner Revision 1.png|22px]][[File:Black Banner Revision 1.png|22px]][[File:Brown Banner Revision 1.png|22px]][[File:Red Banner Revision 1.png|22px]][[File:Orange Banner Revision 1.png|22px]][[File:Yellow Banner Revision 1.png|22px]][[File:Lime Banner Revision 1.png|22px]][[File:Green Banner Revision 1.png|22px]][[File:Cyan Banner Revision 1.png|22px]][[File:Light Blue Banner Revision 1.png|22px]][[File:Blue Banner Revision 1.png|22px]][[File:Purple Banner Revision 1.png|22px]][[File:Magenta Banner Revision 1.png|22px]][[File:Pink Banner Revision 1.png|22px]] Added banners.}}
{{History||xbox=TU46|xbone=CU36|ps=1.38|wiiu=Patch 15|switch=1.0.1|[[File:End City Banner.png|17px]] Magenta banners with a black chevron and inverted chevron are now naturally generated on the outside walls of [[end city|end cities]].}}
{{History||xbox=TU53|xbone=CU43|ps=1.49|wiiu=Patch 23|switch=1.0.3|[[File:White Banner.png|17px]] [[File:Light Gray Banner.png|17px]] [[File:Gray Banner.png|17px]] [[File:Black Banner.png|17px]] [[File:Brown Banner.png|17px]] [[File:Red Banner.png|17px]] [[File:Orange Banner.png|17px]] [[File:Yellow Banner.png|17px]] [[File:Lime Banner.png|17px]] [[File:Green Banner.png|17px]] [[File:Cyan Banner.png|17px]] [[File:Light Blue Banner.png|17px]] [[File:Blue Banner.png|17px]] [[File:Purple Banner.png|17px]] [[File:Magenta Banner.png|17px]] [[File:Pink Banner.png|17px]] Changed banners' [[tint]]s.}}
{{History||xbox=none|xbone=none|ps=1.90|wiiu=none|switch=none|[[Loom]]s have been added to help the [[player]] edit banners more easily.}}
{{History||ps=1.91|[[File:Ominous Banner BE.png|17px]] Added [[illager]] banners, which generate with [[pillager outpost]]s and are [[drops|dropped]] by [[illager captain]]s upon [[death]].}}
{{History|foot}}
== Issues ==
{{issue list}}
== Trivia ==
* With 16 blank banners, 38 patterns of 16 colors each (608 uniquely-colored patterns), and 0 to 6 patterns per banner, the number of uniquely crafted banners is 16 × (608<sup>0</sup> + 608<sup>1</sup> + 608<sup>2</sup> + 608<sup>3</sup> + 608<sup>4</sup> + 608<sup>5</sup> + 608<sup>6</sup>) ≈ 809 quadrillion - 809 with 15 zeros (809,573,616,779,945,488). The number of visually distinct banners is smaller, because one or more patterns may completely cover other patterns, or the entire banner, or be duplicated due to the symmetric set of patterns (e.g. field or (yellow) + per pale azure (blue) = field azure + per pale or inverted).
** Not 38 patterns are available on BE, but 40 patterns of 16 colors each (640 uniquely-colored patterns), so the number is even greater. 16 × (640<sup>0</sup> + 640<sup>1</sup> + 640<sup>2</sup> + 640<sup>3</sup> + 640<sup>4</sup> + 640<sup>5</sup> + 640<sup>6</sup>) ≈ 1 quintillion - 1 with 18 zeros (1,101,232,303,249,827,856). This increases the number by almost 1.4 times, or almost 292 quadrillion, despite the addition of only 2 patterns.
* If a banner has over 6 patterns, only the six bottom-most patterns are displayed when hovered over in the [[inventory]].
* The Mojang logo is called "Thing" in-game, which could be considered an alternate translation for [[wiktionary:mojäng|mojäng]]. If [[wikipedia:Google Translate|Google Translate]] is used, it translates to "thingys" or "contraption".
** In the Swedish translation of the game, this pattern is, in fact, called ''mojäng''.
* [[List of block textures#Banner Textures|Banner textures]] are located in \assets\minecraft\textures\entity\banner.
** There are 40 monochrome textures, each containing all 6 sides of the banner.
** The texture of the back side is the mirrored texture of the front side.
** Compared to the texture files, textures' colors are inverted in-game due to them acting as masks for the re-colored base texture, base.png. That means white is visible, while black is transparent.
* Banners that have the purple NBT+ line in the bottom (obtained by holding Ctrl and middle-clicking the banner, which also copies the NBT [[tag]] of anything that the player points their crosshair to) actually have no difference with the base banner obtained by middle click.
*The Illager Banner in Bedrock Edition is available as a separate item but is just a second variant of the white banner.
**Standard variant of white banner is set to type 0.
**Illager variant is set to type 1.
== Gallery ==
<gallery>
Banners Jeb.png|The first image of banners, as tweeted by Jens Bergensten.
Iceland and Norway Flags.png|Another banner image from Jeb.
Searge Banners.png|Several banners made by Searge.
The Bountiful Update.png|Banners in the official 1.8 poster.
BannersBeforeAndAfter.png|An image, tweeted by Jeb, showcasing the changes he made to the banner color palette in the 1.12 update.
Gradients Overlay.png|The result of using gradient different numbers of times, each time increasing the level of gradient by 1.
All positions and rotations of a banner.png|All positions and rotations of a banner
Item Frame with Banner.png|A banner with the [[Mojang]] logo in an [[item frame]].
EndCityBanners.png|Banners floating outside of an [[End city]] tower.
Woodland mansion 1x2 d1.png|Banners hanging above the doorway of a [[woodland mansion]] master bedroom.
Replaceitembanner.png|Banner put in the helmet slot by using the command {{cmd|replaceitem}}{{Only|BE}} or {{cmd|item replace}}{{Only|JE}}.
Better Together Banners.jpg|Banners in ''Bedrock Edition''.
Better Together Banner Crafting 1.jpg|A banner in the hand.
Better Together Banner Crafting 2.jpg|A banner in the inventory.
Better Together Banner Crafting 3.jpg|A banner in the crafting grid.
Better Together Banner Crafting 4.jpg|A banner being given a pattern.
</gallery>
=== Renders ===
<gallery>
Ominous Banner.gif
White Banner.gif
Light Gray Banner.gif
Gray Banner.gif
Black Banner.gif
Brown Banner.gif
Red Banner.gif
Orange Banner.gif
Yellow Banner.gif
Lime Banner.gif
Green Banner.gif
Cyan Banner.gif
Light Blue Banner.gif
Blue Banner.gif
Purple Banner.gif
Magenta Banner.gif
Pink Banner.gif
Ominous Wall Banner.png|
White Wall Banner.png|
Light Gray Wall Banner.png|
Gray Wall Banner.png|
Black Wall Banner.png|
Brown Wall Banner.png|
Red Wall Banner.png|
Orange Wall Banner.png|
Yellow Wall Banner.png|
Lime Wall Banner.png|
Green Wall Banner.png|
Cyan Wall Banner.png|
Light Blue Wall Banner.png|
Blue Wall Banner.png|
Purple Wall Banner.png|
Magenta Wall Banner.png|
Pink Wall Banner.png
</gallery>
<gallery>
File:Ominous Banner.gif|Ominous banner pattern in Java Edition.
File:Ominous Banner BE.gif|Illager banner pattern in Bedrock Edition.
File:Ominous Banner Revision 1.gif|Old Ominous banner pattern.
File:Ominous Banner washing.gif|Washing with cauldron shows how to apply the ominous banner pattern.
</gallery>
=== [[Lego Minecraft]] Banners ===
<gallery>
File:Lego Red Creeper Banner Collage.jpg|Lego banners from 21127 and 21131
File:Lego Melon Banner.png|Lego banner from 21138
File:Lego Fish Banner.png|Lego banner from 21142
File:Lego Beetroot Banner.png|Lego banner from 21144
File:Lego Wheat Banner.png|Another lego banner from 21144
File:Lego Carrot Banner.png|A third lego banner from 21144
File:Lego Crossbones Banner.png|Lego banner from 21152
File:Lego Green Creeper Banner Collage.jpg|Lego banners from 21155
File:Lego Ominous Banner.png|Lego ominous banner from 21160
</gallery>
== References ==
{{reflist}}
{{Blocks|Utility}}
{{Items}}
[[Category:Generated structure blocks]]
[[Category:Manufactured blocks]]
[[Category:Block entities]]
[[Category:Non-solid blocks]]
[[cs:Prapor]]
[[de:Banner]]
[[es:Estandarte]]
[[fr:Bannière]]
[[ja:旗]]
[[ko:현수막]]
[[nl:Banier]]
[[pl:Sztandar]]
[[pt:Estandarte]]
[[ru:Флаг]]
[[uk:Стяг]]
[[zh:旗帜]]</li></ul></nowiki> | alpha 0.17.0.1 | Speed can be obtained from lingering potion of swiftness. | |||
| Bedrock Edition | |||||
1.11.0{{Extension DPL}}<ul><li>[[Spider Eye|Spider Eye]]<br/>{{Item
| title = Spider Eye
| image = Spider Eye.png
| renewable = Yes
| heals = {{Hunger|2}}
|effects={{EffectLink|Poison}} (0:05)
| stackable = Yes (64)
}}
A '''spider eye''' is a poisonous [[food]] and [[brewing]] item.
== Obtaining ==
=== Mob loot ===
==== Spiders ====
[[Spider]]s and [[cave spider]]s have a {{frac|1|3}} chance of dropping a [[spider eye]] when killed by a player or tamed wolf, but not when killed by environmental damage (such as falling). The maximum amount of spider eyes is increased by 1 per level of [[Looting]]. The chance of a spider '''not''' dropping any spider eyes can be found using the formula <code>2 / (Looting Level + 3)</code>. For example, Looting III gives a {{frac|1|3}} chance of not dropping any spider eyes. All other amounts have an equal chance of occurring.
==== Witches ====
[[Witch]]es have a chance of dropping 0–6 spider eyes upon death. This is increased by 3 per level of [[Looting]], for a maximum of 0-15 spider eyes.
=== Chest loot ===
{{LootChestItem|spider-eye}}
== Usage ==
=== Food ===
When [[Food|eaten]], a spider eye restores {{hunger|2}} [[Hunger|hunger points]] and 3.2 [[Hunger#Mechanics|saturation points]], giving a nourishment value of 1.6. It also applies a [[Poison]] [[effect]] lasting 5 seconds to the player, causing {{hp|4|poisoned=1}} damage, which reduces hunger/saturation by 6 points.
=== Crafting ingredient ===
{{crafting usage}}
=== Brewing ingredient ===
{{brewing
|showname=1
|head=1
|Spider Eye
|Mundane Potion
|base=Water Bottle
}}
{{brewing
|foot=1
|Spider Eye
|Potion of Poison
}}
==Sounds==
{{Sound table/Entity/Food}}
== Data values ==
=== ID ===
{{edition|java}}:
{{ID table
|edition=java
|showforms=y
|generatetranslationkeys=y
|displayname=Spider Eye
|spritetype=item
|nameid=spider_eye
|form=item
|foot=1}}
{{edition|bedrock}}:
{{ID table
|edition=bedrock
|shownumericids=y
|showforms=y
|notshowbeitemforms=y
|generatetranslationkeys=y
|displayname=Spider Eye
|spritetype=item
|nameid=spider_eye
|id=278
|form=item
|foot=1}}
== Advancements ==
{{load advancements|Husbandry;A Balanced Diet}}
== Video ==
<div style="text-align:center">{{yt|-PD-wX07TCg}}</div>
== History ==
{{History|java}}
{{History||1.0.0|snap=Beta 1.9 Prerelease 2|[[File:Spider Eye JE1 BE1.png|32px]] Added spider eyes.
|Spider eyes can be used to craft [[fermented spider eye]]s.}}
{{History|||snap=Beta 1.9 Prerelease 3|Spider eyes can now be [[brewing|brewed]] in a [[water bottle]] to create a [[Mundane Potion]], or in an [[Awkward Potion]] to create a [[Potion of Poison]].}}
{{History||1.4.2|snap=12w38b|Spider eyes can now be dropped by [[witch]]es.}}
{{History||1.9|snap=15w44a|Spider eyes can now be found in [[desert pyramid|desert temple]] [[chest]]s.}}
{{History||1.13|snap=17w47a|Prior to [[1.13/Flattening|''The Flattening'']], this [[item]]'s numeral ID was 375.}}
{{History||1.14|snap=18w43a|[[File:Spider Eye JE2 BE2.png|32px]] The texture of spider eyes has been changed.}}
{{History|pocket alpha}}
{{History||v0.12.1|snap=build 1|[[File:Spider Eye JE1 BE1.png|32px]] Added spider eyes.|Spider eyes can be used to craft [[fermented spider eye]]s and for [[brewing]].}}
{{History||v0.13.0|snap=build 1|Spider eyes can now be found in [[desert pyramid|desert temple]] [[chest]]s.}}
{{History||v0.14.0|snap=build 1|Spider eyes can now dropped by [[witch]]es.}}
{{History|bedrock}}
{{History||1.10.0|snap=beta 1.10.0.3|[[File:Spider Eye JE2 BE2.png|32px]] The texture of spider eyes has been changed.}}
{{History|console}}
{{History||xbox=TU7|xbone=CU1|ps=1.0|wiiu=Patch 1|[[File:Spider Eye JE1 BE1.png|32px]] Added spider eyes.}}
{{History||xbox=none|xbone=none|ps=1.90|wiiu=none|[[File:Spider Eye JE2 BE2.png|32px]] The texture of spider eyes has been changed.}}
{{History|New 3DS}}
{{History||0.1.0|[[File:Spider Eye JE1 BE1.png|32px]] Added spider eyes.}}
{{History|foot}}
== Issues ==
{{issue list}}
== References ==
{{reflist}}
{{items}}
[[cs:Pavoučí oko]]
[[de:Spinnenauge]]
[[es:Ojo de araña]]
[[fr:Œil d'araignée]]
[[hu:Pókszem]]
[[it:Occhio di ragno]]
[[ja:クモの目]]
[[ko:거미 눈]]
[[nl:Spinnenoog]]
[[pl:Oko pająka]]
[[pt:Olho de aranha]]
[[ru:Паучий глаз]]
[[zh:蜘蛛眼]]
[[Category:Food]]
[[Category:Renewable resources]]
[[Category:Brewing recipe]]</li><li>[[Glistering Melon Slice|Glistering Melon Slice]]<br/>{{Item
| image = Glistering Melon Slice.png
| renewable = Yes
| stackable = Yes (64)
}}
A '''glistering melon slice'''{{fn|Known as '''Glistering Melon Slice''' {{in|java}} and '''Glistering Melon''' {{in|bedrock}}.}} is an inedible [[item]] used for brewing [[potion]]s of [[Healing]]. It is also one of the many potion ingredients that can be used to make mundane potions.
== Obtaining ==
=== Chest loot ===
{{LootChestItem|glistering-melon-slice}}
=== Crafting ===
{{Crafting
|A1= Gold Nugget
|B1= Gold Nugget
|C1= Gold Nugget
|A2= Gold Nugget
|B2= Melon Slice
|C2= Gold Nugget
|A3= Gold Nugget
|B3= Gold Nugget
|C3= Gold Nugget
|Output= Glistering Melon Slice
|type= Brewing
}}
=== Trading ===
Master-level farmer [[villager]]s sell 3 glistering melon for 4 [[emerald]]s.
== Usage ==
Despite being crafted with a [[melon slice]], a glistering melon slice cannot be eaten, unlike a [[golden apple]] or [[golden carrot]].
=== Brewing ingredient ===
{{Brewing
|head=1
|Glistering Melon Slice
|Mundane Potion
|base=Water Bottle
}}
{{Brewing
|Glistering Melon Slice
|Potion of Healing
|foot=1}}
===Piglins===
[[Piglin]]s are attracted to glistering melon slices. They run toward any glistering melon slice on the ground, and inspect it for 6 to 8 seconds before putting it in their inventory.
== Achievements ==
{{load achievements|Oooh, shiny!}}
== Advancements ==
{{load advancements|Oh Shiny}}
== Data values ==
=== ID ===
{{edition|java}}:
{{ID table
|edition=java
|showforms=y
|generatetranslationkeys=y
|displayname=Glistering Melon Slice
|spritetype=item
|nameid=glistering_melon_slice
|form=item
|foot=1}}
{{edition|bedrock}}:
{{ID table
|edition=bedrock
|showaliasids=y
|shownumericids=y
|showforms=y
|notshowbeitemforms=y
|generatetranslationkeys=y
|displayname=Glistering Melon
|spritetype=item
|nameid=glistering_melon_slice
|aliasid=speckled_melon
|id=434
|form=item
|translationkey=item.speckled_melon.name
|foot=1}}
== History ==
{{History|java}}
{{History||1.0.0|snap=Beta 1.9 Prerelease 4|[[File:Glistering Melon Slice JE1 BE1.png|32px]] Added glistering melons.
|The [[crafting]] recipe of glistering melons is one [[melon slice]] and one [[gold nugget]].
|Glistering melons have replaced [[ghast tear]]s as the ingredient to produce [[potions of Healing]] due to the difficulty in getting tears.<ref>{{tweet|jeb_|123671273904680960}}</ref> They also now brew with [[water bottle]]s to create [[mundane potion]]s.}}
{{History||1.6.1|snap=13w23a|The [[crafting]] recipe of glistering melons is changed from one [[gold nugget]] to eight.}}
{{History||1.9|snap=15w49a|[[File:Glistering Melon Slice JE2.png|32px]] The rotation of glistering melon [[item]]s has been changed to be consistent with [[melon slice]]s.<ref>{{bug|MC-85963}}</ref>}}
{{History|||snap=15w49b|[[File:Glistering Melon Slice JE1 BE1.png|32px]] The rotation of glistering melons has been reverted and is no longer consistent with melon slices.}}
{{History||1.13|snap=17w47a|Prior to [[1.13/Flattening|''The Flattening'']], this [[item]]'s numeral ID was 382.}}
{{History|||snap=18w20b|"Glistering Melon" has been renamed to "Glistering Melon Slice".
|The ID of glistering melon slices has been changed from <code>speckled_melon</code> to <code>glistering_melon_slice</code>.}}
{{History||1.14|snap=18w43a|[[File:Glistering Melon Slice JE3 BE2.png|32px]] The texture of glistering melon slices has been changed.}}
{{History|||snap=19w11a|Farmer [[villager]]s now [[trading|sell]] glistering melon slices.}}
{{History||1.16|snap=20w09a|Glistering melon slices are now admired by [[piglin]]s.<ref>{{bug|MC-172363}}</ref>}}
{{History|||snap=20w16a|Glistering melon slices now generate in [[ruined portal]] chests.}}
{{History|pocket alpha}}
{{History||v0.12.1|snap=build 1|[[File:Glistering Melon Slice JE1 BE1.png|32px]] Added glistering melons.}}
{{History|bedrock}}
{{History||1.10.0|snap=beta 1.10.0.3|[[File:Glistering Melon Slice JE3 BE2.png|32px]] The texture of glistering melons has been changed.}}
{{History||1.11.0|snap=beta 1.11.0.4|Glistering melons can now be [[trading|bought]] from farmer [[villager]]s.}}
{{History||1.13.0|snap=beta 1.13.0.9|[[Trading]] has been changed. Master-level farmer villagers now have a {{frac|1|3}} chance to [[trading|sell]] glistering melon slices.}}
{{History||1.16.0|snap=beta 1.16.0.57|Glistering melons are [[trading|sold]] from farmer villagers under a 50% chance, once again.
|Glistering melons now generate in [[ruined portal]] chests.}}
{{History||1.16.100|snap=beta 1.16.100.54|[[Ruined Portal]]s can now generate with 4–12 glistering melons instead of only one.}}
{{History|||snap=beta 1.16.100.56|The ID of glistering melon slices has been changed from <code>speckled_melon</code> to <code>glistering_melon_slice</code>.}}
{{History|console}}
{{History||xbox=TU7|xbone=CU1|ps=1.0|wiiu=Patch 1|[[File:Glistering Melon Slice JE1 BE1.png|32px]] Added glistering melons.}}
{{History||xbox=none|xbone=none|ps=1.90|wiiu=none|switch=none|[[File:Glistering Melon Slice JE3 BE2.png|32px]] The texture of glistering melons has been changed.}}
{{History|New 3DS}}
{{History||0.1.0|[[File:Glistering Melon Slice JE1 BE1.png|32px]] Added glistering melons.}}
{{History|foot}}
== Issues ==
{{issue list}}
== See also ==
* [[Melon Slice]]
* [[Melon]]
== Notes ==
{{fnlist}}
== References ==
{{reflist}}
{{Items}}
[[Category:Renewable resources]]
[[cs:Zlatavý kousek melounu]]
[[de:Glitzernde Melonenscheibe]]
[[es:Rodaja de sandía reluciente]]
[[fr:Tranche de pastèque scintillante]]
[[hu:Ragyogó dinnye]]
[[ja:きらめくスイカの薄切り]]
[[ko:반짝이는 수박 조각]]
[[nl:Glinsterende meloenschijf]]
[[pl:Błyszczący arbuz]]
[[pt:Fatia de melancia reluzente]]
[[ru:Сверкающий ломтик арбуза]]
[[uk:Блискуча скибка кавуна]]
[[zh:闪烁的西瓜片]]</li></ul> | beta 1.11.0.5 | ||||
| Legacy Console Edition | |||||
| TU7 | CU1 | 1.0 | Patch 1 | 1.0.1 | |
| TU19 | CU7 | 1.12 | Added the ability to get speed from a beacon. | ||
| TU46 | CU36 | 1.38 | Patch 15 | Added the Lingering Potion of Swiftness. | |
| Added the Arrow of Swiftness. | |||||
| 1.90 | |||||
Issues[]
Issues relating to "Speed" are maintained on the bug tracker. Report issues there.
Trivia[]
- When the player has Speed level 255, the player moves 500 blocks per tick.
- Speed allows slimes to jump farther. High levels of speed can make slimes bounce out of view with just one jump.
Gallery[]

A player with the Speed effect.

A cauldron filled with the potion of swiftness in Bedrock edition.

A spider naturally spawned with the Speed effect.

Speed II potion item description

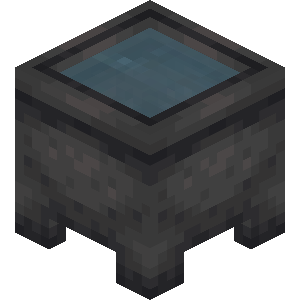
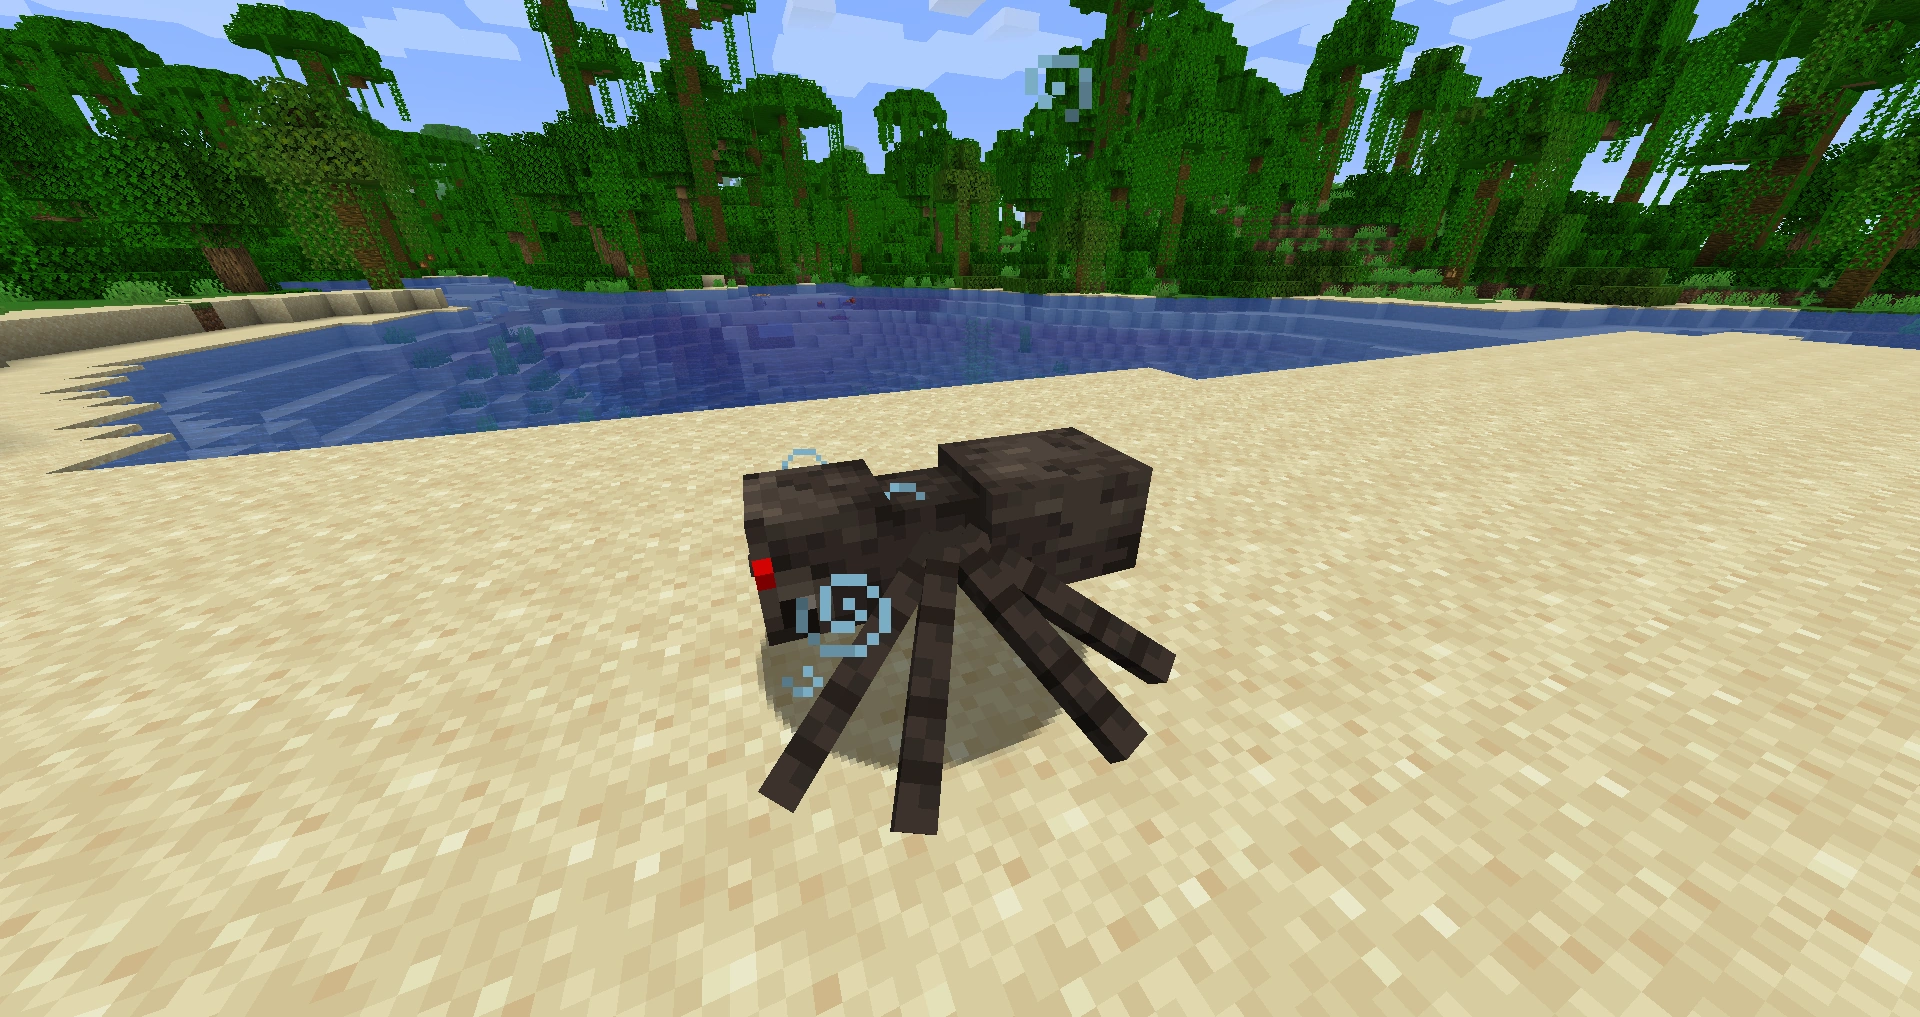
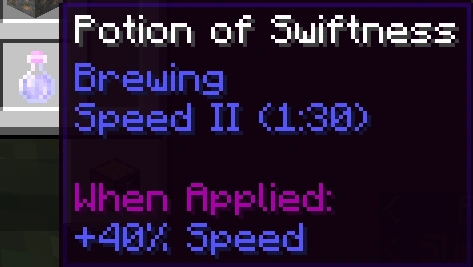