(it said stackable yes (64) but they only stack to 16) |
(Undo revision 1726956 by 152.22.68.26 (talk)) Tag: Undo |
||
| (26 intermediate revisions by 20 users not shown) | |||
| Line 1: | Line 1: | ||
{{ItemEntity |
{{ItemEntity |
||
|image=Eye of Ender.png |
|image=Eye of Ender.png |
||
| − | |stackable=Yes ( |
+ | |stackable=Yes (64) |
|renewable=Yes |
|renewable=Yes |
||
|size=Height: 0.25 Blocks<br>Width: 0.25 Blocks |
|size=Height: 0.25 Blocks<br>Width: 0.25 Blocks |
||
| ⚫ | |||
| − | |id='''[[JE]]''': 15<br>'''[[BE]]''': 70 |
||
|networkid='''[[JE]]''': 72 |
|networkid='''[[JE]]''': 72 |
||
}} |
}} |
||
| Line 26: | Line 24: | ||
[[File:Eye of Ender (break).gif|thumb|300px|An animation of an eye of ender shattering.]] |
[[File:Eye of Ender (break).gif|thumb|300px|An animation of an eye of ender shattering.]] |
||
| − | To locate [[stronghold]]s (and the [[ |
+ | To locate [[stronghold]]s (and the [[end portal]]s they house): |
* Pressing {{control|use}} while holding an eye of ender causes it to fly approximately 12 meters in the direction of the nearest stronghold, traveling through any blocks necessary, and leave a trail of purple particles in its wake, the same particle effect used for [[ender chests]]. |
* Pressing {{control|use}} while holding an eye of ender causes it to fly approximately 12 meters in the direction of the nearest stronghold, traveling through any blocks necessary, and leave a trail of purple particles in its wake, the same particle effect used for [[ender chests]]. |
||
** {{IN|java}}, the eye leads to near the spiral staircase that was the first room generated in the stronghold. |
** {{IN|java}}, the eye leads to near the spiral staircase that was the first room generated in the stronghold. |
||
| Line 43: | Line 41: | ||
{{crafting usage}} |
{{crafting usage}} |
||
| − | ==Sounds== |
+ | == Sounds == |
| + | |||
| − | {| class="wikitable" |
||
| − | + | {{Sound table |
|
| + | |sound=Ender Eye death1.ogg |
||
| − | ! Subtitle |
||
| + | |sound2=Ender Eye death2.ogg |
||
| − | ! [[Namespaced ID]] |
||
| ⚫ | |||
| − | ! Subtitle ID |
||
| ⚫ | |||
| − | ! Source |
||
| ⚫ | |||
| − | ! Pitch |
||
| + | |source=Friendly Creatures |
||
| − | ! Volume |
||
| − | + | |distance=16}} |
|
| + | {{Sound table |
||
| − | |- |
||
| − | | |
+ | |sound=Ender Eye launch1.ogg |
| + | |sound2=Ender Eye launch2.ogg |
||
| − | | ''No subtitle'' |
||
| ⚫ | |||
| ⚫ | |||
| ⚫ | |||
| ⚫ | |||
| + | |source=Friendly Creatures |
||
| − | | ?[[Category:Pages with missing sound source value]] |
||
| ⚫ | |||
| − | | ?[[Category:Pages with missing sound pitch value]] |
||
| + | |distance=16 |
||
| − | | ?[[Category:Pages with missing sound volume value]] |
||
| + | |foot=1}} |
||
| − | | 16 |
||
| − | |- |
||
| − | | {{sound||Ender Eye launch1.ogg|Ender Eye launch2.ogg}} |
||
| ⚫ | |||
| ⚫ | |||
| ⚫ | |||
| − | | ?[[Category:Pages with missing sound source value]] |
||
| − | | ?[[Category:Pages with missing sound pitch value]] |
||
| − | | ?[[Category:Pages with missing sound volume value]] |
||
| − | | 16 |
||
| − | |} |
||
== Data values == |
== Data values == |
||
| − | |||
=== ID === |
=== ID === |
||
| + | {{edition|java}}: |
||
| − | [[Java Edition]]: |
||
| + | {{ID table |
||
| − | {|class=wikitable |
||
| + | |firstcolumnname=Item |
||
| ⚫ | |||
| + | |generatetranslationkeys=java |
||
| − | ! [[Namespaced ID]] |
||
| ⚫ | |||
| − | |- |
||
| + | |spritetype=item |
||
| − | | {{ItemSprite|eye-of-ender}} Item |
||
| − | | |
+ | |nameid=ender_eye |
| + | |foot=1}} |
||
| − | |- |
||
| + | {{ID table |
||
| − | | {{ItemSprite|eye-of-ender}} Entity |
||
| + | |firstcolumnname=Entity |
||
| ⚫ | |||
| + | |generatetranslationkeys=java |
||
| − | |} |
||
| + | |displayname=Eye of Ender |
||
| − | |||
| + | |spritetype=entity |
||
| − | [[Bedrock Edition]]: |
||
| ⚫ | |||
| − | {|class=wikitable |
||
| + | |foot=1}} |
||
| ⚫ | |||
| ⚫ | |||
| − | ! [[Namespaced ID]] |
||
| + | {{ID table |
||
| − | ! Numeric ID |
||
| + | |firstcolumnname=Item |
||
| − | |- |
||
| + | |shownumericids=y |
||
| − | | {{ItemSprite|eye-of-ender}} Item |
||
| + | |generatetranslationkeys=bedrock |
||
| ⚫ | |||
| + | |displayname=Eye of Ender |
||
| − | | 381 |
||
| + | |spritetype=item |
||
| − | |- |
||
| ⚫ | |||
| − | | {{ItemSprite|eye-of-ender}} Entity |
||
| ⚫ | |||
| ⚫ | |||
| + | |foot=1}} |
||
| ⚫ | |||
| + | {{ID table |
||
| − | |} |
||
| + | |firstcolumnname=Entity |
||
| + | |shownumericids=y |
||
| + | |generatetranslationkeys=bedrock |
||
| + | |displayname=Eye of Ender |
||
| + | |spritetype=entity |
||
| ⚫ | |||
| ⚫ | |||
| + | |foot=1}} |
||
=== Entity data === |
=== Entity data === |
||
| Line 122: | Line 117: | ||
{{History|java}} |
{{History|java}} |
||
{{History||1.0.0|snap=Beta 1.9 Prerelease 3|[[File:Eye of Ender JE1 BE1.png|32px]] Added eyes of ender. |
{{History||1.0.0|snap=Beta 1.9 Prerelease 3|[[File:Eye of Ender JE1 BE1.png|32px]] Added eyes of ender. |
||
| + | |Eyes of ender can be used on a [[end portal frame|portal block]] to repair them, but repairing them does nothing.}} |
||
| − | |Eyes of ender currently do not have any use.}} |
||
{{History|||snap=Beta 1.9 Prerelease 4|Each eye can now be placed in a [[end portal frame|portal block]] or used to hone in on a [[stronghold]]. [[Jens Bergensten|Jeb]] demonstrated the new uses for an eye in his livestream.<ref>http://www.twitch.tv/jebox/b/297000418</ref> An [[End portal]] within a stronghold could be seen in the stream with two eyes inserted into blocks. |
{{History|||snap=Beta 1.9 Prerelease 4|Each eye can now be placed in a [[end portal frame|portal block]] or used to hone in on a [[stronghold]]. [[Jens Bergensten|Jeb]] demonstrated the new uses for an eye in his livestream.<ref>http://www.twitch.tv/jebox/b/297000418</ref> An [[End portal]] within a stronghold could be seen in the stream with two eyes inserted into blocks. |
||
|In older worlds with chunks generated before [[Java Edition Beta 1.9 Prerelease 3|Beta 1.9 Prerelease 3]], the eyes may mislead the [[player]] to a place where there isn't a [[stronghold]] at all. This happens because the eyes lead to where a stronghold should be based on the world seed in the current version, but before Beta 1.9 Prerelease 3 strongholds generated differently based on the seed. Therefore, if the player saved the coordinates the eye traveled to in an old world and generated a new world with the same seed, the player could travel to those same coordinates and find a stronghold.}} |
|In older worlds with chunks generated before [[Java Edition Beta 1.9 Prerelease 3|Beta 1.9 Prerelease 3]], the eyes may mislead the [[player]] to a place where there isn't a [[stronghold]] at all. This happens because the eyes lead to where a stronghold should be based on the world seed in the current version, but before Beta 1.9 Prerelease 3 strongholds generated differently based on the seed. Therefore, if the player saved the coordinates the eye traveled to in an old world and generated a new world with the same seed, the player could travel to those same coordinates and find a stronghold.}} |
||
| Line 131: | Line 126: | ||
{{History||1.6.4|snap=1.6.3-pre|Eyes of ender now lead to [[stronghold]]s based on the structure data saved in the world file instead of calculating their approximate location via the [[seed (level generation)|world seed]]. Therefore, strongholds generated in old versions can still be found even if the distribution of strongholds is changed.}} |
{{History||1.6.4|snap=1.6.3-pre|Eyes of ender now lead to [[stronghold]]s based on the structure data saved in the world file instead of calculating their approximate location via the [[seed (level generation)|world seed]]. Therefore, strongholds generated in old versions can still be found even if the distribution of strongholds is changed.}} |
||
{{History||1.8|snap=14w02a|With changes that have been made to villagers and the [[trading]] system, cleric villagers now sell eyes of ender for 7–11 [[emerald]]s, as one of their tier III trades.}} |
{{History||1.8|snap=14w02a|With changes that have been made to villagers and the [[trading]] system, cleric villagers now sell eyes of ender for 7–11 [[emerald]]s, as one of their tier III trades.}} |
||
| − | {{History||1.9|snap=15w41a|Eyes of ender are no longer sold by cleric |
+ | {{History||1.9|snap=15w41a|Eyes of ender are no longer [[trading|sold]] by cleric [[villager]]s.}} |
{{History|||snap=15w44b|An eye of ender is now used to craft an [[end crystal]].}} |
{{History|||snap=15w44b|An eye of ender is now used to craft an [[end crystal]].}} |
||
{{History||1.11|snap=16w32a|The [[entity]] ID has been changed from <code>EyeOfEnderSignal</code> to <code>eye_of_ender_signal</code>.}} |
{{History||1.11|snap=16w32a|The [[entity]] ID has been changed from <code>EyeOfEnderSignal</code> to <code>eye_of_ender_signal</code>.}} |
||
{{History||1.12|snap=17w17a|A new ''pop'' [[sound]] has been added when a thrown eye of ender bursts.}} |
{{History||1.12|snap=17w17a|A new ''pop'' [[sound]] has been added when a thrown eye of ender bursts.}} |
||
{{History||1.13|snap=17w47a|Prior to [[1.13/Flattening|''The Flattening'']], this [[item]]'s numeral ID was 381.}} |
{{History||1.13|snap=17w47a|Prior to [[1.13/Flattening|''The Flattening'']], this [[item]]'s numeral ID was 381.}} |
||
| − | {{History|||snap=pre5|The entity ID has been changed to <code>eye_of_ender</code>.}} |
+ | {{History|||snap=pre5|The [[entity]] ID has been changed to <code>eye_of_ender</code>.}} |
{{History||1.14|snap=18w43a|[[File:Eye of Ender JE2 BE2.png|32px]] The texture of eyes of ender has been changed.}} |
{{History||1.14|snap=18w43a|[[File:Eye of Ender JE2 BE2.png|32px]] The texture of eyes of ender has been changed.}} |
||
| Line 143: | Line 138: | ||
{{History|bedrock}} |
{{History|bedrock}} |
||
{{History||1.10.0|snap=beta 1.10.0.3|[[File:Eye of Ender JE2 BE2.png|32px]] The texture of eyes of ender has been changed.}} |
{{History||1.10.0|snap=beta 1.10.0.3|[[File:Eye of Ender JE2 BE2.png|32px]] The texture of eyes of ender has been changed.}} |
||
| ⚫ | |||
| ⚫ | |||
| ⚫ | |||
{{History|console}} |
{{History|console}} |
||
| Line 160: | Line 154: | ||
== Trivia == |
== Trivia == |
||
| − | * When in third-person view, the eyes of ender fly out from the player's feet instead of their hand. |
+ | * When thrown in third-person view, the eyes of ender fly out from the player's feet instead of their hand. |
* The player cannot throw eyes of ender in the Nether, the End, or Customized and Superflat worlds that do not have stronghold generation selected. |
* The player cannot throw eyes of ender in the Nether, the End, or Customized and Superflat worlds that do not have stronghold generation selected. |
||
| Line 199: | Line 193: | ||
[[pt:Olho de ender]] |
[[pt:Olho de ender]] |
||
[[ru:Око Края]] |
[[ru:Око Края]] |
||
| + | [[th:ดวงตาแห่งเอนเดอร์]] |
||
[[uk:Око Краю]] |
[[uk:Око Краю]] |
||
[[zh:末影之眼]] |
[[zh:末影之眼]] |
||
Revision as of 00:30, 12 October 2020
An eye of ender is a craftable item used to locate strongholds and activate the end portals within them.
Obtaining
Crafting
| Ingredients | Crafting recipe |
|---|---|
| Blaze Powder + Ender Pearl |
Usage
Locating strongholds

An animation of an eye of ender shattering.
To locate strongholds (and the end portals they house):
- Pressing use while holding an eye of ender causes it to fly approximately 12 meters in the direction of the nearest stronghold, traveling through any blocks necessary, and leave a trail of purple particles in its wake, the same particle effect used for ender chests.
- In Java Edition, the eye leads to near the spiral staircase that was the first room generated in the stronghold.
- In Bedrock Edition, the eye of ender signal leads to a five-way crossing room that was the second room generated in the stronghold.
- While far away from an end portal, the ender eye always travels upward to offer an easily-visible indication of the horizontal direction the player must travel.
- When the player gets close to the stronghold, the eye floats in a more precise direction that takes the y-axis into account. This often means the eye travels downward, to indicate the player is above a stronghold and must mine downward.
- After two or three seconds of travel, the eye floats in the air briefly, then either falls (becoming collectable again) or shatters in mid-air. The eye has a 20% chance of shattering. The player can throw the eye an average of five times before it shatters.
- The eye of ender's flying function works only in the Overworld. It does nothing in the Nether, the End, or in worlds with no strongholds.
Activating end portals
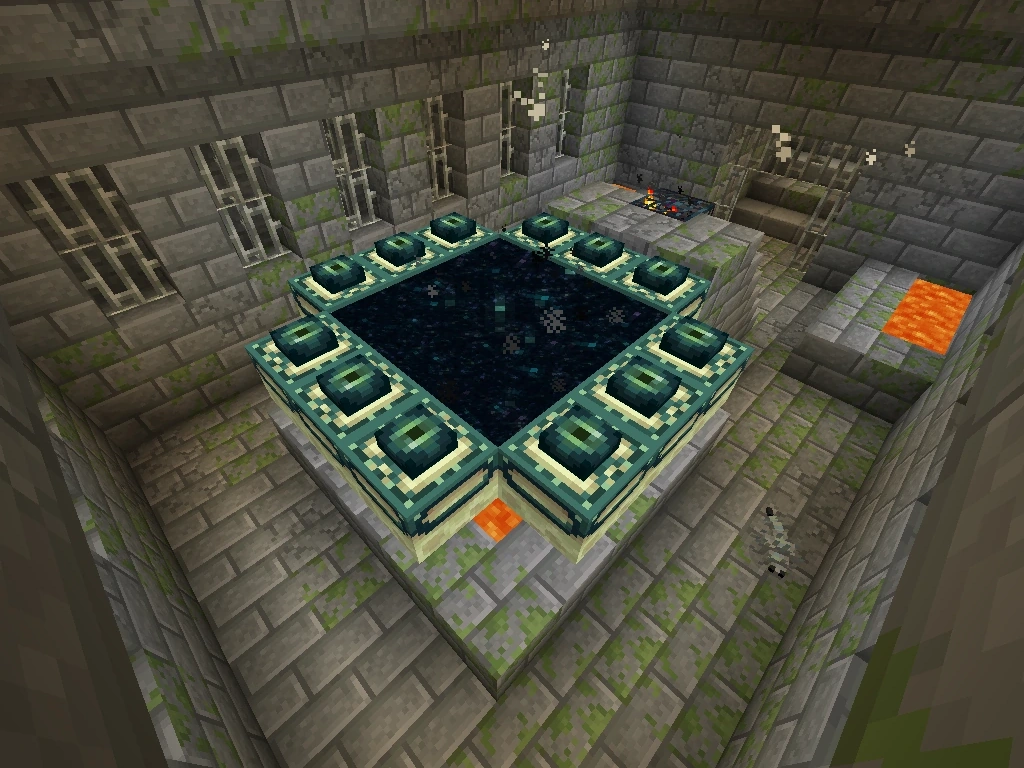
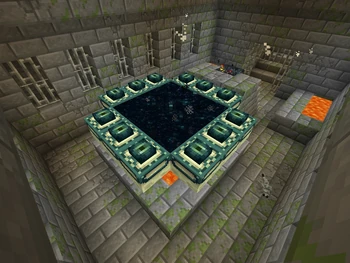
An End Portal activated with eyes of ender.
Once an end portal is found, the eyes of ender are required to activate it. End portals require a total of 12 eyes of ender in order to activate, though each individual frame-block has a 10% chance of containing an eye of ender when generated. Eyes can be placed in empty End portal frames by pressing use on them until the entire ring of 12 is filled, thereby activating the portal. Due to the fact that there is a 10% chance of each individual end portal frame having an eye in it, there is a one out of one trillion chance of every frame having an eye in it thereby activating the portal even if the player doesn't have any eyes of ender.
Crafting ingredient
| Name | Ingredients | Crafting recipe |
|---|---|---|
| End Crystal | Glass + Eye of Ender + Ghast Tear |
|
| Ender Chest | Obsidian + Eye of Ender |
Sounds
| Sound | Subtitles | Source | Description | Resource location | Translation key | Volume | Pitch | Attenuation distance |
|---|---|---|---|---|---|---|---|---|
| Eye of Ender falls | Friendly Creatures | Plays upon either falling or destruction | entity | ? | ? | ? | 16 | |
| Eye of Ender shoots | Friendly Creatures | ? | entity | subtitles | ? | ? | 16 |
Data values
ID
| Item | Identifier | Translation key |
|---|---|---|
| Eye of Ender | ender_eye | item.minecraft.ender_eye |
| Entity | Identifier | Translation key |
|---|---|---|
| Eye of Ender | eye_of_ender | entity.minecraft.eye_of_ender |
| Item | Identifier | Numeric ID | Translation key |
|---|---|---|---|
| Eye of Ender | ender_eye | 381 | item.ender_eye.name |
| Entity | Identifier | Numeric ID | Translation key |
|---|---|---|---|
| Eye of Ender | eye_of_ender_signal | 70 | entity.eye_of_ender_signal.name |
Entity data
The purple particles left by ender eyes have entity data that define various properties of the entity.
- Entity data
- Tags common to all entities
- Item: The item to render as, may be absent.
- Tags common to all items
Advancements
| Icon | Advancement | In-game description | Parent | Actual requirements (if different) | Resource location |
|---|---|---|---|---|---|
 | Eye Spy | Follow an Eye of Ender | We Need to Go Deeper | Enter a stronghold. | story/follow_ender_eye
|
Video
- Note: This video does not mention that eyes of ender can be used to craft ender chests or end crystals.
History
| Java Edition | |||||
|---|---|---|---|---|---|
1.0.0{{Extension DPL}}<ul><li>[[Dye|Dye]]<br/>{{Item
| title = Dyes
| image = White Dye.png
| extratext = View [[#Gallery|all renders]]
| renewable = Yes
| stackable = Yes (64)
}}
'''Dyes''' are a set of sixteen items used to change the color of [[wool]], [[carpet]]s, [[terracotta]], [[concrete powder]], [[glass]], [[shulker box]]es, [[bed]]s, [[candle]]s, the patterns on [[banner]]s, [[firework star]]s, certain mobs, and text on [[sign]]s and [[hanging sign]]s. {{IN|bedrock}} they can also be used to dye water in a [[cauldron]] (which is thereafter used to dye leather [[armor]]); {{in|java}} leather armor can be dyed directly. {{IN|education}} dyes can also be used to dye [[balloon]]s and [[glow stick]]s.
{{IN|bedrock|education}}, [[bone meal]], [[ink sac]]s, [[lapis lazuli]], and [[cocoa bean]]s can generally substitute for [[white dye]], [[black dye]], [[blue dye]], and [[brown dye]], respectively, in crafting recipes and for use in dyeing items or mobs. However, they have other important uses that aren't related to color, and are therefore not considered true dyes. They are mentioned in this article only in regard to their use as dyeing agents; see their individual articles for complete information about them.
[[File:Dye Recipes.png|400px|thumb|A guide for creating all the dyes]]
== Obtaining ==
<!--[[File:Dye Chart.png|350px|thumb|A guide to crafting all the dyes.{{until|java 1.14}}]]-->
Dyes can be produced by crafting them from plants (mainly flowers), by crafting dyes of different colors together, by smelting plants, or by trading with a [[wandering trader]].
{{loadPage|Crafting/Dye|Crafting|h3}}
=== Smelting ===
{{smelting|head=1|Sea Pickle|Lime Dye|0,2}}
{{smelting|foot=1|Cactus|Green Dye|1||b=Lapis Lazuli|c=Any fuel|d=1}}
=== Trading ===
[[Wandering trader]]s can sell 3 dyes for an [[emerald]]. {{IN|bedrock}}, they can also sell 3 lapis lazuli, bone meal, cocoa beans, or ink sacs for one emerald.
Apprentice-level cleric [[villager]]s sell one lapis lazuli per emerald.
=== Chest loot ===
{{#invoke:LootChest|base3|blue-dye,green-dye,orange-dye,light-blue-dye,yellow-dye,white-dye}}
=== Other ===
Ink sacs can also be created using 1 iron, 1 sulfur, and 4 oxygen in the [[compound creator]]. {{only|bedrock|education}}
== Usage ==
Similar to their use in crafting, [[bone meal]], [[ink sac]]s, [[lapis lazuli]], and [[cocoa beans]] can be substituted for the corresponding dye in any of the following usages unless otherwise specified.{{only|bedrock}} <!--- sections are ordered by craftable dyeable blocks, dyeable items, version exclusive sections, and non-crafting miscellaneous uses--->
=== Dyeing wool and mobs ===
Players can dye wool by placing [[wool]] and any dye in a crafting grid.
{{Crafting
|nocat=1
|Any Wool
|Matching Dye
|Output=Any Wool
}}
Dyes can be {{control|use|text=used}} on sheep to change the color of the wool. Shearing a colored sheep drops the corresponding color of the wool, and the sheep retains the color when the wool regenerates. [[Breeding]] colored sheep produces a lamb colored as one of the parent sheep, or a color resulting from the combination of both parents' color. The color combining follows the same rules that dyes use – red and yellow sheep produce an orange lamb, but a blue and yellow sheep cannot create a green lamb. The unlimited reproduction of colored sheep makes dyeing and shearing sheep infinitely more efficient than just dyeing wool directly.
Dye can also be used on a tamed [[wolf]] or [[cat]] to change the color of its collar from the default red to the color of the dye.
=== Dyeing carpets ===
Carpets can be dyed.
{{Crafting
|Any Carpet
|Matching Dye
|Output= Matching Carpet
|type= Building block
}}
=== Dyeing terracotta ===
[[Terracotta]] can be dyed by placing 8 blocks around a dye on a crafting table.
{{Crafting
|nocat=1
|A1=Terracotta |B1=Terracotta |C1=Terracotta
|A2=Terracotta |B2=Matching Dye |C2=Terracotta
|A3=Terracotta |B3=Terracotta |C3=Terracotta
|Output=Matching Dyed Terracotta,8
}}
=== Creating concrete powder ===
Dyes can also be used to craft [[concrete powder]], which can then be set into their respective [[concrete]] blocks (they cannot be dyed directly).
{{Crafting
|nocat=1
|Sand |Gravel |Sand
|Gravel |Matching Dye |Gravel
|Sand |Gravel |Sand
|Output=Matching Concrete Powder,8
}}
=== Staining glass ===
[[Stained glass]] can be stained by placing 8 blocks of glass around a dye on a [[crafting table]]. Just like regular glass, stained glass can be crafted into stained glass panes. The recipe for this is the same as with regular glass.
{{Crafting
|nocat=1
|A1=Glass |B1=Glass |C1=Glass
|A2=Glass |B2=Matching Dye |C2=Glass
|A3=Glass |B3=Glass |C3=Glass
|Output=Matching Stained Glass,8
|head=1
}}
{{Crafting
|nocat=1
|A1= Glass Pane
|B1= Glass Pane
|C1= Glass Pane
|A2= Glass Pane
|B2= Matching Dye
|C2= Glass Pane
|A3= Glass Pane
|B3= Glass Pane
|C3= Glass Pane
|Output= Matching Stained Glass Pane,8
|type= Decoration block
|foot=1
}}
=== Dyeing shulker boxes ===
[[Shulker box]]es are generated in a light shade of purple (like the [[purpur block]]), but can be dyed any color. They can also be re-dyed as often as desired.
{{Crafting
|ignoreusage=1
|showname=1
|Any Shulker Box
|Matching Dye
|Output=Matching Shulker Box
}}
=== Dyeing beds ===
Players can dye beds by placing a [[bed]] and any color dye in a crafting grid.
{{Crafting
|nocat=1
|Any Bed
|Matching Dye
|Output=Matching Bed
}}
=== Dyeing candles ===
Players can dye [[candles]] by placing an undyed candle and any color dye in a crafting grid.
{{Crafting
|ignoreusage=1
|Candle
|Matching Dye
|Output=Matching Dyed Candle
}}
=== Banner patterns ===
{{main|Banner#Patterns}}
Dyes are used in most banner patterns to determine the pattern and color displayed.
=== Dyeing armor ===
[[File:DyeGraph2.png|200px|thumb|A graph showing all combinations of two dyes on a [[tunic]].]]
Leather [[armor]] can be dyed by:
* Crafting dyes with a piece of leather armor or leather [[horse armor]].{{Only|java}}
* Dousing the leather armor or leather [[horse armor]] in a [[cauldron]] to which dyes have been added.{{Only|bedrock}}
There are 5,713,438<ref>https://anrar4.github.io/DyeLeatherArmor/</ref> (34.1% of sRGB) colors leather armor can be, as it is possible to put more than one dye on the crafting bench alongside the leather armor. Armor can be dyed multiple times with previous colors affecting the final outcome. Colored armor can be reverted to their original color using a [[cauldron]] with undyed water.
The game has a specific formula for calculating the color of dyed armor: each color, in the RGB color model, has a red value, green value, and blue value. For each dye in the crafting grid, and the armor itself (if it is already dyed), the red, green, and blue values are added to running totals. In addition, a running total of the highest value (be it red, green, or blue) is also kept. After this, each total is divided by the number of colors used. This effectively produces the average red, green, blue, and maximum values. The maximum value of the average RGB values is also calculated. Finally, each average RGB value is multiplied by the average maximum value and divided by the maximum of the average RGB values. The modified average RGB values are then used as the final color. This procedure can be summed up with the following equations:
for each color (all "total" variables start at 0 before counting):
totalRed = totalRed + redValue
totalGreen = totalGreen + greenValue
totalBlue = totalBlue + blueValue
totalMaximum = totalMaximum + max(redValue, greenValue, blueValue)
numberOfColors = numberOfColors + 1
averageRed = totalRed / numberOfColors
averageGreen = totalGreen / numberOfColors
averageBlue = totalBlue / numberOfColors
averageMaximum = totalMaximum / numberOfColors
maximumOfAverage = max(averageRed, averageGreen, averageBlue)
gainFactor = averageMaximum / maximumOfAverage
resultRed = averageRed * gainFactor
resultGreen = averageGreen * gainFactor
resultBlue = averageBlue * gainFactor
Due to the way this formula works, the resulting color can never be darker than the average of the input colors and is often lighter and more saturated. Of course, the resulting color can never be lighter or more saturated than the lightest or most saturated input color. In addition, this formula never creates an RGB value higher than 255 (which would be invalid in the 8-bit RGB color model).
If leather armor is renamed on an [[anvil]], it retains its name when dyed or undyed.
;Mixing Samples
: {{ItemSprite|Yellow Dye}} + {{ItemSprite|Yellow Dye}} = {{Tint|leather-chestplate| #{{CalcDye| yellow=2 }} | code=1}}
: {{ItemSprite|Red Dye}} + {{ItemSprite|Blue Dye}} + {{ItemSprite|White Dye}} = {{Tint|leather-chestplate| #{{CalcDye| red=1 | blue=1 | white=1}} | code=1}}
: {{ItemSprite|Green Dye}} + {{ItemSprite|Red Dye}} + {{ItemSprite|Pink Dye}} = {{Tint|leather-chestplate| #{{CalcDye| green=1 | red=1 | pink=1}} | code=1}}
=== Dyeing firework stars ===
A [[firework star]] can have a single color or a combination of up to eight colors when crafted with dyes. Adding one or more dyes to a crafted firework star adds a "fade to color" effect to it, overwriting any existing fade colors.
{{Crafting
|head=1
|ignoreusage=1
|ingredients=[[Gunpowder]] +<br>Any Dye (1–8) +<br>Extra ingredient (optional)
|Gunpowder
|Matching Dye
|Diamond;Glowstone Dust;Head;Gold Nugget;Feather;Fire Charge;
|Output=Matching Firework Star
}}
{{Crafting
|ignoreusage=1
|Matching Firework Star
|Any Dye
|Output=Matching Firework Star
|foot=1
}}
=== Creating balloons ===
Dye can be used to craft balloons.{{only|education}}
{{Crafting
|nocat=1
|A1= Latex
|B1= Matching Dye
|C1= Latex
|A2= Latex
|B2= Helium
|C2= Latex
|A3= Latex
|B3= Lead
|C3= Latex
|Output= Matching Balloon
}}
=== Creating glow sticks ===
Dye can also be used to craft glow sticks.{{only|education}}
{{Crafting
|nocat=1
|A1= Polyethylene
|B1= Hydrogen Peroxide
|C1= Polyethylene
|A2= Polyethylene
|B2= Matching Dye
|C2= Polyethylene
|A3= Polyethylene
|B3= Luminol
|C3= Polyethylene
|Output= Matching Glow Stick
}}
=== Dyeing water inside cauldrons ===
Water can be dyed in a cauldron by holding any dye in the hand and pressing {{Ctrl|use}} on a cauldron filled with water.{{only|bedrock}}
=== Signs ===
Dye can be {{control|used}} on a [[sign]] or a [[hanging sign]] to change the text color. {{IN|bedrock}}, [[ink sac]]s cannot be used for this purpose; black dye must be used to change the text to black.
=== Trading ===
Apprentice, journeyman and expert-level shepherd [[villager]]s buy any of the 12 dyes for an [[emerald]].
== Color values ==
The "color codes" are used to determine the color imparted on sheep, wolf and cat collars, firework stars, [[beacon]] beams, and dyed leather armor. The hex value is shown in the extended tooltips of dyed leather armor; however, to set the color using an NBT data tag in a [[command]], the decimal value must be used instead. The color values for firework stars are slightly different from the ones listed below, and use [[Item colors#Firework stars|these values]] instead.
{| class="wikitable" style="margin:2px; border: 1px solid silver; text-align: left;" data-description="Data values"
! rowspan=2 | Description
! colspan=2 style="text-align:center" | Color Code
|-
! Dec
! <abbr title="Hexadecimal color code">Hex</abbr>
|-
| style="text-align:center" | White || 16383998 || {{color|#F9FFFE}}
|-
| style="text-align:center" | Light gray || 10329495 || {{color|#9D9D97}}
|-
| style="text-align:center" | Gray || 4673362 || {{color|#474F52}}
|-
| style="text-align:center" | Black || 1908001|| {{color|#1D1D21}}
|-
| style="text-align:center" | Brown || 8606770 || {{color|#835432}}
|-
| style="text-align:center" | Red || 11546150 || {{color|#B02E26}}
|-
| style="text-align:center" | Orange || 16351261 || {{color|#F9801D}}
|-
| style="text-align:center" | Yellow || 16701501 || {{color|#FED83D}}
|-
| style="text-align:center" | Lime || 8439583 || {{color|#80C71F}}
|-
| style="text-align:center" | Green || 6192150 || {{color|#5E7C16}}
|-
| style="text-align:center" | Cyan || 1481884|| {{color|#169C9C}}
|-
| style="text-align:center" | Light blue || 3847130 || {{color|#3AB3DA}}
|-
| style="text-align:center" | Blue || 3949738 || {{color|#3C44AA}}
|-
| style="text-align:center" | Purple || 8991416 || {{color|#8932B8}}
|-
| style="text-align:center" | Magenta || 13061821 || {{color|#C74EBD}}
|-
| style="text-align:center" | Pink || 15961002 || {{color|#F38BAA}}
|}
== Sounds ==
{{edition|java}}:
{{Sound table
|rowspan=2
|sound=Dye.ogg
|subtitle=Dye stains
|source=block
|description=When dye is used on a [[sign]]
|id=item.dye.use
|translationkey=subtitles.item.dye.use
|volume=1.0
|pitch=1.0/0.9/0.95/1.1
|distance=16}}
{{Sound table
|subtitle=Dye stains
|source=player
|description=When dye is used on a [[sheep]]
|id=item.dye.use
|translationkey=subtitles.item.dye.use
|volume=1.0
|pitch=1.0/0.9/0.95/1.1
|distance=16
|foot=1}}
{{edition|bedrock}}:
{{Sound table
|type=bedrock
|sound=Dye.ogg
|source=sound
|description=When dye is used on a sign
|id=sign.dye.use
|volume=1.0
|pitch=1.0}}
{{Sound table
|rowspan=3
|sound=Water Splash Old.ogg
|source=block
|description=When dye is added to a cauldron
|id=cauldron.adddye
|volume=0.1
|pitch=1.0}}
{{Sound table
|source=block
|description=When armor is dyed using a cauldron
|id=cauldron.dyearmor
|volume=0.1
|pitch=1.0}}
{{Sound table
|source=block
|description=When dye is removed from armor using a cauldron
|id=cauldron.cleanarmor
|volume=0.1
|pitch=1.0
|foot=1}}
== Achievements ==
{{load achievements|Rainbow Collection;Tie dye outfit}}
== Video ==
{{Video note|These videos are outdated, as it does not include details of the [[Java Edition 1.7.2|1.7.2]] update's changes to the dyeing system/production chain.}}
<div style="text-align:center">
<span style="display:inline-block">{{yt|8YD7oauNZHE}}</span>
<span style="display:inline-block">{{yt|7tETaRt7STM}}</span>
</div>
== History ==
{{History|java beta}}
{{History||January 3, 2011|link=https://web.archive.org/web/0/http://notch.tumblr.com/post/2582321901/2011-here-we-go|Notch mentions adding a "paint" feature if he can figure out how.}}
{{History||January 10, 2011<ref group="n">Supposed time when fragment was filmed. Based on modified date of client.jar/gui/trap.png in [[Beta 1.2]].</ref>|link=https://www.youtube.com/watch?v=cBF2ugTzXqQ&t=181s|[[File:Red Dye (pre-release).png|32px]] Shown rose red in development as part of [[Minecraft: The Story of Mojang]].}}
{{History||1.2|[[File:Ink Sac JE1 BE1.png|32px]] [[File:Red Dye JE1 BE1.png|32px]] [[File:Green Dye JE1 BE1.png|32px]] [[File:Cocoa Beans JE1 BE1.png|32px]] [[File:Lapis Lazuli JE1 BE1.png|32px]] [[File:Purple Dye JE1 BE1.png|32px]] [[File:Cyan Dye JE1 BE1.png|32px]] [[File:Light Gray Dye JE1 BE1.png|32px]] [[File:Gray Dye JE1 BE1.png|32px]] [[File:Pink Dye JE1 BE1.png|32px]] [[File:Lime Dye JE1 BE1.png|32px]] [[File:Yellow Dye JE1 BE1.png|32px]] [[File:Light Blue Dye JE1 BE1.png|32px]] [[File:Magenta Dye JE1 BE1.png|32px]] [[File:Orange Dye JE1 BE1.png|32px]] [[File:Bone Meal JE1 BE1.png|32px]] Added dyes.
|[[File:Black Dye (Recreated).png|32px]] [[File:Red Dye (pre-release).png|32px]] [[File:Green Dye (Recreated).png|32px]] [[File:Brown Dye (Recreated).png|32px]] [[File:Blue Dye (Recreated).png|32px]] [[File:Purple Dye (Recreated).png|32px]] [[File:Cyan Dye (Recreated).png|32px]] [[File:Light Gray Dye (Recreated).png|32px]] [[File:Gray Dye (Recreated).png|32px]] [[File:Pink Dye (Recreated).png|32px]] [[File:Lime Dye (Recreated).png|32px]] [[File:Yellow Dye (Recreated).png|32px]] [[File:Light Blue Dye (Recreated).png|32px]] [[File:Magenta Dye (Recreated).png|32px]] [[File:Orange Dye (Recreated).png|32px]] [[File:White Dye (Recreated).png|32px]] Leftovers of old textures can be seen in [[items.png]] with 100% opacity. The white dye texture was reused for [[Sugar]].
| The colors were as follows:{{verify|Did the color codes remain the same between Beta 1.2 and Java 1.11.2?}}
{{:Color/Java Edition dye colors before 17w06a}}
}}
{{History|java}}
{{History||1.1|snap=11w49a|[[Sheep]] can now regrow their [[wool]] by eating [[grass block|grass]]. Dyed sheep regrow wool in their new color.}}
{{History||1.3.1|snap=12w19a|[[File:Cocoa Beans JE2.png|32px]] The texture of [[cocoa beans]] has been changed.}}
{{History|||snap=1.3|[[File:bone meal changes.gif|32px]] The textures of [[bone meal]], [[cactus green]], cocoa beans and [[rose red]] have been changed. The textures have been lowered one pixel.}}
{{History||1.4.2|snap=12w34a|Added the ability to dye leather [[armor]] and [[wolf]] collars.}}
{{History||1.4.4|snap=1.4.3|Color codes have been changed. The colors of red, brown, blue, purple, cyan, pink, light blue, magenta and orange were adjusted a little vividly.}}
{{History||1.6.1|snap=13w19a|[[Stained clay]] can now be crafted using dyes.}}
{{history||1.7.2|snap=13w36a|With the addition of new [[flower]]s, many secondary and tertiary dyes are now primary dyes.}}
{{History|||snap=13w41a|[[Stained glass]] can now be crafted using dyes.}}
{{History||1.8|snap=14w02a|As cleric [[villager]]s now sell lapis lazuli, all dyes have become fully renewable.}}
{{History|||snap=14w30a|Added [[banner]]s, which can be dyed.}}
{{History||1.9|snap=15w34a|Added [[shield]]s, which can be dyed indirectly by applying a matching [[banner]].}}
{{History||1.11|snap=16w39b|Dyes are now used to change the color of [[shulker box]]es.}}
{{History||1.12|snap=17w06a|Dyes are now used to craft [[concrete powder]].
|Color codes have been changed. All colors are adjusted more vividly. The changes were as follows:
{{:Color/Java Edition dye color changes in 17w06a}}
|Light blue dye, stained glass, and stained glass panes, did not change colors in this update. This means that they still use old colors.<ref name="unchanged dyes">{{Bug|MC-214643}}<br>{{Bug|MC-214641}}</ref>
}}
{{History|||snap=17w15a|Dyes can now apply color to white [[bed]]s.}}
{{History||1.13|snap=17w47a|The different data values for the <code>dye</code> ID have been split up into their own IDs.}}
{{History||1.14|snap=18w43a|[[Bone meal]], [[ink sac]]s, [[cocoa beans]] and [[lapis lazuli]] are no longer considered dyes.
|[[File:White Dye JE1 BE1.png|32px]] [[File:Black Dye JE1 BE1.png|32px]] [[File:Brown Dye JE1 BE1.png|32px]] [[File:Blue Dye JE1 BE1.png|32px]] Added [[white dye|white]], [[black dye|black]], [[brown dye|brown]] and [[blue dye]]s.
|"Rose Red", "Dandelion Yellow" and "Cactus Green" have been renamed to "Red Dye", "Yellow Dye" and "Green Dye", respectively.
|[[Glass pane]]s and [[carpet]]s can now be dyed.
|[[File:Light Gray Dye JE2 BE2.png|32px]] [[File:Gray Dye JE2 BE2.png|32px]] [[File:Red Dye JE2 BE2.png|32px]] [[File:Orange Dye JE2 BE2.png|32px]] [[File:Yellow Dye JE2 BE2.png|32px]] [[File:Lime Dye JE2 BE2.png|32px]] [[File:Green Dye JE2 BE2.png|32px]] [[File:Cyan Dye.png|32px]] [[File:Light Blue Dye JE2 BE2.png|32px]] [[File:Purple Dye JE2 BE2.png|32px]] [[File:Magenta Dye JE2 BE2.png|32px]] [[File:Pink Dye JE2 BE2.png|32px]] The textures of light gray, gray, red, orange, yellow, lime, green, cyan, light blue, purple, magenta, and pink dyes, have been changed. The color texture for light blue dye was not changed to reflect the updated colors from 1.12.<ref name="unchanged dyes"></ref>}}
{{History|||snap=18w44a|The color of the text on [[sign]]s can now be changed with dye.}}
{{History|||snap=18w49a|Yellow dyes can now be found in [[chest]]s in [[village]] mason houses.}}
{{History|||snap=18w50a|Green dyes can now be found in [[chest]]s in [[desert]] [[village]] houses.}}
{{History|||snap=19w05a|Added the [[wandering trader]], which can sell any type of dye.}}
{{History|||snap=19w11a|All 16 types of dyes can now be [[trading|bought]] by shepherd villagers.}}
{{History||1.16.2|snap=Pre-release 2|Reversed the order of dyes to match other colored items in the [[Creative inventory]].<ref name="reverse dye">{{Bug|MC-136553}}</ref>
|Regrouped dyes in the Creative inventory such that white, blue, brown, and black dyes are within and not [[cocoa beans]], [[ink sacs]], [[lapis lazuli]], and [[bone meal]].<ref name="regroup dye">{{Bug|MC-177684}}</ref>}}
{{History||1.17|snap=20w45a|Added [[candle]]s, which can be dyed.}}
{{History|||snap=21w03a|Added a sound for applying dyes.}}
{{History|||snap=21w19a|Candles can no longer be dyed.}}
{{History|||snap=Pre-release 1|Candles can now once again be dyed.}}
{{History||1.20<br>(Experimental)|link=1.19.3|snap=22w42a|The color of the text on [[hanging sign]]s can now be changed with dye.}}
{{History||1.20<br>(Experimental)|link=1.19.4|snap=23w07a|[[Torchflower]]s can now be crafted into orange dye.|[[Pink petals]] can now be crafted into pink dye.}}
{{History||1.20|snap=23w12a|[[Pitcher plant]]s can now be crafted into cyan dye.|Blue, light blue, orange, white, and yellow dye can now be found in [[suspicious gravel]] and [[suspicious sand]] in [[trail ruins]].}}
{{History|||snap=23w14a|Pitcher plants can now craft two [[cyan dye]] instead of one.}}
{{History|||snap=23w16a|Blue, light blue, orange, white, and yellow dye no longer generates in [[suspicious sand]] in [[trail ruins]].|Due to the split of the archaeological loot tables for the suspicious gravel within the [[trail ruins]]; blue, light blue, orange, white, and yellow dye now are in the common loot.}}
{{History|pocket alpha}}
{{History||v0.3.0|[[File:Bone Meal JE1 BE1.png|32px]] [[File:Light Gray Dye JE1 BE1.png|32px]] [[File:Gray Dye JE1 BE1.png|32px]] [[File:Ink Sac JE1 BE1.png|32px]] [[File:Cocoa Beans JE1 BE1.png|32px]] [[File:Red Dye JE1 BE1.png|32px]] [[File:Orange Dye JE1 BE1.png|32px]] [[File:Yellow Dye JE1 BE1.png|32px]] [[File:Lime Dye JE1 BE1.png|32px]] [[File:Green Dye JE1 BE1.png|32px]] [[File:Cyan Dye JE1 BE1.png|32px]] [[File:Light Blue Dye JE1 BE1.png|32px]] [[File:Lapis Lazuli JE1 BE1.png|32px]] [[File:Purple Dye JE1 BE1.png|32px]] [[File:Magenta Dye JE1 BE1.png|32px]] [[File:Pink Dye JE1 BE1.png|32px]] Added dyes. Only [[dandelion yellow]] and [[lapis lazuli]] are currently obtainable and have functionality.}}
{{History||v0.3.2|[[Cactus green]] is now obtainable by smelting [[cacti]].}}
{{History||v0.3.3|[[Bone meal]] is now obtainable via [[crafting]].}}
{{History||v0.4.0|[[Cyan dye]], [[light blue dye]], [[lime dye]], [[magenta dye]], [[orange dye]], [[pink dye]], and [[purple dye]] are now obtainable via crafting.
|[[Rose red]] is now obtainable by smelting red [[mushroom]]s.
|All available dyes, excluding bone meal, can now be used to craft their respective [[wool]] color.}}
{{History||v0.8.0|snap=build 1|[[File:Cocoa Beans JE3 BE2.png|32px]] The texture of cocoa beans has been changed.}}
{{History|||snap=build 3|[[Ink sac]]s, [[cocoa bean]]s, [[gray dye]], and [[light gray dye]] are now available in the [[creative]] [[inventory]].
|Rose red can now be obtained from [[beetroot]]s.}}
{{History||v0.9.0|snap=build 1|Cocoa beans can now be obtained from [[cocoa pod]]s.
|The [[rose]] has been removed and replaced with a new poppy [[flower]] that can be crafted into rose red.}}
{{History|||snap=build 3|All new [[flower]]s can now be [[crafting|crafted]] into dyes. Because of this, many secondary and tertiary dyes are now primary dyes.
|[[Gray dye]] and [[light gray dye]] can now be obtained in [[survival]].}}
{{History|||snap=build 11|[[Terracotta|Stained clay]] can now be crafted using dyes.}}
{{History||v0.11.0|snap=build 1|[[Ink sac]]s can now be obtained from [[squid]].
|Added the ability to dye [[wolf]] collars.}}
{{History||v0.12.1|snap=build 1|Red [[mushroom]]s can no longer be smelted to obtain [[rose red]].}}
{{History||v0.14.0|snap=build 1|[[Cauldron]]s now used for leather dyeing, by applying a dye to a [[water]]-filled cauldron.}}
{{History||v0.16.0|snap=build 1|[[Cocoa bean]]s can no longer be crafted.}}
{{History|pocket}}
{{History||1.0.0|snap=alpha 0.17.0.1|Added a ''Dye'' button for [[sheep]].
|Added [[shulker]]s, which can be dyed.
|Added [[stained glass]]. Stain glass cannot be [[crafting|crafted]], but purple glass generates in [[end city|end cities]].}}
{{History||1.1.0|snap=alpha 1.1.0.0|Dyes can now apply color to a white [[bed]]s.
|Dyes are now used to craft [[concrete powder]].
|The color palette has been changed.}}
{{History|bedrock}}
{{History||1.2.0|snap=beta 1.2.0.2|Dyes can now be used for [[banner]] crafting.
|Dyes can now be used to craft [[firework star]]s.
|[[Stained glass]] is now [[crafting|craftable]], using dyes.}}
{{History||1.4.0|snap=beta 1.2.20.1|[[Lime dye]] can now be obtained from smelting [[sea pickle]]s.
|Dyes can now used to craft [[glow stick]]s and [[balloon]]s.}}
{{History||1.8.0|snap=beta 1.8.0.8|Dyes can now be used to dye [[cat]] collars.}}
{{History|||snap=beta 1.8.0.10|[[File:White Dye JE1 BE1.png|32px]] [[File:Black Dye JE1 BE1.png|32px]] [[File:Brown Dye JE1 BE1.png|32px]] [[File:Blue Dye JE1 BE1.png|32px]] Added [[white dye|white]], [[brown dye|brown]], [[black dye|black]] and [[blue dye]]s, which can be crafted from [[lapis lazuli]], [[bone meal]], [[cocoa beans]] and [[ink sac]]s. This, however, the later four still use as dyes.<ref>{{Bug|MCPE-42473}}</ref>
|"Rose Red", "Dandelion Yellow" and "Cactus Green" have been renamed to "Red Dye", "Yellow Dye" and "Green Dye", respectively.}}
{{History||1.9.0|snap=beta 1.9.0.0|Blue and white dye can now be obtained from [[cornflower]]s and [[lily of the valley]]s.}}
{{History||1.10.0|snap=beta 1.10.0.3|[[Glass pane]]s and [[carpet]]s can now be dyed.
|Only a single dye is now required to apply a banner pattern in a [[loom]].
|Various dyes except black dye, white dye, brown dye and blue dye are now [[trading|sold]] by [[wandering trader]]s.
|[[File:Bone Meal JE2 BE2.png|32px]] [[File:Light Gray Dye JE2 BE2.png|32px]] [[File:Gray Dye JE2 BE2.png|32px]] [[File:Ink Sac JE2 BE2.png|32px]] [[File:Cocoa Beans JE4 BE3.png|32px]] [[File:Red Dye JE3 BE3.png|32px]] [[File:Orange Dye JE2 BE2.png|32px]] [[File:Yellow Dye JE2 BE2.png|32px]] [[File:Lime Dye JE2 BE2.png|32px]] [[File:Green Dye JE2 BE2.png|32px]] [[File:Cyan Dye.png|32px]] [[File:Light Blue Dye JE2 BE2.png|32px]] [[File:Lapis Lazuli JE2 BE2.png|32px]] [[File:Purple Dye JE2 BE2.png|32px]] [[File:Magenta Dye JE2 BE2.png|32px]] [[File:Pink Dye JE2 BE2.png|32px]] The textures of bone meal, light gray, gray, ink sac, cocoa beans, red, orange, yellow, lime, green, cyan, light blue, lapis lazuli, purple, magenta, and pink dyes have been changed.}}
{{History||1.11.0|snap=beta 1.11.0.4|Dye can now be [[trading|sold]] to shepherd [[villager]]s.}}
{{History||1.16.210|snap=beta 1.16.210.59|The color of the text on [[sign]]s can now be changed with dye.}}
{{History|||snap=beta 1.16.210.60|The ability to dye the color of the text on [[sign]]s was temporarily removed.}}
{{History||1.16.220|snap=beta 1.16.220.50|The color of the text on [[sign]]s can now be changed with dye again.}}
{{History||1.17.10|snap=beta 1.17.10.22|Added [[candles]], which can be dyed.}}
{{History|console}}
{{History||xbox=TU1|xbone=CU1|ps=1.0|wiiu=Patch 1|switch=1.0.1|[[File:Bone Meal JE1 BE1.png|32px]] [[File:Light Gray Dye JE1 BE1.png|32px]] [[File:Gray Dye JE1 BE1.png|32px]] [[File:Ink Sac JE1 BE1.png|32px]] [[File:Cocoa Beans JE1 BE1.png|32px]] [[File:Red Dye JE1 BE1.png|32px]] [[File:Orange Dye JE1 BE1.png|32px]] [[File:Yellow Dye JE1 BE1.png|32px]] [[File:Lime Dye JE1 BE1.png|32px]] [[File:Green Dye JE1 BE1.png|32px]] [[File:Cyan Dye JE1 BE1.png|32px]] [[File:Light Blue Dye JE1 BE1.png|32px]] [[File:Lapis Lazuli JE1 BE1.png|32px]] [[File:Purple Dye JE1 BE1.png|32px]] [[File:Magenta Dye JE1 BE1.png|32px]] [[File:Pink Dye JE1 BE1.png|32px]] Added dyes.}}
{{History||xbox=TU9|[[File:Cocoa Beans JE3 BE2.png|32px]] The texture of cocoa beans has been changed.}}
{{History||xbox=none|xbone=none|ps=1.83|wiiu=none|switch=none|[[File:White Dye JE1 BE1.png|32px]] [[File:Black Dye JE1 BE1.png|32px]] [[File:Brown Dye JE1 BE1.png|32px]] [[File:Blue Dye JE1 BE1.png|32px]] Added [[white dye|white]], [[black dye|black]], [[brown dye|brown]], and [[blue dye|blue]] dyes, which can crafted from [[bone meal]], [[ink sac]], [[cocoa beans]], and [[lapis lazuli]].
|"Rose Red", "Dandelion Yellow" and "Cactus Green" have been renamed to "Red Dye", "Yellow Dye" and "Green Dye", respectively.}}
{{History||ps=1.90|[[File:Bone Meal JE2 BE2.png|32px]] [[File:Light Gray Dye JE2 BE2.png|32px]] [[File:Gray Dye JE2 BE2.png|32px]] [[File:Ink Sac JE2 BE2.png|32px]] [[File:Cocoa Beans JE4 BE3.png|32px]] [[File:Red Dye JE2 BE2.png|32px]] [[File:Orange Dye JE2 BE2.png|32px]] [[File:Yellow Dye JE2 BE2.png|32px]] [[File:Lime Dye JE2 BE2.png|32px]] [[File:Green Dye JE2 BE2.png|32px]] [[File:Cyan Dye.png|32px]] [[File:Light Blue Dye JE2 BE2.png|32px]] [[File:Lapis Lazuli JE2 BE2.png|32px]] [[File:Purple Dye JE2 BE2.png|32px]] [[File:Magenta Dye JE2 BE2.png|32px]] [[File:Pink Dye JE2 BE2.png|32px]] The textures of bone meal, light gray, gray, ink sac, cocoa beans, red, orange, yellow, lime, green, cyan, light blue, lapis lazuli, purple, magenta, and pink dyes have been changed.}}
{{History|3ds}}
{{History||0.1.0|[[File:Bone Meal JE1 BE1.png|32px]] [[File:Light Gray Dye JE1 BE1.png|32px]] [[File:Gray Dye JE1 BE1.png|32px]] [[File:Ink Sac JE1 BE1.png|32px]] [[File:Cocoa Beans JE3 BE2.png|32px]] [[File:Red Dye JE1 BE1.png|32px]] [[File:Orange Dye JE1 BE1.png|32px]] [[File:Yellow Dye JE1 BE1.png|32px]] [[File:Lime Dye JE1 BE1.png|32px]] [[File:Green Dye JE1 BE1.png|32px]] [[File:Cyan Dye JE1 BE1.png|32px]] [[File:Light Blue Dye JE1 BE1.png|32px]] [[File:Lapis Lazuli JE1 BE1.png|32px]] [[File:Purple Dye JE1 BE1.png|32px]] [[File:Magenta Dye JE1 BE1.png|32px]] [[File:Pink Dye JE1 BE1.png|32px]] Added dyes from [[Pocket Edition v0.15.4 alpha]].}}
{{History|foot}}
<gallery>
Pre-release dyes.png|Pre-release dye textures hidden within [[Items.png]].
</gallery>
;Notes
{{reflist|group=n}}
== Gallery ==
<gallery>
White Dye.png|White Dye
Light Gray Dye.png|Light Gray Dye
Gray Dye.png|Gray Dye
Black Dye.png|Black Dye
Brown Dye.png|Brown Dye
Red Dye.png|Red Dye
Orange Dye.png|Orange Dye
Yellow Dye.png|Yellow Dye
Lime Dye.png|Lime Dye
Green Dye.png|Green Dye
Cyan Dye.png|Cyan Dye
Light Blue Dye.png|Light Blue Dye
Blue Dye.png|Blue Dye
Purple Dye.png|Purple Dye
Magenta Dye.png|Magenta Dye
Pink Dye.png|Pink Dye
</gallery>
==Issues==
{{issue list}}
== Trivia ==
* Players can obtain each one of every color with 1 cocoa bean, 2 yellow dye, 2 ink sac, 3 green dye, 4 lapis lazuli, 4 red dye, and 6 bone meal (2 bones).
* The dyed sheep breeding behavior mirrors [[wikipedia:Lamarckism|Lamarck's theory]], in which the organisms evolve inheriting the external changes and adaptations of the previous generation, transmitting them to their offspring.
* In ''Bedrock Edition'', tertiary colors, along with their regular crafting recipes, can be crafted with primary colors. E.g.: Magenta can be crafted with one rose red and two bone meals.
* The colors of the dyes match the chat colors in [[color codes]] except for brown (dye only), light aqua, and gold (color codes only).
* The texture for light blue dye still uses the color from prior to the 1.12 World of Color update.<ref name="unchanged dyes"></ref>
== References ==
{{reflist}}
== External Links ==
* Tools for calculating leather dye combination: [https://minecraft.tools/en/armor.php minecraft.tools] (webapp); [https://github.com/pudquick/pyMCdyes/ pyMCDyes] (open-source Python script, outdated); [https://anrar4.github.io/DyeLeatherArmor/ DyeLeatherArmor]: a tool for calculating an exact crafting recipe for any sRGB color
{{Items}}
[[Category:Dyes]]
[[Category:Renewable resources]]
[[cs:Barvivo]]
[[de:Farbstoff]]
[[es:Tinte]]
[[fr:Teinture]]
[[hu:Színezés]]
[[it:Colorante]]
[[ja:染料]]
[[ko:염료]]
[[nl:Kleurstof]]
[[pl:Barwniki]]
[[pt:Corante]]
[[ru:Красители]]
[[th:สีย้อม]]
[[uk:Барвники]]
[[zh:染料]]</li><li>[[Explorer Map|Explorer Map]]<br/>{{about|the map used to find rare structures|the craftable map|Map|others|Map (disambiguation)}}{{Needs updating|Add info on the new jungle, swamp, and village maps in Java 1.20.2 Pre-Release 1}}{{Item
| image = <gallery>
Ocean Explorer Map.png | Ocean
Woodland Explorer Map.png | Woodland
Buried Treasure Map.png | Buried Treasure
</gallery>
|image2 = <gallery>
Ocean Explorer Map BE.png | Ocean (BE)
Woodland Explorer Map BE.png | Woodland (BE)
Buried Treasure Map BE.png | Buried in Treasure (BE)
</gallery>
| renewable =
* '''Buried Treasure''': No
* '''Woodland and Ocean''': Yes
| stackable = Yes (64)
}}
An '''explorer map''' is a special [[map]] used to aid in finding rare [[generated structures]], including [[woodland mansion]]s, [[ocean monument]]s, and [[buried treasure]]s.
== Obtaining ==
=== Trading ===
Apprentice-level [[cartographer]] villagers sell ocean explorer maps for 13 emeralds and a compass. Journeyman-level cartographer villagers sell woodland explorer maps for 14 emeralds and a compass.
{{IN|java}}, if the cartographer is in [[the Nether]] or [[the End]], either spawned or transported, the trades for the map do not unlock. However, {{in|bedrock}}, the cartographer trades for the map are unlocked, but the purchased map shows the same layout as in the corresponding dimension and shows no destination structure, but if cartographer trades are unlocked in an old world type (prior-1.11.0), the game stops ticking.
In ''Java Edition'', each cartographer sells its own unique explorer map that points to a different location than other cartographers. Purchasing another explorer map from the same cartographer results in the same explorer map. In Bedrock Edition, a cartographer sells an explorer map that points to the nearest location, regardless of whether it is explored or previously mapped by another cartographer.<!-- start to glitched out-->
=== Chest loot ===
Treasure maps, in contrast to explorer maps, generate in underwater ruins or in shipwrecks.
{{LootChestItem|buried-treasure-map}}
== Usage ==
[[File:Explorer Map Comparison.gif|thumb|217px|Unexplored and partially explored maps.]]
{{See also|Map#Mapping|Map#Map content}}
=== Locating structures ===
There are three types of explorer maps: woodland, [[ocean]], and buried treasure. The maps differ from a normal map, in that it shows the area's land-water outline, with an orange striated (striped) texture for water<ref>Specifically, biomes in the "water_on_map_outlines" [[Tag#Biomes|biome tag]].</ref>, and the blank map texture for land. The maps show a section of land that contains a [[woodland mansion]], [[monument]] or [[buried treasure]] respectively. This may not be the nearest such [[structure]] to the [[player]]. The structures are displayed as a small icon. If the player icon is smaller than it would be on a normal map, that means the player is a great distance away. When the player is less than 1027 blocks away from the map border, the icon returns to the proper size. When the player reaches the map's area of land (512×512), the [[map]] fills in like a normal map.
The basic functions of a buried treasure explorer map are similar to that of the other two. However, instead of showing the structure icon on the map, it shows a red X instead. The [[buried treasure]] structure is located on the same X and Z coordinates as the middle of the X (the player marker may need to be aligned with the bottom of the middle 2×2 pixel square of the X). To locate the [[chest]] spot, hold the treasure map with both hands, not in the offhand slot.
=== Cloning ===
{{Crafting
|showdescription=1
|shapeless=1
|name=[[Explorer Map]]<br>(cloned)
|;;;Empty Map;Empty Map;Empty Map;Empty Map;Empty Map
|;;;;Empty Map;Empty Map;Empty Map;Empty Map
|;;;;;Empty Map;Empty Map;Empty Map
|Ocean Explorer Map; Woodland Explorer Map; Buried Treasure Map; Ocean Explorer Map; Woodland Explorer Map; Buried Treasure Map; Ocean Explorer Map; Woodland Explorer Map
|Empty Map
|;;;;;;Empty Map;Empty Map
|;Empty Map;Empty Map;Empty Map;Empty Map;Empty Map;Empty Map;Empty Map
|;;Empty Map;Empty Map;Empty Map;Empty Map;Empty Map;Empty Map
|;;;;;;;Empty Map
|Output= Ocean Explorer Map,2; Woodland Explorer Map,3; Buried Treasure Map,4; Ocean Explorer Map,5; Woodland Explorer Map,6; Buried Treasure Map,7; Ocean Explorer Map,8; Woodland Explorer Map,9
|type= Miscellaneous
|description=The output has the same map center as the input map, and the same [[monument]], [[woodland mansion]] or [[buried treasure]] marker. Cloned maps are stackable.
}}
The parts of the world that have already been explored and mapped are copied, and newly explored areas appear on both instances. In Creative mode, cloned explorer maps can be obtained by pick blocking on the explorer map displayed on [[item frames]] (the map needs to be out of the [[player]]'s inventory when using pick block, or else that map moves into the active hotbar slot).
== Sounds ==
{{edition|java}}:
{{Sound table
|sound=Drawmap1.ogg
|sound2=Drawmap2.ogg
|sound3=Drawmap3.ogg
|subtitle=Map drawn
|source=block
|description=When an explorer map is edited using a cartography table
|id=ui.cartography_table.take_result
|translationkey=subtitles.ui.cartography_table.take_result
|volume=1.0
|pitch=1.0
|distance=16
|foot=1}}
{{edition|bedrock}}: ''None''
== Data values ==
=== ID ===
{{edition|java}}:
{{ID table
|edition=java
|showforms=y
|generatetranslationkeys=y
|displayname=Map
|spritetype=item
|nameid=filled_map
|form=item
|translationkey=filled_map.mansion,filled_map.ocean,filled_map.buried_treasure
|foot=1}}
{{edition|bedrock}}:
{{ID table
|edition=bedrock
|showaliasids=y
|shownumericids=y
|showforms=y
|notshowbeitemforms=y
|generatetranslationkeys=y
|displayname=Map
|spritetype=item
|nameid=filled_map
|aliasid=map
|id=358
|form=item
|translationkey=item.map.exploration.monument.name,item.map.exploration.mansion.name,item.map.exploration.treasure.name
|foot=1}}
=== Metadata ===
{{see also|Bedrock Edition data values}}
{{IN|bedrock}}, the item [[Data value]] distinguishes explorer maps from one another:
{{:Map/DV}}
=== Item data ===
An explorer map differs from a map in that its <code>display</code> tag is set, which includes a <code>Mapcolor</code> and a <code>LocName</code>; also its <code>Decorations</code> list includes an entry for its target monument, mansion or buried treasure. Its [[Map item format#map_<#>.dat format|map item entry]] is identical to that of a normal map, except that by the time the player sees it, its <code>colors</code> byte array is pre-filled with explorer maps' characteristic land-water boundary lines and water shading.
<div class="treeview">
It should be noted that this additional data is stored in the Cartographer's NBT data and in the inventory item's NBT data, and not in the map file (e.g. <samp>map_0.dat</samp>). If the [[player]] were to use the {{cmd|give}} command to give themselves a map with the same map ID as an existing explorer map, it would still have the Ocean Monument or the Woodland Mansion icon on the map, but it would simply be named "Map" instead of, for example, "Ocean Explorer Map".
* {{nbt|compound}} Item data
** {{nbt|compound|tag}}:
*** {{nbt|compound|display}}: How the map looks in an item slot. See also [[Player.dat_format#Display Properties]].
**** {{nbt|string|Name}}: The name the map is given. In this case, they are localized strings: either <code>{"translate":"filled_map.monument"}</code>,<code>{"translate":"filled_map.mansion"}</code> or <code>{"translate":"filled_map.buried_treasure"}</code>.
**** {{nbt|int|MapColor}}: Color codes are calculated from the Red, Green and Blue components using this formula:<br>'''<span style="color:red">Red</span>[[wikipedia:Logical shift|<<]]16 + <span style="color:green">Green</span><<8 + <span style="color:blue">Blue</span>'''.<ref group=note>For positive values larger than 0x00FFFFFF, the top byte is ignored. All negative values produce white.</ref> Monument maps use 3830373, which is {{color swatch|58|114|101}}. Mansion maps use 5393476, which is {{color swatch|82|76|68}}. Buried treasure explorer maps do not use a color code.
*** {{nbt|list|Decorations}}:
**** {{nbt|compound}}: One of these for each icon on the map. Explorer maps always have at least one representing their target.
***** {{nbt|string|id}}: An arbitrary unique string identifying the decoration. For explorer map target structures, this is "+".
***** {{nbt|double|rot}}: The rotation of the icon. For explorer map target structures, this is always 180.
***** {{nbt|byte|type}}: The ID of the [[Map#Map icons|map icon]]: 8 for a mansion map, 9 for a monument map, 26 for a treasure map.
***** {{nbt|double|x}}: The world x-coordinate of the target structure icon.
***** {{nbt|double|z}}: The world z-coordinate of the target structure icon.
</div>
; Notes
{{notelist}}
== Achievements ==
{{load achievements|Treasure Hunter}}
== History ==
{{History|java}}
{{History||1.11|snap=16w39a|[[File:Woodland Explorer Map JE1 BE1.png|32px]] [[File:Ocean Explorer Map JE1 BE1.png|32px]] Added woodland and ocean explorer maps.}}
{{History|||snap=16w41a|Explorer maps can now no longer be zoomed out.}}
{{History||1.13|snap=18w10a|[[File:Map (item) JE1 BE1.png|32px]] Added buried treasure explorer maps.}}
{{History|||snap=18w11a|Buried treasure explorer maps now generate in the [[chest]]s of [[shipwreck]]s.}}
{{History||1.14|snap=18w43a|[[File:Woodland Explorer Map JE2 BE2.png|32px]] [[File:Ocean Explorer Map JE2 BE2.png|32px]] [[File:Map (item) JE2 BE2.png|32px]] The textures for explorer maps have now been changed.}}
{{History||1.20.2|snap=1.20.2 Pre-release 1|Updated structure icons on explorer maps sold by cartographers.}}
{{History||Villager Trade Rebalance<br>(Experimental)|link=Java Edition 1.20.2|snap=1.20.2 Pre-release 1|Added seven new maps which cartographers can sell.}}
{{History|pocket}}
{{History||1.1.0|snap=alpha 1.1.0.0|[[File:Woodland Explorer Map JE1 BE1.png|32px]] [[File:Ocean Explorer Map JE1 BE1.png|32px]] Added explorer maps.<ref>{{Mcnet|discovery-update-pocket-and-win-10-soon|The Discovery Update: on Pocket and Win 10 soon|March 29, 2017}}</ref>
|Explorer maps are not yet obtainable in [[survival]] mode.}}
{{History|||snap=alpha 1.1.0.3|Explorer maps are now obtainable as [[trading|trades]] from [[cartographer]] [[villager]]s.}}
{{History|bedrock}}
{{History||1.4.0|snap=beta 1.2.14.2|[[File:Map (item) JE1 BE1.png|32px]] Added buried treasure explorer maps.}}
{{History|||snap=beta 1.2.20.1|Treasure maps now generate in [[underwater ruins]] [[chest]]s.}}
{{History||1.10.0|snap=beta 1.10.0.3|[[File:Woodland Explorer Map JE2 BE2.png|32px]] [[File:Ocean Explorer Map JE2 BE2.png|32px]] [[File:Map (item) JE2 BE2.png|32px]] The textures for explorer maps have now been changed.}}
{{History||1.11.0|snap=beta 1.11.0.4|[[Trading]] has now been changed, woodland and ocean explorer maps now cost a [[compass]] and 12 [[emerald]]s.
|Journeyman-level [[cartographer]] [[villager]]s no longer [[trading|sell]] 2 type of explorer map as they now have {{frac|1|3}} chance to sell woodland explorer maps, {{frac|1|3}} chance to sell ocean explorer maps, or {{frac|1|3}} chance to sell other [[item]]s<!-- empty locator map--> as part of their [[trading|trades]].
|Woodland explorer maps can now be [[trading|bought]] from fletcher [[villager]]s.}}
{{History||1.12.0|snap=beta 1.12.0.3|Journeyman-level fletcher villagers no longer [[trading|sell]] woodland explorer maps.}}
{{History||1.13.0|snap=beta 1.13.0.1|[[File:Woodland Explorer Map BE3.png|32px]] [[File:Ocean Explorer Map BE3.png|32px]] [[File:Buried Treasure Map BE3.png|32px]] The textures of explorer maps have now been changed.}}
{{History||1.16.100|snap=beta 1.16.100.56|The ID of maps has been changed from <code>map</code> to <code>filled_map</code>.}}
{{History|console}}
{{History||xbox=TU54|xbone=CU44|ps=1.52|wiiu=Patch 24|switch=1.0.4|[[File:Woodland Explorer Map JE1 BE1.png|32px]] [[File:Ocean Explorer Map JE1 BE1.png|32px]] Added explorer maps.}}
{{History|PS4}}
{{History||1.90|[[File:Woodland Explorer Map JE2 BE2.png|32px]] [[File:Ocean Explorer Map JE2 BE2.png|32px]] The textures for explorer maps have now been changed.}}
{{History|new3ds}}
{{History||1.9.19|[[File:Woodland Explorer Map JE1 BE1.png|32px]] [[File:Ocean Explorer Map JE1 BE1.png|32px]] Added explorer maps.}}
{{History|foot}}
== Issues ==
{{Issue list}}
== Trivia ==
* When a [[cartographer]] generates the trade offers for the explorer maps, it chooses the location of one of the nearest structures of the respective type ([[monument]] or [[woodland mansion]]).
* For the reason above, explorer maps obtained from one cartographer are always the same. Also, if two cartographers unlock the explorer map trades approximately at the same place and at the same time, the map locations are usually identical. This sometimes also happens when finding multiple treasure maps from [[ocean ruins]].
* Explorer maps fill as the [[chunk]]s are generated, rather than when the [[player]] holds them while in the area; leaving an explorer map while exploring the area still fills the map.
* Buried treasure explorer maps are named ''Buried Treasure Map'' {{in|java}} while {{in|bedrock}}, they are named ''Treasure Map''.
* It is possible for a cartographer to give a monument or woodland mansion explorer map for areas where the [[generated structures|structures]] would have spawned in the world, but were unable to as a result of terrain generation. As a result, explorer maps, unfortunately, don't always guarantee that a structure exists at the purported location. This is most common with woodland mansion explorer maps, due to its generation algorithm.
* On [[Bedrock Edition]], inventory editors and add-ons can be used to create Explorer Maps that lead to any structure.
== Gallery ==
<gallery>
File:Explorer Maps.png|An ocean explorer map in the [[off-hand]], a woodland explorer map in the main hand, and a [[cartographer]] [[villager]] in between them.
File:Partial Explorer Map.png|A partially-explored explorer map.
File:ExplorerToNormal Map Comparison.png|Two fully-explored maps of the same place, one of which is a woodland explorer map.
File:Buried Treasure Explorer Map.png|An [[item frame]] holding a buried treasure explorer map. The player can see the red X on the left side of the map.
File:Purchase.png|Purchasing explorer maps from a cartographer.
</gallery>
== See also ==
* [[Map]]
* [[Woodland Mansion]]
* [[Ocean Monument]]
* [[Shipwreck]]
* [[Buried treasure]]
== References ==
{{reflist}}
== External Links ==
*[https://www.minecraft.net/en-us/article/taking-inventory--explorer-map Taking Inventory: Explorer Map] – Minecraft.net on November 13, 2019
{{Items}}
[[de:Schatzkarte]]
[[es:Mapa (localización de estructura)]]
[[fr:Carte d'exploration]]
[[ja:探検家の地図]]
[[ko:탐험 지도]]
[[pl:Mapa eksploracyjna]]
[[pt:Mapa de exploração]]
[[ru:Карта сокровищ]]
[[zh:探险家地图]]</li></ul> | Beta 1.9 Prerelease 3 | ||||
| Eyes of ender can be used on a portal block to repair them, but repairing them does nothing. | |||||
| Beta 1.9 Prerelease 4 | Each eye can now be placed in a portal block or used to hone in on a stronghold. Jeb demonstrated the new uses for an eye in his livestream.[1] An End portal within a stronghold could be seen in the stream with two eyes inserted into blocks. | ||||
| In older worlds with chunks generated before Beta 1.9 Prerelease 3, the eyes may mislead the player to a place where there isn't a stronghold at all. This happens because the eyes lead to where a stronghold should be based on the world seed in the current version, but before Beta 1.9 Prerelease 3 strongholds generated differently based on the seed. Therefore, if the player saved the coordinates the eye traveled to in an old world and generated a new world with the same seed, the player could travel to those same coordinates and find a stronghold. | |||||
| Beta Sound Update | The throwing sound of eyes of ender has been changed. | ||||
1.3.1{{Extension DPL}}<ul><li>[[Cyan Dye|Cyan Dye]]<br/>{{Item
| image = Cyan Dye.png
| renewable = Yes
| stackable = Yes (64)
}}
'''Cyan dye''' is a [[Dyeing#Secondary|secondary dye color]].
== Obtaining ==
=== Crafting ===
{{Crafting
|head=1
|showdescription=1
|showname=0
|Blue Dye
|Green Dye
|Output=Cyan Dye,2
|type=Material
}}
{{Crafting
|Lapis Lazuli
|Green Dye
|Output=Cyan Dye,2
|description={{only|bedrock|education}}
|type=Material
}}
{{Crafting
|Pitcher Plant
|Output=Cyan Dye,2
|description=
|type=Material
|foot=1
}}
=== Trading ===
[[Wandering trader]]s sell 3 cyan dye for an [[emerald]].
== Usage ==
{{dye usage}}
=== Crafting ingredient ===
{{crafting usage|ignore=Banner|continue=1}}
{{banner crafting usage}}
=== Loom ingredient ===
{{Banner loom usage|Cyan Dye}}
=== Trading ===
{{IN|bedrock}}, journeyman-level shepherd villagers have 20% chance to buy 12 cyan dye for an emerald.
{{More info|java=1|Java UI does not use a specific trade slot, which results in a different chance to offer this trade.}}
== Data values ==
=== ID ===
{{edition|java}}:
{{ID table
|edition=java
|showforms=y
|generatetranslationkeys=y
|displayname=Cyan Dye
|spritetype=item
|nameid=cyan_dye
|form=item
|foot=1}}
{{edition|bedrock}}:
{{ID table
|edition=bedrock
|showaliasids=y
|shownumericids=y
|showforms=y
|notshowbeitemforms=y
|generatetranslationkeys=y
|displayname=Cyan Dye
|spritetype=item
|nameid=cyan_dye
|aliasid=dye / 6
|id=401
|form=item
|translationkey=item.dye.cyan.name
|foot=1}}
== History ==
{{History|java beta}}
{{History||1.2|[[File:Cyan Dye JE1 BE1.png|32px]] Added cyan dye.}}
{{History|java}}
{{History||1.4.2|snap=12w34a|Added the ability to [[Armor#Dyeing|dye]] leather [[armor]] and [[wolf]] collars.}}
{{History||1.4.6|snap=12w49a|Cyan dye can now be [[crafting|crafted]] with [[gunpowder]] to create a [[firework star]].}}
{{History||1.6.1|snap=13w19a|[[Stained clay]] can now be crafted.}}
{{history||1.7.2|snap=13w36a|With the addition of new [[flower]]s, many secondary and tertiary dyes are now primary [[dye]]s.}}
{{History|||snap=13w41a|[[Stained glass]] can now be crafted.}}
{{History||1.8|snap=14w02a|Due to [[lapis lazuli]] being [[renewable resource|renewable]], cyan dye is also renewable.}}
{{History|||snap=14w30a|Added [[banner]]s, which can be dyed.}}
{{History||1.13|snap=17w47a|The different data values for the <code>dye</code> ID have now been split up into their own IDs.
|Prior to [[1.13/Flattening|''The Flattening'']], this [[item]]'s numeral ID was 351.}}
{{History||1.14|snap=18w43a|Cyan dye is now [[crafting|crafted]] using [[blue dye]], instead of [[lapis lazuli]].
|[[File:Cyan Dye.png|32px]] The texture of cyan dye has now been changed.}}
{{History|||snap=18w44a|Cyan dye can now change the text color on [[sign]]s to cyan.}}
{{History|||snap=19w05a|Added the [[wandering trader]], which sell cyan dyes.}}
{{History|||snap=19w11a|Cyan dye can now be [[trading|bought]] by shepherd villagers.}}
{{History||1.17|snap=20w45a|Cyan dye can now be used to craft [[cyan candle]]s.}}
{{History|||snap=21w19a|Cyan dye can no longer be used to craft cyan candles.}}
{{History|||snap=Pre-release 1|Cyan dye can once again be used to craft cyan candles.}}
{{History||1.20<br>(Experimental)|link=1.19.3|snap=22w42a|Cyan dye can now change the text color on [[hanging sign]]s to cyan.}}
{{History||1.20|snap=23w12a|Added [[pitcher plant]]s, which can be crafted into cyan dye.}}
{{History|||snap=23w14a|[[Pitcher plant]]s now craft into 2 cyan dye instead of 1.}}
{{History|pocket alpha}}
{{History||v0.3.0|[[File:Cyan Dye JE1 BE1.png|32px]] Added cyan dye. It is currently unobtainable and serves no purpose.}}
{{History||v0.4.0|Cyan dye is now craftable with [[lapis lazuli]] and [[cactus green]].
|Cyan dye can now be used to craft cyan wool.}}
{{History||v0.6.0|Cyan dye can now be used to dye [[sheep]].}}
{{History||v0.9.0|snap=build 11|Cyan dye can now be used to craft colored [[terracotta]].}}
{{History||v0.11.0|snap=build 1|Cyan dye can now be used to dye tamed [[wolf]] collars.}}
{{History||v0.14.0|snap=build 1|Cyan dye can now be used to dye water in [[cauldron]]s.}}
{{History|pocket}}
{{History||1.0.0|snap=alpha 0.17.0.1|Cyan dye can now be used to dye [[shulker]]s.}}
{{History||1.1.0|snap=alpha 1.1.0.0|Cyan dye can now be used to craft [[concrete powder]], colored [[bed]]s and dyed [[shulker box]]es.}}
{{History|bedrock}}
{{History||1.2.0|snap=beta 1.2.0.2|Cyan dye can now be used to craft [[firework star]]s, [[stained glass]] and patterns on [[banner]]s.}}
{{History||1.4.0|snap=beta 1.2.20.1|Cyan dye can now be used to craft [[balloon|ballons]] and [[glow stick|glow sticks]].}}
{{History||1.8.0|snap=beta 1.8.0.8|Cyan dye can now be used to dye tamed [[cat]] collars.}}
{{History||1.10.0|snap=beta 1.10.0.3|Cyan dye are now [[trading|sold]] by [[wandering trader]]s.
|Cyan dye can now be used to dye white [[carpet|carpets]] and undyed [[glass pane]]s.
|[[File:Cyan Dye.png|32px]] The texture of cyan dye has now been changed.}}
{{History||1.11.0|snap=beta 1.11.0.4|Cyan dye can be [[trading|sold]] to shepherd [[villager]]s.}}
{{History||1.16.100|snap=beta 1.16.100.56|The ID of cyan dye has been changed from <code>dye/6</code> to <code>cyan_dye</code>.}}
{{History|console}}
{{History||xbox=TU1|xbone=CU1|ps=1.00|switch=1.0.1|wiiu=Patch 1|[[File:Cyan Dye JE1 BE1.png|32px]] Added cyan dye.}}
{{History|PS4}}
{{History||1.90|[[File:Cyan Dye.png|32px]] The texture of cyan dye has now been changed.}}
{{History|new 3ds}}
{{History||0.1.0|[[File:Cyan Dye JE1 BE1.png|32px]] Added cyan dye.}}
{{History|foot}}
== Issues ==
{{issue list}}
{{Items}}
[[Category:Items]]
[[Category:Dyes]]
[[Category:Renewable resources]]
[[cs:Azurové barvivo]]
[[de:Türkiser Farbstoff]]
[[es:Tinte cian]]
[[fr:Teinture cyan]]
[[hu:Ciánkék festék]]
[[ja:青緑色の染料]]
[[ko:청록색 염료]]
[[nl:Turquoise kleurstof]]
[[pl:Błękitny barwnik]]
[[pt:Corante ciano]]
[[ru:Бирюзовый краситель]]
[[zh:青色染料]]</li><li>[[Debug fourj item|Debug fourj item]]<br/>{{DISPLAYTITLE:<samp>debug_fourj_item</samp>}}
{{exclusive|Legacy Console}}{{Unobtainable||edition=console|section=}}{{Item
| image = Barrier (held) JE1 BE1.png
| renewable = No
| stackable = Yes (64)
| rarity = Common
| title = <samp>debug_fourj_item</samp>
}}
<samp>'''debug_fourj_item'''</samp> is an unobtainable item exclusive to the [[Legacy Console Edition]] and can only be obtained through modding the game. It has the texture of a [[barrier]], no "What's this?" hint and no display name.
==Obtaining==
The only way to obtain this item is via inventory editors and other external tools.
==Usage==
The purpose of this item is unknown, and it cannot be placed. Although the ID<ref name="r">[https://youtu.be/IscH0rUw_20 "マインクラフト WiiU 全面の木、偽バリアブロックのアイテムID公開"] - YouTube, March 26, 2019</ref> suggests that it was used for debugging and testing purposes.
==Data values==
===ID===
{{ID table|displayname=[No displayed name]
|showforms=y|form=item|nameid=debug_fourj_item|id=2255<ref group="note">Numerical IDs aren't supported on the Legacy Console Edition anymore.</ref><ref name="r"/>|shownumericids=y|translationkey=item.debug_fourj_item.name|generatetranslationkeys=y|foot=1}}
<references group="note" />
==History==
{{History|console}}
{{History||xbox=unknown|xbone=unknown|ps=unknown|wiiu=unknown|switch=unknown|[[File:Barrier (held) JE1 BE1.png|32px]] Added <samp>debug_fourj_item</samp>.}}
{{History|foot}}
== Gallery ==
<gallery>
Debug fourj item in inventory.png|<samp>debug_fourj_item</samp> as it appears in one's inventory
</gallery>
==See also==
*[[Debug Stick]]
==References==
<references />
{{Items}}
{{Unused features}}
[[Category:Articles missing historical information]]</li></ul> | 12w21a | Eyes of ender can now be used to craft ender chests. | |||
| Priest villagers would buy 2–3 eyes of ender for one emerald. | |||||
| 12w22a | Priest villagers no longer buy eyes of ender, instead selling them for 7–10 emeralds. | ||||
1.6.4{{Extension DPL}}<ul><li>[[Netherite Ingot|Netherite Ingot]]<br/>{{About|the refined item|the scrap|Netherite Scrap|the ore|Ancient Debris|other uses|Netherite}}
{{Item
| rarity = Common
| renewable = No
| stackable = Yes (64)
}}
'''Netherite ingots''' are items obtained from crafting [[netherite scrap]]s and [[gold ingot]]s together, as well as loot from [[bastion remnant]] loot chests. Unlike other items, they are immune to fire and [[lava]] damage. They are primarily used to upgrade [[diamond]] gear and craft [[lodestone]]s.
== Obtaining ==
Netherite ingots are obtained by crafting four [[netherite scrap]]s and four [[gold ingot]]s. It is a shapeless recipe, therefore the placement of the netherite scraps and gold ingots does not matter when crafting it.
=== Crafting ===
{{Crafting
|head=1
|showname=0
|Netherite Scrap
|Netherite Scrap
|Netherite Scrap
|Netherite Scrap
|Gold Ingot
|Gold Ingot
|Gold Ingot
|Gold Ingot
|Output=Netherite Ingot
|type=Material
}}
{{Crafting
|Block of Netherite
|Output=Netherite Ingot,9
|type=Material
|foot=1
}}
=== Chest loot ===
{{LootChestItem|netherite-ingot}}
== Usage ==
Netherite ingots are crafting materials used to make netherite tools, weapons, and armor.
=== Crafting ingredient ===
{{crafting usage}}
=== Smithing ingredient ===
Netherite ingots can be used on a [[smithing table]] to upgrade diamond items to netherite items, as well as trim any armor piece. Data such as durability, enchantments, and custom names are preserved.
{{Smithing
|head=1
|ingredients=[[Netherite Upgrade]] +<br>Any [[diamond]] gear +<br>[[Netherite Ingot]]
|Netherite Upgrade
|Diamond Helmet; Diamond Chestplate; Diamond Leggings; Diamond Boots; Diamond Sword; Diamond Pickaxe; Diamond Axe; Diamond Shovel; Diamond Hoe
|Netherite Ingot
|Netherite Helmet; Netherite Chestplate; Netherite Leggings; Netherite Boots; Netherite Sword; Netherite Pickaxe; Netherite Axe; Netherite Shovel; Netherite Hoe
}}
{{Smithing
|ingredients=Any Armor Trim +<br/>Any Armor Piece + <br/>Netherite Ingot
|Any Armor Trim Smithing Template
|Diamond Chestplate
|Netherite Ingot
|Netherite Trim Diamond Chestplate
|showdescription=1
|description = All armor types can be used in this recipe,<br/>a diamond chestplate is shown as an example.<br/>
|tail=1
}}
'''Trim color palette'''
The following color palettes are shown on the designs on trimmed armor:
* {{TrimPalette|netherite ingot}}
* {{TrimPalette|netherite ingot|darker=1}} (a darker color palette is used when a netherite armor piece is trimmed using a netherite ingot).
=== Repairing ===
Netherite ingots are the repair items for the netherite [[tier]] and [[armor material]], and thus can be used to [[item repair|repair]] the following items in an [[anvil]]:
* {{ItemLink|Netherite Helmet}}
* {{ItemLink|Netherite Chestplate}}
* {{ItemLink|Netherite Leggings}}
* {{ItemLink|Netherite Boots}}
* {{ItemLink|Netherite Sword}}
* {{ItemLink|Netherite Pickaxe}}
* {{ItemLink|Netherite Axe}}
* {{ItemLink|Netherite Shovel}}
* {{ItemLink|Netherite Hoe}}
=== Beacons ===
A netherite ingot could be used to select powers from a [[beacon]] instead of using an [[emerald]], [[gold ingot]], [[iron ingot]], or a [[diamond]]. The player must select one of the available powers, and then insert an ingot in the item slot. The [[gold]] option is more efficient than the netherite option because it consumes 3 fewer gold and no [[Netherite Scrap|netherite scrap]].
== Data values ==
=== ID ===
{{edition|java}}:
{{ID table
|edition=java
|showitemtags=y
|showforms=y
|generatetranslationkeys=y
|displayname=Netherite Ingot
|spritetype=item
|nameid=netherite_ingot
|itemtags=beacon_payment_items
|form=item
|foot=1}}
{{edition|bedrock}}:
{{ID table
|edition=bedrock
|shownumericids=y
|showforms=y
|notshowbeitemforms=y
|generatetranslationkeys=y
|displayname=Netherite Ingot
|spritetype=item
|nameid=netherite_ingot
|id=603
|form=item
|foot=1}}
=== Advancements ===
{{load advancements|Serious dedication}}
== History ==
{{History|java}}
{{History||1.16|snap=20w06a|[[File:Netherite Ingot JE1 BE2.png|32px]] Added netherite ingots.}}
{{History|||snap=20w07a|Netherite ingots can now be used to power [[beacon]]s.}}
{{History|||snap=20w10a|The [[crafting]] recipe for netherite [[tools]] and [[armor]] has been changed so that a [[smithing table]] is used instead of a [[crafting table]] and [[enchanting|enchantments]] are preserved when upgrading [[item]]s.}}
{{History|||snap=20w13a|Netherite ingots can now be used to craft [[lodestone]]s.}}
{{History|||snap=20w16a|Netherite ingots can now be found in [[bastion remnant]] chests.}}
{{History||1.16.2|snap=20w30a|Increased the chance of finding netherite ingots in bastion remnant chests from 16.8% to 42.1%.}}
{{History||1.20<br>(Experimental)|link=1.19.4|snap=23w04a|Netherite ingots can now be used as an armor trim material.|Upgrading diamond tools and armor to netherite now requires the netherite upgrade [[smithing template]] in addition to a netherite ingot.}}
{{History|||snap=23w05a|Netherite ingots can now be used to trim netherite armor.}}
{{History||1.20|snap=23w12a|Netherite ingots are now usable for trimming without requiring the "Update 1.20" experimental datapack to be enabled.}}
{{History|bedrock}}
{{History||1.16.0|snap=beta 1.16.0.51|[[File:Netherite Ingot BE1.png|32px]] Added netherite ingots.}}
{{History|||snap=beta 1.16.0.57|Netherite ingots can now be used to power [[beacon]]s.
|The [[crafting]] recipe for netherite [[tools]] and [[armor]] has been changed so that a [[smithing table]] is used instead of a [[crafting table]] and [[enchanting|enchantments]] are preserved when upgrading [[item]]s.
|Netherite ingots can now be used to craft [[lodestone]]s.
|Netherite ingots can now be found in [[bastion remnant]] chests.}}
{{History||1.17.10|snap=beta 1.17.10.20|[[File:Netherite Ingot JE1 BE2.png|32px]] The texture of netherite ingots has been changed to match ''Java Edition''.}}
{{History||Next Major Update<br>(Experimental)|link=Bedrock Edition 1.19.80|snap=beta 1.19.80.21|Netherite ingots can now be used as an armor trim material.|Upgrading diamond tools and armor to netherite now requires the netherite upgrade [[smithing template]] in addition to a netherite ingot.}}
{{History||1.20.0|snap=beta 1.20.0.21|Netherite ingots are now usable for trimming without requiring the "Next Major Update" experimental toggle to be enabled.}}
{{History|foot}}
== Issues ==
{{issue list}}
== See also ==
* {{EnvLink|Bastion Remnant}}
* {{BlockLink|Block of Netherite}}
* {{ItemLink|Netherite Scrap}}
* {{BlockLink|Ancient Debris}}
*{{BlockLink|Lodestone}}
== External Links ==
* [https://www.minecraft.net/en-us/article/taking-inventory--netherite-ingot Taking Inventory: Netherite Ingot] – Minecraft.net on May 28, 2020
{{Items}}
[[de:Netheritbarren]]
[[es:Lingote de netherita]]
[[fr:Lingot de Netherite]]
[[it:Lingotto di netherite]]
[[ja:ネザライトインゴット]]
[[ko:네더라이트 주괴]]
[[pl:Sztabka netherytu]]
[[pt:Barra de netherita]]
[[ru:Незеритовый слиток]]
[[th:แท่งเนเธอไรต์]]
[[uk:Незеритовий злиток]]
[[zh:下界合金锭]]
[[Category:Non-renewable resources]]</li><li>[[Rotten Flesh|Rotten Flesh]]<br/>{{Item
| title = Rotten Flesh
| image = Rotten Flesh.png
| renewable = Yes
| heals = {{hunger|4}}
|effects={{EffectLink|link=Hunger (status effect)|Hunger}} (0:30) (80% chance)
| stackable = Yes (64)
}}
'''Rotten flesh''' is a [[food]] item that can be eaten by the [[player]], with high risk of inflicting [[Hunger (status effect)|Hunger]] and low [[Saturation]].
== Obtaining ==
=== Mob loot ===
==== Zombies ====
[[Zombie]]s, [[zombie villager]]s, [[zombie horse]]s, [[husk]]s, and [[drowned]] drop from 0 to 2 units of rotten flesh. [[Looting]] can increase this by one per level, for a maximum of 5 rotten flesh.
==== Zoglins ====
[[Zoglin]]s drop 1-3. Looting III grants a maximum of 6.
==== Zombified piglins ====
[[Zombified Piglin|Zombified piglins]] drop 0-1. Looting III grants a maximum of 4.
=== Fishing ===
Rotten flesh can be obtained as a "junk" item while [[fishing]].
=== Chest loot ===
{{LootChestItem|rotten-flesh}}
=== Cat gifts ===
{{main|Cat#Gifts}}
Tamed [[cat]]s have a 70% chance of giving the [[player]] a gift when they wake up from a [[bed]], and the gift has a 16.13% chance to be a rotten flesh.
== Usage ==
=== Food ===
{{see also|Tutorials/Hunger management}}
To eat rotten flesh, press and hold {{control|use}} while rotten flesh is selected in the hotbar.
Eating rotten flesh restores {{hunger|4}} [[hunger]] and 0.8 hunger [[Hunger#Mechanics|saturation]], but has an 80% chance of inflicting {{EffectLink|Hunger (effect)|id=Hunger}} for 30 seconds. Note that the duration does ''not'' accumulate when eating multiple pieces. However, if more is consumed and the [[Hunger (effect)|Hunger]] status effect is inflicted, the duration resets to 30 seconds.
=== Wolves ===
Rotten flesh can be used to [[breed]] and heal tamed [[wolves]], lead them around, and make baby tamed wolves grow up faster by 10% of the remaining time.
Wolves are immune to the Hunger effect.
=== Trading ===
Novice-level [[Trading#Cleric|cleric villagers]] buy 32 rotten flesh for 1 [[emerald]] as part of their trades.
==Sounds==
{{Sound table/Entity/Food}}
== Data values ==
=== ID ===
{{edition|java}}:
{{ID table
|edition=java
|showforms=y
|generatetranslationkeys=y
|displayname=Rotten Flesh
|spritetype=item
|nameid=rotten_flesh
|form=item
|foot=1}}
{{edition|bedrock}}:
{{ID table
|edition=bedrock
|shownumericids=y
|showforms=y
|notshowbeitemforms=y
|generatetranslationkeys=y
|displayname=Rotten Flesh
|spritetype=item
|nameid=rotten_flesh
|id=277
|form=item
|foot=1}}
== Achievements ==
{{load achievements|Iron Belly}}
== Advancements ==
{{load advancements|Husbandry;A Balanced Diet}}
== Video ==
{{Video note|The video is outdated, as rotten flesh can now be also gained from [[fishing]], [[trading]], or loot chests.}}
<div style="text-align:center">{{yt|xTrUEVoe9Tw}}</div>
== History ==
{{History|java beta}}
{{History||1.8|snap=Pre-release|[[File:Rotten Flesh JE1.png|32px]] Added rotten flesh.
|[[Zombie]]s and [[zombie pigmen]] now drop rotten flesh instead of [[feather]]s and [[cooked porkchop]]s respectively.}}
{{History|java}}
{{History||1.0.0|snap=Beta 1.9 Prerelease 2|Food poisoning can now be stopped by drinking [[milk]].}}
{{History||1.2.1|snap=12w03a|Rotten flesh can now be used to [[Breeding|breed]] wolves. When a wolf eats rotten flesh, it will not receive the [[Hunger (effect)|Hunger]] effect.}}
{{History||1.3.1|snap=12w21a|Rotten flesh can now be found in [[desert temple]] [[chest]]s.
|Priest [[villager]]s now [[trading|buy]] rotten flesh.}}
{{History|||snap=1.3|[[File:Rotten Flesh JE2 BE1.png|32px]] The texture of rotten flesh has been changed.}}
{{History|||snap=12w22a|Rotten flesh now generates in [[jungle temple]] chests.
|Priest [[villager]]s no longer [[trading|buy]] rotten flesh.}}
{{History||1.7.2|snap=13w36a|Rotten flesh can now be obtained as one of the "junk" [[item]]s from [[fishing]].}}
{{History||1.8|snap=14w02a|Cleric [[villager]]s now [[trading|buy]] 36–40 rotten flesh for 1 [[emerald]], as their tier I trade.}}
{{history||1.9|snap=15w43a|Rotten flesh may now be found in [[igloo]] basement [[chest]]s.}}
{{history|||snap=15w44a|Rotten flesh now generates in [[dungeon]] chests.
|The average yield of rotten flesh has been decreased in [[desert temple]] chests.}}
{{History||1.11|snap=16w39a|Rotten flesh can now be found in [[woodland mansion]] [[chest]]s.}}
{{History||1.13|snap=17w47a|Prior to [[1.13/Flattening|''The Flattening'']], this [[item]]'s numeral ID was 367.}}
{{History|||snap=18w09a|Rotten flesh now generates in the loot [[chest]]s of [[underwater ruins]].}}
{{History|||snap=18w11a|[[Drowned]] may now [[drops|drop]] rotten flesh upon death.
|Rotten flesh now sometimes generates in [[shipwreck]] [[chest]]s.}}
{{History||1.14|snap=18w43a|[[File:Rotten Flesh JE3 BE2.png|32px]] The texture of rotten flesh has been changed.}}
{{History|||snap=18w44a|[[Cat]]s now offer rotten flesh as [[Cat#Gifts|gift]]s.}}
{{History|||snap=18w50a|Rotten flesh can now be found in [[village]] temple chests.}}
{{History||1.16|snap=20w06a|Added [[hoglin]]s, which can drop rotten flesh if killed.}}
{{History|||snap=20w07a|Rotten flesh has a {{frac|10|109}} (~9.17%) chance of being given by the new [[piglin]]s when [[bartering]], in a stack size of 4–12.
|[[Hoglin]]s no longer drop rotten flesh.}}
{{History|||snap=20w09a|Rotten flesh can no longer be obtained by bartering with piglins.}}
{{History|||snap=20w14a|Added [[zoglin]]s, which drop rotten flesh when killed.}}
{{History|pocket alpha}}
{{History||v0.11.0|snap=build 1|[[File:Rotten Flesh JE2 BE1.png|32px]] Added rotten flesh.
|As the hunger bar has not yet been added, rotten flesh inflicts [[poison]] rather than [[hunger]].
|[[Zombie]]s and [[zombie pigmen]] now [[drops|drop]] rotten flesh.}}
{{History|||snap=build 11|Rotten flesh can now be used to feed [[wolves]].}}
{{History||v0.12.1|snap=build 1|Eating rotten flesh now gives the [[player]] the [[Hunger]] status effect.
|Rotten flesh now restores [[hunger]] instead of [[health]].
|Added [[zombie villager]]s, which [[drops|drop]] rotten flesh when killed.}}
{{History||v0.13.0|snap=build 1|Rotten flesh can now be found inside [[desert temple]] [[chest]]s.}}
{{History||v0.15.0|snap=build 1|Added [[husk]]s and [[zombie horse]]s, both of which drop rotten flesh when killed.
|Rotten flesh can now be found inside [[jungle temple]] chests.}}
{{History|pocket}}
{{History||1.0.0|snap=alpha 0.17.0.1|Rotten flesh can now be found inside the basement [[chest]]s of [[igloo]]s.}}
{{History||1.0.4|snap=alpha 1.0.4.0|36-40 rotten flesh can now be [[trading|sold]] to cleric [[villager]]s.}}
{{History||1.1.0|snap=alpha 1.1.0.0|Rotten flesh can now be found in [[woodland mansion]] chests.}}
{{History|bedrock}}
{{History||1.4.0|snap=beta 1.2.13.8|Added [[drowned]], which [[drops|drop]] rotten flesh when killed.}}
{{History|||snap=beta 1.2.14.2|Rotten flesh can now be found in some [[shipwreck]] [[chest]]s.}}
{{History|||snap=beta 1.2.20.1|Rotten flesh can now be found inside [[underwater ruins]] chests.}}
{{History||1.8.0|snap=beta 1.8.0.8|Tamed [[cat]]s can now give the [[player]] rotten flesh as a gift.}}
{{History||1.10.0|snap=beta 1.10.0.3|[[File:Rotten Flesh JE3 BE2.png|32px]] The texture of rotten flesh has been changed.}}
{{History||1.11.0|snap=beta 1.11.0.1|Rotten flesh can now be found in [[desert]] [[village]] temple [[chest]]s.}}
{{History|||snap=beta 1.11.0.4|[[Trading]] has been changed, cleric [[villager]]s now [[trading|buy]] 32 rotten flesh for an [[emerald]].}}
{{History|console}}
{{History||xbox=TU5|xbone=CU1|ps=1.0|wiiu=Patch 1|switch=1.0.1|[[File:Rotten Flesh JE2 BE1.png|32px]] Added rotten flesh.}}
{{History||xbox=none|xbone=none|ps=1.90|wiiu=none|switch=none|[[File:Rotten Flesh JE3 BE2.png|32px]] The texture of rotten flesh has been changed.}}
{{History|new3ds}}
{{History||0.1.0|[[File:Rotten Flesh JE2 BE1.png|32px]] Added rotten flesh.}}
{{History|foot}}
== Issues ==
{{issue list}}
== External Links ==
*[https://www.minecraft.net/en-us/article/taking-inventory--rotten-flesh Taking Inventory: Rotten Flesh] – Minecraft.net on June 8, 2020
{{Items}}
[[cs:Shnilé maso]]
[[de:Verrottetes Fleisch]]
[[es:Carne podrida]]
[[fr:Chair putréfiée]]
[[hu:Rohadt hús]]
[[it:Carne marcia]]
[[ja:腐った肉]]
[[ko:썩은 살점]]
[[nl:Bedorven vlees]]
[[pl:Zgniłe mięso]]
[[pt:Carne podre]]
[[ru:Гнилая плоть]]
[[uk:Гнила плоть]]
[[zh:腐肉]]
[[Category:Renewable resources]]
[[Category:Food]]</li></ul> | 1.6.3-pre | Eyes of ender now lead to strongholds based on the structure data saved in the world file instead of calculating their approximate location via the world seed. Therefore, strongholds generated in old versions can still be found even if the distribution of strongholds is changed. | |||
1.8{{Extension DPL}}<ul><li>[[Heart of the Sea|Heart of the Sea]]<br/>{{Item
| image = Heart of the Sea.png
| stackable = Yes (64)
| rarity = Uncommon
| renewable = No
}}
A '''heart of the sea''' is a rare [[item]] that can be crafted into a [[conduit]].
== Obtaining ==
The heart of the sea must be found. It cannot be crafted or obtained by trading, making it a [[non-renewable resource]].
A heart of the sea is obtained from a [[buried treasure]]. The location is marked with a noticeable red X on a [[Explorer Map|buried treasure map]], which is found in [[Ocean_Ruins|ocean ruins]] and [[Shipwreck|shipwrecks]]. Feeding [[raw cod]] or [[raw salmon]] to a [[dolphin]] causes the dolphin to swim toward the nearest [[buried treasure]], [[shipwreck]], or [[ocean ruins]].
=== Chest loot ===
{{LootChestItem|heart-of-the-sea}}
== Usage ==
=== Crafting===
{{crafting usage}}
== Data values ==
=== ID ===
{{edition|java}}:
{{ID table
|edition=java
|showforms=y
|generatetranslationkeys=y
|displayname=Heart of the Sea
|spritetype=item
|nameid=heart_of_the_sea
|form=item
|foot=1}}
{{edition|bedrock}}:
{{ID table
|edition=bedrock
|shownumericids=y
|showforms=y
|notshowbeitemforms=y
|generatetranslationkeys=y
|displayname=Heart of the Sea
|spritetype=item
|nameid=heart_of_the_sea
|id=571
|form=item
|foot=1}}
== History ==
{{History|java}}
{{History||1.13|snap=18w15a|[[File:Heart of the Sea JE1 BE2.png|32px]] Added heart of the sea.}}
{{History|||snap=18w19a|Heart of the sea now generates in all [[buried treasure]] [[chest]]s in a stack of 1.}}
{{History|bedrock}}
{{History||1.4.0|snap=beta 1.2.14.2|An entry in the [[buried treasure]] loot table has been added named <code>nautilus_core</code>. It is unobtainable though since the <code>nautilus_core</code> has not been added into the game yet.}}
{{History|||snap=beta 1.2.20.1|[[File:Heart of the Sea BE1.png|32px]] Added heart of the sea as an [[item]] obtainable in buried treasure [[chest]]s. It cannot be used to craft [[conduit]]s yet.}}
{{History|||snap=beta 1.2.20.2|[[File:Heart of the Sea JE1 BE2.png|32px]] The texture of heart of the sea has been changed.}}
{{History||1.5.0|snap=beta 1.5.0.1|Heart of the sea can now be used to craft [[conduit]]s.}}
{{History|console}}
{{History||xbox=TU69|ps=1.76|wiiu=Patch 38|[[File:Heart of the Sea JE1 BE2.png|32px]] Added heart of the sea.}}
{{History|education}}
{{History||1.4.0|[[File:Heart of the Sea JE1 BE2.png|32px]] Added heart of the sea. It generates in all [[buried treasure]] [[chest]]s in a stack of 1.}}
{{History|foot}}
== Issues ==
{{issue list}}
== Trivia ==
* Before the heart of the sea was added to {{el|be}}, there was an entry found in the buried treasure chest loot table named <code>nautilus_core</code>, which was later revealed to be the heart of the sea. Despite the name change, the heart of the sea continues to be referred to as the <code>nautilus_core</code> in most game files.
== External Links ==
*[https://www.minecraft.net/en-us/article/heart-sea Taking Inventory: Heart of the Sea] – Minecraft.net on August 31, 2023
{{items}}
[[Category:Non-renewable resources]]
[[de:Herz des Meeres]]
[[fr:Cœur de la mer]]
[[es:Corazón del mar]]
[[it:Cuore del mare]]
[[ja:海洋の心]]
[[ko:바다의 심장]]
[[nl:Hart van de zee]]
[[pl:Serce oceanu]]
[[pt:Coração do mar]]
[[ru:Сердце моря]]
[[uk:Серце моря]]
[[zh:海洋之心]]</li><li>[[Poisonous Potato|Poisonous Potato]]<br/>{{Item
| title = Poisonous Potato
| image = Poisonous Potato.png
| heals = {{hunger|2}}
|effects={{EffectLink|Poison}} (0:05) (60% chance)
| stackable = Yes (64)
| renewable = Yes
}}
A '''poisonous potato''' is a type of [[potato]] that can [[poison]] the [[player]].
== Obtaining ==
The poisonous potato is a rare [[drop]] when harvesting (destroying) [[potato|potato crops]]; a fully grown plant has a 2% chance of dropping one in addition to the 2-5 regular potatoes.
=== Chest loot ===
{{LootChestItem|poisonous-potato}}
== Usage ==
Poisonous potatoes cannot be planted on [[farmland]] or [[Baked Potato|baked]]. They also have no use with the [[composter]].<ref>{{bug|MC-142373|resolution=WAI}}</ref>
=== Food ===
{{see also|Tutorials/Hunger management|title1=Hunger management}}
To eat a poisonous potato, press and hold {{control|use}} while it is selected in the hotbar. Eating one restores {{hunger|2}} [[hunger]] and 1.2 hunger [[Hunger#Mechanics|saturation]] and has a 60% chance of applying 5 seconds of [[Poison]] II, draining {{hp|4|poisoned=1}} points of [[health]].
Interestingly, a poisonous potato actually restores double the hunger and saturation than a normal, unpoisoned potato. (A normal potato gives {{hunger|1}} hunger and 0.6 saturation points.)
==Sounds==
{{Sound table/Entity/Food}}
== Advancements ==
{{load advancements|Husbandry;A Balanced Diet}}
== Data values ==
=== ID ===
{{edition|java}}:
{{ID table
|edition=java
|showforms=y
|generatetranslationkeys=y
|displayname=Poisonous Potato
|spritetype=item
|nameid=poisonous_potato
|form=item
|foot=1}}
{{edition|bedrock}}:
{{ID table
|edition=bedrock
|shownumericids=y
|showforms=y
|notshowbeitemforms=y
|generatetranslationkeys=y
|displayname=Poisonous Potato
|spritetype=item
|nameid=poisonous_potato
|id=282
|form=item
|foot=1}}
== History ==
{{History|java}}
{{History||1.4.2|snap=12w34a|[[File:Poisonous Potato JE1 BE1.png|32px]] Added poisonous potatoes.}}
{{History||1.13|snap=17w47a|Prior to [[Java_Edition_1.13/Flattening|''The Flattening'']], this [[item]]'s numeral ID was 394.}}
{{History|||snap=18w11a|Poisonous potatoes now generate in the [[chest]]s of [[shipwreck]]s.}}
{{History||1.14|snap=18w43a|[[File:Poisonous Potato JE2.png|32px]] The texture of poisonous potatoes has been changed.}}
{{History|||snap=18w50a|[[File:Poisonous Potato JE3 BE2.png|32px]] The texture of poisonous potatoes has been changed, once again.}}
{{History|pocket alpha}}
{{History||v0.12.1|snap=build 1|[[File:Poisonous Potato JE1 BE1.png|32px]] Added poisonous potatoes.}}
{{History|bedrock}}
{{History||1.4.0|snap=beta 1.2.14.2|Poisonous potatoes can now be found inside of [[shipwreck]] [[chest]]s.}}
{{History||1.10.0|snap=beta 1.10.0.3|[[File:Poisonous Potato JE3 BE2.png|32px]] The texture of poisonous potatoes has been changed.}}
{{History|console}}
{{History||xbox=TU14|xbone=CU1|ps=1.04|wiiu=Patch 1|switch=1.0.1|[[File:Poisonous Potato JE1 BE1.png|32px]] Added poisonous potatoes.}}
{{History||xbox=none|xbone=none|ps=1.90|wiiu=none|switch=none|[[File:Poisonous Potato JE3 BE2.png|32px]] The texture of poisonous potatoes has been changed.}}
{{History|New 3DS}}
{{History||0.1.0|[[File:Poisonous Potato JE1 BE1.png|32px]] Added poisonous potatoes.}}
{{History|foot}}
== Issues ==
{{issue list}}
== References ==
{{reflist}}
{{Items}}
[[Category:Plants]]
[[cs:Jedovatá brambora]]
[[de:Giftige Kartoffel]]
[[es:Patata envenenada]]
[[fr:Pomme de terre empoisonnée]]
[[hu:Mérgező burgonya]]
[[it:Patata velenosa]]
[[ja:青くなったジャガイモ]]
[[ko:독이 있는 감자]]
[[nl:Giftige aardappel]]
[[pl:Trujący ziemniak]]
[[pt:Batata venenosa]]
[[ru:Ядовитый картофель]]
[[th:มันฝรั่งพิษ]]
[[uk:Отруйна картопля]]
[[zh:毒马铃薯]]
[[Category:Food]]
[[Category:Renewable resources]]</li></ul> | 14w02a | With changes that have been made to villagers and the trading system, cleric villagers now sell eyes of ender for 7–11 emeralds, as one of their tier III trades. | |||
1.9{{Extension DPL}}<ul><li>[[Baked Potato|Baked Potato]]<br/>{{Item
| title = Baked Potato
| renewable = Yes
| heals = {{hunger|5}}
| stackable = Yes (64)}}
A '''baked potato''' is a [[food]] [[item]] that can be eaten by the [[player]].
== Obtaining ==
Baked potatoes can be obtained by cooking [[potato]]es in a [[furnace]], [[smoker]], or [[campfire]].
{{Smelting
|Potato
|Baked Potato
|0,35
}}
{{IN|JE}}, baked potatoes can also be obtained by killing a zombie or one of its variants while it is on fire. The drop chance is still affected by [[Looting]].
=== Chest loot ===
{{LootChestItem|baked-potato}}
== Usage ==
To eat a baked potato, press and hold {{control|use}} while it is selected in the [[hotbar]]. Eating one restores {{hunger|5}} hunger and 6.0 hunger [[Hunger#Mechanics|saturation]].
=== Crafting ingredient ===
{{crafting usage}}
=== Composting ===
Placing a baked potato into a [[composter]] has an 85% chance of raising the compost level by 1. This is more efficient than composting with raw potatoes.
== Sounds ==
{{Sound table/Entity/Food}}
== Data values ==
=== ID ===
{{edition|java}}:
{{ID table
|edition=java
|showforms=y
|generatetranslationkeys=y
|displayname=Baked Potato
|spritetype=item
|nameid=baked_potato
|form=item
|foot=1}}
{{edition|bedrock}}:
{{ID table
|edition=bedrock
|shownumericids=y
|showforms=y
|notshowbeitemforms=y
|generatetranslationkeys=y
|displayname=Baked Potato
|spritetype=item
|nameid=baked_potato
|id=281
|form=item
|foot=1}}
== Advancements ==
{{load advancements|Husbandry;A Balanced Diet}}
== History ==
{{History|java}}
{{History||1.4.2|snap=12w34a|[[File:Baked Potato JE1.png|32px]] Added baked potatoes.}}
{{History|||snap=12w37a|[[File:Baked Potato JE2 BE1.png|32px]] The texture of baked potatoes has been slightly changed.}}
{{History||1.8|snap=14w02a|Baked potatoes now restore {{Hunger|5}} hunger points instead of 6.}}
{{History|||snap=14w27a|Baked potatoes are now used to craft [[rabbit stew]].}}
{{History||1.13|snap=17w47a|Prior to [[1.13/Flattening|''The Flattening'']], this [[item]]'s numeral ID was 393.}}
{{History||1.14|snap=18w43a|[[File:Baked Potato JE3.png|32px]] The texture of baked potatoes has been changed.}}
{{History|||snap=18w50a|[[File:Baked Potato JE4 BE2.png|32px]] The texture of baked potatoes has been changed, once again.}}
{{History|||snap=19w03a|Placing a baked potato into the new [[composter]] has an 80% chance of raising the compost level by 1.}}
{{History|||snap=19w05a|Baked potatoes now have an 85% chance of increasing the compost level in a composter by 1.}}
{{History||1.17|snap=21w13a|Baked potatoes can now be dropped by flaming [[zombie]]s.<ref>{{bug|MC-199065}}</ref>}}
{{History||1.19|snap=22w13a|Baked potatoes can now be found in [[ancient city]] ice box [[chest]]s.}}
{{History|upcoming java}}
{{History||Villager Trade Rebalance<br>(Experimental)|link=Java Edition 1.20.2|snap=23w31a|[[Wandering trader]]s now have a chance to [[trading|buy]] baked potatoes from the player.}}
{{History|pocket alpha}}
{{History||v0.8.0|snap=build 1|[[File:Baked Potato JE2 BE1.png|32px]] Added baked potatoes.}}
{{History||v0.12.1|snap=build 1|Baked potatoes now restore [[hunger]] instead of [[health]].}}
{{History||v0.13.0|snap=build 1|Baked potatoes are now used to craft [[rabbit stew]].}}
{{History|bedrock}}
{{History||1.10.0|snap=beta 1.10.0.3|[[File:Baked Potato JE4 BE2.png|32px]] The texture of baked potatoes has been changed.}}
{{History||1.11.0|snap=beta 1.11.0.1|Baked potatoes can now be used to fill up [[composter]]s.}}
{{History|console}}
{{History||xbox=TU14|xbone=CU1|ps=1.04|wiiu=Patch 1|switch=1.0.1|[[File:Baked Potato JE2 BE1.png|32px]] Added baked potatoes.}}
{{History||ps=1.00|[[File:Baked Potato JE2 BE1.png|32px]] Added baked potatoes to the [[PlayStation 4 Edition|PS4]] and [[PlayStation Vita Edition|PSVita]].}}
{{History||xbox=none|xbone=none|ps=1.90|wiiu=none|switch=none|[[File:Baked Potato JE4 BE2.png|32px]] The texture of baked potatoes has been changed.}}
{{History|new3DS}}
{{History||0.1.0|[[File:Baked Potato JE2 BE1.png|32px]] Added baked potatoes.}}
{{History|foot}}
== Issues ==
{{issue list}}
== See also ==
* {{ItemLink|Poisonous Potato}}
{{Items}}
[[Category:Food]]
[[Category:Renewable resources]]
[[cs:Pečená brambora]]
[[de:Ofenkartoffel]]
[[es:Patata cocida]]
[[fr:Pomme de terre cuite]]
[[hu:Sült burgonya]]
[[it:Patata al forno]]
[[ja:ベイクドポテト]]
[[ko:구운 감자]]
[[nl:Gebakken aardappel]]
[[pl:Pieczony ziemniak]]
[[pt:Batata assada]]
[[ru:Печёный картофель]]
[[th:มันฝรั่งอบ]]
[[zh:烤马铃薯]]</li><li>[[Orange Dye|Orange Dye]]<br/>{{Item
|image = Orange_Dye_JE2_BE2.png
|renewable = Yes
|stackable = Yes (64)
}}
'''Orange dye''' is a [[Dye#Quasi-Primary|quasi-primary dye]] crafted from [[Flower|orange tulips]], or by combining one [[red dye]] with one [[yellow dye]].
== Obtaining ==
=== Crafting ===
{{Crafting
|head = 1
|showname = 0
|Orange Tulip; Torchflower
|Output=Orange Dye
|type=Material
}}
{{Crafting
|Red Dye
|Yellow Dye
|Output = Orange Dye,2
|type = Material
|foot = 1
}}
=== Loot chest ===
{{#invoke:LootChest|base3|orange-dye}}
=== Trading ===
[[Wandering trader|Wandering traders]] sell 3 orange dye for an [[emerald]].
== Usage ==
{{dye usage}}
=== Crafting ingredient ===
{{crafting usage|ignore=Banner|continue=1}}
{{banner crafting usage}}
=== Loom ingredient ===
{{Banner loom usage|Orange Dye}}
=== Trading ===
Apprentice-level shepherd [[villager]]s have a 20% chance to buy 12 orange dye for an [[emerald]] as part of their trades.{{only|bedrock}}
Journeyman-level shepherd [[villager]]s have a {{frac|1|3}} chance to buy 12 orange dye for an [[emerald]].{{only|java}}
== Data values ==
=== ID ===
{{edition|java}}:
{{ID table
|edition=java
|showforms=y
|generatetranslationkeys=y
|displayname=Orange Dye
|spritetype=item
|nameid=orange_dye
|form=item
|foot=1}}
{{edition|bedrock}}:
{{ID table
|edition=bedrock
|showaliasids=y
|shownumericids=y
|showforms=y
|notshowbeitemforms=y
|generatetranslationkeys=y
|displayname=Orange Dye
|spritetype=item
|nameid=orange_dye
|aliasid=dye / 14
|id=409
|form=item
|translationkey=item.dye.orange.name
|foot=1}}
== Video ==
<div style="text-align:center">{{yt|25t7uNMOFS8}}</div>
== History ==
{{History|java beta}}
{{History||1.2|[[File:Orange Dye JE1 BE1.png|32px]] Added orange dye.}}
{{History|java}}
{{History||1.4.2|snap=12w34a|Added the ability to [[Armor#Dyeing|dye]] leather [[armor]] and [[wolf]] collars.}}
{{History||1.4.6|snap=12w49a|Orange dye can now be crafted with [[gunpowder]] to create a [[firework star]].}}
{{History||1.6.1|snap=13w19a|[[Stained clay]] can now be [[crafting|crafted]].}}
{{History||1.7.2|snap=13w36a|With the addition of the new [[flower]]s, many secondary and tertiary [[dye]]s are now primary dyes.}}
{{History|||snap=13w41a|[[Stained glass]] can now be crafted.}}
{{History||1.8|snap=14w30a|Added [[banner]]s, which can be dyed.}}
{{History||1.11|snap=16w39a|Added the ability to dye [[shulker box]]es.}}
{{History||1.12|snap=17w15a|Added the ability to dye [[bed]]s.}}
{{History||1.13|snap=17w47a|The different data values for the <code>dye</code> ID has now been split up into their own IDs.
|Prior to [[1.13/Flattening|''The Flattening'']], this [[item]]'s numeral ID was 351.}}
{{History||1.14|snap=18w43a|[[File:Orange_Dye_JE2_BE2.png|32px]] The texture of orange dye has now been changed.}}
{{History|||snap=18w44a|Orange dye can now change the text color on [[sign]]s to orange.}}
{{History|||snap=19w05a|Added the [[wandering trader]], which sells orange dye.}}
{{History|||snap=19w11a|Orange dye can now be [[trading|bought]] by shepherd villagers.}}
{{History||1.17|snap=20w45a|Orange dye can now be used to craft [[orange candle]]s.}}
{{History|||snap=21w19a|Orange dye can no longer be used to craft orange candles.}}
{{History|||snap=Pre-release 1|Orange dye can now once again be used to craft orange candles.}}
{{History||1.20 (Experimental)|link=1.19.3|snap=22w42a|Orange dye can now change the text color on [[hanging sign]]s to orange.}}
{{History||1.20<br>(Experimental)|link=1.19.4|snap=23w07a|[[Torchflower]]s can now be crafted into orange dye.}}
{{History||1.20|snap=23w12a|Orange dye can now be found in [[suspicious gravel]] and [[suspicious sand]] in [[trail ruins]].}}
{{History|||snap=23w16a|Orange dye no longer generates in [[suspicious sand]] in [[trail ruins]].|Due to the split of the archaeological loot tables for suspicious gravel within [[trail ruins]], orange dye is now common loot.}}
{{History|pocket alpha}}
{{History||v0.3.0|[[File:Orange Dye JE1 BE1.png|32px]] Added orange dye. It is currently unobtainable and serves no purpose.}}
{{History||v0.4.0|Orange dye is now [[craft]]able with rose red and dandelion yellow.
|Orange dye can now be used to craft orange [[wool]].}}
{{History||v0.8.0|snap=build 1|Orange dye is now used to craft [[cocoa bean]]s (version exclusive).}}
{{History||v0.14.0|snap=build 1|Orange dye can now be used to dye [[water]] in [[cauldron]]s.}}
{{History||unknown|The above recipe for orange dye has now been removed.}}
{{History|pocket}}
{{History||1.0.0|snap=alpha 0.17.0.1|Orange dye can now be used to dye [[shulker]]s.}}
{{History||1.1.0|snap=alpha 1.1.0.0|Orange dye can now be used to craft [[concrete powder]] and colored [[bed]]s.}}
{{History|bedrock}}
{{History||1.2.0|snap=beta 1.2.0.2|Orange dye can now be used to craft [[firework star]]s, [[stained glass]], and patterns on [[banner]]s.}}
{{History||1.4.0|snap=beta 1.2.20.1|Orange dye can now be used to craft [[balloon]]s and [[glow stick]]s.}}
{{History||1.8.0|snap=beta 1.8.0.8|Orange dye can now be used to dye [[cat]] collars.}}
{{History||1.10.0|snap=beta 1.10.0.3|Orange dye is now [[trading|sold]] by [[wandering trader]]s.
|Orange dye can now be used to dye white [[carpet]]s.
|[[File:Orange_Dye_JE2_BE2.png|32px]] The texture of orange dye has now been changed.}}
{{History||1.11.0|snap=beta 1.11.0.4|Orange dye can now be [[trading|sold]] to shepherd [[villager]]s.}}
{{History||1.16.100|snap=beta 1.16.100.56|The ID of orange dye has been changed from <code>dye/14</code> to <code>orange_dye</code>.}}
{{History|console}}
{{History||xbox=TU1|xbone=CU1|ps=1.00|switch=1.0.1|wiiu=Patch 1|[[File:Orange Dye JE1 BE1.png|32px]] Added orange dye.}}
{{History|ps4}}
{{History||1.90|[[File:Orange_Dye_JE2_BE2.png|32px]] The texture of orange dye has now been changed.}}
{{History|new 3ds}}
{{History||0.1.0|[[File:Orange_Dye_JE2_BE2.png|32px]] Added orange dye.}}
{{History|foot}}
== Issues ==
{{issue list}}
== References ==
{{Reflist}}
{{Items}}
[[cs:Oranžové barvivo]]
[[de:Oranger Farbstoff]]
[[es:Tinte naranja]]
[[fr:Teinture orange]]
[[hu:Narancssárga festék]]
[[ja:橙色の染料]]
[[ko:주황색 염료]]
[[nl:Oranje kleurstof]]
[[pl:Pomarańczowy barwnik]]
[[pt:Corante laranja]]
[[ru:Оранжевый краситель]]
[[zh:橙色染料]]
[[Category:Items]]
[[Category:Dyes]]
[[Category:Renewable resources]]</li></ul> | 15w41a | Eyes of ender are no longer sold by cleric villagers. | |||
| 15w44b | An eye of ender is now used to craft an end crystal. | ||||
1.11{{Extension DPL}}<ul><li>[[Glistering Melon Slice|Glistering Melon Slice]]<br/>{{Item
| image = Glistering Melon Slice.png
| renewable = Yes
| stackable = Yes (64)
}}
A '''glistering melon slice'''{{fn|Known as '''Glistering Melon Slice''' {{in|java}} and '''Glistering Melon''' {{in|bedrock}}.}} is an inedible [[item]] used for brewing [[potion]]s of [[Healing]]. It is also one of the many potion ingredients that can be used to make mundane potions.
== Obtaining ==
=== Chest loot ===
{{LootChestItem|glistering-melon-slice}}
=== Crafting ===
{{Crafting
|A1= Gold Nugget
|B1= Gold Nugget
|C1= Gold Nugget
|A2= Gold Nugget
|B2= Melon Slice
|C2= Gold Nugget
|A3= Gold Nugget
|B3= Gold Nugget
|C3= Gold Nugget
|Output= Glistering Melon Slice
|type= Brewing
}}
=== Trading ===
Master-level farmer [[villager]]s sell 3 glistering melon for 4 [[emerald]]s.
== Usage ==
Despite being crafted with a [[melon slice]], a glistering melon slice cannot be eaten, unlike a [[golden apple]] or [[golden carrot]].
=== Brewing ingredient ===
{{Brewing
|head=1
|Glistering Melon Slice
|Mundane Potion
|base=Water Bottle
}}
{{Brewing
|Glistering Melon Slice
|Potion of Healing
|foot=1}}
===Piglins===
[[Piglin]]s are attracted to glistering melon slices. They run toward any glistering melon slice on the ground, and inspect it for 6 to 8 seconds before putting it in their inventory.
== Achievements ==
{{load achievements|Oooh, shiny!}}
== Advancements ==
{{load advancements|Oh Shiny}}
== Data values ==
=== ID ===
{{edition|java}}:
{{ID table
|edition=java
|showforms=y
|generatetranslationkeys=y
|displayname=Glistering Melon Slice
|spritetype=item
|nameid=glistering_melon_slice
|form=item
|foot=1}}
{{edition|bedrock}}:
{{ID table
|edition=bedrock
|showaliasids=y
|shownumericids=y
|showforms=y
|notshowbeitemforms=y
|generatetranslationkeys=y
|displayname=Glistering Melon
|spritetype=item
|nameid=glistering_melon_slice
|aliasid=speckled_melon
|id=434
|form=item
|translationkey=item.speckled_melon.name
|foot=1}}
== History ==
{{History|java}}
{{History||1.0.0|snap=Beta 1.9 Prerelease 4|[[File:Glistering Melon Slice JE1 BE1.png|32px]] Added glistering melons.
|The [[crafting]] recipe of glistering melons is one [[melon slice]] and one [[gold nugget]].
|Glistering melons have replaced [[ghast tear]]s as the ingredient to produce [[potions of Healing]] due to the difficulty in getting tears.<ref>{{tweet|jeb_|123671273904680960}}</ref> They also now brew with [[water bottle]]s to create [[mundane potion]]s.}}
{{History||1.6.1|snap=13w23a|The [[crafting]] recipe of glistering melons is changed from one [[gold nugget]] to eight.}}
{{History||1.9|snap=15w49a|[[File:Glistering Melon Slice JE2.png|32px]] The rotation of glistering melon [[item]]s has been changed to be consistent with [[melon slice]]s.<ref>{{bug|MC-85963}}</ref>}}
{{History|||snap=15w49b|[[File:Glistering Melon Slice JE1 BE1.png|32px]] The rotation of glistering melons has been reverted and is no longer consistent with melon slices.}}
{{History||1.13|snap=17w47a|Prior to [[1.13/Flattening|''The Flattening'']], this [[item]]'s numeral ID was 382.}}
{{History|||snap=18w20b|"Glistering Melon" has been renamed to "Glistering Melon Slice".
|The ID of glistering melon slices has been changed from <code>speckled_melon</code> to <code>glistering_melon_slice</code>.}}
{{History||1.14|snap=18w43a|[[File:Glistering Melon Slice JE3 BE2.png|32px]] The texture of glistering melon slices has been changed.}}
{{History|||snap=19w11a|Farmer [[villager]]s now [[trading|sell]] glistering melon slices.}}
{{History||1.16|snap=20w09a|Glistering melon slices are now admired by [[piglin]]s.<ref>{{bug|MC-172363}}</ref>}}
{{History|||snap=20w16a|Glistering melon slices now generate in [[ruined portal]] chests.}}
{{History|pocket alpha}}
{{History||v0.12.1|snap=build 1|[[File:Glistering Melon Slice JE1 BE1.png|32px]] Added glistering melons.}}
{{History|bedrock}}
{{History||1.10.0|snap=beta 1.10.0.3|[[File:Glistering Melon Slice JE3 BE2.png|32px]] The texture of glistering melons has been changed.}}
{{History||1.11.0|snap=beta 1.11.0.4|Glistering melons can now be [[trading|bought]] from farmer [[villager]]s.}}
{{History||1.13.0|snap=beta 1.13.0.9|[[Trading]] has been changed. Master-level farmer villagers now have a {{frac|1|3}} chance to [[trading|sell]] glistering melon slices.}}
{{History||1.16.0|snap=beta 1.16.0.57|Glistering melons are [[trading|sold]] from farmer villagers under a 50% chance, once again.
|Glistering melons now generate in [[ruined portal]] chests.}}
{{History||1.16.100|snap=beta 1.16.100.54|[[Ruined Portal]]s can now generate with 4–12 glistering melons instead of only one.}}
{{History|||snap=beta 1.16.100.56|The ID of glistering melon slices has been changed from <code>speckled_melon</code> to <code>glistering_melon_slice</code>.}}
{{History|console}}
{{History||xbox=TU7|xbone=CU1|ps=1.0|wiiu=Patch 1|[[File:Glistering Melon Slice JE1 BE1.png|32px]] Added glistering melons.}}
{{History||xbox=none|xbone=none|ps=1.90|wiiu=none|switch=none|[[File:Glistering Melon Slice JE3 BE2.png|32px]] The texture of glistering melons has been changed.}}
{{History|New 3DS}}
{{History||0.1.0|[[File:Glistering Melon Slice JE1 BE1.png|32px]] Added glistering melons.}}
{{History|foot}}
== Issues ==
{{issue list}}
== See also ==
* [[Melon Slice]]
* [[Melon]]
== Notes ==
{{fnlist}}
== References ==
{{reflist}}
{{Items}}
[[Category:Renewable resources]]
[[cs:Zlatavý kousek melounu]]
[[de:Glitzernde Melonenscheibe]]
[[es:Rodaja de sandía reluciente]]
[[fr:Tranche de pastèque scintillante]]
[[hu:Ragyogó dinnye]]
[[ja:きらめくスイカの薄切り]]
[[ko:반짝이는 수박 조각]]
[[nl:Glinsterende meloenschijf]]
[[pl:Błyszczący arbuz]]
[[pt:Fatia de melancia reluzente]]
[[ru:Сверкающий ломтик арбуза]]
[[uk:Блискуча скибка кавуна]]
[[zh:闪烁的西瓜片]]</li><li>[[Pitcher Pod|Pitcher Pod]]<br/>{{wip}}
{{Block
| image = <gallery>
Pitcher Crop Age 0 JE1.png| Age 0
Pitcher Crop Age 1 JE1.png| Age 1
Pitcher Crop Age 2 JE1.png| Age 2
Pitcher Crop Age 3 JE1.png| Age 3
Pitcher Crop Age 4 JE1.png| Age 4
</gallery>
| image2 = Pitcher Pod.png
| transparent = Yes
| light = Yes
| tool = N/A
| renewable = Yes
| stackable = Yes (64)
| rarity = Common
| flammable = No
| lavasusceptible = No
}}
A '''pitcher pod''' is an ancient bulbous seed that has a chance to be dropped by [[Sniffer|sniffers]] when they finish digging. It is the seed for [[Pitcher Plant]]s.
== Obtaining ==
[[Sniffer]]s occasionally bury their nose in the ground and start digging. Once the sniffer has finished digging, one pitcher pod has a chance to be dropped on the floor as an item.
Sniffers can only dig for pitcher pods in the following blocks:
*{{BlockLink|Dirt}}
*{{BlockLink|Grass Block}}
*{{BlockLink|Podzol}}
*{{BlockLink|Coarse Dirt}}
*{{BlockLink|Rooted Dirt}}
*{{BlockLink|Moss Block}}
*{{BlockLink|Mud}}
*{{BlockLink|Muddy Mangrove Roots}}
They cannot dig for pitcher pods on [[mycelium]].<ref>{{bug|MC-260259||Sniffers cannot dig nor find seeds on mycelium|WAI}}</ref>
== Usage ==
=== Pitcher Crop ===
{{main|Tutorials/Crop farming|title1=Pitcher Crop Farming}}
Pitcher pods can be placed on [[farmland]] by {{ctrl|using}}, where they grow through three stages as a '''pitcher crop'''.
Breaking the crop before it matures drops the pitcher pod, while breaking the final stage produces a [[pitcher plant]] and does ''not'' yield the pod. Pitcher crops break if pushed by a [[piston]] or if their supporting farmland breaks or turns to dirt (i.e. by being trampled), dropping their usual drops.
Farmer [[villager]]s can plant pitcher pods, but cannot harvest them once they have fully grown.<ref>{{bug|MC-263382|||WAI}}</ref>
=== Feeding ===
Pitcher pods can be used to breed [[chicken]]s and reduce the remaining growth duration of chicks by 10%.
=== Taming ===
Pitcher pods can be used to tame [[parrot]]s.
== Sounds ==
{{Sound table/Block/Crop}}
== Data values ==
=== ID ===
{{edition|java}}:
{{ID table
|edition=java
|showblocktags=y
|showitemtags=y
|showforms=y
|generatetranslationkeys=y
|displayname=Pitcher Crop
|spritetype=block
|nameid=pitcher_crop
|form=block
|blocktags=bee_growables, crops}}
{{ID table
|displayname=Pitcher Pod
|spritetype=item
|nameid=pitcher_pod
|form=item
|itemtags=villager_plantable_seeds
|foot=1}}
{{edition|bedrock}}:
{{ID table
|edition=bedrock
|shownumericids=y
|showforms=y
|generatetranslationkeys=y
|displayname=Pitcher Crop
|spritetype=block
|nameid=pitcher_crop
|id=-574
|form=block
|translationkey=-}}
{{ID table
|displayname=Pitcher Pod
|spritetype=item
|nameid=pitcher_pod
|id=297
|form=item
|foot=1}}
=== Block states ===
{{see also|Block states}}
{{/BS}}
== Achievements ==
{{Load achievements|Planting The Past}}
== Advancements ==
{{load advancements|A Seedy Place;Planting The Past}}
== History ==
{{History|java}}
{{History||1.20|snap=23w12a|[[File:Pitcher Crop Age 0 JE1.png|32px]] [[File:Pitcher Crop Age 1 JE1.png|32px]] [[File:Pitcher Crop Age 2 JE1.png|32px]] [[File:Pitcher Crop Age 3 JE1.png|32px]] [[File:Pitcher Crop Age 4 JE1.png|32px]] [[File:Pitcher Pod JE1.png|32px]] Added pitcher crops and pods.
|[[File:Pitcher Crop Age 0 (bottom) JE1.png|32px]] [[File:Pitcher Crop Age 1 (bottom) JE1.png|32px]] [[File:Pitcher Crop Age 2 (bottom) JE1.png|32px]] [[File:Pitcher Crop Age 3 (bottom) JE1.png|32px]] [[File:Pitcher Crop Age 4 (bottom) JE1.png|32px]] The bottom face on all pitcher crop models is missing.<ref>{{bug|MC-261208}}</ref>}}
{{History|||snap=23w13a|Placing a pitcher pod in farmland now gives the player the "A Seedy Place" [[advancement]].
|Fully grown pitcher crops are now destroyed when the farmland they are placed in is destroyed.}}
{{History|||snap=23w14a|Pitcher crops can now be destroyed by [[ravagers]].|Pitcher crops' hitboxes now change according to their age.|[[File:Pitcher Crop Age 0 (bottom) JE2.png|32px]] [[File:Pitcher Crop Age 1 (bottom) JE2.png|32px]] [[File:Pitcher Crop Age 2 (bottom) JE2.png|32px]] [[File:Pitcher Crop Age 3 (bottom) JE2.png|32px]] [[File:Pitcher Crop Age 4 (bottom) JE2.png|32px]] Pitcher crops now have their bottom texture.}}
{{History|||snap=23w16a|Hitbox shape of pitcher crop has been changed for each stage of its growth.|[[Villager]]s can now plant pitcher pods.}}
{{History|||snap=23w17a|The player now get the [[advancement]] "Planting the past" when they plant pitcher pods on [[farmland]].}}
{{History|bedrock}}
{{History||1.20.0|snap=beta 1.20.0.20|[[File:Pitcher Crop Age 0 JE1.png|32px]] [[File:Pitcher Crop Age 1 JE1.png|32px]] [[File:Pitcher Crop Age 2 JE1.png|32px]] [[File:Pitcher Crop Age 3 JE1.png|32px]] [[File:Pitcher Crop Age 4 JE1.png|32px]] [[File:Pitcher Pod JE1.png|32px]] Added pitcher crops and pods.
|Unlike in Java Edition, pitcher pods can be used to feed chickens and parrots.}}
{{history|foot}}
== Notelist ==
{{notelist}}
== References ==
{{reflist}}
{{Blocks|upcoming}}
{{Items}}
[[Category:Plants]]
[[Category:Non-solid blocks]]
[[de:kannenpflanzentrieb]]
[[es:Vaina de planta odre]]
[[ja:ウツボカズラのさや]]
[[pt:Muda de planta-jarro]]</li></ul> | 16w32a | The entity ID has been changed from EyeOfEnderSignal to eye_of_ender_signal. | |||
1.12{{Extension DPL}}<ul><li>[[Key|Key]]<br/>{{About|the joke item|the golem|Key Golem|in-game control keys|Controls}}
{{Exclusive|Java}}
{{Joke feature}}
{{Item
| image = <gallery>
Red Key.gif | Red
Yellow Key.gif | Yellow
Blue Key.gif | Blue
</gallery>
| renewable =
* Blue: No
* Red, Yellow: Yes
| stackable = No
}}
'''Keys''' were a joke item from [[Java Edition 3D Shareware v1.34]].
There are three different keys: '''red''', '''yellow''', and '''blue'''.
== Obtaining ==
=== Mobs ===
The red key was dropped by the [[wither]], the yellow key was dropped by [[ravager]]s, and the blue key was dropped by the [[elder guardian]].
=== Cheat codes ===
These keys were also obtainable by using the cheat code "IDKFA" when typing in chat.
=== Natural generation ===
{{LootChestItem|red-key,yellow-key,blue-key}}
== Data values ==
=== ID ===
{{ID table
|showforms=y
|generatetranslationkeys=java
|displayname=Red Key
|spritetype=item
|nameid=red_key
|form=item}}
{{ID table
|displayname=Yellow Key
|spritetype=item
|nameid=yellow_key
|form=item}}
{{ID table
|displayname=Blue Key
|spritetype=item
|nameid=blue_key
|form=item
|foot=1}}
== History ==
{{History|java}}
{{History||3D Shareware v1.34|[[File:Red Key.gif|32px]] [[File:Yellow Key.gif|32px]] [[File:Blue Key.gif|32px]] Added red, yellow, and blue keys.}}
{{History|foot}}
== Trivia ==
*[[File:Green Key.png|32px]] A key with a similar appearance is present in ''The Europa Arcology Incident'', a game made by [[Notch]] in 2009.
{{Items}}
{{Jokes}}
[[Category:Joke items]]
[[pt:Chave]]</li><li>[[Raw Beef|Raw Beef]]<br/>{{Item
| title = Raw Beef
| image = Raw Beef.png
| heals = {{hunger|3}}
| renewable = Yes
| stackable = Yes (64)
}}
'''Raw beef''' is a [[food]] item that can be eaten by the [[player]] or cooked in a [[furnace]], [[smoker]], or [[campfire]] to make [[steak]].
== Obtaining ==
=== Mob loot ===
When adult [[cow]]s and [[mooshroom]]s are killed, they drop 1-3 raw beef. The maximum amount is increased by 1 per level of [[Looting]], for a maximum of 1-6 with Looting III. If killed while on fire, they drop [[steak]] instead.
=== Chest loot ===
{{LootChestItem|raw-beef}}
== Usage ==
=== Food ===
To eat raw beef, press and hold {{control|use}} while it is selected in the hotbar. Eating one restores {{hunger|3}} hunger and 1.8 hunger [[Hunger#Mechanics|saturation]].
=== Smelting ingredient ===
{{Smelting
|showname=1
|Raw Beef
|Steak
|0.35
}}
=== Wolves ===
Raw beef can be used to [[breed]] and heal tamed [[wolves]], lead them around, and make baby tamed wolves grow up faster by 10% of the remaining time.
=== Trading ===
Journeyman-level Butcher villagers have a 50% chance to buy 10 raw beef for an emerald.{{only|bedrock}}
Journeyman-level Butcher villagers always offer buy 10 raw beef for an emerald.{{only|java}}
==Sounds==
{{Sound table/Entity/Food}}
== Advancements ==
{{load advancements|Husbandry;A Balanced Diet}}
== Data values ==
=== ID ===
{{edition|java}}:
{{ID table
|edition=java
|showforms=y
|generatetranslationkeys=y
|displayname=Raw Beef
|spritetype=item
|nameid=beef
|form=item
|foot=1}}
{{edition|bedrock}}:
{{ID table
|edition=bedrock
|shownumericids=y
|showforms=y
|notshowbeitemforms=y
|generatetranslationkeys=y
|displayname=Raw Beef
|spritetype=item
|nameid=beef
|id=273
|form=item
|foot=1}}
== History ==
{{History|java beta}}
{{History||1.8|snap=Pre-release|[[File:Raw Beef JE1 BE1.png|32px]] Added raw beef.|Raw beef is one of the new [[food]] items, [[drops|dropped]] by [[cow]]s in addition to their [[leather]].}}
{{History|java}}
{{History||1.2.1|snap=12w03a|Raw beef can now be used to breed wolves.}}
{{History||1.3.1|snap=12w21a|Raw beef can now be [[trading|sold]] to butcher [[villager]]s, at 14–17 raw beef for 1 [[emerald]].}}
{{History|||snap=1.3|[[File:Raw Beef JE2.png|32px]] The texture of raw beef has been changed.}}
{{History||1.4.2|snap=12w37a|[[File:Raw Beef JE3 BE2.png|32px]] The texture of raw beef has been changed, so that it no longer has a dark outline.}}
{{History||1.8|snap=14w02a|[[Villager]]s no longer [[trading|trade]] for raw beef.}}
{{History||1.13|snap=17w47a|Prior to [[1.13/Flattening|''The Flattening'']], this [[item]]'s numeral ID was 363.}}
{{History||1.14|snap=18w43a|[[File:Raw Beef JE4 BE3.png|32px]] The texture of raw beef has been changed.}}
{{History|||snap=18w49a|Raw beef can now be found in [[chest]]s in [[village]] butcher shops.}}
{{History|||snap=19w11a|Butcher [[villager]]s now [[trading|buy]] raw beef.}}
{{History|pocket alpha}}
{{History||v0.4.0|[[File:Raw Beef JE1 BE1.png|32px]] Added raw beef.}}
{{History||v0.5.0|Raw beef now restores {{hp|3}} instead of {{hp|1}}.}}
{{History||v0.8.0|snap=build 1|[[File:Raw Beef JE3 BE2.png|32px]] The texture of raw beef has been changed, so that it no longer has a dark outline.}}
{{History||v0.9.0|snap=build 1|Raw beef has been added to [[Creative]] mode.}}
{{History||v0.12.1|snap=build 1|Raw beef now restores [[hunger]] instead of [[health]].}}
{{History|bedrock}}
{{History||1.10.0|snap=beta 1.10.0.3|[[File:Raw Beef JE4 BE3.png|32px]] The texture of raw beef has been changed.}}
{{History||1.11.0|snap=beta 1.11.0.1|Raw beef can now be found in [[village]] butcher [[chest]]s.}}
{{History|||snap=beta 1.11.0.4|Raw beef can now be [[trading|sold]] to butcher [[villager]]s.}}
{{History|console}}
{{History||xbox=TU5|xbone=CU1|ps=1.0|wiiu=Patch 1|[[File:Raw Beef JE1 BE1.png|32px]] Added raw beef.}}
{{History||xbox=TU12|[[File:Raw Beef JE3 BE2.png|32px]] The texture of raw beef has been changed, so that it no longer has a dark outline.}}
{{History||xbox=none|xbone=none|ps=1.90|wiiu=none|switch=none|[[File:Raw Beef JE4 BE3.png|32px]] The texture of raw beef has been changed.}}
{{History|New 3DS}}
{{History||0.1.0|[[File:Raw Beef JE3 BE2.png|32px]] Added raw beef.}}
{{History|foot}}
== Issues ==
{{issue list}}
== Gallery ==
<gallery>
File:Jeb steak.png|Raw Beef and [[Steak]] in a preview screenshot.
</gallery>
{{Items}}
[[de:Rohes Rindfleisch]]
[[es:Filete crudo]]
[[fr:Bœuf cru]]
[[hu:Nyers marhahús]]
[[ja:生の牛肉]]
[[ko:익히지 않은 소고기]]
[[nl:Rauwe biefstuk]]
[[pl:Surowa wołowina]]
[[pt:Bife cru]]
[[ru:Сырая говядина]]
[[uk:Сира яловичина]]
[[zh:生牛肉]]
[[Category:Food]]
[[Category:Renewable resources]]</li></ul> | 17w17a | A new pop sound has been added when a thrown eye of ender bursts. | |||
1.13{{Extension DPL}}<ul><li>[[Glow Berries|Glow Berries]]<br/>{{Block
|image=<gallery>
Cave Vines (head).png|Without Berries
Cave Vines (berries).png|With Berries
</gallery>
|image2 = Glow Berries JE1 BE1.png
|extratext=[[#Gallery|View all renders]]
|rarity=Common
|renewable=Yes
|stackable=Yes (64)
|tool=Any
|light=Yes
|transparent=Yes
|heals={{hunger|2}}
|flammable=Yes
|lavasusceptible=No
}}
'''Glow berries''' are a [[food]] [[item]] obtained from cave vines and can be used to plant them.
'''Cave vines''' are a climbable, [[Bone Meal|bonemealable]] plant that hangs off ceilings and grows glow berries. Cave vines with glow berries produce [[light]] and drop glow berries when broken or harvested. Cave vines with no glow berries will not drop anything.
== Obtaining ==
=== Natural generation ===
Cave vines can be found in [[lush caves]], hanging from cave ceilings.
=== Chest loot ===
{{LootChestItem|glow-berries}}
=== Post-generation ===
Glow berries can be collected from a cave vine by {{control|using}} or {{control|breaking}} the vine. This yields one glow berry when the vine is bearing them and nothing when it is not. A cave vine also breaks if [[water]] runs over its location or if a [[piston]] extends or pushes a block into its location.
{{IN|bedrock}}, using a tool with [[Silk Touch]] on cave vines always yields a glow berry, even if the vine appears empty.
[[Fortune]] has no effect on the number of glow berries dropped.
== Usage ==
=== Placement ===
Glow berries can be placed on and grown from the bottom of most blocks. They have no specific lighting requirements. When placed, they can be of any length.
=== Growth ===
Placing glow berries on the bottom of a block creates a cave vine that grows downward one block at a time as long as [[air]] is beneath it and its maximum height (2 to 26 blocks) has not been reached. Each newly-grown cave vine block has a 1 in 9 chance of bearing glow berries. Only this tip can ever naturally grow them.{{only|JE}}{{More info|exact growth rate and chance to bear glow berries}}
{{control|Using}} [[bone meal]] on a cave vine produces glow berries if the vine was not bearing any.
{{IN|Java}}, cave vines stop growing if [[shears]] are {{control|used}} on the tip.
{{IN|bedrock}}, if placing glow berries in the Nether, cave vines are able to grow and produces glow berries.
=== Food ===
To eat glow berries, press and hold {{control|use}} while it is selected in the hotbar. Eating one restores {{hunger|2}} [[hunger]] and 0.4 hunger [[Hunger#Mechanics|saturation]] points, like [[sweet berries]].
=== Light ===
When bearing glow berries, cave vines give off a [[light]] level of 14.
=== Composting ===
Placing glow berries into a [[composter]] by {{control|using}} them on it has a 30% chance of raising the compost level by 1.
=== Breeding ===
Glow berries can be fed to [[fox]]es to [[breeding|breed]] them. Foxes are similar to cats when being fed as a wild animal; a sudden movement by the player may cause the fox to flee even if the player holds glow berries. The resulting baby fox trusts the [[player]] and does not flee.
Glow berries can be {{control|used}} on baby foxes to reduce the time until they grow by 10%.
==Sounds==
===Glow berries===
{{Sound table/Entity/Food}}
===Cave vines===
====Generic====
{{Sound table/Block/Cave vines}}
==== Unique ====
{{edition|java}}:
{{Sound table
|sound=Berries pick1.ogg
|sound2=Berries pick2.ogg
|subtitle=Berries pop
|source=block
|description=When glow berries are picked
|id=block.cave_vines.pick_berries
|translationkey=subtitles.item.berries.pick
|volume=1.0
|pitch=0.8-1.2
|distance=16}}
{{Sound table
|sound=Shear.ogg
|subtitle=Plant cropped
|source=block
|description=When the tip of cave vines are cropped with [[Shears#Cropping growing plants|shears]]
|id=block.growing_plant.crop
|translationkey=subtitles.block.growing_plant.crop
|volume=1.0
|pitch=1.0
|distance=16
|foot=1}}
{{edition|bedrock}}:
{{Sound table
|type=bedrock
|sound=Berries pick1.ogg
|sound2=Berries pick2.ogg
|source=block
|description=When glow berries are picked
|id=pick_berries.cave_vines
|volume=1.0
|pitch=0.8-1.2
|foot=1}}
==Data values==
===ID===
{{edition|java}}:
{{ID table
|edition=java
|showblocktags=y
|showitemtags=y
|showforms=y
|generatetranslationkeys=y
|displayname=Cave Vines
|spritetype=block
|nameid=cave_vines
|blocktags=cave_vines,lush_plants_replaceable
|form=block
}}
{{ID table
|displayname=Cave Vines Plant
|spritetype=block
|nameid=cave_vines_plant
|blocktags=cave_vines,lush_plants_replaceable
|form=block
}}
{{ID table
|displayname=Glow Berries
|spritetype=item
|nameid=glow_berries
|itemtags=fox_food
|form=item
|foot=1}}
{{el|be}}:
{{ID table
|edition=bedrock
|shownumericids=y
|showforms=y
|generatetranslationkeys=y
|displayname=Cave Vines
|nameid=cave_vines
|spritetype=block
|id=577}}
{{ID table
|displayname=Cave Vines Body With Berries
|nameid=cave_vines_body_with_berries
|spritename=lit-cave-vines-plant
|spritetype=block
|id=630}}
{{ID table
|displayname=Cave Vines Head With Berries
|spritename=lit-cave-vines
|nameid=cave_vines_head_with_berries
|spritetype=block
|id=631}}
{{ID table
|displayname=Glow Berries
|spritetype=item
|nameid=glow_berries
|form=item
|id=638
|foot=1}}
=== Block states===
{{See also|Block states}}
{{/BS}}
==Advancements==
{{load advancements|Husbandry;A Balanced Diet}}
==History==
{{History||October 3, 2020|link={{ytl|DWZIfsaIgtE|t=1781}}|[[File:Cave Vines Plant JE1 BE1.png|32px]] [[File:Cave Vines Plant (berries) JE1 BE1.png|32px]] [[File:Cave Vines (head) JE1 BE1.png|32px]] [[File:Cave Vines (berries) JE1 BE1.png|32px]] Cave vines (named as glow berries) are shown as part of lush caves at [[Minecraft Live 2020]].}}
{{History|java}}
{{History||1.17|snap=21w05a|[[File:Glow Berries JE1 BE1.png|32px]] Added glow berries.
|[[File:Cave Vines Plant JE1 BE1.png|32px]] [[File:Cave Vines Plant (berries) JE1 BE1.png|32px]] [[File:Cave Vines (head) JE1 BE1.png|32px]] [[File:Cave Vines (berries) JE1 BE1.png|32px]] Added cave vines.}}
{{History|||snap=21w11a|Renamed from "cave vines head" and "cave vines body" to "cave vines" and "cave vines plant", respectively.
|The IDs have also changed.
|Cave vines now always give 14 light, regardless of the type of part.
|Now slow down the player.
|Can now be climbed.}}
{{History|||snap=21w13a|Glow berries now generate as loot in [[mineshaft]] [[Minecart with Chest|chest minecarts]].}}
{{History||1.18|snap=Experimental Snapshot 1|With the implementation of cave biomes including lush caves, caves vines can now generate in normal worlds.}}
{{History|||snap=21w37a|Cave vines stop growing if [[shears]] are used on the tip.}}
{{History|||snap=21w41a|[[File:Cave Vines Plant JE2.png|32px]] [[File:Cave Vines Plant (berries) JE2.png|32px]] Changed cave vines plant texture.}}
{{History||1.19|snap=22w13a|Glow Berries may now be found in [[ancient city]] [[chest]]s.}}
{{History|bedrock}}
{{History||Caves & Cliffs (experimental)|link=Bedrock Edition 1.17.0|snap=beta 1.16.220.52|[[File:Glow Berries JE1 BE1.png|32px]] Added glow berries.
|[[File:Cave Vines Plant JE1 BE1.png|32px]] [[File:Cave Vines Plant (berries) JE1 BE1.png|32px]] [[File:Cave Vines (head) JE1 BE1.png|32px]] [[File:Cave Vines (berries) JE1 BE1.png|32px]] Added cave vines.}}
{{History||1.17.0|snap=beta 1.16.230.54|Glow Berries now generate as loot in [[mineshaft]] [[Minecart with Chest|chest minecarts]].}}
{{History|||snap=beta 1.17.0.52|Glow Berries are now available without enabling [[experimental gameplay]].}}
{{History||1.17.20|snap=beta 1.17.20.20|Cave Vines can now be pollinated by [[bee]]s.}}
{{History||1.18.10|snap=beta 1.18.10.20|[[File:Cave Vines Plant JE2.png|32px]] [[File:Cave Vines Plant (berries) JE2.png|32px]] Changed cave vines plant texture.}}
{{History||1.19.20|snap=beta 1.19.20.20|Cave vines can now be destroyed by [[ravagers]].}}
{{History|foot}}
<gallery>
Lush_caves_overview_concept_art.jpg|Concept art for the lush caves and vegetation including Glow Berries.
JE_1.17_Development_Lush_Caves.jpg|A view of the lush caves with glow berries from Minecraft Live 2020.
Lushcaves_minecon.png|Lush cave in MINECON.
Cavesworkinprogress.jpg|A view of the lush caves with glow berries, tweeted by LadyAgnes.
Livestream_lush_cave.jpg|Another view of the lush caves with glow berries, in an interview with LadyAgnes.
Glow Berry Fox.jpg|A fox under a glow berry vine.
</gallery>
===Cave vines "item"===
{{:Technical blocks/Cave Vines}}
==Issues==
{{Issue list}}
==Trivia==
*They are the first item to be usable as both a food and a light source.
==Gallery==
<gallery>
Cave Vines (plant).png
Cave Vines (berries, plant).png
Cave Vines (head).png
Cave Vines (berries).png
Cave_Vines_Age2_(Possibility_pattern_1)_JE1.png|A possible pattern of the cave vines at Age 2.
Cave_Vines_Age2_(Possibility_pattern_2)_JE1.png|And another pattern.
</gallery>
{{Blocks|vegetation}}
{{Items}}
[[Category:Food]]
[[Category:Plants]]
[[Category:Natural blocks]]
[[Category:Non-solid blocks]]
[[Category:Light sources]]
[[Category:Flammable blocks]]
[[Category:Climbable blocks]]
[[de:Leuchtbeeren]]
[[es:Bayas luminosas]]
[[fr:Baies lumineuses]]
[[it:Bacche luminose]]
[[ja:グロウベリー]]
[[pt:Bagas brilhantes]]
[[ru:Светящиеся ягоды]]
[[zh:发光浆果]]</li><li>[[Spider Eye|Spider Eye]]<br/>{{Item
| title = Spider Eye
| image = Spider Eye.png
| renewable = Yes
| heals = {{Hunger|2}}
|effects={{EffectLink|Poison}} (0:05)
| stackable = Yes (64)
}}
A '''spider eye''' is a poisonous [[food]] and [[brewing]] item.
== Obtaining ==
=== Mob loot ===
==== Spiders ====
[[Spider]]s and [[cave spider]]s have a {{frac|1|3}} chance of dropping a [[spider eye]] when killed by a player or tamed wolf, but not when killed by environmental damage (such as falling). The maximum amount of spider eyes is increased by 1 per level of [[Looting]]. The chance of a spider '''not''' dropping any spider eyes can be found using the formula <code>2 / (Looting Level + 3)</code>. For example, Looting III gives a {{frac|1|3}} chance of not dropping any spider eyes. All other amounts have an equal chance of occurring.
==== Witches ====
[[Witch]]es have a chance of dropping 0–6 spider eyes upon death. This is increased by 3 per level of [[Looting]], for a maximum of 0-15 spider eyes.
=== Chest loot ===
{{LootChestItem|spider-eye}}
== Usage ==
=== Food ===
When [[Food|eaten]], a spider eye restores {{hunger|2}} [[Hunger|hunger points]] and 3.2 [[Hunger#Mechanics|saturation points]], giving a nourishment value of 1.6. It also applies a [[Poison]] [[effect]] lasting 5 seconds to the player, causing {{hp|4|poisoned=1}} damage, which reduces hunger/saturation by 6 points.
=== Crafting ingredient ===
{{crafting usage}}
=== Brewing ingredient ===
{{brewing
|showname=1
|head=1
|Spider Eye
|Mundane Potion
|base=Water Bottle
}}
{{brewing
|foot=1
|Spider Eye
|Potion of Poison
}}
==Sounds==
{{Sound table/Entity/Food}}
== Data values ==
=== ID ===
{{edition|java}}:
{{ID table
|edition=java
|showforms=y
|generatetranslationkeys=y
|displayname=Spider Eye
|spritetype=item
|nameid=spider_eye
|form=item
|foot=1}}
{{edition|bedrock}}:
{{ID table
|edition=bedrock
|shownumericids=y
|showforms=y
|notshowbeitemforms=y
|generatetranslationkeys=y
|displayname=Spider Eye
|spritetype=item
|nameid=spider_eye
|id=278
|form=item
|foot=1}}
== Advancements ==
{{load advancements|Husbandry;A Balanced Diet}}
== Video ==
<div style="text-align:center">{{yt|-PD-wX07TCg}}</div>
== History ==
{{History|java}}
{{History||1.0.0|snap=Beta 1.9 Prerelease 2|[[File:Spider Eye JE1 BE1.png|32px]] Added spider eyes.
|Spider eyes can be used to craft [[fermented spider eye]]s.}}
{{History|||snap=Beta 1.9 Prerelease 3|Spider eyes can now be [[brewing|brewed]] in a [[water bottle]] to create a [[Mundane Potion]], or in an [[Awkward Potion]] to create a [[Potion of Poison]].}}
{{History||1.4.2|snap=12w38b|Spider eyes can now be dropped by [[witch]]es.}}
{{History||1.9|snap=15w44a|Spider eyes can now be found in [[desert pyramid|desert temple]] [[chest]]s.}}
{{History||1.13|snap=17w47a|Prior to [[1.13/Flattening|''The Flattening'']], this [[item]]'s numeral ID was 375.}}
{{History||1.14|snap=18w43a|[[File:Spider Eye JE2 BE2.png|32px]] The texture of spider eyes has been changed.}}
{{History|pocket alpha}}
{{History||v0.12.1|snap=build 1|[[File:Spider Eye JE1 BE1.png|32px]] Added spider eyes.|Spider eyes can be used to craft [[fermented spider eye]]s and for [[brewing]].}}
{{History||v0.13.0|snap=build 1|Spider eyes can now be found in [[desert pyramid|desert temple]] [[chest]]s.}}
{{History||v0.14.0|snap=build 1|Spider eyes can now dropped by [[witch]]es.}}
{{History|bedrock}}
{{History||1.10.0|snap=beta 1.10.0.3|[[File:Spider Eye JE2 BE2.png|32px]] The texture of spider eyes has been changed.}}
{{History|console}}
{{History||xbox=TU7|xbone=CU1|ps=1.0|wiiu=Patch 1|[[File:Spider Eye JE1 BE1.png|32px]] Added spider eyes.}}
{{History||xbox=none|xbone=none|ps=1.90|wiiu=none|[[File:Spider Eye JE2 BE2.png|32px]] The texture of spider eyes has been changed.}}
{{History|New 3DS}}
{{History||0.1.0|[[File:Spider Eye JE1 BE1.png|32px]] Added spider eyes.}}
{{History|foot}}
== Issues ==
{{issue list}}
== References ==
{{reflist}}
{{items}}
[[cs:Pavoučí oko]]
[[de:Spinnenauge]]
[[es:Ojo de araña]]
[[fr:Œil d'araignée]]
[[hu:Pókszem]]
[[it:Occhio di ragno]]
[[ja:クモの目]]
[[ko:거미 눈]]
[[nl:Spinnenoog]]
[[pl:Oko pająka]]
[[pt:Olho de aranha]]
[[ru:Паучий глаз]]
[[zh:蜘蛛眼]]
[[Category:Food]]
[[Category:Renewable resources]]
[[Category:Brewing recipe]]</li></ul> | 17w47a | Prior to The Flattening, this item's numeral ID was 381. | |||
| pre5 | The entity ID has been changed to eye_of_ender. | ||||
1.14{{Extension DPL}}<ul><li>[[Chorus Fruit|Chorus Fruit]]<br/>{{about|the fruit that drops from [[chorus tree]]s|the building material|Popped Chorus Fruit|other uses|Chorus}}
{{Item
| title = Chorus Fruit
| image = Chorus Fruit.png
| renewable = Yes
| heals = {{hunger|4}}
| stackable = Yes (64)
}}
'''Chorus fruit''' is a [[food]] [[item]] native to [[the End]] that can be eaten, or [[smelting|smelted]] into [[Popped Chorus Fruit|popped chorus fruit]]. It can be eaten even when the hunger bar is full, and eating it may teleport the [[player]] up to 8 blocks in any direction.
== Obtaining ==
{{see also|Tutorials/Chorus fruit farming}}
Chorus fruit can be obtained by breaking [[Chorus Plant (block)|chorus plant blocks]]. Each block of chorus plant has a 50% chance to drop a chorus fruit. This is not affected by [[Fortune]].<ref>{{bug|MC-198924||Chorus Fruit doesn't have a higher chance with Fortune|Invalid}}</ref>
== Usage ==
To eat chorus fruit, press and hold {{control|use}} while it is selected in the hotbar. Eating one restores {{hunger|4}} [[hunger]] and 2.4 hunger [[Hunger#Mechanics|saturation]].
Unlike most foods, chorus fruits can be eaten even when the player has a full hunger bar.
The player may also be [[teleportation|teleported]]: up to 16 attempts are made to choose a random destination within ±8 on all three axes in the same manner as [[Enderman#Teleportation|enderman teleportation]], with the exception that the player may teleport into an area only 2 blocks high, or one block tall if the player is crawling. The player does not land in the average centroid of the block, but rather to any position within an 8-block range. The player will be teleported directly down to the ground regardless of the height it was used at if the player is too far from a valid destination.
The chorus fruit, unlike an [[Ender Pearl|ender pearl]], can teleport the player through [[solid block]]s. The algorithm tries to avoid [[fluid]]s; the player cannot teleport into a space occupied by [[water]] or [[lava]]. However, the player can be teleported onto dangerous blocks such as fire, cacti and magma blocks.<ref>{{bug|MC-102836||Enderman and chorus fruit can teleport to some dangerous places}}</ref>
If a teleport succeeds, a sound similar to an enderman teleporting plays originating from the teleportation origin location. Chorus fruit has a cooldown of 1 second before being able to be used again. The cooldown is represented by a white overlay on the chorus fruit in the hotbar. The cooldown is applied to all chorus fruits items, including those in the player's inventory and containers.<ref>{{bug|MC-88236|||WAI}}</ref>
Eating chorus fruit may teleport the player into areas protected by [[bedrock]], [[barrier|barrier blocks]], or other blocks that are otherwise unbreakable in [[Survival]] mode. However, it cannot teleport the player onto [[the Nether]] roof.<ref>{{bug|MC-84198|||Fixed}}</ref>
Chorus fruit is completely non-functional above the nether roof.
[[Fox]]es can also eat chorus fruit and the teleportation effect works the same as with players.
=== Smelting ingredient ===
{{smelting
|Chorus Fruit
|Popped Chorus Fruit
|0.1}}
== Sounds ==
===Generic===
{{Sound table/Entity/Food}}
===Unique===
{{edition|java}}:
{{Sound table
|rowspan=2
|sound=Teleport1.ogg
|sound2=Teleport2.ogg
|subtitle=Player teleports
|source=player
|description=When a player teleports by eating a chorus fruit
|id=item.chorus_fruit.teleport
|translationkey=subtitles.item.chorus_fruit.teleport
|volume=1.0
|pitch=1.0
|distance=16}}
{{Sound table
|subtitle=Fox teleports
|source=Players & Friendly Creatures<wbr><ref group=sound>{{Bug|MC-257516||"Fox teleports" sound plays for both Players and Friendly Creatures sound categories}}</ref>|overridesource=1
|description=When a fox teleports by eating a chorus fruit
|id=entity.fox.teleport
|translationkey=subtitles.entity.fox.teleport
|volume=1.0
|pitch=1.0
|distance=16
|foot=1}}
{{edition|bedrock}}:
{{Sound table
|type=bedrock
|sound=Teleport1.ogg
|sound2=Teleport2.ogg
|source=hostile
|description=When something teleports by eating a chorus fruit
|id=mob.shulker.teleport
|volume=1.0
|pitch=1.0
|foot=1}}
==Data values ==
===ID===
{{edition|java}}:
{{ID table
|edition=java
|showforms=y
|generatetranslationkeys=y
|displayname=Chorus Fruit
|spritetype=item
|nameid=chorus_fruit
|form=item
|foot=1}}
{{edition|bedrock}}:
{{ID table
|edition=bedrock
|shownumericids=y
|showforms=y
|notshowbeitemforms=y
|generatetranslationkeys=y
|displayname=Chorus Fruit
|spritetype=item
|nameid=chorus_fruit
|id=558
|form=item
|foot=1}}
==Advancements==
{{load advancements|Husbandry;A Balanced Diet}}
==History==
{{History|java}}
{{History||1.9|snap=15w31a|[[File:Chorus Fruit JE1 BE1.png|32px]] Added chorus fruit.}}
{{History|||snap=15w34c|A cooldown for using chorus fruit has now been added.}}
{{History|||snap=15w37a|The chorus fruit's teleportation range has now been reduced from ±32 to ±8.}}
{{History|||snap=15w50a|Added a [[sound]] for chorus fruit: <code>item.chorus_fruit.teleport</code>.}}
{{History||1.10|snap=16w21a|Chorus fruit can now teleport riders off their mounts.}}
{{History||1.13|snap=17w47a|Prior to [[1.13/Flattening|''The Flattening'']], this [[item]]'s numeral ID was 432.}}
{{History||1.14|snap=18w43a|[[File:Chorus Fruit JE2 BE2.png|32px]] The texture of chorus fruit has now been changed.}}
{{History||1.20.2|snap=23w33a|Eating chorus fruit now resets fall distance.<ref>{{bug|MC-112133||Eating chorus fruit does not reset fall distance|Fixed}}</ref>}}
{{History|pocket}}
{{History||1.0.0|snap=alpha 0.17.0.1|[[File:Chorus Fruit JE1 BE1.png|32px]] Added chorus fruit.}}
{{History|||snap=alpha 1.0.0.1|The cooldown of chorus fruit now has an animation.}}
{{History|bedrock}}
{{History||1.7.0|snap=beta 1.7.0.2|The category that chorus fruit are apart of in the [[Creative inventory]] has been changed from "Nature" to "Items".}}
{{History||1.10.0|snap=beta 1.10.0.3|[[File:Chorus Fruit JE2 BE2.png|32px]] The texture of chorus fruit has now been changed.}}
{{History||1.13.0|snap=beta 1.13.0.15|Chorus fruit has been moved back to the "Nature" section in the Creative inventory.}}
{{History|console}}
{{History||xbox=TU46|xbone=CU36|switch=1.0.1|ps=1.38|wiiu=Patch 15|[[File:Chorus Fruit JE1 BE1.png|32px]] Added chorus fruit.}}
{{History||xbox=none|xbone=none|ps=1.90|wiiu=none|switch=none|[[File:Chorus Fruit JE2 BE2.png|32px]] The texture of chorus fruit has now been changed.}}
{{History|new 3ds}}
{{History||1.7.10|[[File:Chorus Fruit JE1 BE1.png|32px]] Added chorus fruit.}}
{{History|foot}}
==Issues==
{{issue list}}
==References==
{{reflist}}
==External Links==
*[https://www.minecraft.net/en-us/article/taking-inventory--chorus-fruit Taking Inventory: Chorus Fruit] – Minecraft.net on November 5, 2020
{{Items}}
[[Category:Plants]]
[[Category:Food]]
[[Category:Renewable resources]]
[[de:Chorusfrucht]]
[[es:Fruta chorus]]
[[fr:Chorus]]
[[ja:コーラスフルーツ]]
[[ko:후렴과]]
[[nl:Chorusfruit]]
[[pl:Owoc refrenusu]]
[[pt:Fruta do coro]]
[[ru:Плод коруса]]
[[uk:Фрукт хорусу]]
[[zh:紫颂果]]</li><li>[[Fish|Fish]]<br/>{{About|the type of mob|the action|Fishing}}
'''Fish''' are aquatic creatures that are found in [[river]] and [[ocean]] biomes.
== Mobs ==
There are four categories of fish mobs in ''Minecraft'':
*{{EntityLink|Cod}}
*{{EntityLink|Salmon}}
*{{EntityLink|Pufferfish}}
*{{EntityLink|Tropical Fish}} - many color and pattern varieties
In addition, there are other fish-like mobs that have different characteristics from fish: {{EntityLink|Axolotl}}, {{EntityLink|Guardian}}, and {{EntityLink|Elder Guardian}}.
==Obtaining and transporting==
A live fish can be captured by using a [[water bucket]] on a fish, to obtain a [[bucket of fish]], which is the only way to obtain the live mob in item form. Using the bucket of fish on a water source block transfers the fish from the bucket to the body of water. A water bucket may also be used on [[axolotl]]s in this manner.
==Items==
Fish exist in several different item forms. Upon death, fish drop their item form equivalent (cooked if on fire), with a chance to drop a [[bone]]{{only|bedrock}} or [[bone meal]].{{only|java}}
;Non-living
*{{ItemLink|Raw Cod}}
*{{ItemLink|Cooked Cod}}
*{{ItemLink|Raw Salmon}}
*{{ItemLink|Cooked Salmon}}
*{{ItemLink|Pufferfish|link=Pufferfish (item)}}
*{{ItemLink|Tropical Fish|link=Tropical Fish (item)}}
;Living
*{{ItemLink|Bucket of Cod}}
*{{ItemLink|Bucket of Salmon}}
*{{ItemLink|Bucket of Pufferfish}}
*{{ItemLink|Bucket of Tropical Fish}}
== Spawning ==
Various fish can be found in different [[ocean]] [[biomes]], but only [[salmon]] appear in rivers. Fish can also spawn in player-created bodies of water, as long as they are within a river or ocean biome.
{| class="wikitable sortable" style="text-align:left" data-description="Fish biomes"
!'''Fish'''
! style="text-align:left" |{{BiomeLink|Warm Ocean}}
! style="text-align:left" |{{BiomeLink|Lukewarm Ocean}}<br>{{BiomeLink|Deep Lukewarm Ocean}}
! style="text-align:left" |{{BiomeLink|Ocean}}<br>{{BiomeLink|Deep Ocean}}
! style="text-align:left" |{{BiomeLink|Cold Ocean}}<br>{{BiomeLink|Deep Cold Ocean}}
! style="text-align:left" |{{BiomeLink|Frozen Ocean}}<br>{{BiomeLink|Deep Frozen Ocean}}
! style="text-align:left" |{{BiomeLink|River}}<br>{{BiomeLink|Frozen River}}
|-
! rowspan=2 style="text-align:left" |{{EntityLink|Cod}}
| rowspan=2 {{tc|no}}
| rowspan=2 {{tc|yes}}
| rowspan=2 {{tc|yes}}
| rowspan=2 {{tc|yes}}
| {{tc|no|No{{only|je|short=1}}}}
| rowspan=2 {{tc|no}}
|-
| {{tc|yes|Yes{{only|be|short=1}}}}
|-
! rowspan=2 style="text-align:left" |{{EntityLink|Salmon}}
| rowspan=2 {{tc|no}}
| {{tc|no|No{{only|je|short=1}}}}
| {{tc|no|No{{only|je|short=1}}}}
| rowspan=2 {{tc|yes}}
| rowspan=2 {{tc|yes}}
| rowspan=2 {{tc|yes}}
|-
| {{tc|yes|Yes{{only|be|short=1}}}}
| {{tc|yes|Yes{{only|be|short=1}}}}
|-
! rowspan=2 style="text-align:left" |{{EntityLink|Pufferfish}}
| rowspan=2 {{tc|yes}}
| {{tc|yes|Yes{{only|je|short=1}}}}
| rowspan=2 {{tc|no}}
| rowspan=2 {{tc|no}}
| rowspan=2 {{tc|no}}
| rowspan=2 {{tc|no}}
|-
| {{tc|no|No{{only|be|short=1}}}}
|-
! style="text-align:left" |{{EntityLink|Tropical Fish}}<ref group="note">Also spawns in {{BiomeLink|Lush Caves}} at any Y-level.</ref>
| {{tc|yes}}
| {{tc|yes}}
| {{tc|no}}
| {{tc|no}}
| {{tc|no}}
| {{tc|no}}
|-
! style="text-align:left" |{{EntityLink|Squid}}
| {{tc|yes}}
| {{tc|yes}}
| {{tc|yes}}
| {{tc|yes}}
| {{tc|yes}}
| {{tc|yes}}
|-
! rowspan=2 style="text-align:left" |{{EntityLink|Dolphin}}
| rowspan=2 {{tc|yes}}
| rowspan=2 {{tc|yes}}
| rowspan=2 {{tc|yes}}
| {{tc|no|No{{only|je|short=1}}}}
| rowspan=2 {{tc|no}}
| rowspan=2 {{tc|no}}
|-
| {{tc|yes|Yes{{only|be|short=1}}}}
|}
{{notelist}}
In ''Java Edition'', fish can spawn inside a water block at Y-level 50 to 63 (from 13 blocks below sea level up to inside the block one above it), that also has water above and below it. The spawn block and the block below can be any kind of water, such as a source block, falling water, bubble column, kelp, or even a waterlogged block (as long as the fish can be placed at the bottom center of the spawn block without colliding with anything solid). The block above must be pure water, such as a source block, falling water, or flowing water of any depth. Particularly, the block above cannot also be a bubble column, so fish no longer spawn inside bubble elevators.<ref>{{cite bug|MC|244683|Tropical fish spawn in bubble columns (fixed in 22w07a)}}</ref>
''Bedrock Edition'' does permit fish to spawn in bubble columns.<ref>{{cite bug|MCPE|73967|Squids, Dolphins, and fish not spawning in bubble columns (fixed in 1.16.20)}}</ref>
Fish can spawn between 24 and 64 block spherical range away from the player.{{only|java}}
=== Despawning ===
As of [[1.16]], fish can despawn at range of 40 blocks or more from the player, and will instantly despawn more than 64 blocks away, except when spawned using a [[bucket of fish]].
{{Items}}
{{Entities}}
[[cs:Ryba]]
[[de:Fisch (Begriffsklärung)]]
[[es:Pez]]
[[fr:Poisson]]
[[it:Pesce]]
[[ja:魚]]
[[ko:물고기]]
[[nl:Vis]]
[[pl:Ryba (ujednoznacznienie)]]
[[pt:Peixe]]
[[ru:Рыба]]
[[th:ปลา (แก้ความกำกวม)]]
[[uk:Риба]]
[[zh:鱼]]</li></ul> | 18w43a | ||||
| Pocket Edition | |||||
1.0.0{{Extension DPL}}<ul><li>[[Clay Ball|Clay Ball]]<br/>{{Item
| image = Clay Ball.png
| stackable = Yes (64)
| renewable = Yes
}}
{{about|the item|the block|Clay|other uses|Clay (disambiguation)}}
A '''clay ball''' is the item obtained from [[clay]] used for [[crafting]] or making [[brick]]s.
== Obtaining ==
=== Block loot ===
Clay balls are obtained when a [[clay]] block is broken with a non-[[Silk Touch]] tool. Each block yields four clay balls regardless of [[Fortune]].
=== Chest loot ===
{{LootChestItem|clay-ball}}
=== Villager gifts ===
If a [[player]] has the [[Hero of the Village]] status effect, a Mason [[villager]] might throw that player a [[clay block]] as a gift. {{Only|java}} This can be placed and [[breaking|broken]] to harvest clay balls.
== Usage ==
Clay balls can be [[crafting|crafted]] back together to form [[clay]] blocks or baked in a [[furnace]] to create [[brick]]s.
=== Crafting ingredient ===
{{crafting usage}}
=== Smelting ingredient ===
{{Smelting
|showname=1
|Clay Ball
|Brick
|0.3
}}
=== Trading ===
Novice-level [[Villager|mason villagers]] buy 10 clay balls for 1 [[emerald]] as part of their [[trades]].
== Data values ==
=== ID ===
{{edition|java}}:
{{ID table
|edition=java
|showforms=y
|generatetranslationkeys=y
|displayname=Clay Ball
|spritetype=item
|nameid=clay_ball
|form=item
|foot=1}}
{{edition|bedrock}}:
{{ID table
|edition=bedrock
|shownumericids=y
|showforms=y
|notshowbeitemforms=y
|generatetranslationkeys=y
|displayname=Clay
|spritetype=item
|nameid=clay_ball
|id=384
|form=item
|foot=1}}
== History ==
{{History|java alpha}}
{{History||v1.0.11|[[File:Clay Ball JE1 BE1.png|32px]] Added clay.}}
{{History|java}}
{{History||1.13|snap=17w47a|Prior to [[1.13/Flattening|''The Flattening'']], this [[item]]'s numeral ID was 337.}}
{{History||1.14|snap=18w43a|[[File:Clay Ball JE2 BE2.png|32px]] The texture of clay has been changed.}}
{{History|||snap=18w49a|Clay can now be found in [[chest]]s in [[village]] mason houses.}}
{{History|||snap=18w50a|Clay can now be found in [[chest]]s in [[desert]] [[village]] houses.}}
{{History|||snap=19w11a|Clay is now [[trading|bought]] by [[villager]]s of the new mason profession.}}
{{History||1.16|snap=20w06a|"Clay" has been renamed to "Clay Ball."}}
{{History|pocket alpha}}
{{History||v0.2.0|[[File:Clay Ball JE1 BE1.png|32px]] Added clay. It is currently unobtainable and serves no purpose.}}
{{History||v0.3.2|4 clay items are now dropped from clay blocks when broken.
|Clay can now be crafted into clay blocks.
|Clay can now be smelted into bricks.}}
{{History|bedrock}}
{{History||1.10.0|snap=beta 1.10.0.3|[[File:Clay Ball JE2 BE2.png|32px]] The texture of clay has been changed.|10–13 clay can now be [[trading|sold]] to stone mason [[villager]]s for an [[emerald]].}}
{{History||1.11.0|snap=beta 1.11.0.1|Clay can now be found in [[village]] mason [[chest]]s and [[desert]] village house chests.}}
{{History|||snap=beta 1.11.0.4|[[Trading]] has been changed, stone mason villagers now [[trading|buy]] 10 clay for an emerald<!-- previously 10-13 -->.}}
{{History||1.19.0|snap=beta 1.19.0.24|Clay ball now [[renewable]] by placing [[mud]] above a block which has [[pointed dripstone]] underneath.}}
{{History|console}}
{{History||xbox=TU1|xbone=CU1|ps=1.0|wiiu=Patch 1|[[File:Clay Ball JE1 BE1.png|32px]] Added clay.}}
{{History||xbox=none|xbone=none|ps=1.90|wiiu=none|switch=none|[[File:Clay Ball JE2 BE2.png|32px]] The texture of clay has been changed.}}
{{History|3ds}}
{{History||0.1.0|[[File:Clay Ball JE1 BE1.png|32px]] Added clay.}}
{{History|foot}}
== Issues ==
{{issue list}}
== Gallery ==
<gallery>
File:ClayInNumerousForms.png
</gallery>
== Notes ==
{{fnlist}}
{{Items}}
[[cs:Jíl]]
[[de:Tonklumpen]]
[[es:Bola de arcilla]]
[[fr:Motte d'argile]]
[[hu:Agyag (Tárgy)]]
[[it:Zolla di argilla]]
[[ja:粘土玉]]
[[ko:점토 덩이]]
[[nl:Klei (voorwerp)]]
[[pl:Glina]]
[[pt:Bola de argila]]
[[ru:Глина]]
[[uk:Глиняна кулька]]
[[zh:黏土球]]</li><li>[[Helmet|Helmet]]<br/>{{Update|Include information about armor trims and updated netherite upgrade information.}}
{{redirect|Cap|mob spawning caps|Spawn}}
{{redirect|Turtle Shell|the item dropped by maturing turtles|Scute}}
{{Item
| image = <gallery>
Leather Cap.png| Leather
Chainmail Helmet.png| Chainmail
Iron Helmet.png| Iron
Diamond Helmet.png| Diamond
Golden Helmet.png| Golden
Netherite Helmet.png| Netherite
Turtle Shell.png| Turtle Shell
</gallery>
| durability =
* Leather: 55
* Chainmail: 165
* Iron: 165
* Golden: 77
* Diamond: 363
* Netherite: 407
* Turtle Shell: 275
| renewable =
* '''Netherite''': No
* '''All others''': Yes
| stackable = No
}}
'''Helmets''' are a type of [[armor]] that covers the head of the player. There are seven types of helmets: '''leather cap''', '''chainmail helmet''', '''iron helmet''', '''diamond helmet''', '''gold helmet''', '''netherite helmet''', and '''turtle shell'''.
==Obtaining ==
===Crafting===
{{crafting
|head=1
|showname=0
|showdescription=1
|name=Helmet
|A2= Leather;Gold Ingot;Iron Ingot;Diamond;Scute
|B2= Leather;Gold Ingot;Iron Ingot;Diamond;Scute
|C2= Leather;Gold Ingot;Iron Ingot;Diamond;Scute
|A3= Leather;Gold Ingot;Iron Ingot;Diamond;Scute
|C3= Leather;Gold Ingot;Iron Ingot;Diamond;Scute
|description=
|Output= Leather Cap;Golden Helmet;Iron Helmet;Diamond Helmet;Turtle Shell
|type= Combat
}}
{{crafting
|ignoreusage=1
|name=[[Helmet]]
|ingredients=Damaged matching helmet
|Damaged Leather Cap; Damaged Golden Helmet; Damaged Chainmail Helmet; Damaged Iron Helmet; Damaged Diamond Helmet; Damaged Turtle Shell; Damaged Netherite Helmet
|Damaged Leather Cap; Damaged Golden Helmet; Damaged Chainmail Helmet; Damaged Iron Helmet; Damaged Diamond Helmet; Damaged Turtle Shell; Damaged Netherite Helmet
|Output= Leather Cap; Golden Helmet; Chainmail Helmet; Iron Helmet; Diamond Helmet; Turtle Shell; Netherite Helmet
|description= The durability of the two helmets is added together, plus an extra 5% durability.
|type= Combat
|foot=1
}}
===Upgrading===
{{Smithing
|head=1
|Netherite Upgrade
|Diamond Helmet
|Netherite Ingot
|Netherite Helmet
|tail=1
}}
===Repairing===
====Grinding====
{{Grinding
|showdescription=1
|ingredients=2x Damaged [[Leather Cap]] or<br>2x Damaged [[Chainmail Helmet]] or<br>2x Damaged [[Iron Helmet]] or<br>2x Damaged [[Golden Helmet]] or<br>2x Damaged [[Diamond Helmet]] or<br>2x Damaged [[Netherite Helmet]] or<br>2x Damaged [[Turtle Shell]]
|Damaged Leather Cap; Damaged Chainmail Helmet; Damaged Iron Helmet; Damaged Golden Helmet; Damaged Diamond Helmet; Damaged Netherite Helmet; Damaged Turtle Shell
|Damaged Leather Cap; Damaged Chainmail Helmet; Damaged Iron Helmet; Damaged Golden Helmet; Damaged Diamond Helmet; Damaged Netherite Helmet; Damaged Turtle Shell
|Leather Cap; Chainmail Helmet; Iron Helmet; Golden Helmet; Diamond Helmet; Netherite Helmet; Turtle Shell
|description=The durability of the two helmets are added together, plus an extra 5% durability.
}}
====[[Anvil mechanics#Unit repair|Unit repair]]====
Helmets can be repaired in an [[anvil]] by adding units of the [[armor material]]'s repair material, with each repair material restoring 25% of the helmet's maximum durability, rounded down.
===Mob loot===
If a [[zombie]], [[husk]], [[stray]] or [[skeleton]] is wearing armor, there is a 8.5% chance (9.5% with [[Looting]] I, 10.5% with Looting II and 11.5% with Looting III) for the mob to drop a helmet upon death. The dropped helmet is usually badly damaged, and may be [[enchanted]] with enchantment levels 5-19.
{{IN|bedrock}}, [[vindicator]]s and [[pillager]]s spawned in [[raid]]s have a 8.3525% chance (10.28% on hard) to drop [[iron]] helmets. The dropped helmets are usually badly damaged, and have a 50% chance of being [[enchanted]] with a random [[enchantment]].
===Natural generation===
Two [[armor stand]]s are found in each taiga [[village]] outdoor armory, one of them equipped with an [[iron helmet]].
===Chest loot===
{{IN|BE}}, a sealed room in [[woodland mansion]]s can appear that has a chest sometimes containing an [[Efficiency]] I leather cap.<ref>{{bug|MCPE-109048}}</ref>
{{LootChestItem|leather-cap,random-enchanted-leather-cap,chainmail-helmet,iron-helmet,level-enchanted-iron-helmet,golden-helmet,random-enchanted-golden-helmet,diamond-helmet,damaged-diamond-helmet,level-enchanted-diamond-helmet,damaged-random-enchanted-diamond-helmet,damaged-random-enchanted-diamond-helmet-2}}
===Trading===
{{IN|java}}, novice-level armorer villagers have a 40% chance to sell an iron helmet for 4 emeralds. Journeyman-level armorers have a 40% chance to sell a chainmail helmet for 1 emerald. Master-level armorers always sell an enchanted diamond helmet for 11-27 emeralds. Apprentice-level leatherworker villagers have a {{frac|2|3}} chance to sell a leather cap<ref group="note" name="dye note">The leather armor has a random color created by two dyes (possibly the same dye twice.)</ref> for 5 emeralds. Master-level leatherworker villagers offer the same trade.
Armorer villagers may give the players with the [[Hero of the Village]] effect a chainmail helmet.
{{IN|bedrock}}, novice-level armorer villagers have a 25% chance to sell iron helmet for 5 emeralds, {{frac|1|3}} chance to sell chainmail helmet at journeyman-level for an emerald, and 50% chance to sell enchanted diamond helmet for 8 emeralds at master-level. Apprentice-level leatherworker villagers have a 50% chance to sell leather cap for 5 emeralds as part of their trades, and 50% chance to sell an enchanted leather cap for 5 emeralds at the master level.
{{notelist|columns=1}}
==Usage ==
Helmets can be placed in the top armor slot of a player's [[inventory]] for activation.
===Defense points===
Defense points are each signified by half of a shirt of mail in the armor bar above the health bar. Each defense point reduces any damage dealt to the player that is absorbed by armor by 4%, increasing additively with the number of defense points. Different materials and combinations of armor provide different levels of defense.
The following table shows the number of defense points added by helmets.
{| class="wikitable" data-description="Helmet defense points"
|-
! scope="col" |Material
! scope="col" |
|-
! scope="row" |Leather
|{{armor|1}}
|-
! scope="row" |Golden
| rowspan="4" |{{armor|2}}
|-
! scope="row" |Chainmail
|-
! scope="row" |Iron
|-
! scope="row" |Turtle Shell
|-
! scope="row" |Diamond
| rowspan="2" |{{armor|3}}
|-
! scope="row" |Netherite
|}
===Knockback resistance===
A netherite helmet provides 10% knockback resistance.
===Durability===
The following table shows the amount of damage each piece of armor can absorb before being destroyed.
Any "hit" from a damage source that can be blocked by armor removes one point of durability from each piece of armor worn for every {{hp|4}} of incoming damage (rounded down, but never below 1). Damage taken that armor doesn't protect (such as [[Damage#Fall damage|falling]] or [[Damage#Drowning|drowning]]) does not damage the armor, even if it is enchanted to protect against that type of damage. The following chart displays how many hits helmets can endure.
Netherite armor is not damaged by [[lava]] or [[fire]] when worn.
{| class="wikitable" data-description="Helmet durability"
|-
!Material
!Durability
|-
! scope="row" |Leather
|55
|-
! scope="row" |Golden
|77
|-
! scope="row" |Chainmail
| rowspan="2" |165
|-
! scope="row" |Iron
|-
! scope="row" |Turtle Shell
|275
|-
! scope="row" |Diamond
|363
|-
! scope="row" |Netherite
|407
|}
====Repair====
Helmets may be [[item repair|repaired]] by using them along with some of their crafting material (leather, gold ingots, iron ingots, diamonds or netherite) in an [[anvil]]. Chainmail helmets may be repaired in this way with iron ingots. They may also be repaired by crafting them together with another helmet of like material.
===Enchantments===
A helmet can receive the following [[enchantment]]s. Note that while iron and chainmail have the same durability, chainmail has a higher [[Tutorials/Enchanting mechanics#Enchantability|enchantability]] than iron or diamond.
{| class="wikitable"
|-
!Enchantment !!Max Level !!Notes
|-
|[[Fire Protection]]|| IV ||<ref group="note" name="exclusive">Fire Protection, Blast Protection, Projectile Protection and Protection are mutually exclusive</ref>
|-
|[[Projectile Protection]]|| IV ||<ref group="note" name="exclusive" />
|-
|[[Blast Protection]]|| IV ||<ref group="note" name="exclusive" />
|-
|[[Protection]]|| IV ||<ref group="note" name="exclusive" />
|-
|[[Unbreaking]]||III
|
|-
|[[Respiration]]||III
|
|-
|[[Aqua Affinity]]||I
|
|-
|[[Thorns]]||III ||<ref group="note" name="anvil">Only from using an [[anvil]] and [[enchanted book]]s.</ref>
|-
|[[Mending]]||I ||<ref group="note" name="anvil2">Only from chest loot, fishing, or an anvil and enchanted books.</ref>
|-
|[[Curse of Binding]]||I ||<ref group="note" name="anvil2" />
|-
|[[Curse of Vanishing]]||I ||<ref group="note" name="anvil2" />
|}
{{notelist}}
===Turtle shell effect===
Equipping a {{ItemSprite|Turtle Shell}} turtle shell provides the {{EffectLink|Water Breathing}} status effect, allowing the player to remain underwater for an additional 10 seconds. The time that this effect lasts does not begin to count down until the player dives underwater, then the 10 seconds are counted down. The effect immediately recharges after exposure to air.
===Brewing ingredient===
A turtle shell can also be used as a potion brewing ingredient.
{{Brewing
|Turtle Shell
|Potion of the Turtle Master
|Potion of the Turtle Master
|Potion of the Turtle Master
|showname=1
}}
===Smelting usage===
{{Smelting|showname=1|Iron Helmet;Chainmail Helmet;Golden Helmet|Iron Nugget;Iron Nugget;Gold Nugget|0,1}}
===Piglins===
{{EntityLink|Piglin|Piglins}} are attracted to ''golden'' helmets and pick them up, examining them for 6 to 8 seconds. Piglins can wear other helmets but are not attracted to them. They prefer stronger helmets over weaker helmets, with one exception: They always prefer golden helmets, throwing out stronger helmets in favor of gold helmets. Enchanted helmets are preferred over unenchanted helmets.
==Sounds ==
{{el|je}}:
{{Sound table
|sound=Equip leather1.ogg
|sound2=Equip leather2.ogg
|sound3=Equip leather3.ogg
|sound4=Equip leather4.ogg
|sound5=Equip leather5.ogg
|sound6=Equip leather6.ogg
|subtitle=Leather armor rustles
|source=player
|description=When a leather helmet is equipped
|id=item.armor.equip_leather
|translationkey=subtitles.item.armor.equip_leather
|volume=1.0
|pitch=1.0
|distance=16}}
{{Sound table
|sound=Equip chain1.ogg
|sound2=Equip chain2.ogg
|sound3=Equip chain3.ogg
|sound4=Equip chain4.ogg
|sound5=Equip chain5.ogg
|sound6=Equip chain6.ogg
|subtitle=Chain armor jingles
|source=player
|description=When a chainmail helmet is equipped
|id=item.armor.equip_chain
|translationkey=subtitles.item.armor.equip_chain
|volume=1.0
|pitch=1.0
|distance=16}}
{{Sound table
|sound=Equip iron1.ogg
|sound2=Equip iron2.ogg
|sound3=Equip iron3.ogg
|sound4=Equip iron4.ogg
|sound5=Equip iron5.ogg
|sound6=Equip iron6.ogg
|subtitle=Iron armor clanks
|source=player
|description=When an iron helmet is equipped
|id=item.armor.equip_iron
|translationkey=subtitles.item.armor.equip_iron
|volume=1.0
|pitch=1.0
|distance=16}}
{{Sound table
|sound=Equip gold1.ogg
|sound2=Equip gold2.ogg
|sound3=Equip gold3.ogg
|sound4=Equip gold4.ogg
|sound5=Equip gold5.ogg
|sound6=Equip gold6.ogg
|subtitle=Gold armor clinks
|source=player
|description=When a gold helmet is equipped
|id=item.armor.equip_gold
|translationkey=subtitles.item.armor.equip_gold
|volume=1.0
|pitch=1.0
|distance=16}}
{{Sound table
|sound=Equip diamond1.ogg
|sound2=Equip diamond2.ogg
|sound3=Equip diamond3.ogg
|sound4=Equip diamond4.ogg
|sound5=Equip diamond5.ogg
|sound6=Equip diamond6.ogg
|subtitle=Diamond armor clangs
|source=player
|description=When a diamond helmet is equipped
|id=item.armor.equip_diamond
|translationkey=subtitles.item.armor.equip_diamond
|volume=1.0
|pitch=1.0
|distance=16}}
{{Sound table
|sound=Equip netherite1.ogg
|sound2=Equip netherite2.ogg
|sound3=Equip netherite3.ogg
|sound4=Equip netherite4.ogg
|subtitle=Netherite armor clanks
|source=player
|description=When a netherite helmet is equipped
|id=item.armor.equip_netherite
|translationkey=subtitles.item.armor.equip_netherite
|volume=0.8
|pitch=1.0/0.9
|distance=16}}
{{Sound table
|sound=Equip turtle shell.ogg
|subtitle=Turtle Shell thunks
|source=player
|description=When a turtle shell is equipped
|id=item.armor.equip_turtle
|translationkey=subtitles.item.armor.equip_turtle
|volume=1.0
|pitch=1.0/0.85/1.1
|distance=16}}
{{Sound table
|sound=Random break.ogg
|subtitle=Item breaks
|source=dependent
|description=When a helmet's durability is exhausted
|id=entity.item.break
|translationkey=subtitles.entity.item.break
|volume=0.8
|pitch=0.8-1.2
|distance=16
|foot=1}}
{{el|be}}:
{{Sound table
|type=bedrock
|sound=Equip leather1.ogg
|sound2=Equip leather2.ogg
|sound3=Equip leather3.ogg
|sound4=Equip leather4.ogg
|sound5=Equip leather5.ogg
|sound6=Equip leather6.ogg
|source=player
|description=When a leather helmet or a turtle shell is equipped
|id=armor.equip_leather
|volume=1.0
|pitch=1.0}}
{{Sound table
|sound=Equip chain1.ogg
|sound2=Equip chain2.ogg
|sound3=Equip chain3.ogg
|sound4=Equip chain4.ogg
|sound5=Equip chain5.ogg
|sound6=Equip chain6.ogg
|source=player
|description=When a chain helmet is equipped
|id=armor.equip_chain
|volume=1.0
|pitch=1.0}}
{{Sound table
|sound=Equip iron1.ogg
|sound2=Equip iron2.ogg
|sound3=Equip iron3.ogg
|sound4=Equip iron4.ogg
|sound5=Equip iron5.ogg
|sound6=Equip iron6.ogg
|source=player
|description=When an iron helmet is equipped
|id=armor.equip_iron
|volume=1.0
|pitch=1.0}}
{{Sound table
|sound=Equip gold1.ogg
|sound2=Equip gold2.ogg
|sound3=Equip gold3.ogg
|sound4=Equip gold4.ogg
|sound5=Equip gold5.ogg
|sound6=Equip gold6.ogg
|source=player
|description=When a gold helmet is equipped
|id=armor.equip_gold
|volume=1.0
|pitch=1.0}}
{{Sound table
|sound=Equip diamond1.ogg
|sound2=Equip diamond2.ogg
|sound3=Equip diamond3.ogg
|sound4=Equip diamond4.ogg
|sound5=Equip diamond5.ogg
|sound6=Equip diamond6.ogg
|source=player
|description=When a diamond helmet is equipped
|id=armor.equip_diamond
|volume=1.0
|pitch=1.0}}
{{Sound table
|sound=Equip netherite1.ogg
|sound2=Equip netherite2.ogg
|sound3=Equip netherite3.ogg
|sound4=Equip netherite4.ogg
|source=player
|description=When a netherite helmet is equipped.
|id=armor.equip_netherite
|volume=1.0
|pitch=1.0}}
{{Sound table
|rowspan=2
|sound=Water Splash Old.ogg
|source=block
|description=When a leather helmet is dyed using a cauldron
|id=cauldron.dyearmor
|volume=0.1
|pitch=1.0}}
{{Sound table
|source=block
|description=When a leather helmet's dye is removed using a cauldron
|id=cauldron.cleanarmor
|volume=0.1
|pitch=1.0}}
{{Sound table
|sound=Random break.ogg
|source=player
|description=When a helmet's durability is exhausted
|id=random.break
|volume=1.0
|pitch=0.9
|foot=1}}
==Data values ==
=== ID===
{{edition|java}}:
{{ID table
|edition=java
|showitemtags=y
|showforms=y
|generatetranslationkeys=y
|displayname=Leather Cap
|spritetype=item
|nameid=leather_helmet
|itemtags=freeze_immune_wearables
|form=item}}
{{ID table
|displayname=Chainmail Helmet
|spritetype=item
|nameid=chainmail_helmet
|form=item}}
{{ID table
|displayname=Iron Helmet
|spritetype=item
|nameid=iron_helmet
|form=item}}
{{ID table
|displayname=Diamond Helmet
|spritetype=item
|nameid=diamond_helmet
|form=item}}
{{ID table
|displayname=Golden Helmet
|spritetype=item
|nameid=golden_helmet
|form=item}}
{{ID table
|displayname=Netherite Helmet
|spritetype=item
|nameid=netherite_helmet
|form=item}}
{{ID table
|displayname=Turtle Shell
|spritetype=item
|nameid=turtle_helmet
|form=item
|foot=1}}
{{edition|bedrock}}:
{{ID table
|edition=bedrock
|shownumericids=y
|showforms=y
|notshowbeitemforms=y
|generatetranslationkeys=y
|displayname=Leather Cap
|spritetype=item
|nameid=leather_helmet
|id=335
|form=item}}
{{ID table
|displayname=Chainmail Helmet
|spritetype=item
|nameid=chainmail_helmet
|id=339
|form=item}}
{{ID table
|displayname=Iron Helmet
|spritetype=item
|nameid=iron_helmet
|id=343
|form=item}}
{{ID table
|displayname=Diamond Helmet
|spritetype=item
|nameid=diamond_helmet
|id=347
|form=item}}
{{ID table
|displayname=Golden Helmet
|spritetype=item
|nameid=golden_helmet
|id=351
|form=item}}
{{ID table
|displayname=Netherite Helmet
|spritetype=item
|nameid=netherite_helmet
|id=609
|form=item}}
{{ID table
|displayname=Turtle Shell
|spritetype=item
|nameid=turtle_helmet
|id=573
|form=item
|foot=1}}
===Item data===
When leather caps are dyed, it has the following NBT:
<div class="treeview">
*{{nbt|compound|tag}}: Parent tag.
**{{nbt|compound|display}}: Display properties.
***{{nbt|int|color}}: The color of the leather armor. The tooltip displays "Dyed" if advanced tooltips are disabled, otherwise it displays the hexadecimal color value. Color codes are calculated from the Red, Green and Blue components using this formula:<br>'''<span style="color:red">Red</span>[[wikipedia:Logical shift|<<]]16 + <span style="color:green">Green</span><<8 + <span style="color:blue">Blue</span>'''<ref>For positive values larger than 0x00FFFFFF, the top byte is ignored. All negative values produce white.</ref>
</div>
==Achievements ==
{{load achievements|Iron Man;Tie Dye Outfit;Cover me in debris;Oooh, shiny!}}
==Advancements ==
{{load advancements|Suit Up;Cover me With Diamonds;Oh Shiny;Cover Me in Debris;A Furious Cocktail;How Did We Get Here}}
==History ==
{{History|java classic}}
{{History||August 13, 2009|link=wordofnotch:162091556|Notch tested armor models on [[mob (entity)|mob]]. Only [[chestplate]]s and helmets were available. They were merely aesthetic at the time and had no effect on gameplay.}}
{{History||0.24_SURVIVAL_TEST|[[File:Plate Helmet.png|32px]] Added [[Java_Edition_removed_features#Armor_in_Survival_Test|plate helmet]]s.
|[[File:Chainmail Helmet JE1.png|32px]] Added the model and the texture for unused [[Java_Edition_removed_features#Armor_in_Survival_Test|chain helmet]]s.
|[[File:Zombie full set.png|32px]] [[File:Skeleton helmet.png|26px]] Plate armor models have been tested on [[zombie]]s and [[skeleton]]s. It had no effect on gameplay.}}
{{History|java indev}}
{{History||0.31|snap=20091223-1|Plate and chain armor [[model]]s are no longer used.}}
{{History|||snap=20091231-2|[[File:Leather Cap (item) JE1 BE1.png|32px]] [[File:Studded Helmet (item) JE1.png|32px]] [[File:Chainmail Helmet (item) JE1 BE1.png|32px]] [[File:Iron Helmet (item) JE1 BE1.png|32px]] Added [[item]]s of relation to leather, [[History of textures/Unused textures#Studded armor|studded]], chainmail and plate (iron) helmets.
|The textures of leather helmets are taken from one of [[Notch]]'s previous games, ''[[Legend of the Chambered]]''. The rest are from ''[[Legend of the Chambered 2]]''.}}
{{History||20100206|[[File:Golden Helmet (item) JE1 BE1.png|32px]] [[File:Diamond Helmet (item) JE1 BE1.png|32px]] Added items of golden and diamond helmets.
|Removed leather-chain helmets.}}
{{History||20100212-1|Added armor models.
|[[File:Indev 20100212 armor.png|50px]] Armor models are now displayed on the [[player]] in the [[inventory]].}}
{{History||20100218|[[File:Leather Cap JE1 BE1.png|32px]] [[File:Chainmail Helmet JE2 BE1.png|32px]] [[File:Iron Helmet JE1 BE1.png|32px]] [[File:Golden Helmet JE1 BE1.png|32px]] [[File:Diamond Helmet JE1 BE1.png|32px]] Added models of leather, chainmail, iron, gold, and diamond helmets.
|Helmets can now be [[crafting|crafted]] and worn.
|Helmets now function. All helmets give {{Armor|3}}. Helmets have limited [[item durability|durability]], with lower tier helmets less durable than higher tier helmets.}}
{{History|java alpha}}
{{History||v1.0.8|With the introduction of [[leather]], "Cloth Cap" has been renamed to "Leather Cap".
|Leather cap is now [[crafting|crafted]] with leather instead of [[wool|cloth]].}}
{{History|java}}
{{History||1.0.0|snap=Beta 1.9 Prerelease|The armor protection behavior has been changed. Prior to this update, the total armor protection is based in this equation: (((''total equipped armor damage reduction'' − 1) × (''all equipped armor max damage'' − ''total equipped armor damage'')) ÷ (''total equipped armor max damage'' + 1)). Armor no longer reduces certain damage types to be covered by enchantments.}}
{{History|||snap=October 3, 2011|slink={{tweet|notch|120859830339637249}}|The first images of a [[player]] wearing enchanted armor are revealed.}}
{{History|||snap=Beta 1.9 Prerelease 3|Iron helmets can now be found in the new [[stronghold]] altar [[chest]]s.}}
{{History|||snap=Beta 1.9 Prerelease 4|Helmets can now be [[enchanting|enchanted]].}}
{{History||1.1|snap=12w01a|Iron helmets can now be found in the new blacksmith [[chest]]s in [[village]]s.}}
{{History||1.2.1|snap=12w06a|[[Zombie]]s now drop iron helmets on rare occasions and [[zombie pigman|zombie pigmen]] now drop golden helmets.}}
{{History||1.3.1|snap=12w15a|{{key|Shift}}+clicking can now be used to wear helmets.}}
{{History|||snap=12w21a|Chain helmets can now be obtained legitimately in [[survival]] mode through [[trading]].
|Blacksmith [[villager]]s now [[trading|sell]] chain helmets for 5–6 emeralds.
|Blacksmith villagers now sell diamond helmets for 7 emeralds.
|Blacksmith villagers now sell iron helmets for 4–5 emeralds.
|Butchers now sell leather caps for 2–3 emeralds.}}
{{History||1.4.2|snap=12w32a|[[Mob]] armor has been reintroduced. A partial or full set of any armor is now sometimes worn by [[zombie]]s, [[skeleton]]s and [[zombified piglins|zombie pigmen]], with the likelihood increasing with difficulty.}}
{{History|||snap=August 17, 2012|slink={{tweet|Dinnerbone|236445090929844225}}|[[Jeb]] and [[Dinnerbone]] tweeted pictures of [[dye]]able leather armor.}}
{{History|||snap=12w34a|Leather helmets can now be dyed by [[crafting]] a leather armor piece with [[dye]]s. Dyes can be removed by {{control|use|text=using}} dyed leather armor on a [[cauldron]] with [[water]].
|[[File:Leather Cap JE2.png|32px]] [[File:Leather Cap (item) JE2.png|32px]] Default leather caps textures are now slightly darker.}}
{{History|||snap=12w36a|[[Dye]]d leather caps are now more saturated and have a slight tint of tan in respect to the default armor color.}}
{{History|||snap=12w37a|[[File:Leather Cap JE3 BE2.png|32px]] [[File:Leather Cap (item) JE3 BE2.png|32px]] Leather armor now has non-dyed parts on the cap. This has been implemented so that [[player]]s can distinguish between other types of helmets and similarly colored leather caps.}}
{{History||1.5|snap=13w04a|Helmets in the [[player]]'s hand can now be equipped by right-clicking.
|[[Dispenser]]s can now equip nearby players with helmets.}}
{{History||1.8|snap=14w02a|[[Trading|Trades]] changed: armorer [[villager]]s now [[trading|sell]] chain helmets for 5–7 emeralds.
|Armorer villagers no longer sell diamond helmets.
|Armorer villagers now sell iron helmets for 4–6 emeralds.
|Leatherworkers no longer sell other leather caps.}}
{{History|||snap=14w05a|Helmets no longer turns red when [[mob]]s and [[player]]s are hurt.}}
{{History|||snap=14w06a|Helmets are now visible on [[giant]]s.}}
{{History|||snap=14w25a|Chain helmets [[Java Edition removed features#Chainmail armor|cannot be crafted anymore]] due to the [[item]] form of [[fire]] being [[Java Edition removed features#Obtainable until 1.8|removed]].}}
{{History||1.9|snap=15w31a|Enchanted iron and diamond helmets can now be found in [[end city]] ship [[chest]]s.
|[[Mob]]s now wear armor from the bottom to the top, rather than from the top to the bottom. This means that a mob with three armor pieces, for example, spawn with all armor except a helmet.}}
{{History|||snap=15w34b|Helmet [[item durability|durability]] now affects armor value.}}
{{History|||snap=15w36a|Armor and armor [[enchanting|enchantment]] calculations have been changed. For the original values, see [[Armor/Before 1.9|here]].}}
{{History|||snap=15w36d|Helmet durability affecting value has been removed.
|Helmets now has an attribute controlling the defense points.}}
{{History|||snap=15w50a|Added <code>equip</code> [[sound]]s for leather armor.}}
{{History|||snap=16w02a|Armor and armor enchantment calculations have been changed again.}}
{{History|||snap=16w05a|Armor calculations have been changed, once again.}}
{{History||1.13|snap=17w47a|Prior to [[1.13/Flattening|''The Flattening'']], these [[item]]s' numeral IDs were 298, 302, 306, 310 and 314.}}
{{History|||snap=18w07a|[[File:Turtle Shell.png|32px]] [[File:Turtle Shell (item) JE1 BE1.png|32px]] Added turtle shells.}}
{{History|||snap=18w09a|Golden helmets now have a chance of generating in [[underwater ruins]].}}
{{History|||snap=18w11a|Enchanted leather caps can now generate in the chests of [[shipwreck]]s.}}
{{History|||snap=18w20a|"Chain Helmet" has now been renamed to "Chainmail Helmet".}}
{{History||1.14|snap=18w43a|[[File:Leather Cap JE4 BE2.png|32px]] [[File:Chainmail Helmet JE3 BE2.png|32px]] [[File:Iron Helmet JE2 BE2.png|32px]] [[File:Golden Helmet JE2 BE2.png|32px]] [[File:Diamond Helmet JE2 BE2.png|32px]]<br>[[File:Leather Cap (item) JE4 BE3.png|32px]] [[File:Chainmail Helmet (item) JE2 BE2.png|32px]] [[File:Iron Helmet (item) JE2 BE2.png|32px]] [[File:Golden Helmet (item) JE2 BE2.png|32px]] [[File:Diamond Helmet (item) JE2 BE2.png|32px]] The textures of all types of helmets have been changed.}}
{{History|||snap=18w48a|Leather caps can now be found in [[chest]]s in [[village]] tanneries.}}
{{History|||snap=18w50a|Iron helmets can now be found on [[armor stand]]s in [[taiga]] villages.}}
{{History|||snap=19w08a|[[File:Golden Helmet (item) JE3 BE3.png|32px]] The textures of gold helmet [[item]]s have been changed.}}
{{History|||snap=19w11a|Armorer villagers now sell enchanted diamond helmets, making diamond helmets effectively [[renewable resource|renewable]] again.
|Leatherworker villagers now sell randomly [[dye]]d leather caps.}}
{{History|||snap=19w13a|Armorer villagers now give chainmail helmets to players under the [[Hero of the Village]] effect.}}
{{History||1.16|snap=20w06a|[[File:Netherite Helmet JE1.png|32px]] [[File:Netherite Helmet (item) JE1.png|32px]] Added netherite helmets.}}
{{History|||snap=20w07a|[[File:Leather piglin helmet.png|32px]] [[File:Chainmail piglin helmet.png|32px]] [[File:Iron piglin helmet.png|32px]] [[File:Golden piglin helmet.png|32px]] [[File:Diamond piglin helmet.png|32px]] [[File:Netherite piglin helmet JE1.png|32px]] Added textures and [[model]]s for all helmets when they are used by [[piglin]]s.
|Netherite helmets are now obtained by combining one diamond armor piece and one netherite ingot in a crafting table.
|[[File:Turtle Shell piglin MC-172110.png|32px]] Turtle shells, when used by piglins and [[zombified piglin]]s, result in a [[missing texture]] when being displayed.<ref>{{Cite bug|MC|172110|Texture of turtle shells is missing when worn by a piglin or zombified piglin|date=February 14, 2020}}</ref>}}
{{History|||snap=20w09a|[[File:Diamond Helmet (item) JE3 BE3.png|32px]] The textures of diamond helmet [[item]]s have been changed.}}
{{History|||snap=20w10a|[[File:Netherite Helmet JE2 BE1.png|32px]] [[File:Netherite Helmet (item) JE2 BE1.png|32px]] The texture of netherite helmets has been changed.
|[[File:Netherite piglin helmet.png|32px]] The texture of netherite helmets for [[piglin]]s has been changed.
|Netherite helmets can no longer be [[crafting|crafted]].
|Netherite helmets are now obtained by combining one diamond helmet and one netherite ingot in a [[smithing table]].}}
{{History|||snap=20w16a|Golden and netherite helmets now generate randomly [[enchanting|enchanted]], and sometimes [[damage]]d, in [[bastion remnant]] and [[ruined portal]] chests.}}
{{History|||snap=20w17a|Diamonds helmets now generate in place of netherite helmets in bastion remnant [[chest]]s.}}
{{History|||snap=pre3|The special helmet [[model]]s and textures created for [[piglin]]s have been removed except for leather helmets.}}
{{History||1.17|snap=20w48a|Wearing a leather helmet now prevents [[Powder Snow#Freezing|freezing]] entirely.}}
{{History|||snap=21w13a|The two unused textures of the leather cap for [[piglin]]s<ref><code>/assets/minecraft/textures/models/armor/piglin_leather_layer_1.png</code></ref><ref><code>/assets/minecraft/textures/models/armor/piglin_leather_layer_1_overlay.png</code></ref> have been removed.}}
{{History||1.18.2|snap=22w03a|Netherite helmet knockback resistance is no longer random.}}
{{History||1.19|snap=22w17a|[[File:Leather Cap JE5.png|32px]] The texture of the leather cap item has been changed.|Changed the leather cap texture when worn so the center bar now extends to the bottom of the back face.}}
{{History||1.20<br>(Experimental)|link=1.19.4|snap=23w04a|Non-leather helmets can now be trimmed using a [[smithing table]].
|There are 10 types of material that determine the color of the trim:
*Iron
*Copper
*Gold
*Lapis
*Emerald
*Diamond
*Netherite
*Redstone
*Amethyst
*Quartz
|Upgrading diamond helmets to netherite helmets now requires the netherite upgrade [[smithing template]].}}
{{History|||snap=23w05a|Leather caps can now be trimmed using a smithing table.|Helmets can now have trims of the same material it is made out of.}}
{{History|||snap=23w06a|Swapped {{cd|iron}} and {{cd|iron_darker}} palette, then made {{cd|iron_darker}} darker overall.}}
{{History||1.19.4|snap=23w05a|Helmets can now be swapped by {{ctrl|using}} them in the hotbar.<ref>{{bug|MC-216270|||Fixed}}</ref>}}
{{History||?|Helmets can now be swapped in [[armor stand]]s by {{ctrl|using}} them/[[head]]s/[[carved pumpkin]]s in the armor stand's slot.}}
{{History||1.20|snap=23w12a|The pattern textures of dune and sentry armor trims are changed.|Those previous patterns were left with different names: dune was renamed sentry and sentry was renamed shaper.}}
{{History|pocket alpha}}
{{History||v0.6.0|[[File:Leather Cap JE1 BE1.png|32px]] [[File:Chainmail Helmet JE2 BE1.png|32px]] [[File:Iron Helmet JE1 BE1.png|32px]] [[File:Golden Helmet JE1 BE1.png|32px]] [[File:Diamond Helmet JE1 BE1.png|32px]]<br>[[File:Leather Cap (item) JE1 BE1.png|32px]] [[File:Chainmail Helmet (item) JE1 BE1.png|32px]] [[File:Iron Helmet (item) JE1 BE1.png|32px]] [[File:Golden Helmet (item) JE1 BE1.png|32px]] [[File:Diamond Helmet (item) JE1 BE1.png|32px]] Added helmets.}}
{{History||v0.8.0|snap=build 2|[[File:Leather Cap (item) JE3 BE2.png|32px]] The leather helmet sprite has been changed to that of {{el|je}}, but its armor [[model]] remains that of older versions.}}
{{History||v0.9.0|snap=build 1|Iron helmets now naturally generate in [[village]] [[chest]]s and in [[stronghold]] altar chests.}}
{{History||v0.11.0|snap=build 11|Helmets now protect against [[damage]] from [[mob]]s only.}}
{{History||v0.12.1|snap=build 1|Helmets can now be worn by mobs.
|Chainmail helmets can now be obtained in [[survival]] mode from a mob wearing it.}}
{{History||?|Helmets no longer turn red when [[mob]]s and [[player]]s are hurt.}}
{{History||v0.14.0|snap=build 1|[[File:Leather Cap JE3 BE2.png|32px]] The texture of leather helmets have been changed.
|Leather helmets can now be dyed.}}
{{History||v0.15.0|snap=build 1|Helmets can now be obtained from [[stray]]s and [[husk]]s that naturally spawn with armor.}}
{{History|pocket}}
{{History||1.0.0|snap=alpha 0.17.0.1|[[Enchanting|Enchanted]] iron helmets and enchanted diamond helmets can now be found inside [[chest]]s within [[end city|end cities]].}}
{{History||1.0.4|snap=alpha 1.0.4.0|Iron helmets and chainmail helmets are now [[trading|sold]] by armorer smith [[villager]]s via trading.}}
{{History||1.1.0|snap=alpha 1.1.0.0|Golden, chain and iron helmets can now be [[smelting|smelted]] down into one of their respective [[nugget]]s.}}
{{History|bedrock}}
{{History||1.4.0|snap=beta 1.2.14.2|Chainmail helmets now generate in [[buried treasure]] chests.
|Enchanted leather helmets can now be found inside [[shipwreck]] supply room [[chest]]s.}}
{{History|||snap=beta 1.2.20.1|Golden helmets can now be found inside [[underwater ruins]] chests.}}
{{History||1.5.0|snap=beta 1.5.0.4|[[File:Turtle Shell.png|32px]] [[File:Turtle Shell (item) JE1 BE1.png|32px]] Added turtle shells.}}
{{History||1.10.0|snap=beta 1.10.0.3|[[File:Leather Cap JE4 BE2.png|32px]] [[File:Chainmail Helmet JE3 BE2.png|32px]] [[File:Iron Helmet JE2 BE2.png|32px]] [[File:Golden Helmet JE2 BE2.png|32px]] [[File:Diamond Helmet JE2 BE2.png|32px]]<br>[[File:Leather Cap (item) JE4 BE3.png|32px]] [[File:Chainmail Helmet (item) JE2 BE2.png|32px]] [[File:Iron Helmet (item) JE2 BE2.png|32px]] [[File:Golden Helmet (item) JE2 BE2.png|32px]] [[File:Diamond Helmet (item) JE2 BE2.png|32px]] The textures of all types of helmets have been changed.
|Iron helmets now can be found in plains [[village]] weaponsmith [[chest]]s.
|Leather helmets can now be found inside plains village tannery chests.}}
{{History||1.11.0|snap=beta 1.11.0.1|Iron helmets now can be found in [[savanna]], [[taiga]], [[desert]], [[snowy taiga]] and [[snowy tundra]] [[village]] weaponsmith [[chest]]s.
|Leather helmets can now be found inside savanna, taiga, desert, snowy taiga and snowy tundra village tannery chests.
|Iron helmets can now be found in [[village]] armorer chests.}}
{{History|||snap=beta 1.11.0.4|[[Pillager]]s and [[vindicator]]s that spawn in [[raid]]s can now drop iron helmets.
|Diamond helmets are now sold by armorer villagers.}}
{{History||1.11.0|snap=beta 1.11.0.5|[[File:Golden Helmet (item) JE3 BE3.png|32px]] The textures of gold helmet [[item]]s have been changed.}}
{{History||1.12.0|snap=beta 1.12.0.2|[[File:Armor Stand with Leather Armor MCPE-44669.png|32px]] Leather armor no longer shows as being [[dye]]d properly when worn by [[armor stand]]s.}}
{{History||1.13.0|snap=beta 1.13.0.1|Leather armor now appears properly dyed when worn by armor stands.}}
{{History||1.16.0|snap=beta 1.16.0.51|[[File:Netherite Helmet JE2 BE1.png|32px]] [[File:Netherite Helmet (item) JE2 BE1.png|32px]] Added netherite helmets.
|[[File:Diamond Helmet (item) JE3 BE3.png|32px]] The textures of diamond helmet [[item]]s have been changed.
|Helmets can now be obtained from [[piglin]]s that naturally spawn with golden helmets.}}
{{History|||snap=beta 1.16.0.57|Golden and netherite helmets now generate randomly [[enchanting|enchanted]], and sometimes [[damage]]d, in [[bastion remnant]] chests.
|Netherite helmets can no longer be [[crafting|crafted]].
|Netherite helmets are now obtained by combining one diamond helmet and one netherite ingot in a [[smithing table]].}}
{{History|||snap=beta 1.16.0.63|Diamonds helmets now generate in place of netherite helmets in bastion remnant [[chest]]s.}}
{{History|||snap=beta 1.16.200.53|Netherite helmets now gives a 90% reduction in knockback.}}
{{History||1.16.210|snap=beta 1.16.210.53|Wearing leather helmets now prevents [[Powder Snow#Freezing|freezing]] entirely.}}
{{History|console}}
{{History||xbox=TU1|xbone=CU1|ps=1.0|wiiu=Patch 1|switch=1.0.1|[[File:Leather Cap JE1 BE1.png|32px]] [[File:Chainmail Helmet JE2 BE1.png|32px]] [[File:Iron Helmet JE1 BE1.png|32px]] [[File:Golden Helmet JE1 BE1.png|32px]] [[File:Diamond Helmet JE1 BE1.png|32px]]<br>[[File:Leather Cap (item) JE1 BE1.png|32px]] [[File:Chainmail Helmet (item) JE1 BE1.png|32px]] [[File:Iron Helmet (item) JE1 BE1.png|32px]] [[File:Golden Helmet (item) JE1 BE1.png|32px]] [[File:Diamond Helmet (item) JE1 BE1.png|32px]] Added helmets.
|Added a quick equip for armor to the [[inventory]] interface.}}
{{History||xbox=TU12|ps=1.03|[[File:Leather Cap JE3 BE2.png|32px]] [[File:Leather Cap (item) JE3 BE2.png|32px]] The textures for leather helmets have been changed.}}
{{History||xbox=TU14|ps=1.05|Leather helmets can now be [[dye]]d.
|[[Item repair]] can now repair helmets.}}
{{History||xbox=TU25|xbone=CU13|ps=1.16|Helmets now have the quick equip functionality.}}
{{History||xbox=TU53|xbone=CU43|ps=1.49|wiiu=Patch 23|switch=1.0.3|Golden, chain and iron helmets can now be [[smelting|smelted]] down into one of their respective [[nugget]]s.}}
{{History|PS4}}
{{History||1.90|[[File:Chainmail Helmet (item) JE2 BE2.png|32px]] [[File:Iron Helmet (item) JE2 BE2.png|32px]] [[File:Golden Helmet (item) JE2 BE2.png|32px]] [[File:Diamond Helmet (item) JE2 BE2.png|32px]] The textures of all types of helmet items have been changed (except for the leather helmets).}}
{{History|new 3ds}}
{{History||0.1.0|[[File:Leather Cap JE1 BE1.png|32px]] [[File:Chainmail Helmet JE2 BE1.png|32px]] [[File:Iron Helmet JE1 BE1.png|32px]] [[File:Golden Helmet JE1 BE1.png|32px]] [[File:Diamond Helmet JE1 BE1.png|32px]]<br>[[File:Leather Cap (item) JE3 BE2.png|32px]] [[File:Chainmail Helmet (item) JE1 BE1.png|32px]] [[File:Iron Helmet (item) JE1 BE1.png|32px]] [[File:Golden Helmet (item) JE1 BE1.png|32px]] [[File:Diamond Helmet (item) JE1 BE1.png|32px]] Added helmets.}}
{{History|foot}}
<gallery>
File:ArmorModel Aug 13 2009.jpg|First image of armor.
File:DinnerboneArmor.png|[[Dinnerbone]]'s first screenshot of dyed armor.
File:ArmorPE.png
</gallery>
;Armor durability from Indev until late Beta
{| class="wikitable" data-description="Armor Durability during Indev until late Beta" style="text-align:center;"
|-
!Leather
!Golden
!Chainmail
!Iron
!Diamond
|-
|33
|66
|66
|132
|264
|}
==Issues ==
{{issue list}}
==Trivia ==
*Unlike the other helmets, the netherite helmet covers most of the player's face, due to a nose guard and cheek plates.
*The turtle shell is the only helmet that is not part of a complete set.
* In Bedrock Edition, there exists a bug<ref>{{Cite bug|MCPE|109048|Efficiency 1 Leather Cap in Woodland Mansions|date=December 1, 2020}}</ref> that makes it possible to obtain a Leather Cap enchanted with Efficiency I from [[Woodland Mansion]] chests with a chance of 1.45%. The enchantment has no effect on the cap, however.
==Gallery ==
<gallery>
File:Zombie helmet.png|A zombie wearing a helmet in [[Survival Test]].
</gallery>
===Enchanted Helmets===
<gallery>
File:Enchanted Leather Cap (item).gif
File:Enchanted Chainmail Helmet (item).gif
File:Enchanted Iron Helmet (item).gif
File:Enchanted Golden Helmet (item).gif
File:Enchanted Diamond Helmet (item).gif
File:Enchanted Netherite Helmet (item).gif
File:Enchanted Turtle Shell (item).gif
</gallery>
<gallery>
File:Enchanted Leather Helmet.gif
File:Enchanted Chainmail Helmet.gif
File:Enchanted Iron Helmet.gif
File:Enchanted Golden Helmet.gif
File:Enchanted Diamond Helmet.gif
File:Enchanted Netherite Helmet.gif
File:Enchanted Turtle Shell.gif
</gallery>
==References ==
{{reflist}}
==External Links ==
*[https://www.minecraft.net/en-us/article/taking-inventory--helmet Taking Inventory: Helmet] – Minecraft.net on February 20, 2020
{{Items}}
[[Category:Armor]]
[[es:Casco]]
[[ja:ヘルメット]]
[[ko:투구]]
[[pt:Capacete]]
[[pl:Hełm]]
[[zh:头盔]]</li></ul> | alpha 0.17.0.1 | ||||
| Bedrock Edition | |||||
1.10.0{{Extension DPL}}<ul><li>[[Bed|Bed]]<br/>{{Block
| image = White Bed (N).png
| extratext = View [[#Gallery|all renders]]
| transparent = Yes
| tntres = 25
| hardness = 4
| light = No
| tool = any
| renewable = Yes
| stackable = No
| flammable = No
| lavasusceptible = {{jebe|Yes|No}}
}}
A '''bed''' is a [[Dye|dyeable]] [[block]] that allows a player to sleep and to reset their [[spawn]] point to within a few blocks of the bed in the [[Overworld]]. If the bed is obstructed or removed, the player spawns at the default world spawning location.
== Obtaining ==
=== Natural generation ===
;Igloo
A red bed naturally generates in each [[igloo]].
;Village
Beds of various colors generate in [[village]] houses, depending on the specific structure and [[biome]]:
* [[Desert]] village houses have cyan, green, or lime beds.
* [[Plains]] village houses have white or yellow beds.
* [[Savanna]] village houses have orange, red, or yellow beds.
* [[Snowy taiga]]{{only|bedrock|short=1}} and [[taiga]] village houses have blue or purple beds.
* [[Snowy tundra]] village houses have blue, red, or white beds.
=== Breaking ===
Beds can be mined with any [[tool]], or without a tool.<ref>{{bug|MC-192722||Beds have no assigned tool}}</ref>
{{breaking row|horizontal=1|Bed|sprite=red-bed|any}}
A bed also drops itself as an item when pushed by a [[piston]].
=== Crafting ===
{{Crafting
|head=1
|showname=0
|showdescription=1
|A2=Matching Wool
|B2=Matching Wool
|C2=Matching Wool
|A3=Any Planks
|B3=Any Planks
|C3=Any Planks
|Output= Matching Bed
|type=Decoration block
|description=The wool color must match. The planks can be different.
}}
<!--recipe removed
{{Crafting
|showdescription=1
|White Bed
|Matching Colored Dye
|Output= Matching Dyed Bed
|type=Decoration block
|description=White beds can be re-dyed using dyes.{{only|java}}{{until|JE 1.20}}
}}-->
{{Crafting
|showdescription=1
|Any Bed
|Matching Dye
|Output= Matching Bed
|type=Decoration block
|description=A bed of any color can be re-dyed using dyes.
}}
{{Crafting
|showdescription=1
|Any Dyed Bed
|Bleach
|Output=White Bed
|type=Decoration block
|description=This removes the color from the bed.{{only|bedrock|education}}
|foot=1
}}
<div style="display:none">
<!--
This is so the pre-Village & Pillage dyes can have dye-related crafting recipes show on their respective pages.
They don't need to be displayed on this page because they already intuitively list "Any Matching Dye".
-->
{{Crafting
|showdescription=1
|Any Bed
|Bone Meal; Lapis Lazuli; Cocoa Beans; Ink Sac
|Output=White Bed; Blue Bed; Brown Bed; Black Bed
|type=Decoration block
|description={{only|bedrock|education}}
}}
</div>
=== Trading ===
Journeyman-level shepherd villagers sell 1 of 16 beds for 3 [[emerald]]s as part of their trades.
== Usage ==
=== Sleeping ===
[[File:Sleep Animation.gif|240px|thumb|Player falling asleep.]]
Beds are used by pressing the {{control|use item}} button while looking at the bed.
A player sleeps by {{control|using|using}} a bed during a [[thunderstorm]], or at [[night]] (between 12542 and 23459 ticks in clear weather, when stars appear in the sky, or between 12010 and 23991 ticks in rainy weather). Players can sleep during a thunderstorm even if they are in a biome where it does not rain (i.e. Desert). Attempting to use a bed at any other time results in the message "You can only sleep at night or during thunderstorms". A player sleeps in a bed for 101 in-game [[tick]]s, or 5.05 seconds before the time skips to the next day. Sleeping in a bed with the {{cmd|gamerule doDaylightCycle}} set to <code>false</code> results in the player being kicked out of the bed after the 101 ticks, but does not change time of the world to day.
Sleeping in a bed is possible only in the [[Overworld]]. Attempting to sleep in a bed in [[the Nether]], [[the End]], and [[custom dimension]]s in which they are disabled causes it to [[explosion|explode]] and set [[fire]] to surrounding blocks; unless {{cmd|gamerule respawnBlocksExplode}}{{only|bedrock}} is set to {{cd|false}}.<ref>{{bug|mcpe-28723}} – "Exploding bed in the Nether" resolved as "Works As Intended". This is referenced {{in|je}} when a player is killed by "Intentional Game Design". </ref> The explosion has power 5, which is stronger than [[TNT]] (4), but not as strong as a charged [[creeper]] or [[End Crystal|end crystal]] (6). The explosion centers on the head part of the bed. [[Villager]]s can sleep normally in any dimension without the bed being blown up.<ref>{{bug|MC-146515|||WAI}}</ref> Upon death from a bed explosion, the [[death messages|message]] "'''(Player) was killed by [Intentional Game Design]'''" appears.
The player must be close to the bed to sleep. If the player is close enough to click on the bed, but not close enough to sleep in it, the message "You may not rest now, the bed is too far away"{{only|java|short=1}}/"Bed is too far away"{{only|bedrock|short=1}} appears. A player must be within 2 blocks of the bed {{in|JE}} or 3 blocks {{in|BE}} to use the bed.
If a "monster" is within 8 blocks of the bed horizontally (in the X- and Z-axis), and 5 blocks vertically (in the Y-axis), the message "You may not rest now, there are monsters nearby" appears and the player is prevented from sleeping until the monsters leave or are killed. Most hostile mobs, as well as some neutral mobs prevent players from sleeping, as shown in the table below.
{| class="wikitable mw-collapsible"
!Mob
!Prevent the player from sleeping
|-
|{{EntityLink|Blaze}}
|{{Tc|yes}}
|-
|{{EntityLink|Chicken Jockey}}
|{{Tc|partial|when hostile{{Only|Java|short=1}}/Yes{{Only|Bedrock|short=1}}}}
|-
|{{EntityLink|Creeper}}
|{{Tc|yes}}
|-
|{{EntityLink|Drowned}}
|{{Tc|yes}}
|-
|{{EntityLink|Endermite}}
|{{Tc|yes}}
|-
|{{EntityLink|Enderman}}
|{{Tc|partial|when hostile}}
|-
|{{EntityLink|Ender Dragon}}
|{{Tc|no}}
|-
|{{EntityLink|Evoker}}
|{{Tc|yes}}
|-
|{{EntityLink|Ghast}}
|{{Tc|no}}
|-
|{{EntityLink|Giant}}
|{{Tc|yes}}
|-
|{{EntityLink|Guardian}}, {{EntityLink|Elder Guardian}}
|{{Tc|yes}}
|-
|{{EntityLink|Hoglin}}
|{{Tc|no}}
|-
|{{EntityLink|Illusioner}}
|{{Tc|yes}}
|-
|{{EntityLink|Killer Bunny}}
|{{Tc|no}}
|-
|{{EntityLink|Magma Cube}}
|{{Tc|partial|no{{Only|Java|short=1}}/Yes{{Only|Bedrock|short=1}}}}
|-
|{{EntityLink|Piglin}}
|{{Tc|no}}
|-
|{{EntityLink|Piglin Brute}}
|{{Tc|yes}}
|-
|{{EntityLink|Pillager}}
|{{Tc|yes}}
|-
|{{EntityLink|Phantom}}
|{{Tc|yes}}
|-
|{{EntityLink|Ravager}}
|{{Tc|yes}}
|-
|{{EntityLink|Shulker}}
|{{Tc|no}}
|-
|{{EntityLink|Silverfish}}
|{{Tc|yes}}
|-
|{{EntityLink|Skeleton}}, {{EntityLink|Skeleton Horseman}}, {{EntityLink|Stray}}, {{EntityLink|Wither Skeleton}}
|{{Tc|yes}}
|-
|{{EntityLink|Spider}}, {{EntityLink|Cave Spider}}, {{EntityLink|Spider Jockey}}
|{{Tc|yes}}
|-
|{{EntityLink|Slime}}
|{{Tc|partial|no{{Only|Java|short=1}}/Yes{{Only|Bedrock|short=1}}}}
|-
|{{EntityLink|Vex}}
|{{Tc|yes}}
|-
|{{EntityLink|Vindicator}}
|{{Tc|yes}}
|-
|{{EntityLink|Warden}}
|{{Tc|yes}}
|-
|{{EntityLink|Witch}}
|{{Tc|yes}}
|-
|{{EntityLink|Wither}}
|{{Tc|yes}}
|-
|{{EntityLink|Zoglin}}
|{{Tc|yes}}
|-
|{{EntityLink|Zombie}}, {{EntityLink|Zombie Villager}}, {{EntityLink|Husk}}
|{{Tc|yes}}
|-
|{{EntityLink|Zombified Piglin}}
|{{Tc|partial|when hostile{{Only|Java|short=1}}/Yes{{Only|Bedrock|short=1}}}}
|-
|}
{{notelist}}
If the player has not entered a bed and didn't die for 3 in-game days, [[phantom]]s can spawn unless {{cmd|gamerule doInsomnia}} is set to {{cd|false}}. {{in|java}}, this can be verified by checking if the "Time Since Last Rest" [[statistic]] is greater than 1.00 h.
A hostile mob can wake a player that is sleeping.
The player also cannot sleep in a bed occupied by another player, resulting in the message, "This bed is occupied".
A player can, however, sleep in a bed being used by a villager. The player may first wake the villager (pressing {{control|use}} on the villager) and then quickly enter the bed before the villager can lie down again. The villager reclaims the bed after the player wakes. The villager is kicked out of its bed when a player attempts to sleep there.
A player also cannot sleep while on fire, while poisoned, or while starving.
If all sleeping requirements are met and the player enters a bed, the player is positioned in the bed. The player falls asleep as the screen fades to black. {{IN|bedrock}}, the sleeping animation slowly lowers the player into bed.
Once all players in a world are asleep, after 5 seconds (100 ticks) the time of day changes to sunrise. (time 0)
During this time, the chat window is focused, and the player can leave the bed by clicking the {{btn|Leave Bed}} button.
[[Waterlogging|Waterlogged]] beds{{only|bedrock}} cannot be slept in unless the player or villager has the {{EffectLink|Water Breathing}} or {{EffectLink|Conduit Power}} status effects. Attempting to use a waterlogged bed otherwise does not display any message.<ref>{{bug|MCPE-35802}}</ref>
Beds displaying an error above the hotbar is a feature exclusive to beds; other blocks that cannot be used do not display such a message.<ref>{{bug|MC-160479}} resolved as "Works As Intended"</ref>
If there are two or more blocks of space above the bed, then the player can wake up on the bed. If there is less than two blocks above the bed and there is room on the side, then the player wakes up on the side of the bed. If there is no space on the side of the bed and there is less than two blocks above the bed, then the player still wakes up on top of the bed, but suffocates if it's a solid block.
Villagers always wake up on top of the bed, meaning they can suffocate if there isn't enough room above the bed.
====Passing the night====
Sleeping changes the [[daylight cycle|time of day]] to sunrise and resets the [[weather]] cycle, changing the weather to clear conditions. {{IN|JE}}, the weather cycle is only reset if it is currently raining or snowing. The player wakes up next to the bed, facing the bed.
Sleeping does not accelerate processes that take place over time such as the growth of [[crops]] or [[smelting]]. If {{cmd|gamerule doDaylightCycle}} is <code>false</code>, the player instead wakes up in the night.
To skip the night in multiplayer, all players in the [[Overworld]] must be in bed at the same time. Pressing the {{btn|Leave Bed}} button is not necessary in this case. The percentage of players that need to sleep to skip the night can be customized with the game rule {{cd|playersSleepingPercentage}}.
Villagers are unable to skip the night by sleeping in beds, unlike players.
If the bed is destroyed while the player is in it, due to for example an explosion or by another player, the player wakes prematurely and the night does not pass.
====Setting the spawn point====
Once a player has entered a bed (or right clicked the bed during daytime), their spawn point is set to the location of that bed. {{IN|java}}, multiple players can set their spawn point on a single bed. {{IN|bedrock}}, the last player to use a specific bed is the only player who can respawn there, and players who had previously slept there respawn at the world spawn.
{{ctrl|Using}} a bed in the daytime likewise sets the spawn point, without actually entering the bed.
When a bed explodes, it does not set the spawn point.
The message "Respawn point set" is displayed in chat when the respawn point is successfully changed.
The check for a bed is made only when the player respawns. This means that the bed can be destroyed and replaced or even reoriented, but as long as there is a bed present in the same location, the player can respawn there. If a player's bed is absent, or if the area around the bed is made unsuitable for respawning (see below), a message is displayed saying ''You have no home bed or charged respawn anchor, or it was obstructed''{{only|je}}/''Your home bed was missing or obstructed''{{only|be}}, and the player respawns at the [[Spawn#World spawn|world spawn]] point.
When choosing where to respawn the player, the northwesternmost (lowest X- and Z-coordinates) location of the seven blocks adjacent to the head of the bed is chosen first. If this location is obstructed, the next choice is to its south (+Z), rather than the east (+X). Only when all seven locations around the head are obstructed are the three remaining ones adjacent to the foot then to be considered.
For a location to be unobstructed, the block at the level of the bed must be air or non-solid (e.g. torches, but not glass) and there must be a space with a solid block below it and two non-colliding blocks for the player to stand in 0-2 blocks below the bed. It does not matter if the bed itself has blocks above it. Putting a slab one block above a bed can act as a two block tall space, as the bed is half a block tall. The bed never spawns the player on or directly below itself even if all other locations are obstructed. If a bed is obstructed, the player's spawn point is cleared after they respawn. That is, even if the bed is subsequently made usable again, the player continues to respawn at the world spawn until interacting with the bed again.
Specifically, when interacting with it, the location of the ''head'' of the bed is saved as the spawn point, and if a bed is in that space (whether it is the foot or the head) then the respawn works. This can be observed by reorienting the bed with its head in the same location. Interacting with it does not produce a "Respawn point set" message as the game doesn't change the saved spawn point. If a bed is reoriented so that its foot is in this space, it still functions on the next respawn, but it can also be interacted with to update the spawn point to the new head of the bed and cause a "Respawn point set" message. Attempting the reverse, reorienting the bed so that it overlaps the original location of the foot, results in a respawn at world spawn. However, the location of the foot of the bed is also saved. If the bed is moved so that part of it overlaps the original location of the head, it can be observed that the same locations need to be obstructed to stop spawning. It is possible to respawn 2 blocks away from the bed this way.
=== Bouncing===
Falling onto a bed bounces the player with 66% strength – the bouncing-up velocity is 66% of the impact velocity. The player also takes 50% of normal fall damage.
Baby villagers bounce on beds during the day.
If the player is falling while sleeping requirements are met, and presses {{control|use}} on a bed within reach before hitting the ground, the fall damage is delayed until the player wakes.
A player can bounce on a bed while another player or villager is sleeping on it without waking the player or the villager up.
Villagers can be pushed onto beds, as the bed is half a block tall.
=== Curing===
Each bed in the vicinity of a zombie villager has a chance to speed up the [[Zombie_Villager#Curing|process of curing the zombie villager]]. Iron bars (such as in a prison cell) also have this effect.
=== Placement===
Beds require two blocks of floor space. Placement requires at least 2 blocks from the player's facing direction. When placed, the foot of the bed is placed on the block selected and the head of the bed on the block farther away from the player. {{IN|bedrock}}, beds require solid blocks below them when placed. However, the bed remains in place if its supporting blocks are later removed. {{IN|java}}, beds do not require supporting blocks and can be placed anywhere, provided there is enough room.
==Sounds ==
===Generic===
{{Sound table/Block/Wood}}
===Unique===
{{edition|java}}:
{{Sound table
|sound=Explosion1.ogg
|sound2=Explosion2.ogg
|sound3=Explosion3.ogg
|sound4=Explosion4.ogg
|subtitle=Explosion
|source=block
|description=When a player attempts to sleep while not in the Overworld
|id=entity.generic.explode
|translationkey=subtitles.entity.generic.explode
|volume=4.0
|pitch=0.56-0.84
|distance=16
|foot=1}}
{{edition|bedrock}}:
{{Sound table
|type=bedrock
|sound=Explosion1.ogg
|sound2=Explosion2.ogg
|sound3=Explosion3.ogg
|sound4=Explosion4.ogg
|source=block
|description=When a player attempts to sleep while not in the Overworld
|id=random.explode
|volume=4.0
|pitch=1.0
|foot=1}}
==Data values==
===ID===
{{edition|java}}:
{{ID table|
|edition=java
|showblocktags=y
|showitemtags=y
|showforms=y
|generatetranslationkeys=y
|displayname=White Bed
|spritetype=block
|nameid=white_bed
|blocktags=beds
|itemtags=beds}}
{{ID table
|displayname=Orange Bed
|spritetype=block
|nameid=orange_bed
|blocktags=beds
|itemtags=beds}}
{{ID table
|displayname=Magenta Bed
|spritetype=block
|nameid=magenta_bed
|blocktags=beds
|itemtags=beds}}
{{ID table
|displayname=Light Blue Bed
|spritetype=block
|nameid=light_blue_bed
|blocktags=beds
|itemtags=beds}}
{{ID table
|displayname=Yellow Bed
|spritetype=block
|nameid=yellow_bed
|blocktags=beds
|itemtags=beds}}
{{ID table
|displayname=Lime Bed
|spritetype=block
|nameid=lime_bed
|blocktags=beds
|itemtags=beds}}
{{ID table
|displayname=Pink Bed
|spritetype=block
|nameid=pink_bed
|blocktags=beds
|itemtags=beds}}
{{ID table
|displayname=Gray Bed
|spritetype=block
|nameid=gray_bed
|blocktags=beds
|itemtags=beds}}
{{ID table
|displayname=Light Gray Bed
|spritetype=block
|nameid=light_gray_bed
|blocktags=beds
|itemtags=beds}}
{{ID table
|displayname=Cyan Bed
|spritetype=block
|nameid=cyan_bed
|blocktags=beds
|itemtags=beds}}
{{ID table
|displayname=Purple Bed
|spritetype=block
|nameid=purple_bed
|blocktags=beds
|itemtags=beds}}
{{ID table
|displayname=Blue Bed
|spritetype=block
|nameid=blue_bed
|blocktags=beds
|itemtags=beds}}
{{ID table
|displayname=Brown Bed
|spritetype=block
|nameid=brown_bed
|blocktags=beds
|itemtags=beds}}
{{ID table
|displayname=Green Bed
|spritetype=block
|nameid=green_bed
|blocktags=beds
|itemtags=beds}}
{{ID table
|displayname=Red Bed
|spritetype=block
|nameid=red_bed
|blocktags=beds
|itemtags=beds}}
{{ID table
|displayname=Black Bed
|spritetype=block
|nameid=black_bed
|blocktags=beds
|itemtags=beds
|foot=1}}
{{ID table
|displayname=Block entity
|spritename=beds
|spritetype=block
|nameid=bed
|foot=1}}
{{edition|bedrock}}:
{{ID table
|edition=bedrock
|firstcolumnname=Bed
|shownumericids=y
|showforms=y
|generatetranslationkeys=y
|displayname=Block
|spritename=Beds
|spritetype=block
|nameid=bed
|id=26
|form=block
|itemform=item.bed}}
{{ID table
|displayname=Item
|spritename=bed
|spritetype=item
|nameid=bed
|id=418
|form=item
|translationkey=item.bed.black.name,item.bed.red.name,item.bed.green.name,item.bed.brown.name,item.bed.blue.name,item.bed.cyan.name,item.bed.silver.name,item.bed.gray.name,item.bed.pink.name,item.bed.lime.name,item.bed.yellow.name,item.bed.lightBlue.name,item.bed.magenta.name,item.bed.orange.name,item.bed.white.name
|foot=1}}
{{ID table
|notnamespaced=y
|displayname=Block entity
|spritename=beds
|spritetype=block
|nameid=Bed
|foot=1}}
===Metadata===
{{see also|Data values}}
{{IN|be}}, bed items use the following data values:
{{/DV}}
===Block states===
{{see also|Block states}}
{{/BS}}
===Block data===
A bed has a block entity associated with it that holds additional data about the block.
{{el|java}}:
{{see also|Block entity format}}
{{/BE}}
{{el|bedrock}}:
: See [[Bedrock Edition level format/Block entity format]].
==Advancements==
{{load advancements|Sweet Dreams}}
==History==
''For a more in-depth breakdown of changes to textures and models, including a set of renders for each state combination, see [[/Asset history]]''
{{History|java beta}}
{{History||November 26, 2011|link={{tweet|jeb|140410431394160640}}|Originally, [[crying obsidian]] was intended to act as a block to reset spawn points, until beds were introduced.}}
{{History||1.3|[[File:Red Bed JE1 BE1.png|32px]] [[File:Red Bed (item) JE1 BE1.png|32px]] Added beds.
|The only color for beds is red.
|Beds can currently be crafted using any color combination of wool.
|Sleeping in an area potentially exposed to monsters can cause [[player]]s to wake up early, with a [[skeleton]] or [[zombie]] spawned next to them.
|Trying to sleep in a bed in [[the Nether]] does nothing.}}
{{History||1.4|Sleeping in a bed now resets the player's spawn position, though it does not work for most users. The spawn point unintentionally changes only if ''Leave Bed'' is clicked and the function is limited to [[multiplayer]].}}
{{History||1.4_01|Beds now act as a respawn point as intended.}}
{{History||1.6|snap=Test Build 3|Trying to sleep in a bed in the Nether now causes the bed to [[explosion|explode]].}}
{{History||1.7|As blocks now pull textures from the expected places for model application, this has resulted in the bed texture shifting downward in <samp>[[terrain.png]]</samp>. No visual difference has resulted for the actual bed.}}
{{History|java}}
{{History||1.0.0|snap=Beta 1.9 Prerelease 4|Bed explosions in the Nether now light nearby blocks on fire.}}
{{History|||snap=Beta 1.9 Prerelease 5|The bottom textures of beds have been changed to the texture of the new [[oak]] planks from [[File:Red Bed JE1 (facing NWU).png|32px]] to [[File:Red Bed JE2 BE1 (facing NWU).png|32px]].}}
{{History|||snap=Beta 1.9 Prerelease 6|Beds no longer spawn monsters. Instead, trying to sleep when monsters are around displays a message saying ''You may not rest now, there are monsters nearby''.}}
{{History||1.2.4|snap=release|[[Cat]]s while in standing position now purposely go and sit on beds.
|[[Spruce]], [[birch]], and [[jungle tree|jungle]] planks can now be used to craft beds.}}
{{History||1.5|snap=?|Beds now check their [[biome]] for detonation rather than just their dimension.}}
{{History||1.7.2|snap=1.7.1|[[Acacia]] planks and [[dark oak]] planks can now be used to craft beds.}}
{{History||1.8|snap=14w29a|Beds now display the cracking animation on top and bottom.}}
{{History|||snap=14w33a|Beds now make [[sound]]s when placed, and play logical sounds when stepped on and [[breaking|broken]].<ref>{{bug|MC-66347||Beds make incorrect sounds|Fixed}}</ref>}}
{{History||1.9|snap=15w43a|Bed now generates inside [[igloo]]s.}}
{{History||1.11|snap=16w32a|The messages "You can only sleep at night", "You may not rest now, there are monsters nearby", and "This bed is occupied" now appear on top of the hotbar, the place that the message "Press <whatever your sneak key is> to dismount" also appears when the player is riding a [[mob]].}}
{{History|||snap=16w33a|If the player is close enough to click on the bed, but not close enough to sleep in it, the message "You may not rest now, the bed is too far away" is now displayed.}}
{{History||1.12|snap=17w06a|Neutral [[zombie pigmen]] no longer prevent the player from sleeping in a bed.}}
{{History|||snap=March 13, 2017|slink={{tweet|jeb_|841311279784591361}}|[[Jeb]] mentions colored beds for [[Java Edition 1.12|1.12]].}}
{{History|||snap=17w15a|[[File:White Bed JE1.png|32px]] [[File:Light Gray Bed JE1.png|32px]] [[File:Gray Bed JE1.png|32px]] [[File:Black Bed JE1.png|32px]] [[File:Brown Bed JE1.png|32px]] [[File:Orange Bed JE1.png|32px]] [[File:Yellow Bed JE1.png|32px]] [[File:Lime Bed JE1.png|32px]] [[File:Green Bed JE1.png|32px]] [[File:Cyan Bed JE1.png|32px]] [[File:Light Blue Bed JE1.png|32px]] [[File:Blue Bed JE1.png|32px]] [[File:Purple Bed JE1.png|32px]] [[File:Magenta Bed JE1.png|32px]] [[File:Pink Bed JE1.png|32px]] [[Dye]]d beds have been added.
|The "Bed" has been renamed to "Red Bed".
|Beds can now only be crafted using wool of the same color.
|[[File:Red Bed JE2.png|32px]] The texture of red beds has been changed. The top of the beds are no longer mirrored. <!--- the numbers appear out of order but it is correct since it orders all beds in the current order in the Java Creative inventory --->
|{{Sprite|pos=1|image=Bed Icons 1.12.png|size=32|sheetsize=512}} {{Sprite|pos=9|image=Bed Icons 1.12.png|size=32|sheetsize=512}} {{Sprite|pos=8|image=Bed Icons 1.12.png|size=32|sheetsize=512}} {{Sprite|pos=16|image=Bed Icons 1.12.png|size=32|sheetsize=512}} {{Sprite|pos=13|image=Bed Icons 1.12.png|size=32|sheetsize=512}} {{Sprite|pos=15|image=Bed Icons 1.12.png|size=32|sheetsize=512}} {{Sprite|pos=2|image=Bed Icons 1.12.png|size=32|sheetsize=512}} {{Sprite|pos=5|image=Bed Icons 1.12.png|size=32|sheetsize=512}} {{Sprite|pos=6|image=Bed Icons 1.12.png|size=32|sheetsize=512}} {{Sprite|pos=14|image=Bed Icons 1.12.png|size=32|sheetsize=512}} {{Sprite|pos=10|image=Bed Icons 1.12.png|size=32|sheetsize=512}} {{Sprite|pos=4|image=Bed Icons 1.12.png|size=32|sheetsize=512}} {{Sprite|pos=12|image=Bed Icons 1.12.png|size=32|sheetsize=512}} {{Sprite|pos=11|image=Bed Icons 1.12.png|size=32|sheetsize=512}} {{Sprite|pos=3|image=Bed Icons 1.12.png|size=32|sheetsize=512}} {{Sprite|pos=7|image=Bed Icons 1.12.png|size=32|sheetsize=512}} Beds now appear 3D in the [[inventory]].
|[[File:Red Bed JE3 (facing NWU).png|32px]] Beds now have 3D legs.<ref>{{bug|MC-11963||bed hind legs not rendered|Fixed}}</ref>
|Beds have been made bouncy, though they do not completely reduce all [[fall damage]].
|Beds are now a [[block entity]].}}
{{History|||snap=17w17a|[[File:Red Bed JE4 BE2 (facing NWU).png|32px]] The four legs of a bed are now each textured separately, and their [[model]] is different.
|[[File:White Bed JE2 BE2.png|32px]] [[File:Light Gray Bed JE2 BE2.png|32px]] [[File:Gray Bed JE2 BE2.png|32px]] [[File:Black Bed JE2 BE2.png|32px]] [[File:Brown Bed JE2 BE2.png|32px]] [[File:Red Bed JE3 BE2.png|32px]] [[File:Orange Bed JE2 BE2.png|32px]] [[File:Yellow Bed JE2 BE2.png|32px]] [[File:Lime Bed JE2 BE2.png|32px]] [[File:Green Bed JE2 BE2.png|32px]] [[File:Cyan Bed JE2 BE2.png|32px]] [[File:Light Blue Bed JE2 BE2.png|32px]] [[File:Blue Bed JE2 BE2.png|32px]] [[File:Purple Bed JE2 BE2.png|32px]] [[File:Magenta Bed JE2 BE2.png|32px]] [[File:Pink Bed JE2 BE2.png|32px]]<br> <!--- the numbers appear out of order but it is correct since it orders all beds in the current order in the Java Creative inventory --->
{{Sprite|pos=17|image=Bed Icons 1.12.png|size=32|sheetsize=512}} {{Sprite|pos=25|image=Bed Icons 1.12.png|size=32|sheetsize=512}} {{Sprite|pos=24|image=Bed Icons 1.12.png|size=32|sheetsize=512}} {{Sprite|pos=32|image=Bed Icons 1.12.png|size=32|sheetsize=512}} {{Sprite|pos=29|image=Bed Icons 1.12.png|size=32|sheetsize=512}} {{Sprite|pos=31|image=Bed Icons 1.12.png|size=32|sheetsize=512}} {{Sprite|pos=18|image=Bed Icons 1.12.png|size=32|sheetsize=512}} {{Sprite|pos=21|image=Bed Icons 1.12.png|size=32|sheetsize=512}} {{Sprite|pos=22|image=Bed Icons 1.12.png|size=32|sheetsize=512}} {{Sprite|pos=30|image=Bed Icons 1.12.png|size=32|sheetsize=512}} {{Sprite|pos=26|image=Bed Icons 1.12.png|size=32|sheetsize=512}} {{Sprite|pos=20|image=Bed Icons 1.12.png|size=32|sheetsize=512}} {{Sprite|pos=28|image=Bed Icons 1.12.png|size=32|sheetsize=512}} {{Sprite|pos=27|image=Bed Icons 1.12.png|size=32|sheetsize=512}} {{Sprite|pos=19|image=Bed Icons 1.12.png|size=32|sheetsize=512}} {{Sprite|pos=23|image=Bed Icons 1.12.png|size=32|sheetsize=512}} The textures of beds have now also been changed.}}
{{History||1.13|snap=17w47a|Beds now require solid blocks below them, or they break into an item. Previously, a bed needed to be placed on solid blocks, but the blocks could later be removed.}}
{{History|||snap=18w07a|Sleeping in a bed is now important to keep [[phantom]]s from spawning.}}
{{History|||snap=18w20a|Players in [[Creative]] mode can now sleep even if monsters are nearby.}}
{{History|||snap=18w22a|Beds no longer require supporting blocks below them; they do not break into an [[item (entity)|item]] if said blocks are removed, and can be directly placed on top of non-solid blocks.}}
{{History|||snap=pre2|The "You can only sleep at night" message when using a bed has been changed to "You can sleep only at night and during [[thunderstorm]]s."}}
{{History||1.14|snap=18w43a|[[File:White Bed JE3 BE3.png|32px]] [[File:Light Gray Bed JE3 BE3.png|32px]] [[File:Gray Bed JE3 BE3.png|32px]] [[File:Black Bed JE3 BE3.png|32px]] [[File:Brown Bed JE3 BE3.png|32px]] [[File:Red Bed JE4 BE3.png|32px]] [[File:Orange Bed JE3 BE3.png|32px]] [[File:Yellow Bed JE3 BE3.png|32px]] [[File:Lime Bed JE3 BE3.png|32px]] [[File:Green Bed JE3 BE3.png|32px]] [[File:Cyan Bed JE3 BE3.png|32px]] [[File:Light Blue Bed JE3 BE3.png|32px]] [[File:Blue Bed JE3 BE3.png|32px]] [[File:Purple Bed JE3 BE3.png|32px]] [[File:Magenta Bed JE3 BE3.png|32px]] [[File:Pink Bed JE3 BE3.png|32px]]<br>{{InvSprite|White Bed}} {{InvSprite|Light Gray Bed}} {{InvSprite|Gray Bed}} {{InvSprite|Black Bed}} {{InvSprite|Brown Bed}} {{InvSprite|Red Bed}} {{InvSprite|Orange Bed}} {{InvSprite|Yellow Bed}} {{InvSprite|Lime Bed}} {{InvSprite|Green Bed}} {{InvSprite|Cyan Bed}} {{InvSprite|Light Blue Bed}} {{InvSprite|Blue Bed}} {{InvSprite|Purple Bed}} {{InvSprite|Magenta Bed}} {{InvSprite|Pink Bed}} The textures of all beds have been changed.
|[[File:Red Bed JE5 (facing NWU).png|32px]] The bottom textures of beds have been changed to new oak planks texture.}}
{{History|||snap=18w44a|Cats can now sleep in empty beds or sit on their owner when their owner is sleeping.}}
{{History|||snap=18w47a|[[File:Red Bed JE6 BE3 (facing NWU).png|32px]] The bottom textures of beds have been changed to the new oak planks to texture, once again.}}
{{History|||snap=18w48a|Beds now generate in the updated [[plains]] [[village]]s.}}
{{History|||snap=18w49a|Beds now generate in the updated [[savanna]] villages and the new [[snowy tundra]] villages.}}
{{History|||snap=18w50a|Beds now generate in the updated [[desert]] and [[taiga]] villages.}}
{{History|||snap=19w08a|All mobs can now sleep in beds using [[command]]s.}}
{{History|||snap=19w11a|[[Villager]]s now claim beds and sleep in them during the night.
|Shepherd villagers now [[trading|sell]] beds.}}
{{History||1.15|snap=19w35a|If a player tries to sleep in a bed that is occupied by a villager, that villager is now kicked out of the bed.}}
{{History|||snap=19w36a|Trying to sleep in a bed during the daytime now sets the player's spawn location to that bed.}}
{{History|||snap=pre2|Successfully changing a spawn point using a bed now displays a message in [[chat]].}}
{{History||1.16|snap=20w06a|Crimson and warped planks can now be used to craft beds.}}
{{History|||snap=20w12a|The message "Your home bed was missing or obstructed" has been changed to "You have no home bed or respawn anchor, or it was obstructed" due to the addition of the [[respawn anchor]], used to set the player's spawn in [[the Nether]].}}
{{History||1.16.2|snap=20w30a|Beds now prioritize the side of the bed the player or villager entered from and then spaces circling around the foot of the bed up to the head of the bed.}}
{{History||1.17|snap=20w51a|Added gamerules for sleeping in multiplayer.}}
{{History||1.18|snap=21w44a|Sleeping now only resets the weather cycle if it is currently raining or snowing.<ref>{{bug|MC-63340||Sleeping always resets time until rain|Fixed}}</ref>}}
{{History||1.19|snap=22w11a|[[Mangrove]] planks can now be used to craft beds.}}
{{History||1.19.3|snap=22w43a|Bed explosions can now be properly [[blocking|blocked]] by [[shield]]s.<ref>{{bug|MC-200006|||Fixed}}</ref>}}
{{History||1.20|snap=Pre-release 1|Beds of any color can now be dyed into any other color.}}
{{History|pocket alpha}}
{{History||v0.4.0|[[File:Red Bed JE1 BE1.png|32px]] [[File:Red Bed (item) JE1 BE1.png|32px]] Added beds.}}
{{History||v0.5.0|Beds can now be obtained after activating the [[nether reactor]].}}
{{History||v0.9.0|snap=build 1|Beds no longer restore [[health]] in normal difficulty, making [[food]] a more required [[Survival]]-needed resource.
|Added smooth lighting to beds.}}
{{History||v0.11.0|snap=build 8|The lighting on beds has been improved.}}
{{History||v0.12.1|snap=build 1|Tamed [[cat|ocelots]] while standing now purposely go and sit on beds.
|Beds are no longer available from the [[nether reactor]].}}
{{History||v0.16.0|snap=build 1|Beds now make a [[sound]] when placed, identical to [[block]]s like [[stone]].<ref name="lazilycodedsounds">{{bug|MCPE-10077}} – "Incorrect sounds on beds" resolved as "Fixed".</ref>}}
{{History|pocket}}
{{History||1.0.0|snap=alpha 0.17.0.1|Beds are now generated in [[igloo]]s.}}
{{History|||snap=alpha 0.17.0.2|[[File:Leave Bed 1.0.jpg|36px]] The ''Leave Bed'' button now has a new texture.}}
{{History|||snap=alpha 1.0.0.0|Sleeping now ends [[weather]].}}
{{History||1.1.0|snap=alpha 1.1.0.0|[[File:White Bed JE2 BE2.png|32px]] [[File:Light Gray Bed JE2 BE2.png|32px]] [[File:Gray Bed JE2 BE2.png|32px]] [[File:Black Bed JE2 BE2.png|32px]] [[File:Brown Bed JE2 BE2.png|32px]] [[File:Orange Bed JE2 BE2.png|32px]] [[File:Yellow Bed JE2 BE2.png|32px]] [[File:Lime Bed JE2 BE2.png|32px]] [[File:Green Bed JE2 BE2.png|32px]] [[File:Cyan Bed JE2 BE2.png|32px]] [[File:Light Blue Bed JE2 BE2.png|32px]] [[File:Blue Bed JE2 BE2.png|32px]] [[File:Purple Bed JE2 BE2.png|32px]] [[File:Magenta Bed JE2 BE2.png|32px]] [[File:Pink Bed JE2 BE2.png|32px]]<br>[[File:White Bed (item) BE1.png|32px]] [[File:Light Gray Bed (item) BE1.png|32px]] [[File:Gray Bed (item) BE1.png|32px]] [[File:Black Bed (item) BE1.png|32px]] [[File:Brown Bed (item) BE1.png|32px]] [[File:Orange Bed (item) BE1.png|32px]] [[File:Yellow Bed (item) BE1.png|32px]] [[File:Lime Bed (item) BE1.png|32px]] [[File:Green Bed (item) BE1.png|32px]] [[File:Cyan Bed (item) BE1.png|32px]] [[File:Light Blue Bed (item) BE1.png|32px]] [[File:Blue Bed (item) BE1.png|32px]] [[File:Purple Bed (item) BE1.png|32px]] [[File:Magenta Bed (item) BE1.png|32px]] [[File:Pink Bed (item) BE1.png|32px]] Added the other 15 colors of beds.
|The "Bed" has been renamed to "Red Bed".
|[[File:Red Bed JE3 BE2.png|32px]] The texture of red beds has been changed.
|A new animation when sleeping has been added to beds.
|Beds in [[igloo]]s are now white in [[ice plains]] and brown in [[cold taiga]]s.
|Beds now bounce the [[player]] two [[block]]s up, and have 3D legs.
|Placement, stepping and breaking [[sound]]s for beds are now correctly wooden.<ref name="lazilycodedsounds"/>}}
{{History|bedrock}}
{{History||1.4.0|snap=beta 1.2.14.2|Beds can now be [[waterlogging|waterlogged]] and require [[Water Breathing]] to sleep in.}}
{{History|||snap=beta 1.2.20.1|Colored beds can now be turned into white beds by adding [[bleach]]. This works only if {{el|ee}} features are turned on.}}
{{History||1.6.0|snap=beta 1.6.0.1|Sleeping in a bed is now important to keep [[phantom]]s from spawning.}}
{{History||1.8.0|snap=beta 1.8.0.8|[[Cat]]s can now sleep in empty beds or sit on their [[player|owner]] when their owner is sleeping.}}
{{History||1.10.0|snap=beta 1.10.0.3|Various beds now generate in the new [[village]]s.
|[[Villager]]s can now sleep by occupying a bed, which prevent [[player]]s from using it.
|[[Igloo]]s now generate with red beds.
|Beds are now used to count the number of available houses in [[village]]s.
|[[File:White Bed JE3 BE3.png|32px]] [[File:Light Gray Bed JE3 BE3.png|32px]] [[File:Gray Bed JE3 BE3.png|32px]] [[File:Black Bed JE3 BE3.png|32px]] [[File:Brown Bed JE3 BE3.png|32px]] [[File:Red Bed JE4 BE3.png|32px]] [[File:Orange Bed JE3 BE3.png|32px]] [[File:Yellow Bed JE3 BE3.png|32px]] [[File:Lime Bed JE3 BE3.png|32px]] [[File:Green Bed JE3 BE3.png|32px]] [[File:Cyan Bed JE3 BE3.png|32px]] [[File:Light Blue Bed JE3 BE3.png|32px]] [[File:Blue Bed JE3 BE3.png|32px]] [[File:Purple Bed JE3 BE3.png|32px]] [[File:Magenta Bed JE3 BE3.png|32px]] [[File:Pink Bed JE3 BE3.png|32px]] The textures of all beds have been changed.}}
{{History||1.11.0|snap=beta 1.11.0.4|Beds can now be [[trading|bought]] from shepherd [[villager]]s.}}
{{History||1.13.0|snap=?|[[Player]]s now succeed in attempting to sleep on villager-occupied beds, kicking the villager off.}}
{{History|console}}
{{History||xbox=TU1|xbone=CU1|ps=1.00|wiiu=Patch 1|switch=1.0.1|[[File:Red Bed JE1 BE1.png|32px]] [[File:Red Bed (item) JE1 BE1.png|32px]] Added beds.}}
{{History||xbox=TU12|xbone=CU1|ps=1.00|wiiu= Patch 1|[[Cat]]s in standing position now purposely go and sit on beds, preventing [[player]]s from using them.}}
{{History||xbox=TU43|xbone=CU33|ps=1.36|wiiu=Patch 13|The sleeping animation while in beds has been changed.}}
{{History||xbox=TU54|xbone=CU44|ps=1.52|wiiu=Patch 24|switch=1.0.4|[[File:White Bed JE2 BE2.png|32px]] [[File:Light Gray Bed JE2 BE2.png|32px]] [[File:Gray Bed JE2 BE2.png|32px]] [[File:Black Bed JE2 BE2.png|32px]] [[File:Brown Bed JE2 BE2.png|32px]] [[File:Orange Bed JE2 BE2.png|32px]] [[File:Yellow Bed JE2 BE2.png|32px]] [[File:Lime Bed JE2 BE2.png|32px]] [[File:Green Bed JE2 BE2.png|32px]] [[File:Cyan Bed JE2 BE2.png|32px]] [[File:Light Blue Bed JE2 BE2.png|32px]] [[File:Blue Bed JE2 BE2.png|32px]] [[File:Purple Bed JE2 BE2.png|32px]] [[File:Magenta Bed JE2 BE2.png|32px]] [[File:Pink Bed JE2 BE2.png|32px]]<br>[[File:White Bed (item) LCE.png|32px]] [[File:Light Gray Bed (item) LCE.png|32px]] [[File:Gray Bed (item) LCE.png|32px]] [[File:Black Bed (item) LCE.png|32px]] [[File:Brown Bed (item) LCE.png|32px]] [[File:Orange Bed (item) LCE.png|32px]] [[File:Yellow Bed (item) LCE.png|32px]] [[File:Lime Bed (item) LCE.png|32px]] [[File:Green Bed (item) LCE.png|32px]] [[File:Cyan Bed (item) LCE.png|32px]] [[File:Light Blue Bed (item) LCE.png|32px]] [[File:Blue Bed (item) LCE.png|32px]] [[File:Purple Bed (item) LCE.png|32px]] [[File:Magenta Bed (item) LCE.png|32px]] [[File:Pink Bed (item) LCE.png|32px]] Added the other 15 colors of beds.
|The "Bed" has been now renamed to "Red Bed".
|[[File:Red Bed JE3 BE2.png|32px]] [[File:Red Bed (item) LCE.png|32px]] The textures of red beds has been changed.
|Beds are now [[dye]]able and bounce the [[player]] two [[block]]s up, and have a single 3D legs.}}
{{History||xbox=TU60|xbone=CU51|ps=1.64|wiiu=Patch 30|switch=1.0.11|The sleeping animation in beds has been changed again.}}
{{History||xbox=TU69|xbone=none|ps=1.76|wiiu=Patch 38|switch=none|Sleeping in a bed is now important to keep [[phantom]]s from spawning.
|Beds can now be [[waterlogging|waterlogged]] and require {{EffectLink|Water Breathing}} to sleep in.}}
{{History||xbox=none|xbone=none|ps=1.83|wiiu=none|switch=none|The sleeping animation for beds has been reverted to how it was before [[Legacy Console Edition version history#ps-1.64|1.64]].}}
{{History||xbox=none|xbone=none|ps=1.91|wiiu=none|switch=none|Various beds now generate in the new [[village]]s.
|[[Villager]]s can now sleep by occupying a bed, which prevents [[player]]s from using it.
|Beds are now used to count the number of available houses in villages.
|Beds can now be [[trading|bought]] from shepherd [[villager]]s.}}
{{History|New 3DS}}
{{History||0.1.0|[[File:Red Bed JE1 BE1.png|32px]] [[File:Red Bed (item) JE1 BE1.png|32px]] Added beds.}}
{{History||1.9.19|[[File:White Bed JE2 BE2.png|32px]] [[File:Light Gray Bed JE2 BE2.png|32px]] [[File:Gray Bed JE2 BE2.png|32px]] [[File:Black Bed JE2 BE2.png|32px]] [[File:Brown Bed JE2 BE2.png|32px]] [[File:Orange Bed JE2 BE2.png|32px]] [[File:Yellow Bed JE2 BE2.png|32px]] [[File:Lime Bed JE2 BE2.png|32px]] [[File:Green Bed JE2 BE2.png|32px]] [[File:Cyan Bed JE2 BE2.png|32px]] [[File:Light Blue Bed JE2 BE2.png|32px]] [[File:Blue Bed JE2 BE2.png|32px]] [[File:Purple Bed JE2 BE2.png|32px]] [[File:Magenta Bed JE2 BE2.png|32px]] [[File:Pink Bed JE2 BE2.png|32px]]<br>[[File:White Bed (item) BE1.png|32px]] [[File:Light Gray Bed (item) BE1.png|32px]] [[File:Gray Bed (item) BE1.png|32px]] [[File:Black Bed (item) BE1.png|32px]] [[File:Brown Bed (item) BE1.png|32px]] [[File:Orange Bed (item) BE1.png|32px]] [[File:Yellow Bed (item) BE1.png|32px]] [[File:Lime Bed (item) BE1.png|32px]] [[File:Green Bed (item) BE1.png|32px]] [[File:Cyan Bed (item) BE1.png|32px]] [[File:Light Blue Bed (item) BE1.png|32px]] [[File:Blue Bed (item) BE1.png|32px]] [[File:Purple Bed (item) BE1.png|32px]] [[File:Magenta Bed (item) BE1.png|32px]] [[File:Pink Bed (item) BE1.png|32px]] Added the other 15 colors of beds.
|The "Bed" has been renamed to "Red Bed".
|[[File:Red Bed JE3 BE2.png|32px]] The texture of red beds has been changed.
|Beds now bounce the [[player]] two [[block]]s up and have 3D legs.}}
{{History|Education}}
{{History||1.0|[[File:Red Bed JE1 BE1.png|32px]] [[File:Red Bed (item) JE1 BE1.png|32px]] Added beds.}}
{{History||1.0.1|[[File:White Bed JE2 BE2.png|32px]] [[File:Light Gray Bed JE2 BE2.png|32px]] [[File:Gray Bed JE2 BE2.png|32px]] [[File:Black Bed JE2 BE2.png|32px]] [[File:Brown Bed JE2 BE2.png|32px]] [[File:Orange Bed JE2 BE2.png|32px]] [[File:Yellow Bed JE2 BE2.png|32px]] [[File:Lime Bed JE2 BE2.png|32px]] [[File:Green Bed JE2 BE2.png|32px]] [[File:Cyan Bed JE2 BE2.png|32px]] [[File:Light Blue Bed JE2 BE2.png|32px]] [[File:Blue Bed JE2 BE2.png|32px]] [[File:Purple Bed JE2 BE2.png|32px]] [[File:Magenta Bed JE2 BE2.png|32px]] [[File:Pink Bed JE2 BE2.png|32px]]<br>[[File:White Bed (item) BE1.png|32px]] [[File:Light Gray Bed (item) BE1.png|32px]] [[File:Gray Bed (item) BE1.png|32px]] [[File:Black Bed (item) BE1.png|32px]] [[File:Brown Bed (item) BE1.png|32px]] [[File:Orange Bed (item) BE1.png|32px]] [[File:Yellow Bed (item) BE1.png|32px]] [[File:Lime Bed (item) BE1.png|32px]] [[File:Green Bed (item) BE1.png|32px]] [[File:Cyan Bed (item) BE1.png|32px]] [[File:Light Blue Bed (item) BE1.png|32px]] [[File:Blue Bed (item) BE1.png|32px]] [[File:Purple Bed (item) BE1.png|32px]] [[File:Magenta Bed (item) BE1.png|32px]] [[File:Pink Bed (item) BE1.png|32px]] Added the other 15 colors of beds.
|The "Bed" has been renamed to "Red Bed".
|[[File:Red Bed JE3 BE2.png|32px]] The texture of red beds has been changed.
|Beds now bounce the [[player]] two [[block]]s up, and have 3D legs.}}
{{History||1.0.27|Colored beds can now be turned into white beds by adding [[bleach]].}}
{{History||1.12|[[File:White Bed JE3 BE3.png|32px]] [[File:Light Gray Bed JE3 BE3.png|32px]] [[File:Gray Bed JE3 BE3.png|32px]] [[File:Black Bed JE3 BE3.png|32px]] [[File:Brown Bed JE3 BE3.png|32px]] [[File:Red Bed JE4 BE3.png|32px]] [[File:Orange Bed JE3 BE3.png|32px]] [[File:Yellow Bed JE3 BE3.png|32px]] [[File:Lime Bed JE3 BE3.png|32px]] [[File:Green Bed JE3 BE3.png|32px]] [[File:Cyan Bed JE3 BE3.png|32px]] [[File:Light Blue Bed JE3 BE3.png|32px]] [[File:Blue Bed JE3 BE3.png|32px]] [[File:Purple Bed JE3 BE3.png|32px]] [[File:Magenta Bed JE3 BE3.png|32px]] [[File:Pink Bed JE3 BE3.png|32px]] The textures of all beds have been changed.}}
{{History|foot}}
=== Data history ===
{{History|java}}
{{History||1.13|snap=17w47a|The different block states for the <code>bed</code> ID have been split up into their own IDs.
|Prior to [[1.13/Flattening|''The Flattening'']], this block's numeral ID was 26, and the item's 355.}}
{{History|foot}}
=== Bed "item"===
{{:Technical blocks/Bed}}
==Issues==
{{Issue list}}
== Trivia==
* The reason beds explode in the Nether and the End is because Notch found it was the easiest solution to dimension-unique respawning.<ref>{{tweet|Notch|1259681657793077250|duh|11 May 2020}}, in response to {{tweet|NoahBandito|1259681319392550912|So you're telling me the "Inteded Game Design" should actually be "Sorry, I was too lazy to code"?|11 May 2020}}</ref>
** Dimension-unique respawning was eventually implemented via the [[respawn anchor]], and gained command support at the same time. Despite this, beds and respawn anchors still explode in invalid dimensions.
* If the player quits the game while sleeping, upon return the player wakes up beside the bed.
* Using the {{cmd|teleport}} command while another player is sleeping still teleports the sleeping player, but the player wakes immediately.{{only|java}}
* If the player places a bed on [[ice]], running over the bed acts like running over ice, similar to slabs.
* When placed using the {{cmd|setblock}} command, only one half of a bed is placed, because beds are two blocks long. A single half can be slept in like a whole bed.
* Villagers can sleep in the Nether and the End without causing the bed to explode.<ref>{{bug|MC-146515}} Resolved as Works As Intended</ref>
* While the block state used to determine the half of a two-block block such as [[door]]s and double-tall [[flower]]s is called ''half'', in the case of beds this is called ''part''.
* Players and villagers do not drown or take damage from lava while in a bed, even if the bed is covered in lava.
*The red bed was the original default bed color. In [[Java Edition 1.12]] and [[Pocket Edition 1.1.0]] version of the game, the default color was changed to white.
== Gallery ==
=== All renders ===
<gallery>
White Bed.png|White
Light Gray Bed.png|Light gray
Gray Bed.png|Gray
Black Bed.png|Black
Brown Bed.png|Brown
Red Bed.png|Red
Orange Bed.png|Orange
Yellow Bed.png|Yellow
Lime Bed.png|Lime
Green Bed.png|Green
Cyan Bed.png|Cyan
Light Blue Bed.png|Light blue
Blue Bed.png|Blue
Purple Bed.png|Purple
Magenta Bed.png|Magenta
Pink Bed.png|Pink
</gallery>
=== Screenshots ===
<gallery>
Multiplayer Sleeping.png|A sleeping player in multiplayer.
Missing Bed.png|The message that can be seen after a failed attempt to respawn at the spawn point set by a bed.
Nether Bed.png|A crater created by attempting to sleep in the Nether.
Ender Bed.png|A crater created by attempting to sleep in the End.
16 color beds.png|All the different color variants.
Old Village New Village VillagerSleeping MCEE.png|An unemployed [[villager]] and a [[butcher]] villager goes to sleep, unaware of the zombies outside.
Stackedbeds.png|A stack of beds.
Mob wakeup.png|Player being awakened by a [[zombie]].
Day Sleeping.png|The message that can be seen when any players attempt to sleep during daytime.
Sleeping.png|A player going to sleep in a bed on the first day of a ''Minecraft'' world.
CobwebVillage.png|A bed in an abandoned village has its bottom half replaced by wheat crops.
</gallery>
=== In other media ===
<gallery>
File:Rainbow Bed.png|The [[MCE:Rainbow Bed|rainbow bed]], a unique coloration featured in [[Minecraft Earth]].
File:The Sham.jpg|The Sham, a villainous, sentient bed featured in the [[skin pack|Campfire Tales]] skin pack.
</gallery>
==References==
{{Reflist}}
{{Blocks|Utility}}
{{Items}}
[[Category:Utility blocks]]
[[Category:Manufactured blocks]]
[[Category:Generated structure blocks]]
[[Category:Block entities]]
[[cs:Postel]]
[[de:Bett]]
[[es:Cama]]
[[fr:Lit]]
[[hu:Ágy]]
[[it:Letto]]
[[ja:ベッド]]
[[ko:침대]]
[[nl:Bed]]
[[pl:Łóżko]]
[[pt:Cama]]
[[ru:Кровать]]
[[th:เตียง]]
[[uk:Ліжко]]
[[zh:床]]</li><li>[[Mushroom Stew|Mushroom Stew]]<br/>{{Item
| title = Mushroom Stew
| image = Mushroom Stew.png
| renewable = Yes
| heals = {{hunger|6}}
| stackable = No
}}
'''Mushroom stew''' is a [[food]] item.
== Obtaining ==
=== Harvesting ===
Mushroom stew can be obtained by “milking” a [[mooshroom]] with an empty [[bowl]]. This is accomplished by {{Control|using}} a bowl on a mooshroom. The bowl gets replaced by the mushroom stew item. There is no cooldown for doing so.
If a stack of more than one bowl is used on a mooshroom, only one bowl is consumed, and the mushroom stew goes into an empty inventory slot, or is dropped if the player's inventory is full.
=== Crafting ===
{{Crafting
|Red Mushroom
|Brown Mushroom
|Bowl
|Output= Mushroom Stew
|type= Foodstuff
}}
== Usage ==
=== Food ===
{{see also|Tutorials/Hunger management|title1=Hunger management}}
To eat mushroom stew, press and hold {{control|use}} while it is selected in the hotbar. Eating one restores {{hunger|6}} [[hunger]] and 7.2 hunger
[[Hunger#Mechanics|saturation]].
The bowl is returned to the player empty after the mushroom stew has been eaten, and can be reused to craft more, similarly to [[Rabbit Stew|rabbit stew]] and [[Beetroot Soup|beetroot soup]].
== Sounds ==
=== Generic ===
{{Sound table/Entity/Food}}
=== Unique ===
{{Edition|Java}}:
{{Sound table
|sound=Mooshroom milk1.ogg
|sound2=Mooshroom milk2.ogg
|sound3=Mooshroom milk3.ogg
|subtitle=Mooshroom gets milked
|source=neutral
|description=When a mooshroom is milked with a bowl
|id=entity.mooshroom.milk
|translationkey=subtitles.entity.mooshroom.milk
|volume=1.0
|pitch=''varies'' <ref group=sound name=milkpitch>Can be 1.0, 0.9, or 1.1 for each sound</ref>
|distance=16
|foot=1}}
{{Edition|Bedrock}}:
{{Sound table
|type=bedrock
|sound=Mooshroom milk1.ogg
|sound2=Mooshroom milk2.ogg
|sound3=Mooshroom milk3.ogg
|subtitle=Mooshroom gets milked
|source=Friendly Creatures
|description=When a mooshroom is milked with a bowl
|id=mob.mooshroom.suspicious_milk
|volume=1.0/0.9/1.1
|pitch=1.0
|foot=1}}
== Data values ==
=== ID ===
{{edition|java}}:
{{ID table
|edition=java
|showforms=y
|generatetranslationkeys=y
|displayname=Mushroom Stew
|spritetype=item
|nameid=mushroom_stew
|form=item
|foot=1}}
{{edition|bedrock}}:
{{ID table
|edition=bedrock
|shownumericids=y
|showforms=y
|notshowbeitemforms=y
|generatetranslationkeys=y
|displayname=Mushroom Stew
|spritetype=item
|nameid=mushroom_stew
|id=260
|form=item
|foot=1}}
== Advancements ==
{{load advancements|Husbandry;A Balanced Diet}}
== History ==
{{History|java indev}}
{{History||0.31|snap=20100130|[[File:Mushroom Stew JE1 BE1.png|32px]] Added mushroom stew.
|Restores {{hp|8}} [[health]].}}
{{History||20100206|Mushroom stew now restores {{hp|10}} health.}}
{{History|java beta}}
{{History||1.6|snap=Test Build 3|[[Mushroom]] spreading mechanic added, making mushroom stew [[renewable]].}}
{{History||1.8|snap=Pre-release|Now restores {{hunger|8}} [[hunger]].}}
{{History|java}}
{{History||1.0.0|snap=Beta 1.9 Prerelease|More fungi sources have now been introduced with the addition of the [[Mushroom Fields|mushroom biome]].
|A [[mooshroom]] can now be "milked" with a [[bowl]] to obtain mushroom stew.}}
{{History|||snap=Beta 1.9 Prerelease 3|Mushroom stew can now be crafted in the [[2×2 crafting grid]] in the [[inventory]]. Previously, the crafting recipe was shaped, now it's shapeless.}}
{{History||1.2.5|snap=release|The [[player]] milking a [[mooshroom]] with a stack of [[bowl]]s no longer results in receiving back a single bowl of mushroom stew.}}
{{History||1.4.2|snap=?|Mushroom stew now restores {{Hunger|6}} instead of {{Hunger|8}}.}}
{{History||1.13|snap=17w47a|Prior to [[1.13/Flattening|''The Flattening'']], this [[item]]'s numeral ID was 282.}}
{{History||1.14|snap=18w43a|[[File:Mushroom Stew JE2 BE2.png|32px]] The texture of mushroom stew has now been changed.}}
{{History||1.16|snap=Pre-release 1|Mooshrooms can now be milked for mushroom stew in Creative mode.<ref>{{Cite bug|MC|90969|Cannot get mushroom stew from mooshrooms / milk from cows in creative mode|date=October 19, 2015}}</ref>}}
{{History|pocket alpha}}
{{History||v0.4.0|[[File:Mushroom Stew JE1 BE1.png|32px]] Added mushroom stew.}}
{{History||v0.5.0|Mushroom stew now restores {{hp|8}} instead of {{hp|4}}.}}
{{History||v0.9.0|snap=build 1|A mooshroom can now be "milked" with a [[bowl]] to obtain mushroom stew.}}
{{History||v0.12.1|snap=build 1|Mushroom stew now restores [[hunger]] instead of [[health]].}}
{{History|bedrock}}
{{History||1.10.0|snap=beta 1.10.0.3|[[File:Mushroom Stew JE2 BE2.png|32px]] The texture of mushroom stew has now been changed.}}
{{History|console}}
{{History||xbox=TU1|xbone=CU1|ps=1.0|switch=1.0.1|wiiu=Patch 1|[[File:Mushroom Stew JE1 BE1.png|32px]] Added mushroom stew.}}
{{History||xbox=none|xbone=none|ps=1.90|wiiu=none|switch=none|[[File:Mushroom Stew JE2 BE2.png|32px]] The texture of mushroom stew has now been changed.}}
{{History|new3ds}}
{{History||0.1.0|[[File:Mushroom Stew JE1 BE1.png|32px]] Added mushroom stew.}}
{{History|foot}}
== Issues ==
{{Issue list}}
== References ==
{{reflist}}
== External Links ==
*[https://www.minecraft.net/en-us/article/taking-inventory--mushroom-stew Taking Inventory: Mushroom Stew] – Minecraft.net on September 1, 2022
{{items}}
[[de:Pilzsuppe]]
[[es:Estofado de champiñones]]
[[fr:Soupe de champignons]]
[[hu:Gombaragu]]
[[ja:キノコシチュー]]
[[ko:버섯 스튜]]
[[nl:Paddenstoelenstoofpot]]
[[pl:Zupa grzybowa]]
[[pt:Ensopado de cogumelos]]
[[ru:Тушёные грибы]]
[[zh:蘑菇煲]]
[[Category:Food]]
[[Category:Renewable resources]]
<references /></li></ul> | beta 1.10.0.3 | ||||
1.16.0{{Extension DPL}}<ul><li>[[Melon Slice|Melon Slice]]<br/>{{Dungeons hatnote|type=consumable|Melon}}
{{Item
| title = Melon Slice
|typeimage=Melon Slice.png
| renewable = Yes
| heals = {{hunger|2}}
| stackable = Yes (64)
}}
A '''melon slice'''{{efn|Known as '''Melon Slice''' {{in|java}} and '''Melon''' {{in|bedrock}}.}} is a [[food]] item that can be eaten by the [[player]].
== Obtaining ==
=== Block loot ===
{{see also|Tutorials/Pumpkin and melon farming|title1 = Pumpkin and melon farming}}
Melon slices can be obtained by breaking (harvesting) [[melon]]s using any [[tool]] or by hand. [[Axe]]s, followed by [[sword]]s, are the fastest tools for harvesting melons. A melon drops 3–7 melon slices, when broken; by hand, using a [[tool]], or after being broken by the movement of a [[piston]], with an average of 4.64 slices per melon.
Breaking a melon with a tool enchanted with [[Fortune]] increases the potential number of drops by 1 slice per level, up to a maximum of 9 slices.
== Usage ==
=== Food ===
{{see also|Tutorials/Hunger management|title1=Hunger management}}
To eat a melon slice, press and hold {{control|use}} while it is selected in the hotbar. Eating one restores {{hunger|2}} [[hunger]] and 1.2 hunger
[[Hunger#Mechanics|saturation]].
=== Crafting ingredient ===
{{crafting usage}}
=== Composting ===
Placing a melon slice into a [[composter]] has a 50% chance of raising the compost level by 1.
==Sounds==
{{Sound table/Entity/Food}}
== Data values ==
=== ID ===
{{edition|java}}:
{{ID table
|edition=java
|showforms=y
|generatetranslationkeys=y
|displayname=Melon Slice
|spritetype=item
|nameid=melon_slice
|form=item
|foot=1}}
{{edition|bedrock}}:
{{ID table
|edition=bedrock
|showaliasids=y
|shownumericids=y
|showforms=y
|notshowbeitemforms=y
|generatetranslationkeys=y
|spritename=melon-slice
|displayname=Melon
|spritetype=item
|nameid=melon_slice
|aliasid=melon
|id=272
|form=item
|translationkey=item.melon.name
|foot=1}}
== Advancements ==
{{load advancements|Husbandry;A Balanced Diet}}
== History ==
{{History|java beta}}
{{History||1.8|snap=Pre-release|[[File:Melon Slice JE1 BE1.png|32px]] Added melons.}}
{{History|java}}
{{History||1.0.0|snap=Beta 1.9 Prerelease 4|Melons are now used in the [[crafting]] recipe of [[glistering melon]]s.}}
{{History|||snap=Beta 1.9 Prerelease 5|Melons once again drop the correct number of slices.}}
{{History||1.3.1|snap=12w21a|Melons can now be [[trading|bought]] from farmer [[villager]]s, at 5–8 melon slices for 1 [[emerald]].}}
{{History||1.7.2|snap=13w37a|Block ID 105, [[melon stem]], has been removed from the {{cmd|give}} [[commands|command]].}}
{{History||1.8|snap=14w02a|[[Villager]]s no longer [[trading|sell]] melons. They now buy [[melon]]s instead.}}
{{History||1.13|snap=17w47a|Prior to [[1.13/Flattening|''The Flattening'']], this [[item]]'s numeral ID was 360.}}
{{History|||snap=18w20b|"Melon" has been renamed to "Melon Slice."
|The ID of melon slices has been changed from <code>melon</code> to <code>melon_slice</code>.}}
{{History||1.14|snap=18w43a|[[File:Melon Slice JE2 BE2.png|32px]] The texture of melon slices has been changed.}}
{{History|||snap=19w03a|Placing a melon slice into the new [[composter]] has a 20% chance of raising the compost level by 1.}}
{{History|||snap=19w05a|Melon slices now have a 50% chance of increasing the compost level in a composter by 1.}}
{{History|pocket alpha}}
{{History||v0.5.0|[[File:Melon Slice JE1 BE1.png|32px]] Added melons.
|Melons restore {{health|2}} each, rather than {{hunger|2}}.}}
{{History||v0.12.1|snap=?|Added Melon slice to the Creative inventory.}}
{{History|||snap=build 1|Melons now restores [[hunger]] instead of [[health]].
|Melons can no longer be obtained from [[nether reactor]]s.}}
{{History|pocket}}
{{History||1.1.0|snap=alpha 1.1.0.3|[[Breaking]] a [[melon]] with [[shears]] now always yields 9 melons.}}
{{History|bedrock}}
{{History||1.10.0|snap=beta 1.10.0.3|[[File:Melon Slice JE2 BE2.png|32px]] The texture of melons has been changed.}}
{{History||1.11.0|snap=beta 1.11.0.1|Melons can now be used to fill up [[composter]]s.}}
{{History|||snap=beta 1.11.0.4|Melons can now be [[trading|sold]] to farmer [[villager]]s.}}
{{History||1.16.0|snap=beta 1.16.0.57|[[Trading]] has been changed, melon slices can no longer be sold to farmer villagers.}}
{{History||1.16.100|snap=beta 1.16.100.56|The ID of melon slices has been changed from <code>melon</code> to <code>melon_slice</code>.}}
{{History|console}}
{{History||xbox=TU5|xbone=CU1|ps=1.0|wiiu=Patch 1|[[File:Melon Slice JE1 BE1.png|32px]] Added melons.}}
{{History||xbox=none|xbone=none|ps=1.90|wiiu=none|switch=none|[[File:Melon Slice JE2 BE2.png|32px]] The texture of melons has been changed.}}
{{History|new 3ds}}
{{History||0.1.0|[[File:Melon Slice JE1 BE1.png|32px]] Added melons.}}
{{History|foot}}
== Issues ==
{{issue list}}
== See also ==
* [[Pumpkin]]
* [[Glistering Melon Slice]]
== Notes ==
{{fnlist}}
{{Items}}
[[Category:Plants]]
[[cs:Meloun]]
[[de:Melone]]
[[es:Rodaja de sandía]]
[[fr:Tranche de pastèque]]
[[hu:Dinnye Szelet]]
[[ko:수박]]
[[nl:Meloenschijf]]
[[pl:Arbuz]]
[[pt:Fatia de melancia]]
[[ru:Ломтик арбуза]]
[[zh:西瓜片]]
[[Category:Food]]
[[Category:Renewable resources]]</li><li>[[Nether Brick|Nether Brick]]<br/><!--Please do not change "nether brick" to "Nether brick". According to style guide, item names are not proper nouns and should not be capitalized.-->
{{about|the item|the block|Nether Bricks}}
{{Item
| title = Nether Brick
| image = Nether Brick.png
| renewable = Yes
| stackable = Yes (64)
}}
A '''nether brick''' is an [[item]] made by [[smelting]] [[netherrack]] in a [[furnace]], and is used to craft the [[Nether Bricks|nether bricks]] block and its variants.
== Obtaining ==
=== Smelting ===
Nether brick can be smelted from netherrack.
{{smelting
|Netherrack
|Nether Brick
|0,1
}}
=== Bartering ===
[[Piglin]]s may [[barter]] 2 to 8 nether bricks when given a [[gold ingot]].
== Usage ==
=== Crafting ingredient ===
{{crafting usage|Nether Brick}}
== Data values ==
=== ID ===
{{edition|java}}:
{{ID table
|edition=java
|showforms=y
|generatetranslationkeys=y
|displayname=Nether Brick
|spritetype=item
|nameid=nether_brick
|form=item
|foot=1}}
{{edition|bedrock}}:
{{ID table
|edition=bedrock
|shownumericids=y
|showforms=y
|notshowbeitemforms=y
|generatetranslationkeys=y
|displayname=Nether Brick
|spritetype=item
|nameid=netherbrick
|id=523
|form=item
|foot=1}}
== History ==
{{History|java}}
{{History||1.5|snap=13w01a|[[File:Nether Brick JE1 BE1.png|32px]] Added nether brick items.}}
{{History||1.10|snap=16w20a|Nether brick items can now be used to craft [[red nether bricks]].}}
{{History||1.13|snap=17w47a|The ID of nether bricks has been changed from <code>netherbrick</code> to <code>nether_brick</code>.
|Prior to [[1.13/Flattening|''The Flattening'']], this [[item]]'s numeral ID was 405.}}
{{History||1.14|snap=18w43a|[[File:Nether Brick JE2 BE2.png|32px]] The texture of nether bricks has been changed.}}
{{History||1.16|snap=20w07a|Nether bricks now have a {{frac|10|109}} (~9.17%) chance of being given by the new [[piglin]]s when [[bartering]], in a stack size of 1–4.}}
{{History|||snap=20w09a|Nether bricks now have a {{frac|20|226}} (~8.84%) chance of being given by piglins when bartering, in a stack size of 1–5.}}
{{History|||snap=20w10a|Nether bricks now have a {{frac|40|411}} (~9.73%) chance of being given by piglins when bartering, in a stack size of 4–16.}}
{{History||1.16.2|snap=20w28a|Nether bricks now have a {{frac|40|459}} (~8.71%) chance of being given by piglins when bartering, in a stack size of 2–8.}}
{{History|pocket alpha}}
{{History||v0.6.0|[[File:Nether Brick JE1 BE1.png|32px]] Added nether brick items.}}
{{History||v0.16.0|snap=build 5|Added nether brick items to the [[Creative]] [[inventory]].<ref name="missing brick">{{Bug|MCPE-16556}}</ref>}}
{{History|pocket}}
{{History||1.1.3|snap=alpha 1.1.3.0|Nether brick items are now used to craft [[red nether bricks]].}}
{{History|bedrock}}
{{History||1.9.0|snap=beta 1.9.0.0|Nether brick items are now used to craft nether brick [[fence]]s.}}
{{History||1.10.0|snap=beta 1.10.0.3|[[File:Nether Brick JE2 BE2.png|32px]] The texture of nether bricks has been changed.}}
{{History||1.16.100|snap=beta 1.16.100.50|Nether bricks now can be used as fuel for a [[furnace]].<ref>{{bug|MCPE-114216}}</ref>}}
{{History|||snap=beta 1.16.100.54|Nether bricks now have a {{frac|40|459}} (~8.71%) chance of being given by piglins when bartering, in a stack size of 2–8 to match {{el|Java}}.}}
{{History||1.18.30|snap=beta 1.18.30.26|Nether bricks can no longer be used as fuel in a furnace.}}
{{History|console}}
{{History||xbox=TU9|xbone=CU1|ps=1.0|wiiu=Patch 1|switch=1.0.1|[[File:Nether Brick JE1 BE1.png|32px]] Added nether brick items.}}
{{History||xbox=none|xbone=none|ps=1.90|wiiu=none|switch=none|[[File:Nether Brick JE2 BE2.png|32px]] The texture of nether bricks has been changed.}}
{{History|New 3DS}}
{{History||0.1.0|[[File:Nether Brick JE1 BE1.png|32px]] Added nether brick items.}}
{{History|foot}}
== Issues ==
{{issue list}}
== References ==
{{reflist}}
{{items}}
[[cs:Netheritová cihla]]
[[de:Netherziegel (Gegenstand)]]
[[es:Ladrillo del Nether]]
[[fr:Brique du Nether]]
[[hu:Alvilági tégla]]
[[ja:ネザーレンガ (アイテム)]]
[[ko:네더 벽돌 (아이템)]]
[[lzh:焱界磚]]
[[nl:Netherbaksteen (voorwerp)]]
[[pl:Netherowa cegła]]
[[pt:Tijolo do Nether]]
[[ru:Адский кирпич (предмет)]]
[[uk:Пекельна цегла (предмет)]]
[[zh:下界砖]]
[[Category:Renewable resources]]</li></ul> | beta 1.15.0.51 | The particles of eyes of ender have been changed to match Java Edition. | |||
| Legacy Console Edition | |||||
| TU7 | CU1 | 1.0 | Patch 1 | ||
| 1.90 | |||||
| New Nintendo 3DS Edition | |||||
1.7.10{{Extension DPL}}<ul><li>[[Ink Sac|Ink Sac]]<br/>{{For|the variant dropped by Glow squids|Glow Ink Sac}}
{{Item
| image = Ink Sac.png
| renewable = Yes
| stackable = Yes (64)
}}
An '''ink sac''' is an [[item]] dropped by a [[squid]] upon death used to create [[black dye]], [[dark prismarine]]{{only|BE|short=1}}, and [[Book and Quill|books and quills]].
== Obtaining ==
=== Mob loot ===
==== Squid ====
{{see also|Tutorials/Squid farming|title1=Squid farming}}
A [[squid]] drops one to three ink sacs upon death. The maximum amount is increased by 1 per level of [[Looting]], for a maximum of 1 to 6 with Looting III.
=== Fishing ===
Ink sacs can be obtained as a "junk" item from [[fishing]]. The [[Luck of the Sea]] [[enchantment]] decreases the chance.
=== Trading ===
[[Wandering trader]]s sometimes sell 3 ink sacs for an [[emerald]] {{in|bedrock}}. Apprentice level [[Trading#Librarian|librarians]] also buy 5 ink sacs for one [[emerald]].
=== Natural generation ===
{{LootChestItem|ink-sac}}
== Usage ==
=== Crafting ingredient ===
{{crafting usage}}
{{IN|bedrock}}, ink sacs can be also used in banner patterns:
{{banner crafting usage}}
=== Loom ingredient ===
{{Banner loom usage|Ink Sac}}
=== Dye ===
{{Dye usage}}
* Each type of [[Prismarine#Dark Prismarine|dark prismarine]] can be crafted using varying amounts of 8 [[Prismarine Shard#prismarine shards|prismarine shards]].
=== Trading ===
Journeyman-level librarian [[villager]]s have a {{frac|2|3}} chance to buy five ink sacs for an [[emerald]]. They always offer the trade {{in|bedrock|lc=}}.
=== Signs ===
Ink sacs can be applied to [[sign]]s or [[hanging sign]]s to revert glowing text back to default.
== Sounds ==
{{edition|java}}:
{{Sound table
|sound=Ink sac1.ogg
|sound2=Ink sac2.ogg
|sound3=Ink sac3.ogg
|subtitle=Ink Sac splotches
|source=block
|description=When an ink sac is used on a sign
|id=item.ink_sac.use
|translationkey=subtitles.item.ink_sac.use
|volume=1.0
|pitch=''varies'' <ref group=sound>Each sound can be 0.85, 0.88, or 0.9</ref>
|distance=16
|foot=1}}
{{edition|bedrock}}:
{{Sound table
|type=bedrock
|sound=Ink sac1.ogg
|sound2=Ink sac2.ogg
|sound3=Ink sac3.ogg
|source=sound
|description=When an ink sac is used on a sign
|id=sign.ink_sac.use
|volume=1.0
|pitch=1.0
|foot=1}}
== Data values ==
=== ID ===
{{edition|java}}:
{{ID table
|edition=java
|showforms=y
|generatetranslationkeys=y
|displayname=Ink Sac
|spritetype=item
|nameid=ink_sac
|form=item
|foot=1}}
{{edition|bedrock}}:
{{ID table
|edition=bedrock
|showaliasids=y
|shownumericids=y
|showforms=y
|notshowbeitemforms=y
|generatetranslationkeys=y
|displayname=Ink Sac
|spritetype=item
|nameid=ink_sac
|aliasid=dye / 0
|id=413
|form=item
|translationkey=item.dye.black.name
|foot=1}}
== Video ==
{{video note|Ink sacs can no longer be used as a dye in Java Edition.}}
<div style="text-align:center">{{yt|ABYCZfawO60}}</div>
== History ==
{{History|java beta}}
{{History||1.2|[[File:Ink Sac JE1 BE1.png|32px]] Added ink sacks, together with all other dyes.}}
{{History||1.2_02|"Ink Sack" has been renamed to "Ink Sac".}}
{{History|java}}
{{History||1.3.1|snap=12w17a|Ink sacs are now used to craft [[book and quill]]s.}}
{{History||1.4.2|snap=12w34a|Added the ability to [[Armor#Dyeing|dye]] leather [[armor]] and [[wolf]] collars.}}
{{History||1.4.6|snap=12w49a|Ink sacs can now be crafted with [[gunpowder]] to create a [[firework star]].}}
{{History||1.6.1|snap=13w19a|[[Stained clay]] can now be [[crafting|crafted]].}}
{{History||1.7.2|snap=13w41a|[[Stained glass]] can now be crafted.}}
{{History||1.8|snap=14w25a|Ink sacs are now used to craft [[dark prismarine]].}}
{{History|||snap=14w30a|Added [[banner]]s, which can be [[dye]]d with ink sacs.}}
{{History||1.11|snap=16w39a|Ink sacs can now be used to dye [[shulker box]]es.}}
{{History||1.12|snap=17w06a|Ink sacs are now used to craft black [[concrete powder]].}}
{{History|||snap=17w15a|Ink sacs can now be used to dye [[bed]]s.}}
{{History||1.13|snap=17w47a|The different data values for the <code>dye</code> ID have been split up into their own IDs.
|Prior to [[1.13/Flattening|''The Flattening'']], this [[item]]'s numeral ID was 351.}}
{{History||1.14|snap=18w43a|Ink sacs can now be used to craft [[black dye]].
|Ink sacs can no longer be used as a [[dye]].
|All of the dye-related functions and crafting recipes of ink sac (except books and quills and dark prismarine) have been transferred to black dye.
|[[File:Ink Sac JE2 BE2.png|32px]] The texture of ink sacs has been changed.}}
{{History|||snap=19w11a|Librarian [[villager]]s now [[trading|buy]] ink sacs.}}
{{History||1.15|snap=Pre-release 1|Ink sacs are no longer used to craft [[dark prismarine]].}}
{{History||1.17|snap=21w03a|Ink sacs can now be used to remove the text's glowing effect of a [[sign]].}}
{{History||1.20<br>(Experimental)|link=1.19.3|snap=22w42a|Ink sacs can now be used to remove the text's glowing effect of a [[hanging sign]].}}
{{History|pocket alpha}}
{{History||v0.3.0|[[File:Ink Sac JE1 BE1.png|32px]] Added ink sacs. They are currently unobtainable and serve no purpose.}}
{{History||v0.8.0|snap=build 1|Ink sacs can now be used to craft [[cocoa beans]].}}
{{History|||snap=build 3|Ink sacs are now available in [[creative]].}}
{{History||v0.9.0|snap=build 1|Ink sacs now generate in [[village]] and [[stronghold]] [[chest]]s.}}
{{History||v0.11.0|snap=build 1|Ink sacs can now be obtained from [[squid]].
|Ink sacs can now be obtained as a junk [[item]] from [[fishing]].}}
{{History||v0.14.0|snap=build 1|Ink sacs now can now be used to dye water in [[cauldron]]s.}}
{{History||v0.16.0|snap=build 1|Ink sacs are no longer used to craft [[cocoa beans]].
|Ink sacs can now be used to craft [[dark prismarine]].}}
{{History|pocket}}
{{History||1.0.0|snap=alpha 0.17.0.1|Ink sacs can now be used to dye [[shulker]]s.}}
{{History||1.1.0|snap=alpha 1.1.0.0|Ink sacs are now used to re-dye [[bed]]s.
|Ink sacs can now be used to dye [[shulker box]]es.}}
{{History|bedrock}}
{{History||1.2.0|snap=beta 1.2.0.2|Ink sacs can now be used to craft [[book and quill]]s.
|Added [[banner]]s, which can be [[dye]]d with ink sacs.
|Ink sacs can now be crafted with [[gunpowder]] to create [[firework star]]s.
|Ink sacs can now be used to craft black [[concrete powder]].
|[[Stained glass]] can now be [[crafting|crafted]].}}
{{History||1.4.0|snap=beta 1.2.20.1|Ink sacs can now be crafted from iron, sulfur, and 4 oxygen in the [[compound creator]]s.
|Ink sacs can now be used to craft [[balloon]]s and [[glow stick]]s.}}
{{History||1.8.0|snap=beta 1.8.0.10|Ink sacs can now be used to craft [[black dye]].}}
{{History||1.10.0|snap=beta 1.10.0.3|Ink sacs can now be bought from [[wandering trader]]s.
|[[File:Ink Sac JE2 BE2.png|32px]] The texture of ink sacs has been changed.}}
{{History||1.11.0|snap=beta 1.11.0.4|Ink sacs can now be [[trading|sold]] to librarian [[villager]]s.}}
{{History||1.16.100|snap=beta 1.16.100.56|The ID of ink sacs has been changed from {{cd|dye/0}} to {{cd|ink_sac}}.}}
{{History||1.16.210|snap=beta 1.16.210.59|Ink sacs can now be used to revert glowing text on signs to normal.}}
{{History|console}}
{{History||xbox=TU1|xbone=CU1|ps=1.00|switch=1.0.1|wiiu=Patch 1|[[File:Ink Sac JE1 BE1.png|32px]] Added ink sacs.}}
{{History||xbox=none|xbone=none|ps=1.90|wiiu=none|switch=none|[[File:Ink Sac JE2 BE2.png|32px]] The texture of ink sacs has been changed.}}
{{History|New 3DS}}
{{History||0.1.0|[[File:Ink Sac JE1 BE1.png|32px]] Added ink sacs.}}
{{History|foot}}
== Issues ==
{{issue list}}
== References ==
{{reflist}}
{{Items}}
[[Category:Bedrock Edition specific information]]
[[Category:Items]]
[[Category:Dyes]]
[[Category:Renewable resources]]
[[cs:Váček inkoustu]]
[[de:Tintenbeutel]]
[[es:Saco de tinta]]
[[fr:Poche d'encre]]
[[hu:Tintazsák]]
[[ja:イカスミ]]
[[ko:먹물 주머니]]
[[nl:Inktzak]]
[[pl:Torbiel z atramentem]]
[[pt:Bolsa de tinta]]
[[ru:Чернильный мешок]]
[[uk:Чорнильний мішок]]
[[zh:墨囊]]</li><li>[[Pufferfish (item)|Pufferfish (item)]]<br/>{{DISPLAYTITLE:Pufferfish}}
{{about|the food item|the mob|Pufferfish}}
{{Item
| title = Pufferfish
| image = File:Pufferfish_(item)_JE5_BE2.png
| renewable = Yes
| heals = {{hunger|1}}
| stackable = Yes (64)
|effects=: {{EffectLink|link=Hunger (effect)|Hunger}} III (0:15)
: {{EffectLink|Poison}} II (1:00)
: {{EffectLink|Nausea}} I (0:15){{only|JE}}
: {{EffectLink|Nausea}} II (0:15){{only|BE}}
}}
A '''pufferfish''' is a poisonous [[food]] item that is used to brew [[Potion of Water Breathing|Water Breathing potions]].
== Obtaining ==
=== Fishing ===
Pufferfish can be obtained through [[fishing]]. The pufferfish catch rate can be increased by [[Lure]], which reduces wait time generally.
<!--1-6 exp-->
{{IN|bedrock}}, pufferfish can be caught only when fishing outside [[jungle]] biomes and its variants (i.e. everywhere ''except'' in jungles).
=== Mob loot ===
==== Guardians and elder guardians ====
[[Guardian]]s and [[elder guardian]]s have a 2.5% chance of dropping a random fish upon death. This has a 13% chance of being pufferfish (0.325% chance of dropping a pufferfish). The chance of getting a fish can be increased by 1% per level of [[Looting]], but the type of fish is not affected.
==== Pufferfish ====
[[Pufferfish]] always drop 1 pufferfish in its item form when killed. This drop is not affected by the Looting enchantment.<ref>{{bug|MC-212795||Salmon & Fish mobs are not affected by Looting}}</ref>
== Usage ==
=== Food ===
Pufferfish restores {{hunger|1}} hunger and 0.2 [[Hunger#Mechanics|saturation]], but inflicts [[Hunger_(effect)|Hunger]] III for 15 seconds, [[Poison]] II for 1 minute, and [[Nausea]] I<sup>[''[[Java Edition|JE]] only'']</sup> or II<sup>[''[[Bedrock Edition|BE]] only'']</sup> for 15 seconds. Unlike [[rotten flesh]], it is not helpful to eat pufferfish while starving because they inflict more hunger than they earn.
===Brewing ingredient===
{{brewing
|Pufferfish
|Potion of Water Breathing
|head=1
}}
{{brewing
|Pufferfish
|Mundane Potion
|ingredients=Pufferfish + [[Water Bottle]]
|foot=1
}}
=== Trading ===
Master-level fisherman [[villager]]s buy 1~4{{only|bedrock|short=1}} or four{{only|java|short=1}} pufferfish for an [[emerald]].
=== Wolves ===
{{IN|Bedrock}}, pufferfish can be used to feed a [[wolf]], healing it by {{hp|1|mob=1}}, but only when the wolf is not at full health. Unlike other wolf food, pufferfish cannot be used to speed up the growth of baby wolves, and cannot be used to breed them.
== Sounds ==
{{Sound table/Entity/Food}}
== Data values ==
=== ID ===
{{edition|java}}:
{{ID table
|edition=java
|showitemtags=y
|showforms=y
|generatetranslationkeys=y
|displayname=Pufferfish
|spritetype=item
|nameid=pufferfish
|itemtags=fishes
|form=item
|foot=1}}
{{edition|bedrock}}:
{{ID table
|edition=bedrock
|shownumericids=y
|showforms=y
|notshowbeitemforms=y
|generatetranslationkeys=y
|displayname=Pufferfish
|spritetype=item
|nameid=pufferfish
|id=267
|form=item
|foot=1}}
== Advancements ==
{{load advancements|A Furious Cocktail;How did we get here;Husbandry;A Balanced Diet;Fishy Business}}
== History ==
{{History|java}}
{{History||1.7.2|snap=13w36a|[[File:Pufferfish (item) JE1.png|32px]] Added pufferfish.
|Added potions of [[Water Breathing]], which can be [[brewing|brewed]] by adding a pufferfish to an [[Awkward Potion]].}}
{{History|||snap=13w43a|[[File:Pufferfish (item) JE2 BE1.png|32px]] The texture of pufferfish has been changed.}}
{{History||1.8|snap=14w25a|Pufferfish is now obtainable as a rare drop from [[guardian]]s and [[elder guardian]]s.}}
{{History||1.13|snap=17w47a|The different data values for the <code>fish</code> ID have now been split up into their own IDs.
|Prior to [[1.13/Flattening|''The Flattening'']], this [[item]]'s numeral ID was 349.}}
{{History|||snap=18w08b|[[Pufferfish]] (and other [[fish]] types) has been added as a [[mob]], which [[drops|drop]] its item form when killed.
|[[File:Pufferfish (item) JE3 BE2.png|32px]] The texture of pufferfish has been changed.}}
{{History||1.14|snap=18w43a|[[File:Pufferfish (item) JE4 BE1.png|32px]] The texture of pufferfish has accidentally been reverted.}}
{{History|||snap=18w43b|[[File:Pufferfish (item) JE5 BE2.png|32px]] The correct texture of pufferfish has been restored.}}
{{History|||snap=19w11a|Fisherman [[villager]]s now [[trading|buy]] pufferfish.}}
{{History||1.16.2|snap=Pre-release 2|The level of [[Nausea]] given by pufferfish has been reduced from II to I.<ref>{{bug|MC-196473}}</ref>}}
{{History||1.17|snap=20w46a|The level of [[Poison]] given by pufferfish has been reduced from IV to II.<ref>{{bug|MC-197276}}</ref>}}
{{History|pocket alpha}}
{{History||v0.11.0|snap=build 1|[[File:Pufferfish (item) JE2 BE1.png|32px]] Added pufferfish.}}
{{History||v0.12.1|snap=build 1|Pufferfish now restore [[hunger]] instead of [[health]].
|Pufferfish can now be used to make [[potion]] of Water Breathing.}}
{{History||v0.16.0|snap=build 1|Pufferfish is now dropped by [[guardian]]s and [[elder guardian]]s.}}
{{History|bedrock}}
{{History||1.4.0|snap=beta 1.2.14.2|[[Pufferfish]] has been added as a [[mob]], which [[drops|drop]] its [[item]] form when killed.
|[[File:Pufferfish (item) JE5 BE2.png|32px]] The texture of pufferfish has been changed.}}
{{History||1.8.0|snap=beta 1.8.0.8|Pufferfish can now be used to feed [[ocelot]]s to gain their trust.}}
{{History||1.11.0|snap=beta 1.11.0.4|Pufferfish can now be [[trading|sold]] to fisherman [[villager]]s.}}
{{History||1.19.10|snap=beta 1.19.10.23|The strength of the [[poison]] effect has been decreased from IV to II.}}
{{History|console}}
{{History||xbox=TU31|xbone=CU19|ps=1.22|wiiu=Patch 3|switch=1.0.1|[[File:Pufferfish (item) JE2 BE1.png|32px]] Added pufferfish.}}
{{History||xbox=TU69|xbone=none|ps=1.76|wiiu=Patch 38|switch=none|[[Pufferfish]] (and other [[fish]] types) has been added as a [[mob]], which [[drops|drop]] its [[item]] form when killed.}}
{{History||xbox=none|xbone=none|ps=1.90|wiiu=none|switch=none|[[File:Pufferfish (item) JE5 BE2.png|32px]] The texture of pufferfish has been changed.}}
{{History|foot}}
== Issues ==
{{issue list}}
== Trivia ==
* The consumption of pufferfish inflicting the player with Nausea and Poison is based on reality. Real pufferfish contain the dangerous [[Wikipedia:Tetrodotoxin|tetrodotoxin]] within their organs, especially in the liver. Tetrodotoxin leads to quick death through respiratory paralysis. Muscle tissue and blood contain trace amounts. In East Asia, pufferfish are considered a delicacy known as [[Wikipedia:Fugu|fugu]], as small parts of the fish are actually edible. Any chef preparing fugu must have special licensing/certification to prepare this dish.
== Gallery ==
<gallery>
File:Eat Pufferfish.png|The result of eating pufferfish.
</gallery>
== See also ==
* [[Fishing]]
== References ==
{{Reflist}}
== External Links ==
*[https://www.minecraft.net/en-us/article/taking-inventory--pufferfish Taking Inventory: Pufferfish] – Minecraft.net on October 14, 2020
{{items}}
[[cs:Čtverzubec]]
[[de:Kugelfisch (Nahrung)]]
[[es:Pez globo (objeto)]]
[[fr:Poisson (nourriture)]]
[[it:Pesce palla (oggetto)]]
[[ja:フグ (アイテム)]]
[[ko:복어 (아이템)]]
[[nl:Kogelvis]]
[[pl:Rozdymka]]
[[pt:Baiacu (item)]]
[[ru:Иглобрюх (предмет)]]
[[th:ปลาปักเป้า (ไอเทม)]]
[[tr:Kirpi balığı]]
[[zh:河豚(物品)]]
[[Category:Food]]
[[Category:Brewing recipe]]
[[Category:Renewable resources]]</li></ul> | |||||
Issues
Issues relating to "Eye of Ender" are maintained on the bug tracker. Report issues there.
Trivia
- When thrown in third-person view, the eyes of ender fly out from the player's feet instead of their hand.
- The player cannot throw eyes of ender in the Nether, the End, or Customized and Superflat worlds that do not have stronghold generation selected.
Gallery

The eye of ender used to appear large in third-person view.

The eye of ender in Programmer Art.
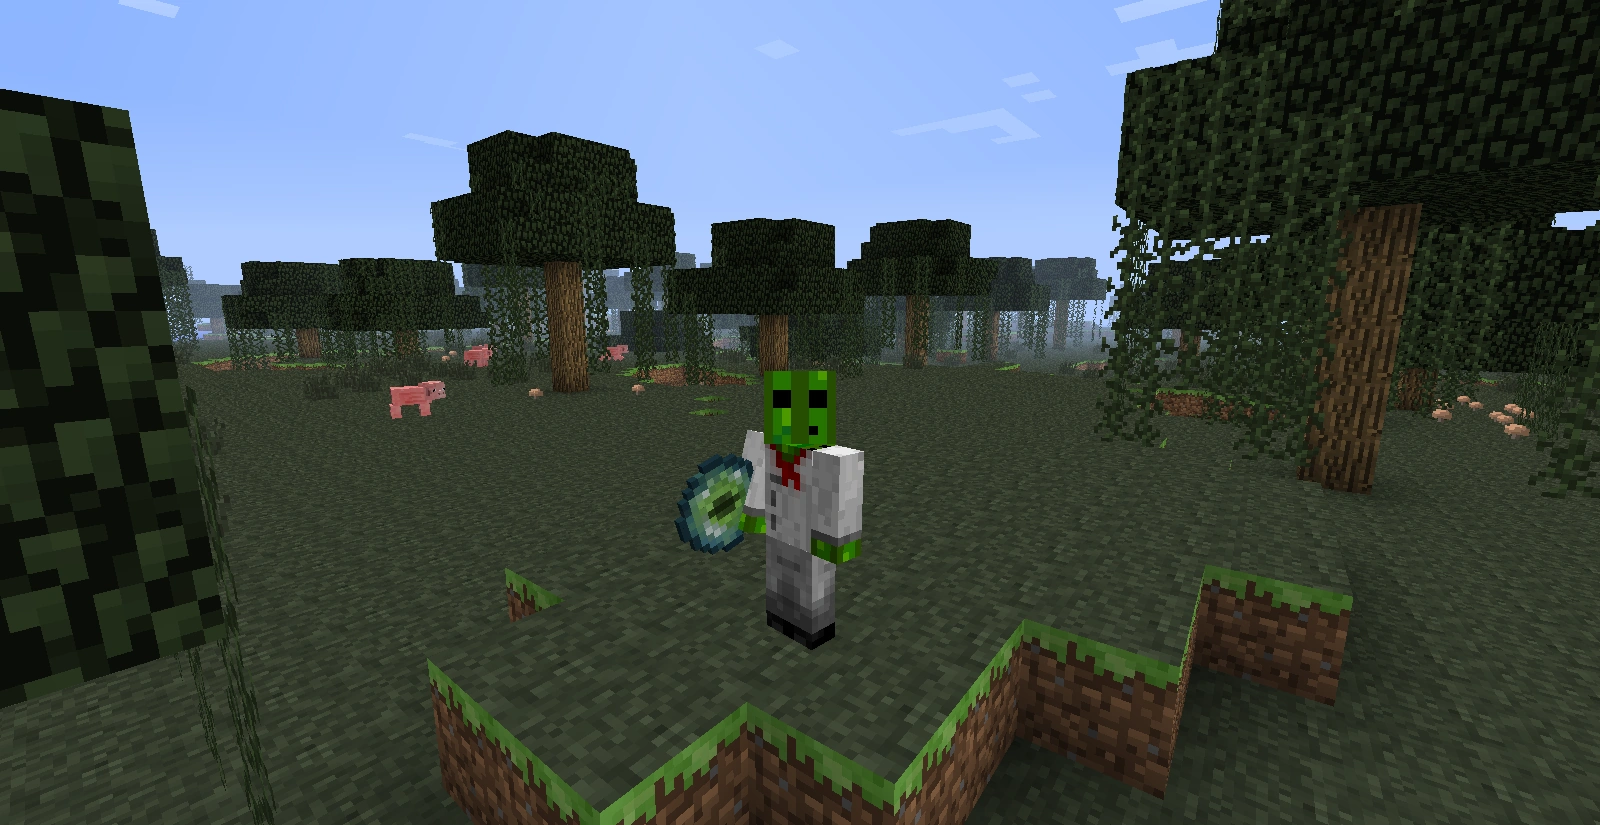

.gif)
External links
- A super-easy stronghold triangulation tool
- JSFiddle Eye of Ender triangulator - can guess the location of other 2 strongholds in the first ring
- Minecraft Stronghold Locator Eye of Ender throw plotting visualizer - zoomable to show all possible stronghold rings
- Python Eye of Ender throw plotting tool
- HTML Eye of Ender throw plotting visualizer (not updated after 1.9 stronghold placement changes)
- Chunkbase Stronghold Finder (seed-based)
- Amidst - File-based world visualizer
- Find strongholds by analyzing stronghold.dat file