Banners are tall decorative blocks, featuring a field that is highly customizable using dyes and banner patterns.
Obtaining[]
Breaking[]
Banners can be broken with or without a tool, but an axe is fastest.
| Block | Banners | |
|---|---|---|
| Hardness | 1 | |
| Tool | ||
| Breaking time[A] | ||
| Default | 1.5 | |
| Wooden | 0.75 | |
| Stone | 0.4 | |
| Iron | 0.25 | |
| Diamond | 0.2 | |
| Netherite | 0.2 | |
| Golden | 0.15 | |
- ↑ Times are for unenchanted tools as wielded by players with no status effects, measured in seconds. For more information, see Breaking § Speed.
A banner also breaks and drops itself as an item if the block the banner is attached to is moved, removed, or destroyed.
Natural generation[]
| Name | Location | Appearance | Design |
|---|---|---|---|
| Magenta Banner | Outside of end cities. | Magenta Banner
| |
| Gray Banner | In banner room in woodland mansions. | Gray Banner | |
| Light Gray Banner | In master bedroom in woodland mansions. | Light Gray Banner
| |
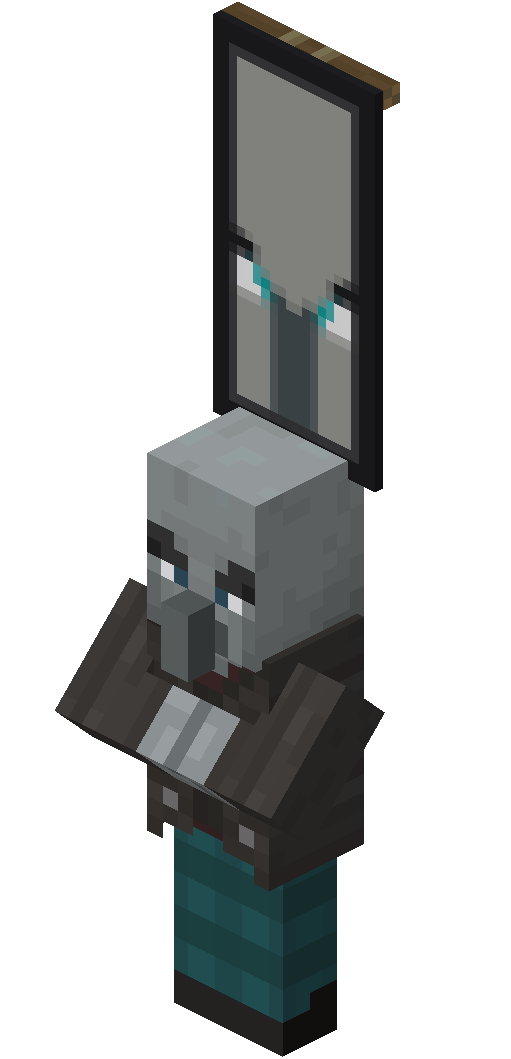
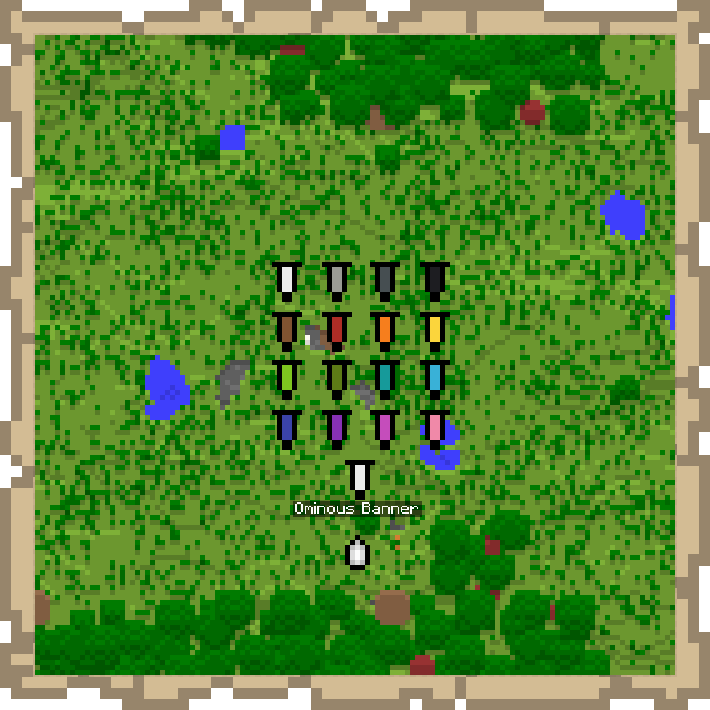
| Ominous Banner[JE only] | Carried by raid captains. Located in pillager outposts. In Java Edition, the ominous banner cannot be crafted or copied because the design uses 8 patterns. In Bedrock Edition, the illager banner is a separate type that cannot be placed in a loom. |
White Banner[JE only]
Separate type entirely[BE only] | |
| Brown Banner | Outside of some houses, meeting points, and pillar fountains in savanna villages. | Brown Banner | |
| Black Banner | In altar room in woodland mansions. | Black Banner |
Crafting[]
Banners can be crafted from six wool and a stick in a pattern resembling a sign.
| Name | Ingredients | Crafting recipe | Description |
|---|---|---|---|
| Banner | Matching Wool + Stick |
Once the banner is crafted, its base color cannot be changed.[Java Edition only] | |
| White Banner | Any Banner + Bleach |
Bleach can be used to remove the color of a banner, resulting in a white banner. This includes removing patterns from a white banner.[Bedrock Edition and Minecraft Education only] |
Trading[]
Expert-level cartographer villagers always offer to sell 1 or 2 blank banners of a random color for 3 emeralds. Expert-level shepherd villagers have a 2⁄7 chance of offering the same trade.[Java Edition only]
In Bedrock Edition, expert-level cartographer and shepherd villagers both offer to sell one of 16 blank banners for 3 emeralds as part of their trades.
Mob loot[]
Illagers that spawn carrying an ominous banner[JE only] / illager banner[BE & edu only] always drop it upon death.
Usage[]

Overlapping block on a banner.

Overlapping on a wall mounted banner.
There are 16 colored blank banners, and numerous patterns each available in each of the 16 colors. A banner can feature up to 6 different patterns. The top layer of a banner (or the last pattern added) can be washed off by using it on a cauldron containing water.
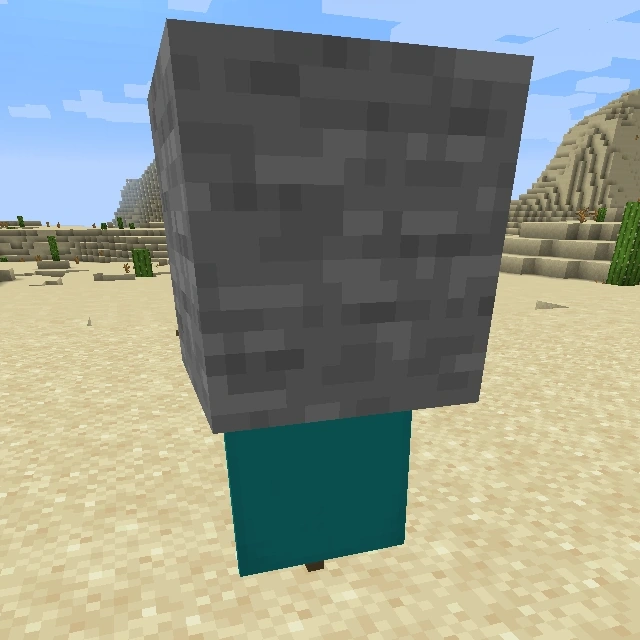
Banners, much like signs, can be placed both on the ground facing in any direction, or on a wall. They gently sway as if affected by a breeze, regardless of dimension or location.
Banners have no collision mask as they are completely non-solid, so entities can move through them.
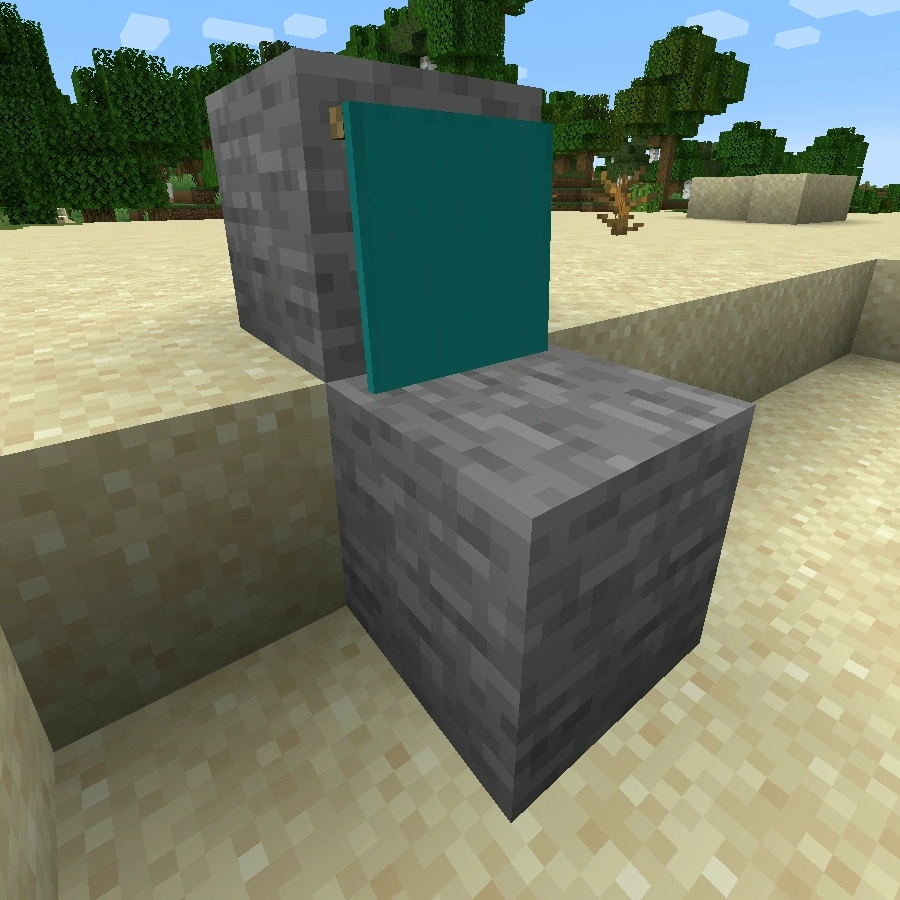
Other blocks (including other banners) can be placed on any edge of a banner's hitbox, which is only one block high despite the banner appearing as two blocks tall. This makes it possible to overlap another solid block on the top half of a banner for floor banners, or the bottom half of wall banners.
When a banner is placed on the side of a block, its position is set by the top block, and it is possible to place it so it appears half buried.
Banners can also be placed in item frames, where they simply appear as their item model.
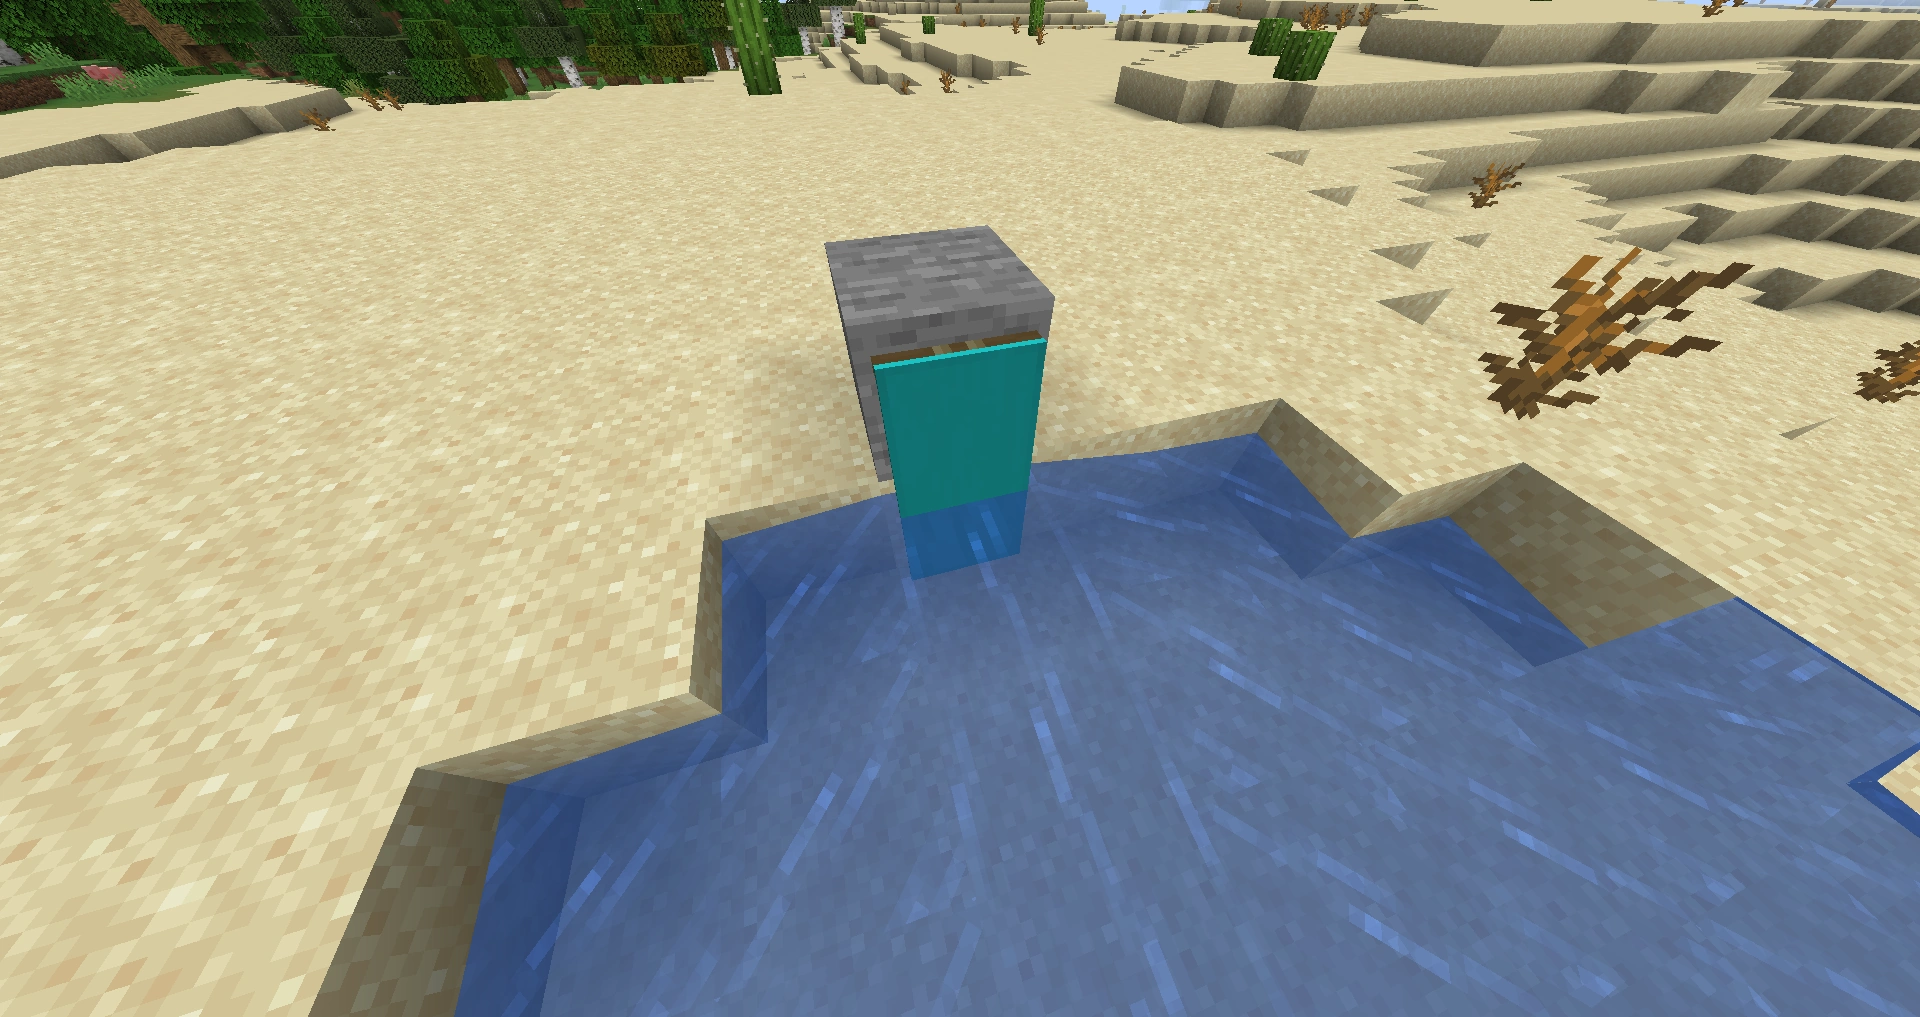
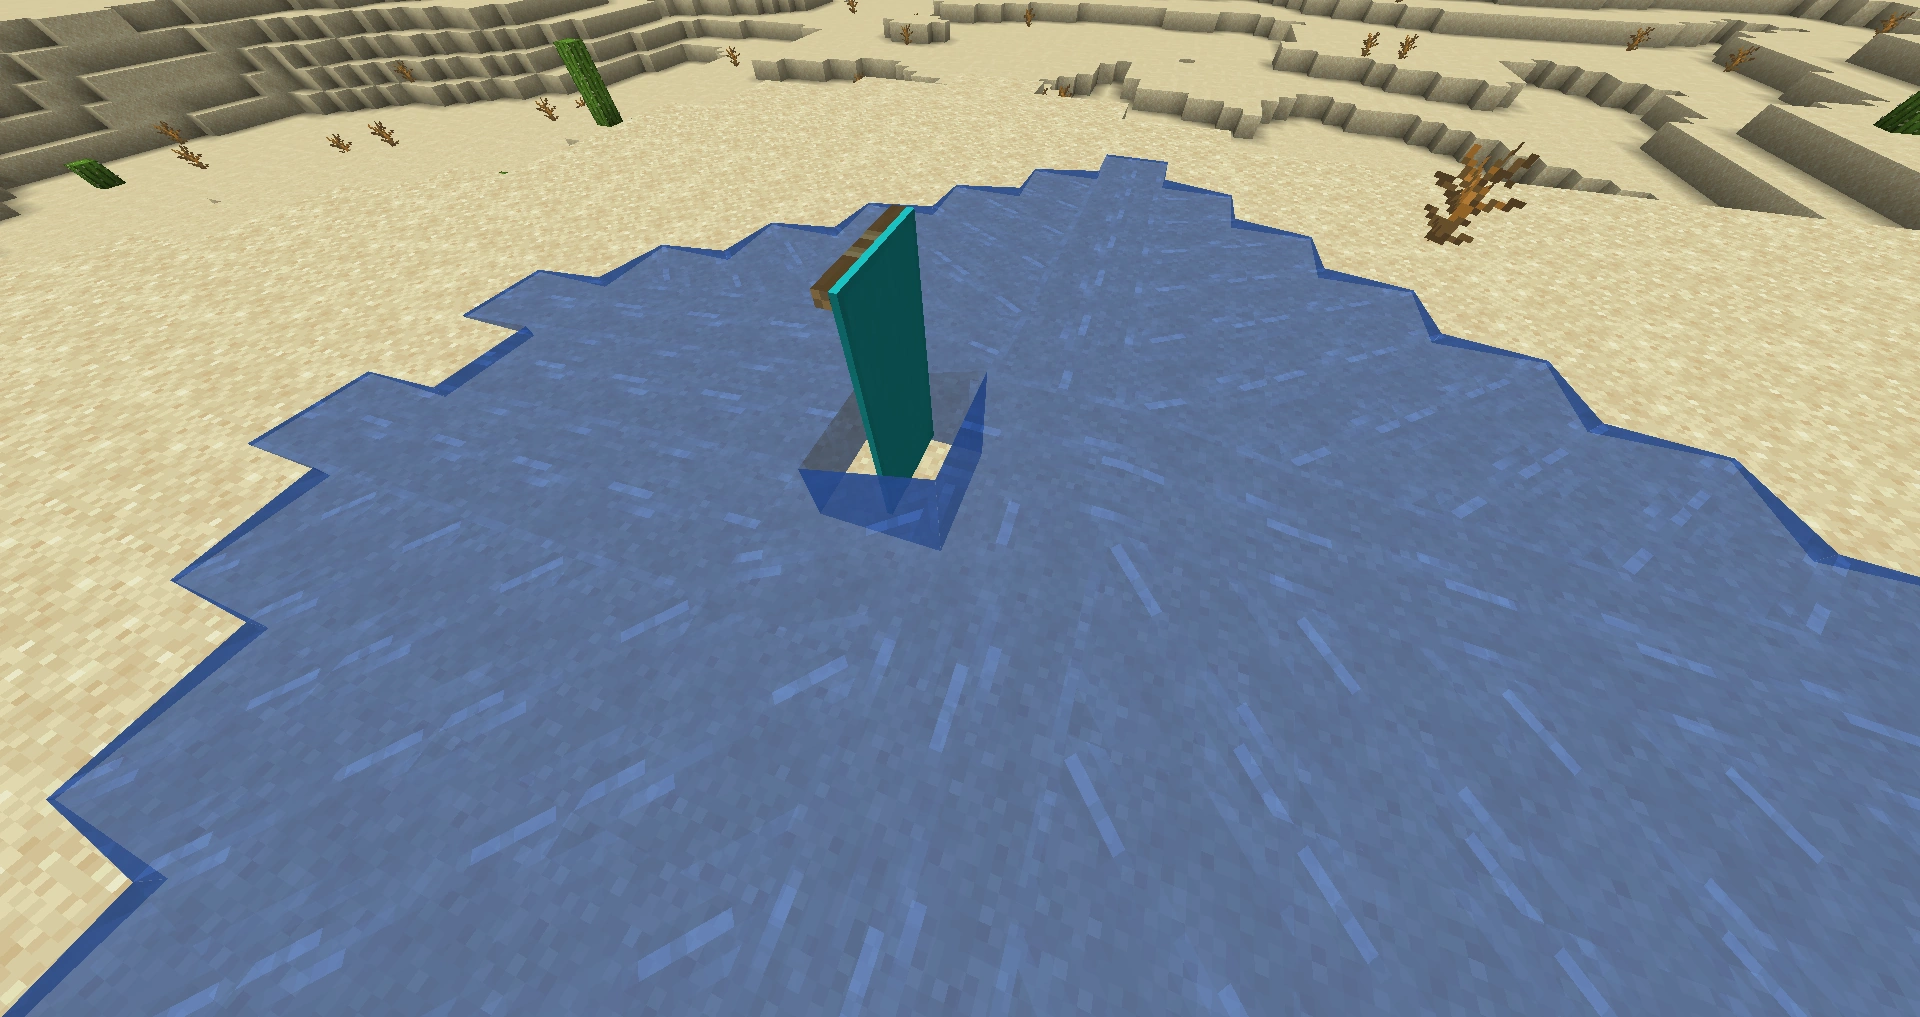
Water and lava flow around banners. In Bedrock Edition, banners can be waterlogged.

Water can be placed below wall banners

Water flows around a banner on the ground
Lava can create fire in air blocks next to banners as if the banners were flammable, but the banners do not burn (and cannot be burned by other methods). Banners also cannot be moved by pistons.
If a banner is renamed on an anvil, it retains its name when a pattern is added, but not when a pattern is removed.
Helmet[]
While a banner cannot be equipped in the head slot in Survival mode, equipping it using commands causes it to appear on top of the player. This is how raid captains wear banners[JE only].
Chestplate[]
While a banner cannot be equipped in the chestplate slot in Survival mode, equipping it using NBT editors causes it to appear on top of the player. This is how raid captains wear banners[BE & edu only].


Crafting ingredient[]
Shields can have patterns applied to them using banners. The shield pattern has a smaller resolution than the banner pattern, causing them to look different or offset. Banners that have more than six patterns, such as Ominous Banners or banners obtained through inventory editors, will be reduced to six patterns on the shield.
| Ingredients | Crafting recipe | Description |
|---|---|---|
| Shield + Matching Banner or Ominous Banner |
Applies the banner pattern to the shield. The banner is consumed. The shield must have no pre-existing patterns. Does not change existing durability or enchantments on the shield. |
Copying[]
Banners can be copied with a blank banner to make multiple identical banners. Banners with more than 6 patterns applied using commands cannot be copied in this manner.
| Ingredients | Crafting recipe | Description |
|---|---|---|
| Matching Banner | Copies pattern; both banners must have the same base color, and the one having a pattern copied onto it must have no preexisting pattern. |
Map marker[]

How every banner appears In Java Edition on a map, including named banners.
In Java Edition, using on a standing banner with a map selected places a marker of the banner's position on the selected map, and using on the banner again removes the marker. Note that wall banners cannot serve as map markers. The marker has the same color as the banner's base without decorations. The marker is removed if the banner is destroyed unless the map is locked using a cartography table. If the banner is renamed, the name appears below the marker.
Patterns[]

Example of a banner with more than 6 patterns, a result of using the /give command.
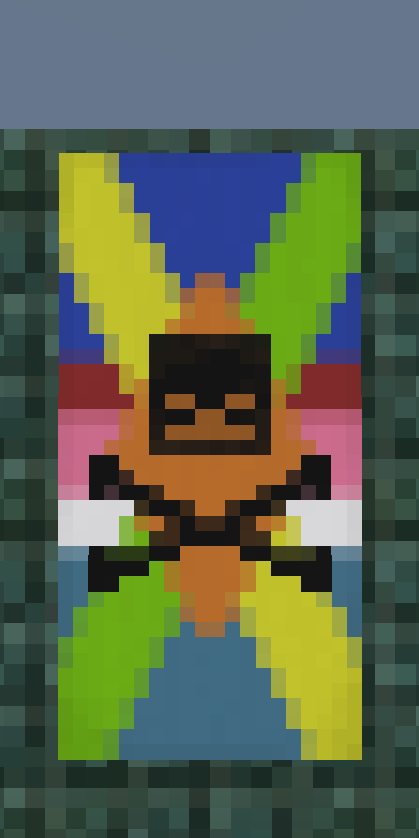
A banner may have up to six layers of patterns, which are overlaid with the last-crafted on top. A banner can have up to 16 layers of patterns with the use of commands. The total number of unique banners is approximately 2.3x10^16 (or 23 quadrillion).
Any color banner can be used; the pattern overlays the color. In Java Edition, a loom is used to make patterns. However, in Bedrock Edition, the patterns can be made in a loom or a crafting table.
A banner can have more than six layers of patterns through the commands /give, /setblock or /fill. This only works in Java Edition, as Bedrock Edition doesn't have any NBT commands. Here is an example of a mining banner with seven different patterns. There is specific codes for the colors and patterns that you have to input.
/give @p white_banner{display:{Name:"\"Mining Industries Banner\""},BlockEntityTag:{Patterns:[{Pattern:"cr",Color:15},{Pattern:"bs",Color:15},{Pattern:"sc",Color:12},{Pattern:"ms",Color:0},{Pattern:"hh",Color:15},{Pattern:"bo",Color:15},{Pattern:"tts",Color:8}]}} 1
Loom recipes
Crafting recipes
Renaming[]
In Java Edition, a banner can be given a custom name that remains as the banner is placed and retrieved. The player can use an anvil to rename the banner item, or may change the CustomName tag using the /data command on the banner block.
Fuel[]
Banners can be used as a fuel in furnaces, smelting 1.5 items per banner.
Note Blocks[]
Banners can be placed under note blocks to produce "bass" sounds.
Sounds[]
Generic[]
| Sound | Subtitles | Source | Description | Resource location | Translation key | Volume | Pitch | Attenuation distance |
|---|---|---|---|---|---|---|---|---|
| Block broken | Blocks | Once the block has broken | block | subtitles | 1.0 | 0.8 | 16 | |
| Block placed | Blocks | When the block is placed | block | subtitles | 1.0 | 0.8 | 16 | |
| Block breaking | Blocks | While the block is in the process of being broken | block | subtitles | 0.25 | 0.5 | 16 | |
| None[sound 1] | Entity-Dependent | Falling on the block with fall damage | block | None[sound 1] | 0.5 | 0.75 | 16 | |
| Footsteps | Entity-Dependent | Walking on the block | block | subtitles | 0.15 | 1.0 | 16 |
| Sound | Source | Description | Resource location | Volume | Pitch |
|---|---|---|---|---|---|
| Blocks | Once the block has broken | dig | 1.0 | 0.8-1.0 | |
| Blocks | When the block is placed | dig | 1.0 | 0.8 | |
| Blocks | While the block is in the process of being broken | hit | 0.23 | 0.5 | |
| Players | Falling on the block with fall damage | fall | 0.4 | 1.0 | |
| Players | Walking on the block | step | 0.3 | 1.0 | |
| Players | Jumping from the block | jump | 0.12 | 1.0 | |
| Players | Falling on the block without fall damage | land | 0.18 | 1.0 |
Unique[]
Java Edition: None
| Sound | Source | Description | Resource location | Volume | Pitch |
|---|---|---|---|---|---|
| Blocks | When all patterns are removed from a banner using a cauldron | cauldron | 0.1 | 1.0 |
Data values[]
ID[]
| Name | Identifier | Form | Block tags | Item tags | Translation key |
|---|---|---|---|---|---|
| White Banner | white_banner | Block & Item | banners wall_post_override | banners | block.minecraft.white_bannerblock.minecraft.ominous_banner |
| Orange Banner | orange_banner | Block & Item | banners wall_post_override | banners | block.minecraft.orange_banner |
| Magenta Banner | magenta_banner | Block & Item | banners wall_post_override | banners | block.minecraft.magenta_banner |
| Light Blue Banner | light_blue_banner | Block & Item | banners wall_post_override | banners | block.minecraft.light_blue_banner |
| Yellow Banner | yellow_banner | Block & Item | banners wall_post_override | banners | block.minecraft.yellow_banner |
| Lime Banner | lime_banner | Block & Item | banners wall_post_override | banners | block.minecraft.lime_banner |
| Pink Banner | pink_banner | Block & Item | banners wall_post_override | banners | block.minecraft.pink_banner |
| Gray Banner | gray_banner | Block & Item | banners wall_post_override | banners | block.minecraft.gray_banner |
| Light Gray Banner | light_gray_banner | Block & Item | banners wall_post_override | banners | block.minecraft.light_gray_banner |
| Cyan Banner | cyan_banner | Block & Item | banners wall_post_override | banners | block.minecraft.cyan_banner |
| Purple Banner | purple_banner | Block & Item | banners wall_post_override | banners | block.minecraft.purple_banner |
| Blue Banner | blue_banner | Block & Item | banners wall_post_override | banners | block.minecraft.blue_banner |
| Brown Banner | brown_banner | Block & Item | banners wall_post_override | banners | block.minecraft.brown_banner |
| Green Banner | green_banner | Block & Item | banners wall_post_override | banners | block.minecraft.green_banner |
| Red Banner | red_banner | Block & Item | banners wall_post_override | banners | block.minecraft.red_banner |
| Black Banner | black_banner | Block & Item | banners wall_post_override | banners | block.minecraft.black_banner |
| White Wall Banner | white_wall_banner | Block | banners wall_post_override | — | block.minecraft.white_bannerblock.minecraft.ominous_banner |
| Orange Wall Banner | orange_wall_banner | Block | banners wall_post_override | — | block.minecraft.orange_banner |
| Magenta Wall Banner | magenta_wall_banner | Block | banners wall_post_override | — | block.minecraft.magenta_banner |
| Light Blue Wall Banner | light_blue_wall_banner | Block | banners wall_post_override | — | block.minecraft.light_blue_banner |
| Yellow Wall Banner | yellow_wall_banner | Block | banners wall_post_override | — | block.minecraft.yellow_banner |
| Lime Wall Banner | lime_wall_banner | Block | banners wall_post_override | — | block.minecraft.lime_banner |
| Pink Wall Banner | pink_wall_banner | Block | banners wall_post_override | — | block.minecraft.pink_banner |
| Gray Wall Banner | gray_wall_banner | Block | banners wall_post_override | — | block.minecraft.gray_banner |
| Light Gray Wall Banner | light_gray_wall_banner | Block | banners wall_post_override | — | block.minecraft.light_gray_banner |
| Cyan Wall Banner | cyan_wall_banner | Block | banners wall_post_override | — | block.minecraft.cyan_banner |
| Purple Wall Banner | purple_wall_banner | Block | banners wall_post_override | — | block.minecraft.purple_banner |
| Blue Wall Banner | blue_wall_banner | Block | banners wall_post_override | — | block.minecraft.blue_banner |
| Brown Wall Banner | brown_wall_banner | Block | banners wall_post_override | — | block.minecraft.brown_banner |
| Green Wall Banner | green_wall_banner | Block | banners wall_post_override | — | block.minecraft.green_banner |
| Red Wall Banner | red_wall_banner | Block | banners wall_post_override | — | block.minecraft.red_banner |
| Black Wall Banner | black_wall_banner | Block | banners wall_post_override | — | block.minecraft.black_banner |
| Name | Identifier |
|---|---|
| Block entity | banner |
| Banner | Identifier | Numeric ID | Form | Item ID[i 1] | Translation key |
|---|---|---|---|---|---|
| Standing | standing_banner | 176 | Block & Ungiveable Item[i 2] | Identical[i 3] | tile.standing_banner.black.name tile.standing_banner.red.name tile.standing_banner.green.name tile.standing_banner.brown.name tile.standing_banner.blue.name tile.standing_banner.purple.name tile.standing_banner.cyan.name tile.standing_banner.silver.name tile.standing_banner.gray.name tile.standing_banner.pink.name tile.standing_banner.lime.name tile.standing_banner.yellow.name tile.standing_banner.lightBlue.name tile.standing_banner.magenta.name tile.standing_banner.orange.name tile.standing_banner.white.name |
| Wall | wall_banner | 177 | Block & Ungiveable Item[i 2] | Identical[i 3] | — |
| Item | banner | 567 | Item | — | item.banner.black.name item.banner.red.name item.banner.green.name item.banner.brown.name item.banner.blue.name item.banner.purple.name item.banner.cyan.name item.banner.silver.name item.banner.gray.name item.banner.pink.name item.banner.lime.name item.banner.yellow.name item.banner.lightBlue.name item.banner.magenta.name item.banner.orange.name item.banner.white.name |
| Name | Savegame ID |
|---|---|
| Block entity | Banner |
Metadata[]
Item[]
In Bedrock Edition, banner items use the following data values:
| DV | Banner color |
|---|---|
| 0 | black |
| 1 | red |
| 2 | green |
| 3 | brown |
| 4 | blue |
| 5 | purple |
| 6 | cyan |
| 7 | light gray |
| 8 | gray |
| 9 | pink |
| 10 | lime |
| 11 | yellow |
| 12 | light blue |
| 13 | magenta |
| 14 | orange |
| 15 | white |
Item[]
In Java Edition, banner items use the following data values:
| DV | Banner color |
|---|---|
| 15 | black |
| 14 | red |
| 13 | green |
| 12 | brown |
| 11 | blue |
| 10 | purple |
| 9 | cyan |
| 8 | light gray |
| 7 | gray |
| 6 | pink |
| 5 | lime |
| 4 | yellow |
| 3 | light blue |
| 2 | magenta |
| 1 | orange |
| 0 | white |
Block states[]
Java Edition:
Floor
| Name | Default value | Allowed values | Description |
|---|---|---|---|
| rotation | 0
| 0 | The block is facing south. |
1 | The block is facing south-southwest. | ||
2 | The block is facing southwest. | ||
3 | The block is facing west-southwest. | ||
4 | The block is facing west. | ||
5 | The block is facing west-northwest. | ||
6 | The block is facing northwest. | ||
7 | The block is facing north-northwest. | ||
8 | The block is facing north. | ||
9 | The block is facing north-northeast. | ||
10 | The block is facing northeast. | ||
11 | The block is facing east-northeast. | ||
12 | The block is facing east. | ||
13 | The block is facing east-southeast. | ||
14 | The block is facing southeast. | ||
15 | The block is facing south-southeast. |
Wall
| Name | Default value | Allowed values | Description |
|---|---|---|---|
| facing | north | eastnorthsouthwest | The direction the block is facing. For example, a block facing east is attached to a block to its west. Opposite from the direction a player faces when placing the block. |
- Standing
| Name | Metadata Bits | Default value | Allowed values | Values for Metadata Bits |
Description |
|---|---|---|---|---|---|
| ground_sign_direction | 0x10x20x40x8 | 0
| 0 | 0 | The block is facing south. |
1 | 1 | The block is facing south-southwest. | |||
2 | 2 | The block is facing southwest. | |||
3 | 3 | The block is facing west-southwest. | |||
4 | 4 | The block is facing west. | |||
5 | 5 | The block is facing west-northwest. | |||
6 | 6 | The block is facing northwest. | |||
7 | 7 | The block is facing north-northwest. | |||
8 | 8 | The block is facing north. | |||
9 | 9 | The block is facing north-northeast. | |||
10 | 10 | The block is facing northeast. | |||
11 | 11 | The block is facing east-northeast. | |||
12 | 12 | The block is facing east. | |||
13 | 13 | The block is facing east-southeast. | |||
14 | 14 | The block is facing southeast. | |||
15 | 15 | The block is facing south-southeast. |
- Wall
| Name | Metadata Bits | Default value | Allowed values | Values for Metadata Bits |
Description |
|---|---|---|---|---|---|
| facing_direction | 0x10x20x4 | 0 | 2345 | 2345 | The direction the block is facing. For example, a block facing east is attached to a block to its west.
|
01 | 01 | Unused |
Block data[]
A banner has a block entity associated with it that holds additional data about the block.
- Block entity data
- Tags common to all block entities
- CustomName: Optional. The name of this beacon in JSON text component, which appears when attempting to open it, while it is locked.
- Patterns: List of all patterns applied to the banner.
- : An individual pattern.
- Color: Color of the section.
- Pattern: The banner pattern code the color is applied to.
- : An individual pattern.
Pattern
Item data[]
Banners, as items, use an NBT tag BlockEntityTag to indicate the patterns and details when it is placed.
- Item: The item
- tag: Additional information about the item. This tag is optional for most items.
- BlockEntityTag: The details of the shulker box.
- All block data, except tags common to all block entities.
- BlockEntityTag: The details of the shulker box.
- tag: Additional information about the item. This tag is optional for most items.
Achievements[]
| Icon | Achievement | In-game description | Actual requirements (if different) | Gamerscore earned | Trophy type (PS4) | |
|---|---|---|---|---|---|---|
| PS4 | Other | |||||
| Fruit on the Loom | Make a banner using an Enchanted Apple Stencil | Make a banner using the Enchanted apple (thing) stencil | 20G | Bronze | ||
Advancements[]
| Icon | Advancement | In-game description | Parent | Actual requirements (if different) | Resource location |
|---|---|---|---|---|---|
 | Voluntary Exile | Kill a raid captain. Maybe consider staying away from villages for the time being... | Adventure | Kill an entity in the #raiders entity tag wearing an ominous banner.This is a hidden advancement, meaning that it can be viewed by the player only after completing it, regardless of if its child advancement(s), if any, have been completed. | adventure/voluntary_exile
|
History[]
| Java Edition | |||||
|---|---|---|---|---|---|
1.8{{Extension DPL}}<ul><li>[[Minecart with Furnace|Minecart with Furnace]]<br/>{{ItemEntity
|image=Minecart with Furnace.png
|renewable=Yes
|stackable=No
|size=Height: 0.7 Blocks<br>Width: 0.98 Blocks
|networkid=10
|drops= 1 {{ItemLink|Minecart with Furnace}}
|health={{Hp|6}}
}}
A '''minecart with furnace''' is a [[furnace]] inside a [[minecart]]. It can be powered with [[coal]] or [[charcoal]] to propel it across a [[rail]] line for a limited time, which can be used to move other minecarts.
==Obtaining==
Minecarts with furnace can be retrieved by attacking them, and by doing so it drops as an [[item]].
===Crafting===
{{Crafting
|Output= Minecart with Furnace
|type= Transportation
|Furnace|Minecart}}
==Usage==
Minecarts with furnaces are placed in the same way as other minecarts. It does not have a graphical user interface, unlike a [[furnace]].
Minecarts with furnaces can be powered, done by feeding fuel ([[coal]] or [[charcoal]]) into the furnace minecart with the {{Control|use}} button. The fuel is consumed immediately and it starts to move in the same direction the player clicked toward. Pressing {{Control|use}} always turns it to that direction, even when not holding coal.
Any piece of fuel, added at any time, increases the total range by an additional 3600 ticks (equal to 180 seconds or 3 minutes). The upper limit is 32767 ticks, approximately 27 minutes.
When powered, minecarts with furnaces cover 240m per minute (about 4 m/s, slightly slower than walking speed) or 720m per piece of coal. They do not accelerate beyond this speed when going downhill or on active [[powered rail]]s, and as long as they remain powered, they do not slow down when going uphill, on inactive powered rails, or when pushing or pulling other minecarts.
If a powered furnace minecart is derailed and then pushed back onto a rail, it starts moving again in the direction it came from, so they are not easily turned around in this state unless a player is nearby to redirect it with {{Control|use}}.
Minecarts with furnaces can climb up steep inclines while pushing other minecarts as long as they have fuel. If a minecart with furnace reaches a slope while pulling another minecart, the pulled minecart is switched to the forward position so that it can be pushed along the slope instead of pulled.
When a minecart with furnace bumps into another minecart or multiple minecarts, the other minecarts are pushed forward with great speed. The furnace minecart continues on with its own speed. Because of this speed difference, some of the minecarts may end up inside unloaded chunks on straight tracks.
===Train mechanics===
{{Schematic
|caption=weakly-shunted 1-cart train, one cart was used only to push the train together and is left behind
|AB|mc-$ew|mc-$ew|mc/Fu-$ew|-
|AB|ra-$wu|ra-$ew|ra-$ew|ra-$ew|ellipsis-ew
}}
{{Schematic
|caption=Creating a strongly-shunted 1-cart train. The sloped rail must be replaced with a horizontal rail before powering.
|AB|mc-$ew||mc/Fu-$ew|-
|AB|ra-$ew|ra-$ew|ra-$eu|ra-$ew|ra-$ew|ellipsis-ew
}}
[[File:FurnaceMinecartTrain.png|thumb|right|A Minecart train powered by furnace [[Minecart|minecarts.]]|alt=]]
A furnace minecart can be made to pull up to four other minecarts. All minecarts in this train move at the constant speed of the furnace minecart. Trains are formed when a minecart is pushed into the back of a powered furnace minecart or a short-enough train. These shunts are fragile at best and easily come undone, but some methods are stronger than others. For example, pushing a minecart into a furnace minecart and then powering the furnace gives a weaker shunt than pushing the furnace minecart into the other minecart against a wall, and then powering the furnace in the other direction.
A high-speed minecart running into the back of a furnace minecart going in the same direction automatically creates a weak shunt with it, pulling it along.
Pulling a minecart with TNT causes it to explode.
{| class="wikitable"
|+Pulled minecart/Shunt behavior
!Condition
!Result
|-
|Furnace loses power/speed||Shunt comes undone
|-
|Entity bumping besides those part of the train||Jettisoned forward
|-
|Upward sloped track||Jettisoned forward
|-
|Downward sloped track||Jettisoned forward (strong shunt) or shunt comes undone (weak shunt)
|-
|90° turn in track||Jettisoned backward
|-
|Turn toward north/south or east/west that is not the direction the train was shunted in||Train derails
|}
When a train comes to a turn, the shunt comes undone with the pulled minecart jettisoned backward. The correct way to make such a turn is having the shunt undone before a turn, and then make the two rejoin on a straight rail later by having the pulled cart catch up with the minecart with furnace.<ref name=mango/>
Since the train runs slower on a fully powered track than a normal minecart (~5 m/s compared to 8m/s), a train pulled by an unpowered furnace minecart is ideal for AFK farms involving breaking or placing blocks like [[nether wart]].<ref name=mango>{{YouTubeLink|1=pRLiAQfhTG8|2=Why The Furnace Minecart Isn't As Useless As You Think|3=ilmango}}</ref>
==Properties==
The coal is not stored as an item in the entity, but in the object data in the fuel property as a time in ticks. ''Fuel'' is a short value, i.e. a maximum of 32767 ticks, which is about 27 minutes. However, {{cmd|/summon furnace_minecart ~ ~ ~ {Fuel:32000} }} alone doesn't make it go since it doesn't have a direction. It can be right-clicked on a track to give it a direction, or it can be summoned with the properties ''PushX'' and ''PushZ'' set, which are responsible for the direction. The <code>Motion</code> property of every entity allows for movement of the minecart, but it does not direct the minecart to move on its own.
==Sounds==
{{Edition|Java}}:<br>
Minecarts with furnaces use the Friendly Creatures sound category for entity-dependent sound events.<ref group=sound name=rollsource>{{bug|MC-42132}}</ref>
{{Sound table
|sound=Minecart rolling.ogg
|subtitle=Minecart rolls
|source=Friendly Creatures <ref group=sound name=rollsource/>
|overridesource=1
|description=While a minecart with furnace is moving
|id=entity.minecart.riding
|translationkey=subtitles.entity.minecart.riding
|volume=0.0-0.35 <ref group=sound>Relates linearly with horizontal velocity (max 0.5)</ref>
|pitch=0.0-1.0 <ref group=sound>Will increase by 0.0025 per tick if the minecart's horizontal velocity is more than 0.01</ref>
|distance=16
|foot=1}}
{{Edition|Bedrock}}:
{{Sound table
|type=bedrock
|sound=Minecart rolling.ogg
|source=neutral
|description=While a minecart with furnace is moving
|id=minecart.base
|foot=1}}
==Data values==
===ID===
{{ID table
|edition=java
|firstcolumnname=Item
|showforms=y
|generatetranslationkeys=y
|displayname=Minecart with Furnace
|spritetype=item
|nameid=furnace_minecart
|form=item
|foot=1}}
{{ID table
|edition=java
|firstcolumnname=Entity
|generatetranslationkeys=y
|displayname=Minecart with Furnace
|spritetype=entity
|nameid=furnace_minecart
|foot=1}}
===Entity data===
Minecarts with furnace have entity data associated with them that contain various properties of the entity.
{{el|java}}:
{{main|Entity format}}
{{/ED}}
{{el|bedrock}}:
: See [[Bedrock Edition level format/Entity format]].
==History==
{{History|java alpha}}
{{History||v1.0.14|[[File:Minecart with Furnace JE1.png|32px]] [[File:Minecart with Furnace (item) JE1.png|32px]] Minecarts with furnace were added.
|Since no in-game name was indicated, they were referred to by names such as "powered minecart" or "furnace minecart".
|No matter how much fuel was added to the minecart, it would never move for more than 3 minutes after the last fuel.}}
{{History|java beta}}
{{History||1.0|When tooltips were added to items in inventory, this was named "Minecart with Furnace".}}
{{History||1.2|[[File:Minecart with Furnace JE2.png|32px]] The texture of the minecart with furnace has been changed.}}
{{History|java}}
{{History||1.0.0|snap=?|Each piece of [[coal]] now powers a [[minecart]] with furnace for {{convert|3|minutes|ticks}}, so that adding another piece of coal at any time increases the total range by another 3 minutes. A full stack of 64 coal now powers it for {{convert|192|minutes|ticks}}.
|Minecarts with furnace on a level track cover 204 meters per minute.}}
{{History||1.8|snap=14w11a|Minecarts with furnace now give a much greater boost to other minecarts.
|When powered, minecarts with furnace now move on non-powered rails without decelerating.}}
{{History|||snap=14w17a|Minecarts with furnace's behavior has been reverted, so that no change was released in [[Java Edition 1.8]].}}
{{History||1.11|snap=16w32a|The entity ID of the minecart with furnace has been changed from <code>MinecartFurnace</code> to <code>furnace_minecart</code>.}}
{{History||1.13|snap=17w47a|Prior to [[1.13/Flattening|''The Flattening'']], this [[item]]'s numeral ID was 343.}}
{{History||1.14|snap=18w43a|[[File:Minecart with Furnace JE3.png|32px]] [[File:Minecart with Furnace (item) JE2.png|32px]] The texture of the minecart with furnace has been changed.}}
{{History||1.15|snap=19w38a|[[File:Minecart with Furnace 19w38a.png|32px]] The furnace now appears dark, like suffocating mobs.}}
{{History|||snap=19w39a|The furnace texture is now colored correctly.}}
{{History||1.15.2|snap=Pre-Release 1|Furnace minecarts can now navigate around any corner.}}
{{History||1.19|snap=22w13a|The crafting recipe for a minecart with furnace is now shapeless.
|Breaking a minecart with furnace will now drop the item instead of the minecart and furnace separately.<ref>{{bug|MC-249493|||Fixed}}</ref>}}
{{History|console}}
{{History||xbox=TU1|xbone=CU1|ps=1.0|wiiu=Patch 1|switch=1.0.1|[[File:Minecart with Furnace JE2.png|32px]] [[File:Minecart with Furnace (item) JE1.png|32px]] Added minecart with furnace.}}
{{History|Ps4}}
{{History||1.90|[[File:Minecart with Furnace JE3.png|32px]] [[File:Minecart with Furnace (item) JE2.png|32px]] The texture of the minecart with furnace has been changed.}}
{{History|foot}}
==Issues==
{{issue list}}
==Trivia==
*The minecart with furnace is excluded from {{els|be|3ds}} on purpose. In a tweet, [[Jeb]] considered removing it from {{el|je}}.<ref>{{tweet|jeb|699241247391772672|I think we will phase out the furnace minecraft ''(sic)''|15 Feb 2016}}</ref>
**When converting a [[Legacy Console Edition]] world to a [[Bedrock Edition]] world, any present minecarts with furnaces are converted into a normal minecart.
**Despite the above-described poor standing of the minecart, it was most recently briefly featured in an animation in the [[Minecraft Live 2022]], where one was depicted as moving a train of about 20 minecarts at a higher than normal speed.
==Gallery==
<gallery>
Running Powered Minecart.png|A powered minecart in action.
</gallery>
==References==
{{reflist}}
{{Items}}
{{Entities}}
[[Category:Mechanics]]
[[cs:Parní vozík]]
[[de:Antriebslore]]
[[es:Vagoneta con horno]]
[[fr:Wagonnet motorisé]]
[[hu:Gőzmeghajtású csille]]
[[ja:かまど付きのトロッコ]]
[[ko:화로가 실린 광산 수레]]
[[nl:Mijnkar met oven]]
[[pl:Wagonik z piecem]]
[[ru:Вагонетка с печью]]
[[uk:Вагонетка з піччю]]
[[zh:动力矿车]]</li><li>[[End Crystal|End Crystal]]<br/>{{ItemEntity
|image=End Crystal.gif
|imagesize=150px
|invimage=End Crystal
|renewable=Yes
|stackable=Yes (64)
|rarity=Rare
|drops=None
|size=
Height: 2 Blocks<br>Width: 2 Blocks
}}
An '''end crystal''' is an [[entity]] that can be [[Crafting|crafted]] or found on [[the End]]'s main island, where it heals the [[Ender Dragon|ender dragon]]. It can only be placed on [[obsidian]] or [[bedrock]] and [[Explosion|explodes]] instantly when attacked or damaged in most ways.
== Spawning ==
=== Natural generation ===
An end crystal is found atop each [[obsidian pillar]] on the central island of the End, each on top of a piece of [[bedrock]]. There are 10 end crystals in total, of which two are protected in "cages" of [[iron bars]]. All end crystals respawn one after another as the respawning process of the [[ender dragon]] starts.
== Obtaining ==
=== Crafting ===
{{Crafting
|A1=Glass
|B1=Glass
|C1=Glass
|A2=Glass
|B2=Eye of Ender
|C2=Glass
|A3=Glass
|B3=Ghast Tear
|C3=Glass
|Output= End Crystal
|type= Decoration block
}}
== Usage ==
=== Healing the ender dragon ===
Their primary purpose is to recharge the health of the ender dragon, who gains a charge from the nearest crystal within a cuboid extending 32 blocks from the dragon in all directions. The dragon is healed {{hp|1}} each half-second. If multiple ender dragons are spawned, an end crystal can affect multiple dragons at the same time. The healing beam is neither obstructed nor is its power diminished by entities or blocks.
=== Respawning the ender dragon ===
[[File:End Crystals on the Exit portal.png|right|thumb|How to arrange end crystals on the exit portal to respawn the ender dragon.]]
As items, end crystals may be placed on bedrock and [[obsidian]], if the two blocks above the bedrock or obsidian block are air or replaceable blocks and no other entities intersect the area. When an end crystal is placed in [[the End]], a [[fire]] block is created at the end crystal location. If four are placed on the end [[exit portal]], one on each of the flat sides, the crystals respawn the original end crystals on the obsidian pillars, as well as resurrect the dragon itself, before exploding. The top of each pillar also explodes, destroying any player-placed blocks. This happens even if TNT explosions are turned off in settings.
If the exit portal is ever broken for any reason, end crystals can still be placed on obsidian blocks with the same location as the exit portal.
=== Explosions ===
End crystals explode when attacked or damaged in most ways, even by attacks that normally do zero damage. They are not affected by exploding fireworks, and if damaged by an explosion, they disappear instead of exploding.{{Only|Java}}<ref>{{bug|MC-118429||End crystals don't explode when destroyed by nearby explosions}}</ref> The end crystal's [[explosion]] has an [[Explosion#Explosion strength|explosion strength]] of 6, the same as a [[charged creeper]]. The end crystal's fire often remains after the crystal explodes. Any ender dragon charging from the crystal when it is destroyed takes {{hp|10}} damage.
{{IN|java}}, an end crystal's explosion can be [[blocking|blocked]] by a [[shield]].
Although an ender dragon damages most blocks and entities in its path, it cannot destroy end crystals simply by going near them.
Placing [[water]] on the end crystal will neutralize the blast effect, but not the [[damage]] or knockback.
End crystals with obsidian or bedrock below them will not damage blocks below them when they explode.
{{IN|bedrock}}, having the game rule {{cd|mobGriefing}} to {{cd|false}} will prevent the End Crystal from destroying any blocks. While {{in|java}} the same game rule will not prevent the End Crystal from destroying any blocks.
=== Beams ===
The end crystal naturally shoots a beam at the ender dragon and heals it when the dragon is within range. This beam can be manually created using the command {{cmd|data merge entity @e[type{{=}}end_crystal,limit{{=}}1] {BeamTarget:{X:0, Y:0, Z:0<nowiki>}}}}. The beam can be pointed in any direction, allowing it to mark locations or objects.
=== Properties ===
[[File:End Crystal (Slateless).gif|thumb|A base-less end crystal.]]
End crystals are of two kinds: the ones with a base beneath them are created either by game mechanism or by the {{cmd|summon}} command; while the base-less ones are created by players by manually placing the crystal items on top of [[obsidian]] or [[bedrock]].
The base appears to be made of bedrock, with a crystal hovering over it. While in the End, a crystal continually generates fire at its current position, one block above the base (directly on top of the block the base is embedded in), replacing any other block at that location. This fire is capable of spreading.
The end crystal entity is not solid and can be walked through freely. End crystals can be pushed by [[piston]]s, but they explode if moved while on fire. Because fire is checked only when an entity moves, end crystals do not normally take damage from their own fire unless moved.
== Sounds ==
{{edition|java}}:
{{Sound table
|sound=Explosion1.ogg
|sound2=Explosion2.ogg
|sound3=Explosion3.ogg
|sound4=Explosion4.ogg
|subtitle=Explosion
|source=block
|description=When an end crystal explodes
|id=entity.generic.explode
|translationkey=subtitles.entity.generic.explode
|volume=4.0
|pitch=0.56-0.84
|distance=16
|foot=1}}
{{edition|bedrock}}:
{{Sound table
|type=bedrock
|sound=Explosion1.ogg
|sound2=Explosion2.ogg
|sound3=Explosion3.ogg
|sound4=Explosion4.ogg
|source=block
|description=When an end crystal explodes
|id=random.explode
|volume=4.0
|pitch=1.0
|foot=1}}
== Data values ==
=== ID ===
{{edition|java}}:
{{ID table
|edition=java
|firstcolumnname=Item
|showforms=y
|generatetranslationkeys=y
|displayname=End Crystal
|spritetype=item
|nameid=end_crystal
|form=item
|foot=1}}
{{ID table
|edition=java
|firstcolumnname=Entity
|generatetranslationkeys=y
|displayname=End Crystal
|spritetype=entity
|nameid=end_crystal
|foot=1}}
{{edition|bedrock}}:
{{ID table
|edition=bedrock
|firstcolumnname=Item
|shownumericids=y
|showforms=y
|notshowbeitemforms=y
|generatetranslationkeys=y
|displayname=End Crystal
|spritetype=item
|nameid=end_crystal
|id=637
|form=item
|foot=1}}
{{ID table
|edition=bedrock
|firstcolumnname=Entity
|shownumericids=y
|generatetranslationkeys=y
|displayname=End Crystal
|spritetype=entity
|nameid=ender_crystal
|id=71
|foot=1}}
=== Entity data ===
End crystals have entity data that define various properties of the entity.
{{el|java}}:
{{main|Entity format}}
{{/ED}}
{{el|bedrock}}:
: See [[Bedrock Edition level format/Entity format]].
== Achievements ==
{{load achievements|The End... Again...}}
== Advancements ==
{{load advancements|The End... Again...}}
== History ==
[[File:End Crystal 19w38a.gif|thumb|Java Edition 19w38a]]
{{History|java}}
{{History||1.0.0|snap=Beta 1.9 Prerelease 6|[[File:End Crystal JE1 BE1.png|32px]] Added ender crystals.}}
{{History||1.2.1|snap=12w04a|Previously, ender crystals could be spawned using [[spawn egg]]s with ID 200 (in a [[server]], these were created using {{cmd|give 383 1 200}}). The spawned crystal would be positioned where a natural crystal would be if there was a bedrock block at the location. It was still possible until 1.9 to obtain an end crystal spawn egg, but it would not spawn anything.}}
{{History||1.7.2|snap=13w36a|Ender crystals can now be spawned with the {{cmd|summon}} command.}}
{{History||1.8|snap=14w06a|Ender crystals now generate one [[block]] lower. The fire they generate destroys the [[bedrock]] block that is supposed to be underneath (see {{bug|MC-47526}}).}}
{{History||1.9|snap=15w31a|Ender crystals generate at the correct Y-level again.}}
{{History|||snap=15w33c|Respawning the ender dragon now also respawns the ender crystals on the obsidian pillars.
|Ender crystals now have a compound BeamTarget tag that hold the X, Y, Z block location the beam points to.}}
{{History|||snap=15w44a|"Ender crystals" have been renamed to "end crystals".
|[[File:End Crystal (item) JE1 BE1.png|32px]] End crystals can now be obtained as an item.
|End crystals now drop from [[skeleton trap]] horses and can be placed only on [[obsidian]] or bedrock. Placing several of them atop the end exit portal respawns the ender dragon.}}
{{History|||snap=15w44b|End crystals are no longer dropped by [[skeleton horse]]s.
|Added crafting recipe for end crystals, making end crystals [[renewable]].}}
{{History|||snap=15w49a|End crystals now require [[air]]/replaceable [[block]]s and lack of [[entity|entities]] for placement.}}
{{History|||snap=15w51a|End crystals can no longer be placed in [[Adventure mode]].}}
{{History||1.11|snap=16w32a|The entity ID has been changed from <code>EnderCrystal</code> to <code>ender_crystal</code>.}}
{{History||1.13|snap=17w47a|Prior to [[1.13/Flattening|''The Flattening'']], this [[item]]'s numeral ID was 426.}}
{{History|||snap=18w20b|Renamed to "End Crystal".}}
{{History|||snap=pre5|Entity ID has been changed to <code>end_crystal</code>.}}
{{History||1.14|snap=18w43a|[[File:End Crystal JE2.png|32px]][[File:End Crystal (item) JE2 BE2.png|32px]] The textures of end crystals and the end crystal [[item]] have been changed.}}
{{History||1.19.3|snap=22w43a|End crystal explosions can now be [[blocking|blocked]] by [[shield]]s.<ref>{{bug|MC-188247|||Fixed}}</ref>}}
{{History|pocket}}
{{History||1.0.0|snap=alpha 0.17.0.1|[[File:End Crystal JE1 BE1.png|32px]][[File:End Crystal (item) JE1 BE1.png|32px]] Added end crystals.}}
{{History|bedrock}}
{{History||1.6.0|snap=?|[[File:End Crystal BE2.png|32px]] [[File:End Crystal BE2.gif|32px]] The model of the end crystals has been changed. It has now two cubes instead of three.}}
{{History||1.10.0|snap=beta 1.10.0.3|[[File:End Crystal BE3.png|32px]][[File:End Crystal (item) JE2 BE2.png|32px]] The textures of end crystals and the end crystal item have been changed.}}
{{History||1.17.10|snap=beta 1.17.10.20|[[File:End Crystal JE2.png|32px]] The model of the end crystals has been changed to have three cubes again, and to match ''Java Edition''.}}
{{History||1.19.70|snap=beta 1.19.70.20|Increased end crystal collision box size to match ''Java Edition''.|End crystals with obsidian or bedrock below them now will not damage blocks below them when they explode.}}
{{History|console}}
{{History||xbox=TU9|xbone=CU1|ps=1.0|wiiu=Patch 1|[[File:End Crystal JE1 BE1.png|32px]] Added ender crystals.}}
{{History||xbox=TU31|xbone=CU19|ps=1.22|wiiu=Patch 3|Ender crystals now generate one block lower. The fire they generate destroys the [[bedrock]] block that is supposed to be underneath.}}
{{History||xbox=TU46|xbone=CU36|ps=1.38|wiiu=Patch 15|"Ender crystals" have been renamed to "end crystals".
|[[File:End Crystal (item) JE1 BE1.png|32px]] End crystals can now be obtained as an [[item]].
|End crystals now drop from [[skeleton trap]] horses and can be placed only on [[obsidian]] or bedrock. Placing several of them atop the [[end portal|end exit portal]] respawns the ender dragon.
|Added a crafting recipe for end crystals.}}
{{History||xbox=none|xbone=none|ps=1.90|wiiu=none|switch=none|[[File:End Crystal JE2.png|32px]][[File:End Crystal (item) JE2 BE2.png|32px]] The textures of end crystals and the end crystal item have been changed.}}
{{History|new 3ds}}
{{History||1.7.10|[[File:End Crystal JE1 BE1.png|32px]][[File:End Crystal (item) JE1 BE1.png|32px]] Added end crystals.}}
{{History|foot}}
== Issues ==
{{issue list}}
== Trivia ==
* According to [[Jens Bergensten|Jeb]], the reason behind the current crafting recipe using glass as opposed to [[Chorus Fruit|chorus fruit]] or any materials introduced in [[Java Edition 1.9|1.9]] is as a means for players to craft end crystals in older worlds that the dragon has already been killed in.<ref>{{tweet|jeb_|667000226524372992|The problem is that you need to be able to craft the crystals on worlds in which the dragon has been destroyed already|November 18, 2015}}</ref>
* A historical rendition of the [[beacon]] block featured an animated entity within it, which resembled a yellow miniaturized end crystal. The bedrock platform of the end crystal entity would also render below the beacon, though this would normally be hidden within the block below.
* Using a [[piston]] to push an end crystal's fire into an end portal block deletes the end portal block. However, natural portal blocks regenerate if the end crystal is moved.
== Gallery ==
<gallery>
End Crystal Usage.png|Using end crystals to respawn the ender dragon.
Crystal Link.png|An ender dragon being hit with the "healing beam" of an end crystal.
Ender Crystal.png|An end crystal.
EnderCrystalOverworld.png|An end crystal in the Overworld spawned using {{cmd|summon}} {{code|end_crystal}}.
Ender Dragon Revival.png|End crystals respawning the ender dragon.
CagedEnderCrystal.png|A caged end crystal.
Respawn ender dragon.png|A [[player]] trying to respawn the ender dragon.
End Crystal (item).gif|An animation of the item of the end crystal.
</gallery>
== References ==
{{reflist}}
{{Entities}}
{{Items}}
[[de:Enderkristall]]
[[el:Κρύσταλλος του Ender]]
[[es:Cristal del End]]
[[fr:Cristal de l'End]]
[[ja:エンドクリスタル]]
[[ko:엔드 수정]]
[[nl:Endkristal]]
[[pl:Kryształ Endu]]
[[pt:Cristal do End]]
[[ru:Кристалл Края]]
[[th:คริสตัลเอนด์]]
[[uk:Кристал Енду]]
[[zh:末影水晶]]</li></ul></nowiki> | July 21, 2014 | Jeb posted a picture of banners, and stated that he is working on them. | |||
| 14w30a | |||||
| 14w30c | Added four additional patterns: Cross (+), Border, Curly Border and Thing (Mojang logo). | ||||
| 14w31a | Added two additional patterns: Inverted Halves and Base Gradient. | ||||
| The banner pattern terminology has been changed based on vexillology advice Jeb received from his Reddit post. | |||||
| Banners can now be used as a fuel in furnaces. | |||||
1.8.8{{Extension DPL}}<ul><li>[[Blaze Powder|Blaze Powder]]<br/>{{Item
| image = Blaze Powder.png
| renewable = Yes
| stackable = Yes (64)
}}
'''Blaze powder''' is an item made from a [[blaze rod]], which is dropped by a [[blaze]] when killed. Its main uses are to fuel [[brewing stand]]s, to brew [[strength]] [[potions]], and to make [[eyes of ender]] to take the player to [[the End]].
== Obtaining ==
=== Crafting ===
{{Crafting
|Blaze Rod
|Output= Blaze Powder,2
|type= Brewing
}}
== Usage ==
=== Crafting Ingredient ===
{{crafting usage}}
=== Brewing stand fuel ===
In addition to being a [[brewing]] ingredient, blaze powder is needed to fuel a [[brewing stand]]. Each piece of blaze powder can brew up to 20 batches of [[Potion|potions]].
=== Brewing ingredient ===
{{brewing
|showname=1
|head=1
|Blaze Powder
|Mundane Potion
|base=Water Bottle
}}
{{brewing
|foot=1
|Blaze Powder
|Potion of Strength
}}
== Data values ==
=== ID ===
{{edition|java}}:
{{ID table
|edition=java
|showforms=y
|generatetranslationkeys=y
|displayname=Blaze Powder
|spritetype=item
|nameid=blaze_powder
|form=item
|foot=1}}
{{edition|bedrock}}:
{{ID table
|edition=bedrock
|shownumericids=y
|showforms=y
|notshowbeitemforms=y
|generatetranslationkeys=y
|displayname=Blaze Powder
|spritetype=item
|nameid=blaze_powder
|id=429
|form=item
|foot=1}}
== Video ==
{{Video note|This video does not mention that blaze powder must be used to fuel [[brewing stand]]s.|minor}}
<div style="text-align:center">{{yt|FSP2qBpe9vI}}</div>
==History==
{{History|java}}
{{History||1.0.0|snap=Beta 1.9 Prerelease 2|[[File:Blaze Powder JE1.png|32px]] Added blaze powder.
|Blaze powder can be used to craft [[eyes of ender]] and [[magma cream]].}}
{{History|||snap=Beta 1.9 Prerelease 3|Blaze powder can now be [[brewing|brewed]] in a [[water bottle]] to create a [[mundane potion]], or in an [[awkward potion]] to create a [[potion of Strength]].}}
{{History||1.2.1|snap=12w04a|Blaze powder can now be used to craft [[fire charge]]s.}}
{{History||1.3.1|snap=1.3|[[File:Blaze Powder JE2 BE1.png|32px]] The texture of blaze powder has been changed.}}
{{History||1.9|snap=15w42a|Blaze powder is now required to operate a [[brewing stand]].}}
{{History|||snap=15w43a|Blaze powder now [[fuel]]s 20 operations rather than 30.}}
{{History||1.13|snap=17w47a|Prior to [[1.13/Flattening|''The Flattening'']], this [[item]]'s numeral ID was 377.}}
{{History|pocket alpha}}
{{History||v0.12.1|snap=build 1|[[File:Blaze Powder JE2 BE1.png|32px]] Added blaze powder.
|Blaze powder can be used to craft [[magma cream]].
|Blaze powder is used as an ingredient to brew [[potion]]s.}}
{{History||v0.15.0|snap=build 1|Blaze powder is now used to craft [[fire charge]]s.}}
{{History|pocket}}
{{History||1.0.0|snap=alpha 0.17.0.1|Blaze powder is now used to craft [[eyes of ender]].}}
{{History|bedrock}}
{{History||1.2.0|snap=beta 1.2.0.2|Blaze powder is now required to operate a [[brewing stand]].}}
{{History|console}}
{{History||xbox=TU7|xbone=CU1|ps=1.00|wiiu=Patch 1|switch=1.0.1|[[File:Blaze Powder JE2 BE1.png|32px]] Added blaze powder.}}
{{History||xbox=TU46|xbone=CU36|ps=1.38|wiiu=Patch 15|Blaze powder is now required to operate a [[brewing stand]].}}
{{History|New 3DS}}
{{History||0.1.0|[[File:Blaze Powder JE2 BE1.png|32px]] Added blaze powder.}}
{{History|foot}}
== Issues ==
{{issue list}}
== See also ==
* [[The Nether]]
* [[Potions]]
== External Links ==
*[https://www.minecraft.net/en-us/article/taking-inventory--blaze-powder Taking Inventory: Blaze Powder] – Minecraft.net on November 25, 2021
{{Items}}
[[Category:Renewable resources]]
[[cs:Ohnivý prach]]
[[de:Lohenstaub]]
[[es:Polvo de blaze]]
[[fr:Poudre de Blaze]]
[[hu:Őrlángpor]]
[[ja:ブレイズパウダー]]
[[ko:블레이즈 가루]]
[[nl:Blazepoeder]]
[[pl:Płomienny proszek]]
[[pt:Pó de blaze]]
[[ru:Огненный порошок]]
[[th:ผงปีศาจไฟ]]
[[zh:烈焰粉]]</li><li>[[Prismarine Crystals|Prismarine Crystals]]<br/>{{Item
|type=
| renewable = Yes
| stackable = Yes (64)
}}
'''Prismarine crystals''' are items obtained by defeating [[guardian]]s or [[elder guardian]]s. They are used along with [[prismarine shard]]s to craft [[sea lantern]]s.
== Obtaining ==
=== Mob loot ===
[[Guardian]]s and [[elder guardian]]s have a 40% chance and {{frac|1|3}} chance, respectively, of dropping prismarine crystals upon death. The maximum drop count is increased by one per level of [[Looting]].
=== Mining ===
Prismarine crystals are dropped by [[sea lantern]]s when not using a [[Silk Touch]] tool. They drop 2–3 crystals each time, which can be increased to a maximum of 5 using the [[Fortune]] enchantment.
=== Natural generation ===
{{LootChestItem|prismarine-crystals}}
== Usage ==
=== Crafting ingredient ===
{{crafting usage}}
== Data values ==
=== ID ===
{{edition|java}}:
{{ID table
|edition=java
|showforms=y
|generatetranslationkeys=y
|displayname=Prismarine Crystals
|spritetype=item
|nameid=prismarine_crystals
|form=item
|foot=1}}
{{edition|bedrock}}:
{{ID table
|edition=bedrock
|shownumericids=y
|showforms=y
|notshowbeitemforms=y
|generatetranslationkeys=y
|displayname=Prismarine Crystals
|spritetype=item
|nameid=prismarine_crystals
|id=549
|form=item
|foot=1}}
== History ==
{{History|java}}
{{History||1.8|snap=14w25a|[[File:Prismarine Crystals JE1 BE1.png|32px]] Added prismarine crystals.}}
{{History||1.9|snap=15w43a|The chance of [[guardian]]s and [[elder guardian]]s dropping prismarine crystals upon [[death]] has been increased, from 33% to 40%.}}
{{History|||snap=15w43b|The chance of elder guardians [[drops|dropping]] crystals upon [[death]] has now been reverted back to 33%. However, the chance for guardians to drop them is still 40%.}}
{{History||1.13|snap=17w47a|Prior to [[1.13/Flattening|''The Flattening'']], this [[item]]'s numeral ID was 410.}}
{{History|||snap=18w10a|Prismarine crystals now generate in [[buried treasure]] [[chest]]s.}}
{{History||1.14|snap=18w43a|[[File:Prismarine Crystals JE2 BE2.png|32px]] The texture of prismarine crystals has been changed.}}
{{History|pocket alpha}}
{{History||v0.16.0|snap=build 1|[[File:Prismarine Crystals JE1 BE1.png|32px]] Added prismarine crystals.}}
{{History|bedrock}}
{{History||1.4.0|snap=beta 1.2.14.2|Prismarine crystals can now be found inside [[buried treasure]] [[chest]]s.}}
{{History||1.10.0|snap=beta 1.10.0.3|[[File:Prismarine Crystals JE2 BE2.png|32px]] The texture of prismarine crystals has been changed.}}
{{History|console}}
{{History||xbox=TU31|xbone=CU19|ps=1.22|wiiu=Patch 3|[[File:Prismarine Crystals JE1 BE1.png|32px]] Added prismarine crystals.}}
{{History||xbox=none|xbone=none|ps=1.90|wiiu=none|switch=none|[[File:Prismarine Crystals JE2 BE2.png|32px]] The texture of prismarine crystals has been changed.}}
{{History|New 3DS}}
{{History||1.3.12|[[File:Prismarine Crystals JE1 BE1.png|32px]] Added prismarine crystals.}}
{{History|foot}}
== Issues ==
{{issue list}}
{{Items}}
[[Category:Renewable resources]]
[[de:Prismarinkristalle]]
[[es:Cristales de prismarina]]
[[fr:Cristaux de prismarine]]
[[hu:Prizmarin kristály]]
[[ja:プリズマリンクリスタル]]
[[ko:프리즈머린 수정]]
[[lzh:海磷晶]]
[[nl:Prismarienkristallen]]
[[pl:Kryształy pryzmarynu]]
[[pt:Cristais de prismarinho]]
[[ru:Призмариновый кристалл]]
[[uk:Призмаринові кристали]]
[[zh:海晶砂粒]]</li></ul> | pre | The number of layers attainable by using commands is now limited to 16 per banner. | |||
1.9{{Extension DPL}}<ul><li>[[Nautilus Shell|Nautilus Shell]]<br/>{{Item
| type =
| stackable = Yes (64)
| renewable = Yes
}}
A '''nautilus shell''' is an item that is used for crafting [[conduit]]s.
==Obtaining==
===Fishing===
{{main|Fishing#Junk and treasure}}
Nautilus shells can be rarely obtained as a treasure item from fishing. The drop chances of nautilus shells slightly increase with each level of [[Luck of the Sea]] on the [[player]]'s [[fishing rod]].
===Mob loot===
[[Drowned]] have a 3%{{only|java|short=1}} or 8%{{only|bedrock|short=1}} chance to spawn with a nautilus shell in their off-hand, and this nautilus shell always drops upon [[death]].
===Trading===
[[Wandering trader]]s may [[trading|sell]] a nautilus shell for 5 [[emerald]]s each, but they only sell 5 of them at a time.
==Usage==
{{IN|bedrock}}, a nautilus shell is one of the few items that can be held in the off-hand.
===Crafting ingredient===
{{crafting usage}}
=== Trading ===
Nautilus shells can be given to trident-wielding drowned with a chance for the drowned to pick up the shell and drop the trident.<sup>[''[[Bedrock Edition]] only'']</sup>
==Data values==
===ID===
{{edition|java}}:
{{ID table
|edition=java
|showforms=y
|generatetranslationkeys=y
|displayname=Nautilus Shell
|spritetype=item
|nameid=nautilus_shell
|form=item
|foot=1}}
{{edition|bedrock}}:
{{ID table
|edition=bedrock
|shownumericids=y
|showforms=y
|notshowbeitemforms=y
|generatetranslationkeys=y
|displayname=Nautilus Shell
|spritetype=item
|nameid=nautilus_shell
|id=570
|form=item
|foot=1}}
==History==
{{History|java}}
{{History||1.13|snap=18w15a|[[File:Nautilus Shell JE1 BE2.png|32px]] Added nautilus shells.}}
{{History||1.14|snap=19w05a|Added [[Wandering Trader|wandering trader]]s, which sell nautilus shells.}}
{{History|bedrock}}
{{History||1.4.0|snap=beta 1.2.20.1|[[File:Nautilus Shell BE1.png|32px]] Added nautilus shells.}}
{{History|||snap=beta 1.2.20.2|[[File:Nautilus Shell JE1 BE2.png|32px]] The texture of nautilus shells has now been changed.}}
{{History||1.5.0|snap=beta 1.5.0.0|[[Drowned]] now sometimes spawn holding a nautilus shell.
|Nautilus shells are no longer behind [[Experimental Gameplay]].}}
{{History|||snap=beta 1.5.0.1|Nautilus shells can now be used to craft [[conduit]]s.}}
{{History||1.10.0|snap=beta 1.10.0.3|Nautilus shells can now be obtained from [[trading]] with [[wandering trader]]s.}}
{{History|console}}
{{History||xbox=TU69|ps=1.76|wiiu=Patch 38|[[File:Nautilus Shell JE1 BE2.png|32px]] Added nautilus shells.}}
{{History||xbox=none|ps=1.91|wiiu=none|Nautilus shells can now be obtained from [[trading]] with [[wandering trader]]s.}}
{{History|foot}}
==Issues==
{{issue list}}
==Trivia==
*[[wikipedia:Nautilus|Nautilus]]es are animals that occupy deep oceans in the real world. However, they are absent in Minecraft and there are currently no plans to add nautilus [[mob]]s into the game.
*Because {{el|bedrock}} allows for Nautilus shells to be held in the off-hand (since drowned hold them), they are the only item in that version that can be put in the off-hand slot without having a specific function.
{{items}}
[[de:Nautilusschale]]
[[es:Caparazón de nautilo]]
[[fr:Coquille de nautile]]
[[it:Conchiglia di nautilus]]
[[ja:オウムガイの殻]]
[[ko:앵무조개 껍데기]]
[[nl:Nautilusschelp]]
[[pl:Muszla łodzika]]
[[pt:Concha de náutilo]]
[[ru:Раковина наутилуса]]
[[th:เปลือกหอยงวงช้าง]]
[[uk:Мушля наутилуса]]
[[zh:鹦鹉螺壳]]
[[Category:Renewable resources]]</li><li>[[Crossbow|Crossbow]]<br/>{{For}}
{{Item
| title = Crossbow
| image = <gallery>
Crossbow.png | Crossbow
Crossbow Pull 0.png | Pull (state 0)
Crossbow Pull 1.png | Pull (state 1)
Crossbow Pull 2.png | Pull (state 2)
Arrow Loaded Crossbow.png | Arrow loaded
Firework Loaded Crossbow.png | Firework loaded
</gallery>
| rarity = Common
| renewable = Yes
| durability = 465{{only|JE|short=yes}}<br>464{{only|BE|short=1}}
| stackable = No
}}
A '''crossbow''' is a ranged [[weapon]] similar to a [[bow]] that uses [[arrow]]s or [[firework rocket|fireworks]] as ammunition.
== Obtaining ==
=== Crafting ===
{{Crafting
|A1=Stick|B1=Iron Ingot |C1=Stick
|A2=String|B2= Tripwire Hook|C2=String
|B3= Stick
|Output= Crossbow
|type= Combat
}}
=== Repairing ===
{{Grinding
|showdescription=1
|ingredients=2× Damaged [[Crossbow]] or<br>2× Damaged [[Arrow Loaded Crossbow]] or<br>2× Damaged [[Firework Loaded Crossbow]]
|Damaged Crossbow; Damaged Arrow Loaded Crossbow; Damaged Firework Loaded Crossbow
|Damaged Crossbow; Damaged Arrow Loaded Crossbow; Damaged Firework Loaded Crossbow
|Crossbow; Arrow Loaded Crossbow; Firework Loaded Crossbow
|description=The [[item durability|durability]] of the two crossbows is added together, plus an extra 5% durability.
}}
{{Crafting
|Damaged Crossbow;Damaged Arrow Loaded Crossbow;Damaged Firework Loaded Crossbow
|Damaged Crossbow;Damaged Arrow Loaded Crossbow;Damaged Firework Loaded Crossbow
|Output=Crossbow
|type=Combat
|ignoreusage=1
|showdescription=1
|description=The durability of the two crossbows is added together, plus an extra 5% durability. Any loaded ammunition is lost.
}}
=== Mob loot ===
==== Pillagers ====
When killed, a [[pillager]] has a small chance (8.5%) of dropping a loaded or unloaded crossbow with random [[durability]]; the [[drop]] rate increases by 1% per [[level]] of [[Looting]]: 9.5% with Looting I, 10.5% with Looting II and 11.5% with Looting III. The [[drop]]ped crossbow can rarely (10% chance) be [[enchanted]] at level 5–19 regardless of being [[enchanted]] when it [[spawn]]ed.
Crossbows dropped by pillagers may have multiple enchantments, including duplicate enchantments on the same weapon.
==== Piglins ====
[[Piglin]]s have a chance of wielding a crossbow upon spawning, and they also have a small chance (8.5%) of dropping a loaded or unloaded crossbow of random durability when killed; this rate increases by 1% per level of [[Looting]]: 9.5% with Looting I, 10.5% with Looting II and 11.5% with Looting III. It can rarely (10% chance) be enchanted at level 5–19 regardless of being enchanted when spawned.
=== Chest loot ===
{{LootChestItem|crossbow,damaged-level-enchanted-crossbow,damaged-random-enchanted-crossbow,damaged-random-enchanted-crossbow-2}}
=== Trading ===
Journeyman-level Fletcher [[villager]]s offer to [[trading|sell]] an unenchanted crossbow for 3 [[emerald]]s.
Master-level Fletcher villagers have a {{frac|1|16}} (6.25%) chance of selling an [[enchanting|enchanted]] crossbow for 8 emeralds.{{only|bedrock}}
Master-level Fletcher villagers have {{frac|2|3}} chance of selling an enchanted crossbow for 7-22 emeralds.{{only|java}}
== Usage ==
<gallery>
Steve aiming with Crossbow.png|
Alex aiming with Crossbow.png|
Pillager Aiming with Crossbow BE.png|
Piglin with Crossbow targeting JE.png|
</gallery>
Despite using [[iron ingot]]s in their crafting recipe, crossbows cannot be smelted into [[iron nugget]]s.<ref>{{bug|MC-111738}}</ref>
=== Weapon ===
[[File:Crossbowcooldown.gif|thumb|right|Charging and shooting the crossbow {{in|bedrock}}.]]
Crossbows are similar to [[bow]]s, but take longer to load and are slightly more powerful, shooting farther with slightly higher accuracy. Alternatively, they can be loaded with a firework rocket, which flies in a straight line.
Load them by {{control|using}} them, which makes the player move at sneak speed. Unlike bows, the [[arrow]] or [[firework rocket]] can be fired only if the player releases the use button after the crossbow is loaded{{Only|je}} or if the crossbow finishes its loading animation {{Only|be}}. At this point, it ''must be used a second time'' to fire its bolt.
Once it has reached full charge, the [[player]]'s speed returns to normal. After that, shooting a charged crossbow does not delay any of the [[player]]'s current action like [[sprinting]] or [[swimming]].
The crossbow can even be placed in another [[inventory]] slot or into an [[item frame]] without the [[arrow]] or [[firework rocket]] being unloaded or fired. A charged crossbow also remains charged after enchanting it with an enchantment table or with an anvil.
In order to use the crossbow, at least one arrow or firework rocket must be present in the inventory. The player can choose the type of arrow to fire based on its location in their [[inventory]]:
* [[File:Java Crossbow 1stP Loading.mp4|thumb|177x177px|Java Edition first-person loading animation for crossbows.]]Arrows in the off-hand, or the selected [[hotbar]] slot if the crossbow is in the off-hand, are prioritized first.
* If there are no arrows in the off-hand or selected hotbar slot, the arrow closest to slot 0 is selected.
Crossbows take 1.25 seconds (25 ticks) to load.
The player can load either an arrow, spectral arrow, tipped arrow (of any effect) or a firework (of any color/type).
[[File:Bedrock Crossbow 1stP Loading.mp4|thumb|177x177px|Bedrock Edition first-person loading animation for crossbows.]]
[[Endermen]] teleport away from projectile paths, so they cannot be hit with crossbow [[arrow]]s. However, they can still get harmed by [[firework rocket]] explosions, if they can't detect the firework rocket.
;Attack strength
''Java Edition'':
{| class="wikitable" style="text-align:center" data-description="Crossbow Damage Statistic"
|-
! Damage || Arrow || Max firework
|-
| {{ItemSprite|Crossbow|text= '''Minimum'''}}
| {{hp|7}}
| {{hp|11}}
|-
| {{ItemSprite|Crossbow|text= '''Average'''}}
| {{hp|9}}
| {{hp|14.5}}
|-
| {{ItemSprite|Crossbow|text= '''Maximum'''}}
| {{hp|11}}
| {{hp|18}}
|}
''Bedrock Edition''
* Always {{hp|9}}
=== Fireworks ===
[[Firework rocket]]s can be fired by loading the crossbow only while holding the rockets in the off-hand. They fly at 32 m/s. Firework rockets with higher flight duration have a longer time before they explode and therefore travel farther. Firing a firework rocket uses 3 [[durability]] points per shot.
{| class="wikitable" style="text-align:center"
! colspan="4" |Firework rocket range
|-
|Minimum
|Average
|Maximum
|Gunpowder
|-
|32m (20 ticks)
|40.8m (25.5 ticks)
|49.6m (31 ticks)
|1 ([[File:Gunpowder JE2 BE2.png|12x12px]])
|-
|48m (30 ticks)
|56.8m (35.5 ticks)
|65.6m (41 ticks)
| 2 ([[File:Gunpowder JE2 BE2.png|12x12px]][[File:Gunpowder JE2 BE2.png|12x12px]])
|-
|64m (40 ticks)
|72.8m (45.5 ticks)
|81.6m (51 ticks)
|3 ([[File:Gunpowder JE2 BE2.png|12x12px]][[File:Gunpowder JE2 BE2.png|12x12px]][[File:Gunpowder JE2 BE2.png|12x12px]])
|}
Firework rockets also work with the [[Multishot]] enchantment, enabling the [[player]] to shoot 3 firework rockets at a time. The increased durability usage stacks, resulting in 9 durability being consumed with each shot.
A shot firework rocket explodes instantly when it hits a [[mob]] or [[block]].{{only|java}} If the firework rocket has no explosion effect, it deals no [[damage]]. The explosion of a firework rocket deals {{hp|5}} to {{hp|6}} points of damage, with one [[firework star]]. The explosion has a radius of roughly 4 blocks, which is unaffected by the firework star's [[Firework Star#Effects|effect]]. Each additional firework star on the rocket deals an additional {{hp|1}} to {{hp|2}} points of damage, for a maximum of {{hp|11}} to {{hp|18}} with 7 firework stars. The flight duration of the firework increases the maximum range the firework can travel before exploding, but does not affect the damage output. Likewise, the damage remains the same regardless of any dyes used. The [[Piercing]] enchantment causes the firework rocket to pierce a number of entities based on its respective level before exploding.{{only|java}} Unlike an arrow shot from a bow, the firework does not slow down under water.
=== Repair ===
Crossbows can be repaired in an [[anvil]] or [[grindstone]] by combining two crossbows. Any loaded ammunition is retained from the crossbow in the first slot but sacrificed from the crossbow in the second slot.
===Enchantments===
{| class="wikitable"
|+
!Name
!Description
!Max Level
|-
|[[Quick Charge]]
|Decreases the reloading time of the crossbow by {{code|level * 0.25}} seconds. Crossbows with [[Quick Charge]] III fire slightly faster than [[bow]]s. If [[commands]] are used to enchant a crossbow with Quick Charge V, the crossbow charges instantaneously. A crossbow enchanted with Quick Charge VI is effectively impossible to charge, which renders it useless. This can be done only {{in|je}}.
|III
|-
|[[Multishot]]
| Makes the crossbow fire a spread of 3 projectiles at once instead of a single projectile, which is useful for targeting mobs spread out in a small area. This works for both [[arrow]]s and [[firework rocket]]s. Firing with this enchantment still uses only one projectile, and because of that, it is possible to recover only one of the three arrows shot from a Multishot crossbow. Multishot crossbows use 3 [[item durability|durability]] points per shot, unless using fireworks for ammunition, in which case 9 durability is consumed. Mutually exclusive with Piercing.
|I
|-
|[[Piercing]]
|Makes [[arrow]]s shot from the crossbow pierce [[entity|entities]] they hit and continue their flight, which allows each arrow to hit up to {{code|level + 1}} entities. This is useful for targeting [[mob]]s closely packed together, and for conserving arrows, as they can be picked up after piercing entities. Arrows fired in this manner also ignore [[Shield|shields]]. Mutually exclusive with Multishot.
|IV
|-
|[[Unbreaking]]
|Causes a <code>(Level /(Level+1)) * 100%</code> chance a shot fired does not reduce the [[item durability|durability]] of the crossbow.
|III
|-
|[[Mending]]
|Allows a certain proportion of [[experience]] orbs collected to contribute toward repairing the crossbow, rather than raising the [[player]]'s experience.
|I
|-
|[[Curse of Vanishing]]
| Causes the crossbow to disappear instead of dropping on the ground when the player dies. The {{cmd|gamerule keepInventory}} overrides this.
|I
|}
[[Multishot]] and [[Piercing]] are mutually exclusive. Normal methods of [[enchanting]] allow only one of them to be applied to a crossbow.
Crossbows can receive 3 unique [[enchanting|enchantment]]s, and have a base enchantability of 1. Enchantments specific to crossbows include [[Quick Charge]], Multishot and Piercing.
===Fuel===
Crossbows can be used as [[fuel]] in [[furnace]]s, [[smelting]] 1.5 [[item]]s per crossbow.
== Sounds ==
{{el|je}}:
{{Sound table
|sound=Crossbow loading start.ogg
|subtitle=Crossbow charges up
|source=player
|description=When a crossbow starts to load
|id=item.crossbow.loading_start
|translationkey=subtitles.item.crossbow.charge
|volume=0.15
|pitch=1.0
|distance=16}}
{{Sound table
|sound=Crossbow quick charge one1.ogg
|sound2=Crossbow quick charge one2.ogg
|sound3=Crossbow quick charge one3.ogg
|subtitle=Crossbow charges up
|source=player
|description=When a Quick Charge I crossbow starts to load <ref group=sound><code>quick1_3</code> occurs at half the frequency as the other sounds</ref>
|id=item.crossbow.quick_charge_1
|translationkey=subtitles.item.crossbow.charge
|volume=''varies'' <ref group=sound>0.325 for all except <code>quick1_1</code> (pitch=0.9), which is 0.25</ref>
|pitch=''varies'' <ref group=sound><code>quick1_1</code> can be 1.0 or 0.9; <code>quick1_2</code> can be 1.0 or 0.95; <code>quick1_3</code> can be 1.0</ref>
|distance=16}}
{{Sound table
|sound=Crossbow quick charge two1.ogg
|sound2=Crossbow quick charge two2.ogg
|sound3=Crossbow quick charge two3.ogg
|subtitle=Crossbow charges up
|source=player
|description=When a Quick Charge II crossbow starts to load <ref group=sound name=quickchargefrequency><code>_1</code> occurs at {{frac|2|3}} the frequency as the other sounds</ref>
|id=item.crossbow.quick_charge_2
|translationkey=subtitles.item.crossbow.charge
|pitch=''varies'' <ref group=sound name=quickchargevolume />
|volume=''varies'' <ref group=sound name=quickchargepitch />
|distance=16}}
{{Sound table
|sound=Crossbow quick charge three1.ogg
|sound2=Crossbow quick charge three2.ogg
|sound3=Crossbow quick charge three3.ogg
|subtitle=Crossbow charges up
|source=player
|description=When a Quick Charge III crossbow starts to load <ref group=sound name=quickchargefrequency />
|id=item.crossbow.quick_charge_3
|translationkey=subtitles.item.crossbow.charge
|volume=''varies'' <ref group=sound name=quickchargevolume>0.325 for all except <code>_1</code> (pitch=0.95), which is 0.25</ref>
|pitch=''varies'' <ref group=sound name=quickchargepitch><code>_1</code> can be 1.0 or 0.95; <code>_2</code> can be 1.0, 0.95, or 1.05; <code>_3</code> can be 1.0, 0.9, or 1.05</ref>
|distance=16}}
{{Sound table
|sound=Crossbow loading middle1.ogg
|sound2=Crossbow loading middle2.ogg
|sound3=Crossbow loading middle3.ogg
|sound4=Crossbow loading middle4.ogg
|subtitle=MC-203146
|source=player
|description=While a crossbow is loading <ref group=sound><code>loading_middle4</code> occurs at {{frac|1|4}} the frequency as the other sounds</ref>
|id=item.crossbow.loading_middle
|translationkey=-
|volume=0.325
|pitch=''varies'' <ref group=sound><code>loading_middle1</code> can be 1.0, 0.95, or 1.2; <code>loading_middle2</code> and <code>loading_middle3</code> can be 1.0, 0.9, or 1.05; <code>loading_middle4</code> can be 1.0</ref>
|distance=16}}
{{Sound table
|sound=Crossbow loading end.ogg
|subtitle=Crossbow loads
|source=dependent
|description=When a crossbow stops loading
|id=item.crossbow.loading_end
|translationkey=subtitles.item.crossbow.load
|volume=1.0
|pitch={{frac|13|15}}-1.2
|distance=16}}
{{Sound table
|sound=Crossbow shoot1.ogg
|sound2=Crossbow shoot2.ogg
|sound3=Crossbow shoot3.ogg
|subtitle=Crossbow fires
|source=dependent
|description=When a crossbow fires
|id=item.crossbow.shoot
|translationkey=subtitles.item.crossbow.shoot
|volume=0.8/0.9/0.9
|pitch=1.0/1.0/0.9 <ref group=sound>Multiplied by the loading percentage of the crossbow</ref>
|distance=16}}
{{Sound table
|sound=Arrow hit1.ogg
|sound2=Arrow hit2.ogg
|sound3=Arrow hit3.ogg
|sound4=Arrow hit4.ogg
|subtitle=Arrow hits
|source=neutral
|description=When an arrow hits a block or entity
|id=item.crossbow.hit
|translationkey=subtitles.item.crossbow.hit
|volume=1.0
|pitch={{frac|12|11}}-{{frac|4|3}}
|distance=16}}
{{Sound table
|sound=Succesfull Hit.ogg
|subtitle=Player hit
|source=player
|description=When an arrow shot by a player hits another player
|id=entity.arrow.hit_player
|translationkey=subtitles.entity.arrow.hit_player
|volume=0.18
|pitch=0.45
|distance=16}}
{{Sound table
|sound=Firework launch.ogg
|subtitle=Firework launches
|source=ambient
|description=When a crossbow fires a firework rocket
|id=entity.firework_rocket.launch
|translationkey=subtitles.entity.firework_rocket.launch
|volume=3.0
|pitch=1.0
|distance=16}}
{{Sound table
|sound=Random break.ogg
|subtitle=Item breaks
|source=dependent
|description=When a crossbow's durability is exhausted
|id=entity.item.break
|translationkey=subtitles.entity.item.break
|volume=0.8
|pitch=0.8-1.2
|distance=16
|foot=1}}
{{el|be}}:
{{Sound table
|type=bedrock
|sound=Crossbow loading start.ogg
|source=player
|description=When a crossbow starts to load
|id=crossbow.loading.start
|volume=1.0
|pitch=1.0}}
{{Sound table
|sound=Crossbow loading middle1.ogg
|sound2=Crossbow loading middle2.ogg
|sound3=Crossbow loading middle3.ogg
|sound4=Crossbow loading middle4.ogg
|source=player
|description=While a crossbow is loading and when a crossbow stops loading
|id=crossbow.loading.middle
|volume=1.0
|pitch=1.0}}
{{Sound table
|sound=Crossbow loading end.ogg
|source=player
|description=''Unused sound event''
|id=crossbow.loading.end
|volume=1.0
|pitch=1.0}}
{{Sound table
|sound=Crossbow quick charge one1.ogg
|sound2=Crossbow quick charge two1.ogg
|sound3=Crossbow quick charge three1.ogg
|source=player
|description=When a crossbow with Quick Charge starts to load
|id=crossbow.quick_charge.start
|volume=1.0
|pitch=1.0}}
{{Sound table
|sound=Crossbow quick charge one2.ogg
|sound2=Crossbow quick charge two2.ogg
|sound3=Crossbow quick charge three2.ogg
|source=player
|description=While a crossbow with Quick Charge is loading
|id=crossbow.quick_charge.middle
|volume=1.0
|pitch=1.0}}
{{Sound table
|sound=Crossbow quick charge one3.ogg
|sound2=Crossbow quick charge two3.ogg
|sound3=Crossbow quick charge three3.ogg
|source=player
|description=When a crossbow with Quick Charge stops loading
|id=crossbow.quick_charge.end
|volume=1.0
|pitch=1.0}}
{{Sound table
|sound=Crossbow shoot1.ogg
|sound2=Crossbow shoot2.ogg
|sound3=Crossbow shoot3.ogg
|source=player
|description=When a crossbow fires
|id=crossbow.shoot
|volume=1.0
|pitch=1.0}}
{{Sound table
|sound=Arrow hit1.ogg
|sound2=Arrow hit2.ogg
|sound3=Arrow hit3.ogg
|sound4=Arrow hit4.ogg
|source=player
|description=When an arrow hits a block or entity
|id=random.bowhit
|volume=1.0
|pitch=1.09-1.3}}
{{Sound table
|sound=Firework launch.ogg
|source=ambient
|description=When a crossbow fires a firework rocket
|id=firework.launch
|volume=1.0
|pitch=1.0}}
{{Sound table
|sound=Random break.ogg
|source=player
|description=When a crossbow's durability is exhausted
|id=random.break
|volume=1.0
|pitch=0.9
|foot=1}}
==Data values==
=== ID===
{{edition|java}}:
{{ID table
|edition=java
|showforms=y
|generatetranslationkeys=y
|displayname=Crossbow
|spritetype=item
|nameid=crossbow
|form=item
|foot=1}}
{{edition|bedrock}}:
{{ID table
|edition=bedrock
|shownumericids=y
|showforms=y
|notshowbeitemforms=y
|generatetranslationkeys=y
|displayname=Crossbow
|spritetype=item
|nameid=crossbow
|id=575
|form=item
|foot=1}}
===Item data===
{{el|java}}:
{{main|Player.dat format}}
<div class="treeview" style="margin-top: 0;">
*{{nbt|compound|tag}}: The '''tag''' tag.
{{:Player.dat_format/Crossbow}}
</div>
{{el|bedrock}}:
: See [[Bedrock Edition level format/Item format]].
==Achievements==
{{load achievements|Sniper Duel;Archer;Bullseye}}
==Advancements==
{{load advancements|Take Aim;Bullseye;Sniper Duel;Ol' Betsy;Who's the Pillager Now;Two Birds;Arbalistic}}
==History==
{{History||September 29, 2018|link={{tweet|Minecraft|1046094916902965249}}|Crossbows are announced at [[MINECON Earth 2018]].}}
{{History|java}}
{{History||1.14|snap=18w43a|[[File:Crossbow.png|32px]] [[File:Crossbow Pull 0.png|32px]] [[File:Crossbow Pull 1.png|32px]] [[File:Crossbow Pull 2.png|32px]] [[File:Arrow Loaded Crossbow.png|32px]] [[File:Crossbow.png|32px]] [[File:Crossbow Pull 0.png|32px]] [[File:Crossbow Pull 1.png|32px]] [[File:Crossbow Pull 2.png|32px]] [[File:Firework Loaded Crossbow.png|32px]] [[File:Crossbow.png|32px]] Added crossbows.
|Crossbows can be enchanted with either the [[Quick Charge]] (Highest Level III), [[Piercing]] (Highest Level IV) or [[Multishot]] (Highest Level I).}}
{{History|||snap=18w47a|Crossbows can now be found inside loot [[chest]]s at the top of [[pillager outpost]]s.}}
{{History|||snap=19w11a|Fletcher [[villager]]s now [[trading|sell]] crossbows and enchanted crossbows.}}
{{History||1.16|snap=20w07a|[[File:Piglin with Crossbow.png|32px]] [[File:Piglin left handed with Crossbow.png|35px]] [[File:Piglin using one hand to hold a loaded crossbow JE1.png|35px]] Added [[piglin]]s, which can spawn with and [[drops|drop]] crossbows.}}
{{History|||snap=20w16a|Crossbows now generate randomly enchanted in [[bastion remnants]] chests.}}
{{History||1.18|snap=21w37a|Crossbow durability is increased to 465 to match {{edition|BE}}.}}
{{History||1.19.4|snap=23w07a|The crossbow recipes are no longer unlocked by [[stick]]s.}}
{{History|upcoming java}}
{{History||Villager Trade Rebalance<br>(Experimental)|link=Java Edition 1.20.2|snap=23w31a|Enchantments exclusive to crossbows are no longer obtainable from villager [[trading]].}}
{{History|bedrock}}
{{History||1.8.0|snap=beta 1.8.0.10|[[File:Crossbow.png|32px]] [[File: Crossbow Pull 0.png|32px]] [[File: Crossbow Pull 1.png|32px]] [[File: Crossbow Pull 2.png|32px]] [[File:Arrow Loaded Crossbow.png|32px]] [[File:Crossbow.png|32px]] [[File:Crossbow Pull 0.png|32px]] [[File:Crossbow Pull 1.png|32px]] [[File:Crossbow Pull 2.png|32px]] [[File:Firework Loaded Crossbow.png|32px]] [[File:Crossbow.png|32px]] Added crossbows.
|Crossbows are currently apart of [[Experimental Gameplay]].}}
{{History||1.9.0|snap=beta 1.9.0.0|Added [[pillager]]s, which use and [[drops|drop]] crossbows.}}
{{History|||snap=beta 1.9.0.3|Crossbows now appear bigger in a pillager's hand.}}
{{History||1.10.0|snap=beta 1.10.0.3|Crossbows are now fully implemented and separate from [[Experimental Gameplay]].
|Crossbows can now be found in [[pillager outpost]] [[chest]]s.}}
{{History||1.11.0|snap=beta 1.11.0.4|Unenchanted and [[enchanting|enchanted]] crossbows can now be [[trading|bought]] from fletcher [[villager]]s.}}
{{History||1.12.0|snap=beta 1.12.0.3|Journeyman-level fletcher villagers now have 100% chance to [[trading|sell]] unenchanted crossbow, rather than 50% chance.}}
{{History||1.16.0|snap=beta 1.16.0.51|[[File:Piglin with Crossbow BE.png|32px]] Added [[piglin]]s, which can spawn with and [[drops|drop]] crossbows.}}
{{History|||snap=beta 1.16.0.57|Crossbows now generate randomly enchanted in [[bastion remnants]] chests.}}
{{History|PS4}}
{{History||1.90|[[File:Crossbow.png|32px]] [[File: Crossbow Pull 0.png|32px]] [[File: Crossbow Pull 1.png|32px]] [[File: Crossbow Pull 2.png|32px]] [[File:Arrow Loaded Crossbow.png|32px]] [[File:Crossbow.png|32px]] [[File:Crossbow Pull 0.png|32px]] [[File:Crossbow Pull 1.png|32px]] [[File:Crossbow Pull 2.png|32px]] [[File:Firework Loaded Crossbow.png|32px]] [[File:Crossbow.png|32px]] Added crossbows.}}
{{History|foot}}
==Issues==
{{issue list}}
==Trivia==
*Alongside [[pillager]]s, crossbows were inspired by ''[[Minecraft Dungeons]]'', even though they were added in the base game first.<ref>{{cite|url=https://discord.com/channels/579770991056519194/818903542139453480/819631528593588244| title = March 2021 developper Q&A|website=discord.com|date=March 11, 2021}}</ref>
*Crossbows [[enchanting|enchanted]] with [[Quick Charge]] VI and above get stuck on the first frame on the recharging animation because the resulting charge time is negative, and the game never reaches the time markers that tell it to advance the animation or the reloading procedure itself. It is technically possible to charge such crossbows, but this would require overflowing the value that determines how long the crossbow has been charged. This takes such an amount of time that this is practically impossible: for example, charging a crossbow with Quick Charge VI would take 69.4 years to complete.
*Although Piercing allows arrows to bypass [[shield]]s, they can't get through the wither armor.
*The crossbow's first-person loading animation in [[Bedrock Edition]] is different from [[Java Edition]].
*Even if a crossbow is already wound with a projectile, when it drops on the ground, it always looks uncharged.<ref>{{bug|MC-137552}}</ref>
*In real life, crossbows don't shoot the same arrows as bows, rather they shoot shorter, thicker, and oftentimes fletchless arrows (usually called "bolts") made to withstand the crossbow's increased power, which can shatter conventional arrows.
==Gallery==
<gallery>
File:CrossbowMinecon.png|A crossbow shown at [[MINECON Earth 2018]].
File:PillagerMinecon.png|A [[pillager]] armed with a crossbow, shown at MINECON Earth 2018.
File:EquippingCrossbow.png|How the crossbow is equipped.
File:Enchanted_Crossbow.gif|An enchanted crossbow.
File:Steve_Charging_Crossbow.gif|Steve charging crossbow {{in|java}}.
File:Alex_Charging_Crossbow.gif|Alex charging crossbow {{in|java}}.
File:Pillager_Charging_Crossbow.gif|Pillager charging crossbow.
File:Piglin_Charging_Crossbow.gif|Piglin charging crossbow.
File:Crossbow_(MCD).png|The ''Minecraft Dungeons'' variant of the crossbow
</gallery>
== References ==
{{reflist}}
== External Links ==
*[https://www.minecraft.net/en-us/article/taking-inventory--crossbow Taking Inventory: Crossbow] – Minecraft.net on October 20, 2022
{{Items}}
[[Category:Combat]]
[[Category:Renewable resources]]
[[de:Armbrust]]
[[es:Ballesta]]
[[fr:Arbalète]]
[[it:Balestra]]
[[ja:クロスボウ]]
[[ko:쇠뇌]]
[[pl:Kusza]]
[[pt:Besta]]
[[ru:Арбалет]]
[[th:หน้าไม้]]
[[zh:弩]]</li></ul> | 15w31a | ||||
| 15w33c | Banners can be used to apply patterns to shields. | ||||
1.11{{Extension DPL}}<ul><li>[[Camera|Camera]]<br/>{{about|the entity|the command|commands/camera}}
{{exclusive|edu}}
{{unobtainable|edition=be}}
{{ItemEntity
|imagesize=80px
|renewable=No
|stackable=Yes (64)
|health={{hp|4}}
|image=Camera.png}}
{{Block
| title = Camera Block
| image = Camera (block).png
| invimage = none
| transparent = No
| light = 0
| tool = any
| stackable = Yes (64)
| flammable = No
| lavasusceptible = No
| renewable = No
}}
The '''camera''' is an [[entity]] that is capable of capturing and storing images. {{IN|edu}}, it works together with the [[portfolio]] item to create collections of [[photo]]s.<ref>https://education.minecraft.net/support/knowledge-base/using-cameras-portfolios/</ref>
== Obtaining ==
The camera can be obtained in the [[Creative inventory]] in ''Minecraft Education''. It can be obtained either by NBT editors, inventory editors, or glitches in Bedrock Edition.
To get the block form of the camera in Bedrock Edition using an NBT editor, you need to set the item name of the block in the inventory slot (<code>name:</code> ) to <code>item.camera</code>, then you need to add a compound tag called <code>Block</code> and inside of that put the int tag <code>version: 18040335</code> and the text tag <code>name: minecraft:camera</code> into the block compound tag. For the usable "[[spawn egg]]" form of the camera, you only need to set the item name of the block in the inventory slot (<code>name:</code> ) to <code>camera</code>; you do not need to add the block compound for this form of the camera.
== Usage ==
Using a camera from the [[inventory]] captures a first-person screenshot. It can also be placed, creating a camera [[entity]] that can track the user, and take pictures from the camera's perspective. Photos that are taken using the camera appear in the [[portfolio]].
Close-up snapshots of an [[item]] on the ground can be taken by holding the Shift key while right-clicking.
Photos that are taken with the camera block are stored in <code>%localappdata%\Packages\MinecraftUWP_8wekyb3d8bbwe\LocalState\screenshots</code>.
== Sounds ==
=== Generic ===
{{Sound table/Block/Normal/BE}}
=== Unique ===
{{Sound table
|sound=Camera1.ogg
|sound2=Camera2.ogg
|sound3=Camera3.ogg
|type=bedrock
|description=When a picture is taken with a camera
|source=Players
|id=camera.take_picture
|volume=1.0
|pitch=1.0
|foot=1}}
== Data values ==
=== ID ===
{{ID table
|edition=bedrock
|firstcolumnname=Camera
|shownumericids=y
|showforms=y
|generatetranslationkeys=y
|displayname=Block
|spritename=camera
|spritetype=block
|nameid=camera
|id=242
|form=block
|itemform=item.camera}}
{{ID table
|displayname=Item
|spritename=camera
|spritetype=item
|translationtype=item
|nameid=camera
|id=593
|form=item
|foot=1}}
{{ID table
|edition=bedrock
|firstcolumnname=Camera
|shownumericids=y
|generatetranslationkeys=y
|displayname=Entity
|spritename=camera
|spritetype=entity
|nameid=tripod_camera
|id=62
|foot=1}}
=== Entity data ===
See [[Bedrock Edition level format/Entity format]].
== Video ==
{{yt|1XLRGFibFNQ}}
== History ==
{{History|pocket alpha}}
{{History||v0.1.0|[[File:Camera BE1.png|50px]] [[File:Camera (item texture) BE1.png|32px]] The textures and model of the camera can be found in the game apk file.<ref name="found">[{{Reddit|jkkmr/found_image_file_for_camera_in_minecraft_portable}} Reddit - Found image file for camera in Minecraft Portable Edition Demo APK file.]</ref><ref>https://web.archive.org/web/20160604161800/https://twitter.com/Kappische/status/103548954368679936</ref>}}
{{History||v0.2.0|[[File:Camera BE2.png|50px]] [[File:Music Disc Blocks JE1 BE1.png|32px]] Added cameras
|Changed item and tripod textures.
|To use a camera, equip it in the [[player]]'s hand, then look in the direction the player wants the picture to be taken. Long-press the screen, and a camera [[drops]] to the ground where the player are standing. Step back, then press on the camera until it starts emitting smoke [[particles]]. The smoke means a picture has been taken, and the camera may disappear immediately afterward.
|Cameras have infinite uses.
|Entity id 62 and item id 456.<ref>https://www.minecraftforum.net/topic/1233138-i-found-the-camera-id/</ref>}}
{{History||v0.5.0|The camera is now invisible and makes the standard player [[damage]] [[sound]].}}
{{History||v0.7.0|Added the "F1" feature (Hide GUI), which has now made the camera obsolete.}}
{{History||v0.8.0|snap=build 2|[[File:Egg JE1 BE1.png|32px]] Item form now uses [[egg]] texture.}}
{{History||v0.9.0|snap=build 1|The camera [[entity]] has been removed. [[Tommaso]] also stated: ''"It doesn't mean that it's dead forever, in fact I have a lot of ideas for it! I think it will be back when have [[shader]]s, sharing and [[redstone]]."''<ref>{{Reddit|sub=MCPE|281sep/camera|ci6znr8}}</ref>}}
{{History||v0.14.0|snap=build 1|[[File:Camera BE3.png|32px]] [[File:Camera (item) BE2.png|32px]] Re-added the camera. It is accessible only with [[inventory]] editors.
|In this version, if the player spawns a camera, leaves the [[world]] and joins back, it summons [[lightning]].}}
{{History||v0.14.2|The camera [[item]] ID has been changed to 498, but it cannot be used at the moment. The [[entity]] can now be spawned with a [[spawn egg]] with a [[damage]] value of 62.
|According to the language files of the game, the empty label that shows up whenever hovering a finger to a camera would now say "Take Picture". However, the button doesn't do anything.}}
{{History||v0.15.0|snap=build 1|The previous empty label on the camera mentioned above now displays the words "Take Picture".
|The [[health]] of the camera [[entity]] is now {{hp|2}} instead {{hp|4}}.
|The camera no longer summons [[lightning]].}}
{{History||v0.16.0|snap=build 1|The camera now has a [[block]] form in [[inventory]], but still spawns the entity. However, the block can be placed only with [[commands]] and editing.
|"Take picture" button on the camera works now, but no image files are created.
|The oldest ID for camera (456) now refers to [[portfolio]].}}
{{History|||snap=build 2|[[File:Camera Block.png|32px]] The camera now has an [[item]] form and the [[block]] has been removed. However, it is still obtainable in servers.
|[[Portfolio]], which works together with the camera to create collections of pictures, has been removed.}}
{{History|||snap=build 4|Camera item form has been removed, and the camera can no longer be obtained or placed using any [[commands|command]].}}
{{History|bedrock}}
{{History||1.8.0|snap=beta 1.8.0.8|[[File:Camera BE3.png|32px]] [[File:Camera Block.png|32px]] The camera has been reimplemented.
|The camera [[entity]] can now be spawned with a [[spawn egg]] with [[damage]] value 258.}}
{{History||1.12.0|snap=beta 1.12.0.2|The camera can now be obtained with the {{cmd|give}} [[commands|command]].}}
{{History||1.13.0|snap=beta 1.13.0.1|The camera can no longer be obtained with the {{cmd|give}} command.
|Functionality has been added to the camera. Screenshots that are taken by the camera can now be saved into the {{cd|screenshots}} folder.
|Cameras are now a part of the {{el|ee}} toggle as a hidden feature.
|Cameras no longer have a [[death]] animation when killed by the [[player]] and instead, instantly emit smoke [[particles]].}}
{{History||1.16.100|snap=beta 1.16.100.50|The camera can now be obtained with the {{cmd|give}} [[commands|command]] once again.}}
{{History|||snap=beta 1.16.100.55|The camera can no longer be obtained with the {{cmd|give}} command.}}
{{History|education}}
{{History||1.0|[[File:Camera BE3.png|32px]] [[File:Camera Block.png|32px]] Added cameras.}}
{{History||1.4.0|Cameras no longer have a [[death]] animation when killed by the [[player]] and instead instantly emit smoke [[particles]].}}
{{History|foot}}
=== Future ===
At the Minecraft [[Pocket Edition]] panel at [[MineCon 2012]], as well as one of [[Johan Bernhardsson|Jbernhardsson]]'s livestreams, it was stated that future plans include trying to have a proper use for cameras, perhaps an easier way to take screenshots and share them with others.<ref>{{ytl|YMhyX_lKWV4}}</ref> In the BlockTalk Q&A, the camera was briefly mentioned as part of a broader "sharing" theme planned for {{el|be}} in the future.<ref>{{ytl|Ruf6tvqsD84}}</ref>
It later got implemented into {{el|ee}}, using the camera to make screenshots and share them in a special book.
== Issues ==
{{Issue list}}
== Trivia ==
* A camera prevents a [[Book and Quill]] from working. Attempting to craft it or obtain it by commands gives a regular book instead, due to non-implementation of photo attaching to written books.
* The camera can take a screenshot, which appears a bit smaller with a thick paper outline having cuts on its edges, making it look like an old photograph.
* This feature is hidden from the Creative inventory and from the /give command item menu.
== Gallery ==
<gallery>
PEcameras030.jpg|A row of cameras, as seen in [[Pocket Edition v0.3.0 alpha|v0.3.0]].
PEcameraphoto.jpg|Example image taken by the camera [[entity]].
CameraUse-1.png|The first method of using cameras.
CameraUse-2.png|The second method of using cameras.
Dinnerbone Camera.png|A camera spawned using a [[spawn egg]] named "[[Dinnerbone]]" in the v0.15.0 beta.
Cam2.png|A camera falling from a [[tree]]. This shows that cameras are entities.
Education Edition Exclusive Features.png|The camera and camera block placed in a world along with other Education Edition features.
Screenshot by camera.jpg|An example of the screenshot taken by a camera in [[Bedrock Edition beta 1.13.0.1|beta 1.13.0.1]].
File:Say Cheese.jpeg|[[Steve]], [[Alex]], [[Jesse]], and an [[Agent]] getting their picture taken.
</gallery>
== See also ==
* [[Portfolio]]
* [[Screenshot]]
== References ==
{{Reflist}}
{{Items}}
{{Entities}}
{{Education Edition}}
[[Category:Education Edition entities]]
[[Category:Education Edition items]]
[[Category:Tools]]
[[cs:Kamera]]
[[de:Kamera]]
[[el:Camera]]
[[es:Cámara]]
[[fr:Appareil photo]]
[[hu:Kamera]]
[[ja:カメラ]]
[[ko:카메라]]
[[nl:Camera]]
[[pl:Kamera]]
[[pt:Câmera]]
[[ru:Камера]]
[[uk:Камера]]
[[zh:相机]]</li><li>[[Hopper|Hopper]]<br/>{{About|the block|the crash utility|Hopper (crash utility)}}
{{Block
|image=<gallery>
Hopper (D).png|Java
Hopper (D) BE.png|Bedrock
</gallery>
|extratext = View [[#Gallery|all renders]]
|transparent=Yes
|light=No
|tool=wooden pickaxe
|renewable=Yes
|stackable=Yes (64)
|flammable=No
|lavasusceptible=No
}}
A '''hopper''' is a low-capacity storage [[block]] that can be used to collect [[item (entity)|item entities]] directly above it, as well as to transfer [[item]]s into and out of other containers. A hopper can be locked with [[Redstone Dust|redstone power]] to stop it from moving items into or out of itself.
== Obtaining ==
=== Breaking ===
To obtain a hopper, {{control|mine}} it with a [[pickaxe]]. Using any other item to mine a hopper drops only its contents.
{{breaking row|horizontal=1|Hopper|Pickaxe|Wood|foot=1}}
===Crafting===
A hopper can be crafted from 5 iron ingots and a chest.
{{Crafting
|A1= Iron Ingot
|C1= Iron Ingot
|A2= Iron Ingot
|B2= Chest
|C2= Iron Ingot
|B3= Iron Ingot
|Output= Hopper
|type= Redstone
}}
==Usage==
{{see also|Tutorials/Hopper}}
[[File:Hopper aligment.png|Hoppers can face down or sideways.|thumb]]
A hopper can be used as a container, as a crafting ingredient, and as a redstone component.
A hopper has an "output" tube at its bottom that can face down or sideways and provides a visual indication of which block the hopper is set up to drop its items into, if that block has an inventory. To place a hopper, use the {{control|Place Block}} control while aiming at the surface to which its output should face (Hoppers ''do not'' orient themselves automatically). To place a hopper directly on the face of an already interactable block, the player can {{control|sneak}} while placing the hopper. Attempting to place a hopper aimed on the bottom face of a block instead faces downward. With some blocks, such as the [[furnace]] and [[brewing stand]], the hopper has multiple uses. A hopper does not change direction after placement, and it is not attached to the container it faces; the container can be removed or replaced, and the hopper remains unchanged.
Hoppers cannot be moved by [[piston]]s.{{only|java}} Despite not being a solid block, attached blocks such as [[rail]]s, [[lever]]s, [[tripwire]] and [[redstone]] dust can be placed on top of hoppers, but not on their sides.
===Container===
[[File:Hopper GUI.png|thumb|176px|Hopper GUI showing the hopper's five slots of inventory at the top and the player's inventory below.]]
A hopper can be used as a container and has 5 slots of inventory space.
To open the hopper GUI, use the {{control|use item|text=Use Item/Place Block}} [[control]]. To move items between the hopper inventory and the player inventory or hotbar while the hopper GUI is open, drag or shift-click the items. To exit the hopper GUI, use the {{key|Esc}} key, B button or circle button, depending on the device.
By default, the GUI of a hopper is labeled "Item Hopper". A hopper's GUI label can be changed by naming the hopper in an [[anvil]] before placing it, or, {{in|java}}, by using the [[Commands#data|data]] command (for example, to label a hopper at (0,64,0) "Steve's Hopper", use <code>/data merge block 0 64 0 {CustomName:'"Steve's Hopper"'}</code>).
{{IN|java}}, a hopper's GUI can be "locked" (or subsequently unlocked) by setting the hopper's <code>Lock</code> tag with the [[Commands#data|data]] command. If a hopper's <code>Lock</code> tag is not blank, the hopper cannot be accessed except by players holding an item with the same name as the <code>Lock</code> tag's text. For example, to lock a hopper at (0,64,0) so that only players holding an item named "Steve's Key" can access the hopper, use <code>/data merge block 0 64 0 {Lock:"Steve's Key"}</code>.
===Crafting ingredient===
A hopper can be used to craft a [[minecart with hopper]].
{{crafting usage}}
===Redstone component===
{{see also|Redstone circuit|Redstone components#Hopper}}
[[File:Hopper logic flowchart.png|thumb|Flowchart of hopper logic]]
While a hopper is ''not'' powered by redstone signals, it operates with three functions:
*'''Collect''' [[Item (entity)|item entities]] (free-floating items in the world) into its inventory from the space above it
*'''Pull''' a single item into its inventory from a container above it
*'''Push''' a single item from its own inventory into a container it faces
A hopper first attempts to push any items inside it. Afterward, it checks if the block above it is a type of container. If so, it attempts to pull from it. Otherwise, the hopper attempts to collect item entities. Notably, hoppers can push to and pull from other hoppers, forming '''hopper pipes''' or '''hopper chains''', which allow transporting items across several blocks and are further discussed below.
====Redstone signals====
When a hopper receives a redstone signal (and is considered to be "activated"), all three functions stop. To avoid confusion over the terms "activated" and "deactivated", powered hoppers are often described as being '''locked''' and unpowered hoppers described as being '''unlocked'''. Hoppers can be powered by [[Redstone_mechanics#Power|soft powered]] blocks, meaning a [[redstone dust]] trail pointing into a block touching the hopper locks it just as effectively as a [[redstone block]] or any other [[Redstone components#Power components|power component]] touching the hopper. When the hopper is unlocked during a redstone tick, it does not push or pull/collect during the same tick, but has a delay of 1 redstone tick instead.
While a locked hopper does not push or pull/collect items, it may still receive items from [[dispenser]]s, [[dropper]]s and other hoppers, and may have its items pulled out by another hopper beneath it. Hence, the item flow in a horizontal hopper pipe may be stopped by locking just one of the hoppers, but stopping a vertical hopper pipe requires locking two adjacent hoppers at the same time, such that both the pushing of the top one and the pulling of the bottom one are stopped.
A hopper does not output any redstone signals by itself, but its fullness can be read using a [[Redstone Comparator|redstone comparator]], which needs to be placed next to it and facing away from it. An empty hopper outputs a signal strength of 0 and a completely full hopper outputs a signal strength of 15. Notably, a single stackable item (16 or 64) outputs a signal strength of 1 and a single non-stackable item outputs a signal strength of 3.
{{IN|Java}}, if the hopper being read is part of a horizontal hopper pipe, the comparator can individually read each item passing through the chain, because items are pushed through the hoppers one by one at a speed that is manageable by the comparator. If there is an uninterrupted stream of items, the comparator does not switch off in between items. On the other hand, in a vertical hopper pipe, some of the hoppers may never produce a reading above 0, even with a continuous stream of items, because pushes and pulls both occur in the same game tick: The hoppers' items get pulled out a single game tick after they're pushed in and this isn't measurable by a comparator, because comparators need measurements lasting at least 1.5 redstone ticks to produce a reading.
====Collecting items====
A hopper collects items dropped on top of it if the space above the hopper not occupied by a storage block. Items are gathered from the entire 1 block space above the hopper, meaning that items sitting on partial blocks such as [[soul sand]] directly above a hopper can be collected.<ref>https://bugs.mojang.com/browse/MCPE-55824</ref> It is also possible for a hopper to collect items from inside a full, solid block, a situation that might come from items rising up through solid blocks or being [[commands/summon|summoned]]. Item entities are not collected when they are outside of the collection area however; for example, items on top of a stone block directly above a hopper are not collected. Collected items are placed in the leftmost empty slot of a hopper's inventory.
{{IN|java}}, if there is no container above the hopper, then the hopper collects dropped items in the order in which they landed on the hopper. This order is remembered even while a hopper is locked. For instance, if a hopper is locked under a carpet while a fully equipped [[armor stand]] is broken above it, then it always collects items in this order when it is unlocked: [[armor stand]], [[boots]], [[leggings]], [[chestplates]], [[helmets]]. This is due to the order in which these items land.{{Verify|Wouldn't this be due to the order in which the game creates the item entities that drop drop from the armor stand?}} {{IN|Bedrock}}, hoppers do not remember the order in which items land on the hopper. Instead, hoppers with multiple dropped items above them collect the items in the order in which they entered the chunk in which the hopper is located. Items that drop from a broken armor stand are collected in a random order.<ref>https://bugs.mojang.com/browse/MCPE-120586</ref>
Hoppers usually check for dropped items every [[game tick]] and they can collect items even before they are picked up by a [[player]]{{Verify|Does this happen always, or sometimes, and in Java only or also in Bedrock?}} or destroyed by [[lava]]. However, {{In|Bedrock}} hoppers have a "collection cooldown" time. After collecting an item (or stack of items), a hopper waits {{tooltip|4 redstone ticks|8 game ticks}} (0.4 seconds, barring lag) before attempting to collect again.
Hoppers collect groups of items all at once rather than collecting them as single items one at a time. As a result, hoppers can collect item entities much faster than they can pull items from a container. Pulling from a moving [[minecart with chest]] or [[minecart with hopper]] is even slower, since the minecart is not always above the hopper.
====Pushing and pulling items====
A hopper with a storage container above it (such as a [[furnace]], [[chest]], [[dropper]], [[composter]], or another hopper) attempts to pull from the container instead of checking for floating items above it, and hence can not collect items. A hopper always tries to push or pull items using the leftmost available slot. When a hopper is removing items from a chest, the items disappear from left to right. Similarly, when filling up a chest, the chest fills up from left to right. Hoppers prioritize pulling from the first slot of a container over pulling into the first hopper slot. If a hopper has stone in its first slot and nothing in its second while the container it is pulling from has chicken in its first slot but stone in the second, the hopper pulls the chicken from the first slot of the container into its empty second slot. However, if the hopper is unable to pull the chicken, such as if all slots are filled with stone, the hopper pulls the stone from the second slot of the container instead. Similarly, hoppers prioritize pushing from their first slot over pushing into the first slot of a container. If a hopper has stone in its first slot and chicken in its second while the container it is pushing to has chicken it its first slot but stone in the second, the hopper pushes stone from its first slot into the second slot of the container.
In [[Java Edition]] the checks done by a hopper while pulling generally require less processing than the checks done by a hopper attempting collection. Therefore, a chain of hoppers topped with storage containers rather than air/solid blocks has better performance (measured as milliseconds of processing per tick) and lower potential for processing lag. <ref name=":0">https://www.youtube.com/watch?v=LC3ZOOI1Rf0</ref> The performance improvement achieved is correlated with the number of storage slots the container has. Placing composters (with no storage slots but still with custom output logic) on top of hoppers provide the greatest efficiency, while double chests actually degrade performance, even when sharing each double chest across two hoppers.<ref name=":0" /> In [[Bedrock Edition]] a chain of hoppers with air or non-container blocks on top has better performance than a chain of hoppers topped by container blocks.<ref>https://cdn.discordapp.com/attachments/715523208530362389/890030941282631741/Redstone_MSPT_measure.xlsx</ref> This may be because, even though hoppers with containers on top do not check for items, they do check for hopper-minecarts and chest-minecarts to pull from, and that involves scanning the chunk entity list.<ref>{{bug|MCPE-109449}}</ref>
{{Schematic|caption='''Push then Pull'''
Chest A is full of items while the hopper and Chest B are empty.
|ch-$+A||-
|ho-$e|ch-$+B
}}
Item pushes and pulls are processed in the same game tick, but pushes are processed before pulls. In the schematic, the empty hopper first pulls an item from chest A as it cannot push anything into chest B. After the cooldown, the hopper first pushes its item into chest B before pulling another item from chest A, both pushing and pulling in the same tick, and the process repeats. The hopper stops pulling when A is empty, and stops pushing when B becomes full.
Hoppers also have a "transfer cooldown" time. After pulling and/or pushing items, a hopper waits {{tooltip|4 redstone ticks|8 game ticks}} (0.4 seconds, barring lag) before pulling or pushing again (a transfer rate of 2.5 items per second, barring lag). A hopper that has an item pushed into it from another hopper also starts a 4 tick cooldown period, regardless of whether it pushed or pulled items itself. Item entities can be collected at any time without affecting the transfer cooldown time. The transfer cooldown and the Bedrock Edition collection cooldown are independent of each other.
====Container interactions====
Some [[container]]s interact with hoppers in specific ways:
:;{{BlockLink|Composter}}
::Hoppers above composters can push compostable items into the composter's top face with a chance of increasing the level of the composter as if the player used the item on the composter. Items that are not compostable cannot be pushed into the composter. Hoppers below the composter can pull [[bone meal]] when the composter is in stage 8, emptying the composter and resetting it to stage 0. Hoppers to the side of a composter do not interact with it.
:;{{BlockLink|Brewing Stand}}
::A working hopper on the top face of a brewing stand deposits only into the ingredient slot and it can push only valid [[brewing]] ingredients. A hopper on side face of a brewing stand can deposit only [[blaze powder]] or filled bottles into the three brew slots. A hopper underneath a brewing stand always extracts from the three brew slots, whether brewing is finished or not—The hopper must be locked to allow potions to finish brewing.
:;{{BlockLink|Chest}}
:;{{BlockLink|Trapped Chest}}
::Large chests and large trapped chests are treated as a single container: A hopper depositing into a large chest fills up the entire chest and a hopper underneath a large chest empties the entire chest. Trapped chests being accessed by a player lock any adjacent hoppers, per the standard behavior of a hopper next to an active power source.
:;{{BlockLink|Furnace}}
:;{{BlockLink|Blast Furnace}}
:;{{BlockLink|Smoker}}
::A working hopper pointing into top of a furnace deposits only into the ingredient slot. It can push any item, including items that can't be smelted by the furnace. A hopper pointing into the side of a furnace deposits into the fuel slot, and only items that are usable as fuel. A hopper below a furnace pulls everything from the output slot and empty [[bucket]]s from the fuel slot left over from using [[lava bucket]]s as fuel. When a hopper removes items from a furnace, the experience points are 'stored' in the furnace until a player removes at least one smelted item, or the furnace block is broken.
:;{{BlockSprite|Hopper}} Hopper
::A sequence of three or more hoppers, each pushing items into the next, is called a '''hopper pipe'''. Working horizontal hopper pipes simply push items into each other at the expected rate of 2.5 items per second, but vertical hopper pipes are more complicated, as the hoppers are trying both to pull and to push. When a vertical pipe pulls from a single container, it simply transfers items at 2.5 items per second because the transfer rate is limited by the first hopper pulling items from the container. If a ''stack of items'' is in a vertical pipe, the items can be transferred twice as fast, because the hopper with the item stack is pushing items down while the hopper below it is also pulling items down.
:;{{EntityLink|Minecart with Chest}}
:;{{EntityLink|Minecart with Hopper}}
::Unlocked hoppers fill chest minecarts and hopper minecarts if any part of the entity's hitbox is within the hopper's target block-space. Hopper minecarts try to pull items from the hopper at high speed. Hoppers can pull items from minecarts above them so rails can be placed directly on the top faces of a hoppers. If a [[detector rail]] is in the right position, it could lock the hopper per standard redstone-hopper behavior.
:;{{BlockLink|Jukebox}}
::Hoppers can insert [[music disc]]s into jukeboxes, and extract the music discs after they finish playing.
:;{{BlockLink|Shulker Box}}
::Hoppers cannot put shulker boxes into other shulker boxes. This allows for the creation of certain [[Tutorials/Hopper#Potions and shulker boxes|item filters]].
::Otherwise, hoppers interact with shulker boxes normally.
:;{{BlockLink|Lectern}}
::Hoppers cannot remove or place books on lecterns. The redstone pulse emitted from a lectern when a page is turned can temporarily lock hoppers.
:;{{BlockLink|Ender Chest}}
::Hoppers cannot interact with ender chests in any way.
:;{{BlockLink|Barrel}}
:;{{BlockLink|Dispenser}}
:;{{BlockLink|Dropper}}
:;{{EntityLink|Boat with Chest}}
::Hoppers interact normally with barrels, dispensers, droppers, and boats with chests.
:;{{BlockLink|Chiseled Bookshelf}}
::Hoppers and minecart with hoppers can insert and remove books from the bookshelf. As with any other container, items are taken from the first slot that has an item that can fit in the hopper and are inserted into the first empty slot.
==Sounds==
===Generic===
{{Sound table/Block/Metal}}
===Unique===
{{Edition|Java}}:
{{Sound table
|sound=Door close.ogg
|sound2=Door open.ogg
|subtitle=Chest locked<ref group=sound name=lock>{{Bug|MC-98316||Wrong subtitles caused by missing distinction}}</ref>
|source=block
|description=When a player attempts to open a hopper locked using the {{nbt|string|Lock}} tag
|id=block.chest.locked|idnote=<ref group=sound name=lock/>
|translationkey=subtitles.block.chest.locked|translationkeynote=<ref group=sound name=lock/>
|volume=1.0
|pitch=1.0
|distance=16
|foot=1}}
{{Edition|Bedrock}}: ''None''
==Data values==
===ID===
{{edition|java}}:
{{ID table
|edition=java
|showforms=y
|generatetranslationkeys=y
|displayname=Hopper
|spritetype=block
|nameid=hopper
|foot=1}}
{{ID table
|displayname=Block entity
|spritename=hopper
|spritetype=block
|nameid=hopper
|foot=1}}
{{edition|bedrock}}:
{{ID table
|edition=bedrock
|firstcolumnname=Hopper
|shownumericids=y
|showforms=y
|generatetranslationkeys=y
|displayname=Block
|spritename=hopper
|spritetype=block
|nameid=hopper
|id=154
|form=block
|itemform=item.hopper}}
{{ID table
|displayname=Item
|spritename=hopper
|spritetype=item
|nameid=hopper
|id=527
|form=item
|translationkey=tile.hopper.name
|foot=1}}
{{ID table
|notnamespaced=y
|displayname=Block entity
|spritename=hopper
|spritetype=block
|nameid=Hopper
|foot=1}}
===Block states===
{{see also|Block states}}
{{/BS}}
===Block data===
A hopper has a block entity associated with it that holds additional data about the block.
{{el|java}}:
{{see also|Block entity format}}
{{/BE}}
{{el|bedrock}}:
:See [[Bedrock Edition level format/Block entity format]].
==Achievements==
{{load achievements|Freight Station;Smelt Everything}}
==Video==
<div style="text-align:center">{{yt|XO0IKUsGiG8}}</div>
==History==
{{History|java}}
{{History||1.5|snap=13w01a|[[File:Hopper (D) JE1.png|32px]] [[File:Hopper (N) JE1.png|32px]] [[File:Hopper (E) JE1.png|32px]] [[File:Hopper (S) JE1.png|32px]] [[File:Hopper (W) JE1.png|32px]] [[File:Hopper (U) JE1.png|32px]] Added hoppers.
|Hoppers with the [[damage]] value of 1, which are obtainable only through world editing, visually point in no direction. They functionally push items upward, however the behavior is inconsistent.
|[[File:Hopper (item) JE1.png|32px]] There is currently a temporary "work in progress" sprite for hoppers in the [[inventory]].
|Hoppers can be [[crafting|crafted]] from a [[chest]] and [[stone]] blocks with the following recipe:
{{{!}} class{{=}}"collapsible collapsed"
! Recipe
{{!}}-
{{!}}
{{Crafting Table
|A1= Stone
|C1= Stone
|A2= Stone
|B2= Chest
|C2= Stone
|B3= Stone
|Output= Hopper
}}
{{!}}}
}}
{{History|||snap=13w01b|[[Rail]]s can now be placed on top of hoppers.
|Hoppers no longer load [[item]]s into [[minecart]]s without [[chest]]s.}}
{{History|||snap=13w02a|[[File:Hopper (item) JE2 BE1.png|32px]] The [[inventory]] sprite of hoppers has been changed.
|[[File:Hopper (item) 13w02a.png|32px]] However, the [[item]] of hoppers appears bugged if [[drops|dropped]] or placed in an [[item frame]].<ref>{{bug|MC-6737}}</ref> This may be due to the game attempting to pull the item sprite from the hopper's equivalent spot in <samp>[[stitched_terrain.png]]</samp> (compare files: [[:File:13w02a stitched terrain.png|terrain]], [[:File:13w02a stitched items.png|items]]), a region which contains parts of the oak planks, end stone and iron bars textures.
|Applying a [[redstone]] signal to a hopper now deactivates the hopper until the signal is removed.
|Hoppers can no longer be used as [[fuel]] in a [[furnace]].
|Hoppers are now [[crafting|crafted]] using 5 [[iron ingot]]s rather than 5 [[stone]] blocks.
{{{!}} class{{=}}"collapsible collapsed"
! Recipe
{{!}}-
{{!}}
{{Crafting
|A1= Iron Ingot
|C1= Iron Ingot
|A2= Iron Ingot
|B2= Chest
|C2= Iron Ingot
|B3= Iron Ingot
|Output= Hopper
}}
{{!}}}
|Hoppers now pull only from the output slot of [[furnace]]s.
|Hoppers now output 1 signal strengh per 1/3 of a stack (21 [[item]]s) when interacting with a [[redstone comparator]].
|[[File:Hopper (D) JE2.png|32px]] [[File:Hopper (N) JE2.png|32px]] [[File:Hopper (E) JE2.png|32px]] [[File:Hopper (S) JE2.png|32px]] [[File:Hopper (W) JE2.png|32px]] [[File:Hopper (U) JE2.png|32px]] The texture of hoppers has been given a unique texture. Hoppers no longer use the [[cauldron]] texture. Note that the top texture does not rotate with facing direction.
|The preferred tool is now a pickaxe, rather than the axe.}}
{{History|||snap=13w02b|Hoppers now treat large [[chest]]s properly, no longer needing two hoppers connected to them to fill up the entire [[inventory]].
|Hoppers no longer take [[item]]s from containers when powered via a [[redstone]] current.
|Hoppers now display correctly as a [[drops|dropped]] or [[item frame|frame]] [[item]].}}
{{History|||snap=13w03a|Hoppers are now used to [[crafting|craft]] a [[minecart with hopper]].
|Hoppers can now empty a [[minecart with hopper]].}}
{{History|||snap=13w04a|The transfer rate of hoppers has been changed from 7 to 8 [[game tick]]s per [[item]] (2.5 items per second).}}
{{History||1.5.1|snap=pre|Hoppers now take empty [[bucket]]s out of furnace fuel slots.}}
{{History||1.7.2|snap=release|[[File:Hopper (D) JE3.png|32px]] [[File:Hopper (N) JE3.png|32px]] [[File:Hopper (E) JE3.png|32px]] [[File:Hopper (S) JE3.png|32px]] [[File:Hopper (W) JE3.png|32px]] [[File:Hopper (U) JE3.png|32px]] The UV of all blocks is broken on certain sides as a result of {{bug|MC-37106}} (few cases are listed on the wiki so far - this is a future project). This includes hoppers.}}
{{History||1.7.4|snap=13w47a|[[File:Hopper (D) JE4.png|32px]] [[File:Hopper (N) JE4.png|32px]] [[File:Hopper (E) JE4.png|32px]] [[File:Hopper (S) JE4.png|32px]] [[File:Hopper (W) JE4.png|32px]] [[File:Hopper (U) JE4.png|32px]] MC-37106 has been fixed, reverting hoppers to their pre-1.7.2 appearences.}}
{{History|||snap=13w48a|This version fixed {{bug|MC-190}}, which hoppers were allegedly subject to since their introduction. However, a comparison of hopper UV in 13w02a and 14w08a failed to reveal any visible differences, even accounting for the example images on the ticket. More research is needed on this matter.}}
{{History||1.8|snap=?|Hoppers no longer generate [[multiplayer]] lag when idle.}}
{{History|||snap=14w10a|[[File:Hopper (D) JE5.png|32px]] [[File:Hopper (N) JE5.png|32px]] [[File:Hopper (E) JE5.png|32px]] [[File:Hopper (S) JE5.png|32px]] [[File:Hopper (W) JE5.png|32px]] [[File:Missing Model JE2.png|32px]] Hoppers now use block models rather than having a hardcoded shape. This brings multiple changes: the inside texture now rotates with the hopper rather than being constant, the inside planes of hoppers are now shaded/have ambient occlusion, and some minor UV changes have occurred, notably on the smallest cuboid. The directionless hopper also [[Missing model|no longer has a model]].}}
{{History|||snap=14w26a|The directionless hopper has been removed.}}
{{History|||snap=14w31a|Hoppers now no longer use wood [[sound]]s.<ref>{{bug|MC-5991}}</ref>}}
{{History||1.9|snap=15w33c|A hopper now generates as a part of the [[end ship]] in the [[end city|end cities]].}}
{{History|||snap=15w41a|End ships no longer contain a hopper.}}
{{History|||snap=15w43a|[[Loot table]]s have been added; hoppers can now use loot tables.}}
{{History|||snap=15w43c|[[File:Hopper (D) JE6.png|32px]] [[File:Hopper (N) JE6.png|32px]] [[File:Hopper (E) JE6.png|32px]] [[File:Hopper (S) JE6.png|32px]] [[File:Hopper (W) JE6.png|32px]] The UV on the hopper model has changed, resulting in minor differences, particularly to the smallest cuboid. This is likely due to the fix for {{bug|MC-73401}}.}}
{{History|||snap=15w44a|[[File:Hopper (D) JE7.png|32px]] [[File:Hopper (N) JE7.png|32px]] [[File:Hopper (E) JE7.png|32px]] [[File:Hopper (S) JE7.png|32px]] [[File:Hopper (W) JE7.png|32px]] A mapping issue introduced in the previous snapshot for the sides of the large funnel region has been fixed. This may be due to the fix for {{bug|MC-50344}}.}}
{{History||1.9.1|snap=pre1|A hopper can now push into and pull [[item]]s from a blocked [[chest]].}}
{{History||1.13|snap=17w47a|Prior to [[1.13/Flattening|''The Flattening'']], this [[block]]'s numeral ID was 154.}}
{{History||1.14|snap=18w43a|[[File:Hopper (D) JE8.png|32px]] [[File:Hopper (N) JE8.png|32px]] [[File:Hopper (E) JE8.png|32px]] [[File:Hopper (S) JE8.png|32px]] [[File:Hopper (W) JE8.png|32px]]<br>[[File:Hopper (item) JE3 BE2.png|32px]] The textures of hoppers have been changed.}}
{{History|||snap=19w03c|Hoppers now use correct cullface arguments, and some redundant faces have also been deleted.}}
{{History||1.19|snap=22w13a|Hoppers no longer drop when breaking a [[minecart with hopper]].}}
{{History||1.19.4|snap=23w07a|Hoppers can now interact with jukeboxes.}}
{{History|pocket alpha}}
{{History||v0.14.0|snap=build 1|[[File:Hopper (D) JE2.png|32px]]{{verify|Is this model correct?}}<br>[[File:Hopper (item) JE2 BE1.png|32px]] Added hoppers. Upward hoppers also exist.}}
{{History||v0.15.0|snap=build 1|Hoppers can now be moved by [[piston]]s.}}
{{History|bedrock}}
{{History||1.10.0|snap=beta 1.10.0.3|[[File:Hopper (D) BE.png|32px]] [[File:Hopper (N) BE.png|32px]] [[File:Hopper (E) BE.png|32px]] [[File:Hopper (S) BE.png|32px]] [[File:Hopper (W) BE.png|32px]] [[File:Hopper (U) BE.png|32px]]<br>[[File:Hopper (item) JE3 BE2.png|32px]] The textures of hoppers have been changed.}}
{{History||1.19.70|snap=beta 1.19.70.20|Hoppers can now collect items through all blocks that have a lower height than a full block.}}
{{History|console}}
{{History||xbox=TU19|xbone=CU7|ps=1.12|wiiu=Patch 1|switch=1.0.1|[[File:Hopper (D) JE2.png|32px]]{{verify|Is this model correct?}}<br>[[File:Hopper (item) JE2 BE1.png|32px]] Added hoppers.}}
{{History||xbox=none|xbone=none|ps=1.90|wiiu=none|switch=none|[[File:Hopper (D) JE8.png|32px]]{{verify|Is this model correct?}}<br>[[File:Hopper (item) JE3 BE2.png|32px]] The textures of hoppers have been changed.}}
{{History||ps=1.91|Hoppers can now fill [[composter]]s.}}
{{History|new 3ds}}
{{History||0.1.0|[[File:Hopper (D) JE2.png|32px]]{{verify|Is this model correct?}}<br>[[File:Hopper (item) JE2 BE1.png|32px]] Added hoppers.}}
{{History|foot}}
==Issues==
{{Issue list}}
==Trivia==
* A [[wikipedia:Hopper (particulate collection container)|real-world hopper]] is a large, pyramidal or cone-shaped container used in industrial processes to hold particulate matter, like dust, gravel, nuts, seeds, etc., and can then dispense them from the bottom.
* A hopper can transfer 9000 items per hour, or 150 items per minute.
==Gallery==
=== Renders ===
<gallery>
Hopper (N).png
Hopper (E).png
Hopper (S).png
Hopper (W).png
</gallery>
<gallery>
Hopper (N) BE.png
Hopper (E) BE.png
Hopper (S) BE.png
Hopper (W) BE.png
</gallery>
=== Screenshots ===
<gallery>
File:Hopper screenshot 1.png|In snapshot 13w01a, the hopper item uses a 'WIP' sprite, though the item still read "Hopper".
File:13w02a Banner.png|The 13w02a Banner includes a [[minecart with TNT]] and a hopper.
</gallery>
==References==
{{Reflist}}
{{Redstone}}
{{Blocks|Utility}}
{{Items}}
[[Category:Mechanisms]]
[[Category:Redstone mechanics]]
[[Category:Mechanics]]
[[Category:Storage]]
[[Category:Utility blocks]]
[[Category:Manufactured blocks]]
[[Category:Block entities]]
[[cs:Násypka]]
[[de:Trichter]]
[[el:Hopper]]
[[es:Tolva]]
[[fr:Entonnoir]]
[[it:tramoggia]]
[[ja:ホッパー]]
[[ko:호퍼]]
[[nl:Trechter]]
[[pl:Lej]]
[[pt:Funil]]
[[ru:Загрузочная воронка]]
[[uk:Лійка]]
[[zh:漏斗]]</li></ul> | 16w33a | Banners now require a dye when applying a pattern that uses a non-dye item, such as a creeper head or enchanted golden apple. Previously, the lack of a dye would have applied the black variant of the pattern. | |||
| 16w39a | Black and gray banners, and light gray banners with a white flower charge are now naturally generated in rooms of woodland mansions. | ||||
1.12{{Extension DPL}}<ul><li>[[Longer String|Longer String]]<br/>{{stub}}
{{Joke feature}}
{{exclusive|java}}
{{item
| image = Longer String.png
| rarity=Common
| renewable=Yes
| stackable=Yes (64)
}}
'''Longer string''' is a joke item from [[Java Edition 23w13a_or_b]].
==Obtaining==
===Crafting===
{{Crafting
|A1= String |B1= String
|Output= Longer String
|shapeless= 1
|ignoreusage=1
}}
==Data values==
===ID===
{{edition|java}}:{{ID table
|edition=java
|showforms=y
|generatetranslationkeys=y
|displayname=Longer String
|spritetype=item
|nameid=string2
|form=item|foot=1}}
==History==
{{History|java}}
{{History||23w13a_or_b|[[File:Longer String.png|32px]] Added longer string.}}
{{History|foot}}
{{items}}
{{Jokes}}
[[Category:Joke items]]
[[ja:Longer String]]
[[pt:Linha mais comprida]]</li><li>[[Hoe|Hoe]]<br/>{{Item
| image = <gallery>
Wooden Hoe.png | Wooden
Stone Hoe.png | Stone
Iron Hoe.png | Iron
Golden Hoe.png | Golden
Diamond Hoe.png | Diamond
Netherite Hoe.png | Netherite
</gallery>
|rarity = Common
|renewable =
* '''Netherite''': No
* '''All others''': Yes
| durability =
* Wood: 59
* Stone: 131
* Iron: 250
* Golden: 32
* Diamond: 1561
* Netherite: 2031
| stackable = No
}}
A '''hoe''' is a [[tool]] used to harvest certain plant-based or organic blocks more quickly, as well as to till most types of [[Dirt (disambiguation)|dirt]] into [[farmland]] and convert [[Coarse Dirt|coarse dirt]] and [[Rooted Dirt|rooted dirt]] to regular [[dirt]].
== Obtaining ==
=== Crafting ===
{{Crafting
|head=1
|showname=0
|showdescription=1
|name=[[Hoe]]
|A1= {Any Planks}; Iron Ingot; Gold Ingot; Diamond
|B1= {Any Planks}; Iron Ingot; Gold Ingot; Diamond
|B2= Stick
|B3= Stick
|Output=Wooden Hoe; Iron Hoe; Golden Hoe; Diamond Hoe
|type=Tool
}}
{{Crafting
|name=[[Stone Hoe]]
|A1=Any stone-tier block |B1=Any stone-tier block
|B2=Stick
|B3=Stick
|Output=Stone Hoe
|type=Tool
||description=Can use cobblestone and its other variants interchangeably.
}}
{{Crafting
|foot=1
|ignoreusage=1
|name=[[Hoe]]
|ingredients=Damaged Matching Hoe
|Damaged Wooden Hoe; Damaged Stone Hoe; Damaged Iron Hoe; Damaged Golden Hoe; Damaged Diamond Hoe; Damaged Netherite Hoe
|Damaged Wooden Hoe; Damaged Stone Hoe; Damaged Iron Hoe; Damaged Golden Hoe; Damaged Diamond Hoe; Damaged Netherite Hoe
|Output=Wooden Hoe; Stone Hoe; Iron Hoe; Golden Hoe; Diamond Hoe; Netherite Hoe
|description= The durability of the two hoes is added together, plus an extra 5% durability.
|type= Tool
}}
=== Upgrading ===
Like other diamond tools, a diamond hoe can be upgraded to a netherite hoe, increasing its durability and slightly increasing its mining speed.
{{Smithing
|head=1
|Netherite Upgrade
|Diamond Hoe
|Netherite Ingot
|Netherite Hoe
|tail=1
}}
=== Repairing ===
==== Grinding ====
{{Grinding
|showdescription=1
|ingredients=2x Damaged [[Wooden Hoe]] or<br>2x Damaged [[Stone Hoe]] or<br>2x Damaged [[Iron Hoe]] or<br>2x Damaged [[Golden Hoe]] or<br>2x Damaged [[Diamond Hoe]] or<br>2x Damaged [[Netherite Hoe]]
|Damaged Wooden Hoe; Damaged Stone Hoe; Damaged Iron Hoe; Damaged Golden Hoe; Damaged Diamond Hoe; Damaged Netherite Hoe
|Damaged Wooden Hoe; Damaged Stone Hoe; Damaged Iron Hoe; Damaged Golden Hoe; Damaged Diamond Hoe; Damaged Netherite Hoe
|Wooden Hoe; Stone Hoe; Iron Hoe; Golden Hoe; Diamond Hoe; Netherite Hoe
|description=The durability of the two hoes is added together, plus an extra 5% durability.
}}
==== Unit repair ====
{{main|Anvil mechanics#Unit repair}}
{{/Repairing with Anvils}}
A hoe can be repaired in an [[anvil]] by adding units of the [[tiers]]' repair material (or the same hoe of that tier), with each repair material restoring 25% of the hoe's maximum durability, rounded down. It also keeps the hoe's [[Enchanting|enchantments]].
=== Chest loot ===
{{LootChestItem|wooden-hoe,diamond-hoe,golden-hoe,random-enchanted-golden-hoe,damaged-level-enchanted-diamond-hoe}}
=== Trading ===
Novice-level toolsmith [[villager]]s have a chance to sell a stone hoe for one [[emerald]], and journeyman-level toolsmiths have a chance to sell a diamond hoe for 4 emeralds. {{IN|bedrock}}, these are 25% chances, and {{in|java}}, these are 40% chances.
=== Villager gifts ===
Toolsmith [[Villager|villagers]] occasionally throw stone hoes at players with the [[Hero of the Village]] status effect.{{Only|java}}
== Usage ==
=== Harvesting ===
Hoes are used to harvest certain plant-based or organic blocks more quickly. Breaking one of these blocks takes 1 [[durability]].
{{breaking row|Sculk Catalyst|sort=1|simple=1}}
{{breaking row|Sculk Shrieker|sort=1|simple=1}}
{{breaking row|Sculk Sensor|sort=1|simple=1}}
{{breaking row|Calibrated Sculk Sensor|sort=1|simple=1}}
{{breaking row|Nether Wart Block,Warped Wart Block|sort=1|simple=1}}
{{breaking row|Shroomlight|sort=1|simple=1}}
{{breaking row|Hay Bale|sort=1|simple=1}}
{{breaking row|Target|sort=1|simple=1}}
{{breaking row|Dried Kelp Block|sort=1|simple=1}}
{{breaking row|Sponge,Wet Sponge|sort=1|simple=1}}
{{breaking row|Leaves|sort=1|simple=1}}
{{breaking row|Sculk|sort=1|simple=1}}
{{breaking row|Sculk Vein|sort=1|simple=1}}
{{breaking row|Moss Block|foot=1}}
Breaking any other block takes 0 durability if the block breaks instantly when broken by hand, or 1 otherwise.
=== Tilling ===
Hoes are used to turn dirt, grass blocks, and dirt paths into [[farmland]]. To till, press {{control|use}} on a grass or dirt block while holding a hoe. This does not work on [[mycelium]] or [[podzol]],<ref>{{bug|MC-8231||Mycelium and podzol cannot be tilled with hoes}}</ref> nor does it work if there are other blocks on top of the targeted blocks, including snow layers or torches. However, mycelium and podzol can be first converted to dirt paths with a shovel, then tilled into farmland with a hoe.
Hoes can be used to convert [[coarse dirt]] into regular dirt by pressing {{control|use}} on the coarse dirt. Similar to tilling dirt, the space above the coarse dirt must be empty for it to be tilled.
Hoes can also be used on [[rooted dirt]], which turns it into normal dirt, and yields a [[hanging roots]] item.
Tilling is effectively instantaneous, regardless of material, and uses 1 durability. Breaking blocks with a hoe uses 0 or 1 durability, depending on the block.
Hoes are unable to work on blocks with a plant on top, even if that plant could normally be placed on top of farmland without reverting it to dirt.<ref>{{bug|MC-167846||Hoe cannot be used on blocks with certain blocks on top even if said blocks can normally exist on farmland|WAI}}</ref>
=== Weapon ===
Hoes may be used as a weapon, although they deal only {{hp|1}} damage {{in|java}}. {{IN|bedrock}}, hoes can do as much as a pickaxe in terms of damage. Hoes use 2 durability when used as a weapon.
{{IN|java}}, hoes have an attack speed modifier depending on the material: wood and gold have a modifier of -3 (refill in 1s), stone has a modifier of -2 (refill in 0.5s), iron has a modifier of -1 (refill in 0.33s), and diamond and netherite have a modifier of 0 (refill in 0.25s).
{| class="wikitable" style="text-align:center" data-description="Attack damage"
! Attack damage
! colspan="4" | Attack speed
! colspan="4" | Damage/Second (DPS)
|-
| {{hp|1}}
| {{ItemSprite|Wooden Hoe}}{{ItemSprite|Golden Hoe}} 1
| {{ItemSprite|Stone Hoe}} 2
| {{ItemSprite|Iron Hoe}} 3
| {{ItemSprite|Diamond Hoe}}{{ItemSprite|Netherite Hoe}} 4
| {{ItemSprite|Wooden Hoe}}{{ItemSprite|Golden Hoe}} 1
| {{ItemSprite|Stone Hoe}} 2
| {{ItemSprite|Iron Hoe}} 3
| {{ItemSprite|Diamond Hoe}}{{ItemSprite|Netherite Hoe}} 4
|}
Hoes always attack instantly {{in|bedrock}}.
=== Enchantments ===
A hoe can receive the following enchantments and curses:
{| class="wikitable col-2-center"
|+
!Name
!Max Level
![[Enchanting|Method]]
|-
|[[Efficiency]]
|V
|{{Inventory slot|Enchanting Table}}{{Inventory slot|Anvil}}
|-
|[[Fortune]] <ref group=note name=note1>Fortune and Silk Touch are mutually exclusive.</ref>
|III
|{{Inventory slot|Enchanting Table}}{{Inventory slot|Anvil}}
|-
|[[Unbreaking]]
|III
|{{Inventory slot|Enchanting Table}}{{Inventory slot|Anvil}}
|-
|[[Silk Touch]] <ref group=note name=note1>Fortune and Silk Touch are mutually exclusive.</ref>
|I
|{{Inventory slot|Enchanting Table}}{{Inventory slot|Anvil}}
|-
|[[Mending]]
|I
|{{Inventory slot|Anvil}}
|-
|[[Curse of Vanishing]]
|I
|{{Inventory slot|Anvil}}
|}
{{Notelist}}
=== Fuel ===
Wooden hoes can be used as a [[fuel]] in [[furnace]]s, smelting 1 item per hoe.
=== Smelting ingredient ===
{{Smelting|showname=1|Iron Hoe;Golden Hoe|Iron Nugget;Gold Nugget|0,1}}
===Piglins===
{{EntityLink|Piglin|Piglins}} are attracted to golden hoes and run toward any golden hoes on the ground, and inspect them for 6 to 8 seconds before putting them in their inventory.
== Sounds ==
{{edition|java}}:
{{Sound table
|sound=Hoe till1.ogg
|sound2=Hoe till2.ogg
|sound3=Hoe till3.ogg
|sound4=Hoe till4.ogg
|subtitle=Hoe tills
|source=block
|description=When a block is tilled into farmland
|id=item.hoe.till
|translationkey=subtitles.item.hoe.till
|volume=1.0
|pitch=1.0
|distance=16}}
{{Sound table
|sound=Random break.ogg
|subtitle=Item breaks
|source=player
|description=When a hoe's durability is exhausted
|id=entity.item.break
|translationkey=subtitles.entity.item.break
|volume=0.8
|pitch=0.8-1.2
|distance=16
|foot=1}}
{{edition|bedrock}}:
{{Sound table
|type=bedrock
|sound=Gravel hit1.ogg
|sound2=Gravel hit2.ogg
|sound3=Gravel hit3.ogg
|sound4=Gravel hit4.ogg
|source=block
|description=When a block is tilled into farmland
|id=use.gravel
|volume=1.0
|pitch=0.8}}
{{Sound table
|sound=Random break.ogg
|source=player
|description=When a hoe's durability is exhausted
|id=random.break
|volume=1.0
|pitch=0.9
|foot=1}}
== Data values ==
=== ID ===
{{edition|java}}:
{{ID table
|edition=java
|showforms=y
|generatetranslationkeys=y
|displayname=Wooden Hoe
|spritetype=item
|nameid=wooden_hoe
|form=item}}
{{ID table
|displayname=Stone Hoe
|spritetype=item
|nameid=stone_hoe
|form=item}}
{{ID table
|displayname=Iron Hoe
|spritetype=item
|nameid=iron_hoe
|form=item}}
{{ID table
|displayname=Diamond Hoe
|spritetype=item
|nameid=diamond_hoe
|form=item}}
{{ID table
|displayname=Golden Hoe
|spritetype=item
|nameid=golden_hoe
|form=item}}
{{ID table
|displayname=Netherite Hoe
|spritetype=item
|nameid=netherite_hoe
|form=item
|foot=1}}
{{edition|bedrock}}:
{{ID table
|edition=bedrock
|shownumericids=y
|showforms=y
|notshowbeitemforms=y
|generatetranslationkeys=y
|displayname=Wooden hoe
|spritetype=item
|nameid=wooden_hoe
|id=329
|form=item}}
{{ID table
|displayname=Stone hoe
|spritetype=item
|nameid=stone_hoe
|id=330
|form=item}}
{{ID table
|displayname=Iron hoe
|spritetype=item
|nameid=iron_hoe
|id=331
|form=item}}
{{ID table
|displayname=Diamond hoe
|spritetype=item
|nameid=diamond_hoe
|id=332
|form=item}}
{{ID table
|displayname=Golden hoe
|spritetype=item
|nameid=golden_hoe
|id=333
|form=item}}
{{ID table
|displayname=Netherite hoe
|spritetype=item
|nameid=netherite_hoe
|id=608
|form=item
|foot=1}}
== Achievements ==
{{load achievements|Time to Farm!; MOAR Tools;Oooh, shiny!}}
== Advancements ==
{{load advancements|Oh Shiny;Serious Dedication;A Seedy Place}}
== Video ==
<div style="text-align:center">{{yt|Wkqfv6QLEs0}}</div>
== History ==
{{History|java indev}}
{{History||20100206|[[File:Wooden Hoe JE1 BE1.png|32px]] [[File:Stone Hoe JE1 BE1.png|32px]] [[File:Iron Hoe JE1 BE1.png|32px]] [[File:Golden Hoe JE1 BE1.png|32px]] [[File:Diamond Hoe JE1 BE1.png|32px]] Added hoes.
|Compared to other golden tools, golden hoes had much higher durability, which was 513 instead of 33.}}
{{History|java alpha}}
{{History||v1.0.17|Golden hoes' durability has been decreased from 513 to 65, matching the stone tools.}}
{{History|java beta}}
{{History||1.2|Golden hoes now have the same durability as the other gold tools.}}
{{History||1.6|snap=Test Build 3|Before, using a hoe on [[grass block]]s was the only way to collect [[Wheat Seeds|seeds]] for planting. As [[tall grass]] has been introduced, this feature has been removed.}}
{{History|java}}
{{History||1.2.1|snap=12w07a|Player is now unable to till [[dirt]] or [[grass block]] when there is block on top of them.}}
{{History||1.2.4|snap=release|[[Spruce planks]], [[birch planks]], and [[jungle planks]] can now be used to craft wooden hoes.}}
{{History||1.3.1|snap=12w18a|Wooden hoes can now be used as [[Smelting#Fuel|fuel]] in a [[furnace]].}}
{{History|||snap=12w21a|Blacksmith [[villager]]s now [[trading|sell]] 1 diamond hoe for 7 [[emerald]]s, and 1 iron hoe for 4–5 emeralds.}}
{{History||1.4.2|snap=12w38a|Hoes now have a [[sound]] when tilling [[dirt]].}}
{{History||1.7.2|snap=1.7.1|[[Acacia planks]] and [[dark oak planks]] can now be used to craft wooden hoes.}}
{{History||1.8|snap=14w02a|Villagers no longer trade iron or diamond hoes, making diamond hoes [[non-renewable resource|non-renewable]].}}
{{History|||snap=14w32a|Hoes can now be used to convert [[coarse dirt]] into regular [[dirt]].}}
{{History||1.9|snap=15w34c|Stone, iron and diamond hoes now do slightly more [[damage]] than an unarmed attack.}}
{{History|||snap=15w34d|All hoes now lose 1 [[durability]] when used as a [[weapon]].}}
{{History|||snap=15w35a|Hoes now all do the same damage, but better materials have higher speeds.}}
{{History|||snap=15w50a|Added a [[sound]] for hoes: <code>item.hoe.till</code>.}}
{{History||1.11|snap=16w39a|Diamond hoes are now found in the new [[woodland mansion]] [[chest]]s.}}
{{History||1.11.1|snap=16w50a|Golden and iron hoes can now be [[smelting|smelted]] down into one of their respective [[nugget]]s.}}
{{History||1.13|snap=17w47a|Prior to ''[[1.13/Flattening|The Flattening]]'', these items' numeral IDs were 290 (wooden), 291 (stone), 292 (iron), 293 (diamond) and 294 (golden).}}
{{History||1.14|snap=18w43a|[[File:Wooden Hoe JE2 BE2.png|32px]] [[File:Stone Hoe JE2 BE2.png|32px]] [[File:Iron Hoe JE2 BE2.png|32px]] [[File:Golden Hoe JE2 BE2.png|32px]] [[File:Diamond Hoe JE2 BE2.png|32px]] The textures of all hoes have been changed.}}
{{History|||snap=19w11a|Toolsmith villagers now sell stone hoes and diamond hoes, making diamond hoes [[renewable resource|renewable]] again.}}
{{History|||snap=19w13a|Toolsmith villagers now give stone hoes to players under the [[Hero of the Village]] effect.}}
{{History||1.16|snap=20w06a|[[File:Netherite Hoe JE1.png|32px]] Added netherite hoes.
|Netherite hoes are obtained by combining one diamond hoe and one netherite ingot in a crafting table.
|[[Crimson planks]] and [[warped planks]] can now be used to craft wooden hoes.}}
{{History|||snap=20w09a|Hoes can now break [[Nether Wart Block|nether wart and warped wart block]]s quickly.
|Netherite hoes can now be obtained through [[bartering]] with [[piglin]]s.
|[[File:Wooden Hoe JE3 BE3.png|32px]] [[File:Golden Hoe JE3 BE3.png|32px]] [[File:Diamond Hoe JE3 BE3.png|32px]] The textures of wooden, golden, and diamond hoes have been changed.}}
{{History|||snap=20w10a|Each tier of hoes now has different a speed while [[breaking|mining]] blocks they are effective against.
|Hoes can now be enchanted with [[Efficiency]], [[Fortune]] and [[Silk Touch]].
|Hoes now mine [[hay bale]]s faster than other tools.
|Netherite hoes are now less common when bartering with piglins.
|Hoes now lose 2 durability when used as a weapon.
|[[File:Netherite Hoe JE2.png|32px]] The texture of netherite hoes has been changed.
|Netherite hoes can no longer be [[crafted]].
|Netherite hoes are now obtained by combining one diamond hoe and one [[netherite ingot]] in a [[smithing table]].}}
{{History|||snap=20w11a|Hoes can now mine [[dried kelp block]]s, [[target]]s, and [[shroomlight]]s faster than other [[tool]]s.}}
{{History|||snap=20w12a|Hoes can now mine [[sponge]]s faster than other tools.}}
{{History|||snap=20w15a|Hoes can now mine [[leaves]] faster.
|Stone hoes can now be crafted using [[blackstone]].}}
{{History|||snap=20w16a|Golden hoes now generate randomly enchanted in [[bastion remnant]]s and [[ruined portal]] chests.}}
{{History|||snap=20w20a|Netherite hoes can no longer be obtained through bartering with piglins, making them no longer renewable.}}
{{History||1.17|snap=20w49a|Hoes can now mine [[sculk sensor]]s faster than other tools.}}
{{History|||snap=21w11a|Hoes are now the appropriate tool for breaking [[moss block]]s.}}
{{History|||snap=21w08a|Stone hoes can now be crafted using [[cobbled deepslate]].}}
{{History|||snap=21w20a|Hoes can now be used on [[rooted dirt]], turning it into normal dirt, yielding a [[hanging roots]] item.}}
{{History||1.19|snap=22w11a|[[Mangrove planks]] can now be used to craft wooden hoes.}}
{{History|||snap=22w12a|Hoes can now mine mangrove [[leaves]] faster.<ref>{{Cite bug|MC|249270|Mangrove leaves do not have a hoe as their preferred tool|date=March 19, 2022}}</ref>}}
{{History|||snap=22w13a|Diamond hoes may now be found in [[ancient city]] [[chest]]s.}}
{{History||1.20<br>(Experimental)|link=1.19.4|snap=23w04a|Upgrading diamond hoes to netherite hoes now requires the netherite upgrade [[smithing template]].}}
{{History||1.20|snap=23w12a|Wooden hoes may now be found when brushing [[suspicious sand]] and [[suspicious gravel]] in cold and warm [[ocean ruins]] and [[trail ruins]].}}
{{History|||snap=23w16a|Wooden hoe no longer generates in [[suspicious sand]] in [[trail ruins]].|Due to the split of the archaeological loot tables for the suspicious gravel within the [[trail ruins]]; wooden hoe now is in the common loot.}}
{{History|upcoming java}}
{{History||Combat Tests|snap=1.14.3 - Combat Test|The attack speed of wooden hoes has been changed to 2, stone to 2.5, and diamond and gold to 3.5.
|The [[damage]] dealt for wooden, stone, and gold hoes have been changed to {{hp|2}} and iron and diamond hoes to {{hp|3}}.
|The attack reach of hoes has been increased to 4 [[block]]s.}}
{{History|pocket alpha}}
{{History||v0.4.0|[[File:Wooden Hoe JE1 BE1.png|32px]] [[File:Stone Hoe JE1 BE1.png|32px]] [[File:Iron Hoe JE1 BE1.png|32px]] [[File:Golden Hoe JE1 BE1.png|32px]] [[File:Diamond Hoe JE1 BE1.png|32px]] Added hoes.
|Only iron hoes are available in the Creative inventory.
|[[Wheat seed]]s are now obtained by using a hoe on [[grass]] blocks.}}
{{History||v0.8.0|snap=build 3|[[Beetroot seeds]], [[carrot]]s, and [[potato]]es are now obtained by using a hoe on [[grass]] blocks.}}
{{History|||snap=build 4|[[Carrot]]s and [[potato]]es no longer spawn from tilling [[grass]] blocks with a hoe.}}
{{History||v0.11.0|snap=build 11|Wooden, stone, golden, and diamond hoes are now available in the [[creative]] [[inventory]].}}
{{History|||snap=build 12|Wooden, stone, golden, and diamond hoes have been removed from creative.}}
{{History|||snap=build 13|All hoes are now available in [[creative]] mode again.}}
{{History||v0.16.2|Wooden hoes can now be found inside the [[chest]] in the large house of [[ice plains]] [[village]]s.}}
{{History|pocket}}
{{History||1.1.0|snap=alpha 1.1.0.0|Iron and golden hoes are now [[smelting|smeltable]].
|Diamond hoes can now be found inside [[woodland mansion]] [[chest]]s.}}
{{History|bedrock}}
{{History||1.2.0|snap=beta 1.2.0.2|Hoes can now be used to transform [[coarse dirt]] into normal [[dirt]].}}
{{History||1.10.0|snap=beta 1.10.0.3|Due to [[village]]s being overhauled, wooden hoes can no longer be found in [[village]]s.
|[[File:Wooden Hoe JE2 BE2.png|32px]] [[File:Stone Hoe JE2 BE2.png|32px]] [[File:Iron Hoe JE2 BE2.png|32px]] [[File:Golden Hoe JE2 BE2.png|32px]] [[File:Diamond Hoe JE2 BE2.png|32px]] The textures of all hoes have been changed.}}
{{History||1.11.0|snap=beta 1.11.0.4|Stone and diamond hoes can now be [[trading|bought]] from toolsmith [[villager]]s.}}
{{History||1.12.0|snap=beta 1.12.0.4|The price of diamond hoes [[trading|sold]] by toolsmith villagers has been lowered to 4 [[emerald]]s.}}
{{History||1.16.0|snap=beta 1.16.0.51|[[File:Netherite Hoe BE1.png|32px]] Added netherite hoes.|Netherite hoes are obtained by combining one diamond hoe and one netherite ingot in a crafting table.
|[[File:Wooden Hoe JE3 BE3.png|32px]] [[File:Golden Hoe JE3 BE3.png|32px]] [[File:Diamond Hoe JE3 BE3.png|32px]] The textures of wooden, golden, and diamond hoes have been changed.}}
{{History|||snap=beta 1.16.0.57|Each tier of hoes now has different a speed while [[breaking|mining]] blocks they are effective against.
|Hoes can now break [[hay bale]]s, [[dried kelp block]]s, [[target block]]s, [[Sponge|dry and wet sponges]], [[shroomlight]]s, [[leaves]], [[Nether Wart Block|nether wart and warped wart block]]s quickly.
|Hoes can now be enchanted with [[Efficiency]], [[Fortune]] and [[Silk Touch]].
|Netherite hoes can now be obtained through [[bartering]] with [[piglin]]s.
|Netherite hoes can no longer be [[crafting|crafted]].
|Netherite hoes are now obtained by combining one diamond hoe and one [[netherite ingot]] in a [[smithing table]].
|Stone Hoes can now be created using Blackstone.
|Golden and netherite hoes now generate randomly enchanted in [[bastion remnants]] chests.
|Golden hoes now generate randomly enchanted in ruined portal chests.
|Hoes now deal the same damage as pickaxes of each tier.}}
{{History||1.16.100|snap=beta 1.16.100.54|Netherite hoes can no longer be obtained through [[bartering]] with [[piglin]]s, making them no longer renewable.}}
{{History||1.17.10|snap=beta 1.17.10.20|[[File:Netherite Hoe JE2.png|32px]] The texture of netherite hoes has been changed to match ''Java Edition''.}}
{{History|console}}
{{History||xbox=TU1|xbone=CU1|ps=1.0|wiiu=Patch 1|switch=1.0.1|[[File:Wooden Hoe JE1 BE1.png|32px]] [[File:Stone Hoe JE1 BE1.png|32px]] [[File:Iron Hoe JE1 BE1.png|32px]] [[File:Golden Hoe JE1 BE1.png|32px]] [[File:Diamond Hoe JE1 BE1.png|32px]] Added hoes (all five types).}}
{{History||xbox=TU53|xbone=CU43|ps=1.49|wiiu=Patch 23|switch=1.0.3|Iron and golden hoes are now [[smelting|smeltable]].}}
{{History|ps4}}
{{History||1.90|[[File:Wooden Hoe JE2 BE2.png|32px]] [[File:Stone Hoe JE2 BE2.png|32px]] [[File:Iron Hoe.png|32px]] [[File:Golden Hoe JE2 BE2.png|32px]] [[File:Diamond Hoe JE2 BE2.png|32px]] The textures of all hoes have been changed.}}
{{History|New 3DS}}
{{History||0.1.0|[[File:Wooden Hoe JE1 BE1.png|32px]] [[File:Stone Hoe JE1 BE1.png|32px]] [[File:Iron Hoe JE1 BE1.png|32px]] [[File:Golden Hoe JE1 BE1.png|32px]] [[File:Diamond Hoe JE1 BE1.png|32px]] Added hoes.}}
{{History|foot}}
== Issues ==
{{issue list}}
== Trivia ==
*Tilling a [[dirt]] block that has a dirt block on top of it changes it to [[farmland]] even though it cannot be used. If a hoe is used on a [[block]] horizontally adjacent to such a block, the first block reverts to dirt and the selected block is not tilled.
*When a hoe breaks, it does not display the tool breaking animation like on other tools, because tilling is not predicted client-side.
*The textures for the post 1.14 iron and stone hoes have an error, where the color for the edge of the handle is partly the same color as the edge of the top part. This isn't present in any other tool.
== Gallery ==
<gallery>
Stone Hoe SDGP.png|Stone hoe in the [[Super Duper Graphics Pack]].
Kingbdogz Hoe.jpg|[[Kingbdgoz]] holding a hoe.
</gallery>
=== Enchanted hoes ===
<gallery>
Enchanted Wooden Hoe.gif
Enchanted Stone Hoe.gif
Enchanted Iron Hoe.gif
Enchanted Golden Hoe.gif
Enchanted Diamond Hoe.gif
Enchanted Netherite Hoe.gif
</gallery>
== References ==
{{reflist}}
== External Links ==
*[https://www.minecraft.net/en-us/article/taking-inventory--hoe Taking Inventory: Hoe] – Minecraft.net on June 25, 2019
{{Items}}
[[Category:Combat]]
[[cs:Motyka]]
[[de:Hacke]]
[[es:Azada]]
[[fr:Houe]]
[[hu:Kapa]]
[[it:Zappa]]
[[ja:クワ]]
[[ko:괭이]]
[[nl:Schoffel]]
[[pl:Motyka]]
[[pt:Enxada]]
[[ru:Мотыга]]
[[tr:Çapa]]
[[uk:Мотика]]
[[zh:锄]]</li></ul> | January 24, 2017 | Jeb tweets a screenshot of the changes to the banner color palette. | |||
| 17w06a | |||||
| pre6 | "Chief fess" and "base fess" banners are now just "chief" and "base" banners. | ||||
1.13{{Extension DPL}}<ul><li>[[Cyan Dye|Cyan Dye]]<br/>{{Item
| image = Cyan Dye.png
| renewable = Yes
| stackable = Yes (64)
}}
'''Cyan dye''' is a [[Dyeing#Secondary|secondary dye color]].
== Obtaining ==
=== Crafting ===
{{Crafting
|head=1
|showdescription=1
|showname=0
|Blue Dye
|Green Dye
|Output=Cyan Dye,2
|type=Material
}}
{{Crafting
|Lapis Lazuli
|Green Dye
|Output=Cyan Dye,2
|description={{only|bedrock|education}}
|type=Material
}}
{{Crafting
|Pitcher Plant
|Output=Cyan Dye,2
|description=
|type=Material
|foot=1
}}
=== Trading ===
[[Wandering trader]]s sell 3 cyan dye for an [[emerald]].
== Usage ==
{{dye usage}}
=== Crafting ingredient ===
{{crafting usage|ignore=Banner|continue=1}}
{{banner crafting usage}}
=== Loom ingredient ===
{{Banner loom usage|Cyan Dye}}
=== Trading ===
{{IN|bedrock}}, journeyman-level shepherd villagers have 20% chance to buy 12 cyan dye for an emerald.
{{More info|java=1|Java UI does not use a specific trade slot, which results in a different chance to offer this trade.}}
== Data values ==
=== ID ===
{{edition|java}}:
{{ID table
|edition=java
|showforms=y
|generatetranslationkeys=y
|displayname=Cyan Dye
|spritetype=item
|nameid=cyan_dye
|form=item
|foot=1}}
{{edition|bedrock}}:
{{ID table
|edition=bedrock
|showaliasids=y
|shownumericids=y
|showforms=y
|notshowbeitemforms=y
|generatetranslationkeys=y
|displayname=Cyan Dye
|spritetype=item
|nameid=cyan_dye
|aliasid=dye / 6
|id=401
|form=item
|translationkey=item.dye.cyan.name
|foot=1}}
== History ==
{{History|java beta}}
{{History||1.2|[[File:Cyan Dye JE1 BE1.png|32px]] Added cyan dye.}}
{{History|java}}
{{History||1.4.2|snap=12w34a|Added the ability to [[Armor#Dyeing|dye]] leather [[armor]] and [[wolf]] collars.}}
{{History||1.4.6|snap=12w49a|Cyan dye can now be [[crafting|crafted]] with [[gunpowder]] to create a [[firework star]].}}
{{History||1.6.1|snap=13w19a|[[Stained clay]] can now be crafted.}}
{{history||1.7.2|snap=13w36a|With the addition of new [[flower]]s, many secondary and tertiary dyes are now primary [[dye]]s.}}
{{History|||snap=13w41a|[[Stained glass]] can now be crafted.}}
{{History||1.8|snap=14w02a|Due to [[lapis lazuli]] being [[renewable resource|renewable]], cyan dye is also renewable.}}
{{History|||snap=14w30a|Added [[banner]]s, which can be dyed.}}
{{History||1.13|snap=17w47a|The different data values for the <code>dye</code> ID have now been split up into their own IDs.
|Prior to [[1.13/Flattening|''The Flattening'']], this [[item]]'s numeral ID was 351.}}
{{History||1.14|snap=18w43a|Cyan dye is now [[crafting|crafted]] using [[blue dye]], instead of [[lapis lazuli]].
|[[File:Cyan Dye.png|32px]] The texture of cyan dye has now been changed.}}
{{History|||snap=18w44a|Cyan dye can now change the text color on [[sign]]s to cyan.}}
{{History|||snap=19w05a|Added the [[wandering trader]], which sell cyan dyes.}}
{{History|||snap=19w11a|Cyan dye can now be [[trading|bought]] by shepherd villagers.}}
{{History||1.17|snap=20w45a|Cyan dye can now be used to craft [[cyan candle]]s.}}
{{History|||snap=21w19a|Cyan dye can no longer be used to craft cyan candles.}}
{{History|||snap=Pre-release 1|Cyan dye can once again be used to craft cyan candles.}}
{{History||1.20<br>(Experimental)|link=1.19.3|snap=22w42a|Cyan dye can now change the text color on [[hanging sign]]s to cyan.}}
{{History||1.20|snap=23w12a|Added [[pitcher plant]]s, which can be crafted into cyan dye.}}
{{History|||snap=23w14a|[[Pitcher plant]]s now craft into 2 cyan dye instead of 1.}}
{{History|pocket alpha}}
{{History||v0.3.0|[[File:Cyan Dye JE1 BE1.png|32px]] Added cyan dye. It is currently unobtainable and serves no purpose.}}
{{History||v0.4.0|Cyan dye is now craftable with [[lapis lazuli]] and [[cactus green]].
|Cyan dye can now be used to craft cyan wool.}}
{{History||v0.6.0|Cyan dye can now be used to dye [[sheep]].}}
{{History||v0.9.0|snap=build 11|Cyan dye can now be used to craft colored [[terracotta]].}}
{{History||v0.11.0|snap=build 1|Cyan dye can now be used to dye tamed [[wolf]] collars.}}
{{History||v0.14.0|snap=build 1|Cyan dye can now be used to dye water in [[cauldron]]s.}}
{{History|pocket}}
{{History||1.0.0|snap=alpha 0.17.0.1|Cyan dye can now be used to dye [[shulker]]s.}}
{{History||1.1.0|snap=alpha 1.1.0.0|Cyan dye can now be used to craft [[concrete powder]], colored [[bed]]s and dyed [[shulker box]]es.}}
{{History|bedrock}}
{{History||1.2.0|snap=beta 1.2.0.2|Cyan dye can now be used to craft [[firework star]]s, [[stained glass]] and patterns on [[banner]]s.}}
{{History||1.4.0|snap=beta 1.2.20.1|Cyan dye can now be used to craft [[balloon|ballons]] and [[glow stick|glow sticks]].}}
{{History||1.8.0|snap=beta 1.8.0.8|Cyan dye can now be used to dye tamed [[cat]] collars.}}
{{History||1.10.0|snap=beta 1.10.0.3|Cyan dye are now [[trading|sold]] by [[wandering trader]]s.
|Cyan dye can now be used to dye white [[carpet|carpets]] and undyed [[glass pane]]s.
|[[File:Cyan Dye.png|32px]] The texture of cyan dye has now been changed.}}
{{History||1.11.0|snap=beta 1.11.0.4|Cyan dye can be [[trading|sold]] to shepherd [[villager]]s.}}
{{History||1.16.100|snap=beta 1.16.100.56|The ID of cyan dye has been changed from <code>dye/6</code> to <code>cyan_dye</code>.}}
{{History|console}}
{{History||xbox=TU1|xbone=CU1|ps=1.00|switch=1.0.1|wiiu=Patch 1|[[File:Cyan Dye JE1 BE1.png|32px]] Added cyan dye.}}
{{History|PS4}}
{{History||1.90|[[File:Cyan Dye.png|32px]] The texture of cyan dye has now been changed.}}
{{History|new 3ds}}
{{History||0.1.0|[[File:Cyan Dye JE1 BE1.png|32px]] Added cyan dye.}}
{{History|foot}}
== Issues ==
{{issue list}}
{{Items}}
[[Category:Items]]
[[Category:Dyes]]
[[Category:Renewable resources]]
[[cs:Azurové barvivo]]
[[de:Türkiser Farbstoff]]
[[es:Tinte cian]]
[[fr:Teinture cyan]]
[[hu:Ciánkék festék]]
[[ja:青緑色の染料]]
[[ko:청록색 염료]]
[[nl:Turquoise kleurstof]]
[[pl:Błękitny barwnik]]
[[pt:Corante ciano]]
[[ru:Бирюзовый краситель]]
[[zh:青色染料]]</li><li>[[Amethyst Shard|Amethyst Shard]]<br/>{{Item
| title = Amethyst Shard
| image = Amethyst Shard.png
| renewable = Yes
| stackable = Yes (64)
}}
An '''amethyst shard''' is a crystal ore obtained from mining a fully grown [[amethyst cluster]] or can be obtained from chests in [[Ancient City|ancient cities]].
== Obtaining ==
=== Mining ===
An [[amethyst cluster]] mined using a non-[[Silk Touch]], non-[[Fortune]] [[pickaxe]] drops 4 amethyst shards. When mined using any other tool, [[item]] or mechanism (such as [[explosion]]s or [[piston]]s) it drops 2 shards. The maximum amount of amethyst shards dropped can be increased with Fortune. Fortune I gives a {{frac|1|3}} chance for eight shards, averaging 5.33 shards; Fortune II gives a 25% chance (each) to give eight or 12 shards, averaging 7 shards, and Fortune III gives a 20% chance (each) to give 8, 12, or 16 shards, averaging 8.8 shards.
If the amethyst cluster in any of its growth stages is mined using a pickaxe enchanted with [[Silk Touch]], it drops itself rather than amethyst shards.
=== Chest loot ===
{{LootChestItem|amethyst-shard}}
== Usage ==
=== Crafting ingredient ===
{{Crafting usage}}
=== Smithing ingredient ===
{{Smithing
|head=1
|ingredients=Any Armor Trim +<br/>Any Armor Piece + <br/>Amethyst Shard
|Any Armor Trim Smithing Template
|Netherite Chestplate
|Amethyst Shard
|Amethyst Trim Netherite Chestplate
|showdescription=1
|description = All armor types can be used in this recipe;<br/>a netherite chestplate is shown as an example.<br/>
|tail=1
}}
;Trim color palette
The following color palette is shown on the designs on trimmed armor:
*{{TrimPalette|amethyst shard}}
=== Allay duplication ===
If an amethyst shard is given to an [[allay]] that is currently dancing to an active [[jukebox]], the allay emits heart particles, consumes the amethyst shard and duplicates into another allay. After this, there is a 5 minute cool down until both allays can be duplicated like this again.
== Sounds ==
{{Edition|Java}}:
{{Sound table
|sound=Amethyst shimmer.ogg
|subtitle=Amethyst chimes
|source=neutral
|description=When an amethyst shard duplicates an allay
|id=block.amethyst_block.chime
|translationkey=subtitles.block.amethyst_block.chime
|volume=0.4
|pitch=1.0
|distance=16
|foot=1}}
{{Edition|Bedrock}}:
{{Sound table
|type=bedrock
|sound=Amethyst shimmer.ogg
|source=block
|description=When an amethyst shard duplicates an allay
|id=chime.amethyst_block
|volume=1.0
|pitch=0.5-1.7
|foot=1}}
== Data values ==
=== ID ===
{{edition|java}}:
{{ID table
|edition=java
|showforms=y
|generatetranslationkeys=y
|displayname=Amethyst Shard
|spritetype=item
|nameid=amethyst_shard
|form=item
|foot=1}}
{{edition|bedrock}}:
{{ID table
|edition=bedrock
|shownumericids=y
|showforms=y
|notshowbeitemforms=y
|generatetranslationkeys=y
|displayname=Amethyst Shard
|spritetype=item
|nameid=amethyst_shard
|form=item
|id=625
|foot=1}}
==History==
{{History||October 3, 2020|link={{ytl|DBvZ2Iqmm3M|t=23m14s}}|Amethyst shards are mentioned, but not shown at [[Minecraft Live 2020]].}}
{{History|java}}
{{History||1.17|snap=20w45a|[[File:Amethyst Shard JE1.png|32px]] Added amethyst shards.}}
{{History|||snap=20w46a|[[File:Amethyst Shard JE2 BE1.png|32px]] The texture for amethyst shards has changed.}}
{{History||1.19|snap=22w13a|Amethyst shards can now be found in [[ancient city]] [[chest]]s.}}
{{History||1.19.1|snap=22w24a|Amethyst shards can now be used to duplicate [[allay]]s.}}
{{History||1.20<br>(Experimental)|link=1.19.4|snap=23w04a|Amethyst shards can now be used as an armor trim material.}}
{{History||1.20|snap=23w12a|Amethyst shards can now be used to craft [[calibrated sculk sensor]]s.}}
{{History|bedrock}}
{{History||1.17.0|snap=beta 1.17.0.50|[[File:Amethyst Shard JE2 BE1.png|32px]] Added amethyst shards.}}
{{History|||snap=beta 1.17.0.52|Amethyst shards are now available without enabling [[Experimental Gameplay]].}}
{{History||1.19.0|snap=beta 1.19.0.26|Amethyst shards can now be found in [[ancient city]] [[chest]]s.}}
{{History||1.19.10|snap=beta 1.19.10.22|Amethyst shards can now be used to duplicate allays.}}
{{History||1.20.0<br>(Experimental)|link=Bedrock Edition 1.19.80|snap=beta 1.19.80.21|Amethyst shards can now be used as an armor trim material.}}
{{History|||snap=beta 1.19.80.22|Amethyst shards can now be used to craft calibrated sculk sensors.}}
{{History|foot}}
==Issues==
{{issue list}}
==Trivia==
* Although in real life {{w|amethyst}} is a variety of {{w|quartz}} like [[Nether Quartz|nether quartz]], the two resources are not interchangeable.
* besides netherite, amethyst is the only or to be attempted not from an ore in caves
== External Links ==
*[https://www.minecraft.net/en-us/article/taking-inventory--amethyst-shard Taking Inventory: Amethyst Shard] – Minecraft.net on May 20, 2021
{{Items}}
[[Category:Renewable resources]]
[[de:Amethystscherbe]]
[[es:Fragmento de amatista]]
[[fr:Éclat d'améthyste]]
[[it:Scheggia di ametista]]
[[ja:アメジストの欠片]]
[[lzh:紫水玉片]]
[[pl:Odłamek ametystu]]
[[pt:Fragmento de ametista]]
[[ru:Осколок аметиста]]
[[uk:Уламок аметисту]]
[[zh:紫水晶碎片]]
[[Category:Ore]]</li></ul> | 17w47a | The colors for the banner, wall_banner and standing_banner ID have been split up into their own IDs.
| |||
| Prior to The Flattening, these blocks' numeral IDs were 176 and 177, and the item's 425. | |||||
| 18w10a | Using a map on a banner now mark the spot of the banner on the map. | ||||
1.14{{Extension DPL}}<ul><li>[[A Very Fine Item|A Very Fine Item]]<br/>{{Joke feature}}
{{Item
| image = A Very Fine Item.png
| renewable = No
| stackable = Yes (64)
}}
'''A very fine item''' was a joke item from [[Java Edition 20w14∞]], found only in the {{code|isolation}} dimension.
== Appearance ==
The texture of a very fine item resembles the side face of a grass block with the words "Home Sweet Home" written on it. Unlike most items, its texture is 64x64 pixels, rather than the usual 16x16.
== Obtaining ==
=== Dimension ===
A very fine item can only be obtained from an item frame in the {{Code|isolation}} dimension. There is a maximum of 1 fine item that can be found legitimately in any world.
=== Cheats/Creative mode ===
This item can't be found in the creative inventory, but it can be middle-click duplicated in creative mode or given with the {{Code|code=give <target> minecraft:fine_item <amount>}} command.
== Usage ==
This item cannot be placed or used in any way other than a trophy. It can still be inserted and/or rotated inside of an item frame.
== Data values ==
=== ID ===
{{ID table
|showforms=y
|generatetranslationkeys=java
|displayname=A Very Fine Item
|spritetype=item
|nameid=fine_item
|form=item
|foot=1}}
== History ==
{{History|java}}
{{History||20w14∞|[[File:A Very Fine Item.png|32px]] Added a very fine item.}}
{{History|foot}}
== Gallery ==
<gallery>
File:isolation biome.png|The Easter Egg dimension that the item spawns in.
</gallery>
== References ==
{{reflist}}
{{Items}}
{{Jokes}}
[[Category:Non-renewable resources]]
[[Category:Joke items]]
[[es:A Very Fine Item]]
[[pt:Um item muito bom]]</li><li>[[Enchanted Golden Apple|Enchanted Golden Apple]]<br/>{{Item
| image = Enchanted Golden Apple.png
| rarity = Epic
| heals = {{hunger|4}}
| effects =
* {{EffectLink|Absorption}} IV (2:00)
* {{EffectLink|Regeneration}} II (0:20){{only|java|short=yes}}/V (0:30){{only|bedrock|short=yes}}
* {{EffectLink|Fire Resistance}} (5:00)
* {{EffectLink|Resistance}} (5:00)
| renewable = No
| stackable = Yes (64)
}}
An '''enchanted golden apple''' ({{in|je}}), notch apple, or '''enchanted apple''' ({{in|be}}), is a rare, uncraftable variant of the [[golden apple]] that grants much more powerful effects when consumed.
== Obtaining ==
=== Chest loot ===
{{LootChestItem|enchanted-golden-apple}}
== Usage ==
{{see also|Tutorials/Hunger management|title1=Hunger management}}
To eat an enchanted golden apple, press and hold {{control|use}} while it is selected in the hotbar. It restores {{hunger|4}} points of hunger and 9.6 [[Hunger#Mechanics|saturation]].
The enchanted golden apple provides:
* [[Absorption]] IV for 2 minutes (providing {{hp|16|absorption=1}} points of absorption health)
* [[Regeneration]] level II {{in|java}} or V {{in|bedrock}} for 30 seconds ({{in|java}}, {{hp|1}} is restored every 25 ticks, {{hp|2|notag=1}} × 0.4 per second) for 20 seconds (long enough to heal {{hp|16}} points of damage; {{in|bedrock}}, {{hp|1}} is restored every 6 ticks, {{hp|2|notag=1}} × 1.66 per second for 30 seconds, which is long enough to heal up to {{hp|100}} points of damage.
* [[Fire Resistance]] I for 5 minutes
* [[Resistance]] I (20% reduced damage from all sources except the [[void]]) for 5 minutes
=== Horses ===
Enchanted golden apples can be used for improving the chances of taming a [[horse]] by 10%, for [[breeding]] and leading horses, and for speeding up the growth of [[baby]] horses by 4 minutes.
=== Crafting ingredient ===
{{crafting usage|Enchanted Golden Apple|match=start}}
===Piglins===
{{EntityLink|Piglin|Piglins}} are attracted to enchanted golden apples and run toward any enchanted golden apples on the ground, and inspect it for 6 to 8 seconds before putting it in their inventory. However, piglins do not eat enchanted golden apples (or any [[food]]).
== Sounds ==
{{Sound table/Entity/Food}}
== Data values ==
=== ID ===
{{edition|java}}:
{{ID table
|edition=java
|showforms=y
|generatetranslationkeys=y
|displayname=Enchanted Golden Apple
|spritetype=item
|nameid=enchanted_golden_apple
|form=item
|foot=1}}
{{edition|bedrock}}:
{{ID table
|edition=bedrock
|showaliasids=y
|shownumericids=y
|showforms=y
|notshowbeitemforms=y
|generatetranslationkeys=y
|displayname=Enchanted Golden Apple
|spritetype=item
|nameid=enchanted_golden_apple
|aliasid=appleenchanted
|id=259
|form=item
|translationkey=item.appleEnchanted.name
|foot=1}}
== Achievements ==
{{load achievements|Overpowered;Fruit on the Loom;Oooh, shiny!}}
== Advancements ==
{{load advancements|Oh Shiny;A Furious Cocktail;How Did We Get Here;Husbandry;A Balanced Diet}}
== History ==
{{History|java}}
{{History||1.3.1|snap=12w21a|[[File:Enchanted Golden Apple JE1 BE1.gif|32px]] Added enchanted golden apples.
|Enchanted golden apples highly resemble the golden apple prior to [[Java Edition 1.1|1.1]].
|Enchanted golden apples have [[Regeneration]] IV (30 seconds), [[Resistance]] (5 minutes) and [[Fire Resistance]] (5 minutes).
|Enchanted golden apples can be [[crafted]] with 8 [[blocks of gold]] and one apple, making them [[renewable]].
|Enchanted golden apples shine like an [[enchanting|enchanted]] [[item]] and have a purple tooltip while the standard golden apple's tooltip changed to blue. However, the standard golden apple's effects remain unchanged.}}
{{History|||snap=12w21b|Added Enchanted Golden Apples to the Creative inventory.}}
{{History||1.6.1|snap=13w24b|Enchanted golden apples now give the player Absorption as well, and Regeneration IV has been increased to Regeneration V.}}
{{History|||snap=?|Enchanted golden apples can now be used to tame, breed and heal horses and donkeys.}}
{{History||1.8|snap=14w06a|[[Crafting]] an enchanted golden apple now gives the [[player]] the [[Achievements/Java_Edition|''achievement'']] "Overpowered."}}
{{History||1.9|snap=15w37a|Enchanted golden apples now give Regeneration II (down from V) and [[Absorption]] IV (up from I), in addition to the unchanged [[Resistance]] and [[Fire Resistance]] effects. The duration of the Regeneration effect has now also been decreased to 20 seconds.}}
{{History|||snap=15w44a|Enchanted golden apples are now uncraftable, making them no longer renewable.
|Enchanted golden apples have been added to [[dungeon]], [[desert temple]] and [[mineshaft]] chests.}}
{{History||1.11|snap=16w39a|Enchanted golden apples are now found in the new [[woodland mansion]] chests.}}
{{History||1.13|snap=17w47a|The names and IDs have been split into golden apple and enchanted golden apple.
|Prior to [[1.13/Flattening|''The Flattening'']], this [[item]]'s numeral ID was 322.}}
{{History||1.14|snap=18w43a|[[File:Enchanted Golden Apple JE2 BE2.gif|32px]] The texture for enchanted golden apples has been changed.}}
{{History||1.16|snap=20w16a|Enchanted golden apples can now be found inside [[ruined portal]] chests.}}
{{History||1.16.2|snap=20w30a|Enchanted golden apples can now be found inside [[bastion remnant]] chests.}}
{{History||1.18|snap=experimental snapshot 6|Horses, donkeys and mules now follow players holding enchanted golden apples.}}
{{History||1.19|snap=22w13a|Enchanted golden apples may now be found in [[ancient city]] [[chest]]s.}}
{{History|pocket alpha}}
{{History||v0.12.1|snap=build 1|[[File:Enchanted Golden Apple JE1 BE1.gif|32px]] Added enchanted golden apples.}}
{{History|||snap=build 4|A crafting recipe has been added for enchanted golden apples.}}
{{History|pocket}}
{{History||1.1.0|snap=alpha 1.1.0.0|Enchanted golden apples are now known as "Enchanted Apple."}}
{{History|bedrock}}
{{History||1.2.0|snap=?|Enchanted apples now give [[Absorption]] IV rather than Absorption I.}}
{{History||1.2.13|snap=?|Enchanted golden apples are now uncraftable, making them no longer [[renewable resource|renewable]].}}
{{History||?|Enchanted apples now give [[Regeneration]] V rather than IV.}}
{{History||1.10.0|snap=beta 1.10.0.3|Enchanted apples are no longer used to [[crafting|craft]] patterns on [[banner]]s directly, but are now used to craft Thing [[banner pattern]]s.
|[[File:Enchanted Golden Apple JE2 BE2.gif|32px]] The texture for the enchanted golden apple has been changed.}}
{{History||1.16.0|snap=beta 1.16.0.57|Enchanted golden apples can now be found inside [[ruined portal]] chests.}}
{{History||1.16.100|snap=beta 1.16.100.56|The ID of enchanted apples has been changed from <code>appleenchanted</code> to <code>enchanted_golden_apple</code>.}}
{{History|console}}
{{History||xbox=TU14|xbone=CU1|ps=1.04|wiiu=Patch 1|switch=1.0.1|[[File:Enchanted Golden Apple JE1 BE1.gif|32px]] Added enchanted golden apples.}}
{{History||xbox=none|xbone=none|ps=1.90|wiiu=none|switch=none|[[File:Enchanted Golden Apple JE2 BE2.gif|32px]] The texture for the enchanted golden apple has been changed.}}
{{History|New 3DS}}
{{History||0.1.0|[[File:Enchanted Golden Apple JE1 BE1.gif|32px]] Added enchanted golden apples.}}
{{History|foot}}
== Issues ==
{{issue list}}
== Trivia ==
* The damage tag of an enchanted apple obtained {{in|be}} is 1, although setting it to 0 makes no difference.
== Gallery ==
<gallery>
GoldenAppleComparison.png|A comparison of the two golden apple variations.
EnchantedGoldenAppleEffects.png|The effects of consuming an enchanted golden apple.
Notch Apple In Mansion Chest.png|An extremely rare occasion where a regular golden apple and an enchanted apple being found in the same woodland mansion chest {{in|ee}}.
GoldenAppleDungeonChest.png|Golden apple in a [[dungeon]] chest, prior to 1.3.1. It resembles the enchanted golden apple.
GodPortal.png|An enchanted golden apple found in a ruined portal chest.
GodSpawner.png|An enchanted golden apple found in a monster room chest.
</gallery>
{{Items}}
[[Category:Non-renewable resources]]
[[Category:Food]]
[[de:Verzauberter goldener Apfel]]
[[es:Manzana dorada encantada]]
[[fr:pomme dorée enchantée]]
[[ja:エンチャントされた金のリンゴ]]
[[pt:Maçã dourada encantada]]
[[th:แอปเปิ้ลทองร่ายมนตร์]]
[[zh:附魔金苹果]]</li></ul> | 18w43a | Looms have been added to help the player edit banners more easily. | |||
| All recipes for banner patterns have been removed. | |||||
| 18w45a | |||||
| 18w46a | |||||
| 19w11a | Cartographer and shepherd villagers now sell banners. | ||||
| Pre-Release 2 | "Illager Banners" have been renamed to "Ominous Banners". | ||||
1.17{{Extension DPL}}<ul><li>[[Painting|Painting]]<br/>{{ItemEntity
|title=Painting
|image=Painting JE2 BE2.png
|extratext=View [[#Renders|all renders]]
|renewable=Yes
|stackable=Yes (64)
|drops=1 {{ItemLink|Painting}}
}}
'''Paintings''' are decorative [[entity|entities]] that hang on walls.
== Obtaining ==
=== Crafting ===
{{Crafting
|A1= Stick |B1= Stick |C1= Stick
|A2= Stick |B2= Any Wool |C2= Stick
|A3= Stick |B3= Stick |C3= Stick
|Output= Painting
|type= Decoration block
}}
Paintings can be crafted with any color of [[wool]]. The color of the wool used does not influence the picture chosen when the painting is placed.
Once placed, it displays a random painting.
=== Breaking ===
To remove a painting from a wall, the player can {{control|attack}} it, break one of its supporting blocks, cover one square of it with a block, hit it with an arrow, egg, ender pearl, snowball, or fire charge, or subject it to an explosion. The painting then drops as an item. Arrows that hit paintings disappear.
=== Trading ===
Master-level shepherd [[villager]]s sell 3 paintings for 2 [[emerald]]s.
== Usage ==
=== Placement ===
Paintings can be placed on the sides of [[solid block]]s, [[sign]]s, [[banner]]s, or [[sculk vein]]s. A small gap is visible between the painting and attachment surface. There are several different sizes of paintings (see below). When placed, a painting checks for the largest amount of space it has. It then chooses a random painting of that size. The player can add blocks around the painting to ensure it is the size wanted. When the supporting blocks are removed, the painting breaks after 20 game [[tick]]s (1 second) if no supporting blocks are replaced during that interval.
=== Properties ===
Being an entity, paintings can simultaneously exist in the same space as blocks such as water or torches. Specifically, they can share the space with any block whose collision box does not intersect its hitbox.
Players and mobs are able to walk through paintings, as long as the blocks supporting the painting allow it. Secret doorways can be created this way. [[Light]] propagates through paintings as well.
If a player is concealed behind a painting, the player's name is also concealed from other players.{{verify|Is this true in Bedrock?}}
Paintings are non-flammable.
== Canvases ==
{{Stub|Needing the new painting renders}}
There are 31 paintings in the game. These are mostly based on paintings by [[Kristoffer Zetterstrand]], who also created the ''Minecraft'' versions.
{| class="wikitable stikitable" style="text-align: center" data-description="Paintings"
! style="min-width:150px" |Canvas
! style="min-width:3em;max-width:4em" |Size
! style="min-width:3em" |Original
! style="min-width:3em" |Name
! style="min-width:3em;max-width:4.5em" |[[Resource location]]
! style="min-width:10em" |Description
! Java Edition version added
|-
! [[File:Alban (texture).png|64px]]
| rowspan="7" | 1×1 blocks<br>16×16 pixels || [https://zetterstrand.com/work/pictures/archive/alban.jpeg "Albanian"] || Albanian || <code>alban</code> || A man wearing a fez next to a house and a bush. As the name of the painting suggests, it may be a landscape in [[Wikipedia:Albania|Albania]]. || rowspan="9" | [[Indev 20100223]]
|-
! [[File:Aztec (texture).png|64px]]
|[https://zetterstrand.com/eventz/wp-content/uploads/2aztbig.jpg "de_aztec"]|| de_aztec || <code>aztec</code> || [[Wikipedia:Noclip mode|Free-look]] perspective of the map [[w:c:counterstrike:Aztec|de_aztec]] from the video game ''[[Wikipedia:Counter-Strike (video game)|Counter-Strike]]''.
|-
! [[File:Aztec2 (texture).png|64px]]
|[https://zetterstrand.com/eventz/wp-content/uploads/11aztec_for_print.jpg "de_aztec"]|| de_aztec || <code>aztec2</code> || [[Wikipedia:Noclip mode|Free-look]] perspective of the map [[w:c:counterstrike:Aztec|de_aztec]] from the video game ''[[Wikipedia:Counter-Strike (video game)|Counter-Strike]]''.
|-
! [[File:Bomb (texture).png|64px]]
|[https://zetterstrand.com/eventz/wp-content/uploads/12bomb.jpg "Target successfully bombed"]|| Target Successfully Bombed || <code>bomb</code> || The map [[w:c:counterstrike:Dust II|de_dust2]] from the video game ''[[Wikipedia:Counter-Strike (video game)|Counter-Strike]]'', named “target successfully bombed" in reference to the game.
|-
! [[File:Kebab (texture).png|64px]]
|[https://zetterstrand.com/work/pictures/archive/kebab2.jpg "Kebab med tre pepperoni"] || Kebab med tre pepperoni || <code>kebab</code> || A kebab with three green chili peppers.
|-
! [[File:Plant (texture).png|64px]]
|[https://zetterstrand.com/work/pictures/archive/paradistrad.jpeg "Paradisträd"] || Paradisträd || <code>plant</code> || Still life of two plants in pots. "Paradisträd" is Swedish for "[[Wikipedia:Crassula ovata|money tree]]", which is a common name for the depicted species in Scandinavia.
|-
! [[File:Wasteland (texture).png|64px]]
|[https://zetterstrand.com/eventz/wp-content/uploads/Wasteland_1920.jpg "Wasteland"]|| Wasteland || <code>wasteland</code> || A view of some wastelands; a small animal (presumably a rabbit) is sitting on the window ledge.
|-
! [[File:Courbet (texture).png|128px]]
| rowspan="5" | 2×1 blocks<br>32×16 pixels ||[https://zetterstrand.com/eventz/wp-content/uploads/bonjourmonsieurcourbet_BIG.jpg "Bonjour monsieur Courbet"]|| Bonjour Monsieur Courbet || <code>courbet</code> || Two hikers with pointy beards seemingly greeting each other. Based on Gustave Courbet's painting ''[[Wikipedia:La rencontre|The Meeting or "Bonjour, Monsieur Courbet"]]''.
|-
! [[File:Pool (texture).png|128px]]
|[https://zetterstrand.com/eventz/wp-content/uploads/thepool_1920.jpg "The pool"]|| The Pool || <code>pool</code> || Some men and women skinny-dipping in a pool over a cube of sorts. Also there is an old man resting in the lower-right edge.
|-
! [[File:Sea (texture).png|128px]]
| rowspan=2 |[https://zetterstrand.com/eventz/wp-content/uploads/SeaSide_1920.jpg "Seaside"]
| Seaside
| <code>sea</code>
| Mountains and a lake, with a small photo of a mountain and a bright-colored plant on the window ledge. || [[Indev 20100223]] / [[Alpha v1.1.1]]
|-
! [[File:Creebet (texture).png|128px]]
| Creebet || <code>creebet</code> || Mountains and a lake, with a small photo of a mountain and a creeper looking at the viewer through a window. || [[Alpha v1.1.1]]
|-
! [[File:Sunset (texture).png|128px]]
|[https://zetterstrand.com/eventz/wp-content/uploads/sunset_dense.jpg "sunset_dense"]|| sunset_dense || <code>sunset</code> || A view of mountains at sunset. || [[Indev 20100223]]
|-
! [[File:Graham (texture).png|64px]]
| rowspan="2" | 1×2 blocks<br>16×32 pixels ||[https://zetterstrand.com/eventz/wp-content/uploads/graham.jpg "Graham"]|| Graham || <code>graham</code> || King Graham, the player character in the video game series ''[[Wikipedia:King's Quest|King's Quest]]''. The original is based on ''[[Wikipedia:File:Sánchez_Cotán_(Bodegón_con_membrillo,_repollo,_melón_y_pepino).jpg|Still Life with Quince, Cabbage, Melon, and Cucumber]]'' by Juan Sánchez Cotán.|| [[Alpha v1.1.1]]
|-
! [[File:Wanderer (texture).png|64px]]
|[https://zetterstrand.com/eventz/wp-content/uploads/wanderer_1920.jpg "Wanderer"]|| Wanderer || <code>wanderer</code> || A version of Caspar David Friedrich's famous painting ''[[Wikipedia:Wanderer above the Sea of Fog|Wanderer above the Sea of Fog]]''. || rowspan="4" | [[Indev 20100223]]
|-
! [[File:Bust (texture).png|128px]]
| rowspan="6" | 2×2 blocks<br>32×32 pixels ||[https://zetterstrand.com/eventz/wp-content/uploads/bust_1915.jpg "Bust"]|| Bust || <code>bust</code> || A bust of [[Wikipedia:Marcus Aurelius|Marcus Aurelius]] surrounded by fire.
|-
! [[File:Match (texture).png|128px]]
|[https://zetterstrand.com/eventz/wp-content/uploads/Match_rgb_1918.jpg "Match"]|| Match || <code>match</code> || A hand holding a match, causing fire on a white cubic gas fireplace.
|-
! [[File:Skull and Roses (texture).png|128px]]
|[https://zetterstrand.com/eventz/wp-content/uploads/moonlight-installation_1920.jpg "Moonlight Installation"]|| Skull and Roses || <code>skull_and_roses</code> || A skeleton at night with red flowers in the foreground. The original painting was different, depicting a woman sitting in a couch, while the skull is in the middle of a body of glacial water of sorts.
|-
! [[File:Stage (texture).png|128px]]
|[https://zetterstrand.com/eventz/wp-content/uploads/The-stage-is-set-1.jpg "The stage is set"]
| The Stage Is Set
| <code>stage</code>
| Scenery from ''[[Wikipedia:Space Quest I|Space Quest I]]'', with the character Graham from the video game series ''[[Wikipedia:King's Quest|King's Quest]]'' appearing twice. || [[Indev 20100223]] / [[Alpha v1.1.1]]
|-
! [[File:Void (texture).png|128px]]
|[https://zetterstrand.com/eventz/wp-content/uploads/the-void_1920.jpg "The Void"]|| The void || <code>void</code> || An angel praying into a void with fire below. || [[Indev 20100223]]
|-
! [[File:Wither (painting texture).png|128px]]
| – || Wither || <code>wither</code> || The creation of a [[wither]].
This is the only painting not based on a real painting. Made by Jens Bergensten.<ref>{{Citation|url=https://www.youtube.com/watch?v=kK5Y4k-vVXc|title=Who Made Minecraft’s LAST Painting?!|author=AntVenom|website=YouTube|date=29 October 2022}}</ref><ref>https://www.reddit.com/r/Minecraft/comments/1tzav2/comment/cedagcy/</ref>
|| [[Java Edition 1.4.2]] ([[12w36a]])
|-
! [[File:Fighters (texture).png|128px]]
| 4×2 blocks<br>64×32 pixels ||[https://zetterstrand.com/eventz/wp-content/uploads/fighters.jpg "Fighters"]|| Fighters || <code>fighters</code> || Two men poised to fight. Paper versions of fighters from the game ''[[Wikipedia:International Karate +|International Karate +]]''. || [[Indev 20100223]]
|-
! [[File:Donkey Kong (texture).png|128px]]
| rowspan="2" | 4×3 blocks<br>64×48 pixels ||[https://zetterstrand.com/eventz/wp-content/uploads/kong.jpg "Kong"]|| Kong || <code>donkey_kong</code> || A paper-looking screenshot of the level [https://www.mariowiki.com/100m 100m] from the arcade game ''[[Wikipedia:Donkey Kong (arcade game)|Donkey Kong]]''. || rowspan="2" | [[Alpha v1.1.1]]
|-
! [[File:Skeleton (painting texture).png|128px]]
|[https://zetterstrand.com/eventz/wp-content/uploads/mortal_coil.jpg "Mortal Coil"]|| Mortal Coil || <code>skeleton</code> || [[w:c:grim-fandango:Bruno Martinez|Bruno Martinez]] from the adventure game ''[[Wikipedia:Grim Fandango|Grim Fandango]]''.
|-
! [[File:Burning Skull (texture).png|128px]]
| rowspan="3" | 4×4 blocks<br>64×64 pixels ||[https://zetterstrand.com/eventz/wp-content/uploads/skull_on_fire_framed_c_1910.jpg "Skull on Fire"]|| Skull On Fire || <code>burning_skull</code> || A Skull on fire; in the background there is a moon in a clear night sky.<br>This painting is based on a Minecraft screenshot,<ref>{{Citation|url=https://web.archive.org/web/20220928041338/https://imgur.com/HVhrbnH|website=Imgur|date=22 August 2020|title=https://web.archive.org/web/20220928041338/https://imgur.com/HVhrbnH}}</ref> with the grass block and a 3D skull added on top.<ref>{{Citation|url=https://web.archive.org/web/20200906184721/https://imgur.com/AwqQFS6|title=https://web.archive.org/web/20200906184721/https://imgur.com/AwqQFS6|website=Imgur|date=23 August 2020}}</ref>
(See the [[:en:Painting#Trivia|trivia]] section for more info.)
| [[Java Edition Beta 1.2 01|Beta 1.2_01]] / [[Java Edition Beta 1.3|Beta 1.3]]
|-
! [[File:Pigscene (texture).png|128px]]
|[https://zetterstrand.com/eventz/wp-content/uploads/rgb_1914.jpg "RGB"]|| Pigscene || <code>pigscene</code> <!-- yes, without an underscore --> || A girl pointing to a pig on a canvas. In the original version, the canvas showed red, green and blue blocks, representing the three colors of the [[Wikipedia:RGB color model|RGB color model]] that is typically used by computer displays. It is based on the painting ''[[Wikipedia:File:Jacob van Oost (I) - The Artist's Studio - WGA16654.jpg|The Artist's Studio]]'' by Jacob van Oost.|| [[Alpha v1.1.1]]
|-
! [[File:Pointer (texture).png|128px]]
|[https://zetterstrand.com/eventz/wp-content/uploads/pointer_1920.jpg "Pointer"]|| Pointer || <code>pointer</code> || The main character of the game ''[[Wikipedia:International Karate +|International Karate +]]'' in a fighting stance touching a large hand. It could also be interpreted as a play on Michelangelo's famous painting ''[[Wikipedia:The Creation of Adam|The Creation of Adam]]''. || [[Indev 20100223]]
|-
! TBA ||
Pack || <code>pack</code> || Reference to the pack.png fi || [[Java Edition 1.21]]le
|}
=== Unused paintings ===
In [[Pocket Edition v0.5.0 alpha|v0.5.0 alpha]], with the addition of paintings to Pocket Edition, four unused 32×32 paintings were present in <samp>[[kz.png]]</samp> which remained unused. See {{slink|Bedrock Edition unused features|Paintings}} for more information. They were also added to Java Edition in snapshot [[Java Edition 22w16a|22w16a]]. They cannot be placed by default, but can be summoned by [[commands]] (such as {{cmd|/summon painting ~ ~ ~ {variant:"water"} }}) or through a [[datapack]].
According to [[Helen Zbihlyj]],<ref>https://old.reddit.com/r/Minecraft/comments/u8hpnx/thoughts_on_the_new_paintings/i5olue6/?context=3 ([https://web.archive.org/web/20220422115723/https://old.reddit.com/r/Minecraft/comments/u8hpnx/thoughts_on_the_new_paintings/i5olue6/?context=3 archived])</ref> these paintings were originally added "as part of a Pocket Edition promo map" (no footage found) which was planned to be a part of [[Pocket Edition]] promotion at [[MINECON 2012]] [[MINECON 2013|or 2013]] and have never been used in game. The artist of these paintings remains unknown.
{| class="wikitable stikitable" style="text-align: center" data-description="Paintings"
! style="min-width:100px" |Canvas
! style="min-width:3em;max-width:4em" |Size
! style="min-width:6em" |Name
! style="min-width:10em" |[[Resource location]]
! style="min-width:10em" |Description
! style="min-width:5em;max-width:10em" |Bedrock Edition version added
! style="min-width:5em;max-width:8em" |Java Edition version added
|-
! [[File:Earth (texture) BE2.png|128px]]
| rowspan="4" | 2×2 blocks<br>32×32 pixels || Earth || <code>earth</code> || One of the four {{Wikipedia|Classical element|classical elements}}: Earth. || rowspan="4" | [[Pocket Edition v0.5.0 alpha|v0.5.0 alpha]] || rowspan="4" | [[Java Edition 22w16a|22w16a]]
|-
! [[File:Fire (texture) BE2.png|128px]]
| Fire || <code>fire</code> || One of the four classical elements: Fire.
|-
! [[File:Water (texture) BE2.png|128px]]
| Water || <code>water</code> || One of the four classical elements: Water.
|-
! [[File:Wind (texture) BE2.png|128px]]
| Wind || <code>wind</code> || One of the four classical elements: Air.
|}
==Sounds==
{{Edition|Java}}:
{{Sound table
|sound=Painting break1.ogg
|sound2=Painting break2.ogg
|sound3=Painting break3.ogg
|subtitle=Painting breaks<ref>{{Cite bug|MC|194948|Painting, item frame and lead breaking subtitles inconsistent with block breaking subtitle|date=July 14, 2020}}</ref>
|source=neutral
|description=When a painting is broken or pops off
|id=entity.painting.break
|translationkey=subtitles.entity.painting.break
|volume=1.0
|pitch=1.0
|distance=16}}
{{Sound table
|sound=Painting place1.ogg
|sound2=Painting place2.ogg
|sound3=Painting place3.ogg
|sound4=Painting place4.ogg
|subtitle=Painting placed
|source=neutral
|description=When a painting is placed
|id=entity.painting.place
|translationkey=subtitles.entity.painting.place
|volume=1.0
|pitch=1.0
|distance=16
|foot=1}}
{{Edition|Bedrock}}:
{{Sound table
|type=bedrock
|sound=Item Frame break1.ogg
|sound2=Item Frame break2.ogg
|sound3=Item Frame break3.ogg
|source=block
|description=When a painting is broken or pops off
|id=block.itemframe.break
|volume=1.0
|pitch=1.0}}
{{Sound table
|sound=Item Frame add item1.ogg
|sound2=Item Frame add item2.ogg
|soumd3=Item Frame add item3.ogg
|sound4=Item Frame add item4.ogg
|source=block
|description=When a painting is placed
|id=block.itemframe.add_item
|volume=1.0
|pitch=1.0
|foot=1}}
== Data values ==
=== ID ===
{{edition|java}}:
{{ID table
|edition=java
|firstcolumnname=Item
|showforms=y
|generatetranslationkeys=y
|displayname=Painting
|spritetype=item
|nameid=painting
|form=item
|foot=1}}
{{ID table
|edition=java
|firstcolumnname=Entity
|generatetranslationkeys=y
|displayname=Painting
|spritetype=entity
|nameid=painting
|foot=1}}
{{edition|bedrock}}:
{{ID table
|edition=bedrock
|firstcolumnname=Item
|shownumericids=y
|showforms=y
|notshowbeitemforms=y
|generatetranslationkeys=y
|displayname=Painting
|spritetype=item
|nameid=painting
|id=357
|form=item
|foot=1}}
{{ID table
|edition=bedrock
|firstcolumnname=Entity
|shownumericids=y
|generatetranslationkeys=y
|displayname=Painting
|spritetype=entity
|nameid=painting
|id=83
|foot=1}}
=== Entity data ===
Paintings have entity data that defines various properties of the entity.
{{el|java}}:
{{main|Entity format}}
{{/ED}}
{{el|bedrock}}:
: See [[Bedrock Edition level format/Entity format]].
== Video ==
<div style="text-align:center">{{yt|M3vWDirTMek}}</div>
== History ==
{{History|java indev}}
{{History||20100223|[[File:Painting JE1 BE1.png|32px]] Added paintings.
|There are currently 19 canvases, which can be viewed at [[Java Edition history of textures/Paintings]].
|The [[crafting]] recipe of paintings uses eight [[planks]].
{{{!}} class{{=}}"collapsible collapsed"
! Recipe
{{!}}-
{{!}}
{{Crafting Table
|A1=Oak Planks
|B1=Oak Planks
|C1=Oak Planks
|A2=Oak Planks
|B2=Light Gray Wool
|C2=Oak Planks
|A3=Oak Planks
|B3=Oak Planks
|C3=Oak Planks
|Output=Painting
}}
{{!}}}
|Painting textures are currently stored on a [[texture atlas]] called <samp>[[kz.png]]</samp>.}}
{{History|java infdev}}
{{History||20100227-1|The [[crafting]] recipe has of paintings has been changed, so that it now uses [[stick]]s, rather than [[planks]].
{{{!}} class{{=}}"collapsible collapsed"
! Recipe
{{!}}-
{{!}}
{{Crafting Table
|A1=Stick
|B1=Stick
|C1=Stick
|A2=Stick
|B2=Light Gray Wool
|C2=Stick
|A3=Stick
|B3=Stick
|C3=Stick
|Output=Painting
}}
{{!}}}
}}
{{History|java alpha}}
{{History||v1.1.1|Added five more painting canvases, for a total of 24.
|The textures of two paintings have been changed.}}
{{History|java beta}}
{{History||1.2_01|Added a new painting, although it uses an untextured part of <samp>kz.png</samp> due to the painting texture not yet being implemented.}}
{{History||1.3|The texture of the new painting, has been added to the part of <samp>kz.png</samp> displayed by the new painting.}}
{{History||April 27, 2011|link=https://web.archive.org/web/20201111211000/https://notch.tumblr.com/post/4988431144/the-maps|Custom paintings are mentioned by [[Notch]].}}
{{History||1.7.3|Paintings pushed by [[piston]]s now pop off.}}
{{History|java}}
{{History||1.4.2|snap=12w36a|Added new painting canvas 'Wither'.
|Paintings can now be placed overlapping one another.}}
{{History||1.8|snap=14w10a|Paintings can no longer be placed directly inside of each other.}}
{{History||1.9|snap=15w49a|Paintings can no longer be destroyed by [[lightning]].}}
{{History|||snap=15w50a|Added [[sound]]s for placing and breaking paintings: <code>entity.painting.place</code> and <code>entity.painting.break</code>.}}
{{History||1.11|snap=16w32a|The [[entity]] ID for paintings has been changed from <code>Painting</code> to <code>painting</code>.}}
{{History||1.12|snap=17w06a|Paintings now have a more intuitive placement system. When placed, a painting always uses the maximum possible amount of available space.}}
{{History||1.13|snap=17w47a|Prior to [[1.13/Flattening|''The Flattening'']], this [[item]]'s numeral ID was 321.}}
{{History|||snap=18w02a|Paintings now use a [[resource location]] for their motive.}}
{{History||1.14|snap=18w43a|[[File:Painting JE2 BE2.png|32px]] The [[item]] texture of paintings has been changed.}}
{{History|||snap=19w07a|Paintings are now stored as individual image files instead of parts of a single large image file, and now support animations.}}
{{History|||snap=19w11a|Shepherd [[villager]]s now [[trading|sell]] paintings.}}
{{History||1.17|snap=21w11a|The painting back texture has been updated to be in line with the texture update.}}
{{History||1.19|snap=22w16a|Added the four unused paintings from Bedrock Edition: "Earth", "Wind", "Fire", and "Water".|These paintings can only be added through a [[data pack]], or with the {{cmd|summon}} command.}}
{{History||1.19.4|snap=23w06a|Added [[painting]] variants to "Functional Blocks" tab.|Paintings with pre-defined variant will now display author, title and size in description when hovered over.|The "Operator Utilities" tab now contains the four paintings that are not available in Survival mode.}}
{{History||1.21|snap=TBA|Added 5 new paintings, one 1x1, one 2x1, one 2x2, one 3x2 and one 4x4}}
}
{{History|pocket alpha}}
{{History||v0.5.0|[[File:Painting JE1 BE1.png|32px]] Added paintings.
|There are currently 25 canvases, which can be viewed at [[Bedrock Edition history of textures/Paintings]].}}
{{History||v0.8.0|snap=build 3|A new painting rendering has been added.{{info needed|What exactly changed?}}}}
{{History||v0.12.1|snap=build 1|Paintings are no longer available from the [[nether reactor]].}}
{{History||v0.15.0|snap=build 1|Paintings now have [[sound]]s when placed and broken.}}
{{History|pocket}}
{{History||1.0.7|Added new painting canvas 'Wither'.}}
{{History|bedrock}}
{{History||1.10.0|snap=beta 1.10.0.3|[[File:Painting JE2 BE2.png|32px]] The [[item]] texture of paintings has been changed.}}
{{History||1.11.0|snap=beta 1.11.0.4|Paintings can now be [[trading|bought]] from shepherd [[villager]]s.}}
{{History||1.17.0|snap=beta 1.17.0.50|The painting back texture has been updated to be in line with the texture update.}}
{{History|console}}
{{History||xbox=TU1|xbone=CU1|ps=1.0|wiiu=Patch 1|switch=1.0.1|[[File:Painting JE1 BE1.png|32px]] Added paintings.
|There are currently 25 canvases, which can be viewed at [[Legacy Console Edition history of textures/Paintings]].}}
{{History||xbox=TU11|The limit for paintings in a world has been increased.
|A message is now displayed when the maximum paintings are reached.}}
{{History||xbox=TU14|ps=1.04|Added new painting canvas 'Wither'.}}
{{History||xbox=TU43|xbone=CU33|ps=1.36|wiiu=Patch 13|Added [[sound]]s for paintings.}}
{{History||xbox=none|xbone=none|ps=1.90|wiiu=none|switch=none|[[File:Painting JE2 BE2.png|32px]] The [[item]] texture of paintings has been changed.}}
{{History|3ds}}
{{History||0.1.0|[[File:Painting JE1 BE1.png|32px]] Added paintings.
|There are currently 25 canvases, which can be viewed at [[New Nintendo 3DS Edition history of textures/Paintings]].}}
{{History|foot}}
== Issues ==
{{issue list}}
== Trivia ==
* On April 26, 2011, Notch stated that the automapping code can be used to share custom paintings and books in the future.<ref>{{tweet|notch|62970142207913984|The auto mapping code can be used to share custom paintings and books in the future. There's a hard cap on 65536 of each/world, though|April 26, 2011}}</ref>
* The texture on the back of a painting is the same as the wooden planks texture, but with a yellowish color similar to that of [[chests]] (but slightly darker).
* The "Skull on Fire" painting contains a Minecraft world in the background, which is based on a screenshot taken by the artist in [[Java Edition Alpha v1.1.2 01|Alpha 1.1.2_01]] (or earlier) on October 12, 2010, at 13:22:49 (UTC+2).<ref>{{cite|url=https://web.archive.org/web/20220928041338/https://imgur.com/HVhrbnH|title=The original (never publicly shared before) screenshot that Kristoffer Zetterstrand took and based his painting on.|website=Imgur}}</ref>
**The seeds for this world are -1044887956651363087 and -6984854390176336655 (both are the same), standing at X=-249.65, Y=91, Z=-29.04.<ref>https://pastebin.com/fzAY9ES4</ref><ref>https://www.reddit.com/r/Minecraft/comments/iqg3ey/the_original_screenshot_seed_of_the_minecraft/</ref>
* The "Skull on Fire" painting's texture was added in [[Java Edition Beta 1.3|Beta 1.3]]. However, the code for paintings to randomly display the part of the [[Kz.png]] texture that was to be occupied by the Burning Skull painting was added earlier, in [[Java Edition Beta 1.2_01|Beta 1.2_01]]. As there was nothing on this part of the texture except for a purple background grid, this is what would be displayed if the painting was randomly chosen, until the Burning Skull painting texture was actually added.
* The original "Skull on Fire" painting was given to the winner of an official texture pack competition by Mojang.<ref>https://web.archive.org/web/20110110003612/http://www.webhallen.com:80/minecraft/</ref>
== Gallery ==
<gallery>
File:Notch Painting Screenshot.png|The first image of paintings released by [[Notch]].
File:Skull on Fire world.jpg|The original screenshot behind the "Skull on Fire" painting.
File:Burning Skull Render.jpg|A render of the "Skull on Fire" painting that [[Kristoffer Zetterstrand]] used as a reference image.
File:Skull on Fire IRL.jpg|The original "Skull on Fire" painting being painted.
File:Burning Skull JE1.png|The "Skull on Fire" painting as it appeared between versions [[Java Edition Beta 1.2_01|Beta 1.2_01]] and [[Java Edition Beta 1.2_02|Beta 1.2_02]], prior to its texture being added in [[Java Edition Beta 1.3|Beta 1.3]].
</gallery>
=== Renders ===
<gallery>
Alban.png | Albanian
Aztec.png | de_aztec
Aztec2.png | de_aztec
Bomb.png | Target Successfully Bombed
Kebab.png | Kebab med tre pepperoni
Plant.png | Paradisträd
Wasteland.png | Wasteland
Courbet.png | Bonjour Monsieur Courbet
Creebet.png | Creebet
Pool.png | The Pool
Sea.png | Seaside
Sunset.png | sunset_dense
Graham.png | Graham
Wanderer.png | Wanderer
Bust.png | Bust
Match.png | Match
Skull and Roses.png | Skull and Roses
Stage.png | The Stage Is Set
Void.png | The void
Wither (painting).png | Wither
Fighters.png | Fighters
Donkey Kong.png | Kong
Skeleton (painting).png | Mortal Coil
Burning Skull.png | Skull On Fire
Pigscene.png | Pigscene
Pointer.png | Pointer
Earth BE2.png | Earth
Fire BE2.png | Fire
Water BE2.png | Water
Wind BE2.png | Wind
</gallery>
== See also ==
* [[Item Frame]]
* [[Bedrock Edition unused features#Paintings|Unused paintings]]
* [[Kz.png]]
* [[Kristoffer Zetterstrand]]
== References ==
{{reflist}}
== External links ==
*[https://www.minecraft.net/en-us/article/taking-inventory-painting Taking Inventory: Painting] – Minecraft.net on January 18, 2019
{{items}}
{{entities}}
[[cs:Obraz]]
[[de:Gemälde]]
[[es:Cuadro]]
[[fr:Tableau]]
[[hu:Festmény]]
[[it:Quadro]]
[[ja:絵画]]
[[ko:그림]]
[[nl:Schilderij]]
[[pl:Obraz]]
[[pt:Quadro]]
[[ru:Картина]]
[[th:ภาพวาด]]
[[uk:Картина]]
[[zh:画]]</li><li>[[Armor Stand|Armor Stand]]<br/>{{ItemEntity
| image = Armor Stand.png
| image2 = Armor Stand BE.png
| extratext = View [[#Gallery|all renders]]
| stackable =
* '''[[JE]]:''' Yes (16)
* '''[[BE]]:''' Yes (64)
| renewable = Yes
| flammable = Yes
| size = '''Normal:'''<br>
Width: 0.5 Blocks<br>
Height: 1.975 Blocks<br>
'''Small:'''<br>
Width: 0.25 Blocks<br>
Height: 0.9875 Blocks<br>
| health = {{hp|20}}
}}
An '''armor stand''' is an inanimate [[entity]] that can wear [[armor]]. It can also hold [[Item|items]] and be posed (but these are not possible in [[Survival]] in [[Java Edition]]).
== Obtaining ==
An armor stand can be broken by quickly {{control|attack|text=attacking}} it twice, dropping itself and any armor placed onto it.
=== Crafting ===
{{Crafting
|A1= Stick
|B1= Stick
|C1= Stick
|B2= Stick
|A3= Stick
|B3= Smooth Stone Slab
|C3= Stick
|Output= Armor Stand
|type=Decoration block
}}
=== Natural generation ===
Two armor stands are found in each taiga [[village]] outdoor armory, one equipped with an [[iron helmet]], the other with an [[iron chestplate]].
== Usage ==
[[Player]]s can use armor stands to hold [[armor]], [[mob head]]s, [[carved pumpkin]]s, and [[elytra]]. [[Commands]] can be used to give them other [[item]]s. The stand does not have a GUI, so players interact with it directly. Armor stands are also able to be placed in different orientations, similar to [[banner]]s or [[sign]]s. Armor stands are [[entity|entities]], allowing them to be pushed by [[piston]]s, moved by flowing [[water]], pulled with [[fishing rod]]s, pushed by players (with knockback), and bounced by [[slime block]]s.
{{Control|use|text=Using}} armor on the stand places the armor if done on a bare spot. Conversely, clicking on armor with a bare hand removes the armor and places it in the highlighted hotbar slot. It is not possible to take or place items from the armor stand's hands unless playing on Bedrock Edition.
Armor, mob heads, or carved pumpkins can be automatically placed on armor stands with a [[dispenser]].
Armor stands can be customized further to have arms, pose, disobey gravity, dual wield and other things by summoning them using {{cmd|summon}} with [[Tutorials/Command NBT tags#Armor Stand|NBT tags]].
In maps heavily using [[command blocks]], armor stands can be used to keep [[scoreboard]] objectives that are 'global' to the map, run [[commands]], etc.
{{IN|bedrock}}, the pose of the armor stand can be changed by interacting with the armor stand (or pressing the {{btn|Pose|be=1}} button on mobile devices) while sneaking, or by using a redstone signal. There are 13 possible poses. Armor stands can also hold items by interacting with the armor stand (or pressing the {{btn|Equip|be=1}} button on mobile devices) while holding an item that cannot be worn.
;<nowiki>Below are the poses:
{| class="wikitable collapsible collapsed"
!No.!!Namespace ID!! Redstone power
!
! !! Image
|-
|0
|{{cd|animation.armor_stand.default_pose}}
|0
|
|
|[[File:Armor Stand Default Pose.png|128px]]
|-
|1
|{{cd|animation.armor_stand.no_pose}}
|1
|
|
|[[File:Armor Stand No Pose.png|128px]]
|-
|2
|{{cd|animation.armor_stand.solemn_pose}}
|2
|
|
|[[File:Armor Stand Solemn Pose.png|128px]]
|-
|3
|{{cd|animation.armor_stand.athena_pose}}
|3
|
|
|[[File:Armor Stand Athena Pose.png|128px]]
|-
|4
|{{cd|animation.armor_stand.brandish_pose}}
|4
|
|
|[[File:Armor Stand Brandish Pose.png|128px]]
|-
|5
|{{cd|animation.armor_stand.honor_pose}}
|5
|
|
|[[File:Armor Stand Honor Pose.png|128px]]
|-
|6
|{{cd|animation.armor_stand.entertain_pose}}
|6
|
|
|[[File:Armor Stand Entertain Pose.png|128px]]
|-
|7
|{{cd|animation.armor_stand.salute_pose}}
|7
|
|
|[[File:Armor Stand Salute Pose.png|128px]]
|-
|8
|{{cd|animation.armor_stand.hero_pose}}
|8, 13 or more
|
|
|[[File:Armor Stand Hero Pose.png|128px]]
|-
|9
|{{cd|animation.armor_stand.riposte_pose}}
|9
|
|
|[[File:Armor Stand Riposte Pose.png|128px]]
|-
|10
|{{cd|animation.armor_stand.zombie_pose}}
|10
|
|
|[[File:Armor Stand Zombie Pose.png|128px]]
|-
|11
|{{cd|animation.armor_stand.cancan_a_pose}}
|11
|
|
|[[File:Armor Stand Cancan A Pose.png|128px]]
|-
|12
|{{cd|animation.armor_stand.cancan_b_pose}}
|12
|
|
|[[File:Armor Stand Cancan B Pose.png|128px]]
|}
==Behavior==
Because armor stands are entities, they obey gravity, allowing them to fall and rest on non-full [[block]]s such as [[enchanting table]]s, [[snow layer]]s and [[slab]]s.
Any [[armor]] on the stand drops when the stand is broken. Armor stands can display [[enchanting|enchanted]] and all forms of [[dye]]d armor. The effects of most enchanted armor have no effect when on an armor stand, with three exceptions:
*[[Frost Walker]] creates [[frosted ice]] blocks on [[water]] as usual if an armor stand is pushed with a [[piston]].
*[[Depth Strider]] slows the movement of the armor stand when being pushed with water.
*A [[player]] may take damage from hitting an armor stand that holds armor enchanted with [[Thorns]].
Armor stands are not damaged by [[cacti]] but can be broken by [[arrow]]s. An armor stand destroyed by an explosion or a firework does not drop as an [[item (entity)|item]]. Armor stands in water and [[lava]] at the same time are not consumed by the lava.
{{IN|be}}, armor stands can be affected by [[status effect]]s. They can be 'killed' by [[Harming]] and [[Decay]] [[splash potion|splash]]/[[lingering potion]]s, lava, [[fire]], and [[campfire]]s, and they play the player death sound and fall to their side and disappear, yielding no armor stand item. If an armor stand is equipped with an item or armor, that item or armor is considered as "naturally-spawned equipment" with an 8.5% chance of dropping when the armor stand "dies" from the [[Instant Damage]] or the [[Wither (status effect)|Wither]] status effect. If the dropped item is any form of [[weapon]], [[tool]] or armor, it drops in a badly damaged state because the game considers it as "naturally-spawned equipment".<ref>{{Bug|MCPE-24341}}</ref>
The stand wobbles slightly when being hit by the player.
{{IN|java}}, it is possible to create an armor stand with arms using the {{cmd|summon}} [[command]]. It is also possible to change an armor stand without arms into a stand with arms by using the {{cmd|data}} command. The commands are as follows:
*<code>/data merge entity @e[type=armor_stand,sort=nearest,limit=1] {ShowArms:1}</code>, which changes the nearest armor stand into an armor stand with arms.
*<code>/summon minecraft:armor_stand ~ ~ ~ {ShowArms:1}</code>, which summons a new armor stand with arms shown.
*<code>/summon armor_stand ~ ~ ~ {Rotation:[0.0f]}</code>, which summons a new armor stand that faces a desired direction (dependent on changing "0.0f" to other numbers like "90.0f" or "180.0f", otherwise it faces the same way as a default armor stand).
==Sounds==
{{edition|java}}:<br>
Armor stands use the Friendly Creatures sound category for entity-dependent sound events.
{{Sound table
|sound=Armor Stand hit1.ogg
|sound2=Armor Stand hit2.ogg
|sound3=Armor Stand hit3.ogg
|sound4=Armor Stand hit4.ogg
|subtitle=Block breaking
|source=Friendly Creatures
|description=When an armor stand is damaged
|id=entity.armor_stand.hit
|translationkey=subtitles.block.generic.hit
|volume=1.0
|pitch=1.0
|distance=16}}
{{Sound table
|sound=Armor Stand break1.ogg
|sound2=Armor Stand break2.ogg
|sound3=Armor Stand break3.ogg
|sound4=Armor Stand break4.ogg
|subtitle=Block broken
|source=Friendly Creatures
|description=When an armor stand is destroyed
|id=entity.armor_stand.break
|translationkey=subtitles.block.generic.break
|volume=1.0
|pitch=1.0
|distance=16}}
{{Sound table
|sound=Stone dig1.ogg
|sound2=Stone dig2.ogg
|sound3=Stone dig3.ogg
|sound4=Stone dig4.ogg
|subtitle=Block placed
|source=Blocks
|description=When an armor stand is placed
|id=entity.armor_stand.place
|translationkey=subtitles.block.generic.place
|volume=1.0
|pitch=1.0
|distance=16}}
{{Sound table
|sound=Wood dig1.ogg
|sound2=Wood dig2.ogg
|sound3=Wood dig3.ogg
|sound4=Wood dig4.ogg
|subtitle=Block placed
|source=Friendly Creatures
|description=When an armor stand falls onto a block at a high speed{{Info needed}}
|id=entity.armor_stand.fall
|translationkey=subtitles.entity.armorstand.fall
|volume=1.0
|pitch=1.0
|distance=16
|foot=1}}
{{edition|bedrock}}:
{{Sound table
|type=bedrock
|sound=Armor Stand hit1.ogg
|sound2=Armor Stand hit2.ogg
|sound3=Armor Stand hit3.ogg
|sound4=Armor Stand hit4.ogg
|source=neutral
|description=When an armor stand is damaged
|id=mob.armor_stand.hit
|volume=1.0
|pitch=1.0}}
{{Sound table
|sound=Armor Stand break1.ogg
|sound2=Armor Stand break2.ogg
|sound3=Armor Stand break3.ogg
|sound4=Armor Stand break4.ogg
|source=neutral
|description=When an armor stand is destroyed
|id=mob.armor_stand.break
|volume=1.0
|pitch=1.0}}
{{Sound table
|sound=Stone dig1.ogg
|sound2=Stone dig2.ogg
|sound3=Stone dig3.ogg
|sound4=Stone dig4.ogg
|source=neutral
|description=When an armor stand is placed
|id=mob.armor_stand.place
|volume=1.0
|pitch=1.0}}
{{Sound table
|sound=Wood dig1.ogg
|sound2=Wood dig2.ogg
|sound3=Wood dig3.ogg
|sound4=Wood dig4.ogg
|source=neutral
|description=When an armor stand falls onto a block at a high speed{{Info needed}}
|id=mob.armor_stand.land
|volume=1.0
|pitch=1.0
|foot=1}}
==Data values==
===ID===
{{edition|java}}:
{{ID table
|edition=java
|firstcolumnname=Armor Stand
|showforms=y
|generatetranslationkeys=y
|displayname=Item
|spritename=armor-stand
|spritetype=item
|nameid=armor_stand
|form=item
|foot=1}}
{{ID table
|edition=java
|firstcolumnname=Armor Stand
|generatetranslationkeys=y
|displayname=Entity
|spritename=armor-stand
|spritetype=entity
|nameid=armor_stand
|foot=1}}
{{edition|bedrock}}:
{{ID table
|edition=bedrock
|firstcolumnname=Armor Stand
|shownumericids=y
|showforms=y
|notshowbeitemforms=y
|generatetranslationkeys=y
|displayname=Item
|spritename=armor-stand
|spritetype=item
|nameid=armor_stand
|id=552
|form=item
|foot=1}}
{{ID table
|edition=bedrock
|firstcolumnname=Armor Stand
|shownumericids=y
|generatetranslationkeys=y
|displayname=Entity
|spritename=armor-stand
|spritetype=entity
|nameid=armor_stand
|id=61
|foot=1}}
===Item data===
{{el|java}}:
{{main|Player.dat format}}
<div class="treeview">
* {{nbt|compound|tag}}: The item's '''tag''' tag.
{{:Player.dat_format/Entity Spawners}}
</div>
{{el|bedrock}}:
:{{IN|bedrock}}, armor stands have no additional item tag.
:See [[Bedrock Edition level format/Item format]].
===Entity data===
Armor stands have entity data associated with them that contain various properties of the [[entity]].
{{el|java}}:
{{main|Entity format}}
{{/ED}}
{{el|bedrock}}:
:See [[Bedrock Edition level format/Entity format]].
== Video==
Note: This video is outdated as Zoglins now attack armor stands
<div style="text-align:center">{{yt|tCFkdTfCleQ}}</div>
==History==
{{History|java}}
{{History||1.8|snap=August 5, 2014|slink={{Tweet|SeargeDP|496666952530538498}}|[[File:Armor Stand (pre-release).png|32px]] [[File:Armor Stand (item) (pre-release).png|32px]] [[Searge]] tweeted a image of an armor stand. The appearance was changed before release.}}
{{History|||snap=August 5, 2014|slink={{Tweet|SeargeDP|496673890148823040}}|Showed crafting recipe and name "[Armor Stand]", both were changed before release.}}
{{History|||snap=14w32a|[[File:Armor Stand JE1.png|32px]] Added armor stands.}}
{{History|||snap=14w32b|[[File:Armor Stand (item) JE1 BE1.png|32px]] The item texture has changed.
|Pick-block can now be used on armor stands.
|Armor stands can now no longer be crafted using [[slabs]] other than stone slabs.}}
{{History|||snap=14w32c|Added a <code>NoBasePlate</code> tag for the armor stand.}}
{{History|||snap=14w33a|Breaking [[particles]] have been added for the armor stand.}}
{{History||1.8.1|snap=pre1|Added <code>Marker</code> tag for armor stands.}}
{{History||1.9|snap=15w31a|Armor stands can now dual wield.
|<code>HandItems</code> and <code>ArmorItems</code> tags added for armor stands, which is intended to replace the <code>Equipment</code> tag.}}
{{History|||snap=15w33a|The <code>Equipment</code> tag has been removed from armor stands.}}
{{History|||snap=15w47a|The armor stand now wobbles when hit by the [[player]].}}
{{History|||snap=16w02a|Marker <code>ArmorStand</code>s now outline their equipment only when glowing.}}
{{History||1.11|snap=16w32a|The entity ID of the armor stand has been changed from <code>ArmorStand</code> to <code>armor_stand</code>.}}
{{History||1.13|snap=17w47a|Prior to [[1.13/Flattening|''The Flattening'']], this [[item]]'s numeral ID was 416.}}
{{History||1.14|snap=18w43a|[[File:Armor Stand JE2.png|32px]] The texture of armor stands has been changed to the new [[planks|oak planks]] texture.
|[[File:Armor Stand (item) JE2 BE2.png|32px]] The texture of armor stand [[item]]s has been slightly changed. (Comparison: [[File:Armor Stand (item) Texture Change 1.13 to 18w43a.gif|32px]])}}
{{History|||snap=18w50a|[[File:Armor Stand JE3.png|32px]] The texture of armor stands has been changed again.
|Armor stands now generate in taiga [[village]]s.}}
{{History||1.15|snap=19w42a|Armor stands can now be placed by [[dispenser]]s.}}
{{History||1.16|snap=20w07a|Armor stands no longer fall through fences and walls when placed.<ref>{{bug|MC-65951}}</ref>}}
{{History|||snap=20w14a|[[Zoglin]]s now attack armor stands.}}
{{History||1.17|snap=20w45a|[[File:Armor Stand 20w45a.png|32px]] The model of the armor stand has been changed.}}
{{History|||snap=20w46a|[[File:Armor Stand JE3.png|32px]] The model of the armor stand has been changed back to how it was in 1.16.}}
{{History||1.18|snap=Pre-release 5|[[File:Armor Stand JE4.png|32px]] Changed smooth stone texture on armor stand.}}
{{History||1.19.4|snap=23w03a|Armor stands now preserve custom names when placed and broken.}}
{{History||1.20<br>(Experimental)|link=1.19.4|snap=23w04a|An armor stand now appears in the smithing table GUI; arms are displayed as in Bedrock Edition.
|When an armor stand is placed, its model now changes in effect of the player's facing direction<ref>{{bug|MC-93533}}</ref>.}}
{{History|||snap=23w06a|The model no longer changes when the armory is placed. Also, the head, which tilted slightly to the lower right in the version from 1.8 up to 1.19.3, now faces forward from [[File:Armor Stand JE4.png|32px]] to [[File:Armor Stand JE5.png|32px]].}}
{{History||?|Armor can now be swapped in [[armor stand]]s by {{ctrl|using}} them in the armor stand's slot.}}
{{History|bedrock}}
{{History||1.2.0|snap=beta 1.2.0.2|[[File:Armor Stand BE1.png|32px]] [[File:Armor Stand (item) JE1 BE1.png|32px]] Added armor stands.}}
{{History||1.10.0|snap=beta 1.10.0.3|[[File:Armor Stand BE2.png|32px]] The texture of armor stands has been changed.
|[[File:Armor Stand (item) JE2 BE2.png|32px]] The texture of armor stand [[item]]s has been slightly changed.}}
{{History||1.12.0|snap=beta 1.12.0.2|[[File:Armor Stand with Leather Armor MCPE-44669.png|32px]] Leather [[armor]] no longer shows as being [[dye]]d properly when worn by armor stands.}}
{{History|||snap=beta 1.12.0.3|[[File:Armor Stand wear Chicken.png|x73px]][[File:Armor Stand wear Rabbit.png|x73px]] [[File:Armor Stand wear Salmon.gif|x73px]] [[File:Armor Stand wear Pufferfish.gif|x73px]] [[File:Armor Stand wear Slime.png|x73px]] When armor stands hold a [[raw chicken]], [[raw rabbit]], [[raw salmon]], [[pufferfish]] or a [[slime block]], they now wear these [[mob]] counterparts.<ref>{{bug|mcpe-48629}}</ref>}}
{{History||1.13.0|snap=beta 1.13.0.1|Leather armor now shows as being dyed properly when worn by armor stands.}}
{{History|||snap=beta 1.13.0.4|Armor stands no longer hold certain [[mob]]s if they are holding a [[item]] related to them.
|Armor stands now have a smoother animation when changing poses.}}
{{History||1.16.0|snap=?|Armor stands are now targeted by zoglins.}}
{{History||1.16.210|snap=beta 1.16.210.51|Armor stands are no longer attacked by [[goat]]s.}}
{{History|console}}
{{History||xbox=TU31|xbone=CU19|ps=1.22|wiiu=Patch 3|switch=1.0.1|[[File:Armor Stand JE1.png|32px]] [[File:Armor Stand (item) JE1 BE1.png|32px]] Added armor stands.}}
{{History||xbox=TU43|xbone=CU33|ps=1.36|wiiu=Patch 13|Added [[sound]]s for armor stands.}}
{{History||xbox=TU60|xbone=CU51|ps=1.64|wiiu=Patch 30|switch=1.0.11|[[File:Armor Stand BE1.png|32px]] Armor stands now have arms and the [[player]] can now change the pose of the armor stand.}}
{{History||xbox=none|xbone=none|ps=1.90|wiiu=none|switch=none|[[File:Armor Stand BE2.png|32px]] The texture of armor stands has been changed.
|[[File:Armor Stand (item) JE2 BE2.png|32px]] The texture of armor stand [[item]]s has been slightly changed.}}
{{History|foot}}
<gallery>
Armour stand 1.png|The first image of the armor stand.
JE 1.8 Dev Armor Stand crafting.png|The first image of armor stand crafting recipe.
The Bountiful Update.png|Armor stands in the [[Java Edition 1.8|1.8]] poster.
Dual Wielding Armor Stand.png|A dual wielding armor stand.
Glowing Armor Stands.png|Armor stands with the [[glowing]] effect.
Armor Stand Chess.jpg|Chess with armor stands.
</gallery>
==Issues==
{{issue list}}
==Trivia ==
*Equipping armor stands with certain [[block]]s and [[item]]s can cause rendering glitches. According to [[Searge]] this is due to transparent rendering on entities not yet being supported.<ref>{{bug|MC-67415||"Armor Stands with Slime Block rendering entities behind them"}} resolved as "Won't Fix"</ref><ref>{{bug|MC-67674||"Armor Stand wearing a Skull and Holding Stained Glass causes Graphical issues"}} resolved as "Won't Fix"</ref>
*Bedrock Edition has a version exclusive armor stand [[model]], which includes posable arms.
*Using [[redstone]] to change the stands reverse the poses, starting with the can-can pose first.
*Placing the stand within three powered [[redstone dust]] always changes its pose to the honor pose. [[Redstone Repeater|Repeaters]] also switch the stand to the honor pose if not set four blocks from one.
*Using external tools, armor stand spawners can be placed.
*Secret signatures for [[Jasper Boerstra|JAPPA]], Chi Wong, and [[Michael Stoyke|Searge]] can be found at the bottom of the armor stand texture.
== Gallery ==
===Renders===
;Armor (Java Edition)
<gallery>
Armor Stand Leather.png
Armor Stand Golden.png
Armor Stand Chainmail.png
Armor Stand Iron.png
Armor Stand Diamond.png
Armor Stand Netherite.png
</gallery>
; Armor (Bedrock Edition)
<gallery>
Armor Stand with Leather Armor BE.png
Armor Stand with Golden Armor BE.png
Armor Stand with Chain Armor BE.png
Armor Stand with Iron Armor BE.png
Armor Stand with Diamond Armor BE.png
Armor Stand with Netherite Armor BE.png
</gallery>
;Poses
<gallery>
Armor Stand Pose 0.png|
Armor Stand Pose 1.png|
Armor Stand Pose 2.png|
Armor Stand Pose 3.png|
Armor Stand Pose 4.png|
Armor Stand Pose 5.png|
Armor Stand Pose 6.png|
Armor Stand Pose 7.png|
Armor Stand Pose 8.png|
Armor Stand Pose 9.png|
Armor Stand Pose 10.png|
Armor Stand Pose 11.png|
Armor Stand Pose 12.png|
</gallery>
===Screenshots===
<gallery>
Armor Stand Demo.png|Armor stands in various positions with various [[armor]].
Armor Stand glass and sword.png|Armor stands can wear [[block]]s on their heads. This is accessible with [[command]]s such as {{cmd|item}}.
Bedrock edition armor stand poses.png|All armor stand poses as seen in {{el|be}}.
Netherite to the rescue!.png|An entire set of netherite [[armor]] on an armor stand.
Armor Stand Garage.png|An armor stand in a garage.
</gallery>
==References ==
{{reflist}}
==External Links==
*[https://www.minecraft.net/en-us/article/taking-inventory--armor-stand Taking Inventory: Armor Stand] – Minecraft.net on March 16, 2023
{{Items}}
{{Entities}}
[[Category:Storage]]
[[de:Rüstungsständer]]
[[es:Soporte para armadura]]
[[fr:Porte-armure]]
[[ja:防具立て]]
[[ko:갑옷 거치대]]
[[pl:Stojak na zbroję]]
[[pt:Suporte de armaduras]]
[[ru:Стойка для брони]]
[[th:แท่นวางชุดเกราะ]]
[[uk:Стійка для обладунків]]
[[zh:盔甲架]]</li></ul></nowiki> | 20w46a | The unused "base" pattern has been renamed to the "field" pattern and given proper translation strings (its ID is still "base"). | |||
1.19.3{{Extension DPL}}<ul><li>[[Tag (item)|Tag (item)]]<br/>{{About|the April Fools item|the standard item used to rename mobs|Name Tag}}
{{wip}}
{{joke feature}}
{{exclusive|java}}
{{Item
| title = Tag
| image = Tag.png
| renewable = Yes
| stackable = Yes (64)
}}
Tags and Bits are items exclusive to the [[Java Edition 23w13a or b|23w13a_or_b]] [[Easter eggs#April Fools|April Fools' joke]] snapshot from 2023. They are used to craft in-game representations of [[NBT format|NBT tags]].
==Obtaining==
A [[stonecutter]] can be used to cut a [[Name Tag|name tag]] into either 16 "Name" or 16 "Tag" items. These can be cut into 16 Bit items each.
{{Stonecutting
|head=1
|showdescription=1
|Name Tag
|Name, 16; Tag, 16
|description=The resulting "Name" items must be named in an [[anvil]].
}}
{{Stonecutting
|showdescription=
|Name; Tag
|Bit, 16
|foot=1
}}
To be able to proceed from here the <code>nbt_crafting</code> vote must be approved. Bits can be used in a crafting table to craft Left Curly, Right Curly, Left Square, and Right Square. In appears like these are the only tag items that can be crafted from Bits.
A [[Crafting Table|crafting table]] can be used to convert a "Tag" item into a "Byte Tag." The amount of [[stick]]s added to the crafting recipe specifies the value of the Byte, as a [[wikipedia:Signed number representations#Two's complement|signed 8-bit value]]. For example, a "Tag" and a full stack of sticks make a Byte with the value <code>64b</code>, while 255 sticks result in <code>-1b</code>. Only one of the sticks is consumed. Two Bytes can be crafted into a "Short Tag" (equivalent to 16 bit), two Shorts into an "Int Tag" (equivalent to 32 bit), and two Ints into a "Long Tag" (equivalent to 64 bit). Many other combinations that form either 16, 32, or 64 bit are possible. For example, two Shorts and an Int make a Long. When combining values, their digits are stuck together in the given order, e.g. <code>1b</code> and <code>0b</code> make <code>256s</code> (equivalent to 0100<sub>16</sub> in [[wikipedia:Hexadecimal|hexadecimal]]). Undoing any of these crafting actions in e.g. a stonecutter is not possible.
"Float" and "Double Tags" can be crafted by adding one or two [[boat]]s to any numeric tag. A "String Tag" is crafted with a "Tag" and a piece of [[string]].
{{Crafting
|head=1
|showdescription=1
|A1= Bit; ; Bit; Bit |B1= ; Bit; Bit; Bit
|A2= ; Bit; Bit; |B2= Bit; ; ; Bit
|A3= Bit; ; Bit; Bit |B3= ; Bit; Bit; Bit
|Output= Right Curly; Left Curly; Left Square; Right Square
|ignoreusage=1
}}
{{Crafting
|Tag
|String
|Output= String Tag
|description=String tags must be named in an [[anvil]] to set their value.
|ignoreusage=1
}}
{{Crafting
|Tag; Tag; Tag
|; Stick; Stick, 64
|; ; Stick, 63
|Output= Byte Tag; Byte Tag; Byte Tag
|description=Only 1 stick is consumed. 128 and more sticks make [[wikipedia:Signed number representations#Two's complement|two's complements]]:
128 sticks = <code>-128b</code><br>
129 sticks = <code>-127b</code><br>
⋮<br>
254 sticks = <code>-2b</code><br>
255 sticks = <code>-1b</code>
|ignoreusage=1
}}
{{Crafting
|Byte Tag; Byte Tag; Byte Tag
|Byte Tag; Byte Tag; Byte Tag
| ; Byte Tag; Byte Tag
| ; Byte Tag; Byte Tag
| ; ; Byte Tag
| ; ; Byte Tag
| ; ; Byte Tag
| ; ; Byte Tag
|Output= Short Tag; Int Tag; Long Tag
|description=Shorts and Ints can be combined the same way, even mixed.
Digits are appended, e.g. two <code>1b</code> tags make <code>257b</code> (0101<sub>16</sub> in [[wikipedia:Hexadecimal|hexadecimal]]).
|ignoreusage=1
}}
{{Crafting
|Byte Tag; Short Tag; Int Tag; Long Tag
|Any Boat; Any Boat; Any Boat; Any Boat
|Output= Float Tag; Float Tag; Float Tag; Float Tag
|ignoreusage=1
}}
{{Crafting
|Byte Tag; Short Tag; Int Tag; Long Tag
|Any Boat; Any Boat; Any Boat; Any Boat
|Any Boat; Any Boat; Any Boat; Any Boat
|Output= Double Tag; Double Tag; Double Tag; Double Tag
|ignoreusage=1
}}
{{Crafting
|Left Curly; Left Curly
|Name; Name
|Byte Tag; Byte Tag
|Right Curly; Name |; Byte Tag | |; Name |; Byte Tag |; Right Curly
|Output= Compound Tag; Compound Tag
|description=Instead of Bytes any other tag can be used, including other compound tags.
|ignoreusage=1
}}
{{Crafting
|Left Square; Left Square
|Byte Tag; Byte Tag
|Right Square; Byte Tag |; Byte Tag |; Byte Tag |; Byte Tag |; Byte Tag |; Byte Tag |; Right Square
|Output= List Tag; List Tag
|description=Instead of Bytes any other tag can be used, including other list tags.
|ignoreusage=1
}}
{{Crafting
|Compound Tag; List Tag
|Compound Tag; List Tag
|Output= Compound Tag; List Tag
|description=Up to 9 can be combined.
When compound tags contain identical names, only the latest of the corresponding values is used.
|ignoreusage=1
|foot=1
}}
"Name" and "String Tags" must be named in an [[anvil]] before they can be used. Unnamed Names and Strings always produce a "Sssyntax Error". None of the other tag items can be named.
All these items can be combined in a crafting table to form a short sequence of JSON code, as long as the resulting syntax is valid. For example:
*A pair of Curlies that enclose a named "Name" item and some value, e.g. a Byte, create a "Compound Tag" with the content <code>{Example:0b}</code>.
**Because of the limited size of the crafting table only 3 name-value pairs can be put between Curlies at a time. Compound Tags of any length can be created by concatenating two or more Compound Tags.
**An empty pair of Curlies produces an empty Compound Tag with the content <code>{}</code>.
*A pair of Square brackets that enclose any number of values, e.g. 7 Bytes, create a "List Tag" with the content <code>[0b,0b,0b,0b,0b,0b,0b]</code>.
**Because of the limited size of the crafting table only 7 values can be put between Square brackets at a time. List Tags of any length can be created by concatenating two or more List Tags.
**An empty pair of Square brackets produces an empty List with the content <code>[]</code>.
**"Name" items cannot be used in a List.
The resulting Compound and List Tags can be used as values in other Compound and List Tags, as deeply nested as you want.
==Usage==
Tags appear to have no further functionality. They cannot be eaten or placed in the world, except in an item frame, as each other item can. However, Compound Tags with values like <code>{Enchantments:[{id:"minecraft:sharpness",lvl:127b}]}</code> will show the [[Enchanting|enchantment]] glint and actually act accordingly when used.<ref>https://www.reddit.com/r/Minecraft/comments/129xdyl/i_figure_out_how_the_nbtcrafting_in_the_vote/</ref> This appears to work with many weapon and tool [[Enchanting#Summary of enchantments by item|enchantments]].
In theory, an extremely lucky <code>replace_recipe_output</code> vote can change the crafting recipe for compound tags to output something else. When cheats are enabled you can test this with a command like <code>/vote rule minecraft:replace_recipe_output approve {key:"minecraft:compound_tag",value:"minecraft:netherite_sword"}</code>. However, as long as this vote is approved no other compound tag can be crafted. Use <code>/vote rule minecraft:replace_recipe_output repeal *</code> to undo all recipe replacements.
In combination with the <code>midas_touch</code> vote tag items can be converted into [[Gold Ingot|gold ingots]]. These retain their NBT data. When the world is loaded in another version of the game tag items disappear, but gold ingots persist.
==Trivia==
*This implies that a [[Name Tag|name tag]] is 128 bit.
*Compound and list tags are special in so far that the value they show in their [[tooltip]] is not merely a property of the item, but their ''actual'' [[NBT format|NBT data]]. This is also the reason why naming them is disabled as that would mess up the NBT data.
*The snapshot also contains an [[History of textures/Unused textures|unused texture]] for an {{ItemLink|End Tag}}.
==History==
{{History|java}}
{{History||23w13a_or_b|[[File:Tag.png|32px]] Added tags.}}
{{History|foot}}
==Gallery==
<gallery>
Tag.png|Tag
Bit.png|Bit
Byte Tag.png|Byte Tag
Double Tag.png|Double Tag
End Tag.png|End Tag
Float Tag.png|Float Tag
Int Tag.png|Int Tag
Left Curly.png|Left Curly
Left Square.png|Left Sqaure
List Tag.png|List Tag
Long Tag.png|Long Tag
Name (23w13a or b).png|Name
Right Curly.png|Right Curly
Right Square.png|Right Square
Short Tag.png|Short Tag
Sssyntax Error.png|Sssyntax Error
String Tag.png|String Tag
</gallery>
== References ==
{{reflist}}
{{items}}
{{jokes}}
[[pt:Tag (item)]]
[[Category:Joke items]]</li><li>[[Spawn Egg|Spawn Egg]]<br/>{{distinguish|Egg|Frogspawn|Dragon Egg|Sniffer Egg|Turtle Egg}}
{{Item
| image = Spawn Egg.png
| extratext = View [[#Gallery|all renders]]
| stackable = Yes (64), the same type of spawn egg only
| renewable = No
}}
{{Many images}}
A '''spawn egg'''<ref group=fn>Known as '''''<Mob>'' Spawn Egg''' {{in|java}} and '''Spawn ''<Mob>''''' {{in|bedrock}}, where ''<Mob>'' is the name of the mob it spawns.</ref> is an [[item]] used to spawn [[mobs]] directly.
== Obtaining ==
Spawn eggs can be obtained only in [[Creative]] mode or using [[commands]]. In Creative mode, the [[player]] can press {{control|pick block}} on an existing mob to obtain their respective egg. Spawn eggs are also available in the Creative inventory. There are 77 spawn eggs {{in|bedrock}} and 75 spawn eggs {{in|java}}.
== Usage ==
A spawn egg is used by pressing {{control|use}} on any surface (top, bottom, or side) with the egg. When used on a top surface, the egg's [[mob]] appears with its feet immediately adjacent to the surface, and its ambient sound is played.
Spawn eggs are not thrown (unlike normal [[egg]]s); the player must be within normal range of the block to use the spawn egg. Ocelot and all monster mobs (except [[shulker]]s, [[piglin]]s, [[hoglin]]s; and in Bedrock Edition, also include [[vindicator]]s, [[evoker]]s, [[zoglin]]s, [[piglin brute]]s) spawned while on Peaceful difficulty get created and immediately deleted from the world.
The surfaces of blocks are prioritized for spawning; if none are within reach, mobs can also be spawned in [[water]].
=== Dispensers ===
A spawn egg fired from a [[dispenser]] spawns the [[mob]] directly in front of the dispenser. The spawn egg is consumed when fired.
=== Baby mobs ===
If the [[player]] {{control|uses}} a spawn egg on the type of [[mob]] it spawns, and that mob has a baby form, the egg spawns a baby version of the mob. In mobs that can breed, the baby is created by breeding the clicked mob to itself. For instance, using a sheep spawn egg on a [[sheep]] makes a baby sheep with the same wool color.{{only|java}}
Other mobs such as [[evoker]]s, [[vindicator]]s, [[vex]]es, [[piglin brute]]s, [[ravager]]s, [[phantom]]s, [[skeleton]]s, [[pillager]]s, [[creeper]]s and [[wither skeleton]]s do not have a baby variant, so the egg still spawns an adult.
=== Monster spawners ===
All spawn eggs can also be {{Control|used}} on a [[monster spawner]] to change the [[mob]] the monster spawner spawns. {{IN|bedrock}}, spawn eggs for any of the fish mobs spawn them only if the monster spawner is waterlogged.
=== Renaming ===
A spawn egg can be renamed on an [[anvil]], and when used it spawns a [[mob]] with that name appearing over its head. The name can be seen only by aiming at the mob from four or fewer blocks away. This name also appears in [[death messages]] from the mob killing a [[player]]. If the player renames a spawn egg by the names described below, the mob appears described below. If the player renames a [[rabbit]] spawn egg "Toast", the secret skin of the rabbit appears when the egg is used. Naming a spawn egg "Dinnerbone" or "Grumm" causes the mob to appear upside down and show the given name above it. Renaming a [[vindicator]] "Johnny" causes it to act hostile to all mobs except for other illagers. Renaming a [[sheep]] "jeb_" makes the sheep's wool color cycle in a rainbow loop. This doesn't change the color of the wool the sheep drops. Renaming a spawn egg of a [[Hostile mob|hostile mob]] with an [[anvil]] and then spawning the hostile mob with the renamed spawn egg does not prevent the hostile mob from despawning, unlike using a [[Name Tag|name tag]] on the mob.
=== Survival mode ===
Mobs can be spawned with spawn eggs in [[Survival]] mode, but spawn eggs are [[Content inaccessible in Survival|not obtainable in Survival]] without cheats; they can be obtained only using the Creative menu or commands. Unlike in creative, spawn eggs are consumed when used in survival.
== List of spawn eggs ==
There is a spawn egg for almost every mob in the game; exceptions are listed below this table.
{| class="wikitable" data-description="Spawn eggs and availability"
! Egg
! Spawns
! Notes
|-
! colspan="4"| Hostile and neutral mobs
|-
| align="center"| {{InvSprite|Bee Spawn Egg}}
| {{EntityLink|Bee}}
| Bees have 5% chance of spawning as a baby.
|-
|align="center"| {{InvSprite|Blaze Spawn Egg}}
| {{EntityLink|Blaze}}
|
|-
|align="center"| {{InvSprite|Bogged Spawn Egg}}
| {{EntityLink|Bogged}}
|
|-
|align="center"| {{InvSprite|Cave Spider Spawn Egg}}
| {{EntityLink|Cave Spider}}
| Cave spiders have a 1% chance of spawning a {{EntityLink|Cave Spider Jockey}}. {{only|bedrock}}
|-
|align="center"| {{InvSprite|Creeper Spawn Egg}}
| {{EntityLink|Creeper}}
| Creepers can never spawn [[Creeper#Charged creeper|charged]].
|-
|align="center"| {{InvSprite|Dolphin Spawn Egg}}
| {{EntityLink|Dolphin}}
| {{IN|bedrock}}, dolphins have 10% chance of spawning as a baby.
|-
|align="center" |{{InvSprite|Drowned Spawn Egg}}
| {{EntityLink|Drowned}}
| Drowned can spawn holding [[trident]]s, [[fishing rod]]s, or [[nautilus shell]]s. Drowned have 5% chance of spawning as a baby.<ref name="LazilyCodedSpawnEggs">{{bug|MC-167377}}</ref>
|-
|align="center"| {{InvSprite|Elder Guardian Spawn Egg}}
| {{EntityLink|Elder Guardian}}
|
|-
|align="center"| {{InvSprite|Ender Dragon Spawn Egg}}
| {{EntityLink|Ender Dragon}}
| Only accessible via commands to prevent accidental destruction of player builds.
|-
|align="center"| {{InvSprite|Enderman Spawn Egg}}
| {{EntityLink|Enderman}}
| Endermen spawn neutral and not holding a block.
|-
|align="center"| {{InvSprite|Endermite Spawn Egg}}
| {{EntityLink|Endermite}}
|
|-
|align="center"| {{InvSprite|Evoker Spawn Egg}}
| {{EntityLink|Evoker}}
|
|-
|align="center"| {{InvSprite|Ghast Spawn Egg}}
| {{EntityLink|Ghast}}
|
|-
|align="center"| {{InvSprite|Goat Spawn Egg}}
| {{EntityLink|Goat}}
|Goats spawn with two horns and have a 5% chance spawning as a baby, and a 2% chance of spawning as a screaming goat.
|-
|align="center"| {{InvSprite|Guardian Spawn Egg}}
| {{EntityLink|Guardian}}
|
|-
|align="center"| {{InvSprite|Hoglin Spawn Egg}}
| {{EntityLink|Hoglin}}
| Hoglins have 5% chance of spawning as a baby.
|-
|align="center"| {{InvSprite|Husk Spawn Egg}}
| {{EntityLink|Husk}}
| Husks have a 5% chance of spawning as a baby. Baby husks have a 5%{{only|java|short=1}} or 15%{{only|bedrock|short=1}} chance of spawning as a {{EntityLink|Chicken Husk Jockey|Chicken Jockey}}. There is also a chance of them holding [[Zombie#Armed zombies|tools, weapons or armor]]. Baby variants are randomly spawned.<ref name="LazilyCodedSpawnEggs"/>
|-
|align="center"| {{InvSprite|Iron Golem Spawn Egg}}
| {{EntityLink|Iron Golem}}
|These golems are neutral like the [[village]] golems.
|-
|align="center"| {{InvSprite|Llama Spawn Egg}}
| {{EntityLink|Llama}}
| Llamas spawn untamed and have a 10% chance of spawning as a baby.
|-
|align="center"| {{InvSprite|Magma Cube Spawn Egg}}
| {{EntityLink|Magma Cube}}
| Magma cubes spawn with a random size.
|-
|align="center"| {{InvSprite|Panda Spawn Egg}}
| {{EntityLink|Panda}}
| Pandas spawn with a random personality and have a 5% chance of spawning as a baby.
|-
|align="center"| {{InvSprite|Phantom Spawn Egg}}
| {{EntityLink|Phantom}}
|
|-
|align="center"| {{InvSprite|Piglin Spawn Egg}}
| {{EntityLink|Piglin}}
| Piglins have a 25%{{only|Java|short=1}} or 5%{{only|bedrock|short=1}} chance of spawning as a baby. They may also spawn with an [[enchanted]] [[crossbow]] or [[golden sword]] and [[golden armor]].
|-
|align="center"| {{InvSprite|Piglin Brute Spawn Egg}}
| {{EntityLink|Piglin Brute}}
| Piglin brutes never spawn with armor.
|-
|align="center"| {{InvSprite|Pillager Spawn Egg}}
| {{EntityLink|Pillager}}
| Pillagers have a chance of spawning with an [[enchanted]] [[crossbow]].
|-
|align="center"| {{InvSprite|Polar Bear Spawn Egg}}
| {{EntityLink|Polar Bear}}
| Polar bears have a 10% chance of spawning as a baby.
|-
|align="center"| {{InvSprite|Ravager Spawn Egg}}
| {{EntityLink|Ravager}}
| Ravagers never spawn being ridden by [[illager]]s.
|-
|align="center"| {{InvSprite|Shulker Spawn Egg}}
| {{EntityLink|Shulker}}
| Shulkers spawn undyed. Their orientation is also dependent on where the shulker is placed.
|-
|align="center"| {{InvSprite|Silverfish Spawn Egg}}
| {{EntityLink|Silverfish}}
|
|-
|align="center"| {{InvSprite|Skeleton Spawn Egg}}
| {{EntityLink|Skeleton}}
|[[Skeleton]] eggs used in the [[Overworld]] and [[the End]] always spawn regular [[skeleton]]s.<br>{{IN|bedrock}}, eggs used in [[the Nether]] have an 80% chance to spawn [[wither skeleton]]s.<br>{{IN|bedrock}}, eggs used in [[Snowy Tundra]], [[Ice Spikes]], [[Snowy Mountains]], [[Frozen River]], [[Frozen Ocean]], [[Deep Frozen Ocean]] and [[Legacy Frozen Ocean]] [[biome]]s have an 80% chance to spawn [[stray]]s, if spawned with a clear view of the sky. They may also spawn with an [[enchanted]] [[bow]] and [[armor]].
|-
|align="center"| {{InvSprite|Slime Spawn Egg}}
| {{EntityLink|Slime}}
| Slimes spawn with a random size.
|-
|align="center"| {{InvSprite|Spider Spawn Egg}}
| {{EntityLink|Spider}}
| Spiders have a 1% chance to spawn a {{EntityLink|Spider Jockey}}.
|-
|align="center"| {{InvSprite|Stray Spawn Egg}}
| {{EntityLink|Stray}}
| Strays may spawn with an [[enchanted]] [[bow]] and [[armor]].
|-
|align="center"| {{InvSprite|Trader Llama Spawn Egg}}
| {{EntityLink|Trader Llama}}
|
|-
|align="center"| {{InvSprite|Vex Spawn Egg}}
| {{EntityLink|Vex}}
|
|-
|align="center"| {{InvSprite|Vindicator Spawn Egg}}
| {{EntityLink|Vindicator}}
| Vindicators never spawn as captains.{{only|bedrock}} They may spawn with an [[enchanted]] [[axe]].
|-
|align="center"| {{InvSprite|Warden Spawn Egg}}
| {{EntityLink|Warden}}
|
|-
|align="center"| {{InvSprite|Witch Spawn Egg}}
| {{EntityLink|Witch}}
|
|-
|align="center"| {{InvSprite|Wither Spawn Egg}}
| {{EntityLink|Wither}}
| Only accessible via commands to prevent accidental destruction of player builds.
|-
|align="center"| {{InvSprite|Wither Skeleton Spawn Egg}}
| {{EntityLink|Wither Skeleton}}
|
|-
|align="center"| {{InvSprite|Wolf Spawn Egg}}
| {{EntityLink|Wolf}}
| Wolves spawn untamed and neutral. Wolves have a 5% chance of spawning as a baby.
|-
|align="center"| {{InvSprite|Zoglin Spawn Egg}}
| {{EntityLink|Zoglin}}
|
|-
|align="center"| {{InvSprite|Zombie Spawn Egg}}
| {{EntityLink|Zombie}}
| Zombies do not spawn as [[zombie villager]]s, but they have a 5% chance of spawning as a baby.<ref name="LazilyCodedSpawnEggs"/> There is also a chance of them holding [[Zombie#Geared zombies|tools, weapons or armor]]. A baby zombie has a 5%{{only|java|short=1}} or 15%{{only|bedrock}} chance of spawning as a {{EntityLink|Chicken Jockey}}.
|-
|align="center"| {{InvSprite|Zombie Villager Spawn Egg}}
| {{EntityLink|Zombie Villager}}
| Zombie villagers' professions are randomized.{{only|Java}} Their outfit depends on the biome, and they have a 5% chance of spawning as a baby.<ref name="LazilyCodedSpawnEggs"/> A baby zombie villager has a 5%{{only|java|short=1}} or 15%{{only|bedrock}} chance of spawning as a {{EntityLink|Chicken Zombie Villager Jockey|Chicken Jockey}}.
{{IN|bedrock}}, they never spawn with equipment.
|-
|align="center"| {{InvSprite|Zombified Piglin Spawn Egg}}
| {{EntityLink|Zombified Piglin}}
| Zombified piglins spawn neutral and have a 5% chance of spawning as a baby.<ref name="LazilyCodedSpawnEggs"/> A baby zombified piglin has a 5% chance of spawning as a {{EntityLink|Chicken Zombified Piglin Jockey|Chicken Jockey}}.{{only|java|short=1}} They may also spawn with an [[enchanted]] [[sword]].
|-
!colspan="4"| Passive mobs
|-
|align="center"| {{InvSprite|Spawn Agent}}
| {{EntityLink|Agent}}
|
|-
|align="center"| {{InvSprite|Allay Spawn Egg}}
| {{EntityLink|Allay}}
|
|-
|align="center"| {{InvSprite|Axolotl Spawn Egg}}
| {{EntityLink|Axolotl}}
|Axolotls' skins are randomized and have a 5% chance of spawning as a baby.
|-
|align="center"| {{InvSprite|Bat Spawn Egg}}
| {{EntityLink|Bat}}
| If the player is far enough away when using the spawn egg on the bottom of an opaque block, the bat hangs upside down from it.
|-
|align="center"| {{InvSprite|Camel Spawn Egg}}
| {{EntityLink|Camel}}
|
|-
|align="center"| {{InvSprite|Cat Spawn Egg}}
| {{EntityLink|Cat}}
| Cats' skins are randomized and always spawn stray cats. Cats have a 25% chance of spawning as a baby.
|-
|align="center"| {{InvSprite|Chicken Spawn Egg}}
| {{EntityLink|Chicken}}
| Chickens have a 5% chance of spawning as a baby.
|-
|align="center"| {{InvSprite|Cod Spawn Egg}}
| {{EntityLink|Cod}}
|Cods have a 0% chance of spawning as a baby. Baby cods can only be found naturally.
|-
|align="center"| {{InvSprite|Cow Spawn Egg}}
| {{EntityLink|Cow}}
| Cows have a 5% chance of spawning as a baby.
|-
|align="center"| {{InvSprite|Donkey Spawn Egg}}
| {{EntityLink|Donkey}}
| Donkeys spawn untamed and have a 20% chance of spawning as a baby.
|-
|align="center"| {{InvSprite|Fox Spawn Egg}}
| {{EntityLink|Fox}}
| Foxes spawn untrusting, with their skins depending on the biome. They can spawn holding items and have 5% chance of spawning as a baby.
|-
|align="center"| {{InvSprite|Frog Spawn Egg}}
| {{EntityLink|Frog}}
| Frog skins are biome-dependent.
|-
|align="center"| {{InvSprite|Glow Squid Spawn Egg}}
| {{EntityLink|Glow Squid}}
| {{IN|bedrock}}, glow squids have a 5% chance of spawning as a baby.
|-
|align="center"| {{InvSprite|Horse Spawn Egg}}
| {{EntityLink|Horse}}
| Horses spawn untamed and have a 20% chance of spawning as a baby.
|-
|align="center"| {{InvSprite|Mooshroom Spawn Egg}}
| {{EntityLink|Mooshroom}}
| Mooshrooms always spawn red and have a 5% chance of spawning as a baby.
|-
|align="center"| {{InvSprite|Mule Spawn Egg}}
| {{EntityLink|Mule}}
| Mules have a 20% chance of spawning as a baby.
|-
|align=“center” | {{InvSprite|Spawn NPC}}
| {{EntityLink|NPC}}
|There is an equal chance of spawning each of the 5 variants of this mob from the egg.
|-
|align="center"| {{InvSprite|Ocelot Spawn Egg}}
| {{EntityLink|Ocelot}}
| Ocelots spawn untrusting.<br>{{frac|1|7}} of the time (14.3%), an ocelot spawns with two ocelot kittens.
|-
|align="center"| {{InvSprite|Parrot Spawn Egg}}
| {{EntityLink|Parrot}}
| Parrots spawn untamed and with a random color.
|-
|align="center"| {{InvSprite|Pig Spawn Egg}}
| {{EntityLink|Pig}}
| Pigs spawn without a [[saddle]] and have a 5% chance of spawning as a baby.
|-
|align="center"| {{InvSprite|Pufferfish Spawn Egg}}
| {{EntityLink|Pufferfish}}
|
|-
|align="center"| {{InvSprite|Rabbit Spawn Egg}}
| {{EntityLink|Rabbit}}
| Rabbit skins are random and biome-dependent. The black-and-white rabbit spawns only if the spawn egg is renamed <code>[[Rabbit#Toast|Toast]]</code>. Rabbits have a 25% chance of spawning as a baby.
|-
|align="center"| {{InvSprite|Salmon Spawn Egg}}
| {{EntityLink|Salmon}}
| {{IN|bedrock}}, salmon spawn with a random size.
|-
|align="center"| {{InvSprite|Sheep Spawn Egg}}
| {{EntityLink|Sheep}}
| Sheep spawn with the colors that can appear naturally; see {{slink|Sheep|Spawning}} for details. Sheep have a 5% chance of spawning as a baby.
|-
|align="center"| {{InvSprite|Skeleton Horse Spawn Egg}}
| {{EntityLink|Skeleton Horse}}
| Skeleton horses have a 20% chance of spawning as a baby and never spawn as a skeleton trap.
|-
|align="center"| {{InvSprite|Sniffer Spawn Egg}}
| {{EntityLink|Sniffer}}
|Baby sniffers can also be spawned by the [[Sniffer Egg|Sniffer Egg.]]
|-
|align="center"| {{InvSprite|Snow Golem Spawn Egg}}
| {{EntityLink|Snow Golem}}
|
|-
|align="center"| {{InvSprite|Squid Spawn Egg}}
| {{EntityLink|Squid}}
| {{IN|bedrock}}, squid have a 5% chance of spawning as a baby.
|-
|align="center"| {{InvSprite|Strider Spawn Egg}}
| {{EntityLink|Strider}}
| Striders have a {{frac|1|10}} chance of spawning ridden by a baby strider and a {{frac|1|30}} chance of spawning ridden by a [[zombified piglin]].
|-
|align="center"| {{InvSprite|Tadpole Spawn Egg}}
| {{EntityLink|Tadpole}}
| Also spawned from [[frogspawn]].
|-
|align="center"| {{InvSprite|Tropical Fish Spawn Egg}}
| {{EntityLink|Tropical Fish}}
| Shapes, colors, and patterns are randomized, though 90% of the time the tropical fish will spawn as 1 of the 22 uniquely-named variants.
|-
|align="center"| {{InvSprite|Turtle Spawn Egg}}
| {{EntityLink|Turtle}}
| Turtles have a 10% chance of spawning as a baby.
|-
|align="center"| {{InvSprite|Villager Spawn Egg}}
| {{EntityLink|Villager}}
| Villagers' professions are randomized{{only|bedrock|short=1}}<ref>{{bug|MCPE-46034}}</ref> or unemployed{{only|java|short=1}}, but their outfit is biome-dependent. They have a 5% chance of spawning as a baby.
|-
|align="center"| {{InvSprite|Wandering Trader Spawn Egg}}
| {{EntityLink|Wandering Trader}}
| {{IN|bedrock}}, wandering traders always spawn with two leashed trader llamas.
|-
|align="center"| {{InvSprite|Zombie Horse Spawn Egg}}
| {{EntityLink|Zombie Horse}}
| Zombie horses have a 20% chance of spawning as a baby.
|}
=== Mobs without spawn eggs ===
The following mobs do not have explicitly defined spawn eggs. Custom spawn eggs can be created with a custom NBT tag that changes the spawned entity, however no spawn egg explicitly associated with any of the mobs exist.
{| class="wikitable" data-description="spawn eggs and availability"
! Mob
! Reason
|-
! colspan="2" | Variants
|-
! {{EntityLink|Brown Mooshroom}}
| Shares ID with red variant
|-
! colspan="2" | Other mobs
|-
! {{EntityLink|Giant}}
| Unused<ref>{{bug|MC-257115|||WAI}}</ref>
|-
! {{EntityLink|Illusioner}}
| Unused<ref>{{bug|MC-257115|||WAI}}</ref>
|}
=== Education Edition spawn eggs ===
These spawn eggs exist {{in|education}} and {{in|bedrock}}:
* {{InvSprite|Spawn Agent}} {{EntityLink|Agent}}
* {{InvSprite|Spawn NPC}} {{EntityLink|NPC}}
The NPC and agent can both be spawned {{in|bedrock}}, however, the agent is not visible or interactable in any way, though it still prevents the placing of blocks and entities.
=== Minecraft Earth spawn eggs ===
These unused spawn egg textures existed {{in|earth}}:
* {{InvSprite|Cluckshroom Spawn Egg}} {{EntityLink|Cluckshroom}}
* {{InvSprite|Horned Sheep Spawn Egg}} {{EntityLink|Horned Sheep}}
* {{InvSprite|Jumbo Rabbit Spawn Egg}} {{EntityLink|Jumbo Rabbit}}
* {{InvSprite|Moobloom Spawn Egg}} {{EntityLink|Moobloom}}
=== April Fools spawn eggs ===
* {{InvSprite|Moon Cow Spawn Egg}} {{EntityLink|Moon Cow}}
== Sounds ==
When a mob is spawned, it immediately makes its ambient sound.
== Data values ==
=== ID ===
{{edition|java}}:
{{ID table
|edition=java
|showforms=y
|generatetranslationkeys=y
|displayname=Allay Spawn Egg
|spritetype=item
|nameid=allay_spawn_egg
|form=item}}
{{ID table
|displayname=Axolotl Spawn Egg
|spritetype=item
|nameid=axolotl_spawn_egg
|form=item}}
{{ID table
|displayname=Bat Spawn Egg
|spritetype=item
|nameid=bat_spawn_egg
|form=item}}
{{ID table
|displayname=Bee Spawn Egg
|spritetype=item
|nameid=bee_spawn_egg
|form=item}}
{{ID table
|displayname=Blaze Spawn Egg
|spritetype=item
|nameid=blaze_spawn_egg
|form=item}}
{{ID table
|displayname=Camel Spawn Egg
|spritetype=item
|nameid=camel_spawn_egg
|form=item}}
{{ID table
|displayname=Cat Spawn Egg
|spritetype=item
|nameid=cat_spawn_egg
|form=item}}
{{ID table
|displayname=Cave Spider Spawn Egg
|spritetype=item
|nameid=cave_spider_spawn_egg
|form=item}}
{{ID table
|displayname=Chicken Spawn Egg
|spritetype=item
|nameid=chicken_spawn_egg
|form=item}}
{{ID table
|displayname=Cod Spawn Egg
|spritetype=item
|nameid=cod_spawn_egg
|form=item}}
{{ID table
|displayname=Cow Spawn Egg
|spritetype=item
|nameid=cow_spawn_egg
|form=item}}
{{ID table
|displayname=Creeper Spawn Egg
|spritetype=item
|nameid=creeper_spawn_egg
|form=item}}
{{ID table
|displayname=Dolphin Spawn Egg
|spritetype=item
|nameid=dolphin_spawn_egg
|form=item}}
{{ID table
|displayname=Donkey Spawn Egg
|spritetype=item
|nameid=donkey_spawn_egg
|form=item}}
{{ID table
|displayname=Drowned Spawn Egg
|spritetype=item
|nameid=drowned_spawn_egg
|form=item}}
{{ID table
|displayname=Elder Guardian Spawn Egg
|spritetype=item
|nameid=elder_guardian_spawn_egg
|form=item}}
{{ID table
|displayname=Ender Dragon Spawn Egg
|spritetype=item
|nameid=ender_dragon_spawn_egg
|form=item}}
{{ID table
|displayname=Enderman Spawn Egg
|spritetype=item
|nameid=enderman_spawn_egg
|form=item}}
{{ID table
|displayname=Endermite Spawn Egg
|spritetype=item
|nameid=endermite_spawn_egg
|form=item}}
{{ID table
|displayname=Evoker Spawn Egg
|spritetype=item
|nameid=evoker_spawn_egg
|form=item}}
{{ID table
|displayname=Fox Spawn Egg
|spritetype=item
|nameid=fox_spawn_egg
|form=item}}
{{ID table
|displayname=Frog Spawn Egg
|spritetype=item
|nameid=frog_spawn_egg
|form=item}}
{{ID table
|displayname=Ghast Spawn Egg
|spritetype=item
|nameid=ghast_spawn_egg
|form=item}}
{{ID table
|displayname=Glow Squid Spawn Egg
|spritename=glow-squid-spawn-egg
|spritetype=item
|nameid=glow_squid_spawn_egg
|form=item}}
{{ID table
|displayname=Goat Spawn Egg
|spritetype=item
|nameid=Goat_spawn_egg
|form=item}}
{{ID table
|displayname=Guardian Spawn Egg
|spritetype=item
|nameid=guardian_spawn_egg
|form=item}}
{{ID table
|displayname=Hoglin Spawn Egg
|spritetype=item
|nameid=hoglin_spawn_egg
|form=item}}
{{ID table
|displayname=Horse Spawn Egg
|spritetype=item
|nameid=horse_spawn_egg
|form=item}}
{{ID table
|displayname=Husk Spawn Egg
|spritetype=item
|nameid=husk_spawn_egg
|form=item}}
{{ID table
|displayname=Iron Golem Spawn Egg
|spritetype=item
|nameid=iron_golem_spawn_egg
|form=item}}
{{ID table
|displayname=Llama Spawn Egg
|spritetype=item
|nameid=llama_spawn_egg
|form=item}}
{{ID table
|displayname=Magma Cube Spawn Egg
|spritetype=item
|nameid=magma_cube_spawn_egg
|form=item}}
{{ID table
|displayname=Mooshroom Spawn Egg
|spritetype=item
|nameid=mooshroom_spawn_egg
|form=item}}
{{ID table
|displayname=Mule Spawn Egg
|spritetype=item
|nameid=mule_spawn_egg
|form=item}}
{{ID table
|displayname=Ocelot Spawn Egg
|spritetype=item
|nameid=ocelot_spawn_egg
|form=item}}
{{ID table
|displayname=Panda Spawn Egg
|spritetype=item
|nameid=panda_spawn_egg
|form=item}}
{{ID table
|displayname=Parrot Spawn Egg
|spritetype=item
|nameid=parrot_spawn_egg
|form=item}}
{{ID table
|displayname=Phantom Spawn Egg
|spritetype=item
|nameid=phantom_spawn_egg
|form=item}}
{{ID table
|displayname=Pig Spawn Egg
|spritetype=item
|nameid=pig_spawn_egg
|form=item}}
{{ID table
|displayname=Piglin Spawn Egg
|spritetype=item
|nameid=piglin_spawn_egg
|form=item}}
{{ID table
|displayname=Piglin Brute Spawn Egg
|spritetype=item
|nameid=piglin_brute_spawn_egg
|form=item}}
{{ID table
|displayname=Pillager Spawn Egg
|spritetype=item
|nameid=pillager_spawn_egg
|form=item}}
{{ID table
|displayname=Polar Bear Spawn Egg
|spritetype=item
|nameid=polar_bear_spawn_egg
|form=item}}
{{ID table
|displayname=Pufferfish Spawn Egg
|spritetype=item
|nameid=pufferfish_spawn_egg
|form=item}}
{{ID table
|displayname=Rabbit Spawn Egg
|spritetype=item
|nameid=rabbit_spawn_egg
|form=item}}
{{ID table
|displayname=Ravager Spawn Egg
|spritetype=item
|nameid=ravager_spawn_egg
|form=item}}
{{ID table
|displayname=Salmon Spawn Egg
|spritetype=item
|nameid=salmon_spawn_egg
|form=item}}
{{ID table
|displayname=Sheep Spawn Egg
|spritetype=item
|nameid=sheep_spawn_egg
|form=item}}
{{ID table
|displayname=Shulker Spawn Egg
|spritetype=item
|nameid=shulker_spawn_egg
|form=item}}
{{ID table
|displayname=Silverfish Spawn Egg
|spritetype=item
|nameid=silverfish_spawn_egg
|form=item}}
{{ID table
|displayname=Skeleton Spawn Egg
|spritetype=item
|nameid=skeleton_spawn_egg
|form=item}}
{{ID table
|displayname=Skeleton Horse Spawn Egg
|spritetype=item
|nameid=skeleton_horse_spawn_egg
|form=item}}
{{ID table
|displayname=Slime Spawn Egg
|spritetype=item
|nameid=slime_spawn_egg
|form=item}}
{{ID table
|displayname=Sniffer Spawn Egg
|spritetype=item
|nameid=sniffer_spawn_egg
|form=item}}
{{ID table
|displayname=Snow Golem Spawn Egg
|spritetype=item
|nameid=snow_golem_spawn_egg
|form=item}}
{{ID table
|displayname=Spider Spawn Egg
|spritetype=item
|nameid=spider_spawn_egg
|form=item}}
{{ID table
|displayname=Squid Spawn Egg
|spritetype=item
|nameid=squid_spawn_egg
|form=item}}
{{ID table
|displayname=Stray Spawn Egg
|spritetype=item
|nameid=stray_spawn_egg
|form=item}}
{{ID table
|displayname=Strider Spawn Egg
|spritetype=item
|nameid=strider_spawn_egg
|form=item}}
{{ID table
|displayname=Tadpole Spawn Egg
|spritetype=item
|nameid=tadpole_spawn_egg
|form=item}}
{{ID table
|displayname=Trader Llama Spawn Egg
|spritetype=item
|nameid=trader_llama_spawn_egg
|form=item}}
{{ID table
|displayname=Tropical Fish Spawn Egg
|spritetype=item
|nameid=tropical_fish_spawn_egg
|form=item}}
{{ID table
|displayname=Turtle Spawn Egg
|spritetype=item
|nameid=turtle_spawn_egg
|form=item}}
{{ID table
|displayname=Vex Spawn Egg
|spritetype=item
|nameid=vex_spawn_egg
|form=item}}
{{ID table
|displayname=Villager Spawn Egg
|spritetype=item
|nameid=villager_spawn_egg
|form=item}}
{{ID table
|displayname=Vindicator Spawn Egg
|spritetype=item
|nameid=vindicator_spawn_egg
|form=item}}
{{ID table
|displayname=Wandering Trader Spawn Egg
|spritetype=item
|nameid=wandering_trader_spawn_egg
|form=item}}
{{ID table
|displayname=Warden Spawn Egg
|spritetype=item
|nameid=warden_spawn_egg
|form=item}}
{{ID table
|displayname=Witch Spawn Egg
|spritetype=item
|nameid=witch_spawn_egg
|form=item}}
{{ID table
|displayname=Wither Spawn Egg
|spritetype=item
|nameid=wither_spawn_egg
|form=item}}
{{ID table
|displayname=Wither Skeleton Spawn Egg
|spritetype=item
|nameid=wither_skeleton_spawn_egg
|form=item}}
{{ID table
|displayname=Wolf Spawn Egg
|spritetype=item
|nameid=wolf_spawn_egg
|form=item}}
{{ID table
|displayname=Zoglin Spawn Egg
|spritetype=item
|nameid=zoglin_spawn_egg
|form=item}}
{{ID table
|displayname=Zombie Spawn Egg
|spritetype=item
|nameid=zombie_spawn_egg
|form=item}}
{{ID table
|displayname=Zombie Horse Spawn Egg
|spritetype=item
|nameid=zombie_horse_spawn_egg
|form=item}}
{{ID table
|displayname=Zombie Villager Spawn Egg
|spritetype=item
|nameid=zombie_villager_spawn_egg
|form=item}}
{{ID table
|displayname=Zombified Piglin Spawn Egg
|spritetype=item
|nameid=zombified_piglin_spawn_egg
|form=item
|foot=1}}
{{edition|bedrock}}:
{{ID table
|edition=bedrock
|showaliasids=y
|shownumericids=y
|showforms=y
|notshowbeitemforms=y
|generatetranslationkeys=y
|displayname=item.spawn_egg.name
|spritename=chicken-spawn-egg
|spritetype=item
|nameid=spawn_egg
|aliasid=spawn_egg / 0
|id=718
|form=item
|translationkey=-}}
{{ID table
|displayname=Spawn Agent
|spritetype=item
|nameid=agent_spawn_egg
|aliasid=spawn_egg / 56
|id=489
|form=item
|translationkey=item.spawn_egg.entity.agent.name}}
{{ID table
|displayname=Spawn Allay
|spritename=Allay Spawn Egg
|spritetype=item
|nameid=allay_spawn_egg
|aliasid=spawn_egg / 134
|id=639
|form=item
|translationkey=item.spawn_egg.entity.allay.name}}
{{ID table
|displayname=Spawn Axolotl
|spritename=Axolotl Spawn Egg
|spritetype=item
|nameid=axolotl_spawn_egg
|aliasid=spawn_egg / 130
|id=503
|form=item
|translationkey=item.spawn_egg.entity.axolotl.name}}
{{ID table
|displayname=Spawn Bat
|spritetype=item
|nameid=bat_spawn_egg
|aliasid=spawn_egg / 19
|id=455
|form=item
|translationkey=item.spawn_egg.entity.bat.name}}
{{ID table
|displayname=Spawn Bee
|spritetype=item
|nameid=bee_spawn_egg
|aliasid=spawn_egg / 122
|id=496
|form=item
|translationkey=item.spawn_egg.entity.bee.name}}
{{ID table
|displayname=Spawn Blaze
|spritetype=item
|nameid=blaze_spawn_egg
|aliasid=spawn_egg / 43
|id=458
|form=item
|translationkey=item.spawn_egg.entity.blaze.name}}
{{ID table
|displayname=Spawn Camel
|spritename=Camel Spawn Egg
|spritetype=item
|nameid=camel_spawn_egg
|aliasid=spawn_egg / 138
|id=663
|form=item
|translationkey=item.spawn_egg.entity.camel.name}}
{{ID table
|displayname=Spawn Cat
|spritetype=item
|nameid=cat_spawn_egg
|aliasid=spawn_egg / 75
|id=490
|form=item
|translationkey=item.spawn_egg.entity.cat.name}}
{{ID table
|displayname=Spawn Cave Spider
|spritetype=item
|nameid=cave_spider_spawn_egg
|aliasid=spawn_egg / 40
|id=459
|form=item
|translationkey=item.spawn_egg.entity.cave_spider.name}}
{{ID table
|displayname=Spawn Chicken
|spritetype=item
|nameid=chicken_spawn_egg
|aliasid=spawn_egg / 10
|id=437
|form=item
|translationkey=item.spawn_egg.entity.chicken.name}}
{{ID table
|displayname=Spawn Cod
|spritetype=item
|nameid=cod_spawn_egg
|aliasid=spawn_egg / 112
|id=482
|form=item
|translationkey=item.spawn_egg.entity.cod.name}}
{{ID table
|displayname=Spawn Cow
|spritetype=item
|nameid=cow_spawn_egg
|aliasid=spawn_egg / 11
|id=438
|form=item
|translationkey=item.spawn_egg.entity.cow.name}}
{{ID table
|displayname=Spawn Creeper
|spritetype=item
|nameid=creeper_spawn_egg
|aliasid=spawn_egg / 33
|id=443
|form=item
|translationkey=item.spawn_egg.entity.creeper.name}}
{{ID table
|displayname=Spawn Dolphin
|spritetype=item
|nameid=dolphin_spawn_egg
|aliasid=spawn_egg / 31
|id=486
|form=item
|translationkey=item.spawn_egg.entity.dolphin.name}}
{{ID table
|displayname=Spawn Donkey
|spritetype=item
|nameid=donkey_spawn_egg
|aliasid=spawn_egg / 24
|id=467
|form=item
|translationkey=item.spawn_egg.entity.donkey.name}}
{{ID table
|displayname=Spawn Drowned
|spritetype=item
|nameid=drowned_spawn_egg
|aliasid=spawn_egg / 110
|id=485
|form=item
|translationkey=item.spawn_egg.entity.drowned.name}}
{{ID table
|displayname=Spawn Elder Guardian
|spritetype=item
|nameid=elder_guardian_spawn_egg
|aliasid=spawn_egg / 50
|id=473
|form=item
|translationkey=item.spawn_egg.entity.elder_guardian.name}}
{{ID table
|displayname=Spawn Ender Dragon
|spritetype=item
|nameid=ender_dragon_spawn_egg
|aliasid=spawn_egg / 53
|id=508
|form=item
|translationkey=item.spawn_egg.entity.ender_dragon.name}}
{{ID table
|displayname=Spawn Enderman
|spritetype=item
|nameid=enderman_spawn_egg
|aliasid=spawn_egg / 38
|id=444
|form=item
|translationkey=item.spawn_egg.entity.enderman.name}}
{{ID table
|displayname=Spawn Endermite
|spritetype=item
|nameid=endermite_spawn_egg
|aliasid=spawn_egg / 55
|id=462
|form=item
|translationkey=item.spawn_egg.entity.endermite.name}}
{{ID table
|displayname=Spawn Evoker
|spritetype=item
|nameid=evoker_spawn_egg
|aliasid=spawn_egg / 104
|id=477
|form=item
|translationkey=item.spawn_egg.entity.evocation_illager.name}}
{{ID table
|displayname=Spawn Fox
|spritetype=item
|nameid=fox_spawn_egg
|aliasid=spawn_egg / 121
|id=492
|form=item
|translationkey=item.spawn_egg.entity.fox.name}}
{{ID table
|displayname=Spawn Frog
|spritetype=item
|nameid=frog_spawn_egg
|aliasid=spawn_egg / 132
|id=636
|form=item
|translationkey=item.spawn_egg.entity.frog.name}}
{{ID table
|displayname=Spawn Ghast
|spritetype=item
|nameid=ghast_spawn_egg
|aliasid=spawn_egg / 41
|id=456
|form=item
|translationkey=item.spawn_egg.entity.ghast.name}}
{{ID table
|displayname=Spawn Glow Squid
|spritename=glow-squid-spawn-egg
|spritetype=item
|nameid=glow_squid_spawn_egg
|aliasid=spawn_egg / 129
|id=505
|form=item
|translationkey=item.spawn_egg.entity.glow_squid.name}}
{{ID table
|displayname=Spawn Goat
|spritename=spawn-goat
|spritetype=item
|nameid=goat_spawn_egg
|aliasid=spawn_egg / 128
|id=504
|form=item
|translationkey=item.spawn_egg.entity.goat.name}}
{{ID table
|displayname=Spawn Guardian
|spritetype=item
|nameid=guardian_spawn_egg
|aliasid=spawn_egg / 49
|id=463
|form=item
|translationkey=item.spawn_egg.entity.guardian.name}}
{{ID table
|displayname=Spawn Hoglin
|spritetype=item
|nameid=hoglin_spawn_egg
|aliasid=spawn_egg / 124
|id=498
|form=item
|translationkey=item.spawn_egg.entity.hoglin.name}}
{{ID table
|displayname=Spawn Horse
|spritetype=item
|nameid=horse_spawn_egg
|aliasid=spawn_egg / 23
|id=460
|form=item
|translationkey=item.spawn_egg.entity.horse.name}}
{{ID table
|displayname=Spawn Husk
|spritetype=item
|nameid=husk_spawn_egg
|aliasid=spawn_egg / 47
|id=465
|form=item
|translationkey=item.spawn_egg.entity.husk.name}}
{{ID table
|displayname=Spawn Iron Golem
|spritetype=item
|nameid=iron_golem_spawn_egg
|aliasid=spawn_egg / 20
|id=506
|form=item
|translationkey=item.spawn_egg.entity.iron_golem.name}}
{{ID table
|displayname=Spawn Llama
|spritetype=item
|nameid=llama_spawn_egg
|aliasid=spawn_egg / 29
|id=475
|form=item
|translationkey=item.spawn_egg.entity.llama.name}}
{{ID table
|displayname=Spawn Magma Cube
|spritetype=item
|nameid=magma_cube_spawn_egg
|aliasid=spawn_egg / 42
|id=457
|form=item
|translationkey=item.spawn_egg.entity.magma_cube.name}}
{{ID table
|displayname=Spawn Mooshroom
|spritetype=item
|nameid=mooshroom_spawn_egg
|aliasid=spawn_egg / 16
|id=442
|form=item
|translationkey=item.spawn_egg.entity.mooshroom.name}}
{{ID table
|displayname=Spawn Mule
|spritetype=item
|nameid=mule_spawn_egg
|aliasid=spawn_egg / 25
|id=468
|form=item
|translationkey=item.spawn_egg.entity.mule.name}}
{{ID table
|displayname=Spawn NPC
|spritetype=item
|nameid=npc_spawn_egg
|aliasid=spawn_egg / 51
|id=472
|form=item
|translationkey=item.spawn_egg.entity.npc.name}}
{{ID table
|displayname=Spawn Ocelot
|spritetype=item
|nameid=ocelot_spawn_egg
|aliasid=spawn_egg / 22
|id=453
|form=item
|translationkey=item.spawn_egg.entity.ocelot.name}}
{{ID table
|displayname=Spawn Panda
|spritetype=item
|nameid=panda_spawn_egg
|aliasid=spawn_egg / 113
|id=491
|form=item
|translationkey=item.spawn_egg.entity.panda.name}}
{{ID table
|displayname=Spawn Parrot
|spritetype=item
|nameid=parrot_spawn_egg
|aliasid=spawn_egg / 30
|id=480
|form=item
|translationkey=item.spawn_egg.entity.parrot.name}}
{{ID table
|displayname=Spawn Phantom
|spritetype=item
|nameid=phantom_spawn_egg
|aliasid=spawn_egg / 58
|id=488
|form=item
|translationkey=item.spawn_egg.entity.phantom.name}}
{{ID table
|displayname=Spawn Pig
|spritetype=item
|nameid=pig_spawn_egg
|aliasid=spawn_egg / 12
|id=439
|form=item
|translationkey=item.spawn_egg.entity.pig.name}}
{{ID table
|displayname=Spawn Piglin Brute
|spritetype=item
|nameid=piglin_brute_spawn_egg
|aliasid=spawn_egg / 127
|id=501
|form=item
|translationkey=item.spawn_egg.entity.piglin_brute.name}}
{{ID table
|displayname=Spawn Piglin
|spritetype=item
|nameid=piglin_spawn_egg
|aliasid=spawn_egg / 123
|id=499
|form=item
|translationkey=item.spawn_egg.entity.piglin.name}}
{{ID table
|displayname=Spawn Pillager
|spritetype=item
|nameid=pillager_spawn_egg
|aliasid=spawn_egg / 114
|id=493
|form=item
|translationkey=item.spawn_egg.entity.pillager.name}}
{{ID table
|displayname=Spawn Polar Bear
|spritetype=item
|nameid=polar_bear_spawn_egg
|aliasid=spawn_egg / 28
|id=474
|form=item
|translationkey=item.spawn_egg.entity.polar_bear.name}}
{{ID table
|displayname=Spawn Pufferfish
|spritetype=item
|nameid=pufferfish_spawn_egg
|aliasid=spawn_egg / 108
|id=483
|form=item
|translationkey=item.spawn_egg.entity.pufferfish.name}}
{{ID table
|displayname=Spawn Rabbit
|spritetype=item
|nameid=rabbit_spawn_egg
|aliasid=spawn_egg / 18
|id=461
|form=item
|translationkey=item.spawn_egg.entity.rabbit.name}}
{{ID table
|displayname=Spawn Ravager
|spritetype=item
|nameid=ravager_spawn_egg
|aliasid=spawn_egg / 59
|id=495
|form=item
|translationkey=item.spawn_egg.entity.ravager.name}}
{{ID table
|displayname=Spawn Salmon
|spritetype=item
|nameid=salmon_spawn_egg
|aliasid=spawn_egg / 109
|id=484
|form=item
|translationkey=item.spawn_egg.entity.salmon.name}}
{{ID table
|displayname=Spawn Sheep
|spritetype=item
|nameid=sheep_spawn_egg
|aliasid=spawn_egg / 13
|id=440
|form=item
|translationkey=item.spawn_egg.entity.sheep.name}}
{{ID table
|displayname=Spawn Shulker
|spritetype=item
|nameid=shulker_spawn_egg
|aliasid=spawn_egg / 54
|id=471
|form=item
|translationkey=item.spawn_egg.entity.shulker.name}}
{{ID table
|displayname=Spawn Silverfish
|spritetype=item
|nameid=silverfish_spawn_egg
|aliasid=spawn_egg / 39
|id=445
|form=item
|translationkey=item.spawn_egg.entity.silverfish.name}}
{{ID table
|displayname=Spawn Skeleton Horse
|spritetype=item
|nameid=skeleton_horse_spawn_egg
|aliasid=spawn_egg / 26
|id=469
|form=item
|translationkey=item.spawn_egg.entity.skeleton_horse.name}}
{{ID table
|displayname=Spawn Skeleton
|spritetype=item
|nameid=skeleton_spawn_egg
|aliasid=spawn_egg / 34
|id=446
|form=item
|translationkey=item.spawn_egg.entity.skeleton.name}}
{{ID table
|displayname=Spawn Slime
|spritetype=item
|nameid=slime_spawn_egg
|aliasid=spawn_egg / 37
|id=447
|form=item
|translationkey=item.spawn_egg.entity.slime.name}}
{{ID table
|displayname=Spawn Sniffer
|spritetype=item
|nameid=sniffer_spawn_egg
|aliasid=spawn_egg / 139
|id=502
|form=item
|translationkey=item.spawn_egg.entity.sniffer.name}}
{{ID table
|displayname=Spawn Snow Golem
|spritetype=item
|nameid=snow_golem_spawn_egg
|aliasid=spawn_egg / 21
|id=507
|form=item
|translationkey=item.spawn_egg.entity.snow_golem.name}}
{{ID table
|displayname=Spawn Spider
|spritetype=item
|nameid=spider_spawn_egg
|aliasid=spawn_egg / 35
|id=448
|form=item
|translationkey=item.spawn_egg.entity.spider.name}}
{{ID table
|displayname=Spawn Squid
|spritetype=item
|nameid=squid_spawn_egg
|aliasid=spawn_egg / 17
|id=452
|form=item
|translationkey=item.spawn_egg.entity.squid.name}}
{{ID table
|displayname=Spawn Stray
|spritetype=item
|nameid=stray_spawn_egg
|aliasid=spawn_egg / 46
|id=464
|form=item
|translationkey=item.spawn_egg.entity.stray.name}}
{{ID table
|displayname=Spawn Strider
|spritetype=item
|nameid=strider_spawn_egg
|aliasid=spawn_egg / 125
|id=497
|form=item
|translationkey=item.spawn_egg.entity.strider.name}}
{{ID table
|displayname=Spawn Tadpole
|spritetype=item
|nameid=tadpole_spawn_egg
|aliasid=spawn_egg / 133
|id=637
|form=item
|translationkey=item.spawn_egg.entity.tadpole.name}}
{{ID table
|displayname=Spawn Trader Llama
|spritetype=item
|nameid=trader_llama_spawn_egg
|aliasid=spawn_egg / 157
|id=656
|form=item
|translationkey=item.spawn_egg.entity.trader_llama.name}}
{{ID table
|displayname=Spawn Tropical Fish
|spritetype=item
|nameid=tropical_fish_spawn_egg
|aliasid=spawn_egg / 111
|id=481
|form=item
|translationkey=item.spawn_egg.entity.tropicalfish.name}}
{{ID table
|displayname=Spawn Sea Turtle
|spritetype=item
|nameid=turtle_spawn_egg
|aliasid=spawn_egg / 74
|id=487
|form=item
|translationkey=item.spawn_egg.entity.turtle.name}}
{{ID table
|displayname=Spawn Vex
|spritetype=item
|nameid=vex_spawn_egg
|aliasid=spawn_egg / 105
|id=478
|form=item
|translationkey=item.spawn_egg.entity.vex.name}}
{{ID table
|displayname=Spawn Villager
|spritetype=item
|nameid=villager_spawn_egg
|aliasid=spawn_egg / 15, 115
|id=451
|form=item
|translationkey=item.spawn_egg.entity.villager_v2.name, item.spawn_egg.entity.villager.name}}
{{ID table
|displayname=Spawn Vindicator
|spritetype=item
|nameid=vindicator_spawn_egg
|aliasid=spawn_egg / 57
|id=476
|form=item
|translationkey=item.spawn_egg.entity.vindicator.name}}
{{ID table
|displayname=Spawn Wandering Trader
|spritetype=item
|nameid=wandering_trader_spawn_egg
|aliasid=spawn_egg / 118
|id=494
|form=item
|translationkey=item.spawn_egg.entity.wandering_trader.name}}
{{ID table
|displayname=Spawn Warden
|spritetype=item
|nameid=warden_spawn_egg
|aliasid=spawn_egg / 131
|id=640
|form=item
|translationkey=item.spawn_egg.entity.warden.name}}
{{ID table
|displayname=Spawn Witch
|spritetype=item
|nameid=witch_spawn_egg
|aliasid=spawn_egg / 45
|id=454
|form=item
|translationkey=item.spawn_egg.entity.witch.name}}
{{ID table
|displayname=Spawn Wither
|spritetype=item
|nameid=wither_spawn_egg
|aliasid=spawn_egg / 52
|id=509
|form=item
|translationkey=item.spawn_egg.entity.wither.name}}
{{ID table
|displayname=Spawn Wither Skeleton
|spritetype=item
|nameid=wither_skeleton_spawn_egg
|aliasid=spawn_egg / 48
|id=466
|form=item
|translationkey=item.spawn_egg.entity.wither_skeleton.name}}
{{ID table
|displayname=Spawn Wolf
|spritetype=item
|nameid=wolf_spawn_egg
|aliasid=spawn_egg / 14
|id=441
|form=item
|translationkey=item.spawn_egg.entity.wolf.name}}
{{ID table
|displayname=Spawn Zoglin
|spritetype=item
|nameid=zoglin_spawn_egg
|aliasid=spawn_egg / 126
|id=500
|form=item
|translationkey=item.spawn_egg.entity.zoglin.name}}
{{ID table
|displayname=Spawn Zombie Horse
|spritetype=item
|nameid=zombie_horse_spawn_egg
|aliasid=spawn_egg / 27
|id=470
|form=item
|translationkey=item.spawn_egg.entity.zombie_horse.name}}
{{ID table
|displayname=Spawn Zombified Piglin
|spritetype=item
|nameid=zombie_pigman_spawn_egg
|aliasid=spawn_egg / 36
|id=450
|form=item
|translationkey=item.spawn_egg.entity.zombie_pigman.name}}
{{ID table
|displayname=Spawn Zombie
|spritetype=item
|nameid=zombie_spawn_egg
|aliasid=spawn_egg / 32
|id=449
|form=item
|translationkey=item.spawn_egg.entity.zombie.name}}
{{ID table
|displayname=Spawn Zombie Villager
|spritetype=item
|nameid=zombie_villager_spawn_egg
|aliasid=spawn_egg / 44, 116
|id=479
|form=item
|translationkey=item.spawn_egg.entity.zombie_villager_v2.name, item.spawn_egg.entity.zombie_villager.name
|foot=1}}
=== Item data ===
{{el|java}}:
{{main|Player.dat format}}
<div class="treeview">
* {{nbt|compound|tag}}: The item's '''tag''' tag.
{{:Player.dat_format/Entity Spawners}}
</div>
{{el|bedrock}}:
: {{IN|bedrock}}, spawn eggs have no additional tags.
: See [[Bedrock Edition level format/Item format]].
== History ==
{{for|information on the historical colors of spawn eggs|Spawn Egg colors}}
{{Info needed|{{Edition|BE}} is outdated}}
{{History|java}}
{{History||1.1|snap=11w49a|[[File:Creeper Spawn Egg JE1.png|32px]] [[File:Spider Spawn Egg JE1.png|32px]] [[File:Skeleton Spawn Egg JE1.png|32px]] [[File:Zombie Spawn Egg JE1.png|32px]] [[File:Slime Spawn Egg JE1.png|32px]] [[File:Ghast Spawn Egg JE1.png|32px]] [[File:Zombie Pigman Spawn Egg JE1.png|32px]] [[File:Enderman Spawn Egg JE1.png|32px]] [[File:Cave Spider Spawn Egg JE1.png|32px]] [[File:Silverfish Spawn Egg JE1.png|32px]] [[File:Blaze Spawn Egg JE1.png|32px]] [[File:Magma Cube Spawn Egg JE1.png|32px]] [[File:Pig Spawn Egg JE1.png|32px]] [[File:Sheep Spawn Egg JE1.png|32px]] [[File:Cow Spawn Egg JE1.png|32px]] [[File:Chicken Spawn Egg JE1.png|32px]] [[File:Squid Spawn Egg JE1.png|32px]] [[File:Wolf Spawn Egg JE1.png|32px]] [[File:Mooshroom Spawn Egg JE1.png|32px]] [[File:Villager Spawn Egg JE1.png|32px]] Added spawn eggs for [[creeper]]s, [[spider]]s, [[skeleton]]s, [[zombie]]s, [[slime]]s, [[ghast]]s, [[zombie pigman|zombie pigmen]], [[endermen]], [[cave spider]]s, [[silverfish]], [[blaze]]s, [[magma cube]]s, [[pig]]s, [[sheep]], [[cow]]s, [[chicken]]s, [[squid]], [[wolf|wolves]], [[mooshroom]]s and [[villager]]s.
|The spawn egg has a single texture file, which is [[tint]]ed different colors.}}
{{History|||snap=12w01a|[[File:Creeper Spawn Egg JE2 BE1.png|32px]] [[File:Spider Spawn Egg JE2 BE1.png|32px]] [[File:Skeleton Spawn Egg JE2 BE1.png|32px]] [[File:Zombie Spawn Egg JE2 BE1.png|32px]] [[File:Slime Spawn Egg JE2 BE1.png|32px]] [[File:Ghast Spawn Egg JE2 BE1.png|32px]] [[File:Zombie Pigman Spawn Egg JE2 BE1.png|32px]] [[File:Enderman Spawn Egg JE2 BE1.png|32px]] [[File:Cave Spider Spawn Egg JE2 BE1.png|32px]] [[File:Silverfish Spawn Egg JE2 BE2.png|32px]] [[File:Blaze Spawn Egg JE2 BE1.png|32px]] [[File:Magma Cube Spawn Egg JE2 BE1.png|32px]] [[File:Pig Spawn Egg JE2 BE1.png|32px]] [[File:Sheep Spawn Egg JE2 BE1.png|32px]] [[File:Cow Spawn Egg JE2 BE1.png|32px]] [[File:Chicken Spawn Egg JE2 BE1.png|32px]] [[File:Squid Spawn Egg JE2 BE1.png|32px]] [[File:Wolf Spawn Egg JE2 BE1.png|32px]] [[File:Mooshroom Spawn Egg JE2 BE1.png|32px]] [[File:Villager Spawn Egg JE2 BE1.png|32px]] The spawn egg and its markings now have their textures separated, allowing them to have entirely different colors. This allows their colors to better match the colors of the [[mob]]s themselves.}}
{{History||1.2.1|snap=12w03a|Spawn eggs can now be placed into a [[dispenser]]. Activating the dispenser spawns the mob, instead of dispensing the egg as an [[item]].
|Spawn eggs are now stackable, which allows dispensers to hold more than nine of them at one time.}}
{{History|||snap=12w04a|[[File:Ocelot Spawn Egg JE1 BE1.png|32px]] Added [[ocelot]] spawn eggs with the addition of the ocelot itself.
|Before 1.2, edited spawn eggs for [[snow golem]]s, [[ender dragon]]s and [[giant]]s (and other "unspawnable" [[mob]]s) produced mobs of their types. Now, this is restricted to those eggs available in the [[creative]] [[inventory]].}}
{{History||1.3.1|snap=12w18a|[[Villager]]s spawned from spawn eggs were always farmers before this update and now their professions are randomized.}}
{{History||1.4.2|snap=12w32a|[[Zombie villager]]s can now be spawned using [[zombie]] spawn eggs.
|[[Sheep]] from spawn eggs can now spawn naturally-colored sheep (white, gray, brown, pink, etc.).}}
{{History|||snap=12w36a|[[Wither skeleton]]s now have a high chance to spawn from a [[skeleton]] spawn egg, if the [[player]] is in [[the Nether]].
|[[Skeleton]]s on [[spider jockey]]s can now be replaced with [[wither skeleton]]s when using [[spider]] spawn eggs in the Nether.}}
{{History|||snap=12w38a|[[File:Witch Spawn Egg JE1 BE1.png|32px]] [[File:Bat Spawn Egg JE1 BE1.png|32px]] Added [[witch]] and [[bat]] spawn eggs.}}
{{History||1.4.4|snap=pre|Baby [[mob]]s are now spawn-able by right-clicking a mob with a corresponding mob egg. Although, this doesn't work with [[zombie]]s.}}
{{History||1.5|snap=January 7, 2013|slink={{tweet|Dinnerbone|288322623916617728}}|[[Dinnerbone]] tweeted the first image of a renamed mob appearing in a [[death messages|death message]].}}
{{History|||snap=13w02a|[[Mob]]s spawned from renamed eggs now have the name of the egg and the names appear in death messages.
|Mobs can now display their custom name as nametag using an NBT tag.}}
{{History||1.6.1|snap=13w16a|[[File:Horse Spawn Egg JE1 BE1.png|32px]] Added [[horse]] spawn eggs.}}
{{History|||snap=13w24a|Spawn eggs now work on [[water]].}}
{{History|||snap=1.6|Renaming a spawn egg "''Dinnerbone''" or "''Grumm''" now cause the [[mob]] to spawn upside-down.}}
{{History||1.7.4|snap=13w48b|Renaming a [[sheep]] or sheep spawn egg "''jeb_''" give it a rainbow wool changing effect. This does not affect the wool dropped after death or [[shear]]ing, however.}}
{{History||1.8|snap=14w11a|[[File:Endermite Spawn Egg JE1 BE1.png|32px]] Added [[endermite]] spawn eggs.}}
{{History|||snap=14w25a|[[File:Guardian Spawn Egg JE1 BE1.png|32px]] Added [[guardian]] spawn eggs.}}
{{History|||snap=14w27a|[[File:Rabbit Spawn Egg JE1 BE1.png|32px]] Added [[rabbit]] spawn eggs.}}
{{History|||snap=14w28b|Spawn eggs can now be used to program [[monster spawner]] blocks.}}
{{History||1.9|snap=15w31a|[[File:Shulker Spawn Egg JE1 BE2.png|32px]] Added [[shulker]] spawn eggs.}}
{{History|||snap=15w33a|Spawn eggs can no longer be addressed by numeric data id, like: <code>give @p spawn_egg 1 50</code>. The spawnable [[entity]] from a spawn egg is now addressed by a datatag: <code>/give @p spawn_egg 1 0 <nowiki>{EntityTag:{id:"Creeper"}}</code>.}}
{{History||1.10|snap=16w20a|[[File:Polar Bear Spawn Egg JE1 BE1.png|32px]] [[File:Wither Skeleton Spawn Egg JE1 BE1.png|32px]] [[File:Stray Spawn Egg JE1 BE2.png|32px]] [[File:Husk Spawn Egg JE1 BE2.png|32px]] [[File:Elder Guardian Spawn Egg JE1 BE1.png|32px]] [[File:Cat Spawn Egg JE1.png|32px]] [[File:Donkey Spawn Egg JE1 BE1.png|32px]] [[File:Mule Spawn Egg JE1 BE1.png|32px]] [[File:Skeleton Horse Spawn Egg JE1 BE1.png|32px]] [[File:Zombie Horse Spawn Egg JE1 BE2.png|32px]] Added spawn eggs for [[polar bear]]s, [[wither skeleton]]s, [[stray]]s, [[husk]]s, [[elder guardian]], [[cat]]s, donkeys, mules, skeleton horses and zombie horses.}}
{{History|||snap=pre2|Removed spawn eggs for wither skeletons, strays, husks, elder guardians, cats, donkeys, mules, skeleton horses and zombie horses that were added in [[16w20a]].}}
{{History||1.11|snap=16w32a|[[File:Polar Bear Spawn Egg JE1 BE1.png|32px]] [[File:Wither Skeleton Spawn Egg JE1 BE1.png|32px]] [[File:Stray Spawn Egg JE1 BE2.png|32px]] [[File:Husk Spawn Egg JE1 BE2.png|32px]] [[File:Elder Guardian Spawn Egg JE1 BE1.png|32px]] [[File:Donkey Spawn Egg JE1 BE1.png|32px]] [[File:Mule Spawn Egg JE1 BE1.png|32px]] [[File:Skeleton Horse Spawn Egg JE1 BE1.png|32px]] [[File:Zombie Horse Spawn Egg JE1 BE2.png|32px]] Re-added the spawn eggs that were removed in [[1.10-pre2]], except the [[cat]] spawn egg.
|[[File:Zombie Villager Spawn Egg JE1 BE1.png|32px]] Added a [[zombie villager]] spawn egg. It can spawn only zombie farmers.
|Using a spawn egg on top of a block such as a [[fence]] no longer cause the spawned [[mob]] to fall inside the fence.<ref>{{bug|MC-88096|| When using spawn eggs on fences the mobs fall through}} – resolved as "Fixed"</ref>}}
{{History|||snap=16w32b|The [[zombie villager]] spawn egg now spawns different zombie professions.}}
{{History|||snap=16w39a|[[File:Evoker Spawn Egg JE1 BE1.png|32px]] [[File:Llama Spawn Egg JE1 BE1.png|32px]] [[File:Vex Spawn Egg JE1 BE1.png|32px]] [[File:Vindicator Spawn Egg JE1 BE1.png|32px]] Added spawn eggs for [[evoker]]s, [[llama]]s, [[vex]]es and [[vindicator]]s.}}
{{History||1.12|snap=17w13a|[[File:Parrot Spawn Egg JE1 BE1.png|32px]] Added spawn egg for [[parrot]]s.}}
{{History||1.13|snap=17w47a|The different {{nbt|compound|EntityTag}} [[entity]] IDs for the <code>spawn_egg</code> ID have now been split up into their own IDs.
|Prior to [[1.13/Flattening|''The Flattening'']], this [[item]]'s numeral ID was 383.}}
{{History|||snap=18w07a|[[File:Phantom Spawn Egg JE1.png|32px]] [[File:Turtle Spawn Egg JE1 BE1.png|32px]] Added spawn eggs for [[phantom]]s and [[turtle]]s.}}
{{History|||snap=18w08b|[[File:Cod Spawn Egg JE1 BE2.png|32px]] [[File:Salmon Spawn Egg JE1 BE2.png|32px]] [[File:Pufferfish Spawn Egg JE1 BE2.png|32px]] Added spawn eggs for the 3 [[fish mob]] variants: cod, salmon, and "puffer fish".}}
{{History|||snap=18w10a|[[File:Tropical Fish Spawn Egg JE1 BE2.png|32px]] Added a spawn egg for the new [[tropical fish]].}}
{{History|||snap=18w11a|[[File:Drowned Spawn Egg JE1 BE1.png|32px]] Added [[drowned]] spawn eggs.}}
{{History|||snap=18w15a|[[File:Dolphin Spawn Egg JE1 BE1.png|32px]] Added [[dolphin]] spawn eggs.}}
{{History|||snap=18w19a|[[File:Phantom Spawn Egg JE2 BE1.png|32px]] The [[phantom]] spawn egg has been changed to look more like [[mob]]'s updated texture.
|The "puffer fish" spawn egg has been renamed to "pufferfish" spawn egg.}}
{{History|||snap=18w20a|"Spawn ''x''" has been changed to "''x'' Spawn Egg".}}
{{History||1.14|snap=18w43a|[[File:Panda Spawn Egg JE1.png|32px]] [[File:Pillager Spawn Egg JE1 BE1.png|32px]] [[File:Ravager Spawn Egg JE1 BE1.png|32px]] Added [[panda]], [[pillager]] and [[ravager|"illager beast"]] spawn eggs.}}
{{History|||snap=18w44a|[[File:Cat Spawn Egg JE2.png|32px]] Re-added [[cat]] spawn eggs.}}
{{History|||snap=19w05a|The "illager beast" spawn egg has been renamed to "ravager" spawn egg.
|[[File:Wandering Trader Spawn Egg JE1.png|32px]] [[File:Trader Llama Spawn Egg JE1 BE1.png|32px]] Added [[wandering trader]] and [[trader llama]] spawn eggs.}}
{{History|||snap=19w07a|[[File:Fox Spawn Egg JE1 BE1.png|32px]] Added [[fox]] spawn eggs.}}
{{History||1.15|snap=19w34a|[[File:Bee Spawn Egg JE1.png|32px]] Added [[bee]] spawn eggs.}}
{{History|||snap=19w41a|[[File:Bee Spawn Egg JE2 BE1.png|32px]] The texture of the bee spawn egg has been changed.}}
{{History|||snap=19w46a|[[Drowned]], [[husk]], [[zombie]], and [[zombie villager]] spawn eggs can now be used on adult versions of these [[mob]]s to spawn baby variants.}}
{{History|||snap=Pre-release 1|[[Zombie pigmen]] spawn eggs can now be used on adult zombie pigmen to spawn the baby variant.}}
{{History||September 28, 2019|link={{ytl|OZqNaEX8208&t|t=2h17m19s}}|[[File:Hoglin Spawn Egg BE1.png|32px]] [[File:Piglin spawn egg.png|32px]] [[Hoglin]] and [[piglin]] spawn eggs were shown.}}
{{History||1.16|snap=20w06a|[[File:Hoglin Spawn Egg JE1.png|30px]] Added [[hoglin]] spawn eggs.
|Currently, the hoglin spawn egg substitutes the [[zombie pigman]]'s spawn egg texture.}}
{{History|||snap=20w07a|[[File:Piglin Spawn Egg JE1.png|32px]] Added [[piglin]] spawn eggs.
|[[File:Hoglin Spawn Egg JE2.png|30px]] The texture of the hoglin spawn egg has been changed.}}
{{History|||snap=20w09a|"Zombie Pigman Spawn Egg" has been renamed to "Zombified Piglin Spawn Egg".}}
{{History|||snap=20w13a|[[File:Strider Spawn Egg JE1 BE1.png|32px]] Added [[strider]] spawn eggs.}}
{{History|||snap=20w14a|[[File:Zoglin Spawn Egg JE1 BE1.png|32px]] Added [[zoglin]] spawn eggs.}}
{{History||1.16.2|snap=20w27a|[[File:Piglin Brute Spawn Egg JE1 BE1.png|32px]] Added [[piglin brute]] spawn eggs.}}
{{History||October 6, 2020|link={{tweet|kingbdogz|1313451032383574017}}|[[File:Warden Spawn Egg (pre-release).png|32px]] [[Kingbdogz]] showed a warden spawn egg.}}
{{History||1.17|snap=20w51a|[[File:Axolotl Spawn Egg JE1 BE1.png|32px]] Added [[axolotl]] spawn eggs.}}
{{History|||snap=21w03a|[[File:Glow Squid Spawn Egg JE1 BE1.png|32px]] Added [[glow squid]] spawn eggs.}}
{{History|||snap=21w13a|[[File:Goat Spawn Egg BE2.png|32px]] Added [[goat]] spawn eggs.}}
{{History||October 16, 2021|link={{ytl|w6zLprHHZOk&t|t=7447s}}|[[File:Frog Spawn Egg (pre-release).png|32px]] [[File:Tadpole Spawn Egg (pre-release).png|32px]] [[Frog]] and [[tadpole]] spawn eggs were shown.}}
{{History||1.19|snap=Deep Dark Experimental Snapshot 1|[[File:Warden Spawn Egg JE1 BE1.png|32px]] Added [[warden]] spawn eggs.}}
{{History|||snap=22w11a|[[File:Frog Spawn Egg JE1 BE1.png|32px]][[File:Tadpole Spawn Egg JE1 BE1.png|32px]] Added [[frog]] and [[tadpole]] spawn eggs.
|As with the warden itself, warden spawn eggs are not added in this snapshot.}}
{{History|||snap=22w12a|[[File:Warden Spawn Egg JE1 BE1.png|32px]] Re-added [[warden]] spawn eggs.}}
{{History|||snap=22w13a|[[File:Allay Spawn Egg JE1 BE1.png|32px]] Added [[allay]] spawn eggs.}}
{{History||1.20<br>(Experimental)|link=1.19.3|snap=22w42a|[[File:Camel Spawn Egg JE1 BE1.png|32px]] Added [[camel]] spawn eggs behind the [[Java Edition 1.20|Update 1.20 experimental datapack]].}}
{{History|||snap=22w43a|[[File:Camel Spawn Egg JE2 BE2.png|32px]] The texture of the camel spawn egg has been changed.}}
{{History||1.19.3|snap=22w44a|[[File:Iron Golem Spawn Egg JE1 BE1.png|32px]] [[File:Snow Golem Spawn Egg JE2 BE1.png|32px]] [[File:Wither Spawn Egg JE1 BE1.png|32px]] [[File:Ender Dragon Spawn Egg JE2 BE1.png|32px]] Added [[iron golem]], [[snow golem]], [[wither]], and [[ender dragon]] spawn eggs. The wither and ender dragon spawn eggs are only available through [[commands]] to prevent accidental destruction of [[Creative]] builds.
|[[File:Polar Bear Spawn Egg JE2 BE2.png|32px]] The texture of the polar bear spawn egg has been changed.<ref>{{bug|MC-242097||Ghast and Polar Bear Spawn Eggs are nearly indistinguishable|Fixed}}</ref>}}
{{History||1.20<br>(Experimental)|link=1.19.4|snap=23w07a|[[File:Sniffer Spawn Egg JE1 BE1.png|32px]] Added [[sniffer]] spawn eggs behind the [[Java Edition 1.20|Update 1.20 experimental datapack]].}}
{{History|||snap=1.19.4-pre1|[[File:Sniffer Spawn Egg JE2.png|32px]] The texture of the sniffer spawn egg has been changed.}}
{{History||1.20|snap=23w12a|Camel and sniffer spawn eggs are now available without using the "Update 1.20" experimental datapack.}}
{{History|pocket alpha}}
{{History||v0.7.0|[[File:Chicken Spawn Egg JE2 BE1.png|32px]] [[File:Sheep Spawn Egg JE2 BE1.png|32px]] [[File:Cow Spawn Egg JE2 BE1.png|32px]] [[File:Pig Spawn Egg JE2 BE1.png|32px]] Added spawn eggs for [[chicken]]s, [[sheep]], [[pig]]s and [[cow]]s.}}
{{History||v0.7.0|All spawn eggs with damage/metadata values 30 and higher, would display a unique texture.}}
{{History||v0.8.0|snap=build 1|The texture of the default spawn egg is now [[File:Chicken Spawn Egg JE2 BE1.png|32px]], instead of having a completely blank texture.}}
{{History||v0.9.0|snap=build 1|[[File:Mooshroom Spawn Egg JE2 BE1.png|32px]] [[File:Creeper Spawn Egg JE2 BE1.png|32px]] [[File:Enderman Spawn Egg JE2 BE1.png|32px]] [[File:Silverfish Spawn Egg BE1.png|32px]] [[File:Skeleton Spawn Egg JE2 BE1.png|32px]] [[File:Slime Spawn Egg JE2 BE1.png|32px]] [[File:Spider Spawn Egg JE2 BE1.png|32px]] [[File:Zombie Spawn Egg JE2 BE1.png|32px]] [[File:Zombie Pigman Spawn Egg JE2 BE1.png|32px]] [[File:Wolf Spawn Egg JE2 BE1.png|32px]] Added more spawn eggs, including [[mooshroom]], [[creeper]], [[enderman]], [[silverfish]], [[skeleton]], [[slime]], [[spider]], [[zombie]], [[zombie pigman]] and [[wolf]].
|Spawn eggs now have the correct name in the [[inventory]].}}
{{History|||snap=build 2|[[File:Villager Spawn Egg JE2 BE1.png|32px]] Added (Old) [[villager]] spawn eggs.
|Spawn eggs can now be used to program [[monster spawner]] blocks.}}
{{History||v0.11.0|All spawn eggs that are obtained in this version with an invalid damage/metadata value would result in the name of that spawn egg displaying as the following: item.monsterPlacer.name.name.}}
{{History||v0.11.0|snap=build 1|[[File:Squid Spawn Egg JE2 BE1.png|32px]] [[File:Bat Spawn Egg JE1 BE1.png|32px]] Added [[squid]] and [[bat]] spawn eggs.
|[[File:Ghast Spawn Egg JE2 BE1.png|32px]] [[File:Magma Cube Spawn Egg JE2 BE1.png|32px]] [[File:Cave Spider Spawn Egg JE2 BE1.png|32px]] Added [[ghast]], [[magma cube]] and [[cave spider]] spawn eggs, which are currently unobtainable.}}
{{History|||snap=build 3|Added [[cave spider]] spawn eggs to the [[creative]] mode [[inventory]].}}
{{History|||snap=build 8|Added [[magma cube]] spawn eggs to the creative mode inventory.}}
{{History||v0.12.1|snap=build 1|[[File:Blaze Spawn Egg JE2 BE1.png|32px]] [[File:Ocelot Spawn Egg JE1 BE1.png|32px]] [[File:Zombie Villager Spawn Egg JE1 BE1.png|32px]] Added [[blaze]], [[ocelot]], and (Old) [[zombie villager]] spawn eggs.
|Added [[ghast]] spawn eggs to the [[creative]] mode [[inventory]].
|[[Wither skeleton]]s now have a high chance to spawn from an [[skeleton]] spawn egg, if the [[player]] is in [[the Nether]].}}
{{History|||snap=build 9|[[Mob]]s spawned from renamed eggs now have the name of the egg and the names appear in [[death messages]].}}
{{History|||snap=build 12|[[Zombie villager]]s can now be spawned using [[zombie]] spawn eggs.}}
{{History||v0.13.0|snap=build 1|[[File:Rabbit Spawn Egg JE1 BE1.png|32px]] Added [[rabbit]] spawn eggs.}}
{{History||v0.14.0|snap=build 1|[[File:Witch Spawn Egg JE1 BE1.png|32px]] Added [[witch]] spawn eggs.}}
{{History||v0.15.0|snap=build 1|[[File:Horse Spawn Egg JE1 BE1.png|32px]] [[File:Mule Spawn Egg JE1 BE1.png|32px]] [[File:Donkey Spawn Egg JE1 BE1.png|32px]] [[File:Zombie Horse Spawn Egg BE1.png|32px]] [[File:Skeleton Horse Spawn Egg JE1 BE1.png|32px]] [[File:Stray Spawn Egg BE1.png|32px]] [[File:Husk Spawn Egg BE1.png|32px]] [[File:Wither Skeleton Spawn Egg JE1 BE1.png|32px]] Added [[horse]], [[mule]], [[donkey]], [[zombie horse]], [[skeleton horse]], [[stray]], [[husk]] and [[wither skeleton]] spawn eggs to the [[creative]] [[inventory]].}}
{{History||v0.15.1|snap=build 1|The texture of the default spawn egg has been changed from [[File:Chicken Spawn Egg JE2 BE1.png|32px]] to [[File:Spawn Egg.png|32px]].
|The empty spawn egg named "Spawn" is now available through [[inventory]] editing, but crashes the game.{{info needed|How? On use? Simply by being in the inventory?}}}}
{{History||v0.16.0|snap=build 1|[[File:Guardian Spawn Egg JE1 BE1.png|32px]] Added [[guardian]] spawn eggs.
|[[File:Spawn Egg.png|32px]] Added [[elder guardian]] spawn egg without colors, which is currently unavailable in the [[creative]] [[inventory]].
|[[File:NPC Spawn Egg BE1.png|32px]] Added a non-functional [[NPC]] spawn egg.}}
{{History|||snap=build 2|The NPC spawn egg has been removed from the creative inventory.}}
{{History|||snap=build 4|The NPC spawn egg has been removed completely.}}
{{History|||snap=build 5|[[File:Elder Guardian Spawn Egg JE1 BE1.png|32px]] Added [[elder guardian]] spawn eggs to the [[creative]] [[inventory]].}}
{{History|pocket}}
{{History||1.0.0|snap=alpha 0.17.0.1|[[File:Shulker Spawn Egg BE1.png|32px]] [[File:Endermite Spawn Egg JE1 BE1.png|32px]] [[File:Polar Bear Spawn Egg JE1 BE1.png|32px]] Added spawn eggs for [[shulker]]s, [[endermite]]s and [[polar bear]]s.}}
{{History||1.1.0|snap=alpha 1.1.0.0|[[File:Llama Spawn Egg JE1 BE1.png|32px]] [[File:Vindicator Spawn Egg JE1 BE1.png|32px]] [[File:Evoker Spawn Egg JE1 BE1.png|32px]] [[File:Vex Spawn Egg JE1 BE1.png|32px]] Added spawn eggs for [[llama]]s, [[vindicator]]s, [[evoker]]s and [[vex]]es.}}
{{History|||snap=alpha 1.1.0.9|[[File:Husk Spawn Egg JE1 BE2.png|32px]] [[File:Shulker Spawn Egg JE1 BE2.png|32px]] [[File:Silverfish Spawn Egg JE2 BE2.png|32px]] [[File:Stray Spawn Egg JE1 BE2.png|32px]] [[File:Zombie Horse Spawn Egg JE1 BE2.png|32px]] The spawn egg textures for [[husk]]s, [[shulker]]s, [[silverfish]]ses, [[stray]]s and [[zombie horse]]s have been updated; probably due to {{bug|MCPE-18348}}.}}
{{History|bedrock}}
{{History||1.2.0|snap=beta 1.2.0.2|[[File:Parrot Spawn Egg JE1 BE1.png|32px]] [[File:Zombie Villager Spawn Egg JE1 BE1.png|32px]] Added [[parrot]] and [[zombie villager]] spawn eggs.}}
{{History||1.4.0|snap=beta 1.2.13.8|[[File:Drowned Spawn Egg JE1 BE1.png|32px]] Added [[drowned]] spawn eggs.}}
{{History|||snap=beta 1.2.14.2|[[File:Cod Spawn Egg BE1.png|32px]] [[File:Salmon Spawn Egg BE1.png|32px]] [[File:Pufferfish Spawn Egg BE1.png|32px]] [[File:Tropical Fish Spawn Egg BE1.png|32px]] Added spawn eggs for each [[fish]], which have different textures compared to {{JE}}.}}
{{History|||snap=beta 1.2.20.1|[[File:Cod Spawn Egg JE1 BE2.png|32px]] [[File:Salmon Spawn Egg JE1 BE2.png|32px]] [[File:Pufferfish Spawn Egg JE1 BE2.png|32px]] [[File:Tropical Fish Spawn Egg JE1 BE2.png|32px]] The fish spawn egg textures have been made less unique; it matches {{JE}}.
|[[File:Dolphin Spawn Egg JE1 BE1.png|32px]] Added [[dolphin]] spawn eggs.}}
{{History||1.5.0|snap=beta 1.5.0.4|[[File:Turtle Spawn Egg JE1 BE1.png|32px]] Added spawn eggs for [[turtle]]s.}}
{{History||1.6.0|snap=beta 1.6.0.1|[[File:Phantom Spawn Egg JE2 BE1.png|32px]] Added spawn eggs for [[phantom]]s.}}
{{History||1.8.0|snap=beta 1.8.0.8|[[File:Panda Spawn Egg BE1.png|32px]] [[File:Cat Spawn Egg BE1.png|32px]] Added spawn eggs for [[panda]]s and [[cat]]s.
|[[File:NPC Spawn Egg BE1.png|32px]] The NPC spawn egg has been re-added.
|[[File:Agent Spawn Egg BE1.png|32px]] Added spawn eggs for [[agent]]s.
|[[File:Spawn Egg BE2.png|32px]] Unknown spawn eggs now use a completely black spawn egg as the default texture.
|[[File:Mask Spawn Egg BE1.png|32px]] Added mask spawn egg texture.}}
{{History||1.9.0|snap=beta 1.9.0.0|[[File:Pillager Spawn Egg JE1 BE1.png|32px]] Added [[pillager]] spawn eggs.}}
{{History||1.10.0|snap=beta 1.10.0.3|[[File:Ravager Spawn Egg JE1 BE1.png|32px]] [[File:Wandering Trader Spawn Egg BE1.png|32px]] [[File:Villager Spawn Egg JE2 BE1.png|32px]] [[File:Zombie Villager Spawn Egg JE1 BE1.png|32px]] Added [[wandering trader]], [[Ravager|"illager beast"]], (New) [[villager]] and (New) [[zombie villager]] spawn eggs.}}
{{History||1.11.0|snap=beta 1.11.0.1|The old villager and old zombie villager spawn eggs have been removed.
|"Spawn Illager Beast" has been renamed to "Spawn Ravager".}}
{{History||1.13.0|snap=beta 1.13.0.1|[[File:Fox Spawn Egg JE1 BE1.png|32px]] Added [[fox]] spawn eggs.}}
{{History||1.14.0|snap=beta 1.14.0.1|[[File:Bee Spawn Egg JE2 BE1.png|32px]] Added [[bee]] spawn eggs.}}
{{History||1.16.0|snap=beta 1.16.0.51|[[File:Hoglin Spawn Egg BE1.png|32px]] [[File:Piglin Spawn Egg BE1.png|32px]] Added [[hoglin]] and [[piglin]] spawn eggs.
|"Spawn Zombie Pigman" has been renamed to "Spawn Zombified Piglin".}}
{{History|||snap=beta 1.16.0.57|[[File:Strider Spawn Egg JE1 BE1.png|32px]] [[File:Zoglin Spawn Egg JE1 BE1.png|32px]] Added [[strider]] and [[zoglin]] spawn eggs.}}
{{History|||snap=beta 1.16.0.59|[[File:Piglin Spawn Egg JE1.png|32px]] [[File:Hoglin Spawn Egg JE2.png|30px]] The textures of the piglin and hoglin spawn eggs have been changed to match [[Java Edition]].}}
{{History||1.16.20|snap=beta 1.16.20.50|[[File:Piglin Brute Spawn Egg JE1 BE1.png|32px]] Added [[piglin brute]] spawn eggs.}}
{{History||1.16.100|snap=beta 1.16.100.56|The different [[entity]] IDs for the <code>spawn_egg</code> ID have now been split up into their own IDs.
|Unused spawn eggs (such as [[Iron Golem]], [[End Crystal]] and [[Wither]]) are completely removed. Attempts to put such spawn eggs in an inventory gives the default spawn egg instead.
|The texture of the default spawn egg is now [[File:Chicken Spawn Egg JE2 BE1.png|32px]], instead of having a completely black texture.}}
{{History||1.16.200|snap=beta 1.16.200.52|[[File:Goat Spawn Egg BE1.png|32px]] Added [[goat]] spawn eggs behind the "Caves and Cliffs" experimental toggle.}}
{{History|||snap=beta 1.16.210.51|[[File:Goat Spawn Egg BE2.png|32px]] The texture for [[goat]] spawn eggs has been changed.}}
{{History||1.16.210|snap=beta 1.16.210.59|[[File:Glow Squid Spawn Egg JE1 BE1.png|32px]] Added [[glow squid]] spawn eggs.}}
{{History|||snap=beta 1.16.210.60|[[Glow squid]] spawn egg is temporarily removed.}}
{{History||1.16.220|snap=beta 1.16.220.50|[[File:Glow Squid Spawn Egg JE1 BE1.png|32px]] Re-added [[glow squid]] spawn egg.}}
{{History||1.17.0|snap=beta 1.16.230.52|[[File:Axolotl Spawn Egg JE1 BE1.png|32px]] Added [[axolotl]] spawn eggs.}}
{{History|||snap=beta 1.17.0.52|[[Goat]], [[glow squid]] and [[axolotl]] spawn eggs are now available without enabling [[experimental gameplay]].}}
{{History||1.18.10|snap=beta 1.18.10.24|[[File:Frog Spawn Egg JE1 BE1.png|32px]][[File:Tadpole Spawn Egg JE1 BE1.png|32px]] Added [[frog]] and [[tadpole]] spawn eggs behind the "Wild Update" experimental toggle.}}
{{History||1.18.30|snap=beta 1.18.30.22|[[File:Allay Spawn Egg JE1 BE1.png|32px]] Added [[allay]] spawn eggs behind the "Wild Update" experimental toggle.}}
{{History|||snap=beta 1.18.30.32|[[File:Warden Spawn Egg JE1 BE1.png|32px]] Added [[warden]] spawn eggs behind the "Wild Update" experimental toggle.}}
{{History||1.19.0|snap=beta 1.19.0.20|Both spawn eggs mentioned above are now available without enabling experimental gameplay.}}
{{History||1.19.10|snap=beta 1.19.10.20|[[File:Trader Llama Spawn Egg JE1 BE1.png|32px]] Added the [[trader llama]] spawn egg.}}
{{History||Next Major Update<br>(Experimental)|link=Bedrock Edition 1.19.50|snap=beta 1.19.50.21|[[File:Camel Spawn Egg JE1 BE1.png|32px]] Added [[camel]] spawn eggs behind the "[[Bedrock Edition 1.20|Next Major Update]]" [[experimental]] toggle.}}
{{History|||snap=beta 1.19.50.22|[[File:Camel Spawn Egg JE2 BE2.png|32px]] The texture of the camel spawn egg has been changed.}}
{{History||1.19.60|snap=beta 1.19.60.20|[[File:Iron Golem Spawn Egg JE1 BE1.png|32px]] [[File:Snow Golem Spawn Egg JE2 BE1.png|32px]] [[File:Wither Spawn Egg JE1 BE1.png|32px]] [[File:Ender Dragon Spawn Egg JE2 BE1.png|32px]] Added [[iron golem]], [[snow golem]], [[wither]], and [[ender dragon]] spawn eggs. The wither and ender dragon spawn eggs will only be available through [[commands]] to prevent accidental destruction of [[Creative]] builds.|[[File:Polar Bear Spawn Egg JE2 BE2.png|32px]] The texture of the polar bear spawn egg has been changed.}}
{{History||1.19.60|snap=beta 1.19.60.25|The wither and ender dragon spawn eggs are no longer available in the creative inventory, only via [[command]]s.}}
{{History||Sniffer<br>(Experimental)|link=Bedrock Edition 1.19.70|snap=beta 1.19.70.23|[[File:Sniffer Spawn Egg JE1 BE1.png|32px]] Added [[sniffer]] spawn eggs behind the "[[Bedrock Edition 1.19.70|Sniffer]]" [[experimental]] toggle.}}
{{History||1.20.0|snap=beta 1.20.0.20|Sniffer spawn eggs are now available without using the "Sniffer" experimental toggle.}}
{{History|||snap=beta 1.20.0.21|Camel spawn eggs are now available without using the "Next Major Update" experimental toggle.}}
{{History|console}}
{{History||xbox=TU9|xbone=CU1|ps=1.0|wiiu=Patch 1|switch=1.0.1|[[File:Creeper Spawn Egg JE2 BE1.png|32px]] [[File:Skeleton Spawn Egg JE2 BE1.png|32px]] [[File:Spider Spawn Egg JE2 BE1.png|32px]] [[File:Zombie Spawn Egg JE2 BE1.png|32px]] [[File:Slime Spawn Egg JE2 BE1.png|32px]] [[File:Ghast Spawn Egg JE2 BE1.png|32px]] [[File:Zombie Pigman Spawn Egg JE2 BE1.png|32px]] [[File:Enderman Spawn Egg JE2 BE1.png|32px]] [[File:Cave Spider Spawn Egg JE2 BE1.png|32px]] [[File:Silverfish Spawn Egg JE2 BE2.png|32px]] [[File:Blaze Spawn Egg JE2 BE1.png|32px]] [[File:Magma Cube Spawn Egg JE2 BE1.png|32px]] [[File:Pig Spawn Egg JE2 BE1.png|32px]] [[File:Sheep Spawn Egg JE2 BE1.png|32px]] [[File:Cow Spawn Egg JE2 BE1.png|32px]] [[File:Chicken Spawn Egg JE2 BE1.png|32px]] [[File:Squid Spawn Egg JE2 BE1.png|32px]] [[File:Wolf Spawn Egg JE2 BE1.png|32px]] [[File:Mooshroom Spawn Egg JE2 BE1.png|32px]] [[File:Villager Spawn Egg JE2 BE1.png|32px]] Added spawn eggs for [[creeper]]s, [[skeleton]]s, [[spider]]s, [[zombie]]s, [[slime]]s, [[ghast]]s, [[zombie pigman]]s, [[enderman]]s, [[cave spider]]s, [[silverfish]]s, [[blaze]]s, [[magma cube]]s, [[pig]]s, [[sheep]]s, [[cow]]s, [[chicken]]s, [[squid]], [[wolf]]s, [[mooshroom]] and [[villager]]s.
|Spawn eggs can now be placed into a [[dispenser]]. Activating the dispenser spawns the [[mob]], instead of dispensing the egg as an [[item]].}}
{{History||xbox=TU11|Added a message when the user tries to spawn a [[hostile mob]] from a spawn egg in Peaceful [[difficulty]].}}
{{History||xbox=TU12|[[File:Ocelot Spawn Egg JE1 BE1.png|32px]] Added [[ocelot]] spawn eggs.}}
{{History||xbox=TU19|xbone=CU7|ps=1.12|[[File:Horse Spawn Egg JE1 BE1.png|32px]] [[File:Witch Spawn Egg JE1 BE1.png|32px]] [[File:Bat Spawn Egg JE1 BE1.png|32px]] [[File:Donkey Spawn Egg CE1.png|32px]] [[File:Mule Spawn Egg CE1.png|32px]] Added [[horse]], [[witch]], [[bat]], donkey and mule spawn eggs.}}
{{History||xbox=TU31|xbone=CU19|ps=1.22|wiiu=Patch 3|[[File:Endermite Spawn Egg JE1 BE1.png|32px]] [[File:Guardian Spawn Egg JE1 BE1.png|32px]] [[File:Rabbit Spawn Egg JE1 BE1.png|32px]] Added [[endermite]], [[guardian]] and [[rabbit]] spawn eggs.}}
{{History||xbox=TU46|xbone=CU36|ps=1.38|wiiu=Patch 15|[[File:Shulker Spawn Egg JE1 BE2.png|32px]] Added [[shulker]] spawn eggs.
|[[File:Donkey Spawn Egg JE1 BE1.png|32px]] [[File:Mule Spawn Egg JE1 BE1.png|32px]] Donkey and mule spawn eggs now match the textures of their [[Bedrock Edition|Bedrock]] and [[Java Edition|Java]] edition counterparts.}}
{{History||xbox=TU54|xbone=CU44|ps=1.52|wiiu=Patch 24|switch=1.0.4|[[File:Skeleton Horse Spawn Egg JE1 BE1.png|32px]] [[File:Zombie Horse Spawn Egg JE1 BE2.png|32px]] [[File:Elder Guardian Spawn Egg JE1 BE1.png|32px]] [[File:Stray Spawn Egg JE1 BE2.png|32px]] [[File:Wither Skeleton Spawn Egg JE1 BE1.png|32px]] [[File:Husk Spawn Egg JE1 BE2.png|32px]] [[File:Zombie Villager Spawn Egg JE1 BE1.png|32px]] [[File:Parrot Spawn Egg JE1 BE1.png|32px]] [[File:Llama Spawn Egg JE1 BE1.png|32px]] [[File:Vindicator Spawn Egg JE1 BE1.png|32px]] [[File:Evoker Spawn Egg JE1 BE1.png|32px]] [[File:Vex Spawn Egg JE1 BE1.png|32px]] Added spawn eggs for [[skeleton horse]]s, [[zombie horse]]s, [[elder guardian]]s, [[stray]]s, [[wither skeleton]]s, [[husk]]s, [[zombie villager]]s, [[parrot]]s, [[llama]]s, [[vindicator]]s, [[evoker]]s and [[vex]]es.}}
{{History||xbox=TU69|xbone=none|ps=1.76|wiiu=Patch 38|switch=none|[[File:Drowned Spawn Egg JE1 BE1.png|32px]] [[File:Cod Spawn Egg JE1 BE2.png|32px]] [[File:Salmon Spawn Egg JE1 BE2.png|32px]] [[File:Pufferfish Spawn Egg JE1 BE2.png|32px]] [[File:Tropical Fish Spawn Egg JE1 BE2.png|32px]] [[File:Dolphin Spawn Egg JE1 BE1.png|32px]] [[File:Turtle Spawn Egg JE1 BE1.png|32px]] [[File:Phantom Spawn Egg JE2 BE1.png|32px]] Added spawn eggs for [[drowned]], [[cod]], [[salmon]], [[pufferfish]], [[tropical fish]], [[dolphin]]s, [[sea turtle]]s and [[phantom]]s.}}
{{History||xbox=none|ps=1.83|wiiu=none|[[File:Panda Spawn Egg BE1.png|32px]] [[File:Cat Spawn Egg BE1.png|32px]] Added spawn eggs for [[panda]]s and [[cat]]s.}}
{{History||ps=1.90|[[File:Pillager Spawn Egg JE1 BE1.png|32px]] Added [[pillager]] spawn eggs.}}
{{History||ps=1.91|[[File:Ravager Spawn Egg JE1 BE1.png|32px]] [[File:Wandering Trader Spawn Egg JE1.png|32px]] Added spawn eggs for [[ravager]]s and [[wandering trader]]s.}}
{{History|New 3DS}}
{{History||0.1.0|[[File:Creeper Spawn Egg JE2 BE1.png|32px]] [[File:Skeleton Spawn Egg JE2 BE1.png|32px]] [[File:Spider Spawn Egg JE2 BE1.png|32px]] [[File:Zombie Spawn Egg JE2 BE1.png|32px]] [[File:Slime Spawn Egg JE2 BE1.png|32px]] [[File:Ghast Spawn Egg JE2 BE1.png|32px]] [[File:Zombie Pigman Spawn Egg JE2 BE1.png|32px]] [[File:Enderman Spawn Egg JE2 BE1.png|32px]] [[File:Cave Spider Spawn Egg JE2 BE1.png|32px]] [[File:Silverfish Spawn Egg JE2 BE2.png|32px]] [[File:Blaze Spawn Egg JE2 BE1.png|32px]] [[File:Magma Cube Spawn Egg JE2 BE1.png|32px]] [[File:Pig Spawn Egg JE2 BE1.png|32px]] [[File:Sheep Spawn Egg JE2 BE1.png|32px]] [[File:Cow Spawn Egg JE2 BE1.png|32px]] [[File:Chicken Spawn Egg JE2 BE1.png|32px]] [[File:Squid Spawn Egg JE2 BE1.png|32px]] [[File:Wolf Spawn Egg JE2 BE1.png|32px]] [[File:Mooshroom Spawn Egg JE2 BE1.png|32px]] [[File:Villager Spawn Egg JE2 BE1.png|32px]] [[File:Ocelot Spawn Egg JE1 BE1.png|32px]] [[File:Guardian Spawn Egg JE1 BE1.png|32px]] [[File:Rabbit Spawn Egg JE1 BE1.png|32px]] [[File:Horse Spawn Egg JE1 BE1.png|32px]] [[File:Witch Spawn Egg JE1 BE1.png|32px]] [[File:Bat Spawn Egg JE1 BE1.png|32px]] [[File:Donkey Spawn Egg JE1 BE1.png|32px]] [[File:Mule Spawn Egg JE1 BE1.png|32px]] Added spawn eggs.}}
{{History||1.7.10|[[File:Endermite Spawn Egg JE1 BE1.png|32px]] [[File:Polar Bear Spawn Egg JE1 BE1.png|32px]] [[File:Shulker Spawn Egg JE1 BE2.png|32px]] Added spawn eggs for [[endermite]]s, [[polar bear]]s and [[shulker]]s.}}
{{History||1.9.19|[[File:Llama Spawn Egg JE1 BE1.png|32px]] [[File:Vindicator Spawn Egg JE1 BE1.png|32px]] [[File:Evoker Spawn Egg JE1 BE1.png|32px]] [[File:Vex Spawn Egg JE1 BE1.png|32px]] Added spawn eggs for [[llama]]s, [[vindicator]]s, [[evoker]]s and [[vex]]es.}}
{{History|Education}}
{{History||1.0|[[File:Creeper Spawn Egg JE2 BE1.png|32px]] [[File:Skeleton Spawn Egg JE2 BE1.png|32px]] [[File:Spider Spawn Egg JE2 BE1.png|32px]] [[File:Zombie Spawn Egg JE2 BE1.png|32px]] [[File:Slime Spawn Egg JE2 BE1.png|32px]] [[File:Ghast Spawn Egg JE2 BE1.png|32px]] [[File:Zombie Pigman Spawn Egg JE2 BE1.png|32px]] [[File:Enderman Spawn Egg JE2 BE1.png|32px]] [[File:Cave Spider Spawn Egg JE2 BE1.png|32px]] [[File:Silverfish Spawn Egg JE2 BE2.png|32px]] [[File:Blaze Spawn Egg JE2 BE1.png|32px]] [[File:Magma Cube Spawn Egg JE2 BE1.png|32px]] [[File:Pig Spawn Egg JE2 BE1.png|32px]] [[File:Sheep Spawn Egg JE2 BE1.png|32px]] [[File:Cow Spawn Egg JE2 BE1.png|32px]] [[File:Chicken Spawn Egg JE2 BE1.png|32px]] [[File:Squid Spawn Egg JE2 BE1.png|32px]] [[File:Wolf Spawn Egg JE2 BE1.png|32px]] [[File:Mooshroom Spawn Egg JE2 BE1.png|32px]] [[File:Villager Spawn Egg JE2 BE1.png|32px]] [[File:Ocelot Spawn Egg JE1 BE1.png|32px]] [[File:Guardian Spawn Egg JE1 BE1.png|32px]] [[File:Elder Guardian Spawn Egg JE1 BE1.png|32px]] [[File:Rabbit Spawn Egg JE1 BE1.png|32px]] [[File:Horse Spawn Egg JE1 BE1.png|32px]] [[File:Husk Spawn Egg JE1 BE2.png|32px]] [[File:Stray Spawn Egg JE1 BE2.png|32px]] [[File:Witch Spawn Egg JE1 BE1.png|32px]] [[File:Bat Spawn Egg JE1 BE1.png|32px]] [[File:Wither Skeleton Spawn Egg JE1 BE1.png|32px]] [[File:Donkey Spawn Egg JE1 BE1.png|32px]] [[File:Mule Spawn Egg JE1 BE1.png|32px]] [[File:Skeleton Horse Spawn Egg JE1 BE1.png|32px]] [[File:Zombie Horse Spawn Egg JE1 BE2.png|32px]] [[File:Endermite Spawn Egg JE1 BE1.png|32px]] [[File:Zombie Villager Spawn Egg JE1 BE1.png|32px]] [[File:Polar Bear Spawn Egg JE1 BE1.png|32px]] [[File:Shulker Spawn Egg JE1 BE2.png|32px]] [[File:Llama Spawn Egg JE1 BE1.png|32px]] [[File:Vindicator Spawn Egg JE1 BE1.png|32px]] [[File:Evoker Spawn Egg JE1 BE1.png|32px]] [[File:Vex Spawn Egg JE1 BE1.png|32px]] [[File:Parrot Spawn Egg JE1 BE1.png|32px]] [[File:NPC Spawn Egg BE1.png|32px]] Added spawn eggs.}}
{{History||1.4|[[File:Cod Spawn Egg JE1 BE2.png|32px]] [[File:Salmon Spawn Egg JE1 BE2.png|32px]] [[File:Pufferfish Spawn Egg JE1 BE2.png|32px]] [[File:Tropical Fish Spawn Egg JE1 BE2.png|32px]] [[File:Dolphin Spawn Egg JE1 BE1.png|32px]] Added spawn eggs for [[cod]], [[salmon]], [[pufferfish]], [[tropical fish]] and [[dolphin]]s.}}
{{History||1.7|[[File:Drowned Spawn Egg JE1 BE1.png|32px]] [[File:Turtle Spawn Egg JE1 BE1.png|32px]] [[File:Phantom Spawn Egg JE2 BE1.png|32px]] [[File:Agent Spawn Egg BE1.png|32px]] Added spawn eggs for [[drowned]], [[turtle|sea turtles]], [[phantom]]s and [[agent]]s.}}
{{History||?|[[File:Mask Spawn Egg BE1.png|32px]] Added mask spawn egg texture.}}
{{History||1.9|[[File:Panda Spawn Egg BE1.png|32px]] [[File:Cat Spawn Egg BE1.png|32px]] Added spawn eggs for [[panda]]s and [[cat]]s.}}
{{History||1.12.0|[[File:Pillager Spawn Egg JE1 BE1.png|32px]] [[File:Ravager Spawn Egg JE1 BE1.png|32px]] [[File:Wandering Trader Spawn Egg BE1.png|32px]] Added spawn eggs for [[pillager]]s, [[ravager]]s and [[wandering trader]]s.}}
{{History||1.14.31|[[File:Bee Spawn Egg JE2 BE1.png|32px]] [[File:Fox Spawn Egg JE1 BE1.png|32px]] Added spawn eggs for [[bee]]s and [[fox]]es.}}
{{History||1.17.30|[[File:Piglin Spawn Egg JE1.png|32px]] [[File:Hoglin Spawn Egg JE2.png|30px]] [[File:Strider Spawn Egg JE1 BE1.png|32px]] [[File:Zoglin Spawn Egg JE1 BE1.png|32px]] [[File:Piglin Brute Spawn Egg JE1 BE1.png|32px]] [[File:Goat Spawn Egg BE2.png|32px]] [[File:Axolotl Spawn Egg JE1 BE1.png|32px]] [[File:Glow Squid Spawn Egg JE1 BE1.png|32px]] Added spawn eggs for [[piglin]]s, [[hoglin]]s, [[strider]]s, [[zoglin]]s, [[piglin brute]]s, [[goat]]s, [[axolotl]]s and [[glow squid]]s.}}
{{History|earth}}
{{History||Release|[[File:Cluckshroom Spawn Egg.png|32px]] [[File:Horned Sheep Spawn Egg.png|32px]] [[File:Moobloom Spawn Egg.png|32px]] Added [[cluckshroom]], [[horned sheep]] and [[moobloom]] spawn egg textures.}}
{{History||0.4.0|[[File:Jumbo Rabbit Spawn Egg.png|32px]] Added [[jumbo rabbit]] spawn egg texture.}}
{{History|foot}}
==Issues==
{{issue list}}
==Gallery==
{{Hidden begin|View all renders}}
<gallery>
Spawn Egg.png|frame|Uncolored Spawn Egg
Agent Spawn Egg.png|Agent Spawn Egg
Allay Spawn Egg.png|Allay Spawn Egg
Axolotl Spawn Egg.png|Axolotl Spawn Egg
Bat Spawn Egg.png|Bat Spawn Egg
Bee Spawn Egg.png|Bee Spawn Egg
Blaze Spawn Egg.png|Blaze Spawn Egg
Camel Spawn Egg.png|Camel Spawn Egg
Cat Spawn Egg.png|Cat Spawn Egg (Java)
Cat Spawn Egg BE1.png|Cat Spawn Egg (Bedrock)
Cave Spider Spawn Egg.png|Cave Spider Spawn Egg
Chicken Spawn Egg.png|Chicken Spawn Egg
Cod Spawn Egg.png|Cod Spawn Egg
Cow Spawn Egg.png|Cow Spawn Egg
Creeper Spawn Egg.png|Creeper Spawn Egg
Dolphin Spawn Egg.png|Dolphin Spawn Egg
Donkey Spawn Egg.png|Donkey Spawn Egg
Drowned Spawn Egg.png|Drowned Spawn Egg
Elder Guardian Spawn Egg.png|Elder Guardian Spawn Egg
Ender Dragon Spawn Egg.png|Ender Dragon Spawn Egg
Enderman Spawn Egg.png|Enderman Spawn Egg
Endermite Spawn Egg.png|Endermite Spawn Egg
Evoker Spawn Egg.png|Evoker Spawn Egg
Fox Spawn Egg.png|Fox Spawn Egg
Frog Spawn Egg.png|Frog Spawn Egg
Ghast Spawn Egg.png|Ghast Spawn Egg
Glow Squid Spawn Egg.png|Glow Squid Spawn Egg
Goat Spawn Egg.png|Goat Spawn Egg
Guardian Spawn Egg.png|Guardian Spawn Egg
Hoglin Spawn Egg.png|Hoglin Spawn Egg
Horse Spawn Egg.png|Horse Spawn Egg
Husk Spawn Egg.png|Husk Spawn Egg
Iron Golem Spawn Egg.png|Iron Golem Spawn Egg
Llama Spawn Egg.png|Llama Spawn Egg
Magma Cube Spawn Egg.png|Magma Cube Spawn Egg
Mooshroom Spawn Egg.png|Mooshroom Spawn Egg
Mule Spawn Egg.png|Mule Spawn Egg
NPC Spawn Egg.png|NPC Spawn Egg
Ocelot Spawn Egg.png|Ocelot Spawn Egg
Panda Spawn Egg.png|Panda Spawn Egg (Java)
Panda Spawn Egg BE1.png|Panda Spawn Egg (Bedrock)
Parrot Spawn Egg.png|Parrot Spawn Egg
Phantom Spawn Egg.png|Phantom Spawn Egg
Pig Spawn Egg.png|Pig Spawn Egg
Piglin Spawn Egg.png|Piglin Spawn Egg
Piglin Brute Spawn Egg.png|Piglin Brute Spawn Egg
Pillager Spawn Egg.png|Pillager Spawn Egg
Polar Bear Spawn Egg.png|Polar Bear Spawn Egg
Pufferfish Spawn Egg.png|Pufferfish Spawn Egg
Rabbit Spawn Egg.png|Rabbit Spawn Egg
Ravager Spawn Egg.png|Ravager Spawn Egg
Salmon Spawn Egg.png|Salmon Spawn Egg
Sheep Spawn Egg.png|Sheep Spawn Egg
Shulker Spawn Egg.png|Shulker Spawn Egg
Silverfish Spawn Egg.png|Silverfish Spawn Egg
Skeleton Spawn Egg.png|Skeleton Spawn Egg
Skeleton Horse Spawn Egg.png|Skeleton Horse Spawn Egg
Slime Spawn Egg.png|Slime Spawn Egg
Sniffer Spawn Egg.png|Sniffer Spawn Egg
Snow Golem Spawn Egg.png|Snow Golem Spawn Egg
Spider Spawn Egg.png|Spider Spawn Egg
Squid Spawn Egg.png|Squid Spawn Egg
Stray Spawn Egg.png|Stray Spawn Egg
Strider Spawn Egg.png|Strider Spawn Egg
Tadpole Spawn Egg.png|Tadpole Spawn Egg
Trader Llama Spawn Egg.png|Trader Llama Spawn Egg
Tropical Fish Spawn Egg.png|Tropical Fish Spawn Egg
Turtle Spawn Egg.png|Turtle Spawn Egg
Vex Spawn Egg.png|Vex Spawn Egg
Villager Spawn Egg.png|Villager Spawn Egg
Vindicator Spawn Egg.png|Vindicator Spawn Egg
Wandering Trader Spawn Egg.png|Wandering Trader Spawn Egg (Java)
Wandering Trader Spawn Egg BE1.png|Wandering Trader Spawn Egg (Bedrock)
Warden Spawn Egg.png|Warden Spawn Egg
Witch Spawn Egg.png|Witch Spawn Egg
Wither Spawn Egg.png|Wither Spawn Egg
Wither Skeleton Spawn Egg.png|Wither Skeleton Spawn Egg
Wolf Spawn Egg.png|Wolf Spawn Egg
Zoglin Spawn Egg.png|Zoglin Spawn Egg
Zombie Spawn Egg.png|Zombie Spawn Egg
Zombie Horse Spawn Egg.png|Zombie Horse Spawn Egg
Zombie Villager Spawn Egg.png|Zombie Villager Spawn Egg
Zombified Piglin Spawn Egg.png|Zombified Piglin Spawn Egg
Mask Spawn Egg.png|Mask Spawn Egg (texture)
</gallery>
{{Hidden end}}
===Screenshots===
<gallery>
Classic eggs.png|Various spawn eggs utilizing their old color scheme before [[12w01a]].
Upsidedownmob.png|An example of an upside-down mob by renaming the spawn egg "Dinnerbone".
UpsideDownMobsEasterEgg.png|Two mobs spawned with the names "Grumm" and "Dinnerbone," respectively.
TheLeadPig.png|First screenshot relating to a named mob shown, through a spawn egg.
</gallery>
==Notes==
{{notelist|fn}}
==References==
{{reflist}}
==External Links==
*[https://www.minecraft.net/en-us/article/taking-inventory--spawn-egg Taking Inventory: Spawn Egg] – Minecraft.net on January 6, 2022
{{Items}}
[[de:Spawn-Ei]]
[[es:Huevo generador]]
[[fr:Œufs d'apparition]]
[[it:Uovo generatore]]
[[ja:スポーンエッグ]]
[[ko:생성 알]]
[[nl:Spawnei]]
[[pl:Jajo przyzywające]]
[[pt:Ovo gerador]]
[[ru:Яйца призывания]]
[[th:ไข่เสก]]
[[zh:刷怪蛋]]
[[Category:Non-renewable resources]]</li></ul></nowiki> | 22w43a | The ominous banner is now available in the Creative inventory. | |||
| Bedrock Edition | |||||
1.2.0{{Extension DPL}}<ul><li>[[Pink Dye|Pink Dye]]<br/>{{Item
| image = Pink Dye.png
| renewable = Yes
| stackable = Yes (64)
}}
'''Pink dye''' is a [[Dyeing#Quasi-Primary|quasi-primary color dye]].
== Obtaining ==
=== Crafting ===
{{Crafting
|head=1
|showname=0
|showdescription=1
|Peony;Pink Tulip;Pink Petals
|Output=Pink Dye,2;Pink Dye;Pink Dye
|type=Material
}}
{{Crafting
|Red Dye
|White Dye
|Output=Pink Dye,2
|type=Material
}}
{{Crafting
|Red Dye
|Bone Meal
|Output=Pink Dye,2
|type=Material
|foot=1
|description={{only|bedrock|education}}
}}
=== Trading ===
[[Wandering trader]]s sell 3 pink dye for an [[emerald]].
== Usage ==
{{dye usage}}
=== Crafting ingredient ===
{{crafting usage|ignore=Banner|continue=1}}
{{banner crafting usage}}
=== Loom ingredient ===
{{Banner loom usage|Pink Dye}}
== Data values ==
=== ID ===
{{edition|java}}:
{{ID table
|edition=java
|showforms=y
|generatetranslationkeys=y
|displayname=Pink Dye
|spritetype=item
|nameid=pink_dye
|form=item
|foot=1}}
{{edition|bedrock}}:
{{ID table
|edition=bedrock
|showaliasids=y
|shownumericids=y
|showforms=y
|notshowbeitemforms=y
|generatetranslationkeys=y
|displayname=Pink Dye
|spritetype=item
|nameid=pink_dye
|aliasid=dye / 9
|id=404
|form=item
|translationkey=item.dye.pink.name
|foot=1}}
== Video ==
{{yt|pPq-Hs9ZPx4}}
== History ==
{{History|java beta}}
{{History||1.2|[[File:Pink Dye JE1 BE1.png|32px]] Added pink dye.}}
{{History|java}}
{{History||1.4.2|snap=12w34a|Added the ability to [[Armor#Dyeing|dye]] leather [[armor]] and [[wolf]] collars.}}
{{History||1.4.6|snap=12w49a|Pink dye can now be [[crafting|crafted]] with [[gunpowder]] to create a [[firework star]].}}
{{History||1.6.1|snap=13w19a|[[Stained clay]] can now be crafted.}}
{{history||1.7.2|snap=13w36a|With the addition of new [[flower]]s, many secondary and tertiary dyes are now primary [[dye]]s.}}
{{History|||snap=13w41a|[[Stained glass]] can now be crafted.}}
{{History||1.8|snap=14w30a|Added [[banner]]s, which can be dyed.}}
{{History||1.11|snap=16w39a|Added the ability to dye [[shulker box]]es.}}
{{History||1.12|snap=17w15a|Added the ability to dye [[bed]]s.}}
{{History||1.13|snap=17w47a|The different data values for the <code>dye</code> ID have now been split up into their own IDs.
|Prior to [[1.13/Flattening|''The Flattening'']], this [[item]]'s numeral ID was 351.}}
{{History||1.14|snap=18w43a|Pink dye is now crafted using [[white dye]], instead of [[bone meal]].
|[[File:Pink Dye JE2 BE2.png|32px]] The texture of pink dye has now been changed.}}
{{History|||snap=18w44a|Pink dye can now change the text color on [[sign]]s to pink.}}
{{History|||snap=19w05a|Added the [[wandering trader]], which sells pink dye.}}
{{History|||snap=19w11a|Pink dye can now be [[trading|bought]] by shepherd villagers.}}
{{History||1.17|snap=20w45a|Pink dye can now be used to craft [[pink candle]]s.}}
{{History|||snap=21w19a|Pink dye can no longer be used to craft pink candles.}}
{{History|||snap=Pre-release 1|Pink dye can now once again be used to craft pink candles.}}
{{History||1.20<br>(Experimental)|link=1.19.3|snap=22w42a|Pink dye can now change the text color on [[hanging sign]]s to pink.}}
{{History||1.20<br>(Experimental)|link=1.19.4|snap=23w07a|[[Pink petals]] can now be crafted into pink dye.}}
{{History|pocket alpha}}
{{History||v0.3.0|[[File:Pink Dye JE1 BE1.png|32px]] Added pink dye.}}
{{History||v0.4.0|Pink dye is now craftable with [[rose red]] and [[bone meal]].
|Pink dye can now be used to craft pink wool.}}
{{History||v0.6.0|Pink dye can now be used to dye [[sheep]].}}
{{History||v0.8.0|snap=build 1|Pink dye can now be used to craft [[magenta dye]].}}
{{History||v0.9.0|snap=build 11|Pink dye can now be used to craft colored [[terracotta]].}}
{{History||v0.11.0|snap=build 1|Pink dye can now be used to dye tamed [[wolf]] collars.}}
{{History||v0.14.0|snap=build 1|Pink dye can now be used to dye [[water]] in [[cauldron]]s.}}
{{History|pocket}}
{{History||1.0.0|snap=alpha 0.17.0.1|Pink dye can now be used to dye [[shulker]]s.}}
{{History||1.1.0|snap=alpha 1.1.0.0|Pink dye can now be used to craft [[concrete powder]], colored [[bed]]s and dyed [[shulker box]]es.}}
{{History|bedrock}}
{{History||1.2.0|snap=beta 1.2.0.2|Pink dye can now be used to craft [[firework star]]s, [[stained glass]] and patterns on [[banner]]s.}}
{{History||1.4.0|snap=beta 1.2.20.1|Pink dye can now be used to craft [[balloon]]s and [[glow stick]]s.}}
{{History||1.8.0|snap=beta 1.8.0.8|Pink dye can now be used to dye tamed [[cat]] collars.}}
{{History||1.10.0|snap=beta 1.10.0.3|Pink dye is now [[trading|sold]] by [[wandering trader]]s.
|Pink dye can now be used to dye white [[carpet]]s and undyed [[glass pane]]s.
|[[File:Pink Dye JE2 BE2.png|32px]] The texture of pink dye has now been changed.}}
{{History||1.16.100|snap=beta 1.16.100.56|The ID of pink dye has been changed from <code>dye/9</code> to <code>pink_dye</code>.}}
{{History|console}}
{{History||xbox=TU1|xbone=CU1|ps=1.00|switch=1.0.1|wiiu=Patch 1|[[File:Pink Dye JE1 BE1.png|32px]] Added pink dye.}}
{{History|PS4}}
{{History||1.90|[[File:Pink Dye JE2 BE2.png|32px]] The texture of pink dye has now been changed.}}
{{History|new 3ds}}
{{History||0.1.0|[[File:Pink Dye JE1 BE1.png|32px]] Added pink dye.}}
{{History|foot}}
== Issues ==
{{issue list}}
{{Items}}
[[Category:Dyes]]
[[cs:Růžové barvivo]]
[[de:Rosa Farbstoff]]
[[es:Tinte rosa]]
[[fr:Teinture rose]]
[[hu:Rózsaszín festék]]
[[ja:桃色の染料]]
[[ko:분홍색 염료]]
[[nl:Roze kleurstof]]
[[pl:Różowy barwnik]]
[[pt:Corante rosa]]
[[ru:Розовый краситель]]
[[zh:粉红色染料]]
[[Category:Renewable resources]]</li><li>[[Pumpkin Seeds|Pumpkin Seeds]]<br/>{{Block
| image = <gallery>
Pumpkin Stem Age 0.png | Age 0
Pumpkin Stem Age 1.png | Age 1
Pumpkin Stem Age 2.png | Age 2
Pumpkin Stem Age 3.png | Age 3
Pumpkin Stem Age 4.png | Age 4
Pumpkin Stem Age 5.png | Age 5
Pumpkin Stem Age 6.png | Age 6
Pumpkin Stem Age 7.png | Age 7
</gallery>
|image2 = <gallery>
Attached Pumpkin Stem (N).png | North
Attached Pumpkin Stem (E).png | East
Attached Pumpkin Stem (S).png | South
Attached Pumpkin Stem (W).png | West
</gallery>
| transparent = Yes
| light = No
| tool = none
| renewable = Yes
| stackable = Yes (64)
| flammable = No
| lavasusceptible = No
}}
'''Pumpkin seeds''' are items obtained from pumpkins that can be used to grow pumpkin stems.
'''Pumpkin stems''' are plants grown on [[farmland]] that, over time, grow [[pumpkin]]s on dirt, mud and moss blocks adjacent to them.
== Obtaining ==
=== Breaking ===
When broken, a pumpkin stem drops 0–3 pumpkin seeds. The chance for pumpkin seeds to drop increases with the stem's age.
{| class="wikitable"
! rowspan="3" |[[Resource location]]
! rowspan="3" | Source
! colspan="4" | Default
|-
| colspan="1" rowspan="2" style="text-align:center" | Nothing || colspan="3" style="text-align:center" |{{ItemLink|Pumpkin Seeds|Pumpkin seeds}}
|-
| style="text-align:center" | 1 || style="text-align:center" | 2 || style="text-align:center" | 3
|-
| rowspan="8" |<code>blocks/pumpkin_stem</code>
|{{BlockLink|Pumpkin Stem|Pumpkin stem}} <code>age = 0</code>
| style="text-align:center" |81.3%|| style="text-align:center" |17.42%|| style="text-align:center" |1.24%|| style="text-align:center" |0.03%
|-
|{{BlockLink|Pumpkin Stem|Pumpkin stem}} <code>age = 1</code>
| style="text-align:center" |65.1%|| style="text-align:center" |30.04%|| style="text-align:center" |4.62%|| style="text-align:center" |0.24%
|-
|{{BlockLink|Pumpkin Stem|Pumpkin stem}} <code>age = 2</code>
| style="text-align:center" |51.2%|| style="text-align:center" |38.4%|| style="text-align:center" |9.6%|| style="text-align:center" |0.8%
|-
|{{BlockLink|Pumpkin Stem|Pumpkin stem}} <code>age = 3</code>
| style="text-align:center" |39.44%|| style="text-align:center" |43.02%|| style="text-align:center" |15.64%|| style="text-align:center" |1.9%
|-
|{{BlockLink|Pumpkin Stem|Pumpkin stem}} <code>age = 4</code>
| style="text-align:center" |29.13%|| style="text-align:center" |44.44%|| style="text-align:center" |22.22%|| style="text-align:center" |3.7%
|-
|{{BlockLink|Pumpkin Stem|Pumpkin stem}} <code>age = 5</code>
| style="text-align:center" |21.6%|| style="text-align:center" |43.2%|| style="text-align:center" |28.8%|| style="text-align:center" |6.4%
|-
|{{BlockLink|Pumpkin Stem|Pumpkin stem}} <code>age = 6</code>
| style="text-align:center" |15.17%|| style="text-align:center" |39.82%|| style="text-align:center" |34.84%|| style="text-align:center" |10.16%
|-
|{{BlockLink|Pumpkin Stem|Pumpkin stem}} <code>age = 7</code>
| style="text-align:center" |10.16%|| style="text-align:center" |34.84%|| style="text-align:center" |39.82%|| style="text-align:center" |15.17%
|-
| rowspan="1" |<code>blocks/attached_pumpkin_stem</code>
|{{BlockLink|Attached Pumpkin Stem|Attached Pumpkin stem}}
| style="text-align:center" |10.16%|| style="text-align:center" |34.84%|| style="text-align:center" |39.82%|| style="text-align:center" |15.17%
|}
=== Natural generation ===
Pumpkin stems generate naturally in stem farm rooms in [[woodland mansion]]s.
Pumpkin stems generate in [[taiga]] and [[snowy taiga]]{{only|be|short=1}} [[village]] farms.
=== Chest loot ===
{{LootChestItem|pumpkin-seeds}}
=== Crafting ===
{{Crafting
|Pumpkin
|Output= Pumpkin Seeds,4
|type= Material
}}
=== Trading ===
[[Wandering trader]]s sell pumpkin seeds for 1 [[emerald]].
=== Post-generation ===
Shearing an uncarved pumpkin yields 4 pumpkin seeds.
== Usage ==
=== Farming ===
{{see also|Tutorials/Pumpkin and melon farming}}
Pumpkin seeds can be planted only on [[farmland]], as stems. Over time, a stem grows through several stages{{Needs testing}} and, at its final growth stage, will produce [[pumpkin]]s on any adjacent [[dirt]], [[Coarse Dirt|coarse dirt]], [[Rooted Dirt|rooted dirt]], [[Grass Block|grass block]], [[farmland]], [[podzol]], [[mycelium]], [[Moss Block|moss block]], [[mud]] or [[Muddy Mangrove Roots|muddy mangrove roots]]. If a pumpkin is already occupying a spot adjacent to a stem it does not grow more pumpkins until the pumpkin is removed. A single stem can grow an unlimited number of pumpkins. Pumpkin stems need a minimum light level of 10 in the block above the stem to grow and give pumpkins. Pumpkin seeds are affected by [[bone meal]] only with respect to stem growth; bone meal does not help produce the actual pumpkins.
=== Breeding ===
Like other seeds, pumpkin seeds can be used to [[breed]] [[chicken]]s, lead chickens around, and make baby chickens grow up faster by 10% of the remaining time.
=== Taming ===
Like other seeds, pumpkin seeds can be used to tame [[parrot]]s.
=== Composting ===
Placing pumpkin seeds into a [[composter]] has a 30% chance of raising the compost level by 1.
== Pumpkin stem ==
A '''pumpkin stem''' is the block that is planted on [[farmland]] when pumpkin seeds are used on it. It starts underground, and rises up as the plant grows. The stem is colored green when young, and then yellow once fully grown.
The stem curves once a pumpkin has grown from it. A fully-grown single stem connects to any [[pumpkin]] in an adjacent square, thus there are 5 possible appearances to a stem. If there are multiple pumpkins it can connect to, it favors the east, then west, north, and south. When the pumpkin is removed, the stem returns to its straight shape.
== Sounds ==
{{Sound table/Block/Hard crop}}
== Data values ==
=== ID ===
{{edition|java}}:
{{ID table
|edition=java
|showblocktags=y
|showforms=y
|generatetranslationkeys=y
|displayname=Pumpkin Stem
|spritetype=block
|nameid=pumpkin_stem
|blocktags=bee_growables, crops
|form=block}}
{{ID table
|displayname=Attached Pumpkin Stem
|spritetype=block
|nameid=attached_pumpkin_stem
|form=block}}
{{ID table
|displayname=Pumpkin Seeds
|spritetype=item
|nameid=pumpkin_seeds
|form=item
|foot=1}}
{{edition|bedrock}}:
{{ID table
|edition=bedrock
|shownumericids=y
|showforms=y
|generatetranslationkeys=y
|displayname=Pumpkin Stem
|spritetype=block
|nameid=pumpkin_stem
|id=104
|form=block}}
{{ID table
|displayname=Pumpkin Seeds
|spritetype=item
|nameid=pumpkin_seeds
|id=292
|form=item
|foot=1}}
=== Block states ===
{{see also|Block states}}
{{/BS}}
== Advancements ==
{{load advancements|A Seedy Place}}
== History ==
{{info needed section|check if stems floated above farmland upon initial implementation}}
{{History|java beta}}
{{History||1.8|snap=Pre-release|[[File:Pumpkin Seeds JE1 BE1.png|32px]] Added pumpkin seeds.
|[[File:Pumpkin Stem Age 0 JE1.png|32px]] [[File:Pumpkin Stem Age 1 JE1.png|32px]] [[File:Pumpkin Stem Age 2 JE1.png|32px]] [[File:Pumpkin Stem Age 3 JE1.png|32px]] [[File:Pumpkin Stem Age 4 JE1.png|32px]] [[File:Pumpkin Stem Age 5 JE1.png|32px]] [[File:Pumpkin Stem Age 6 JE1.png|32px]] [[File:Pumpkin Stem Age 7 JE1.png|32px]] Added the pumpkin stem, with seven stages of growth.
|Pumpkin seeds can be found in the new [[mineshaft]] [[chest]]s.
|[[File:Attached Pumpkin Stem (N) JE1.png|32px]] [[File:Attached Pumpkin Stem (E) JE1.png|32px]] [[File:Attached Pumpkin Stem (S) JE1.png|32px]] [[File:Attached Pumpkin Stem (W) JE1.png|32px]] The pumpkin stem has four slightly visually distinct appearances for each facing direction - the bent part of the stem rotates, but the other two planes do not.
|[[File:Pumpkin Stem Age 8 JE1.png|32px]] [[File:Pumpkin Stem Age 9 JE1.png|32px]] [[File:Pumpkin Stem Age 10 JE1.png|32px]] [[File:Pumpkin Stem Age 11 JE1.png|32px]] [[File:Pumpkin Stem Age 12 JE1.png|32px]] [[File:Pumpkin Stem Age 13 JE1.png|32px]] [[File:Pumpkin Stem Age 14 JE1.png|32px]] [[File:Pumpkin Stem Age 15 JE1.png|32px]] Pumpkin stem data values from 8 through 15 now show a glitched formation, with a floating stem with an attached stem cross eventually emerging below.
|[[File:Attached Stem Age 8 JE1.png|32px]] [[File:Attached Stem Age 9 JE1.png|32px]] [[File:Attached Stem Age 10 JE1.png|32px]] [[File:Attached Stem Age 11 JE1.png|32px]] [[File:Attached Stem Age 12 JE1.png|32px]] [[File:Attached Stem Age 13 JE1.png|32px]] [[File:Attached Stem Age 14 JE1.png|32px]] [[File:Attached Stem Age 15 JE1.png|32px]] Pumpkin stem blocks with data values higher than 7 can attach to adjacent fruits, which results in buggy stem textures with [[vines]] in the mix due to vines being below attached stems in [[terrain.png]].}}
{{History|||snap=Pre-release 2 ;)|Pumpkin stems can now be grown faster using [[bone meal]].}}
{{History|java}}
{{History||1.0.0|snap=Beta 1.9 Prerelease 2|Pumpkins can now be [[crafting|crafted]] into [[pumpkin seeds]].}}
{{History||1.3.1|snap=1.3|The texture of pumpkin stems has been moved one pixel to the left in [[terrain.png]].
|[[File:Pumpkin Stem Age 0 JE2.png|32px]] [[File:Pumpkin Stem Age 1 JE2.png|32px]] [[File:Pumpkin Stem Age 2 JE2.png|32px]] [[File:Pumpkin Stem Age 3 JE2.png|32px]] [[File:Pumpkin Stem Age 4 JE2.png|32px]] [[File:Pumpkin Stem Age 5 JE2.png|32px]] [[File:Pumpkin Stem Age 6 JE2.png|32px]] [[File:Pumpkin Stem Age 7 JE2.png|32px]] Stems now appear slightly different.
|[[File:Pumpkin Stem Age 8 JE2.png|32px]] [[File:Pumpkin Stem Age 9 JE2.png|32px]] [[File:Pumpkin Stem Age 10 JE2.png|32px]] [[File:Pumpkin Stem Age 11 JE2.png|32px]] [[File:Pumpkin Stem Age 12 JE2.png|32px]] [[File:Pumpkin Stem Age 13 JE2.png|32px]] [[File:Pumpkin Stem Age 14 JE2.png|32px]] [[File:Pumpkin Stem Age 15 JE2.png|32px]] Overgrown attached pumpkin stems now appear slightly different.
|[[File:Attached Pumpkin Stem (N) JE2.png|32px]] [[File:Attached Pumpkin Stem (E) JE2.png|32px]] [[File:Attached Pumpkin Stem (S) JE2.png|32px]] [[File:Attached Pumpkin Stem (W) JE2.png|32px]] Attached pumpkin stems now appear slightly different.
|[[File:Attached Stem Age 8 JE2.png|32px]] [[File:Attached Stem Age 9 JE2.png|32px]] [[File:Attached Stem Age 10 JE2.png|32px]] [[File:Attached Stem Age 11 JE2.png|32px]] [[File:Attached Stem Age 12 JE2.png|32px]] [[File:Attached Stem Age 13 JE2.png|32px]] [[File:Attached Stem Age 14 JE2.png|32px]] [[File:Attached Stem Age 15 JE2.png|32px]] Overgrown attached pumpkin stems now appear slightly different.}}
{{History||1.4.2|snap=12w36a|[[Chicken]]s now use [[wheat seeds]], [[melon seeds]] and pumpkin seeds, instead of [[wheat]] to [[breeding|breed]].}}
{{History||1.5|snap=13w02a|[[File:Pumpkin Stem Age 0 JE3.png|32px]] [[File:Pumpkin Stem Age 1 JE3.png|32px]] [[File:Pumpkin Stem Age 2 JE3.png|32px]] [[File:Pumpkin Stem Age 3 JE3.png|32px]] [[File:Pumpkin Stem Age 4 JE3.png|32px]] [[File:Pumpkin Stem Age 5 JE3.png|32px]] [[File:Pumpkin Stem Age 6 JE3.png|32px]] Pumpkin stems now use a squished version of their texture for immature stems, depending on age.
|[[File:Pumpkin Stem Age 8 JE3.png|32px]] [[File:Pumpkin Stem Age 9 JE3.png|32px]] [[File:Pumpkin Stem Age 10 JE3.png|32px]] [[File:Pumpkin Stem Age 11 JE3.png|32px]] [[File:Pumpkin Stem Age 12 JE3.png|32px]] [[File:Pumpkin Stem Age 13 JE3.png|32px]] [[File:Pumpkin Stem Age 14 JE3.png|32px]] [[File:Pumpkin Stem Age 15 JE3.png|32px]] This also affects pumpkin stems of ages 8-15, which are likewise stretched to accommodate its predicted size.
|[[File:Attached Stem Age 8 JE3.png|32px]] [[File:Attached Stem Age 9 JE3.png|32px]] [[File:Attached Stem Age 10 JE3.png|32px]] [[File:Attached Stem Age 11 JE3.png|32px]] [[File:Attached Stem Age 12 JE3.png|32px]] [[File:Attached Stem Age 13 JE3.png|32px]] [[File:Attached Stem Age 14 JE3.png|32px]] [[File:Attached Stem Age 15 JE3.png|32px]] Pumpkin stems of extreme ages, which are attached to adjacent fruits, now show a stretched and tinted stem appearance.}}
{{History|||snap=13w03a|[[File:Pumpkin Stem Age 0 JE4.png|32px]] [[File:Pumpkin Stem Age 1 JE4.png|32px]] [[File:Pumpkin Stem Age 2 JE4.png|32px]] [[File:Pumpkin Stem Age 3 JE4.png|32px]] [[File:Pumpkin Stem Age 4 JE4.png|32px]] [[File:Pumpkin Stem Age 5 JE4.png|32px]] [[File:Pumpkin Stem Age 6 JE4.png|32px]] [[File:Pumpkin Stem Age 7 JE4.png|32px]] Pumpkin stems are no longer squished or stretched to account for age.<ref>{{bug|MC-7111}}</ref>
|[[File:Pumpkin Stem Age 8 JE4.png|32px]] [[File:Pumpkin Stem Age 9 JE4.png|32px]] [[File:Pumpkin Stem Age 10 JE4.png|32px]] [[File:Pumpkin Stem Age 11 JE4.png|32px]] [[File:Pumpkin Stem Age 12 JE4.png|32px]] [[File:Pumpkin Stem Age 13 JE4.png|32px]] [[File:Pumpkin Stem Age 14 JE4.png|32px]] [[File:Pumpkin Stem Age 15 JE4.png|32px]] Pumpkin stems with age values 8 through 15 now show a tinted [[trapdoor]] texture.
|From this version up until 14w08a, overgrown pumpkin stems start to draw from the texture below them on the [[texture atlas]], in much the same way they previously did with terrain.png. However, as texture atlases are unstable and textures tend to change positions as new blocks and textures are added, overgrown stems change the texture they draw from every time new textures are added, which includes when textures added by [[mods]].}}
{{History|||snap=13w09a|[[File:Pumpkin Stem Age 8 JE5.png|32px]] [[File:Pumpkin Stem Age 9 JE5.png|32px]] [[File:Pumpkin Stem Age 10 JE5.png|32px]] [[File:Pumpkin Stem Age 11 JE5.png|32px]] [[File:Pumpkin Stem Age 12 JE5.png|32px]] [[File:Pumpkin Stem Age 13 JE5.png|32px]] [[File:Pumpkin Stem Age 14 JE5.png|32px]] [[File:Pumpkin Stem Age 15 JE5.png|32px]] Pumpkin stems with age values 8 through 15 now show a tinted [[birch wood]] texture.}}
{{History||1.6.1|snap=13w24a|Melon and pumpkin stems have now been assigned separate textures.
|[[File:Pumpkin Stem Age 8 JE6.png|32px]] [[File:Pumpkin Stem Age 9 JE6.png|32px]] [[File:Pumpkin Stem Age 10 JE6.png|32px]] [[File:Pumpkin Stem Age 11 JE6.png|32px]] [[File:Pumpkin Stem Age 12 JE6.png|32px]] [[File:Pumpkin Stem Age 13 JE6.png|32px]] [[File:Pumpkin Stem Age 14 JE6.png|32px]] [[File:Pumpkin Stem Age 15 JE6.png|32px]] Pumpkin stems with age values 8 through 15 now show a tinted curving [[rail]] texture.}}
{{History||1.7.2|snap=13w37a|Added the {{cmd|setblock}} command, allowing for invalid pumpkin stem ages to be placed in the world without using external editors. This also allows them to be obtained in earlier versions via backdating.}}
{{History|||snap=13w41a|[[File:Pumpkin Stem Age 8 JE7.png|32px]] [[File:Pumpkin Stem Age 9 JE7.png|32px]] [[File:Pumpkin Stem Age 10 JE7.png|32px]] [[File:Pumpkin Stem Age 11 JE7.png|32px]] [[File:Pumpkin Stem Age 12 JE7.png|32px]] [[File:Pumpkin Stem Age 13 JE7.png|32px]] [[File:Pumpkin Stem Age 14 JE7.png|32px]] [[File:Pumpkin Stem Age 15 JE7.png|32px]] Pumpkin stems with age values 8 through 15 now show a tinted lit [[furnace]] texture.}}
{{History|||snap=13w43a|[[File:Pumpkin Stem Age 8 JE8.png|32px]] [[File:Pumpkin Stem Age 9 JE8.png|32px]] [[File:Pumpkin Stem Age 10 JE8.png|32px]] [[File:Pumpkin Stem Age 11 JE8.png|32px]] [[File:Pumpkin Stem Age 12 JE8.png|32px]] [[File:Pumpkin Stem Age 13 JE8.png|32px]] [[File:Pumpkin Stem Age 14 JE8.png|32px]] [[File:Pumpkin Stem Age 15 JE8.png|32px]] Pumpkin stems with age values 8 through 15 now show a tinted [[pumpkin]] top texture.}}
{{History||1.8|snap=14w10a|[[File:Pumpkin Stem Age 8 JE9.png|32px]] [[File:Pumpkin Stem Age 9 JE9.png|32px]] [[File:Pumpkin Stem Age 10 JE9.png|32px]] [[File:Pumpkin Stem Age 11 JE9.png|32px]] Pumpkin stems with data values 8-11 now display a tinted attached stem, with 8 facing west, 9 facing east, 10 facing north and 11 facing south.
|Invalid pumpkin stems with data values 12-15 now crash the game.}}
{{History|||snap=14w25a|[[File:Pumpkin Stem Age 0 JE5.png|32px]] [[File:Pumpkin Stem Age 1 JE5.png|32px]] [[File:Pumpkin Stem Age 2 JE5.png|32px]] [[File:Pumpkin Stem Age 3 JE5.png|32px]] [[File:Pumpkin Stem Age 4 JE5.png|32px]] [[File:Pumpkin Stem Age 5 JE5.png|32px]] [[File:Pumpkin Stem Age 6 JE5.png|32px]] [[File:Pumpkin Stem Age 7 JE5.png|32px]] Pumpkin stems now render as a single diagonal plane, or, in the case of attached stems, a diagonal and orthogonal plane.
|[[File:Attached Pumpkin Stem (N) JE3.png|32px]] [[File:Attached Pumpkin Stem (E) JE3.png|32px]] [[File:Attached Pumpkin Stem (S) JE3.png|32px]] [[File:Attached Pumpkin Stem (W) JE3.png|32px]] The attached pumpkin stem [[model]] now fully rotates to the direction the stem points. Prior to this update, the base of the pumpkin stem would stay the same while the long attaching section would differ, resulting in four possible attached stem appearances.
|Invalid overgrown pumpkin stems have now effectively been removed from the game, as attempting to place an out of range stem via {{cmd|setblock}} creates a stem of age 0 and loading a world with existing such stems cause a game crash.}}
{{History|||snap=14w26a|[[File:Pumpkin Stem Age 0 JE6.png|32px]] [[File:Pumpkin Stem Age 1 JE6.png|32px]] [[File:Pumpkin Stem Age 2 JE6.png|32px]] [[File:Pumpkin Stem Age 3 JE6.png|32px]] [[File:Pumpkin Stem Age 4 JE6.png|32px]] [[File:Pumpkin Stem Age 5 JE6.png|32px]] [[File:Pumpkin Stem Age 6 JE6.png|32px]] [[File:Pumpkin Stem Age 7 JE6.png|32px]] [[File:Attached Pumpkin Stem (N) JE4.png|32px]] [[File:Attached Pumpkin Stem (E) JE4.png|32px]] [[File:Attached Pumpkin Stem (S) JE4.png|32px]] [[File:Attached Pumpkin Stem (W) JE4.png|32px]] Pumpkin stems now correctly render as crosses again.<ref>{{bug|MC-58136}}</ref>}}
{{History|||snap=14w27a|[[File:Attached Stem Age 0 14w27a.png|32px]] [[File:Attached Stem Age 1 14w27a.png|32px]] [[File:Attached Stem Age 2 14w27a.png|32px]] [[File:Attached Stem Age 3 14w27a.png|32px]] [[File:Attached Stem Age 4 14w27a.png|32px]] [[File:Attached Stem Age 5 14w27a.png|32px]] [[File:Attached Stem Age 6 14w27a.png|32px]] Due to a bug, all pumpkin stems now appear attached regardless of age or any actual attachment.<ref>{{bug|MC-60208}}</ref>}}
{{History|||snap=14w28a|All pumpkin stems appearing attached regardless of the age of any actual attachment has been fixed. However, pumpkin stems still appear attached to adjacent fruits regardless of age due to a similar bug.<ref>{{bug|MC-61716}}</ref>}}
{{History|||snap=14w34d|Pumpkin seeds no longer can be used to breed [[chicken]]s.}}
{{History||1.9|snap=15w31a|Chickens can now use pumpkin seeds to [[breeding|breed]] again.}}
{{History|||snap=15w44a|Pumpkin seeds have been added to [[dungeon]] [[chest]]s.
|The average yield of pumpkin seeds in [[mineshaft]] chests has been decreased.}}
{{History|||snap=15w45a|Pumpkin stems must now be fully grown again to attach.}}
{{History||1.11|snap=16w39a|Pumpkin seeds are now found in the new [[woodland mansion]] chests.
|Pumpkin stems now generate inside [[woodland mansion]]s.}}
{{History||1.13|snap=17w47a|The different [[block]] states for the <code>pumpkin_stem</code> ID have been split up into their own IDs.
|Pumpkin seeds can now be obtained by [[shear]]ing an uncarved pumpkin.
|Prior to [[1.13/Flattening|''The Flattening'']], this [[block]]'s numeral ID was 104, and the [[item]]'s 361.}}
{{History|||snap=17w48a|Attached pumpkin stems no longer [[drops|drop]] seeds.}}
{{History||1.14|snap=18w43a|[[File:Pumpkin Stem Age 0 JE7.png|32px]] [[File:Pumpkin Stem Age 1 JE7.png|32px]] [[File:Pumpkin Stem Age 2 JE7.png|32px]] [[File:Pumpkin Stem Age 3 JE7.png|32px]] [[File:Pumpkin Stem Age 4 JE7.png|32px]] [[File:Pumpkin Stem Age 5 JE7.png|32px]] [[File:Pumpkin Stem Age 6 JE7.png|32px]] [[File:Pumpkin Stem Age 7 JE7.png|32px]] The stem texture has changed.
|[[File:Attached Pumpkin Stem (N) JE5.png|32px]] [[File:Attached Pumpkin Stem (E) JE5.png|32px]] [[File:Attached Pumpkin Stem (S) JE5.png|32px]] [[File:Attached Pumpkin Stem (W) JE5.png|32px]] The pumpkin stem texture change also affects the base cross on pumpkin stems.}}
{{History|||snap=18w50a|Pumpkin stems now generate in the updated [[taiga]] [[village]] farms.
|Pumpkin seeds can now be found in [[chest]]s in taiga village houses.}}
{{History|||snap=19w03a|Placing pumpkin seeds into the new [[composter]] has a 10% chance of raising the compost level by 1.}}
{{History|||snap=19w05a|Pumpkin seeds now have a 30% chance of increasing the compost level in a composter by 1.
|Added [[Wandering Trader|wandering trader]]s, which sell pumpkin seeds.}}
{{History||1.15|snap=19w34a|[[Bee]]s can now pollinate pumpkin stems.}}
{{History|||snap=19w39a|Attached pumpkin stems now [[drops|drop]] seeds again.<ref>{{bug|MC-136360}}</ref>}}
{{History|pocket alpha}}
{{History||v0.8.0|snap=build 1|[[File:Pumpkin Seeds JE1 BE1.png|32px]] Added pumpkin seeds.
|[[File:Pumpkin Stem Age 0 JE1.png|32px]] [[File:Pumpkin Stem Age 1 JE1.png|32px]] [[File:Pumpkin Stem Age 2 JE1.png|32px]] [[File:Pumpkin Stem Age 3 JE1.png|32px]] [[File:Pumpkin Stem Age 4 JE1.png|32px]] [[File:Pumpkin Stem Age 5 JE1.png|32px]] [[File:Pumpkin Stem Age 6 JE1.png|32px]] [[File:Pumpkin Stem Age 7 JE1.png|32px]] [[File:Attached Pumpkin Stem (N) JE1.png|32px]] [[File:Attached Pumpkin Stem (E) JE1.png|32px]] [[File:Attached Pumpkin Stem (S) JE1.png|32px]] [[File:Attached Pumpkin Stem (W) JE1.png|32px]]{{verify|Were these the models used by this edition?}} Added pumpkin stems.
|Pumpkin seeds are obtainable from the [[Nether reactor]].}}
{{History||v0.12.1|snap=build 1|Pumpkin seeds are no longer available from the Nether reactor.}}
{{History||v0.14.0|snap=build 1|Pumpkin seeds can now be found in [[minecart with chest]]s inside [[mineshaft]]s.}}
{{History|pocket}}
{{History||1.1.0|snap=alpha 1.1.0.0|Pumpkin stems now generate inside [[woodland mansion]]s.}}
{{History|bedrock}}
{{History||1.2.0|snap=beta 1.2.0.2|Pumpkin seeds are now used to tame [[parrot]]s.}}
{{History||1.4.0|snap=beta 1.2.13.8|Pumpkin seeds can now be obtained by [[shear]]ing an uncarved [[pumpkin]].}}
{{History||1.10.0|snap=beta 1.10.0.3|[[File:Attached Pumpkin Stem (W) JE5.png|32px]]{{info needed|More accurate image}} The texture of attached pumpkin stems has been changed.
|Pumpkin seeds can now be [[trading|bought]] from [[wandering trader]]s.
|A single pumpkin crop now generates in the new [[taiga]] and [[snowy taiga]] [[village]]s.}}
{{History||1.11.0|snap=beta 1.11.0.1|A single pumpkin seed can now be used to fill the [[composter]].
|Pumpkin seeds can now be found in [[taiga]] and [[snowy taiga]] [[village]] house [[chest]]s.}}
{{History|console}}
{{History||xbox=TU5|xbone=CU1|ps=1.0|wiiu=Patch 1|[[File:Pumpkin Seeds JE1 BE1.png|32px]] Added pumpkin seeds.
|[[File:Pumpkin Stem Age 0 JE1.png|32px]] [[File:Pumpkin Stem Age 1 JE1.png|32px]] [[File:Pumpkin Stem Age 2 JE1.png|32px]] [[File:Pumpkin Stem Age 3 JE1.png|32px]] [[File:Pumpkin Stem Age 4 JE1.png|32px]] [[File:Pumpkin Stem Age 5 JE1.png|32px]] [[File:Pumpkin Stem Age 6 JE1.png|32px]] [[File:Pumpkin Stem Age 7 JE1.png|32px]] [[File:Attached Pumpkin Stem (N) JE1.png|32px]] [[File:Attached Pumpkin Stem (E) JE1.png|32px]] [[File:Attached Pumpkin Stem (S) JE1.png|32px]] [[File:Attached Pumpkin Stem (W) JE1.png|32px]]{{verify|Were these the models used by this edition?}} Added pumpkin stems.}}
{{History||xbox=TU69|ps=1.76|wiiu=Patch 38|Pumpkin seeds can now be obtained by [[shear]]ing an uncarved [[pumpkin]].}}
{{History||xbox=none|xbone=none|ps=1.90|wiiu=none|switch=none|[[File:Attached Pumpkin Stem (W) JE5.png|32px]]{{info needed|More accurate image}} The texture of attached pumpkin stems has been changed.}}
{{History|New 3DS}}
{{History||0.1.0|[[File:Pumpkin Stem Age 0 JE1.png|32px]] [[File:Pumpkin Stem Age 1 JE1.png|32px]] [[File:Pumpkin Stem Age 2 JE1.png|32px]] [[File:Pumpkin Stem Age 3 JE1.png|32px]] [[File:Pumpkin Stem Age 4 JE1.png|32px]] [[File:Pumpkin Stem Age 5 JE1.png|32px]] [[File:Pumpkin Stem Age 6 JE1.png|32px]] [[File:Pumpkin Stem Age 7 JE1.png|32px]] [[File:Attached Pumpkin Stem (N) JE1.png|32px]] [[File:Attached Pumpkin Stem (E) JE1.png|32px]] [[File:Attached Pumpkin Stem (S) JE1.png|32px]] [[File:Attached Pumpkin Stem (W) JE1.png|32px]]{{verify|Were these the models used by this edition?}} Added pumpkin stems.}}
{{History|foot}}
<gallery>
Pumpkin Stem with data value 15.png|The final version of the pumpkin stem with age 15, as seen in-game.
Pumpkinstems.png|Pumpkin stems of ages 1 to 15 on a modded version of [[Java Edition 1.7.2|1.7.2]], hence the nearby melon stems using the melon top texture.
Stems of 13w02a.png|All 16 stem sizes in [[Java Edition 13w02a|13w02a]], with accompanying data values.
</gallery>
=== Pumpkin stem "item" ===
{{:Technical blocks/Pumpkin Stem}}
== Issues ==
{{issue list}}
== Gallery ==
<gallery>
Stem All Ages.png|All stages of growth.
AllSeeds.png|All the [[seeds]] that exist in the game.
</gallery>
== References ==
{{reflist}}
{{Blocks|vegetation}}
{{Items}}
[[Category:Plants]]
[[Category:Food]]
[[Category:Non-solid blocks]]
[[Category:Generated structure blocks]]
[[cs:Dýňová semínka]]
[[de:Kürbiskerne]]
[[es:Semillas de calabaza]]
[[fr:Graines de citrouille]]
[[hu:Tökmagok]]
[[ja:カボチャの種]]
[[ko:호박씨]]
[[nl:Pompoenpitten]]
[[pl:Nasiona dyni]]
[[pt:Sementes de abóbora]]
[[ru:Семена тыквы]]
[[th:เมล็ดฝักทอง]]
[[zh:南瓜种子]]</li></ul> | beta 1.2.0.2 | ||||
| Black and gray banners, and light gray banners with a white flower charge are now naturally generated in rooms of woodland mansions. | |||||
1.4.0{{Extension DPL}}<ul><li>[[Debug fourj item|Debug fourj item]]<br/>{{DISPLAYTITLE:<samp>debug_fourj_item</samp>}}
{{exclusive|Legacy Console}}{{Unobtainable||edition=console|section=}}{{Item
| image = Barrier (held) JE1 BE1.png
| renewable = No
| stackable = Yes (64)
| rarity = Common
| title = <samp>debug_fourj_item</samp>
}}
<samp>'''debug_fourj_item'''</samp> is an unobtainable item exclusive to the [[Legacy Console Edition]] and can only be obtained through modding the game. It has the texture of a [[barrier]], no "What's this?" hint and no display name.
==Obtaining==
The only way to obtain this item is via inventory editors and other external tools.
==Usage==
The purpose of this item is unknown, and it cannot be placed. Although the ID<ref name="r">[https://youtu.be/IscH0rUw_20 "マインクラフト WiiU 全面の木、偽バリアブロックのアイテムID公開"] - YouTube, March 26, 2019</ref> suggests that it was used for debugging and testing purposes.
==Data values==
===ID===
{{ID table|displayname=[No displayed name]
|showforms=y|form=item|nameid=debug_fourj_item|id=2255<ref group="note">Numerical IDs aren't supported on the Legacy Console Edition anymore.</ref><ref name="r"/>|shownumericids=y|translationkey=item.debug_fourj_item.name|generatetranslationkeys=y|foot=1}}
<references group="note" />
==History==
{{History|console}}
{{History||xbox=unknown|xbone=unknown|ps=unknown|wiiu=unknown|switch=unknown|[[File:Barrier (held) JE1 BE1.png|32px]] Added <samp>debug_fourj_item</samp>.}}
{{History|foot}}
== Gallery ==
<gallery>
Debug fourj item in inventory.png|<samp>debug_fourj_item</samp> as it appears in one's inventory
</gallery>
==See also==
*[[Debug Stick]]
==References==
<references />
{{Items}}
{{Unused features}}
[[Category:Articles missing historical information]]</li><li>[[Feather|Feather]]<br/>{{about|a item|a enchantent|Feather Falling}}
{{Item
| image = Feather.png
| stackable = Yes (64)
| renewable = Yes
}}
'''Feathers''' are items dropped by [[chicken]]s and [[parrot]]s, as well as tamed [[cats]] as morning gifts.
== Obtaining ==
=== Mob loot ===
Adult [[chicken]]s drop 0–2 feathers upon death. The maximum is increased by 1 per level of [[Looting]], for a maximum of 0–5 with Looting III.
[[Parrot]]s drop 1–2 feathers upon death. The maximum is increased by 1 per level of Looting, for a maximum of 1–5 with Looting III.
A [[fox]] sometimes spawns holding a feather, which always drops upon death. Alternatively, the player can drop a [[food]] item, causing the fox to drop the feather in favor of the food.
=== Natural generation ===
{{LootChestItem|feather}}
=== Cat gifts ===
{{main|Cat#Gifts}}
Tamed [[cat]]s have a 70% chance of giving the [[player]] a "morning gift", and the gift has a 16.13% chance to be a feather.
== Usage ==
=== Helmet ===
<div style='float:right'></div>
While a feather cannot be equipped in the head slot in [[Survival]] mode, equipping it using commands causes it to appear completely upright unlike other items.
[[File:Steve wearing Feather.png|75px]]
[[File:Alex wearing Feather.png|75px]]
=== Crafting ingredient ===
{{crafting usage}}
=== Trading ===
Expert-level fletcher [[villager]]s buy 24 feathers for an [[emerald]] as part of their trade.
== Data values ==
=== ID ===
{{edition|java}}:
{{ID table
|edition=java
|showforms=y
|generatetranslationkeys=y
|displayname=Feather
|spritetype=item
|nameid=feather
|form=item
|foot=1}}
{{edition|bedrock}}:
{{ID table
|edition=bedrock
|shownumericids=y
|showforms=y
|notshowbeitemforms=y
|generatetranslationkeys=y
|displayname=Feather
|spritetype=item
|nameid=feather
|id=327
|form=item
|foot=1}}
== History ==
{{History|java indev}}
{{History||0.31|snap=20100130|[[File:Feather JE1.png|32px]] Added feathers.|Feathers can be used to [[craft]] [[arrow]]s.
|Feathers are [[drop]]ped by every [[mob]] in quantities of 0 to 2.}}
{{History||20100206|[[File:Feather JE2 BE1.png|32px]] The feather's texture has been changed; it is now not as straight anymore.}}
{{History||20100219|[[Zombie]]s are now the only [[mob]] that can drop feathers. This was a placeholder as [[Notch]] has stated he currently doesn't know what else they should drop.<ref>{{tweet|notch|21723172931895296}}</ref>}}
{{History|java alpha}}
{{History||v1.0.14|[[Chicken]]s now [[drop]] 0–2 feathers upon death.}}
{{History|java beta}}
{{History||1.8|snap=Pre-release|[[Zombie]]s now drop [[rotten flesh]], instead of feathers.
|[[Chicken]]s are now the only source of feathers.}}
{{History|java}}
{{History||1.3.1|snap=12w17a|Feathers are now used to craft [[book and quill]]s.}}
{{History||1.4.6|snap=12w49a|Feathers are now used to craft a [[firework star]] with a burst effect.}}
{{History||1.12|snap=17w13a|[[Parrot]]s now [[drop]] feathers.}}
{{History||1.13|snap=17w47a|Prior to ''[[The Flattening]]'', this [[item]]'s numeral ID was 288.}}
{{History|||snap=18w11a|Feathers now generate in [[shipwreck]] [[chest]]s.}}
{{History||1.14|snap=18w43a|[[File:Feather JE3 BE2.png|32px]] The texture of feathers has been changed.}}
{{History|||snap=18w44a|[[Cat]]s now offer feathers as [[Cat#Gifts|gift]]s.}}
{{History|||snap=18w48a|Feathers can now be found in chests in plains [[village]] houses.}}
{{History|||snap=18w50a|Feathers can now be found in chests in fletcher houses.}}
{{History|||snap=19w07a|Added [[fox]]es, which sometimes spawn with feather in their mouths.}}
{{History|||snap=19w11a|Fletcher [[villager]]s now [[trading|buy]] feathers.}}
{{History||1.20<br>(Experimental)|link=1.19.4|snap=1.19.4 Pre-release 1|Feathers can now be used to craft [[brush]]es.}}
{{History|pocket alpha}}
{{History||v0.2.0|[[File:Feather JE2 BE1.png|32px]] Added feathers. They are currently unobtainable and serve no purpose.}}
{{History||v0.3.3|Chickens now drop 0–2 feathers upon death.|Feathers can now be used to [[craft]] [[arrow]]s.}}
{{History||v0.5.0|Feathers can now be obtained after activating the [[nether reactor]].}}
{{History||v0.11.0|snap=build 1|[[Zombie]]s now drop [[rotten flesh]], instead of feathers.}}
{{History||v0.12.1|snap=build 1|Feathers are no longer available from the [[nether reactor]].}}
{{History|bedrock}}
{{History||1.2.0|snap=beta 1.2.0.2|Feathers can now be used to craft [[book and quill]]s.|Added [[parrot]]s, which [[drop]] feathers.|Feathers can now be used as an ingredient to craft a [[firework star]].}}
{{History||1.4.0|snap=beta 1.2.14.2|Feathers can now be found in [[shipwreck]] [[chest]]s.}}
{{History||1.8.0|snap=beta 1.8.0.8|Feathers can now be given as a gift to the [[player]] by tamed [[cat]]s.}}
{{History||1.10.0|snap=beta 1.10.0.3|[[File:Feather JE3 BE2.png|32px]] The texture of feathers has been changed.|Feathers can now be found in the new [[plains]] [[village]] house.}}
{{History||1.11.0|snap=beta 1.11.0.1|Feathers can now be found in village fletcher [[chest]]s.}}
{{History|||snap=beta 1.11.0.4|Feathers can now be [[trading|sold]] to fletcher [[villager]]s.}}
{{History||1.13.0|snap=beta 1.13.0.1|Added [[fox]]es, which can [[drops|drop]] feathers.}}
{{History||1.20.0<br>(Experimental)|link=Bedrock Edition 1.19.80|snap=beta 1.19.80.20|Feathers can now be used to craft [[brush]]es.}}
{{History|console}}
{{History||xbox=TU1|xbone=CU1|ps=1.0|wiiu=Patch 1|[[File:Feather JE2 BE1.png|32px]] Added feathers.}}
{{History|Ps4}}
{{History||1.90|[[File:Feather JE3 BE2.png|32px]] The texture of feathers has been changed.}}
{{History|New Nintendo 3DS Edition}}
{{History||0.1.0|[[File:Feather JE2 BE1.png|32px]] Added feathers.}}
{{History|foot}}
== Issues ==
{{issue list}}
== References ==
{{reflist}}
== External Links ==
*[https://www.minecraft.net/en-us/article/taking-inventory--feather Taking Inventory: Feather] – Minecraft.net on March 3, 2019
{{Items}}
[[Category:Renewable resources]]
[[cs:Pírko]]
[[de:Feder]]
[[es:Pluma]]
[[fr:Plume]]
[[hu:Toll]]
[[it:Piuma]]
[[ja:羽根]]
[[ko:깃털]]
[[nl:Veer]]
[[pl:Pióro]]
[[pt:Pena]]
[[ru:Перо]]
[[uk:Перо]]
[[zh:羽毛]]</li></ul> | beta 1.2.20.1 | The white banner can now be crafted from a colored banner and bleach, which also removes all patterns, if used on a white banner. | |||
1.10.0{{Extension DPL}}<ul><li>[[Amethyst Shard|Amethyst Shard]]<br/>{{Item
| title = Amethyst Shard
| image = Amethyst Shard.png
| renewable = Yes
| stackable = Yes (64)
}}
An '''amethyst shard''' is a crystal ore obtained from mining a fully grown [[amethyst cluster]] or can be obtained from chests in [[Ancient City|ancient cities]].
== Obtaining ==
=== Mining ===
An [[amethyst cluster]] mined using a non-[[Silk Touch]], non-[[Fortune]] [[pickaxe]] drops 4 amethyst shards. When mined using any other tool, [[item]] or mechanism (such as [[explosion]]s or [[piston]]s) it drops 2 shards. The maximum amount of amethyst shards dropped can be increased with Fortune. Fortune I gives a {{frac|1|3}} chance for eight shards, averaging 5.33 shards; Fortune II gives a 25% chance (each) to give eight or 12 shards, averaging 7 shards, and Fortune III gives a 20% chance (each) to give 8, 12, or 16 shards, averaging 8.8 shards.
If the amethyst cluster in any of its growth stages is mined using a pickaxe enchanted with [[Silk Touch]], it drops itself rather than amethyst shards.
=== Chest loot ===
{{LootChestItem|amethyst-shard}}
== Usage ==
=== Crafting ingredient ===
{{Crafting usage}}
=== Smithing ingredient ===
{{Smithing
|head=1
|ingredients=Any Armor Trim +<br/>Any Armor Piece + <br/>Amethyst Shard
|Any Armor Trim Smithing Template
|Netherite Chestplate
|Amethyst Shard
|Amethyst Trim Netherite Chestplate
|showdescription=1
|description = All armor types can be used in this recipe;<br/>a netherite chestplate is shown as an example.<br/>
|tail=1
}}
;Trim color palette
The following color palette is shown on the designs on trimmed armor:
*{{TrimPalette|amethyst shard}}
=== Allay duplication ===
If an amethyst shard is given to an [[allay]] that is currently dancing to an active [[jukebox]], the allay emits heart particles, consumes the amethyst shard and duplicates into another allay. After this, there is a 5 minute cool down until both allays can be duplicated like this again.
== Sounds ==
{{Edition|Java}}:
{{Sound table
|sound=Amethyst shimmer.ogg
|subtitle=Amethyst chimes
|source=neutral
|description=When an amethyst shard duplicates an allay
|id=block.amethyst_block.chime
|translationkey=subtitles.block.amethyst_block.chime
|volume=0.4
|pitch=1.0
|distance=16
|foot=1}}
{{Edition|Bedrock}}:
{{Sound table
|type=bedrock
|sound=Amethyst shimmer.ogg
|source=block
|description=When an amethyst shard duplicates an allay
|id=chime.amethyst_block
|volume=1.0
|pitch=0.5-1.7
|foot=1}}
== Data values ==
=== ID ===
{{edition|java}}:
{{ID table
|edition=java
|showforms=y
|generatetranslationkeys=y
|displayname=Amethyst Shard
|spritetype=item
|nameid=amethyst_shard
|form=item
|foot=1}}
{{edition|bedrock}}:
{{ID table
|edition=bedrock
|shownumericids=y
|showforms=y
|notshowbeitemforms=y
|generatetranslationkeys=y
|displayname=Amethyst Shard
|spritetype=item
|nameid=amethyst_shard
|form=item
|id=625
|foot=1}}
==History==
{{History||October 3, 2020|link={{ytl|DBvZ2Iqmm3M|t=23m14s}}|Amethyst shards are mentioned, but not shown at [[Minecraft Live 2020]].}}
{{History|java}}
{{History||1.17|snap=20w45a|[[File:Amethyst Shard JE1.png|32px]] Added amethyst shards.}}
{{History|||snap=20w46a|[[File:Amethyst Shard JE2 BE1.png|32px]] The texture for amethyst shards has changed.}}
{{History||1.19|snap=22w13a|Amethyst shards can now be found in [[ancient city]] [[chest]]s.}}
{{History||1.19.1|snap=22w24a|Amethyst shards can now be used to duplicate [[allay]]s.}}
{{History||1.20<br>(Experimental)|link=1.19.4|snap=23w04a|Amethyst shards can now be used as an armor trim material.}}
{{History||1.20|snap=23w12a|Amethyst shards can now be used to craft [[calibrated sculk sensor]]s.}}
{{History|bedrock}}
{{History||1.17.0|snap=beta 1.17.0.50|[[File:Amethyst Shard JE2 BE1.png|32px]] Added amethyst shards.}}
{{History|||snap=beta 1.17.0.52|Amethyst shards are now available without enabling [[Experimental Gameplay]].}}
{{History||1.19.0|snap=beta 1.19.0.26|Amethyst shards can now be found in [[ancient city]] [[chest]]s.}}
{{History||1.19.10|snap=beta 1.19.10.22|Amethyst shards can now be used to duplicate allays.}}
{{History||1.20.0<br>(Experimental)|link=Bedrock Edition 1.19.80|snap=beta 1.19.80.21|Amethyst shards can now be used as an armor trim material.}}
{{History|||snap=beta 1.19.80.22|Amethyst shards can now be used to craft calibrated sculk sensors.}}
{{History|foot}}
==Issues==
{{issue list}}
==Trivia==
* Although in real life {{w|amethyst}} is a variety of {{w|quartz}} like [[Nether Quartz|nether quartz]], the two resources are not interchangeable.
* besides netherite, amethyst is the only or to be attempted not from an ore in caves
== External Links ==
*[https://www.minecraft.net/en-us/article/taking-inventory--amethyst-shard Taking Inventory: Amethyst Shard] – Minecraft.net on May 20, 2021
{{Items}}
[[Category:Renewable resources]]
[[de:Amethystscherbe]]
[[es:Fragmento de amatista]]
[[fr:Éclat d'améthyste]]
[[it:Scheggia di ametista]]
[[ja:アメジストの欠片]]
[[lzh:紫水玉片]]
[[pl:Odłamek ametystu]]
[[pt:Fragmento de ametista]]
[[ru:Осколок аметиста]]
[[uk:Уламок аметисту]]
[[zh:紫水晶碎片]]
[[Category:Ore]]</li><li>[[Slimeball|Slimeball]]<br/>{{about|the item|the mob|Slime|the block constructed with slimeballs|Slime Block|other uses|Slime (disambiguation)}}
{{Item
| image = Slimeball.png
| renewable = Yes
| stackable = Yes (64)
}}
A '''slimeball''' is a [[crafting]] ingredient commonly dropped by [[slime]]s, and can be sneezed out by [[panda]]s.
== Obtaining ==
=== Mob loot ===
==== Slimes ====
{{see also|Tutorials/Slime farming}}
If a [[slime]]'s size is 1, it drops 0–2 slimeballs when killed. The maximum number of slimeballs is increased by 1 per level of [[Looting]], for a maximum of 5 slimeballs with Looting III.
==== Pandas ====
Baby [[panda]]s have a {{frac|1|700}} chance of [[drop]]ping one slimeball when sneezing.
=== Crafting ===
{{Crafting
|Slime Block
|Output= Slimeball,9
|type= Miscellaneous
}}
=== Trading ===
[[Wandering trader]]s sometimes offer to sell a slimeball for 4 [[emerald]]s.
== Usage ==
=== Crafting ingredient ===
{{crafting usage}}
=== Breeding ===
Slimeballs can be used to breed [[frog]]s and reduce the remaining growth duration of [[tadpole]]s by 10%. Both also follow a player holding a slimeball.
==Video==
{{Video note|This video is outdated, as slimeballs can now also be used to craft [[lead]]s and [[slime block]]s, breed [[frog]]s, and can now be obtained from baby [[panda]]s and [[wandering trader]]s.}}
{{yt|J6oR3fdbbjY}}
== Data values ==
===ID===
{{edition|java}}:
{{ID table
|edition=java
|showforms=y
|generatetranslationkeys=y
|displayname=Slimeball
|spritetype=item
|nameid=slime_ball
|form=item
|foot=1}}
{{edition|bedrock}}:
{{ID table
|edition=bedrock
|shownumericids=y
|showforms=y
|notshowbeitemforms=y
|generatetranslationkeys=y
|displayname=Slimeball
|spritetype=item
|nameid=slime_ball
|id=388
|form=item
|foot=1}}
==History==
{{History|java alpha}}
{{History||v1.0.11|[[File:Slimeball JE1 BE1.png|32px]] Added slimeballs, which are dropped from [[slime]]s. At the moment, they serve no purpose.}}
{{History|java beta}}
{{History||1.7|Slimeballs are now used to craft [[sticky piston]]s.}}
{{History|java}}
{{History||1.0.0|snap=Beta 1.9 Prerelease 2|Slimeballs are used to craft [[magma cream]].}}
{{History||1.6.1|snap=13w18a|[[Lead]]s, which were originally implemented in the [[13w16a]] snapshot, now have a [[crafting]] recipe that includes slimeballs.}}
{{History||1.8|snap=14w02a|Nine slimeballs are now used to [[crafting|craft]] a [[slime block]]. Slime blocks also act as storage [[block]]s, being able to craft back into 9 slimeballs.}}
{{History||1.13|snap=17w47a|Prior to [[1.13/Flattening|''The Flattening'']], this [[item]]'s numeral ID was 341.}}
{{History||1.14|snap=18w43a|[[File:Slimeball JE2 BE2.png|32px]] The texture of slimeballs has been changed.
|Slimeballs can now be obtained when a [[panda|baby panda]] sneezes.}}
{{History|||snap=19w05a|Slimeballs can now be bought from [[wandering trader]]s.}}
{{History||1.19|snap=22w11a|Slimeballs can now be used to breed [[frog]]s.}}
{{History|pocket alpha}}
{{History||v0.9.0|snap=build 1|[[File:Slimeball JE1 BE1.png|32px]] Added slimeballs. They are currently unobtainable and serve no purpose.}}
{{History||v0.12.1|snap=build 1|Added slimeballs to the [[creative]] [[inventory]].
|Slimeballs can now be obtained by killing [[slime]]s.
|Slimeballs are now used to craft [[magma cream]].}}
{{History||v0.14.0|snap=build 1|Slimeballs are now used to craft [[slime block]]s.}}
{{History||v0.15.0|snap=build 1|Slimeballs are now used to craft [[sticky piston]]s and [[lead]]s.}}
{{History|bedrock}}
{{History||1.8.0|snap=beta 1.8.0.8|Slimeballs can now be obtained when a [[panda|baby panda]] sneezes.}}
{{History||1.10.0|snap=beta 1.10.0.3|[[File:Slimeball JE2 BE2.png|32px]] The texture of slimeballs has been changed.
|Slimeballs can now be obtained via [[trading]] with [[wandering trader]]s.}}
{{History|console}}
{{History||xbox=TU1|xbone=CU1|ps=1.0|wiiu=Patch 1|switch=1.0.1|[[File:Slimeball JE1 BE1.png|32px]] Added slimeballs.}}
{{History||xbox=TU3|Slimeballs are now used to craft [[sticky piston]]s.}}
{{History||xbox=TU5|Slimeballs are found in the Miscellaneous tab in the [[Creative inventory]].}}
{{History||xbox=TU9|Moved slimeballs to the Materials tab in the Creative inventory.}}
{{History||xbox=none|xbone=none|ps=1.83|wiiu=none|switch=none|Slimeballs can now be obtained when a [[panda|baby panda]] sneezes.}}
{{History||xbox=none|xbone=none|ps=1.90|wiiu=none|switch=none|[[File:Slimeball JE2 BE2.png|32px]] The texture of slimeballs has been changed.}}
{{History|New 3DS}}
{{History||0.1.0|[[File:Slimeball JE1 BE1.png|32px]] Added slimeballs.}}
{{History|foot}}
==Issues ==
{{issue list}}
== External Links ==
*[https://www.minecraft.net/en-us/article/taking-inventory--slimeball Taking Inventory: Slimeball] – Minecraft.net on June 24, 2021
{{Items}}
[[Category:Renewable resources]]
[[cs:Sliz]]
[[de:Schleimball]]
[[es:Bola de slime]]
[[fr:Boule de Slime]]
[[hu:Nyálkagolyó]]
[[it:Palla di slime]]
[[ja:スライムボール]]
[[ko:슬라임볼]]
[[nl:Slijmbal]]
[[pl:Kula szlamu]]
[[pt:Bola de slime]]
[[ru:Слизь]]
[[th:ลูกเมือก]]
[[uk:Слизова кулька]]
[[zh:黏液球]]</li></ul> | beta 1.10.0.3 | Looms have been added to help the player edit banners more easily. | |||
| Brown banners now generate in new savanna villages. | |||||
| Black banners now generate in pillager outpost watchtowers. | |||||
1.11.0{{Extension DPL}}<ul><li>[[Map|Map]]<br/>{{about|the craftable map|maps showing the locations of certain structures|Explorer Map|other uses|Map (disambiguation)}}
{{distinguish|World}}
{{Item
| image = Map Zoom 4.png
| renewable = Yes
| stackable = Yes (64)
}}
A '''map''' is an [[item]] used to view explored [[Chunk|terrain]] and mark landmarks.
==Obtaining==
===Crafting===
{{crafting
|head=1
|showname=0
|showdescription=1
|A1= Paper
|B1= Paper
|C1= Paper
|A2= Paper
|B2= Compass
|C2= Paper
|A3= Paper
|B3= Paper
|C3= Paper
|Output= Empty Map
|type= Miscellaneous
|description=This variation is called an "empty locator map" {{in|bedrock}}, or an "empty map" {{in|java}}.
When the player first creates a map, it is blank. It needs to be activated by holding it and pressing ''{{Control|use item}}''. after which it records terrain and location markers as the player travels within (or close to) the area it maps.
}}
{{crafting
|A1= Paper
|B1= Paper
|C1= Paper
|A2= Paper
|B2= Paper
|C2= Paper
|A3= Paper
|B3= Paper
|C3= Paper
|Output= Empty Map
|type= Miscellaneous
|description={{only|bedrock}}
This variation is called an "empty map". It does not show location markers. It is intended for cloning and zooming locator maps without having to consume an additional [[compass]] (thereby saving [[iron ingot]]s and [[redstone dust]]), but it can also be {{Control|use|text=activated}} and later converted to a locator map by combining it with a compass on an [[anvil]], [[crafting table]], or [[cartography table]].
|foot=1
}}
=== Natural generation ===
==== Chest loot ====
{{LootChestItem|empty-map,map
}}
=== Cartography table ===
A map can also be created using a single paper on a [[cartography table]] to create an empty map, or a paper with a compass for an empty locator map.{{only|bedrock}}
=== Starting map ===
{{exclusive|bedrock|section=1}}
When creating a new world {{in|bedrock}}, the player can enable the "Starting Map" option to spawn with an empty locator map in the hotbar. The map's zoom scale is 1:8. The map is updated only while the player holds it.
=== Trading ===
Novice-level cartographer [[Villager|villagers]] sell a single empty map for 7 [[Emerald|emeralds]] as their trades.
{{IN|java}}, cartographer villagers may give players with the [[Hero of the Village]] effect an empty map.
== Usage ==
{{See also|Tutorials/Mapping}}
=== Mapping ===
Crafting a map creates an empty map. The map is drawn for the first time when it is held and used (with ''{{control|use item}}''). This map can then be adjusted to different zoom levels. After conversion to a drawn map item, it starts to draw a top-down view of the player's surroundings, with North pointing to the top of the map. A pointed oval pointer indicates the player's position on the map, and moves in real-time as the player moves across the terrain shown on the map. The map does ''not'' center on the player when created, rather, the world is broken up into large invisible grid squares, and the map displays the area of whichever grid square it is in when it is first used. For example, if a player uses a new map in a certain grid square, and then moves a distance away and uses another fresh map but is still within the same grid square, both maps appear identical. To make a map that is not identical to the first one, the player would have to move outside of the edges of the first map (because then they would be in a new grid square). This way, no two maps of the same size can ever partially overlap and every map can display only a fixed area.
To record the world on a map, that specific map must be held in the player's hands while the player moves around the world. The world is recorded as-is during exploration, meaning that if the world is modified, a player must revisit the area while holding the map to update the map's view. Maps can also be [[Map#Cloning|cloned]]. If a player holds a map whose one or more clones are on display in item frames, updates are made on all clone-connected maps.
Other players are displayed on the map only if they have a map in their inventory cloned from the one being looked at. When placing a map into an [[item frame]], the map displays with a green pointer shown at the location of the item frame. This is to help the player see where they are in relation to the area that the map is showing. If the player leaves a map in an item frame and views a clone of it, the green pointer remains in the spot of the framed copy. This can be used to set up waypoints. Unexplored areas are transparent, making the item frame visible.
When the player leaves the area shown on a specific map, the player pointer transforms into a white dot that moves on that map. The marker shrinks to a smaller white dot if the player is far from the map's center: the area is 320 by 320 blocks per scale factor. The dot moves along the edge of the map to show the relative location of the player. However {{in|bedrock}}, the pointer remains as an arrow but shrinks until the player is near the area shown on the map.
While maps in [[the Nether]] work, they show only the red-and-gray pattern, regardless of the blocks placed. The only useful function is finding where the player is in relation to placed framed maps, which show as green pointers. Additionally, the player pointer rapidly spins and is not a good indicator of direction. Placing a [[banner]] in [[the Nether]] still shows it on the map as usual. Having a smaller map image while riding a [[strider]] in the Nether can help one to see one's footing while traveling over [[lava]].
{{IN|java}}, when using a map from another dimension, the map shows the player's position and direction when they were last in the dimension of the map. {{IN|bedrock}}, however, the player can use maps from one dimension while in another dimension. For locator maps, the place marker changes color depending on the dimension that the player is currently in (white for the Overworld, red for [[the Nether]], and magenta for [[the End]]). An Overworld map in the Nether shows the player's corresponding location and direction in the Overworld.<ref name=multiverse>{{ytl|EpP1diZdEdI}}</ref> Similarly, a Nether Map in the Overworld shows the player's corresponding location in the Overworld, but the place marker spins, just like a Nether map in the Nether. An Overworld map in the End shows the world spawn.<ref name=multiverse/> A Nether map cannot be used in the End — the map appears, but the place marker is not shown anywhere — and similarly, an End map cannot be used in the Overworld or the Nether.
A player can make a large piece of pixel art (128×128) facing upward, center a map on it, and place that map in an [[item frame]] to create a custom picture. Locking is recommended. See [[Map item format#Map Pixel Art]] for details on the techniques.
Maps display as a mini-map when held in the off-hand, or if the off-hand slot is occupied; the map is full-sized only when held in the dominant hand with both hands free.
A map always positions itself facing towards North when placed horizontally within an item frame regardless of how the map is placed.
=== Map content ===
{{Main|Map item format}}
Maps consist of square pixels arranged like pixels in a 128×128 square pattern, with each pixel representing a square portion of land. {{IN|java}}, the [[Map item format#Color table|color of a map pixel]] generally matches the color of the most common [[opaque]] block in the corresponding area, as seen from the sky. 'Minority blocks' in the target area have no effect on the color of the pixel, thus small features tend to be undetectable on zoomed-out maps.
{{IN|bedrock}}, the [[Map item format#Color table|color of a map pixel]] instead matches the single top-most opaque block in a grid sized by the map magnification pixel size (see the table in the "Player marker and pointer" section below). For example, a 3/4 magnification map has a pixel size of 8x8 blocks; this means the map will read only the top-most opaque blocks at the 0,0 coordinate, the 8,0 coordinate, the 0,8 coordinate, etcetera, ignoring all other blocks in the area. This means that {{in|bedrock}}, map pixel art requires only one block per pixel regardless of map magnification.
{{IN|bedrock}}, grass, foliage and water colors that are biome-dependent are represented accurately on a map.
{| class="wikitable"
|-
! style="width: 300px;" | {{el|je}}
! style="width: 300px;" | {{el|be}}
|-
| style="text-align: center;" | [[File:Map Zoom 4.png|alt=All banners marked on a map, alongside a named banner.|216px]]
| style="text-align: center;" | [[File:Map item BE.png|216px]]
|-
| Biome colors on ''Java Edition''.
| Biome colors on ''Bedrock Edition''.
|-
|}
Maps also show ground up to about 15 blocks below the surface of the water in oceans as slightly lighter blue, to show where the ground rises. This is not true with land above water. Higher elevations in the world mean lighter colors on the map. The map records the surface even as the player moves below the surface.
A standard map represents 128x128 blocks (1 block per pixel, 8x8 [[chunks]]) but maps can be zoomed-out to represent up to 2048x2048 blocks (16 square blocks per pixel, 128x128 [[chunks]]).
Some relevant distances: 64 blocks (4 chunks) is the update radius from a player in the Overworld and the End. However, it is half this (32 blocks) in the Nether. Also, 1024 blocks is the minimum Overworld distance from a [[nether portal]], at which players can build another portal and expect to reach a new location in the Nether. This is the distance across a 1:8 map, and also from a 1:16 map's center to its edge.
=== Player marker and pointer ===
{{IN|java}}, every map contains a marker that marks the position of the player, and points in the same direction as the player. When a player moves out of a map, a big white dot appears and moves relative to the player's position. The pointer either disappears when the player moves away a certain distance from the border of the map or, in case of [[explorer map]]s, the big white dot changes to a smaller white dot. The distance required for the small white dot to appear(explorer maps) or for the big dot to vanish (normal maps) changes with the scaling of the map.
* '''Level 0/4 :''' 128×128 blocks (each map pixel represents 1 block)
* '''Level 1/4 :''' 256×256 blocks (2×2 blocks per map pixel)
* '''Level 2/4 :''' 512×512 blocks (4×4 blocks per map pixel)
* '''Level 3/4 :''' 1024×1024 blocks (8×8 blocks per map pixel)
* '''Level 4/4 :''' 2048×2048 blocks (16×16 blocks per map pixel)
{{IN|bedrock}}, a map can be crafted with or without this marker, and a map without a position marker can add one later by adding a compass to the map. When a map is crafted without a compass, it's simply called an "empty map", but when crafted with a compass, it's called an "empty locator map". The marker also turns red if the player enters the Nether with an Overworld map and shows the player's Overworld location relative to the Nether location. A map created in the End has a purple marker showing the player's location. If an Overworld map is used in the End, a magenta dot appears on the player's spawn point.{{/BE|position}}
{{crafting
|name=Map<br>(with marker)
|ingredients=[[Map]] or Empty Map +<br>[[Compass]]
|showdescription=1
|Map (no markers);Empty Map
|Compass
|Output= Locator Map;Empty Locator Map
|type= Miscellaneous
|description={{el|be}} only.
Maps crafted from only paper do not show the location marker; to add it, a compass must be added to the map.
|foot=1
}}
{{IN|bedrock}}, a cartography table can also be used to add a pointer to create a locator map or empty locator map. This can be done by adding a compass to paper, or to an empty map or map.
=== Zooming out ===
[[File:Cartography table UI zoom.png|thumb|300px|{{IN|java}}, cartography table's UI, showing the map is being zoomed out.]]
A [[cartography table]] can also be used to zoom out, taking only one piece of paper per zoom level.
A blank map can not be zoomed out. A map has to have something already marked on it for the zooming to be possible.
{{Crafting
|A1= Paper |B1= Paper |C1= Paper
|A2= Paper |B2= Map;Locator Map |C2= Paper
|A3= Paper |B3= Paper |C3= Paper
|Output= Map;Locator Map
|showdescription=1
|description=Locator Map {{el|be}} only.
}}
{{/BE|zoom}}
==== Zoom details ====
The zooming function starts from when the map is created (zoom level 0) up to its fourth zoom step (zoom level 4).
{| class="wikitable" style="text-align: center" data-description="Zoom levels"
! colspan="2" |
! Zoom step 0
! Zoom step 1
! Zoom step 2
! Zoom step 3
! Zoom step 4
|-
! colspan="2" |
| [[File:Map Zoom 0.png|116px|Zoom step 0, 1:1]]
| [[File:Map Zoom 1.png|116px|Zoom step 1, 1:2]]
| [[File:Map Zoom 2.png|116px|Zoom step 2, 1:4]]
| [[File:Map Zoom 3.png|116px|Zoom step 3, 1:8]]
| [[File:Map Zoom 4.png|116px|Zoom step 4, 1:16]]
|-
! colspan="2" | Zoom level
| 0/4
| 1/4
| 2/4
| 3/4
| 4/4
|-
! colspan="2" | 1 map pixel represents
| 1 block
| 2×2 blocks
| 4×4 blocks
| 8×8 blocks
| 16×16 blocks<br>(1×1 chunk)
|-
! colspan="2" | Scaling ratio
| 1:1
| 1:2
| 1:4
| 1:8
| 1:16
|-
! rowspan="2" colspan="2" | Map covers an area of
| 128×128 blocks
| 256×256 blocks
| 512×512 blocks
| 1024×1024 blocks
| 2048×2048 blocks
|-
| 8×8 chunks
| 16×16 chunks
| 32×32 chunks
| 64×64 chunks
| 128×128 chunks
|-
! colspan="2" | Smallest discernible features
| Blocks
| Trees, Paths
| Lakes, Buildings
| Mountains, Rivers
| Biomes, Mountain Ranges
|-
! colspan="2" | Use cases
| Pixel art, Base plans
| Base surroundings
| Structure mapping
| Landscape mapping
| Biome mapping
|-
! rowspan="2" | Total paper needed to zoom out from Level 0
! in anvil{{only|bedrock|short=1}} or crafting table
| -
| {{ItemSprite|Paper}} 8
| {{ItemSprite|Paper}} 16
| {{ItemSprite|Paper}} 24
| {{ItemSprite|Paper}} 32
|-
! in cartography table
| -
| {{ItemSprite|Paper}} 1
| {{ItemSprite|Paper}} 2
| {{ItemSprite|Paper}} 3
| {{ItemSprite|Paper}} 4
|}
Maps are always aligned to a grid at all zoom levels. That means zooming out any different map in a specific area covered by that map always has the same center. As such, maps are aligned by map width (1024 blocks for a level 3 maps) minus 64. A level 3 map generated at spawn covers X and Z coordinates from -64 to 959. All maps generated in this area zoom out to the same coordinates, guaranteeing that they are always 'aligned' on a map wall. For a zoomed-out map to cover a new area, it must start with a base (level 0) map that is in that area.
At zoom level 0, a map created on the point (0,0) has (0,0) at the center of the map. At higher zoom levels of the same map, the coordinate (0,0) is in the top left square of the map.
{{IN|java}}, zoom level can be seen on a map by turning on Advanced Tooltips (a [[Debug screen#More debug keys|debug screen]] option that can be toggled by using the key combination {{key|F3+H}}). The tooltip of the map then shows the zoom level, scaling factors, and map ID.
=== Cloning ===
[[File:Cartography table UI clone.png|thumb|300px|{{IN|Java}}, cartography table's UI, showing the map is being cloned.]]
A mix of empty maps and empty locator maps may be used. Whether the cloned maps show position markers is dependent only on the input map.
A [[cartography table]] can also be used to clone a map.
The parts of the world that have already been explored and mapped are copied, and newly explored areas appear on both instances. If one of the maps is later zoomed out, then the maps lose their connection to each other and function as completely separate maps that have to be individually filled by exploring.
In Creative mode, a map in an item frame may be cloned by using {{control|pick block}} on it, as long as that map is not also in the player's inventory.
It doesn't matter if the map to be cloned is at a higher zoom level (made of more paper) than the blank map. Upon copying the map, both resulting maps have the same magnification as the starting map.
{{/BE|clone}}
=== Crafting ingredient ===
{{crafting usage|Map, Empty Map}}
=== Marking points ===
{{IN|java}} the player has the ability to mark spots on a map. To do this, {{control|use}} a map on a placed-down [[banner]], and the spot of the banner gets marked on the map. The mark takes the color of whatever the base color is for the banner, and if the banner has a name, the mark shows that name. Banner marks on a map are always oriented with their top facing north, regardless of the banner's actual orientation. If the banner is destroyed, the mark of the banner remains at first, but if the player gets closer to where the banner previously was, it disappears as the area is updated on the map.
If a map is mounted on an item frame and is within the area it depicts, the mounted map displays its current location with a green indicator rotated to match its orientation.
[[File:Map Marker Bedrock on Item frame.png|thumb|181x181px|{{IN|bedrock}} this is what a map lying on an item frame looks like, while showing markers.]]
{{IN|bedrock}} the player can place copies of locator maps in [[item frame]]s in order to create a land mark. The marker is a green dot that resembles the shape of the player's marker, but in green color. The position the marker points at depends on the direction the item frame is facing. It is worth noting that the markers work only on copies of the same map. Other maps of the same area do not show the existing markers that the player(s) had placed.
If a player has a cloned map in their inventory, their pointer appears white when viewed on the same map held by another player. Hence, if all players have the same cloned map in their inventory, all markers would appear white when the clone map is viewed.
{| class="wikitable"
|-
! style="width: 300px;" | {{el|je}}
! style="width: 300px;" | {{el|be}}
|-
| style="text-align: center;" | [[File:Banner marked map.png|alt=All banners marked on a map, alongside a named banner.|216px]]
| style="text-align: center;" | [[File:Tracking map with markers bedrock.png|216px]]
|-
| How every banner appears {{IN|java}} on a map, including named banners.
| {{IN|bedrock}} this is how a locator map shows map markers while held by a player.
|-
|}
===Locking===
[[File:Cartography table UI lock.png|thumb|300px|{{IN|Java}}, cartography table's UI, showing the map is being locked.]]
Maps can be locked when using a [[glass pane]] in a [[cartography table]]. This creates a new map containing the same data and locks it. All copies of this new map are also locked. A locked map never changes, even when the depicted terrain changes. {{IN|Be}}, locked maps have a unique texture.
{| class="wikitable" style="text-align: center;"
|-
! Condition
! style="width: 200px;" | Newly created map
! style="width: 200px;" | Map after terrain alteration
|-
! Unlocked map
| [[File:Map Zoom 0.png|174px]] || [[File:Unlocked Map.png|174px]]
|-
! Locked map
| [[File:Map Zoom 0.png|174px]] || [[File:Map Zoom 0.png|174px]]
|-
|}
{{-}}
== Sounds ==
{{Edition|Java}}:
{{Sound table
|rowspan=2
|sound=Drawmap1.ogg
|sound2=Drawmap2.ogg
|sound3=Drawmap3.ogg
|subtitle=Map drawn
|source=player
|description=When a map is drawn
|id=ui.cartography_table.take_result
|translationkey=subtitles.ui.cartography_table.take_result
|volume=1.0
|pitch=1.0
|distance=16}}
{{Sound table
|subtitle=Map drawn
|source=block
|description=When a map is edited using a cartography table
|id=ui.cartography_table.take_result
|translationkey=subtitles.ui.cartography_table.take_result
|volume=1.0
|pitch=1.0
|distance=16
|foot=1}}
{{Edition|Bedrock}}:
{{Sound table
|type=bedrock
|rowspan=2
|sound=Drawmap1.ogg
|sound2=Drawmap2.ogg
|sound3=Drawmap3.ogg
|source=block
|description=When a map is drawn<wbr>{{Upcoming|BE 1.20.20.20}}
|id=ui.cartography_table.take_result|idnote={{Verify|Could be block.cartography_table.use}}
|volume=0.8
|pitch=1.0}}
{{Sound table
|type=bedrock
|source=block
|description=When a map is edited using a cartography table
|id=ui.cartography_table.take_result
|volume=0.8
|pitch=1.0
|foot=1}}
== Data values ==
=== ID ===
{{edition|java}}:
{{ID table
|edition=java
|showforms=y
|generatetranslationkeys=y
|displayname=Empty Map
|spritetype=item
|nameid=map
|form=item}}
{{ID table
|displayname=Map
|spritetype=item
|nameid=filled_map
|form=item
|translationkey=item.minecraft.filled_map, filled_map.buried_treasure, filled_map.explorer_jungle{{upcoming|java 1.20.2}}, filled_map.explorer_swamp{{upcoming|java 1.20.2}}, filled_map.mansion, filled_map.monument, filled_map.unknown, filled_map.village_desert{{upcoming|java 1.20.2}}, filled_map.village_plains{{upcoming|java 1.20.2}}, filled_map.village_savanna{{upcoming|java 1.20.2}}, filled_map.village_snowy{{upcoming|java 1.20.2}}, filled_map.village_taiga{{upcoming|java 1.20.2}}
|foot=1}}
{{edition|bedrock}}:
{{ID table
|edition=bedrock
|showaliasids=y
|shownumericids=y
|showforms=y
|notshowbeitemforms=y
|generatetranslationkeys=y
|displayname=Empty Map
|spritetype=item
|nameid=empty_map
|aliasid=emptymap
|id=515
|form=item
|translationkey=item.emptyMap.name, item.emptyLocatorMap.name}}
{{ID table
|displayname=Map
|spritetype=item
|spritename=map-be
|nameid=filled_map
|aliasid=map
|id=420
|form=item
|translationkey=item.map.name, item.map.exploration.mansion.name, item.map.exploration.monument.name, item.map.exploration.treasure.name
|foot=1}}
=== Metadata ===
{{see also|Bedrock Edition data values}}
{{IN|bedrock}}, maps use the following data values:
{{/DV}}
=== Item data ===
{{el|java}}:
{{main|Player.dat format}}
<div class="treeview">
* {{nbt|compound|tag}}: The item's '''tag''' tag.
{{:Player.dat_format/Maps}}
</div>
{{el|bedrock}}:
: See [[Bedrock Edition level format/Item format]].
=== Map icons ===
{{see also|Player.dat format|Map item format|map_icons.png}}
Map icons are 8×8 in ''Java Edition'', but 16×16 in Bedrock Edition. As such, there are minor misalignment issues in ''Java Edition''.<ref>{{bug|MC-214649|||WF}}</ref>
[[File:Map icons.png|thumb|128px|Map icons texture {{in|Java}}]]
[[File:Map icons BE.png|thumb|128px|Map icons texture {{in|Bedrock}}]]
{| class="wikitable"
|-
! Java ID !! Bedrock ID !! Text ID !! Appearance !! Purpose !! Shown in item frames?
|-
| 0 || ||<code>player</code> || [[File:Player (texture) JE1 BE1.png|16px]] [[File:Player (texture) BE2.png|16px]] White marker || Players (on map) || No
|-
| 1 || 1 ||<code>frame</code> || [[File:Green Marker (texture) JE1 BE1.png|16px]] [[File:Green Marker (texture) BE2.png|16px]] Green marker || The current map in an item frame || Yes
|-
| 2 || ||<code>red_marker</code> || [[File:Red Marker (texture) JE1 BE1.png|16px]] [[File:Red Marker (texture) BE2.png|16px]] Red marker || Position converted to Overworld when opening Overworld map in the Nether{{Only|bedrock}} || No
|-
| 3 || ||<code>blue_marker</code> || [[File:Blue Marker (texture) JE1 BE1.png|16px]] [[File:Blue Marker (texture) BE2.png|16px]] Blue marker || Other players || No
|-
| 4 || ||<code>target_x</code> || [[File:Target X (texture) JE1 BE1.png|16px]] White X || Unused || Yes
|-
| 5 ||5
|<code>target_point</code> || [[File:Target Point (texture) JE1 BE1.png|16px]] [[File:Target Point (texture) BE2.png|16px]] Red triangle || Unused || Yes
|-
| 6 || 6 ||<code>player_off_map</code> || [[File:Player Off Map (texture) JE1 BE1.png|16px]] Large white dot || Players off map, nearby{{only|java}} || No
|-
| 7 || 13 ||<code>player_off_limits</code> || [[File:Player Off Limits (texture) JE1.png|16px]] [[File:Player Off Limits (texture) BE.png|16px]] Small white dot || Players off map, far away{{only|java}} || No
|-
| 8 ||14
|<code>mansion</code> || [[File:Mansion (texture) JE1.png|16px]] [[File:Mansion (Texture) BE2.png|frameless|16x16px]] Woodland mansion || Woodland mansion || Yes
|-
| 9 || 15 ||<code>monument</code> || [[File:Monument (texture) JE1.png|16px]] [[File:Monument Texture BE2.png|frameless|16x16px]] Ocean monument || Ocean monument || Yes
|-
| 10 - 25 || ||<code>{{tooltip|banner_*|banner_white, banner_orange, banner_magenta, banner_light_blue, banner_yellow, banner_lime, banner_pink, banner_gray, banner_light_gray, banner_cyan, banner_purple, banner_blue, banner_brown, banner_green, banner_red, banner_black}}</code> || [[File:Banner White (texture) JE1.png|16px]] [[File:Banner Light Gray (texture) JE1.png|16px]] [[File:Banner Gray (texture) JE1.png|16px]] [[File:Banner Black (texture) JE1.png|16px]] [[File:Banner Brown (texture) JE1.png|16px]] [[File:Banner Red (texture) JE1.png|16px]] [[File:Banner Orange (texture) JE1.png|16px]] [[File:Banner Yellow (texture) JE1.png|16px]] [[File:Banner Lime (texture) JE1.png|16px]] [[File:Banner Green (texture) JE1.png|16px]] [[File:Banner Cyan (texture) JE1.png|16px]] [[File:Banner Light Blue (texture) JE1.png|16px]] [[File:Banner Blue (texture) JE1.png|16px]] [[File:Banner Magenta (texture) JE1.png|16px]] [[File:Banner Purple (texture) JE1.png|16px]] [[File:Banner Pink (texture) JE1.png|16px]]<br>Banners in all 16 wool colors{{only|java}}|| Banner markers || Yes
|-
| 26 ||4
|<code>red_x</code> || [[File:Red X (texture) JE1.png|16px]] [[File:Target X (texture) BE2.png|16px]] Red X || Buried treasure || Yes
|-
| || 8 || || [[File:Magenta Marker (texture) BE1.png|16px]] Magenta marker
| Position converted to Overworld when opening Overworld map in the End{{Only|bedrock}} || No
|-
| || 9 || || [[File:Orange Marker (texture) BE1.png|16px]] Orange marker{{more info}}
|Other players
|Yes
|-
| || 10 || || [[File:Yellow Marker (texture) BE1.png|16px]] Yellow marker
| Other players || No
|-
| || 11 || || [[File:Cyan Marker (texture) BE1.png|16px]] Cyan marker
| Other players || No
|-
| -
|12
| || [[File:Green Point (texture) BE1.png|16px]] Green Triangle
| Other structure such as stronghold, fortress, end city, etc. when used as explorer map destination{{Only|bedrock}} || Yes
|}
It should be noted that even if the player used a NBT editor to add an additional icon on the map, ''Minecraft'' shows only the first one listed when the player loads up their world.
== Achievements ==
{{load achievements|Map Room}}
== History ==
{{see also|section=24|map_icons.png|Java Edition history of textures#Map icons}}
{{more images|section=24|{{bug|MC-72962}}}}
{{History||April 27, 2011|link=https://web.archive.org/web/0/http://notch.tumblr.com/post/4988431144/the-maps|[[Notch]] unveiled screenshots of the map.}}
{{History||April 28, 2011|link={{tweet|notch|63500114005721088}}|[[Notch]] said that he would try to make maps place-able on [[wall]]s.}}
{{History|java beta}}
{{History||1.6|snap=Test Build 3|[[File:Map (item) JE1 BE1.png|32px]] Added maps.}}
{{History||1.6.6|The ability to auto-craft maps using shift-click has been disabled.}}
{{History||1.8|snap=Pre-release|Maps can now be found in library chests in the brand-new [[stronghold]]s.
|Auto crafting maps has been restored. Map cloning, therefore, is unavailable for a period of time.}}
{{History||1.8.1|Maps now work both while walking and flying.}}
{{History|java}}
{{History||1.0.0|snap=Beta 1.9 Prerelease 5|Prior to this update, the [[sun]] in ''[[Minecraft]]'' rose in the North, which threw off many [[player]]s and led to a common misconception that ''Minecraft'' maps/[[world]]s were oriented with East at the top. The sun now rises in the east and sets in the west, making navigation much more intuitive.
|Before the change in sun position, it was commonly said that ''Minecraft'' maps/worlds are oriented with East at the top; sunrise, by definition, occurs at the East, which means it is certainly true that the maps were oriented "East" since the Sun rose from the top (North). However, [[Jeb]] asserted (and [[Notch]] agreed) that the sun rose in the north.<ref>{{Tweet|jeb|87815841160237056}}</ref><ref>{{Tweet|notch|88155424880201728}}</ref> Most mods and map-making tools, however, used the terms East and North consistent with their actual definitions (e.g. a [[Programs and editors/Cartograph|Cartograph]]-generated map with North at the top is rotated 90 degrees from the in-game map).}}
{{History||1.4.2|snap=12w34a|[[File:Empty Map JE1 BE1.png|32px]] [[Crafting]] a map now creates an empty map. The map is drawn for the first time when it is held and right clicked, and is centered near the location of the [[player]] when clicked (not as before where it was centered on the location it was crafted.)
|Previously, in order to map a new area, the map had to be ''crafted'' in that area (rather than carrying a previously-crafted map to the new area). The point where a map is crafted becomes its permanent center, and could never be changed.
|The pointer no longer disappears when leaving the map, but transforms into a white dot, indicating on what side of the map the player is located.
|Maps now align to a grid, making it easier to create adjacent maps.
|Maps can now be zoomed out (but not zoomed in).
|Maps can now be cloned and scaled.}}
{{History||1.4.2|snap=12w34b|Maps now have a ''zoom level'', which was fixed at 1:8 prior to snapshot [[Java Edition 12w34a|12w34a]],<ref name="mapinfo">https://web.archive.org/web/0/http://notch.tumblr.com/post/4988431144/the-maps</ref> but now starts at 1:1 and can be increased up to 1:16 by re-crafting an existing map.
|Maps are no longer numbered on the top-left corner and is labeled through the tooltip.}}
{{History|||snap=12w36a|New maps are now crafted at a scale factor of 1:1. A zoomed in map can be zoomed out by re-crafting it with another 8 sheets of [[paper]] on a [[crafting table]]. Each time this is done, the scale increases - 1:1, 1:2, 1:4, 1:8, 1:16 with a map scale of 1:16 being the current maximum.}}
{{History||1.7.2|snap=13w38a|The map size has been increased when placed on a [[wall]] using the [[item frame]].
|More colors have been added to maps for different [[block]]s.<ref name="infodump2">https://web.archive.org/web/0/https://www.mojang.com/2013/10/minecraft-1-7-the-update-that-changed-the-world</ref>}}
{{History||1.8|snap=14w31a|Zoomed maps now conform to an expanded grid based on their zoom level. Previously, careful considerations would need to be taken to creating a wall of adjoining maps.}}
{{History||1.8.1|snap=pre1|Some colors have been changed on maps to more accurately represent their respective [[block]].}}
{{History||1.9|snap=15w31a|Maps now display as a mini-map when held in the off-hand, or if the off-hand slot is occupied; the (old) large version is visible only when held in the dominant hand with the secondary hand free.}}
{{History|||snap=15w34a|New maps can now be [[crafting|crafted]] at a scale factor of 1:4.
|A crafting recipe has been added for zooming in maps.}}
{{History|||snap=15w43a|The average yield of empty maps from [[stronghold]] library [[chest]]s has been doubled.}}
{{History|||snap=15w45a|New maps are once again [[crafting|crafted]] at a scale factor of 1:1, as they had been before snapshot [[15w34a]].
|The [[crafting]] recipe, that was introduced in 15w34a, for zooming in maps has been removed.}}
{{History|||snap=15w49a|Map making now uses armor equipping sounds.}}
{{History||1.11|snap=16w39a|Maps now work in [[the End]].
|Empty maps are now [[trading|sold]] by cartographer [[villager]]s as their tier 3 [[trading|trade]].
|Added [[explorer map]]s, sold by cartographers as their tier 4 trades.}}
{{History||1.12|snap=17w17a|Maps now have separate colors for colored [[terracotta]] blocks from other colored blocks.}}
{{History||1.13|snap=17w47a|Prior to [[1.13/Flattening|''The Flattening'']], these [[item]]s' numeral IDs were 358 and 395.
|Maps now use additional NBT to specify which map they contain. Prior to this version, they used the [[damage]] value instead.
|Map IDs are no longer limited to 32,768.}}
{{History|||snap=17w50a|Maps can now be placed on floor and ceiling [[item frame]]s.}}
{{History|||snap=18w10a|Spots on maps can now be marked using [[banner]]s.}}
{{History|||snap=18w11a|Empty maps can now generate in [[shipwreck]] [[chest]]s.}}
{{History|||snap=pre7|Maps have been changed slightly, in regard to which [[block]]s are shown and which blocks are not.}}
{{History||1.14|snap=18w43a|[[File:Empty Map JE2 BE2.png|32px]] [[File:Map (item) JE2 BE2.png|32px]] The textures of maps have been changed.}}
{{History|||snap=18w48a|Empty maps can now be found in chests in [[village]] cartographer houses.}}
{{History|||snap=19w02a|Maps can now be cloned and zoomed out (extended) by using a [[cartography table]].
|Maps can now be locked by using a [[glass pane]] with a cartography table.
|The recipes for cloning and zooming out maps have been removed.}}
{{History|||snap=19w06a|Map making is now silent again.}}
{{History|||snap=19w13a|Cartographer villagers now give empty maps to players under the [[Hero of the Village]] effect.}}
{{History||1.16|snap=20w21a|Map making sounds are now the same as when using a cartography table.}}
{{History|pocket alpha}}
{{History||v0.14.0|snap=build 1|[[File:Empty Map JE1 BE1.png|32px]] [[File:Map (item) JE1 BE1.png|32px]] Added maps.
|Maps are crafted using nine [[paper]], one for every slot of the [[crafting]] grid.
|Maps must be combined with a [[compass]] using an [[anvil]] in order to show the [[player]]'s position.
|Maps can be zoomed using an anvil.}}
{{History|||snap=build 3|New maps are now [[crafting|crafted]] at full zoom.
|Empty maps now have a "Create Map" button to initialize them.}}
{{History|||snap=build 7|New maps are now crafted at a scale factor of 1:1.}}
{{History||v0.15.0|snap=unknown|Maps can now be crafted either with 8 pieces of [[paper]] and a [[compass]] ''or'' 9 pieces of paper, to get a map with or without a position marker.}}
{{History||v0.16.0|snap=build 1|Different colors have been added to maps for different [[biome]]s.}}
{{History|pocket}}
{{History||1.0.0|snap=?|[[Windows 10 Edition]] can now use the [[anvil]] as well as the [[crafting table]] to clone, zoom and apply markers, just as [[Pocket Edition]] in general could.
|Maps can now be found inside [[stronghold]] library [[chest]]s.}}
{{History||1.1.0|snap=alpha 1.1.0.0|Empty maps with direction markers built-in are now called "locator maps".}}
{{History|||snap=alpha 1.1.0.3|"Locator maps" are now called "empty locator maps".
|Empty maps are now [[trading|sold]] by cartographer [[villager]]s for 7-11 [[emerald]]s as their tier 3 [[trading|trade]].}}
{{History|bedrock}}
{{History||1.4.0|snap=beta 1.2.14.2|Maps can now be found inside map room [[chest]]s in [[shipwreck]]s.}}
{{History||?|The texture of the filled map overlay has been changed.}}
{{History||?|Maps now function in dimensions other than the dimension in which they were created.}}
{{History||1.10.0|snap=beta 1.10.0.3|Maps can now be found in cartographer house [[chest]]s in [[village]]s.
|[[File:Empty Map JE2 BE2.png|32px]] The texture of empty maps has been changed.}}
{{History||1.11.0|snap=beta 1.11.0.1|Empty maps can now be created from 1 [[paper]] in [[cartography table]]s.
|Maps can now be zoomed, cloned, renamed, and have pointers added in cartography tables.}}
{{History|||snap=beta 1.11.0.4|Cartographer [[villager]]s now [[trading|sell]] empty map for an [[emerald]] as their first tier [[trading|trades]].
|Empty locator maps can now be [[trading|bought]] from cartographer villagers.}}
{{History||1.13.0|snap=beta 1.13.0.1|[[File:Map (item) BE3.png|32px]] [[File:Locked Map (item) BE2.png|32px]] Filled maps and locked maps now have unique inventory icons.}}
{{History||1.16.0|snap=beta 1.16.0.57|Trading has been changed, novice-level cartographer now sell an empty map for 7 emeralds. Cartographer villager no longer sell empty locator map.}}
{{History||1.16.100|snap=beta 1.16.100.56|The ID of maps have been changed from <code>emptymap</code> to <code>empty_map</code> and <code>map</code> to <code>filled_map</code>.}}
{{History|console}}
{{History||xbox=TU1|xbone=CU1|ps=1.00|wiiu=Patch 1|switch=1.0.1|[[File:Map (item) JE1 BE1.png|32px]] Added maps.
|The [[player]] spawns with a free map.
|Maps are available only as zoom step 3 maps centered at coordinates 0,0. Biome colors do not appear on maps.}}
{{History||xbox=none|xbone=CU1|ps=1.0|wiiu=none|Larger sized worlds on Xbox One, Playstation 4, and Nintendo Switch have zoom step 3 maps aligned to a grid with maps centered at 0, 1024, or 2048 on the X or Z coordinates.}}
{{History||xbox=TU21|xbone=CU9|ps=1.14|wiiu=Patch 1|[[File:Empty Map JE1 BE1.png|32px]] [[Crafting]] a map now produces an empty map.}}
{{History||xbox=TU46|xbone=CU36|ps=1.38|wiiu=Patch 15|The outer end islands appear on different maps; even on Xbox 360, Playstation 3, Vita, and Wii U editions.}}
{{History||xbox=none|xbone=none|ps=1.90|wiiu=none|switch=none|[[File:Empty Map JE2 BE2.png|32px]] [[File:Map (item) JE2 BE2.png|32px]] The textures of maps have been changed.}}
{{History||ps=1.91|Maps can now be created and used in [[cartography table]]s.}}
{{History|foot}}
== Issues ==
{{issue list}}
== Trivia ==
* Use of the {{key|F1}} key can allow the player to hold a map without blocking their view at all.
* In ''Java Edition'', a map created using {{cmd|give}} can be any map by using the Map parameter to specify the map number desired. E.g. {{cmd|give [player] minecraft:filled_map{map:5<nowiki>}}} gives the specified player map_5. If no data value is supplied it defaults to map_0. If map_0 has not ever been crafted, it is centered on x=0, z=0.
* The maps are stored separately as their own data (<code>.dat</code>) file as <code>map_x.dat</code> with (x) being the map number, see [[map item format]] for more info. By manipulating this number, players can organize their maps to suit them, or if they accidentally create a map in the same location, they can delete their extra map so as to save the number they make.
* Certain programs can be used to make customized maps with images or text on them instead of actual maps, many people use these in adventure maps to show pictures or to tell a story.
* Since all copies of a map are links to the same file, copying an unfinished map keeps it synchronized with the copy as the player fills it in. Thus, a copy stored in a chest can act as a remote backup.
* A map that is in an item frame does not update itself until a player picks it up, lets it reload, and places it back again. However, if a player holds a clone of the map, both maps update.
* Filled maps are the only items that make 90 degree rotations in item frames, and also the only items that can expand the item frame into full block wide.
* On [[Legacy Console Edition]], the player always spawns with a map in their inventory after creating a world. This was later added to Bedrock Edition as an optional feature in the world creation menu.
* Maps on Legacy Console Edition always show the player's current coordinates, as a substitute for the optional [[Coordinates|coordinate display]] in other editions.
* A map cannot be created on [[New Nintendo 3DS Edition]]. Instead, the map is always displayed on the bottom screen along with the coordinates. Biome colors do not appear on maps.
== Gallery ==
<gallery>
MapItem1.png|A fully zoomed map.
MapRotation.png|Having a map in hand does not stop the ability to see ahead.
MapItem3.png|A world being recorded onto a map.
Mcmap4.png|Nearly fully explored map.
Zoomed Map.png|A map edited to the scale of 1.
Sky Map.png|A map mapping the [[Sky Dimension]].
MapOfVillage.png|A village and how it is represented on a map.
Pumpkin map.png|A map containing a custom image made by placing a large number of blocks.
Complete Map.png|A completely explored map.
MapZooms.png|A diagram showing how maps zoomed out before [[Java Edition 1.8]]. Notice how the larger maps have borders made of half and quarter small maps.
Map18zooms.png|From 1.8, zoomed maps are aligned to this grid exactly.
Large Biome Map.png|A map of a [[Large Biomes]] world.
Map0140-0160.png|A comparison of maps between versions in Pocket Edition Alpha [[Pocket Edition Alpha 0.14.0|0.14.0]] and [[Pocket Edition Alpha 0.16.0|0.16.0]].
Mycelium Map.png|A map view of a mushroom biome, showing that mycelium appears purple on a map.
MiniMap.png|Maps held in the off-hand or in either hand while [[dual wielding]] appear as mini-maps.
Partly filled treasure map.png|Partly filled treasure map with an odd area at the bottom left. Normally a partly filled map would look striped (as in the top left), but this map seems to be bugged and is possibly showing caves, or something, in the bottom left.
Partly filled ocean explorer map.png|Partly filled ocean explorer map. Updating the game from an older version (in this case the area was first generated before 1.18) and buying a map after updating (in this case in 1.19.4) can result in the map displaying rivers and terrain where there is really a frozen sea.
Map Stained Glass 1.png|Stained glasses' appearances on maps before and after 1.13.
Map Stained Glass 2.png|Stained glasses' appearances on maps before and after 1.13.
Map Various Blocks 1.png|Various blocks' appearances on maps before and after 1.13.
Map Various Blocks 2.png|Various blocks' appearances on maps before and after 1.13.
Better Together Map.jpg|Holding a map in the offhand in ''Bedrock Edition''.
Better Together Map Icon.jpg|Holding a map in both hands in ''Bedrock Edition''.
File:MapFailedtoFill.png|A map that has not yet filled. A rare bug in Java.
</gallery>
=== The Nether ===
<gallery>
Nethermap.png|A map in [[the Nether]].
Maponnether.png|A map in the Nether; the arrow turns around itself, like in [[compass]].
</gallery>
=== The End ===
<gallery>
Jeb End Map.png|The first image of a map in [[the End]].
Endmap.png|A map in the End.
</gallery>
=== Maps in item frames ===
<gallery>
FramedMap.png|A map displayed on an item frame, as it looked before [[Java Edition 1.7.2]].
Structure Map Collection.png|Multiple maps in item frames. Notice a [[village]], two [[desert temple]]s and a lava lake.
Minecraft maps 3by3.png|A collection of 9 connected full maps.
Full Map.png|A combination of 25 maps pasted together as one map.
Map wall BE.png|A map wall on ''Bedrock Edition'', showing large areas of biome colors for each biome.
Map's in item frames.png|Maps can be placed into [[item frame]]s so they can be viewed together.
Comparing Maps.png|The comparison between 3 zooms of maps.
SuperflatMap.png|A map in a [[Superflat]] world, with some [[village]]s.
MapWallWithMarkers.png|A 3x3 map wall with banner markers.
HEYYEYAAEYAAAEYAEYAA.png|He-Man map art.
Map Player Icons 1.png|First image of player icons on maps.
Map Player Icons 2.png|Second image of player icons on maps.
</gallery>
== See also ==
* [[Explorer Map]]
* [[Clock]]
* [[Tutorials/Navigation|Navigation]]
== References ==
{{Reflist}}
{{Items}}
[[cs:Mapa]]
[[de:Karte]]
[[es:Mapa]]
[[fr:Carte (objet)]]
[[hu:Térkép (tárgy)]]
[[ja:地図]]
[[ko:지도]]
[[nl:Kaart]]
[[pl:Mapa]]
[[pt:Mapa]]
[[ru:Карта]]
[[tr:Harita]]
[[th:แผนที่]]
[[uk:Мапа]]
[[zh:地图]]
[[Category:Renewable resources]]</li><li>[[Pitcher Pod|Pitcher Pod]]<br/>{{wip}}
{{Block
| image = <gallery>
Pitcher Crop Age 0 JE1.png| Age 0
Pitcher Crop Age 1 JE1.png| Age 1
Pitcher Crop Age 2 JE1.png| Age 2
Pitcher Crop Age 3 JE1.png| Age 3
Pitcher Crop Age 4 JE1.png| Age 4
</gallery>
| image2 = Pitcher Pod.png
| transparent = Yes
| light = Yes
| tool = N/A
| renewable = Yes
| stackable = Yes (64)
| rarity = Common
| flammable = No
| lavasusceptible = No
}}
A '''pitcher pod''' is an ancient bulbous seed that has a chance to be dropped by [[Sniffer|sniffers]] when they finish digging. It is the seed for [[Pitcher Plant]]s.
== Obtaining ==
[[Sniffer]]s occasionally bury their nose in the ground and start digging. Once the sniffer has finished digging, one pitcher pod has a chance to be dropped on the floor as an item.
Sniffers can only dig for pitcher pods in the following blocks:
*{{BlockLink|Dirt}}
*{{BlockLink|Grass Block}}
*{{BlockLink|Podzol}}
*{{BlockLink|Coarse Dirt}}
*{{BlockLink|Rooted Dirt}}
*{{BlockLink|Moss Block}}
*{{BlockLink|Mud}}
*{{BlockLink|Muddy Mangrove Roots}}
They cannot dig for pitcher pods on [[mycelium]].<ref>{{bug|MC-260259||Sniffers cannot dig nor find seeds on mycelium|WAI}}</ref>
== Usage ==
=== Pitcher Crop ===
{{main|Tutorials/Crop farming|title1=Pitcher Crop Farming}}
Pitcher pods can be placed on [[farmland]] by {{ctrl|using}}, where they grow through three stages as a '''pitcher crop'''.
Breaking the crop before it matures drops the pitcher pod, while breaking the final stage produces a [[pitcher plant]] and does ''not'' yield the pod. Pitcher crops break if pushed by a [[piston]] or if their supporting farmland breaks or turns to dirt (i.e. by being trampled), dropping their usual drops.
Farmer [[villager]]s can plant pitcher pods, but cannot harvest them once they have fully grown.<ref>{{bug|MC-263382|||WAI}}</ref>
=== Feeding ===
Pitcher pods can be used to breed [[chicken]]s and reduce the remaining growth duration of chicks by 10%.
=== Taming ===
Pitcher pods can be used to tame [[parrot]]s.
== Sounds ==
{{Sound table/Block/Crop}}
== Data values ==
=== ID ===
{{edition|java}}:
{{ID table
|edition=java
|showblocktags=y
|showitemtags=y
|showforms=y
|generatetranslationkeys=y
|displayname=Pitcher Crop
|spritetype=block
|nameid=pitcher_crop
|form=block
|blocktags=bee_growables, crops}}
{{ID table
|displayname=Pitcher Pod
|spritetype=item
|nameid=pitcher_pod
|form=item
|itemtags=villager_plantable_seeds
|foot=1}}
{{edition|bedrock}}:
{{ID table
|edition=bedrock
|shownumericids=y
|showforms=y
|generatetranslationkeys=y
|displayname=Pitcher Crop
|spritetype=block
|nameid=pitcher_crop
|id=-574
|form=block
|translationkey=-}}
{{ID table
|displayname=Pitcher Pod
|spritetype=item
|nameid=pitcher_pod
|id=297
|form=item
|foot=1}}
=== Block states ===
{{see also|Block states}}
{{/BS}}
== Achievements ==
{{Load achievements|Planting The Past}}
== Advancements ==
{{load advancements|A Seedy Place;Planting The Past}}
== History ==
{{History|java}}
{{History||1.20|snap=23w12a|[[File:Pitcher Crop Age 0 JE1.png|32px]] [[File:Pitcher Crop Age 1 JE1.png|32px]] [[File:Pitcher Crop Age 2 JE1.png|32px]] [[File:Pitcher Crop Age 3 JE1.png|32px]] [[File:Pitcher Crop Age 4 JE1.png|32px]] [[File:Pitcher Pod JE1.png|32px]] Added pitcher crops and pods.
|[[File:Pitcher Crop Age 0 (bottom) JE1.png|32px]] [[File:Pitcher Crop Age 1 (bottom) JE1.png|32px]] [[File:Pitcher Crop Age 2 (bottom) JE1.png|32px]] [[File:Pitcher Crop Age 3 (bottom) JE1.png|32px]] [[File:Pitcher Crop Age 4 (bottom) JE1.png|32px]] The bottom face on all pitcher crop models is missing.<ref>{{bug|MC-261208}}</ref>}}
{{History|||snap=23w13a|Placing a pitcher pod in farmland now gives the player the "A Seedy Place" [[advancement]].
|Fully grown pitcher crops are now destroyed when the farmland they are placed in is destroyed.}}
{{History|||snap=23w14a|Pitcher crops can now be destroyed by [[ravagers]].|Pitcher crops' hitboxes now change according to their age.|[[File:Pitcher Crop Age 0 (bottom) JE2.png|32px]] [[File:Pitcher Crop Age 1 (bottom) JE2.png|32px]] [[File:Pitcher Crop Age 2 (bottom) JE2.png|32px]] [[File:Pitcher Crop Age 3 (bottom) JE2.png|32px]] [[File:Pitcher Crop Age 4 (bottom) JE2.png|32px]] Pitcher crops now have their bottom texture.}}
{{History|||snap=23w16a|Hitbox shape of pitcher crop has been changed for each stage of its growth.|[[Villager]]s can now plant pitcher pods.}}
{{History|||snap=23w17a|The player now get the [[advancement]] "Planting the past" when they plant pitcher pods on [[farmland]].}}
{{History|bedrock}}
{{History||1.20.0|snap=beta 1.20.0.20|[[File:Pitcher Crop Age 0 JE1.png|32px]] [[File:Pitcher Crop Age 1 JE1.png|32px]] [[File:Pitcher Crop Age 2 JE1.png|32px]] [[File:Pitcher Crop Age 3 JE1.png|32px]] [[File:Pitcher Crop Age 4 JE1.png|32px]] [[File:Pitcher Pod JE1.png|32px]] Added pitcher crops and pods.
|Unlike in Java Edition, pitcher pods can be used to feed chickens and parrots.}}
{{history|foot}}
== Notelist ==
{{notelist}}
== References ==
{{reflist}}
{{Blocks|upcoming}}
{{Items}}
[[Category:Plants]]
[[Category:Non-solid blocks]]
[[de:kannenpflanzentrieb]]
[[es:Vaina de planta odre]]
[[ja:ウツボカズラのさや]]
[[pt:Muda de planta-jarro]]</li></ul></nowiki> | beta 1.11.0.1 | Gray banners now generate in pillager outpost watchtowers, instead of black banners. | |||
| beta 1.11.0.3 | Illager banners now generate in pillager outpost watchtowers, instead of gray banners. | ||||
| beta 1.11.0.4 | Banners can now be bought from cartographer and shepherd villagers. | ||||
1.20.0{{Extension DPL}}<ul><li>[[Popped Chorus Fruit|Popped Chorus Fruit]]<br/>{{Item
| image = Popped Chorus Fruit.png
| renewable = Yes
| stackable = Yes (64)
}}
'''Popped chorus fruit''' is an [[item]] obtained by [[smelting]] [[chorus fruit]], and used to craft [[End Rod|end rods]] and [[purpur blocks]]. Unlike raw chorus fruit, the popped fruit is inedible.
== Obtaining ==
=== Smelting ===
{{Smelting
|Chorus Fruit
|Popped Chorus Fruit
|0,1
}}
== Usage ==
=== Crafting ingredient ===
{{crafting usage}}
== Data values ==
=== ID ===
{{edition|java}}:
{{ID table
|edition=java
|showforms=y
|generatetranslationkeys=y
|displayname=Popped Chorus Fruit
|spritetype=item
|nameid=popped_chorus_fruit
|form=item
|foot=1}}
{{edition|bedrock}}:
{{ID table
|edition=bedrock
|showaliasids=y
|shownumericids=y
|showforms=y
|notshowbeitemforms=y
|generatetranslationkeys=y
|displayname=Popped Chorus Fruit
|spritetype=item
|nameid=popped_chorus_fruit
|aliasid=chorus_fruit_popped
|id=559
|form=item
|translationkey=item.chorus_fruit_popped.name
|foot=1}}
== History ==
{{History|java}}
{{History||1.9|snap=15w31a|[[File:Popped Chorus Fruit JE1 BE1.png|32px]] Added popped chorus fruit.
|Popped chorus fruit are used to craft [[purpur block]]s.}}
{{History|||snap=15w44b|Popped chorus fruit are now used to craft [[end rod]]s.}}
{{History||1.13|snap=17w47a|Prior to [[1.13/Flattening|''The Flattening'']], this [[item]]'s numeral ID was 433.}}
{{History|||snap=pre5|The ID of popped chorus fruit has now been changed to <code>popped_chorus_fruit</code>.}}
{{History||1.14|snap=18w43a|[[File:Popped Chorus Fruit JE2 BE2.png|32px]] The texture of popped chorus fruit has now been changed.}}
{{History|pocket}}
{{History||1.0.0|snap=alpha 0.17.0.1|[[File:Popped Chorus Fruit JE1 BE1.png|32px]] Added popped chorus fruit.}}
{{History|bedrock}}
{{History||1.10.0|snap=beta 1.10.0.3|[[File:Popped Chorus Fruit JE2 BE2.png|32px]] The texture of popped chorus fruit has now been changed.}}
{{History||1.16.100|snap=beta 1.16.100.56|The ID of popped chorus fruit has been changed from <code>chorus_fruit_popped</code> to <code>popped_chorus_fruit</code>.}}
{{History|console}}
{{History||xbox=TU46|xbone=CU36|ps=1.38|wiiu=Patch 15|[[File:Popped Chorus Fruit JE1 BE1.png|32px]] Added popped chorus fruit.}}
{{History||xbox=none|xbone=none|ps=1.90|wiiu=none|switch=none|[[File:Popped Chorus Fruit JE2 BE2.png|32px]] The texture of popped chorus fruit has now been changed.}}
{{History|new 3ds}}
{{History||1.7.10|[[File:Popped Chorus Fruit JE1 BE1.png|32px]] Added popped chorus fruit.}}
{{History|foot}}
== Issues ==
{{issue list}}
{{Items}}
[[cs:Vypukaný květ chorusu]]
[[de:Geplatzte Chorusfrucht]]
[[fr:Chorus éclaté]]
[[it:Frutto di chorus scoppiato]]
[[ja:焼いたコーラスフルーツ]]
[[ko:튀긴 후렴과]]
[[nl:Gepoft Chorusfruit]]
[[pl:Prażony owoc refrenusu]]
[[pt:Fruta do coro cozida]]
[[ru:Приготовленный плод коруса]]
[[zh:爆裂紫颂果]]
[[Category:Renewable resources]]</li><li>[[Raw Iron|Raw Iron]]<br/>{{Item
| image = Raw Iron.png
| renewable = No
| stackable = Yes (64)
}}
'''Raw iron''' is a raw metal resource obtained from mining [[iron ore]].
== Obtaining ==
=== Mining ===
[[Iron ore]] and [[deepslate iron ore]] mined with a [[stone pickaxe]] or higher drops 1 unit of raw iron. If the pickaxe is enchanted with [[Fortune]], it can drop an extra unit per level of Fortune, allowing for a maximum of 4 with Fortune III. If the ore is mined using a pickaxe enchanted with [[Silk Touch]], it drops the ore block instead.
=== Crafting ===
{{Crafting
|showname=1
|Block of Raw Iron
|Output=Raw Iron,9
|type=Material
|foot=1
}}
== Usage ==
The primary usage of raw iron is smelting it into [[iron ingot]]s.
=== Crafting ===
{{crafting usage}}
=== Smelting ingredient ===
{{Smelting
|showname=2
|Raw Iron
|Iron Ingot
|0.7
}}
== Data values ==
=== ID ===
{{edition|java}}:
{{ID table
|edition=java
|showitemtags=y
|showforms=y
|generatetranslationkeys=y
|displayname=Raw Iron
|spritetype=item
|nameid=raw_iron
|form=item
|foot=1}}
{{edition|bedrock}}:
{{ID table
|edition=bedrock
|shownumericids=y
|showforms=y
|notshowbeitemforms=y
|generatetranslationkeys=y
|displayname=Raw Iron
|spritetype=item
|nameid=raw_iron
|form=item
|id=505
|foot=1}}
== History ==
{{History|java}}
{{History||1.17|snap=21w14a|[[File:Raw Iron JE1.png|32px]] Added raw iron.}}
{{History|||snap=April 13, 2021|slink={{Tweet|JasperBoerstra|1381991999952277513}}|[[File:Raw Iron JE2.png|32px]] [[JAPPA]] shows a new raw iron texture.}}
{{History|||snap=21w15a|[[File:Raw Iron JE2.png|32px]] The texture of raw iron has been changed.
|Raw iron can now be used to craft [[block of raw iron]].}}
{{History|||snap=April 16, 2021|slink={{Tweet|JasperBoerstra|1383047666037325829}}|[[File:Raw Iron (pre-release).png|32px]] [[JAPPA]] shows a new raw iron texture again.}}
{{History|||snap=21w16a|[[File:Raw Iron JE3.png|32px]] The texture of raw iron has been changed.}}
{{History|Bedrock}}
{{History||1.17.0|snap=beta 1.17.0.50|[[File:Raw Iron JE2.png|32px]] Added raw iron.}}
{{History|||snap=beta 1.17.0.52|Raw iron are now available without enabling [[experimental gameplay]].}}
{{History|||snap=beta 1.17.0.54|[[File:Raw Iron JE3.png|32px]] The texture of raw iron has been changed.}}
{{History|foot}}
== Issues ==
{{Issue list}}
==Gallery==
<gallery>
JE 1.17 Dev Raw Metals.jpg|Jappa shows raw ore textures.
Jappa Raw Ores 1.jpg|Jappa shows raw ore textures.
Jappa Raw Ores 2.png|Jappa shows raw ore textures.
Jappa Raw Ores 3.jpg|Jappa shows raw ore textures.
Jappa Raw Ores 4.jpg|Jappa shows raw ore textures.
Jappa Raw Ores 5.jpg|Jappa shows raw ore textures.
</gallery>
{{Items}}
[[Category:Non-renewable resources]]
[[de:Roheisen]]
[[es:Hierro en bruto]]
[[fr:Fer brut]]
[[it:Ferro grezzo]]
[[ja:鉄の原石]]
[[lzh:砂鐵]]
[[pl:Surowe żelazo]]
[[pt:Ferro bruto]]
[[ru:Необработанное железо]]
[[uk:Необроблене залізо]]
[[zh:粗铁]]</li></ul> | beta 1.20.0.20 | Banners can now be used to customise shields. | |||
| Legacy Console Edition | |||||
| TU43 | CU33 | 1.36 | Patch 13 | 1.0.1 | |
| TU46 | CU36 | 1.38 | Patch 15 | ||
| TU53 | CU43 | 1.49 | Patch 23 | 1.0.3 | |
| 1.90 | Looms have been added to help the player edit banners more easily. | ||||
| 1.91 | |||||
Issues[]
Issues relating to "Banner" are maintained on the bug tracker. Report issues there.
Trivia[]
- With 16 blank banners, 38 patterns of 16 colors each (608 uniquely-colored patterns), and 0 to 6 patterns per banner, the number of uniquely crafted banners is 16 × (6080 + 6081 + 6082 + 6083 + 6084 + 6085 + 6086) ≈ 809 quadrillion - 809 with 15 zeros (809,573,616,779,945,488). The number of visually distinct banners is smaller, because one or more patterns may completely cover other patterns, or the entire banner, or be duplicated due to the symmetric set of patterns (e.g. field or (yellow) + per pale azure (blue) = field azure + per pale or inverted).
- Not 38 patterns are available on BE, but 40 patterns of 16 colors each (640 uniquely-colored patterns), so the number is even greater. 16 × (6400 + 6401 + 6402 + 6403 + 6404 + 6405 + 6406) ≈ 1 quintillion - 1 with 18 zeros (1,101,232,303,249,827,856). This increases the number by almost 1.4 times, or almost 292 quadrillion, despite the addition of only 2 patterns.
- If a banner has over 6 patterns, only the six bottom-most patterns are displayed when hovered over in the inventory.
- The Mojang logo is called "Thing" in-game, which could be considered an alternate translation for mojäng. If Google Translate is used, it translates to "thingys" or "contraption".
- In the Swedish translation of the game, this pattern is, in fact, called mojäng.
- Banner textures are located in \assets\minecraft\textures\entity\banner.
- There are 40 monochrome textures, each containing all 6 sides of the banner.
- The texture of the back side is the mirrored texture of the front side.
- Compared to the texture files, textures' colors are inverted in-game due to them acting as masks for the re-colored base texture, base.png. That means white is visible, while black is transparent.
- Banners that have the purple NBT+ line in the bottom (obtained by holding Ctrl and middle-clicking the banner, which also copies the NBT tag of anything that the player points their crosshair to) actually have no difference with the base banner obtained by middle click.
- The Illager Banner in Bedrock Edition is available as a separate item but is just a second variant of the white banner.
- Standard variant of white banner is set to type 0.
- Illager variant is set to type 1.
Gallery[]

The first image of banners, as tweeted by Jens Bergensten.

Another banner image from Jeb.

Several banners made by Searge.
Banners in the official 1.8 poster.
An image, tweeted by Jeb, showcasing the changes he made to the banner color palette in the 1.12 update.
The result of using gradient different numbers of times, each time increasing the level of gradient by 1.
All positions and rotations of a banner
A banner with the Mojang logo in an item frame.
Banners floating outside of an End city tower.
Banners hanging above the doorway of a woodland mansion master bedroom.
Banner put in the helmet slot by using the command
/replaceitem[Bedrock Edition only] or/item replace[Java Edition only].Banners in Bedrock Edition.
A banner in the hand.
A banner in the inventory.
A banner in the crafting grid.
A banner being given a pattern.
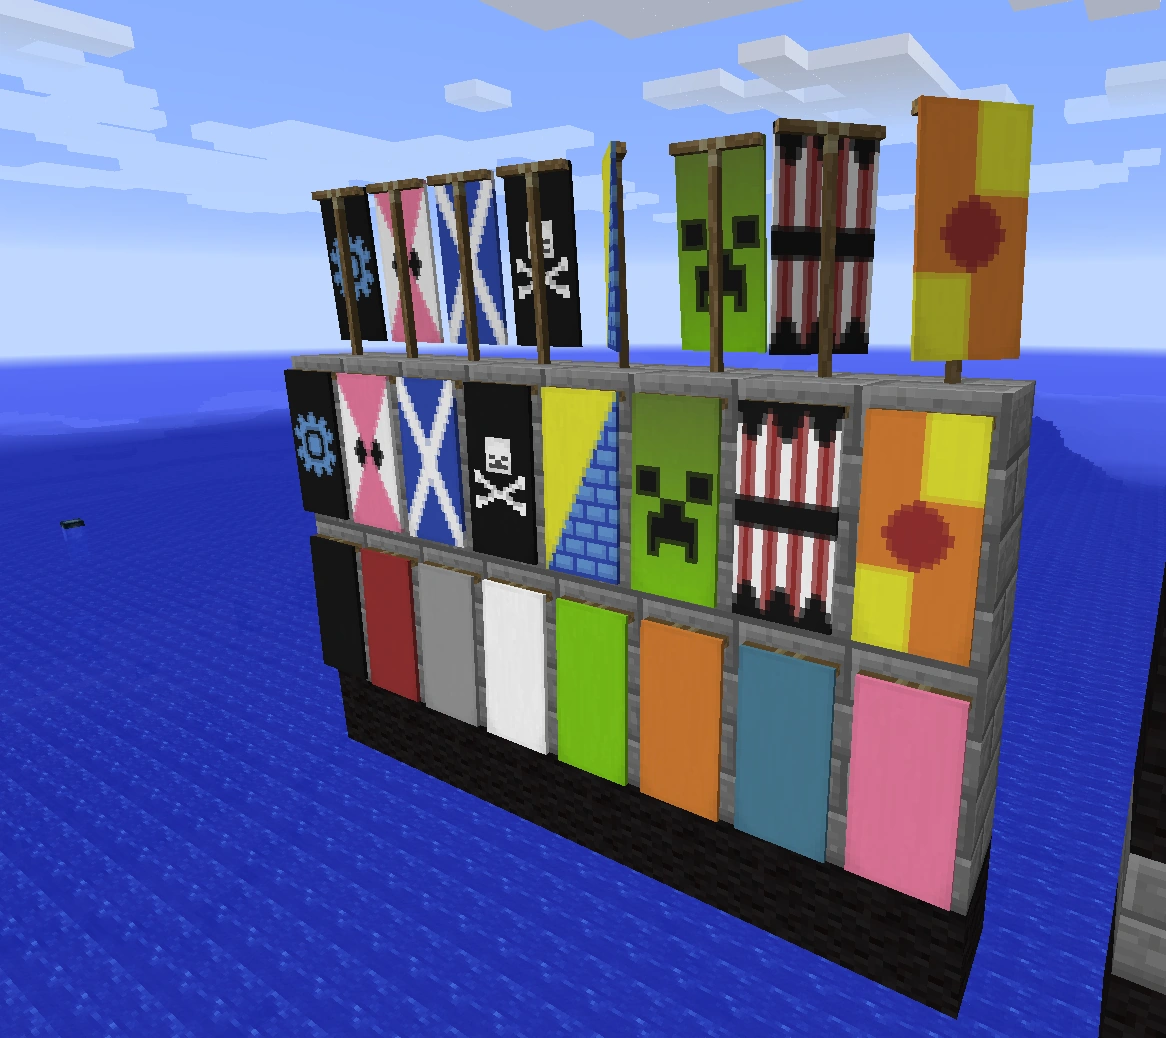
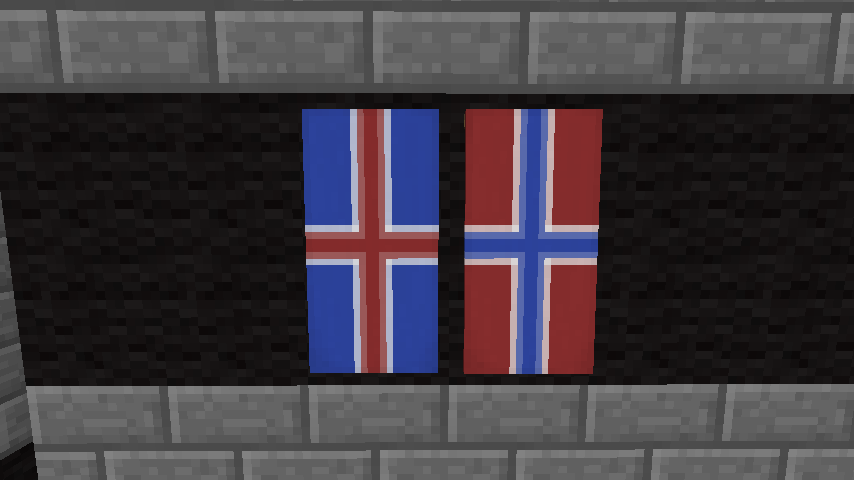

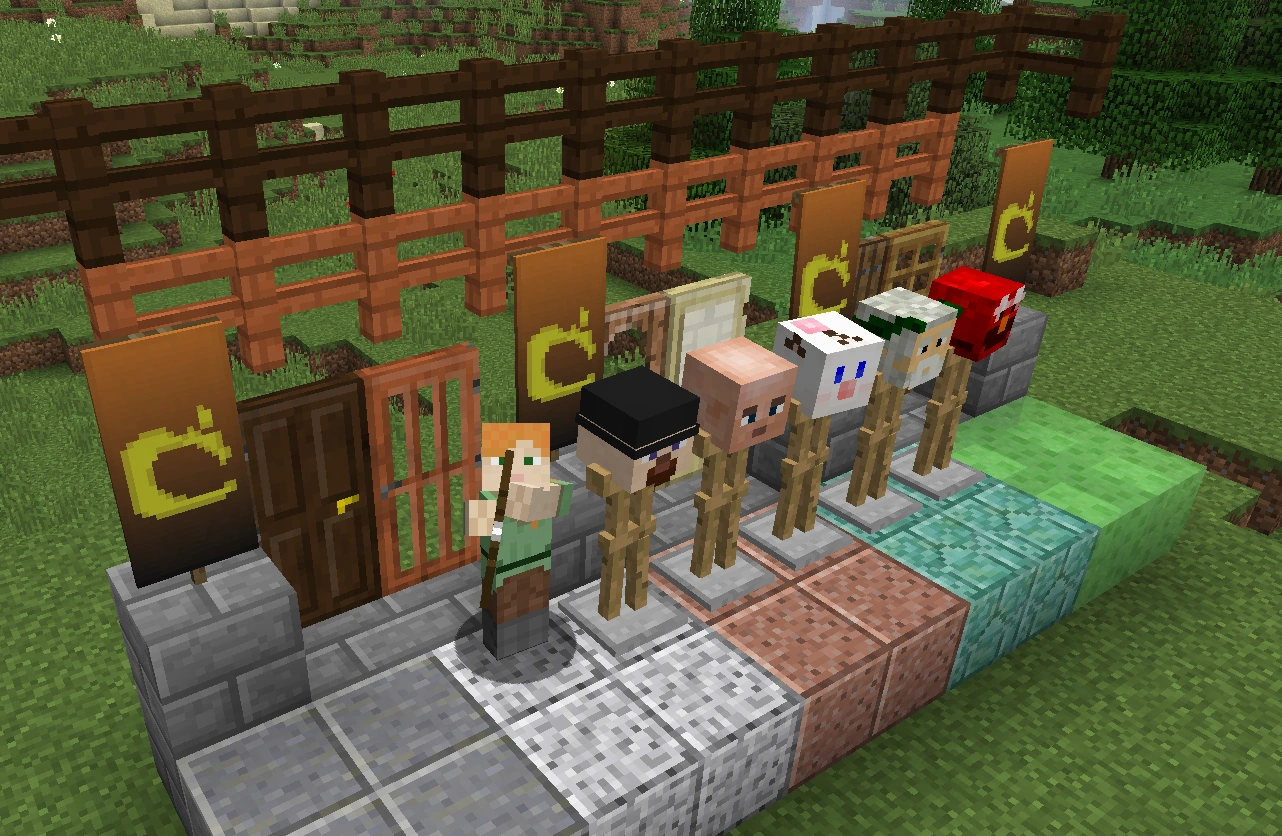
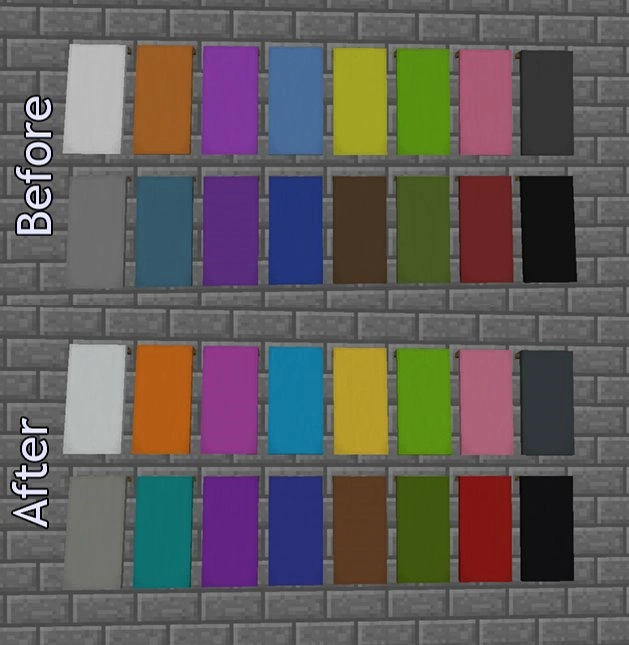
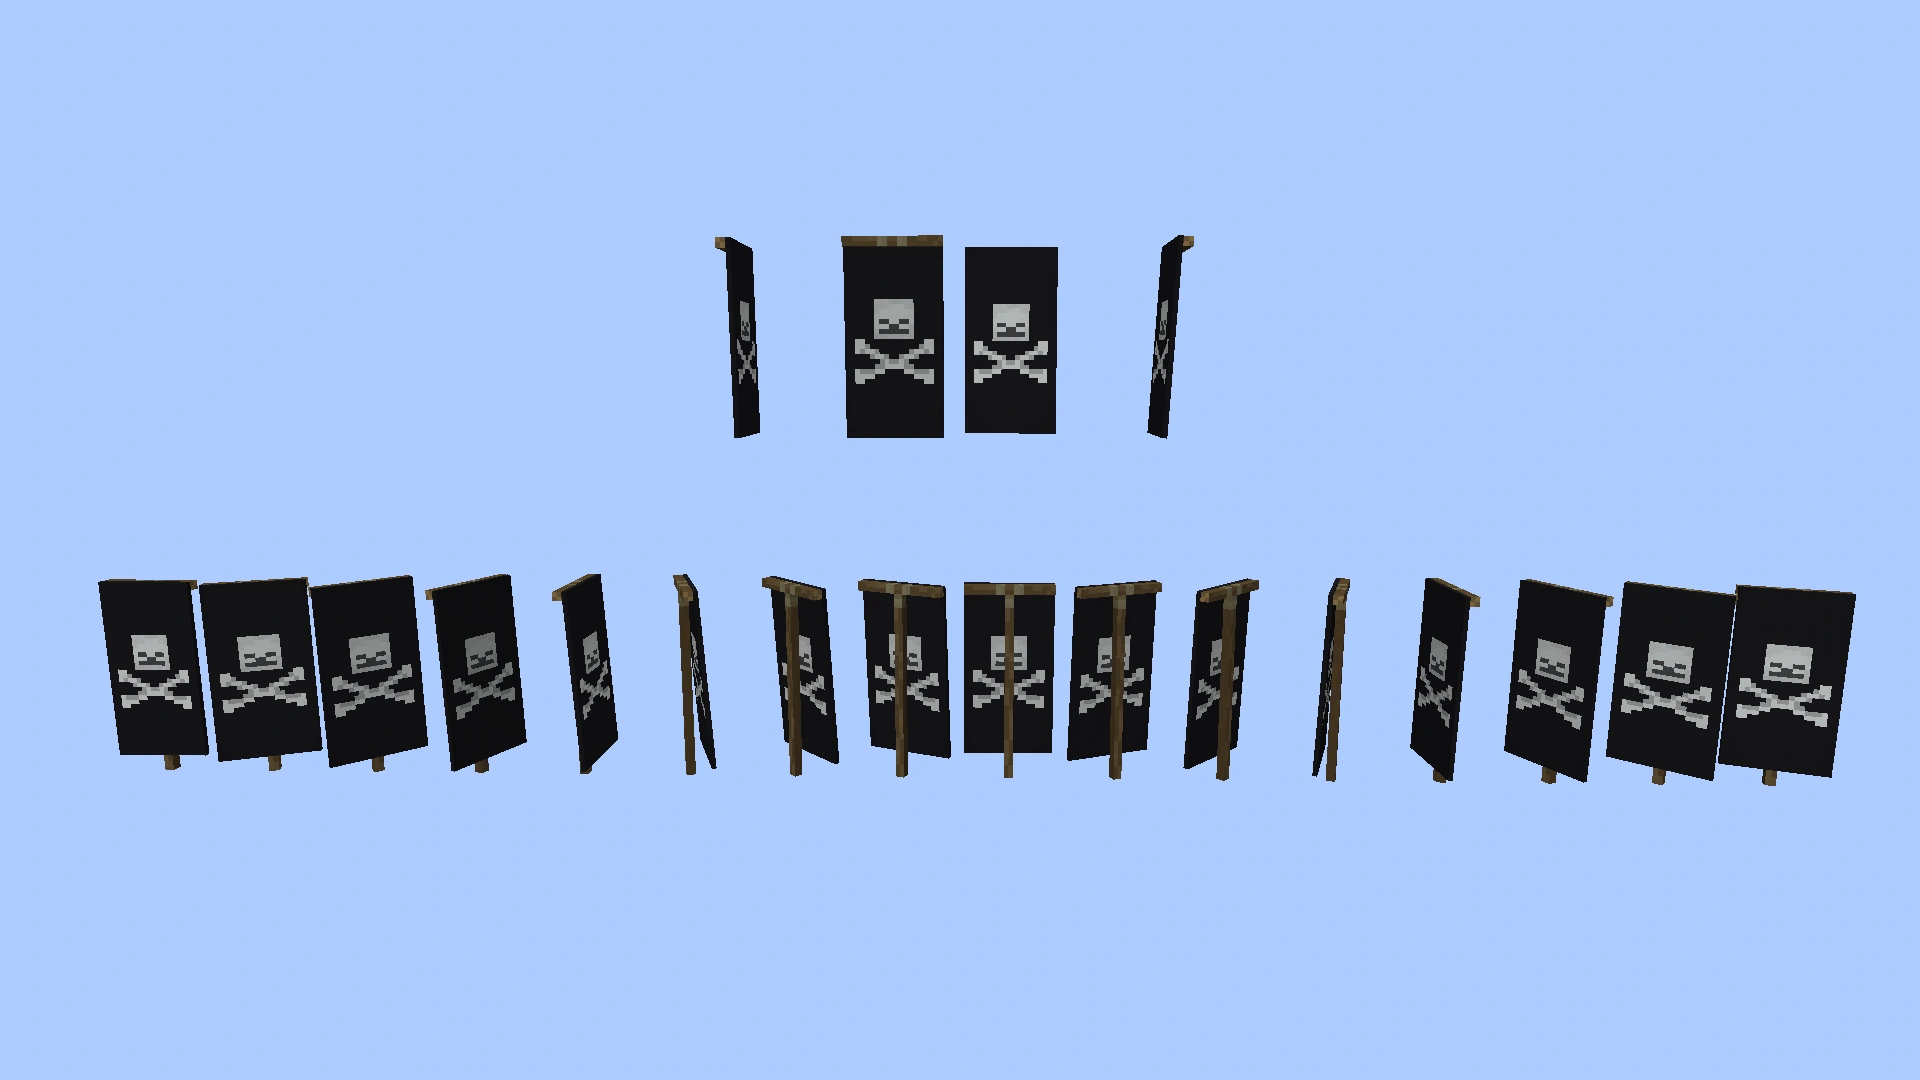
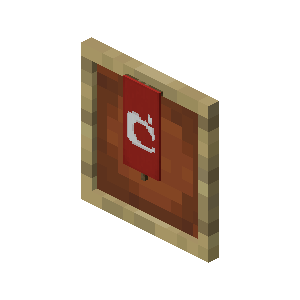
![Banner put in the helmet slot by using the command /replaceitem[Bedrock Edition only] or /item replace[Java Edition only].](https://static.wikia.nocookie.net/minecraft_gamepedia/images/3/3d/Replaceitembanner.png/revision/latest?cb=20190922083109)
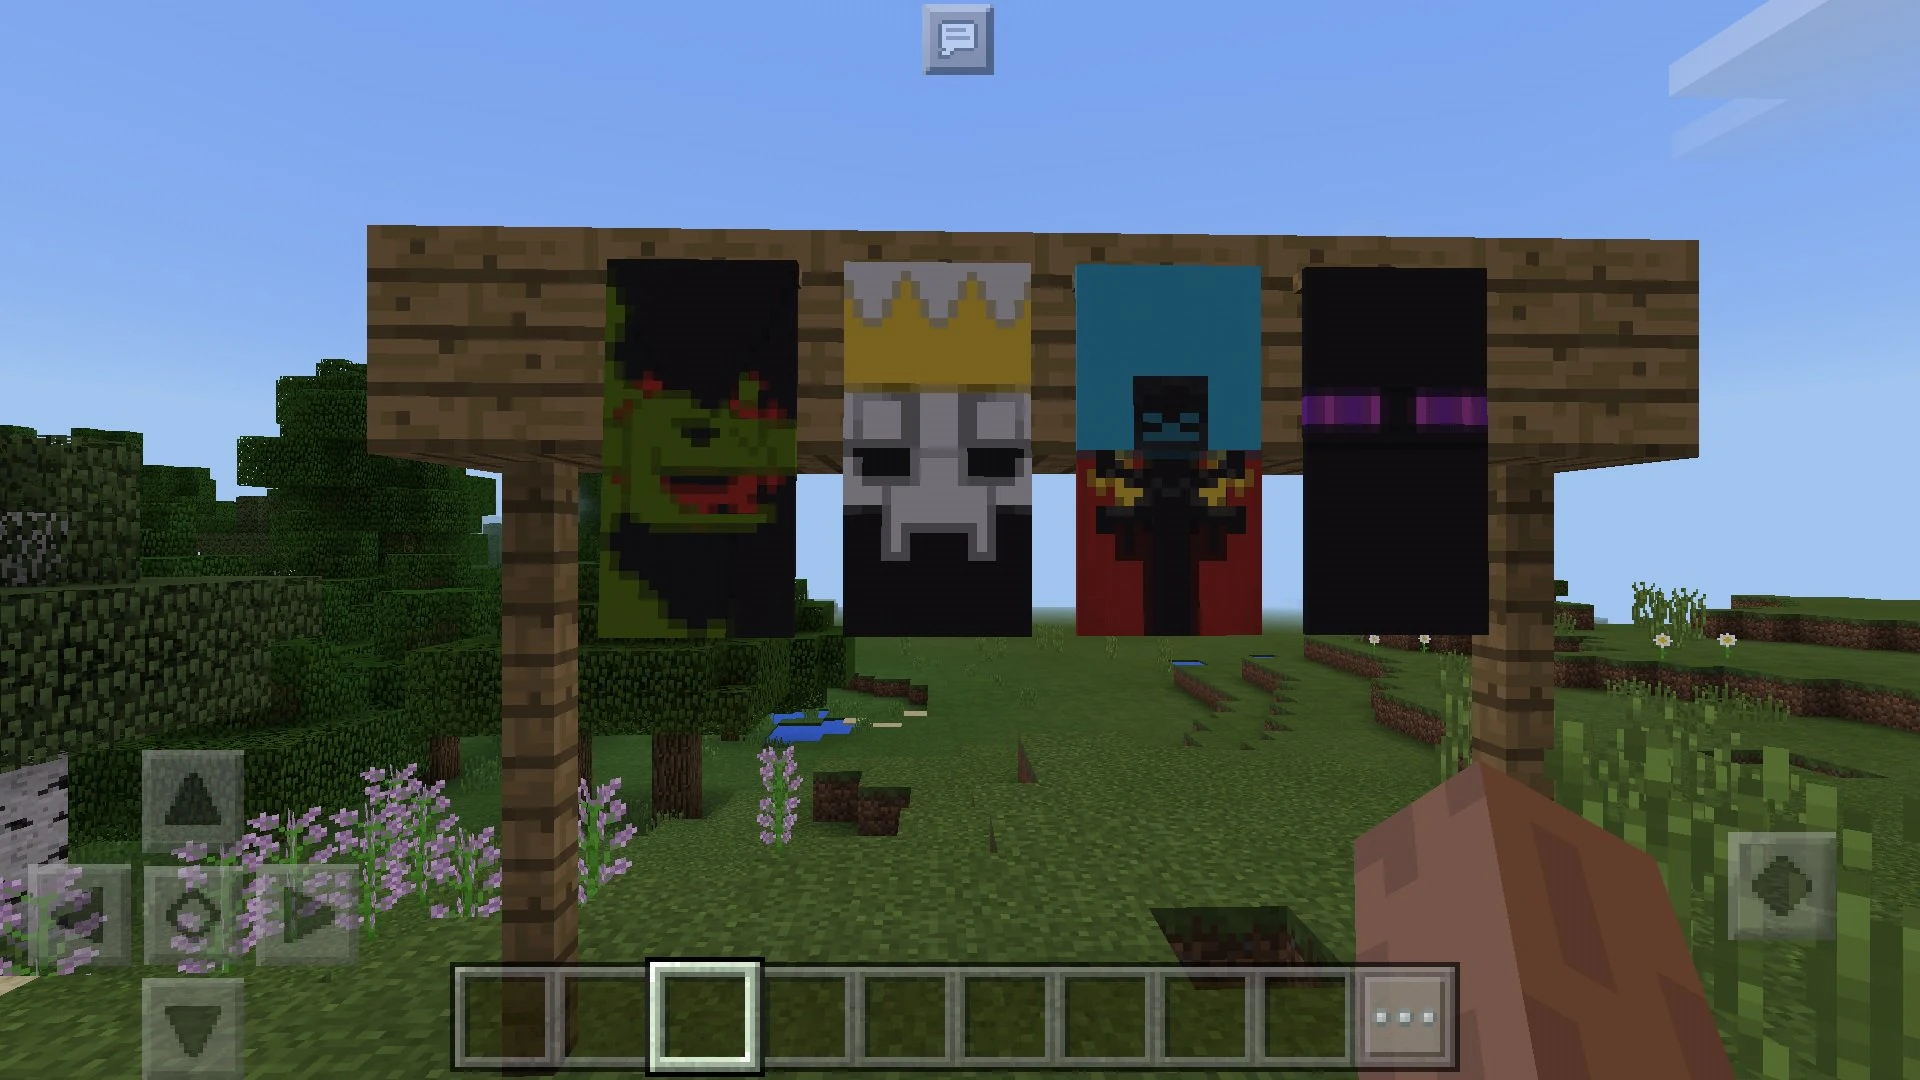
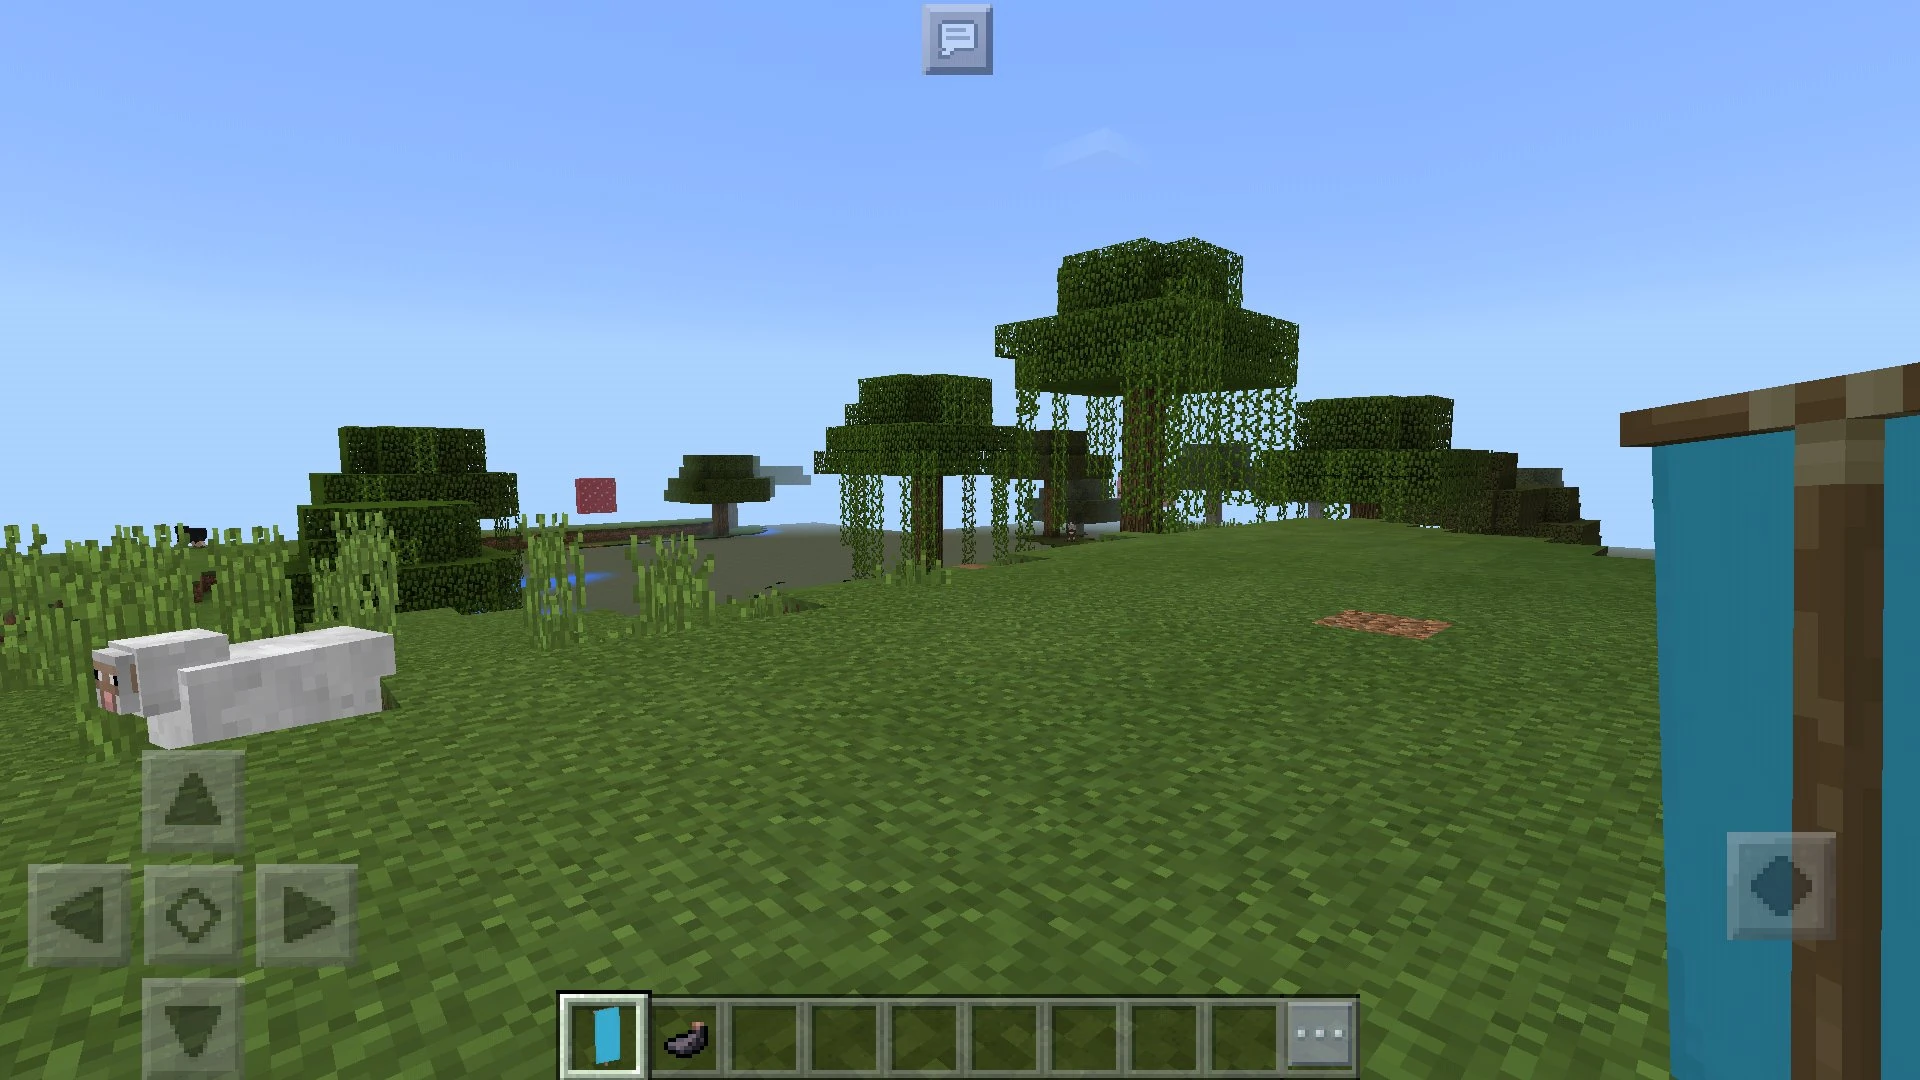
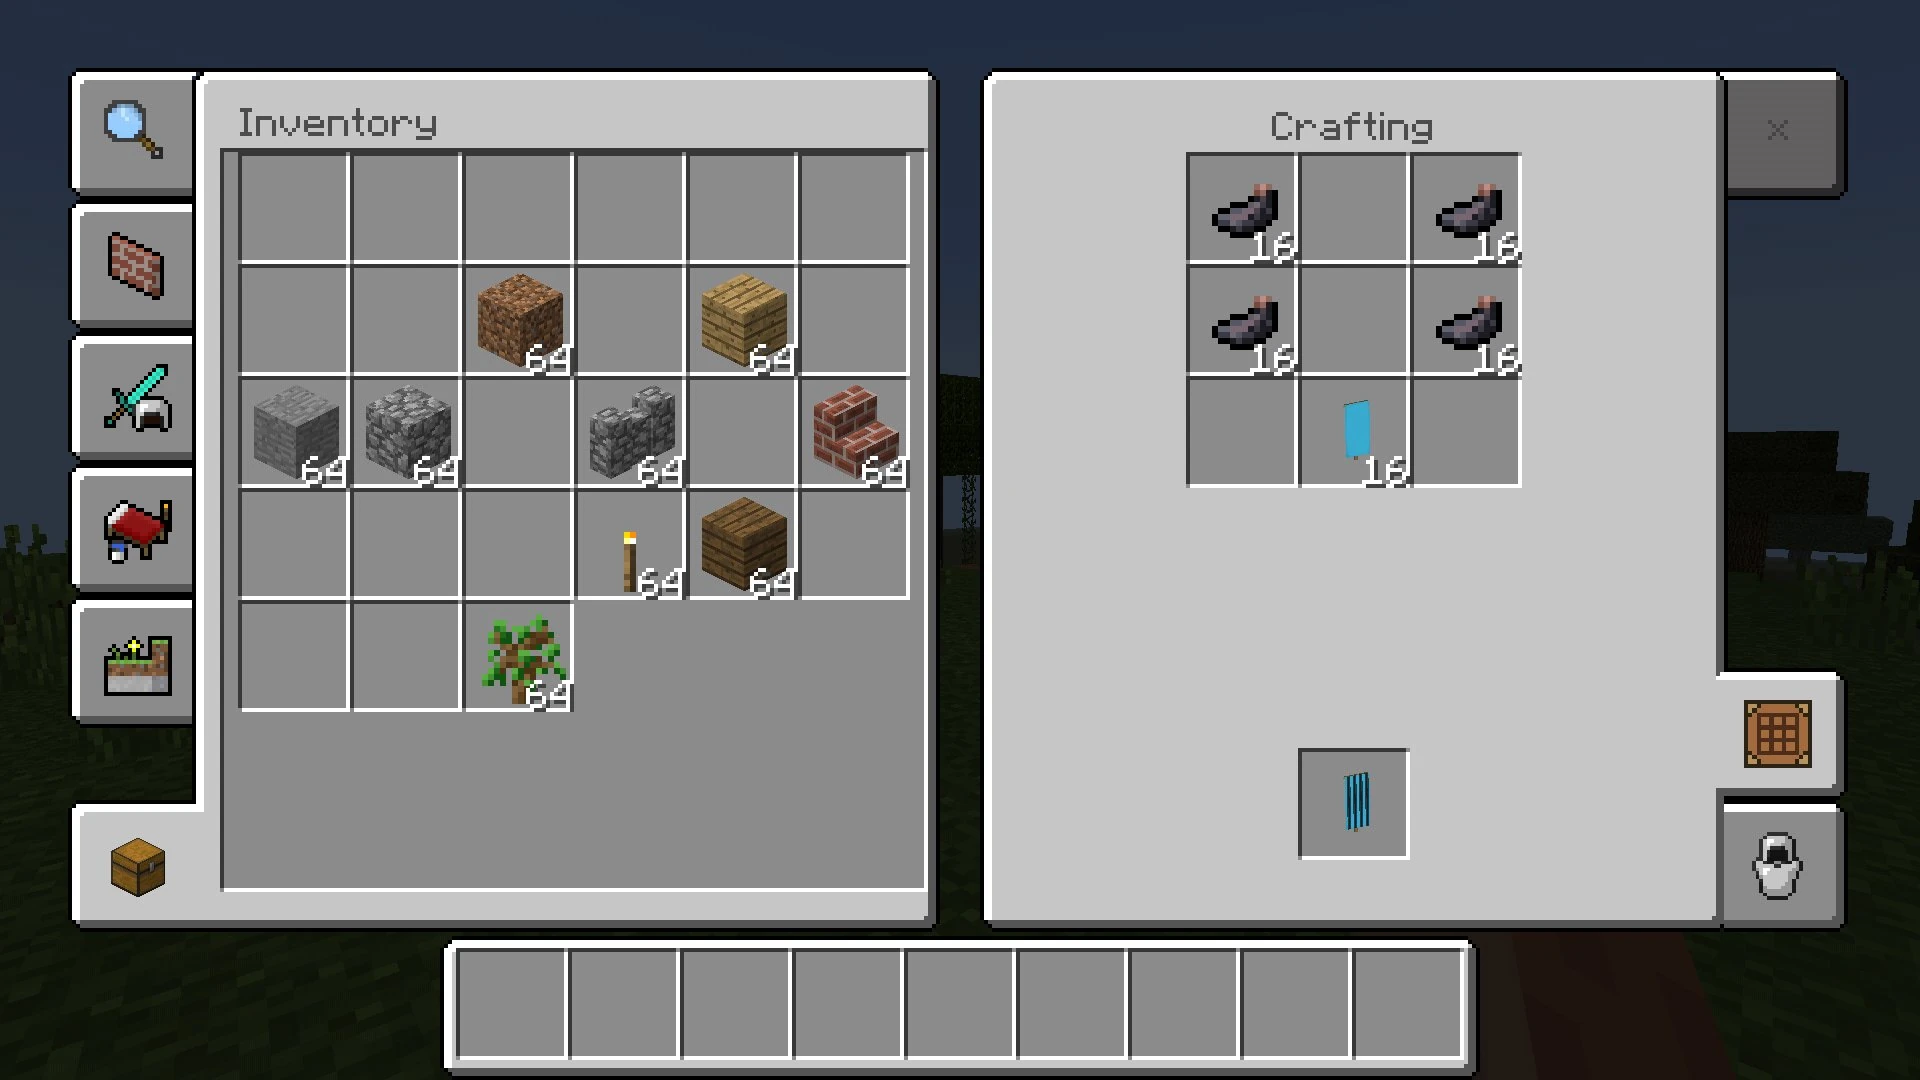
Renders[]

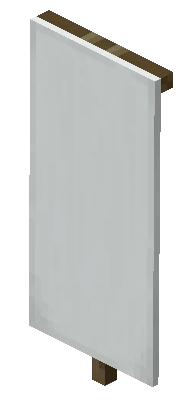
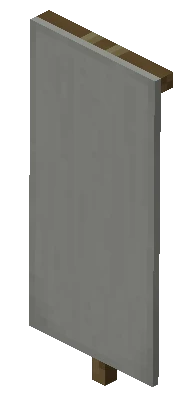
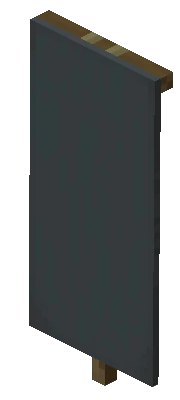

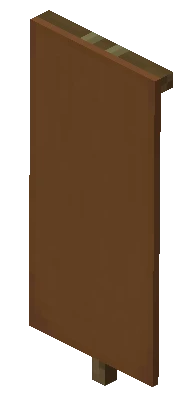

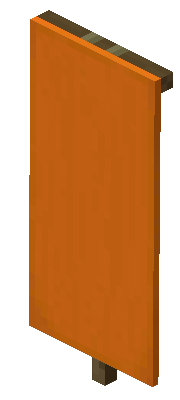
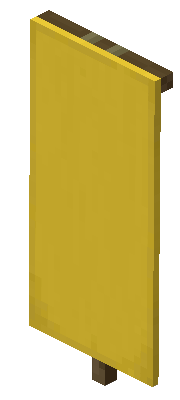
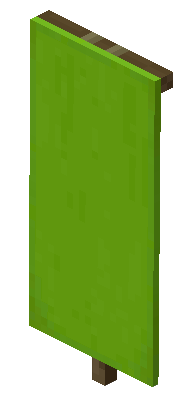
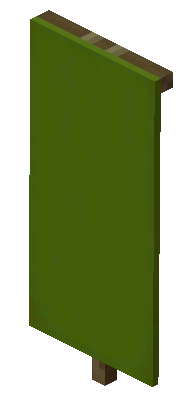
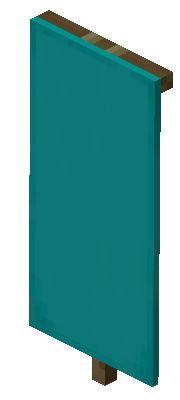
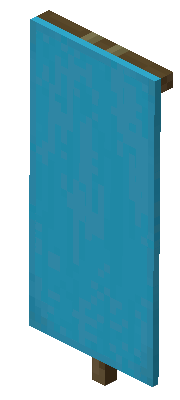


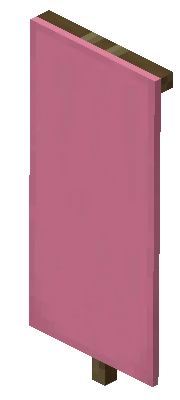
Ominous banner pattern in Java Edition.
Illager banner pattern in Bedrock Edition.
Old Ominous banner pattern.
Washing with cauldron shows how to apply the ominous banner pattern.

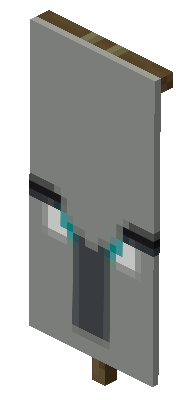
Lego Minecraft Banners[]
Lego banners from 21127 and 21131
Lego banner from 21138
Lego banner from 21142
Lego banner from 21144
Another lego banner from 21144
A third lego banner from 21144
Lego banner from 21152
Lego banners from 21155
Lego ominous banner from 21160


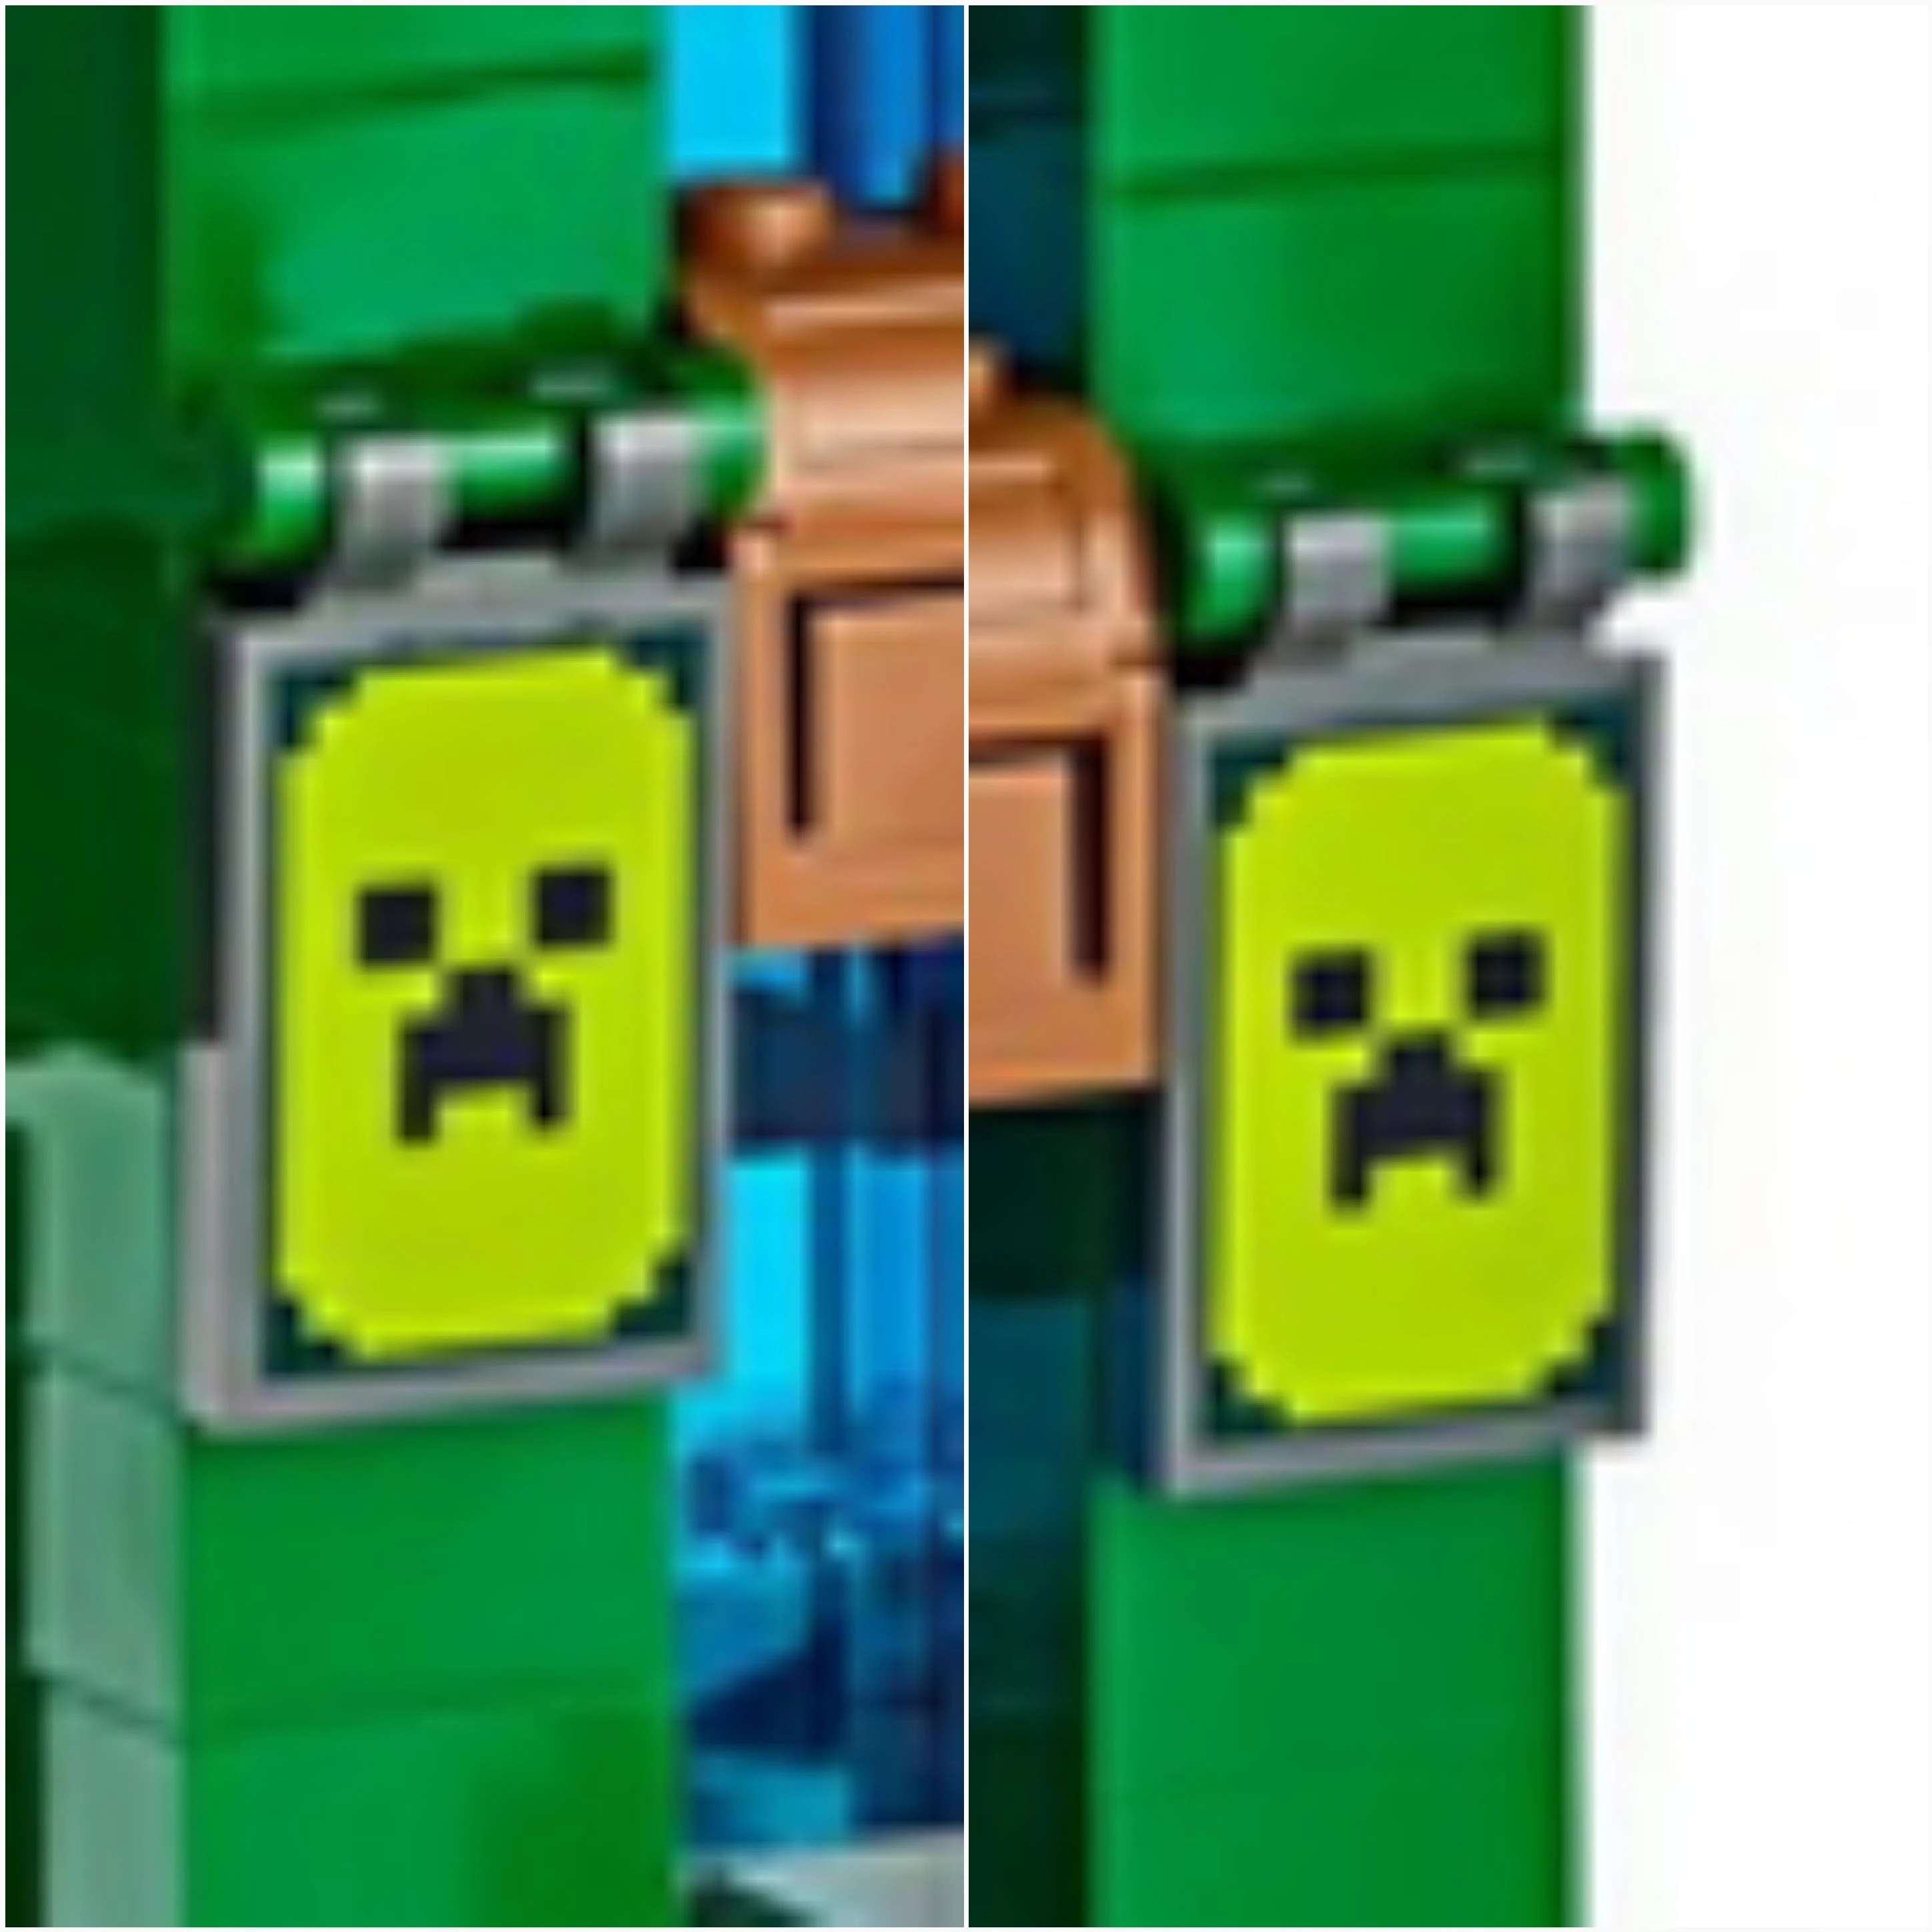

References[]