A TNT cannon is a mechanism that uses TNT or Minecart with TNT to launch Primed TNT. Some cannons can also be used to launch other entities into the air or into other objects. Template:Tocright
General
Main components
- Body, or Housing
- Wiring
- Charge wiring
- Condensing Charge wiring
- Shot wiring
- Other wiring
- Explosives
- Charge
- Condensing charge
- Shot
- Explosion Housing (Usually water, though obsidian barriers work fine, and lava can be used with caution)
- Mounting Block
Basic concepts
- TNT cannons operate on the principle that when TNT explodes in water it will not destroy blocks, but will still launch TNT that was already ignited, which is usually done with redstone (the charge is usually ignited immediately, then a delay will activate the shot).
- The shot is the ammunition; typically it is either a player, a mob, a block of TNT, or, in the case of arrow cannons, an amount of arrows.
- The charge is an amount of TNT used to propel the shot.
- The charge must land (TNT will fall when activated) and explode in water, otherwise the explosion will destroy nearby blocks, redstone wiring, and decorations and damage nearby mobs.
- To properly fire an active shot (and avoid destroying your cannon), you need to be sure that your charge activates before the shot is activated. Since the charge is housed in water it will not destroy your cannon, but the shot is not housed in water when activated, so it will destroy nearby blocks and injure nearby mobs.
- Redstone is used to activate every block of TNT in the Charge simultaneously with the exception of Condenser charges, which are discussed in the appropriate section.
- For maximum range, you want there to be an about 30 degree trajectory but with the least possible amount of matter (blocks) in between the charge and the shot, that way more of the charge's explosion reaches the shot.
- The South-East rule also affects range. A cannon facing east or south will have greater range than one facing west/north, depending on how much room the TNT has to move when initially ignited.
- So it's best for TNT cannons to be elevated off the ground depending on the wanted range of the cannon.
- If you are making an arrow cannon, you will have to make an initiation piston
Here is a video tutorial showing a basic TNT cannon:
Naming standards
There are 2 types of cannon names: The "Common Name" gives a picture of what the cannon can do and how easy it is to build. The "Technical Name" gives the specifics of the cannon, like how much delay the Redstone Repeaters have.
Common names
The common name of a TNT cannon is a short numerical description followed by the cannon's nickname. It is useful for comparison of two cannons and gives the reader an idea of what the cannon can do at a glance.
The common name of a cannon consists of five parts: the Damage Value(DV), the Ergonomic Value(EV), the TNT Amount(TA), the Maximum Range(MR), and the Nickname. They appear in this order:
<DV>.<EV>:<TA>.<MR> <Nickname>
Example: 40.86:8.104 Basic
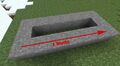
Damage Values show how "good" a cannon is, the higher the value, the better it is. (usually not accurate for specialized cannons)It is calculated as the average of three values, dubbed "Accuracy","Power", and "Speed". The accuracy value is calculated from the accuracy input, which is the average of the distances from the explosions generated in the shots to the average of the positions of the explosions aforementioned.
In the image to the right, the accuracy input is the average of the lengths of the blue lines. The red dot is the average of the positions of the explosions, and an endpoint of each of the blue lines, the others being the explosions. The accuracy value equation is (45-A)*2, where "A" is the accuracy input.
The power value is much simpler to calculate; it's the number of TNT in the shot times ten.
The speed input is the distance between the front of the cannon to the average position of the centers of the explosions. The speed value equation is S/5, where "S" is the speed input.
The Damage Value is generally below 100, and to calculate it all at once use this equation:
(((45-A)*2)+(P*10)+(S/5))/3=40 .
Ergonomic Value tells how hard a cannon is to build, higher values signifying easier build. It is the average of the construction, redstone, and TNT values. The construction input is an estimate of the number of blocks in the cannon, excluding fire, water, air, and TNT.The construction value is (1000-B)/10, assuming "B" is the construction input.
The redstone value is ten minus an estimate from one to ten of the complexity of the redstone, times ten; (10-R)*10, where "R" is the estimate.
The TNT value is (50-T)*2, and "T" is the number of TNT needed to operate the cannon at maximum capacity.
The whole equation to calculate the EV is stated here:
EV=((1000-B)/10+((10-R)*10)+((50-T)*2))/3
TNT Amount, Maximum Range, and Nickname are pretty self-explanatory, but to clarify, the TA is the same as the TNT value of the EV, and the MR is the distance from the front of the cannon to the farthest explosion. The nickname is whatever you name it, assuming it's not profane, and nobody else has already named a similar cannon.
As an example I will show how the 40.86:8.104 Basic was named. (See Image)
(((45-0{Accuracy Input})*2)+(1{Power Input}*10)+(104{Speed Input}/5))/3=40<DV> . (((1000-50{Construction Input})/10+((10-2{Redstone Complexity})*10)+((50-8{TNT Used})*2))/3=86<EV>:8<TA>.104<MR> Basic<Nickname>
Technical names
A cannon's technical name should give those who read it a complete picture of its function, use, and method of operation. While it is impossible to anticipate every innovation in TNT Cannon technology, most cannons will benefit from using these standards in their technical names.
- The first number in a technical TNT cannon name designates how many vertical rows of TNT it has for the charge. The example cannon has 1.
- The next number is the amount of shot TNT, or Shot the TNT cannon has. Again, the example cannon has 1.
- Next, the number designates how many charge blocks of TNT the cannon has.
- After that, you list how many repeaters there are, and how much they are set to. E.g. If you have 10 repeaters set to 4, (which is the max setting) you would list R4.10. If there are no repeaters, you would write an M for manual.
- If there is a condensation system, after you wrote the charge number, write a decimal point, then the amount of condensation charge TNT. If there is no TNT, write 0 instead of a condensation number.
- The mounting block is designated by a code, 0 for no block, 1 for no block, 2 for full block, 3 for slab, 4 for ladder, glass pane, or iron bar, 5 for trapdoor, 6 for fence post and pressure plate, 7 for piston.
- If the cannon does something special, like shoot vertically, or does a spread shot, write that after the mounting block code.
- Then, of course, the nickname of the cannon goes here.
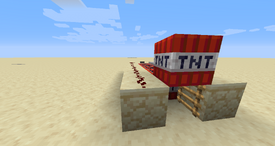
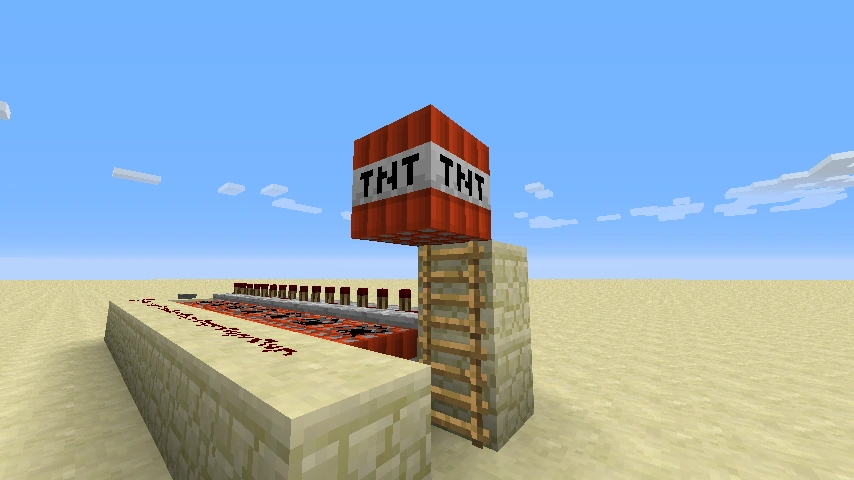
The featured TNT cannon below would be named 114.0R4.4M2
Building materials
Survival mode
As discussed in basic concepts, there are many parts of a TNT cannon. This section will show you what you need to build them.
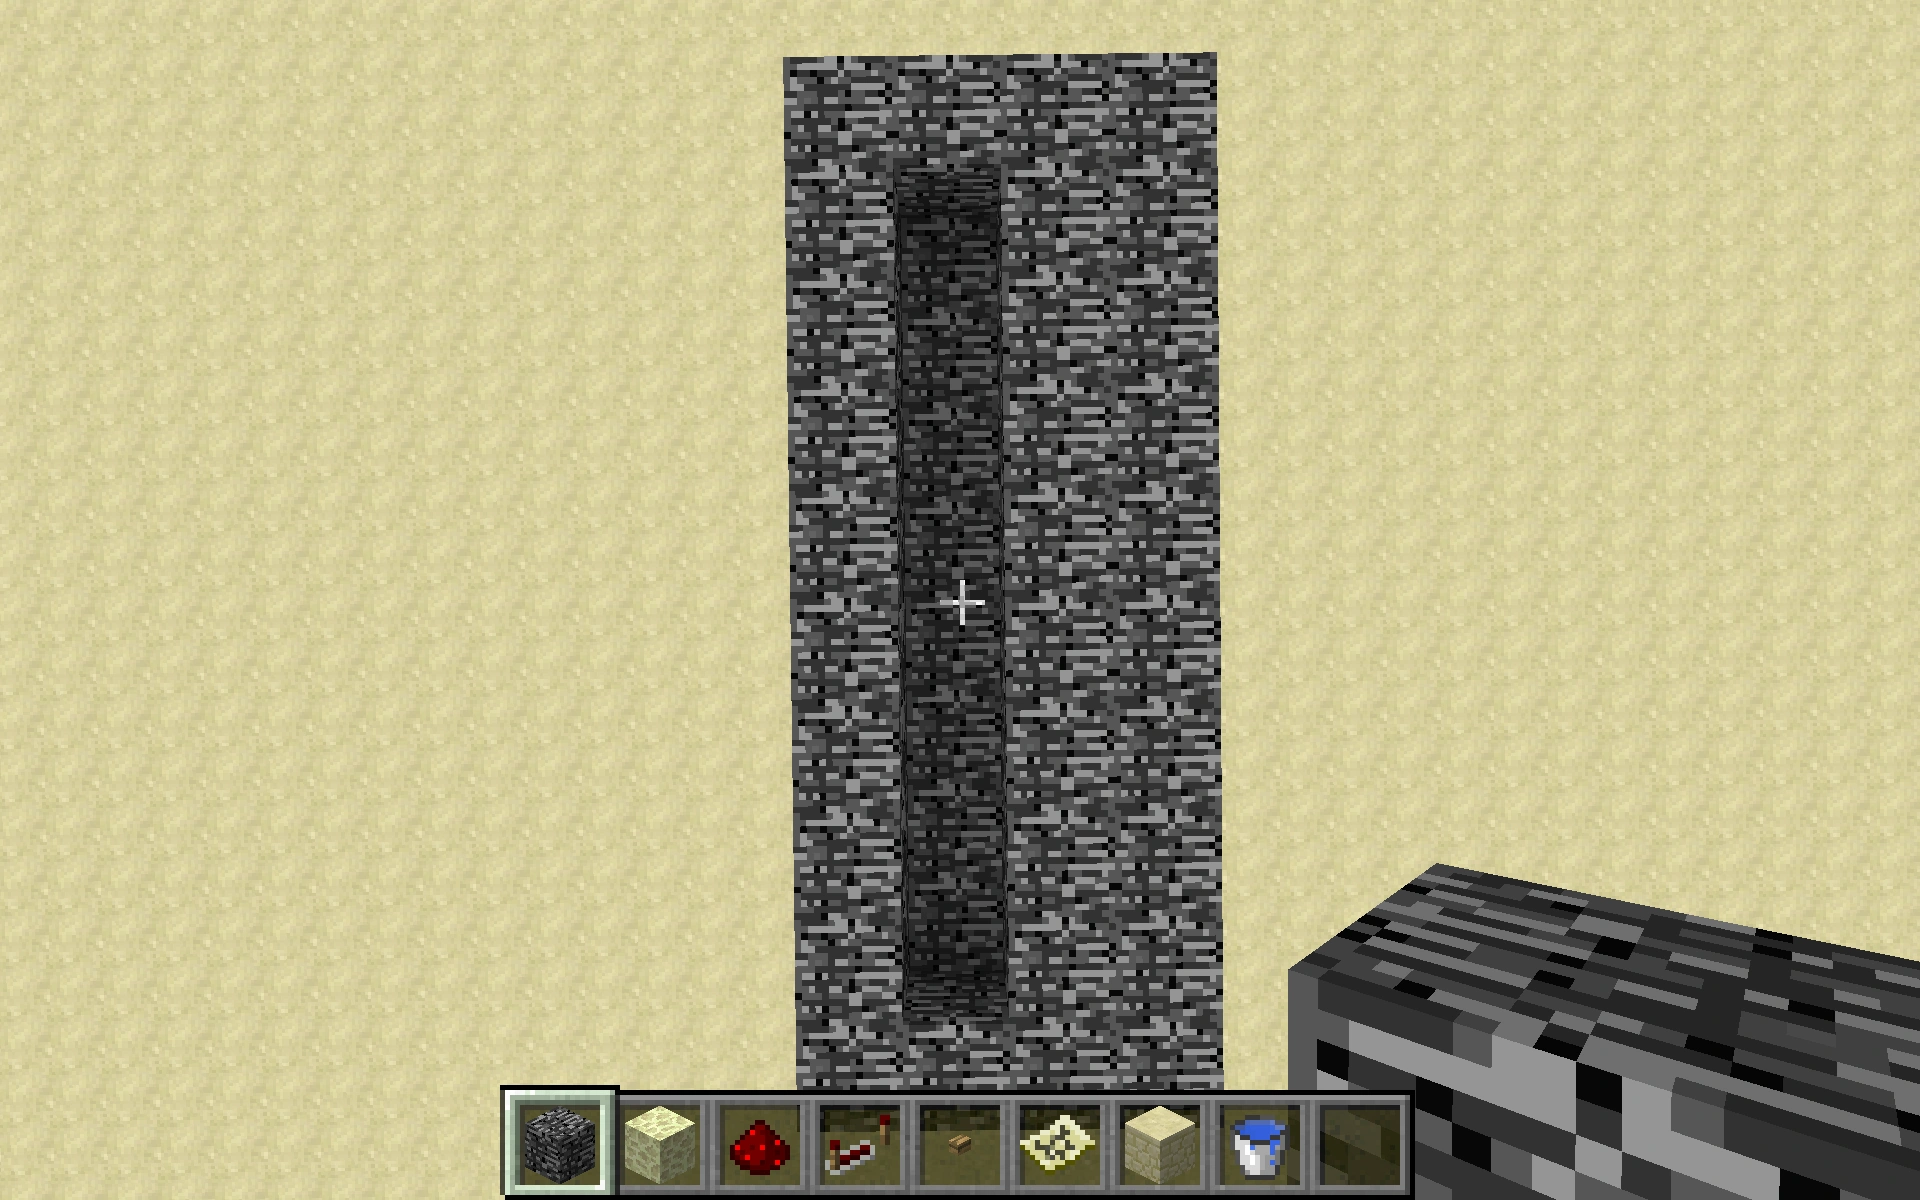
1. Body
- Consider using a common material, such as cobblestone.
- In SMP, when firing against another cannon, try to use materials with higher blast resistance. (For more on TNT cannon defenses, look below)
- Another factor is visibility, which is one commonly overlooked. When making a cannon out of obsidian, it is hard to see redstone, and that can lead to fatal errors. On the other end, when setting up an ambush in the jungle, it is best not to make your cannon out of orange wool or lapis.
2. Wiring
- There are two main sets of wiring in a cannon, the charge wiring which activates the charge, and the shot wiring that activates the shot. Without any repeaters, which can be hard to get, a cannon is designated as manual, with 2 redstone power sources/blocks, such as buttons. For a manual cannon, the materials are simple, just a redstone wire that connects the charge to a redstone emitting item, and a wire that connects the shot to a redstone power source. However, this requires skill so as not to misfire, you must know when to activate each button.
With repeaters it is a different story. The maximum amount of time between the charge activating and the shot activating is ten repeaters set to 4. That will also bring you maximum range, will only require one redstone power source, and will require no skill to fire correctly.
3. Mounting Block
- Mounting blocks (described below) are only certain special blocks.
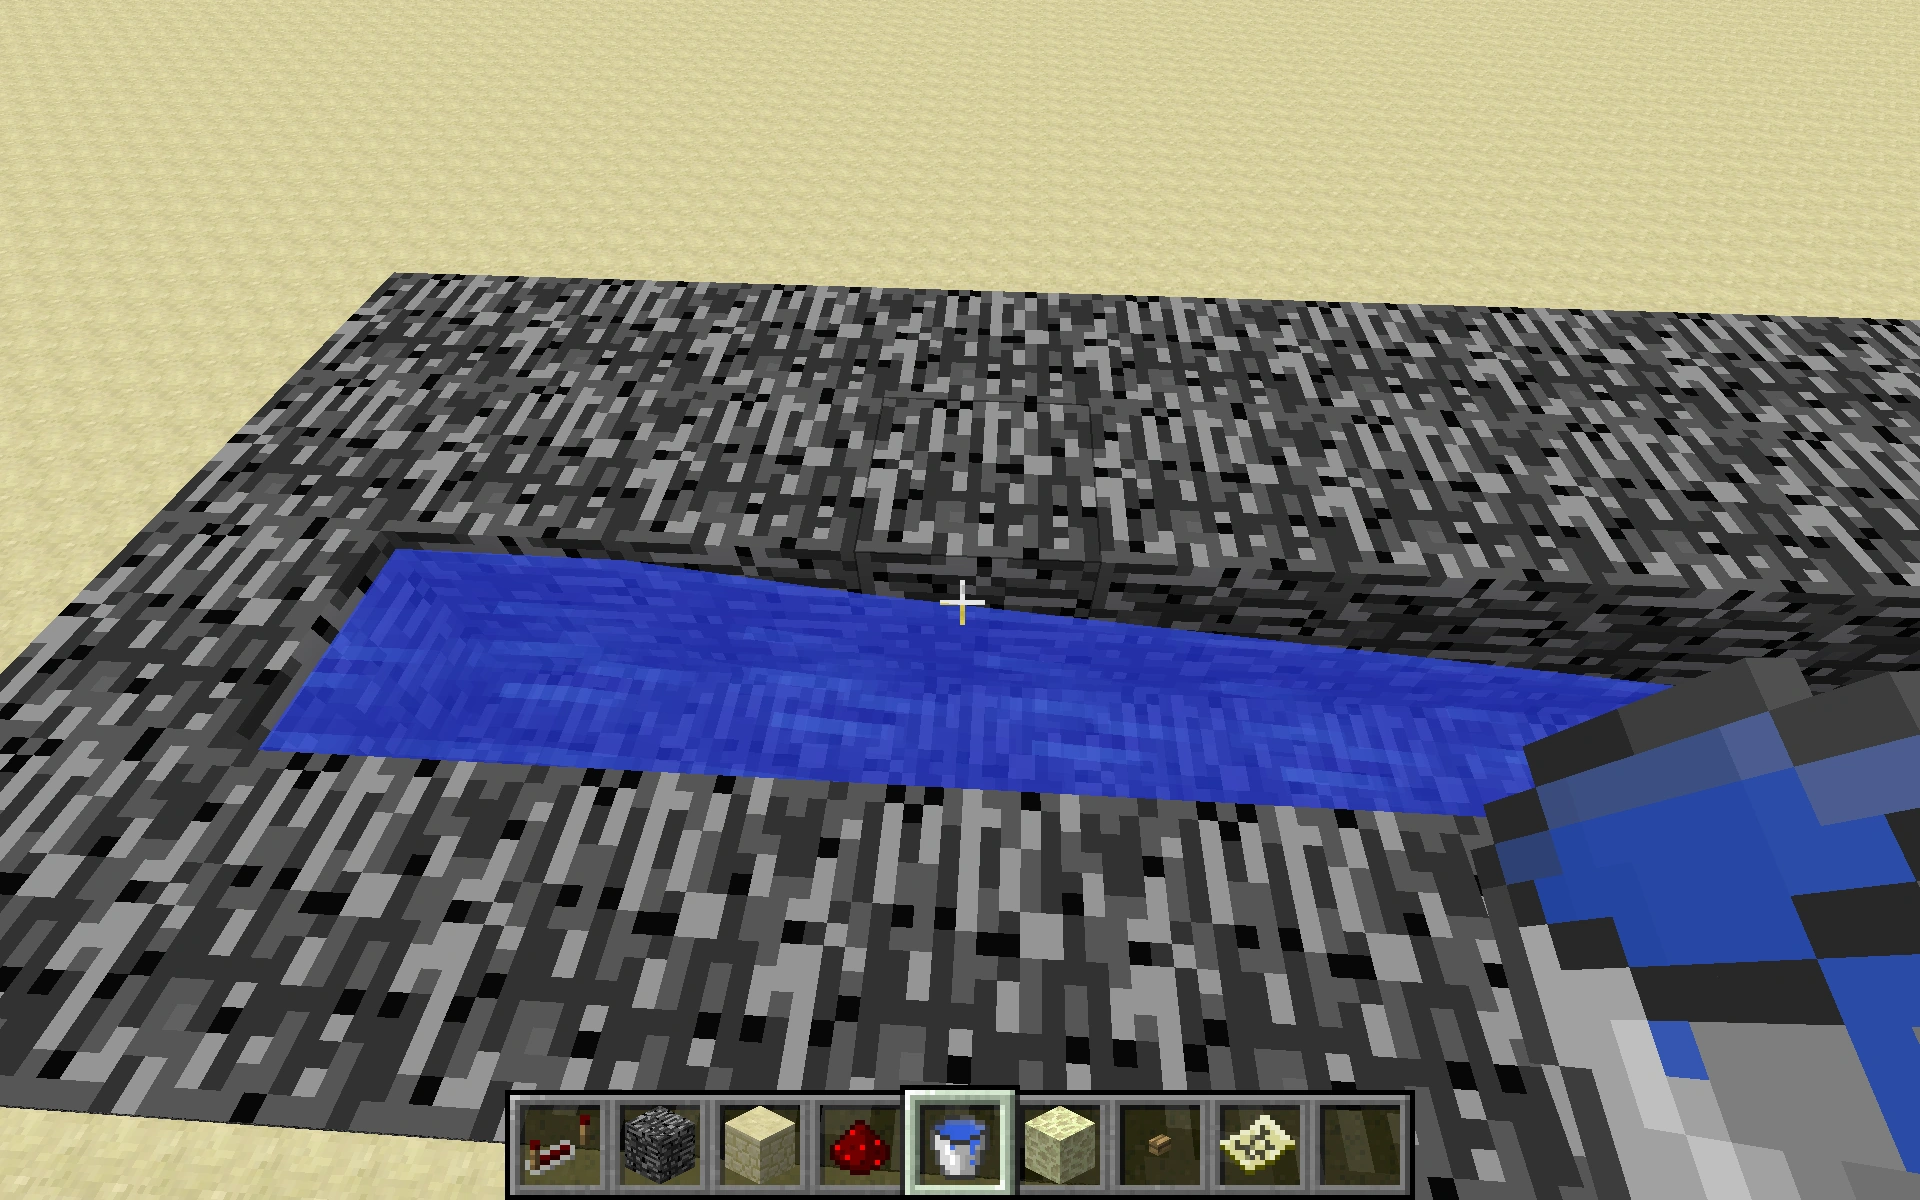
4. Explosion Housing
- Unless it's a dry cannon, this must be water or lava. The liquid prevents the cannon and any other surrounding blocks from being destroyed.
Creative mode
In creative mode, there is no reason to build a TNT cannon for warfare, but is the optimal mode for testing and developing cannons.
Limitations, and ways to possibly get around them
- The four big, main limits to TNT cannon engineering are
Limit 1. That no matter what you do, a TNT will explode approx. 4 seconds or 8 flashes after being primed. The way to sidestep this is to make the TNT fly faster, but that leads us to limit 2.
Limit 2. Minecraft can only take so much, and Entities flying at escape velocity around your Minecraft world can cause it to crash. Another thing that can cause crashes of your Minecraft is large amounts of impulse charges detonating in unison. With the allotted 1.5 GB of RAM, the max TNT is about 500. The way to possibly sidestep is to increase the RAM allowed for Minecraft, if that is even possible for certain computers.
Limit 3 is that TNT has a 7 block detonation radius, so just making a large cannon is a waste of time. Beyond 9 charges, the TNT is wasted. However, this can be sidestepped by either adding more vertical rows of charge to your cannon, adding a condensation charge system to your cannon, or a combination of them both.
Limit 4 is for vertical cannons, and is that if you make it too powerful, it will fly up too fast and far meaning it will crash your game. This can be sidestepped by decreasing the power of said cannon, or making it semi-vertical. That way you can go up and sideways.
Cannon Sizes and Special Features

An example of a super large cannon
The default definition of cannon size is how many TNT are in the shot or how far it fires. If you are talking about compact cannons, you might be talking about literally the size of the cannon (e.g. How much space it takes up) or if you are talking about cannons meant for mass destruction, you might be talking about the size of the shot. But usually, people mean charge mass. A small cannon, such as a 112.0MM3 Ironwall Anti-Infantry cannon, only has a very small range, and is meant for stopping large amounts of rushing players or mobs (tons of wolves) A medium cannon, such as the 116.0R4.6M2 Scorpion is meant for setting up as a first line sieger, to be set up and aimed at a target such as supplies or a wall while one has arrow cover, or to be set up as an Anti-Archer cannon. A large cannon, such as the 119.0R4.10M3 Orion is for attacking from a distance, a borderline long range mortar, an Anti-Cannon defense, a second line sieger, and many other uses such as modding for Icarus ammo or a full lob aiming cannon. A sniper cannon, such as the 119.3R4.10M6 Ares, successor to the Orion, is for a tent line sieger, setting up to shell opponents camp when they can't even see the cannon shelling them, and other über long range tasks such as that. And of course, mass demo cannons, such as the 187.0MM6 Spread Shot Devastator*, which is used to completely mutilate any defenses whatsoever.
Players also like to add features to their cannons including:
- Multiple shots [1]
- Semi-automatic/fully-automatic firing and reloading
- With the Minecraft 1.5 Update, it is possible to make fully automatic TNT Cannons. [2]
- Condenser Charge (Another piece of TNT that explodes, pushing the Charge towards the front of the cannon to concentrate the blast.)
- Safety features
- Adjustable Shot Delay, which lets you change the range and trajectory of the cannon.
- Alternative Ammo [3]
- Dry Cannon: Building a cannon from explosion-resistant material to simplify design, maintenance, and potentially improve firing distance (dry cannons fire farther than their wet counterparts, all other factors being the same). See Tutorials/Dry cannon for construction details.
- Arrows as ammo
- Cannons that fire in a special direction, such as up or diagonally.
- Aimable cannons.
- Spread shot/mass destruction cannons
- Cannons with a blast shield (Even though the TNT is submerged and does not make a crater upon detonation, the player still takes damage).
- Shotgun-like Charges
- Cannons that fire anvils as ammo
Charge Condensing
TNT-Based Condensing (a.k.a., Condenser Charge)

An example cannon with a Condenser Charge.
A comparison of the shot distance of two different cannons, 1 shot with and 1 shot without a condenser charge each.
Because the pushing force of an explosion decreases as it gets farther from the source, TNT placed 7 blocks or more from the projectile would be have little to no effect. To remedy this problem a Condenser Charge may be used.
Condenser charges work by exploding slightly before the main charge, pushing the other primed TNTs towards the projectile.
Using a Condenser charge can increase the range of a TNT cannon by 33%. TNT condensation is still a relatively new innovation in TNT cannon technology, so this is not nearly complete.
Double-condenser-charge
A newer invention is the double condenser charge. As closer TNT to the shot increases in effectiveness ( for example 1 block from shot = 200 blocks range 2 blocks from shot = 170 block range), however is harder to compact, so the only way for it to work is with the double condenser charge.
The way THIS charge works, is by dropping a second piece of TNT just behind the first charge, and as the first charge explodes, the second charge and the shot is condensed, and the second charge explodes 1-3 ticks later, condensing further, giving a 55% range boost.
The current design has been made compact by its creator, MINBLEMONE, and is available to put into any cannon, however cannons with multiple loads may require revised timings.
Also, if you plan to rapid fire the cannon, then the water runs a risk of getting run-over by a TNT block. To fix this, you could find the place where the water will be, and knock off the block off the other side. Then put the water in the new hole of the cannon. Now, if you accidentally place a TNT block over the water, it wont compress, but you will still have your water and the cannon would still fire, but to a lesser distance. This could be applied to most TNT cannons, with a little re-wiring. Also you could use this if the "barrel" is too long and the water length runs out.
Piston-based condensing
Using pistons to push the Main Charge closer to the Shot also does the same thing as a Condenser Charge, more complicated to build but more controllable. To work, the Main Charge must be primed, turning the solid TNT blocks into entities. Once they are entities, a series of pistons can push and concentrated all charges into a single block space behind the Shot. In this system, you get far more efficient power from a given size of Charge.
Example: Cannon with 18 Block Piston Charge Concentrator This cannon uses a two rows of pistons at the sides and a double pistons in the middle to concentrate 18 blocks of TNT into one spot. The TNT Charges are set off when they are pushed beside the column of redstone torches by other pistons. They then fall into the water and are push by the side pistons, putting them in a single row down the middle of the water trough. Then, a double piston extends and pushes all the blocks forward into one spot behind the Shot.
Care must be taken so that the pistons do not displace the water blocks protecting the cannon from TNT damage. To do this, one usually has to apply water a block above the area where the pistons would go into. It is also advised that the pistons should RETRACT back into normal position before the Main Charge explodes, or your cannon might be destroyed. When the pistons extend, they create air spaces in the water no matter what, hence compromising the water's protection.
Guide blocks
Since beta 1.7 (needs confirmation) When a TNT charge is primed, it will usually shift slightly to one side. This can make a previously great cannon inaccurate. This is true with many cannons; but the solution is simple. If you add a guide block to the cannon, so that there is a wall on either side of the TNT when it is primed, it will not shift left or right, making an otherwise straight shot diagonal. If your design does not allow for this, you could just make the guide blocks one block higher, instead of being on either side of the TNT. This works because TNT will jump up, then go sideways in midair. Note that in most basic cannons, Guide blocks should be transparent if the TNT cannon automatically primes the Shot-otherwise, the redstone that ignites the Charge will power the block next to the Shot, and igniting the Shot as well. If this explanation is unclear, look at this diagram:
X = Guide block O = Shot
Figure: XOX
In dry cannons, a guide block is almost a necessity because dry cannons tend to be inaccurate. However, dry cannon's guides are for directing the shot to be shot accurately, not to be primed accurately. However, guides can also decrease range is they are too long. A link to Tutorials/Dry cannon
Shot mounting blocks
The shot mounting block for a cannon should be chosen according to how fast, far, and high you want the cannon to fire. Of course, these variables depend greatly on the position and amount of the charge and the timing of the shot, but the mounting block also can make a difference. For example, with a cannon with a charge of 5 and a delay of R4.3, the shot will take a mortar trajectory with a ladder more than with a fence post and pressure plate. A few things:
- Even though the shot mounting blocks ladder and full block are both the same height and fire a shot at the same trajectory, the ladder will consistently fire farther than the full block because the ladder has less matter in between the shot and the charge than the full block. This situation is the same for all mounting blocks, the slab and fence post w/ pressure plate also follow the same rule.
- There is a trade off: although the fence post and pressure plate fire the farthest, they are also expensive, while the slab is cheap and easy to get, as well as coming in many forms.
- The maximum range for any cannon can be achieved by altering the mounting block. A TNT shot will be fired farthest if it leaves the cannon at a 30 degree angle. So, if you want to just have your cannon go the farthest it can, use the slab, Fence and Pressure plate, or Trapdoor mounting blocks. However, when faced with fortifications or terrain obstacles, the best idea would be to have a mounting block like Piston, ladder, or single block that makes the TNT arc over the said obstacle.But, then again, it is fun to blast your way through things...
- The following shot mounting blocks are tested and deemed safe. Feel free to experiment with mounting blocks, but keep in mind that some blocks, such as a lone pressure plate, will cause a mis fire of your cannon, and of course make it self-destruct.
A rewrite for most of these mounting blocks is coming soon.
No mounting block
Note: These pictures were taken with a texture pack.
No Mounting Block
Pros: Highest velocity, simple, scalable
Cons: poor range in smaller cannons, downward trajectory, line-of-sight only
When no mounting block is used, the Shot is either allow to fall onto the water trough or is place on the trough directly. the Shot will fire out completely horizontal, or 0°. Gravity will quickly pull the Shot to the ground, giving a very flat, downwards trajectory.
With small TNT charges, the range can be extremely limited. To increase the range, ever larger charges are needed or the cannon must be built higher above the ground. A larger charge means a higher velocity to the Shot, pushing the Shot farther away before it drops to the ground.
Players have been known to use up to 70 TNT charges and beyond. But economically, a cannon without a mounting block will take more TNT and longer to load for a certain range.
Single block
Single solid mounting block
Pros: Higher firing angle, can lob shots
Cons: Low velocity, reduced power and extremely poor range for smaller cannons
A single full size block such as cobblestone or obsidian is placed under the Shot. This has the effect of elevating the Shot above the water trough, so the blast force from the Charge is applied not just forward, but upwards. The shot is fired out at a high angle and trajectory. This is useful for hitting an elevated target, or one behind terrain or obstruction.
However, part of the blast force is absorbed by a solid mounting block, so the cannon will suffer similar problems of needing large charge sizes. Also, since some of the energy is expelled in the upwards direction, forward shot velocity is reduced greatly.
A better alternative to the single mounting block is using a Ladder instead.
Half block

Stone Slab used as a half block mounting
Pros: Smooth trajectory (not too high, not too low), average velocity, more efficient for small and medium cannons
Cons: Slightly reduced power, not best for either straight OR lob shots, fuse range limit*
A half block is the compromise between a single block and no mounting, and generally more efficient than either. More of a cannon's blast force is directed forward, but there is still an upward vector that raises the angle of fire to roughly 30°. As with a single block, some of the blast energy is absorbed by the block, but much less. From the same TNT load, the half block has greater range than a single block or no block.
When the TNT Shot is initially placed over a half block, it will hang over the half block as if it was a full size block. Once the TNT has been "primed", it will fall down and sit on the true height of the half block.
The firing angle produced by a half block is good for extending the range of a cannon and hitting elevated targets, but its too low for effective lobbing over high walls and obstacles. For straight direct firing, shots fired with a half block mounting generally land level on the ground within a certain range. However, due to the limited fuse time of TNT in the game, scaling up the TNT charges up to a point will result in the shot flying too high and exploding in the air before it lands or reach the cannon's maximum range. This will be refer to as the "fuse range limit*". All cannons are limited by the fuse range limit, but cannons firing at higher angles are especially prone to the fuse limit, as the shot velocity is lower and shots reach higher altitudes.
Trap door
Trapdoor used as a mounting block
Pros: (closed) Optimized for flat trajectory, velocity almost the same as no-block, have a very large range meaning it can destroy far targets, (opened) can be used in open position for higher firing angle, good scaling, can destroy higher targets
Cons: Be sure that priming circuit doesn't activate the trapdoor by accident. Very high speeds and oversized accurate shots could mean if the primed TNT hits a near castle wall in the air, it will fall down and miss the shot. It cannot aim at middle targets. Cannot aim at closer targets
If the firing angle of the half block is too high for your purpose, a closed trapdoor can be used instead. Like the half block, it provides some upward force to the shot by elevating it above the trough. A trapdoor, however, is only half the height of a half block. Firing angle is roughly 15-20°, making it extremely effective for straight shots at very long range (+180 block). this will give it big explosions
Little forward velocity is lost when firing, and shot typically fly out at very high speeds. This combine with the low firing angle means cannons firing larger loads can extend their range without encountering too much fuse range problems as with the half block or ladder mounting.
Ladder / Iron bars/ Glass pane

Ladder mounting block

Shot mounting with two ladders
Pros: Efficient with small and medium cannons, High firing angle, parabolic trajectory, good for lobbing shots and high altitude
Cons: Low horizontal speed, poor scaling, limited range at ±120 blocks
A Ladder placed on the side can serve as a very effective mounting block for firing at high angles and lobbing shots. A primed Shot will be supported by the edge thickness of the ladder, preventing it from falling into the trough. Because a Ladder is not a full size block, none of the energy from the blast is absorbed, and the shot is propelled out at full force. By adding ladders above each other, different firing angles can be achieved. Typically, a single ladder will give an angle just higher than a half block, roughly 40°-45°. Two ladders will give an extremely parabolic flight, shots fly out at about 50°-60°.
A good portion of the blast energy is directed upwards on the block, so horizontal speeds are generally much slower than a no-mount or half block mount cannon. In return, the cannon has no problem lobbing shots over terrain and walls. At larger charge loads, shots can reach very high altitudes.
However, this also means the fuse range limit is an inherent problem with this mounting. Within a 100 block distance, well built cannons level with the ground can expect to land shots low enough to cause damage. But beyond this shots explode midair way beforehand, even with a shot primed at maximum fuse time with a delay circuit. Hence, one can't simply add more TNT to increase the range, as it will only make the shot fly higher. A basic solution is to put the cannon below ground, in a pit with a slanted slope to allow the shot to fly out. Since the shot had a lower starting point, it will explode closer to the ground once its fuse time runs out. To reach ranges beyond 150 blocks, this solution becomes impractical.
Fence
Pros: Efficient with small and medium cannons, Low firing angle, good for shooting through caves and past overhanging base defenses. High velocity, extremely powerful in spread cannons and long range cannons.
Cons: Expensive materials, Fuse range limit to bigger cannons. If used a condenser, then the explosion will send the TNT too high and with no ceiling, the TNT can destroy the cannon.
A fence placed at the end of the cannon tricks Minecraft to think that it is one block high, since it is only one and a half block high for the player's perspective. Therefore, the Charge would be recognized as closer to the Shot than it actually is. Since it gains more power and velocity, it appears to fly up a bit, then go down in an attack angle. However, to that server from Koopa the troopa 64, the explosion launches the TNT upwards meaning if the cannon has no ceiling, the TNT can well destroy the cannon. This gives it a distinctive style of cannon shooting, and it is considered one of the most useful mounting blocks in Minecraft.
if the cannon needs the water blocked a pressure plate may be used, but slightly decreases the launch velocity
Piston
A Piston Mounting Block TNT cannon (primes after Piston extends)
Pros: Adjustable, when fully extended it has the same effects of a full block but is more efficient than it and is more versatile, compatible with firing sand or gravel.
Cons: Expensive, the shot has been subject to the fuse range delay limit found in arcing cannons, is used as a mortar MB so usage inside caves or buildings is not recommended and will result in short range shots, accidentally placing two TNT blocks (One on top of the other) will destroy the cannon, requires a R4.7 delay.
The three most common ways to use this Mounting block are 1. Prime the Shot then push it up 2. Push it up and then prime the shot and 3. Just use it as a more efficient version of the full block MB.
3x9 Pressure Plate
Pros: easy to build, understand, and use
Cons: any mob can accidently use
This cannon requires water, redstone, any block, TNT, and pressure plates. Make a 9x3 rectangle, break the middle of a 3 on one side, and put 2 more blocks on both sides of the hole, straiht up on the blocks. Pour water into the other side, and place TNT everywhere but source, and between the highest blocks. Make stairs down one side of the high areas, place redstone on the stairs, one block away, then add a pressure plate. Place redstone along the frame until you get to the high points. Put three things of redstone past the far corner by the stairs, and place another pressure plate. Step on that, wait a count of 3 or 4, then go step on the other plate. The high TNT will fly out up to about 50-60 blocks. A wonderful, destructive cannon. Note: The water source neutralizes the lower TNT to prevent destruction.
Rarely used mounting blocks
Flower Pot
Pros: straight, easy to build and can lob shots Cons: Fuse range limit, expensive
This is a cannon used for destroying higher castles. Flower pots are only used in decoration and it cannot aim at lower targets.
Redstone repeater
Pros: Second highest velocity Cons: Can only shoot 9 blocks, expensive, make sure the circuit doesn't activate it by accident
This cannon is only used in an extreme hills biome. It only works if the cannon is on a cliff and the house is below it. It is the second worst cannon.
Daylight sensor
Pros: Good shooting, not too high velocity, can lob shots Cons: Make sure the sensor doesn't activate the circuit by accident by daylight, expensive
This is a cannon for ground levels and it is good on any type of cannon (except of super large cannons which has a fuze range limit.)
Bed
Pros: Good shooting, really fast, high , medium angle"" Cons: Expensive, bigger cannon
This is good for attacking bigger castles, but has also a big range. One of the best mounting blocks.
Cannon tutorials
Dispenser-based Cannons
Since the Redstone Update, redstone dispensers will dispense ignited TNT instead the item. This feature can be used to make a new form of TNT cannons.
First Layer
Second Layer
This cannon would have dispensers that release TNT into the water. Redstone would run on top of the dispensers. A 33-tick delay would keep the shot in the dispenser until the last possible moment. Another dispenser would place the TNT shot right before the charge detonates, giving the shot the most amount of airborne time possible. Dispensers dispense TNT without the characteristic "hop" of ignited TNT, which effectively guarantees the TNT will land in a much shorter radius than a conventional TNT cannon.
One of the smallest TNT cannons is this design by Mumbo Jumbo:
First layer
Second layer
Side view
You can easily modify it to have another dispenser under the water facing up, and you can use a fence post with a pressure plate on top instead of a slab.
Pros: The time taken to reload TNT is at its absolute minimum. All a player has to do is to make sure the next shot is placed AFTER the first shot is fired to make sure you don't destroy your cannon. This cannon requires little skill at all to fire; the hardest part will be placing the cannon a proper distance away to make sure you don't over/under-shoot. Such precision makes this cannon good for castle defense. Furthermore, through use of comparators, it is possible to make an easily aimable dispenser-based cannon, and dispenser-based cannons do not blow themselves up if hit with another TNT cannon.
Cons: Dispensers and TNT are expensive. This type of cannon can never be quite as hardy as manual cannons, since dispensers can be blown up with TNT. Furthermore, if the cannon is left loaded and unattended, it is trivial to steal the TNT from its magazine. (This is also true of conventional autocannons.) Dispenser-based cannons with a one-block-wide water pool have also been known to blow themselves up, particularly if left firing automatically and unattended.
An automatic cannon can easily be made with this design. Subsitute the button for redstone and hook the redstone up to a clock. Be careful not to set the clock under 5 seconds, the same time as it would take the TNT to explode. If the TNT is reloaded too quickly, the timing can cause the shot to detonate before the propellant does, destroying the entire cannon.
Reloading Cannons
Reloading cannons are one of the most complex designs for beginners. However, as long as close attention is payed, for a first time build, it can be created in about 15–20 minutes depending on the size. Reloading cannons became obsolete when dispensers were added.(except in the Xbox 360 version)
The Good: Reloading TNT cannons can be customized just as easily as any other cannon (using fences, iron bars, glass panes, etc.). They can be shot several times with only a few seconds' interval in opposition to having to reload it several times like you'd have to do with a standard TNT cannon. Using the simple design, this TNT cannon can have up to 12 rounds in the magazine. If playing a fortress war server, this cannon can fire repeated shots which will demolish the enemies' buildings before they have time to stuff their ammunition into their puny and inferior weapons.
The Bad: Unfortunately, cannons of this variety are bulky and often unattractive. They require sand or gravel which are nonrenewable resources in survival mode. Added to that, it is tedious to reload the cannons whenever the magazines run out of ammo, however occasional that may be. With standard TNT cannons, if the 1-round magazine is destroyed, it is usually easily replaceable. This is not the case with the reloading kind, as the entire magazine will explode, destroying the weapon and all the redstone wiring with it—often killing you in the process. This type of cannon has also become redundant with the recent updates allowing automatic cannons utilising dispensors to reload the tnt, which is easier and more compact to make.
Short-middle range cannons
Super Quick Raid Cannon
Pros:Very simple
Cons:No water means terrain damage. Can damage you a lot. Requires a bow This cannon only requires a flame bow, 2 arrows, and 8 TNT (though you'll want to use either water or good armor). This was made by reddit user Zecon 365 here More designs can be found here
Vertical TNT cannon
This is a simple TNT cannon to rebuild. It is very efficient and shoots you very high in the air.
| Vertical TNT cannon (view on YouTube) |
|---|
Downwards TNT Cannon
This cannon has very few uses, but can be used instead of a gravity fed TNT dropper. http://www.youtube.com/watch?v=nLgScSMejto
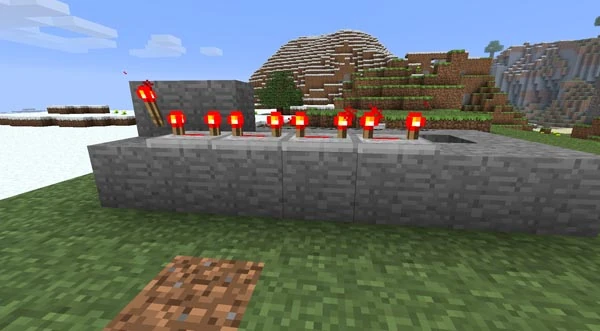
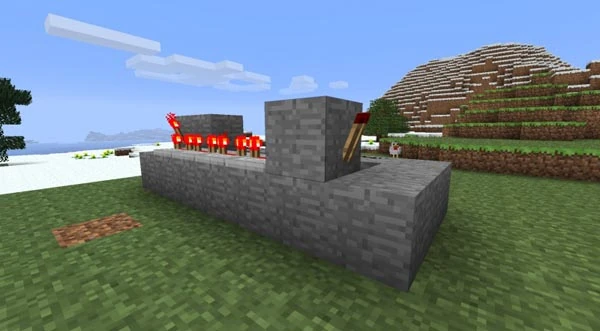
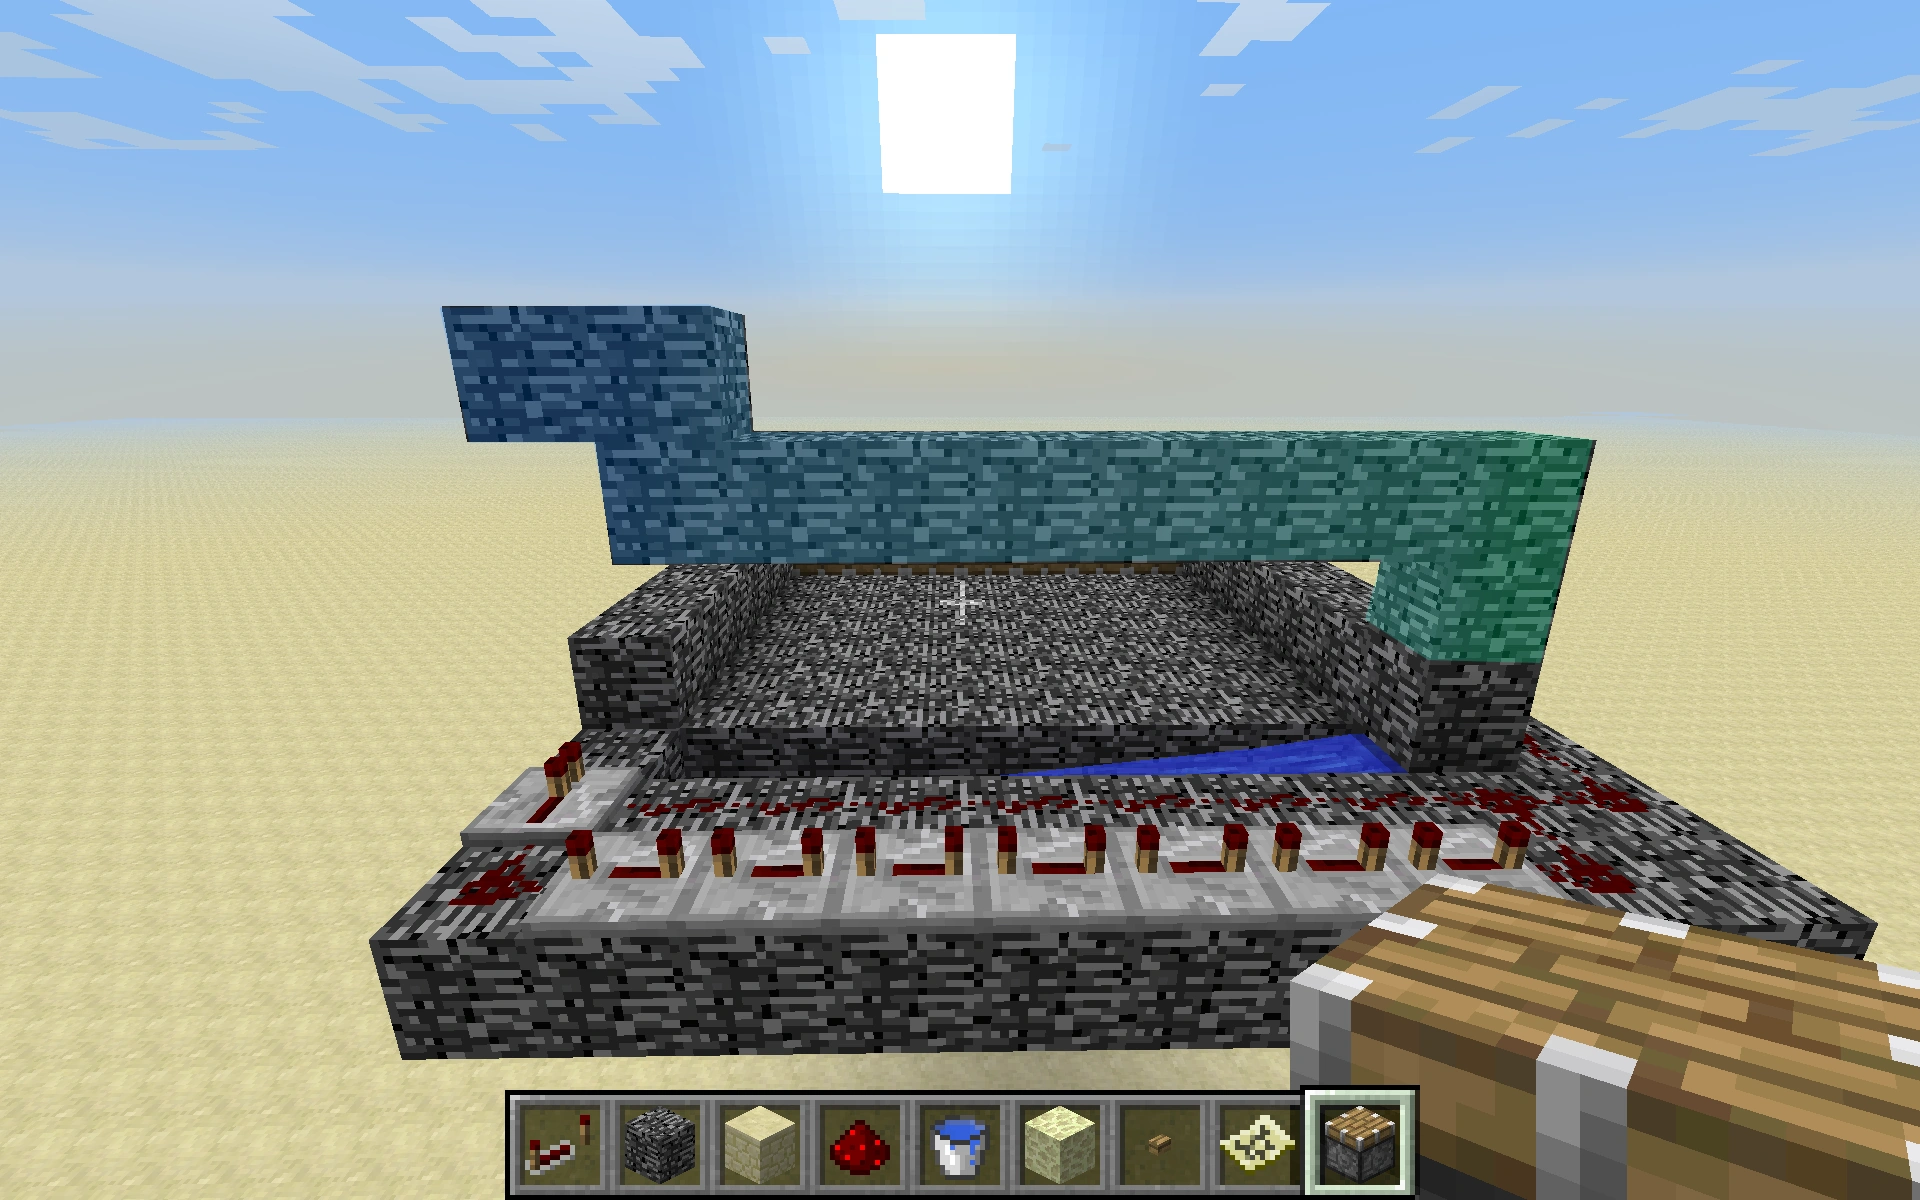
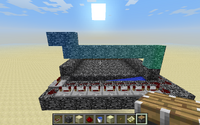
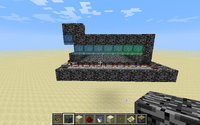
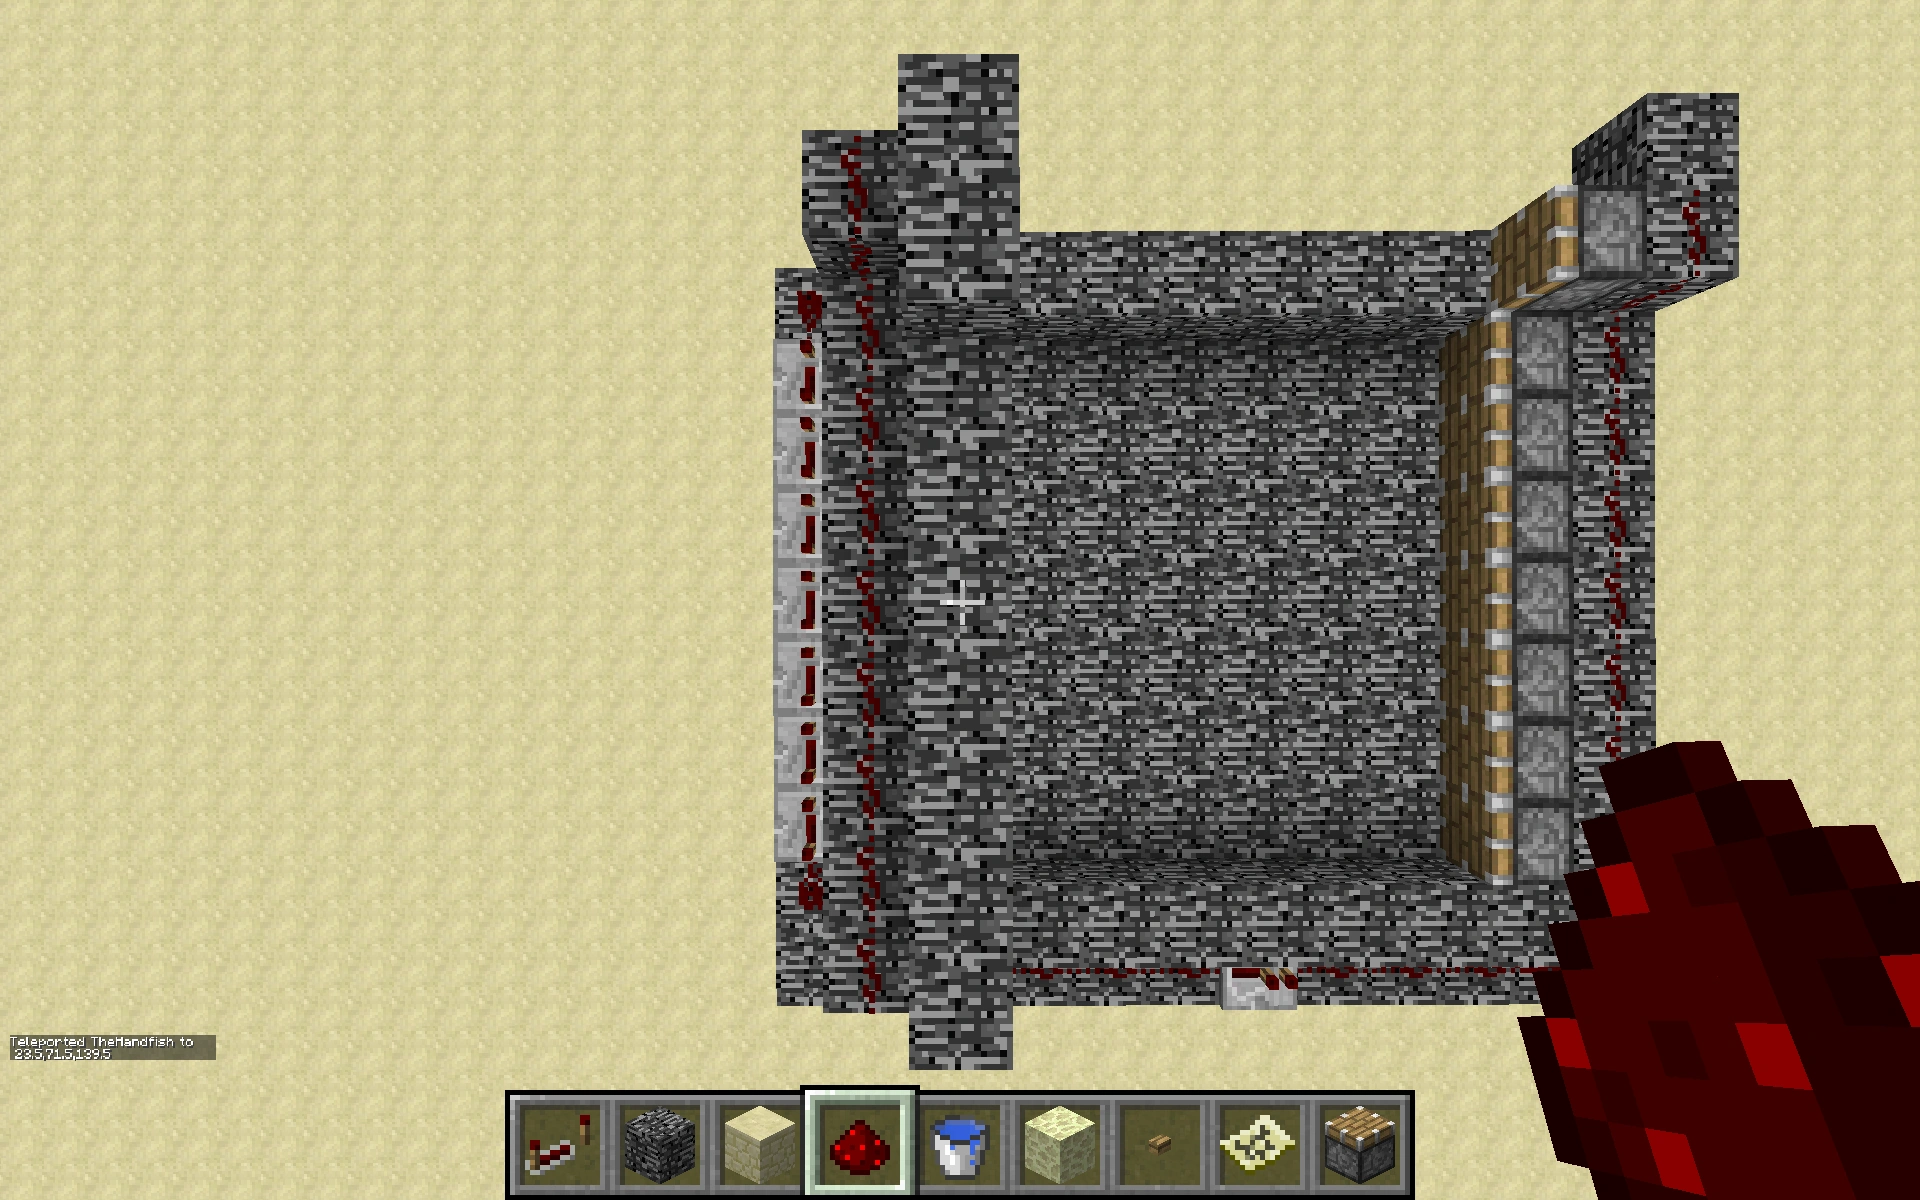
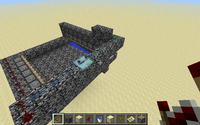
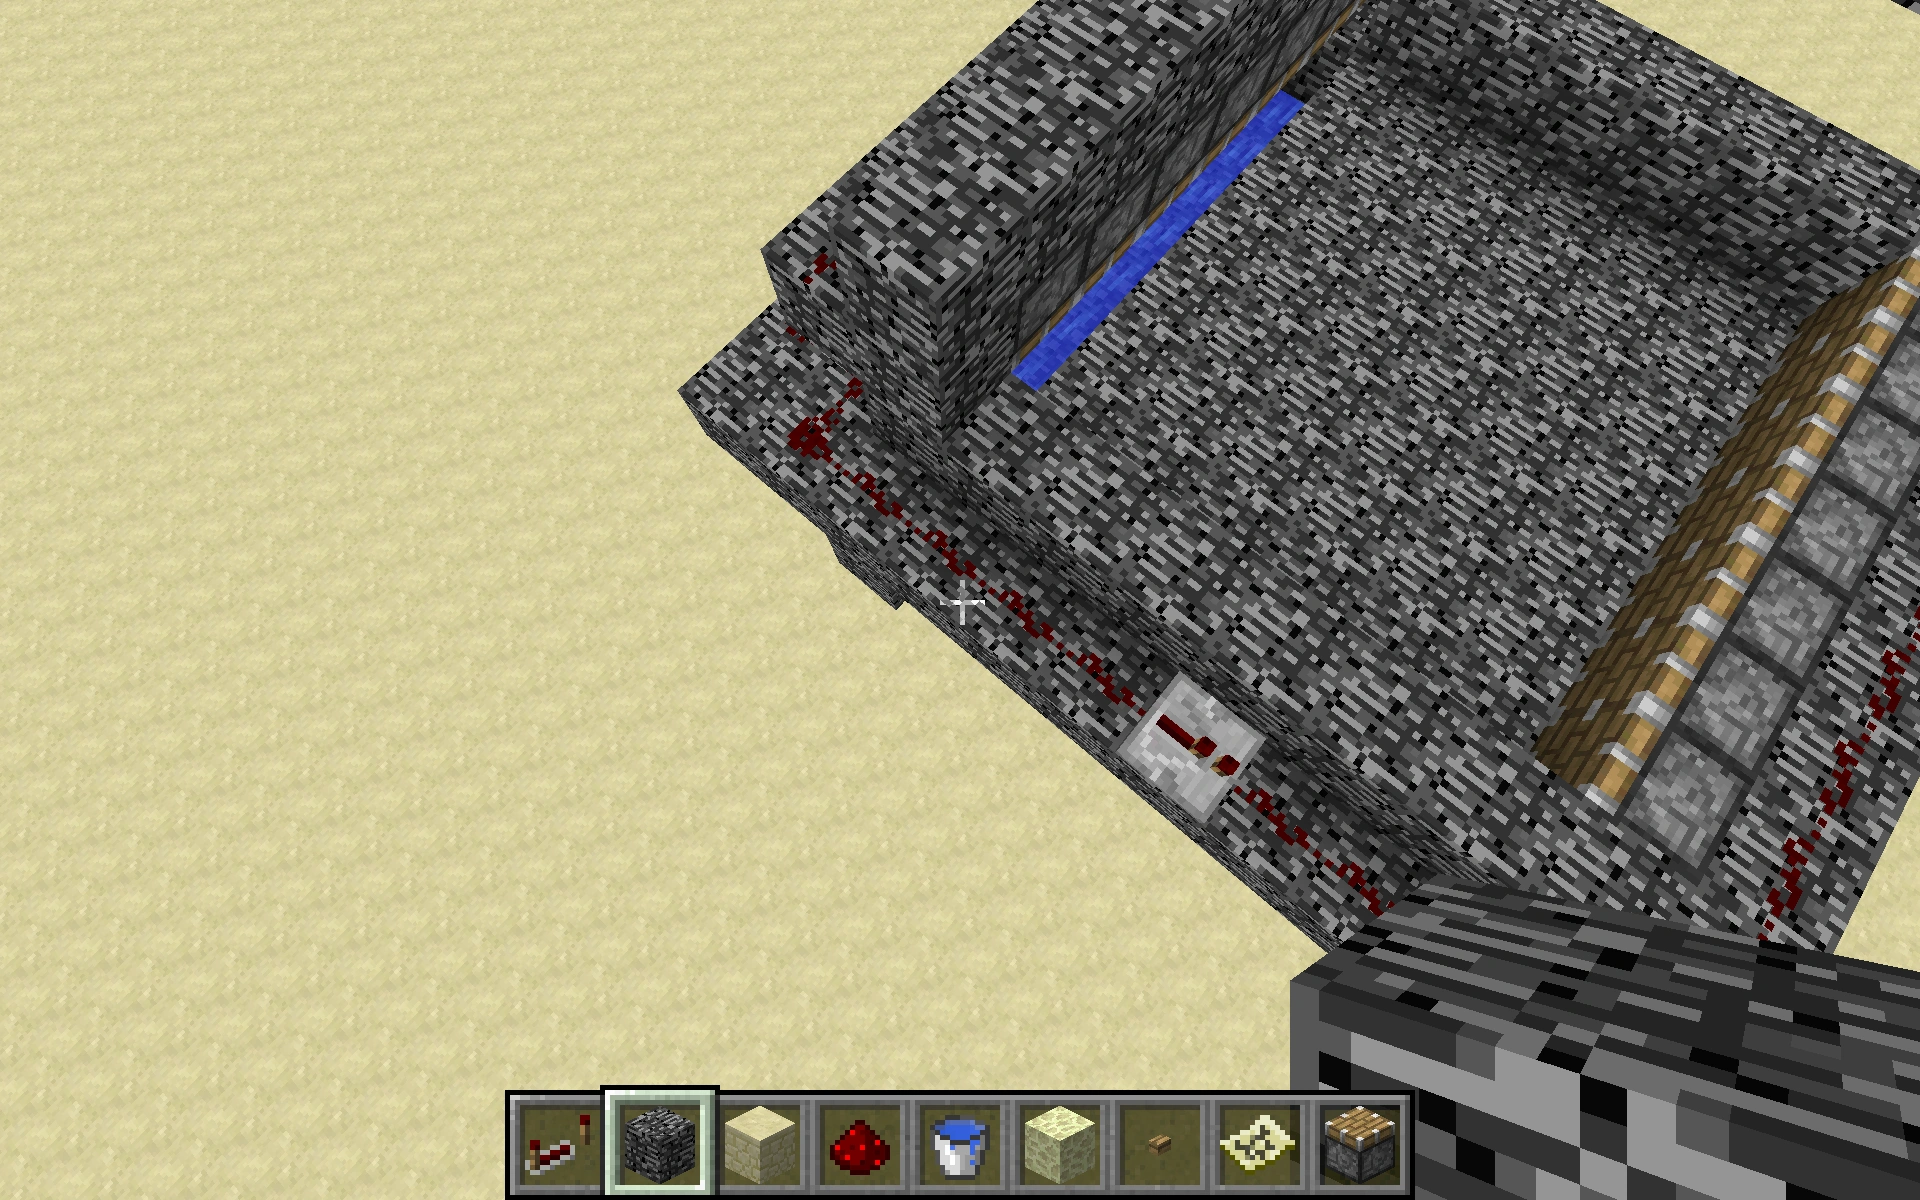
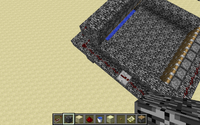
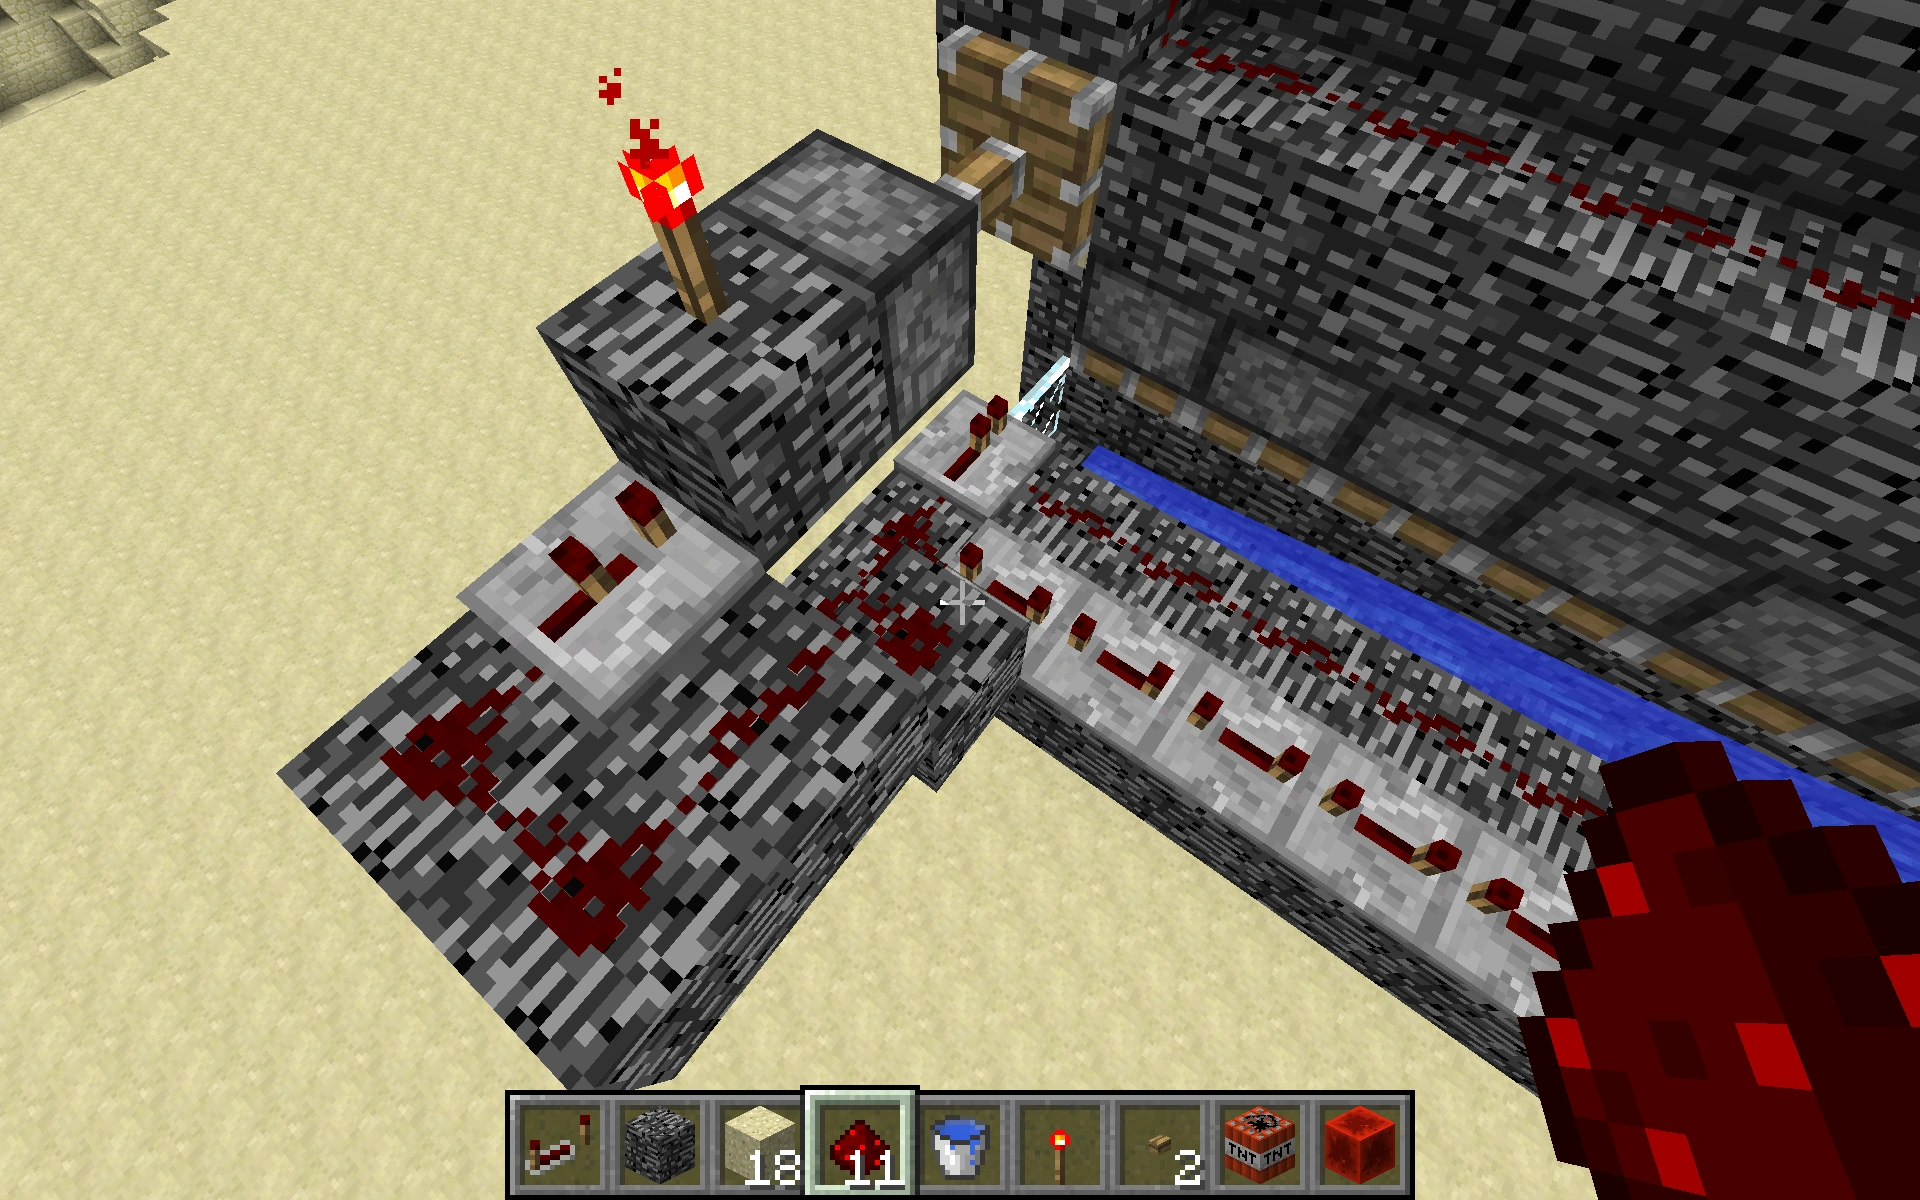
One-button defensively ranged cannon
Repeater used as delay
Is a simple cannon that has an automatic delay. Used mostly for guinea pigging other, larger, prototypical cannons or as wall mounted defense against ground- based troops or artillery.
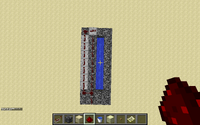
114.0R4.4MB2 - The Naming System for it can be found above.
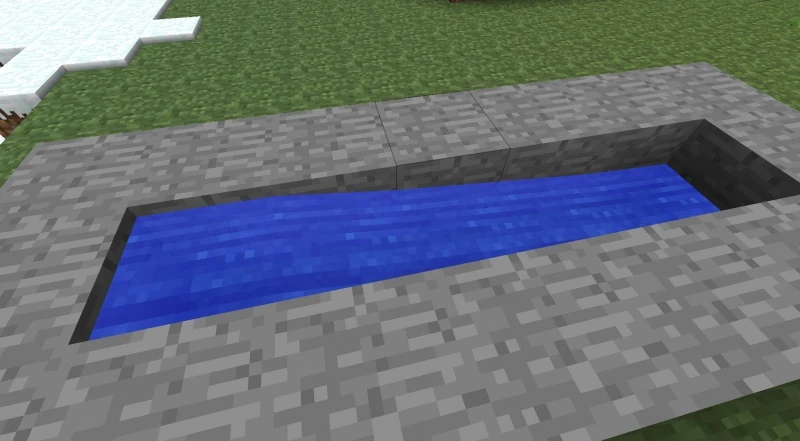
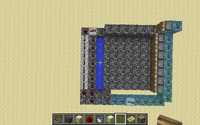
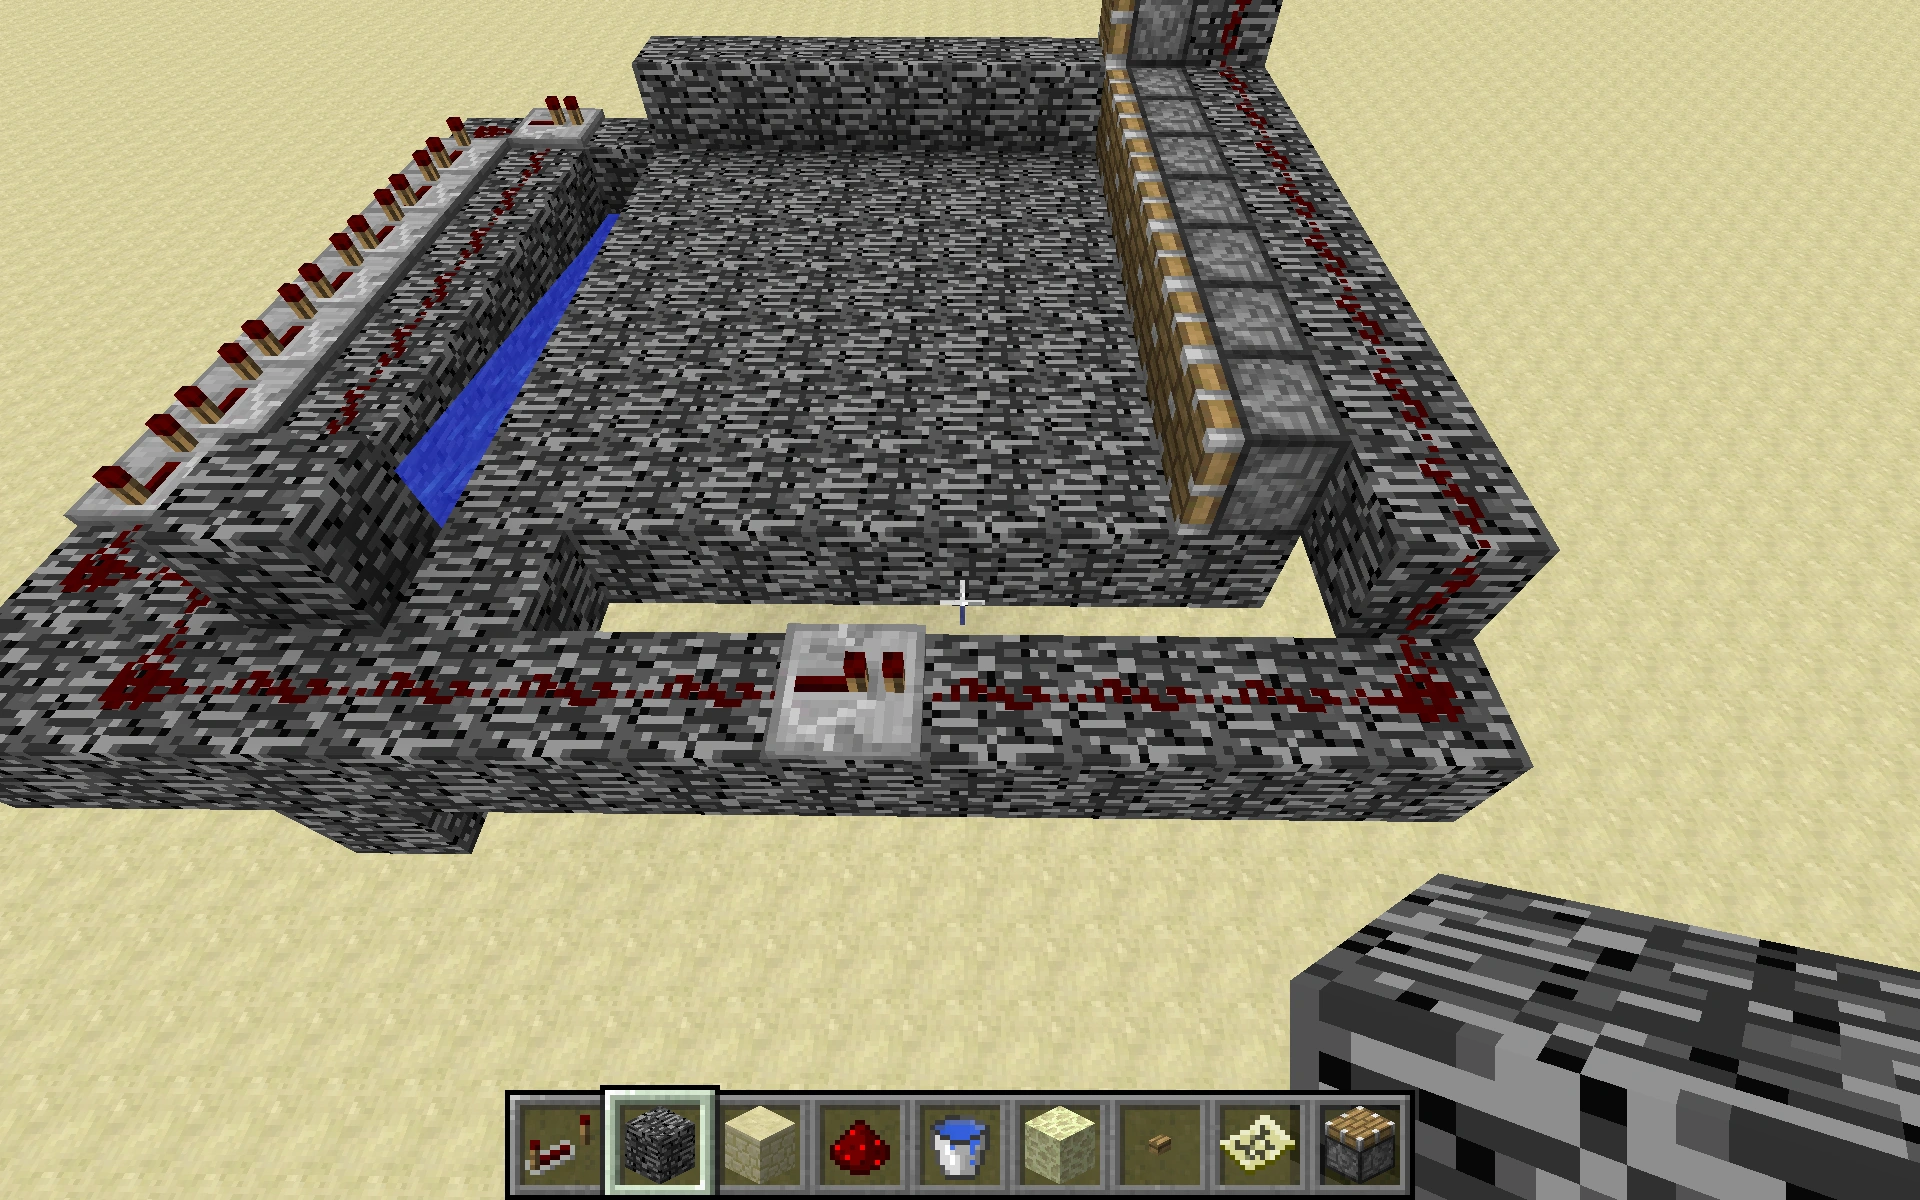
First build the base of the cannon
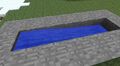
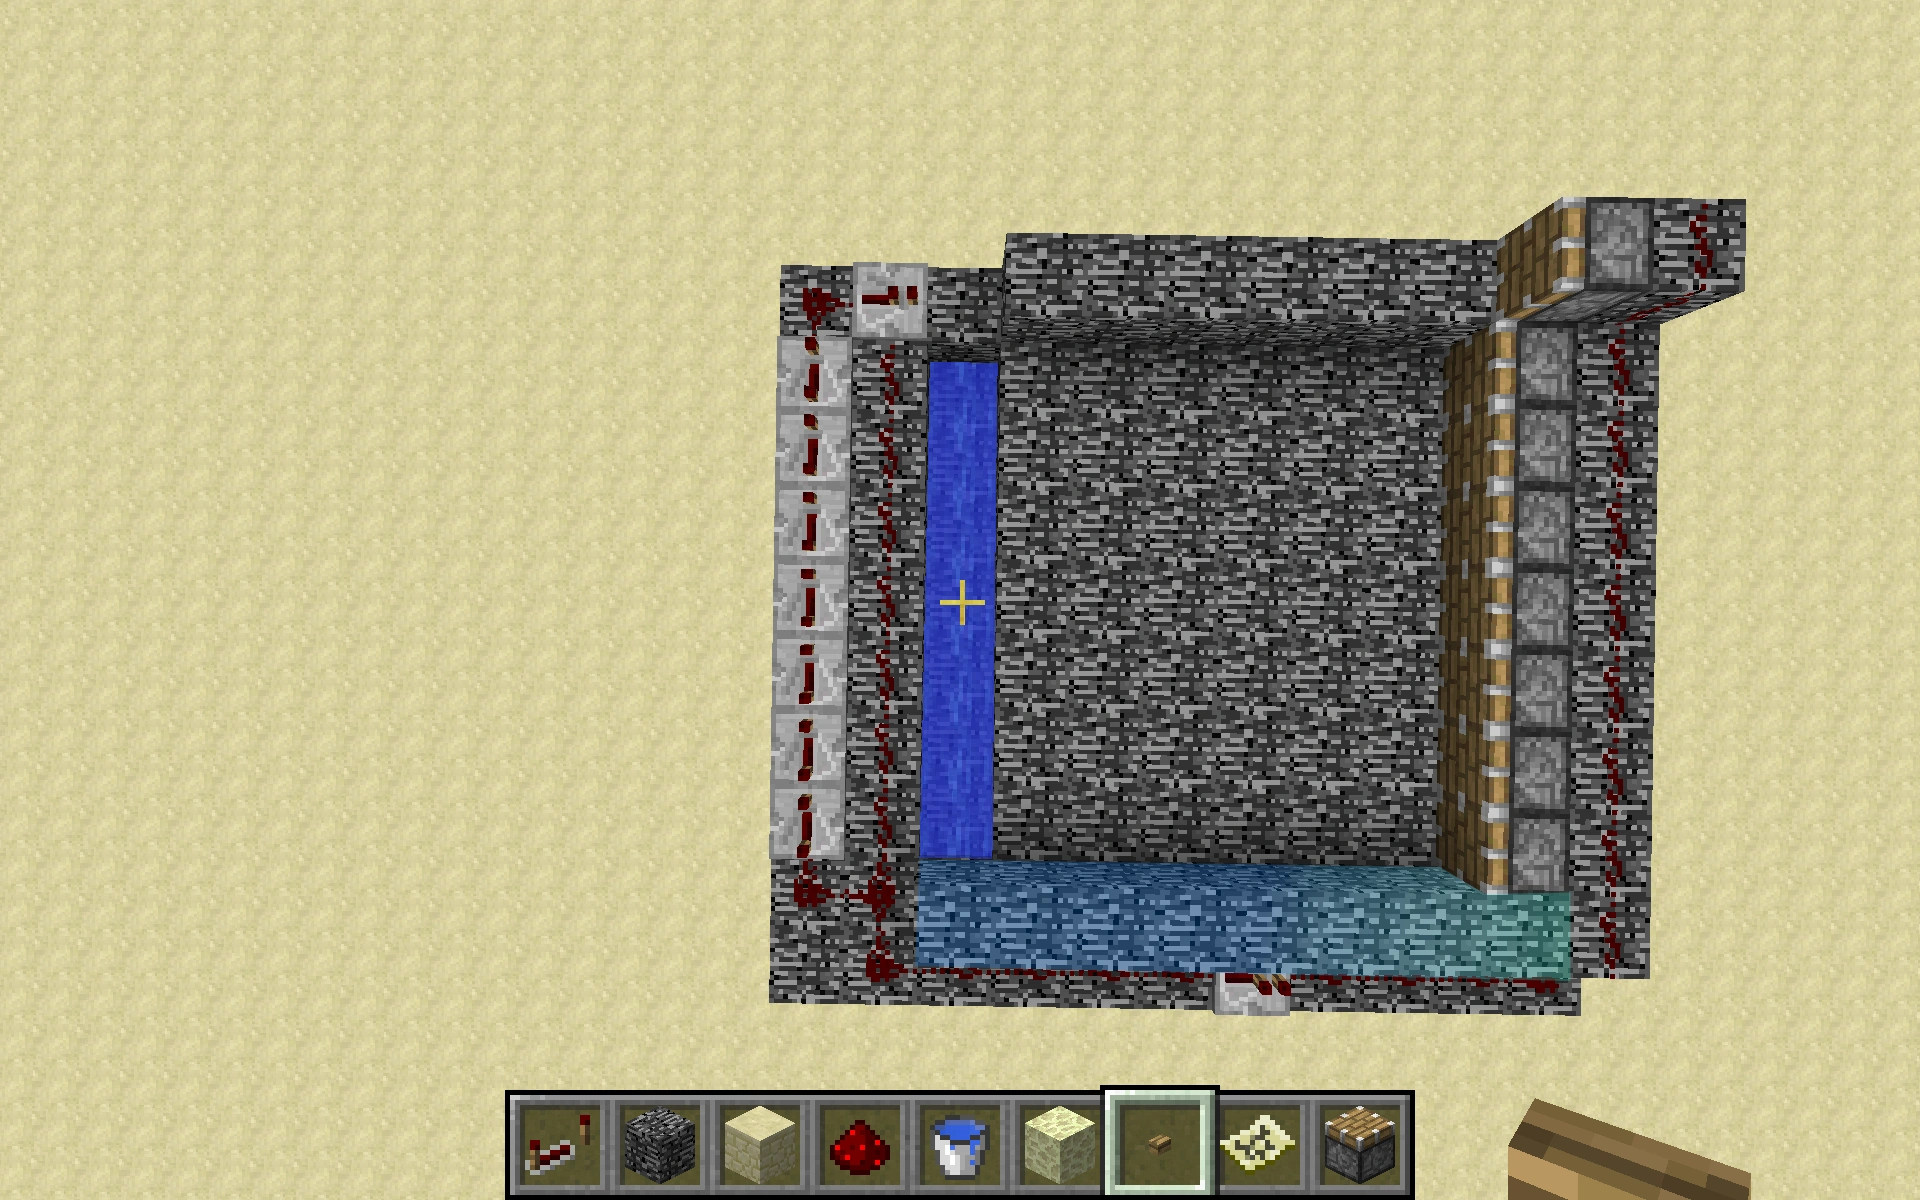
Then fill it with water on one side

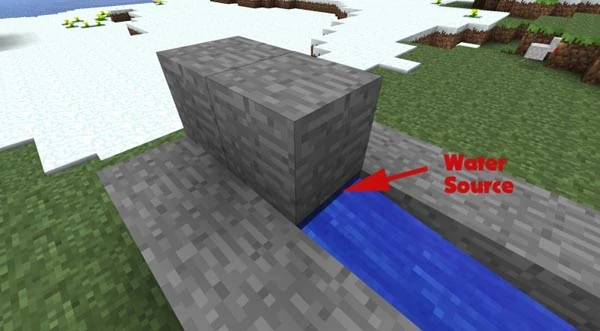
Build two blocks like on the picture

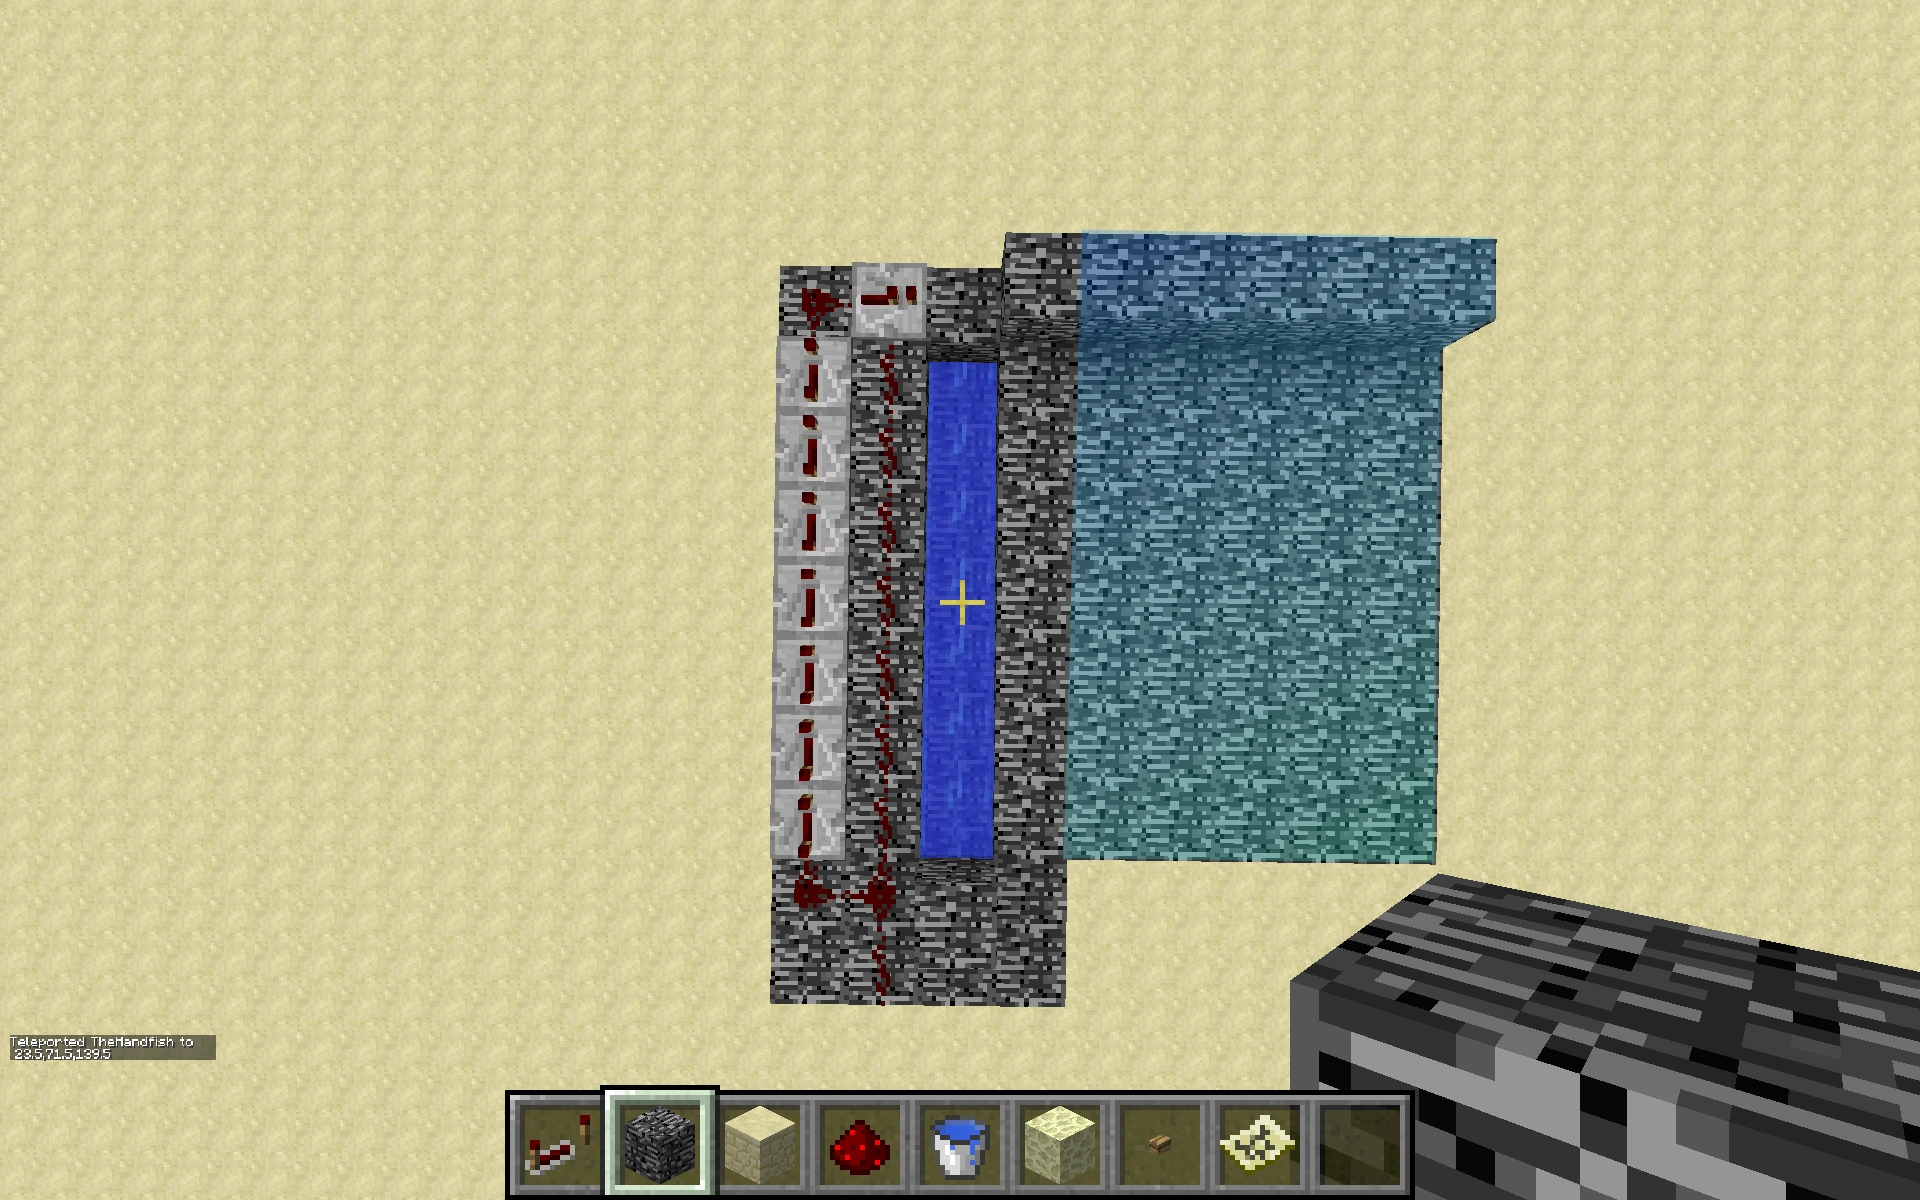
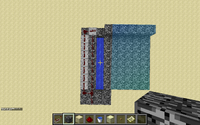
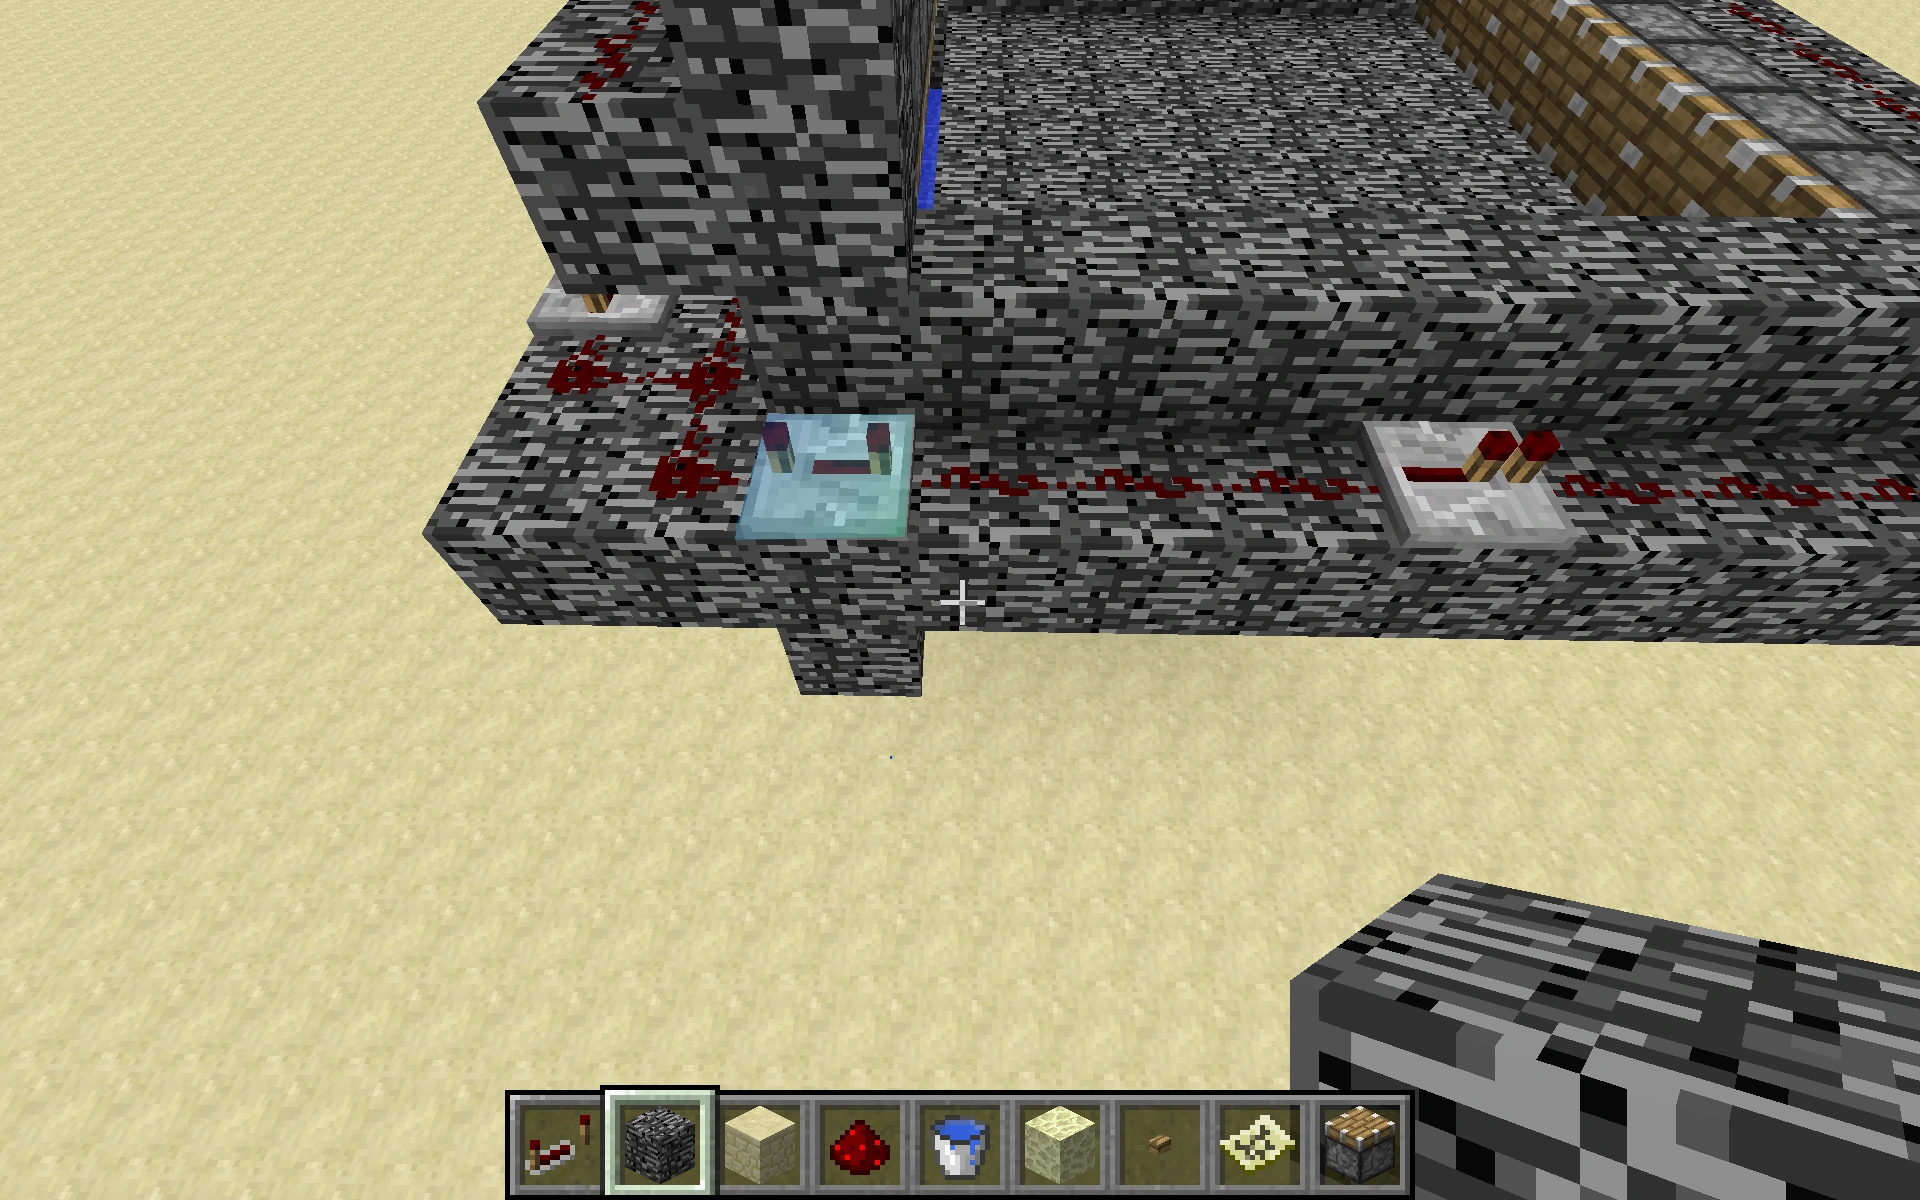
Place the button
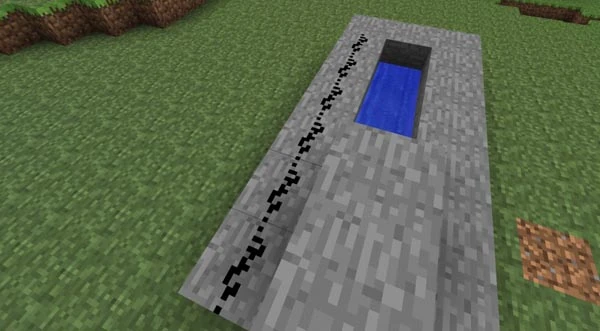
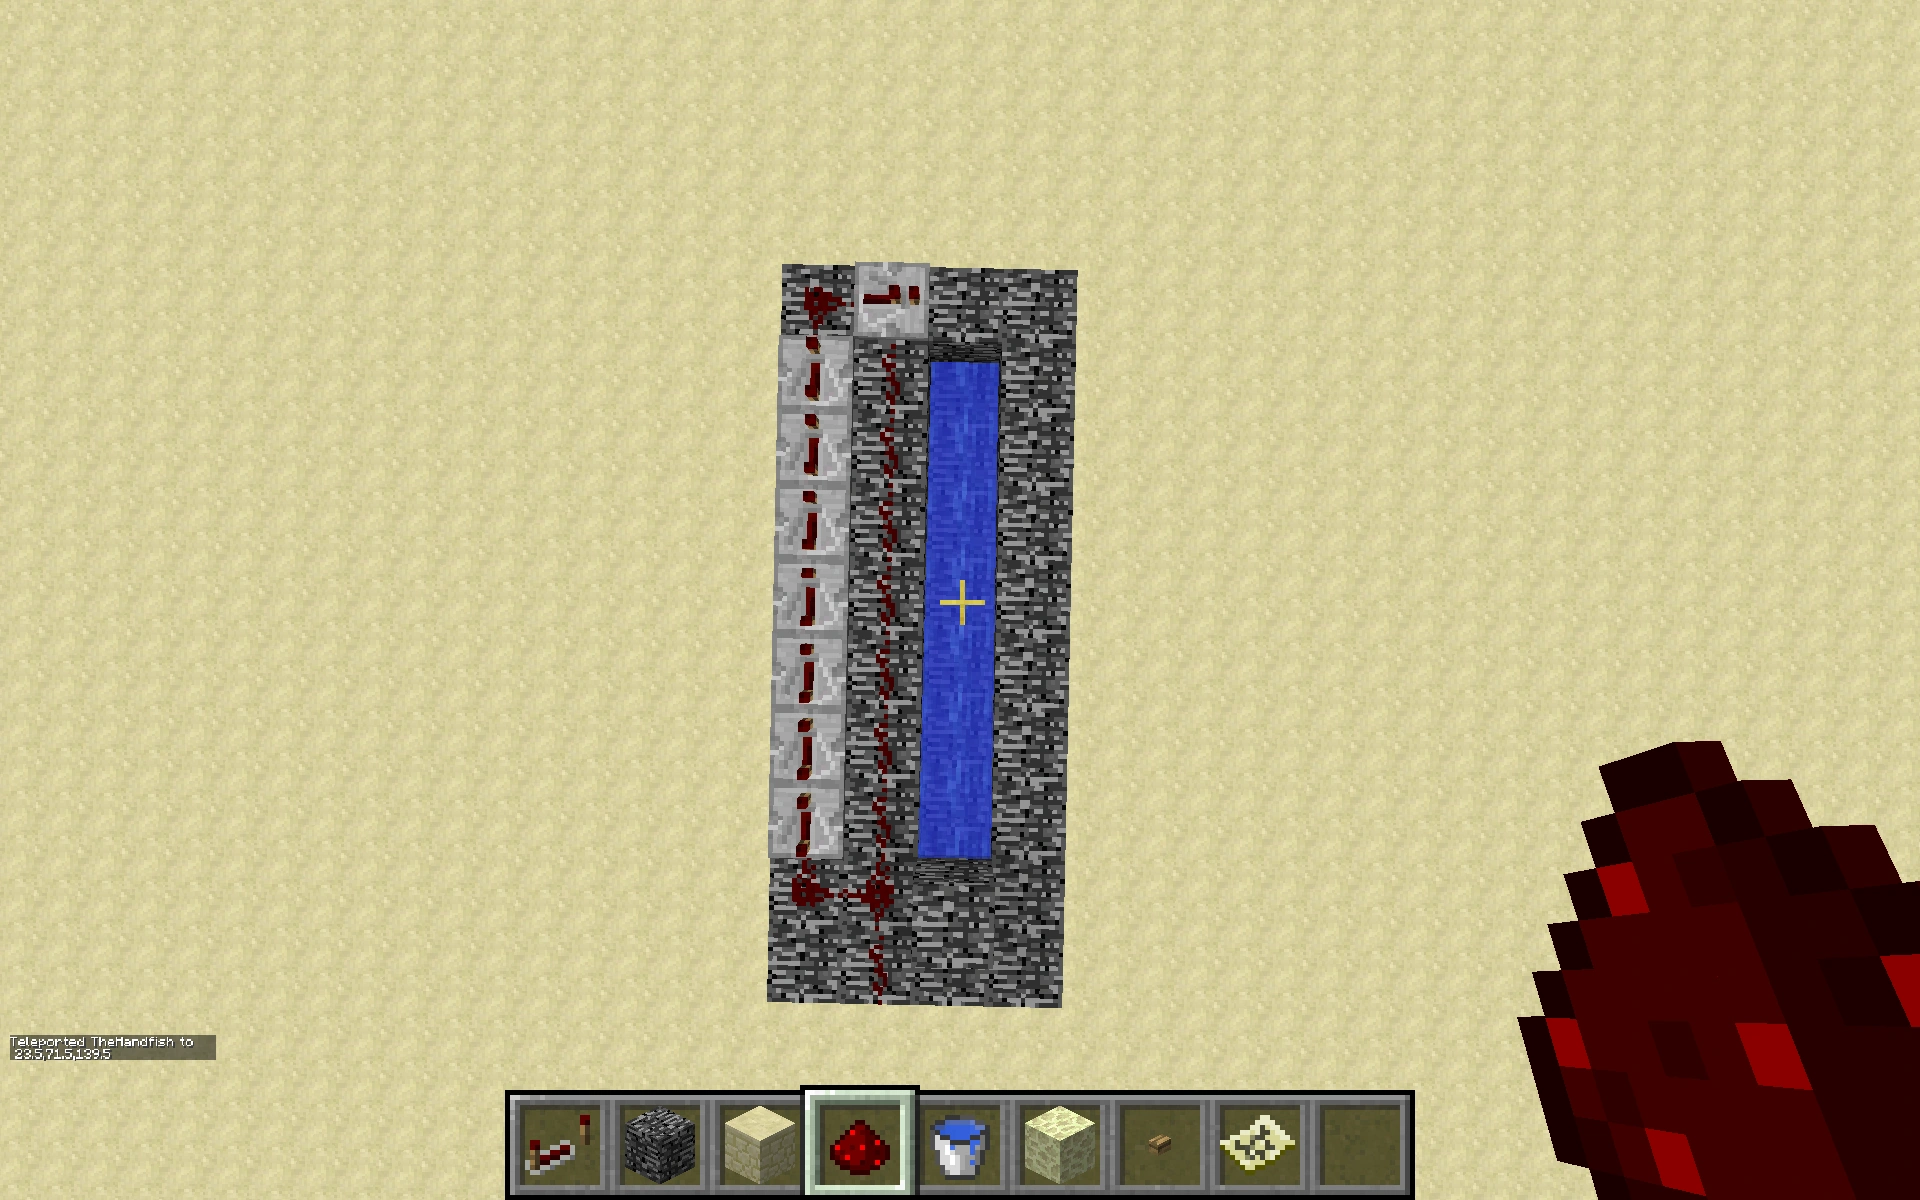
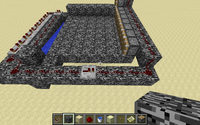
Place the redstone wires on one side
On the other side, place a redstone torch and four repeaters on highest delay
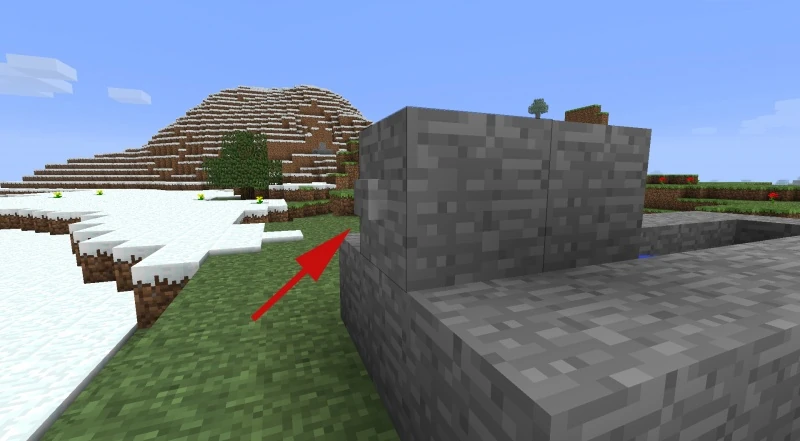
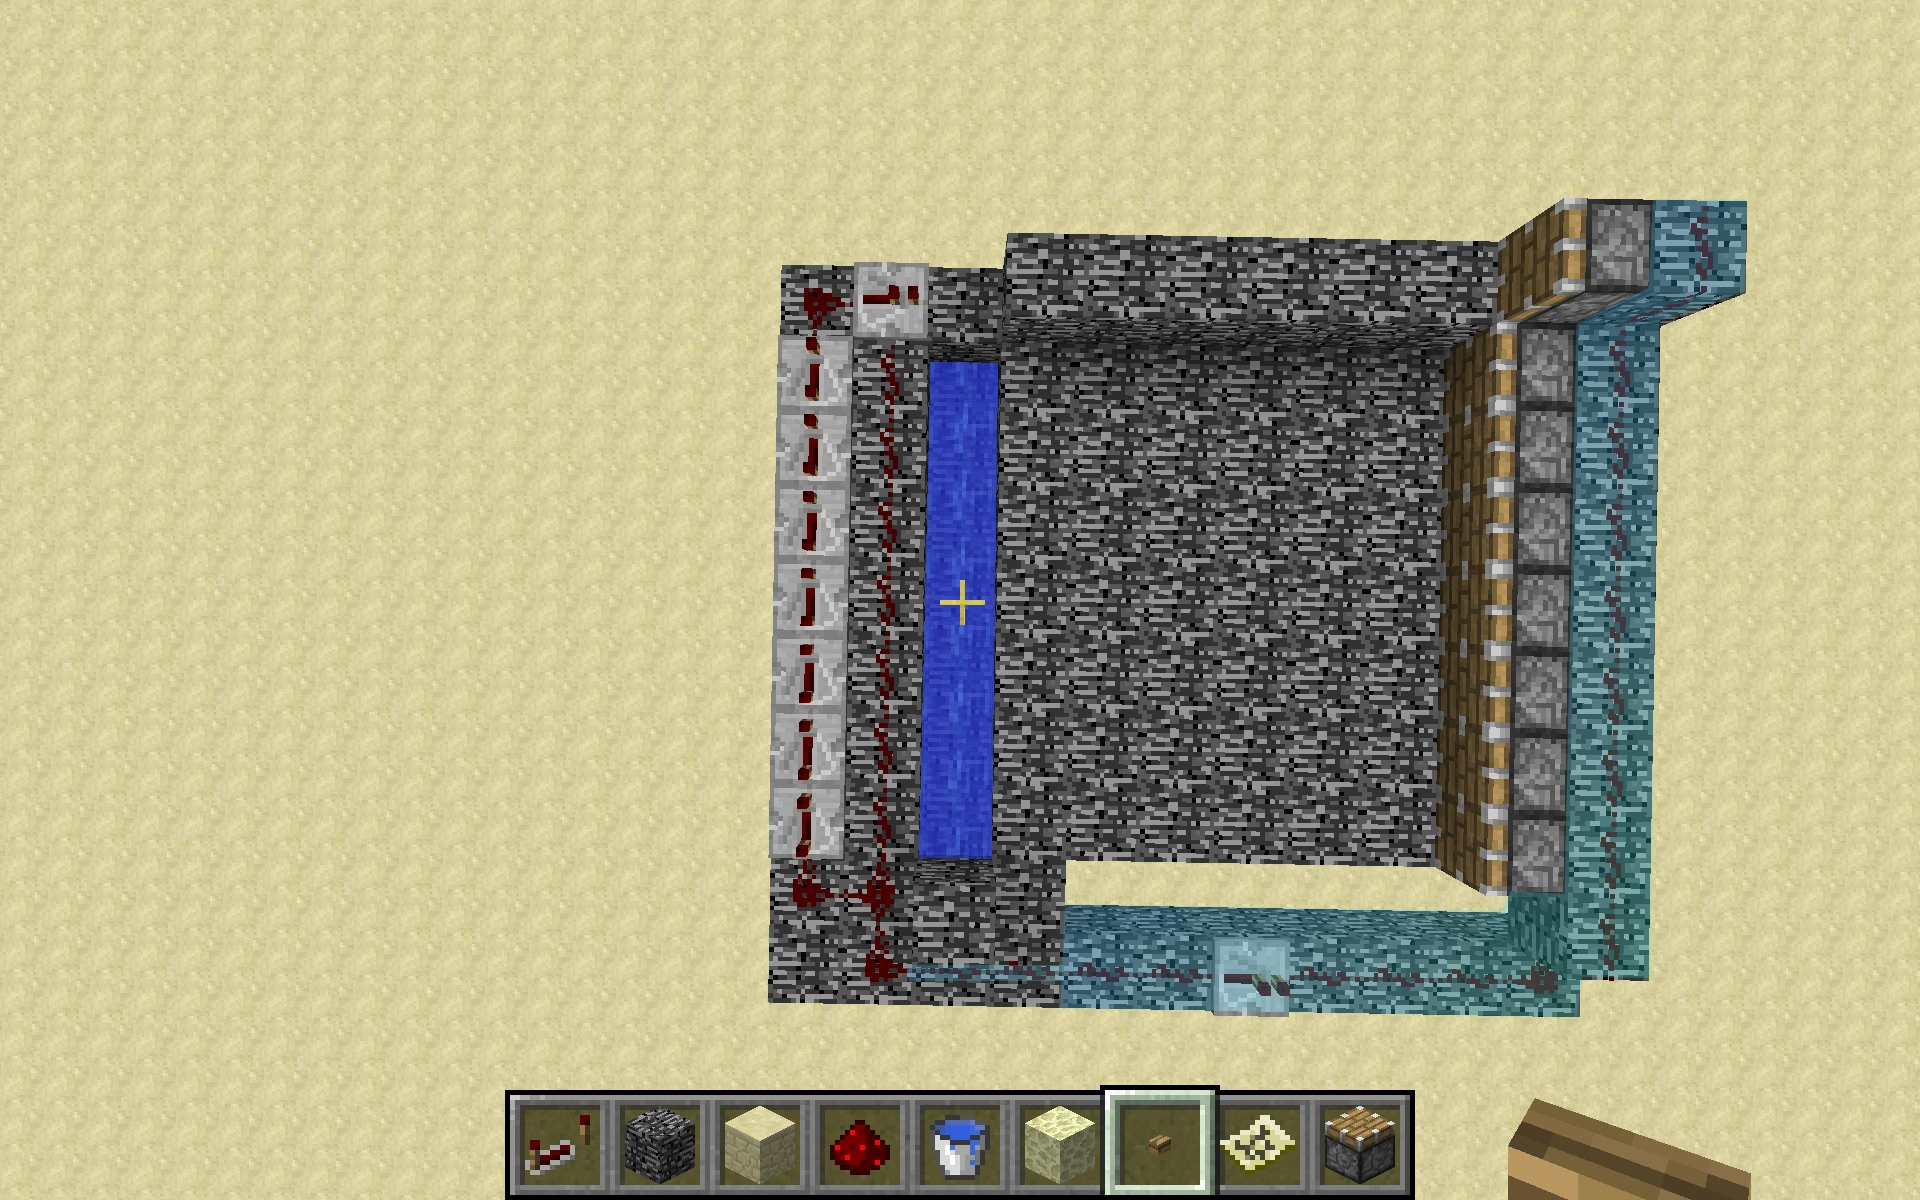
At the front place another block with a torch on the side
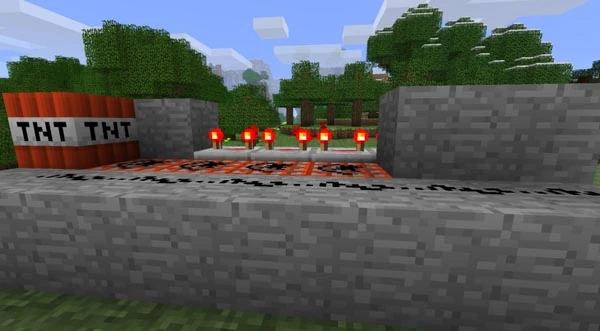
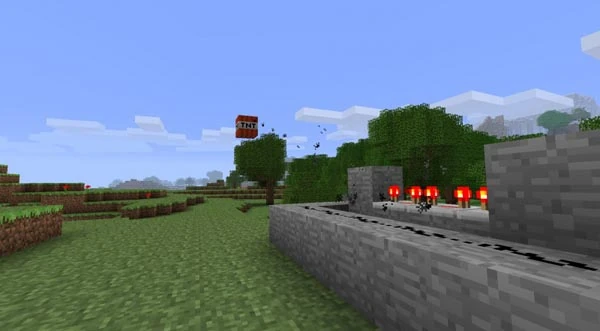
load the cannon like this...
...and finish.

Minecart used as delay
Once you press the redstone emitting item, first it activates the charge wiring, then sends a minecart around the cannon that triggers a detector rail, which primes the shot. Saves redstone, but takes a lot of iron (However, if you get rails from abandoned mineshafts this design can even save you resources!).
| Minecart delay (view on YouTube) |
|---|
Dispenser used as delay
Once you press the redstone emitting item, first it activates the charge wiring, then shoots an item out of a dispenser that will slowly fall down through a pressure plate on a fence and burn. Saves redstone, and requires no repeaters for those survival cannon engineers, Over all, it's cheaper than the design above and normal automatic delay cannons with repeaters used as a delay.
| Dispenser delay (view on YouTube) |
|---|
Human (or other entity) launching cannon
Once this cannon is set up, then it can be used in order to launch entities onto other objects or areas of the map. It can be a little difficult however to get the entity inside the cannon, if it's something other than a human.
| Human launching cannon (view on YouTube) |
|---|
Ender cannon
This type of cannon is easily constructed, very powerful (practically infinite) yet flexible with its charge and hilarious to watch unfold. The only downsides are that it requires an active ender portal and you will need to be in creative to survive maximum charge. It operates on the principle that the fuse timer on primed TNT is reset to 0 when it passes through an end portal. This means that a potentially infinite amount of TNT can be used as a charge, simply by condensing it into 8 blocks of space. Minecraft will not detonate them until you are in the end, thus making the computer itself the limiting function.
My record, using 108 STACKS of TNT, is somewhere around 20,000 blocks on the Y-axis, however this test also caused Minecraft to crash 3 times over when loading the TNT explosions.
(Will provide diagram ASAP)
Vertical launcher
This cannon, often called vertical launcher, other times called "Fireworks cannon" can be used to launch TNT blocks vertically, so that they can explode whilst midair.
| Vertical launcher (view on YouTube) |
|---|
Long range cannons
For long range cannons it is best to use a cannon with multiple rows of TNT for the charge, and depending on the elevation of your cannon, playing around with mounting blocks helps. If you add multiple shot TNT to your cannon, and play around with where you place the TNT in your cannon, then you can effectively destroy anything in the cannons path.
Automatic cannons
RailCannon Design
A simple design using a bug with TNT minecarts, using multiple minecarts to simultaneously explode causing projectiles to be launched into the air. This cannon uses less TNT than traditional methods previous of 1.5 and launches projectiles much further.
L0:
L1:
Dispenser-based
L0: Solid base, 3X9, normally buried one layer down
L1:
L2:
L3:
Remember that all repeaters must be set to their longest setting. Note that obsidian was used here to reduce the possible damage in case of misfires, but feel free to use any other strong, solid block. An improved fully automatic shotgun style cannon tutorial and demo can be found here [4] Make sure all the dispensers face into the barrel of the gun and remember that only the first water block at the back is a source block (similar to this cannon) Also by using pipes of hoppers attached to the backs of the dispensers, one can more easily distribute stacks of TNT from a central point, such as a chest. Feel free, as always to improve the design. Happy hunting!
Specialized cannons
Aerial TNT Dropper
By: lightningtow
This cannon consists of a narrow platform over your target with a long row of dispensers filled with TNT facing downwards. From there you can apply redstone to the dispensers to rain TNT on to your target with devastating effect.
Pros: This is a great way to bomb enemy bases without much retaliation; most cannons cannot fire straight up. It can easily blow its way to bedrock.
Cons: It has a limited length, it the platform can only have 16 dispensers. However, this can be fixed by simply attaching another button. Another way is to remove a dispenser, and then place a redstone repeater. The main problem is that players can block jump up to your platform and steal the TNT and redstone, requiring heavily equipped guards. Enemy players can shoot a bow and potentially knock guards off the platform.
Here are the steps:
First, you block jump a couple of blocks up. (15-25 blocks are recommended. Don’t go too high up, the TNT will explode in midair, or too low, it will blow itself up.) Then make a row of blocks spanning the area you want to bomb. (The easiest way to do this in Survival is to sneak backwards while placing blocks below you.) Then add another row alongside your first row. Now, place dispensers facing downwards. Then, you place redstone connecting the dispensers with a button. Then, you fill each dispenser with a good amount of TNT. When you are ready, just hammer the button. Optional: You can attach a redstone clock to automatically fire.
Anti-water defense cannon
It fuses sand and TNT together to blow up blocks covered with water. Water is the enemy of TNT cannons, and this one works around it.
| Anti-water defense cannon (view on YouTube) |
|---|
Aim-able T gun
This cannon is shaped like a T; the way it works is that it drops the shot in vertically on top of a slab between 2 smaller troughs that can be filled with TNT to change the shot's horizontal launch angle. You can adjust the range by not filling the main trough all the way. Great for putting in a castle to destroy enemy artillery!
Arrow cannon
An arrow cannon technically does the same job as a dispenser just with greater range and area-of-effect. The general way to make these is to have a piston extended over where the mounting block on a normal cannon would be. This would be hooked to a repeater string exactly nine repeaters long, then inverted to keep the piston extended. The rest is simply the charge trough, wired up like a normal cannon. Then use a bow to deposit arrows on the piston head, load the charge trough, and press the button. What happens is: right before the TNT explodes, the piston retracts making the arrows fall. Then the TNT goes off, launching the arrows long distances. This cannon is commonly used in generally mid-range scenarios where damage to blocks is unwanted. (Does not work anymore).
Sand Cannon
Sand cannons are a variation of the TNT cannon that is harmless. The concept is the same, but uses sand as a projectile. Also, the sand must be falling as the TNT in the cannon explodes, shooting the sand, otherwise, nothing happens. It is possible to pile the sand up to make a "sand shotgun cannon", which can fire multiple sand blocks at different distances. Note that the sand cannon generally only fires in one direction and is not destructive. Good for pelting sand at people's plots in creative SMP multiplayer, and making moderators mad. Sand cannons are also commonly used by griefers on multiplayer servers. While the victim is doing renovations on their claimed land, griefers may build a sand cannon as quick as possible as to not being caught, and fire several blocks of sand to the top of the victim's house while they are doing construction in hopes that they will break a block on their roof and have sand fall on top of them.
Sand falls at a different speed than TNT does. As a result, it isn't possible to make a TNT-sand variable cannon that uses sand to determine where the cannon will launch its TNT to. However, it will fire the sand at the same horizontal angle if using an aimable cannon.
To build a sand cannon, use a piston to push the sand off in front of the TNT charge, or a sticky piston attached to an inverter to remove a block holding the sand up.
Dry cannons
A dry cannon uses TNT to launch TNT (or even the user on Creative Mode). Dry cannons are simple, easy to build and effective but require lots of obsidian. The main difference between a dry cannon and other designs is the lack of water and the use of a Wadding Block. This cannon design also has a Charge and a Shot.
- The Charge is a large amount of TNT that propels the shot. All of these TNT blocks must be ignited simultaneously.
- The Wadding Block can be any type of block(except obsidian, bedrock and any other blast-resistant blocks) and provides a buffer between the Charge and the Shot. Sand, snow, Wool and other soft blocks seem to produce the best effects.
- The Shot is a block of TNT or the user if you are on creative mode and drop into position on time.
Vertical cannon
- This design is a vertical cannon but can be turned horizontally as well. - The cannon is built entirely of obsidian. - Start by building a 5x5x4 rectangular prism, leaving a 3x3x2 chamber inside. - Make a hole in the top center of the prism. - Place one piece of obsidian on the center block at the bottom of the chamber. This is the mounting block. - Load bottom layer of chamber with TNT. This is the Charge. - Place the Wadding on top of the mounting block. - Place the Shot on the Wadding. - Provide a redstone circuit so all the Charge blocks are activated simultaneously. - Stand back and throw the switch!
Horizontal cannon
make a long tube of obsidian (3X3X6or7) with a hollow middle. You can make the tube have any diameter, but it seems to work best with these dimensions: (3X3X6or7). Then, put two blocks of obsidian on the top. Hollow it out. Fill with TNT, and put an non-blast resistant block in the last space on the front. Cover the top with redstone, and place a button on the back. Optionally, make a platform to stand on when you trigger it. You should also make it a little ways off the ground. See diagram below, in which the orange stands for the wadding (shown in cutaway side view):
It will launch several blocks of TNT at your target, however it is expensive and does not have a very long range, but with a big cannon, you can shred a large amount of land with each shot. Occasionally the redstone will be blasted off if you have a large cannon, so it is good to keep some redstone on hand. Good for the defense of a village(blast mobs with a row of cannons when they come too close!). Best for creative mode due to the large amount of TNT needed for each shot.
Reloading Cannons
Reloading cannons are one of the most complex designs for beginners. However, as long as close attention is payed, for a first time build, it can be created in about 15–20 minutes depending on the size.
The Good: Reloading TNT cannons can be customized just as easily as any other cannon (using fences, iron bars, glass panes, etc.). They can be shot several times with only a few seconds' interval in opposition to having to reload it several times like you'd have to do with a standard TNT cannon. Using the simple design, this TNT cannon can have up to 12 rounds in the magazine. If playing a fortress war server, this cannon can fire repeated shots which will demolish the enemies' buildings before they have time to stuff their ammunition into their puny and inferior weapons.
The Bad: Unfortunately, cannons of this variety are bulky and often unattractive. They require sand or gravel which are nonrenewable resources in survival mode. Added to that, it is tedious to reload the cannons whenever the magazines run out of ammo, however occasional that may be. With standard TNT cannons, if the 1-round magazine is destroyed, it is usually easily replaceable. This is not the case with the reloading kind, as the entire magazine will explode, destroying the weapon and all the redstone wiring with it—often killing you in the process.
Simple Version
Step 1. Make the framework. Begin with a standard design, but make a few modifications so that it looks like this. (Framework)

Then, you should get out a bucket of water and pour it down the slot like you would with any other design. Make sure to place a block hovering over the source block so you won't accidentally place something on it by accident.


Toss in the wiring and you should get...
…this!
Step 2. Make the magazine. This is where the TNT is going to be pushed and loaded into the firing chamber. It can store up to 12 rounds, but this one will be made with 7. Now we need to add pistons that will push the TNT towards the chamber, so place this following
By the end of that, the cannon should look like this.

Step 3. Work on the chamber. It's important to separate the chamber and magazine wiring from the TNT.
This weird design should go right above the chamber.

Now we're going to attach pistons to it that will shove the TNT into place

An arial view...
Step 4. Connect the chamber and magazine wiring. Add this to the framework

And the wiring...
Step 5. Make a trigger. Go to this area.
Next, we need to replace redstone dust with a repeater.

We're almost done! Just place the ignitor, now.

Step 6. Touch up & check for problems. I purposefully planted a few problems. First, some of the wiring is in the way of the barrel which will severely damage the range. We'll get to that later. More importantly, we need to move one of the repeaters ahead because it isn't providing enough power from where it is. Step 7. Load the magazine. Pay close attention to this part as you will have to do it every time you reload the magazine. Place the TNT into the magazine, from against the side-pushing pistons...

…to the top-right edge of the chamber (NOT underneath the down-facing pistons, but right behind that area).

Now we need to put sand inside the magazine. You'll have to do this every time, as well. Put 8 stacks on top of the TNT pushed against the left-facing pistons.

And there you go! This is what you should see.
Step 8. Finish up. Yes, yes, I promised to fix the wiring in the way of the chamber. Here's the problem.

This is how you fix it. It's relatively simple. Make sure there're no more blocks in the way and you should get this when you fire.
This is the result of fixing the stuff in the way.

You may also want to put in a mount (as mentioned in a previous tutorial) to maximize performance! Here's a glass pane mount.
Additionally, consider covering the hull of the cannon to prevent opposing TNT cannons from blowing yours up!
Whatever you do, just make sure there's a door that leads to the magazine and that the sand-chamber is accessible from the top so you can reload it!
One more thing you can add is this piston. It will pull away the down-facing charge piston so that it isn't in the way when it's firing. And… that about wraps this tutorial up! Experiment with the cannon and test to see what mounts fit your needs. Make sure to pull the ammunition out of the magazine before you test blindly—I can imagine it wouldn't be much fun to watch something that took this long to build fly to pieces!
Video examples
- Mortar High Angle Shot using a ladder mounting block.
- Compact The Shot is primed by hand, which must now be done with flint and steel.
- Superlarge Cannon Firing other Entities.
Trivia
- Most cannons are ineffective against water based defenses since TNT doesn't destroy any blocks when submerged. See the specialized cannon above.
- Cannons follow the South-East quirk and fire further when facing South or East. [5]
- TNT cannons may be illegal on some Minecraft servers because of their potential of causing mass destruction.
- TNT cannon firing is the single most random event in minecraft, because of the thousands of different sample points taken to determine dozens(sometimes hundreds) of different vectors which are then added together to form the base trajectory of the Shot. However, it is possible to make some cannons, especially vertical mortars, 99% accurate (The charge falls back into the barrel and detonates at a specific height).
- If you're really lazy and have ops (or are on single player) you can just use commands or command blocks instead. /summon PrimedTnt ~ ~2 ~ {Fuse:12,Motion:[1.0,0.0,0.0]} will fling a lit tnt eastward, starting from just above your head.