(Undo revision 2335943 by Apple apple tree apple apple (talk)) Tag: Undo |
|||
| (350 intermediate revisions by more than 100 users not shown) | |||
| Line 1: | Line 1: | ||
| − | Shelters are created by players to essentially pass the night and fend off mobs. A list of shelter design and tutorials are as follows. |
+ | [[File:Indoormicroshelter.png|220px|thumb|right|An extremely space-efficient shelter deep underground.]]Shelters are created by players to essentially pass the night and fend off mobs. A list of shelter design and tutorials are as follows. |
| + | |||
| − | ==Some Types of Shelters to Consider== |
||
| + | == Types of shelters to consider == |
||
| − | *A small dirt shack is good for the first night |
||
| + | [[File:Minecraft House.png|thumb|right|240px|alt=A large ''Minecraft'' house.|An example of a large shelter.]] |
||
| + | *A mountain hideout |
||
| + | *A floating house |
||
| + | *A small dirt shack (Good for the first night) |
||
*Small one or two story house |
*Small one or two story house |
||
*Large 2 or 3 story house |
*Large 2 or 3 story house |
||
| Line 8: | Line 12: | ||
*An underground shelter |
*An underground shelter |
||
*A small fort |
*A small fort |
||
| − | *A larger fort or castle |
+ | *A larger fort or castle (a collection of buildings, sometimes arranged around a courtyard. Usually with defenses) |
| + | *A walled off area (Even if there is no ceiling, it will still let you sleep if it's closed off) |
||
| − | *A walled off area |
||
| + | *A large castle (about 40×40×23) |
||
| − | *A mansion (Bigger than 30x30x10) |
||
| + | *A mansion (Bigger than 30×30×10) |
||
| − | [[File:Minecraft House.png|thumb|right|240px|alt=A large Minecraft house.|An example of a large shelter.]] |
||
| + | *A cabin |
||
| − | Generally you will want to start basic, don't over exert yourself on the first day! |
||
| + | * A dugout (When making it, you will gain and not use blocks, unless you run into an opening that you want to block off.) |
||
| + | * An underwater base (not a good first shelter.) |
||
| + | Generally you want to start basic, don't over-exert yourself on the first day! |
||
| + | Get creative! Build a dock, or a town. It is fine to have useless buildings only for their looks. A collection of small builds can make something far greater than one, big building. |
||
| − | ==Blocks to use== |
||
| + | [[File:User JonTheMon Castle1.png|thumb|A large flying castle]] |
||
| − | *[[Cobblestone]] |
||
| − | *[[Wool]] |
||
| − | *[[Stained Clay]] |
||
| − | *[[Nether Quartz]] |
||
| − | *[[Hardened Clay]] |
||
| − | *[[Obsidian]] |
||
| − | *[[Bricks]] |
||
| − | *[[Stone]] and [[Stone Brick|stone bricks]] |
||
| − | *[[Sandstone]] |
||
| − | *[[Nether brick]] |
||
| − | *[[Wood Planks|Wood planks]] |
||
| − | *[[Wood|Wood logs]] |
||
| − | *[[Wooden Door]] |
||
| − | *Decoration blocks: |
||
| − | **[[Stairs]] and [[slabs]] for a sloping roof and for tables or chairs |
||
| − | **[[Wool]] or [[Carpet|carpets]] for the floor |
||
| − | **[[Glass]] and [[Glass Pane|glass panes]] for windows |
||
| − | **[[Fence|Wooden fence]]s or [[Cobblestone Wall|cobblestone wall]]s for pillars, fences and other decorations |
||
| − | **[[Torch]]es for lighting to stop mobs spawning |
||
| − | **Extra [[Hardened Clay]] is nice too |
||
| − | **[[Stained Glass]] is decorative |
||
| − | These materials are good because they are: |
||
| − | *Easily obtained (ish) |
||
| − | *Fairly nice-looking (if used correctly) |
||
| + | ==Shelters for the first night== |
||
| − | If you want a certain theme, such as [[the Nether]] or [[the End]], certain materials such as [[Nether Brick]] or [[End Stone]] from those dimensions can be used. |
||
| + | Here are some options for a shelter on your first night that can be built with limited resources. |
||
| − | If you're in Creative, [[Glass]] often looks nice, and you do not need torches. Use it for a greenhouse look, or just if you like the sunshine. |
||
| − | == |
+ | === Hole in the wall === |
| + | [[File:BG HideyHole.png|thumb|right|A hiding hole.]] |
||
| − | There are several things that are very useful to include in your house in Minecraft. |
||
| − | :Every house should have a main room with an entrance from the outside. You may wish to include a bed, a furnace, and a crafting table in this room. It would be convenient to connect all hallways or separate rooms to this room. |
||
| + | While you were gathering cobblestone and coal on your first day, you most likely dug a small hole in the side of a surface cave, or staircase down through the dirt. In either case, you can use that hole as a shelter. Dig a few more blocks into the hill or cave wall, then you can dig a small room (8×8×3 is the most recommended. It's not too small, but not too big.) Relocate your crafting table and furnace in here, and make sure to light it up! |
||
| − | ;[[Crafting]] Room |
||
| − | :This room is helpful to the player when crafting items. A crafting room may include a crafting table, at least one furnace, and a sufficient number of chests containing common crafting materials found while mining or exploring, such as [[wood]], [[cobblestone]], and [[Iron (disambiguation)|iron]], as well as any other materials that may be useful while crafting, such as [[sticks]] or [[wood planks]]. |
||
| + | You can place a door across the entrance to your shelter to protect you from mobs, while still giving you access. It is generally recommended to place it from the outside (go outside your shelter and place it while looking inside.) |
||
| − | ;[[Smelting]] Room |
||
| − | :This room is important if you are a big miner and/or adventurer as you can [[smelt]] large numbers of [[ores]] quickly. Make a large room and line the walls with [[furnaces]], possibly keeping a chest of [[fuel]] such as [[coal]] or [[wood planks]] inside as well (A bucket of lava is very good too. It can smelt 100 items and also is a good source of light.). The benefit of having multiple furnaces is a faster overall smelting time, since each furnace is able to run independently. Having each furnace full of said fuel is also helpful. This room could easily be merged with the Crafting Room, and it may be most convenient to do so. Also, bear in mind that you can use [[hoppers]] if you wish to automate your smelting operations. |
||
| + | If you don't have wood to spare for a door, simply cover your entrance with dirt or cobblestone when night falls, periodically breaking it to check for daytime (watch out for mobs though!) |
||
| − | ;Storage Room |
||
| − | :A room full of [[chests]] for storing all of the [[dirt]], [[cobblestone]] and other less-valuable materials that accumulates in your inventory while mining. You may also build another store room, with a guarded and hidden entrance though this store room is usually filled with more valuable and rare materials, i.e. [[gold]], [[iron]], [[diamonds]], etc. |
||
| − | :Note that chests are considered transparent, and can therefore be stacked on top of each other, saving space. [[Trapped Chest|Trapped Chests]] can also be placed next to regular chests, saving even more space. It is very convenient to put your storage near a crafting room, for obvious reasons. |
||
| + | === Atop a pillar === |
||
| − | ;Entrance to Your Mine |
||
| + | [[File:Pillar shelter.png|thumb|right|A pillar shelter from ground-based hostile mobs.]] |
||
| − | :It's generally a good idea to put the entrance to your mine inside your shelter, simply so that if you return at night you won't encounter [[mobs]]. It's probably a good idea to make sure your mine is well lit by [[torches]] or [[glowstone]]. If playing in a mode besides peaceful, you should put a door so [[mobs]] do not get in. The safest way is a iron door with a [[button]]. |
||
| + | Build a tall 1×1 column under you, by [[pillar jumping]]: look straight down, jump up, and place one of your blocks in the space you've jumped up from. By doing this repeatedly, you can get high enough above the ground that ground-based mobs are unable to detect you. You can make the pillar out of dirt, wood planks (remember, 4 planks to a log), or even cobblestone, but avoid using sand or gravel to make your tower (see below). |
||
| − | ;Back Door |
||
| − | :The vast majority of basic shelter designs have only a single entrance, but you should always add a second if at all possible. This gives you another way in or out, especially if the main entry-way is temporarily too dangerous to use. (e.g. There is a [[Creeper]] at your front door. Or a player in a faction or player vs. player server) |
||
| + | Going 10 or 12 blocks up will ''usually'' be enough, 16 is safer (skeleton range), and 20 or 30 is more certain. Zombies can track a player 30 blocks up, but they cannot reach the player. You can also use [[sneaking]] (holding {{key|Shift}}) to lean over the edge to place extra blocks as a ledge. Then you can put your crafting table (and soon, your furnace) on the ledge and work overnight. Remember to retrieve them before you come down! You can look around and see what's happening overnight, but try to avoid putting your crosshairs on an enderman. |
||
| − | ;Bedroom |
||
| − | :Sleeping in a [[bed]] resets your spawn point to that bed. A bedroom often shares purpose with another room, such as a crafting room. It's a pretty good idea to have this in a secure bunker. It's also a good idea to keep this room far from the outdoors, so a mob cannot prevent you from sleeping or blow up your bed. |
||
| + | If you haven't slept in 3 or more in-game days, beware of [[phantom]]s, which can reach you on a pillar. Otherwise, watch out for climbing [[spider]]s or even (unlikely) a [[spider jockey]]. To fend off spiders, you can break one of the blocks below your top block, or build a lip around the block you're standing on. You do either of these by crouching as above, and placing or breaking blocks. You will not fall unless you let go of the shift key while leaning over the edge… or unless you are attacked, so don't do this if a spider is actually getting close to you (or if your tower is under 20 blocks and a skeleton is at the base). If a spider does climb the pillar, they're fairly unlikely to actually reach you, but, just in case, keep your stone sword in hand and whack them as soon as they come into reach, ''before'' they get up to you. (Attacking them will knock them down, causing them to take damage from the fall.) |
||
| − | ;Brewery |
||
| − | :Once you've been to [[the Nether]] and gathered some [[Blaze Rods]], you can create a Brewery, which is simply a room with a [[Brewing Stand]] and a [[Cauldron]](however a water source works just the same and doesn't run out). It is great to be able to brew some [[potions]] to prepare yourself for leaving your base. Include a [[chest]] with some potion ingredients such as [[sugar]], [[redstone]], [[Blaze Powder|blaze powder]], [[Nether Wart|nether wart]], [[Glowstone Dust|glowstone dust]], [[Spider Eye|spider eyes]], [[Magma Cream|magma cream]], [[Fermented Spider Eye|fermented spider eye]]s, [[Glass Bottle|Glass Bottles]] and a well as it is an unlimited water supply. |
||
| − | :Positive Effect Potions and an example of a brewery can be found, at the [[brewing]] page. |
||
| + | Once it is light enough, and the undead have burned, simply dig out the blocks you're perched upon, until you're back on the ground. (Check for nearby creepers and other monsters first!) ''Don't'' just jump off your tower unless there's water below you – if you're high enough to avoid mob detection then you're high enough to take damage if you jump, or even die if you're 22 blocks or more up. Also keep an eye out for spiders, which can meet you halfway and knock you off the tower. If a creeper is hanging out at the base of your pillar, and you have more blocks, try going even higher—30, 40 blocks, or even up to cloud level. This makes monsters on the ground despawn far more quickly (because they are now farther away from you). |
||
| − | ;Enchanting Room |
||
| − | :After gathering some [[Diamond|diamonds]], [[obsidian]], [[Sugar Cane|sugar cane]], and [[leather]] (to make a book),you can build an [[Enchantment Table]]. This lets you enchant your items (See [[Enchanting]] for help on design), and since [[Bookshelf|bookshelves]] give you higher level enchantments, this room could also be a good use for your [[Sugar Cane|sugar cane]]. It's also a good idea to keep this room close to your mob grinder for easily regaining your xp and to keep a chest with books in this room to enchant them and, of course, store [[Enchanted Books|enchanted books]]. |
||
| + | Do not use sand or gravel, because unlike most blocks, they are affected by gravity. You can't place a ledge with them, as they fall to the ground. (However, you can put a dirt block on the side of a sand pillar, and that will stay up even if the pillar doesn't. In particular, ''if'' a creeper does notice you, and blows up at the bottom of your pillar, the rest of sand you're standing on will fall closer to the ground, taking you with it… and apparently, you were ''already'' low enough for monsters to notice you. (Also, a passing enderman might pull a block out of your pillar.) If you're really stuck and ''only'' have sand or gravel, make the pillar extra-tall, at least 20 blocks. |
||
| − | ;Farm |
||
| − | :Unless playing on peaceful mode, you will want a source of food readily accessible from your shelter. [[Wheat]] seeds are the easiest food to get, so start with them. Later, you can plant other crops, like [[Potatoes]] and [[Carrots]]. The aforementioned crops can also be used to breed certain [[Mobs#Passive_Mobs|passive mobs]] for more effective food. You can also grow pumpkins, which are obtained from dungeon chests and/or found in the wilderness (Usually taigas, extreme hills, and forests). Melons seeds found in dungeon chests aren't a good source of food, but can be good for potions, via glistering melons. |
||
| + | If you are in a desert with only sand and cacti all around, and have no other blocks available, don't use cacti (they'll kill you). If you have time, try to gather a ''lot'' of sand to make [[sandstone]]. If you got at least 40 or 50 sand (a full stack of 64 is better) by nightfall, you can make enough sandstone for a pillar, even without your crafting table: Press E for your inventory and crafting window, divide the sand among all four boxes of your crafting grid, and take the sandstone. (Use your pickaxe to take down the tower in the morning.) Unfortunately, you need 4 sand to get each block of sandstone. |
||
| − | ;Tree Farm |
||
| − | :Eventually, you will use up all the trees in your immediate surroundings, so you will want to replant them. Keep it well lit, both to keep away mobs and speed up the growth of trees. Birch is recommended, because it grows fastest, but Oak and Jungle trees are also a good choice, due to their apples and immense size respectively. It is difficult to build an indoors or underground tree farm that will supply your wood needs, unless you use bone meal. |
||
| + | === Up a tree === |
||
| − | ;Armory |
||
| + | [[File:BG - In a Tree.png|thumb|right|Shelter in a tree.]] |
||
| − | :An armory is a room near the front door with chests containing food, armor; and weapons, this is for easy access when you are going outside, and so you can quickly prepare yourself to retrieve your lost items. For an even faster alternative, this room consists of a number of [[Dispenser]]s, activated by a single button or pressure plate, providing the adventurous player a way to get started immediately. This is very useful for exploring dangerous caves and going on night expeditions to get your dropped diamonds before they despawn. |
||
| + | Find a single large tree and use dirt (or another non-valuable resource) to pillar up to top and stay up there until day arrives. Jungle, tall spruce, and large oak trees are recommended. Mobs will not spot you if it is a large enough tree, and if they do, just take evasive action and move to the other side of the tree. Spiders could give you a problem, but hopefully, they won't see you. If the leaf canopy is big enough, you can actually dig up ''into'' the leaves, where monsters can't reach you. If all else fails, jump between treetops. When night's over, you can chop down the tree. Take care not to chop it down before you are done using it as a shelter, or the leaves may start to disappear, leaving you with nowhere to stand. |
||
| − | ;Smithy |
||
| − | :After building an [[Anvil]], you might want to make a room with a crafting table, a chest, easy access to an enchanting room, and of course the anvil. Handy if you fight monsters or other players a lot. |
||
| + | === Three block high hut === |
||
| − | ;[[Portal (disambiguation)|Portal]] Room |
||
| − | :Once you have at least 10 [[obsidian]], either from mining it in a cavern or obtaining it through [[obsidian]] farming you can build a [[Portal (disambiguation)|portal]]. Once built, activate it with a [[Flint and Steel|flint and steel]], and you can travel to the [[The Nether|the Nether]]. This can be used for fast travel and for getting [[lava]], [[netherrack]], [[Soul Sand]], [[Nether Quartz Ore]] and [[glowstone]]. Beware of [[ghast]]s, [[Zombie Pigman|Zombie Pigmen]] and [[Blaze]]s as well as [[Magma Cube]]s. Building a another portal room in the nether for protection is a recommended idea. Please note cobblestone is a good block to build with in [[the Nether]] since ghasts can't destroy it with their fireballs. |
||
| + | By making four three block high walls around you, you can simply hide from most mobs. Adding a roof (at the third block, that is 2 blocks high inside) protects against endermen (which can't fit) and spiders, which can otherwise climb the walls. You can make this out of almost anything—cobblestone is more secure, you can use wood planks if you have enough, but even dirt will do in a pinch. You need 13 blocks as a bare minimum (four 3-block high pillars around a 1×1 refuge), but two or three times that, or even a whole stack of 64, lets you build something you can actually move around in, and do some crafting and smelting overnight. (Note that you can use the crafting table and/or furnace as part of the walls.) Keep a block or few in your inventory as spares, in case of enderman theft (see below). You have two main risks: One is [[spider]]s, which can both sense you through the walls, and ''climb'' the walls. However, they can't fit through small holes, and if you make a roof with only a one-block hole, spiders can't get through (but you can still tell when day returns). The other hazard is if an [[enderman]] wanders by and takes a block out of your shelter. Wait for the enderman to wander away a bit, then replace the block, with one of your spares, if possible without letting your cursor cross the enderman (“looking at them”). When full daylight comes, mine a door in your wall, and exit. Keep a wary eye out for monsters, and in particular be prepared to run quickly away from creepers. |
||
| − | ;[[Mobs|Mob]] XP Farm/Drop Collector |
||
| − | :An XP farm uses water currents to push most mobs into a central area. With mobs in the nether, pistons are used. Use a piston crusher or a long drop to get the mobs to a 1/2 heart. Mobs can be killed by hand or with a splash potion of harming to get XP. Note: This is more efficient with multiple spawners, as more spawners mean more spawning opportunities. You will also obtain drops from each mob killed. This can also be done with large dark rooms with platforms. The mobs spawn and fall into water currents, where you can choose what happens to them once they are out of the spawning chamber |
||
| + | === In a cave === |
||
| − | ;Retractable Blast Shields |
||
| − | :These are an easy way to keep mobs at a distance, and are especially effective against mobs which use sight as a weapon, such as [[Creepers]] and [[Endermen]], however it can be tough to collect the necessary resources for this mechanism. Say we're going to protect a window which is two blocks from the ground and four blocks wide. To start, count three blocks out from the window, and then dig a 6-block-wide, 3-block-deep, 3-block-thick (6x3x3) trench, and then line the far edge of the trench with pistons pointing upwards. Next, place three blocks of gravel on each piston so that there is one block of gravel sticking up above the ground. Behind each piston, place a solid block that accepts [[redstone]], and then place a bit of redstone on each of these blocks, as well as the blocks behind them. From there, run a redstone line to the lever which we'll use to work the blast shields, keeping in mind that redstone can accept a signal from the block above it (making it feasible to have the lever inside your house, preferably near the window you wish to protect). |
||
| + | If you found a cave system you can fix it up into a lair—a good one can make a base for the rest of your game. If it ends quickly, then cap off your entrance. If it does not end, then build a little shelter around you by capping off any extra exits or openings into the depths. Don't worry too much about the natural walls of the cave; monsters can still be heard through the walls pretty loudly, but they can't come through unless you leave an opening. |
||
| − | The final product should look like this (P=piston, B=any block which you can place redstone on, I or -=redstone, and L=lever): |
||
| − | PPPPPP |
||
| − | BBBBBB |
||
| − | ------ |
||
| − | I |
||
| − | I |
||
| − | L |
||
| + | To block the cave off, for your first night you can use walls of dirt or cobblestone similarly to the "hole in the wall". If you have enough wood, you may be able to craft [[fence]]s and a [[fence gate]] and place them across the entrance ''and'' any openings in back. Make sure you place the walls or fences behind the upper lip of the cave (or extend the ceiling over the barrier), or monsters are liable to "drop in" inside your barrier. Also, remember to light the area before you settle down. Likewise, remove any stray blocks, within two spaces outside the fence, from which monster could jump onto the fence (try the jump yourself). If using fences, also make sure you can retreat into the cave and away from the entrance (out of sight ''or'' 16 blocks away), or a creeper may drop by and just wait for you to come out. Later, you can be more sophisticated about sealing off and fortifying your lair. |
||
| − | After that, cover the redstone circuitry with whatever you wish to protect it against damage, and you're good to go! |
||
| + | As with "Hole in the wall", you can dig into the cave's wall while waiting for dawn, but keep some blocks handy to patch up any openings you might make into another cave while digging, which might have a hostile mob in it. If you place your [[pickaxe]] one of your hotbar slots (used to navigate quickly between items you are carrying in your inventory) and e.g. dirt is placed right next to it, you can quickly switch between your tool and that block type in order to close the hole you just made. This can be extremely handy when you stumble upon an opening which contains mobs. |
||
| − | '''Note:''' If you're good enough with redstone, you can also have all blast shields around your house hooked up to a single lever, which you can flip whenever you need to. |
||
| − | This is a nice feature to add to the windows of your [[Nether]] bases. |
||
| + | ===Hill Fort=== |
||
| − | ;[[Tutorials/Cobblestone farming|Cobblestone Generator]]:A cobblestone generator provides a safe and convenient way to gather cobblestone. They typically involve mixing water and lava. |
||
| + | Just like cave systems and bunkers and Castle tower. |
||
| − | ;Kennel |
||
| + | Hill forts are forts that can be made by strong or earth-made materials such as dirt or stone. Unlike castle or an outpost tower,hill forts have better defenses and you can create your own cave system for hidden base and hidden storage for your important stuff. You can also create your bunker directly within the fort or near the fort. Hill forts are better for PvP bases and raid farming since you can hide magma blocks under a trapdoor and make a lava flow. |
||
| − | :If you have tamed a lot of wolves, a kennel is a good place to keep them. A simple shed-like structure will suffice, but be sure to keep it well lit for the dogs' safety. |
||
| + | For starter Hill fort, you can just make it out of dirt or any earth-made materials like sand and gravel. |
||
| − | ;Well |
||
| − | :A renewable water source is useful for a variety of projects. Put water in a 1x3 ditch and you can take water repeatedly from the center! For a more aesthetically pleasing pool, a 2x2 well works as well, and you can take water from any of the squares. |
||
| + | For easy Hill fort, it will be made out of any wooden materials like oak log and oak planks. |
||
| − | ;Melon Farm |
||
| − | :A [[Melon]] farm produces the obvious, melon slices. Which can be used as a valuable food source that keeps your hunger bar up. |
||
| + | For normal Hill fort, this can be made with any stone materials such as cobblestone and smooth stone. You can also install defenses using magma blocks and deep hill moat. |
||
| − | ;[[Mushroom (disambiguation)|Mushroom]] Farm |
||
| − | :A big room with flat floor. You can light your farm by [[torch]]es or [[glowstone]], placed on ceiling, to prevent [[mobs]] from appearing. Just make sure that there are no places on the floor where the [[light]] level is greater than 12. More about this can be found on the [[Tutorials/Mushroom farming|Mushroom Farming]] page. Alternatively, find a small [[cavern|cave]] or make one, put some [[Mushroom (disambiguation)|mushroom]]s inside and completely seal it off without [[torch]]es and check on it/clean it out. Also provides the drops from hostile [[mobs]]. |
||
| + | For hard Hill fort, it will be made out of obsidian so nobody could destroy it easily. You can install deadly traps such as night activating lava trap. |
||
| − | ;Incinerator |
||
| + | |||
| − | :A room with [[lava]], for disposing of unwanted materials. A good way to do this is to create a two block high corridor with [[lava]] at the end, and a slab block just before the [[lava]]. This results in you being able to walk up to your incinerator but not into it, eliminating fear of death. Be careful with lava around flammable materials. You may replace the [[lava]] with a cactus block, or burning netherrack. |
||
| + | For advanced and intense Hill fort, it's still can be made with obsidian but with new cave system and maze system so raiders can't find you or your loot easily. |
||
| − | {{FakeImage| |
||
| + | |||
| − | {{BlockGrid |
||
| + | Anyway, you can install any traps even if you're still starter. Cave systems and maze can be done two even when you are still in starter fort. Forts are amazing in raid farming since you can install traps in it to kill raiders (except vexes). |
||
| − | |A=air|B=stone|W=water|R=wool-light-blue|L=lava |
||
| + | |||
| − | |ABBBBBBBB |
||
| + | === Out to sea === |
||
| − | |WRRRRRRRA |
||
| + | |||
| − | |BBBBBBBBL |
||
| + | If you are near an ocean, you can make a [[boat]] (see that page for the recipe) and sail out to where you can barely see land (in any direction). If you can't make a boat, just swim out to the sea, holding the space bar all night to keep yourself afloat. Either way, you won't be getting any crafting or smelting done. Note that drowned can board your boat and cause damage, so getting to land and building a shelter is preferable. |
||
| − | }} |
||
| + | |||
| − | |Example Incinerator Design |
||
| + | === Break the golden rule === |
||
| − | }} |
||
| + | |||
| + | When you're desperate, you can break the golden rule of minecraft (''Don't dig straight down''). Dig three blocks down, and put a block above you that is not sand/gravel. Congrats, you just made the fastest shelter in ''Minecraft'' possible. Since you probably don't have an in-game [[clock]] yet, you may want to use a real-world clock to time the night (7 minutes, with up to 3 more to allow for dawn/dusk). If you have dirt or stone next to you, you can dig out a couple of blocks there, and place your crafting table and furnace. Sometimes keep the hole in the ground as a base. A torch makes your little hidey hole feel a little less like a tomb. |
||
| + | |||
| + | === Vertical hidey hole === |
||
| + | {{FakeImage|{{layered blueprint|d=Dirt|t=Oak trapdoor|l=Ladder|name=Vertical Hidey Hole |
||
| + | |----Underground shaft| |
||
| + | ddd |
||
| + | dld |
||
| + | ddd |
||
| + | |----Layers 1-3| |
||
| + | d |
||
| + | dld |
||
| + | d |
||
| + | |----Layer 4| |
||
| + | |||
| + | td |
||
| + | }}|The entrance}} |
||
| + | |||
| + | This design allows you to see what is going on every time you come out, but it does require a bit of extra wood. |
||
| + | |||
| + | Once you reach [[stone]], you can mine some of the stone, craft a [[furnace]], make [[charcoal]], and craft [[torch]]es. |
||
| + | |||
| + | The next morning, check for mobs, particularly [[creeper]]s, as you climb out. |
||
| + | |||
| + | ==Blocks to use== |
||
| + | *[[Cobblestone]] |
||
| + | *[[Deepslate]] and its variants. |
||
| + | *[[Wool]] |
||
| + | *[[Nether quartz]] |
||
| + | *[[Terracotta]], both plain and stained |
||
| + | *[[Concrete]] |
||
| + | *[[Obsidian]] |
||
| + | *[[Bricks]] |
||
| + | *[[Stone]] and [[stone bricks]] |
||
| + | *[[Sandstone]] |
||
| + | *[[Nether bricks]] |
||
| + | *[[Wood planks]] |
||
| + | *[[Wood|Wood logs]] |
||
| + | *[[Wooden door]] |
||
| + | *Decoration blocks: |
||
| + | **[[Stairs]] and [[slab]]s for a sloping roof and for tables or chairs |
||
| + | **[[Wool]] or [[carpet]]s for the floor |
||
| + | **[[Glass]] and [[glass pane]]s for windows |
||
| + | **[[Fence|Wooden fence]]s or [[cobblestone wall]]s for pillars, fences and other decorations |
||
| + | **[[Torch]]es for lighting to stop mobs spawning |
||
| + | **Extra [[terracotta]] is nice too |
||
| + | **[[Stained glass]] is decorative |
||
| + | These materials are good because they are: |
||
| + | *More or less easily obtained. |
||
| + | *Fairly nice-looking (if used correctly). |
||
| + | |||
| + | If you want a certain theme, such as [[the Nether]] or [[the End]], certain materials such as [[Nether bricks]] or [[End stone]] from those dimensions can be used. |
||
| + | If you're in Creative or have easy access to [[sand]], [[glass]] often looks nice, and you do not need torches. Use it for a greenhouse look, or just if you like the sunshine. |
||
| + | |||
| + | == Core rooms == |
||
| + | |||
| + | There are several things that are useful to include in your house in ''Minecraft''. |
||
| + | === Foyer === |
||
| + | Every house should have a main room with an entrance from the outside. You may wish to include a bed, a furnace, and a crafting table in this room. It would be convenient to connect all hallways or separate rooms to this room. Some tools, weapons, armor, and/or food stored in a chest can be useful, as then you can gather up some essential supplies quickly when coming to your home for a quick resupply. |
||
| + | |||
| + | === Crafting room === |
||
| + | {{seealso|Crafting}} |
||
| + | This room is helpful to the player when crafting items. A crafting room may include a crafting table, at least one furnace, and a sufficient number of chests containing common crafting materials found while mining or exploring, such as [[wood]], [[cobblestone]], and [[iron]], as well as any other materials that may be useful while crafting, such as [[sticks]] or [[wood planks]]. Labeling the chests will help to organize. There should be quick access to the storage room from here. Wood would be a nice material to use as it suits the theme. |
||
| + | === Smelting room === |
||
| + | {{Seealso|Smelting}} |
||
| + | This room is important if you are a big miner and/or adventurer as you can [[smelt]] large numbers of [[ores]] quickly. Make a large room and line the walls with [[furnace]]s, possibly keeping a chest of [[fuel]] such as [[coal]] or [[wood planks]] inside as well (A bucket of lava is good too. It can smelt 100 items and also is a good source of light.). The benefit of having multiple furnaces is a faster overall smelting time, since each furnace is able to run independently. Having each furnace full of said fuel is also helpful. This room could easily be merged with the Crafting Room, and it may be most convenient to do so. Also, bear in mind that you can use [[hopper]]s if you wish to automate your smelting operations. |
||
| + | === Storage room === |
||
| + | A room full of [[chest]]s for storing all of the [[dirt]], [[cobblestone]] and other less-valuable materials that accumulates in your inventory while mining. You can also make a lava 'bin' to dispose of your unwanted items; this can be done by simply digging a hole (don't use wood etc. near it - the lava will ignite flammable blocks) and filling it with lava. You may also build another store room, with a guarded and hidden entrance though this store room is usually filled with more valuable and rare materials, i.e. [[gold]], [[iron]], [[diamond]]s, [[emerald]]s, etc. Perhaps you even want to include a trapped room with trapped chests and [[TNT]], if you are in PVP. |
||
| + | |||
| + | === Entrance to your mine === |
||
| + | It's generally a good idea to put the entrance to your mine inside your shelter, simply so that if you return at night you won't encounter [[mobs]]. It's probably a good idea to make sure your mine is well lit by [[torches]], redstone lamps, or [[glowstone]]. If playing in a mode besides peaceful, you should put a door so [[mobs]] do not get in (use [[iron door]]s when on hard - zombies on that difficulty can damage [[wooden door]]s to the point of breaking). [[Button]]s are useful for any barrier only opened by [[Redstone]]. |
||
| + | === Bedroom === |
||
| + | Sleeping in a [[bed]] resets your spawn point to that bed. It's a pretty good idea to have this in a secure bunker. It's also a good idea to keep this room far from the outdoors, so a mob cannot prevent you from sleeping or blow up your bed. For added safety against [[creepers]] creeping up on you or PVP griefers in your sleep, use three-layered walls, with the middle one being [[Obsidian]] or [[Water]]. |
||
| + | |||
| + | === Brewery === |
||
| + | Once you've been to [[the Nether]] and gathered some [[blaze rod]]s, you can create a Brewery, which is simply a room with a [[brewing stand]] and a [[cauldron]] (however an infinite water source works just the same and doesn't run out). It is great to be able to brew some [[potion]]s to prepare yourself for leaving your base. Include a [[chest]] with some potion ingredients such as [[sugar]], [[redstone]], [[blaze powder]], [[nether wart]], [[glowstone dust]], [[spider eye]]s, [[magma cream]], [[fermented spider eye]]s, [[glass bottle]]s and a well as it is an unlimited water supply. |
||
| + | |||
| + | Positive Effect Potions and an example of a brewery can be found, at the [[brewing]] page. |
||
| + | === Enchanting room === |
||
| + | {{seealso|Enchanting}} |
||
| + | After gathering some [[diamond]]s, [[obsidian]], [[sugar cane]], and [[leather]] (to make a book),you can build an [[Enchantment Table]]. This lets you enchant your items (See [[Enchanting]] for help on design), and since [[bookshelves]] give you higher level enchantments, this room could also be a good use for your [[sugar cane]]. It's also a good idea to keep this room close to your mob grinder for easily regaining your xp and to keep a chest with books in this room to enchant them and, of course, store [[enchanted book]]s. |
||
| + | === Farm === |
||
| + | You need a source of food readily accessible from your shelter. [[Wheat]] seeds are the easiest food to get, so start with them. Later, you can plant other crops, like [[potato]]es and [[carrot]]s. The aforementioned crops can also be used to breed certain [[Mobs#Passive Mobs|passive mobs]] for more effective food. You can also grow pumpkins, which are obtained from dungeon chests and/or found in the wilderness (Usually taigas, extreme hills, and forests). Melons seeds found in dungeon chests aren't a good source of food, but can be good for potions, via glistering melons. [[Beetroot]] seeds are also a choice, although you need to find a village or visit the End or get beetroot seeds which are obtained from dungeon chests first. |
||
| + | Later in game, you may also want to build farms for other plants, such as sugarcane, cactus or chorus fruit, or even flowers and tall grass (details explained in the Expansions section). |
||
| − | ;Minecart Hub |
||
| − | :If you have active mines scattered over the [[The Overworld|map]] and use [[Minecart]]s to haul your stuff back to your base, dig out a universal stopping point under your base. Or, you could actually make a rail road hub outside or connected to your base. |
||
| + | === Nursery/arboretum (tree farm) === |
||
| − | ;Indoor animal farm |
||
| + | Eventually, you will use up all the trees in your immediate surroundings, so you will want to replant them with saplings. Keep it well lit, both to keep away mobs and speed up the growth of trees. Birch is recommended, because it grows fastest, but oak and jungle trees are also a good choice, due to their [[apple]]s and immense size respectively. It is difficult to build an indoors or underground tree farm that will supply your wood needs, unless you use bone meal or keep it well lit. Create a room that is bigger than trees. |
||
| − | :Light up a large area with a [[grass]] floor. Then put two of the same kind of passive [[mobs]] (i.e., two [[pig]]s or two cows) inside. You can then [[Breeding|breed]] them together and you can gather [[wool]], [[leather]], [[Raw Porkchop|pork]], [[Raw Beef|beef]] and [[Raw Chicken|raw chicken]] safely. You might want to put trees inside so the animals feel more comfortable, or, if you're really ambitious, build a man-made forest. |
||
| + | === Armory === |
||
| − | ; Pond |
||
| + | An armory is a room near the front door with [[chest]]s containing food, armor; and weapons, this is for easy access when you are going outside, and so you can quickly prepare yourself to explore and collect items. For an even faster alternative, this room consists of a number of [[dispenser]]s, activated by a single button or [[Pressure Plate|pressure plate]], providing the adventurous player a way to get started immediately. This is useful for exploring dangerous caves and going on night expeditions. |
||
| − | :This is very easy to make, and can be very useful, especially if you don't have a [[wheat]] farm yet. Just make a hole long enough to cast your [[Fishing Rod|fishing rod]], around 8 blocks long and at least 2 blocks deep, and fill it with [[water]]. |
||
| + | === Smithing room === |
||
| − | ;[[Tutorials/Mob farm|Mob Farming]] |
||
| + | After building an [[anvil]], you might want to make a room with a crafting table, a smithing table, a chest, easy access to an enchanting room, and of course the anvil. Handy if you fight monsters or other players a lot. |
||
| − | :A safe, renewable source of [[gunpowder]], [[arrow]]s, [[Rotten Flesh|rotten flesh]] and [[bone]]s. This makes exploring much safer and can provide the means for large amounts of explosives. Also see [[Tutorials/Mob grinder|Mob Grinder]]. |
||
| + | === Nether portal room === |
||
| − | ;Minecart Chest System |
||
| + | {{Seealso|Nether portal}} |
||
| − | :After a lot of days in Minecraft, you will soon have the ability to automate everything ([[Farming (disambiguation)|farm]]s, [[door]]s, etc). The most useful automation you can make is a Minecart Chest System. You can simply craft [[Minecart with Chest|Minecart with chest]]s, [[Powered Rail]]s, and some rails, and you can make a system to send your ores from your mine to your base, and have a minecart with more [[tools]] come back to you. |
||
| + | Once you have at least 10 [[obsidian]], either from mining it in a cavern or obtaining it through [[obsidian]] farming you can build a nether [[portal]]. Once built, activate it with a [[flint and steel]], and you can travel to the [[the Nether]]. This can be used for fast travel and for getting [[lava]], [[netherrack]], [[Soul Sand]], [[Nether quartz ore]] and [[glowstone]]. Beware of [[ghast]]s, [[zombie pigmen]] and [[blaze]]s as well as [[magma cube]]s. Building another nether portal room in the nether for protection is a recommended idea. Please note cobblestone is a good block to build with in [[the Nether]] since ghasts can't destroy it with their fireballs. |
||
| + | Note: the player can potentially create a cabin with all of these. |
||
| − | ;Water Elevator |
||
| − | : If you live in any building that is more than one story, you might want a method to get up and down easily without stairs or a ladder. One way to do this is to make a waterfall that falls through the center of the structure. Make sure to have one block of space on any side of it so that your character can be outside of the water enough to breathe while climbing it. Simply hold down the jump button (the space bar) while inside the waterfall to ascend. This method can also be used to create an elevator to flying islands or houses. |
||
== Expansions == |
== Expansions == |
||
These projects, while not entirely mandatory, make your base more useful and interesting. |
These projects, while not entirely mandatory, make your base more useful and interesting. |
||
| + | === Trading Hall === |
||
| − | ;Kitchen |
||
| + | A [[Tutorials/Villager trading hall|Trading Hall]] is a location to gather villagers to trade with. This is the type of thing an advanced player with a lot of time on their hands, or a bored Creative player, would do. With a few farms, these can make perfect equipment and food with just a bit of time. |
||
| − | :This is basically a crafting room, but you only craft food. The chest(s) should contain most basic foods, including wheat, milk, eggs, etc. Many people, instead of having a kitchen, just craft food in the crafting room, but a kitchen is a nice expansion, because it separates crafting materials so that you don't fill your crafting room's chests with wheat instead of wood. |
||
| + | |||
| + | === Kitchen === |
||
| + | This is basically a crafting room, but you only craft food. The chest(s) should contain most basic foods, including wheat, milk, eggs, etc. Many people, instead of having a kitchen, just craft food in the crafting room, but a kitchen is a nice expansion, because it separates crafting materials so that you don't fill your crafting room's chests with wheat instead of wood. You could also add a smoker if you want. |
||
| + | |||
| + | ;Bakery |
||
| + | This is basically an expansion of a kitchen. You could build this and a kitchen, and just connect them. You would use this to make [[cake]]s, [[pumpkin pie]]s and [[bread]]. Place a crafting table, chest, and, if you want, a display table for cakes. If you want to make a large amount of cakes, make a cake farm under or near the bakery. |
||
;Pantry |
;Pantry |
||
| − | + | This is also an expansion of a kitchen. Make sure that they are categorized so you don't get mixed up. You can use a chest or dispenser to use everything in them. Put some cooked meat, bread, cookies, cakes and melons in them. |
|
| − | Note: If you are using a dispenser, you will need to activate it with a redstone signal |
||
| + | Note: If you are using a dispenser, you need to activate it with a redstone signal. |
||
| − | ;Control Room |
||
| − | : This is a common room to find in most advanced player's houses, but only if said advanced player uses a lot of redstone in their builds. It controls all of the redstone devices a player has and usually consists of: |
||
| + | === Control room === |
||
| − | Levers/Buttons/Other Input Methods- These are used to activate/deactivate redstone signals. |
||
| + | This is a common room to find in most advanced player's houses, but only if said advanced player uses a lot of redstone in their builds. It controls all of the redstone devices a player has and usually consists of: |
||
| − | <br>Redstone torches/Redstone lamps- These are mainly used to determine whether the signals are on or off. |
||
| + | * Levers/Buttons/Other Input Methods - These are used to activate/deactivate redstone signals. |
||
| − | <br>Signs- These are probably the most important thing you can have in your control room. These help you determine what each lever/button does. |
||
| + | *Redstone torches/Redstone lamps - These are mainly used to determine whether the signals are on or off. |
||
| + | *Signs - These are probably the most important thing you can have in your control room. These help you determine what each lever/button does. |
||
| + | ===Maze=== |
||
| − | ;Bakery |
||
| + | This is mainly for if you get bored. It's quite simple and obvious how to build and use. |
||
| − | : This is basically an expansion of a kitchen. You could build this and a kitchen, and just connect them. You would use this to make cakes and bread. Place a crafting table, chest, and, if you want, a display table for cakes. If you want to make a large amount of cakes, make a cake farm under or near the bakery. |
||
| + | |||
| + | ===Mob XP farm/drop collector=== |
||
| + | An [[Tutorials/Mob grinder|experience farm]] uses water currents to push most mobs into a central area. With mobs in the nether, pistons are used. Use a piston crusher or a long drop to get the mobs to a ½ heart. Mobs can be killed by hand or with a splash potion of harming (Healing for undead mobs) to get XP. Note: This is more efficient with multiple spawners, as more spawners mean more spawning opportunities. You also obtain drops from each mob killed. This can also be done with large dark rooms with platforms. The mobs spawn and fall into water currents, where you can choose what happens to them once they are out of the spawning chamber. |
||
| + | |||
| + | ===Rebuilding wall=== |
||
| + | If for some reason you want to have a wall that you can’t get rid of, you can make a [[Tutorials/Cobblestone farming|cobblestone generator]], and make pistons push the [[cobblestone]] (which reforms) up into the wall, unless there are no missing blocks in it. Look at Sethbling's channel for more information or Mumbo Jumbo's indestructible wall V2 |
||
| + | |||
| + | ===In-Shelter Teleporter Room=== |
||
| + | If you have Cheats enabled, you can create a room that teleports you to other rooms in your shelter. you will need [[command blocks]] and basic knowledge of using [[commands]] to make the room. A non-cheat method is to build an ender pearl stasis chamber, which can teleport you to any room. Note: This will require ender pearls so you need an enderman farm. https://www.youtube.com/watch?v=2_ngko21ZmQ |
||
| + | |||
| + | ===Redstone lab=== |
||
| + | A laboratory is a large, clear, secure area where you can safely test designs without distractions. When building large redstone projects with complicated parts, it can save you time and effort if you test the ideas first. However, it's often best to test ideas in creative mode and implement them in survival. |
||
| + | |||
| + | ===Cake factory=== |
||
| + | A cake factory simply provides the avenue to quickly produce cake by having the necessary ingredients nearby and produced in a close area, most commonly in one large factory type building. To make a cake factory, make a [[Tutorials/Wheat farming|Wheat Farm]], a [[Tutorials/Sugar Cane farming|Sugar Cane Farm]], an [[Tutorials/Egg Farming|Egg Farm]], and a [[cow]] in a cage (make the cage so you can [[milk]] the cow.). Place a [[crafting table]] and a [[chest]]. Once you have enough materials from the farms, start making [[cake]]s. This is a good thing to put under/next to a dining hall in [[multiplayer]]. |
||
| + | |||
| + | ===Path/road=== |
||
| + | Consider building a road or a path between your buildings or to the nearest village. Remember to keep it well lit so no mobs spawn! A good material is {{BlockLink|Dirt Path|dirt path}}. |
||
| + | |||
| + | ===Cobblestone generator=== |
||
| + | {{Seealso|Tutorials/Cobblestone farming}} |
||
| + | A cobblestone generator provides a safe and convenient way to gather cobblestone. They typically involve mixing water and lava. |
||
| + | |||
| + | ===Bunker=== |
||
| + | Sometimes called a panic room, a Bunker is a small room made of strong materials (obsidian for example) with an iron [[door]] with the open/close system inside the room. This room must have a bed, a crafting table, a furnace and also a chest with the basic materials (food, tools, armor and weapons are a must). It also has to have a high interior luminosity to avoid monsters spawning inside. It should also be only two blocks tall so [[Endermen]] can't teleport inside. |
||
| + | |||
| + | ===Panic room=== |
||
| + | A panic room is a place meant just for fun, where you put the entrance somewhere where you wouldn't go looking for another room, e.g. the drain in a shower because if using a trapdoor for the drain you can open it. |
||
| + | |||
| + | ===Scout tower=== |
||
| + | A cheap and safe way to survey the land. Note that these are mostly obsoleted by [[map]]s, should you have the resources to make them, although a map doesn't tell you if there are any aggressive mobs. Remember to keep a spyglass at the top! |
||
| + | ===Seed and flower farm=== |
||
| − | ; Maze |
||
| + | You can have a fully-automatic flower and seed farm with just a bit of Redstone and tons of [[bone meal]]! Have an 8×8 area of grass with some [[hopper]]s at the end. Then, place a row dispensers at the back, facing the grass, and put buckets of water in them. Hook up some Redstone from a BUD switch at the end and delay with Repeaters. Attach another line of Redstone and hook it up to Dispensers, under the Grass and filled with bone meal while facing the Grass on top. If you do it right, automatic block updates should cause grass and flowers to grow and immediately be destroyed by the water flow and be carried along the stream and have the water automatically get sucked in. XisumaVoid made a good tutorial. |
||
| − | : This is mainly for if you get bored. It's quite simple and obvious how to build and use. |
||
| + | ===Beacon/lighthouse=== |
||
| − | ;[[Mobs|Mob]] XP Farm/Drop Collector |
||
| + | A tall tower with some sort of light source on the top means that you can see your base from a long distance away. Handy if you go exploring a lot, your spawn point is a long way from your base, or you have not made a bed yet. |
||
| − | :An XP farm uses water currents to push most mobs into a central area. With mobs in the nether, pistons are used. Use a piston crusher or a long drop to get the mobs to a 1/2 heart. Mobs can be killed by hand or with a splash potion of harming to get XP. Note: This is more efficient with multiple spawners, as more spawners mean more spawning opportunities. You will also obtain drops from each mob killed. This can also be done with large dark rooms with platforms. The mobs spawn and fall into water currents, where you can choose what happens to them once they are out of the spawning chamber |
||
| + | ===Beacon room=== |
||
| − | ; Rebuilding Wall |
||
| + | Make this room by digging a 6×6×6 hole and building the base pyramid out of your selected material (Iron is cheapest unless you have a Trading Hall, but you can also use Netherite, Diamonds, Emeralds and Gold). Also, you could put in a few chests with [[Diamond (disambiguation)|diamonds]], [[Netherite]], [[iron]], [[emerald]]s and [[gold]] and/or make it look like an altar. |
||
| − | :If for some reason you want to have a wall that you can get rid of, you can make a [[Tutorials/Cobblestone farming|cobblestone generator]], and make pistons push the [[cobblestone]] (which reforms) up into the wall, unless there are no missing blocks in it. Look at Sethbling's channel for more information. |
||
| + | ===Garage=== |
||
| − | ;Redstone Lab |
||
| − | :A laboratory is a large, clear, secure area where you can safely test designs without distractions. When building large redstone projects with complicated parts, it can save you time and effort if you test the ideas first. |
||
| + | If you like cars, then you might want to build a garage. A garage is just a big room with enough space to build some cars and a garage door at one end so you can drive your cars outside. Some garages are really big and have lots of decorations, like workshops, car lifts, or crazy things like waterfalls or a secret underground garage. When you have finished your garage, remember to build a few cars to fill up the garage. |
||
| − | ;Cake Factory |
||
| − | :A cake factory simply provides the avenue to quickly produce cake by having the necessary ingredients nearby and produced in a close area, most commonly in one large factory type building. To make a cake factory, make a [[Tutorials/Wheat farming|Wheat Farm]], a [[Tutorials/Sugar Cane farming|Sugar Cane Farm]], an [[Egg Farming|Egg Farm]], and a [[cow]] in a cage (make the cage so you can [[milk]] the cow.). Place a [[Crafting Table|crafting table]] and a [[chest]]. Once you have enough materials from the farms, start making [[cake]]s. This is a good thing to put under/next to a dining hall in [[Survival#Survival multiplayer (SMP)|SMP]]. |
||
| + | ===Kennel/pet area === |
||
| − | ;Path/Road |
||
| + | If you have tamed a lot of wolves, a kennel is a good place to keep them. A simple shed-like structure will suffice, but be sure to keep it well lit for the dogs' safety. A pet area is similar to a kennel, but keeps dogs ''and'' cats. For a more realistic feel, separate them. |
||
| − | :How about building a road or a path between your buildings or to the nearest village? Remember to keep it well lit so no mobs spawn! |
||
| + | ===Well === |
||
| − | ;[[Tutorials/Cobblestone farming|Cobblestone Generator]]:A cobblestone generator provides a safe and convenient way to gather cobblestone. They typically involve mixing water and lava. |
||
| + | A renewable water source is useful for a variety of projects. Put water in a 1×3 ditch and you can take water repeatedly from the center! For a more aesthetically pleasing pool, a 2×2 well works as well, and you can take water from any of the squares. |
||
| + | ===Mushroom farm === |
||
| − | ;Bunker |
||
| + | A big room with flat floor for growing [[mushroom]]s. You can light your farm by [[torch]]es or [[glowstone]], placed on ceiling, to prevent [[mobs]] from appearing. Just make sure that there are no places on the floor where the [[light]] level is greater than 12. If you have the material, [[Redstone torches]] are good for this. More about this can be found on the [[Tutorials/Mushroom farming]] page. Alternatively, find a small [[cave]] or make one, put some [[mushroom]]s inside and completely seal it off without [[torch]]es and check on it/clean it out. Also provides the drops from hostile [[mobs]]. |
||
| − | :Sometimes called a panic room, a Bunker is a small room made of strong materials (obsidian for example) with an iron [[door]] with the open/close system inside the room. This room must have a bed, a crafting table, a furnace and also a chest with the basic materials (food, tools, and weapons are a must). It also has to have a high interior luminosity to avoid monsters spawning inside. It should also be only two blocks tall so [[Enderman|Endermen]] can't teleport inside. |
||
| + | ===Sugar cane and cactus farms=== |
||
| − | ;Panic Room |
||
| + | {{seealso|Tutorials/Sugar cane farming|Cactus farming}} |
||
| + | Easier to manage but somewhat less useful than the above two projects, farming [[sugar cane]] and [[cactus]] underground requires little effort. A cactus farm requires [[sand]] to grow, and [[sugar cane]] needs to be properly irrigated with [[water]] within one block of it. If you don't want to spend lots of time harvesting your cactus, place a three-block-tall pillar next to where you want your cactus (See [[Farming]] for more info). |
||
| + | ===Indoor animal farm === |
||
| − | A panic room is a place meant just for fun, where you put the entrance somewhere where you wouldn't go looking for another room, e.g. The drain in a shower because if using a trapdoor for the drain you can open it. |
||
| + | Light up a large area with a [[grass]] floor. Then put two of the same kind of passive [[mobs]] (i.e., two [[pig]]s or two [[cow]]s) inside. You can then [[breed]] them together and you can gather [[wool]], [[leather]], [[pork]], [[beef]] and [[raw chicken]] safely. You might want to put trees inside so the animals feel more comfortable, or, if you're really ambitious, build a man-made forest. |
||
| + | ===Pond === |
||
| − | ;Scout Tower |
||
| + | This is easy to make, and can be useful, especially if you don't have a [[wheat]] farm yet. Just make a hole long enough to cast your [[fishing rod]], around 8 blocks long and at least 2 blocks deep, and fill it with [[water]]. |
||
| − | :A cheap and safe way to survey the land. Note that these are mostly obsoleted by [[map]]s, should you have the resources to make them, although a map doesn't tell you if there are any aggressive mobs outside. |
||
| + | ===Music room === |
||
| − | ;Seed and Flower Farm |
||
| + | A room filled with [[note block]]s to enjoy melodies. This can be made with or without [[redstone repeater]]s. |
||
| − | You can have a fully-automatic flower and seed farm with just a bit of Redstone and tons of [[Bone Meal]]! Have an 8x8 area of grass with some [[hoppers]] at the end. Then, place a row dispensers at the back, facing the grass, and put buckets of water in them. Hook up some Redstone from a BUD switch at the end and delay with Repeaters. Attach another line of Redstone and hook it up to Dispensers, under the Grass and filled with bone meal while facing the Grass on top. If you do it right, automatic block updates should cause grass and flowers to grow and immediately be destroyed by the water flow and be carried along the stream and have the water automatically get sucked in. |
||
| + | ===Library=== |
||
| − | ;Beacon/Lighthouse |
||
| + | Not only is it a great use for any excess [[sugar cane]], a library can also add a bit of class to your home. Can double as an [[enchantment]] room. |
||
| − | :A tall tower with some sort of light source on the top means that you can see your base from a long distance away. Handy if you go exploring a lot, your spawn point is a long way from your base, or you have not made a bed yet. |
||
| + | ===Minecart hub=== |
||
| − | ;Kennel |
||
| + | If you have active mines scattered over the [[Overworld|map]] and use [[minecart]]s to haul your stuff back to your base, dig out a universal stopping point under your base. Or, you could actually make a rail road hub outside or connected to your base. |
||
| − | :If you have tamed a lot of wolves, a kennel is a good place to keep them. A simple shed-like structure will suffice, but be sure to keep it well lit for the dogs' safety. |
||
| + | ===Minecart chest system=== |
||
| + | After a lot of days in ''Minecraft'', you will soon have the ability to automate everything ([[farm]]s, [[door]]s, etc.). The most useful automation you can make is a minecart chest system. You can simply craft [[minecarts with chests]], [[powered rail]]s, and some rails, and you can make a system to send your ores from your mine to your base, |
||
| + | ===Gravel-to-flint room === |
||
| − | ;Pet area |
||
| + | Once you have many stacks of [[gravel]], it can be useful to convert most (leave some for mining) of your [[gravel]] into [[flint]]. This is just a big empty room (a 4×4×4 space holds a stack of blocks), which you fill with gravel, before destroying the gravel, getting some flint in the process. It is most efficient to do this 10 - 15 times for every 20 stacks, though about 5 for 10 stacks, and 30 for 50 or so stacks. This room may include a chest with shovels, as well as ingredients and a crafting table for quick production of arrows, and flint and steel. |
||
| − | :Similar to a kennel, but keep dogs AND cats. For a more realistic feel, separate them. |
||
| + | This is somewhat redundent, since a Fletcher can trade you 10 Gravel and an emerald to 10 Flint. A stack is 6 Emeralds with 4 gravel left over and if you have a tree farm, two logs, 10 gravel, and a bit of trading can get you 10 Flint. |
||
| − | ;Well |
||
| − | :A renewable water source is useful for a variety of projects. Put water in a 1x3 ditch and you can take water repeatedly from the center! For a more aesthetically pleasing pool, a 2x2 well works as well, and you can take water from any of the squares. |
||
| + | ===Target practice rooms=== |
||
| − | ;Melon Farm |
||
| + | Make this room dimly lit, so hostile [[mobs]] can spawn, when you enter this room, always close the [[door]]s when entering and exiting, arm yourself and kill the mobs in there. [[Light]] the entrance area with [[torch]]es. This helps you gain experience and loot. |
||
| − | :A [[Melon]] farm produces the obvious, melon slices. Which can be used as a valuable food source that keeps your hunger bar up. |
||
| + | ===Target practice room (non-hostile)=== |
||
| − | ;Pumpkin Farm |
||
| + | Make this room with a supply of bows, arrows, and several colorful blocks, such as dyed [[wool]], (to determine distance rank) at different distances with buttons on each one facing you with each one hooked up to a [[redstone lamp]]. [[Target Block|Target blocks]] are a good item to use, too. |
||
| − | :A [[Pumpkin]] farm obviously provides pumpkins. These pumpkins can be used for heads for Snow & Iron Golems, pumpkin pie, Enderman protection as well as jack-o-lanterns and, of course, simply for decoration. |
||
| + | ===Bridge=== |
||
| − | ;[[Mushroom (disambiguation)|Mushroom]] Farm |
||
| + | If your base is near a lake, a bridge can help you cross to get resources and give you a safe spot to fish. Just create a 3-block wide path (using [[cobblestone]] would be a good idea) through the water, and you have a basic bridge! When you have time, you may want to add a ceiling+walls (for safety at night from [[mobs]] and during storms) and slits in the side (as either a dock or a place to fish.) |
||
| − | :A big room with flat floor. You can light your farm by [[torch]]es or [[glowstone]], placed on ceiling, to prevent [[mobs]] from appearing. Just make sure that there are no places on the floor where the [[light]] level is greater than 12. More about this can be found on the [[Tutorials/Mushroom farming|Mushroom Farming]] page. Alternatively, find a small [[cavern|cave]] or make one, put some [[Mushroom (disambiguation)|mushroom]]s inside and completely seal it off without [[torch]]es and check on it/clean it out. Also provides the drops from hostile [[mobs]]. |
||
| + | ===Bathroom=== |
||
| − | ;[[Carrot]] or [[Potato]] Farm |
||
| + | If one wants to fish indoors or drown themselves, a bathroom is perfect for them! Make a bath, a toilet and if the player is good with [[redstone]], a shower with pistons is always a good idea for those who want to show their home to others. When the walls are made of [[cobblestone]], make a hopper attached to a [[dropper]] or a [[dispenser]] to make a sink (just add a lever pointing downward above) or a trash can. If the items cannot reach the outside for other players, add a "remove items" [[button]] to empty the items out to a chain of [[hopper]]s that lead to a public chest/thrift shop, or empties the items to something which destroys them(such as [[cacti]], [[fire]] on [[netherrack]], [[lava]], etc.). Attach a [[hopper]] to [[dispenser]] by [[sneaking]], then place the [[hopper]]. This will not work without [[sneaking]]. One wise idea is to have entrances to secret rooms in this room. |
||
| − | : Basically the same thing as [[wheat]] farm (see above), but using the new crops from 1.4.2, carrots and potatoes. Seeds can be obtained from zombies as a rare drop, and these crops provide a very good food source. |
||
| + | ===Dye room === |
||
| − | ;[[Sugar Cane|Sugarcane]] and [[Cactus]] Farms |
||
| + | A nice room where you can store dyes and clay. Typically only has to have one chest, but looks nice with hardened-clay walls. |
||
| − | :Easier to manage but somewhat less useful than the above two projects, farming [[Sugar Cane|Sugarcane]] and [[cactus]] underground requires little effort. A [[cactus]] farm requires [[sand]] to grow, and [[Sugar Cane|Sugarcane]] needs to be properly irrigated with [[water]] within one block of it. If you don't want to spend lots of time harvesting your [[cactus]], place a three-block-tall pillar next to where you want your cactus (See [[Farming (disambiguation)|Farming]] for more info). |
||
| + | ===Balcony=== |
||
| − | ;Indoor animal farm |
||
| + | A nice place to enjoy the view and the nice open air. Also a nice place to pick off those pesky [[creeper]]s hanging by your front door. |
||
| − | :Light up a large area with a [[grass]] floor. Then put two of the same kind of passive [[mobs]] (i.e., two [[pig]]s or two cows) inside. You can then [[Breeding|breed]] them together and you can gather [[wool]], [[leather]], [[Raw Porkchop|pork]], [[Raw Beef|beef]] and [[Raw Chicken|raw chicken]] safely. You might want to put trees inside so the animals feel more comfortable, or, if you're really ambitious, build a man-made forest. |
||
| − | + | ===Incinerator=== |
|
| − | + | A room with [[lava]], for disposing of unwanted materials. A good way to do this is to create a two block high corridor with [[lava]] at the end, and a slab block just before the [[lava]]. This results in you being able to walk up to your incinerator but not into it, eliminating fear of death. Be careful with lava around flammable materials. You may replace the [[lava]] with a [[cactus]], or burning [[netherrack]]. [[Hopper]]s can be used for a "hopper chain," which could lead to a thrift shop, where [[player]]s can be charged for taking items. Adding this to the incinerator will attach a money source. If the hopper chain is full, items will be destroyed. |
|
{{FakeImage| |
{{FakeImage| |
||
{{BlockGrid |
{{BlockGrid |
||
| − | |A=air|B=stone|W=water|R= |
+ | |A=air|B=stone|W=water|R=Light Blue Wool|L=lava |
|ABBBBBBBB |
|ABBBBBBBB |
||
|WRRRRRRRA |
|WRRRRRRRA |
||
| Line 246: | Line 326: | ||
}} |
}} |
||
| + | ===Mob farming=== |
||
| − | ;Minecart Hub |
||
| + | {{seealso|Tutorials/Mob farm}} |
||
| − | :If you have active mines scattered over the [[The Overworld|map]] and use [[Minecart]]s to haul your stuff back to your base, dig out a universal stopping point under your base. Or, you could actually make a rail road hub outside or connected to your base. |
||
| + | A safe, renewable source of [[gunpowder]], [[arrow]]s, [[rotten flesh]] and [[bone]]s. This makes exploring much safer and can provide the means for large amounts of explosives. Also see [[Tutorials/Mob grinder|Mob Grinder]]. |
||
| + | ===Water elevator=== |
||
| − | ; Pond |
||
| + | If you live in any building that is more than one story, you might want a method to get up and down easily without stairs or a ladder. One way to do this is to make a waterfall that falls through the center of the structure. Make sure to have one block of space on any side of it so that your character can be outside of the water enough to breathe while climbing it. Simply hold down the jump button (the space bar) while inside the waterfall to ascend. This method can also be used to create an elevator to flying islands or houses. |
||
| − | :This is very easy to make, and can be very useful, especially if you don't have a [[wheat]] farm yet. Just make a hole long enough to cast your [[Fishing Rod|fishing rod]], around 8 blocks long and at least 2 blocks deep, and fill it with [[water]]. |
||
| + | ==Defense== |
||
| − | ;[[Tutorials/Mob farm|Mob Farming]] |
||
| + | {{see also|Tutorials/Traps}} |
||
| − | :A safe, renewable source of [[gunpowder]], [[arrow]]s, [[Rotten Flesh|rotten flesh]] and [[bone]]s. This makes exploring much safer and can provide the means for large amounts of explosives. Also see [[Tutorials/Mob grinder|Mob Grinder]]. |
||
| + | These additions make your base safer and provide a certain amount of entertainment. |
||
| + | ===Self-destruct button=== |
||
| − | ;Music Room |
||
| + | Pretty self-explanatory, a button that blows up your base and kills the mobs and/or griefers in your house. Remember not to be near during the blast (or you can hide in your bunker with the switch inside)! Also be sure to have a world backup! |
||
| − | :A room filled with [[Note Block|note blocks]] to enjoy melodies. This can be made with or without [[Redstone Repeater|redstone repeater]]s. |
||
| + | ===Arrow slits=== |
||
| − | ;Library |
||
| + | These are small holes in a wall that you can shoot arrows through but are small enough so that skeletons and other players have a hard time shooting back at you. This can be accomplished by stacking up cobblestone walls (the holes can be shot through) or simply digging a one-block hole through the wall and putting a slab on the bottom. Also, placing the non-block part of stairs facing each other, and using the upside-down stair function, you can make arrow slits almost impossible to shoot through unless you are close, so it is advised you put them far above ground. |
||
| − | :Not only is it a great use for any excess [[Sugar Cane|sugar cane]], a library can also add a bit of class to your home. Can double as an [[Enchanting|enchantment]] room. |
||
| + | ===Murder holes=== |
||
| − | ;Minecart Chest System |
||
| + | First, dig a 2 block deep hole in the ground. Dig another hole 3 blocks deep, 1 block away from the first hole. Dig out the block that separates the bottom of the 2-deep hole with the middle of the 3-deep. If done correctly, this should allow all mobs (except for spiders) to fall into the 2 block hole. Then, you simply go into the 3 block hole and attack their feet. Murder Holes often function best alongside a perimeter wall of some sort, with the 2 deep outside and the 3 deep inside. An extra addition to this is to make a large amount of murder holes, and form a tunnel system of sorts, so you can watch multiple holes at once. These were featured by Paulsoaresjr in his ''Minecraft'' tutorial videos. This works best before version 1.2 because the mobs have new coding that makes it hard to get them to fall in holes. They will simply navigate around holes deeper than 2 blocks. A solution to that is to put signs around the holes but is usually more effort than worth. |
||
| − | :After a lot of days in Minecraft, you will soon have the ability to automate everything ([[Farming (disambiguation)|farm]]s, [[door]]s, etc). The most useful automation you can make is a Minecart Chest System. You can simply craft [[Minecart with Chest|Minecart with chest]]s, [[Powered Rail]]s, and some rails, and you can make a system to send your ores from your mine to your base, and have a minecart with more [[tools]] come back to you. |
||
| + | ===Skylight=== |
||
| − | ;[[Gravel]]-to-[[Flint]] room |
||
| + | Although this may not sound like much of a defense, a small skylight above your entrance/exit allows you to easily see any mobs (especially spiders) waiting to pounce on you from above. Not recommended in multiplayer, as it acts as another way for griefers to find your base. |
||
| − | : Once you have many stacks of [[gravel]], it can be useful to convert most (leave some for mining) of your [[gravel]] into [[flint]]. This is just a big empty room (a 4X4X4 space holds a stack of blocks), which you fill with gravel, before destroying the gravel, getting some flint in the process. It is most efficient to do this 10 - 15 times for every 20 stacks, though about 5 for 10 stacks, and 30 for 50 or so stacks. This room may include a chest with shovels, as well as ingredients and a crafting table for quick production of arrows, and flint and steel. |
||
| + | ===Anti hostile mob passageway=== |
||
| − | ;Target Practice Rooms: Make this room dimly lit, so hostile [[mobs]] can spawn, when you enter this room, always close the [[door]]s when entering and exiting, arm yourself and kill the [[mobs]] in there. [[Light]] the entrance area with [[torch]]es. This will help you gain XP and loot. |
||
| + | You can use the fact that snowballs push hostile mobs, by building a 1-wide bridge over lava and putting snow golems on the side (see gallery). The player and passive mobs can pass through safely, while hostile mobs will be pushed to the lava by the snow golems' snowballs. |
||
| + | ===Overhang=== |
||
| − | ;Target Practice Room (non-hostile) |
||
| + | Since [[spider]]s can climb walls, a base needs to have either a ceiling or an overhang along the outside walls to be safe. The walls must be at least four blocks high (since spiders can jump up to three blocks high). Of course, a closed roof with a lava pond on top is also nice… |
||
| − | : Make this room with a supply of bows, arrows, and several colorful blocks, such as dyed [[wool]], (to determine distance rank) at different distances with buttons on each one facing you with each one hooked up to a redstone lamp. |
||
| + | ===Perimeter=== |
||
| − | ;Beacon Room : |
||
| + | Adding [[torch]]es around your base can reduce the amount of monsters that spawn nearby, so add some light to your lawn! You can also use [[fence]]s, [[cacti]], and burning [[netherrack]] to keep enemies out. Just remember that spiders can jump your fences. |
||
| − | :Make this room by digging a 6x6x6 hole and building the base pyramid out of your selected material (Iron, Diamonds, Emeralds, Gold).Also, you could put in a few chests with [[Diamond (disambiguation)|diamonds]], [[Iron (disambiguation)|iron]], [[emerald]]s and [[Gold (disambiguation)|gold]] and/or make it look like an altar. |
||
| + | ===Floodgate=== |
||
| − | ;Bridge |
||
| + | Using a fairly simple redstone circuit connected to a lever at one end, and one or more pistons at the other end, you'll be able to build some simple floodgates. If you extend the pistons first, and then place water, or even lava behind it, you can get rid of or even kill any mob passing by pulling the lever and letting the water or lava flow! For a quick morning mob clean-up and a strong sense of catharsis, you can place lava floodgates surrounding your entire shelter, facing out. One throw of the lever reduces the surrounding landscape to a barren wasteland! Not to be used in wooded areas. |
||
| − | :If your base is near a lake, a bridge can help you cross to get resources and give you a safe spot to fish. Just create a 3-block wide path (using [[cobblestone]] would be a good idea) through the water, and you have a basic bridge! When you have time, you may want to add a ceiling+walls (for safety at night from [[mobs]] and during storms) and slits in the side (as either a dock or a place to fish.) |
||
| + | ===Moat === |
||
| − | ;Bathroom |
||
| + | The simplest of these is a "dry moat" or trench, a couple layers deep so that [[skeleton]]s and [[zombie]]s can't get across. This can provide you with a reasonably safe area that is outside. This can be filled with [[water]] to push the enemies to a mob grinder, or simply filled with lava which has more dramatic and obvious effects. Please note: It might not be a good idea to use lava when having a shelter built out flammable blocks such as wood, wool or wooden planks. Tower shelters would do well to have a three-block deep water moat to break the player's fall so they can safely fall to the bottom. |
||
| − | :If you want to fish indoors, poop for laughs or drown yourself, a bathroom is perfect for you! Make a bath, a toilet and if you are good with redstone, a shower with pistons is always a good idea. |
||
| + | ===Lake === |
||
| − | ;Dye Room |
||
| + | If a moat does not feel sufficient, build a lake around your base, preferably several levels below the entry level and with a bridge to allow easy access back and forth. Again, it can be water, or, if you want a dramatic flair, use lava. Remember to protect the bridge well, though, and be sure you are protected from within the island in case you miss a spawner. Making a drawbridge out of trapdoors is a fun alternative to the actual bridge. |
||
| − | :A nice room where you can store dyes and clay. Typically only has to have one chest, but looks nice with hardened-clay walls. |
||
| + | ===Archery tower=== |
||
| − | ;Balcony |
||
| + | If you have a plentiful supply of arrows, building a small tower to pick off nearby monsters can be fun and provide useful resources such as gunpowder. |
||
| − | :A nice place to enjoy the view and the nice open air. Also a nice place to pick off those pesky [[Creeper]]s hanging by your front door. |
||
| − | == |
+ | ===Dispenser turret=== |
| + | Put a [[dispenser]] with some [[arrow]]s at your desired location (preferably next to a [[door]]) and a [[stone button]]/[[lever]]/[[pressure plate]] attached to it. This is handy if [[mobs]] want to pay you a visit. Splash [[potion]]s can also be used as ammo, but are harder to obtain. The benefits of using potions is that they can affect a wider area than arrows. |
||
| − | These additions make your base safer and provide a certain amount of entertainment. |
||
| + | ===Traps=== |
||
| − | ;Self-Destruct Button |
||
| + | If you're not satisfied with moats or a perimeter fence, consider adding a [[trap]] or two. If you're up to a challenge (and on a multiplayer server), you could even make an entire trap, designed to look like a base! Dark rooms with no way out for mob spawning, entire mazes made of glass, and traps using pistons and lava. The possibilities are endless. |
||
| − | :Pretty self-explanatory, a button that blows up your base and kills the mobs and/or griefers in your house. Remember not to be near during the blast (or you can hide in your bunker with the switch inside)! Also be sure to have a world backup! |
||
| + | ===Drawbridge=== |
||
| − | ;Arrow Slits |
||
| + | Using trapdoors, some redstone, and switches, a simple drawbridge can be made. Dig a moat around your base and make sure it is too long to jump across. Now, make short walls next to your entrance. Depending on whether you have a single door or double door, you will have to use one row or two rows of trapdoors respectively. Run redstone next to the trapdoors and connect them to switches inside your base, then cover up the redstone walls. This prevents mobs from getting close to your door while you are inside your base, but the bridge has to be left open while outside your base, otherwise you'll have to find another way back in. Alternatively, you can make a [[Redstone circuits#T Flip-Flop|T Flip-Flop]] gate and place another switch outside your house to trigger the drawbridge from anywhere. |
||
| − | :These are small holes in a wall that you can shoot arrows through but are small enough so that skeletons and other players have a hard time shooting back at you. This can be accomplished by stacking up the new Cobblestone Walls (the holes can be shot through) or simply digging a one-block hole through the wall and putting a slab on the bottom. Also, placing the non-block part of stairs facing each other, and using the upside-down stair function, you can make arrow slits almost impossible to shoot through unless you are close, so it is advised you put them far above ground. |
||
| + | ===Sticky piston drawbridge=== |
||
| − | ;Murder Holes |
||
| + | {{schematic |
||
| − | :First, dig a 2 block deep hole in the ground. Dig another hole 3 blocks deep, 1 block away from the first hole. Dig out the block that separates the bottom of the 2-deep hole with the middle of the 3-deep. If done correctly, this should allow all mobs (except for spiders) to fall into the 2 block hole. Then, you simply go into the 3 block hole and attack their feet. Murder Holes often function best alongside a perimeter wall of some sort, with the 2 deep outside and the 3 deep inside. An extra addition to this is to make a large amount of murder holes, and form a tunnel system of sorts, so you can watch multiple holes at once. These were featured by Paulsoaresjr in his minecraft tutorial videos. This works best before version 1.2 because the mobs have new coding that makes it hard to get them to fall in holes. They will simply navigate around holes deeper than 2 blocks. A solution to that is to put signs around the holes but is usually more effort than worth. |
||
| + | |caption=Accessible |
||
| + | |float=left |
||
| + | ||||||||||||- |
||
| + | |SB|MB|MB|MB|MB|MB|MB|MB|MB|MB|SB|- |
||
| + | ||sp-$u|se-$u|se-$u|se-$u|se-$u|se-$u|se-$u|se-$u|sp-$u||- |
||
| + | |||sp-$u!|sp-$u!|sp-$u!|sp-$u!|sp-$u!|sp-$u!|sp-$u!|||- |
||
| + | }} |
||
| + | {{schematic |
||
| + | |caption=Inaccessible |
||
| + | |float=left |
||
| + | ||MB||||||||MB||- |
||
| + | |SB|se-$u|wa|wa|wa|wa|wa|wa|wa|se-$u|SB|- |
||
| + | ||sp-$u!|MB|MB|MB|MB|MB|MB|MB|sp-$u!||- |
||
| + | |||sp-$u|sp-$u|sp-$u|sp-$u|sp-$u|sp-$u|sp-$u|||- |
||
| + | }} |
||
| + | {{-}} |
||
| + | It is possible to make a drawbridge using sticky pistons that is difficult for a mob to cross. This draw bridge also involves the use of a moat or lake. A knowledge of redstone logic gates and how power is supplied to blocks is needed as the mechanism uses multiple redstone repeaters, NOT Gates and a [[Mechanics/Redstone/Memory_circuit#T_flip-flop|T-Flip Flop]]. Using the T-Flip Flop one can wire the drawbridge so that it becomes accessible or inaccessible with the touch of a button from either side of the bridge. When the player(s) wants to cross the button is pressed causing both ends of the drawbridge and the center to be even allowing the player(s) to cross. When activated to keep mobs out both ends of the drawbridge are raised 1 block higher than the water level making it impossible to jump from the water to dry land and the center blocks are lowered 1 below the water level causing the center area to flood. Assuming both areas are properly lit and secured this creates an impassable entrance to one's base. |
||
| + | ===Secure waterfront=== |
||
| − | ;Skylight |
||
| + | Because zombies and skeletons can survive sunlight in water and hostile mobs can swim, if you have a base on the coast it's a good idea to make sure it isn't vulnerable to mob attack. Additionally, [[drowned]] pose a threat in the water. Building canals, lighting nearby islands, and building walls on areas of water you don't use can stop rare, but still as deadly, attacks from the sea. |
||
| − | :Although this may not sound like much of a defense, building a small skylight above your entrance/exit will allow you to easily see any mobs (especially spiders) waiting to pounce on you from above. Not recommended in SMP, as it acts as another way for griefers to find your base. |
||
| + | ===Land mines=== |
||
| − | ;Anti Hostile Mob Passageway |
||
| + | If you like to blow up stuff, you might like this. All you need is a lot of pressure plates (wood) and TNT. Once you found your spot dig two blocks down. Then place the TNT then another block, then the place the pressure plate. You can have a big mine field but usually more effort than it's worth. |
||
| − | :You can use the fact that snowballs push hostile mobs, by building a 1-wide bridge over lava and putting snow golems on the side (see gallery). The player and passive mobs can pass through safely, while hostile mobs will be pushed to the lava by the snow golems' snowballs. |
||
| + | ===TNT cannon=== |
||
| − | ;Overhang |
||
| + | TNT cannons are a good destructive way to take out mobs. Make a TNT cannon (a chaos cannon is also nice) and have a chest full of TNT. For more detail go to [[Tutorials/TNT cannons]]. |
||
| − | :Since [[Spider]]s can climb walls, a base needs to have either a ceiling or an overhang along the outside walls to be safe. The walls must be at least four blocks high (since spiders can jump up to three blocks high). Of course, a closed roof with a lava pond on top is also nice... |
||
| + | ===Iron golem trap === |
||
| − | ;Perimeter |
||
| + | If you have a lot of iron, you can create a separate room containing multiple [[iron golem]]s. This can be opened via a piston door to allow iron golems into a courtyard or garden. This will allow them to be sent to kill zombies if your house is under siege. |
||
| − | :Adding [[torch]]es around your base can reduce the amount of monsters that spawn nearby, so add some light to your lawn! You can also use [[fence]]s, [[cactus|cacti]], and burning [[netherrack]] to keep enemies out. Just remember that spiders can jump your fences. |
||
| + | ===Cactus wall === |
||
| − | ;Floodgate |
||
| + | If you have a small house near or in the desert, and you want some more protection because you're just starting out, or if you're a veteran and you want a cheap, effective wall, then this is the wall for you. It's basically composed of cactus blocks, placed about 3 blocks high, and all around your base in a way like this: |
||
| − | :Using a fairly simple redstone circuit connected to a lever at one end, and one or more pistons at the other end, you'll be able to build some simple floodgates. If you extend the pistons first, and then place water, or even lava behind it, you can get rid of or even kill any mob passing by pulling the lever and letting the water or lava flow! For a quick morning mob clean-up and a strong sense of catharsis, you can place lava floodgates surrounding your entire shelter, facing out. One throw of the lever reduces the surrounding landscape to a barren, hellish wasteland! Not to be used in wooded areas. |
||
| + | {{BlockGrid|o=cactus+top |
||
| + | | o o o o |
||
| + | | o o o o |
||
| + | }} |
||
| + | and only make one path to your door, this trips up most mobs, other than skeletons because they shoot, and spiders, and they tend to jump over it, but it's an excellent defense for a beginner. |
||
| − | ;Moat |
||
| − | :The simplest of these is a "dry moat" or trench, a couple layers deep so that [[skeleton]]s and [[zombie]]s can't get across. This can provide you with a reasonably safe area that is outside. This can be filled with [[water]] to push the enemies to a mob grinder, or simply filled with lava which has more dramatic and obvious effects. Please note: It might not be a good idea to use lava when having a shelter built out flammable blocks such as wood, wool or wooden planks. Tower shelters would do well to have a three-block deep water moat to break the player's fall so they can safely fall to the bottom. |
||
| + | ===Snow golem sentry=== |
||
| − | ;Lake |
||
| + | Place a [[snow golem]] in a small booth and give it a hole to throw snowballs at mobs through. Elevate the golem so that [[creeper]]s can't blow it up and zombies can't hit it. |
||
| − | :If a moat does not feel sufficient, build a lake around your base, preferably several levels below the entry level and with a bridge to allow easy access back and forth. Again, it can be water, or, if you want a dramatic flair, use lava. Remember to protect the bridge well, though, and be sure you are protected from within the island in case you miss a spawner. Making a drawbridge out of trapdoors is a fun alternative to the actual bridge. |
||
| + | ===Outer walls=== |
||
| − | ;Archery Tower |
||
| + | The best material to construct these are [[stone]], [[stone brick]] or [[brick]]. [[Obsidian]] is harder to obtain but a lot better than stone-based blocks. They should be at least 4 blocks high and 2 iron doors for the exit. Make sure to build ramparts and cover walls, and fill with lava/water. Also have a 1×1×1 moat of lava/water with a torch in front like this: |
||
| − | :If you have a plentiful supply of arrows, building a small tower to pick off nearby monsters can be fun and provide useful resources such as gunpowder. |
||
| + | {{BlockGrid|i=torch|w=stone|O=water |
||
| + | | w |
||
| + | | iw |
||
| + | | O |
||
| + | }} |
||
| + | ===Weaponry room === |
||
| − | ;Dispenser Turret |
||
| + | This is a room you can solely use to make weapons and store them. You'll want a crafting table and some chests for materials. This is useful since you can then use your original crafting room for things other than weapons, therefore leaving more space for such. Some holes in the side would be useful for sniping all the mobs and creepers outside. |
||
| − | :Put a [[dispenser]] with some [[arrow]]s at your desired location (preferably next to a [[door]]) and a [[Button|Stone Button]]/[[Lever]]/[[Pressure Plate]] attached to it. This is handy if [[mobs]] want to pay you a visit. Splash [[Potions]] can also be used as ammo, but are harder to obtain. The benefits of using potions is that they can affect a wider area than arrows. |
||
| + | ===Blacksmith=== |
||
| − | ;Traps |
||
| − | :If you're not satisfied with moats or a perimeter fence, consider adding a [[trap]] or two. If you're up to a challenge (and on a SMP server), you could even make an entire trap, designed to look like a base! Dark rooms with no way out for mob spawning, entire mazes made of glass, and traps using pistons and lava. The possibilities are endless. |
||
| + | :This room is where you can put your anvils and grindstones and some chests with tool making materials (eg. [[iron ingot]]s, [[stick]]s, [[wood]]). Also put a good bit of furnaces, for all your mined ores to be smelted. This can also be used for good looks if you do it right. |
||
| − | ;Drawbridge |
||
| − | :Using trapdoors, some redstone, and switches, a simple drawbridge can be made. Dig a moat around your base and make sure it is too long to jump across. Now, make short walls next to your entrance. Depending on whether you have a single door or double door, you will have to use one row or two rows of trapdoors respectively. Run redstone next to the trapdoors and connect them to switches inside your base, then cover up the redstone walls. This prevents mobs from getting close to your door while you are inside your base, but the bridge will have to be left open while outside your base, otherwise you'll have to find another way back in. Alternatively, you can make a [[Redstone_circuits#T_Flip-Flop|T Flip-Flop]] gate and place another switch outside your house to trigger the drawbridge from anywhere. |
||
| + | ===Alarm tower=== |
||
| − | ;Sticky Piston Drawbridge |
||
| + | This can be used to signal if enemies are near your base. Using the [[command block]], you could make it so a message gets sent out when you pull a lever or press a button, and could also turn on a source of lighting so people can see the signal from far away. Can be fun on single player or LAN, but it is also quite useful for multiplayer. |
||
| − | [[File:Sticky Piston Drawbridge.JPG|200px|thumb|right|Sticky Piston Drawbridge, blue shows water level]] |
||
| − | It is possible to make a drawbridge using sticky pistons that is very difficult for a mob to cross. This draw bridge also involves the use of a moat or lake. A knowledge of redstone logic gates and how power is supplied to blocks is needed as the mechanism uses multiple redstone repeaters, NOT Gates and a T-Flip Flop. Using the T-Flip Flop one can wire the drawbridge so that it becomes accessible or inaccessible with the touch of a button from either side of the bridge. When the player(s) wants to cross the button is pressed causing both ends of the drawbridge and the center to be even allowing the player(s) to cross. When activated to keep mobs out both ends of the drawbridge are raised 1 block higher than the water level making it impossible to jump from the water to dry land and the center blocks are lowered 1 below the water level causing the center area to flood. Assuming both areas are properly lit and secured this creates an impassable entrance to one's base. |
||
| + | ===Drop trap === |
||
| − | ;Secure Waterfront |
||
| + | This is useful for those short corridors from one part of your building to the other, as when you pull a [[lever]] at one side of the corridor, the floor would open making enemies fall down who are chasing you. Easy to make, all you need are a couple of [[sticky piston]]s and [[redstone]], and optional [[lava]], then you're set! |
||
| − | :Because zombies and skeletons can survive sunlight in water and hostile mobs can swim, if you have a base on the coast it's a good idea to make sure it isn't vulnerable to mob attack. Building canals, lighting nearby islands, and building walls on areas of water you don't use can stop very rare, but still as deadly, attacks from the sea. |
||
| + | ===Retractable blast shields=== |
||
| − | ;Land Mines |
||
| + | These are an easy way to keep mobs at a distance, and are especially effective against mobs which use sight as a weapon, such as [[creeper]]s and [[endermen]], however it can be tough to collect the necessary resources for this mechanism. Say we're going to protect a window which is two blocks from the ground and four blocks wide. To start, count three blocks out from the window, and then dig a 6-block-wide, 3-block-deep, 3-block-thick (6×3×3) trench, and then line the far edge of the trench with pistons pointing upward. Next, place three blocks of gravel on each piston so that there is one block of gravel sticking up above the ground. Behind each piston, place a solid block that accepts [[redstone]], and then place a bit of redstone on each of these blocks, as well as the blocks behind them. From there, run a redstone line to the lever which we'll use to work the blast shields, keeping in mind that redstone can accept a signal from the block above it (making it feasible to have the lever inside your house, preferably near the window you wish to protect). |
||
| − | :If you like to blow up stuff, you might like this. All you need is a lot of pressure plates (wood) and TNT. Once you found your spot dig two blocks down. Then place the TNT then another block, then the place the pressure plate. You can have a big mine field but usually more effort than it's worth. |
||
| + | The final product should look like this (all the redstone should be off and the cobblestone is the window): |
||
| − | ;TNT Cannon |
||
| + | {{layered blueprint|name=Retractable Blast Shields|default=Layer 0|D=dirt|P=piston+face|B=gold block|G=gravel|a=redstone dust+downright|d=redstone dust+t-down|b=redstone dust+downleft|c=redstone dust+upright|u=redstone dust+t-up|e=redstone dust+upleft|g=grass block+top|C=cobblestone|L=lever |
||
| − | :TNT cannons are a good destructive way to take out mobs. Make a TNT cannon(a chaos cannon is also nice) and have a chest full of TNT. For more detail go to [[Tutorials/TNT cannons|Tutorials/TNT Cannons]]. |
||
| + | |----Layer -3| |
||
| + | DDDDDDDD |
||
| + | DDDDDDDD |
||
| + | DDDDDDDD |
||
| + | DDDDDDDD |
||
| + | DDDDDDDD |
||
| + | DDDDDDDD |
||
| + | DDDDDDDD |
||
| + | DDDDDDDD |
||
| + | DDDDDDDD |
||
| + | DDDDDDDD |
||
| + | DDDDDDDD |
||
| + | |----Layer -2| |
||
| + | DDDDDDDD |
||
| + | DDDDDDDD |
||
| + | DDDDDDDD |
||
| + | DDDDDDDD |
||
| + | D D |
||
| + | D D |
||
| + | D D |
||
| + | DPPPPPPD |
||
| + | DBBBBBBD |
||
| + | DBBBBBBD |
||
| + | DDDDDDDD |
||
| + | |----Layer -1| |
||
| + | DDDDDDDD |
||
| + | DDDDDDDD |
||
| + | DDDDDDDD |
||
| + | DDDDDDDD |
||
| + | D D |
||
| + | D D |
||
| + | D D |
||
| + | DGGGGGGD |
||
| + | DaddddbD |
||
| + | DcuuuueD |
||
| + | DDDDDDDD |
||
| + | |----Layer 0| |
||
| + | gggggggg |
||
| + | gggggggg |
||
| + | gggggggg |
||
| + | gggggggg |
||
| + | g g |
||
| + | g g |
||
| + | g g |
||
| + | gGGGGGGg |
||
| + | gggggggg |
||
| + | gggggggg |
||
| + | gBgggggg |
||
| + | |----Layer 1| |
||
| + | CCCCCC |
||
| + | |||
| + | |||
| + | |||
| + | |||
| + | |||
| + | |||
| + | |||
| + | |||
| + | |||
| + | L |
||
| + | |----Layer 2| |
||
| + | C C |
||
| + | |||
| + | |||
| + | |||
| + | |||
| + | |||
| + | |||
| + | |||
| + | |||
| + | |||
| + | |||
| + | |----Layer 3| |
||
| + | CCCCCC |
||
| + | |||
| + | |||
| + | |||
| + | |||
| + | |||
| + | |||
| + | |||
| + | |||
| + | |||
| + | |||
| + | }} |
||
| + | After that, cover the redstone circuitry with whatever you wish to protect it against damage, and you're good to go! |
||
| − | ;Iron Golem Trap |
||
| − | :If you have a lot of iron, you can create a separate room containing multiple iron golems. This can be opened via a piston door to allow iron golems into a courtyard or garden. This will allow them to be sent to kill zombies if your house is under siege. |
||
| + | '''Note:''' If you're good enough with redstone, you can also have all blast shields around your house hooked up to a single lever, which you can flip whenever you need to. |
||
| − | ;Cactus Wall |
||
| + | This is a nice feature to add to the windows of your [[Nether]] bases. |
||
| − | :If you have a small house near or in the desert, and you want some more protection because you're just starting out, or if you're a veteran and you want a cheap, effective wall, then this is the wall for you. It's basically composed of cactus blocks, placed about 3 blocks high, and all around your base in a way like this: |
||
| − | o o o o |
||
| − | o o o o |
||
| + | ===Exploding statues=== |
||
| − | and only make one path to your door, this will trip up most mobs, other than skeletons because they shoot, and spiders, and they tend to jump over it, but it's an excellent defense for a beginner. |
||
| + | Surprising foes makes any weapon effective! No one will ever know when a fancy statue is a literal bomb! To make one, fill a statue with [[TNT]], then add some underground [[redstone]] leading to a button to activate it. Activating detectors makes this defense automatic,though beware of [[mobs]] or [[player]]s setting it off! Building it near a base is not wise. Normal [[rails]] and one block of [[activator rail]] with some power applied can replace a large [[redstone]] usage if statue is lower than the shelter. Push a [[minecart with TNT]] down the rail to activate. Remember to add the [[Activator Rail]] early on the rail if possible for a quick countdown! |
||
| + | ==Other== |
||
| − | ;Snow Golem Sentry |
||
| − | :Place a snow golem in a small booth and give it a hole to throw snowballs at mobs through. It might be a good idea to elevate the golem so creepers can't blow him up and zombies can't smash him. |
||
| + | There are infinite possibilities in ''Minecraft''. These ideas are not always functional but can be fun to make and have. |
||
| − | ;Outer Walls |
||
| − | :The best material to construct these are [[stone]], [[Stone Brick|stone brick]] or [[brick]]. [[Obsidian]] is harder to obtain but a lot better than stone-based blocks. They should be at least 4 blocks high and 2 iron doors for the exit. Make sure to build ramparts and cover walls, and fill with lava/water. Also have a 1x1x1 moat of lava/water with a torch in front like this: |
||
| − | w |
||
| − | i w |
||
| − | O |
||
| − | Where i= [[Torch]], w=Wall and o=[[Water]] |
||
| − | ;Weaponry room |
||
| − | :This is a room you can solely use to make weapons and store them. You'll want a crafting table and some chests for materials. This is useful since you can then use your original crafting room for things other than weapons, therefore leaving more space for such. Some holes in the side would be useful for sniping all the mobs and creepers outside. |
||
| + | ===Secret room === |
||
| − | ;Blacksmith |
||
| + | For your chests with many valuables, in case someone gets in base, they might not find your room to steal your stuff. |
||
| − | :This room is where you can put your anvils and some chests with tool making materials (eg. iron ingots, sticks, wood). Also put a good bit of furnaces, for all your mined ores to be smelted. This can also be used for good looks if you do it right. |
||
| + | ===Nether railroad=== |
||
| − | ;Alarm Tower |
||
| + | {{seealso|Tutorials/Nether hub}} |
||
| − | :This can be used to signal if enemies are near your base. Using the [[Command Block|command block]], you could make it so a message gets sent out when you pull a lever or press a button, and could also turn on a source of lighting so people can see the signal from far away. Can be fun on single player or LAN, but it is also quite useful for SMP. |
||
| + | Every block traveled in the Nether is equivalent to 8 blocks in the overworld. So why not use it to save on materials for building a long rail? You can have a portal in your house and a portal somewhere else connencted by a minecart rail in the nether. This can connect to a village, some cool mountains, a mushroom biome, or another place of interest that would take way too long to walk to. Extremely useful on Large Biomes and island worlds. Plus, you only use ⅛ of the materials you would use in the overworld. |
||
| + | ===Statue=== |
||
| − | ;Drop Trap |
||
| + | This can be made out of any type of [[wool]] you want, but usually people build statues of themselves. This serves no purpose in single player except decoration. |
||
| − | :This is useful for those short corridors from one part of your building to the other, as when you pull a [[Lever]] at one side of the corridor, the floor would open making enemies fall down who are chasing you. Very easy to make, all you need is a couple of [[sticky pistons]] and [[redstone]], and optional [[lava]], then you're set! |
||
| + | ===Trophy room === |
||
| − | ;Retractable Blast Shields |
||
| + | A room with framed trophies from your many victories: your first [[ghast tear]], the enchanted sword you killed a [[wither]] with, your first [[nether star]], a [[block of emerald]], etc. Use signs as plaques to mark the origin and perhaps the date of your trophies, give it fancy [[glowstone]] lighting, and have a pride-of-place shelf for a [[wither skeleton skull]] or perhaps even the [[Dragon Egg]]. |
||
| − | :These are an easy way to keep mobs at a distance, and are especially effective against mobs which use sight as a weapon, such as [[Creepers]] and [[Endermen]], however it can be tough to collect the necessary resources for this mechanism. Say we're going to protect a window which is two blocks from the ground and four blocks wide. To start, count three blocks out from the window, and then dig a 6-block-wide, 3-block-deep, 3-block-thick (6x3x3) trench, and then line the far edge of the trench with pistons pointing upwards. Next, place three blocks of gravel on each piston so that there is one block of gravel sticking up above the ground. Behind each piston, place a solid block that accepts [[redstone]], and then place a bit of redstone on each of these blocks, as well as the blocks behind them. From there, run a redstone line to the lever which we'll use to work the blast shields, keeping in mind that redstone can accept a signal from the block above it (making it feasible to have the lever inside your house, preferably near the window you wish to protect). |
||
| + | ===City === |
||
| − | The final product should look like this (P=piston, B=any block which you can place redstone on, I or -=redstone, and L=lever): |
||
| + | This is a good way to put [[torch]]es, [[cobblestone]], [[gravel]], and [[wood]] to use. First, you should dig out a road (as wide and long as you want it) then fill the holes in with gravel, then build as many cabins as you want in each cabin put a table, a chair, and a [[chest]], then light it up and put a wooden door on each one. Then build a restaurant, this should have some chairs and tables, and in the kitchen put a chest full of food and [[coal]], then put [[furnace]]s in the kitchen, if you want to make it really nice add outdoor seating, and if you're on multiplayer charge people to eat there. Then add a store (only build this if you're on multiplayer). It should have lots of sorted chests. It's recommended you hire a guard to guard the valuables. Now add your house, this should have a [[bed]], a [[crafting table]], and a chest, and anything else you want. Now add a fountain in the center of the city. Finally add a bunch of mini houses containing chests, and a crafting table. |
||
| − | PPPPPP |
||
| − | BBBBBB |
||
| − | ------ |
||
| − | I |
||
| − | I |
||
| − | L |
||
| + | ===Museum=== |
||
| − | After that, cover the redstone circuitry with whatever you wish to protect it against damage, and you're good to go! |
||
| + | This can be about various things. Minecraft, you, your worlds, or a favorite mob can be among ideas. |
||
| + | If you want it to look grand on the outside, place large pillars around it. Also, a grand staircase to a large front entrance helps. |
||
| − | '''Note:''' If you're good enough with redstone, you can also have all blast shields around your house hooked up to a single lever, which you can flip whenever you need to. |
||
| − | This is a nice feature to add to the windows of your [[Nether]] bases. |
||
| + | If you build this in multiplayer, hire guards/security to guard your beautiful creation. |
||
| − | == Other == |
||
| − | There are infinite possibilities in Minecraft. These ideas are not always functional but can be fun to make and have. |
||
| − | + | ===Secret base === |
|
| + | If you are in multiplayer, you don't want anyone getting into an underground base, right? Well, dig down at least three blocks and make a room. Then get out and put a piece of dirt over the entrance and place a [[sapling]]. Put [[bonemeal]] on it. Then dig the piece of dirt out and make a hill one block away from the tree. Dig one block into the hill and place sticky pistons so that when they come out they stick to the tree trunks and pull it back or forth, thus opening the entrance and closing it. After that, you need to expand the base so it's actually useful! |
||
| − | :For your chests with many valuables, in case someone gets in base, they might not find your room. |
||
| − | ;Nether Railroad |
||
| − | :Every block traveled in the Nether is equivalent to 8 blocks in the overworld. So why not use it to save on materials for building a long rail? You can have a portal in your house and a portal somewhere else connencted by a minecart rail in the nether. This can connect to a village, some cool mountains, a mushroom biome, or another place of interest that would take way too long to walk to. Extremely useful on Large Biomes and island worlds. Plus, you only use 1/8 of the materials you would use in the overworld. |
||
| + | ===Zoo=== |
||
| − | ;Statue |
||
| + | Ever wanted an area to see all the mobs in their epic glory? Build this! It's best if you use [[bricks]], [[stone brick]]s, or [[stone]]. You'll also need fences or glass, and signs. First, build various pens for [[mobs]]. Place glass on all sides, or just one. Alternatively, you could make a deep pit and put mobs in it. Put a fence around the outside. |
||
| − | :This can be made out of any type of [[wool]] you want, but usually people build statues of themselves. This serves no purpose in single player except decoration. |
||
| + | When you're done with pens, place paths guiding players around. If you want it to look nice, place large fountains, flowers and hidden [[note block]]s around. If you want it realistic, build restaurants, statues, and gift shops around. If you have hostile mobs in your zoo, you can use a [[name tag]] to rename them so that they do not despawn |
||
| + | ===Natural vacation beach=== |
||
| − | ;Trophy Room |
||
| + | This is simple. Find a lake or beach, dig out a large area, fill it with sand, and your own touches, and tada! You're done. Here is one way to make beach chairs:<ref>A video explaining the design of a beach chair can be found at {{ytl|TePLJQ5gVXA}}</ref> |
||
| − | :A room with framed trophies from your many victories: your first [[Ghast Tear]], the enchanted sword you killed a [[Wither]] with, your first [[nether star]], a [[Block of Emerald|block of emerald]], etc. Use signs as plaques to mark the origin and perhaps the date of your trophies, give it fancy [[glowstone]] lighting, and have a pride-of-place shelf for a [[Mob head|Wither Skeleton Skull]] or perhaps even the [[Dragon Egg]]. After you are pretty wealthy in Minecraft, it can also be used to display your first-ever pickaxe (if you still have it.) |
||
| + | Note: The terracotta can be replaced with wool. |
||
| − | ;City |
||
| − | :This is a good way to put [[torch]]es, [[cobblestone]], [[gravel]], and [[wood]] to use. First, you should dig out a road (as wide and long as you want it) then fill the holes in with [[gravel]], then build as many cabins as you want in each cabin put a table, a chair, and a [[chest]], then light it up and put a wooden door on each one. Then build a restaurant, this should have some chairs and tables, and in the kitchen put a chest full of food and [[coal]], then put [[furnace]]s in the kitchen, if you want to make is really nice add outdoor seating, and if you're on multiplayer charge people to eat there. Then add a store (only build this if you're on multiplayer). It should have lots of sorted [[chest]]s. It's recommended you hire a guard to guard the valuables. Now add your house, this should have a [[bed]], a [[Crafting Table|crafting table]], and a [[chest]], and anything else you want. Now add a fountain in the center of the city. Finally add a bunch of mini houses containing [[chest]]s, and a [[Crafting Table|crafting table]]. |
||
| + | {{BlockGrid|T=colored terracotta|F=fences|S=wooden stairs|H=wooden slabs |
||
| − | ;Museum: This can be about various things. Minecraft, you, your worlds, or a favorite mob can be among ideas. |
||
| + | |TTTTT |
||
| + | | F |
||
| + | |S F S |
||
| + | |H F H |
||
| + | }} |
||
| + | ===Man-made vacation beach=== |
||
| − | If you want it to look grand on the outside, place large pillars around it. Also, a grand staircase to a large front entrance helps. |
||
| + | This is a little harder than the natural version. Dig out a large area. Make it at least 60×60 blocks big, slowly getting deeper. Fill the outer shore with sand, add your touches and tada! You're done! you can also blow up a large area to do it faster and make it look more natural. |
||
| + | ===Sand castle=== |
||
| − | If you build this in multiplayer, hire guards/security to guard your beautiful creation. |
||
| + | Build a big castle of sand and sandstone with many rooms, chambers and whatever else you may desire. Add a moat, sniping towers, or other defenses to make it a nice sand strong hold. |
||
| + | ===Camouflage=== |
||
| − | ;Secret Base |
||
| + | This really serves no purpose in singleplayer. Simply place [[tall grass]], vines, leaves, trees, and water on and around your base(s). It can give it a kind of cool look, depending on how well you do. |
||
| + | ===A water "fall" === |
||
| − | If you are in SMP, you don't want anyone getting into an underground base, right? Well, dig down at least three blocks and make a room. Then get out and put a piece of dirt over the entrance and place a sapling. Put bonemeal on it. Then dig the piece of dirt out and make a hill one block away from the tree. Dig one block into the hill and place sticky pistons so that when they come out they stick to the tree trunks and pull it back or forth, thus opening the entrance and closing it. After that, you need to expand the base so it's actually useful! |
||
| + | If you have a tall base and you want to get down faster, place water on the ground to land on from a fall, so you can jump down safely. Or, if you have version 1.8, you can use a trampoline made of Slime Blocks to bounce between floors of your base. |
||
| + | ===Add underground floors to your shelter=== |
||
| − | ;Zoo |
||
| + | Using this gives you a chance to find resources, and in the case of invasion by [[mobs]], it will always provide a safer spot. Underground floors are also useful for making mob grinders or animal farms. If you're really good, add a whole back up shelter under ground. If you like to be safe, add multiple bunkers, but hide a super safe and secret bunker. You could also make a part of the floor out of glass in the same spot on each floor, so you can see all the way down, and it looks nice if you do it right. |
||
| − | : Ever wanted an area to see all the mobs in their epic glory? Build this! It's best if you use [[Bricks]], [[Stone Brick]]s, or [[Stone]]. You'll also need fences or glass, and signs. First, build various pens for [[Mobs]]. Place glass on all sides, or just one. Alternitively, you could make a deep pit and put mobs in it. Put a fence around the outside. |
||
| − | When you're done with pens, place paths guiding players around. If you want it to look nice, place large fountains, flowers and hidden [[Note Block|Noteblock]]s around. If you want it realistic, build restaurants, statues, and gift shops around. If you have hostile mobs in your zoo, you can use a [[Name Tag]] to rename them so that they do not despawn |
||
| + | === Add above-ground floors to your shelter=== |
||
| − | ;Natural Vacation beach |
||
| + | It is normally advised that you do this after building underground floors, especially if you have a ton of resources (after mining the basement out). These floors could even give you a chance to "snipe" some [[creeper]]s and [[spider]]s in the morning. |
||
| − | : This is VERY easy. Simply find a beach, dig out a large area, fill it with sand, and your own touches, and tada! You're done. Here is one way to make beach chairs:<ref>A video explaining the design of a beach chair can be found at http://www.youtube.com/TePLJQ5gVXA</ref> |
||
| − | * s=stairs (wooden) |
||
| − | * h= half slab (wooden) |
||
| − | * f= fence (wooden) |
||
| − | * c= clay block (wool could also be used) |
||
| + | ===Balcony=== |
||
| − | ccccc<br> f<br>s f s<br>h f h |
||
| + | Place your balcony so that it has a nice view! Add a chest with bows and arrows for quick mob sniping. Useful for a variety of things, from providing a point for easy kills to enjoying views. |
||
| + | ===Landing and takeoff platforms=== |
||
| − | ;Man-made Vacation Beach |
||
| + | If playing with flying enabled (for example, in Creative Mode) you can create platforms at the same height on multiple buildings for easy flight between the upper levels of different locations. This works great in tree-forts, cities, and anywhere that multiple balconies are otherwise unconnected. Since 1.11.2, [[firework]] rockets have allowed the player to have a propelled flight with [[elytra]], so these platforms should have water to slow the impact due to how fast players can fly, if these are meant for elytra. |
||
| − | : This is a little harder than the natural version. Dig out a large area. Make it '''''AT LEAST''''' 60 x 60 blocks big, slowly getting deeper. Fill the outer shore with sand, add your touches and tada! You're done! you can also blow up a large area to do it faster and make it look more natural. |
||
| + | ===Remake it out of a different material=== |
||
| − | ;Sand Castle |
||
| + | Install luxurious violet carpeting for the bedroom. Give your craft room a nice [[glass]] roof. Rebuild the armory out of [[obsidian]]. Redo your outer walls in smooth stone. Add a second story to your library. |
||
| − | : Build a big castle of sand and sandstone with many rooms, chambers and whatever else you may desire. Add a moat, sniping towers, or other defenses to make it a nice sand strong hold. |
||
| + | ===Make another base in a new location === |
||
| − | ;Camouflage |
||
| + | Having more than one base helps if you need to travel farther to get resources. A base next to your spawn point is helpful if you built your main base far away and you died at night. A base in a [[desert]] can provide [[sand]], and a base in a tundra can provide [[snow]]. A base hovering in the sky can provide entertainment, especially if mobs spawn on the edge of it. A great idea is to connect them with nether portals that have a secure hallway in the nether. |
||
| − | : This really serves no purpose in singleplayer. Simply place [[Grass|tall grass]], vines, leaves, trees, and water on and around your base(s). It can give it a kind of cool look, depending on how well you do. |
||
| + | ===An emergency kit=== |
||
| − | ;A Water "Fall" |
||
| + | In case you need to quickly gear up and run back to get dropped gear or items. Perhaps a [[sword]], [[cake]] or a stack of [[porkchop]]s, and stack of [[torch]]es. A more advanced kit can be made from dispensers that give you items at the click of a button or a step on a pressure plate, although arrows and torches still have to be accessed from a chest or two (if you want the whole stack) unless the [[dropper]] is used. |
||
| − | :If you have a tall base and you want to get down faster, make a 3 block deep hole on the ground and fill it with water, so you can jump down safely. Or, if you have version 1.8, you can use a trampoline made of Slime Blocks to bounce between floors of your base. |
||
| + | ===Add an escape tunnel=== |
||
| − | ;Add underground floors to your shelter. |
||
| + | You never know, a [[creeper]] might one day get you. Build a tunnel to escape it. It could also be used to lead to a secondary base. Another idea is to have the tunnel lead to a central room with several other tunnels branching off of it, with tunnels leading to the surface, caves, perhaps even a secret hideout. If playing on a multiplayer server, maybe even add a few dead-end tunnels to confuse anyone who may be following you through the tunnels. |
||
| − | :Using this gives you a chance to find resources, and in the case of invasion by [[mobs]], it will always provide a safer spot. Underground floors are also useful for making mob grinders or animal farms. If you're really good, add a whole back up shelter under ground. If you like to be safe, add multiple bunkers, but hide a super safe and secret bunker. You could also make a part of the floor out of glass in the same spot on each floor, so you can see all the way down, and it looks nice if you do it right. |
||
| + | === Lava lamp=== |
||
| − | ;Add above-ground floors to your shelter. |
||
| + | Simply make a hollow space out of glass and fill it with [[lava]]. An efficient method is to run a vertical column through many floors powered by a single lava block at the top. You can also make one of these high above your base to mark it from afar. If your house is made out of flammable blocks, this isn't recommended. |
||
| − | :It is normally advised that you do this after building underground floors, especially if you have a ton of resources (after mining the basement out). These floors could even give you a chance to "snipe" some [[creeper]]s and [[spider]]s in the morning. |
||
| + | ===Quarry=== |
||
| − | ;Balcony |
||
| + | A [[Tutorials/Mining techniques|Quarry]] yields large amounts of materials such as cobblestone and dirt to make your buildings, and coal and iron to make tools and torches. It can require several days of game-play to finish building. Some rarer materials like gold can be found as well. See the [[Tutorials/Mining techniques|Quarry]] page for instructions. |
||
| − | :Place your balcony so that it has a nice view! Add a chest with bows and arrows for quick mob sniping. Useful for a variety of things, from providing a point for easy kills to enjoying views. |
||
| + | ===Mining shaft sunroof=== |
||
| − | ;Landing and Takeoff Platforms |
||
| + | Making a sunroof that points directly down your mining shaft has its advantages: you can tell the time of day more easily, and burn mobs like [[zombie]]s and [[skeleton]]s. The sunroof can also provide enough light to discourage other mobs from spawning in your mine. |
||
| − | :If playing with flying enabled (for example, in Creative Mode) you can create platforms at the same height on multiple buildings for easy flight between the upper levels of different locations. This works great in tree-forts, cities, and anywhere that multiple balconies are otherwise unconnected. |
||
| + | ===Lava beacon=== |
||
| − | ;Remake it out of a different material |
||
| + | Make a large pillar of stone or any non-flammable material and pour a lava [[bucket]] on it. It helps when you are a long way from home. Make sure not to build it too close to your base if it's made out of a flammable material. |
||
| − | :Install luxurious violet carpeting for the bedroom. Give your craft room a nice [[glass]] roof. Rebuild the armoury out of [[obsidian]]. Redo your outer walls in smooth stone. Add a second story to your library. |
||
| + | === Glass/lava floors=== |
||
| − | ;Make another base in a new location |
||
| + | No mobs can spawn on glass floors, making for a handy alternative to a well-lit shelter. Light is still important, though - you could even have a 1 block high space below all glass blocks on the floor and pour lava there. This keeps your shelter visible and provide a fancy, creepy feel. |
||
| − | :Having more than one base helps if you need to travel farther to get resources. A base next to your spawn point is helpful if you built your main base far away and you died at night. A base in a [[Biome#Desert|desert]] can provide [[sand]], and a base in a tundra can provide [[Snow (cover)|snow]]. A base hovering in the sky can provide entertainment, especially if mobs spawn on the edge of it. A great idea is to connect them with nether portals that have a secure hallway in the nether. |
||
| + | ===Doorbell=== |
||
| − | ;An emergency kit |
||
| + | Players (and mobs) entering your house without your knowledge is a pain, that's why you need a doorbell. When a mob or player steps on the [[pressure plate]] the note block will play a sound, and you can make this more sophisticated making chimes or even a whole song that play upon entering. |
||
| − | :In case you need to quickly gear up and run back to get dropped gear or items. Perhaps a [[sword]], [[cake]] or a stack of [[Porkchop (disambiguation)|porkchops]], and stack of [[torch]]es. A more advanced kit can be made from dispensers that give you items at the click of a button or a step on a pressure plate, although arrows and torches will still have to be accessed from a chest or two (if you want the whole stack) unless the [[dropper]] is used. |
||
| + | If you have multiple entrances to your base, place different blocks under each note block to make sure that if a creeper comes to your west entrance, you don't get blown up when you try to run away through that door. |
||
| + | ===Blinker beacon === |
||
| − | ;Add an escape tunnel |
||
| + | A more technical variation on the Lighthouse - the light blinks on and off like a real lighthouse. |
||
| − | :You never know, a [[creeper]] might one day get you. Build a tunnel to escape it. It could also be used to lead to a secondary base. Another idea is to have the tunnel lead to a central room with several other tunnels branching off of it, with tunnels leading to the surface, caves, perhaps even a secret hideout. If playing on a multiplayer server, maybe even add a few dead-end tunnels to confuse anyone who may be following you through the tunnels. |
||
| + | You may also use a [[minecart]] rail system, which can be made so you put down rails in a square(4 rails on every side), then put down a booster and detector rail, power the booster, and connect the detector rail to the torches you want to blink with redstone. Place a minecart on the booster and it will loop forever. |
||
| + | This can be used to blink multiple torches with the same system, and does not require maintenance. You can connect more detector rails for faster blinking speed. |
||
| + | ===Dock/harbor=== |
||
| − | ;Lava lamp |
||
| + | If you find yourself using [[boat]]s in a general area often, making a dock or two is a good idea. They can help prevent your boats from drifting off into the ocean, or slamming into a wall when you exit, thus breaking the boat. Dispensers can also be placed here and filled with boats for convenience. Chests filled with boats are a good idea too. There are several ways to make useful docks. |
||
| − | :Simply make a hollow space out of glass and fill it with [[lava]]. An efficient method is to run a vertical column through many floors powered by a single lava block at the top. You can also make one of these high above your base to mark it from afar. If your house is made out of flammable blocks, this isn't recommended. |
||
| + | *Placing half-blocks in the water. When a boat moves on top, it will slow down and stop immediately. Half blocks are shorter, so your boat will not collide with it and break. |
||
| − | ;Quarry |
||
| − | :A [[Tutorials/Mining techniques|Quarry]] yields very large amounts of [[materials]] such as cobblestone and dirt to make your buildings, and coal and iron to make tools and torches. It can require several days of game-play to finish building. Some rarer materials like gold can be found as well. See the [[Tutorials/Mining techniques|Quarry]] page for instructions. |
||
| + | '''Warning:''' it is recommended to only use this method on Peaceful [[difficulty]] and to land on the half blocks at a lower speed, since instant death is possible when landing on half blocks at a higher speed. |
||
| − | ;Mining shaft sunroof |
||
| − | :Making a sunroof that points directly down your mining shaft has its advantages: you will be able to tell the time of day more easily, and burn mobs like [[zombie]]s and [[skeleton]]s. The sunroof can also provide enough light to discourage other mobs from spawning in your mine. |
||
| + | *A closed dock. One type of dock is by making a small area (2×3 or larger) that is filled with water. You can place doors in the water, allowing you to ensure your boat will not drift off. [[Soul sand]] is a suggested building material, as it will prevent all of the impact damage from colliding with a wall made out of it. |
||
| − | ;Lava beacon |
||
| − | :Make a large pillar of stone or any non-flammable material and pour a lava [[bucket]] on it. It helps when you are a long way from home. Make sure not to build it too close to your base if it's made out of a flammable material. |
||
| + | *Water currents. By using a bucket to remove the top layer in 2+ deep water, you create a + shaped water current flowing toward the center. You can use this to hold boats, while still being able to escape somewhat easily. This design does not always prevent the boats from moving if you or a mob bumps into it, but will help prevent it from drifting away. |
||
| − | ;Glass/lava floors |
||
| − | :No mobs can spawn on glass floors, making for a handy alternative to a well-lit shelter. Light is still important, though - you could even have a 1 block high space below all glass blocks on the floor and pour lava there. This will keep your shelter visible and provide a fancy, creepy feel. |
||
| + | ===Fridge=== |
||
| − | ;Doorbell |
||
| + | Create a fridge by placing a dispenser on the ground, a block on it and a button on the side of the block to quickly get something to eat when you're starved. Add a door in front of the dispenser if you feel it would look better, or if you just like the idea. |
||
| − | :Players (and mobs) entering your house without your knowledge is a pain, that's why you need a doorbell. When a mob or player steps on the [[Pressure Plate|pressure plate]] the note block will play a sound, and you can make this more sophisticated making chimes or even a whole song that play upon entering. |
||
| − | :If you have multiple entrances to your base, place different blocks under each note block to make sure that if a creeper comes to your west entrance, you don't get blown up when you try to run away through that door. |
||
| + | === Miniature zen garden=== |
||
| − | ;Blinker Beacon |
||
| + | Either above the surface or underground, create decorative minimalistic works of art using water currents, plants/crops/[[flower]]s, [[sand]], clever use of [[fence]] posts, [[sign]]s, [[torch]]es, etc. |
||
| − | :A more technical variation on the Lighthouse - the light blinks on and off like a real lighthouse. |
||
| − | :You may also use a [[minecart]] rail system, which can be made so you put down rails in a square(4 rails on every side), then put down a booster and detector rail, power the booster, and connect the detector rail to the torches you want to blink with redstone. Place a minecart on the booster and it will loop forever. |
||
| − | :This can be used to blink multiple torches with the same system, and does not require maintenance. You can connect more detector rails for faster blinking speed. |
||
| + | ===Fountain=== |
||
| − | ;Dock/Harbor |
||
| + | You need 22 [[stone]] and a bucket of water. Make a 5×5 square with the nine in the middle taken out so the water won't spill, then make a 4 block high pillar in the middle and place the water on top of the highest block. Taking out the stone pillar in the middle of the fountain can look nice, and placing half-blocks around the stone blocks can look fairly cool. You can also make the fountain a source of light by replacing the stone pillar with [[glowstone]]. After making a fountain like this, you could experiment with making fountains in other ways. |
||
| − | :If you find yourself using [[boat]]s in a general area often, making a dock or two is a good idea. They can help prevent your boats from drifting off into the ocean, or slamming into a wall when you exit, thus breaking the boat. Dispensers can also be placed here and filled with boats for convenience. Chests filled with boats are a good idea too. There are several ways to make useful docks. |
||
| + | ===Piston doors=== |
||
| − | :* Placing half-blocks in the water. When a boat moves on top, it will slow down and stop immediately. Half blocks are shorter, so your boat will not collide with it and break. |
||
| + | {{seealso|Tutorials/Piston uses}} |
||
| − | ::'''Warning:''' it is recommended to only use this method on Peaceful [[difficulty]] and to land on the half blocks at a lower speed, since instant death is possible when landing on half blocks at a higher speed. |
||
| + | These look cool. Have these anywhere in your house: library, craft room, furnace room, you name it. All you need is redstone, sticky pistons, and levers. Be sure to keep them hidden if the rooms are secret - a good way to do so is hide the device you use to power the pistons. |
||
| + | ===Tunnel to a stronghold=== |
||
| − | :* A closed dock. One type of dock is by making a small area (2x3 or larger) that is filled with water. You can place doors in the water, allowing you to ensure your boat will not drift off. [[Soul Sand]] is a suggested building material, as it will prevent all of the impact damage from colliding with a wall made out of it. |
||
| + | After you find a stronghold, make a tunnel to it. This is an easy way to get to and from the End. Keep it well lit and defended so that if a creeper runs into you in the stronghold, it can't follow you back to your base and blow it up. |
||
| + | ===Add a carpet=== |
||
| − | :* Water currents. By using a bucket to remove the top layer in 2+ deep water, you will create a + shaped water current flowing towards the centre. You can use this to hold boats, while still being able to escape somewhat easily. This design does not always prevent the boats from moving if you or a mob bumps into it, but will help prevent it from drifting away. |
||
| + | You can spice up your base by adding a carpet made out of colored wool. Make sure that fire and lava aren't within two blocks from the carpet, otherwise your carpet will go up in flames! Bright colors, like red, blue and purple are recommended, because black and gray carpets don't have the same feel. Try mixing colors together in cool patterns if you're looking to give a room a bit of flair. With the new [[carpet]]s added in snapshot [[13w16a]], you can carpet the upper floors of your base without having your lower floors' ceiling made of wool. |
||
| + | ===Roller coaster === |
||
| − | ;Fridge |
||
| + | If you have enough resources, build a [[Tutorials/Building a rollercoaster|roller coaster]] out of rails. Add twists, turns, steep climbs and falls. Use booster rails to keep it running fast. This is a decent way to keep occupied while you have nothing else to do in the vast world of Minecraft. Useful in multiplayer - you can charge other players to ride. This could also be used as a monorail type of system. If you have a large base, this helps you get around it faster. |
||
| − | :Create a fridge by placing a dispenser on the ground, a block on it and a button on the side of the block to quickly get something to eat when you're starved. Add a door in front of the dispenser if you feel it would look better, or if you just like the idea. |
||
| + | ===Sky base=== |
||
| − | ;Miniature zen garden |
||
| + | Create a base floating in the sky with no bridges or stairs connecting it to land. Of course, it doesn't have to be this way to build it! The no-connections idea can be accomplished with waterfalls, piston elevators, and nether portals. Add other sky islands nearby with bridges to connect them, and it'll be like you never left the ground! If you truly don't want any connections to land, even with the waterfalls and nether portals and elevators, gather up all the resources you'll need and seal yourself away in the sky. (But make sure you have a bed up there in case you die.) For extra entertainment, make a smaller island and plunge it into darkness, and watch mobs walk right off. To make it even more entertaining, place some arrow dispensers hooked up to pressure plates on the island, and even make signs all along the edge. |
||
| − | :Either above the surface or underground, create decorative minimalistic works of art using water currents, plants/crops/flowers, sand, clever use of fenceposts, signs, torches, etc. |
||
| + | === Battle arena=== |
||
| − | ;Fountain |
||
| + | The first thing you must do is find a [[spawner]]. Then seal off any extra entrances and place a door at the last remaining one. Maybe make the dungeon a little bigger, to provide for more fun and monster spawns. Finally, make a lobby with chests full of equipment ([[sword]]s, [[bow]]s and [[arrow]]s), various helpful [[potion]]s, and food. Now you can fight that specific mob whether for [[experience]] or drops for as long as you want! Include [[bed]]s if it is a long way away from your base, so that if you die you won't have to walk for ages just to find it again, or simply make a minecart track to take you there quickly. If in multiplayer, add a lock on the lobby and another lobby where other players can pay you to fight that mob and rent equipment and various supplies. This is handy to build in abandoned mineshafts, wherever you find a [[cave spider]] spawner, but if you do that make sure you have plenty of milk buckets on hand. If you want to give your arena a bit of a twist you could add challenges, like a room where the mobs spawn over your head or one where you have to solve a puzzle while fighting the monsters. |
||
| − | :You need 22 [[stone]] and a bucket of water. Make a 5 by 5 square with the nine in the middle taken out so the water won't spill, then make a 4 block high pillar in the middle and place the water on top of the highest block. Taking out the stone pillar in the middle of the fountain can look nice, and placing half-blocks around the stone blocks can look fairly cool. You can also make the fountain a source of light by replacing the stone pillar with [[glowstone]]. After making a fountain like this, you could experiment with making fountains in other ways. |
||
| + | === Railway=== |
||
| − | ;Piston Doors |
||
| + | Make a long tunnel to fit from one to any amount of minecarts, then use minecarts with furnaces to propel the 'train'. You can also use powered rails, but for that you'll have to find gold and redstone. Be sure to add emergency chests to the side of the track and fill them with coal to power your minecart so you don't get stranded. Adding food and weapons in these chests is a good idea, in case you get stranded and have to fight some zombies to make it to your shelter. This is fun for multiplayer and single-player and you can go across the land quickly. Don't make your railway above ground; you will constantly be attacked by creepers. However, covering the railway with blocks (such as you would make a house) can solve this problem. Alternatively, you could build a 3 block wide track that is elevated off the ground 2-45 blocks. This option provides great views but is not suitable for multiplayer. Make stations for your favorite landmarks (big mountains, your house, etc.). |
||
| − | :These are very cool looking. Have these anywhere in your house: library, craft room, furnace room, you name it. All you need is redstone, sticky pistons, and levers. Be sure to keep them hidden if the rooms are secret - a good way to do so is hide the device you use to power the pistons. |
||
| + | ===Minehouse=== |
||
| − | ;Tunnel to a Stronghold |
||
| + | Make one of these if you have a long and deep mine and have to constantly run up and down long tunnels to drop off your bounty and sleep for the night. You need to make a small cottage in the middle of your mine, but digging out a room(s) in the side of a wall works fine as well. Adding a door, windows and plenty of light reduces the chance of being ambushed when you wake up in the morning. It must have a chest with food, picks, and shovels, as well as rare items that you don't want to lose while mining. Having multiple chests in a back room to store your excess dirt, gravel, cobblestone and ores is handy if your main chest is getting crowded and you'll be down in your mine for a while yet. A crafting table, multiple furnaces for quickly smelting items, and a bed are always good to have inside. You can also include an Enchantment Table for quick enchanting of tools and armor, especially if your favorite Efficiency IV/Silk Touch I diamond pick got burnt in the pit of lava that also stole some redstone. |
||
| − | :After you find a stronghold, make a tunnel to it. This is an easy way to get to and from The End. Keep it well lit and defended so that if a creeper runs into you in the stronghold, it can't follow you back to your base and blow it up. |
||
| + | === Pool=== |
||
| − | ;Add a carpet |
||
| + | Make a pit of any shape or depth, but something that's 2 blocks deep is recommended, so that you don't sink to the bottom and drown. You could also place half slabs on the bottom of a two block deep pool so that you get the feeling that you're fully immersed in the water but without fear of drowning. Fill it with [[water]]. And now you've got your own pool. And if you're extra careful, you can make it with [[lava]] instead. Also it lights up that area of your base and looks good. You can add [[glowstone]] underwater as 'lights', or lava with glass over it to make it into a hot tub. |
||
| − | :You can spice up your base by adding a carpet made out of coloured wool. Make sure that fire and lava aren't less than two blocks from the carpet otherwise your carpet will go up in flames! Bright colors, like red, blue and purple are recommended, because black and gray carpets don't have the same feel. Try mixing colors together in cool patterns if you're looking to give a room a bit of flair. With the new [[Carpet|carpets]] added in snapshot 13w16a, you can carpet the upper floors of your base without having your lower floors' ceiling made of wool. Also, they are not flammable, unlike normal wool! |
||
| + | ===Park square=== |
||
| − | ;Roller Coaster |
||
| + | Make fences around a 20×50×15 area, put a garden, and a wool statue with a stone base. You can use bone meal on the grass that makes up your square to make tall grass and flowers appear. Adding pathways of blocks like [[stone brick]] shows players where they can go and adds a nice touch. |
||
| − | :If you have enough resources, build a roller coaster out of rails. Add twists, turns, steep climbs and falls. Use booster rails to keep it running fast. This is a decent way to keep occupied while you have nothing else to do in the vast world of Minecraft. Useful on SMP- you can charge other players to ride. This could also be used as a monorail type of system. If you have a large base, this will help you get around it faster. |
||
| + | ===Work tents=== |
||
| − | ;Sky Base |
||
| + | If you feel that you're running out of inventory space frequently during above ground projects, build a work tent. Make a 6x6 fence box, add a door and wooden roof, and place lots of chests. Add a least 1 furnace and a workbench. Dig a little ditch in case a skeleton or spider appears. This can double as a safe-house/tent. |
||
| − | :Create a base floating in the sky with no bridges or stairs connecting it to land. Of course, it doesn't have to be this way to build it! The no-connections idea can be accomplished with waterfalls, piston elevators, and nether portals. Add other sky islands nearby with bridges to connect them, and it'll be like you never left the ground! If you truly don't want any connections to land, even with the waterfalls and nether portals and elevators, gather up all the resources you'll need and seal yourself away in the sky. (But make sure you have a bed up there in case you die.) For extra entertainment, make a smaller island and plunge it into darkness, and watch mobs walk right off. To make it even more entertaining, place some arrow dispensers hooked up to pressure plates on the island, and even make signs all along the edge. |
||
| + | ===Mining rig=== |
||
| − | ;Battle Arena |
||
| + | Create a platform on top of a relatively flat surface or mountain. Dig out a trench in the middle of it and place redstone on either side. Connect the redstone to a single button and fill the trench with TNT. All you need to do is to press the button and you will begin a pit that leads to the bottom of the world. An automatic reloader can be added via sand and pistons. (This can be easily re-purposed into a cannon.) |
||
| − | :The first thing you must do is find a mob spawner. Then seal off any extra entrances and place a door at the last remaining one. Maybe make the dungeon a little bigger, to provide for more fun and monster spawns. Finally, make a lobby with chests full of equipment (swords, bows and arrows), various helpful potions, and food. Now you can fight that specific mob whether for experience or drops for as long as you want! Include beds if it is a long way away from your base, so that if you die you won't have to walk for ages just to find it again, or simply make a minecart track to take you there quickly. If in SMP, add a lock on the lobby and another lobby where other players can pay you to fight that mob and rent equipment and various supplies. This is handy to build in abandoned mineshafts, wherever you find a cave spider spawner, but if you do that make sure you have plenty of milk buckets on hand. If you want to give your arena a bit of a twist you could add challenges, like a room where the mobs spawn over your head or one where you have to solve a puzzle while fighting the monsters. |
||
| + | ===Toilet=== |
||
| − | ;Railway |
||
| + | You never know when nature will call. You can make a small toilet out of water and sticky pistons or trapdoors. It can be used as a garbage disposal or just for laughs. |
||
| − | :Make a long tunnel to fit from one to any amount of minecarts, then use minecarts with furnaces to propel the 'train'. You can also use powered rails, but for that you'll have to find gold and redstone. Be sure to add emergency chests to the side of the track and fill them with coal to power your minecart so you don't get stranded. Adding food and weapons in these chests is a good idea, in case you get stranded and have to fight some zombies to make it to your shelter. This is fun for SMP and single-player and you can go across the land quickly. Don't make your railway aboveground; you will constantly be attacked by creepers. However, covering the railway with blocks (such as you would make a house) can solve this problem. Alternatively, you could build a 3 block wide track that is elevated off the ground 2-45 blocks. This option is very cool and provides great views but is not suitable for SMP. Make stations for your favorite landmarks (big mountains, your house, etc). |
||
| + | ===Mob aquarium=== |
||
| − | ;Minehouse |
||
| + | A glass box with a mob spawning room above it with a connecting hole so mobs spawn and fall in. |
||
| − | :Make one of these if you have a long and deep mine and have to constantly run up and down long tunnels to drop off your bounty and sleep for the night. You need to make a small cottage in the middle of your mine, but digging out a room(s) in the side of a wall works fine as well. Adding a door, windows and plenty of light will reduce the chance of being ambushed when you wake up in the morning. It must have a chest with food, picks, and shovels, as well as rare items that you don't want to lose while mining. Having multiple chests in a back room to store your excess dirt, gravel, cobblestone and ores is handy if your main chest is getting crowded and you'll be down in your mine for a while yet. A crafting table, multiple furnaces for quickly smelting items, and a bed are always good to have inside. You can also include an Enchantment Table for quick enchanting of tools and armor, especially if your favorite Efficiency IV/Silk Touch I diamond pick got burnt in the pit of lava that also stole some redstone. |
||
| + | ===Testing room=== |
||
| − | ;Pool |
||
| + | Saw this great creation online but never knew how to build it? Following a guide how to build things without risks? Want to warm up on traps and other things with no damage to your shelter? A testing room has various things you have never hoped to build before. Cover it with obsidian to reduce damage to shelter, or make a new world to test new things. |
||
| − | :Make a pit of any shape or depth, but something that's 2 blocks deep is recommended, so that you don't sink to the bottom and drown. You could also place half slabs on the bottom of a two block deep pool so that you get the feeling that you're fully immersed in the watter but without fear of drowning. Fill it with [[water]]. And now you've got your very own pool. And if your extra careful, you can make it with [[lava]] instead. Also it lights up that area of your base and looks good. You can add glowstone underwater as 'lights', or lava with glass over it to make it into a hot tub. |
||
| + | ===Canal=== |
||
| − | ;Park Square |
||
| + | This is a good way to get around if you live in the middle of a huge island. The best kind is a 2×3 extending where ever you need to go. |
||
| − | :Make fences around a 20x50x15 area, put a garden, and a wool statue with a stone base. You can use bone meal on the grass that makes up your square to make tall grass and flowers appear. Adding pathways of blocks like [[Stone Brick|stone brick]] shows players where they can go and adds a nice touch. |
||
| + | ===Landing site (literal) === |
||
| − | ;Work Tents |
||
| + | If you have procured yourself some [[Mods]] you can actually make a real landing site. Once you've got a plane or two you will want to store them somewhere away from the creepers or other players. So behind your base, get black [[wool]] flooring for at least a 30×30 area and put [[Nether brick fence]]s or just normal [[fence]]s all around it. Then, build a dome out of glass blocks big enough to get a plane into it. Repeat the third step for the rest of your planes. |
||
| − | :If you feel that you're running out of inventory space frequently during above ground projects, build a work tent. Make a 6x6 fence box, add a door and wooden roof, and place lots of chests. Add a least 1 furnace and a workbench. Dig a little ditch in case a skeleton or spider appears. This can double as a safe-house/tent. |
||
| + | ===Water elevator === |
||
| − | ;Mining Rig |
||
| + | If you live in any building that is more than one story, you might want a method to get up and down easily without stairs or a ladder. One way to do this is to make a waterfall that falls through the center of the structure. Make sure to have one block of space on any side of it so that your character can be outside of the water enough to breathe while climbing it. Simply hold down the jump button (the space bar) while inside the waterfall to ascend. This method can also be used to create an elevator to flying islands or houses. |
||
| − | :Create a platform on top of a relatively flat surface or mountain. Dig out a trench in the middle of it and place redstone on either side connect the redstone to a single button and fill the trench with TNT. All you need to do is to press the button and you will begin a pit that leads to the bottom of the world. An automatic reloader can be added via sand and pistons.(This can be easily re-purposed into a cannon.) |
||
| + | ===Warehouse=== |
||
| − | ;Toilet |
||
| + | This is for huge things, such as giant iron golems or airplanes. Build a huge area with at least 40×40×20 with cobblestone or other high blast resistance/hitbox item, and then build your thing. You could also fill it with thousands of chests with your stuff! |
||
| − | : You never know when nature will call. You can make a small toilet out of water and sticky pistons or trapdoors. It can be used as a garbage disposal or just for laughs. |
||
| + | ===Underground homes=== |
||
| − | ;Mob aquarium |
||
| + | This is an efficient way to have a surplus of players, so you can have a large number of places to live! Furthermore, you lose virtually no items at all! |
||
| − | : A glass box with a mob spawning room above it with a connecting hole so mobs spawn and fall in. |
||
| + | ===Highway=== |
||
| − | ;Testing room |
||
| + | An extremely fast way to get from one place to another. A [[minecart]] could be used on a [[powered rail]] to speed up the process. It can also look good with a Station. |
||
| − | : Saw this great creation online but never knew how to build it? Following a guide how to build things without risks? Want to warm up on traps and other things with no damage to your shelter? A testing room has various things you have never hoped to build before. Cover it with obsidian to reduce damage to shelter, or make a new world to test new things. |
||
| + | ===Core control Room=== |
||
| − | ;Canal |
||
| + | It's good if you like redstone use this to control all redstone circuits or only for decoration. You can place a [[beacon]] in the middle with glass to make it fancier. |
||
| − | : This is a good way to get around if you live in the middle of a huge island. The best kind is a 2x3 extending where ever you need to go. |
||
| + | ==Exterior constructions== |
||
| − | ;Landing Site (Literal) |
||
| − | : If you have procured yourself some [[Mods]] you can actually make a real landing site. Once you've got a plane or two you will want to store them somewhere away from the creepers or other players. So behind your base, get black [[wool]] flooring for at least a 30x30 area and put [[Nether Brick Fence]]s or just normal [[Fence]]s all around it. Then, build a dome out of glass blocks big enough to get a plane into it. Repeat the third step for the rest of your planes. |
||
| + | These are mostly used for aesthetic purposes, but there are exceptions such as automatic farms located outside. |
||
| − | ;Water Elevator |
||
| − | : If you live in any building that is more than one story, you might want a method to get up and down easily without stairs or a ladder. One way to do this is to make a waterfall that falls through the center of the structure. Make sure to have one block of space on any side of it so that your character can be outside of the water enough to breathe while climbing it. Simply hold down the jump button (the space bar) while inside the waterfall to ascend. This method can also be used to create an elevator to flying islands or houses. |
||
| + | ===Lava pit=== |
||
| − | ;Warehouse |
||
| + | This is just a hole in the ground that can be 1×1 or 4×4. Fill it with [[lava]], and then you can throw items you don't need or items taking up space into the hole to watch them BURN! This isn't always outside your base but it isn't recommended if you have a floor or wall near if the base is made out of [[wood]], [[wood planks]] or [[wool]] due to the risk of it catching on fire and your base burning down. |
||
| − | : This is for huge things, such as giant iron golems or airplanes. Build a huge area with at least 40x40x20 with cobblestone or other high blast resistance/hitbox item, and then build your thing. You could also fill it with thousands of chests with your stuff! |
||
| + | ===Snow farm=== |
||
| − | ;Underground homes |
||
| + | This is basically a caged [[snow golem]] arranged so that you can dig at the snow trail beneath it. (See the snow golem page for plans and tips.) Unfortunately, this doesn't work in all biomes: In a Desert, or the Nether, snow golems will die quickly, and in several other biomes (Swamp, Mushroom Island) they will not form a snow trail. Remember to protect your golem from rain and stray mobs -- especially, block off their firing capability so they don't provoke passing creepers and skeletons! (You can also use snow golems for defense towers, but that's different from farming snow.) |
||
| − | : This is a very efficient way to have a surplus of players, so you can have a large number of places to live! Furthermore, you lose virtually no items at all! |
||
| + | ===Zen Garden (can be seen indoors sometimes)=== |
||
| − | ;Highway |
||
| + | A Zen Garden is for aesthetic purposes only. A Zen Garden is made by choosing the place where you want it to be. Then make the walls surrounding the garden with any material you like. I like to use [[leaves]] or maybe [[cobblestone wall]]. Then fill the walled up space with any kinds of trees, [[flower]]s maybe [[melons]], [[pumpkin]]s, [[sugar cane]], [[mushrooms]] and maybe even a small fountain. Do whatever but try to make it as natural as possible. I don't recommend to build this in multiplayer because griefers can find your house more easily but there is the exception of Faction servers in which you can claim land or servers in which you can buy a block that protects a radius. |
||
| − | : An extremely fast way to get from one place to another. A [[Minecart]] could be used on a [[Powered Rail]] to speed up the process. It can also look good with a Station. |
||
| + | === Stable=== |
||
| − | ;Core Control Room |
||
| + | These are where you keep your horses for easy riding, and normally are about 10 blocks wide. [[Fence]]s and [[lead]]s can be used for keeping your horses in the stable. |
||
| − | :It's good if you like redstone use this to control all redstone circuits or only for decoration. You can place a [[Beacon]] in the middle with glass to make it fancier. |
||
| + | ==Multiplayer-only ideas== |
||
| − | ==Outside of base things== |
||
| + | These ideas are quite pointless if you play by yourself, but are fun additions to a multiplayer server. |
||
| − | The Outside of base things are mostly used for aesthetical purposes but there are exceptions such as automatic farms located outside. |
||
| + | ===Cornucopia=== |
||
| − | ;Lava pit (sometimes outside of base) |
||
| + | The cornucopia is probably one of the most simple "structures" on this list. It basically consists of a storage area where anyone can give away and take any item for free, and can range from a single chest or barrel located off a main road to an elaborate structure of stacked double chests in a central square. Rules are optional but recommended; basic rules include prohibiting taking everything from the cornucopia, requiring each player to give an item of similar or greater quantity, value, or purpose to what they have taken (such as exchanging [[Cooked Cod|cooked cod]] for [[Cooked Rabbit|cooked rabbit]], or [[Potion|potions]] for miscellaneous potion ingredients), only giving and taking what a player actually needs, or limiting what is allowed in the cornucopia (such as prohibiting tools of [[iron]] and better, or limiting food to a stack of 16). |
||
| − | :This is just a hole in the ground that can be 1x1 or 4x4. Fill it with [[lava]], and then you can throw items you don't need or items taking up space into the hole to watch them BURN! This isn't always outside your base but it is recommended if you have a floor or wall near if the base is made out of [[wood]], [[Wood Planks]] or [[wool]] due to the risk of it catching on fire and your base burning down. |
||
| + | === Party room=== |
||
| − | ;[[Snow (cover)|Snow]] farm |
||
| + | This is a large room (or multiple small rooms). You can have a table and chairs or a bar and you can charge people to have a party there. Include jukeboxes with music discs and perhaps colored carpet. |
||
| − | :This is basically a caged [[Snow Golem|snow golem]] arranged so that you can dig at the snow trail beneath it. (See the snow golem page for plans and tips.) Unfortunately, this doesn't work in all biomes: In a Jungle or Desert, or the Nether, snow golems will die quickly, and in several other biomes (Plains, Beaches, Swamp, Mushroom Island) they will not form a snow trail. However, they ''do'' form a snow trail (on solid ground) in River and Ocean biomes, so you can often manage by building a platform for them above the water. (Use the [[debug screen]] to check the actual biome of the spot before you start building!) Remember to protect your golem from rain and stray mobs -- especially, block off their firing capability so they don't provoke passing creepers and skeletons! (You can also use snow golems for defense towers, but that's very different from farming snow.) |
||
| + | ===Mailbox=== |
||
| − | ;Zen Garden (mostly located outside,can be seen indoors sometimes) |
||
| + | Simply put a chest/barrel on top of a fence post, then other players can give you gifts. Be wary of thieves! Alternatively, you can leave messages as books. |
||
| − | :A Zen Garden is for aesthetical purposes only. A Zen Garden is made by choosing the place where you want it to be. Then make the walls surounding the garden with any material you like. I like to use [[leaves]] or maybe [[cobblestone wall]]. Then fill the walled up space with any kinds of trees,[[flowers]] maybe [[melons]],[[pumpkins]],[[sugarcane]],[[mushrooms]] and maybe even a small fountain. Do whatever but try to make it as natural as possible.I don't recommend to build this in SMP because griefers can find your house more easily but there is the exception of Faction servers in which you can claim land or servers in which you can buy a block that protects an radius. |
||
| + | === Bank=== |
||
| − | ;Stable |
||
| + | Make a bank to store items. Players could pay [[gold]] or [[diamond]] to store their valuable items in a 'vault'. If you're really ambitious, the Vault could be lined with [[lava]] or [[obsidian]] (or [[bedrock]] if you're an [[Admin]]) to make it super secure. |
||
| − | :These are where you keep your horses for easy riding, and normally are about 10 blocks wide. [[Fences]] and [[leads]] can be used for keeping your horses in the stable. |
||
| + | ===Tollhouse === |
||
| − | == SMP-only ideas == |
||
| + | For bridges/roads that lead to your property, or for entrances and exits to spawns and player hubs. Only works effectively with some sort of fence or wall around the area. |
||
| − | These ideas are quite pointless if you play by yourself (unless you have a VERY smart [[Mods|mod]]!), but are fun additions to a multiplayer server! |
||
| + | ===Inn or guesthouse=== |
||
| − | ;Party room(s) |
||
| + | Build a large and well-defended structure with private rooms each containing a bed and chest (possibly a furnace and crafting table too). For additional style points, decorate the rooms nicely. Use a locking mod, and charge people to stay at the inn; when they rent a room, add them to the list of people who can unlock the door and chest. You may want to hire people to man the front desk, keep records and collect bills. This is especially useful if you build it near a dungeon, as players will want to have a well-protected "base camp" when setting off to explore. |
||
| − | :This is a large room (or multiple small rooms). You can have a table and chairs or a bar and you can charge people to have a party there. Include jukeboxes with music discs and perhaps colored carpet. |
||
| + | ===Army=== |
||
| − | ;Mailbox |
||
| + | Make an army from other players. People can pay the army in valuables to protect their homes. Charge based on location and how long. |
||
| − | :Simply put a chest on top of a fence post, then other players can give you gifts. Be wary of thieves! Alternatively you can leave messages as books. |
||
| + | ===National park=== |
||
| − | ;Bank |
||
| + | Corner off a ''huge'' area of land with big mountains and amazing caves on a multiplayer server. Put in information signs for landmarks and charge people to visit. Make some camp-sites to house players while exploring, and put chests with food or weapons in the camp-sites. Be sure that players give back any items they use. |
||
| − | :Make a bank to store items. Players could pay [[Gold (disambiguation)|Gold]] or [[Diamond]] to store their valuable items in a 'vault'. If you're really ambitious, the Vault could be lined with [[lava]] or [[obsidian]] (or [[bedrock]] if you're an [[Admin]]) to make it super secure. |
||
| + | === Multiplayer railway=== |
||
| − | ;Tollhouse |
||
| + | Charge other players to ride on it, a perfect way to get coal or emeralds. Make a deluxe version for long journeys. Make windows in the tunnel. Another idea is to make a subway. See [[Tutorials/Train station]] for more information. |
||
| − | : For bridges/roads that lead to your property. |
||
| + | ===Spleef arena=== |
||
| − | ;Inn/Guesthouse |
||
| + | Great way to have some fun with your friends on multiplayer. You should make a [[snow golem]] room to be able to collect snow balls easy to craft into snow blocks. You can bet on games, build a score board and have stands for people to watch. You can also make it so the loser faces a little more punishment and humiliation by making the bottom out of lava so if someone falls they will burn to death. This makes it a little more fun and pleasurable to watch your opponent burn. You could also make a long drop that kills the loser, and the winner can take all the dropped items after the game. |
||
| − | : Build a large and well-defended structure with private rooms each containing a bed and chest (possibly a furnace and crafting table too). For additional style points, decorate the rooms nicely. Use a locking mod, and charge people to stay at the inn; when they rent a room, add them to the list of people who can unlock the door and chest. You may want to hire people to man the front desk, keep records and collect bills. This is especially useful if you build it near a dungeon, as players will want to have a well-protected "base camp" when setting off to explore. |
||
| + | ===PvP combat arena=== |
||
| − | ;Army |
||
| + | Create a huge room and fill it with obstacles and platforms. Make a roof with beds on it, that players will respawn in, and chests to take equipment from. Make holes in the roof to allow players to enter the arena at different places. Use ladders or water holes to prevent falling damage. You can give the arena a theme, like a forest, and decide what equipment should be available when players respawn. |
||
| − | :Make an army from other players. People can pay the army in valuables to protect their homes. Charge based on location and how long. |
||
| + | ===Courtroom=== |
||
| − | ;National Park |
||
| + | Useful on any server with a problem with [[griefer]]s, stealing, or PvP (player vs player). If an admin is online (or with use of a command block), it is advised to turn everyone present to adventure mode and separate them, to prevent PvP and/or griefing of the courtroom. A courtroom usually involves a chair or place for the judge, the jury, the defendant, and other players wishing to speak. It is much easier to maintain a trial with everyone there in the Courtroom rather than just over chat, as there will be no distractions and the defendant and others can be kept under control. Depending on the government system chosen, the jury can vote on the punishment, or the final say can be up to the judge. Due to number restraints, it will often be hard to have a completely unbiased jury, but try to have at least one person who wasn't involved or biased. If the defendant is deemed guilty, a punishment will be decided, which can range from having to give back what they stole or repair the damage griefed, to a restraining order, a banishment from the town, or even being banned from the server. Optionally, you can have a Records Room to keep track of the trail using a [[book and quill]] (just be wary of offenders trying to clear their name by destroying the book or editing it), but can also be tracked with .txt files outside the game (which might be a better idea if things are really getting out of hand). |
||
| − | :Corner off a HUGE area of land with big mountains and amazing caves on a multiplayer server. Put in information signs for landmarks and charge people to visit. Make some camp-sites to house players while exploring, and put chests with food or weapons in the camp-sites. Be sure that players give back any items they use. |
||
| + | ===Jail=== |
||
| − | ;SMP-Railway |
||
| + | The jail is where rule-breakers or criminals go if the punishment agreed on is not an execution/banishment/ban. Build a secure room with traps outside cells to prevent criminals from escaping, via bugs and digging, like lava flowing from the top of the jail. It is difficult to make a secure jail without using Bedrock or obsidian. An alternative is to have the walls of the room constantly being moved by pistons, so the player has no time to break through them. However, this will create a lot of lag. You can make a regenerating wall using water and lava as well. Be warned, however, that if the spawn is outside the jail, the criminal can use the {{cmd|kill}} command to escape or blow themselves up with TNT. Also, remember to ''never'' send an admin to jail without reverting their admin status first or they can just switch themselves to creative mode and mine the thing you made the jail out of. |
||
| − | :Charge other players to ride on it, a perfect way to get coal or emeralds. Make a deluxe version for long journeys. Make windows in the tunnel. Another idea is to make a subway. See [[Tutorials/Train station|Tutorials/Train Station]] for more information. |
||
| + | ===Restaurant=== |
||
| − | ;Spleef Arena |
||
| + | The restaurant can be a place where people pay in goods or money for you to give them food. You could plop a few chairs down too and make a kitchen full of furnaces and chests full of food. Farms for food and resources can be made behind, around, or even within the restaurant's kitchen area. |
||
| − | :Great way to have some fun with your friends on multiplayer. You should make a Snow Golem room to be able to collect snow balls easy to craft into snow blocks. You can bet on games, build a score board and have stands for people to watch. You can also make it so the loser faces a little more punishment and humiliation by making the bottom out of lava so if someone falls they will burn to death. This makes it a little more fun and pleasurable to watch your opponent burn. You could also make a long drop that kills the loser, and the winner can take all the dropped items after the game. |
||
| + | ===Shop=== |
||
| − | ;[[Tutorials/PvP|PvP]] Combat Arena |
||
| + | Simply put a pit with a pressure plate with redstone leading up to a dispenser above the pit where a shopper is standing and when they toss the item you're charging them, the item they want will fall down to them. This method is useful on a multiplayer server but can be made on a single player server to make it look nice. |
||
| − | :Create a huge room and fill it with obstacles and platforms. Make a roof with beds on it, that players will respawn in, and chests to take equipment from. Make holes in the roof to allow players to enter the arena at different places. Use ladders or water holes to prevent falling damage. You can give the arena a theme, like a forest, and decide what equipment should be available when players respawn. |
||
| + | * Armor shop: sells armor for protection. |
||
| − | ;Courtroom |
||
| + | *Tool shop: sells tools for breaking things faster. |
||
| − | :Useful on any server with a problem with [[Griefing|griefer]]s, stealing, or PvP. If an admin is online (or with use of a command block), it is advised to turn everyone present to adventure mode and separate them, to prevent PvP and/or griefing of the courtroom A courtroom usually involves a chair or place for the judge, the jury, the defendant, and others wishing to speak. It is much easier to maintain a trial with everyone there in the Courtroom rather than just over chat, as there will be no distractions and the defendant and others can be kept under control. Depending on the government system chosen, the jury can vote on the punishment, or the final say can be up to the judge. Due to number restraints, it will often be hard to have a completely unbiased jury, but try to have at least one person who wasn't involved or biased. If the defendant is deemed guilty, a punishment will be decided, which can range from having to give back what they stole or repair the damage griefed, to a restraining order, a banishment from the town, or even being banned from the server. Optionally, you can have a Records Room to keep track of the trail using a [[Book and Quill]] (just be wary of offenders trying to clear their name by destroying the book or editing it), but can also be tracked with .txt files outside the game (which might be a better idea if things are really geting out of hand). |
||
| + | *Potion shop: sells potions for health. |
||
| + | *Food shop: sells food for hunger. Note: [[Rotten flesh]], [[poisonous potato]]es, [[raw chicken]], [[pufferfish]] and [[spider eye]]s have food poisoning, so do not sell those in a food shop. |
||
| + | *Weapon shop: sells weapons for killing animals or monsters. |
||
| + | ===Trade routes and hubs=== |
||
| − | ;Jail |
||
| + | Use cobblestone or path blocks to connect trading hubs that you and your fellow players can use. For extra fun you can designate each other jobs and wares, such as merchants, armor makers, and butchers. |
||
| − | :The Jail/Detention Center is where criminals go if the punishment agreed on is not an execution/banishment/ban. Build a secure room with traps outside cells to prevent criminals from escaping, via bugs and digging, like lava flowing from the top of the jail. |
||
| − | It is very hard to make a secure jail without using Bedrock or obsidian. An alternative is to have the walls of the room constantly being moved by pistons, so the player has no time to break through them. However, this will create a lot of lag. You can make a regenerating wall using water and lava as well. Be warned, however, that if the spawn is outside the jail, the criminal can use the /kill command to escape or blow themself up with TNT. Also remember to NEVER send an admin to jail without reverting their admin status first or they can just switch themself to creative mode and mine the thing you made the jail out of. |
||
| + | ===Underground tunnel system=== |
||
| − | ;Restaurant |
||
| + | Dig a large series of tunnels underground (preferably clean, square-shaped, and free of obstructions or danger) and light it up to prevent mob spawns. The tunnel system can be built around a main tunnel or hub. Link the tunnel system with mines, caves, shelters, and landmarks that are frequented or owned by you or other players, providing an alternative to above-ground travel and quicker, easier access to mines and certain points of interest. Optional additions include beautification (such as different wall/floor materials or designs), minecart rails, boat canals, horse accessibility, displays (such as aquariums and dioramas), cave access points, designated mineshafts, simple shelters or work stations, and mob farms. This can technically also be built in singleplayer, in case you have multiple mines or places of interest across a wide area, but it serves more of a purpose in multiplayer. |
||
| − | :The restaurant can be a place where people pay in goods or money for you to give then food. You could plop a few chairs down too and make a kitchen full of furnaces and chests full of food. Out the back of the restaurant you can make a farm to get some food. |
||
| + | ===Central tower=== |
||
| − | ;Shop |
||
| + | Build a large, tall tower in a central area where most players are located. Players can live on each floor or store items there, but its primary purpose should be to mark the location of the central area. Higher floors may have glass windows or balconies to provide lookouts on each side; access to these top floors should be simple and easy. The top floor should contain an actual signaling method to help players locate it at a distance, such as a [[beacon]], [[Campfire|signal campfire]], [[Lightning Rod|lightning rod]], blinking [[Redstone Lamp|redstone lamp]], [[Torch|torches]], or simply a tall spire made of blocks or fence poles. |
||
| − | :Simply put a pit with a pressure plate with redstone leading up to a dispenser above the pit where a shopper is standing and when they toss a the item you're charging them, the item they want will fall down to them. This method is very useful on an SMP server, but can be made on a single player server to make it look nice. |
||
| + | ===Basic housing=== |
||
| − | [[Armor]] shop- This shop sells armor for protection. |
||
| + | Build a series of basic houses with the bare essentials ([[Crafting Table|crafting table]], [[furnace]], [[Chest|chests]], [[bed]]). They should preferably be in the same vicinity, either across from each other or connected, and should be rather simple in design and material, with windows and even doors being optional in some cases. Their purpose should be to provide basic temporary housing for new players so they don't have to mooch off others as they start off, with the intent being for each player to eventually move out as they advance and build their own base; however, they may also be used as permanent housing, should a player become accustomed to it. The residents can optionally be taxed by the builder or server owner, who may require payment in (ideally cheap or common) materials or goods in exchange for protection or even the housing itself, with eviction or even the house's razing possible if payment is not given; however, this can be oppressive and unfeasible for new players and is thus not recommended. |
||
| + | ==Furniture== |
||
| − | [[Tools|Tool]] shop- This shop sells tools for breaking things faster. |
||
| + | If you are bored, or want miscellaneous decorations in any place, add furniture! Tutorials for building furniture can be found at "[[Tutorials/Furniture]]". |
||
| − | [[Potions|Potion]] shop- This shop sells potions for health. |
||
| + | ==Tips== |
||
| − | [[Food]] shop- This shop sells food for hunger. Note: Rotten flesh, Poisonous potatoes, Raw chicken, and Spider eyes have food poisoning so do not sell those in a food shop. |
||
| + | * Build a fence around your house to keep unwanted mobs out. This includes houses on islands, as [[drowned]] can still attack from the water. |
||
| − | [[Weapons (disambiguation)|Weapon]] shop- This shop sells weapons for killing animals or monsters. |
||
| + | *Dig your own mine under your house, accessible through a stairway or a ladder. This provides a safer, more controlled alternative to finding things through a dark cave where mobs can spawn, though it requires more work and resources since the entire mine must be dug by the player. |
||
| − | |||
| + | *Use different chests for different things to avoid confusion and provide a sense of greater space. For example, one chest can be for stone, another chest can be for [[deepslate]], [[andesite]], [[granite]], and [[diorite]], another chest can be for spare tools and armor, so on, so forth. |
||
| − | ==Furniture== |
||
| + | *Use barrels instead of chests when possible. Barrels do not require a free space above, take up less space, and look rather unique, but they cannot be doubled for greater space like chests can. |
||
| − | If you are bored, add furniture! The list of them is in the page "[[Tutorials/Furniture]]". |
||
==Gallery== |
==Gallery== |
||
| + | |||
| − | '''Tip:''' View enlarged images by clicking them. This section needs more pictures please add some by clicking [edit]. [http://www.minecraftwiki.com] [http://www.minecraft.net] |
||
<gallery> |
<gallery> |
||
| − | + | File:Lava_Bridge_Trap_3.png|The lava bridge passageway described in the "Defense" section. |
|
| + | File:Zombiedoom.png|An unfortunate zombie going to its own doom. |
||
| − | LavaBridgeTrap.PNG|A zombie being pushed by a snowball in the lava bridge. |
||
| + | File:Lava_Bridge_Trap.png|A zombie being pushed by a snowball on the lava bridge. |
||
| − | LavaBridgeTrap2.PNG|Burn, Zombie, BURN!!! |
||
| + | File:Lava_Bridge_Trap_2.png|A zombie burning in lava. |
||
| + | File:Ice_hut.png|A shelter built using ice blocks. |
||
</gallery> |
</gallery> |
||
| − | == |
+ | ==References== |
| − | {{reflist}} |
||
| − | {{ |
+ | {{reflist}} |
| + | {{tutorials}} |
||
| − | [[Category:Tutorials]] |
||
| − | [[Category:Guides]] |
||
[[fr:Tutoriels/Abris]] |
[[fr:Tutoriels/Abris]] |
||
| + | [[ja:チュートリアル/シェルター]] |
||
| − | [[zh:教程/如何造房子]] |
||
| + | [[ko:튜토리얼/은신처]] |
||
| + | [[pl:Poradniki/Do zrobienia w Twoim schronie]] |
||
| + | [[pt:Tutoriais/Abrigos]] |
||
| + | [[zh:教程/庇护所]] |
||
Latest revision as of 00:41, 13 November 2023
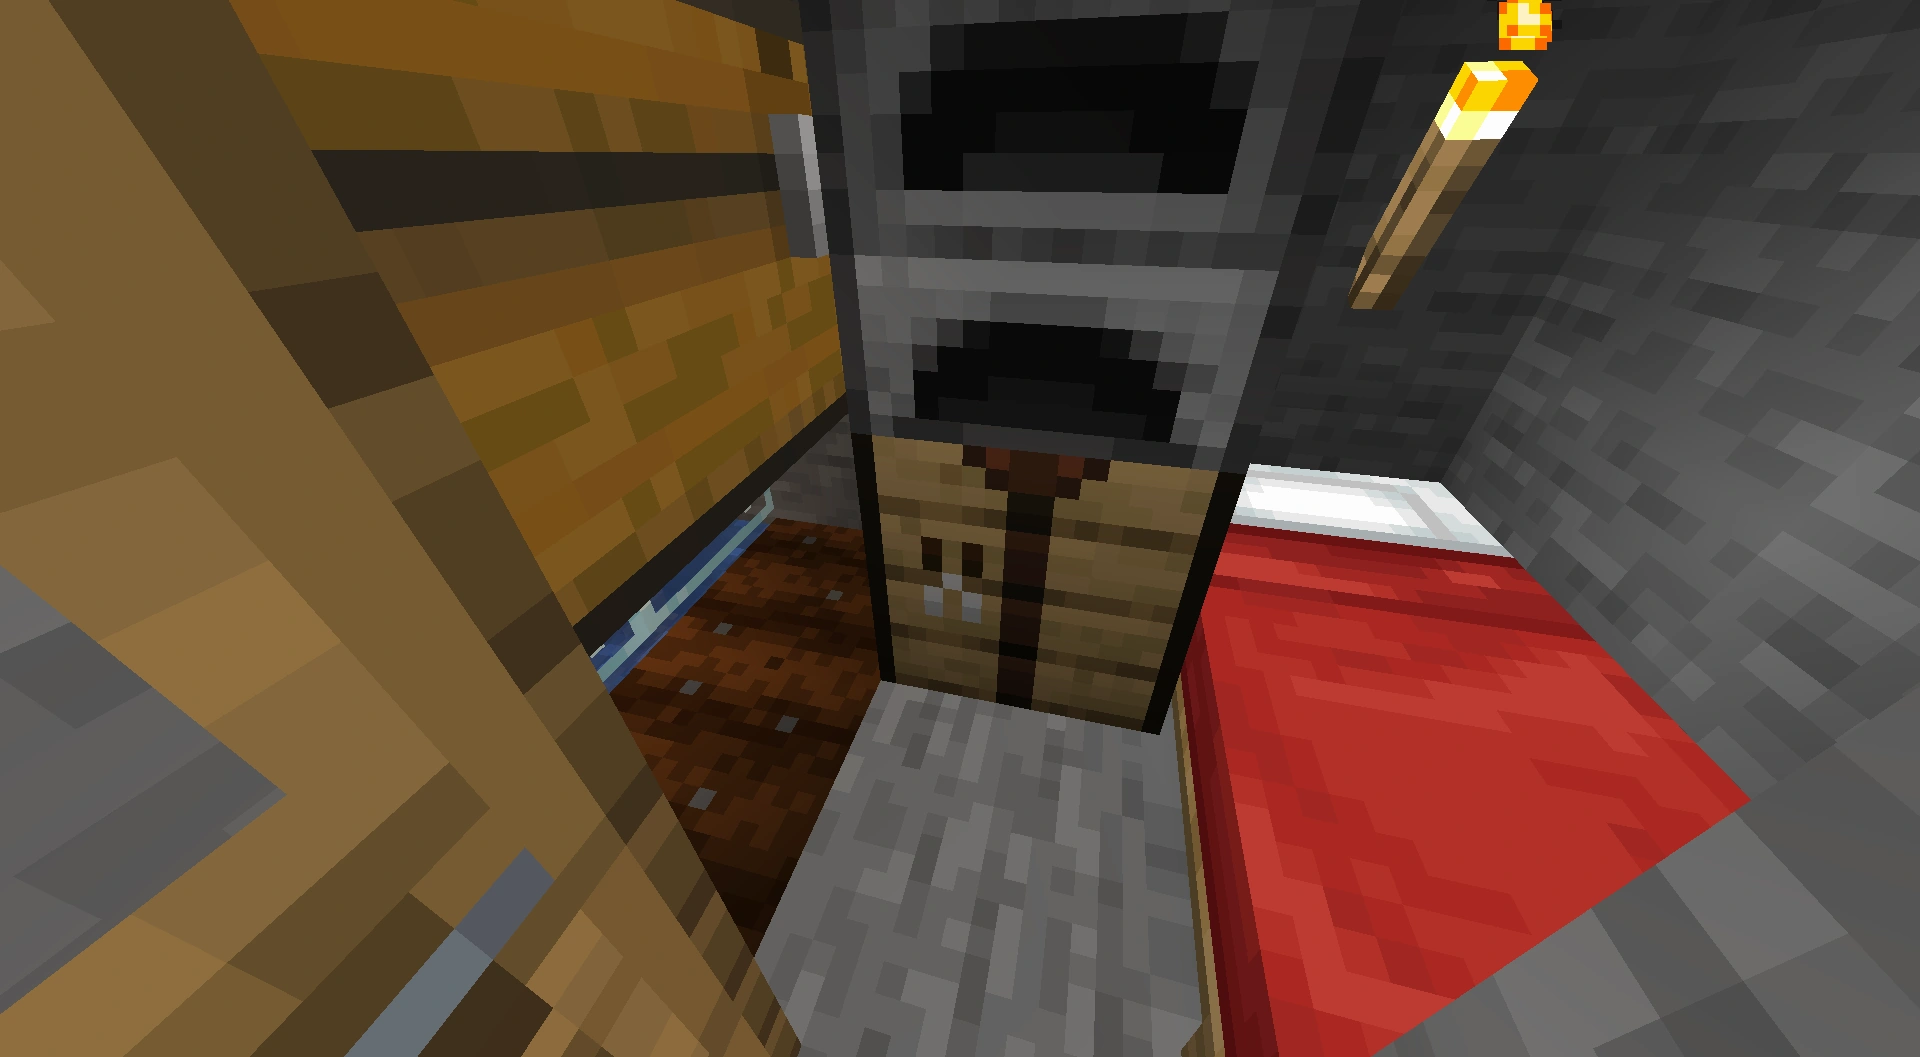
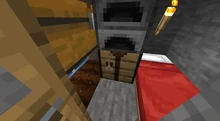
An extremely space-efficient shelter deep underground.
Shelters are created by players to essentially pass the night and fend off mobs. A list of shelter design and tutorials are as follows.
Types of shelters to consider
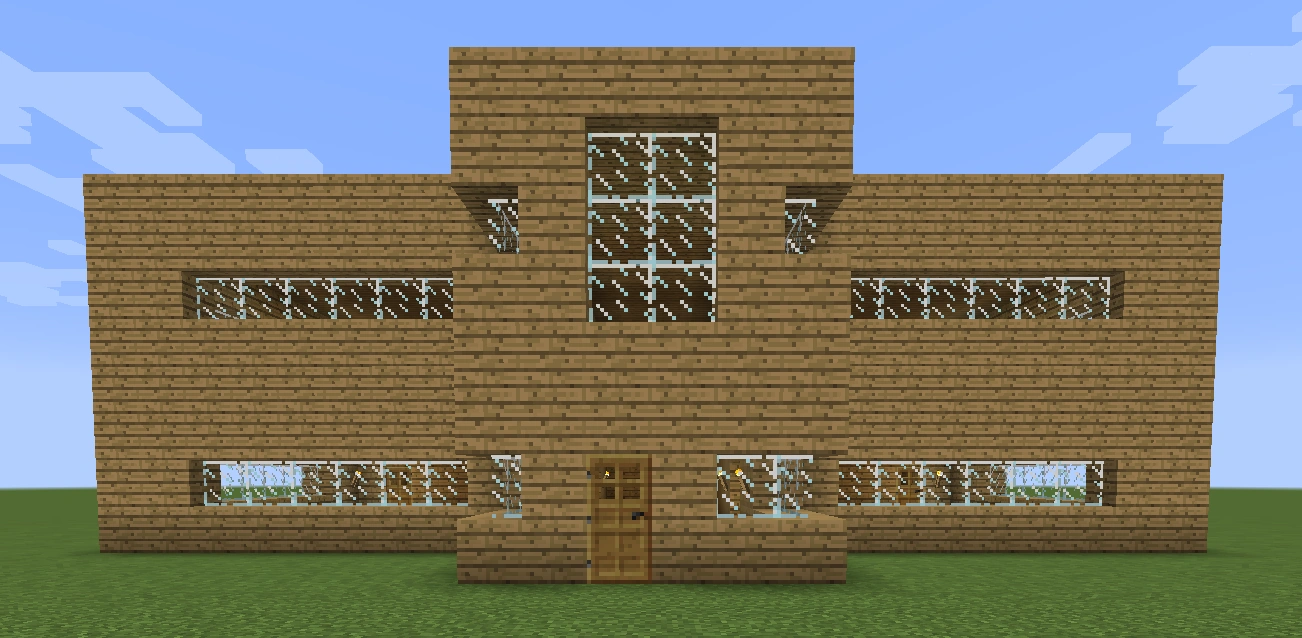

An example of a large shelter.
- A mountain hideout
- A floating house
- A small dirt shack (Good for the first night)
- Small one or two story house
- Large 2 or 3 story house
- A hill fort
- A treehouse
- An underground shelter
- A small fort
- A larger fort or castle (a collection of buildings, sometimes arranged around a courtyard. Usually with defenses)
- A walled off area (Even if there is no ceiling, it will still let you sleep if it's closed off)
- A large castle (about 40×40×23)
- A mansion (Bigger than 30×30×10)
- A cabin
- A dugout (When making it, you will gain and not use blocks, unless you run into an opening that you want to block off.)
- An underwater base (not a good first shelter.)
Generally you want to start basic, don't over-exert yourself on the first day!
Get creative! Build a dock, or a town. It is fine to have useless buildings only for their looks. A collection of small builds can make something far greater than one, big building.
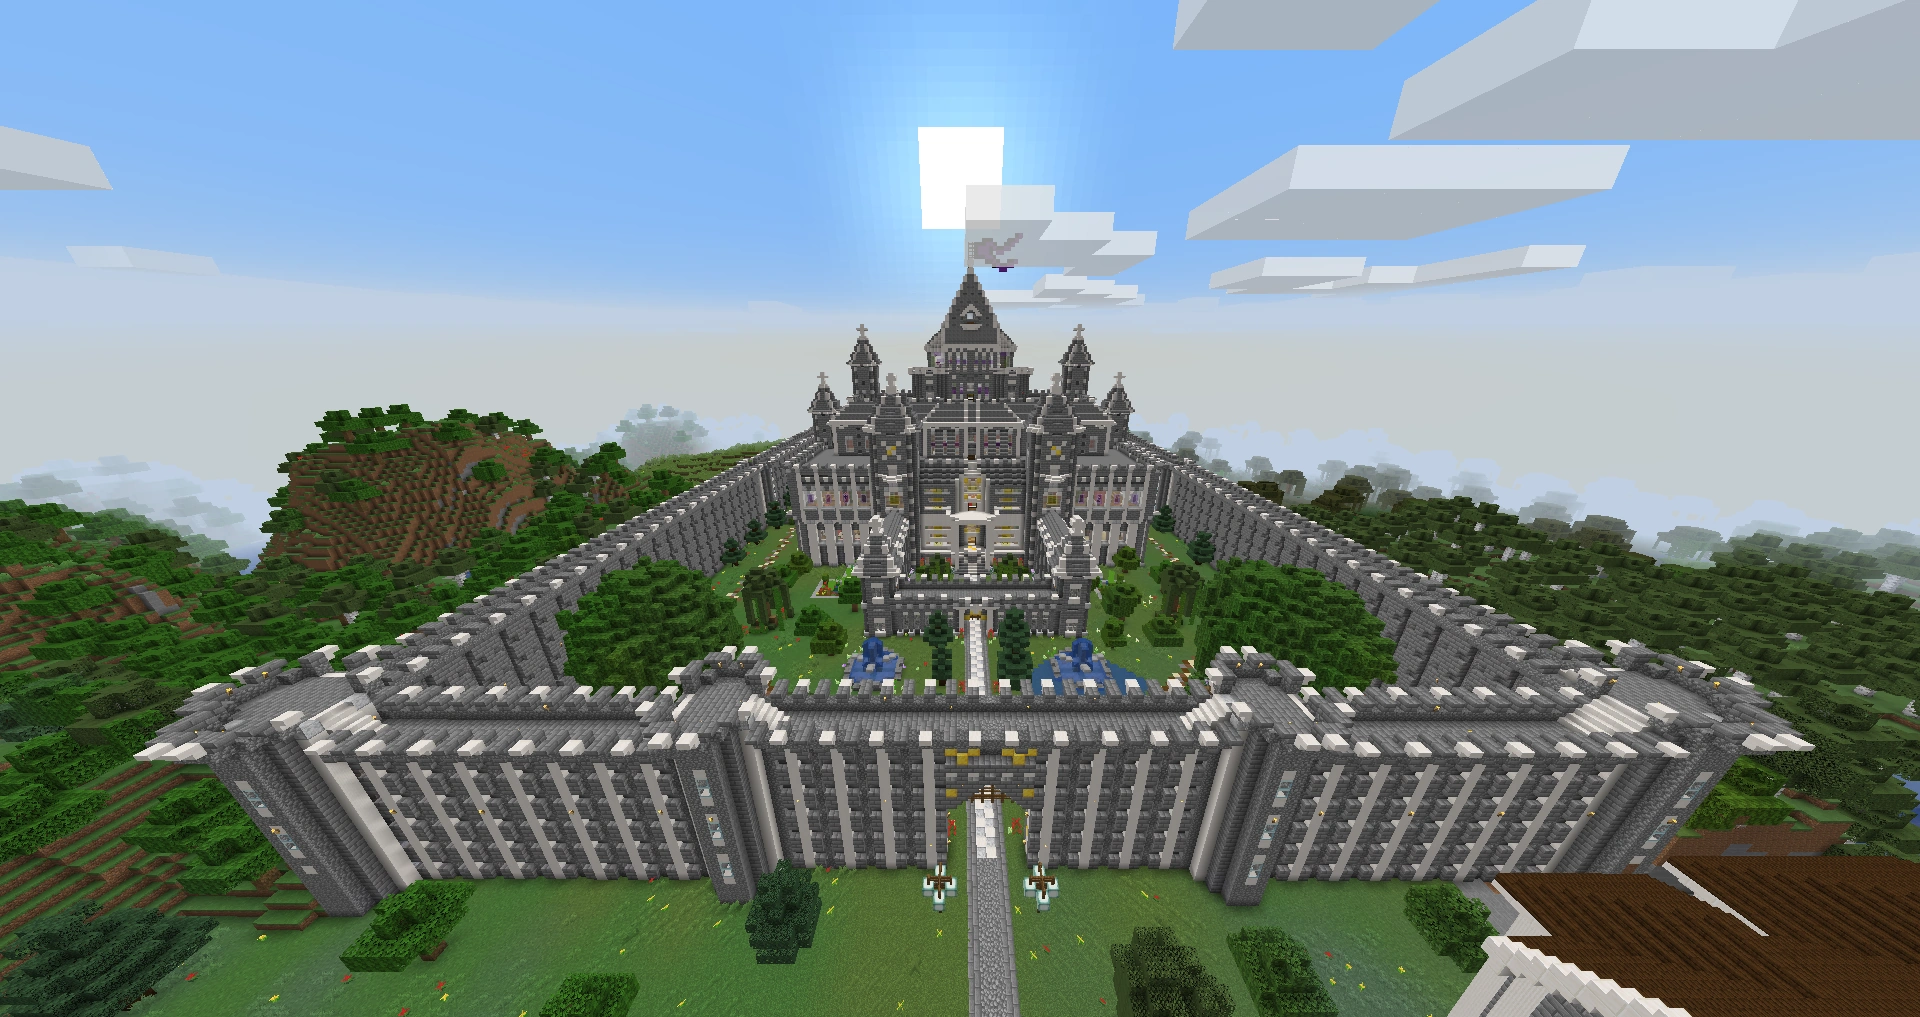
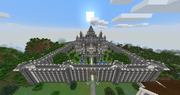
A large flying castle
Shelters for the first night
Here are some options for a shelter on your first night that can be built with limited resources.
Hole in the wall

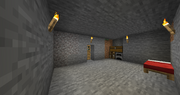
A hiding hole.
While you were gathering cobblestone and coal on your first day, you most likely dug a small hole in the side of a surface cave, or staircase down through the dirt. In either case, you can use that hole as a shelter. Dig a few more blocks into the hill or cave wall, then you can dig a small room (8×8×3 is the most recommended. It's not too small, but not too big.) Relocate your crafting table and furnace in here, and make sure to light it up!
You can place a door across the entrance to your shelter to protect you from mobs, while still giving you access. It is generally recommended to place it from the outside (go outside your shelter and place it while looking inside.)
If you don't have wood to spare for a door, simply cover your entrance with dirt or cobblestone when night falls, periodically breaking it to check for daytime (watch out for mobs though!)
Atop a pillar
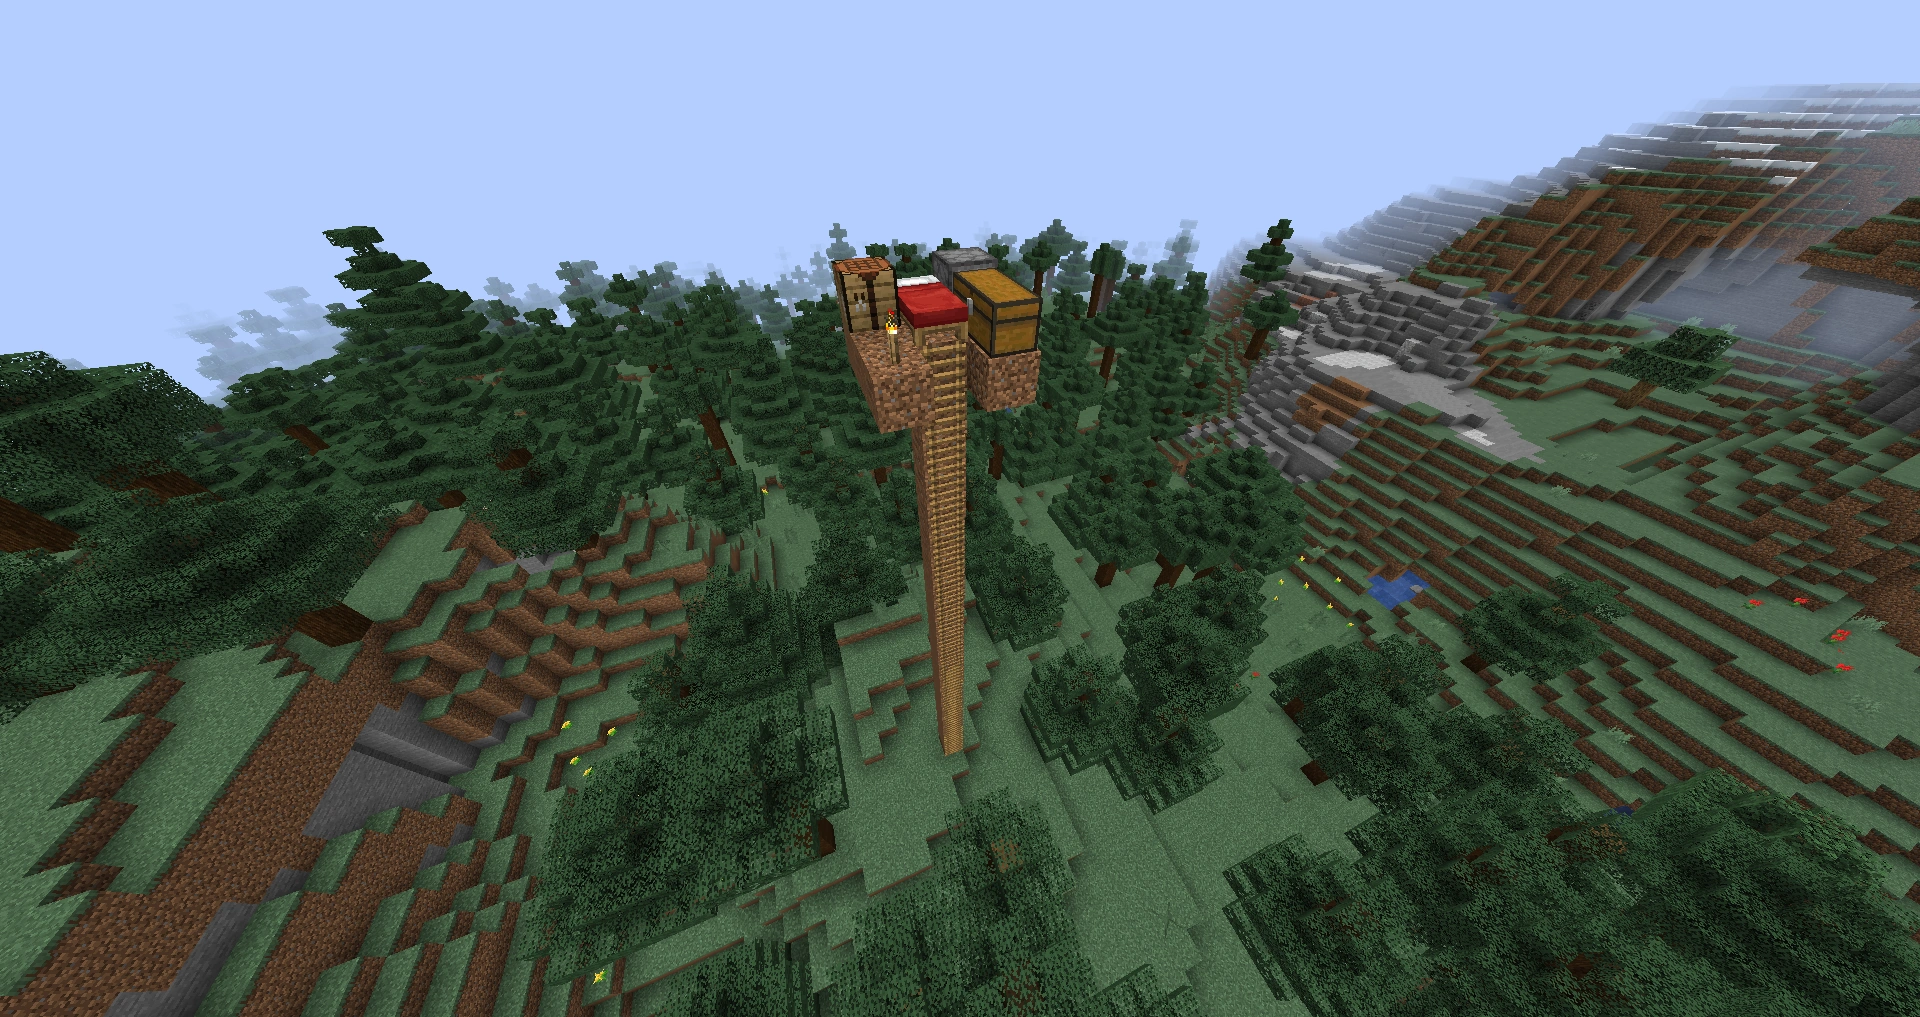

A pillar shelter from ground-based hostile mobs.
Build a tall 1×1 column under you, by pillar jumping: look straight down, jump up, and place one of your blocks in the space you've jumped up from. By doing this repeatedly, you can get high enough above the ground that ground-based mobs are unable to detect you. You can make the pillar out of dirt, wood planks (remember, 4 planks to a log), or even cobblestone, but avoid using sand or gravel to make your tower (see below).
Going 10 or 12 blocks up will usually be enough, 16 is safer (skeleton range), and 20 or 30 is more certain. Zombies can track a player 30 blocks up, but they cannot reach the player. You can also use sneaking (holding ⇧ Shift) to lean over the edge to place extra blocks as a ledge. Then you can put your crafting table (and soon, your furnace) on the ledge and work overnight. Remember to retrieve them before you come down! You can look around and see what's happening overnight, but try to avoid putting your crosshairs on an enderman.
If you haven't slept in 3 or more in-game days, beware of phantoms, which can reach you on a pillar. Otherwise, watch out for climbing spiders or even (unlikely) a spider jockey. To fend off spiders, you can break one of the blocks below your top block, or build a lip around the block you're standing on. You do either of these by crouching as above, and placing or breaking blocks. You will not fall unless you let go of the shift key while leaning over the edge… or unless you are attacked, so don't do this if a spider is actually getting close to you (or if your tower is under 20 blocks and a skeleton is at the base). If a spider does climb the pillar, they're fairly unlikely to actually reach you, but, just in case, keep your stone sword in hand and whack them as soon as they come into reach, before they get up to you. (Attacking them will knock them down, causing them to take damage from the fall.)
Once it is light enough, and the undead have burned, simply dig out the blocks you're perched upon, until you're back on the ground. (Check for nearby creepers and other monsters first!) Don't just jump off your tower unless there's water below you – if you're high enough to avoid mob detection then you're high enough to take damage if you jump, or even die if you're 22 blocks or more up. Also keep an eye out for spiders, which can meet you halfway and knock you off the tower. If a creeper is hanging out at the base of your pillar, and you have more blocks, try going even higher—30, 40 blocks, or even up to cloud level. This makes monsters on the ground despawn far more quickly (because they are now farther away from you).
Do not use sand or gravel, because unlike most blocks, they are affected by gravity. You can't place a ledge with them, as they fall to the ground. (However, you can put a dirt block on the side of a sand pillar, and that will stay up even if the pillar doesn't. In particular, if a creeper does notice you, and blows up at the bottom of your pillar, the rest of sand you're standing on will fall closer to the ground, taking you with it… and apparently, you were already low enough for monsters to notice you. (Also, a passing enderman might pull a block out of your pillar.) If you're really stuck and only have sand or gravel, make the pillar extra-tall, at least 20 blocks.
If you are in a desert with only sand and cacti all around, and have no other blocks available, don't use cacti (they'll kill you). If you have time, try to gather a lot of sand to make sandstone. If you got at least 40 or 50 sand (a full stack of 64 is better) by nightfall, you can make enough sandstone for a pillar, even without your crafting table: Press E for your inventory and crafting window, divide the sand among all four boxes of your crafting grid, and take the sandstone. (Use your pickaxe to take down the tower in the morning.) Unfortunately, you need 4 sand to get each block of sandstone.
Up a tree
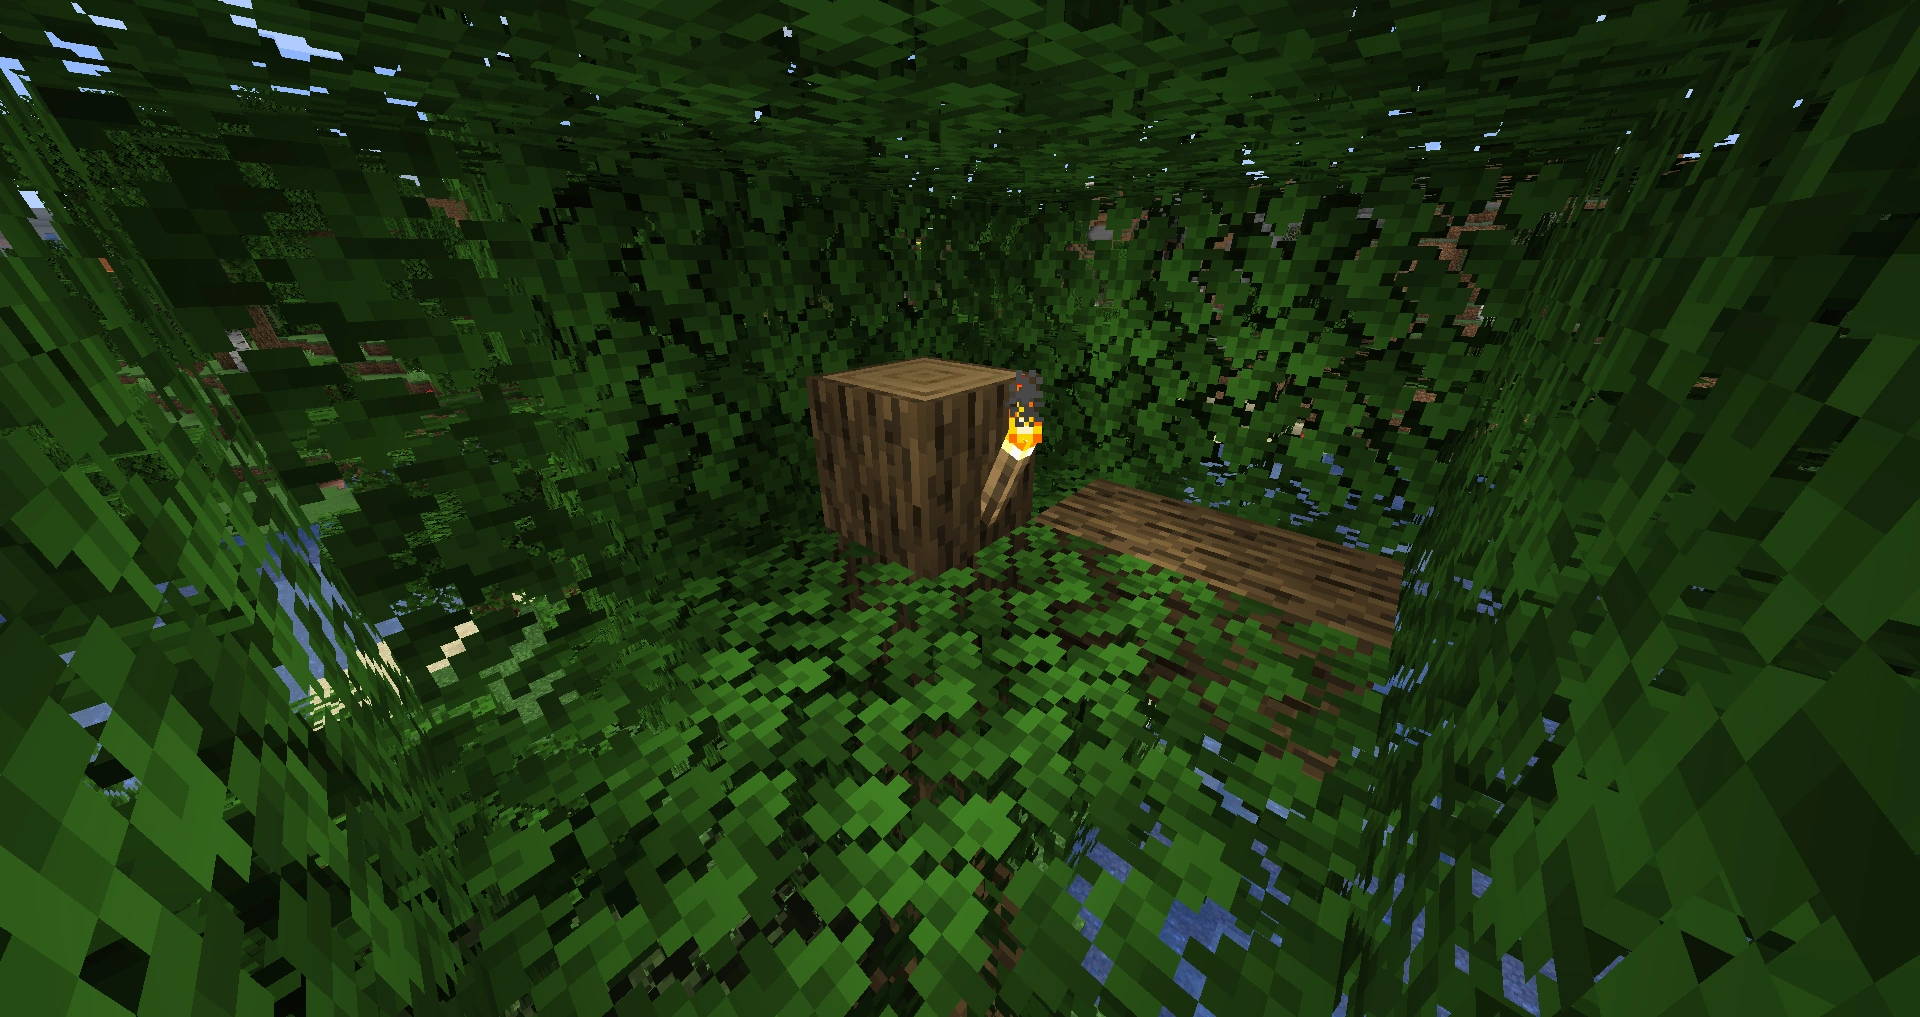

Shelter in a tree.
Find a single large tree and use dirt (or another non-valuable resource) to pillar up to top and stay up there until day arrives. Jungle, tall spruce, and large oak trees are recommended. Mobs will not spot you if it is a large enough tree, and if they do, just take evasive action and move to the other side of the tree. Spiders could give you a problem, but hopefully, they won't see you. If the leaf canopy is big enough, you can actually dig up into the leaves, where monsters can't reach you. If all else fails, jump between treetops. When night's over, you can chop down the tree. Take care not to chop it down before you are done using it as a shelter, or the leaves may start to disappear, leaving you with nowhere to stand.
Three block high hut
By making four three block high walls around you, you can simply hide from most mobs. Adding a roof (at the third block, that is 2 blocks high inside) protects against endermen (which can't fit) and spiders, which can otherwise climb the walls. You can make this out of almost anything—cobblestone is more secure, you can use wood planks if you have enough, but even dirt will do in a pinch. You need 13 blocks as a bare minimum (four 3-block high pillars around a 1×1 refuge), but two or three times that, or even a whole stack of 64, lets you build something you can actually move around in, and do some crafting and smelting overnight. (Note that you can use the crafting table and/or furnace as part of the walls.) Keep a block or few in your inventory as spares, in case of enderman theft (see below). You have two main risks: One is spiders, which can both sense you through the walls, and climb the walls. However, they can't fit through small holes, and if you make a roof with only a one-block hole, spiders can't get through (but you can still tell when day returns). The other hazard is if an enderman wanders by and takes a block out of your shelter. Wait for the enderman to wander away a bit, then replace the block, with one of your spares, if possible without letting your cursor cross the enderman (“looking at them”). When full daylight comes, mine a door in your wall, and exit. Keep a wary eye out for monsters, and in particular be prepared to run quickly away from creepers.
In a cave
If you found a cave system you can fix it up into a lair—a good one can make a base for the rest of your game. If it ends quickly, then cap off your entrance. If it does not end, then build a little shelter around you by capping off any extra exits or openings into the depths. Don't worry too much about the natural walls of the cave; monsters can still be heard through the walls pretty loudly, but they can't come through unless you leave an opening.
To block the cave off, for your first night you can use walls of dirt or cobblestone similarly to the "hole in the wall". If you have enough wood, you may be able to craft fences and a fence gate and place them across the entrance and any openings in back. Make sure you place the walls or fences behind the upper lip of the cave (or extend the ceiling over the barrier), or monsters are liable to "drop in" inside your barrier. Also, remember to light the area before you settle down. Likewise, remove any stray blocks, within two spaces outside the fence, from which monster could jump onto the fence (try the jump yourself). If using fences, also make sure you can retreat into the cave and away from the entrance (out of sight or 16 blocks away), or a creeper may drop by and just wait for you to come out. Later, you can be more sophisticated about sealing off and fortifying your lair.
As with "Hole in the wall", you can dig into the cave's wall while waiting for dawn, but keep some blocks handy to patch up any openings you might make into another cave while digging, which might have a hostile mob in it. If you place your pickaxe one of your hotbar slots (used to navigate quickly between items you are carrying in your inventory) and e.g. dirt is placed right next to it, you can quickly switch between your tool and that block type in order to close the hole you just made. This can be extremely handy when you stumble upon an opening which contains mobs.
Hill Fort
Just like cave systems and bunkers and Castle tower. Hill forts are forts that can be made by strong or earth-made materials such as dirt or stone. Unlike castle or an outpost tower,hill forts have better defenses and you can create your own cave system for hidden base and hidden storage for your important stuff. You can also create your bunker directly within the fort or near the fort. Hill forts are better for PvP bases and raid farming since you can hide magma blocks under a trapdoor and make a lava flow.
For starter Hill fort, you can just make it out of dirt or any earth-made materials like sand and gravel.
For easy Hill fort, it will be made out of any wooden materials like oak log and oak planks.
For normal Hill fort, this can be made with any stone materials such as cobblestone and smooth stone. You can also install defenses using magma blocks and deep hill moat.
For hard Hill fort, it will be made out of obsidian so nobody could destroy it easily. You can install deadly traps such as night activating lava trap.
For advanced and intense Hill fort, it's still can be made with obsidian but with new cave system and maze system so raiders can't find you or your loot easily.
Anyway, you can install any traps even if you're still starter. Cave systems and maze can be done two even when you are still in starter fort. Forts are amazing in raid farming since you can install traps in it to kill raiders (except vexes).
Out to sea
If you are near an ocean, you can make a boat (see that page for the recipe) and sail out to where you can barely see land (in any direction). If you can't make a boat, just swim out to the sea, holding the space bar all night to keep yourself afloat. Either way, you won't be getting any crafting or smelting done. Note that drowned can board your boat and cause damage, so getting to land and building a shelter is preferable.
Break the golden rule
When you're desperate, you can break the golden rule of minecraft (Don't dig straight down). Dig three blocks down, and put a block above you that is not sand/gravel. Congrats, you just made the fastest shelter in Minecraft possible. Since you probably don't have an in-game clock yet, you may want to use a real-world clock to time the night (7 minutes, with up to 3 more to allow for dawn/dusk). If you have dirt or stone next to you, you can dig out a couple of blocks there, and place your crafting table and furnace. Sometimes keep the hole in the ground as a base. A torch makes your little hidey hole feel a little less like a tomb.
Vertical hidey hole
This design allows you to see what is going on every time you come out, but it does require a bit of extra wood.
Once you reach stone, you can mine some of the stone, craft a furnace, make charcoal, and craft torches.
The next morning, check for mobs, particularly creepers, as you climb out.
Blocks to use
- Cobblestone
- Deepslate and its variants.
- Wool
- Nether quartz
- Terracotta, both plain and stained
- Concrete
- Obsidian
- Bricks
- Stone and stone bricks
- Sandstone
- Nether bricks
- Wood planks
- Wood logs
- Wooden door
- Decoration blocks:
- Stairs and slabs for a sloping roof and for tables or chairs
- Wool or carpets for the floor
- Glass and glass panes for windows
- Wooden fences or cobblestone walls for pillars, fences and other decorations
- Torches for lighting to stop mobs spawning
- Extra terracotta is nice too
- Stained glass is decorative
These materials are good because they are:
- More or less easily obtained.
- Fairly nice-looking (if used correctly).
If you want a certain theme, such as the Nether or the End, certain materials such as Nether bricks or End stone from those dimensions can be used. If you're in Creative or have easy access to sand, glass often looks nice, and you do not need torches. Use it for a greenhouse look, or just if you like the sunshine.
Core rooms
There are several things that are useful to include in your house in Minecraft.
Foyer
Every house should have a main room with an entrance from the outside. You may wish to include a bed, a furnace, and a crafting table in this room. It would be convenient to connect all hallways or separate rooms to this room. Some tools, weapons, armor, and/or food stored in a chest can be useful, as then you can gather up some essential supplies quickly when coming to your home for a quick resupply.
Crafting room
This room is helpful to the player when crafting items. A crafting room may include a crafting table, at least one furnace, and a sufficient number of chests containing common crafting materials found while mining or exploring, such as wood, cobblestone, and iron, as well as any other materials that may be useful while crafting, such as sticks or wood planks. Labeling the chests will help to organize. There should be quick access to the storage room from here. Wood would be a nice material to use as it suits the theme.
Smelting room
This room is important if you are a big miner and/or adventurer as you can smelt large numbers of ores quickly. Make a large room and line the walls with furnaces, possibly keeping a chest of fuel such as coal or wood planks inside as well (A bucket of lava is good too. It can smelt 100 items and also is a good source of light.). The benefit of having multiple furnaces is a faster overall smelting time, since each furnace is able to run independently. Having each furnace full of said fuel is also helpful. This room could easily be merged with the Crafting Room, and it may be most convenient to do so. Also, bear in mind that you can use hoppers if you wish to automate your smelting operations.
Storage room
A room full of chests for storing all of the dirt, cobblestone and other less-valuable materials that accumulates in your inventory while mining. You can also make a lava 'bin' to dispose of your unwanted items; this can be done by simply digging a hole (don't use wood etc. near it - the lava will ignite flammable blocks) and filling it with lava. You may also build another store room, with a guarded and hidden entrance though this store room is usually filled with more valuable and rare materials, i.e. gold, iron, diamonds, emeralds, etc. Perhaps you even want to include a trapped room with trapped chests and TNT, if you are in PVP.
Entrance to your mine
It's generally a good idea to put the entrance to your mine inside your shelter, simply so that if you return at night you won't encounter mobs. It's probably a good idea to make sure your mine is well lit by torches, redstone lamps, or glowstone. If playing in a mode besides peaceful, you should put a door so mobs do not get in (use iron doors when on hard - zombies on that difficulty can damage wooden doors to the point of breaking). Buttons are useful for any barrier only opened by Redstone.
Bedroom
Sleeping in a bed resets your spawn point to that bed. It's a pretty good idea to have this in a secure bunker. It's also a good idea to keep this room far from the outdoors, so a mob cannot prevent you from sleeping or blow up your bed. For added safety against creepers creeping up on you or PVP griefers in your sleep, use three-layered walls, with the middle one being Obsidian or Water.
Brewery
Once you've been to the Nether and gathered some blaze rods, you can create a Brewery, which is simply a room with a brewing stand and a cauldron (however an infinite water source works just the same and doesn't run out). It is great to be able to brew some potions to prepare yourself for leaving your base. Include a chest with some potion ingredients such as sugar, redstone, blaze powder, nether wart, glowstone dust, spider eyes, magma cream, fermented spider eyes, glass bottles and a well as it is an unlimited water supply.
Positive Effect Potions and an example of a brewery can be found, at the brewing page.
Enchanting room
After gathering some diamonds, obsidian, sugar cane, and leather (to make a book),you can build an Enchantment Table. This lets you enchant your items (See Enchanting for help on design), and since bookshelves give you higher level enchantments, this room could also be a good use for your sugar cane. It's also a good idea to keep this room close to your mob grinder for easily regaining your xp and to keep a chest with books in this room to enchant them and, of course, store enchanted books.
Farm
You need a source of food readily accessible from your shelter. Wheat seeds are the easiest food to get, so start with them. Later, you can plant other crops, like potatoes and carrots. The aforementioned crops can also be used to breed certain passive mobs for more effective food. You can also grow pumpkins, which are obtained from dungeon chests and/or found in the wilderness (Usually taigas, extreme hills, and forests). Melons seeds found in dungeon chests aren't a good source of food, but can be good for potions, via glistering melons. Beetroot seeds are also a choice, although you need to find a village or visit the End or get beetroot seeds which are obtained from dungeon chests first.
Later in game, you may also want to build farms for other plants, such as sugarcane, cactus or chorus fruit, or even flowers and tall grass (details explained in the Expansions section).
Nursery/arboretum (tree farm)
Eventually, you will use up all the trees in your immediate surroundings, so you will want to replant them with saplings. Keep it well lit, both to keep away mobs and speed up the growth of trees. Birch is recommended, because it grows fastest, but oak and jungle trees are also a good choice, due to their apples and immense size respectively. It is difficult to build an indoors or underground tree farm that will supply your wood needs, unless you use bone meal or keep it well lit. Create a room that is bigger than trees.
Armory
An armory is a room near the front door with chests containing food, armor; and weapons, this is for easy access when you are going outside, and so you can quickly prepare yourself to explore and collect items. For an even faster alternative, this room consists of a number of dispensers, activated by a single button or pressure plate, providing the adventurous player a way to get started immediately. This is useful for exploring dangerous caves and going on night expeditions.
Smithing room
After building an anvil, you might want to make a room with a crafting table, a smithing table, a chest, easy access to an enchanting room, and of course the anvil. Handy if you fight monsters or other players a lot.
Nether portal room
Once you have at least 10 obsidian, either from mining it in a cavern or obtaining it through obsidian farming you can build a nether portal. Once built, activate it with a flint and steel, and you can travel to the the Nether. This can be used for fast travel and for getting lava, netherrack, Soul Sand, Nether quartz ore and glowstone. Beware of ghasts, zombie pigmen and blazes as well as magma cubes. Building another nether portal room in the nether for protection is a recommended idea. Please note cobblestone is a good block to build with in the Nether since ghasts can't destroy it with their fireballs.
Note: the player can potentially create a cabin with all of these.
Expansions
These projects, while not entirely mandatory, make your base more useful and interesting.
Trading Hall
A Trading Hall is a location to gather villagers to trade with. This is the type of thing an advanced player with a lot of time on their hands, or a bored Creative player, would do. With a few farms, these can make perfect equipment and food with just a bit of time.
Kitchen
This is basically a crafting room, but you only craft food. The chest(s) should contain most basic foods, including wheat, milk, eggs, etc. Many people, instead of having a kitchen, just craft food in the crafting room, but a kitchen is a nice expansion, because it separates crafting materials so that you don't fill your crafting room's chests with wheat instead of wood. You could also add a smoker if you want.
- Bakery
This is basically an expansion of a kitchen. You could build this and a kitchen, and just connect them. You would use this to make cakes, pumpkin pies and bread. Place a crafting table, chest, and, if you want, a display table for cakes. If you want to make a large amount of cakes, make a cake farm under or near the bakery.
- Pantry
This is also an expansion of a kitchen. Make sure that they are categorized so you don't get mixed up. You can use a chest or dispenser to use everything in them. Put some cooked meat, bread, cookies, cakes and melons in them.
Note: If you are using a dispenser, you need to activate it with a redstone signal.
Control room
This is a common room to find in most advanced player's houses, but only if said advanced player uses a lot of redstone in their builds. It controls all of the redstone devices a player has and usually consists of:
- Levers/Buttons/Other Input Methods - These are used to activate/deactivate redstone signals.
- Redstone torches/Redstone lamps - These are mainly used to determine whether the signals are on or off.
- Signs - These are probably the most important thing you can have in your control room. These help you determine what each lever/button does.
Maze
This is mainly for if you get bored. It's quite simple and obvious how to build and use.
Mob XP farm/drop collector
An experience farm uses water currents to push most mobs into a central area. With mobs in the nether, pistons are used. Use a piston crusher or a long drop to get the mobs to a ½ heart. Mobs can be killed by hand or with a splash potion of harming (Healing for undead mobs) to get XP. Note: This is more efficient with multiple spawners, as more spawners mean more spawning opportunities. You also obtain drops from each mob killed. This can also be done with large dark rooms with platforms. The mobs spawn and fall into water currents, where you can choose what happens to them once they are out of the spawning chamber.
Rebuilding wall
If for some reason you want to have a wall that you can’t get rid of, you can make a cobblestone generator, and make pistons push the cobblestone (which reforms) up into the wall, unless there are no missing blocks in it. Look at Sethbling's channel for more information or Mumbo Jumbo's indestructible wall V2
In-Shelter Teleporter Room
If you have Cheats enabled, you can create a room that teleports you to other rooms in your shelter. you will need command blocks and basic knowledge of using commands to make the room. A non-cheat method is to build an ender pearl stasis chamber, which can teleport you to any room. Note: This will require ender pearls so you need an enderman farm. https://www.youtube.com/watch?v=2_ngko21ZmQ
Redstone lab
A laboratory is a large, clear, secure area where you can safely test designs without distractions. When building large redstone projects with complicated parts, it can save you time and effort if you test the ideas first. However, it's often best to test ideas in creative mode and implement them in survival.
Cake factory
A cake factory simply provides the avenue to quickly produce cake by having the necessary ingredients nearby and produced in a close area, most commonly in one large factory type building. To make a cake factory, make a Wheat Farm, a Sugar Cane Farm, an Egg Farm, and a cow in a cage (make the cage so you can milk the cow.). Place a crafting table and a chest. Once you have enough materials from the farms, start making cakes. This is a good thing to put under/next to a dining hall in multiplayer.
Path/road
Consider building a road or a path between your buildings or to the nearest village. Remember to keep it well lit so no mobs spawn! A good material is dirt path.
Cobblestone generator
A cobblestone generator provides a safe and convenient way to gather cobblestone. They typically involve mixing water and lava.
Bunker
Sometimes called a panic room, a Bunker is a small room made of strong materials (obsidian for example) with an iron door with the open/close system inside the room. This room must have a bed, a crafting table, a furnace and also a chest with the basic materials (food, tools, armor and weapons are a must). It also has to have a high interior luminosity to avoid monsters spawning inside. It should also be only two blocks tall so Endermen can't teleport inside.
Panic room
A panic room is a place meant just for fun, where you put the entrance somewhere where you wouldn't go looking for another room, e.g. the drain in a shower because if using a trapdoor for the drain you can open it.
Scout tower
A cheap and safe way to survey the land. Note that these are mostly obsoleted by maps, should you have the resources to make them, although a map doesn't tell you if there are any aggressive mobs. Remember to keep a spyglass at the top!
Seed and flower farm
You can have a fully-automatic flower and seed farm with just a bit of Redstone and tons of bone meal! Have an 8×8 area of grass with some hoppers at the end. Then, place a row dispensers at the back, facing the grass, and put buckets of water in them. Hook up some Redstone from a BUD switch at the end and delay with Repeaters. Attach another line of Redstone and hook it up to Dispensers, under the Grass and filled with bone meal while facing the Grass on top. If you do it right, automatic block updates should cause grass and flowers to grow and immediately be destroyed by the water flow and be carried along the stream and have the water automatically get sucked in. XisumaVoid made a good tutorial.
Beacon/lighthouse
A tall tower with some sort of light source on the top means that you can see your base from a long distance away. Handy if you go exploring a lot, your spawn point is a long way from your base, or you have not made a bed yet.
Beacon room
Make this room by digging a 6×6×6 hole and building the base pyramid out of your selected material (Iron is cheapest unless you have a Trading Hall, but you can also use Netherite, Diamonds, Emeralds and Gold). Also, you could put in a few chests with diamonds, Netherite, iron, emeralds and gold and/or make it look like an altar.
Garage
If you like cars, then you might want to build a garage. A garage is just a big room with enough space to build some cars and a garage door at one end so you can drive your cars outside. Some garages are really big and have lots of decorations, like workshops, car lifts, or crazy things like waterfalls or a secret underground garage. When you have finished your garage, remember to build a few cars to fill up the garage.
Kennel/pet area
If you have tamed a lot of wolves, a kennel is a good place to keep them. A simple shed-like structure will suffice, but be sure to keep it well lit for the dogs' safety. A pet area is similar to a kennel, but keeps dogs and cats. For a more realistic feel, separate them.
Well
A renewable water source is useful for a variety of projects. Put water in a 1×3 ditch and you can take water repeatedly from the center! For a more aesthetically pleasing pool, a 2×2 well works as well, and you can take water from any of the squares.
Mushroom farm
A big room with flat floor for growing mushrooms. You can light your farm by torches or glowstone, placed on ceiling, to prevent mobs from appearing. Just make sure that there are no places on the floor where the light level is greater than 12. If you have the material, Redstone torches are good for this. More about this can be found on the Tutorials/Mushroom farming page. Alternatively, find a small cave or make one, put some mushrooms inside and completely seal it off without torches and check on it/clean it out. Also provides the drops from hostile mobs.
Sugar cane and cactus farms
Easier to manage but somewhat less useful than the above two projects, farming sugar cane and cactus underground requires little effort. A cactus farm requires sand to grow, and sugar cane needs to be properly irrigated with water within one block of it. If you don't want to spend lots of time harvesting your cactus, place a three-block-tall pillar next to where you want your cactus (See Farming for more info).
Indoor animal farm
Light up a large area with a grass floor. Then put two of the same kind of passive mobs (i.e., two pigs or two cows) inside. You can then breed them together and you can gather wool, leather, pork, beef and raw chicken safely. You might want to put trees inside so the animals feel more comfortable, or, if you're really ambitious, build a man-made forest.
Pond
This is easy to make, and can be useful, especially if you don't have a wheat farm yet. Just make a hole long enough to cast your fishing rod, around 8 blocks long and at least 2 blocks deep, and fill it with water.
Music room
A room filled with note blocks to enjoy melodies. This can be made with or without redstone repeaters.
Library
Not only is it a great use for any excess sugar cane, a library can also add a bit of class to your home. Can double as an enchantment room.
Minecart hub
If you have active mines scattered over the map and use minecarts to haul your stuff back to your base, dig out a universal stopping point under your base. Or, you could actually make a rail road hub outside or connected to your base.
Minecart chest system
After a lot of days in Minecraft, you will soon have the ability to automate everything (farms, doors, etc.). The most useful automation you can make is a minecart chest system. You can simply craft minecarts with chests, powered rails, and some rails, and you can make a system to send your ores from your mine to your base,
Gravel-to-flint room
Once you have many stacks of gravel, it can be useful to convert most (leave some for mining) of your gravel into flint. This is just a big empty room (a 4×4×4 space holds a stack of blocks), which you fill with gravel, before destroying the gravel, getting some flint in the process. It is most efficient to do this 10 - 15 times for every 20 stacks, though about 5 for 10 stacks, and 30 for 50 or so stacks. This room may include a chest with shovels, as well as ingredients and a crafting table for quick production of arrows, and flint and steel.
This is somewhat redundent, since a Fletcher can trade you 10 Gravel and an emerald to 10 Flint. A stack is 6 Emeralds with 4 gravel left over and if you have a tree farm, two logs, 10 gravel, and a bit of trading can get you 10 Flint.
Target practice rooms
Make this room dimly lit, so hostile mobs can spawn, when you enter this room, always close the doors when entering and exiting, arm yourself and kill the mobs in there. Light the entrance area with torches. This helps you gain experience and loot.
Target practice room (non-hostile)
Make this room with a supply of bows, arrows, and several colorful blocks, such as dyed wool, (to determine distance rank) at different distances with buttons on each one facing you with each one hooked up to a redstone lamp. Target blocks are a good item to use, too.
Bridge
If your base is near a lake, a bridge can help you cross to get resources and give you a safe spot to fish. Just create a 3-block wide path (using cobblestone would be a good idea) through the water, and you have a basic bridge! When you have time, you may want to add a ceiling+walls (for safety at night from mobs and during storms) and slits in the side (as either a dock or a place to fish.)
Bathroom
If one wants to fish indoors or drown themselves, a bathroom is perfect for them! Make a bath, a toilet and if the player is good with redstone, a shower with pistons is always a good idea for those who want to show their home to others. When the walls are made of cobblestone, make a hopper attached to a dropper or a dispenser to make a sink (just add a lever pointing downward above) or a trash can. If the items cannot reach the outside for other players, add a "remove items" button to empty the items out to a chain of hoppers that lead to a public chest/thrift shop, or empties the items to something which destroys them(such as cacti, fire on netherrack, lava, etc.). Attach a hopper to dispenser by sneaking, then place the hopper. This will not work without sneaking. One wise idea is to have entrances to secret rooms in this room.
Dye room
A nice room where you can store dyes and clay. Typically only has to have one chest, but looks nice with hardened-clay walls.
Balcony
A nice place to enjoy the view and the nice open air. Also a nice place to pick off those pesky creepers hanging by your front door.
Incinerator
A room with lava, for disposing of unwanted materials. A good way to do this is to create a two block high corridor with lava at the end, and a slab block just before the lava. This results in you being able to walk up to your incinerator but not into it, eliminating fear of death. Be careful with lava around flammable materials. You may replace the lava with a cactus, or burning netherrack. Hoppers can be used for a "hopper chain," which could lead to a thrift shop, where players can be charged for taking items. Adding this to the incinerator will attach a money source. If the hopper chain is full, items will be destroyed.
Mob farming
A safe, renewable source of gunpowder, arrows, rotten flesh and bones. This makes exploring much safer and can provide the means for large amounts of explosives. Also see Mob Grinder.
Water elevator
If you live in any building that is more than one story, you might want a method to get up and down easily without stairs or a ladder. One way to do this is to make a waterfall that falls through the center of the structure. Make sure to have one block of space on any side of it so that your character can be outside of the water enough to breathe while climbing it. Simply hold down the jump button (the space bar) while inside the waterfall to ascend. This method can also be used to create an elevator to flying islands or houses.
Defense
These additions make your base safer and provide a certain amount of entertainment.
Self-destruct button
Pretty self-explanatory, a button that blows up your base and kills the mobs and/or griefers in your house. Remember not to be near during the blast (or you can hide in your bunker with the switch inside)! Also be sure to have a world backup!
Arrow slits
These are small holes in a wall that you can shoot arrows through but are small enough so that skeletons and other players have a hard time shooting back at you. This can be accomplished by stacking up cobblestone walls (the holes can be shot through) or simply digging a one-block hole through the wall and putting a slab on the bottom. Also, placing the non-block part of stairs facing each other, and using the upside-down stair function, you can make arrow slits almost impossible to shoot through unless you are close, so it is advised you put them far above ground.
Murder holes
First, dig a 2 block deep hole in the ground. Dig another hole 3 blocks deep, 1 block away from the first hole. Dig out the block that separates the bottom of the 2-deep hole with the middle of the 3-deep. If done correctly, this should allow all mobs (except for spiders) to fall into the 2 block hole. Then, you simply go into the 3 block hole and attack their feet. Murder Holes often function best alongside a perimeter wall of some sort, with the 2 deep outside and the 3 deep inside. An extra addition to this is to make a large amount of murder holes, and form a tunnel system of sorts, so you can watch multiple holes at once. These were featured by Paulsoaresjr in his Minecraft tutorial videos. This works best before version 1.2 because the mobs have new coding that makes it hard to get them to fall in holes. They will simply navigate around holes deeper than 2 blocks. A solution to that is to put signs around the holes but is usually more effort than worth.
Skylight
Although this may not sound like much of a defense, a small skylight above your entrance/exit allows you to easily see any mobs (especially spiders) waiting to pounce on you from above. Not recommended in multiplayer, as it acts as another way for griefers to find your base.
Anti hostile mob passageway
You can use the fact that snowballs push hostile mobs, by building a 1-wide bridge over lava and putting snow golems on the side (see gallery). The player and passive mobs can pass through safely, while hostile mobs will be pushed to the lava by the snow golems' snowballs.
Overhang
Since spiders can climb walls, a base needs to have either a ceiling or an overhang along the outside walls to be safe. The walls must be at least four blocks high (since spiders can jump up to three blocks high). Of course, a closed roof with a lava pond on top is also nice…
Perimeter
Adding torches around your base can reduce the amount of monsters that spawn nearby, so add some light to your lawn! You can also use fences, cacti, and burning netherrack to keep enemies out. Just remember that spiders can jump your fences.
Floodgate
Using a fairly simple redstone circuit connected to a lever at one end, and one or more pistons at the other end, you'll be able to build some simple floodgates. If you extend the pistons first, and then place water, or even lava behind it, you can get rid of or even kill any mob passing by pulling the lever and letting the water or lava flow! For a quick morning mob clean-up and a strong sense of catharsis, you can place lava floodgates surrounding your entire shelter, facing out. One throw of the lever reduces the surrounding landscape to a barren wasteland! Not to be used in wooded areas.
Moat
The simplest of these is a "dry moat" or trench, a couple layers deep so that skeletons and zombies can't get across. This can provide you with a reasonably safe area that is outside. This can be filled with water to push the enemies to a mob grinder, or simply filled with lava which has more dramatic and obvious effects. Please note: It might not be a good idea to use lava when having a shelter built out flammable blocks such as wood, wool or wooden planks. Tower shelters would do well to have a three-block deep water moat to break the player's fall so they can safely fall to the bottom.
Lake
If a moat does not feel sufficient, build a lake around your base, preferably several levels below the entry level and with a bridge to allow easy access back and forth. Again, it can be water, or, if you want a dramatic flair, use lava. Remember to protect the bridge well, though, and be sure you are protected from within the island in case you miss a spawner. Making a drawbridge out of trapdoors is a fun alternative to the actual bridge.
Archery tower
If you have a plentiful supply of arrows, building a small tower to pick off nearby monsters can be fun and provide useful resources such as gunpowder.
Dispenser turret
Put a dispenser with some arrows at your desired location (preferably next to a door) and a stone button/lever/pressure plate attached to it. This is handy if mobs want to pay you a visit. Splash potions can also be used as ammo, but are harder to obtain. The benefits of using potions is that they can affect a wider area than arrows.
Traps
If you're not satisfied with moats or a perimeter fence, consider adding a trap or two. If you're up to a challenge (and on a multiplayer server), you could even make an entire trap, designed to look like a base! Dark rooms with no way out for mob spawning, entire mazes made of glass, and traps using pistons and lava. The possibilities are endless.
Drawbridge
Using trapdoors, some redstone, and switches, a simple drawbridge can be made. Dig a moat around your base and make sure it is too long to jump across. Now, make short walls next to your entrance. Depending on whether you have a single door or double door, you will have to use one row or two rows of trapdoors respectively. Run redstone next to the trapdoors and connect them to switches inside your base, then cover up the redstone walls. This prevents mobs from getting close to your door while you are inside your base, but the bridge has to be left open while outside your base, otherwise you'll have to find another way back in. Alternatively, you can make a T Flip-Flop gate and place another switch outside your house to trigger the drawbridge from anywhere.
Sticky piston drawbridge
It is possible to make a drawbridge using sticky pistons that is difficult for a mob to cross. This draw bridge also involves the use of a moat or lake. A knowledge of redstone logic gates and how power is supplied to blocks is needed as the mechanism uses multiple redstone repeaters, NOT Gates and a T-Flip Flop. Using the T-Flip Flop one can wire the drawbridge so that it becomes accessible or inaccessible with the touch of a button from either side of the bridge. When the player(s) wants to cross the button is pressed causing both ends of the drawbridge and the center to be even allowing the player(s) to cross. When activated to keep mobs out both ends of the drawbridge are raised 1 block higher than the water level making it impossible to jump from the water to dry land and the center blocks are lowered 1 below the water level causing the center area to flood. Assuming both areas are properly lit and secured this creates an impassable entrance to one's base.
Secure waterfront
Because zombies and skeletons can survive sunlight in water and hostile mobs can swim, if you have a base on the coast it's a good idea to make sure it isn't vulnerable to mob attack. Additionally, drowned pose a threat in the water. Building canals, lighting nearby islands, and building walls on areas of water you don't use can stop rare, but still as deadly, attacks from the sea.
Land mines
If you like to blow up stuff, you might like this. All you need is a lot of pressure plates (wood) and TNT. Once you found your spot dig two blocks down. Then place the TNT then another block, then the place the pressure plate. You can have a big mine field but usually more effort than it's worth.
TNT cannon
TNT cannons are a good destructive way to take out mobs. Make a TNT cannon (a chaos cannon is also nice) and have a chest full of TNT. For more detail go to Tutorials/TNT cannons.
Iron golem trap
If you have a lot of iron, you can create a separate room containing multiple iron golems. This can be opened via a piston door to allow iron golems into a courtyard or garden. This will allow them to be sent to kill zombies if your house is under siege.
Cactus wall
If you have a small house near or in the desert, and you want some more protection because you're just starting out, or if you're a veteran and you want a cheap, effective wall, then this is the wall for you. It's basically composed of cactus blocks, placed about 3 blocks high, and all around your base in a way like this:
and only make one path to your door, this trips up most mobs, other than skeletons because they shoot, and spiders, and they tend to jump over it, but it's an excellent defense for a beginner.
Snow golem sentry
Place a snow golem in a small booth and give it a hole to throw snowballs at mobs through. Elevate the golem so that creepers can't blow it up and zombies can't hit it.
Outer walls
The best material to construct these are stone, stone brick or brick. Obsidian is harder to obtain but a lot better than stone-based blocks. They should be at least 4 blocks high and 2 iron doors for the exit. Make sure to build ramparts and cover walls, and fill with lava/water. Also have a 1×1×1 moat of lava/water with a torch in front like this:
Weaponry room
This is a room you can solely use to make weapons and store them. You'll want a crafting table and some chests for materials. This is useful since you can then use your original crafting room for things other than weapons, therefore leaving more space for such. Some holes in the side would be useful for sniping all the mobs and creepers outside.
Blacksmith
- This room is where you can put your anvils and grindstones and some chests with tool making materials (eg. iron ingots, sticks, wood). Also put a good bit of furnaces, for all your mined ores to be smelted. This can also be used for good looks if you do it right.
Alarm tower
This can be used to signal if enemies are near your base. Using the command block, you could make it so a message gets sent out when you pull a lever or press a button, and could also turn on a source of lighting so people can see the signal from far away. Can be fun on single player or LAN, but it is also quite useful for multiplayer.
Drop trap
This is useful for those short corridors from one part of your building to the other, as when you pull a lever at one side of the corridor, the floor would open making enemies fall down who are chasing you. Easy to make, all you need are a couple of sticky pistons and redstone, and optional lava, then you're set!
Retractable blast shields
These are an easy way to keep mobs at a distance, and are especially effective against mobs which use sight as a weapon, such as creepers and endermen, however it can be tough to collect the necessary resources for this mechanism. Say we're going to protect a window which is two blocks from the ground and four blocks wide. To start, count three blocks out from the window, and then dig a 6-block-wide, 3-block-deep, 3-block-thick (6×3×3) trench, and then line the far edge of the trench with pistons pointing upward. Next, place three blocks of gravel on each piston so that there is one block of gravel sticking up above the ground. Behind each piston, place a solid block that accepts redstone, and then place a bit of redstone on each of these blocks, as well as the blocks behind them. From there, run a redstone line to the lever which we'll use to work the blast shields, keeping in mind that redstone can accept a signal from the block above it (making it feasible to have the lever inside your house, preferably near the window you wish to protect).
The final product should look like this (all the redstone should be off and the cobblestone is the window):
After that, cover the redstone circuitry with whatever you wish to protect it against damage, and you're good to go!
Note: If you're good enough with redstone, you can also have all blast shields around your house hooked up to a single lever, which you can flip whenever you need to. This is a nice feature to add to the windows of your Nether bases.
Exploding statues
Surprising foes makes any weapon effective! No one will ever know when a fancy statue is a literal bomb! To make one, fill a statue with TNT, then add some underground redstone leading to a button to activate it. Activating detectors makes this defense automatic,though beware of mobs or players setting it off! Building it near a base is not wise. Normal rails and one block of activator rail with some power applied can replace a large redstone usage if statue is lower than the shelter. Push a minecart with TNT down the rail to activate. Remember to add the Activator Rail early on the rail if possible for a quick countdown!
Other
There are infinite possibilities in Minecraft. These ideas are not always functional but can be fun to make and have.
Secret room
For your chests with many valuables, in case someone gets in base, they might not find your room to steal your stuff.
Nether railroad
Every block traveled in the Nether is equivalent to 8 blocks in the overworld. So why not use it to save on materials for building a long rail? You can have a portal in your house and a portal somewhere else connencted by a minecart rail in the nether. This can connect to a village, some cool mountains, a mushroom biome, or another place of interest that would take way too long to walk to. Extremely useful on Large Biomes and island worlds. Plus, you only use ⅛ of the materials you would use in the overworld.
Statue
This can be made out of any type of wool you want, but usually people build statues of themselves. This serves no purpose in single player except decoration.
Trophy room
A room with framed trophies from your many victories: your first ghast tear, the enchanted sword you killed a wither with, your first nether star, a block of emerald, etc. Use signs as plaques to mark the origin and perhaps the date of your trophies, give it fancy glowstone lighting, and have a pride-of-place shelf for a wither skeleton skull or perhaps even the Dragon Egg.
City
This is a good way to put torches, cobblestone, gravel, and wood to use. First, you should dig out a road (as wide and long as you want it) then fill the holes in with gravel, then build as many cabins as you want in each cabin put a table, a chair, and a chest, then light it up and put a wooden door on each one. Then build a restaurant, this should have some chairs and tables, and in the kitchen put a chest full of food and coal, then put furnaces in the kitchen, if you want to make it really nice add outdoor seating, and if you're on multiplayer charge people to eat there. Then add a store (only build this if you're on multiplayer). It should have lots of sorted chests. It's recommended you hire a guard to guard the valuables. Now add your house, this should have a bed, a crafting table, and a chest, and anything else you want. Now add a fountain in the center of the city. Finally add a bunch of mini houses containing chests, and a crafting table.
Museum
This can be about various things. Minecraft, you, your worlds, or a favorite mob can be among ideas.
If you want it to look grand on the outside, place large pillars around it. Also, a grand staircase to a large front entrance helps.
If you build this in multiplayer, hire guards/security to guard your beautiful creation.
Secret base
If you are in multiplayer, you don't want anyone getting into an underground base, right? Well, dig down at least three blocks and make a room. Then get out and put a piece of dirt over the entrance and place a sapling. Put bonemeal on it. Then dig the piece of dirt out and make a hill one block away from the tree. Dig one block into the hill and place sticky pistons so that when they come out they stick to the tree trunks and pull it back or forth, thus opening the entrance and closing it. After that, you need to expand the base so it's actually useful!
Zoo
Ever wanted an area to see all the mobs in their epic glory? Build this! It's best if you use bricks, stone bricks, or stone. You'll also need fences or glass, and signs. First, build various pens for mobs. Place glass on all sides, or just one. Alternatively, you could make a deep pit and put mobs in it. Put a fence around the outside. When you're done with pens, place paths guiding players around. If you want it to look nice, place large fountains, flowers and hidden note blocks around. If you want it realistic, build restaurants, statues, and gift shops around. If you have hostile mobs in your zoo, you can use a name tag to rename them so that they do not despawn
Natural vacation beach
This is simple. Find a lake or beach, dig out a large area, fill it with sand, and your own touches, and tada! You're done. Here is one way to make beach chairs:[1]
Note: The terracotta can be replaced with wool.
Man-made vacation beach
This is a little harder than the natural version. Dig out a large area. Make it at least 60×60 blocks big, slowly getting deeper. Fill the outer shore with sand, add your touches and tada! You're done! you can also blow up a large area to do it faster and make it look more natural.
Sand castle
Build a big castle of sand and sandstone with many rooms, chambers and whatever else you may desire. Add a moat, sniping towers, or other defenses to make it a nice sand strong hold.
Camouflage
This really serves no purpose in singleplayer. Simply place tall grass, vines, leaves, trees, and water on and around your base(s). It can give it a kind of cool look, depending on how well you do.
A water "fall"
If you have a tall base and you want to get down faster, place water on the ground to land on from a fall, so you can jump down safely. Or, if you have version 1.8, you can use a trampoline made of Slime Blocks to bounce between floors of your base.
Add underground floors to your shelter
Using this gives you a chance to find resources, and in the case of invasion by mobs, it will always provide a safer spot. Underground floors are also useful for making mob grinders or animal farms. If you're really good, add a whole back up shelter under ground. If you like to be safe, add multiple bunkers, but hide a super safe and secret bunker. You could also make a part of the floor out of glass in the same spot on each floor, so you can see all the way down, and it looks nice if you do it right.
Add above-ground floors to your shelter
It is normally advised that you do this after building underground floors, especially if you have a ton of resources (after mining the basement out). These floors could even give you a chance to "snipe" some creepers and spiders in the morning.
Balcony
Place your balcony so that it has a nice view! Add a chest with bows and arrows for quick mob sniping. Useful for a variety of things, from providing a point for easy kills to enjoying views.
Landing and takeoff platforms
If playing with flying enabled (for example, in Creative Mode) you can create platforms at the same height on multiple buildings for easy flight between the upper levels of different locations. This works great in tree-forts, cities, and anywhere that multiple balconies are otherwise unconnected. Since 1.11.2, firework rockets have allowed the player to have a propelled flight with elytra, so these platforms should have water to slow the impact due to how fast players can fly, if these are meant for elytra.
Remake it out of a different material
Install luxurious violet carpeting for the bedroom. Give your craft room a nice glass roof. Rebuild the armory out of obsidian. Redo your outer walls in smooth stone. Add a second story to your library.
Make another base in a new location
Having more than one base helps if you need to travel farther to get resources. A base next to your spawn point is helpful if you built your main base far away and you died at night. A base in a desert can provide sand, and a base in a tundra can provide snow. A base hovering in the sky can provide entertainment, especially if mobs spawn on the edge of it. A great idea is to connect them with nether portals that have a secure hallway in the nether.
An emergency kit
In case you need to quickly gear up and run back to get dropped gear or items. Perhaps a sword, cake or a stack of porkchops, and stack of torches. A more advanced kit can be made from dispensers that give you items at the click of a button or a step on a pressure plate, although arrows and torches still have to be accessed from a chest or two (if you want the whole stack) unless the dropper is used.
Add an escape tunnel
You never know, a creeper might one day get you. Build a tunnel to escape it. It could also be used to lead to a secondary base. Another idea is to have the tunnel lead to a central room with several other tunnels branching off of it, with tunnels leading to the surface, caves, perhaps even a secret hideout. If playing on a multiplayer server, maybe even add a few dead-end tunnels to confuse anyone who may be following you through the tunnels.
Lava lamp
Simply make a hollow space out of glass and fill it with lava. An efficient method is to run a vertical column through many floors powered by a single lava block at the top. You can also make one of these high above your base to mark it from afar. If your house is made out of flammable blocks, this isn't recommended.
Quarry
A Quarry yields large amounts of materials such as cobblestone and dirt to make your buildings, and coal and iron to make tools and torches. It can require several days of game-play to finish building. Some rarer materials like gold can be found as well. See the Quarry page for instructions.
Mining shaft sunroof
Making a sunroof that points directly down your mining shaft has its advantages: you can tell the time of day more easily, and burn mobs like zombies and skeletons. The sunroof can also provide enough light to discourage other mobs from spawning in your mine.
Lava beacon
Make a large pillar of stone or any non-flammable material and pour a lava bucket on it. It helps when you are a long way from home. Make sure not to build it too close to your base if it's made out of a flammable material.
Glass/lava floors
No mobs can spawn on glass floors, making for a handy alternative to a well-lit shelter. Light is still important, though - you could even have a 1 block high space below all glass blocks on the floor and pour lava there. This keeps your shelter visible and provide a fancy, creepy feel.
Doorbell
Players (and mobs) entering your house without your knowledge is a pain, that's why you need a doorbell. When a mob or player steps on the pressure plate the note block will play a sound, and you can make this more sophisticated making chimes or even a whole song that play upon entering. If you have multiple entrances to your base, place different blocks under each note block to make sure that if a creeper comes to your west entrance, you don't get blown up when you try to run away through that door.
Blinker beacon
A more technical variation on the Lighthouse - the light blinks on and off like a real lighthouse. You may also use a minecart rail system, which can be made so you put down rails in a square(4 rails on every side), then put down a booster and detector rail, power the booster, and connect the detector rail to the torches you want to blink with redstone. Place a minecart on the booster and it will loop forever. This can be used to blink multiple torches with the same system, and does not require maintenance. You can connect more detector rails for faster blinking speed.
Dock/harbor
If you find yourself using boats in a general area often, making a dock or two is a good idea. They can help prevent your boats from drifting off into the ocean, or slamming into a wall when you exit, thus breaking the boat. Dispensers can also be placed here and filled with boats for convenience. Chests filled with boats are a good idea too. There are several ways to make useful docks.
- Placing half-blocks in the water. When a boat moves on top, it will slow down and stop immediately. Half blocks are shorter, so your boat will not collide with it and break.
Warning: it is recommended to only use this method on Peaceful difficulty and to land on the half blocks at a lower speed, since instant death is possible when landing on half blocks at a higher speed.
- A closed dock. One type of dock is by making a small area (2×3 or larger) that is filled with water. You can place doors in the water, allowing you to ensure your boat will not drift off. Soul sand is a suggested building material, as it will prevent all of the impact damage from colliding with a wall made out of it.
- Water currents. By using a bucket to remove the top layer in 2+ deep water, you create a + shaped water current flowing toward the center. You can use this to hold boats, while still being able to escape somewhat easily. This design does not always prevent the boats from moving if you or a mob bumps into it, but will help prevent it from drifting away.
Fridge
Create a fridge by placing a dispenser on the ground, a block on it and a button on the side of the block to quickly get something to eat when you're starved. Add a door in front of the dispenser if you feel it would look better, or if you just like the idea.
Miniature zen garden
Either above the surface or underground, create decorative minimalistic works of art using water currents, plants/crops/flowers, sand, clever use of fence posts, signs, torches, etc.
Fountain
You need 22 stone and a bucket of water. Make a 5×5 square with the nine in the middle taken out so the water won't spill, then make a 4 block high pillar in the middle and place the water on top of the highest block. Taking out the stone pillar in the middle of the fountain can look nice, and placing half-blocks around the stone blocks can look fairly cool. You can also make the fountain a source of light by replacing the stone pillar with glowstone. After making a fountain like this, you could experiment with making fountains in other ways.
Piston doors
These look cool. Have these anywhere in your house: library, craft room, furnace room, you name it. All you need is redstone, sticky pistons, and levers. Be sure to keep them hidden if the rooms are secret - a good way to do so is hide the device you use to power the pistons.
Tunnel to a stronghold
After you find a stronghold, make a tunnel to it. This is an easy way to get to and from the End. Keep it well lit and defended so that if a creeper runs into you in the stronghold, it can't follow you back to your base and blow it up.
Add a carpet
You can spice up your base by adding a carpet made out of colored wool. Make sure that fire and lava aren't within two blocks from the carpet, otherwise your carpet will go up in flames! Bright colors, like red, blue and purple are recommended, because black and gray carpets don't have the same feel. Try mixing colors together in cool patterns if you're looking to give a room a bit of flair. With the new carpets added in snapshot 13w16a, you can carpet the upper floors of your base without having your lower floors' ceiling made of wool.
Roller coaster
If you have enough resources, build a roller coaster out of rails. Add twists, turns, steep climbs and falls. Use booster rails to keep it running fast. This is a decent way to keep occupied while you have nothing else to do in the vast world of Minecraft. Useful in multiplayer - you can charge other players to ride. This could also be used as a monorail type of system. If you have a large base, this helps you get around it faster.
Sky base
Create a base floating in the sky with no bridges or stairs connecting it to land. Of course, it doesn't have to be this way to build it! The no-connections idea can be accomplished with waterfalls, piston elevators, and nether portals. Add other sky islands nearby with bridges to connect them, and it'll be like you never left the ground! If you truly don't want any connections to land, even with the waterfalls and nether portals and elevators, gather up all the resources you'll need and seal yourself away in the sky. (But make sure you have a bed up there in case you die.) For extra entertainment, make a smaller island and plunge it into darkness, and watch mobs walk right off. To make it even more entertaining, place some arrow dispensers hooked up to pressure plates on the island, and even make signs all along the edge.
Battle arena
The first thing you must do is find a spawner. Then seal off any extra entrances and place a door at the last remaining one. Maybe make the dungeon a little bigger, to provide for more fun and monster spawns. Finally, make a lobby with chests full of equipment (swords, bows and arrows), various helpful potions, and food. Now you can fight that specific mob whether for experience or drops for as long as you want! Include beds if it is a long way away from your base, so that if you die you won't have to walk for ages just to find it again, or simply make a minecart track to take you there quickly. If in multiplayer, add a lock on the lobby and another lobby where other players can pay you to fight that mob and rent equipment and various supplies. This is handy to build in abandoned mineshafts, wherever you find a cave spider spawner, but if you do that make sure you have plenty of milk buckets on hand. If you want to give your arena a bit of a twist you could add challenges, like a room where the mobs spawn over your head or one where you have to solve a puzzle while fighting the monsters.
Railway
Make a long tunnel to fit from one to any amount of minecarts, then use minecarts with furnaces to propel the 'train'. You can also use powered rails, but for that you'll have to find gold and redstone. Be sure to add emergency chests to the side of the track and fill them with coal to power your minecart so you don't get stranded. Adding food and weapons in these chests is a good idea, in case you get stranded and have to fight some zombies to make it to your shelter. This is fun for multiplayer and single-player and you can go across the land quickly. Don't make your railway above ground; you will constantly be attacked by creepers. However, covering the railway with blocks (such as you would make a house) can solve this problem. Alternatively, you could build a 3 block wide track that is elevated off the ground 2-45 blocks. This option provides great views but is not suitable for multiplayer. Make stations for your favorite landmarks (big mountains, your house, etc.).
Minehouse
Make one of these if you have a long and deep mine and have to constantly run up and down long tunnels to drop off your bounty and sleep for the night. You need to make a small cottage in the middle of your mine, but digging out a room(s) in the side of a wall works fine as well. Adding a door, windows and plenty of light reduces the chance of being ambushed when you wake up in the morning. It must have a chest with food, picks, and shovels, as well as rare items that you don't want to lose while mining. Having multiple chests in a back room to store your excess dirt, gravel, cobblestone and ores is handy if your main chest is getting crowded and you'll be down in your mine for a while yet. A crafting table, multiple furnaces for quickly smelting items, and a bed are always good to have inside. You can also include an Enchantment Table for quick enchanting of tools and armor, especially if your favorite Efficiency IV/Silk Touch I diamond pick got burnt in the pit of lava that also stole some redstone.
Pool
Make a pit of any shape or depth, but something that's 2 blocks deep is recommended, so that you don't sink to the bottom and drown. You could also place half slabs on the bottom of a two block deep pool so that you get the feeling that you're fully immersed in the water but without fear of drowning. Fill it with water. And now you've got your own pool. And if you're extra careful, you can make it with lava instead. Also it lights up that area of your base and looks good. You can add glowstone underwater as 'lights', or lava with glass over it to make it into a hot tub.
Park square
Make fences around a 20×50×15 area, put a garden, and a wool statue with a stone base. You can use bone meal on the grass that makes up your square to make tall grass and flowers appear. Adding pathways of blocks like stone brick shows players where they can go and adds a nice touch.
Work tents
If you feel that you're running out of inventory space frequently during above ground projects, build a work tent. Make a 6x6 fence box, add a door and wooden roof, and place lots of chests. Add a least 1 furnace and a workbench. Dig a little ditch in case a skeleton or spider appears. This can double as a safe-house/tent.
Mining rig
Create a platform on top of a relatively flat surface or mountain. Dig out a trench in the middle of it and place redstone on either side. Connect the redstone to a single button and fill the trench with TNT. All you need to do is to press the button and you will begin a pit that leads to the bottom of the world. An automatic reloader can be added via sand and pistons. (This can be easily re-purposed into a cannon.)
Toilet
You never know when nature will call. You can make a small toilet out of water and sticky pistons or trapdoors. It can be used as a garbage disposal or just for laughs.
Mob aquarium
A glass box with a mob spawning room above it with a connecting hole so mobs spawn and fall in.
Testing room
Saw this great creation online but never knew how to build it? Following a guide how to build things without risks? Want to warm up on traps and other things with no damage to your shelter? A testing room has various things you have never hoped to build before. Cover it with obsidian to reduce damage to shelter, or make a new world to test new things.
Canal
This is a good way to get around if you live in the middle of a huge island. The best kind is a 2×3 extending where ever you need to go.
Landing site (literal)
If you have procured yourself some Mods you can actually make a real landing site. Once you've got a plane or two you will want to store them somewhere away from the creepers or other players. So behind your base, get black wool flooring for at least a 30×30 area and put Nether brick fences or just normal fences all around it. Then, build a dome out of glass blocks big enough to get a plane into it. Repeat the third step for the rest of your planes.
Water elevator
If you live in any building that is more than one story, you might want a method to get up and down easily without stairs or a ladder. One way to do this is to make a waterfall that falls through the center of the structure. Make sure to have one block of space on any side of it so that your character can be outside of the water enough to breathe while climbing it. Simply hold down the jump button (the space bar) while inside the waterfall to ascend. This method can also be used to create an elevator to flying islands or houses.
Warehouse
This is for huge things, such as giant iron golems or airplanes. Build a huge area with at least 40×40×20 with cobblestone or other high blast resistance/hitbox item, and then build your thing. You could also fill it with thousands of chests with your stuff!
Underground homes
This is an efficient way to have a surplus of players, so you can have a large number of places to live! Furthermore, you lose virtually no items at all!
Highway
An extremely fast way to get from one place to another. A minecart could be used on a powered rail to speed up the process. It can also look good with a Station.
Core control Room
It's good if you like redstone use this to control all redstone circuits or only for decoration. You can place a beacon in the middle with glass to make it fancier.
Exterior constructions
These are mostly used for aesthetic purposes, but there are exceptions such as automatic farms located outside.
Lava pit
This is just a hole in the ground that can be 1×1 or 4×4. Fill it with lava, and then you can throw items you don't need or items taking up space into the hole to watch them BURN! This isn't always outside your base but it isn't recommended if you have a floor or wall near if the base is made out of wood, wood planks or wool due to the risk of it catching on fire and your base burning down.
Snow farm
This is basically a caged snow golem arranged so that you can dig at the snow trail beneath it. (See the snow golem page for plans and tips.) Unfortunately, this doesn't work in all biomes: In a Desert, or the Nether, snow golems will die quickly, and in several other biomes (Swamp, Mushroom Island) they will not form a snow trail. Remember to protect your golem from rain and stray mobs -- especially, block off their firing capability so they don't provoke passing creepers and skeletons! (You can also use snow golems for defense towers, but that's different from farming snow.)
Zen Garden (can be seen indoors sometimes)
A Zen Garden is for aesthetic purposes only. A Zen Garden is made by choosing the place where you want it to be. Then make the walls surrounding the garden with any material you like. I like to use leaves or maybe cobblestone wall. Then fill the walled up space with any kinds of trees, flowers maybe melons, pumpkins, sugar cane, mushrooms and maybe even a small fountain. Do whatever but try to make it as natural as possible. I don't recommend to build this in multiplayer because griefers can find your house more easily but there is the exception of Faction servers in which you can claim land or servers in which you can buy a block that protects a radius.
Stable
These are where you keep your horses for easy riding, and normally are about 10 blocks wide. Fences and leads can be used for keeping your horses in the stable.
Multiplayer-only ideas
These ideas are quite pointless if you play by yourself, but are fun additions to a multiplayer server.
Cornucopia
The cornucopia is probably one of the most simple "structures" on this list. It basically consists of a storage area where anyone can give away and take any item for free, and can range from a single chest or barrel located off a main road to an elaborate structure of stacked double chests in a central square. Rules are optional but recommended; basic rules include prohibiting taking everything from the cornucopia, requiring each player to give an item of similar or greater quantity, value, or purpose to what they have taken (such as exchanging cooked cod for cooked rabbit, or potions for miscellaneous potion ingredients), only giving and taking what a player actually needs, or limiting what is allowed in the cornucopia (such as prohibiting tools of iron and better, or limiting food to a stack of 16).
Party room
This is a large room (or multiple small rooms). You can have a table and chairs or a bar and you can charge people to have a party there. Include jukeboxes with music discs and perhaps colored carpet.
Mailbox
Simply put a chest/barrel on top of a fence post, then other players can give you gifts. Be wary of thieves! Alternatively, you can leave messages as books.
Bank
Make a bank to store items. Players could pay gold or diamond to store their valuable items in a 'vault'. If you're really ambitious, the Vault could be lined with lava or obsidian (or bedrock if you're an Admin) to make it super secure.
Tollhouse
For bridges/roads that lead to your property, or for entrances and exits to spawns and player hubs. Only works effectively with some sort of fence or wall around the area.
Inn or guesthouse
Build a large and well-defended structure with private rooms each containing a bed and chest (possibly a furnace and crafting table too). For additional style points, decorate the rooms nicely. Use a locking mod, and charge people to stay at the inn; when they rent a room, add them to the list of people who can unlock the door and chest. You may want to hire people to man the front desk, keep records and collect bills. This is especially useful if you build it near a dungeon, as players will want to have a well-protected "base camp" when setting off to explore.
Army
Make an army from other players. People can pay the army in valuables to protect their homes. Charge based on location and how long.
National park
Corner off a huge area of land with big mountains and amazing caves on a multiplayer server. Put in information signs for landmarks and charge people to visit. Make some camp-sites to house players while exploring, and put chests with food or weapons in the camp-sites. Be sure that players give back any items they use.
Multiplayer railway
Charge other players to ride on it, a perfect way to get coal or emeralds. Make a deluxe version for long journeys. Make windows in the tunnel. Another idea is to make a subway. See Tutorials/Train station for more information.
Spleef arena
Great way to have some fun with your friends on multiplayer. You should make a snow golem room to be able to collect snow balls easy to craft into snow blocks. You can bet on games, build a score board and have stands for people to watch. You can also make it so the loser faces a little more punishment and humiliation by making the bottom out of lava so if someone falls they will burn to death. This makes it a little more fun and pleasurable to watch your opponent burn. You could also make a long drop that kills the loser, and the winner can take all the dropped items after the game.
PvP combat arena
Create a huge room and fill it with obstacles and platforms. Make a roof with beds on it, that players will respawn in, and chests to take equipment from. Make holes in the roof to allow players to enter the arena at different places. Use ladders or water holes to prevent falling damage. You can give the arena a theme, like a forest, and decide what equipment should be available when players respawn.
Courtroom
Useful on any server with a problem with griefers, stealing, or PvP (player vs player). If an admin is online (or with use of a command block), it is advised to turn everyone present to adventure mode and separate them, to prevent PvP and/or griefing of the courtroom. A courtroom usually involves a chair or place for the judge, the jury, the defendant, and other players wishing to speak. It is much easier to maintain a trial with everyone there in the Courtroom rather than just over chat, as there will be no distractions and the defendant and others can be kept under control. Depending on the government system chosen, the jury can vote on the punishment, or the final say can be up to the judge. Due to number restraints, it will often be hard to have a completely unbiased jury, but try to have at least one person who wasn't involved or biased. If the defendant is deemed guilty, a punishment will be decided, which can range from having to give back what they stole or repair the damage griefed, to a restraining order, a banishment from the town, or even being banned from the server. Optionally, you can have a Records Room to keep track of the trail using a book and quill (just be wary of offenders trying to clear their name by destroying the book or editing it), but can also be tracked with .txt files outside the game (which might be a better idea if things are really getting out of hand).
Jail
The jail is where rule-breakers or criminals go if the punishment agreed on is not an execution/banishment/ban. Build a secure room with traps outside cells to prevent criminals from escaping, via bugs and digging, like lava flowing from the top of the jail. It is difficult to make a secure jail without using Bedrock or obsidian. An alternative is to have the walls of the room constantly being moved by pistons, so the player has no time to break through them. However, this will create a lot of lag. You can make a regenerating wall using water and lava as well. Be warned, however, that if the spawn is outside the jail, the criminal can use the /kill command to escape or blow themselves up with TNT. Also, remember to never send an admin to jail without reverting their admin status first or they can just switch themselves to creative mode and mine the thing you made the jail out of.
Restaurant
The restaurant can be a place where people pay in goods or money for you to give them food. You could plop a few chairs down too and make a kitchen full of furnaces and chests full of food. Farms for food and resources can be made behind, around, or even within the restaurant's kitchen area.
Shop
Simply put a pit with a pressure plate with redstone leading up to a dispenser above the pit where a shopper is standing and when they toss the item you're charging them, the item they want will fall down to them. This method is useful on a multiplayer server but can be made on a single player server to make it look nice.
- Armor shop: sells armor for protection.
- Tool shop: sells tools for breaking things faster.
- Potion shop: sells potions for health.
- Food shop: sells food for hunger. Note: Rotten flesh, poisonous potatoes, raw chicken, pufferfish and spider eyes have food poisoning, so do not sell those in a food shop.
- Weapon shop: sells weapons for killing animals or monsters.
Trade routes and hubs
Use cobblestone or path blocks to connect trading hubs that you and your fellow players can use. For extra fun you can designate each other jobs and wares, such as merchants, armor makers, and butchers.
Underground tunnel system
Dig a large series of tunnels underground (preferably clean, square-shaped, and free of obstructions or danger) and light it up to prevent mob spawns. The tunnel system can be built around a main tunnel or hub. Link the tunnel system with mines, caves, shelters, and landmarks that are frequented or owned by you or other players, providing an alternative to above-ground travel and quicker, easier access to mines and certain points of interest. Optional additions include beautification (such as different wall/floor materials or designs), minecart rails, boat canals, horse accessibility, displays (such as aquariums and dioramas), cave access points, designated mineshafts, simple shelters or work stations, and mob farms. This can technically also be built in singleplayer, in case you have multiple mines or places of interest across a wide area, but it serves more of a purpose in multiplayer.
Central tower
Build a large, tall tower in a central area where most players are located. Players can live on each floor or store items there, but its primary purpose should be to mark the location of the central area. Higher floors may have glass windows or balconies to provide lookouts on each side; access to these top floors should be simple and easy. The top floor should contain an actual signaling method to help players locate it at a distance, such as a beacon, signal campfire, lightning rod, blinking redstone lamp, torches, or simply a tall spire made of blocks or fence poles.
Basic housing
Build a series of basic houses with the bare essentials (crafting table, furnace, chests, bed). They should preferably be in the same vicinity, either across from each other or connected, and should be rather simple in design and material, with windows and even doors being optional in some cases. Their purpose should be to provide basic temporary housing for new players so they don't have to mooch off others as they start off, with the intent being for each player to eventually move out as they advance and build their own base; however, they may also be used as permanent housing, should a player become accustomed to it. The residents can optionally be taxed by the builder or server owner, who may require payment in (ideally cheap or common) materials or goods in exchange for protection or even the housing itself, with eviction or even the house's razing possible if payment is not given; however, this can be oppressive and unfeasible for new players and is thus not recommended.
Furniture
If you are bored, or want miscellaneous decorations in any place, add furniture! Tutorials for building furniture can be found at "Tutorials/Furniture".
Tips
- Build a fence around your house to keep unwanted mobs out. This includes houses on islands, as drowned can still attack from the water.
- Dig your own mine under your house, accessible through a stairway or a ladder. This provides a safer, more controlled alternative to finding things through a dark cave where mobs can spawn, though it requires more work and resources since the entire mine must be dug by the player.
- Use different chests for different things to avoid confusion and provide a sense of greater space. For example, one chest can be for stone, another chest can be for deepslate, andesite, granite, and diorite, another chest can be for spare tools and armor, so on, so forth.
- Use barrels instead of chests when possible. Barrels do not require a free space above, take up less space, and look rather unique, but they cannot be doubled for greater space like chests can.
Gallery

The lava bridge passageway described in the "Defense" section.
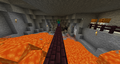
An unfortunate zombie going to its own doom.
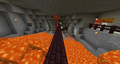
A zombie being pushed by a snowball on the lava bridge.

A zombie burning in lava.
A shelter built using ice blocks.
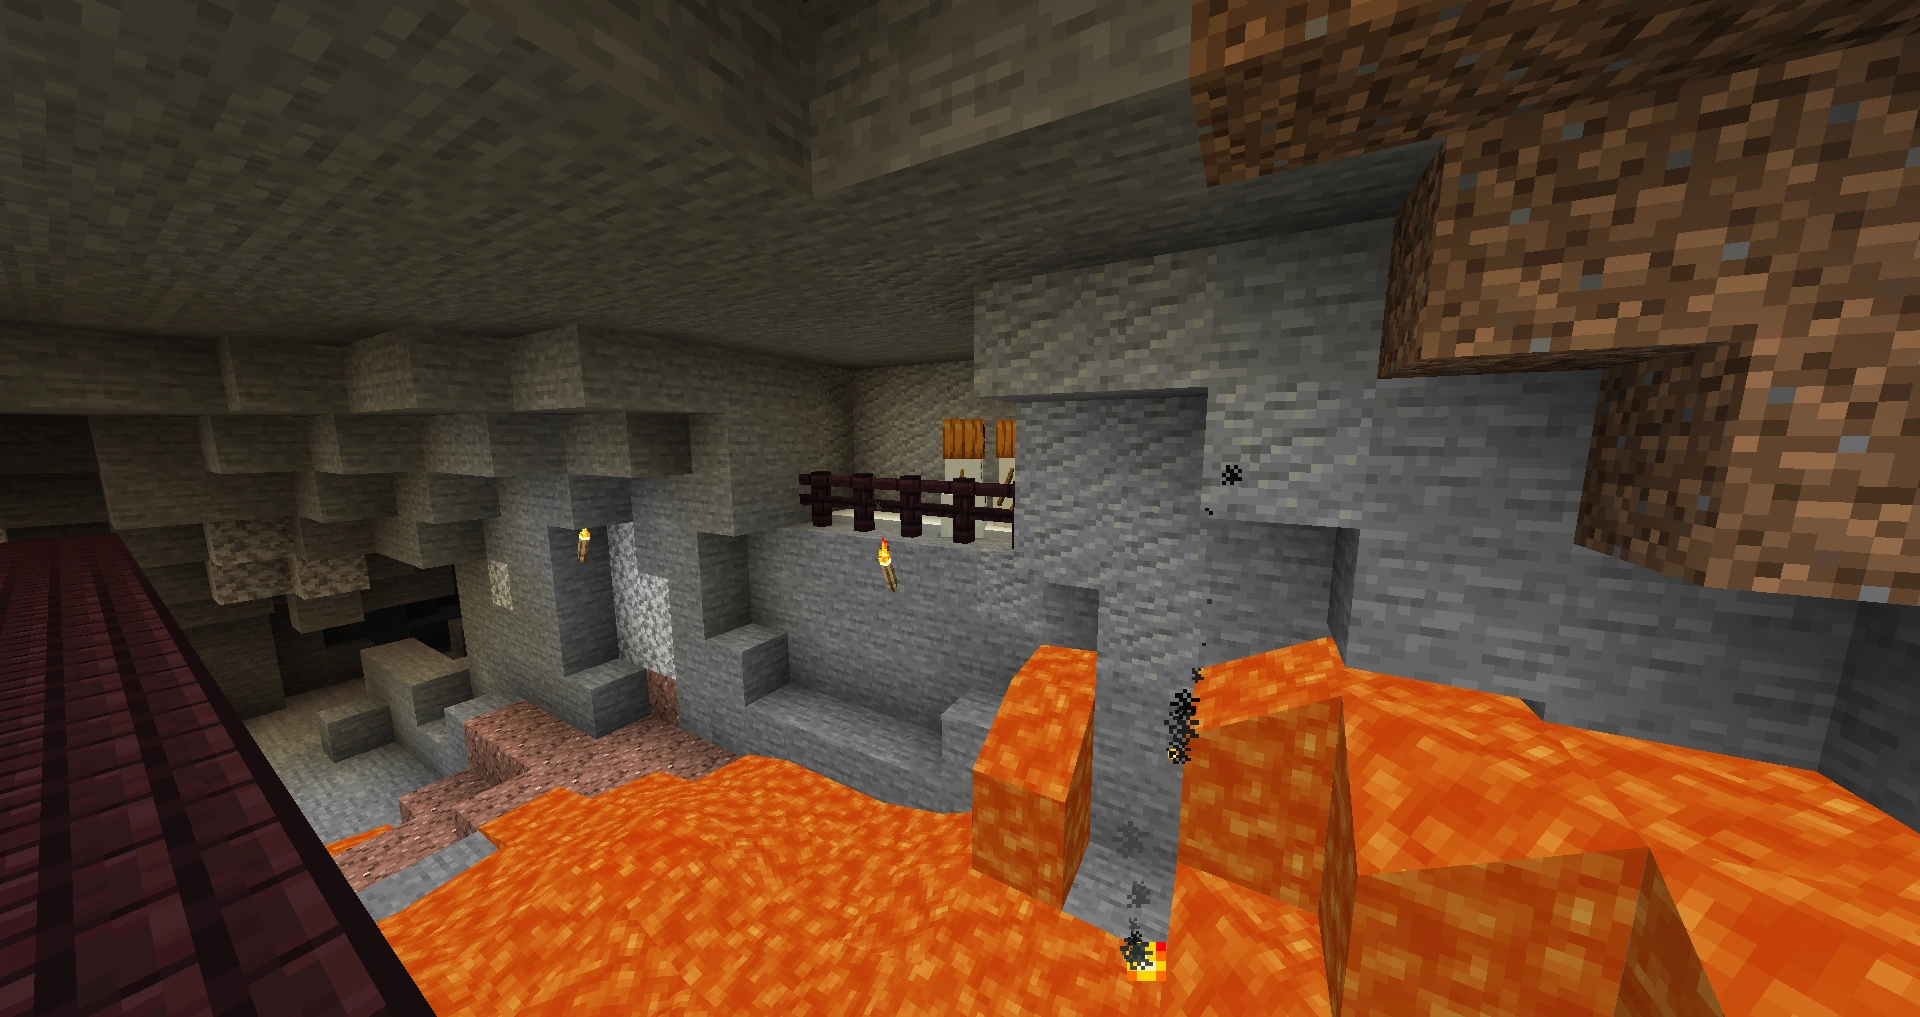

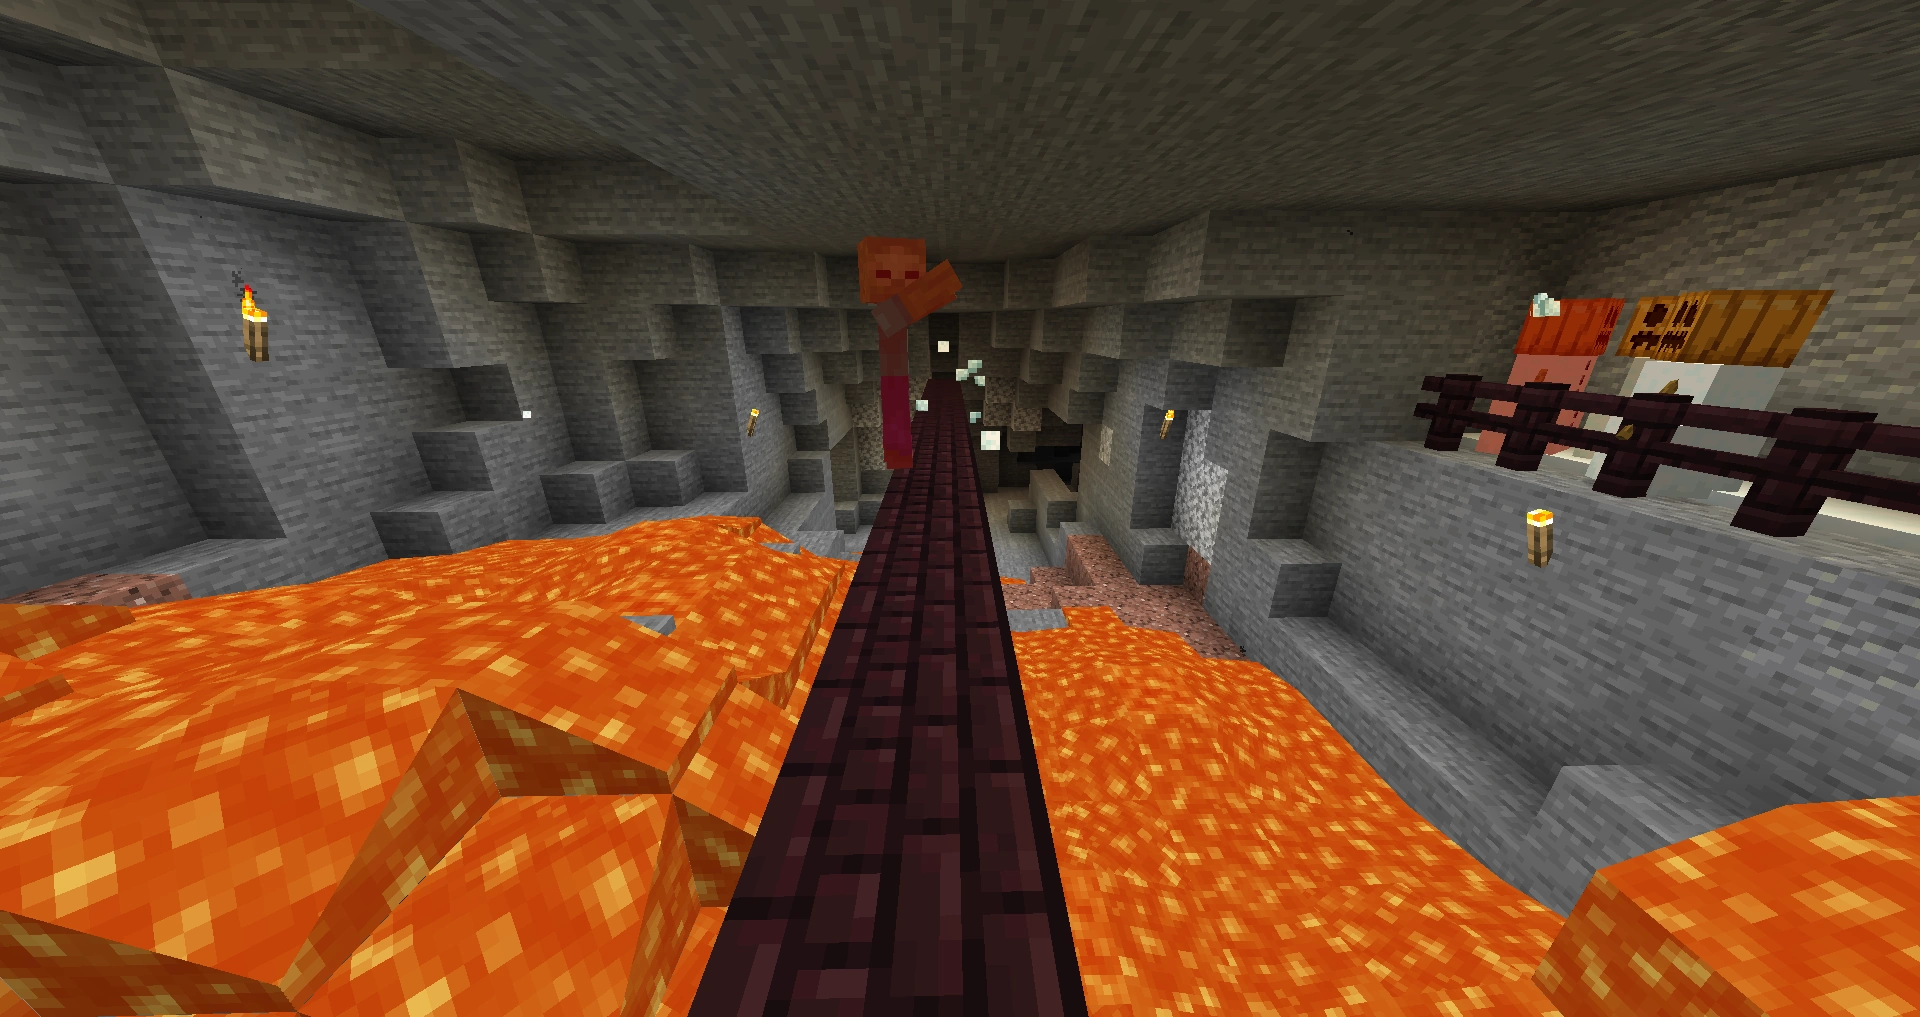
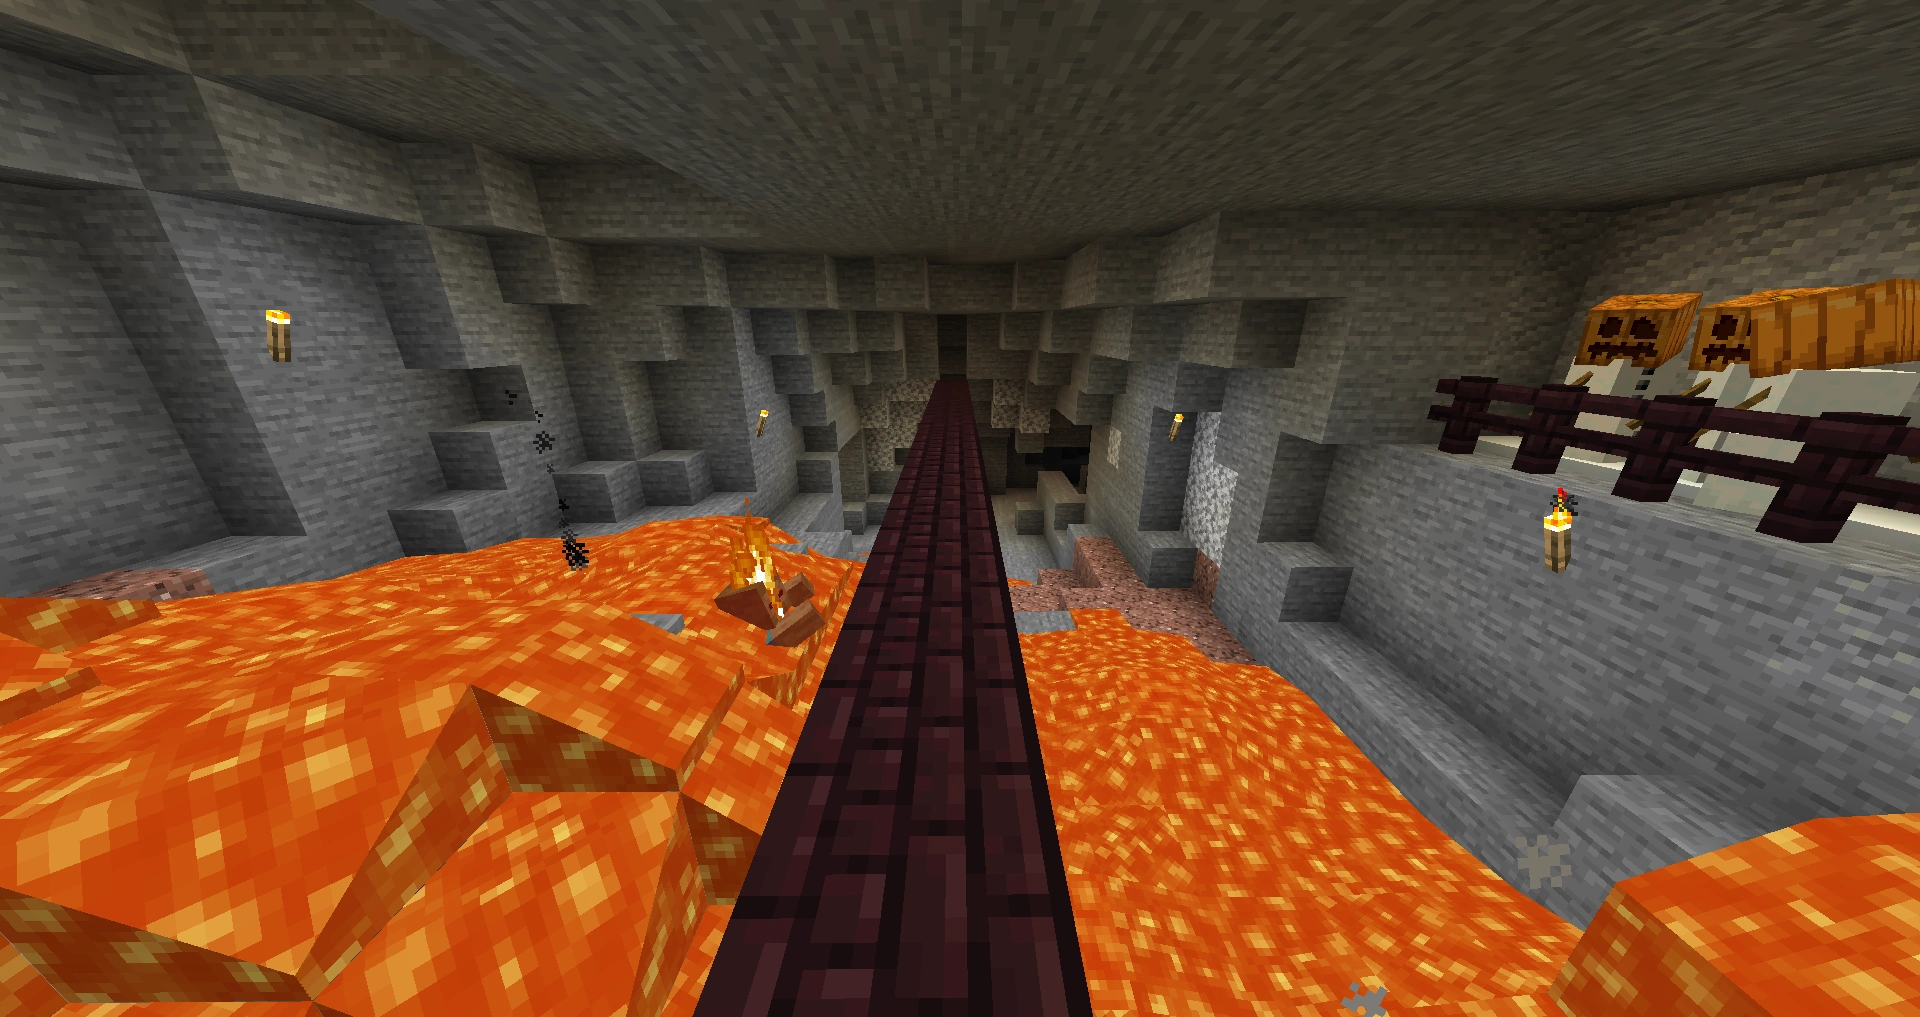
References
- ↑ A video explaining the design of a beach chair can be found at https://youtu.be/TePLJQ5gVXA