(a word) Tag: Visual edit |
(→Spread Mechanics: converting to percentages and using math symbols for easier text comprehension) |
||
| Line 11: | Line 11: | ||
== Spread Mechanics == |
== Spread Mechanics == |
||
| − | Every tick, every mushroom is given a 1 |
+ | Every tick, every mushroom is given a 1% chance to do the following: |
| − | :Choose a random block in the |
+ | :Choose a random block in the 3×3×3 cube centered on the mushroom (the mushroom itself, not the block it's on). This favours the mushroom's own level, the middle 3×3 square: upper and lower levels are given a 25% chance each whereas the mushroom's level is given 50%. If a mushroom could be planted '''in''' the chosen block ([[Air|empty]], [[light]] ≤ 12, lower block is [[Opacity|opaque]]), do: |
| − | ::Choose another random block in the |
+ | ::Choose another random block in the 3×3 square centered on the previously chosen block. If this block could support a mushroom as well, create one there. |
Note that the first randomly chosen block can be the mushroom itself, the block it's sitting on, or the block above. The "can be planted" check will fail in all three cases, further reducing the overall spread chance. |
Note that the first randomly chosen block can be the mushroom itself, the block it's sitting on, or the block above. The "can be planted" check will fail in all three cases, further reducing the overall spread chance. |
||
Revision as of 16:35, 25 August 2015
Farming small mushrooms
Because mushrooms will not grow into squares where the light level is greater than 12 , the farmer must consider carefully with the placement of light sources. Mushrooms are placeable everywhere but well lit areas or non solid / transparent blocks, and do not require water, sand, or extra space like crops, cacti or saplings. However, even at night, they can only be planted on blocks where the daytime illumination would be less than 12. The exceptions to this are Mycelium and Podzol, on which they can be planted and remain in full sunlight. They can then spread slowly to other opaque blocks, including types where they could not be planted. Mushrooms will only spread if there are fewer than 5 mushrooms in an area of 9x9x3(L, W, H) around the original mushroom.
The main danger in basic mushroom farming is that they must be low-lit indoor rooms, often allowing monsters to spawn in the same area (except in peaceful mode). This can be countered in several ways. An easy way is placing torches two blocks above from where you want your mushrooms to grow (sometimes in tiny holes cut into the ceiling overhead). Another way involves making the farming area just one block high and paving any walkways with slabs. This removes some danger, since mobs cannot spawn on half-blocks. You can also use a water system to channel mushrooms out of the room and into a collection point. The Nether is a safe place to start a mushroom farm, since mobs there will not spawn in small spaces.
Changes in recent versions have made farming ordinary mushrooms more difficult; another option is to prepare a large underground room and use bonemeal to grow Huge Mushrooms which can then be mined for multiple mushrooms.
Spread Mechanics
Every tick, every mushroom is given a 1% chance to do the following:
- Choose a random block in the 3×3×3 cube centered on the mushroom (the mushroom itself, not the block it's on). This favours the mushroom's own level, the middle 3×3 square: upper and lower levels are given a 25% chance each whereas the mushroom's level is given 50%. If a mushroom could be planted in the chosen block (empty, light ≤ 12, lower block is opaque), do:
- Choose another random block in the 3×3 square centered on the previously chosen block. If this block could support a mushroom as well, create one there.
Note that the first randomly chosen block can be the mushroom itself, the block it's sitting on, or the block above. The "can be planted" check will fail in all three cases, further reducing the overall spread chance.
The following can be deduced from the algorithm:
- Mushrooms may spread to two blocks away, though only if a block on the way is free.
- Mushrooms may spread diagonally along all three axes.
Basic Mushroom Farming
This method relies on thorough lighting to ensure a monster-free, no-mining-required farm for the beginner mushroom farmer. Create a room two blocks high and as large horizontally as desired. At regular intervals dig one block up into the ceiling of your room, and place a torch to create recessed lighting. This will cast light of level 12 at floor height, allowing mushrooms to grow and spread. You can have as few as one torch every six squares with no danger of mobs spawning. This setup will allow for the fastest mushroom growth. Spread the mushrooms on the floor with room around them to grow and wait.
Huge Mushrooms
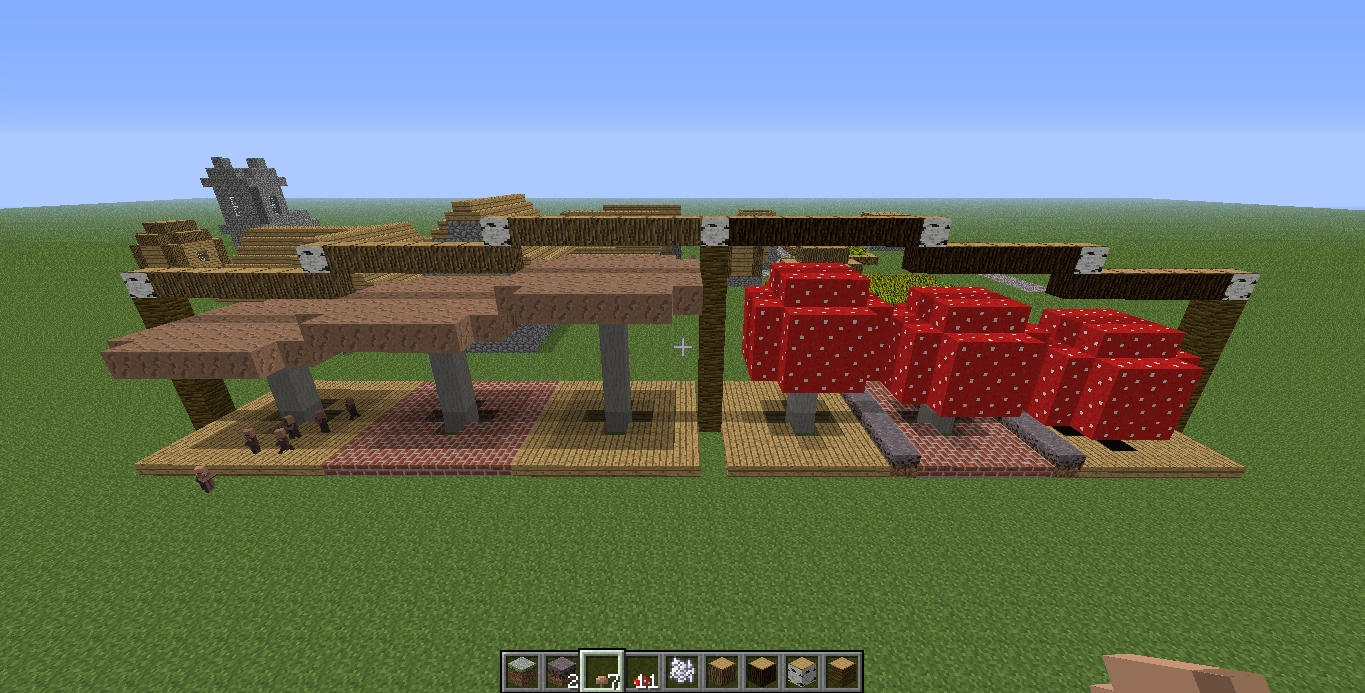
Huge mushroom minimum growth requirements
Using bone meal on either a red or brown mushroom will cause a Huge Mushroom to grow if enough room is available, and if the mushroom is planted on the appropriate block. Huge mushrooms can give upwards of 20 mushrooms when harvested. The image to the right illustrates the minimum growth requirements:
- The wood above illustrates the minimum height required to grow a huge mushroom of that size. Huge mushrooms can be 5, 6, or 7 blocks tall, with the maximum height being 1 block shorter than the available space above it. Thus, if there is a block 7 meters above, the huge mushroom will always grow to be 5 blocks tall.
- The slabs below illustrate the area required, 7×7, as well as the fact that the blocks immediately adjacent to the stalk must be free, but not the rest of the bottom row.
- The mycelium on the right shows the area where the required space overlaps due to the smaller footprint of the huge red mushroom.
- The mushroom must be planted on a dirt, grass, podzol, or mycelium block (not shown).
- Placing blocks where the inside of a red mushroom would be does not hinder the growth of the mushroom substantially, only if the blocks are directly in the way or lie outside of the mushroom will it not grow. By placing dirt blocks around where the stem of the mushroom is supposed to be, you can block the light allowing you to place the mushroom even closer to the surface - then fill up your tunnel and remove the dirt inside of the mushroom once it's grown.
Also if you make a 1x1x1 hole in the ground and fill it with water you will then be able to place a mushroom and use bone meal on it. Even in daylight!
Bear in mind that the huge mushroom may still attempt to grow at a taller height than space is available, failing and wasting a bone meal. It is therefore usually ideal to farm with the maximum space available (7×7×8), so that the bone meal will never fail.
Methods of Farming
- Some of these methods could be outdated, leave comments if you find an obsolete method.
Tunnel method
One way of growing a red mushroom on the surface of the world at any time of day without mycelium (using bone meal) is to dig a tunnel starting from several blocks where the mushroom should sprout, and plant the mushroom two or three blocks below the surface at the end of the tunnel. Then dig a single block chute to the surface from above the mushroom. If the mushroom is deep enough underground, it will not pop off when exposed to the light above it. Once there's light, use the bone meal and see if it grows the mushroom. If it does not, there may be too many blocks in the way of the mushroom, in which case, planting the mushroom closer to the surface may make it grow.
Semi-Automatic Farming
- Step 1.
Lay down redstone in lines with 2 blocks in between each line 15 blocks long. Attach a button to this circuit. Fill the spaces in between the lines with sticky pistons. Place dirt on top of everything (pistons and redstone). Place a piston circuit to allow water to spill forward like in the original design. Attach a lever to this circuit. Adjust circuits as needed for length (I prefer wide to long, as it's easier to wire).
- Step 2.
Place seed mushrooms on the dirt on top of the redstone.
- Step 3.
Press button to dislodge mushrooms, then flip lever to have water bring them down to you. Repeat the design down a hallway, raising the floor one time with each repetition. Allow the water to spill into a central channel and bring the mushrooms to you.
Fully-Automatic Mushroom Farming
Using water dispensers and a light sensor circuit
In the following design mushroom is planted on central platforms and new mushrooms will spread to side platforms. Water will flow once a day through the side platforms delivering the new spread mushrooms to hoppers and finally into chests.
On the central platforms mushrooms can be planted in packs up to four mushroom of each kind. Planting more mushroom will increase the spreading speed, but will also reach its cap limit sooner. In the video three mushroom of each kind are planted, as it gives higher daily output.
The side platforms should be one block height to improve efficiency, whilst the central ones should be 3 blocks height, in the video the central platform has middle glass platforms, as mushroom can't spread over glass.
A circuit using a light sensor emits two delayed pulses once a day, activating and deactivating dispensers containing water buckets, making water flow through the side platforms for about 12 seconds, enough to deliver every new mushroom spread in the side platforms to a hopper collection point, that will store mushroom into chests.
The farm can be covered in glass if the platforms are built in mycelium, or can be covered in any other non transparent block, both designs are shown in the video.
Using lighting redstone and a minecart system
(outdated)
A fully automatic mushroom farming using variable lighting, redstone, and a small minecart system is possible. This type of farm is very complicated however, and difficult to explain without an example, so a video has been included to help with understanding at the bottom of this section.
Variable light can be created by placing lava inside a 3x3 square "ring" of cobblestone, capping the lava off with any block, and attaching signs to all four sides of the block that is located above the lava. Fire will attempt to spread to the sign, and as signs are currently non-flammable it will temporarily set the cobblestone of one of the corner blocks on fire.
By placing a block two away from where the fire will start (Meaning you will need to place 8 blocks total, two for each corner of the starting ring) you will have a square that is sometimes dark enough to have mushrooms grow into it, and sometimes too light for them to do so. You will need to place another two rings outside of this, one that will allow mushrooms to grow up diagonally into your grow squares, and one that will allow them to grow down diagonally - however - by placing a ring of cobblestone one above your ring of signs and continuing the grow squares and the seed squares it is possible to continue building the system up as far as the top of the map - if desired - and subsequent levels are far easier to lay out and build than the first.
The second part of this system - redstone - is used to update the grow blocks when they are lit and cause the mushrooms inside to "pop" out of their square and fall. Mushrooms will remain planted when the light level is too high for them to grow, unless the state of their square is checked. This sounds complicated, but all it means is that something about the square next to it needs to change - by placing a ring of redstone torches that will send a signal to the block next to our grow square it becomes possible to have the mushrooms pop out without having to do anything ourselves, and to stop or start this action by using a redstone system.
Generally this will be accomplished by placing a solid block three away from each of our grow spots on the bottom level with redstone running current to it, and placing a torch on the side nearest to our grow spot. We can then alternate solid blocks and torches all the way up the remainder of our system, meaning that while the bottom row needs a large amount of redstone as part of our redstone mechanism each additional row will need only 8 redstone torches.
The problem with this system is that because the lighting is random, dispensing all the mushrooms would require pressing a button many many times. The way we can get past this is by having a cart system, activated remotely, that does nothing but travel back and forth. By placing a cart activated button on this track and hooking it to the bottom layer of our redstone system we can turn the system on and off with only a single lever and have it remain on for as long as we want. Afterward you can build a water channel under your mushroom system to carry them wherever you want, or simply run underneath the automatic farm to collect the mushrooms that drop.
For a video with step by step instructions and visual examples see Fully Automatic Mushroom Farm Tutorial.
Using pistons
A simple fully automated mushroom farm can be built by the use of pistons. First a room of the height 2 is needed. In this room a water stream in the floor of the width 2 is needed. The purpose of this stream is simply to transport the harvested mushrooms out of the room. Mushrooms shall be planted along the bank of this water stream leaving every other block empty. Lastly, pistons are required to be placed facing towards the waterstream. They need to be placed besides the blocks, in which no mushrooms were planted.
The pistons need to be wired to an outside switch, the water stream shall be redirected to your favorite collection point. Then the room needs to be sealed to be completely dark. The only opening should be 1x1 wide, for the water stream. This being the only opening, spawned monsters cannot leave the room. Eventually the mushrooms will spread to the blocks in front of the pistons. Activating the pistons will then harvest the mushrooms and push them into the water stream. The system is reset by deactivating the pistons without any need for replanting.
Higher efficiency can be achieved by multiple arrangements. The system can even be arranged in a room of the height 1, this makes setup more difficult though.
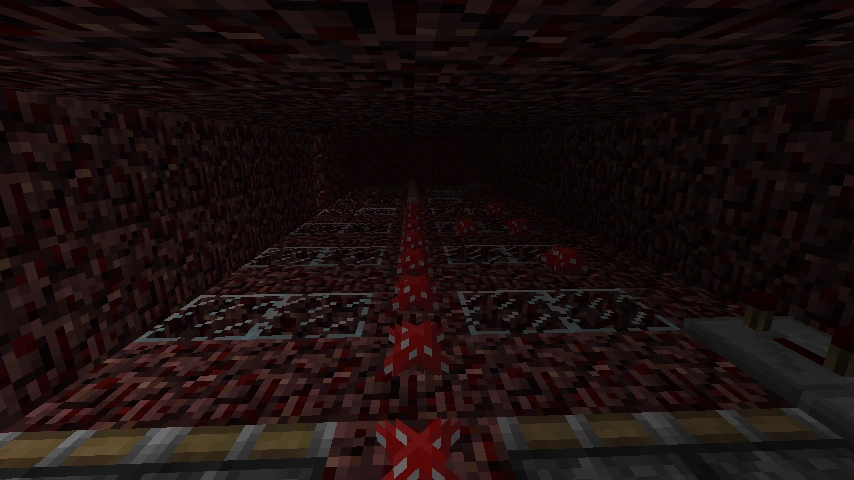
Piston/Glass Based (Dry farming)
The idea here is that mushrooms can also be popped off by causing the block beneath them to change to Glass. Using Pistons you can push 12 blocks of alternating block/Glass rows causing any mushrooms growing on them to pop off.
The basic set up is two sets of pistons facing each other on either side of the seed mushroom row. Upon pushing a button a signal is sent causing the first group to extend popping off the mushrooms. The signal is delayed 12 ticks(3 repeaters) and the second group of pistons then extends resetting the farm.
Generally this is designed for use in the Nether, where "wet" methods are unavailable. Some benefits over other "dry" methods are simplicity and low resource requirements.
Giant Mushroom Farming Outdoors (Without Mycelium)
There is a way to farm mushrooms outside: dig a 1x1 hole where you want your farm to be. Place a bucket of water in the 1x1 hole. Then plant a mushroom in the water and bonemeal it quickly or the mushroom will unplant.
Videos
| YouTube Video (view on YouTube) |
|---|
Video tutorial by HybridCraft
History
- Since the 1.6 update, mushrooms will slowly spread to nearby opaque blocks, allowing for the creation of farms. However, the rate at which mushrooms spread is considerably slow; therefore, starting a farm is an ordeal without multiple mushrooms.
- As of Beta 1.8 mushroom spreading is nerfed, so that a mushroom will only spread if there are fewer than 5 mushrooms in an area of 9x9x3 around the original mushroom. This has made Mushroom farming very inefficient and many of the formerly proven methods (notably the "water flushable pentapipe") will not work in 1.8+. However, the addition of Huge Mushrooms provides a faster alternative.