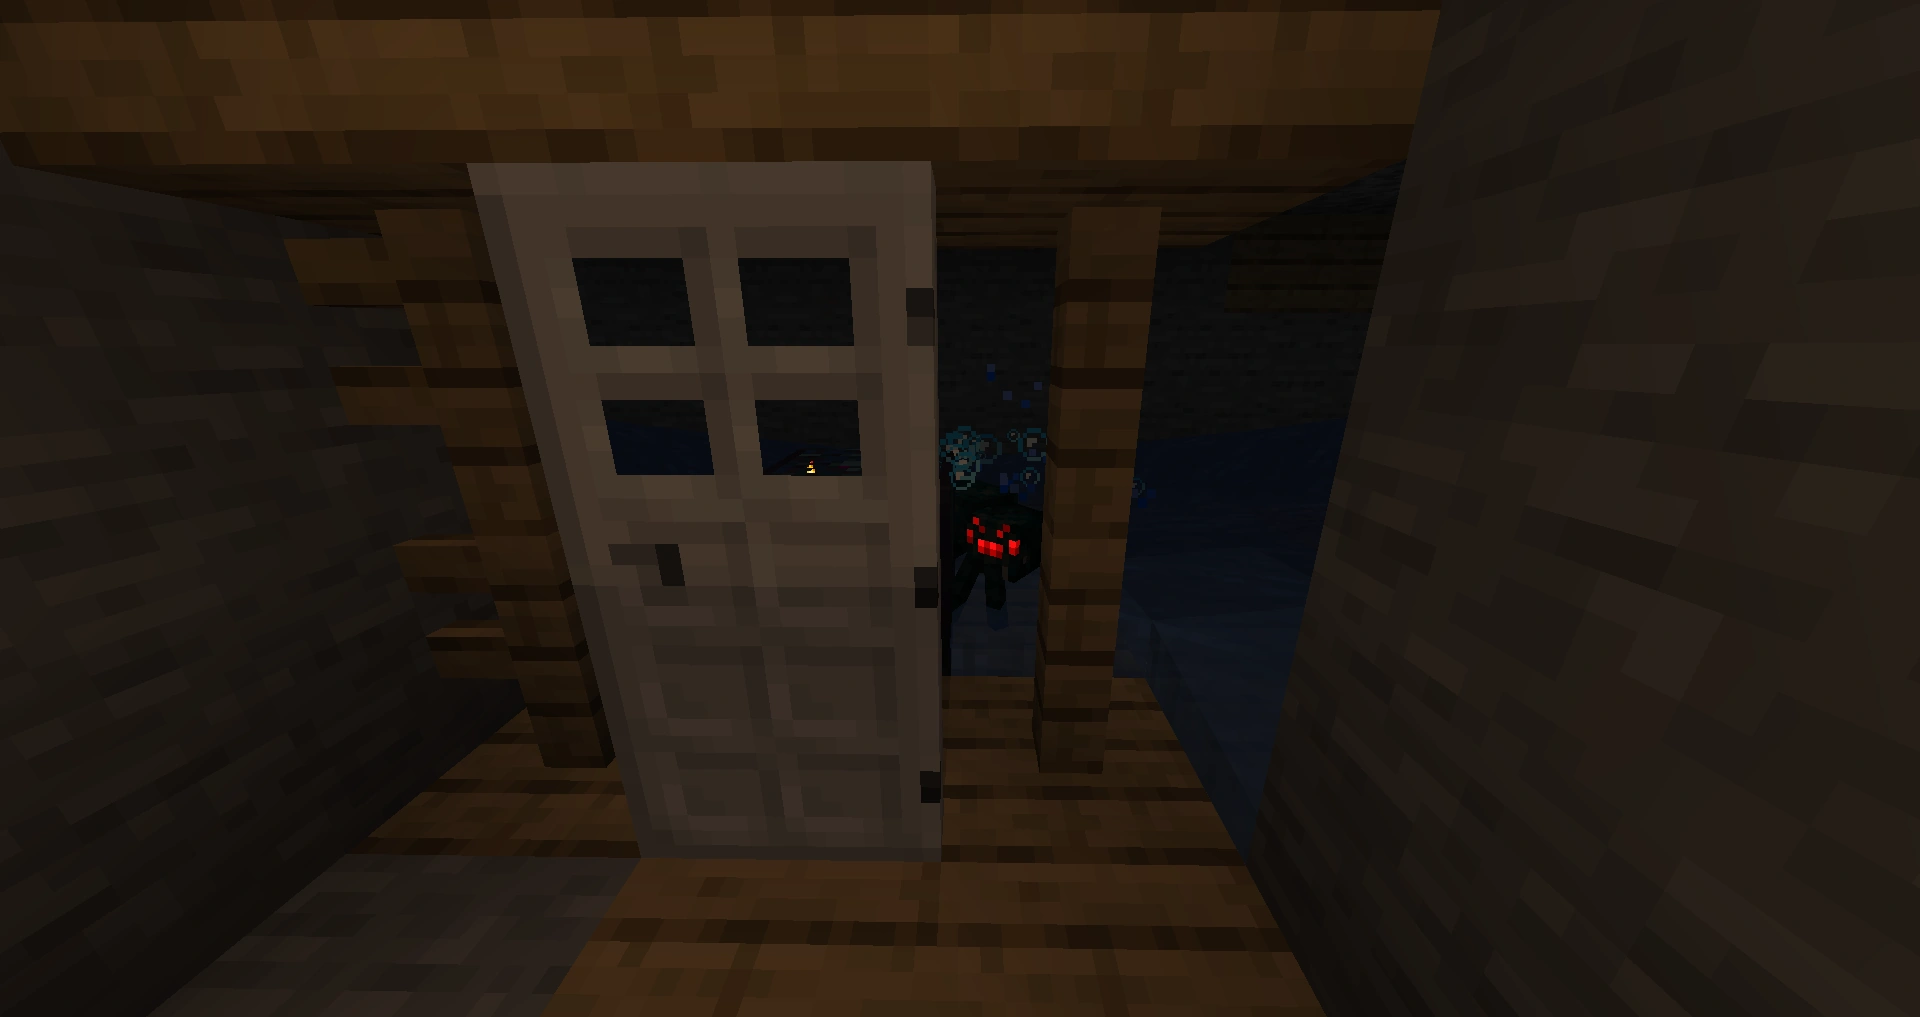
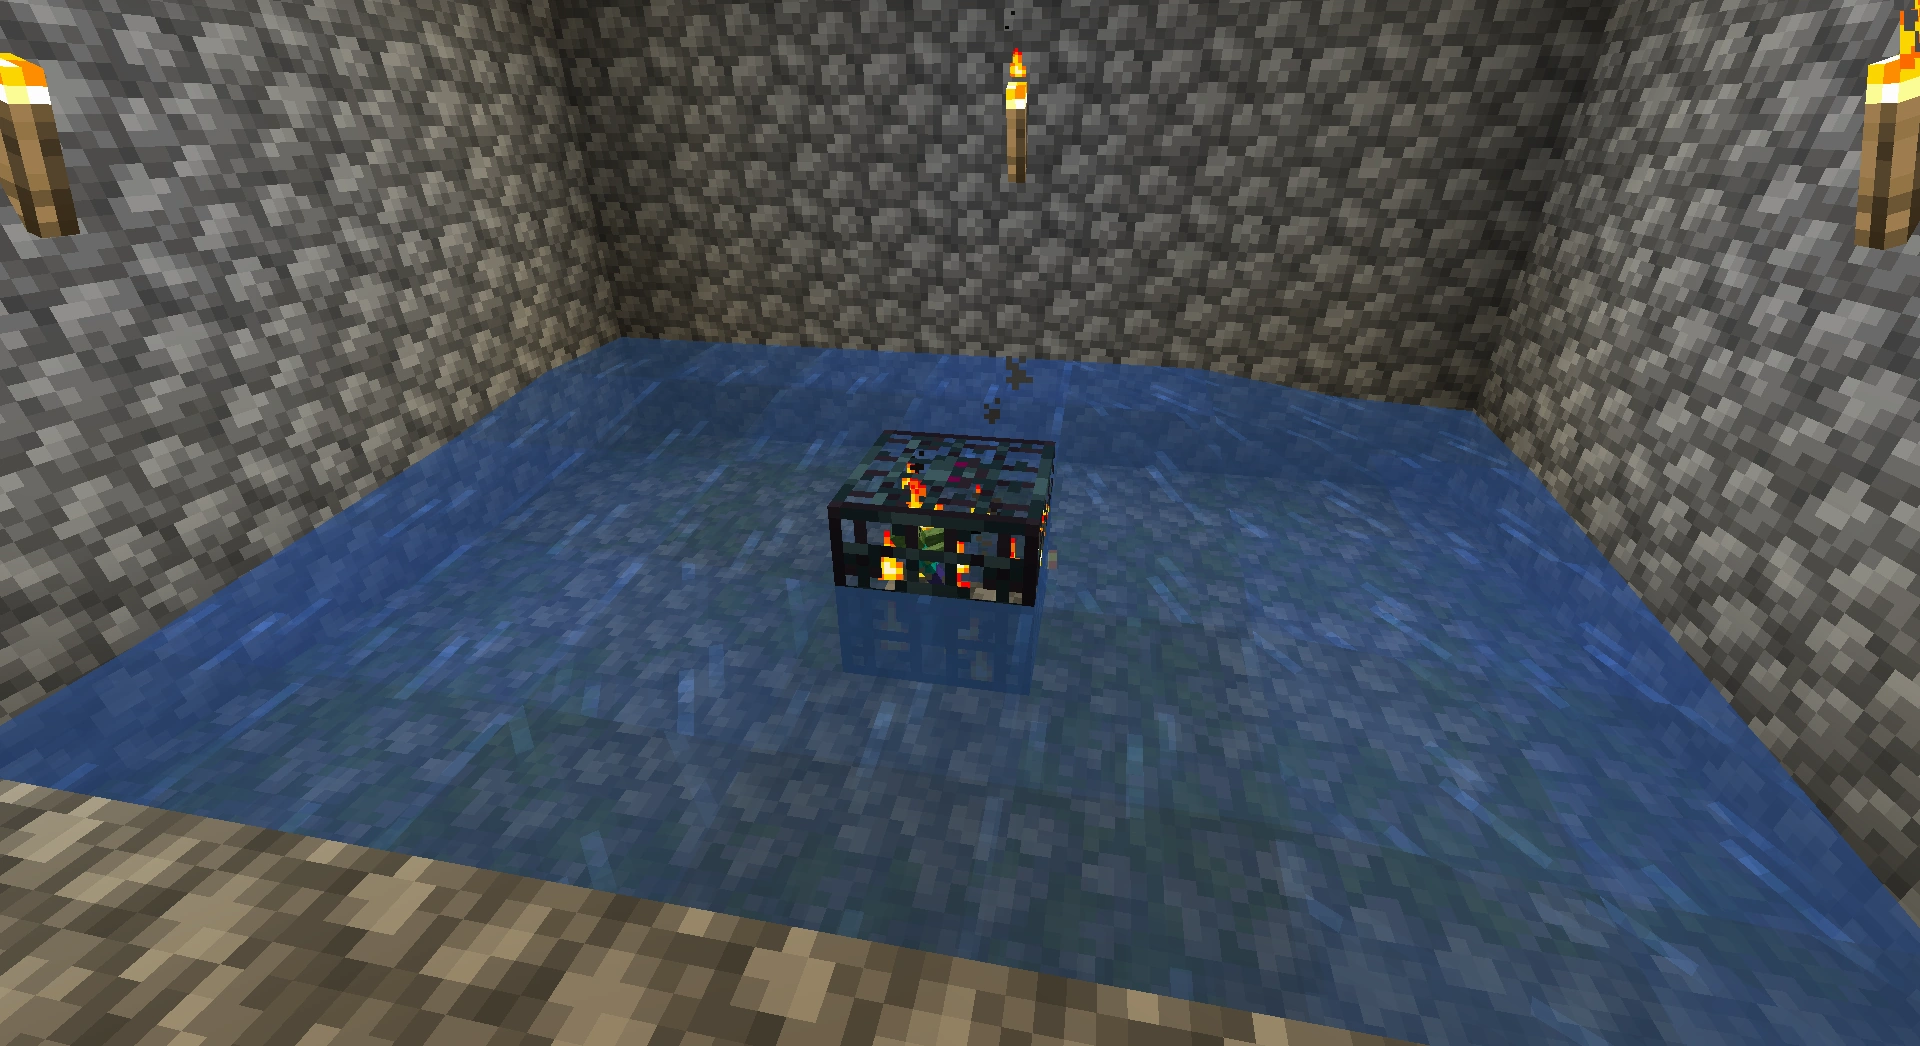
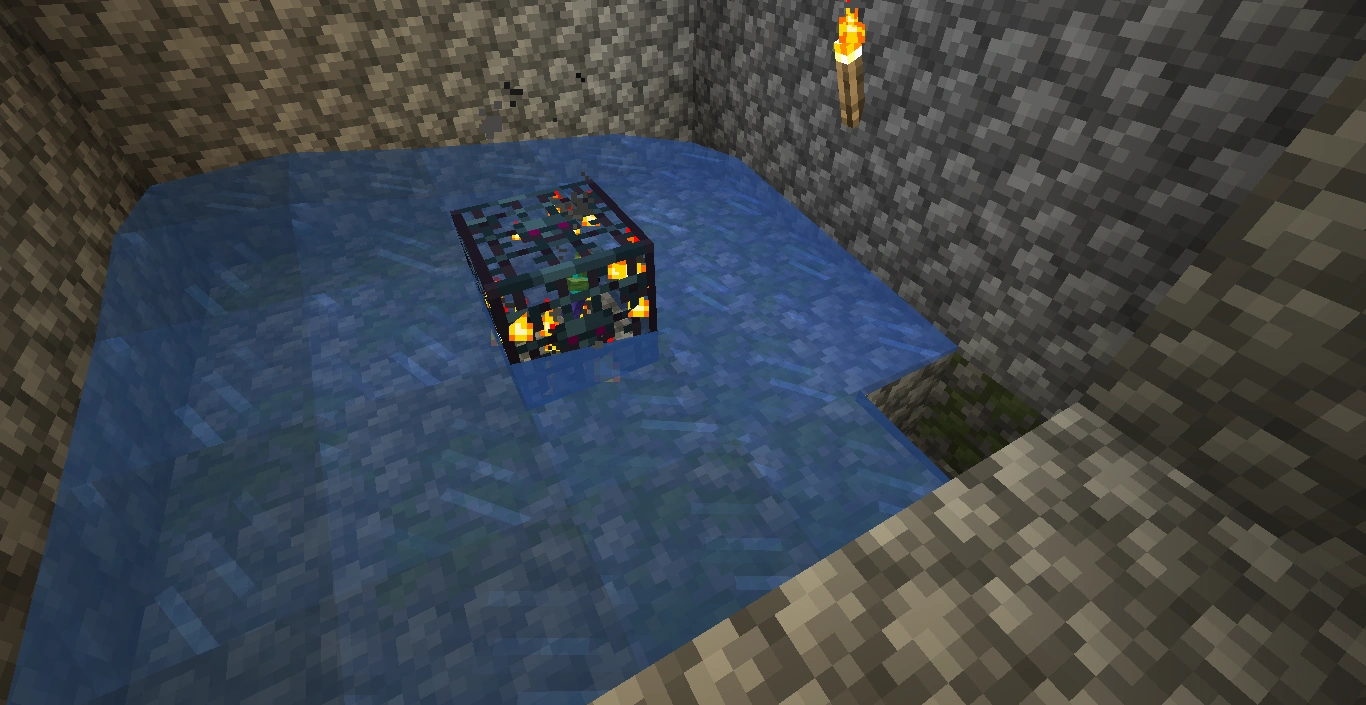
Monster spawner traps are a type of mob farm that uses a monster spawner. They employ the mob spawners found in dungeons as a source of mobs. The purpose of these traps is to create an infinite source of items which can be gathered in an efficient way from the mobs spawned by the monster spawner. Two general goals of these traps are to keep the player safe and to allow the mobs to spawn.
See Also: Tutorials/Mob Farm, for systems based on naturally spawning a mixture of monsters.
Finding the dungeon
Dungeons are found when tunneling or exploring caves and abandoned mine shafts. They appear to spawn in random places, but almost always underground. They are usually at the Y=30 to Y=60 range. One does not simply pinpoint a dungeon without mods, cheats, or external programs. To find a dungeon the "natural" way, one requires a lot of luck and a little know-how. First of all, sand or gravel that fell to make a perfect or near-perfect square is an almost certain sign of a dungeon. When tunneling or exploring a cave, the sound of one or mostly one type of mob in the wall is another tell-tale sign of a dungeon. Finally, if you find cobblestone that was not caused by lava nor placed there by a player, you may have found a dungeon. If that cobblestone is mossy cobblestone, then the chance that it is a dungeon are near 100% (jungle temples are also comprised of this type of block and their bottoms may fall with in the same range of generation as dungeons. They only spawn in jungles though, so these are the only places where confusion may occur.)
Mob spawners can be neutralized by placing torches to light up any dark areas around the spawner. Because blazes can spawn in light level 11 or below, however, torches (light level 14) are not very effective for neutralizing blaze spawners. There are six types of mobs that can spawn (7 if you count the zombie pigman, but they spawn from nether portals not the actual monster spawner block). They are separated into a couple categories: the two block high tall mobs and the one block high short mobs. The Tall Mobs are zombies, skeletons and blazes, while the Short Mobs are the two varieties of spiders and silverfish.
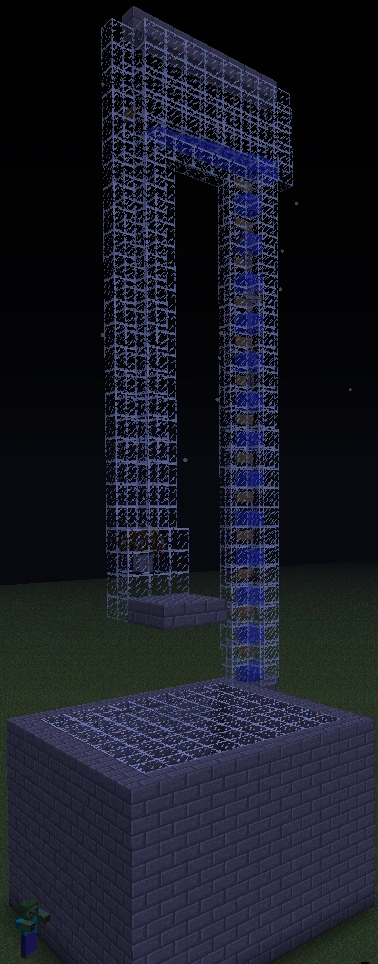
In the Nether, blaze spawners can be generated in nether fortresses, and can be trapped to collect blaze rods and mass amounts of experience. Blaze spawners are the most dangerous to trap because of the height of the structure and the additional danger of lava. One must be well-prepared to contain this type of spawner, lest they might die from heights, lava, the blazes, or even external mobs.
Silverfish spawners can be found in the portal room of a stronghold. However, silverfish do not drop anything and are bothersome unless properly trapped. You may choose to simply break the spawner, unless you want to create a silverfish trap near an entrance to your base. Silverfish do have some advantages, as they are the easiest hostile mob to kill and produce an average amount of experience.
Normal spider spawners are one of the easiest to trap, as they can not fit through a 1 wide hole, so you can dig through the side and place a torch on the spawner without fear of getting hurt.
Cave spider spawners are hard to trap, and since you will get poisoned on normal or higher difficulty, novice and intermediate players may be better off breaking these as soon as possible. These spawners are generated far more often than other types, and some may even generate within 20 blocks of another, which can be made into a very efficient trap. Being very small mobs, they can fit through 1×1 spaces, and even between half-slabs, which makes for a mixed blessing. On the one hand, extremely small, simple, and efficient grinders can be made, but on the other hand, they're far more difficult to contain, potentially leading to spiders leaking out and/or fatally poisoning the players.
Zombie spawners are also a bit tricky, as the spawner may spawn baby zombies, which are a 1×1 mob, making proper containment essential, (and particularly on harder difficulties), the zombies may spawn other zombies nearby to "help", making area security a priority or problematic, and the Spawner may also spawn zombie villagers which makes adding in some manner of player controlled sorting mechanism a consideration. On that note, however, zombie spawners can prove to be one of the most lucrative to trap, as the variety of items it can drop is extensive, and potentially limitless if you factor in the added option to use it to generate Villagers, which can then in turn be traded with, themselves "farmed", or used to make iron golem farms.
Simple farms
The three most common types of spawner are for zombies, skeletons, and spiders. In each case, it's fairly trivial to set them up so that you can attack the monsters without retaliation, forming a simple farm for XP and their drops. (Sometimes cave spider spawners can be treated similarly, but this is more hazardous.) Proceed as follows:
- Secure and light the area around the dungeon! Light the room and spawner while you work on it, so the monsters don't interrupt you.
- Ransack and clear out the chests. Choose and prepare a "front" area for the farm, with a chest and crafting table to supply stone swords for cheap slaughter. Make sure you have a clear approach and/or room to back away quickly, in case you come by and find one or more creepers spawned inside, and you need to shoot them.
- Prepare the spawner area, and especially, open up the entire spawning range: Horizontally, that's 9x9, centered the spawner. That range also includes a block above and below the spawner, so take up the original cobblestone and moss-stone floor, if necessary supplying a new floor one level below. Extend the front to match, so you don't have monsters or items hiding in corners.
- Now seal off extra exits and alcoves, fill stray holes, and place fences or other barriers to channel mobs toward the front. If you want any redstone circuits, now is the time to set up the alcoves and access tunnels.
- Optionally, set up redstone systems:
- Most important is a flood system, to wash monsters and stray drops toward the front. If you've opened up the full 9x9 area under the spawner, you can get a nice sheet of water from three dispensers at the back, each containing a water bucket. This will push monsters forward and bring all drops within reach of the front. If you still have items being stuck in one corner, you might resort to a side tunnel and a sticky piston to get at them without exposing yourself.
- If you're ambitious, you can build a system to light up the dungeon when desired. This will be much easier if you have redstone lamps.
- Prepare the front according to the monster type. You will always want fence gates, in case you want to dash in between spawns to collect drops, or to fix something up.
- For zombies, a simple gated fence will do. Maximize your view of the spawner, so that they come to the fence quickly.
- For spiders, you want one or more 1-block wide slits, 2 or 3 blocks high. You can attack them, they can't come through. To defend against creepers and other non-spider spawns, you can make these slits two-high, between top and bottom slabs. (That is, three blocks total, but with the top and bottom spaces half-blocked by slabs.) The "tall" monsters will not recognize these as passable, but you can move or attack through them easily.
- For cave spiders (if you must), you can place a door between floor-to-ceiling fences (see pictures below). Iron doors are better, so that you can't accidentally open it while you're whacking at the spiders.
- Note that cave spider spawners don't come pre-enclosed in a dungeon, so you'll likely need to start by building a room around them. Remember that the spiders can appear up to 4 blocks away (depending on direction) from the spawner, whether or not there's a wall in the way.
- Skeletons are trickiest: They can shoot through even brief gaps, the moment they get the angle. For the actual killing zone, you want fences/gates at eye level (so they can't shoot you), with an open row below (so you can attack). If you stand directly in front of the fence, they will usually come up to the front so you can attack them. That row in front of the fence can also be a trench—you can reach further into the room, but then they will occasionally get an arrow or two under the fences.
- Once your farm is prepared, remove most or all of the lights. Beat a hasty retreat to the front.
- Special case: If you found a dungeon in a mushroom biome, congratulations! Since creepers can't spawn, you can pull out all the lights in the dungeon room, and get maximum output from the spawner.
- Make some stone swords and whack away. Keep bow and arrows handy near the entrance, in case a creeper spawns while you're away or approaching, or otherwise sneak into the room. (Normal darkness spawns are suppressed within 24 blocks of a player.) It is also possible to kill creepers by hitting them, backing off, and repeating. With an iron sword you can just rush a creeper and kill it before it explodes.

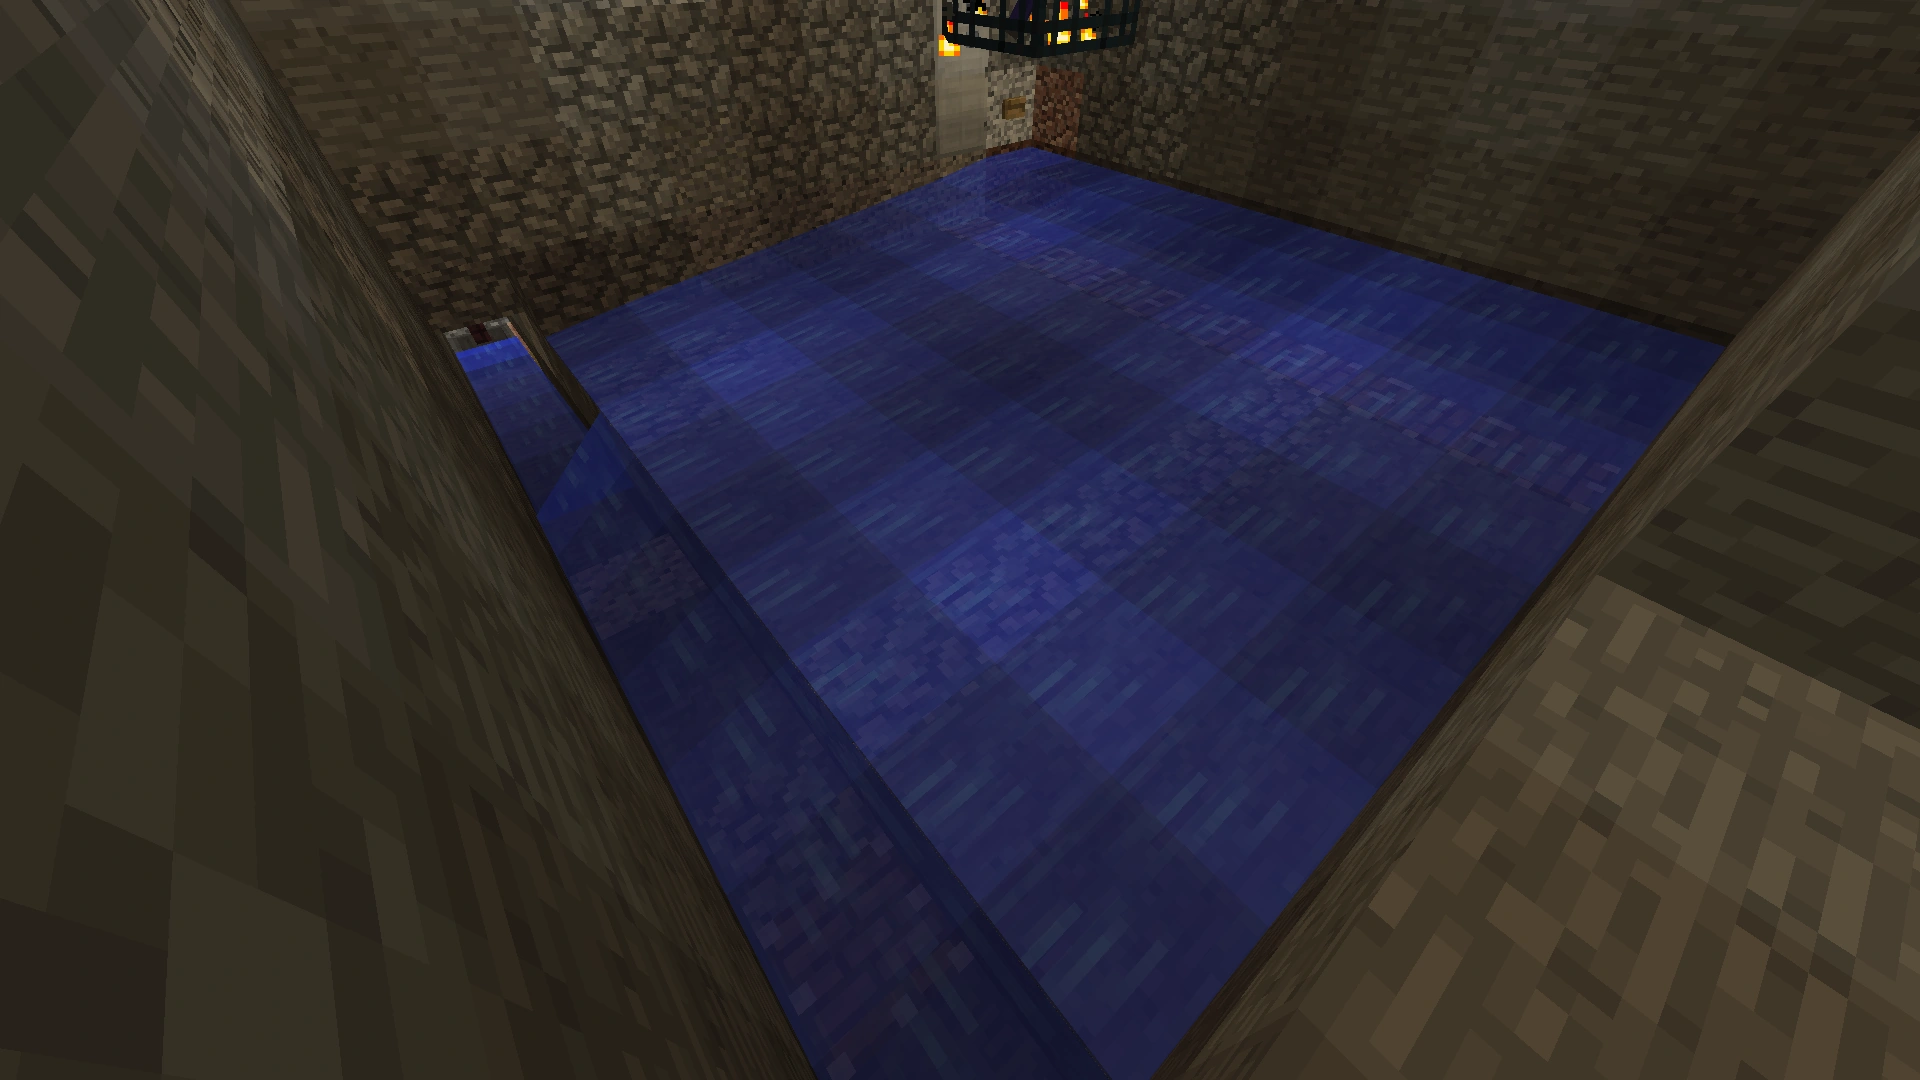
A classic water floor for normal dungeons
Redstone lamps controlling a spawner

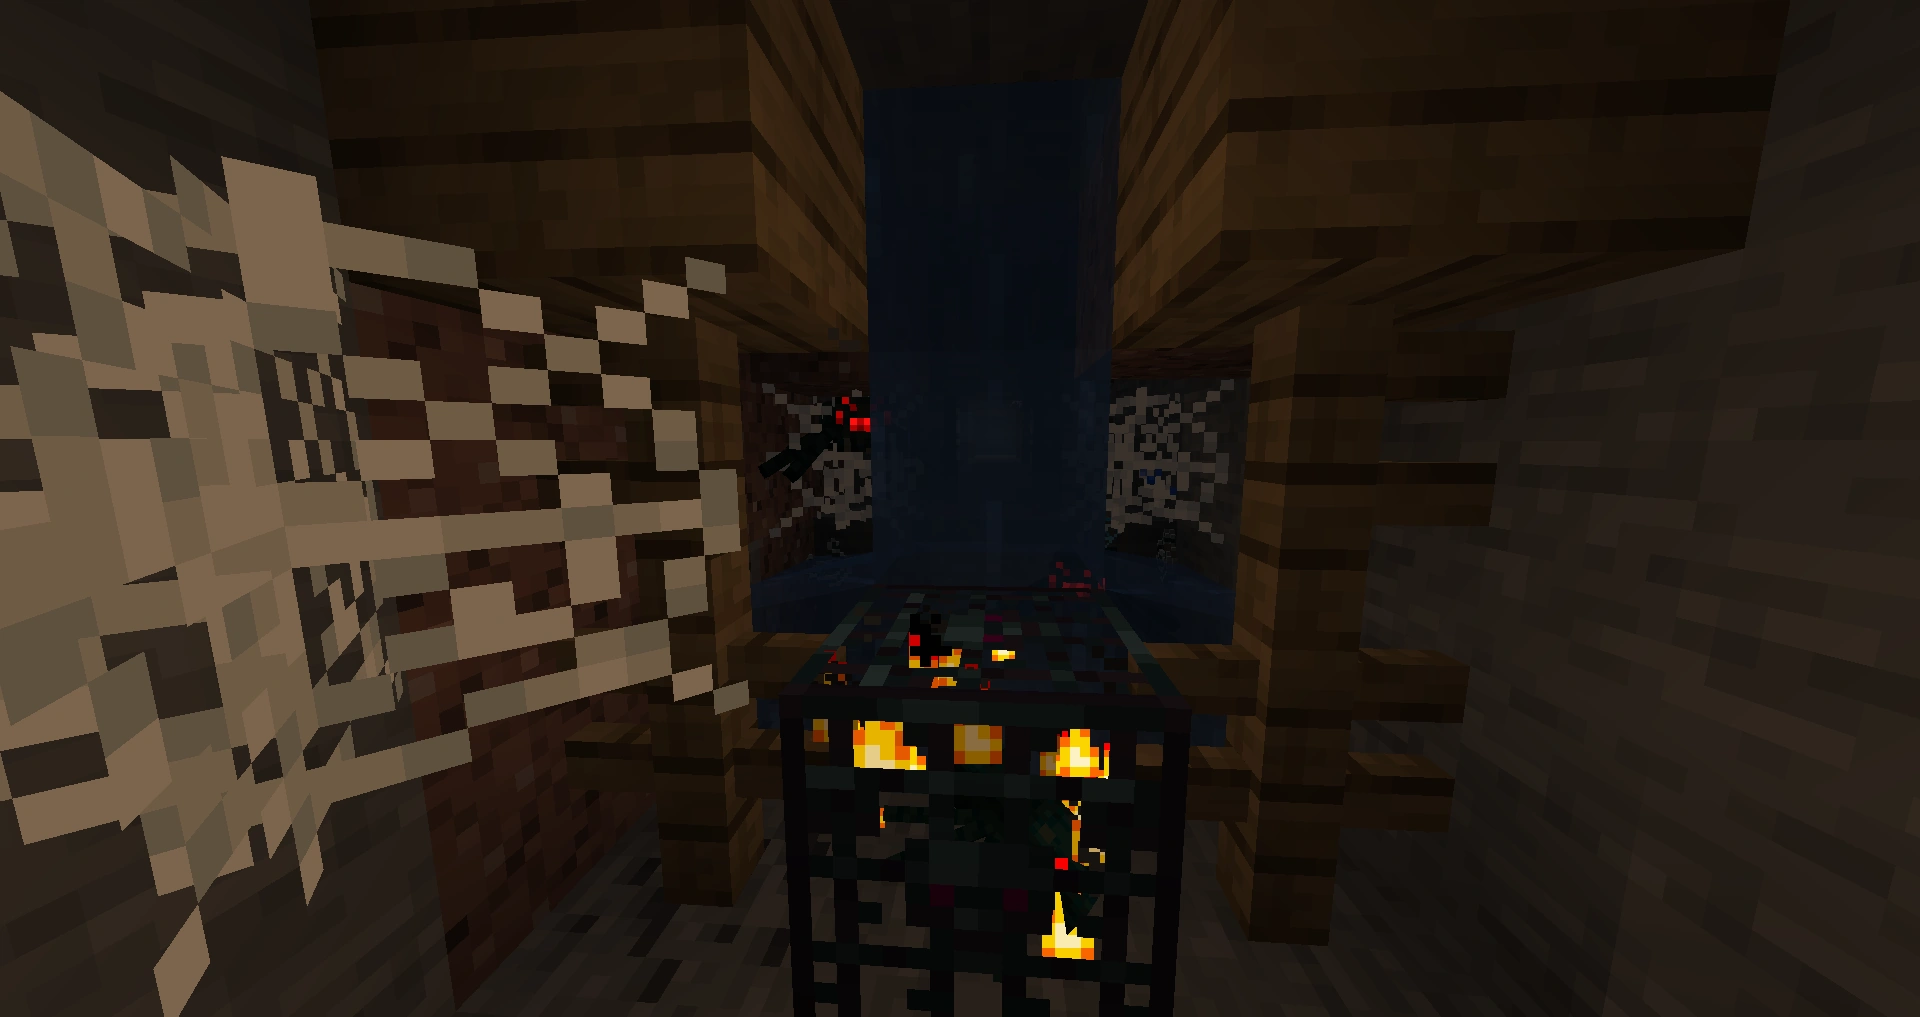
Containing cave spiders

A more elaborate farm, using water to wash them forward
Killing mechanism
Any standard mob grinder can be connected to a dungeon. However, the purpose of this device is for players who are currently low on materials and can't yet build something larger. As of version 1.5, a hopper can be used to collect the items into a chest.
Lava blade traps
A lava blade trap consists of using water underneath the spawner and funneling these into a single line. At this point the mob should find themselves approaching a sign at ground level and a 'lava blade' above it which flows over the top of the sign but no further. This allows the mob to drop items at their feet for your collection. A tutorial can be found "here".
Drowning traps
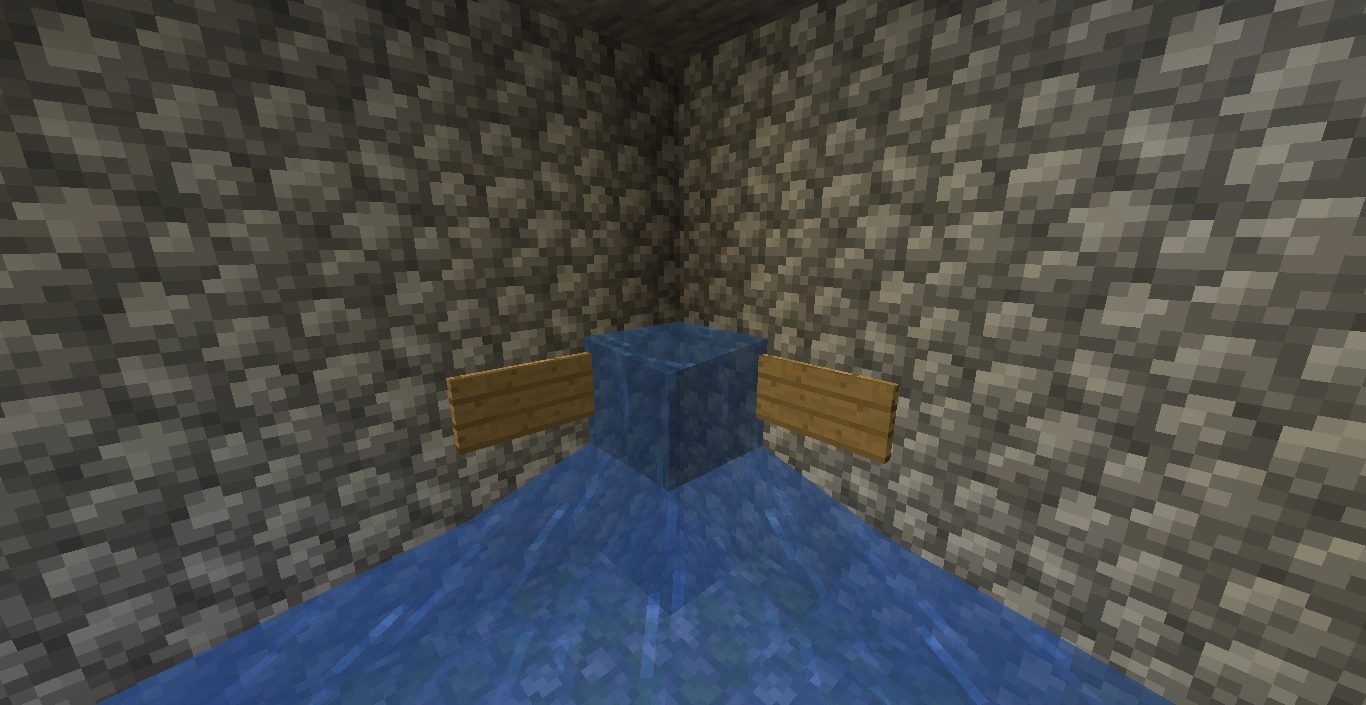
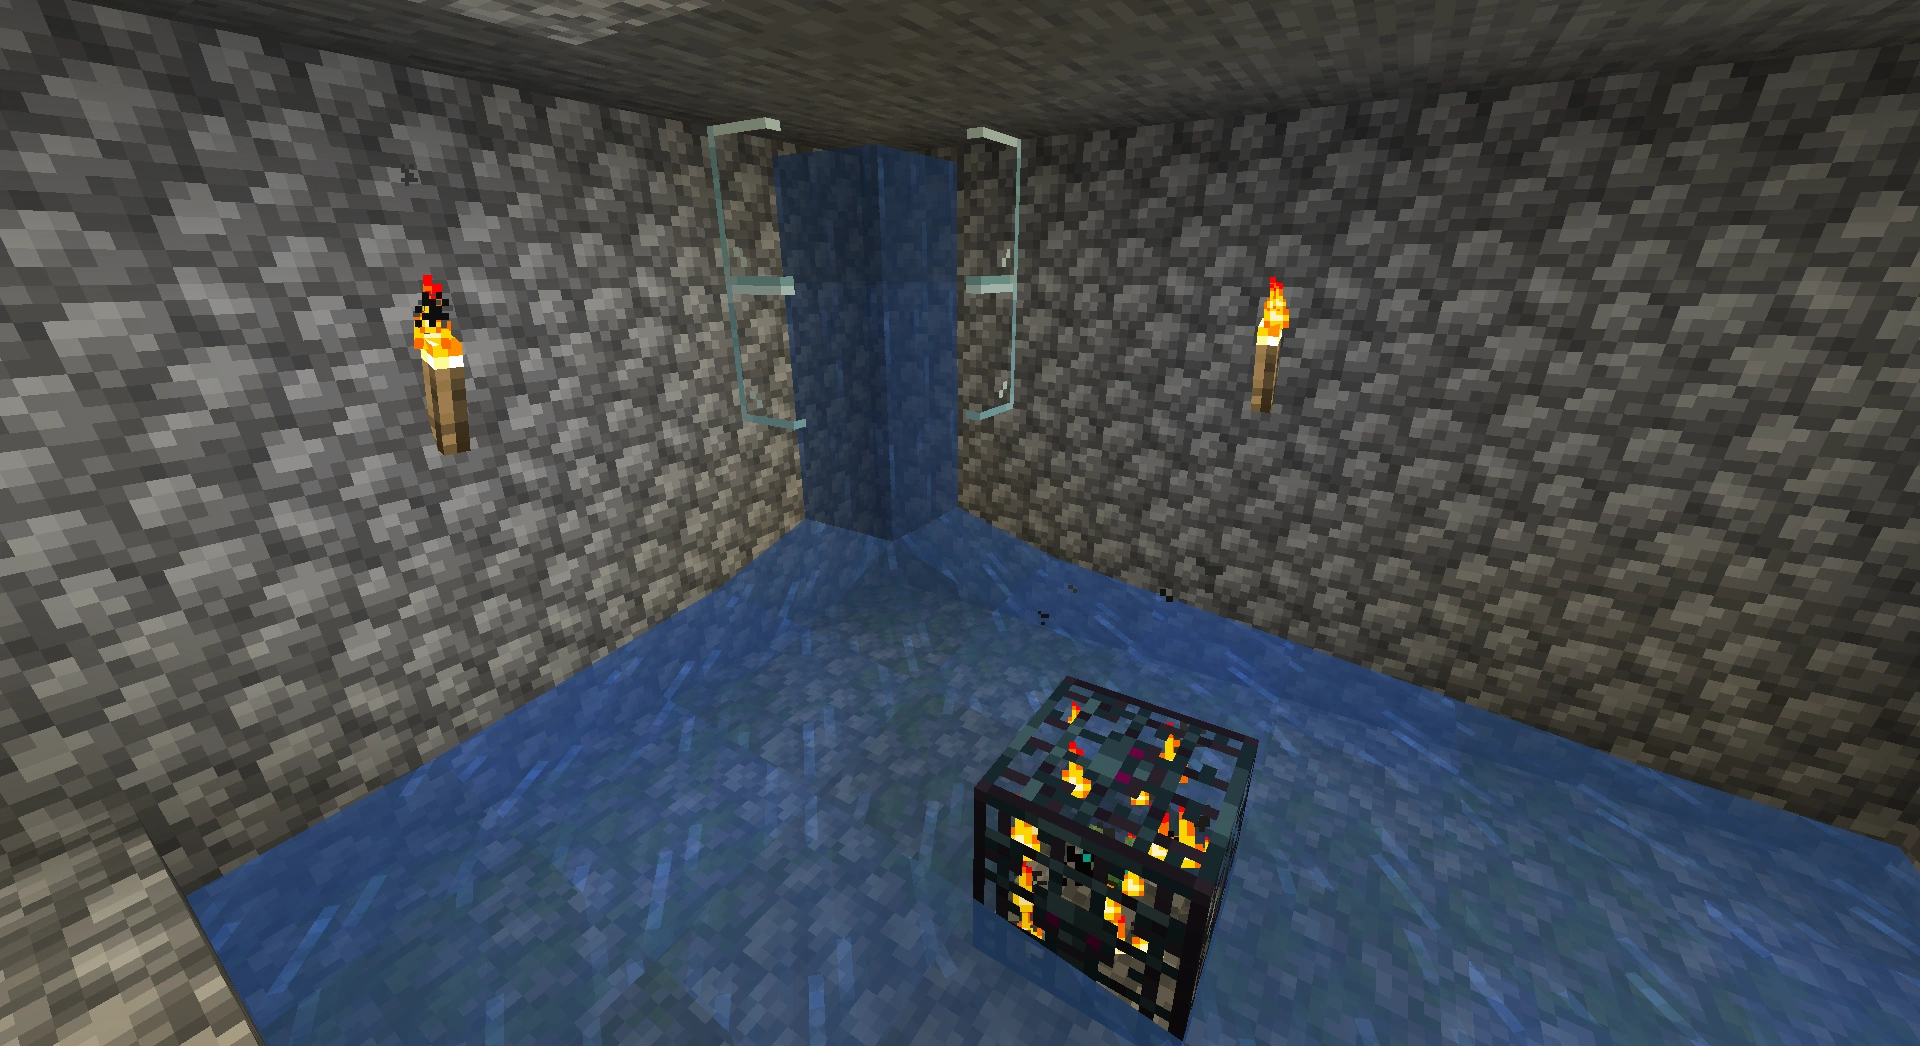
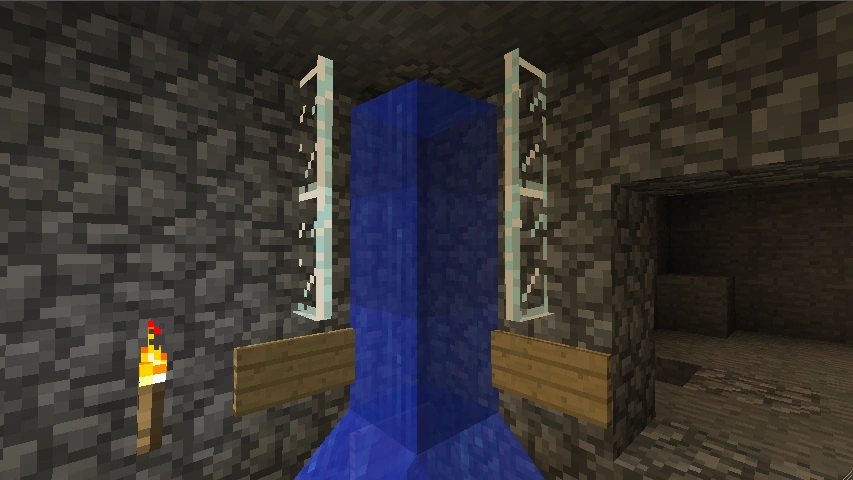
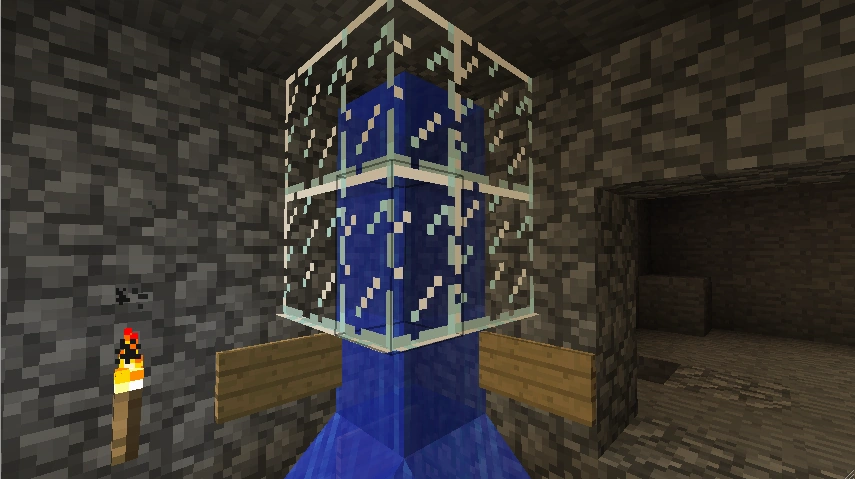
Drowning traps employ water to drown the hostile mobs. Mobs float in water and items drop, which allows easy separation. In this example, the dungeon is a 5×5 zombie spawner.
- Capture the spawner and place water in one of the corners. The opposite corner should have one dry block.
- Dig a small hole in the dry corner. This is where the items will drop and a water channel is recommended.
- Place two signs in the corners and one in the hole. Water considers signs to be solid blocks.
- When water is placed in the corner, it will be held in place, even though it will look like it is flowing backwards.
- Place glass panes (any block works, but this is a cheap material and allows easy access while filling up the drowning chamber).
- Fill the chamber with water to the ceiling.
- Close up the chamber.
- Place a collection stream below the drowning chamber. Remove the torches and close up the dungeon walls.
Take out the torches and enclose the dungeon. This was designed for tall mobs, but can be modified for spiders by making the drowning chamber larger. Use signs to hold up water.
Capture spawner
Place water in one corner. Dig a hole in opposite corner.
Place signs
First source in drowning chamber
Glass panes
Fill the rest of the drowning chamber
Enclose drowning trap.
Collection stream

Please note that this video shows the incorrect process. You must fill up the column using source blocks, not just one at the top.
Flow trap
This trap is highly recommended. It's effective and safe on all mobs, except blazes, since you need water. Disable the spawner, and then make an 10×10 room around the spawner. On one side, place water on every other block. On the opposite side, make a one block deep trench extending along the side opposite the water. Light up the trench well. If you want, you can add a pool for fish and get a fishing rod to fish. Then, make a wall with a line of air at eye level to look through and strike. The holes have to be next to water. Now, get plenty of food, a few chests, and two or three swords. Now, remove the torches and let mobs spawn. The water will bring them and the drops to you, and you can shoot them and hit them. Also, make a room to eat and heal in safety, just in case you didn't build the trap thouroghly. With this trap, You can go for hours in one go, and gain hundreds of experience levels and items at minimum risk. The trap system is built in a way where you can easily leave when you want, with almost no creepers or non-spawner mobs popping up.
- If the spawner is a spider, make these adjustments:
- Add iron doors with levers to control mob flooding and possible death.
- Bring milk.
- This precaution is for cave spiders.
- Add an on/off lighting system.
- Bring bows to help control mob flooding and possible death.
Sunlight based traps
This type only applies to zombie and skeleton mob spawners. Sunlight based traps are made by placing water below a spawner. This water will flow from one side to another. Where the water stops, dig a pit a few levels down. This will drop the mobs into the pit. To finish, make sure that the pit is open to sunlight. This sunlight will burn the mobs alive. An example of this can be found "here".
Potion-based trap
This is a fairly expensive and hard to make trap, so it's not recommended.
First: Light up the room to prevent mobs from spawning.
Second: On top, dig out 2 blocks from the spawner room top without breaking the spawner roof
Third: Place the wires and dispensers like shown:
DWWWWWD    X - Roof Block
XXXWXXX    W - Wires
XXXWXXX    D - Dispenser looking in the spawner room
XXXLXXX    L - Lever, button or even a redstone clock, whatever you want to power
XXXWXXX        the dispensers up!
XXXWXXX
DWWWWWD
Fourth: Put inside the dispensers:
HARMING POTIONS: Used to damage spiders. HEALING POTIONS: Used to damage skeletons and zombies. POISON POTIONS: Used to weaken any mob that is not undead.
Fifth and last, but not least: Take the lights out, get up, and when you hear the roars, push the lever/activate clock/ whatever you used to power it up.
Again, it's expensive, so it's a lot better to use water or lava traps until you got a blaze trap, a lot of patience and potions, or just playing Creative/Having TooManyItems, or you can use witch to let witch throw potions to the trap filled with mobs, but it'll despawn if you're going too far away from them, and witches don't throw healing potions, so it's only usable for any mob that is not undead.
Iron golem traps
In this trap an iron golem is used to kill the monsters for you. To make it, simply make an iron golem in the dungeon and watch it kill for you. However, the iron golem will eventually die (especially if more than 1 enemy is spawned), so you'll have to replace it with another, or link it to an iron golem farm.
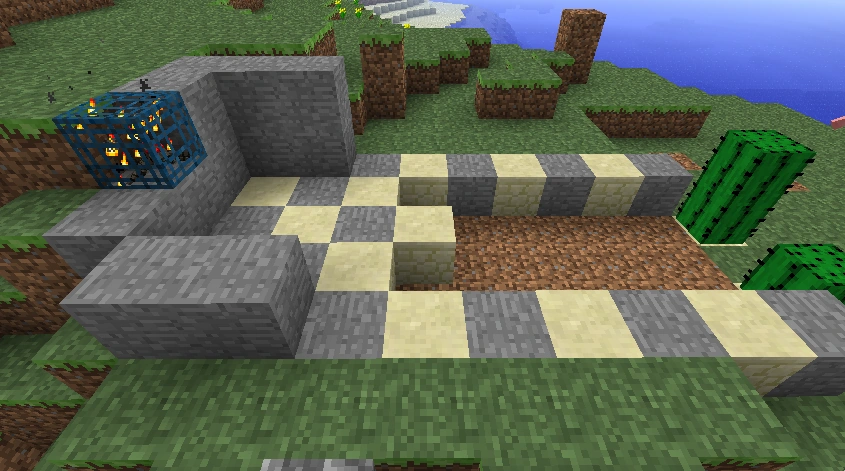
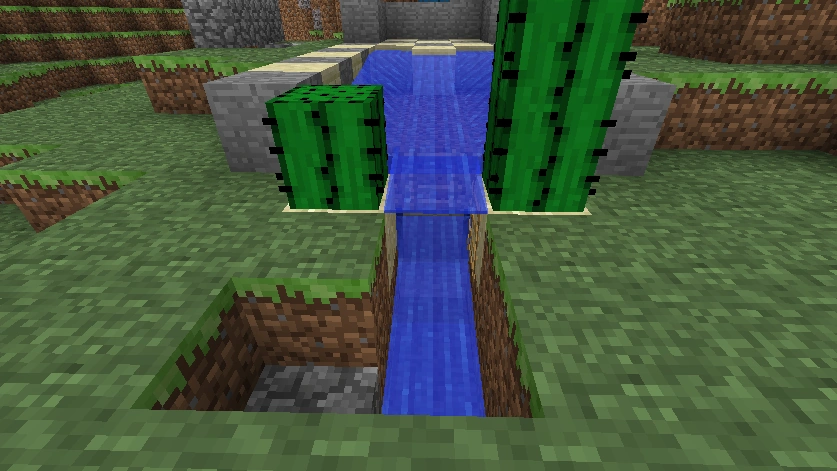
Cactus traps
The following cactus trap is designed for spiders. It has a chance of destroying the items, but this is an inherent issue with cacti. (This can also incorporate a small cactus farm by placing a block 2 blocks above the cacti.)
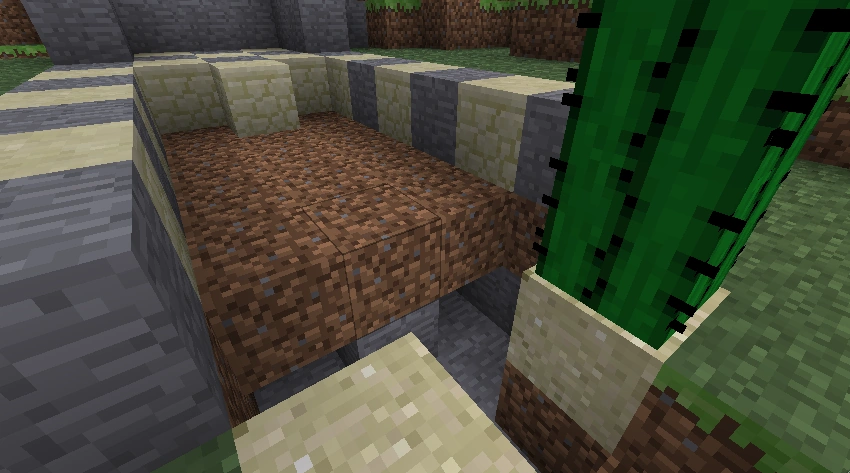
- Dig the main channel. The spider spawner is left in the wall forcing spiders to spawn on the small dry patch.
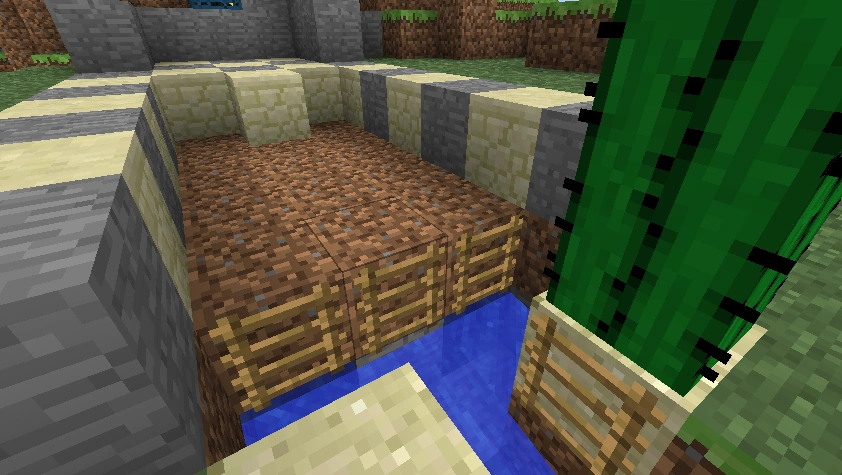
- Dig two blocks down and one block in just before the cacti. These two holes will hold the collection water sources.
- Place three ladders on the far side of the collection output. Place one on either piece of sand. Place the two water sources in the holes.
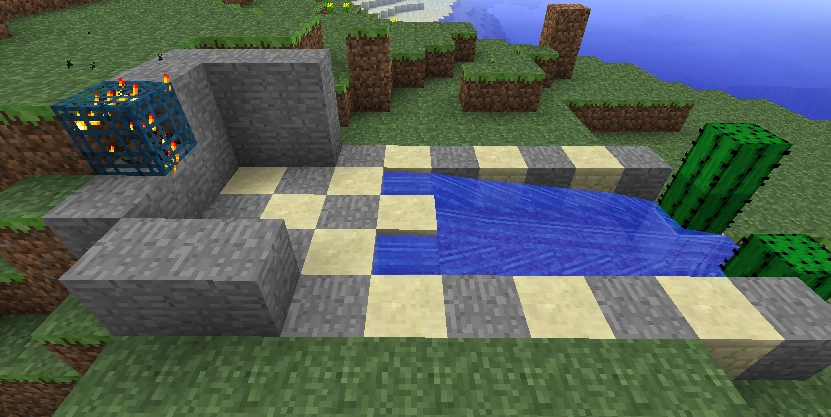
- Place the main water in the two openings. The block between them makes the water flow towards the gap in the cacti, slightly improving the collection rate of string.
- Cover the entire trap and remove all lights.
Villager traps
- First make a room high above the ground and move at least 2 villagers to it.
- Now put at least nine doors in it.
- Next change one of the one wall in the room to glass.
- Attach another room to the side that the glass wall is on.
- Mine a hole in the floor of the empty room.
- Line the hole with open trap doors (if your hole is 2 by 2 you will need 4 trap doors)
- Directly under the hole, make a room without a roof on the ground.
- This trap only works with zombies
- Both rooms that are in the sky must be very dark
- The zombies will try to get the villagers, they will fall through the hole, and if the room was high enough kill themselves in doing so and drop some awesome stuff!
Main channel, dry
Collection channel, dry
Collection channel, water and ladder placement
Main channel, water flow
Both channels. Front view.
Blaze traps
Since it is impossible to obtain water in the Nether for a drowning trap, this trap takes advantage of blazes' weakness to snowballs. To create this trap, one must disable the blaze spawner and fence a snow golem into a nook in a wall. Once the spawner is re-enabled, the snow golem will shoot snowballs at the blaze until it dies. Alternately, one may create a redstone mechanism that brings out glowstone or turns on redstone lights to prevent the blazes from spawning until the mechanism is switched. Fenced access to a snow golem's nook can allow the player to construct a new one should the blaze defeat it. However, in Minecraft version 1.2, Snow Golems die in the Nether, making this trap need a splash potion of fire resistance.
Another way to make a blaze farm is to box in the spawner so that the blazes can't fly away. leave a space at the blazes foot level and stand so that your eye level is at that space. That way the blazes can't hit you (mostly) but you can hit them. This is also a pretty good experience farm since each blaze is worth 10 xp. Be warned however that sometimes blazes will spawn outside the box so it is advised that one box themselves in as well.
(Patched) However, if you are playing on the Xbox 360 edition (This no longer works due to recent updates.), you can make a MUCH easier trap using ice, cobblestone/nether brick, and light sources. First, make an 8×8×3 space around the spawner (recommended you do this on peaceful and creative as you could be killed by blazes, fall in lava, or the spawner may be destroyed by ghast fireballs, as well as ice not being available in survival). This will require destroying the fences around the spawner. Next, place ice in a row along the back of the trap and place a light source above it (recommended glowstone) so that the ice will melt. Once the ice melts, you can destroy the light source above it. Repeat this step until you get flowing water to the front of the trap. Afterwards make a place where you will sit and wait for the blazes to spawn so you can kill them (The water alone will kill them, but you will not get any loot or xp.) Make a hole as wide as the trap's insides and one block high. If you let water flow into the area, you will not catch on fire if you are hit by a fireball (though you will take impact damage), at the cost of being faster to get to the loot, so make a platform out of the water to move around. Then, get your Looting sword (preferably diamond with Sharpness and no Knockback, as Knockback will send the blaze into still water caused by the ice, which will keep it from flowing toward you) and beat the blaze rods and glowstone dust out of them!
A note on lava
Lava can quickly kill mobs and can be suspended on either a ladder or a sign. To suspend the lava, create a 3-long channel then put a sign or ladder on the last block. Lava spreads three blocks away from the source, so the last section of the lava will be left suspended on the sign or ladder.
Lava generates light, which can lower the spawn rate in the dungeon unless placed far away; however the increased turnover of mobs may compensate for this. (Only one trial - lava 'blade' is approximately 7 blocks away from spawner. Significantly increased rate with lava closer as opposed to having a dark spawn room with lava further away.)
"Here" is a video example of how to make a dungeon trap using a lava grinder in 1.2.5.
Auto meat cooking trap
This is when you have peaceful mobs spawn and are burned to death which cooks the dropped meat. First you cause peaceful animal mobs to spawn. Then you cause them to fall into lava that is one block high with a sign below it. This prevents the lava from flowing. Below the signs you put a block of cobweb. This causes mobs that have been caught on fire by the fire to burn and die without losing the drops. Just have a way to collect the fallen meat, and you have an Auto Meat Cooker. You can also make a chicken trap by making a big pit of fire and then go high up and put a spawner. The chickens will fall into the fire and drop cooked chicken.
A working Auto-Pork Cooker
Other
Traps that use unusual methods, such as huge pits, fall into this category.
Note: Using a half slab of cobble, planks, or sandstone in murder holes will prevent creepers and skeletons from seeing you, then you can retrieve items without breaking blocks, place the half slab on top of where the mobs would usually stand.
Pit trap
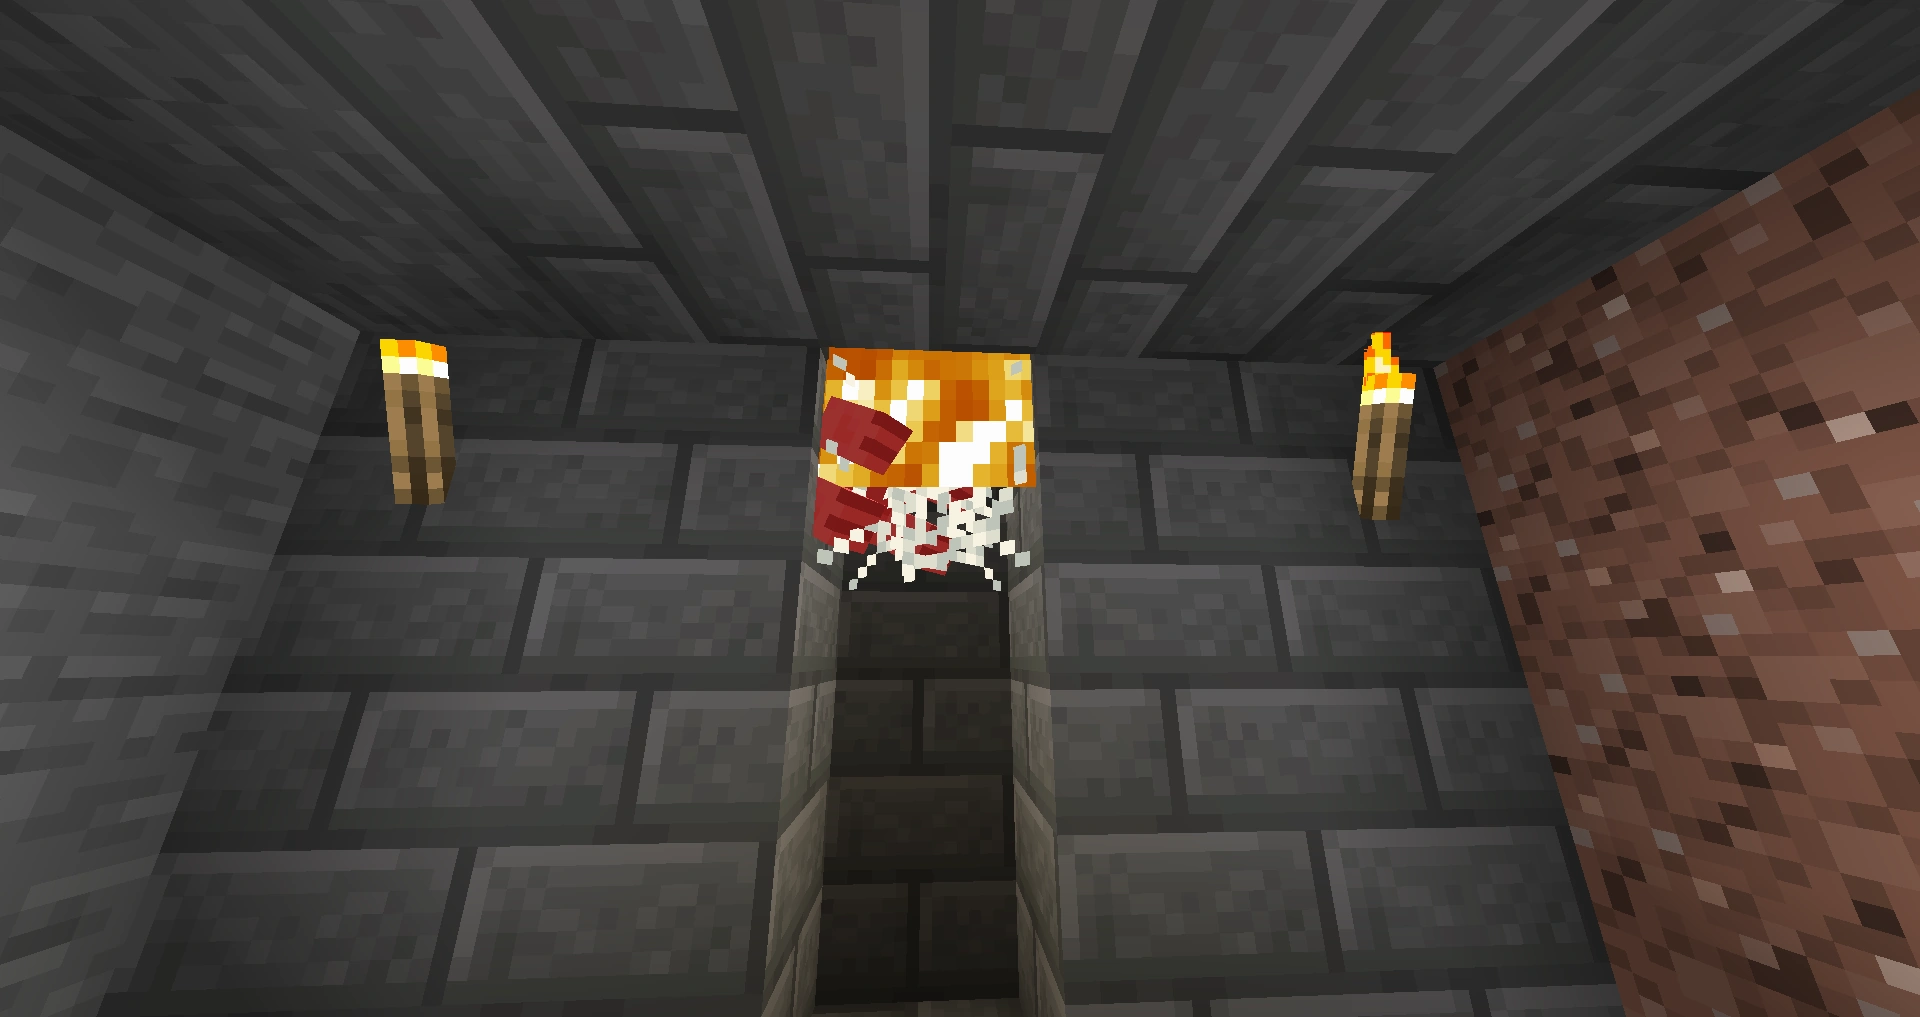
- For this method, you must dig a pit that reaches far under the dungeon. Depending on the height (at least 23 blocks), the mob will die on impact, as long as there aren't any blocks of water at the bottom. However, this method takes a long time to make and only works for spawners near or above the surface. Alternatively, you can build an elevator for the mobs using alternating water and signs to bring the mobs 23 or more blocks higher, and then drop them 23 or more blocks in order to kill them (or you can do 22 blocks if being used for an XP farm).
Experience trap
- For this trap, you need to dig a large pit 22 blocks deep under the dungeon, or make a water elevator taking them upwards so you can stay near the monster spawner. Go to the bottom of the pit and place water in a fashion so that it should flow towards a wall. Then make a room where the water is flowing. This is where you will stay while finishing off the mobs. Make the room so that it has a one-block hole where you can see the mob drop zone. Hopefully, mobs should spawn, fall down the pit and survive with half a heart, get pushed towards you by the water current, and get killed by a single hit. If you like, you can bring food along as your hunger will deplete over time. This should provide normal as well as rare mob drops and experience levels, making it quite useful. Another technique is to leave your player by the dungeon for a couple of hours, overnight is suggested, and there will be at least a hundred monsters waiting to be harvested. There is a possibility of the number of monsters causing large lag spikes, glitches, and maybe even crashing on weaker computers.
Efficient pit + experience trap w/ TuT (by Epiiik)
- *Note, all dimensions are given the format: Horizontal x Vertical. This method is an indirect hybrid of the aforementioned traps, utilizing both fall damage and mob control with water. In the mob spawning room, dig 1 block down so that the spawner is at eye level, and place water blocks at two adjacent corners. On the wall opposite of the two water blocks, dig a 1×2 hole for three blocks in the middle of the wall (allowing mobs to pass through).
- Begin digging upwards in a 1×2 fashion for 26 blocks. To get up, place signs on the long-faced wall (your left/right) in a zig-zag pattern going up while placing water blocks in between the signs. The first sign should be placed as furthest, lowest space possible. Stop placing signs after the 23rd level. The last water block should be against the wall furthest away from the mob spawner on the 24th level.
- On the 25-24 block levels, dig a 1×2 hole for seven blocks in the direction the mob spawner. On the seventh block in, dig one block downwards. Dig in the forward direction for eight more blocks (again, 1×2). You should notice the water block placed on the 24th level should stop where the path drops by one block. Place a water block against the wall of the drop. Notice how this water block stops 1 block short of the path.
- Dig further for two block and begin to dig downwards in a 1×1 fashion for 22 blocks. Face the direction of the mob spawner and dig another 1×2 hole one block deep. Dig down one and fill the top level with one block so that you can only see through one block of the pit you just created. (If you are using a skeleton spawner, you will need to stand one block away from this hole so that the skeletons cannot shoot you.) You are now standing at the loot point. Now that the almost-dead mobs are depositing into your 1×1 hole, simply attack them with any item to gain their loot and experience! You may use TNT + water to do splash damage to kill all mobs at once at the risk of lag spikes. Splash potions of Healing will also work, as they do damage to most hostile mobs.
note: you must have 2 block tall non-exploding mobs to do this or the mob will either destroy or get out of the trap
Useful tips on this design by Duck//Marvin: When you make the opening in the spawn chamber for the mobs to exit, make it 3 blocks high and place a sign or half slab at the top. This lets the mobs into the elevator more easily and prevents water spillage from the elevator. Also making the transport corridors at the top 3 blocks tall instead of 2 allows the mobs to be transported faster as they will not hit the ceiling when they try to swim and get stuck.

Alternative layout 1
As you can see in the picture above, there are 2 spawning rooms for the hostile mobs to spawn. This is very useful if you can silk-touch mine mob spawners. Anyhow, the dimensions for the room are 5 across, 13 down, and 9 long. The picture is slightly deceiving, because you can't see behind the wood. To construct the spawning room(s), you will need a very durable pickaxe, or several pickaxes. You shall dig out the full room, and make a redstone lighting system to control when the mobs can and cannot spawn. You will then make a 2×7 water elevator, bringing the mobs up 5 levels above where you will hit them. You shall then make a 1×2 area to hit the mobs, and if room allows, a spot where water may flow to bring mob drops to you. You will be able to pick up most mob drops without this, but there are still few you won't be able to.
Alternative layout 2
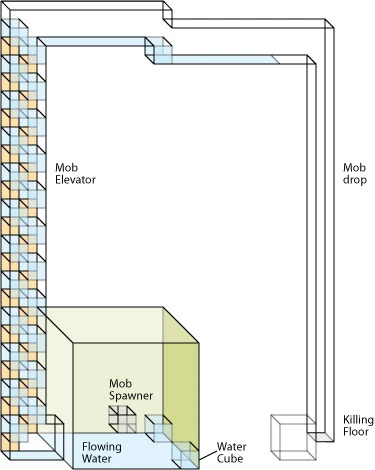
- An alternative layout with a smaller footprint takes advantage of the fact that a player must be within 16 blocks of a spawner for it to activate, but that spawners only check 9 blocks vertically for spawned mobs. Build the trap as above, except instead of being off to the side, the killing floor is 4-16 squares directly above the monster spawner. This requires less materials, less x,z space and less precision in construction, though is 3-15 blocks taller.
- To construct the trap this way, build a 9×5×9 room around the monster spawner with flowing water leading the mobs into a corner. Build a water ladder in this corner going 26-38 blocks upwards as measured from the top of the monster spawner. At the top of the ladder, direct the mobs a couple blocks in any direction with water, and into a 22 block drop chute. At the bottom of the drop chute, create a platform 1 block lower, with a 1x1 "window" into the chute through which you can strike the mobs safely from the platform.
Another experience trap (by AlexxShadenk777)
- Firstly it should be noted that this was made with a zombie spawner in mind. Basically you just make a balcony of sorts and wail on the zombies as they approach you while being unable to hit you.
- Seal the zombie spawner in a 5×5×5 chamber, naturally you want it to stay in the center of the chamber at the lowest height. Outside of the chamber make a platform that is 2 blocks high that surrounds the outer wall, and while standing on this platform, punch a wide hole in the corner of the chamber 1 block above the platform. Remove the corner block so you can stand in the corner while the zombies practically funnel toward you. They'll be able to push you but not hit you at all, so you're free to smack them on the head with your weapon of choice.
- Naturally the rotten meat they drop will remain inside the chamber but the experience points will hover toward you. If for some reason the points end up too far just walk around the chamber to their nearest corner.
- Optional: lead some tamed wolves into the chamber before sealing it!
Experience trap
- Place torches to turn off spawner
- Place water in two corners
- Make a hole where the water ends
- Make a 3×2 path until the water ends
- Make it so mobs will stop at the end.
Recollect the torch and stand where the end of the tunnel is.
If done correctly you can slay the mobs and get experience and rare drops from mobs.
Humanoid monster spawner xp trap (by HeofShadow)
This type of spawner is made for Humanoid type monster spawners (skeletons, zombies, and in some cases zombie pigmen), but can be modified for a spider spawner. First disable the monster spawner and areas around it with Torches so Mobs do not spawn and disrupt the creation of the trap. Now make a room 17 blocks wide by 9 blocks long and anywhere from 4-7 blocks high, with the spawner being in the rough center and 1-2 blocks above the ground. Now dig out the bottom row 1 down everywhere except the center, which should be dug down around 7 blocks. Place a water source block on each end of this dug out area and it should stop just before the center. Now place water source blocks at the top so that it should stop before running into the dug out area. Remove the torches so that the mobs start spawning, and go down so that you are at eye level with where the center area was dug down 7 blocks. Make it so you can only see the mobs feet on one side, and on the other use a slab to make it so you can just see the top of its head. This allows good use of both swords And bows (Also, some servers give bonus damage for Headshots). *Screenshots Coming Soon*
S-bend design
This type of trap allows a one-hit kill on zombies and skeletons; however, the drops and the experience are farther away.
Expand the floor so that there are two blocks of air below the spawner, and the walls so that the room is 9×9. Dig four blocks down on the block directly below the spawner and place water source blocks in each corner.
Dig one block north and two blocks south (three blocks tall for each direction), then go towards the south end, and make an access shaft. At the north end, dig a shaft, 30 blocks deep, and three pointing west. At the bottom, make a small room and light it up. Place ladders on the west end, and make an access shaft to the top of the ladders. Place blocks to the east of the ladders, except for the bottom few.
Place two bottom slabs on the block south to that directly below the spawner, and place trapdoors liberally (zombies and skeletons can climb ladders). Optionally, place hoppers at the bottom of the collection room.
Multiple spawners of the same species
To maintain maximum efficiency a trap must take on an increased complexity in keeping mobs separated or moving quickly when dealing with multiple spawners of the same species. Minecraft first checks within the 17 wide by 17 long by 9 high area with the spawner in the center (or 8×8×4 radius from the spawner) for mobs of the same species as the spawner. If there are fewer than 6 mobs of the same species in the checking zone, it will spawn a mob within half the distance of the checking radius. This means that with two spawners of the same species near to each other, there will be a zone that mobs will count for both spawners and severely impact the spawn rates. It would be a wise idea to work out where these checking zones overlap and ensure that mobs being funneled to the trap do not enter that zone and/or leave the overlapped / checking area as quickly as possible to maintain peak monster spawner output.
Videos
This design is easy to build and doesn't require too many materials. It allows mobs to enter, but blocks them from leaving with pressure plates and pistons.
Tutorials/Monster spawner traps/video