(Undo revision 973964 by 84.249.100.167 (talk)) |
m (Revert edits by Use Minecraft Wiki Fork (talk)) Tag: Rollback |
||
| (293 intermediate revisions by more than 100 users not shown) | |||
| Line 1: | Line 1: | ||
| − | {{About|farms |
+ | {{About|farms that spawn mobs in natural conditions|single-species farms built around a spawner|Tutorials/Spawner traps}} |
| − | '''Mob |
+ | '''Mob farms''' are structures built to acquire mob drops more easily and in larger numbers. They usually consist of two components: a large, dark room to spawn mobs, which are funneled into a central location, and a mob grinder to kill them quickly and efficiently. |
== Locations == |
== Locations == |
||
| − | The purpose for the farm is to provide a large area that is a viable [[Spawn#Mob spawning|spawn position]] for the intended targets, and to kill the mobs quickly. Due to the rules Minecraft applies to spawning mobs, this makes the choice of a location for the mob farm a difficult |
+ | The purpose for the farm is to provide a large area that is a viable [[Spawn#Mob spawning|spawn position]] for the intended targets, and to kill the mobs quickly. Due to the rules Minecraft applies to spawning mobs, this makes the choice of a location for the mob farm a difficult problem. |
| − | Farms placed on the |
+ | Farms placed on the surface can provide good drop rates during the day, when it is one of the few spots of dark ground, but has a sharp drop in effectiveness during nighttime, when the entire surface is dark enough to support mob spawning. |
| − | Farms built |
+ | Farms built underground have a time-independent drop rate, and remain within your personal spawn range for hostiles when you go mining, but their effectiveness depends on the amount of unlit caverns in your vicinity, which provide alternative places for mobs to spawn. |
| − | Farms floating high in the |
+ | Farms floating high in the sky can achieve the best spawn rates during the day and night and you are far away from caves, as they represent the only viable spawn ground. However, building one in survival is rather dangerous, and due to their height they stop working completely when you descend underground to mine resources. To produce loot, you must stay at the height of the farm. |
| − | Farms constructed under an |
+ | Farms constructed under an ocean can provide the best during day and night, as the ocean limits the viable spawn locations to open areas underground except for [[Drowned|drowned]], which spawn underwater. You can also locate your base below it to ensure that you are always close enough to spawn monsters. |
| − | + | [[Superflat]] worlds provide higher spawn rates than other worlds, as the missing air pockets underground reduce the amount of dark places. |
|
| − | + | [[The Nether]] is difficult to farm, as water evaporates and most mobs are immune to fire. This reduces the amount of functioning farm designs considerably. One could try to funnel the mobs through [[Nether Portal]]s to circumvent the restrictions. |
|
== Drops == |
== Drops == |
||
| − | What a mob farm produces depends on location and the type of grinder used to kill the mobs. Automatic killing |
+ | What a mob farm produces depends on location and the type of grinder used to kill the mobs. Automatic killing prevents certain drops and [[experience]], but is safer as the player is not required to be near the mobs. The following is a table of mobs that can be effectively farmed and their usual and player-caused drops. Player-caused drops and experience can be obtained only when the monster is killed directly by [[the player]] or a tamed wolf. |
| + | |||
| + | Note that zombie, skeleton, and creeper heads drop only if killed by a charged creeper. Wither skeletons, however, have a small chance to drop theirs no matter the cause of death, but still always drop them when killed via charged creeper. |
||
| + | |||
{| class="wikitable" data-description="Mob drops" |
{| class="wikitable" data-description="Mob drops" |
||
|- |
|- |
||
! Mob |
! Mob |
||
| − | ! Normal |
+ | ! Normal drops |
| − | ! Player |
+ | ! Player-caused drops |
| + | ! Spawn |
||
! Notes |
! Notes |
||
| + | |- |
||
| + | | {{EntityLink|Blaze}} |
||
| + | | ''None'' |
||
| + | | {{ItemLink|Blaze Rod}} |
||
| + | | [[Blaze#Spawning|Spawns]] in Nether fortresses and at spawners. |
||
| + | | |
||
| + | |- |
||
| + | | {{EntityLink|Cave Spider}} |
||
| + | | {{ItemLink|String}} |
||
| + | | {{ItemLink|Spider Eye}} |
||
| + | | [[Cave Spider#Spawning|Spawns]] at [[spawner]]s in [[Mineshaft]]s. |
||
| + | | Wall climbing may clog passages.<br>Can fit through spaces 0.5 blocks tall. |
||
|- |
|- |
||
| {{EntityLink|Creeper}} |
| {{EntityLink|Creeper}} |
||
| − | | {{ItemLink|Gunpowder}} |
+ | | {{ItemLink|Gunpowder}}<br>{{ItemLink|Music Discs}}<br> |
| − | + | {{BlockLink|Creeper Head}} |
|
| + | | ''None'' |
||
| − | | Music Discs only drop when a skeleton kills a creeper. |
||
| + | | [[Creeper#Spawning|Spawns]] in the [[Overworld]] when dark. |
||
| + | | Music Discs drop only when a [[skeleton]] or [[stray]] kills the creepers, requiring special setup beforehand. |
||
| + | |- |
||
| + | | {{EntityLink|Drowned}} |
||
| + | | {{ItemLink|Rotten Flesh}} |
||
| + | | {{ItemLink|Copper Ingot}}<br>{{ItemLink|Nautilus Shell}}<br> |
||
| + | {{ItemLink|Fishing Rod}}<br>{{BlockLink|Carved Pumpkin}}{{only|java}}<br>{{BlockLink|Jack o'Lantern}}{{only|java}} |
||
| + | | [[Drowned#Spawning|Spawn]] in [[river]]s and most [[ocean]] biomes. |
||
| + | |Drowned drop tridents and nautilus shells only if they spawned with these. |
||
|- |
|- |
||
| {{EntityLink|Enderman}} |
| {{EntityLink|Enderman}} |
||
| − | | {{ItemLink|Ender Pearl}} |
+ | | {{ItemLink|Ender Pearl}}<br> |
| + | Block they hold |
||
| + | | ''None'' |
||
| + | | [[Enderman#Spawning|Spawns]] in the [[Overworld]] when dark, in [[the End]] and sometimes in [[the Nether]]. |
||
| + | | Does not work with most water based farms as it teleports out upon taking damage.<br>Can break farms with randomly taken or placed blocks.<br>Best farmed in [[the End]] or [[Warped Forest]]. |
||
| + | |- |
||
| + | | {{EntityLink|Ender Dragon}} |
||
| + | | ''None'' |
||
| + | | ''None'' |
||
| + | | Spawns in the [[end]] when the player first enters the end, and can be respawned using [[end crystal]]s. |
||
| + | | At 500 xp per respawned dragon, the Ender Dragon is the largest renewable [[Experience#Experience amounts by source|source of experience]] in the game.<br>By using an unload chunk and TNT duplication bug, it is possible to farm this on a large scale in certain Minecraft versions. |
||
| + | |- |
||
| + | | {{EntityLink|Endermite}} |
||
| + | | ''None'' |
||
| + | | ''None'' |
||
| + | | Have 5% chance to spawn when [[ender pearl]] lands. |
||
| + | | [[Endermen]] attempt to kill endermites that spawn from ender pearls. |
||
| + | |- |
||
| + | | {{EntityLink|Evoker}} |
||
| + | | {{ItemLink|Totem of Undying}}<br> |
||
| + | {{BlockLink|Ominous Banner}} |
||
| + | | {{ItemLink|Emerald}} |
||
| + | | [[Evoker#Spawning|Spawns]] during [[raid]]s or in [[woodland mansion]]s. |
||
| + | | Evoker can summon evoker fangs or [[vex]]es. |
||
| + | |- |
||
| + | | {{EntityLink|Ghast}} |
||
| + | | {{ItemLink|Gunpowder}}<br>{{ItemLink|Ghast Tear}} |
||
| + | | ''None'' |
||
| + | | [[Ghast#Spawning|Spawns]] in the [[Nether]]. |
||
| + | | |
||
| + | |- |
||
| + | | {{EntityLink|Guardian}} |
||
| + | | {{ItemLink|Prismarine Shard}}<br> |
||
| + | {{ItemLink|Prismarine Crystals}}<br> |
||
| + | {{ItemLink|Raw Cod}}/{{ItemLink|Cooked Cod}} if the guardian is killed by fire. |
||
| + | | ''None'' |
||
| + | | [[Guardian#Spawning|Spawns]] in [[Ocean monument]]s. |
||
| + | | |
||
| + | |- |
||
| + | | {{EntityLink|Husk}} |
||
| + | | {{ItemLink|Rotten Flesh}} |
||
| + | | {{ItemLink|Iron Shovel}}<br> |
||
| + | {{ItemLink|Iron Sword}}<br> |
||
| + | {{ItemLink|id=iron-chestplate|Armor|Random Armor}}<br> |
||
| + | {{BlockLink|Carved Pumpkin}}{{only|java}}<br> |
||
| + | {{BlockLink|Jack o'Lantern}}{{only|java}} |
||
| + | | [[Husk#Spawning|Spawns]] in desert biomes. |
||
| + | | Husks do not burn in sunlight.<br> |
||
| + | A husk that is submerged in water for 30 seconds converts to a normal zombie. |
||
| + | |- |
||
| + | | {{EntityLink|Hoglin}} |
||
| + | | {{ItemLink|Leather}} |
||
| + | {{ItemLink|Porkchop}} |
||
| + | {{ItemLink|Cooked Porkchop}} if the hoglin is killed by fire. |
||
| + | | ''None'' |
||
| + | | [[Hoglin#Spawning|Spawns]] in Crimson Forest biome. |
||
| + | | Hoglins avoid warped fungi (including in a flower pot), nether portals, and respawn anchors. |
||
| + | |- |
||
| + | | {{EntityLink|Magma Cube}} |
||
| + | | {{ItemLink|Magma Cream}} |
||
| + | | ''None'' |
||
| + | | [[Magma Cube#Spawning|Spawns]] in the [[Nether]]. |
||
| + | | Magma cubes cannot be hurt by [[fall damage]] or [[burning]]. |
||
| + | |- |
||
| + | | {{EntityLink|Phantom}} |
||
| + | | ''None'' |
||
| + | | {{ItemLink|Phantom Membrane}} |
||
| + | | [[Phantom#Spawning|Spawns]] in the night, rain, or thunderstorm if the player hasn't slept in 3 days. |
||
| + | | The phantom is an [[Mob#Undead mobs|undead]] mob. |
||
| + | |- |
||
| + | | {{EntityLink|Pillager}} |
||
| + | | {{BlockLink|Ominous Banner}}<br> |
||
| + | Items that drops during raids: {{Only|bedrock}} |
||
| + | {{ItemLink|Emerald}}<br> |
||
| + | {{ItemLink|Enchanted Book}}<br> |
||
| + | {{ItemLink|Iron Pickaxe}}<br> |
||
| + | {{ItemLink|Iron Axe}}<br> |
||
| + | {{ItemLink|Iron Shovel}}<br> |
||
| + | {{ItemLink|Iron Sword}}<br> |
||
| + | {{ItemLink|Iron Helmet}}<br> |
||
| + | {{ItemLink|Iron Chestplate}}<br> |
||
| + | {{ItemLink|Iron Leggings}}<br> |
||
| + | {{ItemLink|Iron Boots}}<br> |
||
| + | | {{ItemLink|Crossbow}}<br> |
||
| + | {{ItemLink|Arrow}}{{Only|Bedrock}} |
||
| + | | [[Pillager#Spawning|Spawns]] in [[patrol]]s, around [[pillager outpost]]s and during [[raid]]s. |
||
| + | | If the player kills a pillager wearing a banner on its head, the player receives the [[Bad Omen]] status effect. |
||
| + | |- |
||
| + | | {{EntityLink|Ravager}} |
||
| + | | {{ItemLink|Saddle}}{{only|java}} |
||
| + | |{{ItemLink|Saddle}}{{Only|Bedrock}} |
||
| + | | [[Ravager#Spawning|Spawns]] during [[raid]]s. |
||
| + | | |
||
| + | |- |
||
| + | | {{EntityLink|Silverfish}} |
||
| + | | ''None'' |
||
| ''None'' |
| ''None'' |
||
| + | | Can be farmed at [[stronghold]] [[spawner]]s. |
||
| − | | Does not work with water-based farms. Can break farms with randomly taken or placed blocks. |
||
| + | |The ability to hide in blocks could potentially damage the farm if it is made of [[Infested Block|stone]].<br>They can fit through spaces 0.5 blocks tall. |
||
|- |
|- |
||
| {{EntityLink|Skeleton}} |
| {{EntityLink|Skeleton}} |
||
| − | | {{ItemLink|Arrow}}<br> |
+ | | {{ItemLink|Arrow}}<br>{{ItemLink|Bone}}<br>{{ItemLink|Bow}}<br> |
| + | {{BlockLink|Skeleton Skull}} |
||
| − | | {{ItemLink|Bow}}<br>{{ItemLink|id=iron-chestplate|Armor|Random Armor}}<br>{{BlockLink|Pumpkin}}<br>{{BlockLink|Jack o'Lantern}} |
||
| + | | {{ItemLink|Bow}}<br>{{ItemLink|id=iron-chestplate|Armor|Random Armor}}<br>{{BlockLink|Carved Pumpkin}}{{only|java}}<br>{{BlockLink|Jack o'Lantern}}{{only|java}} |
||
| + | | [[Skeleton#Spawning|Spawns]] in the [[Overworld]] when dark, [[dungeon|Skeleton Dungeon]] spawner, [[Soul Sand Valley]], and sometimes in the [[nether fortress]]. |
||
| + | | |
||
|- |
|- |
||
| {{EntityLink|Slime}} |
| {{EntityLink|Slime}} |
||
| {{ItemLink|Slimeball}} |
| {{ItemLink|Slimeball}} |
||
| ''None'' |
| ''None'' |
||
| + | | [[Slime#Spawning|Spawns]] in [[Swamp biome]]s or in [[Slime#"Slime chunks"|slime chunks]] below y level 40. |
||
| − | | Does not swim upwards in water.(in versions before 14w05a; The A.I. was updated at this point) Large slimes can clog up passages. Only spawns in Swamp biomes or in certain chunks at level 39 or below. |
||
| + | |Large slimes could clog smaller passages. |
||
|- |
|- |
||
| − | | |
+ | |{{EntityLink|Spider}} |
| − | | |
+ | |{{ItemLink|String}} |
| − | | |
+ | |{{ItemLink|Spider Eye}} |
| + | |[[Spider#Spawning|Spawns]] in the [[overworld]] when dark or from [[spawner]]s in [[Dungeon]]s. |
||
| − | | Wall-climbing can clog up passages. |
||
| + | |Wall-climbing can clog up passages. |
||
|- |
|- |
||
| − | | |
+ | |{{EntityLink|Stray}} |
| − | | |
+ | |{{ItemLink|Bone}}<br> |
| − | + | {{ItemLink|Arrow}}<br> |
|
| + | {{BlockLink|Wither Skeleton Skull}} |
||
| − | | Wall-climbing can clog up passages. (Only at Mineshafts) |
||
| + | |{{ItemLink|Arrow of Slowness}}<br> |
||
| + | {{ItemLink|Bow}}<br> |
||
| + | {{BlockLink|Carved Pumpkin}}{{only|java}}<br> |
||
| + | {{BlockLink|Jack o'Lantern}}{{only|java}} |
||
| + | |[[Stray#Spawning|Spawns]] under the sky in [[Snowy Tundra]], [[Snowy Mountains]], [[Ice Spikes]], [[Frozen River]], [[Frozen Ocean]],{{only|bedrock|short=1}} [[Deep Frozen Ocean]]{{only|bedrock|short=1}} and [[Legacy Frozen Ocean]]{{only|bedrock|short=1}}. |
||
| + | | |
||
|- |
|- |
||
| − | | |
+ | |{{EntityLink|Vex}} |
| + | |''None'' |
||
| − | | {{ItemLink|Coal}}<br>{{ItemLink|Bone}} |
||
| + | |''None'' |
||
| − | | {{BlockLink|Wither Skeleton Skull}}<br>{{ItemLink|Stone Sword}}<br>{{ItemLink|id=iron-chestplate|Armor|Random Armor}}<br>{{BlockLink|Pumpkin}}<br>{{BlockLink|Jack o'Lantern}} |
||
| + | |Can be summoned by [[evoker]] |
||
| − | | Nether Mob. Only spawns within fortresses. |
||
| + | |They are capable of [[flying]] through the [[air]], and can freely pass through any block, including [[water]] and [[lava]], without taking damage. |
||
|- |
|- |
||
| − | | |
+ | |{{EntityLink|Vindicator}} |
| − | | |
+ | |{{BlockLink|Ominous Banner}}<br> |
| + | Items that drops during raids: {{Only|bedrock}} |
||
| − | | {{ItemLink|Iron Ingot}}<br>{{ItemLink|Carrot}}<br>{{ItemLink|Potato}}<br>{{ItemLink|Iron Shovel}}<br>{{ItemLink|Iron Sword}}<br>{{ItemLink|id=iron-chestplate|Armor|Random Armor}}<br>{{BlockLink|Pumpkin}}<br>{{BlockLink|Jack o'Lantern}} |
||
| + | {{ItemLink|Emerald}}<br> |
||
| − | | Baby zombie variant. Is twice as fast, and 1 block tall making some kill methods impractical, and some farm designs "leaky." |
||
| + | {{ItemLink|Enchanted Book}}<br> |
||
| + | {{ItemLink|Iron Pickaxe}}<br> |
||
| + | {{ItemLink|Iron Axe}}<br> |
||
| + | {{ItemLink|Iron Shovel}}<br> |
||
| + | {{ItemLink|Iron Sword}}<br> |
||
| + | {{ItemLink|Iron Helmet}}<br> |
||
| + | {{ItemLink|Iron Chestplate}}<br> |
||
| + | {{ItemLink|Iron Leggings}}<br> |
||
| + | {{ItemLink|Iron Boots}}<br> |
||
| + | | | |
||
| + | {{ItemLink|Axe}} |
||
| + | |[[Vindicator#Spawning|Spawns]] in [[woodland mansion]]s, during [[raid]] or in [[patrol]]s {{Only|bedrock}}. |
||
| + | |A vindicator named Johnny is hostile to every mob except ghasts and illagers. |
||
|- |
|- |
||
| − | | |
+ | |{{EntityLink|Wither Skeleton}} |
| − | | |
+ | |{{ItemLink|Coal}}<br>{{ItemLink|Bone}}<br>{{BlockLink|Wither Skeleton Skull}} |
| − | | |
+ | |{{BlockLink|Wither Skeleton Skull}}<br>{{ItemLink|Stone Sword}}<br>{{BlockLink|Carved Pumpkin}}{{only|java}}<br>{{BlockLink|Jack o'Lantern}}{{only|java}} |
| + | |[[Wither Skeleton#Spawning|Spawns]] in Nether fortresses. On normal or hard difficulties, the [[wither]] spawns 4 wither skeletons when below half health {{only|bedrock}}. |
||
| − | | Can be farmed in the Nether, or in the Overworld, as they spawn near Nether Portals. Also, the same problem with normal baby zombies apply. |
||
| + | |When wither skeleton attacks an entity, the entity is inflicted with the [[Wither (status effect)|wither effect]] for 10 seconds. |
||
|- |
|- |
||
| − | | |
+ | |{{EntityLink|Witch}} |
| − | | |
+ | |{{ItemLink|Glass Bottle}}<br>{{ItemLink|Glowstone Dust}}<br>{{ItemLink|Redstone Dust}}<br>{{ItemLink|Spider Eye}}<br>{{ItemLink|Stick}}<br>{{ItemLink|Sugar}}<br>{{ItemLink|Gunpowder}} |
| − | | |
+ | |{{ItemLink|Potion of Healing}}<br>{{ItemLink|Potion of Fire Resistance}}<br>{{ItemLink|Potion of Swiftness}}<br>{{ItemLink|Potion of Water Breathing}} |
| + | |[[Witch#Spawning|Spawns]] in [[Swamp hut]]s, anywhere in the [[Overworld]] when dark, during [[raid]]s or when [[villager]] struck by lightning. |
||
| − | | Can be farmed in Swamp Huts during world gen and when it is dark. |
||
| + | |Witches cannot open [[doors]] or use [[cauldron]]s. |
||
|- |
|- |
||
| − | | |
+ | |{{EntityLink|Zoglin}} |
| + | |{{ItemLink|Rotten Flesh}} |
||
| − | | None |
||
| + | |''None'' |
||
| − | | {{ItemLink|Glowstone Dust}} (Only on Xbox and PS3 Edition) <br> {{ItemLink|Blaze Rod}} |
||
| + | |[[Zoglin#Spawning|Spawns]] when a hoglin has been in the [[Overworld]] or the End for 300 game ticks (15 seconds). |
||
| − | | Can be farmed in Nether Fortress or Spawners. |
||
| + | |Zoglins attack every [[player]], [[armor stand]] and every [[mob]] except [[creeper]]s, [[charged creeper]]s and other zoglins. |
||
|- |
|- |
||
| − | | |
+ | |{{EntityLink|Zombie}} |
| − | | |
+ | |{{ItemLink|Rotten Flesh}}<br>{{BlockLink|Zombie Head}} |
| + | |{{ItemLink|Iron Ingot}}<br>{{ItemLink|Carrot}}<br>{{ItemLink|Potato}}<br>{{ItemLink|Iron Shovel}}<br>{{ItemLink|Iron Sword}}<br>{{ItemLink|id=iron-chestplate|Armor|Random Armor}}<br>{{BlockLink|Carved Pumpkin}}{{only|java}}<br>{{BlockLink|Jack o'Lantern}}{{only|java}} |
||
| − | | None |
||
| + | |[[Zombie#Spawning|Spawns]] in the [[Overworld]] when dark, from [[dungeon|Zombie Dungeon]] spawner, during [[siege]], or converted from [[husk]] |
||
| − | | Can be farmed in Nether. |
||
| + | |Baby zombie variant is twice as fast and 1 block tall; a [[Tutorials/Drowned farming|zombie farm]] should account for this to prevent escapes.<br>When converted [[drowned]], they can also drop [[nautilus shell]]s. |
||
|- |
|- |
||
| − | | |
+ | |{{EntityLink|Zombified Piglin}} |
| − | | |
+ | |{{ItemLink|Rotten Flesh}}<br>{{ItemLink|Gold Nugget}} |
| + | |{{ItemLink|Gold Ingot}}<br>{{ItemLink|Golden Sword}}<br>{{BlockLink|Carved Pumpkin}}{{only|java}}<br>{{BlockLink|Jack o'Lantern}}{{only|java}} |
||
| − | | None |
||
| + | |[[Zombie Pigman#Spawning|Spawns]] in the Nether and in the Overworld near [[Nether Portal]]s, when a [[Piglin]] is in the overworld for 15 seconds, or when pig struck by [[lightning]]. |
||
| − | | Can be farmed in Nether. |
||
| + | |Baby pigman are twice as fast and 1 block tall, similar to baby zombies.<br>If a Zombie Pigman dies while targeting [[the player]], it drops [[experience]]. This mechanic has been used to create xp farms. |
||
| − | |- |
||
| − | | {{EntityLink|Silverfish}} |
||
| − | | None |
||
| − | | None |
||
| − | | Can be farmed in strongholds Spawners. Ability to hide in blocks could potentially cause damage to farm if made of cobblestone or stone. |
||
|} |
|} |
||
| − | == |
+ | ==Designs== |
| − | When planning a mob farm, one should |
+ | When planning a mob farm, one should consider the size of the spawnable area. The maximum spawnable area depends on where one plans to be in relation to the farm. If you plan to be directly beneath the center of the farm, waiting for the items, then the radius in which mobs can spawn can be used to calculate the maximum size of the spawnable area: |
| − | ''floor''( ''sqrt''( |
+ | ''floor''( ''sqrt''(Spawn Radius^2 - (Spawn Floor Height - Collection Floor Height)^2 )) = '''Spawnable Area''' |
| + | {{IN|java}} the spawn radius is 128 blocks. {{IN|bedrock}} the spawn radius is roughly 96 blocks for simulation distances > 4. For simulation distance 4 {{in|bedrock}} the spawn radius is 44 blocks. |
||
| − | If you plan to spend your time in a less defined position, it might be easier to stack a simple design several times, ensuring that at least some areas are in the spawn range while limiting complexity. |
||
| + | In practice, however, it is rarely worthwhile to fill the maximum spawnable area with a single farm that delivers mobs to central location. For example, if you plan to spend your time in a less defined position, it might be easier to repeat a simple design several times, ensuring that at least some areas are in the spawn range while limiting complexity. Moreover, transporting mobs long distances for killing makes a farm less efficient because of caps that limit spawning based on the number of mobs already in the loaded areas around the player. The impact of caps is especially important {{in|Bedrock}}, which has caps that limit population densities as well as a global cap that counts mobs around every player loaded in the world. |
||
| − | === Sinkhole === |
||
| + | If you are making a room that relies on darkness to spawn mobs, cave sounds and bats are good signs that your spawner is dark enough to let hostile mobs spawn. |
||
| − | The easiest possible design consists of a large, empty area of simple shape, with one or more holes in the ground for the mobs to drop through. The edge of each hole has to be lined with opened [[trapdoor]]s or [[gate]]s to trick the Mob AI into believing the hole to be solid ground. As of minecraft 1.4, [[signs]] no longer trick the mob AI. Trapdoors can also be controlled with Redstone, so one could shut off the farm by closing the holes remotely. |
||
| + | ===Spawning tower=== |
||
| − | The whole room is closed by a roof to create minimal light level. A roof height of 3 allows Endermen to spawn, while a roof height of 1 would restrict the farm to spiders. |
||
| + | One of the most popular overworld designs for a general mob farm is based on a tower of spawning pads that are periodically flushed with water to push the mobs off so that they die from fall damage. The water comes from a central pillar of dispensers and observers that cascade a clock signal between platforms. This type of farm is known for its high production rates, simplicity, reliability, and ease of build. |
||
| − | Sinkhole farms are naturally not very effective, as the chance for a mob to wander into a hole is small, and zero when the player is so far away that the mobs freeze. But they can be built quickly and cheaply and will work in the Nether as well. |
||
| + | {{yt|guvMmdeZqiI}} |
||
| − | === Canal-Style === |
||
| + | Starting in 1.19.3, mobs no longer spawn on scaffolding. In this case, just build the spawning platforms with top slabs instead of scaffolding. The central signal tower of observers, dispensers, scaffolding blocks remains the same. |
||
| − | {{#ev:youtube|VZgA8Kp8b0M}} |
||
| + | ====Using observer blocks==== |
||
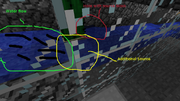
| − | [[File:Canal-map2.png|thumb|Example layout of a 38x38 Canal-Style farm]]To improve the chances of a mob falling into the holes, one can add channels filled with flowing water, leading to the central hole. The channels are lined with open trapdoors to trick the mobs into falling in, and the water transports them into the grinders. Such a design requires a bit of planning to ensure that there is no stationary water in which the mobs might get stuck, reducing effectiveness. |
||
| + | The designs shown in the YouTube videos above are somewhat resource intensive, but this design requires only the following materials: |
||
| + | *1 [[dispenser]] (per layer) |
||
| − | Since the system uses water to transport mobs, it will fail to capture Endermen, which teleport away when touching water. Therefore, the roof of the cavern should be 2 blocks above the ground to prevent griefing of your farm by Endermen taking blocks. |
||
| + | *1 [[water bucket]] (per layer) |
||
| + | *1 [[observer]] (per layer) |
||
| + | *112 [[Spawn#Spawn conditions|opaque]] blocks of choice (per layer) |
||
| + | *1 [[Mechanics/Redstone/Clock circuit/hopper clock|clock]] (e.g. an Ethonian hopper clock: 2 [[hopper]]s, 2 [[sticky piston]]s, 2 [[comparator]]s) |
||
| + | *A capture layer (just several dozen [[hopper]]s leading into a chest) |
||
| + | In addition to being inexpensive, it is also easier to build. |
||
| − | ==== Compact Canal Design ==== |
||
| + | The design uses three different layers that are repeated with a redstone clock added to the top layer. |
||
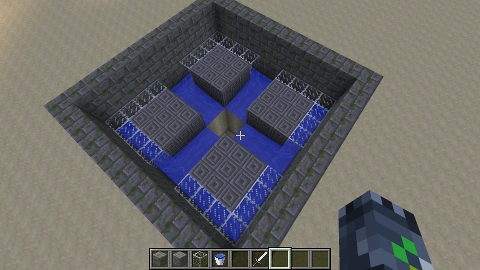
| − | [[File:2GBGd.jpg|thumb|Compact Canal design]] A very easily built design can be made in an 20x20 area, using eight water source triangles to fill the channels, which are exactly eight blocks long so that the water stops exactly at the edges of the central hole. The design can be easily stacked or placed next to each other to increase the effectiveness. |
||
| + | The layers are as follows: |
||
| + | #Top layer: An [[observer]] block, facing ''up'' observing the dispenser it; the rest of this layer is air. |
||
| − | ==== Minimal Canal Design ==== |
||
| + | #Middle layer: This layer is completely air (once the dispenser is triggered, it becomes filled with [[water]] taking the block above the dispenser at its center). |
||
| + | #Bottom layer: The [[dispenser]] (facing ''up'', surrounded by opaque blocks (e.g. cobblestone) to hold the [[water]]. Fill the dispensers are filled with a bucket of water. |
||
| + | For layer one, the blocks must hold all of the water, so go out seven blocks in each direction, then fill in diagonally. |
||
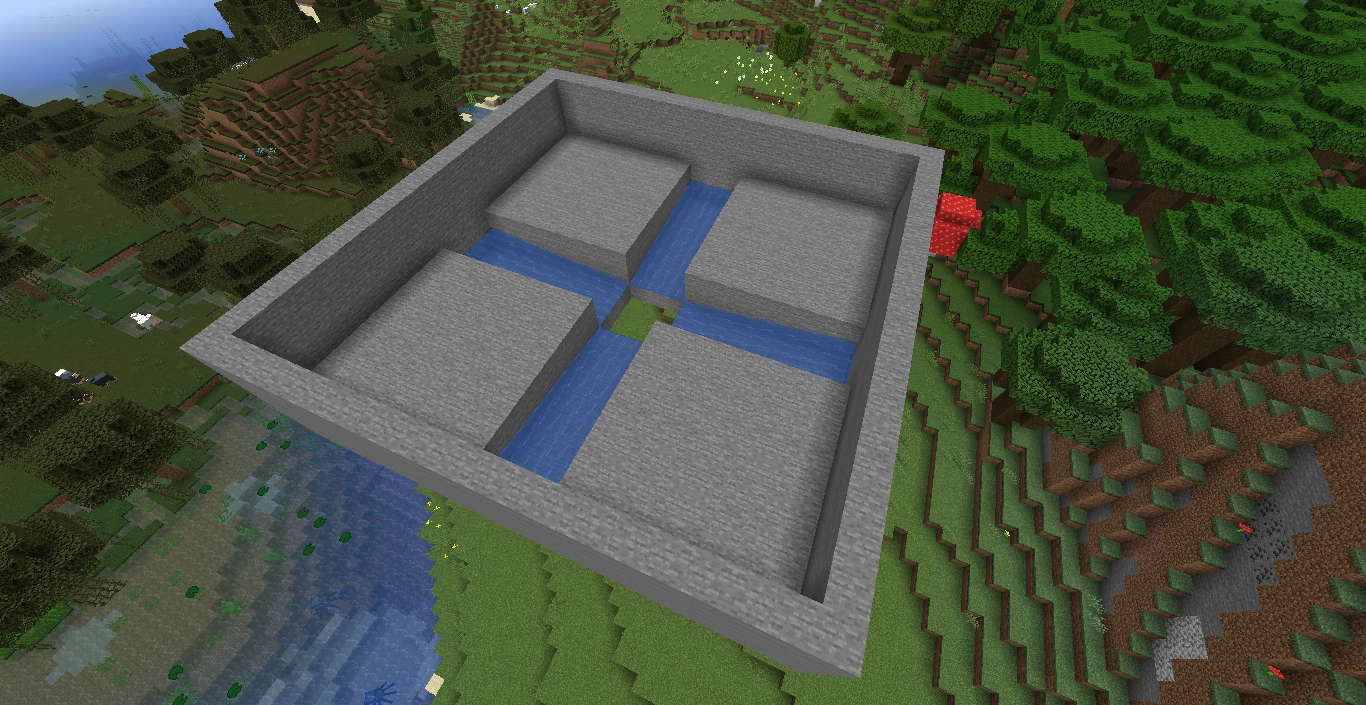
| − | [[File:MinimalFarm.png|thumb|Minimal Canal design, using glass to show the flow of water]] If there is not enough space for larger designs, this might be used. Its small size of 10x10 (inner area) makes it able to be incorporated into larger construction projects without trouble. It uses four water source blocks, one in each corner, with the water flowing around 3x3 squares of building material to the central hole. The parts of the water between the wall and the blocks is closed over to provide more spawning area. |
||
| + | Optionally, you can surround these blocks with signs to prevent spiders from climbing up. However, this would be a large amount of work for little benefit. |
||
| + | This mechanism can cascade downward through quasi-connectivity. When the top dispenser is triggered the observer see the state change and signals down to the air gap above the dispenser below, activating it through quasi-connectivity. |
||
| − | ==== Large Chamber Fully Automatic Design ==== |
||
| + | This cascades down through all of the layers (make as many as you like, but anywhere between 3 and 10 should be plenty). |
||
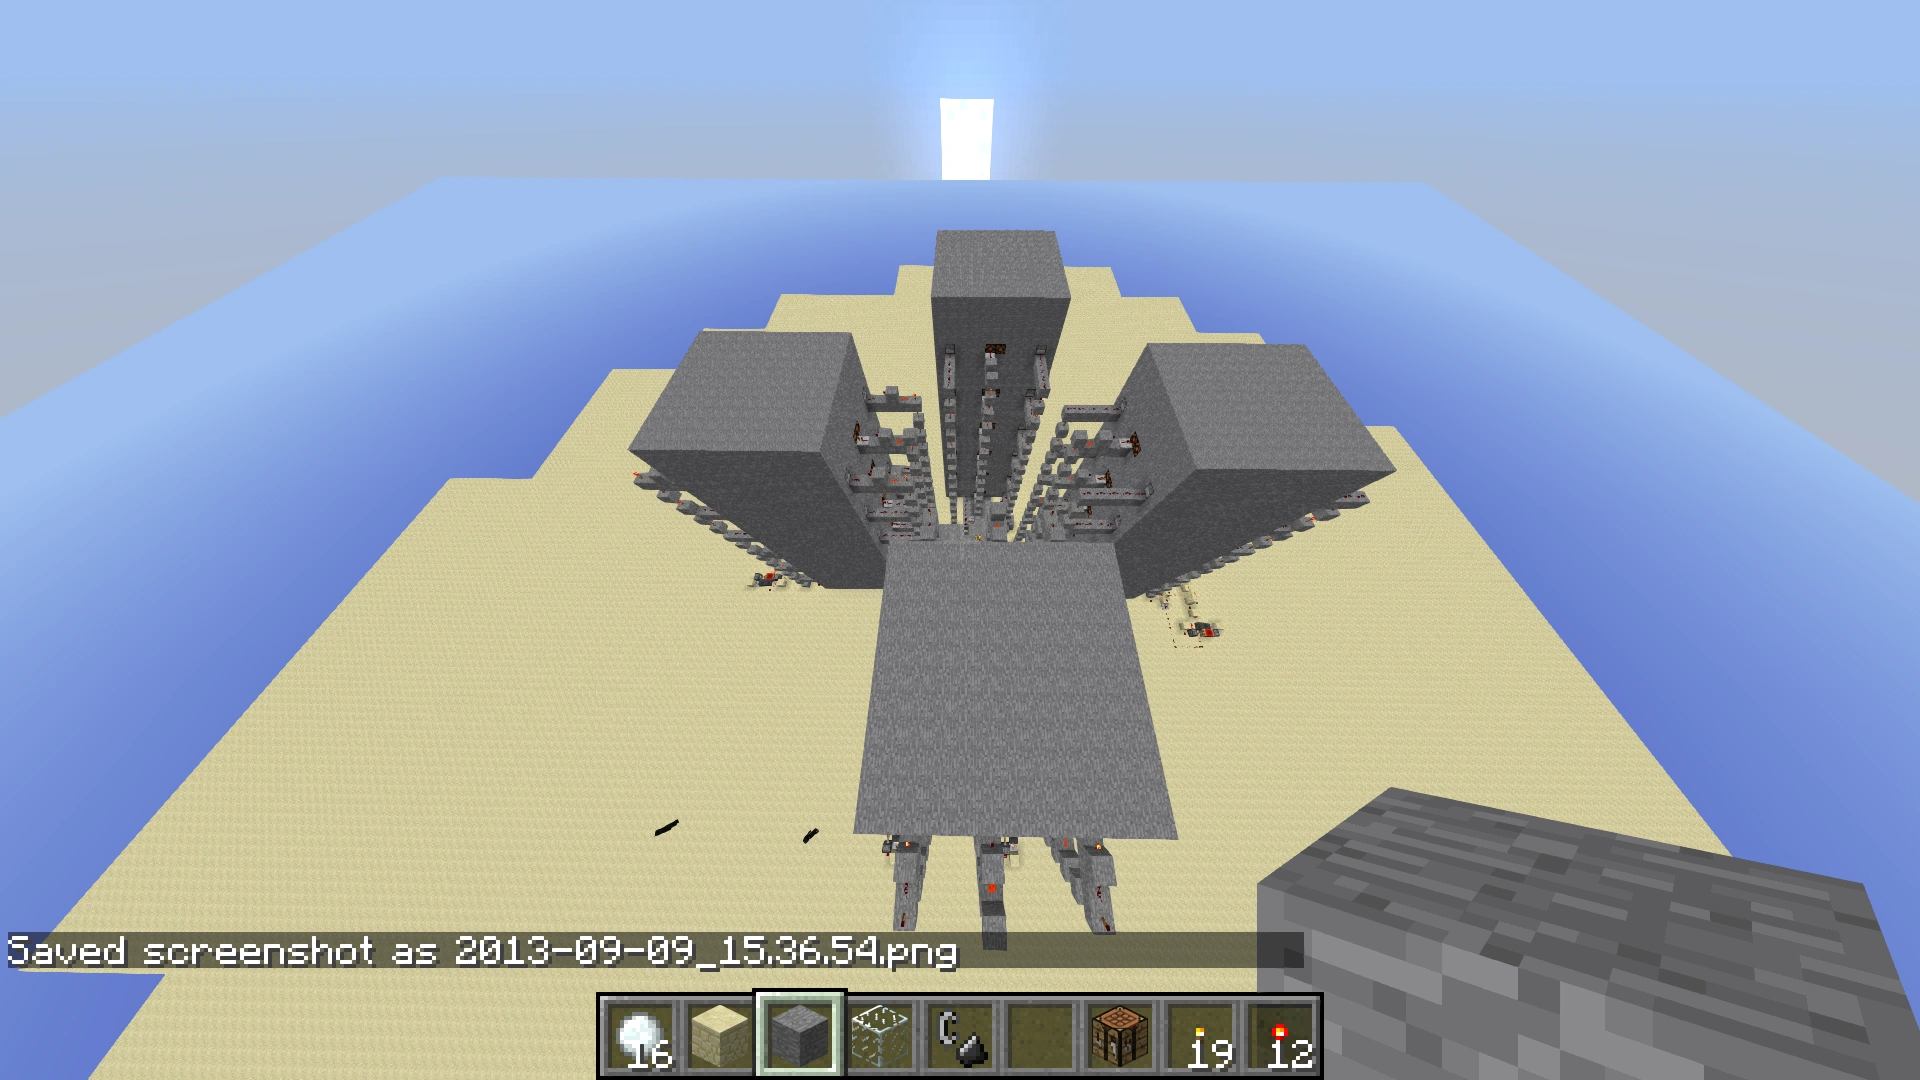
| − | [[File:LargeMobFarm.png|thumb|Large Chamber Fully Automatic]]This is a very large farm that requires a lot of resources, it has 6 spawn chambers in each building, and redstone controlling it. It produces 4 waves of average 10-15 mobs every 16 or so seconds |
||
| + | To start this cascade, the topmost dispenser needs to be activated. It is recommended to do so using an [[Mechanics/Redstone/Clock circuit/hopper clock|Ethonian hopper clock]] with about ten items in it. You can trigger the topmost observer using the redstone output from one of the emplacement the [[redstone block]] could be in the clock. |
||
| + | It is also recommended to make the layer on which you place the clock bigger than the other the hide the layers under from the sun, and to place torchs on it to prevent mob spawn. |
||
| + | ===Sinkhole=== |
||
| − | === Active Mob Displacement === |
||
| + | The easiest possible design consists of a large, empty area of simple shape, with one or more holes in the ground for the mobs to drop through. The edge of each hole has to be lined with opened [[trapdoor]]s or [[gate]]s to trick the Mob AI into believing the hole to be solid ground. Trapdoors can also be controlled with [[redstone]], so one could shut off the farm by closing the holes remotely. |
||
| − | The Canal-Style System still suffer from the mobs freezing when outside a certain range around your character. Active Systems can correct that problem, using Redstone and Dispensers filled with a Water bucket to flood the spawning grounds repeatedly, flushing all mobs into the channels to be transported to the grinders. Thus, the farm provides area for the mobs to spawn in, but does not rely on mob movement to get them into the grinder. Using this, one can omit the trapdoors needed for the other, passive designs. |
||
| + | The whole room is closed by a roof to create a minimal light level. A roof height of 3 allows Endermen to spawn, while a roof height of 1 would restrict the farm to spiders. |
||
| − | A good example of this kind of farm can be seen here, stacking the same basic design several times and using fall damage as grinder. |
||
| + | Sinkhole farms have limited effectiveness, as the chance for a mob to wander into a hole is small, and zero when the player is so far away that the mobs freeze.{{only|java}} But they can be built quickly and cheaply, and works in the Nether (unlike other designs requiring water because you can't place water in the Nether). |
||
| − | {{yt|iN262uzigko}} |
||
| + | ===Canal-style=== |
||
| − | Another design doesn't push mobs into a tube. However, the rates are over 10,000 per hour. |
||
| + | [[File:Canal-map2.png|thumb|Example layout of a 38x38 Canal-style farm]]To improve the chances of a mob falling into the holes, one can add channels filled with flowing water, leading to the central hole. The channels are lined with open trapdoors to trick the mobs into falling in, and the water transports them into the grinders. Such a design requires a bit of planning to ensure that there is no stationary water in which the mobs might get stuck, reducing effectiveness. |
||
| − | {{yt|YA2siTV5s4Q}} |
||
| + | Because the system uses water to transport mobs, it cannot capture Endermen, which teleport away when touching water. Therefore, the roof of the cavern should be 2 blocks above the ground to prevent griefing of your farm by Endermen taking blocks. |
||
| − | === Villager === |
||
| − | This method only works on [[Zombies]] because no other mob is attracted to [[Villagers]]. This is tricky, as you need a [[Village]] to get the Villager into the right position. This method works by having a straight line from the zombie spawner in a straight line next to where the villagers are and having a method of killing at the end next to the villager (e.g. water, fall damage, etc.). |
||
| − | === |
+ | ====Compact canal design ==== |
| + | [[File:2GBGd.png|thumb|Compact Canal design]] An easily-built design can be made in a 20×20 area, using eight water source blocks to fill the channels, which are exactly eight blocks long so that the water stops exactly at the edges of the central hole. The design can be easily stacked or placed next to each other to increase the effectiveness. This design can be made even smaller as shown in the video (14×14 area). Shrinking the design can be done by using signs to cut off the water flow at the edge of the sinkhole, forcing the mobs to fall into the central hole. |
||
| − | Instead of using water to transport mobs, there are various other methods to make them move towards the grinder, all of which may work better with certain mobs, but can have higher resource requirements or lesser gathering rates. |
||
| + | ==== Minimal canal design ==== |
||
| − | For example, this system uses pistons as well as active grinding to also collect XP: |
||
| − | {{yt|5vjioGSDLck}} |
||
| + | [[File:MinimalFarm.png|thumb|Minimal Canal design, using glass to show the flow of water]] If there is not enough space for larger designs, this might be used. Its small size of 10x10 or 20x20 (inner area) makes it able to be incorporated into larger construction projects without trouble. It uses four water source blocks, one in each corner, with the water flowing around 3x3 squares of building material to the central hole. The parts of the water between the wall and the blocks is closed over to provide more spawning area. |
||
| − | ==== One-Way Doors ==== |
||
| − | Relying on the random movement of mobs, One-Way Door Designs use doors or pistons to prevent the mobs from wandering backwards. Making several sets of doors can increase the speed with which the mobs move towards the hole. |
||
| + | ====Large chamber fully automatic design==== |
||
| − | The easiest configuration consists of a wall of doors (Iron on Hard difficulty to prevent Zombies from smashing them, or fencegates, or maybe trapdoors somehow. Use wooden doors on other difficulties) with a row of pressure plates in front of them. When the mobs walk onto the pressure plates, the door opens, letting them through, but once on the other side, they can't open the door since there is no switch. |
||
| + | [[File:LargeMobFarm.png|thumb|Large Chamber Fully Automatic]] |
||
| − | With Pistons, the arrangement is reversed, with the pressure plates on the desired side, and the pistons pointing upwards, so that they block the path of the mobs when extended. This design only work with a 2-block high roof to prevent the mobs from jumping, and even then might fail on spiders. However, it requires considerably more common ingredients than the iron door variant. |
||
| + | This is a large farm that requires significant resources. It has 6 spawn chambers in each building, and redstone controlling it. It outputs 4 waves of average 10-15 mobs every 16 or so seconds. |
||
| + | ====Water pans==== |
||
| − | Such systems can also be used to "store" mobs after gathering them from the farm, so that they later can be killed for the rare drops and experience. |
||
| + | If you have mobs coming in from multiple sources, you may need a water pan (a.k.a. water tray) to collect mobs from a large area to a central dropshaft. |
||
| + | A basic 9×9 (not counting the walls) water tray works well for zombie or skeleton spawners, or when gathering together the output of several dark areas. Simply put water sources at the corners of the square, and they flow to drop the mobs into a hole in the central square. For spiders or iron golems, you must expand this to 10×10, which allows for a 2×2 hole in the middle (for spiders, you must also line the chute with glass). |
||
| − | {{yt|Qrp_8zM9ZGs}} |
||
| + | For a few cases (notably Overworld gold farms), a 27×27 water tray (counting the walls!), with two levels, may be needed. Start with a classic 9x9 pan surrounding the drop chute. Move up a level to surround it with the rest of the large pan — slabs or blocks suffice for most of it (put real blocks at the boundary, so you can place water on them), but the outer ring should be a 25×25 square of fences on the same level (that is, you'd have a half-step up from the outer pan to the fences). Surround this with the 27×27 outer wall. The inner pan gets a water source at each corner, which should send the flow in to surround the hole. For the outer pan, water sources go every other block on top of the fences (place them against the outer wall), but ''not'' in a complete ring. Place the sources every other space along two opposite walls; the water should flow exactly to the edge of the inner pan. Now, if you fill in the entirety of the other walls, you get extra water sources forming from the corners, and your current becomes a sheet of mostly-still water. For the other two walls, put only five sources each covering the middle — that is, one at the midpoint, and two on each side (still every other space). This sends the water flow to the other edges of the inner pan. |
||
| − | ==== Slime ==== |
||
| + | |||
| + | The large pan could also be expanded to 28×28 with a 10×10 inner pan, but this requires some experimentation. |
||
| + | |||
| + | ===Active mob displacement === |
||
| + | |||
| + | The Canal-Style System still suffers from the mobs freezing when outside a certain range around your character {{in|Java}}, and from the limitations of low population density caps {{in|bedrock}}. Active Systems can correct that problem. One example is using Redstone and Dispensers filled with a Water bucket to flood the spawning grounds repeatedly, flushing all mobs into the channels to be transported to the grinders. Thus, the farm provides area for the mobs to spawn in, but does not rely on mob movement to get them into the grinder. Using this, one can omit the trapdoors needed for the other, passive designs. |
||
| + | |||
| + | {{IN|bedrock}} placing water on top of scaffolding provides an efficient means of active transport. Land mobs spawn with their feet inside of the scaffolding and their heads inside of the flowing water. The mobs are then immediately transported to a drop chute or other killing area. Spiders and baby mobs present a challenge for water-on-scaffolding designs because they spawn entirely inside of the scaffolding and cannot be moved by the water until they randomly climb/jump. Several methods have been invented to deal with this: buttons placed every-other block in every-other row prevents spiders from spawning at all; villagers can be used to lure baby zombies (see below); snow golems can be used to knock mobs upward and into the flowing water; or cascading water down a funnel-shaped spawn floor can be used to pull babies and spiders into the water flow at every block. |
||
| + | |||
| + | ===Other designs=== |
||
| + | |||
| + | Instead of using water to transport mobs, there are various other methods to make them move toward the grinder, each of which may work better with certain mobs but with other tradeoffs. |
||
| + | |||
| + | *'''Sunlight mob farm:''' Undead mobs seek protection from sunlight. A roof three blocks above the ground can provide a shady area to lure undead mobs into a pit lined with open trap doors, leading into a grinder. The disadvantage of the farm is that it attracts only zombies and skeletons. |
||
| + | * '''Villager:''' Only [[zombies]] and [[drowned]] are attracted to [[villagers]]. This method works by having one or more villagers trapped (but protected from actual attack). Any nearby zombies go toward the villagers. You can make a maze that the zombies have to go through so that you need only one trap. However, there should be some sort of trap that the zombies fall into to get to the villagers (e.g. a ton of soul sand in water or in air, fall damage, etc.). |
||
| + | *'''Turtle eggs:''' This method works on [[zombies]], [[drowned]] and [[Zombified Piglin|zombified piglins]]. [[Turtle Egg|turtle eggs]] attract all variations of zombies, which want to trample them. Turtle eggs can be used in combination with open trapdoors above a drop to lure any zombie-variant mobs into a killing chamber. It is a popular choice for zombified piglin farms in the nether, and can be used as a method to lure zombies away from other mobs in a standard mob farm. |
||
| + | *'''One-way doors:''' Relying on the random movement of mobs, One-Way Door Designs use doors or pistons to prevent the mobs from wandering backward. Making several sets of doors can increase the speed with which the mobs move toward the hole. |
||
| + | ** The easiest configuration consists of a wall of iron doors or fence gates (you can use wooden doors if you're not on Hard difficulty) with a row of pressure plates in front of them. When the mobs walk onto the pressure plates, the door opens, letting them through, but once on the other side, they can't open the door since there is no switch. |
||
| + | **With pistons, the arrangement is reversed, with the pressure plates on the desired side, and the pistons pointing upward, so that they block the path of the mobs when extended. This design works only with a 2-block high roof to prevent the mobs from jumping, and even then might fail on spiders. However, it requires considerably more common ingredients than the iron door variant. |
||
| + | **Such systems can also be used to "store" mobs after gathering them from the farm, so that they later can be killed for the rare drops and experience |
||
| + | * '''Slime:''' This farm design uses large slimes to push mobs off ledges. The simplest way to get these slimes are through a slime farm. As for the rates, it gets over 20,000 items per hour, as said in the video title. |
||
| + | *'''Cats:''' Creepers flee from cats. This can be used to redirect the creepers away from other mobs, and/or to their own killing chamber. Similarly, skeletons and wither skeletons flee from wolves. |
||
| + | {{yt|Qrp_8zM9ZGs}} |
||
| + | <br /> |
||
| − | If you want an extremely good mob farm, this is the one for you. It utilizes the largest natural slime to push the mobs off the platform. The simplest way to get these slimes are through a slime farm. As for the rates, it gets over 20,000 items per hour, as said in the video title. |
||
{{yt|uTPfWJHnWkc}} |
{{yt|uTPfWJHnWkc}} |
||
| − | == |
+ | ==Transporting mobs== |
After collecting the mobs from the farm, it might be beneficial to transport them to a different location before grinding them, so that you can access the items more easily while remaining at a close-to optimal position for the spawning of your farms. |
After collecting the mobs from the farm, it might be beneficial to transport them to a different location before grinding them, so that you can access the items more easily while remaining at a close-to optimal position for the spawning of your farms. |
||
| − | === |
+ | ===Horizontal transportation=== |
| − | Horizontal Transportation can be done easily using flowing water, with a drop of 1 block vertically for every 8 block |
+ | Horizontal Transportation can be done easily using flowing water, with a drop of 1 block vertically for every 8 block traveled horizontally. Build a tunnel with a height of 3 blocks and a width equal to the size of your gathering holes (usually 2). Mine forward to a length of 8 Blocks, so that water placed at the start ends exactly at the drop. Repeat, but one block lower, so that the mobs fall from one funnel part to the next. Mine out the roof at the higher level for 2 or 3 more blocks to prevent spider clinging to the walls from clogging up the funnel. |
| − | [[File:AntiSpiderCactus.png|thumb|Spider grinder]] Alternatively, one can use a cactus to grind the spiders immediately. To do this, make the first funnel part only 7 |
+ | [[File:AntiSpiderCactus.png|thumb|Spider grinder]] Alternatively, one can use a cactus to grind the spiders immediately. To do this, make the first funnel part only 7 blocks long and place one water source block instead of two. Place a sand block and a cactus on top on the same side as the source block. To place the cactus, you have to mine out the block next to it. To ensure the water flow on the next part, mine out the wall block next to the sand and add the water sources there and next to the sand, where there would usually be one. |
| − | === Downward transportation |
+ | === Downward transportation=== |
Transporting mobs and items downward is trivial, simply let them drop down a chute with a water brake at the bottom. Or omit the water brake when you want the mobs to die from fall damage. |
Transporting mobs and items downward is trivial, simply let them drop down a chute with a water brake at the bottom. Or omit the water brake when you want the mobs to die from fall damage. |
||
| − | === Upward transportation |
+ | === Upward transportation=== |
| − | Upward transportation uses the fact that nearly all mobs |
+ | Upward transportation uses the fact that nearly all mobs attempt to swim in water, moving upward. Therefore, to get the mobs moving upward, one must provide a column of water with enough air holes to prevent them from drowning. This can be done by arranging signs or ladders and water source blocks in the following vertical configuration: {{BlockGrid|w=water|l=ladder|wl|lw}} |
This can be repeated indefinitely in any direction for a mob elevator. When arriving at the right height, flowing water on top of the topmost ladder is enough to dislodge them. |
This can be repeated indefinitely in any direction for a mob elevator. When arriving at the right height, flowing water on top of the topmost ladder is enough to dislodge them. |
||
| − | + | [[Slime]]s do not swim in versions prior to [[Java Edition 1.8]], which can be used to separate them from other mobs. |
|
| + | |||
| + | As of [[Java Edition 1.13]] and [[Bedrock Edition 1.5.0]], a block of soul sand can be placed at the bottom of a column of water source blocks to force entities quickly upward, while also supplying air for long distances. If soul sand is not used, undead mobs can be separated from the others because they do not swim upward. |
||
| + | |||
| + | == Grinding== |
||
| + | |||
| + | {{Main|Tutorials/Mob grinder}} |
||
| + | The last part of a mob farm is to kill the gathered mobs and collect their items. This can be done in different ways, using the variety of damage available in Minecraft, like falling, suffocating, drowning, burning, sunlight (for undead), touching cacti, simply player-applied damage from weapons or lava. |
||
| − | == Grinding == |
||
| + | '''Passive systems''' do not change to kill the mobs, they rely on constantly available damage sources. Traditional mob grinders used "Lava Blades" and "Drowning Traps" while newer models use magma blocks to kill mobs above the minecart/hopper retrieval system. |
||
| − | {{Main|Tutorials/Mob Grinder}} |
||
| + | '''Active systems''' have to change configuration to actually kill mobs, usually in the form of redstone devices. The most known might be the "Piston Grinder", which applies suffocation damage by pushing an opaque block into the head of the mob. While possibly faster than passive systems in killing, active systems usually have a limited capacity, and higher amounts of mobs might clog or even jam the system. The "Minecart Grinder" uses Minecarts to carry the mobs into one block high space, suffocating them. This method can jam up too, but is fairly amusing. You could also use lava to burn mobs. Make sure to have hoppers below so you get the loot before the loot burns automatically. |
||
| − | The last part of a mob farm is to kill the gathered mobs and collect their items. This can be done in different ways, using the variety of damage available in Minecraft, like falling, suffocating, drowning, burning, sunlight (for undead), touching cacti or simply player-applied damage from weapons. |
||
| + | '''XP farms''' are systems that capture and soften up the mobs, but rely on the player to deliver the killing blow, so that the rare drops and experience can be gathered. An example would be a nearly-lethal falling height, which would reduce the majority of mobs to half a heart, easily killed even without a weapon. However, such systems are only as good as the player using them, and in constant danger of being destroyed by creepers if not built out of obsidian, or if the player is out of sight of the creeper, in which case it does not explode. Also on bedrock edition one can make a piston push a trident back and forth for AFK xp. |
||
| − | '''Passive Systems''' do not change to kill the mobs, they rely on constantly available damage sources . The most common mob grinders, the "Lava Blade" and "Drowning Trap" fall in this category. |
||
| + | [[hopper|Hoppers]] make it easy to collect the dropped items, even without player involvement. This makes fully automatic mob farms possible where the loot is deposited into a chest for easy accessibility. |
||
| − | '''Active Systems''' have to change configuration to actually kill mobs, usually in the form of redstone devices. The most known might be the "Piston Grinder", which applies suffocation damage by pushing an opaque block into the head of the mob. While possibly faster than passive systems in killing, active systems usually have a limited capacity, and higher amounts of mobs might clog or even jam the system. |
||
| + | ==Video== |
||
| − | '''EXP farms''' are systems that capture and soften up the mobs, but rely on the player to deliver the killing blow, so that the rare drops and experience can be gathered. An example would be a nearly-lethal falling height which would reduce the majority of mobs to half a heart, easily killed even without a weapon. However, such systems are only as good as the player using them, and in constant danger of being destroyed by creepers if not built out of obsidian, or if the player is out of sight of the creeper, in which case it will not explode. |
||
| + | <div style="text-align:center">{{yt|jjQ8W9gqJuM}}</div> |
||
| − | With the [[Hopper]], it becomes easy to collect the dropped items, even without player interference. This makes fully automatic mob farms possible where the loot will be deposited in a chest for easy accessibility. |
||
| − | == |
+ | ==Performance concerns== |
| + | {{see also|Tick#Game tick}} |
||
| + | *You should clear out the entire chunk where the mob farm is by placing torches. The game has a limit on the number of hostile mobs based on the number of loaded chunks, so it's a good idea to make sure all of them spawn in the farm. |
||
| − | {{/video}} |
||
| + | *You may need a somewhat beefy computer to operate the farm, since mob AI can be taxing on the server component of the game program. Check the TPS indication if you are on singleplayer, or ask about the server host for rules on multiplayer servers. The quicker mobs are killed, the less likely AI is going to be a problem. |
||
{{tutorials}} |
{{tutorials}} |
||
| − | [[de: |
+ | [[de:technik:Monster-Dropfarm (Mechanik)]] |
| − | [[fr:Tutoriels/Exploiter les créatures]] |
+ | [[fr:Tutoriels/Exploiter les créatures hostiles]] |
[[ru:Мобофермы]] |
[[ru:Мобофермы]] |
||
| + | [[uk:Мобоферми]] |
||
[[zh:教程/刷怪塔]] |
[[zh:教程/刷怪塔]] |
||
Latest revision as of 05:10, 4 November 2023
Mob farms are structures built to acquire mob drops more easily and in larger numbers. They usually consist of two components: a large, dark room to spawn mobs, which are funneled into a central location, and a mob grinder to kill them quickly and efficiently.
Locations
The purpose for the farm is to provide a large area that is a viable spawn position for the intended targets, and to kill the mobs quickly. Due to the rules Minecraft applies to spawning mobs, this makes the choice of a location for the mob farm a difficult problem.
Farms placed on the surface can provide good drop rates during the day, when it is one of the few spots of dark ground, but has a sharp drop in effectiveness during nighttime, when the entire surface is dark enough to support mob spawning.
Farms built underground have a time-independent drop rate, and remain within your personal spawn range for hostiles when you go mining, but their effectiveness depends on the amount of unlit caverns in your vicinity, which provide alternative places for mobs to spawn.
Farms floating high in the sky can achieve the best spawn rates during the day and night and you are far away from caves, as they represent the only viable spawn ground. However, building one in survival is rather dangerous, and due to their height they stop working completely when you descend underground to mine resources. To produce loot, you must stay at the height of the farm.
Farms constructed under an ocean can provide the best during day and night, as the ocean limits the viable spawn locations to open areas underground except for drowned, which spawn underwater. You can also locate your base below it to ensure that you are always close enough to spawn monsters.
Superflat worlds provide higher spawn rates than other worlds, as the missing air pockets underground reduce the amount of dark places.
The Nether is difficult to farm, as water evaporates and most mobs are immune to fire. This reduces the amount of functioning farm designs considerably. One could try to funnel the mobs through Nether Portals to circumvent the restrictions.
Drops
What a mob farm produces depends on location and the type of grinder used to kill the mobs. Automatic killing prevents certain drops and experience, but is safer as the player is not required to be near the mobs. The following is a table of mobs that can be effectively farmed and their usual and player-caused drops. Player-caused drops and experience can be obtained only when the monster is killed directly by the player or a tamed wolf.
Note that zombie, skeleton, and creeper heads drop only if killed by a charged creeper. Wither skeletons, however, have a small chance to drop theirs no matter the cause of death, but still always drop them when killed via charged creeper.
| Mob | Normal drops | Player-caused drops | Spawn | Notes |
|---|---|---|---|---|
| Blaze | None | Blaze Rod | Spawns in Nether fortresses and at spawners. | |
| Cave Spider | String | Spider Eye | Spawns at spawners in Mineshafts. | Wall climbing may clog passages. Can fit through spaces 0.5 blocks tall. |
| Creeper | Gunpowder Music Discs |
None | Spawns in the Overworld when dark. | Music Discs drop only when a skeleton or stray kills the creepers, requiring special setup beforehand. |
| Drowned | Rotten Flesh | Copper Ingot Nautilus Shell Fishing Rod |
Spawn in rivers and most ocean biomes. | Drowned drop tridents and nautilus shells only if they spawned with these. |
| Enderman | Ender Pearl Block they hold |
None | Spawns in the Overworld when dark, in the End and sometimes in the Nether. | Does not work with most water based farms as it teleports out upon taking damage. Can break farms with randomly taken or placed blocks. Best farmed in the End or Warped Forest. |
| Ender Dragon | None | None | Spawns in the end when the player first enters the end, and can be respawned using end crystals. | At 500 xp per respawned dragon, the Ender Dragon is the largest renewable source of experience in the game. By using an unload chunk and TNT duplication bug, it is possible to farm this on a large scale in certain Minecraft versions. |
| Endermite | None | None | Have 5% chance to spawn when ender pearl lands. | Endermen attempt to kill endermites that spawn from ender pearls. |
| Evoker | Totem of Undying |
Emerald | Spawns during raids or in woodland mansions. | Evoker can summon evoker fangs or vexes. |
| Ghast | Gunpowder Ghast Tear |
None | Spawns in the Nether. | |
| Guardian | Prismarine Shard Prismarine Crystals |
None | Spawns in Ocean monuments. | |
| Husk | Rotten Flesh | Iron Shovel Iron Sword |
Spawns in desert biomes. | Husks do not burn in sunlight. A husk that is submerged in water for 30 seconds converts to a normal zombie. |
| Hoglin | Leather
Porkchop Cooked Porkchop if the hoglin is killed by fire. |
None | Spawns in Crimson Forest biome. | Hoglins avoid warped fungi (including in a flower pot), nether portals, and respawn anchors. |
| Magma Cube | Magma Cream | None | Spawns in the Nether. | Magma cubes cannot be hurt by fall damage or burning. |
| Phantom | None | Phantom Membrane | Spawns in the night, rain, or thunderstorm if the player hasn't slept in 3 days. | The phantom is an undead mob. |
| Pillager | Ominous Banner Items that drops during raids: [Bedrock Edition only]
Emerald |
Crossbow Arrow[Bedrock Edition only] |
Spawns in patrols, around pillager outposts and during raids. | If the player kills a pillager wearing a banner on its head, the player receives the Bad Omen status effect. |
| Ravager | Saddle[Java Edition only] | Saddle[Bedrock Edition only] | Spawns during raids. | |
| Silverfish | None | None | Can be farmed at stronghold spawners. | The ability to hide in blocks could potentially damage the farm if it is made of stone. They can fit through spaces 0.5 blocks tall. |
| Skeleton | Arrow Bone Bow |
Bow Random Armor Carved Pumpkin[Java Edition only] Jack o'Lantern[Java Edition only] |
Spawns in the Overworld when dark, Skeleton Dungeon spawner, Soul Sand Valley, and sometimes in the nether fortress. | |
| Slime | Slimeball | None | Spawns in Swamp biomes or in slime chunks below y level 40. | Large slimes could clog smaller passages. |
| Spider | String | Spider Eye | Spawns in the overworld when dark or from spawners in Dungeons. | Wall-climbing can clog up passages. |
| Stray | Bone |
Arrow of Slowness Bow |
Spawns under the sky in Snowy Tundra, Snowy Mountains, Ice Spikes, Frozen River, Frozen Ocean,[BE only] Deep Frozen Ocean[BE only] and Legacy Frozen Ocean[BE only]. | |
| Vex | None | None | Can be summoned by evoker | They are capable of flying through the air, and can freely pass through any block, including water and lava, without taking damage. |
| Vindicator | Ominous Banner Items that drops during raids: [Bedrock Edition only]
Emerald |
Spawns in woodland mansions, during raid or in patrols [Bedrock Edition only]. | A vindicator named Johnny is hostile to every mob except ghasts and illagers. | |
| Wither Skeleton | Coal Bone Wither Skeleton Skull |
Wither Skeleton Skull Stone Sword Carved Pumpkin[Java Edition only] Jack o'Lantern[Java Edition only] |
Spawns in Nether fortresses. On normal or hard difficulties, the wither spawns 4 wither skeletons when below half health [Bedrock Edition only]. | When wither skeleton attacks an entity, the entity is inflicted with the wither effect for 10 seconds. |
| Witch | Glass Bottle Glowstone Dust Redstone Dust Spider Eye Stick Sugar Gunpowder |
Potion of Healing Potion of Fire Resistance Potion of Swiftness Potion of Water Breathing |
Spawns in Swamp huts, anywhere in the Overworld when dark, during raids or when villager struck by lightning. | Witches cannot open doors or use cauldrons. |
| Zoglin | Rotten Flesh | None | Spawns when a hoglin has been in the Overworld or the End for 300 game ticks (15 seconds). | Zoglins attack every player, armor stand and every mob except creepers, charged creepers and other zoglins. |
| Zombie | Rotten Flesh Zombie Head |
Iron Ingot Carrot Potato Iron Shovel Iron Sword Random Armor Carved Pumpkin[Java Edition only] Jack o'Lantern[Java Edition only] |
Spawns in the Overworld when dark, from Zombie Dungeon spawner, during siege, or converted from husk | Baby zombie variant is twice as fast and 1 block tall; a zombie farm should account for this to prevent escapes. When converted drowned, they can also drop nautilus shells. |
| Zombified Piglin | Rotten Flesh Gold Nugget |
Gold Ingot Golden Sword Carved Pumpkin[Java Edition only] Jack o'Lantern[Java Edition only] |
Spawns in the Nether and in the Overworld near Nether Portals, when a Piglin is in the overworld for 15 seconds, or when pig struck by lightning. | Baby pigman are twice as fast and 1 block tall, similar to baby zombies. If a Zombie Pigman dies while targeting the player, it drops experience. This mechanic has been used to create xp farms. |
Designs
When planning a mob farm, one should consider the size of the spawnable area. The maximum spawnable area depends on where one plans to be in relation to the farm. If you plan to be directly beneath the center of the farm, waiting for the items, then the radius in which mobs can spawn can be used to calculate the maximum size of the spawnable area:
floor( sqrt(Spawn Radius^2 - (Spawn Floor Height - Collection Floor Height)^2 )) = Spawnable Area
In Java Edition the spawn radius is 128 blocks. In Bedrock Edition the spawn radius is roughly 96 blocks for simulation distances > 4. For simulation distance 4 in Bedrock Edition the spawn radius is 44 blocks.
In practice, however, it is rarely worthwhile to fill the maximum spawnable area with a single farm that delivers mobs to central location. For example, if you plan to spend your time in a less defined position, it might be easier to repeat a simple design several times, ensuring that at least some areas are in the spawn range while limiting complexity. Moreover, transporting mobs long distances for killing makes a farm less efficient because of caps that limit spawning based on the number of mobs already in the loaded areas around the player. The impact of caps is especially important in Bedrock Edition, which has caps that limit population densities as well as a global cap that counts mobs around every player loaded in the world.
If you are making a room that relies on darkness to spawn mobs, cave sounds and bats are good signs that your spawner is dark enough to let hostile mobs spawn.
Spawning tower
One of the most popular overworld designs for a general mob farm is based on a tower of spawning pads that are periodically flushed with water to push the mobs off so that they die from fall damage. The water comes from a central pillar of dispensers and observers that cascade a clock signal between platforms. This type of farm is known for its high production rates, simplicity, reliability, and ease of build.
Starting in 1.19.3, mobs no longer spawn on scaffolding. In this case, just build the spawning platforms with top slabs instead of scaffolding. The central signal tower of observers, dispensers, scaffolding blocks remains the same.
Using observer blocks
The designs shown in the YouTube videos above are somewhat resource intensive, but this design requires only the following materials:
- 1 dispenser (per layer)
- 1 water bucket (per layer)
- 1 observer (per layer)
- 112 opaque blocks of choice (per layer)
- 1 clock (e.g. an Ethonian hopper clock: 2 hoppers, 2 sticky pistons, 2 comparators)
- A capture layer (just several dozen hoppers leading into a chest)
In addition to being inexpensive, it is also easier to build.
The design uses three different layers that are repeated with a redstone clock added to the top layer. The layers are as follows:
- Top layer: An observer block, facing up observing the dispenser it; the rest of this layer is air.
- Middle layer: This layer is completely air (once the dispenser is triggered, it becomes filled with water taking the block above the dispenser at its center).
- Bottom layer: The dispenser (facing up, surrounded by opaque blocks (e.g. cobblestone) to hold the water. Fill the dispensers are filled with a bucket of water.
For layer one, the blocks must hold all of the water, so go out seven blocks in each direction, then fill in diagonally. Optionally, you can surround these blocks with signs to prevent spiders from climbing up. However, this would be a large amount of work for little benefit.
This mechanism can cascade downward through quasi-connectivity. When the top dispenser is triggered the observer see the state change and signals down to the air gap above the dispenser below, activating it through quasi-connectivity.
This cascades down through all of the layers (make as many as you like, but anywhere between 3 and 10 should be plenty). To start this cascade, the topmost dispenser needs to be activated. It is recommended to do so using an Ethonian hopper clock with about ten items in it. You can trigger the topmost observer using the redstone output from one of the emplacement the redstone block could be in the clock. It is also recommended to make the layer on which you place the clock bigger than the other the hide the layers under from the sun, and to place torchs on it to prevent mob spawn.
Sinkhole
The easiest possible design consists of a large, empty area of simple shape, with one or more holes in the ground for the mobs to drop through. The edge of each hole has to be lined with opened trapdoors or gates to trick the Mob AI into believing the hole to be solid ground. Trapdoors can also be controlled with redstone, so one could shut off the farm by closing the holes remotely.
The whole room is closed by a roof to create a minimal light level. A roof height of 3 allows Endermen to spawn, while a roof height of 1 would restrict the farm to spiders.
Sinkhole farms have limited effectiveness, as the chance for a mob to wander into a hole is small, and zero when the player is so far away that the mobs freeze.[Java Edition only] But they can be built quickly and cheaply, and works in the Nether (unlike other designs requiring water because you can't place water in the Nether).
Canal-style

Example layout of a 38x38 Canal-style farm
To improve the chances of a mob falling into the holes, one can add channels filled with flowing water, leading to the central hole. The channels are lined with open trapdoors to trick the mobs into falling in, and the water transports them into the grinders. Such a design requires a bit of planning to ensure that there is no stationary water in which the mobs might get stuck, reducing effectiveness.
Because the system uses water to transport mobs, it cannot capture Endermen, which teleport away when touching water. Therefore, the roof of the cavern should be 2 blocks above the ground to prevent griefing of your farm by Endermen taking blocks.
Compact canal design
Compact Canal design
An easily-built design can be made in a 20×20 area, using eight water source blocks to fill the channels, which are exactly eight blocks long so that the water stops exactly at the edges of the central hole. The design can be easily stacked or placed next to each other to increase the effectiveness. This design can be made even smaller as shown in the video (14×14 area). Shrinking the design can be done by using signs to cut off the water flow at the edge of the sinkhole, forcing the mobs to fall into the central hole.
Minimal canal design
Minimal Canal design, using glass to show the flow of water
If there is not enough space for larger designs, this might be used. Its small size of 10x10 or 20x20 (inner area) makes it able to be incorporated into larger construction projects without trouble. It uses four water source blocks, one in each corner, with the water flowing around 3x3 squares of building material to the central hole. The parts of the water between the wall and the blocks is closed over to provide more spawning area.
Large chamber fully automatic design

Large Chamber Fully Automatic
This is a large farm that requires significant resources. It has 6 spawn chambers in each building, and redstone controlling it. It outputs 4 waves of average 10-15 mobs every 16 or so seconds.
Water pans
If you have mobs coming in from multiple sources, you may need a water pan (a.k.a. water tray) to collect mobs from a large area to a central dropshaft.
A basic 9×9 (not counting the walls) water tray works well for zombie or skeleton spawners, or when gathering together the output of several dark areas. Simply put water sources at the corners of the square, and they flow to drop the mobs into a hole in the central square. For spiders or iron golems, you must expand this to 10×10, which allows for a 2×2 hole in the middle (for spiders, you must also line the chute with glass).
For a few cases (notably Overworld gold farms), a 27×27 water tray (counting the walls!), with two levels, may be needed. Start with a classic 9x9 pan surrounding the drop chute. Move up a level to surround it with the rest of the large pan — slabs or blocks suffice for most of it (put real blocks at the boundary, so you can place water on them), but the outer ring should be a 25×25 square of fences on the same level (that is, you'd have a half-step up from the outer pan to the fences). Surround this with the 27×27 outer wall. The inner pan gets a water source at each corner, which should send the flow in to surround the hole. For the outer pan, water sources go every other block on top of the fences (place them against the outer wall), but not in a complete ring. Place the sources every other space along two opposite walls; the water should flow exactly to the edge of the inner pan. Now, if you fill in the entirety of the other walls, you get extra water sources forming from the corners, and your current becomes a sheet of mostly-still water. For the other two walls, put only five sources each covering the middle — that is, one at the midpoint, and two on each side (still every other space). This sends the water flow to the other edges of the inner pan.
The large pan could also be expanded to 28×28 with a 10×10 inner pan, but this requires some experimentation.
Active mob displacement
The Canal-Style System still suffers from the mobs freezing when outside a certain range around your character in Java Edition, and from the limitations of low population density caps in Bedrock Edition. Active Systems can correct that problem. One example is using Redstone and Dispensers filled with a Water bucket to flood the spawning grounds repeatedly, flushing all mobs into the channels to be transported to the grinders. Thus, the farm provides area for the mobs to spawn in, but does not rely on mob movement to get them into the grinder. Using this, one can omit the trapdoors needed for the other, passive designs.
In Bedrock Edition placing water on top of scaffolding provides an efficient means of active transport. Land mobs spawn with their feet inside of the scaffolding and their heads inside of the flowing water. The mobs are then immediately transported to a drop chute or other killing area. Spiders and baby mobs present a challenge for water-on-scaffolding designs because they spawn entirely inside of the scaffolding and cannot be moved by the water until they randomly climb/jump. Several methods have been invented to deal with this: buttons placed every-other block in every-other row prevents spiders from spawning at all; villagers can be used to lure baby zombies (see below); snow golems can be used to knock mobs upward and into the flowing water; or cascading water down a funnel-shaped spawn floor can be used to pull babies and spiders into the water flow at every block.
Other designs
Instead of using water to transport mobs, there are various other methods to make them move toward the grinder, each of which may work better with certain mobs but with other tradeoffs.
- Sunlight mob farm: Undead mobs seek protection from sunlight. A roof three blocks above the ground can provide a shady area to lure undead mobs into a pit lined with open trap doors, leading into a grinder. The disadvantage of the farm is that it attracts only zombies and skeletons.
- Villager: Only zombies and drowned are attracted to villagers. This method works by having one or more villagers trapped (but protected from actual attack). Any nearby zombies go toward the villagers. You can make a maze that the zombies have to go through so that you need only one trap. However, there should be some sort of trap that the zombies fall into to get to the villagers (e.g. a ton of soul sand in water or in air, fall damage, etc.).
- Turtle eggs: This method works on zombies, drowned and zombified piglins. turtle eggs attract all variations of zombies, which want to trample them. Turtle eggs can be used in combination with open trapdoors above a drop to lure any zombie-variant mobs into a killing chamber. It is a popular choice for zombified piglin farms in the nether, and can be used as a method to lure zombies away from other mobs in a standard mob farm.
- One-way doors: Relying on the random movement of mobs, One-Way Door Designs use doors or pistons to prevent the mobs from wandering backward. Making several sets of doors can increase the speed with which the mobs move toward the hole.
- The easiest configuration consists of a wall of iron doors or fence gates (you can use wooden doors if you're not on Hard difficulty) with a row of pressure plates in front of them. When the mobs walk onto the pressure plates, the door opens, letting them through, but once on the other side, they can't open the door since there is no switch.
- With pistons, the arrangement is reversed, with the pressure plates on the desired side, and the pistons pointing upward, so that they block the path of the mobs when extended. This design works only with a 2-block high roof to prevent the mobs from jumping, and even then might fail on spiders. However, it requires considerably more common ingredients than the iron door variant.
- Such systems can also be used to "store" mobs after gathering them from the farm, so that they later can be killed for the rare drops and experience
- Slime: This farm design uses large slimes to push mobs off ledges. The simplest way to get these slimes are through a slime farm. As for the rates, it gets over 20,000 items per hour, as said in the video title.
- Cats: Creepers flee from cats. This can be used to redirect the creepers away from other mobs, and/or to their own killing chamber. Similarly, skeletons and wither skeletons flee from wolves.
Transporting mobs
After collecting the mobs from the farm, it might be beneficial to transport them to a different location before grinding them, so that you can access the items more easily while remaining at a close-to optimal position for the spawning of your farms.
Horizontal transportation
Horizontal Transportation can be done easily using flowing water, with a drop of 1 block vertically for every 8 block traveled horizontally. Build a tunnel with a height of 3 blocks and a width equal to the size of your gathering holes (usually 2). Mine forward to a length of 8 Blocks, so that water placed at the start ends exactly at the drop. Repeat, but one block lower, so that the mobs fall from one funnel part to the next. Mine out the roof at the higher level for 2 or 3 more blocks to prevent spider clinging to the walls from clogging up the funnel.
Spider grinder
Alternatively, one can use a cactus to grind the spiders immediately. To do this, make the first funnel part only 7 blocks long and place one water source block instead of two. Place a sand block and a cactus on top on the same side as the source block. To place the cactus, you have to mine out the block next to it. To ensure the water flow on the next part, mine out the wall block next to the sand and add the water sources there and next to the sand, where there would usually be one.
Downward transportation
Transporting mobs and items downward is trivial, simply let them drop down a chute with a water brake at the bottom. Or omit the water brake when you want the mobs to die from fall damage.
Upward transportation
Upward transportation uses the fact that nearly all mobs attempt to swim in water, moving upward. Therefore, to get the mobs moving upward, one must provide a column of water with enough air holes to prevent them from drowning. This can be done by arranging signs or ladders and water source blocks in the following vertical configuration:
This can be repeated indefinitely in any direction for a mob elevator. When arriving at the right height, flowing water on top of the topmost ladder is enough to dislodge them.
Slimes do not swim in versions prior to Java Edition 1.8, which can be used to separate them from other mobs.
As of Java Edition 1.13 and Bedrock Edition 1.5.0, a block of soul sand can be placed at the bottom of a column of water source blocks to force entities quickly upward, while also supplying air for long distances. If soul sand is not used, undead mobs can be separated from the others because they do not swim upward.
Grinding
The last part of a mob farm is to kill the gathered mobs and collect their items. This can be done in different ways, using the variety of damage available in Minecraft, like falling, suffocating, drowning, burning, sunlight (for undead), touching cacti, simply player-applied damage from weapons or lava.
Passive systems do not change to kill the mobs, they rely on constantly available damage sources. Traditional mob grinders used "Lava Blades" and "Drowning Traps" while newer models use magma blocks to kill mobs above the minecart/hopper retrieval system.
Active systems have to change configuration to actually kill mobs, usually in the form of redstone devices. The most known might be the "Piston Grinder", which applies suffocation damage by pushing an opaque block into the head of the mob. While possibly faster than passive systems in killing, active systems usually have a limited capacity, and higher amounts of mobs might clog or even jam the system. The "Minecart Grinder" uses Minecarts to carry the mobs into one block high space, suffocating them. This method can jam up too, but is fairly amusing. You could also use lava to burn mobs. Make sure to have hoppers below so you get the loot before the loot burns automatically.
XP farms are systems that capture and soften up the mobs, but rely on the player to deliver the killing blow, so that the rare drops and experience can be gathered. An example would be a nearly-lethal falling height, which would reduce the majority of mobs to half a heart, easily killed even without a weapon. However, such systems are only as good as the player using them, and in constant danger of being destroyed by creepers if not built out of obsidian, or if the player is out of sight of the creeper, in which case it does not explode. Also on bedrock edition one can make a piston push a trident back and forth for AFK xp.
Hoppers make it easy to collect the dropped items, even without player involvement. This makes fully automatic mob farms possible where the loot is deposited into a chest for easy accessibility.
Video
Performance concerns
- You should clear out the entire chunk where the mob farm is by placing torches. The game has a limit on the number of hostile mobs based on the number of loaded chunks, so it's a good idea to make sure all of them spawn in the farm.
- You may need a somewhat beefy computer to operate the farm, since mob AI can be taxing on the server component of the game program. Check the TPS indication if you are on singleplayer, or ask about the server host for rules on multiplayer servers. The quicker mobs are killed, the less likely AI is going to be a problem.