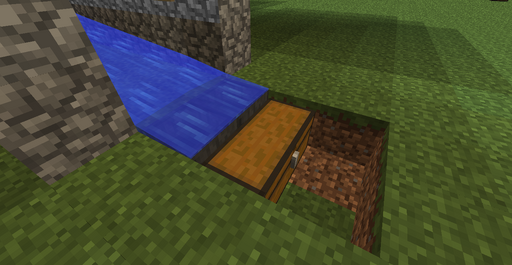
(cleanup) Tag: Undo |
|||
| (194 intermediate revisions by more than 100 users not shown) | |||
| Line 1: | Line 1: | ||
| + | {{Outdated}} |
||
| − | An '''[[Iron Golem]]''' farm is an easy way to acquire many [[iron ingot]]s (and less useful [[poppies]]) with minimal effort after the initial setup. It is an artificial [[village]] (or several of them, spaced far enough apart to remain separate) in which golems are spawned and then either killed immediately, or moved to a holding cell (outside the village boundary, so that new ones can spawn in their place) for later killing. If you opt for the first method, you will either need to go AFK while camping out at the collection point, have a [[hopper]] collecting your items, or else check back periodically to collect your items before they despawn. This necessity can be avoided by using the holding cell method, which allows the golems to collect while you are working nearby, and then you can harvest them all at once when you are ready so that you don't miss any drops. |
||
| + | This tutorial describes '''iron golem farming''' as it works in the [[Legacy Console Edition]] (and as it formerly worked prior to [[Java Edition 1.14]] and [[Bedrock Edition 1.11]]). These farms are based on the number and arrangement of [[door]]s and number of villagers, taking advantage of the fact that if a player creates enough "houses," which can be made with just a door and a block, iron golems can spawn. This tutorial describes door-based farms. For iron golem farming {{in|je|be}}, see [[Tutorials/Iron golem farming]]. |
||
| + | |||
| + | == Overview == |
||
| + | |||
| + | An iron golem farm is commonly a player-made [[village]] (or several of them, spaced far enough apart to remain separate) in which golems are spawned and then either killed immediately, or moved to a holding cell (outside the village boundary, so that new ones can spawn in their place) for later killing. If you opt for the first method, you will either need to go AFK while camping out at the collection point, have a [[hopper]] collecting your items, or else check back periodically to collect your items before they despawn. This necessity can be avoided by using the holding cell method, which allows the golems to collect while you are working nearby, and then you can harvest them all at once when you are ready so that you don't miss any drops. |
||
| + | |||
| + | If the farm is built inside the spawn chunk and fully automatic, it will operate at any time, making it highly efficient. Iron farms also work in Minecraft Bedrock Edition. |
||
== General requirements == |
== General requirements == |
||
| + | Iron golems spawn naturally in [[village]]s (natural or player-made), provided there are 10 [[villager]]s and at least 21 houses (counted as doors). The chance of spawning is 1 in 7000 per [[tick]], which averages around one every six minutes. |
||
| − | There are several ways to build an iron farm, but the decent versions seem to be the ones that use two floors in the golem-spawning zone(16 by 16 by 6), and keep all doors and villagers outside the zone, either above and below the center or in an outer "ring" on the same level. This is in order to maximize the number of available spaces for the golems to spawn in, which in turn will reduce the number of failed attempts, and keep the spawning rate as high as possible. This is much more effective than simply increasing the villager count to raise the golem cap, which only matters for the few seconds between the time when a golem spawns and when it is flushed out and killed. To further increase your output rate, you can build several separate iron farms as long as they are 64 blocks apart, and bring the golems or their drops to a central collection area. The most powerful iron farms are ones that overlap many villages. Tango Tek is the user who discovered the process himself. Since golems are immune to falling or drowning damage, the available killing methods are lava or suffocation (or both like docm77's video.) |
||
| + | |||
| + | There are several approaches to building an iron farm, but efficient farms tend to use two floors in the golem-spawning zone (16 blocks×6 blocks×16 blocks) and keep all doors and villagers outside the zone, either above and below the center or in an outer "ring" on the same level. This is in order to maximize the number of available spaces for the golems to spawn in, which in turn will reduce the number of failed attempts, and keep the spawning rate as high as possible. This is much more effective than simply increasing the villager count to raise the golem cap, which only matters for the few seconds between the time when a golem spawns and when it is flushed out and killed. To further increase your output rate, you can build several separate iron farms as long as they are more than 64 blocks apart, and bring the golems or their drops to a central collection area. The most powerful iron farms are ones that overlap many villages. Since golems are immune to falling or drowning damage, the available killing methods are lava, magma blocks, suffocation, or a combination of these. As a more convoluted option, you can position a group of [[evoker]]s to attack the golems in a holding chamber. |
||
Odds of a missed spawn occurring: |
Odds of a missed spawn occurring: |
||
| − | + | There are 512 valid spawn points in the 16×6×16 block spawn area. Making a farm with only ½ of the valid spawn points (256) does not reduce your chance of spawn by ½. This is because the game randomly "tries" to find a valid place to put a golem 10 times each time an opportunity to spawn a golem comes up. So, your chances become 0.5 for each of the ten tries. Missing a spawn in this case is equivalent to flipping a coin ten times and have all ten come out tails. It is .5^10 or .00098 which is just about one in a thousand odds. A better suggestion would be to use some of the area of the zone to rapidly move golems out of the interference zone so they do not halt further spawning. This is a much more likely occurrence than missed spawns if the golems can't move out of the area quickly. This is not as rare of an occurrence as has been suggested. |
|
| + | |||
| + | Chances of a missed spawn are calculated as follows: |
||
| + | <pre> ( 1 - ( valid_spawn_points / (16*6*16) ) )^10 * 100% </pre> |
||
| + | So with 256 valid spawn points you will miss 16.2% of the spawns whereas 512 valid spawn points will only result in a loss of 1.7%. |
||
| + | |||
| + | Additionally, console players should note the 50 villager spawn limit, which will make difficult, though not impossible, the full population of certain farm designs. Also, due to changes 4J Studios made to door detection and addition in the December 2015 update that brought MCCE to approximate parity with PC 1.8.8 no stacked or chained village iron farms from the PC community will work on console. Console players should avoid using anything but single village designs at this point. 4J Studios has remained silent as to whether or not the change was intentional or if they plan to fix it. All bug report tickets on MCCE bug tracker have gone unassigned. |
||
| + | |||
| + | No designs are guaranteed to work with modded servers including bukkit/spigot/paper/sponge/etc. due to possible changes in mechanics. |
||
== Video == |
== Video == |
||
| + | <div style="text-align:center">{{yt|eLySkOeYWUU}}</div> |
||
| − | {{/video}} |
||
| + | ==Iron golem farm designs== |
||
| − | == |
+ | === Easy 2-tier build=== |
'''Requires spawn chunks''': no<br /> |
'''Requires spawn chunks''': no<br /> |
||
'''Iron per hour''': 40<br /> |
'''Iron per hour''': 40<br /> |
||
| + | '''Scalable''': yes<br /> |
||
| − | '''Description''': This is an older design by trunkz and one of the earliest to feature two spawning floors for greater efficiency. It uses several villager baskets and door pads and is a little outdated, but quite a good and efficient design for the time it takes to build. |
||
| + | '''Designed by''': trunkz |
||
| + | |||
| + | ;Description |
||
| + | This is an older design by trunkz and one of the earliest to feature two spawning floors for greater efficiency. It uses several villager baskets and door pads and is a little outdated, but quite a good and efficient design for the time it takes to build. |
||
| + | |||
| + | This farm has been tested in Spigot 1.8. Extra care must be taken with breeding villagers as they no longer breed as easily as they did in earlier version. For testing in 1.8 the villagers were bred to a population of 20 on the ground before being transported to their cells (the individual villagers were transported to their cell by minecart, the other 18 went to their cell on a dirt ramp). The method given in the video will probably work if the breeding villagers are provided an ample supply of suitable food, e.g. carrots, potatoes or bread. |
||
{{yt|XQDiw_kMXF0}} |
{{yt|XQDiw_kMXF0}} |
||
| + | ---- |
||
| − | == Design by JL2579 (tutorial by docm77) == |
||
| + | ===Survival mode build: Iron golem village=== |
||
| + | '''Requires spawn chunks''': no<br /> |
||
| + | '''Iron per hour''': 30-40, plus occasional loot from other mobs<br /> |
||
| + | '''Scalable''': No<br /> |
||
| + | '''Design by''': Amatulic |
||
| + | [[File:GolemFarmVillage.jpg|thumb|left|A simple iron golem farm built in a village with free-roaming villagers.]] |
||
| + | [[File:Survival iron farm2.png|thumb|left|Another simple iron golem village farm, using fences instead of glass to block the doors.]] |
||
| + | ;Description |
||
| + | This is a simple but flexible design that can be built fairly easily in survival mode, without the need to transport villagers. The villagers can multiply and roam freely, allowing you to trade with them. The farm will occasionally capture other mobs and their loot. Multiple tiers can be built to target more golems or different mobs. |
||
| + | |||
| + | ;Preparation |
||
| + | You will need to gather sufficient resources: enough wood to craft a bunch of doors and fencing, optionally enough sand to smelt 40 glass blocks, and some iron to craft a bucket. You may need wool to craft a bed to sleep on before you start, to move your spawn point to the village in case you die and respawn while you work — some of the work is best done at night while the villagers are indoors and not getting in your way. |
||
| + | |||
| + | Find a village near a source of lava. Some villages have a blacksmith shop with a pool of lava, others have a lava source nearby. |
||
| + | |||
| + | If buildings in the village are missing any doors, give them doors, but keep the total under 21 for now. This encourages villagers to multiply and gives them a place to go at night while you work. Clear a flat 16×16 area in the village; some villages have an empty quadrant that is useful for clearing. You can use existing building walls as boundaries for the 16×16 area. Fence off the area, preferably at night after the villagers have scurried indoors, and install a gate to enter and exit the area. Villagers are curious; don't open the gate if villagers are near it, or they will go through. |
||
| + | |||
| + | ;Construction |
||
| + | The design is a 16×16 pit 2 blocks below the base of the doors, with a 2×2 hole in the middle, buildings on each side of the pit, and fencing all around. It doesn't matter how you design the buildings as long as the door arrangement is symmetric from the center of the hole. Each building shown here has at least 5 doors facing the pit. Doors on the edge of the pit should be barred from opening using glass blocks if the doors are against the edge of the pit. If the pit is completely fenced, the doors will be set back a block and need not be barred by glass. Also there are doors on other walls; placement doesn't matter as long as it's all symmetrical; an imaginary line from any door through the central hole should intersect another door an equal distance on the other side of the hole. |
||
| + | |||
| + | If your doors are on the pit's edge, then avoid placing the doors during the day! Otherwise villagers might fall into your pit. Place them and block them with glass before daylight. Once you have placed all your doors, '''destroy any remaining doors in other buildings''' that aren't part of the symmetry of the farm. Also destroy beds in any building that isn't part of your farm, and put them in your new buildings, preferably in a symmetric arrangement. Your buildings around the pit should have doors (symmetrically placed) on the side walls to allow villagers to use the buildings. |
||
| + | |||
| + | [[File:LavaBlades.jpg|thumb|right|This iron golem farm uses a lava blade trap, intended for when the farm gets additional tiers to catch mobs of different heights, although the single-tier farm described already killed a skeleton and a spider in its first hour of use. Unfortunately, baby zombies would still pass through.]] |
||
| + | Before placing your doors, you should first complete the trap. To sweep the iron golems from the pit into the hole, it's best to cover the whole area with running water, otherwise the iron golems will try to stick to the dry spots. The design shown here has a 1 block undercut around the pit's edge, with water sources along two parallel sides, 2 water source blocks at the middle of the other two sides for the final sweep. This design uses [[Tutorials/Monster spawner traps#Lava blade traps|lava blades]] across the top and middle of a 2-wide by 3-high tunnel leading from the hole. At the bottom of the hole is a river that sweeps the mobs into the blades, and sweeps the loot toward the end of the tunnel. |
||
| + | |||
| + | At the end of the tunnel, build some access to the surface (shown in the first image on the lower right). Villagers are free to go in and out, but make a barrier in the tunnel to keep them from reaching the lava. |
||
| + | |||
| + | You don't need a hopper or chest at first — just watch your farm and when an iron golem falls through the hole, go into your tunnel and collect the iron that drifts toward you. After you have five iron ingots, you can craft a hopper and put it at the end of the water stream in the tunnel, to deposit the ingots into a chest. |
||
| + | |||
| + | ---- |
||
| + | === 4 spawn modules 2-level=== |
||
'''Requires spawn chunks''': no<br /> |
'''Requires spawn chunks''': no<br /> |
||
| − | '''Iron per module per hour''': 40<br /> |
||
'''Iron per hour''': 160<br /> |
'''Iron per hour''': 160<br /> |
||
| + | '''Scalable''': yes<br /> |
||
| − | '''Description''': This design, originally created by JL2579, uses 4 farms spaced 64 blocks apart. It uses 4 spawning modules, with 2 modules per level, with doors surrounding the modules. This pattern could be repeated to fill a very large area with iron farms. The farm also features a lava system to damage the iron golems so that the piston suffocator works more quickly. Youtuber docm77 made this tutorial for the design. |
||
| + | '''Design by''': JL2579 (tutorial by docm77) |
||
| + | |||
| + | ;Description''' |
||
| + | This design, originally created by JL2579, uses 4 spawning modules, with 2 modules per level, with doors surrounding the modules. This pattern could be repeated to fill a very large area with iron farms. The farm also features a lava system to damage the iron golems so that the piston suffocator works more quickly. Youtuber docm77 made this tutorial for the design. |
||
{{yt|xE04Ui90sQY}} |
{{yt|xE04Ui90sQY}} |
||
| + | ---- |
||
| − | == Design by Nims == |
||
| + | === Simpler JL2579 design === |
||
| − | This design by NimsTV is slightly less efficient then JL2579's design but it is simpler and easier to build which would take less time because the water streams are much easier to configure and there is only one villager basket. The golem spawning area is actually larger than the farm, which is why JL2579 did not build his farm in this way because you have to block spawning anywhere outside the farm, if you intend to build several duplicate farms in an array. |
||
| + | '''Requires spawn chunks''': no<br /> |
||
| + | '''Iron per hour''': 30<br /> |
||
| + | '''Scalable''': yes (you can build a second farm 80 blocks overhead to increase the spawning rates)<br /> |
||
| + | '''Design by''': Nims |
||
| + | ;Description |
||
| − | {{yt|Dev3Ls8papM}} |
||
| + | This design, by NimsTV, is less efficient than JL2579's design. However, it is much simpler and easier to build, because the water streams are easier to configure and there is only one villager basket. The golem spawning area is larger than the farm, which is why JL2579 did not build his farm in this way. You have to block spawning anywhere outside the farm, if you intend to build several duplicate farms in an array. |
||
| − | ==Designs by Tango Tek== |
||
| + | {{yt|Dev3Ls8papM}} |
||
| − | These designs by Tango Tek have revolutionized iron-farming in Minecraft. If you are the minecrafter who has a lot of redstone or effort and availability to spawn chunks, these 5 farms below are for you. All of them use the concept of village overlapping, which uses a clever order of placing and breaking doors against the way the game intended to allow. However, if the chunks containing these chained village are unloaded, all of the villages will combine into one giant village and the farm will break, meaning that the designs also need a way to keep the chunks constantly loaded or automatically rebuild the villages. Designs that keep the farm loaded constantly do not need much redstone, but must have access to the spawn chunks and take a lot of time to place and break doors. Designs that automatically rebuild the villages require a lot of redstone, but don't need the spawn chunks, and can therefore be built on public servers. If you want to understand this processes better, watch the explanation section of the Iron Trench. Chaining has changed slightly in 1.8+ and is slightly more difficult, because you have to set up 8 additional strips for doors, thus making it harder to track the door placement, whereas in 1.7 and below you only need set up one additional strip for doors, and therefore making it much more easier to track the door placement. |
||
| + | ---- |
||
| − | '''The Iron Trench''' |
||
| + | === The Iron Stream === |
||
| − | ~1300 iron per hour: not scale-able: does NOT require spawn chunks. |
||
| + | '''Requires spawn chunks''': no<br /> |
||
| + | '''Iron per hour''': 640<br /> |
||
| + | '''Scalable''': no<br /> |
||
| + | '''Design by''': Eta740 |
||
| + | ;Description |
||
| − | The first farm of its kind, using a ton of redstone to automatically chain the villages in a 20 minute process. Unfortunately, the redstone was VERY complicated and quite expensive, likely one of the most complicated redstone systems intended to be build-able in survival ever, using many logic circuits, timers and bus wires. This meant that is was very difficult for the average Joe to build and keep working. Definitely watch the "How it Works" and the "Watch it Rebuild" sections just to get an idea of how these farms really work. Tango even has a mod, created for him by KaboPC, that shows all of the villages. Then move on to the Foundry or Titan, as they are much more efficient and far cheaper to build. This design will be broken in 1.8. |
||
| + | This design is a 16 Village Iron Farm that can be rebuilt on demand if not built in the spawn chunks and the chunk it is in has been unloaded. The village rebuild process takes 24 minutes and it will produce 640 ingots per hour when running at full speed. {{yt|K6Yp__KgcZE}} |
||
| − | {{yt|YFaCNsuD01k}} |
||
| + | ---- |
||
| − | '''The Iron Foundry''' |
||
| + | === The Iron Head, a 100% Efficient Iron Farm === |
||
| − | ~1700 iron per hour: somewhat scale-able: requires spawn chunks |
||
| + | '''Requires spawn chunks''': no but you will get more regular iron if you do build them there<br /> |
||
| + | '''Iron per hour''': 41+<br /> |
||
| + | '''Scalable''': yes (you can build a second farm 65 blocks away from the village center). Possible to fit 36 within the spawn chunks (though not easily).<br /> |
||
| + | '''Design by''': GruvaGuy |
||
| + | ;Description |
||
| − | A vast improvement on the Trench, the Foundry gets rid of all the redstone by using a different mechanism to keep the farm loaded. The Trench simply allowed the farm to break and then auto-built itself when it did. The Foundry never lets it break in the first place. The Foundry must be built in the spawn chunks and uses a funky mechanic with Nether Portals to keep the farm always loaded, even if the player goes to the Nether or the End. This means the the villages can be chained manually one time and then never touched again. This design cannot be built in 1.8, however if you build it in 1.7 or below and then upgrade to 1.8 it will still work, since 1.8 only affects the village chaining process. |
||
| + | This is a single village iron farm designed by GruvaGuy in 1.9 using Golem spawn mechanics to achieve a 100% efficient iron farm. Very different to most designs and can be placed flush on the ground without any digging required. Though this is as efficient as possible it is also expensive in resources. The mechanics show in the video can be applied to most other iron farms. {{yt|j9KGZYqvUwM}} |
||
| − | {{yt|N-Je3IpC1aY}} |
||
| + | ---- |
||
| − | '''The Iron Titan''' |
||
| + | === Comet 107's 30 Village Iron Farm === |
||
| − | ~2600 iron per hour: very scale-able: DOES require spawn chunks |
||
| + | '''Requires spawn chunks''': no<br /> |
||
| + | '''Iron per hour''': 1200<br /> |
||
| + | '''Scalable''': No<br /> |
||
| + | '''Design by''': Comet 107 |
||
| + | ;Description |
||
| − | In 1.8 snapshot [[14w04a]], villagers were completely reworked, including the way doors were seen. Previously, a new door would be added to the ''oldest'' village center in range. Now, doors are added to the ''closest'' village center within range. For a while, everyone thought that since chaining was broken, there was no way to get amazing iron farms like the Foundry to work in 1.8. But Tango Tek responded by changing the way he did chaining with a slightly different process. He used the new chaining in designing The Iron Titan. It is very similar to the Foundry, but this one is far more modular, and can be easily scaled up in increments of 32 villages. Tango's recommended design has 64 villages which produces a whopping 2600 iron every hour. It can theoretically be stacked on top of itself indefinitely, but that would obviously be very expensive and quite unnecessary. |
||
| + | This design is a 30 village iron farm that can be rebuilt on demand if not built in the spawn chunks and the chunk it is in has been unloaded. The village rebuild process takes just over 40 minutes and it will produce 1200 ingots per hour when running at full speed. |
||
| − | {{yt|STs4wDJewNw}} |
||
| + | {{yt|dx5eFXLOcF0}} |
||
| − | ==Designs by DanielKotes== |
||
| + | ---- |
||
| − | '''The Lava Trench''' |
||
| + | ===The Iron Casster=== |
||
| − | Several variations of Tango's original iron trench which allowed the farm (build-able up to 1.7 version) to be scaled up from 32 villages to 128 or even 256 sizes. These farms use the same technique that Tango came up with, but optimize the redstone to be easier to build/understand, allow resets to be done without player interaction even in the middle of an ongoing reset, and as already mentioned are not limited to 32 villages in size. |
||
| + | '''Requires spawn chunks''': no<br /> |
||
| − | A completely overpowered farm with 512 villages was also designed and can be seen in the video that shows all the other variations as well. For anyone interested, the youtube minecrafter ElRich actually managed to build the 512 village farm by himself in his single player survival, although it took him over half a year to build. |
||
| + | '''Iron per hour''': 640-3800<br /> |
||
| + | '''Scalable''': no<br /> |
||
| + | '''Design by''': GruvaGuy |
||
| + | ;Description |
||
| − | {{yt|j2WjrFoclKI}} |
||
| + | This design is an expandable 16-96 village iron farm that can be rebuilt on demand if not built in the spawn chunks and the chunk it is in has been unloaded. The village rebuild process takes up to 106 minutes for 96 villages and it will produce 3800 ingots per hour when running at full speed. |
||
| − | '''The Iron Towers''' |
||
| + | {{yt|gm-G-saDO24}} |
||
| − | Very similar to the Iron Trench, the Iron towers design layers villages one over each other to produce 32 villages. Due to the change in village creation mechanics introduced in 1.8, the previous designs have all been broken and thus a completely different setup was required. |
||
| − | Unlike the Iron Titan (which is also buildable in 1.8 onwards only), the Iron towers can be built outside the spawn chunks and will re-build the villages if they are broken, not requiring any player intervention. |
||
| − | At the moment it can only be built up to 32 villages in size, thus producing at most 1300 iron per hour if the full 32 village farm is built. Fortunately the redstone in this design is much simpler than the older iron trench builds due to the village building process being done in one phase instead of 2. |
||
| + | ---- |
||
| − | {{yt|3eegzcYYaeM}} |
||
| + | ===Comet 107's Double Stacking 168 Village Iron Farm=== |
||
| − | For anyone interested, there is a tutorial available for the iron towers design: |
||
| + | '''Requires spawn chunks''': no<br /> |
||
| + | '''Iron per hour''': 6700<br /> |
||
| + | '''Scalable''': no<br /> |
||
| + | '''Design by''': Comet 107 |
||
| + | ;Description |
||
| − | {{yt|UKP-WvCdo9s}} |
||
| + | This design is a 168 village iron farm that can be rebuilt on demand if not built in the spawn chunks and the chunk it is in has been unloaded. This iron farm resets 2 villages at the same time giving it a faster reset speed than most other designs. The village rebuild process takes 96 minutes and it will produce 6700 ingots per hour when running at full speed.{{yt|FIuimRv74e8}} |
||
| − | == Tower design == |
||
| + | Tutorial: |
||
| − | This design is good especially for survival. It will get you about a stack every 2 hours. It's pretty efficient, but for faster farms, use one of the above. |
||
| + | {{yt|c8Lo9UJg3sU}} |
||
| − | === Step zero - resources === |
||
| + | ---- |
||
| − | To build an iron golem farm, you should have a fair amount of resources, such as cobblestone and wood, as well as a way to get villagers into it. |
||
| + | ===The Iron Bakery=== |
||
| + | '''Requires spawn chunks''': yes<br /> |
||
| + | '''Iron per hour''': 500 each layer with 10 rows of doors<br /> |
||
| + | '''Scalable''': yes<br /> |
||
| + | '''Design by''': Emonadeo |
||
| + | ;Description |
||
| − | You will need: |
||
| + | A great advantage to this design is the customization. You can decide how big and efficient it gets by changing the number of the rings of doors and/or layers. It uses a similar door placement to the Iron Titan by Tango Tek. It is also efficient on smaller multiplayer servers. |
||
| − | * at least 1100 cobblestone (about 18 stacks) |
||
| − | * 64 doors (6 wood per door=384 wood planks or about 6 stacks.)<sup>''' (In 1.8 snapshots three doors are received instead of one)'''</sup> |
||
| − | * 18 water buckets |
||
| − | * 1 lava bucket |
||
| − | * 4 signs |
||
| − | * 2 hoppers and 2 chests<sup>''' (This is for the option to use hoppers to collect items when you are away from the farm)'''</sup> |
||
| + | Emonadeo has since released a video on how to fix it for 1.9/1.10 |
||
| − | === Step one - Building location === |
||
| + | {{yt|9x_CWxzW8aI}} |
||
| − | To build the Iron Golem farm you should: |
||
| + | ---- |
||
| − | * Choose a good location. Don't build it far from your home or main base, because you want the golems to spawn even when you are not at the farm. An ideal spot is on top of your existing home or close to it. |
||
| + | ===Iron Processing Unit (IPU-128)=== |
||
| − | * Gather the resources listed above. |
||
| + | '''Design by''': Panda |
||
| + | ;Description |
||
| − | * Follow the instructions below to begin building the base. |
||
| + | The most important part of any farm is its spawning floor, both in regards to maximising spawning area and the speed at which it can remove spawned entities to be replaced. In the following video, Panda describes a unique spawn floor design that drastically increases both of these. Combine this spawn floor with any of the other designs to improve its output. (Spawnpads still work in 1.8). |
||
| − | === Step two - Building instructions === |
||
| + | {{yt|xgQ_7N1wSZI}} |
||
| − | * '''1.''' |
||
| + | ---- |
||
| − | Start by building a 4x4 cobble base. |
||
| + | === Iron Nucleus === |
||
| − | {{BlockGrid|c=cobblestone| |
||
| + | '''Requires spawn chunks''': no<br /> |
||
| − | | cc |
||
| + | '''Iron per hour''': 1000+<br /> |
||
| − | |c c |
||
| + | '''Scalable''': yes<br /> |
||
| − | |c c |
||
| + | '''Design by''': SwoodyCraft |
||
| − | | cc |
||
| + | ;Description |
||
| − | }} |
||
| + | This design uses offset stacks of villages allowing players to compress a large number into a relatively small space (27 villages in less than 150 sq blocks). It is highly efficient and requires relatively low amount of resources to build. It does not require any redstone to build nor does it have to be built at spawn. The only limiting factor (as with any iron farm) is that it must be built at least 64 blocks from any other village. |
||
| + | {{yt|-6eEroyoerA}} |
||
| − | * '''2.''' |
||
| + | ---- |
||
| − | Continue this until you have a tower that is 10 blocks tall. Next, break a 2x3 hole in the bottom so the golems will be able to go through. |
||
| + | ===Flexible design=== |
||
| − | [[file:golemfarm-base.png|512px]] |
||
| + | '''Requires spawn chunks''': no<br /> |
||
| + | '''Iron per hour''': 30 - 40 (depending on configuration)<br /> |
||
| + | '''Scalable''': yes (As long as the second farm is constructed 70 blocks away)<br /> |
||
| + | '''Design by''': MCinstructabuilds |
||
| + | ;Description |
||
| − | * '''3.''' |
||
| + | This design is not as efficient as some other designs. However, it is simple to build and lends itself to variation and disguise. The spawning area for the golems is 16x16, but can be made smaller by digging 8 blocks down around the edges if desired. The doors are placed equally around the spawning area, but specific placement can be varied. It is this varied door placement that allows the farm to be easily camouflaged. MCinstructabuilds provides three example disguises, a fort, a town, and a mining camp / Furnace. Unlike other designs the villagers are not kept contained. The Farm can be constructed easily and at ground level. |
||
| + | {{yt|Vvexl-MiGwg}} |
||
| − | Build out 7 blocks from the top of this tower to form an 18x18 platform with a 2x2 hole in the middle. |
||
| + | ---- |
||
| − | [[file:golemfarm-18x18.png|512px]] |
||
| + | ===The Iron Paradise=== |
||
| − | <br> |
||
| + | '''Requires spawn chunks''': no<br /> |
||
| − | * '''4.''' |
||
| + | '''Iron per hour''': 500+ (Depending on server lag)<br /> |
||
| + | '''Scalable''': yes (64 blocks horizontally and 100 blocks vertically)<br /> |
||
| + | '''Design by''': TheBurntPhoenix |
||
| + | '''Description''': Although this design consists of multiple regular Iron Golem spawning platforms, the way that each of these spawning platforms is arranged makes the design as efficient as possible. This design is best suited for laggy multiplayer servers or servers that have the mobstack plugin. In TheBurntPhoenix's video, he has built a total of 12 spawning platforms separated into 3 layers, with 4 on each layer. Each platform on a single layer is 64 blocks away from each other, and is vertically 100 blocks away from each layer in order to optimize the rate that iron golems are spawned on slower servers. The bridges sends the newly spawned iron golems away from the spawning area, which allows more iron golems to be spawned without the issue of them being stacked together on servers with Mobstack. This way, the killing process will be much more efficient, allowing more iron to be obtained. |
||
| − | Build in 4 blocks from each corner, then 3 blocks diagonal in both directions to build a triangle. |
||
| − | {{BlockGrid|c=cobblestone |
||
| − | |ccccccc |
||
| − | | cccccc |
||
| − | | ccccc |
||
| − | | cccc |
||
| − | | ccc |
||
| − | | cc |
||
| − | | c |
||
| − | }} |
||
| + | {{yt|5D7NClSkV2w}} |
||
| − | [[file:golemfarm-triangle.png|512px]] |
||
| + | ---- |
||
| − | * '''5.''' |
||
| + | === Tower design === |
||
| + | This design can be built in survival mode. It will yields 30-40 iron per hour. It's suggested to use one of the above for better efficiency with the same effort. |
||
| + | ;Step zero - resources |
||
| − | Next build a 1 block wide platform around this so the platform is now 20x20. |
||
| + | To build an iron golem farm, you should have a fair amount of resources, such as cobblestone and wood, as well as a way to get villagers into it. |
||
| − | * '''6.''' |
||
| + | You will need: |
||
| − | Now build a wall with windows in it as show below. |
||
| + | * at least 1100 cobblestone (about 18 stacks) |
||
| + | * 64 [[door]]s (6 wood per 3 doors=128 wood planks or 2 stacks) |
||
| + | * 18 [[water bucket]]s (or 2 water buckets to make an [[Water Spawner]]) |
||
| + | * 1 [[lava bucket]] |
||
| + | * 4 [[sign]]s |
||
| + | * 2 [[hopper]]s and 2 [[chest]]s (This is for the option to use hoppers to collect items when you are away from the farm) |
||
| + | ;Step one - Building location |
||
| − | [[file:Golemfarm-windows.png|512px]] |
||
| − | + | To build the Iron Golem farm you should: |
|
| + | * Choose a good location. Don't build it far from your home or main base, because you want the golems to spawn even when you are not at the farm. An ideal spot is on top of your existing home or close to it. Remember, village doors need direct access to sunlight within 5 blocks straight ahead of them. |
||
| − | [[file:golemfarm-windowsize.png|512px]] |
||
| + | * Gather the resources listed above. |
||
| − | * '''7.''' |
||
| + | * Follow the instructions below to begin building the base. |
||
| − | Seal off the backs of the windows, and build some small cups to hold the villagers. The cups should be 4x4 on the outside, so there is 2x2x3 of air on the inside. |
||
| + | ;Step two - Building instructions |
||
| − | [[file:golemfarm-colsed.png|512px]] |
||
| + | * '''1.''' Start by building a 4×4 cobble base. |
||
| − | * '''8.''' |
||
| + | {{BlockGrid|c=cobblestone| |
||
| − | Place doors against the back of the indents. This is to make the villagers think these are homes.<br> |
||
| + | | cc |
||
| − | it should look like this: |
||
| + | |c c |
||
| + | |c c |
||
| + | | cc |
||
| + | }} |
||
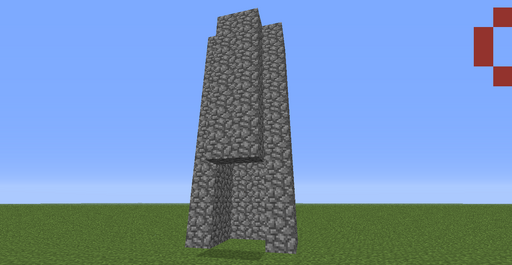
| + | * '''2.''' Continue this until you have a tower that is 10 blocks tall. Next, break a 2×3 hole in the bottom so the golems will be able to go through.<br />[[File:golemfarm-base.png|512px]] |
||
| − | [[file:golemfarm-doors.png|512px]] |
||
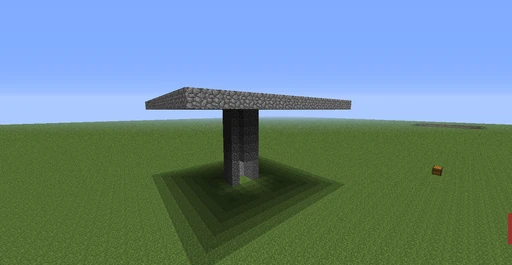
| + | * '''3.''' Build out 7 blocks from the top of this tower to form an 18×18 platform with a 2×2 hole in the middle.<br />[[File:golemfarm-18x18.png|512px]] |
||
| − | * '''9.''' |
||
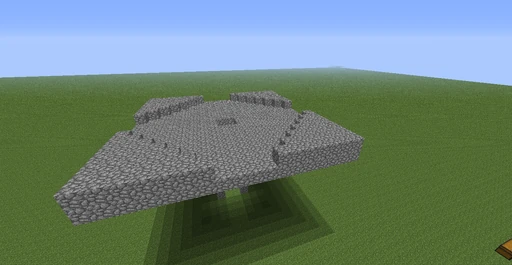
| + | * '''4.''' Build in 4 blocks from each corner, then 3 blocks diagonal in both directions to build a triangle.<br />{{BlockGrid|c=cobblestone |
||
| − | Then place down 1 water in each of the 4 villager cups, and 2 water down in between each of the raised triangles to form this pattern:<br>[[file:golemfarm-water1.png|512px]] |
||
| + | |ccccccc |
||
| − | |||
| + | | cccccc |
||
| − | * '''10.''' |
||
| + | | ccccc |
||
| + | | cccc |
||
| + | | ccc |
||
| + | | cc |
||
| + | | c |
||
| + | }}<br/>[[File:golemfarm-triangle.png|512px]] |
||
| + | * '''5.''' Next build a 1 block wide platform around this so the platform is now 20×20. |
||
| − | Place 1 water on each of the triangles in the very back corner of the wall.<br> |
||
| − | [[file:golemfarm-water2.png|512px]] |
||
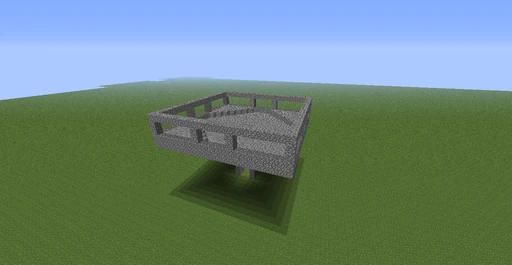
| + | * '''6.''' Now build a wall with windows in it as show below.<br />[[File:Golemfarm-windows.png|512px]] |
||
| + | This is how wide each of the holes in the wall should be:<br />[[File:golemfarm-windowsize.png|512px]] |
||
| − | Now the top part is finished, the golems will spawn once there are 3 villagers in each of the holding cups. |
||
| − | The next step is to build the golem grinder. |
||
| + | * '''7.''' Seal off the backs of the windows, and build some small cups to hold the villagers. The cups should be 4×4 on the outside, so there is 2×2×3 of air on the inside. Make sure that there are at least 10 villagers altogether and note that adding villagers after reaching 30 will have no effect on the efficiency of the farm.<br />[[File:golemfarm-colsed.png|512px]] |
||
| − | * '''11.''' |
||
| + | * '''8.''' Place doors against the back of the indents. This is to make the villagers think these are homes.<br> '''Note:''' To place doors against the inside wall as shown, stand inside the indent, face the spawning area, look down and "place" the door on the block directly under your feet (works on PC up to at least 1.12.2). Don't place them sideways; this can cause them to be not counted as homes.<br />It should look like this:<br />[[File:golemfarm-doors.png|512px]]<br />Note: every single door opens onto a blank wall. The villagers should not be going in and out of the doors; they are trapped inside their cups and can't leave. |
||
| − | Build 4 blocks out from the bottom of the tower and 3 blocks up on each side, then place 2 blocks at the end of it to keep the golems from escaping.<br> |
||
| − | [[file:golemfarm-base1.png|512px]] |
||
| + | * '''9.''' Then place down 1 water in each of the 4 villager cups, and 2 water down in between each of the raised triangles to form this pattern:<br />[[File:golemfarm-water1.png|512px]] |
||
| − | * '''12.''' |
||
| + | * '''10.''' Place 1 water on each of the triangles in the very back corner of the wall.<br />[[File:golemfarm-water2.png|512px]] |
||
| − | Next, place 4 signs in a cup shape to hold the lava that kills the golems.<br> |
||
| − | [[file:golemfarm-base2.png|512px]] |
||
| + | Now the top part is finished, the golems will spawn once there are 3 villagers in each of the holding cups.<br />The next step is to build the golem grinder. |
||
| − | * '''13.''' |
||
| + | * '''11.''' Build 4 blocks out from the bottom of the tower and 3 blocks up on each side, then place 2 blocks at the end of it to keep the golems from escaping.<br />[[File:golemfarm-base1.png|512px]] |
||
| − | Now place the lava in the signs.<br> |
||
| − | [[file:golemfarm-base3.png|512px]] |
||
| + | * '''12.''' Next, place 4 signs in a cup shape to hold the lava that kills the golems.<br />[[File:golemfarm-base2.png|512px]] |
||
| − | * '''14.''' |
||
| + | * '''13.''' Now place the lava in the signs.<br />[[File:golemfarm-base3.png|512px]] |
||
| − | Place the last 2 water in the very back of the base, so the golems will get pushed into the lava.<br> |
||
| − | [[file:golemfarm-base4.png|512px]] |
||
| + | * '''14.''' Place the last 2 water in the very back of the base, so the golems will get pushed into the lava.<br />[[File:golemfarm-base4.png|512px]] |
||
| − | * '''15.''' |
||
| − | Put down 2 hoppers going into a large chest for automatic resource collection (this is not required, but it is a good idea so you don't let any of the items despawn.)<br> |
+ | * '''15.''' Put down 2 hoppers going into a large chest for automatic resource collection (this is not required, but it is a good idea so you don't let any of the items despawn.)<br />[[File:golemfarm-base5.png|512px]] |
| − | [[file:golemfarm-base5.png|512px]] |
||
| + | ;Maintenance |
||
| + | Since villagers will turn into witches when struck by lightning (albeit it happens very rarely), it is sometimes needed to refill the villagers into the farm after a thunderstorm. But if the farm is not built inside the spawn chunk, you can just move away from the farm to let the chunk unload during a thunderstorm. Villagers bred inside the farm will also occasionally spawn outside of the containers. |
||
{{Tutorials}} |
{{Tutorials}} |
||
| + | [[de::technik:Farmanlagen/Eisengolemfarm (Mechanik)]] |
||
| − | [[Category:Guides]] |
||
| + | [[ja:チュートリアル/アイアンゴーレムの生産]] |
||
| + | [[ko:튜토리얼/문 기반 철 골렘 농장]] |
||
Latest revision as of 00:33, 16 November 2023
This tutorial describes iron golem farming as it works in the Legacy Console Edition (and as it formerly worked prior to Java Edition 1.14 and Bedrock Edition 1.11). These farms are based on the number and arrangement of doors and number of villagers, taking advantage of the fact that if a player creates enough "houses," which can be made with just a door and a block, iron golems can spawn. This tutorial describes door-based farms. For iron golem farming in Java and Bedrock editions, see Tutorials/Iron golem farming.
Overview
An iron golem farm is commonly a player-made village (or several of them, spaced far enough apart to remain separate) in which golems are spawned and then either killed immediately, or moved to a holding cell (outside the village boundary, so that new ones can spawn in their place) for later killing. If you opt for the first method, you will either need to go AFK while camping out at the collection point, have a hopper collecting your items, or else check back periodically to collect your items before they despawn. This necessity can be avoided by using the holding cell method, which allows the golems to collect while you are working nearby, and then you can harvest them all at once when you are ready so that you don't miss any drops.
If the farm is built inside the spawn chunk and fully automatic, it will operate at any time, making it highly efficient. Iron farms also work in Minecraft Bedrock Edition.
General requirements
Iron golems spawn naturally in villages (natural or player-made), provided there are 10 villagers and at least 21 houses (counted as doors). The chance of spawning is 1 in 7000 per tick, which averages around one every six minutes.
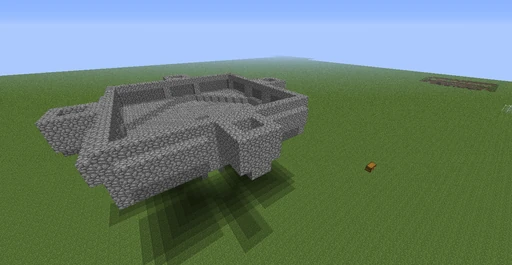
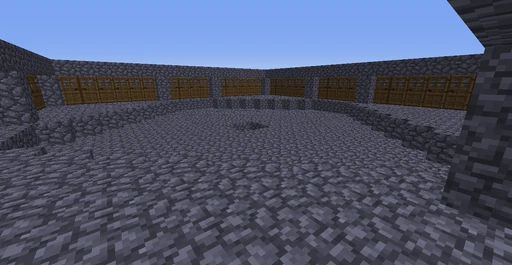
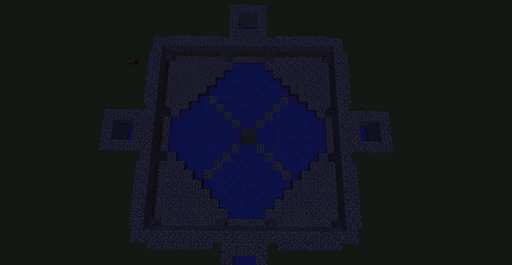
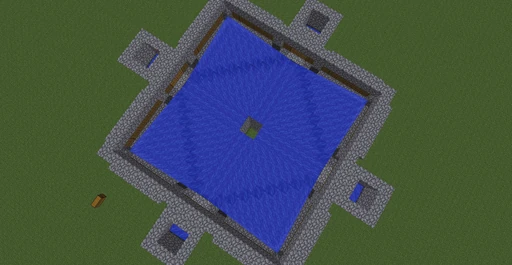
There are several approaches to building an iron farm, but efficient farms tend to use two floors in the golem-spawning zone (16 blocks×6 blocks×16 blocks) and keep all doors and villagers outside the zone, either above and below the center or in an outer "ring" on the same level. This is in order to maximize the number of available spaces for the golems to spawn in, which in turn will reduce the number of failed attempts, and keep the spawning rate as high as possible. This is much more effective than simply increasing the villager count to raise the golem cap, which only matters for the few seconds between the time when a golem spawns and when it is flushed out and killed. To further increase your output rate, you can build several separate iron farms as long as they are more than 64 blocks apart, and bring the golems or their drops to a central collection area. The most powerful iron farms are ones that overlap many villages. Since golems are immune to falling or drowning damage, the available killing methods are lava, magma blocks, suffocation, or a combination of these. As a more convoluted option, you can position a group of evokers to attack the golems in a holding chamber.
Odds of a missed spawn occurring: There are 512 valid spawn points in the 16×6×16 block spawn area. Making a farm with only ½ of the valid spawn points (256) does not reduce your chance of spawn by ½. This is because the game randomly "tries" to find a valid place to put a golem 10 times each time an opportunity to spawn a golem comes up. So, your chances become 0.5 for each of the ten tries. Missing a spawn in this case is equivalent to flipping a coin ten times and have all ten come out tails. It is .5^10 or .00098 which is just about one in a thousand odds. A better suggestion would be to use some of the area of the zone to rapidly move golems out of the interference zone so they do not halt further spawning. This is a much more likely occurrence than missed spawns if the golems can't move out of the area quickly. This is not as rare of an occurrence as has been suggested.
Chances of a missed spawn are calculated as follows:
( 1 - ( valid_spawn_points / (16*6*16) ) )^10 * 100%
So with 256 valid spawn points you will miss 16.2% of the spawns whereas 512 valid spawn points will only result in a loss of 1.7%.
Additionally, console players should note the 50 villager spawn limit, which will make difficult, though not impossible, the full population of certain farm designs. Also, due to changes 4J Studios made to door detection and addition in the December 2015 update that brought MCCE to approximate parity with PC 1.8.8 no stacked or chained village iron farms from the PC community will work on console. Console players should avoid using anything but single village designs at this point. 4J Studios has remained silent as to whether or not the change was intentional or if they plan to fix it. All bug report tickets on MCCE bug tracker have gone unassigned.
No designs are guaranteed to work with modded servers including bukkit/spigot/paper/sponge/etc. due to possible changes in mechanics.
Video
Iron golem farm designs
Easy 2-tier build
Requires spawn chunks: no
Iron per hour: 40
Scalable: yes
Designed by: trunkz
- Description
This is an older design by trunkz and one of the earliest to feature two spawning floors for greater efficiency. It uses several villager baskets and door pads and is a little outdated, but quite a good and efficient design for the time it takes to build.
This farm has been tested in Spigot 1.8. Extra care must be taken with breeding villagers as they no longer breed as easily as they did in earlier version. For testing in 1.8 the villagers were bred to a population of 20 on the ground before being transported to their cells (the individual villagers were transported to their cell by minecart, the other 18 went to their cell on a dirt ramp). The method given in the video will probably work if the breeding villagers are provided an ample supply of suitable food, e.g. carrots, potatoes or bread.
Survival mode build: Iron golem village
Requires spawn chunks: no
Iron per hour: 30-40, plus occasional loot from other mobs
Scalable: No
Design by: Amatulic
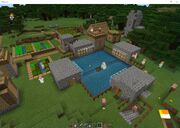
A simple iron golem farm built in a village with free-roaming villagers.

Another simple iron golem village farm, using fences instead of glass to block the doors.
- Description
This is a simple but flexible design that can be built fairly easily in survival mode, without the need to transport villagers. The villagers can multiply and roam freely, allowing you to trade with them. The farm will occasionally capture other mobs and their loot. Multiple tiers can be built to target more golems or different mobs.
- Preparation
You will need to gather sufficient resources: enough wood to craft a bunch of doors and fencing, optionally enough sand to smelt 40 glass blocks, and some iron to craft a bucket. You may need wool to craft a bed to sleep on before you start, to move your spawn point to the village in case you die and respawn while you work — some of the work is best done at night while the villagers are indoors and not getting in your way.
Find a village near a source of lava. Some villages have a blacksmith shop with a pool of lava, others have a lava source nearby.
If buildings in the village are missing any doors, give them doors, but keep the total under 21 for now. This encourages villagers to multiply and gives them a place to go at night while you work. Clear a flat 16×16 area in the village; some villages have an empty quadrant that is useful for clearing. You can use existing building walls as boundaries for the 16×16 area. Fence off the area, preferably at night after the villagers have scurried indoors, and install a gate to enter and exit the area. Villagers are curious; don't open the gate if villagers are near it, or they will go through.
- Construction
The design is a 16×16 pit 2 blocks below the base of the doors, with a 2×2 hole in the middle, buildings on each side of the pit, and fencing all around. It doesn't matter how you design the buildings as long as the door arrangement is symmetric from the center of the hole. Each building shown here has at least 5 doors facing the pit. Doors on the edge of the pit should be barred from opening using glass blocks if the doors are against the edge of the pit. If the pit is completely fenced, the doors will be set back a block and need not be barred by glass. Also there are doors on other walls; placement doesn't matter as long as it's all symmetrical; an imaginary line from any door through the central hole should intersect another door an equal distance on the other side of the hole.
If your doors are on the pit's edge, then avoid placing the doors during the day! Otherwise villagers might fall into your pit. Place them and block them with glass before daylight. Once you have placed all your doors, destroy any remaining doors in other buildings that aren't part of the symmetry of the farm. Also destroy beds in any building that isn't part of your farm, and put them in your new buildings, preferably in a symmetric arrangement. Your buildings around the pit should have doors (symmetrically placed) on the side walls to allow villagers to use the buildings.
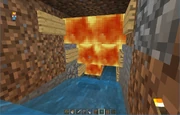
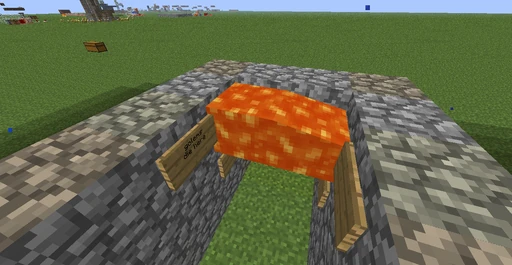
This iron golem farm uses a lava blade trap, intended for when the farm gets additional tiers to catch mobs of different heights, although the single-tier farm described already killed a skeleton and a spider in its first hour of use. Unfortunately, baby zombies would still pass through.
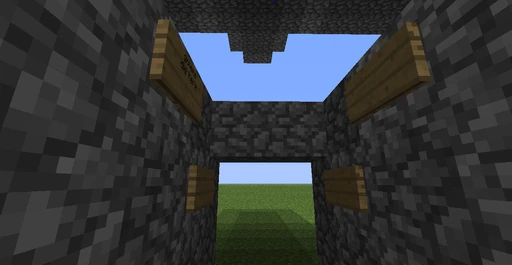
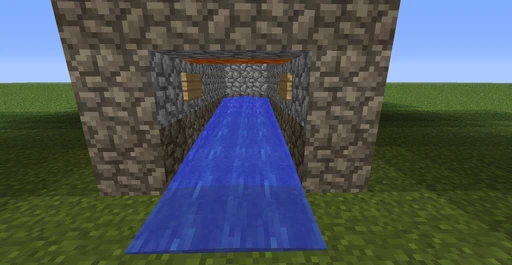
Before placing your doors, you should first complete the trap. To sweep the iron golems from the pit into the hole, it's best to cover the whole area with running water, otherwise the iron golems will try to stick to the dry spots. The design shown here has a 1 block undercut around the pit's edge, with water sources along two parallel sides, 2 water source blocks at the middle of the other two sides for the final sweep. This design uses lava blades across the top and middle of a 2-wide by 3-high tunnel leading from the hole. At the bottom of the hole is a river that sweeps the mobs into the blades, and sweeps the loot toward the end of the tunnel.
At the end of the tunnel, build some access to the surface (shown in the first image on the lower right). Villagers are free to go in and out, but make a barrier in the tunnel to keep them from reaching the lava.
You don't need a hopper or chest at first — just watch your farm and when an iron golem falls through the hole, go into your tunnel and collect the iron that drifts toward you. After you have five iron ingots, you can craft a hopper and put it at the end of the water stream in the tunnel, to deposit the ingots into a chest.
4 spawn modules 2-level
Requires spawn chunks: no
Iron per hour: 160
Scalable: yes
Design by: JL2579 (tutorial by docm77)
- Description
This design, originally created by JL2579, uses 4 spawning modules, with 2 modules per level, with doors surrounding the modules. This pattern could be repeated to fill a very large area with iron farms. The farm also features a lava system to damage the iron golems so that the piston suffocator works more quickly. Youtuber docm77 made this tutorial for the design.
Simpler JL2579 design
Requires spawn chunks: no
Iron per hour: 30
Scalable: yes (you can build a second farm 80 blocks overhead to increase the spawning rates)
Design by: Nims
- Description
This design, by NimsTV, is less efficient than JL2579's design. However, it is much simpler and easier to build, because the water streams are easier to configure and there is only one villager basket. The golem spawning area is larger than the farm, which is why JL2579 did not build his farm in this way. You have to block spawning anywhere outside the farm, if you intend to build several duplicate farms in an array.
The Iron Stream
Requires spawn chunks: no
Iron per hour: 640
Scalable: no
Design by: Eta740
- Description
This design is a 16 Village Iron Farm that can be rebuilt on demand if not built in the spawn chunks and the chunk it is in has been unloaded. The village rebuild process takes 24 minutes and it will produce 640 ingots per hour when running at full speed.
The Iron Head, a 100% Efficient Iron Farm
Requires spawn chunks: no but you will get more regular iron if you do build them there
Iron per hour: 41+
Scalable: yes (you can build a second farm 65 blocks away from the village center). Possible to fit 36 within the spawn chunks (though not easily).
Design by: GruvaGuy
- Description
This is a single village iron farm designed by GruvaGuy in 1.9 using Golem spawn mechanics to achieve a 100% efficient iron farm. Very different to most designs and can be placed flush on the ground without any digging required. Though this is as efficient as possible it is also expensive in resources. The mechanics show in the video can be applied to most other iron farms.
Comet 107's 30 Village Iron Farm
Requires spawn chunks: no
Iron per hour: 1200
Scalable: No
Design by: Comet 107
- Description
This design is a 30 village iron farm that can be rebuilt on demand if not built in the spawn chunks and the chunk it is in has been unloaded. The village rebuild process takes just over 40 minutes and it will produce 1200 ingots per hour when running at full speed.
The Iron Casster
Requires spawn chunks: no
Iron per hour: 640-3800
Scalable: no
Design by: GruvaGuy
- Description
This design is an expandable 16-96 village iron farm that can be rebuilt on demand if not built in the spawn chunks and the chunk it is in has been unloaded. The village rebuild process takes up to 106 minutes for 96 villages and it will produce 3800 ingots per hour when running at full speed.
Comet 107's Double Stacking 168 Village Iron Farm
Requires spawn chunks: no
Iron per hour: 6700
Scalable: no
Design by: Comet 107
- Description
This design is a 168 village iron farm that can be rebuilt on demand if not built in the spawn chunks and the chunk it is in has been unloaded. This iron farm resets 2 villages at the same time giving it a faster reset speed than most other designs. The village rebuild process takes 96 minutes and it will produce 6700 ingots per hour when running at full speed.
Tutorial:
The Iron Bakery
Requires spawn chunks: yes
Iron per hour: 500 each layer with 10 rows of doors
Scalable: yes
Design by: Emonadeo
- Description
A great advantage to this design is the customization. You can decide how big and efficient it gets by changing the number of the rings of doors and/or layers. It uses a similar door placement to the Iron Titan by Tango Tek. It is also efficient on smaller multiplayer servers.
Emonadeo has since released a video on how to fix it for 1.9/1.10
Iron Processing Unit (IPU-128)
Design by: Panda
- Description
The most important part of any farm is its spawning floor, both in regards to maximising spawning area and the speed at which it can remove spawned entities to be replaced. In the following video, Panda describes a unique spawn floor design that drastically increases both of these. Combine this spawn floor with any of the other designs to improve its output. (Spawnpads still work in 1.8).
Iron Nucleus
Requires spawn chunks: no
Iron per hour: 1000+
Scalable: yes
Design by: SwoodyCraft
- Description
This design uses offset stacks of villages allowing players to compress a large number into a relatively small space (27 villages in less than 150 sq blocks). It is highly efficient and requires relatively low amount of resources to build. It does not require any redstone to build nor does it have to be built at spawn. The only limiting factor (as with any iron farm) is that it must be built at least 64 blocks from any other village.
Flexible design
Requires spawn chunks: no
Iron per hour: 30 - 40 (depending on configuration)
Scalable: yes (As long as the second farm is constructed 70 blocks away)
Design by: MCinstructabuilds
- Description
This design is not as efficient as some other designs. However, it is simple to build and lends itself to variation and disguise. The spawning area for the golems is 16x16, but can be made smaller by digging 8 blocks down around the edges if desired. The doors are placed equally around the spawning area, but specific placement can be varied. It is this varied door placement that allows the farm to be easily camouflaged. MCinstructabuilds provides three example disguises, a fort, a town, and a mining camp / Furnace. Unlike other designs the villagers are not kept contained. The Farm can be constructed easily and at ground level.
The Iron Paradise
Requires spawn chunks: no
Iron per hour: 500+ (Depending on server lag)
Scalable: yes (64 blocks horizontally and 100 blocks vertically)
Design by: TheBurntPhoenix
Description: Although this design consists of multiple regular Iron Golem spawning platforms, the way that each of these spawning platforms is arranged makes the design as efficient as possible. This design is best suited for laggy multiplayer servers or servers that have the mobstack plugin. In TheBurntPhoenix's video, he has built a total of 12 spawning platforms separated into 3 layers, with 4 on each layer. Each platform on a single layer is 64 blocks away from each other, and is vertically 100 blocks away from each layer in order to optimize the rate that iron golems are spawned on slower servers. The bridges sends the newly spawned iron golems away from the spawning area, which allows more iron golems to be spawned without the issue of them being stacked together on servers with Mobstack. This way, the killing process will be much more efficient, allowing more iron to be obtained.
Tower design
This design can be built in survival mode. It will yields 30-40 iron per hour. It's suggested to use one of the above for better efficiency with the same effort.
- Step zero - resources
To build an iron golem farm, you should have a fair amount of resources, such as cobblestone and wood, as well as a way to get villagers into it.
You will need:
- at least 1100 cobblestone (about 18 stacks)
- 64 doors (6 wood per 3 doors=128 wood planks or 2 stacks)
- 18 water buckets (or 2 water buckets to make an Water Spawner)
- 1 lava bucket
- 4 signs
- 2 hoppers and 2 chests (This is for the option to use hoppers to collect items when you are away from the farm)
- Step one - Building location
To build the Iron Golem farm you should:
- Choose a good location. Don't build it far from your home or main base, because you want the golems to spawn even when you are not at the farm. An ideal spot is on top of your existing home or close to it. Remember, village doors need direct access to sunlight within 5 blocks straight ahead of them.
- Gather the resources listed above.
- Follow the instructions below to begin building the base.
- Step two - Building instructions
- 1. Start by building a 4×4 cobble base.
- 2. Continue this until you have a tower that is 10 blocks tall. Next, break a 2×3 hole in the bottom so the golems will be able to go through.

- 3. Build out 7 blocks from the top of this tower to form an 18×18 platform with a 2×2 hole in the middle.

- 4. Build in 4 blocks from each corner, then 3 blocks diagonal in both directions to build a triangle.
- 5. Next build a 1 block wide platform around this so the platform is now 20×20.
This is how wide each of the holes in the wall should be: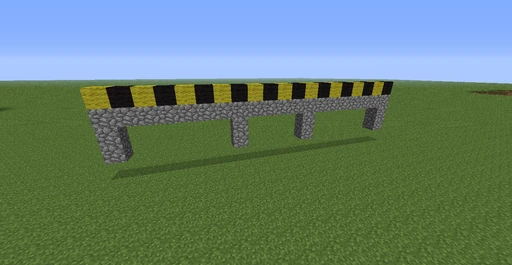
- 7. Seal off the backs of the windows, and build some small cups to hold the villagers. The cups should be 4×4 on the outside, so there is 2×2×3 of air on the inside. Make sure that there are at least 10 villagers altogether and note that adding villagers after reaching 30 will have no effect on the efficiency of the farm.

- 8. Place doors against the back of the indents. This is to make the villagers think these are homes.
Note: To place doors against the inside wall as shown, stand inside the indent, face the spawning area, look down and "place" the door on the block directly under your feet (works on PC up to at least 1.12.2). Don't place them sideways; this can cause them to be not counted as homes.
It should look like this:
Note: every single door opens onto a blank wall. The villagers should not be going in and out of the doors; they are trapped inside their cups and can't leave.
- 9. Then place down 1 water in each of the 4 villager cups, and 2 water down in between each of the raised triangles to form this pattern:

Now the top part is finished, the golems will spawn once there are 3 villagers in each of the holding cups.
The next step is to build the golem grinder.
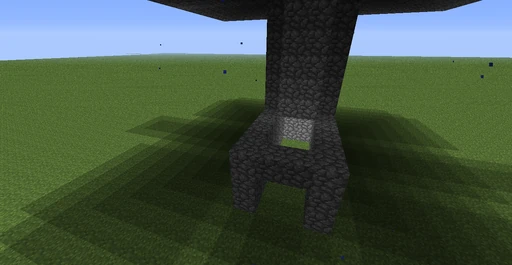
- 11. Build 4 blocks out from the bottom of the tower and 3 blocks up on each side, then place 2 blocks at the end of it to keep the golems from escaping.

- 14. Place the last 2 water in the very back of the base, so the golems will get pushed into the lava.

- 15. Put down 2 hoppers going into a large chest for automatic resource collection (this is not required, but it is a good idea so you don't let any of the items despawn.)

- Maintenance
Since villagers will turn into witches when struck by lightning (albeit it happens very rarely), it is sometimes needed to refill the villagers into the farm after a thunderstorm. But if the farm is not built inside the spawn chunk, you can just move away from the farm to let the chunk unload during a thunderstorm. Villagers bred inside the farm will also occasionally spawn outside of the containers.
