Flying machines are mechanisms that use slime blocks and/or honey blocks, redstone blocks, observers, and pistons to move a structure of blocks in one or more directions, moving freely through air or water without support. They can also be designed to carry along a player and/or other entities, which may be riding in a minecart or towed along by honey blocks.
The mechanics of such machines vary slightly between the Java and Bedrock Editions of Minecraft; This guide covers Java Edition and Bedrock Edition in separate sections.
General Principles[]
The key blocks for flying machines, more or less in order of appearance:
- Pistons are capable of pushing or (sticky pistons) pulling up to 12 blocks. These can simply be arranged in a line in front of the piston, but slime and honey blocks allow carrying along blocks placed to all sides of that line.
- Various immovable blocks (notably obsidian and tile entities such as furnaces[JE only]) provide limits and frameworks.
- Redstone Blocks: The key point here is while most other redstone power sources are partial blocks that get broken by pistons, this one can be pushed or pulled by pistons, so a machine can carry its own power source.
- Observers are sensors for both the environment and adjacent parts of the same machine, which can also turn a change in one part of the machines into power elsewhere.
- Slime and Honey blocks are similar -- both can "stick to" other blocks at their sides, carrying those along with them when pushed or pulled by a piston. Their differences are as follows:
- They do not stick to each other.
- Slime blocks are solid blocks, which can take and transmit a redstone signal, while honey blocks are transparent blocks which cannot.
- Slime blocks bounce entities away from them, while honey blocks drag entities along with them (and prevent players or mobs atop them from jumping).
There are two main components of slime block flying machines:
The engine provides the basic control and motion, based on the idea that a slime block pushed by a piston will move adjacent movable blocks, including other slime blocks, when pushed or pulled. However, each piston is limited to moving 12 blocks total.
Extensions uses additional pistons to let tow along additional segments of a larger machine. Honey blocks can also be used to bypass the piston push limit by using adjacent slime block and honey block flying machines to divide the number of blocks in a structure among pistons. In Bedrock Edition, extensions are divided into leading and trailing types.
Note that the schematics in this section use the usual building scheme where layer 1 (or occasionally layer 0) is the bottom layer.
Java Edition Flying Machines[]
Engines[]

A simple flying engine. The central piston is the only sticky piston used in this configuration.
Engines are mechanical parts of slime-block based flying machines used to move them.
In all cases, a major issue is control, especially how to start and stop the machine. There are several options here:
- A semi-automatic engine needs player's intervention to move it, generally by updating a piston -- e.g., using flint and steel on it, or rapidly placing tripwire against it.
- A fully automatic engine can be started by a single update, say by breaking a block (perhaps a button or a sign). A switch can be used, but is likely to be left behind once the machine starts to move. Stopping them can be more difficult -- many engines will stop only when they run into an obstacle. If the obstacle is wrongly shaped, it may break the machine, thus a prepared docking station may be needed.
- A few "drivable" machines take advantage of the point that a note block produces an update when played, so a player riding the machine can trigger note blocks to start and/or stop the machine.
- Engines can also differ in available directions and speed. The simplest can only move in a single direction, but two-way and even diagonal motion are possible. Again, dedicated docking stations are sometimes needed.
Schematics[]
Schematic Gallery: Engines (Java Edition)
A two-way engine can be made with as few as 6 blocks – 2 Observers, 2 Slime Blocks, and 2 Sticky Pistons. Two-way engines A and B (see gallery above) show two different ways to do this.
In both cases, the direction of flight depends on which observer is updated first. Note that in the diagram shown, each observer directly powers a slime block. The dock shown is placed so that the trapdoor will cover the face of the incoming machine's near observer, which lets it send the machine back the way it came.
Adding honey blocks allows a player to be carried with the machine in relative safety. The rideable engine shown adds two honey blocks, and a player can stand on each of them. It can be made with 14 blocks – 8 slimeblocks, 2 honey blocks, 2 sticky pistons and 2 observers. Getting on and off is another problem....

Turbo engine A. Breaking the sign starts the engine.
Turbo Engine A (see gallery) is a high-speed single-direction engine. It fits into 2×2×6 dimensions and uses 14 blocks. Since zero ticking pistons is not possible on Bedrock Edition, this kind of flying machine will still be the same speed on Bedrock Edition as normal flyers, however, several 2.5 meters per second flying machines have been created for specific use on Bedrock Edition.
An engine can also move diagonally by moving alternately along 2 axes. The Diagonal Engine shown is best built out from level 3 (the upper slime--and-piston layer). It moves along its slime-block diagonal, but is guided by immovable (e.g., obsidian) barriers on level 3, so it can follow a straight or curved "rail", in whichever direction(s) it can move until it reaches a corner to block it. It is started by activating either of the observers on top (placing a block, flint-and-steel), and will move away from that corner (that is, it is also a two-way flyer).
Credits: design from "samnrad" ("smart diagonal flying machine and curved flying machines" YouTube
This video demonstrates two-way engine A above, with long slime-block arms for harvesting, which shuttles between two prepared docks. It can be triggered by placing a block atop the pistons, or by switches at the stations. Note that the harvested crops will be launched at some speed, so this design may be better for an enclosed farm.
Extensions[]
Extensions are mechanical parts of a fully-automatic flying machine used to push an independent part of a large flying structure. A single piston only can push or pull up to 12 blocks. Extensions use additional pistons to "extend" a slime structure by allowing more blocks to be pushed.
One-way extension[]
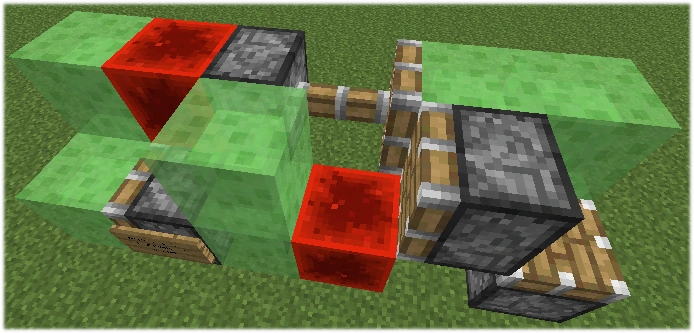
A one-way extension has 2 parts: a normal piston in the rear, and a slime block (or more) with a power source in the front with space between them.
Once the rear part with the piston is pushed, the piston will be activated by a power source from the front part. It will push the slime block (and thus the next part of the flying contraption and its extensions), which pulls the power source with it. The piston will then deactivate and prepare for another push.
Some simple engines are just made of looped extensions, such that, at any given time one piston is always powered (in these machines it is important to place the redstone blocks last).

A 1-way extension. The piston will be powered by quasi-connectivity.
Two-way extensions[]
An example of how extensions can be used to create more complex structures such as this train.
A two-way extension consists of an observer powering at least one sticky piston which pushes or pulls a part of the flying contraption. This is possible only in Java Edition because it's the only version where sticky pistons (upon receiving a short redstone pulse) can push a block and then retract quickly without pulling it back.
This type of extension will either continuously pull or push depending on whether the part it's supposed to move is initially retracted or not. If the part is initially retracted and the extension is continuously pulled, the sticky piston will continuously pull the part. On the other hand, if the part is one block away ("not retracted") and the extensions is continuously pushed, the sticky piston will continuously push the part. This mechanism necessitates a switch within the flying machine to independently retract and extend the extension before flight, because otherwise, the engine will most likely be unable to push due to the "stuck" retracted extensions adding extra load to the engine's pistons.
Driveable flying machines[]
A flying machine can be designed to not only carry a player along, but allow them to control the machine in flight, starting, stopping, or changing directions. Often due to lag, slime engines can bug allowing the player to fall through the machine. This can be solved by placing the player in a vehicle such as a minecart, by standing on top of a honey block, or by standing inside a Composter.
Note: Placing a minecart in any such build will require a temporary rail, perhaps atop a temporary block for convenience.
Starting the engine of a flying machine often involves updating a piston or observer. Braking, on the other hand, isn't as straightforward to do in survival because a piston-immovable block must be present to stop the engine. A reliable braking method that was first popularized by SethBling is to attach a noteblock (or any similar redstone component movable by pistons) to the "face" of an observer that powers a piston. The piston is placed on the front of the engine, and since extended pistons cannot be pushed by other pistons, activating the noteblock at the right time will stop the engine.
By using sticky pistons instead of pistons for the braking components, they also become 2-way extensions. These can be used to carry extra blocks, such as holders for minecarts/minecart chests, passenger roofs, TNT duplicators, etc.
Schematics[]
Schematic Gallery: Driveable flying machines
Driveable flying machine A, 2-way[]
- Dimensions: 8x4 collapsed
- Materials: 4 observers, 10 slime blocks, 2 sticky pistons, 2 regular or sticky pistons, 4 note blocks. For seating: 2 fences, 2 minecarts
- Usage: To start left or right, click the note block with that arrow (behind you). To stop, spam-click the matching barred note block (ahead of you).
- Credits: "Sethbling", February 29, 2019, "Simple 2-Way Controllable Flying Machine" (Video). YouTube
Driveable flying machine B, 2-way[]
A version of Drivable machine A, modified by kurzawa6's, with minecart chests and a roof attached to the 2 two-way spliters. One extension carries a roof to protect the driver from phantoms, the other carries a cargo module with two minecarts (optionally with chests)
- Dimensions: 10x6, 2 high minimum, 5 high with roof.
- Notes:
- The slime block marked a can get another slime block above it, with top slabs on each side sheltering the passenger/cargo minecarts.
- The starred minecart is the "pilot's seat".
- Before going either way, first make sure the roof is retracted by clicking the <̅ block, and the cargo is retracted by clicking the >̅ block.
- To go either way , click the appropriate < >. To stop, spam-click the matching barred block <̅ >̅ .
Credits: Design from "kurozawa6" "Minecraft Flying Machine: Drivable, 2-Way, And Roofed With 2 Extra Passengers/Cargo" YouTube
Driveable flying machine C, 2/4-way[]
A 2-way machine which can be reconfigured in the field to go the other two ways, by mining and replacing four blocks. It can carry two passengers, and has two cargo bays for minecarts with chests (or plain minecarts, for passengers). It uses 20 slime blocks including the cargo bays. Its use is complex, but may be worthwhile just for bragging rights.
- Dimensions: 8x10, 3 high.

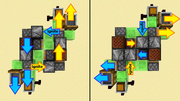
Diagram from video, showing ignition points and note blocks used for each direction. Note: This image is "sideways", with east and west shown as as up and down.

- Usage: The machine is started by updating an observer (one of the two with open faces) twice, using a flint-and-steel or a water bucket.
- To go east:
- Set fire (or water) behind the west-most observer.
- Sit in the eastern minecart.
- Before the fire extinguishes, click the note block nearest you to release the brake.
- Wait for the fire to burn out (or remove the water) to trigger that observer again and start the engine.
- To stop the engine, spam-click the same note block. Check that the carrier for your minecart is retracted, if not, click the note block again to retract it.
- To go west, do the same in mirror image.
- To switch to north-south movement:
- mine the starred pistons (note the helpful logs below them) and rotate them a quarter-turn clockwise -- still facing outward, but the other outward
- likewise, mine the starred observers, and put them in the positions and directions of the arrows.
- To move north and south, similarly twice trigger the "rear" observer, and use the nearer note block to release the brake and stop the engine.
- To go east:
- Credits: Design from "kurozawa6", Sep 12, 2019 "Practical Minecraft 4-Way Flying Machine I used to ride in Hardcore for my first Elytras + Cargo" YouTube
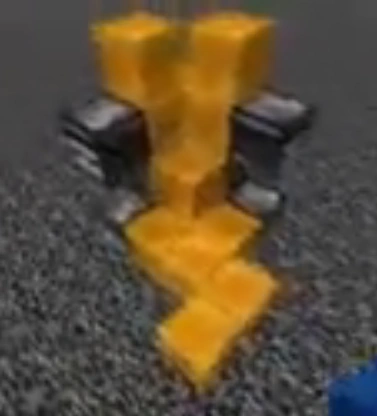
Driveable flying machine D, 4-way[]
A compact four-way engine that is controlled by applying a redstone torch to the central observer.
- Materials: 13 Observers, 26 slime blocks, 8 sticky pistons, 8 regular pistons. For use: redstone torch, immovable block
- Dimensions: 7x5, 4 high (or alternately 5x5x5)
- Build guide:
- Start with the central two slime blocks of layers 2 and 3. The lower of these needs to be at least two blocks above "the ground" -- that is, the highest ground you intend to fly over.
- Place the upper sticky pistons outward, then use those to place the lower ones facing inward.
- Add the downward facing observer on the top of this, then the four-high slime pillars outside the pistons, extending above and below them. Use those to place the downward-facing observers on layer 1.
- Extend the slime pillars into T shapes, at the top on two opposing sides, on the bottom for the other two. (this diagram has the top T's at east and west). Place the regular pistons at the ends of the T-bars, facing into the machine.
- Place the layer-2 observers against the slime pillars, then place the layer-4 observerd against the T-bars.
- Note: the layer-4 observers alternately be placed atop their slime blocks (level 5), each pair facing each (powering the adjacent pistons). This placement fits the entire build in a 5x5x5 cube. However, that higher position slightly obstructs the rider's view, so the original builder prefers the 4-level build.
- Usage: The player stands on the pistons surrounding the top central observer, with a redstone torch in hand. The engine can be started in any direction by placing and quickly breaking the torch on that side of the central observer. It is stopped by again placing the torch in the same place (and leaving it until the engine stops). With the machine in motion, placing the torch may be difficult, having a few spares may be wise. Note that it is entirely possible to fall through the corner holes, so step carefully, and stay on the piston you're riding while the machine is in motion.
- Credits: Original by "FirewolfQuasar", Jul 18, 2017 "Minecraft: 4 way flying machine | 1.11+ Java Edition" YouTube
Driveable flying machine E, 4-way, compact[]
"A modification using honeyblocks to my second 4 way flying maching making it rideable in survival. The stopping block can be any movable block exept slime and glazed teracotta. i just used honeyblocks because they are easy to break." --FirewolfQuasar
- Dimensions: 4x4*x4, JE 1.16+
- Materials: 4 observers, 4 sticky pistons, 15* honey blocks. For seating: 1+ minecart(s), 1 rail, 1 block(temporary).
- Build guide:
- Important note: The build is directional and must be built aligned per the schematic with N facing north. This is a restriction due to the update order of the blocks. This build does not work with slime blocks.
- Place all the honey blocks and sticky pistons first.
- Install the observers. With honey block B (the brake) in place, the pistons won't push if they receive a redstone pulse.
- The optional minecart can be added, by placing any temporary block at T, placing the rail on it, then the cart. Mine block T and recover it and the rail. This need not be slime as pictured, it just mines quickly.
- Options: The honey blocks marked * are optional. If they are in place, any movable block except slime and glazed terracotta can be used to stop by placing it at B. If the * honey blocks aren't used, the piston push limit won't be exceeded, so the brake B block must be a honey block to restrict the pistons. Honey blocks mine easily and have a high rate of recovery in this design, so do make for an effective brake.
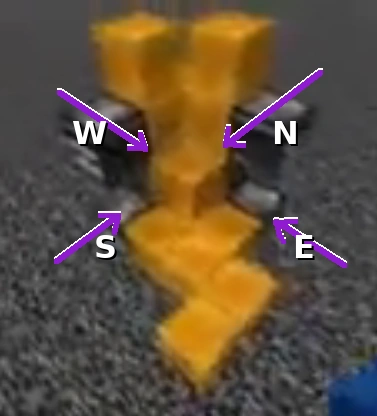
- Usage: Stand on the north-west honey block (or sit in the minecart). Take note of the pistons and choose the one that will push in the direction you wish to travel. Then update its respective observer. Place a torch, button, or other disposable block on the face or otherwise trigger the observer. The disposable item will break or be abandoned when the observer is moved with the machine.
- Collision behaviour: When the flyer collides with immovable blocks (bedrock, obsidian, furnaces,...), it changes direction depending on its current direction of travel:
- North: Begins moving west.
- West: Begins moving north.
- South: Begins moving east.
- East: Begins moving south.
- If the machine cannot travel in the new direction, it halts. This allows for the construction of 'docks' that are easy to park the machine at, as it favours settling into north-west or south-east corners of immovable blocks.
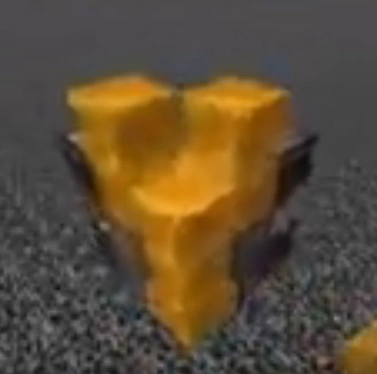
View of NW corner

View of SE corner
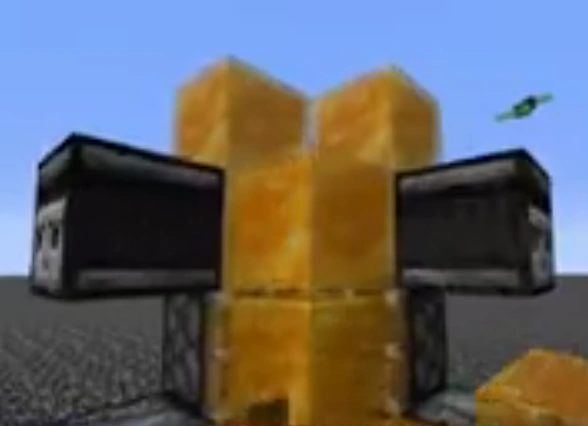
Brake in place, between 2 upper observers
Direction controls
Sample dock showing north and west barriers that guide flyer into the corner. Includes button-activated trap-door for departures.
- Credits: "FirewolfQuasar", Oct 16, 2019, "Minecraft rideable 4 way flying machine in 19w42a" (Video). YouTube
More complex engines[]
The following video shows a complex example, an arbitrarily expandable flying machine with a 2-way engine and multiple extension (each carrying 2 TNT Duplicators):
A 4-way engine (2 vertical directions) that switches directions upon contact with a few blocks.
Bedrock engine designs[]
Flying machines are much more restricted in Bedrock Edition due to the lack of quasi-connectivity and other piston behaviors. In Java Edition, a sticky piston powered with a 1 tick pulse will drop the block it is carrying. The absence of these behaviors makes it difficult to create complex flying machines.
Simple engine 1[]
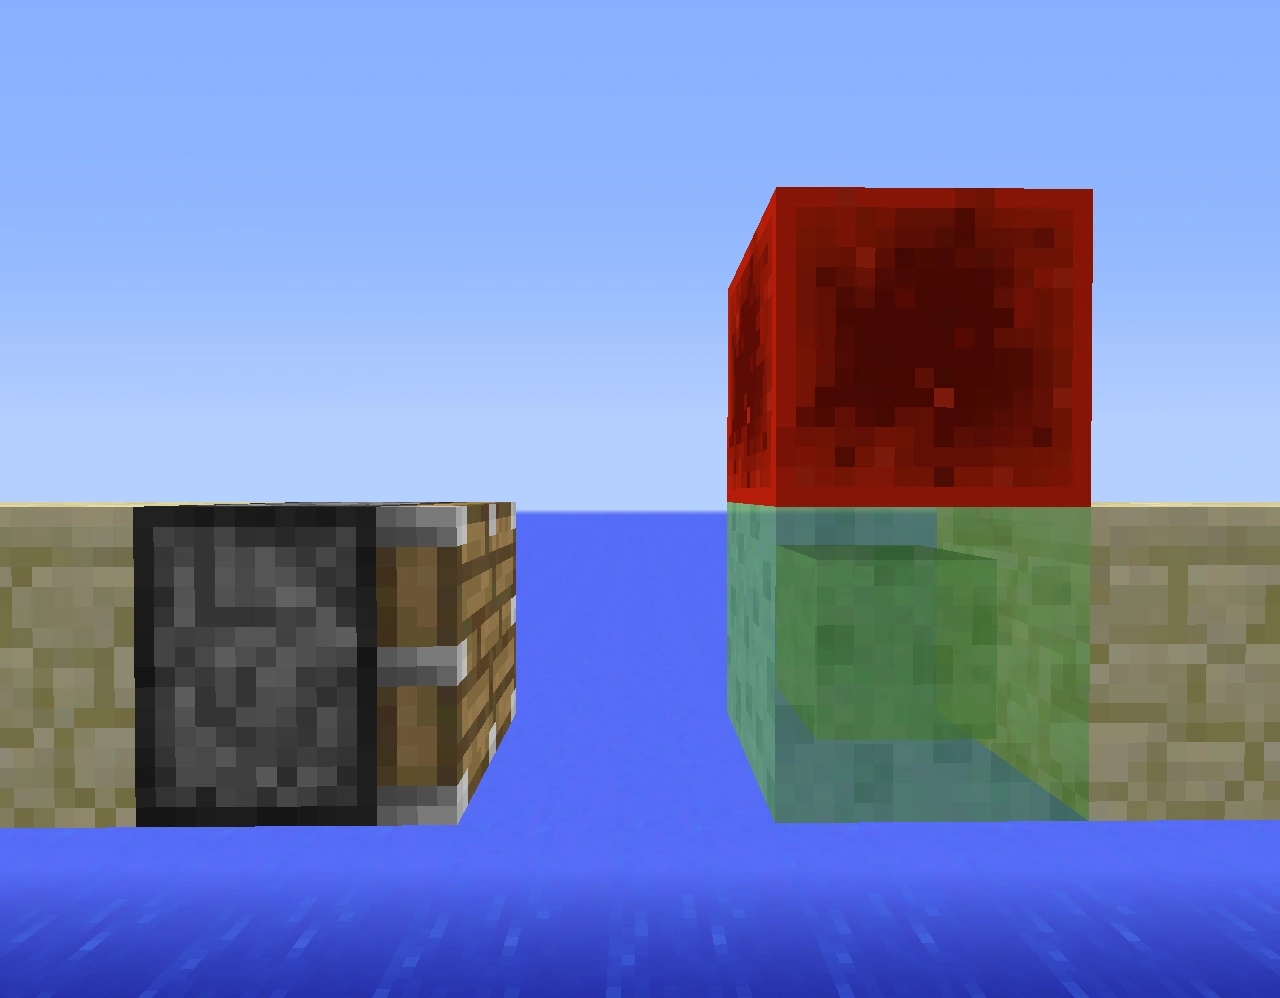
These are basic flying machine designs. The shown examples will move to the viewer's left.
Removing the block of redstone, or placing obsidian in front of the observer, will cause the machine to stop. This may be hard to do, unless in creative mode.
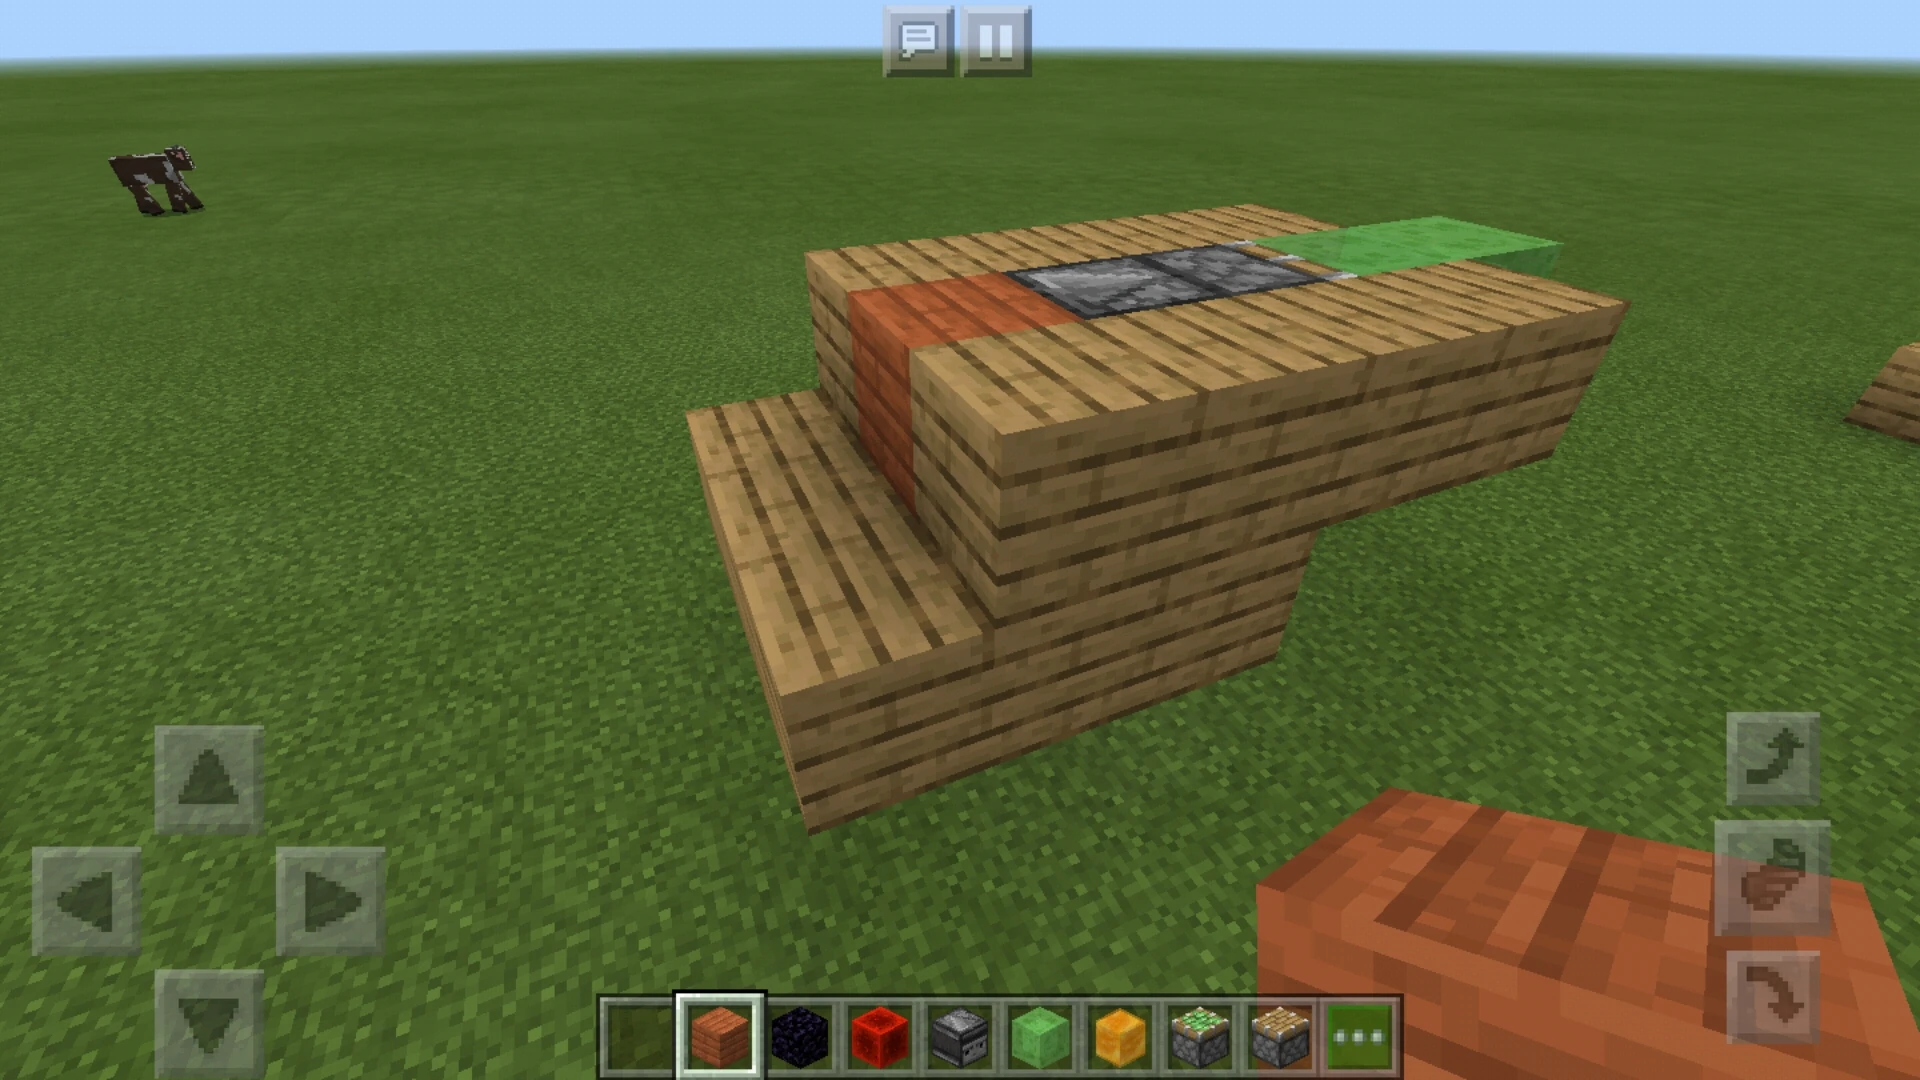

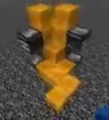
Simple engine 1 design, with added woodwork forming a gondola for the player. To start and stop, add or remove a piece of wood (such as the piece of acacia wood shown here).
For players who want to ride their flying machine, it may be hard to add and remove the obsidian or redstone block (especially in survival mode). A slightly easier way is to add layers of another material (such as wood plank) to the machine, stopping just before the limit of what a piston can move and doubling as a practical gondola for the player at the same time. From a position sitting on the machine somewhere, the player may add another wood plank block to the machine, killing the speed. Removing the final block causes the machine to start again.
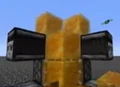
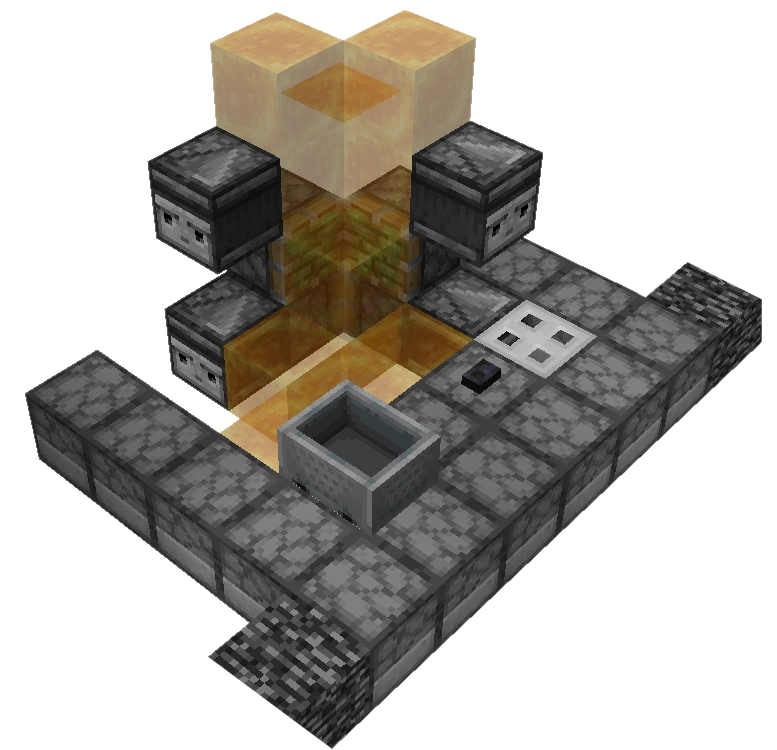
Simple engine 2
The simple engine 2 provides a narrower but longer design, which requires less redstone than others (less redstone blocks). In this example, the machine would begin moving to the left once the observer on the right is activated. This can be done with a redstone pulse, or just lighting the face with flint and steel.
To reverse the direction of this machine, simply move one of the slime blocks to the back, and switch the piston and sticky piston.
This design is ideal when redstone is scarce, or when up to 9 blocks need to be placed on the front end (the front half only consists of 3 blocks, with a total of 12 blocks able to be pushed by the piston).
Trailer
By placing an observer and a sticky piston onto the side, one can build off of the Simple engine 2 design to make the machine bigger as a whole. Keep in mind that multiple trailer attachments can be placed on the side, up, and/or down simultaneously without exceeding the push/pull limit of 12 blocks. This is one way of creating a extension in Bedrock Edition.
This addition can be used to hold more cargo, whether it be entities, chests (which are only movable in Bedrock Edition), or TNT (which can be detonated by a following machine equipped with a redstone block).
Multi-directional engines[]
This design is multi-directional but it does require a return station to change the direction. The observers are 1 block higher than everything else and have slime blocks below them. The return station is only an example, anything that pushes the machine over so that the other sticky piston is unable to pull the terracotta should work. It may help to watch the videos below to see some more examples.
| 2-way flying machine tutorial (view on YouTube) |
|---|
| YouTube Video (view on YouTube) |
|---|
Extensions[]
In Bedrock Edition, it is possible to create extensions, however they are only functional in one direction. This first is the trailing extension (Trailer, shown above), and the leading extension. The leading extension can be made by attaching a backwards-facing observer directly behind a forward-facing normal piston, both attached to slime blocks.
Video[]
Bedrock Edition:
A flying machine on Bedrock.
Gallery[]
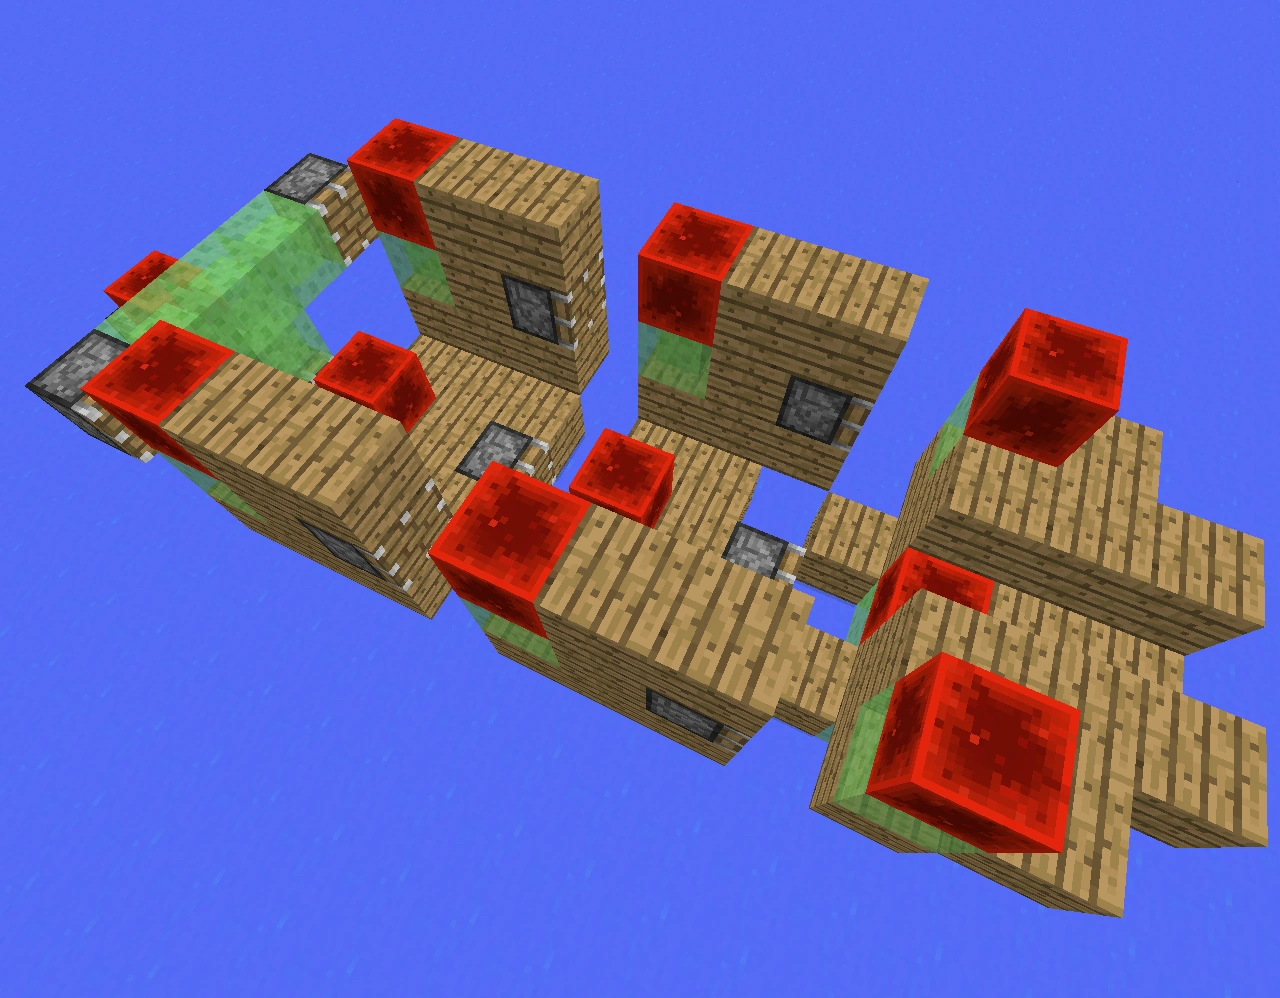
Piston machines[]
A flying module array. The first module is a covered engine, the second and third modules are the middle ones and the final one is made like the last two, but without a splitter in front.
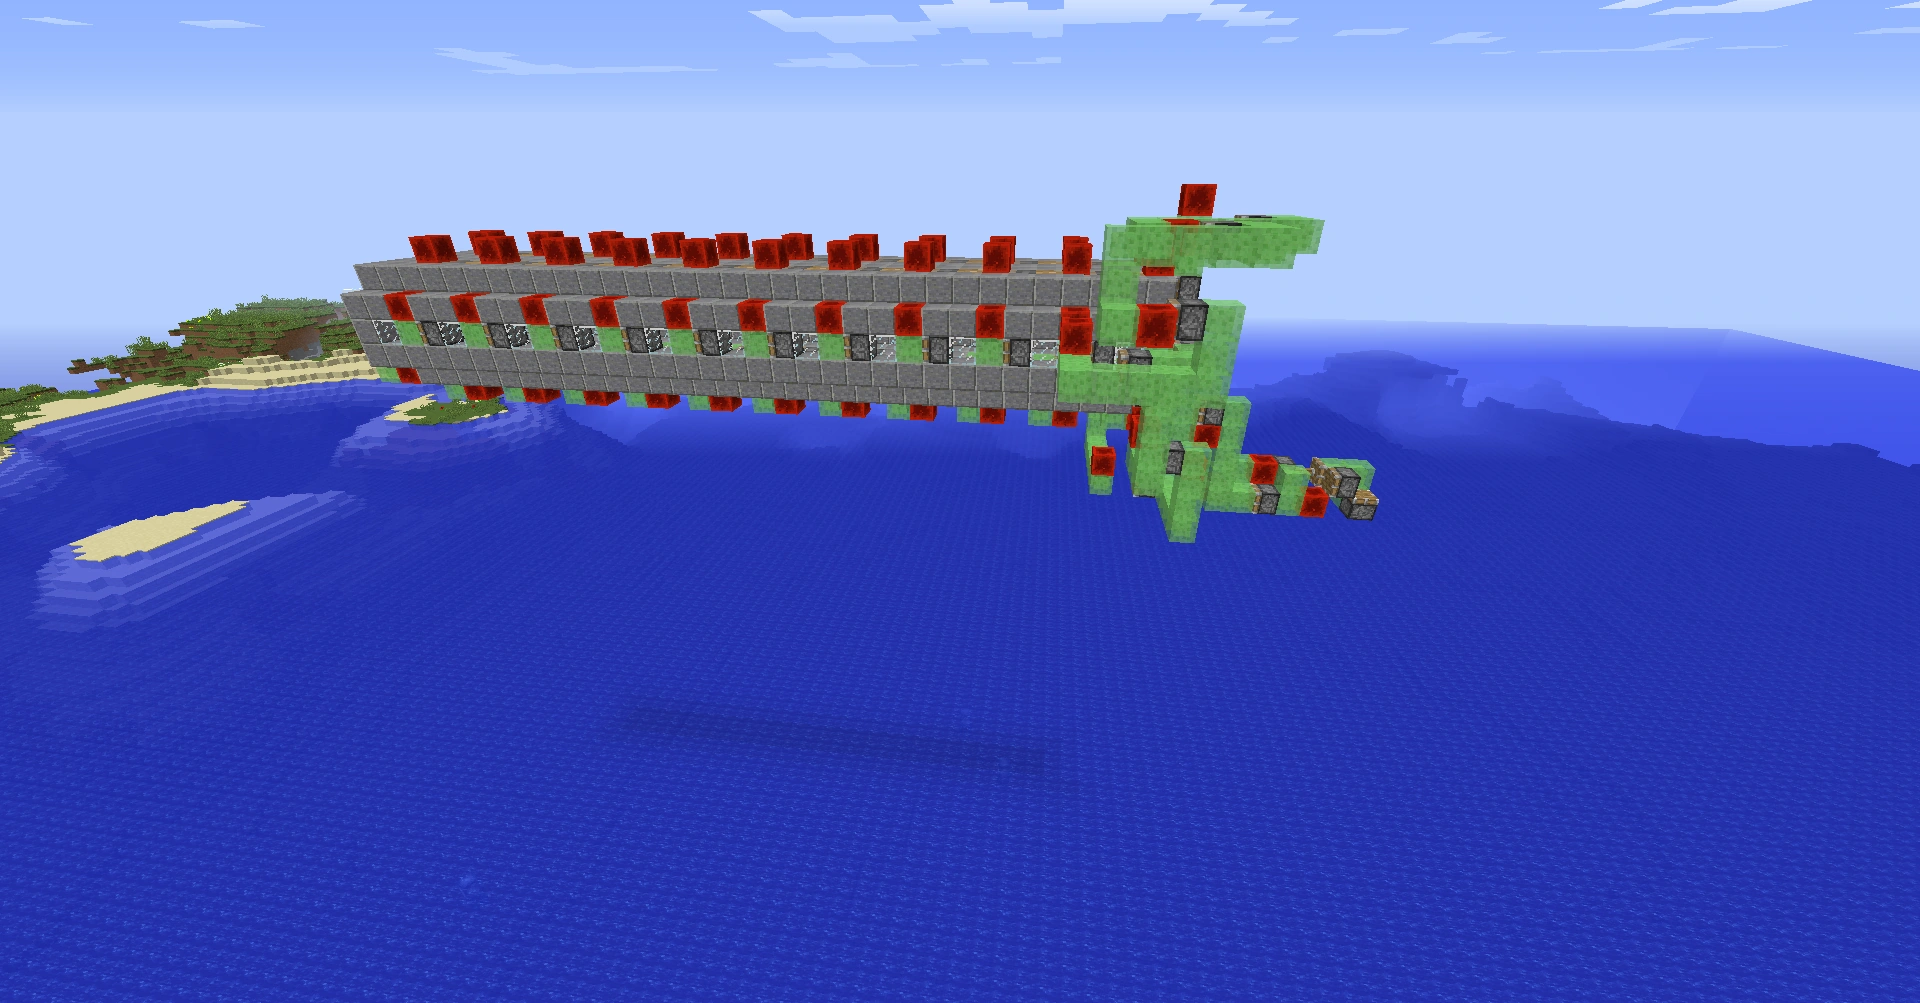
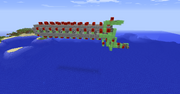
A flying ship.
