Yamikaitou (talk | contribs) (Undo revision 897831 by 131.191.56.60 (talk)) |
(changed the 1st tool to shovel and said to tunnell) Tag: Visual edit |
||
| Line 14: | Line 14: | ||
=== First day === |
=== First day === |
||
| − | As your first day begins, you will need to collect [[wood]]. First |
+ | As your first day begins, you will need to collect [[wood]]. First use this to make a [[crafting table]] (place the crafting table to use it). Right click your crafting bench to access it. The first tool you craft should be a shovel, and then tunnel into a nearby hill or tunnel down at a 45 degree angle.(it is a lot easier to dig yourself a house than build one)The next tool you should make is an axe, to make gathering wood faster. Then make a wooden pickaxe to dig a small stairway into the ground to collect at least 29 [[cobblestone]] for a full set of stone tools, and a [[furnace]] (8 [[cobblestone]]). You then want to make a shelter (dirt or wooden shack), or if available, stay in a village. After that put down your crafting table and furnace and smelt some wood into [[charcoal]], and make some torches with that. You could use coal for torches, if it's nearby. |
Alternately, after you gather wood, you can create a crafting table and make a wooden pickaxe. Find stone to mine, and gather a few cobblestones, then make stone tools and sword. Gather coal to make torches and you are ready to go caving. |
Alternately, after you gather wood, you can create a crafting table and make a wooden pickaxe. Find stone to mine, and gather a few cobblestones, then make stone tools and sword. Gather coal to make torches and you are ready to go caving. |
||
Revision as of 14:43, 4 October 2015
If you have no idea where or how to begin your Minecraft journey, the Beginner's Guide is full of good ways to start! Here you will learn how to survive your first night in two different formats: in an overview with goals or in a step-by-step instruction. You can choose which one you want, but both will accomplish the same goal.
If you have not done so already, take a look at the Controls page to learn how to move your character around. Once you have grasped movement, you will be ready to forge on!
Overview
Minecraft is a sandbox game, so there's no "correct" way to play the game. In Survival, food and shelter are essential, however everything else is optional. Even the bare essentials of food and shelter have countless solutions. This guide will show you some of the more common and straightforward solutions to surviving the first day.
First day
As your first day begins, you will need to collect wood. First use this to make a crafting table (place the crafting table to use it). Right click your crafting bench to access it. The first tool you craft should be a shovel, and then tunnel into a nearby hill or tunnel down at a 45 degree angle.(it is a lot easier to dig yourself a house than build one)The next tool you should make is an axe, to make gathering wood faster. Then make a wooden pickaxe to dig a small stairway into the ground to collect at least 29 cobblestone for a full set of stone tools, and a furnace (8 cobblestone). You then want to make a shelter (dirt or wooden shack), or if available, stay in a village. After that put down your crafting table and furnace and smelt some wood into charcoal, and make some torches with that. You could use coal for torches, if it's nearby.
Alternately, after you gather wood, you can create a crafting table and make a wooden pickaxe. Find stone to mine, and gather a few cobblestones, then make stone tools and sword. Gather coal to make torches and you are ready to go caving.
You can also avoid dealing with hostile mobs by building a bed.
| Ingredients | Crafting recipe |
|---|---|
| Any Wool + Any Wood Planks |
You'll need to kill three sheep or shear the wool from them with shears. Instead of building a home, you simply put down the bed and go to sleep at sunset. Skipping night like this prevents most hostile mobs from spawning above-ground.
Shelter
Main Article:Shelter
Shelter is something you might consider in your first night because you won't want to be killed. You can make a small hole to hide in or a small two by three house made out of wood and dirt. Place torches in your preferred shelter because in light level 7 or below zombies might spawn. Don't forget to put a bed to sleep until dawn.
Night time
For night time, the primary danger will be monsters. It is a good idea to stay in your lit shelter. If you don't have full iron armor and a sword, do not try to engage any monsters! The worst way to die early on is to be killed while trying to hunt monsters, so don't do it! Stay indoors at night!
One way to avoid being attacked by monsters is to put torches, glowstone, or a jack-o-lantern by your house. You will learn how to make all these things later on, but just a heads up. The torches are easy though, you just need to craft charcoal/coal on top of a stick.
If you are repeatedly getting killed, one desperate response is to go into "peaceful difficulty" (see "changing the rules", below). However, consider this: This being your first day, you aren't actually losing much by the deaths (at least not after what stuff you've gathered is lost), so you can just tough it out until dawn and start again.
Death
Normally in survival mode Minecraft, when you die, all items you were carrying or wearing in your inventory are scattered around your point of death while you respawn elsewhere. Until you sleep in a bed, you will spawn somewhere within 10 blocks of the world spawn point. This includes the first time when you started the game, so you can respawn anywhere within 20 blocks of where you first entered the world.
The traditional advice is to build your first shelter as close as possible to the spawn point, so if you die, you can easily find it again, or even spawn in a now-protected area. Even with the variation in where you'll come back, it's good to have a lit shelter nearby the spawn point. However, a problem with sheltering away from spawn is that if your death site is too far from where you respawn, your items may despawn while you're trying reach them. (See below for more details.)
Like any dropped items in Minecraft, the items you drop when you die will despawn (disappear) after 5 minutes, unless you're more than 180 blocks or so away, that is outside of chunk update radius The problem is that if you died at night, you will find yourself stranded without your weapons and armor, so you are quite likely to get killed again, or at least find your stuff guarded by monsters. Meanwhile, some of the monsters can actually pick up your stuff and use it against you! And if you spawned near your death scene, that 5-minute timer can easily go by before you can actually get back to and keep your stuff.
However, the above only applies until you have made and used a bed in a secure shelter. Once you've done that, you have a new option: If you get killed at night, you will respawn next to your bed, so you can just go back to sleep, and wake up the next morning — the items don't “expire” while you're asleep. It still may be worth keeping your bed out of chunk update range from where you're endangering yourself, but at least you won't be stranded outside at night.
Food and hunger
Once you have tools and shelter, your next priority will be food. Hunger will take a while to hit, so it shouldn't be a problem on your first day, but you'll try to pick up some food for when it does. However, after you've been moving around for a while, your food bar will begin rippling and start to decrease. If your food bar drops below 90%, you will not regenerate health, and if it gets to 30%, you can't sprint. If the hunger bar goes down to empty, you will begin losing health. Unless you're in Hard mode (and a beginning player shouldn't be), you can't actually starve to death, but you will go down to 1 health point (![]() ) in Normal mode or half your health (
) in Normal mode or half your health (![]()
![]()
![]()
![]()
![]() ) in Easy mode, and that leaves you quite vulnerable. You don't lose hunger in Peaceful mode, so it's the least of your concern there.
) in Easy mode, and that leaves you quite vulnerable. You don't lose hunger in Peaceful mode, so it's the least of your concern there.
Walking, mining blocks, and even placing blocks all cost some hunger, but all of those are minimal compared to the items below. These are the things that cause the most hunger, in order of cost.
- Healing damage of any sort. Avoid taking falls of more than 3 blocks, drowning yourself, or otherwise taking damage, as healing damage costs a lot of hunger. Especially avoid…
- Fighting: Both attacking mobs and receiving damage cost hunger, even before you start trying to heal damage. (10 blows either way matches healing
 , one health point.) You will need to slaughter a few animals, but pick your fights carefully.
 - Sprinting. If you double-tap the forward movement key (W by default), or press your sprint key (Left Ctrl by default), you will sprint. This moves somewhat faster, but it also uses a lot of food, especially if you go any distance. (30 meters matches healing .)
- Jumping. Obviously, you'll need to jump some just to get around, but don't bounce around randomly or unnecessarily. (15 jumps matches healing ) Sprinting jumps are especially costly, 4 times as much as a regular jump, although they are the fastest mode of transportation early in the game.
Note that if you're (staying) at full health, and not moving, fighting, mining or placing blocks, then you will use no food. Thus if your character has a secure place to stay, you can just stay put to conserve food while waiting out the night, a storm, or crop/animal growth.
Consider making a basic crop farm immediately after you have settled in a place.
Play-by-play
Starting the game
When you begin the game, you will be standing in a landscape somewhere. Take a moment to look around. This is the general area (within 20 blocks) where you will reappear if you get killed. It's a good idea to mark it immediately, by punching out an X of dirt and/or sand, then using the dirt or sand to build a pillar in the middle of that. If you're standing on rock, look around for some dirt or sand to use, remember where you are, and go get it to build your pillar. You can also use the Debug screen to save the coordinates of the spawnpoint for later use (see the page to learn how).
Tough and easy starts
- A general note: Any time you're “looking around”, is a good time to turn your render distance to max, you can put it back afterward if it slows your game.
- If you are standing on and surrounded by sand, you are likely in a desert biome. After marking your spawn point, head for high ground and look around for green grass and/or trees (cacti and sugar cane don't count.) Head that way to gather your wood. If you can't see anything but desert, pick a random direction and head that way, occasionally going to high ground for a look around.
If you are on an island, completely surrounded by water as far as you can see, you are in an ocean biome. This is perhaps the toughest start possible, and as such is highly discouraged for play by beginners -- given an ocean start, it's entirely reasonable to discard the world and make a new one. Assuming you don't do that: If your island has no trees, you will need to swim to another island or mainland to find wood. (Remember that if you die before sleeping in a bed, you will respawn on the island.) When you swim you may see squid. Squid are mobs but they are not hostile. Like cows, sheep, and chickens, they can't attack you (or even defend themselves), but killing them gives only ink sacs (and some XP).
- If, looking around, you see purple land, your game just got a lot easier: you are on a mushroom island, where monsters will not spawn (if it's connected to the mainland, congratulations, you found one of the rarest landscapes in the game). Monsters can still come in from other biomes, but if you head toward the middle, you can spend the night in safety outdoors. Also, with a bowl, you can get free food from the mooshrooms which live there. However, one thing the mushroom biome does not have, is wood—so before you go there, head for green territory to get some wood and stone first.
- If, looking around, you see houses and/or farms, you are near an NPC village. This is a good place to live in general, if you can make a bed: the farms will solve your food worries for now, you can trade with the villagers, and if there's a blacksmith (stone slab roof), it will contain a chest with bonus items. You can also scavenge a fair bit of wood even without trashing the place (try replacing logs with planks). However, at first you'll want to avoid hanging out near there after dark, because zombies can spawn and kill the villagers. You can avoid this fate by making a bed (see below), and consistently sleeping through the night until you can properly fortify the town against monsters):
- If there are no sheep around, look for “lamp posts” in the village — the black block on top is wool (break it with your hand).
- If you can't get enough wool for a bed, your best bets are (first choice) either get far away (150 blocks or so) from the village before nightfall, or (second best) to spend your first night(s) atop a really tall pillar, 40 blocks high or more (64 is even better). By the second night you will hopefully have managed to find a bit of wool....
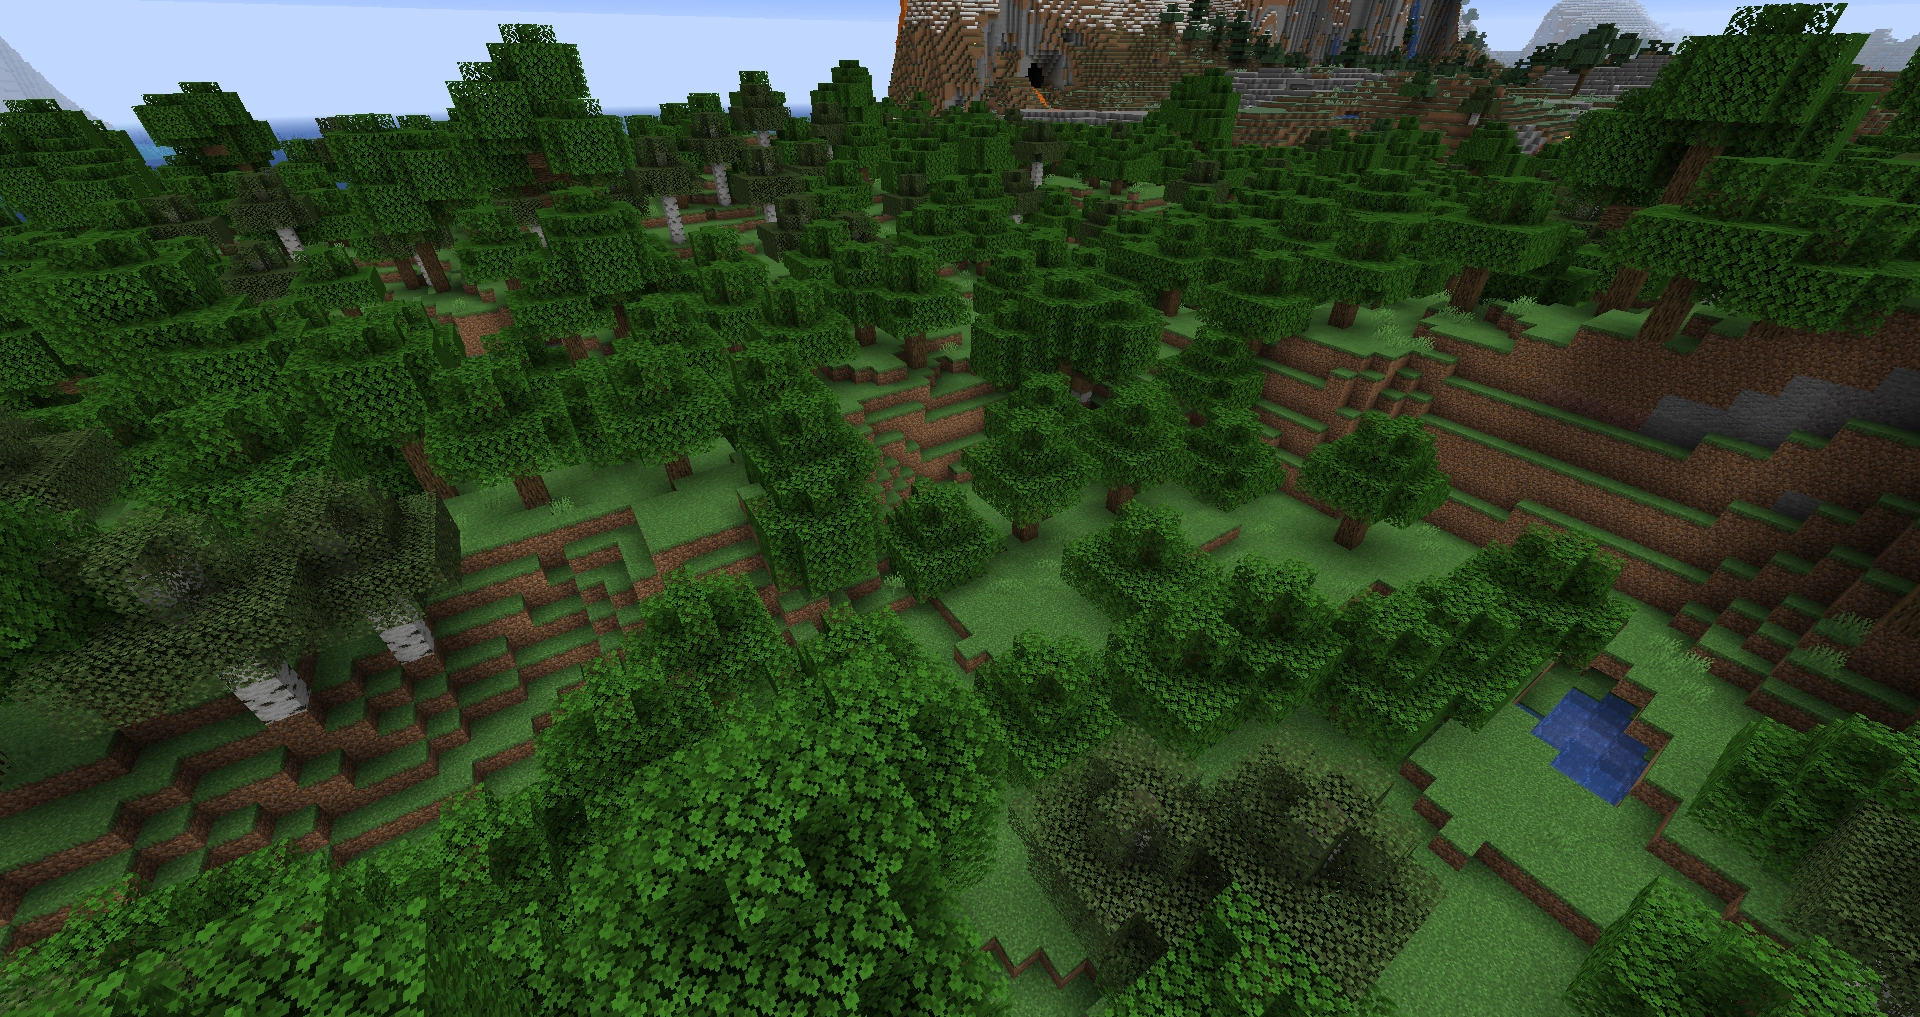
- If you find yourself surrounded by many very large trees, and leaf blocks on the ground, then you have found yourself in a jungle biome. The jungle biome is a good place to start because there are large trees everywhere, however, these can cause you to easily become lost. Also, the cramped quarters can make it difficult to build there. Jungle biomes are the only place to find ocelots (you'll need fish to tame them) and cocoa beans. The sheer amount of leaves here can cause trouble for particularly old computers, lagging or even crashing the game; if you have an old computer and you haven't already switched to fast graphics, a jungle is good reason to do so.
- If you find yourself surrounded by thick, short trees and dark grass, you are in a roofed forest biome. These biomes are especially dangerous because the canopy of leaves can sometimes become so thick that monsters will spawn, even during the day. However, this biome does provide ample supplies of wood and naturally spawning giant mushrooms which can be used for food and shelter for the night.
- There are many other biomes in Minecraft, and to see a more in depth look at all of them, check the Biomes page.
Punching wood
Look around for a few things in particular, in order of priority: trees, visible stone (and especially coal ore), animals, and tall grass. As you move around, break any tall grass in your way, and collect any seeds that drop. For that matter, collect any loose item you see, as most of them will eventually be handy.
Your first priority is to find a small tree, bash through the leaves if needed, and "punch" the wood until each block drops as an item. Don't rapidly click on the block, just hold left-click (or whatever you've set "attack" to) until the block breaks. Don't bother with huge trees at this point, but also don't be upset if you can't reach the top blocks of wood — you can always come back and collect them later. This first tree should give you at least 4 blocks of wood ("logs"). You'll punch more wood in a moment! Wood is essential for tools and useful items such as torches, doors, fences, and chests.
Your first crafting
As the game's name suggests, crafting is core to Minecraft. While there are a small number of items that can be crafted directly from the inventory, a crafting table is required to craft tools and most other items in the game. The crafting table will be your main asset throughout the game.
To make your crafting table, first open the inventory and pick up the logs you collected. Place a log into the crafting area to obtain 4 wooden planks.
Template:Grid
The planks will be different colors depending on what sort of wood you have. Different types of wood don't stack together, but all work the same. With a couple of exceptions (slabs, stairs) you can mix and match different planks when crafting. In particular, sticks don't "remember" what sort of wood they came from.
As you convert your first logs to planks you may want to consider saving some logs for later. Usually, 3-4 logs' worth of planks will be enough to get started. In particular, you want to save logs to make charcoal later on.
Then, take four of your newly crafted planks and arrange them like so to make a crafting table:
You should see this:
Template:Grid/Inventory Table
Return to the world view and walk to a spot you think appropriate. Select your newly crafted crafting table and place it. Now you can get crafting some more complex blocks and items!
- Tip: Anything that you can craft in your inventory crafting space, you can also craft in the crafting table.
Your first tools
In order to collect stone and coal, the next staple resources, you will need a pickaxe. Your first pickaxe will be made of wood; not very durable or fast, but until you collect some cobblestone it's all you have.
To make a pickaxe, you will need to craft some sticks. Do so as shown below to craft 4 sticks:
Template:Grid/Inventory Table
Now you'll use some planks and the sticks you just made to create the final product. Arrange them like so: Template:Grid/Crafting Table
You may have noticed that in order to craft a pickaxe, you more or less draw it with its components in your crafting square. Other items are crafted in a similar fashion. At this point, you can do one of two things: You can either make more wooden tools, or you can gather stone and use that to make better ones.
Stone age
Once you've crafted a pickaxe, you can successfully acquire cobblestone to make better tools. Start by finding stone in the world; it should be fairly easy, as it's extremely common. If you don't see any on the surface, dig down in a staircase fashion and mine the stone with your pickaxe; it will drop as cobblestone items. Gather enough cobblestone to upgrade your pickaxe and make a stone shovel, axe, and sword, and a furnace (the exact number of cobblestone required to make these is 17.) You can also craft a stone hoe (or even a wooden one), but it won't be useful until you start farms (explained on day two).
Template:Grid/Crafting Table
Swords can be used to more effectively slay mobs (animals and monsters).
Template:Grid/Crafting Table
A stone pickaxe is more durable and more efficient than a wooden pickaxe, and it can mine ores that a wooden pickaxe can't.
Template:Grid/Crafting Table
Shovels are mainly used to break dirt, grass, sand, clay, and gravel blocks quicker than by hand. They also allow for the collection of snowballs when used on snow layers in snow biomes.
Template:Grid/Crafting Table
Axes make gathering wood (and most other wooden blocks) much faster.
More resources
Now, you should gather more wood, using your new stone axe. Although some trees may look different than others, all wood functions the same. However, different kinds of wood don't stack together. While you cut down trees, try to to gather the saplings that fall. If you are cutting down oak trees, apples will also drop (see the trees page for more info.)
If the sun is still in the sky, explore around the immediate area (making sure you don't get lost), to try and find some coal. Coal has all the same properties as charcoal (and can also be crafted into coal blocks).
If you happen across a coal-like ore with tan specks in place of the black, you have found some iron. This material will be extremely useful for most of your Minecraft career, and if it's within easy reach, go ahead and gather it (you will need to mine it with a stone pickaxe). However, If it's in a difficult-to-reach place, just note its location and save it for later.
Animals
While you are cutting down trees, you may happen to come across wandering animals, such as chickens, pigs, cows, sheep, and rabbits. These animals are going to be your primary food source in the future. If you see a few, make sure there are more nearby before killing them. If you kill all of the animals in your area, starting animal farms in the future will be much more difficult. Be sure to save at least two of each animal type for farming on day two.
All of the above-mentioned animals drop meat: raw chicken, raw porkchop, raw beef, raw mutton, and raw rabbit, respectively. These foods are among the best food sources in Minecraft, but only after they're cooked (see the next section). If you must eat immediately, avoid eating raw chicken, as it might give you food poisoning. The other meats can be eaten raw safely, but won't feed you nearly as well as cooked meat.
If there are no nearby animals, be sure to be careful about hunger (as above, in order try to avoid getting hurt, fighting, jumping, sprinting, moving around too much.) You will have to wait to get food until you have a wheat farm, which doesn't come until day two.
Heat before light
Next, you need to cook your meat before you get hungry, and also make torches to light up your shelter at night. To do this, you will need to craft a furnace: Template:Grid/Crafting Table
Place it somewhere (generally next to your crafting table) so you can work with it. As it is made with cobblestone, you will have to use your pickaxe to collect it if you wish to relocate your furnace. If you haven't found coal, you will need to find an alternate heat source. Burning your wooden pickaxe (which is useless once you have stone) will smelt exactly one item. From this, you can make a piece of charcoal, which will then allow you to smelt eight more items.
To make charcoal, you have to smelt blocks (logs) of wood. In furnaces, the top slot is the item to be smelted, and the bottom slot is the fuel. Place a wooden log in the top slot and your wood pick in the bottom to smelt the charcoal. Then you can put the charcoal (or other fuel) in the fuel slot to smelt more items. It is generally advised to smelt more charcoal if you do not have a supply of coal. If you don't have spare wooden tools or charcoal, you can use planks, two planks for three items as below. Template:Grid/Furnace Once you have your first pieces of charcoal, use that as fuel any time you have 8 or more items to smelt. Each piece will smelt 8 items (just like mined coal), and you have other uses for planks. If you have both coal and charcoal, use up the charcoal first and save the coal.
Now you can cook your food and make torches. Ration out a piece of coal/charcoal for the food, and cook the food just like smelting the wood above: food in the upper input box, fuel (coal) in the lower one. This being your first day, it's OK to “waste” some of a coal/charcoal lump if you have fewer than 8 pieces of meat.
Use the rest (up to 8 for now) of the coal or charcoal with some sticks to craft into torches. One log crafts into 8 sticks to match 8 pieces of coal or charcoal, producing 32 torches (half a stack.) Throughout the game, you will be crafting more and more torches as you need them, so always keep some coal or charcoal at hand. Template:Grid/Inventory Table
Now you're prepared to light up your shelter.
Bed and shelter
If you have the supplies, it is highly recommended to make a bed: Template:Grid/Crafting Table If you have made a bed, nightfall is easy: As soon as sunset begins, place your bed, sleep in it, and continue with crafting and smelting the next day. However, if you have no bed, and you didn't have time to build something secure, you will probably have to spend your first night in an emergency shelter. You want to be able to make torches and cook food overnight, but if the shelter is underground you really want to have some torches handy before you close yourself into the darkness. If you have wood to spare, you can craft a wooden door: Template:Grid/Crafting Table You can place this door across the entrance to your shelter to protect you from mobs, while still giving you access. It is generally recommended to place it from the outside (go outside your shelter and place it looking inside.)
- While you were gathering cobblestone, you most likely dug a small hole in the side of a surface cave, or staircased down through the dirt. In either case, you can use that hole as a shelter. Dig a few more blocks into the hill or cave wall, then you can dig a small room, about 5 by 5. Relocate your crafting table and furnace in here, and make sure to light it up! If you have no door, simply cover your entrance with dirt or cobblestone when night falls, periodically breaking it to check for day (watch out for mobs though!). A similar shelter can also be created in a small cave, just remember to close off both ends of the cave or monsters can come at you from below.
- If you don't want to live in a hole, there are a couple of other options: you can spend the night atop a pillar by building a tall 1×1 column under you by pillar jumping up. Pillar 20 or 30 blocks upwards to avoid getting shot off by a skeleton or having the bottom blown up by a creeper. You can also use crouching (holding ⇧ Shift) to add a ledge to your pillar. IF you do not have a ledge, watch out for climbing spiders. Keep your stone sword in hand and whack them as soon as they come into reach, before they get up to you - attacking them will knock them back down.
- If there is a large tree nearby, you can spend the night on top of the tree - just watch for skeletons and spiders as with the pillar. If you have a boat, you can spend the night in the middle of the sea as monsters do not spawn in water. You can also simply build a three block high hut from any material, for example cobblestone, wood or dirt. Add a roof to protect against endermen and spiders. Note that you can use the crafting table and/or furnace as part of the walls.
- Remember the golden rule we talked about before? Well, when you're desperate, you can break it a little. Dig three blocks down, and put a block above you that is not sand/gravel to make the fastest shelter in Minecraft possible. You may want to use a real-world clock to time the night (7 minutes, with up to 3 more to allow for dawn/dusk). You can dig out a couple of the blocks around you and place your crafting table and furnace. A torch will make your little hideyhole feel a little less like a tomb....
- Finally, if you're really desperate, you can press the Escape key to pause the game, go into the Options menu, and change the difficulty to "peaceful". Though many players consider it cheating, it's a sure-fire way to make sure mobs don't spawn. If you have cheats allowed, you can simply type in
/gamemode 1which will change your game mode to Creative, and mobs won't be able to attack you.
For more information about the different types of shelters, see the guide to shelters
At Dusk
Make sure you are in (or on) a suitable shelter or hideout with at least some wood, a crafting table, a furnace, a sword (any type will do), some food (probably uncooked meat at this point), and at least 1 torch. If you do have a bed, definitely sleep in it and cook your food the next morning—if monsters show up, you may not be able to sleep later.
It might get boring, but try to limit jumping and sprinting in your shelter, which will conserve your hunger. If you haven't yet found coal or made charcoal (but you have some spare logs), you should make some charcoal as above. Then, if you haven't already, go on to cook your food. If you've only got 3 or 4 food or you have no coal/charcoal, use planks, otherwise use coal or charcoal:
Template:Grid/Furnace Template:Grid/Furnace
Again, on your first night it's OK to waste a little fuel to cook your first food, such as using a whole lump of charcoal for only 5 or 6 items.
If you have a couple of logs (or 8 planks) left over after making torches and a bed, you can also make a chest to stash items you don't want to carry around. If you get killed, anything in the chest will be waiting for you rather than scattered around your death site.
Template:Grid/Crafting Table
A chest isn't really necessary for your first night, but it will become very helpful over the next day or few.
Dawn
Wait for full light, wield your sword, and carefully leave your shelter. Hopefully, it will be sunny, but even so, watch out for any remaining monsters—this may well be your first fight. If you see spiders, don't panic, they will hopefully have become peaceful in the sun (you can try to kill them for their string). If you see a creeper, your best bet at this point is to run at least 16 blocks away from it, and wait for it to go away (or explode, if it got too close before you got away). If you see any skeletons or zombies (hiding under trees or in water), stay away from them—skeletons can still shoot at you if you are too close (16 blocks or so), and either skeletons or zombies may come out from shade to attack you even as they burn. WARNING: If a burning zombie or skeleton touches you, you will be set on fire! If this happens, flee and jump into any nearby (monster-free) water. Once you're out and clear of monsters, look around for and collect bones, arrows, or rotten flesh which may have been dropped by burning skeletons and zombies.
If it is not sunny, you may have worse problems: You may need to kill zombies or even skeletons (or just retreat back in your shelter until the sun comes out). Zombies can be easy to kill by themselves, but if in a pack they can overrun you. However, if a zombie is attacked, it alerts all nearby zombies that you are there, and also some more zombies spawn out of sight to attack you. So even if there's only one zombie, you'll soon find yourself facing a horde.
Skeletons would be easy, but they are pretty accurate with the bow. It can be difficult to dodge their arrows. Also, the closer you get, the more likely the skeleton will hit you. If you get too close, it would only take a couple of shots to kill you. It's best to have a bow of your own before facing these undead creatures.
Assuming you made it out of the shelter, congratulations! You've survived your first night in Minecraft! Within the next day or two, you should have acquired some iron armor and better weapons, which will take a lot of the terror out of nighttime. You can also make a more secure shelter, and hopefully a bed.
After the first Day
A tutorial for your next day is available here: the Second Day. Following are some general tips:
Home safety

A 3×3×2 chamber in stone, filled with 1 bed, 1 furnace, 1 crafting table and 1 torch. Sealed with door and defended by dry moat.
By the end of the first day the shelter will likely be primitive and small. In the days afterwards, you will be able to build a better home, in any of various forms. Some natural extensions include a back door, windows, a surrounding fence, and even traps for monsters. Remember that any time you pick up your bed, your spawn point will revert to the default, until you not only place, but sleep in a bed again.
Mining
Eventually, you will need to venture belowground to gather iron and other resources. While there are many more advanced mining techniques, the most basic way to find ores is by entering a cave and exploring.
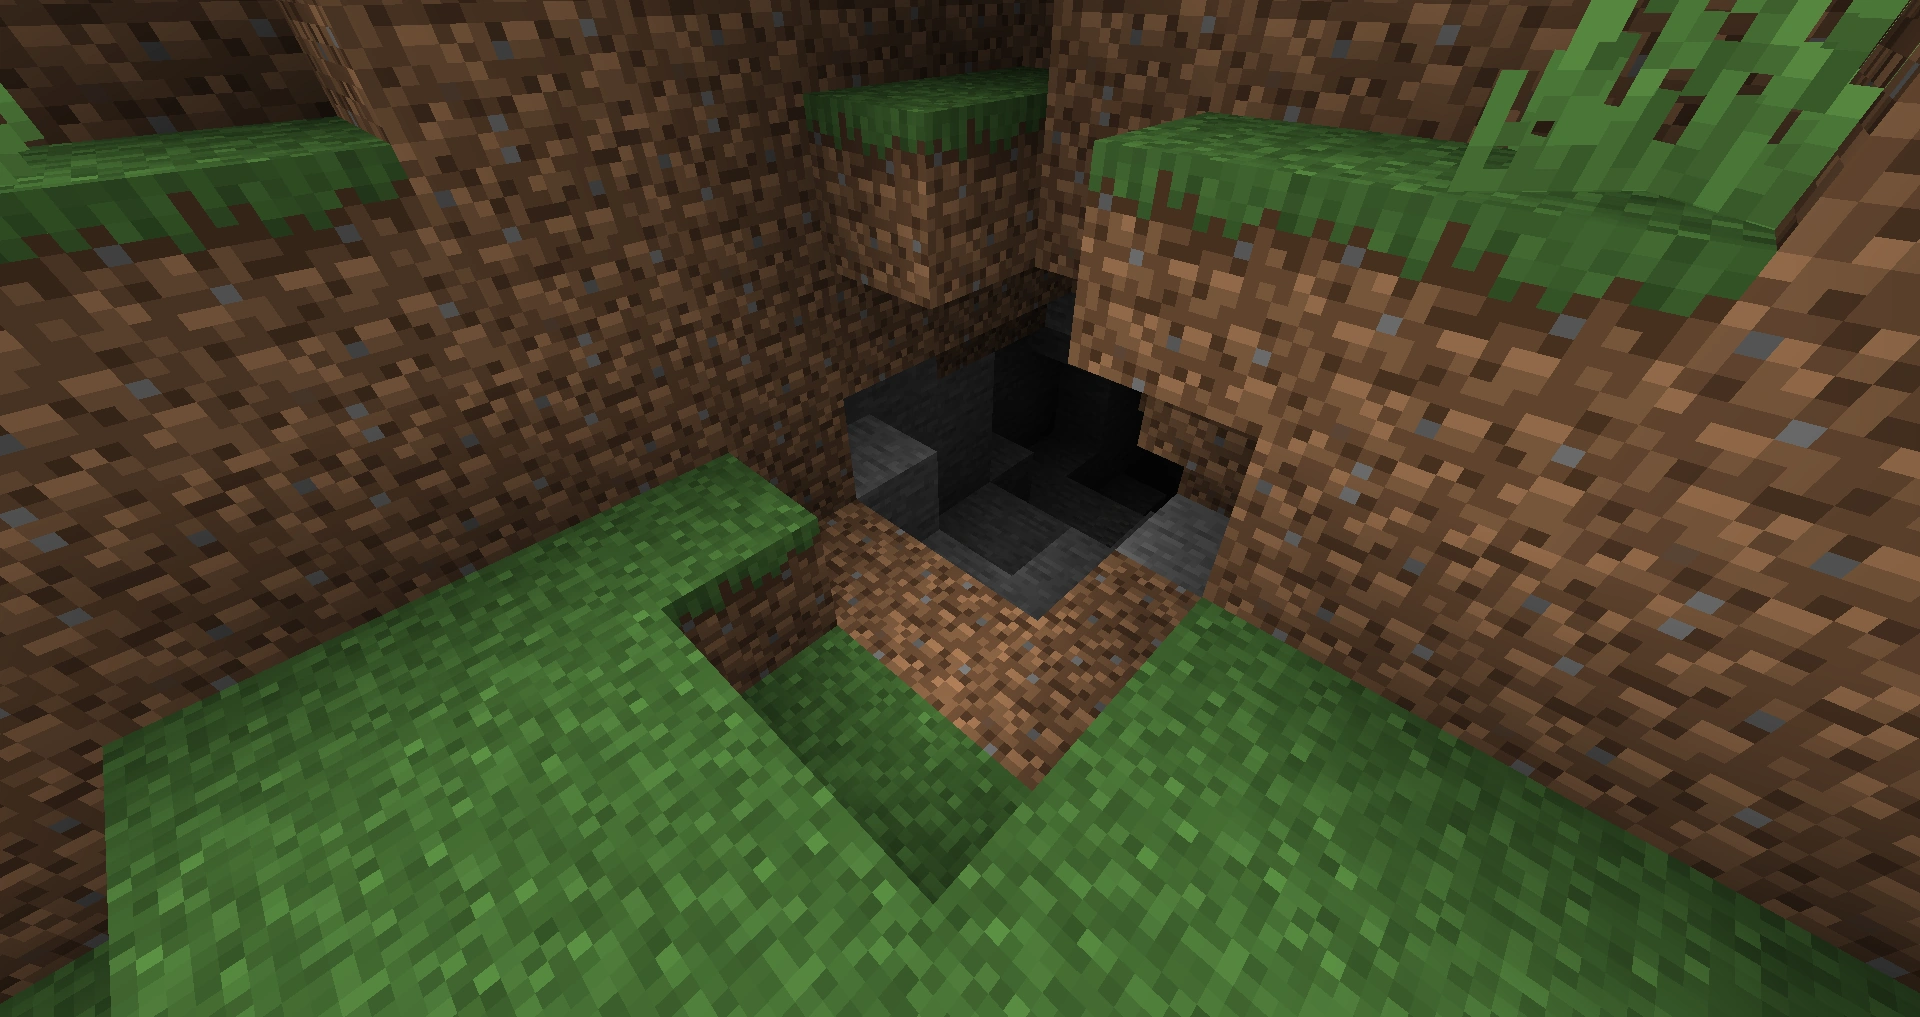
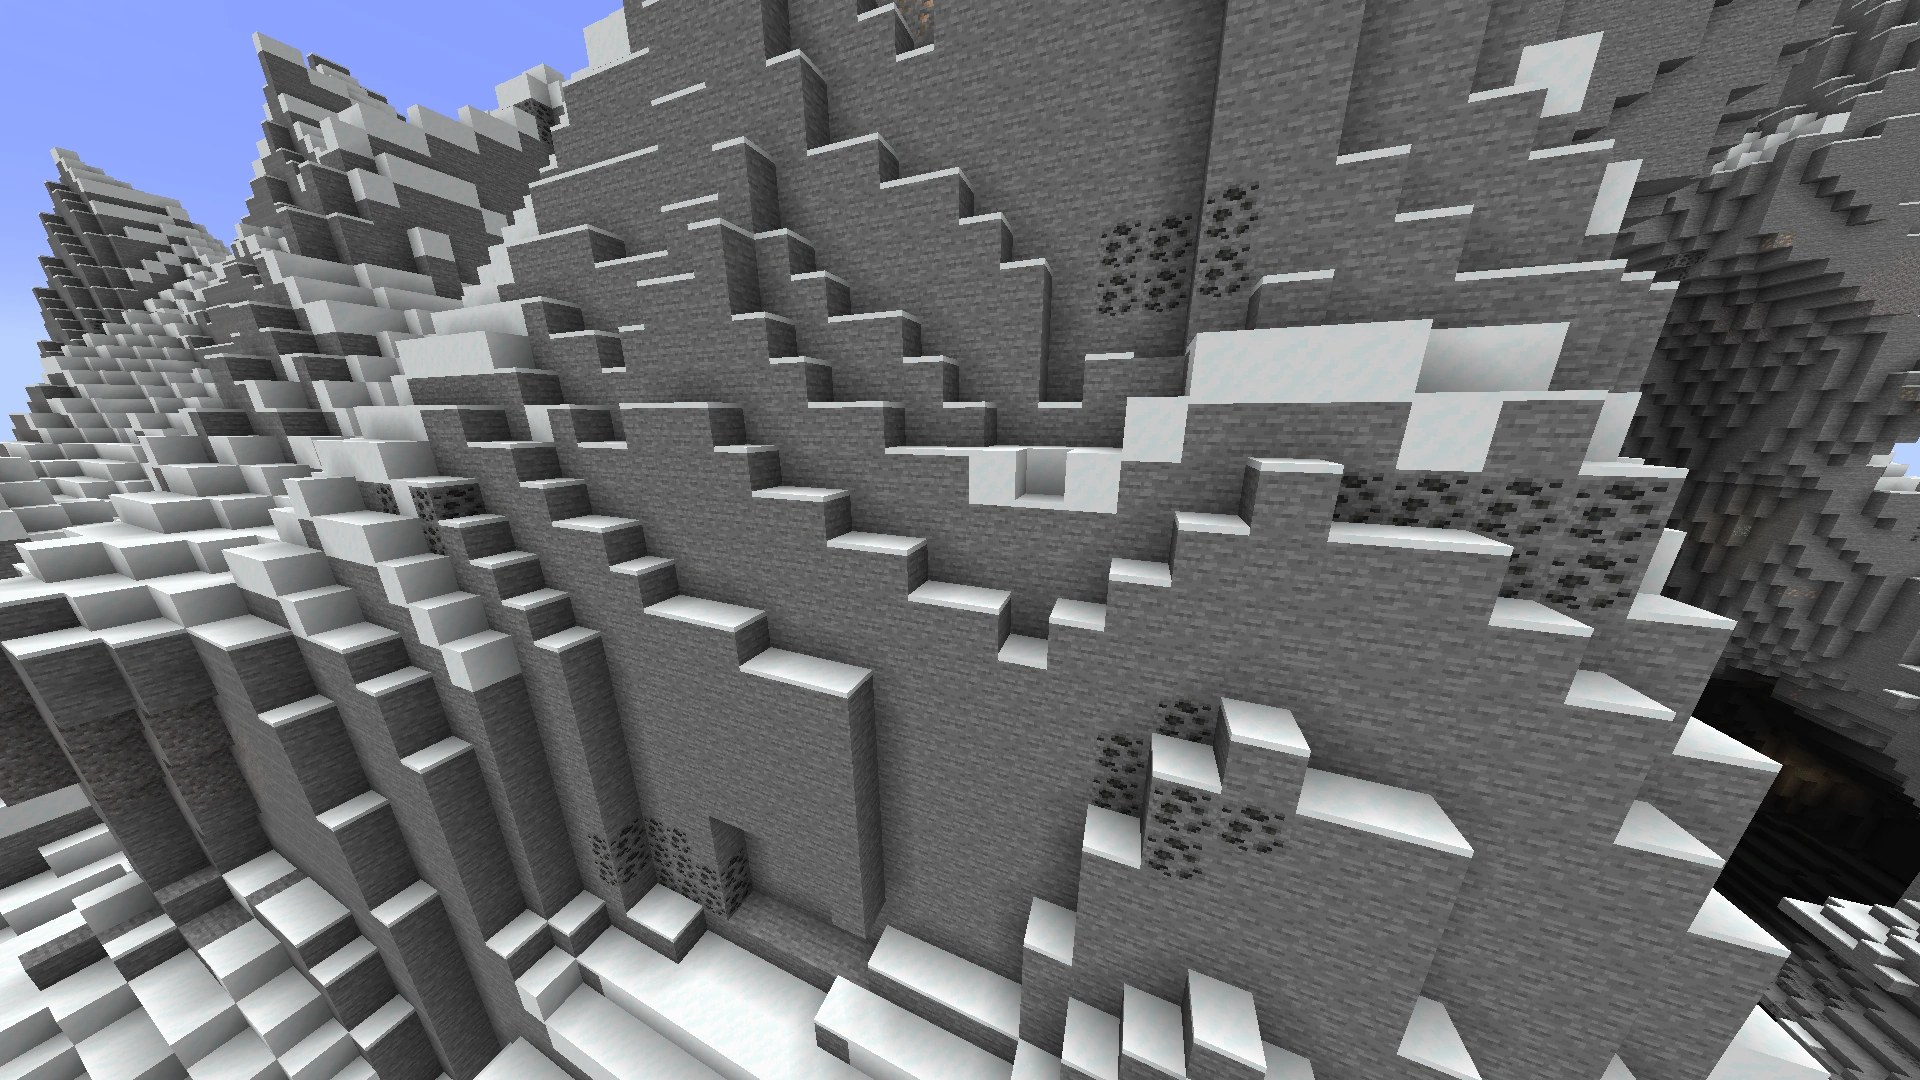
Finding a cave
You have no problems if you have just spent your night in a cave. If you haven't, the easiest way to do so is to roam the Overworld a little and look out for exposed cave entrances. Extreme Hills biomes will have caves inside mountains, but these are generally not what you want, because only coal ore will appear above sea level (Y=64). For iron and better ores, you'll want to find a cave opening into the ground (these are quite common) and head downwards. Sometimes such caves end immediately, but often they continue into big cave systems. If they seem to end right away sometimes there will be a continuation about 2-8 blocks farther back and below the cave's end; mining in these directions (8 blocks back and down, exploring somewhat to the sides) will reveal this if it is the case. Digging away gravel or dirt can also expose cave extensions, but you may go through a few shovels that way. If you can't find any all day, just sleep away the night, replenishing your resources like wood and food as you use them. If you hear suspicious, hostile noises, just try to listen and follow them.
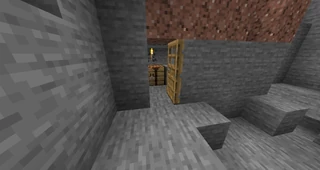
Cave exploration
Cave exploration is pretty straight forward: you light up your way with torches, mine up ores as you see them (check ores and minerals) and kill enemies as you encounter them (see Tutorials/Combat for details). There are also some important techniques that might not be obvious to a new player, such as using waterfalls to descend into shafts, and/or swim back up from them. There are also many options for marking your trail and not getting lost. Also note that the ⇧ Left Shift key prevents you from falling over the edge of a block and as such it is useful if you are caving near a long drop, especially a drop into lava.
Ores and minerals
There are certain materials that can only be found underground and are crucial to gameplay. On your first day, you are likely to see only coal and perhaps iron ore, but it's worth knowing about all of them.
Template:Grid Coal is an important material used to make torches and to smelt or cook items. You have to mine it in order not to run out of torches while exploring caves. One stack (64 lumps) will be an ample supply, but in practice, you can start with less and mine more as you go. Long-term, it's worth accumulating a few stacks, as once you get seriously into mining, you'll be using a lot. Coal is not strictly necessary since you can make charcoal from wood, but it is common, and you have plenty of other things to do with wood. This is the only ore that appears above sea level (anywhere there is stone), and it is often visible in stone outcrops on the surface or even on mountains.
Template:Grid Iron is probably the most important and versatile resource you can find underground. You can use it to craft good quality tools, armor and a plethora of other things. Gather as much of it as possible, but it needs a stone pickaxe or better to mine it, so be careful not to use a wooden pick on it. Once you have some iron ore, make a furnace to smelt it into iron ingots, that you can then craft into other items. First of all craft a pickaxe, a sword, and a bucket (fill it with water), then craft iron armor. This will take a total of 32 ingots, half a stack. If you have extra, go on to make shears, another bucket (to hold a second water source or stray lava), and perhaps an iron shovel or other tools. (If you have enough, save some for compasses and maps.) Crafting recipes can be found here. Note that two water buckets can be used to create an “infinite water source”; place them diagonally in a 2×2 hole.
Template:Grid Gold, lapis lazuli, and redstone are more specialized ores, only found in deeper parts of the caves. Gold and redstone need an iron pick to mine. (Lapis can be mined with a stone pick.) You don't really need them much at the beginning, but you will want small amounts. Once you do have a little gold and redstone, probably the first things you'll want to use them for are a compass (iron+redstone) and a clock (gold+redstone). Once you find some sugar cane, you can add a map (paper+compass) to keep track of your explorations and help avoid getting lost. Lapis lazuli is used for enchanting, a more advanced game mechanic. Later, gold and redstone will have more uses.
Template:Grid Diamond is a very rare mineral, probably the most-sought resource in Minecraft. It can be crafted into very durable and quick tools, and vastly superior armor. The ore can be found at the very bottom of the world, the bottom 15 layers of the map, and requires an iron pickaxe to mine. Once you hit bedrock (unbreakable dark gray blocks) climb back up about 10 levels and mine around for a while before slowly making your way down one level at a time. At levels 5 and below, you'll be working around bedrock, so it's better to keep above that; lava also spawns below layer 10, so it's safer to explore at level 11 or above to avoid it. A good way to check what level you are currently on is to press F3 to show the debug screen, and read the Y-axis value.
Template:Grid Emeralds are normally gained (and used) by trading with villagers, but scattered blocks of emerald ore can also be found beneath extreme hills biomes. Emerald ore is found at the same depths as gold ore, and likewise requires an iron pickaxe. It currently has no practical purpose besides trading.
More advanced ores
Template:Grid This ore is only found in the Nether, which is much more dangerous than the Overworld, and you should probably wait until you have diamond armor to attempt collecting this. It can be used to make comparators, daylight sensors, quartz blocks and a few more items. It is quite common in the Nether and can never be found in the Overworld. It can appear on any level of the Nether except at the very top. Cannot be used to make tools and/or armor but is still useful for other things.
Things you'll need over time
This is a quick list of some things you will need or want to do over the next few days or longer, not necessarily in this order:
- Collect more wood, coal, and iron for crafting.
- Over time, delve deeper for the more advanced ores, and eventually diamonds.
- Start hunting monsters for resources:
- Spiders for string. You need this for bows, fishing rods, and leads. If you still haven't found sheep, 12 string can be crafted into the 3 wool you need for a bed.
- Skeletons for bones and arrows.
- Zombies mostly drop Rotten Flesh (which is best used as dog food), but occasionally will drop a carrot or potato which you can start a farm with.
- Start setting up a wheat farm. Eventually you will add other crops—in particular, carrots and potatoes as you get them from zombies. Pumpkins are also useful, and can be found in any of several biomes.
- Gather sugar cane for maps and books (you will also need iron and redstone for maps, and leather for books). Don't gather all you find; instead, replant at least half your harvest as single blocks (that is, leave more canes growing than you harvested), so you'll have lots when it's time to make maps and books for enchanting.
- Start fencing animals into farm pens, using their food items to lure them and then breed them. Cows, mooshrooms, and sheep eat wheat, pigs eat carrots (you probably won't have these at first), and chickens eat seeds (you've probably picked some up already from breaking grass). Chickens can also be hatched from eggs, which they occasionally lay. Of these, chickens and cows are probably most important; Besides meat, chickens provide feathers for arrows, while cows or mooshrooms provide leather for books and other useful items.
- Collect saplings, and grow some trees of your own in some convenient spot. Saplings drop randomly when leaf blocks are destroyed or decay naturally (after you chop down their tree).
- Craft a boat for travelling the many waterways in your world.
- Take up fishing during rainstorms. Fishing will be about 20% faster when it's raining, and fishing will occasionally get you saddles and name tags (otherwise quite hard to find), along with extra bits of leather and string… not to mention enchanted fishing rods. (Don't eat the pufferfish!) Fishing in a small pool is possible but awkward, and properly fencing a large pool is difficult, but there are two options that are fairly easy for beginners:
- Take a boat out onto an ocean or large lake, well away from land in any direction. You want to be at least 20 blocks from land, and if you're within 30-odd blocks of land, you may have to deal with occasional swimming zombies.)
- Build a fishing tower with a platform on top near any large river, ocean, or lake. You don't need a full building, you can do fine with a pillar (stone or wood) with a ladder leading up to a platform on top. (You can also modify a tall tree to the purpose.) Add a few fences for safety, optionally a roof (lightning is unlikely to hit you, but it does happen), and you have a nice secure spot to fish from, even during thunderstorms and at night.
- A larger and more advanced home, with doors (plural, a back door is really helpful), windows (glass or fencing), storage rooms, and space for the enchanting table and bookshelves you'll eventually make.
- Tame some animals: Each type is found in specific biomes, and needs specific foods to tame them, bring a fair amount:
- For cats, you need to find a jungle and bring raw fish. These are mostly annoying, but have the unique ability to chase off creepers.
- For dogs you need to prowl forests or taigas with a batch of bones. These can help you fight monsters! (But not creepers.)
- Horses can be found in plains; you will need a saddle (try fishing for one). Food is not required, but can help, and any of several foods will do, but wheat or bread is probably easiest. Note that breeding horses is more difficult, and requires gold, as well as carrots or apples.
- Eventually, when you are ready (ideally, full diamond armor and a diamond sword), visit the Nether to get Nether materials.
Tutorial videos
Beginner's Guide/video
- "Most efficient First day tutorial 1.6.2 (tnthost)"
- The First Day in Minecraft 1.0.0 (SecretRevelation)
- "The First Day (Beginners' Essentials) (Minecraft Tutorial)"
- "Minecraft The First 10 Minutes (Minecraft Tutorial)"
- Your First Shelter in Minecraft (Tutorial Machinima)
- Minecraft: Building a Starting House (Minecraft Tutorial)
- "Minecraft Efficient Farm (Minecraft Tutorial)"
- Getting Used To The Minecraft Crafting List 101
- "basic First day tutorial (Macdeezy1996)"