(Undo revision 703986 by 173.228.94.191 (talk)) |
|||
| Line 14: | Line 14: | ||
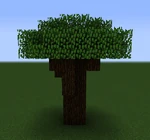
The tree canopy is composed of leaf blocks, and grows 1 block higher than the highest wood block (This does not apply to the giant oak tree, as the leaves grow 3 blocks higher). The canopy may begin from the ground, (for the shorter "bush trees" in the jungle) and go up to 6 blocks from the ground (for the tallest trees). Tree canopies appear to be generated from roughly spherical clusters of leaves about 5–7 blocks across, centered on sections of trunk or branches. Leaves must be supported by an adjacent trunk (or leaf blocks connected to the trunk), otherwise they will wither and disappear. |
The tree canopy is composed of leaf blocks, and grows 1 block higher than the highest wood block (This does not apply to the giant oak tree, as the leaves grow 3 blocks higher). The canopy may begin from the ground, (for the shorter "bush trees" in the jungle) and go up to 6 blocks from the ground (for the tallest trees). Tree canopies appear to be generated from roughly spherical clusters of leaves about 5–7 blocks across, centered on sections of trunk or branches. Leaves must be supported by an adjacent trunk (or leaf blocks connected to the trunk), otherwise they will wither and disappear. |
||
| + | |||
| − | trees jump around chewing bubblegum. |
||
Giant oak and giant jungle trees grow branches (wood blocks connected horizontally, vertically or diagonally to the trunk or other branches). Most of the time, a single tree will have between one and six branches, and each branch will have between one and six wood blocks. A few trees can have many more. Branches support a much larger canopy than a tree with a single trunk. Birch and spruce trees cannot grow branches. Jungle biomes has a special type: "bush trees" (one block of jungle wood completely covered by leaves). |
Giant oak and giant jungle trees grow branches (wood blocks connected horizontally, vertically or diagonally to the trunk or other branches). Most of the time, a single tree will have between one and six branches, and each branch will have between one and six wood blocks. A few trees can have many more. Branches support a much larger canopy than a tree with a single trunk. Birch and spruce trees cannot grow branches. Jungle biomes has a special type: "bush trees" (one block of jungle wood completely covered by leaves). |
||
Revision as of 20:52, 22 August 2014
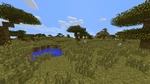
Trees are generated structures of wood and leaf blocks, created when a map chunk is generated or grown from a planted sapling. They are found in most biomes, and are abundant in forest-related biomes. There are six "base" species of trees – oak trees, birch trees, spruce trees, jungle trees, acacia trees, and dark oak trees. All the trees can grow in many shapes and sizes.

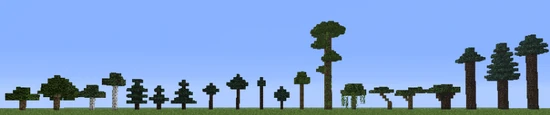
The trees found in Minecraft
Structure
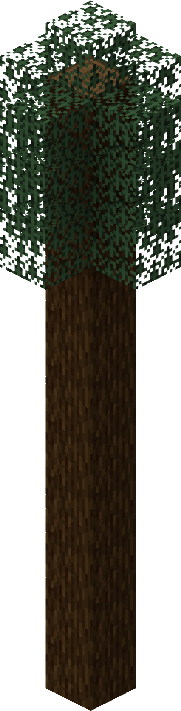
Their natural height varies widely, but most have a minimum height of 5 blocks (4 wood and 1 leaf), ranging up to 30 blocks for the "giant" Jungle trees and 15 for the "small" Jungle trees
The tree canopy is composed of leaf blocks, and grows 1 block higher than the highest wood block (This does not apply to the giant oak tree, as the leaves grow 3 blocks higher). The canopy may begin from the ground, (for the shorter "bush trees" in the jungle) and go up to 6 blocks from the ground (for the tallest trees). Tree canopies appear to be generated from roughly spherical clusters of leaves about 5–7 blocks across, centered on sections of trunk or branches. Leaves must be supported by an adjacent trunk (or leaf blocks connected to the trunk), otherwise they will wither and disappear.
Giant oak and giant jungle trees grow branches (wood blocks connected horizontally, vertically or diagonally to the trunk or other branches). Most of the time, a single tree will have between one and six branches, and each branch will have between one and six wood blocks. A few trees can have many more. Branches support a much larger canopy than a tree with a single trunk. Birch and spruce trees cannot grow branches. Jungle biomes has a special type: "bush trees" (one block of jungle wood completely covered by leaves).
Trees can be generated anywhere where there is light and dirt
Growth and characteristics
See also: Tutorials/Tree Farming
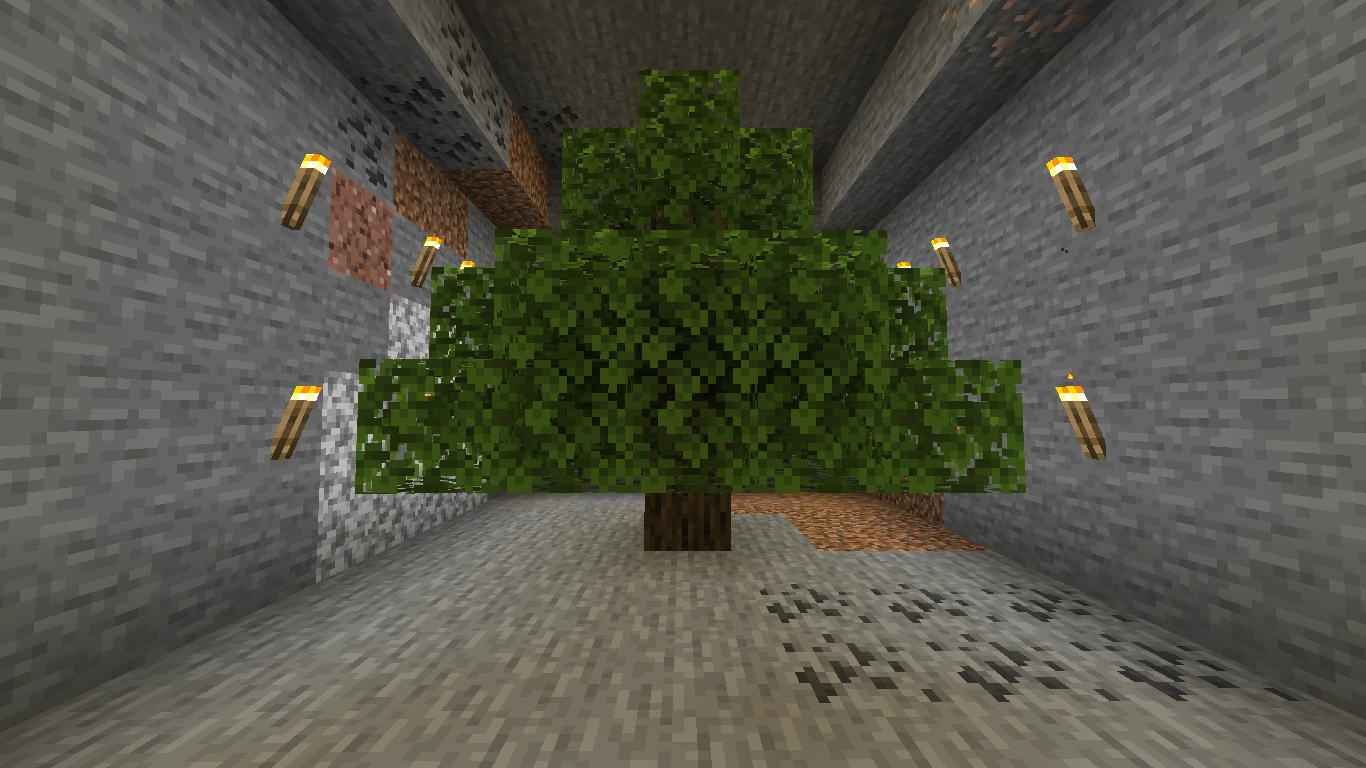
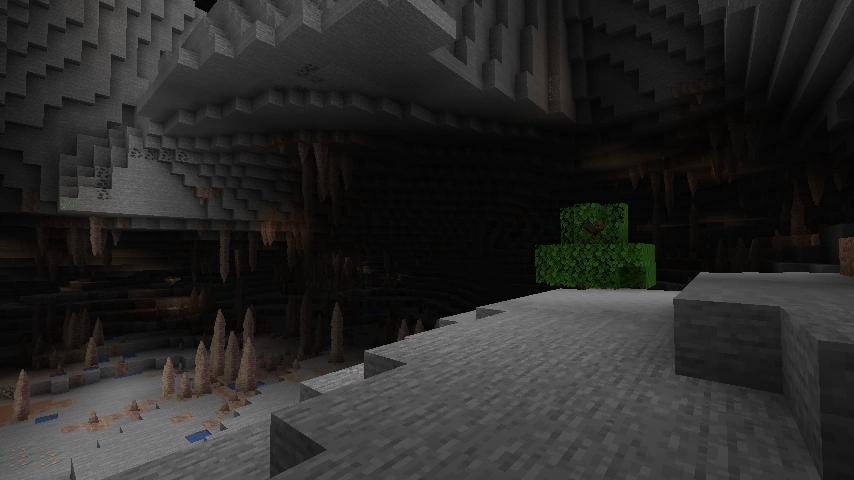
A tree that was grown in a cave, with the necessary light provided by torches
Trees are grown from saplings, which have a 1/20 chance of dropping from leaf blocks when they are destroyed or decay. Some players harvest wood from high-efficiency tree farms. There are six species of saplings, corresponding to the six main trees: oak, birch, spruce, jungle, acacia and dark oak.
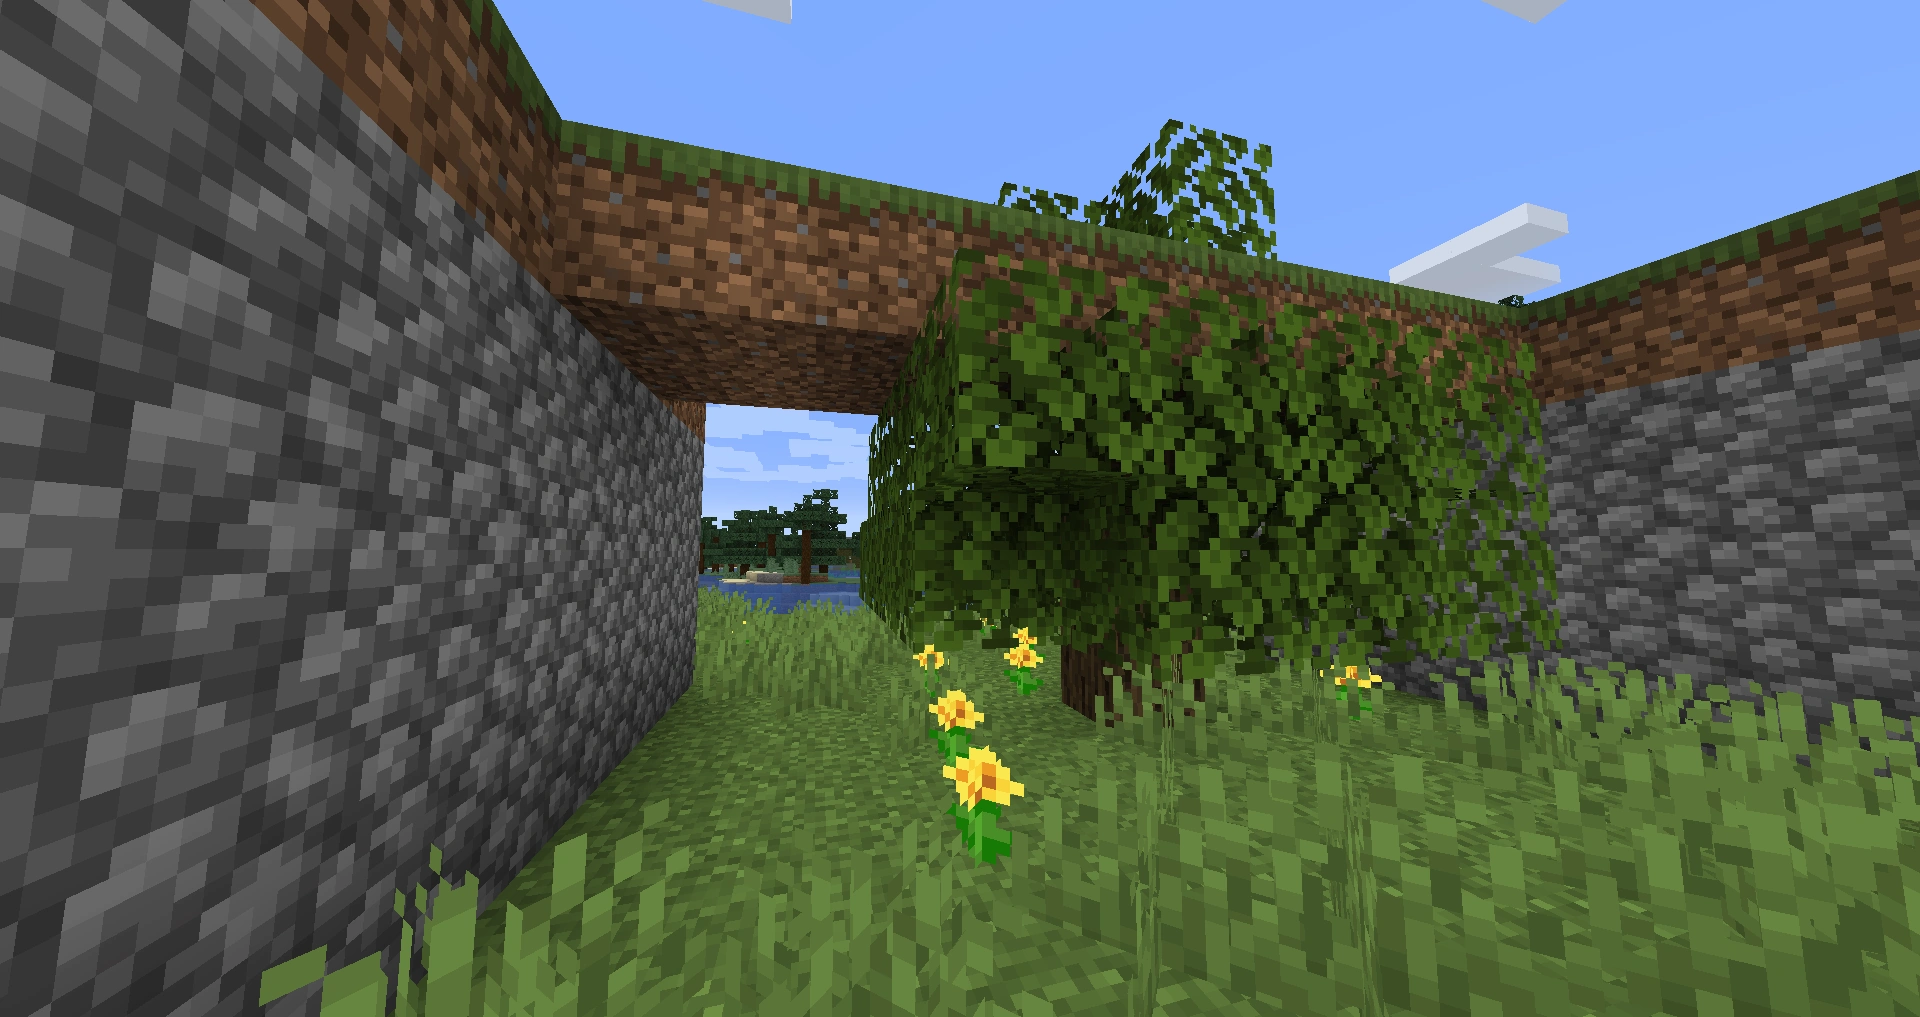
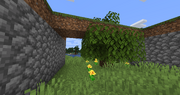
A tree that grew through a bridge
The sapling must be planted on a dirt, podzol or grass block, and must have a light level of at least 8 in the sapling block. A sapling will uproot with light level 7 or less in the sapling block itself unless it has an unobstructed view of the sky (except by glass or other fully transparent materials). The sapling must also have at least 4 blocks of space above it; see the individual sections below for space requirements, as they vary between the different types of trees. If there is a ceiling above a sapling, this will limit the maximum height of the tree that can grow from that sapling.
All trees in the active chunk radius around the player make attempts to grow at random intervals. For any given tree this can work out to about 3 attempts per minute, but a tree will usually not grow until nearly 30 minutes have elapsed since planting. When the tree attempts to grow it first checks that it has enough light, then chooses which variation of tree to spawn. For oak trees, it will choose either small or large; for spruce trees, it will choose either short, tall, or very tall. Birch trees only have one growable type, possibly hinting why they grow so fast.
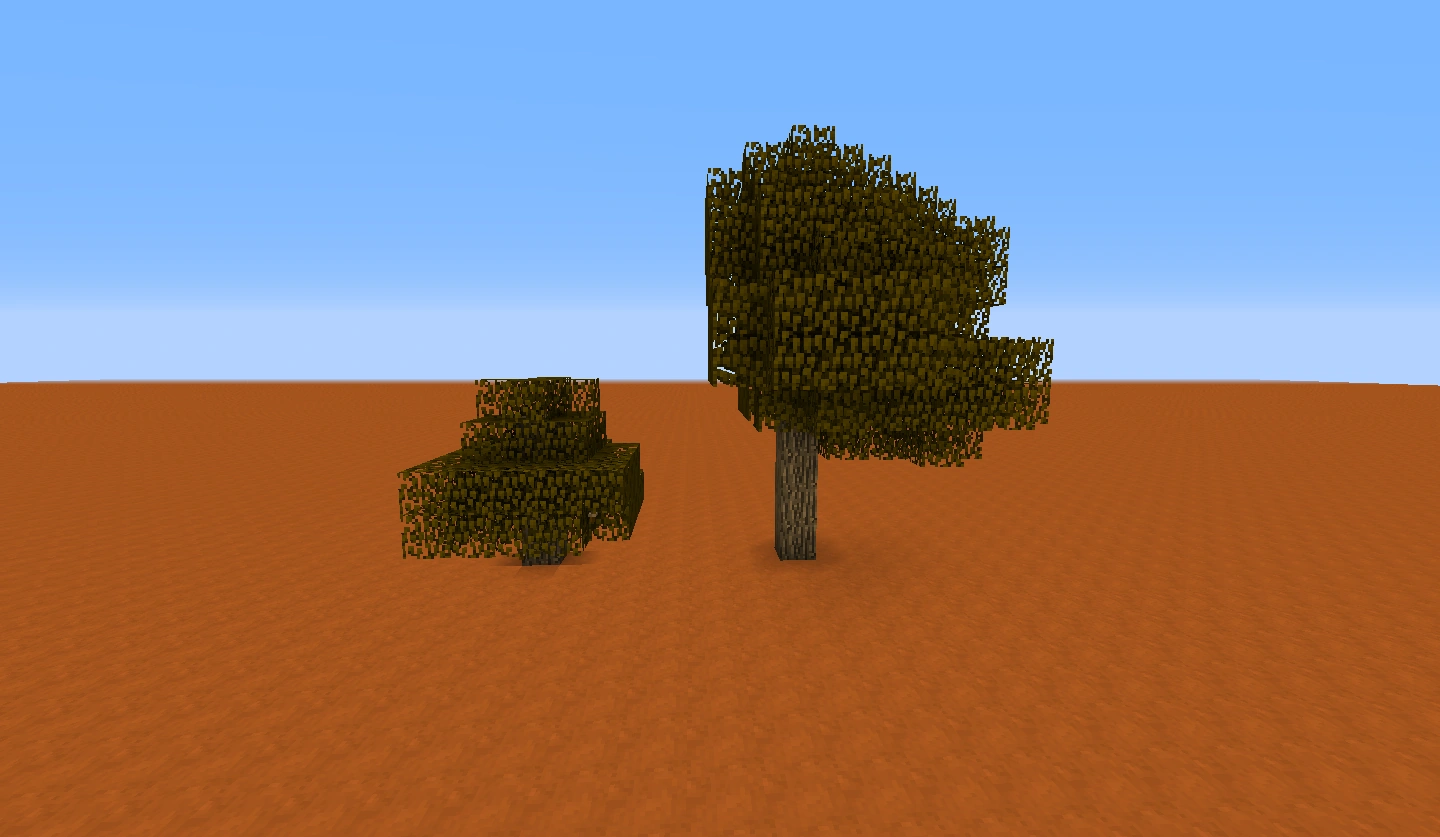

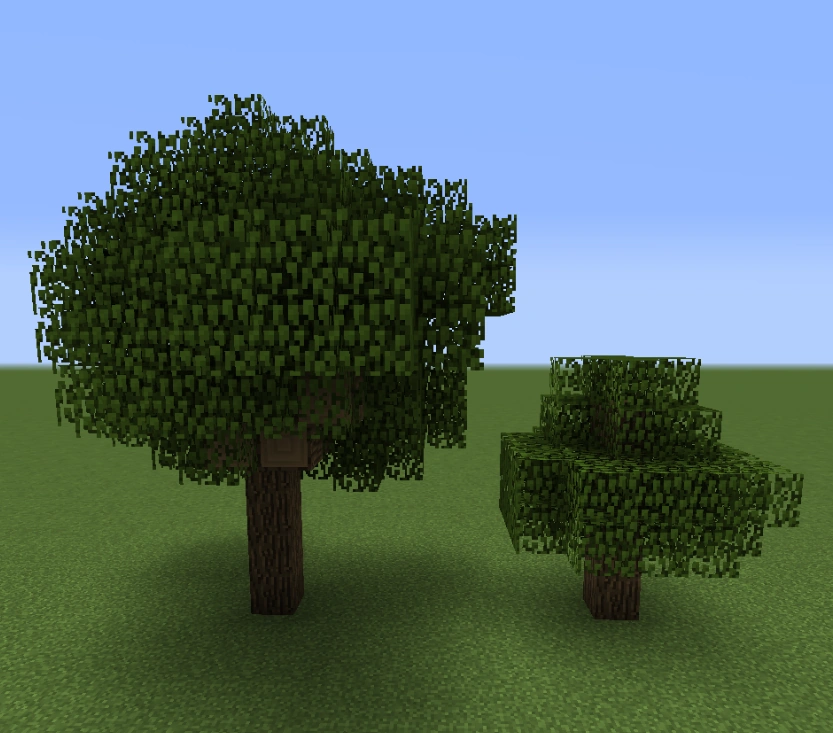
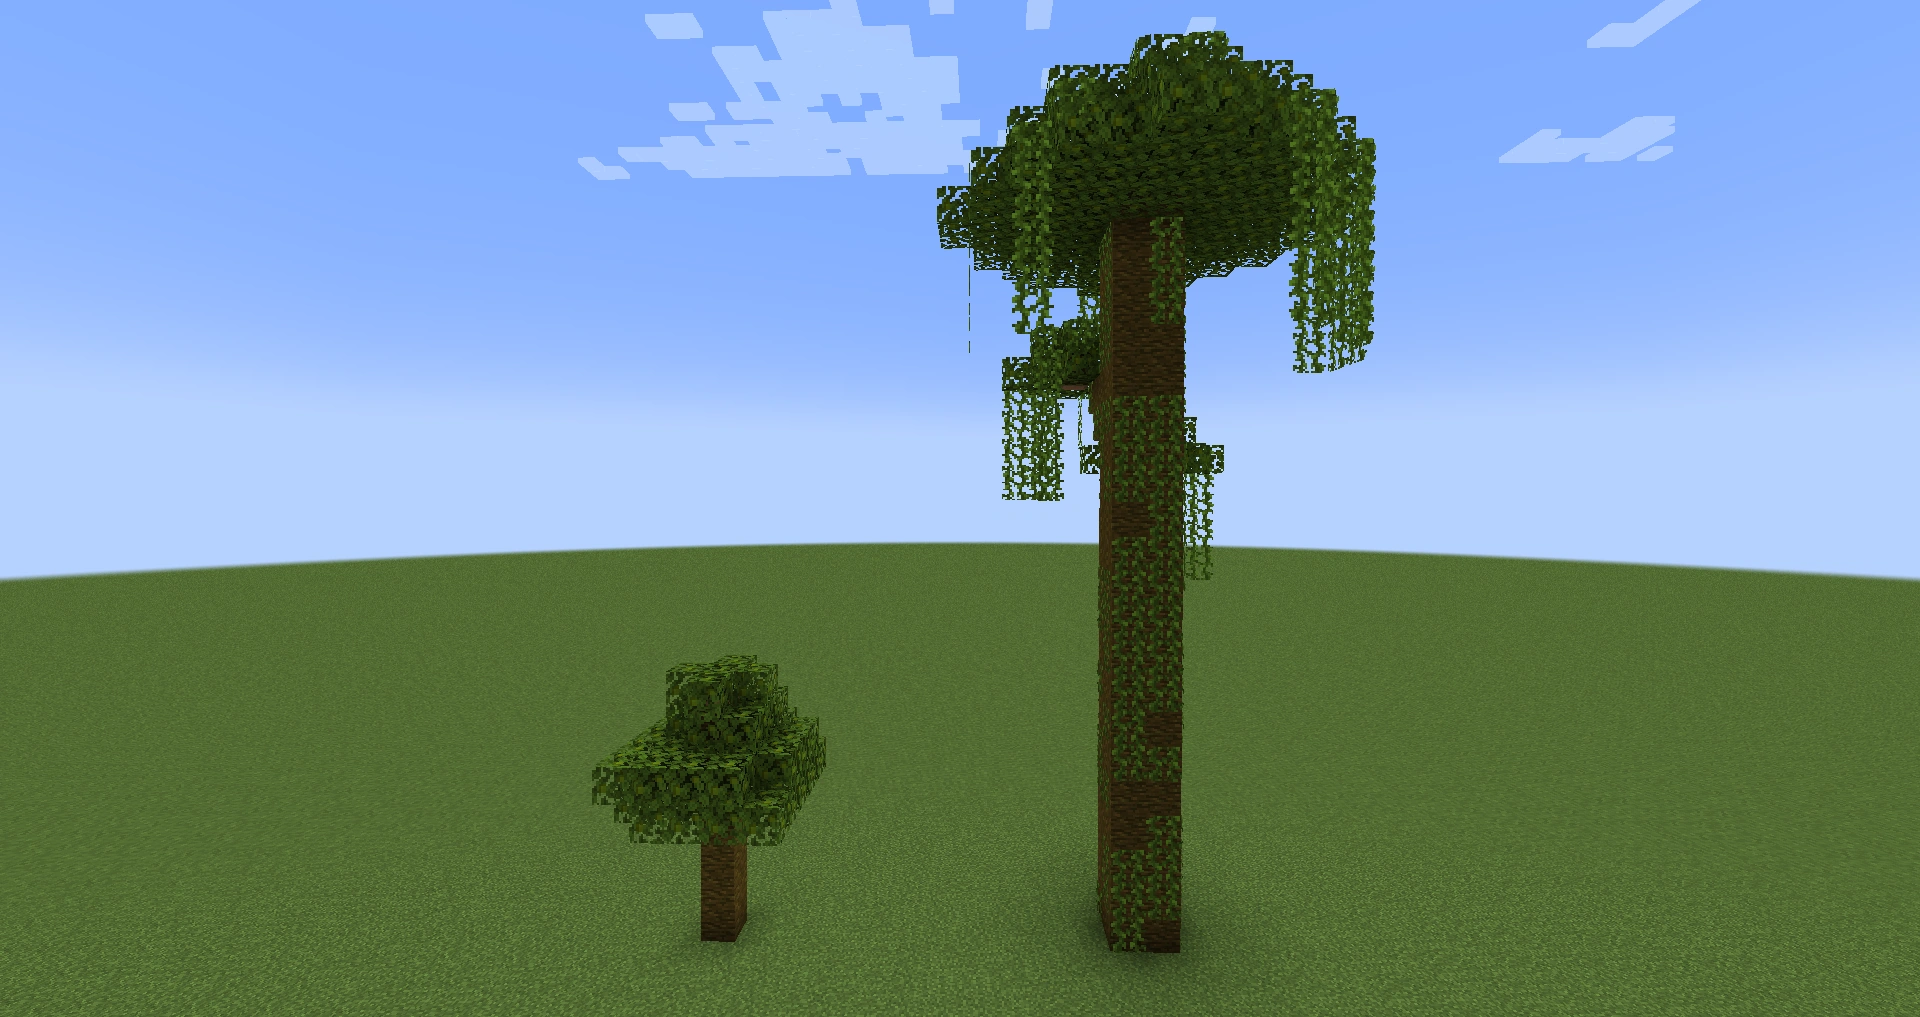
A small oak tree compared to a big oak tree
Now that the tree has passed a light check and chosen a size to attempt, it checks if there is space to grow into what it has already (randomly) chosen to become. If it encounters an obstruction during this check, it fails to grow and must wait for the next pass before it can attempt to grow again. This means that a tree in an open field with enough light will grow quite quickly (usually right around the 30 minute mark), but a tree in a tree farm that stunts its size may make several attempts before finally growing.
If you are standing on a sapling when it turns into a tree you will be trapped inside and begin to suffocate. You can escape by moving or digging. Sometimes, but rarely, this death results in deletion of items.
Bone meal forces the tree to grow if right clicked as long as all of the normal checks are in place (i.e., light, space, dirt, etc.). It does not guarantee a tree will grow, but forces it to attempt to grow, regardless of light level. The tree must still pass the space check for its randomly chosen type, before it grows. This is important to remember when limiting tree height, as the tree may attempt to grow a tall variant and fail even when all other requirements are met.
Leaves of small oaks (but not large ones) will destroy fences, glass, paintings, stairs, pistons, torches, buttons, ladders and doors due to a mismatch between the tree's actual and test forms. While tree trunks will not grow through solid blocks, the branches of large oaks may grow through (replace) any blocks that are not directly above the trunk, including chests. Oak leaves are unique in being able to grow through leaves of other tree types.
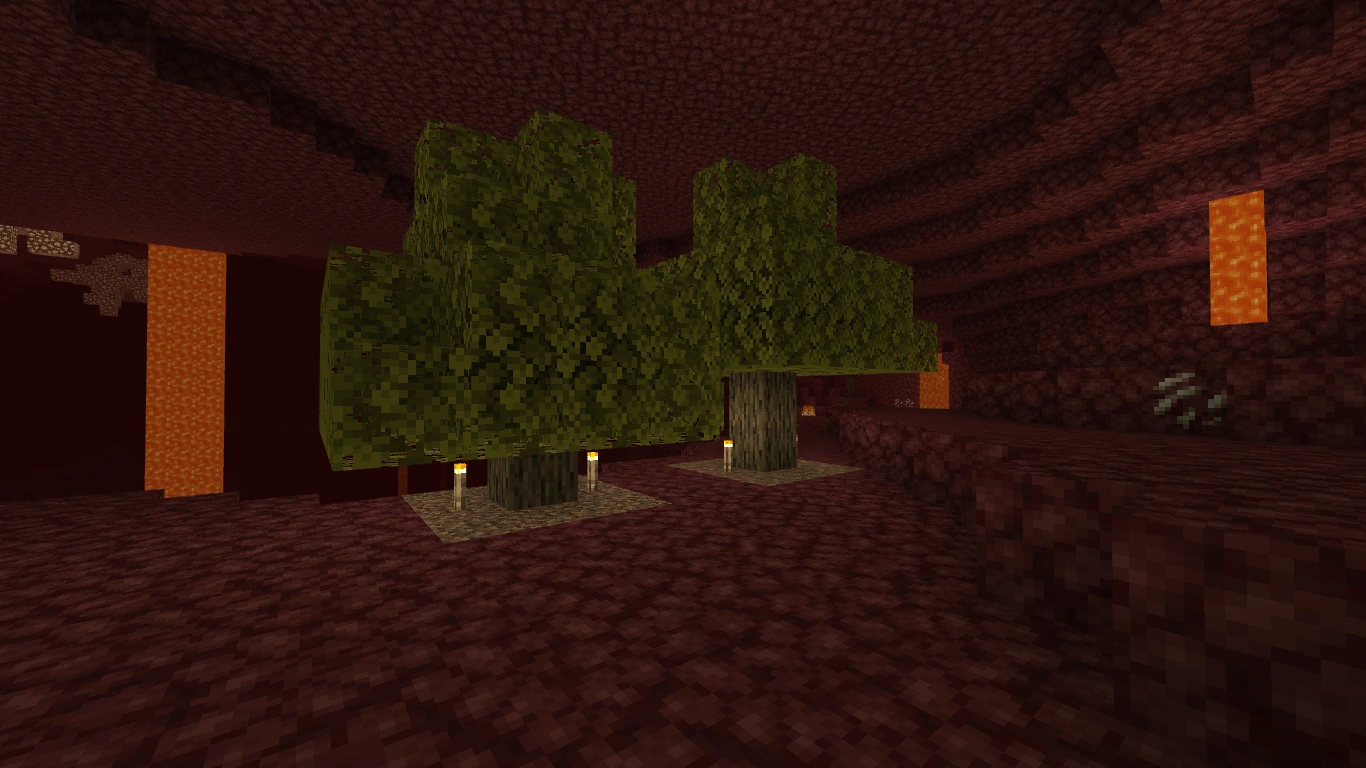

Planting trees in the Nether
All saplings will grow normally in The Nether and in The End, although they must be planted in dirt transported from the Overworld. Leaf blocks in the Nether have the same color as if they were placed in a desert biome.
Species
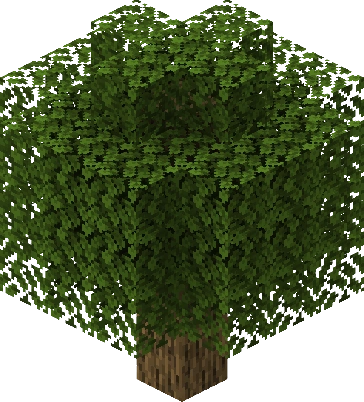
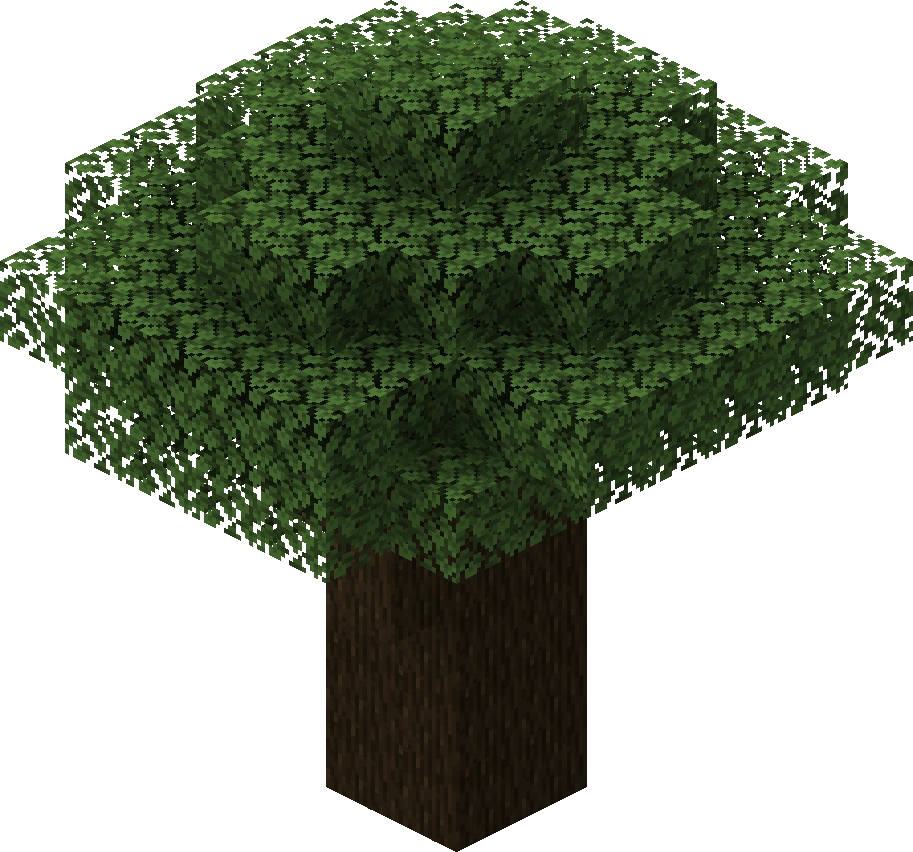
Oak trees

Oak trees
Oak trees are unique in several ways compared to birch, spruce, jungle, acacia and dark oak trees. Oak trees have a much smaller space requirement, and while birch, spruce, jungle, acacia and dark oak trees can only grow through other leaves of their own type, oak trees will grow into any other leaf block. Oak and dark oak trees are also the only species of trees that can drop an Apple when their leaf block is destroyed.
They come in several variants with widely different properties:
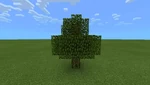
- Small oak trees are the most commonly encountered, and resemble birch trees in their shape and size. They require no horizontal clearance at the base, 1 block around the main trunk, 2 blocks from the top of the trunk up to the ceiling and 6-8 blocks of vertical clearance. Thus, a small oak tree can grow in a 1 deep hole, but not a 2 deep hole. Just as jungle trees, their growth will not be hindered by wood, leaves, dirt and saplings. The small oak tree was the first tree to exist in Minecraft, dating back to Survival Test.
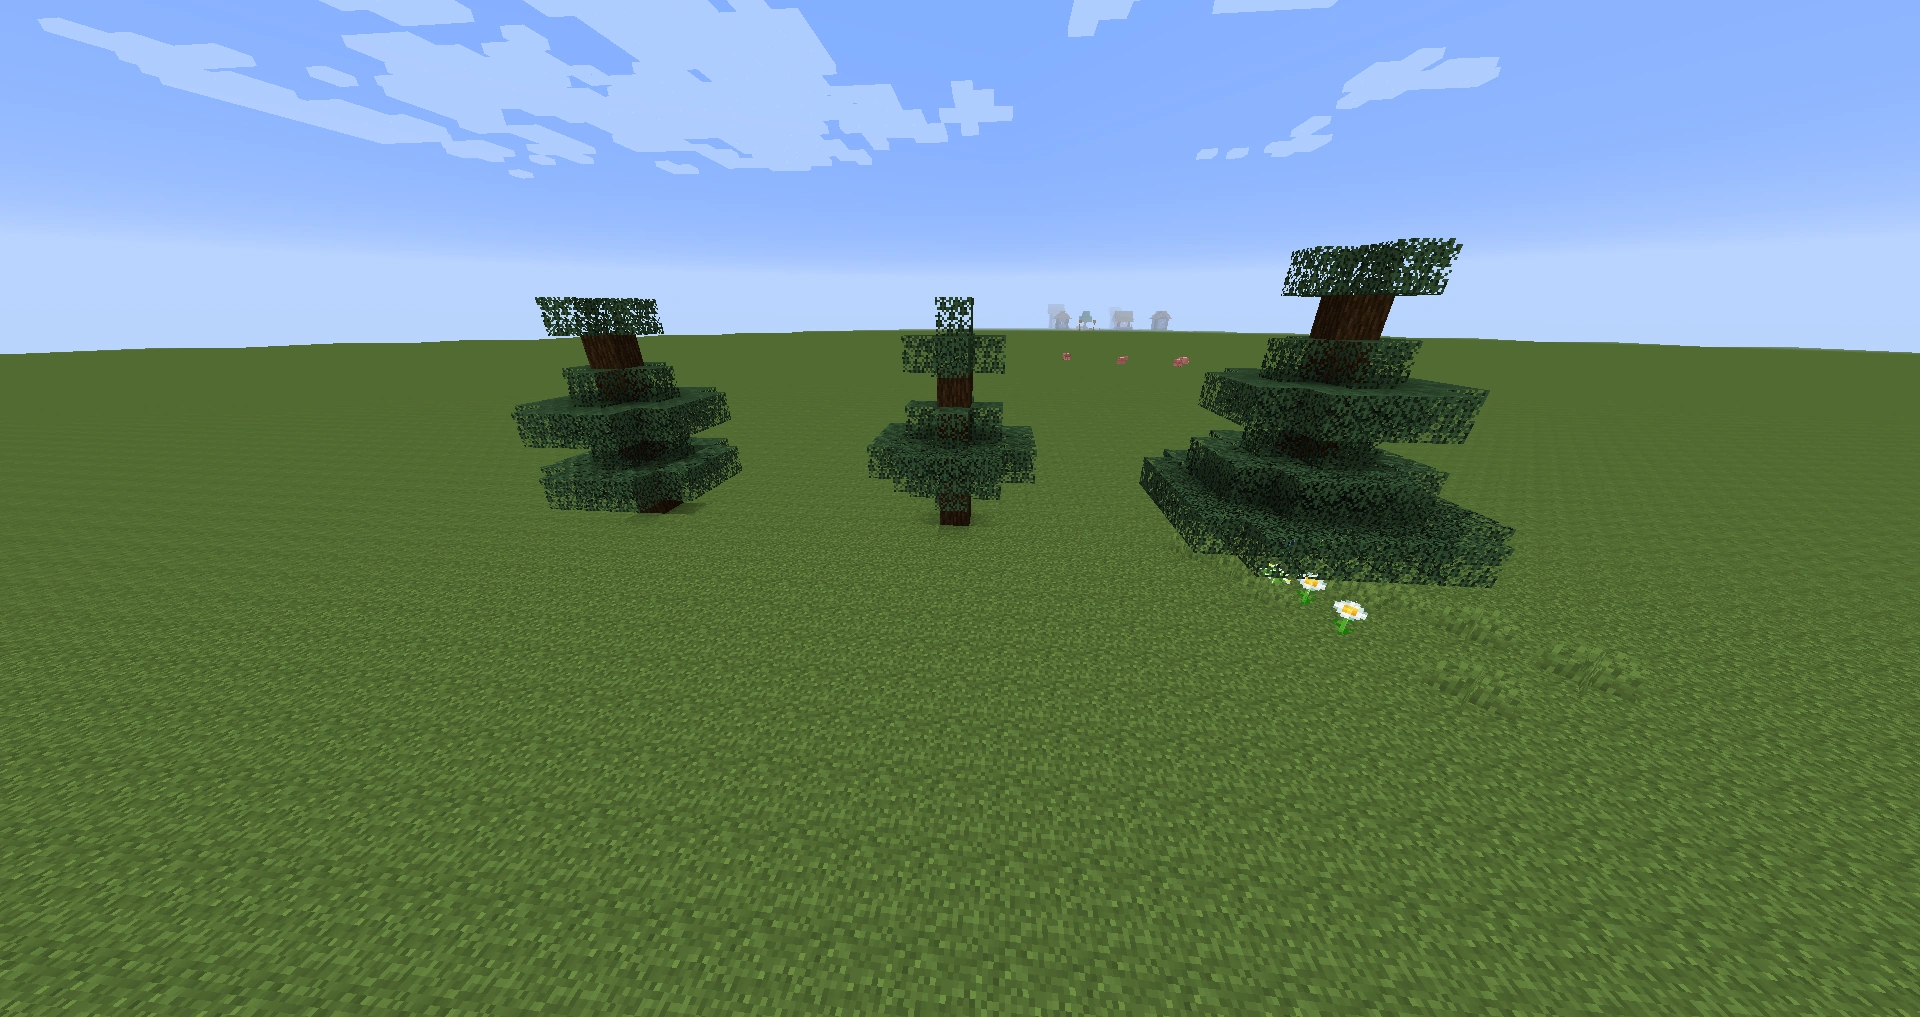
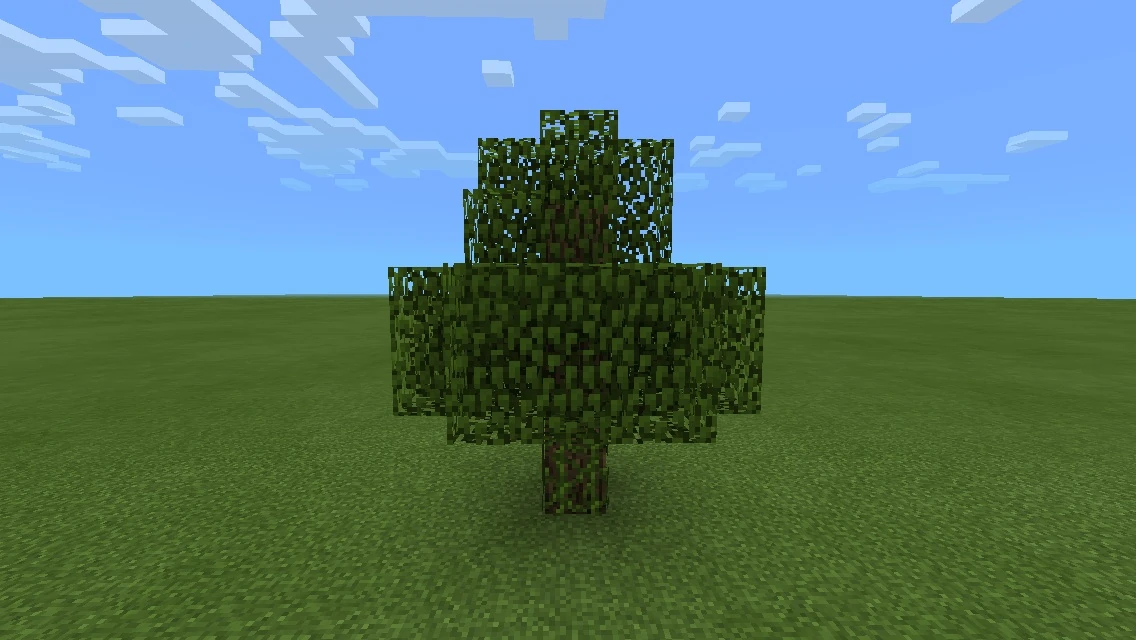
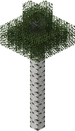
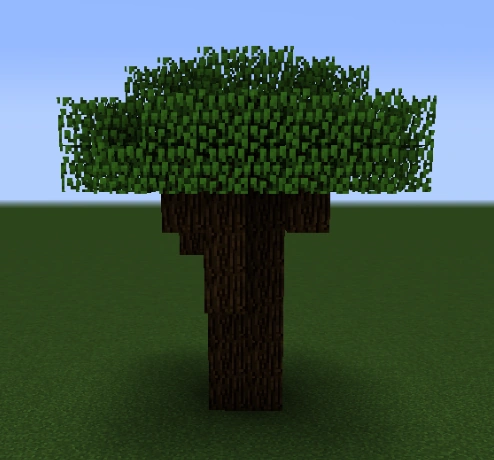
- Large oak trees are more uncommon, and have a distinct look and different growth requirements. They often have "branches", outgrowths of wood on the sides of the trunk, or even freestanding and surrounded by leaves. They require 4-14 blocks of open space directly above the sapling to grow (Air or Leaves only) but can otherwise be completely enclosed on all sides. These have existed since Infdev.
- A large tree form exists with a single leaf block layer above the minimal 4-block trunk, allowing a tree to rarely grow in a vertical space with a height of only 5, but otherwise the maximum trunk height is 2 less than the vertical space, making the practical minimum height 6.
- A large tree can be forced to be grown if a "brace" of non-solid blocks (e.g. glass, or half-slabs) is placed around where the trunk will be, one block off the ground.

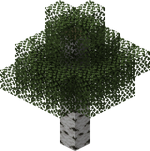
Balloon oak trees
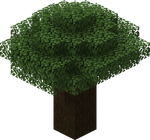
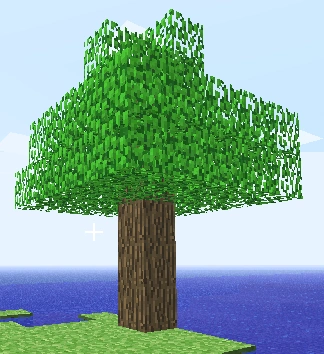
- Balloon oaks are a rare tree that can also grow. These trees were found abundantly in most all versions of classic. They consisted of tall trunks and leaves that formed the shape of a "ball". However, these trees are quite rare in later versions of Minecraft. They will grow even if there is a block obstructing them; they simply grow around that block, meaning a player intending to have a large oak tree may end up with one of these. They usually contain 4 blocks of wood, but some may contain more. Balloon oak trees are the only type of tree that has the possibility of all logs being covered with leaves.
- In swamp biomes, naturally occurring oak trees tend to grow in the water. Unlike oak trees in other biomes, which typically have a slightly conical or pointed canopy, all swamp trees have round, flat topped canopies, and may have vines hanging down. Read more about this tree in the Ungrowable Trees section.
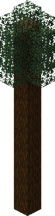
Spruce trees
Spruce trees

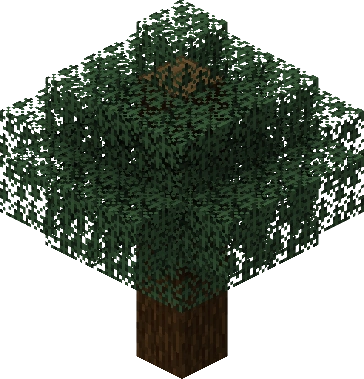
Mega spruce trees
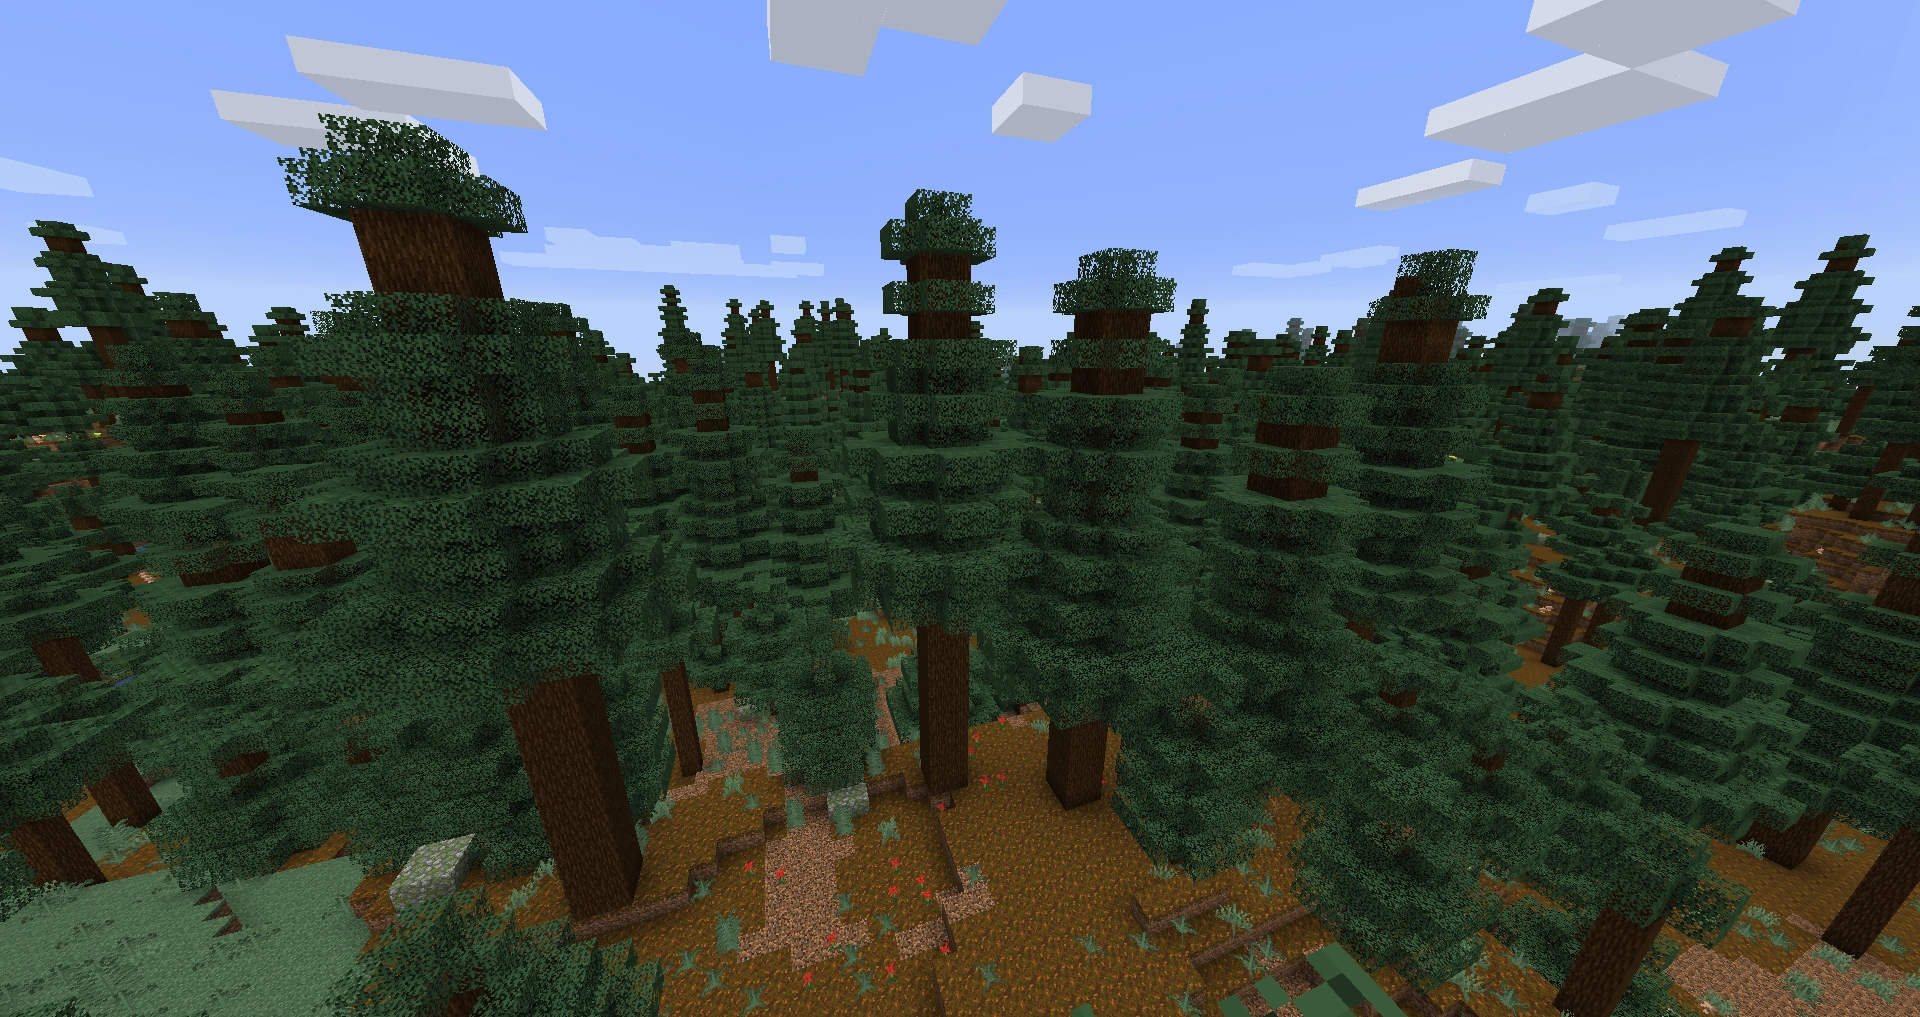
Spruce trees,[1][2] also known as pine trees,[3] grow from spruce saplings and have growth patterns and requirements very similar to birch trees, though they look very different. They are mainly found in the Taiga biome, but they may also generate in Extreme Hills, Cold Taiga, and Mega Taiga biomes. Spruce wood has the same texture as oak wood, but it is a darker shade of brown; its leaves are more dense, with a darker and blueish tone.
There are two different forms of these trees that may grow from any spruce saplings:
- A regular variant with a height similar to oak trees.[4]
- A large 2×2 variant that generates in the Mega Taiga biome and can be grown from spruce saplings arranged in a 2x2 square, with or without bonemeal. They are commonly called "Redwoods" or "Mega Spruce Trees". The saplings need two squares in any direction (thus a 6x6 square) and 16 squares of open space above (or more).
The leaves of the short variant tend to grow in discrete rows rather than the more "spherical" arrangement of oaks and birch trees; the tall variants tend to have very few leaves, concentrated at the top.
Like birch trees, they do not grow branches, and have a larger space requirement than oaks. This minimum space requirement is one block taller than the birch, at 5×5×8 blocks, and as with birch trees, they will not grow if any blocks occupy this volume. When height-constrained, the trunk height maximum is two less than the roof. Headroom of 9 blocks will limit the tree to trunk height of 7, which enables harvesting from ground level.
The trees with leaves at the very top are usually called spruce trees, while the ones with leaves all around are more commonly called pine trees.
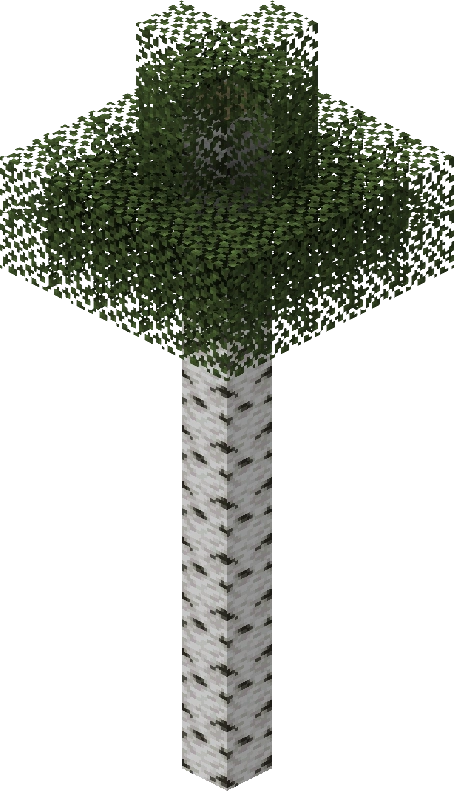
Birch trees
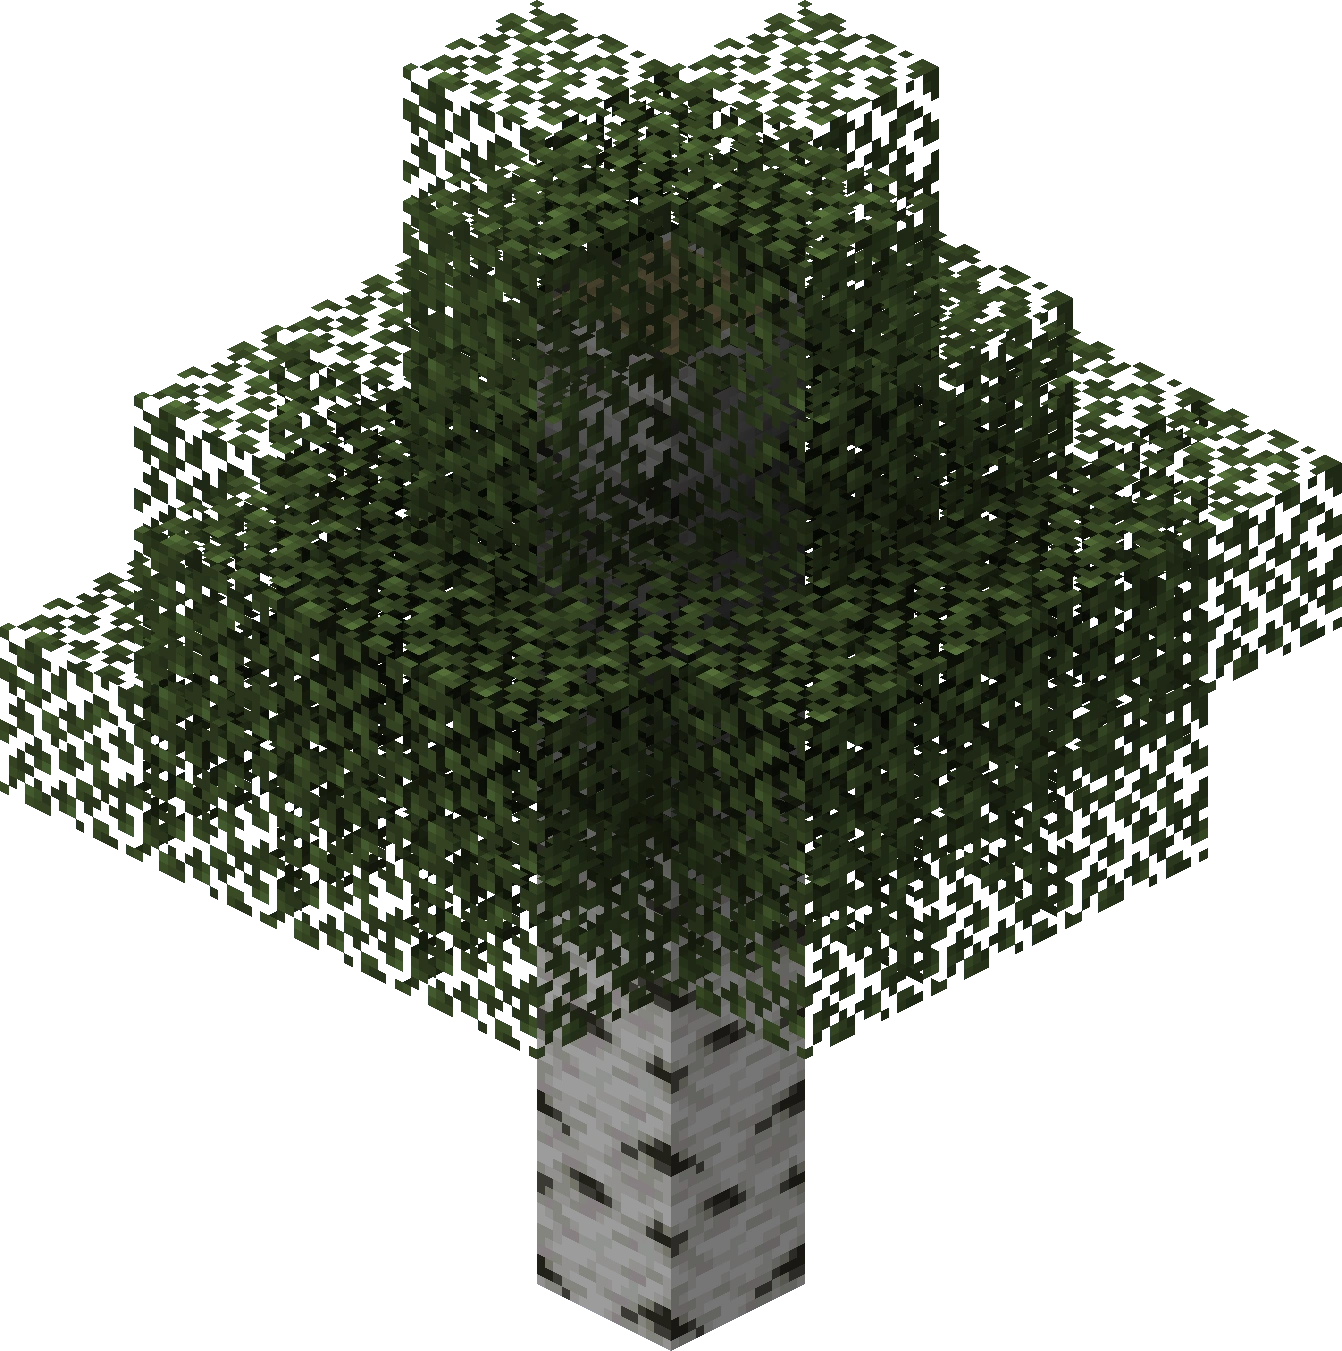
A birch tree
Birch trees look fairly similar to small oak trees in terms of height, and with leaves of a paler color; however, they stand out with their unique white bark. They are most commonly found in birch forest biomes.
There are two types of birch trees: a shorter tree that can be grown by the player with birch saplings; and a taller, more rare tree which only generate in Birch Forest M biomes, and cannot be grown from saplings. Birch trees grown from saplings grow to be five, six, or seven blocks tall, making them easy to cut down. Birch trees always have leaves at least 2 blocks above the ground unless it was grown on a slope; the leaves on one side will have two blocks between the ground and leaves, while the other may have a gap of one block - steep slopes or cliffs may leave no space under the leaves. Because birch saplings only grow into the one type of tree, and due to their relatively fast grow rate, they are the preferred type in tree farms.
The smallest birch tree requires a 5×6 (diameter×height) volume of free space, whilst the tallest tree requires a 5×8 volume. The volume starts at one meter above the base of the sapling, and needs to be void of any block save for leaves of any type or birch wood. This allows for birch trees to grow next to other birches. The topmost 5×5 layer above the tree is always empty space, and saplings will not grow if this space is obstructed by other blocks (including torches). This behavior is different from oak trees, which will grow regardless of obstructions (usually not growing into the obstructed area). Dark wood trees behave similarly (see below).
Birch trees may grow faster than oak trees. A birch tree has been observed growing from sapling to fully grown tree in under one day. They appear to skip the thirty minute delay entirely; in very rare cases they even grow within a single minute. One player even claims that a birch tree grew immediately after planting a sapling. This has been reported for both SSP and SMP.
Birch trees yield a type of wood that can be made into the unique white Wood Planks, while the other trees yield various shades of brown.
Birch leaf distribution
| Top row |
|---|
|
|
| 2nd row |
|
|
| 3rd and 4th rows |
|
|
Birch trees will always grow an absolute minimum of 50 leaves, which bodes well for the player considering the 1-in-20 chance for those leaves to drop saplings. If one is lucky, a birch tree may grow a maximum of 60 leaves. The leaf distributions are shown visually to the right, each table cell representing one 'slice' of the tree viewed from above. The glass blocks represent a barrier, while the cyan flowers represent areas where leaves may grow, but do not always. The growth pattern, in detail, is as follows:
- The topmost row is one above the height of the tree, and always has exactly 5 leaves: one above the wood block and four orthogonally adjacent to it, forming a + shape.
- 5 leaves
- The second row is the top of the wood trunk, and also has 4 leaves adjacent to it. Diagonal to the wood block will be a minimum of 1 and a maximum of 3 additional leaf blocks.
- 5 - 7 leaves
- The third row has the wood in the middle, surrounded orthogonally and diagonally by leaf blocks. Those 8 leaf blocks are also surrounded orthogonally, for an additional 12 leaf blocks. One can think of this as a 5×5 space where every block has leaves except the four corners. These corners are randomly filled with between 0 and 4 leaves, though having all four filled is very rare.
- 20 - 24 leaves
- The fourth row generates with the same rules as the third, and thus has a minimum of 20 and a maximum of 24 leaf blocks.
- 20 - 24 leaves
- The fifth and sixth (bottom) rows contain no leaves, only the wood block in the center. If the tree is 6 or 7 blocks tall, the additional 1 or 2 rows at the bottom will also be just a wood block.
- No leaves
- The air space that surrounds the trunk.
Jungle trees

Jungle trees
Tallest Jungle tree possible
Jungle trees are exclusive to the Jungle biome and have a unique growth system. Jungle tree leaves drop jungle tree saplings, which appear tall and skinny like the jungle tree itself. When planted in grass or dirt they grow into a jungle tree with a 1×1 trunk, unlike the occasional jungle trees with a 2×2 trunk that you find naturally in the jungle biome. For these trees to grow, there must be no blocks adjacent to the sapling up to the height of the tree.
In order to grow a 2×2 jungle tree, four jungle saplings must be placed adjacent to each other. For growth to succeed, there may be no blocks adjacent (even diagonally) to the north-western sapling (which is considered the center of the tree) up to the final height of the tree, as well as no blocks 1 block away except at the same level of the sapling (even diagonally). Which sapling the Bone Meal is used on is irrelevant. The largest jungle trees ever seen can grow up to 44 blocks high, although trees as short as 9 blocks have also been observed.
Some materials (including wood, leaves, dirt and saplings, but not vines, farmland, or tall grass) block the growth of jungle trees.


This tree will not grow because of the red wool block (looking from the northwestern corner)
2×2 jungle trees will not grow within two spaces of the trunk of another 2×2 tree directly north and west direction of the existing tree. On the south and east directions it will not grow within 3 blocks.
Acacia trees

Acacia trees
Acacia trees are only found in the Savanna biome (their wood is also found in bonus chests). Acacia trees feature unique diagonal trunks, and may occasionally have multiple canopies. The way the tree forms is unique. Some have many straight logs and a curve at the top, some at the bottom, and some curve from bottom to top. Typically, the canopy consists of just two layers of leaves, sometimes three. They are usually quite small. A typical acacia tree is around eight blocks tall. The acacia leaves share their texture with oak leaves, although they have their own name in creative mode. Their colour, however, varies on what biome you are in. Acacia leaves have a chance of dropping acacia saplings, which can be grown into acacia trees. Their logs are grey on the outside, with an orangish inside, and acacia planks are a similar shade of red as the inside of the logs. Before the unique log was added, these trees used jungle logs as a placeholder. There are 3 types of acacia tree that can grow:
- The common acacia tree, which has a diagonal trunk and a single canopy.
- The Multi-canopy acacia, where the trunk forks around the middle of the plant and each end ends in a canopy.
- Another form of multiple canopy acacia tree, which has the straight trunk and a lower canopy, then the trunk grows out of the smaller canopy and has a second higher canopy. These trees are much taller than the common acacia tree.
Dark oak trees
A dark oak tree
Dark oak trees are found only in the Roofed Forest biome. They have thick, 2×2 trunks, and will spawn dirt one block under their trunk if generated in a cliffside. Dark Oak trees nearly always generate with irregular blocks of wood connected to the trunk- these represent large branches. Their bark texture is slightly lighter than Spruce logs, but the planks made from them are significantly darker. Growing these trees requires four dark oak saplings arranged in a 2×2 grid; they will not grow if planted individually. Before the unique log was added, these trees used spruce logs as a placeholder. Dark oak trees grow at a much faster rate than most other trees.

Dirt spawned under tree in cliffside
Dying trees
A dying tree
A Pocket Edition exclusive tree. They have the standard growth pattern, however all exposed logs are covered with vines. These can be grown with saplings, allowing for an easy way to get vines in pre-0.9.0 maps.
Ungrowable trees
Some trees are not obtainable with saplings; they only appear with terrain generation, or if a player manually makes one. Some are made from logs and leaves of other species. These trees include:
"Matchstick" spruce trees
Matchstick spruce tree
A variant of Spruce trees with leaves only at the very top. These trees aren't rare and they don't have many leaves on them. This makes it easy to obtain wood from these trees, without the hassle of decaying leaves; they only have nine or twelve. Though somewhat common, they do not make up the majority of the trees in cold or snowy biomes. They cannot be found in Ice Plains, Extreme Hills, or any variant of those biomes. They are only rare within biomes that mega spruce trees spawn in, and are found in all the Taiga biomes.
"Lollipop" spruce trees

Lollipop spruce tree
These trees are very similar to matchstick spruces; however, they have a lot more leaves. As such, they give a lot more saplings than the matchstick spruce which rarely produce even a single sapling. The leaves on this tree are arranged in a "diamond" shape. Just like the matchstick spruce tree, these trees can't be found in the Ice Plains, Extreme Hills, or any variant of those biomes. However, these trees are also seen in all the Taiga biomes. These trees also tend to be a little bit shorter than the matchstick spruce trees, but by a block or two.
Tall birch trees
A tall birch tree
Unlike the normal birch tree, these variants of birch trees have taller trunks than normal. They are found in the Birch Forest M biome. This makes them considerably rare, considering that the biome that they are in is also considerably rare. However, they are very convenient for gathering large quantities of birch wood, or any wood for that matter. This makes them a good biome to start with if you are new to the game.
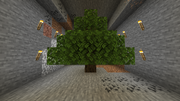
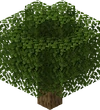
Bush trees

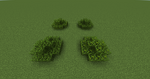
Bush trees
Found in Jungle biomes, they only have 1-2 logs and a few leaves. Typically are 1-3 layers tall and cover the floor of Jungle biomes heavily. In jungles, they consist of oak leaves and a jungle log. Elsewhere, they consist of oak leaves and an oak log.
Swamp trees
A swamp tree
Found in swamp biomes, these trees are made of oak wood logs and oak leaves. They are covered in vines and have a large amount of leaves, causing the misconception that the leaves have a higher percentage to drop apples.
Cold-en oak trees
A Cold-en oak tree
The Cold-en Oak, or winter oak, is a tree formed by a rare glitch in Pocket Edition. They can be found in both the free and paid versions of the MCPE. It causes a small tree with a leaf arrangement the same as that of small oak or birch to be generated on the border of a forest and a snowy area (one of which is usually mountainous). It is composed with spruce leaves and spruce logs (seen in the lite and paid versions) or oak logs (paid only). As of 0.9.0 the tree no longer exists with the lack of ability to make the old style worlds (old just makes a 256x256 map with modern biomes).
Acaci-oak trees
An acaci-oak tree
Occasionally, when an oak tree spawns in a savanna biome, there is a rare glitch when it spawns with acacia leaves instead of oak leaves (but the oak trunk still remains). Oak trees do generate in the savanna, but with oak leaves like normal. This glitch is hard to see since the texture for acacia and oak leaves are exactly the same, though they do not stack with each other, and drop different saplings.
Fallen trees
A fallen birch tree
A Pocket Edition exclusive structure. They are logs lying on their side, occasionally with vines and/or mushrooms of either color. Also, an upright log, or stump, from which it appears to have broken off of can be found two blocks away from where the rings of the wood is facing.
Older trees
Before the unique log types were added, these trees borrowed other tree's leaves and wood.
Jungle acacia trees

A jungle acacia tree
The old acacia, spawned before 13w43a, was composed of jungle logs and oak leaves. It still, however, spawned in the same formation as it currently does.
Spruce dark oak trees
A spruce dark oak tree
The old dark oak tree, spawned before 13w43a, was composed of spruce logs and regular oak leaves, despite still spawning in the same formation as it currently does.
Pocket Edition Lite trees
A MCPE Lite Tree
Oak trees in Pocket Edition's free version are spawned with spruce wood, rather than oak wood, due to a bug in which it is unobtainable.
Uses
Tree harvesting is an essential first step for any player in Survival mode. The wooden blocks can be harvested for wood, without requiring tools (although an axe quickens harvesting). Each wood can be crafted into wooden planks and sticks, which are used to craft tools.
Wood can also be smelted into charcoal, an equivalent of coal.
When leaves are harvested, or decay naturally, there is a chance they will drop a sapling of their own species, which can be planted to grow a new tree. Decaying (dark) oak tree leaves also have a 1/200 chance of dropping an apple. Destroying leaves does not require a tool; a sword destroys leaves negligibly faster, but this quickly wears out the sword. Using a hoe to destroy a leaf block will not wear it out, but is the same speed as your hands. (However, on Pocket Edition, using a hoe will wear it out.) Shears harvest leaf blocks quickly, and will drop a usable leaf block for the player to pick up and later place elsewhere. Use of fire will also destroy leaves quickly, but when used on a tree, fire will also destroy much of the wood. (Fire is more useful when harvested leaf blocks have been placed elsewhere, as temporary barriers or filler blocks.)
Tips on cutting trees
An underground tree farm
- It's worth clearing foliage and collecting the saplings and apples for later—you may want to reforest some areas. It's better not to use a tool to break the leaves, as a block or bare hands will do just as well without wearing out your tools.
- If you've got plenty of daylight and you'll be hanging around for a while, you can just chop the wood out and wait for the leaves to decay. If there's any question of time, bash or shear the leaves (or at least most of them) first.
- Shears do wear out, but will be much faster. The leaves won't drop saplings or apples when you shear them, but you get to take the leaf blocks home and break them at your leisure (or use them for something else).
Time-efficient tree farming for oak and birch trees.
- When trying to cut a big tree (tall spruces, large oaks, jungle giants), the best technique is usually to get up to the top and cut the wood from there going down. Climbing to the top using ladders or vines, or throwing an enderpearl to the top is usually more efficient and safer than dirt pillars or "staircases", especially for very tall trees.
- If you want to pillar to the top, using sand or gravel makes it easy to remove the pillar when you have cut your way to the bottom of the tree, as you can simply punch out the bottom block, and quickly place a torch under the falling sand. The sand will break as it lands on the torch, and you can easily pick it up.
- Another way to cut big trees is to carve it into a spiral staircase and cut the remaining blocks on your way down.
- When climbing large jungle trees you can shear vines from the sides of the tree you are not going to climb up to fill in the gaps on the side you are climbing up.
- When cutting large jungle trees, make sure to cut all the logs in the branches, otherwise the leaves won't decay. It is easier to spot missed logs with fancy graphics turned on.
- Note that with stone or wood axes, this is most of a Minecraft day's work, and it can require more than one axe. If you are not in a safe area you might want to wait out the night atop the trunk, but remember that items despawn after five minutes, so you may want to go down and collect fallen saplings and logs before nightfall.
Video
Tree/video
History

A classic-styled tree before biomes were introduced
| classic | |||||
|---|---|---|---|---|---|
0.0.14a_01{{Extension DPL}}<ul><li>[[Rotten Flesh|Rotten Flesh]]<br/>{{Item
| title = Rotten Flesh
| image = Rotten Flesh.png
| renewable = Yes
| heals = {{hunger|4}}
|effects={{EffectLink|link=Hunger (status effect)|Hunger}} (0:30) (80% chance)
| stackable = Yes (64)
}}
'''Rotten flesh''' is a [[food]] item that can be eaten by the [[player]], with high risk of inflicting [[Hunger (status effect)|Hunger]] and low [[Saturation]].
== Obtaining ==
=== Mob loot ===
==== Zombies ====
[[Zombie]]s, [[zombie villager]]s, [[zombie horse]]s, [[husk]]s, and [[drowned]] drop from 0 to 2 units of rotten flesh. [[Looting]] can increase this by one per level, for a maximum of 5 rotten flesh.
==== Zoglins ====
[[Zoglin]]s drop 1-3. Looting III grants a maximum of 6.
==== Zombified piglins ====
[[Zombified Piglin|Zombified piglins]] drop 0-1. Looting III grants a maximum of 4.
=== Fishing ===
Rotten flesh can be obtained as a "junk" item while [[fishing]].
=== Chest loot ===
{{LootChestItem|rotten-flesh}}
=== Cat gifts ===
{{main|Cat#Gifts}}
Tamed [[cat]]s have a 70% chance of giving the [[player]] a gift when they wake up from a [[bed]], and the gift has a 16.13% chance to be a rotten flesh.
== Usage ==
=== Food ===
{{see also|Tutorials/Hunger management}}
To eat rotten flesh, press and hold {{control|use}} while rotten flesh is selected in the hotbar.
Eating rotten flesh restores {{hunger|4}} [[hunger]] and 0.8 hunger [[Hunger#Mechanics|saturation]], but has an 80% chance of inflicting {{EffectLink|Hunger (effect)|id=Hunger}} for 30 seconds. Note that the duration does ''not'' accumulate when eating multiple pieces. However, if more is consumed and the [[Hunger (effect)|Hunger]] status effect is inflicted, the duration resets to 30 seconds.
=== Wolves ===
Rotten flesh can be used to [[breed]] and heal tamed [[wolves]], lead them around, and make baby tamed wolves grow up faster by 10% of the remaining time.
Wolves are immune to the Hunger effect.
=== Trading ===
Novice-level [[Trading#Cleric|cleric villagers]] buy 32 rotten flesh for 1 [[emerald]] as part of their trades.
==Sounds==
{{Sound table/Entity/Food}}
== Data values ==
=== ID ===
{{edition|java}}:
{{ID table
|edition=java
|showforms=y
|generatetranslationkeys=y
|displayname=Rotten Flesh
|spritetype=item
|nameid=rotten_flesh
|form=item
|foot=1}}
{{edition|bedrock}}:
{{ID table
|edition=bedrock
|shownumericids=y
|showforms=y
|notshowbeitemforms=y
|generatetranslationkeys=y
|displayname=Rotten Flesh
|spritetype=item
|nameid=rotten_flesh
|id=277
|form=item
|foot=1}}
== Achievements ==
{{load achievements|Iron Belly}}
== Advancements ==
{{load advancements|Husbandry;A Balanced Diet}}
== Video ==
{{Video note|The video is outdated, as rotten flesh can now be also gained from [[fishing]], [[trading]], or loot chests.}}
<div style="text-align:center">{{yt|xTrUEVoe9Tw}}</div>
== History ==
{{History|java beta}}
{{History||1.8|snap=Pre-release|[[File:Rotten Flesh JE1.png|32px]] Added rotten flesh.
|[[Zombie]]s and [[zombie pigmen]] now drop rotten flesh instead of [[feather]]s and [[cooked porkchop]]s respectively.}}
{{History|java}}
{{History||1.0.0|snap=Beta 1.9 Prerelease 2|Food poisoning can now be stopped by drinking [[milk]].}}
{{History||1.2.1|snap=12w03a|Rotten flesh can now be used to [[Breeding|breed]] wolves. When a wolf eats rotten flesh, it will not receive the [[Hunger (effect)|Hunger]] effect.}}
{{History||1.3.1|snap=12w21a|Rotten flesh can now be found in [[desert temple]] [[chest]]s.
|Priest [[villager]]s now [[trading|buy]] rotten flesh.}}
{{History|||snap=1.3|[[File:Rotten Flesh JE2 BE1.png|32px]] The texture of rotten flesh has been changed.}}
{{History|||snap=12w22a|Rotten flesh now generates in [[jungle temple]] chests.
|Priest [[villager]]s no longer [[trading|buy]] rotten flesh.}}
{{History||1.7.2|snap=13w36a|Rotten flesh can now be obtained as one of the "junk" [[item]]s from [[fishing]].}}
{{History||1.8|snap=14w02a|Cleric [[villager]]s now [[trading|buy]] 36–40 rotten flesh for 1 [[emerald]], as their tier I trade.}}
{{history||1.9|snap=15w43a|Rotten flesh may now be found in [[igloo]] basement [[chest]]s.}}
{{history|||snap=15w44a|Rotten flesh now generates in [[dungeon]] chests.
|The average yield of rotten flesh has been decreased in [[desert temple]] chests.}}
{{History||1.11|snap=16w39a|Rotten flesh can now be found in [[woodland mansion]] [[chest]]s.}}
{{History||1.13|snap=17w47a|Prior to [[1.13/Flattening|''The Flattening'']], this [[item]]'s numeral ID was 367.}}
{{History|||snap=18w09a|Rotten flesh now generates in the loot [[chest]]s of [[underwater ruins]].}}
{{History|||snap=18w11a|[[Drowned]] may now [[drops|drop]] rotten flesh upon death.
|Rotten flesh now sometimes generates in [[shipwreck]] [[chest]]s.}}
{{History||1.14|snap=18w43a|[[File:Rotten Flesh JE3 BE2.png|32px]] The texture of rotten flesh has been changed.}}
{{History|||snap=18w44a|[[Cat]]s now offer rotten flesh as [[Cat#Gifts|gift]]s.}}
{{History|||snap=18w50a|Rotten flesh can now be found in [[village]] temple chests.}}
{{History||1.16|snap=20w06a|Added [[hoglin]]s, which can drop rotten flesh if killed.}}
{{History|||snap=20w07a|Rotten flesh has a {{frac|10|109}} (~9.17%) chance of being given by the new [[piglin]]s when [[bartering]], in a stack size of 4–12.
|[[Hoglin]]s no longer drop rotten flesh.}}
{{History|||snap=20w09a|Rotten flesh can no longer be obtained by bartering with piglins.}}
{{History|||snap=20w14a|Added [[zoglin]]s, which drop rotten flesh when killed.}}
{{History|pocket alpha}}
{{History||v0.11.0|snap=build 1|[[File:Rotten Flesh JE2 BE1.png|32px]] Added rotten flesh.
|As the hunger bar has not yet been added, rotten flesh inflicts [[poison]] rather than [[hunger]].
|[[Zombie]]s and [[zombie pigmen]] now [[drops|drop]] rotten flesh.}}
{{History|||snap=build 11|Rotten flesh can now be used to feed [[wolves]].}}
{{History||v0.12.1|snap=build 1|Eating rotten flesh now gives the [[player]] the [[Hunger]] status effect.
|Rotten flesh now restores [[hunger]] instead of [[health]].
|Added [[zombie villager]]s, which [[drops|drop]] rotten flesh when killed.}}
{{History||v0.13.0|snap=build 1|Rotten flesh can now be found inside [[desert temple]] [[chest]]s.}}
{{History||v0.15.0|snap=build 1|Added [[husk]]s and [[zombie horse]]s, both of which drop rotten flesh when killed.
|Rotten flesh can now be found inside [[jungle temple]] chests.}}
{{History|pocket}}
{{History||1.0.0|snap=alpha 0.17.0.1|Rotten flesh can now be found inside the basement [[chest]]s of [[igloo]]s.}}
{{History||1.0.4|snap=alpha 1.0.4.0|36-40 rotten flesh can now be [[trading|sold]] to cleric [[villager]]s.}}
{{History||1.1.0|snap=alpha 1.1.0.0|Rotten flesh can now be found in [[woodland mansion]] chests.}}
{{History|bedrock}}
{{History||1.4.0|snap=beta 1.2.13.8|Added [[drowned]], which [[drops|drop]] rotten flesh when killed.}}
{{History|||snap=beta 1.2.14.2|Rotten flesh can now be found in some [[shipwreck]] [[chest]]s.}}
{{History|||snap=beta 1.2.20.1|Rotten flesh can now be found inside [[underwater ruins]] chests.}}
{{History||1.8.0|snap=beta 1.8.0.8|Tamed [[cat]]s can now give the [[player]] rotten flesh as a gift.}}
{{History||1.10.0|snap=beta 1.10.0.3|[[File:Rotten Flesh JE3 BE2.png|32px]] The texture of rotten flesh has been changed.}}
{{History||1.11.0|snap=beta 1.11.0.1|Rotten flesh can now be found in [[desert]] [[village]] temple [[chest]]s.}}
{{History|||snap=beta 1.11.0.4|[[Trading]] has been changed, cleric [[villager]]s now [[trading|buy]] 32 rotten flesh for an [[emerald]].}}
{{History|console}}
{{History||xbox=TU5|xbone=CU1|ps=1.0|wiiu=Patch 1|switch=1.0.1|[[File:Rotten Flesh JE2 BE1.png|32px]] Added rotten flesh.}}
{{History||xbox=none|xbone=none|ps=1.90|wiiu=none|switch=none|[[File:Rotten Flesh JE3 BE2.png|32px]] The texture of rotten flesh has been changed.}}
{{History|new3ds}}
{{History||0.1.0|[[File:Rotten Flesh JE2 BE1.png|32px]] Added rotten flesh.}}
{{History|foot}}
== Issues ==
{{issue list}}
== External Links ==
*[https://www.minecraft.net/en-us/article/taking-inventory--rotten-flesh Taking Inventory: Rotten Flesh] – Minecraft.net on June 8, 2020
{{Items}}
[[cs:Shnilé maso]]
[[de:Verrottetes Fleisch]]
[[es:Carne podrida]]
[[fr:Chair putréfiée]]
[[hu:Rohadt hús]]
[[it:Carne marcia]]
[[ja:腐った肉]]
[[ko:썩은 살점]]
[[nl:Bedorven vlees]]
[[pl:Zgniłe mięso]]
[[pt:Carne podre]]
[[ru:Гнилая плоть]]
[[uk:Гнила плоть]]
[[zh:腐肉]]
[[Category:Renewable resources]]
[[Category:Food]]</li><li>[[Diamond|Diamond]]<br/>{{For}}
{{redirect|Diamonds|the achievement|Achievements#DIAMONDS!|the advancement|Advancements#Diamonds!}}
{{Item
| image = Diamond.png
| renewable = No
| stackable = Yes (64)
| rarity = Common}}
A '''diamond''' is a mineral that can only be obtained from [[Diamond Ore|diamond ore]], [[chest loot|loot chests]] and [[Suspicious Block|suspicious blocks]]. It is required to craft diamond [[tool]]s and [[armor]] (and therefore obtain [[obsidian]] to access the [[The Nether|Nether]]), [[enchanting table]]s, [[jukebox]]es and duplicate [[smithing template]]s.
== Obtaining ==
{{see also|Tutorials/Diamonds}}
=== Mining ===
{{see also|Diamond Ore#Natural generation}}
[[Diamond ore]] can be mined using an iron [[pickaxe]] or stronger. An ore drops a single diamond. If mined by any other tool, it drops nothing. If the pickaxe is enchanted with [[Fortune]], it can drop an extra diamond per level of Fortune, allowing for a maximum of 4 diamonds with Fortune III. If the ore is mined using a pickaxe enchanted with [[Silk Touch]], it drops an ore block rather than a diamond. The ore is found at level 15 or lower, most commonly between -50 and -64; levels -58 and -59 are the preferred levels to mine at since they don't contain [[bedrock]], as it starts spawning at -60.
=== Chest loot ===
{{LootChestItem|diamond}}
=== Suspicious sand ===
When brushing [[suspicious sand]] in [[desert pyramid]]s, they have a {{frac|1|7}} chance to drop a diamond.
=== Crafting ===
{{Crafting
|Block of Diamond
|Output= Diamond,9
|type= Material
}}
=== Smelting ===
{{Smelting
|showname=1
|Diamond Ore; Deepslate Diamond Ore
|Diamond
|1
}}
== Usage ==
Diamonds are mainly used to craft high-tier armor and equipment, which in turn are also used in making [[netherite]] armor and equipment.
=== Crafting ingredient ===
{{crafting usage}}
=== Trading ===
{{IN|bedrock}}, expert-level armorer, toolsmith, and weaponsmith villagers buy one diamond for an emerald as part of their trades.
{{IN|java}}, journeyman-level armorer villagers have a 40% chance of offering to buy one diamond for one emerald. Expert-level toolsmith villagers have {{frac|2|3}} chance of offering to buy one diamond for one emerald. Expert-level weaponsmith villagers always offer to buy one diamond for one emerald.
=== Repairing ===
Diamonds are the repair items for the diamond [[tier]] and [[armor material]], and thus can be used to [[item repair|repair]] the following items in an [[anvil]] or [[grindstone]]:
* {{ItemLink|Diamond Helmet}}
* {{ItemLink|Diamond Chestplate}}
* {{ItemLink|Diamond Leggings}}
* {{ItemLink|Diamond Boots}}
* {{ItemLink|Diamond Sword}}
* {{ItemLink|Diamond Pickaxe}}
* {{ItemLink|Diamond Axe}}
* {{ItemLink|Diamond Shovel}}
* {{ItemLink|Diamond Hoe}}
=== Beacons ===
Diamonds can be used to select powers from a [[beacon]]. The player must select one of the available powers then insert a diamond into the item slot.
A diamond can be substituted for an [[iron ingot]], a [[gold ingot]], an [[emerald]] or a [[netherite ingot]].
=== Smithing ingredient ===
{{Smithing
|head=1
|ingredients=Any Armor Trim +<br/>Any Armor Piece + <br/>Diamond
|Any Armor Trim Smithing Template
|Netherite Chestplate
|Diamond
|Diamond Trim Netherite Chestplate
|showdescription=1
|description = All armor types can be used in this recipe,<br/>a netherite chestplate is shown as an example.<br/>
|tail=1
}}
;Trim color palette
The following color palettes are shown on the designs on trimmed armor:
*{{TrimPalette|diamond}}
*{{TrimPalette|diamond|darker=1}} (a darker color palette is used when a diamond armor piece is trimmed using a diamond).
== Data values ==
=== ID ===
{{edition|java}}:
{{ID table
|edition=java
|showitemtags=y
|showforms=y
|generatetranslationkeys=y
|displayname=Diamond
|spritetype=item
|nameid=diamond
|itemtags=beacon_payment_items
|form=item
|foot=1}}
{{edition|bedrock}}:
{{ID table
|edition=bedrock
|shownumericids=y
|showforms=y
|notshowbeitemforms=y
|generatetranslationkeys=y
|displayname=Diamond
|spritetype=item
|nameid=diamond
|id=304
|form=item
|foot=1}}
== Achievements ==
{{load achievements|DIAMONDS!;Diamonds to you!;Enchanter}}
== Advancements ==
{{load advancements|Diamonds!}}
== History ==
{{History|java indev}}
{{History||0.31|snap=20100128|[[File:Diamond JE1 BE1.png|32px]] Added diamonds. Initially, they were referred to as "emeralds".
|A stack of 100 diamonds can be found inside the [[Indev house]] [[chest]]s.}}
{{History|||snap=20100129|Diamond can be used to craft [[diamond block]]s and diamond [[sword]]s, [[shovel]]s, [[pickaxe]]s and [[axe]]s.
|Diamonds can no longer be found inside the Indev House due to all items having been removed from its chests.
|Diamond can be obtained by smelting diamond blocks.}}
{{History|||snap=20100130|[[Emerald]]s from the previous version are now officially known as "diamonds", though this has no actual effect as item names are not yet displayed in-game.
|[[Diamond block]]s now require 9 diamonds (3×3) instead of 4 (2×2) to be [[crafting|crafted]], making them much more expensive.}}
{{History||20100206|Diamonds are now used to craft diamond [[hoe]]s.}}
{{History||20100212-1|Diamonds are now used to craft diamond [[helmet]]s, [[chestplate]]s, [[leggings]] and [[boots]].}}
{{History|java alpha}}
{{History||v1.0.14|Diamonds are now used to craft [[jukebox]]es.}}
{{History|java beta}}
{{History||1.8|snap=Pre-release|Diamonds are now found in [[mineshaft]] [[chest]]s.}}
{{History|java}}
{{History||1.0.0|snap=Beta 1.9 Prerelease 2|[[Diamond ore]] can now be [[smelting|smelted]] into diamonds.}}
{{History|||snap=Beta 1.9 Prerelease 3|Diamonds are now used to craft [[enchantment table]]s.
|Diamonds are now found in [[stronghold]] altar [[chest]]s.}}
{{History||1.1|snap=12w01a|Diamonds are now found in [[village]] [[villager|blacksmith]] [[chest]]s.}}
{{History||1.3.1|snap=12w21a|Diamonds can now be [[trading|traded]] to blacksmith [[villager]]s in quantities of 3–5 for 1 [[emerald]].
|Added [[desert temple]]s, with a hidden [[chest]] room and loot containing diamonds.}}
{{History|||snap=12w21b|Diamonds have been changed in the game code from "emerald" to "diamond", due to actual [[emerald]]s being added. Diamond's original name during [[Indev]], as stated above, was emerald in the code, and was kept this way until this snapshot.}}
{{History|||snap=12w22a|Added [[jungle temple]]s, which contain loot [[chest]]s with diamonds.}}
{{History|||snap=1.3|[[File:Diamond JE2 BE2.png|32px]] The texture of diamonds has been changed.}}
{{History||1.4.6|snap=12w49a|Diamonds can now be used to [[crafting|craft]] a [[firework star]] with a trail.}}
{{History||1.6.1|snap=13w16a|Diamond is now used to craft diamond [[horse armor]].}}
{{History|||snap=13w18a|Diamond is no longer used to craft diamond [[horse armor]].|Diamonds are now found in [[nether fortress]] [[chest]]s.}}
{{History||1.8|snap=14w02a|Diamonds can now be [[traded]] to any black apron [[villager]] in quantities of 3–4 for 1 [[emerald]], as their tier III trade.}}
{{History||1.9|snap=15w31a|Diamonds now generate in [[end city]] [[chest]]s.}}
{{History|||snap=15w43a|The average yield of diamonds have been slightly decreased in [[nether fortress]] chests.}}
{{History|||snap=15w44a|The average yield of diamonds in [[desert temple]] and [[mineshaft]] chests have been decreased.}}
{{History||1.13|snap=17w47a|Prior to [[1.13/Flattening|''The Flattening'']], this [[item]]'s numeral ID was 264.}}
{{History|||snap=18w10a|Diamonds now generate in [[buried treasure]] [[chest]]s.}}
{{History|||snap=18w11a|Diamonds now generate in [[shipwreck]] treasure chests.}}
{{History||1.14|snap=18w43a|[[File:Diamond JE3 BE3.png|32px]] The texture of diamonds has been changed.}}
{{History|||snap=18w50a|Diamonds can now be found in [[chest]]s in [[village]] toolsmith houses.}}
{{History||1.16|snap=20w16a|Diamonds now generate in bastion remnants chests.}}
{{History||1.16.2|snap=20w30a|The chance of finding diamonds in bastion remnant chests is increased from 8.6% to 15.8%.}}
{{History||1.17|snap=21w08a|Diamonds can now drop and be smelted from [[deepslate diamond ore]].}}
{{History||1.20<br>(Experimental)|link=1.19.4|snap=23w04a|Diamonds can now be used to craft [[smithing template]]s.
|Diamonds can now be used as an armor trim material.}}
{{History|||snap=23w07a|Diamonds now drop when brushing [[suspicious sand]] in [[desert pyramid]]s.}}
{{History||1.20|snap=23w12a|The probability for the diamond to generate in the [[suspicious sand]] in [[desert temple]] has been changed from 1/7 to 1/8.}}
{{History|pocket alpha}}
{{History||v0.2.0|[[File:Diamond JE1 BE1.png|32px]] Added diamonds. They are currently unobtainable and serve no purpose.}}
{{History||v0.3.2|Diamonds can be collected and used to craft [[blocks of diamond]] and diamond [[axe]]s, [[pickaxe]]s, [[sword]]s and [[shovel]]s.}}
{{History||v0.4.0|Diamonds are now used to [[crafting|craft]] diamond [[hoe]]s.}}
{{History||v0.5.0|Diamonds are now used to craft [[nether reactor core]]s.}}
{{History||v0.6.0|Diamonds are now used to craft diamond [[armor]].}}
{{History||v0.8.0|snap=build 1|[[File:Diamond JE2 BE2.png|32px]] The texture of diamonds has been changed.}}
{{History||v0.12.1|snap=build 1|Diamonds are now used to craft [[enchanting table]]s.
|Diamonds are no longer used to craft [[nether reactor core]]s and are now instead dropped by it.
|Diamonds now generate in [[nether fortress]] [[chest]]s.}}
{{History||v0.13.0|snap=build 1|Diamonds now have a chance to generate in [[desert temple]] chests.}}
{{History||v0.14.0|snap=build 1|Diamonds are now found in [[minecart with chest]]s in [[mineshaft]]s.}}
{{History||v0.15.0|snap=build 1|Diamonds can now be found in [[jungle temple]] [[chest]]s.}}
{{History|pocket}}
{{History||1.0.0|snap=alpha 0.17.0.1|Diamonds can now be found in altar [[chest]]s in [[stronghold]]s, [[dungeon]] chests and [[end city]] chests.}}
{{History|||snap=alpha 1.0.0.0|Diamonds can now be found in [[villager|blacksmith]] [[chest]]s in [[village]]s.}}
{{History||1.0.4|snap=alpha 1.0.4.0|3-4 diamonds can now be traded to blacksmith [[villager]]s for an [[emerald]] as part of their third tier trades.}}
{{History|bedrock}}
{{History||1.2.0|snap=beta 1.2.0.2|Diamonds can now be used to [[crafting|craft]] a [[firework star]] with a trail.
|Diamonds can now be used to craft [[jukebox]]es.}}
{{History||1.4.0|snap=beta 1.2.14.2|Diamonds can now be found inside [[buried treasure]] [[chest]]s and [[shipwreck]]s.}}
{{History||1.10.0|snap=beta 1.10.0.3|Diamonds can now be found in [[plains]] [[village]] weaponsmith chests.
|[[File:Diamond JE3 BE3.png|32px]] The texture of diamonds has been changed.}}
{{History||1.11.0|snap=beta 1.11.0.1|Diamonds can now be found in village toolsmith chests and in [[savanna]], [[desert]], [[taiga]], and [[snowy taiga]] village weaponsmith chests.}}
{{History|||snap=beta 1.11.0.4|Armorer, toolsmith, and weaponsmith [[villager]]s now [[trading|buy]] one diamond for an [[emerald]] as part of their fourth tier [[trading|trades]].}}
{{History||1.16.0|snap=beta 1.16.0.57|Diamonds can now be found in [[bastion remnant]] chests.}}
{{History||1.17.0|snap=beta 1.16.230.52|Diamonds can now drop and be smelted from [[deepslate diamond ore]].}}
{{History||1.20.0<br>(Experimental)|link=Bedrock Edition 1.19.70|snap=beta 1.19.70.23|Diamonds now drop when brushing [[suspicious sand]] in [[desert pyramid]]s.}}
{{History||1.20.0<br>(Experimental)|link=Bedrock Edition 1.19.80|snap=beta 1.19.80.21|Diamonds can now be used to craft [[smithing template]]s.
|Diamonds can now be used as an armor trim material.}}
{{History|console}}
{{History||xbox=TU1|xbone=CU1|ps=1.0|wiiu=Patch 1|switch=1.0.1|[[File:Diamond JE1 BE1.png|32px]] Added diamonds.}}
{{History||xbox=TU5|Diamonds are now found in the new [[mineshaft]] [[chest]]s.}}
{{History||xbox=TU7|Diamonds are now used to craft [[enchantment table]]s.}}
{{History||xbox=TU9|Diamonds are now found in [[village]] [[villager|blacksmith]] [[chest]]s.}}
{{History||xbox=TU14|ps=1.04|Diamonds can now be [[trading|traded]] to blacksmith [[villager]]s in quantities of 3–5 for 1 [[emerald]].
|Added [[desert temple]]s, with a hidden [[chest]] room and loot containing diamonds.|Added [[jungle temple]]s, which contain loot [[chest]]s with diamonds.|[[File:Diamond JE2 BE2.png|32px]] The texture of diamonds has been changed.}}
{{History||xbox=TU19|xbone=CU7|ps=1.12|Diamonds can now be used to [[crafting|craft]] a [[firework star]] with a trail|Diamonds are now found in the new [[nether fortress]] [[chest]]s.}}
{{History||xbox=TU31|xbone=CU19|ps=1.22|wiiu=Patch 3|Diamonds can now be [[traded]] to any black apron [[villager]] in quantities of 3–4 for 1 [[emerald]], as their tier III trade.}}
{{History||xbox=TU46|xbone=CU36|ps=1.36|wiiu=Patch 15|Diamonds now generate in [[end city]] [[chest]]s.}}
{{History||xbox=TU69|xbone=none|ps=1.76|wiiu=Patch 38|switch=none|Diamonds now generate in [[buried treasure]] [[chest]]s.|Diamonds now generate in [[shipwreck]] treasure chests.}}
{{History||xbox=none|ps=1.90|wiiu=none|[[File:Diamond JE3 BE3.png|32px]] The texture of diamonds has been changed.}}
{{History|new3DS}}
{{History||0.1.0|[[File:Diamond JE2 BE2.png|32px]] Added diamonds.}}
{{History|foot}}
==Issues==
{{issue list}}
==Trivia==
*Unlike in ''Minecraft'', newly mined [[Wikipedia:Diamond|diamond]]s in real life are rough, cloudy stones. The largest, purest ones are polished into crystal-clear gemstones, while the rest are used in industry for cutting and grinding.
*Although diamonds themselves are not renewable, all tools, weapons, and armor made from diamonds can be acquired through [[trading]], and are therefore renewable. Other items crafted from diamonds are not renewable.
*In the April fools version [[Java Edition 2.0]], [[Diamond Chicken|diamond chickens]] can lay diamonds. This does not exist in newer versions, as this was a joke.
*The item forms of diamonds and [[Turtle Egg|turtle eggs]] have the same shape.
==Gallery==
<gallery>
File:DiamondOre.png|Naturally occurring diamonds.
File:MultipleOreBlobs.png|Multiple ore blobs.
File:Lava Diamond.png|Diamond ore near Lava.
File:Diamond ore blob.png|Another Diamond ore blob near Lava.
File:10 ore diamond blob.png|10 ore diamond blob.
File:Trading a diamond for an emerald.png|A blacksmith offering an [[emerald]] for a diamond.
File:Diamond Pendant Necklace JINX.jpg|Official diamond pendant made by [https://www.jinx.com JINX].
File:All Mine JINX.jpg|Official t-shirt artwork "All Mine" which features a diamond. Made by JINX
File:4 ways of viewing 12 diamonds in stone form.png|4 ways of viewing 12 diamonds in stone form
</gallery>
== External Links ==
*[https://www.minecraft.net/en-us/article/taking-inventory--diamond Taking Inventory: Diamond] – Minecraft.net on February 20, 2019
{{items}}
[[cs:Diamant]]
[[de:Diamant]]
[[el:Διαμάντι]]
[[es:Diamante]]
[[fr:Diamant]]
[[hu:Gyémánt]]
[[it:Diamante]]
[[ja:ダイヤモンド]]
[[ko:다이아몬드]]
[[nl:Diamant]]
[[pl:Diament]]
[[pt:Diamante]]
[[ru:Алмаз]]
[[th:เพชร]]
[[tr:Elmas]]
[[uk:Діамант]]
[[zh:钻石]]
[[Category:Non-renewable resources]]</li></ul> | Added trees, they were only available as oak trees with a single foliage color. | ||||
0.0.15{{Extension DPL}}<ul><li>[[Nether Star|Nether Star]]<br/>{{Distinguish|Firework Star}}
{{Item
| image = Nether Star.gif
| renewable = Yes
| stackable = Yes (64)
| rarity = Uncommon
}}
The '''Nether Star''' is a rare item [[drops|dropped]] by the [[wither]] that is used solely to [[Crafting|craft]] [[Beacon]]s.
== Obtaining ==
=== Mob loot ===
The nether star can be obtained only by defeating the [[Wither]] [[Mob#Boss mobs|boss]], which is created using [[Soul sand]] and [[Head|Wither Skeleton Skulls]]. One nether star is dropped each time; the dropped amount is not affected by the [[Looting]] enchantment. {{IN|java}}, nether stars dropped by withers take 10 minutes to despawn and are immune to explosions. {{IN|bedrock}}, nether star items never despawn, neither by time nor by explosions.
== Usage ==
The nether star has the same animated glint as [[enchanted]] items, [[potion]]s, and [[end crystal]]s.
A dropped nether star item cannot be destroyed by [[explosion]]s. However, it can still be destroyed by a falling [[anvil]],{{only|java}} [[fire]], [[lava]], [[cacti]], or [[the Void]].
It is used to [[Crafting|craft]] a [[beacon]].
=== Crafting ingredient ===
{{crafting usage|match=start}}
== Achievements ==
{{load achievements|The beginning;The beginnig?.}}
== Advancements ==
{{load advancements|Withering Heights}}
== Data values ==
=== ID ===
{{edition|java}}:
{{ID table
|edition=java
|showforms=y
|generatetranslationkeys=y
|displayname=Nether Star
|spritetype=item
|nameid=nether_star
|form=item
|foot=1}}
{{edition|bedrock}}:
{{ID table
|edition=bedrock
|showaliasids=y
|shownumericids=y
|showforms=y
|notshowbeitemforms=y
|generatetranslationkeys=y
|displayname=Nether Star
|spritetype=item
|nameid=nether_star
|aliasid=netherstar
|id=518
|form=item
|translationkey=item.netherStar.name
|foot=1}}
== Video ==
<div style="text-align:center">{{yt|H6k28iUefMo}}</div>
== History ==
{{History|java}}
{{History||1.4.2|snap=12w34a|[[File:Nether Star JE1.png|32px]] The texture of the nether star has been added.}}
{{History|||snap=12w36a|[[File:Nether Star JE1.gif|32px]] Added nether stars.
|Nether stars are [[drops|dropped]] by the [[wither]].}}
{{History|||snap=12w37a|[[File:Nether Star JE2 BE1.gif|32px]] The texture of nether stars has been changed so that they no longer have a dark outline.}}
{{History||1.4.6|snap=12w49a|[[Drops|Dropped]] nether stars can no longer be destroyed by [[explosion]]s.}}
{{History||1.13|snap=17w47a|Prior to [[1.13/Flattening|''The Flattening'']], this [[item]]'s numeral ID was 399.}}
{{History||1.14|snap=18w43a|[[File:Nether Star.gif|32px]] The texture of nether stars has been changed.}}
{{History||1.16|snap=20w07a|Nether star has become a [[renewable resource]], as [[soul sand]], one of the blocks used to construct withers, is now renewable through [[bartering]].}}
{{History|pocket alpha}}
{{History||v0.16.0|snap=build 4|[[File:Nether Star JE2 BE1.gif|32px]] Added nether stars.}}
{{History|bedrock}}
{{History||1.10.0|snap=beta 1.10.0.3|[[File:Nether Star.gif|32px]] The texture of nether stars has been changed.}}
{{History|console}}
{{History||xbox=TU19|xbone=CU7|ps=1.12|wiiu=Patch 1|switch=1.0.1|[[File:Nether Star JE2 BE1.gif|32px]] Added nether stars.}}
{{History||xbox=none|xbone=none|ps=1.90|wiiu=none|switch=none|[[File:Nether Star.gif|32px]] The texture of nether stars has been changed.}}
{{History|New 3DS}}
{{History||1.3.12|[[File:Nether Star JE2 BE1.gif|32px]] Added nether stars.}}
{{History|foot}}
== Issues ==
{{issue list}}
== Gallery ==
<gallery>
File:Nether Star JE3 BE2.png|The nether star without enchanted animated glint.
File:Star Drop.png|The nether star dropped by the wither.
File:Wither, left- Nether Star, right.png|A wither to the left, and a nether star to the right.
</gallery>
== References ==
{{reflist}}
==External Links==
*[https://www.minecraft.net/en-us/article/taking-inventory--nether-star Taking Inventory: Nether Star] – Minecraft.net on May 11, 2023
{{Items}}
[[cs:Netheritová hvězda]]
[[de:Netherstern]]
[[es:Estrella del Inframundo]]
[[fr:Étoile du Nether]]
[[hu:Alvilági csillag]]
[[it:Stella del Nether]]
[[ja:ネザースター]]
[[ko:네더의 별]]
[[nl:Netherster]]
[[pl:Netherowa gwiazda]]
[[pt:Estrela do Nether]]
[[ru:Звезда Нижнего мира]]
[[tr:Nether Yıldızı]]
[[uk:Зірка Незеру]]
[[zh:下界之星]]
[[Category:Renewable resources]]</li><li>[[Dragon's Breath|Dragon's Breath]]<br/>{{Item
| image = Dragon's Breath.png
| renewable = Yes
| stackable = Yes (64)
| rarity = Uncommon
}}
The '''dragon's breath''' is a [[brewing]] item that is used solely to make [[lingering potion]]s.
== Obtaining ==
The dragon's breath can be obtained by scooping up the [[ender dragon]]'s breath attack or the purple [[area effect cloud|effect clouds]] caused by [[dragon fireball]]s in an empty [[glass bottle]].
== Usage ==
=== Brewing ingredient ===
Dragon's breath may be added to any splash potion to upgrade it to a lingering potion, which can be used to create a lasting [[Lingering Potion#Area Effect Cloud|area effect cloud]], or to craft [[Arrow#Tipped arrows|tipped arrows]].
{{brewing
|name=[[Lingering Potion]]
|showname=1
|Dragon's Breath
|Any Lingering Potion
|base=Any Splash Potion}}
When put 2 or more dragon's breath in the brewing stand, after the brewing process, a glass bottle will drop as an [[Item (entity)|entity]]. However, if put only 1 dragon's breath in the brewing stand, after the brewing process, the glass bottle is consumed and cannot be retrieved.<ref>{{bug|MC-259583}}</ref>
== Sounds ==
{{Edition|Java}}:
{{Sound table
|sound=Bottle fill dragon breath1.ogg
|sound2=Bottle fill dragon breath2.ogg
|subtitle=Bottle fills
|source=neutral
|description=Filling a glass bottle with dragon's breath
|id=item.bottle.fill_dragonbreath
|translationkey=subtitles.item.bottle.fill
|volume=1.0
|pitch=1.0
|distance=16
|foot=1}}
{{Edition|Bedrock}}:
{{Sound table
|type=bedrock
|sound=Bottle fill dragon breath1.ogg
|sound2=Bottle fill dragon breath2.ogg
|source=sound
|description=When a bottle is filled with dragon's breath
|id=bottle.dragonbreath
|volume=0.7<wbr>{{Until|BE 1.20.40}}<br>1.0<wbr>{{Upcoming|BE 1.20.40}}
|pitch=1.0
|foot=1}}
== Achievements ==
{{Load achievements|You Need a Mint}}
== Advancements ==
{{load advancements|You Need a Mint}}
== Data values ==
=== ID ===
{{edition|java}}:
{{ID table
|edition=java
|showforms=y
|generatetranslationkeys=y
|displayname=Dragon's Breath
|spritetype=item
|nameid=dragon_breath
|form=item
|foot=1}}
{{edition|bedrock}}:
{{ID table
|edition=bedrock
|shownumericids=y
|showforms=y
|notshowbeitemforms=y
|generatetranslationkeys=y
|displayname=Dragon's Breath
|spritetype=item
|nameid=dragon_breath
|id=560
|form=item
|foot=1}}
== History ==
{{History|java}}
{{History||1.9|snap=15w33a|[[File:Dragon's Breath JE1 BE1.png|32px]] Added dragon's breath.}}
{{History||1.13|snap=17w47a|Prior to [[1.13/Flattening|''The Flattening'']], this [[item]]'s numeral ID was 437.}}
{{History||1.14|snap=18w43a|[[File:Dragon's Breath JE2 BE2.png|32px]] The texture of dragon's breath has been changed.}}
{{History|pocket}}
{{History||1.0.0|snap=alpha 0.17.0.1|[[File:Dragon's Breath JE1 BE1.png|32px]] Added dragon's breath.}}
{{History|bedrock}}
{{History||1.10.0|snap=beta 1.10.0.3|[[File:Dragon's Breath JE2 BE2.png|32px]] The texture of dragon's breath has been changed.}}
{{History|console}}
{{History||xbox=TU46|xbone=CU36|ps=1.38|wiiu=Patch 15|switch=1.0.1|[[File:Dragon's Breath JE1 BE1.png|32px]] Added dragon's breath.}}
{{History||xbox=none|xbone=none|ps=1.90|wiiu=none|switch=none|[[File:Dragon's Breath JE2 BE2.png|32px]] The texture of dragon's breath has been changed.}}
{{History|3ds}}
{{History||1.7.10|[[File:Dragon's Breath JE1 BE1.png|32px]] Added dragon's breath.}}
{{History|foot}}
== Issues ==
{{issue list}}
== Trivia ==
* If the dragon's breath is used in a [[crafting]] recipe (using a [[mod]] or a [[data pack]]), it becomes an empty bottle instead of being entirely consumed.
== References ==
{{reflist}}
==External Links==
*[https://www.minecraft.net/en-us/article/dragon-s-breath Taking Inventory: Dragon's Breath] – Minecraft.net on June 9, 2023
{{Items}}
[[Category:Renewable resources]]
[[de:Drachenatem]]
[[fr:Souffle de dragon]]
[[it:Soffio di drago]]
[[ja:ドラゴンブレス]]
[[ko:드래곤의 숨결]]
[[nl:Drakenadem]]
[[pl:Oddech smoka]]
[[pt:Bafo do dragão]]
[[ru:Драконье дыхание]]
[[zh:龙息]]
[[Category:Brewing recipe]]</li></ul> | Trees have a new shape. | ||||
0.24_06{{Extension DPL}}<ul><li>[[Baked Potato|Baked Potato]]<br/>{{Item
| title = Baked Potato
| renewable = Yes
| heals = {{hunger|5}}
| stackable = Yes (64)}}
A '''baked potato''' is a [[food]] [[item]] that can be eaten by the [[player]].
== Obtaining ==
Baked potatoes can be obtained by cooking [[potato]]es in a [[furnace]], [[smoker]], or [[campfire]].
{{Smelting
|Potato
|Baked Potato
|0,35
}}
{{IN|JE}}, baked potatoes can also be obtained by killing a zombie or one of its variants while it is on fire. The drop chance is still affected by [[Looting]].
=== Chest loot ===
{{LootChestItem|baked-potato}}
== Usage ==
To eat a baked potato, press and hold {{control|use}} while it is selected in the [[hotbar]]. Eating one restores {{hunger|5}} hunger and 6.0 hunger [[Hunger#Mechanics|saturation]].
=== Crafting ingredient ===
{{crafting usage}}
=== Composting ===
Placing a baked potato into a [[composter]] has an 85% chance of raising the compost level by 1. This is more efficient than composting with raw potatoes.
== Sounds ==
{{Sound table/Entity/Food}}
== Data values ==
=== ID ===
{{edition|java}}:
{{ID table
|edition=java
|showforms=y
|generatetranslationkeys=y
|displayname=Baked Potato
|spritetype=item
|nameid=baked_potato
|form=item
|foot=1}}
{{edition|bedrock}}:
{{ID table
|edition=bedrock
|shownumericids=y
|showforms=y
|notshowbeitemforms=y
|generatetranslationkeys=y
|displayname=Baked Potato
|spritetype=item
|nameid=baked_potato
|id=281
|form=item
|foot=1}}
== Advancements ==
{{load advancements|Husbandry;A Balanced Diet}}
== History ==
{{History|java}}
{{History||1.4.2|snap=12w34a|[[File:Baked Potato JE1.png|32px]] Added baked potatoes.}}
{{History|||snap=12w37a|[[File:Baked Potato JE2 BE1.png|32px]] The texture of baked potatoes has been slightly changed.}}
{{History||1.8|snap=14w02a|Baked potatoes now restore {{Hunger|5}} hunger points instead of 6.}}
{{History|||snap=14w27a|Baked potatoes are now used to craft [[rabbit stew]].}}
{{History||1.13|snap=17w47a|Prior to [[1.13/Flattening|''The Flattening'']], this [[item]]'s numeral ID was 393.}}
{{History||1.14|snap=18w43a|[[File:Baked Potato JE3.png|32px]] The texture of baked potatoes has been changed.}}
{{History|||snap=18w50a|[[File:Baked Potato JE4 BE2.png|32px]] The texture of baked potatoes has been changed, once again.}}
{{History|||snap=19w03a|Placing a baked potato into the new [[composter]] has an 80% chance of raising the compost level by 1.}}
{{History|||snap=19w05a|Baked potatoes now have an 85% chance of increasing the compost level in a composter by 1.}}
{{History||1.17|snap=21w13a|Baked potatoes can now be dropped by flaming [[zombie]]s.<ref>{{bug|MC-199065}}</ref>}}
{{History||1.19|snap=22w13a|Baked potatoes can now be found in [[ancient city]] ice box [[chest]]s.}}
{{History|upcoming java}}
{{History||Villager Trade Rebalance<br>(Experimental)|link=Java Edition 1.20.2|snap=23w31a|[[Wandering trader]]s now have a chance to [[trading|buy]] baked potatoes from the player.}}
{{History|pocket alpha}}
{{History||v0.8.0|snap=build 1|[[File:Baked Potato JE2 BE1.png|32px]] Added baked potatoes.}}
{{History||v0.12.1|snap=build 1|Baked potatoes now restore [[hunger]] instead of [[health]].}}
{{History||v0.13.0|snap=build 1|Baked potatoes are now used to craft [[rabbit stew]].}}
{{History|bedrock}}
{{History||1.10.0|snap=beta 1.10.0.3|[[File:Baked Potato JE4 BE2.png|32px]] The texture of baked potatoes has been changed.}}
{{History||1.11.0|snap=beta 1.11.0.1|Baked potatoes can now be used to fill up [[composter]]s.}}
{{History|console}}
{{History||xbox=TU14|xbone=CU1|ps=1.04|wiiu=Patch 1|switch=1.0.1|[[File:Baked Potato JE2 BE1.png|32px]] Added baked potatoes.}}
{{History||ps=1.00|[[File:Baked Potato JE2 BE1.png|32px]] Added baked potatoes to the [[PlayStation 4 Edition|PS4]] and [[PlayStation Vita Edition|PSVita]].}}
{{History||xbox=none|xbone=none|ps=1.90|wiiu=none|switch=none|[[File:Baked Potato JE4 BE2.png|32px]] The texture of baked potatoes has been changed.}}
{{History|new3DS}}
{{History||0.1.0|[[File:Baked Potato JE2 BE1.png|32px]] Added baked potatoes.}}
{{History|foot}}
== Issues ==
{{issue list}}
== See also ==
* {{ItemLink|Poisonous Potato}}
{{Items}}
[[Category:Food]]
[[Category:Renewable resources]]
[[cs:Pečená brambora]]
[[de:Ofenkartoffel]]
[[es:Patata cocida]]
[[fr:Pomme de terre cuite]]
[[hu:Sült burgonya]]
[[it:Patata al forno]]
[[ja:ベイクドポテト]]
[[ko:구운 감자]]
[[nl:Gebakken aardappel]]
[[pl:Pieczony ziemniak]]
[[pt:Batata assada]]
[[ru:Печёный картофель]]
[[th:มันฝรั่งอบ]]
[[zh:烤马铃薯]]</li><li>[[Smarter Watch|Smarter Watch]]<br/>{{Joke feature}}{{Exclusive|Java}}{{Item
| title = Smarter Watch
| image = Smarter Watch.png
| renewable = No
| stackable = Yes (64)
}}
The '''Smarter Watch''' was a joke offhand [[item]].
== Usage ==
Smarter watches were "equipped" by having them placed into the offhand slot. Upon equipping, they would display the current time above the hotbar, in minutes and seconds, with one minute of in-game time being 5/6 of a real-time second, and one in-game hour being 5/6 of a real-time minute or 50 seconds.
The smarter watch would also notify the [[player]] of statistics milestones, alongside taken [[damage]], [[item]] specific info, [[crafting]] items and more.{{info needed|What exactly?}}
== Sounds ==
{{Sound table
|sound=Tick1.ogg
|sound2=Tick2.ogg
|subtitle=''None''
|source=player
|description=When a notification is displayed
|id=item.smarter_watch.notice
|translationkey=''None''
|volume=1.0
|pitch=1.0
|distance=16
|foot=1}}
== Data values ==
=== ID ===
{{ID table
|edition=java
|shownumericids=y
|showforms=y
|generatetranslationkeys=y
|displayname=Smarter Watch
|spritetype=item
|nameid=smarter_watch
|id=502
|form=item
|translationkey=item.smarterWatch.name
|foot=1}}
== History ==
{{History|java}}
{{History||1.RV|snap=1.RV-Pre1|[[File:Smarter_Watch_(item).png|32px]] [[File:Smarter Watch.png|32px]] Added the smarter watch.}}
{{History|foot}}
== Issues ==
Smarter Watches are an unsupported [[item]] due to being an [[Wikipedia:April Fools' Day|April Fools']] joke, and therefore issues relating to them will not be fixed.
== Gallery ==
<gallery>
TechGear.png|A [[player]] wearing the smarter watch, featured in this [[wikipedia:April Fools' Day|April Fools']] joke version.
</gallery>
{{Items}}
{{Jokes}}
[[Category:Non-renewable resources]]
[[Category:Joke items]]
[[pt:Relógio inteligente]]</li></ul> | Added tree growth. | ||||
0.29_01{{Extension DPL}}<ul><li>[[:Category:Invalid data value items|Category:Invalid data value items]]<br/>[[Category:Items]]</li><li>[[Painting|Painting]]<br/>{{ItemEntity
|title=Painting
|image=Painting JE2 BE2.png
|extratext=View [[#Renders|all renders]]
|renewable=Yes
|stackable=Yes (64)
|drops=1 {{ItemLink|Painting}}
}}
'''Paintings''' are decorative [[entity|entities]] that hang on walls.
== Obtaining ==
=== Crafting ===
{{Crafting
|A1= Stick |B1= Stick |C1= Stick
|A2= Stick |B2= Any Wool |C2= Stick
|A3= Stick |B3= Stick |C3= Stick
|Output= Painting
|type= Decoration block
}}
Paintings can be crafted with any color of [[wool]]. The color of the wool used does not influence the picture chosen when the painting is placed.
Once placed, it displays a random painting.
=== Breaking ===
To remove a painting from a wall, the player can {{control|attack}} it, break one of its supporting blocks, cover one square of it with a block, hit it with an arrow, egg, ender pearl, snowball, or fire charge, or subject it to an explosion. The painting then drops as an item. Arrows that hit paintings disappear.
=== Trading ===
Master-level shepherd [[villager]]s sell 3 paintings for 2 [[emerald]]s.
== Usage ==
=== Placement ===
Paintings can be placed on the sides of [[solid block]]s, [[sign]]s, [[banner]]s, or [[sculk vein]]s. A small gap is visible between the painting and attachment surface. There are several different sizes of paintings (see below). When placed, a painting checks for the largest amount of space it has. It then chooses a random painting of that size. The player can add blocks around the painting to ensure it is the size wanted. When the supporting blocks are removed, the painting breaks after 20 game [[tick]]s (1 second) if no supporting blocks are replaced during that interval.
=== Properties ===
Being an entity, paintings can simultaneously exist in the same space as blocks such as water or torches. Specifically, they can share the space with any block whose collision box does not intersect its hitbox.
Players and mobs are able to walk through paintings, as long as the blocks supporting the painting allow it. Secret doorways can be created this way. [[Light]] propagates through paintings as well.
If a player is concealed behind a painting, the player's name is also concealed from other players.{{verify|Is this true in Bedrock?}}
Paintings are non-flammable.
== Canvases ==
{{Stub|Needing the new painting renders}}
There are 31 paintings in the game. These are mostly based on paintings by [[Kristoffer Zetterstrand]], who also created the ''Minecraft'' versions.
{| class="wikitable stikitable" style="text-align: center" data-description="Paintings"
! style="min-width:150px" |Canvas
! style="min-width:3em;max-width:4em" |Size
! style="min-width:3em" |Original
! style="min-width:3em" |Name
! style="min-width:3em;max-width:4.5em" |[[Resource location]]
! style="min-width:10em" |Description
! Java Edition version added
|-
! [[File:Alban (texture).png|64px]]
| rowspan="7" | 1×1 blocks<br>16×16 pixels || [https://zetterstrand.com/work/pictures/archive/alban.jpeg "Albanian"] || Albanian || <code>alban</code> || A man wearing a fez next to a house and a bush. As the name of the painting suggests, it may be a landscape in [[Wikipedia:Albania|Albania]]. || rowspan="9" | [[Indev 20100223]]
|-
! [[File:Aztec (texture).png|64px]]
|[https://zetterstrand.com/eventz/wp-content/uploads/2aztbig.jpg "de_aztec"]|| de_aztec || <code>aztec</code> || [[Wikipedia:Noclip mode|Free-look]] perspective of the map [[w:c:counterstrike:Aztec|de_aztec]] from the video game ''[[Wikipedia:Counter-Strike (video game)|Counter-Strike]]''.
|-
! [[File:Aztec2 (texture).png|64px]]
|[https://zetterstrand.com/eventz/wp-content/uploads/11aztec_for_print.jpg "de_aztec"]|| de_aztec || <code>aztec2</code> || [[Wikipedia:Noclip mode|Free-look]] perspective of the map [[w:c:counterstrike:Aztec|de_aztec]] from the video game ''[[Wikipedia:Counter-Strike (video game)|Counter-Strike]]''.
|-
! [[File:Bomb (texture).png|64px]]
|[https://zetterstrand.com/eventz/wp-content/uploads/12bomb.jpg "Target successfully bombed"]|| Target Successfully Bombed || <code>bomb</code> || The map [[w:c:counterstrike:Dust II|de_dust2]] from the video game ''[[Wikipedia:Counter-Strike (video game)|Counter-Strike]]'', named “target successfully bombed" in reference to the game.
|-
! [[File:Kebab (texture).png|64px]]
|[https://zetterstrand.com/work/pictures/archive/kebab2.jpg "Kebab med tre pepperoni"] || Kebab med tre pepperoni || <code>kebab</code> || A kebab with three green chili peppers.
|-
! [[File:Plant (texture).png|64px]]
|[https://zetterstrand.com/work/pictures/archive/paradistrad.jpeg "Paradisträd"] || Paradisträd || <code>plant</code> || Still life of two plants in pots. "Paradisträd" is Swedish for "[[Wikipedia:Crassula ovata|money tree]]", which is a common name for the depicted species in Scandinavia.
|-
! [[File:Wasteland (texture).png|64px]]
|[https://zetterstrand.com/eventz/wp-content/uploads/Wasteland_1920.jpg "Wasteland"]|| Wasteland || <code>wasteland</code> || A view of some wastelands; a small animal (presumably a rabbit) is sitting on the window ledge.
|-
! [[File:Courbet (texture).png|128px]]
| rowspan="5" | 2×1 blocks<br>32×16 pixels ||[https://zetterstrand.com/eventz/wp-content/uploads/bonjourmonsieurcourbet_BIG.jpg "Bonjour monsieur Courbet"]|| Bonjour Monsieur Courbet || <code>courbet</code> || Two hikers with pointy beards seemingly greeting each other. Based on Gustave Courbet's painting ''[[Wikipedia:La rencontre|The Meeting or "Bonjour, Monsieur Courbet"]]''.
|-
! [[File:Pool (texture).png|128px]]
|[https://zetterstrand.com/eventz/wp-content/uploads/thepool_1920.jpg "The pool"]|| The Pool || <code>pool</code> || Some men and women skinny-dipping in a pool over a cube of sorts. Also there is an old man resting in the lower-right edge.
|-
! [[File:Sea (texture).png|128px]]
| rowspan=2 |[https://zetterstrand.com/eventz/wp-content/uploads/SeaSide_1920.jpg "Seaside"]
| Seaside
| <code>sea</code>
| Mountains and a lake, with a small photo of a mountain and a bright-colored plant on the window ledge. || [[Indev 20100223]] / [[Alpha v1.1.1]]
|-
! [[File:Creebet (texture).png|128px]]
| Creebet || <code>creebet</code> || Mountains and a lake, with a small photo of a mountain and a creeper looking at the viewer through a window. || [[Alpha v1.1.1]]
|-
! [[File:Sunset (texture).png|128px]]
|[https://zetterstrand.com/eventz/wp-content/uploads/sunset_dense.jpg "sunset_dense"]|| sunset_dense || <code>sunset</code> || A view of mountains at sunset. || [[Indev 20100223]]
|-
! [[File:Graham (texture).png|64px]]
| rowspan="2" | 1×2 blocks<br>16×32 pixels ||[https://zetterstrand.com/eventz/wp-content/uploads/graham.jpg "Graham"]|| Graham || <code>graham</code> || King Graham, the player character in the video game series ''[[Wikipedia:King's Quest|King's Quest]]''. The original is based on ''[[Wikipedia:File:Sánchez_Cotán_(Bodegón_con_membrillo,_repollo,_melón_y_pepino).jpg|Still Life with Quince, Cabbage, Melon, and Cucumber]]'' by Juan Sánchez Cotán.|| [[Alpha v1.1.1]]
|-
! [[File:Wanderer (texture).png|64px]]
|[https://zetterstrand.com/eventz/wp-content/uploads/wanderer_1920.jpg "Wanderer"]|| Wanderer || <code>wanderer</code> || A version of Caspar David Friedrich's famous painting ''[[Wikipedia:Wanderer above the Sea of Fog|Wanderer above the Sea of Fog]]''. || rowspan="4" | [[Indev 20100223]]
|-
! [[File:Bust (texture).png|128px]]
| rowspan="6" | 2×2 blocks<br>32×32 pixels ||[https://zetterstrand.com/eventz/wp-content/uploads/bust_1915.jpg "Bust"]|| Bust || <code>bust</code> || A bust of [[Wikipedia:Marcus Aurelius|Marcus Aurelius]] surrounded by fire.
|-
! [[File:Match (texture).png|128px]]
|[https://zetterstrand.com/eventz/wp-content/uploads/Match_rgb_1918.jpg "Match"]|| Match || <code>match</code> || A hand holding a match, causing fire on a white cubic gas fireplace.
|-
! [[File:Skull and Roses (texture).png|128px]]
|[https://zetterstrand.com/eventz/wp-content/uploads/moonlight-installation_1920.jpg "Moonlight Installation"]|| Skull and Roses || <code>skull_and_roses</code> || A skeleton at night with red flowers in the foreground. The original painting was different, depicting a woman sitting in a couch, while the skull is in the middle of a body of glacial water of sorts.
|-
! [[File:Stage (texture).png|128px]]
|[https://zetterstrand.com/eventz/wp-content/uploads/The-stage-is-set-1.jpg "The stage is set"]
| The Stage Is Set
| <code>stage</code>
| Scenery from ''[[Wikipedia:Space Quest I|Space Quest I]]'', with the character Graham from the video game series ''[[Wikipedia:King's Quest|King's Quest]]'' appearing twice. || [[Indev 20100223]] / [[Alpha v1.1.1]]
|-
! [[File:Void (texture).png|128px]]
|[https://zetterstrand.com/eventz/wp-content/uploads/the-void_1920.jpg "The Void"]|| The void || <code>void</code> || An angel praying into a void with fire below. || [[Indev 20100223]]
|-
! [[File:Wither (painting texture).png|128px]]
| – || Wither || <code>wither</code> || The creation of a [[wither]].
This is the only painting not based on a real painting. Made by Jens Bergensten.<ref>{{Citation|url=https://www.youtube.com/watch?v=kK5Y4k-vVXc|title=Who Made Minecraft’s LAST Painting?!|author=AntVenom|website=YouTube|date=29 October 2022}}</ref><ref>https://www.reddit.com/r/Minecraft/comments/1tzav2/comment/cedagcy/</ref>
|| [[Java Edition 1.4.2]] ([[12w36a]])
|-
! [[File:Fighters (texture).png|128px]]
| 4×2 blocks<br>64×32 pixels ||[https://zetterstrand.com/eventz/wp-content/uploads/fighters.jpg "Fighters"]|| Fighters || <code>fighters</code> || Two men poised to fight. Paper versions of fighters from the game ''[[Wikipedia:International Karate +|International Karate +]]''. || [[Indev 20100223]]
|-
! [[File:Donkey Kong (texture).png|128px]]
| rowspan="2" | 4×3 blocks<br>64×48 pixels ||[https://zetterstrand.com/eventz/wp-content/uploads/kong.jpg "Kong"]|| Kong || <code>donkey_kong</code> || A paper-looking screenshot of the level [https://www.mariowiki.com/100m 100m] from the arcade game ''[[Wikipedia:Donkey Kong (arcade game)|Donkey Kong]]''. || rowspan="2" | [[Alpha v1.1.1]]
|-
! [[File:Skeleton (painting texture).png|128px]]
|[https://zetterstrand.com/eventz/wp-content/uploads/mortal_coil.jpg "Mortal Coil"]|| Mortal Coil || <code>skeleton</code> || [[w:c:grim-fandango:Bruno Martinez|Bruno Martinez]] from the adventure game ''[[Wikipedia:Grim Fandango|Grim Fandango]]''.
|-
! [[File:Burning Skull (texture).png|128px]]
| rowspan="3" | 4×4 blocks<br>64×64 pixels ||[https://zetterstrand.com/eventz/wp-content/uploads/skull_on_fire_framed_c_1910.jpg "Skull on Fire"]|| Skull On Fire || <code>burning_skull</code> || A Skull on fire; in the background there is a moon in a clear night sky.<br>This painting is based on a Minecraft screenshot,<ref>{{Citation|url=https://web.archive.org/web/20220928041338/https://imgur.com/HVhrbnH|website=Imgur|date=22 August 2020|title=https://web.archive.org/web/20220928041338/https://imgur.com/HVhrbnH}}</ref> with the grass block and a 3D skull added on top.<ref>{{Citation|url=https://web.archive.org/web/20200906184721/https://imgur.com/AwqQFS6|title=https://web.archive.org/web/20200906184721/https://imgur.com/AwqQFS6|website=Imgur|date=23 August 2020}}</ref>
(See the [[:en:Painting#Trivia|trivia]] section for more info.)
| [[Java Edition Beta 1.2 01|Beta 1.2_01]] / [[Java Edition Beta 1.3|Beta 1.3]]
|-
! [[File:Pigscene (texture).png|128px]]
|[https://zetterstrand.com/eventz/wp-content/uploads/rgb_1914.jpg "RGB"]|| Pigscene || <code>pigscene</code> <!-- yes, without an underscore --> || A girl pointing to a pig on a canvas. In the original version, the canvas showed red, green and blue blocks, representing the three colors of the [[Wikipedia:RGB color model|RGB color model]] that is typically used by computer displays. It is based on the painting ''[[Wikipedia:File:Jacob van Oost (I) - The Artist's Studio - WGA16654.jpg|The Artist's Studio]]'' by Jacob van Oost.|| [[Alpha v1.1.1]]
|-
! [[File:Pointer (texture).png|128px]]
|[https://zetterstrand.com/eventz/wp-content/uploads/pointer_1920.jpg "Pointer"]|| Pointer || <code>pointer</code> || The main character of the game ''[[Wikipedia:International Karate +|International Karate +]]'' in a fighting stance touching a large hand. It could also be interpreted as a play on Michelangelo's famous painting ''[[Wikipedia:The Creation of Adam|The Creation of Adam]]''. || [[Indev 20100223]]
|-
! TBA ||
Pack || <code>pack</code> || Reference to the pack.png fi || [[Java Edition 1.21]]le
|}
=== Unused paintings ===
In [[Pocket Edition v0.5.0 alpha|v0.5.0 alpha]], with the addition of paintings to Pocket Edition, four unused 32×32 paintings were present in <samp>[[kz.png]]</samp> which remained unused. See {{slink|Bedrock Edition unused features|Paintings}} for more information. They were also added to Java Edition in snapshot [[Java Edition 22w16a|22w16a]]. They cannot be placed by default, but can be summoned by [[commands]] (such as {{cmd|/summon painting ~ ~ ~ {variant:"water"} }}) or through a [[datapack]].
According to [[Helen Zbihlyj]],<ref>https://old.reddit.com/r/Minecraft/comments/u8hpnx/thoughts_on_the_new_paintings/i5olue6/?context=3 ([https://web.archive.org/web/20220422115723/https://old.reddit.com/r/Minecraft/comments/u8hpnx/thoughts_on_the_new_paintings/i5olue6/?context=3 archived])</ref> these paintings were originally added "as part of a Pocket Edition promo map" (no footage found) which was planned to be a part of [[Pocket Edition]] promotion at [[MINECON 2012]] [[MINECON 2013|or 2013]] and have never been used in game. The artist of these paintings remains unknown.
{| class="wikitable stikitable" style="text-align: center" data-description="Paintings"
! style="min-width:100px" |Canvas
! style="min-width:3em;max-width:4em" |Size
! style="min-width:6em" |Name
! style="min-width:10em" |[[Resource location]]
! style="min-width:10em" |Description
! style="min-width:5em;max-width:10em" |Bedrock Edition version added
! style="min-width:5em;max-width:8em" |Java Edition version added
|-
! [[File:Earth (texture) BE2.png|128px]]
| rowspan="4" | 2×2 blocks<br>32×32 pixels || Earth || <code>earth</code> || One of the four {{Wikipedia|Classical element|classical elements}}: Earth. || rowspan="4" | [[Pocket Edition v0.5.0 alpha|v0.5.0 alpha]] || rowspan="4" | [[Java Edition 22w16a|22w16a]]
|-
! [[File:Fire (texture) BE2.png|128px]]
| Fire || <code>fire</code> || One of the four classical elements: Fire.
|-
! [[File:Water (texture) BE2.png|128px]]
| Water || <code>water</code> || One of the four classical elements: Water.
|-
! [[File:Wind (texture) BE2.png|128px]]
| Wind || <code>wind</code> || One of the four classical elements: Air.
|}
==Sounds==
{{Edition|Java}}:
{{Sound table
|sound=Painting break1.ogg
|sound2=Painting break2.ogg
|sound3=Painting break3.ogg
|subtitle=Painting breaks<ref>{{Cite bug|MC|194948|Painting, item frame and lead breaking subtitles inconsistent with block breaking subtitle|date=July 14, 2020}}</ref>
|source=neutral
|description=When a painting is broken or pops off
|id=entity.painting.break
|translationkey=subtitles.entity.painting.break
|volume=1.0
|pitch=1.0
|distance=16}}
{{Sound table
|sound=Painting place1.ogg
|sound2=Painting place2.ogg
|sound3=Painting place3.ogg
|sound4=Painting place4.ogg
|subtitle=Painting placed
|source=neutral
|description=When a painting is placed
|id=entity.painting.place
|translationkey=subtitles.entity.painting.place
|volume=1.0
|pitch=1.0
|distance=16
|foot=1}}
{{Edition|Bedrock}}:
{{Sound table
|type=bedrock
|sound=Item Frame break1.ogg
|sound2=Item Frame break2.ogg
|sound3=Item Frame break3.ogg
|source=block
|description=When a painting is broken or pops off
|id=block.itemframe.break
|volume=1.0
|pitch=1.0}}
{{Sound table
|sound=Item Frame add item1.ogg
|sound2=Item Frame add item2.ogg
|soumd3=Item Frame add item3.ogg
|sound4=Item Frame add item4.ogg
|source=block
|description=When a painting is placed
|id=block.itemframe.add_item
|volume=1.0
|pitch=1.0
|foot=1}}
== Data values ==
=== ID ===
{{edition|java}}:
{{ID table
|edition=java
|firstcolumnname=Item
|showforms=y
|generatetranslationkeys=y
|displayname=Painting
|spritetype=item
|nameid=painting
|form=item
|foot=1}}
{{ID table
|edition=java
|firstcolumnname=Entity
|generatetranslationkeys=y
|displayname=Painting
|spritetype=entity
|nameid=painting
|foot=1}}
{{edition|bedrock}}:
{{ID table
|edition=bedrock
|firstcolumnname=Item
|shownumericids=y
|showforms=y
|notshowbeitemforms=y
|generatetranslationkeys=y
|displayname=Painting
|spritetype=item
|nameid=painting
|id=357
|form=item
|foot=1}}
{{ID table
|edition=bedrock
|firstcolumnname=Entity
|shownumericids=y
|generatetranslationkeys=y
|displayname=Painting
|spritetype=entity
|nameid=painting
|id=83
|foot=1}}
=== Entity data ===
Paintings have entity data that defines various properties of the entity.
{{el|java}}:
{{main|Entity format}}
{{/ED}}
{{el|bedrock}}:
: See [[Bedrock Edition level format/Entity format]].
== Video ==
<div style="text-align:center">{{yt|M3vWDirTMek}}</div>
== History ==
{{History|java indev}}
{{History||20100223|[[File:Painting JE1 BE1.png|32px]] Added paintings.
|There are currently 19 canvases, which can be viewed at [[Java Edition history of textures/Paintings]].
|The [[crafting]] recipe of paintings uses eight [[planks]].
{{{!}} class{{=}}"collapsible collapsed"
! Recipe
{{!}}-
{{!}}
{{Crafting Table
|A1=Oak Planks
|B1=Oak Planks
|C1=Oak Planks
|A2=Oak Planks
|B2=Light Gray Wool
|C2=Oak Planks
|A3=Oak Planks
|B3=Oak Planks
|C3=Oak Planks
|Output=Painting
}}
{{!}}}
|Painting textures are currently stored on a [[texture atlas]] called <samp>[[kz.png]]</samp>.}}
{{History|java infdev}}
{{History||20100227-1|The [[crafting]] recipe has of paintings has been changed, so that it now uses [[stick]]s, rather than [[planks]].
{{{!}} class{{=}}"collapsible collapsed"
! Recipe
{{!}}-
{{!}}
{{Crafting Table
|A1=Stick
|B1=Stick
|C1=Stick
|A2=Stick
|B2=Light Gray Wool
|C2=Stick
|A3=Stick
|B3=Stick
|C3=Stick
|Output=Painting
}}
{{!}}}
}}
{{History|java alpha}}
{{History||v1.1.1|Added five more painting canvases, for a total of 24.
|The textures of two paintings have been changed.}}
{{History|java beta}}
{{History||1.2_01|Added a new painting, although it uses an untextured part of <samp>kz.png</samp> due to the painting texture not yet being implemented.}}
{{History||1.3|The texture of the new painting, has been added to the part of <samp>kz.png</samp> displayed by the new painting.}}
{{History||April 27, 2011|link=https://web.archive.org/web/20201111211000/https://notch.tumblr.com/post/4988431144/the-maps|Custom paintings are mentioned by [[Notch]].}}
{{History||1.7.3|Paintings pushed by [[piston]]s now pop off.}}
{{History|java}}
{{History||1.4.2|snap=12w36a|Added new painting canvas 'Wither'.
|Paintings can now be placed overlapping one another.}}
{{History||1.8|snap=14w10a|Paintings can no longer be placed directly inside of each other.}}
{{History||1.9|snap=15w49a|Paintings can no longer be destroyed by [[lightning]].}}
{{History|||snap=15w50a|Added [[sound]]s for placing and breaking paintings: <code>entity.painting.place</code> and <code>entity.painting.break</code>.}}
{{History||1.11|snap=16w32a|The [[entity]] ID for paintings has been changed from <code>Painting</code> to <code>painting</code>.}}
{{History||1.12|snap=17w06a|Paintings now have a more intuitive placement system. When placed, a painting always uses the maximum possible amount of available space.}}
{{History||1.13|snap=17w47a|Prior to [[1.13/Flattening|''The Flattening'']], this [[item]]'s numeral ID was 321.}}
{{History|||snap=18w02a|Paintings now use a [[resource location]] for their motive.}}
{{History||1.14|snap=18w43a|[[File:Painting JE2 BE2.png|32px]] The [[item]] texture of paintings has been changed.}}
{{History|||snap=19w07a|Paintings are now stored as individual image files instead of parts of a single large image file, and now support animations.}}
{{History|||snap=19w11a|Shepherd [[villager]]s now [[trading|sell]] paintings.}}
{{History||1.17|snap=21w11a|The painting back texture has been updated to be in line with the texture update.}}
{{History||1.19|snap=22w16a|Added the four unused paintings from Bedrock Edition: "Earth", "Wind", "Fire", and "Water".|These paintings can only be added through a [[data pack]], or with the {{cmd|summon}} command.}}
{{History||1.19.4|snap=23w06a|Added [[painting]] variants to "Functional Blocks" tab.|Paintings with pre-defined variant will now display author, title and size in description when hovered over.|The "Operator Utilities" tab now contains the four paintings that are not available in Survival mode.}}
{{History||1.21|snap=TBA|Added 5 new paintings, one 1x1, one 2x1, one 2x2, one 3x2 and one 4x4}}
}
{{History|pocket alpha}}
{{History||v0.5.0|[[File:Painting JE1 BE1.png|32px]] Added paintings.
|There are currently 25 canvases, which can be viewed at [[Bedrock Edition history of textures/Paintings]].}}
{{History||v0.8.0|snap=build 3|A new painting rendering has been added.{{info needed|What exactly changed?}}}}
{{History||v0.12.1|snap=build 1|Paintings are no longer available from the [[nether reactor]].}}
{{History||v0.15.0|snap=build 1|Paintings now have [[sound]]s when placed and broken.}}
{{History|pocket}}
{{History||1.0.7|Added new painting canvas 'Wither'.}}
{{History|bedrock}}
{{History||1.10.0|snap=beta 1.10.0.3|[[File:Painting JE2 BE2.png|32px]] The [[item]] texture of paintings has been changed.}}
{{History||1.11.0|snap=beta 1.11.0.4|Paintings can now be [[trading|bought]] from shepherd [[villager]]s.}}
{{History||1.17.0|snap=beta 1.17.0.50|The painting back texture has been updated to be in line with the texture update.}}
{{History|console}}
{{History||xbox=TU1|xbone=CU1|ps=1.0|wiiu=Patch 1|switch=1.0.1|[[File:Painting JE1 BE1.png|32px]] Added paintings.
|There are currently 25 canvases, which can be viewed at [[Legacy Console Edition history of textures/Paintings]].}}
{{History||xbox=TU11|The limit for paintings in a world has been increased.
|A message is now displayed when the maximum paintings are reached.}}
{{History||xbox=TU14|ps=1.04|Added new painting canvas 'Wither'.}}
{{History||xbox=TU43|xbone=CU33|ps=1.36|wiiu=Patch 13|Added [[sound]]s for paintings.}}
{{History||xbox=none|xbone=none|ps=1.90|wiiu=none|switch=none|[[File:Painting JE2 BE2.png|32px]] The [[item]] texture of paintings has been changed.}}
{{History|3ds}}
{{History||0.1.0|[[File:Painting JE1 BE1.png|32px]] Added paintings.
|There are currently 25 canvases, which can be viewed at [[New Nintendo 3DS Edition history of textures/Paintings]].}}
{{History|foot}}
== Issues ==
{{issue list}}
== Trivia ==
* On April 26, 2011, Notch stated that the automapping code can be used to share custom paintings and books in the future.<ref>{{tweet|notch|62970142207913984|The auto mapping code can be used to share custom paintings and books in the future. There's a hard cap on 65536 of each/world, though|April 26, 2011}}</ref>
* The texture on the back of a painting is the same as the wooden planks texture, but with a yellowish color similar to that of [[chests]] (but slightly darker).
* The "Skull on Fire" painting contains a Minecraft world in the background, which is based on a screenshot taken by the artist in [[Java Edition Alpha v1.1.2 01|Alpha 1.1.2_01]] (or earlier) on October 12, 2010, at 13:22:49 (UTC+2).<ref>{{cite|url=https://web.archive.org/web/20220928041338/https://imgur.com/HVhrbnH|title=The original (never publicly shared before) screenshot that Kristoffer Zetterstrand took and based his painting on.|website=Imgur}}</ref>
**The seeds for this world are -1044887956651363087 and -6984854390176336655 (both are the same), standing at X=-249.65, Y=91, Z=-29.04.<ref>https://pastebin.com/fzAY9ES4</ref><ref>https://www.reddit.com/r/Minecraft/comments/iqg3ey/the_original_screenshot_seed_of_the_minecraft/</ref>
* The "Skull on Fire" painting's texture was added in [[Java Edition Beta 1.3|Beta 1.3]]. However, the code for paintings to randomly display the part of the [[Kz.png]] texture that was to be occupied by the Burning Skull painting was added earlier, in [[Java Edition Beta 1.2_01|Beta 1.2_01]]. As there was nothing on this part of the texture except for a purple background grid, this is what would be displayed if the painting was randomly chosen, until the Burning Skull painting texture was actually added.
* The original "Skull on Fire" painting was given to the winner of an official texture pack competition by Mojang.<ref>https://web.archive.org/web/20110110003612/http://www.webhallen.com:80/minecraft/</ref>
== Gallery ==
<gallery>
File:Notch Painting Screenshot.png|The first image of paintings released by [[Notch]].
File:Skull on Fire world.jpg|The original screenshot behind the "Skull on Fire" painting.
File:Burning Skull Render.jpg|A render of the "Skull on Fire" painting that [[Kristoffer Zetterstrand]] used as a reference image.
File:Skull on Fire IRL.jpg|The original "Skull on Fire" painting being painted.
File:Burning Skull JE1.png|The "Skull on Fire" painting as it appeared between versions [[Java Edition Beta 1.2_01|Beta 1.2_01]] and [[Java Edition Beta 1.2_02|Beta 1.2_02]], prior to its texture being added in [[Java Edition Beta 1.3|Beta 1.3]].
</gallery>
=== Renders ===
<gallery>
Alban.png | Albanian
Aztec.png | de_aztec
Aztec2.png | de_aztec
Bomb.png | Target Successfully Bombed
Kebab.png | Kebab med tre pepperoni
Plant.png | Paradisträd
Wasteland.png | Wasteland
Courbet.png | Bonjour Monsieur Courbet
Creebet.png | Creebet
Pool.png | The Pool
Sea.png | Seaside
Sunset.png | sunset_dense
Graham.png | Graham
Wanderer.png | Wanderer
Bust.png | Bust
Match.png | Match
Skull and Roses.png | Skull and Roses
Stage.png | The Stage Is Set
Void.png | The void
Wither (painting).png | Wither
Fighters.png | Fighters
Donkey Kong.png | Kong
Skeleton (painting).png | Mortal Coil
Burning Skull.png | Skull On Fire
Pigscene.png | Pigscene
Pointer.png | Pointer
Earth BE2.png | Earth
Fire BE2.png | Fire
Water BE2.png | Water
Wind BE2.png | Wind
</gallery>
== See also ==
* [[Item Frame]]
* [[Bedrock Edition unused features#Paintings|Unused paintings]]
* [[Kz.png]]
* [[Kristoffer Zetterstrand]]
== References ==
{{reflist}}
== External links ==
*[https://www.minecraft.net/en-us/article/taking-inventory-painting Taking Inventory: Painting] – Minecraft.net on January 18, 2019
{{items}}
{{entities}}
[[cs:Obraz]]
[[de:Gemälde]]
[[es:Cuadro]]
[[fr:Tableau]]
[[hu:Festmény]]
[[it:Quadro]]
[[ja:絵画]]
[[ko:그림]]
[[nl:Schilderij]]
[[pl:Obraz]]
[[pt:Quadro]]
[[ru:Картина]]
[[th:ภาพวาด]]
[[uk:Картина]]
[[zh:画]]</li></ul> | Growing trees on a multiplayer server is now optional. | ||||
| infdev | |||||
March 20, 2010{{Extension DPL}}<ul><li>[[Rabbit's Foot|Rabbit's Foot]]<br/>{{Item
| image = Rabbit's Foot.png
|type=
| renewable = Yes
| stackable = Yes (64)
}}
A '''rabbit's foot''' is a [[brewing]] item obtained from [[rabbit]]s.
== Obtaining ==
=== Mob loot ===
Each [[rabbit]] has a 10% chance to drop a rabbit's foot when killed by the [[player]]. This chance can be increased by 3% per level using a sword enchanted with [[Looting]].
A [[fox]] sometimes spawns with a rabbit's foot in its mouth, which always drops upon death. Alternatively, the player can drop a [[food]] item, which causes the fox to drop the rabbit's foot.
=== Cat gifts ===
{{main|Cat#Gifts}}
A tamed [[cat]] has a 70% chance of giving the player a gift when the player wakes up from a [[bed]], and the gift has a 16.13% chance to be a rabbit's foot.
== Usage ==
=== Brewing ingredient ===
{{Brewing
|head=1
|Rabbit's Foot
|Mundane Potion
|base=Water Bottle
}}
{{brewing
|foot=1
|showname=1
|Rabbit's Foot
|Potion of Leaping
}}
=== Trading ===
Journeyman-level cleric [[villager]]s buy rabbit's feet for an [[emerald]] as part of their trade: {{in|java}} they buy 2, and {{in|bedrock}} they buy 4.
== Video ==
<div style="text-align:center">{{yt|Ba3QN3uCniU}}</div>
== Data values ==
=== ID ===
{{edition|java}}:
{{ID table
|edition=java
|showforms=y
|generatetranslationkeys=y
|displayname=Rabbit's Foot
|spritetype=item
|nameid=rabbit_foot
|form=item
|foot=1}}
{{edition|bedrock}}:
{{ID table
|edition=bedrock
|shownumericids=y
|showforms=y
|notshowbeitemforms=y
|generatetranslationkeys=y
|displayname=Rabbit's Foot
|spritetype=item
|nameid=rabbit_foot
|id=528
|form=item
|foot=1}}
== History ==
{{History|java}}
{{History||1.8|snap=June 30, 2014|slink=https://twitter.com/TheMogMiner/status/483636993780232192|[[Ryan Holtz]] tweeted images of a rabbit's foot with some other new [[item]]s.}}
{{History|||snap=14w27a|[[File:Rabbit's Foot JE1.png|32px]] Added rabbit's foot.
|Added the [[potion of Leaping]]; it is [[brewing|brewed]] by adding a rabbit's foot to an [[awkward potion]]. The rabbit's foot also creates the [[mundane potion]] when brewed into a [[water bottle]].}}
{{History|||snap=14w33b|[[File:Rabbit's Foot JE2 BE1.png|32px]] The texture of the rabbit's foot has been changed. The new texture was created by [[wikipedia:Reddit|Reddit]] user [http://www.reddit.com/u/zeldahuman zeldahuman].<ref>{{reddit|2bjzes/a_reminder_of_the_blocks_and_items_added_in_18_so|cj69zie|context=3}}</ref><ref>{{reddit|2c5f35/minecraft_snapshot_14w31a_has_been_released|cjct7gb}}</ref>}}
{{History||1.8.1|snap=pre1|Potions of Leaping, which use rabbit's foot, can now be extended using [[redstone]].}}
{{History||1.9|snap=15w46a|The drop rate of rabbit's foot has been quadrupled.{{more info|Before/After rates}}}}
{{History||1.13|snap=17w47a|Prior to [[1.13/Flattening|''The Flattening'']], this [[item]]'s numeral ID was 414.}}
{{History||1.14|snap=18w43a|[[File:Rabbit's Foot JE3 BE2.png|32px]] The texture of rabbit's foot has been changed.}}
{{History|||snap=18w44a|[[Cat]]s now offer rabbit's feet as [[Cat#Gifts|gifts]].}}
{{History|||snap=19w07a|Added [[fox]]es, which sometimes spawn with rabbit's feet in their mouths.}}
{{History|||snap=19w11a|Cleric [[villager]]s now [[trading|buy]] rabbit's feet.}}
{{History|pocket alpha}}
{{History||v0.12.1|snap=build 1|[[File:Rabbit's Foot JE2 BE1.png|32px]] Added rabbit's foot to the [[Creative]] mode [[inventory]].}}
{{History||v0.13.0|snap=build 1|Rabbit's foot can now be obtained as a rare [[drops|drop]] upon killing [[rabbit]]s.
|Rabbit's foot can now be [[brewing|brewed]] to make [[potions of Leaping]].}}
{{History|bedrock}}
{{History||1.8.0|snap=beta 1.8.0.8|Tamed [[cat]]s can now give the [[player]] rabbit's foot as a gift.}}
{{History||1.10.0|snap=beta 1.10.0.3|[[File:Rabbit's Foot JE3 BE2.png|32px]] The texture of rabbit's foot has been changed.}}
{{History||1.11.0|snap=beta 1.11.0.4|Rabbit's foot can now be [[trading|sold]] to cleric [[villager]]s.}}
{{History||1.13.0|snap=beta 1.13.0.1|Added [[fox]]es, which can [[drops|drop]] rabbit's foot.}}
{{History|console}}
{{History||xbox=TU31|xbone=CU19|ps=1.22|wiiu=Patch 3|switch=1.0.1|[[File:Rabbit's Foot JE2 BE1.png|32px]] Added rabbit's foot.}}
{{History||xbox=none|xbone=none|ps=1.90|wiiu=none|switch=none|[[File:Rabbit's Foot JE3 BE2.png|32px]] The texture of rabbit's foot has been changed.}}
{{History|New 3DS}}
{{History||0.1.0|[[File:Rabbit's Foot JE2 BE1.png|32px]] Added rabbit's foot.}}
{{History|foot}}
== Issues ==
{{issue list}}
== Trivia ==
* The superstition that [[wikipedia:Rabbit's_foot|a rabbit's foot is a lucky charm]] applies equally to Minecraft as it does in the real world: it does not actually increase luck.
== Gallery ==
<gallery>
Rabbit Items 4 Ryan Holtz.png|First image of the item by [[Ryan Holtz]].
Rabbit Items 5 Ryan Holtz.png|Ryan Holtz brewing the item into a potion.
Rabbit Items 6 Ryan Holtz.png|Ryan Holtz enhancing the potion.
</gallery>
== References ==
{{reflist}}
== External Links ==
*[https://www.minecraft.net/en-us/article/taking-inventory--rabbit-s-foot Taking Inventory: Rabbit's Foot] – Minecraft.net on May 3, 2019
{{items}}
[[de:Hasenpfote]]
[[es:Pata de conejo]]
[[fr:Patte de lapin]]
[[it:Zampa di coniglio]]
[[ja:ウサギの足]]
[[ko:토끼발]]
[[nl:Konijnenpootje]]
[[pl:Królicza łapka]]
[[pt:Pé de coelho]]
[[ru:Кроличья лапка]]
[[uk:Кроляча лапка]]
[[zh:兔子脚]]
[[Category:Renewable resources]]
[[Category:Brewing recipe]]</li><li>[[Book and Quill|Book and Quill]]<br/>{{For|the item produced after a Book and Quill is signed|Written Book}}
{{Item
| image = Book and Quill.png
| renewable = Yes
| stackable = No
}}
A '''book and quill''' is an [[item]] used to write [[written book]]s.
== Obtaining ==
=== Crafting ===
{{Crafting
|Book
|Ink Sac
|Feather
|Output= Book and Quill
|type= Miscellaneous
}}
=== Natural generation ===
{{LootChestItem|book-and-quill}}
== Usage ==
=== Crafting ingredient ===
{{crafting usage}}
=== Writing ===
By pressing {{control|use item}} or long pressing screen anywhere{{only|bedrock}} while holding a book and quill in their hand, the [[player]] can open a text editor GUI.
Using this GUI, the player can write a single book up to 100{{only|java}} or 50{{only|bedrock}} pages long, with up to 798 characters per page. The player can write up to 79,800{{only|java}} or 12,800{{only|bedrock}} characters inside the entire book. No page may be longer than 14 lines and each line can have a width of 114 pixels (see pixel width of each character [[Language#Font|here]]).
The player has the ability to copy and paste into books. However, the paste does not work if the text being pasted is longer than a single page. Most Unicode characters are available in books, and they may be pasted in without issue.
In singleplayer, the world pauses while a book is being edited.{{only|java}}
=== Lecterns ===
One can place a book and quill or a [[written book]] on an empty [[lectern]].
The lectern then emits a redstone signal depending on the displayed page in the book. On the last page, the lectern emits a signal strength of 15. This is why lecterns are listed in the "redstone" tab in the [[creative inventory]].
=== Formatting codes ===
{{main|Formatting codes}}
{{exclusive|bedrock|section=1}}
Text in a book can be styled using codes starting with the {{key|§}} character (section sign).
* {{key|§}} + {{key|k}} creates randomly changing characters.
* {{key|§}} + {{key|l}} creates bold text.
* {{key|§}} + {{key|m}} creates strikethrough text.
* {{key|§}} + {{key|n}} creates underlined text.
* {{key|§}} + {{key|o}} creates italic text.
* {{key|§}} + {{key|0}} – {{key|f}} (hexadecimal) creates colored text.
* {{key|§}} + {{key|r}} resets any of the previous styles so text after it appears normally.
If the [[player]] uses multiple codes, and continue typing past the end of a line, the next line exhibits only the last formatting code used.
=== Signing ===
Books can be signed by pressing the "Sign" button while in the interface. {{IN|java}}, when signed, a book bears the name of the player who wrote it and a title chosen upon signing. {{IN|bedrock}}, the book doesn't display the name of the player as the author; instead, the author can be any text the player wants. After it has been signed, it cannot be edited again – it has turned into a [[written book]].
Special characters can be used in the title, if typed from a keyboard that supports them. Alt codes do not work, and the {{key|§}} character cannot be typed even using a keyboard that implements it, meaning titles cannot be colored or formatted in-game. However, on Linux using the compose key to produce special characters does work.
The title of the book can be up to 16 characters long, and the player cannot paste into a title. A "workaround" for the 16-character limitation is to manually rename the book at an [[Anvil#Renaming|anvil]], which always costs 1 [[Experience|experience level]]. This can be done with either a written book or a book and quill – both versions will always display the changed name. If a custom name is removed from a written book, it will revert back to the title it was given during the signing process.
=== Chiseled bookshelf ===
{{control|Use|text=Using}} the [[chiseled bookshelf]] while having a book and quill in the main hand will put the book inside the chiseled bookshelf.
=== Trading ===
{{IN|bedrock}}, expert-level librarian [[villager]]s buy 2 books and quills for one [[emerald]]. Book and quill is offered in two item slots due to being non-stackable.
{{IN|java}}, expert-level librarian villagers have a 50% chance to buy 2 books and quills for one emerald. The amount of books and quills needed is supposed to be 2, but due to the item being non-stackable, only one is needed for the trade.<ref>{{bug|MC-248042||Librarian's book and quill trade is always discounted to 1 since books are unstackable}}</ref>
== Sounds ==
{{edition|java}}:
{{Sound table
|rowspan=2
|sound=Page turn1.ogg
|sound2=Page turn2.ogg
|sound3=Page turn3.ogg
|subtitle=Page rustles
|source=master
|description=When the page of a book is turned
|id=item.book.page_turn
|translationkey=subtitles.item.book.page_turn
|volume=2.0
|pitch=1.0
|distance=16}}
{{Sound table
|subtitle=Page rustles
|source=block
|description=When the page of a book is turned on a lectern
|id=item.book.page_turn
|translationkey=subtitles.item.book.page_turn
|volume=2.0
|pitch=0.9-1.0
|distance=16}}
{{Sound table
|sound=Book thump1.ogg
|sound2=Book thump2.ogg
|subtitle=Book thumps
|source=block
|description=When a book is placed on a lectern
|id=item.book.put
|translationkey=subtitles.item.book.put
|volume=1.0
|pitch=1.0
|distance=16}}
{{Sound table
|sound=Chiseled bookshelf insert1.ogg
|sound2=Chiseled bookshelf insert2.ogg
|sound3=Chiseled bookshelf insert3.ogg
|sound4=Chiseled bookshelf insert4.ogg
|subtitle=Book placed
|source=block
|description=When a book and quill is placed in a chiseled bookshelf
|id=block.chiseled_bookshelf.insert
|translationkey=subtitles.chiseled_bookshelf.insert
|volume=0.8
|pitch=''varies'' <ref group=sound>Can be 1.0, 0.85, or 1.1 for each sound</ref>
|distance=16}}
{{Sound table
|sound=Chiseled bookshelf pickup1.ogg
|sound2=Chiseled bookshelf pickup2.ogg
|sound3=Chiseled bookshelf pickup3.ogg
|subtitle=Book taken
|source=block
|description=When a book and quill is removed from a chiseled bookshelf
|id=block.chiseled_bookshelf.pickup
|translationkey=subtitles.chiseled_bookshelf.take
|volume=0.8
|pitch=''varies'' <ref group=sound>Can be 1.0, 0.8, or 1.1 for each sound</ref>
|distance=16
|foot=1}}
{{edition|bedrock}}:
{{Sound table
|type=bedrock
|sound=Page turn1.ogg
|sound2=Page turn2.ogg
|sound3=Page turn3.ogg
|source=sound
|description=When the page of a book is turned
|id=item.book.page_turn
|volume=2.0
|pitch=1.0}}
{{Sound table
|sound=Book thump1.ogg
|sound2=Book thump2.ogg
|source=block
|description=When a book is placed on a lectern
|id=item.book.put
|volume=4.8
|pitch=1.0}}
{{Sound table
|type=bedrock
|sound=Chiseled bookshelf insert1.ogg
|sound2=Chiseled bookshelf insert2.ogg
|sound3=Chiseled bookshelf insert3.ogg
|sound4=Chiseled bookshelf insert4.ogg
|source=block
|description=When a book and quill is placed in a chiseled bookshelf
|id=insert.chiseled_bookshelf
|volume=0.8
|pitch=''varies'' <ref group=sound name=insertvaries>Can be 1.0, 0.85, or 1.1 for each sound</ref>}}
{{Sound table
|sound=Chiseled bookshelf pickup1.ogg
|sound2=Chiseled bookshelf pickup2.ogg
|sound3=Chiseled bookshelf pickup3.ogg
|source=block
|description=When a book and quill is removed from a chiseled bookshelf
|id=pickup.chiseled_bookshelf
|volume=0.8
|pitch=''varies'' <ref group=sound name=pickupvaries>Can be 1.0, 0.8, or 1.1 for each sound</ref>
|foot=1}}
== Data values ==
=== ID ===
{{edition|java}}:
{{ID table
|edition=java
|showitemtags=y
|showforms=y
|generatetranslationkeys=y
|displayname=Book and Quill
|spritetype=item
|nameid=writable_book
|itemtags=bookshelf_books, lectern_books
|form=item
|foot=1}}
{{edition|bedrock}}:
{{ID table
|edition=bedrock
|showitemtags=y
|shownumericids=y
|showforms=y
|notshowbeitemforms=y
|generatetranslationkeys=y
|displayname=Book and Quill
|spritetype=item
|nameid=writable_book
|id=510
|itemtags=minecraft:bookshelf_books, minecraft:lectern_books
|form=item
|foot=1}}
=== Item data ===
{{el|java}}:
{{main|Player.dat format}}
<div class="treeview" style="margin-top: 0;">
* {{nbt|compound|tag}}: The '''tag''' tag.
{{:Player.dat_format/Writable Books}}
</div>
{{el|bedrock}}:
: See [[Bedrock Edition level format/Item format]].
== Video ==
<div style="text-align:center">{{yt|DD_Z82wmGZA}}</div>
== History ==
{{History|java}}
{{History||1.3.1|snap=12w17a|[[File:Book and Quill JE1 BE1.png|32px]] Added books and quills.}}
{{History||1.7.2|snap=13w36a|Books and quills can now be crafted with a [[written book]] to clone the written book.}}
{{History||1.8|snap=14w05a|Copying written books now mark them as "Copy of Original" or "Copy of Copy".
|The copying status of a book is now denoted in a separate line in the tooltip, beneath the author's name.
|Copies of copies cannot be copied.}}
{{History|||snap=14w25a|Books and quills now use JSON text components instead of plain text with the new <code>pages</code> tag
|Book and quills are now capable of using the <code>clickEvent</code> and <code>hoverEvent</code> tags.}}
{{History||1.13|snap=17w47a|Prior to [[1.13/Flattening|''The Flattening'']], this [[item]]'s numeral ID was 386.}}
{{History||1.14|snap=18w43a|[[File:Book and Quill JE2 BE2.png|32px]] The texture of books and quills has now been changed.
|Added support for editing anywhere in the book and quill.<ref name="MC-1578">{{bug|MC-1578}}</ref>
|Books and quills now have copy/paste support.<ref name="MC-1578"></ref>
|The page limit of books and quills has now been increased from 50 to 100 pages.}}
{{History|||snap=19w11a|Librarian [[villager]]s now [[trading|buy]] books and quills instead of written books.}}
{{History||1.20<br>(Experimental)|link=1.19.3|snap=22w42a|Books and quills can now interact with [[chiseled bookshelves]].}}
{{History|bedrock}}
{{History||1.2.0|snap=beta 1.2.0.2|[[File:Book and Quill JE1 BE1.png|32px]] Added books and quills.}}
{{History||1.4.0|snap=beta 1.2.14.2|Books and quills can now be found inside [[buried treasure]] [[chest]]s.}}
{{History||1.6.0|snap=beta 1.6.0.1|Pages within books and quills can now be turned using the controller bumper buttons.}}
{{History||1.10.0|snap=beta 1.10.0.3|[[File:Book and Quill JE2 BE2.png|32px]] The texture of books and quills has now been changed.}}
{{History||1.11.0|snap=beta 1.11.0.4|Books and quills can now be [[trading|sold]] to librarian [[villager]]s.}}
{{History|console}}
{{History||xbox=TU25|xbone=CU14|ps=1.17|wiiu=Patch 1|switch=1.0.1|[[File:Book and Quill JE1 BE1.png|32px]] Added books and quills.}}
{{History|PS4}}
{{History||1.90|[[File:Book and Quill JE2 BE2.png|32px]] The texture of books and quills has now been changed.}}
{{History|foot}}
== Issues ==
{{issue list}}
== Trivia ==
* The in-game restrictions on books are not hard limits. Third party editors or commands can make books have more than 100 pages{{only|java}} (2,147,483,639 pages), more than 256 characters per page (32,767 characters per page), can change author names, and can have colored titles, among other things. These books still function properly in vanilla ''Minecraft'', meaning the [[player]] may encounter such books on adventure maps or multiplayer servers.<ref>http://www.minecraftforum.net/topic/1189266-hacking-books</ref>
* If the player renames a book and quill in an anvil before signing it, it retains the name from the anvil instead of taking the name from signing.{{only|java}}
== Gallery ==
<gallery>
Jeb book.png|The first image of a book seen.<ref>https://web.archive.org/web/20120427014334/https://www.mojang.com/2012/04/minecraft-snapshot-12w17a/</ref>
Book and Quill Writing.png|The GUI of writing a book.
Book and Quill Signing.png|The GUI of signing a book.
Written Book tooltip.png|A signed book.
BookandQuillOperators12w17a.png|Display of styles used in a book. "e" and "f" are difficult to see.
Book and Quill in Pocket Edition.jpg|A book and quill {{in|be}}.
Java book and quill example with text.png|An example of text in a book and quill in [[Java Edition]].
Better Together Book.jpg|A book and quill in ''Bedrock Edition''.
</gallery>
== References ==
{{Reflist}}
== External links ==
* [http://www.minecraftforum.net/topic/1498339-132ssp-bookshop-your-books-anywhere/ Bookshop - Book Sharing And Editing Tool]
* [http://fsymbols.com/generators/wide/ Full-Width Text Generator]
* [http://fsymbols.com/generators/smallcaps/ Small Caps Text Generator]
* [http://www.minecraftforum.net/topic/1202590-revise-edit-signed-books-w-more-options-all-os-12w17a/ Revise - External Book Editor]
== See also ==
* [[Book]]
* [[Bookshelf]]
* [[Written Book]]
{{Items}}
[[Category:Renewable resources]]
[[cs:Rozepsaná kniha s brkem]]
[[de:Buch und Feder]]
[[el:Βιβλίο και Πένα]]
[[es:Libro y pluma]]
[[fr:Livre vierge]]
[[hu:Könyv és toll]]
[[it:Libro e penna]]
[[ja:本と羽根ペン]]
[[ko:책과 깃펜]]
[[nl:Boek en veer]]
[[pl:Książka z piórem]]
[[pt:Livro e pena]]
[[ru:Книга с пером]]
[[th:หนังสือกับปากกาขนนก]]
[[uk:Книга з пером]]
[[zh:书与笔]]</li></ul> | Re-added trees. | ||||
April 13, 2010{{Extension DPL}}<ul><li>[[Drinks|Drinks]]<br/>[[File:Drinking Steve.png|150px|right]] [[File:Drinking Alex.png|150px|right]]
'''Drinks''' are a narrow class of consumable [[item]]s that can be ingested by the [[player]] in an extremely similar manner to [[food]]. However, drinks are not encountered quite as commonly as food is, and they are not nearly as integral to Survival gameplay. Drinks can generally be distinguished from food by the sounds they make upon consumption, the lack of [[particles]] they emit, and the fact that they leave an empty container item in the [[inventory]] after consumption. Drinks do not affect [[hunger]] or saturation values upon use (with the exception of [[honey bottle]]s), and do not need those values to be depleted in order to be consumed.
Drinks are drunk by holding {{control|use item}} while having the drink item selected in the hotbar or in the off hand.
== Drinks ==
{{/table}}
== History ==
{{main|Milk#History|Potion#History|Honey Bottle#History}}
{{History|java alpha}}
{{History||v1.0.11|[[File:Milk Bucket JE1 BE1.png|32px]] Added milk.}}
{{History|java}}
{{History||1.0.0|snap=Beta 1.9 Prerelease 3|Added water bottles and potions.}}
{{History||1.15|snap=19w34a|[[File:Honey Bottle JE1.png|32px]] Added honey bottles.}}
{{History|pocket alpha}}
{{History||v0.7.0|[[File:Milk Bucket JE1 BE1.png|32px]] Added milk buckets.}}
{{History||v0.12.1|snap=build 1|Added water bottles and potions.}}
{{History|bedrock}}
{{History||1.14.0|snap=beta 1.14.0.1|[[File:Honey Bottle BE1.png|32px]] Added honey bottles.}}
{{History|foot}}
{{Items}}
[[ja:飲み物]]
[[pt:Bebidas]]
[[Category:Food]]</li><li>[[Banner|Banner]]<br/>{{for|the image|Banner (image)}}
{{Block
| image = <gallery>
White Banner.gif | Banner
White Wall Banner.png | Wall Banner
</gallery>
| rarity = Common
| transparent = Yes
| light = No
| tool = axe
| renewable = Yes
| stackable = Yes (16)
| flammable = No
| lavasusceptible = Yes
}}
'''Banners''' are tall decorative [[blocks]], featuring a field that is highly customizable using [[dye]]s and [[banner pattern]]s.
== Obtaining ==
=== Breaking ===
Banners can be broken with or without a [[tool]], but an [[axe]] is fastest.
{{breaking row|horizontal=1|Banners|Axe}}
A banner also breaks and drops itself as an [[Item (entity)|item]] if the block the banner is attached to is moved, removed, or destroyed.
=== Natural generation ===
{| class="wikitable collapsible"
! Name !! Location !! Appearance !! Design
|-
! Magenta Banner
| Outside of [[end cities]].
| style="text-align: center" | [[File:End City Banner.png|32px]]
| Magenta Banner
* Black Inverted Chevron
* Black Chevron
|-
! Gray Banner
| In banner room in [[woodland mansion]]s.
| style="text-align: center" | [[File:Gray Banner.png|32px]]
| Gray Banner
|-
! Light Gray Banner
| In master bedroom in [[woodland mansion]]s.
| style="text-align: center" | [[File:Master Bedroom Banner.png|32px]]
| Light Gray Banner
* White Flower Charge
|- id="Ominous Banner"
! Ominous Banner{{only|java|short=1}}
Illager Banner{{only|bedrock|education|short=1}}
| Carried by [[raid captain]]s.<br> Located in [[pillager outpost]]s.
{{IN|java}}, the ominous banner cannot be crafted or copied because the design uses 8 patterns.
{{IN|bedrock}}, the illager banner is a separate type that cannot be placed in a loom.
| style="text-align: center" | [[File:Ominous Banner.png|32px]]<br/>[[File:Ominous Banner BE.png|32px]]
| White Banner{{only|java|short=1}}
* Cyan Lozenge
* Light Gray Base
* Gray Pale
* Light Gray Bordure
* Black Fess
* Light Gray Per Fess
* Light Gray Roundel
* Black Bordure
Separate type entirely{{only|bedrock|short=1}}
|-
! Brown Banner
| Outside of some houses, meeting points, and pillar fountains in savanna [[village]]s.
| style="text-align: center" | [[File:Brown Banner.png|32px]]
| Brown Banner
|-
! Black Banner
| In altar room in [[woodland mansions]].
| style="text-align: center" | [[File:Black Banner.png|32px]]
| Black Banner
|}
=== Crafting ===
Banners can be crafted from six [[wool]] and a [[stick]] in a pattern resembling a [[sign]].
{{Crafting
|head=1
|showdescription=1
|A1=Matching Wool |B1=Matching Wool |C1=Matching Wool
|A2=Matching Wool |B2=Matching Wool |C2=Matching Wool
|B3=Stick
|Output=Matching Banner
|Olink=Banner
|type=Decoration block
|description=Once the banner is crafted, its base color cannot be changed.{{only|java}}
}}
{{Crafting
|showdescription=1
|Any Banner
|Bleach
|Output=White Banner
|type=Decoration block
|description=Bleach can be used to remove the color of a banner, resulting in a white banner. This includes removing patterns from a white banner.{{only|bedrock|education}}
|foot=1
}}
=== Trading ===
Expert-level cartographer [[villager]]s always offer to [[trading|sell]] 1 or 2 blank banners of a random color for 3 [[emeralds]]. Expert-level shepherd villagers have a {{frac|2|7}} chance of offering the same trade.{{only|java}}
{{IN|bedrock}}, expert-level cartographer and shepherd villagers both offer to sell one of 16 blank banners for 3 emeralds as part of their trades.
=== Mob loot ===
[[Illager]]s that spawn carrying an ominous banner{{only|java|short=1}} / illager banner{{only|bedrock|education|short=1}} always drop it upon death.
== Usage ==
[[File:Standing banner with block.png|thumb|upright|Overlapping block on a banner.]]
[[File:Wall banner with block.png|thumb|upright|Overlapping on a wall mounted banner.]]
There are 16 colored blank banners, and numerous patterns each available in each of the 16 colors. A banner can feature up to 6 different patterns. The top layer of a banner (or the last pattern added) can be washed off by {{control|using}} it on a [[cauldron]] containing water.
Banners, much like signs, can be placed both on the ground facing in any direction, or on a wall. They gently sway as if affected by a breeze, regardless of dimension or location.
Banners have no collision mask as they are completely non-solid, so [[entities]] can move through them.
Other blocks (including other banners) can be placed on any edge of a banner's hitbox, which is only one block high despite the banner appearing as two blocks tall. This makes it possible to overlap another solid block on the top half of a banner for floor banners, or the bottom half of wall banners.
When a banner is placed on the side of a block, its position is set by the top block, and it is possible to place it so it appears half buried.
Banners can also be placed in [[item frame]]s, where they simply appear as their item model.
[[Water]] and [[lava]] flow around banners. {{IN|bedrock}}, banners can be [[waterlogged]].
<gallery>
File:Wall banner with water below.png| Water can be placed below wall banners
File:Water flowing around banner.png| Water flows around a banner on the ground
</gallery>
Lava can create [[fire]] in air blocks next to banners as if the banners were flammable, but the banners do not burn (and cannot be burned by other methods). Banners also cannot be moved by [[piston]]s.
If a banner is renamed on an [[anvil]], it retains its name when a pattern is added, but not when a pattern is removed.
=== Helmet ===
{{exclusive|java|section=13}}
While a banner cannot be equipped in the [[Helmet|head slot]] in [[Survival]] mode, equipping it using commands causes it to appear on top of the player. This is how [[raid captain]]s wear banners{{only|java|short=1}}.
=== Chestplate ===
{{exclusive|bedrock|section=13}}
While a banner cannot be equipped in the [[chestplate]] slot in Survival mode, equipping it using NBT editors causes it to appear on top of the player. This is how [[raid captain]]s wear banners{{only|bedrock|education|short=1}}.
<gallery>
Steve wearing White Banner.png|
Alex wearing White Banner.png|
Pillager with Ominous Banner.png|
Vindicator with Ominous Banner.png|
Evoker with Ominous Banner.png|Illusioner with Ominous Banner.png|
</gallery>
=== Crafting ingredient ===
[[Shield]]s can have patterns applied to them using banners. The shield pattern has a smaller resolution than the banner pattern, causing them to look different or offset. Banners that have more than six patterns, such as Ominous Banners or banners obtained through inventory editors, will be reduced to six patterns on the shield.
{{Crafting
|showdescription=1
|Shield
|Matching Banner; Ominous Banner
|Output=Matching Shield; Ominous Shield
|B2link=Banner
|type=Combat
|description=Applies the banner pattern to the shield. The banner is consumed.<br>The shield must have no pre-existing patterns.<br>Does not change existing durability or enchantments on the shield.
}}
=== Copying ===
Banners can be copied with a blank banner to make multiple identical banners. Banners with more than 6 patterns applied using commands cannot be copied in this manner.
{{Crafting
|showdescription=1
|Matching Banner
|Matching Banner
|Output=Matching Banner
|A2link=Banner
|B2link=Banner
|Olink=Banner
|type=Decoration block
|ignoreusage=1
|description=Copies pattern; both banners must have the same base color, and the one having a pattern copied onto it must have no preexisting pattern.
}}
=== Map marker ===
[[File:Banner marked map.png|alt=All banners marked on a map, alongside a named banner.|thumb|right|How every banner appears {{IN|java}} on a map, including named banners.]]
{{exclusive|java|section=13}}
{{IN|java}}, {{control|using}} on a standing banner with a [[map]] selected places a marker of the banner's position on the selected map, and {{control|using}} on the banner again removes the marker. Note that wall banners cannot serve as map markers. The marker has the same color as the banner's base without decorations. The marker is removed if the banner is destroyed unless the map is locked using a [[cartography table]]. If the banner is renamed, the name appears below the marker.
=== Patterns ===
{{see also|Banner/Patterns|title1=List of patterned banners}}
[[File:Spawned-in Banner.png|thumb|100px|Example of a banner with more than 6 patterns, a result of using the {{cmd|give}} command.]]
A banner may have up to six layers of patterns, which are overlaid with the last-crafted on top. A banner can have up to 16 layers of patterns with the use of commands. The total number of unique banners is approximately 2.3x10^16 (or 23 quadrillion).
Any color banner can be used; the pattern overlays the color. {{IN|java}}, a [[loom]] is used to make patterns. However, {{in|bedrock}}, the patterns can be made in a [[loom]] or a [[crafting table]].
A banner can have more than six layers of patterns through the commands <code>/[[Commands/give|give]]</code>, <code>/[[Commands/setblock|setblock]]</code> or <code>/[[Commands/fill|fill]]</code>. This only works in ''Java Edition'', as Bedrock Edition doesn't have any NBT commands. Here is an example of a mining banner with seven different patterns. There is specific codes for the [[Banner#Item data:~:text=white-,Item,-In Java Edition|colors]] and [[Banner/Patterns|patterns]] that you have to input.
<code><nowiki>/give @p white_banner{display:{Name:"\"Mining Industries Banner\""},BlockEntityTag:{Patterns:[{Pattern:"cr",Color:15},{Pattern:"bs",Color:15},{Pattern:"sc",Color:12},{Pattern:"ms",Color:0},{Pattern:"hh",Color:15},{Pattern:"bo",Color:15},{Pattern:"tts",Color:8}]}} 1</code>
{{LoadPage|Template:Banner pattern loom recipes|Loom recipes|h4}}
{{LoadPage|Banner/Banner pattern crafting recipes|Crafting recipes|h4|transcluded=1}}
=== Renaming ===
{{IN|java}}, a banner can be given a custom name that remains as the banner is placed and retrieved. The player can use an [[anvil]] to rename the banner item, or may change the <code>CustomName</code> tag using the {{cmd|data}} command on the banner block.
=== Fuel ===
Banners can be used as a fuel in [[furnace]]s, smelting 1.5 items per banner.
=== Note Blocks ===
Banners can be placed under [[note block]]s to produce "bass" sounds.
== Sounds ==
=== Generic ===
{{Sound table/Block/Wood}}
=== Unique ===
{{edition|java}}: ''None''
{{edition|bedrock}}:
{{Sound table
|type=bedrock
|sound=Water Splash Old.ogg
|source=block
|description=When all patterns are removed from a banner using a cauldron
|id=cauldron.cleanbanner
|volume=0.1
|pitch=1.0
|foot=1}}
== Data values ==
=== ID ===
{{edition|java}}:
{{ID table
|edition=java
|showblocktags=y
|showitemtags=y
|showforms=y
|generatetranslationkeys=y
|displayname=White Banner
|spritetype=block
|nameid=white_banner
|blocktags=banners, wall_post_override
|itemtags=banners
|translationkey=block.minecraft.white_banner,block.minecraft.ominous_banner
}}
{{ID table
|displayname=Orange Banner
|spritetype=block
|nameid=orange_banner
|blocktags=banners, wall_post_override
|itemtags=banners}}
{{ID table
|displayname=Magenta Banner
|spritetype=block
|nameid=magenta_banner
|blocktags=banners, wall_post_override
|itemtags=banners}}
{{ID table
|displayname=Light Blue Banner
|spritetype=block
|nameid=light_blue_banner
|blocktags=banners, wall_post_override
|itemtags=banners}}
{{ID table
|displayname=Yellow Banner
|spritetype=block
|nameid=yellow_banner
|blocktags=banners, wall_post_override
|itemtags=banners}}
{{ID table
|displayname=Lime Banner
|spritetype=block
|nameid=lime_banner
|blocktags=banners, wall_post_override
|itemtags=banners}}
{{ID table
|displayname=Pink Banner
|spritetype=block
|nameid=pink_banner
|blocktags=banners, wall_post_override
|itemtags=banners}}
{{ID table
|displayname=Gray Banner
|spritetype=block
|nameid=gray_banner
|blocktags=banners, wall_post_override
|itemtags=banners}}
{{ID table
|displayname=Light Gray Banner
|spritetype=block
|nameid=light_gray_banner
|blocktags=banners, wall_post_override
|itemtags=banners}}
{{ID table
|displayname=Cyan Banner
|spritetype=block
|nameid=cyan_banner
|blocktags=banners, wall_post_override
|itemtags=banners}}
{{ID table
|displayname=Purple Banner
|spritetype=block
|nameid=purple_banner
|blocktags=banners, wall_post_override
|itemtags=banners}}
{{ID table
|displayname=Blue Banner
|spritetype=block
|nameid=blue_banner
|blocktags=banners, wall_post_override
|itemtags=banners}}
{{ID table
|displayname=Brown Banner
|spritetype=block
|nameid=brown_banner
|blocktags=banners, wall_post_override
|itemtags=banners}}
{{ID table
|displayname=Green Banner
|spritetype=block
|nameid=green_banner
|blocktags=banners, wall_post_override
|itemtags=banners}}
{{ID table
|displayname=Red Banner
|spritetype=block
|nameid=red_banner
|blocktags=banners, wall_post_override
|itemtags=banners}}
{{ID table
|displayname=Black Banner
|spritetype=block
|nameid=black_banner
|blocktags=banners, wall_post_override
|itemtags=banners}}
{{ID table
|displayname=White Wall Banner
|spritetype=block
|nameid=white_wall_banner
|blocktags=banners, wall_post_override
|form=block
|translationkey=block.minecraft.white_banner,block.minecraft.ominous_banner}}
{{ID table
|displayname=Orange Wall Banner
|spritetype=block
|nameid=orange_wall_banner
|blocktags=banners, wall_post_override
|form=block
|translationkey=block.minecraft.orange_banner}}
{{ID table
|displayname=Magenta Wall Banner
|spritetype=block
|nameid=magenta_wall_banner
|blocktags=banners, wall_post_override
|form=block
|translationkey=block.minecraft.magenta_banner}}
{{ID table
|displayname=Light Blue Wall Banner
|spritetype=block
|nameid=light_blue_wall_banner
|blocktags=banners, wall_post_override
|form=block
|translationkey=block.minecraft.light_blue_banner}}
{{ID table
|displayname=Yellow Wall Banner
|spritetype=block
|nameid=yellow_wall_banner
|blocktags=banners, wall_post_override
|form=block
|translationkey=block.minecraft.yellow_banner}}
{{ID table
|displayname=Lime Wall Banner
|spritetype=block
|nameid=lime_wall_banner
|blocktags=banners, wall_post_override
|form=block
|translationkey=block.minecraft.lime_banner}}
{{ID table
|displayname=Pink Wall Banner
|spritetype=block
|nameid=pink_wall_banner
|blocktags=banners, wall_post_override
|form=block
|translationkey=block.minecraft.pink_banner}}
{{ID table
|displayname=Gray Wall Banner
|spritetype=block
|nameid=gray_wall_banner
|blocktags=banners, wall_post_override
|form=block
|translationkey=block.minecraft.gray_banner}}
{{ID table
|displayname=Light Gray Wall Banner
|spritetype=block
|nameid=light_gray_wall_banner
|blocktags=banners, wall_post_override
|form=block
|translationkey=block.minecraft.light_gray_banner}}
{{ID table
|displayname=Cyan Wall Banner
|spritetype=block
|nameid=cyan_wall_banner
|blocktags=banners, wall_post_override
|form=block
|translationkey=block.minecraft.cyan_banner}}
{{ID table
|displayname=Purple Wall Banner
|spritetype=block
|nameid=purple_wall_banner
|blocktags=banners, wall_post_override
|form=block
|translationkey=block.minecraft.purple_banner}}
{{ID table
|displayname=Blue Wall Banner
|spritetype=block
|nameid=blue_wall_banner
|blocktags=banners, wall_post_override
|form=block
|translationkey=block.minecraft.blue_banner}}
{{ID table
|displayname=Brown Wall Banner
|spritetype=block
|nameid=brown_wall_banner
|blocktags=banners, wall_post_override
|form=block
|translationkey=block.minecraft.brown_banner}}
{{ID table
|displayname=Green Wall Banner
|spritetype=block
|nameid=green_wall_banner
|blocktags=banners, wall_post_override
|form=block
|translationkey=block.minecraft.green_banner}}
{{ID table
|displayname=Red Wall Banner
|spritetype=block
|nameid=red_wall_banner
|blocktags=banners, wall_post_override
|form=block
|translationkey=block.minecraft.red_banner}}
{{ID table
|displayname=Black Wall Banner
|spritetype=block
|nameid=black_wall_banner
|blocktags=banners, wall_post_override
|form=block
|translationkey=block.minecraft.black_banner
|foot=1}}
{{ID table
|displayname=Block entity
|spritename=Banners
|spritetype=block
|nameid=banner
|foot=1}}
{{edition|bedrock}}:
{{ID table
|edition=bedrock
|firstcolumnname=Banner
|shownumericids=y
|showforms=y
|generatetranslationkeys=y
|displayname=Standing
|spritename=Banners
|spritetype=block
|nameid=standing_banner
|translationkey=tile.standing_banner.black.name, tile.standing_banner.red.name, tile.standing_banner.green.name, tile.standing_banner.brown.name, tile.standing_banner.blue.name, tile.standing_banner.purple.name, tile.standing_banner.cyan.name, tile.standing_banner.silver.name, tile.standing_banner.gray.name, tile.standing_banner.pink.name, tile.standing_banner.lime.name, tile.standing_banner.yellow.name, tile.standing_banner.lightBlue.name, tile.standing_banner.magenta.name, tile.standing_banner.orange.name, tile.standing_banner.white.name
|id=176
|form=block}}
{{ID table
|displayname=Wall
|spritename=Banners
|spritetype=block
|nameid=wall_banner
|id=177
|form=block
|translationkey=-}}
{{ID table
|displayname=Item
|spritename=Banners
|spritetype=item
|nameid=banner
|translationkey=item.banner.black.name, item.banner.red.name, item.banner.green.name, item.banner.brown.name, item.banner.blue.name, item.banner.purple.name, item.banner.cyan.name, item.banner.silver.name, item.banner.gray.name, item.banner.pink.name, item.banner.lime.name, item.banner.yellow.name, item.banner.lightBlue.name, item.banner.magenta.name, item.banner.orange.name, item.banner.white.name
|id=567
|form=item
|foot=1}}
{{ID table
|notnamespaced=y
|displayname=Block entity
|spritename=Banners
|spritetype=block
|nameid=Banner
|foot=1}}
=== Metadata ===
==== Item ====
{{IN|Bedrock}}, banner items use the following data values:
{| class="wikitable"
! DV !! Banner color
|-
|| 0 || black
|-
|| 1 || red
|-
|| 2 || green
|-
|| 3 || brown
|-
|| 4 || blue
|-
|| 5 || purple
|-
|| 6 || cyan
|-
|| 7 || light gray
|-
|| 8 || gray
|-
|| 9 || pink
|-
|| 10 || lime
|-
|| 11 || yellow
|-
|| 12 || light blue
|-
|| 13 || magenta
|-
|| 14 || orange
|-
|| 15 || white
|}
=== Item ===
{{IN|Java}}, banner items use the following data values:
{| class="wikitable"
! DV !! Banner color
|-
|| 15 || black
|-
|| 14 || red
|-
|| 13 || green
|-
|| 12 || brown
|-
|| 11 || blue
|-
|| 10 || purple
|-
|| 9 || cyan
|-
|| 8 || light gray
|-
|| 7 || gray
|-
|| 6 || pink
|-
|| 5 || lime
|-
|| 4 || yellow
|-
|| 3 || light blue
|-
|| 2 || magenta
|-
|| 1 || orange
|-
|| 0 || white
|}
=== Block states ===
{{see also|Block states}}
{{/BS}}
=== Block data ===
A banner has a block entity associated with it that holds additional data about the block.
{{el|bedrock}}:
: See [[Bedrock Edition level format/Block entity format]].
{{el|java}}:
{{see also|Block entity format}}
{{/BE}}
=== Item data ===
{{el|java}}:
{{main|Player.dat format}}
Banners, as items, use an NBT tag <code>BlockEntityTag</code> to indicate the patterns and details when it is placed.
<div class="treeview" style="margin-top: 0;">
* {{nbt|compound|Item}}: The item
** {{nbt|compound|tag}}: Additional information about the item. This tag is optional for most items.
*** {{nbt|compound|BlockEntityTag}}: The details of the shulker box.
**** All block data, except tags common to all block entities.
</div>
{{el|bedrock}}:
: See [[Bedrock Edition level format/Item format]].
== Achievements ==
{{load achievements|Fruit on the Loom}}
== Advancements ==
{{load advancements|Voluntary Exile}}
== History ==
{{info needed section|The Nether Update}}
{{History|java}}
{{History||1.8|snap=July 21, 2014|slink=https://twitter.com/jeb_/status/491238882789572608|[[Jeb]] posted a picture of banners, and stated that he is working on them.}}
{{History|||snap=14w30a|[[File:White Banner Revision 1.png|22px]][[File:Light Gray Banner Revision 1.png|22px]][[File:Gray Banner Revision 1.png|22px]][[File:Black Banner Revision 1.png|22px]][[File:Brown Banner Revision 1.png|22px]][[File:Red Banner Revision 1.png|22px]][[File:Orange Banner Revision 1.png|22px]][[File:Yellow Banner Revision 1.png|22px]][[File:Lime Banner Revision 1.png|22px]][[File:Green Banner Revision 1.png|22px]][[File:Cyan Banner Revision 1.png|22px]][[File:Light Blue Banner Revision 1.png|22px]][[File:Blue Banner Revision 1.png|22px]][[File:Purple Banner Revision 1.png|22px]][[File:Magenta Banner Revision 1.png|22px]][[File:Pink Banner Revision 1.png|22px]] Added banners.}}
{{History|||snap=14w30c|Added four additional patterns: Cross (+), Border, Curly Border and Thing (Mojang logo).}}
{{History|||snap=14w31a|Added two additional patterns: Inverted Halves and Base Gradient.
|The banner pattern terminology has been changed based on vexillology advice [[Jeb]] received from [http://www.reddit.com/r/Minecraft/comments/2bkxej/i_made_a_huge_mistake_banners/ his Reddit post].
|Banners can now be used as a [[fuel]] in [[furnace]]s.}}
{{History||1.8.8|snap=pre|The number of layers attainable by using [[commands]] is now limited to 16 per banner.}}
{{History||1.9|snap=15w31a|[[File:End City Banner.png|17px]] Magenta banners with a black chevron and inverted chevron are now naturally generated on the outside walls of [[end city|end cities]].}}
{{History|||snap=15w33c|Banners can be used to apply patterns to [[shield]]s.}}
{{History||1.11|snap=16w33a|Banners now require a [[dye]] when applying a pattern that uses a non-dye [[item]], such as a [[mob head|creeper head]] or [[golden apple|enchanted golden apple]]. Previously, the lack of a dye would have applied the black variant of the pattern.}}
{{History|||snap=16w39a|Black and gray banners, and light gray banners with a white flower charge are now naturally generated in rooms of [[woodland mansion]]s.}}
{{History||1.12|snap=January 24, 2017|slink={{tweet|jeb_|823817090511601664}}|[[Jeb]] tweets a screenshot of the changes to the banner color palette.}}
{{History|||snap=17w06a|[[File:White Banner.png|17px]] [[File:Light Gray Banner.png|17px]] [[File:Gray Banner.png|17px]] [[File:Black Banner.png|17px]] [[File:Brown Banner.png|17px]] [[File:Red Banner.png|17px]] [[File:Orange Banner.png|17px]] [[File:Yellow Banner.png|17px]] [[File:Lime Banner.png|17px]] [[File:Green Banner.png|17px]] [[File:Cyan Banner.png|17px]] [[File:Light Blue Banner.png|17px]] [[File:Blue Banner.png|17px]] [[File:Purple Banner.png|17px]] [[File:Magenta Banner.png|17px]] [[File:Pink Banner.png|17px]] Changed banners' [[tint]]s.}}
{{History|||snap=pre6|"Chief fess" and "base fess" banners are now just "chief" and "base" banners.}}
{{History||1.13|snap=17w47a|The colors for the <code>banner</code>, <code>wall_banner</code> and <code>standing_banner</code> ID have been split up into their own IDs.
|Prior to [[1.13/Flattening|''The Flattening'']], these [[block]]s' numeral IDs were 176 and 177, and the [[item]]'s 425.}}
{{History|||snap=18w10a|{{control|Using}} a [[map]] on a banner now mark the spot of the banner on the map.}}
{{History||1.14|snap=18w43a|[[Loom]]s have been added to help the [[player]] edit banners more easily.
|All recipes for banner patterns have been removed.}}
{{History|||snap=18w45a|[[File:Ominous Banner Revision 1.png|17px]] Added [[illager patrol]]s, where the leader of an illager patrol carries an [[illager]] banner.}}
{{History|||snap=18w46a|[[File:Ominous Banner.png|17px]] The pattern of [[illager]] banner now has a black border.}}
{{History|||snap=19w11a|Cartographer and shepherd [[villager]]s now [[trading|sell]] banners.}}
{{History|||snap=Pre-Release 2|"Illager Banners" have been renamed to "Ominous Banners".}}
{{History||1.17|snap=20w46a|The unused "base" pattern has been renamed to the "field" pattern and given proper translation strings (its ID is still "base").}}
{{History||1.19.3|snap=22w43a|The ominous banner is now available in the Creative inventory.}}
{{History|bedrock}}
{{History||1.2.0|snap=beta 1.2.0.2|[[File:White Banner.png|17px]] [[File:Light Gray Banner.png|17px]] [[File:Gray Banner.png|17px]] [[File:Black Banner.png|17px]] [[File:Brown Banner.png|17px]] [[File:Red Banner.png|17px]] [[File:Orange Banner.png|17px]] [[File:Yellow Banner.png|17px]] [[File:Lime Banner.png|17px]] [[File:Green Banner.png|17px]] [[File:Cyan Banner.png|17px]] [[File:Light Blue Banner.png|17px]] [[File:Blue Banner.png|17px]] [[File:Purple Banner.png|17px]] [[File:Magenta Banner.png|17px]] [[File:Pink Banner.png|17px]] Added banners.
|[[File:End City Banner.png|17px]] Magenta banners with a black chevron and inverted chevron are now naturally generated on the outside walls of [[end city|end cities]].
|Black and gray banners, and light gray banners with a white flower charge are now naturally generated in rooms of [[woodland mansion]]s.}}
{{History||1.4.0|snap=beta 1.2.20.1|The white banner can now be crafted from a colored banner and [[bleach]], which also removes all patterns, if used on a white banner.}}
{{History||1.10.0|snap=beta 1.10.0.3|[[Loom]]s have been added to help the [[player]] edit banners more easily.
|Brown banners now generate in new [[savanna]] [[village]]s.
|Black banners now generate in [[pillager outpost]] watchtowers.}}
{{History||1.11.0|snap=beta 1.11.0.1|Gray banners now generate in pillager outpost watchtowers, instead of black banners.
|[[File:Ominous Banner BE.png|17px]] Added [[illager captain]]s, which drop an [[illager]] banner upon [[death]].}}
{{History|||snap=beta 1.11.0.3|Illager banners now generate in [[pillager outpost]] watchtowers, instead of gray banners.}}
{{History|||snap=beta 1.11.0.4|Banners can now be [[trading|bought]] from cartographer and shepherd [[villager]]s.}}
{{History||1.20.0|snap=beta 1.20.0.20|Banners can now be used to customise [[shield]]s.}}
{{History|console}}
{{History||xbox=TU43|xbone=CU33|ps=1.36|wiiu=Patch 13|switch=1.0.1|[[File:White Banner Revision 1.png|22px]][[File:Light Gray Banner Revision 1.png|22px]][[File:Gray Banner Revision 1.png|22px]][[File:Black Banner Revision 1.png|22px]][[File:Brown Banner Revision 1.png|22px]][[File:Red Banner Revision 1.png|22px]][[File:Orange Banner Revision 1.png|22px]][[File:Yellow Banner Revision 1.png|22px]][[File:Lime Banner Revision 1.png|22px]][[File:Green Banner Revision 1.png|22px]][[File:Cyan Banner Revision 1.png|22px]][[File:Light Blue Banner Revision 1.png|22px]][[File:Blue Banner Revision 1.png|22px]][[File:Purple Banner Revision 1.png|22px]][[File:Magenta Banner Revision 1.png|22px]][[File:Pink Banner Revision 1.png|22px]] Added banners.}}
{{History||xbox=TU46|xbone=CU36|ps=1.38|wiiu=Patch 15|switch=1.0.1|[[File:End City Banner.png|17px]] Magenta banners with a black chevron and inverted chevron are now naturally generated on the outside walls of [[end city|end cities]].}}
{{History||xbox=TU53|xbone=CU43|ps=1.49|wiiu=Patch 23|switch=1.0.3|[[File:White Banner.png|17px]] [[File:Light Gray Banner.png|17px]] [[File:Gray Banner.png|17px]] [[File:Black Banner.png|17px]] [[File:Brown Banner.png|17px]] [[File:Red Banner.png|17px]] [[File:Orange Banner.png|17px]] [[File:Yellow Banner.png|17px]] [[File:Lime Banner.png|17px]] [[File:Green Banner.png|17px]] [[File:Cyan Banner.png|17px]] [[File:Light Blue Banner.png|17px]] [[File:Blue Banner.png|17px]] [[File:Purple Banner.png|17px]] [[File:Magenta Banner.png|17px]] [[File:Pink Banner.png|17px]] Changed banners' [[tint]]s.}}
{{History||xbox=none|xbone=none|ps=1.90|wiiu=none|switch=none|[[Loom]]s have been added to help the [[player]] edit banners more easily.}}
{{History||ps=1.91|[[File:Ominous Banner BE.png|17px]] Added [[illager]] banners, which generate with [[pillager outpost]]s and are [[drops|dropped]] by [[illager captain]]s upon [[death]].}}
{{History|foot}}
== Issues ==
{{issue list}}
== Trivia ==
* With 16 blank banners, 38 patterns of 16 colors each (608 uniquely-colored patterns), and 0 to 6 patterns per banner, the number of uniquely crafted banners is 16 × (608<sup>0</sup> + 608<sup>1</sup> + 608<sup>2</sup> + 608<sup>3</sup> + 608<sup>4</sup> + 608<sup>5</sup> + 608<sup>6</sup>) ≈ 809 quadrillion - 809 with 15 zeros (809,573,616,779,945,488). The number of visually distinct banners is smaller, because one or more patterns may completely cover other patterns, or the entire banner, or be duplicated due to the symmetric set of patterns (e.g. field or (yellow) + per pale azure (blue) = field azure + per pale or inverted).
** Not 38 patterns are available on BE, but 40 patterns of 16 colors each (640 uniquely-colored patterns), so the number is even greater. 16 × (640<sup>0</sup> + 640<sup>1</sup> + 640<sup>2</sup> + 640<sup>3</sup> + 640<sup>4</sup> + 640<sup>5</sup> + 640<sup>6</sup>) ≈ 1 quintillion - 1 with 18 zeros (1,101,232,303,249,827,856). This increases the number by almost 1.4 times, or almost 292 quadrillion, despite the addition of only 2 patterns.
* If a banner has over 6 patterns, only the six bottom-most patterns are displayed when hovered over in the [[inventory]].
* The Mojang logo is called "Thing" in-game, which could be considered an alternate translation for [[wiktionary:mojäng|mojäng]]. If [[wikipedia:Google Translate|Google Translate]] is used, it translates to "thingys" or "contraption".
** In the Swedish translation of the game, this pattern is, in fact, called ''mojäng''.
* [[List of block textures#Banner Textures|Banner textures]] are located in \assets\minecraft\textures\entity\banner.
** There are 40 monochrome textures, each containing all 6 sides of the banner.
** The texture of the back side is the mirrored texture of the front side.
** Compared to the texture files, textures' colors are inverted in-game due to them acting as masks for the re-colored base texture, base.png. That means white is visible, while black is transparent.
* Banners that have the purple NBT+ line in the bottom (obtained by holding Ctrl and middle-clicking the banner, which also copies the NBT [[tag]] of anything that the player points their crosshair to) actually have no difference with the base banner obtained by middle click.
*The Illager Banner in Bedrock Edition is available as a separate item but is just a second variant of the white banner.
**Standard variant of white banner is set to type 0.
**Illager variant is set to type 1.
== Gallery ==
<gallery>
Banners Jeb.png|The first image of banners, as tweeted by Jens Bergensten.
Iceland and Norway Flags.png|Another banner image from Jeb.
Searge Banners.png|Several banners made by Searge.
The Bountiful Update.png|Banners in the official 1.8 poster.
BannersBeforeAndAfter.png|An image, tweeted by Jeb, showcasing the changes he made to the banner color palette in the 1.12 update.
Gradients Overlay.png|The result of using gradient different numbers of times, each time increasing the level of gradient by 1.
All positions and rotations of a banner.png|All positions and rotations of a banner
Item Frame with Banner.png|A banner with the [[Mojang]] logo in an [[item frame]].
EndCityBanners.png|Banners floating outside of an [[End city]] tower.
Woodland mansion 1x2 d1.png|Banners hanging above the doorway of a [[woodland mansion]] master bedroom.
Replaceitembanner.png|Banner put in the helmet slot by using the command {{cmd|replaceitem}}{{Only|BE}} or {{cmd|item replace}}{{Only|JE}}.
Better Together Banners.jpg|Banners in ''Bedrock Edition''.
Better Together Banner Crafting 1.jpg|A banner in the hand.
Better Together Banner Crafting 2.jpg|A banner in the inventory.
Better Together Banner Crafting 3.jpg|A banner in the crafting grid.
Better Together Banner Crafting 4.jpg|A banner being given a pattern.
</gallery>
=== Renders ===
<gallery>
Ominous Banner.gif
White Banner.gif
Light Gray Banner.gif
Gray Banner.gif
Black Banner.gif
Brown Banner.gif
Red Banner.gif
Orange Banner.gif
Yellow Banner.gif
Lime Banner.gif
Green Banner.gif
Cyan Banner.gif
Light Blue Banner.gif
Blue Banner.gif
Purple Banner.gif
Magenta Banner.gif
Pink Banner.gif
Ominous Wall Banner.png|
White Wall Banner.png|
Light Gray Wall Banner.png|
Gray Wall Banner.png|
Black Wall Banner.png|
Brown Wall Banner.png|
Red Wall Banner.png|
Orange Wall Banner.png|
Yellow Wall Banner.png|
Lime Wall Banner.png|
Green Wall Banner.png|
Cyan Wall Banner.png|
Light Blue Wall Banner.png|
Blue Wall Banner.png|
Purple Wall Banner.png|
Magenta Wall Banner.png|
Pink Wall Banner.png
</gallery>
<gallery>
File:Ominous Banner.gif|Ominous banner pattern in Java Edition.
File:Ominous Banner BE.gif|Illager banner pattern in Bedrock Edition.
File:Ominous Banner Revision 1.gif|Old Ominous banner pattern.
File:Ominous Banner washing.gif|Washing with cauldron shows how to apply the ominous banner pattern.
</gallery>
=== [[Lego Minecraft]] Banners ===
<gallery>
File:Lego Red Creeper Banner Collage.jpg|Lego banners from 21127 and 21131
File:Lego Melon Banner.png|Lego banner from 21138
File:Lego Fish Banner.png|Lego banner from 21142
File:Lego Beetroot Banner.png|Lego banner from 21144
File:Lego Wheat Banner.png|Another lego banner from 21144
File:Lego Carrot Banner.png|A third lego banner from 21144
File:Lego Crossbones Banner.png|Lego banner from 21152
File:Lego Green Creeper Banner Collage.jpg|Lego banners from 21155
File:Lego Ominous Banner.png|Lego ominous banner from 21160
</gallery>
== References ==
{{reflist}}
{{Blocks|Utility}}
{{Items}}
[[Category:Generated structure blocks]]
[[Category:Manufactured blocks]]
[[Category:Block entities]]
[[Category:Non-solid blocks]]
[[cs:Prapor]]
[[de:Banner]]
[[es:Estandarte]]
[[fr:Bannière]]
[[ja:旗]]
[[ko:현수막]]
[[nl:Banier]]
[[pl:Sztandar]]
[[pt:Estandarte]]
[[ru:Флаг]]
[[uk:Стяг]]
[[zh:旗帜]]</li></ul></nowiki> | New trees implemented using parts of Paul Spooner's Forester editor script. | ||||
June 7, 2010{{Extension DPL}}<ul><li>[[Spider Eye|Spider Eye]]<br/>{{Item
| title = Spider Eye
| image = Spider Eye.png
| renewable = Yes
| heals = {{Hunger|2}}
|effects={{EffectLink|Poison}} (0:05)
| stackable = Yes (64)
}}
A '''spider eye''' is a poisonous [[food]] and [[brewing]] item.
== Obtaining ==
=== Mob loot ===
==== Spiders ====
[[Spider]]s and [[cave spider]]s have a {{frac|1|3}} chance of dropping a [[spider eye]] when killed by a player or tamed wolf, but not when killed by environmental damage (such as falling). The maximum amount of spider eyes is increased by 1 per level of [[Looting]]. The chance of a spider '''not''' dropping any spider eyes can be found using the formula <code>2 / (Looting Level + 3)</code>. For example, Looting III gives a {{frac|1|3}} chance of not dropping any spider eyes. All other amounts have an equal chance of occurring.
==== Witches ====
[[Witch]]es have a chance of dropping 0–6 spider eyes upon death. This is increased by 3 per level of [[Looting]], for a maximum of 0-15 spider eyes.
=== Chest loot ===
{{LootChestItem|spider-eye}}
== Usage ==
=== Food ===
When [[Food|eaten]], a spider eye restores {{hunger|2}} [[Hunger|hunger points]] and 3.2 [[Hunger#Mechanics|saturation points]], giving a nourishment value of 1.6. It also applies a [[Poison]] [[effect]] lasting 5 seconds to the player, causing {{hp|4|poisoned=1}} damage, which reduces hunger/saturation by 6 points.
=== Crafting ingredient ===
{{crafting usage}}
=== Brewing ingredient ===
{{brewing
|showname=1
|head=1
|Spider Eye
|Mundane Potion
|base=Water Bottle
}}
{{brewing
|foot=1
|Spider Eye
|Potion of Poison
}}
==Sounds==
{{Sound table/Entity/Food}}
== Data values ==
=== ID ===
{{edition|java}}:
{{ID table
|edition=java
|showforms=y
|generatetranslationkeys=y
|displayname=Spider Eye
|spritetype=item
|nameid=spider_eye
|form=item
|foot=1}}
{{edition|bedrock}}:
{{ID table
|edition=bedrock
|shownumericids=y
|showforms=y
|notshowbeitemforms=y
|generatetranslationkeys=y
|displayname=Spider Eye
|spritetype=item
|nameid=spider_eye
|id=278
|form=item
|foot=1}}
== Advancements ==
{{load advancements|Husbandry;A Balanced Diet}}
== Video ==
<div style="text-align:center">{{yt|-PD-wX07TCg}}</div>
== History ==
{{History|java}}
{{History||1.0.0|snap=Beta 1.9 Prerelease 2|[[File:Spider Eye JE1 BE1.png|32px]] Added spider eyes.
|Spider eyes can be used to craft [[fermented spider eye]]s.}}
{{History|||snap=Beta 1.9 Prerelease 3|Spider eyes can now be [[brewing|brewed]] in a [[water bottle]] to create a [[Mundane Potion]], or in an [[Awkward Potion]] to create a [[Potion of Poison]].}}
{{History||1.4.2|snap=12w38b|Spider eyes can now be dropped by [[witch]]es.}}
{{History||1.9|snap=15w44a|Spider eyes can now be found in [[desert pyramid|desert temple]] [[chest]]s.}}
{{History||1.13|snap=17w47a|Prior to [[1.13/Flattening|''The Flattening'']], this [[item]]'s numeral ID was 375.}}
{{History||1.14|snap=18w43a|[[File:Spider Eye JE2 BE2.png|32px]] The texture of spider eyes has been changed.}}
{{History|pocket alpha}}
{{History||v0.12.1|snap=build 1|[[File:Spider Eye JE1 BE1.png|32px]] Added spider eyes.|Spider eyes can be used to craft [[fermented spider eye]]s and for [[brewing]].}}
{{History||v0.13.0|snap=build 1|Spider eyes can now be found in [[desert pyramid|desert temple]] [[chest]]s.}}
{{History||v0.14.0|snap=build 1|Spider eyes can now dropped by [[witch]]es.}}
{{History|bedrock}}
{{History||1.10.0|snap=beta 1.10.0.3|[[File:Spider Eye JE2 BE2.png|32px]] The texture of spider eyes has been changed.}}
{{History|console}}
{{History||xbox=TU7|xbone=CU1|ps=1.0|wiiu=Patch 1|[[File:Spider Eye JE1 BE1.png|32px]] Added spider eyes.}}
{{History||xbox=none|xbone=none|ps=1.90|wiiu=none|[[File:Spider Eye JE2 BE2.png|32px]] The texture of spider eyes has been changed.}}
{{History|New 3DS}}
{{History||0.1.0|[[File:Spider Eye JE1 BE1.png|32px]] Added spider eyes.}}
{{History|foot}}
== Issues ==
{{issue list}}
== References ==
{{reflist}}
{{items}}
[[cs:Pavoučí oko]]
[[de:Spinnenauge]]
[[es:Ojo de araña]]
[[fr:Œil d'araignée]]
[[hu:Pókszem]]
[[it:Occhio di ragno]]
[[ja:クモの目]]
[[ko:거미 눈]]
[[nl:Spinnenoog]]
[[pl:Oko pająka]]
[[pt:Olho de aranha]]
[[ru:Паучий глаз]]
[[zh:蜘蛛眼]]
[[Category:Food]]
[[Category:Renewable resources]]
[[Category:Brewing recipe]]</li><li>[[Bottle of Entity|Bottle of Entity]]<br/>{{joke feature}}
{{exclusive|java}}
{{WIP}}
{{see also|Potion|Splash Potion}}
{{Item
|image=Bottle of Entity.png
|image2=Splash Bottle of Entity.png
|image3=Bottle of Void.png
|stackable= No
}}
'''Bottles of entity''' are items that transform players into the respective mobs when drunk.
'''Splash bottle of entity''' are a variation of bottles of mob that can be thrown.
'''Bottle of void''' is a special bottle to transform back to the original player. Right clicking with it on a transformed player will remove the transformation and convert the bottle into a bottle of entity of that transformation.
A transformation into an entity will sometimes lead to special effects. For example, transforming into a chicken will allow the player to glide slowly to the ground. The chicken will however take fall damage upon landing, killing it and transforming the player back to themselves.
Transforming into an enderman will cause the player to be teleported randomly when a projectile it aimed at it or when they're being looked at by other players. Transforming into any mob capable of flight (for example, a bat) will allow the player to fly in survival mode as if they were in creative mode.
== Sounds ==<!--No sounds when thrown from a player or dispenser-->
Splash bottles of entities use the Friendly Creatures sound category for entity-dependent sound events.
{{Sound table
|sound=Bottle fill water1.ogg
|sound2=Bottle fill water2.ogg
|sound3=Bottle fill water3.ogg
|sound4=Bottle fill water4.ogg
|subtitle=Bottle fills
|source=neutral
|description=When an entity is collected using a bottle of void
|id=item.bottle.fill
|translationkey=subtitles.item.bottle.fill
|volume=1.0
|pitch=1.0
|distance=16}}
{{Sound table
|sound=Drink.ogg
|subtitle=Sipping
|source=player
|description=While a player is drinking a bottle of entity
|id=entity.generic.drink
|translationkey=subtitles.entity.generic.drink
|volume=0.5
|pitch=0.9-1.0
|distance=16}}
{{Sound table
|sound=Glass dig1.ogg
|sound2=Glass dig2.ogg
|sound3=Glass dig3.ogg
|subtitle=Bottle smashes
|source=neutral
|description=When a splash bottle of entity impacts something <ref group=sound>This sound is played six times simultaneously</ref>
|id=entity.splash_potion.break
|translationkey=subtitles.entity.potion.splash
|volume=1.0
|pitch=0.9-1.0
|distance=16
|foot=1}}
== Data values ==
=== ID ===
{{ID table
|edition=java
|showforms=y
|generatetranslationkeys=y
|displayname=Bottle of Entity
|spritetype=item
|nameid=bottle_of_entity
|form=item
|translationkey=item.minecraft.bottle_of_entity,item.minecraft.bottle_of_entity.specific}}
{{ID table
|showforms=y
|generatetranslationkeys=y
|displayname=Splash Bottle of Entity
|spritetype=item
|nameid=splash_bottle_of_entity
|form=item
|translationkey=item.minecraft.splash_bottle_of_entity,item.minecraft.splash_bottle_of_entity.specific}}
{{ID table
|showforms=y
|generatetranslationkeys=y
|displayname=Bottle of Void
|spritetype=item
|nameid=bottle_of_void
|form=item
|translationkey=item.minecraft.bottle_of_void
|foot=1}}
== History ==
{{History|java}}
{{History||23w13a_or_b|[[File:Bottle of Entity.png|32px]] [[File:Splash Bottle of Entity.png|32px]] [[File:Bottle of Void.png|32px]] Added bottle of entity, splash bottle of entity, and bottle of void.}}
{{History|foot}}
{{items}}
{{Jokes}}
[[ja:Bottle of Entity]]
[[pt:Frasco de entidade]]
[[Category:Joke items]]</li></ul> | Reverted back to old tree code. | ||||
| beta | |||||
1.2{{Extension DPL}}<ul><li>[[Scute|Scute]]<br/>{{about|the item used to craft turtle shell helmets|the helmet|Turtle Shell}}
{{Item
| image = Scute.png
| renewable = Yes
| stackable = Yes (64)
|title=Turtle scute}}
'''Turtle Scutes''' are [[item]]s that baby [[turtle]]s drop when they grow into adults. They can be used to craft [[turtle shell]]s which can be used to brew the [[potion of the Turtle Master]].
== Obtaining ==
=== Mob loot ===
Baby [[turtle]]s drop a single scute when they grow up into adults, which is the only way possible to obtain the [[item]].
== Usage ==
Scutes can be crafted into [[turtle shell]]s.
=== Crafting ingredient ===
{{crafting usage}}
=== Repairing ===
Scutes are the [[repair]] items for the turtle [[armor material]], and thus can be used to repair [[turtle shell]]s in an [[anvil]].
=== Trading ===
Expert-level cleric [[villager]]s have a {{frac|2|3}} chance to buy 4 scutes for an [[emerald]] as part of their [[trading|trades]].{{only|java}}
Expert-level cleric villagers have a 50% chance to buy 4 scutes for an emerald as part of their seventh trades.{{only|bedrock}}
Expert-level leatherworker villagers buy 4 scutes for an emerald as part of their trades.
== Data values ==
=== ID ===
{{edition|java}}:
{{ID table
|edition=java
|showforms=y
|generatetranslationkeys=y
|displayname=Scute
|spritetype=item
|nameid=scute
|form=item
|foot=1}}
{{edition|bedrock}}:
{{ID table
|edition=bedrock
|showaliasids=y
|shownumericids=y
|showforms=y
|notshowbeitemforms=y
|generatetranslationkeys=y
|displayname=Scute
|spritetype=item
|nameid=scute
|aliasid=turtle_shell_piece
|id=572
|form=item
|translationkey=item.turtle_shell_piece.name
|foot=1}}
== History ==
{{History|java}}
{{History||1.13|snap=18w07a|[[File:Scute JE1 BE1.png|32px]] Added turtle shell pieces.}}
{{History|||snap=18w07b|"Turtle Shell Pieces" have now been renamed to "Scutes."}}
{{History||1.14|snap=19w11a|Cleric and leatherworker [[villager]]s now [[trading|buy]] scutes.}}
{{History|bedrock}}
{{History||1.5.0|snap=beta 1.5.0.4|[[File:Scute JE1 BE1.png|32px]] Added scutes.}}
{{History||1.11.0|snap=beta 1.11.0.4|Scutes can be [[trading|sold]] to cleric and leatherworker [[villager]]s.}}
{{History|console}}
{{History||xbox=TU69|ps=1.76|wiiu=Patch 38|[[File:Scute JE1 BE1.png|32px]] Added scutes.}}
{{history|foot}}
== Issues ==
{{issue list}}
== Trivia ==
* Scutes used to be called "Turtle Shell Pieces", they were renamed after it was pointed out that "Scute" was a more technical term.<ref>https://www.reddit.com/r/minecraftsuggestions/comments/7xnp2o/rename_turtle_shell_pieces_to_scutes/</ref>
== References ==
{{reflist}}
{{Items}}
[[Category:Renewable resources]]
[[de:Hornschild]]
[[es:Escama de tortuga]]
[[fr:Écaille de tortue]]
[[ja:カメのウロコ]]
[[ko:인갑]]
[[lzh:鱗]]
[[pl:Tarczka]]
[[pt:Escama de tartaruga]]
[[ru:Щиток]]
[[th:เกล็ดเต่า]]
[[uk:Черепок]]
[[zh:鳞甲]]</li><li>[[Slimeball|Slimeball]]<br/>{{about|the item|the mob|Slime|the block constructed with slimeballs|Slime Block|other uses|Slime (disambiguation)}}
{{Item
| image = Slimeball.png
| renewable = Yes
| stackable = Yes (64)
}}
A '''slimeball''' is a [[crafting]] ingredient commonly dropped by [[slime]]s, and can be sneezed out by [[panda]]s.
== Obtaining ==
=== Mob loot ===
==== Slimes ====
{{see also|Tutorials/Slime farming}}
If a [[slime]]'s size is 1, it drops 0–2 slimeballs when killed. The maximum number of slimeballs is increased by 1 per level of [[Looting]], for a maximum of 5 slimeballs with Looting III.
==== Pandas ====
Baby [[panda]]s have a {{frac|1|700}} chance of [[drop]]ping one slimeball when sneezing.
=== Crafting ===
{{Crafting
|Slime Block
|Output= Slimeball,9
|type= Miscellaneous
}}
=== Trading ===
[[Wandering trader]]s sometimes offer to sell a slimeball for 4 [[emerald]]s.
== Usage ==
=== Crafting ingredient ===
{{crafting usage}}
=== Breeding ===
Slimeballs can be used to breed [[frog]]s and reduce the remaining growth duration of [[tadpole]]s by 10%. Both also follow a player holding a slimeball.
==Video==
{{Video note|This video is outdated, as slimeballs can now also be used to craft [[lead]]s and [[slime block]]s, breed [[frog]]s, and can now be obtained from baby [[panda]]s and [[wandering trader]]s.}}
{{yt|J6oR3fdbbjY}}
== Data values ==
===ID===
{{edition|java}}:
{{ID table
|edition=java
|showforms=y
|generatetranslationkeys=y
|displayname=Slimeball
|spritetype=item
|nameid=slime_ball
|form=item
|foot=1}}
{{edition|bedrock}}:
{{ID table
|edition=bedrock
|shownumericids=y
|showforms=y
|notshowbeitemforms=y
|generatetranslationkeys=y
|displayname=Slimeball
|spritetype=item
|nameid=slime_ball
|id=388
|form=item
|foot=1}}
==History==
{{History|java alpha}}
{{History||v1.0.11|[[File:Slimeball JE1 BE1.png|32px]] Added slimeballs, which are dropped from [[slime]]s. At the moment, they serve no purpose.}}
{{History|java beta}}
{{History||1.7|Slimeballs are now used to craft [[sticky piston]]s.}}
{{History|java}}
{{History||1.0.0|snap=Beta 1.9 Prerelease 2|Slimeballs are used to craft [[magma cream]].}}
{{History||1.6.1|snap=13w18a|[[Lead]]s, which were originally implemented in the [[13w16a]] snapshot, now have a [[crafting]] recipe that includes slimeballs.}}
{{History||1.8|snap=14w02a|Nine slimeballs are now used to [[crafting|craft]] a [[slime block]]. Slime blocks also act as storage [[block]]s, being able to craft back into 9 slimeballs.}}
{{History||1.13|snap=17w47a|Prior to [[1.13/Flattening|''The Flattening'']], this [[item]]'s numeral ID was 341.}}
{{History||1.14|snap=18w43a|[[File:Slimeball JE2 BE2.png|32px]] The texture of slimeballs has been changed.
|Slimeballs can now be obtained when a [[panda|baby panda]] sneezes.}}
{{History|||snap=19w05a|Slimeballs can now be bought from [[wandering trader]]s.}}
{{History||1.19|snap=22w11a|Slimeballs can now be used to breed [[frog]]s.}}
{{History|pocket alpha}}
{{History||v0.9.0|snap=build 1|[[File:Slimeball JE1 BE1.png|32px]] Added slimeballs. They are currently unobtainable and serve no purpose.}}
{{History||v0.12.1|snap=build 1|Added slimeballs to the [[creative]] [[inventory]].
|Slimeballs can now be obtained by killing [[slime]]s.
|Slimeballs are now used to craft [[magma cream]].}}
{{History||v0.14.0|snap=build 1|Slimeballs are now used to craft [[slime block]]s.}}
{{History||v0.15.0|snap=build 1|Slimeballs are now used to craft [[sticky piston]]s and [[lead]]s.}}
{{History|bedrock}}
{{History||1.8.0|snap=beta 1.8.0.8|Slimeballs can now be obtained when a [[panda|baby panda]] sneezes.}}
{{History||1.10.0|snap=beta 1.10.0.3|[[File:Slimeball JE2 BE2.png|32px]] The texture of slimeballs has been changed.
|Slimeballs can now be obtained via [[trading]] with [[wandering trader]]s.}}
{{History|console}}
{{History||xbox=TU1|xbone=CU1|ps=1.0|wiiu=Patch 1|switch=1.0.1|[[File:Slimeball JE1 BE1.png|32px]] Added slimeballs.}}
{{History||xbox=TU3|Slimeballs are now used to craft [[sticky piston]]s.}}
{{History||xbox=TU5|Slimeballs are found in the Miscellaneous tab in the [[Creative inventory]].}}
{{History||xbox=TU9|Moved slimeballs to the Materials tab in the Creative inventory.}}
{{History||xbox=none|xbone=none|ps=1.83|wiiu=none|switch=none|Slimeballs can now be obtained when a [[panda|baby panda]] sneezes.}}
{{History||xbox=none|xbone=none|ps=1.90|wiiu=none|switch=none|[[File:Slimeball JE2 BE2.png|32px]] The texture of slimeballs has been changed.}}
{{History|New 3DS}}
{{History||0.1.0|[[File:Slimeball JE1 BE1.png|32px]] Added slimeballs.}}
{{History|foot}}
==Issues ==
{{issue list}}
== External Links ==
*[https://www.minecraft.net/en-us/article/taking-inventory--slimeball Taking Inventory: Slimeball] – Minecraft.net on June 24, 2021
{{Items}}
[[Category:Renewable resources]]
[[cs:Sliz]]
[[de:Schleimball]]
[[es:Bola de slime]]
[[fr:Boule de Slime]]
[[hu:Nyálkagolyó]]
[[it:Palla di slime]]
[[ja:スライムボール]]
[[ko:슬라임볼]]
[[nl:Slijmbal]]
[[pl:Kula szlamu]]
[[pt:Bola de slime]]
[[ru:Слизь]]
[[th:ลูกเมือก]]
[[uk:Слизова кулька]]
[[zh:黏液球]]</li></ul> | Birch and pine trees introduced. Trees predating this update would appear to have multiple types of leaves, as the data indicating tree type was previously used for decay calculations. | ||||
1.5{{Extension DPL}}<ul><li>[[Blaze Rod|Blaze Rod]]<br/>{{Item
| image = Blaze Rod.png
| renewable = Yes
| stackable = Yes (64)
}}
'''Blaze rods''' are [[item]]s exclusively obtained from [[blaze]]s. They act as a fuel for both brewing and [[smelting]], and are required to craft [[eye of ender|eyes of ender]] used to access to [[the End]].
== Obtaining ==
=== Mob loot ===
When killed by a player or tamed [[wolf]], a [[blaze]] has a 50% chance to drop a blaze rod. The [[Looting]] [[enchantment]] can increase the drops by one per level, for a maximum of 4 blaze rods. Blazes do not drop any blaze rods if killed by any other source.
== Usage ==
=== Crafting ingredient ===
{{crafting usage}}
=== Fuel ===
When used in a [[furnace]], a blaze rod lasts 120 seconds (12 items).
== Achievements ==
{{load achievements|Into Fire}}
== Advancements ==
{{load advancements|Into Fire}}
== Video ==
{{Video note|This video does not mention the crafting of [[End Rod]]s.|minor}}
<div style="text-align:center">{{yt|_mhRHuRlICY}}</div>
== Data values ==
=== ID ===
{{el|java}}:
{{ID table
|edition=java
|showforms=y
|generatetranslationkeys=y
|displayname=Blaze Rod
|spritetype=item
|nameid=blaze_rod
|form=item
|foot=1}}
{{el|bedrock}}:
{{ID table
|edition=bedrock
|shownumericids=y
|showforms=y
|notshowbeitemforms=y
|generatetranslationkeys=y
|displayname=Blaze Rod
|spritetype=item
|nameid=blaze_rod
|id=423
|form=item
|foot=1}}
== History ==
{{History|java}}
{{History||1.0.0|snap=Beta 1.9 Prerelease|[[File:Blaze Rod JE1 BE1.png|32px]] Added blaze rods.}}
{{History|||snap=Beta 1.9 Prerelease 2|Blaze rods are now used to craft [[blaze powder]].}}
{{History|||snap=Beta 1.9 Prerelease 3|Blaze rods are now used to craft [[brewing stand]]s.}}
{{History||1.8|snap=14w07a|Blaze rods are now held similarly to [[tools]].}}
{{History||1.9|snap=15w44b|Blaze rods are now used to craft [[end rod]]s.}}
{{History||1.13|snap=17w47a|Prior to [[1.13/Flattening|''The Flattening'']], this [[item]]'s numeral ID was 369.}}
{{History|pocket alpha}}
{{History||v0.12.1|snap=build 1|[[File:Blaze Rod JE1 BE1.png|32px]] Added blaze rods.
|Blaze rods can be used to craft [[blaze powder]] and [[brewing stand]]s.}}
{{History|pocket}}
{{History||1.0.0|snap=alpha 0.17.0.1|Blaze rods are now used to craft [[end rod]]s.}}
{{History|console}}
{{History||xbox=TU7|xbone=CU1|ps=1.00|wiiu=Patch 1|switch=1.0.1|[[File:Blaze Rod JE1 BE1.png|32px]] Added blaze rods.
|Blaze rods can be used to craft [[blaze powder]] and [[brewing stand]]s.}}
{{History||xbox=TU46|xbone=CU36|ps=1.38|wiiu=Patch 15|Blaze rods are now used to craft [[end rod]]s.}}
{{History|New 3DS}}
{{History||0.1.0|[[File:Blaze Rod JE1 BE1.png|32px]] Added blaze rods.
|Blaze rods can be used to craft [[blaze powder]] and [[brewing stand]]s.}}
{{History|foot}}
== Issues ==
{{issue list}}
== Trivia ==
* As part of an official collaboration, blaze rods are included in a free add-on for the roleplaying game [https://en.wikipedia.org/wiki/Dungeons_%26_Dragons ''Dungeons and Dragons''].<ref>https://www.google.com/url?sa=t&rct=j&q=&esrc=s&source=web&cd=&cad=rja&uact=8&ved=2ahUKEwj9uvqlwIT-AhV7LUQIHYlVDiwQFnoECBAQAQ&url=https%3A%2F%2Fwww.minecraft.net%2Fcontent%2Fdam%2Fgames%2Fminecraft%2Fsoftware%2FMinecraft-Monstrous-Compendium.pdf&usg=AOvVaw0aKOqpKAHSH11qgZhN_Bhx</ref> In the game, they are worth 100 gold pieces, create light, and can be broken to create an explosion.
* They are the spinning things surrounding the blaze's head
{{items}}
== References ==
{{Reflist}}
[[Category:Renewable resources]]
[[cs:Ohnivá hůl]]
[[de:Lohenrute]]
[[el:Οι ράβδοι των Blaze]]
[[es:Vara de blaze]]
[[fr:Bâton de Blaze]]
[[hu:Lángrúd]]
[[it:Verga di blaze]]
[[ja:ブレイズロッド]]
[[ko:블레이즈 막대]]
[[lzh:炎靈桿]]
[[nl:Blazestaf]]
[[pl:Płomienna różdżka]]
[[pt:Vara de blaze]]
[[ru:Огненный стержень]]
[[th:แท่งเบลซ]]
[[tr:Alaz Çubuğu]]
[[uk:Стрижень Блейза]]
[[zh:烈焰棒]]</li><li>[[Spyglass|Spyglass]]<br/>{{Item
| title = Spyglass
| image = Spyglass.png
| durability =
| rarity = Common
| renewable = Yes
| stackable = No
}}
A '''spyglass''' is a [[tool]] used to zoom in on distant objects.
== Obtaining ==
=== Crafting ===
{{Crafting
|B1=Amethyst Shard
|B2=Copper Ingot
|B3=Copper Ingot
|Output=Spyglass
|type=Tool
}}
== Usage ==
[[File:Steve scoping Spyglass.png|right|100px]] [[File:Alex scoping Spyglass.png|right|100px]]
To use a spyglass, the player selects it from the hotbar and clicks {{control|use}} while looking in the desired direction.
Spyglasses are used to zoom in on a specific location in the player's field of view (FOV). The spyglass changes the FOV to {{frac|1|10}} of the FOV set in [[options]]. By default, the FOV is set to 70° in ''Java Edition'' and 60° in Bedrock Edition, resulting in an FOV of 7° in ''Java Edition'' and 6° in Bedrock Edition through the spyglass. The player's FOV can be set from 30° to 110°, so the spyglass FOV can range from 3° to 11°. Regardless of the situation, or status effects the player has, using the Spyglass always shows a FOV {{frac|1|10}} of the FOV set in [[options]].
A square vignette is applied when in use, similar to the effect when wearing a [[carved pumpkin]]. Pressing {{key|F1}} removes the vignette,{{only|java}}<ref>{{bug|MC-203575||The spyglass overlay goes away when pressing F1|WAI}}</ref><ref>{{bug|MCPE-125869||Spyglass's overlay don't go away even if the player toggles Hide GUI on/ Pressing F1|}}</ref> similar to a carved pumpkin.
Hazy distant objects remain hazy when viewed in the spyglass. Mobs too distant to render also do not render in the spyglass. The spyglass shows a magnified view of what the player already sees.
The player is slowed down while watching through the spyglass. When the player uses the spyglass continuously for {{convert|1|minute|game tick}}, the interface is automatically closed.
If the player has a certain effect on their screen like [[fire]], the spyglass does not remove that effect on the player's screen.
[[File:Spyglass Zooming.gif|thumb|center|A spyglass being used to zoom in on a [[block of gold]] starting from normal FOV (70°).]]
== Sounds ==
{{edition|java}}:
{{Sound table
|sound=Spyglass use.ogg
|subtitle=Spyglass expands
|source=player
|description=When a player uses a spyglass
|id=item.spyglass.use
|translationkey=subtitles.item.spyglass.use
|volume=0.5
|pitch=''varies'' <ref group=sound>Can be 1.15, 1.33, 1.4, or 1.55</ref>
|distance=16}}
{{Sound table
|sound=Spyglass stop.ogg
|subtitle=Spyglass retracts
|source=player
|description=When a player stops using a spyglass
|id=item.spyglass.stop_using
|translationkey=subtitles.item.spyglass.stop_using
|volume=0.5
|pitch=''varies'' <ref group=sound>Can be 1.0, 0.8, or 0.9</ref>
|distance=16
|foot=1}}
{{edition|bedrock}}:
{{Sound table
|type=bedrock
|sound=Spyglass use.ogg
|source=player
|description=When a player uses a spyglass
|id=item.spyglass.use
|volume=0.5
|pitch=1.15-1.55}}
{{Sound table
|sound=Spyglass stop.ogg
|source=player
|description=When a player stops using a spyglass
|id=item.spyglass.stop_using
|volume=0.5
|pitch=0.8-1.0
|foot=1}}
== Data values ==
=== ID ===
{{edition|java}}:
{{ID table
|edition=java
|showforms=y
|generatetranslationkeys=y
|displayname=Spyglass
|spritetype=item
|nameid=spyglass
|form=item
|foot=1}}
{{edition|bedrock}}:
{{ID table
|edition=bedrock
|shownumericids=y
|showforms=y
|notshowbeitemforms=y
|generatetranslationkeys=y
|displayname=Spyglass
|spritetype=item
|nameid=spyglass
|form=item
|foot=1|id=626}}
== Advancements ==
{{load advancements|Is it a Bird?;Is it a Balloon?;Is it a Plane?}}
== History ==
{{History||October 3, 2020|link={{ytl|DBvZ2Iqmm3M|t=25m21s}}|[[File:Spyglass JE1.png|32px]]<!-- [[File:Spyglass scope (pre-release).png|32px]]--> Spyglasses are revealed at [[Minecraft Live 2020]]. They were originally named "telescopes" and had an oval vignette.}}
{{History|java}}
{{History||1.17|snap=20w45a|[[File:Spyglass JE1.png|32px]] Added spyglasses.
|[[File:Spyglass scope JE1.png|32px]] The scope texture is currently a circle with glare spots.}}
{{History|||snap=20w46a|[[File:Spyglass scope JE2.png|32px]] The scope texture is now a [[glass]] square with a [[copper]] border.}}
{{History|||snap=20w48a|[[File:Spyglass JE2 BE1.png|32px]] The spyglass is now a 3D model instead of a flat sprite.
|[[File:Spyglass (texture) JE2.png|32px]] The texture of the spyglass has changed.
|A spyglass in use is anchored better to the player's "eye" when viewed in 3rd person.}}
{{History|||snap=21w05a|Copper ingots are now renewable via [[drowned]], making spyglasses renewable.}}
{{History|||snap=21w10a|[[File:Spyglass (item) JE3 BE1.png|32px]] Spyglasses have a new texture in the inventory. The 3D model is still used in the hand, similar to [[tridents]].}}
{{History||1.17.1|snap=Pre-release 1|[[File:Spyglass (texture) JE3.png|32px]] The texture of the spyglass model has changed.}}
{{History|bedrock}}
{{History||1.17.0|snap=beta 1.17.0.50|[[File:Spyglass JE2 BE1.png|32px]] [[File:Spyglass (item) JE3 BE1.png|32px]] Added spyglasses.}}
{{History|||snap=beta 1.17.0.52|Spyglasses are now available without enabling [[experimental gameplay]].}}
{{History|foot}}
== Issues ==
{{Issue list}}
== Trivia ==
*If {{command|item replace}} is used to place a spyglass on a player's head, the item appears stuck to the center of the player's face.
== Gallery ==
<gallery>
Villager Spyglass.png|Spying on [[villager]]s through a spyglass.
After using the spyglass at FOV 30 F1.png|Hiding the HUD removes the spyglass overlay.
Panda eating a spyglass.png|When eaten by a [[panda]], spyglasses cause [[missing texture]] particles to be produced.<ref>{{bug|MC-206684}}</ref>
JE 1.17 Development Telescope.jpg|The spyglass was originally called the telescope.
JE 1.17 Development Telescope 2.jpg|The telescope's overlay was originally round instead of square.
File:Ari Spyglass.jpg|How the spyglass looks in the third person.
Steve scoping Spyglass JE1.png|Steve using a spyglass before its 3D model was added.
Alex scoping Spyglass JE1.png|Alex using a spyglass before its 3D model was added.
File:Mangrove Portal.jpg|An [[allay]] peeking into view of [[Noor]]’s spyglass.
</gallery>
== References ==
{{Reflist}}
== External Links ==
*[https://www.minecraft.net/en-us/article/taking-inventory--spyglass Taking Inventory: Spyglass] – Minecraft.net on February 17, 2022
{{Items}}
[[Category:Renewable resources]]
[[de:Fernrohr]]
[[es:Catalejo]]
[[fr:Longue-vue]]
[[it:Cannocchiale]]
[[ja:望遠鏡]]
[[pl:Luneta]]
[[pt:Luneta]]
[[ru:Подзорная труба]]
[[zh:望远镜]]</li></ul> | Birch and pine saplings became available. Post-Beta 1.5 oak-type saplings will not stack with pre-Beta 1.5 saplings. | ||||
1.8{{Extension DPL}}<ul><li>[[:Category:Education Edition items|Category:Education Edition items]]<br/>[[Category:Education Edition]]
[[Category:Items]]</li><li>[[Disc Fragment|Disc Fragment]]<br/>{{Item
| image = Disc Fragment.png
| renewable = No
| stackable = Yes (64)
}}
A '''disc fragment''' is a [[music disc]] fragment obtained from [[ancient city]] loot chests. Nine fragments can be combined in a [[Crafting Table|crafting table]] to make a music disc named "5".
== Obtaining ==
=== Chest loot ===
{{LootChestItem|disc-fragment-5}}
== Usage ==
=== Crafting ingredient ===
{{crafting usage|Disc Fragment 5}}
== Data values ==
=== ID ===
{{ID table
|edition=java<!--
|showitemtags=y-->
|showforms=y
|firstcolumnname=Track
|generatetranslationkeys=y
|displayname=Samuel Åberg - 5
|spritename=disc-fragment-5
|spritetype=item
|nameid=disc_fragment_5<!--
|itemtags=-->
|form=item
|foot=y}}
== History ==
{{History|java}}
{{History||1.19|snap=22w16a|[[File:Disc Fragment.png|32px]] Added disc fragments.}}
{{History|bedrock}}
{{History||1.19.0|snap=beta 1.19.0.28|[[File:Disc Fragment.png|32px]] Added disc fragments.}}
{{History|foot}}
== Issues ==
{{Issue list}}
==Gallery==
<gallery>
9 to 5.jpg|9 fragments of the 5 music disc.
</gallery>
==See also==
* {{EnvLink|Music}}
* {{ItemLink|Music Disc}}
{{Items}}
[[de:Plattenbruchstück]]
[[es:Fragmento de disco]]
[[fr:Fragment de disque]]
[[ja:レコードの破片]]
[[pl:Fragment płyty]]
[[pt:Fragmento de disco]]
[[ru:Фрагмент пластинки 5]]
[[uk:Фрагмент платівки]]
[[zh:唱片残片]]
[[Category:Non-renewable resources]]</li></ul> | The Swampland biome was added, with a new tree design (made of the same blocks as oak trees), which are of more uniform size and have vines growing on them. There is no way to grow these trees; oak saplings will grow normal oak trees. A bush-shaped variety of oak tree was removed. | ||||
| r | |||||
1.0.0{{Extension DPL}}<ul><li>[[Banner Pattern|Banner Pattern]]<br/>{{Item
| image = Banner Pattern.png
| rarity =
* '''Flower Charge, Field Masoned, Bordure Indented, Globe, Snout'''
* Common
* '''Creeper Charge, Skull Charge'''
* Uncommon
* '''Thing'''
* Epic
| renewable =
* '''Snout, Thing''': No
* '''All others''': Yes
| stackable = No
}}
'''Banner patterns''' are [[item]]s used to customize [[banner]]s inside [[loom]]s.
There are six patterns {{in|java}} and eight {{in|bedrock}}.
== Obtaining ==
[[File:Banner Patterns 20w15a.png|thumb|All six banner patterns {{in|java}} with their various sources.]]
=== Crafting ===
{{see also|Banner/Patterns|title1=List of patterned banners}}
4 out of 6 banner patterns {{only|JE}} and 2 more {{only|BE}} can be obtained by crafting. They are crafted by combining one [[paper]] along with a certain material.
{{Crafting
|head=1
|Paper
|Creeper Head
|Output=Banner Pattern Creeper
|type=Miscellaneous
|description=Creeper face
}}
{{Crafting
|Paper
|Wither Skeleton Skull
|Output=Banner Pattern Skull
|type=Miscellaneous
|description=Skeleton skull and crossbones
}}
{{Crafting
|Paper
|Oxeye Daisy
|Output=Banner Pattern Flower
|type=Miscellaneous
|description=Daisy
}}
{{Crafting
|Paper
|Enchanted Golden Apple
|Output=Banner Pattern Thing
|type=Miscellaneous
|showdescription=true
|description=Former [[Mojang Studios]] logo
}}
{{Crafting
|Paper
|Bricks
|Output=Banner Pattern Field Masoned
|type=Miscellaneous
|description={{only|bedrock}}
}}
{{Crafting
|Paper
|Vines
|Output=Banner Pattern Bordure Indented
|type=Miscellaneous
|description={{only|bedrock}}
|foot=1
}}
=== Trading ===
'''Globe banner pattern''' is obtained by trading with a master-level [[Trading#Cartographer|cartographer villager]] for a price of 8 emeralds.
=== Chest loot ===
'''Snout banner pattern''' is obtained in the [[Bastion Remnant]] as loot.
{{LootChestItem|snout-banner-pattern}}
== Usage ==
=== Loom ingredient ===
Banner patterns are used in [[loom]]s to add customization to [[banner]]s. The pattern must be combined with 1 banner and 1 [[dye]]. Upon usage in the loom, the banner pattern is not consumed.
{{Looming
|head=1
|showdescription=1
|name=[[Banner|Flower Charge Banner]]
|ingredients={{:Banner/recipe|ingredients}}
|{{:Banner/recipe|banner}}
|Matching Dye
|Banner Pattern Flower Charge
|Flower Charge
|{{:Banner/recipe|output|Flower Charge}}
|Blink=Banner
|Olink=Banner
|description=Emblazons a flower charge (flower icon)
}}
{{Looming
|name=[[Banner|Creeper Charge Banner]]
|ingredients={{:Banner/recipe|ingredients}}
|{{:Banner/recipe|banner}}
|Matching Dye
|Banner Pattern Creeper Charge
|Creeper Charge
|{{:Banner/recipe|output|Creeper Charge}}
|Blink=Banner
|Olink=Banner
|description=Emblazons a creeper charge (creeper face)
}}
{{Looming
|name=[[Banner|Skull Charge Banner]]
|ingredients={{:Banner/recipe|ingredients}}
|{{:Banner/recipe|banner}}
|Matching Dye
|Banner Pattern Skull Charge
|Skull Charge
|{{:Banner/recipe|output|Skull Charge}}
|Blink=Banner
|Olink=Banner
|description=Emblazons a skull charge (skull and crossbones)
}}
{{Looming
|name=[[Banner|Thing Banner]]
|ingredients={{:Banner/recipe|ingredients}}
|{{:Banner/recipe|banner}}
|Matching Dye
|Banner Pattern Thing
|Thing
|{{:Banner/recipe|output|Thing}}
|Blink=Banner
|Olink=Banner
|description=Emblazons a thing (old Mojang logo)}}
{{Looming
|name=[[Banner|Snout Banner]]
|ingredients={{:Banner/recipe|ingredients}}
|{{:Banner/recipe|banner}}
|Matching Dye
|Banner Pattern Snout
|Snout
|{{:Banner/recipe|output|Snout}}
|Blink=Banner
|Olink=Banner
|description=Emblazons a piglin snout
}}
{{Looming
|name=[[Banner|Globe Banner]]
|ingredients={{:Banner/recipe|ingredients}}
|{{:Banner/recipe|banner}}
|Matching Dye
|Banner Pattern Globe
|Globe
|{{:Banner/recipe|output|Globe}}
|Blink=Banner
|Olink=Banner
|description=Emblazons a globe (cube shaped earth)
}}
{{Looming
|name=[[Banner|Bordure Indented Banner]]
|ingredients={{:Banner/recipe|ingredients}}
|{{:Banner/recipe|banner}}
|Matching Dye
|Banner Pattern Bordure Indented
|Bordure Indented
|{{:Banner/recipe|output|Bordure Indented}}
|Blink=Banner
|Olink=Banner
|description=Emblazons a bordure indented (fancy border){{only|bedrock}}
}}
{{Looming
|name=[[Banner|Field Masoned Banner]]
|ingredients={{:Banner/recipe|ingredients}}
|{{:Banner/recipe|banner}}
|Matching Dye
|Banner Pattern Field Masoned
|Field Masoned
|{{:Banner/recipe|output|Field Masoned}}
|Blink=Banner
|Olink=Banner
|description=Emblazons a field masoned (brick pattern){{only|bedrock}}
|foot=1
}}
== Data values ==
=== ID ===
{{edition|java}}:
{{ID table
|edition=java
|firstcolumnname=Banner Pattern
|showforms=y
|generatetranslationkeys=y
|displayname=Flower Charge
|spritename=banner-pattern
|spritetype=item
|nameid=flower_banner_pattern
|form=item}}
{{ID table
|displayname=Creeper Charge
|spritename=banner-pattern
|spritetype=item
|nameid=creeper_banner_pattern
|form=item}}
{{ID table
|displayname=Skull Charge
|spritename=banner-pattern
|spritetype=item
|nameid=skull_banner_pattern
|form=item}}
{{ID table
|displayname=Thing
|spritename=banner-pattern
|spritetype=item
|nameid=mojang_banner_pattern
|form=item}}
{{ID table
|displayname=Globe
|spritename=banner-pattern
|spritetype=item
|nameid=globe_banner_pattern
|form=item}}
{{ID table
|displayname=Snout
|spritename=banner-pattern
|spritetype=item
|nameid=piglin_banner_pattern
|form=item
|foot=1}}
{{edition|bedrock}}:
{{ID table
|edition=bedrock
|firstcolumnname=Banner Pattern
|showaliasids=y
|shownumericids=y
|showforms=y
|notshowbeitemforms=y
|generatetranslationkeys=y
|displayname=Creeper Charge
|spritename=banner-pattern
|spritetype=item
|nameid=creeper_banner_pattern
|aliasid=banner_pattern / 0
|id=582
|form=item
|translationkey=item.banner_pattern.name, item.banner_pattern.creeper}}
{{ID table
|displayname=Skull Charge
|spritename=banner-pattern
|spritetype=item
|nameid=skull_banner_pattern
|aliasid=banner_pattern / 1
|id=583
|form=item
|translationkey=item.banner_pattern.name, item.banner_pattern.skull}}
{{ID table
|displayname=Flower Charge
|spritename=banner-pattern
|spritetype=item
|nameid=flower_banner_pattern
|aliasid=banner_pattern / 2
|id=581
|form=item
|translationkey=item.banner_pattern.name, item.banner_pattern.flower}}
{{ID table
|displayname=Thing
|spritename=banner-pattern
|spritetype=item
|nameid=mojang_banner_pattern
|aliasid=banner_pattern / 3
|id=584
|form=item
|translationkey=item.banner_pattern.name, item.banner_pattern.thing}}
{{ID table
|displayname=Field Masoned
|spritename=banner-pattern
|spritetype=item
|nameid=field_masoned_banner_pattern
|aliasid=banner_pattern / 4
|id=585
|form=item
|translationkey=item.banner_pattern.name, item.banner_pattern.bricks}}
{{ID table
|displayname=Bordure Indented
|spritename=banner-pattern
|spritetype=item
|nameid=bordure_indented_banner_pattern
|aliasid=banner_pattern / 5
|id=586
|form=item
|translationkey=item.banner_pattern.name, item.banner_pattern.vines}}
{{ID table
|displayname=Snout
|spritename=banner-pattern
|spritetype=item
|nameid=piglin_banner_pattern
|aliasid=banner_pattern / 6
|id=587
|form=item
|translationkey=item.banner_pattern.name, item.banner_pattern.piglin}}
{{ID table
|displayname=Globe
|spritename=banner-pattern
|spritetype=item
|nameid=globe_banner_pattern
|aliasid=banner_pattern / 7
|id=588
|form=item
|translationkey=item.banner_pattern.name, item.banner_pattern.globe
|foot=1}}
== Achievements ==
{{load achievements|Fruit on the Loom}}
== History ==
{{History|java}}
{{History||1.14|snap=18w43a|[[File:Banner Pattern JE1 BE1.png|32px]] [[File:Banner Pattern JE1 BE1.png|32px]] [[File:Banner Pattern JE1 BE1.png|32px]] [[File:Banner Pattern JE1 BE1.png|32px]] Added banner patterns for flower charge, creeper charge, skull charge and thing patterns.}}
{{History|||snap=19w11a|[[File:Banner Pattern JE1 BE1.png|32px]] Added banner pattern for globe.
|The banner pattern for globe can be [[trading|bought]] from master-level cartographer [[villager]]s for 8 [[emerald]]s.}}
{{History||1.16|snap=20w15a|[[File:Banner Pattern JE1 BE1.png|32px]] Added the piglin banner pattern.}}
{{History|||snap=20w16a|The piglin banner pattern can now be found in [[chest]]s in [[bastion remnants]].}}
{{History|||snap=20w18a|The piglin pattern has now been renamed to "Snout".}}
{{History||1.16.2|snap=20w30a|The chance of finding the "Snout" banner pattern in bastion remnant chests has been increased from 5.5% to 10.1%.}}
{{History|bedrock}}
{{History||1.10.0|snap=beta 1.10.0.3|[[File:Banner Pattern JE1 BE1.png|32px]] [[File:Banner Pattern JE1 BE1.png|32px]] [[File:Banner Pattern JE1 BE1.png|32px]] [[File:Banner Pattern JE1 BE1.png|32px]] [[File:Banner Pattern JE1 BE1.png|32px]] [[File:Banner Pattern JE1 BE1.png|32px]] Added banner patterns for creeper charge, skull charge, flower charge, thing, field masoned and bordure indented patterns.}}
{{History||1.11.0|snap=beta 1.11.0.4|The banner patterns flower charge, field masoned and bordure indented can now be [[trading|bought]] from cartographer [[villager]]s.}}
{{History||1.16.0|snap=beta 1.16.0.57|[[File:Banner Pattern JE1 BE1.png|32px]] Added the piglin banner pattern.}}
{{History|||snap=beta 1.16.0.59|The piglin pattern has now been renamed to "Snout".}}
{{History||1.16.100|snap=beta 1.16.100.55|The "Thing" banner pattern can now be crafted at the [[loom]].}}
{{History||1.16.100|snap=beta 1.16.100.56|The ID of banner patterns have been changed from <code>banner_pattern</code> to <code><type>_banner_pattern</code>.}}
{{History||1.18.10|snap=beta 1.18.10.24|[[File:Banner Pattern JE1 BE1.png|32px]] Added banner pattern for globe. It is currently unobtainable in survival.}}
{{History|||snap=beta 1.18.10.26|The banner pattern for globe are now obtainable in survival and can be [[trading|bought]] from master-level cartographer [[villager]]s for 8 [[emerald]]s.
|Removed flower charge, field masoned and bordure indented banner pattern from villager trading.}}
{{History|PS4}}
{{History||1.90|[[File:Banner Pattern JE1 BE1.png|32px]] [[File:Banner Pattern JE1 BE1.png|32px]] [[File:Banner Pattern JE1 BE1.png|32px]] [[File:Banner Pattern JE1 BE1.png|32px]] [[File:Banner Pattern JE1 BE1.png|32px]] [[File:Banner Pattern JE1 BE1.png|32px]] Added banner patterns for creeper charge, skull charge, flower charge, thing, field masoned and bordure indented patterns.}}
{{History|foot}}
== Issues ==
{{issue list}}
{{Items}}
[[de:Bannervorlage]]
[[es:Diseño de estandarte]]
[[fr:Motif de bannière]]
[[ja:旗の模様]]
[[ko:현수막 무늬]]
[[pl:Wzór sztandaru]]
[[pt:Desenho para estandarte]]
[[ru:Узор флага]]
[[th:ลวดลายธง]]
[[zh:旗帜图案]]</li><li>[[Recovery Compass|Recovery Compass]]<br/>{{About|the item used to point to the location of the player's last death|the item used to point to the world spawn or to a lodestone|Compass}}
{{Item
| image = Recovery Compass.gif
| renewable = No
| stackable = Yes (64)
}}
A '''recovery compass''' is an item used to point to the location of the [[Player|player's]] last death.
== Obtaining ==
=== Crafting ===
{{Crafting
|A1= Echo Shard |B1= Echo Shard |C1= Echo Shard
|A2= Echo Shard |B2= Compass |C2= Echo Shard
|A3= Echo Shard |B3= Echo Shard |C3= Echo Shard
|Output= Recovery Compass
|type= Tool
}}
== Usage ==
When held by a player, the recovery compass will point towards the spot where they previously died.
The recovery compass will only work when it is held by a player who has previously died and is in the same dimension as their last death. Otherwise, it will spin around randomly.
Like other items, the recovery compass itself will still drop when a player dies and the <code>keepInventory</code> [[game rule]] is not enabled.
This item is useless on Hardcore mode, as once the player dies, the player cannot respawn.
=== Enchantments ===
A recovery compass can receive the following [[enchantment]]s:
{| class="wikitable col-2-center col-3-right"
|+
!Name
!Max Level
![[Enchanting|Method]]
|-
|[[Curse of Vanishing]]{{only|bedrock|short=1}}
|I
|{{Inventory slot|Anvil}}
|-
|}
== Data values ==
{{Missing information|section|data values for Bedrock Edition|type=data}}
=== ID ===
[[Java Edition|''Java Edition'']]:
{{ID table|edition=java|displayname=Recovery Compass|nameid=recovery_compass|translationkey=item.minecraft.recovery_compass|generatetranslationkeys=y|showforms=y|spritetype=item|form=item|foot=1}}
==History==
{{History|java}}
{{History||1.19|snap=22w14a|[[File:Recovery Compass JE1 BE1.gif|32px]] Added recovery compasses.}}
{{History|||snap=22w15a|Recovery compasses can no longer be used on [[lodestone]]s and can no longer be enchanted with [[Curse of Vanishing]].}}
{{History|bedrock}}
{{History||1.19.0|snap=beta 1.19.0.24|[[File:Recovery Compass JE1 BE1.gif|32px]] Added recovery compasses.}}
{{History|foot}}
==Issues==
{{issue list}}
==Gallery==
<gallery>
File:Recovery Compass In An Item Frame.jpg|Recovery Compass.<ref>{{tweet|kingbdogz|1511751971673419782|Tell us what you think of the new Recovery Compass! We're hoping it improves how rewarding it feels to obtain Ancient City loot. Despite that, how do you feel about it? Will you use it? If so, how? What situations would you use it instead of just trying to remember?|April 6, 2022}}</ref>
</gallery>
==References==
{{reflist}}
== External Links ==
*[https://www.minecraft.net/en-us/article/taking-inventory--recovery-compass Taking Inventory:Recovery Compass] – Minecraft.net on January 19, 2023
{{Items}}
[[Category:Tools]]
[[Category:Non-renewable resources]]
[[de:Bergungskompass]]
[[es:Brújula de recuperación]]
[[fr:Boussole de récupération]]
[[ja:リカバリーコンパス]]
[[pl:Kompas powrotny]]
[[pt:Bússola de retomada]]
[[ru:Компас восстановления]]
[[th:เข็มทิศกู้คืน]]
[[uk:Компас відновлення]]
[[zh:追溯指针]]</li></ul> | 1.9pre4 | Trees can sometimes be found growing on blocks of sand. This has been observed in swamp biomes. | |||
1.1{{Extension DPL}}<ul><li>[[:Category:Armor|Category:Armor]]<br/>[[Category:Items]]</li><li>[[Copper Ingot|Copper Ingot]]<br/>{{About|the ingot|the ore|Copper Ore|the mineral block|Block of Copper}}
{{Item
| image = Copper Ingot.png
| renewable = Yes
| stackable = Yes (64)
}}
'''Copper ingots''' are [[metal]] ingots obtained from smelting [[raw copper]] or killing [[drowned]].
== Obtaining ==
=== Crafting ===
{{Crafting
|Block of Copper;Waxed Block of Copper|Output=Copper Ingot,9
|type=Miscellaneous
}}
=== Smelting ===
Copper ingots can be obtained by smelting [[raw copper]] in a [[furnace]] or [[blast furnace]], as well as the ore itself if mined using [[Silk Touch]].
{{Smelting
|head=1
|Raw Copper
|Copper Ingot
|0.7
}}
{{Smelting
|foot=1
|Copper Ore; Deepslate Copper Ore
|Copper Ingot
|0.7
}}
=== Mob loot ===
==== Drowned ====
When killed by a [[player]] or a tamed [[wolf]], a [[drowned]] has a 11% ({{frac|11|100}}) chance of dropping a copper ingot. With the [[Looting]] enchantment, the chance can be increased to 13% ({{frac|13|100}}) with Looting I, 15% ({{frac|3|20}}) with Looting II, and 17% ({{frac|17|100}}) with Looting III.
== Usage ==
=== Crafting ingredient ===
{{crafting usage}}
=== Smithing ingredient ===
{{Smithing
|head=1
|ingredients=Any Armor Trim +<br/>Any Armor Piece + <br/>Copper Ingot
|Any Armor Trim Smithing Template
|Netherite Chestplate
|Copper Ingot
|Copper Trim Netherite Chestplate
|showdescription=1
|description = All armor types can be used in this recipe,<br/>a netherite chestplate is shown as an example.<br/>
|tail=1
}}
;Trim color palette
The following color palette is shown on the designs on trimmed armor:
*{{TrimPalette|copper ingot}}
== Data values ==
=== ID ===
{{edition|java}}:
{{ID table
|edition=java
|showforms=y
|generatetranslationkeys=y
|displayname=Copper Ingot
|spritetype=item
|nameid=copper_ingot
|form=item
|foot=1}}
{{edition|bedrock}}:
{{ID table
|edition=bedrock
|shownumericids=y
|showforms=y
|notshowbeitemforms=y
|generatetranslationkeys=y
|displayname=Copper Ingot
|spritetype=item
|nameid=copper_ingot
|form=item
|id=504
|foot=1}}
== History ==
{{History|java}}
{{History||1.17|snap=20w45a|[[File:Copper Ingot JE1.png|32px]] Added copper ingots.}}
{{History|||snap=20w46a|[[File:Copper Ingot JE2 BE1.png|32px]] The texture of copper ingots has been changed.|Crafting copper ingots from and into copper blocks now outputs/requires only 4 ingots.}}
{{History|||snap=21w05a|[[Drowned]] can now drop copper ingots when killed instead of [[gold ingots]], making copper ingots renewable.}}
{{History|||snap=21w10a|Copper ingots can now be smelted from [[deepslate copper ore]].}}
{{History|||snap=21w14a|Copper ingots can now be smelted from [[raw copper]].}}
{{History|||snap=21w17a|The amount of copper ingots required to make a [[block of copper]] has been changed back to 9.}}
{{History||1.17.1|snap=Pre-release 1|Increased the chance of [[drowned]] dropping a copper ingot from 5% to 11% and the increase of this chance for each level of [[Looting]] enchantment from 1% to 2% to match {{el|be}}.}}
{{History||1.20<br>(Experimental)|link=1.19.4|snap=23w04a|Copper ingots can now be used as an armor trim material.}}
{{History|||snap=1.19.4 Pre-release 1|Copper ingots can now be used to craft [[brush]]es.}}
{{History|bedrock}}
{{History||Caves & Cliffs (experimental)|link=Bedrock Edition 1.17.0|snap=beta 1.16.210.57|[[File:Copper Ingot JE2 BE1.png|32px]] Added copper ingots.}}
{{History||1.17.0|snap=beta 1.17.0.50|Copper ingots can now be used to craft [[spyglass|spyglasses]].}}
{{History|||snap=beta 1.17.0.52|Copper ingots are now available without enabling [[experimental gameplay]].}}
{{History|||snap=beta 1.17.0.54|The amount of copper ingots required to make a [[block of copper]] has been changed to 9.}}
{{History||Vanilla Experiments (experimental)|link=1.18.30|snap=beta 1.18.30.26|Copper ingots can now be used to craft copper horns.}}
{{History||1.19.0|snap=beta 1.19.0.24|Copper ingots can no longer be used to craft copper horns, as copper horns have been removed.}}
{{History||1.20.0<br>(Experimental)|link=Bedrock Edition 1.19.80|snap=beta 1.19.80.20|Copper ingots can now be used to craft [[brush]]es.}}
{{History|||snap=beta 1.19.80.21|Copper ingots can now be used as an armor trim material.}}
{{History|foot}}
== Issues ==
{{Issue list}}
== External Links ==
*[https://www.minecraft.net/en-us/article/taking-inventory--copper-ingot Taking Inventory:Copper Ingot] – Minecraft.net on December 22, 2022
{{Items}}
[[Category:Renewable resources]]
[[de:Kupferbarren]]
[[es:Lingote de cobre]]
[[fr:Lingot de cuivre]]
[[it:Lingotto di rame]]
[[ja:Copper Ingot]]
[[ko:구리괴]]
[[pl:Sztabka miedzi]]
[[pt:Barra de cobre]]
[[ru:Медный слиток]]
[[uk:Мідний злиток]]
[[zh:铜锭]]</li></ul> | Oak leaves were given a 1/200(0.5%) chance of dropping an Apple when they are destroyed or decay. This is useful as now golden apples can be created without the player needing to find a dungeon. | ||||
1.2.1{{Extension DPL}}<ul><li>[[Nether Star|Nether Star]]<br/>{{Distinguish|Firework Star}}
{{Item
| image = Nether Star.gif
| renewable = Yes
| stackable = Yes (64)
| rarity = Uncommon
}}
The '''Nether Star''' is a rare item [[drops|dropped]] by the [[wither]] that is used solely to [[Crafting|craft]] [[Beacon]]s.
== Obtaining ==
=== Mob loot ===
The nether star can be obtained only by defeating the [[Wither]] [[Mob#Boss mobs|boss]], which is created using [[Soul sand]] and [[Head|Wither Skeleton Skulls]]. One nether star is dropped each time; the dropped amount is not affected by the [[Looting]] enchantment. {{IN|java}}, nether stars dropped by withers take 10 minutes to despawn and are immune to explosions. {{IN|bedrock}}, nether star items never despawn, neither by time nor by explosions.
== Usage ==
The nether star has the same animated glint as [[enchanted]] items, [[potion]]s, and [[end crystal]]s.
A dropped nether star item cannot be destroyed by [[explosion]]s. However, it can still be destroyed by a falling [[anvil]],{{only|java}} [[fire]], [[lava]], [[cacti]], or [[the Void]].
It is used to [[Crafting|craft]] a [[beacon]].
=== Crafting ingredient ===
{{crafting usage|match=start}}
== Achievements ==
{{load achievements|The beginning;The beginnig?.}}
== Advancements ==
{{load advancements|Withering Heights}}
== Data values ==
=== ID ===
{{edition|java}}:
{{ID table
|edition=java
|showforms=y
|generatetranslationkeys=y
|displayname=Nether Star
|spritetype=item
|nameid=nether_star
|form=item
|foot=1}}
{{edition|bedrock}}:
{{ID table
|edition=bedrock
|showaliasids=y
|shownumericids=y
|showforms=y
|notshowbeitemforms=y
|generatetranslationkeys=y
|displayname=Nether Star
|spritetype=item
|nameid=nether_star
|aliasid=netherstar
|id=518
|form=item
|translationkey=item.netherStar.name
|foot=1}}
== Video ==
<div style="text-align:center">{{yt|H6k28iUefMo}}</div>
== History ==
{{History|java}}
{{History||1.4.2|snap=12w34a|[[File:Nether Star JE1.png|32px]] The texture of the nether star has been added.}}
{{History|||snap=12w36a|[[File:Nether Star JE1.gif|32px]] Added nether stars.
|Nether stars are [[drops|dropped]] by the [[wither]].}}
{{History|||snap=12w37a|[[File:Nether Star JE2 BE1.gif|32px]] The texture of nether stars has been changed so that they no longer have a dark outline.}}
{{History||1.4.6|snap=12w49a|[[Drops|Dropped]] nether stars can no longer be destroyed by [[explosion]]s.}}
{{History||1.13|snap=17w47a|Prior to [[1.13/Flattening|''The Flattening'']], this [[item]]'s numeral ID was 399.}}
{{History||1.14|snap=18w43a|[[File:Nether Star.gif|32px]] The texture of nether stars has been changed.}}
{{History||1.16|snap=20w07a|Nether star has become a [[renewable resource]], as [[soul sand]], one of the blocks used to construct withers, is now renewable through [[bartering]].}}
{{History|pocket alpha}}
{{History||v0.16.0|snap=build 4|[[File:Nether Star JE2 BE1.gif|32px]] Added nether stars.}}
{{History|bedrock}}
{{History||1.10.0|snap=beta 1.10.0.3|[[File:Nether Star.gif|32px]] The texture of nether stars has been changed.}}
{{History|console}}
{{History||xbox=TU19|xbone=CU7|ps=1.12|wiiu=Patch 1|switch=1.0.1|[[File:Nether Star JE2 BE1.gif|32px]] Added nether stars.}}
{{History||xbox=none|xbone=none|ps=1.90|wiiu=none|switch=none|[[File:Nether Star.gif|32px]] The texture of nether stars has been changed.}}
{{History|New 3DS}}
{{History||1.3.12|[[File:Nether Star JE2 BE1.gif|32px]] Added nether stars.}}
{{History|foot}}
== Issues ==
{{issue list}}
== Gallery ==
<gallery>
File:Nether Star JE3 BE2.png|The nether star without enchanted animated glint.
File:Star Drop.png|The nether star dropped by the wither.
File:Wither, left- Nether Star, right.png|A wither to the left, and a nether star to the right.
</gallery>
== References ==
{{reflist}}
==External Links==
*[https://www.minecraft.net/en-us/article/taking-inventory--nether-star Taking Inventory: Nether Star] – Minecraft.net on May 11, 2023
{{Items}}
[[cs:Netheritová hvězda]]
[[de:Netherstern]]
[[es:Estrella del Inframundo]]
[[fr:Étoile du Nether]]
[[hu:Alvilági csillag]]
[[it:Stella del Nether]]
[[ja:ネザースター]]
[[ko:네더의 별]]
[[nl:Netherster]]
[[pl:Netherowa gwiazda]]
[[pt:Estrela do Nether]]
[[ru:Звезда Нижнего мира]]
[[tr:Nether Yıldızı]]
[[uk:Зірка Незеру]]
[[zh:下界之星]]
[[Category:Renewable resources]]</li><li>[[Poisonous Potato|Poisonous Potato]]<br/>{{Item
| title = Poisonous Potato
| image = Poisonous Potato.png
| heals = {{hunger|2}}
|effects={{EffectLink|Poison}} (0:05) (60% chance)
| stackable = Yes (64)
| renewable = Yes
}}
A '''poisonous potato''' is a type of [[potato]] that can [[poison]] the [[player]].
== Obtaining ==
The poisonous potato is a rare [[drop]] when harvesting (destroying) [[potato|potato crops]]; a fully grown plant has a 2% chance of dropping one in addition to the 2-5 regular potatoes.
=== Chest loot ===
{{LootChestItem|poisonous-potato}}
== Usage ==
Poisonous potatoes cannot be planted on [[farmland]] or [[Baked Potato|baked]]. They also have no use with the [[composter]].<ref>{{bug|MC-142373|resolution=WAI}}</ref>
=== Food ===
{{see also|Tutorials/Hunger management|title1=Hunger management}}
To eat a poisonous potato, press and hold {{control|use}} while it is selected in the hotbar. Eating one restores {{hunger|2}} [[hunger]] and 1.2 hunger [[Hunger#Mechanics|saturation]] and has a 60% chance of applying 5 seconds of [[Poison]] II, draining {{hp|4|poisoned=1}} points of [[health]].
Interestingly, a poisonous potato actually restores double the hunger and saturation than a normal, unpoisoned potato. (A normal potato gives {{hunger|1}} hunger and 0.6 saturation points.)
==Sounds==
{{Sound table/Entity/Food}}
== Advancements ==
{{load advancements|Husbandry;A Balanced Diet}}
== Data values ==
=== ID ===
{{edition|java}}:
{{ID table
|edition=java
|showforms=y
|generatetranslationkeys=y
|displayname=Poisonous Potato
|spritetype=item
|nameid=poisonous_potato
|form=item
|foot=1}}
{{edition|bedrock}}:
{{ID table
|edition=bedrock
|shownumericids=y
|showforms=y
|notshowbeitemforms=y
|generatetranslationkeys=y
|displayname=Poisonous Potato
|spritetype=item
|nameid=poisonous_potato
|id=282
|form=item
|foot=1}}
== History ==
{{History|java}}
{{History||1.4.2|snap=12w34a|[[File:Poisonous Potato JE1 BE1.png|32px]] Added poisonous potatoes.}}
{{History||1.13|snap=17w47a|Prior to [[Java_Edition_1.13/Flattening|''The Flattening'']], this [[item]]'s numeral ID was 394.}}
{{History|||snap=18w11a|Poisonous potatoes now generate in the [[chest]]s of [[shipwreck]]s.}}
{{History||1.14|snap=18w43a|[[File:Poisonous Potato JE2.png|32px]] The texture of poisonous potatoes has been changed.}}
{{History|||snap=18w50a|[[File:Poisonous Potato JE3 BE2.png|32px]] The texture of poisonous potatoes has been changed, once again.}}
{{History|pocket alpha}}
{{History||v0.12.1|snap=build 1|[[File:Poisonous Potato JE1 BE1.png|32px]] Added poisonous potatoes.}}
{{History|bedrock}}
{{History||1.4.0|snap=beta 1.2.14.2|Poisonous potatoes can now be found inside of [[shipwreck]] [[chest]]s.}}
{{History||1.10.0|snap=beta 1.10.0.3|[[File:Poisonous Potato JE3 BE2.png|32px]] The texture of poisonous potatoes has been changed.}}
{{History|console}}
{{History||xbox=TU14|xbone=CU1|ps=1.04|wiiu=Patch 1|switch=1.0.1|[[File:Poisonous Potato JE1 BE1.png|32px]] Added poisonous potatoes.}}
{{History||xbox=none|xbone=none|ps=1.90|wiiu=none|switch=none|[[File:Poisonous Potato JE3 BE2.png|32px]] The texture of poisonous potatoes has been changed.}}
{{History|New 3DS}}
{{History||0.1.0|[[File:Poisonous Potato JE1 BE1.png|32px]] Added poisonous potatoes.}}
{{History|foot}}
== Issues ==
{{issue list}}
== References ==
{{reflist}}
{{Items}}
[[Category:Plants]]
[[cs:Jedovatá brambora]]
[[de:Giftige Kartoffel]]
[[es:Patata envenenada]]
[[fr:Pomme de terre empoisonnée]]
[[hu:Mérgező burgonya]]
[[it:Patata velenosa]]
[[ja:青くなったジャガイモ]]
[[ko:독이 있는 감자]]
[[nl:Giftige aardappel]]
[[pl:Trujący ziemniak]]
[[pt:Batata venenosa]]
[[ru:Ядовитый картофель]]
[[th:มันฝรั่งพิษ]]
[[uk:Отруйна картопля]]
[[zh:毒马铃薯]]
[[Category:Food]]
[[Category:Renewable resources]]</li></ul> | The Jungle tree became available. A bug existed that transformed saplings in a 2×2 square with jungle saplings into other jungle saplings if the growth of a giant tree fails. This would not be revealed until the block graphics were updated, such as when a block is placed or destroyed nearby. The bug was exploited to rapidly create jungle saplings from other saplings using bonemeal, since they do not drop as frequently. | ||||
1.2.4{{Extension DPL}}<ul><li>[[Yellow Dye|Yellow Dye]]<br/>{{Item
| title = Yellow Dye
| renewable = Yes
| stackable = Yes (64)
}}
'''Yellow dye''' is a [[Dye#Primary|primary dye]] created by placing a [[dandelion]] or [[sunflower]] into a [[crafting]] grid.
== Obtaining ==
=== Crafting ===
{{Crafting
|Dandelion;Sunflower
|Output=Yellow Dye;Yellow Dye,2
|type=Material
}}
=== Chest loot ===
{{LootChestItem|yellow-dye}}
=== Trading ===
[[Wandering trader]]s sell 3 yellow dye for an [[emerald]].
== Usage ==
{{dye usage}}
=== Crafting ingredient ===
{{crafting usage|ignore=Banner|continue=1}}
{{banner crafting usage}}
=== Loom ingredient ===
{{Banner loom usage|Yellow Dye}}
=== Trading ===
Expert-level shepherd villagers have a {{frac|1|6}} chance to buy 12 yellow dye for an emerald.
== Data values ==
=== ID ===
{{edition|java}}:
{{ID table
|edition=java
|showforms=y
|generatetranslationkeys=y
|displayname=Yellow Dye
|spritetype=item
|nameid=yellow_dye
|form=item
|foot=1}}
{{edition|bedrock}}:
{{ID table
|edition=bedrock
|showaliasids=y
|shownumericids=y
|showforms=y
|notshowbeitemforms=y
|generatetranslationkeys=y
|displayname=Yellow Dye
|spritetype=item
|nameid=yellow_dye
|aliasid=dye / 11
|id=406
|form=item
|translationkey=item.dye.yellow.name
|foot=1}}
== Video ==
{{yt|nOQUDjEHGRg}}
== History ==
{{History|java beta}}
{{History||1.2|[[File:Yellow Dye JE1 BE1.png|32px]] Added dandelion yellow.}}
{{History||1.6.6|Dandelions can now be generated using [[Bone Meal|bone meal]], making dandelion yellow [[renewable resource|renewable]].}}
{{History|java}}
{{History||1.4.2|snap=12w34a|Added the ability to [[Armor#Dyeing|dye]] leather [[armor]] and [[wolf]] collars.}}
{{History||1.4.6|snap=12w49a|Dandelion yellow can be crafted with [[gunpowder]] to create a [[firework star]].}}
{{History||1.6.1|snap=13w19a|[[Stained clay]] can now be crafted.}}
{{History||1.7.2|snap=13w36a|Can now be crafted using sunflower.}}
{{History|||snap=13w37a|Each dandelion now yields only 1 dandelion yellow, instead of 2.}}
{{History|||snap=13w41a|[[Stained glass]] can now be [[crafting|crafted]].}}
{{History||1.8|snap=14w30a|Added [[banner]]s, which can be [[dye]]d.}}
{{History||1.11|snap=16w39a|Added the ability to dye [[shulker box]]es.}}
{{History||1.12|snap=17w06a|Yellow dye can now be used to craft yellow [[concrete powder]].}}
{{History|||snap=17w15a|Added the ability to dye [[bed]]s.}}
{{History||1.13|snap=17w47a|The different data values for the <code>dye</code> ID have now been split up into their own IDs.
|Prior to [[1.13/Flattening|''The Flattening'']], this [[item]]'s numeral ID was 351.}}
{{History||1.14|snap=18w43a|"Dandelion Yellow" has now been renamed to "Yellow Dye".
|[[File:Yellow Dye JE2 BE2.png|32px]] The texture of yellow dye has now been changed.}}
{{History|||snap=18w44a|Yellow dye can now change the text color on [[sign]]s to yellow.}}
{{History|||snap=18w49a|Yellow dye can now be found in [[chest]]s in [[village]] mason houses.}}
{{History|||snap=19w05a|Added the [[wandering trader]], which sells yellow dye.}}
{{History|||snap=19w11a|Yellow dye can now be [[trading|bought]] by shepherd villagers.}}
{{History||1.17|snap=20w45a|Yellow dye can now be used to craft [[yellow candle]]s.}}
{{History|||snap=21w19a|Yellow dye can no longer be used to craft yellow candles.}}
{{History|||snap=Pre-release 1|Yellow dye can once again used to craft yellow candles.}}
{{History||1.20<br>(Experimental)|link=1.19.3|snap=22w42a|Yellow dye can now change the text color on [[hanging sign]]s to yellow.}}
{{History||1.20|snap=23w12a|Yellow dye can now be found in [[suspicious gravel]] and [[suspicious sand]] in [[trail ruins]].}}
{{History|||snap=23w16a|Yellow dye no longer generates in [[suspicious sand]] in [[trail ruins]].|Due to the split of the archaeological loot tables for suspicious gravel within [[trail ruins]], yellow dye is now common loot.}}
{{History|pocket alpha}}
{{History||v0.3.0|[[File:Yellow Dye JE1 BE1.png|32px]] Added dandelion yellow.}}
{{History||v0.8.0|snap=build 1|Dandelion yellow is now used to craft [[cocoa beans]].}}
{{History||v0.14.0|snap=build 1|Yellow dye can now be used to dye [[water]] in [[cauldron]]s.}}
{{History||v0.16.0|snap=build 1|Dandelion yellow is no longer used to [[crafting|craft]] cocoa beans.}}
{{History|pocket}}
{{History||1.0.0|snap=alpha 0.17.0.1|Yellow dye can now be used to dye [[shulker]]s.}}
{{History||1.1.0|snap=alpha 1.1.0.0|Yellow dye can now be used to dye [[shulker box]]es, [[bed]]s, and craft [[concrete powder]].}}
{{History|bedrock}}
{{History||1.2.0|snap=beta 1.2.0.2|Yellow dye can now be used to craft patterns on [[banner]]s, [[firework star]]s, and [[stained glass]].}}
{{History||1.4.0|snap=beta 1.2.20.1|Yellow dye can now be used to craft [[balloon]]s and [[glow stick]]s.}}
{{History||1.8.0|snap=beta 1.8.0.8|Dandelion yellow can now be used to dye [[cat]] collars.}}
{{History|||snap=beta 1.8.0.10|"Dandelion Yellow" has now been renamed to "Yellow Dye".}}
{{History||1.10.0|snap=beta 1.10.0.3|Yellow dye is now [[trading|sold]] by [[wandering trader]]s.
|[[File:Yellow Dye JE2 BE2.png|32px]] The texture of yellow dye has now been changed.}}
{{History||1.11.0|snap=beta 1.11.0.1|Yellow dye can now be found in [[village]] mason [[chest]]s.}}
{{History|||snap=beta 1.11.0.4|Yellow dye can now be sold to shepherd [[villager]]s.}}
{{History||1.16.100|snap=beta 1.16.100.56|The ID of yellow dye has been changed from <code>dye/11</code> to <code>yellow_dye</code>.}}
{{History|console}}
{{History||xbox=TU1|xbone=CU1|ps=1.00|switch=1.0.1|wiiu=Patch 1|[[File:Yellow Dye JE1 BE1.png|32px]] Added dandelion yellow.}}
{{History|ps4}}
{{History||1.83|"Dandelion Yellow" has now been renamed to "Yellow Dye".}}
{{History||1.90|[[File:Yellow Dye JE2 BE2.png|32px]] The texture of yellow dye has now been changed.}}
{{History|new 3ds}}
{{History||0.1.0|[[File:Yellow Dye JE1 BE1.png|32px]] Added dandelion yellow.}}
{{History|foot}}
== Issues ==
{{issue list}}
== References ==
{{reflist}}
{{Items}}
[[cs:Pampelišková žluť]]
[[de:Gelber Farbstoff]]
[[es:Tinte amarillo]]
[[fr:Teinture jaune]]
[[hu:Pitypangsárga]]
[[ja:黄色の染料]]
[[ko:노란색 염료]]
[[nl:Paardenbloemgeel]]
[[pl:Żółty barwnik]]
[[pt:Corante amarelo]]
[[ru:Жёлтый краситель]]
[[zh:黄色染料]]
[[Category:Items]]
[[Category:Dyes]]
[[Category:Renewable resources]]</li><li>[[Melon Seeds|Melon Seeds]]<br/>{{Block
|image = <gallery>
Melon Stem Age 0.png | Age 0
Melon Stem Age 1.png | Age 1
Melon Stem Age 2.png | Age 2
Melon Stem Age 3.png | Age 3
Melon Stem Age 4.png | Age 4
Melon Stem Age 5.png | Age 5
Melon Stem Age 6.png | Age 6
Melon Stem Age 7.png | Age 7
</gallery>
| image2 = <gallery>
Attached Melon Stem (N).png | North
Attached Melon Stem (E).png | East
Attached Melon Stem (S).png | South
Attached Melon Stem (W).png | West
</gallery>
| transparent = Yes
| light = No
| tool = none
| renewable = Yes
| stackable = Yes (64)
| flammable = No
| lavasusceptible = No
}}'''Melon seeds''' are items obtained from [[Melon Slice|melon slices]] that can be used to grow melon stems.
'''Melon stems''' are plants grown on [[farmland]] that, over time, grow [[melon]]s on dirt, mud and moss blocks adjacent to them.
== Obtaining ==
=== Breaking ===
When broken, a melon stem drops 0–3 melon seeds. The chance for melon seeds to drop increases with the stem's age.
{| class="wikitable"
! rowspan="3" |[[Resource location]]
! rowspan="3" | Source
! colspan="4" | Default
|-
| colspan="1" rowspan="2" style="text-align:center" | Nothing || colspan="3" style="text-align:center" |{{ItemLink|Melon Seeds|Melon seeds}}
|-
| style="text-align:center" | 1 || style="text-align:center" | 2 || style="text-align:center" | 3
|-
| rowspan="8" |<code>blocks/melon_stem</code>
|{{BlockLink|Melon Stem|Melon stem}} <code>age = 0</code>
| style="text-align:center" |81.3%|| style="text-align:center" |17.42%|| style="text-align:center" |1.24%|| style="text-align:center" |0.03%
|-
|{{BlockLink|Melon Stem|Melon stem}} <code>age = 1</code>
| style="text-align:center" |65.1%|| style="text-align:center" |30.04%|| style="text-align:center" |4.62%|| style="text-align:center" |0.24%
|-
|{{BlockLink|Melon Stem|Melon stem}} <code>age = 2</code>
| style="text-align:center" |51.2%|| style="text-align:center" |38.4%|| style="text-align:center" |9.6%|| style="text-align:center" |0.8%
|-
|{{BlockLink|Melon Stem|Melon stem}} <code>age = 3</code>
| style="text-align:center" |39.44%|| style="text-align:center" |43.02%|| style="text-align:center" |15.64%|| style="text-align:center" |1.9%
|-
|{{BlockLink|Melon Stem|Melon stem}} <code>age = 4</code>
| style="text-align:center" |29.13%|| style="text-align:center" |44.44%|| style="text-align:center" |22.22%|| style="text-align:center" |3.7%
|-
|{{BlockLink|Melon Stem|Melon stem}} <code>age = 5</code>
| style="text-align:center" |21.6%|| style="text-align:center" |43.2%|| style="text-align:center" |28.8%|| style="text-align:center" |6.4%
|-
|{{BlockLink|Melon Stem|Melon stem}} <code>age = 6</code>
| style="text-align:center" |15.17%|| style="text-align:center" |39.82%|| style="text-align:center" |34.84%|| style="text-align:center" |10.16%
|-
|{{BlockLink|Melon Stem|Melon stem}} <code>age = 7</code>
| style="text-align:center" |10.16%|| style="text-align:center" |34.84%|| style="text-align:center" |39.82%|| style="text-align:center" |15.17%
|-
| rowspan="1" |<code>blocks/attached_melon_stem</code>
|{{BlockLink|Attached Melon Stem|Attached Melon stem}}
| style="text-align:center" |10.16%|| style="text-align:center" |34.84%|| style="text-align:center" |39.82%|| style="text-align:center" |15.17%
|}
=== Natural generation ===
Melon stems generate naturally in stem farm inside [[woodland mansion]]s.
Melon stems generate in 20% of the farm plots in [[savanna]] [[village]]s, and 10% of the farm plots in [[desert]] villages.
=== Chest loot ===
{{LootChestItem|melon-seeds}}
=== Crafting ===
{{Crafting
|Melon Slice
|Output= Melon Seeds
|type= Material
}}
=== Trading ===
[[Wandering trader]]s sell melon seeds for 1 [[emerald]].
== Usage ==
=== Farming ===
{{see also|Tutorials/Pumpkin and melon farming}}
Melon seeds can be planted only on [[farmland]], as stems. Over time, a stem grows through several stages<sup>[''[[Talk:Pumpkin Seeds|needs testing]]'']</sup> and, at its final growth stage, will produce [[melon]]s on any adjacent [[dirt]], [[Coarse Dirt|coarse dirt]], [[Rooted Dirt|rooted dirt]], [[Grass Block|grass block]], [[farmland]], [[podzol]], [[mycelium]], [[Moss Block|moss block]], [[mud]] or [[Muddy Mangrove Roots|muddy mangrove roots]]. If a melon is already occupying a spot adjacent to a stem it does not grow more melons until the melons is removed. A single stem can grow an unlimited number of melons. Melon stems need a minimum light level of 10 in the block above the stem to grow and give melons. Melon seeds are affected by [[bone meal]] only with respect to stem growth; bone meal does not help produce the actual melons.
=== Breeding ===
Like other seeds, melon seeds can be used to [[breed]] [[chicken]]s, lead chickens around, and make baby chickens grow up faster by 10% of the remaining time.
=== Taming ===
Like other seeds, melon seeds can be used to tame [[parrot]]s.
=== Composting ===
Placing melon seeds into a [[composter]] has a 30% chance of raising the compost level by 1.
== Melon Stem ==
A '''melon stem''' is the block that is planted on [[farmland]] when melon seeds are used on it. It starts underground, and rises up as the plant grows. The stem is colored green when young, and then yellow once fully grown.
The stem curves once a melon has grown from it. A fully-grown single stem connects to any [[melon]] in an adjacent square, thus there are 5 possible appearances to a stem. If there are multiple melons it can connect to, it favors the east, then west, north, and south. When the melon is removed, the stem returns to its straight shape.
== Sounds ==
{{Sound table/Block/Hard crop}}
== Data values ==
=== ID ===
{{edition|java}}:
{{ID table
|edition=java
|showblocktags=y
|showforms=y
|generatetranslationkeys=y
|displayname=Melon Stem
|spritetype=block
|nameid=melon_stem
|blocktags=bee_growables, crops
|form=block}}
{{ID table
|displayname=Attached Melon Stem
|spritetype=block
|nameid=attached_melon_stem
|form=block}}
{{ID table
|displayname=Melon Seeds
|spritetype=item
|nameid=melon_seeds
|form=item
|foot=1}}
{{edition|bedrock}}:
{{ID table
|edition=bedrock
|shownumericids=y
|showforms=y
|generatetranslationkeys=y
|displayname=Melon Stem
|spritetype=block
|nameid=melon_stem
|id=105
|form=block
|translationkey=-}}
{{ID table
|displayname=Melon Seeds
|spritetype=item
|nameid=melon_seeds
|id=293
|form=item
|foot=1}}
=== Block states ===
{{see also|Block states}}
{{/BS}}
== Advancements ==
{{load advancements|A Seedy Place}}
== History ==
{{info needed section|check if stems floated above farmland upon initial implementation}}
{{History|java beta}}
{{History||1.8|snap=Pre-release|[[File:Melon Seeds JE1 BE1.png|32px]] Added melon seeds.
|[[File:Melon Stem Age 0 JE1.png|32px]] [[File:Stem Age 1 JE1.png|32px]] [[File:Melon Stem Age 2 JE1.png|32px]] [[File:Melon Stem Age 3 JE1.png|32px]] [[File:Melon Stem Age 4 JE1.png|32px]] [[File:Melon Stem Age 5 JE1.png|32px]] [[File:Melon Stem Age 6 JE1.png|32px]] [[File:Melon Stem Age 7 JE1.png|32px]] Added the melon stem, with seven stages of growth.
|Melon seeds can found in the new [[mineshaft]] [[chest]]s.
|[[File:Attached Melon Stem (N) JE1.png|32px]] [[File:Attached Melon Stem (E) JE1.png|32px]] [[File:Attached Melon Stem (S) JE1.png|32px]] [[File:Attached Melon Stem (W) JE1.png|32px]] Melon stems have four slightly visually distinct appearances for each facing direction - the bent part of the stem rotates, but the other two planes do not.
|[[File:Melon Stem Age 8 JE1.png|32px]] [[File:Melon Stem Age 9 JE1.png|32px]] [[File:Melon Stem Age 10 JE1.png|32px]] [[File:Melon Stem Age 11 JE1.png|32px]] [[File:Melon Stem Age 12 JE1.png|32px]] [[File:Melon Stem Age 13 JE1.png|32px]] [[File:Melon Stem Age 14 JE1.png|32px]] [[File:Melon Stem Age 15 JE1.png|32px]] Melon stem data values 8–15 now show a glitched formation, with a floating stem with an attached stem cross eventually emerging below.
|[[File:Attached Stem Age 8 JE1.png|32px]] [[File:Attached Stem Age 9 JE1.png|32px]] [[File:Attached Stem Age 10 JE1.png|32px]] [[File:Attached Stem Age 11 JE1.png|32px]] [[File:Attached Stem Age 12 JE1.png|32px]] [[File:Attached Stem Age 13 JE1.png|32px]] [[File:Attached Stem Age 14 JE1.png|32px]] [[File:Attached Stem Age 15 JE1.png|32px]] Melon stem blocks with data values higher than 7 can now attach to adjacent fruits, which results in buggy stem textures with [[vines]] in the mix due to vines being below attached stems in [[terrain.png]].}}
{{History|||snap=Pre-release 2 ;)|Melon stems can now be grown faster using [[bone meal]].}}
{{History|java}}
{{History||1.3.1|snap=1.3|The texture of melon stems has been moved one pixel to the left in [[terrain.png]].
|[[File:Melon Stem Age 0 JE2.png|32px]] [[File:Melon Stem Age 1 JE2.png|32px]] [[File:Melon Stem Age 2 JE2.png|32px]] [[File:Melon Stem Age 3 JE2.png|32px]] [[File:Melon Stem Age 4 JE2.png|32px]] [[File:Melon Stem Age 5 JE2.png|32px]] [[File:Melon Stem Age 6 JE2.png|32px]] [[File:Melon Stem Age 7 JE2.png|32px]] Stems now appear slightly different.
|[[File:Melon Stem Age 8 JE2.png|32px]] [[File:Melon Stem Age 9 JE2.png|32px]] [[File:Melon Stem Age 10 JE2.png|32px]] [[File:Melon Stem Age 11 JE2.png|32px]] [[File:Melon Stem Age 12 JE2.png|32px]] [[File:Melon Stem Age 13 JE2.png|32px]] [[File:Melon Stem Age 14 JE2.png|32px]] [[File:Melon Stem Age 15 JE2.png|32px]] Overgrown stems now appear slightly different.
|[[File:Attached Melon Stem (N) JE2.png|32px]] [[File:Attached Melon Stem (E) JE2.png|32px]] [[File:Attached Melon Stem (S) JE2.png|32px]] [[File:Attached Melon Stem (W) JE2.png|32px]] Attached melon stems now appear slightly different.
|[[File:Attached Stem Age 8 JE2.png|32px]] [[File:Attached Stem Age 9 JE2.png|32px]] [[File:Attached Stem Age 10 JE2.png|32px]] [[File:Attached Stem Age 11 JE2.png|32px]] [[File:Attached Stem Age 12 JE2.png|32px]] [[File:Attached Stem Age 13 JE2.png|32px]] [[File:Attached Stem Age 14 JE2.png|32px]] [[File:Attached Stem Age 15 JE2.png|32px]] Overgrown attached melon stems now appear slightly different.}}
{{History||1.4.2|snap=12w36a|[[Chicken]]s now use [[wheat seeds]], melon seeds, and [[pumpkin seeds]], instead of [[wheat]] to breed.}}
{{History||1.5|snap=13w02a|[[File:Melon Stem Age 0 JE3.png|32px]] [[File:Melon Stem Age 1 JE3.png|32px]] [[File:Melon Stem Age 2 JE3.png|32px]] [[File:Melon Stem Age 3 JE3.png|32px]] [[File:Melon Stem Age 4 JE3.png|32px]] [[File:Melon Stem Age 5 JE3.png|32px]] [[File:Melon Stem Age 6 JE3.png|32px]] Melon stems now use a squished version of their texture for immature stems, depending on age.
|[[File:Melon Stem Age 8 JE3.png|32px]] [[File:Melon Stem Age 9 JE3.png|32px]] [[File:Melon Stem Age 10 JE3.png|32px]] [[File:Melon Stem Age 11 JE3.png|32px]] [[File:Melon Stem Age 12 JE3.png|32px]] [[File:Melon Stem Age 13 JE3.png|32px]] [[File:Melon Stem Age 14 JE3.png|32px]] [[File:Melon Stem Age 15 JE3.png|32px]] This also affects melon stems of ages 8–15, which are likewise stretched to accommodate its predicted size.
|[[File:Attached Stem Age 8 JE3.png|32px]] [[File:Attached Stem Age 9 JE3.png|32px]] [[File:Attached Stem Age 10 JE3.png|32px]] [[File:Attached Stem Age 11 JE3.png|32px]] [[File:Attached Stem Age 12 JE3.png|32px]] [[File:Attached Stem Age 13 JE3.png|32px]] [[File:Attached Stem Age 14 JE3.png|32px]] [[File:Attached Stem Age 15 JE3.png|32px]] Melon stems of extreme ages, which are attached to adjacent fruits, now show a stretched and tinted stem appearance.}}
{{History|||snap=13w03a|[[File:Melon Stem Age 0 JE4.png|32px]] [[File:Melon Stem Age 1 JE4.png|32px]] [[File:Melon Stem Age 2 JE4.png|32px]] [[File:Melon Stem Age 3 JE4.png|32px]] [[File:Melon Stem Age 4 JE4.png|32px]] [[File:Melon Stem Age 5 JE4.png|32px]] [[File:Melon Stem Age 6 JE4.png|32px]] [[File:Melon Stem Age 7 JE4.png|32px]] Melon stems are no longer squished or stretched to account for age.<ref>{{bug|MC-7111}}</ref>
|[[File:Melon Stem Age 8 JE4.png|32px]] [[File:Melon Stem Age 9 JE4.png|32px]] [[File:Melon Stem Age 10 JE4.png|32px]] [[File:Melon Stem Age 11 JE4.png|32px]] [[File:Melon Stem Age 12 JE4.png|32px]] [[File:Melon Stem Age 13 JE4.png|32px]] [[File:Melon Stem Age 14 JE4.png|32px]] [[File:Melon Stem Age 15 JE4.png|32px]] Melon stems with age values 8 through 15 now show a tinted [[trapdoor]] texture.
|From this version up until 14w08a, overgrown melon stems start to draw from the texture below them on the [[texture atlas]], in much the same way they previously did with terrain.png. However, as texture atlases are unstable and textures tend to change positions as new blocks and textures are added, overgrown stems change the texture they draw from every time new textures are added, which includes when textures added by [[mods]].}}
{{History|||snap=13w09a|[[File:Melon Stem Age 8 JE5.png|32px]] [[File:Melon Stem Age 9 JE5.png|32px]] [[File:Melon Stem Age 10 JE5.png|32px]] [[File:Melon Stem Age 11 JE5.png|32px]] [[File:Melon Stem Age 12 JE5.png|32px]] [[File:Melon Stem Age 13 JE5.png|32px]] [[File:Melon Stem Age 14 JE5.png|32px]] [[File:Melon Stem Age 15 JE5.png|32px]] Melon stems with age values 8–15 now show a tinted [[birch wood]] texture.}}
{{History||1.6.1|snap=13w24a|Melon and pumpkin stems have now been assigned separate textures.
|[[File:Melon Stem Age 8 JE6.png|32px]] [[File:Melon Stem Age 9 JE6.png|32px]] [[File:Melon Stem Age 10 JE6.png|32px]] [[File:Melon Stem Age 11 JE6.png|32px]] [[File:Melon Stem Age 12 JE6.png|32px]] [[File:Melon Stem Age 13 JE6.png|32px]] [[File:Melon Stem Age 14 JE6.png|32px]] [[File:Melon Stem Age 15 JE6.png|32px]] Melon stems with age values 8–15 now show a tinted [[note block]] texture.}}
{{History||1.7.2|snap=13w37a|Added the {{cmd|setblock}} [[commands|command]], allowing for invalid stem ages to be placed in the world without using external editors. This also allows them to be obtained in earlier versions via backdating.}}
{{History|||snap=13w41a|[[File:Melon Stem Age 8 JE7.png|32px]] [[File:Melon Stem Age 9 JE7.png|32px]] [[File:Melon Stem Age 10 JE7.png|32px]] [[File:Melon Stem Age 11 JE7.png|32px]] [[File:Melon Stem Age 12 JE7.png|32px]] [[File:Melon Stem Age 13 JE7.png|32px]] [[File:Melon Stem Age 14 JE7.png|32px]] [[File:Melon Stem Age 15 JE7.png|32px]] Melon stems with age values 8–15 now show a tinted [[netherrack]] texture.}}
{{History||1.8|snap=14w10a|[[File:Melon Stem Age 8 JE8.png|32px]] [[File:Melon Stem Age 9 JE8.png|32px]] [[File:Melon Stem Age 10 JE8.png|32px]] [[File:Melon Stem Age 11 JE8.png|32px]] Melon stems with data values 8–11 now display a tinted attached stem, with 8 facing west, 9 facing east, 10 facing north and 11 facing south.
|Invalid melon stems with data values 12-15 now crash the game.}}
{{History|||snap=14w25a|[[File:Melon Stem Age 0 JE5.png|32px]] [[File:Melon Stem Age 1 JE5.png|32px]] [[File:Melon Stem Age 2 JE5.png|32px]] [[File:Melon Stem Age 3 JE5.png|32px]] [[File:Melon Stem Age 4 JE5.png|32px]] [[File:Melon Stem Age 5 JE5.png|32px]] [[File:Melon Stem Age 6 JE5.png|32px]] [[File:Melon Stem Age 7 JE5.png|32px]] Melon stems now render as a single diagonal plane, or, in the case of attached stems, a diagonal and orthogonal plane.
|[[File:Attached Melon Stem (N) JE3.png|32px]] [[File:Attached Melon Stem (E) JE3.png|32px]] [[File:Attached Melon Stem (S) JE3.png|32px]] [[File:Attached Melon Stem (W) JE3.png|32px]] The attached melon stem [[model]] now fully rotates to the direction the stem points. Prior to this update, the base of the melon stem would stay the same while the long attaching section would differ, resulting in four possible attached stem appearances.
|Invalid overgrown melon stems have effectively been removed from the game, as attempting to place an out of range stem via {{cmd|setblock}} creates a stem of age 0 and loading a world with such stems existing causes a game crash.}}
{{History|||snap=14w26a|[[File:Melon Stem Age 0 JE6.png|32px]] [[File:Melon Stem Age 1 JE6.png|32px]] [[File:Melon Stem Age 2 JE6.png|32px]] [[File:Melon Stem Age 3 JE6.png|32px]] [[File:Melon Stem Age 4 JE6.png|32px]] [[File:Melon Stem Age 5 JE6.png|32px]] [[File:Melon Stem Age 6 JE6.png|32px]] [[File:Melon Stem Age 7 JE6.png|32px]] [[File:Attached Melon Stem (N) JE4.png|32px]] [[File:Attached Melon Stem (E) JE4.png|32px]] [[File:Attached Melon Stem (S) JE4.png|32px]] [[File:Attached Melon Stem (W) JE4.png|32px]] Melon stems now correctly render as crosses again.<ref>{{bug|MC-58136}}</ref>}}
{{History|||snap=14w27a|[[File:Attached Stem Age 0 14w27a.png|32px]] [[File:Attached Stem Age 1 14w27a.png|32px]] [[File:Attached Stem Age 2 14w27a.png|32px]] [[File:Attached Stem Age 3 14w27a.png|32px]] [[File:Attached Stem Age 4 14w27a.png|32px]] [[File:Attached Stem Age 5 14w27a.png|32px]] [[File:Attached Stem Age 6 14w27a.png|32px]] Due to a bug, all melon stems appear attached regardless of age or any actual attachment.<ref>{{bug|MC-60208}}</ref>}}
{{History|||snap=14w28a|All melon stems appearing attached regardless of age or any actual attachment has been fixed. However, melon stems still appear attached to adjacent fruits regardless of age due to a similar bug.<ref>{{bug|MC-61716}}</ref>}}
{{History|||snap=14w34d|Melon seeds can no longer be used for [[breeding]] [[chicken]]s.}}
{{History||1.9|snap=15w31a|Chickens can now use melon seeds to breed again.}}
{{History|||snap=15w44a|Melon seeds have been added to [[dungeon]] [[chest]]s.
|The average yield of melon seeds from [[mineshaft]] chests has been decreased.}}
{{History|||snap=15w45a|Melon stems must now be fully grown again to attach.}}
{{History||1.11|snap=16w39a|Melon seeds can now be found inside chests in the new [[woodland mansion]]s.
|Melon crops now generate inside woodland mansions.}}
{{History||1.12|snap=17w18b|Placing a melon seeds in farmland now gives the player the "A Seedy Place" [[advancement]].{{verify}}}}
{{History||1.13|snap=17w47a|The different block states for the <code>melon_stem</code> ID have been split up into their own IDs.
|Prior to [[1.13/Flattening|''The Flattening'']], this [[block]]'s numeral ID was 105, and the [[item]]'s 362.}}
{{History|||snap=17w48a|Attached melon stems no longer [[drops|drop]] seeds.}}
{{History||1.14|snap=18w43a|[[File:Attached Melon Stem (N) JE5.png|32px]] [[File:Attached Melon Stem (E) JE5.png|32px]] [[File:Attached Melon Stem (S) JE5.png|32px]] [[File:Attached Melon Stem (W) JE5.png|32px]] The texture of attached melon stems has been changed.}}
{{History|||snap=18w49a|Melon stems now generate in the updated [[savanna]] [[village]]s.}}
{{History|||snap=18w50a|Melon stems now generate in the updated [[desert]] [[village]]s.}}
{{History|||snap=19w03a|Placing melon seeds into the new [[composter]] has a 10% chance of raising the compost level by 1.}}
{{History|||snap=19w05a|Melon seeds now have a 30% chance of increasing the compost level in a composter by 1.
|Added [[Wandering Trader|wandering trader]]s, which sell melon seeds.}}
{{History||1.15|snap=19w34a|[[Bee]]s can now pollinate melon stems.}}
{{History|||snap=19w39a|Attached melon stems now [[drops|drop]] seeds again.<ref>{{bug|MC-136360}}</ref>}}
{{History||1.18|snap=Pre-release 5|[[File:Melon Seeds JE2.png|32px]] The texture of melon seeds has been changed.}}
{{History|pocket alpha}}
{{History||v0.5.0|Added melon seeds.
|[[File:Melon Stem Age 0 JE1.png|32px]] [[File:Stem Age 1 JE1.png|32px]] [[File:Melon Stem Age 2 JE1.png|32px]] [[File:Melon Stem Age 3 JE1.png|32px]] [[File:Melon Stem Age 4 JE1.png|32px]] [[File:Melon Stem Age 5 JE1.png|32px]] [[File:Melon Stem Age 6 JE1.png|32px]] [[File:Melon Stem Age 7 JE1.png|32px]] [[File:Attached Melon Stem (N) JE1.png|32px]] [[File:Attached Melon Stem (E) JE1.png|32px]] [[File:Attached Melon Stem (S) JE1.png|32px]] [[File:Attached Melon Stem (W) JE1.png|32px]]{{verify|Are these models correct?}} Added melon stems.}}
{{History||v0.6.0|[[File:Melon Seeds JE1 BE1.png|32px]] Melon seeds no longer use the pumpkin seeds texture.}}
{{History||v0.9.0|snap=?|Melon seeds can now be found in [[mineshaft]] chests.}}
{{History||v0.12.1|snap=build 1|Melon seeds are no longer available from the [[Nether reactor]].}}
{{History||v0.14.0|snap=build 1|Melon seeds can now be found in [[minecart with chest|minecarts with chests]] in [[mineshaft]]s.}}
{{History|pocket}}
{{History||1.0.0|snap=alpha 0.17.0.1|Melon seeds now generate inside [[dungeon]] [[chest]]s.}}
{{History||1.1.0|snap=alpha 1.1.0.0|Melon crops now generate inside [[woodland mansion]]s.
|Melon seeds can now be found in woodland mansion chests.}}
{{History|bedrock}}
{{History||1.2.0|snap=beta 1.2.0.2|Melon seeds can now be found inside [[bonus chest]]s.
|Melon seeds are now used to tame [[parrot]]s.}}
{{History||1.10.0|snap=beta 1.10.0.3|[[File:Attached Melon Stem (W) JE5.png|32px]]{{info needed|More accurate image}} The texture of attached melon stems has been changed.
|Melon stems now generate in [[savanna]] and [[desert]] [[village]] farms.
|Added [[wandering trader]]s, who [[trading|sell]] melon seeds.}}
{{History||1.11.0|snap=beta 1.11.0.1|Melon seeds can now be used to fill up [[composter]]s.}}
{{History||1.14.0|snap=beta 1.14.0.1|[[Bee]]s can now pollinate melon stems.}}
{{History|console}}
{{History||xbox=TU5|xbone=CU1|ps=1.0|wiiu=Patch 1|[[File:Melon Seeds JE1 BE1.png|32px]] Added melon seeds.
|[[File:Melon Stem Age 0 JE1.png|32px]] [[File:Stem Age 1 JE1.png|32px]] [[File:Melon Stem Age 2 JE1.png|32px]] [[File:Melon Stem Age 3 JE1.png|32px]] [[File:Melon Stem Age 4 JE1.png|32px]] [[File:Melon Stem Age 5 JE1.png|32px]] [[File:Melon Stem Age 6 JE1.png|32px]] [[File:Melon Stem Age 7 JE1.png|32px]] [[File:Attached Melon Stem (N) JE1.png|32px]] [[File:Attached Melon Stem (E) JE1.png|32px]] [[File:Attached Melon Stem (S) JE1.png|32px]] [[File:Attached Melon Stem (W) JE1.png|32px]]{{verify|Are these models correct?}} Added melon stems.}}
{{History||xbox=none|xbone=none|ps=1.90|wiiu=none|switch=none|[[File:Attached Melon Stem (W) JE5.png|32px]]{{info needed|More accurate image}} The texture of attached melon stems has been changed.}}
{{History|New 3DS}}
{{History||0.1.0|[[File:Melon Stem Age 0 JE1.png|32px]] [[File:Stem Age 1 JE1.png|32px]] [[File:Melon Stem Age 2 JE1.png|32px]] [[File:Melon Stem Age 3 JE1.png|32px]] [[File:Melon Stem Age 4 JE1.png|32px]] [[File:Melon Stem Age 5 JE1.png|32px]] [[File:Melon Stem Age 6 JE1.png|32px]] [[File:Melon Stem Age 7 JE1.png|32px]] [[File:Attached Melon Stem (N) JE1.png|32px]] [[File:Attached Melon Stem (E) JE1.png|32px]] [[File:Attached Melon Stem (S) JE1.png|32px]] [[File:Attached Melon Stem (W) JE1.png|32px]]{{verify|Are these models correct?}} Added melon stems.}}
{{History|foot}}
<gallery>
Melon Stem with data value 15.png|The final version of the melon stem with age 15, as seen in-game.
Melonstems.png|Melon stems of ages 1–15 on a modded version of 1.7.2, hence the melon stems using the melon top texture.
Stems of 13w02a.png|All 16 stem sizes in 13w02a, with accompanying data values.
</gallery>
=== Melon stem "item" ===
{{:Technical blocks/Melon Stem}}
== Issues ==
{{issue list}}
== Gallery ==
<gallery>
Stem All Ages.png|All stages of growth.
AllSeeds.png|All the [[seeds]] that exist in the game.
</gallery>
== See also ==
* [[Melon]]
* [[Pumpkin Seeds]]
==References==
{{Reflist}}
{{Blocks|vegetation}}
{{Items}}
[[Category:Plants]]
[[Category:Food]]
[[Category:Non-solid blocks]]
[[Category:Generated structure blocks]]
[[cs:Semínka melounu]]
[[de:Melone]]
[[es:Semillas de sandía]]
[[fr:Graines de pastèque]]
[[hu:Dinnyemagok]]
[[it:Anguria]]
[[ja:スイカの種]]
[[ko:수박씨]]
[[nl:Meloenzaden]]
[[pl:Nasiona arbuza]]
[[pt:Sementes de melancia]]
[[ru:Семена арбуза]]
[[th:เมล็ดแตงโม]]
[[zh:西瓜种子]]</li></ul> | Fixed sapling bug. Different tree logs have slightly different colors, and make different colored planks. (e.g., Birch tree logs are turned into a lighter plank texture when crafted into planks.) Neither blocks nor planks from different types of tree will stack with each other, but they can be freely mixed in crafting. Crafted items (notably sticks) no longer remember what sort of wood they came from. In particular, a smashed boat always produces oak planks (and some sticks). | ||||
1.3.1{{Extension DPL}}<ul><li>[[Chorus Fruit|Chorus Fruit]]<br/>{{about|the fruit that drops from [[chorus tree]]s|the building material|Popped Chorus Fruit|other uses|Chorus}}
{{Item
| title = Chorus Fruit
| image = Chorus Fruit.png
| renewable = Yes
| heals = {{hunger|4}}
| stackable = Yes (64)
}}
'''Chorus fruit''' is a [[food]] [[item]] native to [[the End]] that can be eaten, or [[smelting|smelted]] into [[Popped Chorus Fruit|popped chorus fruit]]. It can be eaten even when the hunger bar is full, and eating it may teleport the [[player]] up to 8 blocks in any direction.
== Obtaining ==
{{see also|Tutorials/Chorus fruit farming}}
Chorus fruit can be obtained by breaking [[Chorus Plant (block)|chorus plant blocks]]. Each block of chorus plant has a 50% chance to drop a chorus fruit. This is not affected by [[Fortune]].<ref>{{bug|MC-198924||Chorus Fruit doesn't have a higher chance with Fortune|Invalid}}</ref>
== Usage ==
To eat chorus fruit, press and hold {{control|use}} while it is selected in the hotbar. Eating one restores {{hunger|4}} [[hunger]] and 2.4 hunger [[Hunger#Mechanics|saturation]].
Unlike most foods, chorus fruits can be eaten even when the player has a full hunger bar.
The player may also be [[teleportation|teleported]]: up to 16 attempts are made to choose a random destination within ±8 on all three axes in the same manner as [[Enderman#Teleportation|enderman teleportation]], with the exception that the player may teleport into an area only 2 blocks high, or one block tall if the player is crawling. The player does not land in the average centroid of the block, but rather to any position within an 8-block range. The player will be teleported directly down to the ground regardless of the height it was used at if the player is too far from a valid destination.
The chorus fruit, unlike an [[Ender Pearl|ender pearl]], can teleport the player through [[solid block]]s. The algorithm tries to avoid [[fluid]]s; the player cannot teleport into a space occupied by [[water]] or [[lava]]. However, the player can be teleported onto dangerous blocks such as fire, cacti and magma blocks.<ref>{{bug|MC-102836||Enderman and chorus fruit can teleport to some dangerous places}}</ref>
If a teleport succeeds, a sound similar to an enderman teleporting plays originating from the teleportation origin location. Chorus fruit has a cooldown of 1 second before being able to be used again. The cooldown is represented by a white overlay on the chorus fruit in the hotbar. The cooldown is applied to all chorus fruits items, including those in the player's inventory and containers.<ref>{{bug|MC-88236|||WAI}}</ref>
Eating chorus fruit may teleport the player into areas protected by [[bedrock]], [[barrier|barrier blocks]], or other blocks that are otherwise unbreakable in [[Survival]] mode. However, it cannot teleport the player onto [[the Nether]] roof.<ref>{{bug|MC-84198|||Fixed}}</ref>
Chorus fruit is completely non-functional above the nether roof.
[[Fox]]es can also eat chorus fruit and the teleportation effect works the same as with players.
=== Smelting ingredient ===
{{smelting
|Chorus Fruit
|Popped Chorus Fruit
|0.1}}
== Sounds ==
===Generic===
{{Sound table/Entity/Food}}
===Unique===
{{edition|java}}:
{{Sound table
|rowspan=2
|sound=Teleport1.ogg
|sound2=Teleport2.ogg
|subtitle=Player teleports
|source=player
|description=When a player teleports by eating a chorus fruit
|id=item.chorus_fruit.teleport
|translationkey=subtitles.item.chorus_fruit.teleport
|volume=1.0
|pitch=1.0
|distance=16}}
{{Sound table
|subtitle=Fox teleports
|source=Players & Friendly Creatures<wbr><ref group=sound>{{Bug|MC-257516||"Fox teleports" sound plays for both Players and Friendly Creatures sound categories}}</ref>|overridesource=1
|description=When a fox teleports by eating a chorus fruit
|id=entity.fox.teleport
|translationkey=subtitles.entity.fox.teleport
|volume=1.0
|pitch=1.0
|distance=16
|foot=1}}
{{edition|bedrock}}:
{{Sound table
|type=bedrock
|sound=Teleport1.ogg
|sound2=Teleport2.ogg
|source=hostile
|description=When something teleports by eating a chorus fruit
|id=mob.shulker.teleport
|volume=1.0
|pitch=1.0
|foot=1}}
==Data values ==
===ID===
{{edition|java}}:
{{ID table
|edition=java
|showforms=y
|generatetranslationkeys=y
|displayname=Chorus Fruit
|spritetype=item
|nameid=chorus_fruit
|form=item
|foot=1}}
{{edition|bedrock}}:
{{ID table
|edition=bedrock
|shownumericids=y
|showforms=y
|notshowbeitemforms=y
|generatetranslationkeys=y
|displayname=Chorus Fruit
|spritetype=item
|nameid=chorus_fruit
|id=558
|form=item
|foot=1}}
==Advancements==
{{load advancements|Husbandry;A Balanced Diet}}
==History==
{{History|java}}
{{History||1.9|snap=15w31a|[[File:Chorus Fruit JE1 BE1.png|32px]] Added chorus fruit.}}
{{History|||snap=15w34c|A cooldown for using chorus fruit has now been added.}}
{{History|||snap=15w37a|The chorus fruit's teleportation range has now been reduced from ±32 to ±8.}}
{{History|||snap=15w50a|Added a [[sound]] for chorus fruit: <code>item.chorus_fruit.teleport</code>.}}
{{History||1.10|snap=16w21a|Chorus fruit can now teleport riders off their mounts.}}
{{History||1.13|snap=17w47a|Prior to [[1.13/Flattening|''The Flattening'']], this [[item]]'s numeral ID was 432.}}
{{History||1.14|snap=18w43a|[[File:Chorus Fruit JE2 BE2.png|32px]] The texture of chorus fruit has now been changed.}}
{{History||1.20.2|snap=23w33a|Eating chorus fruit now resets fall distance.<ref>{{bug|MC-112133||Eating chorus fruit does not reset fall distance|Fixed}}</ref>}}
{{History|pocket}}
{{History||1.0.0|snap=alpha 0.17.0.1|[[File:Chorus Fruit JE1 BE1.png|32px]] Added chorus fruit.}}
{{History|||snap=alpha 1.0.0.1|The cooldown of chorus fruit now has an animation.}}
{{History|bedrock}}
{{History||1.7.0|snap=beta 1.7.0.2|The category that chorus fruit are apart of in the [[Creative inventory]] has been changed from "Nature" to "Items".}}
{{History||1.10.0|snap=beta 1.10.0.3|[[File:Chorus Fruit JE2 BE2.png|32px]] The texture of chorus fruit has now been changed.}}
{{History||1.13.0|snap=beta 1.13.0.15|Chorus fruit has been moved back to the "Nature" section in the Creative inventory.}}
{{History|console}}
{{History||xbox=TU46|xbone=CU36|switch=1.0.1|ps=1.38|wiiu=Patch 15|[[File:Chorus Fruit JE1 BE1.png|32px]] Added chorus fruit.}}
{{History||xbox=none|xbone=none|ps=1.90|wiiu=none|switch=none|[[File:Chorus Fruit JE2 BE2.png|32px]] The texture of chorus fruit has now been changed.}}
{{History|new 3ds}}
{{History||1.7.10|[[File:Chorus Fruit JE1 BE1.png|32px]] Added chorus fruit.}}
{{History|foot}}
==Issues==
{{issue list}}
==References==
{{reflist}}
==External Links==
*[https://www.minecraft.net/en-us/article/taking-inventory--chorus-fruit Taking Inventory: Chorus Fruit] – Minecraft.net on November 5, 2020
{{Items}}
[[Category:Plants]]
[[Category:Food]]
[[Category:Renewable resources]]
[[de:Chorusfrucht]]
[[es:Fruta chorus]]
[[fr:Chorus]]
[[ja:コーラスフルーツ]]
[[ko:후렴과]]
[[nl:Chorusfruit]]
[[pl:Owoc refrenusu]]
[[pt:Fruta do coro]]
[[ru:Плод коруса]]
[[uk:Фрукт хорусу]]
[[zh:紫颂果]]</li><li>[[Water Bucket|Water Bucket]]<br/>{{Item
| title = Water Bucket
| renewable = Yes
| image = Water Bucket.png
| stackable = No
}}
A '''water bucket''' is a [[bucket]] filled with [[water]].
== Obtaining ==
=== Interacting ===
To fill an empty [[bucket]] with water, {{control|use}} it on a [[water]] source block. The water is consumed in the process. Flowing water does not fill a bucket.
{{control|Using}} an empty bucket on a [[cauldron]] filled with water (water level 3) empties the cauldron and fills the bucket.
Water buckets can also be filled by placing an empty one in the fuel slot of a [[furnace]], and a wet [[sponge]] into the oven slot. The bucket is filled when the [[smelting]] process completes, which also leaves the sponge dry and ready to be reused.
=== Chest Loot ===
{{LootChestItem|water-bucket}}
== Usage ==
{{Control|Using}} a water bucket on a solid block places a water source block against that block, emptying the bucket; using a water bucket on a [[waterlogging|waterloggable]] block waterlogs the block. In [[the Nether]], however, the water evaporates, making a fire extinguishing sound and displays smoke particles while nothing gets placed.
=== Dispensers ===
A [[dispenser]] can be loaded with a water bucket, and when activated it places a water block directly before it, emptying the bucket. A dispenser loaded with an empty bucket and a water source right in front of it draws the source into the bucket when activated.
=== Cauldrons ===
A single water bucket can fill a [[cauldron]], and using an empty bucket on a water-filled cauldron fills the bucket. Empty buckets cannot be filled from partly-filled cauldrons.
=== Filling bucket with mobs ===
Water buckets can be used on a [[fish]], [[axolotl]] or [[tadpole]] to create a [[bucket of aquatic mob]].
=== Transportation ===
{{main|Tutorials/Elevators#Water elevators}}
Water buckets can be used as a means of quickly descending great heights in the [[Overworld]] and [[the End]], either by creating a waterfall or using the water bucket while falling to create a safe water landing.
Water buckets can also be used to climb vertical surfaces anywhere but [[the Nether]] by repeatedly creating higher waterfalls from the bottom and swimming up them.
== Sounds ==
{{el|je}}:
{{Sound table
|sound=Fill water bucket1.ogg
|sound2=Fill water bucket2.ogg
|sound3=Fill water bucket3.ogg
|subtitle=Bucket fills
|source=player
|description=When a bucket is filled with water
|id=item.bucket.fill
|translationkey=subtitles.item.bucket.fill
|volume=1.0
|pitch=1.0
|distance=16}}
{{Sound table
|sound=Empty water bucket1.ogg
|sound2=Empty water bucket2.ogg
|sound3=Empty water bucket3.ogg
|subtitle=Bucket empties
|source=block
|description=When the bucket is placed
|id=item.bucket.empty
|translationkey=subtitles.item.bucket.empty
|volume=1.0 <ref group=sound>Except for the second copy of {{cd|empty1}}, which is 0.9</ref>
|pitch=1.0
|distance=16
|foot=1}}
{{el|je}}:
{{Sound table
|type=bedrock
|sound=Fill water bucket1.ogg
|sound2=Fill water bucket2.ogg
|sound3=Fill water bucket3.ogg
|source=block
|description=When a bucket is filled with water
|id=bucket.fill_water
|volume=1.0
|pitch=1.0}}
{{Sound table
|sound=Empty water bucket1.ogg
|sound2=Empty water bucket2.ogg
|sound3=Empty water bucket3.ogg
|source=block
|description=When a water bucket is emptied
|id=bucket.empty_water
|volume=1.0
|pitch=1.0}}
{{Sound table
|rowspan=2
|sound=Water Splash Old.ogg
|source=block
|description=When a water bucket is placed in a cauldron<wbr><ref group=sound name=bucketsplash>{{Bug|MCPE-135919}}</ref>
|id=cauldron.fillwater
|volume=0.1
|pitch=1.0}}
{{Sound table
|source=block
|description=When a water bucket is removed from a cauldron<wbr><ref group=sound name=bucketsplash/>
|id=cauldron.takewater
|volume=0.1
|pitch=1.0
|foot=1}}
==Data values==
=== ID ===
{{edition|java}}:
{{ID table
|edition=java
|showforms=y
|generatetranslationkeys=y
|displayname=Water Bucket
|spritetype=item
|nameid=water_bucket
|form=item
|foot=1}}
{{edition|bedrock}}:
{{ID table
|edition=bedrock
|showaliasids=y
|shownumericids=y
|showforms=y
|notshowbeitemforms=y
|generatetranslationkeys=y
|displayname=Water Bucket
|spritetype=item
|nameid=water_bucket
|aliasid=bucket / 8
|id=362
|form=item
|translationkey=item.bucketWater.name
|foot=1}}
== Advancements ==
{{load advancements|Tactical fishing;The Cutest Predator;Bukkit bukkit}}
==History==
{{History|java infdev}}
{{History||20100615|[[File:Water Bucket JE1 BE1.png|32px]] Added water buckets.}}
{{History|java alpha}}
{{History||v1.2.6|{{control|use|text=Using}} a water bucket on [[block]]s with GUIs ([[chest]]s, [[furnace]]s, etc.) no longer places the water.}}
{{History|java}}
{{History||1.0.0|snap=Beta 1.9 Prerelease 2|Water buckets can now be used to fill [[cauldron]]s.}}
{{History||1.3.1|snap=12w15a|[[Dispenser]]s have now been given the ability to dispense water buckets. They can also collect if activated again.}}
{{History||1.8|snap=14w25a|A water bucket is now shown as the icon when [[water]] is used as a layer in [[Superflat]].}}
{{History|||snap=14w25b|[[Smelting]] a wet [[sponge]] while an empty bucket is in the fuel slot fills the bucket with water.}}
{{History||1.9|snap=15w44a|A full [[cauldron]] can now be emptied with a bucket, yielding a water bucket.}}
{{History|||snap=15w50a|Added sounds for collecting and pouring water using a bucket.}}
{{History||1.13|snap=17w47a|Prior to the ''[[Flattening]]'' this item's numerical ID was 326.}}
{{History|||snap=18w08b|Water buckets can now be used to pick up [[fish]] mobs.}}
{{History||1.14|snap=18w43a|[[File:Water Bucket JE2 BE2.png|32px]] The texture of water buckets has now been changed.
|Water buckets can now suck up liquids directly adjacent to the side they are facing. How this works is unknown, given the water bucket clearly already contains a liquid.}}
{{History|||snap=18w48a|Water buckets can now be found in [[chest]]s in [[village]] fishing cottages.}}
{{History|||snap=19w02a|Water buckets can now be used to put out [[campfire]]s.}}
{{History||1.17|snap=20w51a|Water buckets can now be used to collect [[axolotl]]s.}}
{{History||1.19|snap=22w11a|Water buckets can now be used to collect [[tadpole]]s.}}
{{History||1.19.3|snap=22w45a|Water buckets can now be emptied into [[waterlogging|waterlogged]] blocks, instead of placing water against them.<ref>{{bug|MC-127110|||Fixed}}</ref>}}
{{History|upcoming java}}
{{History||Villager Trade Rebalance<br>(Experimental)|link=Java Edition 1.20.2|snap=23w31a|[[Wandering trader]]s now have a chance to [[trading|buy]] a water bucket from the player.}}
{{History|pocket alpha}}
{{History||v0.7.0|[[File:Water Bucket JE1 BE1.png|32px]] Added water buckets.
|Water buckets were simply called "Bucket".}}
{{History||v0.7.4|Water buckets no longer stack to 64.}}
{{History||v0.14.0|snap=build 1|Dispensers can now shoot out water from water buckets.}}
{{History|bedrock}}
{{History||1.4.0|snap=beta 1.2.14.2|Water buckets can now be used to pick up [[fish mob]]s.
|Moved all bucket items, including water buckets, from the Equipment tab to the Items tab in the [[Creative inventory]].{{verify|type=update}}{{info needed}}<!---please check snapshots, only 1 major release version was checked each--->}}
{{History||1.10.0|snap=beta 1.10.0.3|[[File:Water Bucket JE2 BE2.png|32px]] The texture of water buckets has now been changed.}}
{{History||1.16.100|snap=beta 1.16.100.56|The ID of water buckets has been changed from <code>bucket/8</code> to <code>water_bucket</code>.}}
{{History||1.17.0|snap=beta 1.16.230.52|Water buckets can now be used to collect [[axolotl]]s.}}
{{History||1.18.10|snap=beta 1.18.10.24|Water buckets can now be used to collect [[tadpole]]s behind the "Wild Update" experimental toggle.}}
{{History|console}}
{{History||xbox=TU1|xbone=CU1|ps=1.0|wiiu=Patch 1|switch=1.0.1|[[File:Water Bucket JE1 BE1.png|32px]] Added water buckets.}}
{{History||xbox=TU9|[[Dispenser]]s have now been given the ability to shoot out the [[liquids]] inside water buckets. They can also suck up the liquids if activated again, but a bug prevents the empty [[bucket]] from being filled. Whether this was ever fixed is unknown.}}
{{History||xbox=none|xbone=none|ps=1.90|wiiu=none|switch=none|[[File:Water Bucket JE2 BE2.png|32px]] The texture of water buckets has now been changed.}}
{{History|New Nintendo 3DS Edition}}
{{History||0.1.0|[[File:Water Bucket JE1 BE1.png|32px]] Added water buckets.}}
{{History|foot}}
==Issues==
{{issue list}}
==Gallery==
<gallery>
Water Bucket SDGP.png|Water bucket in the [[Super Duper Graphics Pack]].
</gallery>
==References==
{{Reflist}}
{{Items}}
[[Category:Renewable resources]]
[[Category:Tools]]
[[de:Wassereimer]]
[[ja:水入りバケツ]]
[[pt:Balde de água]]
[[th:ถังน้ำ]]
[[uk:Відро води]]
[[zh:水桶]]</li></ul> | 12w18a | Jungle trees were given a chance to drop cocoa beans from their leaves. | |||
| 12w19a | Jungle leaves no longer drop cocoa beans. Instead, small jungle trees can generate with the new Cocoa Plants already growing on them. | ||||
1.3.2{{Extension DPL}}<ul><li>[[3D|3D]]<br/>{{about|the edible item|the April Fools' snapshot itself|Java Edition 3D Shareware v1.34}}
{{Joke feature}}
{{Item
| image = 3D (item).png
| renewable = Yes
| stackable = Yes (64)
}}
'''3D''' was a joke item from [[Java Edition 3D Shareware v1.34]]. Eating it shows a picture of the developer cast.
== Obtaining ==
=== Mob drops ===
3D was dropped by a creeper summoned by the cheat code "'''NEEEERD'''".
== Usage ==
Eating the 3D item when the hunger bar was not full shows a picture of the developer cast of Minecraft.
== Data values ==
=== ID ===
{{ID table
|showforms=y
|generatetranslationkeys=java
|displayname=3D
|spritetype=item
|nameid=3d
|form=item
|foot=1}}
== History ==
{{History|java}}
{{History||3D Shareware v1.34|[[File:3D (item).png|32px]] Added the 3D item.}}
{{History|foot}}
== Gallery ==
<gallery>
File:3D Shareware Mojang Team.png|The developer cast of Minecraft.
File:Tasty 3D Item.gif|The "'''Tasty!'''" 3D Item lore.
</gallery>
{{Items}}
{{Jokes}}
[[Category:Non-renewable resources]]
[[Category:Joke items]]</li><li>[[Pitcher Pod|Pitcher Pod]]<br/>{{wip}}
{{Block
| image = <gallery>
Pitcher Crop Age 0 JE1.png| Age 0
Pitcher Crop Age 1 JE1.png| Age 1
Pitcher Crop Age 2 JE1.png| Age 2
Pitcher Crop Age 3 JE1.png| Age 3
Pitcher Crop Age 4 JE1.png| Age 4
</gallery>
| image2 = Pitcher Pod.png
| transparent = Yes
| light = Yes
| tool = N/A
| renewable = Yes
| stackable = Yes (64)
| rarity = Common
| flammable = No
| lavasusceptible = No
}}
A '''pitcher pod''' is an ancient bulbous seed that has a chance to be dropped by [[Sniffer|sniffers]] when they finish digging. It is the seed for [[Pitcher Plant]]s.
== Obtaining ==
[[Sniffer]]s occasionally bury their nose in the ground and start digging. Once the sniffer has finished digging, one pitcher pod has a chance to be dropped on the floor as an item.
Sniffers can only dig for pitcher pods in the following blocks:
*{{BlockLink|Dirt}}
*{{BlockLink|Grass Block}}
*{{BlockLink|Podzol}}
*{{BlockLink|Coarse Dirt}}
*{{BlockLink|Rooted Dirt}}
*{{BlockLink|Moss Block}}
*{{BlockLink|Mud}}
*{{BlockLink|Muddy Mangrove Roots}}
They cannot dig for pitcher pods on [[mycelium]].<ref>{{bug|MC-260259||Sniffers cannot dig nor find seeds on mycelium|WAI}}</ref>
== Usage ==
=== Pitcher Crop ===
{{main|Tutorials/Crop farming|title1=Pitcher Crop Farming}}
Pitcher pods can be placed on [[farmland]] by {{ctrl|using}}, where they grow through three stages as a '''pitcher crop'''.
Breaking the crop before it matures drops the pitcher pod, while breaking the final stage produces a [[pitcher plant]] and does ''not'' yield the pod. Pitcher crops break if pushed by a [[piston]] or if their supporting farmland breaks or turns to dirt (i.e. by being trampled), dropping their usual drops.
Farmer [[villager]]s can plant pitcher pods, but cannot harvest them once they have fully grown.<ref>{{bug|MC-263382|||WAI}}</ref>
=== Feeding ===
Pitcher pods can be used to breed [[chicken]]s and reduce the remaining growth duration of chicks by 10%.
=== Taming ===
Pitcher pods can be used to tame [[parrot]]s.
== Sounds ==
{{Sound table/Block/Crop}}
== Data values ==
=== ID ===
{{edition|java}}:
{{ID table
|edition=java
|showblocktags=y
|showitemtags=y
|showforms=y
|generatetranslationkeys=y
|displayname=Pitcher Crop
|spritetype=block
|nameid=pitcher_crop
|form=block
|blocktags=bee_growables, crops}}
{{ID table
|displayname=Pitcher Pod
|spritetype=item
|nameid=pitcher_pod
|form=item
|itemtags=villager_plantable_seeds
|foot=1}}
{{edition|bedrock}}:
{{ID table
|edition=bedrock
|shownumericids=y
|showforms=y
|generatetranslationkeys=y
|displayname=Pitcher Crop
|spritetype=block
|nameid=pitcher_crop
|id=-574
|form=block
|translationkey=-}}
{{ID table
|displayname=Pitcher Pod
|spritetype=item
|nameid=pitcher_pod
|id=297
|form=item
|foot=1}}
=== Block states ===
{{see also|Block states}}
{{/BS}}
== Achievements ==
{{Load achievements|Planting The Past}}
== Advancements ==
{{load advancements|A Seedy Place;Planting The Past}}
== History ==
{{History|java}}
{{History||1.20|snap=23w12a|[[File:Pitcher Crop Age 0 JE1.png|32px]] [[File:Pitcher Crop Age 1 JE1.png|32px]] [[File:Pitcher Crop Age 2 JE1.png|32px]] [[File:Pitcher Crop Age 3 JE1.png|32px]] [[File:Pitcher Crop Age 4 JE1.png|32px]] [[File:Pitcher Pod JE1.png|32px]] Added pitcher crops and pods.
|[[File:Pitcher Crop Age 0 (bottom) JE1.png|32px]] [[File:Pitcher Crop Age 1 (bottom) JE1.png|32px]] [[File:Pitcher Crop Age 2 (bottom) JE1.png|32px]] [[File:Pitcher Crop Age 3 (bottom) JE1.png|32px]] [[File:Pitcher Crop Age 4 (bottom) JE1.png|32px]] The bottom face on all pitcher crop models is missing.<ref>{{bug|MC-261208}}</ref>}}
{{History|||snap=23w13a|Placing a pitcher pod in farmland now gives the player the "A Seedy Place" [[advancement]].
|Fully grown pitcher crops are now destroyed when the farmland they are placed in is destroyed.}}
{{History|||snap=23w14a|Pitcher crops can now be destroyed by [[ravagers]].|Pitcher crops' hitboxes now change according to their age.|[[File:Pitcher Crop Age 0 (bottom) JE2.png|32px]] [[File:Pitcher Crop Age 1 (bottom) JE2.png|32px]] [[File:Pitcher Crop Age 2 (bottom) JE2.png|32px]] [[File:Pitcher Crop Age 3 (bottom) JE2.png|32px]] [[File:Pitcher Crop Age 4 (bottom) JE2.png|32px]] Pitcher crops now have their bottom texture.}}
{{History|||snap=23w16a|Hitbox shape of pitcher crop has been changed for each stage of its growth.|[[Villager]]s can now plant pitcher pods.}}
{{History|||snap=23w17a|The player now get the [[advancement]] "Planting the past" when they plant pitcher pods on [[farmland]].}}
{{History|bedrock}}
{{History||1.20.0|snap=beta 1.20.0.20|[[File:Pitcher Crop Age 0 JE1.png|32px]] [[File:Pitcher Crop Age 1 JE1.png|32px]] [[File:Pitcher Crop Age 2 JE1.png|32px]] [[File:Pitcher Crop Age 3 JE1.png|32px]] [[File:Pitcher Crop Age 4 JE1.png|32px]] [[File:Pitcher Pod JE1.png|32px]] Added pitcher crops and pods.
|Unlike in Java Edition, pitcher pods can be used to feed chickens and parrots.}}
{{history|foot}}
== Notelist ==
{{notelist}}
== References ==
{{reflist}}
{{Blocks|upcoming}}
{{Items}}
[[Category:Plants]]
[[Category:Non-solid blocks]]
[[de:kannenpflanzentrieb]]
[[es:Vaina de planta odre]]
[[ja:ウツボカズラのさや]]
[[pt:Muda de planta-jarro]]</li></ul> | Large oak trees now generate with sideways logs. | ||||
| July 30, 2013 | |||||
| Cherry trees have been mentioned to be implemented by Patrick Geuder | |||||
1.7.2{{Extension DPL}}<ul><li>[[Bone Meal|Bone Meal]]<br/>{{Item
| image = Bone Meal.png
| renewable = Yes
| stackable = Yes (64)
}}
'''Bone meal''' is a material that can be used as a fertilizer for most plants and fungi, as well as a crafting ingredient for [[dye]]s.
== Obtaining ==
=== Crafting ===
{{Crafting
|Bone
|Output=Bone Meal,3
|type=Material
|showname=0
|head=1
}}
{{Crafting
|Bone Block
|Output= Bone Meal,9
|type=Material
|foot=1
}}
=== Mob loot ===
==== Fish ====
All fish mob variants ([[cod]], [[salmon]], [[tropical fish]], and [[pufferfish]]) have a 5% chance to drop 1 bone meal upon death.{{only|java}} In [[Bedrock Edition]], they drop [[bones]] instead.
=== Composters ===
When a [[composter]] is completely filled, a single bone meal drops the next time the composter is {{ctrl|used}}.
=== Trading ===
[[Wandering trader]]s sell 3 bone meal for an [[emerald]].{{only|bedrock}}
== Usage ==
=== Crafting ingredient ===
{{crafting usage}}
{{IN|bedrock}}, bone meal can be also used in [[banner pattern]]s:
{{banner crafting usage}}
=== Loom ingredient ===
{{Banner loom usage|Bone Meal}}
=== Dye ===
{{Dye usage}}
=== Fertilizer ===
Bone meal can also be used on the following [[plants]] to have a chance to increase their growth stage:
{| class="wikitable"
|+
!Plant
!Action
|-
|{{BlockLink|Wheat}}<br>{{BlockLink|Carrots}}<br>{{BlockLink|Potatoes}}
|The plant matures 2–5 growth stages.
|-
|{{BlockLink|Beetroots}}
|The plant has a 75% chance of growing to the next growth stage.
|-
|{{BlockLink|Bamboo}}
|Grows the [[bamboo]] by 1-2 stems.
|-
|{{BlockLink|Melon Stem|link=Melon seeds|text=Melon Seeds}}<br>{{BlockLink|Pumpkin Stem|link=Pumpkin seeds|text=Pumpkin Seeds}}
|The planted stem matures 2–5 growth stages. Bone meal affects only the stem's growth; it does not cause [[melon]]s or [[pumpkin]]s to sprout from a mature stem.
|-
|{{BlockLink|Saplings}}<br>{{BlockLink|Azalea}}<br>{{BlockLink|Flowering Azalea}}<br>{{BlockLink|Mangrove Propagule}} (not hanging)
|The [[sapling]] has a 45% chance of growing to the next growth stage, if possible. Saplings have two growth stages (with no visible difference between them) before growing into trees as the third stage. A tree cannot grow unless the sapling is planted in proper ground and sufficient space is available. Using bone meal on such an obstructed sapling with no chance of growing wastes the bone meal.
|-
|{{BlockLink|Sunflower}}s<br>{{BlockLink|Lilac}}s<br>{{BlockLink|Rose Bush}}es<br>{{BlockLink|Peony|Peonies}}
|The corresponding item form drops, without destroying the original plant.
|-
|{{BlockLink|Grass}}<br>{{BlockLink|Fern}}s<br>{{BlockLink|Seagrass}}
|A one-block-high tall [[grass]], [[fern]], or [[seagrass]] (that is on [[grass block]], [[dirt]], [[coarse dirt]], [[rooted dirt]], [[farmland]], [[podzol]], [[mycelium]], [[moss block]], [[mud]], or [[muddy mangrove roots]] (only exception is seagrass, will need to on a full surface)) grows into a two-block-high tall grass, fern or seagrass.
|-
|{{BlockLink|Mushrooms}}
|Has a 40% chance of growing into a {{EnvLink|huge mushroom}} if on [[grass block]], [[dirt]], [[coarse dirt]], [[rooted dirt]], [[farmland]], [[podzol]], [[mycelium]], [[moss block]], [[mud]], or [[muddy mangrove roots]].
|-
|{{BlockLink|Cocoa}}
|The cocoa plant matures 1 growth stage.
|-
|{{BlockLink|Sweet Berry Bush}}
|Grows every stage.
|-
|{{BlockLink|Sea Pickle}}
|If the [[sea pickle]] is on a [[coral block]] and in [[water]] at least 2 blocks deep, the sea pickle colony grows, and additional sea pickles generate nearby.
|-
|{{BlockLink|Sugar Cane}}{{only|bedrock|short=1}}
|The sugar cane grows to maximum height (three blocks tall).
|-
|{{BlockLink|Kelp}}
|The kelp plant grows by 1 block per bone meal used, up to its maximum height.
|-
|{{BlockLink|Flower|id=poppy}} (excluding wither roses){{only|bedrock|short=1}}
|One-block-high flowers make more flowers of the same type grow in the surrounding area.
|-
|{{BlockLink|Fungus|id=fungi}}
|Grows into [[huge fungi]], but only if on the respective [[nylium]].
|-
|{{BlockLink|Weeping Vines}}
|Grows the [[weeping vine]]s a few blocks downward.
|-
|{{BlockLink|Twisting Vines}}
|Grows the [[twisting vine]]s a few blocks upward.
|-
|{{BlockLink|Cave Vines}}
|Produces [[glow berries]] if the vine did not have any [[glow berries]] on it already.
|-
|{{BlockLink|Glow Lichen}}
|The [[glow lichen]] spreads to a random adjacent block.
|-
|{{BlockLink|Moss Block}}
|The [[moss block]] causes nearby [[stone]], [[cave vine]]s, and [[dirt]] to become moss blocks.
|-
|{{BlockLink|Big Dripleaf}}<br>{{BlockLink|Small Dripleaf}}
|A [[big dripleaf]] grows one block higher, and a [[small dripleaf]] becomes a big dripleaf.
|-
|{{BlockLink|Rooted Dirt}}
|Causes [[hanging roots]] to grow underneath the [[rooted dirt]] if there is space.
|-
|{{BlockLink|Mangrove Leaves}}
|Creates a hanging [[mangrove propagule]] under the [[mangrove leaves]].
|-
|{{BlockLink|Mangrove Propagule}} (hanging)
|The [[mangrove propagule]] matures 1 growth age.
|-
|{{BlockLink|Pink Petals}}
|Produces another pink petal in the block. If there are already four pink petals in the block, it will drop a pink petal as an item.
|-
|{{BlockLink|Torchflower Crop}}<br>{{BlockLink|Pitcher Crop}}
|Grows every stage.
|}
Bone meal does not affect:
* [[Cactus]]
* [[Vines]]
* [[Nether wart]]
* [[Sugar cane]]{{only|JE}}
* [[Chorus plant]]s, or other plants not listed above.
==== Wasting bone meal ====
Bone meal can be used on the following objects in the following situations, consuming it without any real effect:
* On [[grass]], [[fern]]s, and [[seagrass]] that do not have enough space to grow.<ref>{{bug|MC-125642}}</ref>
* On [[seagrass]] that doesn't have [[water]] above.
* On a [[dark oak sapling]] that is not in a group of four.<ref>{{bug|MC-168446}}</ref>
* On a [[mushroom]] that is not on a block that allows it to grow into a huge mushroom.<ref>{{bug|MC-173213}}</ref>
* On a [[sea pickle]] that is already in a group of four and has no valid locations to expand to.<ref>{{bug|MC-127995}}</ref>
* On a [[bamboo]] (not [[bamboo shoot]]) that is blocked in the way.
* On a [[sea pickle]] that is not on a [[coral block]].
* On a [[fungus]] that is not on its respective [[nylium]].
* Any plants that can't grow due to being block by the [[build limit]].
=== Creating new plants ===
If bone meal is {{ctrl|used}} on a [[grass block]]; [[tall grass]], [[grass]], [[flower]]s, and [[pink petals]] form on the targeted block and on random adjacent grass blocks in an 15×5×15{{only|java|short=1}}/7×5×7{{only|bedrock|short=1}} area centered on the targeted block. The flowers/pink petals that appear depend on the biome, meaning that in order to obtain specific flowers, the player must travel to biomes where the flowers are found naturally. See {{slink|Flower|Flower biomes}} for more information.
Using bone meal on a 2-block flower (rose bushes, sunflowers, lilacs or peonies) will cause one of the same type of flower to drop, without breaking the original. This is the only way to reproduce these flowers, since they cannot generate from using bone meal on grass blocks.
Using bone meal on a non-transparent block that is underwater generates [[seagrass]] on that block and surrounding blocks. Sometimes, if in a [[warm ocean]] biome, [[coral]] and [[coral fan]]s may have a chance to generate as well, and in Bedrock Edition, coral (not coral fan) can be generated in any biome. In order for this to work, there must be 2 water blocks above the block the bone meal is being used on, and the lower one must be non-flowing water.
Using bone meal on a [[sea pickle]] on a [[coral block]] creates sea pickles. This generates sea pickles up to 3 [[block]]s (of coral) away, so a 7+ × 7+ block (49+ blocks) of coral may be necessary, to return the most sea pickles per given bone meal attempt (more attempts grows them more numerously, exactly - including the range of it growing, like grass with heights on grass blocks - as coral and coral fans, though those others being non-solid blocks).
Using bone meal on [[netherrack]] adjacent to [[nylium]] converts the netherrack into nylium of the same type. If both crimson and warped nylium are adjacent to the netherrack that was applied with bone meal, there is a 50% chance that either type of nylium is created.
Using bone meal on [[nylium]] causes the corresponding [[roots]] and both types of [[fungi]] to appear on the nylium block and other nylium nearby, with the type of fungi matching the type of nylium being more common. In addition, using bone meal on the side of warped nylium creates [[nether sprouts]] and [[twisting vines]].
=== Farmer villagers ===
[[Villager]]s with the farmer profession can collect bone meal from a full [[composter]], with which they can make their crops grow faster.
== Sounds ==
{{edition|java}}:
{{Sound table
|sound=Bonemeal1.ogg
|sound2=Bonemeal2.ogg
|sound3=Bonemeal3.ogg
|sound4=Bonemeal4.ogg
|sound5=Bonemeal5.ogg
|subtitle=Bone Meal crinkles
|description=When bone meal is successfully used
|source=block
|id=item.bone_meal.use
|translationkey=subtitles.item.bone_meal.use
|volume=1.0
|pitch=1.0
|distance=16
|foot=1}}
{{edition|be}}:
{{Sound table
|type=bedrock
|sound=Bonemeal1.ogg
|sound2=Bonemeal2.ogg
|sound3=Bonemeal3.ogg
|sound4=Bonemeal4.ogg
|sound5=Bonemeal5.ogg
|description=When bone meal is successfully used
|source=block
|id=item.bone_meal.use
|volume=1.0
|pitch=0.9-1.1
|foot=1}}
== Data values ==
=== ID ===
{{edition|java}}:
{{ID table
|edition=java
|showforms=y
|generatetranslationkeys=y
|displayname=Bone Meal
|spritetype=item
|nameid=bone_meal
|form=item
|foot=1}}
{{edition|bedrock}}:
{{ID table
|edition=bedrock
|showaliasids=y
|shownumericids=y
|showforms=y
|notshowbeitemforms=y
|generatetranslationkeys=y
|displayname=Bone Meal
|spritetype=item
|nameid=bone_meal
|aliasid=dye / 15
|id=411
|form=item
|translationkey=item.dye.white.name
|foot=1}}
== History ==
{{History|java beta}}
{{History||1.2|[[File:Bone Meal JE1 BE1.png|32px]] Added bone meal.
|Bone meal can now only be applied to [[sapling]]s and [[wheat]].}}
{{History||1.6.6|Bone meal can now be applied on [[grass block]]s.}}
{{History||1.8|snap=Pre-release|Bone meal can now be used on [[mushroom]]s to make [[huge mushroom]]s, and the block the mushroom is on changes to [[dirt]].}}
{{History|||snap=Pre-release 2 ;)|Bone meal can now be applied on [[pumpkin seeds|pumpkin]] and [[melon seed]]s.}}
{{History|java}}
{{History||1.3.1|snap=12w19a|Bone meal can now be applied on [[cocoa bean]]s.}}
{{History|||snap=1.3|[[File:Bone Meal JE2 BE2.png|32px]] The texture of bone meal has been changed.}}
{{History||1.4.2|snap=12w34a|Bone meal can now be used to dye [[leather armor]] and [[tamed wolf]]'s collar.}}
{{History||1.4.6|snap=12w49a|Bone meal can now be [[crafted]] with [[gunpowder]] to create a [[firework star]].}}
{{History||1.5|snap=13w04a|Bone meal has been significantly nerfed.<br>
[[Wheat]], [[melon seeds|melon]] and [[pumpkin seed]]s, [[potato]]es and [[carrot]]s: one bone meal is now consumed for all seven stages of growth (melon and pumpkin seeds do not spawn right away).<br>
[[Sapling]]s: one bone meal is now consumed for each of the two growth stages, then it grows into a tree.<br>
[[Cocoa]]s: one bone meal is now consumed for each of the three stages of growth.
|Green [[particle]]s are now displayed when bone meal is used.
|Bone meal can now be used from [[dispenser]]s.}}
{{History|||snap=13w05a|The balancing of bone meal has been adjusted. Growing a plant to its last state now takes on average 2-5 uses of bone meal (results vary from plant to plant).<ref>https://web.archive.org/web/20220921040940/https://imgur.com/a/gOngk</ref>}}
{{History||1.6.1|snap=13w19a|Bone meal can now be used to craft white [[stained clay]].}}
{{History||1.7.2|snap=13w36a|The [[flower]]s generated when using bone meal on grass blocks is now biome dependent.}}
{{History|||snap=13w41a|Bone meal can now be used to craft white [[stained glass]].}}
{{History||1.8|snap=14w30a|Added [[banner]]s, which can be dyed with [[bone meal]].}}
{{History||1.10|snap=16w20a|Bone meal can now be used to craft [[bone block]]s.}}
{{History||1.11|snap=16w39b|Bone meal can now be used to dye [[shulker box]]es.}}
{{History||1.12|snap=17w06a|Bone meal can now be used to craft white [[concrete powder]].}}
{{History||1.13|snap=17w47a|The different data values for the <code>dye</code> ID have been split up into their own IDs.
|Prior to [[1.13/Flattening|''The Flattening'']], this [[item]]'s numeral ID was 351.}}
{{History|||snap=18w07a|Bone meal can now be used underwater to create [[seagrass]].}}
{{History|||snap=18w14b|Bone meal can now be used for spreading [[sea pickle]]s.}}
{{History||1.13.1|snap=18w31a|Bone meal used in [[water]] of warm ocean biomes now has a chance of growing [[coral]].
|[[Cod]], [[salmon]], [[tropical fish]], and [[pufferfish]] now have a chance of dropping bone meal upon death.}}
{{History|||snap=18w32a|Bone meal used in [[water]] of warm ocean biomes now has a chance of growing [[coral fan]]s.}}
{{History||1.14|snap=18w43a|Bone meal can now used to craft [[white dye]].
|Bone meal can no longer be used as a [[dye]].
|All of the dye-related functions and crafting recipes of bone meal (except bone blocks) have been transferred to white dye.
|[[File:Bone Meal JE3 BE3.png|32px]] The texture of bone meal has been changed.
|Bone meal can now be used on [[bamboo]] and [[bamboo shoot]].}}
{{History|||snap=19w03a|Bone meal can now be obtained from [[composter]]s.}}
{{History||1.16|snap=20w06a|Bone meal can now be used to grow [[fungi]] into [[huge fungi]].
|Bone meal can now be used to spread [[nylium]] onto netherrack.}}
{{History|||snap=20w09a|Using bone meal to grow fungi now works only on the respective [[nylium]].}}
{{History|||snap=20w11a|Bone meal can now grow [[kelp]], [[weeping vines]], and [[twisting vines]].}}
{{History|||snap=20w12a|Bone meal can now be used to grow [[roots]], [[fungi]], and [[nether sprouts]] on nylium.}}
{{History|||snap=20w13a|Farmers can now use bone meal to grow crops.}}
{{History||1.17|snap=21w03a|Bone meal can now be used to spread [[glow lichen]]s.}}
{{History|||snap=21w05a|Bone meal can now be used on [[moss block]]s, [[small dripleaf]], [[big dripleaf]], and [[cave vines]].}}
{{History|||snap=21w11a|Bone meal can now be used on [[rooted dirt]].}}
{{History|||snap=21w15a|Bone meal now makes a sound when used.}}
{{History|||snap=21w16a|Moss patches obtained from fertilizing moss blocks contain less vegetation and are now smaller and more irregular in shape.
|Bone meal can now be used on [[azalea]] and [[flowering azalea]].}}
{{History||1.19|snap=22w11a|Bone meal can now be used on [[mangrove propagule]]s and [[mangrove leaves]].}}
{{History||1.20<br>(Experimental)|link=1.19.4|snap=23w07a|Bone meal can now be used on [[pink petals]] and [[torchflower crop]]s.|Using bone meal on [[cherry grove]]s now have a chance to generate [[pink petal]]s.}}
{{History||1.20|snap=23w12a|Bone meal can now be used on [[pitcher crop]]s.}}
{{History|pocket alpha}}
{{History||v0.3.0|[[File:Bone Meal JE1 BE1.png|32px]] Added bone meal. It is currently unobtainable and serves no purpose.}}
{{History||v0.3.3|Bone meal can now be crafted from bones.
|Bone meal can now be applied to grass blocks and saplings.}}
{{History||v0.4.0|Added the first [[crop]]s, which bone meal can be applied to.}}
{{History||v0.8.0|snap=build 1|[[File:Bone Meal JE2 BE2.png|32px]] The texture of bone meal has been changed.
|Bone meal no longer instantly grows [[crop]]s to full size.
|Bone meal can now be used to craft white [[wool]].}}
{{History|||snap=build 5|[[Pumpkin]] and [[melon]] stems now grow by only one stage when bone meal is used.
|Some [[flower]]s now spawn certain other flowers when bone meal is used on them.
|Bone meal can now grow [[fern]]s and [[tall grass]] in [[survival]] and [[creative]].
|Bone meal can now grow [[sugar cane]]s to maximum height.}}
{{History||v0.9.0|snap=build 11|Bone meal can now be used to dye tamed [[wolf]] collars.}}
{{History||v0.14.0|snap=build 1|Bone meal can now be used from [[dispenser]]s.
|Bone meal can now be used to dye [[water]] in [[cauldron]]s.}}
{{History|pocket}}
{{History||1.0.0|snap=alpha 0.17.0.1|Bone meal can now be used to dye [[shulker]]s.}}
{{History||1.1.0|snap=alpha 1.1.0.0|Bone meal can now be used to craft white [[concrete powder]], white [[bed]]s and white [[shulker box]]es.}}
{{History||1.1.3|snap=alpha 1.1.3.0|Bone meal can now be used to craft [[bone block]]s.}}
{{History|bedrock}}
{{History||1.2.0|snap=beta 1.2.0.2|Bone meal can now be used to craft white [[stained glass]].
|Bone meal can now be used to craft [[firework star]]s.
|Bone meal can now be used to create [[banner]] patterns.}}
{{History||1.4.0|snap=beta 1.2.14.2|Bone meal can now be used underwater for growing [[seagrass]] and [[coral]].}}
{{History|||snap=beta 1.2.20.1|Bone meal can now be used for spreading [[sea pickle]]s.
|Bone meal can now be used to craft white [[balloon]]s and white [[glow stick]]s.}}
{{History||1.8.0|snap=beta 1.8.0.8|Bone meal can now be used to grow [[bamboo]].}}
{{History|||snap=beta 1.8.0.10|Bone meal can now be used to craft [[white dye]].}}
{{History||1.10.0|snap=beta 1.10.0.3|Bone meal are now sold by [[wandering trader]]s.
|[[File:Bone Meal JE3 BE3.png|32px]] The texture of bone meal has been changed.}}
{{History||1.11.0|snap=beta 1.11.0.1|Bone meal can now be obtained from [[composter]]s.}}
{{History||1.16.0|snap=beta 1.16.0.51|Bone meal can now grow [[fungus|fungi]] into [[huge fungi]].
|Bone meal can now be used to turn [[netherrack]] into [[nylium]].
|Bone meal can now be used to grow [[roots]], [[fungi]], and [[nether sprouts]] on nylium.}}
{{History||1.16.100|snap=beta 1.16.100.56|The ID of bone meal has been changed from <code>dye/15</code> to <code>bone_meal</code>.}}
{{History||1.16.210|snap=beta 1.16.210.51|Bone meal used in [[water]] now has a chance of growing [[coral fan]]s.}}
{{History||1.16.220|snap=beta 1.16.220.52|Bone meal can now be used on [[moss block]]s, [[small dripleaf]], [[big dripleaf]], [[cave vines]] and [[rooted dirt]].}}
{{History||1.17.0|snap=beta 1.16.230.50|Bone meal can now be used to spread [[glow lichen]]s.}}
{{History|||snap=beta 1.16.230.54|Bone meal can be used to grow [[azalea]]s into azalea trees.}}
{{History|||snap=beta 1.17.0.50|Bone meal now makes a sound when used.}}
{{History|console}}
{{History||xbox=TU1|xbone=CU1|ps=1.00|wiiu=Patch 1|switch=1.0.1|[[File:Bone Meal JE1 BE1.png|32px]] Added bone meal.}}
{{History||xbox=TU19|xbone=CU7|ps=1.12|Bone meal no longer instantly grows [[crop]]s to full size.}}
{{History||xbox=none|xbone=none|ps=1.90|wiiu=none|switch=none|[[File:Bone Meal JE3 BE3.png|32px]] The texture of bone meal has been changed.}}
{{History|new 3ds}}
{{History||0.1.0|[[File:Bone Meal JE2 BE2.png|32px]] Added bone meal.}}
{{History|foot}}
== Issues ==
{{issue list}}
== Trivia ==
* Bone meal can be used on the sides or bottom of a [[grass block]], as well as on a grass block with [[plant]]s already on top of it.
* Regardless of if it succeeds in fertilizing, bone meal makes green sparkles. However, like smoke from a [[torch]], the sparkles appear only if the [[player]] has [[particles]] set All or Decreased.
* In real life, [[Wikipedia:bone meal|bone meal]] is used as a fertilizer to provide nitrogen and phosphorus to plants.
==Gallery==
<gallery>
File:Bone Meal On Grass.png|Bone meal used on [[grass block]]s.
</gallery>
== See also ==
* [[Farming]]
== References ==
{{reflist}}
{{Items}}
[[Category:Dyes]]
[[Category:Plants]]
[[Category:Renewable resources]]
[[cs:Kostní moučka]]
[[de:Knochenmehl]]
[[es:Polvo de hueso]]
[[fr:Poudre d'os]]
[[hu:Csontliszt]]
[[ja:骨粉]]
[[ko:뼛가루]]
[[nl:Beendermeel]]
[[pl:Mączka kostna]]
[[pt:Farinha de osso]]
[[ru:Костная мука]]
[[th:ผงกระดูก]]
[[zh:骨粉]]</li><li>[[Nether Wart|Nether Wart]]<br/><!--Please do not change "nether wart" to "Nether wart". According to style guide, block names should not be capitalized.-->
{{about|the fungus used for potions|the block found in crimson forests|Nether Wart Block}}{{Block
| group = Age 0
| 1-1 = Nether Wart Age 0.png
| 1-2 = Nether Wart Age 0 BE.png
| group2 = Age 1-2
| 2-1 = Nether Wart Age 1-2.png
| 2-2 = Nether Wart Age 1-2 BE.png
| group3 = Age 3
| 3-1 = Nether Wart Age 3.png
| 3-2 = Nether Wart Age 3 BE.png
|image= Nether Wart (item).png
|transparent=Yes
|light=No
|tool=any
|renewable=Yes
|stackable=Yes (64)
|flammable=No
|lavasusceptible=No
}}
'''Nether wart''' is a fungus harvested from nether wart crops and is used to plant them, as well as being vital in the creation of [[potions]].
'''Nether wart crops''' are found in [[Nether Fortress/Structure|nether fortresses]] and [[Bastion Remnant|bastions]] and is used to grow nether wart in [[Soul Sand|soul sand]].
== Obtaining ==
=== Breaking ===
Nether wart can be mined instantly with any tool. A fully mature nether wart crop yields 2–4 nether wart. This is increased by one for each level of [[Fortune]], this allows for a maximum of 7 nether warts dropping from one crop. Less mature stages drop one nether wart, even with the Fortune enchantment.
=== Natural generation ===
Nether wart can generate in [[nether fortress]]es in [[soul sand]] gardens around stairwells. Nether wart can also generate in the courtyards of housing unit [[bastion remnant]]s. Due to only spawning in these specific structures, it's entirely possible for a nether fortress or bastion remnant to generate without nether wart (though they may still appear in the chests that generate in the fortress).
{| class="wikitable"
|+
!Location
!Description
!Image
|-
|{{anchor|Nether Fortress}}'''Nether Fortress'''
|Nether wart can be found growing near stairwells in small soul sand gardens.
|[[File:Nether wart garden.png|thumb|Nether wart growing in a nether fortress.]]
|-
|{{anchor|Bastion Remnant}}'''Bastion Remnant'''
|Nether wart can be found growing in the central courtyard of each of the sections of piglin housing unit bastions.
|[[File:Bastion Courtyard.png|thumb|Nether wart growing in a bastion remnant.]]
|}
<br>
=== Chest loot ===
{{LootChestItem|nether-wart}}
== Usage ==
=== Brewing ingredient ===
Nether wart's primary purpose is to [[brew]] the [[Potion|awkward potion]], the base for all potions, but optional for Weakness.
{{brewing
|showname=1
|Nether Wart
|Awkward Potion
|base=Water Bottle
}}
=== Crafting ingredient ===
{{crafting usage}}
=== Trading ===
Master-level cleric [[villager]]s buy 22 nether warts for an [[emerald]] as part of their trades.
=== Farming ===
{{main|Tutorials/Nether Wart farming}}
When planted on [[soul sand]], nether wart grows through four stages, though the middle two stages use the same texture (the hitbox of stage 3 is three pixels taller). {{IN|java}}, the exact age can be seen using the [[debug screen]], and the ages range from 0 to 3. Each random tick, nether wart has a 10% chance of growing one stage. At default random tick speed, each nether wart grows one age step approximately every {{convert|13653|ticks|minutes}} on average, and fully grows from planting to harvest every {{convert|40960|ticks|minutes}} on average. The growth rate is not affected by light or any other environmental factors. [[Bone meal]] cannot be used on the nether wart.
Nether wart can only be planted on [[soul sand]]. It cannot be planted on [[soul soil]]. It can grow in any [[dimension]].
Nether wart is ready to harvest when it reaches its fourth stage (age:3). Breaking a fully grown nether wart drops 2 to 4 nether wart, while an immature one drops a single nether wart. Using a tool enchanted with fortune increases the maximum number of nether wart dropped by 1 per level, for a maximum of 7 for a tool enchanted with [[Fortune|Fortune III]].
=== Composting ===
Placing a nether wart into a [[composter]] has a 30% chance of raising the compost level by 1.
== Sounds ==
{{Sound table/Block/Nether wart}}
== Data values ==
=== ID ===
{{edition|java}}:
{{ID table
|edition=java
|showforms=y
|generatetranslationkeys=y
|displayname=Nether Wart
|spritetype=block
|nameid=nether_wart
|translationkey=block.minecraft.nether_wart,item.minecraft.nether_wart
|foot=1}}
{{edition|bedrock}}:
{{ID table
|edition=bedrock
|firstcolumnname=Nether Wart
|shownumericids=y
|showforms=y
|generatetranslationkeys=y
|displayname=Block
|spritename=nether-wart
|spritetype=block
|nameid=nether_wart
|id=115
|form=block
|itemform=item.nether_wart}}
{{ID table
|displayname=Item
|spritename=nether-wart
|spritetype=item
|nameid=nether_wart
|id=294
|form=item
|foot=1}}
=== Block states ===
{{see also|Block states}}
{{/BS}}
== Advancements ==
{{load advancements|A Seedy Place}}
== History ==
{{History|java}}
{{History||1.0.0|snap=Beta 1.9 Prerelease|[[File:Nether Wart Age 0 JE1.png|32px]] [[File:Nether Wart Age 1-2 JE1.png|32px]] [[File:Nether Wart Age 3 JE1.png|32px]] [[File:Nether Wart (item) JE1.png|32px]] Added nether wart.}}
{{History|||snap=Beta 1.9 Prerelease 3|Nether wart can now be brewed in a [[water bottle]] to create an [[awkward potion]].}}
{{History||1.3.1|snap=12w27a|Nether wart can now grow outside of [[the Nether]].}}
{{History|||snap=1.3|[[File:Nether Wart (item) JE2 BE1.png|32px]] The item texture has been changed.}}
{{History||1.4.2|snap=12w36a|Nether wart can now be used to breed [[chicken]]s.}}
{{History||1.6.1|snap=13w18a|Nether wart is now found in the new [[chest]]s in [[nether fortress]]es.}}
{{History||1.8|snap=14w06a|[[File:Nether Wart Age 0 JE2.png|32px]] [[File:Nether Wart Age 1-2 JE2.png|32px]] [[File:Nether Wart Age 3 JE2.png|32px]] Nether wart crops are now a pixel higher, likely as an accidental result of model conversion. Previously they were offset one pixel downwards like the other crops (wheat, carrots potatoes) to match farmland, although in nether wart's case such a downwards offset hides some pixels of the texture inside of the soul sand.<ref>{{bug|MC-250679}}</ref>}}
{{History|||snap=14w10a|[[File:Missing Model JE2.png|32px]] [[File:Missing Model JE2.png|32px]] [[File:Missing Model JE2.png|32px]]<br>[[File:Missing Model (anisotropic filtering) JE2.png|32px]] [[File:Missing Model (anisotropic filtering) JE2.png|32px]] [[File:Missing Model (anisotropic filtering) JE2.png|32px]] Nether wart crops of all ages [[Missing model|no longer have a model]].}}
{{History|||snap=14w10b|[[File:Nether Wart Age 0 JE4.png|32px]] [[File:Nether Wart Age 1-2 JE4.png|32px]] [[File:Nether Wart Age 3 JE4.png|32px]] Nether wart crops now have models again.<ref>{{bug|MC-50276}}</ref> In addition, they are now offset downwards by one pixel once more, hiding the bottom row of pixels again.}}
{{History|||snap=14w25a|[[File:Nether Wart Age 0 JE5.png|32px]] [[File:Nether Wart Age 1-2 JE5.png|32px]] [[File:Nether Wart Age 3 JE5.png|32px]] Nether wart crops are now darker and subject to directional shading.}}
{{History|||snap=14w27a|[[File:Nether Wart Age 0 JE6.png|32px]] [[File:Nether Wart Age 1-2 JE6.png|32px]] [[File:Nether Wart Age 3 JE6.png|32px]] Nether wart crops are no longer subject to directional shading.}}
{{History|||snap=14w34d|Nether wart can no longer be used to breed [[chicken]]s.}}
{{History||1.9|snap=15w43a|The average yield of nether wart from [[nether fortress]] chests has now been slightly decreased.}}
{{History||1.10|snap=16w20a|Nether wart can now be used to [[crafting|craft]] the new [[red nether brick]] blocks and [[nether wart block]]s.}}
{{History||1.12|snap=17w18b|Placing a nether wart in soul sand now gives the player the "A Seedy Place" [[advancement]].{{verify}}}}
{{History||1.13|snap=17w47a|Prior to [[1.13/Flattening|''The Flattening'']], this block's numeral ID was 115, and the item's 372.}}
{{History||1.14|snap=18w43a|[[File:Nether Wart Age 0 JE7.png|32px]] [[File:Nether Wart Age 1-2 JE7.png|32px]] [[File:Nether Wart Age 3 JE7.png|32px]] The textures of nether wart crops have changed.}}
{{History|||snap=19w03a|Placement and breaking [[sound]]s have now been added to nether wart. Before this version, nether wart made stone sounds.}}
{{History|||snap=19w11a|Cleric [[villager]]s now [[trading|buy]] nether wart.
|Nether wart can now be planted by aiming against the sides and underside of blocks, rather than just the top surface of the soul sand.}}
{{History||1.16|snap=20w15a|Nether wart can now be [[composter|composted]].}}
{{History|||snap=20w16a|Nether wart now generates as part of [[bastion remnant]]s.}}
{{History||1.17|snap=21w13a|[[File:Nether Wart Age 0 JE8.png|32px]] [[File:Nether Wart Age 1-2 JE8.png|32px]] [[File:Nether Wart Age 3 JE8.png|32px]] The "crop" template model has changed such that pixels appear in the same physical positions on opposite sides of texture planes, changing the nether wart crop's appearance in the process.<ref>{{bug|MC-199242}}</ref>}}
{{History|pocket alpha}}
{{History||v0.12.1|snap=build 1|[[File:Nether Wart Age 0 BE1.png|32px]] [[File:Nether Wart Age 1-2 BE1.png|32px]] [[File:Nether Wart Age 3 BE1.png|32px]] [[File:Nether Wart (item) JE2 BE1.png|32px]] Added nether wart.
|Nether wart uses a cross model instead of the "hash" shape associated with crops.}}
{{History||?|[[File:Nether Wart Age 0 JE6 BE2.png|32px]] [[File:Nether Wart Age 1-2 JE6 BE2.png|32px]] [[File:Nether Wart Age 3 JE6 BE2.png|32px]]{{verify|Correct models? check UV, etc.}} Nether wart now uses a more conventional crop model.}}
{{History|pocket}}
{{History||1.1.3|snap=alpha 1.1.3.0|Nether wart can now be used to [[crafting|craft]] [[red nether bricks]] and [[nether wart block]]s.}}
{{History|bedrock}}
{{History||1.10.0|snap=beta 1.10.0.3|[[File:Nether Wart Age 0 BE.png|32px]] [[File:Nether Wart Age 1-2 BE.png|32px]] [[File:Nether Wart Age 3 BE.png|32px]] The textures of nether wart crops have changed.
|Placement and breaking [[sound]]s have now been added to nether wart.}}
{{History||1.11.0|snap=beta 1.11.0.4|Nether wart can now be [[trading|sold]] to cleric [[villager]]s.}}
{{History||1.16.0|snap=beta 1.16.0.57|Nether wart now generates as part of [[bastion remnant]]s.
|The placement and breaking [[sound]]s for nether wart have been changed to match {{el|je}}.
|Nether wart can now be [[composter|composted]].}}
{{History|console}}
{{History||xbox=TU7|xbone=CU1|ps=1.0|wiiu=Patch 1|switch=1.0.1|[[File:Nether Wart Age 0 JE6 BE2.png|32px]] [[File:Nether Wart Age 1-2 JE6 BE2.png|32px]] [[File:Nether Wart Age 3 JE6 BE2.png|32px]]{{verify|Correct models? check UV, etc.}} [[File:Nether Wart (item) JE2 BE1.png|32px]] Added nether wart.}}
{{History||xbox=TU9|Nether wart now spawns randomly wherever [[soul sand]] is generated in [[the Nether]].
|[[Nether fortress]]es have now been changed to make nether wart rooms more likely.
|Nether wart can now grow outside of [[the Nether]].}}
{{History||xbox=none|xbone=none|ps=1.90|wiiu=none|switch=none|[[File:Nether Wart Age 0 JE7.png|32px]] [[File:Nether Wart Age 1-2 JE7.png|32px]] [[File:Nether Wart Age 3 JE7.png|32px]]{{verify|Correct models?}} The textures of nether wart crops have now been changed.}}
{{History|New 3DS}}
{{History||0.1.0|[[File:Nether Wart Age 0 JE6 BE2.png|32px]] [[File:Nether Wart Age 1-2 JE6 BE2.png|32px]] [[File:Nether Wart Age 3 JE6 BE2.png|32px]]{{verify|Correct models? check UV, etc.}} [[File:Nether Wart (item) JE2 BE1.png|32px]] Added nether wart.}}
{{History|foot}}
=== Nether wart "item" ===
{{:Technical blocks/Nether Wart}}
==Issues==
{{issue list}}
== Trivia ==
* Nether wart's stage changes cannot be detected by a [[block update detector]], but can by an [[observer]] block.
* Unlike other crimson "plants", nether wart doesn't have a warped equivalent. This is also the case with [[nether sprouts]], which lack a crimson equivalent.
== Gallery ==
<gallery>
Nether Brick And Wart.png|Nether wart found in a nether fortress.
Nether Wart Closeup.png| Another example of nether wart found in a nether fortress.
Nether wart three sizes.png|The three different sizes of the nether wart as viewed from the side.
Nether Fortress Large Stairs Room.png
</gallery>
== References ==
{{reflist}}
{{Blocks|vegetation}}
{{Items}}
[[Category:Nether blocks]]
[[Category:Fungi]]
[[Category:Non-solid blocks]]
[[Category:Generated structure blocks]]
[[de:Netherwarze]]
[[es:Verruga del Nether]]
[[fr:Verrues du Nether]]
[[hu:Bibircsók]]
[[it:Verruca del Nether]]
[[ja:ネザーウォート]]
[[ko:네더 사마귀]]
[[nl:Netherkruid]]
[[pl:Netherowa brodawka]]
[[pt:Fungo do Nether]]
[[ru:Адский нарост]]
[[th:หูดเนเธอร์]]
[[uk:Пекельний наріст]]
[[zh:下界疣]]
[[Category:Brewing recipe]]</li></ul> | 13w36a | 2×2 Spruce trees, Dark Oak trees, and Acacia trees added. | |||
| Spruce trees now spawn in ice plains biomes and extreme hills+ biomes in addition to oak trees. | |||||
| Large oak trees no longer naturally generate in forest biomes.[5] | |||||
| 13w43a | Acacia and "Roofed Oak" saplings, wood, and leaves added. Note that Acacia and Dark Oak trees generated prior to this snapshot will remain unchanged. | ||||
| 1.7pre | Acacia and Dark oak can be crafted into planks, added new textures for the logs, and changed "Roofed Oak" to "Dark Oak". | ||||
| pocketa | |||||
0.9.0{{Extension DPL}}<ul><li>[[Raw Gold|Raw Gold]]<br/>{{Item
| image = Raw Gold.png
| renewable = No
| stackable = Yes (64)
}}
'''Raw gold''' is a raw metal resource obtained from mining [[gold ore]].
== Obtaining ==
=== Mining ===
[[Gold ore]] and [[deepslate gold ore]] mined with an [[iron pickaxe]] or higher drops 1 unit of raw gold. If the pickaxe is enchanted with [[Fortune]], it can drop an extra unit per level of Fortune, allowing for a maximum of 4 with Fortune III. If the ore is mined using a pickaxe enchanted with [[Silk Touch]], it drops the ore block instead.
=== Crafting ===
{{Crafting
|showname=1
|Block of Raw Gold
|Output=Raw Gold,9
|type=Material
|foot=1
}}
== Usage ==
The primary usage of raw gold is smelting it into [[gold ingot]]s.
=== Crafting ===
{{crafting usage|Raw Gold}}
=== Smelting ingredient ===
{{Smelting
|showname=2
|Raw Gold
|Gold Ingot
|1.0
}}
=== Piglins ===
{{EntityLink|Piglin|Piglins}} are attracted to raw gold. They run toward any raw gold on the ground, and inspect it for 6 to 8 seconds before putting it in their inventory.
== Advancements ==
{{load advancements|Oh Shiny}}
== Data values ==
=== ID ===
{{edition|java}}:
{{ID table
|edition=java
|showitemtags=y
|showforms=y
|generatetranslationkeys=y
|displayname=Raw Gold
|spritetype=item
|nameid=raw_gold
|itemtags=piglin_loved
|form=item
|foot=1}}
{{edition|bedrock}}:
{{ID table
|edition=bedrock
|shownumericids=y
|showforms=y
|notshowbeitemforms=y
|generatetranslationkeys=y
|displayname=Raw Gold
|spritetype=item
|nameid=raw_gold
|form=item
|id=506
|foot=1}}
== History ==
{{History|java}}
{{History||1.17|snap=21w14a|[[File:Raw Gold JE1.png|32px]] Added raw gold.}}
{{History|||snap=April 13, 2021|slink={{Tweet|JasperBoerstra|1381991999952277513}}|[[File:Raw Gold JE2.png|32px]] [[JAPPA]] shows a new raw gold texture.}}
{{History|||snap=21w15a|[[File:Raw Gold JE2.png|32px]] The texture of raw gold has been changed.
|Raw gold can now be used to craft [[block of raw gold]].}}
{{History|||snap=April 16, 2021|slink={{Tweet|JasperBoerstra|1383047666037325829}}|[[File:Raw Gold (pre-release).png|32px]] [[JAPPA]] shows a new raw gold texture again.}}
{{History|||snap=21w16a|[[File:Raw Gold JE3.png|32px]] The texture of raw gold has been changed.}}
{{History|Bedrock}}
{{History||1.17.0|snap=beta 1.17.0.50|[[File:Raw Gold JE2.png|32px]] Added raw gold.}}
{{History|||snap=beta 1.17.0.52|Raw gold are now available without enabling [[experimental gameplay]].}}
{{History|||snap=beta 1.17.0.54|[[File:Raw Gold JE3.png|32px]] The texture of raw gold has been changed.}}
{{History|foot}}
== Issues ==
{{Issue list}}
==Gallery==
<gallery>
JE 1.17 Dev Raw Metals.jpg|Jappa shows raw ore textures.
Jappa Raw Ores 1.jpg|Jappa shows raw ore textures.
Jappa Raw Ores 2.png|Jappa shows raw ore textures.
Jappa Raw Ores 3.jpg|Jappa shows raw ore textures.
Jappa Raw Ores 4.jpg|Jappa shows raw ore textures.
Jappa Raw Ores 5.jpg|Jappa shows raw ore textures.
</gallery>
{{Items}}
[[Category:Non-renewable resources]]
[[de:Rohgold]]
[[es:Oro en bruto]]
[[fr:Or brut]]
[[ja:金の原石]]
[[pl:Surowe złoto]]
[[pt:Ouro bruto]]
[[ru:Необработанное золото]]
[[uk:Необроблене золото]]
[[zh:粗金]]</li><li>[[Torchflower Seeds|Torchflower Seeds]]<br/>{{wip}}
{{Block
| image = <gallery>
Torchflower Age 0.png| Age 0
Torchflower Age 1.png| Age 1
Torchflower Age 2.png| Age 2
</gallery>
| image2 = Torchflower Seeds JE1.png
| transparent = Yes
| light = No
| tool = N/A
| renewable = Yes
| stackable = Yes (64)
| rarity = Common
|flammable=No
|lavasusceptible=No
}}
'''Torchflower seeds''' are seeds that have a chance to be dropped by [[Sniffer|sniffers]] when they finish digging.
== Obtaining ==
[[Sniffer]]s will occasionally bury their nose in the ground and start digging. Once the sniffer has finished digging, one torchflower seed will have a chance to be dropped on the floor as an item.
Sniffers can only dig for torchflower seeds in the following blocks:
*{{BlockLink|Dirt}}
*{{BlockLink|Grass Block}}
*{{BlockLink|Podzol}}
*{{BlockLink|Coarse Dirt}}
*{{BlockLink|Rooted Dirt}}
*{{BlockLink|Moss Block}}
*{{BlockLink|Mud}}
*{{BlockLink|Muddy Mangrove Roots}}
They cannot dig for torchflower seeds on [[mycelium]], which is intended.<ref>{{bug|MC-260259||Sniffers cannot dig nor find seeds on mycelium|WAI}}</ref>
== Usage ==
=== Crop ===
{{main|Tutorials/Crop farming|title1=Crop farming}}
Torchflower seeds can be {{control|placed}} on [[farmland]], where they grow through three stages. Breaking the torchflower crop before it matures drops the seed, while breaking the final stage produces one [[torchflower]] and does not yield the seed.
Crops break if pushed by a [[piston]] or if their supporting farmland breaks or turns to dirt (i.e. by being trampled), dropping their usual drops.
Farmer [[villager]]s can plant torchflower seeds, but cannot harvest them after they have fully grown.<ref>{{bug|MC-263382|||WAI}}</ref>
=== Feeding ===
Torchflower seeds can be used to breed [[sniffer]]s and [[chicken]]s and reduce the remaining growth duration of snifflets and chicks by 10%. Also, if some torchflower seeds were fed to an injured sniffer, it will heal it by {{hp|2}} health points.
=== Taming ===
Torchflower seeds can be used to tame [[parrot]]s.
=== Composting ===
Placing torchflower seeds into a [[composter]] has a 30% chance of raising the compost level by 1.
== Sounds ==
{{Sound table/Block/Crop}}
== Data values ==
=== ID ===
{{edition|java}}:
{{ID table
|edition=java
|showblocktags=y
|showitemtags=y
|showforms=y
|generatetranslationkeys=y
|displayname=Torchflower Crop
|spritetype=block
|nameid=torchflower_crop
|form=block
|blocktags=bee_growables, crops}}
{{ID table
|displayname=Torchflower Seeds
|spritetype=item
|nameid=torchflower_seeds
|form=item
|itemtags=villager_plantable_seeds
|foot=1}}
{{edition|bedrock}}:
{{ID table
|edition=bedrock
|shownumericids=y
|showforms=y
|generatetranslationkeys=y
|displayname=Torchflower Crop
|spritetype=block
|nameid=torchflower_crop
|id=-567
|form=block
|translationkey=-}}
{{ID table
|displayname=Torchflower Seeds
|spritetype=item
|nameid=torchflower_seeds
|id=296
|form=item
|foot=1}}
=== Block states ===
{{see also|Block states}}
{{/BS}}
== Achievements ==
{{Load achievements|Planting The Past}}
== Advancements ==
{{load advancements|A Seedy Place;Planting The Past;Little Sniffs}}
== History ==
{{History|java}}
{{History||1.20<br>(Experimental)|link=1.19.4|snap=23w07a|[[File:Torchflower Seeds JE1.png|32px]] Added torchflower seeds behind the [[Java Edition 1.20|Update 1.20 experimental datapack]].}}
{{History|||snap=1.19.4 Pre-release 1|Torchflower seeds can now be used to breed [[chicken]]s and tame [[parrot]]s.<ref>{{bug|MC-260035|||Fixed}}</ref>|Torchflower seeds are now next to other seeds in the [[Creative inventory]].|Placing torchflower seeds in farmland now gives the player the "A Seedy Place" [[advancement]].}}
{{History||1.20|snap=23w12a|[[Sniffer]]s can now be obtained in Survival, making torchflower seeds [[renewable]].|Torchflower seeds are now available without using the "Update 1.20" experimental datapack.}}
{{History|||snap=23w14a|Torchflower seeds can now be picked up by farmer [[villager]]s.|[[Sniffer]]s can now be tempted with torchflower seeds.}}
{{History|||snap=23w16a|[[Villager]]s can now plant torchflower seeds.}}
{{History|||snap=23w17a|The player now get the [[advancement]] "Little sniffs" when they feed a [[snifflet]] using torchflower seeds, "Planting the past" when they plant torchflower seeds on [[farmland]].}}
{{History|bedrock}}
{{History||Sniffer<br>(Experimental)|link=Bedrock Edition 1.19.70|snap=beta 1.19.70.23|[[File:Torchflower Seeds JE1.png|32px]] Added torchflower seeds behind the "[[Bedrock Edition 1.20.0|Sniffer]]" [[experimental]] toggle.}}
{{History||1.20.0|snap=beta 1.20.0.20|Torchflower seeds are now available without using the "Sniffer" experimental toggle.}}
{{History|foot}}
== Issues ==
{{issue list}}
== Trivia ==
* The final growth stage of the torchflower crop uses the same ID as the actual torchflower. This causes some side effects, such as the plant becoming offset and randomly jumping to the side.<ref>{{bug|MC-260472|resolution=wai}}</ref>
== Gallery ==
<gallery>
Torchflower Seeds stages.png|All the growth stages of torchflower seeds.
</gallery>
== Notes ==
{{notelist}}
== References ==
{{reflist}}
{{Blocks|upcoming}}
{{Items}}
[[Category:Plants]]
[[Category:Non-solid blocks]]
[[de:Fackelliliensamen]]
[[es:Semillas de plantorcha]]
[[ja:トーチフラワーの種]]
[[pt:Sementes de plantocha]]
[[zh:火把莲种子]]</li></ul> | build 1 | Added jungle trees (small and large), dark oak trees, acacia trees, 2x2 spruce trees, savanna trees, oak trees (swamp and large oak variants) and version-exclusive fallen trees. | |||
| Cold-en oak trees will not generate in maps with the new terrain. | |||||
| Oak and spruce trees now generate with different heights and structures. | |||||
Issues
Issues relating to "Tree" are maintained on the bug tracker. Report issues there.
Trivia
- Trees will only grow if they are planted on a chunk of the map that is loaded into memory. If you plant saplings and then explore another more distant area of your world for a few days, they will still be saplings when you return.
- It seems with the addition of different types of lakes above ground, you may have floating trees. This happens since the tree is spawned when the chunk loads first. Then, the lake is spawned afterwards. This leaves the tree floating above the lake.
- It is possible, but very rare to find a tree in a desert biome, since they can only spawn in basins with exposed dirt, or on a bit of dirt located at the VERY border of the desert and other biome.
- However, you can trick other players to thinking that a tree can grow in sand by removing a sand block (in a desert biome) and replacing it with a dirt block, placing a sapling on it and using bone meal on the sapling so that the tree will grow and the other sand blocks surrounding it will block the dirt below it. To make it even more realistic, replace dirt block with sand.
- You can also do this with stone, bricks and other blocks that saplings cannot be planted on. (If it's transparent, remember to replace the dirt block!)
- However, you can trick other players to thinking that a tree can grow in sand by removing a sand block (in a desert biome) and replacing it with a dirt block, placing a sapling on it and using bone meal on the sapling so that the tree will grow and the other sand blocks surrounding it will block the dirt below it. To make it even more realistic, replace dirt block with sand.
- If a sapling is surrounded by a 2 block tall tube it guarantees that it will, eventually, grow into a big tree. The tube forces the small tree growth to always fail each attempt. However, this takes far longer to produce a mature tree, due to the low chance that a sapling will try to grow into a big tree.
- Trees can grow to encase the player in leaves. This may allow them to see through the world.
- Two regular saplings planted near each other have a chance to grow above their normal height limit of 14. (Example: 16 tall with 57 wood)[citation needed]
- A tree standing over a lava pool may catch fire from the lava. These fires can be very dangerous, burning down entire forests. Though an effective way to prevent this is to avoid or cut trees that are near lava, or cover the lava, and so on to prevent the forests from burning down.
- Trees can naturally spawn on stone, sand, and clay.[citation needed] It is unknown if this is a bug.
- Large jungle trees and dark oak trees have dirt generated under them if they spawn with part over air or leaves.
- Oak and dark oak trees drop apples on occasion, which is botanically incorrect. Apple trees drop apples. Oak trees drop acorns. There is a real thing called an "oak apple", but it's an inedible gall, caused by a wasp that lays its eggs in oak buds.
- Jungle trees can sometimes exceed cloud level. (Y-coord 128)
- Birch trees resemble the most and recognizable birch tree type: the "Betula Papyrifera", or Paper Birch, which is native to northern North America.
- In Pocket Edition editor, spruce parts are all tagged as Redwood.
Gallery
Tree species
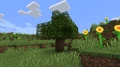
A small oak tree
- Screentree2.PNG
A large oak tree

Several spruce trees in the cold taiga
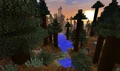
An example of large spruce tree in a Mega Taiga Biome
Jungle trees in a jungle
Acacia tree in the savanna
Dark oak tree
A "matchstick" spruce tree
Wild balloon oak tree
Two balloon oak trees and a jungle tree, on the border of a jungle.
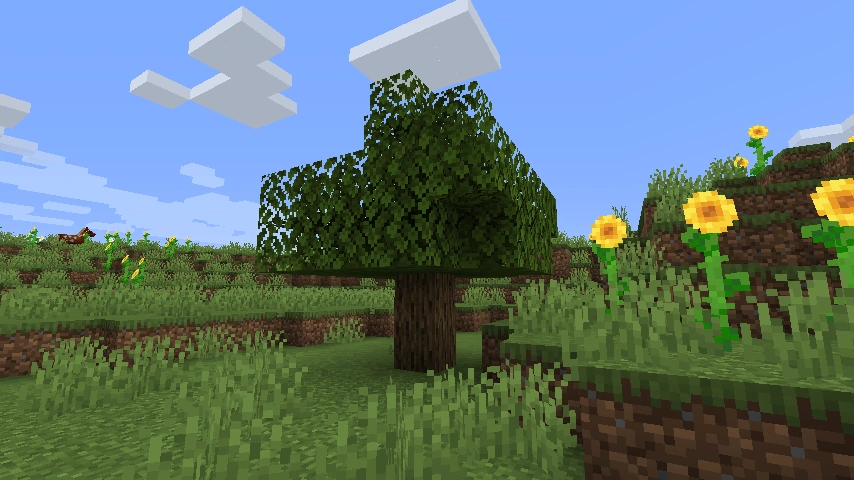
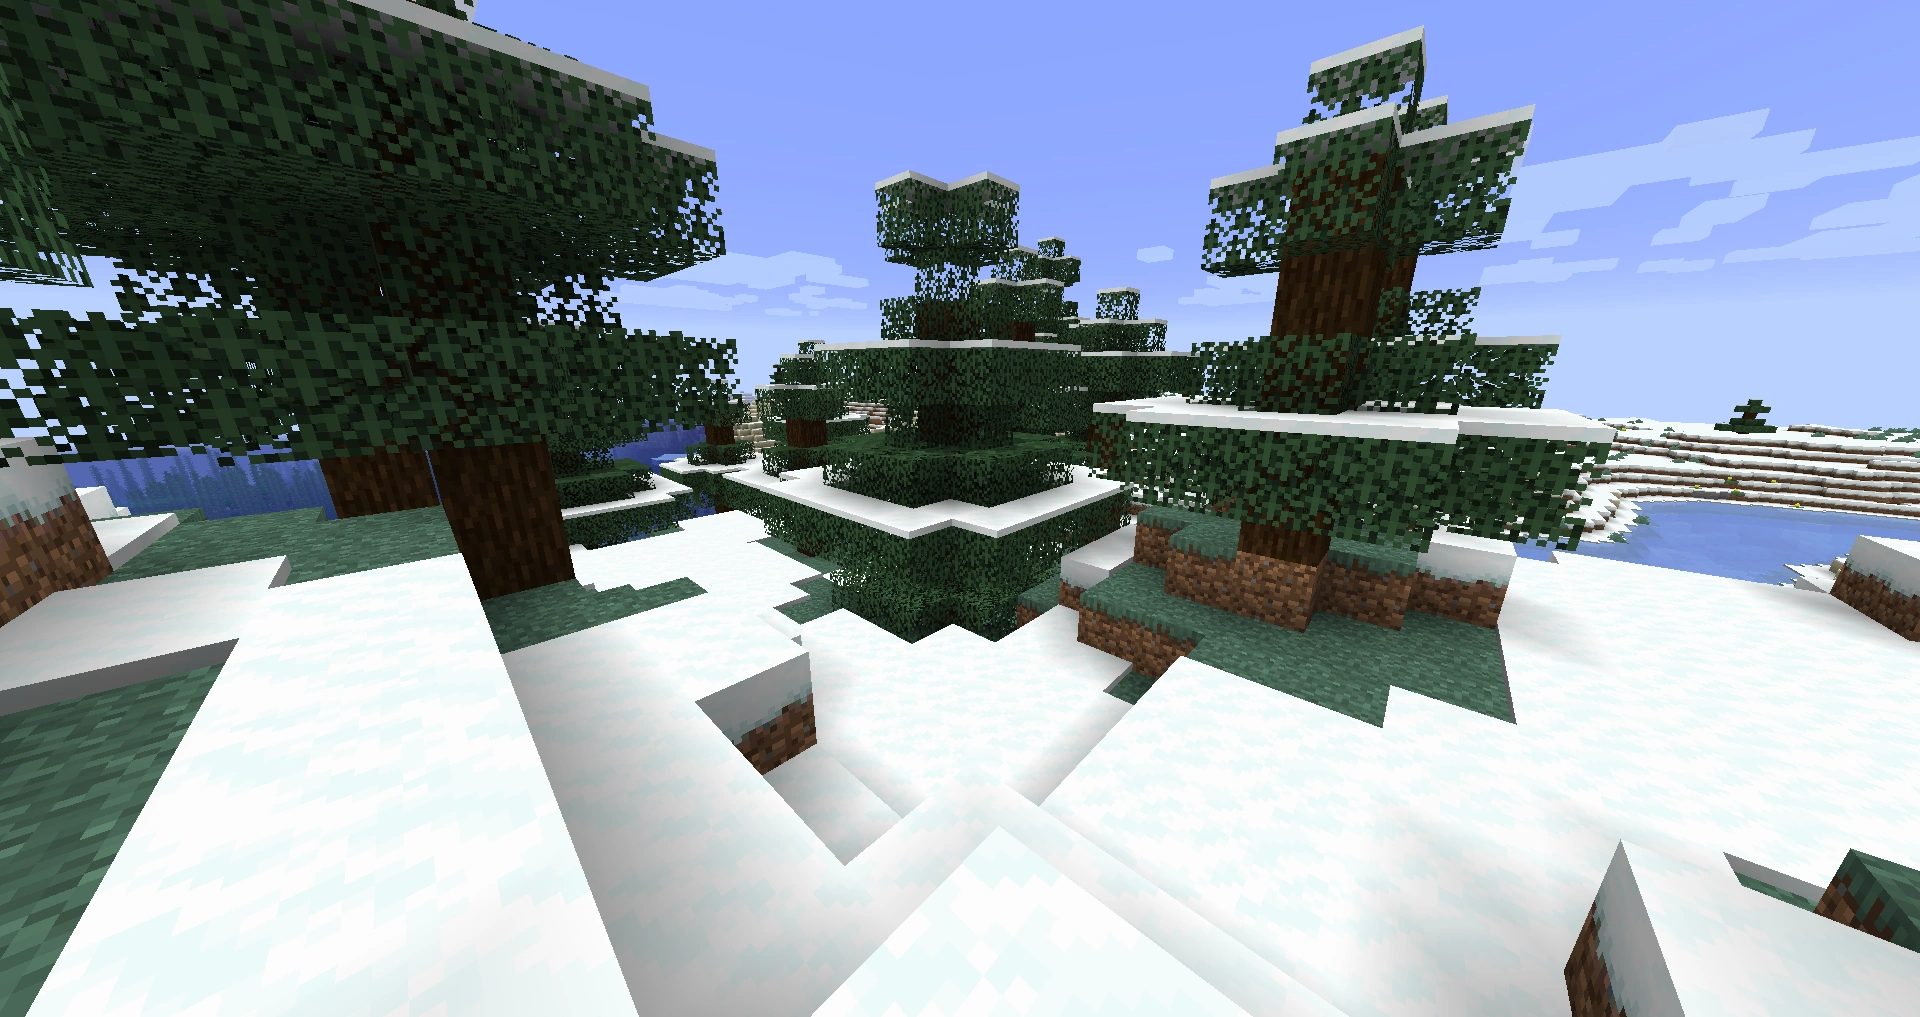

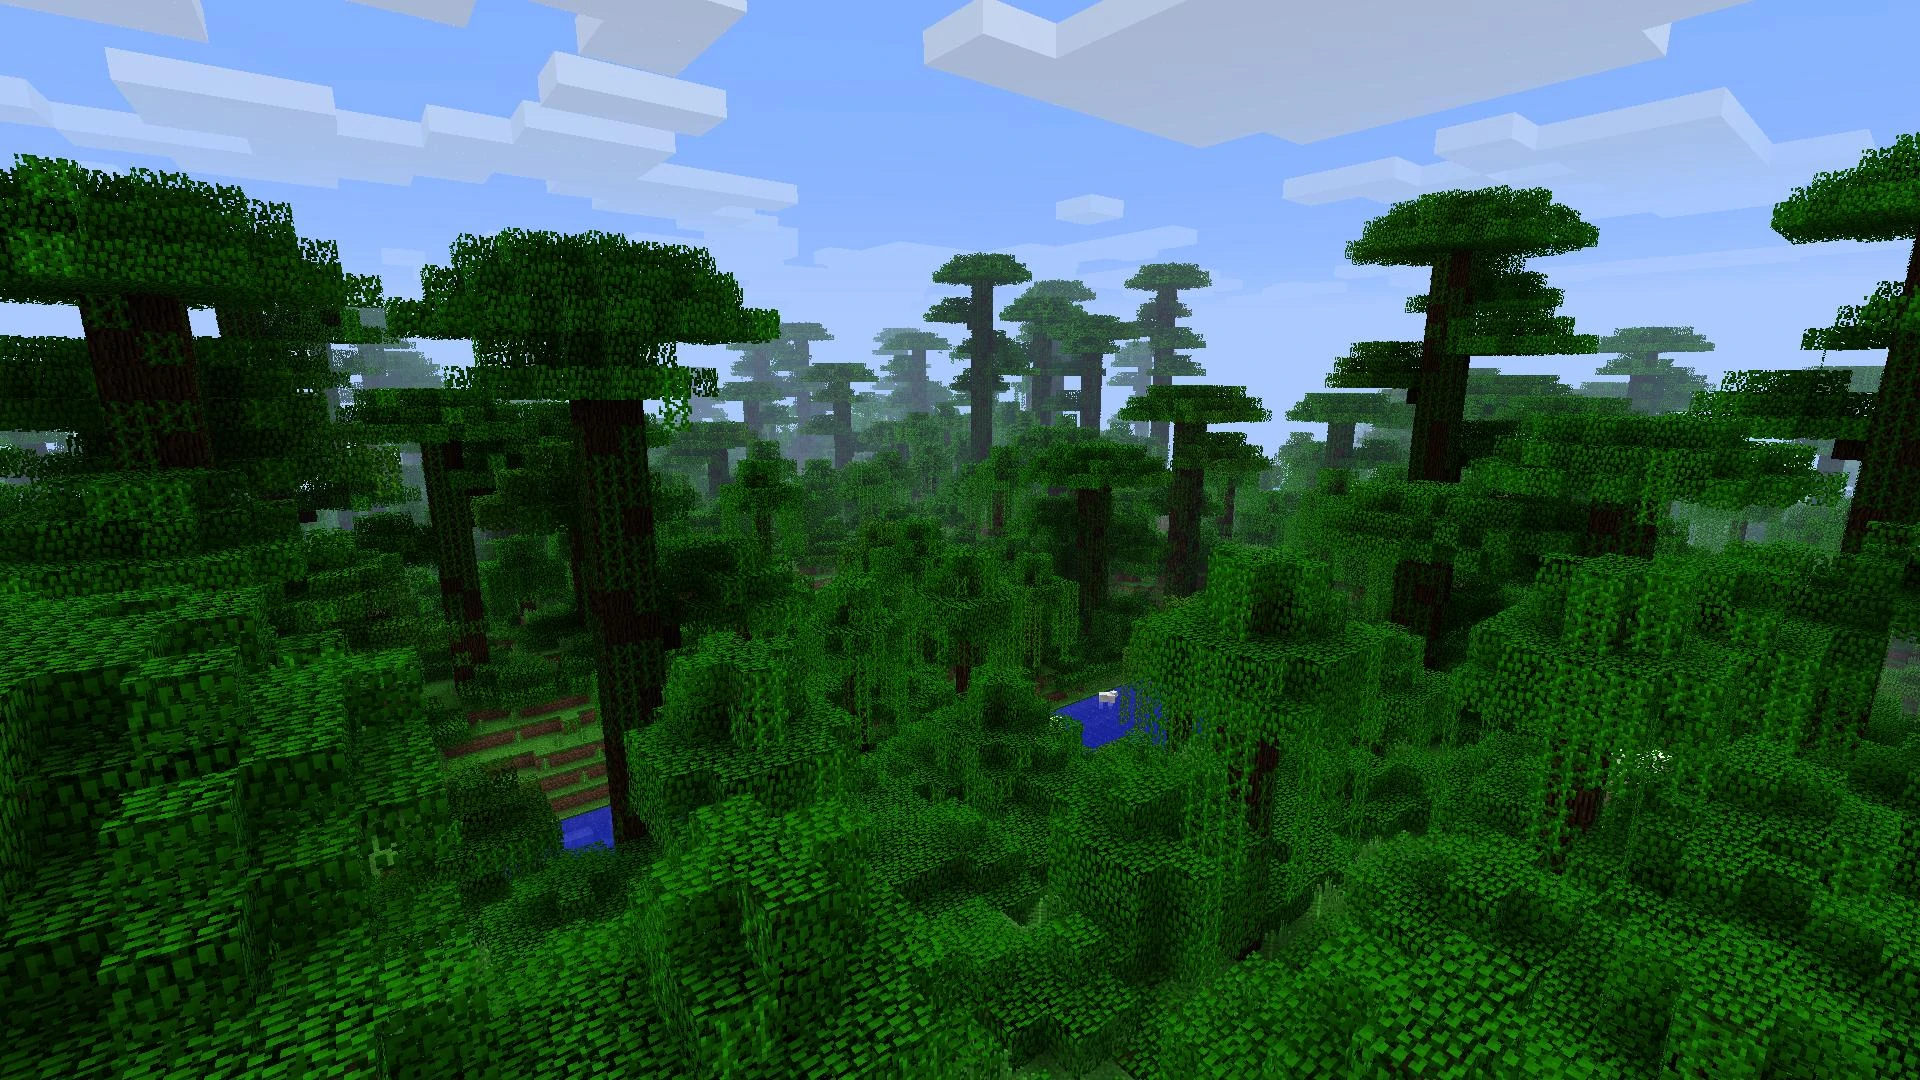
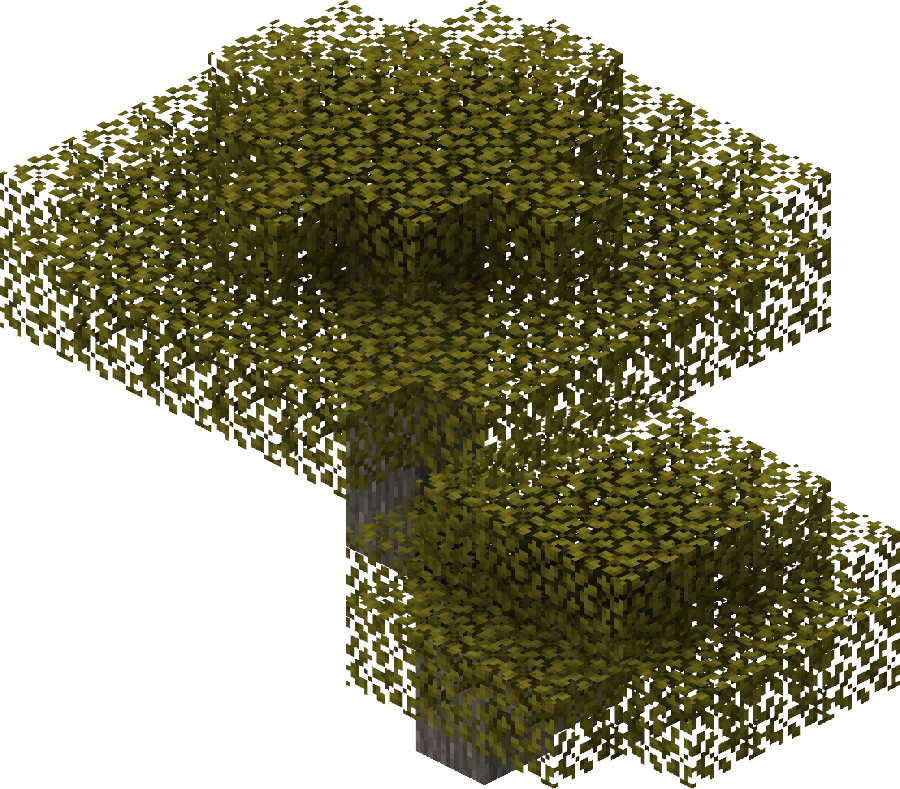
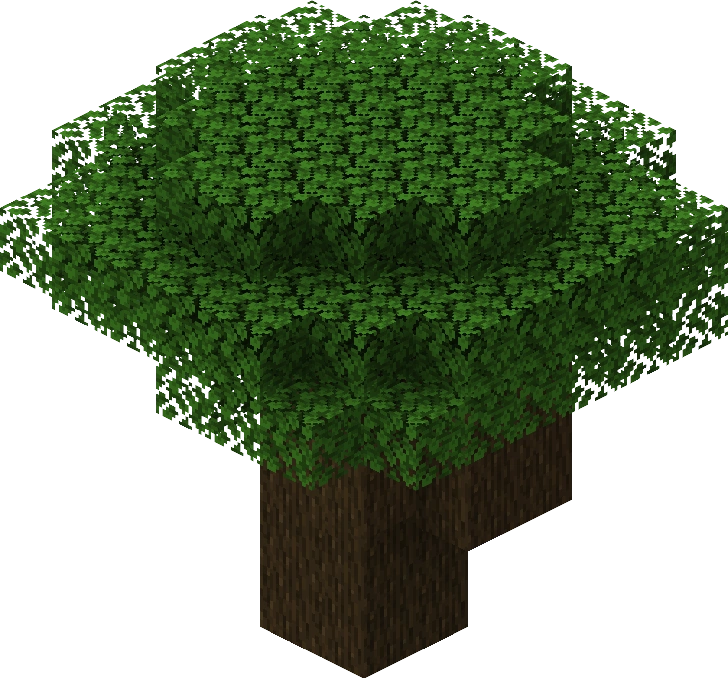
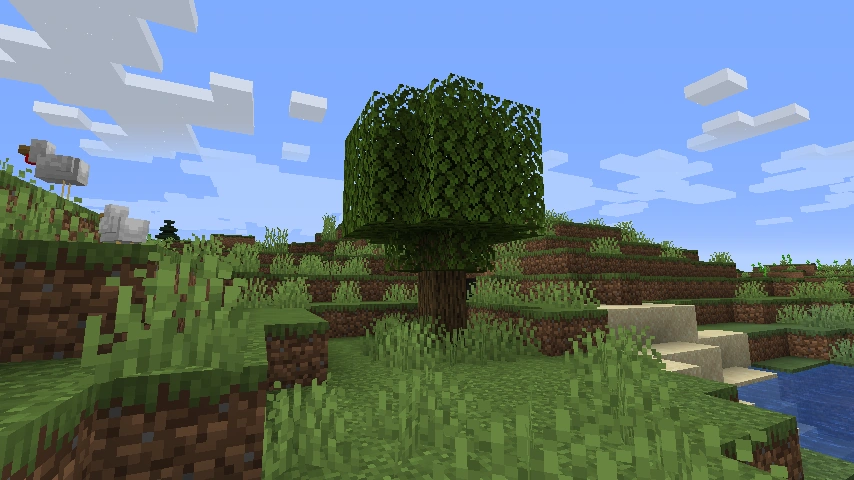
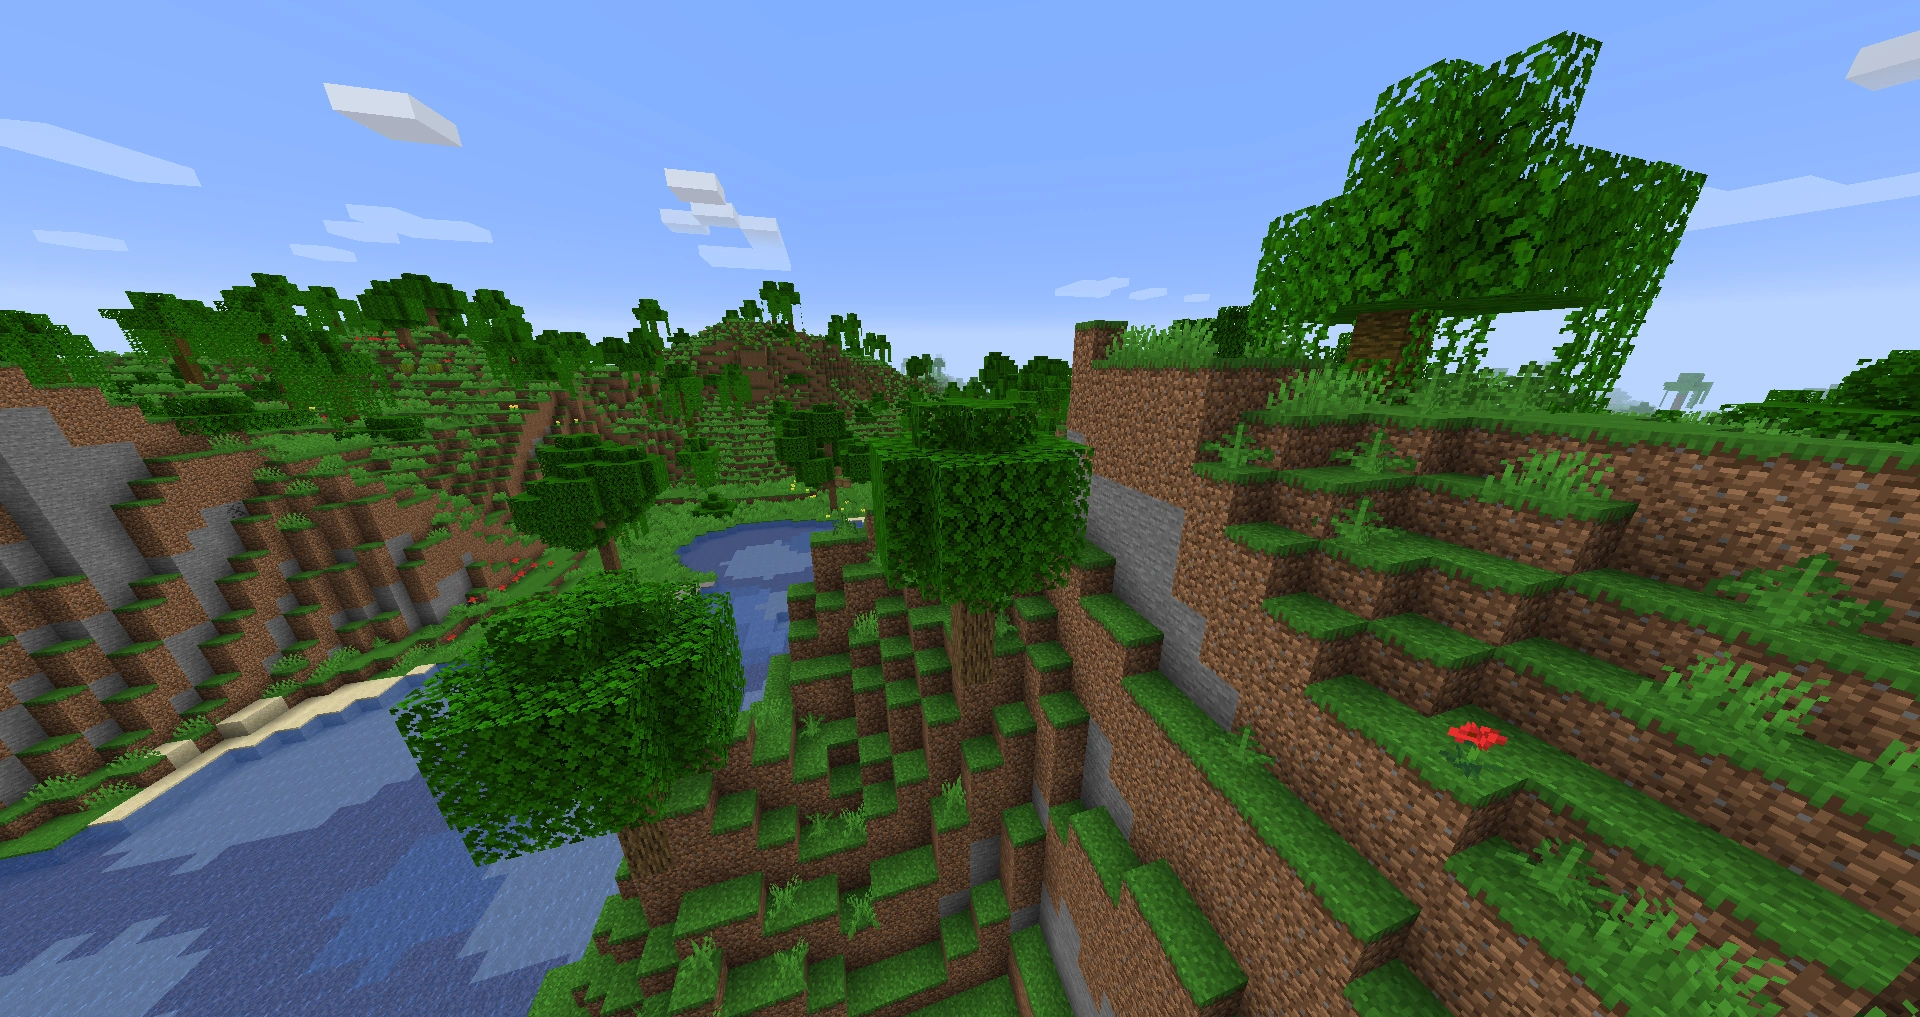
Ungrowable
- Good1.png
A swamp tree
What the rare cold-en oak tree looks like
- Acacia-leaved Oak.png
An "acaci-oak" tree

Foliage colors
Foliage color in lusher biomes.
Foliage color in drier biomes.
Foliage color in colder biomes.
A tree grown between two biomes.
A tree situated on the boundary of a jungle, swamp and desert biome, showing skins of all three on its leaves.
An acacia tree split between two biomes, which are the Savanna and the Plains biomes.
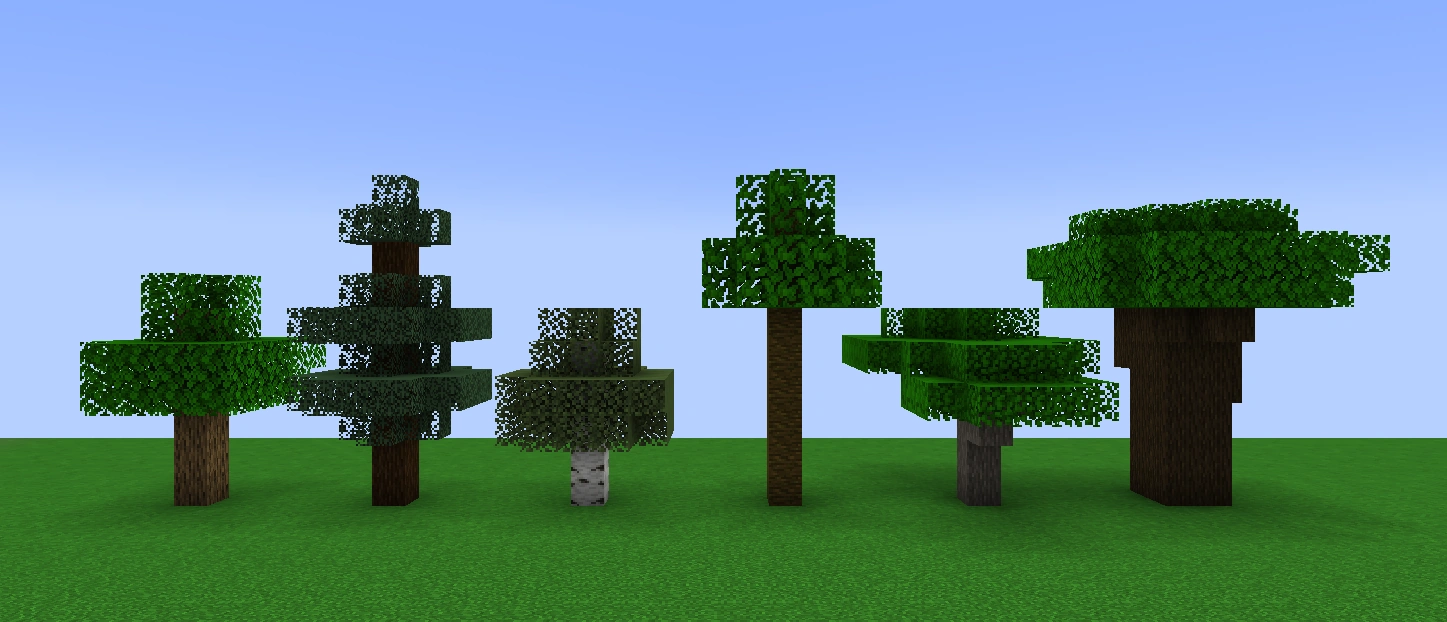
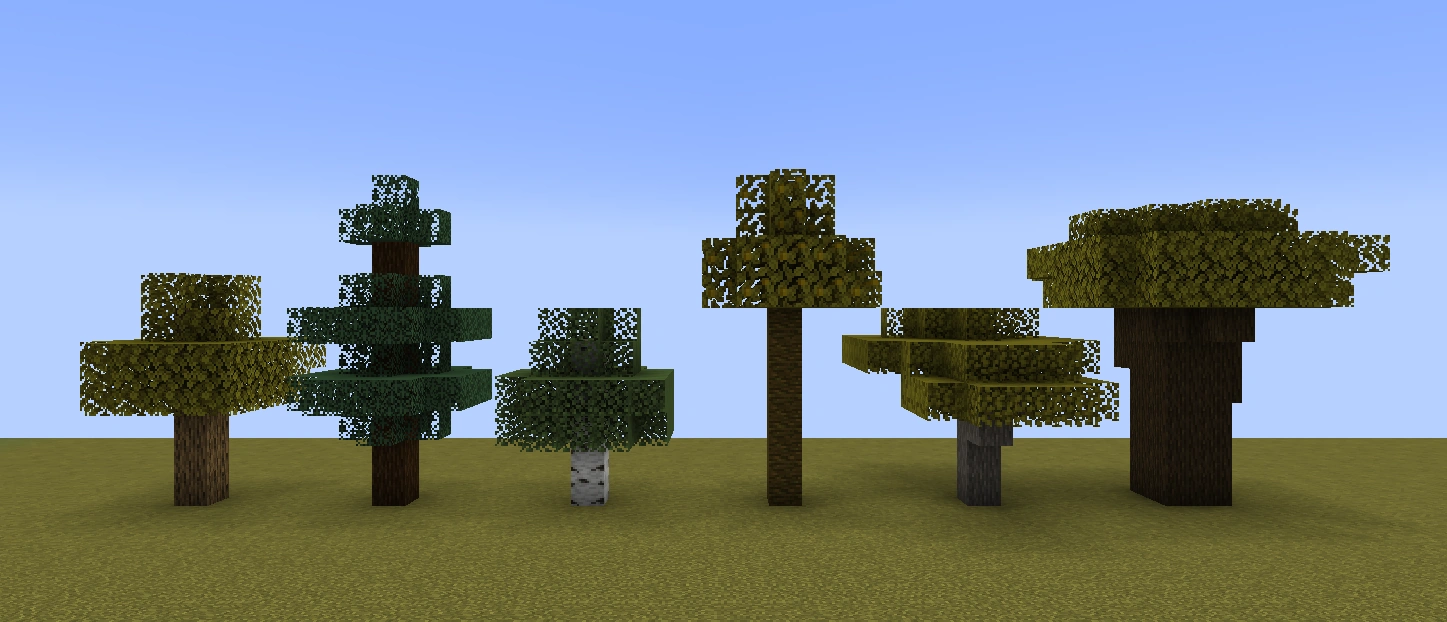
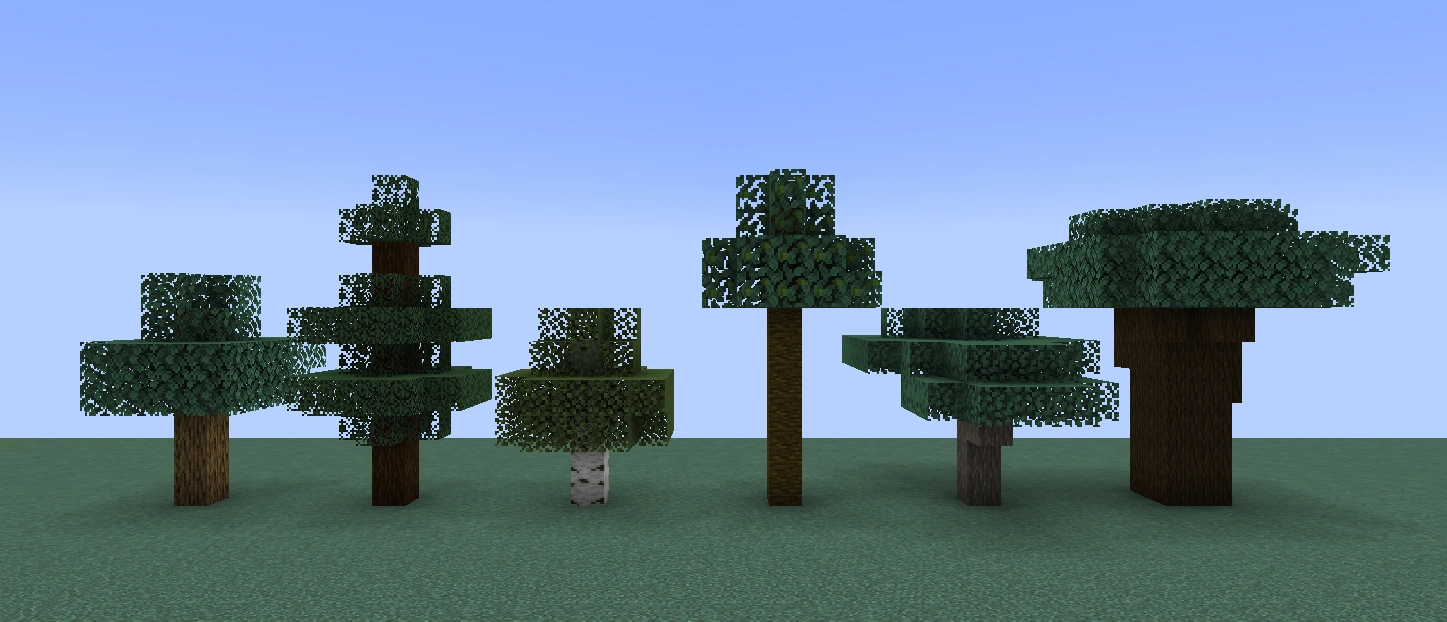
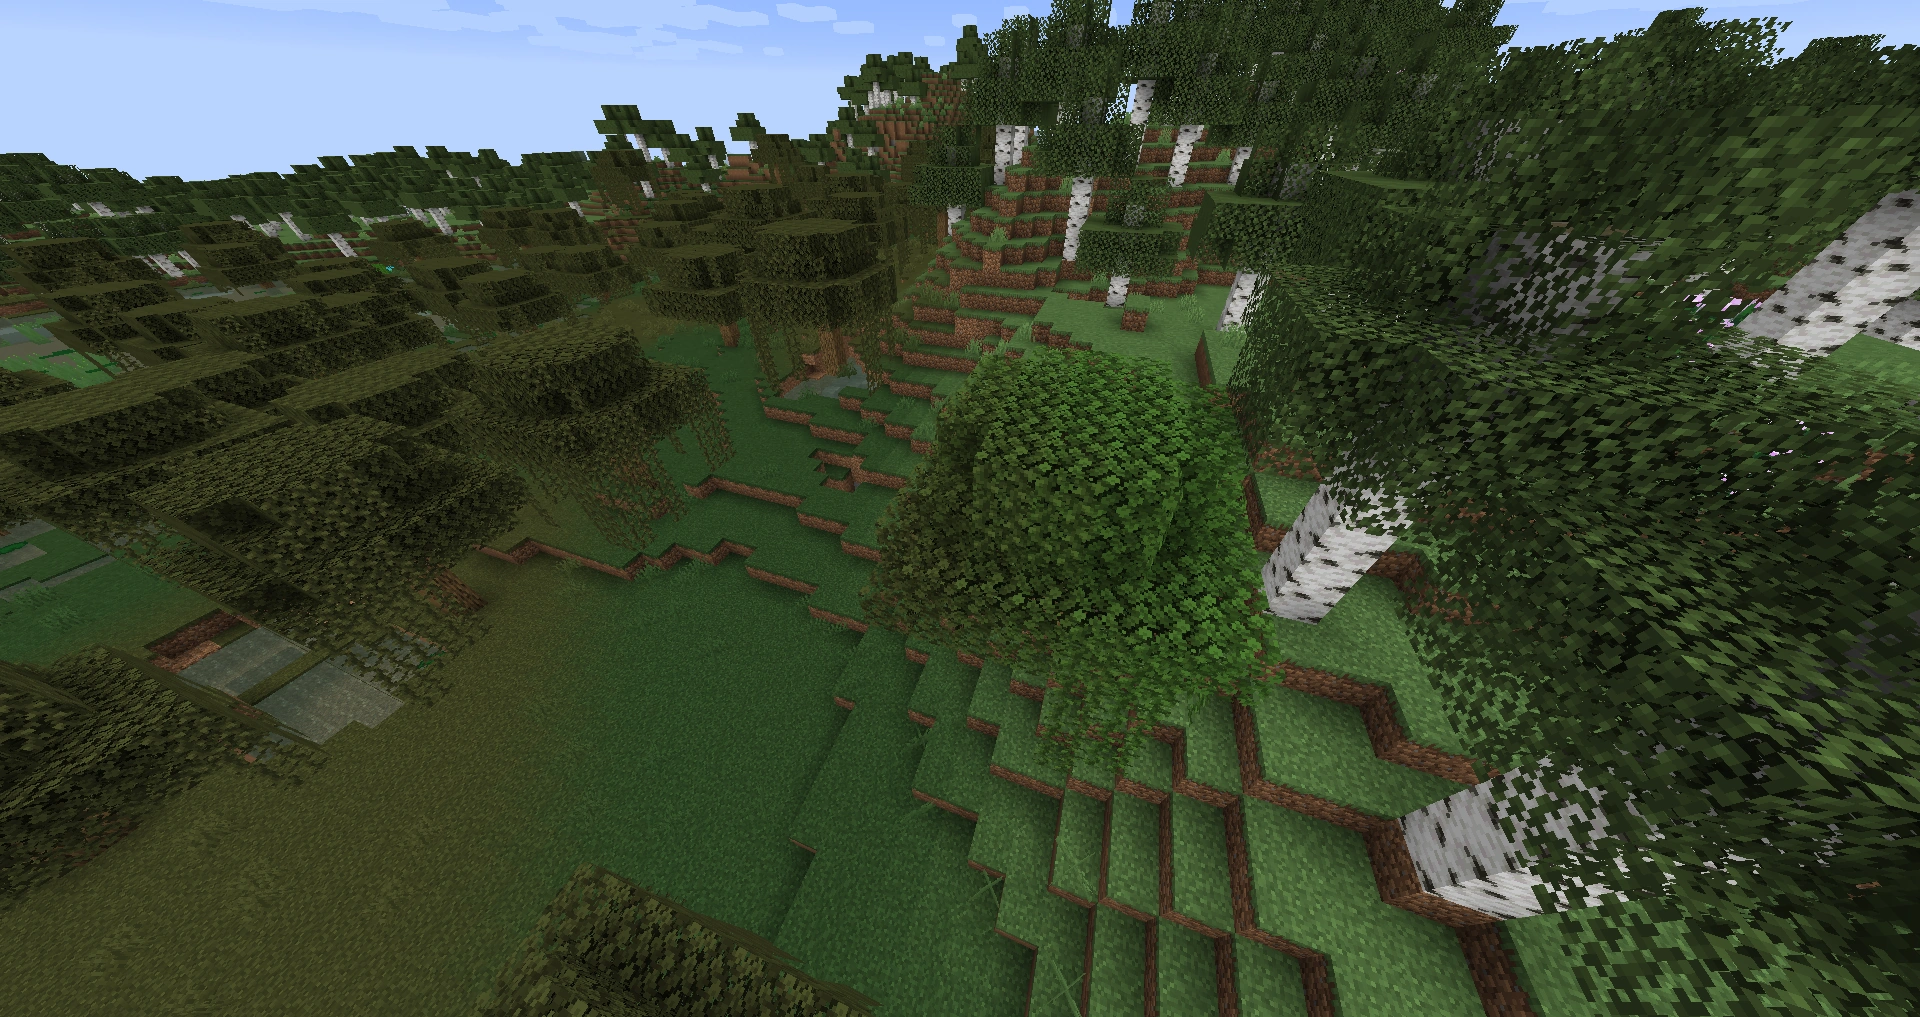
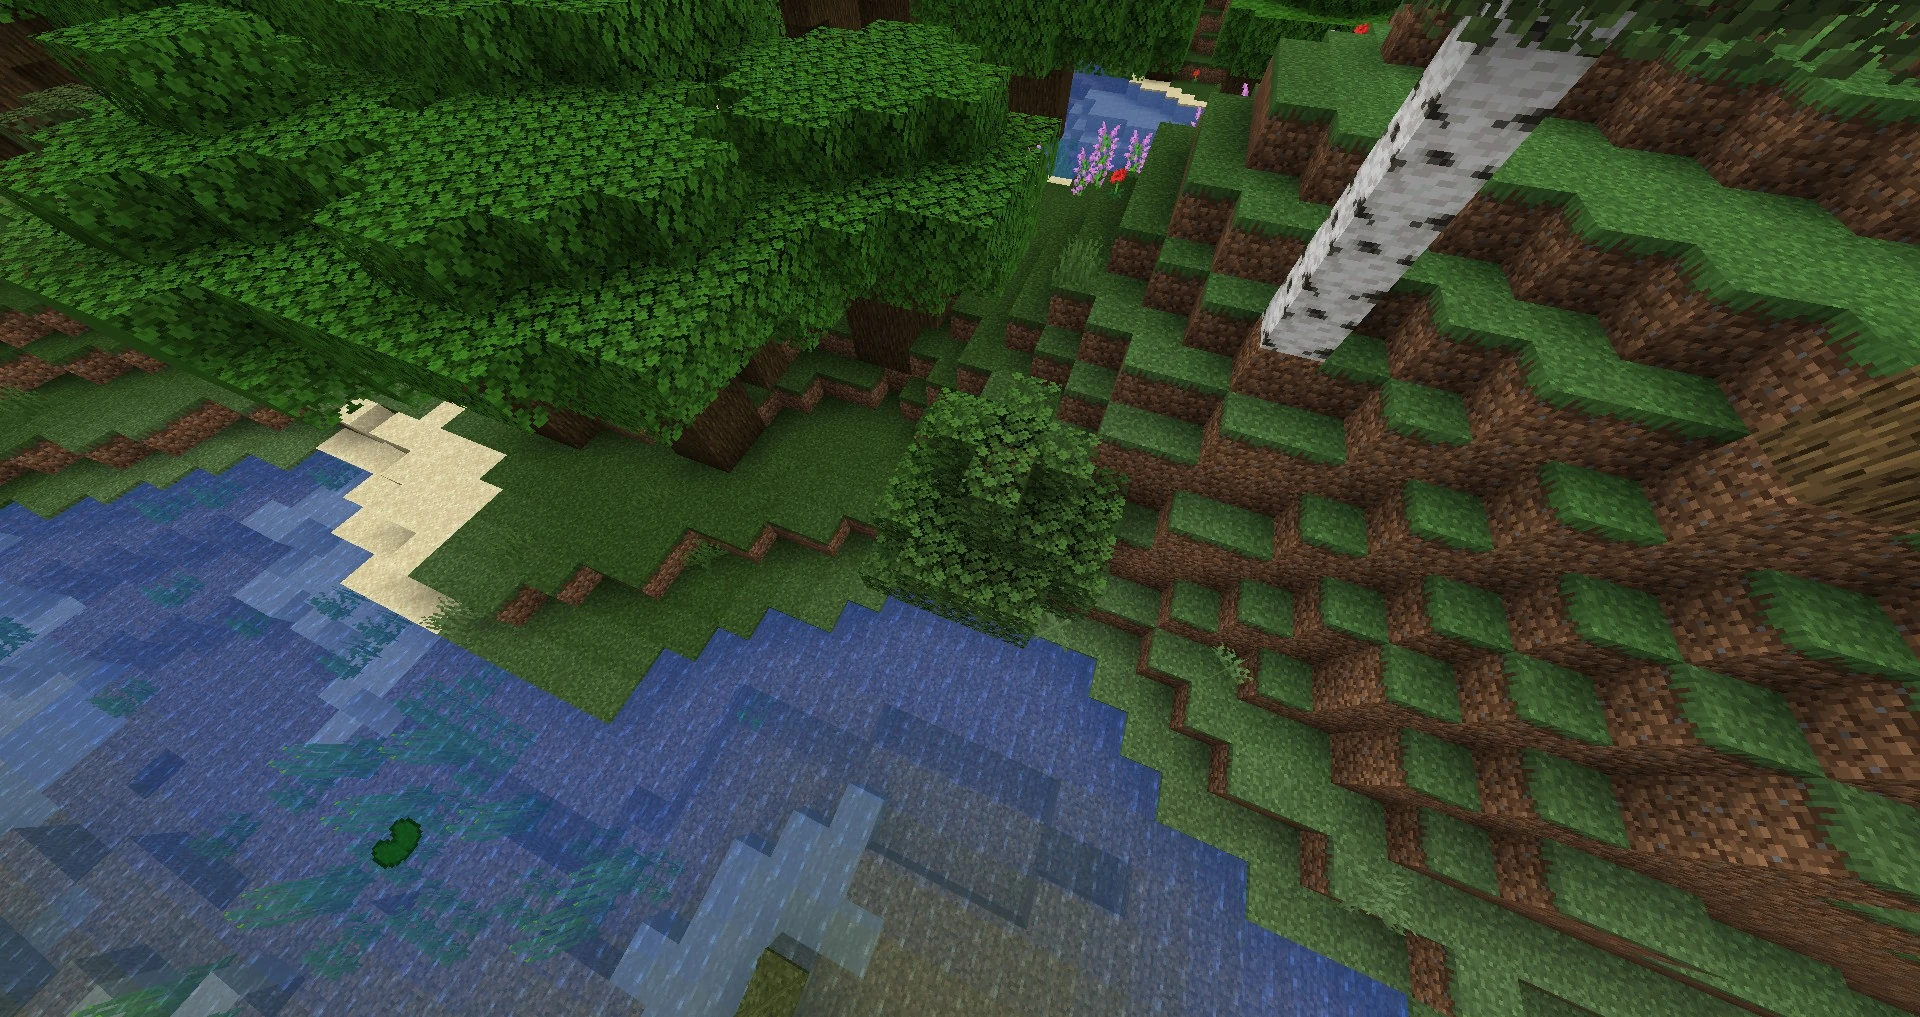
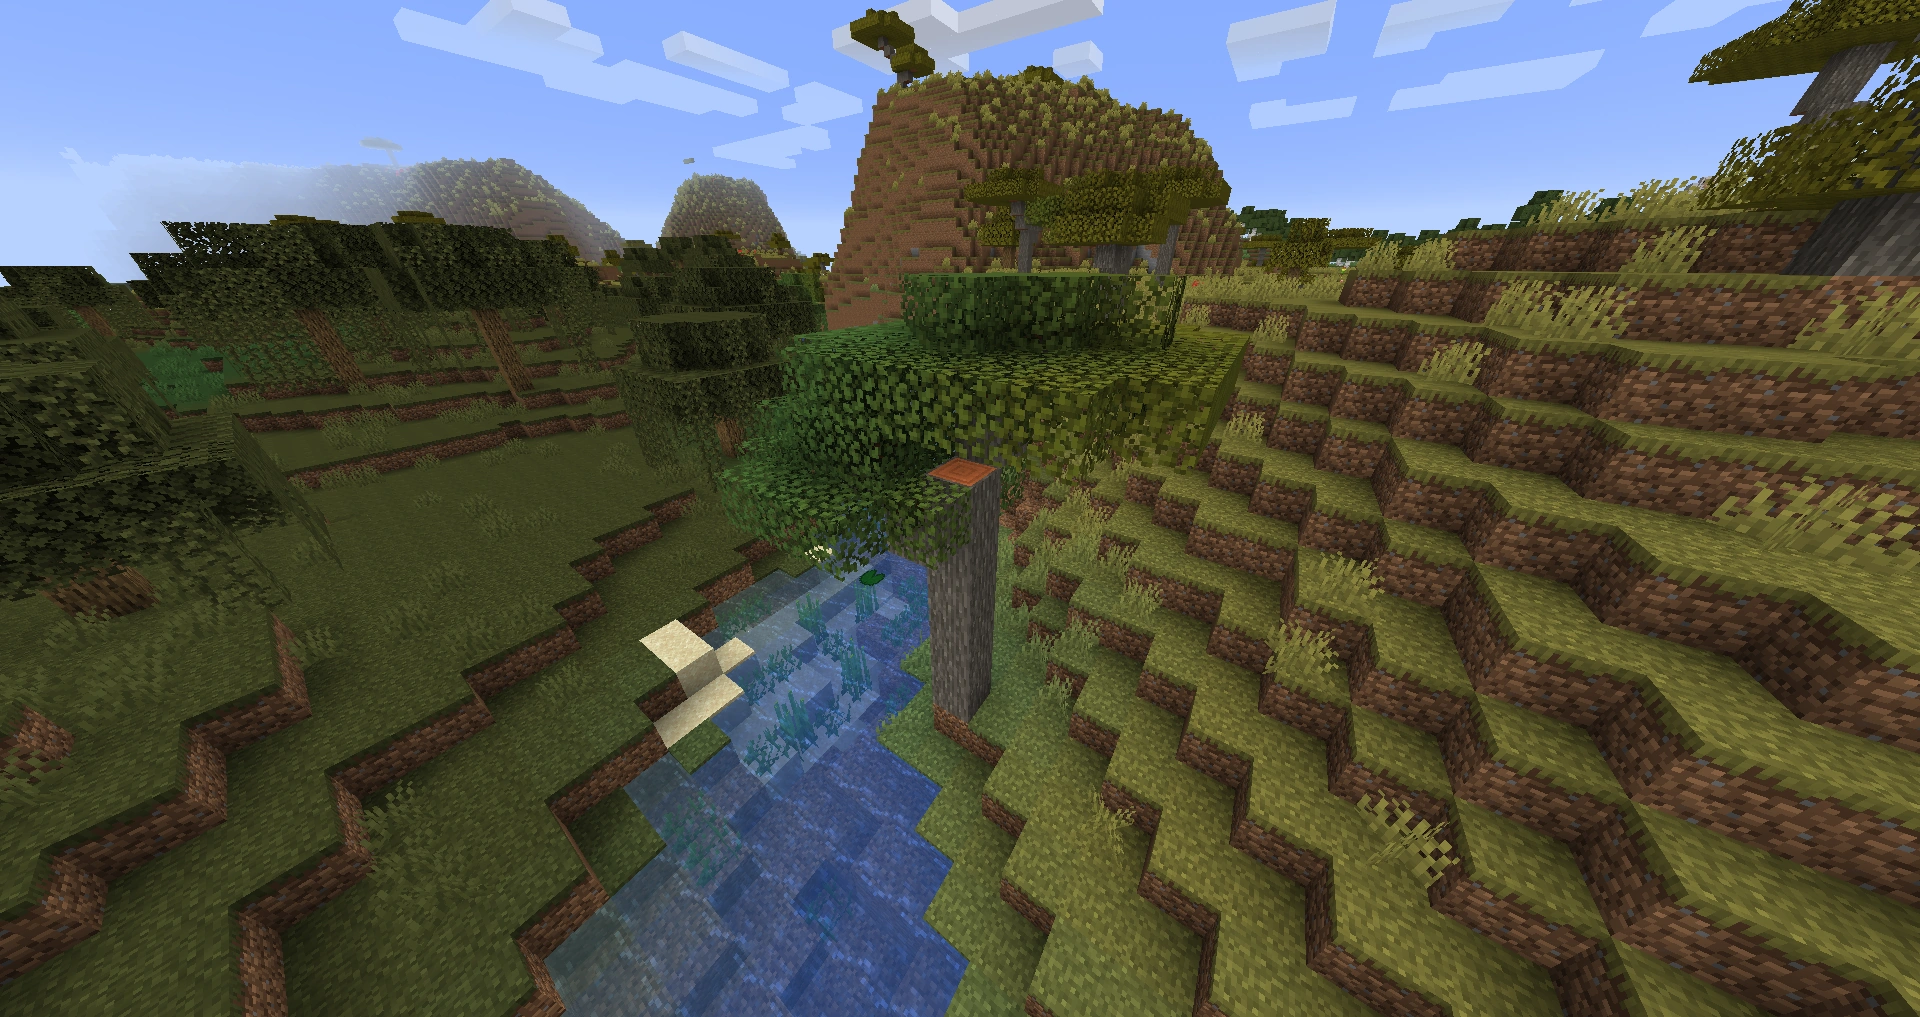
Strange spawning places
- NaturallyOccurringFloatingTree.png
A large tree that was generated floating in the air.
- 2011-10-23 20.16.20.png
A birch tree that was generated growing on nothing above a lake.
A tree that was naturally generated in a cave, with light provided by a hole in the ceiling.
- 2011-10-17 17.37.55.png
Trees can even generate in ravines.
Another ravine tree.
A tree that spawned on top of clay.
An oak tree that grew without a block below it.
A jungle tree that was generated without a block below it.
- Treeonstone.JPG
A tree spawned on stone, over a lava lake.
- 2012-06-14 20.29.48.png
A tree generated on a sand block.
- 2011-12-10 22.05.42.png
A tree generated in a very deep cave, with light provided from the lava.
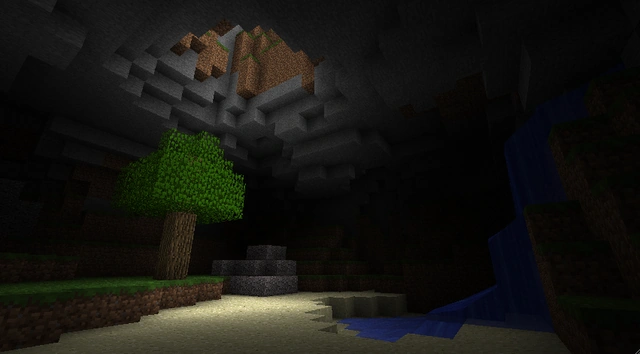
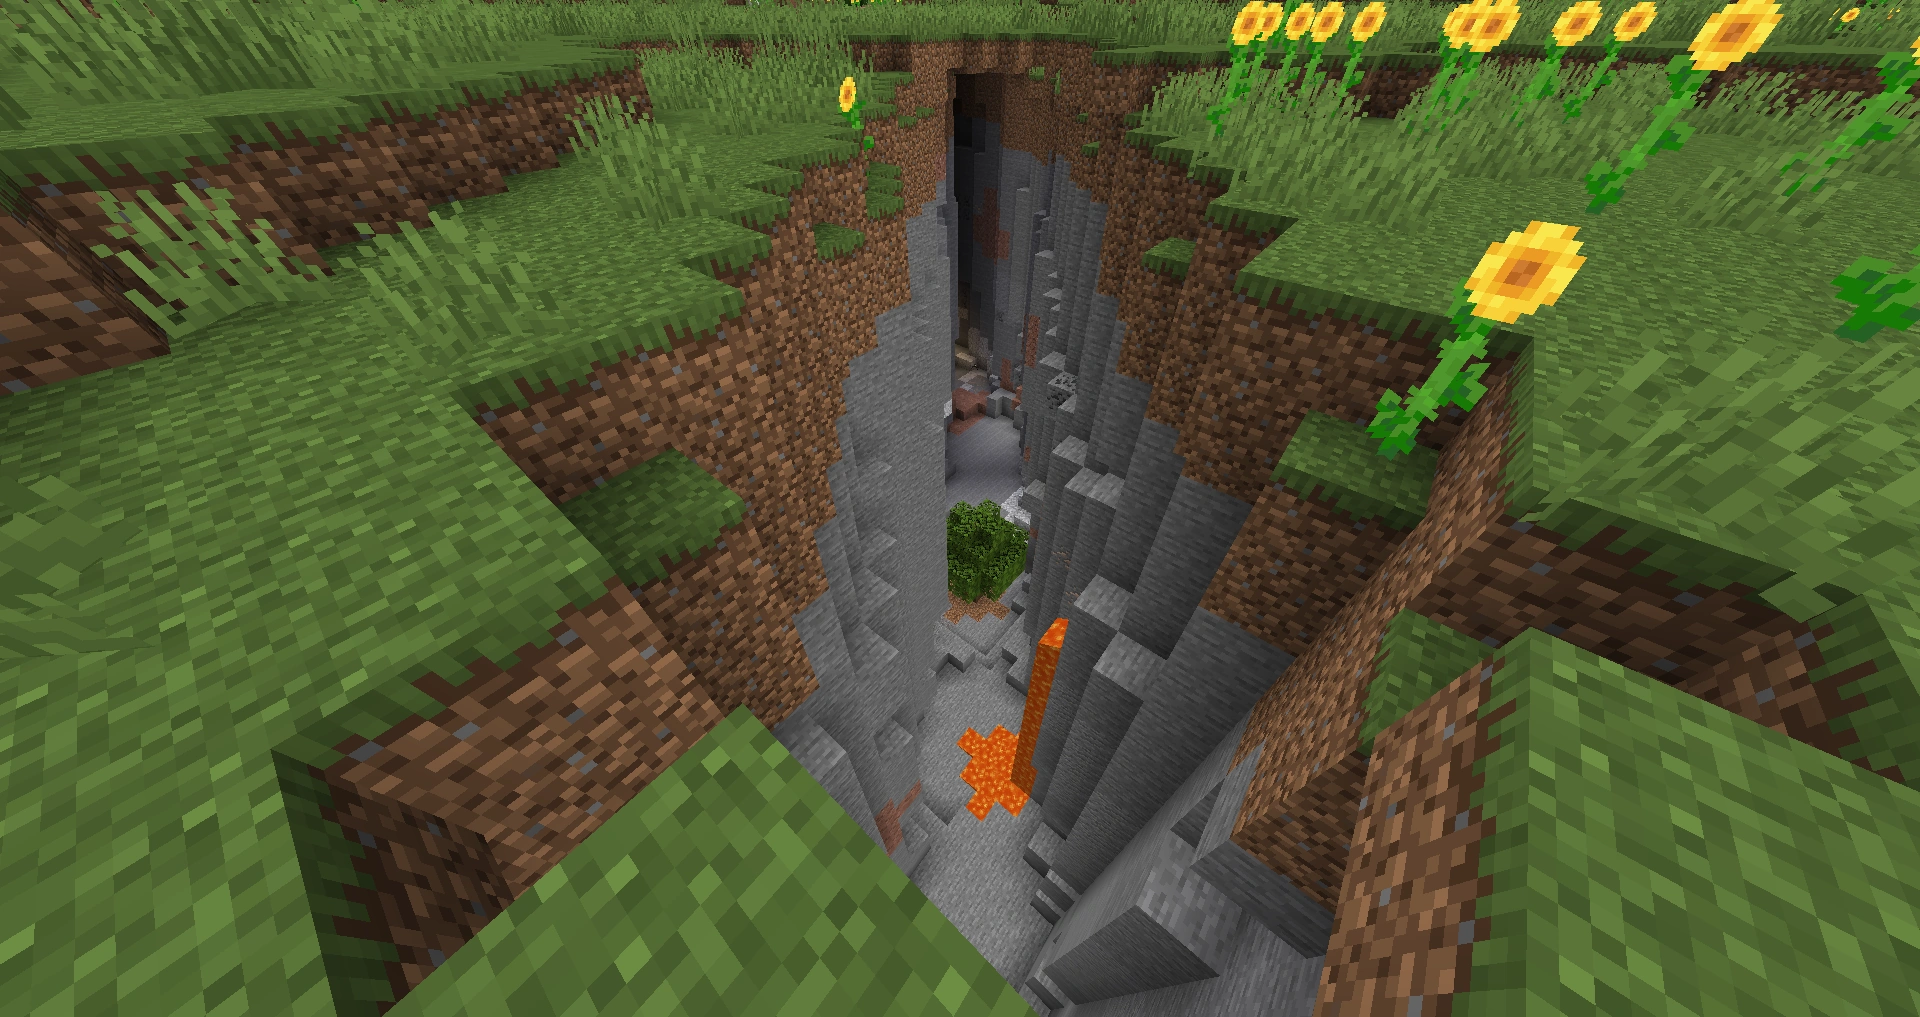
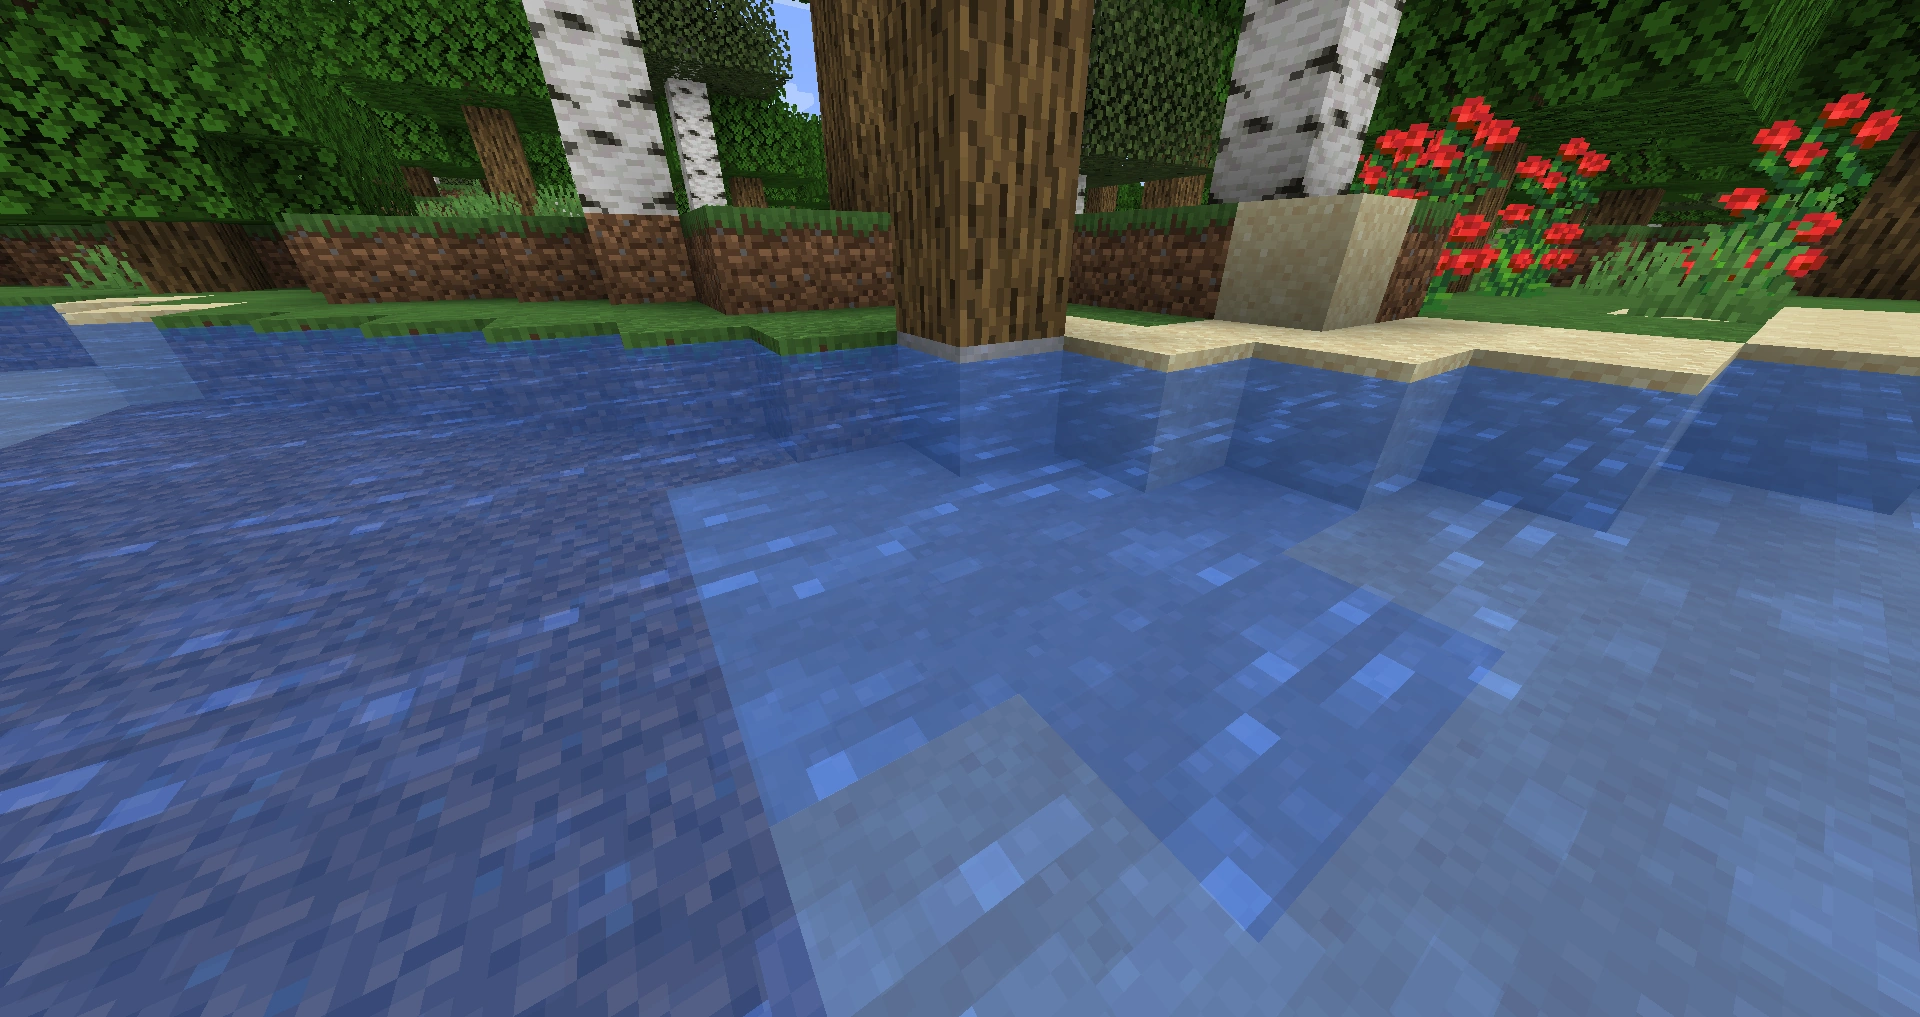
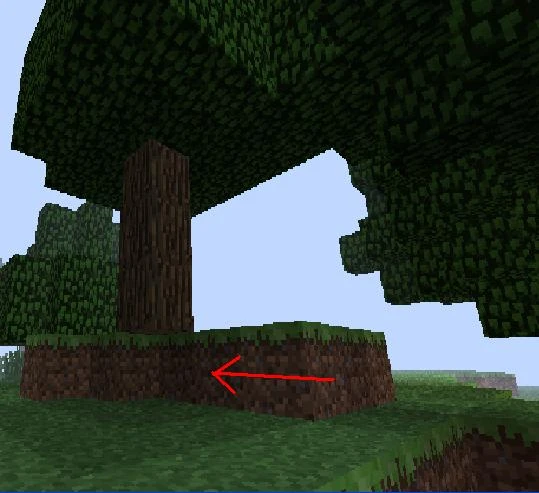
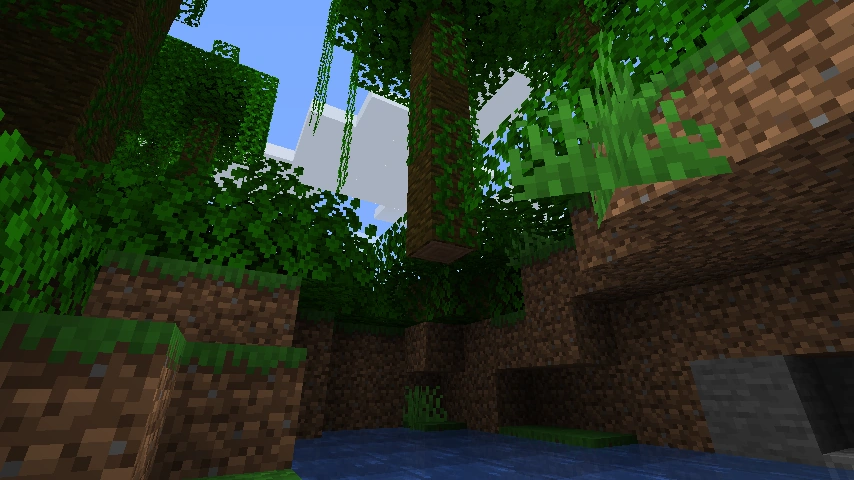
Other images
- 2011-10-11 18.48.25.png
Sugar cane that naturally generated through a tree.
An old image where acacias were spawned with jungle wood.
A giant floating oak treetop, caused when a player set it ablaze with flint and steel.
Large oaks with leaves removed.
A picture of a jungle taken at dawn, with a pig and chicken visible.
A spruce forest in the cold taiga.
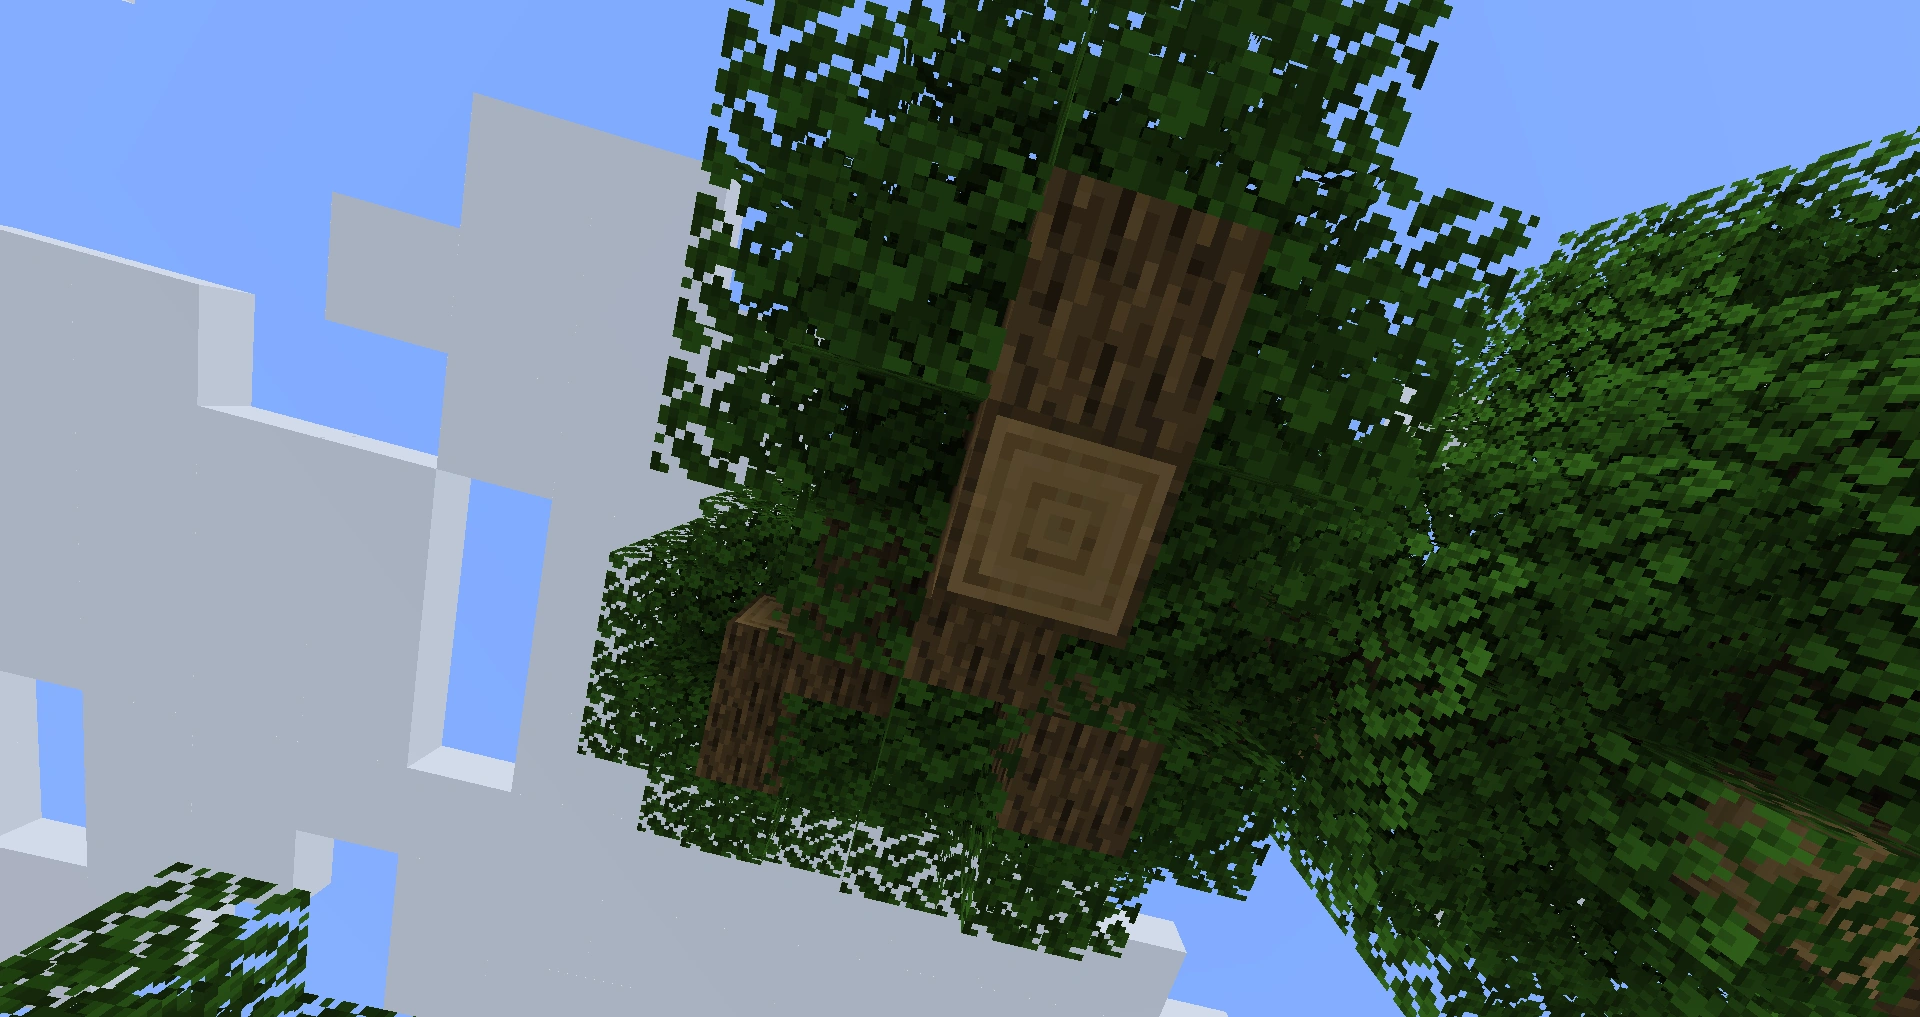
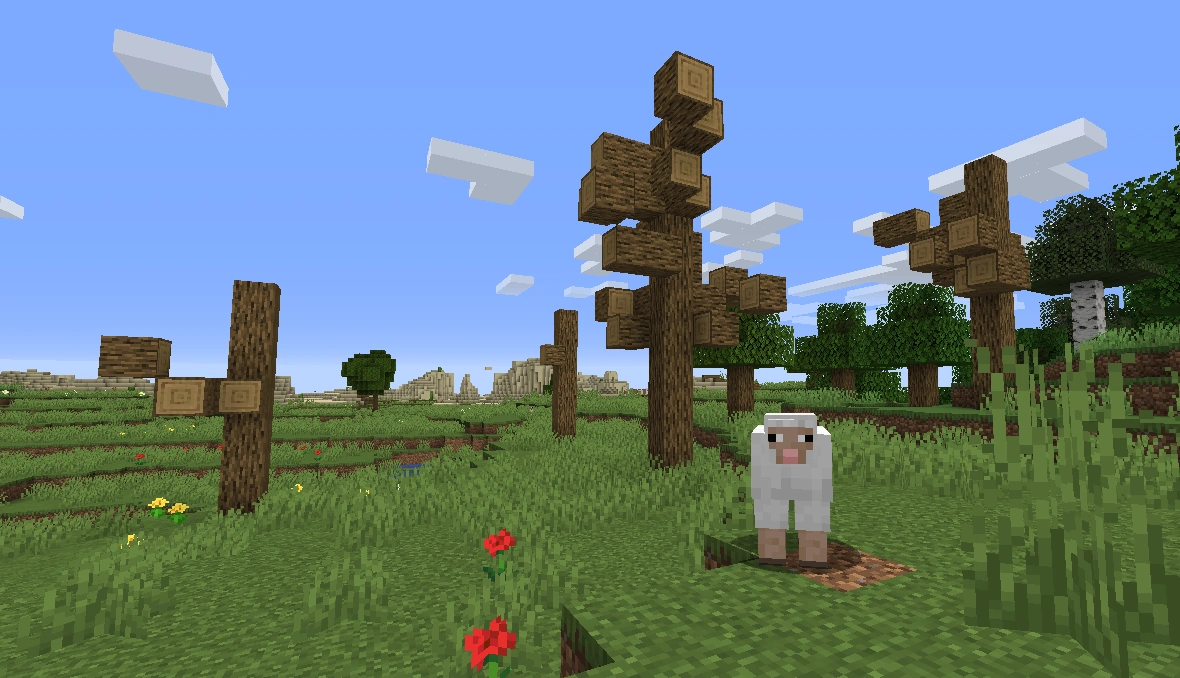
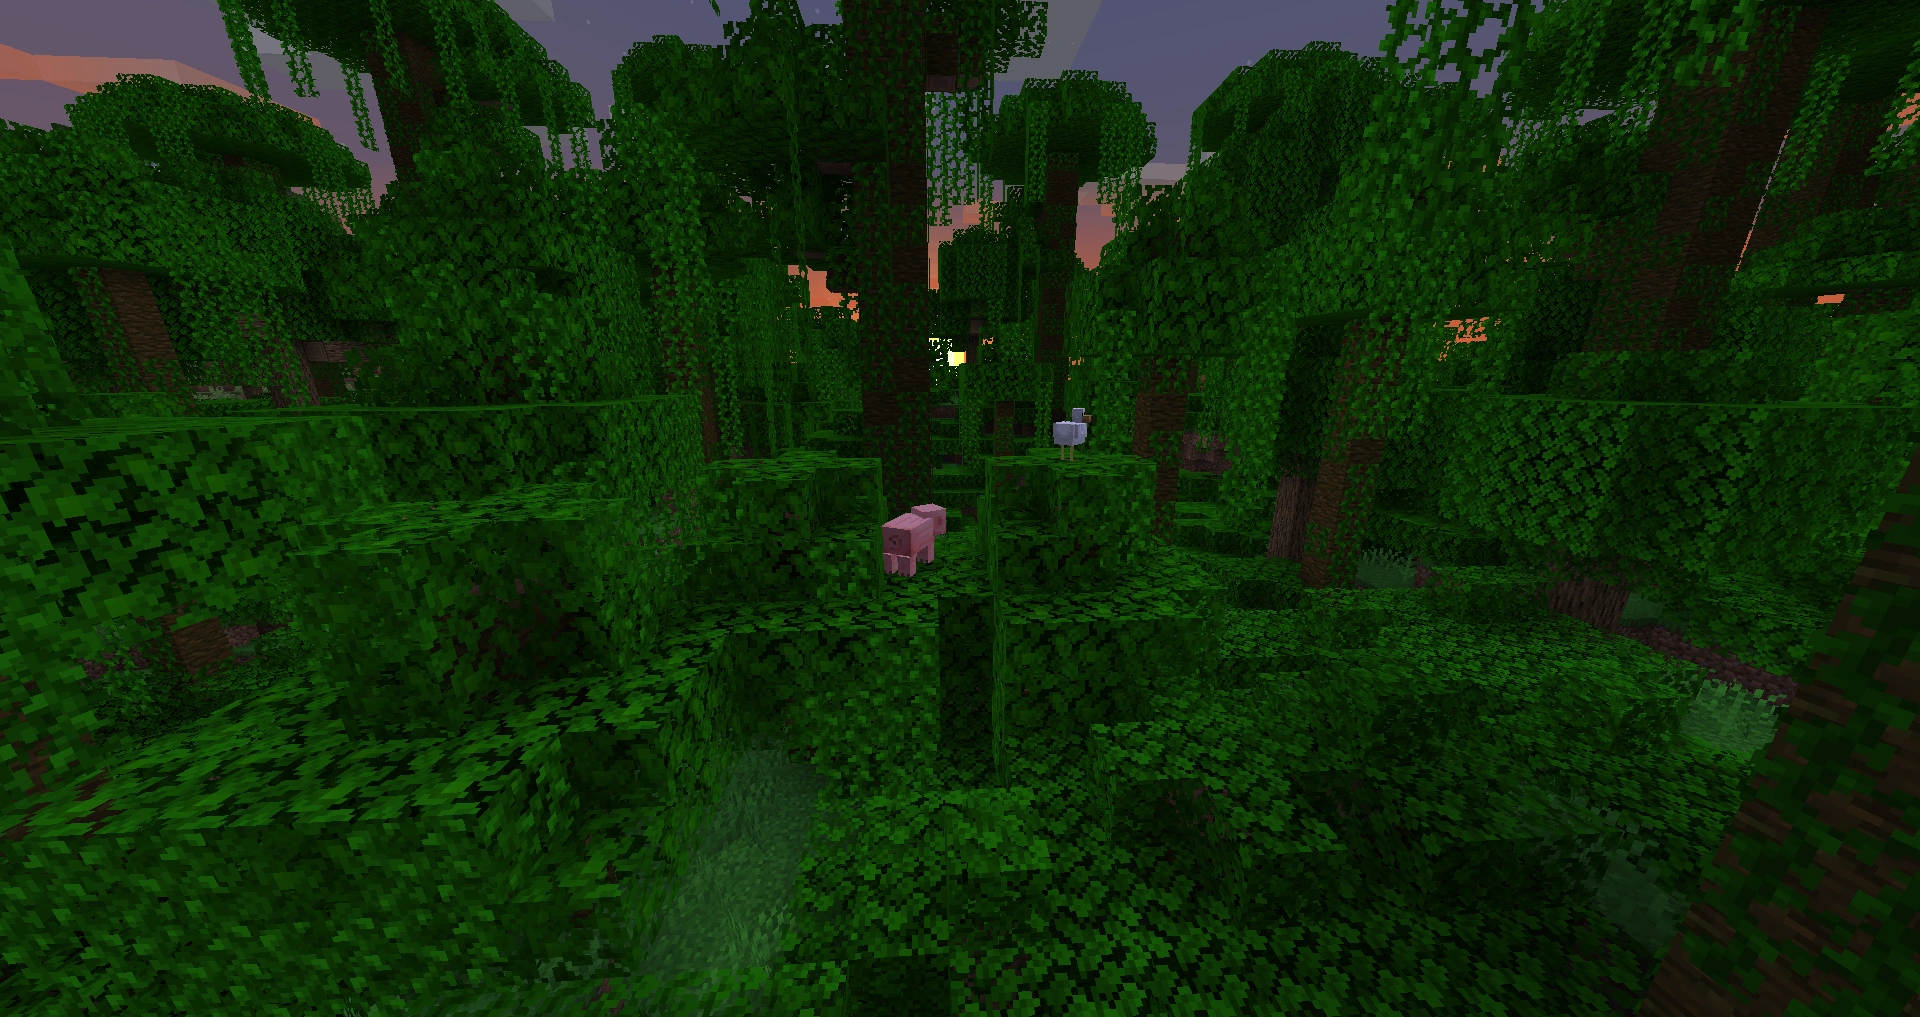
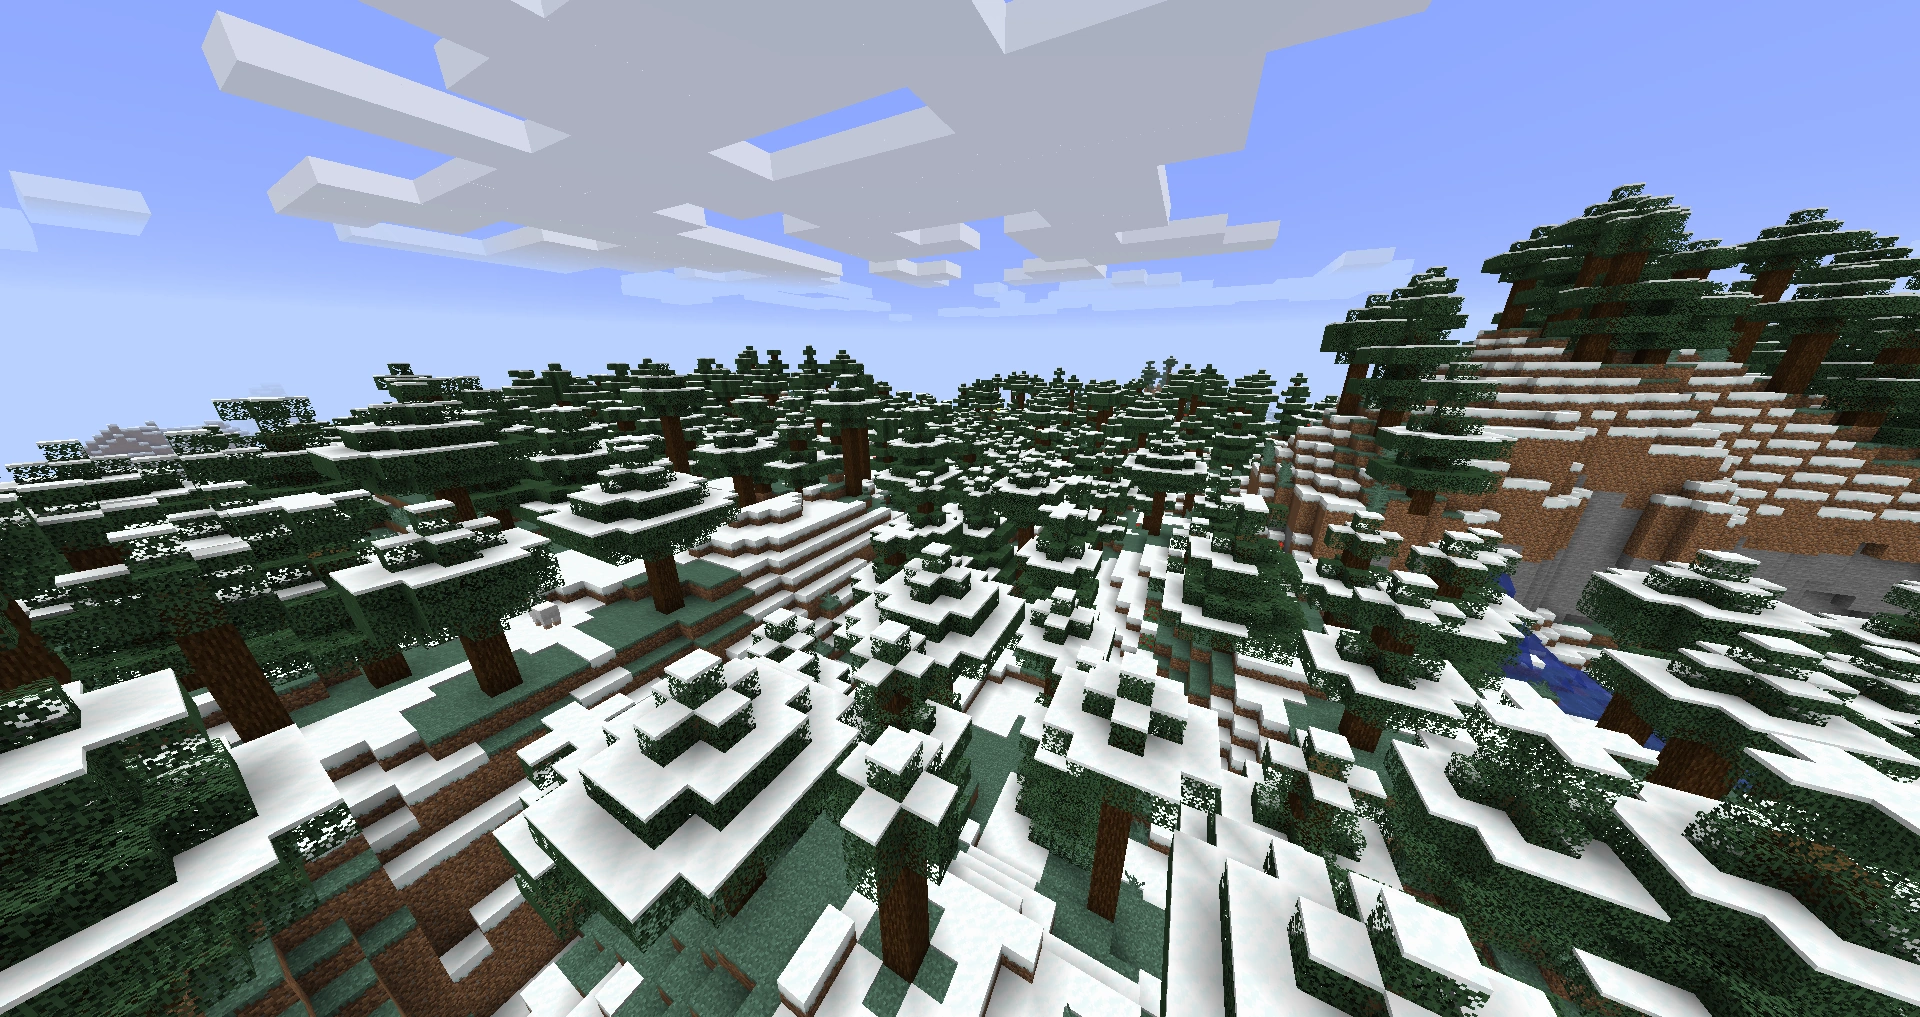
References
- ↑ http://mcupdate.tumblr.com/post/18600004768/minecraft-1-2-3
- ↑ http://twitter.com/jeb_/status/55976702232379392
- ↑ http://twitter.com/jeb_/status/175224622525071363
- ↑ http://twitter.com/jeb_/status/55957097329864704
- ↑ http://www.reddit.com/r/Minecraft/comments/1m97cw/while_you_are_all_crying_over_the_name_change_of/