m (→History: replaced: snap=1.9pre4 → snap=Beta 1.9-pre4) |
mNo edit summary |
||
| (16 intermediate revisions by 12 users not shown) | |||
| Line 1: | Line 1: | ||
[[File:Minecraft 2.jpg|thumb|300px|The Overworld, as seen in an [[Biome#Extreme Hills|Extreme Hills]] biome]] |
[[File:Minecraft 2.jpg|thumb|300px|The Overworld, as seen in an [[Biome#Extreme Hills|Extreme Hills]] biome]] |
||
| − | '''The Overworld''' is the starting [[:Category:Dimensions|dimension]] in ''Minecraft''. As with all dimensions in the game, the Overworld can generate infinitely. The Overworld is limited to 862 by 862 blocks on the ''[[Xbox 360 Edition]]'', and 256 by 256 blocks on [[Old]] ''[[Pocket Edition]]'' worlds. At the edge of the Overworld, there is an |
+ | '''The Overworld''' is the starting [[:Category:Dimensions|dimension]] in ''Minecraft''. As with all dimensions in the game, the Overworld can generate infinitely. The Overworld is limited to 862 by 862 blocks on the ''[[Xbox 360 Edition]]'', and 256 by 256 blocks on [[Old]] ''[[Pocket Edition]]'' worlds. At the edge of the Overworld, there is an animated world border. Nether portals in the Overworld can be used to teleport to [[the Nether]]. |
| − | The Overworld encompasses the level ceiling down to [[bedrock]] and extending in every direction on the horizontal plane. It is generated through a secret process which creates multiple noise maps to create differing [[Altitude|elevations]], general [[Chunks|chunk]] shapes, and complex [[Generated structures#Mountain|mountain]] and [[ |
+ | The Overworld encompasses the level ceiling down to [[bedrock]] and extending in every direction on the horizontal plane. It is generated through a secret process which creates multiple noise maps to create differing [[Altitude|elevations]], general [[Chunks|chunk]] shapes, and complex [[Generated structures#Mountain|mountain]] and [[cave]] systems. |
| − | Most [[mobs]] in the game can appear in the Overworld: [[ |
+ | Most [[mobs]] in the game can appear in the Overworld: [[wolves]], [[bat]]s, [[pig]]s, [[sheep]], [[cow]]s, [[horse]]s, [[mooshroom]]s, [[chicken]]s, [[chicken jockey]]s, [[squid]], [[zombie]]s, [[ocelot]]s, [[skeleton]]s, [[spider]]s, [[villager]]s, [[spider jockey]]s, [[witch]]es, [[endermen]], [[creeper]]s and [[slime]]s all spawn normally. [[Zombie pigmen]] can also spawn near nether portals. |
| − | Mobs from [[the Nether]] may also pass through [[ |
+ | Mobs from [[the Nether]] may also pass through [[nether portal]]s and enter the Overworld: [[zombie pigmen]], [[magma cube]]s, [[wither skeleton]]s, [[ghast]]s, and [[blaze]]s (mobs from the Overworld can also enter the Nether through a Nether Portal). The [[Ender Dragon]] however can't enter the Overworld because there is no return portal from [[the End]] unless the dragon is defeated. |
| + | While less dangerous than the Nether, the Overworld is still, nonetheless, a somewhat hostile dimension, mostly due to monsters that roam the darkness of [[caves]] and outside at night, and the common hazards ranging from falling from great heights to the near-lethal [[lava]] found underground or in lava lakes on the surface. Also, living humans are a very rare sight, these "humans" can refer to the [[player]]s that are trying to survive day by day, and [[villager]]s, who live in [[village]]s. |
||
== Seeds == |
== Seeds == |
||
{{Main|Seed (level generation)|title1=Seed}} |
{{Main|Seed (level generation)|title1=Seed}} |
||
| Line 15: | Line 16: | ||
Using a specific seed generates exactly the same world each time, and thus interesting ''Minecraft'' worlds could be shared between players. The [[spawn]] is not on ''exactly'' the same spot, though, so it is wise to give [[coordinates]] instead of directions. The seed input is converted into an integer, so, for instance, the word 'Glacier' corresponds to a value of 1772835215, which generates exactly the same world when entered as a seed value. |
Using a specific seed generates exactly the same world each time, and thus interesting ''Minecraft'' worlds could be shared between players. The [[spawn]] is not on ''exactly'' the same spot, though, so it is wise to give [[coordinates]] instead of directions. The seed input is converted into an integer, so, for instance, the word 'Glacier' corresponds to a value of 1772835215, which generates exactly the same world when entered as a seed value. |
||
| − | Many seeds are chosen simply because they spawn the player near desirable resources, a stronghold or some certain special structure, such as a dungeon. Players often like to find seeds with other very important generated structures such as [[abandoned mine shaft]]s (possibly for the melon seeds and cobwebs) and [[village]]s (perhaps for a surplus of wheat, potatoes, and/or carrots, and for the open possibility of trading with villagers.). While [[ |
+ | Many seeds are chosen simply because they spawn the player near desirable resources, a stronghold or some certain special structure, such as a dungeon. Players often like to find seeds with other very important generated structures such as [[abandoned mine shaft]]s (possibly for the melon seeds and cobwebs) and [[village]]s (perhaps for a surplus of wheat, potatoes, and/or carrots, and for the open possibility of trading with villagers.). While [[stronghold]]s have a minimum distance from the origin, a seed could also be chosen for a relatively close one. |
| − | Seeds can also be chosen for useful [[biome]]s near the spawn point; notably, a Mushroom Island biome provides a large sanctuary from monsters, even underground. Other particularly useful biomes |
+ | Seeds can also be chosen for useful [[biome]]s near the spawn point; notably, a Mushroom Island biome provides a large sanctuary from monsters, even underground. Other particularly useful biomes includes jungle ([[wood]], [[cat]]s), desert ([[village]]s, [[sand]], open line-of-sight), Mesa ([[stained clay]]), taiga ([[wolves]], [[snow]]), Swampland (aboveground [[slime]]s), and extreme hills ([[emerald ore]]s). |
| − | Players can find the current map seed by entering the /seed [[ |
+ | Players can find the current map seed by entering the /seed [[command]]. |
== Sizes == |
== Sizes == |
||
| Line 28: | Line 29: | ||
[[File:mc cutoff.png|thumb|200px|Visual cutoff point of a ''Minecraft'' map (Left is normal minecraft generation, the right is after limitation.)]] |
[[File:mc cutoff.png|thumb|200px|Visual cutoff point of a ''Minecraft'' map (Left is normal minecraft generation, the right is after limitation.)]] |
||
| − | While the map is infinite, the number of blocks the player may walk on is limited. The map |
+ | While the map is infinite, the number of blocks the player may walk on is limited. The map contains a world border at +/- 30,000,000 x/z. The world border is an animated wall of blue stripes. As you get near it, the edges of your screen turn red, and you can not go past it. There is nothing past maybe 10 blocks after the wall, just emptiness. |
| ⚫ | Because of these limitations the maximum blocks that can be generated in a world is approximately 921,600,000,000,000,000. This means that a filled world with no entities or tile entities would be 3,686,400,000,000,000,000 bits (409.27261579781770706 Petabytes) in block data alone due to the fact that each standard block is assigned 4 bits of information. |
||
| − | Beyond this edge, world generation is significantly simpler. Any chunk after the edge consists of just dirt, stone, sand, gravel and water with absolutely no vegetation. Caves ''do'' generate here, but no ores or structures appear inside, and the lighting in some of these caves may appear to make them look brighter with more contrast. Another point to note is that if a person stands on the very border of the edge, the ocean will look empty and 'seemingly' be able to see as though there was no water. |
||
| − | |||
| ⚫ | Because of these limitations the maximum blocks that can be generated in a world is approximately 921,600,000,000,000,000. This means that a filled world with no entities or tile entities would be |
||
== Generation == |
== Generation == |
||
=== Generated blocks === |
=== Generated blocks === |
||
| + | |||
| − | Entries marked with a <sup>D</sup> require additional data to fully define the block in a Beta world. Entries marked with an <sup>I</sup> have a different ID as an inventory item. Entries marked with a <sup>B</sup> require additional inventory data to fully define the inventory item. Entries marked with a <sup>[[Tile entity|T]]</sup> have tile entities associated with them to store additional data. Blocks with IDs in red cannot be legitimately obtained in the player's inventory in the game; they can only be obtained by "hacking" (such as the use of Inventory editors) or, in multiplayer using the /give server command. Blocks available only in Creative mode are in blue, and blocks available in Survival mode only with the use of a Silk Touch-enchanted tool are in green. |
||
| + | Entries marked with a <sup>D</sup> require additional data to fully define the block in a Beta world. |
||
| + | *Entries marked with an <sup>I</sup> have a different ID as an inventory item. |
||
| + | *Entries marked with a <sup>B</sup> require additional inventory data to fully define the inventory item. |
||
| + | *Entries marked with a <sup>[[Block entity|T]]</sup> have block entities associated with them to store additional data. |
||
| + | *Blocks with IDs in can only be obtained using commands. |
||
| + | *Blocks available only in Creative mode are in blue. |
||
| + | *Blocks available in survival mode only with the use of a Silk Touch-enchanted tool are in green. |
||
==== Naturally generated ==== |
==== Naturally generated ==== |
||
| Line 46: | Line 52: | ||
! Icon !! Dec !! Hex !! Block type |
! Icon !! Dec !! Hex !! Block type |
||
|- |
|- |
||
| − | | height="27px" | || <span style='color: |
+ | | height="27px" | || <span style='color:lightblue'>00</span> || <span style='color:lightblue'>00</span> || [[Air]] |
|- |
|- |
||
| height="27px" | [[File:Stone.png|25px]] || 01 || 01 || [[Stone]] |
| height="27px" | [[File:Stone.png|25px]] || 01 || 01 || [[Stone]] |
||
| Line 52: | Line 58: | ||
| height="27px" | [[File:Grass.png|25px]] || <span style='color:green'>02</span> || <span style='color:green'>02</span> || [[Grass Block]] |
| height="27px" | [[File:Grass.png|25px]] || <span style='color:green'>02</span> || <span style='color:green'>02</span> || [[Grass Block]] |
||
|- |
|- |
||
| − | | height="27px" | [[File:Dirt.png|25px]] || 03 || 03 || [[Dirt]] <sup>[[Data |
+ | | height="27px" | [[File:Dirt.png|25px]] || 03 || 03 || [[Dirt]] <sup>[[Data values#Dirt|D]] [[Data values#Dirt|B]] |
|- |
|- |
||
| height="27px" | [[File:Cobblestone.png|25px]] || 04 || 04 || [[Cobblestone]] |
| height="27px" | [[File:Cobblestone.png|25px]] || 04 || 04 || [[Cobblestone]] |
||
| Line 58: | Line 64: | ||
| height="27px" | [[File:Bedrock.png|25px]] || <span style='color:blue'>07</span> || <span style='color:blue'>07</span> || [[Bedrock]] |
| height="27px" | [[File:Bedrock.png|25px]] || <span style='color:blue'>07</span> || <span style='color:blue'>07</span> || [[Bedrock]] |
||
|- |
|- |
||
| − | | height="27px" | [[File:Water.png|25px]] || <span style='color: |
+ | | height="27px" | [[File:Water.png|25px]] || <span style='color:lightblue'>09</span> || <span style='color:lightblue'>09</span> || [[Water]] (Stationary) <sup>[[Data values#Water and Lava|D]]</sup> |
|- |
|- |
||
| − | | height="27px" | [[File:Lava.png|25px]] || <span style='color: |
+ | | height="27px" | [[File:Lava.png|25px]] || <span style='color:lightblue'>11</span> || <span style='color:lightblue'>0B</span> || [[Lava]] (Stationary) <sup>[[Data values#Water and Lava|D]]</sup> |
|- |
|- |
||
| height="27px" | [[File:Sand.png|25px]] || 12 || 0C || [[Sand]] |
| height="27px" | [[File:Sand.png|25px]] || 12 || 0C || [[Sand]] |
||
| Line 66: | Line 72: | ||
| height="27px" | [[File:Gravel.png|25px]] || 13 || 0D || [[Gravel]] |
| height="27px" | [[File:Gravel.png|25px]] || 13 || 0D || [[Gravel]] |
||
|- |
|- |
||
| − | | height="27px" | [[File:Gold (Ore).png|25px]] || 14 || 0E || [[Gold |
+ | | height="27px" | [[File:Gold (Ore).png|25px]] || 14 || 0E || [[Gold ore]] |
|- |
|- |
||
| − | | height="27px" | [[File:Iron (Ore).png|25px]] || 15 || 0F || [[Iron |
+ | | height="27px" | [[File:Iron (Ore).png|25px]] || 15 || 0F || [[Iron ore]] |
|- |
|- |
||
| height="27px" | [[File:Coal (Ore).png|25px]] || <span style='color:green'>16</span> || <span style='color:green'>10</span> || [[Coal Ore]] |
| height="27px" | [[File:Coal (Ore).png|25px]] || <span style='color:green'>16</span> || <span style='color:green'>10</span> || [[Coal Ore]] |
||
|- |
|- |
||
| − | | height="27px" | [[File:Wood.png|25px]] || 17 || 11 || [[Wood]] <sup>[[Data |
+ | | height="27px" | [[File:Wood.png|25px]] || 17 || 11 || [[Wood]] <sup>[[Data values#Wood|D]] [[Data values#Wood|B]] |
|- |
|- |
||
| − | | height="27px" | [[File:Leaves.png|25px]] || 18 || 12 || [[Leaves]] <sup>[[Data |
+ | | height="27px" | [[File:Leaves.png|25px]] || 18 || 12 || [[Leaves]] <sup>[[Data values#Leaves|D]] [[Data values#Leaves|B]]</sup> |
|- |
|- |
||
| − | | height="27px" | [[File:Lapis Lazuli (Ore).png|25px]] || <span style='color:green'>21</span> || <span style='color:green'>15</span> || [[Lapis |
+ | | height="27px" | [[File:Lapis Lazuli (Ore).png|25px]] || <span style='color:green'>21</span> || <span style='color:green'>15</span> || [[Lapis lazuli ore]] |
|- |
|- |
||
| height="27px" | [[File:Sandstone.png|25px]] || 24 || 18 || [[Sandstone]] |
| height="27px" | [[File:Sandstone.png|25px]] || 24 || 18 || [[Sandstone]] |
||
| Line 82: | Line 88: | ||
| height="27px" | [[File:Tall Grass.png|25px]] || 31 || 1F || [[Grass]] <sup>[[Data Values#Tall Grass|D]] [[Data Values#Tall Grass|B]]</sup> |
| height="27px" | [[File:Tall Grass.png|25px]] || 31 || 1F || [[Grass]] <sup>[[Data Values#Tall Grass|D]] [[Data Values#Tall Grass|B]]</sup> |
||
|- |
|- |
||
| − | | height="27px" | [[File:Grid Dead Bush.png|25px]] || 32 || 20 || [[Dead |
+ | | height="27px" | [[File:Grid Dead Bush.png|25px]] || 32 || 20 || [[Dead bush]] |
|- |
|- |
||
| − | | height="27px" | [[File:Dandelion.png|25px]] || 37 || 25 || [[ |
+ | | height="27px" | [[File:Dandelion.png|25px]] || 37 || 25 || [[Dandelion]] |
|} |
|} |
||
{| align="left" style="margin:2px; border: 1px solid silver; text-align: center;" |
{| align="left" style="margin:2px; border: 1px solid silver; text-align: center;" |
||
! Icon !! Dec !! Hex !! Block type |
! Icon !! Dec !! Hex !! Block type |
||
|- |
|- |
||
| − | | height="27px" | [[File:Poppy.png|25px]] || 38 || 26 || [[ |
+ | | height="27px" | [[File:Poppy.png|25px]] || 38 || 26 || [[Flower]]s <sup>[[Data values#Flowers|D]] [[Data Values#Flowers|B]] |
|- |
|- |
||
| − | | height="27px" | [[File:Brown Mushroom.png|25px]] || 39 || 27 || [[ |
+ | | height="27px" | [[File:Brown Mushroom.png|25px]] || 39 || 27 || [[Brown mushroom]] |
|- |
|- |
||
| − | | height="27px" | [[File:Red Mushroom.png|25px]] || 40 || 28 || [[ |
+ | | height="27px" | [[File:Red Mushroom.png|25px]] || 40 || 28 || [[Red mushroom]] |
|- |
|- |
||
| − | | height="27px" | [[File:Moss Stone.png|25px]] || 48 || 30 || [[Moss |
+ | | height="27px" | [[File:Moss Stone.png|25px]] || 48 || 30 || [[Moss stone]] |
|- |
|- |
||
| − | | height="27px" | [[File:Monster Spawner.png|25px]] || <span style='color:red'>52</span> || <span style='color:red'>34</span> || [[Monster |
+ | | height="27px" | [[File:Monster Spawner.png|25px]] || <span style='color:red'>52</span> || <span style='color:red'>34</span> || [[Monster spawner]] <sup>[[Block entity|T]]</sup> |
|- |
|- |
||
| − | | height="27px" | [[File:Diamond (Ore).png|25px]] || <span style='color:green'>56</span> || <span style='color:green'>38</span> || [[Diamond |
+ | | height="27px" | [[File:Diamond (Ore).png|25px]] || <span style='color:green'>56</span> || <span style='color:green'>38</span> || [[Diamond ore]] |
|- |
|- |
||
| − | | height="27px" | [[File:Redstone (Ore).png|25px]] || <span style='color:green'>73</span> || <span style='color:green'>49</span> || [[Redstone |
+ | | height="27px" | [[File:Redstone (Ore).png|25px]] || <span style='color:green'>73</span> || <span style='color:green'>49</span> || [[Redstone ore]] |
|- |
|- |
||
| − | | height="27px" | [[File:Snow.png|25px]] || |
+ | | height="27px" | [[File:Snow.png|25px]] || 78 || 4E || [[Snow (layer)|Snow]] |
|- |
|- |
||
| height="27px" | [[File:Ice.png|25px]] || <span style='color:green'>79</span> || <span style='color:green'>4F</span> || [[Ice]] |
| height="27px" | [[File:Ice.png|25px]] || <span style='color:green'>79</span> || <span style='color:green'>4F</span> || [[Ice]] |
||
|- |
|- |
||
| − | | height="27px" | [[File:Cactus.png|25px]] || 81 || 51 || [[Cactus]] <sup>[[Data |
+ | | height="27px" | [[File:Cactus.png|25px]] || 81 || 51 || [[Cactus]] <sup>[[Data values#Cactus|D]]</sup> |
|- |
|- |
||
| − | | height="27px" | [[File:Clay (Block).png|25px]] || 82 || 52 || [[Clay (block)|Clay |
+ | | height="27px" | [[File:Clay (Block).png|25px]] || 82 || 52 || [[Clay (block)|Clay]] |
|- |
|- |
||
| − | | height="27px" | [[File:Sugar Cane.png|25px]] || <span style='color: |
+ | | height="27px" | [[File:Sugar Cane.png|25px]] || <span style='color:lightblue'>83</span> || <span style='color:lightblue'>53</span> || [[Sugar canes]] <sup>[[Data values#Sugar Canes|D]] [[Data values#Item IDs|I]]</sup> |
|- |
|- |
||
| − | | height="27px" | [[File:Pumpkin.png|25px]] || 86 || 56 || [[Pumpkin]] <sup>[[Data |
+ | | height="27px" | [[File:Pumpkin.png|25px]] || 86 || 56 || [[Pumpkin]] <sup>[[Data values#Pumpkins and Jack o'Lanterns|D]]</sup> |
|- |
|- |
||
| − | | height="27px" | [[File:BrownMushroomCap.png|25px]] || <span style='color:green'>99</span> || <span style='color:green'>63</span> || [[Huge |
+ | | height="27px" | [[File:BrownMushroomCap.png|25px]] || <span style='color:green'>99</span> || <span style='color:green'>63</span> || [[Huge mushroom|Huge brown mushroom]] <sup>[[Data values#Huge brown and red mushroom|D]]</sup> |
|- |
|- |
||
| − | | height="27px" | [[File:RedMushroomCap.png|25px]] || <span style='color:green'>100</span> || <span style='color:green'>64</span> || [[Huge |
+ | | height="27px" | [[File:RedMushroomCap.png|25px]] || <span style='color:green'>100</span> || <span style='color:green'>64</span> || [[Huge mushroom|Huge red mushroom]] <sup>[[Data Values#Huge brown and red mushroom|D]]</sup> |
|- |
|- |
||
| height="27px" | [[File:Melon (Block).png|25px]] || <span style='color:green'>103</span> || <span style='color:green'>67</span> || [[Melon (block)|Melon]] |
| height="27px" | [[File:Melon (Block).png|25px]] || <span style='color:green'>103</span> || <span style='color:green'>67</span> || [[Melon (block)|Melon]] |
||
|- |
|- |
||
| − | | height="27px" | [[File:Vine.png|25px]] || 106 || 6A || [[Vines]] <sup>[[Data |
+ | | height="27px" | [[File:Vine.png|25px]] || 106 || 6A || [[Vines]] <sup>[[Data values#Vines|D]]</sup> |
|- |
|- |
||
| height="27px" | [[File:Mycelium.png|25px]] || <span style='color:green'>110</span> || <span style='color:green'>6E</span> || [[Mycelium]] |
| height="27px" | [[File:Mycelium.png|25px]] || <span style='color:green'>110</span> || <span style='color:green'>6E</span> || [[Mycelium]] |
||
|- |
|- |
||
| − | | height="27px" | [[File:Lily Pad.png|25px]] || 111 || 6F || [[Lily |
+ | | height="27px" | [[File:Lily Pad.png|25px]] || 111 || 6F || [[Lily pad]] |
|- |
|- |
||
| − | | height="27px" | [[File:End Portal Frame.png|25px]] || <span style='color:blue'>120</span> || <span style='color:blue'>78</span> || [[End Portal (block)|End |
+ | | height="27px" | [[File:End Portal Frame.png|25px]] || <span style='color:blue'>120</span> || <span style='color:blue'>78</span> || [[End Portal (block)|End portal]] |
|- |
|- |
||
| − | | height="27px" | [[File:Cocoa Plant.png|25px]] || <span style='color: |
+ | | height="27px" | [[File:Cocoa Plant.png|25px]] || <span style='color:lightblue'>127</span> || <span style='color:lightblue'>7F</span> || [[Cocoa]] |
|- |
|- |
||
| − | | height="27px" | [[File:Emerald Ore2.png|25px]] || <span style='color:green'>129</span> || <span style='color:green'>81</span> || [[Emerald |
+ | | height="27px" | [[File:Emerald Ore2.png|25px]] || <span style='color:green'>129</span> || <span style='color:green'>81</span> || [[Emerald ore]] |
|- |
|- |
||
| − | | height="27px" | [[File:Grid Sunflower.png|25px]] || 175 || AF || [[Flowers|Large Flowers]] <sup>[[Data Values#Large Flowers|D]] [[Data |
+ | | height="27px" | [[File:Grid Sunflower.png|25px]] || 175 || AF || [[Flowers|Large Flowers]] <sup>[[Data Values#Large Flowers|D]] [[Data values#Large Flowers|B]] |
|- |
|- |
||
| − | | height="27px" | [[File:Red Sandstone.png|25px]] || 179 || B3 || [[Red |
+ | | height="27px" | [[File:Red Sandstone.png|25px]] || 179 || B3 || [[Red sandstone]] |
|} |
|} |
||
{{-}} |
{{-}} |
||
| Line 146: | Line 152: | ||
! Icon !! Dec !! Hex !! Block type |
! Icon !! Dec !! Hex !! Block type |
||
|- |
|- |
||
| − | | height="27px" | || <span style='color: |
+ | | height="27px" | || <span style='color:lightblue'>00</span> || <span style='color:lightblue'>00</span> || [[Air]] |
|- |
|- |
||
| height="27px" | [[File:Grass.png|25px]] || <span style='color:green'>02</span> || <span style='color:green'>02</span> || [[Grass Block]] |
| height="27px" | [[File:Grass.png|25px]] || <span style='color:green'>02</span> || <span style='color:green'>02</span> || [[Grass Block]] |
||
| Line 154: | Line 160: | ||
| height="27px" | [[File:Cobblestone.png|25px]] || 04 || 04 || [[Cobblestone]] |
| height="27px" | [[File:Cobblestone.png|25px]] || 04 || 04 || [[Cobblestone]] |
||
|- |
|- |
||
| − | | height="27px" | [[File:Water.png|25px]] || <span style='color: |
+ | | height="27px" | [[File:Water.png|25px]] || <span style='color:lightblue'>08</span> || <span style='color:lightblue'>08</span> || [[Water]] (Flowing) <sup>[[Data values#Water and Lava|D]]</sup> |
|- |
|- |
||
| − | | height="27px" | [[File:Lava.png|25px]] || <span style='color: |
+ | | height="27px" | [[File:Lava.png|25px]] || <span style='color:lightblue'>10</span> || <span style='color:lightblue'>0A</span> || [[Lava]] (Flowing) <sup>[[Data values#Water and Lava|D]]</sup> |
|- |
|- |
||
| − | | height="27px" | [[File:Brown Mushroom.png|25px]] || 39 || 27 || [[ |
+ | | height="27px" | [[File:Brown Mushroom.png|25px]] || 39 || 27 || [[Brown mushroom]] |
|- |
|- |
||
| − | | height="27px" | [[File:Red Mushroom.png|25px]] || 40 || 28 || [[ |
+ | | height="27px" | [[File:Red Mushroom.png|25px]] || 40 || 28 || [[Red mushroom]] |
|} |
|} |
||
{| align="left" style="margin:2px; border: 1px solid silver; text-align: center;" |
{| align="left" style="margin:2px; border: 1px solid silver; text-align: center;" |
||
| Line 167: | Line 173: | ||
| height="27px" | [[File:Obsidian.png|25px]] || 49 || 31 || [[Obsidian]] |
| height="27px" | [[File:Obsidian.png|25px]] || 49 || 31 || [[Obsidian]] |
||
|- |
|- |
||
| − | | height="27px" | [[File:Fire.png|25px]] || <span style='color: |
+ | | height="27px" | [[File:Fire.png|25px]] || <span style='color:lightblue'>51</span> || <span style='color:lightblue'>33</span> || [[Fire]] <sup>[[Data Values#Fire|D]]</sup> |
|- |
|- |
||
| − | | height="27px" | [[File:Snow.png|25px]] || |
+ | | height="27px" | [[File:Snow.png|25px]] || 78 || 4E || [[Snow (layer)|Snow]] |
|- |
|- |
||
| height="27px" | [[File:Ice.png|25px]] || <span style='color:blue'>79</span> || <span style='color:blue'>4F</span> || [[Ice]] |
| height="27px" | [[File:Ice.png|25px]] || <span style='color:blue'>79</span> || <span style='color:blue'>4F</span> || [[Ice]] |
||
| Line 175: | Line 181: | ||
| height="27px" | [[File:Cactus.png|25px]] || 81 || 51 || [[Cactus]] <sup>[[Data Values#Cactus|D]]</sup> |
| height="27px" | [[File:Cactus.png|25px]] || 81 || 51 || [[Cactus]] <sup>[[Data Values#Cactus|D]]</sup> |
||
|- |
|- |
||
| − | | height="27px" | [[File:Sugar Cane.png|25px]] || <span style='color: |
+ | | height="27px" | [[File:Sugar Cane.png|25px]] || <span style='color:lightblue'>83</span> || <span style='color:lightblue'>53</span> || [[Sugar canes]] <sup>[[Data values#Sugar Canes|D]] [[Data values#Item IDs|I]]</sup> |
|- |
|- |
||
| − | | height="27px" | [[File:Vine.png|25px]] || 106 || 6A || [[Vines]] <sup>[[Data |
+ | | height="27px" | [[File:Vine.png|25px]] || 106 || 6A || [[Vines]] <sup>[[Data values#Vines|D]]</sup> |
|- |
|- |
||
| height="27px" | [[File:Mycelium.png|25px]] || <span style='color:green'>110</span> || <span style='color:green'>6E</span> || [[Mycelium]] |
| height="27px" | [[File:Mycelium.png|25px]] || <span style='color:green'>110</span> || <span style='color:green'>6E</span> || [[Mycelium]] |
||
| Line 190: | Line 196: | ||
! Icon !! Dec !! Hex !! Block type |
! Icon !! Dec !! Hex !! Block type |
||
|- |
|- |
||
| − | | height="27px" | || <span style='color: |
+ | | height="27px" | || <span style='color:lightblue'>00</span> || <span style='color:lightblue'>00</span> || [[Air]] |
|- |
|- |
||
| height="27px" | [[File:Cobblestone.png|25px]] || 04 || 04 || [[Cobblestone]] |
| height="27px" | [[File:Cobblestone.png|25px]] || 04 || 04 || [[Cobblestone]] |
||
|- |
|- |
||
| − | | height="27px" | [[File:Wooden Plank.png|25px]] || 05 || 05 || [[ |
+ | | height="27px" | [[File:Wooden Plank.png|25px]] || 05 || 05 || [[Wood planks]] |
| + | |- |
||
| + | | height="27px" | [[File:Water.png|25px]] || <span style='color:lightblue'>09</span> || <span style='color:lightblue'>09</span> || [[Water]] (Stationary) <sup>[[Data values#Water and Lava|D]]</sup> |
||
| + | |- |
||
| + | | height="27px" | [[File:Dispenser.png|25px]] || 23 || 17 || [[Dispenser]] |
||
|- |
|- |
||
| height="27px" | [[File:Grid Cobweb.png|25px]] || <span style='color:green'>30</span> || <span style='color:green'>1E</span> || [[Cobweb]] |
| height="27px" | [[File:Grid Cobweb.png|25px]] || <span style='color:green'>30</span> || <span style='color:green'>1E</span> || [[Cobweb]] |
||
| Line 200: | Line 210: | ||
| height="27px" | [[File:Sandstone.png|25px]] || 24 || 18 || [[Sandstone]] |
| height="27px" | [[File:Sandstone.png|25px]] || 24 || 18 || [[Sandstone]] |
||
|- |
|- |
||
| − | | height="27px" | [[File:Sticky Piston.png|25px]] || 29 || 1D || [[Sticky |
+ | | height="27px" | [[File:Sticky Piston.png|25px]] || 29 || 1D || [[Sticky piston]] |
|- |
|- |
||
| height="27px" | [[File:Piston.png|25px]] || 33 || 21 || [[Piston]] |
| height="27px" | [[File:Piston.png|25px]] || 33 || 21 || [[Piston]] |
||
|- |
|- |
||
| − | | height="27px" | [[File:Brown Mushroom.png|25px]] || 39 || 27 || [[ |
+ | | height="27px" | [[File:Brown Mushroom.png|25px]] || 39 || 27 || [[Brown mushroom]] |
|- |
|- |
||
| − | | height="27px" | [[File:Red Mushroom.png|25px]] || 40 || 28 || [[ |
+ | | height="27px" | [[File:Red Mushroom.png|25px]] || 40 || 28 || [[Red mushroom]] |
|- |
|- |
||
| − | | height="27px" | [[File:Grid Black Wool.png|25px]] || 35 || 23 || [[Wool]] <sup>[[Data |
+ | | height="27px" | [[File:Grid Black Wool.png|25px]] || 35 || 23 || [[Wool]] <sup>[[Data values#Wool|D]] [[Data values#Wool|B]]</sup> |
|- |
|- |
||
| − | | height="27px" | [[File:Stone Slab.png|25px]] || 44 || 2C || [[ |
+ | | height="27px" | [[File:Stone Slab.png|25px]] || 44 || 2C || [[Slab]]s <sup>[[Data values#Slabs|D]] [[Data values#Slabs|B]] |
|- |
|- |
||
| height="27px" | [[File:Bookshelf.png|25px]] || 47 || 2F || [[Bookshelf]] |
| height="27px" | [[File:Bookshelf.png|25px]] || 47 || 2F || [[Bookshelf]] |
||
|- |
|- |
||
| − | | height="27px" | [[File:Torch.png|25px]] || 50 || 32 || [[Torch]] <sup>[[Data |
+ | | height="27px" | [[File:Torch.png|25px]] || 50 || 32 || [[Torch]] <sup>[[Data values#Torches and Redstone Torches|D]]</sup> |
|- |
|- |
||
| − | | height="27px" | [[File:Wooden Stairs.png|25px]] || 53 || 35 || |
+ | | height="27px" | [[File:Wooden Stairs.png|25px]] || 53 || 35 || Wood [[Stairs]] <sup>[[Data values#Stairs|D]]</sup> |
|- |
|- |
||
| − | | height="27px" | [[File:Chest.png|25px]] || 54 || 36 || [[Chest]] <sup>[[# |
+ | | height="27px" | [[File:Chest.png|25px]] || 54 || 36 || [[Chest]] <sup>[[Data values#Ladders, Furnaces, Chests|D]]</sup> <sup>[[Block entity|T]]</sup> |
|- |
|- |
||
| − | | height="27px" | [[File:Crafting Table.png|25px]] || 58 || 3A || [[Crafting |
+ | | height="27px" | [[File:Crafting Table.png|25px]] || 58 || 3A || [[Crafting table]] |
|- |
|- |
||
| − | | height="27px" | [[File:Crops.png|25px]] || <span style='color: |
+ | | height="27px" | [[File:Crops.png|25px]] || <span style='color:lightblue'>59</span> || <span style='color:lightblue'>3B</span> || [[Wheat]] <sup>[[Data values#Crops|D]]</sup><sup>[[Data values#Item IDs|I]]</sup> |
|- |
|- |
||
| − | | height="27px" | [[File:Farmland.png|25px]] || <span style='color:red'>60</span> || <span style='color:red'>3C</span> || [[Farmland]] <sup>[[Data |
+ | | height="27px" | [[File:Farmland.png|25px]] || <span style='color:red'>60</span> || <span style='color:red'>3C</span> || [[Farmland]] <sup>[[Data values#Farmland|D]]</sup> |
|- |
|- |
||
| − | | height="27px" | [[File:Furnace.png|25px]] || 61 || 3D || [[Furnace]] <sup>[[Data |
+ | | height="27px" | [[File:Furnace.png|25px]] || 61 || 3D || [[Furnace]] <sup>[[Data values#Ladders, Furnaces, Chests|D]]</sup> <sup>[[Block entity|T]]</sup> |
|} |
|} |
||
{| align="left" style="margin:2px; border: 1px solid silver; text-align: center;" |
{| align="left" style="margin:2px; border: 1px solid silver; text-align: center;" |
||
! Icon !! Dec !! Hex !! Block type |
! Icon !! Dec !! Hex !! Block type |
||
|- |
|- |
||
| − | | height="27px" | [[File:Wooden Door.png|25px]] || 64 || 40 || |
+ | | height="27px" | [[File:Wooden Door.png|25px]] || <span style='color:lightblue'>64</span> || <span style='color:lightblue'>40</span> || [[Wooden door]] <sup>[[Data values#Door|D]] [[Data values#Item IDs|I]]</sup><sup>[[Data values#Item IDs|I]]</sup> |
|- |
|- |
||
| − | | height="27px" | [[File:Ladders.png|25px]] || 65 || 41 || [[ |
+ | | height="27px" | [[File:Ladders.png|25px]] || 65 || 41 || [[Ladder]] <sup>[[Data values#Ladders, Furnaces, Chests|D]]</sup> |
|- |
|- |
||
| − | | height="27px" | [[File:Rails.png|25px]] || 66 || 42 || [[Rail]] |
+ | | height="27px" | [[File:Rails.png|25px]] || 66 || 42 || [[Rail]] <sup>[[Data values#Rails|D]]</sup> |
|- |
|- |
||
| − | | height="27px" | [[File:Cobblestone Stairs.png|25px]] || 67 || 43 || |
+ | | height="27px" | [[File:Cobblestone Stairs.png|25px]] || 67 || 43 || [[Cobblestone stairs]] |
|- |
|- |
||
| height="27px" | [[File:Lever.png|25px]] || 69 || 45 || [[Lever]] |
| height="27px" | [[File:Lever.png|25px]] || 69 || 45 || [[Lever]] |
||
|- |
|- |
||
| − | | height="27px" | [[File:Iron Door.png|25px]] || 71 || 47 || |
+ | | height="27px" | [[File:Iron Door.png|25px]] || <span style='color:lightblue'>71</span> || <span style='color:lightblue'>47</span> || [[Iron door]] <sup>[[Data values#Door|D]]</sup><sup>[[Data values#Item IDs|I]]</sup> |
|- |
|- |
||
| − | | height="27px" | [[File:Wooden Pressure Plate.png|25px]] || 72 || 48 || |
+ | | height="27px" | [[File:Wooden Pressure Plate.png|25px]] || 72 || 48 || [[Wooden pressure plate]] <sup>[[Data values#Pressure Plates|D]]</sup> |
|- |
|- |
||
| − | | height="27px" | [[File:Stone Button.png|25px]] || 77 || 4D || [[Button]] <sup>[[Data |
+ | | height="27px" | [[File:Stone Button.png|25px]] || 77 || 4D || [[Button]] <sup>[[Data values#Button|D]] </sup> |
|- |
|- |
||
| height="27px" | [[File:Fence.png|25px]] || 85 || 55 || [[Fence]] |
| height="27px" | [[File:Fence.png|25px]] || 85 || 55 || [[Fence]] |
||
|- |
|- |
||
| − | | height="27px" | [[File:Stone.png|25px]] || <span style='color: |
+ | | height="27px" | [[File:Stone.png|25px]] || <span style='color:blue'>97</span> || <span style='color:blue'>61</span> || [[Monster Egg]] <sup>[[Data values#Monster Egg|D]]</sup> |
|- |
|- |
||
| − | | height="27px" | [[File:Stone Brick.png|25px]] || 98 || 62 || [[Stone |
+ | | height="27px" | [[File:Stone Brick.png|25px]] || 98 || 62 || [[Stone bricks]] <sup>[[Data values#Stone Brick|D]]</sup> <sup>[[Data values#Stone Brick|B]]</sup> (2) |
|- |
|- |
||
| − | | height="27px" | [[File:Iron Bars.png|25px]] || 101 || 65 || [[Iron |
+ | | height="27px" | [[File:Iron Bars.png|25px]] || 101 || 65 || [[Iron bars]] |
|- |
|- |
||
| − | | height="27px" | [[File:Glass Pane.png|25px]] || 102 || 66 || [[Glass |
+ | | height="27px" | [[File:Glass Pane.png|25px]] || 102 || 66 || [[Glass pane]] |
|} |
|} |
||
{| align="left" style="margin:2px; border: 1px solid silver; text-align: center;" |
{| align="left" style="margin:2px; border: 1px solid silver; text-align: center;" |
||
! Icon !! Dec !! Hex !! Block type |
! Icon !! Dec !! Hex !! Block type |
||
|- |
|- |
||
| − | | height="27px" | [[File:Moss Stone.png|25px]] || 48 || 30 || [[Moss |
+ | | height="27px" | [[File:Moss Stone.png|25px]] || 48 || 30 || [[Moss stone]] |
|- |
|- |
||
| − | | height="27px" | [[File:Cauldron.png|25px]] || 118 || 76 || [[Cauldron]] |
+ | | height="27px" | [[File:Cauldron.png|25px]] || <span style='color:lightblue'>118</span> || <span style='color:lightblue'>76<span> || [[Cauldron]]<sup>[[Data values#Item IDs|I]]<sup> |
|- |
|- |
||
| − | | height="27px" | [[File:End Portal Frame.png|25px]] || 120 || 78 || [[End Portal (block)|End |
+ | | height="27px" | [[File:End Portal Frame.png|25px]] || <span style='color:blue'>120</span> || <span style='color:blue'>78</span> || [[End Portal (block)|End portal block]] |
|- |
|- |
||
| − | | height="27px" | [[File:Tripwire.png|25px]] || 132 || 84 || [[ |
+ | | height="27px" | [[File:Tripwire.png|25px]] || <span style='color:lightblue'>132</span> || <span style='color:lightblue'>84</span> || [[Tripwire]]<sup>[[Data values#Item IDs|I]]<sup> |
|- |
|- |
||
| − | | height="27px" | [[File:Flower Pot.png|25px]] || 140 || 8C || [[Flower |
+ | | height="27px" | [[File:Flower Pot.png|25px]] || <span style='color:lightblue'>140</span> || <span style='color:lightblue'>8C || [[Flower pot]]<sup>[[Data values#Item IDs|I]]<sup> |
|- |
|- |
||
| − | | height="27px" | [[File:Carrot Crop.png|25px]] || 141 || 8D || [[ |
+ | | height="27px" | [[File:Carrot Crop.png|25px]] || <span style='color:lightblue'>141</span> || <span style='color:lightblue'>8D</span> || [[Carrot]]s<sup>[[Data values#Item IDs|I]]</sup> |
|- |
|- |
||
| − | | height="27px" | [[File:Potato Crop.png|25px]] || 142 || 8E || [[ |
+ | | height="27px" | [[File:Potato Crop.png|25px]] || <span style='color:lightblue'>142</span> || <span style='color:lightblue'>8E</span> || [[Potato]]es<sup>[[Data values#Item IDs|I]]</sup> |
|} |
|} |
||
| Line 286: | Line 296: | ||
The Overworld is also subdivided into [[biomes]]. What biome you are in determines the physical aspects of the land above ground and can entirely change its appearance. It also influences which mobs may spawn and affects the behavior of the weather. |
The Overworld is also subdivided into [[biomes]]. What biome you are in determines the physical aspects of the land above ground and can entirely change its appearance. It also influences which mobs may spawn and affects the behavior of the weather. |
||
| − | Biomes may have varying sizes, and each has its own features. For example, a forest biome will have large quantities of [[tree]]s, and a snow biome will have much [[Snow ( |
+ | Biomes may have varying sizes, and each has its own features. For example, a forest biome will have large quantities of [[tree]]s, and a snow biome will have much [[Snow (layer)|snow]] and [[ice]]. |
=== Natural structures === |
=== Natural structures === |
||
| Line 299: | Line 309: | ||
The Overworld can be navigated by use of the position of the [[sun]] and the [[moon]], and the movement of the [[clouds]] and the stars. All of these rise in the east and go west. |
The Overworld can be navigated by use of the position of the [[sun]] and the [[moon]], and the movement of the [[clouds]] and the stars. All of these rise in the east and go west. |
||
| − | Tools used for navigating the Overworld include the [[ |
+ | Tools used for navigating the Overworld include the [[compass]] and [[Map (Item)|Map]]. The compass points to the world [[spawn]] point (sleeping in a [[bed]] does not change the compass operation), and the Map displays an area around where it was made, and shows an overview at various scales depending on its zoom factor. In [[the Nether]] and [[the End]], maps are much less useful. |
The {{key|F3}} key toggles a debug console which shows the player their absolute [[coordinates]], where the X and Z [[coordinates]] show longitude and latitude, and the Y coordinate shows height, where Y=63 corresponds to sea level. The 'f' value indicates the direction the player is facing. |
The {{key|F3}} key toggles a debug console which shows the player their absolute [[coordinates]], where the X and Z [[coordinates]] show longitude and latitude, and the Y coordinate shows height, where Y=63 corresponds to sea level. The 'f' value indicates the direction the player is facing. |
||
| Line 306: | Line 316: | ||
{{Main|Day-night cycle}} |
{{Main|Day-night cycle}} |
||
| − | The Overworld is the only [[:Category:Dimensions|dimension]] with a day/night cycle. During the daytime, the [[sun]] acts as a [[light]] source. This light is strong enough to kill [[ |
+ | The Overworld is the only [[:Category:Dimensions|dimension]] with a day/night cycle. During the daytime, the [[sun]] acts as a [[light]] source. This light is strong enough to kill [[zombie]]s, and [[skeleton]]s, make [[endermen]] teleport away from the player and also makes [[spider]]s neutral. The only mobs that survive and stay hostile in the daylight are [[creeper]]s and [[slime]]s. |
At night time the [[moon]] is the only natural [[light]] source. However, it provides little light, allowing hostile [[mobs]] to spawn. |
At night time the [[moon]] is the only natural [[light]] source. However, it provides little light, allowing hostile [[mobs]] to spawn. |
||
| Line 326: | Line 336: | ||
{{History|inf}} |
{{History|inf}} |
||
| − | {{History|| |
+ | {{History||(February 27, 2010)|The world is infinite. Before this, it wasn't.}} |
{{History|a}} |
{{History|a}} |
||
{{History||1.0.0|Build limit increased to 128. Previously the build limit was 64 (32 blocks up from sea level and 32 down).}} |
{{History||1.0.0|Build limit increased to 128. Previously the build limit was 64 (32 blocks up from sea level and 32 down).}} |
||
| Line 340: | Line 350: | ||
{{History||1.2.1|snap=12w07a|New maps have a height of 256 thanks to the new Anvil level format.}} |
{{History||1.2.1|snap=12w07a|New maps have a height of 256 thanks to the new Anvil level format.}} |
||
{{History||1.6.1|snap=13w17a|[[Desert]] biomes do not generate large pools of water anymore}} |
{{History||1.6.1|snap=13w17a|[[Desert]] biomes do not generate large pools of water anymore}} |
||
| − | {{History||1.7.2 |
+ | {{History||1.7.2|snap=13w36a|Cave Generation was tweaked, making caves less dense and interconnected.<ref>http://www.minecraftforum.net/topic/1981051-it-seems-that-the-underground-is-no-longer-swiss-cheese-anymore/page__hl__cave%20generation%20swiss%20cheese</ref> |
|New biomes were added and some old biomes were changed.}} |
|New biomes were added and some old biomes were changed.}} |
||
{{History|||snap=13w37a|An invisible barrier at 30,000,000 blocks was added. This removed the last remnants of the [[Far Lands]].}} |
{{History|||snap=13w37a|An invisible barrier at 30,000,000 blocks was added. This removed the last remnants of the [[Far Lands]].}} |
||
| Line 346: | Line 356: | ||
== Trivia == |
== Trivia == |
||
| + | |||
* If someone made a 1:1 (1 block = 1 meter) scale version of the Earth, its area would be 510,000,000,000,000 blocks. Assuming the map is only one block deep and takes 1 byte/block, we get approximately 475,000GB, or 464TB. |
* If someone made a 1:1 (1 block = 1 meter) scale version of the Earth, its area would be 510,000,000,000,000 blocks. Assuming the map is only one block deep and takes 1 byte/block, we get approximately 475,000GB, or 464TB. |
||
* 461 quadrillion (4.608x10<sup>17</sup>) blocks would fit in a Minecraft world assuming that it spreads from 30,000,000 to -30,000,000. |
* 461 quadrillion (4.608x10<sup>17</sup>) blocks would fit in a Minecraft world assuming that it spreads from 30,000,000 to -30,000,000. |
||
| Line 369: | Line 380: | ||
[[fr:La Surface]] |
[[fr:La Surface]] |
||
[[hu:Térkép]] |
[[hu:Térkép]] |
||
| + | [[it:Mondo principale]] |
||
[[nl:De Overwereld]] |
[[nl:De Overwereld]] |
||
[[pl:Świat (wymiar)]] |
[[pl:Świat (wymiar)]] |
||
Revision as of 14:52, 27 November 2014
The Overworld, as seen in an Extreme Hills biome
The Overworld is the starting dimension in Minecraft. As with all dimensions in the game, the Overworld can generate infinitely. The Overworld is limited to 862 by 862 blocks on the Xbox 360 Edition, and 256 by 256 blocks on Old Pocket Edition worlds. At the edge of the Overworld, there is an animated world border. Nether portals in the Overworld can be used to teleport to the Nether.
The Overworld encompasses the level ceiling down to bedrock and extending in every direction on the horizontal plane. It is generated through a secret process which creates multiple noise maps to create differing elevations, general chunk shapes, and complex mountain and cave systems.
Most mobs in the game can appear in the Overworld: wolves, bats, pigs, sheep, cows, horses, mooshrooms, chickens, chicken jockeys, squid, zombies, ocelots, skeletons, spiders, villagers, spider jockeys, witches, endermen, creepers and slimes all spawn normally. Zombie pigmen can also spawn near nether portals.
Mobs from the Nether may also pass through nether portals and enter the Overworld: zombie pigmen, magma cubes, wither skeletons, ghasts, and blazes (mobs from the Overworld can also enter the Nether through a Nether Portal). The Ender Dragon however can't enter the Overworld because there is no return portal from the End unless the dragon is defeated.
While less dangerous than the Nether, the Overworld is still, nonetheless, a somewhat hostile dimension, mostly due to monsters that roam the darkness of caves and outside at night, and the common hazards ranging from falling from great heights to the near-lethal lava found underground or in lava lakes on the surface. Also, living humans are a very rare sight, these "humans" can refer to the players that are trying to survive day by day, and villagers, who live in villages.
Seeds
Worlds in Minecraft are generated through a procedural formula that takes a random number as a starting point - a seed, and it will be used to generate all the terrain.
Using a specific seed generates exactly the same world each time, and thus interesting Minecraft worlds could be shared between players. The spawn is not on exactly the same spot, though, so it is wise to give coordinates instead of directions. The seed input is converted into an integer, so, for instance, the word 'Glacier' corresponds to a value of 1772835215, which generates exactly the same world when entered as a seed value.
Many seeds are chosen simply because they spawn the player near desirable resources, a stronghold or some certain special structure, such as a dungeon. Players often like to find seeds with other very important generated structures such as abandoned mine shafts (possibly for the melon seeds and cobwebs) and villages (perhaps for a surplus of wheat, potatoes, and/or carrots, and for the open possibility of trading with villagers.). While strongholds have a minimum distance from the origin, a seed could also be chosen for a relatively close one. Seeds can also be chosen for useful biomes near the spawn point; notably, a Mushroom Island biome provides a large sanctuary from monsters, even underground. Other particularly useful biomes includes jungle (wood, cats), desert (villages, sand, open line-of-sight), Mesa (stained clay), taiga (wolves, snow), Swampland (aboveground slimes), and extreme hills (emerald ores). Players can find the current map seed by entering the /seed command.
Sizes
In Classic and Indev, maps can be generated in "small" (128×128×64), "normal" (256×256×64), and "huge" (512×512×64) sizes.
In Infdev, Alpha and Beta, maps are somewhat infinitely big - They are made up of chunks; this means that as the player explores the map distant chunks are generated automatically, leading to theoretically infinite maps. In practice, technical reasons (the limits of 32-bit math[1]) force the maximum map size, including the Far Lands, to be around 9.3 million times the surface area of Earth [1], which comes out to about 4.7 quadrillion km2 (The hard limit where chunks are overwritten is at X/Z of ±34,359,738,368, making the world at most 68,719,476,736 meters wide and long, which is about 4,722,366,482,869,645 km2. When compared to Earth's total surface area, 510,072,000 km2, this works out to be about 9,258,235 times that). Whilst the horizontal planes of the maps are vast in size, the vertical plane remains at a fixed (soft limit) 256-block height [2].
Map limitation
Visual cutoff point of a Minecraft map (Left is normal minecraft generation, the right is after limitation.)
While the map is infinite, the number of blocks the player may walk on is limited. The map contains a world border at +/- 30,000,000 x/z. The world border is an animated wall of blue stripes. As you get near it, the edges of your screen turn red, and you can not go past it. There is nothing past maybe 10 blocks after the wall, just emptiness.
Because of these limitations the maximum blocks that can be generated in a world is approximately 921,600,000,000,000,000. This means that a filled world with no entities or tile entities would be 3,686,400,000,000,000,000 bits (409.27261579781770706 Petabytes) in block data alone due to the fact that each standard block is assigned 4 bits of information.
Generation
Generated blocks
Entries marked with a D require additional data to fully define the block in a Beta world.
- Entries marked with an I have a different ID as an inventory item.
- Entries marked with a B require additional inventory data to fully define the inventory item.
- Entries marked with a T have block entities associated with them to store additional data.
- Blocks with IDs in can only be obtained using commands.
- Blocks available only in Creative mode are in blue.
- Blocks available in survival mode only with the use of a Silk Touch-enchanted tool are in green.
Naturally generated
Naturally Generated includes blocks that are created through the world seed.
| Icon | Dec | Hex | Block type |
|---|---|---|---|
| 00 | 00 | Air | |
| 01 | 01 | Stone | |
| 02 | 02 | Grass Block | |
| 03 | 03 | Dirt D B | |
| 04 | 04 | Cobblestone | |
| 07 | 07 | Bedrock | |
| 09 | 09 | Water (Stationary) D | |
| 11 | 0B | Lava (Stationary) D | |
| 12 | 0C | Sand | |
| 13 | 0D | Gravel | |
| File:Gold (Ore).png | 14 | 0E | Gold ore |
| File:Iron (Ore).png | 15 | 0F | Iron ore |
| File:Coal (Ore).png | 16 | 10 | Coal Ore |
| File:Wood.png | 17 | 11 | Wood D B |
| File:Leaves.png | 18 | 12 | Leaves D B |
| File:Lapis Lazuli (Ore).png | 21 | 15 | Lapis lazuli ore |
| 24 | 18 | Sandstone | |
| 31 | 1F | Grass D B | |
| File:Grid Dead Bush.png | 32 | 20 | Dead bush |
| 37 | 25 | Dandelion |
.png)
.png)
.png)
.png)
| Icon | Dec | Hex | Block type |
|---|---|---|---|
| 38 | 26 | Flowers D B | |
| 39 | 27 | Brown mushroom | |
| 40 | 28 | Red mushroom | |
| File:Moss Stone.png | 48 | 30 | Moss stone |
| 52 | 34 | Monster spawner T | |
| File:Diamond (Ore).png | 56 | 38 | Diamond ore |
| File:Redstone (Ore).png | 73 | 49 | Redstone ore |
| 78 | 4E | Snow | |
| 79 | 4F | Ice | |
| 81 | 51 | Cactus D | |
| File:Clay (Block).png | 82 | 52 | Clay |
| 83 | 53 | Sugar canes D I | |
| 86 | 56 | Pumpkin D | |
| File:BrownMushroomCap.png | 99 | 63 | Huge brown mushroom D |
| File:RedMushroomCap.png | 100 | 64 | Huge red mushroom D |
| File:Melon (Block).png | 103 | 67 | Melon |
| File:Vine.png | 106 | 6A | Vines D |
| 110 | 6E | Mycelium | |
| 111 | 6F | Lily pad | |
| 120 | 78 | End portal | |
| File:Cocoa Plant.png | 127 | 7F | Cocoa |
| File:Emerald Ore2.png | 129 | 81 | Emerald ore |
| File:Grid Sunflower.png | 175 | AF | Large Flowers D B |
| 179 | B3 | Red sandstone |
.png)
.png)
.png)
.png)
Naturally created
Naturally created means a combination of events that cause a new block to be placed by natural causes, not the player. Some of these blocks may also be created as part of world generation.
| Icon | Dec | Hex | Block type |
|---|---|---|---|
| 00 | 00 | Air | |
| 02 | 02 | Grass Block | |
| 03 | 03 | Dirt | |
| 04 | 04 | Cobblestone | |
| 08 | 08 | Water (Flowing) D | |
| 10 | 0A | Lava (Flowing) D | |
| 39 | 27 | Brown mushroom | |
| 40 | 28 | Red mushroom |
| Icon | Dec | Hex | Block type |
|---|---|---|---|
| 49 | 31 | Obsidian | |
| 51 | 33 | Fire D | |
| 78 | 4E | Snow | |
| 79 | 4F | Ice | |
| 81 | 51 | Cactus D | |
| 83 | 53 | Sugar canes D I | |
| File:Vine.png | 106 | 6A | Vines D |
| 110 | 6E | Mycelium |
Structures
Same as naturally generated, but these blocks are only created with the "Generate Structures" option enabled.
| Icon | Dec | Hex | Block type |
|---|---|---|---|
| 00 | 00 | Air | |
| 04 | 04 | Cobblestone | |
| File:Wooden Plank.png | 05 | 05 | Wood planks |
| 09 | 09 | Water (Stationary) D | |
| 23 | 17 | Dispenser | |
| File:Grid Cobweb.png | 30 | 1E | Cobweb |
| 24 | 18 | Sandstone | |
| 29 | 1D | Sticky piston | |
| 33 | 21 | Piston | |
| 39 | 27 | Brown mushroom | |
| 40 | 28 | Red mushroom | |
| File:Grid Black Wool.png | 35 | 23 | Wool D B |
| 44 | 2C | Slabs D B | |
| 47 | 2F | Bookshelf | |
| 50 | 32 | Torch D | |
| File:Wooden Stairs.png | 53 | 35 | Wood Stairs D |
| 54 | 36 | Chest D T | |
| 58 | 3A | Crafting table | |
| File:Crops.png | 59 | 3B | Wheat DI |
| 60 | 3C | Farmland D | |
| 61 | 3D | Furnace D T |
| Icon | Dec | Hex | Block type |
|---|---|---|---|
| File:Wooden Door.png | 64 | 40 | Wooden door D II |
| File:Ladders.png | 65 | 41 | Ladder D |
| File:Rails.png | 66 | 42 | Rail D |
| 67 | 43 | Cobblestone stairs | |
| 69 | 45 | Lever | |
| 71 | 47 | Iron door DI | |
| File:Wooden Pressure Plate.png | 72 | 48 | Wooden pressure plate D |
| 77 | 4D | Button D | |
| File:Fence.png | 85 | 55 | Fence |
| 97 | 61 | Monster Egg D | |
| File:Stone Brick.png | 98 | 62 | Stone bricks D B (2) |
| 101 | 65 | Iron bars | |
| 102 | 66 | Glass pane |
| Icon | Dec | Hex | Block type |
|---|---|---|---|
| File:Moss Stone.png | 48 | 30 | Moss stone |
| 118 | 76 | CauldronI | |
| 120 | 78 | End portal block | |
| 132 | 84 | TripwireI | |
| 140 | 8C | Flower potI | |
| File:Carrot Crop.png | 141 | 8D | CarrotsI |
| File:Potato Crop.png | 142 | 8E | PotatoesI |
Chunks
Chunks are the method used by Notch to divide maps into manageable pieces. They are 16 blocks wide, 16 blocks long, and 256 blocks high, each containing 65,536 blocks. By adjusting the render distance, differing numbers of chunks will be loaded into memory, ranging from 25 to 1089. Only chunks which have been loaded may experience activity such as spawning, despawning, growth, fluid movement, or player interaction. Upon reaching the required distance away from a chunk, it will be unloaded from the memory, however not deleted. Thus, upon re-entering that area, Minecraft will reload the chunk(s).
Biomes
The Overworld is also subdivided into biomes. What biome you are in determines the physical aspects of the land above ground and can entirely change its appearance. It also influences which mobs may spawn and affects the behavior of the weather. Biomes may have varying sizes, and each has its own features. For example, a forest biome will have large quantities of trees, and a snow biome will have much snow and ice.
Natural structures
The Overworld is able to seamlessly create new areas by using patterns found in the surrounding chunks and extend those into the newly created chunk. These patterns, while unique to each world, can be categorized easily by comparing them to a real-world equivalent, such as cliffs or oceans. While Minecraft is based on landforms found on earth, impossible formations, such as floating islands, can be found throughout the Overworld.
The Overworld can be navigated by use of the position of the sun and the moon, and the movement of the clouds and the stars. All of these rise in the east and go west.
Tools used for navigating the Overworld include the compass and Map. The compass points to the world spawn point (sleeping in a bed does not change the compass operation), and the Map displays an area around where it was made, and shows an overview at various scales depending on its zoom factor. In the Nether and the End, maps are much less useful.
The F3 key toggles a debug console which shows the player their absolute coordinates, where the X and Z coordinates show longitude and latitude, and the Y coordinate shows height, where Y=63 corresponds to sea level. The 'f' value indicates the direction the player is facing.
Day and night
The Overworld is the only dimension with a day/night cycle. During the daytime, the sun acts as a light source. This light is strong enough to kill zombies, and skeletons, make endermen teleport away from the player and also makes spiders neutral. The only mobs that survive and stay hostile in the daylight are creepers and slimes. At night time the moon is the only natural light source. However, it provides little light, allowing hostile mobs to spawn.
Far Lands
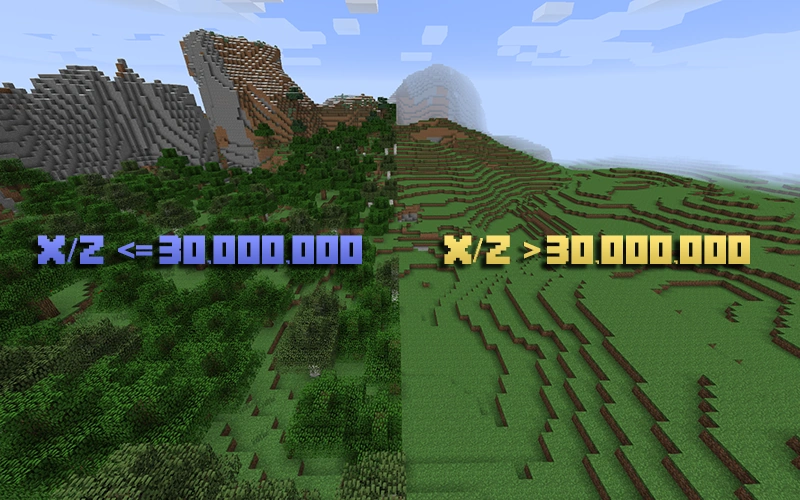
Difference between >30,000,000 and <30,000,000.
The Far Lands used to be an area that formed the "edge" of the "infinite" map, but was later removed from a patch on Beta 1.8 due to the change in the terrain generation code. When players made it to the Far Lands, they experienced an excessive amount of lag and the world became severely distorted.
According to Notch, this distortion could be fixed, but since no one was likely to make it to the Far Lands without some form of cheating, he says that he was likely not going to fix it.
In Beta 1.8, instead of a distorted land, there is a seemingly endless ocean. Normal terrain only starts to generate beyond the actual edges of the world.
As of 1.7.2, the player can not go past 30,000,000 in any direction. This was added by placing an Invisible Bedrock-like wall at 30,000,000 blocks from the center of the map in each direction.
History
In addition to this, as new features get added, they will change Overworld generation.
| inf | |||||
|---|---|---|---|---|---|
February 27, 2010{{Extension DPL}}<ul><li>[[Light Gray Dye|Light Gray Dye]]<br/>{{Item
| image = Light Gray Dye.png
| renewable = Yes
| stackable = Yes (64)
}}
'''Light gray dye'''{{fn|Known as '''Light Grey Dye''' in British, Canadian, Australian, and New Zealand English variants.}} is a [[Dyeing#Primary Colors|quasi-primary dye]].
== Obtaining ==
=== Crafting ===
{{Crafting
|head=1
|showname=0
|showdescription=1
|Azure Bluet;Oxeye Daisy;White Tulip
|Output=Light Gray Dye
|type=Material
}}
{{Crafting
|Black Dye
|White Dye
|White Dye
|Output=Light Gray Dye,3
|type=Material
|description={{IN|bedrock}}, the black and white dye can be replaced with [[ink sac]]s and [[bone meal]], respectively.
}}
{{Crafting
|Gray Dye
|White Dye
|Output=Light Gray Dye,2
|type=Material
|description={{IN|bedrock}}, the white dye can be replaced with [[bone meal]].
|foot=1
}}
=== Trading ===
[[Wandering trader]]s sell 3 light gray dye for an [[emerald]].
== Usage ==
{{dye usage}}
=== Crafting ingredient ===
{{crafting usage|ignore=Banner|continue=1}}
{{banner crafting usage}}
=== Loom ingredient ===
{{Banner loom usage|Light Gray Dye}}
=== Trading ===
Expert-level shepherd villagers have {{frac|1|6}} chance to buy 12 light gray dye for an emerald.
== Data values ==
=== ID ===
{{edition|java}}:
{{ID table
|edition=java
|showforms=y
|generatetranslationkeys=y
|displayname=Light Gray Dye
|spritetype=item
|nameid=light_gray_dye
|form=item
|foot=1}}
{{edition|bedrock}}:
{{ID table
|edition=bedrock
|showaliasids=y
|shownumericids=y
|showforms=y
|notshowbeitemforms=y
|generatetranslationkeys=y
|displayname=Light Gray Dye
|spritetype=item
|nameid=light_gray_dye
|aliasid=dye / 7
|id=402
|form=item
|translationkey=item.dye.silver.name
|foot=1}}
== Video ==
<div style="text-align:center">{{yt|1w3j1SKcoww}}</div>
== History ==
{{History|java beta}}
{{History||1.2|[[File:Light Gray Dye JE1 BE1.png|32px]] Added light gray dye.}}
{{History|java}}
{{History||1.4.2|snap=12w34a|Added the ability to [[Armor#Dyeing|dye]] leather [[armor]] and [[wolf]] collars.}}
{{History||1.4.6|snap=12w49a|Light gray dye can now be [[crafting|crafted]] with [[gunpowder]] to create a [[firework star]].}}
{{History||1.6.1|snap=13w19a|[[Stained clay]] can now be crafted.}}
{{history||1.7.2|snap=13w36a|With the addition of new [[flower]]s, many secondary and tertiary dyes are now primary [[dye]]s.}}
{{History|||snap=13w41a|[[Stained glass]] can now be crafted.}}
{{History||1.8|snap=14w30a|Added [[banner]]s, which can be dyed.}}
{{History||1.11|snap=16w39a|Added the ability to dye [[shulker box]]es.}}
{{History||1.12|snap=17w15a|Added the ability to dye [[bed]]s.}}
{{History||1.13|snap=17w47a|The different data values for the <code>dye</code> ID have now been split up into their own IDs.
|Prior to [[1.13/Flattening|''The Flattening'']], this [[item]]'s numeral ID was 351.}}
{{History||1.14|snap=18w43a|Light gray dye is now crafted using [[white dye|white]] and [[black dye]]s, instead of [[bone meal]] and [[ink sac]]s.
|[[File:Light Gray Dye JE2 BE2.png|32px]] The texture of light gray dye has now been changed.}}
{{History|||snap=18w44a|Light gray dye can now change the text color on [[sign]]s to light gray.}}
{{History|||snap=19w05a|Added the [[wandering trader]], which sells light gray dye.}}
{{History|||snap=19w11a|Light gray dye can now be [[trading|bought]] by shepherd villagers.}}
{{History||1.17|snap=20w45a|Light gray dye can now be used to craft [[light gray candle]]s.}}
{{History|||snap=21w19a|Light gray dye can no longer be used to craft light gray candles.}}
{{History|||snap=Pre-release 1|Light gray dye can now once again be used to craft light gray candles.}}
{{History||1.20<br>(Experimental)|link=1.19.3|snap=22w42a|Light gray dye can now change the text color on [[hanging sign]]s to light gray.}}
{{History|pocket alpha}}
{{History||v0.3.0|[[File:Light Gray Dye JE1 BE1.png|32px]] Added light gray dye. It is currently unobtainable and serves no purpose.}}
{{History||v0.8.0|snap=build 1|Light gray dye can be [[craft]]ed with [[bone meal]] and [[gray dye]], or with two bone meals and an [[ink sac]], despite there being no way of obtaining gray dye or ink sacs at the time.}}
{{History||v0.8.0|snap=build 3|Light gray dye is now available in [[creative]] mode.}}
{{History||v0.9.0|snap=build 3|Light gray dye can now be obtained in [[survival]] mode.}}
{{History|||snap=build 11|Light gray dye can now be used to craft colored [[terracotta]].}}
{{History||v0.11.0|snap=build 1|Light gray dye can now be used to dye tamed [[wolf]] collars.}}
{{History||v0.14.0|snap=build 1|Light gray dye can now be used to dye [[water]] in [[cauldron]]s.}}
{{History|pocket}}
{{History||1.0.0|snap=alpha 0.17.0.1|Light gray dye can now be used to dye [[shulker]]s.}}
{{History||1.1.0|snap=alpha 1.1.0.0|Light gray dye can now be used to craft [[concrete powder]], colored [[bed]]s and dyed [[shulker box]]es.}}
{{History|bedrock}}
{{History||1.2.0|snap=beta 1.2.0.2|Light gray dye can now be used to craft [[firework star]]s, [[stained glass]] and patterns on [[banner]]s.}}
{{History||1.4.0|snap=beta 1.2.20.1|Light gray dye can now be used to craft [[balloon]]s and [[glow stick]]s.}}
{{History||1.8.0|snap=beta 1.8.0.8|Light gray dye can now be used to dye tamed [[cat]] collars.}}
{{History||1.10.0|snap=beta 1.10.0.3|Light gray dye is now [[trading|sold]] by [[wandering trader]]s.
|Light gray dye can now be used to dye white [[carpet]]s and undyed [[glass pane]]s.
|[[File:Light Gray Dye JE2 BE2.png|32px]] The texture of light gray dye has now been changed.}}
{{History||1.11.0|snap=beta 1.11.0.1|Light gray dye can be [[trading|sold]] to shepherd [[villager]]s.}}
{{History||1.16.100|snap=beta 1.16.100.56|The ID of light gray dye has been changed from <code>dye/7</code> to <code>light_gray_dye</code>.}}
{{History|console}}
{{History||xbox=TU1|xbone=CU1|ps=1.00|switch=1.0.1|wiiu=Patch 1|[[File:Light Gray Dye JE1 BE1.png|32px]] Added light gray dye.}}
{{History|PS4}}
{{History||1.90|[[File:Light Gray Dye JE2 BE2.png|32px]] The texture of light gray dye has now been changed.}}
{{History|new 3ds}}
{{History||0.1.0|[[File:Light Gray Dye JE1 BE1.png|32px]] Added light gray dye.}}
{{History|foot}}
== Issues ==
{{issue list}}
== Trivia ==
* In [[Bedrock Edition]], Some items/blocks' Block states/Item NBT uses '''Silver''' instead of '''Light Gray'''
== Notes ==
{{fnlist}}
{{Items}}
[[Category:Dyes]]
[[cs:Světle šedé barvivo]]
[[de:Hellgrauer Farbstoff]]
[[es:Tinte gris claro]]
[[fr:Teinture gris clair]]
[[hu:Világosszürke festék]]
[[ja:薄灰色の染料]]
[[ko:회백색 염료]]
[[nl:Lichtgrijze kleurstof]]
[[pl:Jasnoszary barwnik]]
[[pt:Corante cinza-claro]]
[[ru:Светло-серый краситель]]
[[zh:淡灰色染料]]
[[Category:Renewable resources]]</li><li>[[Phantom Membrane|Phantom Membrane]]<br/>{{Item
| title = Phantom Membrane
| image = Phantom Membrane.png
| renewable = Yes
| stackable = Yes (64)
}}
'''Phantom membranes''' are items obtained from killing [[phantom]]s. They are used to repair [[elytra]] and brew [[Potion of Slow Falling|potions of Slow Falling]].
== Obtaining ==
=== Mob loot ===
[[Phantom]]s drop 0–1 phantom membrane when killed by a [[player]] or tamed [[wolf]]. [[Looting]] increases the maximum drops by 1 per level, for a maximum of 4 with Looting III.
=== Cat gifts ===
{{main|Cat#Gifts}}
Tamed [[cat]]s have a 70% chance to bring the player a gift when they wake up from a [[bed]], and the gift has a 3.22% chance to be a phantom membrane.
== Usage ==
=== Repairing ===
Phantom membranes can be used in an [[anvil]] to repair [[elytra]], restoring 108 durability points (25% of the pair's total durability) per membrane while preserving their [[enchantments]].
{| class="wikitable" data-description="Repairing elytra"
! scope="col" style="width:64px;" | Name
! Ingredients
! [[Anvil]] usage
|-
! scope="row" style="text-align: center;" | '''Elytra'''
| [[Elytra]] +<br>[[Phantom Membrane]]
| style="width: 260px; padding: 1px;" | {{Anvil| title = Elytra|Input1=Damaged Elytra|Input2=Phantom Membrane, 2|Output=Elytra}}
|-
|}
=== Brewing ingredient ===
Phantom membranes are used to [[brewing|brew]] [[Potion of Slow Falling|slow falling potions]] from an [[awkward potion]].
{{Brewing
|Phantom Membrane
|Potion of Slow Falling
|showname=3
}}
== Data values ==
=== ID ===
{{edition|java}}:
{{ID table
|edition=java
|showforms=y
|generatetranslationkeys=y
|displayname=Phantom Membrane
|spritetype=item
|nameid=phantom_membrane
|form=item
|foot=1}}
{{edition|bedrock}}:
{{ID table
|edition=bedrock
|shownumericids=y
|showforms=y
|notshowbeitemforms=y
|generatetranslationkeys=y
|displayname=Phantom Membrane
|spritetype=item
|nameid=phantom_membrane
|id=574
|form=item
|foot=1}}
== History ==
{{History|java}}
{{History||1.13|snap=18w14a|[[File:Phantom Membrane JE1 BE1.png|32px]] Added phantom membranes.}}
{{History||1.14|snap=18w44a|Tamed [[cat]]s now have a chance to give the [[player]] phantom membranes as [[Cat#Gifts|gifts]].}}
{{History|||snap=19w08a|[[File:Phantom Membrane JE2 BE2.png|32px]] The texture of phantom membranes has now been changed.}}
{{History|bedrock}}
{{History||1.6.0|snap=beta 1.6.0.5|[[File:Phantom Membrane JE1 BE1.png|32px]] Added phantom membranes.}}
{{History||1.8.0|snap=beta 1.8.0.8|Tamed [[cat]]s now have a chance to give the [[player]] phantom membranes as gifts.}}
{{History||1.10.0|snap=beta 1.10.0.3|[[File:Phantom Membrane JE2 BE2.png|32px]] The texture of phantom membranes has now been changed.}}
{{History|console}}
{{History||xbox=TU69|ps=1.76|wiiu=Patch 38|[[File:Phantom Membrane JE1 BE1.png|32px]] Added phantom membranes.}}
{{History||xbox=none|xbone=none|ps=1.90|wiiu=none|switch=none|[[File:Phantom Membrane JE2 BE2.png|32px]] The texture of phantom membranes has now been changed.}}
{{History|foot}}
== Issues ==
{{issue list}}
== References ==
{{reflist}}
== External Links ==
*[https://www.minecraft.net/en-us/article/taking-inventory--phantom-membrane Taking Inventory: Phantom Membrane] – Minecraft.net on August 2, 2019
{{items}}
[[de:Phantomhaut]]
[[fr:Membrane de Phantom]]
[[ja:ファントムの皮膜]]
[[ko:팬텀 막]]
[[pl:Błona fantoma]]
[[pt:Membrana de phantom]]
[[ru:Мембрана фантома]]
[[th:เนื้อเยื่อแฟนท่อม]]
[[uk:Перетинка фантома]]
[[zh:幻翼膜]]
[[Category:Renewable resources]]
[[Category:Brewing recipe]]</li></ul> | The world is infinite. Before this, it wasn't. | ||||
| a | |||||
1.0.0{{Extension DPL}}<ul><li>[[Pufferfish (item)|Pufferfish (item)]]<br/>{{DISPLAYTITLE:Pufferfish}}
{{about|the food item|the mob|Pufferfish}}
{{Item
| title = Pufferfish
| image = File:Pufferfish_(item)_JE5_BE2.png
| renewable = Yes
| heals = {{hunger|1}}
| stackable = Yes (64)
|effects=: {{EffectLink|link=Hunger (effect)|Hunger}} III (0:15)
: {{EffectLink|Poison}} II (1:00)
: {{EffectLink|Nausea}} I (0:15){{only|JE}}
: {{EffectLink|Nausea}} II (0:15){{only|BE}}
}}
A '''pufferfish''' is a poisonous [[food]] item that is used to brew [[Potion of Water Breathing|Water Breathing potions]].
== Obtaining ==
=== Fishing ===
Pufferfish can be obtained through [[fishing]]. The pufferfish catch rate can be increased by [[Lure]], which reduces wait time generally.
<!--1-6 exp-->
{{IN|bedrock}}, pufferfish can be caught only when fishing outside [[jungle]] biomes and its variants (i.e. everywhere ''except'' in jungles).
=== Mob loot ===
==== Guardians and elder guardians ====
[[Guardian]]s and [[elder guardian]]s have a 2.5% chance of dropping a random fish upon death. This has a 13% chance of being pufferfish (0.325% chance of dropping a pufferfish). The chance of getting a fish can be increased by 1% per level of [[Looting]], but the type of fish is not affected.
==== Pufferfish ====
[[Pufferfish]] always drop 1 pufferfish in its item form when killed. This drop is not affected by the Looting enchantment.<ref>{{bug|MC-212795||Salmon & Fish mobs are not affected by Looting}}</ref>
== Usage ==
=== Food ===
Pufferfish restores {{hunger|1}} hunger and 0.2 [[Hunger#Mechanics|saturation]], but inflicts [[Hunger_(effect)|Hunger]] III for 15 seconds, [[Poison]] II for 1 minute, and [[Nausea]] I<sup>[''[[Java Edition|JE]] only'']</sup> or II<sup>[''[[Bedrock Edition|BE]] only'']</sup> for 15 seconds. Unlike [[rotten flesh]], it is not helpful to eat pufferfish while starving because they inflict more hunger than they earn.
===Brewing ingredient===
{{brewing
|Pufferfish
|Potion of Water Breathing
|head=1
}}
{{brewing
|Pufferfish
|Mundane Potion
|ingredients=Pufferfish + [[Water Bottle]]
|foot=1
}}
=== Trading ===
Master-level fisherman [[villager]]s buy 1~4{{only|bedrock|short=1}} or four{{only|java|short=1}} pufferfish for an [[emerald]].
=== Wolves ===
{{IN|Bedrock}}, pufferfish can be used to feed a [[wolf]], healing it by {{hp|1|mob=1}}, but only when the wolf is not at full health. Unlike other wolf food, pufferfish cannot be used to speed up the growth of baby wolves, and cannot be used to breed them.
== Sounds ==
{{Sound table/Entity/Food}}
== Data values ==
=== ID ===
{{edition|java}}:
{{ID table
|edition=java
|showitemtags=y
|showforms=y
|generatetranslationkeys=y
|displayname=Pufferfish
|spritetype=item
|nameid=pufferfish
|itemtags=fishes
|form=item
|foot=1}}
{{edition|bedrock}}:
{{ID table
|edition=bedrock
|shownumericids=y
|showforms=y
|notshowbeitemforms=y
|generatetranslationkeys=y
|displayname=Pufferfish
|spritetype=item
|nameid=pufferfish
|id=267
|form=item
|foot=1}}
== Advancements ==
{{load advancements|A Furious Cocktail;How did we get here;Husbandry;A Balanced Diet;Fishy Business}}
== History ==
{{History|java}}
{{History||1.7.2|snap=13w36a|[[File:Pufferfish (item) JE1.png|32px]] Added pufferfish.
|Added potions of [[Water Breathing]], which can be [[brewing|brewed]] by adding a pufferfish to an [[Awkward Potion]].}}
{{History|||snap=13w43a|[[File:Pufferfish (item) JE2 BE1.png|32px]] The texture of pufferfish has been changed.}}
{{History||1.8|snap=14w25a|Pufferfish is now obtainable as a rare drop from [[guardian]]s and [[elder guardian]]s.}}
{{History||1.13|snap=17w47a|The different data values for the <code>fish</code> ID have now been split up into their own IDs.
|Prior to [[1.13/Flattening|''The Flattening'']], this [[item]]'s numeral ID was 349.}}
{{History|||snap=18w08b|[[Pufferfish]] (and other [[fish]] types) has been added as a [[mob]], which [[drops|drop]] its item form when killed.
|[[File:Pufferfish (item) JE3 BE2.png|32px]] The texture of pufferfish has been changed.}}
{{History||1.14|snap=18w43a|[[File:Pufferfish (item) JE4 BE1.png|32px]] The texture of pufferfish has accidentally been reverted.}}
{{History|||snap=18w43b|[[File:Pufferfish (item) JE5 BE2.png|32px]] The correct texture of pufferfish has been restored.}}
{{History|||snap=19w11a|Fisherman [[villager]]s now [[trading|buy]] pufferfish.}}
{{History||1.16.2|snap=Pre-release 2|The level of [[Nausea]] given by pufferfish has been reduced from II to I.<ref>{{bug|MC-196473}}</ref>}}
{{History||1.17|snap=20w46a|The level of [[Poison]] given by pufferfish has been reduced from IV to II.<ref>{{bug|MC-197276}}</ref>}}
{{History|pocket alpha}}
{{History||v0.11.0|snap=build 1|[[File:Pufferfish (item) JE2 BE1.png|32px]] Added pufferfish.}}
{{History||v0.12.1|snap=build 1|Pufferfish now restore [[hunger]] instead of [[health]].
|Pufferfish can now be used to make [[potion]] of Water Breathing.}}
{{History||v0.16.0|snap=build 1|Pufferfish is now dropped by [[guardian]]s and [[elder guardian]]s.}}
{{History|bedrock}}
{{History||1.4.0|snap=beta 1.2.14.2|[[Pufferfish]] has been added as a [[mob]], which [[drops|drop]] its [[item]] form when killed.
|[[File:Pufferfish (item) JE5 BE2.png|32px]] The texture of pufferfish has been changed.}}
{{History||1.8.0|snap=beta 1.8.0.8|Pufferfish can now be used to feed [[ocelot]]s to gain their trust.}}
{{History||1.11.0|snap=beta 1.11.0.4|Pufferfish can now be [[trading|sold]] to fisherman [[villager]]s.}}
{{History||1.19.10|snap=beta 1.19.10.23|The strength of the [[poison]] effect has been decreased from IV to II.}}
{{History|console}}
{{History||xbox=TU31|xbone=CU19|ps=1.22|wiiu=Patch 3|switch=1.0.1|[[File:Pufferfish (item) JE2 BE1.png|32px]] Added pufferfish.}}
{{History||xbox=TU69|xbone=none|ps=1.76|wiiu=Patch 38|switch=none|[[Pufferfish]] (and other [[fish]] types) has been added as a [[mob]], which [[drops|drop]] its [[item]] form when killed.}}
{{History||xbox=none|xbone=none|ps=1.90|wiiu=none|switch=none|[[File:Pufferfish (item) JE5 BE2.png|32px]] The texture of pufferfish has been changed.}}
{{History|foot}}
== Issues ==
{{issue list}}
== Trivia ==
* The consumption of pufferfish inflicting the player with Nausea and Poison is based on reality. Real pufferfish contain the dangerous [[Wikipedia:Tetrodotoxin|tetrodotoxin]] within their organs, especially in the liver. Tetrodotoxin leads to quick death through respiratory paralysis. Muscle tissue and blood contain trace amounts. In East Asia, pufferfish are considered a delicacy known as [[Wikipedia:Fugu|fugu]], as small parts of the fish are actually edible. Any chef preparing fugu must have special licensing/certification to prepare this dish.
== Gallery ==
<gallery>
File:Eat Pufferfish.png|The result of eating pufferfish.
</gallery>
== See also ==
* [[Fishing]]
== References ==
{{Reflist}}
== External Links ==
*[https://www.minecraft.net/en-us/article/taking-inventory--pufferfish Taking Inventory: Pufferfish] – Minecraft.net on October 14, 2020
{{items}}
[[cs:Čtverzubec]]
[[de:Kugelfisch (Nahrung)]]
[[es:Pez globo (objeto)]]
[[fr:Poisson (nourriture)]]
[[it:Pesce palla (oggetto)]]
[[ja:フグ (アイテム)]]
[[ko:복어 (아이템)]]
[[nl:Kogelvis]]
[[pl:Rozdymka]]
[[pt:Baiacu (item)]]
[[ru:Иглобрюх (предмет)]]
[[th:ปลาปักเป้า (ไอเทม)]]
[[tr:Kirpi balığı]]
[[zh:河豚(物品)]]
[[Category:Food]]
[[Category:Brewing recipe]]
[[Category:Renewable resources]]</li><li>[[Sword|Sword]]<br/>{{For|the item in ''Minecraft Dungeons''|MCD:Sword|MCD:Diamond Sword}}
{{Item
| image = <gallery>
Wooden Sword.png | Wooden
Stone Sword.png | Stone
Iron Sword.png | Iron
Golden Sword.png | Golden
Diamond Sword.png | Diamond
Netherite Sword.png | Netherite
</gallery>
| rarity = Common
| renewable =
* '''Netherite''': No
* '''All others''': Yes
| durability =
'''Java Edition'''<br>
Golden: 32<br>
Wood: 59<br>
Stone: 131<br>
Iron: 250<br>
Diamond: 1561<br>
Netherite: 2031<br>
'''Bedrock Edition'''<br>
Golden: 33<br>
Wood: 60<br>
Stone: 132<br>
Iron: 251<br>
Diamond: 1562<br>
Netherite: 2032
| stackable = No
}}
The '''sword''' is a melee [[weapon]] that is mainly used to deal [[damage]] to [[entity|entities]] or for breaking certain blocks faster than by hand. A sword is made from one of six materials, in order of increasing quality and expense: wood, gold, stone, iron, diamond and netherite.
== Obtaining ==
=== Crafting ===
{{Crafting
|showname=0
|showdescription=1
|head=1
|name=[[Swords]]
|B1={Any Planks}; Iron Ingot; Gold Ingot; Diamond
|B2={Any Planks}; Iron Ingot; Gold Ingot; Diamond
|B3=Stick
|Output=Wooden Sword; Iron Sword; Golden Sword; Diamond Sword
|type=Combat
}}
{{Crafting
|name=Stone Sword
|B1=Any stone-tier block
|B2=Any stone-tier block
|B3=Stick
|Output=Stone Sword
|description=Can use cobblestone and its other variants interchangeably.
|type=Combat
}}
{{Crafting
|foot=1
|ignoreusage=1
|name=[[Swords]]
|ingredients=Damaged Matching [[Swords]]
|Damaged Wooden Sword; Damaged Stone Sword; Damaged Iron Sword; Damaged Golden Sword; Damaged Diamond Sword; Damaged Netherite Sword
|Damaged Wooden Sword; Damaged Stone Sword; Damaged Iron Sword; Damaged Golden Sword; Damaged Diamond Sword; Damaged Netherite Sword
|description= The durability of the two swords is added together, plus an extra 5% of the tool type's total durability. Enchantments are removed unless combined on an [[anvil]].<br>'''Example:''' Two wooden swords, each with remaining durability of 20, combine into a wooden sword having 43 durability (20 + 20 + 5% of 60).
|Output=Wooden Sword; Stone Sword; Iron Sword; Golden Sword; Diamond Sword; Netherite Sword
|type=Combat
}}
=== Upgrading ===
{{Smithing
|Netherite Upgrade
|Diamond Sword
|Netherite Ingot
|Netherite Sword
|description=
|tail=1
}}
=== Repairing ===
==== Grinding ====
{{Grinding
|showdescription=1
|ingredients=2x Damaged Wooden Sword or<br>2x Damaged Stone Sword or<br>2x Damaged Iron Sword or<br>2x Damaged Golden Sword or<br>2x Damaged Diamond Sword or <br>2x Damaged Netherite Sword
|Damaged Wooden Sword; Damaged Stone Sword; Damaged Iron Sword; Damaged Golden Sword; Damaged Diamond Sword; Damaged Netherite Sword
|Damaged Wooden Sword; Damaged Stone Sword; Damaged Iron Sword; Damaged Golden Sword; Damaged Diamond Sword; Damaged Netherite Sword
|Wooden Sword; Stone Sword; Iron Sword; Golden Sword; Diamond Sword; Netherite Sword
|description=The durability of the two swords is added together, plus an extra 5% durability. Any enchantments, besides curses, would be removed.
}}
==== Unit repair ====
{{main|Anvil mechanics#Unit repair}}
{{/Repairing with Anvils}}
A sword can be repaired in an [[anvil]] by adding units of the [[tiers]]' repair material, with each repair material restoring 25% of the sword's maximum durability, rounded down.
=== Mob loot ===
{{Main|Drops#Equipped items}}
Some [[mobs]] can spawn with a sword and have an 8.5% chance of dropping them upon death caused by player. This chance is increased by 1% per level of [[Looting]], up to a maximum of 11.5% with Looting III. [[Zombie]]s and [[husk]]s can drop iron swords, [[zombified piglin]]s and [[piglin]]s can drop golden swords, and [[wither skeleton]]s can drop stone swords. The dropped sword is usually badly damaged and may be enchanted. Stone swords dropped by wither skeletons are never enchanted.
A [[vex]] wields an iron sword that normally has a 0% chance of dropping, because their main hand's <code>HandDropChances</code> is 0. However, this chance increases by 1 percentage point per level of Looting. It is never damaged{{only|java}} and may be enchanted.
{{IN|be}}, [[pillager]]s and [[vindicator]]s that spawn from raids have a 4.1% chance (5.12% chance on hard mode) of dropping a damaged iron sword. This sword has a 50% chance of being enchanted.
=== Trading ===
[[File:Weaponsmith Diamond Sword Trade.png|thumb|right|The diamond sword trade of a weaponsmith.]]
{{IN|bedrock}}, an apprentice-level weaponsmith villagers sells enchanted iron swords for at least 7-21 emeralds, and a master-level weaponsmith sells enchanted diamond swords for at least 13-27 emeralds.
{{IN|java}}, a novice-level weaponsmith villager has a {{frac|2|3}} chance of selling an enchanted iron sword for at least 7-22 emeralds. A master-level weaponsmith offers to sell an enchanted diamond sword for at least 11–27 emeralds.
The enchantments of the swords offered by villagers are the same as the ones obtained from an [[enchantment table]] at levels 5–19.
=== Chest loot ===
{{LootChestItem|iron-sword,level-enchanted-iron-sword,damaged-random-enchanted-iron-sword,golden-sword,random-enchanted-golden-sword,diamond-sword,damaged-diamond-sword,level-enchanted-diamond-sword,damaged-random-enchanted-diamond-sword,damaged-random-enchanted-diamond-sword-2}}
== Usage ==
=== Attacking ===
Pressing {{control|attack}} while holding a sword inflicts damage on both mobs and other players. Upon damaging a mob or player, the sword's [[Item Durability|durability]] decreases by 1.
Attacking a [[boat]] or a [[minecart]] with a sword stone tier or higher instantly destroys it {{only|java}}, without decreasing the sword's durability. Otherwise, it requires 2 hits, with neither decreasing durability.
==== Sweeping ====
{{exclusive|Java|section=1}}
If the attack recharge meter is 84.8% or above and the player is on the ground standing or moving slower than the [[sprinting]] speed in a straight line, the sword performs a sweeping attack indicated by a gale [[particle]] that reaches nearby enemies for {{hp|1}} and knocks them back; the amount of knockback is 80% that of the basal knockback and does not benefit from the [[knockback]] enchantment. As result, the player can perform a sweep attack while they are sprinting diagonally but it is impossible to perform a sweep attack at the same time as a critical hit or while riding some [[entity]]. All enemies within an 1 by 0.25 by 1 block area of any part of the attacked mob and whose feet are 3 or less blocks away from player's feet are affected. The [[sweeping edge]] enchantment increases the damage dealt by 50% of the normal hit damage for level I, 67% for level II and 75% for level III.
=== Damage ===
{{Main|Damage}}
==== Java Edition ====
Swords have an attack speed of 1.6 and take 0.625 seconds to [[Damage#Attack cooldown|recover]].
{| class="wikitable" style="text-align:center" data-description="Sword attack damage by type"
! Material
! {{ItemSprite|Wooden Sword|text=Wooden}}
! {{ItemSprite|Golden Sword|text=Gold}}
! {{ItemSprite|Stone Sword|text=Stone}}
! {{ItemSprite|Iron Sword|text=Iron}}
! {{ItemSprite|Diamond Sword|text=Diamond}}
! {{ItemSprite|Netherite Sword|text=Netherite}}
|-
! Attack Damage
| {{hp|4}}
| {{hp|4}}
| {{hp|5}}
| {{hp|6}}
| {{hp|7}}
| {{hp|8}}
|-
! Attack Speed
| 1.6
| 1.6
| 1.6
| 1.6
| 1.6
| 1.6
|-
! Damage/Second (DPS)
| 6.4
| 6.4
| 8
| 9.6
| 11.2
| 12.8
|-
! Durability
| 59
| 32
| 131
| 250
| 1561
| 2031
|-
! Lifetime damage inflicted<ref group="note">The formula to find the total lifetime damage is ''Lifetime damage minimum = Durability × Damage per hit''. It ignores enchantments and [[Damage#Critical_hit|critical hits]], and assumes the sword is at maximum charge</ref>
| {{hp|236}}
| {{hp|128}}
| {{hp|655}}
| {{hp|1500}}
| {{hp|10927}}
| {{hp|16248}}
|}
{{notelist}}
==== Bedrock Edition ====
{{IN|bedrock}}, swords have no attack cooldown or sweep attack, and deal the following damage:
{| class="wikitable" style="text-align:center" data-description="Sword attack damage by type"
! Material
! {{ItemSprite|Wooden Sword|text=Wooden}}
! {{ItemSprite|Golden Sword|text=Gold}}
! {{ItemSprite|Stone Sword|text=Stone}}
! {{ItemSprite|Iron Sword|text=Iron}}
! {{ItemSprite|Diamond Sword|text=Diamond}}
! {{ItemSprite|Netherite Sword|text=Netherite}}
|-
! Attack Damage
| {{hp|5}} <!-- DO NOT CHANGE THESE! The values are correct, '+4 Attack Damage' means 5 total attack damage. -->
| {{hp|5}}
| {{hp|6}}
| {{hp|7}}
| {{hp|8}}
| {{hp|9}}
|-
! Durability
| 60
| 33
| 132
| 251
| 1562
| 2032
|-
! Lifetime damage inflicted<ref group="note">The formula to find the total lifetime damage is ''Durability × Damage per hit = Lifetime damage minimum''. It excludes enchantments and critical hits</ref>
| {{hp|300}}
| {{hp|165}}
| {{hp|792}}
| {{hp|1757}}
| {{hp|12496}}
| {{hp|18288}}
|}
{{notelist}}
The most amount of damage that a sword enchanted with [[Sharpness]] V can do is 11 {{in|java}} and 15.25 {{in|bedrock}}, without critical hits.
=== Sword breaking times ===
{{main|Breaking}}
A sword can also be used to destroy certain blocks 50% quicker, sometimes much quicker than with fists. Using a sword to destroy any block that doesn't break instantly by hand decreases its durability by 2; this includes bamboo, despite that the sword is the fastest tool for breaking it.<ref>{{bug|MC-195168||Swords consume double durability than they normally would when destroying bamboo saplings, bamboo, or cobwebs}}</ref>
If a sword is enchanted with [[Silk Touch]], either using [[Creative]] or [[commands]], cobwebs the sword destroys will drop the cobwebs themselves instead of the usual string. This is due to the sword being classified as the proper tool for cobwebs.
The following table shows the time it takes to break blocks on which swords have any effect. Colors indicate what gets dropped:
* White: an original block.
* Blue: block's normal drop (e.g. seeds, sapling, apple).
* Red: nothing.
{| class="wikitable" style="text-align:center" data-description="Blocks affected by swords"
! Block
! Fists
! Sword
! colspan="2" | Proper/fastest tool
|-
!style="text-align:left"| {{BlockLink|Bamboo}}
| {{tc|no|{{breaking time|Bamboo}} s }} || 0.05 s (instant) <!-- this doesn't work: {{tc|planned|{{breaking time|Bamboo|Sword}} s}} -->
| {{ItemSprite|sword|link=Sword}}
| 0.05 s (instant) <!-- this doesn't work: {{breaking time|Bamboo|Sword}} s -->
|-
!style="text-align:left"| {{BlockLink|Cobweb}}
| {{tc|no|{{breaking time|Cobweb|drop=None}} s}} || {{tc|planned|{{breaking time|Cobweb|Sword}} s}}
| {{ItemSprite|shears|link=Shears}}
| {{breaking time|Cobweb|Shears}} s
|-
!style="text-align:left"| {{BlockLink|Cocoa}}
| {{tc|planned|{{breaking time|Cocoa}}s}} || {{tc|planned|{{breaking time|Cocoa|Sword}}s}}
| {{ItemSprite|wooden-axe|link=Axe}}
| {{tc|planned|{{breaking time|Cocoa|Golden}} – {{breaking time|Cocoa|Wooden}} s}}
|-
! style="text-align:left"|{{BlockLink|Hay Bale}}
| 1s
| 0.8s{{only|bedrock}}
| {{ItemSprite|wooden-hoe|link=Hoe}}
| {{breaking time|Hay Bale|Golden}} – {{breaking time|Hay Bale|Wooden}} s
|-
!style="text-align:left" rowspan="2"| {{BlockLink|Leaves}}
!rowspan="2" {{tc|planned|{{breaking time|Leaves}} s}}
!rowspan="2" {{tc|planned|{{breaking time|Leaves|Sword}} s}}
| {{ItemSprite|shears|link=Shears}}
| {{breaking time|Leaves|Shears}}s
|-
| {{ItemSprite|wooden-hoe|link=Hoe}}
| {{tc|planned|{{breaking time|Leaves|Golden}} – {{breaking time|Leaves|Wooden}} s}}
|-
!style="text-align:left"| {{BlockLink|Jack o'Lantern}}
| {{breaking time|Jack o'Lantern}} s || {{breaking time|Jack o'Lantern|Sword}} s
| {{ItemSprite|wooden-axe|link=Axe}}
| {{breaking time|Jack o'Lantern|Golden}} – {{breaking time|Jack o'Lantern|Wooden}} s
|-
!style="text-align:left"| {{BlockLink|Melon}}
| {{tc|planned|{{breaking time|Melon}} s}} || {{tc|planned|{{breaking time|Melon|Sword}} s}}
| {{ItemSprite|wooden-axe|link=Axe}}
| {{tc|planned|{{breaking time|Melon|Golden}} – {{breaking time|Melon|Wooden}} s}}
|-
!style="text-align:left"| {{BlockLink|Pumpkin}}
| {{breaking time|Pumpkin}}s || {{breaking time|Pumpkin|Sword}} s
| {{ItemSprite|wooden-axe|link=Axe}}
| {{breaking time|Pumpkin|Golden}} – {{breaking time|Pumpkin|Wooden}} s
|-
!style="text-align:left" rowspan="2"| {{BlockLink|Vines}}
| rowspan="2" {{tc|no|{{breaking time|Vines}} s}} || rowspan="2" {{tc|no|{{breaking time|Vines|Sword}} s}}
| {{ItemSprite|wooden-axe|link=Axe}}
| {{tc|no|{{breaking time|Vines|Golden}} – {{breaking time|Vines|Wooden}} s}}
|-
| {{ItemSprite|shears|link=Shears}}
| {{breaking time|Vines|Shears}} s
|}
==== Safety around constructions ====
In Creative mode, swords are unable to break blocks. However, care must still be taken around [[minecart]]s, [[painting]]s, [[item frame]]s,{{only|java}} and [[armor stand]]s; these are entities, thus can be broken with swords in Creative.<ref>{{bug|MC-27140}}</ref><ref>{{bug|MC-18463}}</ref>
=== Enchantments ===
Swords can receive, gathered from mob drops/villager trades or be found in various loot chests (example: End City, Bastion Remnant)with the following [[enchantment]]s:
{| class="wikitable sortable col-2-center col-3-right"
|+
!Name
!Max Level
![[Enchanting|Method]]
!Weight
|-
|[[Fire Aspect]]
|II
|{{Inventory slot|Enchanting Table}}{{Inventory slot|Anvil}}
|2
|-
|[[Looting]]
|III
|{{Inventory slot|Enchanting Table}}{{Inventory slot|Anvil}}
|2
|-
|[[Unbreaking]]
|III
|{{Inventory slot|Enchanting Table}}{{Inventory slot|Anvil}}
|5
|-
|[[Sharpness]]<ref group=note name=note1>Sharpness, Smite, and Bane of Arthropods are mutually exclusive.</ref>
|V
|{{Inventory slot|Enchanting Table}}{{Inventory slot|Anvil}}
|10
|-
|[[Smite]]<ref group=note name=note1/>
|V
|{{Inventory slot|Enchanting Table}}{{Inventory slot|Anvil}}
|5
|-
|[[Bane of Arthropods]]<ref group="note" name=note1/>
|V
|{{Inventory slot|Enchanting Table}}{{Inventory slot|Anvil}}
|5
|-
|[[Knockback]]
|II
|{{Inventory slot|Enchanting Table}}{{Inventory slot|Anvil}}
|5
|-
|[[Mending]]
|I
|{{Inventory slot|Anvil}}
|2
|-
|[[Curse of Vanishing]]
|I
|{{Inventory slot|Anvil}}
|1
|-
|[[Sweeping Edge]]{{Only|java|short=1}}
|III
|{{Inventory slot|Enchanting Table}}{{Inventory slot|Anvil}}
|2
|}
Golden swords have the highest enchantability, yet the least durability{{Notelist}}
=== Fuel ===
Wooden swords can be used as fuel in [[furnace]]s, smelting 1 item per sword.
=== Smelting ingredient ===
{{Smelting|showname=1|Iron Sword;Golden Sword|Iron Nugget;Gold Nugget|0,1}}
=== Piglins ===
[[Piglin]]s are attracted to golden swords, run toward any golden swords on the ground and inspect it for 6 to 8 seconds before putting it in their [[inventory]] slot.
== Sounds ==
{{Edition|Java}}:
{{Sound table
|sound=Strong attack1.ogg
|sound2=Strong attack2.ogg
|sound3=Strong attack3.ogg
|sound4=Strong attack4.ogg
|sound5=Strong attack5.ogg
|sound6=Strong attack6.ogg
|subtitle=Strong attack
|source=player
|description=When a player deals an attack that does not trigger any other attack sounds
|id=entity.player.attack.strong
|translationkey=subtitles.entity.player.attack.strong
|volume=''varies'' <ref group=sound>0.6 for <code>strong1</code> through <code>strong4</code>, and 0.7 for <code>strong5</code> and <code>strong6</code></ref>
|pitch=1.0
|distance=16}}
{{Sound table
|sound=Critical attack1.ogg
|sound2=Critical attack2.ogg
|sound3=Critical attack3.ogg
|subtitle=Critical attack
|source=player
|description=When a player deals a critical hit
|id=entity.player.attack.crit
|translationkey=subtitles.entity.player.attack.crit
|volume=0.7
|pitch=1.0
|distance=16}}
{{Sound table
|sound=Knockback attack1.ogg
|sound2=Knockback attack2.ogg
|sound3=Knockback attack3.ogg
|sound4=Knockback attack4.ogg
|subtitle=Knockback attack
|source=player
|description=When a player deals a sprinting attack
|id=entity.player.attack.knockback
|translationkey=subtitles.entity.player.attack.knockback
|volume=0.7
|pitch=1.0
|distance=16}}
{{Sound table
|sound=Sweep attack1.ogg
|sound2=Sweep attack2.ogg
|sound3=Sweep attack3.ogg
|sound4=Sweep attack4.ogg
|sound5=Sweep attack5.ogg
|sound6=Sweep attack6.ogg
|sound7=Sweep attack7.ogg
|subtitle=Sweeping attack
|source=player
|description=When a player deals a sweep attack
|id=entity.player.attack.sweep
|translationkey=subtitles.entity.player.attack.sweep
|volume=0.7
|pitch=1.0
|distance=16}}
{{Sound table
|rowspan=2
|sound=Weak attack1.ogg
|sound2=Weak attack2.ogg
|sound3=Weak attack3.ogg
|sound4=Weak attack4.ogg
|subtitle=Weak attack
|source=player
|description=When a player deals an attack with no damage
|id=entity.player.attack.nodamage
|translationkey=subtitles.entity.player.attack.weak
|volume=0.7
|pitch=1.0
|distance=16}}
{{Sound table
|subtitle=Weak attack
|source=player
|description=When a player attempts to attack without sufficient cooldown
|id=entity.player.attack.weak
|translationkey=subtitles.entity.player.attack.weak
|volume=0.7
|pitch=1.0
|distance=16}}
{{Sound table
|sound=Random break.ogg
|subtitle=Item breaks
|source=player
|description=When a sword's durability is exhausted
|id=entity.item.break
|translationkey=subtitles.entity.item.break
|volume=0.8
|pitch=0.8-1.2
|distance=16
|foot=1}}
{{Edition|Bedrock}}:
{{Sound table
|type=bedrock
|sound=Strong attack1.ogg
|sound2=Strong attack2.ogg
|sound3=Strong attack3.ogg
|sound4=Strong attack4.ogg
|sound5=Strong attack5.ogg
|sound6=Strong attack6.ogg
|source=player
|description=When a player deals an attack with damage
|id=game.player.attack.strong
|volume=0.2
|pitch=0.8-1.2}}
{{Sound table
|sound=Weak attack1.ogg
|sound2=Weak attack2.ogg
|sound3=Weak attack3.ogg
|sound4=Weak attack4.ogg
|source=player
|description=When a player deals an attack with no damage
|id=game.player.attack.nodamage
|volume=0.2
|pitch=0.8-1.2}}
{{Sound table
|sound=Random break.ogg
|source=player
|description=When an sword's durability is exhausted
|id=random.break
|volume=1.0
|pitch=0.9
|foot=1}}
== Data values ==
=== ID ===
{{edition|java}}:
{{ID table
|edition=java
|showforms=y
|generatetranslationkeys=y
|displayname=Wooden Sword
|spritetype=item
|nameid=wooden_sword
|form=item}}
{{ID table
|displayname=Stone Sword
|spritetype=item
|nameid=stone_sword
|form=item}}
{{ID table
|displayname=Iron Sword
|spritetype=item
|nameid=iron_sword
|form=item}}
{{ID table
|displayname=Diamond Sword
|spritetype=item
|nameid=diamond_sword
|form=item}}
{{ID table
|displayname=Golden Sword
|spritetype=item
|nameid=golden_sword
|form=item}}
{{ID table
|displayname=Netherite Sword
|spritetype=item
|nameid=netherite_sword
|form=item
|foot=1}}
{{edition|bedrock}}:
{{ID table
|edition=bedrock
|shownumericids=y
|showforms=y
|notshowbeitemforms=y
|generatetranslationkeys=y
|displayname=Wooden Sword
|spritetype=item
|nameid=wooden_sword
|id=308
|form=item}}
{{ID table
|displayname=Stone Sword
|spritetype=item
|nameid=stone_sword
|id=312
|form=item}}
{{ID table
|displayname=Iron Sword
|spritetype=item
|nameid=iron_sword
|id=307
|form=item}}
{{ID table
|displayname=Diamond Sword
|spritetype=item
|nameid=diamond_sword
|id=316
|form=item}}
{{ID table
|displayname=Golden Sword
|spritetype=item
|nameid=golden_sword
|id=322
|form=item}}
{{ID table
|displayname=Netherite Sword
|spritetype=item
|nameid=netherite_sword
|id=604
|form=item
|foot=1}}
== Achievements ==
{{load achievements|Time to Strike!;Overkill;Oooh, shiny!}}
== Advancements ==
{{load advancements|Oh Shiny}}
== History ==
=== Blocking ===
{{main|Blocking}}
[[File:Parrying.png|thumb|right|The blocking animation using a sword before and after [[Java Edition 14w30a]] (from the [[Adventure Update|Adventure]] to the [[Bountiful Update|Bountiful]] updates).]]
Previously, since the [[Adventure Update]], all types of swords could be used to parry to block some forms of damage. If the player is blocking with a sword when attacked, the sword deflects 50% of incoming damage from melee, non-magical projectiles like arrows, and explosions, along with minimizing airborne knockback. The sword is held in front of the player and its durability is not reduced by blocking. The player moves at a slower rate than [[sneaking]] if blocking with a sword. Sword blocks could be engaged and disengaged instantly, with no delay between the input and damage mitigation nor cooldown between lowering a block and raising a new one.
After the [[Combat Update]], the sword blocking functionality was replaced by blocking with [[shield]]s and to accommodate the [[dual wield]] system. Shields negate more damage and knockback than sword blocking from "blockable" attacks (they block 100% damage and knockback after [[Java Edition 1.11]]), but, unlike swords, they lose durability, have a 0.25 second startup period before damage can be mitigated and can be temporarily disabled by attacks with an [[axe]].
=== Knockback ===
The knockback dealt by swords used to be higher than while the players are using another melee [[item]]s, like an axe or with the hands. This feature was removed in [[Java Edition 1.9]] and is also no longer used in ''[[Bedrock Edition]]''.
=== Historical changes per version ===
{{History|java indev}}
{{History||0.31|snap=20091231-2|[[File:Iron Sword JE1 BE1.png|32px]] Added iron swords.
|Iron swords cannot be [[craft]]ed yet, but can be added to the [[player]]'s [[inventory]] during world creation.}}
{{History||0.31|snap=?|The iron sword is no longer added to the player's inventory during world creation.}}
{{History||0.31|snap=20100128|[[File:Wooden Sword JE1 BE1.png|32px]] [[File:Stone Sword JE1 BE1.png|32px]] [[File:Diamond Sword JE1 BE1.png|32px]] Swords made from wood, stone, and diamond have been added.
|Swords cannot be crafted yet, but have been added to the [[item]] [[chest]] in the Indev house.|A sword held by the player is now rendered to appear more 3D.}}
{{History||0.31|snap=20100129|Wood, stone, iron, and diamond swords can now be [[craft]]ed.}}
{{History|||snap=20100130|[[File:Golden Sword JE1.png|32px]] Swords can now be made out of gold.}}
{{History|||snap=20100131|Swords now have [[durability]].
|Better swords now last longer.
|Swords now cost 1 durability per hit, and 2 points per block broken.}}
{{History||20100206|[[File:Golden Sword JE2 BE1.png|32px]] The texture of gold swords has been slightly changed.}}
{{History|java alpha}}
{{History||v1.2.0|snap=release|[[Zombie pigmen]] now hold golden swords.}}
{{History|java beta}}
{{History||1.2|Swords, like all [[tool]]s, now have more [[item durability|durability]].
|Prior, diamond swords had 1024 durability, iron swords had 128, stone swords 64 and wood and gold had 32 durability.}}
{{History||1.5|The damages of all swords have increased by 1, due to the player's barehand damage increasing from {{hp|1}} to {{hp|2}}.
|As a result, wooden and golden swords now dealt {{hp|5}}, stone swords {{hp|7}}, iron swords {{hp|9}}, and diamond swords {{hp|11}}.}}
{{History||1.8|snap=Pre-release|Added the ability to block with a sword, giving the [[player]] more options in combat.
|Swords deflect 50% of incoming melee damage, non-magical projectiles like arrows and explosion damage, and a bit of knockback.
|The sword is held in front of the player and its durability is not reduced by blocking.|The player moves at a slower rate than [[sneaking]] when blocking with a sword.
|As barehand damage has been reduced from {{hp|2}} to {{hp|1}}, the damages of all swords have been reduced to their pre Beta 1.5 values.}}
{{History|java}}
{{History||1.0.0|snap=Beta 1.9 Prerelease 3|Sword [[damage]] has been reduced to make way for [[enchanting]]. A diamond sword's damage has been reduced from {{hp|10}} to {{hp|7}}, iron has been reduced from {{hp|8}} to {{hp|6}} and stone has been reduced from {{hp|6}} to {{hp|5}}. Wooden and golden swords still deal {{hp|4}} damage.|Iron swords are now found in the new [[stronghold]] altar [[chest]]s.}}
{{History|||snap=Beta 1.9 Prerelease 4|Swords can now be enchanted in the [[enchantment table]].}}
{{History||1.1|snap=12w01a|Iron swords are now found in [[village]] blacksmith chests.}}
{{History||1.2.1|snap=12w06a|The [[player]] now has a rare chance of obtaining iron swords by killing [[zombie]]s and golden swords from [[zombie pigmen]] from the addition of [[rare drops]]. These swords have a 20% chance of being enchanted.}}
{{History||1.2.4|snap=release|[[Spruce planks]], [[birch planks]], and [[jungle planks]] can now be used to craft wooden swords.}}
{{History||1.3.1|snap=12w18a|Wooden swords can now be used as [[fuel]] in a [[furnace]].}}
{{History|||snap=12w21a|Blacksmith [[villager]]s now [[trading|sell]] diamond swords for 12–13 [[emerald]]s, and iron swords for 7–10 emeralds.
|With the [[trading]] implementation, renewable [[item]]s such as [[wheat]] can now be [[trading|sold]] to buy a diamond sword. This has now made all swords [[Renewable Resource|renewable]].}}
{{History||1.4.2|snap=12w32a|[[Zombie]]s may sometimes wield iron swords, dealing extra [[damage]].}}
{{History|||snap=12w34a|If a [[player]] has dyed leather armor equipped and selected a sword of any kind, it appears in the color of the dye applied to the armor, when switching to second or third person view.}}
{{History|||snap=12w36a|Added [[wither skeleton]]s, which hold stone swords.}}
{{History||1.4.6|snap=12w49a|[[Unbreaking]] can now be applied to a sword with an [[enchanted book]].}}
{{History||1.6.1|snap=13w18a|Golden swords are now found in the new [[chest]]s in [[nether fortress]]es.}}
{{History|||snap=13w21a|Instead of replacing the barehanded [[damage]] ({{hp|1}}), swords now add their damage onto the barehanded damage, which results in all swords doing {{hp|1}} more damage than before.}}
{{History|||snap=13w25b|In [[Creative]] mode, swords are no longer able to break [[block]]s, and no [[sound]] plays when they're hit with one.}}
{{History||1.7.2|snap=1.7.1|[[Acacia planks]] and [[dark oak planks]] can now be used to craft wooden swords.}}
{{History||1.8|snap=14w02a|Weaponsmith [[villager]]s now [[trading|sell]] enchanted diamond swords for 12–15 [[emerald]]s, and iron swords for 9–10 emeralds. Unenchanted swords are no longer sold.}}
{{History|||snap=14w30a|Sword holding position have been tweaked, and the blocking animation has changed. Blocking while mining was made impossible. Blocking immediately after attacking no longer continues the swing animation.}}
{{History||1.9|snap=15w31a|[[Enchanting|Enchanted]] iron and diamond swords can now be found in [[end city]] ship [[chest]]s.}}
{{History|||snap=15w33c|Swords no longer block attacks. Instead, [[shield]]s are used.}}
{{History|||snap=15w34b|Swords now use the attack speed [[attribute]]. The attack speed of a sword is 1.25 or 0.8 seconds.}}
{{History|||snap=15w34c|Nerfed swords, they now do {{hp|1}} less [[damage]] and have an attack speed of 1.45, or 0.69 seconds.
|Swords can now do a sweep attack when moving at walking speed or slower, which knock back [[mob]]s near the one hit. The attack speed meter must be filled for it to work.}}
{{History|||snap=15w36a|Each [[Sharpness]] level now adds {{hp|1}} damage to the base damage at level I and an additional {{hp|0.5}} for each additional level, down from a flat {{hp|1.25}} per level.}}
{{History|||snap=15w37a|Swords now have an attack speed of 1.6, or 0.63 seconds.}}
{{History|||snap=15w43a|The average yield of golden swords in [[nether fortress]] chests has been decreased.}}
{{History|||snap=15w49a|Sweep attack now does {{hp|1}} damage to affected [[mob]]s and players.}}
{{History||1.11.1|snap=16w50a|Golden and iron swords now [[smelt]] down into one of their respective [[nugget]]s.
|Added [[Sweeping Edge]] enchantment.}}
{{History||1.13|snap=17w47a|Prior to [[1.13/Flattening|''The Flattening'']], these [[item]]s' numeral IDs were 268, 272, 267, 276 and 283.}}
{{History|||snap=18w10a|Swords can now generate in [[buried treasure]] chests.}}
{{History||September 10, 2018|link={{tweet|JasperBoerstra|1039167196801458176}}|[[File:Wooden Sword JE2 BE2.png|32px]] [[File:Stone Sword JE2 BE2.png|32px]] [[File:Iron Sword JE2 BE2.png|32px]] [[File:Golden Sword JE3 BE2.png|32px]] [[File:Diamond Sword JE2 BE2.png|32px]] [[Jasper Boerstra]] tweets an image of updated sword textures.}}
{{History||1.14|snap=18w43a|[[File:Wooden Sword JE2 BE2.png|32px]] [[File:Stone Sword JE2 BE2.png|32px]] [[File:Iron Sword JE2 BE2.png|32px]] [[File:Golden Sword JE3 BE2.png|32px]] [[File:Diamond Sword JE2 BE2.png|32px]] The textures of all swords have been changed.
|Swords now break [[bamboo]] instantly.}}
{{History||1.16|snap=20w06a|[[File:Netherite Sword JE1.png|32px]] Added netherite swords.
|Netherite swords are obtained by combining one diamond sword and one [[netherite ingot]] in a [[crafting table]].
|[[Crimson planks]] and [[warped planks]] can now be used to craft wooden swords.}}
{{History|||snap=20w09a|[[File:Diamond Sword JE3 BE3.png|32px]] The texture of diamond swords has been changed.}}
{{History|||snap=20w10a|[[File:Netherite Sword JE2 BE2.png|32px]] The texture of netherite swords has been changed.
|Netherite swords can no longer be [[crafted]].
|Netherite swords are now obtained by combining one diamond sword and one [[netherite ingot]] in a [[smithing table]].}}
{{History|||snap=20w15a|Stone swords can now be crafted using [[blackstone]].}}
{{History|||snap=20w16a|Golden and netherite swords now generate in [[bastion remnants]] chests.
|Golden swords now generate randomly enchanted in [[ruined portal]] chests.}}
{{History|||snap=20w17a|Diamonds swords now generate in place of netherite swords in bastion remnant [[chest]]s.}}
{{History||1.16.2|snap=20w30a|Damaged enchanted iron swords can now be found in [[bastion remnant]] chests.}}
{{History||1.17|snap=21w08a|Stone swords can now be crafted using [[cobbled deepslate]].}}
{{History||1.19|snap=22w11a|[[Mangrove planks]] can now be used to craft wooden swords.}}
{{History||1.20<br>(Experimental)|link=1.19.4|snap=23w04a|Upgrading diamond swords to netherite swords now requires the netherite upgrade [[smithing template]].}}
{{History|upcoming java}}
{{History||Combat Tests|snap=1.14.3 - Combat Test|The attack speed for all swords has been increased to 3.
|The base [[damage]] is now {{Hp|2}}, meaning that all swords now do {{Hp|1}} more damage than before}.
|The attack reach of swords has been increased to 3.5 [[block]]s.}}
{{History|||snap=Combat Test 2|The attack speed of all swords has been decreased to 2.5.}}
{{History|||snap=Combat Test 3|The attack speed of all swords has been changed from 2.5 back to 3.0.
|The attack key can now again be held down to automatically attack when the attack meter is full.
|Attacks now happen only when the sword is at 120% charge, slower than if attacks were timed.}}
{{History|||snap=Combat Test 4|Sword can now perform critical, knockback ([[sprint]]) hits on 100% charge.
|The attack reach of all weapons was decreased by 0.5 [[block]]. Sword now have a 3 [[block]]s reach.
|The 200% attack now gives a bonus reach of 1 [[block]].}}
{{History|||snap=Combat Test 5|Weapons have been nerfed. All material tiers have been nerfed by {{Hp|1}} except wood and gold, and the sword tier have been nerfed by {{Hp|1}}. This means that the wooden/stone/golden sword now does {{Hp|4}} damage, the iron sword now does {{Hp|5}} damage and the diamond sword now does {{Hp|6}} damage.}}
{{History|||snap=Combat Test 6|All weapons' attack reach have been buffed by 0.5 [[block]].
|200% attacks have been removed.
|Swords now always do sweep attack, even in the air.
|The cooldown for missed hit is a 4-tick cooldown instead of using the attack speed attribute.}}
{{History|||snap=Combat Test 7c|All weapons' attack reach have been nerfed by 0.5 [[block]]. The sword's attack reach is now 3 [[block]]s again.
|200% attacks have been re-added.
|Swords no longer sweep without [[Sweeping Edge]] and 200% charge again.
|Adjusted the netherite tier value to match the weapon nerf in Combat Test 5}}
{{History|||snap=Combat Test 8b|Enchantment bonus attack damage are now included in the base damage when calculating critical hits (they were excluded before). Due to this change, enchanted swords critical attacks are now way more powerful (especially with high enchantments)}}
{{History|pocket alpha}}
{{History||v0.2.0|[[File:Stone Sword JE1 BE1.png|32px]] Added stone swords.}}
{{History||v0.3.0|[[File:Wooden Sword JE1 BE1.png|32px]] Added wooden swords.
|Survival players no longer start out with an infinite durability stone sword in the inventory.}}
{{History||v0.3.2|[[File:Iron Sword JE1 BE1.png|32px]] [[File:Golden Sword JE2 BE1.png|32px]] [[File:Diamond Sword JE1 BE1.png|32px]] Added iron, gold, and diamond swords.}}
{{History||v0.4.0|Iron swords have replaced stone swords in the creative inventory.}}
{{History||v0.9.0|snap=build 1|Iron swords can now be found in [[stronghold]] altar [[chest]]s and inside blacksmith chests.}}
{{History||v0.11.0|snap=build 11|Wooden, stone, golden and diamond swords are now available in the [[creative]] [[inventory]].}}
{{History||v0.11.0|snap=build 12|Wooden, stone, golden and diamond swords have been removed from creative.}}
{{History||v0.11.0|snap=build 13|All swords are available in creative mode again.}}
{{History||v0.12.1|snap=build 1|Instead of replacing the barehanded [[damage]] ({{hp|1}}), swords now add their damage onto the barehanded damage, which results in all swords doing {{hp|1}} more damage than before.|In [[creative]] mode, swords are no longer able to break [[block]]s, and no [[sound]] plays when they're hit with one.|Golden swords can now be found in [[nether fortress]] chests.
|[[Zombie]]s now rarely spawn holding an iron sword that have a chance to [[drops|dropped]].
|Golden swords are now rarely dropped by [[zombie pigmen]].
|Stone swords are now rarely dropped by [[wither skeleton]]s.}}
{{History||v0.15.0|snap=build 1|Iron swords are now sometimes dropped by [[husk]]s that spawn holding an iron sword.}}
{{History|pocket}}
{{History||1.0.0|snap=alpha 0.17.0.1|Enchanted iron and diamond swords can now be found in [[end city]] [[chest]]s.}}
{{History||1.0.4|snap=alpha 1.0.4.0|Iron swords and enchanted diamond swords are now sold by weaponsmith [[villager]]s.}}
{{History||1.1.0|snap=alpha 1.1.0.0|Iron and golden swords are now [[smelting|smeltable]].
|Added [[vex]]es, which rarely drop an iron sword if killed using [[Looting]] enchantment.}}
{{History|bedrock}}
{{History||1.10.0|snap=beta 1.10.0.3|[[File:Wooden Sword JE2 BE2.png|32px]] [[File:Stone Sword JE2 BE2.png|32px]] [[File:Iron Sword JE2 BE2.png|32px]] [[File:Golden Sword JE3 BE2.png|32px]] [[File:Diamond Sword JE2 BE2.png|32px]] The textures of all swords have been changed.
|Iron swords are now found in [[plains]] [[village]] weaponsmiths.}}
{{History||1.11.0|snap=beta 1.11.0.1|Iron swords can now be found in [[savanna]], [[snowy taiga]], [[taiga]] and [[desert]] village weaponsmiths.}}
{{History|||snap=beta 1.11.0.4|[[Pillager]]s and [[vindicator]]s that spawn in [[raid]]s can now drop iron swords upon [[death]].
|[[Trading]] has been changed. Iron swords [[trading|sold]] by weaponsmith [[villager]]s now cost 2 [[emerald]]s while diamond swords cost 8 emeralds as part of their fourth tier trades.}}
{{History||1.16.0|snap=beta 1.16.0.51|[[File:Netherite Sword BE1.png|32px]] Added netherite swords.
|Netherite swords are obtained by combining one diamond sword and one [[netherite ingot]] in a [[crafting table]].
|[[File:Diamond Sword JE3 BE3.png|32px]] The texture of diamond swords has been changed.
|Golden swords are now sometimes [[drops|dropped]] by [[piglin]]s that spawn holding a golden sword.}}
{{History|||snap=beta 1.16.0.57|Netherite swords can no longer be [[crafting|crafted]].
|Netherite swords are now obtained by combining one diamond sword and one [[netherite ingot]] in a [[smithing table]].
|Stone swords can now be crafted using [[blackstone]].
|Golden and netherite swords now generate in [[bastion remnant]] chests.
|Golden swords now generate randomly enchanted in [[ruined portal]] chests.}}
{{History|||snap=beta 1.16.0.63|Diamonds swords now generate in place of netherite swords in bastion remnant [[chest]]s.}}
{{History||1.17.30|snap=beta 1.17.20.20|Swords now break [[bamboo]] instantly.}}
{{History|console}}
{{History||xbox=TU1|xbone=CU1|ps=1.0|wiiu=Patch 1|switch=1.0.1|[[File:Wooden Sword JE1 BE1.png|32px]] [[File:Stone Sword JE1 BE1.png|32px]] [[File:Iron Sword JE1 BE1.png|32px]] [[File:Golden Sword JE2 BE1.png|32px]] [[File:Diamond Sword JE1 BE1.png|32px]] Added swords (all five types).}}
{{History||xbox=TU5|The ability to block with swords has been added, giving the [[player]] more options in combat.}}
{{History||xbox=TU53|xbone=CU43|ps=1.49|wiiu=Patch 23|switch=1.0.3|Iron and golden swords are now [[smelting|smeltable]].}}
{{History||xbox=none|xbone=none|ps=1.90|wiiu=none|switch=none|[[File:Wooden Sword JE2 BE2.png|32px]] [[File:Stone Sword JE2 BE2.png|32px]] [[File:Iron Sword JE2 BE2.png|32px]] [[File:Golden Sword JE3 BE2.png|32px]] [[File:Diamond Sword JE2 BE2.png|32px]] The textures of all swords have been changed.}}
{{History||ps=1.92|The ability to block with swords has been removed.}}
{{History|New Nintendo 3DS Edition}}
{{History||0.1.0|[[File:Wooden Sword JE1 BE1.png|32px]] [[File:Stone Sword JE1 BE1.png|32px]] [[File:Iron Sword JE1 BE1.png|32px]] [[File:Golden Sword JE2 BE1.png|32px]] [[File:Diamond Sword JE1 BE1.png|32px]] Added swords.
|Swords cannot block attacks.}}
{{History|foot}}
== Issues ==
{{issue list}}
== Trivia ==
*The sword's traditional [[texture]] came from [[Notch]]'s abandoned RPG, ''[[Legend of the Chambered]]''. The iron sword's texture was created first, as it was from the game, and the other swords followed.
*In ''Java Edition'', with the introduction of netherite swords, it is possible to one-hit kill undead [[mob]]s in the game (except [[wither]]s and [[zombie]]s/[[skeleton]]s with random armor) using a sword with the [[Smite]] V enchantment, without the need to perform a critical hit (this was previously possible only with a [[Smite]] V stone, iron, or diamond axe).
*Plastic diamond and enchanted swords are official ''[[Minecraft]]'' merchandise.<ref>https://shop.minecraft.net/products/minecraft-sword?_pos=1&_psq=sword&_ss=e&_v=1.0</ref><ref>https://shop.minecraft.net/products/minecraft-enchanted-purple-sword?_pos=4&_psq=sword&_ss=e&_v=1.0</ref>
*In the game [[wikipedia:Transformice|''Transformice'']], a diamond sword can be found in the shop.
== Gallery ==
=== Enchanted swords ===
<gallery>
Enchanted Wooden Sword.gif|Enchanted wooden sword.
Enchanted Stone Sword.gif|Enchanted stone sword.
Enchanted Iron Sword.gif|Enchanted iron sword.
Enchanted Golden Sword.gif|Enchanted golden sword.
Enchanted Diamond Sword.gif|Enchanted diamond sword.
Enchanted Netherite Sword.gif|Enchanted netherite sword.
</gallery>
=== Texture packs ===
<gallery>
File:Wood sword TP.png|Wooden sword in the [[Texture Pack DLC|Plastic Pack]].
Stone Sword SDGP.png|Stone sword in the [[Super Duper Graphics Pack]].
File:Gold sword Natural.png|Gold sword in the [[Texture Pack DLC|Natural Pack]].
</gallery>
=== In other media ===
<gallery>
File:Alex Fighting in Nether.jpeg|Pixel art of [[Alex]] fighting with a diamond sword in the [[Nether]].
File:Alex Retrieving Diamond Sword.jpeg|Alex retrieving another diamond sword from a [[chest]].
File:Sinister Sword Sprite MCD.png|The [[MCD:Sinister Sword|Sinister Sword]], a unique sword featured in ''Minecraft Dungeons''.
File:Sword GUI.png|A nondescript [[MCD:Sword|sword]] as it appears in ''[[Minecraft Dungeons]]''.
File:Sword (item).png|A sword as it appears in ''[[Legend of the Chambered]]''.
File:Sword Shirt.png|Officially licensed T-Shirt of a diamond sword.
File:IronSword replica.jpg|Foam replica of an iron sword.
</gallery>
== References ==
{{reflist}}
{{Items}}
[[Category:Tools]]
[[Category:Combat]]
[[de:Schwert]]
[[es:Espada]]
[[fr:Épée]]
[[hu:Kard]]
[[ja:剣]]
[[ko:검]]
[[nl:Zwaard]]
[[pl:Miecz]]
[[pt:Espada]]
[[ru:Меч]]
[[tr:Kılıç]]
[[uk:Меч]]
[[zh:剑]]</li></ul> | Build limit increased to 128. Previously the build limit was 64 (32 blocks up from sea level and 32 down). | ||||
1.2.0{{Extension DPL}}<ul><li>[[Dragon's Breath|Dragon's Breath]]<br/>{{Item
| image = Dragon's Breath.png
| renewable = Yes
| stackable = Yes (64)
| rarity = Uncommon
}}
The '''dragon's breath''' is a [[brewing]] item that is used solely to make [[lingering potion]]s.
== Obtaining ==
The dragon's breath can be obtained by scooping up the [[ender dragon]]'s breath attack or the purple [[area effect cloud|effect clouds]] caused by [[dragon fireball]]s in an empty [[glass bottle]].
== Usage ==
=== Brewing ingredient ===
Dragon's breath may be added to any splash potion to upgrade it to a lingering potion, which can be used to create a lasting [[Lingering Potion#Area Effect Cloud|area effect cloud]], or to craft [[Arrow#Tipped arrows|tipped arrows]].
{{brewing
|name=[[Lingering Potion]]
|showname=1
|Dragon's Breath
|Any Lingering Potion
|base=Any Splash Potion}}
When put 2 or more dragon's breath in the brewing stand, after the brewing process, a glass bottle will drop as an [[Item (entity)|entity]]. However, if put only 1 dragon's breath in the brewing stand, after the brewing process, the glass bottle is consumed and cannot be retrieved.<ref>{{bug|MC-259583}}</ref>
== Sounds ==
{{Edition|Java}}:
{{Sound table
|sound=Bottle fill dragon breath1.ogg
|sound2=Bottle fill dragon breath2.ogg
|subtitle=Bottle fills
|source=neutral
|description=Filling a glass bottle with dragon's breath
|id=item.bottle.fill_dragonbreath
|translationkey=subtitles.item.bottle.fill
|volume=1.0
|pitch=1.0
|distance=16
|foot=1}}
{{Edition|Bedrock}}:
{{Sound table
|type=bedrock
|sound=Bottle fill dragon breath1.ogg
|sound2=Bottle fill dragon breath2.ogg
|source=sound
|description=When a bottle is filled with dragon's breath
|id=bottle.dragonbreath
|volume=0.7<wbr>{{Until|BE 1.20.40}}<br>1.0<wbr>{{Upcoming|BE 1.20.40}}
|pitch=1.0
|foot=1}}
== Achievements ==
{{Load achievements|You Need a Mint}}
== Advancements ==
{{load advancements|You Need a Mint}}
== Data values ==
=== ID ===
{{edition|java}}:
{{ID table
|edition=java
|showforms=y
|generatetranslationkeys=y
|displayname=Dragon's Breath
|spritetype=item
|nameid=dragon_breath
|form=item
|foot=1}}
{{edition|bedrock}}:
{{ID table
|edition=bedrock
|shownumericids=y
|showforms=y
|notshowbeitemforms=y
|generatetranslationkeys=y
|displayname=Dragon's Breath
|spritetype=item
|nameid=dragon_breath
|id=560
|form=item
|foot=1}}
== History ==
{{History|java}}
{{History||1.9|snap=15w33a|[[File:Dragon's Breath JE1 BE1.png|32px]] Added dragon's breath.}}
{{History||1.13|snap=17w47a|Prior to [[1.13/Flattening|''The Flattening'']], this [[item]]'s numeral ID was 437.}}
{{History||1.14|snap=18w43a|[[File:Dragon's Breath JE2 BE2.png|32px]] The texture of dragon's breath has been changed.}}
{{History|pocket}}
{{History||1.0.0|snap=alpha 0.17.0.1|[[File:Dragon's Breath JE1 BE1.png|32px]] Added dragon's breath.}}
{{History|bedrock}}
{{History||1.10.0|snap=beta 1.10.0.3|[[File:Dragon's Breath JE2 BE2.png|32px]] The texture of dragon's breath has been changed.}}
{{History|console}}
{{History||xbox=TU46|xbone=CU36|ps=1.38|wiiu=Patch 15|switch=1.0.1|[[File:Dragon's Breath JE1 BE1.png|32px]] Added dragon's breath.}}
{{History||xbox=none|xbone=none|ps=1.90|wiiu=none|switch=none|[[File:Dragon's Breath JE2 BE2.png|32px]] The texture of dragon's breath has been changed.}}
{{History|3ds}}
{{History||1.7.10|[[File:Dragon's Breath JE1 BE1.png|32px]] Added dragon's breath.}}
{{History|foot}}
== Issues ==
{{issue list}}
== Trivia ==
* If the dragon's breath is used in a [[crafting]] recipe (using a [[mod]] or a [[data pack]]), it becomes an empty bottle instead of being entirely consumed.
== References ==
{{reflist}}
==External Links==
*[https://www.minecraft.net/en-us/article/dragon-s-breath Taking Inventory: Dragon's Breath] – Minecraft.net on June 9, 2023
{{Items}}
[[Category:Renewable resources]]
[[de:Drachenatem]]
[[fr:Souffle de dragon]]
[[it:Soffio di drago]]
[[ja:ドラゴンブレス]]
[[ko:드래곤의 숨결]]
[[nl:Drakenadem]]
[[pl:Oddech smoka]]
[[pt:Bafo do dragão]]
[[ru:Драконье дыхание]]
[[zh:龙息]]
[[Category:Brewing recipe]]</li><li>[[Popped Chorus Fruit|Popped Chorus Fruit]]<br/>{{Item
| image = Popped Chorus Fruit.png
| renewable = Yes
| stackable = Yes (64)
}}
'''Popped chorus fruit''' is an [[item]] obtained by [[smelting]] [[chorus fruit]], and used to craft [[End Rod|end rods]] and [[purpur blocks]]. Unlike raw chorus fruit, the popped fruit is inedible.
== Obtaining ==
=== Smelting ===
{{Smelting
|Chorus Fruit
|Popped Chorus Fruit
|0,1
}}
== Usage ==
=== Crafting ingredient ===
{{crafting usage}}
== Data values ==
=== ID ===
{{edition|java}}:
{{ID table
|edition=java
|showforms=y
|generatetranslationkeys=y
|displayname=Popped Chorus Fruit
|spritetype=item
|nameid=popped_chorus_fruit
|form=item
|foot=1}}
{{edition|bedrock}}:
{{ID table
|edition=bedrock
|showaliasids=y
|shownumericids=y
|showforms=y
|notshowbeitemforms=y
|generatetranslationkeys=y
|displayname=Popped Chorus Fruit
|spritetype=item
|nameid=popped_chorus_fruit
|aliasid=chorus_fruit_popped
|id=559
|form=item
|translationkey=item.chorus_fruit_popped.name
|foot=1}}
== History ==
{{History|java}}
{{History||1.9|snap=15w31a|[[File:Popped Chorus Fruit JE1 BE1.png|32px]] Added popped chorus fruit.
|Popped chorus fruit are used to craft [[purpur block]]s.}}
{{History|||snap=15w44b|Popped chorus fruit are now used to craft [[end rod]]s.}}
{{History||1.13|snap=17w47a|Prior to [[1.13/Flattening|''The Flattening'']], this [[item]]'s numeral ID was 433.}}
{{History|||snap=pre5|The ID of popped chorus fruit has now been changed to <code>popped_chorus_fruit</code>.}}
{{History||1.14|snap=18w43a|[[File:Popped Chorus Fruit JE2 BE2.png|32px]] The texture of popped chorus fruit has now been changed.}}
{{History|pocket}}
{{History||1.0.0|snap=alpha 0.17.0.1|[[File:Popped Chorus Fruit JE1 BE1.png|32px]] Added popped chorus fruit.}}
{{History|bedrock}}
{{History||1.10.0|snap=beta 1.10.0.3|[[File:Popped Chorus Fruit JE2 BE2.png|32px]] The texture of popped chorus fruit has now been changed.}}
{{History||1.16.100|snap=beta 1.16.100.56|The ID of popped chorus fruit has been changed from <code>chorus_fruit_popped</code> to <code>popped_chorus_fruit</code>.}}
{{History|console}}
{{History||xbox=TU46|xbone=CU36|ps=1.38|wiiu=Patch 15|[[File:Popped Chorus Fruit JE1 BE1.png|32px]] Added popped chorus fruit.}}
{{History||xbox=none|xbone=none|ps=1.90|wiiu=none|switch=none|[[File:Popped Chorus Fruit JE2 BE2.png|32px]] The texture of popped chorus fruit has now been changed.}}
{{History|new 3ds}}
{{History||1.7.10|[[File:Popped Chorus Fruit JE1 BE1.png|32px]] Added popped chorus fruit.}}
{{History|foot}}
== Issues ==
{{issue list}}
{{Items}}
[[cs:Vypukaný květ chorusu]]
[[de:Geplatzte Chorusfrucht]]
[[fr:Chorus éclaté]]
[[it:Frutto di chorus scoppiato]]
[[ja:焼いたコーラスフルーツ]]
[[ko:튀긴 후렴과]]
[[nl:Gepoft Chorusfruit]]
[[pl:Prażony owoc refrenusu]]
[[pt:Fruta do coro cozida]]
[[ru:Приготовленный плод коруса]]
[[zh:爆裂紫颂果]]
[[Category:Renewable resources]]</li></ul> | Biomes added. This changes world generation a lot. | ||||
1.2.3{{Extension DPL}}<ul><li>[[Bone Meal|Bone Meal]]<br/>{{Item
| image = Bone Meal.png
| renewable = Yes
| stackable = Yes (64)
}}
'''Bone meal''' is a material that can be used as a fertilizer for most plants and fungi, as well as a crafting ingredient for [[dye]]s.
== Obtaining ==
=== Crafting ===
{{Crafting
|Bone
|Output=Bone Meal,3
|type=Material
|showname=0
|head=1
}}
{{Crafting
|Bone Block
|Output= Bone Meal,9
|type=Material
|foot=1
}}
=== Mob loot ===
==== Fish ====
All fish mob variants ([[cod]], [[salmon]], [[tropical fish]], and [[pufferfish]]) have a 5% chance to drop 1 bone meal upon death.{{only|java}} In [[Bedrock Edition]], they drop [[bones]] instead.
=== Composters ===
When a [[composter]] is completely filled, a single bone meal drops the next time the composter is {{ctrl|used}}.
=== Trading ===
[[Wandering trader]]s sell 3 bone meal for an [[emerald]].{{only|bedrock}}
== Usage ==
=== Crafting ingredient ===
{{crafting usage}}
{{IN|bedrock}}, bone meal can be also used in [[banner pattern]]s:
{{banner crafting usage}}
=== Loom ingredient ===
{{Banner loom usage|Bone Meal}}
=== Dye ===
{{Dye usage}}
=== Fertilizer ===
Bone meal can also be used on the following [[plants]] to have a chance to increase their growth stage:
{| class="wikitable"
|+
!Plant
!Action
|-
|{{BlockLink|Wheat}}<br>{{BlockLink|Carrots}}<br>{{BlockLink|Potatoes}}
|The plant matures 2–5 growth stages.
|-
|{{BlockLink|Beetroots}}
|The plant has a 75% chance of growing to the next growth stage.
|-
|{{BlockLink|Bamboo}}
|Grows the [[bamboo]] by 1-2 stems.
|-
|{{BlockLink|Melon Stem|link=Melon seeds|text=Melon Seeds}}<br>{{BlockLink|Pumpkin Stem|link=Pumpkin seeds|text=Pumpkin Seeds}}
|The planted stem matures 2–5 growth stages. Bone meal affects only the stem's growth; it does not cause [[melon]]s or [[pumpkin]]s to sprout from a mature stem.
|-
|{{BlockLink|Saplings}}<br>{{BlockLink|Azalea}}<br>{{BlockLink|Flowering Azalea}}<br>{{BlockLink|Mangrove Propagule}} (not hanging)
|The [[sapling]] has a 45% chance of growing to the next growth stage, if possible. Saplings have two growth stages (with no visible difference between them) before growing into trees as the third stage. A tree cannot grow unless the sapling is planted in proper ground and sufficient space is available. Using bone meal on such an obstructed sapling with no chance of growing wastes the bone meal.
|-
|{{BlockLink|Sunflower}}s<br>{{BlockLink|Lilac}}s<br>{{BlockLink|Rose Bush}}es<br>{{BlockLink|Peony|Peonies}}
|The corresponding item form drops, without destroying the original plant.
|-
|{{BlockLink|Grass}}<br>{{BlockLink|Fern}}s<br>{{BlockLink|Seagrass}}
|A one-block-high tall [[grass]], [[fern]], or [[seagrass]] (that is on [[grass block]], [[dirt]], [[coarse dirt]], [[rooted dirt]], [[farmland]], [[podzol]], [[mycelium]], [[moss block]], [[mud]], or [[muddy mangrove roots]] (only exception is seagrass, will need to on a full surface)) grows into a two-block-high tall grass, fern or seagrass.
|-
|{{BlockLink|Mushrooms}}
|Has a 40% chance of growing into a {{EnvLink|huge mushroom}} if on [[grass block]], [[dirt]], [[coarse dirt]], [[rooted dirt]], [[farmland]], [[podzol]], [[mycelium]], [[moss block]], [[mud]], or [[muddy mangrove roots]].
|-
|{{BlockLink|Cocoa}}
|The cocoa plant matures 1 growth stage.
|-
|{{BlockLink|Sweet Berry Bush}}
|Grows every stage.
|-
|{{BlockLink|Sea Pickle}}
|If the [[sea pickle]] is on a [[coral block]] and in [[water]] at least 2 blocks deep, the sea pickle colony grows, and additional sea pickles generate nearby.
|-
|{{BlockLink|Sugar Cane}}{{only|bedrock|short=1}}
|The sugar cane grows to maximum height (three blocks tall).
|-
|{{BlockLink|Kelp}}
|The kelp plant grows by 1 block per bone meal used, up to its maximum height.
|-
|{{BlockLink|Flower|id=poppy}} (excluding wither roses){{only|bedrock|short=1}}
|One-block-high flowers make more flowers of the same type grow in the surrounding area.
|-
|{{BlockLink|Fungus|id=fungi}}
|Grows into [[huge fungi]], but only if on the respective [[nylium]].
|-
|{{BlockLink|Weeping Vines}}
|Grows the [[weeping vine]]s a few blocks downward.
|-
|{{BlockLink|Twisting Vines}}
|Grows the [[twisting vine]]s a few blocks upward.
|-
|{{BlockLink|Cave Vines}}
|Produces [[glow berries]] if the vine did not have any [[glow berries]] on it already.
|-
|{{BlockLink|Glow Lichen}}
|The [[glow lichen]] spreads to a random adjacent block.
|-
|{{BlockLink|Moss Block}}
|The [[moss block]] causes nearby [[stone]], [[cave vine]]s, and [[dirt]] to become moss blocks.
|-
|{{BlockLink|Big Dripleaf}}<br>{{BlockLink|Small Dripleaf}}
|A [[big dripleaf]] grows one block higher, and a [[small dripleaf]] becomes a big dripleaf.
|-
|{{BlockLink|Rooted Dirt}}
|Causes [[hanging roots]] to grow underneath the [[rooted dirt]] if there is space.
|-
|{{BlockLink|Mangrove Leaves}}
|Creates a hanging [[mangrove propagule]] under the [[mangrove leaves]].
|-
|{{BlockLink|Mangrove Propagule}} (hanging)
|The [[mangrove propagule]] matures 1 growth age.
|-
|{{BlockLink|Pink Petals}}
|Produces another pink petal in the block. If there are already four pink petals in the block, it will drop a pink petal as an item.
|-
|{{BlockLink|Torchflower Crop}}<br>{{BlockLink|Pitcher Crop}}
|Grows every stage.
|}
Bone meal does not affect:
* [[Cactus]]
* [[Vines]]
* [[Nether wart]]
* [[Sugar cane]]{{only|JE}}
* [[Chorus plant]]s, or other plants not listed above.
==== Wasting bone meal ====
Bone meal can be used on the following objects in the following situations, consuming it without any real effect:
* On [[grass]], [[fern]]s, and [[seagrass]] that do not have enough space to grow.<ref>{{bug|MC-125642}}</ref>
* On [[seagrass]] that doesn't have [[water]] above.
* On a [[dark oak sapling]] that is not in a group of four.<ref>{{bug|MC-168446}}</ref>
* On a [[mushroom]] that is not on a block that allows it to grow into a huge mushroom.<ref>{{bug|MC-173213}}</ref>
* On a [[sea pickle]] that is already in a group of four and has no valid locations to expand to.<ref>{{bug|MC-127995}}</ref>
* On a [[bamboo]] (not [[bamboo shoot]]) that is blocked in the way.
* On a [[sea pickle]] that is not on a [[coral block]].
* On a [[fungus]] that is not on its respective [[nylium]].
* Any plants that can't grow due to being block by the [[build limit]].
=== Creating new plants ===
If bone meal is {{ctrl|used}} on a [[grass block]]; [[tall grass]], [[grass]], [[flower]]s, and [[pink petals]] form on the targeted block and on random adjacent grass blocks in an 15×5×15{{only|java|short=1}}/7×5×7{{only|bedrock|short=1}} area centered on the targeted block. The flowers/pink petals that appear depend on the biome, meaning that in order to obtain specific flowers, the player must travel to biomes where the flowers are found naturally. See {{slink|Flower|Flower biomes}} for more information.
Using bone meal on a 2-block flower (rose bushes, sunflowers, lilacs or peonies) will cause one of the same type of flower to drop, without breaking the original. This is the only way to reproduce these flowers, since they cannot generate from using bone meal on grass blocks.
Using bone meal on a non-transparent block that is underwater generates [[seagrass]] on that block and surrounding blocks. Sometimes, if in a [[warm ocean]] biome, [[coral]] and [[coral fan]]s may have a chance to generate as well, and in Bedrock Edition, coral (not coral fan) can be generated in any biome. In order for this to work, there must be 2 water blocks above the block the bone meal is being used on, and the lower one must be non-flowing water.
Using bone meal on a [[sea pickle]] on a [[coral block]] creates sea pickles. This generates sea pickles up to 3 [[block]]s (of coral) away, so a 7+ × 7+ block (49+ blocks) of coral may be necessary, to return the most sea pickles per given bone meal attempt (more attempts grows them more numerously, exactly - including the range of it growing, like grass with heights on grass blocks - as coral and coral fans, though those others being non-solid blocks).
Using bone meal on [[netherrack]] adjacent to [[nylium]] converts the netherrack into nylium of the same type. If both crimson and warped nylium are adjacent to the netherrack that was applied with bone meal, there is a 50% chance that either type of nylium is created.
Using bone meal on [[nylium]] causes the corresponding [[roots]] and both types of [[fungi]] to appear on the nylium block and other nylium nearby, with the type of fungi matching the type of nylium being more common. In addition, using bone meal on the side of warped nylium creates [[nether sprouts]] and [[twisting vines]].
=== Farmer villagers ===
[[Villager]]s with the farmer profession can collect bone meal from a full [[composter]], with which they can make their crops grow faster.
== Sounds ==
{{edition|java}}:
{{Sound table
|sound=Bonemeal1.ogg
|sound2=Bonemeal2.ogg
|sound3=Bonemeal3.ogg
|sound4=Bonemeal4.ogg
|sound5=Bonemeal5.ogg
|subtitle=Bone Meal crinkles
|description=When bone meal is successfully used
|source=block
|id=item.bone_meal.use
|translationkey=subtitles.item.bone_meal.use
|volume=1.0
|pitch=1.0
|distance=16
|foot=1}}
{{edition|be}}:
{{Sound table
|type=bedrock
|sound=Bonemeal1.ogg
|sound2=Bonemeal2.ogg
|sound3=Bonemeal3.ogg
|sound4=Bonemeal4.ogg
|sound5=Bonemeal5.ogg
|description=When bone meal is successfully used
|source=block
|id=item.bone_meal.use
|volume=1.0
|pitch=0.9-1.1
|foot=1}}
== Data values ==
=== ID ===
{{edition|java}}:
{{ID table
|edition=java
|showforms=y
|generatetranslationkeys=y
|displayname=Bone Meal
|spritetype=item
|nameid=bone_meal
|form=item
|foot=1}}
{{edition|bedrock}}:
{{ID table
|edition=bedrock
|showaliasids=y
|shownumericids=y
|showforms=y
|notshowbeitemforms=y
|generatetranslationkeys=y
|displayname=Bone Meal
|spritetype=item
|nameid=bone_meal
|aliasid=dye / 15
|id=411
|form=item
|translationkey=item.dye.white.name
|foot=1}}
== History ==
{{History|java beta}}
{{History||1.2|[[File:Bone Meal JE1 BE1.png|32px]] Added bone meal.
|Bone meal can now only be applied to [[sapling]]s and [[wheat]].}}
{{History||1.6.6|Bone meal can now be applied on [[grass block]]s.}}
{{History||1.8|snap=Pre-release|Bone meal can now be used on [[mushroom]]s to make [[huge mushroom]]s, and the block the mushroom is on changes to [[dirt]].}}
{{History|||snap=Pre-release 2 ;)|Bone meal can now be applied on [[pumpkin seeds|pumpkin]] and [[melon seed]]s.}}
{{History|java}}
{{History||1.3.1|snap=12w19a|Bone meal can now be applied on [[cocoa bean]]s.}}
{{History|||snap=1.3|[[File:Bone Meal JE2 BE2.png|32px]] The texture of bone meal has been changed.}}
{{History||1.4.2|snap=12w34a|Bone meal can now be used to dye [[leather armor]] and [[tamed wolf]]'s collar.}}
{{History||1.4.6|snap=12w49a|Bone meal can now be [[crafted]] with [[gunpowder]] to create a [[firework star]].}}
{{History||1.5|snap=13w04a|Bone meal has been significantly nerfed.<br>
[[Wheat]], [[melon seeds|melon]] and [[pumpkin seed]]s, [[potato]]es and [[carrot]]s: one bone meal is now consumed for all seven stages of growth (melon and pumpkin seeds do not spawn right away).<br>
[[Sapling]]s: one bone meal is now consumed for each of the two growth stages, then it grows into a tree.<br>
[[Cocoa]]s: one bone meal is now consumed for each of the three stages of growth.
|Green [[particle]]s are now displayed when bone meal is used.
|Bone meal can now be used from [[dispenser]]s.}}
{{History|||snap=13w05a|The balancing of bone meal has been adjusted. Growing a plant to its last state now takes on average 2-5 uses of bone meal (results vary from plant to plant).<ref>https://web.archive.org/web/20220921040940/https://imgur.com/a/gOngk</ref>}}
{{History||1.6.1|snap=13w19a|Bone meal can now be used to craft white [[stained clay]].}}
{{History||1.7.2|snap=13w36a|The [[flower]]s generated when using bone meal on grass blocks is now biome dependent.}}
{{History|||snap=13w41a|Bone meal can now be used to craft white [[stained glass]].}}
{{History||1.8|snap=14w30a|Added [[banner]]s, which can be dyed with [[bone meal]].}}
{{History||1.10|snap=16w20a|Bone meal can now be used to craft [[bone block]]s.}}
{{History||1.11|snap=16w39b|Bone meal can now be used to dye [[shulker box]]es.}}
{{History||1.12|snap=17w06a|Bone meal can now be used to craft white [[concrete powder]].}}
{{History||1.13|snap=17w47a|The different data values for the <code>dye</code> ID have been split up into their own IDs.
|Prior to [[1.13/Flattening|''The Flattening'']], this [[item]]'s numeral ID was 351.}}
{{History|||snap=18w07a|Bone meal can now be used underwater to create [[seagrass]].}}
{{History|||snap=18w14b|Bone meal can now be used for spreading [[sea pickle]]s.}}
{{History||1.13.1|snap=18w31a|Bone meal used in [[water]] of warm ocean biomes now has a chance of growing [[coral]].
|[[Cod]], [[salmon]], [[tropical fish]], and [[pufferfish]] now have a chance of dropping bone meal upon death.}}
{{History|||snap=18w32a|Bone meal used in [[water]] of warm ocean biomes now has a chance of growing [[coral fan]]s.}}
{{History||1.14|snap=18w43a|Bone meal can now used to craft [[white dye]].
|Bone meal can no longer be used as a [[dye]].
|All of the dye-related functions and crafting recipes of bone meal (except bone blocks) have been transferred to white dye.
|[[File:Bone Meal JE3 BE3.png|32px]] The texture of bone meal has been changed.
|Bone meal can now be used on [[bamboo]] and [[bamboo shoot]].}}
{{History|||snap=19w03a|Bone meal can now be obtained from [[composter]]s.}}
{{History||1.16|snap=20w06a|Bone meal can now be used to grow [[fungi]] into [[huge fungi]].
|Bone meal can now be used to spread [[nylium]] onto netherrack.}}
{{History|||snap=20w09a|Using bone meal to grow fungi now works only on the respective [[nylium]].}}
{{History|||snap=20w11a|Bone meal can now grow [[kelp]], [[weeping vines]], and [[twisting vines]].}}
{{History|||snap=20w12a|Bone meal can now be used to grow [[roots]], [[fungi]], and [[nether sprouts]] on nylium.}}
{{History|||snap=20w13a|Farmers can now use bone meal to grow crops.}}
{{History||1.17|snap=21w03a|Bone meal can now be used to spread [[glow lichen]]s.}}
{{History|||snap=21w05a|Bone meal can now be used on [[moss block]]s, [[small dripleaf]], [[big dripleaf]], and [[cave vines]].}}
{{History|||snap=21w11a|Bone meal can now be used on [[rooted dirt]].}}
{{History|||snap=21w15a|Bone meal now makes a sound when used.}}
{{History|||snap=21w16a|Moss patches obtained from fertilizing moss blocks contain less vegetation and are now smaller and more irregular in shape.
|Bone meal can now be used on [[azalea]] and [[flowering azalea]].}}
{{History||1.19|snap=22w11a|Bone meal can now be used on [[mangrove propagule]]s and [[mangrove leaves]].}}
{{History||1.20<br>(Experimental)|link=1.19.4|snap=23w07a|Bone meal can now be used on [[pink petals]] and [[torchflower crop]]s.|Using bone meal on [[cherry grove]]s now have a chance to generate [[pink petal]]s.}}
{{History||1.20|snap=23w12a|Bone meal can now be used on [[pitcher crop]]s.}}
{{History|pocket alpha}}
{{History||v0.3.0|[[File:Bone Meal JE1 BE1.png|32px]] Added bone meal. It is currently unobtainable and serves no purpose.}}
{{History||v0.3.3|Bone meal can now be crafted from bones.
|Bone meal can now be applied to grass blocks and saplings.}}
{{History||v0.4.0|Added the first [[crop]]s, which bone meal can be applied to.}}
{{History||v0.8.0|snap=build 1|[[File:Bone Meal JE2 BE2.png|32px]] The texture of bone meal has been changed.
|Bone meal no longer instantly grows [[crop]]s to full size.
|Bone meal can now be used to craft white [[wool]].}}
{{History|||snap=build 5|[[Pumpkin]] and [[melon]] stems now grow by only one stage when bone meal is used.
|Some [[flower]]s now spawn certain other flowers when bone meal is used on them.
|Bone meal can now grow [[fern]]s and [[tall grass]] in [[survival]] and [[creative]].
|Bone meal can now grow [[sugar cane]]s to maximum height.}}
{{History||v0.9.0|snap=build 11|Bone meal can now be used to dye tamed [[wolf]] collars.}}
{{History||v0.14.0|snap=build 1|Bone meal can now be used from [[dispenser]]s.
|Bone meal can now be used to dye [[water]] in [[cauldron]]s.}}
{{History|pocket}}
{{History||1.0.0|snap=alpha 0.17.0.1|Bone meal can now be used to dye [[shulker]]s.}}
{{History||1.1.0|snap=alpha 1.1.0.0|Bone meal can now be used to craft white [[concrete powder]], white [[bed]]s and white [[shulker box]]es.}}
{{History||1.1.3|snap=alpha 1.1.3.0|Bone meal can now be used to craft [[bone block]]s.}}
{{History|bedrock}}
{{History||1.2.0|snap=beta 1.2.0.2|Bone meal can now be used to craft white [[stained glass]].
|Bone meal can now be used to craft [[firework star]]s.
|Bone meal can now be used to create [[banner]] patterns.}}
{{History||1.4.0|snap=beta 1.2.14.2|Bone meal can now be used underwater for growing [[seagrass]] and [[coral]].}}
{{History|||snap=beta 1.2.20.1|Bone meal can now be used for spreading [[sea pickle]]s.
|Bone meal can now be used to craft white [[balloon]]s and white [[glow stick]]s.}}
{{History||1.8.0|snap=beta 1.8.0.8|Bone meal can now be used to grow [[bamboo]].}}
{{History|||snap=beta 1.8.0.10|Bone meal can now be used to craft [[white dye]].}}
{{History||1.10.0|snap=beta 1.10.0.3|Bone meal are now sold by [[wandering trader]]s.
|[[File:Bone Meal JE3 BE3.png|32px]] The texture of bone meal has been changed.}}
{{History||1.11.0|snap=beta 1.11.0.1|Bone meal can now be obtained from [[composter]]s.}}
{{History||1.16.0|snap=beta 1.16.0.51|Bone meal can now grow [[fungus|fungi]] into [[huge fungi]].
|Bone meal can now be used to turn [[netherrack]] into [[nylium]].
|Bone meal can now be used to grow [[roots]], [[fungi]], and [[nether sprouts]] on nylium.}}
{{History||1.16.100|snap=beta 1.16.100.56|The ID of bone meal has been changed from <code>dye/15</code> to <code>bone_meal</code>.}}
{{History||1.16.210|snap=beta 1.16.210.51|Bone meal used in [[water]] now has a chance of growing [[coral fan]]s.}}
{{History||1.16.220|snap=beta 1.16.220.52|Bone meal can now be used on [[moss block]]s, [[small dripleaf]], [[big dripleaf]], [[cave vines]] and [[rooted dirt]].}}
{{History||1.17.0|snap=beta 1.16.230.50|Bone meal can now be used to spread [[glow lichen]]s.}}
{{History|||snap=beta 1.16.230.54|Bone meal can be used to grow [[azalea]]s into azalea trees.}}
{{History|||snap=beta 1.17.0.50|Bone meal now makes a sound when used.}}
{{History|console}}
{{History||xbox=TU1|xbone=CU1|ps=1.00|wiiu=Patch 1|switch=1.0.1|[[File:Bone Meal JE1 BE1.png|32px]] Added bone meal.}}
{{History||xbox=TU19|xbone=CU7|ps=1.12|Bone meal no longer instantly grows [[crop]]s to full size.}}
{{History||xbox=none|xbone=none|ps=1.90|wiiu=none|switch=none|[[File:Bone Meal JE3 BE3.png|32px]] The texture of bone meal has been changed.}}
{{History|new 3ds}}
{{History||0.1.0|[[File:Bone Meal JE2 BE2.png|32px]] Added bone meal.}}
{{History|foot}}
== Issues ==
{{issue list}}
== Trivia ==
* Bone meal can be used on the sides or bottom of a [[grass block]], as well as on a grass block with [[plant]]s already on top of it.
* Regardless of if it succeeds in fertilizing, bone meal makes green sparkles. However, like smoke from a [[torch]], the sparkles appear only if the [[player]] has [[particles]] set All or Decreased.
* In real life, [[Wikipedia:bone meal|bone meal]] is used as a fertilizer to provide nitrogen and phosphorus to plants.
==Gallery==
<gallery>
File:Bone Meal On Grass.png|Bone meal used on [[grass block]]s.
</gallery>
== See also ==
* [[Farming]]
== References ==
{{reflist}}
{{Items}}
[[Category:Dyes]]
[[Category:Plants]]
[[Category:Renewable resources]]
[[cs:Kostní moučka]]
[[de:Knochenmehl]]
[[es:Polvo de hueso]]
[[fr:Poudre d'os]]
[[hu:Csontliszt]]
[[ja:骨粉]]
[[ko:뼛가루]]
[[nl:Beendermeel]]
[[pl:Mączka kostna]]
[[pt:Farinha de osso]]
[[ru:Костная мука]]
[[th:ผงกระดูก]]
[[zh:骨粉]]</li><li>[[Egg|Egg]]<br/>{{About|chicken eggs|the similar item that spawns mobs|Spawn egg|other uses}}
{{ItemEntity
|image=Egg.png
|renewable=Yes
|stackable=Yes (16)
|size=Height: 0.25 Blocks<br>Width: 0.25 Blocks
}}
An '''egg''' is an [[item]] that can be used to craft [[food]] items, or thrown for a chance to spawn [[chick]]s on impact.
== Obtaining ==
=== Mob loot ===
{{see also|Tutorials/Egg farming}}
A [[chicken]] drops an egg item every 5–10 minutes. The theoretical average would be expected at 1 egg every 7.5 minutes, or 0.1333 eggs per minute.
A [[fox]] sometimes spawns holding an egg, which it always drops upon death. Alternatively, a player dropping a food item causes the fox to drop the egg.
=== Chest loot ===
{{LootChestItem|egg}}
== Usage ==
=== Crafting ingredient ===
{{crafting usage}}
=== Combat ===
Players are able to throw eggs and deal knockback to [[mob]]s (but not other players{{only|JE|short=1}}<ref>{{bug|MC-3179|||WAI}}</ref>{{until|JE Combat Tests}}), but no damage is dealt, similar to a [[snowball]]. Likewise, throwing eggs at [[neutral mobs]] provokes them. Eggs can also be fired from [[dispenser]]s and are affected by gravity.
=== Spawning chickens ===
When thrown by a dispenser or by pressing the {{control|use}} button, an egg has a {{fraction|1|8}} (12.5%) chance of spawning a [[chick]]. If this occurs, there is a {{fraction|1|32}} (3.125%) chance of spawning three additional chicks (on average, 1 out of every 256 eggs spawns 4 chicks). In other words, whenever an egg is thrown, there is a {{fraction|31|256}} chance of spawning 1 chick and a {{fraction|1|256}} chance of spawning four chicks.
The expected value of the number of chicks an egg produces is {{fraction|35|256}} or 13.7%. This means that on average, a chick is spawned every 7.3 eggs, a stack of 16 eggs spawns 2.188 chicks, and a full inventory including the hotbar and off-hand (<code>37 * 16 = 592</code> eggs) is expected to spawn approximately 81 chicks.
== Sounds ==
{{Edition|Java}}:<br>
Thrown eggs use the Friendly Creatures sound category for entity-dependent sound events.
{{Sound table
|rowspan=2
|sound=Bow shoot.ogg
|subtitle=Egg flies
|source=player
|description=When an egg is thrown
|id=entity.egg.throw
|translationkey=subtitles.entity.egg.throw
|volume=0.5
|pitch={{frac|1|3}}-0.5
|distance=16}}
{{Sound table
|subtitle=Dispensed item
|source=block
|description=When a dispenser shoots an egg
|id=block.dispenser.launch
|translationkey=subtitles.block.dispenser.dispense
|volume=1.0
|pitch=1.2
|distance=16}}
{{Sound table
|sound=Chicken plop.ogg
|subtitle=Chicken plops
|source=Friendly Creatures
|description=When an egg is laid by a chicken
|id=entity.chicken.egg
|translationkey=subtitles.entity.chicken.egg
|volume=1.0
|pitch=0.8-1.2
|distance=16
|foot=1}}
{{Edition|Bedrock}}:
{{Sound table
|type=bedrock
|rowspan=2
|sound=Bow shoot.ogg
|source=player
|description=When an egg is thrown
|id=random.bow
|volume=0.5
|pitch=0.33-0.5}}
{{Sound table
|source=player
|description=When a dispenser shoots an egg
|id=random.bow
|volume=1.0
|pitch=0.83-1.25}}
{{Sound table
|sound=Chicken plop.ogg
|source=neutral
|description=When an egg is laid by a chicken
|id=mob.chicken.plop
|volume=1.0
|pitch=0.8-1.2
|foot=1}}
== Data values ==
=== ID ===
{{edition|java}}:
{{ID table
|edition=java
|showforms=y
|generatetranslationkeys=y
|displayname=Egg
|spritetype=item
|nameid=egg
|form=item
|foot=1}}
{{ID table
|edition=java
|showentitytags=y
|generatetranslationkeys=y
|displayname=Thrown Egg
|spritetype=entity
|spritename=Egg
|nameid=egg
|entitytags=impact_projectiles
|foot=1}}
{{edition|bedrock}}:
{{ID table
|edition=bedrock
|shownumericids=y
|showforms=y
|notshowbeitemforms=y
|generatetranslationkeys=y
|displayname=Egg
|spritetype=item
|nameid=egg
|id=390
|form=item
|foot=1}}
{{ID table
|edition=bedrock
|shownumericids=y
|generatetranslationkeys=y
|displayname=Egg
|spritetype=entity
|nameid=egg
|id=82
|foot=1}}
=== Entity Data ===
Thrown eggs have entity data that define various properties of the entity.
{{el|java}}:
{{main|Entity format}}
{{/ED}}
{{el|bedrock}}:
: See [[Bedrock Edition level format/Entity format]].
== Achievements ==
{{load achievements|The Lie}}
==Advancements==
{{Load advancements|Bullseye}}
== Video ==
<div style="text-align:center">{{yt|8rDbF8UYuTc}}</div>
== History ==
{{History|java alpha}}
{{History||v1.0.14|[[File:Egg JE1 BE1.png|32px]] Added eggs.
|Eggs currently have no purpose.}}
{{History|java beta}}
{{History||1.0|Eggs are now throwable at the request of a fan as the result of a [[wikipedia:Twitter|Twitter]] conversation about a man eating his [[wikipedia:USB|USB]], if [[Notch]] added egg throwing.<ref>{{tweet|notch|11773078791000065}}</ref>}}
{{History||1.2|Eggs are now used to craft [[cake]]s.
|Eggs can now be thrown by [[dispenser]]s.}}
{{History|java}}
{{History||1.0.0|snap=Beta 1.9 Prerelease 2|[[Breeding]] has been added, making eggs easier to obtain.}}
{{History|||snap=RC1|Thrown eggs now hatch chicks instead of adult chickens.
|The egg's throw [[sound]] has been changed.}}
{{History||1.4.2|snap=12w37a|Eggs are now used to craft [[pumpkin pie]]s.}}
{{History||1.9|snap=15w32a|Eggs no longer [[damage]] the [[ender dragon]].}}
{{History|||snap=15w36b|Eggs now produce particles when thrown at an entity.}}
{{History|||snap=15w49a|Eggs, like all throwable projectiles, now take the thrower's motion into account when fired.}}
{{History||1.11|snap=16w32a|The [[entity]] ID has now been changed from <code>ThrownEgg</code> to <code>egg</code>.}}
{{History||1.13|snap=17w47a|Prior to [[1.13/Flattening|''The Flattening'']], this [[item]]'s numeral ID was 344.}}
{{History||1.14|snap=18w43a|[[File:Egg JE2 BE2.png|32px]] The texture of eggs has been changed.}}
{{History|||snap=18w50a|Eggs can now be found in [[chest]]s in [[village]] fletcher houses.
|Therefore, chickens are no longer the only source of eggs.}}
{{History|||snap=19w07a|Added [[fox]]es, which sometimes spawn with eggs in their mouths.}}
{{History||1.16.2|snap=Pre-Release 1|Eggs are now affected by [[bubble column]]s.}}
{{History|pocket alpha}}
{{History||v0.4.0|[[File:Egg JE1 BE1.png|32px]] Added eggs. They are currently unobtainable.
|Eggs are throwable, but are unable to spawn chickens.}}
{{History||v0.7.0|[[Chicken]]s now occasionally lay eggs.
|Eggs can be used to craft [[cake]].
|Thrown eggs now have a chance of spawning adult chickens.}}
{{History||v0.8.0|snap=build 1|Eggs are now used to craft [[pumpkin pie]]s.}}
{{History|||snap=build 3|Thrown eggs now have a chance of spawning chicks instead of adult chickens.}}
{{History|pocket}}
{{History||1.1.0|snap=alpha 1.1.0.0|The [[entity]] ID has now been changed from <code>thrownegg</code> to <code>egg</code>.}}
{{History|bedrock}}
{{History||1.2.0|Eggs now deal knockback to [[player]]s.}}
{{History||1.10.0|snap=beta 1.10.0.3|[[File:Egg.png|32px]] The texture of eggs has been changed.}}
{{History||1.11.0|snap=beta 1.11.0.1|Eggs can now be found in [[village]] fletcher [[chest]]s.}}
{{History|||snap=beta 1.11.0.4|Eggs can now be [[trading|sold]] to farmer [[villager]]s.}}
{{History||1.13.0|snap=beta 1.13.0.1|Added [[fox]]es, which can [[drops|drop]] eggs.}}
{{History||1.16.0|snap=beta 1.16.0.57|[[Trading]] has now been changed, eggs can no longer be [[trading|sold]] to farmer [[villager]]s.}}
{{History|console}}
{{History||xbox=TU1|xbone=CU1|ps=1.0|wiiu=Patch 1|[[File:Egg JE1 BE1.png|32px]] Added eggs.}}
{{History|PS4}}
{{History||1.90|[[File:Egg JE2 BE2.png|32px]] The texture of eggs has been changed.}}
{{History|New 3DS}}
{{History||0.1.0|[[File:Egg JE1 BE1.png|32px]] Added eggs.}}
{{History|foot}}
== Issues ==
{{issue list}}
== Trivia ==
* Eggs break mid-fall if hit by another projectile; the chance of spawning a chick is not affected.
* Throwing an egg at a [[nether portal]] breaks the egg when it hits the portal.
* A thrown egg faces toward the [[player]] in first-person view, while it appears rotated horizontally in third-person view. This is the case for all throwable [[item]]s ([[ender pearl]]s, eggs, [[snowball]]s, and all throwable [[potion]]s).
== References ==
{{Reflist}}
{{Items}}
{{entities}}
[[Category:Combat]]
[[Category:Egg]]
[[cs:Vajíčko]]
[[de:Ei]]
[[es:Huevo]]
[[fr:Œuf]]
[[hu:Tojás]]
[[it:Uovo]]
[[ja:卵]]
[[ko:달걀]]
[[nl:Ei]]
[[pl:Jajko]]
[[pt:Ovo]]
[[ru:Яйцо]]
[[th:ไข่ไก่]]
[[uk:Яйце]]
[[zh:鸡蛋]]
<br /></li></ul> | The F3 key toggles a debug console which shows the player their exact coordinates. | ||||
| beta | |||||
1.3{{Extension DPL}}<ul><li>[[Iron Ingot|Iron Ingot]]<br/>{{About|the ingot|the ore|Iron Ore|the mineral block|Block of Iron|the nugget|Iron Nugget|the raw mineral|Raw Iron}}
{{Item
| image = Iron Ingot.png
|type=
| renewable = Yes
| stackable = Yes (64)
}}
'''Iron ingots''' are versatile [[metal]] ingots used extensively in [[crafting]].
== Obtaining ==
=== Chest loot ===
{{LootChestItem|iron-ingot}}
=== Crafting ===
{{Crafting
|head=1
|showname=0
|Block of Iron
|Output=Iron Ingot,9
|type=Material
}}
{{Crafting
|A1= Iron Nugget
|B1= Iron Nugget
|C1= Iron Nugget
|A2= Iron Nugget
|B2= Iron Nugget
|C2= Iron Nugget
|A3= Iron Nugget
|B3= Iron Nugget
|C3= Iron Nugget
|Output=Iron Ingot
|type= Material
|foot=1
}}
=== Smelting ===
{{see also|Iron Ore#Natural generation}}[[Smelting]] raw iron in a [[furnace]] or [[blast furnace]] is the most common way to obtain iron ingots.
{{Smelting
|head=1
|Iron Ore;Deepslate Iron Ore
|Iron Ingot
|0,7
}}
{{Smelting
|foot=1
|Raw Iron
|Iron Ingot
|0,7
}}
=== Compound creation ===
Iron Ingot can be created from its base [[element]]s, using the [[compound creator]].{{only|bedrock|education}}
{| class="wikitable"
!Name
!Elements
!Example recipe
|- <!-- Temporarily using crafting grid as a substitute for the compound creator (template not yet available), since the layout is the same, even if the appearance is different -->
!Iron Ingot
|Iron <br>
|{{Crafting Table
|shapeless= 1
|A2=Iron
|Output=Iron Ingot}}
|}
=== Mob loot ===
{{see also|Tutorials/Iron golem farming}}
[[Iron golem]]s drop 3-5 iron ingots upon death, regardless of the way they die. The looting enchantment does not increase the amount of iron ingots dropped.
[[Zombie]]s, [[husk]]s, and [[zombie villager]]s have a 2.5% ({{frac|1|40}}) chance of dropping either an iron ingot, [[carrot]], or [[potato]] when killed by a player or tamed wolf. This is increased by 1% ({{frac|1|100}}) per level of looting. This gives iron ingots the following chances of dropping:
* {{frac|1|120}} (about 0.83%)
* {{frac|7|600}} (about 1.17%) with Looting I
* {{frac|9|600}} (1.50%) with Looting II
* {{frac|11|600}} (about 1.83%) with Looting III
== Usage ==
=== Crafting ingredient ===
{{crafting usage}}
=== Trading ===
Apprentice-level Armorer, Toolsmith, and Weaponsmith [[Villager|villagers]] buy 3 iron ingots for an [[emerald]] as their third trade.{{only|bedrock}}
Apprentice-level Armorer villagers have a 50% chance to buy 4 iron ingots for one emerald, and apprentice-level Toolsmith and Weaponsmith villagers always offer to buy 4 iron ingots for one emerald.{{only|java}}
=== Repairing ===
Iron ingots are the repair items for the iron [[tier]] and chainmail and iron [[armor material]]s, and thus can be used to [[item repair|repair]] the following items in an [[anvil]]:
* {{ItemLink|Chainmail Helmet}}
* {{ItemLink|Chainmail Chestplate}}
* {{ItemLink|Chainmail Leggings}}
* {{ItemLink|Chainmail Boots}}
* {{ItemLink|Iron Helmet}}
* {{ItemLink|Iron Chestplate}}
* {{ItemLink|Iron Leggings}}
* {{ItemLink|Iron Boots}}
* {{ItemLink|Iron Sword}}
* {{ItemLink|Iron Axe}}
* {{ItemLink|Iron Pickaxe}}
* {{ItemLink|Iron Shovel}}
* {{ItemLink|Iron Hoe}}
=== Healing iron golems ===
{{control|Using}} an iron ingot on an [[iron golem]] restores its health by {{hp|25}}.
=== Beacons ===
Iron ingots can be used to select powers from a [[beacon]]. The player must select one of the available powers, and then insert an iron ingot in the item slot.
An iron ingot can be substituted for an [[emerald]], a [[gold ingot]], a [[diamond]], or a [[netherite ingot]].
=== Smithing ingredient ===
{{Smithing
|head=1
|ingredients=Any Armor Trim +<br/>Any Armor Piece + <br/>Iron Ingot
|Any Armor Trim Smithing Template
|Netherite Chestplate
|Iron Ingot
|Iron Trim Netherite Chestplate
|showdescription=1
|description = All armor types can be used in this recipe,<br/>a netherite chestplate is shown as an example.<br/>
|tail=1
}}
;Trim color palette
The following color palettes are shown on the designs on trimmed armor:
*{{TrimPalette|iron ingot}}
*{{TrimPalette|iron ingot|darker=1}} (a darker color palette is used when an iron armor piece is trimmed using an iron ingot).
== Achievements ==
{{load achievements|Acquire Hardware}}
== Advancements ==
{{load advancements|Acquire Hardware}}
== Data values ==
=== ID ===
{{edition|java}}:
{{ID table
|edition=java
|showitemtags=y
|showforms=y
|generatetranslationkeys=y
|displayname=Iron Ingot
|spritetype=item
|nameid=iron_ingot
|itemtags=beacon_payment_items
|form=item
|foot=1}}
{{edition|bedrock}}:
{{ID table
|edition=bedrock
|shownumericids=y
|showforms=y
|notshowbeitemforms=y
|generatetranslationkeys=y
|displayname=Iron Ingot
|spritetype=item
|nameid=iron_ingot
|id=305
|form=item
|foot=1}}
== History ==
{{History|java indev}}
{{History||0.31|snap=20100128|[[File:Iron Ingot JE1.png|32px]] Added iron ingots.}}
{{History|||snap=20100129|[[File:Iron Ingot JE2 BE1.png|32px]] The texture of iron ingots has been changed.
|Iron ingots can be [[smelting|smelted]] from [[iron ore]] and [[drops|drop]] 3–5 iron ingots.
|Iron ingots can be used to craft [[iron block]]s, [[flint and steel]] and iron [[sword]]s, [[shovel]]s, [[pickaxe]]s and [[axe]]s.}}
{{History|||snap=20100130|Iron ingots are now used to craft [[arrow]]s.|[[Iron block]]s now require 9 iron ingots (3×3) instead 4 (2×2) to be [[crafting|crafted]], making them much more expensive.}}
{{History||20100206|Iron ingots can now be used to [[crafting|craft]] iron [[hoe]]s.}}
{{History||?|[[Smelting]] now [[drops]] only 1 iron ingot (down from 3–5).}}
{{History||20100218|Iron ingots are now used to craft iron [[helmet]]s, [[chestplate]]s, [[leggings]] and [[boots]].}}
{{History|java infdev}}
{{History||20100615|Iron ingots are now used to craft [[bucket]]s.}}
{{History||20100618|Iron ingots are now used to craft [[rail]]s and [[minecart]]s.}}
{{History||20100625-2|Iron ingots can be found in [[dungeon]] [[chest]]s.}}
{{History|java alpha}}
{{History||v1.0.1|Iron ingots are now used to [[crafting|craft]] iron [[door]]s.}}
{{History||v1.0.14|Iron ingots are no longer used to craft [[arrow]]s.}}
{{History||v1.1.0|Iron ingots are now used to craft [[compass]]es.}}
{{History|java beta}}
{{History||1.5|Iron ingots are now used to craft [[detector rail]]s.}}
{{History||1.7|Iron ingots are now used to craft [[piston]]s and [[shears]].}}
{{History||1.8|snap=Pre-release|Iron ingots are found in the new [[stronghold]] storeroom and [[mineshaft]] [[chest]]s.
|Iron ingots are now used to craft [[iron bars]].}}
{{History|java}}
{{History||1.0.0|snap=Beta 1.9 Prerelease 2|Iron ingots are now used to craft [[cauldron]]s.}}
{{History|||snap=Beta 1.9 Prerelease 3|Iron ingots are now found in the new stronghold altar [[chest]]s.}}
{{History||1.1|snap=12w01a|Iron ingots are now found in [[village]] blacksmith chests.}}
{{History||1.2.1|snap=12w06a|[[Zombie]]s now rarely [[drops|drop]] iron ingots, making it a [[renewable resource]].}}
{{History|||snap=12w08a|[[Iron golem]]s now drop 3–5 iron ingots.}}
{{History||1.3.1|snap=12w21a|Added [[desert temple]]s, with a hidden [[chest]] room and loot containing iron ingots.
|Blacksmith [[villager]]s now [[trading|buy]] 8–9 iron ingots for 1 [[emerald]].}}
{{History|||snap=12w22a|Added [[jungle temple]]s, which contain loot [[chest]]s with iron ingots.
|Iron ingots are now used to craft [[tripwire hook]]s.}}
{{History||1.4.2|snap=12w32a|Iron ingots can be used to activate [[beacon]]s.}}
{{History|||snap=12w41a|Iron ingots are now used to craft [[anvil]]s.}}
{{History|||snap=12w42a|Anvils now need 4 iron ingots to [[craft]] instead of 1.}}
{{History||1.5|snap=13w01a|Iron ingots are now used to [[crafting|craft]] heavy [[weighted pressure plate]]s.}}
{{History|||snap=13w02a|Iron ingots are now used to craft [[hopper]]s and [[activator rail]]s.}}
{{History||1.6.1|snap=13w16a|Iron ingot is now used to craft iron [[horse armor]] and [[horse saddle]].}}
{{History|||snap=13w18a|Iron ingot is no longer used to craft iron [[horse armor]] and [[horse saddle]].|Iron ingots are now found in [[nether fortress]] [[chest]]s.}}
{{History||1.8|snap=14w02a|[[Trading]] for iron ingots has been changed: armorer, weapon smith and tool smith [[villager]]s now [[trading|buy]] 7–9 iron ingots for 1 [[emerald]].}}
{{History|||snap=14w07a|Iron ingots are now used to craft [[iron trapdoor]]s.}}
{{History||1.9|snap=15w31a|Iron ingots are now found in [[end city]] ship [[chest]]s.}}
{{History|||snap=15w33c|Iron ingots are now used to craft [[shield]]s.}}
{{History|||snap=15w44a|The average yield from [[dungeon]] and [[desert temple]] chests has been substantially decreased.
|The average yield from [[mineshaft]] and [[nether fortress]] chests has been slightly decreased.}}
{{History||1.11|snap=16w39a|Iron ingots are now found in the new [[woodland mansion]] chests.}}
{{History||1.11.1|snap=16w50a|Iron ingots are now used to craft [[iron nugget]]s.}}
{{History||1.13|snap=17w47a|Prior to [[1.13/Flattening|''The Flattening'']], this [[item]]'s numeral ID was 265.}}
{{History|||snap=18w10a|Iron ingots now generate in [[buried treasure]] [[chest]]s.}}
{{History|||snap=18w11a|Iron ingots can now be found in the chests of [[shipwreck]]s.}}
{{History||1.14|snap=18w43a|Iron ingots can now be used to craft [[crossbow]]s.
|[[File:Iron Ingot JE3 BE2.png|32px]] The texture of iron ingots has been changed.}}
{{History|||snap=18w47a|Iron ingots can now be found inside of loot [[chest]]s on top of [[pillager outpost]]s.}}
{{History|||snap=18w50a|Iron ingots can now be found in chests in [[village]] toolsmith houses.
|Iron ingots can now be used to craft a [[blast furnace]].}}
{{History|||snap=19w04a|Iron ingots can now be used to craft [[stonecutter]]s.}}
{{History||1.15|snap=19w41a|Iron ingots can now be used to heal [[iron golem]]s.}}
{{History||1.16|snap=20w16a|Iron ingots now generate in [[bastion remnants]] chests.
|Iron ingots are now used to craft [[chain]]s.}}
{{History||1.16.2|snap=20w30a|The average yield of iron ingots from bastion remnant chests has been slightly increased.}}
{{History||1.17|snap=21w08a|Iron ingots can now be smelted from [[deepslate iron ore]].}}
{{History|||snap=21w14a|Iron ingots can now be smelted from [[raw iron]].}}
{{History||1.20<br>(Experimental)|link=1.19.4|snap=23w04a|Iron ingots can now be used as an armor trim material.}}
{{History|||snap=23w05a|Iron ingots can now be trimmed with iron [[armor]].}}
{{History|pocket alpha}}
{{History||v0.2.0|[[File:Iron Ingot JE2 BE1.png|32px]] Added iron ingots. They are currently unobtainable and serve no purpose.}}
{{History||v0.3.2|Iron ingots are now obtainable by [[smelting]] iron ore in a [[furnace]].
|Iron ingots can be used to craft [[shears]], [[blocks of iron]] and iron [[pickaxe]]s, [[axe]]s, [[sword]]s and [[shovel]]s.}}
{{History||v0.4.0|Iron ingots are now used to craft [[flint and steel]] and iron [[hoe]]s.}}
{{History||v0.5.0|Iron ingots are now used to craft [[nether reactor core]]s.}}
{{History||v0.6.0|Iron ingots are now used to craft iron [[armor]].}}
{{History||v0.7.0|Iron ingots are now used to craft [[bucket]]s.}}
{{History||v0.8.0|snap=build 1|Iron ingots are now used to craft [[compass]]es and [[iron bars]].}}
{{History|||snap=build 2|Iron ingots are now used to craft [[minecart]]s and [[rail]]s.}}
{{History||v0.9.0|snap=build 1|Iron ingots can now be found in [[village]] blacksmith [[chest]]s, [[stronghold]] altar chests and [[dungeon]] chests.
|[[Zombie]]s now rarely drop iron ingots.}}
{{History||v0.12.1|snap=build 1|Iron ingots are no longer used to craft [[nether reactor core]]s and are instead dropped by it.
|Iron ingots are now used to craft [[anvil]]s.
|Iron ingots are now found in [[nether fortress]] chests.
|Added [[iron golem]]s, which [[drops|drop]] iron ingots.
|Iron ingots can now be used to repair iron [[tool]]s, [[armor]] and [[weapon]]s in [[anvil]]s.
|Added [[zombie villager]]s, which rarely drop iron ingots.}}
{{History||v0.13.0|snap=build 1|Iron ingots are now used to craft [[tripwire hook]]s, [[detector rail]]s, [[iron trapdoor]]s and heavy [[weighted pressure plate]]s.
|Added [[desert temple]]s, which have hidden [[chest]] rooms and loot containing iron ingots.}}
{{History||v0.14.0|snap=build 1|Iron ingots are now used to craft [[hoppers]] and [[cauldron]]s.
|Iron ingots can now be found in [[minecart with chest|minecart chests]] generated in [[mineshaft]]s.}}
{{History||v0.15.0|snap=build 1|Iron ingots are now used to craft [[piston]]s.
|Added [[jungle temple]]s, which have hidden [[chest]] rooms and main treasure rooms that have loot containing iron ingots.
|Added [[husk]]s, which rarely [[drops|drop]] iron ingots.}}
{{History||v0.16.0|snap=build 4|Iron ingots can now be used to activate [[beacon]]s.}}
{{History|pocket}}
{{History||1.0.0|snap=alpha 0.17.0.1|Iron ingots can now be found in [[end city]] ship [[chest]]s.
|Iron ingots can now be found in [[stronghold]] storeroom chests.}}
{{History||1.0.4|snap=alpha 1.0.4.0|Added [[trading]]—armorer, weaponsmith and toolsmith [[villager]]s now [[trading|buy]] 7–9 iron ingots for 1 [[emerald]].}}
{{History||1.1.0|snap=alpha 1.1.0.0|Iron ingots can now be [[crafting|crafted]] using [[iron nugget]]s.
|Iron ingots can now be used to [[crafting|craft]] iron nuggets.
|Iron ingots can now be found in [[woodland mansion]] [[chest]]s.}}
{{History|bedrock}}
{{History||1.4.0|snap=beta 1.2.14.2|Iron ingots now generate in [[buried treasure]] [[chest]]s.
|Iron ingots can now be found in [[shipwreck]] treasure chests.}}
{{History||1.8.0|snap=beta 1.8.0.10|Iron ingots can now be used to craft [[crossbow]]s.}}
{{History||1.10.0|snap=beta 1.10.0.3|Iron ingots can now be found inside [[pillager outpost]]s and plains [[village]]s' weaponsmith chests.
|Iron ingots can now be used to craft [[blast furnace]]s, [[stonecutter]]s and [[shield]]s.
|[[File:Iron Ingot JE3 BE2.png|32px]] The texture of iron ingots has been changed.}}
{{History||1.11.0|snap=beta 1.11.0.1|Iron ingots can now be found in [[village]] armorer and toolsmith [[chest]]s.
|Iron ingots can now be found in [[savanna]], [[taiga]], [[desert]] and [[snowy taiga]] village weaponsmiths.}}
{{History|||snap=beta 1.11.0.4|Armorer, toolsmith, and weaponsmith [[villager]]s now [[trading|buy]] 4 iron ingots for an [[emerald]].}}
{{History||1.16.0|snap=beta 1.16.0.57|Iron ingots now generate in bastion remnants chests.}}
{{History||1.17.0|snap=beta 1.16.230.52|Iron ingots can now be smelted from [[deepslate iron ore]].}}
{{History|||snap=beta 1.17.0.50|Iron ingots can now be smelted from [[raw iron]].}}
{{History||1.18.10|snap=beta 1.18.10.26|Iron ingots can now be used to heal iron golems.}}
{{History||1.19.80|snap=beta 1.19.80.21|Iron ingots can now be used as an armor trim material.}}
{{History|console}}
{{History||xbox=TU1|xbone=CU1|ps=1.0|wiiu=Patch 1|switch=1.0.1|[[File:Iron Ingot JE2 BE1.png|32px]] Added iron ingots.}}
{{History||xbox=none|xbone=none|ps=1.90|wiiu=none|switch=none|[[File:Iron Ingot JE3 BE2.png|32px]] The texture of iron ingots has been changed.}}
{{History|new3DS}}
{{History||0.1.0|[[File:Iron Ingot JE2 BE1.png|32px]] Added iron ingots.}}
{{History|foot}}
== Issues ==
{{issue list}}
== Trivia ==
* To craft each recipe once, a player would need 152 iron ingots, including 27 for the iron blocks in an [[anvil]], while using the extra tripwire hook for the [[crossbow]] and the [[iron nuggets]] for the [[chain]].
== See also ==
* {{BlockLink|Block of Iron}}
* {{ItemSprite|Iron Chestplate}} [[Iron armor]]
* {{ItemLink|Iron Nugget}}
* {{BlockLink|Iron Ore}}
* [[Ores]]
== External links ==
* {{Mcnet|taking-inventory--iron-ignot|Taking Inventory: Iron Ingot}}
{{Items}}
[[cs:Železný ingot]]
[[de:Eisenbarren]]
[[es:Lingote de hierro]]
[[fr:Lingot de fer]]
[[hu:Vasrúd]]
[[it:Lingotto di ferro]]
[[ja:鉄インゴット]]
[[ko:철괴]]
[[nl:IJzerstaaf]]
[[pl:Sztabka żelaza]]
[[pt:Barra de ferro]]
[[ru:Железный слиток]]
[[uk:Залізний зливок]]
[[zh:铁锭]]
[[Category:Renewable resources]]</li><li>[[Milk Bucket|Milk Bucket]]<br/>{{Item
| title=Milk Bucket
| image = Milk Bucket.png
| renewable = Yes
| effects = Clears all
| stackable = No
}}
A '''milk bucket'''{{fn|Known as '''Milk Bucket''' {{in|java}} and '''Milk''' {{in|bedrock}}.}} is a [[drink]] obtained from {{Control|use|text=using}} a [[bucket]] on [[cow]]s, [[mooshroom]]s and [[goat]]s that can be consumed to clear all [[Effect|effects]].
== Obtaining ==
=== Harvesting ===
Milk buckets can be obtained from [[cow]]s, [[mooshroom]]s, and [[goat]]s by pressing {{control|use}} while looking at them with an empty [[bucket]].
=== Mob loot ===
A milk bucket has a chance of dropping from a [[wandering trader]], if the trader is killed while holding it.{{only|java}}
== Usage ==
Holding {{control|use}} with a milk bucket starts the drinking sound and animation. {{IN|java}}, the animation is shown only in first-person camera mode.
When consumed, milk immediately removes all status [[effect]]s from the [[player]]. [[Fire]] is not a status effect; therefore, drinking milk doesn't extinguish a burning player.
The benefits of area status effects granted by [[beacon]]s and [[Conduit Power|conduit power]] are restored almost immediately in Bedrock Edition and after a few seconds in ''Java Edition''.
=== Crafting ingredient ===
{{crafting usage|Milk Bucket}}
== Sounds ==
{{el|je}}:
{{Sound table
|sound=Drink.ogg
|subtitle=Sipping
|source=player
|description=While a player is drinking milk
|id=entity.generic.drink
|translationkey=subtitles.entity.generic.drink
|volume=0.5
|pitch=0.9-1.0
|distance=16}}
{{Sound table
|sound=Cow milk1.ogg
|sound2=Cow milk2.ogg
|sound3=Cow milk3.ogg
|source=player
|subtitle=Cow gets milked
|description=When a cow is milked
|id=entity.cow.milk
|translationkey=subtitles.entity.cow.milk
|volume=1.0
|pitch=1.0
|distance=16}}
{{Sound table
|sound=Mooshroom milk1.ogg
|sound2=Mooshroom milk2.ogg
|sound3=Mooshroom milk3.ogg
|subtitle=Goat gets milked
|description=When a regular goat is milked
|source=neutral
|id=entity.goat.milk
|translationkey=subtitles.entity.goat.milk
|volume=1.0
|pitch=1.0
|distance=16}}
{{Sound table
|sound=Goat screaming milk1.ogg
|sound2=Goat screaming milk2.ogg
|sound3=Goat screaming milk3.ogg
|sound4=Goat screaming milk4.ogg
|sound5=Goat screaming milk5.ogg
|subtitle=Goat gets milked
|description=When a screaming goat is milked
|source=neutral
|id=entity.goat.screaming.milk
|translationkey=subtitles.entity.goat.milk
|volume=1.0
|pitch=1.0
|distance=16}}
{{Sound table
|sound=Wandering trader drink milk1.ogg
|sound2=Wandering trader drink milk2.ogg
|sound3=Wandering trader drink milk3.ogg
|sound4=Wandering trader drink milk4.ogg
|sound5=Wandering trader drink milk5.ogg
|subtitle=Wandering Trader drinks milk
|source=neutral
|description=While a wandering trader is drinking milk to become visible during daytime
|id=entity.wandering_trader.drink_milk
|translationkey=subtitles.entity.wandering_trader.drink_milk
|volume=0.5
|pitch=0.9-1.0
|distance=16
|foot=1}}
{{el|be}}:
{{Sound table
|type=bedrock
|sound=Drink.ogg
|source=player
|description=While a player is drinking milk
|id=random.drink
|volume=0.35
|pitch=0.9-1.1}}
{{Sound table
|sound=Cow milk1.ogg
|sound2=Cow milk2.ogg
|sound3=Cow milk3.ogg
|source=neutral
|description=When a cow is milked
|id=mob.cow.milk
|volume=1.0
|pitch=1.0}}
{{Sound table
|sound=Mooshroom milk1.ogg
|sound2=Mooshroom milk2.ogg
|sound3=Mooshroom milk3.ogg
|description=When a regular goat is milked
|source=neutral
|id=mob.mooshroom.suspicious_milk
|volume=1.0
|pitch=1.0/0.9/1.1}}
{{Sound table
|sound=Goat screaming milk1.ogg
|sound2=Goat screaming milk2.ogg
|sound3=Goat screaming milk3.ogg
|sound4=Goat screaming milk4.ogg
|sound5=Goat screaming milk5.ogg
|description=When a screaming goat is milked
|source=neutral
|id=mob.goat.milk.screamer
|volume=1.0
|pitch=1.0}}
{{Sound table
|sound=Wandering trader drink milk1.ogg
|sound2=Wandering trader drink milk2.ogg
|sound3=Wandering trader drink milk3.ogg
|sound4=Wandering trader drink milk4.ogg
|sound5=Wandering trader drink milk5.ogg
|source=neutral
|description=While a wandering trader is drinking milk to become visible during daytime
|id=mob.wanderingtrader.drink_milk
|volume=1.0
|pitch=0.8-1.2
|foot=1}}
== Data values ==
=== ID ===
{{edition|java}}:
{{ID table
|edition=java
|showforms=y
|generatetranslationkeys=y
|displayname=Milk Bucket
|spritetype=item
|nameid=milk_bucket
|form=item
|foot=1}}
{{edition|bedrock}}:
{{ID table
|edition=bedrock
|showaliasids=y
|shownumericids=y
|showforms=y
|notshowbeitemforms=y
|generatetranslationkeys=y
|displayname=Milk
|spritetype=item
|nameid=milk_bucket
|aliasid=bucket / 1
|id=361
|form=item
|translationkey=item.milk.name
|foot=1}}
== Achievements ==
{{load achievements|The Lie}}
== Advancements ==
{{Load advancements|Husbandry}}
== Video ==
<div style="text-align:center">{{yt|eyxea_d0b3s}}</div>
== History ==
{{History|java alpha}}
{{History||v1.0.8|[[File:Milk Bucket JE1 BE1.png|32px]] Milk has been introduced, but it has no purpose and is obtainable only through inventory editing.}}
{{History||v1.0.11|Milk can now be obtained by {{control|use|text=milking}} a [[cow]] with a [[bucket]]. However, it is not yet drinkable.}}
{{History||v1.0.17|Milk buckets can now be emptied.}}
{{History|java beta}}
{{History||1.2|Milk has been incorporated into the [[crafting]] recipe of [[cake]].}}
{{History||1.2_01|[[Squid]] can now be milked by right-clicking on their mouth if part of their body was exposed to [[air]] or if they were not touching another [[block]]. An easy way to accomplish this is to pull a squid with a [[fishing rod]] away from other blocks and then milk it.}}
{{History||1.3_01|Squid milking has been removed.}}
{{History|java}}
{{History||1.0.0|snap=Beta 1.9 Prerelease|Milk can now be obtained by milking [[mooshroom]]s.}}
{{History|||snap=Beta 1.9 Prerelease 2|Milk has been made drinkable.
|According to a tweet by [[Jeb]] on September 30th 2011, milk was made a cure for all status effects.<ref>{{tweet|jeb_|119842906528944129|@Nexusdog_UK I haven't! In beta 1.9 pre2 milk works like a clear-everything drink|September 30, 2011}}</ref>
|Milk is no longer emptiable.}}
{{History||1.13|snap=17w47a|Prior to [[1.13/Flattening|''The Flattening'']], this [[item]]'s numeral ID was 335.}}
{{History|||snap=18w20a|"Milk" has been renamed to "Milk Bucket".}}
{{History||1.14|snap=18w43a|[[File:Milk Bucket JE2 BE2.png|32px]] The texture of milk buckets has been changed.}}
{{History||1.14|snap=19w06a|[[Wandering trader]]s now drink from milk buckets at dawn, and have a change to drop them.}}
{{History||1.17|snap=21w13a|Milk can now be obtained by milking [[goat]]s.}}
{{History|upcoming java}}
{{History||Villager Trade Rebalance<br>(Experimental)|link=Java Edition 1.20.2|snap=23w31a|Wander traders now have a chance to [[trading|buy]] a milk bucket from the player.}}
{{History|pocket alpha}}
{{History||v0.7.0|[[File:Milk Bucket JE1 BE1.png|32px]] Added milk buckets.
|Milk buckets are not yet drinkable.}}
{{History||v0.11.0|snap=build 4|Drinking milk now removes [[status effects]].
|Added milk buckets to the Creative inventory.{{verify|type=update}}{{info needed}}<!---same update?--->}}
{{History|bedrock}}
{{History||1.4.0|snap=beta 1.2.14.2|Moved all bucket items, including milk, from the Equipment tab to the Items tab in the [[Creative inventory]].{{verify|type=update}}{{info needed}}<!---please check snapshots, only 1 major release version was checked each--->}}
{{History||1.10.0|snap=beta 1.10.0.3|[[File:Milk Bucket JE2 BE2.png|32px]] The texture of milk buckets has been changed.}}
{{History||1.16.100|snap=beta 1.16.100.56|The ID of milk has been changed from <code>bucket/1</code> to <code>milk_bucket</code>.}}
{{History||1.16.200|snap=beta 1.16.200.52|Milk can now be obtained by milking [[goat]]s.}}
{{History|console}}
{{History||xbox=TU1|xbone=CU1|ps=1.0|wiiu=Patch 1|switch=1.0.1|[[File:Milk Bucket JE1 BE1.png|32px]] Added milk buckets.}}
{{History|Ps4}}
{{History||1.90|[[File:Milk Bucket JE2 BE2.png|32px]] The texture of milk buckets has been changed.}}
{{History|New 3DS}}
{{History||0.1.0|[[File:Milk Bucket JE1 BE1.png|32px]] Added milk buckets.}}
{{History|foot}}
== Issues ==
{{issue list}}
== See also ==
*[[Water Bucket]]
*[[Lava]]
*[[Food]]
*[[Cake]]
*[[Honey Bottle]] (alternative to remove poison effect)
*[[Medicine]]
== Notes ==
{{fnlist}}
== References ==
{{reflist}}
== External Links ==
*[https://www.minecraft.net/en-us/article/taking-inventory--milk-bucket Taking Inventory: Milk Bucket] – Minecraft.net on October 8, 2019
{{Items}}
[[Category:Food]]
[[Category:Renewable resources]]
[[Category:Tools]]
[[cs:Mléko]]
[[de:Milcheimer]]
[[es:Cubo con leche]]
[[fr:Seau de lait]]
[[hu:Tej]]
[[it:Secchio di latte]]
[[ja:ミルク入りバケツ]]
[[ko:우유 양동이]]
[[nl:Emmer melk]]
[[pl:Wiadro mleka]]
[[pt:Balde de leite]]
[[ru:Ведро с молоком]]
[[th:ถังนม]]
[[uk:Відро молока]]
[[zh:奶桶]]</li></ul> | The option was added for the player to specify the world seed. | ||||
1.5{{Extension DPL}}<ul><li>[[Book|Book]]<br/>{{For}}
{{Item
| image = Book.png
| renewable = Yes
| stackable = Yes (64)
|effects=Read}}
'''Books''' are items used in [[enchanting]] and [[crafting]].
== Obtaining ==
=== Block loot ===
Three books are dropped when a [[bookshelf]] is mined without [[Silk Touch]] or destroyed by an [[explosion]].
=== Crafting ===
{{crafting
|Paper
|Paper
|Paper
|Leather
|Output= Book
|type= Miscellaneous
}}
=== Chest loot ===
{{LootChestItem|book}}
=== Grindstones ===
Disenchanting an [[enchanted book]] at a [[grindstone]] yields a normal book and a small amount of experience.
=== Villager gifts ===
{{in|java}}, librarian [[villagers]] throw books at players under the [[Hero of the Village]] effect.
== Usage ==
=== Crafting ingredient ===
{{crafting usage}}
=== Chiseled bookshelf ===
{{control|Use|text=Using}} the [[chiseled bookshelf]] while having a book in the main hand will put the book inside the chiseled bookshelf.
=== Enchanting ===
Books can be made into [[enchanted book]]s by enchanting them on [[enchanting table]]s.
=== Trading ===
Librarian [[villager]]s can buy a single book as part of an [[enchanted book]] trade.
Apprentice-level Librarian villagers have a {{frac|2|3}} chance to buy 4 books for an [[emerald]] {{in|java}}, and always offer the trade {{in|bedrock}}.
== Achievements ==
{{load achievements|Librarian;Enchanter}}
== Advancements ==
{{load advancements|Enchanter;The Power of Books}}
== Sounds ==
{{edition|java}}:
{{Sound table
|sound=Chiseled bookshelf insert1.ogg
|sound2=Chiseled bookshelf insert2.ogg
|sound3=Chiseled bookshelf insert3.ogg
|sound4=Chiseled bookshelf insert4.ogg
|subtitle=Book placed
|source=block
|description=When a book is placed in a chiseled bookshelf
|id=block.chiseled_bookshelf.insert
|translationkey=subtitles.chiseled_bookshelf.insert
|volume=0.8
|pitch=''varies'' <ref group=sound>Can be 1.0, 0.85, or 1.1 for each sound</ref>
|distance=16}}
{{Sound table
|sound=Chiseled bookshelf pickup1.ogg
|sound2=Chiseled bookshelf pickup2.ogg
|sound3=Chiseled bookshelf pickup3.ogg
|subtitle=Book taken
|source=block
|description=When a book is removed from a chiseled bookshelf
|id=block.chiseled_bookshelf.pickup
|translationkey=subtitles.chiseled_bookshelf.take
|volume=0.8
|pitch=''varies'' <ref group=sound>Can be 1.0, 0.8, or 1.1 for each sound</ref>
|distance=16
|foot=1}}
{{edition|bedrock}}:
{{Sound table
|type=bedrock
|sound=Chiseled bookshelf insert1.ogg
|sound2=Chiseled bookshelf insert2.ogg
|sound3=Chiseled bookshelf insert3.ogg
|sound4=Chiseled bookshelf insert4.ogg
|source=block
|description=When a book is placed in a chiseled bookshelf
|id=insert.chiseled_bookshelf
|volume=0.8
|pitch=''varies'' <ref group=sound name=insertvaries>Can be 1.0, 0.85, or 1.1 for each sound</ref>}}
{{Sound table
|sound=Chiseled bookshelf pickup1.ogg
|sound2=Chiseled bookshelf pickup2.ogg
|sound3=Chiseled bookshelf pickup3.ogg
|source=block
|description=When a book is removed from a chiseled bookshelf
|id=pickup.chiseled_bookshelf
|volume=0.8
|pitch=''varies'' <ref group=sound name=pickupvaries>Can be 1.0, 0.8, or 1.1 for each sound</ref>
|foot=1}}
== Data values ==
=== ID ===
{{edition|java}}:
{{ID table
|edition=java
|showforms=y
|generatetranslationkeys=y
|displayname=Book
|spritetype=item
|nameid=book
|form=item
|foot=1}}
{{edition|bedrock}}:
{{ID table
|edition=bedrock
|showitemtags=y
|shownumericids=y
|showforms=y
|notshowbeitemforms=y
|generatetranslationkeys=y
|displayname=Book
|spritetype=item
|nameid=book
|id=387
|itemtags=minecraft:bookshelf_books</code>
|form=item
|foot=1}}
== Video ==
<div style="text-align:center">{{yt|UGJBUhxwKy0}}</div>
== History ==
{{History|java alpha}}
{{History||v1.0.11|[[File:Book JE1 BE1.png|32px]] Added books.
|The only use of books is crafting [[bookshelves]], which are only used as a purely decorative [[block]] until [[Beta 1.9 Prerelease 3]].}}
{{History|java beta}}
{{History||1.8|snap=Pre-release|Books are now found in the new [[stronghold]] library [[chest]]s.}}
{{History|java}}
{{History||1.0.0|snap=Beta 1.9 Prerelease 3|Books are now used to craft [[enchantment table]]s, gaining their first functional usage outside of decoration.}}
{{History||1.3.1|snap=12w17a|The crafting recipe is now shapeless, so books can now be crafted in the player's 2×2 [[crafting]] area, although the recipe now requires [[leather]]. Before this version, books were crafted with three [[paper]] sheets in a single column.
|A book can now be crafted into a [[book and quill]], which can be used to create [[written book]]s.}}
{{History|||snap=12w21a|Librarian [[villager]]s now [[trading|buy]] 11–12 books for 1 [[emerald]].}}
{{History|||snap=12w22a|Librarian villagers now [[trading|sell]] [[enchanted book]]s for 5–64 emeralds and 1 book.}}
{{History||1.4.6|snap=12w49a|Books can now be enchanted into [[enchanted book]]s, and then combined together in an [[anvil]] with a [[tool]] to then enchant it.}}
{{History||1.8|snap=14w02a|Librarian villagers now buy 8–10 books for 1 [[emerald]].}}
{{History||1.9|snap=15w43a|Average yield of books in [[stronghold]] library chests has been substantially increased.}}
{{History||1.12|snap=17w13a|Added the [[knowledge book]], a green-colored book that grants the [[player]] a recipe for [[crafting]].
|The recipe tab on the [[crafting table]] GUI uses a red-colored book.}}
{{History||1.13|snap=17w47a|Prior to [[1.13/Flattening|''The Flattening'']], this [[item]]'s numeral ID was 340.}}
{{History|||snap=18w11a|Books now generate in [[shipwreck]] chests.}}
{{History||1.14|snap=18w43a|[[File:Book JE2 BE2.png|32px]] The texture of books has been changed.}}
{{History|||snap=18w48a|Books can now be obtain by disenchanting non-curse [[enchanted book]]s in a grindstone.|Books can now be found in chests in [[plains]] [[village]] houses.}}
{{History|||snap=18w50a|Books can now be found in chests in [[desert]] village houses.}}
{{History|||snap=19w13a|Librarian villagers now give books to players under the [[Hero of the Village]] effect.}}
{{History||1.19|snap=Deep Dark Experimental Snapshot 1|Books now generate in [[ancient city]] chests.}}
{{History||1.20<br>(Experimental)|link=1.19.3|snap=22w42a|Books can now interact with [[chiseled bookshelves]].}}
{{History|pocket alpha}}
{{History||v0.2.0|[[File:Book JE1 BE1.png|32px]] Added books. They are currently unobtainable and serve no purpose.}}
{{History||v0.3.0|Books can be used to craft [[bookshelves]].}}
{{History||v0.5.0|Books can now be obtained after activating the [[nether reactor]].}}
{{History||v0.12.1|snap=build 1|The crafting recipe for books now requires [[leather]]. Before this version, books were crafted with three [[paper]] sheets in a single column.
|Books are now used to craft [[enchanting table]]s.
|Books can now be enchanted into [[enchanted book]]s, and then combined together in an [[anvil]] with a [[tool]] to then enchant it.
|Books are no longer available from the [[nether reactor]].}}
{{History|pocket}}
{{History||1.0.4|snap=alpha 1.0.4.0|Librarian villagers now [[trading|buy]] 8–10 books for 1 [[emerald]].}}
{{History|bedrock}}
{{History||1.2.0|snap=beta 1.2.0.2|A book can now be crafted into a [[book and quill]], which can be used to create [[written book]]s.}}
{{History||1.4.0|snap=beta 1.2.14.2|Books can now be found inside of the map room [[chest]] in [[shipwreck]]s.}}
{{History||1.10.0|snap=beta 1.10.0.3|Books can now be found in [[plains]] [[village]] chests.
|[[File:Book JE2 BE2.png|32px]] The texture of books has been changed.}}
{{History||1.11.0|snap=beta 1.11.0.4|Librarian [[villager]]s now [[trading|buy]] 4 books for an [[emerald]].}}
{{History||Wild Update<br>(Experimental)|link=Bedrock Edition 1.18.30|snap=beta 1.18.30.32|Books now generate in [[ancient city]] chests.}}
{{History||1.20<br>(Experimental)|link=Bedrock Edition 1.19.50|snap=beta 1.19.50.21|Books can now interact with [[chiseled bookshelves]].}}
{{History|console}}
{{History||xbox=TU1|xbone=CU1|ps=1.0|wiiu=Patch 1|[[File:Book JE1 BE1.png|32px]] Added books.}}
{{History||xbox=TU14|ps=1.04|The crafting recipe for books now requires [[leather]]. Before this version, books were crafted with three [[paper]] sheets in a single column.}}
{{History|PS4}}
{{History||1.90|[[File:Book JE2 BE2.png|32px]] The texture of books has now been changed.}}
{{History|New 3DS}}
{{History||0.1.0|[[File:Book JE1 BE1.png|32px]] Added books.}}
{{History|foot}}
== Issues ==
{{issue list}}
== See also ==
* [[Enchanted Book]]
* [[Knowledge Book]]
== How book is renewable ==
The paper comes from sugar canes, which is renewable because it grows and the leather from killing cows, renewable because cows breed{{Items}}
[[Category:Renewable resources]]
[[cs:Kniha]]
[[de:Buch]]
[[es:Libro]]
[[fr:Livre]]
[[hu:Könyv]]
[[it:Libro]]
[[ja:本]]
[[ko:책]]
[[nl:Boek]]
[[pl:Książka]]
[[pt:Livro]]
[[ru:Книга]]
[[th:หนังสือ]]
[[uk:Книга]]
[[zh:书]]</li><li>[[Minecart with Hopper|Minecart with Hopper]]<br/>{{ItemEntity
|image=Minecart with Hopper.png
|renewable=Yes
|stackable=No
|size=Height: 0.7 Blocks<br>Width: 0.98 Blocks
|networkid='''[[JE]]''': 10
|drops=1 {{ItemLink|Minecart with Hopper}}<br>plus contents
|health={{hp|6}}
}}
A '''minecart with hopper''' is a [[minecart]] with a [[hopper]] inside. Unlike a normal hopper, it pulls items from containers much more quickly, cannot push items into containers, can collect [[Item (entity)|item entities]] through a single layer of [[solid block]]s and is locked and unlocked via [[Activator Rail|activator rails]].
== Obtaining ==
=== Crafting ===
{{Crafting
|Output= Minecart with Hopper
|type= Transportation
|Hopper|Minecart}}
Minecarts with hoppers can be retrieved by attacking them. By doing so it drop as an [[item (entity)|item]] and any other contents of the hopper are dropped as well.
== Usage ==
[[File:Minecart with Hopper GUI.png|thumb|176px|The GUI of a minecart with hopper.]]
Minecarts with hoppers are placed similarly to other [[minecart]]s.
A minecart with hopper pulls in items lying nearby (within a range slightly larger than the cart itself), or inside a container directly above the minecart, at a rate of 1 item every [[game tick]] (20 items per second), eight times as fast as a normal hopper. It also picks up items that are lying on a block directly above the track. It does not push items into containers, but a hopper underneath the track can remove items from a minecart with hopper on the track. Ordinary hoppers can also drop items into a minecart with hopper like other containers, at the normal speed of 2.5 items per second. In Bedrock Edition, a minecart with hopper on curved rail pulls in items in a hopper lying in front of its moving direction and 1 block above if hopper's output funnel is pointed downward and no block is below that hopper.<ref>{{bug|MCPE-94293}}</ref>
The hopper can be disabled by passing over a powered [[activator rail]], and can be reenabled by an inactive activator rail.
An empty minecart with hopper can travel more than 85 blocks without stopping (as opposed to a normal cart going less than 12 blocks) from a dead stop using a 2 powered track starter even with another cart in front of them. However, the distance traveled by a minecart with hopper depends on the hopper's load. Using a 1 powered rail starter track, a minecart with an empty hopper travels 64 blocks until it stops (as opposed to an empty normal minecart going 8 blocks). The distance traveled diminishes non-linearly with increased hopper load; a minecart with a full hopper can travel only 16 blocks in this setup.
{{See also|Tutorials/Storage minecarts}}
== Sounds ==
{{Edition|Java}}:<br>
Minecarts with hoppers use the Friendly Creatures sound category for entity-dependent sound events.<ref group=sound name=rollsource>{{bug|MC-42132}}</ref>
{{Sound table
|sound=Minecart rolling.ogg
|subtitle=Minecart rolls
|source=Friendly Creatures <ref group=sound name=rollsource/>
|overridesource=1
|description=While a minecart with hopper is moving
|id=entity.minecart.riding
|translationkey=subtitles.entity.minecart.riding
|volume=0.0-0.35 <ref group=sound>Relates linearly with horizontal velocity (max 0.5)</ref>
|pitch=0.0-1.0 <ref group=sound>Will increase by 0.0025 per tick if the minecart's horizontal velocity is more than 0.01</ref>
|distance=16
|foot=1}}
{{Edition|Bedrock}}:
{{Sound table
|type=bedrock
|sound=Minecart rolling.ogg
|source=neutral
|description=While a minecart with hopper is moving
|id=minecart.base
|foot=1}}
== Data values ==
=== ID ===
{{edition|java}}:
{{ID table
|edition=java
|firstcolumnname=Item
|showforms=y
|generatetranslationkeys=y
|displayname=Minecart with Hopper
|spritetype=item
|nameid=hopper_minecart
|form=item
|foot=1}}
{{ID table
|edition=java
|firstcolumnname=Entity
|generatetranslationkeys=y
|displayname=Minecart with Hopper
|spritetype=entity
|nameid=hopper_minecart
|foot=1}}
{{edition|bedrock}}:
{{ID table
|edition=bedrock
|firstcolumnname=Item
|shownumericids=y
|showforms=y
|notshowbeitemforms=y
|generatetranslationkeys=y
|displayname=Minecart with Hopper
|spritetype=item
|nameid=hopper_minecart
|id=526
|form=item
|foot=1}}
{{ID table
|edition=bedrock
|firstcolumnname=Entity
|shownumericids=y
|generatetranslationkeys=y
|displayname=Minecart with Hopper
|spritetype=entity
|nameid=hopper_minecart
|id=96
|foot=1}}
=== Entity data ===
Minecarts with hoppers have entity data associated with them that contain various properties of the entity.
{{el|java}}:
{{main|Entity format}}
{{/ED}}
{{el|bedrock}}:
: See [[Bedrock Edition level format/Entity format]].
== Video ==
<div style="text-align:center">{{yt|I5etC7LeCac}}</div>
== History ==
{{History|java}}
{{History||1.5|snap=13w03a|[[File:Minecart with Hopper JE1 BE1.png|32px]] [[File:Minecart with Hopper (item) JE1 BE1.png|32px]] Added minecart with hopper.}}
{{History||1.9|snap=15w43a|Loot tables are added; minecarts with hopper now can use loot tables.}}
{{History||1.9.1|snap=pre2|The title of the [[inventory]] is changed from 'Hopper minecart' to 'Minecart with Hopper'.}}
{{History||1.11|snap=16w32a|The entity ID of the minecart with hopper has now been changed from <code>MinecartHopper</code> to <code>hopper_minecart</code>.}}
{{History||1.13|snap=17w47a|Prior to [[1.13/Flattening|''The Flattening'']], this [[item]]'s numeral ID was 408.}}
{{History||1.14|snap=18w43a|[[File:Minecart with Hopper JE2 BE2.png|32px]] [[File:Minecart with Hopper (item) JE2 BE2.png|32px]] The textures of the minecart with hopper have now been changed.}}
{{History||1.15|snap=19w38a|[[File:Minecart with Hopper 19w38a.png|32px]] The hopper now appears dark, same as suffocating mobs.}}
{{History|||snap=19w39a|The hopper now renders correctly.}}
{{History||1.16.2|snap=Pre-release 1|Opening or destroying a minecart with hopper now angers nearby [[piglin]]s.}}
{{History||1.19|snap=22w13a|The crafting recipe for a minecart with hopper is now shapeless.|Breaking a minecart with hopper will now drop the item instead of the minecart and hopper separately, though the contents of the hopper are still dropped.<ref>{{bug|MC-249493|||Fixed}}</ref>}}
{{History||1.19.4|snap=23w06a|Minecart with hopper now no longer aggravates [[piglin]]s when opened.}}
{{History|pocket alpha}}
{{History||v0.14.0|snap=build 1|[[File:Minecart with Hopper JE1 BE1.png|32px]] [[File:Minecart with Hopper (item) JE1 BE1.png|32px]] Added minecart with hopper.}}
{{History|pocket}}
{{History||1.1.0|snap=alpha 1.1.0.0|The entity ID of the minecart with hopper has now been changed from <code>minecarthopper</code> to <code>hopper_minecart</code>.}}
{{History|bedrock}}
{{History||1.10.0|snap=beta 1.10.0.3|[[File:Minecart with Hopper JE2 BE2.png|32px]] [[File:Minecart with Hopper (item) JE2 BE2.png|32px]] The textures of the minecart with hopper have now been changed.}}
{{History||1.19.0|snap=beta 1.19.0.30|Breaking a minecart with hopper will now drop the item instead of the minecart and hopper separately, though the contents of the hopper are still dropped.}}
{{History|console}}
{{History||xbox=TU19|xbone=CU7|ps=1.12|wiiu=Patch 1|switch=1.0.1|[[File:Minecart with Hopper JE1 BE1.png|32px]] [[File:Minecart with Hopper (item) JE1 BE1.png|32px]] Added minecart with hopper.}}
{{History||xbox=none|xbone=none|ps=1.90|wiiu=none|switch=none|[[File:Minecart with Hopper JE2 BE2.png|32px]] [[File:Minecart with Hopper (item) JE2 BE2.png|32px]] The textures of the minecart with hopper have now been changed.}}
{{History|new 3ds}}
{{History||0.1.0|[[File:Minecart with Hopper JE1 BE1.png|32px]] [[File:Minecart with Hopper (item) JE1 BE1.png|32px]] Added minecart with hopper.
|Minecarts with hopper emit smoke [[particles]] when destroyed.}}
{{History|foot}}
== Issues ==
{{issue list}}
== Gallery ==
<gallery>
File:First hopper Minecart Image.png|The first image of hopper carts released by Dinnerbone.<ref>{{Tweet|Dinnerbone|291215700213772289|Well you guys got that quick. The letters in the hotbar were for <nowiki>[imgur link]|January 15, 2013}}</ref>
File:13w03a Banner.png|The 13w03a banner showing a minecart with hopper and a [[dropper]].
</gallery>
== References ==
{{reflist}}
{{items}}
{{entities}}
[[Category:Mechanics]]
[[Category:Storage]]
[[cs:Vozík s násypkou]]
[[de:Trichterlore]]
[[es:Vagoneta con tolva]]
[[fr:Wagonnet à entonnoir]]
[[hu:Tölcsér csille]]
[[it:Carrello da miniera]]
[[ja:ホッパー付きのトロッコ]]
[[ko:호퍼가 실린 광산 수레]]
[[nl:Mijnkar met trechter]]
[[pl:Wagonik z lejem]]
[[pt:Carrinho de mina com funil]]
[[ru:Вагонетка с воронкой]]
[[uk:Вагонетка з лійкою]]
[[zh:漏斗矿车]]</li></ul></nowiki> | Rain was added. | ||||
1.7{{Extension DPL}}<ul><li>[[Golden Carrot|Golden Carrot]]<br/>{{Item
| title = Golden Carrot
| image = Golden Carrot.png
| heals = {{hunger|6}}
| renewable = Yes
| stackable = Yes (64)
}}
A '''golden carrot''' is a valuable [[food]] item and [[brewing]] ingredient. It provides the second most saturation in the game, behind [[suspicious stew]] crafted with either a [[Flower|dandelion]] or [[Flower|blue orchid]].
==Obtaining==
=== Chest loot ===
{{LootChestItem|golden-carrot}}
=== Crafting ===
{{Crafting
|A1= Gold Nugget
|B1= Gold Nugget
|C1= Gold Nugget
|A2= Gold Nugget
|B2= Carrot
|C2= Gold Nugget
|A3= Gold Nugget
|B3= Gold Nugget
|C3= Gold Nugget
|Output= Golden Carrot
|type= Foodstuff
}}
=== Trading ===
Master-level farmer [[villager]]s have a 50% chance to sell 3 golden carrots for 3 [[emerald]]s {{in|bedrock}}, and always offer the same trade {{in|java}}.
== Usage ==
=== Food ===
To eat a golden carrot, press and hold {{control|use}} while it is selected in the hotbar. Eating one restores {{hunger|6}} and 14.4 [[Hunger#Mechanics|saturation points]].
=== Animal food ===
Golden carrots are used to tame, [[breed]], lead, grow, and heal [[horse]]s, [[donkey]]s, and [[mule]]s, and to breed, lead, and grow [[rabbit]]s.
=== Brewing ingredient ===
{{Brewing
|showname=1
|Golden Carrot
|Potion of Night Vision
}}
== Sounds ==
{{Sound table/Entity/Food}}
== Data values ==
=== ID ===
{{edition|java}}:
{{ID table
|edition=java
|showforms=y
|generatetranslationkeys=y
|displayname=Golden Carrot
|spritetype=item
|nameid=golden_carrot
|form=item
|foot=1}}
{{edition|bedrock}}:
{{ID table
|edition=bedrock
|shownumericids=y
|showforms=y
|notshowbeitemforms=y
|generatetranslationkeys=y
|displayname=Golden Carrot
|spritetype=item
|nameid=golden_carrot
|id=283
|form=item
|foot=1}}
== Achievements ==
{{load achievements|Artificial Selection;Oooh, shiny!}}
== Advancements ==
{{load advancements|Oh Shiny;Husbandry;A Balanced Diet}}
== Video ==
{{Video note|this video is outdated; it does not mention that golden carrots can be used as animal food.}}
<div style="text-align:center">{{yt|HJUaKroydLQ}}</div>
== History ==
{{History|java}}
{{History||1.4.2|snap=12w34a|[[File:Golden Carrot JE1.png|32px]] Added golden carrots.
|The new [[Potion of Night Vision]] is brewed by adding a golden carrot to an [[Awkward Potion]].}}
{{History|||snap=12w36a|[[File:Golden Carrot JE2.png|32px]] The texture of golden carrots has been changed.}}
{{History|||snap=12w37a|[[File:Golden Carrot JE3 BE1.png|32px]] The texture of golden carrots has been changed in order to match the new [[carrot]] texture. The [[item]] sprite no longer has a dark outline.}}
{{History||1.6.1|snap=?|Golden carrots can now be used to tame, breed and heal horses and donkeys.}}
{{History||1.8|snap=?|Golden carrots can now be used to breed rabbits.}}
{{History|||snap=14w32a|Moved golden carrots from the Foodstuffs tab to the Brewing tab in the [[Creative inventory]].<ref name="gold carrot inventory">https://bugs.mojang.com/browse/MC-3664</ref>}}
{{History||1.8.1|snap=pre1|Rabbits now follow players holding golden carrots.<ref>{{bug|MC-70054|||Fixed}}</ref>}}
{{History||1.13|snap=17w47a|Prior to [[1.13/Flattening|''The Flattening'']], this [[item]]'s numeral ID was 396.}}
{{History||1.14|snap=18w43a|[[File:Golden Carrot JE4 BE2.png|32px]] The texture of golden carrots has been changed.}}
{{History|||snap=19w11a|Farmer [[villager]]s now [[trading|sell]] golden carrots.}}
{{History||1.16|snap=20w16a|Golden carrots can now be found in [[ruined portal]] chests.}}
{{History||1.16.2|snap=20w30a|Golden carrots can now be found in [[bastion remnant]] chests.}}
{{History||1.18|snap=experimental snapshot 6|Horses, donkeys and mules now follow players holding golden carrots.}}
{{History||1.19|snap=22w13a|Golden carrots may now be found in [[ancient city]] ice box [[chest]]s.
|A single golden carrot now generates in the [[chest]] in <code>ancient_city/city_center/city_center_2</code>.}}
{{History|||snap=22w14a|The golden carrot in the chest in <code>ancient_city/city_center/city_center_2</code> has been replaced with a [[golden apple]].}}
{{History|pocket alpha}}
{{History||v0.12.1|snap=build 1|[[File:Golden Carrot JE3 BE1.png|32px]] Added golden carrots.}}
{{History||v0.13.0|snap=build 1| Golden carrots can now be used to feed [[rabbit]]s.}}
{{History||v0.15.0|snap=build 1|Golden carrots can now be used to feed [[horse]]s and [[donkey]]s.}}
{{History|bedrock}}
{{History||1.10.0|snap=beta 1.10.0.3|[[File:Golden Carrot JE4 BE2.png|32px]] The texture of golden carrots has been changed.}}
{{History||1.11.0|snap=beta 1.11.0.4|Golden carrots can now be [[trading|bought]] from farmer [[villager]]s.}}
{{History||1.13.0|snap=beta 1.13.0.9|Trading has been changed, master-level farmer now has {{frac|1|3}} chance to sell golden carrots.}}
{{History||1.16.0|snap=beta 1.16.0.57|Golden carrots now generate in [[ruined portal]] chests.
|Golden carrots trade offering chance changed to 50%.}}
{{History|console}}
{{History||xbox=TU14|xbone=CU1|ps=1.04|wiiu=Patch 1|[[File:Golden Carrot JE3 BE1.png|32px]] Added golden carrots.}}
{{History||xbox=none|xbone=none|ps=1.90|wiiu=none|switch=none|[[File:Golden Carrot JE4 BE2.png|32px]] The texture of golden carrots has been changed.}}
{{History|New 3DS}}
{{History||0.1.0|[[File:Golden Carrot JE3 BE1.png|32px]] Added golden carrots.}}
{{History|foot}}
== Issues ==
{{issue list}}
== See also ==
* [[Carrot]]
* [[Golden Apple]]
== External Links ==
*[https://www.minecraft.net/en-us/article/taking-inventory--golden-carrot Taking Inventory: Golden Carrot] – Minecraft.net on September 6, 2022
{{items}}
[[cs:Zlatá mrkev]]
[[de:Goldene Karotte]]
[[es:Zanahoria dorada]]
[[fr:Carotte dorée]]
[[hu:Aranyrépa]]
[[ja:金のニンジン]]
[[ko:황금 당근]]
[[nl:Gouden wortel]]
[[pl:Złota marchewka]]
[[pt:Cenoura dourada]]
[[ru:Золотая морковь]]
[[uk:Золота морква]]
[[zh:金胡萝卜]]
[[Category:Renewable resources]]
[[Category:Food]]
[[Category:Brewing recipe]]</li><li>[[Totem of Undying|Totem of Undying]]<br/>{{redirect|Totem}}
{{Item
| image = Totem_of_Undying_JE2_BE2.png
| renewable = Yes
| stackable = No
| rarity = Uncommon
|effects=: {{EffectLink|Absorption}} II (0:05)
: {{EffectLink|Regeneration}} II (0:45){{only|java|short=yes}}/ II (0:40){{only|bedrock|short=yes}}
: {{EffectLink|Fire Resistance}} I (0:40)
}}
A '''totem of undying''' is an uncommon [[combat]] item that can save holders from death. It is dropped by [[Evoker|evokers]], which spawn in [[woodland mansion]]s and [[raid]]s.
== Obtaining ==
=== Mob loot ===
Evokers always drop one totem of undying upon death. The drop rate is not affected by [[Looting]].
== Usage ==
[[File:Totem of Undying Animation.gif|alt=The totem animation in Java Edition.|thumb|Animation of the totem activating {{in|java}}.]]
[[File:Totem of Undying Bedrock Animation.gif|alt=The totem animation in Bedrock Edition.|thumb|Animation of the totem activating {{in|bedrock}}.]]
If the [[player]] is holding a totem of undying in their [[off-hand]] or main-hand slot and receives otherwise fatal [[damage]], the totem saves the player from [[death]]. The totem of undying must be in the player's hand (main hand or offhand) for it to work—it does not work if it is in the [[Heads-up display#Hotbar|hotbar]], unless selected. Any [[mob]] that can hold a totem of undying (in a hand or in the mouth) can use it while holding it.{{only|JE}} The totem can be used only once; it disappears after use. It does not save the player from death caused by [[void]] damage, the {{cmd|kill}} [[command]]s or even a [[tipped arrow]] with [[Instant Damage|harming]] effect damage.<ref>{{bug|MC-206307}}</ref>
== Effect ==
When activated, the totem of undying restores {{hp|1}}, removes all existing [[status effect]]s, then grants 40{{only|bedrock|short=1}} or 45{{only|java|short=1}} seconds<ref>{{bug|MCPE-90716}}</ref> of [[Regeneration]] II, 40 seconds of [[Fire Resistance]] I and 5 seconds of [[Absorption]] II. An animation shows the totem of undying appearing to hover in front of the [[player]]'s screen, similar to the animation seen when a player receives the [[Bad Omen]] or [[Hero of the Village]] effect{{only|bedrock|short=1}} or encounters an [[elder guardian]]. When killed by an [[Instant Damage]] tipped [[arrow]], the arrow's instant damage takes effect after the totem has been activated.
The totem of undying also works in [[Hardcore]] mode.
== Sounds ==
{{edition|java}}:
{{Sound table
|sound=Totem of Undying.ogg
|subtitle=Totem activates
|source=dependent
|description=When something dies, using a totem of undying
|id=item.totem.use
|translationkey=subtitles.item.totem.use
|volume=1.0
|pitch=1.0
|distance=16
|foot=1}}
{{edition|bedrock}}:
{{Sound table
|type=bedrock
|sound=Totem of Undying.ogg
|source=player
|description=When something dies, using a totem of undying
|id=random.totem
|volume=1.0
|pitch=1.0
|foot=1}}
== Data values ==
=== ID ===
{{edition|java}}:
{{ID table
|edition=java
|showforms=y
|generatetranslationkeys=y
|displayname=Totem of Undying
|spritetype=item
|nameid=totem_of_undying
|form=item
|foot=1}}
{{edition|bedrock}}:
{{ID table
|edition=bedrock
|showaliasids=y
|shownumericids=y
|showforms=y
|notshowbeitemforms=y
|generatetranslationkeys=y
|displayname=Totem of Undying
|spritetype=item
|nameid=totem_of_undying
|aliasid=totem
|id=568
|form=item
|translationkey=item.totem.name
|foot=1}}
== Achievements ==
{{load achievements|Cheating Death}}
== Advancements ==
{{load advancements|Postmortal}}
== History ==
{{History||2016|[[File:Totem of Undying (pre-release).png|32px]] An early version of the totem of undying was seen during Minecon shortly before its reveal.}}
{{History|java}}
{{History||1.11|snap=16w39a|[[File:Totem of Undying JE1 BE1.png|32px]] Added totem of undying.}}
{{History||1.11.1|snap=16w50a|The ID name has now been changed from <code>totem</code> to <code>totem_of_undying</code>.}}
{{History||1.13|snap=17w47a|Prior to [[1.13/Flattening|''The Flattening'']], this [[item]]'s numeral ID was 449.}}
{{History||1.14|snap=18w43a|[[File:Totem of Undying JE2 BE2.png|32px]] The texture of the totem of undying has been changed.}}
{{History|||snap=18w47a|The totem of undying is now [[renewable resource|renewable]] as [[evoker]]s now spawn in [[raid]]s.}}
{{History||1.16.2|snap=20w28a|The totem of undying now gives the [[Fire Resistance]] II status effect for 40 seconds.}}
{{History|||snap=20w29a|The level of Fire Resistance given by the totem of undying is now reduced from II to I.<ref>{{bug|MC-194220}}</ref>}}
{{History||1.20.2|snap=23w31a|Totems of undying now trigger [[sculk sensor]]s when they activate.<ref>{{bug|MC-261427||Sculk sensors and calibrated sculk sensors don't detect totem of undying activating|Fixed}}</ref>}}
{{History|pocket}}
{{History||1.1.0|snap=alpha 1.1.0.0|[[File:Totem of Undying JE1 BE1.png|32px]] Added totem of undying.}}
{{History|bedrock}}
{{History||1.10.0|snap=beta 1.10.0.3|[[File:Totem of Undying JE2 BE2.png|32px]] The texture of the totem of undying has been changed.}}
{{History||1.11.0|snap=beta 1.11.0.3|The totem of undying is now [[renewable resource|renewable]] as [[evoker]]s now spawn in [[raid]]s.}}
{{History||1.16.100|snap=beta 1.16.100.54|The level of Fire Resistance given by the totem of undying is now reduced from II to I.<ref>{{bug|MCPE-52364}}</ref>}}
{{History||1.16.100|snap=beta 1.16.100.56|The ID of totems of undying has been changed from <code>totem</code> to <code>totem_of_undying</code>.}}
{{History|console}}
{{History||xbox=TU54|xbone=CU44|ps=1.52|wiiu=Patch 24|switch=1.0.4|[[File:Totem of Undying JE1 BE1.png|32px]] Added totem of undying.}}
{{History||xbox=TU56|xbone=CU48|ps=1.55|wiiu=Patch 26|switch=1.0.6|The totem of undying now applies [[Fire Resistance]] II when used.}}
{{History||xbox=none|xbone=none|ps=1.90|wiiu=none|switch=none|[[File:Totem of Undying JE2 BE2.png|32px]] The texture of the totem of undying has been changed.}}
{{History||xbox=none|xbone=none|ps=1.91|wiiu=none|switch=none|The totem of undying is now [[renewable resource|renewable]] as [[evoker]]s now spawn in [[raid]]s.}}
{{History|new3ds}}
{{History||1.9.19|[[File:Totem of Undying JE1 BE1.png|32px]] Added totem of undying.}}
{{History|foot}}
== Issues ==
{{issue list}}
== Trivia ==
* If a [[mob]] holds a totem of undying, the mob also resurrects upon [[Health#Death|death]] and the [[sound]] effect plays. However, the animation does not appear.
* In the {{el|ds}}, the totem of undying can be put in any hotbar slot to activate it, due to the lack of an [[Dual wield|off-hand slot]] in that version.
* Being able to obtain totems of undying in [[raids]] without exploring [[woodland mansions]] is considered a "massive game play design flaw" by Mojang.<ref>{{ytl|YRPlscod34Y}}</ref>
== Gallery ==
<gallery>
File:Particle totem of undying.png|Screenshot of the totem of undying being used mid-animation after a [[drowned]] deals otherwise fatal damage to the player.
File:Totem of Undying activating.gif|Animation of the totem activating.
File:Totem animation in third person mode.png|The totem animation in third person mode.
</gallery>
== References ==
{{reflist}}
{{Items}}
[[de:Totem der Unsterblichkeit]]
[[fr:Totem d'immortalité]]
[[ja:不死のトーテム]]
[[ko:불사의 토템]]
[[lzh:保命符]]
[[nl:Totem der onsterfelijkheid]]
[[pl:Totem nieśmiertelności]]
[[pt:Totem da imortalidade]]
[[ru:Тотем бессмертия]]
[[th:Totem of Undying]]
[[zh:不死图腾]]
[[Category:Renewable resources]]</li></ul> | An 'f' value was added to the performance screen, indicating the direction the player is facing. | ||||
1.8{{Extension DPL}}<ul><li>[[Light Gray Dye|Light Gray Dye]]<br/>{{Item
| image = Light Gray Dye.png
| renewable = Yes
| stackable = Yes (64)
}}
'''Light gray dye'''{{fn|Known as '''Light Grey Dye''' in British, Canadian, Australian, and New Zealand English variants.}} is a [[Dyeing#Primary Colors|quasi-primary dye]].
== Obtaining ==
=== Crafting ===
{{Crafting
|head=1
|showname=0
|showdescription=1
|Azure Bluet;Oxeye Daisy;White Tulip
|Output=Light Gray Dye
|type=Material
}}
{{Crafting
|Black Dye
|White Dye
|White Dye
|Output=Light Gray Dye,3
|type=Material
|description={{IN|bedrock}}, the black and white dye can be replaced with [[ink sac]]s and [[bone meal]], respectively.
}}
{{Crafting
|Gray Dye
|White Dye
|Output=Light Gray Dye,2
|type=Material
|description={{IN|bedrock}}, the white dye can be replaced with [[bone meal]].
|foot=1
}}
=== Trading ===
[[Wandering trader]]s sell 3 light gray dye for an [[emerald]].
== Usage ==
{{dye usage}}
=== Crafting ingredient ===
{{crafting usage|ignore=Banner|continue=1}}
{{banner crafting usage}}
=== Loom ingredient ===
{{Banner loom usage|Light Gray Dye}}
=== Trading ===
Expert-level shepherd villagers have {{frac|1|6}} chance to buy 12 light gray dye for an emerald.
== Data values ==
=== ID ===
{{edition|java}}:
{{ID table
|edition=java
|showforms=y
|generatetranslationkeys=y
|displayname=Light Gray Dye
|spritetype=item
|nameid=light_gray_dye
|form=item
|foot=1}}
{{edition|bedrock}}:
{{ID table
|edition=bedrock
|showaliasids=y
|shownumericids=y
|showforms=y
|notshowbeitemforms=y
|generatetranslationkeys=y
|displayname=Light Gray Dye
|spritetype=item
|nameid=light_gray_dye
|aliasid=dye / 7
|id=402
|form=item
|translationkey=item.dye.silver.name
|foot=1}}
== Video ==
<div style="text-align:center">{{yt|1w3j1SKcoww}}</div>
== History ==
{{History|java beta}}
{{History||1.2|[[File:Light Gray Dye JE1 BE1.png|32px]] Added light gray dye.}}
{{History|java}}
{{History||1.4.2|snap=12w34a|Added the ability to [[Armor#Dyeing|dye]] leather [[armor]] and [[wolf]] collars.}}
{{History||1.4.6|snap=12w49a|Light gray dye can now be [[crafting|crafted]] with [[gunpowder]] to create a [[firework star]].}}
{{History||1.6.1|snap=13w19a|[[Stained clay]] can now be crafted.}}
{{history||1.7.2|snap=13w36a|With the addition of new [[flower]]s, many secondary and tertiary dyes are now primary [[dye]]s.}}
{{History|||snap=13w41a|[[Stained glass]] can now be crafted.}}
{{History||1.8|snap=14w30a|Added [[banner]]s, which can be dyed.}}
{{History||1.11|snap=16w39a|Added the ability to dye [[shulker box]]es.}}
{{History||1.12|snap=17w15a|Added the ability to dye [[bed]]s.}}
{{History||1.13|snap=17w47a|The different data values for the <code>dye</code> ID have now been split up into their own IDs.
|Prior to [[1.13/Flattening|''The Flattening'']], this [[item]]'s numeral ID was 351.}}
{{History||1.14|snap=18w43a|Light gray dye is now crafted using [[white dye|white]] and [[black dye]]s, instead of [[bone meal]] and [[ink sac]]s.
|[[File:Light Gray Dye JE2 BE2.png|32px]] The texture of light gray dye has now been changed.}}
{{History|||snap=18w44a|Light gray dye can now change the text color on [[sign]]s to light gray.}}
{{History|||snap=19w05a|Added the [[wandering trader]], which sells light gray dye.}}
{{History|||snap=19w11a|Light gray dye can now be [[trading|bought]] by shepherd villagers.}}
{{History||1.17|snap=20w45a|Light gray dye can now be used to craft [[light gray candle]]s.}}
{{History|||snap=21w19a|Light gray dye can no longer be used to craft light gray candles.}}
{{History|||snap=Pre-release 1|Light gray dye can now once again be used to craft light gray candles.}}
{{History||1.20<br>(Experimental)|link=1.19.3|snap=22w42a|Light gray dye can now change the text color on [[hanging sign]]s to light gray.}}
{{History|pocket alpha}}
{{History||v0.3.0|[[File:Light Gray Dye JE1 BE1.png|32px]] Added light gray dye. It is currently unobtainable and serves no purpose.}}
{{History||v0.8.0|snap=build 1|Light gray dye can be [[craft]]ed with [[bone meal]] and [[gray dye]], or with two bone meals and an [[ink sac]], despite there being no way of obtaining gray dye or ink sacs at the time.}}
{{History||v0.8.0|snap=build 3|Light gray dye is now available in [[creative]] mode.}}
{{History||v0.9.0|snap=build 3|Light gray dye can now be obtained in [[survival]] mode.}}
{{History|||snap=build 11|Light gray dye can now be used to craft colored [[terracotta]].}}
{{History||v0.11.0|snap=build 1|Light gray dye can now be used to dye tamed [[wolf]] collars.}}
{{History||v0.14.0|snap=build 1|Light gray dye can now be used to dye [[water]] in [[cauldron]]s.}}
{{History|pocket}}
{{History||1.0.0|snap=alpha 0.17.0.1|Light gray dye can now be used to dye [[shulker]]s.}}
{{History||1.1.0|snap=alpha 1.1.0.0|Light gray dye can now be used to craft [[concrete powder]], colored [[bed]]s and dyed [[shulker box]]es.}}
{{History|bedrock}}
{{History||1.2.0|snap=beta 1.2.0.2|Light gray dye can now be used to craft [[firework star]]s, [[stained glass]] and patterns on [[banner]]s.}}
{{History||1.4.0|snap=beta 1.2.20.1|Light gray dye can now be used to craft [[balloon]]s and [[glow stick]]s.}}
{{History||1.8.0|snap=beta 1.8.0.8|Light gray dye can now be used to dye tamed [[cat]] collars.}}
{{History||1.10.0|snap=beta 1.10.0.3|Light gray dye is now [[trading|sold]] by [[wandering trader]]s.
|Light gray dye can now be used to dye white [[carpet]]s and undyed [[glass pane]]s.
|[[File:Light Gray Dye JE2 BE2.png|32px]] The texture of light gray dye has now been changed.}}
{{History||1.11.0|snap=beta 1.11.0.1|Light gray dye can be [[trading|sold]] to shepherd [[villager]]s.}}
{{History||1.16.100|snap=beta 1.16.100.56|The ID of light gray dye has been changed from <code>dye/7</code> to <code>light_gray_dye</code>.}}
{{History|console}}
{{History||xbox=TU1|xbone=CU1|ps=1.00|switch=1.0.1|wiiu=Patch 1|[[File:Light Gray Dye JE1 BE1.png|32px]] Added light gray dye.}}
{{History|PS4}}
{{History||1.90|[[File:Light Gray Dye JE2 BE2.png|32px]] The texture of light gray dye has now been changed.}}
{{History|new 3ds}}
{{History||0.1.0|[[File:Light Gray Dye JE1 BE1.png|32px]] Added light gray dye.}}
{{History|foot}}
== Issues ==
{{issue list}}
== Trivia ==
* In [[Bedrock Edition]], Some items/blocks' Block states/Item NBT uses '''Silver''' instead of '''Light Gray'''
== Notes ==
{{fnlist}}
{{Items}}
[[Category:Dyes]]
[[cs:Světle šedé barvivo]]
[[de:Hellgrauer Farbstoff]]
[[es:Tinte gris claro]]
[[fr:Teinture gris clair]]
[[hu:Világosszürke festék]]
[[ja:薄灰色の染料]]
[[ko:회백색 염료]]
[[nl:Lichtgrijze kleurstof]]
[[pl:Jasnoszary barwnik]]
[[pt:Corante cinza-claro]]
[[ru:Светло-серый краситель]]
[[zh:淡灰色染料]]
[[Category:Renewable resources]]</li><li>[[Longer String|Longer String]]<br/>{{stub}}
{{Joke feature}}
{{exclusive|java}}
{{item
| image = Longer String.png
| rarity=Common
| renewable=Yes
| stackable=Yes (64)
}}
'''Longer string''' is a joke item from [[Java Edition 23w13a_or_b]].
==Obtaining==
===Crafting===
{{Crafting
|A1= String |B1= String
|Output= Longer String
|shapeless= 1
|ignoreusage=1
}}
==Data values==
===ID===
{{edition|java}}:{{ID table
|edition=java
|showforms=y
|generatetranslationkeys=y
|displayname=Longer String
|spritetype=item
|nameid=string2
|form=item|foot=1}}
==History==
{{History|java}}
{{History||23w13a_or_b|[[File:Longer String.png|32px]] Added longer string.}}
{{History|foot}}
{{items}}
{{Jokes}}
[[Category:Joke items]]
[[ja:Longer String]]
[[pt:Linha mais comprida]]</li></ul> | Players can find the current map seed by pressing F3. | ||||
| Some biomes were changed, added, or removed. | |||||
| Animals spawn on world generation, and don't spawn randomly as much. | |||||
| The Far Lands were "accidentally" fixed.[1] | |||||
| r | |||||
1.0.0{{Extension DPL}}<ul><li>[[Redstone Comparator|Redstone Comparator]]<br/>{{Block
| image =
| image2 =
| transparent = Yes
| light = No
| tool = any
| renewable = Yes
| stackable = Yes (64)
| flammable = No
| lavasusceptible = No
| group = Redstone Comparator
| group2 = Subtracting
| group3 = Powered
| group4 = Powered+Subtracting
| 1-1 = Redstone Comparator.png
| 2-1 = Subtracting Redstone Comparator.png
| 3-1 = Powered Redstone Comparator.png
| 4-1 = Powered Subtracting Redstone Comparator.png
}}
{{Many images}}
A '''redstone comparator''' is a [[block]] that can produce an [[Redstone Dust|output signal]] from its front by reading [[chest]]s, [[lectern]]s, [[beehive]]s and similar blocks, or repeat a signal without changing its strength. It can also be set to either stop outputting a signal when its side input recieves a stronger one (front torch off), or subtract its side input's signal strength from its output (front torch on).
== Obtaining ==
=== Natural generation ===
Redstone comparators generate in [[Ancient City|ancient cities]].
=== Breaking ===
A redstone comparator can be broken instantly with any [[tool]], or by hand, and drops itself as an item.
{{Breaking row|Redstone Comparator|horizontal=y}}
A redstone comparator is removed and dropped as an item if:
* its attachment block is moved, removed, or destroyed;
* [[water]] flows into its space;{{only|java}}
* a [[piston]] tries to push it or moves a block into its space.
If [[lava]] flows into a redstone comparator's space, the redstone comparator is destroyed without dropping as an item.
=== Crafting ===
{{Crafting
|B1=Redstone Torch
|A2=Redstone Torch
|B2=Nether Quartz
|C2=Redstone Torch
|A3=Stone
|B3=Stone
|C3=Stone
|Output= Redstone Comparator
|type=Redstone
}}
== Usage ==
A redstone comparator can be placed on the top of any [[opaque]] block with a solid full-height top surface (including upside-down [[slab]]s and upside-down [[stairs]]). {{IN|be}}, a comparator can also be placed on [[wall]]s and fences. For more information about placement on transparent blocks, see [[Opacity/Placement]].
The redstone comparator has a front and a back — the arrow on the top of the comparator points to the front. When placed, the comparator faces away from the player. The comparator has two miniature redstone torches at the back and one at the front. The back torches turn on when the comparator's output is greater than zero (the arrow on top also turns red). The front torch has two states that can be toggled by {{control|using}} the comparator:
* Down and unpowered (indicating the comparator is in "comparison mode")
* Up and powered (indicating the comparator is in "subtraction mode")
The redstone comparator can take a signal strength input from its rear as well as from both sides. Side inputs are accepted only from [[redstone dust]], [[block of redstone]], [[redstone repeater]]s, other comparators, and [[observer]]s in specific scenarios. The redstone comparator's front is its output.
It takes 1 [[redstone tick]] (2 game ticks, or 0.1 seconds barring lag) for signals to move through a redstone comparator, either from the rear or from the sides. This applies to changing signal strengths as well as simply to turning on and off.
Redstone comparators check their power state before their scheduled ticks update. This results in redstone comparators not usually responding to 1-tick fluctuations of power or signal strength — for example, a [[clock circuit|1-clock]] input is treated as always off from the side, and always on from the rear. This happens because the signal changes back to its original state before the redstone comparator checks its input states. However, certain setups such as powering any input with two separate observer pulses at the same time will cause a redstone comparator to respond to 2 gametick pulses.
The redstone comparator has four functions: maintain signal strength, compare signal strength, subtract signal strength, and measure certain block states (primarily the fullness of containers).
=== Maintain signal strength ===
A redstone comparator with no powered sides outputs the same signal strength as its rear input.
=== Compare signal strength ===
[[File:Comparators Explained.png|Comparators in comparison mode.|thumb]]
A redstone comparator in comparison mode (front torch down and unpowered) compares its rear input to its two side inputs. If either side input is greater than the rear input, the comparator output turns off. If neither side input is greater than the rear input, the comparator outputs the same signal strength as its rear input.
The formula for calculating the output signal strength is as follows:
<code>output = rear × [[Wikipedia:Iverson bracket|[]]'''''left''''' ≤ '''''rear''''' AND '''''right''''' ≤ '''''rear'''''[[Wikipedia:Iverson bracket|<nowiki>]]]</code>
{{-}}
=== Subtract signal strength ===
[[File:Redstone comparator.png|thumb|The greatest of the side inputs A and C is subtracted from the rear input B, outputting 1. If either A or C were greater than B, it would output 0.]]
A redstone comparator in subtraction mode (front torch up and powered) subtracts the signal strength of the higher side input from the signal strength of the rear input.
<code>output = max('''''rear''''' − max('''''left''', '''right'''''), 0)</code>
For example: if the signal strength is 6 at the left input, 7 at the right input and 4 at the rear, the output signal has a strength of ''max(4 − max(6, 7), 0) = max(4−7, 0) = max(−3, 0) = 0''.
If the signal strength is 9 at the rear, 2 at the right input and 5 at the left input, the output signal has a strength of ''max(9 − max(2, 5), 0) = max(9−5, 0) = 4''.
=== Measure block state ===
{{Schematic | caption = A redstone comparator can measure the fullness of a chest, as well as other block states, even through an opaque block.
|rd-ew!|rc-w!|ch|SB|rc-e!|rd-ew!
}}
A redstone comparator treats certain blocks behind it as power sources and outputs a signal strength proportional to the block's state. The comparator may be separated from the measured block by an opaque block. However, {{in|je}}, if the opaque block is powered to signal strength 15, then the comparator outputs 15 no matter the fullness of the container.<ref>{{bug|MC-64394}} (resolved as "Works As Intended")</ref>
[[Category:Java Edition specific information]]
{{-}}
==== Fullness of containers ====
{| class="wikitable floatright" style="margin-left: 0.5em; margin-right: 0; text-align: center;"
|+ Minimum Items for Container Signal Strength
|-
!Containers
!{{BlockSprite|Furnace|link=Furnace}}<br>{{BlockSprite|Blast Furnace|link=Blast Furnace}}<br>{{BlockSprite|Smoker|link=Smoker}}
!{{BlockSprite|Hopper|link=Hopper}}<br>{{EntitySprite|Minecart with Hopper|link=Minecart with Hopper}}<br>{{BlockSprite|Brewing Stand|link=Brewing Stand}}
!{{BlockSprite|Dispenser|link=Dispenser}}<br>{{BlockSprite|Dropper|link=Dropper}}
!{{BlockSprite|Chest|link=Chest}}<br>{{EntitySprite|Minecart with Chest|link=Minecart with Chest}}<br>{{BlockSprite|Shulker Box|link=Shulker Box}}<br>{{BlockSprite|Barrel|link=Barrel}}
![[Double Chest|{{Schematic|size=16|ch-s|-|ch-n}}
]]
!{{BlockSprite|Jukebox|link=Jukebox}}
|-
!Total Slots
!3!!5!!9!!27!!54!!1
|-
!Power Level
! colspan="5" |Number of Items
!Music Disc
|-
|0||0||0||0||0||0||No disc
|-
|1||1||1||1||1||1||"13"
|-
|2||14||23||42||1s 60||3s 55||"cat"
|-
|3||28||46||1s 19||3s 55||7s 46||"blocks"
|-
|4||42||1s 5||1s 60||5s 51||11s 37||"chirp"
|-
|5||55||1s 28||2s 37||7s 46||15s 28||"far"
|-
|6||1s 5||1s 51||3s 14||9s 42||19s 19||"mall"
|-
|7||1s 19||2s 10||3s 55||11s 37||23s 10||"mellohi"
|-
|8||1s 32||2s 32||4s 32||13s 32||27s||"stal"
|-
|9||1s 46||2s 55||5s 10||15s 28||30s 55||"strad"
|-
|10||1s 60||3s 14||5s 51||17s 23||34s 46||"ward"
|-
|11||2s 10||3s 37||6s 28||19s 19||38s 37||"11"
|-
|12||2s 23||3s 60||7s 5||21s 14||42s 28||"wait"
|-
|13||2s 37||4s 19||7s 46||23s 10||46s 19||"Pigstep"
|-
|14||2s 51||4s 42||8s 23||25s 5||50s 10||"Otherside"<br>"Relic"
|-
|15||3s||5s||9s||27s||54s||"5"
|}
A redstone comparator can output a signal indicating how full a container is. (0 for empty, 15 for full, etc.) The table on the right is described more in detail, later in this section.
Containers that can be measured by a comparator include:
* {{BlockLink|Furnace}}
* {{BlockLink|Blast Furnace}}
* {{BlockLink|Smoker}}
* {{BlockLink|Brewing Stand}}
* {{BlockLink|Hopper}}
* {{ItemLink|Minecart with Hopper}} on top of a [[detector rail]]
* {{BlockLink|Dispenser}}
* {{BlockLink|Dropper}}
* {{BlockLink|Chest}}
* {{BlockLink|Trapped Chest}}
* {{ItemLink|Minecart with Chest}} on top of a [[detector rail]]
* {{BlockLink|Barrel}}
* {{SchematicSprite|size=16|ch-e}}{{SchematicSprite|size=16|ch-w}} Large chest
* {{SchematicSprite|size=16|ch-e}}{{SchematicSprite|size=16|ch-w}} Large trapped chest
* {{BlockLink|Shulker Box}} (any color)
Generally speaking, the comparator output signal strength represents the average fullness of the slots, based on how many of that item form a full stack (64, 16, or 1 for non-stackable items).
The ''Minimum Items for Container Signal Strength'' table (right) shows the minimum '''''full-stack-equivalent (FSE)''''' to produce different signal strengths from common containers. A '''''full-stack-equivalent''''' quantifies how many normal 64-stackable items are needed to output a corresponding signal strength. The 's' is a constant 64, with the additional amount needed following after.
One may also consider the terms: '''c''umulative-weight''''' or '''''weighted-sum''''' instead of '''''full-stack-equivalent'''''.
Items that stack to a max of 16 ([[snowball]]s, [[sign]]s, [[ender pearl]]s, etc.), contribute +4 to the ''full-stack-equivalent'' for each unity (count of 1 item). Similarly, items that stack to 1 ([[minecart]], [[boat]], etc.) contribute +64, and items that stack to 64 contribute +1.
Example 1: 3 ender pearls will contribute a 3 x 4 = 12 ''full-stack-equivalent''.
Example 2: 16 ender pearls and 60 redstone dust contributes a 16x4 + 60x1 = 124 ''full-stack-equivalent''.
Example 3: 1 minecart and 60 redstone dust contributes a 1x64 + 60x1 = 124 ''full-stack-equivalent''.
Example 4: To produce a signal strength of 10 from a hopper, one requires a ''full-stack-equivalent'' of at least 3s + 14 = 206 but strictly less than than 3s + 37 = 229. This can be done with 3 minecarts, and 14 dirt.
When a comparator measures a large chest or large trapped chest, it measures the entire large chest (54 slots), not just the half directly behind the comparator. A chest or trapped chest that cannot be opened (either because it has an opaque block, [[ocelot]], or [[cat]] above it) always produces an output of 0 no matter how many items are in the container — shulker boxes can always be measured, even if they cannot open.
;Calculating signal strength from items
:When a container is empty, the output is off.
:When it is not empty, the output signal strength is calculated as follows:
:<code>'''''signal strength''''' = floor(1 + (('''''sum of all slots' fullnesses''''') / ('''''number of slots in container''''')) × 14)</code>
:<code>fullness of a slot = '''''number of items in slot''''' / '''''max stack size for this type of item'''''</code>
:''Example:'' 300 blocks in a dispenser (which has 9 slots), where each block stacks to a maximum of 64 has a 300 ''full-stack-equivalent.'' This produces an output with a signal strength of 8:
<blockquote>
1 + ((300 items / 64 items per slot) / 9 slots) × 14 = 8.292, floored is 8
</blockquote>
;Calculating items from signal strength
:It can be useful in redstone circuits to use containers with comparators to create signals of a specific strength. The number of items required in a container to produce a signal of desired strength is calculated as follows:
:<code>items required = max('''''desired signal strength''''', roundup(('''''total slots in container''''' × 64 / 14) × (desired signal strength − 1)))</code>
:''Example:'' To use a furnace (which has 3 slots) to create a strength 9 signal, players need 110 items:
<blockquote>
max(9, (3×64/14) × (9−1)) = 109.714, rounded up is 110
</blockquote>
{{-}}
==== Miscellaneous ====
[[File:Comparator storage.png|Comparators used to measure containers.|thumb]]
Some non-container blocks can also be measured by a redstone comparator:
;{{BlockLink|Beehive}} and {{BlockLink|Bee nest}}
: A hive or nest outputs a signal strength equal to the amount of honey in the hive/nest.
;{{BlockLink|Cake}}
: A cake outputs a signal strength relative to the amount of cake remaining. Each slice is worth 2 signal strength, with 7 total slices, for an output of 14 for a full cake.
[[File:Cauldron Redstone Strength Values.png|Cauldron signal strength|thumb]]
;{{BlockLink|Cauldron}}
: A cauldron outputs different signal strengths depending on how much water or powdered snow is inside. From completely empty to completely full, the output values are 0, 1, 2, and 3. If lava or powder snow is inside, the strength is always 3.
[[File:Composter Redstone Strength Values.png|Composter signal strength|thumb]]
;{{BlockLink|Composter}}
: A composter outputs different signal strengths depending on the level inside. From completely empty to completely full, the output values are 0, 1, 2, 3, 4, 5, 6, 7 and 8.
;{{Anchor|CommandBlock}}{{BlockLink|Command Block}}
: A command block stores the "success count" of the last command executed, which represents the number of times the most recently used command of this command block succeeded. A "success" is defined by the [[command]]'s success conditions: if a red error message is returned in the chat, the command was not successful.
: Most commands can succeed once per execution, but certain commands (such as those that accept players as arguments) can succeed multiple times, and the comparator outputs the number of times it succeeded (maximum 15 when sent to redstone dust, but in the code it is able to go up to the 32-bit integer limit, and can be used in contraptions with no redstone dust with those values).
: A command block continues to store the success count of the last command executed until it executes its command again, thus the comparator continues to output the same signal strength even after the command block is no longer being activated (it doesn't turn off when the signal to the command block turns off).
;{{BlockLink|End Portal Frame}}
: An end portal frame outputs a full signal of 15 if it contains an [[eye of ender]] and zero otherwise.
[[File:Item frame and comparator.png|A comparator can measure the presence and rotation of an item frame's contents.|thumb]]
;{{EntityLink|Item Frame}}
: A comparator can measure the state of an [[item frame]]'s contents. An item frame comparator outputs 0 if the item frame is empty, or 1 to 8 for any item depending on its rotation: 1 at initial placement, plus 1 for each 45° of rotation for a maximum of 8.
: For an item frame that holds a map, a unit of rotation is 90° instead of 45°, but a comparator still outputs power levels 1 to 8. It takes two full rotations to cycle through all comparator outputs, and each orientation of the map corresponds to two output levels that differ by 4.
: The comparator must be placed behind the block the item frame is attached to, facing away from the item frame. The block must be a full block, and the item frame cannot be submerged in water. Having a sign in the same block as the item frame will prevent the frame from sending a signal as well.{{only|java}}
;{{BlockLink|Jukebox}}
: A jukebox outputs a signal strength indicating which music disc is currently playing. See the ''Minimum Items for Container Signal Strength'' table above.
;{{BlockLink|Lectern}}
: A lectern outputs a signal strength that depends on what page the player is currently on. The calculation used is:
:<code>'''''signal strength''''' = floor(1 + (('''''current page''''' - 1) / ('''''number of pages in book''''' - 1)) × 14)</code>
:This results in page 1 having a signal strength of 1, and the last page having a signal strength of 15. The exception is a single page book, which will output a signal strength of 15.
:For example, a book with 15 pages will output a signal equal to the current page number. A book with 5 pages will output signal strengths of 1, 4, 8, 11 and 15 for the different pages. A book with 100 pages will have the signal strength increase to the next level on pages 1, 9, 16, 23, 30, 37, 44, 51, 58, 65, 72, 79, 86, 93 and 100.
:
;{{BlockLink|Respawn Anchor}}
: A respawn anchor outputs a signal strength of 0, 3, 7, 11, or 15, depending on the "charged" value.
;{{BlockLink|Sculk Sensor}}
: A sculk sensor outputs a signal strength depending on the type of vibration that is detected.
;{{BlockLink|Chiseled Bookshelf}}
: A chisled bookshelf outputs a signal strength between 1 and 6 indicating the last slot interacted with. When no slot has been interacted with yet, it outputs 0.
{{-}}
== Sounds ==
=== Generic ===
{{Edition|Java}}:
{{Sound table/Block/Stone/JE}}
{{Edition|Bedrock}}:
{{Sound table/Block/Wood/BE}}
=== Unique ===
{{edition|java}}:
{{Sound table
|rowspan=2
|sound=Click.ogg
|subtitle=Comparator clicks
|source=block
|description=When a comparator is set to subtraction mode
|id=block.comparator.click
|translationkey=subtitles.block.comparator.click
|volume=0.3
|pitch=0.55
|distance=16}}
{{Sound table
|subtitle=Comparator clicks
|source=block
|description=When a comparator is set to comparison mode
|id=block.comparator.click
|translationkey=subtitles.block.comparator.click
|volume=0.3
|pitch=0.5
|distance=16
|foot=1}}
{{edition|bedrock}}:
{{Sound table
|type=bedrock
|rowspan=2
|sound=Click.ogg
|source=block
|description=When a comparator is set to subtraction mode
|id=block.click
|volume=0.2
|pitch=0.55}}
{{Sound table
|source=block
|description=When a comparator is set to comparison mode
|id=block.click
|volume=0.2
|pitch=0.5
|foot=1}}
== Data values ==
=== ID ===
{{edition|java}}:
{{ID table
|edition=java
|showforms=y
|generatetranslationkeys=y
|displayname=Redstone Comparator
|spritetype=block
|nameid=comparator
|foot=1}}
{{ID table
|displayname=Block entity
|spritename=redstone-comparator
|spritetype=block
|nameid=comparator
|foot=1}}
{{edition|bedrock}}:
{{ID table
|edition=bedrock
|firstcolumnname=Redstone Comparator
|shownumericids=y
|showforms=y
|generatetranslationkeys=y
|displayname=Unpowered block
|spritename=unpowered-comparator
|spritetype=block
|nameid=unpowered_comparator
|id=149
|form=block
|translationkey=-}}
{{ID table
|displayname=Powered block
|spritename=powered-comparator
|spritetype=block
|nameid=powered_comparator
|id=150
|form=block
|translationkey=-}}
{{ID table
|displayname=Item
|spritename=redstone-comparator
|spritetype=item
|nameid=comparator
|id=522
|form=item
|foot=1}}
{{ID table
|notnamespaced=y
|displayname=Block entity
|spritename=redstone-comparator
|spritetype=block
|nameid=Comparator
|foot=1}}
=== Block states ===
{{see also|Block states}}
{{/BS}}
=== Block data ===
A redstone comparator has a block entity associated with it that holds additional data about the block.
{{el|je}}:
{{see also|Block entity format}}
{{/BE}}
{{el|be}}:
: See [[Bedrock Edition level format/Block entity format]].
== Advancements ==
{{Load advancements|the power of books}}
== Video ==
<div style="text-align:center">{{yt|J7Z20Zzz3yU}}</div>
== History ==
{{info needed section|If {{bug|MC-50242}} also affected comparators?}}
''For a more in-depth breakdown of changes to repeater textures and models, including a set of renders for each state combination, see [[/Asset history]]''
{{History|java}}
{{History||November 24, 2012|link=https://youtube.com/watch?v=YG9RNyRhIow&t=6m56s|[[Jeb]] stated that there may be a "capacitor" in [[Minecraft]]. }}
{{History||December 27, 2012|link={{tweet|Dinnerbone|284388625595125760}}|[[Dinnerbone]] released [https://web.archive.org/web/20190710120115/https://imgur.com/a/FBKed pictures] of the first version of the "comparator", stating it was a replacement for the "capacitor" idea that has variable, alternate inputs.}}
{{History||January 2, 2013|link={{tweet|Dinnerbone|286428595423965184}}|Dinnerbone released one more [http://dinnerbone.com/media/uploads/2013-01/screenshots/2013-01-02_12.06.47.png picture] of the comparator. The picture itself showing a digital-to-analog converter, using the comparator as the main [[block]].}}
{{History||1.5|snap=13w01a|[[File:Redstone Comparator (S) JE1.png|32px]] [[File:Powered Redstone Comparator (S) JE1.png|32px]] [[File:Subtracting Redstone Comparator (S) JE1.png|32px]] [[File:Powered Subtracting Redstone Comparator (S) JE1.png|32px]] [[File:Redstone Comparator (item) JE1 BE1.png|32px]] Added redstone comparators.
|Redstone comparators have 0 delay.
At this point, block ID 149 was used for unpowered comparators, and block ID 150 for powered comparators.}}
{{History|||snap=13w01b|A delay of 1 game tick ({{frac|1|2}} redstone tick) has now been added to redstone comparators to fix bugs.
|The ability to measure containers to redstone comparators has now been added.}}
{{History|||snap=13w02a|[[File:Redstone Comparator (S) JE2.png|32px]] [[File:Powered Redstone Comparator (S) JE2.png|32px]] [[File:Subtracting Redstone Comparator (S) JE2.png|32px]] [[File:Powered Subtracting Redstone Comparator (S) JE2.png|32px]] The appearance of redstone comparators has now been changed - the top texture has changed to show [[quartz]] in the middle and the sides now use the [[smooth stone]] texture rather than the smooth stone slab side texture.
|The algorithm for measuring containers has now been changed so that redstone comparators output a signal with as few as 1 [[item]] in the container.}}
{{History|||snap=13w02b|Redstone comparators now treat large [[chest]]s as a single container.}}
{{History|||snap=13w03a|Redstone comparators now output success count of [[command block]]s.
|Redstone comparators now measure container [[minecart]]s on [[detector rail]]s.}}
{{History|||snap=13w04a|Redstone comparators now measure [[jukebox]]es.}}
{{History|||snap=13w05a|Redstone comparators no longer cause constant [[block]] updates. The delay has now been made consistent, and side input no longer causes a pulse output.
|Block 150 (later <code>powered_comparator</code>) is no longer used; powered state is now represented by the 8s bit on block 149 (later <code>unpowered_comparator</code>).}}
{{History|||snap=13w05b|Redstone comparator delay has now been changed from 1 game tick (1/2 [[redstone]] tick) to 2 game ticks (1 redstone tick).}}
{{History|||snap=13w09c|The redstone signal strength from a redstone comparator next to a [[brewing stand]] with 3 [[water bottle]]s in it is now the same as one with 3 water bottles and 1 ingredient in it.}}
{{History||1.6.1|snap=13w18a|Redstone comparators now measure [[cauldron]]s and [[end portal frame]]s.}}
{{History||1.8|snap=14w04a|Redstone comparators now measure [[item frame]]s.}}
{{History|||snap=14w10a|The torches under redstone comparators have now been shortened, which has changed the underside appearance from [[File:Redstone Comparator UNKVER1 (facing NWU).png|32px]] [[File:Powered Redstone Comparator UNKVER1 (facing NWU).png|32px]] [[File:Subtracting Redstone Comparator UNKVER1 (facing NWU).png|32px]] [[File:Powered Subtracting Redstone Comparator UNKVER1 (facing NWU).png|32px]] to [[File:Redstone Comparator UNKVER2 (facing NWU).png|32px]].}}
{{History|||snap=14w25a|[[File:Redstone Comparator (S) JE3.png|32px]] [[File:Powered Redstone Comparator (S) JE3.png|32px]] [[File:Subtracting Redstone Comparator (S) JE3.png|32px]] [[File:Powered Subtracting Redstone Comparator (S) JE3.png|32px]] The torches on comparators are now subject to ambient occlusion.
|Comparators set to subtract mode appear to be powered as well regardless of incoming power. The subtracting-only model still exists and can be achieved through {{cmd|setblock}}.}}
{{History|||snap=14w25b|[[File:Subtracting Redstone Comparator (S) JE4.png|32px]] [[File:Powered Subtracting Redstone Comparator (S) JE4.png|32px]] The powered front torch when in subtraction mode is now lower.
|Comparators set to subtract by hand now appear normally again.}}
{{History|||snap=14w28a|Redstone comparators now measure [[cake]]s.}}
{{History||1.9|snap=15w42a|With the addition of the [[blaze powder]] fuel slot, [[brewing stand]]s now have 5 slots instead of 4. Their original comparative power values from redstone comparators are listed below:
{{{!}} class{{=}}"wikitable collapsible collapsed" data-description{{=}}"Original values"
! Original values
{{!}}-
{{!}}
*0: 0
*1: 1
*2: 19
*3: 37
*4: 55
*5: 1s 10
*6: 1s 28
*7: 1s 46
*8: 2s
*9: 2s 19
*10: 2s 37
*11: 2s 55
*12: 3s 10
*13: 3s 28
*14: 3s 46
*15: 4s
{{!}}}
}}
{{History|||snap=15w47a|Redstone comparators' side inputs now take power from [[redstone block]]s.}}
{{History||1.13|snap=17w47a|All 3 IDs for the redstone comparator have now been merged into one ID: <code>comparator</code>.
|Redstone comparators now render their underside, which has changed their undersides from [[File:Redstone Comparator UNKVER2 (facing NWU).png|32px]] to [[File:Redstone Comparator UNKVER3 (facing NWU).png|32px]].
|Prior to [[1.13/Flattening|''The Flattening'']], these blocks' numeral IDs were 149 and 150, and the [[item]]'s 404.
|As a result, the formerly unused comparator ID is now technically used again, due to both unpowered and powered versions being merged into a single comparator block ID.}}
{{History||1.14|snap=18w43a|[[File:Redstone Comparator (S) JE4.png|32px]] [[File:Powered Redstone Comparator (S) JE4.png|32px]] [[File:Subtracting Redstone Comparator (S) JE5.png|32px]] [[File:Powered Subtracting Redstone Comparator (S) JE5.png|32px]] [[File:Redstone Comparator (item) JE2 BE2.png|32px]] The textures of redstone comparators have now been changed.}}
{{History|||snap=19w02a|Redstone comparators now measure [[lectern]]s.}}
{{History|||snap=19w03a|Redstone comparators now measure [[composter]]s.}}
{{History|||snap=19w12b|Redstone comparators can now be placed on [[glass]], [[ice]], [[glowstone]] and [[sea lantern]]s.}}
{{History||1.15|snap=19w34a|Redstone comparators now measure how much honey is inside [[beehive|bee hive]]s and [[bee nest]]s.}}
{{History||1.16|snap=20w06a|The way to calculate the input signals of redstone comparators has now been changed.}}
{{History|||snap=20w11a|The changes to the way of calculating the input signals of redstone comparators from [[Java Edition 20w06a|20w06a]] have now been reverted.}}
{{History|||snap=20w16a|Redstone comparators now measure [[Pigstep music disc]]s in [[jukebox]]es.}}
{{History||1.17|snap=20w45a|Redstone comparators now measure [[lava cauldron]]s.}}
{{History|||snap=20w46a|Redstone comparators now measure [[Cauldron#Holding powder snow|powder snow cauldron]]s.}}
{{History||1.18|snap=21w41a|[[File:Powered Redstone Comparator (S) JE5.png|32px]] [[File:Powered Subtracting Redstone Comparator (S) JE6.png|32px]] The texture of powered redstone comparator have now been changed.}}
{{History||1.19|snap=22w13a|Redstone comparators now generate as part of [[ancient cities]].}}
{{History||1.20<br>(Experimental)|link=1.19.3|snap=22w42a|Redstone comparators now measure [[chiseled bookshelves]].}}
{{History||1.20.2|snap=23w33a|Redstone comparators now use stone sounds instead of wood sounds.<ref>{{bug|MC-182820|||Fixed}}</ref>}}
{{History|pocket alpha}}
{{History||v0.14.0|snap=build 1|[[File:Redstone Comparator (S) JE2 BE1.png|32px]] [[File:Powered Redstone Comparator (S) JE2 BE1.png|32px]] [[File:Subtracting Redstone Comparator (S) JE2 BE1.png|32px]] [[File:Powered Subtracting Redstone Comparator (S) JE2 BE1.png|32px]]{{verify|Was this the model used?}} [[File:Redstone Comparator (item) JE1 BE1.png|32px]] Added redstone comparators.}}
{{History|pocket}}
{{History||1.0.0|snap=alpha 0.17.0.1|Redstone comparators now measure [[end portal frame]]s.}}
{{History||1.0.5|snap=alpha 1.0.5.0|Redstone comparators now output success count of [[command block]]s.}}
{{History||1.1.0|snap=alpha 1.1.0.0|Redstone comparators now measure [[shulker box]]es.}}
{{History|bedrock}}
{{History||1.2.0|snap=beta 1.2.0.2|Redstone comparators now measure [[jukebox]]es.
|Redstone comparators now render their underside, which has changed their undersides from [[File:Redstone Comparator UNKVER1 (facing NWU).png|32px]] to [[File:Redstone Comparator UNKVER3 (facing NWU).png|32px]]}}
{{History||1.10.0|snap=beta 1.10.0.3|[[File:Redstone Comparator (S) BE.png|32px]] [[File:Powered Redstone Comparator (S) BE.png|32px]] [[File:Subtracting Redstone Comparator (S) BE.png|32px]] [[File:Powered Subtracting Redstone Comparator (S) BE.png|32px]] [[File:Redstone Comparator (item) JE2 BE2.png|32px]] The textures of redstone comparators have now been changed.}}
{{History||1.11.0|snap=beta 1.11.0.1|Redstone comparators now measure [[smoker]]s, [[blast furnace]]s, [[lectern]]s and [[composter]]s.}}
{{History||1.18.10|snap=beta 1.18.10.20|[[File:Powered Redstone Comparator (S) JE5.png|32px]] [[File:Powered Subtracting Redstone Comparator (S) JE6.png|32px]] The texture of powered redstone comparator have now been changed.}}
{{History||1.20.30|snap=beta 1.20.30.20|Redstone comparators now use the <code>minecraft:cardinal_direction</code> [[block state]] instead of <code>direction</code>.}}
{{History|console}}
{{History||xbox=TU19|xbone=CU7|ps=1.12|wiiu=Patch 1|switch=1.0.1|[[File:Redstone Comparator (S) JE2 BE1.png|32px]] [[File:Powered Redstone Comparator (S) JE2 BE1.png|32px]] [[File:Subtracting Redstone Comparator (S) JE2 BE1.png|32px]] [[File:Powered Subtracting Redstone Comparator (S) JE2 BE1.png|32px]]{{verify|Was this the model used?}} [[File:Redstone Comparator (item) JE1 BE1.png|32px]] Added redstone comparators.}}
{{History||xbox=TU31|xbone=CU19|ps=1.22|wiiu=Patch 3|switch=1.0.1|Redstone comparators can now measure [[item frame]]s.}}
{{History||xbox=none|xbone=none|ps=1.90|wiiu=none|switch=none|[[File:Redstone Comparator (S) BE.png|32px]] [[File:Powered Redstone Comparator (S) BE.png|32px]] [[File:Subtracting Redstone Comparator (S) BE.png|32px]] [[File:Powered Subtracting Redstone Comparator (S) BE.png|32px]]{{verify|Was this the model used?}} [[File:Redstone Comparator (item) JE2 BE2.png|32px]] The textures of redstone comparators have now been changed.}}
{{History|3ds}}
{{History||0.1.0|[[File:Redstone Comparator (S) JE2 BE1.png|32px]] [[File:Powered Redstone Comparator (S) JE2 BE1.png|32px]] [[File:Subtracting Redstone Comparator (S) JE2 BE1.png|32px]] [[File:Powered Subtracting Redstone Comparator (S) JE2 BE1.png|32px]]{{verify|Was this the model used?}} [[File:Redstone Comparator (item) JE2 BE2.png|32px]] Added redstone comparators.}}
{{History|foot}}
=== Redstone comparator "items" ===
{{:Technical blocks/Redstone Comparator}}
== Issues ==
{{issue list}}
== Trivia ==
* Comparators do not emit redstone particles when powered, unlike redstone torches and repeaters.<ref>{{bug|MC-51692|||WAI}}</ref>
== Gallery ==
<gallery>
Dinnerbone Comparator 1.png|Dinnerbone showing how comparators work.
Dinnerbone Comparator 2.png|Dinnerbone showing how comparators work.
Dinnerbone Comparator 3.png|Dinnerbone showing how comparators work.
Dinnerbone Comparators 1.png|A contraption incorporating comparators.
Dinnerbone Comparators 2.png|Comparators in action.
Dinnerbone Comparators 3.png|Output specific signals.
Dinnerbone Comparator Thing.png|Another comparator in use.
Item Frame Comparator.png|Rotating the torch in the item frame adjusts the comparator's output.
</gallery>
== References ==
{{reflist}}
{{Redstone}}
{{Blocks|Utility}}
{{Items}}
[[Category:Mechanics]]
[[Category:Block entities]]
[[Category:Redstone mechanics]]
[[Category:Mechanisms]]
[[Category:Manufactured blocks]]
[[Category:Non-solid blocks]]
[[de:Redstone-Komparator]]
[[es:Comparador de redstone]]
[[fr:Comparateur de redstone]]
[[hu:Redstone-komparátor]]
[[ja:レッドストーンコンパレーター]]
[[ko:레드스톤 비교기]]
[[nl:Redstonevergelijker]]
[[pl:Komparator]]
[[pt:Comparador de redstone]]
[[ru:Компаратор]]
[[uk:Редстоуновий компаратор]]
[[zh:红石比较器]]</li><li>[[Sign|Sign]]<br/>{{Block
| image = <gallery>
Oak Sign.png|Sign
Oak Wall Sign.png|Wall Sign
Oak Hanging Sign.png|Hanging Sign
Oak Wall Hanging Sign.png|Wall Hanging Sign
</gallery>
| image2 = <gallery>
Oak Sign JE3.png|Sign
Oak Hanging Sign (item) JE1 BE1.png|Hanging Sign
</gallery>
| extratext = [[#Gallery|View all renders]]
| transparent = Yes
| light = No
| tool = axe
| renewable = Yes
| stackable = Yes (16)
| flammable = No
| lavasusceptible = No
}}
A '''sign''' is a non-solid [[block]] that displays text and can be placed on the top or side of other blocks. A '''hanging sign''' is a decorative block that also displays text, and can be placed underneath blocks or with a solid self-supporting bracket. The text of both types of signs can be customized with [[dye]]s and [[glow ink sac]]s.
== Obtaining ==
=== Breaking ===
Signs can be broken with any tool or without a tool, but an [[axe]] is fastest.
{{breaking row|horizontal=1|Sign|sprite=oak-sign|Axe|foot=1|item=1}}
A sign or a hanging sign also breaks and drops itself as an [[item]] if the block the sign is attached to is moved, removed or destroyed. However, a wall hanging sign will stay here if the block the hanging sign is attached to is removed.<ref>{{bug|MC-256501|||WAI}}</ref>
If a sign is broken while being edited, the player continues to edit the sign<ref>{{bug|MC-117815}}</ref>, although {{in|bedrock}} breaking the sign stops the editing operation.
=== Natural generation ===
An oak sign can be found in [[igloo]] basements. Spruce signs can be found in taiga [[village]] houses, as part of a chair.
=== Chest loot ===
{{LootChestItem|oak-sign,oak-hanging-sign,spruce-sign,spruce-hanging-sign}}
=== Crafting ===
[[The player]] can place six stripped [[log]] [[block]]s at the bottom half of the crafting table and place two [[chain]]s on the top-left and top-right slots to create hanging signs. This crafting recipe will create six hanging signs. Hanging signs can only be crafted with stripped logs or [[stem]]s; non-stripped wood cannot be used to craft hanging signs.
{{Crafting
|head=1
|showdescription=1
|nolink=1
|A1= Matching Planks
|B1= Matching Planks
|C1= Matching Planks
|A2= Matching Planks
|B2= Matching Planks
|C2= Matching Planks
|B3= Stick
|Output=Matching Sign,3
|type=Decoration block
}}
{{Crafting
|name= Hanging Sign
|A1= Chain
|C1= Chain
|A2= Matching Stripped Log or Stem; Block of Stripped Bamboo
|B2= Matching Stripped Log or Stem; Block of Stripped Bamboo
|C2= Matching Stripped Log or Stem; Block of Stripped Bamboo
|A3= Matching Stripped Log or Stem; Block of Stripped Bamboo
|B3= Matching Stripped Log or Stem; Block of Stripped Bamboo
|C3= Matching Stripped Log or Stem; Block of Stripped Bamboo
|Output= Matching Hanging Sign,6; Bamboo Hanging Sign,6
|type=Decoration block
|foot=1
}}
== Usage ==
Signs can be used to display text; they can be used to label storage, display information to other players or note areas of interest. Signs are also not destroyed by [[water]] or [[lava]] and therefore may be used to control the flow of these fluids.
=== Placement ===
==== Signs ====
Signs may be placed on the top or side of other [[block]]s (including semi-solid and non-solid blocks such as [[fence]]s, [[Trapdoor|trapdoors]] and other signs). To place a sign, {{control|use}} a sign [[item]] while pointing at the block the sign should be attached to, enter the desired text (or none), and click the "Done" button or press "escape" on a keyboard (or press × {{in|bedrock}}, {{xbtn|b}} on an Xbox controller, {{psbtn|o}} on a PlayStation controller, or {{nsbutton|B}} on a Nintendo Switch controller. Closing the virtual keyboard on a mobile device also exits the typing menu). To place a sign on a block that can be interacted with by the {{control|use}} control (for example, [[chest]]s, [[note block]]s, etc.), {{control|sneak}} while placing the sign.
Signs on the top of a block stand on a short post and face toward the player who placed it, in any of 16 different directions. Signs placed on the side of a block simply float there, even if the block doesn't make contact with the sign.
Even if placed on a vertical surface, a sign may not co-exist in the same block of air as any other item, despite not necessarily visibly obstructing eachother.
For more information about the blocks signs can be placed on, see [[Opacity/Placement]].
==== Hanging signs ====
Hanging signs can be placed in three different ways:
* Placing a hanging sign on the side of a block will result in it being placed with a self-supporting bracket, which allows it to float without any supporting block. This version can be placed in four different directions.
* Placing a hanging sign on the bottom of a block will result in the sign hanging below the block.
** If the block is wide enough, the chains holding the sign will be parallel. This version can be placed in four different directions.
** If the block is too narrow, the chains will meet together in a upwards arrow shape. This version is also placed if the player is {{control|sneaking}} when placing a hanging sign below a wide-enough block. This version can be placed in sixteen different directions.
=== Text ===
[[File:Oak Sign GUI.png|thumb|240px|Oak Sign editing.]]
Placing a sign opens an editor interface resembling a magnified view of the sign. Up to four lines of text can then be entered using a keyboard (hardware or on-screen). The editor supports limited editing, including moving the cursor and inserting and deleting characters. {{IN|bedrock}}, [[formatting codes]] can also be used to apply decorative effects such as color, bold, italic and underline to various bits of the text. Depending on the edition and platform in use, copy and paste operations may be supported and the editor may also support keyboard entry of Alt-codes for displaying Unicode characters.
Text can be added to the back side of a sign by interacting with the that side of the sign after placing it and editing the front.
Signs can be waxed by {{Control|use|text=using}} a [[honeycomb]] on it. Once waxed, a sign cannot be unwaxed or edited.
After placing and affixing text on a sign, a player can change the text color by {{control|using}} a [[dye]] on it. When colored with dye, the text color may differ from any color specified by formatting codes.{{Info needed|How does this work? Does the dye affect all the text? One line? One word? Does dye override all formatting codes, including font effects?}}
[[File:Glow Ink Sign with Orange Dye JE2.png|thumb|216px|Oak sign with glow ink and orange dye applied in {{JE}}.]]
A player can {{control|use}} a [[glow ink sac]] on a sign to make its text glow. The glowing text is not affected by lighting. The player can use a regular black [[ink sac]] on the sign to remove the glowing effect.
{| class="wikitable mw-collapsible mw-collapsed"
|+ class="nowrap" | Glow ink colors
!Name !! Main Color !! Edge Color
|-
! Black
| {{color|#000000}}
| {{color|#EDE8CA}}
|-
! Red
| {{color|#FC0000}}
| {{color|#650000}}
|-
! Green
| {{color|#00FC00}}
| {{color|#006500}}
|-
! Brown
| {{color|#894413}}
| {{color|#361B07}}
|-
! Blue
| {{color|#0000FC}}
| {{color|#000065}}
|-
! Purple
| {{color|#9E20ED}}
| {{color|#3F0C5F}}
|-
! Cyan
| {{color|#00D6D6}}
| {{color|#006565}}
|-
! Light Gray
| {{color|#D0D0D0}}
| {{color|#535353}}
|-
! Gray
| {{color|#7E7E7E}}
| {{color|#323232}}
|-
! Pink
| {{color|#FC68B2}}
| {{color|#652947}}
|-
! Lime
| {{color|#8DFC00}}
| {{color|#4B6500}}
|-
! Yellow
| {{color|#FCFC00}}
| {{color|#656500}}
|-
! Light Blue
| {{color|#98BECB}}
| {{color|#3C4B51}}
|-
! Magenta
| {{color|#FC00FC}}
| {{color|#650065}}
|-
! Orange
| {{color|#FC671F}}
| {{color|#65280C}}
|-
! White
| {{color|#FCFCFC}}
| {{color|#656565}}
|}
In [[Creative]] mode, the combination {{key|Ctrl}} + {{control|pick block}} on Windows/Linux, or {{key|cmd}} + {{control|pick block}} on macOS, can be used to copy an already-placed sign, including its text (with decorations), into the player's inventory.
A dyed sign facing east or west will have its text appear more saturated and bright than a sign facing north or south. However, it is actually the sign that is dimmer, because ''Minecraft'''s lighting engine uses side lighting to make the world appear less flat, but the text on signs is not affected by this.
{{IN|bedrock}}, inappropriate words or phrases in a sign's text are displayed as asterisks.
{{IN|java}}, signs can be created with [[Commands#Raw JSON Text|JSON text]], which allows complex formatting (colors, bold, italic, etc.), hover and click events, localized translation (for ''Minecraft'' technical terms, like "Redstone Repeater", otherwise translations must be provided in language files in resource packs), and the incorporation of scoreboard values into text. Use the {{cmd|data merge block}} command to create or alter JSON signs.
: Example: {{cmd|long=1|data merge block ~ ~1 ~ {front_text:{ color:"green", messages:[ '{"selector":"@p", "bold":false, "italic":false, "underlined":false, "strikethrough":false, "obfuscated":false}' , '{"text":"Second Line"}']}}}}
Signs can post the success count of JSON text hover and click events to [[scoreboard]] objectives. The objectives to be used can be specified by running the {{cmd|execute store}} command or by modifying the sign's NBT data directly with the {{cmd|data merge block}} command.
=== Interaction ===
Signs act as though they have a {{control|use}} action, so the [[player]] is unable to place [[block]]s or use [[item]]s while the cursor is pointed at them without {{control|sneaking}}.
Signs are destroyed and drop as an item when pushed by a [[piston]].{{Only|bedrock}}
Signs are non-solid and have no collision, so [[item]]s and [[mob]]s can move through sign blocks. Other [[block]]s (including other signs) can be placed on any edge of a sign.
[[Water]] and [[lava]] flow around signs. Lava can create [[fire]] in [[air]] blocks next to signs as if the signs were flammable, but the signs do not burn (and cannot be burned by other methods either, except {{in|be}}).
=== Fuel ===
Wooden signs can be used as a fuel in [[furnace]]s, smelting an [[item]] per sign.
=== Note Blocks ===
Signs can be placed under [[note block]]s to produce a "bass" sounds.
== Sounds ==
=== Generic ===
==== Normal wood ====
; Sign
{{Sound table/Block/Wood|forcecollapsed=1}}
; Hanging sign
{{Sound table/Block/Hanging sign|forcecollapsed=1}}
==== Cherry wood ====
; Sign
{{Sound table/Block/Cherry wood|forcecollapsed=1}}
; Hanging sign
{{Sound table/Block/Cherry wood hanging sign|forcecollapsed=1}}
==== Bamboo wood ====
; Sign
{{Sound table/Block/Bamboo wood|forcecollapsed=1}}
; Hanging sign
{{edition|java}}:
{{Sound table/Block/Bamboo wood hanging sign/JE|forcecollapsed=1}}
{{edition|bedrock}}:
{{Sound table/Block/Bamboo wood hanging sign/BE|forcecollapsed=1}}
==== Nether wood ====
; Sign
{{Sound table/Block/Nether wood|forcecollapsed=1}}
; Hanging sign
{{edition|java}}:
{{Sound table/Block/Nether wood hanging sign/JE|forcecollapsed=1}}
{{edition|bedrock}}:
{{Sound table/Block/Nether wood hanging sign/BE|forcecollapsed=1}}
=== Unique ===
{{edition|java}}:
{{Sound table|forcecollapsed=1
|rowspan=2
|sound=Ink sac1.ogg
|sound2=Ink sac2.ogg
|sound3=Ink sac3.ogg
|subtitle=Glow Ink Sac splotches
|source=block
|description=When a [[glow ink sac]] is used on a sign
|id=item.glow_ink_sac.use
|translationkey=subtitles.item.glow_ink_sac.use
|volume=1.0
|pitch=''varies'' <ref group=sound>Can be 1.0, 0.95, or 1.05 for each sound</ref>
|distance=16}}
{{Sound table
|subtitle=Ink Sac splotches
|source=block
|description=When an [[ink sac]] is used on a sign
|id=item.ink_sac.use
|translationkey=subtitles.item.ink_sac.use
|volume=1.0
|pitch=''varies'' <ref group=sound>Can be 0.85, 0.88, or 0.9 for each sound</ref>
|distance=16}}
{{Sound table
|sound=Dye.ogg
|subtitle=Dye stains
|source=block
|description=When [[dye]] is used on a sign
|id=item.dye.use
|translationkey=subtitles.item.dye.use
|volume=1.0
|pitch=''varies'' <ref group=sound>Can be 1.0, 0.9, 0.95, or 1.1</ref>
|distance=16}}
{{Sound table
|sound=Wax on1.ogg
|sound2=Wax on2.ogg
|sound3=Wax on3.ogg
|subtitle=Wax on
|source=block
|description=When a sign is waxed
|id=item.honeycomb.wax_on
|translationkey=subtitles.item.honeycomb.wax_on
|volume=1.0
|pitch=1.0/0.9/1.1
|distance=16}}
{{Sound table
|sound=Sign waxed interact fail1.ogg
|sound2=Sign waxed interact fail2.ogg
|sound3=Sign waxed interact fail3.ogg
|subtitle=Sign wobbles
|source=block
|description=When a player attempts to edit a waxed sign
|id=block.sign.waxed_interact_fail
|translationkey=subtitles.block.sign.waxed_interact_fail
|volume=1.0
|pitch=''varies''<ref group=sound>{{cd|fail1}} can be 1.0 or 0.9; {{cd|fail2}} and {{cd|fail3}} can be 0.8 or 0.9</ref>
|distance=16
|foot=1}}
{{edition|bedrock}}:
{{Sound table|forcecollapsed=1
|type=bedrock
|sound=Ink sac1.ogg
|sound2=Ink sac2.ogg
|sound3=Ink sac3.ogg
|source=sound
|description=When a glow ink sac or an ink sac is used on a sign
|id=sign.ink_sac.use
|volume=1.0
|pitch=1.0}}
{{Sound table
|type=bedrock
|sound=Dye.ogg
|source=sound
|description=When dye is used on a sign
|id=sign.dye.use
|volume=1.0
|pitch=1.0}}
{{Sound table
|sound=Wax on1.ogg
|sound2=Wax on2.ogg
|sound3=Wax on3.ogg
|source=neutral
|description=When a honeycomb waxes a sign
|id=copper.wax.on
|volume=1.0
|pitch=0.8-1.2}}
{{Sound table
|sound=Sign waxed interact fail1.ogg
|sound2=Sign waxed interact fail2.ogg
|sound3=Sign waxed interact fail3.ogg
|source=block
|description=When a player attempts to edit a waxed sign
|id=block.sign.waxed_interact_fail
|volume=1.0
|pitch=''varies'' <ref group=sound>Can be 1.0 or 0.9 for <code>waxed_interact_fail1</code>; can be 0.8 or 0.9 for <code>waxed_interact_fail2</code> and <code>waxed_interact_fail3</code></ref>
|foot=1}}
== Data values ==
=== ID ===
{{edition|java}}:
{{ID table
|edition=java
|showblocktags=y
|showitemtags=y
|showforms=y
|generatetranslationkeys=y
|displayname=Oak Sign
|spritetype=block
|nameid=oak_sign
|blocktags=signs, standing_signs, wall_post_override
|itemtags=signs}}
{{ID table
|displayname=Spruce Sign
|spritetype=block
|nameid=spruce_sign
|blocktags=signs, standing_signs, wall_post_override
|itemtags=signs}}
{{ID table
|displayname=Birch Sign
|spritetype=block
|nameid=birch_sign
|blocktags=signs, standing_signs, wall_post_override
|itemtags=signs}}
{{ID table
|displayname=Jungle Sign
|spritetype=block
|nameid=jungle_sign
|blocktags=signs, standing_signs, wall_post_override
|itemtags=signs}}
{{ID table
|displayname=Acacia Sign
|spritetype=block
|nameid=acacia_sign
|blocktags=signs, standing_signs, wall_post_override
|itemtags=signs}}
{{ID table
|displayname=Dark Oak Sign
|spritetype=block
|nameid=dark_oak_sign
|blocktags=signs, standing_signs, wall_post_override
|itemtags=signs}}
{{ID table
|displayname=Mangrove Sign
|spritetype=block
|nameid=mangrove_sign
|blocktags=signs, standing_signs, wall_post_override
|itemtags=signs}}
{{ID table
|displayname=Cherry Sign
|spritename=Cherry Sign
|spritetype=block
|nameid=cherry_sign
|blocktags=signs, standing_signs, wall_post_override
|itemtags=signs}}
{{ID table
|displayname=Bamboo Sign
|spritename=Bamboo Sign
|spritetype=block
|nameid=bamboo_sign
|blocktags=signs, standing_signs, wall_post_override
|itemtags=signs}}
{{ID table
|displayname=Crimson Sign
|spritetype=block
|nameid=crimson_sign
|blocktags= signs, standing_signs, wall_post_override
|itemtags=non_flammable_wood, signs}}
{{ID table
|displayname=Warped Sign
|spritetype=block
|nameid=warped_sign
|blocktags=signs, standing_signs, wall_post_override
|itemtags=non_flammable_wood, signs}}
{{ID table
|displayname=Oak Wall Sign
|spritetype=block
|nameid=oak_wall_sign
|blocktags=signs, wall_signs
|form=block}}
{{ID table
|displayname=Spruce Wall Sign
|spritetype=block
|nameid=spruce_wall_sign
|blocktags=signs, wall_signs
|form=block}}
{{ID table
|displayname=Birch Wall Sign
|spritetype=block
|nameid=birch_wall_sign
|blocktags=signs, wall_signs
|form=block}}
{{ID table
|displayname=Jungle Wall Sign
|spritetype=block
|nameid=jungle_wall_sign
|blocktags=signs, wall_signs
|form=block}}
{{ID table
|displayname=Acacia Wall Sign
|spritetype=block
|nameid=acacia_wall_sign
|blocktags=signs, wall_signs
|form=block}}
{{ID table
|displayname=Dark Oak Wall Sign
|spritetype=block
|nameid=dark_oak_wall_sign
|blocktags=signs, wall_signs
|form=block}}
{{ID table
|displayname=Mangrove Wall Sign
|spritetype=block
|nameid=mangrove_wall_sign
|blocktags=signs, wall_signs
|form=block}}
{{ID table
|displayname=Cherry Wall Sign
|spritename=Cherry Wall Sign
|spritetype=block
|nameid=cherry_wall_sign
|blocktags=signs, wall_signs
|form=block}}
{{ID table
|displayname=Bamboo Wall Sign
|spritename=Bamboo Wall Sign
|spritetype=block
|nameid=bamboo_wall_sign
|blocktags=signs, wall_signs
|form=block}}
{{ID table
|displayname=Crimson Wall Sign
|spritetype=block
|nameid=crimson_wall_sign
|blocktags=signs, wall_signs
|form=block}}
{{ID table
|displayname=Warped Wall Sign
|spritetype=block
|nameid=warped_wall_sign
|blocktags=signs, wall_signs
|form=block}}
{{ID table
|displayname=Oak Hanging Sign
|spritename=Oak Hanging Sign
|spritetype=block
|nameid=oak_hanging_sign
|blocktags=all_hanging_signs, ceiling_hanging_signs
|itemtags=hanging_signs}}
{{ID table
|displayname=Spruce Hanging Sign
|spritename=Spruce Hanging Sign
|spritetype=block
|nameid=spruce_hanging_sign
|blocktags=all_hanging_signs, ceiling_hanging_signs
|itemtags=hanging_signs}}
{{ID table
|displayname=Birch Hanging Sign
|spritename=Birch Hanging Sign
|spritetype=block
|nameid=birch_hanging_sign
|blocktags=all_hanging_signs, ceiling_hanging_signs
|itemtags=hanging_signs}}
{{ID table
|displayname=Jungle Hanging Sign
|spritename=Jungle Hanging Sign
|spritetype=block
|nameid=jungle_hanging_sign
|blocktags=all_hanging_signs, ceiling_hanging_signs
|itemtags=hanging_signs}}
{{ID table
|displayname=Acacia Hanging Sign
|spritename=Acacia Hanging Sign
|spritetype=block
|nameid=acacia_hanging_sign
|blocktags=all_hanging_signs, ceiling_hanging_signs
|itemtags=hanging_signs}}
{{ID table
|displayname=Dark Oak Hanging Sign
|spritename=Dark Oak Hanging Sign
|spritetype=block
|nameid=dark_oak_hanging_sign
|blocktags=all_hanging_signs, ceiling_hanging_signs
|itemtags=hanging_signs}}
{{ID table
|displayname=Mangrove Hanging Sign
|spritename=Mangrove Hanging Sign
|spritetype=block
|nameid=mangrove_hanging_sign
|blocktags=all_hanging_signs, ceiling_hanging_signs
|itemtags=hanging_signs}}
{{ID table
|displayname=Cherry Hanging Sign
|spritename=Cherry Hanging Sign
|spritetype=block
|nameid=cherry_hanging_sign
|blocktags=all_hanging_signs, ceiling_hanging_signs
|itemtags=hanging_signs}}
{{ID table
|displayname=Bamboo Hanging Sign
|spritename=Bamboo Hanging Sign
|spritetype=block
|nameid=bamboo_hanging_sign
|blocktags=all_hanging_signs, ceiling_hanging_signs
|itemtags=hanging_signs}}
{{ID table
|displayname=Crimson Hanging Sign
|spritename=Crimson Hanging Sign
|spritetype=block
|nameid=crimson_hanging_sign
|blocktags=all_hanging_signs, ceiling_hanging_signs
|itemtags=hanging_signs, non_flammable_wood}}
{{ID table
|displayname=Warped Hanging Sign
|spritename=Warped Hanging Sign
|spritetype=block
|nameid=warped_hanging_sign
|blocktags=all_hanging_signs, ceiling_hanging_signs
|itemtags=hanging_signs, non_flammable_wood}}
{{ID table
|displayname=Oak Wall Hanging Sign
|spritename=Oak Wall Hanging Sign
|spritetype=block
|nameid=oak_wall_hanging_sign
|blocktags=all_hanging_signs, wall_hanging_signs
|form=block}}
{{ID table
|displayname=Spruce Wall Hanging Sign
|spritename=Spruce Wall Hanging Sign
|spritetype=block
|nameid=spruce_wall_hanging_sign
|blocktags=all_hanging_signs, wall_hanging_signs
|form=block}}
{{ID table
|displayname=Birch Wall Hanging Sign
|spritename=Birch Wall Hanging Sign
|spritetype=block
|nameid=birch_wall_hanging_sign
|blocktags=all_hanging_signs, wall_hanging_signs
|form=block}}
{{ID table
|displayname=Jungle Wall Hanging Sign
|spritename=Jungle Wall Hanging Sign
|spritetype=block
|nameid=jungle_wall_hanging_sign
|blocktags=all_hanging_signs, wall_hanging_signs
|form=block}}
{{ID table
|displayname=Acacia Wall Hanging Sign
|spritename=Acacia Wall Hanging Sign
|spritetype=block
|nameid=acacia_wall_hanging_sign
|blocktags=all_hanging_signs, wall_hanging_signs
|form=block}}
{{ID table
|displayname=Dark Oak Wall Hanging Sign
|spritename=Dark Oak Wall Hanging Sign
|spritetype=block
|nameid=dark_oak_wall_hanging_sign
|blocktags=all_hanging_signs, wall_hanging_signs
|form=block}}
{{ID table
|displayname=Mangrove Wall Hanging Sign
|spritename=Mangrove Wall Hanging Sign
|spritetype=block
|nameid=mangrove_wall_hanging_sign
|blocktags=all_hanging_signs, wall_hanging_signs
|form=block}}
{{ID table
|displayname=Cherry Wall Hanging Sign
|spritename=Cherry Wall Hanging Sign
|spritetype=block
|nameid=cherry_wall_hanging_sign
|blocktags=all_hanging_signs, wall_hanging_signs
|form=block}}
{{ID table
|displayname=Bamboo Wall Hanging Sign
|spritename=Bamboo Wall Hanging Sign
|spritetype=block
|nameid=bamboo_wall_hanging_sign
|blocktags=all_hanging_signs, wall_hanging_signs
|form=block}}
{{ID table
|displayname=Crimson Wall Hanging Sign
|spritename=Crimson Wall Hanging Sign
|spritetype=block
|nameid=crimson_wall_hanging_sign
|blocktags=all_hanging_signs, wall_hanging_signs
|form=block}}
{{ID table
|displayname=Warped Wall Hanging Sign
|spritename=Warped Wall Hanging Sign
|spritetype=block
|nameid=warped_wall_hanging_sign
|blocktags=all_hanging_signs, wall_hanging_signs
|form=block
|foot=1}}
{{ID table
|displayname=Block entity
|spritename=signs
|spritetype=block
|nameid=sign}}
{{ID table
|displayname=Block entity
|spritename=hanging-signs
|spritetype=block
|nameid=hanging_sign
|foot=1}}
{{edition|bedrock}}:
{{ID table
|edition=bedrock
|firstcolumnname=Sign
|shownumericids=y
|showforms=y
|showaliasids=y
|showitemtags=y
|generatetranslationkeys=y
|displayname=Oak standing
|spritename=oak-sign
|spritetype=block
|nameid=standing_sign
|id=63
|form=block}}
{{ID table
|displayname=Spruce standing
|spritename=spruce-sign
|spritetype=block
|nameid=spruce_standing_sign
|id=436
|form=block}}
{{ID table
|displayname=Birch standing
|spritename=birch-sign
|spritetype=block
|nameid=birch_standing_sign
|id=441
|form=block}}
{{ID table
|displayname=Jungle standing
|spritename=jungle-sign
|spritetype=block
|nameid=jungle_standing_sign
|id=443
|form=block}}
{{ID table
|displayname=Acacia standing
|spritename=acacia-sign
|spritetype=block
|nameid=acacia_standing_sign
|id=445
|form=block}}
{{ID table
|displayname=Dark Oak standing
|spritename=dark-oak-sign
|spritetype=block
|nameid=darkoak_standing_sign
|id=447
|form=block}}
{{ID table
|displayname=Mangrove standing
|spritename=mangrove-sign
|spritetype=block
|nameid=mangrove_standing_sign
|id=-494
|form=block
|translationkey=-}}
{{ID table
|displayname=Cherry standing
|spritename=cherry-sign
|spritetype=block
|nameid=cherry_standing_sign
|id=-542
|form=block
|translationkey=-}}
{{ID table
|displayname=Bamboo standing
|spritename=bamboo-sign
|spritetype=block
|nameid=bamboo_standing_sign
|id=-518
|form=block
|translationkey=-}}
{{ID table
|displayname=Crimson standing
|spritename=crimson-sign
|spritetype=block
|nameid=crimson_standing_sign
|id=505
|form=block}}
{{ID table
|displayname=Warped standing
|spritename=warped-sign
|spritetype=block
|nameid=warped_standing_sign
|id=506
|form=block}}
{{ID table
|displayname=Oak wall
|spritename=oak-wall-sign
|spritetype=block
|nameid=wall_sign
|id=68
|form=block
|translationkey=-}}
{{ID table
|displayname=Spruce wall
|spritename=spruce-wall-sign
|spritetype=block
|nameid=spruce_wall_sign
|id=437
|form=block
|translationkey=-}}
{{ID table
|displayname=Birch wall
|spritename=birch-wall-sign
|spritetype=block
|nameid=birch_wall_sign
|id=442
|form=block
|translationkey=-}}
{{ID table
|displayname=Jungle wall
|spritename=jungle-wall-sign
|spritetype=block
|nameid=jungle_wall_sign
|id=444
|form=block
|translationkey=-}}
{{ID table
|displayname=Acacia wall
|spritename=acacia-wall-sign
|spritetype=block
|nameid=acacia_wall_sign
|id=446
|form=block
|translationkey=-}}
{{ID table
|displayname=Dark Oak wall
|spritename=dark-oak-wall-sign
|spritetype=block
|nameid=darkoak_wall_sign
|id=448
|form=block
|translationkey=-}}
{{ID table
|displayname=Mangrove wall
|spritename=mangrove-wall-sign
|spritetype=block
|nameid=mangrove_wall_sign
|id=-495
|form=block
|translationkey=-}}
{{ID table
|displayname=Cherry wall
|spritename=cherry-wall-sign
|spritetype=block
|nameid=cherry_wall_sign
|id=-544
|form=block
|translationkey=-}}
{{ID table
|displayname=Bamboo wall
|spritename=bamboo-wall-sign
|spritetype=block
|nameid=bamboo_wall_sign
|id=-519
|form=block
|translationkey=-}}
{{ID table
|displayname=Crimson wall
|spritename=crimson-wall-sign
|spritetype=block
|nameid=crimson_wall_sign
|id=507
|form=block}}
{{ID table
|displayname=Warped wall
|spritename=warped-wall-sign
|spritetype=block
|nameid=warped_wall_sign
|id=508
|form=block}}
{{ID table
|displayname=Oak item
|spritename=oak-sign
|spritetype=item
|nameid=oak_sign
|aliasid=sign
|id=360
|form=item
|itemtags=minecraft:sign
|translationkey=item.sign.name}}
{{ID table
|displayname=Spruce item
|spritename=spruce-sign
|spritetype=item
|nameid=spruce_sign
|id=576
|form=item
|itemtags=minecraft:sign}}
{{ID table
|displayname=Birch item
|spritename=birch-sign
|spritetype=item
|nameid=birch_sign
|id=577
|form=item
|itemtags=minecraft:sign}}
{{ID table
|displayname=Jungle item
|spritename=jungle-sign
|spritetype=item
|nameid=jungle_sign
|id=578
|form=item
|itemtags=minecraft:sign}}
{{ID table
|displayname=Acacia item
|spritename=acacia-sign
|spritetype=item
|nameid=acacia_sign
|id=579
|form=item
|itemtags=minecraft:sign}}
{{ID table
|displayname=Dark Oak item
|spritename=dark-oak-sign
|spritetype=item
|nameid=dark_oak_sign
|aliasid=darkoak_sign
|id=587
|form=item
|itemtags=minecraft:sign
|translationkey=item.darkoak_sign.name}}
{{ID table
|displayname=Mangrove item
|spritename=mangrove-sign
|spritetype=item
|nameid=mangrove_sign
|id=642
|form=item
|itemtags=minecraft:sign}}
{{ID table
|displayname=Cherry item
|spritename=cherry-sign
|spritetype=item
|nameid=cherry_sign
|id=659
|form=item
|itemtags=minecraft:sign}}
{{ID table
|displayname=Bamboo item
|spritename=bamboo-sign
|spritetype=item
|nameid=bamboo_sign
|id=660
|form=item
|itemtags=minecraft:sign}}
{{ID table
|displayname=Crimson item
|spritename=crimson-sign
|spritetype=item
|nameid=crimson_sign
|id=614
|form=item
|itemtags=minecraft:sign}}
{{ID table
|displayname=Warped item
|spritename=warped-sign
|spritetype=item
|nameid=warped_sign
|id=615
|form=item
|itemtags=minecraft:sign}}
{{ID table
|displayname=Oak Hanging Sign
|spritename=Oak Wall Hanging Sign
|spritetype=block
|nameid=oak_hanging_sign
|id=-500
|itemtags=minecraft:hanging_sign
|translationkey=item.oak_hanging_sign.name}}
{{ID table
|displayname=Spruce Hanging Sign
|spritename=Spruce Wall Hanging Sign
|spritetype=block
|nameid=spruce_hanging_sign
|id=-501
|itemtags=minecraft:hanging_sign
|translationkey=item.spruce_hanging_sign.name}}
{{ID table
|displayname=Birch Hanging Sign
|spritename=Birch Wall Hanging Sign
|spritetype=block
|nameid=birch_hanging_sign
|id=-502
|itemtags=minecraft:hanging_sign
|translationkey=item.birch_hanging_sign.name}}
{{ID table
|displayname=Jungle Hanging Sign
|spritename=Jungle Wall Hanging Sign
|spritetype=block
|nameid=jungle_hanging_sign
|id=-503
|itemtags=minecraft:hanging_sign
|translationkey=item.jungle_hanging_sign.name}}
{{ID table
|displayname=Acacia Hanging Sign
|spritename=Acacia Wall Hanging Sign
|spritetype=block
|nameid=acacia_hanging_sign
|id=-504
|itemtags=minecraft:hanging_sign
|translationkey=item.acacia_hanging_sign.name}}
{{ID table
|displayname=Dark Oak Hanging Sign
|spritename=Dark Oak Wall Hanging Sign
|spritetype=block
|nameid=dark_oak_hanging_sign
|id=-505
|itemtags=minecraft:hanging_sign
|translationkey=item.dark_oak_hanging_sign.name}}
{{ID table
|displayname=Mangrove Hanging Sign
|spritename=Mangrove Wall Hanging Sign
|spritetype=block
|nameid=mangrove_hanging_sign
|id=-508
|itemtags=minecraft:hanging_sign
|translationkey=item.mangrove_hanging_sign.name}}
{{ID table
|displayname=Cherry Hanging Sign
|spritename=Cherry Wall Hanging Sign
|spritetype=block
|nameid=cherry_hanging_sign
|id=-534
|itemtags=minecraft:hanging_sign
|translationkey=item.cherry_hanging_sign.name}}
{{ID table
|displayname=Bamboo Hanging Sign
|spritename=Bamboo Wall Hanging Sign
|spritetype=block
|nameid=bamboo_hanging_sign
|id=-522
|itemtags=minecraft:hanging_sign
|translationkey=item.bamboo_hanging_sign.name}}
{{ID table
|displayname=Crimson Hanging Sign
|spritename=Crimson Wall Hanging Sign
|spritetype=block
|nameid=crimson_hanging_sign
|id=-506
|itemtags=minecraft:hanging_sign
|translationkey=item.crimson_hanging_sign.name}}
{{ID table
|displayname=Warped Hanging Sign
|spritename=Warped Wall Hanging Sign
|spritetype=block
|nameid=warped_hanging_sign
|id=-507
|itemtags=minecraft:hanging_sign
|translationkey=item.warped_hanging_sign.name
|foot=1}}
{{ID table
|notnamespaced=y
|displayname=Block entity
|spritename=signs
|spritetype=block
|nameid=Sign}}
{{ID table
|displayname=Block entity
|spritename=hanging-signs
|spritetype=block
|nameid=HangingSign
|foot=1}}
=== Block states ===
{{see also|Block states}}
{{/BS}}
=== Block data ===
A sign has a block entity associated with it that holds additional data about the block.
{{el|java}}:
{{see also|Block entity format}}
{{/BE}}
{{el|bedrock}}:
:See [[Bedrock Edition level format/Block entity format]].
== Achievements ==
{{load achievements|It's a Sign}}
== Advancements ==
{{load advancements|Glow and Behold}}
== History ==
{{main|/History}}
{{History|java classic}}
{{History||0.24_SURVIVAL_TEST|[[File:Sign Entity.png|32px]] Signs are currently being tested as [[entity|entities]]. They always display "This is a test of the signs. Each line can be 15 chars!" and can only be spawned by pressing {{key|B}}.<ref>{{ytl|bdT76iFEnLk}}</ref>}}
{{History||0.26 SURVIVAL TEST|Removed signs.}}
{{History|java infdev}}
{{History||20100607|[[File:Oak Sign (0) JE1.png|32px]] Signs have been re-implemented as [[block]]s, although still rendering as entities.
|Signs now have a [[crafting]] recipe and the text can now be edited. Editing a sign pauses the game in [[singleplayer]].
|Signs are currently huge and drop [[planks]] when destroyed.
|Signs do not have a particle texture defined. As such, they [[Placeholder texture#Default texture|default to using the grass block texture instead]].}}
{{History||20100608|Signs are now broken faster.
|Signs now [[drops|drop]] themselves when [[breaking|destroyed]], instead of planks.
|Signs now use planks particles.}}
{{History|java alpha}}
{{History||v1.0.1|[[File:Oak Wall Sign (S) JE1 BE1.png|32px]] Added wall signs.
|[[File:Oak Sign (0) JE2.png|32px]] Signs are now smaller.}}
{{History||v1.0.5|Signs no longer require a free [[block]] above it to place.}}
{{History|java beta}}
{{History||April 27, 2011|link=https://notch.tumblr.com/post/4988431144|Hand-drawn signs are mentioned.}}
{{History|java}}
{{History||1.0.0|snap=Beta 1.9 Prerelease 6|Signs are now broken faster using an [[axe]].}}
{{History||1.3.1|snap=12w18a|Editing a sign no longer pauses the game in [[singleplayer]].}}
{{History|||snap=12w27a|Signs are now stackable up to 16.
|The same [[crafting]] recipe now produces 3 signs instead of 1.}}
{{History||June 9, 2014|link=https://twitter.com/SeargeDP/status/476047216541700096|[[Searge]] tweeted a picture of a sign showing a username and a [[scoreboard]] score.}}
{{History||1.8|snap=14w25a|Added support for JSON text to signs.
|Sign character limit now depends on character width.}}
{{History|||snap=14w29a|Signs now display the cracking animation.}}
{{History||1.9|snap=15w43a|A sign now generates within [[igloo]] basements.}}
{{History||1.11|snap=16w33a|Signs can now be used as [[fuel]] in [[furnace]]s.}}
{{History||1.13|snap=17w47a|The standing sign ID has been changed from <code>standing_sign</code> to <code>sign</code>.
|Prior to [[1.13/Flattening|''The Flattening'']], these [[block]]s' numeral IDs were 63 and 68, and the [[item]]'s 323.}}
{{History|||snap=18w10d|[[Water]] can now be placed on the same block as signs.}}
{{History||1.14|snap=18w43a|"Sign" has been renamed to "Oak Sign".
|[[File:Oak Sign JE2 BE2.png|32px]] The texture of oak sign [[item]]s has been changed.
|[[File:Spruce Standing Sign JE1 BE1.png|32px]] [[File:Birch Standing Sign JE1 BE1.png|32px]] [[File:Jungle Standing Sign JE1 BE1.png|32px]] [[File:Acacia Standing Sign JE1 BE1.png|32px]] [[File:Dark Oak Standing Sign JE1 BE1.png|32px]] [[File:Spruce Sign JE1 BE1.png|32px]] [[File:Birch Sign JE1 BE1.png|32px]] [[File:Jungle Sign JE1 BE1.png|32px]] [[File:Acacia Sign JE1 BE1.png|32px]] [[File:Dark Oak Sign JE1 BE1.png|32px]] Added spruce, birch, jungle, acacia and dark oak signs.
|The sign's text has been changed from black to white.
|A sign's recipe now requires the same type of [[wood]] instead of a random assortment.}}
{{History|||snap=18w44a|Signs can now be {{control|used}} while holding a [[dye]] to change the text color.
|Default text color for signs has been changed back to black.}}
{{History|||snap=18w45a|A new movable cursor for free text editing to signs has been added.
|Selection and copy/paste support have been added to signs.}}
{{History|||snap=18w50a|Spruce signs now generate in some [[taiga]] [[village]] houses.
|Spruce sign items can now be found in [[chest]]s in taiga village houses.}}
{{History|||snap=19w12a|Signs can now be [[dye]]d only in [[Creative mode]].}}
{{History|||snap=19w12b|Signs can now be dyed in [[Survival mode]] again.}}
{{History||1.16|snap=20w06a|[[File:Crimson Standing Sign JE1 BE1.png|32px]] [[File:Warped Standing Sign JE1 BE1.png|32px]] [[File:Crimson Sign JE1 BE1.png|32px]] [[File:Warped Sign JE1 BE1.png|32px]] Added crimson and warped signs.}}
{{History|||snap=20w09a|Crimson and warped signs can now be [[crafting|crafted]].}}
{{History||1.17|snap=21w03a|Signs can now be tinted with [[Glow Ink Sac|glow ink sac]]s to make the text glow.
|Works with both undyed and dyed signs.
|Signs now have a sound for being dyed.}}
{{History|||snap=21w11a|[[File:Oak Standing Sign (S) JE2.png|32px]][[File:Spruce Standing Sign (S) JE2 BE2.png|32px]] [[File:Birch Standing Sign (S) JE2 BE2.png|32px]] [[File:Jungle Standing Sign (S) JE2 BE2.png|32px]] [[File:Acacia Standing Sign (S) JE2 BE2.png|32px]] [[File:Dark Oak Standing Sign (S) JE2 BE2.png|32px]] [[File:Oak Wall Sign (S) JE2.png|32px]] [[File:Spruce Wall Sign (S) JE2 BE2.png|32px]] [[File:Birch Wall Sign (S) JE2 BE2.png|32px]] [[File:Jungle Wall Sign (S) JE2 BE2.png|32px]] [[File:Acacia Wall Sign (S) JE2 BE2.png|32px]] [[File:Dark Oak Wall Sign (S) JE2 BE2.png|32px]] The textures of signs have been changed to reflect the changes made to planks in the [[Texture Update]].}}
{{History|||snap=Pre-release 1|Glowing text on signs now has an outer glow, making text more visible in the dark.}}
{{History||1.18|snap=21w41a|[[File:Oak Sign JE3.png|32px]] [[File:Spruce Sign JE2.png|32px]] [[File:Birch Sign JE2.png|32px]] [[File:Jungle Sign JE2.png|32px]] [[File:Acacia Sign JE2.png|32px]] [[File:Dark Oak Sign JE2.png|32px]] [[File:Crimson Sign JE2.png|32px]] [[File:Warped Sign JE2.png|32px]] Changed all signs textures as items.}}
{{History||1.19|snap=22w11a|[[File:Mangrove Sign JE1 BE1.png|32px]][[File:Mangrove Wall Sign JE1 BE1.png|32px]][[File:Mangrove Sign (item) JE1 BE1.png|32px]] Added mangrove signs.}}
{{History|||snap=22w14a|Due to the addition of the [[mangrove tree]] and [[mangrove swamp]], mangrove signs are now obtainable in survival and renewable.}}
{{History||October 15, 2022|link={{ytl|https://youtu.be/iM9KtHaDcUg?t=5437}}|Hanging signs were announced and shown on [[Minecraft Live 2022]].|Hanging signs were conceptualized by [[Agnes Larsson]] with input from her daughter.<ref>{{ytl|vJCMpPyaN8Q|Minecraft 1.20: New Blocks and Their Functions! @ 0:29|Minecraft|February 24, 2023|t=29s}}</ref>}}
{{History||1.20<br>(Experimental)|link=1.19.3|snap=22w42a|[[File:Bamboo Sign (0) JE1 BE1.png|32px]] [[File:Bamboo Wall Sign (S) JE1 BE1.png|32px]] [[File:Bamboo Sign (item) JE1 BE1.png|32px]] Added bamboo signs behind the [[Java Edition 1.20|Update 1.20 experimental datapack]].
|[[File:Oak Hanging Sign JE1 BE1.png|32px]] [[File:Spruce Hanging Sign JE1 BE1.png|32px]] [[File:Birch Hanging Sign JE1 BE1.png|32px]] [[File:Jungle Hanging Sign JE1 BE1.png|32px]] [[File:Acacia Hanging Sign JE1 BE1.png|32px]] [[File:Dark Oak Hanging Sign JE1 BE1.png|32px]] [[File:Mangrove Hanging Sign JE1 BE1.png|32px]] [[File:Bamboo Hanging Sign JE1 BE1.png|32px]] [[File:Crimson Hanging Sign JE1 BE1.png|32px]] [[File:Warped Hanging Sign JE1 BE1.png|32px]]<br>[[File:Oak Wall Hanging Sign JE1 BE1.png|32px]] [[File:Spruce Wall Hanging Sign JE1 BE1.png|32px]] [[File:Birch Wall Hanging Sign JE1 BE1.png|32px]] [[File:Jungle Wall Hanging Sign JE1 BE1.png|32px]] [[File:Acacia Wall Hanging Sign JE1 BE1.png|32px]] [[File:Dark Oak Wall Hanging Sign JE1 BE1.png|32px]] [[File:Mangrove Wall Hanging Sign JE1 BE1.png|32px]] [[File:Bamboo Wall Hanging Sign (S) JE1 BE1.png|32px]] [[File:Crimson Wall Hanging Sign JE1 BE1.png|32px]] [[File:Warped Wall Hanging Sign JE1 BE1.png|32px]]<br>[[File:Oak Hanging Sign (item) JE1 BE1.png|32px]] [[File:Spruce Hanging Sign (item) JE1 BE1.png|32px]] [[File:Birch Hanging Sign (item) JE1 BE1.png|32px]] [[File:Jungle Hanging Sign (item) JE1 BE1.png|32px]] [[File:Acacia Hanging Sign (item) JE1 BE1.png|32px]] [[File:Dark Oak Hanging Sign (item) JE1 BE1.png|32px]] [[File:Mangrove Hanging Sign (item) JE1 BE1.png|32px]] [[File:Bamboo Hanging Sign (item) JE1 BE1.png|32px]] [[File:Crimson Hanging Sign (item) JE1 BE1.png|32px]] [[File:Warped Hanging Sign (item) JE1 BE1.png|32px]]<br>Added hanging signs behind the [[Java Edition 1.20|Update 1.20 experimental datapack]].|Added unique sounds for Nether and bamboo wood signs.}}
{{History|||snap=22w45a|[[File:Jungle Wall Hanging Sign JE2 BE2.png|32px]] The texture of jungle hanging wall signs have been changed.|Added unique sounds for Nether and bamboo wood hanging signs.|Bamboo hanging signs now can be crafted using [[block of stripped bamboo]] instead of bamboo planks.|Crafting bamboo hanging signs now outputs 6 hanging signs instead of 2.}}
{{History||1.20<br>(Experimental)|link=1.19.4|snap=23w07a|[[File:Cherry Sign (0) JE1.png|32px]] [[File:Cherry Wall Sign (S) JE1.png|32px]] [[File:Cherry Sign (item) JE1.png|32px]] [[File:Cherry Hanging Sign JE1.png|32px]] [[File:Cherry Wall Hanging Sign JE1.png|32px]] [[File:Cherry Hanging Sign (item) JE1.png|32px]] Added cherry signs and hanging signs behind the [[Java Edition 1.20|Update 1.20 experimental datapack]]. There used to be a glitch where right clicking on a sign would play the “use” animation. This was fixed in the snapshots for 1.20, where signs are editable.}}
{{History|||snap=1.19.4 Pre-release 4|[[File:Cherry Sign (0) JE2 BE2.png|32px]] Updated the texture of cherry signs.}}
{{History||1.20|snap=23w12a|Bamboo sign, cherry sign and all of the hanging signs are now available without using the "Update 1.20" experimental datapack.|Signs and hanging signs can now be edited after being placed.|Signs and hanging signs now support text on both sides.|Signs and hanging signs can now be waxed with [[honeycomb]] to prevent editing.|Oak and spruce hanging sign can now be found in [[suspicious gravel]] and [[suspicious sand]] in [[trail ruins]].}}
{{History|||snap=23w14a|Signs and hanging signs with click commands can now be interacted with even if the sign is not waxed.|Signs and hanging signs can no longer be edited by players in [[Adventure]] mode.|Signs and hanging signs with non-text chat components can no longer be edited, even if the sign is not waxed.|Signs and hanging signs now save text even if the edit screen is closed by the player being moved far away.}}
{{History|||snap=23w16a|Oak and spruce hanging sign no longer generates in [[suspicious sand]] in [[trail ruins]].|Due to the split of the archaeological loot tables for the suspicious gravel within the [[trail ruins]]; oak and spruce hanging sign now are in the common loot.}}
{{History||1.20.2|snap=23w31a|Changed sounds for Nether wood hanging signs.<ref>{{Bug|MC-262295||Warped and Crimson hanging signs uses their respective plank sounds, despite their stripped stems having unique sounds|Fixed}}</ref>}}
{{History|pocket alpha}}
{{History||v0.5.0|[[File:Oak Standing Sign.png|32px]] [[File:Oak Sign JE1 BE1.png|32px]] Signs have been added, though they can be obtained only through [[inventory]] editors. |The [[player]] currently cannot write on signs.}}
{{History||v0.6.0|Signs can now be legitimately obtained in [[Survival]] and [[Creative]] mode.|The player can now write on signs.}}
{{History||v0.10.0|snap=build 1|Signs now have a selection overlay.}}
{{History|pocket}}
{{History||1.0.0|snap=alpha 0.17.0.1|Signs can now be found in [[igloo]] basements.}}
{{History|bedrock}}
{{History||1.9.0|snap=beta 1.9.0.0|"Sign" has been renamed to "Oak Sign".
|[[File:Spruce Standing Sign (S) JE2 BE2.png|32px]] [[File:Birch Standing Sign (S) JE2 BE2.png|32px]] [[File:Jungle Standing Sign (S) JE2 BE2.png|32px]] [[File:Acacia Standing Sign (S) JE2 BE2.png|32px]] [[File:Dark Oak Standing Sign (S) JE2 BE2.png|32px]] [[File:Spruce Sign JE1 BE1.png|32px]] [[File:Birch Sign JE1 BE1.png|32px]] [[File:Jungle Sign JE1 BE1.png|32px]] [[File:Acacia Sign JE1 BE1.png|32px]] [[File:Dark Oak Sign JE1 BE1.png|32px]] Added spruce, birch, jungle, acacia and dark oak signs.|The sign's text has been changed from black to white.|A sign's recipe now requires the same type of [[wood]] instead of a random assortment.}}
{{History|||snap=beta 1.9.0.2|The default sign text color has been changed back to black.|Sign variants are now grouped in their own [[inventory]] category.}}
{{History||1.10.0|snap=beta 1.10.0.3|[[File:Oak Sign JE2 BE2.png|32px]] The texture of oak sign [[item]]s has been changed.|Spruce signs now generate in new [[taiga]] and [[snowy taiga]] [[village]] houses.}}
{{History||1.11.0|snap=beta 1.11.0.1|Signs can now be used as a [[fuel]] in [[furnace]]s.|Oak signs can now be found inside taiga and snowy taiga village house [[chest]]s.}}
{{History||1.16.0|snap=beta 1.16.0.51|[[File:Crimson Standing Sign JE1 BE1.png|32px]] [[File:Warped Standing Sign JE1 BE1.png|32px]] [[File:Crimson Sign JE1 BE1.png|32px]] [[File:Warped Sign JE1 BE1.png|32px]] Added crimson and warped signs.|[[File:Spruce Standing Sign (S) JE2 BE2.png|32px]] [[File:Birch Standing Sign (S) JE2 BE2.png|32px]] [[File:Jungle Standing Sign (S) JE2 BE2.png|32px]] [[File:Acacia Standing Sign (S) JE2 BE2.png|32px]] [[File:Dark Oak Standing Sign (S) JE2 BE2.png|32px]] [[File:Spruce Wall Sign (S) JE2 BE2.png|32px]] [[File:Birch Wall Sign (S) JE2 BE2.png|32px]] [[File:Jungle Wall Sign (S) JE2 BE2.png|32px]] [[File:Acacia Wall Sign (S) JE2 BE2.png|32px]] [[File:Dark Oak Wall Sign (S) JE2 BE2.png|32px]] The texture of all signs except oak sign have been changed.}}
{{History||1.16.20|snap=beta 1.16.20.50|Crimson and warped signs now uses regular plank [[sound]]s instead of their stem variant sounds.}}
{{History||1.16.210|snap=beta 1.16.210.59|Signs can now be {{control|used}} while holding a [[dye]] to change the text color.|Signs can now be tinted with [[Glow Ink Sac|glow ink sac]]s to make the text glow.
|Works with both default and dyed signs.}}
{{History|||snap=beta 1.16.210.60|Color on dyed signs disappears and the text turns back to black.|Signs with applied glowing effect as well as color stops glowing and color is removed.}}
{{History||1.16.220|snap=beta 1.16.220.50|Signs can now be {{control|used}} while holding a [[dye]] to change the text color again.|Signs can now be tinted with [[Glow Ink Sac|glow ink sac]]s to make the text glow again.}}
{{History|||snap=beta 1.16.220.52|Now has sounds for being dyed.}}
{{History|||snap=release|A glowing effect can no longer be applied to signs due to glow ink sacs becoming inaccessible in the full release.}}
{{History||1.17.0|snap=beta 1.17.0.50|[[File:Oak Sign BE3.png|32px]] [[File:Spruce Sign BE2.png|32px]] [[File:Birch Sign BE2.png|32px]] [[File:Jungle Sign BE2.png|32px]] [[File:Acacia Sign BE2.png|32px]] [[File:Dark Oak Sign BE2.png|32px]] Textures of sign items was updated.
|[[File:Oak Standing Sign (S) JE2 BE2.png|32px]] [[File:Oak Wall Sign (S) JE2 BE2.png|32px]] The textures of oak signs have been changed to reflect the changes made to planks in the [[Texture Update]].}}
{{History||1.17.10|snap=beta 1.17.10.21|Glowing text on signs now has an outer glow, making text more visible in the dark.}}
{{History||1.18.10|snap=beta 1.18.10.20|[[File:Oak Sign JE3.png|32px]] [[File:Spruce Sign JE2.png|32px]] [[File:Birch Sign JE2.png|32px]] [[File:Jungle Sign JE2.png|32px]] [[File:Acacia Sign JE2.png|32px]] [[File:Dark Oak Sign JE2.png|32px]] [[File:Crimson Sign JE2.png|32px]] [[File:Warped Sign JE2.png|32px]] Changed all signs textures as items.}}
{{History||1.19.0|snap=beta 1.19.0.20|[[File:Mangrove Sign JE1 BE1.png|32px]][[File:Mangrove Wall Sign JE1 BE1.png|32px]][[File:Mangrove Sign (item) JE1 BE1.png|32px]] Added mangrove signs.}}
{{History||Next Major Update<br>(Experimental)|link=Bedrock Edition 1.20|snap=beta 1.19.50.21|[[File:Bamboo Sign (0) JE1 BE1.png|32px]] [[File:Bamboo Wall Sign (S) JE1 BE1.png|32px]] [[File:Bamboo Sign (item) JE1 BE1.png|32px]] Added bamboo signs behind the "[[Bedrock Edition 1.20|Next Major Update]]" [[experimental]] toggle.|[[File:Oak Hanging Sign JE1 BE1.png|32px]] [[File:Spruce Hanging Sign JE1 BE1.png|32px]] [[File:Birch Hanging Sign JE1 BE1.png|32px]] [[File:Jungle Hanging Sign JE1 BE1.png|32px]] [[File:Acacia Hanging Sign JE1 BE1.png|32px]] [[File:Dark Oak Hanging Sign JE1 BE1.png|32px]] [[File:Mangrove Hanging Sign JE1 BE1.png|32px]] [[File:Bamboo Hanging Sign JE1 BE1.png|32px]] [[File:Crimson Hanging Sign JE1 BE1.png|32px]] [[File:Warped Hanging Sign JE1 BE1.png|32px]]<br>[[File:Oak Wall Hanging Sign JE1 BE1.png|32px]] [[File:Spruce Wall Hanging Sign JE1 BE1.png|32px]] [[File:Birch Wall Hanging Sign JE1 BE1.png|32px]] [[File:Jungle Wall Hanging Sign JE1 BE1.png|32px]] [[File:Acacia Wall Hanging Sign JE1 BE1.png|32px]] [[File:Dark Oak Wall Hanging Sign JE1 BE1.png|32px]] [[File:Mangrove Wall Hanging Sign JE1 BE1.png|32px]] [[File:Bamboo Wall Hanging Sign (S) JE1 BE1.png|32px]] [[File:Crimson Wall Hanging Sign JE1 BE1.png|32px]] [[File:Warped Wall Hanging Sign JE1 BE1.png|32px]]<br>[[File:Oak Hanging Sign (item) JE1 BE1.png|32px]] [[File:Spruce Hanging Sign (item) JE1 BE1.png|32px]] [[File:Birch Hanging Sign (item) JE1 BE1.png|32px]] [[File:Jungle Hanging Sign (item) JE1 BE1.png|32px]] [[File:Acacia Hanging Sign (item) JE1 BE1.png|32px]] [[File:Dark Oak Hanging Sign (item) JE1 BE1.png|32px]] [[File:Mangrove Hanging Sign (item) JE1 BE1.png|32px]] [[File:Bamboo Hanging Sign (item) JE1 BE1.png|32px]] [[File:Crimson Hanging Sign (item) JE1 BE1.png|32px]] [[File:Warped Hanging Sign (item) JE1 BE1.png|32px]]<br>Added hanging signs behind the "[[Bedrock Edition 1.20.0|Next Major Update]]" [[experimental]] toggle.|Added unique sounds for Nether and bamboo wood signs.}}
{{History|||snap=beta 1.19.60.20|[[File:Jungle Wall Hanging Sign JE2 BE2.png|32px]] The texture of jungle hanging wall signs have been changed.|Bamboo hanging signs now can be crafted using [[block of stripped bamboo]] instead of bamboo planks.|Crafting bamboo hanging signs now outputs 6 hanging signs instead of 2.}}
{{History||Next Major Update<br>(Experimental)|link=Bedrock Edition 1.19.80|snap=beta 1.19.80.20|[[File:Cherry Sign (0).png|32px]] [[File:Cherry Wall Sign (S) JE1.png|32px]] [[File:Cherry Sign (item) JE1.png|32px]] [[File:Cherry Hanging Sign JE1.png|32px]] [[File:Cherry Wall Hanging Sign JE1.png|32px]] [[File:Cherry Hanging Sign (item) JE1.png|32px]] Added cherry signs and hanging signs behind the "[[Bedrock Edition 1.20.0|Next Major Update]]" [[experimental]] toggle.}}
{{History|||snap=beta 1.19.80.21|[[File:Cherry Sign (0) JE2 BE2.png|32px]] Updated the texture of cherry signs.}}
{{History|||snap=beta 1.19.80.22|Signs and hanging signs can now be edited after being placed.|Signs and hanging signs now support text on both sides.|Signs and hanging signs can now be waxed with [[honeycomb]] to prevent editing.}}
{{History|||snap=beta 1.20.0.20|Crimson, warped, and bamboo hanging signs now have custom sounds to match their wood type.<ref name=badnewsounds>{{Bug|MCPE-164246}}</ref>}}
{{History||1.20.0|snap=beta 1.20.0.21|Bamboo sign, cherry sign and all of the hanging signs are now available without using the "Next Major Update" experimental toggle.}}
{{History|console}}
{{History||xbox=TU1|xbone=CU1|ps=1.0|wiiu=Patch 1|switch=1.0.1|[[File:Oak Standing Sign.png|32px]] [[File:Oak Sign JE1 BE1.png|32px]] Added signs.}}
{{History||xbox=TU9|Signs are now stackable up to 16.
|The same [[crafting]] recipe for signs now produces 3 signs instead of 1.}}
{{History||xbox=none|xbone=none|ps=1.88|wiiu=none|switch=none|[[File:Spruce Standing Sign (S) JE2 BE2.png|32px]] [[File:Birch Standing Sign (S) JE2 BE2.png|32px]] [[File:Jungle Standing Sign (S) JE2 BE2.png|32px]] [[File:Acacia Standing Sign (S) JE2 BE2.png|32px]] [[File:Dark Oak Standing Sign (S) JE2 BE2.png|32px]] [[File:Spruce Sign JE1 BE1.png|32px]] [[File:Birch Sign JE1 BE1.png|32px]] [[File:Jungle Sign JE1 BE1.png|32px]] [[File:Acacia Sign JE1 BE1.png|32px]] [[File:Dark Oak Sign JE1 BE1.png|32px]] Added spruce, birch, jungle, acacia and dark oak signs.}}
{{History||xbox=none|xbone=none|ps=1.90|wiiu=none|switch=none|[[File:Oak Sign JE2 BE2.png|32px]] The texture of oak sign [[item]]s has been changed.}}
{{History|new 3ds}}
{{History||0.1.0|[[File:Oak Standing Sign (S) JE2 BE2.png|32px]] [[File:Oak Sign JE1 BE1.png|32px]] Added signs.}}
{{History|foot}}
== Trivia ==
* The first concept art of hanging signs came from [[Agnes Larsson]]'s daughter.<ref>{{Ytl|vJCMpPyaN8Q|Minecraft 1.20: New Blocks and Their Functions!|Minecraft|t=30s}}</ref>
== Gallery ==
=== Screenshots ===
<gallery>
Signs classic.png|Test of signs in early [[Java Edition Classic]].
Sigh test.jpg|Another early sign image.
Signs PreRelease.png|First image of sign blocks during [[Java Edition Infdev|Infdev]].
Pocket Edition v0.6.0 alpha Development sign.png|First image of signs on [[Pocket Edition]].
Pocket Edition v0.6.0 alpha Development sign editing.png|First image of editing text on [[PE]] iOS.
Pocket Edition v0.6.0 alpha Development sign editing 2.png|First image of editing text on [[PE]] Android.
Pocket Edition v0.6.0 alpha Development sky.png
Door Sign.png|A sign placed on a door.
Breaking News.png|A sign being broken.
Sign Text Dark.jpg|A dark oak sign with black text.
Sign Text Light.jpg|A dark oak sign with white text.
Sign Blockdata.gif|A sign using blockdata to dynamically change.
JSON Sign.png|First image of a sign using JSON text.
Width Based Character Limit.png|First image of a sign using width based character limits.
Glow Ink Sign with Pink Dye.png|Oak sign with glow ink in the dark in [[Java Edition 21w03a]].
Lit vs unlit signs.png|Difference in visibility of a lime text, from left to right, in a lit birch sign, unlit birch sign, lit dark oak sign, and unlit dark oak sign.
Glowing Text Comparison.png|The comparison between glow text and non-glow text.
Example Of Signs Being Weird.png|alt=Shading differences|Signs being different shades depending on orientation.
Glow text.gif|All sixteen colors of glow text.
Glow Ink Signs.jpg|Signs with glowing ink in several colors.
Lots of Glowing Signs.jpg|More signs with glowing ink.
Sign Platforms.jpg|[[Ari]] standing on top of a hanged sign.
Eric Shop.jpg|[[Sunny]] looking at a double sided hanging sign.
Hanging Sign Bedrock.png|Hanging sign with small text.
Hanging Sign Java.png|Hanging sign with large text.
New Hanging Sign Text Length 1.jpg|Text on hanging sign.
New Hanging Sign Text Length 2.jpg|Text on hanging sign.
</gallery>
=== Concept Art ===
<gallery>
Hanging_Sign_Concept_Art.png|Hanging sign concept art.
Hanging_Sign_Concept_Art2.png|Ditto.
Hanging_Sign_Concept_Art3.png|Hanging sign dimensions concept art.
Hanging_Sign_Concept_Art4.png|Hanging sign crafting recipe, block states concept art.
</gallery>
=== Renders ===
{{hidden begin}}
<div style="clear: both"></div>
<gallery>
Oak Sign.png|Oak Sign
Spruce Sign.png|Spruce Sign
Birch Sign.png|Birch Sign
Jungle Sign.png|Jungle Sign
Acacia Sign.png|Acacia Sign
Dark Oak Sign.png|Dark Oak Sign
Mangrove Sign.png|Mangrove Sign
Cherry Sign.png|Cherry Sign
Bamboo Sign.png|Bamboo Sign
Crimson Sign.png|Crimson Sign
Warped Sign.png|Warped Sign
Oak Wall Sign.png|Oak Wall Sign
Spruce Wall Sign.png|Spruce Wall Sign
Birch Wall Sign.png|Birch Wall Sign
Jungle Wall Sign.png|Jungle Wall Sign
Acacia Wall Sign.png|Acacia Wall Sign
Dark Oak Wall Sign.png|Dark Oak Wall Sign
Mangrove Wall Sign.png|Mangrove Wall Sign
Cherry Wall Sign.png|Cherry Wall Sign
Bamboo Wall Sign.png|Bamboo Wall Sign
Crimson Wall Sign.png|Crimson Wall Sign
Warped Wall Sign.png|Warped Wall Sign
Oak Hanging Sign.png|Oak Hanging Sign
Spruce Hanging Sign.png|Spruce Hanging Sign
Birch Hanging Sign.png|Birch Hanging Sign
Jungle Hanging Sign.png|Jungle Hanging Sign
Acacia Hanging Sign.png|Acacia Hanging Sign
Dark Oak Hanging Sign.png|Dark Oak Hanging Sign
Mangrove Hanging Sign.png|Mangrove Hanging Sign
Cherry Hanging Sign.png|Cherry Hanging Sign
Bamboo Hanging Sign.png|Bamboo Hanging Sign
Crimson Hanging Sign.png|Crimson Hanging Sign
Warped Hanging Sign.png|Warped Hanging Sign
Oak Wall Hanging Sign.png|Oak Wall Hanging Sign
Spruce Wall Hanging Sign.png|Spruce Wall Hanging Sign
Birch Wall Hanging Sign.png|Birch Wall Hanging Sign
Jungle Wall Hanging Sign.png|Jungle Wall Hanging Sign
Acacia Wall Hanging Sign.png|Acacia Wall Hanging Sign
Dark Oak Wall Hanging Sign.png|Dark Oak Wall Hanging Sign
Mangrove Wall Hanging Sign.png|Mangrove Wall Hanging Sign
Cherry Wall Hanging Sign.png|Cherry Wall Hanging Sign
Bamboo Wall Hanging Sign.png|Bamboo Wall Hanging Sign
Crimson Wall Hanging Sign.png|Crimson Wall Hanging Sign
Warped Wall Hanging Sign.png|Warped Wall Hanging Sign
</gallery>
<gallery>
Oak Sign JE3.png
Spruce Sign JE2.png
Birch Sign JE2.png
Jungle Sign JE2.png
Acacia Sign JE2.png
Dark Oak Sign JE2.png
Mangrove Sign (item) JE1 BE1.png
Cherry Sign (item) JE1.png
Bamboo Sign (item) JE1 BE1.png
Crimson Sign JE2.png
Warped Sign JE2.png
Oak Hanging Sign (item) JE1 BE1.png
Spruce Hanging Sign (item) JE1 BE1.png
Birch Hanging Sign (item) JE1 BE1.png
Jungle Hanging Sign (item) JE1 BE1.png
Acacia Hanging Sign (item) JE1 BE1.png
Dark Oak Hanging Sign (item) JE1 BE1.png
Mangrove Hanging Sign (item) JE1 BE1.png
Cherry Hanging Sign (item) JE1.png
Bamboo Hanging Sign (item) JE1 BE1.png
Crimson Hanging Sign (item) JE1 BE1.png
Warped Hanging Sign (item) JE1 BE1.png
</gallery>
{{hidden end}}
{{-}}
== Issues ==
{{issue list}}
== See also ==
* [[Chalkboard]]
== References ==
{{Reflist}}
== External Links ==
*[https://www.minecraft.net/en-us/article/taking-inventory--sign Taking Inventory: Sign] – Minecraft.net on January 9, 2020
{{Blocks|utility}}
{{Items}}
[[Category:Utility blocks]]
[[Category:Manufactured blocks]]
[[Category:Generated structure blocks]]
[[Category:Block entities]]
[[Category:Non-solid blocks]]
[[cs:Cedule]]
[[de:Schild (Schrift)]]
[[es:Cartel]]
[[fr:Pancarte]]
[[hu:Tábla]]
[[it:Cartello]]
[[ja:看板]]
[[ko:표지판]]
[[nl:Bord]]
[[pl:Tabliczka]]
[[pt:Placa]]
[[ru:Табличка]]
[[th:ป้าย]]
[[uk:Табличка]]
[[zh:告示牌]]</li></ul></nowiki> | Beta 1.9-pre4 | The Compass needle and the Clock will spin randomly within The End and The Nether. | |||
1.2.1{{Extension DPL}}<ul><li>[[Balloon|Balloon]]<br/>{{exclusive|bedrock|education}}
{{education feature}}
{{ItemEntity
|image=White Balloon.png
|extratext = View [[#Gallery|all renders]]
|invimage=White Balloon
|invimage2=Orange Balloon
|invimage3=Magenta Balloon
|invimage4=Light Blue Balloon
|invimage5=Yellow Balloon
|invimage6=Lime Balloon
|invimage7=Pink Balloon
|invimage8=Gray Balloon
|invimage9=Light Gray Balloon
|invimage10=Cyan Balloon
|invimage11=Purple Balloon
|invimage12=Blue Balloon
|invimage13=Brown Balloon
|invimage14=Green Balloon
|invimage15=Red Balloon
|invimage16=Black Balloon
|renewable=No
|stackable=Yes
|size=Height: 0.4 Blocks<br>Width: 0.4 Blocks
}}
'''Balloons''' are [[entities]] that float upward when placed.
== Obtaining ==
Balloons are not available in the [[Creative]] inventory or [[commands]].
=== Crafting ===
{{Crafting
|A1= Latex
|B1= Matching Dye
|C1= Latex
|A2= Latex
|B2= Helium
|C2= Latex
|A3= Latex
|B3= Lead
|C3= Latex
|Output= Matching Balloon
|description={{only|bedrock|education}}
|type= Miscellaneous
|head=1
}}
{{Crafting
|A1= Latex
|B1= Bone Meal; Lapis Lazuli; Cocoa Beans; Ink Sac
|C1= Latex
|A2= Latex
|B2= Helium
|C2= Latex
|A3= Latex
|B3= Lead
|C3= Latex
|Output= White Balloon; Blue Balloon; Brown Balloon; Black Balloon
|description={{only|bedrock|education}}
|type= Miscellaneous
|foot=1
}}
== Usage ==
When {{control|used}} on a [[mob]], a [[fence]], or a [[wall]], balloons attach to the mob or block, similarly to a [[lead]]. Balloons float into the air faster than the speed the [[player]] flies up, but remain grounded if tied to a fence. If tied to a mob, the balloon floats away and carries the mob into the air, before both eventually [[despawn]] or disappear.
{| class="wikitable sortable" style="text-align: left;"
|+ Balloon-attachable mobs
! Mob
! Mass
|-
| {{EntityLink|Chicken}}
| 0.6
|-
| {{EntityLink|Cow}}
| 1.0
|-
| {{EntityLink|Donkey}}
| 1.0
|-
| {{EntityLink|Horse}}
| 1.0
|-
| {{EntityLink|Iron Golem}}
| 2.0
|-
| {{EntityLink|Llama}}
| 1.0
|-
| {{EntityLink|Mule}}
| 1.0
|-
| {{EntityLink|Mooshroom}}
| 1.0
|-
| {{EntityLink|Panda}}
| 1.5
|-
| {{EntityLink|Pig}}
| 0.75
|-
| {{EntityLink|Sheep}}
| 0.75
|-
| {{EntityLink|Snow Golem}}
| 1.0
|-
| {{EntityLink|Fox}}
| 0.6
|}
When a balloon is shot by an [[arrow]] or a [[trident]], or floats into a solid block, it pops, summons [[particles]], and is destroyed. It drops nothing. A balloon tied to a fence post bursts when a player strikes it in any direction.
== Sounds ==
{{Sound table
|type=bedrock
|sound=Balloon pop1.ogg
|sound2=Balloon pop2.ogg
|source=neutral
|description=When a balloon collides with a block from above
|id=balloon.pop
|volume=10.0
|pitch=1.75/2.0
|foot=1}}
== Data values ==
=== ID ===
{{ID table
|edition=bedrock
|firstcolumnname=Balloon
|shownumericids=y
|showforms=y
|notshowbeitemforms=y
|generatetranslationkeys=y
|displayname=Item
|spritename=balloons
|spritetype=item
|nameid=balloon
|id=598
|form=item
|translationkey=item.balloon.black.name,item.balloon.red.name,item.balloon.green.name,item.balloon.brown.name,item.balloon.blue.name,item.balloon.purple.name,item.balloon.cyan.name,item.balloon.silver.name,item.balloon.gray.name,item.balloon.pink.name,item.balloon.lime.name,item.balloon.yellow.name,item.balloon.lightBlue.name,item.balloon.magenta.name,item.balloon.orange.name,item.balloon.white.name
|foot=1}}
{{ID table
|edition=bedrock
|firstcolumnname=Balloon
|shownumericids=y
|generatetranslationkeys=y
|displayname=Entity
|spritename=balloons
|spritetype=entity
|nameid=balloon
|id=107
|foot=1}}
=== Metadata ===
In ''Bedrock Edition'', balloon items use the following data values:
{{/DV}}
== History ==
{{History|bedrock}}
{{History||1.4.0|snap=beta 1.2.20.1|[[File:White Balloon BE1.png|32px]] [[File:Orange Balloon BE1.png|32px]] [[File:Magenta Balloon BE1.png|32px]] [[File:Light Blue Balloon BE1.png|32px]] [[File:Yellow Balloon BE1.png|32px]] [[File:Lime Balloon BE1.png|32px]] [[File:Pink Balloon BE1.png|32px]] [[File:Gray Balloon BE1.png|32px]] [[File:Silver Balloon BE1.png|32px]] [[File:Cyan Balloon BE1.png|32px]] [[File:Purple Balloon BE1.png|32px]] [[File:Blue Balloon BE1.png|32px]] [[File:Brown Balloon BE1.png|32px]] [[File:Green Balloon BE1.png|32px]] [[File:Red Balloon BE1.png|32px]] [[File:Black Balloon BE1.png|32px]] <br> [[File:White Balloon (item) BE1.png|32px]] [[File:Orange Balloon (item) BE1.png|32px]] [[File:Magenta Balloon (item) BE1.png|32px]] [[File:Light Blue Balloon (item) BE1.png|32px]] [[File:Yellow Balloon (item) BE1.png|32px]] [[File:Lime Balloon (item) BE1.png|32px]] [[File:Pink Balloon (item) BE1.png|32px]] [[File:Gray Balloon (item) BE1.png|32px]] [[File:Silver Balloon (item) BE1.png|32px]] [[File:Cyan Balloon (item) BE1.png|32px]] [[File:Purple Balloon (item) BE1.png|32px]] [[File:Blue Balloon (item) BE1.png|32px]] [[File:Brown Balloon (item) BE1.png|32px]] [[File:Green Balloon (item) BE1.png|32px]] [[File:Red Balloon (item) BE1.png|32px]] [[File:Black Balloon (item) BE1.png|32px]] Added balloons.}}
{{History||1.18.10|snap=beta 1.18.10.24|[[Bee]]s, [[boat]]s, tamed [[cat]]s, [[dolphin]]s, [[glow squid]]s, [[goat]]s, [[hoglin]]s, [[ocelot]]s, [[panda]]s, [[parrot]]s, [[polar bear]]s, [[squid]]s, [[strider]]s, tamed [[wolves]] and [[zoglin]]s can now be leashed.}}
{{History||1.18.30|snap=beta 1.18.30.28|Added the [[boat with chest]], which can be leashed.}}
{{History|education}}
{{History||1.0.27|[[File:White Balloon BE1.png|32px]] [[File:Orange Balloon BE1.png|32px]] [[File:Magenta Balloon BE1.png|32px]] [[File:Light Blue Balloon BE1.png|32px]] [[File:Yellow Balloon BE1.png|32px]] [[File:Lime Balloon.png|32px]] [[File:Pink Balloon BE1.png|32px]] [[File:Gray Balloon BE1.png|32px]] [[File:Silver Balloon BE1.png|32px]] [[File:Cyan Balloon BE1.png|32px]] [[File:Purple Balloon BE1.png|32px]] [[File:Blue Balloon.png|32px]] [[File:Brown Balloon BE1.png|32px]] [[File:Green Balloon BE1.png|32px]] [[File:Red Balloon BE1.png|32px]] [[File:Black Balloon BE1.png|32px]] <br> [[File:White Balloon (item) BE1.png|32px]] [[File:Orange Balloon (item) BE1.png|32px]] [[File:Magenta Balloon (item) BE1.png|32px]] [[File:Light Blue Balloon (item) BE1.png|32px]] [[File:Yellow Balloon (item) BE1.png|32px]] [[File:Lime Balloon (item) BE1.png|32px]] [[File:Pink Balloon (item) BE1.png|32px]] [[File:Gray Balloon (item) BE1.png|32px]] [[File:Silver Balloon (item) BE1.png|32px]] [[File:Cyan Balloon (item) BE1.png|32px]] [[File:Purple Balloon (item) BE1.png|32px]] [[File:Blue Balloon (item) BE1.png|32px]] [[File:Brown Balloon (item) BE1.png|32px]] [[File:Green Balloon (item) BE1.png|32px]] [[File:Red Balloon (item) BE1.png|32px]] [[File:Black Balloon (item) BE1.png|32px]] Added balloons.}}
{{History||1.18.32|snap=1.18.10.04|[[Bee]]s, [[boat]]s, tamed [[cat]]s, [[dolphin]]s, [[glow squid]]s, [[goat]]s, [[hoglin]]s, [[ocelot]]s, [[panda]]s, [[parrot]]s, [[polar bear]]s, [[squid]]s, [[strider]]s, tamed [[wolves]] and [[zoglin]]s can now be leashed.}}
{{History|foot}}
==Gallery==
=== Colors ===
<gallery>
Orange Balloon.png
Magenta Balloon.png
Light Blue Balloon.png
Yellow Balloon.png
Lime Balloon.png
Pink Balloon.png
Gray Balloon.png
Light Gray Balloon.png
Cyan Balloon.png
Purple Balloon.png
Blue Balloon.png
Brown Balloon.png
Green Balloon.png
Red Balloon.png
Black Balloon.png
</gallery>
=== [[Event servers]] ===
<gallery>
File:Legends Balloon.png|Differently designed balloons featured in the ''[[Minecraft Legends Live Event]]''.
File:Sniffer Balloon (Trails and Tales Summer Event) Render.png|A [[Sniffer]] balloon, featured in the [[Trails & Tales Event]].
File:Camel Balloon (Trails and Tales Summer Event) Render.png|A balloon of a [[Camel]], featured in the Trails & Tales Event.
File:Balloon Bundle (Trails and Tales Summer Event) Render.png|Bundle of balloons from the Trails & Tales Event.
</gallery>{{Items}}
{{Entities}}
{{Education Edition}}
[[Category:Education Edition entities]]
[[Category:Education Edition items]]
[[de:Ballon]]
[[it:Palloncino]]
[[ja:風船]]
[[ko:풍선]]
[[pl:Balon]]
[[pt:Balão]]
[[ru:Воздушный шар]]
[[zh:气球]]</li><li>[[Spyglass|Spyglass]]<br/>{{Item
| title = Spyglass
| image = Spyglass.png
| durability =
| rarity = Common
| renewable = Yes
| stackable = No
}}
A '''spyglass''' is a [[tool]] used to zoom in on distant objects.
== Obtaining ==
=== Crafting ===
{{Crafting
|B1=Amethyst Shard
|B2=Copper Ingot
|B3=Copper Ingot
|Output=Spyglass
|type=Tool
}}
== Usage ==
[[File:Steve scoping Spyglass.png|right|100px]] [[File:Alex scoping Spyglass.png|right|100px]]
To use a spyglass, the player selects it from the hotbar and clicks {{control|use}} while looking in the desired direction.
Spyglasses are used to zoom in on a specific location in the player's field of view (FOV). The spyglass changes the FOV to {{frac|1|10}} of the FOV set in [[options]]. By default, the FOV is set to 70° in ''Java Edition'' and 60° in Bedrock Edition, resulting in an FOV of 7° in ''Java Edition'' and 6° in Bedrock Edition through the spyglass. The player's FOV can be set from 30° to 110°, so the spyglass FOV can range from 3° to 11°. Regardless of the situation, or status effects the player has, using the Spyglass always shows a FOV {{frac|1|10}} of the FOV set in [[options]].
A square vignette is applied when in use, similar to the effect when wearing a [[carved pumpkin]]. Pressing {{key|F1}} removes the vignette,{{only|java}}<ref>{{bug|MC-203575||The spyglass overlay goes away when pressing F1|WAI}}</ref><ref>{{bug|MCPE-125869||Spyglass's overlay don't go away even if the player toggles Hide GUI on/ Pressing F1|}}</ref> similar to a carved pumpkin.
Hazy distant objects remain hazy when viewed in the spyglass. Mobs too distant to render also do not render in the spyglass. The spyglass shows a magnified view of what the player already sees.
The player is slowed down while watching through the spyglass. When the player uses the spyglass continuously for {{convert|1|minute|game tick}}, the interface is automatically closed.
If the player has a certain effect on their screen like [[fire]], the spyglass does not remove that effect on the player's screen.
[[File:Spyglass Zooming.gif|thumb|center|A spyglass being used to zoom in on a [[block of gold]] starting from normal FOV (70°).]]
== Sounds ==
{{edition|java}}:
{{Sound table
|sound=Spyglass use.ogg
|subtitle=Spyglass expands
|source=player
|description=When a player uses a spyglass
|id=item.spyglass.use
|translationkey=subtitles.item.spyglass.use
|volume=0.5
|pitch=''varies'' <ref group=sound>Can be 1.15, 1.33, 1.4, or 1.55</ref>
|distance=16}}
{{Sound table
|sound=Spyglass stop.ogg
|subtitle=Spyglass retracts
|source=player
|description=When a player stops using a spyglass
|id=item.spyglass.stop_using
|translationkey=subtitles.item.spyglass.stop_using
|volume=0.5
|pitch=''varies'' <ref group=sound>Can be 1.0, 0.8, or 0.9</ref>
|distance=16
|foot=1}}
{{edition|bedrock}}:
{{Sound table
|type=bedrock
|sound=Spyglass use.ogg
|source=player
|description=When a player uses a spyglass
|id=item.spyglass.use
|volume=0.5
|pitch=1.15-1.55}}
{{Sound table
|sound=Spyglass stop.ogg
|source=player
|description=When a player stops using a spyglass
|id=item.spyglass.stop_using
|volume=0.5
|pitch=0.8-1.0
|foot=1}}
== Data values ==
=== ID ===
{{edition|java}}:
{{ID table
|edition=java
|showforms=y
|generatetranslationkeys=y
|displayname=Spyglass
|spritetype=item
|nameid=spyglass
|form=item
|foot=1}}
{{edition|bedrock}}:
{{ID table
|edition=bedrock
|shownumericids=y
|showforms=y
|notshowbeitemforms=y
|generatetranslationkeys=y
|displayname=Spyglass
|spritetype=item
|nameid=spyglass
|form=item
|foot=1|id=626}}
== Advancements ==
{{load advancements|Is it a Bird?;Is it a Balloon?;Is it a Plane?}}
== History ==
{{History||October 3, 2020|link={{ytl|DBvZ2Iqmm3M|t=25m21s}}|[[File:Spyglass JE1.png|32px]]<!-- [[File:Spyglass scope (pre-release).png|32px]]--> Spyglasses are revealed at [[Minecraft Live 2020]]. They were originally named "telescopes" and had an oval vignette.}}
{{History|java}}
{{History||1.17|snap=20w45a|[[File:Spyglass JE1.png|32px]] Added spyglasses.
|[[File:Spyglass scope JE1.png|32px]] The scope texture is currently a circle with glare spots.}}
{{History|||snap=20w46a|[[File:Spyglass scope JE2.png|32px]] The scope texture is now a [[glass]] square with a [[copper]] border.}}
{{History|||snap=20w48a|[[File:Spyglass JE2 BE1.png|32px]] The spyglass is now a 3D model instead of a flat sprite.
|[[File:Spyglass (texture) JE2.png|32px]] The texture of the spyglass has changed.
|A spyglass in use is anchored better to the player's "eye" when viewed in 3rd person.}}
{{History|||snap=21w05a|Copper ingots are now renewable via [[drowned]], making spyglasses renewable.}}
{{History|||snap=21w10a|[[File:Spyglass (item) JE3 BE1.png|32px]] Spyglasses have a new texture in the inventory. The 3D model is still used in the hand, similar to [[tridents]].}}
{{History||1.17.1|snap=Pre-release 1|[[File:Spyglass (texture) JE3.png|32px]] The texture of the spyglass model has changed.}}
{{History|bedrock}}
{{History||1.17.0|snap=beta 1.17.0.50|[[File:Spyglass JE2 BE1.png|32px]] [[File:Spyglass (item) JE3 BE1.png|32px]] Added spyglasses.}}
{{History|||snap=beta 1.17.0.52|Spyglasses are now available without enabling [[experimental gameplay]].}}
{{History|foot}}
== Issues ==
{{Issue list}}
== Trivia ==
*If {{command|item replace}} is used to place a spyglass on a player's head, the item appears stuck to the center of the player's face.
== Gallery ==
<gallery>
Villager Spyglass.png|Spying on [[villager]]s through a spyglass.
After using the spyglass at FOV 30 F1.png|Hiding the HUD removes the spyglass overlay.
Panda eating a spyglass.png|When eaten by a [[panda]], spyglasses cause [[missing texture]] particles to be produced.<ref>{{bug|MC-206684}}</ref>
JE 1.17 Development Telescope.jpg|The spyglass was originally called the telescope.
JE 1.17 Development Telescope 2.jpg|The telescope's overlay was originally round instead of square.
File:Ari Spyglass.jpg|How the spyglass looks in the third person.
Steve scoping Spyglass JE1.png|Steve using a spyglass before its 3D model was added.
Alex scoping Spyglass JE1.png|Alex using a spyglass before its 3D model was added.
File:Mangrove Portal.jpg|An [[allay]] peeking into view of [[Noor]]’s spyglass.
</gallery>
== References ==
{{Reflist}}
== External Links ==
*[https://www.minecraft.net/en-us/article/taking-inventory--spyglass Taking Inventory: Spyglass] – Minecraft.net on February 17, 2022
{{Items}}
[[Category:Renewable resources]]
[[de:Fernrohr]]
[[es:Catalejo]]
[[fr:Longue-vue]]
[[it:Cannocchiale]]
[[ja:望遠鏡]]
[[pl:Luneta]]
[[pt:Luneta]]
[[ru:Подзорная труба]]
[[zh:望远镜]]</li></ul> | 12w07a | New maps have a height of 256 thanks to the new Anvil level format. | |||
1.6.1{{Extension DPL}}<ul><li>[[Glass Bottle|Glass Bottle]]<br/>{{about|the empty bottle||Bottle}}
{{Item
| image = Glass Bottle.png
| renewable = Yes
| stackable = Yes (64)
}}
A '''glass bottle''' is an [[item]] that can hold [[water]], [[potion]]s, [[Honey Bottle|honey]], or [[dragon's breath]].
== Obtaining ==
Glass bottles can be obtained by crafting, drinking from bottles, [[fishing]], or from [[witch]] drops.
=== Crafting ===
{{Crafting
|A2= Glass
|C2= Glass
|B3= Glass
|Output= Glass Bottle,3
|type= Brewing
}}
=== Drinking ===
Drinking a [[potion]] or [[Honey Bottle|honey bottle]] returns the empty glass bottle. Throwing a splash potion or a lingering potion does not return a glass bottle, but brewing a lingering potion gives back a glass bottle.
=== Mob loot ===
[[Witch]]es have a chance of dropping 0–6 glass bottles upon death. This is increased by 3 per level of [[Looting]], for a maximum of 0–15 glass bottles.
=== Mud ===
{{control|Using}} a [[water bottle]], [[splash water bottle]] or [[lingering water bottle]] on [[dirt]], [[coarse dirt]] or [[rooted dirt]] will transforming it into a [[mud]] block, at the same time leaving the player with an empty glass bottle.
=== Cauldrons ===
{{control|Using}} a water bottle (or, {{in|bedrock}}, a potion, splash potion, or lingering potion) on a [[cauldron]] that is not yet full adds that liquid to the cauldron, leaving the player with an empty glass bottle.
== Usage ==
Glass bottles can be filled to make [[water bottle]]s, which can then be used to [[brew]] items with a [[brewing stand]]. Glass bottles are also used to hold the resulting [[potion]].
=== Collecting liquids ===
==== Water ====
A bottle may be filled with water by holding it in the hand and {{control|using}} it on a [[water]] source block or a [[cauldron]] that has water in it. It can also be filled using a waterlogged block.{{only|java}}<ref>{{bug|MCPE-83420}}</ref>
Also, a bottle may be filled by powering a [[dispenser]] containing a bottle and pointed at a water source block. This does not work with cauldrons.<ref>{{bug|MC-165196|||Invalid}}</ref>
If filled via a water source, the water is unaffected. If filled via a cauldron, {{frac|1|3}} of the water in the cauldron is removed. Therefore, using a cauldron to fill water bottles is inefficient, except in [[the Nether]] where it is normally the only way to fill bottles.
==== Potion ====
{{IN|bedrock}}, a bottle may be filled with potion by {{control|using}} it on a [[cauldron]] containing potion. When the bottle is filled, {{frac|1|3}} of the cauldron's potion is removed.
==== Honey ====
If a [[beehive|bee nest]] or [[beehive]] is full, the player can {{control|use}} a glass bottle on the block, or may power a [[dispenser]] that contains a bottle and is pointed at the block, which empties the block and creates a [[honey bottle]]. Honey bottles can also be emptied by using them in crafting recipes (such as [[sugar]] or [[honey block]]). However, a lingering potion use on tipped arrow recipe does not give the bottle back.
==== Dragon's breath ====
{{control|Using}} a glass bottle in clouds emitted when the [[ender dragon]] breathes or shoots a [[dragon fireball]] fills the bottle with [[dragon's breath]].
When put 2 or more dragon's breath in the brewing stand, after the brewing process, a glass bottle will drop as an [[Item (entity)|entity]]. However, if put only 1 dragon's breath in the brewing stand, after the brewing process, the glass bottle is consumed and cannot be retrieved.<ref>{{bug|MC-259583}}</ref>
=== Trading ===
Expert-level cleric [[villager]]s have a 50% chance to buy 9 glass bottles for one [[emerald]] as part of their trade.{{only|bedrock}}
Expert-level cleric villagers have a {{frac|2|3}} chance to buy 9 glass bottles for one emerald.{{only|java}}
=== Crafting ingredients ===
{{Crafting usage|Glass Bottle}}
== Sounds ==
{{edition|java}}:
{{Sound table
|rowspan=2
|sound=Bottle fill water1.ogg
|sound2=Bottle fill water2.ogg
|sound3=Bottle fill water3.ogg
|sound4=Bottle fill water4.ogg
|subtitle=Bottle fills
|source=block
|description=When a bottle is filled with a liquid from a cauldron, or honey from a bee nest or beehive
|id=item.bottle.fill
|translationkey=subtitles.item.bottle.fill
|volume=1.0
|pitch=1.0
|distance=16}}
{{Sound table
|subtitle=Bottle fills
|source=neutral
|description=When a bottle is filled with water from a water source
|id=item.bottle.fill
|translationkey=subtitles.item.bottle.fill
|volume=1.0
|pitch=1.0
|distance=16}}
{{Sound table
|sound=Bottle empty1.ogg
|sound2=Bottle empty2.ogg
|subtitle=Bottle empties
|source=block
|description=When a water bottle is emptied
|id=item.bottle.empty
|translationkey=subtitles.item.bottle.empty
|volume=1.0
|pitch=1.0
|distance=16}}
{{Sound table
|sound=Bottle fill dragon breath1.ogg
|sound2=Bottle fill dragon breath2.ogg
|subtitle=Bottle fills
|source=neutral
|description=When a bottle is filled with dragon's breath
|id=item.bottle.fill_dragonbreath
|translationkey=subtitles.item.bottle.fill
|volume=1.0
|pitch=1.0
|distance=16
|foot=1}}
{{edition|java}}:
{{Sound table
|type=bedrock
|rowspan=4
|sound=Water Splash Old.ogg
|source=block
|description=When water from a bottle is placed in a cauldron<wbr><ref group=sound name=potionsplash>{{Bug|MCPE-174867}}</ref>
|id=cauldron.fillwater
|volume=0.1
|pitch=1.0}}
{{Sound table
|source=block
|description=When water from a bottle is taken from a cauldron<wbr><ref group=sound name=potionsplash/>
|id=cauldron.takewater
|volume=0.1
|pitch=1.0}}
{{Sound table
|source=block
|description=When a bottle is filled with a potion from a cauldron<wbr><ref group=sound name=potionsplash/>
|id=cauldron.fillpotion
|volume=0.1
|pitch=1.0}}
{{Sound table
|source=block
|description=When a potion bottle is emptied into a cauldron<wbr><ref group=sound name=potionsplash/>
|id=cauldron.takepotion
|volume=0.1
|pitch=1.0}}
{{Sound table
|sound=Bottle empty1.ogg
|sound2=Bottle empty2.ogg
|source=sound<!--bottle-->
|description=When a bottle is emptied<wbr>{{Upcoming|BE 1.20.40}}
|id=bottle.empty
|volume=1.0
|pitch=1.0}}
{{Sound table
|sound=Bottle fill water1.ogg
|sound2=Bottle fill water2.ogg
|sound3=Bottle fill water3.ogg
|sound4=Bottle fill water4.ogg
|source=sound<!--bottle-->
|description=When a bottle is filled<wbr>{{Upcoming|BE 1.20.40}}
|id=bottle.fill
|volume=1.0
|pitch=1.0}}
{{Sound table
|sound=Fill water bucket1.ogg
|sound2=Fill water bucket2.ogg
|sound3=Fill water bucket3.ogg
|source=block
|description=When a bottle is filled with honey from a bee nest or beehive<wbr><ref group=sound>{{Bug|MCPE-53881}}</ref>
|id=bucket.fill_water
|volume=1.0
|pitch=1.0}}
{{Sound table
|sound=Bottle fill dragon breath1.ogg
|sound2=Bottle fill dragon breath2.ogg
|source=sound
|description=When a bottle is filled with dragon's breath
|id=bottle.dragonbreath
|volume=0.7<wbr>{{Until|BE 1.20.40}}<br>1.0<wbr>{{Upcoming|BE 1.20.40}}
|pitch=1.0
|foot=1}}
== Data values ==
=== ID ===
{{edition|java}}:
{{ID table
|edition=java
|showforms=y
|generatetranslationkeys=y
|displayname=Glass Bottle
|spritetype=item
|nameid=glass_bottle
|form=item
|foot=1}}
{{edition|bedrock}}:
{{ID table
|edition=bedrock
|shownumericids=y
|showforms=y
|notshowbeitemforms=y
|generatetranslationkeys=y
|displayname=Glass Bottle
|spritetype=item
|id=427
|nameid=glass_bottle
|form=item
|foot=1}}
== Achievements ==
{{Load achievements|You Need a Mint;Local Brewery;Bee Our guest}}
== Advancements ==
{{load advancements|Local Brewery;You Need a Mint;Bee Our Guest}}
== History ==
{{History|java}}
{{History||1.0.0|snap=Beta 1.9 Prerelease 2|[[File:Glass Bottle JE1 BE1.png|32px]] Added glass bottles.}}
{{History|||snap=Beta 1.9 Prerelease 3|[[File:Water Bottle JE1 BE1.png|32px]] Glass bottles have been given their sole function of picking up [[water]] for the [[brewing]] of [[potion]]s.}}
{{History||1.4.2|snap=12w38b|[[Witch]]es now have a chance of [[drops|dropping]] glass bottles upon [[death]].}}
{{history||1.9|snap=15w33a|[[File:Dragon's Breath JE1 BE1.png|32px]] Glass bottles can now be used to obtain [[dragon's breath]].}}
{{history|||snap=15w43a|A glass bottle can be found in the [[brewing stand]] in an [[igloo]] basement.}}
{{history|||snap=15w43c|The glass bottle has been removed from igloo basements.}}
{{History|||snap=15w50a|Added [[sound]]s: <code>item.bottle.fill</code> and <code>item.bottle.fill_dragonbreath</code>.}}
{{History||1.13|snap=17w47a|Prior to [[1.13/Flattening|''The Flattening'']], this [[item]]'s numeral ID was 374.}}
{{History||1.14|snap=18w43a|[[File:Glass Bottle JE2 BE2.png|32px]] [[File:Water Bottle JE2 BE2.png|32px]] [[File:Dragon's Breath JE2 BE2.png|32px]] The textures of glass bottles, [[water bottle]]s and [[dragon's breath]] have been changed.}}
{{History|||snap=19w11a|Cleric [[villager]]s now [[trading|buy]] glass bottles.}}
{{History||1.15|snap=19w34a|[[File:Honey Bottle JE1.png|32px]] Glass bottles can now be used to collect [[Honey Bottle|honey]].
|[[Dispenser]]s may now use glass bottles to collect [[water]] and honey.}}
{{History|||snap=19w46a|Using glass bottles to collect honey now unlocks the [[Bee Our Guest]] advancement.}}
{{History||1.19|snap=22w11a|Converting [[dirt]], [[coarse dirt]] or [[rooted dirt]] into [[mud]] using a [[water bottle]], [[splash water bottle]] or [[lingering water bottle]] now leaves the player with an empty glass bottle.}}
{{History|pocket alpha}}
{{History||v0.12.1|snap=build 1|[[File:Glass Bottle JE1 BE1.png|32px]] Added glass bottles.}}
{{History||v0.14.0|snap=build 1|Glass bottles can now be used to empty [[cauldron]]s filled with [[water]] or [[potion]]s.
|Glass bottles can now be dropped by [[witch]]es.
|Potions and [[splash potion]]s can now be used to fill cauldrons, which turns them into glass bottles.}}
{{History|pocket}}
{{History||1.0.0|snap=alpha 0.17.0.1|[[File:Dragon's Breath JE1 BE1.png|32px]] Glass bottles can now be used to obtain [[dragon's breath]].
|[[Lingering potion]]s can now be used to fill [[cauldron]]s, which turns them into glass bottles.}}
{{History|bedrock}}
{{History||1.10.0|snap=beta 1.10.0.3|[[File:Glass Bottle JE2 BE2.png|32px]] The texture of glass bottles has been changed.}}
{{History||1.11.0|snap=beta 1.11.0.4|Glass bottles can now be [[trading|sold]] to cleric [[villager]]s.}}
{{History||1.14.0|snap=beta 1.14.0.1|[[File:Honey Bottle BE1.png|32px]] Glass bottles can now be used to collect [[Honey Bottle|honey]].
|[[Dispenser]]s may now use glass bottles to collect [[water]] and honey.}}
{{History|console}}
{{History||xbox=TU7|xbone=CU1|ps=1.0|wiiu=Patch 1|[[File:Glass Bottle JE1 BE1.png|32px]] Added glass bottles.}}
{{History|PS4}}
{{History||1.90|[[File:Glass Bottle JE2 BE2.png|32px]] The texture of glass bottles has been changed.}}
{{History|new 3ds}}
{{History||0.1.0|[[File:Glass Bottle JE1 BE1.png|32px]] Added glass bottles.}}
{{History||1.7.10|[[File:Dragon's Breath JE1 BE1.png|32px]] Glass bottles can now be used to obtain [[dragon's breath]].}}
{{history|foot}}
== Issues ==
{{issue list}}
==References==
{{Reflist}}
{{Items}}
[[cs:Lahvička]]
[[de:Glasflasche]]
[[es:Frasco de cristal]]
[[fr:Fiole]]
[[hu:Üvegpalack]]
[[it:Ampolla]]
[[ja:ガラス瓶]]
[[ko:유리병]]
[[nl:Glazen fles]]
[[pl:Szklana butelka]]
[[pt:Frasco]]
[[ru:Колба]]
[[zh:玻璃瓶]]
[[Category:Renewable resources]]</li><li>[[Raw Copper|Raw Copper]]<br/>{{Item
| image = Raw Copper.png
| renewable = No
| stackable = Yes (64)
}}
'''Raw copper''' is a raw metal resource obtained from mining [[copper ore]].
== Obtaining ==
=== Mining ===
Copper ore and deepslate copper ore mined with a [[stone pickaxe]] or better drops 2–5 units of raw copper. If the pickaxe is enchanted with [[Fortune]], it can drop extra raw copper, allowing for a maximum of 20 units per ore block with Fortune III, or an average of 7.7 units of raw copper per ore block. If the ore is mined using a pickaxe enchanted with [[Silk Touch]], it drops the ore block instead.
=== Crafting ===
{{Crafting
|showname=1
|Block of Raw Copper
|Output=Raw Copper,9
|type=Material
|foot=1
}}
== Usage ==
The primary usage of raw copper is [[smelting]] it into [[copper ingot]]s.
=== Crafting ===
{{crafting usage}}
=== Smelting ingredient ===
{{Smelting
|showname=2
|Raw Copper
|Copper Ingot
|0.7
}}
== Data values ==
=== ID ===
{{edition|java}}:
{{ID table
|edition=java
|showitemtags=y
|showforms=y
|generatetranslationkeys=y
|displayname=Raw Copper
|spritetype=item
|nameid=raw_copper
|form=item
|foot=1}}
{{edition|bedrock}}:
{{ID table
|edition=bedrock
|shownumericids=y
|showforms=y
|notshowbeitemforms=y
|generatetranslationkeys=y
|displayname=Raw Copper
|spritetype=item
|nameid=raw_copper
|form=item
|id=507
|foot=1}}
== History ==
{{History|java}}
{{History||1.17|snap=21w14a|[[File:Raw Copper JE1.png|32px]] Added raw copper.}}
{{History|||snap=April 13, 2021|slink={{Tweet|JasperBoerstra|1381991999952277513}}|[[File:Raw Copper JE2.png|32px]] [[JAPPA]] shows a new raw copper texture.}}
{{History|||snap=21w15a|[[File:Raw Copper JE2.png|32px]] The texture of raw copper has been changed.
|Raw copper can now be used to craft [[block of raw copper]].}}
{{History|||snap=April 16, 2021|slink={{Tweet|JasperBoerstra|1383047666037325829}}|[[File:Raw Copper (pre-release).png|32px]] [[JAPPA]] shows a new raw copper texture again.}}
{{History|||snap=21w16a|[[File:Raw Copper JE3.png|32px]] The texture of raw copper has been changed.}}
{{History|||snap=21w17a|[[Copper ore]] now drops 2-3 raw copper when mined instead of a single unit.}}
{{History||1.18|snap=21w40a|[[Copper ore]] now drops 2-5 raw copper when mined.}}
{{History|bedrock}}
{{History||1.17.0|snap=beta 1.17.0.50|[[File:Raw Copper JE2.png|32px]] Added raw copper.}}
{{History|||snap=beta 1.17.0.52|Raw copper are now available without enabling [[experimental gameplay]].}}
{{History|||snap=beta 1.17.0.54|[[File:Raw Copper JE3.png|32px]] The texture of raw copper has been changed.}}
{{History|foot}}
== Issues ==
{{Issue list}}
==Gallery==
<gallery>
JE 1.17 Dev Raw Metals.jpg|Jappa shows raw ore textures.
Jappa Raw Ores 1.jpg|Jappa shows raw ore textures.
Jappa Raw Ores 2.png|Jappa shows raw ore textures.
Jappa Raw Ores 3.jpg|Jappa shows raw ore textures.
Jappa Raw Ores 4.jpg|Jappa shows raw ore textures.
Jappa Raw Ores 5.jpg|Jappa shows raw ore textures.
</gallery>
{{Items}}
[[Category:Non-renewable resources]]
[[de:Rohkupfer]]
[[es:Cobre en bruto]]
[[fr:Cuivre brut]]
[[it:Rame grezzo]]
[[ja:銅の原石]]
[[pl:Surowa miedź]]
[[pt:Cobre bruto]]
[[ru:Необработанная медь]]
[[tr:Ham Bakır]]
[[uk:Необроблена мідь]]
[[zh:粗铜]]</li></ul> | 13w17a | Desert biomes do not generate large pools of water anymore | |||
1.7.2{{Extension DPL}}<ul><li>[[Powder Snow Bucket|Powder Snow Bucket]]<br/>{{Item
| title = Powder Snow Bucket
| image = Powder Snow Bucket.png
| renewable = Yes
| stackable = No
}}
A '''powder snow bucket''' is a [[bucket]] with [[powder snow]] inside.
== Obtaining ==
A powder snow bucket can be obtained by {{ctrl|using}} an [[empty bucket]] on a [[powder snow block]] or [[powder snow cauldron]].
== Usage ==
Pressing {{control|use}} while holding a powder snow bucket places a [[powder snow]] block. {{IN|Java}}, powder snow may also be placed inside empty [[cauldron]]s, creating powder snow cauldrons.
[[Dispenser]]s can also create and place powder snow buckets. However, they cannot do so with [[cauldron]]s. You can also use it to cushion falls in the [[nether]] by placing it below you when falling.
== Sounds ==
{{el|je}}:
{{Sound table
|sound=Empty powder snow bucket1.ogg
|sound2=Empty powder snow bucket2.ogg
|subtitle=Bucket empties
|source=block
|description=When a powder snow bucket is placed
|id=item.bucket.empty_powder_snow
|translationkey=subtitles.item.bucket.empty
|volume=1.0
|pitch=''varies'' <ref group=sound>Each sound event can be 1.0, 0.95, or 1.1</ref>
|distance=16}}
{{Sound table
|sound=Fill powder snow bucket1.ogg
|sound2=Fill powder snow bucket2.ogg
|subtitle=Bucket fills
|source=player
|description=When a bucket is filled with powder snow
|id=item.bucket.fill_powder_snow
|translationkey=subtitles.item.bucket.fill
|volume=1.0
|pitch=''varies'' <ref group=sound>Each sound event can be 1.0, 0.9, or 1.1</ref>
|distance=16}}
{{Sound table
|sound=Powder Snow break1.ogg
|sound2=Powder Snow break2.ogg
|sound3=Powder Snow break3.ogg
|sound4=Powder Snow break4.ogg
|sound5=Powder Snow break5.ogg
|sound6=Powder Snow break6.ogg
|sound7=Powder Snow break7.ogg
|subtitle=Block broken
|source=block
|description=When a bucket is filled with powder snow
|id=block.powder_snow.break
|translationkey=subtitles.block.generic.break
|volume=1.0
|pitch=0.8
|distance=16
|foot=1}}
{{el|be}}:
{{Sound table
|type=bedrock
|sound=Fill powder snow bucket1.ogg
|sound2=Fill powder snow bucket2.ogg
|source=player
|description=When a bucket is filled with powder snow
|id=bucket.fill_powder_snow
|volume=1.0
|pitch=1.0}}
{{Sound table
|sound=Empty powder snow bucket1.ogg
|sound2=Empty powder snow bucket2.ogg
|source=block
|description=When a powder snow bucket is placed
|id=bucket.empty_powder_snow
|volume=1.0
|pitch=1.0
|foot=1}}
== Data values ==
=== ID ===
{{edition|java}}:
{{ID table
|edition=java
|showforms=y
|generatetranslationkeys=y
|displayname=Powder Snow Bucket
|spritetype=item
|nameid=powder_snow_bucket
|form=item
|foot=1}}
{{edition|bedrock}}:
{{ID table
|edition=bedrock
|shownumericids=y
|showforms=y
|showaliasids=y
|notshowbeitemforms=y
|generatetranslationkeys=y
|displayname=Powder Snow Bucket
|spritetype=item
|nameid=powder_snow_bucket
|aliasid=bucket / 11
|form=item
|id=368
|foot=1}}
== History ==
{{History|java}}
{{History||1.17|snap=20w46a|[[File:Powder Snow Bucket JE1 BE1.png|32px]] Added powder snow buckets.}}
{{History|bedrock}}
{{History||Caves & Cliffs<br>(experimental)|link=Bedrock Edition 1.17.0|snap=beta 1.16.210.53|[[File:Powder Snow Bucket JE1 BE1.png|32px]] Added powder snow buckets.
|The powder snow bucket replaced the powder snow block in the creative inventory.}}
{{History||1.17.0|snap=beta 1.17.0.50|Powder snow bucket are now available without enabling [[Experimental Gameplay]].}}
{{h|foot}}
== Issues ==
{{Issue list}}
==Gallery==
<gallery>
Cozy Cabin Powder Snow Bucket 1.jpg|Teaser image with a barely visible powder snow bucket.
Cozy Cabin Powder Snow Bucket 2.jpg|Teaser image with a barely visible powder snow bucket.
Cozy Cabin Powder Snow Bucket 3.jpg|Teaser image with a barely visible powder snow bucket.
</gallery>
{{Items}}
[[Category:Renewable resources]]
[[Category:Tools]]
[[de:Pulverschneeeimer]]
[[es:Cubo con nieve polvo]]
[[fr:Seau de neige poudreuse]]
[[it:Secchio di neve polverosa]]
[[ja:粉雪入りバケツ]]
[[pl:Wiadro sypkiego śniegu]]
[[pt:Balde de neve fofa]]
[[ru:Ведро с рыхлым снегом]]
[[zh:细雪桶]]</li><li>[[Sparkler|Sparkler]]<br/>{{About|the Education Edition exclusive item|the new melee weapon available from the ''Minecraft Dungeons'' anniversary event|MCD:Sparkler}}
{{Item
| image = <gallery>
Orange Sparkler.png | Orange
Blue Sparkler.png | Blue
Red Sparkler.png | Red
Purple Sparkler.png | Purple
Green Sparkler.png | Green
</gallery>
| image2 = <gallery>
Active Orange Sparkler.png | Active Orange
Active Blue Sparkler.png | Active Blue
Active Red Sparkler.png | Active Red
Active Purple Sparkler.png | Active Purple
Active Green Sparkler.png | Active Green
</gallery>
| renewable = No
| stackable = No
}}
{{education feature}}
{{exclusive|bedrock|education}}
A '''sparkler''' is a [[Chemistry Update|chemistry]]-related [[item]] that emits particles when lit.
Sparklers are available in orange, blue, red, purple, and green colors.
== Obtaining ==
=== Crafting ===
{{Crafting
|showdescription=1
|B1=Chloride |B2=Magnesium |B3=Stick
|Output=Sparkler
|description= Calcium Chloride: Orange<br>Cerium Chloride: Blue<br>Mercuric Chloride: Red<br>Potassium Chloride: Purple<br>Tungsten Chloride: Green<br>{{only|bedrock|education}}
|type=Miscellaneous
}}
== Usage ==
{{ctrl|Using}} a sparkler ignites it, causing its texture to change. When lit, the sparkler emits colored [[particles]]; the [[durability]] meter depletes while the sparkler is burning. Sparklers are one of the few [[item]]s that can be held in the [[off-hand]] {{in|be}}. Unlit sparklers have normal lighting like most items, while lit sparklers appear to glow when held in the player's hand, similarly to [[glow stick]]s.
When the [[player]] uses another item while a sparkler is lit, or holds the sparkler in the off-hand, the sparkler's durability stops depleting.
If the player has a lit sparkler in their [[inventory]] and goes into the [[water]], the sparkler is destroyed immediately. However, it does not get destroyed if dropped in water. It also cannot float.
Despite having durability, sparklers cannot be enchanted with [[Unbreaking]] or [[Mending]].
== Sounds ==
{{Sound table
|type=bedrock
|sound=Fuse.ogg
|source=sound
|description=While a sparkler is active
|id=sparkler.active
|volume=0.25
|pitch=0.8/1.2}}
{{Sound table
|sound=Fizz.ogg
|source=block
|description=While a sparkler is being lit
|id=random.fizz
|volume=1.0
|pitch=2.4/2.6
|foot=1}}
== Data values ==
=== ID ===
{{ID table
|edition=bedrock
|shownumericids=y
|showforms=y
|notshowbeitemforms=y
|generatetranslationkeys=y
|displayname=Sparkler
|spritename=sparklers
|spritetype=item
|nameid=sparkler
|id=600
|form=item
|translationkey=item.sparkler.orange.name,item.sparkler.blue.name,item.sparkler.red.name,item.sparkler.purple.name,item.sparkler.green.name
|foot=1}}
== History ==
{{History|bedrock}}
{{History||1.4.0|snap=beta 1.2.20.1|[[File:Orange Sparkler BE1.png|32px]] [[File:Blue Sparkler BE1.png|32px]] [[File:Red Sparkler BE1.png|32px]] [[File:Purple Sparkler BE1.png|32px]] [[File:Green Sparkler BE1.png|32px]] <br>[[File:Active Orange Sparkler BE1.png|32px]] [[File:Active Blue Sparkler BE1.png|32px]] [[File:Active Red Sparkler BE1.png|32px]] [[File:Active Purple Sparkler BE1.png|32px]] [[File:Active Green Sparkler BE1.png|32px]] Added sparklers.}}
{{History|education}}
{{History||1.0.27|[[File:Orange Sparkler BE1.png|32px]] [[File:Blue Sparkler BE1.png|32px]] [[File:Red Sparkler BE1.png|32px]] [[File:Purple Sparkler BE1.png|32px]] [[File:Green Sparkler BE1.png|32px]] <br>[[File:Active Orange Sparkler BE1.png|32px]] [[File:Active Blue Sparkler BE1.png|32px]] [[File:Active Red Sparkler BE1.png|32px]] [[File:Active Purple Sparkler BE1.png|32px]] [[File:Active Green Sparkler BE1.png|32px]] Added sparklers.}}
{{History|foot}}
== Issues ==
{{issue list}}
== Trivia ==
* The formula for sparkler roughly works in real life. Magnesium itself burns white in air, while the metal salts add [[wikipedia:flame test|color to the flame]].
{{items}}
{{Education Edition}}
[[Category:Non-renewable resources]]
[[Category:Education Edition items]]
[[de:Wunderkerze]]
[[ja:手持ち花火]]
[[ko:스파클러]]
[[pl:Zimne ognie]]
[[pt:Vela-Faísca]]
[[zh:烟花棒]]</li></ul> | 13w36a | Cave Generation was tweaked, making caves less dense and interconnected.[2] | |||
| New biomes were added and some old biomes were changed. | |||||
| 13w37a | An invisible barrier at 30,000,000 blocks was added. This removed the last remnants of the Far Lands. | ||||
Trivia
- If someone made a 1:1 (1 block = 1 meter) scale version of the Earth, its area would be 510,000,000,000,000 blocks. Assuming the map is only one block deep and takes 1 byte/block, we get approximately 475,000GB, or 464TB.
- 461 quadrillion (4.608x10¹⁷) blocks would fit in a Minecraft world assuming that it spreads from 30,000,000 to -30,000,000.
- A Minecraft world is theoretically bigger than the earth, but in practice, an Earth-sized map would be large enough to overwhelm almost any consumer-grade computer. Indeed, nearly all structures within Minecraft, such as strongholds, villages, and mountains, are much smaller than a realistic version would be. The same applies even on larger scales such as biomes, landmasses, oceans, and the vertical space between bedrock and the "sky" (approximated by the build limit) .