(→Issues) |
(→Issues) |
||
| Line 96: | Line 96: | ||
{{issue list}} |
{{issue list}} |
||
| − | |||
| − | Well, the hopper will still "RECIEVE" items when powered by a redstone current, however it will not "TAKE" items. This might seem trivial but is actually very important. |
||
== Trivia == |
== Trivia == |
||
Revision as of 18:49, 19 April 2014
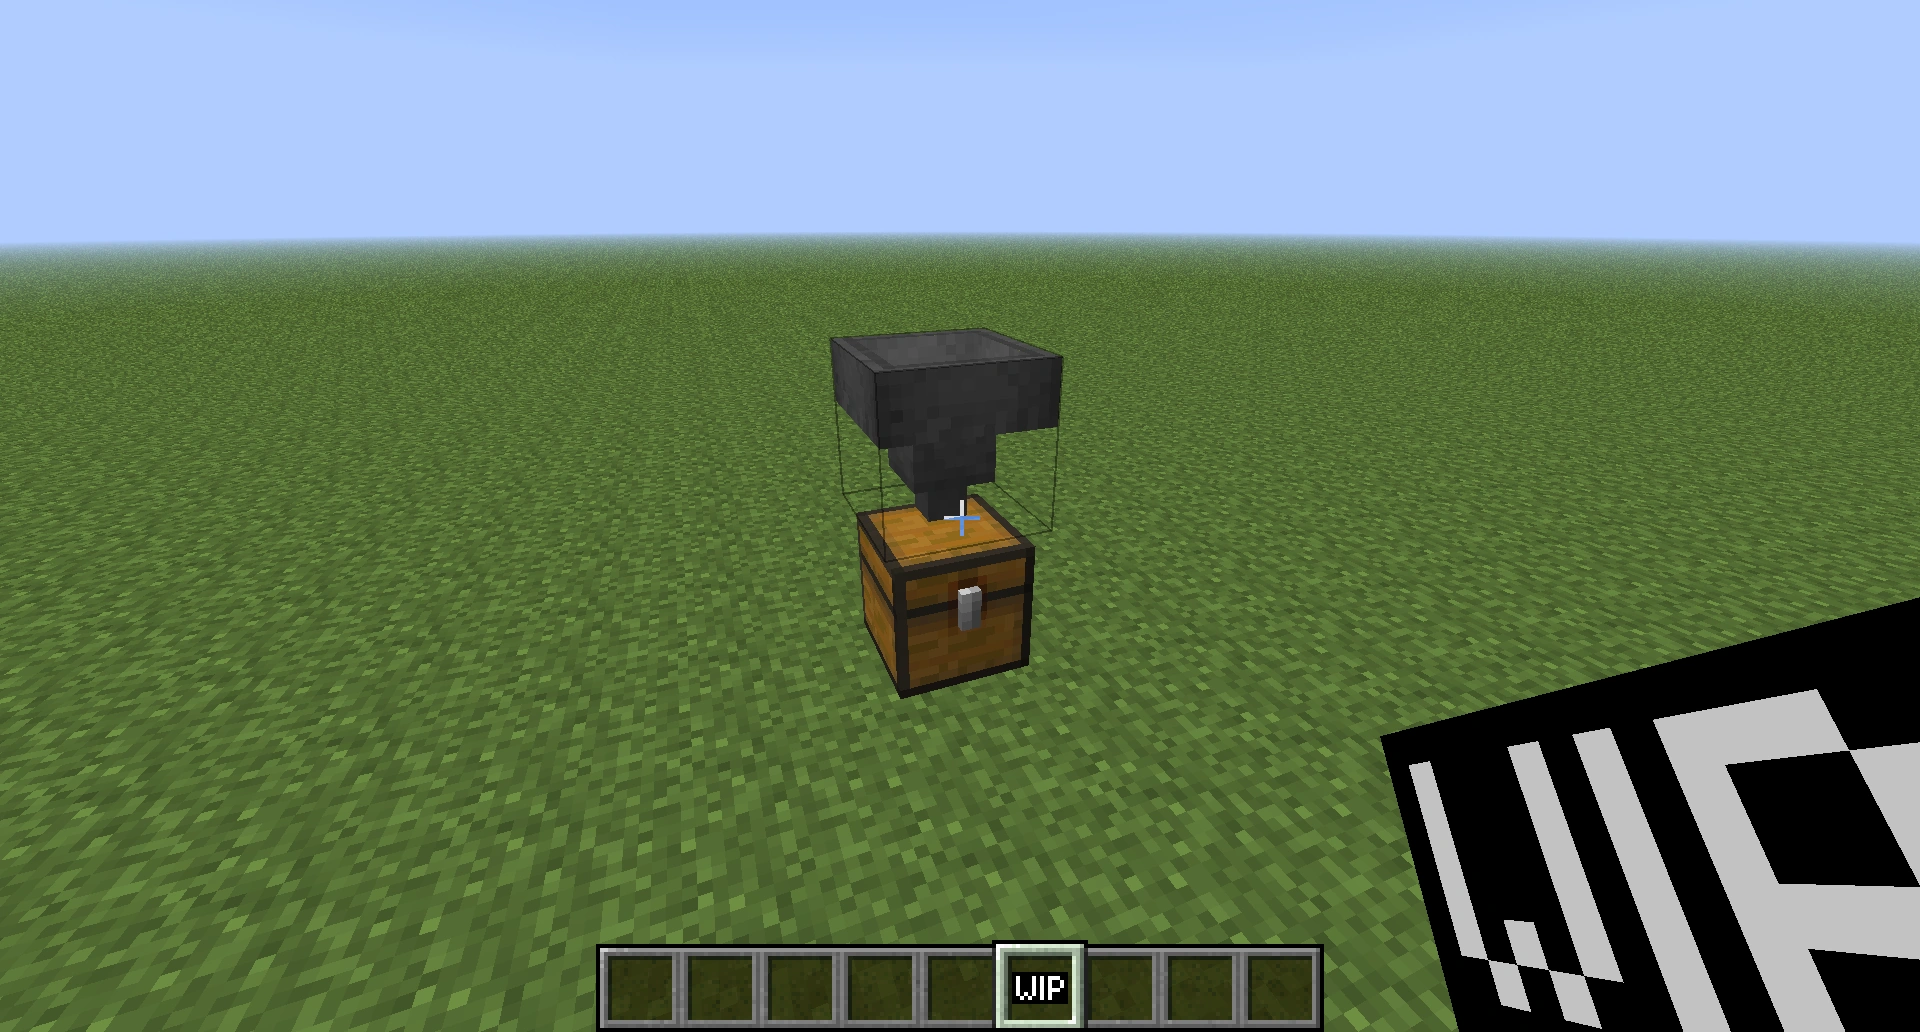
Template:BlockTileEntity A hopper is a block which moves items into and out of containers. When placed, its output end will attach to the clicked block. If an item falls into the top of it, it will store it in its own internal inventory of five item slots. However, if the hopper's output is attached to (or pointing at) a container with inventory slots (like a chest, another hopper, Minecart with Chest or a Minecart with Hopper), it will transfer items from its inventory to the inventory of the attached block (or cart) at a rate of 2.5 items per second (8 game ticks, 4 redstone ticks or 0.4 seconds per item).
The hopper will also transfer items from the inventory of a container placed directly above it into its own inventory at the same rate. Even if the hopper is drawing items from an inventory above it, and depositing it into another attached inventory, it will still transfer from the source inventory to the destination inventory at 2.5 items per second. When powered by redstone, the hopper won't take items from the inventories of blocks directly above it, put items into an attached inventory or suck up items from the environment. However, a hopper below it can still take items from its inventory and a hopper above or beside it can still put items into it. Powering hoppers to achieve this effect is commonly referred to as the hopper being 'disabled' or 'deactivating' the hopper.
Crafting
| Ingredients | Crafting recipe |
|---|---|
| Iron Ingot + Chest |
As a crafting ingredient
| Name | Ingredients | Crafting recipe |
|---|---|---|
| Minecart with Hopper | Hopper + Minecart |
Behavior
Hoppers cannot be moved by pistons. Applying a redstone signal will stop the hopper from pushing out items, and they will not pull in new items (although another hopper may still push items into it). Despite not appearing as a solid block, attached blocks such as rails, levers, and redstone dust can be placed on top of hoppers.
When a hopper is connected to the side of an object, a chest for this example, and there is another hopper directly underneath the first hopper, the bottom hopper has a higher priority. Whenever the hopper is outputting, an item in the first nonempty slot will be sent to the bottom hopper, and at the same time, another item (if there is any) from the first among the remaining nonempty slot will be sent to the chest. If you put a stack of items in the hopper, it will be divided evenly between the bottom hopper and the chest unless it is an odd number in which case the bottom hopper will get one more than the chest. If the hopper is initially empty and is taking input from another hopper sideways, all the items will go into the bottom hopper. If instead the hopper is being fed by another hopper above, then the items will be split evenly between the bottom hopper and the chest.
A hopper can suck in item entities from above it, even if such an item is only 'flying through' that block, or items sitting on a block which is not full height (slabs, soul sand, etc.) immediately above the hopper. It will not suck up items sitting on a full block above it, however a Minecart with hopper can.
Testing with Comparators
If a hopper is the input to a redstone comparator, the comparator will output a redstone signal whenever there are any items stored inside the hopper. An empty hopper produces a power output of 0, a single item in a hopper produces a power level of at least 1, and the power level will increase depending on how you fill the 5 stacks of the hopper (see Redstone Comparator for precise values) to a maximum power level of 15 at 5 full stacks.
Whether a comparator will activate when a hopper is simply transferring items from its input to its output depends on its configuration. For example, if three hoppers are arranged vertically feeding into each other, so that they are both pulling items from the hopper above and pushing items into the hopper below, a comparator of the middle hopper will activate; but if the middle hopper is faced to the side and powered, so that items are moving through it only because the hoppers above and below are pushing and pulling items into and out of it, a comparator off the middle hopper will not activate.
Interactions
Hoppers can remove items from and place items into the following:
- Brewing Stands
- Hoppers above the brewing stand will fill the ingredient slot, while hoppers to the side will fill the potion slots. Unlike furnaces, a hopper placed under a brewing stand will empty the brewing stand immediately, whether the potions are complete or not.
- Chests
- Large chests are treated as a single unit; one hopper placed on a large chest will fill up the whole chest.
- Hoppers can only remove items from or place items into a chest if it can be opened.
- Dispensers / Droppers
- Items can be removed from as well as placed in dispensers/droppers.
- Furnaces
- Items fed to the top of a furnace will fill the ore slot, items fed from any side will fill the fuel slot, and hoppers under the furnace will only take finished products (and emptied buckets from using lava as fuel). A hopper removing items from a furnace will not yield experience points.
- Hoppers
- Hoppers both pull items from containers above them, and push items to containers they are facing (including other hoppers). Thus a hopper above a hopper will both push items into the hopper below and have items pulled from it by the hopper below. To stop item transfer in a vertical stack, two adjacent hoppers in a column must be deactivated so that the top hopper isn't pushing down and the bottom hopper isn't pulling from above. When two hoppers are laid horizontally, only one hopper needs to be deactivated because the hoppers can only push, not pull. Similarly, when a horizontal hopper is stacked above another hopper, vertical transfer between these two hoppers only can be interrupted by deactivating the hopper below.
- Minecarts with Chest / Hopper
- Hoppers will fill minecarts with chests or hoppers if they are pointing at them and are not separated by another block. Hoppers can also take items from minecarts above them; rails can be placed directly on top of hoppers by aiming at a nearby block or holding the sneak key (default ⇧ Shift), to make unloading stations. A hopper will not unload a minecart which is on a Detector Rail above the hopper, because the detector rail will power the hopper.
- Trapped Chests
- Identical to chests (see above), except that interaction is blocked while the chest is open, as it emits a redstone pulse and powers the hopper.
Hoppers cannot remove items from or place items into Ender Chests. They do not interact with them in any way.
Connecting
- A hopper will connect to the block at which you point, and only that block (does not automatically connect to others).
- If you destroy the block to which the hopper was connected, it stays pointing to the original location; useful for transferring into minecarts via their sides.
- To get a hopper to connect to a block with an inventory, sneak (default Shift) and click the block.
- You can deactivate a hopper with a redstone signal, but note that another (active/unpowered) hopper beneath it can still take items from it.
- If you place a hopper by clicking on the bottom face of the block, the hopper will not point up, but down instead, because you can't input upwards. This can be solved by using a Minecart with Hopper and sending it up along a rail, or powering a Dropper with a clock circuit.
- When using hoppers to remove smelted items from a furnace, you aren't granted experience.
Video
Hopper/video
History
| release | |||||
|---|---|---|---|---|---|
1.5{{Extension DPL}}<ul><li>[[Dye|Dye]]<br/>{{Item
| title = Dyes
| image = White Dye.png
| extratext = View [[#Gallery|all renders]]
| renewable = Yes
| stackable = Yes (64)
}}
'''Dyes''' are a set of sixteen items used to change the color of [[wool]], [[carpet]]s, [[terracotta]], [[concrete powder]], [[glass]], [[shulker box]]es, [[bed]]s, [[candle]]s, the patterns on [[banner]]s, [[firework star]]s, certain mobs, and text on [[sign]]s and [[hanging sign]]s. {{IN|bedrock}} they can also be used to dye water in a [[cauldron]] (which is thereafter used to dye leather [[armor]]); {{in|java}} leather armor can be dyed directly. {{IN|education}} dyes can also be used to dye [[balloon]]s and [[glow stick]]s.
{{IN|bedrock|education}}, [[bone meal]], [[ink sac]]s, [[lapis lazuli]], and [[cocoa bean]]s can generally substitute for [[white dye]], [[black dye]], [[blue dye]], and [[brown dye]], respectively, in crafting recipes and for use in dyeing items or mobs. However, they have other important uses that aren't related to color, and are therefore not considered true dyes. They are mentioned in this article only in regard to their use as dyeing agents; see their individual articles for complete information about them.
[[File:Dye Recipes.png|400px|thumb|A guide for creating all the dyes]]
== Obtaining ==
<!--[[File:Dye Chart.png|350px|thumb|A guide to crafting all the dyes.{{until|java 1.14}}]]-->
Dyes can be produced by crafting them from plants (mainly flowers), by crafting dyes of different colors together, by smelting plants, or by trading with a [[wandering trader]].
{{loadPage|Crafting/Dye|Crafting|h3}}
=== Smelting ===
{{smelting|head=1|Sea Pickle|Lime Dye|0,2}}
{{smelting|foot=1|Cactus|Green Dye|1||b=Lapis Lazuli|c=Any fuel|d=1}}
=== Trading ===
[[Wandering trader]]s can sell 3 dyes for an [[emerald]]. {{IN|bedrock}}, they can also sell 3 lapis lazuli, bone meal, cocoa beans, or ink sacs for one emerald.
Apprentice-level cleric [[villager]]s sell one lapis lazuli per emerald.
=== Chest loot ===
{{#invoke:LootChest|base3|blue-dye,green-dye,orange-dye,light-blue-dye,yellow-dye,white-dye}}
=== Other ===
Ink sacs can also be created using 1 iron, 1 sulfur, and 4 oxygen in the [[compound creator]]. {{only|bedrock|education}}
== Usage ==
Similar to their use in crafting, [[bone meal]], [[ink sac]]s, [[lapis lazuli]], and [[cocoa beans]] can be substituted for the corresponding dye in any of the following usages unless otherwise specified.{{only|bedrock}} <!--- sections are ordered by craftable dyeable blocks, dyeable items, version exclusive sections, and non-crafting miscellaneous uses--->
=== Dyeing wool and mobs ===
Players can dye wool by placing [[wool]] and any dye in a crafting grid.
{{Crafting
|nocat=1
|Any Wool
|Matching Dye
|Output=Any Wool
}}
Dyes can be {{control|use|text=used}} on sheep to change the color of the wool. Shearing a colored sheep drops the corresponding color of the wool, and the sheep retains the color when the wool regenerates. [[Breeding]] colored sheep produces a lamb colored as one of the parent sheep, or a color resulting from the combination of both parents' color. The color combining follows the same rules that dyes use – red and yellow sheep produce an orange lamb, but a blue and yellow sheep cannot create a green lamb. The unlimited reproduction of colored sheep makes dyeing and shearing sheep infinitely more efficient than just dyeing wool directly.
Dye can also be used on a tamed [[wolf]] or [[cat]] to change the color of its collar from the default red to the color of the dye.
=== Dyeing carpets ===
Carpets can be dyed.
{{Crafting
|Any Carpet
|Matching Dye
|Output= Matching Carpet
|type= Building block
}}
=== Dyeing terracotta ===
[[Terracotta]] can be dyed by placing 8 blocks around a dye on a crafting table.
{{Crafting
|nocat=1
|A1=Terracotta |B1=Terracotta |C1=Terracotta
|A2=Terracotta |B2=Matching Dye |C2=Terracotta
|A3=Terracotta |B3=Terracotta |C3=Terracotta
|Output=Matching Dyed Terracotta,8
}}
=== Creating concrete powder ===
Dyes can also be used to craft [[concrete powder]], which can then be set into their respective [[concrete]] blocks (they cannot be dyed directly).
{{Crafting
|nocat=1
|Sand |Gravel |Sand
|Gravel |Matching Dye |Gravel
|Sand |Gravel |Sand
|Output=Matching Concrete Powder,8
}}
=== Staining glass ===
[[Stained glass]] can be stained by placing 8 blocks of glass around a dye on a [[crafting table]]. Just like regular glass, stained glass can be crafted into stained glass panes. The recipe for this is the same as with regular glass.
{{Crafting
|nocat=1
|A1=Glass |B1=Glass |C1=Glass
|A2=Glass |B2=Matching Dye |C2=Glass
|A3=Glass |B3=Glass |C3=Glass
|Output=Matching Stained Glass,8
|head=1
}}
{{Crafting
|nocat=1
|A1= Glass Pane
|B1= Glass Pane
|C1= Glass Pane
|A2= Glass Pane
|B2= Matching Dye
|C2= Glass Pane
|A3= Glass Pane
|B3= Glass Pane
|C3= Glass Pane
|Output= Matching Stained Glass Pane,8
|type= Decoration block
|foot=1
}}
=== Dyeing shulker boxes ===
[[Shulker box]]es are generated in a light shade of purple (like the [[purpur block]]), but can be dyed any color. They can also be re-dyed as often as desired.
{{Crafting
|ignoreusage=1
|showname=1
|Any Shulker Box
|Matching Dye
|Output=Matching Shulker Box
}}
=== Dyeing beds ===
Players can dye beds by placing a [[bed]] and any color dye in a crafting grid.
{{Crafting
|nocat=1
|Any Bed
|Matching Dye
|Output=Matching Bed
}}
=== Dyeing candles ===
Players can dye [[candles]] by placing an undyed candle and any color dye in a crafting grid.
{{Crafting
|ignoreusage=1
|Candle
|Matching Dye
|Output=Matching Dyed Candle
}}
=== Banner patterns ===
{{main|Banner#Patterns}}
Dyes are used in most banner patterns to determine the pattern and color displayed.
=== Dyeing armor ===
[[File:DyeGraph2.png|200px|thumb|A graph showing all combinations of two dyes on a [[tunic]].]]
Leather [[armor]] can be dyed by:
* Crafting dyes with a piece of leather armor or leather [[horse armor]].{{Only|java}}
* Dousing the leather armor or leather [[horse armor]] in a [[cauldron]] to which dyes have been added.{{Only|bedrock}}
There are 5,713,438<ref>https://anrar4.github.io/DyeLeatherArmor/</ref> (34.1% of sRGB) colors leather armor can be, as it is possible to put more than one dye on the crafting bench alongside the leather armor. Armor can be dyed multiple times with previous colors affecting the final outcome. Colored armor can be reverted to their original color using a [[cauldron]] with undyed water.
The game has a specific formula for calculating the color of dyed armor: each color, in the RGB color model, has a red value, green value, and blue value. For each dye in the crafting grid, and the armor itself (if it is already dyed), the red, green, and blue values are added to running totals. In addition, a running total of the highest value (be it red, green, or blue) is also kept. After this, each total is divided by the number of colors used. This effectively produces the average red, green, blue, and maximum values. The maximum value of the average RGB values is also calculated. Finally, each average RGB value is multiplied by the average maximum value and divided by the maximum of the average RGB values. The modified average RGB values are then used as the final color. This procedure can be summed up with the following equations:
for each color (all "total" variables start at 0 before counting):
totalRed = totalRed + redValue
totalGreen = totalGreen + greenValue
totalBlue = totalBlue + blueValue
totalMaximum = totalMaximum + max(redValue, greenValue, blueValue)
numberOfColors = numberOfColors + 1
averageRed = totalRed / numberOfColors
averageGreen = totalGreen / numberOfColors
averageBlue = totalBlue / numberOfColors
averageMaximum = totalMaximum / numberOfColors
maximumOfAverage = max(averageRed, averageGreen, averageBlue)
gainFactor = averageMaximum / maximumOfAverage
resultRed = averageRed * gainFactor
resultGreen = averageGreen * gainFactor
resultBlue = averageBlue * gainFactor
Due to the way this formula works, the resulting color can never be darker than the average of the input colors and is often lighter and more saturated. Of course, the resulting color can never be lighter or more saturated than the lightest or most saturated input color. In addition, this formula never creates an RGB value higher than 255 (which would be invalid in the 8-bit RGB color model).
If leather armor is renamed on an [[anvil]], it retains its name when dyed or undyed.
;Mixing Samples
: {{ItemSprite|Yellow Dye}} + {{ItemSprite|Yellow Dye}} = {{Tint|leather-chestplate| #{{CalcDye| yellow=2 }} | code=1}}
: {{ItemSprite|Red Dye}} + {{ItemSprite|Blue Dye}} + {{ItemSprite|White Dye}} = {{Tint|leather-chestplate| #{{CalcDye| red=1 | blue=1 | white=1}} | code=1}}
: {{ItemSprite|Green Dye}} + {{ItemSprite|Red Dye}} + {{ItemSprite|Pink Dye}} = {{Tint|leather-chestplate| #{{CalcDye| green=1 | red=1 | pink=1}} | code=1}}
=== Dyeing firework stars ===
A [[firework star]] can have a single color or a combination of up to eight colors when crafted with dyes. Adding one or more dyes to a crafted firework star adds a "fade to color" effect to it, overwriting any existing fade colors.
{{Crafting
|head=1
|ignoreusage=1
|ingredients=[[Gunpowder]] +<br>Any Dye (1–8) +<br>Extra ingredient (optional)
|Gunpowder
|Matching Dye
|Diamond;Glowstone Dust;Head;Gold Nugget;Feather;Fire Charge;
|Output=Matching Firework Star
}}
{{Crafting
|ignoreusage=1
|Matching Firework Star
|Any Dye
|Output=Matching Firework Star
|foot=1
}}
=== Creating balloons ===
Dye can be used to craft balloons.{{only|education}}
{{Crafting
|nocat=1
|A1= Latex
|B1= Matching Dye
|C1= Latex
|A2= Latex
|B2= Helium
|C2= Latex
|A3= Latex
|B3= Lead
|C3= Latex
|Output= Matching Balloon
}}
=== Creating glow sticks ===
Dye can also be used to craft glow sticks.{{only|education}}
{{Crafting
|nocat=1
|A1= Polyethylene
|B1= Hydrogen Peroxide
|C1= Polyethylene
|A2= Polyethylene
|B2= Matching Dye
|C2= Polyethylene
|A3= Polyethylene
|B3= Luminol
|C3= Polyethylene
|Output= Matching Glow Stick
}}
=== Dyeing water inside cauldrons ===
Water can be dyed in a cauldron by holding any dye in the hand and pressing {{Ctrl|use}} on a cauldron filled with water.{{only|bedrock}}
=== Signs ===
Dye can be {{control|used}} on a [[sign]] or a [[hanging sign]] to change the text color. {{IN|bedrock}}, [[ink sac]]s cannot be used for this purpose; black dye must be used to change the text to black.
=== Trading ===
Apprentice, journeyman and expert-level shepherd [[villager]]s buy any of the 12 dyes for an [[emerald]].
== Color values ==
The "color codes" are used to determine the color imparted on sheep, wolf and cat collars, firework stars, [[beacon]] beams, and dyed leather armor. The hex value is shown in the extended tooltips of dyed leather armor; however, to set the color using an NBT data tag in a [[command]], the decimal value must be used instead. The color values for firework stars are slightly different from the ones listed below, and use [[Item colors#Firework stars|these values]] instead.
{| class="wikitable" style="margin:2px; border: 1px solid silver; text-align: left;" data-description="Data values"
! rowspan=2 | Description
! colspan=2 style="text-align:center" | Color Code
|-
! Dec
! <abbr title="Hexadecimal color code">Hex</abbr>
|-
| style="text-align:center" | White || 16383998 || {{color|#F9FFFE}}
|-
| style="text-align:center" | Light gray || 10329495 || {{color|#9D9D97}}
|-
| style="text-align:center" | Gray || 4673362 || {{color|#474F52}}
|-
| style="text-align:center" | Black || 1908001|| {{color|#1D1D21}}
|-
| style="text-align:center" | Brown || 8606770 || {{color|#835432}}
|-
| style="text-align:center" | Red || 11546150 || {{color|#B02E26}}
|-
| style="text-align:center" | Orange || 16351261 || {{color|#F9801D}}
|-
| style="text-align:center" | Yellow || 16701501 || {{color|#FED83D}}
|-
| style="text-align:center" | Lime || 8439583 || {{color|#80C71F}}
|-
| style="text-align:center" | Green || 6192150 || {{color|#5E7C16}}
|-
| style="text-align:center" | Cyan || 1481884|| {{color|#169C9C}}
|-
| style="text-align:center" | Light blue || 3847130 || {{color|#3AB3DA}}
|-
| style="text-align:center" | Blue || 3949738 || {{color|#3C44AA}}
|-
| style="text-align:center" | Purple || 8991416 || {{color|#8932B8}}
|-
| style="text-align:center" | Magenta || 13061821 || {{color|#C74EBD}}
|-
| style="text-align:center" | Pink || 15961002 || {{color|#F38BAA}}
|}
== Sounds ==
{{edition|java}}:
{{Sound table
|rowspan=2
|sound=Dye.ogg
|subtitle=Dye stains
|source=block
|description=When dye is used on a [[sign]]
|id=item.dye.use
|translationkey=subtitles.item.dye.use
|volume=1.0
|pitch=1.0/0.9/0.95/1.1
|distance=16}}
{{Sound table
|subtitle=Dye stains
|source=player
|description=When dye is used on a [[sheep]]
|id=item.dye.use
|translationkey=subtitles.item.dye.use
|volume=1.0
|pitch=1.0/0.9/0.95/1.1
|distance=16
|foot=1}}
{{edition|bedrock}}:
{{Sound table
|type=bedrock
|sound=Dye.ogg
|source=sound
|description=When dye is used on a sign
|id=sign.dye.use
|volume=1.0
|pitch=1.0}}
{{Sound table
|rowspan=3
|sound=Water Splash Old.ogg
|source=block
|description=When dye is added to a cauldron
|id=cauldron.adddye
|volume=0.1
|pitch=1.0}}
{{Sound table
|source=block
|description=When armor is dyed using a cauldron
|id=cauldron.dyearmor
|volume=0.1
|pitch=1.0}}
{{Sound table
|source=block
|description=When dye is removed from armor using a cauldron
|id=cauldron.cleanarmor
|volume=0.1
|pitch=1.0
|foot=1}}
== Achievements ==
{{load achievements|Rainbow Collection;Tie dye outfit}}
== Video ==
{{Video note|These videos are outdated, as it does not include details of the [[Java Edition 1.7.2|1.7.2]] update's changes to the dyeing system/production chain.}}
<div style="text-align:center">
<span style="display:inline-block">{{yt|8YD7oauNZHE}}</span>
<span style="display:inline-block">{{yt|7tETaRt7STM}}</span>
</div>
== History ==
{{History|java beta}}
{{History||January 3, 2011|link=https://web.archive.org/web/0/http://notch.tumblr.com/post/2582321901/2011-here-we-go|Notch mentions adding a "paint" feature if he can figure out how.}}
{{History||January 10, 2011<ref group="n">Supposed time when fragment was filmed. Based on modified date of client.jar/gui/trap.png in [[Beta 1.2]].</ref>|link=https://www.youtube.com/watch?v=cBF2ugTzXqQ&t=181s|[[File:Red Dye (pre-release).png|32px]] Shown rose red in development as part of [[Minecraft: The Story of Mojang]].}}
{{History||1.2|[[File:Ink Sac JE1 BE1.png|32px]] [[File:Red Dye JE1 BE1.png|32px]] [[File:Green Dye JE1 BE1.png|32px]] [[File:Cocoa Beans JE1 BE1.png|32px]] [[File:Lapis Lazuli JE1 BE1.png|32px]] [[File:Purple Dye JE1 BE1.png|32px]] [[File:Cyan Dye JE1 BE1.png|32px]] [[File:Light Gray Dye JE1 BE1.png|32px]] [[File:Gray Dye JE1 BE1.png|32px]] [[File:Pink Dye JE1 BE1.png|32px]] [[File:Lime Dye JE1 BE1.png|32px]] [[File:Yellow Dye JE1 BE1.png|32px]] [[File:Light Blue Dye JE1 BE1.png|32px]] [[File:Magenta Dye JE1 BE1.png|32px]] [[File:Orange Dye JE1 BE1.png|32px]] [[File:Bone Meal JE1 BE1.png|32px]] Added dyes.
|[[File:Black Dye (Recreated).png|32px]] [[File:Red Dye (pre-release).png|32px]] [[File:Green Dye (Recreated).png|32px]] [[File:Brown Dye (Recreated).png|32px]] [[File:Blue Dye (Recreated).png|32px]] [[File:Purple Dye (Recreated).png|32px]] [[File:Cyan Dye (Recreated).png|32px]] [[File:Light Gray Dye (Recreated).png|32px]] [[File:Gray Dye (Recreated).png|32px]] [[File:Pink Dye (Recreated).png|32px]] [[File:Lime Dye (Recreated).png|32px]] [[File:Yellow Dye (Recreated).png|32px]] [[File:Light Blue Dye (Recreated).png|32px]] [[File:Magenta Dye (Recreated).png|32px]] [[File:Orange Dye (Recreated).png|32px]] [[File:White Dye (Recreated).png|32px]] Leftovers of old textures can be seen in [[items.png]] with 100% opacity. The white dye texture was reused for [[Sugar]].
| The colors were as follows:{{verify|Did the color codes remain the same between Beta 1.2 and Java 1.11.2?}}
{{:Color/Java Edition dye colors before 17w06a}}
}}
{{History|java}}
{{History||1.1|snap=11w49a|[[Sheep]] can now regrow their [[wool]] by eating [[grass block|grass]]. Dyed sheep regrow wool in their new color.}}
{{History||1.3.1|snap=12w19a|[[File:Cocoa Beans JE2.png|32px]] The texture of [[cocoa beans]] has been changed.}}
{{History|||snap=1.3|[[File:bone meal changes.gif|32px]] The textures of [[bone meal]], [[cactus green]], cocoa beans and [[rose red]] have been changed. The textures have been lowered one pixel.}}
{{History||1.4.2|snap=12w34a|Added the ability to dye leather [[armor]] and [[wolf]] collars.}}
{{History||1.4.4|snap=1.4.3|Color codes have been changed. The colors of red, brown, blue, purple, cyan, pink, light blue, magenta and orange were adjusted a little vividly.}}
{{History||1.6.1|snap=13w19a|[[Stained clay]] can now be crafted using dyes.}}
{{history||1.7.2|snap=13w36a|With the addition of new [[flower]]s, many secondary and tertiary dyes are now primary dyes.}}
{{History|||snap=13w41a|[[Stained glass]] can now be crafted using dyes.}}
{{History||1.8|snap=14w02a|As cleric [[villager]]s now sell lapis lazuli, all dyes have become fully renewable.}}
{{History|||snap=14w30a|Added [[banner]]s, which can be dyed.}}
{{History||1.9|snap=15w34a|Added [[shield]]s, which can be dyed indirectly by applying a matching [[banner]].}}
{{History||1.11|snap=16w39b|Dyes are now used to change the color of [[shulker box]]es.}}
{{History||1.12|snap=17w06a|Dyes are now used to craft [[concrete powder]].
|Color codes have been changed. All colors are adjusted more vividly. The changes were as follows:
{{:Color/Java Edition dye color changes in 17w06a}}
|Light blue dye, stained glass, and stained glass panes, did not change colors in this update. This means that they still use old colors.<ref name="unchanged dyes">{{Bug|MC-214643}}<br>{{Bug|MC-214641}}</ref>
}}
{{History|||snap=17w15a|Dyes can now apply color to white [[bed]]s.}}
{{History||1.13|snap=17w47a|The different data values for the <code>dye</code> ID have been split up into their own IDs.}}
{{History||1.14|snap=18w43a|[[Bone meal]], [[ink sac]]s, [[cocoa beans]] and [[lapis lazuli]] are no longer considered dyes.
|[[File:White Dye JE1 BE1.png|32px]] [[File:Black Dye JE1 BE1.png|32px]] [[File:Brown Dye JE1 BE1.png|32px]] [[File:Blue Dye JE1 BE1.png|32px]] Added [[white dye|white]], [[black dye|black]], [[brown dye|brown]] and [[blue dye]]s.
|"Rose Red", "Dandelion Yellow" and "Cactus Green" have been renamed to "Red Dye", "Yellow Dye" and "Green Dye", respectively.
|[[Glass pane]]s and [[carpet]]s can now be dyed.
|[[File:Light Gray Dye JE2 BE2.png|32px]] [[File:Gray Dye JE2 BE2.png|32px]] [[File:Red Dye JE2 BE2.png|32px]] [[File:Orange Dye JE2 BE2.png|32px]] [[File:Yellow Dye JE2 BE2.png|32px]] [[File:Lime Dye JE2 BE2.png|32px]] [[File:Green Dye JE2 BE2.png|32px]] [[File:Cyan Dye.png|32px]] [[File:Light Blue Dye JE2 BE2.png|32px]] [[File:Purple Dye JE2 BE2.png|32px]] [[File:Magenta Dye JE2 BE2.png|32px]] [[File:Pink Dye JE2 BE2.png|32px]] The textures of light gray, gray, red, orange, yellow, lime, green, cyan, light blue, purple, magenta, and pink dyes, have been changed. The color texture for light blue dye was not changed to reflect the updated colors from 1.12.<ref name="unchanged dyes"></ref>}}
{{History|||snap=18w44a|The color of the text on [[sign]]s can now be changed with dye.}}
{{History|||snap=18w49a|Yellow dyes can now be found in [[chest]]s in [[village]] mason houses.}}
{{History|||snap=18w50a|Green dyes can now be found in [[chest]]s in [[desert]] [[village]] houses.}}
{{History|||snap=19w05a|Added the [[wandering trader]], which can sell any type of dye.}}
{{History|||snap=19w11a|All 16 types of dyes can now be [[trading|bought]] by shepherd villagers.}}
{{History||1.16.2|snap=Pre-release 2|Reversed the order of dyes to match other colored items in the [[Creative inventory]].<ref name="reverse dye">{{Bug|MC-136553}}</ref>
|Regrouped dyes in the Creative inventory such that white, blue, brown, and black dyes are within and not [[cocoa beans]], [[ink sacs]], [[lapis lazuli]], and [[bone meal]].<ref name="regroup dye">{{Bug|MC-177684}}</ref>}}
{{History||1.17|snap=20w45a|Added [[candle]]s, which can be dyed.}}
{{History|||snap=21w03a|Added a sound for applying dyes.}}
{{History|||snap=21w19a|Candles can no longer be dyed.}}
{{History|||snap=Pre-release 1|Candles can now once again be dyed.}}
{{History||1.20<br>(Experimental)|link=1.19.3|snap=22w42a|The color of the text on [[hanging sign]]s can now be changed with dye.}}
{{History||1.20<br>(Experimental)|link=1.19.4|snap=23w07a|[[Torchflower]]s can now be crafted into orange dye.|[[Pink petals]] can now be crafted into pink dye.}}
{{History||1.20|snap=23w12a|[[Pitcher plant]]s can now be crafted into cyan dye.|Blue, light blue, orange, white, and yellow dye can now be found in [[suspicious gravel]] and [[suspicious sand]] in [[trail ruins]].}}
{{History|||snap=23w14a|Pitcher plants can now craft two [[cyan dye]] instead of one.}}
{{History|||snap=23w16a|Blue, light blue, orange, white, and yellow dye no longer generates in [[suspicious sand]] in [[trail ruins]].|Due to the split of the archaeological loot tables for the suspicious gravel within the [[trail ruins]]; blue, light blue, orange, white, and yellow dye now are in the common loot.}}
{{History|pocket alpha}}
{{History||v0.3.0|[[File:Bone Meal JE1 BE1.png|32px]] [[File:Light Gray Dye JE1 BE1.png|32px]] [[File:Gray Dye JE1 BE1.png|32px]] [[File:Ink Sac JE1 BE1.png|32px]] [[File:Cocoa Beans JE1 BE1.png|32px]] [[File:Red Dye JE1 BE1.png|32px]] [[File:Orange Dye JE1 BE1.png|32px]] [[File:Yellow Dye JE1 BE1.png|32px]] [[File:Lime Dye JE1 BE1.png|32px]] [[File:Green Dye JE1 BE1.png|32px]] [[File:Cyan Dye JE1 BE1.png|32px]] [[File:Light Blue Dye JE1 BE1.png|32px]] [[File:Lapis Lazuli JE1 BE1.png|32px]] [[File:Purple Dye JE1 BE1.png|32px]] [[File:Magenta Dye JE1 BE1.png|32px]] [[File:Pink Dye JE1 BE1.png|32px]] Added dyes. Only [[dandelion yellow]] and [[lapis lazuli]] are currently obtainable and have functionality.}}
{{History||v0.3.2|[[Cactus green]] is now obtainable by smelting [[cacti]].}}
{{History||v0.3.3|[[Bone meal]] is now obtainable via [[crafting]].}}
{{History||v0.4.0|[[Cyan dye]], [[light blue dye]], [[lime dye]], [[magenta dye]], [[orange dye]], [[pink dye]], and [[purple dye]] are now obtainable via crafting.
|[[Rose red]] is now obtainable by smelting red [[mushroom]]s.
|All available dyes, excluding bone meal, can now be used to craft their respective [[wool]] color.}}
{{History||v0.8.0|snap=build 1|[[File:Cocoa Beans JE3 BE2.png|32px]] The texture of cocoa beans has been changed.}}
{{History|||snap=build 3|[[Ink sac]]s, [[cocoa bean]]s, [[gray dye]], and [[light gray dye]] are now available in the [[creative]] [[inventory]].
|Rose red can now be obtained from [[beetroot]]s.}}
{{History||v0.9.0|snap=build 1|Cocoa beans can now be obtained from [[cocoa pod]]s.
|The [[rose]] has been removed and replaced with a new poppy [[flower]] that can be crafted into rose red.}}
{{History|||snap=build 3|All new [[flower]]s can now be [[crafting|crafted]] into dyes. Because of this, many secondary and tertiary dyes are now primary dyes.
|[[Gray dye]] and [[light gray dye]] can now be obtained in [[survival]].}}
{{History|||snap=build 11|[[Terracotta|Stained clay]] can now be crafted using dyes.}}
{{History||v0.11.0|snap=build 1|[[Ink sac]]s can now be obtained from [[squid]].
|Added the ability to dye [[wolf]] collars.}}
{{History||v0.12.1|snap=build 1|Red [[mushroom]]s can no longer be smelted to obtain [[rose red]].}}
{{History||v0.14.0|snap=build 1|[[Cauldron]]s now used for leather dyeing, by applying a dye to a [[water]]-filled cauldron.}}
{{History||v0.16.0|snap=build 1|[[Cocoa bean]]s can no longer be crafted.}}
{{History|pocket}}
{{History||1.0.0|snap=alpha 0.17.0.1|Added a ''Dye'' button for [[sheep]].
|Added [[shulker]]s, which can be dyed.
|Added [[stained glass]]. Stain glass cannot be [[crafting|crafted]], but purple glass generates in [[end city|end cities]].}}
{{History||1.1.0|snap=alpha 1.1.0.0|Dyes can now apply color to a white [[bed]]s.
|Dyes are now used to craft [[concrete powder]].
|The color palette has been changed.}}
{{History|bedrock}}
{{History||1.2.0|snap=beta 1.2.0.2|Dyes can now be used for [[banner]] crafting.
|Dyes can now be used to craft [[firework star]]s.
|[[Stained glass]] is now [[crafting|craftable]], using dyes.}}
{{History||1.4.0|snap=beta 1.2.20.1|[[Lime dye]] can now be obtained from smelting [[sea pickle]]s.
|Dyes can now used to craft [[glow stick]]s and [[balloon]]s.}}
{{History||1.8.0|snap=beta 1.8.0.8|Dyes can now be used to dye [[cat]] collars.}}
{{History|||snap=beta 1.8.0.10|[[File:White Dye JE1 BE1.png|32px]] [[File:Black Dye JE1 BE1.png|32px]] [[File:Brown Dye JE1 BE1.png|32px]] [[File:Blue Dye JE1 BE1.png|32px]] Added [[white dye|white]], [[brown dye|brown]], [[black dye|black]] and [[blue dye]]s, which can be crafted from [[lapis lazuli]], [[bone meal]], [[cocoa beans]] and [[ink sac]]s. This, however, the later four still use as dyes.<ref>{{Bug|MCPE-42473}}</ref>
|"Rose Red", "Dandelion Yellow" and "Cactus Green" have been renamed to "Red Dye", "Yellow Dye" and "Green Dye", respectively.}}
{{History||1.9.0|snap=beta 1.9.0.0|Blue and white dye can now be obtained from [[cornflower]]s and [[lily of the valley]]s.}}
{{History||1.10.0|snap=beta 1.10.0.3|[[Glass pane]]s and [[carpet]]s can now be dyed.
|Only a single dye is now required to apply a banner pattern in a [[loom]].
|Various dyes except black dye, white dye, brown dye and blue dye are now [[trading|sold]] by [[wandering trader]]s.
|[[File:Bone Meal JE2 BE2.png|32px]] [[File:Light Gray Dye JE2 BE2.png|32px]] [[File:Gray Dye JE2 BE2.png|32px]] [[File:Ink Sac JE2 BE2.png|32px]] [[File:Cocoa Beans JE4 BE3.png|32px]] [[File:Red Dye JE3 BE3.png|32px]] [[File:Orange Dye JE2 BE2.png|32px]] [[File:Yellow Dye JE2 BE2.png|32px]] [[File:Lime Dye JE2 BE2.png|32px]] [[File:Green Dye JE2 BE2.png|32px]] [[File:Cyan Dye.png|32px]] [[File:Light Blue Dye JE2 BE2.png|32px]] [[File:Lapis Lazuli JE2 BE2.png|32px]] [[File:Purple Dye JE2 BE2.png|32px]] [[File:Magenta Dye JE2 BE2.png|32px]] [[File:Pink Dye JE2 BE2.png|32px]] The textures of bone meal, light gray, gray, ink sac, cocoa beans, red, orange, yellow, lime, green, cyan, light blue, lapis lazuli, purple, magenta, and pink dyes have been changed.}}
{{History||1.11.0|snap=beta 1.11.0.4|Dye can now be [[trading|sold]] to shepherd [[villager]]s.}}
{{History||1.16.210|snap=beta 1.16.210.59|The color of the text on [[sign]]s can now be changed with dye.}}
{{History|||snap=beta 1.16.210.60|The ability to dye the color of the text on [[sign]]s was temporarily removed.}}
{{History||1.16.220|snap=beta 1.16.220.50|The color of the text on [[sign]]s can now be changed with dye again.}}
{{History||1.17.10|snap=beta 1.17.10.22|Added [[candles]], which can be dyed.}}
{{History|console}}
{{History||xbox=TU1|xbone=CU1|ps=1.0|wiiu=Patch 1|switch=1.0.1|[[File:Bone Meal JE1 BE1.png|32px]] [[File:Light Gray Dye JE1 BE1.png|32px]] [[File:Gray Dye JE1 BE1.png|32px]] [[File:Ink Sac JE1 BE1.png|32px]] [[File:Cocoa Beans JE1 BE1.png|32px]] [[File:Red Dye JE1 BE1.png|32px]] [[File:Orange Dye JE1 BE1.png|32px]] [[File:Yellow Dye JE1 BE1.png|32px]] [[File:Lime Dye JE1 BE1.png|32px]] [[File:Green Dye JE1 BE1.png|32px]] [[File:Cyan Dye JE1 BE1.png|32px]] [[File:Light Blue Dye JE1 BE1.png|32px]] [[File:Lapis Lazuli JE1 BE1.png|32px]] [[File:Purple Dye JE1 BE1.png|32px]] [[File:Magenta Dye JE1 BE1.png|32px]] [[File:Pink Dye JE1 BE1.png|32px]] Added dyes.}}
{{History||xbox=TU9|[[File:Cocoa Beans JE3 BE2.png|32px]] The texture of cocoa beans has been changed.}}
{{History||xbox=none|xbone=none|ps=1.83|wiiu=none|switch=none|[[File:White Dye JE1 BE1.png|32px]] [[File:Black Dye JE1 BE1.png|32px]] [[File:Brown Dye JE1 BE1.png|32px]] [[File:Blue Dye JE1 BE1.png|32px]] Added [[white dye|white]], [[black dye|black]], [[brown dye|brown]], and [[blue dye|blue]] dyes, which can crafted from [[bone meal]], [[ink sac]], [[cocoa beans]], and [[lapis lazuli]].
|"Rose Red", "Dandelion Yellow" and "Cactus Green" have been renamed to "Red Dye", "Yellow Dye" and "Green Dye", respectively.}}
{{History||ps=1.90|[[File:Bone Meal JE2 BE2.png|32px]] [[File:Light Gray Dye JE2 BE2.png|32px]] [[File:Gray Dye JE2 BE2.png|32px]] [[File:Ink Sac JE2 BE2.png|32px]] [[File:Cocoa Beans JE4 BE3.png|32px]] [[File:Red Dye JE2 BE2.png|32px]] [[File:Orange Dye JE2 BE2.png|32px]] [[File:Yellow Dye JE2 BE2.png|32px]] [[File:Lime Dye JE2 BE2.png|32px]] [[File:Green Dye JE2 BE2.png|32px]] [[File:Cyan Dye.png|32px]] [[File:Light Blue Dye JE2 BE2.png|32px]] [[File:Lapis Lazuli JE2 BE2.png|32px]] [[File:Purple Dye JE2 BE2.png|32px]] [[File:Magenta Dye JE2 BE2.png|32px]] [[File:Pink Dye JE2 BE2.png|32px]] The textures of bone meal, light gray, gray, ink sac, cocoa beans, red, orange, yellow, lime, green, cyan, light blue, lapis lazuli, purple, magenta, and pink dyes have been changed.}}
{{History|3ds}}
{{History||0.1.0|[[File:Bone Meal JE1 BE1.png|32px]] [[File:Light Gray Dye JE1 BE1.png|32px]] [[File:Gray Dye JE1 BE1.png|32px]] [[File:Ink Sac JE1 BE1.png|32px]] [[File:Cocoa Beans JE3 BE2.png|32px]] [[File:Red Dye JE1 BE1.png|32px]] [[File:Orange Dye JE1 BE1.png|32px]] [[File:Yellow Dye JE1 BE1.png|32px]] [[File:Lime Dye JE1 BE1.png|32px]] [[File:Green Dye JE1 BE1.png|32px]] [[File:Cyan Dye JE1 BE1.png|32px]] [[File:Light Blue Dye JE1 BE1.png|32px]] [[File:Lapis Lazuli JE1 BE1.png|32px]] [[File:Purple Dye JE1 BE1.png|32px]] [[File:Magenta Dye JE1 BE1.png|32px]] [[File:Pink Dye JE1 BE1.png|32px]] Added dyes from [[Pocket Edition v0.15.4 alpha]].}}
{{History|foot}}
<gallery>
Pre-release dyes.png|Pre-release dye textures hidden within [[Items.png]].
</gallery>
;Notes
{{reflist|group=n}}
== Gallery ==
<gallery>
White Dye.png|White Dye
Light Gray Dye.png|Light Gray Dye
Gray Dye.png|Gray Dye
Black Dye.png|Black Dye
Brown Dye.png|Brown Dye
Red Dye.png|Red Dye
Orange Dye.png|Orange Dye
Yellow Dye.png|Yellow Dye
Lime Dye.png|Lime Dye
Green Dye.png|Green Dye
Cyan Dye.png|Cyan Dye
Light Blue Dye.png|Light Blue Dye
Blue Dye.png|Blue Dye
Purple Dye.png|Purple Dye
Magenta Dye.png|Magenta Dye
Pink Dye.png|Pink Dye
</gallery>
==Issues==
{{issue list}}
== Trivia ==
* Players can obtain each one of every color with 1 cocoa bean, 2 yellow dye, 2 ink sac, 3 green dye, 4 lapis lazuli, 4 red dye, and 6 bone meal (2 bones).
* The dyed sheep breeding behavior mirrors [[wikipedia:Lamarckism|Lamarck's theory]], in which the organisms evolve inheriting the external changes and adaptations of the previous generation, transmitting them to their offspring.
* In ''Bedrock Edition'', tertiary colors, along with their regular crafting recipes, can be crafted with primary colors. E.g.: Magenta can be crafted with one rose red and two bone meals.
* The colors of the dyes match the chat colors in [[color codes]] except for brown (dye only), light aqua, and gold (color codes only).
* The texture for light blue dye still uses the color from prior to the 1.12 World of Color update.<ref name="unchanged dyes"></ref>
== References ==
{{reflist}}
== External Links ==
* Tools for calculating leather dye combination: [https://minecraft.tools/en/armor.php minecraft.tools] (webapp); [https://github.com/pudquick/pyMCdyes/ pyMCDyes] (open-source Python script, outdated); [https://anrar4.github.io/DyeLeatherArmor/ DyeLeatherArmor]: a tool for calculating an exact crafting recipe for any sRGB color
{{Items}}
[[Category:Dyes]]
[[Category:Renewable resources]]
[[cs:Barvivo]]
[[de:Farbstoff]]
[[es:Tinte]]
[[fr:Teinture]]
[[hu:Színezés]]
[[it:Colorante]]
[[ja:染料]]
[[ko:염료]]
[[nl:Kleurstof]]
[[pl:Barwniki]]
[[pt:Corante]]
[[ru:Красители]]
[[th:สีย้อม]]
[[uk:Барвники]]
[[zh:染料]]</li><li>[[Netherite Ingot|Netherite Ingot]]<br/>{{About|the refined item|the scrap|Netherite Scrap|the ore|Ancient Debris|other uses|Netherite}}
{{Item
| rarity = Common
| renewable = No
| stackable = Yes (64)
}}
'''Netherite ingots''' are items obtained from crafting [[netherite scrap]]s and [[gold ingot]]s together, as well as loot from [[bastion remnant]] loot chests. Unlike other items, they are immune to fire and [[lava]] damage. They are primarily used to upgrade [[diamond]] gear and craft [[lodestone]]s.
== Obtaining ==
Netherite ingots are obtained by crafting four [[netherite scrap]]s and four [[gold ingot]]s. It is a shapeless recipe, therefore the placement of the netherite scraps and gold ingots does not matter when crafting it.
=== Crafting ===
{{Crafting
|head=1
|showname=0
|Netherite Scrap
|Netherite Scrap
|Netherite Scrap
|Netherite Scrap
|Gold Ingot
|Gold Ingot
|Gold Ingot
|Gold Ingot
|Output=Netherite Ingot
|type=Material
}}
{{Crafting
|Block of Netherite
|Output=Netherite Ingot,9
|type=Material
|foot=1
}}
=== Chest loot ===
{{LootChestItem|netherite-ingot}}
== Usage ==
Netherite ingots are crafting materials used to make netherite tools, weapons, and armor.
=== Crafting ingredient ===
{{crafting usage}}
=== Smithing ingredient ===
Netherite ingots can be used on a [[smithing table]] to upgrade diamond items to netherite items, as well as trim any armor piece. Data such as durability, enchantments, and custom names are preserved.
{{Smithing
|head=1
|ingredients=[[Netherite Upgrade]] +<br>Any [[diamond]] gear +<br>[[Netherite Ingot]]
|Netherite Upgrade
|Diamond Helmet; Diamond Chestplate; Diamond Leggings; Diamond Boots; Diamond Sword; Diamond Pickaxe; Diamond Axe; Diamond Shovel; Diamond Hoe
|Netherite Ingot
|Netherite Helmet; Netherite Chestplate; Netherite Leggings; Netherite Boots; Netherite Sword; Netherite Pickaxe; Netherite Axe; Netherite Shovel; Netherite Hoe
}}
{{Smithing
|ingredients=Any Armor Trim +<br/>Any Armor Piece + <br/>Netherite Ingot
|Any Armor Trim Smithing Template
|Diamond Chestplate
|Netherite Ingot
|Netherite Trim Diamond Chestplate
|showdescription=1
|description = All armor types can be used in this recipe,<br/>a diamond chestplate is shown as an example.<br/>
|tail=1
}}
'''Trim color palette'''
The following color palettes are shown on the designs on trimmed armor:
* {{TrimPalette|netherite ingot}}
* {{TrimPalette|netherite ingot|darker=1}} (a darker color palette is used when a netherite armor piece is trimmed using a netherite ingot).
=== Repairing ===
Netherite ingots are the repair items for the netherite [[tier]] and [[armor material]], and thus can be used to [[item repair|repair]] the following items in an [[anvil]]:
* {{ItemLink|Netherite Helmet}}
* {{ItemLink|Netherite Chestplate}}
* {{ItemLink|Netherite Leggings}}
* {{ItemLink|Netherite Boots}}
* {{ItemLink|Netherite Sword}}
* {{ItemLink|Netherite Pickaxe}}
* {{ItemLink|Netherite Axe}}
* {{ItemLink|Netherite Shovel}}
* {{ItemLink|Netherite Hoe}}
=== Beacons ===
A netherite ingot could be used to select powers from a [[beacon]] instead of using an [[emerald]], [[gold ingot]], [[iron ingot]], or a [[diamond]]. The player must select one of the available powers, and then insert an ingot in the item slot. The [[gold]] option is more efficient than the netherite option because it consumes 3 fewer gold and no [[Netherite Scrap|netherite scrap]].
== Data values ==
=== ID ===
{{edition|java}}:
{{ID table
|edition=java
|showitemtags=y
|showforms=y
|generatetranslationkeys=y
|displayname=Netherite Ingot
|spritetype=item
|nameid=netherite_ingot
|itemtags=beacon_payment_items
|form=item
|foot=1}}
{{edition|bedrock}}:
{{ID table
|edition=bedrock
|shownumericids=y
|showforms=y
|notshowbeitemforms=y
|generatetranslationkeys=y
|displayname=Netherite Ingot
|spritetype=item
|nameid=netherite_ingot
|id=603
|form=item
|foot=1}}
=== Advancements ===
{{load advancements|Serious dedication}}
== History ==
{{History|java}}
{{History||1.16|snap=20w06a|[[File:Netherite Ingot JE1 BE2.png|32px]] Added netherite ingots.}}
{{History|||snap=20w07a|Netherite ingots can now be used to power [[beacon]]s.}}
{{History|||snap=20w10a|The [[crafting]] recipe for netherite [[tools]] and [[armor]] has been changed so that a [[smithing table]] is used instead of a [[crafting table]] and [[enchanting|enchantments]] are preserved when upgrading [[item]]s.}}
{{History|||snap=20w13a|Netherite ingots can now be used to craft [[lodestone]]s.}}
{{History|||snap=20w16a|Netherite ingots can now be found in [[bastion remnant]] chests.}}
{{History||1.16.2|snap=20w30a|Increased the chance of finding netherite ingots in bastion remnant chests from 16.8% to 42.1%.}}
{{History||1.20<br>(Experimental)|link=1.19.4|snap=23w04a|Netherite ingots can now be used as an armor trim material.|Upgrading diamond tools and armor to netherite now requires the netherite upgrade [[smithing template]] in addition to a netherite ingot.}}
{{History|||snap=23w05a|Netherite ingots can now be used to trim netherite armor.}}
{{History||1.20|snap=23w12a|Netherite ingots are now usable for trimming without requiring the "Update 1.20" experimental datapack to be enabled.}}
{{History|bedrock}}
{{History||1.16.0|snap=beta 1.16.0.51|[[File:Netherite Ingot BE1.png|32px]] Added netherite ingots.}}
{{History|||snap=beta 1.16.0.57|Netherite ingots can now be used to power [[beacon]]s.
|The [[crafting]] recipe for netherite [[tools]] and [[armor]] has been changed so that a [[smithing table]] is used instead of a [[crafting table]] and [[enchanting|enchantments]] are preserved when upgrading [[item]]s.
|Netherite ingots can now be used to craft [[lodestone]]s.
|Netherite ingots can now be found in [[bastion remnant]] chests.}}
{{History||1.17.10|snap=beta 1.17.10.20|[[File:Netherite Ingot JE1 BE2.png|32px]] The texture of netherite ingots has been changed to match ''Java Edition''.}}
{{History||Next Major Update<br>(Experimental)|link=Bedrock Edition 1.19.80|snap=beta 1.19.80.21|Netherite ingots can now be used as an armor trim material.|Upgrading diamond tools and armor to netherite now requires the netherite upgrade [[smithing template]] in addition to a netherite ingot.}}
{{History||1.20.0|snap=beta 1.20.0.21|Netherite ingots are now usable for trimming without requiring the "Next Major Update" experimental toggle to be enabled.}}
{{History|foot}}
== Issues ==
{{issue list}}
== See also ==
* {{EnvLink|Bastion Remnant}}
* {{BlockLink|Block of Netherite}}
* {{ItemLink|Netherite Scrap}}
* {{BlockLink|Ancient Debris}}
*{{BlockLink|Lodestone}}
== External Links ==
* [https://www.minecraft.net/en-us/article/taking-inventory--netherite-ingot Taking Inventory: Netherite Ingot] – Minecraft.net on May 28, 2020
{{Items}}
[[de:Netheritbarren]]
[[es:Lingote de netherita]]
[[fr:Lingot de Netherite]]
[[it:Lingotto di netherite]]
[[ja:ネザライトインゴット]]
[[ko:네더라이트 주괴]]
[[pl:Sztabka netherytu]]
[[pt:Barra de netherita]]
[[ru:Незеритовый слиток]]
[[th:แท่งเนเธอไรต์]]
[[uk:Незеритовий злиток]]
[[zh:下界合金锭]]
[[Category:Non-renewable resources]]</li></ul> | 13w01a | Added hopper, but with a temporary "work in progress(File:Grid Hopper-Pre 13w02a.png)" sprite for the inventory. | |||
| 13w01b | Rails can be placed on top of hoppers. The hopper no longer loads items into minecarts without chests. | ||||
| 13w02a | Inventory sprite changed from File:Grid Hopper-Pre 13w02a.png to File:Grid Hopper.png. | ||||
| Applying a redstone signal to the hopper now deactivates the hopper until the signal is removed. | |||||
| Hoppers are now crafted using 5 iron ingots rather than 5 stone blocks. | |||||
| Hoppers will now only take from the output slot of furnaces. | |||||
| Hoppers no longer use the Cauldron texture. | |||||
| 13w02b | Hoppers now treat double chests properly, no longer needing two hoppers connected to them to fill up the entire inventory. | ||||
| Hoppers will not receive items when powered via a redstone current. | |||||
| 13w04a | Transfer rate changed from 7 to 8 game ticks per item (2.5 items per second). | ||||
Issues
Issues relating to "Hopper" are maintained on the bug tracker. Report issues there.
Trivia
- A real-life hopper is a type of chute used in industrial processes that incorporates a limited storage capacity.
- Chickens can easily become stuck inside hoppers, and once inside are difficult to interact with, but still produce eggs. A hopper filled with chickens and attached to a dispenser with a 5-clock results in a compact automatic chicken machine.
- Hoppers can easily be used to funnel smeltable items and fuel into a singular furnace. Just attach hoppers to the top, side, and bottom of the furnace with a chest at the input of the top and side and one at the output of the bottom. Any fuel goes in the side, smeltables go in the top, and products come out of the bottom.
- Carpets can be placed on top of hoppers to create a floor that removes dropped items.
- If you put a Minecart with Hopper beneath any block, the block will act as a hopper. This also works with Soul Sand above a hopper.
- Hoppers can also be used to make a lossless cobblestone generator without using redstone, as they collect the cobblestone immediately above them before it can fall into lava.
Gallery
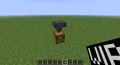
The hopper in snapshot 13w01a. You can see the 'WIP' sprite in the inventory.
- Hopper-Aligment.png
Possible connections of hopper block.
- 13w02a banner.png
In the 13w02a Banner a Minecart with TNT and a Hopper can be seen.