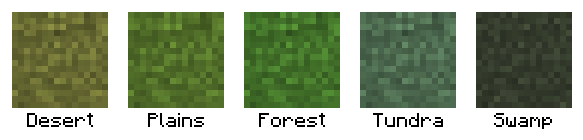
Some of the hues that grass block can be.
A Grass Block is a block that was introduced very early in the game. It uses 4 textures: a gray one for the top which is then tinted to the correct color according to what biome the block is in, one borrowed from the dirt block for the bottom, an edited dirt texture with grass on the top edge on all of the sides, and a gray texture matching the shape of the grass on the side of the block, which is tinted to the correct biome color. When covered by snow the side texture is white. On natural maps, grass appears on topmost blocks of dirt with no fluids or opaque solid blocks above them.
In mining, grass blocks behave just like dirt - they drop dirt resources and are best dug with a shovel; however, they make a different sound when harvested and take slightly longer to dig up. This can be used to tell when the player is about to break the surface when tunneling upwards.
Growth
Grass grows spontaneously only during map generation. Afterward, it can only spread to a nearby dirt block. Grass spreading without player intervention depends heavily on the time of day. In order for a dirt block to accept grass from a nearby grass block, the following requirements must be met:
- The dirt block receiving grass must be within a 3×3×5 range of the source block where the source block is in the center of the second topmost layer of that range,
- The source block must have a light level of 9 or brighter directly above it,
- The dirt block must have a light level of at least 4 above it,
- Any block above the dirt block must not reduce light by 2 levels or more.
Light-reducing blocks include any opaque block, as well as lava, water, ice, and partially transparent blocks like stairs and single slabs. Grass blocks can grow under all other transparent blocks like glass, fences, torches, or pistons. Grass jumps directly from one block to a neighbor and is not affected by gaps or other blocks being "in the way". Grass blocks spread at random intervals and have an equal chance of spreading to any suitable dirt blocks that are in range. Because grass can spread as much as 3 levels downward, it tends to spread down slopes much faster than it spreads up them. Also due to this spreading 3 levels down regardless of obstructions, the player can later discover grass growing in dirt floored cellars or extremely shallow caves if the player previously lit them.
Harvesting grass blocks by hand or with most tools will drop a dirt block. However, grass blocks that retain the grass on top can be harvested by any tool with the Silk Touch enchantment. When mined with such a tool, a grass block will drop just like the same block in the Creative mode and can be placed in any valid location. This can be useful for creating grass patches in places where it doesn't naturally occur, such as underground, the middle of a desert, player made structures, or more exotic places like the Nether or the End. Once harvested with Silk Touch and the above requirements are met, grass blocks will spread normally in both the Nether and the End, though it does not occur naturally in either. Of course, dirt doesn't occur naturally in those places either, so it must also be brought in by the player in addition to the grass block.
Without using Silk Touch, the player can help grass spread by placing a trail of dirt blocks from a grass block to the patch of dirt where grass is desired. The process can take awhile, but it can be sped up by lighting the blocks so the grass also has a chance of spreading during the night. It can be sped up even further by placing dirt blocks on the sides and on top, leaving a space above each block. With this method grass can grow to more of the adjacent dirt blocks, increasing the odds of transfer.
Since Endermen can pick up some naturally occurring blocks, they can also unintentionally spread grass. An Enderman can pick up a grass block, teleport elsewhere in the map and place the grass block on or next to some dirt where it can spread if the above requirements are met. This can lead to rare occurrences where the player discovers grass growing inside caves or ravines that the player previously explored and lit.
Death
A grassy field
A Grass Block will die and change to dirt after a random time if covered by any block that reduces the light level above the grass block to 4 or below, including any opaque blocks, or the surrounding area is brought to sufficient darkness. Transparent blocks directly over grass can't kill the grass directly, if the surrounding area provides sufficient darkness, the grass will die.
For example, in direct sunlight with a light level of 15, grass will die with 4 or more water or ice blocks directly on top of it (assuming it isn't getting any extra light from the sides). In Moonlight, which is level 4, grass will die when covered by a single water or ice block.
Tilling a grass block with a hoe will convert it to a Farmland block, which can then revert to a dirt block from several causes, which can then return to grass.
Grass blocks also change to dirt when sheep "eat" them.
Uses
- Animals will occasionally spawn on grass blocks that have light level 9 or brighter in the space directly above. This is quite rare and requires that there be few other animals nearby. Most animals are instead created along with the terrain. See the spawn page for details.
- Passive mobs tend to wander towards grass blocks. They also wander towards light, but they ignore light over grass blocks and prefer them to any light levels below 10.
- Bone Meal used on Grass Blocks will grow tall Grass and Flowers.
- Sheep "feed" on grass blocks by turning them into dirt.
- Sheep regrow wool when they "eat" a grass block.
- Grass blocks can be used to make lawns, gardens or as a shade of green in pixel art that is on the ground.
- A growing or dying grass block can be detected by a BUD. Therefore, growth and death conditions can be used to create a redstone light sensor.
Video
Grass Block/video
History
Grass block in inventory prior to Beta 1.8
| classic | |||||
|---|---|---|---|---|---|
Pre 0.0.9 (rd-132211){{Extension DPL}}<ul><li>[[Dye|Dye]]<br/>{{Item
| title = Dyes
| image = White Dye.png
| extratext = View [[#Gallery|all renders]]
| renewable = Yes
| stackable = Yes (64)
}}
'''Dyes''' are a set of sixteen items used to change the color of [[wool]], [[carpet]]s, [[terracotta]], [[concrete powder]], [[glass]], [[shulker box]]es, [[bed]]s, [[candle]]s, the patterns on [[banner]]s, [[firework star]]s, certain mobs, and text on [[sign]]s and [[hanging sign]]s. {{IN|bedrock}} they can also be used to dye water in a [[cauldron]] (which is thereafter used to dye leather [[armor]]); {{in|java}} leather armor can be dyed directly. {{IN|education}} dyes can also be used to dye [[balloon]]s and [[glow stick]]s.
{{IN|bedrock|education}}, [[bone meal]], [[ink sac]]s, [[lapis lazuli]], and [[cocoa bean]]s can generally substitute for [[white dye]], [[black dye]], [[blue dye]], and [[brown dye]], respectively, in crafting recipes and for use in dyeing items or mobs. However, they have other important uses that aren't related to color, and are therefore not considered true dyes. They are mentioned in this article only in regard to their use as dyeing agents; see their individual articles for complete information about them.
[[File:Dye Recipes.png|400px|thumb|A guide for creating all the dyes]]
== Obtaining ==
<!--[[File:Dye Chart.png|350px|thumb|A guide to crafting all the dyes.{{until|java 1.14}}]]-->
Dyes can be produced by crafting them from plants (mainly flowers), by crafting dyes of different colors together, by smelting plants, or by trading with a [[wandering trader]].
{{loadPage|Crafting/Dye|Crafting|h3}}
=== Smelting ===
{{smelting|head=1|Sea Pickle|Lime Dye|0,2}}
{{smelting|foot=1|Cactus|Green Dye|1||b=Lapis Lazuli|c=Any fuel|d=1}}
=== Trading ===
[[Wandering trader]]s can sell 3 dyes for an [[emerald]]. {{IN|bedrock}}, they can also sell 3 lapis lazuli, bone meal, cocoa beans, or ink sacs for one emerald.
Apprentice-level cleric [[villager]]s sell one lapis lazuli per emerald.
=== Chest loot ===
{{#invoke:LootChest|base3|blue-dye,green-dye,orange-dye,light-blue-dye,yellow-dye,white-dye}}
=== Other ===
Ink sacs can also be created using 1 iron, 1 sulfur, and 4 oxygen in the [[compound creator]]. {{only|bedrock|education}}
== Usage ==
Similar to their use in crafting, [[bone meal]], [[ink sac]]s, [[lapis lazuli]], and [[cocoa beans]] can be substituted for the corresponding dye in any of the following usages unless otherwise specified.{{only|bedrock}} <!--- sections are ordered by craftable dyeable blocks, dyeable items, version exclusive sections, and non-crafting miscellaneous uses--->
=== Dyeing wool and mobs ===
Players can dye wool by placing [[wool]] and any dye in a crafting grid.
{{Crafting
|nocat=1
|Any Wool
|Matching Dye
|Output=Any Wool
}}
Dyes can be {{control|use|text=used}} on sheep to change the color of the wool. Shearing a colored sheep drops the corresponding color of the wool, and the sheep retains the color when the wool regenerates. [[Breeding]] colored sheep produces a lamb colored as one of the parent sheep, or a color resulting from the combination of both parents' color. The color combining follows the same rules that dyes use – red and yellow sheep produce an orange lamb, but a blue and yellow sheep cannot create a green lamb. The unlimited reproduction of colored sheep makes dyeing and shearing sheep infinitely more efficient than just dyeing wool directly.
Dye can also be used on a tamed [[wolf]] or [[cat]] to change the color of its collar from the default red to the color of the dye.
=== Dyeing carpets ===
Carpets can be dyed.
{{Crafting
|Any Carpet
|Matching Dye
|Output= Matching Carpet
|type= Building block
}}
=== Dyeing terracotta ===
[[Terracotta]] can be dyed by placing 8 blocks around a dye on a crafting table.
{{Crafting
|nocat=1
|A1=Terracotta |B1=Terracotta |C1=Terracotta
|A2=Terracotta |B2=Matching Dye |C2=Terracotta
|A3=Terracotta |B3=Terracotta |C3=Terracotta
|Output=Matching Dyed Terracotta,8
}}
=== Creating concrete powder ===
Dyes can also be used to craft [[concrete powder]], which can then be set into their respective [[concrete]] blocks (they cannot be dyed directly).
{{Crafting
|nocat=1
|Sand |Gravel |Sand
|Gravel |Matching Dye |Gravel
|Sand |Gravel |Sand
|Output=Matching Concrete Powder,8
}}
=== Staining glass ===
[[Stained glass]] can be stained by placing 8 blocks of glass around a dye on a [[crafting table]]. Just like regular glass, stained glass can be crafted into stained glass panes. The recipe for this is the same as with regular glass.
{{Crafting
|nocat=1
|A1=Glass |B1=Glass |C1=Glass
|A2=Glass |B2=Matching Dye |C2=Glass
|A3=Glass |B3=Glass |C3=Glass
|Output=Matching Stained Glass,8
|head=1
}}
{{Crafting
|nocat=1
|A1= Glass Pane
|B1= Glass Pane
|C1= Glass Pane
|A2= Glass Pane
|B2= Matching Dye
|C2= Glass Pane
|A3= Glass Pane
|B3= Glass Pane
|C3= Glass Pane
|Output= Matching Stained Glass Pane,8
|type= Decoration block
|foot=1
}}
=== Dyeing shulker boxes ===
[[Shulker box]]es are generated in a light shade of purple (like the [[purpur block]]), but can be dyed any color. They can also be re-dyed as often as desired.
{{Crafting
|ignoreusage=1
|showname=1
|Any Shulker Box
|Matching Dye
|Output=Matching Shulker Box
}}
=== Dyeing beds ===
Players can dye beds by placing a [[bed]] and any color dye in a crafting grid.
{{Crafting
|nocat=1
|Any Bed
|Matching Dye
|Output=Matching Bed
}}
=== Dyeing candles ===
Players can dye [[candles]] by placing an undyed candle and any color dye in a crafting grid.
{{Crafting
|ignoreusage=1
|Candle
|Matching Dye
|Output=Matching Dyed Candle
}}
=== Banner patterns ===
{{main|Banner#Patterns}}
Dyes are used in most banner patterns to determine the pattern and color displayed.
=== Dyeing armor ===
[[File:DyeGraph2.png|200px|thumb|A graph showing all combinations of two dyes on a [[tunic]].]]
Leather [[armor]] can be dyed by:
* Crafting dyes with a piece of leather armor or leather [[horse armor]].{{Only|java}}
* Dousing the leather armor or leather [[horse armor]] in a [[cauldron]] to which dyes have been added.{{Only|bedrock}}
There are 5,713,438<ref>https://anrar4.github.io/DyeLeatherArmor/</ref> (34.1% of sRGB) colors leather armor can be, as it is possible to put more than one dye on the crafting bench alongside the leather armor. Armor can be dyed multiple times with previous colors affecting the final outcome. Colored armor can be reverted to their original color using a [[cauldron]] with undyed water.
The game has a specific formula for calculating the color of dyed armor: each color, in the RGB color model, has a red value, green value, and blue value. For each dye in the crafting grid, and the armor itself (if it is already dyed), the red, green, and blue values are added to running totals. In addition, a running total of the highest value (be it red, green, or blue) is also kept. After this, each total is divided by the number of colors used. This effectively produces the average red, green, blue, and maximum values. The maximum value of the average RGB values is also calculated. Finally, each average RGB value is multiplied by the average maximum value and divided by the maximum of the average RGB values. The modified average RGB values are then used as the final color. This procedure can be summed up with the following equations:
for each color (all "total" variables start at 0 before counting):
totalRed = totalRed + redValue
totalGreen = totalGreen + greenValue
totalBlue = totalBlue + blueValue
totalMaximum = totalMaximum + max(redValue, greenValue, blueValue)
numberOfColors = numberOfColors + 1
averageRed = totalRed / numberOfColors
averageGreen = totalGreen / numberOfColors
averageBlue = totalBlue / numberOfColors
averageMaximum = totalMaximum / numberOfColors
maximumOfAverage = max(averageRed, averageGreen, averageBlue)
gainFactor = averageMaximum / maximumOfAverage
resultRed = averageRed * gainFactor
resultGreen = averageGreen * gainFactor
resultBlue = averageBlue * gainFactor
Due to the way this formula works, the resulting color can never be darker than the average of the input colors and is often lighter and more saturated. Of course, the resulting color can never be lighter or more saturated than the lightest or most saturated input color. In addition, this formula never creates an RGB value higher than 255 (which would be invalid in the 8-bit RGB color model).
If leather armor is renamed on an [[anvil]], it retains its name when dyed or undyed.
;Mixing Samples
: {{ItemSprite|Yellow Dye}} + {{ItemSprite|Yellow Dye}} = {{Tint|leather-chestplate| #{{CalcDye| yellow=2 }} | code=1}}
: {{ItemSprite|Red Dye}} + {{ItemSprite|Blue Dye}} + {{ItemSprite|White Dye}} = {{Tint|leather-chestplate| #{{CalcDye| red=1 | blue=1 | white=1}} | code=1}}
: {{ItemSprite|Green Dye}} + {{ItemSprite|Red Dye}} + {{ItemSprite|Pink Dye}} = {{Tint|leather-chestplate| #{{CalcDye| green=1 | red=1 | pink=1}} | code=1}}
=== Dyeing firework stars ===
A [[firework star]] can have a single color or a combination of up to eight colors when crafted with dyes. Adding one or more dyes to a crafted firework star adds a "fade to color" effect to it, overwriting any existing fade colors.
{{Crafting
|head=1
|ignoreusage=1
|ingredients=[[Gunpowder]] +<br>Any Dye (1–8) +<br>Extra ingredient (optional)
|Gunpowder
|Matching Dye
|Diamond;Glowstone Dust;Head;Gold Nugget;Feather;Fire Charge;
|Output=Matching Firework Star
}}
{{Crafting
|ignoreusage=1
|Matching Firework Star
|Any Dye
|Output=Matching Firework Star
|foot=1
}}
=== Creating balloons ===
Dye can be used to craft balloons.{{only|education}}
{{Crafting
|nocat=1
|A1= Latex
|B1= Matching Dye
|C1= Latex
|A2= Latex
|B2= Helium
|C2= Latex
|A3= Latex
|B3= Lead
|C3= Latex
|Output= Matching Balloon
}}
=== Creating glow sticks ===
Dye can also be used to craft glow sticks.{{only|education}}
{{Crafting
|nocat=1
|A1= Polyethylene
|B1= Hydrogen Peroxide
|C1= Polyethylene
|A2= Polyethylene
|B2= Matching Dye
|C2= Polyethylene
|A3= Polyethylene
|B3= Luminol
|C3= Polyethylene
|Output= Matching Glow Stick
}}
=== Dyeing water inside cauldrons ===
Water can be dyed in a cauldron by holding any dye in the hand and pressing {{Ctrl|use}} on a cauldron filled with water.{{only|bedrock}}
=== Signs ===
Dye can be {{control|used}} on a [[sign]] or a [[hanging sign]] to change the text color. {{IN|bedrock}}, [[ink sac]]s cannot be used for this purpose; black dye must be used to change the text to black.
=== Trading ===
Apprentice, journeyman and expert-level shepherd [[villager]]s buy any of the 12 dyes for an [[emerald]].
== Color values ==
The "color codes" are used to determine the color imparted on sheep, wolf and cat collars, firework stars, [[beacon]] beams, and dyed leather armor. The hex value is shown in the extended tooltips of dyed leather armor; however, to set the color using an NBT data tag in a [[command]], the decimal value must be used instead. The color values for firework stars are slightly different from the ones listed below, and use [[Item colors#Firework stars|these values]] instead.
{| class="wikitable" style="margin:2px; border: 1px solid silver; text-align: left;" data-description="Data values"
! rowspan=2 | Description
! colspan=2 style="text-align:center" | Color Code
|-
! Dec
! <abbr title="Hexadecimal color code">Hex</abbr>
|-
| style="text-align:center" | White || 16383998 || {{color|#F9FFFE}}
|-
| style="text-align:center" | Light gray || 10329495 || {{color|#9D9D97}}
|-
| style="text-align:center" | Gray || 4673362 || {{color|#474F52}}
|-
| style="text-align:center" | Black || 1908001|| {{color|#1D1D21}}
|-
| style="text-align:center" | Brown || 8606770 || {{color|#835432}}
|-
| style="text-align:center" | Red || 11546150 || {{color|#B02E26}}
|-
| style="text-align:center" | Orange || 16351261 || {{color|#F9801D}}
|-
| style="text-align:center" | Yellow || 16701501 || {{color|#FED83D}}
|-
| style="text-align:center" | Lime || 8439583 || {{color|#80C71F}}
|-
| style="text-align:center" | Green || 6192150 || {{color|#5E7C16}}
|-
| style="text-align:center" | Cyan || 1481884|| {{color|#169C9C}}
|-
| style="text-align:center" | Light blue || 3847130 || {{color|#3AB3DA}}
|-
| style="text-align:center" | Blue || 3949738 || {{color|#3C44AA}}
|-
| style="text-align:center" | Purple || 8991416 || {{color|#8932B8}}
|-
| style="text-align:center" | Magenta || 13061821 || {{color|#C74EBD}}
|-
| style="text-align:center" | Pink || 15961002 || {{color|#F38BAA}}
|}
== Sounds ==
{{edition|java}}:
{{Sound table
|rowspan=2
|sound=Dye.ogg
|subtitle=Dye stains
|source=block
|description=When dye is used on a [[sign]]
|id=item.dye.use
|translationkey=subtitles.item.dye.use
|volume=1.0
|pitch=1.0/0.9/0.95/1.1
|distance=16}}
{{Sound table
|subtitle=Dye stains
|source=player
|description=When dye is used on a [[sheep]]
|id=item.dye.use
|translationkey=subtitles.item.dye.use
|volume=1.0
|pitch=1.0/0.9/0.95/1.1
|distance=16
|foot=1}}
{{edition|bedrock}}:
{{Sound table
|type=bedrock
|sound=Dye.ogg
|source=sound
|description=When dye is used on a sign
|id=sign.dye.use
|volume=1.0
|pitch=1.0}}
{{Sound table
|rowspan=3
|sound=Water Splash Old.ogg
|source=block
|description=When dye is added to a cauldron
|id=cauldron.adddye
|volume=0.1
|pitch=1.0}}
{{Sound table
|source=block
|description=When armor is dyed using a cauldron
|id=cauldron.dyearmor
|volume=0.1
|pitch=1.0}}
{{Sound table
|source=block
|description=When dye is removed from armor using a cauldron
|id=cauldron.cleanarmor
|volume=0.1
|pitch=1.0
|foot=1}}
== Achievements ==
{{load achievements|Rainbow Collection;Tie dye outfit}}
== Video ==
{{Video note|These videos are outdated, as it does not include details of the [[Java Edition 1.7.2|1.7.2]] update's changes to the dyeing system/production chain.}}
<div style="text-align:center">
<span style="display:inline-block">{{yt|8YD7oauNZHE}}</span>
<span style="display:inline-block">{{yt|7tETaRt7STM}}</span>
</div>
== History ==
{{History|java beta}}
{{History||January 3, 2011|link=https://web.archive.org/web/0/http://notch.tumblr.com/post/2582321901/2011-here-we-go|Notch mentions adding a "paint" feature if he can figure out how.}}
{{History||January 10, 2011<ref group="n">Supposed time when fragment was filmed. Based on modified date of client.jar/gui/trap.png in [[Beta 1.2]].</ref>|link=https://www.youtube.com/watch?v=cBF2ugTzXqQ&t=181s|[[File:Red Dye (pre-release).png|32px]] Shown rose red in development as part of [[Minecraft: The Story of Mojang]].}}
{{History||1.2|[[File:Ink Sac JE1 BE1.png|32px]] [[File:Red Dye JE1 BE1.png|32px]] [[File:Green Dye JE1 BE1.png|32px]] [[File:Cocoa Beans JE1 BE1.png|32px]] [[File:Lapis Lazuli JE1 BE1.png|32px]] [[File:Purple Dye JE1 BE1.png|32px]] [[File:Cyan Dye JE1 BE1.png|32px]] [[File:Light Gray Dye JE1 BE1.png|32px]] [[File:Gray Dye JE1 BE1.png|32px]] [[File:Pink Dye JE1 BE1.png|32px]] [[File:Lime Dye JE1 BE1.png|32px]] [[File:Yellow Dye JE1 BE1.png|32px]] [[File:Light Blue Dye JE1 BE1.png|32px]] [[File:Magenta Dye JE1 BE1.png|32px]] [[File:Orange Dye JE1 BE1.png|32px]] [[File:Bone Meal JE1 BE1.png|32px]] Added dyes.
|[[File:Black Dye (Recreated).png|32px]] [[File:Red Dye (pre-release).png|32px]] [[File:Green Dye (Recreated).png|32px]] [[File:Brown Dye (Recreated).png|32px]] [[File:Blue Dye (Recreated).png|32px]] [[File:Purple Dye (Recreated).png|32px]] [[File:Cyan Dye (Recreated).png|32px]] [[File:Light Gray Dye (Recreated).png|32px]] [[File:Gray Dye (Recreated).png|32px]] [[File:Pink Dye (Recreated).png|32px]] [[File:Lime Dye (Recreated).png|32px]] [[File:Yellow Dye (Recreated).png|32px]] [[File:Light Blue Dye (Recreated).png|32px]] [[File:Magenta Dye (Recreated).png|32px]] [[File:Orange Dye (Recreated).png|32px]] [[File:White Dye (Recreated).png|32px]] Leftovers of old textures can be seen in [[items.png]] with 100% opacity. The white dye texture was reused for [[Sugar]].
| The colors were as follows:{{verify|Did the color codes remain the same between Beta 1.2 and Java 1.11.2?}}
{{:Color/Java Edition dye colors before 17w06a}}
}}
{{History|java}}
{{History||1.1|snap=11w49a|[[Sheep]] can now regrow their [[wool]] by eating [[grass block|grass]]. Dyed sheep regrow wool in their new color.}}
{{History||1.3.1|snap=12w19a|[[File:Cocoa Beans JE2.png|32px]] The texture of [[cocoa beans]] has been changed.}}
{{History|||snap=1.3|[[File:bone meal changes.gif|32px]] The textures of [[bone meal]], [[cactus green]], cocoa beans and [[rose red]] have been changed. The textures have been lowered one pixel.}}
{{History||1.4.2|snap=12w34a|Added the ability to dye leather [[armor]] and [[wolf]] collars.}}
{{History||1.4.4|snap=1.4.3|Color codes have been changed. The colors of red, brown, blue, purple, cyan, pink, light blue, magenta and orange were adjusted a little vividly.}}
{{History||1.6.1|snap=13w19a|[[Stained clay]] can now be crafted using dyes.}}
{{history||1.7.2|snap=13w36a|With the addition of new [[flower]]s, many secondary and tertiary dyes are now primary dyes.}}
{{History|||snap=13w41a|[[Stained glass]] can now be crafted using dyes.}}
{{History||1.8|snap=14w02a|As cleric [[villager]]s now sell lapis lazuli, all dyes have become fully renewable.}}
{{History|||snap=14w30a|Added [[banner]]s, which can be dyed.}}
{{History||1.9|snap=15w34a|Added [[shield]]s, which can be dyed indirectly by applying a matching [[banner]].}}
{{History||1.11|snap=16w39b|Dyes are now used to change the color of [[shulker box]]es.}}
{{History||1.12|snap=17w06a|Dyes are now used to craft [[concrete powder]].
|Color codes have been changed. All colors are adjusted more vividly. The changes were as follows:
{{:Color/Java Edition dye color changes in 17w06a}}
|Light blue dye, stained glass, and stained glass panes, did not change colors in this update. This means that they still use old colors.<ref name="unchanged dyes">{{Bug|MC-214643}}<br>{{Bug|MC-214641}}</ref>
}}
{{History|||snap=17w15a|Dyes can now apply color to white [[bed]]s.}}
{{History||1.13|snap=17w47a|The different data values for the <code>dye</code> ID have been split up into their own IDs.}}
{{History||1.14|snap=18w43a|[[Bone meal]], [[ink sac]]s, [[cocoa beans]] and [[lapis lazuli]] are no longer considered dyes.
|[[File:White Dye JE1 BE1.png|32px]] [[File:Black Dye JE1 BE1.png|32px]] [[File:Brown Dye JE1 BE1.png|32px]] [[File:Blue Dye JE1 BE1.png|32px]] Added [[white dye|white]], [[black dye|black]], [[brown dye|brown]] and [[blue dye]]s.
|"Rose Red", "Dandelion Yellow" and "Cactus Green" have been renamed to "Red Dye", "Yellow Dye" and "Green Dye", respectively.
|[[Glass pane]]s and [[carpet]]s can now be dyed.
|[[File:Light Gray Dye JE2 BE2.png|32px]] [[File:Gray Dye JE2 BE2.png|32px]] [[File:Red Dye JE2 BE2.png|32px]] [[File:Orange Dye JE2 BE2.png|32px]] [[File:Yellow Dye JE2 BE2.png|32px]] [[File:Lime Dye JE2 BE2.png|32px]] [[File:Green Dye JE2 BE2.png|32px]] [[File:Cyan Dye.png|32px]] [[File:Light Blue Dye JE2 BE2.png|32px]] [[File:Purple Dye JE2 BE2.png|32px]] [[File:Magenta Dye JE2 BE2.png|32px]] [[File:Pink Dye JE2 BE2.png|32px]] The textures of light gray, gray, red, orange, yellow, lime, green, cyan, light blue, purple, magenta, and pink dyes, have been changed. The color texture for light blue dye was not changed to reflect the updated colors from 1.12.<ref name="unchanged dyes"></ref>}}
{{History|||snap=18w44a|The color of the text on [[sign]]s can now be changed with dye.}}
{{History|||snap=18w49a|Yellow dyes can now be found in [[chest]]s in [[village]] mason houses.}}
{{History|||snap=18w50a|Green dyes can now be found in [[chest]]s in [[desert]] [[village]] houses.}}
{{History|||snap=19w05a|Added the [[wandering trader]], which can sell any type of dye.}}
{{History|||snap=19w11a|All 16 types of dyes can now be [[trading|bought]] by shepherd villagers.}}
{{History||1.16.2|snap=Pre-release 2|Reversed the order of dyes to match other colored items in the [[Creative inventory]].<ref name="reverse dye">{{Bug|MC-136553}}</ref>
|Regrouped dyes in the Creative inventory such that white, blue, brown, and black dyes are within and not [[cocoa beans]], [[ink sacs]], [[lapis lazuli]], and [[bone meal]].<ref name="regroup dye">{{Bug|MC-177684}}</ref>}}
{{History||1.17|snap=20w45a|Added [[candle]]s, which can be dyed.}}
{{History|||snap=21w03a|Added a sound for applying dyes.}}
{{History|||snap=21w19a|Candles can no longer be dyed.}}
{{History|||snap=Pre-release 1|Candles can now once again be dyed.}}
{{History||1.20<br>(Experimental)|link=1.19.3|snap=22w42a|The color of the text on [[hanging sign]]s can now be changed with dye.}}
{{History||1.20<br>(Experimental)|link=1.19.4|snap=23w07a|[[Torchflower]]s can now be crafted into orange dye.|[[Pink petals]] can now be crafted into pink dye.}}
{{History||1.20|snap=23w12a|[[Pitcher plant]]s can now be crafted into cyan dye.|Blue, light blue, orange, white, and yellow dye can now be found in [[suspicious gravel]] and [[suspicious sand]] in [[trail ruins]].}}
{{History|||snap=23w14a|Pitcher plants can now craft two [[cyan dye]] instead of one.}}
{{History|||snap=23w16a|Blue, light blue, orange, white, and yellow dye no longer generates in [[suspicious sand]] in [[trail ruins]].|Due to the split of the archaeological loot tables for the suspicious gravel within the [[trail ruins]]; blue, light blue, orange, white, and yellow dye now are in the common loot.}}
{{History|pocket alpha}}
{{History||v0.3.0|[[File:Bone Meal JE1 BE1.png|32px]] [[File:Light Gray Dye JE1 BE1.png|32px]] [[File:Gray Dye JE1 BE1.png|32px]] [[File:Ink Sac JE1 BE1.png|32px]] [[File:Cocoa Beans JE1 BE1.png|32px]] [[File:Red Dye JE1 BE1.png|32px]] [[File:Orange Dye JE1 BE1.png|32px]] [[File:Yellow Dye JE1 BE1.png|32px]] [[File:Lime Dye JE1 BE1.png|32px]] [[File:Green Dye JE1 BE1.png|32px]] [[File:Cyan Dye JE1 BE1.png|32px]] [[File:Light Blue Dye JE1 BE1.png|32px]] [[File:Lapis Lazuli JE1 BE1.png|32px]] [[File:Purple Dye JE1 BE1.png|32px]] [[File:Magenta Dye JE1 BE1.png|32px]] [[File:Pink Dye JE1 BE1.png|32px]] Added dyes. Only [[dandelion yellow]] and [[lapis lazuli]] are currently obtainable and have functionality.}}
{{History||v0.3.2|[[Cactus green]] is now obtainable by smelting [[cacti]].}}
{{History||v0.3.3|[[Bone meal]] is now obtainable via [[crafting]].}}
{{History||v0.4.0|[[Cyan dye]], [[light blue dye]], [[lime dye]], [[magenta dye]], [[orange dye]], [[pink dye]], and [[purple dye]] are now obtainable via crafting.
|[[Rose red]] is now obtainable by smelting red [[mushroom]]s.
|All available dyes, excluding bone meal, can now be used to craft their respective [[wool]] color.}}
{{History||v0.8.0|snap=build 1|[[File:Cocoa Beans JE3 BE2.png|32px]] The texture of cocoa beans has been changed.}}
{{History|||snap=build 3|[[Ink sac]]s, [[cocoa bean]]s, [[gray dye]], and [[light gray dye]] are now available in the [[creative]] [[inventory]].
|Rose red can now be obtained from [[beetroot]]s.}}
{{History||v0.9.0|snap=build 1|Cocoa beans can now be obtained from [[cocoa pod]]s.
|The [[rose]] has been removed and replaced with a new poppy [[flower]] that can be crafted into rose red.}}
{{History|||snap=build 3|All new [[flower]]s can now be [[crafting|crafted]] into dyes. Because of this, many secondary and tertiary dyes are now primary dyes.
|[[Gray dye]] and [[light gray dye]] can now be obtained in [[survival]].}}
{{History|||snap=build 11|[[Terracotta|Stained clay]] can now be crafted using dyes.}}
{{History||v0.11.0|snap=build 1|[[Ink sac]]s can now be obtained from [[squid]].
|Added the ability to dye [[wolf]] collars.}}
{{History||v0.12.1|snap=build 1|Red [[mushroom]]s can no longer be smelted to obtain [[rose red]].}}
{{History||v0.14.0|snap=build 1|[[Cauldron]]s now used for leather dyeing, by applying a dye to a [[water]]-filled cauldron.}}
{{History||v0.16.0|snap=build 1|[[Cocoa bean]]s can no longer be crafted.}}
{{History|pocket}}
{{History||1.0.0|snap=alpha 0.17.0.1|Added a ''Dye'' button for [[sheep]].
|Added [[shulker]]s, which can be dyed.
|Added [[stained glass]]. Stain glass cannot be [[crafting|crafted]], but purple glass generates in [[end city|end cities]].}}
{{History||1.1.0|snap=alpha 1.1.0.0|Dyes can now apply color to a white [[bed]]s.
|Dyes are now used to craft [[concrete powder]].
|The color palette has been changed.}}
{{History|bedrock}}
{{History||1.2.0|snap=beta 1.2.0.2|Dyes can now be used for [[banner]] crafting.
|Dyes can now be used to craft [[firework star]]s.
|[[Stained glass]] is now [[crafting|craftable]], using dyes.}}
{{History||1.4.0|snap=beta 1.2.20.1|[[Lime dye]] can now be obtained from smelting [[sea pickle]]s.
|Dyes can now used to craft [[glow stick]]s and [[balloon]]s.}}
{{History||1.8.0|snap=beta 1.8.0.8|Dyes can now be used to dye [[cat]] collars.}}
{{History|||snap=beta 1.8.0.10|[[File:White Dye JE1 BE1.png|32px]] [[File:Black Dye JE1 BE1.png|32px]] [[File:Brown Dye JE1 BE1.png|32px]] [[File:Blue Dye JE1 BE1.png|32px]] Added [[white dye|white]], [[brown dye|brown]], [[black dye|black]] and [[blue dye]]s, which can be crafted from [[lapis lazuli]], [[bone meal]], [[cocoa beans]] and [[ink sac]]s. This, however, the later four still use as dyes.<ref>{{Bug|MCPE-42473}}</ref>
|"Rose Red", "Dandelion Yellow" and "Cactus Green" have been renamed to "Red Dye", "Yellow Dye" and "Green Dye", respectively.}}
{{History||1.9.0|snap=beta 1.9.0.0|Blue and white dye can now be obtained from [[cornflower]]s and [[lily of the valley]]s.}}
{{History||1.10.0|snap=beta 1.10.0.3|[[Glass pane]]s and [[carpet]]s can now be dyed.
|Only a single dye is now required to apply a banner pattern in a [[loom]].
|Various dyes except black dye, white dye, brown dye and blue dye are now [[trading|sold]] by [[wandering trader]]s.
|[[File:Bone Meal JE2 BE2.png|32px]] [[File:Light Gray Dye JE2 BE2.png|32px]] [[File:Gray Dye JE2 BE2.png|32px]] [[File:Ink Sac JE2 BE2.png|32px]] [[File:Cocoa Beans JE4 BE3.png|32px]] [[File:Red Dye JE3 BE3.png|32px]] [[File:Orange Dye JE2 BE2.png|32px]] [[File:Yellow Dye JE2 BE2.png|32px]] [[File:Lime Dye JE2 BE2.png|32px]] [[File:Green Dye JE2 BE2.png|32px]] [[File:Cyan Dye.png|32px]] [[File:Light Blue Dye JE2 BE2.png|32px]] [[File:Lapis Lazuli JE2 BE2.png|32px]] [[File:Purple Dye JE2 BE2.png|32px]] [[File:Magenta Dye JE2 BE2.png|32px]] [[File:Pink Dye JE2 BE2.png|32px]] The textures of bone meal, light gray, gray, ink sac, cocoa beans, red, orange, yellow, lime, green, cyan, light blue, lapis lazuli, purple, magenta, and pink dyes have been changed.}}
{{History||1.11.0|snap=beta 1.11.0.4|Dye can now be [[trading|sold]] to shepherd [[villager]]s.}}
{{History||1.16.210|snap=beta 1.16.210.59|The color of the text on [[sign]]s can now be changed with dye.}}
{{History|||snap=beta 1.16.210.60|The ability to dye the color of the text on [[sign]]s was temporarily removed.}}
{{History||1.16.220|snap=beta 1.16.220.50|The color of the text on [[sign]]s can now be changed with dye again.}}
{{History||1.17.10|snap=beta 1.17.10.22|Added [[candles]], which can be dyed.}}
{{History|console}}
{{History||xbox=TU1|xbone=CU1|ps=1.0|wiiu=Patch 1|switch=1.0.1|[[File:Bone Meal JE1 BE1.png|32px]] [[File:Light Gray Dye JE1 BE1.png|32px]] [[File:Gray Dye JE1 BE1.png|32px]] [[File:Ink Sac JE1 BE1.png|32px]] [[File:Cocoa Beans JE1 BE1.png|32px]] [[File:Red Dye JE1 BE1.png|32px]] [[File:Orange Dye JE1 BE1.png|32px]] [[File:Yellow Dye JE1 BE1.png|32px]] [[File:Lime Dye JE1 BE1.png|32px]] [[File:Green Dye JE1 BE1.png|32px]] [[File:Cyan Dye JE1 BE1.png|32px]] [[File:Light Blue Dye JE1 BE1.png|32px]] [[File:Lapis Lazuli JE1 BE1.png|32px]] [[File:Purple Dye JE1 BE1.png|32px]] [[File:Magenta Dye JE1 BE1.png|32px]] [[File:Pink Dye JE1 BE1.png|32px]] Added dyes.}}
{{History||xbox=TU9|[[File:Cocoa Beans JE3 BE2.png|32px]] The texture of cocoa beans has been changed.}}
{{History||xbox=none|xbone=none|ps=1.83|wiiu=none|switch=none|[[File:White Dye JE1 BE1.png|32px]] [[File:Black Dye JE1 BE1.png|32px]] [[File:Brown Dye JE1 BE1.png|32px]] [[File:Blue Dye JE1 BE1.png|32px]] Added [[white dye|white]], [[black dye|black]], [[brown dye|brown]], and [[blue dye|blue]] dyes, which can crafted from [[bone meal]], [[ink sac]], [[cocoa beans]], and [[lapis lazuli]].
|"Rose Red", "Dandelion Yellow" and "Cactus Green" have been renamed to "Red Dye", "Yellow Dye" and "Green Dye", respectively.}}
{{History||ps=1.90|[[File:Bone Meal JE2 BE2.png|32px]] [[File:Light Gray Dye JE2 BE2.png|32px]] [[File:Gray Dye JE2 BE2.png|32px]] [[File:Ink Sac JE2 BE2.png|32px]] [[File:Cocoa Beans JE4 BE3.png|32px]] [[File:Red Dye JE2 BE2.png|32px]] [[File:Orange Dye JE2 BE2.png|32px]] [[File:Yellow Dye JE2 BE2.png|32px]] [[File:Lime Dye JE2 BE2.png|32px]] [[File:Green Dye JE2 BE2.png|32px]] [[File:Cyan Dye.png|32px]] [[File:Light Blue Dye JE2 BE2.png|32px]] [[File:Lapis Lazuli JE2 BE2.png|32px]] [[File:Purple Dye JE2 BE2.png|32px]] [[File:Magenta Dye JE2 BE2.png|32px]] [[File:Pink Dye JE2 BE2.png|32px]] The textures of bone meal, light gray, gray, ink sac, cocoa beans, red, orange, yellow, lime, green, cyan, light blue, lapis lazuli, purple, magenta, and pink dyes have been changed.}}
{{History|3ds}}
{{History||0.1.0|[[File:Bone Meal JE1 BE1.png|32px]] [[File:Light Gray Dye JE1 BE1.png|32px]] [[File:Gray Dye JE1 BE1.png|32px]] [[File:Ink Sac JE1 BE1.png|32px]] [[File:Cocoa Beans JE3 BE2.png|32px]] [[File:Red Dye JE1 BE1.png|32px]] [[File:Orange Dye JE1 BE1.png|32px]] [[File:Yellow Dye JE1 BE1.png|32px]] [[File:Lime Dye JE1 BE1.png|32px]] [[File:Green Dye JE1 BE1.png|32px]] [[File:Cyan Dye JE1 BE1.png|32px]] [[File:Light Blue Dye JE1 BE1.png|32px]] [[File:Lapis Lazuli JE1 BE1.png|32px]] [[File:Purple Dye JE1 BE1.png|32px]] [[File:Magenta Dye JE1 BE1.png|32px]] [[File:Pink Dye JE1 BE1.png|32px]] Added dyes from [[Pocket Edition v0.15.4 alpha]].}}
{{History|foot}}
<gallery>
Pre-release dyes.png|Pre-release dye textures hidden within [[Items.png]].
</gallery>
;Notes
{{reflist|group=n}}
== Gallery ==
<gallery>
White Dye.png|White Dye
Light Gray Dye.png|Light Gray Dye
Gray Dye.png|Gray Dye
Black Dye.png|Black Dye
Brown Dye.png|Brown Dye
Red Dye.png|Red Dye
Orange Dye.png|Orange Dye
Yellow Dye.png|Yellow Dye
Lime Dye.png|Lime Dye
Green Dye.png|Green Dye
Cyan Dye.png|Cyan Dye
Light Blue Dye.png|Light Blue Dye
Blue Dye.png|Blue Dye
Purple Dye.png|Purple Dye
Magenta Dye.png|Magenta Dye
Pink Dye.png|Pink Dye
</gallery>
==Issues==
{{issue list}}
== Trivia ==
* Players can obtain each one of every color with 1 cocoa bean, 2 yellow dye, 2 ink sac, 3 green dye, 4 lapis lazuli, 4 red dye, and 6 bone meal (2 bones).
* The dyed sheep breeding behavior mirrors [[wikipedia:Lamarckism|Lamarck's theory]], in which the organisms evolve inheriting the external changes and adaptations of the previous generation, transmitting them to their offspring.
* In ''Bedrock Edition'', tertiary colors, along with their regular crafting recipes, can be crafted with primary colors. E.g.: Magenta can be crafted with one rose red and two bone meals.
* The colors of the dyes match the chat colors in [[color codes]] except for brown (dye only), light aqua, and gold (color codes only).
* The texture for light blue dye still uses the color from prior to the 1.12 World of Color update.<ref name="unchanged dyes"></ref>
== References ==
{{reflist}}
== External Links ==
* Tools for calculating leather dye combination: [https://minecraft.tools/en/armor.php minecraft.tools] (webapp); [https://github.com/pudquick/pyMCdyes/ pyMCDyes] (open-source Python script, outdated); [https://anrar4.github.io/DyeLeatherArmor/ DyeLeatherArmor]: a tool for calculating an exact crafting recipe for any sRGB color
{{Items}}
[[Category:Dyes]]
[[Category:Renewable resources]]
[[cs:Barvivo]]
[[de:Farbstoff]]
[[es:Tinte]]
[[fr:Teinture]]
[[hu:Színezés]]
[[it:Colorante]]
[[ja:染料]]
[[ko:염료]]
[[nl:Kleurstof]]
[[pl:Barwniki]]
[[pt:Corante]]
[[ru:Красители]]
[[th:สีย้อม]]
[[uk:Барвники]]
[[zh:染料]]</li><li>[[Red Dye|Red Dye]]<br/>{{Item
| title = Red Dye
| renewable = Yes
| stackable = Yes (64)
}}
'''Red dye''' is a [[Dye#Primary|primary color dye]] created primarily from flowers.
== Obtaining ==
=== Crafting ===
{{Crafting
|head=1
|showname=0
|Poppy; Red Tulip; Beetroot
|Output=Red Dye
|type=Material
}}
{{Crafting
|Rose Bush
|Output=Red Dye,2
|type=Material
|foot=1
}}
=== Trading ===
[[Wandering trader]]s sell 3 red dye for an [[emerald]].
== Usage ==
{{dye usage}}
=== Crafting ingredient ===
{{crafting usage|ignore=Banner|continue=1}}
{{banner crafting usage}}
=== Loom ingredient ===
{{Banner loom usage|Red Dye}}
=== Trading ===
Journeyman-level shepherd villagers have a {{frac|1|6}} chance to buy 12 red dye for an emerald.
== Data values ==
=== ID ===
{{edition|java}}:
{{ID table
|edition=java
|showforms=y
|generatetranslationkeys=y
|displayname=Red Dye
|spritetype=item
|nameid=red_dye
|form=item
|foot=1}}
{{edition|bedrock}}:
{{ID table
|edition=bedrock
|showaliasids=y
|shownumericids=y
|showforms=y
|notshowbeitemforms=y
|generatetranslationkeys=y
|displayname=Red Dye
|spritetype=item
|nameid=red_dye
|aliasid=dye / 1
|id=396
|form=item
|translationkey=item.dye.red.name
|foot=1}}
== Video ==
<div style="text-align:center">{{yt|tqTbsbt2irk}}</div>
== History ==
{{History|java beta}}
{{History||January 10, 2011<ref group="n">Supposed time when fragment was filmed. Based on modified date of client.jar/gui/trap.png in [[Beta 1.2]].</ref>|link=https://www.youtube.com/watch?v=cBF2ugTzXqQ&t=181s|[[File:Red Dye (pre-release).png|32px]] Shown rose red in development as part of [[Minecraft: The Story of Mojang]].}}
{{History||1.2|[[File:Red Dye JE1 BE1.png|32px]] Added rose red.}}
{{History||1.6.6|Roses can now be generated using [[Bone Meal|bone meal]], making rose red [[renewable resource|renewable]].}}
{{History|java}}
{{History||1.3.1|snap=1.3|[[File:Red Dye JE2 BE2.png|32px]] The texture of rose red has now been changed.}}
{{History||1.4.2|snap=12w34a|Added the ability to [[Armor#Dyeing|dye]] leather [[armor]] and [[wolf]] collars.}}
{{History||1.4.6|snap=12w49a|Rose red can now be crafted with [[gunpowder]] to create a [[firework star]].}}
{{History||1.6.1|snap=13w19a|Rose red can now be used to craft stained clay.}}
{{History||1.7.2|snap=13w36a|Rose red is now crafted using a poppy instead of a rose, as the latter is removed.
|Rose red can now be crafted using red tulips and rose bushes.}}
{{History|||snap=13w37a|Each poppy now yields only 1 rose red, instead of 2.}}
{{History|||snap=13w41a|Rose red can now be used to craft stained glass.}}
{{History||1.8|snap=14w30a|Added [[banner]]s, which can be dyed.}}
{{History||1.9|snap=15w31a|Rose red can now be crafted using [[beetroot]].}}
{{History||1.11|snap=16w39a|Added the ability to dye [[shulker box]]es.}}
{{History||1.12|snap=17w06a|Rose red can now be used to craft red [[concrete powder]].}}
{{History|||snap=17w15a|Added the ability to dye [[bed]]s.}}
{{History||1.13|snap=17w47a|The different data values for the <code>dye</code> ID have now been split up into their own IDs.
|Prior to [[1.13/Flattening|''The Flattening'']], this [[item]]'s numeral ID was 351.}}
{{History||1.14|snap=18w43a|"Rose Red" has now been renamed to "Red Dye".
|[[File:Red Dye JE3 BE3.png|32px]] The texture of red dye has now been changed.}}
{{History|||snap=18w44a|Red dye can now change the text color on [[sign]]s to red.}}
{{History|||snap=19w05a|Added the [[wandering trader]], which sells red dye.}}
{{History|||snap=19w11a|Red dye can now be [[trading|bought]] by shepherd villagers.}}
{{History||1.17|snap=20w45a|Red dye can now be used to craft [[red candle]]s.}}
{{History|||snap=21w19a|Red dye can no longer be used to craft red candles.}}
{{History|||snap=Pre-release 1|Red dye can once again be used to craft red candles.}}
{{History||1.20<br>(Experimental)|link=1.19.3|snap=22w42a|Red dye can now change the text color on [[hanging sign]]s to red.}}
{{History|pocket alpha}}
{{History||v0.3.0|[[File:Red Dye JE1 BE1.png|32px]] Added rose red. It is currently unobtainable and serves no purpose.}}
{{History||v0.4.0|Rose red is now obtainable by smelting red [[mushroom]]s.
|Rose red can now be used to craft other dyes and red wool.}}
{{History||v0.8.0|snap=build 1|[[File:Red Dye JE2 BE2.png|32px]] The texture of red dye has been changed.
|Rose red is now used to craft [[cocoa beans]].}}
{{History||v0.9.0|snap=build 3|Rose red can now be obtained by putting a poppy, red tulip or rose bush [[flower]]s in the crafting grid.}}
{{History||v0.15.0|snap=build 1|Red mushrooms can no longer be smelted to obtain rose red.}}
{{History||v0.16.0|snap=build 1|Rose red is no longer used to craft cocoa beans.}}
{{History|bedrock}}
{{History||1.8.0|snap=beta 1.8.0.10|"Rose Red" has now been renamed to "Red Dye".}}
{{History||1.10.0|snap=beta 1.10.0.3|Red dye can now be [[trading|bought]] from [[wandering trader]]s.
|[[File:Red Dye JE3 BE3.png|32px]] The texture of red dye has now been changed.}}
{{History||1.11.0|snap=beta 1.11.0.4|Red dye can now be [[trading|sold]] to shepherd [[villager]]s.}}
{{History||1.16.100|snap=beta 1.16.100.56|The ID of red dye has been changed from <code>dye/1</code> to <code>red_dye</code>.}}
{{History|console}}
{{History||xbox=TU1|xbone=CU1|ps=1.00|switch=1.0.1|wiiu=Patch 1|[[File:Red Dye JE1 BE1.png|32px]] Added rose red.}}
{{History||xbox=none|xbone=none|ps=1.83|switch=none|wiiu=none|"Rose Red" has now been renamed to "Red Dye".}}
{{History||ps=1.90|[[File:Red Dye JE3 BE3.png|32px]] The texture of red dye has now been changed.}}
{{History|new 3ds}}
{{History||0.1.0|[[File:Red Dye JE1 BE1.png|32px]] Added rose red.}}
{{History|foot}}
;Notes
{{reflist|group=n}}
== Issues ==
{{issue list}}
{{Items}}
[[cs:Šípková červeň]]
[[de:Roter Farbstoff]]
[[es:Tinte rojo]]
[[fr:Teinture rouge]]
[[hu:Rózsavörös]]
[[ja:赤色の染料]]
[[ko:장밋빛 빨강 염료]]
[[nl:Rozenrood]]
[[pl:Czerwony barwnik]]
[[pt:Corante vermelho]]
[[ru:Красный краситель]]
[[zh:红色染料]]
[[Category:Items]]
[[Category:Dyes]]
[[Category:Renewable resources]]</li></ul> | Grass block was the second block in Minecraft, after Cobblestone. | ||||
| When first introduced, Grass block had its top side texture on all sides, resulting in "grass cubes"[1]: File:Grass rd132211.PNG | |||||
Pre 0.0.9 (rd-132328){{Extension DPL}}<ul><li>[[Brewing Stand|Brewing Stand]]<br/>{{Block
| image = <gallery>
Brewing Stand (empty) JE10.png | Empty
Brewing Stand (right) JE10.png | Right
Brewing Stand (left) JE10.png | Left
Brewing Stand (full) JE10.png | Full
</gallery>
| transparent = Yes
| light = Yes (1)
| tool = Wooden Pickaxe
| renewable = Yes
| stackable = Yes (64)
| flammable = No
| lavasusceptible = No
}}
A '''brewing stand''' is a [[block]] used for [[brewing]] [[potion]]s using [[Glass Bottle|bottles]] and suitable ingredients. It also serves as a [[cleric]]'s [[job site block]].
== Obtaining ==
=== Breaking ===
A brewing stand can be obtained using any [[pickaxe]]. If mined without a pickaxe, it drops nothing {{in|JE}}, while it drops itself {{in|BE}}.
{{breaking row|horizontal=1|Brewing Stand|Pickaxe|Wood|foot=1}}
=== Natural generation ===
Brewing stands generate in [[end ship]]s. They have two [[potion of Healing|Instant Health II potions]] in their holders.
A brewing stand also generates in the basement of [[igloo]]s with a [[splash potion of Weakness]] in it.
Brewing stands can generate without potions in [[village]] churches.
=== Crafting ===
{{Crafting
|head=1
|showdescription=1
|B1= Blaze Rod
|A2= Any stone-tier block |B2= Any stone-tier block |C2= Any stone-tier block
|Output= Brewing Stand
|type= Brewing
|description=Can use cobblestone and its other variants interchangeably.
|foot=1
}}
== Usage ==
[[File:Brewing Stand GUI.png|thumb|right|176px|Brewing stand GUI {{in|java}}]]
By default, the interface of a brewing stand is labeled "Brewing Stand", but this name can be customized by naming it in an [[anvil]] before placing it.
Brewing stands cannot be pushed by [[piston]]s {{in|java}}.
=== Brewing ===
{{main|Brewing}}
The main purpose of brewing stands is to allow for the [[brewing]] of [[potion]]s. Its interface can be opened by pressing {{control|use}} on them.
Brewing stands need [[blaze powder]] as fuel. Each piece brews 20 batches of potions, with each stage of brewing counting separately. Unlike [[furnace]]s, there is no time limit; fuel is consumed only when there are [[Glass Bottle|bottles]] and an ingredient to brew into it.
Brewing stands interact with [[hopper]]s as follows:
* They accept brewing ingredients from hoppers pointing down into the top.
* Any valid potion recipe can be preloaded for "hands-free" brewing of a complex recipe, with the [[Nether Wart|nether wart]] falling through into the stand for the first step.
* Bottles and fuel are accepted from hoppers pointing into the side.
* Finished products can be pulled out by hoppers below, but each stage of brewing counts as a batch of "finished" potions.
{{IN|education}}, elements can be combined in the brewing stand to make the [[medicine]] potions: antidote, elixir, eye drops, and tonic.
=== Changing profession ===
If a village has a brewing stand that has not been claimed by a villager, any villager who hasn't already picked a [[job site]] block in the village has a chance to change their profession into cleric.
=== Light source ===
Brewing stands emit a light level of 1.
== Sounds ==
=== Generic ===
{{Sound table/Block/Stone}}
=== Unique ===
{{edition|java}}:
{{Sound table
|rowspan=2
|sound=Brewing Stand brew1.ogg
|sound2=Brewing Stand brew2.ogg
|subtitle=Brewing Stand bubbles
|source=block
|description=When a potion finishes brewing
|id=block.brewing_stand.brew
|translationkey=subtitles.block.brewing_stand.brew
|volume=1.0
|pitch=1.0
|distance=16}}
{{Sound table
|subtitle=Cleric works
|source=neutral
|description=Randomly while a cleric is working
|id=entity.villager.work_cleric
|translationkey=subtitles.entity.villager.work_cleric
|volume=1.0
|pitch=0.8-1.2
|distance=16}}
{{Sound table
|sound=Door close.ogg
|sound2=Door open.ogg
|subtitle=Chest locked<ref group=sound name=lock>{{Bug|MC-98316||Wrong subtitles caused by missing distinction}}</ref>
|source=block
|description=When a player attempts to open a brewing stand locked using the {{nbt|string|Lock}} tag
|id=block.chest.locked|idnote=<ref group=sound name=lock/>
|translationkey=subtitles.block.chest.locked|translationkeynote=<ref group=sound name=lock/>
|volume=1.0
|pitch=1.0
|distance=16
|foot=1}}
{{Edition|Bedrock}}:
{{Sound table
|type=bedrock
|rowspan=2
|sound=Brewing Stand brew1.ogg
|sound2=Brewing Stand brew2.ogg
|source=block
|description=When a potion finishes brewing
|id=random.potion.brewed
|volume=1.0
|pitch=1.0}}
{{Sound table
|source=block
|description=Randomly while a cleric is working
|id=random.potion.brewed
|volume=1.0
|pitch=1.0
|foot=1}}
== Data values ==
=== ID ===
{{edition|java}}:
{{ID table
|edition=java
|showforms=y
|generatetranslationkeys=y
|displayname=Brewing Stand
|spritetype=block
|nameid=brewing_stand
|translationkey=block.minecraft.brewing_stand, item.minecraft.brewing_stand
|foot=1}}
{{ID table
|displayname=Block entity
|spritename=brewing-stand
|spritetype=block
|nameid=brewing_stand
|foot=1}}
{{edition|bedrock}}:
{{ID table
|edition=bedrock
|firstcolumnname=Brewing Stand
|shownumericids=y
|showforms=y
|generatetranslationkeys=y
|displayname=Block
|spritename=brewing-stand
|spritetype=block
|nameid=brewing_stand
|id=117
|form=block
|itemform=item.brewing_stand
|translationkey=-}}
{{ID table
|displayname=Item
|spritename=brewing-stand
|spritetype=item
|nameid=brewing_stand
|id=431
|form=item
|foot=1}}
{{ID table
|notnamespaced=y
|displayname=Block entity
|spritename=brewing-stand
|spritetype=block
|nameid=BrewingStand
|foot=1}}
=== Block states ===
{{see also|Block states}}
{{/BS}}
=== Block data ===
A brewing stand has a block entity associated with it that holds additional data about the block.
{{el|java}}:
{{see also|Block entity format}}
{{/BE}}
{{el|bedrock}}:
: See [[Bedrock Edition level format/Block entity format]].
== Achievements ==
{{load achievements|Local Brewery}}
== Advancements ==
{{Load advancements|Local Brewery}}
== History ==
{{History|java}}
{{History||1.0.0|snap=Beta 1.9 Prerelease 2|[[Cauldron]]s are implemented to be used to brew [[potion]]s, but are not available in-game yet.}}
{{History|||snap=September 30, 2011|slink={{tweet|jeb|119762786619359232}}|[[File:Brewing Stand (pre-release).png|32px]] [[Jens Bergensten|Jeb]] reveals that brewing is done through a brewing stand instead of a [[cauldron]].}}
{{History|||snap=Beta 1.9 Prerelease 3|[[File:Brewing Stand (empty) JE1 BE1.png|32px]] [[File:Brewing Stand (right) JE1.png|32px]] [[File:Brewing Stand (left) JE1.png|32px]] [[File:Brewing Stand (full) JE1.png|32px]] [[File:Brewing Stand (item) JE1 BE1.png|32px]] Added brewing stands.
|Brewing [[potion]]s with brewing stands currently take 30 seconds.
|When the first brewing stand was shown by Jeb, it had an additional 2D sub-stand for [[Glass Bottle|bottles]], but the stands for bottles are now designed in 3D.<ref>{{tweet|jeb|119763532312096769|I'm fully aware the potions are very thin (diet?), but it looks cute. (Always work in progress, of course)|September 30, 2011}}</ref>}}
{{History||1.1|snap=12w01a|Brewing time for brewing stands has been reduced to 20 seconds.}}
{{History||1.3.1|snap=12w15a|{{key|Shift}} + clicking can now be used to put items in brewing stands.}}
{{History||1.8|snap=14w11a|[[File:Brewing Stand (empty) JE2.png|32px]] [[File:Brewing Stand (right) JE2.png|32px]] [[File:Brewing Stand (left) JE2.png|32px]] [[File:Brewing Stand (full) JE2.png|32px]] The [[model]] of brewing stands has been changed. Stands with no bottles appear glitched from some angles, the left and right slots appear identical when filled in (although both distinct appearences still exist as metadata), and the arm angles have changed due to the 22.5º rotation limit.
|Brewing stands' targeting [[hitbox]] is now a full cube - previously it was a cuboid around the base plates.}}
{{History|||snap=14w11b|[[File:Brewing Stand (empty) JE3.png|32px]] [[File:Brewing Stand (right) JE3.png|32px]] [[File:Brewing Stand (left) JE3.png|32px]] [[File:Brewing Stand (full) JE3.png|32px]] Empty brewing stands' model have been fixed, although the other changes still remain.}}
{{History|||snap=14w25a|[[File:Brewing Stand (empty) JE4.png|32px]] [[File:Brewing Stand (right) JE4.png|32px]] [[File:Brewing Stand (left) JE4.png|32px]] [[File:Brewing Stand (full) JE4.png|32px]] Brewing stand models have changed such that bottles in the left and right slots now indeed appear different. However, the leftmost one appears stretched. Arms are also now affected by directional shading.<ref>{{bug|MC-68302|||WAI}}</ref>}}
{{History||1.9|snap=15w31a|Brewing stands now generate in [[End City|end cities]].}}
{{History|||snap=15w33a|Brewing stands can now brew [[Lingering Potion|lingering potion]]s.}}
{{History|||snap=15w33c|A bug where the [[player]] couldn't put in a [[splash potion]] to make a lingering potion has been fixed.}}
{{History|||snap=15w42a|Brewing stands now require [[Blaze Powder|blaze powder]] to operate.}}
{{History|||snap=15w43a|Brewing stands now generate in the basement of [[igloo]]s.
|Each blaze powder now fuels 20 brewing stand operations rather than 30.}}
{{History|||snap=15w44a|[[File:Brewing Stand (empty) JE5.png|32px]] [[File:Brewing Stand (right) JE5.png|32px]] [[File:Brewing Stand (left) JE5.png|32px]] [[File:Brewing Stand (full) JE5.png|32px]] Brewing stand models no longer have a stretched bottle.}}
{{History|||snap=15w47b|[[Sound]]s have been added for brewing stands.}}
{{History||1.11|snap=16w32a|The block entity ID has been changed from <code>Cauldron</code> to <code>brewing_stand</code>.}}
{{History||1.13|snap=17w47a|Prior to [[Java Edition 1.13/Flattening|''The Flattening'']], this [[block]]'s numeral ID was 117, and the [[item]]'s 379.}}
{{History||1.14|snap=18w43a|[[File:Brewing Stand (empty) JE6 BE2.png|32px]] <!-- [[File:Brewing Stand (left) JE6 BE2.png|32px]] [[File:Brewing Stand (right) JE6 BE2.png|32px]] -->[[File:Brewing Stand (Full) JE6 BE2.png|32px]] [[File:Brewing Stand (item) JE2.png|32px]] The textures of brewing stands have been changed.}}
{{History|||snap=18w44a|[[File:Brewing Stand (item) JE3 BE2.png|32px]] The texture of the brewing stand [[item]] has been changed.}}
{{History|||snap=18w48a|Brewing stands now generate in the updated [[plains]] [[village]]s.}}
{{History|||snap=18w49a|Brewing stands now generate in the updated [[savanna]] villages and the new [[Snowy Tundra|snowy]] villages.}}
{{History|||snap=18w50a|Brewing stands now generate in the updated [[desert]] and [[taiga]] villages.}}
{{History|||snap=19w03c|The three plates, but not the rod, of a brewing stand now use correct cullface arguments.}}
{{History|||snap=19w11a|Brewing stands now serve as cleric [[villager]]s' job site block.}}
{{History||1.16.2|snap=20w28a|Brewing stands can now be [[crafting|crafted]] with [[blackstone]].}}
{{History||1.17|snap=21w07a|Brewing stands can now be crafted with [[deepslate|grimstone]] (now deepslate).}}
{{History||1.17|snap=21w08a|Brewing stands can no longer be crafted with deepslate.
|Brewing stands can now be crafted with [[Cobbled Deepslate|cobbled deepslate]].}}
{{History|||snap=21w11a|<!--[[File:Brewing Stand (empty) JE7.png|32px]] [[File:Brewing Stand (right) JE7.png|32px]] [[File:Brewing Stand (left) JE7.png|32px]] [[File:Brewing Stand (Full) JE7.png|32px]] Changed [[lighting]].-->Tweaked the brewing stand GUI texture.}}
{{History||1.18|snap=21w39a|[[File:Brewing Stand (empty) JE8.png|32px]] [[File:Brewing Stand (right) JE8.png|32px]] [[File:Brewing Stand (left) JE8.png|32px]] [[File:Brewing Stand (full) JE8.png|32px]] The default [[brightness]] has been changed from "Moody" to 50.}}
{{History||1.19|snap=22w11a|[[File:Brewing Stand (empty) JE9.png|32px]] [[File:Brewing Stand (right) JE9.png|32px]] [[File:Brewing Stand (left) JE9.png|32px]] [[File:Brewing Stand (full) JE9.png|32px]] Changed texture and model.}}
{{History|||snap=22w17a|[[File:Brewing Stand (empty) JE10.png|32px]] [[File:Brewing Stand (right) JE10.png|32px]] [[File:Brewing Stand (left) JE10.png|32px]] [[File:Brewing Stand (full) JE10.png|32px]] Changed base texture and model.}}
{{History|pocket alpha}}
{{History||v0.12.1|snap=build 1|[[File:Brewing Stand (empty) JE1 BE1.png|32px]] [[File:Brewing Stand (item) JE1 BE1.png|32px]] Added brewing stands.}}
{{History|pocket}}
{{History||1.0.0|snap=alpha 0.17.0.1|Brewing stands now generate in [[igloo]] basements.
|Brewing stands now generate in [[end ship]]s.}}
{{History|bedrock}}
{{History||1.2.0|snap=beta 1.2.0.2|Brewing stands now require [[blaze powder]] to operate.}}
{{History||1.10.0|snap=beta 1.10.0.3|[[File:Brewing Stand (empty) JE6 BE2.png|32px]] [[File:Brewing Stand (item) JE3 BE2.png|32px]] The textures of brewing stands have been changed.|A brewing stand can now generate in [[village]] temples.}}
{{History||1.16.100|snap=beta 1.16.100.52|Brewing stands can now be [[craft]]ed with [[blackstone]].}}
{{History||1.17.0|snap=beta 1.17.0.50|Brewing stands can now be [[craft]]ed with [[cobbled deepslate]].}}
{{History||1.19.0|snap=beta 1.19.0.20|[[File:Brewing Stand (empty) JE10.png|32px]] [[File:Brewing Stand (right) JE10.png|32px]] [[File:Brewing Stand (left) JE10.png|32px]] [[File:Brewing Stand (full) JE10.png|32px]] Slightly changed its texture, to make their arms connect to their bases.}}
{{History|console}}
{{History||xbox=TU7|xbone=CU1|ps=1.0|wiiu=Patch 1|switch=1.0.1|[[File:Brewing Stand (empty) JE1 BE1.png|32px]] [[File:Brewing Stand (item) JE1 BE1.png|32px]] Added brewing stands.}}
{{History||xbox=TU43|xbone=CU33|ps=1.36|wiiu=Patch 13|Brewing stands now appear in [[igloo]]s. The lack of a fuel requirement means that potions can now be made without going to the Nether.}}
{{History||xbox=TU46|xbone=CU36|ps=1.38|wiiu=Patch 15|Brewing stands now require [[blaze powder]] to operate.}}
{{History||xbox=none|xbone=none|ps=1.90|wiiu=none|switch=none|[[File:Brewing Stand.png|32px]] [[File:Brewing Stand (item) JE3 BE2.png|32px]] The textures of brewing stands have been changed.}}
{{History|new 3ds}}
{{History||0.1.0|[[File:Brewing Stand (empty) JE1 BE1.png|32px]] [[File:Brewing Stand (item) JE1 BE1.png|32px]] Added brewing stands.}}
{{History|foot}}
<gallery>
File:Brewingstand Potion.png|The first picture of a brewing stand. A [[giant mushroom]] is also seen in this picture.
</gallery>
=== Brewing stand "item" ===
{{:Technical blocks/Brewing Stand}}
== Issues ==
{{issue list}}
== Trivia ==
* Even when the brewing stand is not in use, there is still smoke coming out of the top of it.
* In ''[[Java Edition]]'', when a brewing stand is broken, particles from a bottle appear, even if no bottle is in the stand.
* No matter what potion (including water bottles) is in the stand it always looks like a full red bottle.
* Brewing stands always face east, no matter what direction they are placed.
* According to [[Michael Stoyke|Searge]], for thematic reasons, a brewing stand was added to the basement of the [[igloo]]. Because of this, blaze powder was required for fuel to preserve game progression. In this way, the player is prevented from using it before going to the Nether.<ref>https://minecraft.net/en-us/article/meet-blaze</ref>
== Gallery ==
<gallery>
File:Brewing stand in action.png|A brewing stand in action.
File:Igloobasement.png|A brewing stand in an igloo basement.
File:1.8 and below brewing stand.png|The GUI of the brewing stand in 1.8.x and below.
</gallery>
== See also ==
*[[Glass Bottle]]
*[[Splash Potion]]
== References ==
{{reflist}}
== External links ==
*[https://www.minecraft.net/en-us/article/taking-inventory--brewing-stand Taking Inventory: Brewing Stand] – Minecraft.net on October 11, 2019
{{Blocks|Utility}}
{{items}}
[[Category:Job blocks]]
[[Category:Utility blocks]]
[[Category:Manufactured blocks]]
[[Category:Generated structure blocks]]
[[Category:Storage]]
[[Category:Block entities]]
[[Category:Light sources]]
[[de:Braustand]]
[[es:Soporte para pociones]]
[[fr:Alambic]]
[[hu:Főzőállvány]]
[[it:Alambicco]]
[[ja:醸造台]]
[[nl:Brouwstandaard]]
[[pl:Statyw alchemiczny]]
[[pt:Suporte de poções]]
[[ru:Варочная стойка]]
[[uk:Варильна стійка]]
[[zh:酿造台]]</li><li>[[Nether Sprouts|Nether Sprouts]]<br/>{{Block
|title=Nether Sprouts
|image=Nether Sprouts.png
|image2=Nether Sprouts (texture) JE2 BE2.png
|transparent=Yes
|tool=shears
|light=No
|renewable=Yes
|stackable=Yes (64)
|flammable=No
|lavasusceptible=Yes
}}
'''Nether sprouts''' are a non-solid fungi block that generate in [[warped forest]]s.
== Obtaining ==
=== Natural generation ===
Nether sprouts generate in [[warped forest]] biomes.
=== Breaking ===
Nether sprouts can be mined instantly with any item. The block also breaks if the block below is removed, or if [[water]] flows into its space. The block only drops if broken with [[shear]]s.
=== Post-generation ===
Applying [[bone meal]] to warped [[nylium]] creates nether sprouts on that block and surrounding nylium, along with both types of [[roots]] and [[fungi]].
== Usage ==
[[File:RootsSproutsPlaceBlock.png|thumb|All of the blocks that nether sprouts can be placed on.]]
Nether sprouts can be planted on the same blocks that [[fungus|fungi]] and [[roots]] can be placed on: [[nylium]], [[soul soil]], [[Grass Block|grass]], [[podzol]], [[mycelium]], [[Moss Block|moss]], [[dirt]], [[coarse dirt]], [[rooted dirt]], and [[farmland]]. However, they cannot be planted in [[flower pot]]s.
=== Composting ===
Placing nether sprouts into a [[composter]] has a 50% chance of raising the compost level by 1.
== Sounds ==
{{Sound table/Block/Nether sprouts}}
== Data values ==
=== ID ===
{{edition|java}}:
{{ID table
|edition=java
|generatetranslationkeys=y
|showforms=y
|displayname=Nether Sprouts
|spritetype=block
|nameid=nether_sprouts
|foot=1}}
{{edition|bedrock}}:
{{ID table
|edition=bedrock
|firstcolumnname=Nether Sprouts
|shownumericids=y
|showforms=y
|generatetranslationkeys=y
|displayname=Block
|spritename=nether-sprouts
|spritetype=block
|nameid=nether_sprouts
|id=493
|form=block
|itemform=item.nether_sprouts}}
{{ID table
|displayname=Item
|spritename=nether-sprouts
|spritetype=item
|nameid=nether_sprouts
|id=621
|form=item
|translationkey=tile.nether_sprouts.name
|foot=1}}
== History ==
{{History|java}}
{{History||1.16|snap=20w06a|[[File:Nether Sprouts JE1 BE1.png|24px]] [[File:Nether Sprouts (texture) JE1 BE1.png|24px]] Added nether sprouts.}}
{{History|||snap=20w10a|[[File:Nether Sprouts JE2 BE2.png|24px]] [[File:Nether Sprouts (texture) JE2 BE2.png|24px]] The textures of the nether sprouts have now been changed.}}
{{History|||snap=20w15a|Nether sprouts can now be [[composter|composted]].}}
{{History|||snap=20w19a|Nether sprouts now only [[drops|drop]] if [[breaking|broken]] with [[shears]].}}
{{History|||snap=20w21a|[[File:Nether Sprouts (item) JE3 BE2.png|24px]] The [[inventory]] texture of the nether sprouts have now been changed.
|The [[block]] [[model]] of nether sprouts is now centered of the block rather than positioned randomly.}}
{{History||1.19.3|snap=22w44a|Nether sprouts now make sounds when being walked on.<ref>{{bug|MC-171621|||Fixed}}</ref>}}
{{History|bedrock}}
{{History||1.16.0|snap=beta 1.16.0.51|[[File:Nether Sprouts JE1 BE1.png|24px]] [[File:Nether Sprouts (texture) JE1 BE1.png|24px]] Added nether sprouts.}}
{{History|||snap=beta 1.16.0.57|Nether sprouts can now be [[composter|composted]].}}
{{History|||snap=beta 1.16.0.59|[[File:Nether Sprouts JE2 BE2.png|24px]] [[File:Nether Sprouts (item) JE3 BE2.png|24px]] The textures of the nether sprouts have now been changed.
|[[File:Nether Sprouts Glitched BE.png|32px]] Nether sprouts now appear with a glitched texture when [[breaking|broken]] in [[survival]] mode or when picking the [[block]] in [[creative]] mode. The [[item]] received is also nameless.<ref>{{bug|MCPE-74339}}</ref>}}
{{History|||snap=beta 1.16.0.63|Nether sprouts now give the [[player]] the correct item when broken in survival mode or when picking the block in creative mode.}}
{{History|foot}}
== Issues ==
{{issue list}}
== Trivia ==
* Unlike other warped "plants", nether sprouts don't have a crimson equivalent. This is also the case with [[nether wart]], which lacks a warped equivalent.
== References ==
{{Reflist}}
{{Blocks|vegetation}}
{{Items}}
[[Category:Nether blocks]]
[[Category:Fungi]]
[[Category:Natural blocks]]
[[Category:Non-solid blocks]]
[[de:Nethersprossen]]
[[de:Nethersprossen]]
[[es:Rastrojo del Nether]]
[[fr:Germes du Nether]]
[[ja:ネザースプラウト]]
[[pl:Netherowe kiełki]]
[[pt:Brotos do Nether]]
[[ru:Адские ростки]]
[[zh:下界苗]]</li></ul> | Grass blocks now have side textures. Also, the top texture was made brighter: File:GrassAlpha.png | ||||
0.26{{Extension DPL}}<ul><li>[[Iron Ingot|Iron Ingot]]<br/>{{About|the ingot|the ore|Iron Ore|the mineral block|Block of Iron|the nugget|Iron Nugget|the raw mineral|Raw Iron}}
{{Item
| image = Iron Ingot.png
|type=
| renewable = Yes
| stackable = Yes (64)
}}
'''Iron ingots''' are versatile [[metal]] ingots used extensively in [[crafting]].
== Obtaining ==
=== Chest loot ===
{{LootChestItem|iron-ingot}}
=== Crafting ===
{{Crafting
|head=1
|showname=0
|Block of Iron
|Output=Iron Ingot,9
|type=Material
}}
{{Crafting
|A1= Iron Nugget
|B1= Iron Nugget
|C1= Iron Nugget
|A2= Iron Nugget
|B2= Iron Nugget
|C2= Iron Nugget
|A3= Iron Nugget
|B3= Iron Nugget
|C3= Iron Nugget
|Output=Iron Ingot
|type= Material
|foot=1
}}
=== Smelting ===
{{see also|Iron Ore#Natural generation}}[[Smelting]] raw iron in a [[furnace]] or [[blast furnace]] is the most common way to obtain iron ingots.
{{Smelting
|head=1
|Iron Ore;Deepslate Iron Ore
|Iron Ingot
|0,7
}}
{{Smelting
|foot=1
|Raw Iron
|Iron Ingot
|0,7
}}
=== Compound creation ===
Iron Ingot can be created from its base [[element]]s, using the [[compound creator]].{{only|bedrock|education}}
{| class="wikitable"
!Name
!Elements
!Example recipe
|- <!-- Temporarily using crafting grid as a substitute for the compound creator (template not yet available), since the layout is the same, even if the appearance is different -->
!Iron Ingot
|Iron <br>
|{{Crafting Table
|shapeless= 1
|A2=Iron
|Output=Iron Ingot}}
|}
=== Mob loot ===
{{see also|Tutorials/Iron golem farming}}
[[Iron golem]]s drop 3-5 iron ingots upon death, regardless of the way they die. The looting enchantment does not increase the amount of iron ingots dropped.
[[Zombie]]s, [[husk]]s, and [[zombie villager]]s have a 2.5% ({{frac|1|40}}) chance of dropping either an iron ingot, [[carrot]], or [[potato]] when killed by a player or tamed wolf. This is increased by 1% ({{frac|1|100}}) per level of looting. This gives iron ingots the following chances of dropping:
* {{frac|1|120}} (about 0.83%)
* {{frac|7|600}} (about 1.17%) with Looting I
* {{frac|9|600}} (1.50%) with Looting II
* {{frac|11|600}} (about 1.83%) with Looting III
== Usage ==
=== Crafting ingredient ===
{{crafting usage}}
=== Trading ===
Apprentice-level Armorer, Toolsmith, and Weaponsmith [[Villager|villagers]] buy 3 iron ingots for an [[emerald]] as their third trade.{{only|bedrock}}
Apprentice-level Armorer villagers have a 50% chance to buy 4 iron ingots for one emerald, and apprentice-level Toolsmith and Weaponsmith villagers always offer to buy 4 iron ingots for one emerald.{{only|java}}
=== Repairing ===
Iron ingots are the repair items for the iron [[tier]] and chainmail and iron [[armor material]]s, and thus can be used to [[item repair|repair]] the following items in an [[anvil]]:
* {{ItemLink|Chainmail Helmet}}
* {{ItemLink|Chainmail Chestplate}}
* {{ItemLink|Chainmail Leggings}}
* {{ItemLink|Chainmail Boots}}
* {{ItemLink|Iron Helmet}}
* {{ItemLink|Iron Chestplate}}
* {{ItemLink|Iron Leggings}}
* {{ItemLink|Iron Boots}}
* {{ItemLink|Iron Sword}}
* {{ItemLink|Iron Axe}}
* {{ItemLink|Iron Pickaxe}}
* {{ItemLink|Iron Shovel}}
* {{ItemLink|Iron Hoe}}
=== Healing iron golems ===
{{control|Using}} an iron ingot on an [[iron golem]] restores its health by {{hp|25}}.
=== Beacons ===
Iron ingots can be used to select powers from a [[beacon]]. The player must select one of the available powers, and then insert an iron ingot in the item slot.
An iron ingot can be substituted for an [[emerald]], a [[gold ingot]], a [[diamond]], or a [[netherite ingot]].
=== Smithing ingredient ===
{{Smithing
|head=1
|ingredients=Any Armor Trim +<br/>Any Armor Piece + <br/>Iron Ingot
|Any Armor Trim Smithing Template
|Netherite Chestplate
|Iron Ingot
|Iron Trim Netherite Chestplate
|showdescription=1
|description = All armor types can be used in this recipe,<br/>a netherite chestplate is shown as an example.<br/>
|tail=1
}}
;Trim color palette
The following color palettes are shown on the designs on trimmed armor:
*{{TrimPalette|iron ingot}}
*{{TrimPalette|iron ingot|darker=1}} (a darker color palette is used when an iron armor piece is trimmed using an iron ingot).
== Achievements ==
{{load achievements|Acquire Hardware}}
== Advancements ==
{{load advancements|Acquire Hardware}}
== Data values ==
=== ID ===
{{edition|java}}:
{{ID table
|edition=java
|showitemtags=y
|showforms=y
|generatetranslationkeys=y
|displayname=Iron Ingot
|spritetype=item
|nameid=iron_ingot
|itemtags=beacon_payment_items
|form=item
|foot=1}}
{{edition|bedrock}}:
{{ID table
|edition=bedrock
|shownumericids=y
|showforms=y
|notshowbeitemforms=y
|generatetranslationkeys=y
|displayname=Iron Ingot
|spritetype=item
|nameid=iron_ingot
|id=305
|form=item
|foot=1}}
== History ==
{{History|java indev}}
{{History||0.31|snap=20100128|[[File:Iron Ingot JE1.png|32px]] Added iron ingots.}}
{{History|||snap=20100129|[[File:Iron Ingot JE2 BE1.png|32px]] The texture of iron ingots has been changed.
|Iron ingots can be [[smelting|smelted]] from [[iron ore]] and [[drops|drop]] 3–5 iron ingots.
|Iron ingots can be used to craft [[iron block]]s, [[flint and steel]] and iron [[sword]]s, [[shovel]]s, [[pickaxe]]s and [[axe]]s.}}
{{History|||snap=20100130|Iron ingots are now used to craft [[arrow]]s.|[[Iron block]]s now require 9 iron ingots (3×3) instead 4 (2×2) to be [[crafting|crafted]], making them much more expensive.}}
{{History||20100206|Iron ingots can now be used to [[crafting|craft]] iron [[hoe]]s.}}
{{History||?|[[Smelting]] now [[drops]] only 1 iron ingot (down from 3–5).}}
{{History||20100218|Iron ingots are now used to craft iron [[helmet]]s, [[chestplate]]s, [[leggings]] and [[boots]].}}
{{History|java infdev}}
{{History||20100615|Iron ingots are now used to craft [[bucket]]s.}}
{{History||20100618|Iron ingots are now used to craft [[rail]]s and [[minecart]]s.}}
{{History||20100625-2|Iron ingots can be found in [[dungeon]] [[chest]]s.}}
{{History|java alpha}}
{{History||v1.0.1|Iron ingots are now used to [[crafting|craft]] iron [[door]]s.}}
{{History||v1.0.14|Iron ingots are no longer used to craft [[arrow]]s.}}
{{History||v1.1.0|Iron ingots are now used to craft [[compass]]es.}}
{{History|java beta}}
{{History||1.5|Iron ingots are now used to craft [[detector rail]]s.}}
{{History||1.7|Iron ingots are now used to craft [[piston]]s and [[shears]].}}
{{History||1.8|snap=Pre-release|Iron ingots are found in the new [[stronghold]] storeroom and [[mineshaft]] [[chest]]s.
|Iron ingots are now used to craft [[iron bars]].}}
{{History|java}}
{{History||1.0.0|snap=Beta 1.9 Prerelease 2|Iron ingots are now used to craft [[cauldron]]s.}}
{{History|||snap=Beta 1.9 Prerelease 3|Iron ingots are now found in the new stronghold altar [[chest]]s.}}
{{History||1.1|snap=12w01a|Iron ingots are now found in [[village]] blacksmith chests.}}
{{History||1.2.1|snap=12w06a|[[Zombie]]s now rarely [[drops|drop]] iron ingots, making it a [[renewable resource]].}}
{{History|||snap=12w08a|[[Iron golem]]s now drop 3–5 iron ingots.}}
{{History||1.3.1|snap=12w21a|Added [[desert temple]]s, with a hidden [[chest]] room and loot containing iron ingots.
|Blacksmith [[villager]]s now [[trading|buy]] 8–9 iron ingots for 1 [[emerald]].}}
{{History|||snap=12w22a|Added [[jungle temple]]s, which contain loot [[chest]]s with iron ingots.
|Iron ingots are now used to craft [[tripwire hook]]s.}}
{{History||1.4.2|snap=12w32a|Iron ingots can be used to activate [[beacon]]s.}}
{{History|||snap=12w41a|Iron ingots are now used to craft [[anvil]]s.}}
{{History|||snap=12w42a|Anvils now need 4 iron ingots to [[craft]] instead of 1.}}
{{History||1.5|snap=13w01a|Iron ingots are now used to [[crafting|craft]] heavy [[weighted pressure plate]]s.}}
{{History|||snap=13w02a|Iron ingots are now used to craft [[hopper]]s and [[activator rail]]s.}}
{{History||1.6.1|snap=13w16a|Iron ingot is now used to craft iron [[horse armor]] and [[horse saddle]].}}
{{History|||snap=13w18a|Iron ingot is no longer used to craft iron [[horse armor]] and [[horse saddle]].|Iron ingots are now found in [[nether fortress]] [[chest]]s.}}
{{History||1.8|snap=14w02a|[[Trading]] for iron ingots has been changed: armorer, weapon smith and tool smith [[villager]]s now [[trading|buy]] 7–9 iron ingots for 1 [[emerald]].}}
{{History|||snap=14w07a|Iron ingots are now used to craft [[iron trapdoor]]s.}}
{{History||1.9|snap=15w31a|Iron ingots are now found in [[end city]] ship [[chest]]s.}}
{{History|||snap=15w33c|Iron ingots are now used to craft [[shield]]s.}}
{{History|||snap=15w44a|The average yield from [[dungeon]] and [[desert temple]] chests has been substantially decreased.
|The average yield from [[mineshaft]] and [[nether fortress]] chests has been slightly decreased.}}
{{History||1.11|snap=16w39a|Iron ingots are now found in the new [[woodland mansion]] chests.}}
{{History||1.11.1|snap=16w50a|Iron ingots are now used to craft [[iron nugget]]s.}}
{{History||1.13|snap=17w47a|Prior to [[1.13/Flattening|''The Flattening'']], this [[item]]'s numeral ID was 265.}}
{{History|||snap=18w10a|Iron ingots now generate in [[buried treasure]] [[chest]]s.}}
{{History|||snap=18w11a|Iron ingots can now be found in the chests of [[shipwreck]]s.}}
{{History||1.14|snap=18w43a|Iron ingots can now be used to craft [[crossbow]]s.
|[[File:Iron Ingot JE3 BE2.png|32px]] The texture of iron ingots has been changed.}}
{{History|||snap=18w47a|Iron ingots can now be found inside of loot [[chest]]s on top of [[pillager outpost]]s.}}
{{History|||snap=18w50a|Iron ingots can now be found in chests in [[village]] toolsmith houses.
|Iron ingots can now be used to craft a [[blast furnace]].}}
{{History|||snap=19w04a|Iron ingots can now be used to craft [[stonecutter]]s.}}
{{History||1.15|snap=19w41a|Iron ingots can now be used to heal [[iron golem]]s.}}
{{History||1.16|snap=20w16a|Iron ingots now generate in [[bastion remnants]] chests.
|Iron ingots are now used to craft [[chain]]s.}}
{{History||1.16.2|snap=20w30a|The average yield of iron ingots from bastion remnant chests has been slightly increased.}}
{{History||1.17|snap=21w08a|Iron ingots can now be smelted from [[deepslate iron ore]].}}
{{History|||snap=21w14a|Iron ingots can now be smelted from [[raw iron]].}}
{{History||1.20<br>(Experimental)|link=1.19.4|snap=23w04a|Iron ingots can now be used as an armor trim material.}}
{{History|||snap=23w05a|Iron ingots can now be trimmed with iron [[armor]].}}
{{History|pocket alpha}}
{{History||v0.2.0|[[File:Iron Ingot JE2 BE1.png|32px]] Added iron ingots. They are currently unobtainable and serve no purpose.}}
{{History||v0.3.2|Iron ingots are now obtainable by [[smelting]] iron ore in a [[furnace]].
|Iron ingots can be used to craft [[shears]], [[blocks of iron]] and iron [[pickaxe]]s, [[axe]]s, [[sword]]s and [[shovel]]s.}}
{{History||v0.4.0|Iron ingots are now used to craft [[flint and steel]] and iron [[hoe]]s.}}
{{History||v0.5.0|Iron ingots are now used to craft [[nether reactor core]]s.}}
{{History||v0.6.0|Iron ingots are now used to craft iron [[armor]].}}
{{History||v0.7.0|Iron ingots are now used to craft [[bucket]]s.}}
{{History||v0.8.0|snap=build 1|Iron ingots are now used to craft [[compass]]es and [[iron bars]].}}
{{History|||snap=build 2|Iron ingots are now used to craft [[minecart]]s and [[rail]]s.}}
{{History||v0.9.0|snap=build 1|Iron ingots can now be found in [[village]] blacksmith [[chest]]s, [[stronghold]] altar chests and [[dungeon]] chests.
|[[Zombie]]s now rarely drop iron ingots.}}
{{History||v0.12.1|snap=build 1|Iron ingots are no longer used to craft [[nether reactor core]]s and are instead dropped by it.
|Iron ingots are now used to craft [[anvil]]s.
|Iron ingots are now found in [[nether fortress]] chests.
|Added [[iron golem]]s, which [[drops|drop]] iron ingots.
|Iron ingots can now be used to repair iron [[tool]]s, [[armor]] and [[weapon]]s in [[anvil]]s.
|Added [[zombie villager]]s, which rarely drop iron ingots.}}
{{History||v0.13.0|snap=build 1|Iron ingots are now used to craft [[tripwire hook]]s, [[detector rail]]s, [[iron trapdoor]]s and heavy [[weighted pressure plate]]s.
|Added [[desert temple]]s, which have hidden [[chest]] rooms and loot containing iron ingots.}}
{{History||v0.14.0|snap=build 1|Iron ingots are now used to craft [[hoppers]] and [[cauldron]]s.
|Iron ingots can now be found in [[minecart with chest|minecart chests]] generated in [[mineshaft]]s.}}
{{History||v0.15.0|snap=build 1|Iron ingots are now used to craft [[piston]]s.
|Added [[jungle temple]]s, which have hidden [[chest]] rooms and main treasure rooms that have loot containing iron ingots.
|Added [[husk]]s, which rarely [[drops|drop]] iron ingots.}}
{{History||v0.16.0|snap=build 4|Iron ingots can now be used to activate [[beacon]]s.}}
{{History|pocket}}
{{History||1.0.0|snap=alpha 0.17.0.1|Iron ingots can now be found in [[end city]] ship [[chest]]s.
|Iron ingots can now be found in [[stronghold]] storeroom chests.}}
{{History||1.0.4|snap=alpha 1.0.4.0|Added [[trading]]—armorer, weaponsmith and toolsmith [[villager]]s now [[trading|buy]] 7–9 iron ingots for 1 [[emerald]].}}
{{History||1.1.0|snap=alpha 1.1.0.0|Iron ingots can now be [[crafting|crafted]] using [[iron nugget]]s.
|Iron ingots can now be used to [[crafting|craft]] iron nuggets.
|Iron ingots can now be found in [[woodland mansion]] [[chest]]s.}}
{{History|bedrock}}
{{History||1.4.0|snap=beta 1.2.14.2|Iron ingots now generate in [[buried treasure]] [[chest]]s.
|Iron ingots can now be found in [[shipwreck]] treasure chests.}}
{{History||1.8.0|snap=beta 1.8.0.10|Iron ingots can now be used to craft [[crossbow]]s.}}
{{History||1.10.0|snap=beta 1.10.0.3|Iron ingots can now be found inside [[pillager outpost]]s and plains [[village]]s' weaponsmith chests.
|Iron ingots can now be used to craft [[blast furnace]]s, [[stonecutter]]s and [[shield]]s.
|[[File:Iron Ingot JE3 BE2.png|32px]] The texture of iron ingots has been changed.}}
{{History||1.11.0|snap=beta 1.11.0.1|Iron ingots can now be found in [[village]] armorer and toolsmith [[chest]]s.
|Iron ingots can now be found in [[savanna]], [[taiga]], [[desert]] and [[snowy taiga]] village weaponsmiths.}}
{{History|||snap=beta 1.11.0.4|Armorer, toolsmith, and weaponsmith [[villager]]s now [[trading|buy]] 4 iron ingots for an [[emerald]].}}
{{History||1.16.0|snap=beta 1.16.0.57|Iron ingots now generate in bastion remnants chests.}}
{{History||1.17.0|snap=beta 1.16.230.52|Iron ingots can now be smelted from [[deepslate iron ore]].}}
{{History|||snap=beta 1.17.0.50|Iron ingots can now be smelted from [[raw iron]].}}
{{History||1.18.10|snap=beta 1.18.10.26|Iron ingots can now be used to heal iron golems.}}
{{History||1.19.80|snap=beta 1.19.80.21|Iron ingots can now be used as an armor trim material.}}
{{History|console}}
{{History||xbox=TU1|xbone=CU1|ps=1.0|wiiu=Patch 1|switch=1.0.1|[[File:Iron Ingot JE2 BE1.png|32px]] Added iron ingots.}}
{{History||xbox=none|xbone=none|ps=1.90|wiiu=none|switch=none|[[File:Iron Ingot JE3 BE2.png|32px]] The texture of iron ingots has been changed.}}
{{History|new3DS}}
{{History||0.1.0|[[File:Iron Ingot JE2 BE1.png|32px]] Added iron ingots.}}
{{History|foot}}
== Issues ==
{{issue list}}
== Trivia ==
* To craft each recipe once, a player would need 152 iron ingots, including 27 for the iron blocks in an [[anvil]], while using the extra tripwire hook for the [[crossbow]] and the [[iron nuggets]] for the [[chain]].
== See also ==
* {{BlockLink|Block of Iron}}
* {{ItemSprite|Iron Chestplate}} [[Iron armor]]
* {{ItemLink|Iron Nugget}}
* {{BlockLink|Iron Ore}}
* [[Ores]]
== External links ==
* {{Mcnet|taking-inventory--iron-ignot|Taking Inventory: Iron Ingot}}
{{Items}}
[[cs:Železný ingot]]
[[de:Eisenbarren]]
[[es:Lingote de hierro]]
[[fr:Lingot de fer]]
[[hu:Vasrúd]]
[[it:Lingotto di ferro]]
[[ja:鉄インゴット]]
[[ko:철괴]]
[[nl:IJzerstaaf]]
[[pl:Sztabka żelaza]]
[[pt:Barra de ferro]]
[[ru:Железный слиток]]
[[uk:Залізний зливок]]
[[zh:铁锭]]
[[Category:Renewable resources]]</li><li>[[Shovel|Shovel]]<br/>{{Item
| image = <gallery>
Wooden Shovel.png | Wooden
Stone Shovel.png | Stone
Iron Shovel.png | Iron
Golden Shovel.png | Golden
Diamond Shovel.png | Diamond
Netherite Shovel.png | Netherite
</gallery>
| rarity = Common
| renewable = '''Netherite''': No<br>'''All others''': Yes
| durability =
* Wood: 59
* Stone: 131
* Iron: 250
* Golden: 32
* Diamond: 1561
* Netherite: 2031
| stackable = No
}}
'''Shovels''' are [[tool]]s used to hasten the process of breaking [[dirt]], [[sand]], [[gravel]] and other soil blocks, as well as to convert [[Dirt (disambiguation)|dirt]] blocks into [[Dirt Path|dirt paths]].
== Obtaining ==
=== Crafting ===
{{Crafting
|head=1
|showname=0
|showdescription=1
|name=[[Shovel]]s
|B1= {Any Planks}; Iron Ingot; Gold Ingot; Diamond
|B2= Stick
|B3= Stick
|Output= Wooden Shovel; Iron Shovel; Golden Shovel; Diamond Shovel
|type= Tool
}}
{{Crafting
|name=[[Stone Shovel]]
|B1=Any stone-tier block
|B2=Stick
|B3=Stick
|Output=Stone Shovel
|description=Can use any variant of cobblestone
|type=Tool
}}
{{Crafting
|foot=1
|ignoreusage=1
|name=[[Shovel]]
|ingredients=Damaged Matching [[Shovel]]
|Damaged Wooden Shovel; Damaged Stone Shovel; Damaged Iron Shovel; Damaged Golden Shovel; Damaged Diamond Shovel; Damaged Netherite Shovel
|Damaged Wooden Shovel; Damaged Stone Shovel; Damaged Iron Shovel; Damaged Golden Shovel; Damaged Diamond Shovel; Damaged Netherite Shovel
|Output=Wooden Shovel; Stone Shovel; Iron Shovel; Golden Shovel; Diamond Shovel; Netherite Shovel
|description= The durability of the two shovels is added together, plus an extra 5% durability.
|type= Tool
}}
=== Upgrading ===
Like other diamond tools, a diamond shovel can be upgraded to a netherite shovel, although increased durability and resistance to fire/lava in item form are the only benefits. The shovel's performance as a digging tool or a weapon is unchanged by the upgrade.
{{Smithing
|Netherite Upgrade
|Diamond Shovel
|Netherite Ingot
|Netherite Shovel
|description=
|tail=1
}}
=== Repairing ===
==== Grinding ====
{{Grinding
|showdescription=1
|ingredients=2x Damaged [[Wooden Shovel]] or<br>2x Damaged [[Stone Shovel]] or<br>2x Damaged [[Iron Shovel]] or<br>2x Damaged [[Golden Shovel]] or<br>2x Damaged [[Diamond Shovel]] or<br>2x Damaged [[Netherite Shovel]]
|Damaged Wooden Shovel; Damaged Stone Shovel; Damaged Iron Shovel; Damaged Golden Shovel; Damaged Diamond Shovel; Damaged Netherite Shovel
|Damaged Wooden Shovel; Damaged Stone Shovel; Damaged Iron Shovel; Damaged Golden Shovel; Damaged Diamond Shovel; Damaged Netherite Shovel
|Wooden Shovel; Stone Shovel; Iron Shovel; Golden Shovel; Diamond Shovel; Netherite Shovel
|description=The durability of the two shovels is added together, plus an extra 5% durability.
}}
==== [[Anvil mechanics#Unit repair|Unit repair]] ====
{{/Repairing with Anvils}}
A shovel can be repaired in an [[anvil]] by adding units of the [[tiers]]' repair material, with each repair material restoring 25% the shovel's maximum durability, rounded down. It also keeps the shovel's [[Enchanting|enchantments]].
=== Chest loot ===
On <code>ancient_city/city_center/city_center_2</code>, they generate a furnace with a wooden shovel inside of it.
{{LootChestItem|iron-shovel,level-enchanted-iron-shovel,random-enchanted-golden-shovel,diamond-shovel,level-enchanted-diamond-shovel,damaged-random-enchanted-diamond-shovel,damaged-random-enchanted-diamond-shovel-2}}
=== Mob loot ===
==== Equipment ====
{{Main|Drops#Equipped items}}
[[Zombie]]s and [[husk]]s have a 0.67% (3.33% in Hard [[difficulty]]) chance of spawning with an iron shovel. They have an 8.5% (9.5% with [[Looting]] I, 10.5% with Looting II and 11.5% with Looting III) chance of dropping that shovel if they are killed by the player. The dropped shovel is usually badly damaged, and may be enchanted: 0%–25% on Normal difficulty and 3.125%–25% on Hard difficulty, varying with [[regional difficulty]], and enchanted as if on an enchanting table at level 5–22.
==== Raids ====
Vindicators and pillagers that spawn from raids have a 4.1% chance(5.12% on hard) to drop a badly-damaged iron shovel that is sometimes enchanted with a random enchantment.{{only|bedrock}}
=== Trading ===
Novice-level toolsmith villagers have a 25% chance to sell stone shovels for one emerald, journeyman-level toolsmith villagers have a 25% chance to sell enchanted iron shovels for 2 emeralds, and expert-level toolsmith villagers have a 50% chance to sell enchanted diamond shovels for 5 emeralds as part of their trades.{{only|bedrock}}
Novice-level toolsmith villagers have a 40% chance to sell stone shovels for one emerald, journeyman-level tool smiths have a 40% chance to sell an enchanted iron shovel for 7-22 emeralds, and expert-level tool smiths have a {{frac|2|3}} chance to sell an enchanted diamond shovel for 11-27 emeralds.{{only|java}}
The enchantments are the same as the ones obtained from an [[enchanting table]] at levels 5–19.
=== Villager gifts ===
{{in|java}}, toolsmith [[villager]]s occasionally throw stone shovels at players with the [[Hero of the Village]] effect.
== Usage ==
=== Digging ===
A shovel can be used to break some materials faster. When breaking a block, it uses 1 durability. For blocks that break instantly, it uses 0 durability.
==== Durability ====
Each different tier of shovel has a different durability:
{| class="wikitable sortable"
! Material
! [[Durability]]
|-
| {{itemLink|Wooden Shovel|Wood|link=Shovel}}
| 59
|-
| {{itemLink|Stone Shovel|Stone|link=Shovel}}
| 131
|-
| {{itemLink|Iron Shovel|Iron|link=Shovel}}
| 250
|-
| {{itemLink|Diamond Shovel|Diamond|link=Shovel}}
| 1561
|-
| {{itemLink|Golden Shovel|Golden|link=Shovel}}
| 32
|-
| {{itemLink|Netherite Shovel|Netherite|link=Shovel}}
| 2031
|}
==== Speed ====
The following table summarizes the speed at which different quality shovels perform on different block types. Values with a red background indicate that no resource is dropped when the block is destroyed without a shovel.
{{breaking row|Clay|simple=1}}
{{breaking row|Coarse Dirt}}
{{Breaking row|Concrete Powder}}
{{breaking row|Dirt}}
{{breaking row|Dirt Path}}
{{breaking row|Farmland}}
{{breaking row|Grass Block}}
{{breaking row|Gravel}}
{{breaking row|Mud}}
{{breaking row|Muddy Mangrove Roots}}
{{breaking row|Mycelium}}
{{breaking row|Podzol}}
{{breaking row|Red Sand}}
{{breaking row|Rooted Dirt}}
{{breaking row|Sand}}
{{breaking row|Snow|Wooden}}
{{breaking row|Snow Block|Wooden}}
{{breaking row|Soul Sand}}
{{breaking row|Soul Soil}}
{{breaking row|Suspicious Gravel}}
{{breaking row|Suspicious Sand|foot=1}}
=== Dirt paths ===
A shovel can be used to create a [[dirt path]] by {{control|using}} (not digging) the shovel on any one of the following blocks, losing one durability point:
* {{BlockLink|Grass Block}}
* {{BlockLink|Dirt}}
* {{BlockLink|Coarse Dirt}}
* {{BlockLink|Rooted Dirt}}
* {{BlockLink|Podzol}}
* {{BlockLink|Mycelium}}
=== Campfire ===
A shovel can be used to extinguish a [[campfire]].
===Weapon===
Hitting a mob while holding a shovel is a stronger attack than barehanded. Shovels take 2 damage when used as a weapon.
====Java Edition====
[[Category:Java Edition specific information]]
Shovels have an attack speed modifier of -3, meaning they take 1 second to [[Damage#Attack cooldown|recover]]. Shovels deal different damage based on the type:
{| class="wikitable" style="text-align:center" data-description="Attack damage"
!Shovel type
! Attack damage
! Attack speed
!Damage per<br>second (DPS)
|-
|{{ItemLink|Wooden Shovel}}<br>{{ItemLink|Golden Shovel}}||{{hp|2.5}}|| rowspan="4" |1||2.5
|-
|{{ItemLink|Stone Shovel}}||{{hp|3.5}}||3.5
|-
|{{ItemLink|Iron Shovel}}||{{hp|4.5}}||4.5
|-
|{{ItemLink|Diamond Shovel}}||{{hp|5.5}}||5.5
|-
|{{ItemLink|Netherite Shovel}}||{{hp|6.5}}
|1.6||10.4
|}
====Bedrock Edition====
{{IN|bedrock}}, shovels always attack instantly and do the following damage:
{| class="wikitable" style="text-align:center" data-description="Attack damage"
! colspan="5" |Attack damage
|-
|{{ItemSprite|Wooden Shovel}}{{ItemSprite|Golden Shovel}} {{hp|2}}
|{{ItemSprite|Stone Shovel}} {{hp|3}}
|{{ItemSprite|Iron Shovel}} {{hp|4}}
|{{ItemSprite|Diamond Shovel}} {{hp|5}}
|{{ItemSprite|Netherite Shovel}} {{hp|6}}
|}
===Enchantments===
A shovel can receive, or be found in an [[End City]] with the following [[enchantment]]s:
{| class="wikitable col-2-center col-3-right"
|+
!Name
!Max Level
![[Enchanting|Method]]
|-
|[[Fortune]]<ref group="note" name="exc">Silk Touch and Fortune are mutually exclusive</ref>
|III
|{{Inventory slot|Enchanting Table}}{{Inventory slot|Anvil}}
|-
|[[Silk Touch]]<ref group="note" name="exc" />
|I
|{{Inventory slot|Enchanting Table}}{{Inventory slot|Anvil}}
|-
|[[Efficiency]]
|V
|{{Inventory slot|Enchanting Table}}{{Inventory slot|Anvil}}
|-
|[[Unbreaking]]
|III
|{{Inventory slot|Enchanting Table}}{{Inventory slot|Anvil}}
|-
|[[Mending]]
|I
|{{Inventory slot|Anvil}}
|-
|[[Curse of Vanishing]]
|I
|{{Inventory slot|Anvil}}
|}
{{notelist}}
=== Fuel===
Wooden shovels can be used as a fuel in [[furnace]]s, smelting 1 item per shovel.
===Smelting ingredient===
{{Smelting|showname=1|Iron Shovel;Golden Shovel|Iron Nugget;Gold Nugget|0,1}}
===Piglins ===
{{EntityLink|Piglin|Piglins}} are attracted to golden shovels and run toward any golden shovels on the ground, and inspect it for 6 to 8 seconds before putting it in their inventory.
== Sounds ==
{{edition|java}}:
{{Sound table
|sound=Shovel flatten1.ogg
|sound2=Shovel flatten2.ogg
|sound3=Shovel flatten3.ogg
|sound4=Shovel flatten4.ogg
|subtitle=Shovel flattens
|source=block
|description=When a shovel creates a [[dirt path]]
|id=item.shovel.flatten
|translationkey=subtitles.item.shovel.flatten
|volume=1.0
|pitch=1.0
|distance=16}}
{{Sound table
|sound=Random break.ogg
|subtitle=Item breaks
|source=player
|description=When a shovel's durability is exhausted
|id=entity.item.break
|translationkey=subtitles.entity.item.break
|volume=0.8
|pitch=0.8-1.2
|distance=16
|foot=1}}
{{edition|bedrock}}:
{{Sound table
|type=bedrock
|sound=Grass hit1.ogg
|sound2=Grass hit2.ogg
|sound3=Grass hit3.ogg
|sound4=Grass hit4.ogg
|sound5=Grass hit5.ogg
|sound6=Grass hit6.ogg
|source=block
|description=When a shovel creates a dirt path <ref group=sound>{{Bug|MCPE-114390}}</ref>
|id=use.grass
|volume=1.0
|pitch=0.8}}
{{Sound table
|sound=Random break.ogg
|source=player
|description=When a shovel's durability is exhausted
|id=random.break
|volume=1.0
|pitch=0.9
|foot=1}}
==Data values==
===ID===
{{edition|java}}:
{{ID table
|edition=java
|showforms=y
|generatetranslationkeys=y
|displayname=Wooden Shovel
|spritetype=item
|nameid=wooden_shovel
|form=item}}
{{ID table
|displayname=Stone Shovel
|spritetype=item
|nameid=stone_shovel
|form=item}}
{{ID table
|displayname=Iron Shovel
|spritetype=item
|nameid=iron_shovel
|form=item}}
{{ID table
|displayname=Diamond Shovel
|spritetype=item
|nameid=diamond_shovel
|form=item}}
{{ID table
|displayname=Golden Shovel
|spritetype=item
|nameid=golden_shovel
|form=item}}
{{ID table
|displayname=Netherite Shovel
|spritetype=item
|nameid=netherite_shovel
|form=item
|foot=1}}
{{edition|bedrock}}:
{{ID table
|edition=bedrock
|shownumericids=y
|showforms=y
|notshowbeitemforms=y
|generatetranslationkeys=y
|displayname=Wooden Shovel
|spritetype=item
|nameid=wooden_shovel
|id=309
|form=item}}
{{ID table
|displayname=Stone Shovel
|spritetype=item
|nameid=stone_shovel
|id=313
|form=item}}
{{ID table
|displayname=Iron Shovel
|spritetype=item
|nameid=iron_shovel
|id=296
|form=item}}
{{ID table
|displayname=Diamond Shovel
|spritetype=item
|nameid=diamond_shovel
|id=317
|form=item}}
{{ID table
|displayname=Golden Shovel
|spritetype=item
|nameid=golden_shovel
|id=323
|form=item}}
{{ID table
|displayname=Netherite Shovel
|spritetype=item
|nameid=netherite_shovel
|id=605
|form=item
|foot=1}}
==Achievements==
{{load achievements|MOAR Tools ;Oooh, shiny!}}
==Advancements==
{{load advancements|Oh Shiny}}
== Video==
<div style="text-align:center">{{yt|U4X-4S4neYM}}</div>
==History==
{{Missing information|there are so many missing blocks that need shovel to break}}
{{History|java indev}}
{{History||0.31|snap=20091231-2|[[File:Iron Shovel JE1.png|32px]] Added iron shovels which are located in the player's [[inventory]].
|Shovels cannot be crafted yet and are not functional in this version.}}
{{History|||snap=20100110|Shovels are now functional and can now be used to gather [[material]]s like [[dirt]], [[sand]] and [[gravel]] 400% faster than by hand.}}
{{History|||snap=20100124|A complete [[tool]] set is no longer given to the [[player]] on starting a new world. Instead, there are multiple [[chest]]s in the later called "[[Indev House]]" containing a stack of most accessible [[blocks]]/[[items]] including [[tools]].}}
{{History|||snap=20100128|[[File:Wooden Shovel JE1 BE1.png|32px]] [[File:Stone Shovel JE1 BE1.png|32px]] [[File:Diamond Shovel JE1 BE1.png|32px]] [[Tools]] now have tiers. Shovels made from wood, stone, and diamond have been added.
|[[File:Iron Shovel JE2 BE1.png|32px]] The texture of iron shovels has been changed.
|A shovel held by the player is now rendered to appear more 3D.|They cannot be crafted yet, but have been added to the item chest in the Indev house.}}
{{History|||snap=20100129|Wood, stone, iron, and diamond shovels can now be [[craft]]ed.}}
{{History|||snap=20100130|[[File:Golden Shovel JE1.png|32px]] Shovels can now be made out of gold.}}
{{History|||snap=20100201-1|[[Tools]], including shovels, now take [[damage]] when being used.
|Better tools, including shovels, now last longer.}}
{{History||20100206|[[File:Golden Shovel JE2 BE1.png|32px]] The texture of golden shovels has been changed.}}
{{History|java alpha}}
{{History||1.0.5_01|Shovels are now used to get snowballs out of snow layers.}}
{{History|java beta}}
{{History||April 9, 2011|link=https://www.youtube.com/watch?v=qy882ILYJMM&t=154s|[[File:Iron Shovel (pre-release).png|32px]] Alternate iron shovel texture was shown in [[Mojang]] test video.}}
{{History|java}}
{{History||1.2.4|snap=release|[[Spruce planks]], [[birch planks]], and [[jungle planks]] can now be used to craft wooden shovels.}}
{{History||1.3.1|snap=12w18a|Wooden shovels can now be used as [[fuel]] in a [[furnace]].}}
{{History|||snap=12w21a|Blacksmith [[villager]]s now [[trading|sell]] diamond shovels for 7 [[emerald]]s, and iron shovels for 4–5 emeralds.}}
{{History||1.6.1|snap=13w21a|Instead of replacing the barehanded [[damage]] ({{hp|1}}), shovels now add their damage onto the barehanded damage, which results in all shovels doing {{hp|1}} more damage than before.}}
{{History||1.7.2|snap=1.7.1|[[Acacia planks]] and [[dark oak planks]] can now be used to craft wooden shovels.}}
{{History||1.8|snap=14w02a|Tool smith villagers now [[trading|sell]] enchanted iron shovels for 5–7 emeralds. The previous trades are now unavailable, making diamond shovels [[non-renewable resource|non-renewable]].}}
{{History||1.9|snap=15w31a|A shovel can now be used on a [[grass block]] to create [[grass path]] blocks.
|[[Enchanting|Enchanted]] iron or diamond shovels can now be found in [[end city]] chests.}}
{{History|||snap=15w34a|Shovels now use the "attack strength" combat mechanic meter. The time it takes for the meter to fill up for a shovel is 0.8 seconds.}}
{{History|||snap=15w34c|Shovels now do more [[damage]] and take longer to recover.}}
{{History|||snap=15w35a|The damage of shovels has been reduced.}}
{{History|||snap=15w41a|Wooden shovels are now used to craft [[boat]]s.}}
{{History|||snap=15w50a|The [[sound]] <code>item.shovel.flatten</code> has been added to shovels.}}
{{History|||snap=16w04a|Wooden shovels are no longer used to [[crafting|craft]] boats.}}
{{History||1.11.1|snap=16w50a|Golden and iron shovels now [[smelting|smelt]] down into one of their respective [[nugget]]s.}}
{{History||1.13|snap=17w47a|Prior to [[1.13/Flattening|''The Flattening'']], these [[item]]s' numeral IDs were 269, 273, 256, 277 and 284.}}
{{History||1.14|snap=18w43a|[[File:Wooden Shovel JE2 BE2.png|32px]] [[File:Stone Shovel JE2 BE2.png|32px]] [[File:Iron Shovel JE3 BE2.png|32px]] [[File:Golden Shovel JE3 BE2.png|32px]] [[File:Diamond Shovel JE2 BE2.png|32px]] The textures of all shovels have been changed.}}
{{History|||snap=18w50a|Iron shovels can now be found in chests in [[village]] toolsmith houses.}}
{{History|||snap=19w11a|Toolsmith [[villager]]s now [[trading|sell]] stone shovels and enchanted diamond shovels, making diamond shovels [[renewable resource|renewable]] again.}}
{{History|||snap=19w13a|Toolsmith villagers now give stone shovels to players under the [[Hero of the Village]] effect.}}
{{History||1.15|snap=19w37a|Shovels can now be used to extinguish [[campfire]]s.}}
{{History||1.16|snap=20w06a|[[File:Netherite Shovel JE1.png|32px]] Added netherite shovels.
|Netherite shovels are obtained by combining one diamond shovel and one netherite ingot in a crafting table.
|[[Crimson planks]] and [[warped planks]] can now be used to craft wooden shovels.}}
{{History|||snap=20w09a|[[File:Diamond Shovel JE3 BE3.png|32px]] The texture of diamond shovels has been changed.
|Shovels can now break soul soil quickly.}}
{{History|||snap=20w10a|[[File:Netherite Shovel JE2 BE1.png|32px]] The texture of netherite shovels has been changed.
|Netherite shovels can no longer be crafted.
|Netherite shovels are now obtained by combining one diamond shovel and one netherite ingot in a smithing table.}}
{{History|||snap=20w15a|Stone shovels can now be crafted using [[blackstone]].}}
{{History|||snap=20w16a|Netherite shovels now generate randomly enchanted in [[bastion remnants]] chests.
|Golden shovels now generate randomly enchanted in [[ruined portal]] chests.}}
{{History|||snap=20w17a|Diamonds shovels now generate in place of netherite shovels in bastion remnant chests.}}
{{History||1.16.2|snap=20w30a|Increases the chance of finding randomly enchanted diamond shovels in bastion remnant chests.
|Unenchanted, undamaged diamond shovels can also be found in bastion remnant chests.}}
{{History||1.17|snap=21w08a|Stone shovels can now be crafted using [[cobbled deepslate]].}}
{{History||1.19|snap=22w11a|[[Mangrove planks]] can now be used to craft wooden shovels.}}
{{History|||snap=22w13a|Wooden shovels may now be found in [[ancient city]] [[furnace]]s.}}
{{History||1.20<br>(Experimental)|link=1.19.4|snap=23w04a|Upgrading diamond shovels to netherite shovels now requires the netherite upgrade [[smithing template]].}}
{{History||1.20|snap=23w14a|Shovel now breaks [[suspicious sand]] and [[suspicious gravel]] quickly.}}
{{History|upcoming java}}
{{History||Combat Tests|snap=1.14.3 - Combat Test|The attack speed for all shovels has been increased to 2.|The [[damage]] for all shovels has been decreased by {{hp|1}}.}}
{{History|pocket alpha}}
{{History||v0.2.0|[[File:Stone Shovel JE1 BE1.png|32px]] Added stone shovels.}}
{{History||v0.3.0|[[File:Wooden Shovel JE1 BE1.png|32px]] Added wooden shovels.
|Survival players no longer start out with an infinite durability stone shovel in the inventory.}}
{{History||v0.3.2|[[File:Iron Shovel JE2 BE1.png|32px]] [[File:Golden Shovel JE2 BE1.png|32px]] [[File:Diamond Shovel JE1 BE1.png|32px]] Added iron, gold, and diamond shovels.}}
{{History||v0.4.0|Removed stone shovels from the creative inventory.}}
{{History||v0.11.0|snap=build 1|Wooden shovels are now used to craft [[boat]]s.
|Iron shovels are now available in the [[creative]] [[inventory]].
|A shovel can now be used on a [[grass block]] to create [[grass path]] blocks.}}
{{History|||snap=build 11|Wooden, stone, golden, and diamond shovels are now available in the [[creative]] inventory.}}
{{History|||snap=build 12|All shovels have been removed from creative.}}
{{History|||snap=build 13|Shovel have been re-added to creative mode.}}
{{History||v0.12.1|snap=build 1|Shovels can now be [[enchanting|enchanted]].
|[[Zombie]]s now have a small chance to spawn holding an iron shovel.}}
{{History||v0.15.0|snap=build 1|Added [[husk]]s, which have a small chance to spawn holding an iron shovel.}}
{{History|pocket}}
{{History||1.0.0|snap=alpha 0.17.0.1|[[Enchanting|Enchanted]] iron and diamond shovels can now be found inside [[end city]] chests.}}
{{History||1.0.4|snap=alpha 1.0.4.0|Enchanted iron shovels are now [[trading|sold]] by toolsmith [[villager]]s for 4-5 [[emerald]]s.}}
{{History||1.1.0|snap=alpha 1.1.0.0|Iron and golden shovels are now [[smelting|smeltable]].}}
{{History|bedrock}}
{{History||1.10.0|snap=beta 1.10.0.3|[[File:Wooden Shovel JE2 BE2.png|32px]] [[File:Stone Shovel JE2 BE2.png|32px]] [[File:Iron Shovel JE3 BE2.png|32px]] [[File:Golden Shovel JE3 BE2.png|32px]] [[File:Diamond Shovel JE2 BE2.png|32px]] The textures of all shovels have been changed.}}
{{History||1.11.0|snap=beta 1.11.0.1|Iron shovels can now be found in [[village]] toolsmith houses.}}
{{History|||snap=beta 1.11.0.4|[[Vindicator]]s and [[pillager]]s that spawn in [[raid]]s can now drop iron shovels upon [[death]].
|[[Trading]] has been changed, toolsmith [[villager]]s now have a 25% chance to [[trading|sell]] enchanted iron shovels for 2 [[emerald]]s as part of their third tier trades.
|Stone shovels and [[enchanting|enchanted]] diamond shovels can now be [[trading|bought]] from toolsmith villagers.}}
{{History||1.16.0|snap=beta 1.16.0.51|[[File:Netherite Shovel JE2 BE1.png|32px]] Added netherite shovels.|Netherite shovels are obtained by combining one diamond shovel and one netherite ingot in a crafting table.
|[[File:Diamond Shovel JE3 BE3.png|32px]] The texture of diamond shovels has been changed.}}
{{History|||snap=beta 1.16.0.57|Netherite shovels can no longer be crafted.
|Netherite shovels are now obtained by combining one diamond shovel and one netherite ingot in a smithing table.
|Stone shovels can now be crafted using [[blackstone]].
|Netherite shovels now generate randomly enchanted in [[bastion remnants]] chests.
|Golden shovels now generate randomly enchanted in [[ruined portal]] chests.}}
{{History|||snap=beta 1.16.0.63|Diamonds shovels now generate in place of netherite shovels in bastion remnant chests.}}
{{History||1.20.10|snap=beta 1.20.10.20|The [[wooden shovel]] in the crafting recipe has been removed for all boat types except the bamboo raft.}}
{{History|||snap=beta 1.20.10.21|The bamboo raft recipe no longer needs a wooden shovel.}}
{{History|console}}
{{History||xbox=TU1|xbone=CU1|ps=1.0|wiiu=Patch 1|switch=1.0.1|[[File:Wooden Shovel JE1 BE1.png|32px]] [[File:Stone Shovel JE1 BE1.png|32px]] [[File:Iron Shovel JE2 BE1.png|32px]] [[File:Golden Shovel JE2 BE1.png|32px]] [[File:Diamond Shovel JE1 BE1.png|32px]] Added shovels (all five types).}}
{{History||xbox=TU53|xbone=CU43|ps=1.49|wiiu=Patch 23|switch=1.0.3|Iron and golden shovels are now [[smelting|smeltable]].}}
{{History||xbox=none|xbone=none|ps=1.90|wiiu=none|switch=none|[[File:Wooden Shovel JE2 BE2.png|32px]] [[File:Stone Shovel JE2 BE2.png|32px]] [[File:Iron Shovel JE3 BE2.png|32px]] [[File:Golden Shovel JE3 BE2.png|32px]] [[File:Diamond Shovel JE2 BE2.png|32px]] The textures of all shovels have been changed.}}
{{History|New Nintendo 3DS Edition}}
{{History||0.1.0|[[File:Wooden Shovel JE1 BE1.png|32px]] [[File:Stone Shovel JE1 BE1.png|32px]] [[File:Iron Shovel JE2 BE1.png|32px]] [[File:Golden Shovel JE2 BE1.png|32px]] [[File:Diamond Shovel JE1 BE1.png|32px]] Added shovels.}}
{{History|foot}}
==Issues==
{{issue list}}
==Gallery==
<gallery>
Shovel JINX.jpg|Official shovel T-shirt made by JINX.
Stone Shovel SDGP.png|Stone shovel in the [[Super Duper Graphics Pack]].
Adventure Shovel.png|An "adventure shovel" that can break blocks in [[adventure mode]].
</gallery>
===Enchanted shovels===
<gallery>
Enchanted_Wooden_Shovel.gif
Enchanted_Stone_Shovel.gif
Enchanted_Iron_Shovel.gif
Enchanted_Golden_Shovel.gif
Enchanted_Diamond_Shovel.gif
Enchanted_Netherite_Shovel.gif
</gallery>
==References==
{{reflist}}
== External Links ==
*[https://www.minecraft.net/en-us/article/taking-inventory-shovel Taking Inventory: Shovel] – Minecraft.net on November 16, 2018
{{items}}
[[Category:Combat]]
[[cs:Lopata]]
[[de:Schaufel]]
[[es:Pala]]
[[fr:Pelle]]
[[hu:Ásó]]
[[ja:シャベル]]
[[ko:삽]]
[[nl:Schep]]
[[pl:Łopata]]
[[pt:Pá]]
[[ru:Лопата]]
[[uk:Лопата]]
[[zh:锹]]</li></ul> | Sheep would eat grass to regrow wool on their bodies, reverting it to dirt. Often, the grass would regrow just as quickly as sheep would eat it. | ||||
0.30{{Extension DPL}}<ul><li>[[Saddle|Saddle]]<br/>{{about|normal saddles|the removed horse saddle|Horse Saddle}}
{{item
| image = <gallery>
Saddle (Pig).png | Pig
Saddle (Horse).png | Horse
Saddle (Strider).png | Strider
</gallery>
| invimage = Saddle
| renewable = Yes
| stackable = No
}}
A '''saddle''' is an [[item]] required to ride [[Pig|pigs]] and [[Strider|striders]] or control ridden [[camel]]s, [[Horse|horses]], [[Donkey|donkeys]] and [[Mule|mules]].
== Obtaining ==
=== Chest loot ===
{{LootChestItem|saddle}}
=== Fishing ===
Saddles can be obtained as a "treasure" item from [[fishing]] with a base chance (without fishing rod enchantments) of 0.8%.
=== Trading ===
Master-level [[Trading#Leatherworker|leatherworker]] [[villager]]s have a 50% chance to sell a saddle for 6 [[Emerald|emeralds]] as their trade.{{only|bedrock}} This trade is always offered in ''Java Edition''.
=== Mob loot ===
Any mob that the player equips with a saddle drops the saddle upon death.
A [[strider]] may spawn being ridden by a [[zombified piglin]], which causes it to spawn wearing a saddle. This saddle always drops when the strider is killed.
A [[ravager]] always spawns with a saddle and always drops the saddle upon death. Looting does not affect the drop.
== Usage ==
[[File:SaddledHorse.png|thumb|right|A [[horse]] equipped with a saddle.]]
While [[camel]]s, [[horse]]s, [[donkey]]s, [[mule]]s and [[Skeleton Horse|skeleton horse]]s{{Only|Java}} can always be ridden, a saddle is required to control them. These mobs (only after being tamed, in the case of equine mobs) can be equipped with a saddle by placing it in their inventory, which can be opened by pressing {{control|use}} while holding a saddle or {{control|sneaking}}. The saddle can be unequipped by removing it from {{SlotSprite|Saddle}} the specific inventory slot.
Saddles are required to ride [[Pig|pigs]] and [[Strider|striders]], but even with a saddle their movement cannot be controlled like other mobs. A [[Carrot on a Stick|carrot on a stick]] (for pigs) or a [[Warped Fungus on a Stick|warped fungus on a stick]] (for striders) is required to direct these mobs. {{control|Using}} a saddle on one of these mobs equips them with the saddle, and, since they have no inventory, there is no way to retrieve the saddle without killing the mob.
Animals can also be equipped with saddles by a [[dispenser]].
Although [[ravager]]s are equipped with saddles and sometimes ridden by other mobs, the [[player]] is unable to ride ravagers.
== Sounds ==
{{edition|java}}:
{{Sound table
|rowspan=4
|sound=Saddle equip.ogg
|source=neutral
|subtitle=Saddle equips
|description=When a saddle is equipped to a camel
|id=entity.camel.saddle
|translationkey=subtitles.entity.horse.saddle
|volume=0.5
|pitch=0.8
|distance=16}}
{{Sound table
|subtitle=MC-184399
|source=neutral
|description=When a saddle is equipped to a strider
|id=entity.strider.saddle
|translationkey=-
|volume=0.5
|pitch=1.0
|distance=16}}
{{Sound table
|subtitle=Saddle equips
|source=neutral
|description=When a saddle is equipped to a horse, donkey, mule, skeleton horse, or zombie horse
|id=entity.horse.saddle
|translationkey=subtitles.entity.horse.saddle
|volume=0.5
|pitch=1.0
|distance=16}}
{{Sound table
|subtitle=Saddle equips
|source=neutral
|description=When a saddle is equipped to a pig
|id=entity.pig.saddle
|translationkey=subtitles.entity.pig.saddle
|volume=0.5
|pitch=1.0
|distance=16
|foot=1}}
{{edition|bedrock}}:
{{Sound table
|type=bedrock
|rowspan=3
|sound=Saddle equip.ogg
|source=neutral
|description=When a saddle is equipped to a camel
|id=mob.horse.leather
|volume=1.0
|pitch=1.0}}
{{Sound table
|source=neutral
|description=When a saddle is equipped to a horse, mule, skeleton horse, or zombie horse
|id=mob.horse.leather
|volume=0.6
|pitch=1.0}}
{{Sound table
|source=neutral
|description=When a saddle is equipped to a donkey
|id=mob.horse.leather
|volume=0.5
|pitch=1.0
|foot=1}}
== Data values ==
=== ID ===
{{edition|java}}:
{{ID table
|edition=java
|showforms=y
|generatetranslationkeys=y
|displayname=Saddle
|spritetype=item
|nameid=saddle
|form=item
|foot=1}}
{{edition|bedrock}}:
{{ID table
|edition=bedrock
|shownumericids=y
|showforms=y
|notshowbeitemforms=y
|generatetranslationkeys=y
|displayname=Saddle
|spritetype=item
|nameid=saddle
|id=371
|form=item
|foot=1}}
== Achievements ==
{{load achievements|When Pigs Fly}}
== Advancements ==
{{load advancements|This Boat Has Legs}}
== History ==
{{needs render|type=old|isolated saddles in 1.13 dev|section=11}}
{{History|java infdev}}
{{History||20100625-2|[[File:Saddle (Pig) JE1 BE1.png|32px]] [[File:Saddle JE1 BE1.png|32px]] Added saddles.
|Saddles do not [[drops|drop]] from saddled [[pig]]s.
|Saddles can be found in the new [[dungeon]] [[chest]]s.}}
{{History|java}}
{{History||1.2.4|snap=release|When baby animals were introduced, baby [[pig]]s could be ridden just like adult pigs. After this version, baby pigs can no longer be saddled.}}
{{History||1.3.1|snap=12w21a|Saddles can now be [[trading|bought]] from butcher [[villager]]s for 6–7 [[emerald]]s each, and thus have become [[renewable resource|renewable]].}}
{{History||1.4.2|snap=12w36a|Saddles now [[drops|drop]] from killing saddled [[pig]]s.
|Added [[Carrot on a Stick|carrot on a stick]] to direct saddled pigs, effectively controlling them.}}
{{History|||snap=12w37a|Pigs can now jump when being ridden.}}
{{History||1.6.1|snap=13w18a|Regular saddles can now be used to ride [[horse]]s, while previously they required [[Horse Saddle|horse saddle]]s.
|Added saddles to the loot tables of [[mineshaft]] minecarts, [[stronghold]] altar chests, [[village]] blacksmith chests, as well as [[Desert pyramid|desert]] and [[jungle pyramid]]s.
|Added chests to [[Nether Fortress|nether fortresses]], where saddles can be found.}}
{{History||1.7.2|snap=13w36a|Saddles can now be [[fishing|fished]] with [[Fishing Rod|fishing rod]]s and are described as treasure.}}
{{History||1.8|snap=14w02a|[[Trading]] has been changed: leatherworker [[villager]]s now [[trading|sell]] saddles for 8–10 [[emerald]]s each, and butchers no longer [[trading|trade]] saddles.}}
{{History||1.9|snap=15w31a|Saddles can now be found in [[End City|end city]] [[chest]]s.}}
{{History|||snap=15w43a|The average yield of saddles in [[Nether Fortress|nether fortress]] chests has been slightly decreased.}}
{{History|||snap=15w44a|Saddles have been removed from [[mineshaft]] chests.
|The average yield of saddles in [[dungeon]] chests has been decreased.
|The average yield of saddles in [[desert pyramid|desert temple]] chests has been increased.}}
{{History||1.13|snap=17w45a|[[File:White Horse (Saddle) 17w45a.png|50px]] The models of the horse's saddle has been changed.}}
{{History|||snap=17w46a|[[File:White Horse (Saddle) 17w46a.png|50px]] The models of the horse's saddle has been changed once again.}}
{{History|||snap=17w47a|Prior to [[Java Edition 1.13/Flattening|''The Flattening'']], this [[item]]'s numeral ID was 329.}}
{{History|||snap=18w03a|[[File:White Horse (Saddle) 18w03a.png|50px]] The models of the horse's saddle has been changed once again.}}
{{History|||snap=pre2|[[File:White Horse (Saddle) 1.13pre2.png|50px]] The models of the horse's saddle has been changed once again. The reins bit has now been rendered. Also, the lines of the reins are no longer rendered except when riding.}}
{{History||1.14|snap=18w43a|Added [[ravager|illager beast]]s, which [[drops|drop]] saddles.
|[[File:Saddle (Pig) JE2 BE2.png|32px]] [[File:Saddle (Horse) JE2 BE2.png|32px]] <br>[[File:Saddle JE2 BE2.png|32px]] The textures of saddles have been changed.}}
{{History|||snap=18w48a|Saddles can now be found in [[chest]]s in [[village]] tanneries.}}
{{History|||snap=18w49a|Saddles can now be found in chests in [[savanna]] village houses.}}
{{History||1.16|snap=20w13a|[[File:Saddle (Strider) JE1 BE1.png|32px]] Added [[strider]]s, which can be ridden with saddles.}}
{{History|||snap=20w15a|Saddles placed in a [[dispenser]] can now saddle pigs, striders, and tamed horses, donkeys and mules.}}
{{History|||snap=20w16a|Saddles now generate in [[Bastion Remnant|bastion remnant]] chests.}}
{{History|||snap=20w17a|[[File:Saddle (Strider) JE2.png|32px]] The texture of the strider saddles has been changed. The front and back orientation of the saddle has been corrected.<ref>{{bug|MC-176116}}</ref>}}
{{History||1.19|snap=22w13a|Saddles may now be found in [[ancient city]] [[chest]]s.}}
{{History||1.20<br>(Experimental)|link=1.19.3|snap=22w42a|Saddles can be used to ride [[camel]]s with the use of a built-in experimental data pack.}}
{{History|pocket alpha}}
{{History||v0.7.0|[[File:Saddle JE1 BE1.png|32px]] Added saddles. They are currently unobtainable and have no practical usage since they cannot be equipped on any mobs.}}
{{History||v0.9.0|snap=build 1|Saddles can now be obtained from [[village]] blacksmith [[chest]]s.}}
{{History||v0.11.0|snap=build 1|Saddles can now be [[fishing|fished]] with [[fishing rod]]s and are described as treasure.}}
{{History||v0.12.1|snap=build 1|Saddles can now be found in [[nether fortress]]es.}}
{{History||v0.13.0|snap=build 1|Saddles can now be found in [[desert temple]]s.}}
{{History||v0.15.0|snap=build 1|[[File:Saddle (Pig) JE1 BE1.png|32px]] [[File:Saddle (Horse) JE1 BE1.png|32px]] Saddles can now be used for riding [[horse]]s and [[pig]]s.|Saddles can now be found inside [[jungle temple]]s.}}
{{History||snap=?||Added saddles to the [[Creative inventory]].{{info needed}}}}
{{History|pocket}}
{{History||1.0.0|snap=alpha 0.17.0.1|Saddles can now be found in [[end cities]].}}
{{History||1.0.4|snap=alpha 1.0.4.0|Saddles are now [[trading|sold]] by leatherworker [[villager]]s for 8-10 [[emerald]]s as their only third tiers [[trading|trades]].}}
{{History|bedrock}}
{{History||1.10.0|snap=beta 1.10.0.3|Saddles can now be found in [[plains]] [[village]] tannery and weaponsmith [[chest]]s.
|Added [[ravager]]s, which [[drops|drop]] a saddle upon death.
|[[File:Saddle (Pig) JE2 BE2.png|32px]] [[File:Saddle (Horse) JE2 BE2.png|32px]] <br>[[File:Saddle JE2 BE2.png|32px]] The textures of saddles have been changed.}}
{{History||1.11.0|snap=beta 1.11.0.1|Saddles can now be found in [[savanna]], [[snowy taiga]], [[taiga]] and [[snowy tundra]] village tannery [[chest]]s.
|Saddles can now be found in savanna, taiga, snowy taiga, and [[desert]] village weaponsmith chests.
|Saddles can now be found in savanna [[village]] house chests.}}
{{History|||snap=beta 1.11.0.4|[[Trading]] has been changed. Leatherworker [[villager]]s now have 50% chance to [[trading|sell]] saddles for 10 [[emerald]]s as part of their last tier [[trading|trade]].}}
{{History||1.12.0|snap=beta 1.12.0.3|The trading price of saddles has been lowered to 6 emeralds.}}
{{History||1.16.0|snap=beta 1.16.0.57|[[File:Saddle (Strider) JE1 BE1.png|32px]] Added [[strider]]s, which can be ridden with saddles.|Saddles now generate in [[Bastion Remnant|bastion remnant]] chests.}}
{{History||1.20.0<br>(Experimental)|link=Bedrock Edition 1.19.50|snap=beta 1.19.50.21|Saddles can now be used to ride [[camel]]s with the use of the "[[Bedrock Edition 1.20|Next Major Update]]" [[experimental]] toggle.}}
{{History|console}}
{{History||xbox=TU1|xbone=CU1|ps=1.0|wiiu=Patch 1|switch=1.0.1|[[File:Saddle (Pig) JE1 BE1.png|32px]] <br>[[File:Saddle JE1 BE1.png|32px]] Added saddles.}}
{{History||xbox=none|xbone=none|ps=1.90|wiiu=none|switch=none|[[File:Saddle (Pig) JE2 BE2.png|32px]] [[File:Saddle (Horse) JE2 BE2.png|32px]] <br>[[File:Saddle JE2 BE2.png|32px]] The textures of saddles have been changed.}}
{{History|3ds}}
{{History||0.1.0|[[File:Saddle (Pig) JE1 BE1.png|32px]] <br>[[File:Saddle JE1 BE1.png|32px]] Added saddles.}}
{{History|foot}}
== Issues ==
{{issue list}}
== Trivia ==
* A saddle is considered "armor" by the game, but the value of protection to the animal is zero.
* A saddle on a pig can still be seen if the pig is afflicted with [[Invisibility]].
* When riding a saddled mob, the hunger bar is replaced by hearts (representing the mounted mob's health) resembling the look of the saddle.
== Gallery ==
<gallery>
File:Pig saddle.png|A [[player]] riding a [[pig]] (before [[Java Edition Beta 1.8|Beta 1.8]]).
File:Horse saddle.png|A player riding a [[horse]].
File:13w21a-new-HorseUI-inventory.png|The horse interface implemented in [[Java Edition 13w21a|13w21a]] that allows for the removal of saddles, but only on horses, [[donkey]]s or [[mule]]s.
File:Saddled Mule (picture).png|Mule equipped with both a saddle and a [[chest]].
File:GodSpawner.png|A saddle found in a monster room chest, which coincidentally contains an [[enchanted golden apple]].
</gallery>
== See also ==
* [[Transportation]]
== References ==
{{reflist}}
{{items}}
[[cs:Sedlo]]
[[de:Sattel]]
[[es:Montura]]
[[fr:Selle]]
[[hu:Nyereg]]
[[it:Sella]]
[[ja:鞍]]
[[ko:안장]]
[[nl:Zadel]]
[[pl:Siodło]]
[[pt:Sela]]
[[ru:Седло]]
[[zh:鞍]]
[[Category:Renewable resources]]
[[uk:Сідло]]</li><li>[[String|String]]<br/>{{Block
| image = <gallery>
String JE2 BE2.png | String
Tripwire (NESW).png | Tripwire
</gallery>
| extratext = View [[#Gallery|all renders]]
| transparent = Yes
| light = No
| tool = any
| renewable = Yes
| stackable = Yes (64)
| flammable = No
| lavasusceptible = No
}}
'''String''' is an item used in [[crafting]] recipes such as [[bow]]s, [[fishing rod]]s and [[lead]]s. When placed as a [[block]], string becomes '''tripwire''', which can be combined with [[Tripwire Hook|tripwire hooks]] to form a tripwire circuit.
== Obtaining==
String can be obtained from [[drop]]s, breaking [[cobweb]]s, [[fishing]], [[bartering]], and as gifts from [[cat]]s. String can be looted from [[jungle temple]]s, [[desert pyramid]] chests, and [[dungeon]]s.
===Breaking ===
Tripwire can be {{control|mine|text=mined}} instantly with any [[tool]], dropping string. Tripwire is also removed and drops string as an [[item]] when:
*[[Water]] flows into its space
* A [[piston]] pushes it or moves a [[block]] into its space
Tripwire is destroyed without dropping string if [[lava]] flows into its space.
A [[cobweb]] drops string when it is broken in these ways (see also {{section link|Cobweb|Usage}}):
*Breaking a cobweb with a [[sword]]
*Pushing a cobweb with a [[piston]]
*[[Water]] breaking a cobweb by flowing over it (flowing [[lava]] destroys cobwebs without leaving string)
===Natural generation===
Five pieces of tripwire generate naturally in every [[jungle temple]].
===Mob loot ===
[[Spider]]s and [[cave spider]]s drop 0–2 string upon death. The maximum is increased by 1 per level of [[Looting]], for a maximum of 0–5 string with Looting III.
[[Strider]]s drop 2–5 string upon death. The maximum is increased by 1 per level of [[Looting]], for a maximum of 2–8 string with Looting III.{{only|Java|short=1}}
[[Cat]]s drop 0–2 string upon death, unaffected by Looting.<ref>{{bug|MC-200707||Looting does not increase drops for iron golems and cats}}</ref>
===Chest loot===
{{LootChestItem|string}}
===Fishing===
String has a 0.6% ({{frac|3|500}}) chance of being caught when [[fishing]] with an unenchanted fishing rod. The chance decreases to 0.5% ({{frac|1|200}}), 0.4% ({{frac|1|250}}), and 0.3% ({{frac|3|1000}}) if the fishing rod is enchanted with [[Luck of the Sea]] at enchantment levels I, II, and III, respectively.
===Cat gifts===
{{main|Cat#Gifts}}
Tamed [[cat]]s have a 70% chance of giving the [[player]] a gift when they wake up from a [[bed]], and the gift has a 16.13% chance to be a string.
===Bartering ===
[[Piglin]]s may [[barter]] 3-9 string when given a [[gold ingot]].
== Usage==
String can be used as a crafting ingredient and tripwire can be used as a [[redstone circuit]] component. It can also be used to keep [[player]]s from ender-pearling through that space.
=== Crafting ingredient===
{{crafting usage}}
===Redstone component===
{{redirect|Tripwire|tripwire hooks|Tripwire Hook}}
{{see also|Redstone circuits}}
String can be placed as tripwire, which can be used to detect [[entity|entities]] as part of a tripwire circuit. [[Observer]]s can also be used with a tripwire to generate redstone signals.
;Placement
To place tripwire, {{control|use}} string while pointing at a surface facing the space the tripwire should occupy.
{{Schematic | caption =
'''Tripwire Circuit'''
|SB|th-$w|tw-$ew|th-$e|SB
}}
:In order to activate [[tripwire hook]]s, tripwire must be part of a "tripwire circuit": a straight line of [[block]]s consisting of a block with a tripwire hook attached to it, a "tripwire line" (1 to 40 blocks of tripwire), and a second tripwire hook attached to another block.
;Activation
Tripwire activates if almost any [[entity]] ([[player]]s, [[mob]]s, [[minecart]]s, [[boat]]s, [[item]]s, [[arrow]]s, etc.) intersects its collision mask. The tripwire remains active until there are no entities intersecting its collision mask. Thrown [[potion]]s, some arrows, thrown [[ender pearl]]s, and thrown [[eyes of ender]] do not activate tripwire.
;Behavior
An active tripwire updates adjacent [[block]]s (for example, it can activate a [[Tutorials/Block update detector|BUD circuit]]). Additionally, active tripwires that are part of valid tripwire circuits cause the attached tripwire hooks to activate (producing [[redstone]] power). Active tripwires do ''not'' themselves produce redstone power.
When tripwire is broken (including by being washed away by spreading [[water]] {{in|java}}) after being part of a valid tripwire circuit, it activates the attached tripwire hooks. {{IN|JE}}, it activates for 5 redstone ticks (10 game [[tick]]s, or 0.5 seconds barring lag). {{IN|BE}}, it activates for 6 redstone ticks (14 game [[tick]]s, or 0.6 seconds barring lag). It does not produce the signal if it is broken using [[shear]]s.
===Trading===
Novice-level fisherman [[villager]]s have a 50% chance to buy 20 string as part of their first-tier trade.
Journeyman-level fletcher villagers buy 14 string for 1 [[emerald]] as part of their trade.
==Sounds==
=== Generic===
{{Sound table/Block/Normal}}
===Unique===
{{edition|java}}:
{{Sound table
|rowspan=3
|sound=Click.ogg
|subtitle=Tripwire attaches
|source=block
|description=When a tripwire line is completed
|id=block.tripwire.attach
|translationkey=subtitles.block.tripwire.attach
|volume=0.4
|pitch=0.7
|distance=16}}
{{Sound table
|subtitle=Tripwire clicks
|source=block
|description=When a tripwire line deactivates
|id=block.tripwire.click_off
|translationkey=subtitles.block.tripwire.click
|volume=0.4
|pitch=0.5
|distance=16}}
{{Sound table
|subtitle=Tripwire clicks
|source=block
|description=When a tripwire line activates
|id=block.tripwire.click_on
|translationkey=subtitles.block.tripwire.click
|volume=0.4
|pitch=0.6
|distance=16}}
{{Sound table
|sound=Arrow hit1.ogg
|sound2=Arrow hit2.ogg
|sound3=Arrow hit3.ogg
|sound4=Arrow hit4.ogg
|subtitle=Tripwire detaches
|source=block
|description=When a tripwire hook in a tripwire line is destroyed
|id=block.tripwire.detach
|translationkey=subtitles.block.tripwire.detach
|volume=0.4
|pitch={{frac|12|11}}-{{frac|4|3}}
|distance=16
|foot=1}}
{{edition|bedrock}}:
{{Sound table
|type=bedrock
|rowspan=3
|sound=Click.ogg
|source=block
|description=When a tripwire line is completed
|id=block.click
|volume=0.2
|pitch=0.7}}
{{Sound table
|type=bedrock
|source=block
|description=When a tripwire line deactivates
|id=random.click
|volume=0.2
|pitch=0.5}}
{{Sound table
|source=block
|description=When a tripwire line activates
|id=random.click
|volume=0.2
|pitch=0.6}}
{{Sound table
|sound=Arrow hit1.ogg
|sound2=Arrow hit2.ogg
|sound3=Arrow hit3.ogg
|sound4=Arrow hit4.ogg
|source=block
|description=When a tripwire hook in a tripwire line is destroyed
|id=block.bowhit
|volume=0.4
|pitch=1.1-1.33
|foot=1}}
==Data values==
===ID===
{{edition|java}}:
{{ID table
|edition=java
|showblocktags=y
|showforms=y
|generatetranslationkeys=y
|displayname=Tripwire
|spritetype=block
|nameid=tripwire
|blocktags=wall_post_override
|form=block}}
{{ID table
|displayname=String
|spritetype=item
|nameid=string
|form=item
|foot=1}}
{{edition|bedrock}}:
{{ID table
|edition=bedrock
|shownumericids=y
|showaliasids=y
|showforms=y
|generatetranslationkeys=y
|displayname=Tripwire
|spritetype=block
|nameid=trip_wire
|aliasid=tripWire
|id=132
|form=block
|itemform=trip_wire
|translationkey=tile.tripWire.name}}
{{ID table
|displayname=String
|spritetype=item
|nameid=string
|id=326
|form=item
|foot=1}}
===Block states===
{{see also|Block states}}
{{/BS}}
==Video==
<div style="text-align:center">
<span style="display:inline-block">{{yt|WUlhmu3JbcQ}}</span>
<span style="display:inline-block">{{yt|-7jEtrETxwc}}</span>
</div>
==History==
{{History|java indev}}
{{History||0.31|snap=20100129|[[File:String JE1 BE1.png|32px]] Added string.}}
{{History|||snap=20100130|[[Bow]]s can now be [[crafting|crafted]] using string.}}
{{History|||snap=20100201-2|[[Wool|Cloth]] can now be crafted using nine string.}}
{{History||20100219|[[Spider]]s now [[drops|drop]] string.}}
{{History|java infdev}}
{{History||20100625-2|String can now be found inside [[chest]]s in the new [[dungeon]]s.}}
{{History|java alpha}}
{{History||v1.1.1|String can now be used to craft [[fishing rod]]s.}}
{{History|java beta}}
{{History||1.5|Introduced [[cobweb]]s, which [[drops|drop]] string when [[breaking|broken]] with a [[sword]].}}
{{History||1.6.6|Wool is now crafted from four string rather than nine.}}
{{History||1.7|Cobwebs now drop string when broken using [[shears]].}}
{{History||1.8|snap=Pre-release|Cobwebs now generate naturally, making them a viable method to obtain string.}}
{{History|java}}
{{History||May 28, 2012|link=none|Tripwire was first revealed on [[Dinnerbone]]'s [[wikipedia:Twitter|Twitter]].<ref>{{tweet|Dinnerbone|207154562711289856|It's a tripwire, yeah.|May 28, 2012}}</ref><ref>{{tweet|Dinnerbone|207155073023868928|You place it yourself. String is now placeable|May 28, 2012}}</ref> Dinnerbone released a [{{ytl|mWuvXIzYcTc}} video] showing him experimenting with tripwire before its release.}}
{{History||1.3.1|snap=12w22a|String can now be placed on the ground as tripwire.}}
{{History|||snap=12w23a|Tripwire can now activated by most [[entity|entities]] (including [[arrow]]s).
|The max distance of tripwire has now been increased from 18 to 40 [[block]]s.
|Tripwire now has a translucent texture.}}
{{History||1.6.1|snap=13w18a|String can now be used to craft [[lead]]s.}}
{{History||1.8|snap=14w02a|String can now be [[trading|sold]] to fletcher and fisherman [[villager]]s, at 15–20 string for 1 [[emerald]].}}
{{History|||snap=release|Tripwire is now translucent.}}
{{History||1.9|snap=15w44a|String now generates in [[desert temple]] [[chest]]s.
|The average yield of string in [[dungeon]] chests has now more than doubled.}}
{{History|||snap=15w49a|The <code>suspended</code> block state has now been removed from tripwire.}}
{{History||1.11|snap=16w39a|String can now be found in [[woodland mansion]] [[chest]]s.}}
{{History||1.13|snap=17w47a|Prior to [[1.13/Flattening|''The Flattening'']], this [[block]]'s numeral ID was 132 and the [[item]]'s was 287.
|Tripwire can now be disarmed.}}
{{History||1.14|snap=18w43a|String can now be used to craft [[crossbow]]s and a [[loom]].
|[[File:String JE2 BE2.png|32px]] The texture of string has now been changed.}}
{{History|||snap=18w44a|[[Cat]]s now drop 0-2 string upon death.
|Cats now offer string as [[Cat#Gifts|gift]]s.}}
{{History|||snap=18w45a|String can now be used to craft [[scaffolding]].}}
{{History|||snap=18w47a|String can now be found inside [[pillager outpost]] [[chest]]s.}}
{{History||1.16|snap=20w09a|String can now be obtained through [[bartering]] with [[piglin]]s.}}
{{History|||snap=20w13a|[[Strider]]s now [[drops|drop]] string upon [[death]].}}
{{History|||snap=20w16a|String now generates in [[bastion remnant]] chests.}}
{{History||1.17|snap=20w45a|String can now be used to craft [[bundle]]s and [[candle]]s.}}
{{History|||snap=21w13a|The model of the tripwire has been tweaked that the underside texture is mirrored.}}
{{History|||snap=21w19a|String can no longer be used to craft bundles and candles.}}
{{History|||snap=Pre-release 1|String can once again used to craft candles.}}
{{History||1.18|snap=Experimental Snapshot 1|String can now once again be used to craft bundles.}}
{{History|||snap=21w37a|String once again can no longer be used to craft bundles.}}
{{History||1.20<br>(Experimental)|link=1.19.3|snap=22w42a|String can now once again be used to craft bundles.}}
{{History||1.20<br>(Experimental)|link=1.19.4|snap=23w07a|String can now be used to craft [[brush]]es.}}
{{History|||snap=1.19.4-pre1|String can no longer be used to craft [[brush]]es.}}
{{History||1.20|snap=23w12a|String can now be found in [[suspicious gravel]] and [[suspicious sand]] in [[trail ruins]].}}
{{History|||snap=23w16a|String no longer generates in [[suspicious sand]] in [[trail ruins]].|Due to the split of the archaeological loot tables for the suspicious gravel within the [[trail ruins]]; string now is in the common loot.}}
{{History|pocket alpha}}
{{History||v0.2.0|[[File:String JE1 BE1.png|32px]] Added string. It is currently unobtainable and serves no purpose.}}
{{History||v0.3.3|Added spiders, which drop string when they die.
|String can now be used to [[crafting|craft]] [[bow]]s.}}
{{History||v0.4.0|String can now be crafted into [[wool]].}}
{{History||v0.11.0|snap=build 1|String can now be used to craft [[fishing rod]]s.
|String can now be caught as a junk [[item]] from [[fishing]].}}
{{History||v0.13.0|snap=build 1|String can now be placed on the ground as a tripwire.
|String can now be found in [[desert temple]] [[chest]]s.}}
{{History||v0.15.0|snap=build 1|String can now be used to craft [[lead]]s.
|Tripwire now generates in [[jungle temple]]s.}}
{{History|pocket}}
{{History||1.0.4|snap=alpha 1.0.4.0|15-20 String can now be [[trading|sold]] to fletcher and fisherman [[villager]]s for an [[emerald]].}}
{{History||1.1.0|snap=alpha 1.1.0.0|String can now be found in [[woodland mansion]] [[chest]]s.
|[[Cobweb]]s can now be used to [[crafting|craft]] 9 string.}}
{{History|bedrock}}
{{History||1.8.0|snap=beta 1.8.0.8|Tamed [[cat]]s can now give the [[player]] string as gifts.
|String can now be used to craft [[scaffolding]].
|[[Cat]]s now [[drops|drop]] 0–2 string.}}
{{History|||snap=beta 1.8.0.10|String can now be used to craft [[crossbow]]s.}}
{{History||1.9.0|snap=beta 1.9.0.0|Tripwire string that is broken now activates, unless broken with [[shears]].}}
{{History||1.10.0|snap=beta 1.10.0.3|String can now be found in [[pillager outpost]] chests.
|String can now be used to craft a [[loom]].
|[[File:String JE2 BE2.png|32px]] The texture of string has now been changed.}}
{{History||1.11.0|snap=beta 1.11.0.4|[[Trading]] has now been changed, fisherman [[villager]]s now have a 50% chance to [[trading|buy]] 20 string as part of their first-tier trade.
|Fletcher villagers now buy 14 string for an [[emerald]] as their third-tier trade.}}
{{History||1.16.0|snap=beta 1.16.0.57|String can now be obtained through [[bartering]] with [[piglin]]s.
|Added [[strider]]s, which [[drops|drop]] string upon [[death]].
|String can now be found in [[bastion remnant]] chests.}}
{{History||1.17.10|snap=beta 1.17.10.22|String can now be used to craft [[candles]].}}
{{History||1.18.30|snap=beta 1.18.30.26|The ID of tripwire block is changed from <code>tripWire</code> to <code>trip_wire</code>}}
{{History||1.20.10|snap=beta 1.20.10.20|String can no longer be crafted from cobwebs.}}
{{History|console}}
{{History||xbox=TU1|xbone=CU1|ps=1.0|wiiu=Patch 1|switch=1.0.1|[[File:String JE1 BE1.png|32px]] Added string.}}
{{History||xbox=TU14|ps=1.04|String can now be placed on the ground as [[tripwire]].}}
{{History||xbox=none|xbone=none|ps=1.88|wiiu=none|switch=none|Tripwires are now activated when [[breaking|broken]], unless broken with [[shears]].}}
{{History||xbox=none|xbone=none|ps=1.90|wiiu=none|switch=none|[[File:String JE2 BE2.png|32px]] The texture of string has now been changed.}}
{{History|new 3ds}}
{{History||0.1.0|[[File:String JE1 BE1.png|32px]] Added string.}}
{{History|foot}}
===Tripwire "item"===
{{:Technical blocks/Tripwire}}
== Issues ==
{{Issue list}}
== Gallery ==
<gallery>
Tripwire (NS).png|
Tripwire (N).png|
Tripwire (E).png|
Tripwire (S).png|
Tripwire (W).png|
Tripwire (EW).png|
Tripwire (NE).png|
Tripwire (ES).png|
Tripwire (SW).png|
Tripwire (NW).png|
Tripwire (ESW).png|
Tripwire (NSW).png|
Tripwire (NEW).png|
Tripwire (NES).png|
</gallery>
=== Screenshots ===
<gallery>
DinnerboneTripwireDev3.png|The first image of tripwires [[dinnerbonetweet:207154292593917952|released]] by Mojang.
DinnerboneTripwireDev4.png|An image [[dinnerbonetweet:207294114398605312|released]] by Mojang testing visibility of tripwires from a distance at night.
DinnerboneTripwireDev5.png|The same room viewed from the same angle, in daytime.
Dinnerbone String.png|Power lines made of suspended string blocks.
</gallery>
==References==
{{Reflist}}
== External Links ==
*[https://www.minecraft.net/en-us/article/taking-inventory--string Taking Inventory: String] – Minecraft.net on May 14, 2020
{{Redstone}}
{{Items}}
{{Blocks|Utility}}
[[Category:Redstone mechanics]]
[[Category:Mechanics]]
[[Category:Mechanisms]]
[[Category:Generated structure blocks]]
[[Category:Non-solid blocks]]
[[cs:Vlákno]]
[[de:Faden]]
[[es:Hilo]]
[[fr:Ficelle]]
[[hu:Fonál]]
[[it:Cordicella]]
[[ja:糸]]
[[ko:실]]
[[nl:Draad]]
[[pl:Nić]]
[[pt:Linha]]
[[ru:Нить]]
[[th:เส้นใย]]
[[uk:Нитка]]
[[zh:线]]</li></ul> | Attempting to place grass blocks by means of hacking one's inventory in Classic Creative Multiplayer will cause the server to automatically kick the player. Due to Creative mode's lack of dynamic lighting, grass that is in shadow will eventually die and change to dirt. Grass in one's inventory used to have a green color on all sides of the block. | ||||
| indev | |||||
January 26, 2010{{Extension DPL}}<ul><li>[[Gunpowder|Gunpowder]]<br/>{{Item
| image = Gunpowder.png
| stackable = Yes (64)
| renewable = Yes
}}
'''Gunpowder''' is an item that is used for [[explosion]]-related recipes, and as an ingredient in potions.
== Obtaining ==
=== Mob loot ===
==== Creepers ====
[[Creeper]]s can drop 0-2 pieces of gunpowder upon death. [[Looting]] can increase this by one per level, with a maximum of 5 gunpowder.
==== Ghasts ====
[[Ghast]]s can drop 0-2 pieces of gunpowder upon death. Looting can increase this by one per level, with a maximum of 5 gunpowder.
==== Witches ====
[[Witch]]es can drop 0-6 pieces of gunpowder upon death. Looting can increase this by three per level, with a maximum of 15 gunpowder.
<!--
=== Crafting ===
{{Crafting
|showdescription=1
|description= {{only|bedrock|education}}
|Coal; Charcoal
|Sulfur
|Bone Meal
|Output= Gunpowder, 3
|type= Miscellaneous
}}
-->
=== Trading ===
<!--Wandering trader always offer one of the 5 item (one of them is gunpowder)-->
[[Wandering trader]]s have {{frac|1|6}} chance to sell gunpowder for an [[emerald]].
=== Chest loot ===
{{LootChestItem|gunpowder}}
== Usage ==
=== Crafting ingredient ===
{{crafting usage}}
=== Brewing ingredient ===
{{brewing
|name=[[Splash Potion]]
|showname=1
|Gunpowder
|Splash Mundane Potion; Splash Potion of Healing; Splash Potion of Fire Resistance; Splash Potion of Harming; Splash Potion of Poison; Splash Potion of Regeneration; Splash Potion of Slowness; Splash Potion of Strength; Splash Potion of Swiftness; Splash Potion of Weakness; Splash Potion of Night Vision; Splash Potion of Invisibility; Splash Potion of Water Breathing; Splash Potion of Leaping
|base=Any Potion
}}
== Data values ==
=== ID ===
{{edition|java}}:
{{ID table
|edition=java
|showforms=y
|generatetranslationkeys=y
|displayname=Gunpowder
|spritetype=item
|nameid=gunpowder
|form=item
|foot=1}}
{{edition|bedrock}}:
{{ID table
|edition=bedrock
|shownumericids=y
|showforms=y
|notshowbeitemforms=y
|generatetranslationkeys=y
|displayname=Gunpowder
|spritetype=item
|nameid=gunpowder
|id=328
|form=item
|foot=1}}
== History ==
{{History|java indev}}
{{History||0.31|snap=20100130|[[File:Gunpowder JE1 BE1.png|32px]] Added gunpowder.
|Gunpowder is a [[crafting]] ingredient for [[TNT]].
|Gunpowder can be [[drops|dropped]] by any [[mob]].}}
{{History||20100219|Gunpowder now [[drops]] only from [[creeper]]s.}}
{{History|java infdev}}
{{History||20100625-2|Gunpowder can now be found in [[dungeon]] [[chest]]s.}}
{{History|java alpha}}
{{History||v1.2.0|snap=preview|Added [[ghast]]s, which [[drops|drop]] gunpowder upon [[death]].{{needs testing|was their gunpowder dropping present in the preview version, or added later on?|type=untestable}}}}
{{History|java beta}}
{{History||1.0|The item now has a display name: ''Sulphur''.}}
{{History||1.3|''Sulphur'' has been renamed to ''Gunpowder''.}}
{{History|java}}
{{History||1.0.0|snap=Beta 1.9 Prerelease 4|Gunpowder is now usable in [[brewing]] to create [[splash potion]]s.}}
{{History||1.2.1|snap=12w04a|[[Fire charge]]s are now [[crafting|crafted]] with gunpowder.}}
{{History||1.4.2|snap=12w38b|[[Witch]]es may now [[drops|drop]] gunpowder.}}
{{History||1.4.6|snap=12w49a|Gunpowder can now be used to craft a [[firework star]] and a [[firework rocket]].}}
{{History||1.9|snap=15w44a|Gunpowder now generates in [[desert temple]] [[chest]]s.
|The average yield of gunpowder in [[dungeon]] chests has now doubled.}}
{{History||1.11|snap=16w39a|Gunpowder can now be found in [[woodland mansion]] chests.}}
{{History||1.13|snap=17w47a|Prior to [[1.13/Flattening|''The Flattening'']], this [[item]]'s numeral ID was 289.}}
{{History|||snap=18w11a|Gunpowder can now generate in [[shipwreck]] [[chest]]s.}}
{{History||1.14|snap=18w43a|[[File:Gunpowder JE2 BE2.png|32px]] The texture of gunpowder has been changed.}}
{{History|||snap=19w05a|Added [[wandering trader]]s, which sell gunpowder.}}
{{History||1.20<br>(Experimental)|link=1.19.4|snap=23w07a|Gunpowder now drops when brushing [[suspicious sand]] in [[desert pyramid]]s.}}
{{History||1.20|snap=23w12a|The probability for the gunpowder to generate in [[suspicious sand]] in [[desert temple]]s has been changed from 1/7 to 1/8.}}
{{History|pocket alpha}}
{{History||v0.2.0|[[File:Gunpowder JE1 BE1.png|32px]] Added gunpowder. It is currently unobtainable and serves no purpose.}}
{{History||v0.3.3|Gunpowder now drops from [[creeper]]s. It is still unobtainable due to creepers not yet spawning naturally.}}
{{History||v0.4.0|Creepers now spawn naturally, making gunpowder obtainable in Survival mode.
|Gunpowder can now be used to craft [[TNT]].}}
{{History||v0.12.1|snap=build 1|Added gunpowder to the [[creative]] [[inventory]].
|Gunpowder is now usable in [[brewing]] to create [[splash potion]]s.}}
{{History||v0.13.0|snap=build 1|Gunpowder can now be found inside [[desert temple]] [[chest]]s.}}
{{History||v0.14.0|snap=build 1|Gunpowder can now be dropped by [[witch]]es.}}
{{History||v0.15.0|snap=build 1|Gunpowder can now be used to craft [[fire charge]]s.}}
{{History|pocket}}
{{History||1.1.0|snap=alpha 1.1.0.0|Gunpowder now generates inside [[woodland mansion]] [[chest]]s.}}
{{History|bedrock}}
{{History||1.2.0|snap=beta 1.2.0.2|Gunpowder can now be used to craft [[firework rocket]]s and [[firework star]]s.}}
{{History||1.4.0|snap=beta 1.2.14.2|Gunpowder now generates inside [[shipwreck]] [[chest]]s.}}
{{History||1.10.0|snap=beta 1.10.0.3|[[File:Gunpowder JE2 BE2.png|32px]] The texture of gunpowder has been changed.}}
{{History||Next Major Update<br>(Experimental)|link=Bedrock Edition 1.19.70|snap=beta 1.19.70.23|Gunpowder now drops when brushing [[suspicious sand]] in [[desert pyramid]]s.}}
{{History|console}}
{{History||xbox=TU1|xbone=CU1|ps=1.0|wiiu=Patch 1|switch=1.0.1|[[File:Gunpowder JE1 BE1.png|32px]] Added gunpowder.}}
{{History||xbox=none|xbone=none|ps=1.90|wiiu=none|switch=none|[[File:Gunpowder JE2 BE2.png|32px]] The texture of gunpowder has been changed.}}
{{History|New 3DS}}
{{History||0.1.0|[[File:Gunpowder JE1 BE1.png|32px]] Added gunpowder.}}
{{History|foot}}
== Issues ==
{{issue list}}
== References ==
{{reflist}}
== External Links ==
*[https://www.minecraft.net/en-us/article/taking-inventory--gunpowder Taking Inventory: Gunpowder] – Minecraft.net on June 21, 2019
{{Items}}
[[Category:Recipe using Charcoal]]
[[cs:Střelný prach]]
[[de:Schwarzpulver]]
[[es:Pólvora]]
[[fr:Poudre à canon]]
[[hu:Puskapor]]
[[it:Polvere da sparo]]
[[ja:火薬]]
[[ko:화약]]
[[nl:Buskruit]]
[[pl:Proch]]
[[pt:Pólvora]]
[[ru:Порох]]
[[th:ดินปืน]]
[[tr:Barut]]
[[uk:Порох]]
[[zh:火药]]
[[Category:Renewable resources]]
[[Category:Brewing recipe]]</li><li>[[Melon Slice|Melon Slice]]<br/>{{Dungeons hatnote|type=consumable|Melon}}
{{Item
| title = Melon Slice
|typeimage=Melon Slice.png
| renewable = Yes
| heals = {{hunger|2}}
| stackable = Yes (64)
}}
A '''melon slice'''{{efn|Known as '''Melon Slice''' {{in|java}} and '''Melon''' {{in|bedrock}}.}} is a [[food]] item that can be eaten by the [[player]].
== Obtaining ==
=== Block loot ===
{{see also|Tutorials/Pumpkin and melon farming|title1 = Pumpkin and melon farming}}
Melon slices can be obtained by breaking (harvesting) [[melon]]s using any [[tool]] or by hand. [[Axe]]s, followed by [[sword]]s, are the fastest tools for harvesting melons. A melon drops 3–7 melon slices, when broken; by hand, using a [[tool]], or after being broken by the movement of a [[piston]], with an average of 4.64 slices per melon.
Breaking a melon with a tool enchanted with [[Fortune]] increases the potential number of drops by 1 slice per level, up to a maximum of 9 slices.
== Usage ==
=== Food ===
{{see also|Tutorials/Hunger management|title1=Hunger management}}
To eat a melon slice, press and hold {{control|use}} while it is selected in the hotbar. Eating one restores {{hunger|2}} [[hunger]] and 1.2 hunger
[[Hunger#Mechanics|saturation]].
=== Crafting ingredient ===
{{crafting usage}}
=== Composting ===
Placing a melon slice into a [[composter]] has a 50% chance of raising the compost level by 1.
==Sounds==
{{Sound table/Entity/Food}}
== Data values ==
=== ID ===
{{edition|java}}:
{{ID table
|edition=java
|showforms=y
|generatetranslationkeys=y
|displayname=Melon Slice
|spritetype=item
|nameid=melon_slice
|form=item
|foot=1}}
{{edition|bedrock}}:
{{ID table
|edition=bedrock
|showaliasids=y
|shownumericids=y
|showforms=y
|notshowbeitemforms=y
|generatetranslationkeys=y
|spritename=melon-slice
|displayname=Melon
|spritetype=item
|nameid=melon_slice
|aliasid=melon
|id=272
|form=item
|translationkey=item.melon.name
|foot=1}}
== Advancements ==
{{load advancements|Husbandry;A Balanced Diet}}
== History ==
{{History|java beta}}
{{History||1.8|snap=Pre-release|[[File:Melon Slice JE1 BE1.png|32px]] Added melons.}}
{{History|java}}
{{History||1.0.0|snap=Beta 1.9 Prerelease 4|Melons are now used in the [[crafting]] recipe of [[glistering melon]]s.}}
{{History|||snap=Beta 1.9 Prerelease 5|Melons once again drop the correct number of slices.}}
{{History||1.3.1|snap=12w21a|Melons can now be [[trading|bought]] from farmer [[villager]]s, at 5–8 melon slices for 1 [[emerald]].}}
{{History||1.7.2|snap=13w37a|Block ID 105, [[melon stem]], has been removed from the {{cmd|give}} [[commands|command]].}}
{{History||1.8|snap=14w02a|[[Villager]]s no longer [[trading|sell]] melons. They now buy [[melon]]s instead.}}
{{History||1.13|snap=17w47a|Prior to [[1.13/Flattening|''The Flattening'']], this [[item]]'s numeral ID was 360.}}
{{History|||snap=18w20b|"Melon" has been renamed to "Melon Slice."
|The ID of melon slices has been changed from <code>melon</code> to <code>melon_slice</code>.}}
{{History||1.14|snap=18w43a|[[File:Melon Slice JE2 BE2.png|32px]] The texture of melon slices has been changed.}}
{{History|||snap=19w03a|Placing a melon slice into the new [[composter]] has a 20% chance of raising the compost level by 1.}}
{{History|||snap=19w05a|Melon slices now have a 50% chance of increasing the compost level in a composter by 1.}}
{{History|pocket alpha}}
{{History||v0.5.0|[[File:Melon Slice JE1 BE1.png|32px]] Added melons.
|Melons restore {{health|2}} each, rather than {{hunger|2}}.}}
{{History||v0.12.1|snap=?|Added Melon slice to the Creative inventory.}}
{{History|||snap=build 1|Melons now restores [[hunger]] instead of [[health]].
|Melons can no longer be obtained from [[nether reactor]]s.}}
{{History|pocket}}
{{History||1.1.0|snap=alpha 1.1.0.3|[[Breaking]] a [[melon]] with [[shears]] now always yields 9 melons.}}
{{History|bedrock}}
{{History||1.10.0|snap=beta 1.10.0.3|[[File:Melon Slice JE2 BE2.png|32px]] The texture of melons has been changed.}}
{{History||1.11.0|snap=beta 1.11.0.1|Melons can now be used to fill up [[composter]]s.}}
{{History|||snap=beta 1.11.0.4|Melons can now be [[trading|sold]] to farmer [[villager]]s.}}
{{History||1.16.0|snap=beta 1.16.0.57|[[Trading]] has been changed, melon slices can no longer be sold to farmer villagers.}}
{{History||1.16.100|snap=beta 1.16.100.56|The ID of melon slices has been changed from <code>melon</code> to <code>melon_slice</code>.}}
{{History|console}}
{{History||xbox=TU5|xbone=CU1|ps=1.0|wiiu=Patch 1|[[File:Melon Slice JE1 BE1.png|32px]] Added melons.}}
{{History||xbox=none|xbone=none|ps=1.90|wiiu=none|switch=none|[[File:Melon Slice JE2 BE2.png|32px]] The texture of melons has been changed.}}
{{History|new 3ds}}
{{History||0.1.0|[[File:Melon Slice JE1 BE1.png|32px]] Added melons.}}
{{History|foot}}
== Issues ==
{{issue list}}
== See also ==
* [[Pumpkin]]
* [[Glistering Melon Slice]]
== Notes ==
{{fnlist}}
{{Items}}
[[Category:Plants]]
[[cs:Meloun]]
[[de:Melone]]
[[es:Rodaja de sandía]]
[[fr:Tranche de pastèque]]
[[hu:Dinnye Szelet]]
[[ko:수박]]
[[nl:Meloenschijf]]
[[pl:Arbuz]]
[[pt:Fatia de melancia]]
[[ru:Ломтик арбуза]]
[[zh:西瓜片]]
[[Category:Food]]
[[Category:Renewable resources]]</li></ul> | Placeable grass blocks were stored in chests for a short time, and when placed, no matter where, the grass would never die. The only way to kill the grass was to mine the block. | ||||
| alpha | |||||
1.2.0{{Extension DPL}}<ul><li>[[Brewing Stand|Brewing Stand]]<br/>{{Block
| image = <gallery>
Brewing Stand (empty) JE10.png | Empty
Brewing Stand (right) JE10.png | Right
Brewing Stand (left) JE10.png | Left
Brewing Stand (full) JE10.png | Full
</gallery>
| transparent = Yes
| light = Yes (1)
| tool = Wooden Pickaxe
| renewable = Yes
| stackable = Yes (64)
| flammable = No
| lavasusceptible = No
}}
A '''brewing stand''' is a [[block]] used for [[brewing]] [[potion]]s using [[Glass Bottle|bottles]] and suitable ingredients. It also serves as a [[cleric]]'s [[job site block]].
== Obtaining ==
=== Breaking ===
A brewing stand can be obtained using any [[pickaxe]]. If mined without a pickaxe, it drops nothing {{in|JE}}, while it drops itself {{in|BE}}.
{{breaking row|horizontal=1|Brewing Stand|Pickaxe|Wood|foot=1}}
=== Natural generation ===
Brewing stands generate in [[end ship]]s. They have two [[potion of Healing|Instant Health II potions]] in their holders.
A brewing stand also generates in the basement of [[igloo]]s with a [[splash potion of Weakness]] in it.
Brewing stands can generate without potions in [[village]] churches.
=== Crafting ===
{{Crafting
|head=1
|showdescription=1
|B1= Blaze Rod
|A2= Any stone-tier block |B2= Any stone-tier block |C2= Any stone-tier block
|Output= Brewing Stand
|type= Brewing
|description=Can use cobblestone and its other variants interchangeably.
|foot=1
}}
== Usage ==
[[File:Brewing Stand GUI.png|thumb|right|176px|Brewing stand GUI {{in|java}}]]
By default, the interface of a brewing stand is labeled "Brewing Stand", but this name can be customized by naming it in an [[anvil]] before placing it.
Brewing stands cannot be pushed by [[piston]]s {{in|java}}.
=== Brewing ===
{{main|Brewing}}
The main purpose of brewing stands is to allow for the [[brewing]] of [[potion]]s. Its interface can be opened by pressing {{control|use}} on them.
Brewing stands need [[blaze powder]] as fuel. Each piece brews 20 batches of potions, with each stage of brewing counting separately. Unlike [[furnace]]s, there is no time limit; fuel is consumed only when there are [[Glass Bottle|bottles]] and an ingredient to brew into it.
Brewing stands interact with [[hopper]]s as follows:
* They accept brewing ingredients from hoppers pointing down into the top.
* Any valid potion recipe can be preloaded for "hands-free" brewing of a complex recipe, with the [[Nether Wart|nether wart]] falling through into the stand for the first step.
* Bottles and fuel are accepted from hoppers pointing into the side.
* Finished products can be pulled out by hoppers below, but each stage of brewing counts as a batch of "finished" potions.
{{IN|education}}, elements can be combined in the brewing stand to make the [[medicine]] potions: antidote, elixir, eye drops, and tonic.
=== Changing profession ===
If a village has a brewing stand that has not been claimed by a villager, any villager who hasn't already picked a [[job site]] block in the village has a chance to change their profession into cleric.
=== Light source ===
Brewing stands emit a light level of 1.
== Sounds ==
=== Generic ===
{{Sound table/Block/Stone}}
=== Unique ===
{{edition|java}}:
{{Sound table
|rowspan=2
|sound=Brewing Stand brew1.ogg
|sound2=Brewing Stand brew2.ogg
|subtitle=Brewing Stand bubbles
|source=block
|description=When a potion finishes brewing
|id=block.brewing_stand.brew
|translationkey=subtitles.block.brewing_stand.brew
|volume=1.0
|pitch=1.0
|distance=16}}
{{Sound table
|subtitle=Cleric works
|source=neutral
|description=Randomly while a cleric is working
|id=entity.villager.work_cleric
|translationkey=subtitles.entity.villager.work_cleric
|volume=1.0
|pitch=0.8-1.2
|distance=16}}
{{Sound table
|sound=Door close.ogg
|sound2=Door open.ogg
|subtitle=Chest locked<ref group=sound name=lock>{{Bug|MC-98316||Wrong subtitles caused by missing distinction}}</ref>
|source=block
|description=When a player attempts to open a brewing stand locked using the {{nbt|string|Lock}} tag
|id=block.chest.locked|idnote=<ref group=sound name=lock/>
|translationkey=subtitles.block.chest.locked|translationkeynote=<ref group=sound name=lock/>
|volume=1.0
|pitch=1.0
|distance=16
|foot=1}}
{{Edition|Bedrock}}:
{{Sound table
|type=bedrock
|rowspan=2
|sound=Brewing Stand brew1.ogg
|sound2=Brewing Stand brew2.ogg
|source=block
|description=When a potion finishes brewing
|id=random.potion.brewed
|volume=1.0
|pitch=1.0}}
{{Sound table
|source=block
|description=Randomly while a cleric is working
|id=random.potion.brewed
|volume=1.0
|pitch=1.0
|foot=1}}
== Data values ==
=== ID ===
{{edition|java}}:
{{ID table
|edition=java
|showforms=y
|generatetranslationkeys=y
|displayname=Brewing Stand
|spritetype=block
|nameid=brewing_stand
|translationkey=block.minecraft.brewing_stand, item.minecraft.brewing_stand
|foot=1}}
{{ID table
|displayname=Block entity
|spritename=brewing-stand
|spritetype=block
|nameid=brewing_stand
|foot=1}}
{{edition|bedrock}}:
{{ID table
|edition=bedrock
|firstcolumnname=Brewing Stand
|shownumericids=y
|showforms=y
|generatetranslationkeys=y
|displayname=Block
|spritename=brewing-stand
|spritetype=block
|nameid=brewing_stand
|id=117
|form=block
|itemform=item.brewing_stand
|translationkey=-}}
{{ID table
|displayname=Item
|spritename=brewing-stand
|spritetype=item
|nameid=brewing_stand
|id=431
|form=item
|foot=1}}
{{ID table
|notnamespaced=y
|displayname=Block entity
|spritename=brewing-stand
|spritetype=block
|nameid=BrewingStand
|foot=1}}
=== Block states ===
{{see also|Block states}}
{{/BS}}
=== Block data ===
A brewing stand has a block entity associated with it that holds additional data about the block.
{{el|java}}:
{{see also|Block entity format}}
{{/BE}}
{{el|bedrock}}:
: See [[Bedrock Edition level format/Block entity format]].
== Achievements ==
{{load achievements|Local Brewery}}
== Advancements ==
{{Load advancements|Local Brewery}}
== History ==
{{History|java}}
{{History||1.0.0|snap=Beta 1.9 Prerelease 2|[[Cauldron]]s are implemented to be used to brew [[potion]]s, but are not available in-game yet.}}
{{History|||snap=September 30, 2011|slink={{tweet|jeb|119762786619359232}}|[[File:Brewing Stand (pre-release).png|32px]] [[Jens Bergensten|Jeb]] reveals that brewing is done through a brewing stand instead of a [[cauldron]].}}
{{History|||snap=Beta 1.9 Prerelease 3|[[File:Brewing Stand (empty) JE1 BE1.png|32px]] [[File:Brewing Stand (right) JE1.png|32px]] [[File:Brewing Stand (left) JE1.png|32px]] [[File:Brewing Stand (full) JE1.png|32px]] [[File:Brewing Stand (item) JE1 BE1.png|32px]] Added brewing stands.
|Brewing [[potion]]s with brewing stands currently take 30 seconds.
|When the first brewing stand was shown by Jeb, it had an additional 2D sub-stand for [[Glass Bottle|bottles]], but the stands for bottles are now designed in 3D.<ref>{{tweet|jeb|119763532312096769|I'm fully aware the potions are very thin (diet?), but it looks cute. (Always work in progress, of course)|September 30, 2011}}</ref>}}
{{History||1.1|snap=12w01a|Brewing time for brewing stands has been reduced to 20 seconds.}}
{{History||1.3.1|snap=12w15a|{{key|Shift}} + clicking can now be used to put items in brewing stands.}}
{{History||1.8|snap=14w11a|[[File:Brewing Stand (empty) JE2.png|32px]] [[File:Brewing Stand (right) JE2.png|32px]] [[File:Brewing Stand (left) JE2.png|32px]] [[File:Brewing Stand (full) JE2.png|32px]] The [[model]] of brewing stands has been changed. Stands with no bottles appear glitched from some angles, the left and right slots appear identical when filled in (although both distinct appearences still exist as metadata), and the arm angles have changed due to the 22.5º rotation limit.
|Brewing stands' targeting [[hitbox]] is now a full cube - previously it was a cuboid around the base plates.}}
{{History|||snap=14w11b|[[File:Brewing Stand (empty) JE3.png|32px]] [[File:Brewing Stand (right) JE3.png|32px]] [[File:Brewing Stand (left) JE3.png|32px]] [[File:Brewing Stand (full) JE3.png|32px]] Empty brewing stands' model have been fixed, although the other changes still remain.}}
{{History|||snap=14w25a|[[File:Brewing Stand (empty) JE4.png|32px]] [[File:Brewing Stand (right) JE4.png|32px]] [[File:Brewing Stand (left) JE4.png|32px]] [[File:Brewing Stand (full) JE4.png|32px]] Brewing stand models have changed such that bottles in the left and right slots now indeed appear different. However, the leftmost one appears stretched. Arms are also now affected by directional shading.<ref>{{bug|MC-68302|||WAI}}</ref>}}
{{History||1.9|snap=15w31a|Brewing stands now generate in [[End City|end cities]].}}
{{History|||snap=15w33a|Brewing stands can now brew [[Lingering Potion|lingering potion]]s.}}
{{History|||snap=15w33c|A bug where the [[player]] couldn't put in a [[splash potion]] to make a lingering potion has been fixed.}}
{{History|||snap=15w42a|Brewing stands now require [[Blaze Powder|blaze powder]] to operate.}}
{{History|||snap=15w43a|Brewing stands now generate in the basement of [[igloo]]s.
|Each blaze powder now fuels 20 brewing stand operations rather than 30.}}
{{History|||snap=15w44a|[[File:Brewing Stand (empty) JE5.png|32px]] [[File:Brewing Stand (right) JE5.png|32px]] [[File:Brewing Stand (left) JE5.png|32px]] [[File:Brewing Stand (full) JE5.png|32px]] Brewing stand models no longer have a stretched bottle.}}
{{History|||snap=15w47b|[[Sound]]s have been added for brewing stands.}}
{{History||1.11|snap=16w32a|The block entity ID has been changed from <code>Cauldron</code> to <code>brewing_stand</code>.}}
{{History||1.13|snap=17w47a|Prior to [[Java Edition 1.13/Flattening|''The Flattening'']], this [[block]]'s numeral ID was 117, and the [[item]]'s 379.}}
{{History||1.14|snap=18w43a|[[File:Brewing Stand (empty) JE6 BE2.png|32px]] <!-- [[File:Brewing Stand (left) JE6 BE2.png|32px]] [[File:Brewing Stand (right) JE6 BE2.png|32px]] -->[[File:Brewing Stand (Full) JE6 BE2.png|32px]] [[File:Brewing Stand (item) JE2.png|32px]] The textures of brewing stands have been changed.}}
{{History|||snap=18w44a|[[File:Brewing Stand (item) JE3 BE2.png|32px]] The texture of the brewing stand [[item]] has been changed.}}
{{History|||snap=18w48a|Brewing stands now generate in the updated [[plains]] [[village]]s.}}
{{History|||snap=18w49a|Brewing stands now generate in the updated [[savanna]] villages and the new [[Snowy Tundra|snowy]] villages.}}
{{History|||snap=18w50a|Brewing stands now generate in the updated [[desert]] and [[taiga]] villages.}}
{{History|||snap=19w03c|The three plates, but not the rod, of a brewing stand now use correct cullface arguments.}}
{{History|||snap=19w11a|Brewing stands now serve as cleric [[villager]]s' job site block.}}
{{History||1.16.2|snap=20w28a|Brewing stands can now be [[crafting|crafted]] with [[blackstone]].}}
{{History||1.17|snap=21w07a|Brewing stands can now be crafted with [[deepslate|grimstone]] (now deepslate).}}
{{History||1.17|snap=21w08a|Brewing stands can no longer be crafted with deepslate.
|Brewing stands can now be crafted with [[Cobbled Deepslate|cobbled deepslate]].}}
{{History|||snap=21w11a|<!--[[File:Brewing Stand (empty) JE7.png|32px]] [[File:Brewing Stand (right) JE7.png|32px]] [[File:Brewing Stand (left) JE7.png|32px]] [[File:Brewing Stand (Full) JE7.png|32px]] Changed [[lighting]].-->Tweaked the brewing stand GUI texture.}}
{{History||1.18|snap=21w39a|[[File:Brewing Stand (empty) JE8.png|32px]] [[File:Brewing Stand (right) JE8.png|32px]] [[File:Brewing Stand (left) JE8.png|32px]] [[File:Brewing Stand (full) JE8.png|32px]] The default [[brightness]] has been changed from "Moody" to 50.}}
{{History||1.19|snap=22w11a|[[File:Brewing Stand (empty) JE9.png|32px]] [[File:Brewing Stand (right) JE9.png|32px]] [[File:Brewing Stand (left) JE9.png|32px]] [[File:Brewing Stand (full) JE9.png|32px]] Changed texture and model.}}
{{History|||snap=22w17a|[[File:Brewing Stand (empty) JE10.png|32px]] [[File:Brewing Stand (right) JE10.png|32px]] [[File:Brewing Stand (left) JE10.png|32px]] [[File:Brewing Stand (full) JE10.png|32px]] Changed base texture and model.}}
{{History|pocket alpha}}
{{History||v0.12.1|snap=build 1|[[File:Brewing Stand (empty) JE1 BE1.png|32px]] [[File:Brewing Stand (item) JE1 BE1.png|32px]] Added brewing stands.}}
{{History|pocket}}
{{History||1.0.0|snap=alpha 0.17.0.1|Brewing stands now generate in [[igloo]] basements.
|Brewing stands now generate in [[end ship]]s.}}
{{History|bedrock}}
{{History||1.2.0|snap=beta 1.2.0.2|Brewing stands now require [[blaze powder]] to operate.}}
{{History||1.10.0|snap=beta 1.10.0.3|[[File:Brewing Stand (empty) JE6 BE2.png|32px]] [[File:Brewing Stand (item) JE3 BE2.png|32px]] The textures of brewing stands have been changed.|A brewing stand can now generate in [[village]] temples.}}
{{History||1.16.100|snap=beta 1.16.100.52|Brewing stands can now be [[craft]]ed with [[blackstone]].}}
{{History||1.17.0|snap=beta 1.17.0.50|Brewing stands can now be [[craft]]ed with [[cobbled deepslate]].}}
{{History||1.19.0|snap=beta 1.19.0.20|[[File:Brewing Stand (empty) JE10.png|32px]] [[File:Brewing Stand (right) JE10.png|32px]] [[File:Brewing Stand (left) JE10.png|32px]] [[File:Brewing Stand (full) JE10.png|32px]] Slightly changed its texture, to make their arms connect to their bases.}}
{{History|console}}
{{History||xbox=TU7|xbone=CU1|ps=1.0|wiiu=Patch 1|switch=1.0.1|[[File:Brewing Stand (empty) JE1 BE1.png|32px]] [[File:Brewing Stand (item) JE1 BE1.png|32px]] Added brewing stands.}}
{{History||xbox=TU43|xbone=CU33|ps=1.36|wiiu=Patch 13|Brewing stands now appear in [[igloo]]s. The lack of a fuel requirement means that potions can now be made without going to the Nether.}}
{{History||xbox=TU46|xbone=CU36|ps=1.38|wiiu=Patch 15|Brewing stands now require [[blaze powder]] to operate.}}
{{History||xbox=none|xbone=none|ps=1.90|wiiu=none|switch=none|[[File:Brewing Stand.png|32px]] [[File:Brewing Stand (item) JE3 BE2.png|32px]] The textures of brewing stands have been changed.}}
{{History|new 3ds}}
{{History||0.1.0|[[File:Brewing Stand (empty) JE1 BE1.png|32px]] [[File:Brewing Stand (item) JE1 BE1.png|32px]] Added brewing stands.}}
{{History|foot}}
<gallery>
File:Brewingstand Potion.png|The first picture of a brewing stand. A [[giant mushroom]] is also seen in this picture.
</gallery>
=== Brewing stand "item" ===
{{:Technical blocks/Brewing Stand}}
== Issues ==
{{issue list}}
== Trivia ==
* Even when the brewing stand is not in use, there is still smoke coming out of the top of it.
* In ''[[Java Edition]]'', when a brewing stand is broken, particles from a bottle appear, even if no bottle is in the stand.
* No matter what potion (including water bottles) is in the stand it always looks like a full red bottle.
* Brewing stands always face east, no matter what direction they are placed.
* According to [[Michael Stoyke|Searge]], for thematic reasons, a brewing stand was added to the basement of the [[igloo]]. Because of this, blaze powder was required for fuel to preserve game progression. In this way, the player is prevented from using it before going to the Nether.<ref>https://minecraft.net/en-us/article/meet-blaze</ref>
== Gallery ==
<gallery>
File:Brewing stand in action.png|A brewing stand in action.
File:Igloobasement.png|A brewing stand in an igloo basement.
File:1.8 and below brewing stand.png|The GUI of the brewing stand in 1.8.x and below.
</gallery>
== See also ==
*[[Glass Bottle]]
*[[Splash Potion]]
== References ==
{{reflist}}
== External links ==
*[https://www.minecraft.net/en-us/article/taking-inventory--brewing-stand Taking Inventory: Brewing Stand] – Minecraft.net on October 11, 2019
{{Blocks|Utility}}
{{items}}
[[Category:Job blocks]]
[[Category:Utility blocks]]
[[Category:Manufactured blocks]]
[[Category:Generated structure blocks]]
[[Category:Storage]]
[[Category:Block entities]]
[[Category:Light sources]]
[[de:Braustand]]
[[es:Soporte para pociones]]
[[fr:Alambic]]
[[hu:Főzőállvány]]
[[it:Alambicco]]
[[ja:醸造台]]
[[nl:Brouwstandaard]]
[[pl:Statyw alchemiczny]]
[[pt:Suporte de poções]]
[[ru:Варочная стойка]]
[[uk:Варильна стійка]]
[[zh:酿造台]]</li><li>[[Lead|Lead]]<br/>{{About|the item used for leashing and leading mobs|the element|Element#Lead}}
{{Item
| image = Lead.png
| stackable = Yes (64)
| renewable = Yes
}}
'''Leads''' are [[tool]]s used to leash and lead passive and neutral [[animal]]s, [[golem]]s and some [[monster]]s.
== Obtaining ==
=== Chest loot ===
{{LootChestItem|lead}}
=== Crafting ===
{{Crafting
|A1= String
|B1= String
|A2= String
|B2= Slimeball
|C3= String
|Output= Lead,2
|type= Tool
}}
=== Mob loot ===
[[Wandering Trader|Wandering trader]]s always spawn with 2 [[llama|trader llama]]s, each held with a lead. When a trader llama is detached, either by killing it or the wandering trader, dragging them far apart, or putting the llama in a [[boat]] or a [[minecart]], the lead drops at the llama's position.
== Usage ==
=== Crafting ingredient ===
{{crafting usage}}
=== Leashing mobs ===
[[File:SuspendedPigs.png|190px|thumb|One block tall mobs, such as pigs, suspend at 7 blocks above the ground.]]
[[File:SuspendedCows.png|190px|thumb|Two block tall mobs, such as cows, also suspend at 7 blocks above the ground.]]
{{control|Using}} a lead on a [[mob]] ties the lead to the mob, allowing it to be moved by the player. Multiple mobs can be held by leads at once, but each mob held requires its own lead.
It is possible to leash the following mobs and other entities:
{{columns-list|colwidth=20em|
* {{EntityLink|Allay}}
* {{EntityLink|Axolotl}}
* {{EntityLink|Bee}}
* {{EntityLink|Boat}}{{only|bedrock}}
* {{EntityLink|Camel}}
* {{EntityLink|Cat}}
* {{EntityLink|Chicken}}
* {{EntityLink|Chicken Jockey}} (only the mount)
* {{EntityLink|Cow}}
* {{EntityLink|Dolphin}}
* {{EntityLink|Donkey}}
* {{EntityLink|Fox}}
* {{EntityLink|Frog}}
* {{EntityLink|Glow Squid}}
* {{EntityLink|Goat}}
* {{EntityLink|Hoglin}}
* {{EntityLink|Horse}}
* {{EntityLink|Iron Golem}}
* {{EntityLink|Llama}}
* {{EntityLink|Mooshroom}}
* {{EntityLink|Mule}}
* {{EntityLink|Ocelot}}
* {{EntityLink|Parrot}}
* {{EntityLink|Pig}}
* {{EntityLink|Polar Bear}}
* {{EntityLink|Rabbit}}
* {{EntityLink|Sheep}}
* {{EntityLink|Skeleton Horse}}
* {{EntityLink|Skeleton Horseman}} (only the mount)
* {{EntityLink|Sniffer}}
* {{EntityLink|Snow Golem}}
* {{EntityLink|Squid}}
* {{EntityLink|Strider}}
* {{EntityLink|Trader Llama}}
* {{EntityLink|Wolf}}
* {{EntityLink|Zoglin}}
* {{EntityLink|Zombie Horse}}}}
Additionally, [[villager]]s, [[wandering trader]]s, and [[monster]]s other than the ones listed above, can be leashed using a map editor or [[NBT]] editor.
With a mob on a lead held by the player, {{control|using}} the lead on any type of [[fence]] (or [[wall]]{{only|bedrock|short=1}}) attaches the lead to it with a visible knot, tying the mob to it. To attach it to a wall on Bedrock Edition, the player must hold a lead in the main hand.<ref>{{bug|MCPE-108078}}</ref> Multiple leads may be attached to one fence post. A mob tied to a fence tends to stay within 5 blocks of the fence post.
A lead is broken by pressing the {{control|use item}} control on the mob again, hitting the knot, or removing the attached fence post. Leads also break when hit by projectiles. Whenever a lead is removed or broken, it drops as an [[item (entity)|item]] at the location of the mob. However, it does not drop when unleashed in Creative mode.{{only|java}}<ref>{{bug|MCPE-79639}}</ref> A lead does not break if the attached animal dies.
A lead can stretch a maximum of 10 blocks. If the mob is able to move towards the player or fence post, it does so. If not, or if the mob is moving very quickly away from the player, the lead breaks.
When the player or the knot is more than 7 blocks above the ground, the mob being leashed becomes suspended.
Most mobs that can be leashed can still be leashed even if attacking the player leashing them, and any attached leads do not break.
[[Wolf|Wolves]] cannot be leashed after becoming angry. Despite this, if they become angry while already leashed, the lead does not break, but it cannot be reattached when broken through other methods while the wolf is still angry.
A lead attached to a hoglin breaks if it becomes a [[zoglin]].
A lead does not prevent mobs from despawning if they normally would despawn.
When moving downwards and accelerating towards the ground, leashed mobs accumulate fall damage and take it if they hit the ground while still accelerating. When moving up or decelerating (such as when the lead is stretched to its limit), the fall distance is set to one block and the mob therefore does not take any fall damage if it touches the ground.
If the player walks into and back out of a [[nether portal]] while holding a lead connected to a mob, the lead remains attached to the mob. However, if a mob attached to a lead walks into a nether portal, the lead breaks and drops as an item in the other dimension.
A lead can be used to remove a mob from a boat without needing to break the boat, if the mob can normally be leashed.
If a chunk unloads while containing a leashed mob (either by the player walking too far away, or traveling to another dimension via a portal), the lead breaks and drops as an item, leaving the mob free to wander around.
== Sounds ==
{{Edition|Java}}:
{{Sound table
|sound=Lead Knot break1.ogg
|sound2=Lead Knot break2.ogg
|sound3=Lead Knot break3.ogg
|subtitle=Leash Knot breaks
|source=neutral
|description=When a leash knot is destroyed
|id=entity.leash_knot.break
|translationkey=subtitles.entity.leashknot.break
|volume=1.0
|pitch=1.0
|distance=16}}
{{Sound table
|sound=Lead Knot place1.ogg
|sound2=Lead Knot place2.ogg
|sound3=Lead Knot place3.ogg
|subtitle=Leash Knot tied
|source=neutral
|description=When a leash knot is placed on a fence
|id=entity.leash_knot.place
|translationkey=subtitles.entity.leashknot.place
|volume=1.0
|pitch=1.0
|distance=16
|foot=1}}
{{Edition|Bedrock}}:
{{Sound table
|type=bedrock
|sound=Lead Knot break1.ogg
|sound2=Lead Knot break2.ogg
|sound3=Lead Knot break3.ogg
|source=neutral
|description=When a leash knot is broken by {{ctrl|interacting}} with it
|id=leashknot.break
|volume=1.0
|pitch=1.0}}
{{Sound table
|sound=Lead Knot place1.ogg
|sound2=Lead Knot place2.ogg
|sound3=Lead Knot place3.ogg
|source=neutral
|description=When a leash knot is placed on a fence or wall
|id=leashknot.place
|volume=1.0
|pitch=1.0
|foot=1}}
== Leash Knot ==
'''Leash knot''' is an entity created when the [[player]] right-clicks the fence while having a mob leashed.
{{Entity| title = Leash Knot| image = Knot.png|imagesize= 100px|networkid='''[[JE]]''': 77}}
=== Data values ===
==== ID ====
{{edition|java}}:
{{ID table
|edition=java
|generatetranslationkeys=y
|displayname=Leash Knot
|spritetype=entity
|nameid=leash_knot
|foot=1}}
{{edition|bedrock}}:
{{ID table
|edition=bedrock
|shownumericids=y
|notshowbeitemforms=y
|generatetranslationkeys=y
|displayname=Leash Knot
|spritetype=entity
|nameid=leash_knot
|id=88
|foot=1}}
==== Entity data ====
Leash knots have entity data that define various properties of the entity.
{{el|java}}:
{{main|Entity format}}
{{/ED}}
{{el|bedrock}}:
: See [[Bedrock Edition level format/Entity format]].
== Data values ==
=== ID ===
{{edition|java}}:
{{ID table
|edition=java
|showforms=y
|generatetranslationkeys=y
|displayname=Lead
|spritetype=item
|nameid=lead
|form=item
|foot=1}}
{{edition|bedrock}}:
{{ID table
|edition=bedrock
|shownumericids=y
|showforms=y
|notshowbeitemforms=y
|generatetranslationkeys=y
|displayname=Lead
|spritetype=item
|nameid=lead
|id=547
|form=item
|foot=1}}
== Achievements ==
{{load achievements|So I Got That Going for Me}}
== Advancements ==
{{load advancements|When the Squad Hops into Town}}
== History ==
{{missing information|The history of a lot of mobs be leashed}}
{{History|java}}
{{History||1.6.1|snap=13w16a|[[File:Lead JE1 BE1.png|32px]] Added leads.
|Leads do not currently have a tooltip and are called “leashes” in [http://www.mojang.com/2013/04/minecraft-snapshot-13w16a-and-new-launcher/ the change notes].}}
{{History|||snap=13w16b|Leads have been given a tooltip.}}
{{History|||snap=13w18a|Leads have been given a [[crafting]] recipe.}}
{{History||1.9|snap=15w50a|Added a [[sound]] for leads: <code>entity.leashknot.place</code>.}}
{{History||1.11|snap=16w32a|The [[entity]] ID of the knot has been changed from <code>LeashKnot</code> to <code>leash_knot</code>.}}
{{History|||snap=16w39a|Leads can now be found in [[woodland mansion]] chests.}}
{{History||1.13|snap=17w47a|Prior to [[1.13/Flattening|''The Flattening'']], this [[item]]'s numeral ID was 420.}}
{{History||1.14|snap=18w43a|[[File:Lead JE2 BE2.png|32px]] The texture of leads has been changed.}}
{{History|||snap=19w05a|Added [[wandering trader]]s, which are naturally equipped with leads.}}
{{History||1.15|snap=?|[[Bee]]s can now be leashed.}}
{{History||1.16|snap=20w09a|[[Skeleton horse]]s and [[zombie horse]]s can now be leashed.<ref>{{bug|MC-166246}}</ref>}}
{{History|||snap=?|[[Hoglin]]s can now be leashed.}}
{{History||1.16.2|snap=20w27a|[[Zoglin]]s can now be leashed.}}
{{History||1.17|snap=21w19a|[[Squid]]s and [[glow squid]]s can now be leashed.<ref>{{bug|MC-136647}}</ref>}}
{{History|||snap=?|[[Axolotl]]s can now be leashed.}}
{{History||1.19|snap=22w13a|Lead may now be found in [[ancient city]] [[chest]]s.}}
{{History|||snap=?|[[Frog]]s can now be leashed.}}
{{History||1.19.3|snap=22w42a|[[Camel]]s can now be leashed.|Mobs no longer accumulate fall damage when dangling on leads.<ref>{{bug|MC-14167||Mobs build up fall damage when dangling on a lead|Fixed}}</ref>}}
{{History||1.20 (Experimental)|link=1.19.4|snap=?|[[Sniffer]]s can now be leashed.}}
{{History||1.20|snap=23w12a|Lead can now be found in [[suspicious gravel]] and [[suspicious sand]] in [[trail ruins]].}}
{{History|||snap=23w16a|Lead no longer generates in [[suspicious sand]] in [[trail ruins]].|Due to the split of the archaeological loot tables for the suspicious gravel within the [[trail ruins]]; lead now is in the common loot.}}
{{History|pocket alpha}}
{{History||v0.15.0|snap=build 1|[[File:Lead JE1 BE1.png|32px]] Added leads.}}
{{History|pocket}}
{{History||1.1.0|snap=alpha 1.1.0.0|Leads now have better "physics".
|The [[entity]] ID of the knot has been changed from <code>leashknot</code> to <code>leash_knot</code>.
|Leads can now be found inside [[woodland mansion]] [[chest]]s.}}
{{History|bedrock}}
{{History||1.4.0|snap=beta 1.2.14.2|Leads can now be found inside [[buried treasure]] [[chest]]s.
|Leads can now be used on [[boat]]s.}}
{{History||1.4.0|snap=beta 1.2.20.1|Leads can now be used to craft [[balloon]]s.}}
{{History||1.10.0|snap=beta 1.10.0.3|[[File:Lead JE2 BE2.png|32px]] The texture of leads has been changed.
|[[Wandering trader]]s now [[drops|drop]] leads after they are detached from trader [[llama]]s.}}
{{History||1.14.0|snap=beta 1.14.0.1|Leads can now be used on [[polar bear]]s, [[ocelot]]s, [[parrot]]s, [[dolphin]]s and old [[villager]]s.}}
{{History||1.19.0|snap=beta 1.19.0.20|Allays can now be leashed.}}
{{History|console}}
{{History||xbox=TU19|xbone=CU7|ps=1.12|wiiu=Patch 1|switch=1.0.1|[[File:Lead JE1 BE1.png|32px]] Added leads.}}
{{History||xbox=TU43|xbone=CU33|ps=1.36|wiiu=Patch 13|[[Sound]]s have been added for leads.}}
{{History|Ps4}}
{{History||1.90|[[File:Lead JE2 BE2.png|32px]] The texture of leads has been changed.}}
{{History|3ds}}
{{History||0.1.0|[[File:Lead JE1 BE1.png|32px]] Added leads.}}
{{History|foot}}
== Issues ==
{{issue list|Lead|Leash}}
== Trivia ==
[[File:Steve wearing Lead.png|100px]] [[File:Alex wearing Lead.png|100px]]
* The lead is named as "leash" in the texture file.
* If a [[player]] goes to sleep while holding a mob on a lead, the lead remains attached.
* {{IN|Java}}, when using the {{cmd|item}} command to put a lead in a player's head slot, the item gets rotated and positioned in such a way that it looks like the player is wearing a monocle.
== Gallery ==
<gallery>
Multiple_Leash.png|Many animals can be tied to one fence post.
HorseLeashedOnAFence.png|A [[horse]] wearing [[golden horse armor]] that is leashed to a fence post.
ThreeTiedSheep.png|Three sheep tied to the same fence.
More accurate lead mobs.png|A shot of all the mobs that could be tied with leads as of 1.6.1, except donkeys and mules.
Yo Yo.png|With the use of the leash, it is possible to suspend animals in the air by tying the leash on high-up fence posts.
YoYo.png|A [[donkey]] with the Grumm/Dinnerbone [[name tag]] [[easter egg]] tied to a fence with a lead to make a yo-yo.
Flying_Sheep.png|Several [[sheep]] hanging in the air in [[Creative]] mode.
Pocket Edition Lead.jpg|First image of a lead in ''Bedrock Edition''.
</gallery>
== References ==
{{Reflist}}
== External Links ==
*[https://www.minecraft.net/en-us/article/taking-inventory-lead Taking Inventory: Lead] – Minecraft.net on April 8, 2022
{{items}}
{{entities}}
[[Category:Tools]]
[[de:Leine]]
[[es:Rienda]]
[[fr:Laisse]]
[[hu:Lasszó]]
[[it:Guinzaglio]]
[[ja:リード]]
[[ko:끈]]
[[nl:Leidtouw]]
[[pl:Smycz]]
[[pt:Laço]]
[[ru:Поводок]]
[[th:เชือกจูง]]
[[zh:拴绳]]
[[Category:Renewable resources]]</li></ul> | Before, grass blocks had a bright green top texture since Biomes didn't exist at that time, and when biomes were added in the Halloween Update, the color of the top of the Grass block now corresponds to whatever biome it is located in: File:GrassPreBeta1.5.png | ||||
| beta | |||||
1.5{{Extension DPL}}<ul><li>[[Paper|Paper]]<br/>{{Item
| image = Paper.png
| renewable = Yes
| stackable = Yes (64)
}}
'''Paper''' is an item crafted from [[sugar cane]].
== Obtaining ==
=== Chest loot ===
{{LootChestItem|paper}}
=== Crafting ===
{{Crafting
|A2= Sugar Cane |B2= Sugar Cane |C2= Sugar Cane
|Output= Paper,3
|type= Miscellaneous
}}
=== Villagers ===
{{IN|java}}, cartographer [[Villager|villagers]] may give paper to players with the [[Hero of the Village]] effect.
== Usage ==
=== Crafting ingredient ===
{{crafting usage}}
=== Anvil usage ===
{{:Map/BE|zoom}}
=== Trading ===
{{IN|bedrock}}, novice-level librarian and cartographer villagers buy 24 paper for an [[emerald]] as part of their trades.
{{IN|java}}, novice-level cartographer villagers always offer to buy 24 paper for an emerald, while novice-level librarians have a {{frac|2|3}} chance of offering the same trade.
== Data values ==
=== ID ===
{{edition|java}}:
{{ID table
|edition=java
|showforms=y
|generatetranslationkeys=y
|displayname=Paper
|spritetype=item
|nameid=paper
|form=item
|foot=1}}
{{edition|bedrock}}:
{{ID table
|edition=bedrock
|shownumericids=y
|showforms=y
|notshowbeitemforms=y
|generatetranslationkeys=y
|displayname=Paper
|spritetype=item
|nameid=paper
|id=386
|form=item
|foot=1}}
==History==
{{History|java alpha}}
{{History||v1.0.11|[[File:Paper JE1 BE1.png|32px]] Added paper, which can be used to craft [[book]]s.}}
{{History|java beta}}
{{History||1.6|snap=Test Build 3|Paper can now be used to craft [[map]]s.}}
{{History||1.8|snap=Pre-release|Paper can now be found in the new [[stronghold]] library [[chest]]s.}}
{{History|java}}
{{History||1.3.1|snap=12w21a|Paper can now be [[trading|sold]] to librarian [[villager]]s, at 24–35 paper for 1 [[emerald]].}}
{{History||1.4.2|snap=12w34a|Paper can now be used to craft an empty [[map]].
|Maps start out at their closest zoom level and can be extended by adding more paper.}}
{{History||1.4.6|snap=12w49a|Paper can now be used to craft [[firework rocket]]s.}}
{{History||1.8|snap=14w02a|[[Trading]] has been changed: librarian [[villager]]s now [[trading|buy]] 24–46 paper for 1 [[emerald]].}}
{{History||1.9|snap=15w43a|The average yield of paper from [[stronghold]] library [[chest]]s has more than doubled.}}
{{History||1.11|snap=16w39a|Added cartographer [[villager]]s, which [[trading|buy]] paper as their tier 1 trade.}}
{{History||1.13|snap=17w47a|Prior to [[1.13/Flattening|''The Flattening'']], this [[item]]'s numeral ID was 339.}}
{{History|||snap=18w11a|Paper now generates in the [[chest]]s of some [[shipwreck]]s.}}
{{History||1.14|snap=18w43a|[[File:Paper JE2 BE2.png|32px]] The texture of paper has now been changed.
|Paper can now be used to craft [[banner pattern]]s.}}
{{History|||snap=18w48a|Paper can now be found in chests in [[village]] cartographer houses.}}
{{History|||snap=19w02a|Paper can now be used to craft a [[cartography table]].}}
{{History|||snap=19w13a|Cartographer villagers now give paper to players under the [[Hero of the Village]] effect.}}
{{History|pocket alpha}}
{{History||v0.2.0|[[File:Paper JE1 BE1.png|32px]] Added paper. It is currently unobtainable and serves no purpose.}}
{{History||v0.3.0|Paper is now [[craft]]able, and can be used to craft [[book]]s.}}
{{History||v0.14.0|snap=build 1|Paper can now be used to craft empty [[map]]s and empty locator maps.
|Paper can now be used to zoom in maps, using [[anvil]]s.}}
{{History|pocket}}
{{History||1.0.0|snap=?|The [[Windows 10 Edition]] can now use the [[anvil]], as well as the [[crafting table]], to zoom in [[map]]s, just as [[Pocket Edition]] in general can.}}
{{History||1.0.4|snap=alpha 1.0.4.0|Librarian [[villager]]s now [[trading|buy]] 24–36 paper for 1 [[emerald]].}}
{{History||1.1.0|snap=alpha 1.1.0.3|Added cartographer villagers, which [[trading|buy]] 24–36 paper as their tier 1 trade.}}
{{History|bedrock}}
{{History||1.2.0|snap=beta 1.2.0.2|Paper can now be used to craft [[firework rocket]]s.}}
{{History||1.4.0|snap=beta 1.2.14.2|Paper can now be found inside [[chest]]s of some [[shipwreck]]s.}}
{{History||1.10.0|snap=beta 1.10.0.3|[[File:Paper JE2 BE2.png|32px]] The texture of paper has now been changed.
|Paper can now be found in cartographer house chests in [[village]]s.
|Paper can now be used to craft [[banner pattern]]s and [[cartography table]]s.}}
{{History||1.11.0|snap=beta 1.11.0.4|Librarian and cartographer villagers now buy 24 paper for an [[emerald]].}}
{{History|console}}
{{History||xbox=TU1|xbone=CU1|ps=1.0|wiiu=Patch 1|[[File:Paper JE1 BE1.png|32px]] Added paper.}}
{{History||xbox=none|xbone=none|ps=1.90|wiiu=none|switch=none|[[File:Paper JE2 BE2.png|32px]] The texture of paper has now been changed.}}
{{History|New 3DS}}
{{History||0.1.0|[[File:Paper JE1 BE1.png|32px]] Added paper.}}
{{History|foot}}
== Issues ==
{{issue list}}
== References ==
{{Reflist}}
==External Links==
*[https://www.minecraft.net/en-us/article/paper Taking Inventory: Paper] – Minecraft.net on August 4, 2023
{{Items}}
[[cs:Papír]]
[[de:Papier]]
[[es:Papel]]
[[fr:Papier]]
[[hu:Papír]]
[[ja:紙]]
[[ko:종이]]
[[nl:Papier]]
[[pl:Papier]]
[[pt:Papel]]
[[ru:Бумага]]
[[th:กระดาษ]]
[[uk:Папір]]
[[zh:纸]]
[[Category:Renewable resources]]</li><li>[[Raw Copper|Raw Copper]]<br/>{{Item
| image = Raw Copper.png
| renewable = No
| stackable = Yes (64)
}}
'''Raw copper''' is a raw metal resource obtained from mining [[copper ore]].
== Obtaining ==
=== Mining ===
Copper ore and deepslate copper ore mined with a [[stone pickaxe]] or better drops 2–5 units of raw copper. If the pickaxe is enchanted with [[Fortune]], it can drop extra raw copper, allowing for a maximum of 20 units per ore block with Fortune III, or an average of 7.7 units of raw copper per ore block. If the ore is mined using a pickaxe enchanted with [[Silk Touch]], it drops the ore block instead.
=== Crafting ===
{{Crafting
|showname=1
|Block of Raw Copper
|Output=Raw Copper,9
|type=Material
|foot=1
}}
== Usage ==
The primary usage of raw copper is [[smelting]] it into [[copper ingot]]s.
=== Crafting ===
{{crafting usage}}
=== Smelting ingredient ===
{{Smelting
|showname=2
|Raw Copper
|Copper Ingot
|0.7
}}
== Data values ==
=== ID ===
{{edition|java}}:
{{ID table
|edition=java
|showitemtags=y
|showforms=y
|generatetranslationkeys=y
|displayname=Raw Copper
|spritetype=item
|nameid=raw_copper
|form=item
|foot=1}}
{{edition|bedrock}}:
{{ID table
|edition=bedrock
|shownumericids=y
|showforms=y
|notshowbeitemforms=y
|generatetranslationkeys=y
|displayname=Raw Copper
|spritetype=item
|nameid=raw_copper
|form=item
|id=507
|foot=1}}
== History ==
{{History|java}}
{{History||1.17|snap=21w14a|[[File:Raw Copper JE1.png|32px]] Added raw copper.}}
{{History|||snap=April 13, 2021|slink={{Tweet|JasperBoerstra|1381991999952277513}}|[[File:Raw Copper JE2.png|32px]] [[JAPPA]] shows a new raw copper texture.}}
{{History|||snap=21w15a|[[File:Raw Copper JE2.png|32px]] The texture of raw copper has been changed.
|Raw copper can now be used to craft [[block of raw copper]].}}
{{History|||snap=April 16, 2021|slink={{Tweet|JasperBoerstra|1383047666037325829}}|[[File:Raw Copper (pre-release).png|32px]] [[JAPPA]] shows a new raw copper texture again.}}
{{History|||snap=21w16a|[[File:Raw Copper JE3.png|32px]] The texture of raw copper has been changed.}}
{{History|||snap=21w17a|[[Copper ore]] now drops 2-3 raw copper when mined instead of a single unit.}}
{{History||1.18|snap=21w40a|[[Copper ore]] now drops 2-5 raw copper when mined.}}
{{History|bedrock}}
{{History||1.17.0|snap=beta 1.17.0.50|[[File:Raw Copper JE2.png|32px]] Added raw copper.}}
{{History|||snap=beta 1.17.0.52|Raw copper are now available without enabling [[experimental gameplay]].}}
{{History|||snap=beta 1.17.0.54|[[File:Raw Copper JE3.png|32px]] The texture of raw copper has been changed.}}
{{History|foot}}
== Issues ==
{{Issue list}}
==Gallery==
<gallery>
JE 1.17 Dev Raw Metals.jpg|Jappa shows raw ore textures.
Jappa Raw Ores 1.jpg|Jappa shows raw ore textures.
Jappa Raw Ores 2.png|Jappa shows raw ore textures.
Jappa Raw Ores 3.jpg|Jappa shows raw ore textures.
Jappa Raw Ores 4.jpg|Jappa shows raw ore textures.
Jappa Raw Ores 5.jpg|Jappa shows raw ore textures.
</gallery>
{{Items}}
[[Category:Non-renewable resources]]
[[de:Rohkupfer]]
[[es:Cobre en bruto]]
[[fr:Cuivre brut]]
[[it:Rame grezzo]]
[[ja:銅の原石]]
[[pl:Surowa miedź]]
[[pt:Cobre bruto]]
[[ru:Необработанная медь]]
[[tr:Ham Bakır]]
[[uk:Необроблена мідь]]
[[zh:粗铜]]</li></ul> | File:Grass-Pre Beta 1.9pre5.png The grass block textures on the top of the sides are the same hue as the grass on top on Fancy mode. | ||||
1.6{{Extension DPL}}<ul><li>[[Horse Saddle|Horse Saddle]]<br/>{{About|the removed item|the current item|Saddle}}
{{outdated feature|edition=java}}
{{Item
| title = Horse Saddle
| image = Horse Saddle.png
| renewable = Yes
| stackable = Yes (32)
}}
'''Horse saddles''' were [[item]]s which allowed the player to ride [[horse]]s.
== Obtaining ==
=== Crafting ===
{{crafting |ignoreusage=1
|A1=Leather |B1=Leather |C1=Leather
|A2=Leather |B2=Iron Ingot |C2=Leather
|A3=Iron Ingot |C3=Iron Ingot
|Output=Horse Saddle
}}
== Usage ==
Horse saddles worked just like regular [[saddle]]s, but for [[horse]]s instead of [[pig]]s. Taming a horse was required before putting a horse saddle on it. Unlike any other items, horse saddles could be stacked up to 32.
== Sounds ==
''None''<ref>{{ytl|2a6BQeW6is4|t=330}}; sounds for horses were not added until [[13w22a]]</ref>
== Data values ==
=== ID ===
{{ID table
|nonameid=y
|shownumericids=y
|showforms=y
|generatetranslationkeys=java
|displayname=Horse Saddle
|spritetype=item
|id=416
|form=item
|translationkey=item.horsesaddle.name
|foot=y}}
== History ==
{{History|java}}
{{History||1.6.1|snap=13w16a|[[File:Horse Saddle JE1.png|32px]] Added horse saddles.}}
{{History|||snap=13w18a|Horse saddles have been removed.
|[[Horse]]s and [[zombie horse]]s can now be ridden using regular [[saddle]]s.}}
{{History|foot}}
== Issues ==
Horse saddles have been removed from the game, and as such are no longer supported.
{{Items}}
{{Removed Features}}
[[es:Montura de caballo]]
[[fr:Selle de cheval]]
[[it:Sella di cavallo]]
[[ja:ウマの鞍]]
[[ko:말 안장]]
[[pt:Sela para cavalo]]
[[zh:马鞍]]</li><li>[[Pufferfish (item)|Pufferfish (item)]]<br/>{{DISPLAYTITLE:Pufferfish}}
{{about|the food item|the mob|Pufferfish}}
{{Item
| title = Pufferfish
| image = File:Pufferfish_(item)_JE5_BE2.png
| renewable = Yes
| heals = {{hunger|1}}
| stackable = Yes (64)
|effects=: {{EffectLink|link=Hunger (effect)|Hunger}} III (0:15)
: {{EffectLink|Poison}} II (1:00)
: {{EffectLink|Nausea}} I (0:15){{only|JE}}
: {{EffectLink|Nausea}} II (0:15){{only|BE}}
}}
A '''pufferfish''' is a poisonous [[food]] item that is used to brew [[Potion of Water Breathing|Water Breathing potions]].
== Obtaining ==
=== Fishing ===
Pufferfish can be obtained through [[fishing]]. The pufferfish catch rate can be increased by [[Lure]], which reduces wait time generally.
<!--1-6 exp-->
{{IN|bedrock}}, pufferfish can be caught only when fishing outside [[jungle]] biomes and its variants (i.e. everywhere ''except'' in jungles).
=== Mob loot ===
==== Guardians and elder guardians ====
[[Guardian]]s and [[elder guardian]]s have a 2.5% chance of dropping a random fish upon death. This has a 13% chance of being pufferfish (0.325% chance of dropping a pufferfish). The chance of getting a fish can be increased by 1% per level of [[Looting]], but the type of fish is not affected.
==== Pufferfish ====
[[Pufferfish]] always drop 1 pufferfish in its item form when killed. This drop is not affected by the Looting enchantment.<ref>{{bug|MC-212795||Salmon & Fish mobs are not affected by Looting}}</ref>
== Usage ==
=== Food ===
Pufferfish restores {{hunger|1}} hunger and 0.2 [[Hunger#Mechanics|saturation]], but inflicts [[Hunger_(effect)|Hunger]] III for 15 seconds, [[Poison]] II for 1 minute, and [[Nausea]] I<sup>[''[[Java Edition|JE]] only'']</sup> or II<sup>[''[[Bedrock Edition|BE]] only'']</sup> for 15 seconds. Unlike [[rotten flesh]], it is not helpful to eat pufferfish while starving because they inflict more hunger than they earn.
===Brewing ingredient===
{{brewing
|Pufferfish
|Potion of Water Breathing
|head=1
}}
{{brewing
|Pufferfish
|Mundane Potion
|ingredients=Pufferfish + [[Water Bottle]]
|foot=1
}}
=== Trading ===
Master-level fisherman [[villager]]s buy 1~4{{only|bedrock|short=1}} or four{{only|java|short=1}} pufferfish for an [[emerald]].
=== Wolves ===
{{IN|Bedrock}}, pufferfish can be used to feed a [[wolf]], healing it by {{hp|1|mob=1}}, but only when the wolf is not at full health. Unlike other wolf food, pufferfish cannot be used to speed up the growth of baby wolves, and cannot be used to breed them.
== Sounds ==
{{Sound table/Entity/Food}}
== Data values ==
=== ID ===
{{edition|java}}:
{{ID table
|edition=java
|showitemtags=y
|showforms=y
|generatetranslationkeys=y
|displayname=Pufferfish
|spritetype=item
|nameid=pufferfish
|itemtags=fishes
|form=item
|foot=1}}
{{edition|bedrock}}:
{{ID table
|edition=bedrock
|shownumericids=y
|showforms=y
|notshowbeitemforms=y
|generatetranslationkeys=y
|displayname=Pufferfish
|spritetype=item
|nameid=pufferfish
|id=267
|form=item
|foot=1}}
== Advancements ==
{{load advancements|A Furious Cocktail;How did we get here;Husbandry;A Balanced Diet;Fishy Business}}
== History ==
{{History|java}}
{{History||1.7.2|snap=13w36a|[[File:Pufferfish (item) JE1.png|32px]] Added pufferfish.
|Added potions of [[Water Breathing]], which can be [[brewing|brewed]] by adding a pufferfish to an [[Awkward Potion]].}}
{{History|||snap=13w43a|[[File:Pufferfish (item) JE2 BE1.png|32px]] The texture of pufferfish has been changed.}}
{{History||1.8|snap=14w25a|Pufferfish is now obtainable as a rare drop from [[guardian]]s and [[elder guardian]]s.}}
{{History||1.13|snap=17w47a|The different data values for the <code>fish</code> ID have now been split up into their own IDs.
|Prior to [[1.13/Flattening|''The Flattening'']], this [[item]]'s numeral ID was 349.}}
{{History|||snap=18w08b|[[Pufferfish]] (and other [[fish]] types) has been added as a [[mob]], which [[drops|drop]] its item form when killed.
|[[File:Pufferfish (item) JE3 BE2.png|32px]] The texture of pufferfish has been changed.}}
{{History||1.14|snap=18w43a|[[File:Pufferfish (item) JE4 BE1.png|32px]] The texture of pufferfish has accidentally been reverted.}}
{{History|||snap=18w43b|[[File:Pufferfish (item) JE5 BE2.png|32px]] The correct texture of pufferfish has been restored.}}
{{History|||snap=19w11a|Fisherman [[villager]]s now [[trading|buy]] pufferfish.}}
{{History||1.16.2|snap=Pre-release 2|The level of [[Nausea]] given by pufferfish has been reduced from II to I.<ref>{{bug|MC-196473}}</ref>}}
{{History||1.17|snap=20w46a|The level of [[Poison]] given by pufferfish has been reduced from IV to II.<ref>{{bug|MC-197276}}</ref>}}
{{History|pocket alpha}}
{{History||v0.11.0|snap=build 1|[[File:Pufferfish (item) JE2 BE1.png|32px]] Added pufferfish.}}
{{History||v0.12.1|snap=build 1|Pufferfish now restore [[hunger]] instead of [[health]].
|Pufferfish can now be used to make [[potion]] of Water Breathing.}}
{{History||v0.16.0|snap=build 1|Pufferfish is now dropped by [[guardian]]s and [[elder guardian]]s.}}
{{History|bedrock}}
{{History||1.4.0|snap=beta 1.2.14.2|[[Pufferfish]] has been added as a [[mob]], which [[drops|drop]] its [[item]] form when killed.
|[[File:Pufferfish (item) JE5 BE2.png|32px]] The texture of pufferfish has been changed.}}
{{History||1.8.0|snap=beta 1.8.0.8|Pufferfish can now be used to feed [[ocelot]]s to gain their trust.}}
{{History||1.11.0|snap=beta 1.11.0.4|Pufferfish can now be [[trading|sold]] to fisherman [[villager]]s.}}
{{History||1.19.10|snap=beta 1.19.10.23|The strength of the [[poison]] effect has been decreased from IV to II.}}
{{History|console}}
{{History||xbox=TU31|xbone=CU19|ps=1.22|wiiu=Patch 3|switch=1.0.1|[[File:Pufferfish (item) JE2 BE1.png|32px]] Added pufferfish.}}
{{History||xbox=TU69|xbone=none|ps=1.76|wiiu=Patch 38|switch=none|[[Pufferfish]] (and other [[fish]] types) has been added as a [[mob]], which [[drops|drop]] its [[item]] form when killed.}}
{{History||xbox=none|xbone=none|ps=1.90|wiiu=none|switch=none|[[File:Pufferfish (item) JE5 BE2.png|32px]] The texture of pufferfish has been changed.}}
{{History|foot}}
== Issues ==
{{issue list}}
== Trivia ==
* The consumption of pufferfish inflicting the player with Nausea and Poison is based on reality. Real pufferfish contain the dangerous [[Wikipedia:Tetrodotoxin|tetrodotoxin]] within their organs, especially in the liver. Tetrodotoxin leads to quick death through respiratory paralysis. Muscle tissue and blood contain trace amounts. In East Asia, pufferfish are considered a delicacy known as [[Wikipedia:Fugu|fugu]], as small parts of the fish are actually edible. Any chef preparing fugu must have special licensing/certification to prepare this dish.
== Gallery ==
<gallery>
File:Eat Pufferfish.png|The result of eating pufferfish.
</gallery>
== See also ==
* [[Fishing]]
== References ==
{{Reflist}}
== External Links ==
*[https://www.minecraft.net/en-us/article/taking-inventory--pufferfish Taking Inventory: Pufferfish] – Minecraft.net on October 14, 2020
{{items}}
[[cs:Čtverzubec]]
[[de:Kugelfisch (Nahrung)]]
[[es:Pez globo (objeto)]]
[[fr:Poisson (nourriture)]]
[[it:Pesce palla (oggetto)]]
[[ja:フグ (アイテム)]]
[[ko:복어 (아이템)]]
[[nl:Kogelvis]]
[[pl:Rozdymka]]
[[pt:Baiacu (item)]]
[[ru:Иглобрюх (предмет)]]
[[th:ปลาปักเป้า (ไอเทม)]]
[[tr:Kirpi balığı]]
[[zh:河豚(物品)]]
[[Category:Food]]
[[Category:Brewing recipe]]
[[Category:Renewable resources]]</li></ul> | Seeds are no longer obtained by using a hoe on a grass block; tall grass will occasionally drop seeds. | ||||
1.8{{Extension DPL}}<ul><li>[[Nautilus Shell|Nautilus Shell]]<br/>{{Item
| type =
| stackable = Yes (64)
| renewable = Yes
}}
A '''nautilus shell''' is an item that is used for crafting [[conduit]]s.
==Obtaining==
===Fishing===
{{main|Fishing#Junk and treasure}}
Nautilus shells can be rarely obtained as a treasure item from fishing. The drop chances of nautilus shells slightly increase with each level of [[Luck of the Sea]] on the [[player]]'s [[fishing rod]].
===Mob loot===
[[Drowned]] have a 3%{{only|java|short=1}} or 8%{{only|bedrock|short=1}} chance to spawn with a nautilus shell in their off-hand, and this nautilus shell always drops upon [[death]].
===Trading===
[[Wandering trader]]s may [[trading|sell]] a nautilus shell for 5 [[emerald]]s each, but they only sell 5 of them at a time.
==Usage==
{{IN|bedrock}}, a nautilus shell is one of the few items that can be held in the off-hand.
===Crafting ingredient===
{{crafting usage}}
=== Trading ===
Nautilus shells can be given to trident-wielding drowned with a chance for the drowned to pick up the shell and drop the trident.<sup>[''[[Bedrock Edition]] only'']</sup>
==Data values==
===ID===
{{edition|java}}:
{{ID table
|edition=java
|showforms=y
|generatetranslationkeys=y
|displayname=Nautilus Shell
|spritetype=item
|nameid=nautilus_shell
|form=item
|foot=1}}
{{edition|bedrock}}:
{{ID table
|edition=bedrock
|shownumericids=y
|showforms=y
|notshowbeitemforms=y
|generatetranslationkeys=y
|displayname=Nautilus Shell
|spritetype=item
|nameid=nautilus_shell
|id=570
|form=item
|foot=1}}
==History==
{{History|java}}
{{History||1.13|snap=18w15a|[[File:Nautilus Shell JE1 BE2.png|32px]] Added nautilus shells.}}
{{History||1.14|snap=19w05a|Added [[Wandering Trader|wandering trader]]s, which sell nautilus shells.}}
{{History|bedrock}}
{{History||1.4.0|snap=beta 1.2.20.1|[[File:Nautilus Shell BE1.png|32px]] Added nautilus shells.}}
{{History|||snap=beta 1.2.20.2|[[File:Nautilus Shell JE1 BE2.png|32px]] The texture of nautilus shells has now been changed.}}
{{History||1.5.0|snap=beta 1.5.0.0|[[Drowned]] now sometimes spawn holding a nautilus shell.
|Nautilus shells are no longer behind [[Experimental Gameplay]].}}
{{History|||snap=beta 1.5.0.1|Nautilus shells can now be used to craft [[conduit]]s.}}
{{History||1.10.0|snap=beta 1.10.0.3|Nautilus shells can now be obtained from [[trading]] with [[wandering trader]]s.}}
{{History|console}}
{{History||xbox=TU69|ps=1.76|wiiu=Patch 38|[[File:Nautilus Shell JE1 BE2.png|32px]] Added nautilus shells.}}
{{History||xbox=none|ps=1.91|wiiu=none|Nautilus shells can now be obtained from [[trading]] with [[wandering trader]]s.}}
{{History|foot}}
==Issues==
{{issue list}}
==Trivia==
*[[wikipedia:Nautilus|Nautilus]]es are animals that occupy deep oceans in the real world. However, they are absent in Minecraft and there are currently no plans to add nautilus [[mob]]s into the game.
*Because {{el|bedrock}} allows for Nautilus shells to be held in the off-hand (since drowned hold them), they are the only item in that version that can be put in the off-hand slot without having a specific function.
{{items}}
[[de:Nautilusschale]]
[[es:Caparazón de nautilo]]
[[fr:Coquille de nautile]]
[[it:Conchiglia di nautilus]]
[[ja:オウムガイの殻]]
[[ko:앵무조개 껍데기]]
[[nl:Nautilusschelp]]
[[pl:Muszla łodzika]]
[[pt:Concha de náutilo]]
[[ru:Раковина наутилуса]]
[[th:เปลือกหอยงวงช้าง]]
[[uk:Мушля наутилуса]]
[[zh:鹦鹉螺壳]]
[[Category:Renewable resources]]</li><li>[[Reality Vision|Reality Vision]]<br/>{{Joke feature}}
{{Item
| title = Reality Vision
| image = Reality Vision.png
| renewable = No
| stackable = Yes (64)
}}
The '''Reality vision''' was a joke [[helmet]].
== Usage ==
Reality vision was equipped via the [[helmet]] slot. When equipped, it showed a [[wikipedia:Mini-map|minimap]] in the bottom-center of the screen (which moved when the [[player]]'s camera moves). The minimap showed all [[chunk]]s that were currently rendered. The player's location was represented by a green [[beacon]] beam marker on the map.
It displayed a vision overlay (similar to the [[pumpkin]] overlay). The overlay would change to a new overlay if the player went into third person (unlike the pumpkin overlay), which made the screen appear like an old [[wikipedia:Television|television]] screen. The overlay was called <code>cantseeshit<!-- Do not change this; this is that word that is actually used-->captain.png</code> in the assets folder. It activated a [[Shaders|shader]] when equipped (<code>scan_pincushion</code>).
== Sounds ==
{{Sound table
|sound=Equipvr.ogg
|subtitle=''None''
|source=player
|description=When equipped
|id=item.reality_vision.use
|translationkey=''None''
|volume=1.0
|pitch=1.0
|distance=16
|foot=1}}
== Data values ==
=== ID ===
{{ID table
|edition=java
|shownumericids=y
|showforms=y
|generatetranslationkeys=y
|displayname=Reality Vision
|spritetype=item
|nameid=reality_vision
|id=500
|form=item
|translationkey=item.realityVision.name
|foot=1}}
== History ==
{{History|java}}
{{History||1.RV-Pre1|[[File:Reality_Vision_(item).png|32px]] [[File:Reality Vision.png|32px]] Added reality vision.}}
{{History|foot}}
== Issues ==
Reality Vision is an unsupported item due to being an [[Wikipedia:April Fools' Day|April Fools']] joke, and therefore such issues relating to them will not be fixed.
== Trivia ==
* [[Sign]]s display the text "OBEY" while equipped, a reference to the movie [[wikipedia:They Live|''They Live'']].
== Gallery ==
<gallery>
Sign2.png|The [[sign]] texture found in the game files.
OBEY.png|OBEY seen in a sign.
OBEY sign in 1.RV-Pre1..png|OBEY seen in a sign, but seen from a better perspective.
TechGear.png|A [[player]] wearing reality vision, featured in this [[wikipedia:April Fools' Day|April Fools']] joke version.
</gallery>
{{Items}}
{{Jokes}}
[[Category:Non-renewable resources]]
[[Category:Joke items]]
[[pt:Visão da realidade]]
[[es:Reality Vision]]</li></ul> | Between Alpha 1.2.0 to now, Grass block had a different texture when held by Endermen or obtained in the inventory (via an Inventory Editor or the /give command). The texture appeared to have the side face on the top, as well. | ||||
| It was not possible to legitimately obtain a Grass Block before this update with the introduction of Creative Mode. It was first obtainable in Survival Mode in 1.9Pre-4 when enchantments were added, and with Silk Touch destroying a Grass Block would give the actual block instead of Dirt, although you cannot pick up the block again with a normal tool after placing it yourself. | |||||
| r | |||||
1.0.0{{Extension DPL}}<ul><li>[[Bottle o' Enchanting|Bottle o' Enchanting]]<br/>{{ItemEntity
|image=Bottle o' Enchanting.gif
|imagesize=160px
|invimage=Bottle o' Enchanting
|stackable=Yes (64)
|renewable=Yes
|size=Height: 0.25 Blocks<br>Width: 0.25 Blocks
|rarity=Uncommon
|networkid='''[[JE]]''': 75
}}
A '''bottle o' enchanting''' is a throwable item that releases [[experience]] orbs on impact.
== Obtaining ==
=== Trading ===
Master-level cleric [[villager]]s sell bottles o' enchanting for 3 emeralds as part of their trade.
=== Natural generation ===
{{LootChestItem|bottle-o'-enchanting}}
== Usage ==
A bottle o' enchanting can be thrown by pressing {{control|use}}. On impact, it drops [[experience]] orbs worth {{xp|3|11}} (average 7.0) and sends out blue particles.
== Sounds ==
{{Edition|Java}}:<br>
Bottles o' enchanting use the Friendly Creatures sound category for entity-dependent sound events.
{{Sound table
|sound=Glass dig1.ogg
|sound2=Glass dig2.ogg
|sound3=Glass dig3.ogg
|subtitle=Bottle smashes
|source=neutral
|description=When a bottle o' enchanting impacts something
|id=entity.splash_potion.break
|translationkey=subtitles.entity.potion.splash
|volume=1.0
|pitch=0.9-1.0
|distance=16}}
{{Sound table
|rowspan=2
|sound=Bow shoot.ogg
|subtitle=Bottle thrown
|source=neutral
|description=When a bottle o' enchanting is thrown by a player
|id=entity.experience_bottle.throw
|translationkey=subtitles.entity.potion.throw
|volume=0.5
|pitch={{frac|1|3}}-0.5
|distance=16}}
{{Sound table
|subtitle=Dispensed item
|source=block
|description=When a bottle o' enchanting is dispensed from a [[dispenser]]
|id=block.dispenser.launch
|translationkey=subtitles.block.dispenser.dispense
|volume=1.0
|pitch=1.2
|distance=16
|foot=1}}
{{Edition|Bedrock}}:
{{Sound table
|type=bedrock
|sound=Glass dig1.ogg
|sound2=Glass dig2.ogg
|sound3=Glass dig3.ogg
|source=block
|description=When a splash potion impacts something
|id=random.glass
|volume=1.0
|pitch=1.0}}
{{Sound table
|rowspan=2
|sound=Bow shoot.ogg
|source=player
|description=When a splash potion is thrown by a player
|id=random.bow
|volume=0.5
|pitch=0.33-0.5}}
{{Sound table
|source=player
|description=When a splash potion is dispensed from a dispenser
|id=random.bow
|volume=1.0
|pitch=0.83-1.25
|foot=1}}
== Data values ==
=== ID ===
{{edition|java}}:
{{ID table
|edition=java
|firstcolumnname=Item
|showforms=y
|generatetranslationkeys=y
|displayname=Bottle o' Enchanting
|spritetype=item
|nameid=experience_bottle
|form=item
|foot=1}}
{{ID table
|edition=java
|firstcolumnname=Entity
|generatetranslationkeys=y
|displayname=Thrown Bottle o' Enchanting
|spritetype=entity
|spritename=Bottle o' Enchanting
|nameid=experience_bottle
|foot=1}}
{{edition|bedrock}}:
{{ID table
|edition=bedrock
|firstcolumnname=Item
|shownumericids=y
|showforms=y
|notshowbeitemforms=y
|generatetranslationkeys=y
|displayname=Bottle o' Enchanting
|spritetype=item
|nameid=experience_bottle
|id=508
|form=item
|foot=1}}
{{ID table
|edition=bedrock
|firstcolumnname=Entity
|shownumericids=y
|generatetranslationkeys=y
|displayname=Bottle o' Enchanting
|spritetype=entity
|nameid=xp_bottle
|id=68
|foot=1}}
=== Entity data ===
{{see also|Chunk format}}
Thrown bottles o' enchanting have entity data that define various properties of the entity.
{{/ED}}
== History ==
<!--When were dispensers made able to fire these? Or was this always a thing?-->
{{History|java}}
{{History||1.2.1|snap=12w04a|[[File:Bottle o' Enchanting JE1 BE1.png|32px]] Added bottles o' enchanting.
|Bottles o' enchanting can currently be obtained only in [[creative]] mode.}}
{{History||1.3.1|snap=12w21a|With the implementation of the [[trading]] system, the [[player]] can now trade with priest [[villager]]s to obtain 2–4 bottles o' enchanting for 1 [[emerald]].}}
{{History||1.8|snap=14w02a|With the trading revamp, villagers no longer [[trading|sell]] bottles o' enchanting, making them again unobtainable in regular [[survival]].}}
{{History|||snap=14w31a|Cleric [[villager]]s now sell bottles o' enchanting for 3–11 [[emerald]]s each, making them [[renewable resource|renewable]] again.}}
{{History||1.9|snap=15w49a|Bottles o' enchanting, like all projectiles, now take thrower's motion into account.}}
{{History||1.11|snap=16w32a|The entity ID has now been changed from <code>ThrownExpBottle</code> to <code>xp_bottle</code>.}}
{{History||1.13|snap=17w47a|Prior to [[1.13/Flattening|''The Flattening'']], this [[item]]'s numeral ID was 384.}}
{{History|||snap=18w11a|Bottles o' enchanting can now generate in [[shipwreck]] chests.}}
{{History|||snap=pre5|The entity ID has now been changed to <code>experience_bottle</code>.}}
{{History||1.14|snap=18w43a|[[File:Bottle o' Enchanting JE2 BE2.png|32px]] The texture of bottles o' enchanting has now been changed.}}
{{History|||snap=18w47a|Bottles o' enchanting can now generate in [[pillager outpost]] chests.}}
{{History||1.19|snap=22w13a|Bottles o' enchanting may now be found in [[ancient city]] [[chest]]s.}}
{{History|pocket alpha}}
{{History||v0.12.1|snap=build 1|[[File:Bottle o' Enchanting JE1 BE1.png|32px]] Added bottles o' enchanting.
|Due to the lack of [[trading]], bottles o' enchanting are currently available only in [[creative]] mode, similar to [[Java Edition 12w04a|12w04a]] when it was first released.}}
{{History|pocket}}
{{History||1.0.4|snap=alpha 1.0.4.0|With [[villager]] [[trading]] added, it is now possible to obtain bottles o' enchanting legitimately.}}
{{History||1.1.0|snap=alpha 1.1.0.0|The entity ID has now been changed from <code>potion.experience</code> to <code>xp_bottle</code>.}}
{{History|bedrock}}
{{History||1.4.0|snap=beta 1.2.14.2|Bottles o' enchanting can now be found inside [[shipwreck]] and [[buried treasure]] [[chest]]s.}}
{{History||1.10.0|snap=beta 1.10.0.3|Bottles o' enchanting can now be found in [[pillager outpost]] chests.
|[[File:Bottle o' Enchanting JE2 BE2.png|32px]] The texture of bottles o' enchanting has now been changed.}}
{{History||1.11.0|snap=beta 1.11.0.4|[[Trading]] has now been changed and bottles o' enchanting are now [[trading|sold]] by cleric [[villager]]s for 3 [[emerald]]s.}}
{{History|console}}
{{History||xbox=TU7|xbone=CU1|ps=1.0|wiiu=Patch 1|[[File:Bottle o' Enchanting JE1 BE1.png|32px]] Added bottles o' enchanting.
|Bottle o' enchanting can be found in the Miscellaneous tab in the [[Creative inventory]].}}
{{History||xbox=TU12|Moved bottle o' enchanting to the Brewing tab in the Creative inventory.}}
{{History|PS4}}
{{History||1.90|[[File:Bottle o' Enchanting JE2 BE2.png|32px]] The texture of bottles o' enchanting has now been changed.}}
{{History|3ds}}
{{History||0.1.0|[[File:Bottle o' Enchanting JE1 BE1.png|32px]] Added bottles o' enchanting.
|Bottles o' enchanting are not available within the [[Creative inventory]].}}
{{History||?|Added bottles o' enchanting to the Creative inventory.{{info needed|Which update did this occur?}}}}
{{History|foot}}
== Issues ==
{{issue list|Bottle o' Enchanting|Experience Bottle}}
== Gallery ==
<gallery>
Bottle O' Enchanting Splash.gif|Bottle o' enchanting splash animation on impact.
Bottle O' Enchanting villager.png|Players may trade with villagers to obtain bottles o' enchanting in survival mode.
</gallery>
{{Items}}
{{Entities}}
[[cs:Lektvar očarování]]
[[de:Erfahrungsfläschchen]]
[[es:Frasco con experiencia]]
[[fr:Fiole d'expérience]]
[[ja:エンチャントの瓶]]
[[ko:경험치 병]]
[[pl:Zaklęta butelka]]
[[pt:Frasco de experiência]]
[[ru:Зелье опыта]]
[[th:ขวดแห่งเวทมนตร์]]
[[zh:附魔之瓶]]</li><li>[[Coal|Coal]]<br/>{{About|the fuel item that can be mined|the ore|Coal Ore|the block|Block of Coal|the smelted wood|Charcoal}}
{{Item
| image = Coal.png
|type=
| renewable = Yes
| stackable = Yes (64)
}}
'''Coal''' is a mineral [[item]] mainly obtained from [[Coal Ore|coal ore]]. It is primarily used for crafting [[torches]] and [[Campfire|campfires]], as well as [[fuel]].
== Obtaining ==
=== Chest loot ===
{{see also|Coal Ore#Natural generation}}
{{LootChestItem|coal}}
=== Mining ===
[[Coal ore]] are mined using a [[pickaxe]] and drops 1 piece of coal. If the pickaxe is enchanted with [[Fortune]], it may drop an extra piece per level of Fortune, up to a maximum of 4 with Fortune III.
=== Mob loot ===
[[Wither skeleton]]s have a {{Frac|1|3}} chance of dropping a single coal upon death. The maximum amount of coal is increased by 1 per level of [[Looting]]. The chance of a wither skeleton ''not'' dropping any coal can be found using the formula <code>2 / (Looting Level + 3)</code>. For example, Looting III gives a {{frac|1|3}} chance of not dropping any coal. All other amounts have an equal chance of occurring.
=== Crafting ===
{{Crafting
|showname=1
|Block of Coal
|Output=Coal,9
|type=Material
}}
=== Smelting ===
{{Smelting
|head=1
|Coal Ore
|Coal
|0,1
|foot=1
}}
== Usage ==
=== Crafting ingredient ===
{{crafting usage|Coal}}
=== Fuel ===
When used in a [[furnace]] as a fuel, a piece of coal lasts 80 seconds (smelting up to 8 items), like [[charcoal]]. Coal used as fuel lasts more than 5 times longer than [[wood planks]] or [[wood]] logs used as fuel, being more efficient than any other use of wood for smelting {{in|je}}, but outstripped by [[wooden slabs]] {{in|be}}.
Coal and charcoal are also the only fuels accepted by [[Minecart with Furnace|furnace minecart]]s. They provide approximately four minutes of transit each.
=== Trading ===
Novice-level fisherman [[villager]]s have a 50% chance to buy 10 coal for one [[emerald]].
{{IN|java}}, novice-level armorer and toolsmith villagers have a 40% chance of offering to buy 15 coal for one emerald. Novice-level weaponsmith villagers and apprentice-level butcher villagers have {{frac|2|3}} chance of offering to buy 15 coal for one emerald.
{{IN|bedrock}}, novice-level armorer, toolsmith, and weaponsmith villagers and apprentice-level butcher villagers buy 15 coal for one emerald.
[[trading|Trade]]s that involve coal cannot be substituted by [[charcoal]].
== Data values ==
=== ID ===
{{edition|java}}:
{{ID table
|edition=java
|showitemtags=y
|showforms=y
|generatetranslationkeys=y
|displayname=Coal
|spritetype=item
|nameid=coal
|itemtags=coals
|form=item
|foot=1}}
{{edition|bedrock}}:
{{ID table
|edition=bedrock
|showitemtags=y
|showaliasids=y
|shownumericids=y
|showforms=y
|notshowbeitemforms=y
|generatetranslationkeys=y
|displayname=Coal
|spritetype=item
|nameid=coal
|aliasid=coal / 0
|id=302
|itemtags=minecraft:coals
|form=item
|foot=1}}
== History ==
{{History|java classic}}
{{History||May 21, 2009|link=https://web.archive.org/web/0/http://notch.tumblr.com/post/110762705/my-list-on-tile-types-so-far|[[Notch]] shows interest in adding coal, commenting that it might be combined with [[iron ore]] to make steel.}}
{{History|java indev}}
{{History||0.31|snap=20100128|[[File:Coal JE1.png|32px]] Added coal.
|Mining [[coal ore]] blocks [[drops]] 2-5 pieces of coal.}}
{{History||0.31|snap=20100129|Coal can be used to craft [[torch]]es.}}
{{History||?|Mining [[coal ore]] now drops 1 piece of coal (down from 2-5).}}
{{History||20100219|[[File:Coal JE2 BE1.png|32px]] The texture of coal has been changed. It is now more centered.}}
{{History|java beta}}
{{History||1.8|snap=Pre-release|Coal can now be found in the new [[mineshaft]] [[chest]]s and [[stronghold]] storeroom chests.}}
{{History|java}}
{{History||1.0.0|snap=?|Coal can be now obtained by [[smelting]] [[coal ore]].}}
{{History||1.2.1|snap=12w04a|Coal can now be used to craft [[fire charge]]s.}}
{{History||1.3.1|snap=12w21a|Blacksmith and butcher [[villager]]s now [[trading|buy]] 16–23 of either coal or charcoal for 1 [[emerald]].}}
{{History|||snap=1.3|[[File:Coal JE3 BE2.png|32px]] The texture of coal has been changed.}}
{{History||1.4.2|snap=12w36a|Coal is now dropped by [[wither skeleton]]s, making it [[renewable resource|renewable]].}}
{{History||1.6.1|snap=13w18a|Coal can now be used to craft [[block of coal|coal block]]s.}}
{{History||1.8|snap=14w02a|Fisherman, armorer, tool smith, weapon smith and butcher [[villager]]s now [[trading|buy]] 16–24 coal for 1 [[emerald]].}}
{{History||1.9|snap=15w43a|Coal may now be found in [[igloo]] basement [[chest]]s.}}
{{History|||snap=15w44a|The average yield of coal from [[mineshaft]] chests has been decreased, and added to [[dungeon]] chests.}}
{{History||1.11|snap=16w39a|Coal can now be found in the new [[woodland mansion]] [[chest]]s.}}
{{History||1.13|snap=17w47a|The different data values for the <code>coal</code> ID have been split up into their own IDs.
|Prior to [[1.13/Flattening|''The Flattening'']], this [[item]]'s numeral ID was 263.}}
{{History|||snap=18w09a|Coal can now be found in the loot [[chest]]s of [[underwater ruins]].}}
{{History|||snap=18w11a|Coal now generates in [[shipwreck]] [[chest]]s.}}
{{History||1.14|snap=18w43a|[[File:Coal JE4 BE3.png|32px]] The texture of coal has been changed.}}
{{History|||snap=18w48a|Coal can now be found in [[chest]]s in [[village]] fishing cottages.}}
{{History|||snap=18w49a|Coal can now be found in [[chest]]s in [[village]] butcher shops and [[snowy tundra|snowy]] village houses.}}
{{History|||snap=18w50a|Coal can now be found in [[chest]]s in [[village]] toolsmith houses.}}
{{History|||snap=19w02a|Coal can now be used to craft [[campfire]]s. Destroying a campfire returns 2 charcoal.}}
{{History||1.16|snap=20w06a|Coal can now be used to craft [[torch|soul torches]].}}
{{History||1.19|snap=22w13a|Coal may now be found in [[ancient city]] [[chest]]s.}}
{{History||1.20|snap=23w12a|Coal can now be found in [[suspicious gravel]] and [[suspicious sand]] in cold and warm [[ocean ruins]] and in [[trail ruins]].}}
{{History|||snap=23w16a|Coal no longer generates in [[suspicious sand]] in [[trail ruins]].|Due to the split of the archaeological loot tables for the suspicious gravel within the [[trail ruins]]; coal now is in the common loot.}}
{{History|pocket alpha}}
{{History||v0.3.0|[[File:Coal JE2 BE1.png|32px]] Added coal.
|Coal can be used to craft [[torch]]es.}}
{{History||v0.8.0|snap=build 1|[[File:Coal JE3 BE2.png|32px]] The texture of coal has been changed.
|Coal can now be crafted to make a [[block of coal]].}}
{{History||v0.12.1|snap=build 1|Coal is now [[drops|dropped]] by [[wither skeleton]]s.}}
{{History||v0.14.0|snap=build 1|Coal can now be found inside [[minecart with chest|chest minecarts]] in [[mineshaft]]s.}}
{{History||v0.15.0|snap=build 1|Coal is now used to craft [[fire charge]]s.}}
{{History|pocket}}
{{History||1.0.0|snap=alpha 0.17.0.1|Coal can now be found in the [[stronghold]] storeroom [[chest]]s.
|Coal may now be found in [[igloo]] basement chests.}}
{{History||1.0.4|snap=alpha 1.0.4.0|Fisherman, armorer, toolsmith, weaponsmith and butcher [[villager]]s now [[trading|buy]] 16–24 coal for 1 [[emerald]].}}
{{History||1.1.0|snap=alpha 1.1.0.0|Coal is now found in [[woodland mansion]] [[chest]]s.}}
{{History|bedrock}}
{{History||1.4.0|snap=beta 1.2.14.2|Coal can now be found inside [[shipwreck]] [[chest]]s.}}
{{History|||snap=beta 1.2.20.1|Coal can now be found inside [[underwater ruins]] [[chest]]s.}}
{{History||1.10.0|snap=beta 1.10.0.3|Coal can now be used to craft [[campfire]]s. Destroying a campfire returns 2 charcoal.
|[[File:Coal JE4 BE3.png|32px]] The texture of coal has been changed.}}
{{History||1.11.0|snap=beta 1.11.0.1|Coal can now be found in [[snowy tundra]] [[village]] house [[chest]]s and in village butcher and toolsmith chests.}}
{{History|||snap=beta 1.11.0.4|Armorer, weaponsmith, toolsmith, and butcher [[villager]]s now [[trading|buy]] 15 coal for an [[emerald]].
|Fishermen villagers now have a 50% chance to buy 10 coal for an emerald as part of their first tier [[trading|trade]].}}
{{History||1.16.0|snap=beta 1.16.0.51|Coal can now used to craft [[soul torch]]es.}}
{{History|console}}
{{History||xbox=TU1|xbone=CU1|ps=1.0|wiiu=Patch 1|switch=1.0.1|[[File:Coal JE2 BE1.png|32px]] Added coal.}}
{{History||?|[[File:Coal JE3 BE2.png|32px]] The texture of coal has been changed.}}
{{History||xbox=none|xbone=none|ps=1.90|wiiu=none|switch=none|[[File:Coal JE4 BE3.png|32px]] The texture of coal has been changed.}}
{{History|New 3DS}}
{{History||0.1.0|[[File:Coal JE3 BE2.png|32px]] Added coal.}}
{{History|foot}}
== Issues ==
{{issue list|Coal}}
{{Items}}
[[Category:Renewable resources]]
[[cs:Uhlí]]
[[de:Kohle]]
[[es:Carbón]]
[[fr:Charbon]]
[[hu:Szén]]
[[it:Carbone]]
[[ja:石炭]]
[[ko:석탄]]
[[nl:Steenkool]]
[[pl:Węgiel]]
[[pt:Carvão]]
[[ru:Уголь]]
[[th:ถ่าน]]
[[tr:Kömür]]
[[uk:Вугілля]]
[[zh:煤炭]]</li></ul> | 1.9pre5 | The top textures of Grass Blocks and snowy Grass blocks were slightly changed, to look more fitting with standard biomes and give it a darker look: | |||
| ? | The functionality of slabs has changed and will no longer revert grass blocks beneath it to dirt allowing grass to spread from underneath. | ||||
1.4.2{{Extension DPL}}<ul><li>[[Map|Map]]<br/>{{about|the craftable map|maps showing the locations of certain structures|Explorer Map|other uses|Map (disambiguation)}}
{{distinguish|World}}
{{Item
| image = Map Zoom 4.png
| renewable = Yes
| stackable = Yes (64)
}}
A '''map''' is an [[item]] used to view explored [[Chunk|terrain]] and mark landmarks.
==Obtaining==
===Crafting===
{{crafting
|head=1
|showname=0
|showdescription=1
|A1= Paper
|B1= Paper
|C1= Paper
|A2= Paper
|B2= Compass
|C2= Paper
|A3= Paper
|B3= Paper
|C3= Paper
|Output= Empty Map
|type= Miscellaneous
|description=This variation is called an "empty locator map" {{in|bedrock}}, or an "empty map" {{in|java}}.
When the player first creates a map, it is blank. It needs to be activated by holding it and pressing ''{{Control|use item}}''. after which it records terrain and location markers as the player travels within (or close to) the area it maps.
}}
{{crafting
|A1= Paper
|B1= Paper
|C1= Paper
|A2= Paper
|B2= Paper
|C2= Paper
|A3= Paper
|B3= Paper
|C3= Paper
|Output= Empty Map
|type= Miscellaneous
|description={{only|bedrock}}
This variation is called an "empty map". It does not show location markers. It is intended for cloning and zooming locator maps without having to consume an additional [[compass]] (thereby saving [[iron ingot]]s and [[redstone dust]]), but it can also be {{Control|use|text=activated}} and later converted to a locator map by combining it with a compass on an [[anvil]], [[crafting table]], or [[cartography table]].
|foot=1
}}
=== Natural generation ===
==== Chest loot ====
{{LootChestItem|empty-map,map
}}
=== Cartography table ===
A map can also be created using a single paper on a [[cartography table]] to create an empty map, or a paper with a compass for an empty locator map.{{only|bedrock}}
=== Starting map ===
{{exclusive|bedrock|section=1}}
When creating a new world {{in|bedrock}}, the player can enable the "Starting Map" option to spawn with an empty locator map in the hotbar. The map's zoom scale is 1:8. The map is updated only while the player holds it.
=== Trading ===
Novice-level cartographer [[Villager|villagers]] sell a single empty map for 7 [[Emerald|emeralds]] as their trades.
{{IN|java}}, cartographer villagers may give players with the [[Hero of the Village]] effect an empty map.
== Usage ==
{{See also|Tutorials/Mapping}}
=== Mapping ===
Crafting a map creates an empty map. The map is drawn for the first time when it is held and used (with ''{{control|use item}}''). This map can then be adjusted to different zoom levels. After conversion to a drawn map item, it starts to draw a top-down view of the player's surroundings, with North pointing to the top of the map. A pointed oval pointer indicates the player's position on the map, and moves in real-time as the player moves across the terrain shown on the map. The map does ''not'' center on the player when created, rather, the world is broken up into large invisible grid squares, and the map displays the area of whichever grid square it is in when it is first used. For example, if a player uses a new map in a certain grid square, and then moves a distance away and uses another fresh map but is still within the same grid square, both maps appear identical. To make a map that is not identical to the first one, the player would have to move outside of the edges of the first map (because then they would be in a new grid square). This way, no two maps of the same size can ever partially overlap and every map can display only a fixed area.
To record the world on a map, that specific map must be held in the player's hands while the player moves around the world. The world is recorded as-is during exploration, meaning that if the world is modified, a player must revisit the area while holding the map to update the map's view. Maps can also be [[Map#Cloning|cloned]]. If a player holds a map whose one or more clones are on display in item frames, updates are made on all clone-connected maps.
Other players are displayed on the map only if they have a map in their inventory cloned from the one being looked at. When placing a map into an [[item frame]], the map displays with a green pointer shown at the location of the item frame. This is to help the player see where they are in relation to the area that the map is showing. If the player leaves a map in an item frame and views a clone of it, the green pointer remains in the spot of the framed copy. This can be used to set up waypoints. Unexplored areas are transparent, making the item frame visible.
When the player leaves the area shown on a specific map, the player pointer transforms into a white dot that moves on that map. The marker shrinks to a smaller white dot if the player is far from the map's center: the area is 320 by 320 blocks per scale factor. The dot moves along the edge of the map to show the relative location of the player. However {{in|bedrock}}, the pointer remains as an arrow but shrinks until the player is near the area shown on the map.
While maps in [[the Nether]] work, they show only the red-and-gray pattern, regardless of the blocks placed. The only useful function is finding where the player is in relation to placed framed maps, which show as green pointers. Additionally, the player pointer rapidly spins and is not a good indicator of direction. Placing a [[banner]] in [[the Nether]] still shows it on the map as usual. Having a smaller map image while riding a [[strider]] in the Nether can help one to see one's footing while traveling over [[lava]].
{{IN|java}}, when using a map from another dimension, the map shows the player's position and direction when they were last in the dimension of the map. {{IN|bedrock}}, however, the player can use maps from one dimension while in another dimension. For locator maps, the place marker changes color depending on the dimension that the player is currently in (white for the Overworld, red for [[the Nether]], and magenta for [[the End]]). An Overworld map in the Nether shows the player's corresponding location and direction in the Overworld.<ref name=multiverse>{{ytl|EpP1diZdEdI}}</ref> Similarly, a Nether Map in the Overworld shows the player's corresponding location in the Overworld, but the place marker spins, just like a Nether map in the Nether. An Overworld map in the End shows the world spawn.<ref name=multiverse/> A Nether map cannot be used in the End — the map appears, but the place marker is not shown anywhere — and similarly, an End map cannot be used in the Overworld or the Nether.
A player can make a large piece of pixel art (128×128) facing upward, center a map on it, and place that map in an [[item frame]] to create a custom picture. Locking is recommended. See [[Map item format#Map Pixel Art]] for details on the techniques.
Maps display as a mini-map when held in the off-hand, or if the off-hand slot is occupied; the map is full-sized only when held in the dominant hand with both hands free.
A map always positions itself facing towards North when placed horizontally within an item frame regardless of how the map is placed.
=== Map content ===
{{Main|Map item format}}
Maps consist of square pixels arranged like pixels in a 128×128 square pattern, with each pixel representing a square portion of land. {{IN|java}}, the [[Map item format#Color table|color of a map pixel]] generally matches the color of the most common [[opaque]] block in the corresponding area, as seen from the sky. 'Minority blocks' in the target area have no effect on the color of the pixel, thus small features tend to be undetectable on zoomed-out maps.
{{IN|bedrock}}, the [[Map item format#Color table|color of a map pixel]] instead matches the single top-most opaque block in a grid sized by the map magnification pixel size (see the table in the "Player marker and pointer" section below). For example, a 3/4 magnification map has a pixel size of 8x8 blocks; this means the map will read only the top-most opaque blocks at the 0,0 coordinate, the 8,0 coordinate, the 0,8 coordinate, etcetera, ignoring all other blocks in the area. This means that {{in|bedrock}}, map pixel art requires only one block per pixel regardless of map magnification.
{{IN|bedrock}}, grass, foliage and water colors that are biome-dependent are represented accurately on a map.
{| class="wikitable"
|-
! style="width: 300px;" | {{el|je}}
! style="width: 300px;" | {{el|be}}
|-
| style="text-align: center;" | [[File:Map Zoom 4.png|alt=All banners marked on a map, alongside a named banner.|216px]]
| style="text-align: center;" | [[File:Map item BE.png|216px]]
|-
| Biome colors on ''Java Edition''.
| Biome colors on ''Bedrock Edition''.
|-
|}
Maps also show ground up to about 15 blocks below the surface of the water in oceans as slightly lighter blue, to show where the ground rises. This is not true with land above water. Higher elevations in the world mean lighter colors on the map. The map records the surface even as the player moves below the surface.
A standard map represents 128x128 blocks (1 block per pixel, 8x8 [[chunks]]) but maps can be zoomed-out to represent up to 2048x2048 blocks (16 square blocks per pixel, 128x128 [[chunks]]).
Some relevant distances: 64 blocks (4 chunks) is the update radius from a player in the Overworld and the End. However, it is half this (32 blocks) in the Nether. Also, 1024 blocks is the minimum Overworld distance from a [[nether portal]], at which players can build another portal and expect to reach a new location in the Nether. This is the distance across a 1:8 map, and also from a 1:16 map's center to its edge.
=== Player marker and pointer ===
{{IN|java}}, every map contains a marker that marks the position of the player, and points in the same direction as the player. When a player moves out of a map, a big white dot appears and moves relative to the player's position. The pointer either disappears when the player moves away a certain distance from the border of the map or, in case of [[explorer map]]s, the big white dot changes to a smaller white dot. The distance required for the small white dot to appear(explorer maps) or for the big dot to vanish (normal maps) changes with the scaling of the map.
* '''Level 0/4 :''' 128×128 blocks (each map pixel represents 1 block)
* '''Level 1/4 :''' 256×256 blocks (2×2 blocks per map pixel)
* '''Level 2/4 :''' 512×512 blocks (4×4 blocks per map pixel)
* '''Level 3/4 :''' 1024×1024 blocks (8×8 blocks per map pixel)
* '''Level 4/4 :''' 2048×2048 blocks (16×16 blocks per map pixel)
{{IN|bedrock}}, a map can be crafted with or without this marker, and a map without a position marker can add one later by adding a compass to the map. When a map is crafted without a compass, it's simply called an "empty map", but when crafted with a compass, it's called an "empty locator map". The marker also turns red if the player enters the Nether with an Overworld map and shows the player's Overworld location relative to the Nether location. A map created in the End has a purple marker showing the player's location. If an Overworld map is used in the End, a magenta dot appears on the player's spawn point.{{/BE|position}}
{{crafting
|name=Map<br>(with marker)
|ingredients=[[Map]] or Empty Map +<br>[[Compass]]
|showdescription=1
|Map (no markers);Empty Map
|Compass
|Output= Locator Map;Empty Locator Map
|type= Miscellaneous
|description={{el|be}} only.
Maps crafted from only paper do not show the location marker; to add it, a compass must be added to the map.
|foot=1
}}
{{IN|bedrock}}, a cartography table can also be used to add a pointer to create a locator map or empty locator map. This can be done by adding a compass to paper, or to an empty map or map.
=== Zooming out ===
[[File:Cartography table UI zoom.png|thumb|300px|{{IN|java}}, cartography table's UI, showing the map is being zoomed out.]]
A [[cartography table]] can also be used to zoom out, taking only one piece of paper per zoom level.
A blank map can not be zoomed out. A map has to have something already marked on it for the zooming to be possible.
{{Crafting
|A1= Paper |B1= Paper |C1= Paper
|A2= Paper |B2= Map;Locator Map |C2= Paper
|A3= Paper |B3= Paper |C3= Paper
|Output= Map;Locator Map
|showdescription=1
|description=Locator Map {{el|be}} only.
}}
{{/BE|zoom}}
==== Zoom details ====
The zooming function starts from when the map is created (zoom level 0) up to its fourth zoom step (zoom level 4).
{| class="wikitable" style="text-align: center" data-description="Zoom levels"
! colspan="2" |
! Zoom step 0
! Zoom step 1
! Zoom step 2
! Zoom step 3
! Zoom step 4
|-
! colspan="2" |
| [[File:Map Zoom 0.png|116px|Zoom step 0, 1:1]]
| [[File:Map Zoom 1.png|116px|Zoom step 1, 1:2]]
| [[File:Map Zoom 2.png|116px|Zoom step 2, 1:4]]
| [[File:Map Zoom 3.png|116px|Zoom step 3, 1:8]]
| [[File:Map Zoom 4.png|116px|Zoom step 4, 1:16]]
|-
! colspan="2" | Zoom level
| 0/4
| 1/4
| 2/4
| 3/4
| 4/4
|-
! colspan="2" | 1 map pixel represents
| 1 block
| 2×2 blocks
| 4×4 blocks
| 8×8 blocks
| 16×16 blocks<br>(1×1 chunk)
|-
! colspan="2" | Scaling ratio
| 1:1
| 1:2
| 1:4
| 1:8
| 1:16
|-
! rowspan="2" colspan="2" | Map covers an area of
| 128×128 blocks
| 256×256 blocks
| 512×512 blocks
| 1024×1024 blocks
| 2048×2048 blocks
|-
| 8×8 chunks
| 16×16 chunks
| 32×32 chunks
| 64×64 chunks
| 128×128 chunks
|-
! colspan="2" | Smallest discernible features
| Blocks
| Trees, Paths
| Lakes, Buildings
| Mountains, Rivers
| Biomes, Mountain Ranges
|-
! colspan="2" | Use cases
| Pixel art, Base plans
| Base surroundings
| Structure mapping
| Landscape mapping
| Biome mapping
|-
! rowspan="2" | Total paper needed to zoom out from Level 0
! in anvil{{only|bedrock|short=1}} or crafting table
| -
| {{ItemSprite|Paper}} 8
| {{ItemSprite|Paper}} 16
| {{ItemSprite|Paper}} 24
| {{ItemSprite|Paper}} 32
|-
! in cartography table
| -
| {{ItemSprite|Paper}} 1
| {{ItemSprite|Paper}} 2
| {{ItemSprite|Paper}} 3
| {{ItemSprite|Paper}} 4
|}
Maps are always aligned to a grid at all zoom levels. That means zooming out any different map in a specific area covered by that map always has the same center. As such, maps are aligned by map width (1024 blocks for a level 3 maps) minus 64. A level 3 map generated at spawn covers X and Z coordinates from -64 to 959. All maps generated in this area zoom out to the same coordinates, guaranteeing that they are always 'aligned' on a map wall. For a zoomed-out map to cover a new area, it must start with a base (level 0) map that is in that area.
At zoom level 0, a map created on the point (0,0) has (0,0) at the center of the map. At higher zoom levels of the same map, the coordinate (0,0) is in the top left square of the map.
{{IN|java}}, zoom level can be seen on a map by turning on Advanced Tooltips (a [[Debug screen#More debug keys|debug screen]] option that can be toggled by using the key combination {{key|F3+H}}). The tooltip of the map then shows the zoom level, scaling factors, and map ID.
=== Cloning ===
[[File:Cartography table UI clone.png|thumb|300px|{{IN|Java}}, cartography table's UI, showing the map is being cloned.]]
A mix of empty maps and empty locator maps may be used. Whether the cloned maps show position markers is dependent only on the input map.
A [[cartography table]] can also be used to clone a map.
The parts of the world that have already been explored and mapped are copied, and newly explored areas appear on both instances. If one of the maps is later zoomed out, then the maps lose their connection to each other and function as completely separate maps that have to be individually filled by exploring.
In Creative mode, a map in an item frame may be cloned by using {{control|pick block}} on it, as long as that map is not also in the player's inventory.
It doesn't matter if the map to be cloned is at a higher zoom level (made of more paper) than the blank map. Upon copying the map, both resulting maps have the same magnification as the starting map.
{{/BE|clone}}
=== Crafting ingredient ===
{{crafting usage|Map, Empty Map}}
=== Marking points ===
{{IN|java}} the player has the ability to mark spots on a map. To do this, {{control|use}} a map on a placed-down [[banner]], and the spot of the banner gets marked on the map. The mark takes the color of whatever the base color is for the banner, and if the banner has a name, the mark shows that name. Banner marks on a map are always oriented with their top facing north, regardless of the banner's actual orientation. If the banner is destroyed, the mark of the banner remains at first, but if the player gets closer to where the banner previously was, it disappears as the area is updated on the map.
If a map is mounted on an item frame and is within the area it depicts, the mounted map displays its current location with a green indicator rotated to match its orientation.
[[File:Map Marker Bedrock on Item frame.png|thumb|181x181px|{{IN|bedrock}} this is what a map lying on an item frame looks like, while showing markers.]]
{{IN|bedrock}} the player can place copies of locator maps in [[item frame]]s in order to create a land mark. The marker is a green dot that resembles the shape of the player's marker, but in green color. The position the marker points at depends on the direction the item frame is facing. It is worth noting that the markers work only on copies of the same map. Other maps of the same area do not show the existing markers that the player(s) had placed.
If a player has a cloned map in their inventory, their pointer appears white when viewed on the same map held by another player. Hence, if all players have the same cloned map in their inventory, all markers would appear white when the clone map is viewed.
{| class="wikitable"
|-
! style="width: 300px;" | {{el|je}}
! style="width: 300px;" | {{el|be}}
|-
| style="text-align: center;" | [[File:Banner marked map.png|alt=All banners marked on a map, alongside a named banner.|216px]]
| style="text-align: center;" | [[File:Tracking map with markers bedrock.png|216px]]
|-
| How every banner appears {{IN|java}} on a map, including named banners.
| {{IN|bedrock}} this is how a locator map shows map markers while held by a player.
|-
|}
===Locking===
[[File:Cartography table UI lock.png|thumb|300px|{{IN|Java}}, cartography table's UI, showing the map is being locked.]]
Maps can be locked when using a [[glass pane]] in a [[cartography table]]. This creates a new map containing the same data and locks it. All copies of this new map are also locked. A locked map never changes, even when the depicted terrain changes. {{IN|Be}}, locked maps have a unique texture.
{| class="wikitable" style="text-align: center;"
|-
! Condition
! style="width: 200px;" | Newly created map
! style="width: 200px;" | Map after terrain alteration
|-
! Unlocked map
| [[File:Map Zoom 0.png|174px]] || [[File:Unlocked Map.png|174px]]
|-
! Locked map
| [[File:Map Zoom 0.png|174px]] || [[File:Map Zoom 0.png|174px]]
|-
|}
{{-}}
== Sounds ==
{{Edition|Java}}:
{{Sound table
|rowspan=2
|sound=Drawmap1.ogg
|sound2=Drawmap2.ogg
|sound3=Drawmap3.ogg
|subtitle=Map drawn
|source=player
|description=When a map is drawn
|id=ui.cartography_table.take_result
|translationkey=subtitles.ui.cartography_table.take_result
|volume=1.0
|pitch=1.0
|distance=16}}
{{Sound table
|subtitle=Map drawn
|source=block
|description=When a map is edited using a cartography table
|id=ui.cartography_table.take_result
|translationkey=subtitles.ui.cartography_table.take_result
|volume=1.0
|pitch=1.0
|distance=16
|foot=1}}
{{Edition|Bedrock}}:
{{Sound table
|type=bedrock
|rowspan=2
|sound=Drawmap1.ogg
|sound2=Drawmap2.ogg
|sound3=Drawmap3.ogg
|source=block
|description=When a map is drawn<wbr>{{Upcoming|BE 1.20.20.20}}
|id=ui.cartography_table.take_result|idnote={{Verify|Could be block.cartography_table.use}}
|volume=0.8
|pitch=1.0}}
{{Sound table
|type=bedrock
|source=block
|description=When a map is edited using a cartography table
|id=ui.cartography_table.take_result
|volume=0.8
|pitch=1.0
|foot=1}}
== Data values ==
=== ID ===
{{edition|java}}:
{{ID table
|edition=java
|showforms=y
|generatetranslationkeys=y
|displayname=Empty Map
|spritetype=item
|nameid=map
|form=item}}
{{ID table
|displayname=Map
|spritetype=item
|nameid=filled_map
|form=item
|translationkey=item.minecraft.filled_map, filled_map.buried_treasure, filled_map.explorer_jungle{{upcoming|java 1.20.2}}, filled_map.explorer_swamp{{upcoming|java 1.20.2}}, filled_map.mansion, filled_map.monument, filled_map.unknown, filled_map.village_desert{{upcoming|java 1.20.2}}, filled_map.village_plains{{upcoming|java 1.20.2}}, filled_map.village_savanna{{upcoming|java 1.20.2}}, filled_map.village_snowy{{upcoming|java 1.20.2}}, filled_map.village_taiga{{upcoming|java 1.20.2}}
|foot=1}}
{{edition|bedrock}}:
{{ID table
|edition=bedrock
|showaliasids=y
|shownumericids=y
|showforms=y
|notshowbeitemforms=y
|generatetranslationkeys=y
|displayname=Empty Map
|spritetype=item
|nameid=empty_map
|aliasid=emptymap
|id=515
|form=item
|translationkey=item.emptyMap.name, item.emptyLocatorMap.name}}
{{ID table
|displayname=Map
|spritetype=item
|spritename=map-be
|nameid=filled_map
|aliasid=map
|id=420
|form=item
|translationkey=item.map.name, item.map.exploration.mansion.name, item.map.exploration.monument.name, item.map.exploration.treasure.name
|foot=1}}
=== Metadata ===
{{see also|Bedrock Edition data values}}
{{IN|bedrock}}, maps use the following data values:
{{/DV}}
=== Item data ===
{{el|java}}:
{{main|Player.dat format}}
<div class="treeview">
* {{nbt|compound|tag}}: The item's '''tag''' tag.
{{:Player.dat_format/Maps}}
</div>
{{el|bedrock}}:
: See [[Bedrock Edition level format/Item format]].
=== Map icons ===
{{see also|Player.dat format|Map item format|map_icons.png}}
Map icons are 8×8 in ''Java Edition'', but 16×16 in Bedrock Edition. As such, there are minor misalignment issues in ''Java Edition''.<ref>{{bug|MC-214649|||WF}}</ref>
[[File:Map icons.png|thumb|128px|Map icons texture {{in|Java}}]]
[[File:Map icons BE.png|thumb|128px|Map icons texture {{in|Bedrock}}]]
{| class="wikitable"
|-
! Java ID !! Bedrock ID !! Text ID !! Appearance !! Purpose !! Shown in item frames?
|-
| 0 || ||<code>player</code> || [[File:Player (texture) JE1 BE1.png|16px]] [[File:Player (texture) BE2.png|16px]] White marker || Players (on map) || No
|-
| 1 || 1 ||<code>frame</code> || [[File:Green Marker (texture) JE1 BE1.png|16px]] [[File:Green Marker (texture) BE2.png|16px]] Green marker || The current map in an item frame || Yes
|-
| 2 || ||<code>red_marker</code> || [[File:Red Marker (texture) JE1 BE1.png|16px]] [[File:Red Marker (texture) BE2.png|16px]] Red marker || Position converted to Overworld when opening Overworld map in the Nether{{Only|bedrock}} || No
|-
| 3 || ||<code>blue_marker</code> || [[File:Blue Marker (texture) JE1 BE1.png|16px]] [[File:Blue Marker (texture) BE2.png|16px]] Blue marker || Other players || No
|-
| 4 || ||<code>target_x</code> || [[File:Target X (texture) JE1 BE1.png|16px]] White X || Unused || Yes
|-
| 5 ||5
|<code>target_point</code> || [[File:Target Point (texture) JE1 BE1.png|16px]] [[File:Target Point (texture) BE2.png|16px]] Red triangle || Unused || Yes
|-
| 6 || 6 ||<code>player_off_map</code> || [[File:Player Off Map (texture) JE1 BE1.png|16px]] Large white dot || Players off map, nearby{{only|java}} || No
|-
| 7 || 13 ||<code>player_off_limits</code> || [[File:Player Off Limits (texture) JE1.png|16px]] [[File:Player Off Limits (texture) BE.png|16px]] Small white dot || Players off map, far away{{only|java}} || No
|-
| 8 ||14
|<code>mansion</code> || [[File:Mansion (texture) JE1.png|16px]] [[File:Mansion (Texture) BE2.png|frameless|16x16px]] Woodland mansion || Woodland mansion || Yes
|-
| 9 || 15 ||<code>monument</code> || [[File:Monument (texture) JE1.png|16px]] [[File:Monument Texture BE2.png|frameless|16x16px]] Ocean monument || Ocean monument || Yes
|-
| 10 - 25 || ||<code>{{tooltip|banner_*|banner_white, banner_orange, banner_magenta, banner_light_blue, banner_yellow, banner_lime, banner_pink, banner_gray, banner_light_gray, banner_cyan, banner_purple, banner_blue, banner_brown, banner_green, banner_red, banner_black}}</code> || [[File:Banner White (texture) JE1.png|16px]] [[File:Banner Light Gray (texture) JE1.png|16px]] [[File:Banner Gray (texture) JE1.png|16px]] [[File:Banner Black (texture) JE1.png|16px]] [[File:Banner Brown (texture) JE1.png|16px]] [[File:Banner Red (texture) JE1.png|16px]] [[File:Banner Orange (texture) JE1.png|16px]] [[File:Banner Yellow (texture) JE1.png|16px]] [[File:Banner Lime (texture) JE1.png|16px]] [[File:Banner Green (texture) JE1.png|16px]] [[File:Banner Cyan (texture) JE1.png|16px]] [[File:Banner Light Blue (texture) JE1.png|16px]] [[File:Banner Blue (texture) JE1.png|16px]] [[File:Banner Magenta (texture) JE1.png|16px]] [[File:Banner Purple (texture) JE1.png|16px]] [[File:Banner Pink (texture) JE1.png|16px]]<br>Banners in all 16 wool colors{{only|java}}|| Banner markers || Yes
|-
| 26 ||4
|<code>red_x</code> || [[File:Red X (texture) JE1.png|16px]] [[File:Target X (texture) BE2.png|16px]] Red X || Buried treasure || Yes
|-
| || 8 || || [[File:Magenta Marker (texture) BE1.png|16px]] Magenta marker
| Position converted to Overworld when opening Overworld map in the End{{Only|bedrock}} || No
|-
| || 9 || || [[File:Orange Marker (texture) BE1.png|16px]] Orange marker{{more info}}
|Other players
|Yes
|-
| || 10 || || [[File:Yellow Marker (texture) BE1.png|16px]] Yellow marker
| Other players || No
|-
| || 11 || || [[File:Cyan Marker (texture) BE1.png|16px]] Cyan marker
| Other players || No
|-
| -
|12
| || [[File:Green Point (texture) BE1.png|16px]] Green Triangle
| Other structure such as stronghold, fortress, end city, etc. when used as explorer map destination{{Only|bedrock}} || Yes
|}
It should be noted that even if the player used a NBT editor to add an additional icon on the map, ''Minecraft'' shows only the first one listed when the player loads up their world.
== Achievements ==
{{load achievements|Map Room}}
== History ==
{{see also|section=24|map_icons.png|Java Edition history of textures#Map icons}}
{{more images|section=24|{{bug|MC-72962}}}}
{{History||April 27, 2011|link=https://web.archive.org/web/0/http://notch.tumblr.com/post/4988431144/the-maps|[[Notch]] unveiled screenshots of the map.}}
{{History||April 28, 2011|link={{tweet|notch|63500114005721088}}|[[Notch]] said that he would try to make maps place-able on [[wall]]s.}}
{{History|java beta}}
{{History||1.6|snap=Test Build 3|[[File:Map (item) JE1 BE1.png|32px]] Added maps.}}
{{History||1.6.6|The ability to auto-craft maps using shift-click has been disabled.}}
{{History||1.8|snap=Pre-release|Maps can now be found in library chests in the brand-new [[stronghold]]s.
|Auto crafting maps has been restored. Map cloning, therefore, is unavailable for a period of time.}}
{{History||1.8.1|Maps now work both while walking and flying.}}
{{History|java}}
{{History||1.0.0|snap=Beta 1.9 Prerelease 5|Prior to this update, the [[sun]] in ''[[Minecraft]]'' rose in the North, which threw off many [[player]]s and led to a common misconception that ''Minecraft'' maps/[[world]]s were oriented with East at the top. The sun now rises in the east and sets in the west, making navigation much more intuitive.
|Before the change in sun position, it was commonly said that ''Minecraft'' maps/worlds are oriented with East at the top; sunrise, by definition, occurs at the East, which means it is certainly true that the maps were oriented "East" since the Sun rose from the top (North). However, [[Jeb]] asserted (and [[Notch]] agreed) that the sun rose in the north.<ref>{{Tweet|jeb|87815841160237056}}</ref><ref>{{Tweet|notch|88155424880201728}}</ref> Most mods and map-making tools, however, used the terms East and North consistent with their actual definitions (e.g. a [[Programs and editors/Cartograph|Cartograph]]-generated map with North at the top is rotated 90 degrees from the in-game map).}}
{{History||1.4.2|snap=12w34a|[[File:Empty Map JE1 BE1.png|32px]] [[Crafting]] a map now creates an empty map. The map is drawn for the first time when it is held and right clicked, and is centered near the location of the [[player]] when clicked (not as before where it was centered on the location it was crafted.)
|Previously, in order to map a new area, the map had to be ''crafted'' in that area (rather than carrying a previously-crafted map to the new area). The point where a map is crafted becomes its permanent center, and could never be changed.
|The pointer no longer disappears when leaving the map, but transforms into a white dot, indicating on what side of the map the player is located.
|Maps now align to a grid, making it easier to create adjacent maps.
|Maps can now be zoomed out (but not zoomed in).
|Maps can now be cloned and scaled.}}
{{History||1.4.2|snap=12w34b|Maps now have a ''zoom level'', which was fixed at 1:8 prior to snapshot [[Java Edition 12w34a|12w34a]],<ref name="mapinfo">https://web.archive.org/web/0/http://notch.tumblr.com/post/4988431144/the-maps</ref> but now starts at 1:1 and can be increased up to 1:16 by re-crafting an existing map.
|Maps are no longer numbered on the top-left corner and is labeled through the tooltip.}}
{{History|||snap=12w36a|New maps are now crafted at a scale factor of 1:1. A zoomed in map can be zoomed out by re-crafting it with another 8 sheets of [[paper]] on a [[crafting table]]. Each time this is done, the scale increases - 1:1, 1:2, 1:4, 1:8, 1:16 with a map scale of 1:16 being the current maximum.}}
{{History||1.7.2|snap=13w38a|The map size has been increased when placed on a [[wall]] using the [[item frame]].
|More colors have been added to maps for different [[block]]s.<ref name="infodump2">https://web.archive.org/web/0/https://www.mojang.com/2013/10/minecraft-1-7-the-update-that-changed-the-world</ref>}}
{{History||1.8|snap=14w31a|Zoomed maps now conform to an expanded grid based on their zoom level. Previously, careful considerations would need to be taken to creating a wall of adjoining maps.}}
{{History||1.8.1|snap=pre1|Some colors have been changed on maps to more accurately represent their respective [[block]].}}
{{History||1.9|snap=15w31a|Maps now display as a mini-map when held in the off-hand, or if the off-hand slot is occupied; the (old) large version is visible only when held in the dominant hand with the secondary hand free.}}
{{History|||snap=15w34a|New maps can now be [[crafting|crafted]] at a scale factor of 1:4.
|A crafting recipe has been added for zooming in maps.}}
{{History|||snap=15w43a|The average yield of empty maps from [[stronghold]] library [[chest]]s has been doubled.}}
{{History|||snap=15w45a|New maps are once again [[crafting|crafted]] at a scale factor of 1:1, as they had been before snapshot [[15w34a]].
|The [[crafting]] recipe, that was introduced in 15w34a, for zooming in maps has been removed.}}
{{History|||snap=15w49a|Map making now uses armor equipping sounds.}}
{{History||1.11|snap=16w39a|Maps now work in [[the End]].
|Empty maps are now [[trading|sold]] by cartographer [[villager]]s as their tier 3 [[trading|trade]].
|Added [[explorer map]]s, sold by cartographers as their tier 4 trades.}}
{{History||1.12|snap=17w17a|Maps now have separate colors for colored [[terracotta]] blocks from other colored blocks.}}
{{History||1.13|snap=17w47a|Prior to [[1.13/Flattening|''The Flattening'']], these [[item]]s' numeral IDs were 358 and 395.
|Maps now use additional NBT to specify which map they contain. Prior to this version, they used the [[damage]] value instead.
|Map IDs are no longer limited to 32,768.}}
{{History|||snap=17w50a|Maps can now be placed on floor and ceiling [[item frame]]s.}}
{{History|||snap=18w10a|Spots on maps can now be marked using [[banner]]s.}}
{{History|||snap=18w11a|Empty maps can now generate in [[shipwreck]] [[chest]]s.}}
{{History|||snap=pre7|Maps have been changed slightly, in regard to which [[block]]s are shown and which blocks are not.}}
{{History||1.14|snap=18w43a|[[File:Empty Map JE2 BE2.png|32px]] [[File:Map (item) JE2 BE2.png|32px]] The textures of maps have been changed.}}
{{History|||snap=18w48a|Empty maps can now be found in chests in [[village]] cartographer houses.}}
{{History|||snap=19w02a|Maps can now be cloned and zoomed out (extended) by using a [[cartography table]].
|Maps can now be locked by using a [[glass pane]] with a cartography table.
|The recipes for cloning and zooming out maps have been removed.}}
{{History|||snap=19w06a|Map making is now silent again.}}
{{History|||snap=19w13a|Cartographer villagers now give empty maps to players under the [[Hero of the Village]] effect.}}
{{History||1.16|snap=20w21a|Map making sounds are now the same as when using a cartography table.}}
{{History|pocket alpha}}
{{History||v0.14.0|snap=build 1|[[File:Empty Map JE1 BE1.png|32px]] [[File:Map (item) JE1 BE1.png|32px]] Added maps.
|Maps are crafted using nine [[paper]], one for every slot of the [[crafting]] grid.
|Maps must be combined with a [[compass]] using an [[anvil]] in order to show the [[player]]'s position.
|Maps can be zoomed using an anvil.}}
{{History|||snap=build 3|New maps are now [[crafting|crafted]] at full zoom.
|Empty maps now have a "Create Map" button to initialize them.}}
{{History|||snap=build 7|New maps are now crafted at a scale factor of 1:1.}}
{{History||v0.15.0|snap=unknown|Maps can now be crafted either with 8 pieces of [[paper]] and a [[compass]] ''or'' 9 pieces of paper, to get a map with or without a position marker.}}
{{History||v0.16.0|snap=build 1|Different colors have been added to maps for different [[biome]]s.}}
{{History|pocket}}
{{History||1.0.0|snap=?|[[Windows 10 Edition]] can now use the [[anvil]] as well as the [[crafting table]] to clone, zoom and apply markers, just as [[Pocket Edition]] in general could.
|Maps can now be found inside [[stronghold]] library [[chest]]s.}}
{{History||1.1.0|snap=alpha 1.1.0.0|Empty maps with direction markers built-in are now called "locator maps".}}
{{History|||snap=alpha 1.1.0.3|"Locator maps" are now called "empty locator maps".
|Empty maps are now [[trading|sold]] by cartographer [[villager]]s for 7-11 [[emerald]]s as their tier 3 [[trading|trade]].}}
{{History|bedrock}}
{{History||1.4.0|snap=beta 1.2.14.2|Maps can now be found inside map room [[chest]]s in [[shipwreck]]s.}}
{{History||?|The texture of the filled map overlay has been changed.}}
{{History||?|Maps now function in dimensions other than the dimension in which they were created.}}
{{History||1.10.0|snap=beta 1.10.0.3|Maps can now be found in cartographer house [[chest]]s in [[village]]s.
|[[File:Empty Map JE2 BE2.png|32px]] The texture of empty maps has been changed.}}
{{History||1.11.0|snap=beta 1.11.0.1|Empty maps can now be created from 1 [[paper]] in [[cartography table]]s.
|Maps can now be zoomed, cloned, renamed, and have pointers added in cartography tables.}}
{{History|||snap=beta 1.11.0.4|Cartographer [[villager]]s now [[trading|sell]] empty map for an [[emerald]] as their first tier [[trading|trades]].
|Empty locator maps can now be [[trading|bought]] from cartographer villagers.}}
{{History||1.13.0|snap=beta 1.13.0.1|[[File:Map (item) BE3.png|32px]] [[File:Locked Map (item) BE2.png|32px]] Filled maps and locked maps now have unique inventory icons.}}
{{History||1.16.0|snap=beta 1.16.0.57|Trading has been changed, novice-level cartographer now sell an empty map for 7 emeralds. Cartographer villager no longer sell empty locator map.}}
{{History||1.16.100|snap=beta 1.16.100.56|The ID of maps have been changed from <code>emptymap</code> to <code>empty_map</code> and <code>map</code> to <code>filled_map</code>.}}
{{History|console}}
{{History||xbox=TU1|xbone=CU1|ps=1.00|wiiu=Patch 1|switch=1.0.1|[[File:Map (item) JE1 BE1.png|32px]] Added maps.
|The [[player]] spawns with a free map.
|Maps are available only as zoom step 3 maps centered at coordinates 0,0. Biome colors do not appear on maps.}}
{{History||xbox=none|xbone=CU1|ps=1.0|wiiu=none|Larger sized worlds on Xbox One, Playstation 4, and Nintendo Switch have zoom step 3 maps aligned to a grid with maps centered at 0, 1024, or 2048 on the X or Z coordinates.}}
{{History||xbox=TU21|xbone=CU9|ps=1.14|wiiu=Patch 1|[[File:Empty Map JE1 BE1.png|32px]] [[Crafting]] a map now produces an empty map.}}
{{History||xbox=TU46|xbone=CU36|ps=1.38|wiiu=Patch 15|The outer end islands appear on different maps; even on Xbox 360, Playstation 3, Vita, and Wii U editions.}}
{{History||xbox=none|xbone=none|ps=1.90|wiiu=none|switch=none|[[File:Empty Map JE2 BE2.png|32px]] [[File:Map (item) JE2 BE2.png|32px]] The textures of maps have been changed.}}
{{History||ps=1.91|Maps can now be created and used in [[cartography table]]s.}}
{{History|foot}}
== Issues ==
{{issue list}}
== Trivia ==
* Use of the {{key|F1}} key can allow the player to hold a map without blocking their view at all.
* In ''Java Edition'', a map created using {{cmd|give}} can be any map by using the Map parameter to specify the map number desired. E.g. {{cmd|give [player] minecraft:filled_map{map:5<nowiki>}}} gives the specified player map_5. If no data value is supplied it defaults to map_0. If map_0 has not ever been crafted, it is centered on x=0, z=0.
* The maps are stored separately as their own data (<code>.dat</code>) file as <code>map_x.dat</code> with (x) being the map number, see [[map item format]] for more info. By manipulating this number, players can organize their maps to suit them, or if they accidentally create a map in the same location, they can delete their extra map so as to save the number they make.
* Certain programs can be used to make customized maps with images or text on them instead of actual maps, many people use these in adventure maps to show pictures or to tell a story.
* Since all copies of a map are links to the same file, copying an unfinished map keeps it synchronized with the copy as the player fills it in. Thus, a copy stored in a chest can act as a remote backup.
* A map that is in an item frame does not update itself until a player picks it up, lets it reload, and places it back again. However, if a player holds a clone of the map, both maps update.
* Filled maps are the only items that make 90 degree rotations in item frames, and also the only items that can expand the item frame into full block wide.
* On [[Legacy Console Edition]], the player always spawns with a map in their inventory after creating a world. This was later added to Bedrock Edition as an optional feature in the world creation menu.
* Maps on Legacy Console Edition always show the player's current coordinates, as a substitute for the optional [[Coordinates|coordinate display]] in other editions.
* A map cannot be created on [[New Nintendo 3DS Edition]]. Instead, the map is always displayed on the bottom screen along with the coordinates. Biome colors do not appear on maps.
== Gallery ==
<gallery>
MapItem1.png|A fully zoomed map.
MapRotation.png|Having a map in hand does not stop the ability to see ahead.
MapItem3.png|A world being recorded onto a map.
Mcmap4.png|Nearly fully explored map.
Zoomed Map.png|A map edited to the scale of 1.
Sky Map.png|A map mapping the [[Sky Dimension]].
MapOfVillage.png|A village and how it is represented on a map.
Pumpkin map.png|A map containing a custom image made by placing a large number of blocks.
Complete Map.png|A completely explored map.
MapZooms.png|A diagram showing how maps zoomed out before [[Java Edition 1.8]]. Notice how the larger maps have borders made of half and quarter small maps.
Map18zooms.png|From 1.8, zoomed maps are aligned to this grid exactly.
Large Biome Map.png|A map of a [[Large Biomes]] world.
Map0140-0160.png|A comparison of maps between versions in Pocket Edition Alpha [[Pocket Edition Alpha 0.14.0|0.14.0]] and [[Pocket Edition Alpha 0.16.0|0.16.0]].
Mycelium Map.png|A map view of a mushroom biome, showing that mycelium appears purple on a map.
MiniMap.png|Maps held in the off-hand or in either hand while [[dual wielding]] appear as mini-maps.
Partly filled treasure map.png|Partly filled treasure map with an odd area at the bottom left. Normally a partly filled map would look striped (as in the top left), but this map seems to be bugged and is possibly showing caves, or something, in the bottom left.
Partly filled ocean explorer map.png|Partly filled ocean explorer map. Updating the game from an older version (in this case the area was first generated before 1.18) and buying a map after updating (in this case in 1.19.4) can result in the map displaying rivers and terrain where there is really a frozen sea.
Map Stained Glass 1.png|Stained glasses' appearances on maps before and after 1.13.
Map Stained Glass 2.png|Stained glasses' appearances on maps before and after 1.13.
Map Various Blocks 1.png|Various blocks' appearances on maps before and after 1.13.
Map Various Blocks 2.png|Various blocks' appearances on maps before and after 1.13.
Better Together Map.jpg|Holding a map in the offhand in ''Bedrock Edition''.
Better Together Map Icon.jpg|Holding a map in both hands in ''Bedrock Edition''.
File:MapFailedtoFill.png|A map that has not yet filled. A rare bug in Java.
</gallery>
=== The Nether ===
<gallery>
Nethermap.png|A map in [[the Nether]].
Maponnether.png|A map in the Nether; the arrow turns around itself, like in [[compass]].
</gallery>
=== The End ===
<gallery>
Jeb End Map.png|The first image of a map in [[the End]].
Endmap.png|A map in the End.
</gallery>
=== Maps in item frames ===
<gallery>
FramedMap.png|A map displayed on an item frame, as it looked before [[Java Edition 1.7.2]].
Structure Map Collection.png|Multiple maps in item frames. Notice a [[village]], two [[desert temple]]s and a lava lake.
Minecraft maps 3by3.png|A collection of 9 connected full maps.
Full Map.png|A combination of 25 maps pasted together as one map.
Map wall BE.png|A map wall on ''Bedrock Edition'', showing large areas of biome colors for each biome.
Map's in item frames.png|Maps can be placed into [[item frame]]s so they can be viewed together.
Comparing Maps.png|The comparison between 3 zooms of maps.
SuperflatMap.png|A map in a [[Superflat]] world, with some [[village]]s.
MapWallWithMarkers.png|A 3x3 map wall with banner markers.
HEYYEYAAEYAAAEYAEYAA.png|He-Man map art.
Map Player Icons 1.png|First image of player icons on maps.
Map Player Icons 2.png|Second image of player icons on maps.
</gallery>
== See also ==
* [[Explorer Map]]
* [[Clock]]
* [[Tutorials/Navigation|Navigation]]
== References ==
{{Reflist}}
{{Items}}
[[cs:Mapa]]
[[de:Karte]]
[[es:Mapa]]
[[fr:Carte (objet)]]
[[hu:Térkép (tárgy)]]
[[ja:地図]]
[[ko:지도]]
[[nl:Kaart]]
[[pl:Mapa]]
[[pt:Mapa]]
[[ru:Карта]]
[[tr:Harita]]
[[th:แผนที่]]
[[uk:Мапа]]
[[zh:地图]]
[[Category:Renewable resources]]</li><li>[[:Category:Storage|Category:Storage]]<br/>Blocks and items used to '''store''' other blocks or items.
[[Category:Blocks]][[Category:Items]]
[[ja:カテゴリ:ストレージ]]
[[zh:Category:储物]]</li></ul></nowiki> | 12w38a | Grass now has new sounds when being placed and walked on. | |||
| u | |||||
1.8{{Extension DPL}}<ul><li>[[Beetroot|Beetroot]]<br/>{{about|the basic food item|the seeds|Beetroot Seeds|the soup|Beetroot Soup}}
{{Item
| title = Beetroot
| image = Beetroot.png
| heals = {{hunger|1}}
| renewable = Yes
| stackable = Yes (64)
}}
A '''beetroot''' is a food and [[dye]] ingredient.
== Obtaining ==
=== Farming ===
Beetroots are obtained from harvesting a fully grown [[beetroots|crop block]], which drops 1 beetroot and 1-4 seeds ({{frac|2|5|7}} seeds per plant harvested on average). Seed yield can be increased using a tool enchanted with [[Fortune]], with Fortune III harvesting an average of {{frac|5|3|7}} seeds per plant.
These crops can be found growing in [[village]]s or can be grown from planted [[beetroot seeds]].<!-- Do not add locations for finding seeds. Where to find seeds is described in the article about the seeds. -->
== Usage ==
=== Food ===
A beetroot can be eaten to restore {{hunger|1}} [[hunger]] and 1.2 hunger [[Hunger#Mechanics|saturation]]. Six beetroots can be crafted into [[beetroot soup]], which restores six times the hunger and saturation of a single beetroot.
=== Crafting ingredient ===
{{crafting usage}}
=== Breeding ===
Beetroots can be used to [[breeding|breed]] [[pig]]s. Pigs also follow a player who is holding beetroot.
[[Villager]]s can pick up beetroot items to become willing, allowing them to breed. Villagers need 12 beetroots before they can breed.
=== Composting ===
Placing beetroot into a [[composter]] has a 65% chance of raising the compost level by 1.
=== Trading ===
Novice-level Farmer villagers have a 25%{{only|bedrock}} or 40%{{only|java}} chance to buy 15 beetroots for an emerald.
== Sounds ==
{{Sound table/Entity/Food}}
== Data values ==
=== ID ===
{{edition|java}}:
{{ID table
|edition=java
|showforms=y
|generatetranslationkeys=y
|displayname=Beetroot
|spritetype=item
|nameid=beetroot
|form=item
|foot=1}}
{{edition|bedrock}}:
{{ID table
|edition=bedrock
|shownumericids=y
|showforms=y
|notshowbeitemforms=y
|generatetranslationkeys=y
|displayname=Beetroot
|spritetype=item
|nameid=beetroot
|id=285
|form=item
|foot=1}}
== Advancements ==
{{load advancements|Husbandry;A Balanced Diet}}
== History ==
{{History|java}}
{{History||1.9|snap=15w31a|[[File:Beetroot JE1 BE1.png|32px]] Beetroots have been added, along with its [[beetroot seeds|seeds]] and [[beetroot soup]]. Beetroot can also be used to craft [[rose red]] dye.}}
{{History||1.13|snap=17w47a|Prior to [[1.13/Flattening|''The Flattening'']], this [[item]]'s numeral ID was 434.}}
{{History||1.14|snap=18w43a|[[File:Beetroot JE2 BE2.png|32px]] The texture of beetroot has been changed.}}
{{History|||snap=19w03a|Placing beetroot into the new [[composter]] has a 50% chance of raising the compost level by 1.}}
{{History|||snap=19w05a|Beetroot now has a 65% chance of increasing the compost level in a composter by 1.}}
{{History|||snap=19w11a|Farmer [[villager]]s now [[trading|buy]] beetroots.}}
{{History||1.17|snap=21w13a|The model of the [[crop]] for the beetroot crops has been tweaked that the backside textures are mirrored.}}
{{History|pocket alpha}}
{{History||November 13, 2013|link=http://instagram.com/p/gnkWOlJMB3/|[[Jeb]] announces on [[wikipedia:Instagram|Instagram]] that [[Johan Bernhardsson]] is working on a surprise feature for 0.8.0 alongside a picture of the [[player]] holding beetroot.}}
{{History||November 14, 2013|link={{tweet|jbernhardsson|400902957782147072}}|Johan posts another image of beetroot, confirming that the image previously posted by Jeb was indeed beetroot.}}
{{History||v0.8.0|snap=build 2|[[File:Beetroot JE1 BE1.png|32px]] Added beetroots. They are not obtainable in the Creative inventory.}}
{{History||v0.9.0|snap=build 1|Beetroot can now be used to lead and [[breeding|breed]] [[pig]]s.}}
{{History||v0.12.1|snap=build 1|Beetroot now restore [[hunger]], rather than [[health]].
|Beetroot can now generate in [[village]]s as [[crop]]s.}}
{{History||v0.13.1|Added beetroot to the Creative inventory.<ref name="missing beetroot item">https://bugs.mojang.com/browse/MCPE-10497</ref><!---{{info needed}}, the bug tracker has very little information. It's not in the Creative inventory in v0.12.1 or v0.13.0 initial release, but is in v0.14.0--->}}
{{History||v0.16.0|snap=build 1|Beetroot can now be used to craft [[rose red]] dye.}}
{{History||v0.16.2|Beetroot can now be found in [[chest]]s inside large houses in [[snowy taiga]] and [[snowy tundra]] [[village]]s.}}
{{History|pocket}}
{{History||1.0.4|snap=alpha 1.0.4.0|[[Villager]]s can now can pick up beetroot to become willing.}}
{{History|bedrock}}
{{History||1.10.0|snap=beta 1.10.0.3|[[File:Beetroot JE2 BE2.png|32px]] The texture of beetroot has been changed.}}
{{History||1.11.0|snap=beta 1.11.0.1|Beetroot can now be used to fill up [[composter]]s.}}
{{History|||snap=beta 1.11.0.4|Beetroot can now be sold to farmer villagers.}}
{{History|console}}
{{History||xbox=TU43|xbone=CU33|ps=1.36|wiiu=Patch 13|switch=1.0.1|[[File:Beetroot JE1 BE1.png|32px]] Added beetroots.}}
{{History||xbox=none|xbone=none|ps=1.90|wiiu=none|switch=none|[[File:Beetroot JE2 BE2.png|32px]] The texture of beetroot has been changed.}}
{{History|new 3ds}}
{{History||0.1.0|[[File:Beetroot JE1 BE1.png|32px]] Added beetroots.}}
{{History|foot}}
== Issues ==
{{Issue list}}
== Gallery ==
<gallery>
File:Beetrootstwitpic.png|The image released by [[Johan Bernhardsson]] on [[Wikipedia:Twitter|Twitter]].
File:Pigs following beetroot holder.png|Pigs following the [[player]].
File:Village Wheat Beetroot Farm.png|Beetroots generated in a [[village]].
File:Beetroot farm.png|A beetroot garden.
</gallery>
== References ==
{{Reflist}}
{{Items}}
[[Category:Plants]]
[[Category:Food]]
[[Category:Renewable resources]]
[[cs:Červená řepa]]
[[de:Rote Bete]]
[[es:Remolacha]]
[[fr:Betterave]]
[[hu:Cékla]]
[[it:Barbabietola]]
[[ja:ビートルート]]
[[ko:비트]]
[[nl:Biet]]
[[pl:Burak]]
[[pt:Beterraba]]
[[ru:Свёкла]]
[[th:บีทรูท]]
[[uk:Буряк]]
[[zh:甜菜根]]</li><li>[[Raw Mutton|Raw Mutton]]<br/>{{Distinguish|Cooked Mutton}}
{{Item
| title = Raw Mutton
| image = Raw Mutton.png
| heals = {{hunger|2}}
| renewable = Yes
| stackable = Yes (64)
}}
'''Raw mutton''' is a [[food]] item dropped by [[sheep]] when killed.
== Obtaining ==
=== Mob loot ===
An adult [[sheep]] drops 1–2 raw mutton when killed. The maximum amount is increased by 1 per level of [[Looting]], for a maximum of 1–5 with Looting III. If killed while on fire, a sheep drops [[cooked mutton]] instead.
=== Chest loot ===
{{LootChestItem|raw-mutton}}
== Usage ==
=== Food ===
To eat raw mutton, press and hold {{control|use}} while it is selected in the [[hotbar]]. Eating one restores {{hunger|2}} [[hunger]] and 1.2 [[Hunger#Mechanics|saturation]].
=== Smelting ingredient ===
{{Smelting
|showname=1
|Raw Mutton
|Cooked Mutton
|0.35
}}
=== Wolves ===
Raw mutton can be used to [[breed]] and heal tamed [[wolves]], lead them around, and make baby tamed wolves grow up faster by 10% of the remaining time.
=== Trading ===
Journeyman-level butcher [[villager]]s have a 50% chance to buy 7 raw mutton for an [[emerald]] as part of their trades.{{only|bedrock}}
Journeyman-level butcher villagers always offer to buy 7 raw mutton for an emerald.{{only|java}}
==Sounds==
{{Sound table/Entity/Food}}
== Data values ==
=== ID ===
{{edition|java}}:
{{ID table
|edition=java
|showforms=y
|generatetranslationkeys=y
|displayname=Raw Mutton
|spritetype=item
|nameid=mutton
|form=item
|foot=1}}
{{edition|bedrock}}:
{{ID table
|edition=bedrock
|showaliasids=y
|shownumericids=y
|showforms=y
|notshowbeitemforms=y
|generatetranslationkeys=y
|displayname=Raw Mutton
|spritetype=item
|nameid=mutton
|aliasid=muttonraw
|id=550
|form=item
|translationkey=item.muttonRaw.name
|foot=1}}
== Advancements ==
{{load advancements|Husbandry;A Balanced Diet}}
== Video ==
<div style="text-align:center">{{yt|PXlW-sZygTs}}</div>
== History ==
{{History||September 23, 2011|link={{tweet|jeb|117313469900009472}}|Mutton is mentioned by [[Jeb]].}}
{{History||September 11, 2012|link={{tweet|jeb|245503714167750656}}|Jeb again mentions the possibility of mutton as well as calamari being added into the game.}}
{{History|java}}
{{History||June 30, 2014|link=https://twitter.com/TheMogMiner/status/483636993780232192|[[Ryan Holtz]] tweets images of raw mutton and some other new items.}}
{{History||1.8|snap=14w27a|[[File:Raw Mutton JE1.png|32px]] Added raw mutton.}}
{{History||1.8|snap=14w33b|[[File:Raw Mutton JE2 BE1.png|32px]] The texture of raw mutton has been changed. The new texture was created by [[wikipedia:Reddit|Reddit]] user [http://www.reddit.com/u/zeldahuman zeldahuman].<ref>{{reddit|2bjzes/a_reminder_of_the_blocks_and_items_added_in_18_so|cj69zie|context=3}}</ref><ref>{{reddit|2c5f35/minecraft_snapshot_14w31a_has_been_released|cjct7gb}}</ref>}}
{{History||1.13|snap=17w47a|Prior to [[1.13/Flattening|''The Flattening'']], this [[item]]'s numeral ID was 423.}}
{{History||1.14|snap=18w43a|[[File:Raw Mutton JE3 BE2.png|32px]] The texture of raw mutton has been changed.}}
{{History|||snap=18w49a|Raw mutton can now be found in [[chest]]s in [[village]] butcher shops.}}
{{History|||snap=19w11a|Butcher villagers now [[trading|buy]] raw mutton.}}
{{History|pocket alpha}}
{{History||v0.15.0|snap=build 1|[[File:Raw Mutton JE2 BE1.png|32px]] Added raw mutton.}}
{{History|bedrock}}
{{History||1.10.0|snap=beta 1.10.0.3|[[File:Raw Mutton JE3 BE2.png|32px]] The texture of raw mutton has been changed.}}
{{History||1.11.0|snap=beta 1.11.0.1|Raw mutton can now be found in [[village]] butcher [[chest]]s.}}
{{History|||snap=beta 1.11.0.4|Raw mutton can now be [[trading|sold]] to butcher [[villager]]s.}}
{{History||1.16.0|snap=beta 1.16.0.57|Trading has been changed; journeyman butcher villagers now buy 7 raw mutton for an emerald instead of 8.}}
{{History||1.16.100|snap=beta 1.16.100.56|The ID of raw mutton has been changed from <code>muttonraw</code> to <code>mutton</code>.}}
{{History||1.16.210|snap=beta 1.16.210.51|Raw mutton is [[drops|dropped]] by [[goats]].}}
{{History||1.17.0|snap=beta 1.17.0.52|Goats no longer drop raw mutton.}}
{{History|console}}
{{History||xbox=TU31|xbone=CU19|ps=1.22|wiiu=Patch 3|[[File:Raw Mutton JE2 BE1.png|32px]] Added raw mutton.}}
{{History|PS4}}
{{History||1.90|[[File:Raw Mutton JE3 BE2.png|32px]] The texture of raw mutton has been changed.}}
{{History|3ds}}
{{History||0.1.0|[[File:Raw Mutton JE2 BE1.png|32px]] Added raw mutton.}}
{{History|foot}}
== Issues ==
{{issue list}}
== Gallery ==
<gallery>
Rabbit Items 3 Ryan Holtz.png|First image of the item by [[Ryan Holtz]].
Pocket Edition Mutton.jpg|First image of the item in ''Bedrock Edition'' by [[Jason Major]].
</gallery>
== References ==
{{reflist}}
{{items}}
[[de:Rohes Hammelfleisch]]
[[es:Cordero crudo]]
[[fr:Mouton cru]]
[[ja:生の羊肉]]
[[ko:익히지 않은 양고기]]
[[nl:Rauw schapenvlees]]
[[pl:Surowa baranina]]
[[pt:Carneiro cru]]
[[ru:Сырая баранина]]
[[zh:生羊肉]]
[[Category:Food]]
[[Category:Renewable resources]]</li></ul> | 14w27b | Grass's top texture is now rotated randomly, thanks to the addition of arrays to the block model format. | |||
| pocketa | |||||
0.1.0{{Extension DPL}}<ul><li>[[Heart of the Sea|Heart of the Sea]]<br/>{{Item
| image = Heart of the Sea.png
| stackable = Yes (64)
| rarity = Uncommon
| renewable = No
}}
A '''heart of the sea''' is a rare [[item]] that can be crafted into a [[conduit]].
== Obtaining ==
The heart of the sea must be found. It cannot be crafted or obtained by trading, making it a [[non-renewable resource]].
A heart of the sea is obtained from a [[buried treasure]]. The location is marked with a noticeable red X on a [[Explorer Map|buried treasure map]], which is found in [[Ocean_Ruins|ocean ruins]] and [[Shipwreck|shipwrecks]]. Feeding [[raw cod]] or [[raw salmon]] to a [[dolphin]] causes the dolphin to swim toward the nearest [[buried treasure]], [[shipwreck]], or [[ocean ruins]].
=== Chest loot ===
{{LootChestItem|heart-of-the-sea}}
== Usage ==
=== Crafting===
{{crafting usage}}
== Data values ==
=== ID ===
{{edition|java}}:
{{ID table
|edition=java
|showforms=y
|generatetranslationkeys=y
|displayname=Heart of the Sea
|spritetype=item
|nameid=heart_of_the_sea
|form=item
|foot=1}}
{{edition|bedrock}}:
{{ID table
|edition=bedrock
|shownumericids=y
|showforms=y
|notshowbeitemforms=y
|generatetranslationkeys=y
|displayname=Heart of the Sea
|spritetype=item
|nameid=heart_of_the_sea
|id=571
|form=item
|foot=1}}
== History ==
{{History|java}}
{{History||1.13|snap=18w15a|[[File:Heart of the Sea JE1 BE2.png|32px]] Added heart of the sea.}}
{{History|||snap=18w19a|Heart of the sea now generates in all [[buried treasure]] [[chest]]s in a stack of 1.}}
{{History|bedrock}}
{{History||1.4.0|snap=beta 1.2.14.2|An entry in the [[buried treasure]] loot table has been added named <code>nautilus_core</code>. It is unobtainable though since the <code>nautilus_core</code> has not been added into the game yet.}}
{{History|||snap=beta 1.2.20.1|[[File:Heart of the Sea BE1.png|32px]] Added heart of the sea as an [[item]] obtainable in buried treasure [[chest]]s. It cannot be used to craft [[conduit]]s yet.}}
{{History|||snap=beta 1.2.20.2|[[File:Heart of the Sea JE1 BE2.png|32px]] The texture of heart of the sea has been changed.}}
{{History||1.5.0|snap=beta 1.5.0.1|Heart of the sea can now be used to craft [[conduit]]s.}}
{{History|console}}
{{History||xbox=TU69|ps=1.76|wiiu=Patch 38|[[File:Heart of the Sea JE1 BE2.png|32px]] Added heart of the sea.}}
{{History|education}}
{{History||1.4.0|[[File:Heart of the Sea JE1 BE2.png|32px]] Added heart of the sea. It generates in all [[buried treasure]] [[chest]]s in a stack of 1.}}
{{History|foot}}
== Issues ==
{{issue list}}
== Trivia ==
* Before the heart of the sea was added to {{el|be}}, there was an entry found in the buried treasure chest loot table named <code>nautilus_core</code>, which was later revealed to be the heart of the sea. Despite the name change, the heart of the sea continues to be referred to as the <code>nautilus_core</code> in most game files.
== External Links ==
*[https://www.minecraft.net/en-us/article/heart-sea Taking Inventory: Heart of the Sea] – Minecraft.net on August 31, 2023
{{items}}
[[Category:Non-renewable resources]]
[[de:Herz des Meeres]]
[[fr:Cœur de la mer]]
[[es:Corazón del mar]]
[[it:Cuore del mare]]
[[ja:海洋の心]]
[[ko:바다의 심장]]
[[nl:Hart van de zee]]
[[pl:Serce oceanu]]
[[pt:Coração do mar]]
[[ru:Сердце моря]]
[[uk:Серце моря]]
[[zh:海洋之心]]</li><li>[[Shears|Shears]]<br/>{{Item
| image = Shears.png
| rarity = Common
| renewable = Yes
| durability = 238
| stackable = No
}}
'''Shears''' are tools required to obtain some organic blocks or otherwise mine them faster as well as to shear certain entities and blocks.
==Obtaining==
===Crafting===
{{Crafting
|head=1
|showdescription=1
|B2= Iron Ingot
|A3= Iron Ingot
|Output= Shears
|type= Tool
}}
{{crafting
|foot=1
|ignoreusage=1
|Damaged Shears
|Damaged Shears
|Output= Shears
|description= The durability of the two shears is added together, plus an extra 5% durability.
|type= Tool
}}
Despite using [[Iron Ingot|iron]] in its crafting recipe, shears cannot be smelted into [[iron nugget]]s.<ref>{{bug|MC-111738}}</ref>
===Trading===
Novice-level Shepherd [[villager]]s have a 40% chance to sell shears for 2 [[emerald]]s in Java Edition. This trade is always offered in Bedrock Edition.
===Chest loot===
{{LootChestItem|shears}}
==Usage==
===Shearing===
Shears lose 1 [[durability]] when used to shear something.
Shears can be {{Control|use|text=used}} on a [[sheep]] to remove its coat and drop 1–3 [[wool]] of the corresponding color. The same sheep can be sheared again after it eats from a [[grass block]] to regenerate its coat.
Shearing a [[mooshroom]] drops 5 [[mushroom]]s of the corresponding color and irreversibly turns it into a normal [[cow]].
Shearing a [[snow golem]] irreversibly removes its pumpkin, dropping it and revealing its face.
Shearing either a [[beehive]] or [[bee nest]] that is full of honey makes it drop 3 [[honeycomb]]s and resets it to honey level 0. The same beehive or bee nest can be sheared again if it is able to reach full honey again. If sheared by hand without a [[campfire]] below the hive or nest all bees within will exit and all nearby bees will attack the offending player.
[[Dispenser]]s can use shears in any of the above listed ways, interacting with any valid block or entity in front of the dispenser's face. This decreases the shears' [[durability]]. A dispenser shearing a beehive or bee nest will not anger bees or cause them to leave even if there is not a campfire below it.
Shearing a [[pumpkin]] turns it into a [[carved pumpkin]], dropping 4 [[pumpkin seeds]].
{{IN|java}}, shearing the tip of [[cave vines]], [[kelp]], [[weeping vines]], or [[twisting vines]] sets its age value to 25 and stops further growth.
===Breaking blocks===
Shears use 1 [[durability]] when is used to break any block, even if it [[instant mining|breaks instantly]] by hand.
Shears can be used to harvest [[cobweb|cobwebs]], [[leaves]], [[grass|grass, tall grass]], [[seagrass|seagrass, tall seagrass]], [[fern|ferns, large fern]]s, [[dead bush]]es, [[nether sprouts]], [[vines]], [[glow lichen]] or [[hanging roots]] and obtain them in item form. They can also be used to break [[tripwire]] connected to a [[tripwire hook]] without activating it.
When shears are used to break [[Weeping Vines|weeping vines]] or [[Twisting Vines|twisting vines]] they are guaranteed to drop in item form instead of the usual 33% chance. This only applies to vines directly broken by shears and not vines that are broken due to the destruction of their supporting vines.
The following table shows information about blocks that can be broken with shears. Colors indicate what gets dropped when the block is broken:
*White: The original block.
*Blue: The block's normal drop (i.e. string, sticks, seeds, saplings, apples).
*Red: Nothing.
{| class="wikitable" style="text-align:center" data-description="Blocks broken with shears"
!
!No shears breaking time
!Shears breaking time
|-
! style="text-align:left" |{{BlockLink|Cobweb}}
| {{tc|no|20 s}}<ref group="note">Breaking cobwebs with a sword is as fast as breaking with shears, and yields string. This costs double durability.</ref>
|0.4 s
|-
! style="text-align:left" |{{BlockLink|Dead Bush}}
| {{tc|planned|0 s}}
|0 s
|-
! style="text-align:left" |{{BlockLink|id=fern|Grass|Fern}}
| {{tc|planned|0 s}}
|0 s
|-
! style="text-align:left" |{{BlockLink|Grass}}
| {{tc|planned|0 s}}
| 0 s
|-
! style="text-align:left" |{{BlockLink|Nether Sprouts}}
| {{tc|no|0 s}}<ref group="note">{{IN|bedrock}}, the item drops when breaking it with fists.</ref>
|0 s
|-
! style="text-align:left" |{{BlockLink|Leaves}}
| {{tc|planned|0.35 s}}
|0.05 s
|-
! style="text-align:left" |{{BlockLink|id=tripwire|String#Tripwire|Tripwire}}
|0 s
|0 s<ref group="note">Using shears does not trigger a redstone pulse.</ref>
|-
! style="text-align:left" |{{BlockLink|Vines}}
| {{tc|no|0.35 s}}
|0.35 s
|-
! style="text-align:left" |{{BlockLink|Wool}}
|1.25 s
|0.25 s
|-
! style="text-align:left" |{{BlockLink|Seagrass}}
| {{tc|no|0 s}}
|0 s
|-
! style="text-align:left" | {{BlockLink|Glow Lichen}}
| {{tc|no|0.3 s}}
|0.3 s
|-
! style="text-align:left" |{{BlockLink|Hanging Roots}}
| {{tc|no|0 s}}
|0 s
|-
! style="text-align:left" |{{BlockSprite|Twisting Vines Plant}}{{BlockLink|Twisting Vines}}<br> {{BlockSprite|Weeping Vines Plant}}{{BlockLink|Weeping Vines}}
|0 s
|0 s<ref group="note">Using shears will increase the chance of dropping from 33% to 100%.</ref>
|}
{{notelist}}
===Enchantments===
Shears can receive the following [[Enchanting|enchantments]]:
{| class="wikitable col-2-center col-3-right"
|+
!Name
! Max Level
![[Enchanting|Method]]
|-
|[[Efficiency]]
|V
|{{Inventory slot|Anvil}}
|-
|[[Unbreaking]]
| III
|{{Inventory slot|Anvil}}
|-
|[[Mending]]
|I
|{{Inventory slot|Anvil}}
|-
|[[Curse of Vanishing]]
|I
|{{Inventory slot|Anvil}}
|-
|[[Silk Touch]]{{only|be|short=1}}
|I
|{{Inventory slot|Anvil}}
|}
{{notelist}}
== Sounds ==
{{edition|java}}:
{{Sound table
|rowspan=4
|sound=Shear.ogg
|subtitle=Shears click
|source=player
|description=When a mooshroom is sheared
|id=entity.mooshroom.shear
|translationkey=subtitles.item.shears.shear
|volume=1.0
|pitch=1.0
|distance=16}}
{{Sound table
|subtitle=Shears click
|source=player
|description=When a sheep is sheared
|id=entity.sheep.shear
|translationkey=subtitles.item.shears.shear
|volume=1.0
|pitch=1.0
|distance=16}}
{{Sound table
|subtitle=Shears click
|source=player
|description=When a snow golem is sheared
|id=entity.snow_golem.shear
|translationkey=subtitles.item.shears.shear
|volume=1.0
|pitch=1.0
|distance=16}}
{{Sound table
|subtitle=Plant cropped
|source=block
|description=When a growing plant is cropped
|id=block.growing_plant.crop
|translationkey=subtitles.block.growing_plant.crop
|volume=1.0
|pitch=1.0
|distance=16}}
{{Sound table
|sound=Beehive shear.ogg
|source=block
|subtitle=Shears scrape
|description=When honeycombs are harvested from a beehive
|id=block.beehive.shear
|translationkey=subtitles.block.beehive.shear
|volume=0.8
|pitch=1.0/0.8/0.9
|distance=16}}
{{Sound table
|sound=Pumpkin carve1.ogg
|sound2=Pumpkin carve2.ogg
|source=block
|subtitle=Shears carve
|description=When a pumpkin is carved
|id=block.pumpkin.carve
|translationkey=subtitles.block.pumpkin.carve
|volume=1.0
|pitch=1.0
|distance=16}}
{{Sound table
|sound=Random break.ogg
|subtitle=Item breaks
|source=player
|description=When a pair of shears' durability is exhausted
|id=entity.item.break
|translationkey=subtitles.entity.item.break
|volume=0.8
|pitch=0.8-1.2
|distance=16
|foot=1}}
{{edition|bedrock}}:<br>
Pumpkins do not have carve sounds.
{{Sound table
|type=bedrock
|sound=Shear.ogg
|source=player
|description=When something is sheared
|id=mob.sheep.shear
|volume=1.0
|pitch=1.0}}
{{Sound table
|sound=Beehive shear.ogg
|source=block
|description=When honeycombs are harvested from a beehive
|id=block.beehive.shear
|volume=0.8
|pitch=0.8-1.0}}
{{Sound table
|sound=Random break.ogg
|source=player
|description=When a pair of shears' durability is exhausted
|id=random.break
|volume=1.0
|pitch=0.9
|foot=1}}
==Data values==
===ID===
{{edition|java}}:
{{ID table
|edition=java
|showforms=y
|generatetranslationkeys=y
|displayname=Shears
|spritetype=item
|nameid=shears
|form=item
|foot=1}}
{{edition|bedrock}}:
{{ID table
|edition=bedrock
|shownumericids=y
|showforms=y
|notshowbeitemforms=y
|generatetranslationkeys=y
|displayname=Shears
|spritetype=item
|nameid=shears
|id=421
|form=item
|foot=1}}
==Achievements==
{{load achievements|Have a Shearful Day}}<div style="text-align:center"></div>
==History==
{{History||June 3, 2011|link=https://twitter.com/jeb_/status/76570646074765312|Shears were first mentioned by [[Jeb]] on [[wikipedia:Twitter|Twitter]]. The tweet revealing Jeb's work on shears was written in Swedish (''Jag jobbar på shears nu''), which translates to "I'm working on shears now".}}
{{History||June 7, 2011|link=https://twitter.com/jeb_/status/78154891637436416|Jeb tweets about how shears were originally planned as a way to defuse [[TNT]], but he dropped this shortly after deciding TNT would detonate only with [[redstone]] or [[fire]].}}
{{History|java beta}}
{{History||1.7|[[File:Shears JE1 BE1.png|32px]] Added shears.
|Before [[Beta 1.7]], [[sheep]] would drop 1-3 [[wool]] blocks at most when hit, but shears can harvest up to 4 wool blocks per sheep.}}
{{History||1.8|snap=Pre-release|Shears can now be used to harvest a [[fern]], [[vines]] and [[grass]].}}
{{History|java}}
{{History||1.0.0|snap=Beta 1.9 Prerelease|Shears now harvest [[red mushroom]]s from a [[mooshroom]] and turn it back into a normal [[cow]].}}
{{History||1.1|snap=11w49a|[[Sheep]] now drop only 1-3 wool blocks when sheared, but they can also regrow their wool by eating [[grass block|grass]], which is part of a plan to have [[animal]]s stay in the game longer.<ref>{{Tweet|jeb|76647002317930496}}</ref>}}
{{History||1.2.1|snap=12w05a|Shears can now be used to harvest [[dead bush]]es.}}
{{History|||snap=12w06a|Shears are now [[renewable]], due to [[zombie]]s occassionally dropping iron ingots.}}
{{History||1.3.1|snap=12w21a|Shears can now be [[trading|bought]] from farmer [[villager]]s for 3 [[emerald]]s each.}}
{{History|||snap=12w22a|Shears can now be used to break [[tripwire]] string and not set it off.}}
{{History||1.4.2|snap=12w38a|Added a [[sound]] when using shears on [[sheep]].}}
{{History||1.4.6|snap=12w50a|Shears can now be [[enchanting|enchanted]].}}
{{History||1.8|snap=14w02a|[[Trading]] has been changed: Shepherd [[villager]]s now [[trading|sell]] shears for 3–4 [[emerald]]s each.
|Farmers no longer trade shears.}}
{{History|||snap=pre1|Shears now lose [[item durability|durability]] when breaking [[wool]] blocks. In previous versions, shears would take [[item durability|durability]] [[damage]] only when destroyed or when breaking [[tall grass]] or [[leaves]], the damage remaining the same for all other [[block]]s.<ref>{{bug|MC-5313}}</ref>}}
{{History||1.9|snap=15w34a|Shears may now be used in a crafting grid to zoom in [[map]]s.}}
{{History|||snap=15w45a|Shears no longer zoom in maps.}}
{{History|||snap=15w47b|Shears can no longer be enchanted with [[Silk Touch]].
|Shears now lose durability when used to break any block (formerly lost durability only from [[leaves]], [[web]], [[grass]], [[vines]], [[tripwire]] and [[wool]]).}}
{{History|||snap=15w47c|Shears now harvest [[cobweb]] without requiring [[Silk Touch]].}}
{{History|||snap=15w49a|[[Snow golem]]'s [[pumpkin]] can now be removed with shears.}}
{{History||1.13|snap=17w47a|When shears are {{control|used}} on an un-carved [[pumpkin]], it now turns into a carved pumpkin and drops 4 [[pumpkin seeds]].
|Prior to [[1.13/Flattening|''The Flattening'']], this [[item]]'s numeral ID was 359.}}
{{History||1.14|snap=18w43a|Shears placed in a [[dispenser]] can now shear [[sheep]].
|[[File:Shears JE2 BE2.png|32px]] The texture of shears has been changed.}}
{{History|||snap=18w49a|Shears can now be found in [[chest]]s in [[village]] shepherd houses.}}
{{History||1.15|snap=19w34a|Shears can now be used on [[bee nest]]s and [[beehive]]s to harvest [[honeycomb]].}}
{{History||1.16|snap=20w15a|Shears placed in a dispenser can now shear [[mooshrooms]] and [[snow golem]]s.}}
{{History||1.16.2|snap=pre1|Shears are now required in order to pick up [[roots]].}}
{{History||1.16.2|snap=pre2|Shears are no longer required to pick up [[roots]].}}
{{History||1.17|snap=?|Shears are now required in order to pick up [[hanging roots]].}}
{{History||1.18|snap=21w37a|Shears can now stop [[cave vines]], [[kelp]], [[weeping vines]], and [[twisting vines]] from aging.}}
{{History||1.19|snap=22w11a|Shears are now required in order to pick up [[mangrove leaves]].}}
{{History|pocket alpha}}
{{History||v0.2.0|[[File:Shears JE1 BE1.png|32px]] Added shears.}}
{{History||v0.3.2|Survival [[player]]s no longer start out with infinite durability shears in the [[inventory]].}}
{{History||v0.4.0|Removed shears from the creative inventory.}}
{{History||v0.8.0|snap=build 3|Re-added shears to [[creative]] mode.}}
{{History||v0.9.0|snap=build 1|Shears can now be used to transform [[mooshroom]]s into [[cow]]s.}}
{{History||v0.12.1|snap=build 3|Shearing a [[snow golem]] now removes its [[pumpkin]].
|Shears can now be [[enchanting|enchanted]] in an [[anvil]].}}
{{History||v0.13.0|snap=build 1|Shears can now be used to break [[tripwire]] string without triggering it.}}
{{History||v0.15.0|snap=build 1|Shears now lose durability when used to break any [[block]].}}
{{History|pocket}}
{{History||1.0.4|snap=alpha 1.0.4.0|Shears can now be [[trading|bought]] from shepherd [[villager]]s.}}
{{History||1.1.0|snap=alpha 1.1.0.0|Breaking a [[melon|melon block]] with shears now always drop 9 [[melon slice|melons]].}}
{{History|bedrock}}
{{History||1.4.0|snap=beta 1.2.13.8|Shears can now be used to turn un-carved [[pumpkin]]s into [[carved pumpkin]] and spit out 4 [[pumpkin seeds]].}}
{{History||?|Shears now harvest [[cobweb]] without requiring [[Silk Touch]].}}
{{History||1.10.0|snap=beta 1.10.0.3|Shears placed in a [[dispenser]] can now shear [[sheep]].
|[[File:Shears JE2 BE2.png|32px]] The texture of shears has been changed.}}
{{History||1.11.0|snap=beta 1.11.0.1|Shears can now be found in [[village]] shepherd houses.}}
{{History|||snap=beta 1.11.0.4|Shears [[trading|sold]] by shepherd [[villager]]s now cost only 2 [[emerald]]s.}}
{{History||1.14.0|snap=beta 1.14.0.1|Shears can now be used on [[bee nest]]s and [[beehive]]s to harvest [[honeycomb]].}}
{{History|console}}
{{History||xbox=TU3|xbone=CU1|ps=1.0|wiiu=Patch 1|switch=1.0.1|[[File:Shears JE1 BE1.png|32px]] Added shears.}}
{{History||xbox=TU69|xbone=none|ps=1.76|wiiu=Patch 38|switch=none|Shears can now be used to turn regular [[pumpkin]]s into [[carved pumpkin]]s.}}
{{History||xbox=none|xbone=none|ps=1.90|wiiu=none|switch=none|[[File:Shears JE2 BE2.png|32px]] The texture of shears has been changed.
|Shears placed in a [[dispenser]] can now shear [[sheep]].}}
{{History|New 3DS}}
{{History||0.1.0|[[File:Shears JE1 BE1.png|32px]] Added shears.}}
{{History|foot}}
==Issues==
{{issue list}}
==Gallery==
<gallery>
File:Enchanted Shears.gif|An enchanted pair of shears.
</gallery>
==References==
{{reflist}}
==External links==
*[https://www.minecraft.net/en-us/article/taking-inventory--shears Taking Inventory: Shears] – Minecraft.net on November 20, 2019
{{Items}}
[[cs:Nůžky]]
[[de:Schere]]
[[es:Tijeras]]
[[fr:Cisailles]]
[[hu:Metszőolló]]
[[it:Cesoie]]
[[ja:ハサミ]]
[[ko:가위]]
[[nl:Schaar]]
[[pl:Nożyce]]
[[pt:Tesoura]]
[[ru:Ножницы]]
[[zh:剪刀]]
[[Category:Renewable resources]]</li></ul> | Added grass blocks. | ||||
| Legacy Console Edition | |||||
TU1{{Extension DPL}}<ul><li>[[Coal|Coal]]<br/>{{About|the fuel item that can be mined|the ore|Coal Ore|the block|Block of Coal|the smelted wood|Charcoal}}
{{Item
| image = Coal.png
|type=
| renewable = Yes
| stackable = Yes (64)
}}
'''Coal''' is a mineral [[item]] mainly obtained from [[Coal Ore|coal ore]]. It is primarily used for crafting [[torches]] and [[Campfire|campfires]], as well as [[fuel]].
== Obtaining ==
=== Chest loot ===
{{see also|Coal Ore#Natural generation}}
{{LootChestItem|coal}}
=== Mining ===
[[Coal ore]] are mined using a [[pickaxe]] and drops 1 piece of coal. If the pickaxe is enchanted with [[Fortune]], it may drop an extra piece per level of Fortune, up to a maximum of 4 with Fortune III.
=== Mob loot ===
[[Wither skeleton]]s have a {{Frac|1|3}} chance of dropping a single coal upon death. The maximum amount of coal is increased by 1 per level of [[Looting]]. The chance of a wither skeleton ''not'' dropping any coal can be found using the formula <code>2 / (Looting Level + 3)</code>. For example, Looting III gives a {{frac|1|3}} chance of not dropping any coal. All other amounts have an equal chance of occurring.
=== Crafting ===
{{Crafting
|showname=1
|Block of Coal
|Output=Coal,9
|type=Material
}}
=== Smelting ===
{{Smelting
|head=1
|Coal Ore
|Coal
|0,1
|foot=1
}}
== Usage ==
=== Crafting ingredient ===
{{crafting usage|Coal}}
=== Fuel ===
When used in a [[furnace]] as a fuel, a piece of coal lasts 80 seconds (smelting up to 8 items), like [[charcoal]]. Coal used as fuel lasts more than 5 times longer than [[wood planks]] or [[wood]] logs used as fuel, being more efficient than any other use of wood for smelting {{in|je}}, but outstripped by [[wooden slabs]] {{in|be}}.
Coal and charcoal are also the only fuels accepted by [[Minecart with Furnace|furnace minecart]]s. They provide approximately four minutes of transit each.
=== Trading ===
Novice-level fisherman [[villager]]s have a 50% chance to buy 10 coal for one [[emerald]].
{{IN|java}}, novice-level armorer and toolsmith villagers have a 40% chance of offering to buy 15 coal for one emerald. Novice-level weaponsmith villagers and apprentice-level butcher villagers have {{frac|2|3}} chance of offering to buy 15 coal for one emerald.
{{IN|bedrock}}, novice-level armorer, toolsmith, and weaponsmith villagers and apprentice-level butcher villagers buy 15 coal for one emerald.
[[trading|Trade]]s that involve coal cannot be substituted by [[charcoal]].
== Data values ==
=== ID ===
{{edition|java}}:
{{ID table
|edition=java
|showitemtags=y
|showforms=y
|generatetranslationkeys=y
|displayname=Coal
|spritetype=item
|nameid=coal
|itemtags=coals
|form=item
|foot=1}}
{{edition|bedrock}}:
{{ID table
|edition=bedrock
|showitemtags=y
|showaliasids=y
|shownumericids=y
|showforms=y
|notshowbeitemforms=y
|generatetranslationkeys=y
|displayname=Coal
|spritetype=item
|nameid=coal
|aliasid=coal / 0
|id=302
|itemtags=minecraft:coals
|form=item
|foot=1}}
== History ==
{{History|java classic}}
{{History||May 21, 2009|link=https://web.archive.org/web/0/http://notch.tumblr.com/post/110762705/my-list-on-tile-types-so-far|[[Notch]] shows interest in adding coal, commenting that it might be combined with [[iron ore]] to make steel.}}
{{History|java indev}}
{{History||0.31|snap=20100128|[[File:Coal JE1.png|32px]] Added coal.
|Mining [[coal ore]] blocks [[drops]] 2-5 pieces of coal.}}
{{History||0.31|snap=20100129|Coal can be used to craft [[torch]]es.}}
{{History||?|Mining [[coal ore]] now drops 1 piece of coal (down from 2-5).}}
{{History||20100219|[[File:Coal JE2 BE1.png|32px]] The texture of coal has been changed. It is now more centered.}}
{{History|java beta}}
{{History||1.8|snap=Pre-release|Coal can now be found in the new [[mineshaft]] [[chest]]s and [[stronghold]] storeroom chests.}}
{{History|java}}
{{History||1.0.0|snap=?|Coal can be now obtained by [[smelting]] [[coal ore]].}}
{{History||1.2.1|snap=12w04a|Coal can now be used to craft [[fire charge]]s.}}
{{History||1.3.1|snap=12w21a|Blacksmith and butcher [[villager]]s now [[trading|buy]] 16–23 of either coal or charcoal for 1 [[emerald]].}}
{{History|||snap=1.3|[[File:Coal JE3 BE2.png|32px]] The texture of coal has been changed.}}
{{History||1.4.2|snap=12w36a|Coal is now dropped by [[wither skeleton]]s, making it [[renewable resource|renewable]].}}
{{History||1.6.1|snap=13w18a|Coal can now be used to craft [[block of coal|coal block]]s.}}
{{History||1.8|snap=14w02a|Fisherman, armorer, tool smith, weapon smith and butcher [[villager]]s now [[trading|buy]] 16–24 coal for 1 [[emerald]].}}
{{History||1.9|snap=15w43a|Coal may now be found in [[igloo]] basement [[chest]]s.}}
{{History|||snap=15w44a|The average yield of coal from [[mineshaft]] chests has been decreased, and added to [[dungeon]] chests.}}
{{History||1.11|snap=16w39a|Coal can now be found in the new [[woodland mansion]] [[chest]]s.}}
{{History||1.13|snap=17w47a|The different data values for the <code>coal</code> ID have been split up into their own IDs.
|Prior to [[1.13/Flattening|''The Flattening'']], this [[item]]'s numeral ID was 263.}}
{{History|||snap=18w09a|Coal can now be found in the loot [[chest]]s of [[underwater ruins]].}}
{{History|||snap=18w11a|Coal now generates in [[shipwreck]] [[chest]]s.}}
{{History||1.14|snap=18w43a|[[File:Coal JE4 BE3.png|32px]] The texture of coal has been changed.}}
{{History|||snap=18w48a|Coal can now be found in [[chest]]s in [[village]] fishing cottages.}}
{{History|||snap=18w49a|Coal can now be found in [[chest]]s in [[village]] butcher shops and [[snowy tundra|snowy]] village houses.}}
{{History|||snap=18w50a|Coal can now be found in [[chest]]s in [[village]] toolsmith houses.}}
{{History|||snap=19w02a|Coal can now be used to craft [[campfire]]s. Destroying a campfire returns 2 charcoal.}}
{{History||1.16|snap=20w06a|Coal can now be used to craft [[torch|soul torches]].}}
{{History||1.19|snap=22w13a|Coal may now be found in [[ancient city]] [[chest]]s.}}
{{History||1.20|snap=23w12a|Coal can now be found in [[suspicious gravel]] and [[suspicious sand]] in cold and warm [[ocean ruins]] and in [[trail ruins]].}}
{{History|||snap=23w16a|Coal no longer generates in [[suspicious sand]] in [[trail ruins]].|Due to the split of the archaeological loot tables for the suspicious gravel within the [[trail ruins]]; coal now is in the common loot.}}
{{History|pocket alpha}}
{{History||v0.3.0|[[File:Coal JE2 BE1.png|32px]] Added coal.
|Coal can be used to craft [[torch]]es.}}
{{History||v0.8.0|snap=build 1|[[File:Coal JE3 BE2.png|32px]] The texture of coal has been changed.
|Coal can now be crafted to make a [[block of coal]].}}
{{History||v0.12.1|snap=build 1|Coal is now [[drops|dropped]] by [[wither skeleton]]s.}}
{{History||v0.14.0|snap=build 1|Coal can now be found inside [[minecart with chest|chest minecarts]] in [[mineshaft]]s.}}
{{History||v0.15.0|snap=build 1|Coal is now used to craft [[fire charge]]s.}}
{{History|pocket}}
{{History||1.0.0|snap=alpha 0.17.0.1|Coal can now be found in the [[stronghold]] storeroom [[chest]]s.
|Coal may now be found in [[igloo]] basement chests.}}
{{History||1.0.4|snap=alpha 1.0.4.0|Fisherman, armorer, toolsmith, weaponsmith and butcher [[villager]]s now [[trading|buy]] 16–24 coal for 1 [[emerald]].}}
{{History||1.1.0|snap=alpha 1.1.0.0|Coal is now found in [[woodland mansion]] [[chest]]s.}}
{{History|bedrock}}
{{History||1.4.0|snap=beta 1.2.14.2|Coal can now be found inside [[shipwreck]] [[chest]]s.}}
{{History|||snap=beta 1.2.20.1|Coal can now be found inside [[underwater ruins]] [[chest]]s.}}
{{History||1.10.0|snap=beta 1.10.0.3|Coal can now be used to craft [[campfire]]s. Destroying a campfire returns 2 charcoal.
|[[File:Coal JE4 BE3.png|32px]] The texture of coal has been changed.}}
{{History||1.11.0|snap=beta 1.11.0.1|Coal can now be found in [[snowy tundra]] [[village]] house [[chest]]s and in village butcher and toolsmith chests.}}
{{History|||snap=beta 1.11.0.4|Armorer, weaponsmith, toolsmith, and butcher [[villager]]s now [[trading|buy]] 15 coal for an [[emerald]].
|Fishermen villagers now have a 50% chance to buy 10 coal for an emerald as part of their first tier [[trading|trade]].}}
{{History||1.16.0|snap=beta 1.16.0.51|Coal can now used to craft [[soul torch]]es.}}
{{History|console}}
{{History||xbox=TU1|xbone=CU1|ps=1.0|wiiu=Patch 1|switch=1.0.1|[[File:Coal JE2 BE1.png|32px]] Added coal.}}
{{History||?|[[File:Coal JE3 BE2.png|32px]] The texture of coal has been changed.}}
{{History||xbox=none|xbone=none|ps=1.90|wiiu=none|switch=none|[[File:Coal JE4 BE3.png|32px]] The texture of coal has been changed.}}
{{History|New 3DS}}
{{History||0.1.0|[[File:Coal JE3 BE2.png|32px]] Added coal.}}
{{History|foot}}
== Issues ==
{{issue list|Coal}}
{{Items}}
[[Category:Renewable resources]]
[[cs:Uhlí]]
[[de:Kohle]]
[[es:Carbón]]
[[fr:Charbon]]
[[hu:Szén]]
[[it:Carbone]]
[[ja:石炭]]
[[ko:석탄]]
[[nl:Steenkool]]
[[pl:Węgiel]]
[[pt:Carvão]]
[[ru:Уголь]]
[[th:ถ่าน]]
[[tr:Kömür]]
[[uk:Вугілля]]
[[zh:煤炭]]</li><li>[[Shield|Shield]]<br/>{{Item
| image = Shield.png
| image2 = White Shield.png
| extratext = View [[#Gallery|all renders]]
| durability = 336
| renewable = Yes
| stackable = No
}}
A '''shield''' is a tool used for protecting the [[player]] against attacks.
== Obtaining ==
=== Crafting ===
{{Crafting
|head=1
|showname=0
|A1=Any Planks <!-- the recipe changed in 15w37a, do not change it to the old recipe without reason -->
|B1=Iron Ingot
|C1=Any Planks
|A2=Any Planks
|B2=Any Planks
|C2=Any Planks
|B3=Any Planks
|Output=Shield
|type=Combat
}}
{{Crafting
|ignoreusage=1
|Shield
|Matching Banner
|A2=Shield
|B2=Banner
|Output=Matching Shield
|type=combat
|foot=1
}}
=== Repairing ===
{{Crafting
|ignoreusage=1
|showdescription=1
|Damaged Shield
|Damaged Shield
|Output=Shield
|description= The durability of the two shields is added together, plus an extra 5% durability. The repaired shield has no pattern.
|type= Combat
}}
Shields may also be repaired on an [[anvil]] by using [[planks]] or another shield. Shields repaired on anvils retain their pattern.
=== Trading ===
Journeyman-level armorer [[villager]]s have {{frac|1|3}}{{only|Bedrock|short=1}}/{{frac|2|5}}{{only|Java|short=1}} chance of selling a shield for 5 [[emerald]]s as their sixth trade.
== Usage ==
Despite using iron in its crafting recipe, it cannot be smelted into [[iron nugget]]s.<ref>{{bug|MC-111738}}</ref>
=== Defense ===
Shields are used for [[blocking]] incoming attacks. {{control|Using}}{{Only|Java|short=1}} or {{Control|sneaking}}{{Only|Bedrock|short=1}} causes a player to slow to a [[sneaking]] pace, and after {{convert|5|ticks|seconds}}<ref>{{bug|MC-100949||Shield blocking is delayed}}</ref>, attacks coming from in front of the player are blocked, dealing no damage. When the shield blocks an attack of {{hp|3}} or stronger, it takes durability damage equal to the strength of the attack rounded up.
Most blocked projectiles that carry status effects (such as [[Shulker#Shulker bullet|shulker bullets]]{{only|java|short=1}}, flaming [[arrow]]s, or tipped arrows) do not affect the blocker. [[Trident]]s & arrows can be deflected into other targets. Knockback from melee attacks and projectiles is prevented, while knockback from [[explosion]]s, [[hoglin]], and [[ravager]] attacks are significantly reduced.
The shield directionally blocks all attacks coming from within the FOV of the direction the wielder is facing, providing a full hemisphere of coverage to them. If the wielder faces straight up, they are likely to miss their blocks.<ref>{{bug|MC-109101||Shields do not block damage while the player faces straight up}}</ref><!--straight down fix: MC-92019-->
Mobs that deal continuous contact damage such as the slime, magma cube, and blaze rapidly drain the shield's durability for as long as the shielded player remains within the mob's hitbox.<ref>{{bug|MC-169167}}</ref><ref>{{bug|MCPE-119451}}</ref>
Blockable attacks include:
*Melee attacks, except by a warden, axe-wielding mobs or by a sprinting player wielding an axe, however even without sprinting an axe still greatly decreases the durability
** Status effects do not carry through to the blocker{{only|java|short=1}}.
*Normal, tipped, and spectral [[arrow]]s
** Arrows other than [[Piercing]] are totally deflected and can hit other targets.
** Status effects do not carry through to the blocker{{only|java|short=1}}.
***This can be used to damage the attacker or another mob down there.
*[[Flame|Flaming arrows]]
** Burning does not carry through to the blocker{{only|java|short=1}}.
*[[Trident]]s
*[[Snowball]]s and [[egg]]s
*Spines from [[pufferfish]]
*Bullets from [[shulker]]s
** The levitation effect does not carry through to the blocker{{only|java|short=1}}.
*Spit from [[llama]]s
*[[Fireball]]s, such as from [[blaze]]s and [[fire charge]]s
** Burning does not carry through to the blocker.
*Direct hits from [[ghast]] [[fireball]]s
** These still cause environmental damage.
*All explosions{{only|JE|short=1}}
*Explosion damage from [[creeper]]s
*[[TNT]] that another player lit
*[[Ravager]] headbutts
** These still knock the blocker back by about 3 blocks.
** Blocking these strikes can stun the ravager for a moment, and it roars afterward.
*Ravager roars are blocked but still knock back the blocker.
*[[Bee]] stings are blocked, but bees continuously attack until the player stops blocking and the player is stung.
*Beam attacks from [[guardian]]s or [[elder guardian]]s (only reduces damage by 50%).
*Damage reflected from [[Thorns]] enchantment / [[Guardian|guardians]].
They cannot block:
*Arrows from a [[crossbow]] enchanted with [[Piercing]]
** This does not reduce the shield's durability.
*[[Status effect]]s from tipped arrows or shulker bullets {{only|bedrock|short=1}} <ref>{{bug|MCPE-52904}}</ref>
** Direct projectile damage is blocked, but the effect still carries through.
*Status effects from splash/lingering [[potion]]s, [[evoker]]s' fangs, or breath from the [[ender dragon]]
*Beam attacks from [[guardian]]s or [[elder guardian]]s, or the [[warden]]'s sonic boom attack
*TNT that the blocking player lit themselves{{only|BE|short=1}}
*TNT that a [[Redstone (disambiguation)|redstone mechanism]] lit{{only|BE|short=1}}
*[[Fall damage]], including that from [[ender pearl]]s
** This also includes when the player rides an [[entity]] that died due to fall damage.
*Strikes from a warden or any [[axe]]-wielding mob (e.g., [[vindicator]]s, [[piglin brute]]s, [[zombie]]s after disabling players shield they attack another time immediately)
** Such strikes disable being able to use shields for 5 seconds.
=== Applying patterns ===
[[File:Cyan Shield Screenshot.png|250px|thumb|A custom shield.]]
Shields can be decorated by applying a [[banner]].
{{Crafting
|showdescription=1
|Shield
|Matching Banner
|Output=Matching Shield; Ominous Shield
|B2link=Banner
|Olink=Shield
|type=Combat
|description=Applies the banner pattern to the shield. The banner is consumed.<br>The shield must have no preexisting patterns.<br>Does not change existing durability or enchantments on the shield.
}}
Unlike with [[banner]]s, shields cannot be repainted or washed in a [[cauldron]]. Shields have only half the resolution of banners, making patterns look slightly different. In the game files, the pattern textures can be found in a separate directory called entity/shield.
{{IN|java}}, shields with patterns can also be obtained using the same commands as banners, except <code>banner</code> has to be replaced with <code>shield</code>.
=== Enchantments ===
A shield can receive the following [[enchantments]], but only through an [[anvil]]:
{| class="wikitable col-2-center"
|+
!Name
!Max Level
![[Enchanting|Method]]
|-
|[[Unbreaking]]
|III
|{{Inventory slot|Anvil}}
|-
|[[Mending]]
|I
|{{Inventory slot|Anvil}}
|-
|[[Curse of Vanishing]]
|I
|{{Inventory slot|Anvil}}
|-
|}
== Sounds ==
{{edition|java}}:
{{Sound table
|sound=Shield block1.ogg
|sound2=Shield block2.ogg
|sound3=Shield block3.ogg
|sound4=Shield block4.ogg
|sound5=Shield block5.ogg
|subtitle=Shield blocks
|source=player
|description=When an attack is blocked using a shield
|id=item.shield.block
|translationkey=subtitles.item.shield.block
|volume=1.0
|pitch=0.8-1.2
|distance=16}}
{{Sound table
|sound=Equip generic1.ogg
|sound2=Equip generic2.ogg
|sound3=Equip generic3.ogg
|sound4=Equip generic4.ogg
|sound5=Equip generic5.ogg
|sound6=Equip generic6.ogg
|subtitle=Gear equips
|source=player
|description=When a shield is placed in the offhand slot
|id=item.armor.equip_generic
|translationkey=subtitles.item.armor.equip
|volume=1.0
|pitch=1.0
|distance=16}}
{{Sound table
|sound=Random break.ogg
|subtitle=Item breaks
|source=player
|description=When a shield's durability is exhausted
|id=item.shield.break
|translationkey=subtitles.entity.item.break
|volume=0.8
|pitch=0.8-1.2
|distance=16
|foot=1}}
{{edition|bedrock}}:
{{Sound table
|type=bedrock
|sound=Shield block1.ogg
|sound2=Shield block2.ogg
|sound3=Shield block3.ogg
|sound4=Shield block4.ogg
|sound5=Shield block5.ogg
|source=player
|description=When an attack is blocked using a shield
|id=item.shield.block
|volume=0.7
|pitch=1.0}}
{{Sound table
|sound=Equip generic1.ogg
|sound2=Equip generic2.ogg
|sound3=Equip generic3.ogg
|sound4=Equip generic4.ogg
|sound5=Equip generic5.ogg
|sound6=Equip generic6.ogg
|source=player
|description=When a shield is placed in the offhand slot<wbr>{{Upcoming|BE 1.20.30}}<wbr><ref group=sound>{{Bug|MCPE-168039}}</ref>
|id=armor.equip_generic
|volume=1.0
|pitch=1.0}}
{{Sound table
|sound=Random break.ogg
|source=player
|description=When a shield's durability is exhausted
|id=random.break
|volume=1.0
|pitch=0.9
|foot=1}}
== Data values ==
=== ID ===
{{edition|java}}:
{{ID table
|edition=java
|showforms=y
|generatetranslationkeys=y
|displayname=Shield
|spritetype=item
|nameid=shield
|form=item
|translationkey=item.minecraft.shield, item.minecraft.shield.white, item.minecraft.shield.orange, item.minecraft.shield.magenta, item.minecraft.shield.light_blue, item.minecraft.shield.yellow, item.minecraft.shield.lime, item.minecraft.shield.pink, item.minecraft.shield.gray, item.minecraft.shield.light_gray, item.minecraft.shield.cyan, item.minecraft.shield.purple, item.minecraft.shield.blue, item.minecraft.shield.brown, item.minecraft.shield.green, item.minecraft.shield.red, item.minecraft.shield.black
|foot=1}}
{{edition|bedrock}}:
{{ID table
|edition=bedrock
|shownumericids=y
|showforms=y
|notshowbeitemforms=y
|generatetranslationkeys=y
|displayname=Shield
|spritetype=item
|nameid=shield
|id=355
|form=item
|translationkey=item.shield.name, item.shield.white.name, item.shield.orange.name, item.shield.magenta.name, item.shield.lightBlue.name, item.shield.yellow.name, item.shield.lime.name, item.shield.pink.name, item.shield.gray.name, item.shield.silver.name, item.shield.cyan.name, item.shield.purple.name, item.shield.blue.name, item.shield.brown.name, item.shield.green.name, item.shield.red.name, item.shield.black.name
|foot=1}}
== Advancements ==
{{load advancements|Not Today}}
== History ==
{{History||July 10, 2011|link=http://minetimes.wordpress.com/2011/07/10/interview-mit-jeb-ihr-konntet-die-fragen-stellen/|During an interview, [[Jeb]] says that "shields for the left arm" might be added.}}
{{History|java}}
{{History||1.9|snap=15w33c|[[File:White Shield.png|22px]] [[File:Light Gray Shield.png|22px]] [[File:Gray Shield.png|22px]] [[File:Black Shield.png|22px]] [[File:Brown Shield.png|22px]] [[File:Red Shield.png|22px]] [[File:Orange Shield.png|22px]] [[File:Yellow Shield.png|22px]] [[File:Lime Shield.png|22px]] [[File:Green Shield.png|22px]] [[File:Cyan Shield.png|22px]] [[File:Light Blue Shield.png|22px]] [[File:Blue Shield.png|22px]] [[File:Purple Shield.png|22px]] [[File:Magenta Shield.png|22px]] [[File:Pink Shield.png|22px]] Added shields.
|Shields replace the [[blocking]] functionality of [[sword]]s, although blocking more [[damage]].
|The current [[crafting]] recipe of shields includes [[wool]], producing 16 possible colored shields. There currently isn't a blank, uncolored shield.
{{{!}} class{{=}}"collapsible collapsed" data-description{{=}}"Recipe"
! Recipe
{{!}}-
{{!}}
{{Crafting
|A1=Matching Wool |B1=Any Planks
|A2=Matching Wool |B2=Any Planks |C2=Iron Ingot
|A3=Matching Wool |B3=Any Planks
|Output=Matching Shield
|ignoreusage=1
}}
{{!}}}
|Any of the colored base shields can be [[crafting|crafted]] with a [[banner]] of the same base color, to produce a patterned shield.
}}
{{History|||snap=15w34c|When an attack is blocked by a shield, the attacker now may be knocked back.
|Being attacked with an [[axe]] now may disable shield use for 5 seconds.}}
{{History|||snap=15w37a|The [[crafting]] recipe of shields has been changed to 6 [[planks]] and 1 [[iron ingot]].
{{{!}} class{{=}}"collapsible collapsed" data-description{{=}}"Recipe"
! Recipe
{{!}}-
{{!}}
{{Crafting
|A1=Any Planks |B1=Iron Ingot |C1=Any Planks
|A2=Any Planks |B2=Any Planks |C2=Any Planks
|B3=Any Planks
|Output=Shield
|ignoreusage=1
}}
{{!}}}
|[[File:Shield JE1.png|22px]] Crafting a shield now produces a base wooden shield that can be crafted together with any [[banner]].
|The cooldown of shields has been reduced from 0.5s to 0.25s.
|Blocking with shields now prevents some side effects.{{verify}}
|[[Arrow]]s now ricochet off shields.}}
{{History|||snap=15w44a|Shields can now be repaired by combining with other shields. This removes any [[banner]] that had been applied.}}
{{History|||snap=15w45a|Crafting a banner onto a shield now consumes the banner.}}
{{History|||snap=15w47b|Added shield blocking [[sound]]s.}}
{{History|||snap=16w07a|Added more variation of shield blocking sounds.}}
{{History|||snap=pre1|The [[durability]] of shields has been increased from 181 to 337.}}
{{History||1.10|snap=16w21a|Shields can now be equipped by [[dispenser]]s.}}
{{History||1.11|snap=16w33a|[[Crafting]] a shield with a banner no longer changes the durability, nor does it remove [[enchanting|enchantments]] from it.}}
{{History|||snap=16w35a|Shields now block 100% of [[damage]]/[[knockback]]/debuffs dealt in melee combat.}}
{{History||1.13|snap=17w47a|Prior to [[1.13/Flattening|''The Flattening'']], this [[item]]'s numeral ID was 442.}}
{{History||1.13.2|snap=release|Shields now properly block attacks when the player is facing down.<ref>{{bug|MC-92019|||Fixed}}</ref>}}
{{History||1.14|snap=18w43a|[[File:Shield JE2 BE1.png|22px]] The texture of shields has been changed.
|Shields no longer knockback attackers when they block due to a bug with rework of the blocking mechanic with the introduction of the ravager.<ref>{{bug|MC-147694}}</ref>}}
{{History|||snap=19w11a|Shields can now be [[trading|bought]] from armorer [[villager]]s.}}
{{History||1.14.3|snap=Pre-Release 3|Shields blocking flaming [[arrow]]s no longer put the [[player]] on [[fire]].}}
{{History||1.16|snap=20w06a|[[Crimson planks]] and [[warped planks]] can now be used to craft shields.}}
{{History||1.19|snap=22w11a|[[Mangrove planks]] can now be used to craft shields.}}
{{History||1.19.3|snap=22w43a|Shields can now properly block all explosions.}}
{{History||1.19.4|snap=23w06a|A sound is now played when a shield is placed into the offhand slot.}}
{{History|upcoming java}}
{{History||Combat Tests|snap=1.14.3 - Combat Test|Critical hits now bypass shields.
|The warm-up delay has been removed from shields.
|When in the off-hand, shields now activate when [[sneaking]].}}
{{History|||snap=Combat Test 2|Shields now protect against critical attacks again.
|Shields can only be activated when the weapon is charged to 200%.}}
{{History|||snap=Combat Test 3|A "Shield Indicator" option that displays when the shield is active, similar to the attack indicator, has been added.
|An option to hide shields when active has been added.
|The arc of available protection of shields has been decreased to 100 degrees instead of 180 degrees.}}
{{History|||snap=Combat Test 4|An option to disable shields being activated by pressing {{ctrl|crouch}} has been added.
|The option to hide the shield has been removed.}}
{{History|||snap=Combat Test 6|Shields now protect up to 5 [[damage]] for melee attacks (still 100% against projectiles).
|Shields activate instantly regardless if the weapon is charged, similar to Combat test 1.
|Shields now recover faster after an attack.}}
{{History|||snap=Combat Test 7c|Shields now add a 50% knockback resistance when active.
|Shields now protect against 100% [[explosions|explosion]] damage.}}
{{History|||snap=Combat Test 8c|The knockback calculations for shields have been fixed.{{Info needed}}
|Crouch-shielding while jumping has been disabled.
|Shields with [[banner]]s are now temporarily stronger than normal shields (10 absorption instead of 5, and better knockback resistance) to test different shield types.}}
{{History|bedrock}}
{{History||1.10.0|snap=beta 1.10.0.3|[[File:Shield JE2 BE1.png|22px]] Added shields.
|Shields cannot be customized with [[banner]]s.
|Shields are activated by [[sneaking|crouching]] or mounting [[mob]]s.}}
{{History||1.11.0|snap=beta 1.11.0.4|Shields can now be [[trading|bought]] from armorer [[villager]]s.}}
{{History||1.16.210|snap=beta 1.16.210.51|Now grants partial knockback protection from the [[goat]] ram attack.}}
{{History||1.16.220|snap=beta 1.16.220.50|[[Mob]]s that pick up shields now place them to their off-hand.}}
{{History||1.18.30|snap=beta 1.18.30.26|Being attacked with an [[axe]] now may disable shield use. This was not mentioned in the official changelog.<ref>{{tweet|kingbdogz|1504505321884196872|We missed a change in recent changelogs for the Bedrock beta that you may like - we have now made a parity fix that makes shields get disabled for 5 seconds when attacked by an Axe-wielding mob or player. We will make sure to list this properly in the next beta :)|March 17, 2022}}</ref>}}
{{History||1.20.0|snap=beta 1.20.0.20|[[File:White Shield.png|22px]] [[File:Light Gray Shield.png|22px]] [[File:Gray Shield.png|22px]] [[File:Black Shield.png|22px]] [[File:Brown Shield.png|22px]] [[File:Red Shield.png|22px]] [[File:Orange Shield.png|22px]] [[File:Yellow Shield.png|22px]] [[File:Lime Shield.png|22px]] [[File:Green Shield.png|22px]] [[File:Cyan Shield.png|22px]] [[File:Light Blue Shield.png|22px]] [[File:Blue Shield.png|22px]] [[File:Purple Shield.png|22px]] [[File:Magenta Shield.png|22px]] [[File:Pink Shield.png|22px]] Shields can now be customized using a banner.}}
{{History|PS4}}
{{History||1.90|[[File:Shield JE1.png|22px]] Added shields.
|Shields do not have [[banner]] application features.}}
{{History|foot}}
== Issues ==
{{issue list|-wither}}
== Gallery ==
<gallery>
Shield.png|Shield
White Shield.png|White Shield
Light Gray Shield.png|Light Gray Shield
Gray Shield.png|Gray Shield
Black Shield.png|Black Shield
Brown Shield.png|Brown Shield
Red Shield.png|Red Shield
Orange Shield.png|Orange Shield
Yellow Shield.png|Yellow Shield
Lime Shield.png|Lime Shield
Green Shield.png|Green Shield
Cyan Shield.png|Cyan Shield
Light Blue Shield.png|Light Blue Shield
Blue Shield.png|Blue Shield
Purple Shield.png|Purple Shield
Magenta Shield.png|Magenta Shield
Pink Shield.png|Pink Shield
</gallery>
=== Screenshots ===
<gallery>
JebShield.png|One of the first images of shields. [[Jeb]] wearing diamond armor while holding a creeper-emblazoned shield during [[MineCon]] 2015.
Jeb Crafting Shield.png|Jeb crafting a shield.
Player with Shield.png|Player holding the default shield.
Shield Block.png|A player blocking with a shield.
ShieldFirstPerson.png|Blocking with a shield as seen in first person.
Enchanted Shield (item).gif|An enchanted shield as seen in the [[inventory]].
-ominous- shield.png|A shield with the [[ominous banner]] on it as seen in the inventory.
Kai-Shield.jpg|An image of [[Kai]] wielding a banner with a shield, used to announce the feature on [[Bedrock Edition]].
Bedrock-Shields.jpg
</gallery>
== References ==
{{reflist}}
== External Links ==
* [https://www.minecraft.net/en-us/article/taking-inventory--shield Taking Inventory: Shield] – Minecraft.net on July 25, 2019
{{Items}}
[[Category:Combat]]
[[Category:Renewable resources]]
[[de:Schild (Kampf)]]
[[fr:Bouclier]]
[[it:Scudo]]
[[ja:盾]]
[[ko:방패]]
[[nl:Schild]]
[[pl:Tarcza]]
[[pt:Escudo]]
[[ru:Щит]]
[[th:โล่]]
[[zh:盾牌]]</li></ul> | Added grass blocks. | ||||
| Pi Edition | |||||
0.1.1{{Extension DPL}}<ul><li>[[Photo|Photo]]<br/>{{exclusive|education}}
{{Item
| image = Photo EE2.png
| renewable = No (unless [[portfolio]] is available)
| stackable =
}}
A '''photo''' is an [[item]] containing a picture taken with a [[camera]].<ref>{{cite|url=https://web.archive.org/web/20210925044841mp_/https://educommunity.minecraft.net/hc/en-us/articles/4407489082644-Feature-Walkthrough-Minecraft-Education-Edition-GOAT-Beta-version-1-17-30-| title = Feature Walkthrough Minecraft: Education Edition GOAT Beta (version 1.17.30)|website=Minecraft: Education Edition Support|date=September 24, 2021}}</ref><ref>{{cite|url=https://education.minecraft.net/en-us/blog/new-update-and-anniversary-for-mee| title = The GOAT Update Celebrates a Minecraft Milestone!|website=Minecraft: Education Edition|date=November 2, 2021}}</ref><ref>{{ytl|2Wd0J-EIfws|GOAT Release Playthrough|Minecraft: Education Edition|December 2, 2021}}</ref>
== Obtaining ==
A photo in a [[portfolio]] can be saved as a photo item by selecting the "Save to Inventory" button underneath it.
== Usage ==
Photos display an image when held in the hand or when placed in an [[item frame]], similarly to [[map]]s. Photos can have captions added to them by renaming them in an [[anvil]] or by adding a caption while they are in a portfolio. Photos can be added to [[book and quill]]s and portfolios by selecting the "Add Photo" button in the book and quill or portfolio.
== Data values ==
=== ID ===
{{ID table
|edition=bedrock
|shownumericids=y
|showforms=y
|notshowbeitemforms=y
|generatetranslationkeys=y
|displayname=Photo
|spritetype=item
|nameid=photo_item
|id=?
|form=item
|foot=1}}
== History ==
{{History|education}}
{{History||1.17.30|snap=1.17.30.2|[[File:Photo EE1.png|32px]] Added photos.}}
{{History||1.17.30|snap=release|[[File:Photo EE2.png|32px]] Changed photo texture.}}
{{History|foot}}
== Gallery ==
<gallery>
Photo Item 1.png|A photo being placed in an item frame.
Photo Item 2.png|A photo being saved from a portfolio.
Photo Item 3.png|A photo being added to a book and quill.
</gallery>
== References ==
{{Reflist}}
{{Items}}
{{Education Edition}}
[[Category:Education Edition items]]
[[Category:Non-renewable resources]]
[[ja:写真]]
[[pl:Zdjęcie]]
[[zh:相片]]</li><li>[[Sign|Sign]]<br/>{{Block
| image = <gallery>
Oak Sign.png|Sign
Oak Wall Sign.png|Wall Sign
Oak Hanging Sign.png|Hanging Sign
Oak Wall Hanging Sign.png|Wall Hanging Sign
</gallery>
| image2 = <gallery>
Oak Sign JE3.png|Sign
Oak Hanging Sign (item) JE1 BE1.png|Hanging Sign
</gallery>
| extratext = [[#Gallery|View all renders]]
| transparent = Yes
| light = No
| tool = axe
| renewable = Yes
| stackable = Yes (16)
| flammable = No
| lavasusceptible = No
}}
A '''sign''' is a non-solid [[block]] that displays text and can be placed on the top or side of other blocks. A '''hanging sign''' is a decorative block that also displays text, and can be placed underneath blocks or with a solid self-supporting bracket. The text of both types of signs can be customized with [[dye]]s and [[glow ink sac]]s.
== Obtaining ==
=== Breaking ===
Signs can be broken with any tool or without a tool, but an [[axe]] is fastest.
{{breaking row|horizontal=1|Sign|sprite=oak-sign|Axe|foot=1|item=1}}
A sign or a hanging sign also breaks and drops itself as an [[item]] if the block the sign is attached to is moved, removed or destroyed. However, a wall hanging sign will stay here if the block the hanging sign is attached to is removed.<ref>{{bug|MC-256501|||WAI}}</ref>
If a sign is broken while being edited, the player continues to edit the sign<ref>{{bug|MC-117815}}</ref>, although {{in|bedrock}} breaking the sign stops the editing operation.
=== Natural generation ===
An oak sign can be found in [[igloo]] basements. Spruce signs can be found in taiga [[village]] houses, as part of a chair.
=== Chest loot ===
{{LootChestItem|oak-sign,oak-hanging-sign,spruce-sign,spruce-hanging-sign}}
=== Crafting ===
[[The player]] can place six stripped [[log]] [[block]]s at the bottom half of the crafting table and place two [[chain]]s on the top-left and top-right slots to create hanging signs. This crafting recipe will create six hanging signs. Hanging signs can only be crafted with stripped logs or [[stem]]s; non-stripped wood cannot be used to craft hanging signs.
{{Crafting
|head=1
|showdescription=1
|nolink=1
|A1= Matching Planks
|B1= Matching Planks
|C1= Matching Planks
|A2= Matching Planks
|B2= Matching Planks
|C2= Matching Planks
|B3= Stick
|Output=Matching Sign,3
|type=Decoration block
}}
{{Crafting
|name= Hanging Sign
|A1= Chain
|C1= Chain
|A2= Matching Stripped Log or Stem; Block of Stripped Bamboo
|B2= Matching Stripped Log or Stem; Block of Stripped Bamboo
|C2= Matching Stripped Log or Stem; Block of Stripped Bamboo
|A3= Matching Stripped Log or Stem; Block of Stripped Bamboo
|B3= Matching Stripped Log or Stem; Block of Stripped Bamboo
|C3= Matching Stripped Log or Stem; Block of Stripped Bamboo
|Output= Matching Hanging Sign,6; Bamboo Hanging Sign,6
|type=Decoration block
|foot=1
}}
== Usage ==
Signs can be used to display text; they can be used to label storage, display information to other players or note areas of interest. Signs are also not destroyed by [[water]] or [[lava]] and therefore may be used to control the flow of these fluids.
=== Placement ===
==== Signs ====
Signs may be placed on the top or side of other [[block]]s (including semi-solid and non-solid blocks such as [[fence]]s, [[Trapdoor|trapdoors]] and other signs). To place a sign, {{control|use}} a sign [[item]] while pointing at the block the sign should be attached to, enter the desired text (or none), and click the "Done" button or press "escape" on a keyboard (or press × {{in|bedrock}}, {{xbtn|b}} on an Xbox controller, {{psbtn|o}} on a PlayStation controller, or {{nsbutton|B}} on a Nintendo Switch controller. Closing the virtual keyboard on a mobile device also exits the typing menu). To place a sign on a block that can be interacted with by the {{control|use}} control (for example, [[chest]]s, [[note block]]s, etc.), {{control|sneak}} while placing the sign.
Signs on the top of a block stand on a short post and face toward the player who placed it, in any of 16 different directions. Signs placed on the side of a block simply float there, even if the block doesn't make contact with the sign.
Even if placed on a vertical surface, a sign may not co-exist in the same block of air as any other item, despite not necessarily visibly obstructing eachother.
For more information about the blocks signs can be placed on, see [[Opacity/Placement]].
==== Hanging signs ====
Hanging signs can be placed in three different ways:
* Placing a hanging sign on the side of a block will result in it being placed with a self-supporting bracket, which allows it to float without any supporting block. This version can be placed in four different directions.
* Placing a hanging sign on the bottom of a block will result in the sign hanging below the block.
** If the block is wide enough, the chains holding the sign will be parallel. This version can be placed in four different directions.
** If the block is too narrow, the chains will meet together in a upwards arrow shape. This version is also placed if the player is {{control|sneaking}} when placing a hanging sign below a wide-enough block. This version can be placed in sixteen different directions.
=== Text ===
[[File:Oak Sign GUI.png|thumb|240px|Oak Sign editing.]]
Placing a sign opens an editor interface resembling a magnified view of the sign. Up to four lines of text can then be entered using a keyboard (hardware or on-screen). The editor supports limited editing, including moving the cursor and inserting and deleting characters. {{IN|bedrock}}, [[formatting codes]] can also be used to apply decorative effects such as color, bold, italic and underline to various bits of the text. Depending on the edition and platform in use, copy and paste operations may be supported and the editor may also support keyboard entry of Alt-codes for displaying Unicode characters.
Text can be added to the back side of a sign by interacting with the that side of the sign after placing it and editing the front.
Signs can be waxed by {{Control|use|text=using}} a [[honeycomb]] on it. Once waxed, a sign cannot be unwaxed or edited.
After placing and affixing text on a sign, a player can change the text color by {{control|using}} a [[dye]] on it. When colored with dye, the text color may differ from any color specified by formatting codes.{{Info needed|How does this work? Does the dye affect all the text? One line? One word? Does dye override all formatting codes, including font effects?}}
[[File:Glow Ink Sign with Orange Dye JE2.png|thumb|216px|Oak sign with glow ink and orange dye applied in {{JE}}.]]
A player can {{control|use}} a [[glow ink sac]] on a sign to make its text glow. The glowing text is not affected by lighting. The player can use a regular black [[ink sac]] on the sign to remove the glowing effect.
{| class="wikitable mw-collapsible mw-collapsed"
|+ class="nowrap" | Glow ink colors
!Name !! Main Color !! Edge Color
|-
! Black
| {{color|#000000}}
| {{color|#EDE8CA}}
|-
! Red
| {{color|#FC0000}}
| {{color|#650000}}
|-
! Green
| {{color|#00FC00}}
| {{color|#006500}}
|-
! Brown
| {{color|#894413}}
| {{color|#361B07}}
|-
! Blue
| {{color|#0000FC}}
| {{color|#000065}}
|-
! Purple
| {{color|#9E20ED}}
| {{color|#3F0C5F}}
|-
! Cyan
| {{color|#00D6D6}}
| {{color|#006565}}
|-
! Light Gray
| {{color|#D0D0D0}}
| {{color|#535353}}
|-
! Gray
| {{color|#7E7E7E}}
| {{color|#323232}}
|-
! Pink
| {{color|#FC68B2}}
| {{color|#652947}}
|-
! Lime
| {{color|#8DFC00}}
| {{color|#4B6500}}
|-
! Yellow
| {{color|#FCFC00}}
| {{color|#656500}}
|-
! Light Blue
| {{color|#98BECB}}
| {{color|#3C4B51}}
|-
! Magenta
| {{color|#FC00FC}}
| {{color|#650065}}
|-
! Orange
| {{color|#FC671F}}
| {{color|#65280C}}
|-
! White
| {{color|#FCFCFC}}
| {{color|#656565}}
|}
In [[Creative]] mode, the combination {{key|Ctrl}} + {{control|pick block}} on Windows/Linux, or {{key|cmd}} + {{control|pick block}} on macOS, can be used to copy an already-placed sign, including its text (with decorations), into the player's inventory.
A dyed sign facing east or west will have its text appear more saturated and bright than a sign facing north or south. However, it is actually the sign that is dimmer, because ''Minecraft'''s lighting engine uses side lighting to make the world appear less flat, but the text on signs is not affected by this.
{{IN|bedrock}}, inappropriate words or phrases in a sign's text are displayed as asterisks.
{{IN|java}}, signs can be created with [[Commands#Raw JSON Text|JSON text]], which allows complex formatting (colors, bold, italic, etc.), hover and click events, localized translation (for ''Minecraft'' technical terms, like "Redstone Repeater", otherwise translations must be provided in language files in resource packs), and the incorporation of scoreboard values into text. Use the {{cmd|data merge block}} command to create or alter JSON signs.
: Example: {{cmd|long=1|data merge block ~ ~1 ~ <nowiki>{front_text:{ color:"green", messages:[ '{"selector":"@p", "bold":false, "italic":false, "underlined":false, "strikethrough":false, "obfuscated":false}' , '{"text":"Second Line"}']}}}}
Signs can post the success count of JSON text hover and click events to [[scoreboard]] objectives. The objectives to be used can be specified by running the {{cmd|execute store}} command or by modifying the sign's NBT data directly with the {{cmd|data merge block}} command.
=== Interaction ===
Signs act as though they have a {{control|use}} action, so the [[player]] is unable to place [[block]]s or use [[item]]s while the cursor is pointed at them without {{control|sneaking}}.
Signs are destroyed and drop as an item when pushed by a [[piston]].{{Only|bedrock}}
Signs are non-solid and have no collision, so [[item]]s and [[mob]]s can move through sign blocks. Other [[block]]s (including other signs) can be placed on any edge of a sign.
[[Water]] and [[lava]] flow around signs. Lava can create [[fire]] in [[air]] blocks next to signs as if the signs were flammable, but the signs do not burn (and cannot be burned by other methods either, except {{in|be}}).
=== Fuel ===
Wooden signs can be used as a fuel in [[furnace]]s, smelting an [[item]] per sign.
=== Note Blocks ===
Signs can be placed under [[note block]]s to produce a "bass" sounds.
== Sounds ==
=== Generic ===
==== Normal wood ====
; Sign
{{Sound table/Block/Wood|forcecollapsed=1}}
; Hanging sign
{{Sound table/Block/Hanging sign|forcecollapsed=1}}
==== Cherry wood ====
; Sign
{{Sound table/Block/Cherry wood|forcecollapsed=1}}
; Hanging sign
{{Sound table/Block/Cherry wood hanging sign|forcecollapsed=1}}
==== Bamboo wood ====
; Sign
{{Sound table/Block/Bamboo wood|forcecollapsed=1}}
; Hanging sign
{{edition|java}}:
{{Sound table/Block/Bamboo wood hanging sign/JE|forcecollapsed=1}}
{{edition|bedrock}}:
{{Sound table/Block/Bamboo wood hanging sign/BE|forcecollapsed=1}}
==== Nether wood ====
; Sign
{{Sound table/Block/Nether wood|forcecollapsed=1}}
; Hanging sign
{{edition|java}}:
{{Sound table/Block/Nether wood hanging sign/JE|forcecollapsed=1}}
{{edition|bedrock}}:
{{Sound table/Block/Nether wood hanging sign/BE|forcecollapsed=1}}
=== Unique ===
{{edition|java}}:
{{Sound table|forcecollapsed=1
|rowspan=2
|sound=Ink sac1.ogg
|sound2=Ink sac2.ogg
|sound3=Ink sac3.ogg
|subtitle=Glow Ink Sac splotches
|source=block
|description=When a [[glow ink sac]] is used on a sign
|id=item.glow_ink_sac.use
|translationkey=subtitles.item.glow_ink_sac.use
|volume=1.0
|pitch=''varies'' <ref group=sound>Can be 1.0, 0.95, or 1.05 for each sound</ref>
|distance=16}}
{{Sound table
|subtitle=Ink Sac splotches
|source=block
|description=When an [[ink sac]] is used on a sign
|id=item.ink_sac.use
|translationkey=subtitles.item.ink_sac.use
|volume=1.0
|pitch=''varies'' <ref group=sound>Can be 0.85, 0.88, or 0.9 for each sound</ref>
|distance=16}}
{{Sound table
|sound=Dye.ogg
|subtitle=Dye stains
|source=block
|description=When [[dye]] is used on a sign
|id=item.dye.use
|translationkey=subtitles.item.dye.use
|volume=1.0
|pitch=''varies'' <ref group=sound>Can be 1.0, 0.9, 0.95, or 1.1</ref>
|distance=16}}
{{Sound table
|sound=Wax on1.ogg
|sound2=Wax on2.ogg
|sound3=Wax on3.ogg
|subtitle=Wax on
|source=block
|description=When a sign is waxed
|id=item.honeycomb.wax_on
|translationkey=subtitles.item.honeycomb.wax_on
|volume=1.0
|pitch=1.0/0.9/1.1
|distance=16}}
{{Sound table
|sound=Sign waxed interact fail1.ogg
|sound2=Sign waxed interact fail2.ogg
|sound3=Sign waxed interact fail3.ogg
|subtitle=Sign wobbles
|source=block
|description=When a player attempts to edit a waxed sign
|id=block.sign.waxed_interact_fail
|translationkey=subtitles.block.sign.waxed_interact_fail
|volume=1.0
|pitch=''varies''<ref group=sound>{{cd|fail1}} can be 1.0 or 0.9; {{cd|fail2}} and {{cd|fail3}} can be 0.8 or 0.9</ref>
|distance=16
|foot=1}}
{{edition|bedrock}}:
{{Sound table|forcecollapsed=1
|type=bedrock
|sound=Ink sac1.ogg
|sound2=Ink sac2.ogg
|sound3=Ink sac3.ogg
|source=sound
|description=When a glow ink sac or an ink sac is used on a sign
|id=sign.ink_sac.use
|volume=1.0
|pitch=1.0}}
{{Sound table
|type=bedrock
|sound=Dye.ogg
|source=sound
|description=When dye is used on a sign
|id=sign.dye.use
|volume=1.0
|pitch=1.0}}
{{Sound table
|sound=Wax on1.ogg
|sound2=Wax on2.ogg
|sound3=Wax on3.ogg
|source=neutral
|description=When a honeycomb waxes a sign
|id=copper.wax.on
|volume=1.0
|pitch=0.8-1.2}}
{{Sound table
|sound=Sign waxed interact fail1.ogg
|sound2=Sign waxed interact fail2.ogg
|sound3=Sign waxed interact fail3.ogg
|source=block
|description=When a player attempts to edit a waxed sign
|id=block.sign.waxed_interact_fail
|volume=1.0
|pitch=''varies'' <ref group=sound>Can be 1.0 or 0.9 for <code>waxed_interact_fail1</code>; can be 0.8 or 0.9 for <code>waxed_interact_fail2</code> and <code>waxed_interact_fail3</code></ref>
|foot=1}}
== Data values ==
=== ID ===
{{edition|java}}:
{{ID table
|edition=java
|showblocktags=y
|showitemtags=y
|showforms=y
|generatetranslationkeys=y
|displayname=Oak Sign
|spritetype=block
|nameid=oak_sign
|blocktags=signs, standing_signs, wall_post_override
|itemtags=signs}}
{{ID table
|displayname=Spruce Sign
|spritetype=block
|nameid=spruce_sign
|blocktags=signs, standing_signs, wall_post_override
|itemtags=signs}}
{{ID table
|displayname=Birch Sign
|spritetype=block
|nameid=birch_sign
|blocktags=signs, standing_signs, wall_post_override
|itemtags=signs}}
{{ID table
|displayname=Jungle Sign
|spritetype=block
|nameid=jungle_sign
|blocktags=signs, standing_signs, wall_post_override
|itemtags=signs}}
{{ID table
|displayname=Acacia Sign
|spritetype=block
|nameid=acacia_sign
|blocktags=signs, standing_signs, wall_post_override
|itemtags=signs}}
{{ID table
|displayname=Dark Oak Sign
|spritetype=block
|nameid=dark_oak_sign
|blocktags=signs, standing_signs, wall_post_override
|itemtags=signs}}
{{ID table
|displayname=Mangrove Sign
|spritetype=block
|nameid=mangrove_sign
|blocktags=signs, standing_signs, wall_post_override
|itemtags=signs}}
{{ID table
|displayname=Cherry Sign
|spritename=Cherry Sign
|spritetype=block
|nameid=cherry_sign
|blocktags=signs, standing_signs, wall_post_override
|itemtags=signs}}
{{ID table
|displayname=Bamboo Sign
|spritename=Bamboo Sign
|spritetype=block
|nameid=bamboo_sign
|blocktags=signs, standing_signs, wall_post_override
|itemtags=signs}}
{{ID table
|displayname=Crimson Sign
|spritetype=block
|nameid=crimson_sign
|blocktags= signs, standing_signs, wall_post_override
|itemtags=non_flammable_wood, signs}}
{{ID table
|displayname=Warped Sign
|spritetype=block
|nameid=warped_sign
|blocktags=signs, standing_signs, wall_post_override
|itemtags=non_flammable_wood, signs}}
{{ID table
|displayname=Oak Wall Sign
|spritetype=block
|nameid=oak_wall_sign
|blocktags=signs, wall_signs
|form=block}}
{{ID table
|displayname=Spruce Wall Sign
|spritetype=block
|nameid=spruce_wall_sign
|blocktags=signs, wall_signs
|form=block}}
{{ID table
|displayname=Birch Wall Sign
|spritetype=block
|nameid=birch_wall_sign
|blocktags=signs, wall_signs
|form=block}}
{{ID table
|displayname=Jungle Wall Sign
|spritetype=block
|nameid=jungle_wall_sign
|blocktags=signs, wall_signs
|form=block}}
{{ID table
|displayname=Acacia Wall Sign
|spritetype=block
|nameid=acacia_wall_sign
|blocktags=signs, wall_signs
|form=block}}
{{ID table
|displayname=Dark Oak Wall Sign
|spritetype=block
|nameid=dark_oak_wall_sign
|blocktags=signs, wall_signs
|form=block}}
{{ID table
|displayname=Mangrove Wall Sign
|spritetype=block
|nameid=mangrove_wall_sign
|blocktags=signs, wall_signs
|form=block}}
{{ID table
|displayname=Cherry Wall Sign
|spritename=Cherry Wall Sign
|spritetype=block
|nameid=cherry_wall_sign
|blocktags=signs, wall_signs
|form=block}}
{{ID table
|displayname=Bamboo Wall Sign
|spritename=Bamboo Wall Sign
|spritetype=block
|nameid=bamboo_wall_sign
|blocktags=signs, wall_signs
|form=block}}
{{ID table
|displayname=Crimson Wall Sign
|spritetype=block
|nameid=crimson_wall_sign
|blocktags=signs, wall_signs
|form=block}}
{{ID table
|displayname=Warped Wall Sign
|spritetype=block
|nameid=warped_wall_sign
|blocktags=signs, wall_signs
|form=block}}
{{ID table
|displayname=Oak Hanging Sign
|spritename=Oak Hanging Sign
|spritetype=block
|nameid=oak_hanging_sign
|blocktags=all_hanging_signs, ceiling_hanging_signs
|itemtags=hanging_signs}}
{{ID table
|displayname=Spruce Hanging Sign
|spritename=Spruce Hanging Sign
|spritetype=block
|nameid=spruce_hanging_sign
|blocktags=all_hanging_signs, ceiling_hanging_signs
|itemtags=hanging_signs}}
{{ID table
|displayname=Birch Hanging Sign
|spritename=Birch Hanging Sign
|spritetype=block
|nameid=birch_hanging_sign
|blocktags=all_hanging_signs, ceiling_hanging_signs
|itemtags=hanging_signs}}
{{ID table
|displayname=Jungle Hanging Sign
|spritename=Jungle Hanging Sign
|spritetype=block
|nameid=jungle_hanging_sign
|blocktags=all_hanging_signs, ceiling_hanging_signs
|itemtags=hanging_signs}}
{{ID table
|displayname=Acacia Hanging Sign
|spritename=Acacia Hanging Sign
|spritetype=block
|nameid=acacia_hanging_sign
|blocktags=all_hanging_signs, ceiling_hanging_signs
|itemtags=hanging_signs}}
{{ID table
|displayname=Dark Oak Hanging Sign
|spritename=Dark Oak Hanging Sign
|spritetype=block
|nameid=dark_oak_hanging_sign
|blocktags=all_hanging_signs, ceiling_hanging_signs
|itemtags=hanging_signs}}
{{ID table
|displayname=Mangrove Hanging Sign
|spritename=Mangrove Hanging Sign
|spritetype=block
|nameid=mangrove_hanging_sign
|blocktags=all_hanging_signs, ceiling_hanging_signs
|itemtags=hanging_signs}}
{{ID table
|displayname=Cherry Hanging Sign
|spritename=Cherry Hanging Sign
|spritetype=block
|nameid=cherry_hanging_sign
|blocktags=all_hanging_signs, ceiling_hanging_signs
|itemtags=hanging_signs}}
{{ID table
|displayname=Bamboo Hanging Sign
|spritename=Bamboo Hanging Sign
|spritetype=block
|nameid=bamboo_hanging_sign
|blocktags=all_hanging_signs, ceiling_hanging_signs
|itemtags=hanging_signs}}
{{ID table
|displayname=Crimson Hanging Sign
|spritename=Crimson Hanging Sign
|spritetype=block
|nameid=crimson_hanging_sign
|blocktags=all_hanging_signs, ceiling_hanging_signs
|itemtags=hanging_signs, non_flammable_wood}}
{{ID table
|displayname=Warped Hanging Sign
|spritename=Warped Hanging Sign
|spritetype=block
|nameid=warped_hanging_sign
|blocktags=all_hanging_signs, ceiling_hanging_signs
|itemtags=hanging_signs, non_flammable_wood}}
{{ID table
|displayname=Oak Wall Hanging Sign
|spritename=Oak Wall Hanging Sign
|spritetype=block
|nameid=oak_wall_hanging_sign
|blocktags=all_hanging_signs, wall_hanging_signs
|form=block}}
{{ID table
|displayname=Spruce Wall Hanging Sign
|spritename=Spruce Wall Hanging Sign
|spritetype=block
|nameid=spruce_wall_hanging_sign
|blocktags=all_hanging_signs, wall_hanging_signs
|form=block}}
{{ID table
|displayname=Birch Wall Hanging Sign
|spritename=Birch Wall Hanging Sign
|spritetype=block
|nameid=birch_wall_hanging_sign
|blocktags=all_hanging_signs, wall_hanging_signs
|form=block}}
{{ID table
|displayname=Jungle Wall Hanging Sign
|spritename=Jungle Wall Hanging Sign
|spritetype=block
|nameid=jungle_wall_hanging_sign
|blocktags=all_hanging_signs, wall_hanging_signs
|form=block}}
{{ID table
|displayname=Acacia Wall Hanging Sign
|spritename=Acacia Wall Hanging Sign
|spritetype=block
|nameid=acacia_wall_hanging_sign
|blocktags=all_hanging_signs, wall_hanging_signs
|form=block}}
{{ID table
|displayname=Dark Oak Wall Hanging Sign
|spritename=Dark Oak Wall Hanging Sign
|spritetype=block
|nameid=dark_oak_wall_hanging_sign
|blocktags=all_hanging_signs, wall_hanging_signs
|form=block}}
{{ID table
|displayname=Mangrove Wall Hanging Sign
|spritename=Mangrove Wall Hanging Sign
|spritetype=block
|nameid=mangrove_wall_hanging_sign
|blocktags=all_hanging_signs, wall_hanging_signs
|form=block}}
{{ID table
|displayname=Cherry Wall Hanging Sign
|spritename=Cherry Wall Hanging Sign
|spritetype=block
|nameid=cherry_wall_hanging_sign
|blocktags=all_hanging_signs, wall_hanging_signs
|form=block}}
{{ID table
|displayname=Bamboo Wall Hanging Sign
|spritename=Bamboo Wall Hanging Sign
|spritetype=block
|nameid=bamboo_wall_hanging_sign
|blocktags=all_hanging_signs, wall_hanging_signs
|form=block}}
{{ID table
|displayname=Crimson Wall Hanging Sign
|spritename=Crimson Wall Hanging Sign
|spritetype=block
|nameid=crimson_wall_hanging_sign
|blocktags=all_hanging_signs, wall_hanging_signs
|form=block}}
{{ID table
|displayname=Warped Wall Hanging Sign
|spritename=Warped Wall Hanging Sign
|spritetype=block
|nameid=warped_wall_hanging_sign
|blocktags=all_hanging_signs, wall_hanging_signs
|form=block
|foot=1}}
{{ID table
|displayname=Block entity
|spritename=signs
|spritetype=block
|nameid=sign}}
{{ID table
|displayname=Block entity
|spritename=hanging-signs
|spritetype=block
|nameid=hanging_sign
|foot=1}}
{{edition|bedrock}}:
{{ID table
|edition=bedrock
|firstcolumnname=Sign
|shownumericids=y
|showforms=y
|showaliasids=y
|showitemtags=y
|generatetranslationkeys=y
|displayname=Oak standing
|spritename=oak-sign
|spritetype=block
|nameid=standing_sign
|id=63
|form=block}}
{{ID table
|displayname=Spruce standing
|spritename=spruce-sign
|spritetype=block
|nameid=spruce_standing_sign
|id=436
|form=block}}
{{ID table
|displayname=Birch standing
|spritename=birch-sign
|spritetype=block
|nameid=birch_standing_sign
|id=441
|form=block}}
{{ID table
|displayname=Jungle standing
|spritename=jungle-sign
|spritetype=block
|nameid=jungle_standing_sign
|id=443
|form=block}}
{{ID table
|displayname=Acacia standing
|spritename=acacia-sign
|spritetype=block
|nameid=acacia_standing_sign
|id=445
|form=block}}
{{ID table
|displayname=Dark Oak standing
|spritename=dark-oak-sign
|spritetype=block
|nameid=darkoak_standing_sign
|id=447
|form=block}}
{{ID table
|displayname=Mangrove standing
|spritename=mangrove-sign
|spritetype=block
|nameid=mangrove_standing_sign
|id=-494
|form=block
|translationkey=-}}
{{ID table
|displayname=Cherry standing
|spritename=cherry-sign
|spritetype=block
|nameid=cherry_standing_sign
|id=-542
|form=block
|translationkey=-}}
{{ID table
|displayname=Bamboo standing
|spritename=bamboo-sign
|spritetype=block
|nameid=bamboo_standing_sign
|id=-518
|form=block
|translationkey=-}}
{{ID table
|displayname=Crimson standing
|spritename=crimson-sign
|spritetype=block
|nameid=crimson_standing_sign
|id=505
|form=block}}
{{ID table
|displayname=Warped standing
|spritename=warped-sign
|spritetype=block
|nameid=warped_standing_sign
|id=506
|form=block}}
{{ID table
|displayname=Oak wall
|spritename=oak-wall-sign
|spritetype=block
|nameid=wall_sign
|id=68
|form=block
|translationkey=-}}
{{ID table
|displayname=Spruce wall
|spritename=spruce-wall-sign
|spritetype=block
|nameid=spruce_wall_sign
|id=437
|form=block
|translationkey=-}}
{{ID table
|displayname=Birch wall
|spritename=birch-wall-sign
|spritetype=block
|nameid=birch_wall_sign
|id=442
|form=block
|translationkey=-}}
{{ID table
|displayname=Jungle wall
|spritename=jungle-wall-sign
|spritetype=block
|nameid=jungle_wall_sign
|id=444
|form=block
|translationkey=-}}
{{ID table
|displayname=Acacia wall
|spritename=acacia-wall-sign
|spritetype=block
|nameid=acacia_wall_sign
|id=446
|form=block
|translationkey=-}}
{{ID table
|displayname=Dark Oak wall
|spritename=dark-oak-wall-sign
|spritetype=block
|nameid=darkoak_wall_sign
|id=448
|form=block
|translationkey=-}}
{{ID table
|displayname=Mangrove wall
|spritename=mangrove-wall-sign
|spritetype=block
|nameid=mangrove_wall_sign
|id=-495
|form=block
|translationkey=-}}
{{ID table
|displayname=Cherry wall
|spritename=cherry-wall-sign
|spritetype=block
|nameid=cherry_wall_sign
|id=-544
|form=block
|translationkey=-}}
{{ID table
|displayname=Bamboo wall
|spritename=bamboo-wall-sign
|spritetype=block
|nameid=bamboo_wall_sign
|id=-519
|form=block
|translationkey=-}}
{{ID table
|displayname=Crimson wall
|spritename=crimson-wall-sign
|spritetype=block
|nameid=crimson_wall_sign
|id=507
|form=block}}
{{ID table
|displayname=Warped wall
|spritename=warped-wall-sign
|spritetype=block
|nameid=warped_wall_sign
|id=508
|form=block}}
{{ID table
|displayname=Oak item
|spritename=oak-sign
|spritetype=item
|nameid=oak_sign
|aliasid=sign
|id=360
|form=item
|itemtags=minecraft:sign
|translationkey=item.sign.name}}
{{ID table
|displayname=Spruce item
|spritename=spruce-sign
|spritetype=item
|nameid=spruce_sign
|id=576
|form=item
|itemtags=minecraft:sign}}
{{ID table
|displayname=Birch item
|spritename=birch-sign
|spritetype=item
|nameid=birch_sign
|id=577
|form=item
|itemtags=minecraft:sign}}
{{ID table
|displayname=Jungle item
|spritename=jungle-sign
|spritetype=item
|nameid=jungle_sign
|id=578
|form=item
|itemtags=minecraft:sign}}
{{ID table
|displayname=Acacia item
|spritename=acacia-sign
|spritetype=item
|nameid=acacia_sign
|id=579
|form=item
|itemtags=minecraft:sign}}
{{ID table
|displayname=Dark Oak item
|spritename=dark-oak-sign
|spritetype=item
|nameid=dark_oak_sign
|aliasid=darkoak_sign
|id=587
|form=item
|itemtags=minecraft:sign
|translationkey=item.darkoak_sign.name}}
{{ID table
|displayname=Mangrove item
|spritename=mangrove-sign
|spritetype=item
|nameid=mangrove_sign
|id=642
|form=item
|itemtags=minecraft:sign}}
{{ID table
|displayname=Cherry item
|spritename=cherry-sign
|spritetype=item
|nameid=cherry_sign
|id=659
|form=item
|itemtags=minecraft:sign}}
{{ID table
|displayname=Bamboo item
|spritename=bamboo-sign
|spritetype=item
|nameid=bamboo_sign
|id=660
|form=item
|itemtags=minecraft:sign}}
{{ID table
|displayname=Crimson item
|spritename=crimson-sign
|spritetype=item
|nameid=crimson_sign
|id=614
|form=item
|itemtags=minecraft:sign}}
{{ID table
|displayname=Warped item
|spritename=warped-sign
|spritetype=item
|nameid=warped_sign
|id=615
|form=item
|itemtags=minecraft:sign}}
{{ID table
|displayname=Oak Hanging Sign
|spritename=Oak Wall Hanging Sign
|spritetype=block
|nameid=oak_hanging_sign
|id=-500
|itemtags=minecraft:hanging_sign
|translationkey=item.oak_hanging_sign.name}}
{{ID table
|displayname=Spruce Hanging Sign
|spritename=Spruce Wall Hanging Sign
|spritetype=block
|nameid=spruce_hanging_sign
|id=-501
|itemtags=minecraft:hanging_sign
|translationkey=item.spruce_hanging_sign.name}}
{{ID table
|displayname=Birch Hanging Sign
|spritename=Birch Wall Hanging Sign
|spritetype=block
|nameid=birch_hanging_sign
|id=-502
|itemtags=minecraft:hanging_sign
|translationkey=item.birch_hanging_sign.name}}
{{ID table
|displayname=Jungle Hanging Sign
|spritename=Jungle Wall Hanging Sign
|spritetype=block
|nameid=jungle_hanging_sign
|id=-503
|itemtags=minecraft:hanging_sign
|translationkey=item.jungle_hanging_sign.name}}
{{ID table
|displayname=Acacia Hanging Sign
|spritename=Acacia Wall Hanging Sign
|spritetype=block
|nameid=acacia_hanging_sign
|id=-504
|itemtags=minecraft:hanging_sign
|translationkey=item.acacia_hanging_sign.name}}
{{ID table
|displayname=Dark Oak Hanging Sign
|spritename=Dark Oak Wall Hanging Sign
|spritetype=block
|nameid=dark_oak_hanging_sign
|id=-505
|itemtags=minecraft:hanging_sign
|translationkey=item.dark_oak_hanging_sign.name}}
{{ID table
|displayname=Mangrove Hanging Sign
|spritename=Mangrove Wall Hanging Sign
|spritetype=block
|nameid=mangrove_hanging_sign
|id=-508
|itemtags=minecraft:hanging_sign
|translationkey=item.mangrove_hanging_sign.name}}
{{ID table
|displayname=Cherry Hanging Sign
|spritename=Cherry Wall Hanging Sign
|spritetype=block
|nameid=cherry_hanging_sign
|id=-534
|itemtags=minecraft:hanging_sign
|translationkey=item.cherry_hanging_sign.name}}
{{ID table
|displayname=Bamboo Hanging Sign
|spritename=Bamboo Wall Hanging Sign
|spritetype=block
|nameid=bamboo_hanging_sign
|id=-522
|itemtags=minecraft:hanging_sign
|translationkey=item.bamboo_hanging_sign.name}}
{{ID table
|displayname=Crimson Hanging Sign
|spritename=Crimson Wall Hanging Sign
|spritetype=block
|nameid=crimson_hanging_sign
|id=-506
|itemtags=minecraft:hanging_sign
|translationkey=item.crimson_hanging_sign.name}}
{{ID table
|displayname=Warped Hanging Sign
|spritename=Warped Wall Hanging Sign
|spritetype=block
|nameid=warped_hanging_sign
|id=-507
|itemtags=minecraft:hanging_sign
|translationkey=item.warped_hanging_sign.name
|foot=1}}
{{ID table
|notnamespaced=y
|displayname=Block entity
|spritename=signs
|spritetype=block
|nameid=Sign}}
{{ID table
|displayname=Block entity
|spritename=hanging-signs
|spritetype=block
|nameid=HangingSign
|foot=1}}
=== Block states ===
{{see also|Block states}}
{{/BS}}
=== Block data ===
A sign has a block entity associated with it that holds additional data about the block.
{{el|java}}:
{{see also|Block entity format}}
{{/BE}}
{{el|bedrock}}:
:See [[Bedrock Edition level format/Block entity format]].
== Achievements ==
{{load achievements|It's a Sign}}
== Advancements ==
{{load advancements|Glow and Behold}}
== History ==
{{main|/History}}
{{History|java classic}}
{{History||0.24_SURVIVAL_TEST|[[File:Sign Entity.png|32px]] Signs are currently being tested as [[entity|entities]]. They always display "This is a test of the signs. Each line can be 15 chars!" and can only be spawned by pressing {{key|B}}.<ref>{{ytl|bdT76iFEnLk}}</ref>}}
{{History||0.26 SURVIVAL TEST|Removed signs.}}
{{History|java infdev}}
{{History||20100607|[[File:Oak Sign (0) JE1.png|32px]] Signs have been re-implemented as [[block]]s, although still rendering as entities.
|Signs now have a [[crafting]] recipe and the text can now be edited. Editing a sign pauses the game in [[singleplayer]].
|Signs are currently huge and drop [[planks]] when destroyed.
|Signs do not have a particle texture defined. As such, they [[Placeholder texture#Default texture|default to using the grass block texture instead]].}}
{{History||20100608|Signs are now broken faster.
|Signs now [[drops|drop]] themselves when [[breaking|destroyed]], instead of planks.
|Signs now use planks particles.}}
{{History|java alpha}}
{{History||v1.0.1|[[File:Oak Wall Sign (S) JE1 BE1.png|32px]] Added wall signs.
|[[File:Oak Sign (0) JE2.png|32px]] Signs are now smaller.}}
{{History||v1.0.5|Signs no longer require a free [[block]] above it to place.}}
{{History|java beta}}
{{History||April 27, 2011|link=https://notch.tumblr.com/post/4988431144|Hand-drawn signs are mentioned.}}
{{History|java}}
{{History||1.0.0|snap=Beta 1.9 Prerelease 6|Signs are now broken faster using an [[axe]].}}
{{History||1.3.1|snap=12w18a|Editing a sign no longer pauses the game in [[singleplayer]].}}
{{History|||snap=12w27a|Signs are now stackable up to 16.
|The same [[crafting]] recipe now produces 3 signs instead of 1.}}
{{History||June 9, 2014|link=https://twitter.com/SeargeDP/status/476047216541700096|[[Searge]] tweeted a picture of a sign showing a username and a [[scoreboard]] score.}}
{{History||1.8|snap=14w25a|Added support for JSON text to signs.
|Sign character limit now depends on character width.}}
{{History|||snap=14w29a|Signs now display the cracking animation.}}
{{History||1.9|snap=15w43a|A sign now generates within [[igloo]] basements.}}
{{History||1.11|snap=16w33a|Signs can now be used as [[fuel]] in [[furnace]]s.}}
{{History||1.13|snap=17w47a|The standing sign ID has been changed from <code>standing_sign</code> to <code>sign</code>.
|Prior to [[1.13/Flattening|''The Flattening'']], these [[block]]s' numeral IDs were 63 and 68, and the [[item]]'s 323.}}
{{History|||snap=18w10d|[[Water]] can now be placed on the same block as signs.}}
{{History||1.14|snap=18w43a|"Sign" has been renamed to "Oak Sign".
|[[File:Oak Sign JE2 BE2.png|32px]] The texture of oak sign [[item]]s has been changed.
|[[File:Spruce Standing Sign JE1 BE1.png|32px]] [[File:Birch Standing Sign JE1 BE1.png|32px]] [[File:Jungle Standing Sign JE1 BE1.png|32px]] [[File:Acacia Standing Sign JE1 BE1.png|32px]] [[File:Dark Oak Standing Sign JE1 BE1.png|32px]] [[File:Spruce Sign JE1 BE1.png|32px]] [[File:Birch Sign JE1 BE1.png|32px]] [[File:Jungle Sign JE1 BE1.png|32px]] [[File:Acacia Sign JE1 BE1.png|32px]] [[File:Dark Oak Sign JE1 BE1.png|32px]] Added spruce, birch, jungle, acacia and dark oak signs.
|The sign's text has been changed from black to white.
|A sign's recipe now requires the same type of [[wood]] instead of a random assortment.}}
{{History|||snap=18w44a|Signs can now be {{control|used}} while holding a [[dye]] to change the text color.
|Default text color for signs has been changed back to black.}}
{{History|||snap=18w45a|A new movable cursor for free text editing to signs has been added.
|Selection and copy/paste support have been added to signs.}}
{{History|||snap=18w50a|Spruce signs now generate in some [[taiga]] [[village]] houses.
|Spruce sign items can now be found in [[chest]]s in taiga village houses.}}
{{History|||snap=19w12a|Signs can now be [[dye]]d only in [[Creative mode]].}}
{{History|||snap=19w12b|Signs can now be dyed in [[Survival mode]] again.}}
{{History||1.16|snap=20w06a|[[File:Crimson Standing Sign JE1 BE1.png|32px]] [[File:Warped Standing Sign JE1 BE1.png|32px]] [[File:Crimson Sign JE1 BE1.png|32px]] [[File:Warped Sign JE1 BE1.png|32px]] Added crimson and warped signs.}}
{{History|||snap=20w09a|Crimson and warped signs can now be [[crafting|crafted]].}}
{{History||1.17|snap=21w03a|Signs can now be tinted with [[Glow Ink Sac|glow ink sac]]s to make the text glow.
|Works with both undyed and dyed signs.
|Signs now have a sound for being dyed.}}
{{History|||snap=21w11a|[[File:Oak Standing Sign (S) JE2.png|32px]][[File:Spruce Standing Sign (S) JE2 BE2.png|32px]] [[File:Birch Standing Sign (S) JE2 BE2.png|32px]] [[File:Jungle Standing Sign (S) JE2 BE2.png|32px]] [[File:Acacia Standing Sign (S) JE2 BE2.png|32px]] [[File:Dark Oak Standing Sign (S) JE2 BE2.png|32px]] [[File:Oak Wall Sign (S) JE2.png|32px]] [[File:Spruce Wall Sign (S) JE2 BE2.png|32px]] [[File:Birch Wall Sign (S) JE2 BE2.png|32px]] [[File:Jungle Wall Sign (S) JE2 BE2.png|32px]] [[File:Acacia Wall Sign (S) JE2 BE2.png|32px]] [[File:Dark Oak Wall Sign (S) JE2 BE2.png|32px]] The textures of signs have been changed to reflect the changes made to planks in the [[Texture Update]].}}
{{History|||snap=Pre-release 1|Glowing text on signs now has an outer glow, making text more visible in the dark.}}
{{History||1.18|snap=21w41a|[[File:Oak Sign JE3.png|32px]] [[File:Spruce Sign JE2.png|32px]] [[File:Birch Sign JE2.png|32px]] [[File:Jungle Sign JE2.png|32px]] [[File:Acacia Sign JE2.png|32px]] [[File:Dark Oak Sign JE2.png|32px]] [[File:Crimson Sign JE2.png|32px]] [[File:Warped Sign JE2.png|32px]] Changed all signs textures as items.}}
{{History||1.19|snap=22w11a|[[File:Mangrove Sign JE1 BE1.png|32px]][[File:Mangrove Wall Sign JE1 BE1.png|32px]][[File:Mangrove Sign (item) JE1 BE1.png|32px]] Added mangrove signs.}}
{{History|||snap=22w14a|Due to the addition of the [[mangrove tree]] and [[mangrove swamp]], mangrove signs are now obtainable in survival and renewable.}}
{{History||October 15, 2022|link={{ytl|https://youtu.be/iM9KtHaDcUg?t=5437}}|Hanging signs were announced and shown on [[Minecraft Live 2022]].|Hanging signs were conceptualized by [[Agnes Larsson]] with input from her daughter.<ref>{{ytl|vJCMpPyaN8Q|Minecraft 1.20: New Blocks and Their Functions! @ 0:29|Minecraft|February 24, 2023|t=29s}}</ref>}}
{{History||1.20<br>(Experimental)|link=1.19.3|snap=22w42a|[[File:Bamboo Sign (0) JE1 BE1.png|32px]] [[File:Bamboo Wall Sign (S) JE1 BE1.png|32px]] [[File:Bamboo Sign (item) JE1 BE1.png|32px]] Added bamboo signs behind the [[Java Edition 1.20|Update 1.20 experimental datapack]].
|[[File:Oak Hanging Sign JE1 BE1.png|32px]] [[File:Spruce Hanging Sign JE1 BE1.png|32px]] [[File:Birch Hanging Sign JE1 BE1.png|32px]] [[File:Jungle Hanging Sign JE1 BE1.png|32px]] [[File:Acacia Hanging Sign JE1 BE1.png|32px]] [[File:Dark Oak Hanging Sign JE1 BE1.png|32px]] [[File:Mangrove Hanging Sign JE1 BE1.png|32px]] [[File:Bamboo Hanging Sign JE1 BE1.png|32px]] [[File:Crimson Hanging Sign JE1 BE1.png|32px]] [[File:Warped Hanging Sign JE1 BE1.png|32px]]<br>[[File:Oak Wall Hanging Sign JE1 BE1.png|32px]] [[File:Spruce Wall Hanging Sign JE1 BE1.png|32px]] [[File:Birch Wall Hanging Sign JE1 BE1.png|32px]] [[File:Jungle Wall Hanging Sign JE1 BE1.png|32px]] [[File:Acacia Wall Hanging Sign JE1 BE1.png|32px]] [[File:Dark Oak Wall Hanging Sign JE1 BE1.png|32px]] [[File:Mangrove Wall Hanging Sign JE1 BE1.png|32px]] [[File:Bamboo Wall Hanging Sign (S) JE1 BE1.png|32px]] [[File:Crimson Wall Hanging Sign JE1 BE1.png|32px]] [[File:Warped Wall Hanging Sign JE1 BE1.png|32px]]<br>[[File:Oak Hanging Sign (item) JE1 BE1.png|32px]] [[File:Spruce Hanging Sign (item) JE1 BE1.png|32px]] [[File:Birch Hanging Sign (item) JE1 BE1.png|32px]] [[File:Jungle Hanging Sign (item) JE1 BE1.png|32px]] [[File:Acacia Hanging Sign (item) JE1 BE1.png|32px]] [[File:Dark Oak Hanging Sign (item) JE1 BE1.png|32px]] [[File:Mangrove Hanging Sign (item) JE1 BE1.png|32px]] [[File:Bamboo Hanging Sign (item) JE1 BE1.png|32px]] [[File:Crimson Hanging Sign (item) JE1 BE1.png|32px]] [[File:Warped Hanging Sign (item) JE1 BE1.png|32px]]<br>Added hanging signs behind the [[Java Edition 1.20|Update 1.20 experimental datapack]].|Added unique sounds for Nether and bamboo wood signs.}}
{{History|||snap=22w45a|[[File:Jungle Wall Hanging Sign JE2 BE2.png|32px]] The texture of jungle hanging wall signs have been changed.|Added unique sounds for Nether and bamboo wood hanging signs.|Bamboo hanging signs now can be crafted using [[block of stripped bamboo]] instead of bamboo planks.|Crafting bamboo hanging signs now outputs 6 hanging signs instead of 2.}}
{{History||1.20<br>(Experimental)|link=1.19.4|snap=23w07a|[[File:Cherry Sign (0) JE1.png|32px]] [[File:Cherry Wall Sign (S) JE1.png|32px]] [[File:Cherry Sign (item) JE1.png|32px]] [[File:Cherry Hanging Sign JE1.png|32px]] [[File:Cherry Wall Hanging Sign JE1.png|32px]] [[File:Cherry Hanging Sign (item) JE1.png|32px]] Added cherry signs and hanging signs behind the [[Java Edition 1.20|Update 1.20 experimental datapack]]. There used to be a glitch where right clicking on a sign would play the “use” animation. This was fixed in the snapshots for 1.20, where signs are editable.}}
{{History|||snap=1.19.4 Pre-release 4|[[File:Cherry Sign (0) JE2 BE2.png|32px]] Updated the texture of cherry signs.}}
{{History||1.20|snap=23w12a|Bamboo sign, cherry sign and all of the hanging signs are now available without using the "Update 1.20" experimental datapack.|Signs and hanging signs can now be edited after being placed.|Signs and hanging signs now support text on both sides.|Signs and hanging signs can now be waxed with [[honeycomb]] to prevent editing.|Oak and spruce hanging sign can now be found in [[suspicious gravel]] and [[suspicious sand]] in [[trail ruins]].}}
{{History|||snap=23w14a|Signs and hanging signs with click commands can now be interacted with even if the sign is not waxed.|Signs and hanging signs can no longer be edited by players in [[Adventure]] mode.|Signs and hanging signs with non-text chat components can no longer be edited, even if the sign is not waxed.|Signs and hanging signs now save text even if the edit screen is closed by the player being moved far away.}}
{{History|||snap=23w16a|Oak and spruce hanging sign no longer generates in [[suspicious sand]] in [[trail ruins]].|Due to the split of the archaeological loot tables for the suspicious gravel within the [[trail ruins]]; oak and spruce hanging sign now are in the common loot.}}
{{History||1.20.2|snap=23w31a|Changed sounds for Nether wood hanging signs.<ref>{{Bug|MC-262295||Warped and Crimson hanging signs uses their respective plank sounds, despite their stripped stems having unique sounds|Fixed}}</ref>}}
{{History|pocket alpha}}
{{History||v0.5.0|[[File:Oak Standing Sign.png|32px]] [[File:Oak Sign JE1 BE1.png|32px]] Signs have been added, though they can be obtained only through [[inventory]] editors. |The [[player]] currently cannot write on signs.}}
{{History||v0.6.0|Signs can now be legitimately obtained in [[Survival]] and [[Creative]] mode.|The player can now write on signs.}}
{{History||v0.10.0|snap=build 1|Signs now have a selection overlay.}}
{{History|pocket}}
{{History||1.0.0|snap=alpha 0.17.0.1|Signs can now be found in [[igloo]] basements.}}
{{History|bedrock}}
{{History||1.9.0|snap=beta 1.9.0.0|"Sign" has been renamed to "Oak Sign".
|[[File:Spruce Standing Sign (S) JE2 BE2.png|32px]] [[File:Birch Standing Sign (S) JE2 BE2.png|32px]] [[File:Jungle Standing Sign (S) JE2 BE2.png|32px]] [[File:Acacia Standing Sign (S) JE2 BE2.png|32px]] [[File:Dark Oak Standing Sign (S) JE2 BE2.png|32px]] [[File:Spruce Sign JE1 BE1.png|32px]] [[File:Birch Sign JE1 BE1.png|32px]] [[File:Jungle Sign JE1 BE1.png|32px]] [[File:Acacia Sign JE1 BE1.png|32px]] [[File:Dark Oak Sign JE1 BE1.png|32px]] Added spruce, birch, jungle, acacia and dark oak signs.|The sign's text has been changed from black to white.|A sign's recipe now requires the same type of [[wood]] instead of a random assortment.}}
{{History|||snap=beta 1.9.0.2|The default sign text color has been changed back to black.|Sign variants are now grouped in their own [[inventory]] category.}}
{{History||1.10.0|snap=beta 1.10.0.3|[[File:Oak Sign JE2 BE2.png|32px]] The texture of oak sign [[item]]s has been changed.|Spruce signs now generate in new [[taiga]] and [[snowy taiga]] [[village]] houses.}}
{{History||1.11.0|snap=beta 1.11.0.1|Signs can now be used as a [[fuel]] in [[furnace]]s.|Oak signs can now be found inside taiga and snowy taiga village house [[chest]]s.}}
{{History||1.16.0|snap=beta 1.16.0.51|[[File:Crimson Standing Sign JE1 BE1.png|32px]] [[File:Warped Standing Sign JE1 BE1.png|32px]] [[File:Crimson Sign JE1 BE1.png|32px]] [[File:Warped Sign JE1 BE1.png|32px]] Added crimson and warped signs.|[[File:Spruce Standing Sign (S) JE2 BE2.png|32px]] [[File:Birch Standing Sign (S) JE2 BE2.png|32px]] [[File:Jungle Standing Sign (S) JE2 BE2.png|32px]] [[File:Acacia Standing Sign (S) JE2 BE2.png|32px]] [[File:Dark Oak Standing Sign (S) JE2 BE2.png|32px]] [[File:Spruce Wall Sign (S) JE2 BE2.png|32px]] [[File:Birch Wall Sign (S) JE2 BE2.png|32px]] [[File:Jungle Wall Sign (S) JE2 BE2.png|32px]] [[File:Acacia Wall Sign (S) JE2 BE2.png|32px]] [[File:Dark Oak Wall Sign (S) JE2 BE2.png|32px]] The texture of all signs except oak sign have been changed.}}
{{History||1.16.20|snap=beta 1.16.20.50|Crimson and warped signs now uses regular plank [[sound]]s instead of their stem variant sounds.}}
{{History||1.16.210|snap=beta 1.16.210.59|Signs can now be {{control|used}} while holding a [[dye]] to change the text color.|Signs can now be tinted with [[Glow Ink Sac|glow ink sac]]s to make the text glow.
|Works with both default and dyed signs.}}
{{History|||snap=beta 1.16.210.60|Color on dyed signs disappears and the text turns back to black.|Signs with applied glowing effect as well as color stops glowing and color is removed.}}
{{History||1.16.220|snap=beta 1.16.220.50|Signs can now be {{control|used}} while holding a [[dye]] to change the text color again.|Signs can now be tinted with [[Glow Ink Sac|glow ink sac]]s to make the text glow again.}}
{{History|||snap=beta 1.16.220.52|Now has sounds for being dyed.}}
{{History|||snap=release|A glowing effect can no longer be applied to signs due to glow ink sacs becoming inaccessible in the full release.}}
{{History||1.17.0|snap=beta 1.17.0.50|[[File:Oak Sign BE3.png|32px]] [[File:Spruce Sign BE2.png|32px]] [[File:Birch Sign BE2.png|32px]] [[File:Jungle Sign BE2.png|32px]] [[File:Acacia Sign BE2.png|32px]] [[File:Dark Oak Sign BE2.png|32px]] Textures of sign items was updated.
|[[File:Oak Standing Sign (S) JE2 BE2.png|32px]] [[File:Oak Wall Sign (S) JE2 BE2.png|32px]] The textures of oak signs have been changed to reflect the changes made to planks in the [[Texture Update]].}}
{{History||1.17.10|snap=beta 1.17.10.21|Glowing text on signs now has an outer glow, making text more visible in the dark.}}
{{History||1.18.10|snap=beta 1.18.10.20|[[File:Oak Sign JE3.png|32px]] [[File:Spruce Sign JE2.png|32px]] [[File:Birch Sign JE2.png|32px]] [[File:Jungle Sign JE2.png|32px]] [[File:Acacia Sign JE2.png|32px]] [[File:Dark Oak Sign JE2.png|32px]] [[File:Crimson Sign JE2.png|32px]] [[File:Warped Sign JE2.png|32px]] Changed all signs textures as items.}}
{{History||1.19.0|snap=beta 1.19.0.20|[[File:Mangrove Sign JE1 BE1.png|32px]][[File:Mangrove Wall Sign JE1 BE1.png|32px]][[File:Mangrove Sign (item) JE1 BE1.png|32px]] Added mangrove signs.}}
{{History||Next Major Update<br>(Experimental)|link=Bedrock Edition 1.20|snap=beta 1.19.50.21|[[File:Bamboo Sign (0) JE1 BE1.png|32px]] [[File:Bamboo Wall Sign (S) JE1 BE1.png|32px]] [[File:Bamboo Sign (item) JE1 BE1.png|32px]] Added bamboo signs behind the "[[Bedrock Edition 1.20|Next Major Update]]" [[experimental]] toggle.|[[File:Oak Hanging Sign JE1 BE1.png|32px]] [[File:Spruce Hanging Sign JE1 BE1.png|32px]] [[File:Birch Hanging Sign JE1 BE1.png|32px]] [[File:Jungle Hanging Sign JE1 BE1.png|32px]] [[File:Acacia Hanging Sign JE1 BE1.png|32px]] [[File:Dark Oak Hanging Sign JE1 BE1.png|32px]] [[File:Mangrove Hanging Sign JE1 BE1.png|32px]] [[File:Bamboo Hanging Sign JE1 BE1.png|32px]] [[File:Crimson Hanging Sign JE1 BE1.png|32px]] [[File:Warped Hanging Sign JE1 BE1.png|32px]]<br>[[File:Oak Wall Hanging Sign JE1 BE1.png|32px]] [[File:Spruce Wall Hanging Sign JE1 BE1.png|32px]] [[File:Birch Wall Hanging Sign JE1 BE1.png|32px]] [[File:Jungle Wall Hanging Sign JE1 BE1.png|32px]] [[File:Acacia Wall Hanging Sign JE1 BE1.png|32px]] [[File:Dark Oak Wall Hanging Sign JE1 BE1.png|32px]] [[File:Mangrove Wall Hanging Sign JE1 BE1.png|32px]] [[File:Bamboo Wall Hanging Sign (S) JE1 BE1.png|32px]] [[File:Crimson Wall Hanging Sign JE1 BE1.png|32px]] [[File:Warped Wall Hanging Sign JE1 BE1.png|32px]]<br>[[File:Oak Hanging Sign (item) JE1 BE1.png|32px]] [[File:Spruce Hanging Sign (item) JE1 BE1.png|32px]] [[File:Birch Hanging Sign (item) JE1 BE1.png|32px]] [[File:Jungle Hanging Sign (item) JE1 BE1.png|32px]] [[File:Acacia Hanging Sign (item) JE1 BE1.png|32px]] [[File:Dark Oak Hanging Sign (item) JE1 BE1.png|32px]] [[File:Mangrove Hanging Sign (item) JE1 BE1.png|32px]] [[File:Bamboo Hanging Sign (item) JE1 BE1.png|32px]] [[File:Crimson Hanging Sign (item) JE1 BE1.png|32px]] [[File:Warped Hanging Sign (item) JE1 BE1.png|32px]]<br>Added hanging signs behind the "[[Bedrock Edition 1.20.0|Next Major Update]]" [[experimental]] toggle.|Added unique sounds for Nether and bamboo wood signs.}}
{{History|||snap=beta 1.19.60.20|[[File:Jungle Wall Hanging Sign JE2 BE2.png|32px]] The texture of jungle hanging wall signs have been changed.|Bamboo hanging signs now can be crafted using [[block of stripped bamboo]] instead of bamboo planks.|Crafting bamboo hanging signs now outputs 6 hanging signs instead of 2.}}
{{History||Next Major Update<br>(Experimental)|link=Bedrock Edition 1.19.80|snap=beta 1.19.80.20|[[File:Cherry Sign (0).png|32px]] [[File:Cherry Wall Sign (S) JE1.png|32px]] [[File:Cherry Sign (item) JE1.png|32px]] [[File:Cherry Hanging Sign JE1.png|32px]] [[File:Cherry Wall Hanging Sign JE1.png|32px]] [[File:Cherry Hanging Sign (item) JE1.png|32px]] Added cherry signs and hanging signs behind the "[[Bedrock Edition 1.20.0|Next Major Update]]" [[experimental]] toggle.}}
{{History|||snap=beta 1.19.80.21|[[File:Cherry Sign (0) JE2 BE2.png|32px]] Updated the texture of cherry signs.}}
{{History|||snap=beta 1.19.80.22|Signs and hanging signs can now be edited after being placed.|Signs and hanging signs now support text on both sides.|Signs and hanging signs can now be waxed with [[honeycomb]] to prevent editing.}}
{{History|||snap=beta 1.20.0.20|Crimson, warped, and bamboo hanging signs now have custom sounds to match their wood type.<ref name=badnewsounds>{{Bug|MCPE-164246}}</ref>}}
{{History||1.20.0|snap=beta 1.20.0.21|Bamboo sign, cherry sign and all of the hanging signs are now available without using the "Next Major Update" experimental toggle.}}
{{History|console}}
{{History||xbox=TU1|xbone=CU1|ps=1.0|wiiu=Patch 1|switch=1.0.1|[[File:Oak Standing Sign.png|32px]] [[File:Oak Sign JE1 BE1.png|32px]] Added signs.}}
{{History||xbox=TU9|Signs are now stackable up to 16.
|The same [[crafting]] recipe for signs now produces 3 signs instead of 1.}}
{{History||xbox=none|xbone=none|ps=1.88|wiiu=none|switch=none|[[File:Spruce Standing Sign (S) JE2 BE2.png|32px]] [[File:Birch Standing Sign (S) JE2 BE2.png|32px]] [[File:Jungle Standing Sign (S) JE2 BE2.png|32px]] [[File:Acacia Standing Sign (S) JE2 BE2.png|32px]] [[File:Dark Oak Standing Sign (S) JE2 BE2.png|32px]] [[File:Spruce Sign JE1 BE1.png|32px]] [[File:Birch Sign JE1 BE1.png|32px]] [[File:Jungle Sign JE1 BE1.png|32px]] [[File:Acacia Sign JE1 BE1.png|32px]] [[File:Dark Oak Sign JE1 BE1.png|32px]] Added spruce, birch, jungle, acacia and dark oak signs.}}
{{History||xbox=none|xbone=none|ps=1.90|wiiu=none|switch=none|[[File:Oak Sign JE2 BE2.png|32px]] The texture of oak sign [[item]]s has been changed.}}
{{History|new 3ds}}
{{History||0.1.0|[[File:Oak Standing Sign (S) JE2 BE2.png|32px]] [[File:Oak Sign JE1 BE1.png|32px]] Added signs.}}
{{History|foot}}
== Trivia ==
* The first concept art of hanging signs came from [[Agnes Larsson]]'s daughter.<ref>{{Ytl|vJCMpPyaN8Q|Minecraft 1.20: New Blocks and Their Functions!|Minecraft|t=30s}}</ref>
== Gallery ==
=== Screenshots ===
<gallery>
Signs classic.png|Test of signs in early [[Java Edition Classic]].
Sigh test.jpg|Another early sign image.
Signs PreRelease.png|First image of sign blocks during [[Java Edition Infdev|Infdev]].
Pocket Edition v0.6.0 alpha Development sign.png|First image of signs on [[Pocket Edition]].
Pocket Edition v0.6.0 alpha Development sign editing.png|First image of editing text on [[PE]] iOS.
Pocket Edition v0.6.0 alpha Development sign editing 2.png|First image of editing text on [[PE]] Android.
Pocket Edition v0.6.0 alpha Development sky.png
Door Sign.png|A sign placed on a door.
Breaking News.png|A sign being broken.
Sign Text Dark.jpg|A dark oak sign with black text.
Sign Text Light.jpg|A dark oak sign with white text.
Sign Blockdata.gif|A sign using blockdata to dynamically change.
JSON Sign.png|First image of a sign using JSON text.
Width Based Character Limit.png|First image of a sign using width based character limits.
Glow Ink Sign with Pink Dye.png|Oak sign with glow ink in the dark in [[Java Edition 21w03a]].
Lit vs unlit signs.png|Difference in visibility of a lime text, from left to right, in a lit birch sign, unlit birch sign, lit dark oak sign, and unlit dark oak sign.
Glowing Text Comparison.png|The comparison between glow text and non-glow text.
Example Of Signs Being Weird.png|alt=Shading differences|Signs being different shades depending on orientation.
Glow text.gif|All sixteen colors of glow text.
Glow Ink Signs.jpg|Signs with glowing ink in several colors.
Lots of Glowing Signs.jpg|More signs with glowing ink.
Sign Platforms.jpg|[[Ari]] standing on top of a hanged sign.
Eric Shop.jpg|[[Sunny]] looking at a double sided hanging sign.
Hanging Sign Bedrock.png|Hanging sign with small text.
Hanging Sign Java.png|Hanging sign with large text.
New Hanging Sign Text Length 1.jpg|Text on hanging sign.
New Hanging Sign Text Length 2.jpg|Text on hanging sign.
</gallery>
=== Concept Art ===
<gallery>
Hanging_Sign_Concept_Art.png|Hanging sign concept art.
Hanging_Sign_Concept_Art2.png|Ditto.
Hanging_Sign_Concept_Art3.png|Hanging sign dimensions concept art.
Hanging_Sign_Concept_Art4.png|Hanging sign crafting recipe, block states concept art.
</gallery>
=== Renders ===
{{hidden begin}}
<div style="clear: both"></div>
<gallery>
Oak Sign.png|Oak Sign
Spruce Sign.png|Spruce Sign
Birch Sign.png|Birch Sign
Jungle Sign.png|Jungle Sign
Acacia Sign.png|Acacia Sign
Dark Oak Sign.png|Dark Oak Sign
Mangrove Sign.png|Mangrove Sign
Cherry Sign.png|Cherry Sign
Bamboo Sign.png|Bamboo Sign
Crimson Sign.png|Crimson Sign
Warped Sign.png|Warped Sign
Oak Wall Sign.png|Oak Wall Sign
Spruce Wall Sign.png|Spruce Wall Sign
Birch Wall Sign.png|Birch Wall Sign
Jungle Wall Sign.png|Jungle Wall Sign
Acacia Wall Sign.png|Acacia Wall Sign
Dark Oak Wall Sign.png|Dark Oak Wall Sign
Mangrove Wall Sign.png|Mangrove Wall Sign
Cherry Wall Sign.png|Cherry Wall Sign
Bamboo Wall Sign.png|Bamboo Wall Sign
Crimson Wall Sign.png|Crimson Wall Sign
Warped Wall Sign.png|Warped Wall Sign
Oak Hanging Sign.png|Oak Hanging Sign
Spruce Hanging Sign.png|Spruce Hanging Sign
Birch Hanging Sign.png|Birch Hanging Sign
Jungle Hanging Sign.png|Jungle Hanging Sign
Acacia Hanging Sign.png|Acacia Hanging Sign
Dark Oak Hanging Sign.png|Dark Oak Hanging Sign
Mangrove Hanging Sign.png|Mangrove Hanging Sign
Cherry Hanging Sign.png|Cherry Hanging Sign
Bamboo Hanging Sign.png|Bamboo Hanging Sign
Crimson Hanging Sign.png|Crimson Hanging Sign
Warped Hanging Sign.png|Warped Hanging Sign
Oak Wall Hanging Sign.png|Oak Wall Hanging Sign
Spruce Wall Hanging Sign.png|Spruce Wall Hanging Sign
Birch Wall Hanging Sign.png|Birch Wall Hanging Sign
Jungle Wall Hanging Sign.png|Jungle Wall Hanging Sign
Acacia Wall Hanging Sign.png|Acacia Wall Hanging Sign
Dark Oak Wall Hanging Sign.png|Dark Oak Wall Hanging Sign
Mangrove Wall Hanging Sign.png|Mangrove Wall Hanging Sign
Cherry Wall Hanging Sign.png|Cherry Wall Hanging Sign
Bamboo Wall Hanging Sign.png|Bamboo Wall Hanging Sign
Crimson Wall Hanging Sign.png|Crimson Wall Hanging Sign
Warped Wall Hanging Sign.png|Warped Wall Hanging Sign
</gallery>
<gallery>
Oak Sign JE3.png
Spruce Sign JE2.png
Birch Sign JE2.png
Jungle Sign JE2.png
Acacia Sign JE2.png
Dark Oak Sign JE2.png
Mangrove Sign (item) JE1 BE1.png
Cherry Sign (item) JE1.png
Bamboo Sign (item) JE1 BE1.png
Crimson Sign JE2.png
Warped Sign JE2.png
Oak Hanging Sign (item) JE1 BE1.png
Spruce Hanging Sign (item) JE1 BE1.png
Birch Hanging Sign (item) JE1 BE1.png
Jungle Hanging Sign (item) JE1 BE1.png
Acacia Hanging Sign (item) JE1 BE1.png
Dark Oak Hanging Sign (item) JE1 BE1.png
Mangrove Hanging Sign (item) JE1 BE1.png
Cherry Hanging Sign (item) JE1.png
Bamboo Hanging Sign (item) JE1 BE1.png
Crimson Hanging Sign (item) JE1 BE1.png
Warped Hanging Sign (item) JE1 BE1.png
</gallery>
{{hidden end}}
{{-}}
== Issues ==
{{issue list}}
== See also ==
* [[Chalkboard]]
== References ==
{{Reflist}}
== External Links ==
*[https://www.minecraft.net/en-us/article/taking-inventory--sign Taking Inventory: Sign] – Minecraft.net on January 9, 2020
{{Blocks|utility}}
{{Items}}
[[Category:Utility blocks]]
[[Category:Manufactured blocks]]
[[Category:Generated structure blocks]]
[[Category:Block entities]]
[[Category:Non-solid blocks]]
[[cs:Cedule]]
[[de:Schild (Schrift)]]
[[es:Cartel]]
[[fr:Pancarte]]
[[hu:Tábla]]
[[it:Cartello]]
[[ja:看板]]
[[ko:표지판]]
[[nl:Bord]]
[[pl:Tabliczka]]
[[pt:Placa]]
[[ru:Табличка]]
[[th:ป้าย]]
[[uk:Табличка]]
[[zh:告示牌]]</li></ul></nowiki> | Added grass blocks. | ||||
Issues
Issues relating to "Grass Block" are maintained on the bug tracker. Report issues there.
Trivia
- Grass blocks and dirt blocks changing between each other is a very common cause of chunk updates.
- A grass block has become the favicon for Minecraft.net, and is the icon for the Minecraft launcher and the Pocket Edition app.
- In MineCon's goodie-bags, grass, along with the Creeper, diamond, and the Player, were given as foldable decorations.
- TNT and Sponge sounds for walking on, placing the block, and destroying it are the same as the grass block.
- If at the edge of the rendered world (i.e. the edge of a chunk, where the adjacent chunk has not yet appeared), the edge line of grass blocks will adopt the "default" grass hue, until the adjacent chunk appears, at which point it will assume the correct color (this is more easily noticed in swampland biomes).