
|
“ |
|
„ |
| — Marsh Davies[1] |
Farmland is a block on which seeds can be planted and grown.
Obtaining
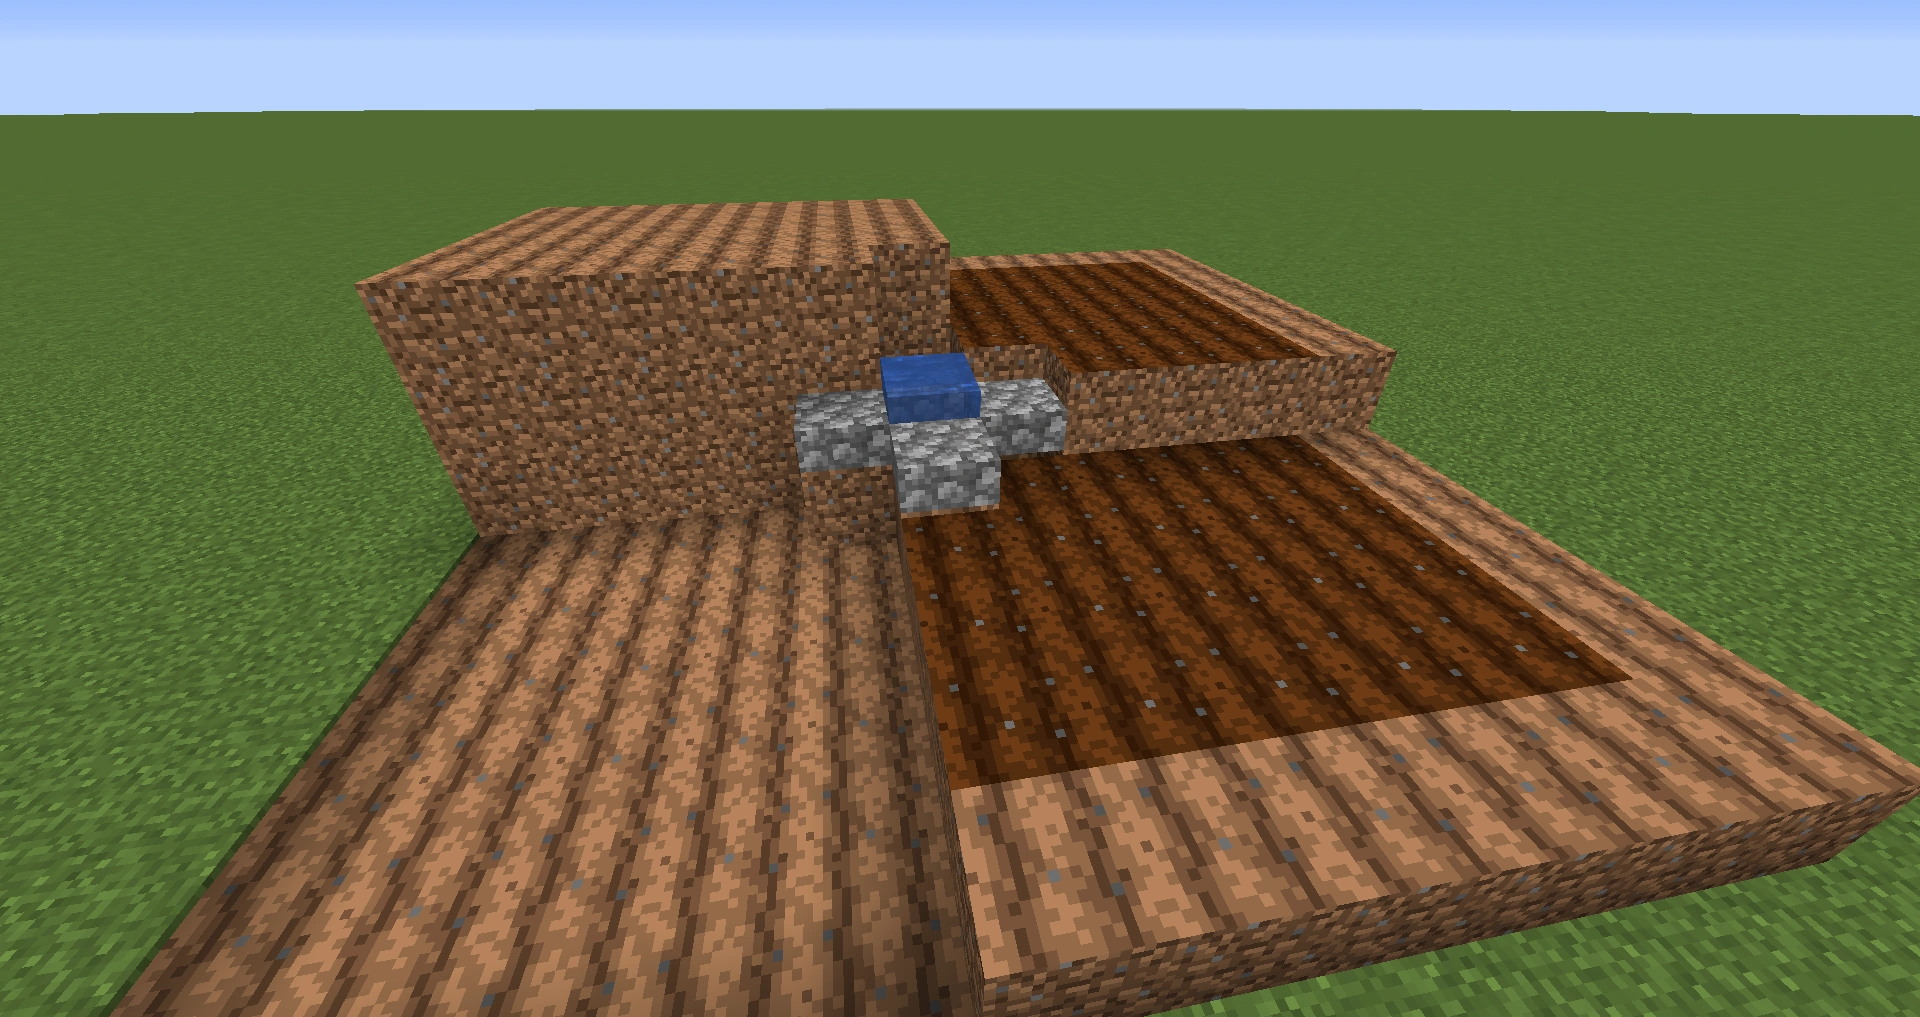
To make a block of farmland, use a hoe on dirt, grass block or grass path.
Farmland can be only be obtained in the inventory using commands or the pick block control. When mined (even with a Silk Touch tool), it drops dirt.
| Block | Farmland | |
|---|---|---|
| Hardness | 0.6 | |
| Tool | ||
| Breaking time[A] | ||
| Default | 0.9 | |
| Wooden | 0.45 | |
| Stone | 0.25 | |
| Iron | 0.15 | |
| Diamond | 0.15 | |
| Netherite | 0.1 | |
| Golden | 0.1 | |
- ↑ Times are for unenchanted tools as wielded by players with no status effects, measured in seconds. For more information, see Breaking § Speed.
Natural generation
Farmland occurs naturally in villages where wheat, potatoes, carrots and beetroots are grown. Patches of farmland are surrounded by logs or sandstone. They also naturally occur in woodland mansions.
Usage
Farmland is required to grow six of the game's types of crops (5 in Console Edition).
Plants such as saplings, ferns, tall grass and flowers may be planted on farmland. Mushrooms, sugar canes and cactus cannot be planted on farmland.
Hydration
Conditions in which farmland is and is not hydrated.
A farmland block will be created dry. It will become hydrated if the following conditions are met:
- Water up to four blocks away horizontally, including diagonals.
- The water must be on the same level or 1 block above farmland block level.
The blocks between the farmland block and the water make no difference.
There is nothing the player can do to affect the rate at which farmland becomes hydrated. Each farmland block within a 9x9 grid of farmland with a single water block in the middle has exactly the same chance of becoming hydrated as a single farmland block in an ocean.
Farmland can also be hydrated by rain.
Different types of seeds grow faster on hydrated farmland than on dry farmland. Hydrated farmland will yield a fully developed wheat crop in a little over a single day/night cycle.
Decay
Under certain conditions, a farmland block will "decay" becoming a dirt block, regardless of its state of hydration. This will happen if any of the following occur:
- If the farmland block is dehydrated and nothing is planted on it for too long.
- If the player or any mob jumps/falls on the block (with a greater chance as falling speed increases).
- In the Computer Edition, mobs smaller than 0.512 cubic block cannot destroy farmland. This includes rabbits, chickens, bats, ocelots, wolves, cave spiders, endermites, silverfish, baby mobs, small slimes, and small magma cubes.
- If a piston arm is extended over a farmland block.
- If a piston pushes a farmland block down.
- If a solid block covers the top surface of the farmland block such as when pumpkin or melon blocks appear.
- If an enderman teleports directly on top of a farmland block.
When farmland decays, crops at the top are dropped as items, as if they were harvested.
Data values
Block data
| Value | Meaning |
|---|---|
| 0 | Dry land |
| 1 to 7 | Increasing levels of wetness. The wetness value counts down to 0 while the farmland does not have access to water. The wet texture is used only on level 7. Newly hydrated farmland jumps from 0 to 7. |
Block state
| Name | Default value | Allowed values | Description |
|---|---|---|---|
| moisture | 0
| 01234567 | Increasing levels of wetness. The wetness value counts down to 0 while the farmland does not have access to water. The wet texture is used only on level 7. Newly hydrated farmland jumps from 0 to 7.[2] |
| Name | Metadata Bits | Default value | Allowed values | Values for Metadata Bits |
Description |
|---|---|---|---|---|---|
| moisturized_amount | 0x10x20x4 | 0
| 01234567 | 01234567 | Increasing levels of wetness. The wetness value counts down to 0 while the farmland does not have access to water. The wet texture is used only on level 7. Newly hydrated farmland jumps from 0 to 7. |
Video
- Note: The video states that wheat, pumpkins and melons can be grown on farmland. This was before the introduction of potatoes, carrots and beetroot seeds which can also be grown on farmland. Also, the video states that sneaking is a good way to avoid trampling crops. This was prior to 1.1, where it was changed so that walking on farmland does not damage it.
Farmland/video
History
| indev | |||||
|---|---|---|---|---|---|
February 6, 2010{{Extension DPL}}<ul><li>[[Disc Fragment|Disc Fragment]]<br/>{{Item
| image = Disc Fragment.png
| renewable = No
| stackable = Yes (64)
}}
A '''disc fragment''' is a [[music disc]] fragment obtained from [[ancient city]] loot chests. Nine fragments can be combined in a [[Crafting Table|crafting table]] to make a music disc named "5".
== Obtaining ==
=== Chest loot ===
{{LootChestItem|disc-fragment-5}}
== Usage ==
=== Crafting ingredient ===
{{crafting usage|Disc Fragment 5}}
== Data values ==
=== ID ===
{{ID table
|edition=java<!--
|showitemtags=y-->
|showforms=y
|firstcolumnname=Track
|generatetranslationkeys=y
|displayname=Samuel Åberg - 5
|spritename=disc-fragment-5
|spritetype=item
|nameid=disc_fragment_5<!--
|itemtags=-->
|form=item
|foot=y}}
== History ==
{{History|java}}
{{History||1.19|snap=22w16a|[[File:Disc Fragment.png|32px]] Added disc fragments.}}
{{History|bedrock}}
{{History||1.19.0|snap=beta 1.19.0.28|[[File:Disc Fragment.png|32px]] Added disc fragments.}}
{{History|foot}}
== Issues ==
{{Issue list}}
==Gallery==
<gallery>
9 to 5.jpg|9 fragments of the 5 music disc.
</gallery>
==See also==
* {{EnvLink|Music}}
* {{ItemLink|Music Disc}}
{{Items}}
[[de:Plattenbruchstück]]
[[es:Fragmento de disco]]
[[fr:Fragment de disque]]
[[ja:レコードの破片]]
[[pl:Fragment płyty]]
[[pt:Fragmento de disco]]
[[ru:Фрагмент пластинки 5]]
[[uk:Фрагмент платівки]]
[[zh:唱片残片]]
[[Category:Non-renewable resources]]</li><li>[[Compass|Compass]]<br/>{{About|the item used to point to the world spawn or to a lodestone|the item used to point to the location of the player's last death|Recovery Compass}}
{{Item
| image = Compass.gif
| image2 = Lodestone Compass.gif
| renewable = Yes
| stackable = '''Compass:''' Yes (64)<br>'''Lodestone Compass:''' No
}}
A '''compass''' is an item used to point to the world spawn or to a [[lodestone]].
== Obtaining ==
=== Crafting ===
{{Crafting
|B1= Iron Ingot
|A2= Iron Ingot |B2= Redstone Dust |C2= Iron Ingot
|B3= Iron Ingot
|Output= Compass
|type= Tool
}}
=== Chest loot ===
{{LootChestItem|compass}}
=== Trading ===
{{IN|java}}, expert-level librarian [[villager]]s have a 50% chance to sell a single compass for 4 [[emerald]]s.
{{IN|bedrock}}, expert-level librarian villagers have a {{frac|1|3}} chance to sell a single compass for 4 emeralds.
== Usage ==
Normally, the compass' needle points toward the world [[Spawn#World spawn|spawn point]]. The compass points to spawn when viewed in any way, including as a dropped [[Item (entity)|item]], in a player's hand, in an inventory or the crafting table, or in an [[item frame]]. The direction the needle points to is relative to the player who is viewing it. When a compass in an item frame is rotated, the needle turns accordingly.
In [[the Nether]] or [[the End]], the compass' needle spins and points in random directions.
The compass can be used on a [[lodestone]], after which it is named lodestone compass by default and points to that lodestone as long as the compass is in the same dimension as the lodestone, but if the compass is taken to a different dimension, it spins randomly, as a normal compass would in the Nether or the End. If the lodestone is destroyed, it also spins randomly, even if the lodestone is replaced afterward. However, if a lodestone compass is placed in storage, the lodestone can be broken and replaced without the compass losing the attunement, as long as the compass remains in storage while the lodestone is missing.
A lodestone compass appears [[enchanting|enchanted]], similar to the [[Enchanted Golden Apple|enchanted golden apple]].
Using {{cmd|setworldspawn}} to change the world spawn also changes where the compass points.
=== Crafting ingredient ===
{{crafting usage|Compass, Compass.gif}}
=== Anvil usage ===
{{:Map/BE|position}}
=== Trading ===
A single compass can be sold to a journeyman-level cartographer villager for 1 [[emerald]].{{only|java}}
A single compass can be sold to an expert-level cartographer villager for 1 emerald as their sixth trade.{{only|bedrock}}
A compass is also part of the cost of [[explorer map]]s:
* An ocean explorer map and{{only|java|short=1}}/or{{only|bedrock|short=1}} a woodland explorer map can be bought from a journeyman-level cartographer for 12 emeralds and one compass, as part of their fifth trade.{{only|bedrock}}
* {{IN|java}}, apprentice-level cartographer villagers offer to sell an ocean explorer map for 13 emeralds and a compass, and journeyman-level cartographer villagers offer to sell a woodland explorer map for 14 emeralds and one compass.
=== Enchantments ===
A compass can receive the following [[enchantment]]s:
{|class="wikitable col-2-center col-3-right"
|+
!Name
!Max Level
![[Enchanting|Method]]
|-
|[[Curse of Vanishing]]
|I
|{{Inventory slot|Anvil}}
|-
|}
== Sounds ==
{{edition|java}}:
{{Sound table
|sound=Lodestone lock1.ogg
|sound2=Lodestone lock2.ogg
|source=player
|subtitle=Lodestone Compass locks onto Lodestone
|description=When a compass is used on a lodestone
|id=item.lodestone_compass.lock
|translationkey=subtitles.item.lodestone_compass.lock
|volume=1.0
|pitch=''varies'' <ref group=sound>Can be 0.85 or 0.95 for each sound</ref>
|distance=16
|foot=1}}
{{edition|bedrock}}:
{{Sound table
|type=bedrock
|sound=Lodestone lock1.ogg
|sound2=Lodestone lock2.ogg
|source=block
|description=When a compass is used on a lodestone
|id=lodestone_compass.link_compass_to_lodestone
|volume=1.0
|pitch=0.85-0.95
|foot=1}}
== Data values ==
=== ID ===
{{edition|java}}:
{{ID table
|edition=java
|showforms=y
|generatetranslationkeys=y
|displayname=Compass
|spritetype=item
|nameid=compass
|form=item
|translationkey=item.minecraft.compass,item.minecraft.lodestone_compass
|foot=1}}
{{edition|bedrock}}:
{{ID table
|edition=bedrock
|showaliasids=y
|shownumericids=y
|showforms=y
|notshowbeitemforms=y
|generatetranslationkeys=y
|displayname=Compass
|spritetype=item
|nameid=compass
|id=391
|form=item}}
{{ID table
|displayname=Lodestone Compass
|spritename=lodestone-compass-be
|spritetype=item
|nameid=lodestone_compass
|aliasid=lodestonecompass
|id=602
|form=item
|translationkey=item.lodestonecompass.name
|foot=1}}
=== Item data ===
{{el|java}}:
{{main|Player.dat format}}
<div class="treeview">
* {{nbt|compound|tag}}: The item's '''tag''' tag.
{{:Player.dat_format/Compasses}}
</div>
{{el|bedrock}}:
: See [[Bedrock Edition level format/Item format]].
== Advancements ==
{{load advancements|Country Lode}}
== History ==
{{History|java alpha}}
{{History||v1.1.0|[[File:Compass JE1.gif|32px]] Added compasses.
|They have 102 visually distinct frames due to how the texture is generated - see the section below.}}
{{History|java beta}}
{{History||1.8|snap=Pre-release|Compasses can now be found in library [[chest]]s in the new [[strongholds]].}}
{{History|java}}
{{History||1.3.1|snap=12w21a|Librarian [[villager]]s now [[trading|sell]] 1 compass for 10–11 [[emerald]]s, making them [[renewable]].}}
{{History||1.4.2|snap=12w34a|Since the mapping system has been changed, a compass can now be used to [[crafting|craft]] an empty [[map]].}}
{{History||1.5|snap=13w02a|[[File:Compass JE2 BE2.gif|32px]] Compasses now, instead of splitting two textures, use the new animation feature included in texture packs. As a result, they are considerably less precise, having only 29 visually distinct frames. }}
{{History||1.8|snap=14w02a|Librarian villagers now sell 1 compass for 10–12 emeralds.}}
{{History||1.9|snap=15w31a|Compasses are now broken up into individual textures, instead of having every individual frame on one vertical strip like with animated textures.}}
{{History|||snap=15w43a|The average yield of compasses in [[stronghold]] library [[chest]]s has been increased.}}
{{History||1.11|snap=16w39a|Cartographer [[villager]]s have been added, who [[trading|buy]] compasses as their tier 2 trade.}}
{{History||1.13|snap=17w47a|Prior to [[1.13/Flattening|''The Flattening'']], this [[item]]'s numeral ID was 345.}}
{{History|||snap=18w11a|Compasses can now generate in [[shipwreck]] [[chest]]s.}}
{{History||1.14|snap=18w48a|Compasses can now generate in chests in [[village]] cartographer houses.}}
{{History||1.16|snap=20w13a|[[File:Lodestone Compass JE1.gif|32px]] Compasses can now be used on [[lodestone]]s to make them point to the stones.
|Compasses now point to the center of the spawn point block, instead of its north-west corner.}}
{{History|||snap=20w14a|Compasses now have the <code>LodestonePos</code>, <code>LodestoneDimension</code>, and <code>LodestoneTracked</code> data fields. If <code>LodestoneTracked</code> is zero, the game skips checking for a lodestone in the specified position.
|Compasses can now have the [[Curse of Vanishing]] [[enchantment]] on them.}}
{{History|||snap=20w19a|Compasses no longer work in the [[recipe book]].<ref>{{bug|MC-116293}}</ref>}}
{{History|||snap=20w22a|Compasses no longer work in the villager trading GUI.<ref>{{bug|MC-182888}}</ref>}}
{{History||1.17|snap=20w48a|[[File:Compass JE3.gif|32px]] [[File:Lodestone Compass JE2.gif|32px]] The textures of compass and lodestone compass have been changed.}}
{{History||1.19|snap=22w13a|Compasses may now be found in [[ancient city]] [[chest]]s.}}
{{History|||snap=22w14a|Compasses can now used to craft [[recovery compass]]es.}}
{{History|pocket alpha}}
{{History||v0.2.0|[[File:Compass BE1.png|32px]] Added compasses.
|Compasses currently have no function or legitimate method of obtaining them.}}
{{History||v0.8.0|snap=build 1|[[File:Compass JE2 BE2.gif|32px]] Added animated texture to compasses.
|Compasses are now functional and [[crafting|craftable]]. They have been added into the Creative Inventory.}}
{{History||v0.14.0|snap=build 1|Compasses must now be added to a [[map]] using an [[anvil]] to add the location marker.}}
{{History|pocket}}
{{History||1.0.0|snap=?|[[Windows 10 Edition]] can now use the [[anvil]], as well as the [[crafting table]], to apply position markers, with compasses just as [[Pocket Edition]] can in general.}}
{{History||1.0.4|snap=alpha 1.0.4.0|Librarian [[villager]]s now [[trading|sell]] 1 compass for 10–12 [[emerald]]s.}}
{{History||1.1.0|snap=alpha 1.1.0.3|Cartographer villagers have been added, who [[trading|buy]] compasses as part of their tier 2 trade.
|Compasses used with emeralds can be used to buy explorer maps as part of cartographer villagers' fourth tiers trade.}}
{{History|bedrock}}
{{History||1.4.0|snap=beta 1.2.14.2|Compasses can now be found inside map room [[chest]]s in [[shipwreck]]s.}}
{{History||1.10.0|snap=beta 1.10.0.3|Compasses can now be found in [[village]] cartographer house chests.}}
{{History||1.11.0|snap=beta 1.11.0.4|[[Trading]] has been changed, cartographer [[villager]]s now [[trading|buy]] compassess as part of their fourth tier trades.
|Compasses used with [[emerald]]s can now be used to buy explorer maps as part of cartographer and fletcher villagers' third tier trades.
|Librarian villagers now have a {{frac|1|3}} chance to [[trading|sell]] compasses for 4 emeralds as part of their fourth tier trades.}}
{{History||1.16.0|snap=beta 1.16.0.57|[[File:Lodestone Compass BE1.gif|32px]] Compasses can now be used on [[lodestone]]s to make them point to the stones.
|Compasses now have the <code>LodestonePos</code>, <code>LodestoneDimension</code>, and <code>LodestoneTracked</code> data fields. If <code>LodestoneTracked</code> is zero, the game skips checking for a lodestone in the specified position.
|Compasses can now have the [[Curse of Vanishing]] [[enchantment]] on them.}}
{{History||1.16.100|snap=beta 1.16.100.56|Changed the ID {{code|lodestonecompass}} to {{code|lodestone_compass}}.}}
{{History||1.17.0|snap=beta 1.17.0.54|[[File:Compass JE3.gif|32px]] The texture of compass has been changed.}}
{{History||1.18.10|snap=beta 1.18.10.20|[[File:Lodestone Compass JE2.gif|32px]] The texture of lodestone compass has been changed.}}
{{History|console}}
{{History||xbox=TU1|xbone=CU1|ps=1.0|wiiu=Patch 1|switch=1.0.1|[[File:Compass JE2 BE2.gif|32px]] Added compasses.}}
{{History|New Nintendo 3DS Edition}}
{{History||0.1.0|[[File:Compass JE2 BE2.gif|32px]] Added compasses.}}
{{History|foot}}
=== Texture generation prior to Java Edition 13w02a ===
{{:Procedural animated texture generation/Compasses}}
== Issues ==
{{issue list}}
== Gallery ==
<gallery>
12w21a CompassPurchase.png|Purchasing a compass from a librarian [[villager]].
</gallery>
== See also ==
*[[Clock]]
*[[Tutorials/Navigation|Navigation]]
== External Links ==
*[https://www.minecraft.net/en-us/article/taking-inventory--compass Taking Inventory: Compass] – Minecraft.net on August 15, 2019
{{Items}}
[[Category:Tools]]
[[Category:Renewable resources]]
[[cs:Kompas]]
[[de:Kompass]]
[[es:Brújula]]
[[fr:Boussole]]
[[hu:Iránytű]]
[[it:Bussola]]
[[ja:コンパス]]
[[ko:나침반]]
[[nl:Kompas]]
[[pl:Kompas]]
[[pt:Bússola]]
[[ru:Компас]]
[[uk:Компас]]
[[zh:指南针]]</li></ul> | Added farmland. | ||||
| beta | |||||
1.2{{Extension DPL}}<ul><li>[[Scute|Scute]]<br/>{{about|the item used to craft turtle shell helmets|the helmet|Turtle Shell}}
{{Item
| image = Scute.png
| renewable = Yes
| stackable = Yes (64)
|title=Turtle scute}}
'''Turtle Scutes''' are [[item]]s that baby [[turtle]]s drop when they grow into adults. They can be used to craft [[turtle shell]]s which can be used to brew the [[potion of the Turtle Master]].
== Obtaining ==
=== Mob loot ===
Baby [[turtle]]s drop a single scute when they grow up into adults, which is the only way possible to obtain the [[item]].
== Usage ==
Scutes can be crafted into [[turtle shell]]s.
=== Crafting ingredient ===
{{crafting usage}}
=== Repairing ===
Scutes are the [[repair]] items for the turtle [[armor material]], and thus can be used to repair [[turtle shell]]s in an [[anvil]].
=== Trading ===
Expert-level cleric [[villager]]s have a {{frac|2|3}} chance to buy 4 scutes for an [[emerald]] as part of their [[trading|trades]].{{only|java}}
Expert-level cleric villagers have a 50% chance to buy 4 scutes for an emerald as part of their seventh trades.{{only|bedrock}}
Expert-level leatherworker villagers buy 4 scutes for an emerald as part of their trades.
== Data values ==
=== ID ===
{{edition|java}}:
{{ID table
|edition=java
|showforms=y
|generatetranslationkeys=y
|displayname=Scute
|spritetype=item
|nameid=scute
|form=item
|foot=1}}
{{edition|bedrock}}:
{{ID table
|edition=bedrock
|showaliasids=y
|shownumericids=y
|showforms=y
|notshowbeitemforms=y
|generatetranslationkeys=y
|displayname=Scute
|spritetype=item
|nameid=scute
|aliasid=turtle_shell_piece
|id=572
|form=item
|translationkey=item.turtle_shell_piece.name
|foot=1}}
== History ==
{{History|java}}
{{History||1.13|snap=18w07a|[[File:Scute JE1 BE1.png|32px]] Added turtle shell pieces.}}
{{History|||snap=18w07b|"Turtle Shell Pieces" have now been renamed to "Scutes."}}
{{History||1.14|snap=19w11a|Cleric and leatherworker [[villager]]s now [[trading|buy]] scutes.}}
{{History|bedrock}}
{{History||1.5.0|snap=beta 1.5.0.4|[[File:Scute JE1 BE1.png|32px]] Added scutes.}}
{{History||1.11.0|snap=beta 1.11.0.4|Scutes can be [[trading|sold]] to cleric and leatherworker [[villager]]s.}}
{{History|console}}
{{History||xbox=TU69|ps=1.76|wiiu=Patch 38|[[File:Scute JE1 BE1.png|32px]] Added scutes.}}
{{history|foot}}
== Issues ==
{{issue list}}
== Trivia ==
* Scutes used to be called "Turtle Shell Pieces", they were renamed after it was pointed out that "Scute" was a more technical term.<ref>https://www.reddit.com/r/minecraftsuggestions/comments/7xnp2o/rename_turtle_shell_pieces_to_scutes/</ref>
== References ==
{{reflist}}
{{Items}}
[[Category:Renewable resources]]
[[de:Hornschild]]
[[es:Escama de tortuga]]
[[fr:Écaille de tortue]]
[[ja:カメのウロコ]]
[[ko:인갑]]
[[lzh:鱗]]
[[pl:Tarczka]]
[[pt:Escama de tartaruga]]
[[ru:Щиток]]
[[th:เกล็ดเต่า]]
[[uk:Черепок]]
[[zh:鳞甲]]</li><li>[[Map|Map]]<br/>{{about|the craftable map|maps showing the locations of certain structures|Explorer Map|other uses|Map (disambiguation)}}
{{distinguish|World}}
{{Item
| image = Map Zoom 4.png
| renewable = Yes
| stackable = Yes (64)
}}
A '''map''' is an [[item]] used to view explored [[Chunk|terrain]] and mark landmarks.
==Obtaining==
===Crafting===
{{crafting
|head=1
|showname=0
|showdescription=1
|A1= Paper
|B1= Paper
|C1= Paper
|A2= Paper
|B2= Compass
|C2= Paper
|A3= Paper
|B3= Paper
|C3= Paper
|Output= Empty Map
|type= Miscellaneous
|description=This variation is called an "empty locator map" {{in|bedrock}}, or an "empty map" {{in|java}}.
When the player first creates a map, it is blank. It needs to be activated by holding it and pressing ''{{Control|use item}}''. after which it records terrain and location markers as the player travels within (or close to) the area it maps.
}}
{{crafting
|A1= Paper
|B1= Paper
|C1= Paper
|A2= Paper
|B2= Paper
|C2= Paper
|A3= Paper
|B3= Paper
|C3= Paper
|Output= Empty Map
|type= Miscellaneous
|description={{only|bedrock}}
This variation is called an "empty map". It does not show location markers. It is intended for cloning and zooming locator maps without having to consume an additional [[compass]] (thereby saving [[iron ingot]]s and [[redstone dust]]), but it can also be {{Control|use|text=activated}} and later converted to a locator map by combining it with a compass on an [[anvil]], [[crafting table]], or [[cartography table]].
|foot=1
}}
=== Natural generation ===
==== Chest loot ====
{{LootChestItem|empty-map,map
}}
=== Cartography table ===
A map can also be created using a single paper on a [[cartography table]] to create an empty map, or a paper with a compass for an empty locator map.{{only|bedrock}}
=== Starting map ===
{{exclusive|bedrock|section=1}}
When creating a new world {{in|bedrock}}, the player can enable the "Starting Map" option to spawn with an empty locator map in the hotbar. The map's zoom scale is 1:8. The map is updated only while the player holds it.
=== Trading ===
Novice-level cartographer [[Villager|villagers]] sell a single empty map for 7 [[Emerald|emeralds]] as their trades.
{{IN|java}}, cartographer villagers may give players with the [[Hero of the Village]] effect an empty map.
== Usage ==
{{See also|Tutorials/Mapping}}
=== Mapping ===
Crafting a map creates an empty map. The map is drawn for the first time when it is held and used (with ''{{control|use item}}''). This map can then be adjusted to different zoom levels. After conversion to a drawn map item, it starts to draw a top-down view of the player's surroundings, with North pointing to the top of the map. A pointed oval pointer indicates the player's position on the map, and moves in real-time as the player moves across the terrain shown on the map. The map does ''not'' center on the player when created, rather, the world is broken up into large invisible grid squares, and the map displays the area of whichever grid square it is in when it is first used. For example, if a player uses a new map in a certain grid square, and then moves a distance away and uses another fresh map but is still within the same grid square, both maps appear identical. To make a map that is not identical to the first one, the player would have to move outside of the edges of the first map (because then they would be in a new grid square). This way, no two maps of the same size can ever partially overlap and every map can display only a fixed area.
To record the world on a map, that specific map must be held in the player's hands while the player moves around the world. The world is recorded as-is during exploration, meaning that if the world is modified, a player must revisit the area while holding the map to update the map's view. Maps can also be [[Map#Cloning|cloned]]. If a player holds a map whose one or more clones are on display in item frames, updates are made on all clone-connected maps.
Other players are displayed on the map only if they have a map in their inventory cloned from the one being looked at. When placing a map into an [[item frame]], the map displays with a green pointer shown at the location of the item frame. This is to help the player see where they are in relation to the area that the map is showing. If the player leaves a map in an item frame and views a clone of it, the green pointer remains in the spot of the framed copy. This can be used to set up waypoints. Unexplored areas are transparent, making the item frame visible.
When the player leaves the area shown on a specific map, the player pointer transforms into a white dot that moves on that map. The marker shrinks to a smaller white dot if the player is far from the map's center: the area is 320 by 320 blocks per scale factor. The dot moves along the edge of the map to show the relative location of the player. However {{in|bedrock}}, the pointer remains as an arrow but shrinks until the player is near the area shown on the map.
While maps in [[the Nether]] work, they show only the red-and-gray pattern, regardless of the blocks placed. The only useful function is finding where the player is in relation to placed framed maps, which show as green pointers. Additionally, the player pointer rapidly spins and is not a good indicator of direction. Placing a [[banner]] in [[the Nether]] still shows it on the map as usual. Having a smaller map image while riding a [[strider]] in the Nether can help one to see one's footing while traveling over [[lava]].
{{IN|java}}, when using a map from another dimension, the map shows the player's position and direction when they were last in the dimension of the map. {{IN|bedrock}}, however, the player can use maps from one dimension while in another dimension. For locator maps, the place marker changes color depending on the dimension that the player is currently in (white for the Overworld, red for [[the Nether]], and magenta for [[the End]]). An Overworld map in the Nether shows the player's corresponding location and direction in the Overworld.<ref name=multiverse>{{ytl|EpP1diZdEdI}}</ref> Similarly, a Nether Map in the Overworld shows the player's corresponding location in the Overworld, but the place marker spins, just like a Nether map in the Nether. An Overworld map in the End shows the world spawn.<ref name=multiverse/> A Nether map cannot be used in the End — the map appears, but the place marker is not shown anywhere — and similarly, an End map cannot be used in the Overworld or the Nether.
A player can make a large piece of pixel art (128×128) facing upward, center a map on it, and place that map in an [[item frame]] to create a custom picture. Locking is recommended. See [[Map item format#Map Pixel Art]] for details on the techniques.
Maps display as a mini-map when held in the off-hand, or if the off-hand slot is occupied; the map is full-sized only when held in the dominant hand with both hands free.
A map always positions itself facing towards North when placed horizontally within an item frame regardless of how the map is placed.
=== Map content ===
{{Main|Map item format}}
Maps consist of square pixels arranged like pixels in a 128×128 square pattern, with each pixel representing a square portion of land. {{IN|java}}, the [[Map item format#Color table|color of a map pixel]] generally matches the color of the most common [[opaque]] block in the corresponding area, as seen from the sky. 'Minority blocks' in the target area have no effect on the color of the pixel, thus small features tend to be undetectable on zoomed-out maps.
{{IN|bedrock}}, the [[Map item format#Color table|color of a map pixel]] instead matches the single top-most opaque block in a grid sized by the map magnification pixel size (see the table in the "Player marker and pointer" section below). For example, a 3/4 magnification map has a pixel size of 8x8 blocks; this means the map will read only the top-most opaque blocks at the 0,0 coordinate, the 8,0 coordinate, the 0,8 coordinate, etcetera, ignoring all other blocks in the area. This means that {{in|bedrock}}, map pixel art requires only one block per pixel regardless of map magnification.
{{IN|bedrock}}, grass, foliage and water colors that are biome-dependent are represented accurately on a map.
{| class="wikitable"
|-
! style="width: 300px;" | {{el|je}}
! style="width: 300px;" | {{el|be}}
|-
| style="text-align: center;" | [[File:Map Zoom 4.png|alt=All banners marked on a map, alongside a named banner.|216px]]
| style="text-align: center;" | [[File:Map item BE.png|216px]]
|-
| Biome colors on ''Java Edition''.
| Biome colors on ''Bedrock Edition''.
|-
|}
Maps also show ground up to about 15 blocks below the surface of the water in oceans as slightly lighter blue, to show where the ground rises. This is not true with land above water. Higher elevations in the world mean lighter colors on the map. The map records the surface even as the player moves below the surface.
A standard map represents 128x128 blocks (1 block per pixel, 8x8 [[chunks]]) but maps can be zoomed-out to represent up to 2048x2048 blocks (16 square blocks per pixel, 128x128 [[chunks]]).
Some relevant distances: 64 blocks (4 chunks) is the update radius from a player in the Overworld and the End. However, it is half this (32 blocks) in the Nether. Also, 1024 blocks is the minimum Overworld distance from a [[nether portal]], at which players can build another portal and expect to reach a new location in the Nether. This is the distance across a 1:8 map, and also from a 1:16 map's center to its edge.
=== Player marker and pointer ===
{{IN|java}}, every map contains a marker that marks the position of the player, and points in the same direction as the player. When a player moves out of a map, a big white dot appears and moves relative to the player's position. The pointer either disappears when the player moves away a certain distance from the border of the map or, in case of [[explorer map]]s, the big white dot changes to a smaller white dot. The distance required for the small white dot to appear(explorer maps) or for the big dot to vanish (normal maps) changes with the scaling of the map.
* '''Level 0/4 :''' 128×128 blocks (each map pixel represents 1 block)
* '''Level 1/4 :''' 256×256 blocks (2×2 blocks per map pixel)
* '''Level 2/4 :''' 512×512 blocks (4×4 blocks per map pixel)
* '''Level 3/4 :''' 1024×1024 blocks (8×8 blocks per map pixel)
* '''Level 4/4 :''' 2048×2048 blocks (16×16 blocks per map pixel)
{{IN|bedrock}}, a map can be crafted with or without this marker, and a map without a position marker can add one later by adding a compass to the map. When a map is crafted without a compass, it's simply called an "empty map", but when crafted with a compass, it's called an "empty locator map". The marker also turns red if the player enters the Nether with an Overworld map and shows the player's Overworld location relative to the Nether location. A map created in the End has a purple marker showing the player's location. If an Overworld map is used in the End, a magenta dot appears on the player's spawn point.{{/BE|position}}
{{crafting
|name=Map<br>(with marker)
|ingredients=[[Map]] or Empty Map +<br>[[Compass]]
|showdescription=1
|Map (no markers);Empty Map
|Compass
|Output= Locator Map;Empty Locator Map
|type= Miscellaneous
|description={{el|be}} only.
Maps crafted from only paper do not show the location marker; to add it, a compass must be added to the map.
|foot=1
}}
{{IN|bedrock}}, a cartography table can also be used to add a pointer to create a locator map or empty locator map. This can be done by adding a compass to paper, or to an empty map or map.
=== Zooming out ===
[[File:Cartography table UI zoom.png|thumb|300px|{{IN|java}}, cartography table's UI, showing the map is being zoomed out.]]
A [[cartography table]] can also be used to zoom out, taking only one piece of paper per zoom level.
A blank map can not be zoomed out. A map has to have something already marked on it for the zooming to be possible.
{{Crafting
|A1= Paper |B1= Paper |C1= Paper
|A2= Paper |B2= Map;Locator Map |C2= Paper
|A3= Paper |B3= Paper |C3= Paper
|Output= Map;Locator Map
|showdescription=1
|description=Locator Map {{el|be}} only.
}}
{{/BE|zoom}}
==== Zoom details ====
The zooming function starts from when the map is created (zoom level 0) up to its fourth zoom step (zoom level 4).
{| class="wikitable" style="text-align: center" data-description="Zoom levels"
! colspan="2" |
! Zoom step 0
! Zoom step 1
! Zoom step 2
! Zoom step 3
! Zoom step 4
|-
! colspan="2" |
| [[File:Map Zoom 0.png|116px|Zoom step 0, 1:1]]
| [[File:Map Zoom 1.png|116px|Zoom step 1, 1:2]]
| [[File:Map Zoom 2.png|116px|Zoom step 2, 1:4]]
| [[File:Map Zoom 3.png|116px|Zoom step 3, 1:8]]
| [[File:Map Zoom 4.png|116px|Zoom step 4, 1:16]]
|-
! colspan="2" | Zoom level
| 0/4
| 1/4
| 2/4
| 3/4
| 4/4
|-
! colspan="2" | 1 map pixel represents
| 1 block
| 2×2 blocks
| 4×4 blocks
| 8×8 blocks
| 16×16 blocks<br>(1×1 chunk)
|-
! colspan="2" | Scaling ratio
| 1:1
| 1:2
| 1:4
| 1:8
| 1:16
|-
! rowspan="2" colspan="2" | Map covers an area of
| 128×128 blocks
| 256×256 blocks
| 512×512 blocks
| 1024×1024 blocks
| 2048×2048 blocks
|-
| 8×8 chunks
| 16×16 chunks
| 32×32 chunks
| 64×64 chunks
| 128×128 chunks
|-
! colspan="2" | Smallest discernible features
| Blocks
| Trees, Paths
| Lakes, Buildings
| Mountains, Rivers
| Biomes, Mountain Ranges
|-
! colspan="2" | Use cases
| Pixel art, Base plans
| Base surroundings
| Structure mapping
| Landscape mapping
| Biome mapping
|-
! rowspan="2" | Total paper needed to zoom out from Level 0
! in anvil{{only|bedrock|short=1}} or crafting table
| -
| {{ItemSprite|Paper}} 8
| {{ItemSprite|Paper}} 16
| {{ItemSprite|Paper}} 24
| {{ItemSprite|Paper}} 32
|-
! in cartography table
| -
| {{ItemSprite|Paper}} 1
| {{ItemSprite|Paper}} 2
| {{ItemSprite|Paper}} 3
| {{ItemSprite|Paper}} 4
|}
Maps are always aligned to a grid at all zoom levels. That means zooming out any different map in a specific area covered by that map always has the same center. As such, maps are aligned by map width (1024 blocks for a level 3 maps) minus 64. A level 3 map generated at spawn covers X and Z coordinates from -64 to 959. All maps generated in this area zoom out to the same coordinates, guaranteeing that they are always 'aligned' on a map wall. For a zoomed-out map to cover a new area, it must start with a base (level 0) map that is in that area.
At zoom level 0, a map created on the point (0,0) has (0,0) at the center of the map. At higher zoom levels of the same map, the coordinate (0,0) is in the top left square of the map.
{{IN|java}}, zoom level can be seen on a map by turning on Advanced Tooltips (a [[Debug screen#More debug keys|debug screen]] option that can be toggled by using the key combination {{key|F3+H}}). The tooltip of the map then shows the zoom level, scaling factors, and map ID.
=== Cloning ===
[[File:Cartography table UI clone.png|thumb|300px|{{IN|Java}}, cartography table's UI, showing the map is being cloned.]]
A mix of empty maps and empty locator maps may be used. Whether the cloned maps show position markers is dependent only on the input map.
A [[cartography table]] can also be used to clone a map.
The parts of the world that have already been explored and mapped are copied, and newly explored areas appear on both instances. If one of the maps is later zoomed out, then the maps lose their connection to each other and function as completely separate maps that have to be individually filled by exploring.
In Creative mode, a map in an item frame may be cloned by using {{control|pick block}} on it, as long as that map is not also in the player's inventory.
It doesn't matter if the map to be cloned is at a higher zoom level (made of more paper) than the blank map. Upon copying the map, both resulting maps have the same magnification as the starting map.
{{/BE|clone}}
=== Crafting ingredient ===
{{crafting usage|Map, Empty Map}}
=== Marking points ===
{{IN|java}} the player has the ability to mark spots on a map. To do this, {{control|use}} a map on a placed-down [[banner]], and the spot of the banner gets marked on the map. The mark takes the color of whatever the base color is for the banner, and if the banner has a name, the mark shows that name. Banner marks on a map are always oriented with their top facing north, regardless of the banner's actual orientation. If the banner is destroyed, the mark of the banner remains at first, but if the player gets closer to where the banner previously was, it disappears as the area is updated on the map.
If a map is mounted on an item frame and is within the area it depicts, the mounted map displays its current location with a green indicator rotated to match its orientation.
[[File:Map Marker Bedrock on Item frame.png|thumb|181x181px|{{IN|bedrock}} this is what a map lying on an item frame looks like, while showing markers.]]
{{IN|bedrock}} the player can place copies of locator maps in [[item frame]]s in order to create a land mark. The marker is a green dot that resembles the shape of the player's marker, but in green color. The position the marker points at depends on the direction the item frame is facing. It is worth noting that the markers work only on copies of the same map. Other maps of the same area do not show the existing markers that the player(s) had placed.
If a player has a cloned map in their inventory, their pointer appears white when viewed on the same map held by another player. Hence, if all players have the same cloned map in their inventory, all markers would appear white when the clone map is viewed.
{| class="wikitable"
|-
! style="width: 300px;" | {{el|je}}
! style="width: 300px;" | {{el|be}}
|-
| style="text-align: center;" | [[File:Banner marked map.png|alt=All banners marked on a map, alongside a named banner.|216px]]
| style="text-align: center;" | [[File:Tracking map with markers bedrock.png|216px]]
|-
| How every banner appears {{IN|java}} on a map, including named banners.
| {{IN|bedrock}} this is how a locator map shows map markers while held by a player.
|-
|}
===Locking===
[[File:Cartography table UI lock.png|thumb|300px|{{IN|Java}}, cartography table's UI, showing the map is being locked.]]
Maps can be locked when using a [[glass pane]] in a [[cartography table]]. This creates a new map containing the same data and locks it. All copies of this new map are also locked. A locked map never changes, even when the depicted terrain changes. {{IN|Be}}, locked maps have a unique texture.
{| class="wikitable" style="text-align: center;"
|-
! Condition
! style="width: 200px;" | Newly created map
! style="width: 200px;" | Map after terrain alteration
|-
! Unlocked map
| [[File:Map Zoom 0.png|174px]] || [[File:Unlocked Map.png|174px]]
|-
! Locked map
| [[File:Map Zoom 0.png|174px]] || [[File:Map Zoom 0.png|174px]]
|-
|}
{{-}}
== Sounds ==
{{Edition|Java}}:
{{Sound table
|rowspan=2
|sound=Drawmap1.ogg
|sound2=Drawmap2.ogg
|sound3=Drawmap3.ogg
|subtitle=Map drawn
|source=player
|description=When a map is drawn
|id=ui.cartography_table.take_result
|translationkey=subtitles.ui.cartography_table.take_result
|volume=1.0
|pitch=1.0
|distance=16}}
{{Sound table
|subtitle=Map drawn
|source=block
|description=When a map is edited using a cartography table
|id=ui.cartography_table.take_result
|translationkey=subtitles.ui.cartography_table.take_result
|volume=1.0
|pitch=1.0
|distance=16
|foot=1}}
{{Edition|Bedrock}}:
{{Sound table
|type=bedrock
|rowspan=2
|sound=Drawmap1.ogg
|sound2=Drawmap2.ogg
|sound3=Drawmap3.ogg
|source=block
|description=When a map is drawn<wbr>{{Upcoming|BE 1.20.20.20}}
|id=ui.cartography_table.take_result|idnote={{Verify|Could be block.cartography_table.use}}
|volume=0.8
|pitch=1.0}}
{{Sound table
|type=bedrock
|source=block
|description=When a map is edited using a cartography table
|id=ui.cartography_table.take_result
|volume=0.8
|pitch=1.0
|foot=1}}
== Data values ==
=== ID ===
{{edition|java}}:
{{ID table
|edition=java
|showforms=y
|generatetranslationkeys=y
|displayname=Empty Map
|spritetype=item
|nameid=map
|form=item}}
{{ID table
|displayname=Map
|spritetype=item
|nameid=filled_map
|form=item
|translationkey=item.minecraft.filled_map, filled_map.buried_treasure, filled_map.explorer_jungle{{upcoming|java 1.20.2}}, filled_map.explorer_swamp{{upcoming|java 1.20.2}}, filled_map.mansion, filled_map.monument, filled_map.unknown, filled_map.village_desert{{upcoming|java 1.20.2}}, filled_map.village_plains{{upcoming|java 1.20.2}}, filled_map.village_savanna{{upcoming|java 1.20.2}}, filled_map.village_snowy{{upcoming|java 1.20.2}}, filled_map.village_taiga{{upcoming|java 1.20.2}}
|foot=1}}
{{edition|bedrock}}:
{{ID table
|edition=bedrock
|showaliasids=y
|shownumericids=y
|showforms=y
|notshowbeitemforms=y
|generatetranslationkeys=y
|displayname=Empty Map
|spritetype=item
|nameid=empty_map
|aliasid=emptymap
|id=515
|form=item
|translationkey=item.emptyMap.name, item.emptyLocatorMap.name}}
{{ID table
|displayname=Map
|spritetype=item
|spritename=map-be
|nameid=filled_map
|aliasid=map
|id=420
|form=item
|translationkey=item.map.name, item.map.exploration.mansion.name, item.map.exploration.monument.name, item.map.exploration.treasure.name
|foot=1}}
=== Metadata ===
{{see also|Bedrock Edition data values}}
{{IN|bedrock}}, maps use the following data values:
{{/DV}}
=== Item data ===
{{el|java}}:
{{main|Player.dat format}}
<div class="treeview">
* {{nbt|compound|tag}}: The item's '''tag''' tag.
{{:Player.dat_format/Maps}}
</div>
{{el|bedrock}}:
: See [[Bedrock Edition level format/Item format]].
=== Map icons ===
{{see also|Player.dat format|Map item format|map_icons.png}}
Map icons are 8×8 in ''Java Edition'', but 16×16 in Bedrock Edition. As such, there are minor misalignment issues in ''Java Edition''.<ref>{{bug|MC-214649|||WF}}</ref>
[[File:Map icons.png|thumb|128px|Map icons texture {{in|Java}}]]
[[File:Map icons BE.png|thumb|128px|Map icons texture {{in|Bedrock}}]]
{| class="wikitable"
|-
! Java ID !! Bedrock ID !! Text ID !! Appearance !! Purpose !! Shown in item frames?
|-
| 0 || ||<code>player</code> || [[File:Player (texture) JE1 BE1.png|16px]] [[File:Player (texture) BE2.png|16px]] White marker || Players (on map) || No
|-
| 1 || 1 ||<code>frame</code> || [[File:Green Marker (texture) JE1 BE1.png|16px]] [[File:Green Marker (texture) BE2.png|16px]] Green marker || The current map in an item frame || Yes
|-
| 2 || ||<code>red_marker</code> || [[File:Red Marker (texture) JE1 BE1.png|16px]] [[File:Red Marker (texture) BE2.png|16px]] Red marker || Position converted to Overworld when opening Overworld map in the Nether{{Only|bedrock}} || No
|-
| 3 || ||<code>blue_marker</code> || [[File:Blue Marker (texture) JE1 BE1.png|16px]] [[File:Blue Marker (texture) BE2.png|16px]] Blue marker || Other players || No
|-
| 4 || ||<code>target_x</code> || [[File:Target X (texture) JE1 BE1.png|16px]] White X || Unused || Yes
|-
| 5 ||5
|<code>target_point</code> || [[File:Target Point (texture) JE1 BE1.png|16px]] [[File:Target Point (texture) BE2.png|16px]] Red triangle || Unused || Yes
|-
| 6 || 6 ||<code>player_off_map</code> || [[File:Player Off Map (texture) JE1 BE1.png|16px]] Large white dot || Players off map, nearby{{only|java}} || No
|-
| 7 || 13 ||<code>player_off_limits</code> || [[File:Player Off Limits (texture) JE1.png|16px]] [[File:Player Off Limits (texture) BE.png|16px]] Small white dot || Players off map, far away{{only|java}} || No
|-
| 8 ||14
|<code>mansion</code> || [[File:Mansion (texture) JE1.png|16px]] [[File:Mansion (Texture) BE2.png|frameless|16x16px]] Woodland mansion || Woodland mansion || Yes
|-
| 9 || 15 ||<code>monument</code> || [[File:Monument (texture) JE1.png|16px]] [[File:Monument Texture BE2.png|frameless|16x16px]] Ocean monument || Ocean monument || Yes
|-
| 10 - 25 || ||<code>{{tooltip|banner_*|banner_white, banner_orange, banner_magenta, banner_light_blue, banner_yellow, banner_lime, banner_pink, banner_gray, banner_light_gray, banner_cyan, banner_purple, banner_blue, banner_brown, banner_green, banner_red, banner_black}}</code> || [[File:Banner White (texture) JE1.png|16px]] [[File:Banner Light Gray (texture) JE1.png|16px]] [[File:Banner Gray (texture) JE1.png|16px]] [[File:Banner Black (texture) JE1.png|16px]] [[File:Banner Brown (texture) JE1.png|16px]] [[File:Banner Red (texture) JE1.png|16px]] [[File:Banner Orange (texture) JE1.png|16px]] [[File:Banner Yellow (texture) JE1.png|16px]] [[File:Banner Lime (texture) JE1.png|16px]] [[File:Banner Green (texture) JE1.png|16px]] [[File:Banner Cyan (texture) JE1.png|16px]] [[File:Banner Light Blue (texture) JE1.png|16px]] [[File:Banner Blue (texture) JE1.png|16px]] [[File:Banner Magenta (texture) JE1.png|16px]] [[File:Banner Purple (texture) JE1.png|16px]] [[File:Banner Pink (texture) JE1.png|16px]]<br>Banners in all 16 wool colors{{only|java}}|| Banner markers || Yes
|-
| 26 ||4
|<code>red_x</code> || [[File:Red X (texture) JE1.png|16px]] [[File:Target X (texture) BE2.png|16px]] Red X || Buried treasure || Yes
|-
| || 8 || || [[File:Magenta Marker (texture) BE1.png|16px]] Magenta marker
| Position converted to Overworld when opening Overworld map in the End{{Only|bedrock}} || No
|-
| || 9 || || [[File:Orange Marker (texture) BE1.png|16px]] Orange marker{{more info}}
|Other players
|Yes
|-
| || 10 || || [[File:Yellow Marker (texture) BE1.png|16px]] Yellow marker
| Other players || No
|-
| || 11 || || [[File:Cyan Marker (texture) BE1.png|16px]] Cyan marker
| Other players || No
|-
| -
|12
| || [[File:Green Point (texture) BE1.png|16px]] Green Triangle
| Other structure such as stronghold, fortress, end city, etc. when used as explorer map destination{{Only|bedrock}} || Yes
|}
It should be noted that even if the player used a NBT editor to add an additional icon on the map, ''Minecraft'' shows only the first one listed when the player loads up their world.
== Achievements ==
{{load achievements|Map Room}}
== History ==
{{see also|section=24|map_icons.png|Java Edition history of textures#Map icons}}
{{more images|section=24|{{bug|MC-72962}}}}
{{History||April 27, 2011|link=https://web.archive.org/web/0/http://notch.tumblr.com/post/4988431144/the-maps|[[Notch]] unveiled screenshots of the map.}}
{{History||April 28, 2011|link={{tweet|notch|63500114005721088}}|[[Notch]] said that he would try to make maps place-able on [[wall]]s.}}
{{History|java beta}}
{{History||1.6|snap=Test Build 3|[[File:Map (item) JE1 BE1.png|32px]] Added maps.}}
{{History||1.6.6|The ability to auto-craft maps using shift-click has been disabled.}}
{{History||1.8|snap=Pre-release|Maps can now be found in library chests in the brand-new [[stronghold]]s.
|Auto crafting maps has been restored. Map cloning, therefore, is unavailable for a period of time.}}
{{History||1.8.1|Maps now work both while walking and flying.}}
{{History|java}}
{{History||1.0.0|snap=Beta 1.9 Prerelease 5|Prior to this update, the [[sun]] in ''[[Minecraft]]'' rose in the North, which threw off many [[player]]s and led to a common misconception that ''Minecraft'' maps/[[world]]s were oriented with East at the top. The sun now rises in the east and sets in the west, making navigation much more intuitive.
|Before the change in sun position, it was commonly said that ''Minecraft'' maps/worlds are oriented with East at the top; sunrise, by definition, occurs at the East, which means it is certainly true that the maps were oriented "East" since the Sun rose from the top (North). However, [[Jeb]] asserted (and [[Notch]] agreed) that the sun rose in the north.<ref>{{Tweet|jeb|87815841160237056}}</ref><ref>{{Tweet|notch|88155424880201728}}</ref> Most mods and map-making tools, however, used the terms East and North consistent with their actual definitions (e.g. a [[Programs and editors/Cartograph|Cartograph]]-generated map with North at the top is rotated 90 degrees from the in-game map).}}
{{History||1.4.2|snap=12w34a|[[File:Empty Map JE1 BE1.png|32px]] [[Crafting]] a map now creates an empty map. The map is drawn for the first time when it is held and right clicked, and is centered near the location of the [[player]] when clicked (not as before where it was centered on the location it was crafted.)
|Previously, in order to map a new area, the map had to be ''crafted'' in that area (rather than carrying a previously-crafted map to the new area). The point where a map is crafted becomes its permanent center, and could never be changed.
|The pointer no longer disappears when leaving the map, but transforms into a white dot, indicating on what side of the map the player is located.
|Maps now align to a grid, making it easier to create adjacent maps.
|Maps can now be zoomed out (but not zoomed in).
|Maps can now be cloned and scaled.}}
{{History||1.4.2|snap=12w34b|Maps now have a ''zoom level'', which was fixed at 1:8 prior to snapshot [[Java Edition 12w34a|12w34a]],<ref name="mapinfo">https://web.archive.org/web/0/http://notch.tumblr.com/post/4988431144/the-maps</ref> but now starts at 1:1 and can be increased up to 1:16 by re-crafting an existing map.
|Maps are no longer numbered on the top-left corner and is labeled through the tooltip.}}
{{History|||snap=12w36a|New maps are now crafted at a scale factor of 1:1. A zoomed in map can be zoomed out by re-crafting it with another 8 sheets of [[paper]] on a [[crafting table]]. Each time this is done, the scale increases - 1:1, 1:2, 1:4, 1:8, 1:16 with a map scale of 1:16 being the current maximum.}}
{{History||1.7.2|snap=13w38a|The map size has been increased when placed on a [[wall]] using the [[item frame]].
|More colors have been added to maps for different [[block]]s.<ref name="infodump2">https://web.archive.org/web/0/https://www.mojang.com/2013/10/minecraft-1-7-the-update-that-changed-the-world</ref>}}
{{History||1.8|snap=14w31a|Zoomed maps now conform to an expanded grid based on their zoom level. Previously, careful considerations would need to be taken to creating a wall of adjoining maps.}}
{{History||1.8.1|snap=pre1|Some colors have been changed on maps to more accurately represent their respective [[block]].}}
{{History||1.9|snap=15w31a|Maps now display as a mini-map when held in the off-hand, or if the off-hand slot is occupied; the (old) large version is visible only when held in the dominant hand with the secondary hand free.}}
{{History|||snap=15w34a|New maps can now be [[crafting|crafted]] at a scale factor of 1:4.
|A crafting recipe has been added for zooming in maps.}}
{{History|||snap=15w43a|The average yield of empty maps from [[stronghold]] library [[chest]]s has been doubled.}}
{{History|||snap=15w45a|New maps are once again [[crafting|crafted]] at a scale factor of 1:1, as they had been before snapshot [[15w34a]].
|The [[crafting]] recipe, that was introduced in 15w34a, for zooming in maps has been removed.}}
{{History|||snap=15w49a|Map making now uses armor equipping sounds.}}
{{History||1.11|snap=16w39a|Maps now work in [[the End]].
|Empty maps are now [[trading|sold]] by cartographer [[villager]]s as their tier 3 [[trading|trade]].
|Added [[explorer map]]s, sold by cartographers as their tier 4 trades.}}
{{History||1.12|snap=17w17a|Maps now have separate colors for colored [[terracotta]] blocks from other colored blocks.}}
{{History||1.13|snap=17w47a|Prior to [[1.13/Flattening|''The Flattening'']], these [[item]]s' numeral IDs were 358 and 395.
|Maps now use additional NBT to specify which map they contain. Prior to this version, they used the [[damage]] value instead.
|Map IDs are no longer limited to 32,768.}}
{{History|||snap=17w50a|Maps can now be placed on floor and ceiling [[item frame]]s.}}
{{History|||snap=18w10a|Spots on maps can now be marked using [[banner]]s.}}
{{History|||snap=18w11a|Empty maps can now generate in [[shipwreck]] [[chest]]s.}}
{{History|||snap=pre7|Maps have been changed slightly, in regard to which [[block]]s are shown and which blocks are not.}}
{{History||1.14|snap=18w43a|[[File:Empty Map JE2 BE2.png|32px]] [[File:Map (item) JE2 BE2.png|32px]] The textures of maps have been changed.}}
{{History|||snap=18w48a|Empty maps can now be found in chests in [[village]] cartographer houses.}}
{{History|||snap=19w02a|Maps can now be cloned and zoomed out (extended) by using a [[cartography table]].
|Maps can now be locked by using a [[glass pane]] with a cartography table.
|The recipes for cloning and zooming out maps have been removed.}}
{{History|||snap=19w06a|Map making is now silent again.}}
{{History|||snap=19w13a|Cartographer villagers now give empty maps to players under the [[Hero of the Village]] effect.}}
{{History||1.16|snap=20w21a|Map making sounds are now the same as when using a cartography table.}}
{{History|pocket alpha}}
{{History||v0.14.0|snap=build 1|[[File:Empty Map JE1 BE1.png|32px]] [[File:Map (item) JE1 BE1.png|32px]] Added maps.
|Maps are crafted using nine [[paper]], one for every slot of the [[crafting]] grid.
|Maps must be combined with a [[compass]] using an [[anvil]] in order to show the [[player]]'s position.
|Maps can be zoomed using an anvil.}}
{{History|||snap=build 3|New maps are now [[crafting|crafted]] at full zoom.
|Empty maps now have a "Create Map" button to initialize them.}}
{{History|||snap=build 7|New maps are now crafted at a scale factor of 1:1.}}
{{History||v0.15.0|snap=unknown|Maps can now be crafted either with 8 pieces of [[paper]] and a [[compass]] ''or'' 9 pieces of paper, to get a map with or without a position marker.}}
{{History||v0.16.0|snap=build 1|Different colors have been added to maps for different [[biome]]s.}}
{{History|pocket}}
{{History||1.0.0|snap=?|[[Windows 10 Edition]] can now use the [[anvil]] as well as the [[crafting table]] to clone, zoom and apply markers, just as [[Pocket Edition]] in general could.
|Maps can now be found inside [[stronghold]] library [[chest]]s.}}
{{History||1.1.0|snap=alpha 1.1.0.0|Empty maps with direction markers built-in are now called "locator maps".}}
{{History|||snap=alpha 1.1.0.3|"Locator maps" are now called "empty locator maps".
|Empty maps are now [[trading|sold]] by cartographer [[villager]]s for 7-11 [[emerald]]s as their tier 3 [[trading|trade]].}}
{{History|bedrock}}
{{History||1.4.0|snap=beta 1.2.14.2|Maps can now be found inside map room [[chest]]s in [[shipwreck]]s.}}
{{History||?|The texture of the filled map overlay has been changed.}}
{{History||?|Maps now function in dimensions other than the dimension in which they were created.}}
{{History||1.10.0|snap=beta 1.10.0.3|Maps can now be found in cartographer house [[chest]]s in [[village]]s.
|[[File:Empty Map JE2 BE2.png|32px]] The texture of empty maps has been changed.}}
{{History||1.11.0|snap=beta 1.11.0.1|Empty maps can now be created from 1 [[paper]] in [[cartography table]]s.
|Maps can now be zoomed, cloned, renamed, and have pointers added in cartography tables.}}
{{History|||snap=beta 1.11.0.4|Cartographer [[villager]]s now [[trading|sell]] empty map for an [[emerald]] as their first tier [[trading|trades]].
|Empty locator maps can now be [[trading|bought]] from cartographer villagers.}}
{{History||1.13.0|snap=beta 1.13.0.1|[[File:Map (item) BE3.png|32px]] [[File:Locked Map (item) BE2.png|32px]] Filled maps and locked maps now have unique inventory icons.}}
{{History||1.16.0|snap=beta 1.16.0.57|Trading has been changed, novice-level cartographer now sell an empty map for 7 emeralds. Cartographer villager no longer sell empty locator map.}}
{{History||1.16.100|snap=beta 1.16.100.56|The ID of maps have been changed from <code>emptymap</code> to <code>empty_map</code> and <code>map</code> to <code>filled_map</code>.}}
{{History|console}}
{{History||xbox=TU1|xbone=CU1|ps=1.00|wiiu=Patch 1|switch=1.0.1|[[File:Map (item) JE1 BE1.png|32px]] Added maps.
|The [[player]] spawns with a free map.
|Maps are available only as zoom step 3 maps centered at coordinates 0,0. Biome colors do not appear on maps.}}
{{History||xbox=none|xbone=CU1|ps=1.0|wiiu=none|Larger sized worlds on Xbox One, Playstation 4, and Nintendo Switch have zoom step 3 maps aligned to a grid with maps centered at 0, 1024, or 2048 on the X or Z coordinates.}}
{{History||xbox=TU21|xbone=CU9|ps=1.14|wiiu=Patch 1|[[File:Empty Map JE1 BE1.png|32px]] [[Crafting]] a map now produces an empty map.}}
{{History||xbox=TU46|xbone=CU36|ps=1.38|wiiu=Patch 15|The outer end islands appear on different maps; even on Xbox 360, Playstation 3, Vita, and Wii U editions.}}
{{History||xbox=none|xbone=none|ps=1.90|wiiu=none|switch=none|[[File:Empty Map JE2 BE2.png|32px]] [[File:Map (item) JE2 BE2.png|32px]] The textures of maps have been changed.}}
{{History||ps=1.91|Maps can now be created and used in [[cartography table]]s.}}
{{History|foot}}
== Issues ==
{{issue list}}
== Trivia ==
* Use of the {{key|F1}} key can allow the player to hold a map without blocking their view at all.
* In ''Java Edition'', a map created using {{cmd|give}} can be any map by using the Map parameter to specify the map number desired. E.g. {{cmd|give [player] minecraft:filled_map{map:5<nowiki>}}} gives the specified player map_5. If no data value is supplied it defaults to map_0. If map_0 has not ever been crafted, it is centered on x=0, z=0.
* The maps are stored separately as their own data (<code>.dat</code>) file as <code>map_x.dat</code> with (x) being the map number, see [[map item format]] for more info. By manipulating this number, players can organize their maps to suit them, or if they accidentally create a map in the same location, they can delete their extra map so as to save the number they make.
* Certain programs can be used to make customized maps with images or text on them instead of actual maps, many people use these in adventure maps to show pictures or to tell a story.
* Since all copies of a map are links to the same file, copying an unfinished map keeps it synchronized with the copy as the player fills it in. Thus, a copy stored in a chest can act as a remote backup.
* A map that is in an item frame does not update itself until a player picks it up, lets it reload, and places it back again. However, if a player holds a clone of the map, both maps update.
* Filled maps are the only items that make 90 degree rotations in item frames, and also the only items that can expand the item frame into full block wide.
* On [[Legacy Console Edition]], the player always spawns with a map in their inventory after creating a world. This was later added to Bedrock Edition as an optional feature in the world creation menu.
* Maps on Legacy Console Edition always show the player's current coordinates, as a substitute for the optional [[Coordinates|coordinate display]] in other editions.
* A map cannot be created on [[New Nintendo 3DS Edition]]. Instead, the map is always displayed on the bottom screen along with the coordinates. Biome colors do not appear on maps.
== Gallery ==
<gallery>
MapItem1.png|A fully zoomed map.
MapRotation.png|Having a map in hand does not stop the ability to see ahead.
MapItem3.png|A world being recorded onto a map.
Mcmap4.png|Nearly fully explored map.
Zoomed Map.png|A map edited to the scale of 1.
Sky Map.png|A map mapping the [[Sky Dimension]].
MapOfVillage.png|A village and how it is represented on a map.
Pumpkin map.png|A map containing a custom image made by placing a large number of blocks.
Complete Map.png|A completely explored map.
MapZooms.png|A diagram showing how maps zoomed out before [[Java Edition 1.8]]. Notice how the larger maps have borders made of half and quarter small maps.
Map18zooms.png|From 1.8, zoomed maps are aligned to this grid exactly.
Large Biome Map.png|A map of a [[Large Biomes]] world.
Map0140-0160.png|A comparison of maps between versions in Pocket Edition Alpha [[Pocket Edition Alpha 0.14.0|0.14.0]] and [[Pocket Edition Alpha 0.16.0|0.16.0]].
Mycelium Map.png|A map view of a mushroom biome, showing that mycelium appears purple on a map.
MiniMap.png|Maps held in the off-hand or in either hand while [[dual wielding]] appear as mini-maps.
Partly filled treasure map.png|Partly filled treasure map with an odd area at the bottom left. Normally a partly filled map would look striped (as in the top left), but this map seems to be bugged and is possibly showing caves, or something, in the bottom left.
Partly filled ocean explorer map.png|Partly filled ocean explorer map. Updating the game from an older version (in this case the area was first generated before 1.18) and buying a map after updating (in this case in 1.19.4) can result in the map displaying rivers and terrain where there is really a frozen sea.
Map Stained Glass 1.png|Stained glasses' appearances on maps before and after 1.13.
Map Stained Glass 2.png|Stained glasses' appearances on maps before and after 1.13.
Map Various Blocks 1.png|Various blocks' appearances on maps before and after 1.13.
Map Various Blocks 2.png|Various blocks' appearances on maps before and after 1.13.
Better Together Map.jpg|Holding a map in the offhand in ''Bedrock Edition''.
Better Together Map Icon.jpg|Holding a map in both hands in ''Bedrock Edition''.
File:MapFailedtoFill.png|A map that has not yet filled. A rare bug in Java.
</gallery>
=== The Nether ===
<gallery>
Nethermap.png|A map in [[the Nether]].
Maponnether.png|A map in the Nether; the arrow turns around itself, like in [[compass]].
</gallery>
=== The End ===
<gallery>
Jeb End Map.png|The first image of a map in [[the End]].
Endmap.png|A map in the End.
</gallery>
=== Maps in item frames ===
<gallery>
FramedMap.png|A map displayed on an item frame, as it looked before [[Java Edition 1.7.2]].
Structure Map Collection.png|Multiple maps in item frames. Notice a [[village]], two [[desert temple]]s and a lava lake.
Minecraft maps 3by3.png|A collection of 9 connected full maps.
Full Map.png|A combination of 25 maps pasted together as one map.
Map wall BE.png|A map wall on ''Bedrock Edition'', showing large areas of biome colors for each biome.
Map's in item frames.png|Maps can be placed into [[item frame]]s so they can be viewed together.
Comparing Maps.png|The comparison between 3 zooms of maps.
SuperflatMap.png|A map in a [[Superflat]] world, with some [[village]]s.
MapWallWithMarkers.png|A 3x3 map wall with banner markers.
HEYYEYAAEYAAAEYAEYAA.png|He-Man map art.
Map Player Icons 1.png|First image of player icons on maps.
Map Player Icons 2.png|Second image of player icons on maps.
</gallery>
== See also ==
* [[Explorer Map]]
* [[Clock]]
* [[Tutorials/Navigation|Navigation]]
== References ==
{{Reflist}}
{{Items}}
[[cs:Mapa]]
[[de:Karte]]
[[es:Mapa]]
[[fr:Carte (objet)]]
[[hu:Térkép (tárgy)]]
[[ja:地図]]
[[ko:지도]]
[[nl:Kaart]]
[[pl:Mapa]]
[[pt:Mapa]]
[[ru:Карта]]
[[tr:Harita]]
[[th:แผนที่]]
[[uk:Мапа]]
[[zh:地图]]
[[Category:Renewable resources]]</li></ul></nowiki> | There was a bug which would allow players to destroy any block (even bedrock) by placing a dirt block under a block, tilling the dirt, and planting seeds on the dirt. This would cause the block above the tilled dirt to disappear without giving a resource. | ||||
1.6{{Extension DPL}}<ul><li>[[Magma Cream|Magma Cream]]<br/>{{Item
| title = Magma Cream
| image = Magma Cream.png
| renewable = Yes
| stackable = Yes (64)
}}
'''Magma cream''' is an [[item]] used in [[brewing]] to create [[potion]]s of [[Fire Resistance]], and to manually craft [[magma block]]s.
== Obtaining ==
=== Mob loot ===
==== Magma cubes ====
All but tiny-sized [[magma cube]]s drop 0–1 magma cream. The maximum amount of magma cream is increased by 1 per level of [[Looting]], for a maximum of 4 with Looting III.
=== Crafting ===
{{Crafting
|Blaze Powder
|Slimeball
|Output= Magma Cream
|type= Brewing
}}
=== Chest Loot ===
{{LootChestItem|magma-cream}}
== Usage ==
=== Brewing ingredient ===
{{brewing
|showname=1
|head=1
|Magma Cream|Mundane Potion|base=Water Bottle
}}
{{brewing
|foot=1
|Magma Cream
|Potion of Fire Resistance
}}
=== Crafting ingredient ===
{{crafting usage}}
== Data values ==
=== ID ===
{{edition|java}}:
{{ID table
|edition=java
|showforms=y
|generatetranslationkeys=y
|displayname=Magma Cream
|spritetype=item
|nameid=magma_cream
|form=item
|foot=1}}
{{edition|bedrock}}:
{{ID table
|edition=bedrock
|shownumericids=y
|showforms=y
|notshowbeitemforms=y
|generatetranslationkeys=y
|displayname=Magma Cream
|spritetype=item
|nameid=magma_cream
|id=430
|form=item
|foot=1}}
== History ==
{{History|java}}
{{History||1.0.0|snap=Beta 1.9 Prerelease 2|[[File:Magma Cream JE1.png|32px]] Added magma cream.}}
{{History|||snap=Beta 1.9 Prerelease 3|Magma cream can now be [[brewing|brewed]] in a [[water bottle]] to create a mundane [[potion]], or in an awkward potion to create a potion of [[Fire Resistance]].}}
{{History||1.1|snap=release|[[Magma cube]]s now [[drops|drop]] magma cream.}}
{{History||1.3.1|snap=1.3|[[File:Magma Cream JE2 BE1.png|32px]] The texture of magma cream has been changed.}}
{{History||1.10|snap=16w20a|Magma cream can now be [[crafting|crafted]] into [[magma block]]s.}}
{{History||1.13|snap=17w47a|Prior to [[1.13/Flattening|''The Flattening'']], this [[item]]'s numeral ID was 378.}}
{{History||1.14|snap=18w43a|[[File:Magma Cream JE3 BE2.png|32px]] The texture of magma cream has been changed.}}
{{History||1.16|snap=20w07a|Magma cream has a {{frac|2|109}} (~1.83%) chance of being offered by [[piglin]]s when [[bartering]], in a stack size of 1–3.}}
{{History|||snap=20w09a|Magma cream now has a {{frac|10|226}} (~4.42%) chance of being offered by piglins when bartering, in a stack size of 1–5.}}
{{History|||snap=20w16a|Magma cream now generates in [[bastion remnant]]s chests.}}
{{History||1.16.2|snap=20w28a|Magma cream can no longer be obtained from bartering with piglins.}}
{{History|||snap=20w30a|The average yield of magma cream from bastion remnant chests has been slightly increased.}}
{{History|pocket edition alpha}}
{{History||v0.11.0|snap=build 1|[[File:Magma Cream JE2 BE1.png|32px]] Added magma cream.
|Magma cream is currently unobtainable.}}
{{History||v0.11.0|snap=build 8|[[Magma cube]]s now [[drops|drop]] magma cream.}}
{{History||v0.12.1|snap=build 1|Added magma cream to the [[Creative]] mode [[inventory]].
|Magma cream can now be [[crafting|crafted]].}}
{{History|pocket}}
{{History||1.1.3|snap=alpha 1.1.3.0|Magma cream can now be crafted into [[magma block]]s.}}
{{History|bedrock}}
{{History||1.10.0|snap=beta 1.10.0.3|[[File:Magma Cream JE3 BE2.png|32px]] The texture of magma cream has been changed.}}
{{History||1.16.0|snap=beta 1.16.0.57|Magma cream can be obtained from bartering with piglins.
|Magma cream can now be found in [[bastion remnants]] chests.}}
{{History||1.16.100|snap=beta 1.16.100.54|Magma cream can no longer be obtained from [[barter]]ing with [[piglin]]s.}}
{{History|console}}
{{History||xbox=TU7|xbone=CU1|ps=1.0|wiiu=Patch 1|switch=1.0.1|[[File:Magma Cream JE2 BE1.png|32px]] Added magma cream.}}
{{History||xbox=none|xbone=none|ps=1.90|wiiu=none|switch=none|[[File:Magma Cream JE3 BE2.png|32px]] The texture of magma cream has been changed.}}
{{History|New 3DS}}
{{History||0.1.0|[[File:Magma Cream JE2 BE1.png|32px]] Added magma cream.}}
{{history|foot}}
== Issues ==
{{issue list}}
{{items}}
[[Category:Renewable resources]]
[[cs:Lávová pěna]]
[[de:Magmacreme]]
[[es:Crema de magma]]
[[fr:Crème de magma]]
[[hu:Magmakrém]]
[[ja:マグマクリーム]]
[[ko:마그마 크림]]
[[lzh:火漿膏]]
[[nl:Magmacrème]]
[[pl:Magmowy krem]]
[[pt:Creme de magma]]
[[ru:Лавовый крем]]
[[th:ครีมแมกม่า]]
[[uk:Магмовий крем]]
[[zh:岩浆膏]]</li><li>[[Raw Chicken|Raw Chicken]]<br/>{{about|a food item|the mob "chicken"|Chicken}}{{About|a food item|the cooked version|Cooked Chicken}}{{Item
| title = Raw Chicken
| image = Raw Chicken.png
| heals = {{hunger|2}}
| effects = {{EffectLink|Hunger}} (0:30) (30% chance)
| renewable = Yes
| stackable = Yes (64)
}}
'''Raw chicken''' is a [[food]] item that can be eaten by the [[player]]. It can be cooked in a [[furnace]], [[smoker]], or a [[campfire]] to make [[cooked chicken]].
==Obtaining==
===Mob loot ===
Upon death, an adult [[chicken]] drops 1 raw chicken. The maximum is increased by 1 per level of [[Looting]], for a maximum of 1-4 with Looting III. Chickens that die while on [[fire]] drop [[cooked chicken]] instead.
===Cat gifts===
{{main|Cat#Gifts}}
Tamed [[cat]]s have a 70% chance to give the [[player]] a gift as they wake up from a [[bed]], and the gift has a 16.13% chance to be raw chicken.
==Usage==
=== Food===
To eat raw chicken, press and hold {{control|use}} while it is selected in the hotbar. Eating one restores {{hunger|2}} hunger and 1.2 hunger [[Hunger#Mechanics|saturation]], but has a 30% chance of inflicting food poisoning (the {{EffectLink|link=Hunger (status effect)|Hunger}} effect for 30 seconds).
<nowiki>*This has a similar effect as [[Rotten Flesh]].
===Smelting ingredient===
{{Smelting
|showname=1
|Raw Chicken
|Cooked Chicken
|0.35
}}
===Wolves===
Raw chicken can be used to [[breed]] and heal tamed [[wolves]], lead them around, and make baby tamed wolves grow up faster by 10% of the remaining time.
Wolves are at no risk of food poisoning.
===Trading===
Novice-level Butcher villagers have a {{frac|1|3}} chance to buy 14 raw chicken for an emerald.{{only|bedrock}}
Novice-level Butcher villagers have a 50% chance of offering to buy 14 raw chicken for an emerald.{{only|java}}
==Sounds==
{{Sound table/Entity/Food}}
==Data values==
===ID ===
{{edition|java}}:
{{ID table
|edition=java
|showforms=y
|generatetranslationkeys=y
|displayname=Raw Chicken
|spritetype=item
|nameid=chicken
|form=item
|foot=1}}
{{edition|bedrock}}:
{{ID table
|edition=bedrock
|shownumericids=y
|showforms=y
|notshowbeitemforms=y
|generatetranslationkeys=y
|displayname=Raw Chicken
|spritetype=item
|nameid=chicken
|id=275
|form=item
|foot=1}}
==Advancements ==
{{load advancements|Husbandry;A Balanced Diet}}
==Video==
<div style="text-align:center">{{yt|ux362Ae8Llc}}</div>
==History==
{{History|java beta}}
{{History||July 19, 2011|link=https://twitter.com/jeb_/status/93330811608240128|A teaser image for [[cooked chicken]] is revealed by [[Jeb]].}}
{{History||July 19, 2011|link=https://twitter.com/jeb_/status/93946593748852736|[[File:Raw Chicken (pre-release).png|32px]] Jens reveals raw chicken with changed texture based on feedback, saying "the chicken may be too smooth compared to other MC [[item]]s."<ref>https://twitter.com/jeb_/status/93335976298033152</ref>}}
{{History||1.8|snap=Pre-release|[[File:Raw Chicken JE1 BE1.png|32px]] Added raw chicken.
|Raw chicken is a new [[drops|drop]], obtained by killing a [[chicken]], usually along with a [[feather]].}}
{{History|java}}
{{History||1.2.1|snap=12w03a|Raw chicken can now be used to [[breeding|breed]] wolves.}}
{{History||1.3.1|snap=12w21a|Raw chicken can now be [[trading|sold]] to farmer [[villager]]s, at 14–17 raw chicken for 1 [[emerald]].}}
{{History||1.4.2|snap=12w37a|[[File:Raw Chicken JE2 BE2.png|32px]] The texture of raw chicken has been changed, so that it no longer has a dark outline.}}
{{History||1.8|snap=14w02a|Trading has been changed: butcher [[villager]]s now [[trading|buy]] 14–18 raw chicken for 1 [[emerald]].
|Farmer villagers no longer [[trading|trade]] raw chicken.}}
{{History||1.9|snap=15w43a|[[Chicken]]s can now [[drops|drop]] several raw chickens, if killed with a [[Looting]]-[[enchanting|enchanted]] [[weapon]].}}
{{History||1.13|snap=17w47a|Prior to [[1.13/Flattening|''The Flattening'']], this [[item]]'s numeral ID was 365.}}
{{History||1.14|snap=18w43a|[[File:Raw Chicken JE3 BE3.png|32px]] The texture of raw chicken has been changed.}}
{{History|||snap=18w44a|[[Cat]]s now offer raw chicken as [[Cat#Gifts|gift]]s.}}
{{History|pocket alpha}}
{{History||v0.4.0|[[File:Raw Chicken JE1 BE1.png|32px]] Added raw chicken.}}
{{History||v0.5.0|Raw chicken now restores {{hp|2}} instead of {{hp|1}}.}}
{{History||v0.8.0|snap=build 1|[[File:Raw Chicken JE2 BE2.png|32px]] The texture of raw chicken has been changed, so that it no longer has a dark outline.}}
{{History||v0.11.0|snap=build 1|Raw chicken now sometimes inflicts the [[hunger]] effect, despite the hunger bar not existing yet.}}
{{History||v0.12.1|snap=build 1|Raw chicken now restores [[hunger]] instead of [[health]].}}
{{History|pocket}}
{{History||1.0.4|snap=alpha 1.0.4.0|Butcher [[villager]]s now [[trading|buy]] 14-18 raw chicken for one [[emerald]].}}
{{History|bedrock}}
{{History||?|[[Chicken]]s can now [[drops|drop]] several raw chicken, if killed with a [[Looting]]-[[enchanting|enchanted]] [[weapon]].}}
{{History||1.8.0|snap=beta 1.8.0.8|Tamed [[cat]]s can now give the [[player]] raw chicken as a gift.}}
{{History||1.10.0|snap=beta 1.10.0.3|[[File:Raw Chicken JE3 BE3.png|32px]] The texture of raw chicken has been changed.}}
{{History||1.11.0|snap=beta 1.11.0.4|Butcher [[villager]]s now have {{frac|1|3}} of a chance to [[trading|buy]] 14 raw chicken.}}
{{History|console}}
{{History||xbox=TU5|xbone=CU1|ps=1.0|wiiu=Patch 1|[[File:Raw Chicken JE1 BE1.png|32px]] Added raw chicken.}}
{{History||xbox=TU12|[[File:Raw Chicken JE2 BE2.png|32px]] The texture of raw chicken has been changed, so that it no longer has a dark outline.}}
{{History|PS4}}
{{History||1.90|[[File:Raw Chicken JE3 BE3.png|32px]] The texture of raw chicken has been changed.}}
{{History|new3DS}}
{{History||0.1.0|[[File:Raw Chicken JE2 BE2.png|32px]] Added raw chicken.}}
{{History|foot}}
==Issues==
{{issue list}}
==Gallery ==
<gallery>
Beta 1.8 Dev Chicken 2.png|First image of raw chicken.
</gallery>
==References==
{{reflist}}
{{Items}}
[[de:Rohes Hühnchen]]
[[es:Pollo crudo]]
[[fr:Poulet cru]]
[[hu:Nyers csirkehús]]
[[ja:生の鶏肉]]
[[ko:익히지 않은 닭고기]]
[[nl:Rauwe kip]]
[[pl:Surowy kurczak]]
[[pt:Frango cru]]
[[ru:Сырая курятина]]
[[th:ไก่ดิบ]]
[[zh:生鸡肉]]
[[Category:Food]]
[[Category:Renewable resources]]</li></ul></nowiki> | Farmland could not be dug faster using a shovel. Saplings couldn't be planted onto farmland; however, if a sapling was planted, and the block below was tilled, the sapling would remain. This was changed and now the player can plant saplings onto farmland, but they will not grow until the land reverts to dirt. | ||||
| release | |||||
1.0.0{{Extension DPL}}<ul><li>[[Book and Quill|Book and Quill]]<br/>{{For|the item produced after a Book and Quill is signed|Written Book}}
{{Item
| image = Book and Quill.png
| renewable = Yes
| stackable = No
}}
A '''book and quill''' is an [[item]] used to write [[written book]]s.
== Obtaining ==
=== Crafting ===
{{Crafting
|Book
|Ink Sac
|Feather
|Output= Book and Quill
|type= Miscellaneous
}}
=== Natural generation ===
{{LootChestItem|book-and-quill}}
== Usage ==
=== Crafting ingredient ===
{{crafting usage}}
=== Writing ===
By pressing {{control|use item}} or long pressing screen anywhere{{only|bedrock}} while holding a book and quill in their hand, the [[player]] can open a text editor GUI.
Using this GUI, the player can write a single book up to 100{{only|java}} or 50{{only|bedrock}} pages long, with up to 798 characters per page. The player can write up to 79,800{{only|java}} or 12,800{{only|bedrock}} characters inside the entire book. No page may be longer than 14 lines and each line can have a width of 114 pixels (see pixel width of each character [[Language#Font|here]]).
The player has the ability to copy and paste into books. However, the paste does not work if the text being pasted is longer than a single page. Most Unicode characters are available in books, and they may be pasted in without issue.
In singleplayer, the world pauses while a book is being edited.{{only|java}}
=== Lecterns ===
One can place a book and quill or a [[written book]] on an empty [[lectern]].
The lectern then emits a redstone signal depending on the displayed page in the book. On the last page, the lectern emits a signal strength of 15. This is why lecterns are listed in the "redstone" tab in the [[creative inventory]].
=== Formatting codes ===
{{main|Formatting codes}}
{{exclusive|bedrock|section=1}}
Text in a book can be styled using codes starting with the {{key|§}} character (section sign).
* {{key|§}} + {{key|k}} creates randomly changing characters.
* {{key|§}} + {{key|l}} creates bold text.
* {{key|§}} + {{key|m}} creates strikethrough text.
* {{key|§}} + {{key|n}} creates underlined text.
* {{key|§}} + {{key|o}} creates italic text.
* {{key|§}} + {{key|0}} – {{key|f}} (hexadecimal) creates colored text.
* {{key|§}} + {{key|r}} resets any of the previous styles so text after it appears normally.
If the [[player]] uses multiple codes, and continue typing past the end of a line, the next line exhibits only the last formatting code used.
=== Signing ===
Books can be signed by pressing the "Sign" button while in the interface. {{IN|java}}, when signed, a book bears the name of the player who wrote it and a title chosen upon signing. {{IN|bedrock}}, the book doesn't display the name of the player as the author; instead, the author can be any text the player wants. After it has been signed, it cannot be edited again – it has turned into a [[written book]].
Special characters can be used in the title, if typed from a keyboard that supports them. Alt codes do not work, and the {{key|§}} character cannot be typed even using a keyboard that implements it, meaning titles cannot be colored or formatted in-game. However, on Linux using the compose key to produce special characters does work.
The title of the book can be up to 16 characters long, and the player cannot paste into a title. A "workaround" for the 16-character limitation is to manually rename the book at an [[Anvil#Renaming|anvil]], which always costs 1 [[Experience|experience level]]. This can be done with either a written book or a book and quill – both versions will always display the changed name. If a custom name is removed from a written book, it will revert back to the title it was given during the signing process.
=== Chiseled bookshelf ===
{{control|Use|text=Using}} the [[chiseled bookshelf]] while having a book and quill in the main hand will put the book inside the chiseled bookshelf.
=== Trading ===
{{IN|bedrock}}, expert-level librarian [[villager]]s buy 2 books and quills for one [[emerald]]. Book and quill is offered in two item slots due to being non-stackable.
{{IN|java}}, expert-level librarian villagers have a 50% chance to buy 2 books and quills for one emerald. The amount of books and quills needed is supposed to be 2, but due to the item being non-stackable, only one is needed for the trade.<ref>{{bug|MC-248042||Librarian's book and quill trade is always discounted to 1 since books are unstackable}}</ref>
== Sounds ==
{{edition|java}}:
{{Sound table
|rowspan=2
|sound=Page turn1.ogg
|sound2=Page turn2.ogg
|sound3=Page turn3.ogg
|subtitle=Page rustles
|source=master
|description=When the page of a book is turned
|id=item.book.page_turn
|translationkey=subtitles.item.book.page_turn
|volume=2.0
|pitch=1.0
|distance=16}}
{{Sound table
|subtitle=Page rustles
|source=block
|description=When the page of a book is turned on a lectern
|id=item.book.page_turn
|translationkey=subtitles.item.book.page_turn
|volume=2.0
|pitch=0.9-1.0
|distance=16}}
{{Sound table
|sound=Book thump1.ogg
|sound2=Book thump2.ogg
|subtitle=Book thumps
|source=block
|description=When a book is placed on a lectern
|id=item.book.put
|translationkey=subtitles.item.book.put
|volume=1.0
|pitch=1.0
|distance=16}}
{{Sound table
|sound=Chiseled bookshelf insert1.ogg
|sound2=Chiseled bookshelf insert2.ogg
|sound3=Chiseled bookshelf insert3.ogg
|sound4=Chiseled bookshelf insert4.ogg
|subtitle=Book placed
|source=block
|description=When a book and quill is placed in a chiseled bookshelf
|id=block.chiseled_bookshelf.insert
|translationkey=subtitles.chiseled_bookshelf.insert
|volume=0.8
|pitch=''varies'' <ref group=sound>Can be 1.0, 0.85, or 1.1 for each sound</ref>
|distance=16}}
{{Sound table
|sound=Chiseled bookshelf pickup1.ogg
|sound2=Chiseled bookshelf pickup2.ogg
|sound3=Chiseled bookshelf pickup3.ogg
|subtitle=Book taken
|source=block
|description=When a book and quill is removed from a chiseled bookshelf
|id=block.chiseled_bookshelf.pickup
|translationkey=subtitles.chiseled_bookshelf.take
|volume=0.8
|pitch=''varies'' <ref group=sound>Can be 1.0, 0.8, or 1.1 for each sound</ref>
|distance=16
|foot=1}}
{{edition|bedrock}}:
{{Sound table
|type=bedrock
|sound=Page turn1.ogg
|sound2=Page turn2.ogg
|sound3=Page turn3.ogg
|source=sound
|description=When the page of a book is turned
|id=item.book.page_turn
|volume=2.0
|pitch=1.0}}
{{Sound table
|sound=Book thump1.ogg
|sound2=Book thump2.ogg
|source=block
|description=When a book is placed on a lectern
|id=item.book.put
|volume=4.8
|pitch=1.0}}
{{Sound table
|type=bedrock
|sound=Chiseled bookshelf insert1.ogg
|sound2=Chiseled bookshelf insert2.ogg
|sound3=Chiseled bookshelf insert3.ogg
|sound4=Chiseled bookshelf insert4.ogg
|source=block
|description=When a book and quill is placed in a chiseled bookshelf
|id=insert.chiseled_bookshelf
|volume=0.8
|pitch=''varies'' <ref group=sound name=insertvaries>Can be 1.0, 0.85, or 1.1 for each sound</ref>}}
{{Sound table
|sound=Chiseled bookshelf pickup1.ogg
|sound2=Chiseled bookshelf pickup2.ogg
|sound3=Chiseled bookshelf pickup3.ogg
|source=block
|description=When a book and quill is removed from a chiseled bookshelf
|id=pickup.chiseled_bookshelf
|volume=0.8
|pitch=''varies'' <ref group=sound name=pickupvaries>Can be 1.0, 0.8, or 1.1 for each sound</ref>
|foot=1}}
== Data values ==
=== ID ===
{{edition|java}}:
{{ID table
|edition=java
|showitemtags=y
|showforms=y
|generatetranslationkeys=y
|displayname=Book and Quill
|spritetype=item
|nameid=writable_book
|itemtags=bookshelf_books, lectern_books
|form=item
|foot=1}}
{{edition|bedrock}}:
{{ID table
|edition=bedrock
|showitemtags=y
|shownumericids=y
|showforms=y
|notshowbeitemforms=y
|generatetranslationkeys=y
|displayname=Book and Quill
|spritetype=item
|nameid=writable_book
|id=510
|itemtags=minecraft:bookshelf_books, minecraft:lectern_books
|form=item
|foot=1}}
=== Item data ===
{{el|java}}:
{{main|Player.dat format}}
<div class="treeview" style="margin-top: 0;">
* {{nbt|compound|tag}}: The '''tag''' tag.
{{:Player.dat_format/Writable Books}}
</div>
{{el|bedrock}}:
: See [[Bedrock Edition level format/Item format]].
== Video ==
<div style="text-align:center">{{yt|DD_Z82wmGZA}}</div>
== History ==
{{History|java}}
{{History||1.3.1|snap=12w17a|[[File:Book and Quill JE1 BE1.png|32px]] Added books and quills.}}
{{History||1.7.2|snap=13w36a|Books and quills can now be crafted with a [[written book]] to clone the written book.}}
{{History||1.8|snap=14w05a|Copying written books now mark them as "Copy of Original" or "Copy of Copy".
|The copying status of a book is now denoted in a separate line in the tooltip, beneath the author's name.
|Copies of copies cannot be copied.}}
{{History|||snap=14w25a|Books and quills now use JSON text components instead of plain text with the new <code>pages</code> tag
|Book and quills are now capable of using the <code>clickEvent</code> and <code>hoverEvent</code> tags.}}
{{History||1.13|snap=17w47a|Prior to [[1.13/Flattening|''The Flattening'']], this [[item]]'s numeral ID was 386.}}
{{History||1.14|snap=18w43a|[[File:Book and Quill JE2 BE2.png|32px]] The texture of books and quills has now been changed.
|Added support for editing anywhere in the book and quill.<ref name="MC-1578">{{bug|MC-1578}}</ref>
|Books and quills now have copy/paste support.<ref name="MC-1578"></ref>
|The page limit of books and quills has now been increased from 50 to 100 pages.}}
{{History|||snap=19w11a|Librarian [[villager]]s now [[trading|buy]] books and quills instead of written books.}}
{{History||1.20<br>(Experimental)|link=1.19.3|snap=22w42a|Books and quills can now interact with [[chiseled bookshelves]].}}
{{History|bedrock}}
{{History||1.2.0|snap=beta 1.2.0.2|[[File:Book and Quill JE1 BE1.png|32px]] Added books and quills.}}
{{History||1.4.0|snap=beta 1.2.14.2|Books and quills can now be found inside [[buried treasure]] [[chest]]s.}}
{{History||1.6.0|snap=beta 1.6.0.1|Pages within books and quills can now be turned using the controller bumper buttons.}}
{{History||1.10.0|snap=beta 1.10.0.3|[[File:Book and Quill JE2 BE2.png|32px]] The texture of books and quills has now been changed.}}
{{History||1.11.0|snap=beta 1.11.0.4|Books and quills can now be [[trading|sold]] to librarian [[villager]]s.}}
{{History|console}}
{{History||xbox=TU25|xbone=CU14|ps=1.17|wiiu=Patch 1|switch=1.0.1|[[File:Book and Quill JE1 BE1.png|32px]] Added books and quills.}}
{{History|PS4}}
{{History||1.90|[[File:Book and Quill JE2 BE2.png|32px]] The texture of books and quills has now been changed.}}
{{History|foot}}
== Issues ==
{{issue list}}
== Trivia ==
* The in-game restrictions on books are not hard limits. Third party editors or commands can make books have more than 100 pages{{only|java}} (2,147,483,639 pages), more than 256 characters per page (32,767 characters per page), can change author names, and can have colored titles, among other things. These books still function properly in vanilla ''Minecraft'', meaning the [[player]] may encounter such books on adventure maps or multiplayer servers.<ref>http://www.minecraftforum.net/topic/1189266-hacking-books</ref>
* If the player renames a book and quill in an anvil before signing it, it retains the name from the anvil instead of taking the name from signing.{{only|java}}
== Gallery ==
<gallery>
Jeb book.png|The first image of a book seen.<ref>https://web.archive.org/web/20120427014334/https://www.mojang.com/2012/04/minecraft-snapshot-12w17a/</ref>
Book and Quill Writing.png|The GUI of writing a book.
Book and Quill Signing.png|The GUI of signing a book.
Written Book tooltip.png|A signed book.
BookandQuillOperators12w17a.png|Display of styles used in a book. "e" and "f" are difficult to see.
Book and Quill in Pocket Edition.jpg|A book and quill {{in|be}}.
Java book and quill example with text.png|An example of text in a book and quill in [[Java Edition]].
Better Together Book.jpg|A book and quill in ''Bedrock Edition''.
</gallery>
== References ==
{{Reflist}}
== External links ==
* [http://www.minecraftforum.net/topic/1498339-132ssp-bookshop-your-books-anywhere/ Bookshop - Book Sharing And Editing Tool]
* [http://fsymbols.com/generators/wide/ Full-Width Text Generator]
* [http://fsymbols.com/generators/smallcaps/ Small Caps Text Generator]
* [http://www.minecraftforum.net/topic/1202590-revise-edit-signed-books-w-more-options-all-os-12w17a/ Revise - External Book Editor]
== See also ==
* [[Book]]
* [[Bookshelf]]
* [[Written Book]]
{{Items}}
[[Category:Renewable resources]]
[[cs:Rozepsaná kniha s brkem]]
[[de:Buch und Feder]]
[[el:Βιβλίο και Πένα]]
[[es:Libro y pluma]]
[[fr:Livre vierge]]
[[hu:Könyv és toll]]
[[it:Libro e penna]]
[[ja:本と羽根ペン]]
[[ko:책과 깃펜]]
[[nl:Boek en veer]]
[[pl:Książka z piórem]]
[[pt:Livro e pena]]
[[ru:Книга с пером]]
[[th:หนังสือกับปากกาขนนก]]
[[uk:Книга з пером]]
[[zh:书与笔]]</li><li>[[Cocoa Beans|Cocoa Beans]]<br/>{{Block
|image=<gallery>
Cocoa Age 0.png|Age 0 JE
Cocoa Age 1.png|Age 1 JE
Cocoa Age 2.png|Age 2 JE
</gallery>
|image2=<gallery>
Cocoa Age 0 BE.png|Age 0 BE
Cocoa Age 1 BE.png|Age 1 BE
Cocoa Age 2 BE.png|Age 2 BE
</gallery>
|transparent=Yes
|light=No
|tool=axe
|renewable=Yes
|stackable=Yes (64)
|flammable=No
|lavasusceptible=No
}} '''Cocoa beans''' are items obtained from cocoa pods and are used to plant them, as well as to craft [[dye|brown dye]] and [[cookie|cookies]].
'''Cocoa pods''' are [[Bone Meal|bonemealable]] [[plant]]s placed on [[Log|jungle log]] sides that grow cocoa beans, and can be found naturally in [[Jungle|jungles]].
==Obtaining==
In ''Java Edition'', cocoa beans are only obtained through the natural generation of cocoa pods, while in ''Bedrock Edition'', they can also be gotten in bonus chests, from [[fishing]] inside the jungle, bamboo jungle and sparse jungle biomes and during a [[trading]] with a wandering trader.
Cocoa beans come from cocoa pods, which are found on the trunks of normal-sized naturally-generated [[jungle tree]]s in [[jungle]], [[bamboo jungle]]s and [[sparse jungle]] temperate [[biome]]s.
Cocoa pods can be mined with any item, but [[axe]]s are the quickest. Fully grown cocoa pods drop 3 cocoa beans. Using a tool enchanted with Fortune does not increase the amount of cocoa beans dropped.
{{breaking row|horizontal=1|Cocoa|Axe|sword=1|link=none}}
The block itself can be obtained by inventory editing or [[add-on]]s {{in|bedrock}}.
From one to two cocoa beans can be found in 40% of bonus [[chest]]s {{in|bedrock}}.
{{LootChestItem|cocoa-beans}}
Cocoa beans can be obtained from [[fishing]] in a jungle {{in|bedrock}}.
[[Wandering trader]]s may sell 3 cocoa beans for an [[emerald]] during a [[trading]] {{in|bedrock}}.
==Usage==
===Farming===
{{main|Tutorials/Cocoa bean farming}}
Placing cocoa beans on the side of a jungle [[log]] plants a new cocoa pod. The log does not need to be attached to a tree. A cocoa pod can be placed on jungle logs, jungle [[wood]], stripped jungle logs and stripped jungle wood.
[[File:Cocoaplant farm.png|thumb|left|A somewhat efficient cocoa pod farm, minimizing space and wood use.]]
Cocoa has three stages of growth. During its first stage, the pod is small and green. In the second stage, the plant is bigger and colored tan. In its last stage, the pod is even larger and orange. The cocoa block has a 20% chance to grow a stage when receiving a [[Tick#Random tick|random tick]], giving it an average time of 5 minutes and 41 seconds per stage. When destroyed in the first two stages, the pod yields only one cocoa bean. When destroyed in the third stage, it gives 3 cocoa beans. [[Bone meal]] can be used to force the cocoa pod forward by one growth stage. Cocoa pods burst and drop their beans when struck by flowing water, pushed by a piston or if their [[log]] or wood are removed by any means.
===Composting===
Placing cocoa beans into a [[composter]] has a 65% chance of raising the compost level by 1. {{IN|bedrock}}, cocoa beans are accepted as a direct substitute of brown dye in many recipes.
===Crafting ingredient===
{{crafting usage}}
{{Dye usage}}
{{IN|bedrock}}, cocoa beans can be also used in banner patterns:
{{banner crafting usage}}
{{Banner loom usage|Cocoa Beans}}
==Sounds==
{{Sound table/Block/Wood}}
==Data values==
===ID===
{{edition|java}}:
{{ID table
|edition=java
|showforms=y
|generatetranslationkeys=y
|displayname=Cocoa
|spritetype=block
|nameid=cocoa
|form=block}}
{{ID table
|displayname=Cocoa Beans
|spritetype=item
|nameid=cocoa_beans
|form=item
|foot=1}}
{{edition|bedrock}}:
{{ID table
|edition=bedrock
|showforms=y
|showaliasids=y
|shownumericids=y
|generatetranslationkeys=y
|displayname=Cocoa
|spritetype=block
|nameid=cocoa
|id=127
|form=block}}
{{ID table
|displayname=Cocoa Beans
|spritetype=item
|nameid=cocoa_beans
|aliasid=dye / 3
|id=412
|form=item
|translationkey=item.dye.brown.name
|foot=1}}
===Block states===
{{see also|Block states}}
{{/BS}}
==History==
''For a more in-depth breakdown of changes to textures and models, including a set of renders for each state combination, see [[/Asset history]]''
{{History|java beta}}
{{History||1.2|[[File:Cocoa Beans JE1 BE1.png|32px]] Added cocoa beans.
|Cocoa beans are currently obtainable only through an inventory editor.}}
{{History||1.2_02|Prior to this, Cocoa Beans were misspelled as 'Coco Beans'.}}
{{History||1.4|Cocoa beans have been formally brought into the game as a reward found in [[dungeon]] chests.<ref>{{tweet|notch|53161729990987776}}</ref> (53% chance) Also, brown [[sheep]] now naturally spawn, making brown [[wool]] obtainable without hacking the game.
|Cocoa beans can now be used to craft [[cookie]]s.}}
{{History|java}}
{{History||May 8, 2012|link={{tweet|jeb|199867730927697920}}|[[Jeb]] revealed cocoa with a screenshot.}}
{{History||1.3.1|snap=12w18a|For only this snapshot, cocoa beans have been given a small (0.5%) chance of dropping from destroyed [[jungle tree]] [[leaves]] in a similar fashion to [[apple]]s from oak leaves, which makes cocoa beans [[renewable resource|renewable]] for the first time.}}
{{History|||snap=12w19a|[[File:Cocoa Age 0 (S) JE1.png|32px]] [[File:Cocoa Age 1 (S) JE1.png|32px]] [[File:Cocoa Age 2 (S) JE1.png|32px]] Added cocoa. The top textures of cocoa always keep a completely constant rotation, regardless of what direction they face. They also not shaded.
|[[File:Cocoa Beans JE2.png|32px]] The texture of cocoa beans has been changed.
|Cocoa has replaced jungle [[leaves]] as the main method of finding cocoa beans.
|[[File:Cocoa Age 3 (S) JE1.png|32px]] Cocoa with values 12–15 is inaccessible normally, and use the texture of the [[dragon egg]]. This is due to the dragon egg texture being to the left of the ripe cocoa texture in <samp>[[terrain.png]]</samp>, as cocoa textures are arranged with the oldest on the left and the youngest on the right, resulting in the unusually ripe cocoa reading the dragon egg texture.}}
{{History|||snap=1.3|[[File:Cocoa Beans JE3 BE2.png|32px]] The texture of cocoa beans has been changed.}}
{{History||1.4.2|snap=12w34a|Cocoa beans have been given the ability to [[Armor#Dyeing|dye]] leather [[armor]] and [[wolf]] collars.}}
{{History||1.4.6|snap=12w49a|Cocoa beans can now be [[crafting|crafted]] with [[gunpowder]] to create a [[firework star]].}}
{{History||1.5|snap=13w02a|Due to textures being stored in individual files, cocoa beans with data 12–15 no longer have a texture to use, and now crash the game if a [[chunk]] containing one is loaded.}}
{{History|||snap=13w03a|Cocoa with data values 12–15 now only crash the game if one is directly in the field of view.}}
{{History|||snap=13w04a|[[Bone meal]] now grows cocoa by only one stage.}}
{{History|||snap=13w10a|[[File:Cocoa Age 3 (S) JE2.png|32px]] Cocoa with data 12–15 now use the age 2 texture, resulting in a broken appearance, preventing previously mentioned crashes.}}
{{History||1.6.1|snap=13w18a|Cocoa beans have been removed from [[dungeon]] [[chest]]s.}}
{{History|||snap=13w19a|Brown [[Terracotta|stained clay]] can now be [[crafting|crafted]] using cocoa beans.}}
{{History||1.7.2|snap=13w41a|Brown [[stained glass]] can now be crafted using cocoa beans.}}
{{History||1.8|snap=14w07a|[[File:Cocoa Age 0 (S) JE2.png|32px]] [[File:Cocoa Age 1 (S) JE2.png|32px]] [[File:Cocoa Age 2 (S) JE2.png|32px]] [[File:Missing Model JE1.png|32px]] The top textures of cocoa now rotate with the blocks themselves (cocoa facing north remaining visually unaffected), and cocoa of age 3 has [[Missing model|no model]].}}
{{History|||snap=14w10a|[[File:Cocoa Age 0 (S) JE3.png|32px]] [[File:Cocoa Age 1 (S) JE3.png|32px]] [[File:Cocoa Age 2 (S) JE3.png|32px]] [[File:Missing Model JE2.png|32px]] The large section of cocoa is shaded, and the missing model (which age 3 cocoa uses) has changed.}}
{{History|||snap=14w25a|[[File:Cocoa Age 0 (S) JE4.png|32px]] [[File:Cocoa Age 1 (S) JE4.png|32px]] [[File:Cocoa Age 2 (S) JE4.png|32px]] The connecting region of cocoa is now shaded.}}
{{History|||snap=14w26a|Cocoa with data 12–15 has been effectively removed from the game, as such blocks now convert to a proper value with {{cmd|setblock}}. Loading worlds with existing out of range cocoa crash the game.}}
{{History|||snap=14w30a|Cocoa beans can now be used to dye [[banner]]s.}}
{{History||1.13|snap=17w47a|The different data values for the <code>dye</code> ID have been split up into their own IDs.
|Prior to [[1.13/Flattening|''The Flattening'']], this block's and item's numeral ID were respectively 127 and 351.}}
{{History||1.14|snap=18w43a|Cocoa beans can now be used to craft [[brown dye]].
|Cocoa beans can no longer be used as a [[dye]].
|All of the dye-related functions and crafting recipes of cocoa beans (except cookies) have been transferred to brown dye.
|"Cocoa Beans" item has been renamed to "Cocoa".
|[[File:Cocoa Beans JE4 BE3.png|32px]] The texture of cocoa has been changed.
|[[File:Cocoa Age 0 (S) JE5.png|32px]] [[File:Cocoa Age 1 (S) JE5.png|32px]] [[File:Cocoa Age 2 (S) JE5.png|32px]] The textures of cocoa have been changed.
|[[File:Cocoa Age 0 (texture) JE2 BE2.png|32px]] [[File:Cocoa Age 1 (texture) JE2 BE2.png|32px]] Textures for cocoa age 0 and 1 has palette left, visible only on particles.
|Cocoa now has a placement [[sound]].}}
{{History|||snap=19w03a|Placing cocoa into the new [[composter]] has a 50% chance of raising the compost level by 1.}}
{{History|||snap=19w05a|Cocoa now has a 65% chance of increasing the compost level in a composter by 1.}}
{{History|||snap=19w11b|"Cocoa" item has been renamed back to "Cocoa Beans".{{verify|was this not just one bug that affected other crops as well? if so cite the ticket and add to all other affected pages}}}}
{{History||1.18|snap=Pre-release 5|[[File:Cocoa Age 0 (texture) JE3 BE3.png|32px]] [[File:Cocoa Age 1 (texture) JE3 BE3.png|32px]] Textures for cocoa age 0 and 1 were changed. This visually changes only particles.}}
{{History||1.19|snap=22w11a|[[File:Cocoa Age 2 (S) JE6.png|32px]] The texture and model of cocoa age 2 have been changed.}}
{{History|pocket alpha}}
{{History||v0.3.0|[[File:Cocoa Beans JE1 BE1.png|32px]] Added cocoa beans. They are currently unobtainable and serve no purpose.}}
{{History||v0.8.0|snap=build 1|[[File:Cocoa Beans JE3 BE2.png|32px]] The texture of cocoa beans has been changed.
|Cocoa beans can be [[crafted]] from an [[orange dye]] and an [[ink sac]], or from [[dandelion yellow]], [[rose red]], and an ink sac, despite there being no way of obtaining ink sacs at the time.}}
{{History|||snap=build 3|Cocoa beans are now available in [[creative]].}}
{{History||v0.9.0|snap=build 1|[[File:Cocoa Age 0 (S) JE1.png|32px]] [[File:Cocoa Age 1 (S) JE1.png|32px]] [[File:Cocoa Age 2 (S) JE1.png|32px]] {{info needed|How did 12-16 appear?}} Added cocoa.
|Cocoa provides an additional way of obtaining cocoa beans.
|Cocoa beans are now used to craft [[cookie]]s.}}
{{History||v0.11.0|snap=build 14|Cocoa now grows over time.<ref>{{bug|MCPE-7887}}</ref>}}
{{History||?|[[File:Cocoa Age 0 (S) BE4.png|32px]] [[File:Cocoa Age 1 (S) BE4.png|32px]] [[File:Cocoa Age 2 (S) BE2.png|32px]] Cocoa no longer has a stem connecting it to the log.}}
{{History||v0.15.0|snap=Realms build 4|[[File:Cocoa Age 0 (S) JE1.png|32px]] [[File:Cocoa Age 1 (S) JE1.png|32px]] [[File:Cocoa Age 2 (S) JE1.png|32px]] Cocoa stems now render again.<ref>{{bug|MCPE-13579}}</ref>}}
{{History||v0.16.0|snap=build 1|Cocoa beans can no longer be crafted from [[orange dye]] and an ink sac.
|Cocoa beans can no longer be crafted from rose red, dandelion yellow and ink sacs.}}
{{History|pocket}}
{{History||1.0.0|snap=alpha 0.17.0.1|Cocoa beans can now be used to dye [[shulker]]s.}}
{{History||1.1.0|snap=alpha 1.1.0.0|Cocoa beans can now be used to dye [[shulker box]]es and [[bed]]s.
|Cocoa beans can now be used to craft [[concrete powder]].}}
{{History|bedrock}}
{{History||1.2.0|snap=beta 1.2.0.2|Cocoa beans can now be used to dye [[banner]]s, [[firework star]]s, and [[glass]].
|Cocoa beans can now be found in [[bonus chest]]s.}}
{{History||1.4.0|snap=beta 1.2.20.1|Cocoa beans can now be used to craft brown [[balloon]]s and [[glow stick]]s.}}
{{History||1.8.0|snap=beta 1.8.0.10|Cocoa beans can now be used to craft [[brown dye]].}}
{{History||1.10.0|snap=beta 1.10.0.3|Cocoa beans are now [[trading|sold]] by [[wandering trader]]s.
|[[File:Cocoa Beans JE4 BE3.png|32px]] The texture of cocoa beans has been changed.
|[[File:Cocoa Age 0 (S) BE4.png|32px]] [[File:Cocoa Age 1 (S) BE4.png|32px]] [[File:Cocoa Age 2 (S) BE4.png|32px]] The textures of cocoa have been changed.}}
{{History||1.11.0|snap=beta 1.11.0.1|Cocoa beans can now be used to fill up [[composter]]s.}}
{{History||1.16.100|snap=beta 1.16.100.56|The ID of cocoa beans has been changed from <code>dye/3</code> to <code>cocoa_beans</code>.}}
{{History||1.18.10|snap=beta 1.18.10.22|[[File:Cocoa Age 0 (texture) JE3 BE3.png|32px]] [[File:Cocoa Age 1 (texture) JE3 BE3.png|32px]] Textures for cocoa age 0 and 1 were changed. This visually changes only particles.}}
{{History|console}}
{{History||xbox=TU1|xbone=CU1|ps=1.0|wiiu=Patch 1|switch=1.0.1|[[File:Cocoa Beans JE1 BE1.png|32px]] Added cocoa beans.}}
{{History||xbox=TU9|[[File:Cocoa Beans JE3 BE2.png|32px]] The texture of cocoa beans has been changed.}}
{{History||xbox=TU12|[[File:Cocoa Age 0 (S) JE3.png|32px]] [[File:Cocoa Age 1 (S) JE3.png|32px]] [[File:Cocoa Age 2 (S) JE3.png|32px]]{{verify|Were these the models used?}} Added cocoa.}}
{{History||xbox=none|xbone=none|ps=1.90|wiiu=none|switch=none|[[File:Cocoa Beans JE4 BE3.png|32px]] The texture of cocoa beans has been changed once again.
|[[File:Cocoa Age 0 (S) JE5.png|32px]] [[File:Cocoa Age 1 (S) JE5.png|32px]] [[File:Cocoa Age 2 (S) JE5.png|32px]]{{verify|Were these the models used?}} The textures of cocoa have been changed.}}
{{History|new 3ds}}
{{History||0.1.0|[[File:Cocoa Beans JE3 BE2.png|32px]] Added cocoa beans.
|[[File:Cocoa Age 0 (S) JE3.png|32px]] [[File:Cocoa Age 1 (S) JE3.png|32px]] [[File:Cocoa Age 2 (S) JE3.png|32px]]{{verify|Were these the models used?}} Added cocoa.}}
{{History|foot}}
=== Cocoa "item" ===
{{:Technical blocks/Cocoa}}
== Issues ==
{{issue list|Cocoa Beans|Cocoa Pod}}
== Trivia ==
*Cocoa pods have a different hitbox for each size; however, the top is always 0.25 blocks below the top of the [[log]] it is on.
*If a cocoa pod grows while the player is standing next to it, the player is forced into the appropriate form of [[suffocation prevention]] depending on available space.
*{{IN|be}}, the pixels on top of the fully grown pod are 8/7 the size of those on the side.<ref>{{bug|MC-109055||Fixed}}</ref><ref>{{bug|MCPE-152862}}</ref>
== Gallery ==
<gallery>
CocoaReveal.png|The first screenshot of cocoa pods tweeted by [[Jens Bergensten]], which revealed the plants.
CocoaPlant.png|A screenshot tweeted by Jens Bergensten, showing the pod.
Cocoa Plants in a Jungle Biome (12w19a).png|Naturally generated cocoa pods.
CPlantsJWood.png|A cocoa pod farm.
Cocoa2.jpg|A cocoa farm.
Cocoa beans phases.png|Three growing phases of the cocoa pod.
AreaOptimizedBeanPods.gif|A log and pod layout for optimizing an example area of 14×14 (including walls).
File:CocoaBean15.png|Cocoa beans with values greater than 12 appeared this way
</gallery>
==Literature==
===References===
{{reflist}}
===External Links===
*[https://www.minecraft.net/en-us/article/taking-inventory--cocoa-beans Taking Inventory: Cocoa Beans] – Minecraft.net on December 5, 2019
{{Items}}
{{Blocks|vegetation}}
[[Category:Dyes]]
[[Category:Food]]
[[Category:Plants]]
[[Category:Renewable resources]]
[[Category:Non-solid blocks]]
[[Category:Natural blocks]]
[[cs:Kakaové boby]]
[[de:Kakaobohnen]]
[[es:Semillas de cacao]]
[[fr:Fèves de cacao]]
[[hu:Kakaóbab]]
[[ja:カカオ豆]]
[[ko:코코아 콩]]
[[nl:Cacaobonen]]
[[pl:Ziarna kakaowe]]
[[pt:Sementes de cacau]]
[[ru:Какао-бобы]]
[[uk:Какао-боби]]
[[zh:可可豆]]</li></ul> | Beta 1.9-pre5 | When the player tilled a dirt block, the top layer was removed, but due to the way tilled dirt blocks were textured, it appeared as if the block sank into the ground. The texture for the sides shifted down instead of the top pixels being removed. | |||
| Beta 1.9-pre6 | Fixed placing fences below farmland blocks making the farmland and crops immune to decay caused by players or animals walking on them. | ||||
| ? | Passive mobs could spawn on nearby and lit grass, trampling the crops. | ||||
1.1{{Extension DPL}}<ul><li>[[Raw Copper|Raw Copper]]<br/>{{Item
| image = Raw Copper.png
| renewable = No
| stackable = Yes (64)
}}
'''Raw copper''' is a raw metal resource obtained from mining [[copper ore]].
== Obtaining ==
=== Mining ===
Copper ore and deepslate copper ore mined with a [[stone pickaxe]] or better drops 2–5 units of raw copper. If the pickaxe is enchanted with [[Fortune]], it can drop extra raw copper, allowing for a maximum of 20 units per ore block with Fortune III, or an average of 7.7 units of raw copper per ore block. If the ore is mined using a pickaxe enchanted with [[Silk Touch]], it drops the ore block instead.
=== Crafting ===
{{Crafting
|showname=1
|Block of Raw Copper
|Output=Raw Copper,9
|type=Material
|foot=1
}}
== Usage ==
The primary usage of raw copper is [[smelting]] it into [[copper ingot]]s.
=== Crafting ===
{{crafting usage}}
=== Smelting ingredient ===
{{Smelting
|showname=2
|Raw Copper
|Copper Ingot
|0.7
}}
== Data values ==
=== ID ===
{{edition|java}}:
{{ID table
|edition=java
|showitemtags=y
|showforms=y
|generatetranslationkeys=y
|displayname=Raw Copper
|spritetype=item
|nameid=raw_copper
|form=item
|foot=1}}
{{edition|bedrock}}:
{{ID table
|edition=bedrock
|shownumericids=y
|showforms=y
|notshowbeitemforms=y
|generatetranslationkeys=y
|displayname=Raw Copper
|spritetype=item
|nameid=raw_copper
|form=item
|id=507
|foot=1}}
== History ==
{{History|java}}
{{History||1.17|snap=21w14a|[[File:Raw Copper JE1.png|32px]] Added raw copper.}}
{{History|||snap=April 13, 2021|slink={{Tweet|JasperBoerstra|1381991999952277513}}|[[File:Raw Copper JE2.png|32px]] [[JAPPA]] shows a new raw copper texture.}}
{{History|||snap=21w15a|[[File:Raw Copper JE2.png|32px]] The texture of raw copper has been changed.
|Raw copper can now be used to craft [[block of raw copper]].}}
{{History|||snap=April 16, 2021|slink={{Tweet|JasperBoerstra|1383047666037325829}}|[[File:Raw Copper (pre-release).png|32px]] [[JAPPA]] shows a new raw copper texture again.}}
{{History|||snap=21w16a|[[File:Raw Copper JE3.png|32px]] The texture of raw copper has been changed.}}
{{History|||snap=21w17a|[[Copper ore]] now drops 2-3 raw copper when mined instead of a single unit.}}
{{History||1.18|snap=21w40a|[[Copper ore]] now drops 2-5 raw copper when mined.}}
{{History|bedrock}}
{{History||1.17.0|snap=beta 1.17.0.50|[[File:Raw Copper JE2.png|32px]] Added raw copper.}}
{{History|||snap=beta 1.17.0.52|Raw copper are now available without enabling [[experimental gameplay]].}}
{{History|||snap=beta 1.17.0.54|[[File:Raw Copper JE3.png|32px]] The texture of raw copper has been changed.}}
{{History|foot}}
== Issues ==
{{Issue list}}
==Gallery==
<gallery>
JE 1.17 Dev Raw Metals.jpg|Jappa shows raw ore textures.
Jappa Raw Ores 1.jpg|Jappa shows raw ore textures.
Jappa Raw Ores 2.png|Jappa shows raw ore textures.
Jappa Raw Ores 3.jpg|Jappa shows raw ore textures.
Jappa Raw Ores 4.jpg|Jappa shows raw ore textures.
Jappa Raw Ores 5.jpg|Jappa shows raw ore textures.
</gallery>
{{Items}}
[[Category:Non-renewable resources]]
[[de:Rohkupfer]]
[[es:Cobre en bruto]]
[[fr:Cuivre brut]]
[[it:Rame grezzo]]
[[ja:銅の原石]]
[[pl:Surowa miedź]]
[[pt:Cobre bruto]]
[[ru:Необработанная медь]]
[[tr:Ham Bakır]]
[[uk:Необроблена мідь]]
[[zh:粗铜]]</li><li>[[Magenta Dye|Magenta Dye]]<br/>{{Item
| image = Magenta Dye.png
| renewable = Yes
| stackable = Yes (64)
}}
'''Magenta dye''' is a [[Dye#Quasi-Primary|quasi-primary color dye]].
== Obtaining ==
=== Crafting ===
{{Crafting
|head=1
|showdescription=1
|showname=0
|Allium
|Output=Magenta Dye
|type=Material
}}
{{Crafting
|Lilac
|Output=Magenta Dye,2
|type=Material
}}
{{Crafting
|Purple Dye
|Pink Dye
|Output=Magenta Dye,2
|type=Material
}}
{{Crafting
|Blue Dye
|Red Dye
|Pink Dye
|Output=Magenta Dye,3
|type=Material
}}
{{Crafting
|Lapis Lazuli
|Red Dye
|Pink Dye
|Output=Magenta Dye,3
|type=Material
|description={{only|bedrock|education}}
}}
{{Crafting
|Blue Dye
|Red Dye
|Red Dye
|White Dye
|Output=Magenta Dye,4
|type=Material
}}
{{Crafting
|Lapis Lazuli;Lapis Lazuli;Blue Dye
|Red Dye;Red Dye;Red Dye
|Red Dye;Red Dye;Red Dye
|Bone Meal;White Dye;Bone Meal
|Output=Magenta Dye,4
|type=Material
|description={{only|bedrock|education}}
|foot=1
}}
=== Trading ===
[[Wandering trader]]s sell 3 magenta dye for an [[emerald]].
== Usage ==
{{dye usage}}
=== Crafting ingredient ===
{{crafting usage|ignore=Banner|continue=1}}
{{banner crafting usage}}
=== Loom ingredient ===
{{Banner loom usage|Magenta Dye}}
=== Trading ===
Expert-level shepherd villagers have a {{frac|1|6}} chance to buy 12 magenta dye for an emerald.
== Data values ==
=== ID ===
{{edition|java}}:
{{ID table
|edition=java
|showforms=y
|generatetranslationkeys=y
|displayname=Magenta Dye
|spritetype=item
|nameid=magenta_dye
|form=item
|foot=1}}
{{edition|bedrock}}:
{{ID table
|edition=bedrock
|showaliasids=y
|shownumericids=y
|showforms=y
|notshowbeitemforms=y
|generatetranslationkeys=y
|displayname=Magenta Dye
|spritetype=item
|nameid=magenta_dye
|aliasid=dye / 13
|id=408
|form=item
|translationkey=item.dye.magenta.name
|foot=1}}
== Video ==
{{yt|IkaIFDQJNUU}}
== History ==
{{History|java beta}}
{{History||1.2|[[File:Magenta Dye JE1 BE1.png|32px]] Added magenta dye.}}
{{History|java}}
{{History||1.4.2|snap=12w34a|Added the ability to [[Armor#Dyeing|dye]] leather [[armor]] and [[wolf]] collars.}}
{{History||1.4.6|snap=12w49a|Magenta dye can now be [[crafting|crafted]] with [[gunpowder]] to create a [[firework star]].}}
{{History||1.6.1|snap=13w19a|[[Stained clay]] can now be crafted.}}
{{history||1.7.2|snap=13w36a|With the addition of new [[flower]]s, many secondary and tertiary dyes are now primary [[dye]]s.}}
{{History||1.7.2|snap=13w41a|[[Stained glass]] can now be crafted.}}
{{History||1.8|snap=14w30a|Added [[banner]]s, which can be dyed.}}
{{History||1.11|snap=16w39a|Added [[shulker box]]es, which can be dyed.}}
{{History||1.12|snap=17w15a|Added ability to dye [[bed]]s.}}
{{History||1.13|snap=17w47a|The different data values for the <code>dye</code> ID have now been split up into their own IDs.
|Prior to [[1.13/Flattening|''The Flattening'']], this [[item]]'s numeral ID was 351.}}
{{History||1.14|snap=18w43a|Magenta dye is now crafted using [[blue dye]] and [[white dye]], instead of [[lapis lazuli]] and [[bone meal]].
|[[File:Magenta Dye JE2 BE2.png|32px]] The texture of magenta dye has now been changed.}}
{{History|||snap=18w44a|Magenta dye can now change the text color on [[sign]]s to magenta.}}
{{History|||snap=19w05a|Added the [[wandering trader]], which sells magenta dye.}}
{{History|||snap=19w11a|Magenta dye can now be [[trading|bought]] by shepherd villagers.}}
{{History||1.17|snap=20w45a|Magenta dye can now be used to craft [[magenta candle]]s.}}
{{History|||snap=21w19a|Magenta dye can no longer be used to craft magenta candles.}}
{{History|||snap=Pre-release 1|Magenta dye can now once again be used to craft magenta candles.}}
{{History||1.20<br>(Experimental)|link=1.19.3|snap=22w42a|Magenta dye can now change the text color on [[hanging sign]]s to magenta.}}
{{History|pocket alpha}}
{{History||v0.3.0|[[File:Magenta Dye JE1 BE1.png|32px]] Added magenta dye. It is currently unobtainable and serves no purpose.}}
{{History||v0.4.0|Magenta dye is now craftable with one [[lapis lazuli]], two [[rose red]]s, and one [[bone meal]].
|Magenta dye can now be used to craft magenta wool.}}
{{History||v0.6.0|Magenta dye can now be used to dye [[sheep]].}}
{{History||v0.8.0|snap=build 1|Magenta dye can now additionally be crafted with one [[purple dye]] and one [[pink dye]], or with one [[lapis lazuli]], one [[rose red]], and one pink dye.}}
{{History||v0.9.0|snap=build 11|Magenta dye can now be used to craft colored [[terracotta]].}}
{{History||v0.11.0|snap=build 1|Magenta dye can now be used to dye tamed [[wolf]] collars.}}
{{History||v0.14.0|snap=build 1|Magenta dye can now be used to dye [[water]] in [[cauldron]]s.}}
{{History|pocket}}
{{History||1.0.0|snap=alpha 0.17.0.1|Magenta dye can now be used to dye [[shulker]]s.}}
{{History||1.1.0|snap=alpha 1.1.0.0|Magenta dye can now be used to craft [[concrete powder]], colored [[bed]]s and dyed [[shulker box]]es.}}
{{History|bedrock}}
{{History||1.2.0|snap=beta 1.2.0.2|Magenta dye can now be used to craft [[firework star]]s, [[stained glass]] and patterns on [[banner]]s.}}
{{History||1.4.0|snap=beta 1.2.20.1|Magenta dye can now be used to craft [[balloon]]s and [[glow stick]]s.}}
{{History||1.8.0|snap=beta 1.8.0.8|Magenta dye can now be used to dye tamed [[cat]] collars.}}
{{History||1.10.0|snap=beta 1.10.0.3|Magenta dye is now [[trading|sold]] by [[wandering trader]]s.
|Magenta dye can now be used to dye white [[carpet]]s and regular [[glass pane]]s.
|[[File:Magenta Dye JE2 BE2.png|32px]] The texture of magenta dye has now been changed.}}
{{History||1.11.0|snap=beta 1.11.0.4|Magenta dye can now be [[trading|sold]] to shepherd [[villager]]s.}}
{{History||1.16.100|snap=beta 1.16.100.56|The ID of magenta dye has been changed from <code>dye/13</code> to <code>magenta_dye</code>.}}
{{History|console}}
{{History||xbox=TU1|xbone=CU1|ps=1.00|switch=1.0.1|wiiu=Patch 1|[[File:Magenta Dye JE1 BE1.png|32px]] Added magenta dye.}}
{{History|PS4}}
{{History||1.90|[[File:Magenta Dye JE2 BE2.png|32px]] The texture of magenta dye has now been changed.}}
{{History|new 3ds}}
{{History||0.1.0|[[File:Magenta Dye JE1 BE1.png|32px]] Added magenta dye.}}
{{History|foot}}
== Issues ==
{{issue list}}
== References ==
{{reflist}}
{{Items}}
[[Category:Dyes]]
[[cs:Purpurové barvivo]]
[[de:Magenta Farbstoff]]
[[es:Tinte magenta]]
[[fr:Teinture magenta]]
[[hu:Bíborvörös festék]]
[[ja:赤紫色の染料]]
[[ko:자홍색 염료]]
[[nl:Magenta kleurstof]]
[[pl:Karmazynowy barwnik]]
[[pt:Corante magenta]]
[[ru:Сиреневый краситель]]
[[zh:品红色染料]]
[[Category:Renewable resources]]</li></ul> | 11w48a | Farmland can now only be trampled if the player jumps onto it; walking no longer affects it. Animals, villagers, and other mobs can similarly trample farmland by jumping on it, but not by walking. | |||
| 11w49a | Particles no longer destroy farmland. | ||||
| ? | Melon and pumpkin blocks no longer need farmland to spawn onto, as they can now grow on normal dirt or grass blocks. | ||||
1.9{{Extension DPL}}<ul><li>[[Fishing Rod|Fishing Rod]]<br/>{{Dungeons hatnote|type=artifact}}
{{Item
| image = Fishing Rod.png
| image2 = Cast Fishing Rod.png
| rarity = Common
| renewable = Yes
| durability =
Depends on the Edition:
Java: 64
Bedrock: 384
| stackable = No
}}
A '''fishing rod''' is a [[tool]] that casts a bobber used to [[Fishing|fish]] in [[water]] or to hook and pull [[Mob|mobs]], [[Item (entity)|items]] and some [[Entity|entities]] towards the user.
== Obtaining ==
=== Crafting ===
{{Crafting
|head=1
|showname=0
|showdescription=1
|C1= Stick
|B2= Stick
|C2= String
|A3= Stick
|C3= String
|Output= Fishing Rod
|type= Tool
}}
{{crafting
|foot=1
|ignoreusage=1
|Damaged Fishing Rod
|Damaged Fishing Rod
|Output= Fishing Rod
|description= The durability of the two fishing rods is added together, plus an extra 5% durability.
|type= Tool
}}
=== Fishing ===
Enchanted fishing rods can be obtained as "treasure" [[item]]s from [[fishing]], and unenchanted ones as "junk" items.
=== Trading ===
Journeyman-level [[fisherman]] [[villager]]s sell enchanted fishing rods for 6 [[emerald]]s.
The [[enchantment]]s are the same as the ones obtained from an [[enchantment table]] at levels 5–19.
=== Chest loot ===
{{LootChestItem|enchanted-fishing-rod}}
{{notelist}}
=== Carrot/warped fungus on a stick ===
If a [[carrot on a stick]] or a [[warped fungus on a stick]] is used to the point of zero durability, it becomes a fishing rod again.
=== Mob loot ===
{{IN|java}}, the [[drowned]] mob has a 3.75% chance of spawning with a fishing rod equipped.
{{IN|bedrock}}, naturally-spawned drowned has 0.85% chance to spawn with fishing rod, while converted drowned has 1% chance to spawn with it.
If killed, they have an 8.5% chance of dropping this fishing rod. That chance increases by 1% for each level of Looting applied to a weapon (up to 11.5% chance). The dropped item is damaged and never enchanted.
== Usage ==
=== Fishing ===
{{main|Fishing}}
Fishing rods can be cast into water. After a short period of time, a stream of bubble particles approaches the fishing rod. If the rod is reeled in once the particles "bite" the bobber, the player obtains a fish, junk, or possibly a treasure item. If the fishing rod was in the player's hand and is no longer, the fishing bobber [[Entity|entity]] despawns, unless the fishing rod to the off-hand or it's been swapped with another fishing rod{{Cn|Cn=Research on the way fishing rods behave when you swap rod or have two equipped (one in the main and one in the off hand) needs to be done}}.
=== Crafting ingredient ===
{{crafting usage|Fishing Rod, Damaged Fishing Rod}}
=== Hooking mobs and other entities ===
{{see also|Fishing#Fishing rod durability}}
The fishing rod can be used to hook [[mobs]], [[Item (entity)|items]]{{only|java}} and some [[entities]], and even [[player]]s. The fishing rod can then be reeled in, dragging the hooked object toward the player without dealing damage. Reeling in a [[mob]] or entity costs 5 points of durability, and reeling in an item costs 3 points. Reeling a mob pulls it toward the player with a speed of {{frac|1|10}} the distance between mob and player.
Besides mobs and items, entities that can be reeled in include:
* {{ItemLink|id=oak boat|Boat}}s
* {{ItemLink|id=oak boat with chest|Boat with Chest}}s
* {{ItemSprite|Minecart}} [[Minecart]]s of any type
* {{ItemLink|Armor Stand}}s
* {{EntityLink|Shulker Bullet}}s
* {{EntityLink|Fireball}}s
* {{EntityLink|Small fireball}}s
* {{EntitySprite|TNT}} Primed [[TNT]]
* Any [[falling block]] such as {{EntityLink|Sand}}, {{EntityLink|Gravel}}, {{EntityLink|Dragon Egg}}s, {{EntityLink|Concrete Powder}}s, {{EntityLink|Scaffolding}}, [[Snow]] on [[Bedrock Edition]] or {{EntityLink|Anvil}}s
Some entities can be hooked, but cannot be reeled in:
* {{EntitySprite|Horse}} Mobs riding/being ridden by other mobs (in Bedrock Edition, the hooked mob dismounts)
* {{EntityLink|Painting}}s
* {{EntityLink|Item Frame}}s
* {{EntityLink|id=leash-knot|Lead}} knots
* {{EntityLink|End Crystal}}s
* {{EntityLink|Shulker}}s
Attempting to reel in said entities still costs durability to the rod.
The rest of the entities cannot be hooked at all:
* {{EntitySprite|egg}} Thrown [[egg]]s
* {{EntitySprite|snowball}} Thrown [[snowball]]s
* {{EntitySprite|ender-pearl}} Thrown [[ender pearl]]s
* {{EntitySprite|eye-of-ender}} Thrown [[eyes of ender]]
* {{ItemSprite|splash-potion}} Thrown [[potion]]s
* {{ItemSprite|bottle-o'-enchanting|附魔之瓶}} Thrown [[bottles o' enchanting]]
* {{EntitySprite|dragon-fireball}} [[Dragon fireball]]s
* {{EntitySprite|Wither Skull}} [[Wither#Wither Skull|Wither skull]]s
* {{ItemSprite|firework-rocket}} [[Firework rocket]]s in flight
* {{EntitySprite|arrow}} [[Arrow]]s in flight
* {{EffectSprite|particle-speed}} [[Lingering Potion#Area effect cloud|Area effect cloud]]
* {{EntityLink|id=experience-orb|Experience|XP orbs}}
Using it on a [[villager]] lowers the player's popularity and causes any naturally-spawned [[iron golem]]s nearby to attack.
=== Fuel ===
A fishing rod can be used as fuel in [[furnace]]s, smelting 1.5 items per fishing rod.
=== Other usage ===
The hook can also be used to activate wooden [[pressure plate]]s or [[weighted pressure plate]]s.
=== Enchantments ===
A fishing rod can receive the following enchantments:
{| class="wikitable col-2-center"
|+
!Name
!Max Level
![[Enchanting|Method]]
|-
|[[Lure]]<ref group="note">Lure levels above V don't work.</ref>
|III
|{{Inventory slot|Enchanting Table}}{{Inventory slot|Anvil}}
|-
|[[Luck of the Sea]]
|III
|{{Inventory slot|Enchanting Table}}{{Inventory slot|Anvil}}
|-
|[[Unbreaking]]
|III
|{{Inventory slot|Enchanting Table}}{{Inventory slot|Anvil}}
|-
|[[Mending]]
|I
|{{Inventory slot|Anvil}}
|-
|[[Curse of Vanishing]]
|I
|{{Inventory slot|Anvil}}
|}
{{Notelist|note}}
A fishing rod with the [[Mending]] enchantment has infinite durability if used for fishing only. The rod incrementally repairs itself using the experience gained each time a player reels in a fish, even if starting from nearly 0% durability. Players wearing damaged [[Mending]] armor have a lower average rate of repair, because the mending mechanic can ignore damage to the rod while repairing armor instead. [[Unbreaking]] III can nearly guarantee that the rod does not break, unless it's already at low durability.
== Fishing Bobber ==
{{Entity
| title = Fishing Bobber
| image2 = Fishing Bobber BE.png
| imagesize = 100px
| image = Fishing Bobber JE1.png
| networkid = '''[[JE]]:''' 90
}}
{{see also|Entity format}}
'''Fishing bobbers''' have entity data associated with them that contain various properties of the entity. They also appear to despawn after a while.
=== Data values ===
==== ID ====
{{edition|java}}:
{{ID table
|generatetranslationkeys=java
|displayname=Fishing Bobber
|spritetype=entity
|nameid=fishing_bobber
|foot=1}}
{{edition|bedrock}}:
{{ID table
|shownumericids=y
|generatetranslationkeys=bedrock
|displayname=Fishing Bobber
|spritetype=entity
|nameid=fishing_hook
|id=77
|foot=1}}
==== Entity data ====
{{el|java}}:
{{main|Entity format}}
{{/ED}}
{{el|bedrock}}:
: See [[Bedrock Edition level format/Entity format]].
== Sounds ==
{{Edition|Java}}:<br>
Fishing bobbers use the Friendly Creatures sound category for entity-dependent sound events.<ref group="sound" name="oddcats" />
{{Sound table
|sound=Fishing rod cast.ogg
|subtitle=Bobber thrown
|source=Friendly Creatures <ref group="sound" name="oddcats">{{bug|MC-139041||The sounds of fishing bobbers aren't controlled by the "Players" sound slider}}</ref>
|overridesource=1
|description=When a fishing rod is cast
|id=entity.fishing_bobber.throw
|translationkey=subtitles.entity.fishing_bobber.throw
|volume=0.5
|pitch={{frac|1|3}}-0.5
|distance=16}}
{{Sound table
|sound=Fishing rod reel in1.ogg
|sound2=Fishing rod reel in2.ogg
|subtitle=Bobber retrieved
|source=Friendly Creatures <ref group="sound" name="oddcats"/>
|overridesource=1
|description=When a fishing rod is reeled in
|id=entity.fishing_bobber.retrieve
|translationkey=subtitles.entity.fishing_bobber.retrieve
|volume=1.0
|pitch=0.8-1.2
|distance=16}}
{{Sound table
|sound=Water Splash Old.ogg
|subtitle=Fishing Bobber splashes
|description=When a fishing bobber is bitten by something
|source=Friendly Creatures <ref group="sound" name="oddcats"/>
|overridesource=1
|id=entity.fishing_bobber.splash
|translationkey=subtitles.entity.fishing_bobber.splash
|volume=0.25
|pitch=0.6-1.4
|distance=16}}
{{Sound table
|sound=Random break.ogg
|subtitle=Item breaks
|source=player
|description=When a fishing rod's durability is exhausted
|id=entity.item.break
|translationkey=subtitles.entity.item.break
|volume=0.8
|pitch=0.8-1.2
|distance=16
|foot=1}}
{{Edition|Bedrock}}:
{{Sound table
|type=bedrock
|sound=Bow shoot.ogg
|source=player
|description=When a fishing rod is cast
|id=random.bow
|volume=0.5
|pitch=0.33-0.5}}
<!--There is no reel in sound on Bedrock Edition, it seems.-->
{{Sound table
|sound=Water Splash Old.ogg
|source=player
|description=When a fishing bobber is bitten by something
|id=random.splash
|volume=1.0
|pitch=0.6-1.4}}
{{Sound table
|sound=Random break.ogg
|source=player
|description=When a fishing rod's durability is exhausted
|id=random.break
|volume=1.0
|pitch=0.9
|foot=1}}
== Data values ==
=== ID ===
{{edition|java}}:
{{ID table
|edition=java
|showforms=y
|generatetranslationkeys=y
|displayname=Fishing Rod
|spritetype=item
|nameid=fishing_rod
|form=item
|foot=1}}
{{edition|bedrock}}:
{{ID table
|edition=bedrock
|shownumericids=y
|showforms=y
|notshowbeitemforms=y
|generatetranslationkeys=y
|displayname=Fishing Rod
|spritetype=item
|nameid=fishing_rod
|id=392
|form=item
|foot=1}}
== Achievements==
{{load achievements|Cow Tipper}}<!--This is due to the fact that leather can be obtained via fishing, which grants the achievement.-->
== Advancements ==
{{load advancements|Fishy Business}}
== History ==
{{more sounds|section=24|type=old|Old throwing sound (pre-Sound Update), which was used for fishing rods}}
{{History|java alpha}}
{{History||v1.1.1|[[File:Fishing Rod JE1 BE1.png|32px]] Added fishing rods.
|Fishing rods currently have no function.
|Fishing rods are stackable.}}
{{History||v1.2.0|snap=<nowiki>?|slink=:Category:Information needed requiring unarchived version|Fishing rods have been updated to be able to [[fishing|catch fish]] from any body of [[water]].
|[[File:Stick JE1 BE1.png|32px]] Cast fishing rods use the [[stick]] texture in first and third person, and do not appear cast in the hotbar.}}
{{History||v1.2.2|Fishing rods now work in [[multiplayer]]. Previously, fishing rods could be used in multiplayer, but would produce fake client-side fish that could not be picked up.
|Fishing rods in multiplayer repeat the cast sound when reeling in, do not render the line, and do not switch textures when cast.}}
{{History|java beta}}
{{History||1.6|snap=Test Build 3|Fishing rods are now no longer stackable, stacking rods would allow the player to change the damage values of any rods stacked to the first rod. This could be exploited to have fishing rods that lasted forever.
|[[File:Cast Fishing Rod JE2 BE1.png|32px]] In first person, cast fishing rods now use a texture without the line to show that it is no longer on the rod. The stick texture is still used in third person, however.}}
{{History||Sound Update|The fishing rod cast [[sound]] has been changed.}}
{{History|java}}
{{History||1.3.1|snap=12w17a|Fishing rods now have infinite [[durability]] in [[Creative]] mode.}}
{{History|||snap=12w18a|Fishing rods in multiplayer no longer repeat the cast sound when reeling in, now properly render the line, and now switch textures when cast.}}
{{History||1.4.2|snap=12w36a|Added [[carrot on a stick]], which can be [[crafting|crafted]] using a fishing rod and a [[carrot]].}}
{{History|||snap=12w37a|Fishing now give the [[player]] [[experience]] with each [[fish]] caught.}}
{{History||1.4.6|snap=12w49a|Fishing rods can now be [[enchanting|enchanted]] with [[Unbreaking]] using [[enchanted book]]s.}}
{{History||1.7.2|snap=13w36a|Fishing rods now have 2 new [[enchanting|enchantments]]: [[Lure]] and [[Luck of the Sea]].
|Fishing rods can now be [[enchanted]] in an [[enchantment table]].
|Enchanted fishing rods can now be obtained as a "treasure" item from [[fishing]], and unenchanted ones as a "junk" item.}}
{{History||1.8|snap=14w02a|Fisherman [[villager]]s now [[trading|sell]] enchanted fishing rods for 7–8 [[emerald]]s.}}
{{History|||snap=14w33b|Cast fishing rods now use the cast texture in third person, rather than the stick texture.}}
{{History||1.9|snap=15w31a|Cast fishing rods now look cast in the [[hotbar]] and [[inventory]].}}
{{History|||snap=15w32a|Fishing rods no longer [[damage]] the [[ender dragon]].}}
{{History|||snap=15w36a|Fishing rods now properly hook [[entity|entities]].
|Reeling in while hooked to a non-item entity now costs 5 [[durability]] (was 3) to the fishing rod.}}
{{History||1.10|snap=16w21a|Fishing rods now hook [[item (entity)|item]]s, which costs 3 durability.}}
{{History||1.11|snap=16w33a|Fishing rods can now be used to fuel [[furnace]]s.}}
{{History||1.12|snap=17w13a|The [[sound]] of the bobbers of fishing rods being thrown has been changed.}}
{{History|||snap=17w16a|Added sounds for reeling in fishing bobbers.}}
{{History||1.13|snap=17w47a|Prior to [[1.13/Flattening|''The Flattening'']], this [[item]]'s numeral ID was 346.}}
{{History|||snap=17w50a|[[Crafting]] a [[carrot on a stick]] no longer requires the fishing rod to be at full [[durability]].<ref>[https://bugs.mojang.com/browse/MC-123196 MC-123196 resolved as "Works as Intended"]</ref>}}
{{History|||snap=18w02a|The bobber of fishing rods now has its own [[entity]] ID: <code>fishing_bobber</code>, although summoning the bobber alone is still not possible.}}
{{History|||snap=18w09a|[[Enchanting|Enchanted]] fishing rods now generate in the [[chest]]s of [[underwater ruins]].}}
{{History|||snap=18w11a|Added [[drowned]], which have a chance to spawn [[drops|drop]] fishing rods upon [[death]].}}
{{History|||snap=18w14a|Catching a [[fish]] with the fishing rod now grants the "Fishy Business" [[advancement]].}}
{{History|||snap=?|Fishing rods no longer display as unknown when called by a target selector.}}
{{History||1.14|snap=18w43a|[[File:Fishing Rod JE2 BE2.png|32px]] [[File:Cast Fishing Rod JE3 BE2.png|32px]] The textures of fishing rods have been changed.}}
{{History||1.16|snap=20w13a|Fishing rod is now used to craft [[warped fungus on a stick]].}}
{{History|||snap=20w14a|The bobber of fishing rods is now considered a projectile and can ignite (if on [[fire]]) [[TNT]], activate [[target]]s and ring [[bell]]s.}}
{{History|upcoming java}}
{{History||Villager Trade Rebalance<br>(Experimental)|link=Java Edition 1.20.2|snap=23w31a|Enchantments exclusive to fishing rods are no longer obtainable from villager [[trading]].}}
{{History|pocket alpha}}
{{History||v0.11.0|snap=build 1|[[File:Fishing Rod JE1 BE1.png|32px]] [[File:Cast Fishing Rod JE2 BE1.png|32px]] Added fishing rods.}}
{{History|||snap=build 8|If an [[entity]] is mounted on another entity, reeling it in with a fishing rod now pulls it off its ride.}}
{{History|||snap=build 11|Fishing rods are now functional in [[third person view]].}}
{{History||v0.12.1|snap=build 12|Fishing rods now make a less repetitive [[sound]].
|Fishing rods now grant [[experience]] when successful.
|Fishing rods can now be [[enchanting|enchanted]].
|Enchanted fishing rods can now be found as "treasure" from [[fishing]].}}
{{History||v0.15.0|snap=build 1|Fishing rods are now used to craft [[carrot on a stick]].}}
{{History|pocket}}
{{History||1.0.4|snap=alpha 1.0.4.0|Fisherman [[villager]]s now [[trading|sell]] enchanted fishing rods.}}
{{History||1.1.0|snap=alpha 1.1.0.0|The [[entity]] ID of fishing rods has been changed from <code>fishinghook</code> to <code>fishing_hook</code>.}}
{{History|bedrock}}
{{History||1.4.0|snap=beta 1.2.13.8|Added [[drowned]], which can spawn with and [[drops|drop]] fishing rods.}}
{{History|||snap=beta 1.2.20.1|Fishing rods and [[enchanting|enchanted]] fishing rods can now be found in [[underwater ruins]].}}
{{History||1.10.0|snap=beta 1.10.0.3|[[File:Fishing Rod JE2 BE2.png|32px]] [[File:Cast Fishing Rod JE3 BE2.png|32px]] The textures of fishing rods have been changed.}}
{{History||1.11.0|snap=beta 1.11.0.4|Fisherman [[villager]]s now [[trading|sell]] enchanted fishing rods for 6 [[emerald]]s as part of their third tier [[trading|trade]].}}
{{History|console}}
{{History||xbox=TU1|xbone=CU1|ps=1.0|wiiu=Patch 1|switch=1.0.1|[[File:Fishing Rod JE1 BE1.png|32px]] Added fishing rods.
|As a result of Legacy Console Edition using an internal server, fishing rods repeat the cast sound when reeling in, do not render the line, and do not switch textures when cast.}}
{{History||xbox=TU7|[[File:Cast Fishing Rod JE2 BE1.png|32px]] [[File:Stick JE1 BE1.png|32px]] Fishing rods no longer repeat the cast sound when reeling in, now properly render the line, and now switch textures when cast.
|The cast fishing rod texture appears in first person, while the stick texture is used instead in third person.}}
{{History||xbox=TU27|xbone=CU15|ps=1.18|Cast fishing rods now use the cast texture in third person, rather than the stick texture.}}
{{History||xbox=TU46|xbone=CU36|ps=1.38|wiiu=Patch 15|switch=none|Fishing rods now hook [[item (entity)|item]]s, which costs 3 durability.}}
{{History||xbox=TU53|xbone=CU43|ps=1.49|wiiu=Patch 23|switch=1.0.3|The [[sound]] of the bobbers of fishing rods being thrown has been changed.|Added sounds for reeling in fishing bobbers.}}
{{History||xbox=TU69|xbone=none|ps=1.76|wiiu=Patch 38|switch=none|[[Enchanting|Enchanted]] fishing rods now generate in the [[chest]]s of [[underwater ruins]].
|Added [[drowned]], which have a chance to spawn [[drops|drop]] fishing rods upon [[death]].}}
{{History||xbox=none|xbone=none|ps=1.90|wiiu=none|switch=none|[[File:Fishing Rod JE2 BE2.png|32px]] [[File:Cast Fishing Rod JE3 BE2.png|32px]] The textures of fishing rods have been changed.}}
{{History|new 3ds}}
{{History||0.1.0|[[File:Fishing Rod JE1 BE1.png|32px]] [[File:Cast Fishing Rod JE2 BE1.png|32px]] Added fishing rods.}}
{{History|foot}}
== Issues ==
{{issue list}}
== Trivia ==
*The maximum distance the [[player]] can get between the bobber and themselves is 33 blocks.
*[[Skeleton]]s can be pulled into their own [[arrow]]s.
*When casting the rod into a [[portal]], the bobber may stick to it like a normal [[block]], go through and travel in [[the Nether]], or stop on the next block behind the portal.
*If the player stands directly in front of a column and casts the line onto a block above the player, the line falls downward.
*If the bobber hits a [[painting]], the painting breaks.
*The player can get into [[bed]] after casting a line, and the line remains in the water until the player wakes up and reels it in.
== Gallery ==
<gallery>
13w36a banner.png|[[13w36a]] snapshot banner.
Bobber and bubbles.png|Trail of bubbles indicating that a [[fish]] is about to bite.
Bobber2D.png|Two-dimensional bobber {{in|je}}.
Bobber3D.png|Three-dimensional bobber {{in|be}}.
Enderman Fishing.png|Bobbers can be attached to [[mobs]], like this [[enderman]].
Drowned with Fishing rod.png|A [[drowned]] holding a fishing rod.
Firebobber.png|A bobber cast in fire.
Fishingbobber.png|Fishing in 2010.
Fishing Rod Hooking Teaser.png|Image from [[dinnerbone]] teasing the addition of fishing rods hooking entities.
File:Sunny Fishing.jpg|[[Sunny]] reeling back a fishing rod.
File:Croc Ad 1.jpg|[[Noor]] catching a [[salmon]].<ref> https://www.youtube.com/shorts/e1AJo7jU5MI</ref>
Enchanted Fishing Rod.gif|An enchanted fishing rod.
Fishing Rod SDGP.png|Fishing rod in the [[Super Duper Graphics Pack]].
</gallery>
== References ==
{{Reflist}}
{{Items}}
{{entities}}
[[Category:Renewable resources]]
[[cs:Rybářský prut]]
[[de:Angel]]
[[es:Caña de pescar]]
[[fr:Canne à pêche]]
[[hu:Horgászbot]]
[[it:Canna da pesca]]
[[ja:釣竿]]
[[ko:낚싯대]]
[[nl:Vishengel]]
[[pl:Wędka]]
[[pt:Vara de pesca]]
[[ru:Удочка]]
[[uk:Вудка]]
[[zh:钓鱼竿]]</li><li>[[Smithing Template|Smithing Template]]<br/>{{for|the block|Smithing Table}}
{{Item
| title = Smithing Template
| image = <gallery>
Netherite Upgrade Smithing Template.png | Netherite Upgrade
Sentry Armor Trim Smithing Template.png | Armor Trim
</gallery>
| rarity = Rare
| renewable = No<!--Smithing templates are not renewable because diamonds, their only other method of creation, are not renewable.-->
| stackable = Yes (64)
}}
'''Smithing templates''' are items used in [[Smithing Table|smithing tables]] to alter [[Tool|tools]] and [[armor]]. They are consumed when used, but can be [[Crafting|duplicated]] using an existing template, its material and [[Diamond|diamonds]].
The sixteen '''armor trim smithing templates''' are found in a variety of [[Generated structures|structures]], and are used to apply various decorative trims (dependent on the variant) to armor using certain minerals for different colors.
'''Netherite upgrade smithing templates''' are required to upgrade diamond equipment with a [[Netherite Ingot|netherite ingot]]. They are only found in [[Bastion Remnant|bastion remnants]], but are guaranteed only in [[:en:Bastion_Remnant#Treasure_room|treasure rooms]].
== Obtaining ==
Smithing templates can be found in various [[Generated structures|structures]] and can be duplicated by using seven diamonds and a block based on what the template is.
=== Crafting ===
{{Crafting
|A1=Diamond |B1=Matching Smithing Template |C1=Diamond
|A2=Diamond |B2=Netherrack;Cobblestone;Sandstone;End Stone;Terracotta;Terracotta;Netherrack;Cobblestone;Terracotta;Cobbled Deepslate;Blackstone;Purpur Block;Prismarine;Cobblestone;Cobbled Deepslate;Terracotta;Mossy Cobblestone |C2=Diamond
|A3=Diamond |B3=Diamond |C3=Diamond
|Output=Matching Smithing Template,2
}}
{| class="article-table"
|+ Duplication
! Item !! Material
|-
| {{ItemSprite|netherite-upgrade|text=Netherite Upgrade}} || {{BlockSprite|Netherrack|text=Netherrack}}
|-
| {{ItemSprite|sentry-armor-trim|text=Sentry Armor Trim}} || {{BlockSprite|Cobblestone|text=Cobblestone}}
|-
| {{ItemSprite|vex-armor-trim|text=Vex Armor Trim}} || {{BlockSprite|Cobblestone|text=Cobblestone}}
|-
| {{ItemSprite|wild-armor-trim|text=Wild Armor Trim}} || {{BlockSprite|Mossy Cobblestone|text=Mossy Cobblestone}}
|-
| {{ItemSprite|coast-armor-trim|text=Coast Armor Trim}} || {{BlockSprite|Cobblestone|text=Cobblestone}}
|-
| {{ItemSprite|dune-armor-trim|text=Dune Armor Trim}} || {{BlockSprite|Sandstone|text=Sandstone}}
|-
| {{ItemSprite|wayfinder-armor-trim|text=Wayfinder Armor Trim}} || {{BlockSprite|Terracotta|text=Terracotta}}
|-
| {{ItemSprite|raiser-armor-trim|text=Raiser Armor Trim}} || {{BlockSprite|Terracotta|text=Terracotta}}
|-
| {{ItemSprite|shaper-armor-trim|text=Shaper Armor Trim}} || {{BlockSprite|Terracotta|text=Terracotta}}
|-
| {{ItemSprite|host-armor-trim|text=Host Armor Trim}} || {{BlockSprite|Terracotta|text=Terracotta}}
|-
| {{ItemSprite|ward-armor-trim|text=Ward Armor Trim}} || {{BlockSprite|Cobbled Deepslate|text=Cobbled Deepslate}}
|-
| {{ItemSprite|silence-armor-trim|text=Silence Armor Trim}} || {{BlockSprite|Cobbled Deepslate|text=Cobbled Deepslate}}
|-
| {{ItemSprite|tide-armor-trim|text=Tide Armor Trim}} || {{BlockSprite|Prismarine|text=Prismarine}}
|-
| {{ItemSprite|snout-armor-trim|text=Snout Armor Trim}} || {{BlockSprite|Blackstone|text=Blackstone}}
|-
| {{ItemSprite|rib-armor-trim|text=Rib Armor Trim}} || {{BlockSprite|Netherrack|text=Netherrack}}
|-
| {{ItemSprite|eye-armor-trim|text=Eye Armor Trim}} || {{BlockSprite|End Stone|text=End Stone}}
|-
| {{ItemSprite|spire-armor-trim|text=Spire Armor Trim}} || {{BlockSprite|Purpur Block|text=Purpur Block}}
|}
{{IN|bedrock}}, spire, tide, and dune armor trims can be duplicated with more blocks than {{in|java}}. In addition to the normal blocks, Tide armor trims can be duplicated using Prismarine Bricks or Dark Prismarine, dune armor trims can be duplicated with smooth sandstone, cut sandstone, or chiseled sandstone, and spire armor trims can be duplicated with purpur pillars.<ref>{{bug|MCPE-172711||Tide, Spire, and Dune Armor Trims can be crafted from more blocks than in Java Edition}}</ref>
=== Mob loot ===
[[Elder guardian]]s have a 20% chance to drop 1 tide armor trim upon death. [[Looting]] doesn't affect this percentage, and the elder guardian doesn't need to be killed by a player in order for the trim to drop and can be duplicated with [[prismarine]].
=== Chest loot ===
{{#invoke:LootChest|base3|netherite-upgrade-smithing-template,sentry-armor-trim-smithing-template,vex-armor-trim-smithing-template,wild-armor-trim-smithing-template,coast-armor-trim-smithing-template,dune-armor-trim-smithing-template,ward-armor-trim-smithing-template,silence-armor-trim-smithing-template,snout-armor-trim-smithing-template,rib-armor-trim-smithing-template,eye-armor-trim-smithing-template,spire-armor-trim-smithing-template}}
Note: In Woodland Mansions, only chests with random loot have the chance to contain the Vex Smithing Template, chests in the "Allium room", "Sapling farm", "Tree-chopping room" and "Fake End portal room" always generate with the same, room specific, loot.
=== Suspicious block loot ===
Items can only be extracted from [[Suspicious Block|suspicious blocks]] using a [[brush]].{{#invoke:LootChest|base3|wayfinder-armor-trim-smithing-template,raiser-armor-trim-smithing-template,shaper-armor-trim-smithing-template,host-armor-trim-smithing-template}}
== Usage ==
=== Crafting ingredient ===
{{Crafting
|A1=Diamond |B1=Matching Smithing Template |C1=Diamond
|A2=Diamond |B2=Netherrack;Cobblestone;Sandstone;End Stone;Terracotta;Terracotta;Netherrack;Cobblestone;Terracotta;Cobbled Deepslate;Blackstone;Purpur Block;Prismarine;Cobblestone;Cobbled Deepslate;Terracotta;Mossy Cobblestone |C2=Diamond
|A3=Diamond |B3=Diamond |C3=Diamond
|Output=Matching Smithing Template,2
}}
=== Smithing ingredient ===
Smithing templates are used at a [[smithing table]]. Netherite upgrade smithing templates are used to upgrade diamond gear into netherite gear by using a netherite upgrade, a piece of diamond gear, and a [[netherite ingot]].
{{Smithing
|head=1
|ingredients=Netherite Upgrade +<br>Any Diamond Gear +<br>[[Netherite Ingot]]
|Netherite Upgrade
|Diamond Helmet; Diamond Chestplate; Diamond Leggings; Diamond Boots; Diamond Sword; Diamond Pickaxe; Diamond Axe; Diamond Shovel
|Netherite Ingot
|Netherite Helmet; Netherite Chestplate; Netherite Leggings; Netherite Boots; Netherite Sword; Netherite Pickaxe; Netherite Axe; Netherite Shovel
|tail=1
}}
{{FakeImage|{{Animate|Iron_Armor_with_Iron_Shaper_Trim.png; Golden_Armor_with_Golden_Shaper_Trim.png; Diamond_Armor_with_Diamond_Shaper_Trim.png; Netherite_Armor_with_Netherite_Shaper_Trim.png|180px}}|If the armor material and the trimming material are the same, the color palette used for the armor trim is darker.}}
Armor trim smithing templates are used to customize an armor piece's appearance by using a smithing template, an armor piece, and an ingot or crystal ([[emerald]], [[redstone dust]], [[lapis lazuli]], [[amethyst shard]], [[nether quartz]], [[netherite ingot]], [[diamond]], [[gold ingot]], [[iron ingot]], or [[copper ingot]]). Including all dyed leather armor colors and regular armor, there are ≈3.679x10<sup>9</sup> different possible armor pieces<!--5713438 leather colors, plus the 4 other armor materials = 5713442. 5713442 * 161 (the 160 trim combos (16 trims, 10 materials) + untrimmed) = 919864162. 919864162 * 4 (helmet, chestplate, leggings, boots) = 3679456648 ≈ 3.679x10^9-->, and 7.16x10<sup>35</sup> <!--919864162 + 1 (no armor in that slot) = 919864163. 919864163^4 = 715969952015045562662444917041515536 ≈ 7.16x10^35 total possible armor combinations-->total possible armor combinations excluding enchantments and the player not wearing armor.
Already trimmed armor can be trimmed again by applying another template on it; the old trim pattern is overwritten in the process.<ref>{{bug|MC-262538||When combining armor trims the new trim deletes the old one|WAI}}</ref> Therefore, one piece of armor cannot possess multiple trims at the same time.
Most armor trims cover a small portion of the armor piece's surface with the trim material, except for the silence armor trim, which allows the trim material to cover a majority of the armor piece's surface.
All of the trims are purely decorative, and don't impact gameplay or strength(without the use of mods or plugins) of the armor they are applied to in any way. [[Piglin]]s do not pick up any gold-trimmed armor pieces, and they are not pacified by players wearing even a full set of gold-trimmed armor (unless, of course, the armor pieces in question are themselves golden), and netherite-trimmed armor pieces can still be burned by [[fire]].
{{Smithing
|head=1
|ingredients=Any Armor Trim +<br>Any Armor Piece +<br>Any Ingot/Crystal
|Any Armor Trim Smithing Template
|Iron Helmet; Netherite Chestplate;Golden Leggings;Diamond Boots
|Amethyst Shard; Copper Ingot; Diamond; Emerald; Gold Ingot; Iron Ingot; Lapis Lazuli; Nether Quartz; Netherite Ingot; Redstone Dust; Diamond; Emerald
|Amethyst Trim Iron Helmet; Copper Trim Netherite Chestplate; Diamond Trim Golden Leggings; Emerald Trim Diamond Boots; Gold Trim Iron Helmet; Iron Trim Netherite Chestplate; Lapis Trim Golden Leggings; Quartz Trim Diamond Boots; Netherite Trim Iron Helmet; Redstone Trim Netherite Chestplate; Diamond Trim Golden Leggings; Emerald Trim Diamond Boots
|tail=1
}}
;List of color palettes for all materials
*{{ItemSprite|emerald }} - {{TrimPalette| emerald }}
*{{ItemSprite|redstone dust }} - {{TrimPalette| redstone dust }}
*{{ItemSprite|lapis lazuli }} - {{TrimPalette| lapis lazuli }}
*{{ItemSprite|amethyst shard }} - {{TrimPalette| amethyst shard }}
*{{ItemSprite|nether quartz }} - {{TrimPalette| nether quartz }}
*{{ItemSprite|netherite ingot }} - {{TrimPalette| netherite ingot }} (Darker: {{TrimPalette| netherite ingot |darker=1}})
*{{ItemSprite|diamond }} - {{TrimPalette| diamond }} (Darker: {{TrimPalette| diamond |darker=1}})
*{{ItemSprite|gold ingot }} - {{TrimPalette| gold ingot }} (Darker: {{TrimPalette| gold ingot |darker=1}})
*{{ItemSprite|iron ingot }} - {{TrimPalette| iron ingot }} (Darker: {{TrimPalette| iron ingot |darker=1}})
*{{ItemSprite|copper ingot }} - {{TrimPalette| copper ingot }}
== Data values ==
=== ID ===
{{edition|java}}:
{{ID table
|edition=java
|firstcolumnname=Smithing Template
|showforms=y
|generatetranslationkeys=y
|displayname=Netherite Upgrade
|spritename=netherite-upgrade-smithing-template
|spritetype=item
|nameid=netherite_upgrade_smithing_template
|form=item}}
{{ID table
|displayname=Sentry Armor Trim
|spritename=sentry-armor-trim-smithing-template
|spritetype=item
|nameid=sentry_armor_trim_smithing_template
|form=item}}
{{ID table
|displayname=Vex Armor Trim
|spritename=vex-armor-trim-smithing-template
|spritetype=item
|nameid=vex_armor_trim_smithing_template
|form=item}}
{{ID table
|displayname=Wild Armor Trim
|spritename=wild-armor-trim-smithing-template
|spritetype=item
|nameid=wild_armor_trim_smithing_template
|form=item}}
{{ID table
|displayname=Coast Armor Trim
|spritename=coast-armor-trim-smithing-template
|spritetype=item
|nameid=coast_armor_trim_smithing_template
|form=item}}
{{ID table
|displayname=Dune Armor Trim
|spritename=dune-armor-trim-smithing-template
|spritetype=item
|nameid=dune_armor_trim_smithing_template
|form=item}}
{{ID table
|displayname=Wayfinder Armor Trim
|spritename=wayfinder-armor-trim-smithing-template
|spritetype=item
|nameid=wayfinder_armor_trim_smithing_template
|form=item}}
{{ID table
|displayname=Raiser Armor Trim
|spritename=raiser-armor-trim-smithing-template
|spritetype=item
|nameid=raiser_armor_trim_smithing_template
|form=item}}
{{ID table
|displayname=Shaper Armor Trim
|spritename=shaper-armor-trim-smithing-template
|spritetype=item
|nameid=shaper_armor_trim_smithing_template
|form=item}}
{{ID table
|displayname=Host Armor Trim
|spritename=host-armor-trim-smithing-template
|spritetype=item
|nameid=host_armor_trim_smithing_template
|form=item}}
{{ID table
|displayname=Ward Armor Trim
|spritename=ward-armor-trim-smithing-template
|spritetype=item
|nameid=ward_armor_trim_smithing_template
|form=item}}
{{ID table
|displayname=Silence Armor Trim
|spritename=silence-armor-trim-smithing-template
|spritetype=item
|nameid=silence_armor_trim_smithing_template
|form=item}}
{{ID table
|displayname=Tide Armor Trim
|spritename=tide-armor-trim-smithing-template
|spritetype=item
|nameid=tide_armor_trim_smithing_template
|form=item}}
{{ID table
|displayname=Snout Armor Trim
|spritename=snout-armor-trim-smithing-template
|spritetype=item
|nameid=snout_armor_trim_smithing_template
|form=item}}
{{ID table
|displayname=Rib Armor Trim
|spritename=rib-armor-trim-smithing-template
|spritetype=item
|nameid=rib_armor_trim_smithing_template
|form=item}}
{{ID table
|displayname=Eye Armor Trim
|spritename=eye-armor-trim-smithing-template
|spritetype=item
|nameid=eye_armor_trim_smithing_template
|form=item}}
{{ID table
|displayname=Spire Armor Trim
|spritename=spire-armor-trim-smithing-template
|spritetype=item
|nameid=spire_armor_trim_smithing_template
|form=item
|foot=1}}
{{edition|bedrock}}:
{{ID table
|edition=bedrock
|firstcolumnname=Smithing Template
|shownumericids=y
|showforms=y
|notshowbeitemforms=y
|generatetranslationkeys=y
|displayname=Netherite Upgrade
|spritename=netherite-upgrade-smithing-template
|spritetype=item
|nameid=netherite_upgrade_smithing_template
|id=685
|form=item
|translationkey=item.smithing_template.name, upgrade.netherite_upgrade.name}}
{{ID table
|displayname=Sentry Armor Trim
|spritename=sentry-armor-trim-smithing-template
|spritetype=item
|nameid=sentry_armor_trim_smithing_template
|id=686
|form=item
|translationkey=item.smithing_template.name, trim_pattern.sentry.name}}
{{ID table
|displayname=Vex Armor Trim
|spritename=vex-armor-trim-smithing-template
|spritetype=item
|nameid=vex_armor_trim_smithing_template
|id=692
|form=item
|translationkey=item.smithing_template.name, trim_pattern.vex.name}}
{{ID table
|displayname=Wild Armor Trim
|spritename=wild-armor-trim-smithing-template
|spritetype=item
|nameid=wild_armor_trim_smithing_template
|id=689
|form=item
|translationkey=item.smithing_template.name, trim_pattern.wild.name}}
{{ID table
|displayname=Coast Armor Trim
|spritename=coast-armor-trim-smithing-template
|spritetype=item
|nameid=coast_armor_trim_smithing_template
|id=688
|form=item
|translationkey=item.smithing_template.name, trim_pattern.coast.name}}
{{ID table
|displayname=Dune Armor Trim
|spritename=dune-armor-trim-smithing-template
|spritetype=item
|nameid=dune_armor_trim_smithing_template
|id=687
|form=item
|translationkey=item.smithing_template.name, trim_pattern.dune.name}}
{{ID table
|displayname=Wayfinder Armor Trim
|spritename=wayfinder-armor-trim-smithing-template
|spritetype=item
|nameid=wayfinder_armor_trim_smithing_template
|id=698
|form=item
|translationkey=item.smithing_template.name, trim_pattern.wayfinder.name}}
{{ID table
|displayname=Raiser Armor Trim
|spritename=raiser-armor-trim-smithing-template
|spritetype=item
|nameid=raiser_armor_trim_smithing_template
|id=699
|form=item
|translationkey=item.smithing_template.name, trim_pattern.raiser.name}}
{{ID table
|displayname=Shaper Armor Trim
|spritename=shaper-armor-trim-smithing-template
|spritetype=item
|nameid=shaper_armor_trim_smithing_template
|id=700
|form=item
|translationkey=item.smithing_template.name, trim_pattern.shaper.name}}
{{ID table
|displayname=Host Armor Trim
|spritename=host-armor-trim-smithing-template
|spritetype=item
|nameid=host_armor_trim_smithing_template
|id=701
|form=item
|translationkey=item.smithing_template.name, trim_pattern.host.name}}
{{ID table
|displayname=Ward Armor Trim
|spritename=ward-armor-trim-smithing-template
|spritetype=item
|nameid=ward_armor_trim_smithing_template
|id=690
|form=item
|translationkey=item.smithing_template.name, trim_pattern.ward.name}}
{{ID table
|displayname=Silence Armor Trim
|spritename=silence-armor-trim-smithing-template
|spritetype=item
|nameid=silence_armor_trim_smithing_template
|id=697
|form=item
|translationkey=item.smithing_template.name, trim_pattern.silence.name}}
{{ID table
|displayname=Tide Armor Trim
|spritename=tide-armor-trim-smithing-template
|spritetype=item
|nameid=tide_armor_trim_smithing_template
|id=693
|form=item
|translationkey=item.smithing_template.name, trim_pattern.tide.name}}
{{ID table
|displayname=Snout Armor Trim
|spritename=snout-armor-trim-smithing-template
|spritetype=item
|nameid=snout_armor_trim_smithing_template
|id=694
|form=item
|translationkey=item.smithing_template.name, trim_pattern.snout.name}}
{{ID table
|displayname=Rib Armor Trim
|spritename=rib-armor-trim-smithing-template
|spritetype=item
|nameid=rib_armor_trim_smithing_template
|id=695
|form=item
|translationkey=item.smithing_template.name, trim_pattern.rib.name}}
{{ID table
|displayname=Eye Armor Trim
|spritename=eye-armor-trim-smithing-template
|spritetype=item
|nameid=eye_armor_trim_smithing_template
|id=691
|form=item
|translationkey=item.smithing_template.name, trim_pattern.eye.name}}
{{ID table
|displayname=Spire Armor Trim
|spritename=spire-armor-trim-smithing-template
|spritetype=item
|nameid=spire_armor_trim_smithing_template
|id=696
|form=item
|translationkey=item.smithing_template.name, trim_pattern.spire.name
|foot=1}}
== Achievements ==
{{load achievements|Smithing with style}}
== Advancements ==
{{load advancements|Crafting a New Look;Smithing with Style}}
== Video ==
{{yt|klP9SrJFDU8}}
== History ==
{{History|java}}
{{History||1.20<br>(Experimental)|link=1.19.4|snap=23w04a|[[File:Netherite Upgrade Smithing Template JE1 BE1.png|32px]] [[File:Sentry Armor Trim Smithing Template JE1 BE1.png|32px]] [[File:Vex Armor Trim Smithing Template JE1 BE1.png|32px]] [[File:Wild Armor Trim Smithing Template JE1 BE1.png|32px]] [[File:Coast Armor Trim Smithing Template JE1 BE1.png|32px]] [[File:Dune Armor Trim Smithing Template JE1 BE1.png|32px]] [[File:Ward Armor Trim Smithing Template JE1 BE1.png|32px]] [[File:Tide Armor Trim Smithing Template JE1 BE1.png|32px]] [[File:Snout Armor Trim Smithing Template JE1 BE1.png|32px]] [[File:Rib Armor Trim Smithing Template JE1 BE1.png|32px]] [[File:Eye Armor Trim Smithing Template JE1 BE1.png|32px]] [[File:Spire Armor Trim Smithing Template JE1 BE1.png|32px]] Added smithing templates behind the "Update 1.20" experimental datapack.}}
{{History|||snap=23w05a|Smithing templates can be used to trim leather armor.
|Gold, iron, diamond, and netherite armor can be trimmed with their respective material.
|The dune, coast, wild, and sentry armor trims now always generate two templates in a chest when found.
|Increased the chances for all smithing templates that generate in chest loot to spawn:
*Netherite upgrade chance to find increased from 3.2% to 10%.
*Coast chance to find increased from 11.1% to 16.7%.
*Dune chance to find increased from 11.1% to 14.3%.
*Eye chance to find increased from 4.7% to 10% in alter chests, and to 100% in library chests.
*Rib chance to find increased from 4.7% to 6.7%.
*Sentry chance to find increased from 20% to 25%.
*Snout chance to find increased from 4.7% to 8.3%.
*Spire chance to find increased from 4.7% to 6.7%.
*Vex chance to find increased from 4.7% to 50%.
*Ward chance to find increased from 4.7% to 5%.
*Wild chance to find increased from 20% to 33%.}}
{{History||1.20|snap=23w12a|Smithing templates are now available without using the "Update 1.20" experimental datapack.|[[File:Wayfinder Armor Trim Smithing Template JE1 BE1.png|32px]] [[File:Raiser Armor Trim Smithing Template JE1 BE1.png|32px]] [[File:Shaper Armor Trim Smithing Template JE1 BE1.png|32px]] [[File:Host Armor Trim Smithing Template JE1 BE1.png|32px]] [[File:Silence Armor Trim Smithing Template JE1 BE1.png|32px]] Added wayfinder, raiser, shaper, host, and silence armor trim smithing templates.
|[[File:Sentry Armor Trim Smithing Template JE2 BE2.png|32px]] [[File:Dune Armor Trim Smithing Template JE2 BE2.png|32px]] Changed the textures of the sentry and dune armor trim smithing templates.
|The pattern textures of dune and sentry armor trims are changed from [[File:Armor Trim Dune (sample model) JE1 BE1.png|24px]] [[File:Armor Trim Sentry (sample model) JE1 BE1.png|24px]] to [[File:Armor Trim Dune (sample model) JE2 BE2.png|24px]] [[File:Armor Trim Sentry (sample model) JE2 BE2.png|24px]].<br>
Those previous patterns were left with different names: dune was renamed sentry and sentry was renamed shaper.}}
{{History|||snap=23w16a|Wayfinder, raiser, shaper, and host armor trim no longer generates in [[suspicious sand]] in [[trail ruins]].|Due to the split of the archaeological loot tables for the suspicious gravel within the [[trail ruins]]; wayfinder, raiser, shaper, and host armor trim now are in the rare loot.}}
{{History|||snap=23w17a|The probability of the wayfinder, raiser, shaper, and host armor trim to generate in [[suspicious gravel]] in [[trail ruins]] has been changed from 1/11 to 1/12.|The player now get the [[advancement]] "Crafting a new look" when they craft a trimmed armor at a [[smithing table]] using a smithing template, "Smithing with style" when they apply these smithing templates at least once on their armor: Spire, Snout, Rib, Ward, Silence, Vex, Tide, and Wayfinder.}}
{{History|bedrock}}
{{History||Next Major Update<br>(Experimental)|link=Bedrock Edition 1.19.80|snap=beta 1.19.80.21|[[File:Netherite Upgrade Smithing Template JE1 BE1.png|32px]] [[File:Sentry Armor Trim Smithing Template JE1 BE1.png|32px]] [[File:Vex Armor Trim Smithing Template JE1 BE1.png|32px]] [[File:Wild Armor Trim Smithing Template JE1 BE1.png|32px]] [[File:Coast Armor Trim Smithing Template JE1 BE1.png|32px]] [[File:Dune Armor Trim Smithing Template JE1 BE1.png|32px]] [[File:Ward Armor Trim Smithing Template JE1 BE1.png|32px]] [[File:Tide Armor Trim Smithing Template JE1 BE1.png|32px]] [[File:Snout Armor Trim Smithing Template JE1 BE1.png|32px]] [[File:Rib Armor Trim Smithing Template JE1 BE1.png|32px]] [[File:Eye Armor Trim Smithing Template JE1 BE1.png|32px]] [[File:Spire Armor Trim Smithing Template JE1 BE1.png|32px]] Added smithing templates behind the "[[Bedrock Edition 1.20.0|Next Major Update]]" [[experimental]] toggle.}}
{{History|||snap=beta 1.19.80.22|[[File:Wayfinder Armor Trim Smithing Template JE1 BE1.png|32px]] [[File:Raiser Armor Trim Smithing Template JE1 BE1.png|32px]] [[File:Shaper Armor Trim Smithing Template JE1 BE1.png|32px]] [[File:Host Armor Trim Smithing Template JE1 BE1.png|32px]] [[File:Silence Armor Trim Smithing Template JE1 BE1.png|32px]] Added wayfinder, raiser, shaper, host, and silence armor trim smithing templates.
|[[File:Sentry Armor Trim Smithing Template JE2 BE2.png|32px]] [[File:Dune Armor Trim Smithing Template JE2 BE2.png|32px]] Changed the textures of the sentry and dune armor trim smithing templates.
|The pattern textures of dune and sentry armor trims are changed from [[File:Armor Trim Dune (sample model) JE1 BE1.png|24px]] [[File:Armor Trim Sentry (sample model) JE1 BE1.png|24px]] to [[File:Armor Trim Dune (sample model) JE2 BE2.png|24px]] [[File:Armor Trim Sentry (sample model) JE2 BE2.png|24px]].<br>
Those previous patterns were left with different names: dune was renamed sentry and sentry was renamed shaper.}}
{{History||1.20.0|snap=beta 1.20.0.21|Smithing templates are now available without using the "Next Major Update" experimental toggle.}}
{{History|foot}}
== Issues ==
{{Issue list}}
== Trivia ==
* Smithing templates were named "Smithing Blueprints" in the prototype but was changed because the word "blueprint" sounded modern and technical.<ref>{{ytl|klP9SrJFDU8|Minecraft 1.20: Armor Trims - What Do They Mean?|Minecraft|May 4, 2023|t=98}}</ref>
* When Mojang developer Gnembon was working on armor trims, he accidentally messed up their rendering, making them jet through the player's body in a weird fashion, similar to what appears in {{w|Salvador Dalí}}'s paintings where a hand might poke through a forehead.<ref>{{ytl|ghQODkq4ITI|Mojang Dev Comes To Hermitcraft! (Mojang Developer Gnembom Interview)|GoodVodsWithScar|June 23, 2023|t=1980}}</ref>
* Some of the armor trims feature patterns based on a [[mob]] or [[block]] that is found in the same [[Generated structures|structure]] as the corresponding smithing template.<ref name=":0">"Some of the armor trims reflect the place where you found the template, for example bastions contain a piglin-inspired trim."-[[Sofia Dankis]]-{{Mcnet|armor-trims-coming-minecraft-1-20|Armor Trims Coming to Minecraft 1.20|January 24, 2023}}</ref>
** The spire armor trim resembles a [[shulker]].
** The vex armor trim resembles an [[evoker]]. As an item in the [[inventory]], it resembles the wing or the vein texture of a [[vex]].
** The wild armor trim has moss growing on 3 of its corners.
** The coast armor trim appears to have barnacles attached to it.
** The ward armor trim, as an item in the inventory, resembles the faces inside a [[warden]]'s chest.
** The silence armor trim appears to have sculk creeping onto / infecting it.
** The tide armor trim resembles [[Prismarine|prismarine bricks]].
** The snout armor trim resembles a [[piglin]]<ref name=":0" />.
** The rib armor trim resembles a [[wither skeleton]].
** The eye armor trim resembles an [[eye of ender]]. There are also two eyes on the head part of the armor trim that resemble those of an [[enderman]].
* ''Netherite upgrade smithing template'' (35 characters with "_" and 32 characters without "_") and ''sentry armor trim smithing template'' (35 characters with "_" and 31 characters without "_") are the current longest name for item ID, while ''[[polished blackstone pressure plate]]'' and ''[[cracked polished blackstone bricks]]'' have 34 characters with "_" and 31 characters without "_".
* The silence armor trim is the rarest trim, due to being found in ancient cities in the deep dark, and having only a 1.2% chance to be per chest.
* When [[lapis lazuli]] is used as trim material, it is called "Lapis" instead of its full name "Lapis Lazuli"; this is the only instance of the abbreviation "Lapis" being used in-game.<ref>{{bug|MC-262486|||WAI}}</ref>
== Gallery ==
=== Sprites ===
<gallery>
Netherite Upgrade Smithing Template.png|Netherite Upgrade
Sentry Armor Trim Smithing Template.png|Sentry Armor Trim
Vex Armor Trim Smithing Template.png|Vex Armor Trim
Wild Armor Trim Smithing Template.png|Wild Armor Trim
Coast Armor Trim Smithing Template.png|Coast Armor Trim
Dune Armor Trim Smithing Template.png|Dune Armor Trim
Wayfinder Armor Trim Smithing Template.png|Wayfinder Armor Trim
Raiser Armor Trim Smithing Template.png|Raiser Armor Trim
Shaper Armor Trim Smithing Template.png|Shaper Armor Trim
Host Armor Trim Smithing Template.png|Host Armor Trim
Ward Armor Trim Smithing Template.png|Ward Armor Trim
Silence Armor Trim Smithing Template.png|Silence Armor Trim
Tide Armor Trim Smithing Template.png|Tide Armor Trim
Snout Armor Trim Smithing Template.png|Snout Armor Trim
Rib Armor Trim Smithing Template.png|Rib Armor Trim
Eye Armor Trim Smithing Template.png|Eye Armor Trim
Spire Armor Trim Smithing Template.png|Spire Armor Trim
</gallery>
=== Armor trim patterns ===
<gallery>
Armor Trim Sentry (sample model).png|Sentry Armor Trim
Armor Trim Vex (sample model).png|Vex Armor Trim
Armor Trim Wild (sample model).png|Wild Armor Trim
Armor Trim Coast (sample model).png|Coast Armor Trim
Armor Trim Dune (sample model).png|Dune Armor Trim
Armor Trim Wayfinder (sample model).png|Wayfinder Armor Trim
Armor Trim Raiser (sample model).png|Raiser Armor Trim
Armor Trim Shaper (sample model).png|Shaper Armor Trim
Armor Trim Host (sample model).png|Host Armor Trim
Armor Trim Ward (sample model).png|Ward Armor Trim
Armor Trim Silence (sample model).png|Silence Armor Trim
Armor Trim Tide (sample model).png|Tide Armor Trim
Armor Trim Snout (sample model).png|Snout Armor Trim
Armor Trim Rib (sample model).png|Rib Armor Trim
Armor Trim Eye (sample model).png|Eye Armor Trim
Armor Trim Spire (sample model).png|Spire Armor Trim
</gallery>
=== Official Artwork ===
<gallery>
T&T Thumbnail.jpg|[[Sunny]] wearing amethyst armor trims.
Warden Chasing Alex with Silence Trim Pixel Art.png|A [[warden]] chasing Alex holding the silence armor trim.
Alex Trimming Armor in Smithing Table Pixel Art.png|Alex adding the silence armor trim and amethyst on iron armor.
Alex Wearing Iron Armor with Amethyst Pixel Art.jpg|Alex wearing the trimmed iron armor.
File:Live2023-01.jpeg|Noor working on trimmed iron armor.
</gallery>
=== Screenshots ===
<gallery>
Kingbdogz Armor Trim 1.jpg|Redstone trims on diamond armor.
Kingbdogz Armor Trim 2.jpg|Gold trims on netherite armor.
Too Many Trims.jpg|A large amount of armor trims.
Kingbdogz Armor Trim 3.jpg|Gold on netherite.
Kingbdogz Armor Trim 4.jpg|Diamond on diamond.
New Armor Trims in 23W12A.jpg|<ref>{{Tweet|kingbdogz|1638580472962850831|new trims got the drip The new "Silence" armor trim to the left is now the hardest trim to get, with only a 1% chance per chest to spawn in Ancient Cities. Definitely gonna be a challenge to get!|March 22, 2023}}</ref>
Emerald Armor.png|Emerald on gold.
Xilefian Armor Trims 1.png|[[Xilefian]] showing how armor trims work.
Xilefian Armor Trims 2.png|[[Xilefian]] showing how armor trims work.
Xilefian Armor Trims 3.png|[[Xilefian]] showing how armor trims work.
Armor Trims On Netherite Armors.png|A display of all eleven (before [[Java Edition 23w12a]]) armor trims and ten colors on netherite armors.
Armor Trim Showcase.png|A display of all eleven (before [[Java Edition 23w12a]]) armor trims, on netherite armor using emerald as the trim material.
Armor Trim Colors.png|A display of all ten armor trim colors, using the ward trim on a netherite helmet.
Silence Armor Trim on All Armors.png|A display of all ten colors of the silence armor trim on all armors.
Image 2023-06-07 154100087.png|A screenshot of every armor trim in every color(besides quartz) on leather armor.
Armor Trim Friends.jpg|Official screenshot of [[Alex]] and [[Zuri]] wearing armor trims.
LadyAgnes Armor Trims.jpg|Copper trims on netherite armor.
Trim Lineup.jpg
Fancy Delta.jpg|[[Kai]] wearing trimmed armor in a [[Basalt Delta]].
Trims & Pots.jpg
Noor Gold Armor Trim .jpeg
Noor Diamond Armor Trim.jpeg
Noor Netherite Armor Trim.jpeg
Noor Iron Armor Trim.jpeg
</gallery>
== References ==
{{Reflist}}
{{Items}}
[[Category:Bedrock Edition]]
[[Category:Non-renewable resources]]
[[de:Schmiedevorlage]]
[[es:Molde de herrería]]
[[fr:Modèle de forge]]
[[ja:鍛冶型]]
[[pl:Szablon kowalski]]
[[pt:Molde de ferraria]]
[[ru:Кузнечный шаблон]]
[[uk:Ковальський шаблон]]
[[zh:锻造模板]]</li></ul></nowiki> | 15w46a | Small mobs no longer turn farmland to dirt by falling on it. | |||
1.10.1{{Extension DPL}}<ul><li>[[Explorer Map|Explorer Map]]<br/>{{about|the map used to find rare structures|the craftable map|Map|others|Map (disambiguation)}}{{Needs updating|Add info on the new jungle, swamp, and village maps in Java 1.20.2 Pre-Release 1}}{{Item
| image = <gallery>
Ocean Explorer Map.png | Ocean
Woodland Explorer Map.png | Woodland
Buried Treasure Map.png | Buried Treasure
</gallery>
|image2 = <gallery>
Ocean Explorer Map BE.png | Ocean (BE)
Woodland Explorer Map BE.png | Woodland (BE)
Buried Treasure Map BE.png | Buried in Treasure (BE)
</gallery>
| renewable =
* '''Buried Treasure''': No
* '''Woodland and Ocean''': Yes
| stackable = Yes (64)
}}
An '''explorer map''' is a special [[map]] used to aid in finding rare [[generated structures]], including [[woodland mansion]]s, [[ocean monument]]s, and [[buried treasure]]s.
== Obtaining ==
=== Trading ===
Apprentice-level [[cartographer]] villagers sell ocean explorer maps for 13 emeralds and a compass. Journeyman-level cartographer villagers sell woodland explorer maps for 14 emeralds and a compass.
{{IN|java}}, if the cartographer is in [[the Nether]] or [[the End]], either spawned or transported, the trades for the map do not unlock. However, {{in|bedrock}}, the cartographer trades for the map are unlocked, but the purchased map shows the same layout as in the corresponding dimension and shows no destination structure, but if cartographer trades are unlocked in an old world type (prior-1.11.0), the game stops ticking.
In ''Java Edition'', each cartographer sells its own unique explorer map that points to a different location than other cartographers. Purchasing another explorer map from the same cartographer results in the same explorer map. In Bedrock Edition, a cartographer sells an explorer map that points to the nearest location, regardless of whether it is explored or previously mapped by another cartographer.<!-- start to glitched out-->
=== Chest loot ===
Treasure maps, in contrast to explorer maps, generate in underwater ruins or in shipwrecks.
{{LootChestItem|buried-treasure-map}}
== Usage ==
[[File:Explorer Map Comparison.gif|thumb|217px|Unexplored and partially explored maps.]]
{{See also|Map#Mapping|Map#Map content}}
=== Locating structures ===
There are three types of explorer maps: woodland, [[ocean]], and buried treasure. The maps differ from a normal map, in that it shows the area's land-water outline, with an orange striated (striped) texture for water<ref>Specifically, biomes in the "water_on_map_outlines" [[Tag#Biomes|biome tag]].</ref>, and the blank map texture for land. The maps show a section of land that contains a [[woodland mansion]], [[monument]] or [[buried treasure]] respectively. This may not be the nearest such [[structure]] to the [[player]]. The structures are displayed as a small icon. If the player icon is smaller than it would be on a normal map, that means the player is a great distance away. When the player is less than 1027 blocks away from the map border, the icon returns to the proper size. When the player reaches the map's area of land (512×512), the [[map]] fills in like a normal map.
The basic functions of a buried treasure explorer map are similar to that of the other two. However, instead of showing the structure icon on the map, it shows a red X instead. The [[buried treasure]] structure is located on the same X and Z coordinates as the middle of the X (the player marker may need to be aligned with the bottom of the middle 2×2 pixel square of the X). To locate the [[chest]] spot, hold the treasure map with both hands, not in the offhand slot.
=== Cloning ===
{{Crafting
|showdescription=1
|shapeless=1
|name=[[Explorer Map]]<br>(cloned)
|;;;Empty Map;Empty Map;Empty Map;Empty Map;Empty Map
|;;;;Empty Map;Empty Map;Empty Map;Empty Map
|;;;;;Empty Map;Empty Map;Empty Map
|Ocean Explorer Map; Woodland Explorer Map; Buried Treasure Map; Ocean Explorer Map; Woodland Explorer Map; Buried Treasure Map; Ocean Explorer Map; Woodland Explorer Map
|Empty Map
|;;;;;;Empty Map;Empty Map
|;Empty Map;Empty Map;Empty Map;Empty Map;Empty Map;Empty Map;Empty Map
|;;Empty Map;Empty Map;Empty Map;Empty Map;Empty Map;Empty Map
|;;;;;;;Empty Map
|Output= Ocean Explorer Map,2; Woodland Explorer Map,3; Buried Treasure Map,4; Ocean Explorer Map,5; Woodland Explorer Map,6; Buried Treasure Map,7; Ocean Explorer Map,8; Woodland Explorer Map,9
|type= Miscellaneous
|description=The output has the same map center as the input map, and the same [[monument]], [[woodland mansion]] or [[buried treasure]] marker. Cloned maps are stackable.
}}
The parts of the world that have already been explored and mapped are copied, and newly explored areas appear on both instances. In Creative mode, cloned explorer maps can be obtained by pick blocking on the explorer map displayed on [[item frames]] (the map needs to be out of the [[player]]'s inventory when using pick block, or else that map moves into the active hotbar slot).
== Sounds ==
{{edition|java}}:
{{Sound table
|sound=Drawmap1.ogg
|sound2=Drawmap2.ogg
|sound3=Drawmap3.ogg
|subtitle=Map drawn
|source=block
|description=When an explorer map is edited using a cartography table
|id=ui.cartography_table.take_result
|translationkey=subtitles.ui.cartography_table.take_result
|volume=1.0
|pitch=1.0
|distance=16
|foot=1}}
{{edition|bedrock}}: ''None''
== Data values ==
=== ID ===
{{edition|java}}:
{{ID table
|edition=java
|showforms=y
|generatetranslationkeys=y
|displayname=Map
|spritetype=item
|nameid=filled_map
|form=item
|translationkey=filled_map.mansion,filled_map.ocean,filled_map.buried_treasure
|foot=1}}
{{edition|bedrock}}:
{{ID table
|edition=bedrock
|showaliasids=y
|shownumericids=y
|showforms=y
|notshowbeitemforms=y
|generatetranslationkeys=y
|displayname=Map
|spritetype=item
|nameid=filled_map
|aliasid=map
|id=358
|form=item
|translationkey=item.map.exploration.monument.name,item.map.exploration.mansion.name,item.map.exploration.treasure.name
|foot=1}}
=== Metadata ===
{{see also|Bedrock Edition data values}}
{{IN|bedrock}}, the item [[Data value]] distinguishes explorer maps from one another:
{{:Map/DV}}
=== Item data ===
An explorer map differs from a map in that its <code>display</code> tag is set, which includes a <code>Mapcolor</code> and a <code>LocName</code>; also its <code>Decorations</code> list includes an entry for its target monument, mansion or buried treasure. Its [[Map item format#map_<#>.dat format|map item entry]] is identical to that of a normal map, except that by the time the player sees it, its <code>colors</code> byte array is pre-filled with explorer maps' characteristic land-water boundary lines and water shading.
<div class="treeview">
It should be noted that this additional data is stored in the Cartographer's NBT data and in the inventory item's NBT data, and not in the map file (e.g. <samp>map_0.dat</samp>). If the [[player]] were to use the {{cmd|give}} command to give themselves a map with the same map ID as an existing explorer map, it would still have the Ocean Monument or the Woodland Mansion icon on the map, but it would simply be named "Map" instead of, for example, "Ocean Explorer Map".
* {{nbt|compound}} Item data
** {{nbt|compound|tag}}:
*** {{nbt|compound|display}}: How the map looks in an item slot. See also [[Player.dat_format#Display Properties]].
**** {{nbt|string|Name}}: The name the map is given. In this case, they are localized strings: either <code>{"translate":"filled_map.monument"}</code>,<code>{"translate":"filled_map.mansion"}</code> or <code>{"translate":"filled_map.buried_treasure"}</code>.
**** {{nbt|int|MapColor}}: Color codes are calculated from the Red, Green and Blue components using this formula:<br>'''<span style="color:red">Red</span>[[wikipedia:Logical shift|<<]]16 + <span style="color:green">Green</span><<8 + <span style="color:blue">Blue</span>'''.<ref group=note>For positive values larger than 0x00FFFFFF, the top byte is ignored. All negative values produce white.</ref> Monument maps use 3830373, which is {{color swatch|58|114|101}}. Mansion maps use 5393476, which is {{color swatch|82|76|68}}. Buried treasure explorer maps do not use a color code.
*** {{nbt|list|Decorations}}:
**** {{nbt|compound}}: One of these for each icon on the map. Explorer maps always have at least one representing their target.
***** {{nbt|string|id}}: An arbitrary unique string identifying the decoration. For explorer map target structures, this is "+".
***** {{nbt|double|rot}}: The rotation of the icon. For explorer map target structures, this is always 180.
***** {{nbt|byte|type}}: The ID of the [[Map#Map icons|map icon]]: 8 for a mansion map, 9 for a monument map, 26 for a treasure map.
***** {{nbt|double|x}}: The world x-coordinate of the target structure icon.
***** {{nbt|double|z}}: The world z-coordinate of the target structure icon.
</div>
; Notes
{{notelist}}
== Achievements ==
{{load achievements|Treasure Hunter}}
== History ==
{{History|java}}
{{History||1.11|snap=16w39a|[[File:Woodland Explorer Map JE1 BE1.png|32px]] [[File:Ocean Explorer Map JE1 BE1.png|32px]] Added woodland and ocean explorer maps.}}
{{History|||snap=16w41a|Explorer maps can now no longer be zoomed out.}}
{{History||1.13|snap=18w10a|[[File:Map (item) JE1 BE1.png|32px]] Added buried treasure explorer maps.}}
{{History|||snap=18w11a|Buried treasure explorer maps now generate in the [[chest]]s of [[shipwreck]]s.}}
{{History||1.14|snap=18w43a|[[File:Woodland Explorer Map JE2 BE2.png|32px]] [[File:Ocean Explorer Map JE2 BE2.png|32px]] [[File:Map (item) JE2 BE2.png|32px]] The textures for explorer maps have now been changed.}}
{{History||1.20.2|snap=1.20.2 Pre-release 1|Updated structure icons on explorer maps sold by cartographers.}}
{{History||Villager Trade Rebalance<br>(Experimental)|link=Java Edition 1.20.2|snap=1.20.2 Pre-release 1|Added seven new maps which cartographers can sell.}}
{{History|pocket}}
{{History||1.1.0|snap=alpha 1.1.0.0|[[File:Woodland Explorer Map JE1 BE1.png|32px]] [[File:Ocean Explorer Map JE1 BE1.png|32px]] Added explorer maps.<ref>{{Mcnet|discovery-update-pocket-and-win-10-soon|The Discovery Update: on Pocket and Win 10 soon|March 29, 2017}}</ref>
|Explorer maps are not yet obtainable in [[survival]] mode.}}
{{History|||snap=alpha 1.1.0.3|Explorer maps are now obtainable as [[trading|trades]] from [[cartographer]] [[villager]]s.}}
{{History|bedrock}}
{{History||1.4.0|snap=beta 1.2.14.2|[[File:Map (item) JE1 BE1.png|32px]] Added buried treasure explorer maps.}}
{{History|||snap=beta 1.2.20.1|Treasure maps now generate in [[underwater ruins]] [[chest]]s.}}
{{History||1.10.0|snap=beta 1.10.0.3|[[File:Woodland Explorer Map JE2 BE2.png|32px]] [[File:Ocean Explorer Map JE2 BE2.png|32px]] [[File:Map (item) JE2 BE2.png|32px]] The textures for explorer maps have now been changed.}}
{{History||1.11.0|snap=beta 1.11.0.4|[[Trading]] has now been changed, woodland and ocean explorer maps now cost a [[compass]] and 12 [[emerald]]s.
|Journeyman-level [[cartographer]] [[villager]]s no longer [[trading|sell]] 2 type of explorer map as they now have {{frac|1|3}} chance to sell woodland explorer maps, {{frac|1|3}} chance to sell ocean explorer maps, or {{frac|1|3}} chance to sell other [[item]]s<!-- empty locator map--> as part of their [[trading|trades]].
|Woodland explorer maps can now be [[trading|bought]] from fletcher [[villager]]s.}}
{{History||1.12.0|snap=beta 1.12.0.3|Journeyman-level fletcher villagers no longer [[trading|sell]] woodland explorer maps.}}
{{History||1.13.0|snap=beta 1.13.0.1|[[File:Woodland Explorer Map BE3.png|32px]] [[File:Ocean Explorer Map BE3.png|32px]] [[File:Buried Treasure Map BE3.png|32px]] The textures of explorer maps have now been changed.}}
{{History||1.16.100|snap=beta 1.16.100.56|The ID of maps has been changed from <code>map</code> to <code>filled_map</code>.}}
{{History|console}}
{{History||xbox=TU54|xbone=CU44|ps=1.52|wiiu=Patch 24|switch=1.0.4|[[File:Woodland Explorer Map JE1 BE1.png|32px]] [[File:Ocean Explorer Map JE1 BE1.png|32px]] Added explorer maps.}}
{{History|PS4}}
{{History||1.90|[[File:Woodland Explorer Map JE2 BE2.png|32px]] [[File:Ocean Explorer Map JE2 BE2.png|32px]] The textures for explorer maps have now been changed.}}
{{History|new3ds}}
{{History||1.9.19|[[File:Woodland Explorer Map JE1 BE1.png|32px]] [[File:Ocean Explorer Map JE1 BE1.png|32px]] Added explorer maps.}}
{{History|foot}}
== Issues ==
{{Issue list}}
== Trivia ==
* When a [[cartographer]] generates the trade offers for the explorer maps, it chooses the location of one of the nearest structures of the respective type ([[monument]] or [[woodland mansion]]).
* For the reason above, explorer maps obtained from one cartographer are always the same. Also, if two cartographers unlock the explorer map trades approximately at the same place and at the same time, the map locations are usually identical. This sometimes also happens when finding multiple treasure maps from [[ocean ruins]].
* Explorer maps fill as the [[chunk]]s are generated, rather than when the [[player]] holds them while in the area; leaving an explorer map while exploring the area still fills the map.
* Buried treasure explorer maps are named ''Buried Treasure Map'' {{in|java}} while {{in|bedrock}}, they are named ''Treasure Map''.
* It is possible for a cartographer to give a monument or woodland mansion explorer map for areas where the [[generated structures|structures]] would have spawned in the world, but were unable to as a result of terrain generation. As a result, explorer maps, unfortunately, don't always guarantee that a structure exists at the purported location. This is most common with woodland mansion explorer maps, due to its generation algorithm.
* On [[Bedrock Edition]], inventory editors and add-ons can be used to create Explorer Maps that lead to any structure.
== Gallery ==
<gallery>
File:Explorer Maps.png|An ocean explorer map in the [[off-hand]], a woodland explorer map in the main hand, and a [[cartographer]] [[villager]] in between them.
File:Partial Explorer Map.png|A partially-explored explorer map.
File:ExplorerToNormal Map Comparison.png|Two fully-explored maps of the same place, one of which is a woodland explorer map.
File:Buried Treasure Explorer Map.png|An [[item frame]] holding a buried treasure explorer map. The player can see the red X on the left side of the map.
File:Purchase.png|Purchasing explorer maps from a cartographer.
</gallery>
== See also ==
* [[Map]]
* [[Woodland Mansion]]
* [[Ocean Monument]]
* [[Shipwreck]]
* [[Buried treasure]]
== References ==
{{reflist}}
== External Links ==
*[https://www.minecraft.net/en-us/article/taking-inventory--explorer-map Taking Inventory: Explorer Map] – Minecraft.net on November 13, 2019
{{Items}}
[[de:Schatzkarte]]
[[es:Mapa (localización de estructura)]]
[[fr:Carte d'exploration]]
[[ja:探検家の地図]]
[[ko:탐험 지도]]
[[pl:Mapa eksploracyjna]]
[[pt:Mapa de exploração]]
[[ru:Карта сокровищ]]
[[zh:探险家地图]]</li><li>[[Goat Horn|Goat Horn]]<br/>{{redirect|Horn}}
{{Item
| image = Goat Horn JE1 BE1.png
| renewable = Yes
| stackable = No
}}
A '''goat horn''' is an [[item]] dropped by [[goat]]s. It has eight variants, and each plays a unique sound when {{Control|used}} which can be heard by [[Player|players]] in a large radius.
== Obtaining ==
=== Mob loot ===
A horn is dropped when an adult [[goat]] rams a tree or any other hard block that occurs naturally where goats spawn. These include [[stone]], [[coal ore]], [[copper ore]], [[iron ore]], [[emerald ore]], [[log]], or [[packed ice]]. Goats do not ram other solid blocks. {{IN|java}}, these blocks are listed under the {{cd|snaps_goat_horn}} [[tag]], and can be modified by [[data pack]]s.
Up to two horns can be dropped from an adult goat. Regular goats may drop the Ponder, Sing, Seek, and Feel horns, while screaming goats drop the Admire, Call, Yearn, and Dream horns. A specific goat drops only one type of horn; that is, if a goat drops a Sing horn, its other horn is also a Sing horn.
=== Natural generation ===
{{LootChestItem|goat-horn}}
Only the four variants from regular goats can be found here.
== Usage ==
When {{control|used}}, they play a loud sound that can be heard from up to 256 blocks, but are also limited by the server view distance. Each horn variant plays a unique sound. There are eight variants, four of which are exclusive to [[Goat#Spawning|screaming goats]].
There is a cooldown of seven seconds between each use of the horn. All goat horns are affected by this cooldown.
== Sounds ==
=== Generic ===
{{edition|java}}:
{{Sound table
|sound=Goat horn break1.ogg
|sound2=Goat horn break2.ogg
|sound3=Goat horn break3.ogg
|sound4=Goat horn break4.ogg
|subtitle=Goat Horn breaks off
|source=neutral
|description=When a goat's horn breaks off
|id=entity.goat.horn_break
|translationkey=subtitles.entity.goat.horn_break
|volume=0.9
|pitch=1.0
|distance=16
|foot=1}}
{{edition|bedrock}}:
{{Sound table
|type=bedrock
|sound=Goat horn break1.ogg
|sound2=Goat horn break2.ogg
|sound3=Goat horn break3.ogg
|sound4=Goat horn break4.ogg
|description=When a goat's horn breaks off
|source=hostile
|id=mob.goat.horn_break
|volume=1.0
|pitch=1.0
|foot=1}}
=== Playing ===
{{edition|java}}:
{{Sound table
|sound=Goat Horn Call0.ogg
|description="Ponder"
|subtitle=Goat horn plays
|source=Jukebox/Note Blocks
|id=item.goat_horn.sound.0
|translationkey=subtitles.item.goat_horn.play
|volume=16.0
|pitch=1.0
|distance=256}}
{{Sound table
|sound=Goat Horn Call1.ogg
|description="Sing"
|subtitle=Goat horn plays
|source=Jukebox/Note Blocks
|id=item.goat_horn.sound.1
|translationkey=subtitles.item.goat_horn.play
|volume=16.0
|pitch=1.0
|distance=256}}
{{Sound table
|sound=Goat Horn Call2.ogg
|description="Seek"
|subtitle=Goat horn plays
|source=Jukebox/Note Blocks
|id=item.goat_horn.sound.2
|translationkey=subtitles.item.goat_horn.play
|volume=16.0
|pitch=1.0
|distance=256}}
{{Sound table
|sound=Goat Horn Call3.ogg
|description="Feel"
|subtitle=Goat horn plays
|source=Jukebox/Note Blocks
|id=item.goat_horn.sound.3
|translationkey=subtitles.item.goat_horn.play
|volume=16.0
|pitch=1.0
|distance=256}}
{{Sound table
|sound=Goat Horn Call4.ogg
|description="Admire"<ref group=note name=screaming>These are dropped by screaming goats.</ref>
|subtitle=Goat horn plays
|source=Jukebox/Note Blocks
|id=item.goat_horn.sound.4
|translationkey=subtitles.item.goat_horn.play
|volume=16.0
|pitch=1.0
|distance=256}}
{{Sound table
|sound=Goat Horn Call5.ogg
|description="Call"<ref group=note name=screaming/>
|subtitle=Goat horn plays
|source=Jukebox/Note Blocks
|id=item.goat_horn.sound.5
|translationkey=subtitles.item.goat_horn.play
|volume=16.0
|pitch=1.0
|distance=256}}
{{Sound table
|sound=Goat Horn Call6.ogg
|description="Yearn"<ref group=note name=screaming/>
|subtitle=Goat horn plays
|source=Jukebox/Note Blocks
|id=item.goat_horn.sound.6
|translationkey=subtitles.item.goat_horn.play
|volume=16.0
|pitch=1.0
|distance=256}}
{{Sound table
|sound=Goat Horn Call7.ogg
|description="Dream"<ref group=note name=screaming/>
|subtitle=Goat horn plays
|source=Jukebox/Note Blocks
|id=item.goat_horn.sound.7
|translationkey=subtitles.item.goat_horn.play
|volume=16.0
|pitch=1.0
|distance=256
|foot=1}}
{{edition|bedrock}}:
{{Sound table
|type=bedrock
|sound=Goat Horn Call0.ogg
|source=Jukebox/Note Blocks<wbr>{{Until|BE 1.20.40}}<br>Hostile Creatures<wbr>{{Upcoming|BE 1.20.40}}|overridesource=1
|description="Ponder"
|id=horn.call.0
|volume=1.0<wbr><ref group=sound name=nodistance>{{Bug|MCPE-153254}}</ref><wbr>{{Until|BE 1.20.40}}<br>16.0<wbr>{{Upcoming|BE 1.20.40}}
|pitch=1.0}}
{{Sound table
|sound=Goat Horn Call1.ogg
|source=Jukebox/Note Blocks<wbr>{{Until|BE 1.20.40}}<br>Hostile Creatures<wbr>{{Upcoming|BE 1.20.40}}|overridesource=1
|description="Sing"
|id=horn.call.1
|volume=1.0<wbr><ref group=sound name=nodistance/><wbr>{{Until|BE 1.20.40}}<br>16.0<wbr>{{Upcoming|BE 1.20.40}}
|pitch=1.0}}
{{Sound table
|sound=Goat Horn Call2.ogg
|source=Jukebox/Note Blocks<wbr>{{Until|BE 1.20.40}}<br>Hostile Creatures<wbr>{{Upcoming|BE 1.20.40}}|overridesource=1
|description="Seek"
|id=horn.call.2
|volume=1.0<wbr><ref group=sound name=nodistance/><wbr>{{Until|BE 1.20.40}}<br>16.0<wbr>{{Upcoming|BE 1.20.40}}
|pitch=1.0}}
{{Sound table
|sound=Goat Horn Call3.ogg
|source=Jukebox/Note Blocks<wbr>{{Until|BE 1.20.40}}<br>Hostile Creatures<wbr>{{Upcoming|BE 1.20.40}}|overridesource=1
|description="Feel"
|id=horn.call.3
|volume=1.0<wbr><ref group=sound name=nodistance/><wbr>{{Until|BE 1.20.40}}<br>16.0<wbr>{{Upcoming|BE 1.20.40}}
|pitch=1.0}}
{{Sound table
|sound=Goat Horn Call4.ogg
|source=Jukebox/Note Blocks<wbr>{{Until|BE 1.20.40}}<br>Hostile Creatures<wbr>{{Upcoming|BE 1.20.40}}|overridesource=1
|description="Admire"<ref group=note name=screaming/>
|id=horn.call.4
|volume=1.0<wbr><ref group=sound name=nodistance/><wbr>{{Until|BE 1.20.40}}<br>16.0<wbr>{{Upcoming|BE 1.20.40}}
|pitch=1.0}}
{{Sound table
|sound=Goat Horn Call5.ogg
|source=Jukebox/Note Blocks<wbr>{{Until|BE 1.20.40}}<br>Hostile Creatures<wbr>{{Upcoming|BE 1.20.40}}|overridesource=1
|description="Call"<ref group=note name=screaming/>
|id=horn.call.5
|volume=1.0<wbr><ref group=sound name=nodistance/><wbr>{{Until|BE 1.20.40}}<br>16.0<wbr>{{Upcoming|BE 1.20.40}}
|pitch=1.0}}
{{Sound table
|sound=Goat Horn Call6.ogg
|source=Jukebox/Note Blocks<wbr>{{Until|BE 1.20.40}}<br>Hostile Creatures<wbr>{{Upcoming|BE 1.20.40}}|overridesource=1
|description="Yearn"<ref group=note name=screaming/>
|id=horn.call.6
|volume=1.0<wbr><ref group=sound name=nodistance/><wbr>{{Until|BE 1.20.40}}<br>16.0<wbr>{{Upcoming|BE 1.20.40}}
|pitch=1.0}}
{{Sound table
|sound=Goat Horn Call7.ogg
|source=Jukebox/Note Blocks<wbr>{{Until|BE 1.20.40}}<br>Hostile Creatures<wbr>{{Upcoming|BE 1.20.40}}|overridesource=1
|description="Dream"<ref group=note name=screaming/>
|id=horn.call.7
|volume=1.0<wbr><ref group=sound name=nodistance/><wbr>{{Until|BE 1.20.40}}<br>16.0<wbr>{{Upcoming|BE 1.20.40}}
|pitch=1.0
|foot=1}}
== Data values ==
=== ID ===
{{el|je}}:
{{ID table
|edition=java
|showforms=y
|generatetranslationkeys=y
|displayname=Goat Horn
|spritetype=item
|nameid=goat_horn
|form=item
|foot=1}}
{{el|be}}:
{{ID table
|edition=bedrock
|shownumericids=y
|showforms=y
|notshowbeitemforms=y
|generatetranslationkeys=y
|displayname=Goat Horn
|spritetype=item
|nameid=goat_horn
|form=item
|id=624
|translationkey=item.goat_horn.name, item.minecraft.goat_horn.sound.0, item.minecraft.goat_horn.sound.1, item.minecraft.goat_horn.sound.2, item.minecraft.goat_horn.sound.3, item.minecraft.goat_horn.sound.4, item.minecraft.goat_horn.sound.5, item.minecraft.goat_horn.sound.6, item.minecraft.goat_horn.sound.7
|foot=1}}
=== Item data ===
==== ''Java Edition'' ====
<div class="treeview">
*{{nbt|compound|tag}}: The item's '''tag''' tag.
{{:Player.dat_format/Goat Horn}}
</div>
Goat horns use the "instrument" tag to control which sound can be played when using a goat horn. The values of the tag (to be prefixed with <code>minecraft:</code>) are:
{| class="wikitable sortable" style="text-align: center;"
!Sound type !![[Resource location|Identifier]]
|-
|Ponder||<code>ponder_goat_horn</code>
|-
|Sing ||<code>sing_goat_horn</code>
|-
|Seek ||<code>seek_goat_horn</code>
|-
|Feel ||<code>feel_goat_horn</code>
|-
|Admire||<code>admire_goat_horn</code>
|-
|Call ||<code>call_goat_horn</code>
|-
|Yearn||<code>yearn_goat_horn</code>
|-
|Dream||<code>dream_goat_horn</code>
|}
== History ==
{{History||October 16, 2021|link=https://www.twitch.tv/videos/1178420217?t=02h46m05s|Ulraf, a game developer on ''Minecraft'', states that goat horns are not included in [[Java Edition 1.18]].}}
{{History||November 17, 2021|link=https://www.minecraft.net/en-us/article/caves---cliffs-update-part-ii-coming|Goat horns are initially announced to be added after "The Wild Update".}}
{{History|java}}
{{History||1.19|snap=22w17a|[[File:Goat Horn JE1 BE1.png|32px]]Added goat horns.}}
{{History||1.19|snap=Pre-release 2|Goat Horns now snap when a goat rams into [[copper ore]].<ref>{{bug|MC-250941|||Fixed }}</ref>}}
{{History|Bedrock}}
{{History||Caves & Cliffs<br>(experimental)|link=Caves & Cliffs|snap=beta 1.16.200.52|[[File:Goat Horn JE1 BE1.png|32px]]Added goat horns behind the "Caves and Cliffs" experimental toggle.}}
{{History|||snap=beta 1.16.210.51|Goats now drop 2 horns each.}}
{{History|||snap=beta 1.17.20.20|Baby goats no longer drop horns.}}
{{History||1.18.0|snap=beta 1.18.0.20|Goat horns are now available outside of experimental gameplay.}}
{{History|||snap=beta 1.18.0.22|Goat horns have been moved behind the "Vanilla Experiments" [[experimental gameplay|experiments]] toggle.}}
{{History||Vanilla Experiments (experimental)|link=Experimental Gameplay|snap=beta 1.18.20.23|Goat horns now have a cooldown after being used.}}
{{History|||snap=beta 1.18.20.25|Goat horns now have an animation when being used in first person.
|Goats now make a sound when they drop goat horns.}}
{{History|||snap=beta 1.18.30.26|Goat horns are now used to craft [[copper horn]]s.|Changed goat horn sounds.}}
{{History||Vanilla Experiments (experimental)|link=Experimental Gameplay|snap=beta 1.19.0.24|Goat horns are no longer used to craft copper horns, as copper horns have been removed.|Changed goat horn sounds.{{verify}}|Removed "Fly" and "Dream" goat horns.}}
{{History||1.19.0|snap=beta 1.19.0.28|Goat horns are now available without enabling experimental gameplay.}}
{{History||1.19.10|snap=beta 1.19.10.22|Renamed the "Resist" goat horn to the "Dream" goat horn to match ''Java Edition''.|The "Feel" goat horn now plays the same sound as ''Java Edition''.}}
{{History|upcoming bedrock}}
{{History||1.20.40|snap=beta 1.20.40.22|Goat horns now have a range of 256 blocks.<ref name=nodistance>{{Bug|MCPE-153254}}</ref>}}
{{History|foot}}
== Issues ==
{{issue list}}
== Trivia ==
* The "seek" horn sounds similar to the "ominous horn" that announces a [[raid]].
== Gallery ==
<gallery>
File:Screenshot (17).png|Steve using a goat horn.
File:Alex uses a goat horn.png|Alex using a goat horn.
File:Screenshot (18).png|The goat horn animation in first person.
File:Screenshot (19).png|The goat horn animation with "Left Hand" option enabled.
</gallery>
== Notes ==
<references group="note" />
== References ==
{{reflist}}
== External Links ==
* [https://www.minecraft.net/en-us/article/taking-inventory--goat-horn Taking Inventory: Goat Horn] - Minecraft.net on February 16, 2023
{{Items}}
[[Category:Renewable resources]]
[[Category:Tools]]
[[de:Ziegenhorn]]
[[es:Cuerno de cabra]]
[[fr:Corne de chèvre]]
[[it:Corno di capra]]
[[ja:ヤギの角笛]]
[[pl:Kozi róg]]
[[pt:Chifre de cabra]]
[[ru:Козий рог]]
[[zh:山羊角]]</li></ul> | Reduced from a full block tall to 15⁄16. | ||||
1.11{{Extension DPL}}<ul><li>[[Sparkler|Sparkler]]<br/>{{About|the Education Edition exclusive item|the new melee weapon available from the ''Minecraft Dungeons'' anniversary event|MCD:Sparkler}}
{{Item
| image = <gallery>
Orange Sparkler.png | Orange
Blue Sparkler.png | Blue
Red Sparkler.png | Red
Purple Sparkler.png | Purple
Green Sparkler.png | Green
</gallery>
| image2 = <gallery>
Active Orange Sparkler.png | Active Orange
Active Blue Sparkler.png | Active Blue
Active Red Sparkler.png | Active Red
Active Purple Sparkler.png | Active Purple
Active Green Sparkler.png | Active Green
</gallery>
| renewable = No
| stackable = No
}}
{{education feature}}
{{exclusive|bedrock|education}}
A '''sparkler''' is a [[Chemistry Update|chemistry]]-related [[item]] that emits particles when lit.
Sparklers are available in orange, blue, red, purple, and green colors.
== Obtaining ==
=== Crafting ===
{{Crafting
|showdescription=1
|B1=Chloride |B2=Magnesium |B3=Stick
|Output=Sparkler
|description= Calcium Chloride: Orange<br>Cerium Chloride: Blue<br>Mercuric Chloride: Red<br>Potassium Chloride: Purple<br>Tungsten Chloride: Green<br>{{only|bedrock|education}}
|type=Miscellaneous
}}
== Usage ==
{{ctrl|Using}} a sparkler ignites it, causing its texture to change. When lit, the sparkler emits colored [[particles]]; the [[durability]] meter depletes while the sparkler is burning. Sparklers are one of the few [[item]]s that can be held in the [[off-hand]] {{in|be}}. Unlit sparklers have normal lighting like most items, while lit sparklers appear to glow when held in the player's hand, similarly to [[glow stick]]s.
When the [[player]] uses another item while a sparkler is lit, or holds the sparkler in the off-hand, the sparkler's durability stops depleting.
If the player has a lit sparkler in their [[inventory]] and goes into the [[water]], the sparkler is destroyed immediately. However, it does not get destroyed if dropped in water. It also cannot float.
Despite having durability, sparklers cannot be enchanted with [[Unbreaking]] or [[Mending]].
== Sounds ==
{{Sound table
|type=bedrock
|sound=Fuse.ogg
|source=sound
|description=While a sparkler is active
|id=sparkler.active
|volume=0.25
|pitch=0.8/1.2}}
{{Sound table
|sound=Fizz.ogg
|source=block
|description=While a sparkler is being lit
|id=random.fizz
|volume=1.0
|pitch=2.4/2.6
|foot=1}}
== Data values ==
=== ID ===
{{ID table
|edition=bedrock
|shownumericids=y
|showforms=y
|notshowbeitemforms=y
|generatetranslationkeys=y
|displayname=Sparkler
|spritename=sparklers
|spritetype=item
|nameid=sparkler
|id=600
|form=item
|translationkey=item.sparkler.orange.name,item.sparkler.blue.name,item.sparkler.red.name,item.sparkler.purple.name,item.sparkler.green.name
|foot=1}}
== History ==
{{History|bedrock}}
{{History||1.4.0|snap=beta 1.2.20.1|[[File:Orange Sparkler BE1.png|32px]] [[File:Blue Sparkler BE1.png|32px]] [[File:Red Sparkler BE1.png|32px]] [[File:Purple Sparkler BE1.png|32px]] [[File:Green Sparkler BE1.png|32px]] <br>[[File:Active Orange Sparkler BE1.png|32px]] [[File:Active Blue Sparkler BE1.png|32px]] [[File:Active Red Sparkler BE1.png|32px]] [[File:Active Purple Sparkler BE1.png|32px]] [[File:Active Green Sparkler BE1.png|32px]] Added sparklers.}}
{{History|education}}
{{History||1.0.27|[[File:Orange Sparkler BE1.png|32px]] [[File:Blue Sparkler BE1.png|32px]] [[File:Red Sparkler BE1.png|32px]] [[File:Purple Sparkler BE1.png|32px]] [[File:Green Sparkler BE1.png|32px]] <br>[[File:Active Orange Sparkler BE1.png|32px]] [[File:Active Blue Sparkler BE1.png|32px]] [[File:Active Red Sparkler BE1.png|32px]] [[File:Active Purple Sparkler BE1.png|32px]] [[File:Active Green Sparkler BE1.png|32px]] Added sparklers.}}
{{History|foot}}
== Issues ==
{{issue list}}
== Trivia ==
* The formula for sparkler roughly works in real life. Magnesium itself burns white in air, while the metal salts add [[wikipedia:flame test|color to the flame]].
{{items}}
{{Education Edition}}
[[Category:Non-renewable resources]]
[[Category:Education Edition items]]
[[de:Wunderkerze]]
[[ja:手持ち花火]]
[[ko:스파클러]]
[[pl:Zimne ognie]]
[[pt:Vela-Faísca]]
[[zh:烟花棒]]</li><li>[[Brush|Brush]]<br/>{{Item
|image=Brush.png
|rarity=Common
|renewable=Yes
|durability=64
|stackable=No
}}
A '''brush''' is a [[tool]] used in [[archaeology]] to excavate [[suspicious block]]s for different items.
==Obtaining==
===Crafting===
{{Crafting
|head=1
|showname=0
|showdescription=1
|B1=Feather
|B2=Copper Ingot
|B3=Stick
|Output=Brush
|type=Tool
}}
{{crafting
|foot=1
|ignoreusage=1
|Damaged Brush
|Damaged Brush
|Output=Brush
|description=The durability of the two brushes is added together, plus an extra 5% durability.
|type=Tool
}}
==Usage==
{{Main|Suspicious Block}}
{{Control|Using}} the brush on any block displays a brushing animation, slowing down the player and creating breaking [[particles]], but not actually damaging the block or brush. When continuously brushing a [[suspicious block]], a random item slowly emerges from it until it drops out, and the block turns into regular [[sand]] or regular [[gravel]], depleting 1 [[durability]] point on the brush. It takes 96 [[game tick]]s (4.8 seconds) to brush a single suspicious block.
=== Enchantments ===
A brush can receive the following [[enchantment]]s:
{|class="wikitable col-2-center col-3-right"
|+
!Name
!Max Level
![[Enchanting|Method]]
|-
|[[Unbreaking]]
|III
|{{Inventory slot|Anvil}}
|-
|[[Mending]]
|I
|{{Inventory slot|Anvil}}
|-
|[[Curse of Vanishing]]
|I
|{{Inventory slot|Anvil}}
|}
== Sounds ==
{{Edition|Java}}:
{{Sound table
<!--All of these sounds are, in fact, different-->
|sound=Brushing sand1.ogg
|sound2=Brushing sand2.ogg
|sound3=Brushing sand3.ogg
|sound4=Brushing sand4.ogg
|subtitle=Brushing Sand
|source=block
|description=While a brush is brushing suspicious sand
|id=item.brush.brushing.sand
|translationkey=subtitles.item.brush.brushing.sand
|volume=0.6
|pitch=0.6
|distance=16}}
{{Sound table
|sound=Brushing gravel1.ogg
|sound2=Brushing gravel2.ogg
|sound3=Brushing gravel3.ogg
|sound4=Brushing gravel4.ogg
|subtitle=Brushing Gravel
|source=block
|description=While a brush is brushing suspicious gravel
|id=item.brush.brushing.gravel
|translationkey=subtitles.item.brush.brushing.gravel
|volume=0.6
|pitch=0.6
|distance=16}}
{{Sound table
|sound=Brushing generic1.ogg
|sound2=Brushing generic2.ogg
|sound3=Brushing generic3.ogg
|sound4=Brushing generic4.ogg
|subtitle=Brushing
|source=block
|description=While a brush is brushing any other block
|id=item.brush.brushing.generic
|translationkey=subtitles.item.brush.brushing.generic
|volume=0.6
|pitch=0.6
|distance=16}}
{{Sound table
|sound=Brushing sand completed1.ogg
|sound2=Brushing sand completed2.ogg
|sound3=Brushing sand completed3.ogg
|sound4=Brushing sand completed4.ogg
|sound5=Brushing sand completed5.ogg
|subtitle=Brushing Sand completed
|source=Players<ref group=sound name=badsource>{{Bug|MC-260202}}</ref>|overridesource=1
|description=When a brush finishes brushing suspicious sand
|id=item.brush.brushing.sand.complete
|translationkey=subtitles.item.brush.brushing.sand.complete
|volume=1.0
|pitch=1.0
|distance=16}}
{{Sound table
|sound=Brushing gravel completed1.ogg
|sound2=Brushing gravel completed2.ogg
|sound3=Brushing gravel completed3.ogg
|sound4=Brushing gravel completed4.ogg
|subtitle=Brushing Gravel completed
|source=Players<ref group=sound name=badsource/>|overridesource=1
|description=When a brush finishes brushing suspicious gravel
|id=item.brush.brushing.gravel.complete
|translationkey=subtitles.item.brush.brushing.gravel.complete
|volume=1.0
|pitch=1.0
|distance=16
|foot=1}}
{{Edition|Bedrock}}:
{{Sound table
|type=bedrock
|sound=Brushing sand1.ogg
|sound2=Brushing sand2.ogg
|sound3=Brushing sand3.ogg
|sound4=Brushing sand4.ogg
|source=player
|description=While a brush is brushing suspicious sand
|id=brush.suspicious_sand
|volume=1.0
|pitch=0.8-1.0}}
{{Sound table
|sound=Brushing gravel1.ogg
|sound2=Brushing gravel2.ogg
|sound3=Brushing gravel3.ogg
|sound4=Brushing gravel4.ogg
|source=player
|description=While a brush is brushing suspicious gravel
|id=brush.suspicious_gravel
|volume=1.0
|pitch=0.8-1.0}}
{{Sound table
|sound=Brushing generic1.ogg
|sound2=Brushing generic2.ogg
|sound3=Brushing generic3.ogg
|sound4=Brushing generic4.ogg
|source=player
|description=While a brush is brushing any other block
|id=brush.generic
|volume=1.0
|pitch=0.8-1.0}}
{{Sound table
|sound=Brushing sand completed1.ogg
|sound2=Brushing sand completed2.ogg
|sound3=Brushing sand completed3.ogg
|sound4=Brushing sand completed4.ogg
|sound5=Brushing sand completed5.ogg
|source=player
|description=When a brush finishes brushing suspicious sand
|id=brush_completed.suspicious_sand
|volume=1.0
|pitch=0.8-1.0}}
{{Sound table
|sound=Brushing gravel completed1.ogg
|sound2=Brushing gravel completed2.ogg
|sound3=Brushing gravel completed3.ogg
|sound4=Brushing gravel completed4.ogg
|source=player
|description=When a brush finishes brushing suspicious gravel
|id=brush_completed.suspicious_gravel
|volume=1.0
|pitch=0.8-1.0
|foot=1}}
== Data values ==
=== ID ===
{{edition|java}}:
{{ID table
|edition=java
|showforms=y
|generatetranslationkeys=y
|displayname=Brush
|spritetype=item
|nameid=brush
|form=item
|foot=1}}
{{edition|bedrock}}:
{{ID table
|edition=bedrock
|shownumericids=y
|showforms=y
|notshowbeitemforms=y
|generatetranslationkeys=y
|displayname=Brush
|spritetype=item
|nameid=brush
|id=684
|form=item
|foot=1}}
== Advancements ==
{{load advancements|Respecting the Remnants}}
== History ==
{{History||October 3, 2020|link=https://youtu.be/DBvZ2Iqmm3M?t=2178|[[File:Brush (pre-release 1).png|32px]][[File:Brush 2.png|32px]] Brushes were announced at [[Minecraft Live 2020]] with two variants.}}
{{History||?|link=https://youtu.be/klP9SrJFDU8?t=206|[[File:Brush (pre-release 2).png|32px]] Changed the brush's item texture.}}
{{History||February 10, 2023|[[File:Brush JE1 BE1.png|32px]] [[Sofia Dankis]] posted an article about upcoming archaeology features, including brushes.|link=https://www.minecraft.net/en-us/article/archeology-coming-minecraft-120}}
{{History|java}}
{{History||1.20<br>(Experimental)|link=1.19.4|snap=23w07a|[[File:Brush JE1 BE1.png|32px]] Added brushes with an updated texture behind the [[Java Edition 1.20|Update 1.20 experimental datapack]].|The crafting recipe was originally three [[string]] and two [[stick]]s.
{{{!}} class{{=}}"collapsible collapsed" data-description{{=}}"Recipe"
! Recipe
{{!}}-
{{!}}{{Crafting Table
|A1 = String
|B1 = String
|C1 = String
|B2 = Stick
|B3 = Stick
|Output = Brush
|type = Tool
|ignoreusage=1}}
{{!}}}
}}
{{History|||snap=1.19.4 Pre-release 1|The crafting recipe for brushes has been changed:
{{{!}} class{{=}}"collapsible collapsed" data-description{{=}}"Recipe"
! Recipe
{{!}}-
{{!}}{{Crafting Table
|B1 = Feather
|B2 = Copper Ingot
|B3 = Stick
|Output = Brush
|type = Tool
|ignoreusage=1}}
{{!}}}
}}
{{History||1.20|snap=23w12a|Brushes are now available without using the "Update 1.20" experimental data pack.
|Brushes can now brush [[suspicious gravel]].}}
{{History|||snap=23w14a|The brushing sound of brush is now controlled by the "Blocks" sound slider instead of the "Players" sound slider.}}
{{History|||snap=23w17a|The player now gets the [[advancement]] "Respecting the Remnants" when they use a brush on a [[suspicious block]] to obtain a [[pottery sherd]].}}
{{History|bedrock}}
{{History||Next Major Update<br>(Experimental)|link=Bedrock Edition 1.19.70|snap=beta 1.19.70.23|[[File:Brush JE1 BE1.png|32px]] Added brushes behind the "[[Bedrock Edition 1.20.0|Next Major Update]]" [[experimental]] toggle.
|The crafting recipe is originally three [[string]] and two [[stick]]s.
{{{!}} class{{=}}"collapsible collapsed" data-description{{=}}"Recipe"
! Recipe
{{!}}-
{{!}}{{Crafting Table
|A1 = String
|B1 = String
|C1 = String
|B2 = Stick
|B3 = Stick
|Output = Brush
|type = Tool
|ignoreusage=1}}
{{!}}}
}}
{{History||Next Major Update<br>(Experimental)|link=Bedrock Edition 1.19.80|snap=beta 1.19.80.20|The crafting recipe for brushes has been changed:
{{{!}} class{{=}}"collapsible collapsed" data-description{{=}}"Recipe"
! Recipe
{{!}}-
{{!}}{{Crafting Table
|B1 = Feather
|B2 = Copper Ingot
|B3 = Stick
|Output = Brush
|type = Tool
|ignoreusage=1}}
{{!}}}
}}
{{History||1.20.0|snap=beta 1.20.0.21|Brushes are now available without using the "Next Major Update" experimental toggle.}}
{{History|foot}}
== Issues ==
{{Issue list}}
== References ==
{{Reflist}}
==External Links==
*[https://www.minecraft.net/en-us/article/brush Taking Inventory: Brush] – Minecraft.net on July 6, 2023
{{Items}}
[[Category:Renewable resources]]
[[de:Pinsel]]
[[es:Pincel]]
[[ja:ブラシ]]
[[pt:Pincel]]
[[pl:Pędzel]]
[[uk:Щітка]]
[[zh:刷子]]</li></ul> | 16w38a | Using pick block gives the player the farmland itself instead of dirt. | |||
| 16w39a | Farmland now generates in woodland mansions. | ||||
| Pocket Edition Alpha | |||||
0.4.0{{Extension DPL}}<ul><li>[[Nether Brick|Nether Brick]]<br/><!--Please do not change "nether brick" to "Nether brick". According to style guide, item names are not proper nouns and should not be capitalized.-->
{{about|the item|the block|Nether Bricks}}
{{Item
| title = Nether Brick
| image = Nether Brick.png
| renewable = Yes
| stackable = Yes (64)
}}
A '''nether brick''' is an [[item]] made by [[smelting]] [[netherrack]] in a [[furnace]], and is used to craft the [[Nether Bricks|nether bricks]] block and its variants.
== Obtaining ==
=== Smelting ===
Nether brick can be smelted from netherrack.
{{smelting
|Netherrack
|Nether Brick
|0,1
}}
=== Bartering ===
[[Piglin]]s may [[barter]] 2 to 8 nether bricks when given a [[gold ingot]].
== Usage ==
=== Crafting ingredient ===
{{crafting usage|Nether Brick}}
== Data values ==
=== ID ===
{{edition|java}}:
{{ID table
|edition=java
|showforms=y
|generatetranslationkeys=y
|displayname=Nether Brick
|spritetype=item
|nameid=nether_brick
|form=item
|foot=1}}
{{edition|bedrock}}:
{{ID table
|edition=bedrock
|shownumericids=y
|showforms=y
|notshowbeitemforms=y
|generatetranslationkeys=y
|displayname=Nether Brick
|spritetype=item
|nameid=netherbrick
|id=523
|form=item
|foot=1}}
== History ==
{{History|java}}
{{History||1.5|snap=13w01a|[[File:Nether Brick JE1 BE1.png|32px]] Added nether brick items.}}
{{History||1.10|snap=16w20a|Nether brick items can now be used to craft [[red nether bricks]].}}
{{History||1.13|snap=17w47a|The ID of nether bricks has been changed from <code>netherbrick</code> to <code>nether_brick</code>.
|Prior to [[1.13/Flattening|''The Flattening'']], this [[item]]'s numeral ID was 405.}}
{{History||1.14|snap=18w43a|[[File:Nether Brick JE2 BE2.png|32px]] The texture of nether bricks has been changed.}}
{{History||1.16|snap=20w07a|Nether bricks now have a {{frac|10|109}} (~9.17%) chance of being given by the new [[piglin]]s when [[bartering]], in a stack size of 1–4.}}
{{History|||snap=20w09a|Nether bricks now have a {{frac|20|226}} (~8.84%) chance of being given by piglins when bartering, in a stack size of 1–5.}}
{{History|||snap=20w10a|Nether bricks now have a {{frac|40|411}} (~9.73%) chance of being given by piglins when bartering, in a stack size of 4–16.}}
{{History||1.16.2|snap=20w28a|Nether bricks now have a {{frac|40|459}} (~8.71%) chance of being given by piglins when bartering, in a stack size of 2–8.}}
{{History|pocket alpha}}
{{History||v0.6.0|[[File:Nether Brick JE1 BE1.png|32px]] Added nether brick items.}}
{{History||v0.16.0|snap=build 5|Added nether brick items to the [[Creative]] [[inventory]].<ref name="missing brick">{{Bug|MCPE-16556}}</ref>}}
{{History|pocket}}
{{History||1.1.3|snap=alpha 1.1.3.0|Nether brick items are now used to craft [[red nether bricks]].}}
{{History|bedrock}}
{{History||1.9.0|snap=beta 1.9.0.0|Nether brick items are now used to craft nether brick [[fence]]s.}}
{{History||1.10.0|snap=beta 1.10.0.3|[[File:Nether Brick JE2 BE2.png|32px]] The texture of nether bricks has been changed.}}
{{History||1.16.100|snap=beta 1.16.100.50|Nether bricks now can be used as fuel for a [[furnace]].<ref>{{bug|MCPE-114216}}</ref>}}
{{History|||snap=beta 1.16.100.54|Nether bricks now have a {{frac|40|459}} (~8.71%) chance of being given by piglins when bartering, in a stack size of 2–8 to match {{el|Java}}.}}
{{History||1.18.30|snap=beta 1.18.30.26|Nether bricks can no longer be used as fuel in a furnace.}}
{{History|console}}
{{History||xbox=TU9|xbone=CU1|ps=1.0|wiiu=Patch 1|switch=1.0.1|[[File:Nether Brick JE1 BE1.png|32px]] Added nether brick items.}}
{{History||xbox=none|xbone=none|ps=1.90|wiiu=none|switch=none|[[File:Nether Brick JE2 BE2.png|32px]] The texture of nether bricks has been changed.}}
{{History|New 3DS}}
{{History||0.1.0|[[File:Nether Brick JE1 BE1.png|32px]] Added nether brick items.}}
{{History|foot}}
== Issues ==
{{issue list}}
== References ==
{{reflist}}
{{items}}
[[cs:Netheritová cihla]]
[[de:Netherziegel (Gegenstand)]]
[[es:Ladrillo del Nether]]
[[fr:Brique du Nether]]
[[hu:Alvilági tégla]]
[[ja:ネザーレンガ (アイテム)]]
[[ko:네더 벽돌 (아이템)]]
[[lzh:焱界磚]]
[[nl:Netherbaksteen (voorwerp)]]
[[pl:Netherowa cegła]]
[[pt:Tijolo do Nether]]
[[ru:Адский кирпич (предмет)]]
[[uk:Пекельна цегла (предмет)]]
[[zh:下界砖]]
[[Category:Renewable resources]]</li><li>[[Painting|Painting]]<br/>{{ItemEntity
|title=Painting
|image=Painting JE2 BE2.png
|extratext=View [[#Renders|all renders]]
|renewable=Yes
|stackable=Yes (64)
|drops=1 {{ItemLink|Painting}}
}}
'''Paintings''' are decorative [[entity|entities]] that hang on walls.
== Obtaining ==
=== Crafting ===
{{Crafting
|A1= Stick |B1= Stick |C1= Stick
|A2= Stick |B2= Any Wool |C2= Stick
|A3= Stick |B3= Stick |C3= Stick
|Output= Painting
|type= Decoration block
}}
Paintings can be crafted with any color of [[wool]]. The color of the wool used does not influence the picture chosen when the painting is placed.
Once placed, it displays a random painting.
=== Breaking ===
To remove a painting from a wall, the player can {{control|attack}} it, break one of its supporting blocks, cover one square of it with a block, hit it with an arrow, egg, ender pearl, snowball, or fire charge, or subject it to an explosion. The painting then drops as an item. Arrows that hit paintings disappear.
=== Trading ===
Master-level shepherd [[villager]]s sell 3 paintings for 2 [[emerald]]s.
== Usage ==
=== Placement ===
Paintings can be placed on the sides of [[solid block]]s, [[sign]]s, [[banner]]s, or [[sculk vein]]s. A small gap is visible between the painting and attachment surface. There are several different sizes of paintings (see below). When placed, a painting checks for the largest amount of space it has. It then chooses a random painting of that size. The player can add blocks around the painting to ensure it is the size wanted. When the supporting blocks are removed, the painting breaks after 20 game [[tick]]s (1 second) if no supporting blocks are replaced during that interval.
=== Properties ===
Being an entity, paintings can simultaneously exist in the same space as blocks such as water or torches. Specifically, they can share the space with any block whose collision box does not intersect its hitbox.
Players and mobs are able to walk through paintings, as long as the blocks supporting the painting allow it. Secret doorways can be created this way. [[Light]] propagates through paintings as well.
If a player is concealed behind a painting, the player's name is also concealed from other players.{{verify|Is this true in Bedrock?}}
Paintings are non-flammable.
== Canvases ==
{{Stub|Needing the new painting renders}}
There are 31 paintings in the game. These are mostly based on paintings by [[Kristoffer Zetterstrand]], who also created the ''Minecraft'' versions.
{| class="wikitable stikitable" style="text-align: center" data-description="Paintings"
! style="min-width:150px" |Canvas
! style="min-width:3em;max-width:4em" |Size
! style="min-width:3em" |Original
! style="min-width:3em" |Name
! style="min-width:3em;max-width:4.5em" |[[Resource location]]
! style="min-width:10em" |Description
! Java Edition version added
|-
! [[File:Alban (texture).png|64px]]
| rowspan="7" | 1×1 blocks<br>16×16 pixels || [https://zetterstrand.com/work/pictures/archive/alban.jpeg "Albanian"] || Albanian || <code>alban</code> || A man wearing a fez next to a house and a bush. As the name of the painting suggests, it may be a landscape in [[Wikipedia:Albania|Albania]]. || rowspan="9" | [[Indev 20100223]]
|-
! [[File:Aztec (texture).png|64px]]
|[https://zetterstrand.com/eventz/wp-content/uploads/2aztbig.jpg "de_aztec"]|| de_aztec || <code>aztec</code> || [[Wikipedia:Noclip mode|Free-look]] perspective of the map [[w:c:counterstrike:Aztec|de_aztec]] from the video game ''[[Wikipedia:Counter-Strike (video game)|Counter-Strike]]''.
|-
! [[File:Aztec2 (texture).png|64px]]
|[https://zetterstrand.com/eventz/wp-content/uploads/11aztec_for_print.jpg "de_aztec"]|| de_aztec || <code>aztec2</code> || [[Wikipedia:Noclip mode|Free-look]] perspective of the map [[w:c:counterstrike:Aztec|de_aztec]] from the video game ''[[Wikipedia:Counter-Strike (video game)|Counter-Strike]]''.
|-
! [[File:Bomb (texture).png|64px]]
|[https://zetterstrand.com/eventz/wp-content/uploads/12bomb.jpg "Target successfully bombed"]|| Target Successfully Bombed || <code>bomb</code> || The map [[w:c:counterstrike:Dust II|de_dust2]] from the video game ''[[Wikipedia:Counter-Strike (video game)|Counter-Strike]]'', named “target successfully bombed" in reference to the game.
|-
! [[File:Kebab (texture).png|64px]]
|[https://zetterstrand.com/work/pictures/archive/kebab2.jpg "Kebab med tre pepperoni"] || Kebab med tre pepperoni || <code>kebab</code> || A kebab with three green chili peppers.
|-
! [[File:Plant (texture).png|64px]]
|[https://zetterstrand.com/work/pictures/archive/paradistrad.jpeg "Paradisträd"] || Paradisträd || <code>plant</code> || Still life of two plants in pots. "Paradisträd" is Swedish for "[[Wikipedia:Crassula ovata|money tree]]", which is a common name for the depicted species in Scandinavia.
|-
! [[File:Wasteland (texture).png|64px]]
|[https://zetterstrand.com/eventz/wp-content/uploads/Wasteland_1920.jpg "Wasteland"]|| Wasteland || <code>wasteland</code> || A view of some wastelands; a small animal (presumably a rabbit) is sitting on the window ledge.
|-
! [[File:Courbet (texture).png|128px]]
| rowspan="5" | 2×1 blocks<br>32×16 pixels ||[https://zetterstrand.com/eventz/wp-content/uploads/bonjourmonsieurcourbet_BIG.jpg "Bonjour monsieur Courbet"]|| Bonjour Monsieur Courbet || <code>courbet</code> || Two hikers with pointy beards seemingly greeting each other. Based on Gustave Courbet's painting ''[[Wikipedia:La rencontre|The Meeting or "Bonjour, Monsieur Courbet"]]''.
|-
! [[File:Pool (texture).png|128px]]
|[https://zetterstrand.com/eventz/wp-content/uploads/thepool_1920.jpg "The pool"]|| The Pool || <code>pool</code> || Some men and women skinny-dipping in a pool over a cube of sorts. Also there is an old man resting in the lower-right edge.
|-
! [[File:Sea (texture).png|128px]]
| rowspan=2 |[https://zetterstrand.com/eventz/wp-content/uploads/SeaSide_1920.jpg "Seaside"]
| Seaside
| <code>sea</code>
| Mountains and a lake, with a small photo of a mountain and a bright-colored plant on the window ledge. || [[Indev 20100223]] / [[Alpha v1.1.1]]
|-
! [[File:Creebet (texture).png|128px]]
| Creebet || <code>creebet</code> || Mountains and a lake, with a small photo of a mountain and a creeper looking at the viewer through a window. || [[Alpha v1.1.1]]
|-
! [[File:Sunset (texture).png|128px]]
|[https://zetterstrand.com/eventz/wp-content/uploads/sunset_dense.jpg "sunset_dense"]|| sunset_dense || <code>sunset</code> || A view of mountains at sunset. || [[Indev 20100223]]
|-
! [[File:Graham (texture).png|64px]]
| rowspan="2" | 1×2 blocks<br>16×32 pixels ||[https://zetterstrand.com/eventz/wp-content/uploads/graham.jpg "Graham"]|| Graham || <code>graham</code> || King Graham, the player character in the video game series ''[[Wikipedia:King's Quest|King's Quest]]''. The original is based on ''[[Wikipedia:File:Sánchez_Cotán_(Bodegón_con_membrillo,_repollo,_melón_y_pepino).jpg|Still Life with Quince, Cabbage, Melon, and Cucumber]]'' by Juan Sánchez Cotán.|| [[Alpha v1.1.1]]
|-
! [[File:Wanderer (texture).png|64px]]
|[https://zetterstrand.com/eventz/wp-content/uploads/wanderer_1920.jpg "Wanderer"]|| Wanderer || <code>wanderer</code> || A version of Caspar David Friedrich's famous painting ''[[Wikipedia:Wanderer above the Sea of Fog|Wanderer above the Sea of Fog]]''. || rowspan="4" | [[Indev 20100223]]
|-
! [[File:Bust (texture).png|128px]]
| rowspan="6" | 2×2 blocks<br>32×32 pixels ||[https://zetterstrand.com/eventz/wp-content/uploads/bust_1915.jpg "Bust"]|| Bust || <code>bust</code> || A bust of [[Wikipedia:Marcus Aurelius|Marcus Aurelius]] surrounded by fire.
|-
! [[File:Match (texture).png|128px]]
|[https://zetterstrand.com/eventz/wp-content/uploads/Match_rgb_1918.jpg "Match"]|| Match || <code>match</code> || A hand holding a match, causing fire on a white cubic gas fireplace.
|-
! [[File:Skull and Roses (texture).png|128px]]
|[https://zetterstrand.com/eventz/wp-content/uploads/moonlight-installation_1920.jpg "Moonlight Installation"]|| Skull and Roses || <code>skull_and_roses</code> || A skeleton at night with red flowers in the foreground. The original painting was different, depicting a woman sitting in a couch, while the skull is in the middle of a body of glacial water of sorts.
|-
! [[File:Stage (texture).png|128px]]
|[https://zetterstrand.com/eventz/wp-content/uploads/The-stage-is-set-1.jpg "The stage is set"]
| The Stage Is Set
| <code>stage</code>
| Scenery from ''[[Wikipedia:Space Quest I|Space Quest I]]'', with the character Graham from the video game series ''[[Wikipedia:King's Quest|King's Quest]]'' appearing twice. || [[Indev 20100223]] / [[Alpha v1.1.1]]
|-
! [[File:Void (texture).png|128px]]
|[https://zetterstrand.com/eventz/wp-content/uploads/the-void_1920.jpg "The Void"]|| The void || <code>void</code> || An angel praying into a void with fire below. || [[Indev 20100223]]
|-
! [[File:Wither (painting texture).png|128px]]
| – || Wither || <code>wither</code> || The creation of a [[wither]].
This is the only painting not based on a real painting. Made by Jens Bergensten.<ref>{{Citation|url=https://www.youtube.com/watch?v=kK5Y4k-vVXc|title=Who Made Minecraft’s LAST Painting?!|author=AntVenom|website=YouTube|date=29 October 2022}}</ref><ref>https://www.reddit.com/r/Minecraft/comments/1tzav2/comment/cedagcy/</ref>
|| [[Java Edition 1.4.2]] ([[12w36a]])
|-
! [[File:Fighters (texture).png|128px]]
| 4×2 blocks<br>64×32 pixels ||[https://zetterstrand.com/eventz/wp-content/uploads/fighters.jpg "Fighters"]|| Fighters || <code>fighters</code> || Two men poised to fight. Paper versions of fighters from the game ''[[Wikipedia:International Karate +|International Karate +]]''. || [[Indev 20100223]]
|-
! [[File:Donkey Kong (texture).png|128px]]
| rowspan="2" | 4×3 blocks<br>64×48 pixels ||[https://zetterstrand.com/eventz/wp-content/uploads/kong.jpg "Kong"]|| Kong || <code>donkey_kong</code> || A paper-looking screenshot of the level [https://www.mariowiki.com/100m 100m] from the arcade game ''[[Wikipedia:Donkey Kong (arcade game)|Donkey Kong]]''. || rowspan="2" | [[Alpha v1.1.1]]
|-
! [[File:Skeleton (painting texture).png|128px]]
|[https://zetterstrand.com/eventz/wp-content/uploads/mortal_coil.jpg "Mortal Coil"]|| Mortal Coil || <code>skeleton</code> || [[w:c:grim-fandango:Bruno Martinez|Bruno Martinez]] from the adventure game ''[[Wikipedia:Grim Fandango|Grim Fandango]]''.
|-
! [[File:Burning Skull (texture).png|128px]]
| rowspan="3" | 4×4 blocks<br>64×64 pixels ||[https://zetterstrand.com/eventz/wp-content/uploads/skull_on_fire_framed_c_1910.jpg "Skull on Fire"]|| Skull On Fire || <code>burning_skull</code> || A Skull on fire; in the background there is a moon in a clear night sky.<br>This painting is based on a Minecraft screenshot,<ref>{{Citation|url=https://web.archive.org/web/20220928041338/https://imgur.com/HVhrbnH|website=Imgur|date=22 August 2020|title=https://web.archive.org/web/20220928041338/https://imgur.com/HVhrbnH}}</ref> with the grass block and a 3D skull added on top.<ref>{{Citation|url=https://web.archive.org/web/20200906184721/https://imgur.com/AwqQFS6|title=https://web.archive.org/web/20200906184721/https://imgur.com/AwqQFS6|website=Imgur|date=23 August 2020}}</ref>
(See the [[:en:Painting#Trivia|trivia]] section for more info.)
| [[Java Edition Beta 1.2 01|Beta 1.2_01]] / [[Java Edition Beta 1.3|Beta 1.3]]
|-
! [[File:Pigscene (texture).png|128px]]
|[https://zetterstrand.com/eventz/wp-content/uploads/rgb_1914.jpg "RGB"]|| Pigscene || <code>pigscene</code> <!-- yes, without an underscore --> || A girl pointing to a pig on a canvas. In the original version, the canvas showed red, green and blue blocks, representing the three colors of the [[Wikipedia:RGB color model|RGB color model]] that is typically used by computer displays. It is based on the painting ''[[Wikipedia:File:Jacob van Oost (I) - The Artist's Studio - WGA16654.jpg|The Artist's Studio]]'' by Jacob van Oost.|| [[Alpha v1.1.1]]
|-
! [[File:Pointer (texture).png|128px]]
|[https://zetterstrand.com/eventz/wp-content/uploads/pointer_1920.jpg "Pointer"]|| Pointer || <code>pointer</code> || The main character of the game ''[[Wikipedia:International Karate +|International Karate +]]'' in a fighting stance touching a large hand. It could also be interpreted as a play on Michelangelo's famous painting ''[[Wikipedia:The Creation of Adam|The Creation of Adam]]''. || [[Indev 20100223]]
|-
! TBA ||
Pack || <code>pack</code> || Reference to the pack.png fi || [[Java Edition 1.21]]le
|}
=== Unused paintings ===
In [[Pocket Edition v0.5.0 alpha|v0.5.0 alpha]], with the addition of paintings to Pocket Edition, four unused 32×32 paintings were present in <samp>[[kz.png]]</samp> which remained unused. See {{slink|Bedrock Edition unused features|Paintings}} for more information. They were also added to Java Edition in snapshot [[Java Edition 22w16a|22w16a]]. They cannot be placed by default, but can be summoned by [[commands]] (such as {{cmd|/summon painting ~ ~ ~ {variant:"water"} }}) or through a [[datapack]].
According to [[Helen Zbihlyj]],<ref>https://old.reddit.com/r/Minecraft/comments/u8hpnx/thoughts_on_the_new_paintings/i5olue6/?context=3 ([https://web.archive.org/web/20220422115723/https://old.reddit.com/r/Minecraft/comments/u8hpnx/thoughts_on_the_new_paintings/i5olue6/?context=3 archived])</ref> these paintings were originally added "as part of a Pocket Edition promo map" (no footage found) which was planned to be a part of [[Pocket Edition]] promotion at [[MINECON 2012]] [[MINECON 2013|or 2013]] and have never been used in game. The artist of these paintings remains unknown.
{| class="wikitable stikitable" style="text-align: center" data-description="Paintings"
! style="min-width:100px" |Canvas
! style="min-width:3em;max-width:4em" |Size
! style="min-width:6em" |Name
! style="min-width:10em" |[[Resource location]]
! style="min-width:10em" |Description
! style="min-width:5em;max-width:10em" |Bedrock Edition version added
! style="min-width:5em;max-width:8em" |Java Edition version added
|-
! [[File:Earth (texture) BE2.png|128px]]
| rowspan="4" | 2×2 blocks<br>32×32 pixels || Earth || <code>earth</code> || One of the four {{Wikipedia|Classical element|classical elements}}: Earth. || rowspan="4" | [[Pocket Edition v0.5.0 alpha|v0.5.0 alpha]] || rowspan="4" | [[Java Edition 22w16a|22w16a]]
|-
! [[File:Fire (texture) BE2.png|128px]]
| Fire || <code>fire</code> || One of the four classical elements: Fire.
|-
! [[File:Water (texture) BE2.png|128px]]
| Water || <code>water</code> || One of the four classical elements: Water.
|-
! [[File:Wind (texture) BE2.png|128px]]
| Wind || <code>wind</code> || One of the four classical elements: Air.
|}
==Sounds==
{{Edition|Java}}:
{{Sound table
|sound=Painting break1.ogg
|sound2=Painting break2.ogg
|sound3=Painting break3.ogg
|subtitle=Painting breaks<ref>{{Cite bug|MC|194948|Painting, item frame and lead breaking subtitles inconsistent with block breaking subtitle|date=July 14, 2020}}</ref>
|source=neutral
|description=When a painting is broken or pops off
|id=entity.painting.break
|translationkey=subtitles.entity.painting.break
|volume=1.0
|pitch=1.0
|distance=16}}
{{Sound table
|sound=Painting place1.ogg
|sound2=Painting place2.ogg
|sound3=Painting place3.ogg
|sound4=Painting place4.ogg
|subtitle=Painting placed
|source=neutral
|description=When a painting is placed
|id=entity.painting.place
|translationkey=subtitles.entity.painting.place
|volume=1.0
|pitch=1.0
|distance=16
|foot=1}}
{{Edition|Bedrock}}:
{{Sound table
|type=bedrock
|sound=Item Frame break1.ogg
|sound2=Item Frame break2.ogg
|sound3=Item Frame break3.ogg
|source=block
|description=When a painting is broken or pops off
|id=block.itemframe.break
|volume=1.0
|pitch=1.0}}
{{Sound table
|sound=Item Frame add item1.ogg
|sound2=Item Frame add item2.ogg
|soumd3=Item Frame add item3.ogg
|sound4=Item Frame add item4.ogg
|source=block
|description=When a painting is placed
|id=block.itemframe.add_item
|volume=1.0
|pitch=1.0
|foot=1}}
== Data values ==
=== ID ===
{{edition|java}}:
{{ID table
|edition=java
|firstcolumnname=Item
|showforms=y
|generatetranslationkeys=y
|displayname=Painting
|spritetype=item
|nameid=painting
|form=item
|foot=1}}
{{ID table
|edition=java
|firstcolumnname=Entity
|generatetranslationkeys=y
|displayname=Painting
|spritetype=entity
|nameid=painting
|foot=1}}
{{edition|bedrock}}:
{{ID table
|edition=bedrock
|firstcolumnname=Item
|shownumericids=y
|showforms=y
|notshowbeitemforms=y
|generatetranslationkeys=y
|displayname=Painting
|spritetype=item
|nameid=painting
|id=357
|form=item
|foot=1}}
{{ID table
|edition=bedrock
|firstcolumnname=Entity
|shownumericids=y
|generatetranslationkeys=y
|displayname=Painting
|spritetype=entity
|nameid=painting
|id=83
|foot=1}}
=== Entity data ===
Paintings have entity data that defines various properties of the entity.
{{el|java}}:
{{main|Entity format}}
{{/ED}}
{{el|bedrock}}:
: See [[Bedrock Edition level format/Entity format]].
== Video ==
<div style="text-align:center">{{yt|M3vWDirTMek}}</div>
== History ==
{{History|java indev}}
{{History||20100223|[[File:Painting JE1 BE1.png|32px]] Added paintings.
|There are currently 19 canvases, which can be viewed at [[Java Edition history of textures/Paintings]].
|The [[crafting]] recipe of paintings uses eight [[planks]].
{{{!}} class{{=}}"collapsible collapsed"
! Recipe
{{!}}-
{{!}}
{{Crafting Table
|A1=Oak Planks
|B1=Oak Planks
|C1=Oak Planks
|A2=Oak Planks
|B2=Light Gray Wool
|C2=Oak Planks
|A3=Oak Planks
|B3=Oak Planks
|C3=Oak Planks
|Output=Painting
}}
{{!}}}
|Painting textures are currently stored on a [[texture atlas]] called <samp>[[kz.png]]</samp>.}}
{{History|java infdev}}
{{History||20100227-1|The [[crafting]] recipe has of paintings has been changed, so that it now uses [[stick]]s, rather than [[planks]].
{{{!}} class{{=}}"collapsible collapsed"
! Recipe
{{!}}-
{{!}}
{{Crafting Table
|A1=Stick
|B1=Stick
|C1=Stick
|A2=Stick
|B2=Light Gray Wool
|C2=Stick
|A3=Stick
|B3=Stick
|C3=Stick
|Output=Painting
}}
{{!}}}
}}
{{History|java alpha}}
{{History||v1.1.1|Added five more painting canvases, for a total of 24.
|The textures of two paintings have been changed.}}
{{History|java beta}}
{{History||1.2_01|Added a new painting, although it uses an untextured part of <samp>kz.png</samp> due to the painting texture not yet being implemented.}}
{{History||1.3|The texture of the new painting, has been added to the part of <samp>kz.png</samp> displayed by the new painting.}}
{{History||April 27, 2011|link=https://web.archive.org/web/20201111211000/https://notch.tumblr.com/post/4988431144/the-maps|Custom paintings are mentioned by [[Notch]].}}
{{History||1.7.3|Paintings pushed by [[piston]]s now pop off.}}
{{History|java}}
{{History||1.4.2|snap=12w36a|Added new painting canvas 'Wither'.
|Paintings can now be placed overlapping one another.}}
{{History||1.8|snap=14w10a|Paintings can no longer be placed directly inside of each other.}}
{{History||1.9|snap=15w49a|Paintings can no longer be destroyed by [[lightning]].}}
{{History|||snap=15w50a|Added [[sound]]s for placing and breaking paintings: <code>entity.painting.place</code> and <code>entity.painting.break</code>.}}
{{History||1.11|snap=16w32a|The [[entity]] ID for paintings has been changed from <code>Painting</code> to <code>painting</code>.}}
{{History||1.12|snap=17w06a|Paintings now have a more intuitive placement system. When placed, a painting always uses the maximum possible amount of available space.}}
{{History||1.13|snap=17w47a|Prior to [[1.13/Flattening|''The Flattening'']], this [[item]]'s numeral ID was 321.}}
{{History|||snap=18w02a|Paintings now use a [[resource location]] for their motive.}}
{{History||1.14|snap=18w43a|[[File:Painting JE2 BE2.png|32px]] The [[item]] texture of paintings has been changed.}}
{{History|||snap=19w07a|Paintings are now stored as individual image files instead of parts of a single large image file, and now support animations.}}
{{History|||snap=19w11a|Shepherd [[villager]]s now [[trading|sell]] paintings.}}
{{History||1.17|snap=21w11a|The painting back texture has been updated to be in line with the texture update.}}
{{History||1.19|snap=22w16a|Added the four unused paintings from Bedrock Edition: "Earth", "Wind", "Fire", and "Water".|These paintings can only be added through a [[data pack]], or with the {{cmd|summon}} command.}}
{{History||1.19.4|snap=23w06a|Added [[painting]] variants to "Functional Blocks" tab.|Paintings with pre-defined variant will now display author, title and size in description when hovered over.|The "Operator Utilities" tab now contains the four paintings that are not available in Survival mode.}}
{{History||1.21|snap=TBA|Added 5 new paintings, one 1x1, one 2x1, one 2x2, one 3x2 and one 4x4}}
}
{{History|pocket alpha}}
{{History||v0.5.0|[[File:Painting JE1 BE1.png|32px]] Added paintings.
|There are currently 25 canvases, which can be viewed at [[Bedrock Edition history of textures/Paintings]].}}
{{History||v0.8.0|snap=build 3|A new painting rendering has been added.{{info needed|What exactly changed?}}}}
{{History||v0.12.1|snap=build 1|Paintings are no longer available from the [[nether reactor]].}}
{{History||v0.15.0|snap=build 1|Paintings now have [[sound]]s when placed and broken.}}
{{History|pocket}}
{{History||1.0.7|Added new painting canvas 'Wither'.}}
{{History|bedrock}}
{{History||1.10.0|snap=beta 1.10.0.3|[[File:Painting JE2 BE2.png|32px]] The [[item]] texture of paintings has been changed.}}
{{History||1.11.0|snap=beta 1.11.0.4|Paintings can now be [[trading|bought]] from shepherd [[villager]]s.}}
{{History||1.17.0|snap=beta 1.17.0.50|The painting back texture has been updated to be in line with the texture update.}}
{{History|console}}
{{History||xbox=TU1|xbone=CU1|ps=1.0|wiiu=Patch 1|switch=1.0.1|[[File:Painting JE1 BE1.png|32px]] Added paintings.
|There are currently 25 canvases, which can be viewed at [[Legacy Console Edition history of textures/Paintings]].}}
{{History||xbox=TU11|The limit for paintings in a world has been increased.
|A message is now displayed when the maximum paintings are reached.}}
{{History||xbox=TU14|ps=1.04|Added new painting canvas 'Wither'.}}
{{History||xbox=TU43|xbone=CU33|ps=1.36|wiiu=Patch 13|Added [[sound]]s for paintings.}}
{{History||xbox=none|xbone=none|ps=1.90|wiiu=none|switch=none|[[File:Painting JE2 BE2.png|32px]] The [[item]] texture of paintings has been changed.}}
{{History|3ds}}
{{History||0.1.0|[[File:Painting JE1 BE1.png|32px]] Added paintings.
|There are currently 25 canvases, which can be viewed at [[New Nintendo 3DS Edition history of textures/Paintings]].}}
{{History|foot}}
== Issues ==
{{issue list}}
== Trivia ==
* On April 26, 2011, Notch stated that the automapping code can be used to share custom paintings and books in the future.<ref>{{tweet|notch|62970142207913984|The auto mapping code can be used to share custom paintings and books in the future. There's a hard cap on 65536 of each/world, though|April 26, 2011}}</ref>
* The texture on the back of a painting is the same as the wooden planks texture, but with a yellowish color similar to that of [[chests]] (but slightly darker).
* The "Skull on Fire" painting contains a Minecraft world in the background, which is based on a screenshot taken by the artist in [[Java Edition Alpha v1.1.2 01|Alpha 1.1.2_01]] (or earlier) on October 12, 2010, at 13:22:49 (UTC+2).<ref>{{cite|url=https://web.archive.org/web/20220928041338/https://imgur.com/HVhrbnH|title=The original (never publicly shared before) screenshot that Kristoffer Zetterstrand took and based his painting on.|website=Imgur}}</ref>
**The seeds for this world are -1044887956651363087 and -6984854390176336655 (both are the same), standing at X=-249.65, Y=91, Z=-29.04.<ref>https://pastebin.com/fzAY9ES4</ref><ref>https://www.reddit.com/r/Minecraft/comments/iqg3ey/the_original_screenshot_seed_of_the_minecraft/</ref>
* The "Skull on Fire" painting's texture was added in [[Java Edition Beta 1.3|Beta 1.3]]. However, the code for paintings to randomly display the part of the [[Kz.png]] texture that was to be occupied by the Burning Skull painting was added earlier, in [[Java Edition Beta 1.2_01|Beta 1.2_01]]. As there was nothing on this part of the texture except for a purple background grid, this is what would be displayed if the painting was randomly chosen, until the Burning Skull painting texture was actually added.
* The original "Skull on Fire" painting was given to the winner of an official texture pack competition by Mojang.<ref>https://web.archive.org/web/20110110003612/http://www.webhallen.com:80/minecraft/</ref>
== Gallery ==
<gallery>
File:Notch Painting Screenshot.png|The first image of paintings released by [[Notch]].
File:Skull on Fire world.jpg|The original screenshot behind the "Skull on Fire" painting.
File:Burning Skull Render.jpg|A render of the "Skull on Fire" painting that [[Kristoffer Zetterstrand]] used as a reference image.
File:Skull on Fire IRL.jpg|The original "Skull on Fire" painting being painted.
File:Burning Skull JE1.png|The "Skull on Fire" painting as it appeared between versions [[Java Edition Beta 1.2_01|Beta 1.2_01]] and [[Java Edition Beta 1.2_02|Beta 1.2_02]], prior to its texture being added in [[Java Edition Beta 1.3|Beta 1.3]].
</gallery>
=== Renders ===
<gallery>
Alban.png | Albanian
Aztec.png | de_aztec
Aztec2.png | de_aztec
Bomb.png | Target Successfully Bombed
Kebab.png | Kebab med tre pepperoni
Plant.png | Paradisträd
Wasteland.png | Wasteland
Courbet.png | Bonjour Monsieur Courbet
Creebet.png | Creebet
Pool.png | The Pool
Sea.png | Seaside
Sunset.png | sunset_dense
Graham.png | Graham
Wanderer.png | Wanderer
Bust.png | Bust
Match.png | Match
Skull and Roses.png | Skull and Roses
Stage.png | The Stage Is Set
Void.png | The void
Wither (painting).png | Wither
Fighters.png | Fighters
Donkey Kong.png | Kong
Skeleton (painting).png | Mortal Coil
Burning Skull.png | Skull On Fire
Pigscene.png | Pigscene
Pointer.png | Pointer
Earth BE2.png | Earth
Fire BE2.png | Fire
Water BE2.png | Water
Wind BE2.png | Wind
</gallery>
== See also ==
* [[Item Frame]]
* [[Bedrock Edition unused features#Paintings|Unused paintings]]
* [[Kz.png]]
* [[Kristoffer Zetterstrand]]
== References ==
{{reflist}}
== External links ==
*[https://www.minecraft.net/en-us/article/taking-inventory-painting Taking Inventory: Painting] – Minecraft.net on January 18, 2019
{{items}}
{{entities}}
[[cs:Obraz]]
[[de:Gemälde]]
[[es:Cuadro]]
[[fr:Tableau]]
[[hu:Festmény]]
[[it:Quadro]]
[[ja:絵画]]
[[ko:그림]]
[[nl:Schilderij]]
[[pl:Obraz]]
[[pt:Quadro]]
[[ru:Картина]]
[[th:ภาพวาด]]
[[uk:Картина]]
[[zh:画]]</li></ul> | Added farmland. | ||||
0.5.0{{Extension DPL}}<ul><li>[[Spider Eye|Spider Eye]]<br/>{{Item
| title = Spider Eye
| image = Spider Eye.png
| renewable = Yes
| heals = {{Hunger|2}}
|effects={{EffectLink|Poison}} (0:05)
| stackable = Yes (64)
}}
A '''spider eye''' is a poisonous [[food]] and [[brewing]] item.
== Obtaining ==
=== Mob loot ===
==== Spiders ====
[[Spider]]s and [[cave spider]]s have a {{frac|1|3}} chance of dropping a [[spider eye]] when killed by a player or tamed wolf, but not when killed by environmental damage (such as falling). The maximum amount of spider eyes is increased by 1 per level of [[Looting]]. The chance of a spider '''not''' dropping any spider eyes can be found using the formula <code>2 / (Looting Level + 3)</code>. For example, Looting III gives a {{frac|1|3}} chance of not dropping any spider eyes. All other amounts have an equal chance of occurring.
==== Witches ====
[[Witch]]es have a chance of dropping 0–6 spider eyes upon death. This is increased by 3 per level of [[Looting]], for a maximum of 0-15 spider eyes.
=== Chest loot ===
{{LootChestItem|spider-eye}}
== Usage ==
=== Food ===
When [[Food|eaten]], a spider eye restores {{hunger|2}} [[Hunger|hunger points]] and 3.2 [[Hunger#Mechanics|saturation points]], giving a nourishment value of 1.6. It also applies a [[Poison]] [[effect]] lasting 5 seconds to the player, causing {{hp|4|poisoned=1}} damage, which reduces hunger/saturation by 6 points.
=== Crafting ingredient ===
{{crafting usage}}
=== Brewing ingredient ===
{{brewing
|showname=1
|head=1
|Spider Eye
|Mundane Potion
|base=Water Bottle
}}
{{brewing
|foot=1
|Spider Eye
|Potion of Poison
}}
==Sounds==
{{Sound table/Entity/Food}}
== Data values ==
=== ID ===
{{edition|java}}:
{{ID table
|edition=java
|showforms=y
|generatetranslationkeys=y
|displayname=Spider Eye
|spritetype=item
|nameid=spider_eye
|form=item
|foot=1}}
{{edition|bedrock}}:
{{ID table
|edition=bedrock
|shownumericids=y
|showforms=y
|notshowbeitemforms=y
|generatetranslationkeys=y
|displayname=Spider Eye
|spritetype=item
|nameid=spider_eye
|id=278
|form=item
|foot=1}}
== Advancements ==
{{load advancements|Husbandry;A Balanced Diet}}
== Video ==
<div style="text-align:center">{{yt|-PD-wX07TCg}}</div>
== History ==
{{History|java}}
{{History||1.0.0|snap=Beta 1.9 Prerelease 2|[[File:Spider Eye JE1 BE1.png|32px]] Added spider eyes.
|Spider eyes can be used to craft [[fermented spider eye]]s.}}
{{History|||snap=Beta 1.9 Prerelease 3|Spider eyes can now be [[brewing|brewed]] in a [[water bottle]] to create a [[Mundane Potion]], or in an [[Awkward Potion]] to create a [[Potion of Poison]].}}
{{History||1.4.2|snap=12w38b|Spider eyes can now be dropped by [[witch]]es.}}
{{History||1.9|snap=15w44a|Spider eyes can now be found in [[desert pyramid|desert temple]] [[chest]]s.}}
{{History||1.13|snap=17w47a|Prior to [[1.13/Flattening|''The Flattening'']], this [[item]]'s numeral ID was 375.}}
{{History||1.14|snap=18w43a|[[File:Spider Eye JE2 BE2.png|32px]] The texture of spider eyes has been changed.}}
{{History|pocket alpha}}
{{History||v0.12.1|snap=build 1|[[File:Spider Eye JE1 BE1.png|32px]] Added spider eyes.|Spider eyes can be used to craft [[fermented spider eye]]s and for [[brewing]].}}
{{History||v0.13.0|snap=build 1|Spider eyes can now be found in [[desert pyramid|desert temple]] [[chest]]s.}}
{{History||v0.14.0|snap=build 1|Spider eyes can now dropped by [[witch]]es.}}
{{History|bedrock}}
{{History||1.10.0|snap=beta 1.10.0.3|[[File:Spider Eye JE2 BE2.png|32px]] The texture of spider eyes has been changed.}}
{{History|console}}
{{History||xbox=TU7|xbone=CU1|ps=1.0|wiiu=Patch 1|[[File:Spider Eye JE1 BE1.png|32px]] Added spider eyes.}}
{{History||xbox=none|xbone=none|ps=1.90|wiiu=none|[[File:Spider Eye JE2 BE2.png|32px]] The texture of spider eyes has been changed.}}
{{History|New 3DS}}
{{History||0.1.0|[[File:Spider Eye JE1 BE1.png|32px]] Added spider eyes.}}
{{History|foot}}
== Issues ==
{{issue list}}
== References ==
{{reflist}}
{{items}}
[[cs:Pavoučí oko]]
[[de:Spinnenauge]]
[[es:Ojo de araña]]
[[fr:Œil d'araignée]]
[[hu:Pókszem]]
[[it:Occhio di ragno]]
[[ja:クモの目]]
[[ko:거미 눈]]
[[nl:Spinnenoog]]
[[pl:Oko pająka]]
[[pt:Olho de aranha]]
[[ru:Паучий глаз]]
[[zh:蜘蛛眼]]
[[Category:Food]]
[[Category:Renewable resources]]
[[Category:Brewing recipe]]</li><li>[[:Category:Education Edition items|Category:Education Edition items]]<br/>[[Category:Education Edition]]
[[Category:Items]]</li></ul> | Farmland can be trampled into dirt when jumped on. | ||||
0.9.0{{Extension DPL}}<ul><li>[[Steak|Steak]]<br/>{{Item
| title = Steak
| image = Steak.png
| renewable = Yes
| heals = {{hunger|8}}
| stackable = Yes (64)
}}
'''Steak''' ({{in|java}}) or '''cooked beef''' ({{in|bedrock}}) is a [[food]] [[item]] obtained from [[cow]]s, [[mooshroom]]s, or from cooking [[raw beef]].
== Obtaining ==
=== Mob loot ===
==== Cows ====
When a [[cow]] or [[mooshroom]] is killed, it drops [[raw beef]]. If a cow dies while on fire, it drops steak instead. If the cow is killed using a weapon with the [[Looting]] enchantment, the maximum number of steak drops increases by 1 per level.
=== Cooking ===
Raw beef can be cooked in a [[furnace]], [[smoker]], or [[campfire]]. Each steak removed from a furnace output slot gives 0.35 [[experience]] (22.4 experience per stack).
{{Smelting
|Raw Beef
|Steak
|0,35
}}
=== Villager gifts ===
{{IN|java}}, butcher [[Villager|villagers]] may give players steak if they have the [[Hero of the Village]] status effect.
== Usage ==
=== Food ===
To eat steak, press and hold {{control|use}} while it is selected in the hotbar. Eating one restores {{hunger|8}} [[hunger]] and 12.8 hunger
[[saturation]].
=== Wolves ===
Steak can be used to [[breed]] and heal tamed [[wolves]], lead them around, and make baby tamed wolves grow up faster by 10% of the remaining time.
==Sounds==
{{Sound table/Entity/Food}}
== Data values ==
=== ID ===
{{edition|java}}:
{{ID table
|edition=java
|showforms=y
|generatetranslationkeys=y
|displayname=Steak
|spritetype=item
|nameid=cooked_beef
|form=item
|foot=1}}
{{edition|bedrock}}:
{{ID table
|edition=bedrock
|shownumericids=y
|showforms=y
|notshowbeitemforms=y
|generatetranslationkeys=y
|displayname=Cooked Beef
|spritetype=item
|nameid=cooked_beef
|id=274
|form=item
|foot=1}}
== Advancements ==
{{load advancements|Husbandry;A Balanced Diet}}
== History ==
{{History|java beta}}
{{History||1.8|snap=Pre-release|[[File:Steak JE1 BE1.png|32px]] Added steak.
|Steak has been introduced as the cooked result of [[raw beef]].
|Steak is a new [[food]] [[item]] dropped by [[cow]]s in addition to their [[leather]].
|The icon for steak is used as the image for the [[cooked porkchop]] before [[Java Edition Beta 1.8|Beta 1.8]], as the cooked porkchop's icon was updated to a lighter colored piece of meat.}}
{{History|java}}
{{History||1.2.1|snap=12w03a|Steak can now be used to [[breed]] [[wolves]].}}
{{History||1.3.1|snap=12w21a|Steak can now be [[trading|bought]] from butcher [[villager]]s, at 6–7 steak for 1 [[emerald]].}}
{{History|||snap=1.3|[[File:Steak JE2.png|32px]] The texture of steak has been changed.}}
{{History||1.4.2|snap=12w37a|[[File:Steak JE3 BE2.png|32px]] The texture of steak has been changed, so that it no longer has a dark outline.}}
{{History||1.8|snap=14w02a|[[Villager]]s no longer [[trade]] steak.}}
{{History||1.13|snap=17w47a|Prior to [[1.13/Flattening|''The Flattening'']], this [[item]]'s numeral ID was 364.}}
{{History||1.14|snap=18w43a|[[File:Steak JE4 BE3.png|32px]] The texture of steak has been changed.}}
{{History|||snap=19w13a|Butcher villagers now give steak to players under the [[Hero of the Village]] effect.}}
{{History|pocket alpha}}
{{History||v0.4.0|[[File:Steak JE1 BE1.png|32px]] Added steak.}}
{{History||v0.5.0|Steak now restores {{hp|8}} instead of {{hp|4}}.}}
{{History||v0.8.0|snap=build 1|[[File:Steak JE3 BE2.png|32px]] The texture of steak has been changed, so that it no longer has a dark outline.}}
{{History||v0.12.1|snap=build 1|Steak now restores [[hunger]] instead of [[health]].}}
{{History||v0.16.0|snap=build 4|"Steak" has been renamed to "Cooked Beef."}}
{{History|bedrock}}
{{History||1.10.0|snap=beta 1.10.0.3|[[File:Steak JE4 BE3.png|32px]] The texture of cooked beef has been changed.}}
{{History||1.11.0|snap=beta 1.11.0.4|Cooked beef can now be [[trading|bought]] from butcher [[villager]]s.}}
{{History|console}}
{{History||xbox=TU5|xbone=CU1|ps=1.0|wiiu=Patch 1|switch=1.0.1|[[File:Steak JE1 BE1.png|32px]] Added steak.}}
{{History||xbox=TU12|[[File:Steak JE3 BE2.png|32px]] The steak's texture has been changed, so that it no longer has a dark outline.}}
{{History||xbox=none|xbone=none|ps=1.90|wiiu=none|switch=none|[[File:Steak JE4 BE3.png|32px]] The texture of steak has been changed.}}
{{History|new3DS}}
{{History||0.1.0|[[File:Steak JE3 BE2.png|32px]] Added steak.}}
{{History|foot}}
== Issues ==
{{issue list}}
== Gallery ==
<gallery>
Jeb steak.png|Raw beef and steak shown in the [[inventory]] from a preview screenshot.
Eating Steak.png|A still frame of the player eating a steak.
Steak SDGP.png|Steak in the [[Super Duper Graphics Pack]].
</gallery>
== Notes ==
{{fnlist}}
{{Items}}
[[cs:Propečený steak]]
[[de:Steak]]
[[es:Filete asado]]
[[fr:Steak]]
[[hu:Steak]]
[[it:Bistecca]]
[[ja:ステーキ]]
[[ko:스테이크]]
[[nl:Biefstuk]]
[[pl:Befsztyk]]
[[pt:Filé]]
[[ru:Жареная говядина]]
[[tr:Biftek]]
[[uk:Стейк]]
[[zh:牛排]]
[[Category:Food]]
[[Category:Renewable resources]]</li><li>[[Fish|Fish]]<br/>{{About|the type of mob|the action|Fishing}}
'''Fish''' are aquatic creatures that are found in [[river]] and [[ocean]] biomes.
== Mobs ==
There are four categories of fish mobs in ''Minecraft'':
*{{EntityLink|Cod}}
*{{EntityLink|Salmon}}
*{{EntityLink|Pufferfish}}
*{{EntityLink|Tropical Fish}} - many color and pattern varieties
In addition, there are other fish-like mobs that have different characteristics from fish: {{EntityLink|Axolotl}}, {{EntityLink|Guardian}}, and {{EntityLink|Elder Guardian}}.
==Obtaining and transporting==
A live fish can be captured by using a [[water bucket]] on a fish, to obtain a [[bucket of fish]], which is the only way to obtain the live mob in item form. Using the bucket of fish on a water source block transfers the fish from the bucket to the body of water. A water bucket may also be used on [[axolotl]]s in this manner.
==Items==
Fish exist in several different item forms. Upon death, fish drop their item form equivalent (cooked if on fire), with a chance to drop a [[bone]]{{only|bedrock}} or [[bone meal]].{{only|java}}
;Non-living
*{{ItemLink|Raw Cod}}
*{{ItemLink|Cooked Cod}}
*{{ItemLink|Raw Salmon}}
*{{ItemLink|Cooked Salmon}}
*{{ItemLink|Pufferfish|link=Pufferfish (item)}}
*{{ItemLink|Tropical Fish|link=Tropical Fish (item)}}
;Living
*{{ItemLink|Bucket of Cod}}
*{{ItemLink|Bucket of Salmon}}
*{{ItemLink|Bucket of Pufferfish}}
*{{ItemLink|Bucket of Tropical Fish}}
== Spawning ==
Various fish can be found in different [[ocean]] [[biomes]], but only [[salmon]] appear in rivers. Fish can also spawn in player-created bodies of water, as long as they are within a river or ocean biome.
{| class="wikitable sortable" style="text-align:left" data-description="Fish biomes"
!'''Fish'''
! style="text-align:left" |{{BiomeLink|Warm Ocean}}
! style="text-align:left" |{{BiomeLink|Lukewarm Ocean}}<br>{{BiomeLink|Deep Lukewarm Ocean}}
! style="text-align:left" |{{BiomeLink|Ocean}}<br>{{BiomeLink|Deep Ocean}}
! style="text-align:left" |{{BiomeLink|Cold Ocean}}<br>{{BiomeLink|Deep Cold Ocean}}
! style="text-align:left" |{{BiomeLink|Frozen Ocean}}<br>{{BiomeLink|Deep Frozen Ocean}}
! style="text-align:left" |{{BiomeLink|River}}<br>{{BiomeLink|Frozen River}}
|-
! rowspan=2 style="text-align:left" |{{EntityLink|Cod}}
| rowspan=2 {{tc|no}}
| rowspan=2 {{tc|yes}}
| rowspan=2 {{tc|yes}}
| rowspan=2 {{tc|yes}}
| {{tc|no|No{{only|je|short=1}}}}
| rowspan=2 {{tc|no}}
|-
| {{tc|yes|Yes{{only|be|short=1}}}}
|-
! rowspan=2 style="text-align:left" |{{EntityLink|Salmon}}
| rowspan=2 {{tc|no}}
| {{tc|no|No{{only|je|short=1}}}}
| {{tc|no|No{{only|je|short=1}}}}
| rowspan=2 {{tc|yes}}
| rowspan=2 {{tc|yes}}
| rowspan=2 {{tc|yes}}
|-
| {{tc|yes|Yes{{only|be|short=1}}}}
| {{tc|yes|Yes{{only|be|short=1}}}}
|-
! rowspan=2 style="text-align:left" |{{EntityLink|Pufferfish}}
| rowspan=2 {{tc|yes}}
| {{tc|yes|Yes{{only|je|short=1}}}}
| rowspan=2 {{tc|no}}
| rowspan=2 {{tc|no}}
| rowspan=2 {{tc|no}}
| rowspan=2 {{tc|no}}
|-
| {{tc|no|No{{only|be|short=1}}}}
|-
! style="text-align:left" |{{EntityLink|Tropical Fish}}<ref group="note">Also spawns in {{BiomeLink|Lush Caves}} at any Y-level.</ref>
| {{tc|yes}}
| {{tc|yes}}
| {{tc|no}}
| {{tc|no}}
| {{tc|no}}
| {{tc|no}}
|-
! style="text-align:left" |{{EntityLink|Squid}}
| {{tc|yes}}
| {{tc|yes}}
| {{tc|yes}}
| {{tc|yes}}
| {{tc|yes}}
| {{tc|yes}}
|-
! rowspan=2 style="text-align:left" |{{EntityLink|Dolphin}}
| rowspan=2 {{tc|yes}}
| rowspan=2 {{tc|yes}}
| rowspan=2 {{tc|yes}}
| {{tc|no|No{{only|je|short=1}}}}
| rowspan=2 {{tc|no}}
| rowspan=2 {{tc|no}}
|-
| {{tc|yes|Yes{{only|be|short=1}}}}
|}
{{notelist}}
In ''Java Edition'', fish can spawn inside a water block at Y-level 50 to 63 (from 13 blocks below sea level up to inside the block one above it), that also has water above and below it. The spawn block and the block below can be any kind of water, such as a source block, falling water, bubble column, kelp, or even a waterlogged block (as long as the fish can be placed at the bottom center of the spawn block without colliding with anything solid). The block above must be pure water, such as a source block, falling water, or flowing water of any depth. Particularly, the block above cannot also be a bubble column, so fish no longer spawn inside bubble elevators.<ref>{{cite bug|MC|244683|Tropical fish spawn in bubble columns (fixed in 22w07a)}}</ref>
''Bedrock Edition'' does permit fish to spawn in bubble columns.<ref>{{cite bug|MCPE|73967|Squids, Dolphins, and fish not spawning in bubble columns (fixed in 1.16.20)}}</ref>
Fish can spawn between 24 and 64 block spherical range away from the player.{{only|java}}
=== Despawning ===
As of [[1.16]], fish can despawn at range of 40 blocks or more from the player, and will instantly despawn more than 64 blocks away, except when spawned using a [[bucket of fish]].
{{Items}}
{{Entities}}
[[cs:Ryba]]
[[de:Fisch (Begriffsklärung)]]
[[es:Pez]]
[[fr:Poisson]]
[[it:Pesce]]
[[ja:魚]]
[[ko:물고기]]
[[nl:Vis]]
[[pl:Ryba (ujednoznacznienie)]]
[[pt:Peixe]]
[[ru:Рыба]]
[[th:ปลา (แก้ความกำกวม)]]
[[uk:Риба]]
[[zh:鱼]]</li></ul> | build 1 | Farmland now naturally spawns in villages. | |||
| Legacy Console Edition | |||||
| TU1 | CU1 | 1.0 | Patch 1 | Added farmland. | |
Issues
Issues relating to "Farmland" are maintained on the bug tracker. Report issues there.
Trivia
- Ladders cannot be attached to the side of a farmland block, but signs can.
- Farmland will not be trampled when walking off of a slab next to it.
- Farmland will not decay if the player 'jumps' onto it, with a block two blocks above the farmland being jumped on.
- The flowing water that comes off of a source block hydrates farmland just as source blocks do.
See also
References
- ↑ https://minecraft.net/en/article/block-week-farmland
- ↑ MC-265476 — resolved as "Works As Intended".