DarthWienerface (talk | contribs) mNo edit summary Tags: Visual edit contains YouTube embed |
(Undo revision 956062 by DarthWienerface (talk) - rv youtube spam) |
||
| Line 57: | Line 57: | ||
== Video == |
== Video == |
||
| − | {{/video |
+ | {{/video}} |
== Data values == |
== Data values == |
||
Revision as of 01:22, 12 March 2016
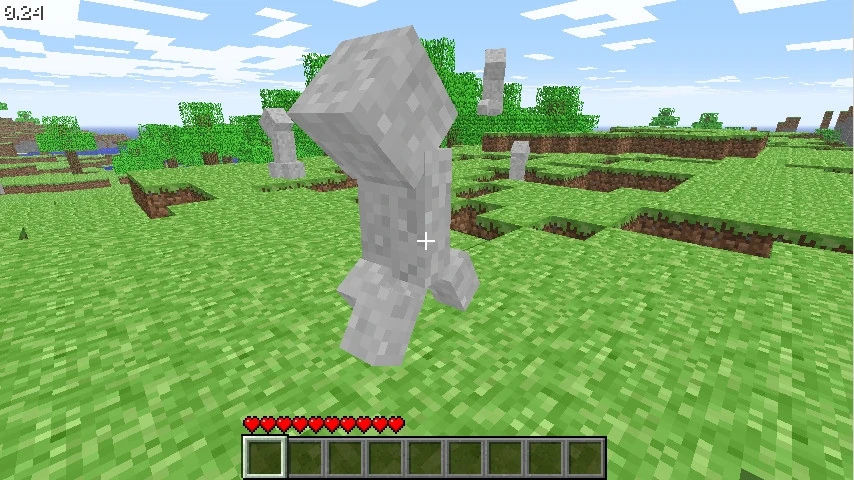
Creepers are common hostile mobs that will explode when close to the player.
Spawning
Creepers naturally spawn in the Overworld on top of solid blocks with a light level of 7 or less.
Drops
Creepers drop 0-2 gunpowder, and a music disc if killed by a skeleton arrow. They also drop a creeper head if killed by a charged creeper's explosion. They drop 5 experience when killed by a player or tamed wolf.
Behavior
A creeper giving chase and about to explode.
Creepers will chase after any player, as long as it is within a 16 block (±5%) radius and ±4 blocks vertically. The detection range of creepers is reduced to half of their normal range (8 blocks) when the player is wearing a creeper mob head.
Creepers can climb up ladders and vines like any other mob, but do not do so intentionally.
When within one block of a player, a creeper will hiss loudly, start flashing and inflating, and violently explode after 1.5 seconds. A creeper's detonation can be halted if the player gets out of the blast radius (about 3 - 5 blocks, depending on the difficulty setting; including by knocking back a creeper) or kills it. However, the creeper's fuse countdown lasts a little longer if it encounters a cobweb, and it will not explode at all when completely inside cobweb. Creepers can be forced to explode by using a flint and steel.
Creepers will flee from ocelots and cats if one is too close, until they are approximately 16 blocks away from the feline(s).
A creeper's explosion has a power of 3 (but see an exception below).
Creepers are never targeted by any mobs, other than the wither and the snow golem. If they are hit by a stray projectile, they will only retaliate if they are not already chasing a player.
Charged Creepers
Two creepers' explosion damage radius in sand. Comparison between a charged creeper's (left) and a normal creeper's (right).
A charged creeper is created only when lightning strikes within 3–4 blocks of a normal creeper, which significantly increases its explosive power. Charged creepers are distinguished from normal creepers by the blue aura surrounding them.
Their countdown timers are the same as normal creepers, both in terms of range and time. With a power of 6, an explosion caused by a charged creeper is twice as powerful as the explosion caused by a regular creeper (see image). How close the creeper was to the lightning strike will not affect the size of the explosion.
Charged creepers have the same entity ID as normal creepers. The only difference is that the value of the boolean "powered" tag is set to "1" (true).
Charged creeper explosions will cause a zombie, skeleton, wither skeleton, or other creeper to drop the corresponding mob head, one per explosion. However, they will not drop their own head.
Video
Creeper/video
Data values
Creepers have entity data associated with them that contain various properties of the mob. Their entity ID is Creeper.
- Entity data
- Tags common to all entities
- Tags common to all mobs
- ExplosionRadius: The radius of the explosion itself, default 3.
- Fuse: States the initial value of the creeper's internal fuse timer (does not affect creepers that fall and explode upon impacting their victim). The internal fuse timer returns to this value if the creeper is no longer within attack range. Default 30.
- ignited: 1 or 0 (true/false) - Whether the creeper has been ignited by flint and steel.
- powered: 1 or 0 (true/false) - May not exist. True if the creeper is charged from being struck by lightning.
Achievements
| Icon | Achievement | In-game description | Actual requirements (if different) | Gamerscore earned | Trophy type (PS4) | |
|---|---|---|---|---|---|---|
| PS4 | Other | |||||
| Archer | Kill a creeper with arrows. | — | 10G | Bronze | ||
History
| classic | |||||
|---|---|---|---|---|---|
0.24_SURVIVAL_TEST{{Extension DPL}}<ul><li>[[Raw Rabbit|Raw Rabbit]]<br/>{{for|the cooked version|Cooked Rabbit}}
{{Item
| title = Raw Rabbit
| image = Raw Rabbit.png
| heals = {{hunger|3}}
| renewable = Yes
| stackable = Yes (64)
}}
'''Raw rabbit''' is a food item that can be eaten by the [[player]], or cooked in a [[furnace]] or a [[campfire]] to make [[cooked rabbit]].
== Obtaining ==
=== Mob loot ===
{{IN|Bedrock}}, adult [[rabbit]]s drop 0-1 raw rabbit when killed. The maximum amount is increased by 1 per level of [[Looting]], for a maximum of 0-4 with [[Looting]] III. If killed while on [[fire]], they drop [[cooked rabbit]] instead.
{{IN|Java}}, adult [[rabbit]]s drop 1 raw rabbit when killed. The maximum amount is increased by 1 per level of [[Looting]], for a maximum of 1-4 with [[Looting]] III. If killed while on [[fire]], they drop [[cooked rabbit]] instead.
== Usage ==
To eat raw rabbit, press and hold {{control|use}} while it is selected in the hotbar. Eating one restores {{hunger|3}} [[hunger]] and 1.8 [[Hunger#Mechanics|saturation]].
=== Smelting ingredient ===
{{Smelting
|showname=1
|Raw Rabbit
|Cooked Rabbit
|0.35
}}
=== Wolves ===
Raw rabbit can be used to [[breed]] and heal tamed [[wolves]], lead them around, and make baby tamed [[Wolf|wolves]] grow up faster by 10% of the remaining time.
=== Trading ===
Novice-level Butcher [[villager|villagers]] have a {{frac|1|3}} chance to buy 4 raw rabbit for an [[emerald]] as their trades.{{only|bedrock}}
Novice-level Butcher villagers have 40% chance of offering to buy 4 raw rabbit for an emerald.{{only|java}}
==Sounds==
{{Sound table/Entity/Food}}
== Data values ==
=== ID ===
{{edition|java}}:
{{ID table
|edition=java
|showforms=y
|generatetranslationkeys=y
|displayname=Raw Rabbit
|spritetype=item
|nameid=rabbit
|form=item
|foot=1}}
{{edition|bedrock}}:
{{ID table
|edition=bedrock
|shownumericids=y
|showforms=y
|notshowbeitemforms=y
|generatetranslationkeys=y
|displayname=Raw Rabbit
|spritetype=item
|nameid=rabbit
|id=288
|form=item
|foot=1}}
== Achievements ==
{{load achievements|Rabbit Season}}
== Advancements ==
{{load advancements|Husbandry;A Balanced Diet}}
== History ==
{{History|java}}
{{History||1.8|snap=June 30, 2014|slink=https://twitter.com/TheMogMiner/status/483636993780232192|[[Ryan Holtz]] tweeted images of raw rabbits and some other new [[item]]s.}}
{{History|||snap=14w27a|[[File:Raw Rabbit JE1.png|32px]] Added raw rabbit.}}
{{History|||snap=14w33b|[[File:Raw Rabbit JE2 BE1.png|32px]] The texture of raw rabbit has been changed. The new texture was created by [[wikipedia:Reddit|Reddit]] user [http://www.reddit.com/u/zeldahuman zeldahuman].<ref>{{reddit|2bjzes/a_reminder_of_the_blocks_and_items_added_in_18_so|cj69zie|context=3}}</ref><ref>{{reddit|2c5f35/minecraft_snapshot_14w31a_has_been_released|cjct7gb}}</ref>}}
{{History||1.13|snap=17w47a|Prior to [[1.13/Flattening|''The Flattening'']], this [[item]]'s numeral ID was 411.}}
{{History||1.14|snap=18w43a|[[File:Raw Rabbit JE3 BE2.png|32px]] The texture of raw rabbit has been changed.}}
{{History|||snap=19w11a|Butcher [[villager]]s now [[trading|buy]] raw rabbit.}}
{{History||1.19.3|snap=22w42a|Rabbits now always drop at least 1 raw rabbit when killed.<ref>{{bug|MC-96449|||Fixed}}</ref>}}
{{History|pocket alpha}}
{{History||v0.13.0|snap=build 1|[[File:Raw Rabbit JE2 BE1.png|32px]] Added raw rabbit.}}
{{History|bedrock}}
{{History||1.10.0|snap=beta 1.10.0.3|[[File:Raw Rabbit JE3 BE2.png|32px]] The texture of raw rabbit has been changed.}}
{{History||1.11.0|snap=beta 1.11.0.4|Raw rabbit can now be [[trading|sold]] to butcher [[villager]]s.}}
{{History|console}}
{{History||xbox=TU31|xbone=CU19|ps=1.22|wiiu=Patch 3|[[File:Raw Rabbit JE2 BE1.png|32px]] Added raw rabbit.}}
{{History|PS4}}
{{History||1.90|[[File:Raw Rabbit JE3 BE2.png|32px]] The texture of raw rabbit has been changed.}}
{{History|new 3ds}}
{{History||0.1.0|[[File:Raw Rabbit JE2 BE1.png|32px]] Added raw rabbit.}}
{{History|foot}}
== Issues ==
{{issue list}}
== Gallery ==
<gallery>
File:Rabbit Items 2 Ryan Holtz.png|First image of the item by [[Ryan Holtz]].
</gallery>
== References ==
{{reflist}}
{{items}}
[[de:Rohes Kaninchen]]
[[es:Conejo crudo]]
[[it:Coniglio crudo]]
[[fr:Lapin cru]]
[[ja:生の兎肉]]
[[ko:익히지 않은 토끼고기]]
[[nl:Rauw konijnenvlees]]
[[pl:Surowy królik]]
[[pt:Coelho cru]]
[[ru:Сырая крольчатина]]
[[zh:生兔肉]]
[[Category:Food]]
[[Category:Renewable resources]]</li><li>[[Block Inspector|Block Inspector]]<br/>{{MinecraftEdu feature}}
{{stub}}
{{Item
| image = BlockInspector.png
| stackable = No {{verify}}
}}
'''Block Inspector''' is an item used to display the name of the block the player is looking at on screen.
== Data values ==
{{ID table
|generatetranslationkeys=java
|displayname=Block Inspector
|spritetype=item
|nameid=block_inspector|foot=1}}
==History==
{{History|MinecraftEDU}}
{{History||0.9848|[[File:BlockInspector.png|32px]] Added block inspectors.}}
{{History|foot}}
{{Items}}</li></ul> | Creepers were first introduced in on August 31, 2009, based on a failed pig model Notch had created (he mixed up the length and height of the body[1]). They were the first mob added in Survival Test. | ||||
  The original pig model the creeper was based on. | |||||
0.26 SURVIVAL TEST 3{{Extension DPL}}<ul><li>[[Nautilus Shell|Nautilus Shell]]<br/>{{Item
| type =
| stackable = Yes (64)
| renewable = Yes
}}
A '''nautilus shell''' is an item that is used for crafting [[conduit]]s.
==Obtaining==
===Fishing===
{{main|Fishing#Junk and treasure}}
Nautilus shells can be rarely obtained as a treasure item from fishing. The drop chances of nautilus shells slightly increase with each level of [[Luck of the Sea]] on the [[player]]'s [[fishing rod]].
===Mob loot===
[[Drowned]] have a 3%{{only|java|short=1}} or 8%{{only|bedrock|short=1}} chance to spawn with a nautilus shell in their off-hand, and this nautilus shell always drops upon [[death]].
===Trading===
[[Wandering trader]]s may [[trading|sell]] a nautilus shell for 5 [[emerald]]s each, but they only sell 5 of them at a time.
==Usage==
{{IN|bedrock}}, a nautilus shell is one of the few items that can be held in the off-hand.
===Crafting ingredient===
{{crafting usage}}
=== Trading ===
Nautilus shells can be given to trident-wielding drowned with a chance for the drowned to pick up the shell and drop the trident.<sup>[''[[Bedrock Edition]] only'']</sup>
==Data values==
===ID===
{{edition|java}}:
{{ID table
|edition=java
|showforms=y
|generatetranslationkeys=y
|displayname=Nautilus Shell
|spritetype=item
|nameid=nautilus_shell
|form=item
|foot=1}}
{{edition|bedrock}}:
{{ID table
|edition=bedrock
|shownumericids=y
|showforms=y
|notshowbeitemforms=y
|generatetranslationkeys=y
|displayname=Nautilus Shell
|spritetype=item
|nameid=nautilus_shell
|id=570
|form=item
|foot=1}}
==History==
{{History|java}}
{{History||1.13|snap=18w15a|[[File:Nautilus Shell JE1 BE2.png|32px]] Added nautilus shells.}}
{{History||1.14|snap=19w05a|Added [[Wandering Trader|wandering trader]]s, which sell nautilus shells.}}
{{History|bedrock}}
{{History||1.4.0|snap=beta 1.2.20.1|[[File:Nautilus Shell BE1.png|32px]] Added nautilus shells.}}
{{History|||snap=beta 1.2.20.2|[[File:Nautilus Shell JE1 BE2.png|32px]] The texture of nautilus shells has now been changed.}}
{{History||1.5.0|snap=beta 1.5.0.0|[[Drowned]] now sometimes spawn holding a nautilus shell.
|Nautilus shells are no longer behind [[Experimental Gameplay]].}}
{{History|||snap=beta 1.5.0.1|Nautilus shells can now be used to craft [[conduit]]s.}}
{{History||1.10.0|snap=beta 1.10.0.3|Nautilus shells can now be obtained from [[trading]] with [[wandering trader]]s.}}
{{History|console}}
{{History||xbox=TU69|ps=1.76|wiiu=Patch 38|[[File:Nautilus Shell JE1 BE2.png|32px]] Added nautilus shells.}}
{{History||xbox=none|ps=1.91|wiiu=none|Nautilus shells can now be obtained from [[trading]] with [[wandering trader]]s.}}
{{History|foot}}
==Issues==
{{issue list}}
==Trivia==
*[[wikipedia:Nautilus|Nautilus]]es are animals that occupy deep oceans in the real world. However, they are absent in Minecraft and there are currently no plans to add nautilus [[mob]]s into the game.
*Because {{el|bedrock}} allows for Nautilus shells to be held in the off-hand (since drowned hold them), they are the only item in that version that can be put in the off-hand slot without having a specific function.
{{items}}
[[de:Nautilusschale]]
[[es:Caparazón de nautilo]]
[[fr:Coquille de nautile]]
[[it:Conchiglia di nautilus]]
[[ja:オウムガイの殻]]
[[ko:앵무조개 껍데기]]
[[nl:Nautilusschelp]]
[[pl:Muszla łodzika]]
[[pt:Concha de náutilo]]
[[ru:Раковина наутилуса]]
[[th:เปลือกหอยงวงช้าง]]
[[uk:Мушля наутилуса]]
[[zh:鹦鹉螺壳]]
[[Category:Renewable resources]]</li><li>[[Smithing Template|Smithing Template]]<br/>{{for|the block|Smithing Table}}
{{Item
| title = Smithing Template
| image = <gallery>
Netherite Upgrade Smithing Template.png | Netherite Upgrade
Sentry Armor Trim Smithing Template.png | Armor Trim
</gallery>
| rarity = Rare
| renewable = No<!--Smithing templates are not renewable because diamonds, their only other method of creation, are not renewable.-->
| stackable = Yes (64)
}}
'''Smithing templates''' are items used in [[Smithing Table|smithing tables]] to alter [[Tool|tools]] and [[armor]]. They are consumed when used, but can be [[Crafting|duplicated]] using an existing template, its material and [[Diamond|diamonds]].
The sixteen '''armor trim smithing templates''' are found in a variety of [[Generated structures|structures]], and are used to apply various decorative trims (dependent on the variant) to armor using certain minerals for different colors.
'''Netherite upgrade smithing templates''' are required to upgrade diamond equipment with a [[Netherite Ingot|netherite ingot]]. They are only found in [[Bastion Remnant|bastion remnants]], but are guaranteed only in [[:en:Bastion_Remnant#Treasure_room|treasure rooms]].
== Obtaining ==
Smithing templates can be found in various [[Generated structures|structures]] and can be duplicated by using seven diamonds and a block based on what the template is.
=== Crafting ===
{{Crafting
|A1=Diamond |B1=Matching Smithing Template |C1=Diamond
|A2=Diamond |B2=Netherrack;Cobblestone;Sandstone;End Stone;Terracotta;Terracotta;Netherrack;Cobblestone;Terracotta;Cobbled Deepslate;Blackstone;Purpur Block;Prismarine;Cobblestone;Cobbled Deepslate;Terracotta;Mossy Cobblestone |C2=Diamond
|A3=Diamond |B3=Diamond |C3=Diamond
|Output=Matching Smithing Template,2
}}
{| class="article-table"
|+ Duplication
! Item !! Material
|-
| {{ItemSprite|netherite-upgrade|text=Netherite Upgrade}} || {{BlockSprite|Netherrack|text=Netherrack}}
|-
| {{ItemSprite|sentry-armor-trim|text=Sentry Armor Trim}} || {{BlockSprite|Cobblestone|text=Cobblestone}}
|-
| {{ItemSprite|vex-armor-trim|text=Vex Armor Trim}} || {{BlockSprite|Cobblestone|text=Cobblestone}}
|-
| {{ItemSprite|wild-armor-trim|text=Wild Armor Trim}} || {{BlockSprite|Mossy Cobblestone|text=Mossy Cobblestone}}
|-
| {{ItemSprite|coast-armor-trim|text=Coast Armor Trim}} || {{BlockSprite|Cobblestone|text=Cobblestone}}
|-
| {{ItemSprite|dune-armor-trim|text=Dune Armor Trim}} || {{BlockSprite|Sandstone|text=Sandstone}}
|-
| {{ItemSprite|wayfinder-armor-trim|text=Wayfinder Armor Trim}} || {{BlockSprite|Terracotta|text=Terracotta}}
|-
| {{ItemSprite|raiser-armor-trim|text=Raiser Armor Trim}} || {{BlockSprite|Terracotta|text=Terracotta}}
|-
| {{ItemSprite|shaper-armor-trim|text=Shaper Armor Trim}} || {{BlockSprite|Terracotta|text=Terracotta}}
|-
| {{ItemSprite|host-armor-trim|text=Host Armor Trim}} || {{BlockSprite|Terracotta|text=Terracotta}}
|-
| {{ItemSprite|ward-armor-trim|text=Ward Armor Trim}} || {{BlockSprite|Cobbled Deepslate|text=Cobbled Deepslate}}
|-
| {{ItemSprite|silence-armor-trim|text=Silence Armor Trim}} || {{BlockSprite|Cobbled Deepslate|text=Cobbled Deepslate}}
|-
| {{ItemSprite|tide-armor-trim|text=Tide Armor Trim}} || {{BlockSprite|Prismarine|text=Prismarine}}
|-
| {{ItemSprite|snout-armor-trim|text=Snout Armor Trim}} || {{BlockSprite|Blackstone|text=Blackstone}}
|-
| {{ItemSprite|rib-armor-trim|text=Rib Armor Trim}} || {{BlockSprite|Netherrack|text=Netherrack}}
|-
| {{ItemSprite|eye-armor-trim|text=Eye Armor Trim}} || {{BlockSprite|End Stone|text=End Stone}}
|-
| {{ItemSprite|spire-armor-trim|text=Spire Armor Trim}} || {{BlockSprite|Purpur Block|text=Purpur Block}}
|}
{{IN|bedrock}}, spire, tide, and dune armor trims can be duplicated with more blocks than {{in|java}}. In addition to the normal blocks, Tide armor trims can be duplicated using Prismarine Bricks or Dark Prismarine, dune armor trims can be duplicated with smooth sandstone, cut sandstone, or chiseled sandstone, and spire armor trims can be duplicated with purpur pillars.<ref>{{bug|MCPE-172711||Tide, Spire, and Dune Armor Trims can be crafted from more blocks than in Java Edition}}</ref>
=== Mob loot ===
[[Elder guardian]]s have a 20% chance to drop 1 tide armor trim upon death. [[Looting]] doesn't affect this percentage, and the elder guardian doesn't need to be killed by a player in order for the trim to drop and can be duplicated with [[prismarine]].
=== Chest loot ===
{{#invoke:LootChest|base3|netherite-upgrade-smithing-template,sentry-armor-trim-smithing-template,vex-armor-trim-smithing-template,wild-armor-trim-smithing-template,coast-armor-trim-smithing-template,dune-armor-trim-smithing-template,ward-armor-trim-smithing-template,silence-armor-trim-smithing-template,snout-armor-trim-smithing-template,rib-armor-trim-smithing-template,eye-armor-trim-smithing-template,spire-armor-trim-smithing-template}}
Note: In Woodland Mansions, only chests with random loot have the chance to contain the Vex Smithing Template, chests in the "Allium room", "Sapling farm", "Tree-chopping room" and "Fake End portal room" always generate with the same, room specific, loot.
=== Suspicious block loot ===
Items can only be extracted from [[Suspicious Block|suspicious blocks]] using a [[brush]].{{#invoke:LootChest|base3|wayfinder-armor-trim-smithing-template,raiser-armor-trim-smithing-template,shaper-armor-trim-smithing-template,host-armor-trim-smithing-template}}
== Usage ==
=== Crafting ingredient ===
{{Crafting
|A1=Diamond |B1=Matching Smithing Template |C1=Diamond
|A2=Diamond |B2=Netherrack;Cobblestone;Sandstone;End Stone;Terracotta;Terracotta;Netherrack;Cobblestone;Terracotta;Cobbled Deepslate;Blackstone;Purpur Block;Prismarine;Cobblestone;Cobbled Deepslate;Terracotta;Mossy Cobblestone |C2=Diamond
|A3=Diamond |B3=Diamond |C3=Diamond
|Output=Matching Smithing Template,2
}}
=== Smithing ingredient ===
Smithing templates are used at a [[smithing table]]. Netherite upgrade smithing templates are used to upgrade diamond gear into netherite gear by using a netherite upgrade, a piece of diamond gear, and a [[netherite ingot]].
{{Smithing
|head=1
|ingredients=Netherite Upgrade +<br>Any Diamond Gear +<br>[[Netherite Ingot]]
|Netherite Upgrade
|Diamond Helmet; Diamond Chestplate; Diamond Leggings; Diamond Boots; Diamond Sword; Diamond Pickaxe; Diamond Axe; Diamond Shovel
|Netherite Ingot
|Netherite Helmet; Netherite Chestplate; Netherite Leggings; Netherite Boots; Netherite Sword; Netherite Pickaxe; Netherite Axe; Netherite Shovel
|tail=1
}}
{{FakeImage|{{Animate|Iron_Armor_with_Iron_Shaper_Trim.png; Golden_Armor_with_Golden_Shaper_Trim.png; Diamond_Armor_with_Diamond_Shaper_Trim.png; Netherite_Armor_with_Netherite_Shaper_Trim.png|180px}}|If the armor material and the trimming material are the same, the color palette used for the armor trim is darker.}}
Armor trim smithing templates are used to customize an armor piece's appearance by using a smithing template, an armor piece, and an ingot or crystal ([[emerald]], [[redstone dust]], [[lapis lazuli]], [[amethyst shard]], [[nether quartz]], [[netherite ingot]], [[diamond]], [[gold ingot]], [[iron ingot]], or [[copper ingot]]). Including all dyed leather armor colors and regular armor, there are ≈3.679x10<sup>9</sup> different possible armor pieces<!--5713438 leather colors, plus the 4 other armor materials = 5713442. 5713442 * 161 (the 160 trim combos (16 trims, 10 materials) + untrimmed) = 919864162. 919864162 * 4 (helmet, chestplate, leggings, boots) = 3679456648 ≈ 3.679x10^9-->, and 7.16x10<sup>35</sup> <!--919864162 + 1 (no armor in that slot) = 919864163. 919864163^4 = 715969952015045562662444917041515536 ≈ 7.16x10^35 total possible armor combinations-->total possible armor combinations excluding enchantments and the player not wearing armor.
Already trimmed armor can be trimmed again by applying another template on it; the old trim pattern is overwritten in the process.<ref>{{bug|MC-262538||When combining armor trims the new trim deletes the old one|WAI}}</ref> Therefore, one piece of armor cannot possess multiple trims at the same time.
Most armor trims cover a small portion of the armor piece's surface with the trim material, except for the silence armor trim, which allows the trim material to cover a majority of the armor piece's surface.
All of the trims are purely decorative, and don't impact gameplay or strength(without the use of mods or plugins) of the armor they are applied to in any way. [[Piglin]]s do not pick up any gold-trimmed armor pieces, and they are not pacified by players wearing even a full set of gold-trimmed armor (unless, of course, the armor pieces in question are themselves golden), and netherite-trimmed armor pieces can still be burned by [[fire]].
{{Smithing
|head=1
|ingredients=Any Armor Trim +<br>Any Armor Piece +<br>Any Ingot/Crystal
|Any Armor Trim Smithing Template
|Iron Helmet; Netherite Chestplate;Golden Leggings;Diamond Boots
|Amethyst Shard; Copper Ingot; Diamond; Emerald; Gold Ingot; Iron Ingot; Lapis Lazuli; Nether Quartz; Netherite Ingot; Redstone Dust; Diamond; Emerald
|Amethyst Trim Iron Helmet; Copper Trim Netherite Chestplate; Diamond Trim Golden Leggings; Emerald Trim Diamond Boots; Gold Trim Iron Helmet; Iron Trim Netherite Chestplate; Lapis Trim Golden Leggings; Quartz Trim Diamond Boots; Netherite Trim Iron Helmet; Redstone Trim Netherite Chestplate; Diamond Trim Golden Leggings; Emerald Trim Diamond Boots
|tail=1
}}
;List of color palettes for all materials
*{{ItemSprite|emerald }} - {{TrimPalette| emerald }}
*{{ItemSprite|redstone dust }} - {{TrimPalette| redstone dust }}
*{{ItemSprite|lapis lazuli }} - {{TrimPalette| lapis lazuli }}
*{{ItemSprite|amethyst shard }} - {{TrimPalette| amethyst shard }}
*{{ItemSprite|nether quartz }} - {{TrimPalette| nether quartz }}
*{{ItemSprite|netherite ingot }} - {{TrimPalette| netherite ingot }} (Darker: {{TrimPalette| netherite ingot |darker=1}})
*{{ItemSprite|diamond }} - {{TrimPalette| diamond }} (Darker: {{TrimPalette| diamond |darker=1}})
*{{ItemSprite|gold ingot }} - {{TrimPalette| gold ingot }} (Darker: {{TrimPalette| gold ingot |darker=1}})
*{{ItemSprite|iron ingot }} - {{TrimPalette| iron ingot }} (Darker: {{TrimPalette| iron ingot |darker=1}})
*{{ItemSprite|copper ingot }} - {{TrimPalette| copper ingot }}
== Data values ==
=== ID ===
{{edition|java}}:
{{ID table
|edition=java
|firstcolumnname=Smithing Template
|showforms=y
|generatetranslationkeys=y
|displayname=Netherite Upgrade
|spritename=netherite-upgrade-smithing-template
|spritetype=item
|nameid=netherite_upgrade_smithing_template
|form=item}}
{{ID table
|displayname=Sentry Armor Trim
|spritename=sentry-armor-trim-smithing-template
|spritetype=item
|nameid=sentry_armor_trim_smithing_template
|form=item}}
{{ID table
|displayname=Vex Armor Trim
|spritename=vex-armor-trim-smithing-template
|spritetype=item
|nameid=vex_armor_trim_smithing_template
|form=item}}
{{ID table
|displayname=Wild Armor Trim
|spritename=wild-armor-trim-smithing-template
|spritetype=item
|nameid=wild_armor_trim_smithing_template
|form=item}}
{{ID table
|displayname=Coast Armor Trim
|spritename=coast-armor-trim-smithing-template
|spritetype=item
|nameid=coast_armor_trim_smithing_template
|form=item}}
{{ID table
|displayname=Dune Armor Trim
|spritename=dune-armor-trim-smithing-template
|spritetype=item
|nameid=dune_armor_trim_smithing_template
|form=item}}
{{ID table
|displayname=Wayfinder Armor Trim
|spritename=wayfinder-armor-trim-smithing-template
|spritetype=item
|nameid=wayfinder_armor_trim_smithing_template
|form=item}}
{{ID table
|displayname=Raiser Armor Trim
|spritename=raiser-armor-trim-smithing-template
|spritetype=item
|nameid=raiser_armor_trim_smithing_template
|form=item}}
{{ID table
|displayname=Shaper Armor Trim
|spritename=shaper-armor-trim-smithing-template
|spritetype=item
|nameid=shaper_armor_trim_smithing_template
|form=item}}
{{ID table
|displayname=Host Armor Trim
|spritename=host-armor-trim-smithing-template
|spritetype=item
|nameid=host_armor_trim_smithing_template
|form=item}}
{{ID table
|displayname=Ward Armor Trim
|spritename=ward-armor-trim-smithing-template
|spritetype=item
|nameid=ward_armor_trim_smithing_template
|form=item}}
{{ID table
|displayname=Silence Armor Trim
|spritename=silence-armor-trim-smithing-template
|spritetype=item
|nameid=silence_armor_trim_smithing_template
|form=item}}
{{ID table
|displayname=Tide Armor Trim
|spritename=tide-armor-trim-smithing-template
|spritetype=item
|nameid=tide_armor_trim_smithing_template
|form=item}}
{{ID table
|displayname=Snout Armor Trim
|spritename=snout-armor-trim-smithing-template
|spritetype=item
|nameid=snout_armor_trim_smithing_template
|form=item}}
{{ID table
|displayname=Rib Armor Trim
|spritename=rib-armor-trim-smithing-template
|spritetype=item
|nameid=rib_armor_trim_smithing_template
|form=item}}
{{ID table
|displayname=Eye Armor Trim
|spritename=eye-armor-trim-smithing-template
|spritetype=item
|nameid=eye_armor_trim_smithing_template
|form=item}}
{{ID table
|displayname=Spire Armor Trim
|spritename=spire-armor-trim-smithing-template
|spritetype=item
|nameid=spire_armor_trim_smithing_template
|form=item
|foot=1}}
{{edition|bedrock}}:
{{ID table
|edition=bedrock
|firstcolumnname=Smithing Template
|shownumericids=y
|showforms=y
|notshowbeitemforms=y
|generatetranslationkeys=y
|displayname=Netherite Upgrade
|spritename=netherite-upgrade-smithing-template
|spritetype=item
|nameid=netherite_upgrade_smithing_template
|id=685
|form=item
|translationkey=item.smithing_template.name, upgrade.netherite_upgrade.name}}
{{ID table
|displayname=Sentry Armor Trim
|spritename=sentry-armor-trim-smithing-template
|spritetype=item
|nameid=sentry_armor_trim_smithing_template
|id=686
|form=item
|translationkey=item.smithing_template.name, trim_pattern.sentry.name}}
{{ID table
|displayname=Vex Armor Trim
|spritename=vex-armor-trim-smithing-template
|spritetype=item
|nameid=vex_armor_trim_smithing_template
|id=692
|form=item
|translationkey=item.smithing_template.name, trim_pattern.vex.name}}
{{ID table
|displayname=Wild Armor Trim
|spritename=wild-armor-trim-smithing-template
|spritetype=item
|nameid=wild_armor_trim_smithing_template
|id=689
|form=item
|translationkey=item.smithing_template.name, trim_pattern.wild.name}}
{{ID table
|displayname=Coast Armor Trim
|spritename=coast-armor-trim-smithing-template
|spritetype=item
|nameid=coast_armor_trim_smithing_template
|id=688
|form=item
|translationkey=item.smithing_template.name, trim_pattern.coast.name}}
{{ID table
|displayname=Dune Armor Trim
|spritename=dune-armor-trim-smithing-template
|spritetype=item
|nameid=dune_armor_trim_smithing_template
|id=687
|form=item
|translationkey=item.smithing_template.name, trim_pattern.dune.name}}
{{ID table
|displayname=Wayfinder Armor Trim
|spritename=wayfinder-armor-trim-smithing-template
|spritetype=item
|nameid=wayfinder_armor_trim_smithing_template
|id=698
|form=item
|translationkey=item.smithing_template.name, trim_pattern.wayfinder.name}}
{{ID table
|displayname=Raiser Armor Trim
|spritename=raiser-armor-trim-smithing-template
|spritetype=item
|nameid=raiser_armor_trim_smithing_template
|id=699
|form=item
|translationkey=item.smithing_template.name, trim_pattern.raiser.name}}
{{ID table
|displayname=Shaper Armor Trim
|spritename=shaper-armor-trim-smithing-template
|spritetype=item
|nameid=shaper_armor_trim_smithing_template
|id=700
|form=item
|translationkey=item.smithing_template.name, trim_pattern.shaper.name}}
{{ID table
|displayname=Host Armor Trim
|spritename=host-armor-trim-smithing-template
|spritetype=item
|nameid=host_armor_trim_smithing_template
|id=701
|form=item
|translationkey=item.smithing_template.name, trim_pattern.host.name}}
{{ID table
|displayname=Ward Armor Trim
|spritename=ward-armor-trim-smithing-template
|spritetype=item
|nameid=ward_armor_trim_smithing_template
|id=690
|form=item
|translationkey=item.smithing_template.name, trim_pattern.ward.name}}
{{ID table
|displayname=Silence Armor Trim
|spritename=silence-armor-trim-smithing-template
|spritetype=item
|nameid=silence_armor_trim_smithing_template
|id=697
|form=item
|translationkey=item.smithing_template.name, trim_pattern.silence.name}}
{{ID table
|displayname=Tide Armor Trim
|spritename=tide-armor-trim-smithing-template
|spritetype=item
|nameid=tide_armor_trim_smithing_template
|id=693
|form=item
|translationkey=item.smithing_template.name, trim_pattern.tide.name}}
{{ID table
|displayname=Snout Armor Trim
|spritename=snout-armor-trim-smithing-template
|spritetype=item
|nameid=snout_armor_trim_smithing_template
|id=694
|form=item
|translationkey=item.smithing_template.name, trim_pattern.snout.name}}
{{ID table
|displayname=Rib Armor Trim
|spritename=rib-armor-trim-smithing-template
|spritetype=item
|nameid=rib_armor_trim_smithing_template
|id=695
|form=item
|translationkey=item.smithing_template.name, trim_pattern.rib.name}}
{{ID table
|displayname=Eye Armor Trim
|spritename=eye-armor-trim-smithing-template
|spritetype=item
|nameid=eye_armor_trim_smithing_template
|id=691
|form=item
|translationkey=item.smithing_template.name, trim_pattern.eye.name}}
{{ID table
|displayname=Spire Armor Trim
|spritename=spire-armor-trim-smithing-template
|spritetype=item
|nameid=spire_armor_trim_smithing_template
|id=696
|form=item
|translationkey=item.smithing_template.name, trim_pattern.spire.name
|foot=1}}
== Achievements ==
{{load achievements|Smithing with style}}
== Advancements ==
{{load advancements|Crafting a New Look;Smithing with Style}}
== Video ==
{{yt|klP9SrJFDU8}}
== History ==
{{History|java}}
{{History||1.20<br>(Experimental)|link=1.19.4|snap=23w04a|[[File:Netherite Upgrade Smithing Template JE1 BE1.png|32px]] [[File:Sentry Armor Trim Smithing Template JE1 BE1.png|32px]] [[File:Vex Armor Trim Smithing Template JE1 BE1.png|32px]] [[File:Wild Armor Trim Smithing Template JE1 BE1.png|32px]] [[File:Coast Armor Trim Smithing Template JE1 BE1.png|32px]] [[File:Dune Armor Trim Smithing Template JE1 BE1.png|32px]] [[File:Ward Armor Trim Smithing Template JE1 BE1.png|32px]] [[File:Tide Armor Trim Smithing Template JE1 BE1.png|32px]] [[File:Snout Armor Trim Smithing Template JE1 BE1.png|32px]] [[File:Rib Armor Trim Smithing Template JE1 BE1.png|32px]] [[File:Eye Armor Trim Smithing Template JE1 BE1.png|32px]] [[File:Spire Armor Trim Smithing Template JE1 BE1.png|32px]] Added smithing templates behind the "Update 1.20" experimental datapack.}}
{{History|||snap=23w05a|Smithing templates can be used to trim leather armor.
|Gold, iron, diamond, and netherite armor can be trimmed with their respective material.
|The dune, coast, wild, and sentry armor trims now always generate two templates in a chest when found.
|Increased the chances for all smithing templates that generate in chest loot to spawn:
*Netherite upgrade chance to find increased from 3.2% to 10%.
*Coast chance to find increased from 11.1% to 16.7%.
*Dune chance to find increased from 11.1% to 14.3%.
*Eye chance to find increased from 4.7% to 10% in alter chests, and to 100% in library chests.
*Rib chance to find increased from 4.7% to 6.7%.
*Sentry chance to find increased from 20% to 25%.
*Snout chance to find increased from 4.7% to 8.3%.
*Spire chance to find increased from 4.7% to 6.7%.
*Vex chance to find increased from 4.7% to 50%.
*Ward chance to find increased from 4.7% to 5%.
*Wild chance to find increased from 20% to 33%.}}
{{History||1.20|snap=23w12a|Smithing templates are now available without using the "Update 1.20" experimental datapack.|[[File:Wayfinder Armor Trim Smithing Template JE1 BE1.png|32px]] [[File:Raiser Armor Trim Smithing Template JE1 BE1.png|32px]] [[File:Shaper Armor Trim Smithing Template JE1 BE1.png|32px]] [[File:Host Armor Trim Smithing Template JE1 BE1.png|32px]] [[File:Silence Armor Trim Smithing Template JE1 BE1.png|32px]] Added wayfinder, raiser, shaper, host, and silence armor trim smithing templates.
|[[File:Sentry Armor Trim Smithing Template JE2 BE2.png|32px]] [[File:Dune Armor Trim Smithing Template JE2 BE2.png|32px]] Changed the textures of the sentry and dune armor trim smithing templates.
|The pattern textures of dune and sentry armor trims are changed from [[File:Armor Trim Dune (sample model) JE1 BE1.png|24px]] [[File:Armor Trim Sentry (sample model) JE1 BE1.png|24px]] to [[File:Armor Trim Dune (sample model) JE2 BE2.png|24px]] [[File:Armor Trim Sentry (sample model) JE2 BE2.png|24px]].<br>
Those previous patterns were left with different names: dune was renamed sentry and sentry was renamed shaper.}}
{{History|||snap=23w16a|Wayfinder, raiser, shaper, and host armor trim no longer generates in [[suspicious sand]] in [[trail ruins]].|Due to the split of the archaeological loot tables for the suspicious gravel within the [[trail ruins]]; wayfinder, raiser, shaper, and host armor trim now are in the rare loot.}}
{{History|||snap=23w17a|The probability of the wayfinder, raiser, shaper, and host armor trim to generate in [[suspicious gravel]] in [[trail ruins]] has been changed from 1/11 to 1/12.|The player now get the [[advancement]] "Crafting a new look" when they craft a trimmed armor at a [[smithing table]] using a smithing template, "Smithing with style" when they apply these smithing templates at least once on their armor: Spire, Snout, Rib, Ward, Silence, Vex, Tide, and Wayfinder.}}
{{History|bedrock}}
{{History||Next Major Update<br>(Experimental)|link=Bedrock Edition 1.19.80|snap=beta 1.19.80.21|[[File:Netherite Upgrade Smithing Template JE1 BE1.png|32px]] [[File:Sentry Armor Trim Smithing Template JE1 BE1.png|32px]] [[File:Vex Armor Trim Smithing Template JE1 BE1.png|32px]] [[File:Wild Armor Trim Smithing Template JE1 BE1.png|32px]] [[File:Coast Armor Trim Smithing Template JE1 BE1.png|32px]] [[File:Dune Armor Trim Smithing Template JE1 BE1.png|32px]] [[File:Ward Armor Trim Smithing Template JE1 BE1.png|32px]] [[File:Tide Armor Trim Smithing Template JE1 BE1.png|32px]] [[File:Snout Armor Trim Smithing Template JE1 BE1.png|32px]] [[File:Rib Armor Trim Smithing Template JE1 BE1.png|32px]] [[File:Eye Armor Trim Smithing Template JE1 BE1.png|32px]] [[File:Spire Armor Trim Smithing Template JE1 BE1.png|32px]] Added smithing templates behind the "[[Bedrock Edition 1.20.0|Next Major Update]]" [[experimental]] toggle.}}
{{History|||snap=beta 1.19.80.22|[[File:Wayfinder Armor Trim Smithing Template JE1 BE1.png|32px]] [[File:Raiser Armor Trim Smithing Template JE1 BE1.png|32px]] [[File:Shaper Armor Trim Smithing Template JE1 BE1.png|32px]] [[File:Host Armor Trim Smithing Template JE1 BE1.png|32px]] [[File:Silence Armor Trim Smithing Template JE1 BE1.png|32px]] Added wayfinder, raiser, shaper, host, and silence armor trim smithing templates.
|[[File:Sentry Armor Trim Smithing Template JE2 BE2.png|32px]] [[File:Dune Armor Trim Smithing Template JE2 BE2.png|32px]] Changed the textures of the sentry and dune armor trim smithing templates.
|The pattern textures of dune and sentry armor trims are changed from [[File:Armor Trim Dune (sample model) JE1 BE1.png|24px]] [[File:Armor Trim Sentry (sample model) JE1 BE1.png|24px]] to [[File:Armor Trim Dune (sample model) JE2 BE2.png|24px]] [[File:Armor Trim Sentry (sample model) JE2 BE2.png|24px]].<br>
Those previous patterns were left with different names: dune was renamed sentry and sentry was renamed shaper.}}
{{History||1.20.0|snap=beta 1.20.0.21|Smithing templates are now available without using the "Next Major Update" experimental toggle.}}
{{History|foot}}
== Issues ==
{{Issue list}}
== Trivia ==
* Smithing templates were named "Smithing Blueprints" in the prototype but was changed because the word "blueprint" sounded modern and technical.<ref>{{ytl|klP9SrJFDU8|Minecraft 1.20: Armor Trims - What Do They Mean?|Minecraft|May 4, 2023|t=98}}</ref>
* When Mojang developer Gnembon was working on armor trims, he accidentally messed up their rendering, making them jet through the player's body in a weird fashion, similar to what appears in {{w|Salvador Dalí}}'s paintings where a hand might poke through a forehead.<ref>{{ytl|ghQODkq4ITI|Mojang Dev Comes To Hermitcraft! (Mojang Developer Gnembom Interview)|GoodVodsWithScar|June 23, 2023|t=1980}}</ref>
* Some of the armor trims feature patterns based on a [[mob]] or [[block]] that is found in the same [[Generated structures|structure]] as the corresponding smithing template.<ref name=":0">"Some of the armor trims reflect the place where you found the template, for example bastions contain a piglin-inspired trim."-[[Sofia Dankis]]-{{Mcnet|armor-trims-coming-minecraft-1-20|Armor Trims Coming to Minecraft 1.20|January 24, 2023}}</ref>
** The spire armor trim resembles a [[shulker]].
** The vex armor trim resembles an [[evoker]]. As an item in the [[inventory]], it resembles the wing or the vein texture of a [[vex]].
** The wild armor trim has moss growing on 3 of its corners.
** The coast armor trim appears to have barnacles attached to it.
** The ward armor trim, as an item in the inventory, resembles the faces inside a [[warden]]'s chest.
** The silence armor trim appears to have sculk creeping onto / infecting it.
** The tide armor trim resembles [[Prismarine|prismarine bricks]].
** The snout armor trim resembles a [[piglin]]<ref name=":0" />.
** The rib armor trim resembles a [[wither skeleton]].
** The eye armor trim resembles an [[eye of ender]]. There are also two eyes on the head part of the armor trim that resemble those of an [[enderman]].
* ''Netherite upgrade smithing template'' (35 characters with "_" and 32 characters without "_") and ''sentry armor trim smithing template'' (35 characters with "_" and 31 characters without "_") are the current longest name for item ID, while ''[[polished blackstone pressure plate]]'' and ''[[cracked polished blackstone bricks]]'' have 34 characters with "_" and 31 characters without "_".
* The silence armor trim is the rarest trim, due to being found in ancient cities in the deep dark, and having only a 1.2% chance to be per chest.
* When [[lapis lazuli]] is used as trim material, it is called "Lapis" instead of its full name "Lapis Lazuli"; this is the only instance of the abbreviation "Lapis" being used in-game.<ref>{{bug|MC-262486|||WAI}}</ref>
== Gallery ==
=== Sprites ===
<gallery>
Netherite Upgrade Smithing Template.png|Netherite Upgrade
Sentry Armor Trim Smithing Template.png|Sentry Armor Trim
Vex Armor Trim Smithing Template.png|Vex Armor Trim
Wild Armor Trim Smithing Template.png|Wild Armor Trim
Coast Armor Trim Smithing Template.png|Coast Armor Trim
Dune Armor Trim Smithing Template.png|Dune Armor Trim
Wayfinder Armor Trim Smithing Template.png|Wayfinder Armor Trim
Raiser Armor Trim Smithing Template.png|Raiser Armor Trim
Shaper Armor Trim Smithing Template.png|Shaper Armor Trim
Host Armor Trim Smithing Template.png|Host Armor Trim
Ward Armor Trim Smithing Template.png|Ward Armor Trim
Silence Armor Trim Smithing Template.png|Silence Armor Trim
Tide Armor Trim Smithing Template.png|Tide Armor Trim
Snout Armor Trim Smithing Template.png|Snout Armor Trim
Rib Armor Trim Smithing Template.png|Rib Armor Trim
Eye Armor Trim Smithing Template.png|Eye Armor Trim
Spire Armor Trim Smithing Template.png|Spire Armor Trim
</gallery>
=== Armor trim patterns ===
<gallery>
Armor Trim Sentry (sample model).png|Sentry Armor Trim
Armor Trim Vex (sample model).png|Vex Armor Trim
Armor Trim Wild (sample model).png|Wild Armor Trim
Armor Trim Coast (sample model).png|Coast Armor Trim
Armor Trim Dune (sample model).png|Dune Armor Trim
Armor Trim Wayfinder (sample model).png|Wayfinder Armor Trim
Armor Trim Raiser (sample model).png|Raiser Armor Trim
Armor Trim Shaper (sample model).png|Shaper Armor Trim
Armor Trim Host (sample model).png|Host Armor Trim
Armor Trim Ward (sample model).png|Ward Armor Trim
Armor Trim Silence (sample model).png|Silence Armor Trim
Armor Trim Tide (sample model).png|Tide Armor Trim
Armor Trim Snout (sample model).png|Snout Armor Trim
Armor Trim Rib (sample model).png|Rib Armor Trim
Armor Trim Eye (sample model).png|Eye Armor Trim
Armor Trim Spire (sample model).png|Spire Armor Trim
</gallery>
=== Official Artwork ===
<gallery>
T&T Thumbnail.jpg|[[Sunny]] wearing amethyst armor trims.
Warden Chasing Alex with Silence Trim Pixel Art.png|A [[warden]] chasing Alex holding the silence armor trim.
Alex Trimming Armor in Smithing Table Pixel Art.png|Alex adding the silence armor trim and amethyst on iron armor.
Alex Wearing Iron Armor with Amethyst Pixel Art.jpg|Alex wearing the trimmed iron armor.
File:Live2023-01.jpeg|Noor working on trimmed iron armor.
</gallery>
=== Screenshots ===
<gallery>
Kingbdogz Armor Trim 1.jpg|Redstone trims on diamond armor.
Kingbdogz Armor Trim 2.jpg|Gold trims on netherite armor.
Too Many Trims.jpg|A large amount of armor trims.
Kingbdogz Armor Trim 3.jpg|Gold on netherite.
Kingbdogz Armor Trim 4.jpg|Diamond on diamond.
New Armor Trims in 23W12A.jpg|<ref>{{Tweet|kingbdogz|1638580472962850831|new trims got the drip The new "Silence" armor trim to the left is now the hardest trim to get, with only a 1% chance per chest to spawn in Ancient Cities. Definitely gonna be a challenge to get!|March 22, 2023}}</ref>
Emerald Armor.png|Emerald on gold.
Xilefian Armor Trims 1.png|[[Xilefian]] showing how armor trims work.
Xilefian Armor Trims 2.png|[[Xilefian]] showing how armor trims work.
Xilefian Armor Trims 3.png|[[Xilefian]] showing how armor trims work.
Armor Trims On Netherite Armors.png|A display of all eleven (before [[Java Edition 23w12a]]) armor trims and ten colors on netherite armors.
Armor Trim Showcase.png|A display of all eleven (before [[Java Edition 23w12a]]) armor trims, on netherite armor using emerald as the trim material.
Armor Trim Colors.png|A display of all ten armor trim colors, using the ward trim on a netherite helmet.
Silence Armor Trim on All Armors.png|A display of all ten colors of the silence armor trim on all armors.
Image 2023-06-07 154100087.png|A screenshot of every armor trim in every color(besides quartz) on leather armor.
Armor Trim Friends.jpg|Official screenshot of [[Alex]] and [[Zuri]] wearing armor trims.
LadyAgnes Armor Trims.jpg|Copper trims on netherite armor.
Trim Lineup.jpg
Fancy Delta.jpg|[[Kai]] wearing trimmed armor in a [[Basalt Delta]].
Trims & Pots.jpg
Noor Gold Armor Trim .jpeg
Noor Diamond Armor Trim.jpeg
Noor Netherite Armor Trim.jpeg
Noor Iron Armor Trim.jpeg
</gallery>
== References ==
{{Reflist}}
{{Items}}
[[Category:Bedrock Edition]]
[[Category:Non-renewable resources]]
[[de:Schmiedevorlage]]
[[es:Molde de herrería]]
[[fr:Modèle de forge]]
[[ja:鍛冶型]]
[[pl:Szablon kowalski]]
[[pt:Molde de ferraria]]
[[ru:Кузнечный шаблон]]
[[uk:Ковальський шаблон]]
[[zh:锻造模板]]</li></ul> | Creeper explosions no longer destroy stone or stone-like blocks. | ||||
| Explosions leave smoldering. | |||||
| a | |||||
1.2.0{{Extension DPL}}<ul><li>[[Milk Bucket|Milk Bucket]]<br/>{{Item
| title=Milk Bucket
| image = Milk Bucket.png
| renewable = Yes
| effects = Clears all
| stackable = No
}}
A '''milk bucket'''{{fn|Known as '''Milk Bucket''' {{in|java}} and '''Milk''' {{in|bedrock}}.}} is a [[drink]] obtained from {{Control|use|text=using}} a [[bucket]] on [[cow]]s, [[mooshroom]]s and [[goat]]s that can be consumed to clear all [[Effect|effects]].
== Obtaining ==
=== Harvesting ===
Milk buckets can be obtained from [[cow]]s, [[mooshroom]]s, and [[goat]]s by pressing {{control|use}} while looking at them with an empty [[bucket]].
=== Mob loot ===
A milk bucket has a chance of dropping from a [[wandering trader]], if the trader is killed while holding it.{{only|java}}
== Usage ==
Holding {{control|use}} with a milk bucket starts the drinking sound and animation. {{IN|java}}, the animation is shown only in first-person camera mode.
When consumed, milk immediately removes all status [[effect]]s from the [[player]]. [[Fire]] is not a status effect; therefore, drinking milk doesn't extinguish a burning player.
The benefits of area status effects granted by [[beacon]]s and [[Conduit Power|conduit power]] are restored almost immediately in Bedrock Edition and after a few seconds in ''Java Edition''.
=== Crafting ingredient ===
{{crafting usage|Milk Bucket}}
== Sounds ==
{{el|je}}:
{{Sound table
|sound=Drink.ogg
|subtitle=Sipping
|source=player
|description=While a player is drinking milk
|id=entity.generic.drink
|translationkey=subtitles.entity.generic.drink
|volume=0.5
|pitch=0.9-1.0
|distance=16}}
{{Sound table
|sound=Cow milk1.ogg
|sound2=Cow milk2.ogg
|sound3=Cow milk3.ogg
|source=player
|subtitle=Cow gets milked
|description=When a cow is milked
|id=entity.cow.milk
|translationkey=subtitles.entity.cow.milk
|volume=1.0
|pitch=1.0
|distance=16}}
{{Sound table
|sound=Mooshroom milk1.ogg
|sound2=Mooshroom milk2.ogg
|sound3=Mooshroom milk3.ogg
|subtitle=Goat gets milked
|description=When a regular goat is milked
|source=neutral
|id=entity.goat.milk
|translationkey=subtitles.entity.goat.milk
|volume=1.0
|pitch=1.0
|distance=16}}
{{Sound table
|sound=Goat screaming milk1.ogg
|sound2=Goat screaming milk2.ogg
|sound3=Goat screaming milk3.ogg
|sound4=Goat screaming milk4.ogg
|sound5=Goat screaming milk5.ogg
|subtitle=Goat gets milked
|description=When a screaming goat is milked
|source=neutral
|id=entity.goat.screaming.milk
|translationkey=subtitles.entity.goat.milk
|volume=1.0
|pitch=1.0
|distance=16}}
{{Sound table
|sound=Wandering trader drink milk1.ogg
|sound2=Wandering trader drink milk2.ogg
|sound3=Wandering trader drink milk3.ogg
|sound4=Wandering trader drink milk4.ogg
|sound5=Wandering trader drink milk5.ogg
|subtitle=Wandering Trader drinks milk
|source=neutral
|description=While a wandering trader is drinking milk to become visible during daytime
|id=entity.wandering_trader.drink_milk
|translationkey=subtitles.entity.wandering_trader.drink_milk
|volume=0.5
|pitch=0.9-1.0
|distance=16
|foot=1}}
{{el|be}}:
{{Sound table
|type=bedrock
|sound=Drink.ogg
|source=player
|description=While a player is drinking milk
|id=random.drink
|volume=0.35
|pitch=0.9-1.1}}
{{Sound table
|sound=Cow milk1.ogg
|sound2=Cow milk2.ogg
|sound3=Cow milk3.ogg
|source=neutral
|description=When a cow is milked
|id=mob.cow.milk
|volume=1.0
|pitch=1.0}}
{{Sound table
|sound=Mooshroom milk1.ogg
|sound2=Mooshroom milk2.ogg
|sound3=Mooshroom milk3.ogg
|description=When a regular goat is milked
|source=neutral
|id=mob.mooshroom.suspicious_milk
|volume=1.0
|pitch=1.0/0.9/1.1}}
{{Sound table
|sound=Goat screaming milk1.ogg
|sound2=Goat screaming milk2.ogg
|sound3=Goat screaming milk3.ogg
|sound4=Goat screaming milk4.ogg
|sound5=Goat screaming milk5.ogg
|description=When a screaming goat is milked
|source=neutral
|id=mob.goat.milk.screamer
|volume=1.0
|pitch=1.0}}
{{Sound table
|sound=Wandering trader drink milk1.ogg
|sound2=Wandering trader drink milk2.ogg
|sound3=Wandering trader drink milk3.ogg
|sound4=Wandering trader drink milk4.ogg
|sound5=Wandering trader drink milk5.ogg
|source=neutral
|description=While a wandering trader is drinking milk to become visible during daytime
|id=mob.wanderingtrader.drink_milk
|volume=1.0
|pitch=0.8-1.2
|foot=1}}
== Data values ==
=== ID ===
{{edition|java}}:
{{ID table
|edition=java
|showforms=y
|generatetranslationkeys=y
|displayname=Milk Bucket
|spritetype=item
|nameid=milk_bucket
|form=item
|foot=1}}
{{edition|bedrock}}:
{{ID table
|edition=bedrock
|showaliasids=y
|shownumericids=y
|showforms=y
|notshowbeitemforms=y
|generatetranslationkeys=y
|displayname=Milk
|spritetype=item
|nameid=milk_bucket
|aliasid=bucket / 1
|id=361
|form=item
|translationkey=item.milk.name
|foot=1}}
== Achievements ==
{{load achievements|The Lie}}
== Advancements ==
{{Load advancements|Husbandry}}
== Video ==
<div style="text-align:center">{{yt|eyxea_d0b3s}}</div>
== History ==
{{History|java alpha}}
{{History||v1.0.8|[[File:Milk Bucket JE1 BE1.png|32px]] Milk has been introduced, but it has no purpose and is obtainable only through inventory editing.}}
{{History||v1.0.11|Milk can now be obtained by {{control|use|text=milking}} a [[cow]] with a [[bucket]]. However, it is not yet drinkable.}}
{{History||v1.0.17|Milk buckets can now be emptied.}}
{{History|java beta}}
{{History||1.2|Milk has been incorporated into the [[crafting]] recipe of [[cake]].}}
{{History||1.2_01|[[Squid]] can now be milked by right-clicking on their mouth if part of their body was exposed to [[air]] or if they were not touching another [[block]]. An easy way to accomplish this is to pull a squid with a [[fishing rod]] away from other blocks and then milk it.}}
{{History||1.3_01|Squid milking has been removed.}}
{{History|java}}
{{History||1.0.0|snap=Beta 1.9 Prerelease|Milk can now be obtained by milking [[mooshroom]]s.}}
{{History|||snap=Beta 1.9 Prerelease 2|Milk has been made drinkable.
|According to a tweet by [[Jeb]] on September 30th 2011, milk was made a cure for all status effects.<ref>{{tweet|jeb_|119842906528944129|@Nexusdog_UK I haven't! In beta 1.9 pre2 milk works like a clear-everything drink|September 30, 2011}}</ref>
|Milk is no longer emptiable.}}
{{History||1.13|snap=17w47a|Prior to [[1.13/Flattening|''The Flattening'']], this [[item]]'s numeral ID was 335.}}
{{History|||snap=18w20a|"Milk" has been renamed to "Milk Bucket".}}
{{History||1.14|snap=18w43a|[[File:Milk Bucket JE2 BE2.png|32px]] The texture of milk buckets has been changed.}}
{{History||1.14|snap=19w06a|[[Wandering trader]]s now drink from milk buckets at dawn, and have a change to drop them.}}
{{History||1.17|snap=21w13a|Milk can now be obtained by milking [[goat]]s.}}
{{History|upcoming java}}
{{History||Villager Trade Rebalance<br>(Experimental)|link=Java Edition 1.20.2|snap=23w31a|Wander traders now have a chance to [[trading|buy]] a milk bucket from the player.}}
{{History|pocket alpha}}
{{History||v0.7.0|[[File:Milk Bucket JE1 BE1.png|32px]] Added milk buckets.
|Milk buckets are not yet drinkable.}}
{{History||v0.11.0|snap=build 4|Drinking milk now removes [[status effects]].
|Added milk buckets to the Creative inventory.{{verify|type=update}}{{info needed}}<!---same update?--->}}
{{History|bedrock}}
{{History||1.4.0|snap=beta 1.2.14.2|Moved all bucket items, including milk, from the Equipment tab to the Items tab in the [[Creative inventory]].{{verify|type=update}}{{info needed}}<!---please check snapshots, only 1 major release version was checked each--->}}
{{History||1.10.0|snap=beta 1.10.0.3|[[File:Milk Bucket JE2 BE2.png|32px]] The texture of milk buckets has been changed.}}
{{History||1.16.100|snap=beta 1.16.100.56|The ID of milk has been changed from <code>bucket/1</code> to <code>milk_bucket</code>.}}
{{History||1.16.200|snap=beta 1.16.200.52|Milk can now be obtained by milking [[goat]]s.}}
{{History|console}}
{{History||xbox=TU1|xbone=CU1|ps=1.0|wiiu=Patch 1|switch=1.0.1|[[File:Milk Bucket JE1 BE1.png|32px]] Added milk buckets.}}
{{History|Ps4}}
{{History||1.90|[[File:Milk Bucket JE2 BE2.png|32px]] The texture of milk buckets has been changed.}}
{{History|New 3DS}}
{{History||0.1.0|[[File:Milk Bucket JE1 BE1.png|32px]] Added milk buckets.}}
{{History|foot}}
== Issues ==
{{issue list}}
== See also ==
*[[Water Bucket]]
*[[Lava]]
*[[Food]]
*[[Cake]]
*[[Honey Bottle]] (alternative to remove poison effect)
*[[Medicine]]
== Notes ==
{{fnlist}}
== References ==
{{reflist}}
== External Links ==
*[https://www.minecraft.net/en-us/article/taking-inventory--milk-bucket Taking Inventory: Milk Bucket] – Minecraft.net on October 8, 2019
{{Items}}
[[Category:Food]]
[[Category:Renewable resources]]
[[Category:Tools]]
[[cs:Mléko]]
[[de:Milcheimer]]
[[es:Cubo con leche]]
[[fr:Seau de lait]]
[[hu:Tej]]
[[it:Secchio di latte]]
[[ja:ミルク入りバケツ]]
[[ko:우유 양동이]]
[[nl:Emmer melk]]
[[pl:Wiadro mleka]]
[[pt:Balde de leite]]
[[ru:Ведро с молоком]]
[[th:ถังนม]]
[[uk:Відро молока]]
[[zh:奶桶]]</li><li>[[Le Tricolore|Le Tricolore]]<br/>{{Exclusive|Java}}
{{Joke feature}}
{{Item
| image =
| renewable = Yes
| stackable = Yes (64)
}}
'''Le Tricolore''' (French for ''The Tricolour'') is a joke item from [[Java Edition 23w13a_or_b]].
== Obtaining ==
One le tricolore and one [[la baguette]] is given to all players when [[French mode]] gets activated. Deactivating the mode will remove le tricolore from the player's inventory (but not la baguette; [[container]]s such as [[chest]]s are not affected).
Le Tricolore is not available in the creative inventory, but can be obtained by using the {{cmd|give}} command.
== Data values ==
=== ID ===
{{ID table
|showforms=y
|generatetranslationkeys=java
|displayname=Le Tricolore
|spritetype=item
|nameid=le_tricolore
|form=item
|foot=1}}
== History ==
{{History|java}}
{{History||23w13a or b|[[File:Le Tricolore.png|32px]] Added Le Tricolore.}}
{{History|foot}}
{{Items}}
{{Jokes}}
[[Category:Joke items]]
[[ja:Le Tricolore]]
[[pt:Le Tricolore]]</li></ul> | Creepers have a new damage sound. | ||||
| b | |||||
1.4{{Extension DPL}}<ul><li>[[Minecart with Hopper|Minecart with Hopper]]<br/>{{ItemEntity
|image=Minecart with Hopper.png
|renewable=Yes
|stackable=No
|size=Height: 0.7 Blocks<br>Width: 0.98 Blocks
|networkid='''[[JE]]''': 10
|drops=1 {{ItemLink|Minecart with Hopper}}<br>plus contents
|health={{hp|6}}
}}
A '''minecart with hopper''' is a [[minecart]] with a [[hopper]] inside. Unlike a normal hopper, it pulls items from containers much more quickly, cannot push items into containers, can collect [[Item (entity)|item entities]] through a single layer of [[solid block]]s and is locked and unlocked via [[Activator Rail|activator rails]].
== Obtaining ==
=== Crafting ===
{{Crafting
|Output= Minecart with Hopper
|type= Transportation
|Hopper|Minecart}}
Minecarts with hoppers can be retrieved by attacking them. By doing so it drop as an [[item (entity)|item]] and any other contents of the hopper are dropped as well.
== Usage ==
[[File:Minecart with Hopper GUI.png|thumb|176px|The GUI of a minecart with hopper.]]
Minecarts with hoppers are placed similarly to other [[minecart]]s.
A minecart with hopper pulls in items lying nearby (within a range slightly larger than the cart itself), or inside a container directly above the minecart, at a rate of 1 item every [[game tick]] (20 items per second), eight times as fast as a normal hopper. It also picks up items that are lying on a block directly above the track. It does not push items into containers, but a hopper underneath the track can remove items from a minecart with hopper on the track. Ordinary hoppers can also drop items into a minecart with hopper like other containers, at the normal speed of 2.5 items per second. In Bedrock Edition, a minecart with hopper on curved rail pulls in items in a hopper lying in front of its moving direction and 1 block above if hopper's output funnel is pointed downward and no block is below that hopper.<ref>{{bug|MCPE-94293}}</ref>
The hopper can be disabled by passing over a powered [[activator rail]], and can be reenabled by an inactive activator rail.
An empty minecart with hopper can travel more than 85 blocks without stopping (as opposed to a normal cart going less than 12 blocks) from a dead stop using a 2 powered track starter even with another cart in front of them. However, the distance traveled by a minecart with hopper depends on the hopper's load. Using a 1 powered rail starter track, a minecart with an empty hopper travels 64 blocks until it stops (as opposed to an empty normal minecart going 8 blocks). The distance traveled diminishes non-linearly with increased hopper load; a minecart with a full hopper can travel only 16 blocks in this setup.
{{See also|Tutorials/Storage minecarts}}
== Sounds ==
{{Edition|Java}}:<br>
Minecarts with hoppers use the Friendly Creatures sound category for entity-dependent sound events.<ref group=sound name=rollsource>{{bug|MC-42132}}</ref>
{{Sound table
|sound=Minecart rolling.ogg
|subtitle=Minecart rolls
|source=Friendly Creatures <ref group=sound name=rollsource/>
|overridesource=1
|description=While a minecart with hopper is moving
|id=entity.minecart.riding
|translationkey=subtitles.entity.minecart.riding
|volume=0.0-0.35 <ref group=sound>Relates linearly with horizontal velocity (max 0.5)</ref>
|pitch=0.0-1.0 <ref group=sound>Will increase by 0.0025 per tick if the minecart's horizontal velocity is more than 0.01</ref>
|distance=16
|foot=1}}
{{Edition|Bedrock}}:
{{Sound table
|type=bedrock
|sound=Minecart rolling.ogg
|source=neutral
|description=While a minecart with hopper is moving
|id=minecart.base
|foot=1}}
== Data values ==
=== ID ===
{{edition|java}}:
{{ID table
|edition=java
|firstcolumnname=Item
|showforms=y
|generatetranslationkeys=y
|displayname=Minecart with Hopper
|spritetype=item
|nameid=hopper_minecart
|form=item
|foot=1}}
{{ID table
|edition=java
|firstcolumnname=Entity
|generatetranslationkeys=y
|displayname=Minecart with Hopper
|spritetype=entity
|nameid=hopper_minecart
|foot=1}}
{{edition|bedrock}}:
{{ID table
|edition=bedrock
|firstcolumnname=Item
|shownumericids=y
|showforms=y
|notshowbeitemforms=y
|generatetranslationkeys=y
|displayname=Minecart with Hopper
|spritetype=item
|nameid=hopper_minecart
|id=526
|form=item
|foot=1}}
{{ID table
|edition=bedrock
|firstcolumnname=Entity
|shownumericids=y
|generatetranslationkeys=y
|displayname=Minecart with Hopper
|spritetype=entity
|nameid=hopper_minecart
|id=96
|foot=1}}
=== Entity data ===
Minecarts with hoppers have entity data associated with them that contain various properties of the entity.
{{el|java}}:
{{main|Entity format}}
{{/ED}}
{{el|bedrock}}:
: See [[Bedrock Edition level format/Entity format]].
== Video ==
<div style="text-align:center">{{yt|I5etC7LeCac}}</div>
== History ==
{{History|java}}
{{History||1.5|snap=13w03a|[[File:Minecart with Hopper JE1 BE1.png|32px]] [[File:Minecart with Hopper (item) JE1 BE1.png|32px]] Added minecart with hopper.}}
{{History||1.9|snap=15w43a|Loot tables are added; minecarts with hopper now can use loot tables.}}
{{History||1.9.1|snap=pre2|The title of the [[inventory]] is changed from 'Hopper minecart' to 'Minecart with Hopper'.}}
{{History||1.11|snap=16w32a|The entity ID of the minecart with hopper has now been changed from <code>MinecartHopper</code> to <code>hopper_minecart</code>.}}
{{History||1.13|snap=17w47a|Prior to [[1.13/Flattening|''The Flattening'']], this [[item]]'s numeral ID was 408.}}
{{History||1.14|snap=18w43a|[[File:Minecart with Hopper JE2 BE2.png|32px]] [[File:Minecart with Hopper (item) JE2 BE2.png|32px]] The textures of the minecart with hopper have now been changed.}}
{{History||1.15|snap=19w38a|[[File:Minecart with Hopper 19w38a.png|32px]] The hopper now appears dark, same as suffocating mobs.}}
{{History|||snap=19w39a|The hopper now renders correctly.}}
{{History||1.16.2|snap=Pre-release 1|Opening or destroying a minecart with hopper now angers nearby [[piglin]]s.}}
{{History||1.19|snap=22w13a|The crafting recipe for a minecart with hopper is now shapeless.|Breaking a minecart with hopper will now drop the item instead of the minecart and hopper separately, though the contents of the hopper are still dropped.<ref>{{bug|MC-249493|||Fixed}}</ref>}}
{{History||1.19.4|snap=23w06a|Minecart with hopper now no longer aggravates [[piglin]]s when opened.}}
{{History|pocket alpha}}
{{History||v0.14.0|snap=build 1|[[File:Minecart with Hopper JE1 BE1.png|32px]] [[File:Minecart with Hopper (item) JE1 BE1.png|32px]] Added minecart with hopper.}}
{{History|pocket}}
{{History||1.1.0|snap=alpha 1.1.0.0|The entity ID of the minecart with hopper has now been changed from <code>minecarthopper</code> to <code>hopper_minecart</code>.}}
{{History|bedrock}}
{{History||1.10.0|snap=beta 1.10.0.3|[[File:Minecart with Hopper JE2 BE2.png|32px]] [[File:Minecart with Hopper (item) JE2 BE2.png|32px]] The textures of the minecart with hopper have now been changed.}}
{{History||1.19.0|snap=beta 1.19.0.30|Breaking a minecart with hopper will now drop the item instead of the minecart and hopper separately, though the contents of the hopper are still dropped.}}
{{History|console}}
{{History||xbox=TU19|xbone=CU7|ps=1.12|wiiu=Patch 1|switch=1.0.1|[[File:Minecart with Hopper JE1 BE1.png|32px]] [[File:Minecart with Hopper (item) JE1 BE1.png|32px]] Added minecart with hopper.}}
{{History||xbox=none|xbone=none|ps=1.90|wiiu=none|switch=none|[[File:Minecart with Hopper JE2 BE2.png|32px]] [[File:Minecart with Hopper (item) JE2 BE2.png|32px]] The textures of the minecart with hopper have now been changed.}}
{{History|new 3ds}}
{{History||0.1.0|[[File:Minecart with Hopper JE1 BE1.png|32px]] [[File:Minecart with Hopper (item) JE1 BE1.png|32px]] Added minecart with hopper.
|Minecarts with hopper emit smoke [[particles]] when destroyed.}}
{{History|foot}}
== Issues ==
{{issue list}}
== Gallery ==
<gallery>
File:First hopper Minecart Image.png|The first image of hopper carts released by Dinnerbone.<ref>{{Tweet|Dinnerbone|291215700213772289|Well you guys got that quick. The letters in the hotbar were for <nowiki>[imgur link]|January 15, 2013}}</ref>
File:13w03a Banner.png|The 13w03a banner showing a minecart with hopper and a [[dropper]].
</gallery>
== References ==
{{reflist}}
{{items}}
{{entities}}
[[Category:Mechanics]]
[[Category:Storage]]
[[cs:Vozík s násypkou]]
[[de:Trichterlore]]
[[es:Vagoneta con tolva]]
[[fr:Wagonnet à entonnoir]]
[[hu:Tölcsér csille]]
[[it:Carrello da miniera]]
[[ja:ホッパー付きのトロッコ]]
[[ko:호퍼가 실린 광산 수레]]
[[nl:Mijnkar met trechter]]
[[pl:Wagonik z lejem]]
[[pt:Carrinho de mina com funil]]
[[ru:Вагонетка с воронкой]]
[[uk:Вагонетка з лійкою]]
[[zh:漏斗矿车]]</li><li>[[Drinks|Drinks]]<br/>[[File:Drinking Steve.png|150px|right]] [[File:Drinking Alex.png|150px|right]]
'''Drinks''' are a narrow class of consumable [[item]]s that can be ingested by the [[player]] in an extremely similar manner to [[food]]. However, drinks are not encountered quite as commonly as food is, and they are not nearly as integral to Survival gameplay. Drinks can generally be distinguished from food by the sounds they make upon consumption, the lack of [[particles]] they emit, and the fact that they leave an empty container item in the [[inventory]] after consumption. Drinks do not affect [[hunger]] or saturation values upon use (with the exception of [[honey bottle]]s), and do not need those values to be depleted in order to be consumed.
Drinks are drunk by holding {{control|use item}} while having the drink item selected in the hotbar or in the off hand.
== Drinks ==
{{/table}}
== History ==
{{main|Milk#History|Potion#History|Honey Bottle#History}}
{{History|java alpha}}
{{History||v1.0.11|[[File:Milk Bucket JE1 BE1.png|32px]] Added milk.}}
{{History|java}}
{{History||1.0.0|snap=Beta 1.9 Prerelease 3|Added water bottles and potions.}}
{{History||1.15|snap=19w34a|[[File:Honey Bottle JE1.png|32px]] Added honey bottles.}}
{{History|pocket alpha}}
{{History||v0.7.0|[[File:Milk Bucket JE1 BE1.png|32px]] Added milk buckets.}}
{{History||v0.12.1|snap=build 1|Added water bottles and potions.}}
{{History|bedrock}}
{{History||1.14.0|snap=beta 1.14.0.1|[[File:Honey Bottle BE1.png|32px]] Added honey bottles.}}
{{History|foot}}
{{Items}}
[[ja:飲み物]]
[[pt:Bebidas]]
[[Category:Food]]</li></ul></nowiki> | The 'A' in the Minecraft logo now includes a creeper face. | ||||
1.5{{Extension DPL}}<ul><li>[[Wheat|Wheat]]<br/>{{About||the artifact in ''Minecraft Dungeons''|Minecraft Dungeons:Wonderful Wheat|the seed|Wheat Seeds}}
{{Item
| image = Wheat.png
| renewable = Yes
| stackable = Yes (64)
}}
'''Wheat''' is an [[item]] primarily obtained by harvesting fully-grown [[Wheat Seeds|wheat crops]]. It is used for [[crafting]] as well as to feed certain animals.
== Obtaining ==
=== Natural generation ===
{{LootChestItem|wheat}}
=== Farming ===
{{main|Tutorials/Crop farming}}
When a fully-grown wheat crop is harvested, it drops 1 wheat and 1 to 4 [[wheat seeds]] ({{frac|2|5|7}} per crop harvested on average). A wheat crop has a total of eight stages (0-7) from the time it is planted until it can be harvested. If a crop is harvested before it is fully grown, it just drops one seed. Wheat needs light to grow; a seed is destroyed if planted without light. Harvesting with a [[Fortune]]-enchanted tool increases the number of seeds dropped but does not increase the yield of wheat.
=== Crafting ===
{{Crafting
|Hay Bale
|Output= Wheat,9
|type= Material
}}
=== Drops ===
A [[fox]] sometimes spawns holding wheat, which it always drops upon death. Alternatively, the player can drop a [[food]] item, causing the fox to drop the wheat.
== Usage ==
=== Food ===
[[File:New Cattle.png|thumb|Using wheat to lead a cow.]]
When wheat is held, it causes nearby [[cow]]s, [[sheep]], [[goat]]s and [[mooshroom]]s to follow the player, until either the player stops holding the wheat or goes too far away from the animal, thus leading them to lose interest.
Wheat may be used to [[breed]] cows, sheep, goats, and mooshrooms by first herding two of them together and then {{control|using}} the wheat on them to begin "Love Mode."
Wheat can heal a [[horse]] {{hp|1}} health or lower its temper by 3% when attempting to tame it. It can also decrease the time it takes for a foal to grow by 20 seconds.
Similarly, wheat can heal a [[llama]] {{hp|2}} health, and it decreases the time it takes a baby llama to grow by 10 seconds.
=== Crafting ingredient ===
{{crafting usage}}
=== Trading ===
Novice-level farmer [[Villager|villagers]] have a 25%{{only|bedrock}} or 40%{{only|java}} chance to buy 20 wheat for one [[emerald]].
=== Composting ===
Placing wheat into a [[composter]] has a 65% chance of raising the compost level by 1. A stack of wheat yields an average of 5.94 [[bone meal]].
== Achievements ==
{{load achievements|Bake Bread;The Lie;Repopulation}}
== Advancements ==
{{load advancements|A Seedy Place}}
== Data values ==
=== ID ===
{{edition|java}}:
{{ID table
|edition=java
|showforms=y
|generatetranslationkeys=y
|displayname=Wheat
|spritetype=item
|nameid=wheat
|form=item
|foot=1}}
{{edition|bedrock}}:
{{ID table
|edition=bedrock
|shownumericids=y
|showforms=y
|notshowbeitemforms=y
|generatetranslationkeys=y
|displayname=Wheat
|spritetype=item
|nameid=wheat
|id=334
|form=item
|foot=1}}
== Video ==
{{Video note|the narrator demonstrates at 0:56 that walking over wheat can destroy the crop and un-till the land. This is outdated: since version {{Version link|JE 1.1}}, wheat can be destroyed only by a player or mob jumping on it or falling on it.}}
<div style="text-align:center">{{yt|JbAURiYQZlA}}</div>
== History ==
{{History|java indev}}
{{History||20100206|[[File:Wheat JE1 BE1.png|32px]] Wheat has been added.
|Wheat can be used to craft [[bread]].}}
{{History||20100223|Bread now requires 3 wheat (1 row of 3) instead of 6 (2 rows of 3) to be crafted.}}
{{History|java infdev}}
{{History||20100625-2|Wheat can now be found in the new [[dungeon]] [[chest]]s.}}
{{History|java beta}}
{{History||1.2|Wheat can now be used to craft [[cake]].}}
{{History||1.4|Wheat can now be used to craft [[cookie]]s.}}
{{History|java}}
{{History||1.0.0|snap=Beta 1.9 Prerelease 2|Wheat can now be used in [[breeding]].}}
{{History||1.3.1|snap=12w21a|Wheat can now be [[trading|sold]] to farmer [[villager]]s, at 18–21 wheat for 1 [[emerald]].}}
{{History||1.4.2|snap=12w36a|[[Chicken]]s and [[pig]]s no longer use wheat to [[breeding|breed]].}}
{{History||1.6.1|snap=13w16a|[[Horse]]s can now be healed by being fed wheat.
|Foals can now have their growth increased by being fed wheat.}}
{{History|||snap=13w17a|[[Horse]]s can now have their tempers lowered with wheat.}}
{{History|||snap=13w18a|Nine wheat can now be crafted to make a [[hay bale]].}}
{{History||1.8|snap=14w02a|Trading has been changed: farmer [[villager]]s now [[trading|buy]] 18–22 wheat for 1 [[emerald]].}}
{{history||1.9|snap=15w43a|Wheat may now be found in [[igloo]] basement chests.}}
{{history|||snap=15w44a|The average yield of wheat in [[dungeon]] chests has been decreased.}}
{{History||1.11|snap=16w39a|Wheat can now be found in the new [[woodland mansion]] chests.}}
{{History||1.13|snap=17w47a|Prior to [[1.13/Flattening|''The Flattening'']], this [[item]]'s numeral ID was 296.}}
{{History|||snap=18w09a|Wheat can now generate in the chests of [[underwater ruins]].}}
{{History|||snap=18w11a|Wheat can now generate in [[shipwreck]] chests.}}
{{History||1.14|snap=18w43a|[[File:Wheat JE2 BE2.png|32px]] The texture of wheat has been changed.}}
{{History|||snap=18w47a|Wheat can now generate inside of loot chests on top of [[pillager outpost]]s.}}
{{History|||snap=18w49a|Wheat can now generate in chests in [[village]] butcher and shepherd houses.}}
{{History|||snap=18w50a|Wheat can now generate in chests in desert [[village]] houses.}}
{{History||1.14|snap=19w03a|Placing wheat into the new [[composter]] has a 50% chance of raising the compost level by 1.}}
{{History|||snap=19w05a|Wheat now has a 65% chance of increasing the compost level in a composter by 1.}}
{{History|||snap=19w07a|Added [[fox]]es, which sometimes spawn with wheat in their mouths.}}
{{History||1.17|snap=21w13a|Wheat can now be used to breed [[goat]]s.}}
{{History||1.19|snap=22w11a|Wheat can now be used to craft [[packed mud]].}}
{{History||1.20|snap=23w12a|Wheat can now be found in [[suspicious gravel]] and [[suspicious sand]] in cold and warm [[ocean ruins]] and in [[trail ruins]].}}
{{History|||snap=23w16a|Wheat no longer generates in [[suspicious sand]] in [[trail ruins]].|Due to the split of the archaeological loot tables for suspicious gravel within [[trail ruins]], wheat is now common loot.}}
{{History|pocket alpha}}
{{History||v0.2.0|[[File:Wheat JE1 BE1.png|32px]] Added wheat. It is currently unobtainable and serves no purpose.}}
{{History||v0.4.0|Wheat is now obtainable via farming and can be used to craft [[bread]].}}
{{History||v0.7.0|Wheat can now be used to craft [[cake]].}}
{{History||v0.8.0|snap=build 1|Wheat can now be used to breed [[cow]]s and [[sheep]].
|Wheat can now be used to craft [[hay bale]]s.}}
{{History||v0.9.0|snap=build 1|Wheat [[crop]]s now naturally spawn in [[village]]s.
|Wheat can now be used to craft [[cookie]]s.}}
{{History||v0.15.0|snap=build 1|Wheat can now be used to grow, increase tame and heal [[horse]]s, [[donkey]]s and [[mule]]s.}}
{{History||v0.16.2|Wheat can now be found in the [[chest]]s inside of large houses in [[ice plains]] and [[cold taiga]] [[village]]s.}}
{{History|pocket}}
{{History||1.0.0|snap=alpha 0.17.0.1|Wheat can now be found in [[igloo]] basement chests.}}
{{History||1.0.4|snap=alpha 1.0.4.0|Farmer [[villager]]s now [[trading|buy]] 18–22 wheat for 1 [[emerald]].}}
{{History||1.1.0|snap=alpha 1.1.0.0|Wheat can now be found in the new [[woodland mansion]] chests.}}
{{History|bedrock}}
{{History||1.4.0|snap=beta 1.2.14.2|Wheat can now be found inside [[shipwreck]] chests.}}
{{History|||snap=beta 1.2.20.1|Wheat can now be found inside [[underwater ruins]] chests.}}
{{History||1.10.0|snap=beta 1.10.0.3|Wheat can now be found in [[pillager outpost]] chests.
|[[File:Wheat JE2 BE2.png|32px]] The texture of wheat has been changed.}}
{{History||1.11.0|snap=beta 1.11.0.1|Wheat can now be found in [[desert]] [[village]] house chests, village shepherd and butcher house chests.
|Wheat can now be used to fill up [[composter]]s.}}
{{History|||snap=beta 1.11.0.4|[[Trading]] has changed, farmer [[villager]]s now have a 25% chance to buy 20 wheat for one [[emerald]] as part of their first tier trade.}}
{{History||1.13.0|snap=beta 1.13.0.1|Added [[fox]]es, which can drop wheat.}}
{{History|console}}
{{History||xbox=TU1|xbone=CU1|ps=1.0|wiiu=Patch 1|switch=1.0.1|[[File:Wheat JE1 BE1.png|32px]] Added wheat.}}
{{History||xbox=none|xbone=none|ps=1.90|wiiu=none|switch=none|[[File:Wheat JE2 BE2.png|32px]] The texture of wheat has been changed.}}
{{History|New 3DS}}
{{History||0.1.0|[[File:Wheat JE1 BE1.png|32px]] Added wheat.}}
{{History|foot}}
== Issues ==
{{issue list}}
== Gallery ==
<gallery>
Wheat SDGP.png|Wheat in the [[Super Duper Graphics Pack]].
File:Field of Wheat.jpg|[[Steve]] and [[Kai]] in a field of wheat crops.<ref>https://www.instagram.com/p/CumuJleg6Ij/</ref>
</gallery>
== External Links ==
*[https://www.minecraft.net/en-us/article/taking-inventory--wheat Taking Inventory: Wheat] – Minecraft.net on April 21, 2022
{{Items}}
[[Category:Plants]]
[[Category:Food]]
[[cs:Pšenice]]
[[de:Weizen]]
[[es:Trigo]]
[[fr:Blé]]
[[hu:Búza]]
[[it:Grano]]
[[ja:小麦]]
[[ko:밀]]
[[nl:Tarwe]]
[[pl:Pszenica]]
[[pt:Trigo]]
[[ru:Пшеница]]
[[th:ข้าวสาลี]]
[[uk:Пшениця]]
[[zh:小麦]]
[[Category:Renewable resources]]</li><li>[[Pumpkin Seeds|Pumpkin Seeds]]<br/>{{Block
| image = <gallery>
Pumpkin Stem Age 0.png | Age 0
Pumpkin Stem Age 1.png | Age 1
Pumpkin Stem Age 2.png | Age 2
Pumpkin Stem Age 3.png | Age 3
Pumpkin Stem Age 4.png | Age 4
Pumpkin Stem Age 5.png | Age 5
Pumpkin Stem Age 6.png | Age 6
Pumpkin Stem Age 7.png | Age 7
</gallery>
|image2 = <gallery>
Attached Pumpkin Stem (N).png | North
Attached Pumpkin Stem (E).png | East
Attached Pumpkin Stem (S).png | South
Attached Pumpkin Stem (W).png | West
</gallery>
| transparent = Yes
| light = No
| tool = none
| renewable = Yes
| stackable = Yes (64)
| flammable = No
| lavasusceptible = No
}}
'''Pumpkin seeds''' are items obtained from pumpkins that can be used to grow pumpkin stems.
'''Pumpkin stems''' are plants grown on [[farmland]] that, over time, grow [[pumpkin]]s on dirt, mud and moss blocks adjacent to them.
== Obtaining ==
=== Breaking ===
When broken, a pumpkin stem drops 0–3 pumpkin seeds. The chance for pumpkin seeds to drop increases with the stem's age.
{| class="wikitable"
! rowspan="3" |[[Resource location]]
! rowspan="3" | Source
! colspan="4" | Default
|-
| colspan="1" rowspan="2" style="text-align:center" | Nothing || colspan="3" style="text-align:center" |{{ItemLink|Pumpkin Seeds|Pumpkin seeds}}
|-
| style="text-align:center" | 1 || style="text-align:center" | 2 || style="text-align:center" | 3
|-
| rowspan="8" |<code>blocks/pumpkin_stem</code>
|{{BlockLink|Pumpkin Stem|Pumpkin stem}} <code>age = 0</code>
| style="text-align:center" |81.3%|| style="text-align:center" |17.42%|| style="text-align:center" |1.24%|| style="text-align:center" |0.03%
|-
|{{BlockLink|Pumpkin Stem|Pumpkin stem}} <code>age = 1</code>
| style="text-align:center" |65.1%|| style="text-align:center" |30.04%|| style="text-align:center" |4.62%|| style="text-align:center" |0.24%
|-
|{{BlockLink|Pumpkin Stem|Pumpkin stem}} <code>age = 2</code>
| style="text-align:center" |51.2%|| style="text-align:center" |38.4%|| style="text-align:center" |9.6%|| style="text-align:center" |0.8%
|-
|{{BlockLink|Pumpkin Stem|Pumpkin stem}} <code>age = 3</code>
| style="text-align:center" |39.44%|| style="text-align:center" |43.02%|| style="text-align:center" |15.64%|| style="text-align:center" |1.9%
|-
|{{BlockLink|Pumpkin Stem|Pumpkin stem}} <code>age = 4</code>
| style="text-align:center" |29.13%|| style="text-align:center" |44.44%|| style="text-align:center" |22.22%|| style="text-align:center" |3.7%
|-
|{{BlockLink|Pumpkin Stem|Pumpkin stem}} <code>age = 5</code>
| style="text-align:center" |21.6%|| style="text-align:center" |43.2%|| style="text-align:center" |28.8%|| style="text-align:center" |6.4%
|-
|{{BlockLink|Pumpkin Stem|Pumpkin stem}} <code>age = 6</code>
| style="text-align:center" |15.17%|| style="text-align:center" |39.82%|| style="text-align:center" |34.84%|| style="text-align:center" |10.16%
|-
|{{BlockLink|Pumpkin Stem|Pumpkin stem}} <code>age = 7</code>
| style="text-align:center" |10.16%|| style="text-align:center" |34.84%|| style="text-align:center" |39.82%|| style="text-align:center" |15.17%
|-
| rowspan="1" |<code>blocks/attached_pumpkin_stem</code>
|{{BlockLink|Attached Pumpkin Stem|Attached Pumpkin stem}}
| style="text-align:center" |10.16%|| style="text-align:center" |34.84%|| style="text-align:center" |39.82%|| style="text-align:center" |15.17%
|}
=== Natural generation ===
Pumpkin stems generate naturally in stem farm rooms in [[woodland mansion]]s.
Pumpkin stems generate in [[taiga]] and [[snowy taiga]]{{only|be|short=1}} [[village]] farms.
=== Chest loot ===
{{LootChestItem|pumpkin-seeds}}
=== Crafting ===
{{Crafting
|Pumpkin
|Output= Pumpkin Seeds,4
|type= Material
}}
=== Trading ===
[[Wandering trader]]s sell pumpkin seeds for 1 [[emerald]].
=== Post-generation ===
Shearing an uncarved pumpkin yields 4 pumpkin seeds.
== Usage ==
=== Farming ===
{{see also|Tutorials/Pumpkin and melon farming}}
Pumpkin seeds can be planted only on [[farmland]], as stems. Over time, a stem grows through several stages{{Needs testing}} and, at its final growth stage, will produce [[pumpkin]]s on any adjacent [[dirt]], [[Coarse Dirt|coarse dirt]], [[Rooted Dirt|rooted dirt]], [[Grass Block|grass block]], [[farmland]], [[podzol]], [[mycelium]], [[Moss Block|moss block]], [[mud]] or [[Muddy Mangrove Roots|muddy mangrove roots]]. If a pumpkin is already occupying a spot adjacent to a stem it does not grow more pumpkins until the pumpkin is removed. A single stem can grow an unlimited number of pumpkins. Pumpkin stems need a minimum light level of 10 in the block above the stem to grow and give pumpkins. Pumpkin seeds are affected by [[bone meal]] only with respect to stem growth; bone meal does not help produce the actual pumpkins.
=== Breeding ===
Like other seeds, pumpkin seeds can be used to [[breed]] [[chicken]]s, lead chickens around, and make baby chickens grow up faster by 10% of the remaining time.
=== Taming ===
Like other seeds, pumpkin seeds can be used to tame [[parrot]]s.
=== Composting ===
Placing pumpkin seeds into a [[composter]] has a 30% chance of raising the compost level by 1.
== Pumpkin stem ==
A '''pumpkin stem''' is the block that is planted on [[farmland]] when pumpkin seeds are used on it. It starts underground, and rises up as the plant grows. The stem is colored green when young, and then yellow once fully grown.
The stem curves once a pumpkin has grown from it. A fully-grown single stem connects to any [[pumpkin]] in an adjacent square, thus there are 5 possible appearances to a stem. If there are multiple pumpkins it can connect to, it favors the east, then west, north, and south. When the pumpkin is removed, the stem returns to its straight shape.
== Sounds ==
{{Sound table/Block/Hard crop}}
== Data values ==
=== ID ===
{{edition|java}}:
{{ID table
|edition=java
|showblocktags=y
|showforms=y
|generatetranslationkeys=y
|displayname=Pumpkin Stem
|spritetype=block
|nameid=pumpkin_stem
|blocktags=bee_growables, crops
|form=block}}
{{ID table
|displayname=Attached Pumpkin Stem
|spritetype=block
|nameid=attached_pumpkin_stem
|form=block}}
{{ID table
|displayname=Pumpkin Seeds
|spritetype=item
|nameid=pumpkin_seeds
|form=item
|foot=1}}
{{edition|bedrock}}:
{{ID table
|edition=bedrock
|shownumericids=y
|showforms=y
|generatetranslationkeys=y
|displayname=Pumpkin Stem
|spritetype=block
|nameid=pumpkin_stem
|id=104
|form=block}}
{{ID table
|displayname=Pumpkin Seeds
|spritetype=item
|nameid=pumpkin_seeds
|id=292
|form=item
|foot=1}}
=== Block states ===
{{see also|Block states}}
{{/BS}}
== Advancements ==
{{load advancements|A Seedy Place}}
== History ==
{{info needed section|check if stems floated above farmland upon initial implementation}}
{{History|java beta}}
{{History||1.8|snap=Pre-release|[[File:Pumpkin Seeds JE1 BE1.png|32px]] Added pumpkin seeds.
|[[File:Pumpkin Stem Age 0 JE1.png|32px]] [[File:Pumpkin Stem Age 1 JE1.png|32px]] [[File:Pumpkin Stem Age 2 JE1.png|32px]] [[File:Pumpkin Stem Age 3 JE1.png|32px]] [[File:Pumpkin Stem Age 4 JE1.png|32px]] [[File:Pumpkin Stem Age 5 JE1.png|32px]] [[File:Pumpkin Stem Age 6 JE1.png|32px]] [[File:Pumpkin Stem Age 7 JE1.png|32px]] Added the pumpkin stem, with seven stages of growth.
|Pumpkin seeds can be found in the new [[mineshaft]] [[chest]]s.
|[[File:Attached Pumpkin Stem (N) JE1.png|32px]] [[File:Attached Pumpkin Stem (E) JE1.png|32px]] [[File:Attached Pumpkin Stem (S) JE1.png|32px]] [[File:Attached Pumpkin Stem (W) JE1.png|32px]] The pumpkin stem has four slightly visually distinct appearances for each facing direction - the bent part of the stem rotates, but the other two planes do not.
|[[File:Pumpkin Stem Age 8 JE1.png|32px]] [[File:Pumpkin Stem Age 9 JE1.png|32px]] [[File:Pumpkin Stem Age 10 JE1.png|32px]] [[File:Pumpkin Stem Age 11 JE1.png|32px]] [[File:Pumpkin Stem Age 12 JE1.png|32px]] [[File:Pumpkin Stem Age 13 JE1.png|32px]] [[File:Pumpkin Stem Age 14 JE1.png|32px]] [[File:Pumpkin Stem Age 15 JE1.png|32px]] Pumpkin stem data values from 8 through 15 now show a glitched formation, with a floating stem with an attached stem cross eventually emerging below.
|[[File:Attached Stem Age 8 JE1.png|32px]] [[File:Attached Stem Age 9 JE1.png|32px]] [[File:Attached Stem Age 10 JE1.png|32px]] [[File:Attached Stem Age 11 JE1.png|32px]] [[File:Attached Stem Age 12 JE1.png|32px]] [[File:Attached Stem Age 13 JE1.png|32px]] [[File:Attached Stem Age 14 JE1.png|32px]] [[File:Attached Stem Age 15 JE1.png|32px]] Pumpkin stem blocks with data values higher than 7 can attach to adjacent fruits, which results in buggy stem textures with [[vines]] in the mix due to vines being below attached stems in [[terrain.png]].}}
{{History|||snap=Pre-release 2 ;)|Pumpkin stems can now be grown faster using [[bone meal]].}}
{{History|java}}
{{History||1.0.0|snap=Beta 1.9 Prerelease 2|Pumpkins can now be [[crafting|crafted]] into [[pumpkin seeds]].}}
{{History||1.3.1|snap=1.3|The texture of pumpkin stems has been moved one pixel to the left in [[terrain.png]].
|[[File:Pumpkin Stem Age 0 JE2.png|32px]] [[File:Pumpkin Stem Age 1 JE2.png|32px]] [[File:Pumpkin Stem Age 2 JE2.png|32px]] [[File:Pumpkin Stem Age 3 JE2.png|32px]] [[File:Pumpkin Stem Age 4 JE2.png|32px]] [[File:Pumpkin Stem Age 5 JE2.png|32px]] [[File:Pumpkin Stem Age 6 JE2.png|32px]] [[File:Pumpkin Stem Age 7 JE2.png|32px]] Stems now appear slightly different.
|[[File:Pumpkin Stem Age 8 JE2.png|32px]] [[File:Pumpkin Stem Age 9 JE2.png|32px]] [[File:Pumpkin Stem Age 10 JE2.png|32px]] [[File:Pumpkin Stem Age 11 JE2.png|32px]] [[File:Pumpkin Stem Age 12 JE2.png|32px]] [[File:Pumpkin Stem Age 13 JE2.png|32px]] [[File:Pumpkin Stem Age 14 JE2.png|32px]] [[File:Pumpkin Stem Age 15 JE2.png|32px]] Overgrown attached pumpkin stems now appear slightly different.
|[[File:Attached Pumpkin Stem (N) JE2.png|32px]] [[File:Attached Pumpkin Stem (E) JE2.png|32px]] [[File:Attached Pumpkin Stem (S) JE2.png|32px]] [[File:Attached Pumpkin Stem (W) JE2.png|32px]] Attached pumpkin stems now appear slightly different.
|[[File:Attached Stem Age 8 JE2.png|32px]] [[File:Attached Stem Age 9 JE2.png|32px]] [[File:Attached Stem Age 10 JE2.png|32px]] [[File:Attached Stem Age 11 JE2.png|32px]] [[File:Attached Stem Age 12 JE2.png|32px]] [[File:Attached Stem Age 13 JE2.png|32px]] [[File:Attached Stem Age 14 JE2.png|32px]] [[File:Attached Stem Age 15 JE2.png|32px]] Overgrown attached pumpkin stems now appear slightly different.}}
{{History||1.4.2|snap=12w36a|[[Chicken]]s now use [[wheat seeds]], [[melon seeds]] and pumpkin seeds, instead of [[wheat]] to [[breeding|breed]].}}
{{History||1.5|snap=13w02a|[[File:Pumpkin Stem Age 0 JE3.png|32px]] [[File:Pumpkin Stem Age 1 JE3.png|32px]] [[File:Pumpkin Stem Age 2 JE3.png|32px]] [[File:Pumpkin Stem Age 3 JE3.png|32px]] [[File:Pumpkin Stem Age 4 JE3.png|32px]] [[File:Pumpkin Stem Age 5 JE3.png|32px]] [[File:Pumpkin Stem Age 6 JE3.png|32px]] Pumpkin stems now use a squished version of their texture for immature stems, depending on age.
|[[File:Pumpkin Stem Age 8 JE3.png|32px]] [[File:Pumpkin Stem Age 9 JE3.png|32px]] [[File:Pumpkin Stem Age 10 JE3.png|32px]] [[File:Pumpkin Stem Age 11 JE3.png|32px]] [[File:Pumpkin Stem Age 12 JE3.png|32px]] [[File:Pumpkin Stem Age 13 JE3.png|32px]] [[File:Pumpkin Stem Age 14 JE3.png|32px]] [[File:Pumpkin Stem Age 15 JE3.png|32px]] This also affects pumpkin stems of ages 8-15, which are likewise stretched to accommodate its predicted size.
|[[File:Attached Stem Age 8 JE3.png|32px]] [[File:Attached Stem Age 9 JE3.png|32px]] [[File:Attached Stem Age 10 JE3.png|32px]] [[File:Attached Stem Age 11 JE3.png|32px]] [[File:Attached Stem Age 12 JE3.png|32px]] [[File:Attached Stem Age 13 JE3.png|32px]] [[File:Attached Stem Age 14 JE3.png|32px]] [[File:Attached Stem Age 15 JE3.png|32px]] Pumpkin stems of extreme ages, which are attached to adjacent fruits, now show a stretched and tinted stem appearance.}}
{{History|||snap=13w03a|[[File:Pumpkin Stem Age 0 JE4.png|32px]] [[File:Pumpkin Stem Age 1 JE4.png|32px]] [[File:Pumpkin Stem Age 2 JE4.png|32px]] [[File:Pumpkin Stem Age 3 JE4.png|32px]] [[File:Pumpkin Stem Age 4 JE4.png|32px]] [[File:Pumpkin Stem Age 5 JE4.png|32px]] [[File:Pumpkin Stem Age 6 JE4.png|32px]] [[File:Pumpkin Stem Age 7 JE4.png|32px]] Pumpkin stems are no longer squished or stretched to account for age.<ref>{{bug|MC-7111}}</ref>
|[[File:Pumpkin Stem Age 8 JE4.png|32px]] [[File:Pumpkin Stem Age 9 JE4.png|32px]] [[File:Pumpkin Stem Age 10 JE4.png|32px]] [[File:Pumpkin Stem Age 11 JE4.png|32px]] [[File:Pumpkin Stem Age 12 JE4.png|32px]] [[File:Pumpkin Stem Age 13 JE4.png|32px]] [[File:Pumpkin Stem Age 14 JE4.png|32px]] [[File:Pumpkin Stem Age 15 JE4.png|32px]] Pumpkin stems with age values 8 through 15 now show a tinted [[trapdoor]] texture.
|From this version up until 14w08a, overgrown pumpkin stems start to draw from the texture below them on the [[texture atlas]], in much the same way they previously did with terrain.png. However, as texture atlases are unstable and textures tend to change positions as new blocks and textures are added, overgrown stems change the texture they draw from every time new textures are added, which includes when textures added by [[mods]].}}
{{History|||snap=13w09a|[[File:Pumpkin Stem Age 8 JE5.png|32px]] [[File:Pumpkin Stem Age 9 JE5.png|32px]] [[File:Pumpkin Stem Age 10 JE5.png|32px]] [[File:Pumpkin Stem Age 11 JE5.png|32px]] [[File:Pumpkin Stem Age 12 JE5.png|32px]] [[File:Pumpkin Stem Age 13 JE5.png|32px]] [[File:Pumpkin Stem Age 14 JE5.png|32px]] [[File:Pumpkin Stem Age 15 JE5.png|32px]] Pumpkin stems with age values 8 through 15 now show a tinted [[birch wood]] texture.}}
{{History||1.6.1|snap=13w24a|Melon and pumpkin stems have now been assigned separate textures.
|[[File:Pumpkin Stem Age 8 JE6.png|32px]] [[File:Pumpkin Stem Age 9 JE6.png|32px]] [[File:Pumpkin Stem Age 10 JE6.png|32px]] [[File:Pumpkin Stem Age 11 JE6.png|32px]] [[File:Pumpkin Stem Age 12 JE6.png|32px]] [[File:Pumpkin Stem Age 13 JE6.png|32px]] [[File:Pumpkin Stem Age 14 JE6.png|32px]] [[File:Pumpkin Stem Age 15 JE6.png|32px]] Pumpkin stems with age values 8 through 15 now show a tinted curving [[rail]] texture.}}
{{History||1.7.2|snap=13w37a|Added the {{cmd|setblock}} command, allowing for invalid pumpkin stem ages to be placed in the world without using external editors. This also allows them to be obtained in earlier versions via backdating.}}
{{History|||snap=13w41a|[[File:Pumpkin Stem Age 8 JE7.png|32px]] [[File:Pumpkin Stem Age 9 JE7.png|32px]] [[File:Pumpkin Stem Age 10 JE7.png|32px]] [[File:Pumpkin Stem Age 11 JE7.png|32px]] [[File:Pumpkin Stem Age 12 JE7.png|32px]] [[File:Pumpkin Stem Age 13 JE7.png|32px]] [[File:Pumpkin Stem Age 14 JE7.png|32px]] [[File:Pumpkin Stem Age 15 JE7.png|32px]] Pumpkin stems with age values 8 through 15 now show a tinted lit [[furnace]] texture.}}
{{History|||snap=13w43a|[[File:Pumpkin Stem Age 8 JE8.png|32px]] [[File:Pumpkin Stem Age 9 JE8.png|32px]] [[File:Pumpkin Stem Age 10 JE8.png|32px]] [[File:Pumpkin Stem Age 11 JE8.png|32px]] [[File:Pumpkin Stem Age 12 JE8.png|32px]] [[File:Pumpkin Stem Age 13 JE8.png|32px]] [[File:Pumpkin Stem Age 14 JE8.png|32px]] [[File:Pumpkin Stem Age 15 JE8.png|32px]] Pumpkin stems with age values 8 through 15 now show a tinted [[pumpkin]] top texture.}}
{{History||1.8|snap=14w10a|[[File:Pumpkin Stem Age 8 JE9.png|32px]] [[File:Pumpkin Stem Age 9 JE9.png|32px]] [[File:Pumpkin Stem Age 10 JE9.png|32px]] [[File:Pumpkin Stem Age 11 JE9.png|32px]] Pumpkin stems with data values 8-11 now display a tinted attached stem, with 8 facing west, 9 facing east, 10 facing north and 11 facing south.
|Invalid pumpkin stems with data values 12-15 now crash the game.}}
{{History|||snap=14w25a|[[File:Pumpkin Stem Age 0 JE5.png|32px]] [[File:Pumpkin Stem Age 1 JE5.png|32px]] [[File:Pumpkin Stem Age 2 JE5.png|32px]] [[File:Pumpkin Stem Age 3 JE5.png|32px]] [[File:Pumpkin Stem Age 4 JE5.png|32px]] [[File:Pumpkin Stem Age 5 JE5.png|32px]] [[File:Pumpkin Stem Age 6 JE5.png|32px]] [[File:Pumpkin Stem Age 7 JE5.png|32px]] Pumpkin stems now render as a single diagonal plane, or, in the case of attached stems, a diagonal and orthogonal plane.
|[[File:Attached Pumpkin Stem (N) JE3.png|32px]] [[File:Attached Pumpkin Stem (E) JE3.png|32px]] [[File:Attached Pumpkin Stem (S) JE3.png|32px]] [[File:Attached Pumpkin Stem (W) JE3.png|32px]] The attached pumpkin stem [[model]] now fully rotates to the direction the stem points. Prior to this update, the base of the pumpkin stem would stay the same while the long attaching section would differ, resulting in four possible attached stem appearances.
|Invalid overgrown pumpkin stems have now effectively been removed from the game, as attempting to place an out of range stem via {{cmd|setblock}} creates a stem of age 0 and loading a world with existing such stems cause a game crash.}}
{{History|||snap=14w26a|[[File:Pumpkin Stem Age 0 JE6.png|32px]] [[File:Pumpkin Stem Age 1 JE6.png|32px]] [[File:Pumpkin Stem Age 2 JE6.png|32px]] [[File:Pumpkin Stem Age 3 JE6.png|32px]] [[File:Pumpkin Stem Age 4 JE6.png|32px]] [[File:Pumpkin Stem Age 5 JE6.png|32px]] [[File:Pumpkin Stem Age 6 JE6.png|32px]] [[File:Pumpkin Stem Age 7 JE6.png|32px]] [[File:Attached Pumpkin Stem (N) JE4.png|32px]] [[File:Attached Pumpkin Stem (E) JE4.png|32px]] [[File:Attached Pumpkin Stem (S) JE4.png|32px]] [[File:Attached Pumpkin Stem (W) JE4.png|32px]] Pumpkin stems now correctly render as crosses again.<ref>{{bug|MC-58136}}</ref>}}
{{History|||snap=14w27a|[[File:Attached Stem Age 0 14w27a.png|32px]] [[File:Attached Stem Age 1 14w27a.png|32px]] [[File:Attached Stem Age 2 14w27a.png|32px]] [[File:Attached Stem Age 3 14w27a.png|32px]] [[File:Attached Stem Age 4 14w27a.png|32px]] [[File:Attached Stem Age 5 14w27a.png|32px]] [[File:Attached Stem Age 6 14w27a.png|32px]] Due to a bug, all pumpkin stems now appear attached regardless of age or any actual attachment.<ref>{{bug|MC-60208}}</ref>}}
{{History|||snap=14w28a|All pumpkin stems appearing attached regardless of the age of any actual attachment has been fixed. However, pumpkin stems still appear attached to adjacent fruits regardless of age due to a similar bug.<ref>{{bug|MC-61716}}</ref>}}
{{History|||snap=14w34d|Pumpkin seeds no longer can be used to breed [[chicken]]s.}}
{{History||1.9|snap=15w31a|Chickens can now use pumpkin seeds to [[breeding|breed]] again.}}
{{History|||snap=15w44a|Pumpkin seeds have been added to [[dungeon]] [[chest]]s.
|The average yield of pumpkin seeds in [[mineshaft]] chests has been decreased.}}
{{History|||snap=15w45a|Pumpkin stems must now be fully grown again to attach.}}
{{History||1.11|snap=16w39a|Pumpkin seeds are now found in the new [[woodland mansion]] chests.
|Pumpkin stems now generate inside [[woodland mansion]]s.}}
{{History||1.13|snap=17w47a|The different [[block]] states for the <code>pumpkin_stem</code> ID have been split up into their own IDs.
|Pumpkin seeds can now be obtained by [[shear]]ing an uncarved pumpkin.
|Prior to [[1.13/Flattening|''The Flattening'']], this [[block]]'s numeral ID was 104, and the [[item]]'s 361.}}
{{History|||snap=17w48a|Attached pumpkin stems no longer [[drops|drop]] seeds.}}
{{History||1.14|snap=18w43a|[[File:Pumpkin Stem Age 0 JE7.png|32px]] [[File:Pumpkin Stem Age 1 JE7.png|32px]] [[File:Pumpkin Stem Age 2 JE7.png|32px]] [[File:Pumpkin Stem Age 3 JE7.png|32px]] [[File:Pumpkin Stem Age 4 JE7.png|32px]] [[File:Pumpkin Stem Age 5 JE7.png|32px]] [[File:Pumpkin Stem Age 6 JE7.png|32px]] [[File:Pumpkin Stem Age 7 JE7.png|32px]] The stem texture has changed.
|[[File:Attached Pumpkin Stem (N) JE5.png|32px]] [[File:Attached Pumpkin Stem (E) JE5.png|32px]] [[File:Attached Pumpkin Stem (S) JE5.png|32px]] [[File:Attached Pumpkin Stem (W) JE5.png|32px]] The pumpkin stem texture change also affects the base cross on pumpkin stems.}}
{{History|||snap=18w50a|Pumpkin stems now generate in the updated [[taiga]] [[village]] farms.
|Pumpkin seeds can now be found in [[chest]]s in taiga village houses.}}
{{History|||snap=19w03a|Placing pumpkin seeds into the new [[composter]] has a 10% chance of raising the compost level by 1.}}
{{History|||snap=19w05a|Pumpkin seeds now have a 30% chance of increasing the compost level in a composter by 1.
|Added [[Wandering Trader|wandering trader]]s, which sell pumpkin seeds.}}
{{History||1.15|snap=19w34a|[[Bee]]s can now pollinate pumpkin stems.}}
{{History|||snap=19w39a|Attached pumpkin stems now [[drops|drop]] seeds again.<ref>{{bug|MC-136360}}</ref>}}
{{History|pocket alpha}}
{{History||v0.8.0|snap=build 1|[[File:Pumpkin Seeds JE1 BE1.png|32px]] Added pumpkin seeds.
|[[File:Pumpkin Stem Age 0 JE1.png|32px]] [[File:Pumpkin Stem Age 1 JE1.png|32px]] [[File:Pumpkin Stem Age 2 JE1.png|32px]] [[File:Pumpkin Stem Age 3 JE1.png|32px]] [[File:Pumpkin Stem Age 4 JE1.png|32px]] [[File:Pumpkin Stem Age 5 JE1.png|32px]] [[File:Pumpkin Stem Age 6 JE1.png|32px]] [[File:Pumpkin Stem Age 7 JE1.png|32px]] [[File:Attached Pumpkin Stem (N) JE1.png|32px]] [[File:Attached Pumpkin Stem (E) JE1.png|32px]] [[File:Attached Pumpkin Stem (S) JE1.png|32px]] [[File:Attached Pumpkin Stem (W) JE1.png|32px]]{{verify|Were these the models used by this edition?}} Added pumpkin stems.
|Pumpkin seeds are obtainable from the [[Nether reactor]].}}
{{History||v0.12.1|snap=build 1|Pumpkin seeds are no longer available from the Nether reactor.}}
{{History||v0.14.0|snap=build 1|Pumpkin seeds can now be found in [[minecart with chest]]s inside [[mineshaft]]s.}}
{{History|pocket}}
{{History||1.1.0|snap=alpha 1.1.0.0|Pumpkin stems now generate inside [[woodland mansion]]s.}}
{{History|bedrock}}
{{History||1.2.0|snap=beta 1.2.0.2|Pumpkin seeds are now used to tame [[parrot]]s.}}
{{History||1.4.0|snap=beta 1.2.13.8|Pumpkin seeds can now be obtained by [[shear]]ing an uncarved [[pumpkin]].}}
{{History||1.10.0|snap=beta 1.10.0.3|[[File:Attached Pumpkin Stem (W) JE5.png|32px]]{{info needed|More accurate image}} The texture of attached pumpkin stems has been changed.
|Pumpkin seeds can now be [[trading|bought]] from [[wandering trader]]s.
|A single pumpkin crop now generates in the new [[taiga]] and [[snowy taiga]] [[village]]s.}}
{{History||1.11.0|snap=beta 1.11.0.1|A single pumpkin seed can now be used to fill the [[composter]].
|Pumpkin seeds can now be found in [[taiga]] and [[snowy taiga]] [[village]] house [[chest]]s.}}
{{History|console}}
{{History||xbox=TU5|xbone=CU1|ps=1.0|wiiu=Patch 1|[[File:Pumpkin Seeds JE1 BE1.png|32px]] Added pumpkin seeds.
|[[File:Pumpkin Stem Age 0 JE1.png|32px]] [[File:Pumpkin Stem Age 1 JE1.png|32px]] [[File:Pumpkin Stem Age 2 JE1.png|32px]] [[File:Pumpkin Stem Age 3 JE1.png|32px]] [[File:Pumpkin Stem Age 4 JE1.png|32px]] [[File:Pumpkin Stem Age 5 JE1.png|32px]] [[File:Pumpkin Stem Age 6 JE1.png|32px]] [[File:Pumpkin Stem Age 7 JE1.png|32px]] [[File:Attached Pumpkin Stem (N) JE1.png|32px]] [[File:Attached Pumpkin Stem (E) JE1.png|32px]] [[File:Attached Pumpkin Stem (S) JE1.png|32px]] [[File:Attached Pumpkin Stem (W) JE1.png|32px]]{{verify|Were these the models used by this edition?}} Added pumpkin stems.}}
{{History||xbox=TU69|ps=1.76|wiiu=Patch 38|Pumpkin seeds can now be obtained by [[shear]]ing an uncarved [[pumpkin]].}}
{{History||xbox=none|xbone=none|ps=1.90|wiiu=none|switch=none|[[File:Attached Pumpkin Stem (W) JE5.png|32px]]{{info needed|More accurate image}} The texture of attached pumpkin stems has been changed.}}
{{History|New 3DS}}
{{History||0.1.0|[[File:Pumpkin Stem Age 0 JE1.png|32px]] [[File:Pumpkin Stem Age 1 JE1.png|32px]] [[File:Pumpkin Stem Age 2 JE1.png|32px]] [[File:Pumpkin Stem Age 3 JE1.png|32px]] [[File:Pumpkin Stem Age 4 JE1.png|32px]] [[File:Pumpkin Stem Age 5 JE1.png|32px]] [[File:Pumpkin Stem Age 6 JE1.png|32px]] [[File:Pumpkin Stem Age 7 JE1.png|32px]] [[File:Attached Pumpkin Stem (N) JE1.png|32px]] [[File:Attached Pumpkin Stem (E) JE1.png|32px]] [[File:Attached Pumpkin Stem (S) JE1.png|32px]] [[File:Attached Pumpkin Stem (W) JE1.png|32px]]{{verify|Were these the models used by this edition?}} Added pumpkin stems.}}
{{History|foot}}
<gallery>
Pumpkin Stem with data value 15.png|The final version of the pumpkin stem with age 15, as seen in-game.
Pumpkinstems.png|Pumpkin stems of ages 1 to 15 on a modded version of [[Java Edition 1.7.2|1.7.2]], hence the nearby melon stems using the melon top texture.
Stems of 13w02a.png|All 16 stem sizes in [[Java Edition 13w02a|13w02a]], with accompanying data values.
</gallery>
=== Pumpkin stem "item" ===
{{:Technical blocks/Pumpkin Stem}}
== Issues ==
{{issue list}}
== Gallery ==
<gallery>
Stem All Ages.png|All stages of growth.
AllSeeds.png|All the [[seeds]] that exist in the game.
</gallery>
== References ==
{{reflist}}
{{Blocks|vegetation}}
{{Items}}
[[Category:Plants]]
[[Category:Food]]
[[Category:Non-solid blocks]]
[[Category:Generated structure blocks]]
[[cs:Dýňová semínka]]
[[de:Kürbiskerne]]
[[es:Semillas de calabaza]]
[[fr:Graines de citrouille]]
[[hu:Tökmagok]]
[[ja:カボチャの種]]
[[ko:호박씨]]
[[nl:Pompoenpitten]]
[[pl:Nasiona dyni]]
[[pt:Sementes de abóbora]]
[[ru:Семена тыквы]]
[[th:เมล็ดฝักทอง]]
[[zh:南瓜种子]]</li></ul> | Creepers become charged when struck by lightning, increasing the explosion's radius and strength. | ||||
1.8{{Extension DPL}}<ul><li>[[Torchflower Seeds|Torchflower Seeds]]<br/>{{wip}}
{{Block
| image = <gallery>
Torchflower Age 0.png| Age 0
Torchflower Age 1.png| Age 1
Torchflower Age 2.png| Age 2
</gallery>
| image2 = Torchflower Seeds JE1.png
| transparent = Yes
| light = No
| tool = N/A
| renewable = Yes
| stackable = Yes (64)
| rarity = Common
|flammable=No
|lavasusceptible=No
}}
'''Torchflower seeds''' are seeds that have a chance to be dropped by [[Sniffer|sniffers]] when they finish digging.
== Obtaining ==
[[Sniffer]]s will occasionally bury their nose in the ground and start digging. Once the sniffer has finished digging, one torchflower seed will have a chance to be dropped on the floor as an item.
Sniffers can only dig for torchflower seeds in the following blocks:
*{{BlockLink|Dirt}}
*{{BlockLink|Grass Block}}
*{{BlockLink|Podzol}}
*{{BlockLink|Coarse Dirt}}
*{{BlockLink|Rooted Dirt}}
*{{BlockLink|Moss Block}}
*{{BlockLink|Mud}}
*{{BlockLink|Muddy Mangrove Roots}}
They cannot dig for torchflower seeds on [[mycelium]], which is intended.<ref>{{bug|MC-260259||Sniffers cannot dig nor find seeds on mycelium|WAI}}</ref>
== Usage ==
=== Crop ===
{{main|Tutorials/Crop farming|title1=Crop farming}}
Torchflower seeds can be {{control|placed}} on [[farmland]], where they grow through three stages. Breaking the torchflower crop before it matures drops the seed, while breaking the final stage produces one [[torchflower]] and does not yield the seed.
Crops break if pushed by a [[piston]] or if their supporting farmland breaks or turns to dirt (i.e. by being trampled), dropping their usual drops.
Farmer [[villager]]s can plant torchflower seeds, but cannot harvest them after they have fully grown.<ref>{{bug|MC-263382|||WAI}}</ref>
=== Feeding ===
Torchflower seeds can be used to breed [[sniffer]]s and [[chicken]]s and reduce the remaining growth duration of snifflets and chicks by 10%. Also, if some torchflower seeds were fed to an injured sniffer, it will heal it by {{hp|2}} health points.
=== Taming ===
Torchflower seeds can be used to tame [[parrot]]s.
=== Composting ===
Placing torchflower seeds into a [[composter]] has a 30% chance of raising the compost level by 1.
== Sounds ==
{{Sound table/Block/Crop}}
== Data values ==
=== ID ===
{{edition|java}}:
{{ID table
|edition=java
|showblocktags=y
|showitemtags=y
|showforms=y
|generatetranslationkeys=y
|displayname=Torchflower Crop
|spritetype=block
|nameid=torchflower_crop
|form=block
|blocktags=bee_growables, crops}}
{{ID table
|displayname=Torchflower Seeds
|spritetype=item
|nameid=torchflower_seeds
|form=item
|itemtags=villager_plantable_seeds
|foot=1}}
{{edition|bedrock}}:
{{ID table
|edition=bedrock
|shownumericids=y
|showforms=y
|generatetranslationkeys=y
|displayname=Torchflower Crop
|spritetype=block
|nameid=torchflower_crop
|id=-567
|form=block
|translationkey=-}}
{{ID table
|displayname=Torchflower Seeds
|spritetype=item
|nameid=torchflower_seeds
|id=296
|form=item
|foot=1}}
=== Block states ===
{{see also|Block states}}
{{/BS}}
== Achievements ==
{{Load achievements|Planting The Past}}
== Advancements ==
{{load advancements|A Seedy Place;Planting The Past;Little Sniffs}}
== History ==
{{History|java}}
{{History||1.20<br>(Experimental)|link=1.19.4|snap=23w07a|[[File:Torchflower Seeds JE1.png|32px]] Added torchflower seeds behind the [[Java Edition 1.20|Update 1.20 experimental datapack]].}}
{{History|||snap=1.19.4 Pre-release 1|Torchflower seeds can now be used to breed [[chicken]]s and tame [[parrot]]s.<ref>{{bug|MC-260035|||Fixed}}</ref>|Torchflower seeds are now next to other seeds in the [[Creative inventory]].|Placing torchflower seeds in farmland now gives the player the "A Seedy Place" [[advancement]].}}
{{History||1.20|snap=23w12a|[[Sniffer]]s can now be obtained in Survival, making torchflower seeds [[renewable]].|Torchflower seeds are now available without using the "Update 1.20" experimental datapack.}}
{{History|||snap=23w14a|Torchflower seeds can now be picked up by farmer [[villager]]s.|[[Sniffer]]s can now be tempted with torchflower seeds.}}
{{History|||snap=23w16a|[[Villager]]s can now plant torchflower seeds.}}
{{History|||snap=23w17a|The player now get the [[advancement]] "Little sniffs" when they feed a [[snifflet]] using torchflower seeds, "Planting the past" when they plant torchflower seeds on [[farmland]].}}
{{History|bedrock}}
{{History||Sniffer<br>(Experimental)|link=Bedrock Edition 1.19.70|snap=beta 1.19.70.23|[[File:Torchflower Seeds JE1.png|32px]] Added torchflower seeds behind the "[[Bedrock Edition 1.20.0|Sniffer]]" [[experimental]] toggle.}}
{{History||1.20.0|snap=beta 1.20.0.20|Torchflower seeds are now available without using the "Sniffer" experimental toggle.}}
{{History|foot}}
== Issues ==
{{issue list}}
== Trivia ==
* The final growth stage of the torchflower crop uses the same ID as the actual torchflower. This causes some side effects, such as the plant becoming offset and randomly jumping to the side.<ref>{{bug|MC-260472|resolution=wai}}</ref>
== Gallery ==
<gallery>
Torchflower Seeds stages.png|All the growth stages of torchflower seeds.
</gallery>
== Notes ==
{{notelist}}
== References ==
{{reflist}}
{{Blocks|upcoming}}
{{Items}}
[[Category:Plants]]
[[Category:Non-solid blocks]]
[[de:Fackelliliensamen]]
[[es:Semillas de plantorcha]]
[[ja:トーチフラワーの種]]
[[pt:Sementes de plantocha]]
[[zh:火把莲种子]]</li><li>[[Carrot|Carrot]]<br/>{{about|the natural food item|the golden food|Golden Carrot|the item for controlling saddled pigs|Carrot on a Stick}}
{{Item
| group = Age 0-1
| 1-1 = Carrots Age 0-1.png
| 1-2 = Carrots Age 0-1 BE.png
| group2 = Age 2-3
| 2-1 = Carrots Age 2-3.png
| 2-2 = Carrots Age 2-3 BE.png
| group3 = Age 4-6
| 3-1 = Carrots Age 4-6.png
| 3-2 = Carrots Age 4-6 BE.png
| group4 = Age 7
| 4-1 = Carrots Age 7.png
| 4-2 = Carrots Age 7 BE.png
| image2 = Carrot JE3 BE2.png
| renewable = Yes
| heals = {{hunger|3}}
| stackable = Yes (64)
}}
A '''carrot''' is a [[food]] [[item]] obtained from carrot crops that can be used to plant them, eaten or used as a crafting ingredient.
'''Carrot crops''' are planted in [[farmland]] and used to grow carrots.
== Obtaining ==
=== Breaking ===
{{See also|Fortune#Seeds}}
Fully grown carrot crops drop 2 to 5 carrots ({{frac|3|5|7}} per crop harvested on average). Yield can be increased using a tool enchanted with [[Fortune]], with Fortune III harvesting an average of {{frac|5|3|7}} carrots.
The yield is calculated by a binomial distribution: 2 drops are fixed, then a drop is attempted three times with a success rate of 57.14286% to yield the extra 0–3 drops. Each level of Fortune enchantment increases the number of attempts by one.
=== Natural generation ===
[[Village]] farm plots have a chance of having carrots. The exact chance depends on the style of the village:
{| class="wikitable"
! Village style !! Chance
|-
| {{EnvSprite|plains-village}} Plains || 30%
|-
| {{EnvSprite|snowy-village}} Snowy || 10%
|}
=== Mob loot ===
[[Zombie]]s, [[husk]]s, and [[zombie villager]]s have a 2.5% ({{frac|1|40}}) chance of dropping either an [[iron ingot]], carrot, or [[potato]] when killed by a player or tamed wolf. This is increased by 1% ({{frac|1|100}}) per level of looting. This gives carrots the following chances of dropping:
* {{frac|1|120}} (about 0.83%)
* {{frac|7|600}} (about 1.17%) with Looting I
* {{frac|9|600}} (about 1.50%) with Looting II
* {{frac|11|600}} (about 1.83%) with Looting III
=== Chest loot ===
{{LootChestItem|carrot}}
== Usage ==
{{see also|Tutorials/Hunger management|title1=Hunger management}}
To eat a carrot, press and hold {{control|use}} while the carrot is selected in the [[hotbar]]. Eating a carrot restores {{hunger|3}} [[hunger]] and 3.6 hunger [[Hunger#Mechanics|saturation]].
=== Farming ===
{{see also|Tutorials/Crop farming|title1 = Crop farming }}
Carrots can be [[farming|farmed]] and harvested on [[farmland]]. Planted carrots take 8 [[Block tick|stages]] to grow, and go through 4 visually distinct stages. Planted carrots require a light level of 9 or greater to continue growing. If the light level is 7 or below, the crops instantly un-plant themselves ("pop off"). It is not possible to plant carrots if the light level is too low.
Crops grow faster if the farmland they are planted in is [[Farmland#Hydration|hydrated]]. Using [[bone meal]] on crops also increases the speed of growth by randomly increasing their growth stage by 2 to 5.
Crops break if pushed by a [[piston]] or if their supporting farmland breaks or turns to dirt (i.e. by being trampled), dropping their usual drops.
If {{cmd|gamerule mobGriefing}} is <code>true</code>, rabbits will find mature carrot [[crops]]{{only|je}} / carrot crops with growth stage greater than 1{{only|be}}. This reduces the growth stages by one, removing the crop completely when the growth stage reaches 0.
=== Breeding ===
Carrots can also be used to [[breed]] and attract [[pig]]s and [[rabbit]]s.
Villagers can pick up carrot items to become willing, which allow them to breed. Villagers require 12 carrots to become willing.
=== Trading ===
Novice-level Farmer villagers have a 25% ({{frac|1|4}}){{only|bedrock}} or 40% ({{frac|2|5}}){{only|java}} chance to buy 22 carrots for an emerald.
=== Crafting ingredient ===
{{crafting usage}}
=== Composting ===
Placing a carrot into a [[composter]] has a 65% chance of raising the compost level by 1.
== Sounds ==
=== Block ===
{{Sound table/Block/Crop}}
=== Item ===
{{Sound table/Entity/Food}}
== Data values ==
=== ID ===
{{edition|java}}:
{{ID table
|edition=java
|showblocktags=y
|showforms=y
|generatetranslationkeys=y
|displayname=Carrots
|spritetype=block
|nameid=carrots
|blocktags=bee_growables, crops
|form=block}}
{{ID table
|displayname=Carrot
|spritetype=item
|nameid=carrot
|form=item
|foot=1}}
{{edition|bedrock}}:
{{ID table
|edition=bedrock
|showforms=y
|shownumericids=y
|generatetranslationkeys=y
|displayname=Carrots
|spritetype=block
|nameid=carrots
|id=141
|form=block
|translationkey=-}}
{{ID table
|displayname=Carrot
|spritetype=item
|nameid=carrot
|id=279
|form=item
|foot=1}}
=== Block states ===
{{see also|Block states}}
{{/BS}}
== Advancements ==
{{load advancements|Husbandry;A Balanced Diet}}
== History ==
{{History|java}}
{{History||1.4.2|snap=12w34a|[[File:Carrot JE1.png|32px]] Added carrots.
|[[File:Carrots Age 0-1 JE1.png|32px]] [[File:Carrots Age 2-3 JE1.png|32px]] [[File:Carrots Age 4-6 JE1.png|32px]] [[File:Carrots Age 7 JE1.png|32px]] Added carrot crops.
|Carrots can be obtained only as a rare [[drop]] from [[zombie]]s.}}
{{History|||snap=August 28, 2012|slink={{tweet|Dinnerbone|240428477856231424}}|[[Dinnerbone]] released an image of a [[saddle]]d [[pig]] being controlled with a [[carrot on a stick]]. [[Wheat]] was considered as a "fuel" along with carrots,<ref>{{Tweet|Dinnerbone|240188453789257728}}</ref> but Dinnerbone eventually decided on carrots.<ref>{{Tweet|Dinnerbone|240355810650247168}}</ref>}}
{{History|||snap=12w34a|Carrots can now be used to craft [[golden carrot]]s.}}
{{History|||snap=12w36a|Carrots can now be found in [[village]]s.
|Carrots are now used to breed [[pig]]s.
|Carrots are now used to craft [[carrot on a stick]].}}
{{History|||snap=12w37a|[[File:Carrot JE2 BE1.png|32px]] The texture of carrots has now been changed. The texture has been changed to singular carrot, with the tooltip changed to reflect this.}}
{{History||1.5|snap=13w04a|[[Bone meal]] now grows carrots by 1 stage instead of fully growing it. The [[player]] might not see it grow, because some stages look the same.}}
{{History||1.8|snap=14w02a|Carrots now restore {{hunger|3}} points and 3.6 hunger [[saturation]], instead of {{hunger|4}} and 4.8 hunger saturation.
|Farmer [[villager]]s now [[trading|buy]] 15–19 carrots for 1 [[emerald]].}}
{{History|||snap=14w04a|[[Farmer]] (profession) [[villager]]s now harvest fully grown carrots.
|Villagers can now be made willing using 12 carrots.}}
{{History|||snap=14w06a|[[File:Carrots Age 0-1 JE2.png|32px]] [[File:Carrots Age 2-3 JE2.png|32px]] [[File:Carrots Age 4-6 JE2.png|32px]] [[File:Carrots Age 7 JE2.png|32px]] Carrot crops are now a pixel higher - previously they were offset one pixel down as to match farmland's sunken model. This is likely an accidental result of model conversion.}}
{{History|||snap=14w10a|[[File:Missing Model JE2.png|32px]] [[File:Missing Model JE2.png|32px]] [[File:Missing Model JE2.png|32px]] [[File:Missing Model JE2.png|32px]]<br>[[File:Missing Model (anisotropic filtering) JE2.png|32px]] [[File:Missing Model (anisotropic filtering) JE2.png|32px]] [[File:Missing Model (anisotropic filtering) JE2.png|32px]] [[File:Missing Model (anisotropic filtering) JE2.png|32px]]<br>Carrot crops of all stages [[Missing model|no longer have a model]].}}
{{History|||snap=14w10b|[[File:Carrots Age 0-1 JE4.png|32px]] [[File:Carrots Age 2-3 JE4.png|32px]] [[File:Carrots Age 4-6 JE4.png|32px]] [[File:Carrots Age 7 JE4.png|32px]] Carrot crops now have models again.<ref>{{bug|MC-50232}}</ref> In addition, they are now offset downwards by one pixel once more.<ref>{{bug|MC-50155}}</ref>}}
{{History|||snap=14w25a|[[File:Carrots Age 0-1 JE5.png|32px]] [[File:Carrots Age 2-3 JE5.png|32px]] [[File:Carrots Age 4-6 JE5.png|32px]] [[File:Carrots Age 7 JE5.png|32px]] Carrot crops are now darker and subject to directional shading.}}
{{History|||snap=14w27a|[[File:Carrots Age 0-1 JE6.png|32px]] [[File:Carrots Age 2-3 JE6.png|32px]] [[File:Carrots Age 4-6 JE6.png|32px]] [[File:Carrots Age 7 JE6.png|32px]] Carrot crops are no longer subject to directional shading.
|Added [[rabbit]]s, which can be [[breeding|bred]] and/or tamed using carrots. Rabbits also grief carrot crops.
|Carrots are now used to craft [[rabbit stew]].}}
{{History|||snap=14w34a|Rabbits can no longer be tamed.}}
{{History||1.9|snap=15w38a|The [[drops|drop]] chances have now been slightly improved from an average of {{frac|2|3|5}} per [[crops|crop]] harvested to {{frac|2|5|7}}.}}
{{History||1.13|snap=17w47a|Prior to [[1.13/Flattening|''The Flattening'']], this block's numeral ID was 141, and the item's 391.}}
{{History|||snap=18w11a|Carrots can now generate in the chests of [[shipwreck]]s.}}
{{History||1.14|snap=18w43a|[[File:Carrot JE3 BE2.png|32px]] The texture of carrots has now been changed.
|[[File:Carrots Age 0-1 JE7.png|32px]] [[File:Carrots Age 2-3 JE7.png|32px]] [[File:Carrots Age 4-6 JE7.png|32px]] [[File:Carrots Age 7 JE7.png|32px]] The textures of carrot crops have now been changed.}}
{{History|||snap=18w47a|Carrots can now generate in the [[chest]]s of [[pillager outpost]]s.}}
{{History|||snap=19w03a|Placement and breaking [[sound]]s have now been added to carrots.
|Placing a carrot into the new [[composter]] has a 50% chance of raising the compost level by 1.}}
{{History|||snap=19w05a|Carrots now have a 65% chance of increasing the compost level in a composter by 1.}}
{{History||1.15|snap=19w34a|[[Bee]]s can now pollinate carrot crops.}}
{{History||1.17|snap=21w13a|[[File:Carrots Age 0-1 JE8.png|32px]] [[File:Carrots Age 2-3 JE8.png|32px]] [[File:Carrots Age 4-6 JE8.png|32px]] [[File:Carrots Age 7 JE8.png|32px]] The "crop" template model has changed such that pixels appear in the same physical positions on opposite sides of texture planes, changing the carrot crop's appearance in the process.<ref>{{bug|MC-199242}}</ref>}}
{{History||1.18|snap=Pre-release 5|[[File:Carrots Age 7 JE9.png|32px]] A stray dark pixel has been removed from the texture of fully-grown carrots.<ref>{{bug|MC-226711}}</ref>}}
{{History|pocket alpha}}
{{History||v0.8.0|snap=build 1|[[File:Carrot JE2 BE1.png|32px]] Added carrots.
|[[File:Carrots Age 0-1 JE6 BE1.png|32px]] [[File:Carrots Age 2-3 JE6 BE1.png|32px]] [[File:Carrots Age 4-6 JE6 BE1.png|32px]] [[File:Carrots Age 7 JE6 BE1.png|32px]]{{verify|Correct models?}} Added carrot crops.
|Carrots can be obtained by killing [[zombie]]s.}}
{{History|||snap=build 3|Carrots now have a chance to [[drops|drop]] when tilling [[grass block]]s.}}
{{History|||snap=build 4|Carrots are no longer dropped by tilling [[grass block]]s.}}
{{History||v0.9.0|snap=build 1|Carrot crops now naturally spawn in [[village]]s.
|Carrot now used to breed [[pig]]s.}}
{{History||v0.12.1|snap=build 1|Carrots now restore [[hunger]] instead of [[health]].
|Brown robed [[villager]]s can now harvest fully grown carrot crops.
|Carrots can now be used to craft [[golden carrot]]s.}}
{{History||v0.13.0|snap=build 1|Carrots can now be used to breed [[rabbit]]s.
|Carrots can now be used to craft [[rabbit stew]].}}
{{History||v0.15.0|snap=build 1|Carrots are now used to craft [[carrot on a stick]].}}
{{History||v0.16.2|Carrots can now be found in a [[chest]] inside the large house in [[snowy tundra]] and [[snowy taiga]] [[village]]s.}}
{{History|pocket}}
{{History||1.0.4|snap=alpha 1.0.4.0|Farmer [[villager]]s now [[trading|buy]] 15–19 carrots for 1 [[emerald]].
|Carrots can now be picked up by villagers and become willing.}}
{{History|bedrock}}
{{History||1.2.0|snap=beta 1.2.0.2|Carrots can now be found inside of [[bonus chest]]s.}}
{{History||1.4.0|snap=beta 1.2.14.2|Carrots can now be found inside [[shipwreck]] chests.}}
{{History||1.10.0|snap=beta 1.10.0.3|Carrots can be found in the new [[pillager outpost]]s.
|[[File:Carrot JE3 BE2.png|32px]] The texture of carrots has now been changed.
|[[File:Carrots Age 0-1 JE7.png|32px]] [[File:Carrots Age 2-3 JE7.png|32px]] [[File:Carrots Age 4-6 JE7.png|32px]] [[File:Carrots Age 7 JE7.png|32px]]{{verify|Correct models?}} The textures of carrot crops have now been changed.}}
{{History||1.11.0|snap=beta 1.11.0.1|Carrots can now be used to fill up [[composter]]s.}}
{{History|||snap=beta 1.11.0.4|[[Trading]] has now been changed, farmer [[villager]]s now have a 25% chance to [[trading|buy]] 22 carrots for an [[emerald]].}}
{{History||1.14.0|snap=beta 1.14.0.1|[[Bee]]s can now pollinate carrot crops.}}
{{History||?|[[File:Carrots Age 0-1 BE.png|32px]] [[File:Carrots Age 2-3 BE.png|32px]] [[File:Carrots Age 4-6 BE.png|32px]] [[File:Carrots Age 7 BE.png|32px]] Carrot crop planes use a mapping that results in very unnatural mirroring when viewed from certain angles, such as northwest.<ref>{{bug|MCPE-146936}}</ref>}}
{{History|console}}
{{History||xbox=TU14|xbone=CU1|ps=1.04|wiiu=Patch 1|switch=1.0.1|[[File:Carrot JE2 BE1.png|32px]] Added carrots.
|[[File:Carrots Age 0-1 JE6 BE1.png|32px]] [[File:Carrots Age 2-3 JE6 BE1.png|32px]] [[File:Carrots Age 4-6 JE6 BE1.png|32px]] [[File:Carrots Age 7 JE6 BE1.png|32px]]{{verify|Correct models?}} Added carrot crops.}}
{{History||xbox=none|xbone=none|ps=1.90|wiiu=none|switch=none|[[File:Carrot JE3 BE2.png|32px]] The texture of carrots has now been changed.
|[[File:Carrots Age 0-1 JE7.png|32px]] [[File:Carrots Age 2-3 JE7.png|32px]] [[File:Carrots Age 4-6 JE7.png|32px]] [[File:Carrots Age 7 JE7.png|32px]]{{verify|Correct models?}} The textures of carrot crops have now been changed.}}
{{History||xbox=none|xbone=none|ps=1.91|wiiu=none|switch=none|Carrots can now be used to fill up [[composter]]s.}}
{{History|New 3DS}}
{{History||0.1.0|[[File:Carrot JE2 BE1.png|32px]] Added carrots.
|[[File:Carrots Age 0-1 JE6 BE1.png|32px]] [[File:Carrots Age 2-3 JE6 BE1.png|32px]] [[File:Carrots Age 4-6 JE6 BE1.png|32px]] [[File:Carrots Age 7 JE6 BE1.png|32px]]{{verify|Correct models?}} Added carrot crops.}}
{{History|foot}}
=== Carrots "item" ===
{{:Technical blocks/Carrots}}
== Issues ==
{{issue list}}
== Gallery ==
<gallery>
AllSeeds.png|All the seeds that exist in the game (except [[nether wart]] and [[cocoa beans]]).
VillageGrowingCarrotsAndPotatoes.png|Carrots and [[potato]]es found growing naturally in a [[village]].
Carrots Growing.png|Carrots in multiple stages of growth.
Carrot Dungeon.jpg|A carrot that dropped from a zombie, just to the right of the [[spawner]].
Carrot SDGP.png|Carrot in the [[Super Duper Graphics Pack]].
</gallery>
== References ==
{{reflist}}
{{Items}}
{{blocks|vegetation}}
[[Category:Plants]]
[[Category:Food]]
[[Category:Renewable resources]]
[[Category:Non-solid blocks]]
[[Category:Generated structure blocks]]
[[cs:Mrkev]]
[[de:Karotte]]
[[es:Zanahoria]]
[[fr:Carotte]]
[[hu:Sárgarépa]]
[[ja:ニンジン]]
[[ko:당근]]
[[lzh:胡蘿蔔]]
[[nl:Wortel]]
[[pl:Marchewka]]
[[pt:Cenoura]]
[[ru:Морковь]]
[[th:แคร์รอต]]
[[uk:Морква]]
[[zh:胡萝卜]]</li></ul> | 1.8-pre1 | Creepers are much more deadly and will definitely kill an unarmored player if in a radius of 4 to 5 blocks around the creeper. This damage is also difficulty-independent. | |||
Sound Update{{Extension DPL}}<ul><li>[[Baked Potato|Baked Potato]]<br/>{{Item
| title = Baked Potato
| renewable = Yes
| heals = {{hunger|5}}
| stackable = Yes (64)}}
A '''baked potato''' is a [[food]] [[item]] that can be eaten by the [[player]].
== Obtaining ==
Baked potatoes can be obtained by cooking [[potato]]es in a [[furnace]], [[smoker]], or [[campfire]].
{{Smelting
|Potato
|Baked Potato
|0,35
}}
{{IN|JE}}, baked potatoes can also be obtained by killing a zombie or one of its variants while it is on fire. The drop chance is still affected by [[Looting]].
=== Chest loot ===
{{LootChestItem|baked-potato}}
== Usage ==
To eat a baked potato, press and hold {{control|use}} while it is selected in the [[hotbar]]. Eating one restores {{hunger|5}} hunger and 6.0 hunger [[Hunger#Mechanics|saturation]].
=== Crafting ingredient ===
{{crafting usage}}
=== Composting ===
Placing a baked potato into a [[composter]] has an 85% chance of raising the compost level by 1. This is more efficient than composting with raw potatoes.
== Sounds ==
{{Sound table/Entity/Food}}
== Data values ==
=== ID ===
{{edition|java}}:
{{ID table
|edition=java
|showforms=y
|generatetranslationkeys=y
|displayname=Baked Potato
|spritetype=item
|nameid=baked_potato
|form=item
|foot=1}}
{{edition|bedrock}}:
{{ID table
|edition=bedrock
|shownumericids=y
|showforms=y
|notshowbeitemforms=y
|generatetranslationkeys=y
|displayname=Baked Potato
|spritetype=item
|nameid=baked_potato
|id=281
|form=item
|foot=1}}
== Advancements ==
{{load advancements|Husbandry;A Balanced Diet}}
== History ==
{{History|java}}
{{History||1.4.2|snap=12w34a|[[File:Baked Potato JE1.png|32px]] Added baked potatoes.}}
{{History|||snap=12w37a|[[File:Baked Potato JE2 BE1.png|32px]] The texture of baked potatoes has been slightly changed.}}
{{History||1.8|snap=14w02a|Baked potatoes now restore {{Hunger|5}} hunger points instead of 6.}}
{{History|||snap=14w27a|Baked potatoes are now used to craft [[rabbit stew]].}}
{{History||1.13|snap=17w47a|Prior to [[1.13/Flattening|''The Flattening'']], this [[item]]'s numeral ID was 393.}}
{{History||1.14|snap=18w43a|[[File:Baked Potato JE3.png|32px]] The texture of baked potatoes has been changed.}}
{{History|||snap=18w50a|[[File:Baked Potato JE4 BE2.png|32px]] The texture of baked potatoes has been changed, once again.}}
{{History|||snap=19w03a|Placing a baked potato into the new [[composter]] has an 80% chance of raising the compost level by 1.}}
{{History|||snap=19w05a|Baked potatoes now have an 85% chance of increasing the compost level in a composter by 1.}}
{{History||1.17|snap=21w13a|Baked potatoes can now be dropped by flaming [[zombie]]s.<ref>{{bug|MC-199065}}</ref>}}
{{History||1.19|snap=22w13a|Baked potatoes can now be found in [[ancient city]] ice box [[chest]]s.}}
{{History|upcoming java}}
{{History||Villager Trade Rebalance<br>(Experimental)|link=Java Edition 1.20.2|snap=23w31a|[[Wandering trader]]s now have a chance to [[trading|buy]] baked potatoes from the player.}}
{{History|pocket alpha}}
{{History||v0.8.0|snap=build 1|[[File:Baked Potato JE2 BE1.png|32px]] Added baked potatoes.}}
{{History||v0.12.1|snap=build 1|Baked potatoes now restore [[hunger]] instead of [[health]].}}
{{History||v0.13.0|snap=build 1|Baked potatoes are now used to craft [[rabbit stew]].}}
{{History|bedrock}}
{{History||1.10.0|snap=beta 1.10.0.3|[[File:Baked Potato JE4 BE2.png|32px]] The texture of baked potatoes has been changed.}}
{{History||1.11.0|snap=beta 1.11.0.1|Baked potatoes can now be used to fill up [[composter]]s.}}
{{History|console}}
{{History||xbox=TU14|xbone=CU1|ps=1.04|wiiu=Patch 1|switch=1.0.1|[[File:Baked Potato JE2 BE1.png|32px]] Added baked potatoes.}}
{{History||ps=1.00|[[File:Baked Potato JE2 BE1.png|32px]] Added baked potatoes to the [[PlayStation 4 Edition|PS4]] and [[PlayStation Vita Edition|PSVita]].}}
{{History||xbox=none|xbone=none|ps=1.90|wiiu=none|switch=none|[[File:Baked Potato JE4 BE2.png|32px]] The texture of baked potatoes has been changed.}}
{{History|new3DS}}
{{History||0.1.0|[[File:Baked Potato JE2 BE1.png|32px]] Added baked potatoes.}}
{{History|foot}}
== Issues ==
{{issue list}}
== See also ==
* {{ItemLink|Poisonous Potato}}
{{Items}}
[[Category:Food]]
[[Category:Renewable resources]]
[[cs:Pečená brambora]]
[[de:Ofenkartoffel]]
[[es:Patata cocida]]
[[fr:Pomme de terre cuite]]
[[hu:Sült burgonya]]
[[it:Patata al forno]]
[[ja:ベイクドポテト]]
[[ko:구운 감자]]
[[nl:Gebakken aardappel]]
[[pl:Pieczony ziemniak]]
[[pt:Batata assada]]
[[ru:Печёный картофель]]
[[th:มันฝรั่งอบ]]
[[zh:烤马铃薯]]</li><li>[[Netherite Ingot|Netherite Ingot]]<br/>{{About|the refined item|the scrap|Netherite Scrap|the ore|Ancient Debris|other uses|Netherite}}
{{Item
| rarity = Common
| renewable = No
| stackable = Yes (64)
}}
'''Netherite ingots''' are items obtained from crafting [[netherite scrap]]s and [[gold ingot]]s together, as well as loot from [[bastion remnant]] loot chests. Unlike other items, they are immune to fire and [[lava]] damage. They are primarily used to upgrade [[diamond]] gear and craft [[lodestone]]s.
== Obtaining ==
Netherite ingots are obtained by crafting four [[netherite scrap]]s and four [[gold ingot]]s. It is a shapeless recipe, therefore the placement of the netherite scraps and gold ingots does not matter when crafting it.
=== Crafting ===
{{Crafting
|head=1
|showname=0
|Netherite Scrap
|Netherite Scrap
|Netherite Scrap
|Netherite Scrap
|Gold Ingot
|Gold Ingot
|Gold Ingot
|Gold Ingot
|Output=Netherite Ingot
|type=Material
}}
{{Crafting
|Block of Netherite
|Output=Netherite Ingot,9
|type=Material
|foot=1
}}
=== Chest loot ===
{{LootChestItem|netherite-ingot}}
== Usage ==
Netherite ingots are crafting materials used to make netherite tools, weapons, and armor.
=== Crafting ingredient ===
{{crafting usage}}
=== Smithing ingredient ===
Netherite ingots can be used on a [[smithing table]] to upgrade diamond items to netherite items, as well as trim any armor piece. Data such as durability, enchantments, and custom names are preserved.
{{Smithing
|head=1
|ingredients=[[Netherite Upgrade]] +<br>Any [[diamond]] gear +<br>[[Netherite Ingot]]
|Netherite Upgrade
|Diamond Helmet; Diamond Chestplate; Diamond Leggings; Diamond Boots; Diamond Sword; Diamond Pickaxe; Diamond Axe; Diamond Shovel; Diamond Hoe
|Netherite Ingot
|Netherite Helmet; Netherite Chestplate; Netherite Leggings; Netherite Boots; Netherite Sword; Netherite Pickaxe; Netherite Axe; Netherite Shovel; Netherite Hoe
}}
{{Smithing
|ingredients=Any Armor Trim +<br/>Any Armor Piece + <br/>Netherite Ingot
|Any Armor Trim Smithing Template
|Diamond Chestplate
|Netherite Ingot
|Netherite Trim Diamond Chestplate
|showdescription=1
|description = All armor types can be used in this recipe,<br/>a diamond chestplate is shown as an example.<br/>
|tail=1
}}
'''Trim color palette'''
The following color palettes are shown on the designs on trimmed armor:
* {{TrimPalette|netherite ingot}}
* {{TrimPalette|netherite ingot|darker=1}} (a darker color palette is used when a netherite armor piece is trimmed using a netherite ingot).
=== Repairing ===
Netherite ingots are the repair items for the netherite [[tier]] and [[armor material]], and thus can be used to [[item repair|repair]] the following items in an [[anvil]]:
* {{ItemLink|Netherite Helmet}}
* {{ItemLink|Netherite Chestplate}}
* {{ItemLink|Netherite Leggings}}
* {{ItemLink|Netherite Boots}}
* {{ItemLink|Netherite Sword}}
* {{ItemLink|Netherite Pickaxe}}
* {{ItemLink|Netherite Axe}}
* {{ItemLink|Netherite Shovel}}
* {{ItemLink|Netherite Hoe}}
=== Beacons ===
A netherite ingot could be used to select powers from a [[beacon]] instead of using an [[emerald]], [[gold ingot]], [[iron ingot]], or a [[diamond]]. The player must select one of the available powers, and then insert an ingot in the item slot. The [[gold]] option is more efficient than the netherite option because it consumes 3 fewer gold and no [[Netherite Scrap|netherite scrap]].
== Data values ==
=== ID ===
{{edition|java}}:
{{ID table
|edition=java
|showitemtags=y
|showforms=y
|generatetranslationkeys=y
|displayname=Netherite Ingot
|spritetype=item
|nameid=netherite_ingot
|itemtags=beacon_payment_items
|form=item
|foot=1}}
{{edition|bedrock}}:
{{ID table
|edition=bedrock
|shownumericids=y
|showforms=y
|notshowbeitemforms=y
|generatetranslationkeys=y
|displayname=Netherite Ingot
|spritetype=item
|nameid=netherite_ingot
|id=603
|form=item
|foot=1}}
=== Advancements ===
{{load advancements|Serious dedication}}
== History ==
{{History|java}}
{{History||1.16|snap=20w06a|[[File:Netherite Ingot JE1 BE2.png|32px]] Added netherite ingots.}}
{{History|||snap=20w07a|Netherite ingots can now be used to power [[beacon]]s.}}
{{History|||snap=20w10a|The [[crafting]] recipe for netherite [[tools]] and [[armor]] has been changed so that a [[smithing table]] is used instead of a [[crafting table]] and [[enchanting|enchantments]] are preserved when upgrading [[item]]s.}}
{{History|||snap=20w13a|Netherite ingots can now be used to craft [[lodestone]]s.}}
{{History|||snap=20w16a|Netherite ingots can now be found in [[bastion remnant]] chests.}}
{{History||1.16.2|snap=20w30a|Increased the chance of finding netherite ingots in bastion remnant chests from 16.8% to 42.1%.}}
{{History||1.20<br>(Experimental)|link=1.19.4|snap=23w04a|Netherite ingots can now be used as an armor trim material.|Upgrading diamond tools and armor to netherite now requires the netherite upgrade [[smithing template]] in addition to a netherite ingot.}}
{{History|||snap=23w05a|Netherite ingots can now be used to trim netherite armor.}}
{{History||1.20|snap=23w12a|Netherite ingots are now usable for trimming without requiring the "Update 1.20" experimental datapack to be enabled.}}
{{History|bedrock}}
{{History||1.16.0|snap=beta 1.16.0.51|[[File:Netherite Ingot BE1.png|32px]] Added netherite ingots.}}
{{History|||snap=beta 1.16.0.57|Netherite ingots can now be used to power [[beacon]]s.
|The [[crafting]] recipe for netherite [[tools]] and [[armor]] has been changed so that a [[smithing table]] is used instead of a [[crafting table]] and [[enchanting|enchantments]] are preserved when upgrading [[item]]s.
|Netherite ingots can now be used to craft [[lodestone]]s.
|Netherite ingots can now be found in [[bastion remnant]] chests.}}
{{History||1.17.10|snap=beta 1.17.10.20|[[File:Netherite Ingot JE1 BE2.png|32px]] The texture of netherite ingots has been changed to match ''Java Edition''.}}
{{History||Next Major Update<br>(Experimental)|link=Bedrock Edition 1.19.80|snap=beta 1.19.80.21|Netherite ingots can now be used as an armor trim material.|Upgrading diamond tools and armor to netherite now requires the netherite upgrade [[smithing template]] in addition to a netherite ingot.}}
{{History||1.20.0|snap=beta 1.20.0.21|Netherite ingots are now usable for trimming without requiring the "Next Major Update" experimental toggle to be enabled.}}
{{History|foot}}
== Issues ==
{{issue list}}
== See also ==
* {{EnvLink|Bastion Remnant}}
* {{BlockLink|Block of Netherite}}
* {{ItemLink|Netherite Scrap}}
* {{BlockLink|Ancient Debris}}
*{{BlockLink|Lodestone}}
== External Links ==
* [https://www.minecraft.net/en-us/article/taking-inventory--netherite-ingot Taking Inventory: Netherite Ingot] – Minecraft.net on May 28, 2020
{{Items}}
[[de:Netheritbarren]]
[[es:Lingote de netherita]]
[[fr:Lingot de Netherite]]
[[it:Lingotto di netherite]]
[[ja:ネザライトインゴット]]
[[ko:네더라이트 주괴]]
[[pl:Sztabka netherytu]]
[[pt:Barra de netherita]]
[[ru:Незеритовый слиток]]
[[th:แท่งเนเธอไรต์]]
[[uk:Незеритовий злиток]]
[[zh:下界合金锭]]
[[Category:Non-renewable resources]]</li></ul> | Creeper explosions have a new sound. | ||||
| release | |||||
1.0.0{{Extension DPL}}<ul><li>[[Clay Ball|Clay Ball]]<br/>{{Item
| image = Clay Ball.png
| stackable = Yes (64)
| renewable = Yes
}}
{{about|the item|the block|Clay|other uses|Clay (disambiguation)}}
A '''clay ball''' is the item obtained from [[clay]] used for [[crafting]] or making [[brick]]s.
== Obtaining ==
=== Block loot ===
Clay balls are obtained when a [[clay]] block is broken with a non-[[Silk Touch]] tool. Each block yields four clay balls regardless of [[Fortune]].
=== Chest loot ===
{{LootChestItem|clay-ball}}
=== Villager gifts ===
If a [[player]] has the [[Hero of the Village]] status effect, a Mason [[villager]] might throw that player a [[clay block]] as a gift. {{Only|java}} This can be placed and [[breaking|broken]] to harvest clay balls.
== Usage ==
Clay balls can be [[crafting|crafted]] back together to form [[clay]] blocks or baked in a [[furnace]] to create [[brick]]s.
=== Crafting ingredient ===
{{crafting usage}}
=== Smelting ingredient ===
{{Smelting
|showname=1
|Clay Ball
|Brick
|0.3
}}
=== Trading ===
Novice-level [[Villager|mason villagers]] buy 10 clay balls for 1 [[emerald]] as part of their [[trades]].
== Data values ==
=== ID ===
{{edition|java}}:
{{ID table
|edition=java
|showforms=y
|generatetranslationkeys=y
|displayname=Clay Ball
|spritetype=item
|nameid=clay_ball
|form=item
|foot=1}}
{{edition|bedrock}}:
{{ID table
|edition=bedrock
|shownumericids=y
|showforms=y
|notshowbeitemforms=y
|generatetranslationkeys=y
|displayname=Clay
|spritetype=item
|nameid=clay_ball
|id=384
|form=item
|foot=1}}
== History ==
{{History|java alpha}}
{{History||v1.0.11|[[File:Clay Ball JE1 BE1.png|32px]] Added clay.}}
{{History|java}}
{{History||1.13|snap=17w47a|Prior to [[1.13/Flattening|''The Flattening'']], this [[item]]'s numeral ID was 337.}}
{{History||1.14|snap=18w43a|[[File:Clay Ball JE2 BE2.png|32px]] The texture of clay has been changed.}}
{{History|||snap=18w49a|Clay can now be found in [[chest]]s in [[village]] mason houses.}}
{{History|||snap=18w50a|Clay can now be found in [[chest]]s in [[desert]] [[village]] houses.}}
{{History|||snap=19w11a|Clay is now [[trading|bought]] by [[villager]]s of the new mason profession.}}
{{History||1.16|snap=20w06a|"Clay" has been renamed to "Clay Ball."}}
{{History|pocket alpha}}
{{History||v0.2.0|[[File:Clay Ball JE1 BE1.png|32px]] Added clay. It is currently unobtainable and serves no purpose.}}
{{History||v0.3.2|4 clay items are now dropped from clay blocks when broken.
|Clay can now be crafted into clay blocks.
|Clay can now be smelted into bricks.}}
{{History|bedrock}}
{{History||1.10.0|snap=beta 1.10.0.3|[[File:Clay Ball JE2 BE2.png|32px]] The texture of clay has been changed.|10–13 clay can now be [[trading|sold]] to stone mason [[villager]]s for an [[emerald]].}}
{{History||1.11.0|snap=beta 1.11.0.1|Clay can now be found in [[village]] mason [[chest]]s and [[desert]] village house chests.}}
{{History|||snap=beta 1.11.0.4|[[Trading]] has been changed, stone mason villagers now [[trading|buy]] 10 clay for an emerald<!-- previously 10-13 -->.}}
{{History||1.19.0|snap=beta 1.19.0.24|Clay ball now [[renewable]] by placing [[mud]] above a block which has [[pointed dripstone]] underneath.}}
{{History|console}}
{{History||xbox=TU1|xbone=CU1|ps=1.0|wiiu=Patch 1|[[File:Clay Ball JE1 BE1.png|32px]] Added clay.}}
{{History||xbox=none|xbone=none|ps=1.90|wiiu=none|switch=none|[[File:Clay Ball JE2 BE2.png|32px]] The texture of clay has been changed.}}
{{History|3ds}}
{{History||0.1.0|[[File:Clay Ball JE1 BE1.png|32px]] Added clay.}}
{{History|foot}}
== Issues ==
{{issue list}}
== Gallery ==
<gallery>
File:ClayInNumerousForms.png
</gallery>
== Notes ==
{{fnlist}}
{{Items}}
[[cs:Jíl]]
[[de:Tonklumpen]]
[[es:Bola de arcilla]]
[[fr:Motte d'argile]]
[[hu:Agyag (Tárgy)]]
[[it:Zolla di argilla]]
[[ja:粘土玉]]
[[ko:점토 덩이]]
[[nl:Klei (voorwerp)]]
[[pl:Glina]]
[[pt:Bola de argila]]
[[ru:Глина]]
[[uk:Глиняна кулька]]
[[zh:黏土球]]</li><li>[[Warped Fungus on a Stick|Warped Fungus on a Stick]]<br/>{{Item
| image = Warped Fungus on a Stick.png
| durability = 100
| renewable = Yes
| stackable = No
}}
A '''warped fungus on a stick''' is an item that can be used to control saddled [[strider]]s.
== Obtaining ==
=== Crafting ===
{{Crafting
|head=1
|showdescription=1
|A1=Fishing Rod; Damaged Fishing Rod
|B2=Warped Fungus
|Output= Warped Fungus on a Stick
|description=Crafting from a damaged fishing rod is available only {{in|bedrock}}. ''Java Edition'' requires a pristine fishing rod. The [[2×2 grid]] can also be used for crafting instead of a crafting table.
|type= Transportation
}}
{{crafting
|foot=1
|ignoreusage=1
|Damaged Warped Fungus on a Stick
|Damaged Warped Fungus on a Stick
|Output= Warped Fungus on a Stick
|description= The durability of the two warped fungi on sticks is added together, plus an extra 5% durability.
|type= Transportation
}}
=== Mobs ===
A [[zombified piglin]] that spawns as a strider jockey holds a warped fungus on a stick instead of a {{ItemLink|golden sword}}, and has an 8.5%{{Only|java|short=y}} or 25%{{Only|bedrock|short=y}} chance to drop it if killed by a player or tamed [[wolf]], or upon death when angry. chance is increased by 1%{{Only|java|short=y}} or 5%{{Only|bedrock|short=y}} per level of Looting, for a maximum of 11.5%{{Only|java|short=y}} or 40%{{Only|bedrock|short=y}} with Looting III.
== Usage ==
[[File:Strider riding.gif|A [[player]] shown using a warped fungus on a stick to ride a [[strider]] (click to see animation).|thumb|350px]]
Similar to how a [[carrot on a stick]] is used to control [[pig]]s, the [[player]]s can use a warped fungus on a stick to control a [[strider]]. To do this, the player simply holds the [[item]] in one hand and any nearby striders within view is attracted toward the player. If mounted on a [[saddle]]d strider, the strider moves in the direction the player is facing while holding the warped fungus on a stick. Right clicking with the item makes the strider go faster, but reduces the item's durability by 1 for every speed boost. If the item durability reaches 0, it turns into a fishing rod.
Due to a strider's ability to walk on [[lava]], this is a beneficial [[tools|tool]] for using striders as a safe transport across [[the Nether]]'s terrain, which is otherwise considered difficult to traverse.
=== Enchantments ===
A warped fungus on a stick can receive the following enchantments, but only through an [[anvil]]:
{|class="wikitable col-2-center col-3-right"
|+
!Name
!Max Level
![[Enchanting|Method]]
|-
|[[Unbreaking]]
|III
|{{Inventory slot|Anvil}}
|-
|[[Mending]]
|I
|{{Inventory slot|Anvil}}
|-
|[[Curse of Vanishing]]
|I
|{{Inventory slot|Anvil}}
|}
== Sounds ==
{{Edition|Java}}:
{{Sound table
|sound=Random break.ogg
|subtitle=Item breaks
|source=player
|description=When a warped fungus on a stick's durability is exhausted
|id=entity.item.break
|translationkey=subtitles.entity.item.break
|volume=0.8
|pitch=0.8-1.2
|distance=16
|foot=1}}
{{Edition|Bedrock}}:
{{Sound table
|type=bedrock
|sound=Random break.ogg
|source=player
|description=When a warped fungus on a stick's durability is exhausted
|id=random.break
|volume=1.0
|pitch=0.9
|foot=1}}
== Data values ==
=== ID ===
{{edition|java}}:
{{ID table
|edition=java
|showforms=y
|generatetranslationkeys=y
|displayname=Warped Fungus on a Stick
|spritetype=item
|nameid=warped_fungus_on_a_stick
|form=item
|foot=1}}
{{edition|bedrock}}:
{{ID table
|edition=bedrock
|shownumericids=y
|showforms=y
|notshowbeitemforms=y
|generatetranslationkeys=y
|displayname=Warped Fungus on a Stick
|spritetype=item
|nameid=warped_fungus_on_a_stick
|id=618
|form=item
|foot=1}}
== Advancements ==
{{load advancements|This Boat Has Legs}}
== History ==
{{History|java}}
{{History||1.16|snap=20w13a|[[File:Warped Fungus on a Stick JE1 BE1.png|32px]] Added warped fungus on a stick.}}
{{History|||snap=20w14a|Now has 100 durability instead of 25.
|Now takes only 1 damage every time the strider is speed boosted.}}
{{History||1.16.2|snap=Pre-release 1|The [[zombified piglin]] riding a [[strider]] now spawns holding a warped fungus on a stick.}}
{{History|bedrock}}
{{History||1.16.0|snap=beta 1.16.0.57|[[File:Warped Fungus on a Stick JE1 BE1.png|32px]] Added warped fungus on a stick.}}
{{History|||snap=beta 1.16.0.63|Warped Fungus on a Stick can now be enchanted.}}
{{History||1.16.100|snap=beta 1.16.100.54|The [[zombified piglin]] riding a [[strider]] now spawns holding a warped fungus on a stick.}}
{{History|foot}}
== Issues ==
{{Issue list}}
== See also ==
* {{ItemLink|Carrot on a Stick}}
* {{ItemLink|Saddle}}
== References ==
{{Items}}
[[Category:Renewable resources]]
[[de:Wirrpilzrute]]
[[es:Caña con hongo distorsionado]]
[[fr:Champignon biscornu sur un bâton]]
[[ja:歪んだキノコ付きの棒]]
[[lzh:譎蕈釣竿]]
[[pl:Spaczony grzyb na patyku]]
[[pt:Vara com fungo distorcido]]
[[ru:Удочка с искажённым грибком]]
[[zh:诡异菌钓竿]]</li></ul> | Beta 1.9-pre5 | Creepers and other hostile mobs no longer attack the player in Creative mode unless provoked. | |||
1.2.1{{Extension DPL}}<ul><li>[[Axe|Axe]]<br/>{{For}}
{{Item
| image = <gallery>
Wooden Axe.png | Wooden
Stone Axe.png | Stone
Iron Axe.png | Iron
Golden Axe.png | Golden
Diamond Axe.png | Diamond
Netherite Axe.png | Netherite
</gallery>
| rarity = Common
| renewable =
* '''Netherite''': No
* '''Others''': Yes
| durability =
'''Bedrock Edition'''
* Golden: 33
* Wooden: 60
* Stone: 132
* Iron: 251
* Diamond: 1562
* Netherite: 2032
'''Java Edition'''
* Golden: 32
* Wooden: 59
* Stone: 131
* Iron: 250
* Diamond: 1561
* Netherite: 2031
| stackable = No
}}
An '''axe''' is a [[tool]] used to hasten the [[breaking]] of [[wood]]-based or other tough organic [[block]]s, strip or scrape certain blocks, or as a melee [[weapon]] that can disable [[Shield|shields]] it hits.
==Obtaining==
===Crafting===
{{Crafting
|head=1
|showname=0
|showdescription=1
|name=[[Axe]]
|A1={Any Planks}; Iron Ingot; Gold Ingot; Diamond
|B1={Any Planks}; Iron Ingot; Gold Ingot; Diamond
|A2={Any Planks}; Iron Ingot; Gold Ingot; Diamond
|B2=Stick
|B3=Stick
|Output= Wooden Axe; Iron Axe; Golden Axe; Diamond Axe
|type= Tool
}}
{{Crafting
|name=[[Stone Axe]]
|A1=Any stone-tier block |B1=Any stone-tier block
|A2=Any stone-tier block |B2=Stick
|B3=Stick
|Output=Stone Axe
|type=Tool
|description=Can use cobblestone and its other variants interchangeably.
}}
{{Crafting
|foot=1
|ignoreusage=1
|name=[[Axe]]
|ingredients=Damaged Matching [[Axe]]
|Damaged Wooden Axe; Damaged Stone Axe; Damaged Iron Axe; Damaged Golden Axe; Damaged Diamond Axe; Damaged Netherite Axe
|Damaged Wooden Axe; Damaged Stone Axe; Damaged Iron Axe; Damaged Golden Axe; Damaged Diamond Axe; Damaged Netherite Axe
|Output=Wooden Axe; Stone Axe; Iron Axe; Golden Axe; Diamond Axe; Netherite Axe
|description= The durability of the two axes is added together, plus an extra 5% durability.
|type= Tool
}}
=== Upgrading ===
{{Smithing
|head=1
|Netherite Upgrade
|Diamond Axe
|Netherite Ingot
|Netherite Axe
|tail=1
}}
===Repairing===
====Grinding====
{{Grinding
|showdescription=1
|ingredients= 2× Damaged [[Wooden Axe]] or 2× Damaged [[Stone Axe]] or 2× Damaged [[Iron Axe]] or 2× Damaged [[Golden Axe]] or 2× Damaged [[Diamond Axe]] or 2× Damaged [[Netherite Axe]]
|Damaged Wooden Axe; Damaged Stone Axe; Damaged Iron Axe; Damaged Golden Axe; Damaged Diamond Axe; Damaged Netherite Axe
|Damaged Wooden Axe; Damaged Stone Axe; Damaged Iron Axe; Damaged Golden Axe; Damaged Diamond Axe; Damaged Netherite Axe
|Wooden Axe; Stone Axe; Iron Axe; Golden Axe; Diamond Axe; Netherite Axe
|description=The durability of the two axes is added together, plus an extra 5% of max durability.
}}
====[[Anvil mechanics#Unit repair|Unit repair]]====
An axe can be repaired in an [[anvil]] by adding units of the [[tiers|tier]]'s repair material, with each repair material restoring 25% of the axe's maximum durability, rounded down.
===Mob loot===
==== Equipment ====
{{Main|Drops#Equipped items}}
A [[vindicator]] spawns with an iron axe and has an 8.5% chance (9.5% with Looting I, 10.5% with Looting II, and 11.5% with Looting III) of dropping it upon death by the player. It is usually heavily damaged and is sometimes enchanted.
A [[piglin brute]] spawns with a golden axe and has an 8.5% chance (9.5% with Looting I, 10.5% with Looting II, and 11.5% with Looting III) of dropping it upon death by the player. Also, {{in|java}}, [[Zombified Piglin|zombified piglins]] can drop their golden axe (with the same chance as piglin brute drop) if they have been zombified from a [[Piglin Brute|piglin brute.]]
====Raids====
{{IN|be}}, [[Vindicator]] and [[pillager]]s that spawn in raids have a 4.1% chance (5.12% on hard) to drop a badly-damaged iron axe, which is sometimes enchanted with a random enchantment. A vindicator can drop 2 iron axes, one from natural equipment and one from raid drops.
===Trading===
Novice-level [[Trading#Toolsmith|Toolsmith]] [[villager]]s have a 25% chance to sell a stone axe for one [[emerald]], journeyman-level Toolsmith villagers have a 25% chance to sell an enchanted iron axe for eight emeralds, and expert-level Toolsmith villagers have a 50% chance to sell an enchanted diamond axe for 13 emeralds.{{only|bedrock}}
Novice-level [[Trading#Toolsmith 2|Toolsmith]] villagers have a 40% chance to sell a stone axe for one emerald, journeyman-level Toolsmith villagers have a 40% chance to sell an enchanted iron axe for 7-22 emeralds, and expert-level Toolsmith villagers have a 66.67% chance to sell an enchanted diamond axe for 18-35 emeralds.{{only|java}}
Novice-level [[Trading#Weaponsmith|Weaponsmith]] [[villager]]s sell an iron axe for 3 emeralds as one of their trades, and master-level Weaponsmith villagers sell an enchanted diamond axe for 12 emeralds.{{only|bedrock}}
Novice-level [[Trading#Weaponsmith 2|Weaponsmith]] villagers have a 66.67% chance to sell an iron axe for 3 emeralds. Master-level Weaponsmith villagers always offer to sell an enchanted diamond axe for 18-35 emeralds.{{only|java}}
The enchantments are the same as the ones obtained from an [[enchantment table]] at levels 5–19.
=== Villager gifts ===
[[Trading#Toolsmith 2|Toolsmith]] [[villagers]] occasionally throw stone axes at players with the [[Hero of the Village]] status effect.{{only|java}}
[[Trading#Weaponsmith 2|Weaponsmith]] [[villagers]] occasionally throw either stone, gold, or iron axes at players with the [[Hero of the Village]] status effect.{{only|java}}
===Structure loot===
{{IN|JE}}, a sealed room in [[woodland mansion]]s can appear that has a chest always containing an [[Efficiency]] I iron axe.
{{LootChestItem|wooden-axe,stone-axe,random-enchanted-golden-axe,damaged-random-enchanted-netherite-axe,iron-axe}}
==Usage==
===Chopping===
An axe is used to break [[logs]], blocks derived from wood and some other blocks faster than by using other tools. An axe uses 1 durability to break 1 block. For blocks that break instantly, it uses 0 durability.
====Durability====
Each tier of axe has a different durability:
{| class="wikitable sortable"
! Material
! [[Durability]]
|-
| {{itemLink|Wooden Axe|Wood|link=Axe}}
| 59
|-
| {{itemLink|Stone Axe|Stone|link=Axe}}
| 131
|-
| {{itemLink|Iron Axe|Iron|link=Axe}}
| 250
|-
| {{itemLink|Diamond Axe|Diamond|link=Axe}}
| 1561
|-
| {{itemLink|Golden Axe|Golden|link=Axe}}
| 32
|-
| {{itemLink|Netherite Axe|Netherite|link=Axe}}
| 2031
|}
====Speed====
The following table summarizes the speed at which axes of different qualities perform.
{{breaking row|Wooden Trapdoors|link=Trapdoor|sort=1|simple=1}}
{{breaking row|Wooden Doors|item=1|link=Door|sprite=oak-door}}
{{breaking row|Barrel}}
{{breaking row|Cartography Table}}
{{breaking row|Chest}}
{{breaking row|Trapped Chest}}
{{breaking row|Crafting Table}}
{{breaking row|Fletching Table}}
{{breaking row|Lectern}}
{{breaking row|Loom}}
{{breaking row|Smithing Table}}
{{breaking row|Bamboo Mosaic}}
{{breaking row|Block of Bamboo}}
{{breaking row|Campfire}}
{{breaking row|Fences}}
{{breaking row|Fence Gates}}
{{breaking row|Jukebox}}
{{breaking row|Logs}}
{{breaking row|Planks}}
{{breaking row|Wooden Slabs|link=Slabs|sprite=all-wooden-slabs}}
{{breaking row|Wooden Stairs|link=Stairs|sprite=all-wooden-stairs}}
{{breaking row|Bookshelf}}
{{breaking row|Chiseled Bookshelf}}
{{breaking row|Banners}}
{{breaking row|Jack o'Lantern}}
{{breaking row|Melon}}
{{breaking row|Pumpkin}}
{{breaking row|Sign|sprite=oak-sign}}
{{breaking row|Hanging Sign|sprite=hanging-oak-sign}}
{{breaking row|Note Block}}
{{breaking row|Mangrove Roots}}
{{breaking row|Wooden Pressure Plate|sprite=oak-pressure-plate}}
{{breaking row|Beehive}}
{{breaking row|Ladder}}
{{breaking row|Bee Nest|drop=0}}
{{breaking row|Composter}}
{{breaking row|Bamboo}}
{{breaking row|sprite=red-bed|Bed}}
{{breaking row|Cocoa}}
{{breaking row|Daylight Detector}}
{{breaking row|Mushroom Block|sprite=mushroom-blocks}}
{{breaking row|Vines|drop=0|foot=1}}
=== Stripping ===
{{control|Using}} an axe on a [[log]], [[wood]] block, [[block of bamboo]]\, or [[block of copper]] causes it to become a [[stripped log]], [[stripped wood]] block, [[block of stripped bamboo]], or removes one layer of oxidization or wax, respectively. This consumes one point of durability from the axe.
===Weapon===
An axe loses 2 points of durability when used as a weapon.
==== Bedrock Edition ====
{{IN|bedrock}}, axes always attack instantly and deal {{hp|1}} less damage than a [[sword]] of the same quality but it lowers the durability of armor and shields faster than any other tool in-game.
{| class="wikitable" style="text-align:center" data-description="Bedrock damage"
! Material !! Damage
|-
| {{ItemSprite|Wooden Axe}} Wooden || rowspan="2" |{{hp|4}}
|-
| {{ItemSprite|Golden Axe}} Golden
|-
| {{ItemSprite|Stone Axe}} Stone ||{{hp|5}}
|-
| {{ItemSprite|Iron Axe}} Iron ||{{hp|6}}
|-
| {{ItemSprite|Diamond Axe}} Diamond ||{{hp|7}}
|-
| {{ItemSprite|Netherite Axe}} Netherite ||{{hp|8}}
|}
====Java Edition====
Attacking a [[shield]] user with an axe should have a chance to disable the use of the shield for 5 seconds, but currently this always disables a shield.<ref>{{bug|MC-197537}}</ref> The base chance is 25%, plus 5 percentage points per level of [[Efficiency]] on the axe, plus 75 percentage points if attacking while sprinting. [[Vindicator]]s, [[piglin brute]]s, or other [[mob]]s with commands always disable the player's shield. Damage done when using an axe as a weapon is more than that of a [[sword]] of the same tier, though they take longer than a sword to [[Damage#Attack cooldown|recover]], resulting in lower <abbr title="Damage/Second">DPS</abbr> (with the exception of [[gold]]en axes). The damage dealt and cooldown time depends on the type:
{| class="wikitable" style="text-align:center" data-description="Attack damage"
! Material
! {{ItemSprite|Wooden Axe|text=Wooden}}
! {{ItemSprite|Golden Axe|text=Gold}}
! {{ItemSprite|Stone Axe|text=Stone}}
! {{ItemSprite|Iron Axe|text=Iron}}
! {{ItemSprite|Diamond Axe|text=Diamond}}
! {{ItemSprite|Netherite Axe|text=Netherite}}
|-
! Attack Damage
| {{hp|7}}
| {{hp|7}}
| {{hp|9}}
| {{hp|9}}
| {{hp|9}}
| {{hp|10}}
|-
! Attack Speed
| 0.8
| 1.0
| 0.8
| 0.9
| 1.0
| 1.0
|-
! Recovery time
| {{convert|1.25|sec|tick|sep=}}
| {{convert|1|sec|tick|sep=}}
| {{convert|1.25|sec|tick|sep=}}
| {{convert|1.11|sec|tick|sep=}}
| {{convert|1|sec|tick|sep=}}
| {{convert|1|sec|tick|sep=}}
|-
! <abbr title="Damage/Second">DPS</abbr>
| 5.6
| 7.0
| 7.2
| 8.1
| 9.0
| 10.0
|-
! Lifetime damage inflicted<ref group="note">The formula to find the total lifetime damage is <code>ceil(''durability'' ÷ 2) × ''damage per hit''</code>. The durability is halved then ceiled because axes take double durability when used as a weapon, and the last 1 durability can also deal damage. The formula also ignores enchantments and critical hits, and assumes each attack is performed at maximum charge.</ref>
| {{hp|210}}
| {{hp|112}}
| {{hp|594}}
| {{hp|1125}}
| {{hp|7029}}
| {{hp|10160}}
|}
{{notelist}}
=== Enchantments ===
An axe can receive the following enchantments:
{| class="wikitable col-2-center col-3-right"
|+
!Name
!Max Level
![[Enchanting|Method]]
|-
|[[Fortune]]<ref group=note name=exc>Silk Touch and Fortune are mutually exclusive.</ref>
|III
|{{Inventory slot|Enchanting Table}}{{Inventory slot|Anvil}}
|-
|[[Silk Touch]]<ref group=note name=exc/>
|I
|{{Inventory slot|Enchanting Table}}{{Inventory slot|Anvil}}
|-
|[[Efficiency]]
|V
|{{Inventory slot|Enchanting Table}}{{Inventory slot|Anvil}}
|-
|[[Unbreaking]]
|III
|{{Inventory slot|Enchanting Table}}{{Inventory slot|Anvil}}
|-
|[[Sharpness]]<ref group="note" name="exc2">Sharpness, Smite, Bane of Arthropods, and Cleaving{{upcoming|java Combat Tests}} are mutually exclusive.</ref>
|V
|{{Inventory slot|Anvil}}
|-
|[[Smite]]<ref group="note" name=exc2/>
|V
|{{Inventory slot|Anvil}}
|-
|[[Bane of Arthropods]]<ref group="note" name=exc2/>
|V
|{{Inventory slot|Anvil}}
|-
|[[Fire Aspect]]{{upcoming|java Combat Tests}}<ref group="note" name="sword">Fire Aspect, Looting, Knockback, and Sweeping Edge currently exist, but they can be used only for [[sword]]s.</ref>
|II
|{{Inventory slot|Anvil}}
|-
|[[Looting]]{{upcoming|java Combat Tests}}<ref group="note" name="sword" />
|III
|{{Inventory slot|Anvil}}
|-
|[[Knockback]]{{upcoming|java Combat Tests}}<ref group="note" name="sword" />
|II
|{{Inventory slot|Anvil}}
|-
|[[Cleaving]]{{upcoming|java Combat Tests}}<ref group="note" name="exc2" />
|III
|{{Inventory slot|Enchanting Table}}{{Inventory slot|Anvil}}
|-
|[[Sweeping Edge]]{{upcoming|java Combat Tests}}<ref group="note" name="sword" />
|III
|{{Inventory slot|Enchanting Table}}{{Inventory slot|Anvil}}
|-
|[[Mending]]
|I
|{{Inventory slot|Anvil}}
|-
|[[Curse of Vanishing]]
|I
|{{Inventory slot|Anvil}}
|}
{{notelist}}
=== Fuel===
Wooden axes can be used as a fuel in [[furnace]]s, smelting 1 item per axe.
===Smelting ingredient===
{{Smelting|showname=1|Iron Axe;Golden Axe|Iron Nugget;Gold Nugget|0,1}}
===Piglins===
{{EntityLink|Piglin|Piglins}} are attracted to golden axes and run toward any golden axes on the ground, and inspect it for 6 to 8 seconds before putting it in their inventory.
== Sounds ==
{{el|je}}:
{{Sound table
|sound=Axe strip1.ogg
|sound2=Axe strip2.ogg
|sound3=Axe strip3.ogg
|sound4=Axe strip4.ogg
|subtitle=Axe strips
|source=block
|description=When an axe strips a log or wood block
|id=item.axe.strip
|translationkey=subtitles.item.axe.strip
|volume=0.9
|pitch=1.0/0.85
|distance=16}}
{{Sound table
|sound=wax_off1.ogg
|sound2=wax_off2.ogg
|sound3=wax_off3.ogg
|subtitle=Wax off
|source=block
|description=When an axe unwaxes a [[block of copper]]
|id=item.axe.wax_off
|translationkey=subtitles.item.axe.wax_off
|volume=1.0
|pitch=0.9/1.1/1.0
|distance=16}}
{{Sound table
|sound=scrape1.ogg
|sound2=scrape2.ogg
|sound3=scrape3.ogg
|subtitle=Axe scrapes
|source=block
|description=When an axe deoxidizes a block of copper
|id=item.axe.scrape
|translationkey=subtitles.item.axe.scrape
|volume=1.0
|pitch=1.0/0.9/1.1
|distance=16}}
{{Sound table
|sound=Random break.ogg
|subtitle=Item breaks
|source=player
|description=When an axe's durability is exhausted
|id=entity.item.break
|translationkey=subtitles.entity.item.break
|volume=0.8
|pitch=0.8-1.2
|distance=16
|foot=1}}
{{el|be}}:
{{Sound table
|type=bedrock
|sound=Wood hit1.ogg
|sound2=Wood hit2.ogg
|sound3=Wood hit3.ogg
|sound4=Wood hit4.ogg
|sound5=Wood hit5.ogg
|sound6=Wood hit6.ogg
|source=block
|description=When an axe strips a log or wood block <ref group=sound name=stripsoundbug>{{Bug|MCPE-106552}}</ref>
|id=use.wood
|volume=1.0
|pitch=0.8}}
{{Sound table
|sound=Stem step1.ogg
|sound2=Stem step2.ogg
|sound3=Stem step3.ogg
|sound4=Stem step4.ogg
|sound5=Stem step5.ogg
|sound6=Stem step6.ogg
|source=block
|description=When an axe strips a stem or hyphae block <ref group=sound name=stripsoundbug/>
|id=use.stem
|volume=1.0
|pitch=0.8}}
{{Sound table
|sound=Bamboo wood step1.ogg
|sound2=Bamboo wood step2.ogg
|sound3=Bamboo wood step3.ogg
|sound4=Bamboo wood step4.ogg
|sound5=Bamboo wood step5.ogg
|sound6=Bamboo wood step6.ogg
|source=player
|description=When an axe strips a [[block of bamboo]] <ref group=sound name=stripsoundbug/>
|id=step.bamboo_wood
|volume=1.0
|pitch=0.8}}
{{Sound table
|sound=Cherry wood step1.ogg
|sound2=Cherry wood step2.ogg
|sound3=Cherry wood step3.ogg
|sound4=Cherry wood step4.ogg
|sound5=Cherry wood step5.ogg
|sound6=Cherry wood step6.ogg
|source=player
|description=When an axe strips a cherry log or cherry wood block <ref group=sound name=stripsoundbug/>
|id=step.cherry_wood
|volume=1.0
|pitch=0.8}}
{{Sound table
|sound=wax_off1.ogg
|sound2=wax_off2.ogg
|sound3=wax_off3.ogg
|source=neutral
|description=When an axe unwaxes or deoxidizes a block of copper {{More info|Is use.copper used as well?}}
|id=copper.wax.off
|volume=1.0
|pitch=0.8-1.2}}
{{Sound table
|sound=Random break.ogg
|source=player
|description=When an axe's durability is exhausted
|id=random.break
|volume=1.0
|pitch=0.9
|foot=1}}
==Data values==
===ID===
{{edition|java}}:
{{ID table
|edition=java
|showforms=y
|generatetranslationkeys=y
|displayname=Wooden Axe
|spritetype=item
|nameid=wooden_axe
|form=item}}
{{ID table
|displayname=Stone Axe
|spritetype=item
|nameid=stone_axe
|form=item}}
{{ID table
|displayname=Iron Axe
|spritetype=item
|nameid=iron_axe
|form=item}}
{{ID table
|displayname=Diamond Axe
|spritetype=item
|nameid=diamond_axe
|form=item}}
{{ID table
|displayname=Golden Axe
|spritetype=item
|nameid=golden_axe
|form=item}}
{{ID table
|displayname=Netherite Axe
|spritetype=item
|nameid=netherite_axe
|form=item
|foot=1}}
{{edition|bedrock}}:
{{ID table
|edition=bedrock
|shownumericids=y
|showforms=y
|notshowbeitemforms=y
|generatetranslationkeys=y
|displayname=Wooden Axe
|spritetype=item
|nameid=wooden_axe
|id=311
|form=item}}
{{ID table
|displayname=Stone Axe
|spritetype=item
|nameid=stone_axe
|id=315
|form=item}}
{{ID table
|displayname=Iron Axe
|spritetype=item
|nameid=iron_axe
|id=298
|form=item}}
{{ID table
|displayname=Diamond Axe
|spritetype=item
|nameid=diamond_axe
|id=319
|form=item}}
{{ID table
|displayname=Golden Axe
|spritetype=item
|nameid=golden_axe
|id=325
|form=item}}
{{ID table
|displayname=Netherite Axe
|spritetype=item
|nameid=netherite_axe
|id=607
|form=item
|foot=1}}
==Achievements==
{{load achievements|MOAR Tools ;Oooh, shiny!}}
==Advancements ==
{{load advancements|Oh Shiny;Wax off}}
==History==
{{History|java indev}}
{{History||0.31|snap=20100110|[[File:Iron Axe JE1.png|32px]] Added iron axes.
|An axe is used to gather [[log|wood]] 400% faster than by hand.
|When starting in a new world, the [[player]] is given one of each [[tools|tool]].}}
{{History|||snap=20100122|[[File:Iron Axe JE2.png|32px]] The texture of axes has been changed. Half of the axe head has been removed.}}
{{History|||snap=20100124|[[File:Iron Axe JE3.png|32px]] The texture of axes has been changed again. The other axe head is now used instead.
|A complete toolset is no longer given to the [[player]] on starting a new world. Instead, there are multiple [[chest]]s in the later called "[[Indev House]]" containing a stack of most accessible [[blocks]]/[[items]] including [[tools]].}}
{{History|||snap=20100128|[[File:Wooden Axe JE1 BE1.png|32px]] [[File:Stone Axe JE1 BE1.png|32px]] [[File:Diamond Axe JE1 BE1.png|32px]] [[Tools]] now have tiers. Wooden, stone, and diamond axes have been added.
|[[File:Iron Axe JE4 BE1.png|32px]] The texture of iron axes has been changed.
|An axe held by the player is now rendered to appear more 3D.
|They cannot be crafted yet, but have been added to the item chest in the Indev house.}}
{{History|||snap=20100129|Wooden, stone, iron, and diamond axes can now be [[craft]]ed.}}
{{History|||snap=20100130|[[File:Golden Axe JE1.png|32px]] Axes can now be made out of gold.}}
{{History|||snap=20100201-1|[[Tools]] now take [[damage]] when being used. Better tools now last longer.}}
{{History||20100206|[[File:Golden Axe JE2 BE1.png|32px]] The texture of golden axes has been changed.}}
{{History|java beta}}
{{History||1.2|Gold [[tools]], including axes, now remove [[block]]s faster than diamond tools.}}
{{History|java}}
{{History||1.2.4|snap=release|[[Spruce planks]], [[birch planks]], and [[jungle planks]] can now be used to craft wooden axes.}}
{{History||1.3.1|snap=12w16a|Wooden and stone axes are now found in the new [[bonus chest]]s.}}
{{History|||snap=12w18a|Wooden axes can now be used as [[fuel]] in a [[furnace]].}}
{{History|||snap=12w21a|Blacksmith [[villager]]s now [[trading|sell]] 1 diamond axe for 9–11 [[emerald]]s, and 1 iron axe for 6–7 emeralds.}}
{{History||1.6.1|snap=13w21a|Instead of replacing the barehanded [[damage]] ({{hp|1}}), axes now add their damage onto the barehanded damage, which results in all axes doing {{hp|1}} more damage than before.}}
{{History||1.7.2|snap=1.7.1|[[Acacia planks]] and [[dark oak planks]] can now be used to craft wooden axes.}}
{{History||1.8|snap=14w02a|Weapon smith villagers now sell 1 [[enchanting|enchanted]] diamond axe for 9–12 emeralds, and 1 iron axe for 6–8 emeralds. Unenchanted diamond axes are no longer sold.}}
{{History||1.9|snap=15w34a|Axes now use the attack speed combat mechanic meter. The time it takes for the meter to fill up for an axe is 1.2 seconds.}}
{{History|||snap=15w34b|Axes now have an attack speed of 0.8, taking about 1.25 seconds to fill the attack meter.}}
{{History|||snap=15w34c|Axes do {{hp|4}} more [[damage]] than previously.
|Axes now have an attack speed of 0.85.
|Axes can now temporarily disable [[shield]] use.}}
{{History|||snap=15w35a|The [[damage]] of axes has been reduced by {{hp|1}}.
|The speed of axes has been increased to 0.9.}}
{{History|||snap=15w37a|Stone and diamond axes now both do {{hp|9}} damage, instead of the previous {{hp|8}} and {{hp|10}} respectively.
|Axes now have attack speed based on the tier, with wooden and stone having a speed of 0.8, iron having a speed of 0.9, and diamond and gold having a speed of 1.}}
{{History|||snap=15w43a|Stone axes may now be found in [[igloo]] basement chests.}}
{{History|||snap=15w44a|The average yield of stone and wooden axes from [[bonus chest]]s has been decreased.}}
{{History||1.11.1|snap=16w50a|Golden and iron axes now [[smelting|smelt]] down into one of their respective [[nugget]]s.}}
{{History||1.13|snap=17w47a|Prior to [[1.13/Flattening|''The Flattening'']], these [[item]]s' numeral IDs were 271, 275, 258, 279 and 286.}}
{{History||1.13|snap=18w07a|{{control|Using}} an axe on a block of [[wood]] or [[log]] now turns it into a stripped block of wood or log.}}
{{History|||snap=18w09a|Stone axes now can generate in the [[chest]]s of [[underwater ruins]].}}
{{History|||snap=pre2|{{control|Using}} an axe on a bark now turns it into a stripped bark.}}
{{History||1.14|snap=18w43a|[[File:Wooden Axe JE2 BE2.png|32px]] [[File:Stone Axe JE2 BE2.png|32px]] [[File:Iron Axe JE5 BE2.png|32px]] [[File:Golden Axe JE3 BE2.png|32px]] [[File:Diamond Axe JE2 BE2.png|32px]] The textures of all axes have been changed.}}
{{History|||snap=19w11a|Toolsmith villagers now sell stone axes, as well as enchanted iron and diamond axes.}}
{{History|||snap=19w13a|Toolsmith villagers now give stone axes to players under the [[Hero of the Village]] effect.
|Weaponsmith villagers now give stone, golden and iron axes to players under the [[Hero of the Village]] effect.}}
{{History||1.16|snap=20w06a|[[File:Netherite Axe JE1.png|32px]] Added netherite axes.
|Netherite axes are obtained by combining one diamond axe and one netherite ingot in a crafting table.
|[[Crimson planks]] and [[warped planks]] can now be used to craft wooden axes.}}
{{History|||snap=20w09a|[[File:Diamond Axe JE3 BE3.png|32px]] The texture of diamond axes has been changed.}}
{{History|||snap=20w10a|[[File:Netherite Axe JE2.png|32px]] The texture of netherite axes has been changed.
|Netherite axes can no longer be crafted.
|Netherite axes are now obtained by combining one diamond axe and one netherite ingot in a smithing table.}}
{{History|||snap=20w15a|Stone axes can now be crafted using [[blackstone]].}}
{{History|||snap=20w16a|Golden axes now generate randomly enchanted in [[ruined portal]] chests.}}
{{History||1.16.2|snap=20w30a|Enchanted golden axes can now be found in [[bastion remnant]] chests.}}
{{History||1.17|snap=21w08a|Stone axes can now be crafted using [[cobbled deepslate]].}}
{{History|||snap=21w11a|Axes can now be used to scrape wax and oxidation off [[copper block]]s.}}
{{History||1.19|snap=22w11a|[[Mangrove planks]] can now be used to craft wooden axes.}}
{{History||1.20 (Experimental)|link=1.19.3|snap=22w42a|Added [[block of bamboo]], which when used with an axe gives a block of stripped bamboo.}}
{{History||1.20<br>(Experimental)|link=1.19.4|snap=23w04a|Upgrading diamond axes to netherite axes now requires the netherite upgrade [[smithing template]].}}
{{History||1.20|snap=23w12a|Iron axes can now be found in [[suspicious gravel]] and [[suspicious sand]] in cold and warm [[ocean ruins]].}}
{{History|upcoming java}}
{{History||Combat Tests|snap=1.14.3 - Combat Test|The attack speed for all axes has been increased to 2.
|All axes now deal {{hp|1}} more [[damage]] than their sword counterparts.}}
{{History|||snap=Combat Test 3|The [[Cleaving|Chopping]] enchantment has been added for axes, which adds 1 damage and 0.5 seconds (10 [[game tick]]s) of [[shield]] stunning per level and is mutually exclusive with [[Sharpness]].
|Axes now always disable shields for {{convert|1.6|seconds|ticks}}, instead of having a 25% to disable them for 5 seconds (100 game ticks).
|Axes now take 1 damage when attacking instead of 2.
|The [[Sweeping Edge]] enchantment can now be applied to axes.}}
{{History|||snap=Combat Test 4|[[Knockback]], [[Looting]], and [[Fire Aspect]] enchantments can now be applied to axes.}}
{{History|pocket alpha}}
{{History||v0.2.0|[[File:Stone Axe JE1 BE1.png|32px]] Added stone axes.}}
{{History||v0.3.0|[[File:Wooden Axe JE1 BE1.png|32px]] Added wooden axes.
|Survival players no longer start with an infinite durability stone axe in the inventory.}}
{{History||v0.3.2|[[File:Iron Axe JE4 BE1.png|32px]] [[File:Golden Axe JE2 BE1.png|32px]] [[File:Diamond Axe JE1 BE1.png|32px]] Added iron, golden and diamond axes.}}
{{History||v0.4.0|Removed stone axes from the creative inventory.}}
{{History||v0.11.0|snap=build 11|All axes are now available in the [[creative]] [[inventory]].}}
{{History|||snap=build 12|All axes have been removed from creative.}}
{{History|||snap=build 13|All axes have been re-added to creative mode.}}
{{History||v0.12.1|snap=build 1|Instead of replacing the barehanded [[damage]] ({{hp|1}}), axes now add their damage onto the barehanded damage, which results in all axes doing {{hp|1}} more damage than before.}}
{{History|pocket}}
{{History||1.0.0|snap=alpha 0.17.0.1|Stone axes now can be found inside [[igloo]] basement [[chest]]s.}}
{{History||1.0.4|snap=alpha 1.0.4.0|Weaponsmith [[villager]]s now [[trading|sell]] iron axes for 6-8 [[emerald]]s as part of their first tier [[trading|trades]] and [[enchanting|enchanted]] diamond axes for 9-12 emeralds as part of their third tier trades.}}
{{History||1.1.0|snap=alpha 1.1.0.0|Iron and golden axes are now [[smelting|smeltable]].
|Iron axes with the [[Efficiency]] I enchantment can now be found inside [[chest]]s in [[woodland mansion]]s.
|Added [[vindicator]]s, who rarely [[drops|drop]] iron axes.}}
{{History|bedrock}}
{{History||1.2.0|snap=beta 1.2.0.2|Wooden and stone axes can now be found in [[bonus chest]]s.}}
{{History||1.4.0|snap=beta 1.2.13.8|Using an axe on a [[log]] now turns it into a stripped log.}}
{{History|||snap=beta 1.2.20.1|Stone axes can now be found inside [[underwater ruins]] chests.}}
{{History||1.10.0|snap=beta 1.10.0.3|[[File:Wooden Axe JE2 BE2.png|32px]] [[File:Stone Axe JE2 BE2.png|32px]] [[File:Iron Axe JE5 BE2.png|32px]] [[File:Golden Axe JE3 BE2.png|32px]] [[File:Diamond Axe JE2 BE2.png|32px]] The textures of all axes have been changed.}}
{{History||1.11.0|snap=beta 1.11.0.4|[[Vindicator]]s and [[pillager]]s that spawn in [[raid]]s can now [[drops|drop]] an iron axe.
|[[Trading]] has been changed, weaponsmith [[villager]]s now [[trading|sell]] iron axes for 3 [[emerald]]s and [[enchanting|enchanted]] diamond axes for 12 emeralds as part of their fourth tier [[trading|trades]].
|Stone axes, enchanted iron axes, and diamond axes can now be [[trading|bought]] from toolsmith villagers.}}
{{History||1.16.0|snap=beta 1.16.0.51|[[File:Netherite Axe BE1.png|32px]] Added netherite axes.|Netherite axes are obtained by combining one diamond axe and one netherite ingot in a crafting table.
|[[File:Diamond Axe JE3 BE3.png|32px]] The texture of diamond axes has been changed.}}
{{History|||snap=beta 1.16.0.57|Netherite axes can no longer be crafted.
|Netherite axes are now obtained by combining one diamond axe and one netherite ingot in a smithing table.
|Stone axes can now be crafted using blackstone.
|Golden axes now generate randomly enchanted in [[ruined portal]] chests.
|Netherite axes now generate randomly enchanted in [[bastion remnant]] chests.}}
{{History||1.16.20|snap=beta 1.16.20.50|Added [[piglin brute]]s, who rarely drop golden axes.}}
{{History||1.16.100|snap=beta 1.16.100.54|Piglin brutes no longer spawn with enchanted axes.}}
{{History|||snap=beta 1.16.100.55|Zombified piglins that are converted from piglin brutes now keep their golden axes.}}
{{History||1.16.220|snap=beta 1.16.220.52|Axes can now be used to scrape wax off copper blocks.}}
{{History||1.18.30|snap=beta 1.18.30.26|Axes can now temporarily disable [[shield]] use. This is not mentioned in the official changelog.<ref>{{tweet|kingbdogz|1504505321884196872|We missed a change in recent changelogs for the Bedrock beta that you may like - we have now made a parity fix that makes shields get disabled for 5 seconds when attacked by an Axe-wielding mob or player. We will make sure to list this properly in the next beta :)|March 17, 2022}}</ref>
}}
{{History|console}}
{{History||xbox=TU1|xbone=CU1|ps=1.00|wiiu=Patch 1|switch=1.0.1|[[File:Wooden Axe JE1 BE1.png|32px]] [[File:Stone Axe JE1 BE1.png|32px]] [[File:Iron Axe JE4 BE1.png|32px]] [[File:Golden Axe JE2 BE1.png|32px]] [[File:Diamond Axe JE1 BE1.png|32px]] Added axes (all five types).}}
{{History||xbox=TU53|xbone=CU43|ps=1.49|wiiu=Patch 23|switch=1.0.3|Iron and golden axes are now [[smelting|smeltable]].}}
{{History||xbox=none|xbone=none|ps=1.90|wiiu=none|switch=none|[[File:Wooden Axe JE2 BE2.png|32px]] [[File:Stone Axe JE2 BE2.png|32px]] [[File:Iron Axe JE5 BE2.png|32px]] [[File:Golden Axe JE3 BE2.png|32px]] [[File:Diamond Axe JE2 BE2.png|32px]] The textures of all axes have been changed.}}
{{History|New Nintendo 3DS Edition}}
{{History||0.1.0|[[File:Wooden Axe JE1 BE1.png|32px]] [[File:Stone Axe JE1 BE1.png|32px]] [[File:Iron Axe JE4 BE1.png|32px]] [[File:Golden Axe JE2 BE1.png|32px]] [[File:Diamond Axe JE1 BE1.png|32px]] Added axes.}}
{{History|foot}}
==Issues==
{{issue list}}
==Trivia==
*Before [[Java Edition 1.13]], in the language files, axes were referred to as Hatchets.<ref name="1.8 lang">''1.8/assets/minecraft/lang/en_US.lang'', line 915: '''item.hatchetIron.name= Iron Axe'''</ref>
*Weaponsmith villagers gifting stone, iron and golden axes is a reference to the story ''[[wikipedia:The Honest Woodcutter|The Honest Woodcutter]]'', where a woodcutter dropped his axe into a river, and is successively provided a silver and a golden axe by the river god.{{cn}}
== Gallery ==
<gallery>
Stone Axe SDGP.png|Stone axe in the [[Super Duper Graphics Pack]].
</gallery>
=== Enchanted axes ===
<gallery>
Enchanted Wooden Axe.gif
Enchanted Stone Axe.gif
Enchanted Iron Axe.gif
Enchanted Golden Axe.gif
Enchanted Diamond Axe.gif
Enchanted Netherite Axe.gif
</gallery>
==See also==
*{{ItemLink|Pickaxe}}
==References==
{{Reflist}}
== External Links ==
*[https://www.minecraft.net/en-us/article/taking-inventory--axe Taking Inventory: Axe] – Minecraft.net on February 6, 2020
{{items}}
[[Category:Combat]]
[[cs:Sekera]]
[[de:Axt]]
[[es:Hacha]]
[[fr:Hache]]
[[hu:Balta]]
[[ja:斧]]
[[ko:도끼]]
[[nl:Bijl]]
[[pl:Siekiera]]
[[pt:Machado]]
[[ru:Топор]]
[[th:ขวาน]]
[[uk:Сокира]]
[[zh:斧]]</li><li>[[Sweet Berries|Sweet Berries]]<br/>{{Block
| title = Sweet Berries
| image = <gallery>
Sweet Berry Bush Age 0.png| Age 0
Sweet Berry Bush Age 1.png| Age 1
Sweet Berry Bush Age 2.png| Age 2
Sweet Berry Bush Age 3.png| Age 3
</gallery>
| image2 = Sweet Berries JE1 BE1.png
| transparent = Yes
| light = No
| tool = Any
| renewable = Yes
| stackable = Yes (64)
| heals = {{hunger|2}}
| flammable = Yes (60 java, 30 bedrock)
| lavasusceptible = No
}}
'''Sweet berries''' are a [[food]] [[item]] obtained from sweet berry bushes and are used to plant them.
'''Sweet berry bushes''' are quick-growing, [[Bone Meal|bonemealable]] [[Plant|plants]] that grow sweet berries, and damage and slow [[Player|players]] and most [[Mob|mobs]] moving through them. They can be found naturally in [[taiga]] and [[Snowy Taiga|snowy taiga]] biomes.
== Obtaining ==
=== Breaking ===
{{See also|Fortune#Discrete random}}
Sweet berry bushes can be mined instantly with any tool or by hand. A mature sweet berry bush yields 2–3 sweet berries. On its third growth stage, it yields 1–2 sweet berries. Each level of [[Fortune]] can increase the amount of drops by 1.
{{IN|ps4}}, the sweet berries drop into the player's inventory. In other editions, they drop on the ground.
=== Natural generation ===
Berry bushes commonly generate in [[taiga]] and [[snowy taiga]] biomes. Each [[chunk]] has {{frac|1|12}} chance to generate sweet berry bushes in [[random patch]]es. They also generate in both [[old growth pine taiga]] and [[old growth spruce taiga]].
=== Chest loot ===
{{LootChestItem|sweet-berries}}
=== Post-generation ===
Sweet berries can be collected from a sweet berry bush by {{control|using}} or {{control|breaking}} it, which yield 1–2 sweet berries in its third growth stage, and 2–3 sweet berries in its final growth stage.
== Usage ==
=== Placement ===
Placing [[sweet berries]] on a [[grass block]], [[dirt]], [[podzol]], [[coarse dirt]], [[farmland]]{{Only|Java}}, or [[moss block]] creates a small sweet berry bush that eventually becomes a fully grown sweet berry bush.
=== Growth ===
A sweet berry bush grows through four stages after it is planted. Its first growth stage is a small bush without any berries. It becomes a grown plant in its second stage, and produces berries in its third and fourth growth stage. The bush needs to be in light level 9 or greater to grow. {{control|Using}} [[bone meal]] on it increases its growth stage by one, and at full maturity, ejects the sweet berry item. The bush can be placed on a 1 block high space, but it cannot grow with a full, non-transparent block immediately above it.
=== Food ===
To eat sweet berries, press and hold {{control|use}} while it is selected in the hotbar. Eating one restores {{hunger|2}} [[hunger]] and 0.4{{only|je|short=1}} / 1.2{{only|be|short=1}} hunger [[saturation]].
=== Composting ===
Placing sweet berries into a [[composter]] has a 30% chance of raising the compost level by 1.
=== Breeding ===
Sweet berries can be fed to [[fox]]es to [[breeding|breed]] them. Foxes are similar to cats when being fed as a wild animal; a sudden movement by the [[player]] may cause the fox to flee even if the player holds sweet berries. A baby fox bred by a [[player]] trusts the player and does not flee.
=== Trading ===
Master-level butcher [[villager]]s offer to [[trading|buy]] 10 sweet berries for an [[emerald]].
=== Entity movement ===
A sweet berry bush (at any stage) slows down all [[entity|entities]] (except [[Item (entity)|items]]) passing through it. At stage 1 and higher, it causes damage. [[Fox]]es are immune to both characteristics, however. Sweet berry bushes deal {{hp|1}} [[damage]] every 0.5 seconds, only if the entity is moving in the hitbox of the bush. Entities that move through sweet berry bushes slow down to about 34.05% of their normal speed, similar to how a [[cobweb]] slows down mobs to 15% of normal speed. This makes it impossible to jump a full [[block]] while inside the bush.
Mobs at standard block height in a [[minecart]] are not damaged when the minecart is pushed through sweet berries. Players in a sweet berry bush take no damage except from horizontal movement, but are unable to jump out of the bush, similar to a cobweb.
=== Bees ===
[[Bee]]s pollinate sweet berry bushes, and then increase the honey level in [[beehive]]s and bee nests by 1.{{only|java}}
== Sounds ==
=== Generic ===
==== Block ====
{{Sound table/Block/Sweet berry bush}}
==== Item ====
{{Sound table/Entity/Food}}
=== Unique ===
{{edition|java}}:
{{Sound table
|rowspan=2
|sound=Berries pick1.ogg
|sound2=Berries pick2.ogg
|subtitle=Berries pop
|source=block
|description=When sweet berries are picked by a player
|id=block.sweet_berry_bush.pick_berries
|translationkey=subtitles.item.berries.pick
|volume=1.0
|pitch=0.8-1.2
|distance=16}}
{{Sound table
|subtitle=Berries pop
|source=block
|description=When sweet berries are picked by a fox
|id=block.sweet_berry_bush.pick_berries
|translationkey=subtitles.item.berries.pick
|volume=1.0
|pitch=1.0
|distance=16}}
{{Sound table
|sound=Player hurt sweet berry bush1.ogg
|sound2=Player hurt sweet berry bush2.ogg
|subtitle=Player hurts
|source=player
|description=When a player is damaged by touching a sweet berry bush
|id=entity.player.hurt_sweet_berry_bush
|translationkey=subtitles.entity.player.hurt
|volume=1.0
|pitch=0.8-1.2
|distance=16
|foot=1}}
{{edition|bedrock}}:
{{Sound table
|type=bedrock
|sound=Berries pick1.ogg
|sound2=Berries pick2.ogg
|source=block
|description=When sweet berries are picked
|id=block.sweet_berry_bush.pick
|volume=1.0
|pitch=1.0}}
{{Sound table
|sound=Player hurt sweet berry bush1.ogg
|sound2=Player hurt sweet berry bush2.ogg
|source=block
|description=When a player is damaged by touching a sweet berry bush
|id=block.sweet_berry_bush.hurt
|volume=1.0
|pitch=1.0
|foot=1}}
== Data values ==
=== ID ===
{{edition|java}}:
{{ID table
|edition=java
|showblocktags=y
|showitemtags=y
|showforms=y
|generatetranslationkeys=y
|displayname=Sweet Berry Bush
|spritetype=block
|nameid=sweet_berry_bush
|blocktags=azalea_log_replaceable, bee_growables
|form=block}}
{{ID table
|displayname=Sweet Berries
|spritetype=item
|nameid=sweet_berries
|itemtags=fox_food
|form=item
|foot=1}}
{{edition|bedrock}}:
{{ID table
|edition=bedrock
|shownumericids=y
|showforms=y
|generatetranslationkeys=y
|displayname=Sweet Berry Bush
|spritetype=block
|nameid=sweet_berry_bush
|id=462
|form=block}}
{{ID table
|displayname=Sweet Berries
|spritetype=item
|nameid=sweet_berries
|id=287
|form=item
|foot=1}}
=== Block states ===
{{see also|Block states}}
{{/BS}}
==Advancements==
{{Load advancements|Husbandry;A Balanced Diet;The Parrots and the Bats;Two by Two}}
== History ==
{{History||September 26, 2018|link={{tweet|minecraft|1044587405779451906}}|Berries are announced to be part of the [[biome]] vote at [[MINECON Earth 2018]].}}
{{History||September 29, 2018|link={{tweet|minecraft|1046097775199498245}}|[[Taiga]] wins the [[biome]] vote, meaning berries are to be added to the game first.}}
{{History|java}}
{{History||December 3, 2018|link={{tweet|cojomax99|1069586461173919745}}|[[Cojomax99]] tweets an image of some berries.}}
{{History||1.14|snap=18w49a|[[File:Sweet Berry Bush Age 0 JE1 BE1.png|32px]] [[File:Sweet Berry Bush Age 1 JE1 BE1.png|32px]] [[File:Sweet Berry Bush Age 2 JE1 BE1.png|32px]] [[File:Sweet Berry Bush Age 3 JE1 BE1.png|32px]] Added sweet berry bushes.|
[[File:Sweet Berries JE1 BE1.png|32px]] Added sweet berries.}}
{{History|||snap=18w50a|Sweet berries can now be found within [[taiga]] [[village]] loot [[chest]]s.}}
{{History|||snap=19w03a|Placing a sweet berry into the new [[composter]] has a 10% chance of raising the compost level by 1.
|Added [[sound]]s for sweet berry bushes.}}
{{History|||snap=19w05a|Sweet berries now have a 30% chance of increasing the compost level in a composter by 1.
|The [[sound]] for planting sweet berries has been changed.}}
{{History|||snap=19w07a|Sweet berries can now be fed to [[fox]]es to [[breeding|breed]] them.}}
{{History|||snap=19w11a|Butcher [[villager]]s now [[trading|buy]] sweet berries.}}
{{History||1.15|snap=19w34a|[[Bee]]s can now pollinate sweet berry bushes.}}
{{History|||snap=Pre-Release 2|Sweet berries now generate in [[giant tree taiga]] biomes.}}
{{History||1.16|snap=Pre-release 1|Sweet berry bushes no longer prevent mob spawning inside them.}}
{{History||1.17|snap=21w20a|The sound event for picking berries has been changed as to align better with that of glow berries.<ref>{{bug|MC-220063}}</ref>}}
{{History||1.18|snap=1.18-pre5|Sweet berry bushes in taigas are about 4 times more common than in previous snapshots.}}
{{History|bedrock}}
{{History||1.10.0|snap=beta 1.10.0.3|[[File:Sweet Berries JE1 BE1.png|32px]] Added sweet berries, which are available only through Experimental Gameplay.|[[File:Sweet Berry Bush Age 0 JE1 BE1.png|32px]] [[File:Sweet Berry Bush Age 1 JE1 BE1.png|32px]] [[File:Sweet Berry Bush Age 2 JE1 BE1.png|32px]] [[File:Sweet Berry Bush Age 3 JE1 BE1.png|32px]] Added sweet berry bushes, available only through Experimental Gameplay.}}
{{History||1.11.0|snap=beta 1.11.0.1|Sweet berries can now be used to fill [[composter]]s.}}
{{History|||snap=beta 1.11.0.3|Sweet berries and sweet berry bushes have been fully implemented and are now separate from Experimental Gameplay.}}
{{History|||snap=beta 1.11.0.4|Sweet berries can now be [[trading|sold]] to butcher [[villager]]s.}}
{{History||1.13.0|snap=beta 1.13.0.1|Sweet berries can now be fed to [[fox]]es to [[breeding|breed]] them.}}
{{History||1.14.0|snap=beta 1.14.0.1|[[Bee]]s can now pollinate sweet berry bushes.}}
{{History||1.16.100|snap=beta 1.16.100.54|Sweet berry bushes now properly damage entities.<ref>{{Bug|MCPE-56142}}</ref>}}
{{History||1.17.0|snap=beta 1.17.0.56|Bees no longer gather nectar from sweet berry bushes.}}
{{History|PS4}}
{{History||1.91|[[File:Sweet Berries JE1 BE1.png|32px]] Added sweet berries.|[[File:Sweet Berry Bush Age 0 JE1 BE1.png|32px]] [[File:Sweet Berry Bush Age 1 JE1 BE1.png|32px]] [[File:Sweet Berry Bush Age 2 JE1 BE1.png|32px]] [[File:Sweet Berry Bush Age 3 JE1 BE1.png|32px]] Added sweet berry bushes.}}
{{History|foot}}
=== Sweet berry bush "item" ===
{{:Technical blocks/Sweet Berry Bush}}
== Issues ==
{{issue list|berry|berries|sweet berry|sweet berries|berry bush|sweet berry bush}}
==Trivia==
* {{IN|java}}, sweet berry bushes absorb [[fall damage]] like [[water]].<ref>{{bug|MC-149990|||WAI}}</ref>
* Foxes harvest mature sweet berry bushes that have grown into their third or fourth stage. Unlike how carrots eaten by rabbits are destroyed and not dropped as items, sweet berry bushes harvested by foxes drop as items, although the fox may pick up one of the dropped berries. The bush remains intact, allowing for automatic sweet berry farms.
== Gallery ==
<gallery>
Berry Bush.png|A close-up look of a sweet berry bush.
Naturally generated berry bushes.png|A naturally generated sweet berry bush.
Multiplebushes.png|Multiple bushes of sweet berries in Taiga biome.
BerryBushCloseToRavine.png|A berry bush that is close to a ravine.
Cozy Cabin Berries.jpg|Berry bushes near a cozy cabin.
</gallery>
==References==
{{Reflist}}
{{Blocks|vegetation}}
{{Items}}
[[Category:Food]]
[[Category:Plants]]
[[Category:Non-solid blocks]]
[[Category:Natural blocks]]
[[Category:Flammable blocks]]
[[cs:Sladké bobule]]
[[es:Bayas dulces]]
[[de:Süßbeeren]]
[[fr:Baies sucrées]]
[[ja:スイートベリー]]
[[ko:달콤한 열매]]
[[pl:Słodkie jagody]]
[[pt:Bagas doces]]
[[ru:Сладкие ягоды]]
[[th:เบอร์รีหวาน]]
[[zh:甜浆果]]</li></ul> | As part of the AI overhaul, creepers no longer attack other mobs. | ||||
1.3.1{{Extension DPL}}<ul><li>[[Golden Carrot|Golden Carrot]]<br/>{{Item
| title = Golden Carrot
| image = Golden Carrot.png
| heals = {{hunger|6}}
| renewable = Yes
| stackable = Yes (64)
}}
A '''golden carrot''' is a valuable [[food]] item and [[brewing]] ingredient. It provides the second most saturation in the game, behind [[suspicious stew]] crafted with either a [[Flower|dandelion]] or [[Flower|blue orchid]].
==Obtaining==
=== Chest loot ===
{{LootChestItem|golden-carrot}}
=== Crafting ===
{{Crafting
|A1= Gold Nugget
|B1= Gold Nugget
|C1= Gold Nugget
|A2= Gold Nugget
|B2= Carrot
|C2= Gold Nugget
|A3= Gold Nugget
|B3= Gold Nugget
|C3= Gold Nugget
|Output= Golden Carrot
|type= Foodstuff
}}
=== Trading ===
Master-level farmer [[villager]]s have a 50% chance to sell 3 golden carrots for 3 [[emerald]]s {{in|bedrock}}, and always offer the same trade {{in|java}}.
== Usage ==
=== Food ===
To eat a golden carrot, press and hold {{control|use}} while it is selected in the hotbar. Eating one restores {{hunger|6}} and 14.4 [[Hunger#Mechanics|saturation points]].
=== Animal food ===
Golden carrots are used to tame, [[breed]], lead, grow, and heal [[horse]]s, [[donkey]]s, and [[mule]]s, and to breed, lead, and grow [[rabbit]]s.
=== Brewing ingredient ===
{{Brewing
|showname=1
|Golden Carrot
|Potion of Night Vision
}}
== Sounds ==
{{Sound table/Entity/Food}}
== Data values ==
=== ID ===
{{edition|java}}:
{{ID table
|edition=java
|showforms=y
|generatetranslationkeys=y
|displayname=Golden Carrot
|spritetype=item
|nameid=golden_carrot
|form=item
|foot=1}}
{{edition|bedrock}}:
{{ID table
|edition=bedrock
|shownumericids=y
|showforms=y
|notshowbeitemforms=y
|generatetranslationkeys=y
|displayname=Golden Carrot
|spritetype=item
|nameid=golden_carrot
|id=283
|form=item
|foot=1}}
== Achievements ==
{{load achievements|Artificial Selection;Oooh, shiny!}}
== Advancements ==
{{load advancements|Oh Shiny;Husbandry;A Balanced Diet}}
== Video ==
{{Video note|this video is outdated; it does not mention that golden carrots can be used as animal food.}}
<div style="text-align:center">{{yt|HJUaKroydLQ}}</div>
== History ==
{{History|java}}
{{History||1.4.2|snap=12w34a|[[File:Golden Carrot JE1.png|32px]] Added golden carrots.
|The new [[Potion of Night Vision]] is brewed by adding a golden carrot to an [[Awkward Potion]].}}
{{History|||snap=12w36a|[[File:Golden Carrot JE2.png|32px]] The texture of golden carrots has been changed.}}
{{History|||snap=12w37a|[[File:Golden Carrot JE3 BE1.png|32px]] The texture of golden carrots has been changed in order to match the new [[carrot]] texture. The [[item]] sprite no longer has a dark outline.}}
{{History||1.6.1|snap=?|Golden carrots can now be used to tame, breed and heal horses and donkeys.}}
{{History||1.8|snap=?|Golden carrots can now be used to breed rabbits.}}
{{History|||snap=14w32a|Moved golden carrots from the Foodstuffs tab to the Brewing tab in the [[Creative inventory]].<ref name="gold carrot inventory">https://bugs.mojang.com/browse/MC-3664</ref>}}
{{History||1.8.1|snap=pre1|Rabbits now follow players holding golden carrots.<ref>{{bug|MC-70054|||Fixed}}</ref>}}
{{History||1.13|snap=17w47a|Prior to [[1.13/Flattening|''The Flattening'']], this [[item]]'s numeral ID was 396.}}
{{History||1.14|snap=18w43a|[[File:Golden Carrot JE4 BE2.png|32px]] The texture of golden carrots has been changed.}}
{{History|||snap=19w11a|Farmer [[villager]]s now [[trading|sell]] golden carrots.}}
{{History||1.16|snap=20w16a|Golden carrots can now be found in [[ruined portal]] chests.}}
{{History||1.16.2|snap=20w30a|Golden carrots can now be found in [[bastion remnant]] chests.}}
{{History||1.18|snap=experimental snapshot 6|Horses, donkeys and mules now follow players holding golden carrots.}}
{{History||1.19|snap=22w13a|Golden carrots may now be found in [[ancient city]] ice box [[chest]]s.
|A single golden carrot now generates in the [[chest]] in <code>ancient_city/city_center/city_center_2</code>.}}
{{History|||snap=22w14a|The golden carrot in the chest in <code>ancient_city/city_center/city_center_2</code> has been replaced with a [[golden apple]].}}
{{History|pocket alpha}}
{{History||v0.12.1|snap=build 1|[[File:Golden Carrot JE3 BE1.png|32px]] Added golden carrots.}}
{{History||v0.13.0|snap=build 1| Golden carrots can now be used to feed [[rabbit]]s.}}
{{History||v0.15.0|snap=build 1|Golden carrots can now be used to feed [[horse]]s and [[donkey]]s.}}
{{History|bedrock}}
{{History||1.10.0|snap=beta 1.10.0.3|[[File:Golden Carrot JE4 BE2.png|32px]] The texture of golden carrots has been changed.}}
{{History||1.11.0|snap=beta 1.11.0.4|Golden carrots can now be [[trading|bought]] from farmer [[villager]]s.}}
{{History||1.13.0|snap=beta 1.13.0.9|Trading has been changed, master-level farmer now has {{frac|1|3}} chance to sell golden carrots.}}
{{History||1.16.0|snap=beta 1.16.0.57|Golden carrots now generate in [[ruined portal]] chests.
|Golden carrots trade offering chance changed to 50%.}}
{{History|console}}
{{History||xbox=TU14|xbone=CU1|ps=1.04|wiiu=Patch 1|[[File:Golden Carrot JE3 BE1.png|32px]] Added golden carrots.}}
{{History||xbox=none|xbone=none|ps=1.90|wiiu=none|switch=none|[[File:Golden Carrot JE4 BE2.png|32px]] The texture of golden carrots has been changed.}}
{{History|New 3DS}}
{{History||0.1.0|[[File:Golden Carrot JE3 BE1.png|32px]] Added golden carrots.}}
{{History|foot}}
== Issues ==
{{issue list}}
== See also ==
* [[Carrot]]
* [[Golden Apple]]
== External Links ==
*[https://www.minecraft.net/en-us/article/taking-inventory--golden-carrot Taking Inventory: Golden Carrot] – Minecraft.net on September 6, 2022
{{items}}
[[cs:Zlatá mrkev]]
[[de:Goldene Karotte]]
[[es:Zanahoria dorada]]
[[fr:Carotte dorée]]
[[hu:Aranyrépa]]
[[ja:金のニンジン]]
[[ko:황금 당근]]
[[nl:Gouden wortel]]
[[pl:Złota marchewka]]
[[pt:Cenoura dourada]]
[[ru:Золотая морковь]]
[[uk:Золота морква]]
[[zh:金胡萝卜]]
[[Category:Renewable resources]]
[[Category:Food]]
[[Category:Brewing recipe]]</li><li>[[Campfire|Campfire]]<br/>{{Block
| image = <gallery>
Campfire.gif|Campfire
Soul Campfire.gif|Soul Campfire
Unlit Campfire.png|Unlit
</gallery>
| image2 = <gallery>
Campfire (item) JE2.png|Campfire
Soul Campfire (item) JE2.png|Soul Campfire
</gallery>
| invimage = Campfire
| invimage2 = Soul Campfire
| transparent = No
| light = '''Campfire''': <br>Yes (15) when lit<br>'''Soul Campfire''': <br>Yes (10) when lit
| tool = axe
| renewable = Yes
| stackable = Yes (64)
| flammable = No
| lavasusceptible = Yes
}}
A '''campfire''' is a block that can be used to cook [[food]], pacify [[bee]]s, act as a spread-proof [[light source]], smoke signal or damaging trap block.
A '''soul campfire''' is a dimmer variant of the campfire with turquoise flames. Soul campfires deal more damage than normal campfires.
== Obtaining ==
=== Breaking ===
Campfires can be mined with any tool, or without a tool, but [[axe]]s are the fastest. A regular campfire drops 2{{only|java|short=1}} or 4{{only|bedrock|short=1}} [[charcoal]], a soul campfire drops [[soul soil]], and either one also drops any items placed on it. If mined with a tool enchanted with [[Silk Touch]], the campfire instead drops itself as an item.
{{IN|BE}}, either kind of campfire can also be broken by pushing it with a [[piston]] or [[sticky piston]]. Pistons cannot move or break campfires {{in|je}}.
{{breaking row
|Campfire, Soul Campfire
|axe
|horizontal=1}}
=== Natural generation ===
Campfires can generate in {{BiomeLink|taiga}} and {{BiomeLink|snowy taiga}}{{only|be}} [[village]]s.
Campfires also generate in camps inside [[ancient city|ancient cities]], beneath a pile of blue, light blue and cyan [[wool]] blocks.
=== Crafting ===
{{Crafting
|head=1
|B1= Stick
|A2= Stick
|B2= Coal; Charcoal
|C2= Stick
|A3= Any Log or Stem; Any Stripped Log or Stem; Any Wood or Hyphae; Any Stripped Wood or Hyphae
|B3= Any Log or Stem; Any Stripped Log or Stem; Any Wood or Hyphae; Any Stripped Wood or Hyphae
|C3= Any Log or Stem; Any Stripped Log or Stem; Any Wood or Hyphae; Any Stripped Wood or Hyphae
|Output= Campfire
|type= Decoration block
}}
{{Crafting
|foot=1
|B1= Stick
|A2= Stick
|B2= Soul Sand; Soul Soil
|C2= Stick
|A3= Any Log or Stem; Any Stripped Log or Stem; Any Wood or Hyphae; Any Stripped Wood or Hyphae
|B3= Any Log or Stem; Any Stripped Log or Stem; Any Wood or Hyphae; Any Stripped Wood or Hyphae
|C3= Any Log or Stem; Any Stripped Log or Stem; Any Wood or Hyphae; Any Stripped Wood or Hyphae
|Output= Soul Campfire
|type= Decoration block
}}
=== Trading ===
{{IN|bedrock}}, apprentice-level fisherman [[villager]]s have a 50% chance of selling a campfire for 5 [[emerald]]s.
{{IN|java}}, apprentice-level fisherman villagers have a {{frac|2|3}} chance of selling a campfire for 2 [[emerald]]s.
== Usage ==
Lit campfires emit a light level of 15 and lit soul campfires emit a light level of 10. Unlike [[fire]], campfires do not spread under any circumstances.
Campfires are lit by default when placed. Campfires can be manually lit by {{control|using}} or [[Dispenser|dispensing]] [[flint and steel]] on them, shooting it with a flaming arrow, or using or dispensing fire charges, blaze fireballs, and ghast fireballs when {{cmd|gamerule|mobGriefing}} is true. {{IN|bedrock}}, campfires can also be lit by {{control|using}} an item enchanted with [[fire aspect]], or stepping on it while burning.
Campfires can be extinguished by [[waterlogging]] it (placing [[water]] in the same block space), throwing a [[splash water bottle]] on it, or {{control|using}} a [[shovel]] on it. {{IN|bedrock}}, campfires can also be extinguished by placing a water source or allowing water to flow in the space above the campfire. As with [[torches]], rain does not extinguish campfires.<ref>{{bug|MC-141920||Rain doesn't put out campfire|Works as Intended}}</ref>
Using [[flint and steel]] on the side of a waterlogged or lit campfire sets the adjacent air block on fire instead.
Any items cooking on a campfire always drop when the campfire block is broken.
=== Particles and smoke signals ===
[[File:Campfire with smoke.gif|thumb|Campfire emitting smoke.]]
Campfires produce smoke particles that float up around 10 blocks before disappearing. If a [[hay bale]] is placed below, the campfire becomes a signal fire and the smoke floats up 24 blocks instead.
Campfire smoke particles can partially pass through a block directly above it, but do not pass through blocks more than one block directly above it.
Although a trap door is thinner than a slab, a trap door can block the smoke completely, preventing the smoke from floating up.
Campfires emit extra smoke particles during rain, similar to [[lava]].
Campfires also emit occasional ember particles, similar to lava. Soul campfires, however, do not emit embers.<ref>{{bug|MC-185482||Soul campfires do not emit ember particles|Works as Intended}}</ref>
=== Damage ===
Campfires damage [[mob]]s standing on top of them even if underwater (with exceptions such as [[shulker]]s, [[zombified piglin]]s or [[guardian]]s), but only if lit. Campfires deal {{hp|1}} and soul campfires deal {{hp|2}} of damage every tick (although [[damage immunity]] reduces this to once every half-second) Campfires do not cause lasting burning or destroy items. Damage taken is considered [[Damage#Fire|fire damage]] and is reduced by [[armor]] (which loses [[Item durability#Armor durability|durability]]), the [[Resistance]] potion effects, and the [[Protection]] and [[Fire Protection]] enchantments. The player can avoid being damaged at all, either by using a [[potion of fire resistance]] or wearing [[Frost Walker]] boots.
Regardless of [[Solid block#Height|height]], all blocks prevent damage done to mobs or players above campfires. The campfire deals damage only to entities occupying its block.
=== Cooking ===
[[File:Campfire (Cooking).gif|thumb]]
The player can place {{tooltip|raw food|raw beef, raw chicken, raw rabbit, raw porkchop, raw mutton, raw cod, raw salmon, potato, kelp}} on a lit campfire by {{control|using}} the food item on it. Up to four food items can be placed on a single campfire, which cooks the items simultaneously. Unlike other blocks that can cook food, campfires do not require any kind of fuel to cook. On a campfire, foods produce small smoke particles, indicating they are being cooked. Food items take 30 seconds (600 [[tick]]s) to cook, compared to 10 seconds for [[furnace]]s or 5 seconds for [[smoker]]s. Assuming that one uses all four slots to cook at once, the Campfire is, therefore, more efficient than furnaces (taking 10 seconds less per four items and no fuel) for cooking, but must be watched so as to pick up the food and refill it once it is done. It is slower than a smoker by about ten seconds, but its lack of fuel consumption could be seen as a worthwhile trade-off. Once finished cooking, items pop off the campfire. If the campfire is extinguished while cooking food, it resets as if it had not been cooked at all. Food items can be placed on an unlit campfire.
Other items can be placed on campfires using external editors, mods or add-ons.
=== Hoppers ===
Campfires do not have an [[Inventory#External inventories|external inventory]]. Raw food cannot be loaded into the campfire with a [[hopper]].
A hopper placed directly underneath a campfire pulls through any items dropped into the campfire. Any drops from a mob that dies in the campfire get pulled into the hopper.
=== Bees ===
Placing a campfire under a [[beehive]] or [[bee nest]] allows players to harvest [[honey bottle]]s or [[honeycomb]] without provoking the [[bee]]s.
There must be unobstructed air between the campfire and the beehive or bee nest. [[Carpet]]s are an exception.{{only|JE}}
=== Piglins ===
Lit soul campfires repel [[piglin]]s that are not currently attacking. This occurs when the [[piglin]] is within an 8 block radius of the soul campfire.
=== Light source ===
Standard lit campfires emit a light level of 15, while soul campfires emit a light level of 10. Like most other sources of light, campfires melt nearby [[snow]] and [[ice]]. Due to their lower light level, soul campfires do not melt snow or ice.
=== Note blocks ===
Campfires can be placed under [[note block]]s to produce "bass" sounds.
=== Converting soul sand to soul soil ===
Soul campfires can be used to convert [[soul sand]] into [[soul soil]]. If a soul campfire is crafted using soul sand, placed, and then broken without [[Silk Touch]], that soul campfire drops soul soil.<ref>{{bug|MC-178579||Soul campfires can be used to convert soul sand into soul soil|Works as Intended}}</ref>
=== Piston interactivity ===
{{IN|BE}}, pushing a campfire or soul campfire with a [[piston]] or [[sticky piston]] breaks it. Unlike other methods, breaking with a piston drops only one [[charcoal]] instead of two. Campfires cannot be pulled by sticky pistons.
{{IN|JE}}, pistons do not interact with campfires. Campfires neither move nor break when pushed or pulled by pistons.
== Sounds ==
=== Generic ===
{{Sound table/Block/Wood}}
=== Unique ===
{{edition|java}}:
{{Sound table
|sound=Campfire crackle1.ogg
|sound2=Campfire crackle2.ogg
|sound3=Campfire crackle3.ogg
|sound4=Campfire crackle4.ogg
|sound5=Campfire crackle5.ogg
|sound6=Campfire crackle6.ogg
|subtitle=Campfire crackles
|source=block
|description=Randomly while lit
|id=block.campfire.crackle
|translationkey=subtitles.block.campfire.crackle
|volume=0.5-1.5
|pitch=0.6-1.3
|distance=16}}
{{Sound table
|sound=Flint and steel click.ogg
|subtitle=Flint and steel click
|source=block
|description=When a campfire is lit with a flint and steel
|id=item.flintandsteel.use
|translationkey=subtitles.item.flintandsteel.use
|volume=1.0
|pitch=0.8-1.2
|distance=16}}
{{Sound table
|sound=Ghast fireball4.ogg
|subtitle=Fireball whooshes
|source=block
|description=When a campfire is lit with a fire charge
|id=item.firecharge.use
|translationkey=subtitles.item.firecharge.use
|volume=1.0
|pitch=0.8-1.2
|distance=16}}
{{Sound table
|rowspan=2
|sound=Fizz.ogg
|subtitle=Fire extinguishes
|source=block
|description=When a campfire is extinguished with water
|id=entity.generic.extinguish_fire
|translationkey=subtitles.entity.generic.extinguish_fire
|volume=1.0
|pitch=1.0
|distance=16}}
{{Sound table
|subtitle=Fire extinguished
|source=block
|description=When a campfire is extinguished
|id=block.fire.extinguish
|translationkey=subtitles.block.fire.extinguish
|volume=0.5
|pitch=2.0
|distance=16
|foot=1}}
{{edition|bedrock}}:
{{Sound table
|type=bedrock
|sound=Campfire crackle1.ogg
|sound2=Campfire crackle2.ogg
|sound3=Campfire crackle3.ogg
|sound4=Campfire crackle4.ogg
|sound5=Campfire crackle5.ogg
|sound6=Campfire crackle6.ogg
|source=block
|description=Randomly while lit
|id=block.campfire.crackle
|volume=1.0 {{Until|BE 1.19.80}}<br>0.5-1.5 {{Upcoming|BE 1.19.80}}
|pitch=1.0 {{Until|BE 1.19.80}}<br>0.6-1.3 {{Upcoming|BE 1.19.80}}}}
{{Sound table
|sound=Flint and steel click.ogg
|source=block
|description=When a campfire is lit
|id=fire.ignite
|volume=1.0
|pitch=0.8-1.2}}
{{Sound table
|sound=Ghast fireball4.ogg
|source=hostile
|description=When a campfire is lit with a fire charge
|id=mob.ghast.fireball
|volume=1.0
|pitch=1.0}}
{{Sound table
|sound=Fizz.ogg
|source=block
|description=When a campfire is extinguished
|id=random.fizz
|volume=0.5
|pitch=1.8-2.4
|foot=1}}
== Data values ==
=== ID ===
{{edition|java}}:
{{ID table
|edition=java
|showblocktags=y
|showforms=y
|generatetranslationkeys=y
|displayname=Campfire
|spritetype=block
|nameid=campfire
|blocktags=campfires}}
{{ID table
|displayname=Soul Campfire
|spritetype=block
|nameid=soul_campfire
|blocktags=campfires, piglin_repellents
|itemtags=piglin_repellents
|foot=1}}
{{ID table
|displayname=Block entity
|spritename=campfire
|spritetype=block
|nameid=campfire
|foot=1}}
{{edition|bedrock}}:
{{ID table
|edition=bedrock
|firstcolumnname=Campfire
|shownumericids=y
|showforms=y
|generatetranslationkeys=y
|displayname=Normal block
|spritename=campfire
|spritetype=block
|nameid=campfire
|id=464
|form=block
|itemform=item.campfire}}
{{ID table
|displayname=Normal item
|spritename=campfire
|spritetype=item
|nameid=campfire
|id=589
|form=item
|translationkey=tile.campfire.name}}
{{ID table
|displayname=Soul block
|spritename=soul-campfire
|spritetype=block
|nameid=soul_campfire
|id=545
|form=block
|itemform=item.soul_campfire}}
{{ID table
|displayname=Soul item
|spritename=soul-campfire
|spritetype=item
|nameid=soul_campfire
|id=622
|form=item
|translationkey=tile.soul_campfire.name
|foot=1}}
{{ID table
|notnamespaced=y
|displayname=Block entity
|spritename=campfire
|spritetype=block
|nameid=Campfire
|foot=1}}
=== Block states ===
{{see also|Block states}}
{{/BS}}
=== Block data ===
A campfire has a [[block entity]] associated with it that holds additional data about the [[block]].
{{el|java}}:
{{see also|Block entity format}}
{{/BE}}
{{el|bedrock}}:
: See [[Bedrock Edition level format/Block entity format]].
== Achievements ==
{{load achievements|Bee our guest}}
== Advancements ==
{{Load advancements|Bee Our Guest}}
== History ==
{{History||September 26, 2018|link={{tweet|minecraft|1044587405779451906}}|Campfires are announced to be part of the [[biome]] vote at [[MINECON Earth 2018]].}}
{{History||September 29, 2018|link={{ytl|HoMDyRqMNMA}}|Campfires are showcased at [[MINECON Earth 2018]].}}
{{History||September 29, 2018|link={{tweet|minecraft|1046097775199498325}}|[[Taiga]] wins the [[biome]] vote, meaning campfires are to be added to the game in [[Java Edition 1.14|1.14]].}}
{{History|java}}
{{History||1.14|snap=19w02a|[[File:Campfire JE1 BE1.gif|32px]] [[File:Unlit Campfire JE1 BE1.png|32px]] Added campfires.}}
{{History|||snap=19w03a|[[File:Campfire (item) JE1 BE1.png|32px]] [[File:Campfire JE2 BE2.gif|32px]] [[File:Unlit Campfire JE2 BE2.png|32px]] The [[model]] and texture of the campfire have been changed.
|Lit campfires now produce spark [[particles]].
|The [[light]] level of campfires has been changed from 9 to 15.
|Campfires are now directionally placed.
|Lit campfires produce smoke plume [[particles]] more often.}}
{{History|||snap=19w04a|Campfires now spawn in [[taiga]] [[village]]s on the ground and inside chimneys.
|Crouching on a campfire no longer prevents the player from taking damage from it.<ref>{{Bug|MC-141913||Sneaking on a campfire prevents damage|Fixed}}</ref>}}
{{History|||snap=19w08a|Campfires can now be extinguished by [[splash water bottle]]s.}}
{{History|||snap=19w11a|Fisherman [[villager]]s now [[trading|sell]] campfires.}}
{{History||1.14.1|snap=Pre-Release 2|Campfires can now be lit by flaming [[arrow]]s.}}
{{History||1.14.2|snap=Pre-Release 1|Flaming arrows can no longer light [[waterlogging|waterlogged]] campfires.}}
{{History||1.15|snap=19w34a|Campfires under [[bee nest]]s and [[bee hive]]s now prevent [[bee]]s from aggravating toward [[player]]s who harvest them.}}
{{History|||snap=19w37a|Campfires can now be extinguished using a [[shovel]].}}
{{History|||snap=19w42a|Campfires can now be lit by small [[fireball]]s.}}
{{History||1.16|snap=20w11a|Campfires can now be lit by any burning [[projectile]].}}
{{History|||snap=20w13a|Campfires can now be [[crafting|crafted]] using [[stems]] and [[hyphae]].}}
{{History|||snap=20w15a|[[File:Soul Campfire (item) JE1 BE1.png|32px]] [[File:Soul Campfire.gif|32px]] Added soul campfires.}}
{{History|||snap=20w22a|Campfires now [[drops|drop]] the [[food]] being cooked when they are put out with a [[shovel]] or [[water bottle]].}}
{{History|||snap=Pre-release 3|[[File:Unlit Campfire with foods on it.png|32px]] Food can now be placed on unlit campfires. However, due to a bug,<ref>{{Bug|MC-188448||Food pops off of campfire when extinguished|Fixed}}</ref> food pops off of campfires when extinguished.}}
{{History||1.17|snap=20w46a|Food no longer pops off of campfires when extinguished.}}
{{History||1.18|snap=21w41a|[[File:Campfire (item) JE2.png|32px]] [[File:Soul Campfire (item) JE2.png|32px]] Changed campfire and soul campfire textures as items.}}
{{History||1.19|snap=22w13a|Campfires now generate in camps inside [[ancient city|ancient cities]].}}
{{History||1.19.4|snap=23w07a|The soul campfire recipes are no longer unlocked by [[stick]]s.<ref>{{bug|MC-238920}}</ref>}}
{{History||1.20<br>(Experimental)|link=1.19.4|snap=1.19.4-pre1|Cherry logs, wood, and their stripped variations can now used to craft campfire and soul campfire.<ref>{{bug|MC-260149}}</ref>}}
{{History|bedrock}}
{{History||1.10.0|snap=beta 1.10.0.3|[[File:Campfire JE1 BE1.gif|32px]] [[File:Unlit Campfire JE1 BE1.png|32px]] Added campfires.
|Campfires are available only through [[Experimental Gameplay]].}}
{{History||1.11.0|snap=beta 1.11.0.1|Campfires have been fully implemented.
|[[File:Campfire_(item)_JE1_BE1.png|32px]] [[File:Campfire JE2 BE2.gif|32px]] [[File:Unlit Campfire JE2 BE2.png|32px]] The [[model]] and texture of the campfire have been changed.}}
{{History|||snap=beta 1.11.0.4|Campfires can now be [[trading|bought]] from fishermen [[villager]]s.}}
{{History||1.13.0|snap=?|Campfires now emit embers similar to [[lava]].}}
{{History||1.14.0|snap=beta 1.14.0.1|Campfires under [[bee nest]]s and [[beehive]]s now prevent [[bee]]s from aggravating toward [[player]]s who harvest them.}}
{{History||1.16.0|snap=beta 1.16.0.57|[[File:Soul_Campfire_(item)_JE1_BE1.png|32px]] [[File:Soul Campfire.gif|32px]] Added soul campfires.}}
{{History||1.16.20|snap=beta 1.16.20.50|Soul campfires now emit [[light]] level of 10.}}
{{History||1.16.100|snap=beta 1.16.100.54|Soul campfires now deal double the damage that normal campfires deal.|Soul campfires now drop [[Soul Soil]] instead of [[Charcoal]] when mined.}}
{{History||1.17.30|snap=beta 1.17.30.23|Campfires are now stackable in the inventory.}}
{{History||1.18.10|snap=beta 1.18.10.20|[[File:Campfire (item) JE2.png|32px]] [[File:Soul Campfire (item) JE2.png|32px]] Changed campfire and soul campfire textures as items.}}
{{History||1.19.60|snap=beta 1.19.60.23|Campfires no longer set players and mobs on fire.}}
{{History||1.19.80|snap=beta 1.19.80.22|Campfires now damage mobs standing on top of them.}}
{{History||1.20.30|snap=beta 1.20.30.20|Campfires now use the <code>minecraft:cardinal_direction</code> [[block state]] instead of <code>direction</code>.}}
{{History|console}}
{{History||ps=1.91|[[File:Campfire_(item)_JE1_BE1.png|32px]] [[File:Campfire JE2 BE2.gif|32px]] [[File:Unlit Campfire JE2 BE2.png|32px]] Added campfires.}}
{{History|foot}}
== Issues ==
{{Issue list}}
== Gallery ==
<gallery>
Cozy Cabin Smoke.jpg|Campfire smoke coming out of a cozy cabin.
Cozy Cabin Campfire.jpg|Campfire near a cozy cabin.
1.14 Dev Campfire.jpg|Dev screenshot.
Campfire in taiga village.png|A few naturally generating campfires in a [[taiga]] biome [[village]].
Campfire with hay bale vs without.png|A comparison between a campfire with a [[hay bale]] below it (left) and one without (right).
Campfire Particles.png|The number of particles depends on the height of the top block.
Campfire cooking.png|Cooking porkchops with a campfire.
Campfire (cooking) JE1 BE1.gif|Cooking with a campfire in [[Java Edition 19w02a]].
</gallery>
== References ==
{{reflist}}
{{Blocks|Utility}}
{{Items}}
[[Category:Utility blocks]]
[[Category:Manufactured blocks]]
[[Category:Generated structure blocks]]
[[Category:Block entities]]
[[Category:Storage]]
[[Category:Light sources]]
[[de:Lagerfeuer]]
[[fr:Feu de camp]]
[[ja:焚き火]]
[[ko:모닥불]]
[[pl:Ognisko]]
[[pt:Fogueira]]
[[ru:Костёр]]
[[th:แคมป์ไฟ]]
[[zh:营火]]</li></ul> | 12w30a | Creepers were made stronger. Depending on difficulty, creeper damage is scaled now with Easy: ~50% less damage, Normal: same damage as before, and Hard: ~33% more damage than before. In full diamond armor and hard difficulty a creeper can knock players down to 2 hearts.[2] | |||
1.4.2{{Extension DPL}}<ul><li>[[Black Dye|Black Dye]]<br/>{{Item
| image = Black Dye.png
| renewable = Yes
| stackable = Yes (64)
}}
'''Black dye''' is a [[Dye#Primary|primary color dye]] similar to an [[ink sac]].
== Obtaining ==
=== Trading ===
[[Wandering trader]]s have a chance to [[trading|trade]] 3 black dyes for 1 [[emerald]].{{only|java}}
=== Crafting ===
{{Crafting
|head=1
|showname=0
|Ink Sac
|Output=Black Dye
|type=Material
}}
{{Crafting
|Wither Rose
|Output=Black Dye
|type=Material
|foot=1
}}
== Usage ==
{{dye usage}}
=== Crafting ingredient ===
{{crafting usage|ignore=Banner|continue=1}}
{{banner crafting usage}}
=== Loom ingredient ===
{{Banner loom usage|Black Dye}}
=== Trading ===
Apprentice-level Shepherd villagers have a 20%{{only|bedrock}} or {{frac|2|7}}{{only|java}} chance to buy 12 black dye for an emerald.
== Data values ==
=== ID ===
{{edition|java}}:
{{ID table
|edition=java
|showforms=y
|generatetranslationkeys=y
|displayname=Black Dye
|spritetype=item
|nameid=black_dye
|form=item
|foot=1}}
{{edition|bedrock}}:
{{ID table
|edition=bedrock
|showaliasids=y
|shownumericids=y
|showforms=y
|notshowbeitemforms=y
|generatetranslationkeys=y
|displayname=Black Dye
|spritetype=item
|nameid=black_dye
|aliasid=dye / 16
|id=395
|form=item
|translationkey=item.dye.black_new.name
|foot=1}}
== History ==
{{History|java}}
{{History||1.14|snap=18w43a|[[File:Black Dye JE1 BE1.png|32px]] Added black dye.}}
{{History|||snap=18w44a|Black dyes now can changed the text color on the [[sign]]s to black.}}
{{History|||snap=19w05a|Added the [[wandering trader]], which sell black dyes.}}
{{History|||snap=19w11a|Black dyes can now be [[trading|bought]] by shepherd villagers.}}
{{History||1.15|snap=Pre-release 1|Black dye can now be used to craft [[prismarine|dark prismarine]], just like [[Bedrock Edition]].}}
{{History||1.17|snap=20w45a|Black dyes can now used to craft newly added [[black candle]]s.}}
{{History|||snap=21w19a|Black dyes can no longer used to craft black candles.}}
{{History|||snap=Pre-release 1|Black dyes can once again used to craft black candles.}}
{{History||1.20<br>(Experimental)|link=1.19.3|snap=22w42a|Black dyes now can change the text color on [[hanging sign]]s to black.}}
{{History|bedrock}}
{{History||1.8.0|snap=beta 1.8.0.10|[[File:Black Dye JE1 BE1.png|32px]] Added black dye.}}
{{History||1.11.0|snap=beta 1.11.0.4|Black dye can now be [[trading|sold]] to shepherd [[villager]]s.}}
{{history||1.13.0|snap=beta 1.13.0.9|Black dye can now be [[crafting|crafted]] from [[flower|wither roses]].}}
{{History||1.16.100|snap=beta 1.16.100.56|The ID of black dye has been changed from <code>dye/16</code> to <code>black_dye</code>.}}
{{History|ps4}}
{{History||1.83|[[File:Black Dye JE1 BE1.png|32px]] Added black dye.}}
{{History|foot}}
== Issues ==
{{issue list}}
{{Items}}
[[Category:Dyes]]
[[Category:Renewable resources]]
[[de:Schwarzer Farbstoff]]
[[es:Tinte negro]]
[[fr:Teinture noire]]
[[ja:黒色の染料]]
[[ko:검은색 염료]]
[[pl:Czarny barwnik]]
[[pt:Corante preto]]
[[th:สีย้อมสีดำ]]
[[zh:黑色染料]]</li><li>[[Trial Key|Trial Key]]<br/>{{Item|
|image=Trial Key .webp
|renewable=Yes
|stackable=Yes (64)
}}
{{Stub}}
{{in dev|java|bedrock|1.21|1.21.0}}
A '''Trial Key''' is an item found in [[Trial Chambers]].
Its functionality remained a mystery for a pretty good time, but on the Minecraft Monthly of January 2024, it has been revealed to open vaults, which once opened will drop an item. It's still unknown what will the loot be, but was seen dispensing the following:
Enchanted iron helmet, enchanted iron leggings, enchanted crossbow, enchanted diamond chestplate, iron, gold and diamond horse armour, enchanted golden apple, saddle, enchanted diamond axe, enchanted iron pickaxe and enchanted iron Shovel.
The trial key can currently be obtained from trial spawners (50%), or from pots and chests (8%).
[[Category:Items]]
[[ja:Trial Key]]
[[lzh:煉管]]</li></ul> | 12w38b | New creeper fall mechanics; creepers will explode if they fall on the player from a certain height. | |||
1.6.1{{Extension DPL}}<ul><li>[[Name Tag|Name Tag]]<br/>{{about|the item that gives names to mobs|the nameplate above a player's head|Player#Username}}
{{Item
| image = Name Tag.png
| renewable = Yes
| stackable = Yes (64)
}}
A '''name tag''' is an [[item]] used to name [[mob]]s in the world and prevent them from despawning naturally.
== Obtaining ==
=== Chest loot ===
{{LootChestItem|name-tag}}
=== Fishing ===
Name tags can be caught from [[fishing]] as part of the treasure category with a {{frac|1|6}} chance after the 5% chance of being a treasure catch. The chance of catching treasure increases with the [[Luck of the Sea]] enchantment.
=== Trading ===
Master-level librarian [[villagers]] offer to sell a name tag for 20 [[emerald]]s as one of their available trades.
== Usage ==
To use a name tag, it must first be renamed with an [[anvil]], costing 1 [[experience]] level.
If it is not renamed, it has no effect when used on a mob. After the name tag is renamed, the player can {{control|use}} it on a mob to give it the name given to the name tag from the anvil. Mobs and name tags can be renamed any number of times. Name tags with the same name are stackable.
Once a mob is named, it keeps its name, and the name tag is consumed.
When a mob is named, it is excluded from the mob cap count.
Effects on various mobs:
* A named [[silverfish]] that goes into a block appears to lose its name because it is replaced by a newly generated unnamed silverfish when the block is broken.
* A baby (animal or villager) keeps its name when becoming an adult.
** A named [[villager]] keeps its name when transformed into a [[Zombie Villager|zombie villager]].
** A named zombie villager keeps its name when cured.
* [[Wandering Trader|Wandering trader]]s still despawn even if they are named, or in a [[minecart]] or [[boat]].
* A named [[wither]]'s boss bar displays its name instead of "Wither".
* Naming an [[ender dragon]] with commands also displays the name in the boss bar.
=== Limitations ===
Any mob can be named except for the [[ender dragon]] and [[player]]s.
A name tag can rename an [[armor stand]], though it does not show the nameplate above its head until <code>CustomNameVisible:1b</code> is set as an extra step.
{{control|Using|use}} a name tag on a villager renames the villager instead of opening the trading interface. A saddled pig is renamed instead of being ridden. Using a name tag on any other mob that can be interacted with performs the {{control|use}} action instead of being named. These mobs can be renamed if the player uses the name tag while crouching or standing in a [[nether portal]] because the portal suppresses the {{control|use}} action.
Once a name tag is used on a mob, it is impossible to remove the name of that mob without the use of commands or external modifications.
=== Behavior ===
Renamed mobs have their name displayed over their head in the same fashion as a mob named through a renamed [[spawn egg]]. Their names can be seen only if they are aimed at from four or fewer blocks away.
Mobs that are named using the name tag never despawn in the world, similar to tamed mobs.<ref>{{tweet|dinnerbone|327485109940916226}}</ref> The exceptions are [[wandering trader]]s or if the mob is hostile and the difficulty is switched to "[[Peaceful]]", causing any hostile mobs or any named hostile mobs to despawn immediately.
If a renamed mob kills a player, the custom name is used in the death message in place of the mob type name. For instance, if a vindicator named "Johnny" kills a player, the death message is "Player was slain by Johnny".
A renamed [[wither]] also has a renamed health bar, and the boss bar doesn't regenerate{{verify}}.
=== Easter eggs ===
* Any mob that receives the name "[[Easter eggs#Upside-down mobs|Dinnerbone]]" or "[[Easter eggs#Upside-down mobs|Grumm]]" is rendered upside down. This even includes the player in early versions of Bedrock Edition if the username is set to either of these and you are not signed into Xbox Live.
* Naming a [[sheep]] "[[Easter eggs#Jeb sheep|jeb_]]" causes its wool to fade between the dye colors, producing a rainbow effect. The [[wool]] that drops when the sheep is [[shear]]ed or killed is the original color of the sheep before the sheep was named.
* Naming a [[rabbit]] "[[Rabbit#Toast|Toast]]" causes it to have a special memorial skin of user xyzen420's girlfriend's [http://www.reddit.com/r/minecraftsuggestions/comments/27hjog/to_themogminer_my_bunny_is_missing_please_help_me/ missing rabbit].
* Naming a [[vindicator]] "Johnny" causes it to be aggressive and attack all [[mob]]s including the wither (except [[ghast]]s and other [[illager]]s). The hostility even extends to [[Ravager|ravagers]] in [[Java Edition|''Java Edition'']], as the "Johnny" vindicator can also attack the ravager while it's riding it.
== Data values ==
=== ID ===
{{edition|java}}:
{{ID table
|edition=java
|showforms=y
|generatetranslationkeys=y
|displayname=Name Tag
|spritetype=item
|nameid=name_tag
|form=item
|foot=1}}
{{edition|bedrock}}:
{{ID table
|edition=bedrock
|shownumericids=y
|showforms=y
|notshowbeitemforms=y
|generatetranslationkeys=y
|displayname=Name Tag
|spritetype=item
|nameid=name_tag
|id=548
|form=item
|foot=1}}
== History ==
{{History|java}}
{{History||1.6.1|snap=13w16b|[[File:Name Tag JE1 BE1.png|32px]] Added name tags. They can now be found in [[dungeon]] [[chest]]s.}}
{{History|||snap=13w25a|A [[mob]] named "Dinnerbone" or "Grumm" now renders upside down.}}
{{History||1.7.2|snap=13w36a|Name tags can now rarely be acquired by [[fishing]], making them [[renewable resource|renewable]].}}
{{History||1.7.4|snap=13w48b|A sheep named "jeb_" now fades between the [[dye]] colors.}}
{{History||1.8|snap=14w02a|Name tags can now be [[trading|bought]] from librarian [[villager]]s, at 20–22 [[emerald]]s for 1 name tag.}}
{{History|||snap=14w27a|[[Rabbit]]s have been added and naming one "Toast" gives it a special memorial skin.}}
{{History||1.9|snap=15w44a|Added name tags to [[mineshaft]] [[chest]]s.
|The average yield of name tags in [[dungeon]] chests has been decreased.}}
{{History||1.11|snap=16w39a|Name tags can now be found in the new [[woodland mansion]] chests.
|Added [[vindicator]]s, which attack almost all mobs if named "Johnny".}}
{{History||1.13|snap=17w47a|Prior to [[1.13/Flattening|''The Flattening'']], this [[item]]'s numeral ID was 421.}}
{{History||1.14|snap=18w43a|[[File:Name Tag JE2 BE2.png|32px]] The texture of name tags has been changed.}}
{{History||1.19|snap=Deep Dark Experimental Snapshot 1|Name tags now generate in [[ancient city]] chests.}}
{{History|pocket alpha}}
{{History||v0.15.0|snap=build 1|[[File:Name Tag JE1 BE1.png|32px]] Added name tags, and a new "Name" Interact button.
|A [[mob]] named "Dinnerbone" or "Grumm" renders upside down.
|A [[sheep]] named "jeb_" fades between the [[dye]] colors.
|Naming a [[rabbit]] "Toast" gives it a special memorial skin.}}
{{History|pocket}}
{{History||1.0.4|snap=alpha 1.0.4.0|Name tags can now be [[trading|bought]] from librarian [[villager]]s for 20-22 [[emerald]]s as their last tier trade.}}
{{History||1.1.0|snap=alpha 1.1.0.0|Naming a [[vindicator]] "Johnny" now makes it hostile to any [[mob]], except other [[illager]]s.
|Name tags can now be found in [[woodland mansion]]s.}}
{{History|bedrock}}
{{History||1.4.0|snap=beta 1.2.14.2|Name tags can now be found in buried treasure [[chest]]s.}}
{{History||1.10.0|snap=beta 1.10.0.3|[[File:Name Tag JE2 BE2.png|32px]] The texture of name tags has been changed.}}
{{History||1.11.0|snap=beta 1.11.0.4|Name tags [[trading|sold]] by librarian [[villager]]s now cost 20 [[emerald]]s.}}
{{History|console}}
{{History||xbox=TU19|xbone=CU7|ps=1.12|wiiu=Patch 1|[[File:Name Tag JE1 BE1.png|32px]] Added name tags.}}
{{History|PS4}}
{{History||1.90|[[File:Name Tag JE2 BE2.png|32px]] The texture of name tags has been changed.}}
{{History|3ds}}
{{History||0.1.0|[[File:Name Tag JE1 BE1.png|32px]] Added name tags.}}
{{History|foot}}
== Issues ==
{{issue list}}
== Trivia ==
* Name tags were added at the request of [https://www.youtube.com/user/paulsoaresjr/ Paulsoaresjr].<ref>{{tweet|paulsoaresjr|326865482839883777}}</ref><ref>{{tweet|Dinnerbone|326812168630722561}}</ref>
* A stack of up to 64 name tags can be renamed at once. The cost is 1 [[experience]] level per stack, regardless of how many name tags were stacked.
* To name a [[mob]] “Name Tag” the player must give the name tag a random name, then rename it back to “Name Tag”.
* A [[villager]] with a name tag turned into a [[zombie villager]] by a [[zombie]] with a name tag does not despawn, but a villager with a name tag turned into a zombie by a zombie without a name tag does despawn.
* It is impossible to have a rainbow [[sheep]] upside-down, because it is impossible for it to be named “Jeb_” and “Dinnerbone” at the same time.
== Gallery ==
<gallery>
NameTag2.png|To use a name tag, the [[player]] must first rename it using an [[anvil]].
NameTag1.png|A [[wolf]] that has been renamed using a name tag.
RenamedCreeper.png|A [[creeper]] renamed using the name tag.
RenamedWither.png|A [[Wither Boss|wither]] renamed using a name tag. The custom name takes place of "Wither" over the [[health bar]] as well.
YoYo.png|How to use "Grumm" and "Dinnerbone" name tag [[easter egg]] and [[lead]] to make another animal Yo-yo.
Grumm Horse.png|A [[horse]] using the "Grumm" or "Dinnerbone" easter egg to be rendered upside-down.
MineshaftNameTag.png|Name Tag found in a mineshaft chest.
Pocket Edition Name Tag.jpg|First image of a name tag in bedrock edition.
</gallery>
== See also ==
* [[Spawn Egg]]
== References ==
{{reflist}}
== External Links ==
*[https://www.minecraft.net/en-us/article/taking-inventory--name-tag Taking Inventory: Name Tag] – Minecraft.net on March 15, 2019
{{items}}
[[de:Namensschild]]
[[es:Etiqueta]]
[[fr:Étiquette]]
[[it:Targhetta]]
[[ja:名札]]
[[ko:이름표]]
[[nl:Naamkaartje]]
[[pl:Znacznik]]
[[pt:Etiqueta]]
[[ru:Бирка]]
[[zh:命名牌]]
[[Category:Renewable resources]]</li><li>[[Helmet|Helmet]]<br/>{{Update|Include information about armor trims and updated netherite upgrade information.}}
{{redirect|Cap|mob spawning caps|Spawn}}
{{redirect|Turtle Shell|the item dropped by maturing turtles|Scute}}
{{Item
| image = <gallery>
Leather Cap.png| Leather
Chainmail Helmet.png| Chainmail
Iron Helmet.png| Iron
Diamond Helmet.png| Diamond
Golden Helmet.png| Golden
Netherite Helmet.png| Netherite
Turtle Shell.png| Turtle Shell
</gallery>
| durability =
* Leather: 55
* Chainmail: 165
* Iron: 165
* Golden: 77
* Diamond: 363
* Netherite: 407
* Turtle Shell: 275
| renewable =
* '''Netherite''': No
* '''All others''': Yes
| stackable = No
}}
'''Helmets''' are a type of [[armor]] that covers the head of the player. There are seven types of helmets: '''leather cap''', '''chainmail helmet''', '''iron helmet''', '''diamond helmet''', '''gold helmet''', '''netherite helmet''', and '''turtle shell'''.
==Obtaining ==
===Crafting===
{{crafting
|head=1
|showname=0
|showdescription=1
|name=Helmet
|A2= Leather;Gold Ingot;Iron Ingot;Diamond;Scute
|B2= Leather;Gold Ingot;Iron Ingot;Diamond;Scute
|C2= Leather;Gold Ingot;Iron Ingot;Diamond;Scute
|A3= Leather;Gold Ingot;Iron Ingot;Diamond;Scute
|C3= Leather;Gold Ingot;Iron Ingot;Diamond;Scute
|description=
|Output= Leather Cap;Golden Helmet;Iron Helmet;Diamond Helmet;Turtle Shell
|type= Combat
}}
{{crafting
|ignoreusage=1
|name=[[Helmet]]
|ingredients=Damaged matching helmet
|Damaged Leather Cap; Damaged Golden Helmet; Damaged Chainmail Helmet; Damaged Iron Helmet; Damaged Diamond Helmet; Damaged Turtle Shell; Damaged Netherite Helmet
|Damaged Leather Cap; Damaged Golden Helmet; Damaged Chainmail Helmet; Damaged Iron Helmet; Damaged Diamond Helmet; Damaged Turtle Shell; Damaged Netherite Helmet
|Output= Leather Cap; Golden Helmet; Chainmail Helmet; Iron Helmet; Diamond Helmet; Turtle Shell; Netherite Helmet
|description= The durability of the two helmets is added together, plus an extra 5% durability.
|type= Combat
|foot=1
}}
===Upgrading===
{{Smithing
|head=1
|Netherite Upgrade
|Diamond Helmet
|Netherite Ingot
|Netherite Helmet
|tail=1
}}
===Repairing===
====Grinding====
{{Grinding
|showdescription=1
|ingredients=2x Damaged [[Leather Cap]] or<br>2x Damaged [[Chainmail Helmet]] or<br>2x Damaged [[Iron Helmet]] or<br>2x Damaged [[Golden Helmet]] or<br>2x Damaged [[Diamond Helmet]] or<br>2x Damaged [[Netherite Helmet]] or<br>2x Damaged [[Turtle Shell]]
|Damaged Leather Cap; Damaged Chainmail Helmet; Damaged Iron Helmet; Damaged Golden Helmet; Damaged Diamond Helmet; Damaged Netherite Helmet; Damaged Turtle Shell
|Damaged Leather Cap; Damaged Chainmail Helmet; Damaged Iron Helmet; Damaged Golden Helmet; Damaged Diamond Helmet; Damaged Netherite Helmet; Damaged Turtle Shell
|Leather Cap; Chainmail Helmet; Iron Helmet; Golden Helmet; Diamond Helmet; Netherite Helmet; Turtle Shell
|description=The durability of the two helmets are added together, plus an extra 5% durability.
}}
====[[Anvil mechanics#Unit repair|Unit repair]]====
Helmets can be repaired in an [[anvil]] by adding units of the [[armor material]]'s repair material, with each repair material restoring 25% of the helmet's maximum durability, rounded down.
===Mob loot===
If a [[zombie]], [[husk]], [[stray]] or [[skeleton]] is wearing armor, there is a 8.5% chance (9.5% with [[Looting]] I, 10.5% with Looting II and 11.5% with Looting III) for the mob to drop a helmet upon death. The dropped helmet is usually badly damaged, and may be [[enchanted]] with enchantment levels 5-19.
{{IN|bedrock}}, [[vindicator]]s and [[pillager]]s spawned in [[raid]]s have a 8.3525% chance (10.28% on hard) to drop [[iron]] helmets. The dropped helmets are usually badly damaged, and have a 50% chance of being [[enchanted]] with a random [[enchantment]].
===Natural generation===
Two [[armor stand]]s are found in each taiga [[village]] outdoor armory, one of them equipped with an [[iron helmet]].
===Chest loot===
{{IN|BE}}, a sealed room in [[woodland mansion]]s can appear that has a chest sometimes containing an [[Efficiency]] I leather cap.<ref>{{bug|MCPE-109048}}</ref>
{{LootChestItem|leather-cap,random-enchanted-leather-cap,chainmail-helmet,iron-helmet,level-enchanted-iron-helmet,golden-helmet,random-enchanted-golden-helmet,diamond-helmet,damaged-diamond-helmet,level-enchanted-diamond-helmet,damaged-random-enchanted-diamond-helmet,damaged-random-enchanted-diamond-helmet-2}}
===Trading===
{{IN|java}}, novice-level armorer villagers have a 40% chance to sell an iron helmet for 4 emeralds. Journeyman-level armorers have a 40% chance to sell a chainmail helmet for 1 emerald. Master-level armorers always sell an enchanted diamond helmet for 11-27 emeralds. Apprentice-level leatherworker villagers have a {{frac|2|3}} chance to sell a leather cap<ref group="note" name="dye note">The leather armor has a random color created by two dyes (possibly the same dye twice.)</ref> for 5 emeralds. Master-level leatherworker villagers offer the same trade.
Armorer villagers may give the players with the [[Hero of the Village]] effect a chainmail helmet.
{{IN|bedrock}}, novice-level armorer villagers have a 25% chance to sell iron helmet for 5 emeralds, {{frac|1|3}} chance to sell chainmail helmet at journeyman-level for an emerald, and 50% chance to sell enchanted diamond helmet for 8 emeralds at master-level. Apprentice-level leatherworker villagers have a 50% chance to sell leather cap for 5 emeralds as part of their trades, and 50% chance to sell an enchanted leather cap for 5 emeralds at the master level.
{{notelist|columns=1}}
==Usage ==
Helmets can be placed in the top armor slot of a player's [[inventory]] for activation.
===Defense points===
Defense points are each signified by half of a shirt of mail in the armor bar above the health bar. Each defense point reduces any damage dealt to the player that is absorbed by armor by 4%, increasing additively with the number of defense points. Different materials and combinations of armor provide different levels of defense.
The following table shows the number of defense points added by helmets.
{| class="wikitable" data-description="Helmet defense points"
|-
! scope="col" |Material
! scope="col" |
|-
! scope="row" |Leather
|{{armor|1}}
|-
! scope="row" |Golden
| rowspan="4" |{{armor|2}}
|-
! scope="row" |Chainmail
|-
! scope="row" |Iron
|-
! scope="row" |Turtle Shell
|-
! scope="row" |Diamond
| rowspan="2" |{{armor|3}}
|-
! scope="row" |Netherite
|}
===Knockback resistance===
A netherite helmet provides 10% knockback resistance.
===Durability===
The following table shows the amount of damage each piece of armor can absorb before being destroyed.
Any "hit" from a damage source that can be blocked by armor removes one point of durability from each piece of armor worn for every {{hp|4}} of incoming damage (rounded down, but never below 1). Damage taken that armor doesn't protect (such as [[Damage#Fall damage|falling]] or [[Damage#Drowning|drowning]]) does not damage the armor, even if it is enchanted to protect against that type of damage. The following chart displays how many hits helmets can endure.
Netherite armor is not damaged by [[lava]] or [[fire]] when worn.
{| class="wikitable" data-description="Helmet durability"
|-
!Material
!Durability
|-
! scope="row" |Leather
|55
|-
! scope="row" |Golden
|77
|-
! scope="row" |Chainmail
| rowspan="2" |165
|-
! scope="row" |Iron
|-
! scope="row" |Turtle Shell
|275
|-
! scope="row" |Diamond
|363
|-
! scope="row" |Netherite
|407
|}
====Repair====
Helmets may be [[item repair|repaired]] by using them along with some of their crafting material (leather, gold ingots, iron ingots, diamonds or netherite) in an [[anvil]]. Chainmail helmets may be repaired in this way with iron ingots. They may also be repaired by crafting them together with another helmet of like material.
===Enchantments===
A helmet can receive the following [[enchantment]]s. Note that while iron and chainmail have the same durability, chainmail has a higher [[Tutorials/Enchanting mechanics#Enchantability|enchantability]] than iron or diamond.
{| class="wikitable"
|-
!Enchantment !!Max Level !!Notes
|-
|[[Fire Protection]]|| IV ||<ref group="note" name="exclusive">Fire Protection, Blast Protection, Projectile Protection and Protection are mutually exclusive</ref>
|-
|[[Projectile Protection]]|| IV ||<ref group="note" name="exclusive" />
|-
|[[Blast Protection]]|| IV ||<ref group="note" name="exclusive" />
|-
|[[Protection]]|| IV ||<ref group="note" name="exclusive" />
|-
|[[Unbreaking]]||III
|
|-
|[[Respiration]]||III
|
|-
|[[Aqua Affinity]]||I
|
|-
|[[Thorns]]||III ||<ref group="note" name="anvil">Only from using an [[anvil]] and [[enchanted book]]s.</ref>
|-
|[[Mending]]||I ||<ref group="note" name="anvil2">Only from chest loot, fishing, or an anvil and enchanted books.</ref>
|-
|[[Curse of Binding]]||I ||<ref group="note" name="anvil2" />
|-
|[[Curse of Vanishing]]||I ||<ref group="note" name="anvil2" />
|}
{{notelist}}
===Turtle shell effect===
Equipping a {{ItemSprite|Turtle Shell}} turtle shell provides the {{EffectLink|Water Breathing}} status effect, allowing the player to remain underwater for an additional 10 seconds. The time that this effect lasts does not begin to count down until the player dives underwater, then the 10 seconds are counted down. The effect immediately recharges after exposure to air.
===Brewing ingredient===
A turtle shell can also be used as a potion brewing ingredient.
{{Brewing
|Turtle Shell
|Potion of the Turtle Master
|Potion of the Turtle Master
|Potion of the Turtle Master
|showname=1
}}
===Smelting usage===
{{Smelting|showname=1|Iron Helmet;Chainmail Helmet;Golden Helmet|Iron Nugget;Iron Nugget;Gold Nugget|0,1}}
===Piglins===
{{EntityLink|Piglin|Piglins}} are attracted to ''golden'' helmets and pick them up, examining them for 6 to 8 seconds. Piglins can wear other helmets but are not attracted to them. They prefer stronger helmets over weaker helmets, with one exception: They always prefer golden helmets, throwing out stronger helmets in favor of gold helmets. Enchanted helmets are preferred over unenchanted helmets.
==Sounds ==
{{el|je}}:
{{Sound table
|sound=Equip leather1.ogg
|sound2=Equip leather2.ogg
|sound3=Equip leather3.ogg
|sound4=Equip leather4.ogg
|sound5=Equip leather5.ogg
|sound6=Equip leather6.ogg
|subtitle=Leather armor rustles
|source=player
|description=When a leather helmet is equipped
|id=item.armor.equip_leather
|translationkey=subtitles.item.armor.equip_leather
|volume=1.0
|pitch=1.0
|distance=16}}
{{Sound table
|sound=Equip chain1.ogg
|sound2=Equip chain2.ogg
|sound3=Equip chain3.ogg
|sound4=Equip chain4.ogg
|sound5=Equip chain5.ogg
|sound6=Equip chain6.ogg
|subtitle=Chain armor jingles
|source=player
|description=When a chainmail helmet is equipped
|id=item.armor.equip_chain
|translationkey=subtitles.item.armor.equip_chain
|volume=1.0
|pitch=1.0
|distance=16}}
{{Sound table
|sound=Equip iron1.ogg
|sound2=Equip iron2.ogg
|sound3=Equip iron3.ogg
|sound4=Equip iron4.ogg
|sound5=Equip iron5.ogg
|sound6=Equip iron6.ogg
|subtitle=Iron armor clanks
|source=player
|description=When an iron helmet is equipped
|id=item.armor.equip_iron
|translationkey=subtitles.item.armor.equip_iron
|volume=1.0
|pitch=1.0
|distance=16}}
{{Sound table
|sound=Equip gold1.ogg
|sound2=Equip gold2.ogg
|sound3=Equip gold3.ogg
|sound4=Equip gold4.ogg
|sound5=Equip gold5.ogg
|sound6=Equip gold6.ogg
|subtitle=Gold armor clinks
|source=player
|description=When a gold helmet is equipped
|id=item.armor.equip_gold
|translationkey=subtitles.item.armor.equip_gold
|volume=1.0
|pitch=1.0
|distance=16}}
{{Sound table
|sound=Equip diamond1.ogg
|sound2=Equip diamond2.ogg
|sound3=Equip diamond3.ogg
|sound4=Equip diamond4.ogg
|sound5=Equip diamond5.ogg
|sound6=Equip diamond6.ogg
|subtitle=Diamond armor clangs
|source=player
|description=When a diamond helmet is equipped
|id=item.armor.equip_diamond
|translationkey=subtitles.item.armor.equip_diamond
|volume=1.0
|pitch=1.0
|distance=16}}
{{Sound table
|sound=Equip netherite1.ogg
|sound2=Equip netherite2.ogg
|sound3=Equip netherite3.ogg
|sound4=Equip netherite4.ogg
|subtitle=Netherite armor clanks
|source=player
|description=When a netherite helmet is equipped
|id=item.armor.equip_netherite
|translationkey=subtitles.item.armor.equip_netherite
|volume=0.8
|pitch=1.0/0.9
|distance=16}}
{{Sound table
|sound=Equip turtle shell.ogg
|subtitle=Turtle Shell thunks
|source=player
|description=When a turtle shell is equipped
|id=item.armor.equip_turtle
|translationkey=subtitles.item.armor.equip_turtle
|volume=1.0
|pitch=1.0/0.85/1.1
|distance=16}}
{{Sound table
|sound=Random break.ogg
|subtitle=Item breaks
|source=dependent
|description=When a helmet's durability is exhausted
|id=entity.item.break
|translationkey=subtitles.entity.item.break
|volume=0.8
|pitch=0.8-1.2
|distance=16
|foot=1}}
{{el|be}}:
{{Sound table
|type=bedrock
|sound=Equip leather1.ogg
|sound2=Equip leather2.ogg
|sound3=Equip leather3.ogg
|sound4=Equip leather4.ogg
|sound5=Equip leather5.ogg
|sound6=Equip leather6.ogg
|source=player
|description=When a leather helmet or a turtle shell is equipped
|id=armor.equip_leather
|volume=1.0
|pitch=1.0}}
{{Sound table
|sound=Equip chain1.ogg
|sound2=Equip chain2.ogg
|sound3=Equip chain3.ogg
|sound4=Equip chain4.ogg
|sound5=Equip chain5.ogg
|sound6=Equip chain6.ogg
|source=player
|description=When a chain helmet is equipped
|id=armor.equip_chain
|volume=1.0
|pitch=1.0}}
{{Sound table
|sound=Equip iron1.ogg
|sound2=Equip iron2.ogg
|sound3=Equip iron3.ogg
|sound4=Equip iron4.ogg
|sound5=Equip iron5.ogg
|sound6=Equip iron6.ogg
|source=player
|description=When an iron helmet is equipped
|id=armor.equip_iron
|volume=1.0
|pitch=1.0}}
{{Sound table
|sound=Equip gold1.ogg
|sound2=Equip gold2.ogg
|sound3=Equip gold3.ogg
|sound4=Equip gold4.ogg
|sound5=Equip gold5.ogg
|sound6=Equip gold6.ogg
|source=player
|description=When a gold helmet is equipped
|id=armor.equip_gold
|volume=1.0
|pitch=1.0}}
{{Sound table
|sound=Equip diamond1.ogg
|sound2=Equip diamond2.ogg
|sound3=Equip diamond3.ogg
|sound4=Equip diamond4.ogg
|sound5=Equip diamond5.ogg
|sound6=Equip diamond6.ogg
|source=player
|description=When a diamond helmet is equipped
|id=armor.equip_diamond
|volume=1.0
|pitch=1.0}}
{{Sound table
|sound=Equip netherite1.ogg
|sound2=Equip netherite2.ogg
|sound3=Equip netherite3.ogg
|sound4=Equip netherite4.ogg
|source=player
|description=When a netherite helmet is equipped.
|id=armor.equip_netherite
|volume=1.0
|pitch=1.0}}
{{Sound table
|rowspan=2
|sound=Water Splash Old.ogg
|source=block
|description=When a leather helmet is dyed using a cauldron
|id=cauldron.dyearmor
|volume=0.1
|pitch=1.0}}
{{Sound table
|source=block
|description=When a leather helmet's dye is removed using a cauldron
|id=cauldron.cleanarmor
|volume=0.1
|pitch=1.0}}
{{Sound table
|sound=Random break.ogg
|source=player
|description=When a helmet's durability is exhausted
|id=random.break
|volume=1.0
|pitch=0.9
|foot=1}}
==Data values ==
=== ID===
{{edition|java}}:
{{ID table
|edition=java
|showitemtags=y
|showforms=y
|generatetranslationkeys=y
|displayname=Leather Cap
|spritetype=item
|nameid=leather_helmet
|itemtags=freeze_immune_wearables
|form=item}}
{{ID table
|displayname=Chainmail Helmet
|spritetype=item
|nameid=chainmail_helmet
|form=item}}
{{ID table
|displayname=Iron Helmet
|spritetype=item
|nameid=iron_helmet
|form=item}}
{{ID table
|displayname=Diamond Helmet
|spritetype=item
|nameid=diamond_helmet
|form=item}}
{{ID table
|displayname=Golden Helmet
|spritetype=item
|nameid=golden_helmet
|form=item}}
{{ID table
|displayname=Netherite Helmet
|spritetype=item
|nameid=netherite_helmet
|form=item}}
{{ID table
|displayname=Turtle Shell
|spritetype=item
|nameid=turtle_helmet
|form=item
|foot=1}}
{{edition|bedrock}}:
{{ID table
|edition=bedrock
|shownumericids=y
|showforms=y
|notshowbeitemforms=y
|generatetranslationkeys=y
|displayname=Leather Cap
|spritetype=item
|nameid=leather_helmet
|id=335
|form=item}}
{{ID table
|displayname=Chainmail Helmet
|spritetype=item
|nameid=chainmail_helmet
|id=339
|form=item}}
{{ID table
|displayname=Iron Helmet
|spritetype=item
|nameid=iron_helmet
|id=343
|form=item}}
{{ID table
|displayname=Diamond Helmet
|spritetype=item
|nameid=diamond_helmet
|id=347
|form=item}}
{{ID table
|displayname=Golden Helmet
|spritetype=item
|nameid=golden_helmet
|id=351
|form=item}}
{{ID table
|displayname=Netherite Helmet
|spritetype=item
|nameid=netherite_helmet
|id=609
|form=item}}
{{ID table
|displayname=Turtle Shell
|spritetype=item
|nameid=turtle_helmet
|id=573
|form=item
|foot=1}}
===Item data===
When leather caps are dyed, it has the following NBT:
<div class="treeview">
*{{nbt|compound|tag}}: Parent tag.
**{{nbt|compound|display}}: Display properties.
***{{nbt|int|color}}: The color of the leather armor. The tooltip displays "Dyed" if advanced tooltips are disabled, otherwise it displays the hexadecimal color value. Color codes are calculated from the Red, Green and Blue components using this formula:<br>'''<span style="color:red">Red</span>[[wikipedia:Logical shift|<<]]16 + <span style="color:green">Green</span><<8 + <span style="color:blue">Blue</span>'''<ref>For positive values larger than 0x00FFFFFF, the top byte is ignored. All negative values produce white.</ref>
</div>
==Achievements ==
{{load achievements|Iron Man;Tie Dye Outfit;Cover me in debris;Oooh, shiny!}}
==Advancements ==
{{load advancements|Suit Up;Cover me With Diamonds;Oh Shiny;Cover Me in Debris;A Furious Cocktail;How Did We Get Here}}
==History ==
{{History|java classic}}
{{History||August 13, 2009|link=wordofnotch:162091556|Notch tested armor models on [[mob (entity)|mob]]. Only [[chestplate]]s and helmets were available. They were merely aesthetic at the time and had no effect on gameplay.}}
{{History||0.24_SURVIVAL_TEST|[[File:Plate Helmet.png|32px]] Added [[Java_Edition_removed_features#Armor_in_Survival_Test|plate helmet]]s.
|[[File:Chainmail Helmet JE1.png|32px]] Added the model and the texture for unused [[Java_Edition_removed_features#Armor_in_Survival_Test|chain helmet]]s.
|[[File:Zombie full set.png|32px]] [[File:Skeleton helmet.png|26px]] Plate armor models have been tested on [[zombie]]s and [[skeleton]]s. It had no effect on gameplay.}}
{{History|java indev}}
{{History||0.31|snap=20091223-1|Plate and chain armor [[model]]s are no longer used.}}
{{History|||snap=20091231-2|[[File:Leather Cap (item) JE1 BE1.png|32px]] [[File:Studded Helmet (item) JE1.png|32px]] [[File:Chainmail Helmet (item) JE1 BE1.png|32px]] [[File:Iron Helmet (item) JE1 BE1.png|32px]] Added [[item]]s of relation to leather, [[History of textures/Unused textures#Studded armor|studded]], chainmail and plate (iron) helmets.
|The textures of leather helmets are taken from one of [[Notch]]'s previous games, ''[[Legend of the Chambered]]''. The rest are from ''[[Legend of the Chambered 2]]''.}}
{{History||20100206|[[File:Golden Helmet (item) JE1 BE1.png|32px]] [[File:Diamond Helmet (item) JE1 BE1.png|32px]] Added items of golden and diamond helmets.
|Removed leather-chain helmets.}}
{{History||20100212-1|Added armor models.
|[[File:Indev 20100212 armor.png|50px]] Armor models are now displayed on the [[player]] in the [[inventory]].}}
{{History||20100218|[[File:Leather Cap JE1 BE1.png|32px]] [[File:Chainmail Helmet JE2 BE1.png|32px]] [[File:Iron Helmet JE1 BE1.png|32px]] [[File:Golden Helmet JE1 BE1.png|32px]] [[File:Diamond Helmet JE1 BE1.png|32px]] Added models of leather, chainmail, iron, gold, and diamond helmets.
|Helmets can now be [[crafting|crafted]] and worn.
|Helmets now function. All helmets give {{Armor|3}}. Helmets have limited [[item durability|durability]], with lower tier helmets less durable than higher tier helmets.}}
{{History|java alpha}}
{{History||v1.0.8|With the introduction of [[leather]], "Cloth Cap" has been renamed to "Leather Cap".
|Leather cap is now [[crafting|crafted]] with leather instead of [[wool|cloth]].}}
{{History|java}}
{{History||1.0.0|snap=Beta 1.9 Prerelease|The armor protection behavior has been changed. Prior to this update, the total armor protection is based in this equation: (((''total equipped armor damage reduction'' − 1) × (''all equipped armor max damage'' − ''total equipped armor damage'')) ÷ (''total equipped armor max damage'' + 1)). Armor no longer reduces certain damage types to be covered by enchantments.}}
{{History|||snap=October 3, 2011|slink={{tweet|notch|120859830339637249}}|The first images of a [[player]] wearing enchanted armor are revealed.}}
{{History|||snap=Beta 1.9 Prerelease 3|Iron helmets can now be found in the new [[stronghold]] altar [[chest]]s.}}
{{History|||snap=Beta 1.9 Prerelease 4|Helmets can now be [[enchanting|enchanted]].}}
{{History||1.1|snap=12w01a|Iron helmets can now be found in the new blacksmith [[chest]]s in [[village]]s.}}
{{History||1.2.1|snap=12w06a|[[Zombie]]s now drop iron helmets on rare occasions and [[zombie pigman|zombie pigmen]] now drop golden helmets.}}
{{History||1.3.1|snap=12w15a|{{key|Shift}}+clicking can now be used to wear helmets.}}
{{History|||snap=12w21a|Chain helmets can now be obtained legitimately in [[survival]] mode through [[trading]].
|Blacksmith [[villager]]s now [[trading|sell]] chain helmets for 5–6 emeralds.
|Blacksmith villagers now sell diamond helmets for 7 emeralds.
|Blacksmith villagers now sell iron helmets for 4–5 emeralds.
|Butchers now sell leather caps for 2–3 emeralds.}}
{{History||1.4.2|snap=12w32a|[[Mob]] armor has been reintroduced. A partial or full set of any armor is now sometimes worn by [[zombie]]s, [[skeleton]]s and [[zombified piglins|zombie pigmen]], with the likelihood increasing with difficulty.}}
{{History|||snap=August 17, 2012|slink={{tweet|Dinnerbone|236445090929844225}}|[[Jeb]] and [[Dinnerbone]] tweeted pictures of [[dye]]able leather armor.}}
{{History|||snap=12w34a|Leather helmets can now be dyed by [[crafting]] a leather armor piece with [[dye]]s. Dyes can be removed by {{control|use|text=using}} dyed leather armor on a [[cauldron]] with [[water]].
|[[File:Leather Cap JE2.png|32px]] [[File:Leather Cap (item) JE2.png|32px]] Default leather caps textures are now slightly darker.}}
{{History|||snap=12w36a|[[Dye]]d leather caps are now more saturated and have a slight tint of tan in respect to the default armor color.}}
{{History|||snap=12w37a|[[File:Leather Cap JE3 BE2.png|32px]] [[File:Leather Cap (item) JE3 BE2.png|32px]] Leather armor now has non-dyed parts on the cap. This has been implemented so that [[player]]s can distinguish between other types of helmets and similarly colored leather caps.}}
{{History||1.5|snap=13w04a|Helmets in the [[player]]'s hand can now be equipped by right-clicking.
|[[Dispenser]]s can now equip nearby players with helmets.}}
{{History||1.8|snap=14w02a|[[Trading|Trades]] changed: armorer [[villager]]s now [[trading|sell]] chain helmets for 5–7 emeralds.
|Armorer villagers no longer sell diamond helmets.
|Armorer villagers now sell iron helmets for 4–6 emeralds.
|Leatherworkers no longer sell other leather caps.}}
{{History|||snap=14w05a|Helmets no longer turns red when [[mob]]s and [[player]]s are hurt.}}
{{History|||snap=14w06a|Helmets are now visible on [[giant]]s.}}
{{History|||snap=14w25a|Chain helmets [[Java Edition removed features#Chainmail armor|cannot be crafted anymore]] due to the [[item]] form of [[fire]] being [[Java Edition removed features#Obtainable until 1.8|removed]].}}
{{History||1.9|snap=15w31a|Enchanted iron and diamond helmets can now be found in [[end city]] ship [[chest]]s.
|[[Mob]]s now wear armor from the bottom to the top, rather than from the top to the bottom. This means that a mob with three armor pieces, for example, spawn with all armor except a helmet.}}
{{History|||snap=15w34b|Helmet [[item durability|durability]] now affects armor value.}}
{{History|||snap=15w36a|Armor and armor [[enchanting|enchantment]] calculations have been changed. For the original values, see [[Armor/Before 1.9|here]].}}
{{History|||snap=15w36d|Helmet durability affecting value has been removed.
|Helmets now has an attribute controlling the defense points.}}
{{History|||snap=15w50a|Added <code>equip</code> [[sound]]s for leather armor.}}
{{History|||snap=16w02a|Armor and armor enchantment calculations have been changed again.}}
{{History|||snap=16w05a|Armor calculations have been changed, once again.}}
{{History||1.13|snap=17w47a|Prior to [[1.13/Flattening|''The Flattening'']], these [[item]]s' numeral IDs were 298, 302, 306, 310 and 314.}}
{{History|||snap=18w07a|[[File:Turtle Shell.png|32px]] [[File:Turtle Shell (item) JE1 BE1.png|32px]] Added turtle shells.}}
{{History|||snap=18w09a|Golden helmets now have a chance of generating in [[underwater ruins]].}}
{{History|||snap=18w11a|Enchanted leather caps can now generate in the chests of [[shipwreck]]s.}}
{{History|||snap=18w20a|"Chain Helmet" has now been renamed to "Chainmail Helmet".}}
{{History||1.14|snap=18w43a|[[File:Leather Cap JE4 BE2.png|32px]] [[File:Chainmail Helmet JE3 BE2.png|32px]] [[File:Iron Helmet JE2 BE2.png|32px]] [[File:Golden Helmet JE2 BE2.png|32px]] [[File:Diamond Helmet JE2 BE2.png|32px]]<br>[[File:Leather Cap (item) JE4 BE3.png|32px]] [[File:Chainmail Helmet (item) JE2 BE2.png|32px]] [[File:Iron Helmet (item) JE2 BE2.png|32px]] [[File:Golden Helmet (item) JE2 BE2.png|32px]] [[File:Diamond Helmet (item) JE2 BE2.png|32px]] The textures of all types of helmets have been changed.}}
{{History|||snap=18w48a|Leather caps can now be found in [[chest]]s in [[village]] tanneries.}}
{{History|||snap=18w50a|Iron helmets can now be found on [[armor stand]]s in [[taiga]] villages.}}
{{History|||snap=19w08a|[[File:Golden Helmet (item) JE3 BE3.png|32px]] The textures of gold helmet [[item]]s have been changed.}}
{{History|||snap=19w11a|Armorer villagers now sell enchanted diamond helmets, making diamond helmets effectively [[renewable resource|renewable]] again.
|Leatherworker villagers now sell randomly [[dye]]d leather caps.}}
{{History|||snap=19w13a|Armorer villagers now give chainmail helmets to players under the [[Hero of the Village]] effect.}}
{{History||1.16|snap=20w06a|[[File:Netherite Helmet JE1.png|32px]] [[File:Netherite Helmet (item) JE1.png|32px]] Added netherite helmets.}}
{{History|||snap=20w07a|[[File:Leather piglin helmet.png|32px]] [[File:Chainmail piglin helmet.png|32px]] [[File:Iron piglin helmet.png|32px]] [[File:Golden piglin helmet.png|32px]] [[File:Diamond piglin helmet.png|32px]] [[File:Netherite piglin helmet JE1.png|32px]] Added textures and [[model]]s for all helmets when they are used by [[piglin]]s.
|Netherite helmets are now obtained by combining one diamond armor piece and one netherite ingot in a crafting table.
|[[File:Turtle Shell piglin MC-172110.png|32px]] Turtle shells, when used by piglins and [[zombified piglin]]s, result in a [[missing texture]] when being displayed.<ref>{{Cite bug|MC|172110|Texture of turtle shells is missing when worn by a piglin or zombified piglin|date=February 14, 2020}}</ref>}}
{{History|||snap=20w09a|[[File:Diamond Helmet (item) JE3 BE3.png|32px]] The textures of diamond helmet [[item]]s have been changed.}}
{{History|||snap=20w10a|[[File:Netherite Helmet JE2 BE1.png|32px]] [[File:Netherite Helmet (item) JE2 BE1.png|32px]] The texture of netherite helmets has been changed.
|[[File:Netherite piglin helmet.png|32px]] The texture of netherite helmets for [[piglin]]s has been changed.
|Netherite helmets can no longer be [[crafting|crafted]].
|Netherite helmets are now obtained by combining one diamond helmet and one netherite ingot in a [[smithing table]].}}
{{History|||snap=20w16a|Golden and netherite helmets now generate randomly [[enchanting|enchanted]], and sometimes [[damage]]d, in [[bastion remnant]] and [[ruined portal]] chests.}}
{{History|||snap=20w17a|Diamonds helmets now generate in place of netherite helmets in bastion remnant [[chest]]s.}}
{{History|||snap=pre3|The special helmet [[model]]s and textures created for [[piglin]]s have been removed except for leather helmets.}}
{{History||1.17|snap=20w48a|Wearing a leather helmet now prevents [[Powder Snow#Freezing|freezing]] entirely.}}
{{History|||snap=21w13a|The two unused textures of the leather cap for [[piglin]]s<ref><code>/assets/minecraft/textures/models/armor/piglin_leather_layer_1.png</code></ref><ref><code>/assets/minecraft/textures/models/armor/piglin_leather_layer_1_overlay.png</code></ref> have been removed.}}
{{History||1.18.2|snap=22w03a|Netherite helmet knockback resistance is no longer random.}}
{{History||1.19|snap=22w17a|[[File:Leather Cap JE5.png|32px]] The texture of the leather cap item has been changed.|Changed the leather cap texture when worn so the center bar now extends to the bottom of the back face.}}
{{History||1.20<br>(Experimental)|link=1.19.4|snap=23w04a|Non-leather helmets can now be trimmed using a [[smithing table]].
|There are 10 types of material that determine the color of the trim:
*Iron
*Copper
*Gold
*Lapis
*Emerald
*Diamond
*Netherite
*Redstone
*Amethyst
*Quartz
|Upgrading diamond helmets to netherite helmets now requires the netherite upgrade [[smithing template]].}}
{{History|||snap=23w05a|Leather caps can now be trimmed using a smithing table.|Helmets can now have trims of the same material it is made out of.}}
{{History|||snap=23w06a|Swapped {{cd|iron}} and {{cd|iron_darker}} palette, then made {{cd|iron_darker}} darker overall.}}
{{History||1.19.4|snap=23w05a|Helmets can now be swapped by {{ctrl|using}} them in the hotbar.<ref>{{bug|MC-216270|||Fixed}}</ref>}}
{{History||?|Helmets can now be swapped in [[armor stand]]s by {{ctrl|using}} them/[[head]]s/[[carved pumpkin]]s in the armor stand's slot.}}
{{History||1.20|snap=23w12a|The pattern textures of dune and sentry armor trims are changed.|Those previous patterns were left with different names: dune was renamed sentry and sentry was renamed shaper.}}
{{History|pocket alpha}}
{{History||v0.6.0|[[File:Leather Cap JE1 BE1.png|32px]] [[File:Chainmail Helmet JE2 BE1.png|32px]] [[File:Iron Helmet JE1 BE1.png|32px]] [[File:Golden Helmet JE1 BE1.png|32px]] [[File:Diamond Helmet JE1 BE1.png|32px]]<br>[[File:Leather Cap (item) JE1 BE1.png|32px]] [[File:Chainmail Helmet (item) JE1 BE1.png|32px]] [[File:Iron Helmet (item) JE1 BE1.png|32px]] [[File:Golden Helmet (item) JE1 BE1.png|32px]] [[File:Diamond Helmet (item) JE1 BE1.png|32px]] Added helmets.}}
{{History||v0.8.0|snap=build 2|[[File:Leather Cap (item) JE3 BE2.png|32px]] The leather helmet sprite has been changed to that of {{el|je}}, but its armor [[model]] remains that of older versions.}}
{{History||v0.9.0|snap=build 1|Iron helmets now naturally generate in [[village]] [[chest]]s and in [[stronghold]] altar chests.}}
{{History||v0.11.0|snap=build 11|Helmets now protect against [[damage]] from [[mob]]s only.}}
{{History||v0.12.1|snap=build 1|Helmets can now be worn by mobs.
|Chainmail helmets can now be obtained in [[survival]] mode from a mob wearing it.}}
{{History||?|Helmets no longer turn red when [[mob]]s and [[player]]s are hurt.}}
{{History||v0.14.0|snap=build 1|[[File:Leather Cap JE3 BE2.png|32px]] The texture of leather helmets have been changed.
|Leather helmets can now be dyed.}}
{{History||v0.15.0|snap=build 1|Helmets can now be obtained from [[stray]]s and [[husk]]s that naturally spawn with armor.}}
{{History|pocket}}
{{History||1.0.0|snap=alpha 0.17.0.1|[[Enchanting|Enchanted]] iron helmets and enchanted diamond helmets can now be found inside [[chest]]s within [[end city|end cities]].}}
{{History||1.0.4|snap=alpha 1.0.4.0|Iron helmets and chainmail helmets are now [[trading|sold]] by armorer smith [[villager]]s via trading.}}
{{History||1.1.0|snap=alpha 1.1.0.0|Golden, chain and iron helmets can now be [[smelting|smelted]] down into one of their respective [[nugget]]s.}}
{{History|bedrock}}
{{History||1.4.0|snap=beta 1.2.14.2|Chainmail helmets now generate in [[buried treasure]] chests.
|Enchanted leather helmets can now be found inside [[shipwreck]] supply room [[chest]]s.}}
{{History|||snap=beta 1.2.20.1|Golden helmets can now be found inside [[underwater ruins]] chests.}}
{{History||1.5.0|snap=beta 1.5.0.4|[[File:Turtle Shell.png|32px]] [[File:Turtle Shell (item) JE1 BE1.png|32px]] Added turtle shells.}}
{{History||1.10.0|snap=beta 1.10.0.3|[[File:Leather Cap JE4 BE2.png|32px]] [[File:Chainmail Helmet JE3 BE2.png|32px]] [[File:Iron Helmet JE2 BE2.png|32px]] [[File:Golden Helmet JE2 BE2.png|32px]] [[File:Diamond Helmet JE2 BE2.png|32px]]<br>[[File:Leather Cap (item) JE4 BE3.png|32px]] [[File:Chainmail Helmet (item) JE2 BE2.png|32px]] [[File:Iron Helmet (item) JE2 BE2.png|32px]] [[File:Golden Helmet (item) JE2 BE2.png|32px]] [[File:Diamond Helmet (item) JE2 BE2.png|32px]] The textures of all types of helmets have been changed.
|Iron helmets now can be found in plains [[village]] weaponsmith [[chest]]s.
|Leather helmets can now be found inside plains village tannery chests.}}
{{History||1.11.0|snap=beta 1.11.0.1|Iron helmets now can be found in [[savanna]], [[taiga]], [[desert]], [[snowy taiga]] and [[snowy tundra]] [[village]] weaponsmith [[chest]]s.
|Leather helmets can now be found inside savanna, taiga, desert, snowy taiga and snowy tundra village tannery chests.
|Iron helmets can now be found in [[village]] armorer chests.}}
{{History|||snap=beta 1.11.0.4|[[Pillager]]s and [[vindicator]]s that spawn in [[raid]]s can now drop iron helmets.
|Diamond helmets are now sold by armorer villagers.}}
{{History||1.11.0|snap=beta 1.11.0.5|[[File:Golden Helmet (item) JE3 BE3.png|32px]] The textures of gold helmet [[item]]s have been changed.}}
{{History||1.12.0|snap=beta 1.12.0.2|[[File:Armor Stand with Leather Armor MCPE-44669.png|32px]] Leather armor no longer shows as being [[dye]]d properly when worn by [[armor stand]]s.}}
{{History||1.13.0|snap=beta 1.13.0.1|Leather armor now appears properly dyed when worn by armor stands.}}
{{History||1.16.0|snap=beta 1.16.0.51|[[File:Netherite Helmet JE2 BE1.png|32px]] [[File:Netherite Helmet (item) JE2 BE1.png|32px]] Added netherite helmets.
|[[File:Diamond Helmet (item) JE3 BE3.png|32px]] The textures of diamond helmet [[item]]s have been changed.
|Helmets can now be obtained from [[piglin]]s that naturally spawn with golden helmets.}}
{{History|||snap=beta 1.16.0.57|Golden and netherite helmets now generate randomly [[enchanting|enchanted]], and sometimes [[damage]]d, in [[bastion remnant]] chests.
|Netherite helmets can no longer be [[crafting|crafted]].
|Netherite helmets are now obtained by combining one diamond helmet and one netherite ingot in a [[smithing table]].}}
{{History|||snap=beta 1.16.0.63|Diamonds helmets now generate in place of netherite helmets in bastion remnant [[chest]]s.}}
{{History|||snap=beta 1.16.200.53|Netherite helmets now gives a 90% reduction in knockback.}}
{{History||1.16.210|snap=beta 1.16.210.53|Wearing leather helmets now prevents [[Powder Snow#Freezing|freezing]] entirely.}}
{{History|console}}
{{History||xbox=TU1|xbone=CU1|ps=1.0|wiiu=Patch 1|switch=1.0.1|[[File:Leather Cap JE1 BE1.png|32px]] [[File:Chainmail Helmet JE2 BE1.png|32px]] [[File:Iron Helmet JE1 BE1.png|32px]] [[File:Golden Helmet JE1 BE1.png|32px]] [[File:Diamond Helmet JE1 BE1.png|32px]]<br>[[File:Leather Cap (item) JE1 BE1.png|32px]] [[File:Chainmail Helmet (item) JE1 BE1.png|32px]] [[File:Iron Helmet (item) JE1 BE1.png|32px]] [[File:Golden Helmet (item) JE1 BE1.png|32px]] [[File:Diamond Helmet (item) JE1 BE1.png|32px]] Added helmets.
|Added a quick equip for armor to the [[inventory]] interface.}}
{{History||xbox=TU12|ps=1.03|[[File:Leather Cap JE3 BE2.png|32px]] [[File:Leather Cap (item) JE3 BE2.png|32px]] The textures for leather helmets have been changed.}}
{{History||xbox=TU14|ps=1.05|Leather helmets can now be [[dye]]d.
|[[Item repair]] can now repair helmets.}}
{{History||xbox=TU25|xbone=CU13|ps=1.16|Helmets now have the quick equip functionality.}}
{{History||xbox=TU53|xbone=CU43|ps=1.49|wiiu=Patch 23|switch=1.0.3|Golden, chain and iron helmets can now be [[smelting|smelted]] down into one of their respective [[nugget]]s.}}
{{History|PS4}}
{{History||1.90|[[File:Chainmail Helmet (item) JE2 BE2.png|32px]] [[File:Iron Helmet (item) JE2 BE2.png|32px]] [[File:Golden Helmet (item) JE2 BE2.png|32px]] [[File:Diamond Helmet (item) JE2 BE2.png|32px]] The textures of all types of helmet items have been changed (except for the leather helmets).}}
{{History|new 3ds}}
{{History||0.1.0|[[File:Leather Cap JE1 BE1.png|32px]] [[File:Chainmail Helmet JE2 BE1.png|32px]] [[File:Iron Helmet JE1 BE1.png|32px]] [[File:Golden Helmet JE1 BE1.png|32px]] [[File:Diamond Helmet JE1 BE1.png|32px]]<br>[[File:Leather Cap (item) JE3 BE2.png|32px]] [[File:Chainmail Helmet (item) JE1 BE1.png|32px]] [[File:Iron Helmet (item) JE1 BE1.png|32px]] [[File:Golden Helmet (item) JE1 BE1.png|32px]] [[File:Diamond Helmet (item) JE1 BE1.png|32px]] Added helmets.}}
{{History|foot}}
<gallery>
File:ArmorModel Aug 13 2009.jpg|First image of armor.
File:DinnerboneArmor.png|[[Dinnerbone]]'s first screenshot of dyed armor.
File:ArmorPE.png
</gallery>
;Armor durability from Indev until late Beta
{| class="wikitable" data-description="Armor Durability during Indev until late Beta" style="text-align:center;"
|-
!Leather
!Golden
!Chainmail
!Iron
!Diamond
|-
|33
|66
|66
|132
|264
|}
==Issues ==
{{issue list}}
==Trivia ==
*Unlike the other helmets, the netherite helmet covers most of the player's face, due to a nose guard and cheek plates.
*The turtle shell is the only helmet that is not part of a complete set.
* In Bedrock Edition, there exists a bug<ref>{{Cite bug|MCPE|109048|Efficiency 1 Leather Cap in Woodland Mansions|date=December 1, 2020}}</ref> that makes it possible to obtain a Leather Cap enchanted with Efficiency I from [[Woodland Mansion]] chests with a chance of 1.45%. The enchantment has no effect on the cap, however.
==Gallery ==
<gallery>
File:Zombie helmet.png|A zombie wearing a helmet in [[Survival Test]].
</gallery>
===Enchanted Helmets===
<gallery>
File:Enchanted Leather Cap (item).gif
File:Enchanted Chainmail Helmet (item).gif
File:Enchanted Iron Helmet (item).gif
File:Enchanted Golden Helmet (item).gif
File:Enchanted Diamond Helmet (item).gif
File:Enchanted Netherite Helmet (item).gif
File:Enchanted Turtle Shell (item).gif
</gallery>
<gallery>
File:Enchanted Leather Helmet.gif
File:Enchanted Chainmail Helmet.gif
File:Enchanted Iron Helmet.gif
File:Enchanted Golden Helmet.gif
File:Enchanted Diamond Helmet.gif
File:Enchanted Netherite Helmet.gif
File:Enchanted Turtle Shell.gif
</gallery>
==References ==
{{reflist}}
==External Links ==
*[https://www.minecraft.net/en-us/article/taking-inventory--helmet Taking Inventory: Helmet] – Minecraft.net on February 20, 2020
{{Items}}
[[Category:Armor]]
[[es:Casco]]
[[ja:ヘルメット]]
[[ko:투구]]
[[pt:Capacete]]
[[pl:Hełm]]
[[zh:头盔]]</li></ul> | 13w18a | Creepers no longer explode when hit in Creative mode. | |||
1.7.2{{Extension DPL}}<ul><li>[[Orange Dye|Orange Dye]]<br/>{{Item
|image = Orange_Dye_JE2_BE2.png
|renewable = Yes
|stackable = Yes (64)
}}
'''Orange dye''' is a [[Dye#Quasi-Primary|quasi-primary dye]] crafted from [[Flower|orange tulips]], or by combining one [[red dye]] with one [[yellow dye]].
== Obtaining ==
=== Crafting ===
{{Crafting
|head = 1
|showname = 0
|Orange Tulip; Torchflower
|Output=Orange Dye
|type=Material
}}
{{Crafting
|Red Dye
|Yellow Dye
|Output = Orange Dye,2
|type = Material
|foot = 1
}}
=== Loot chest ===
{{#invoke:LootChest|base3|orange-dye}}
=== Trading ===
[[Wandering trader|Wandering traders]] sell 3 orange dye for an [[emerald]].
== Usage ==
{{dye usage}}
=== Crafting ingredient ===
{{crafting usage|ignore=Banner|continue=1}}
{{banner crafting usage}}
=== Loom ingredient ===
{{Banner loom usage|Orange Dye}}
=== Trading ===
Apprentice-level shepherd [[villager]]s have a 20% chance to buy 12 orange dye for an [[emerald]] as part of their trades.{{only|bedrock}}
Journeyman-level shepherd [[villager]]s have a {{frac|1|3}} chance to buy 12 orange dye for an [[emerald]].{{only|java}}
== Data values ==
=== ID ===
{{edition|java}}:
{{ID table
|edition=java
|showforms=y
|generatetranslationkeys=y
|displayname=Orange Dye
|spritetype=item
|nameid=orange_dye
|form=item
|foot=1}}
{{edition|bedrock}}:
{{ID table
|edition=bedrock
|showaliasids=y
|shownumericids=y
|showforms=y
|notshowbeitemforms=y
|generatetranslationkeys=y
|displayname=Orange Dye
|spritetype=item
|nameid=orange_dye
|aliasid=dye / 14
|id=409
|form=item
|translationkey=item.dye.orange.name
|foot=1}}
== Video ==
<div style="text-align:center">{{yt|25t7uNMOFS8}}</div>
== History ==
{{History|java beta}}
{{History||1.2|[[File:Orange Dye JE1 BE1.png|32px]] Added orange dye.}}
{{History|java}}
{{History||1.4.2|snap=12w34a|Added the ability to [[Armor#Dyeing|dye]] leather [[armor]] and [[wolf]] collars.}}
{{History||1.4.6|snap=12w49a|Orange dye can now be crafted with [[gunpowder]] to create a [[firework star]].}}
{{History||1.6.1|snap=13w19a|[[Stained clay]] can now be [[crafting|crafted]].}}
{{History||1.7.2|snap=13w36a|With the addition of the new [[flower]]s, many secondary and tertiary [[dye]]s are now primary dyes.}}
{{History|||snap=13w41a|[[Stained glass]] can now be crafted.}}
{{History||1.8|snap=14w30a|Added [[banner]]s, which can be dyed.}}
{{History||1.11|snap=16w39a|Added the ability to dye [[shulker box]]es.}}
{{History||1.12|snap=17w15a|Added the ability to dye [[bed]]s.}}
{{History||1.13|snap=17w47a|The different data values for the <code>dye</code> ID has now been split up into their own IDs.
|Prior to [[1.13/Flattening|''The Flattening'']], this [[item]]'s numeral ID was 351.}}
{{History||1.14|snap=18w43a|[[File:Orange_Dye_JE2_BE2.png|32px]] The texture of orange dye has now been changed.}}
{{History|||snap=18w44a|Orange dye can now change the text color on [[sign]]s to orange.}}
{{History|||snap=19w05a|Added the [[wandering trader]], which sells orange dye.}}
{{History|||snap=19w11a|Orange dye can now be [[trading|bought]] by shepherd villagers.}}
{{History||1.17|snap=20w45a|Orange dye can now be used to craft [[orange candle]]s.}}
{{History|||snap=21w19a|Orange dye can no longer be used to craft orange candles.}}
{{History|||snap=Pre-release 1|Orange dye can now once again be used to craft orange candles.}}
{{History||1.20 (Experimental)|link=1.19.3|snap=22w42a|Orange dye can now change the text color on [[hanging sign]]s to orange.}}
{{History||1.20<br>(Experimental)|link=1.19.4|snap=23w07a|[[Torchflower]]s can now be crafted into orange dye.}}
{{History||1.20|snap=23w12a|Orange dye can now be found in [[suspicious gravel]] and [[suspicious sand]] in [[trail ruins]].}}
{{History|||snap=23w16a|Orange dye no longer generates in [[suspicious sand]] in [[trail ruins]].|Due to the split of the archaeological loot tables for suspicious gravel within [[trail ruins]], orange dye is now common loot.}}
{{History|pocket alpha}}
{{History||v0.3.0|[[File:Orange Dye JE1 BE1.png|32px]] Added orange dye. It is currently unobtainable and serves no purpose.}}
{{History||v0.4.0|Orange dye is now [[craft]]able with rose red and dandelion yellow.
|Orange dye can now be used to craft orange [[wool]].}}
{{History||v0.8.0|snap=build 1|Orange dye is now used to craft [[cocoa bean]]s (version exclusive).}}
{{History||v0.14.0|snap=build 1|Orange dye can now be used to dye [[water]] in [[cauldron]]s.}}
{{History||unknown|The above recipe for orange dye has now been removed.}}
{{History|pocket}}
{{History||1.0.0|snap=alpha 0.17.0.1|Orange dye can now be used to dye [[shulker]]s.}}
{{History||1.1.0|snap=alpha 1.1.0.0|Orange dye can now be used to craft [[concrete powder]] and colored [[bed]]s.}}
{{History|bedrock}}
{{History||1.2.0|snap=beta 1.2.0.2|Orange dye can now be used to craft [[firework star]]s, [[stained glass]], and patterns on [[banner]]s.}}
{{History||1.4.0|snap=beta 1.2.20.1|Orange dye can now be used to craft [[balloon]]s and [[glow stick]]s.}}
{{History||1.8.0|snap=beta 1.8.0.8|Orange dye can now be used to dye [[cat]] collars.}}
{{History||1.10.0|snap=beta 1.10.0.3|Orange dye is now [[trading|sold]] by [[wandering trader]]s.
|Orange dye can now be used to dye white [[carpet]]s.
|[[File:Orange_Dye_JE2_BE2.png|32px]] The texture of orange dye has now been changed.}}
{{History||1.11.0|snap=beta 1.11.0.4|Orange dye can now be [[trading|sold]] to shepherd [[villager]]s.}}
{{History||1.16.100|snap=beta 1.16.100.56|The ID of orange dye has been changed from <code>dye/14</code> to <code>orange_dye</code>.}}
{{History|console}}
{{History||xbox=TU1|xbone=CU1|ps=1.00|switch=1.0.1|wiiu=Patch 1|[[File:Orange Dye JE1 BE1.png|32px]] Added orange dye.}}
{{History|ps4}}
{{History||1.90|[[File:Orange_Dye_JE2_BE2.png|32px]] The texture of orange dye has now been changed.}}
{{History|new 3ds}}
{{History||0.1.0|[[File:Orange_Dye_JE2_BE2.png|32px]] Added orange dye.}}
{{History|foot}}
== Issues ==
{{issue list}}
== References ==
{{Reflist}}
{{Items}}
[[cs:Oranžové barvivo]]
[[de:Oranger Farbstoff]]
[[es:Tinte naranja]]
[[fr:Teinture orange]]
[[hu:Narancssárga festék]]
[[ja:橙色の染料]]
[[ko:주황색 염료]]
[[nl:Oranje kleurstof]]
[[pl:Pomarańczowy barwnik]]
[[pt:Corante laranja]]
[[ru:Оранжевый краситель]]
[[zh:橙色染料]]
[[Category:Items]]
[[Category:Dyes]]
[[Category:Renewable resources]]</li><li>[[Copper Horn|Copper Horn]]<br/>{{About|the removed item|the current item|Goat Horn}}
{{outdated feature|edition=bedrock}}
{{Item
| renewable = Yes
| stackable = No
}}
A '''copper horn''' was an [[item]] crafted from a [[goat horn]] and [[copper ingots]].
== Obtaining ==
=== Crafting ===
{{Crafting
|ignoreusage=1
|A2=Copper Ingot
|B2=Goat Horn
|B3=Copper Ingot
|C2=Copper Ingot
|Output=Copper Horn
}}
=== Natural generation ===
Copper horns were found in pillager outpost chests.
== Usage ==
Copper horns were used to play sounds. They took one second to use and had a four second cooldown. There were ten variations of copper horns, and each of them played three different sounds: when looking up, crouching, or neither of those. In total, there were thirty different sounds that could be played using copper horns. The sound a copper horn plays based on multiple conditions, which are in order as follows:
* If crouching, the bass tune was played.
* Else, if looking up (by 45 degrees), the harmony tune was played.
* Else, the melody tune was played.
== Sounds ==
Sound names in the item tooltip are created using the harmony, melody, and bass sounds in that order.
=== Harmony ===
{{Sound table
|type=bedrock
|sound=harmony0.ogg
|description="Great" ("Great Sky Falling")
|source=hostile
|id=horn.call.0
|volume=1.0
|pitch=1.0}}
{{Sound table
|sound=harmony1.ogg
|description="Old" ("Old Hymn Resting")
|source=hostile
|id=horn.call.1
|volume=1.0
|pitch=1.0}}
{{Sound table
|sound=harmony2.ogg
|description="Pure" ("Pure Water Desire")
|source=hostile
|id=horn.call.2
|volume=1.0
|pitch=1.0}}
{{Sound table
|sound=harmony3.ogg
|description="Humble" ("Humble Fire Memory")
|source=hostile
|id=horn.call.3
|volume=1.0
|pitch=1.0}}
{{Sound table
|sound=harmony4.ogg
|description="Dry" ("Dry Urge Anger")
|source=hostile
|id=horn.call.4
|volume=1.0
|pitch=1.0}}
{{Sound table
|sound=harmony5.ogg
|description="Clear" ("Clear Temper Journey")
|source=hostile
|id=horn.call.5
|volume=1.0
|pitch=1.0}}
{{Sound table
|sound=harmony6.ogg
|description="Fresh" ("Fresh Nest Thought")
|source=hostile
|id=horn.call.6
|volume=1.0
|pitch=1.0}}
{{Sound table
|sound=harmony7.ogg
|description="Secret" ("Secret Lake Tear")
|source=hostile
|id=horn.call.7
|volume=1.0
|pitch=1.0}}
{{Sound table
|sound=harmony8.ogg
|description="Fearless" ("Fearless River Gift")
|source=hostile
|id=horn.call.8
|volume=1.0
|pitch=1.0}}
{{Sound table
|sound=harmony9.ogg
|description="Sweet" ("Sweet Moon Love")
|source=hostile
|id=horn.call.9
|volume=1.0
|pitch=1.0
|foot=1}}
=== Melody ===
{{Sound table
|type=bedrock
|sound=melody0.ogg
|description="Sky" ("Great Sky Falling")
|source=hostile
|id=horn.melody.0
|volume=1.0
|pitch=1.0}}
{{Sound table
|sound=melody1.ogg
|description="Hymn" ("Old Hymn Resting")
|source=hostile
|id=horn.melody.1
|volume=1.0
|pitch=1.0}}
{{Sound table
|sound=melody2.ogg
|description="Water" ("Pure Water Desire")
|source=hostile
|id=horn.melody.2
|volume=1.0
|pitch=1.0}}
{{Sound table
|sound=melody3.ogg
|description="Fire" ("Humble Fire Memory")
|source=hostile
|id=horn.melody.3
|volume=1.0
|pitch=1.0}}
{{Sound table
|sound=melody4.ogg
|description="Urge" ("Dry Urge Anger")
|source=hostile
|id=horn.melody.4
|volume=1.0
|pitch=1.0}}
{{Sound table
|sound=melody5.ogg
|description="Temper" ("Clear Temper Journey")
|source=hostile
|id=horn.melody.5
|volume=1.0
|pitch=1.0}}
{{Sound table
|sound=melody6.ogg
|description="Nest" ("Fresh Nest Thought")
|source=hostile
|id=horn.melody.6
|volume=1.0
|pitch=1.0}}
{{Sound table
|sound=melody7.ogg
|description="Lake" ("Secret Lake Tear")
|source=hostile
|id=horn.melody.7
|volume=1.0
|pitch=1.0}}
{{Sound table
|sound=melody8.ogg
|description="River" ("Fearless River Gift")
|source=hostile
|id=horn.melody.8
|volume=1.0
|pitch=1.0}}
{{Sound table
|sound=melody9.ogg
|description="Moon" ("Sweet Moon Love")
|source=hostile
|id=horn.melody.9
|volume=1.0
|pitch=1.0
|foot=1}}
=== Bass ===
{{Sound table
|type=bedrock
|sound=bass0.ogg
|description="Falling" ("Great Sky Falling")
|source=hostile
|id=horn.bass.0
|volume=1.0
|pitch=1.0}}
{{Sound table
|sound=bass1.ogg
|description="Resting" ("Old Hymn Resting")
|source=hostile
|id=horn.bass.1
|volume=1.0
|pitch=1.0}}
{{Sound table
|sound=bass2.ogg
|description="Desire" ("Pure Water Desire")
|source=hostile
|id=horn.bass.2
|volume=1.0
|pitch=1.0}}
{{Sound table
|sound=bass3.ogg
|description="Memory" ("Humble Fire Memory")
|source=hostile
|id=horn.bass.3
|volume=1.0
|pitch=1.0}}
{{Sound table
|sound=bass4.ogg
|description="Anger" ("Dry Urge Anger")
|source=hostile
|id=horn.bass.4
|volume=1.0
|pitch=1.0}}
{{Sound table
|sound=bass5.ogg
|description="Journey" ("Clear Temper Journey")
|source=hostile
|id=horn.bass.5
|volume=1.0
|pitch=1.0}}
{{Sound table
|sound=bass6.ogg
|description="Thought" ("Fresh Nest Thought")
|source=hostile
|id=horn.bass.6
|volume=1.0
|pitch=1.0}}
{{Sound table
|sound=bass7.ogg
|description="Tear" ("Secret Lake Tear")
|source=hostile
|id=horn.bass.7
|volume=1.0
|pitch=1.0}}
{{Sound table
|sound=bass8.ogg
|description="Gift" ("Fearless River Gift")
|source=hostile
|id=horn.bass.8
|volume=1.0
|pitch=1.0}}
{{Sound table
|sound=bass9.ogg
|description="Love" ("Sweet Moon Love")
|source=hostile
|id=horn.bass.9
|volume=1.0
|pitch=1.0
|foot=1}}
==Data Values==
===ID===
{{ID table
|edition=bedrock
|shownumericids=y
|showforms=y
|notshowbeitemforms=y
|generatetranslationkeys=y
|displayname=Copper Horn
|spritetype=item
|nameid=copper_horn
|form=item
|foot=1}}
== History ==
{{h|bedrock}}
{{h||Vanilla Experiments<br>(experimental)|link=1.18.30|snap=beta 1.18.30.26|[[File:Copper Horn BE1.png|32px]]Added copper horns.}}
{{h|||snap=beta 1.18.30.28|[[File:Copper Horn BE2.png|32px]]Changed the texture of copper horns.}}
{{h||1.19.0|snap=beta 1.19.0.24|Removed copper horns.}}
{{h|foot}}
== Trivia ==
* Copper horns were removed from the game as they didn't live up to the developers' design goals, and as such are no longer supported.<ref>{{cite|url=https://feedback.minecraft.net/hc/en-us/articles/5540500564365| title = Minecraft Beta & Preview - 1.19.0.24/25|website=feedback.minecraft.net|date=April 14, 2022}}</ref>
* This is the first item in {{el|be}} to have been completely removed instead of just made unobtainable. This is likely due to the fact it never made it out of [[experimental gameplay]].
** If a world that contained this item is loaded into a newer version, the horn will disappear upon loading.
== References ==
{{reflist}}
{{Items}}
{{Removed features}}
[[Category:Renewable resources]]
[[de:Ziegenhorn]]
[[es:Cuerno de cobre]]
[[fr:Corne de chèvre]]
[[it:Corno di capra]]
[[lzh:銅號]]
[[pl:Kozi róg]]
[[pt:Chifre de cobre]]
[[ru:Козий рог]]
[[zh:铜制号角]]</li></ul> | 13w36a | Creepers can be forcibly exploded using flint and steel. | |||
1.8{{Extension DPL}}<ul><li>[[:Category:Planned items|Category:Planned items]]<br/>All pages relating to items that have been officially announced, but are not yet in the game.
__EXPECTUNUSEDCATEGORY__
[[Category:Items]]
[[Category:Planned]]
[[pt:Itens planejados]]</li><li>[[Obsidian Boat|Obsidian Boat]]<br/>{{for|other uses|Obsidian (disambiguation)}} {{for|other kinds of boats|Boat (disambiguation)}}
{{Joke feature}}
{{ItemEntity
|title=Obsidian Boat
|image=Obsidian Boat.png
|image2=Obsidian Boat (item).png
|stackable=No
|renewable=Yes
}}
The '''obsidian boat''' was a joke [[boat]] variant released in an April Fools' joke version.
== Obtaining ==
=== Crafting ===
{{crafting
|A2 = Obsidian |C2 = Obsidian
|A3 = Obsidian |B3 = Obsidian |C3 = Obsidian
|Output= Obsidian Boat
|ignoreusage=1
}}
== Usage ==
Obsidian boats sank in [[water]] instead of floating. They also sank in lava like other boats but did not get destroyed in it.
== Sounds ==
Obsidian boats used the Friendly Creatures sound category for entity-dependent sound events, although did not have any sounds of their own.
== Data values ==
=== ID ===
{{ID table
|shownumericids=y
|showforms=y
|generatetranslationkeys=java
|displayname=Obsidian Boat
|spritetype=item
|nameid=obsidian_boat
|id=432
|form=item
|translationkey=item.obsidian_boat.name
|foot=1}}
{{ID table
|shownumericids=y
|generatetranslationkeys=java
|displayname=Obsidian Boat
|spritetype=entity
|nameid=boat
|id=41
|translationkey=entity.Boat.name
|foot=1}}
=== Entity data ===
{{/ED}}
== History ==
{{History|java}}
{{History||1.10|snap=15w14a|link=Java Edition 15w14a|[[File:Obsidian_Boat_(item).png|32px]] [[File:Obsidian Boat.png|32px]] Added the obsidian boat.}}
{{History|foot}}
== Issues ==
Obsidian boat is a joke feature and as such issues relating to them cannot be fixed.
{{Items}}
{{Entities}}
{{Jokes}}
[[Category:Joke items]]
[[Category:Joke entities]]
[[it:Barca di ossidiana]]
[[ja:黒曜石のボート]]
[[pt:Bote de obsidiana]]
[[uk:Обсидіановий човен]]
[[zh:15w14a]]</li></ul> | 14w05a | Players can now see from the perspective of a creeper in spectator mode. A creeper shader is applied, and the player is limited to the creeper's movements. | |||
| 14w11a | Witches, zombies, skeletons, spiders, cave spiders, zombie pigmen and other creepers will run away from creepers that are about to explode. | ||||
| 14w30a | Charged creepers now cause zombies, skeletons, wither skeletons, and other creepers to drop heads. | ||||
| 14w30b | Each charged creeper will cause the drop of only one head, even if multiple head-dropping mobs are killed. | ||||
1.8.1{{Extension DPL}}<ul><li>[[Chestplate|Chestplate]]<br/>{{Update|Include information about armor trims and updated netherite upgrade information.}}
{{Item
| image = <gallery>
Leather Tunic.png | Leather
Chainmail Chestplate.png | Chainmail
Iron Chestplate.png | Iron
Diamond Chestplate.png | Diamond
Golden Chestplate.png | Golden
Netherite Chestplate.png | Netherite
</gallery>
| durability =
* Leather: 80
* Chainmail: 240
* Iron: 240
* Golden: 112
* Diamond: 528
* Netherite: 592
| renewable =
* '''Netherite''': No
* '''All Other''': Yes
| stackable = No
}}
'''Chestplates''' are a type of [[armor]] that covers the upper body of the player. There are six types of chestplates: '''leather''', '''chainmail''', '''iron''', '''diamond''', '''gold''' and '''netherite'''.
== Obtaining ==
=== Crafting ===
{{crafting
|head=1
|showname=0
|showdescription=1
|name=[[Chestplate]]
|A1= Leather;Gold Ingot;Iron Ingot;Diamond
|C1= Leather;Gold Ingot;Iron Ingot;Diamond
|A2= Leather;Gold Ingot;Iron Ingot;Diamond
|B2= Leather;Gold Ingot;Iron Ingot;Diamond
|C2= Leather;Gold Ingot;Iron Ingot;Diamond
|A3= Leather;Gold Ingot;Iron Ingot;Diamond
|B3= Leather;Gold Ingot;Iron Ingot;Diamond
|C3= Leather;Gold Ingot;Iron Ingot;Diamond
|Output= Leather Tunic;Golden Chestplate;Iron Chestplate;Diamond Chestplate
|type= Combat
}}
{{crafting
|foot=1
|ignoreusage=1
|name=[[Chestplate]]
|ingredients=Damaged Matching [[Chestplate]]
|Damaged Leather Tunic; Damaged Golden Chestplate; Damaged Chainmail Chestplate; Damaged Iron Chestplate; Damaged Diamond Chestplate; Damaged Netherite Chestplate
|Damaged Leather Tunic; Damaged Golden Chestplate; Damaged Chainmail Chestplate; Damaged Iron Chestplate; Damaged Diamond Chestplate; Damaged Netherite Chestplate
|Output= Leather Tunic; Golden Chestplate; Chainmail Chestplate; Iron Chestplate; Diamond Chestplate; Netherite Chestplate
|description= The durability of the two chestplates is added together, making a fully healed chestplate. You can get 5% more durability while using a grindstone to fix.
|type= Combat
}}
=== Upgrading ===
{{Smithing
|Netherite Upgrade
|Diamond Chestplate
|Netherite Ingot
|Netherite Chestplate
|description=
|tail=1
}}
=== Repairing ===
==== Grinding ====
{{Grinding
|showdescription=1
|ingredients=Damaged Matching Chestplates
|Damaged Leather Tunic; Damaged Chainmail Chestplate; Damaged Iron Chestplate; Damaged Golden Chestplate; Damaged Diamond Chestplate; Damaged Netherite Chestplate
|Damaged Leather Tunic; Damaged Chainmail Chestplate; Damaged Iron Chestplate; Damaged Golden Chestplate; Damaged Diamond Chestplate; Damaged Netherite Chestplate
|Leather Tunic; Chainmail Chestplate; Iron Chestplate; Golden Chestplate; Diamond Chestplate; Netherite Chestplate
|description=The durability of the two chestplates are added together, plus an extra 5% durability.
}}
==== [[Anvil mechanics#Unit repair|Unit repair]] ====
Chestplates can be repaired in an [[anvil]] by adding units of the [[armor material]]'s repair material, with each repair material restoring 25% of the chestplate's maximum durability, rounded down.
=== Mob loot ===
[[Zombie]]s and [[skeleton]]s have a small chance to spawn wearing any armor. There is an 8.5% chance (9.5% with [[Looting]] I, 10.5% with Looting II and 11.5% with Looting III) for the mob to drop a chestplate upon death. The chestplate the mob drops is usually badly damaged, and rarely enchanted.
[[Vindicator]]s and [[Pillager]]s spawning in [[raid]]s have a 4.1% chance (5.12% on hard difficulty) to drop iron chestplate, which is almost always badly damaged and rarely enchanted.
=== Natural generation ===
Two [[armor stand]]s are found in each taiga [[village]] outdoor armory, one of them equipped with an [[iron chestplate]].
=== Chest loot ===
{{IN|BE}}, a sealed room in [[woodland mansion]]s can appear that has a chest sometimes containing an [[Efficiency]] I leather tunic.<ref>{{bug|MCPE-109048}}</ref>
{{LootChestItem|leather-tunic,random-enchanted-leather-tunic,chainmail-chestplate,iron-chestplate,level-enchanted-iron-chestplate,golden-chestplate,random-enchanted-golden-chestplate,diamond-chestplate,damaged-diamond-chestplate,level-enchanted-diamond-chestplate,damaged-random-enchanted-diamond-chestplate,damaged-random-enchanted-diamond-chestplate-2}}
=== Trading ===
{{IN|java}}, novice-level armorer villagers have a 40% chance to sell an iron chestplate for 9 emeralds. Journeyman-level armorers have a 40% chance to sell a chainmail chestplate for 4 emeralds. Master-level armorers always sell an enchanted<ref group="note" name="enchantment" /> diamond chestplate for 18-35 emeralds. Novice-level leatherworker villagers have a {{frac|2|3}} chance to sell a leather tunic<ref group="note" name="dye note">The leather armor has a random color created by two dyes (possibly the same dye twice).</ref> for 7 emeralds. Journeyman-level Leatherworker villagers always offer the same trade.
Armorer villagers may give the players with the [[Hero of the Village]] effect a chainmail chestplate.
{{IN|bedrock}}, novice-level armorer villagers have a 25% chance to sell an iron chestplate for 9 emeralds. Journeyman-level armorers have a {{frac|1|3}} chance to sell a chainmail chestplate for 4 emeralds. Master-level armorers have a 50% chance to sell an enchanted<ref group="note" name="enchantment">When creating an enchantment offer, the game uses a random enchantment level from 5 – 19. The enchantments are never treasure enchantments.</ref> diamond chestplate for 16 emeralds. Novice-level leatherworker villagers have a 50% chance to sell leather tunic for 7 emeralds. Master-level leatherworkers always sell an enchanted<ref group="note" name="enchantment" /> leather tunic for 7 emeralds.
{{notelist|columns=1}}
== Usage ==
Chestplates can be placed in the 2nd armor slot of a player's [[inventory]] for activation.
=== Defense points ===
Defense points are each signified by chestplates in the armor bar above the [[health]] bar. 1 defense point is half of a chestplate in the armor bar. Each defense point reduces any damage dealt to the player, which is absorbed by armor by 4%, increasing additively with the number of defense points. Different materials and combinations of armor provide different levels of defense.
The following table shows the amount of defense points added by chestplates.
{| class="wikitable" data-description="Chestplate defense points"
|-
!scope="col" | Material
!scope="col" | Defense points
|-
!scope="row" | Leather
| {{armor|3}}
|-
!scope="row" | Golden
| rowspan="2" | {{armor|5}}
|-
!scope="row" | Chainmail
|-
!scope="row" | Iron
| {{armor|6}}
|-
!scope="row" | Diamond
| rowspan="2" | {{armor|8}}
|-
!scope="row" | Netherite
|}
===Knockback Resistance ===
A netherite chestplate provides 10% knockback resistance.
=== Durability ===
The following table shows the amount of damage each piece of armor can absorb before being destroyed.
Any "hit" from a damage source that can be blocked by armor removes one point of durability from each piece of armor worn for every {{hp|4}} of incoming damage (rounded down, but never below 1). Damage taken that unenchanted armor does not protect against (such as [[Damage#Fall damage|falling]] or [[Damage#Drowning|drowning]]) does not damage the armor, even if it is enchanted to protect against that type of damage. The following chart displays how many hits chest plates can endure.
Netherite armor is not damaged by [[lava]] or [[fire]] when worn.
{| class="wikitable" data-description="Chestplate durability"
|-
! Material
! Durability
|-
!scope="row" | Leather
| 80
|-
!scope="row" | Golden
| 112
|-
!scope="row" | Chainmail
| rowspan="2" | 240
|-
!Iron
|-
!scope="row" | Diamond
| 528
|-
!scope="row" | Netherite
| 592
|}
==== Repair ====
Chestplates may be [[item repair|repaired]] by using them along with some of their crafting material ([[leather]], [[gold ingot]]s, [[iron ingot]]s, [[diamond]]s, or [[netherite ingot]]s) in an [[anvil]]. Chainmail chestplates may be repaired in this way with iron ingots. They may also be repaired by crafting them together with another chestplate of the same material.
=== Enchantments ===
A chestplate can receive the following [[enchantment]]s:
{| class="wikitable"
|-
! Enchantment !! Max Level !! Notes
|-
| [[Fire Protection]] || IV || <ref group=note name=exclusive>Fire Protection, Blast Protection, Projectile Protection and Protection are mutually exclusive</ref>
|-
| [[Projectile Protection]] || IV || <ref group=note name="exclusive"/>
|-
| [[Blast Protection]] || IV || <ref group=note name="exclusive"/>
|-
| [[Protection]] || IV || <ref group=note name="exclusive"/>
|-
| [[Unbreaking]] || III ||
|-
| [[Thorns]] || III || <ref group="note" name="maxlvl">The max level obtainable in the enchanting table is 2</ref>
|-
| [[Mending]] || I || <ref group=note name="anvil2">Only from chest loot, fishing, or an anvil and enchanted books.</ref>
|-
| [[Curse of Binding]] || I || <ref group="note" name="anvil2"/>
|-
| [[Curse of Vanishing]] || I || <ref group="note" name="anvil2"/>
|}
{{notelist}}
=== Smelting usage ===
{{Smelting|showname=1|Iron Chestplate;Chainmail Chestplate;Golden Chestplate|Iron Nugget;Iron Nugget;Gold Nugget|0,1}}
=== Piglins ===
{{EntityLink|Piglin|Piglins}} are attracted to ''golden'' chestplates and pick them up, examining them for 6 to 8 seconds. Piglins can wear other chestplates but are not attracted to them. They prefer stronger chestplates over weaker chestplates, with one exception: They always prefer golden chestplates over all other chestplates, throwing out stronger chestplates to equip them. Enchanted chestplates are preferred over unenchanted chestplates.
== Sounds ==
{{el|je}}:
{{Sound table
|sound=Equip leather1.ogg
|sound2=Equip leather2.ogg
|sound3=Equip leather3.ogg
|sound4=Equip leather4.ogg
|sound5=Equip leather5.ogg
|sound6=Equip leather6.ogg
|subtitle=Leather armor rustles
|source=player
|description=When a leather chestplate is equipped
|id=item.armor.equip_leather
|translationkey=subtitles.item.armor.equip_leather
|volume=1.0
|pitch=1.0
|distance=16}}
{{Sound table
|sound=Equip chain1.ogg
|sound2=Equip chain2.ogg
|sound3=Equip chain3.ogg
|sound4=Equip chain4.ogg
|sound5=Equip chain5.ogg
|sound6=Equip chain6.ogg
|subtitle=Chain armor jingles
|source=player
|description=When a chainmail chestplate is equipped
|id=item.armor.equip_chain
|translationkey=subtitles.item.armor.equip_chain
|volume=1.0
|pitch=1.0
|distance=16}}
{{Sound table
|sound=Equip iron1.ogg
|sound2=Equip iron2.ogg
|sound3=Equip iron3.ogg
|sound4=Equip iron4.ogg
|sound5=Equip iron5.ogg
|sound6=Equip iron6.ogg
|subtitle=Iron armor clanks
|source=player
|description=When an iron chestplate is equipped
|id=item.armor.equip_iron
|translationkey=subtitles.item.armor.equip_iron
|volume=1.0
|pitch=1.0
|distance=16}}
{{Sound table
|sound=Equip gold1.ogg
|sound2=Equip gold2.ogg
|sound3=Equip gold3.ogg
|sound4=Equip gold4.ogg
|sound5=Equip gold5.ogg
|sound6=Equip gold6.ogg
|subtitle=Gold armor clinks
|source=player
|description=When a gold chestplate is equipped
|id=item.armor.equip_gold
|translationkey=subtitles.item.armor.equip_gold
|volume=1.0
|pitch=1.0
|distance=16}}
{{Sound table
|sound=Equip diamond1.ogg
|sound2=Equip diamond2.ogg
|sound3=Equip diamond3.ogg
|sound4=Equip diamond4.ogg
|sound5=Equip diamond5.ogg
|sound6=Equip diamond6.ogg
|subtitle=Diamond armor clangs
|source=player
|description=When a diamond chestplate is equipped
|id=item.armor.equip_diamond
|translationkey=subtitles.item.armor.equip_diamond
|volume=1.0
|pitch=1.0
|distance=16}}
{{Sound table
|sound=Equip netherite1.ogg
|sound2=Equip netherite2.ogg
|sound3=Equip netherite3.ogg
|sound4=Equip netherite4.ogg
|subtitle=Netherite armor clanks
|source=player
|description=When a netherite chestplate is equipped
|id=item.armor.equip_netherite
|translationkey=subtitles.item.armor.equip_netherite
|volume=0.8
|pitch=1.0/0.9
|distance=16}}
{{Sound table
|sound=Random break.ogg
|subtitle=Item breaks
|source=dependent
|description=When a chestplate's durability is exhausted
|id=entity.item.break
|translationkey=subtitles.entity.item.break
|volume=0.8
|pitch=0.8-1.2
|distance=16
|foot=1}}
{{el|be}}:
{{Sound table
|type=bedrock
|sound=Equip leather1.ogg
|sound2=Equip leather2.ogg
|sound3=Equip leather3.ogg
|sound4=Equip leather4.ogg
|sound5=Equip leather5.ogg
|sound6=Equip leather6.ogg
|source=player
|description=When a leather chestplate is equipped
|id=armor.equip_leather
|volume=1.0
|pitch=1.0}}
{{Sound table
|sound=Equip chain1.ogg
|sound2=Equip chain2.ogg
|sound3=Equip chain3.ogg
|sound4=Equip chain4.ogg
|sound5=Equip chain5.ogg
|sound6=Equip chain6.ogg
|source=player
|description=When a chain chestplate is equipped
|id=armor.equip_chain
|volume=1.0
|pitch=1.0}}
{{Sound table
|sound=Equip iron1.ogg
|sound2=Equip iron2.ogg
|sound3=Equip iron3.ogg
|sound4=Equip iron4.ogg
|sound5=Equip iron5.ogg
|sound6=Equip iron6.ogg
|source=player
|description=When an iron chestplate is equipped
|id=armor.equip_iron
|volume=1.0
|pitch=1.0}}
{{Sound table
|sound=Equip gold1.ogg
|sound2=Equip gold2.ogg
|sound3=Equip gold3.ogg
|sound4=Equip gold4.ogg
|sound5=Equip gold5.ogg
|sound6=Equip gold6.ogg
|source=player
|description=When a gold chestplate is equipped
|id=armor.equip_gold
|volume=1.0
|pitch=1.0}}
{{Sound table
|sound=Equip diamond1.ogg
|sound2=Equip diamond2.ogg
|sound3=Equip diamond3.ogg
|sound4=Equip diamond4.ogg
|sound5=Equip diamond5.ogg
|sound6=Equip diamond6.ogg
|source=player
|description=When a diamond chestplate is equipped
|id=armor.equip_diamond
|volume=1.0
|pitch=1.0}}
{{Sound table
|sound=Equip netherite1.ogg
|sound2=Equip netherite2.ogg
|sound3=Equip netherite3.ogg
|sound4=Equip netherite4.ogg
|source=player
|description=When a netherite chestplate is equipped.
|id=armor.equip_netherite
|volume=1.0
|pitch=1.0}}
{{Sound table
|rowspan=2
|sound=Water Splash Old.ogg
|source=block
|description=When a leather chestplate is dyed using a cauldron
|id=cauldron.dyearmor
|volume=0.1
|pitch=1.0}}
{{Sound table
|source=block
|description=When a leather chestplate's dye is removed using a cauldron
|id=cauldron.cleanarmor
|volume=0.1
|pitch=1.0}}
{{Sound table
|sound=Random break.ogg
|source=player
|description=When a chestplate's durability is exhausted
|id=random.break
|volume=1.0
|pitch=0.9
|foot=1}}
== Data values ==
=== ID ===
{{edition|java}}:
{{ID table
|edition=java
|showitemtags=y
|showforms=y
|generatetranslationkeys=y
|displayname=Leather Tunic
|spritetype=item
|nameid=leather_chestplate
|itemtags=freeze_immune_wearables
|form=item}}
{{ID table
|displayname=Chainmail Chestplate
|spritetype=item
|nameid=chainmail_chestplate
|form=item}}
{{ID table
|displayname=Iron Chestplate
|spritetype=item
|nameid=iron_chestplate
|form=item}}
{{ID table
|displayname=Diamond Chestplate
|spritetype=item
|nameid=diamond_chestplate
|form=item}}
{{ID table
|displayname=Golden Chestplate
|spritetype=item
|nameid=golden_chestplate
|form=item}}
{{ID table
|displayname=Netherite Chestplate
|spritetype=item
|nameid=netherite_chestplate
|form=item
|foot=1}}
{{edition|bedrock}}:
{{ID table
|edition=bedrock
|shownumericids=y
|showforms=y
|notshowbeitemforms=y
|generatetranslationkeys=y
|displayname=Leather Tunic
|spritetype=item
|nameid=leather_chestplate
|id=336
|form=item}}
{{ID table
|displayname=Chainmail Chestplate
|spritetype=item
|nameid=chainmail_chestplate
|id=340
|form=item}}
{{ID table
|displayname=Iron Chestplate
|spritetype=item
|nameid=iron_chestplate
|id=344
|form=item}}
{{ID table
|displayname=Diamond Chestplate
|spritetype=item
|nameid=diamond_chestplate
|id=348
|form=item}}
{{ID table
|displayname=Golden Chestplate
|spritetype=item
|nameid=golden_chestplate
|id=352
|form=item}}
{{ID table
|displayname=Netherite Chestplate
|spritetype=item
|nameid=netherite_chestplate
|id=610
|form=item
|foot=1}}
=== Item data ===
When leather tunics are dyed, it has the following NBT:
<div class="treeview">
* {{nbt|compound|tag}}: Parent tag.
** {{nbt|compound|display}}: Display properties.
*** {{nbt|int|color}}: The color of the leather armor. The tooltip displays "Dyed" if advanced tooltips are disabled, otherwise it displays the hexadecimal color value. Color codes are calculated from the Red, Green and Blue components using this formula:<br>'''<span style="color:red">Red</span>[[wikipedia:Logical shift|<<]]16 + <span style="color:green">Green</span><<8 + <span style="color:blue">Blue</span>'''<ref>For positive values larger than 0x00FFFFFF, the top byte is ignored. All negative values produce white.</ref>
</div>
== Achievements ==
{{load achievements|Iron Man;Tie Dye Outfit;Cover me in debris;Oooh, shiny!}}
== Advancements ==
{{load advancements|Suit Up;Cover me With Diamonds;Oh Shiny;Cover Me in Debris}}
== History ==
{{History|java classic}}
{{History||June 14, 2009|link=wordofnotch:123343045|[[Notch]] discussed how armor would work in [[Survival]] mode: "Two types of swords, two types of armor, two types of helmets. The basic versions require iron. The advanced versions require steel, which you make by combining iron and coal. Carrying swords, armor or helmets take up inventory slots, but otherwise have no penalty and work pretty much as you expect (prevent some damage, or cause more damage)".}}
{{History||August 13, 2009|link=wordofnotch:162091556|Notch tested chestplates on the [[human]]. They were merely aesthetic at the time and had no effect on gameplay.}}
{{History||0.24_SURVIVAL_TEST|[[File:Plate Chestplate.png|32px]] Added the [[Java_Edition_removed_features#Armor_in_Survival_Test|plate chestplate]].
|[[File:Chainmail Chestplate JE1.png|32px]] Added the model and the texture for the unused [[Java_Edition_removed_features#Armor_in_Survival Test|chain chestplate]].
|[[File:Zombie full set.png|32px]] [[File:Skeleton helmet.png|26px]] The plate chestplate has been tested on [[zombie]]s and [[skeleton]]s. It had no effect on gameplay.}}
{{History|java indev}}
{{History||0.31|snap=20091223-1|Plate and chain armor chestplates are no longer used.}}
{{History|||snap=20091231-2|[[File:Leather Tunic (item) JE1 BE1.png|32px]] [[File:Studded Chestplate (item) JE1.png|32px]] [[File:Chainmail Chestplate (item) JE1 BE1.png|32px]] [[File:Iron Chestplate (item) JE1 BE1.png|32px]] Added the single item form of relation to leather, [[History of textures/Unused textures#Studded armor|studded]], chainmail, and plate (iron) chestplates.
|The textures of the cloth chestplate are taken from one of [[Notch]]'s previous games, ''[[Legend of the Chambered]]''. The rest are from ''[[Legend of the Chambered 2]]''.}}
{{History||20100206|[[File:Golden Chestplate (item) JE1 BE1.png|32px]] [[File:Diamond Chestplate (item) JE1 BE1.png|32px]] Added the item form of golden and diamond chestplates.
|Removed the leather-chain chestplate.}}
{{History||February 9, 2010|link=wordofnotch:380486636|[[File:Notch revealed armor.png|32px]] [[Notch]] revealed new models for armor - including chestplates.}}
{{History||20100212-1|Added armor models.
|[[File:Indev 20100212 armor.png|50px]] Armor models are now displayed on the [[player]] in the [[inventory]].}}
{{History||20100218|[[File:Leather Tunic JE1 BE1.png|32px]] [[File:Chainmail Chestplate JE2 BE1.png|32px]] [[File:Iron Chestplate JE1 BE1.png|32px]] [[File:Golden Chestplate JE1 BE1.png|32px]] [[File:Diamond Chestplate JE1 BE1.png|32px]] Added models of cloth, chainmail, iron, gold, and diamond chestplates.
|Chestplates can now be [[crafting|crafted]] and worn.
|Chestplates now functions. All chestplates give {{Armor|8}}. Chestplates have limited [[item durability|durability]], with lower tier chestplates less durable than higher tier chestplates.}}
{{History|java alpha}}
{{History||v1.0.8|With the introduction of [[leather]], "Cloth Chestplate" has been renamed to "Leather Tunic".
|Leather tunics is now [[crafting|crafted]] with leather instead of [[wool|cloth]].}}
{{History|java}}
{{History||1.0.0|snap=Beta 1.9 Prerelease|The armor protection behavior has been changed. Previous to this update, the total armor protection is based in this equation: ((''total equipped armor damage reduction'' − 1) × (''all equipped armor max damage'' − ''total equipped armor damage'')) ÷ (''total equipped armor max damage'' + 1)). Armor no longer reduces certain damage types to be covered by enchantments.}}
{{History|||snap=October 3, 2011|slink={{tweet|notch|120859830339637249}}|The first images of a [[player]] wearing enchanted chestplates are revealed.}}
{{History|||snap=Beta 1.9 Prerelease 3|Iron chestplates can now be found in the new [[stronghold]] altar [[chest]]s.}}
{{History|||snap=Beta 1.9 Prerelease 4|Chestplates can now be [[enchanting|enchanted]].}}
{{History||1.1|snap=12w01a|Iron chestplates can now be found in the new blacksmith [[chest]]s in [[village]]s.}}
{{History||1.3.1|snap=12w15a|{{key|Shift}}+clicking can now be used to wear chestplates.}}
{{History|||snap=12w21a|Chainmail chestplates can now be obtained legitimately in [[survival]] mode through [[trading]].
|Blacksmith [[villager]]s now [[trading|sell]] chainmail chestplates for 11–14 emeralds.
|Blacksmith villagers now sell diamond chestplates for 16–18 emeralds.
|Blacksmith villagers now sell iron chestplates for 10–13 emeralds.
|Butchers now sell leather tunics for 4 emeralds.}}
{{History||1.4.2|snap=12w32a|[[Mob]] armor has been reintroduced. A partial or full set of any armor is now sometimes worn by [[zombie]]s, [[skeleton]]s and [[zombified piglins|zombie pigmen]], with the likelihood increasing with difficulty.}}
{{History|||snap=August 17, 2012|slink={{tweet|Dinnerbone|236445090929844225}}|[[Jeb]] and [[Dinnerbone]] tweeted pictures of [[dye]]able leather chestplates.}}
{{History|||snap=12w34a|Leather tunics can now be dyed by [[crafting]] a leather tunic piece with [[dye]]s. Dyes can be removed by {{control|use|text=using}} dyed leather tunics on a [[cauldron]] with [[water]].
|[[File:Leather Tunic JE2.png|32px]] [[File:Leather Tunic (item) JE2.png|32px]] Default leather tunic textures are now slightly darker and have buttons.}}
{{History|||snap=12w34b|[[File:Leather Tunic JE3 BE2.png|32px]] [[File:Leather Tunic (item) JE3 BE2.png|32px]] [[File:Diamond Chestplate JE2.png|32px]] The texture of leather and diamond chestplates has been changed. Leather tunics now have longer sleeves. Diamond chestplates now have notches under the shoulders.}}
{{History|||snap=12w36a|[[Dye]]d leather tunics are now more saturated and have a slight tint of tan in respect to the default armor color.}}
{{History|||snap=12w37a|[[File:Leather Cap JE3 BE2.png|32px]] [[File:Leather Boots JE2 BE2.png|32px]] [[File:Leather Cap (item) JE3 BE2.png|32px]] [[File:Leather Boots (item) JE3 BE2.png|32px]] Leather armor now have non-dyed parts on cap, pants and boots. This has been implemented so that [[player]]s can distinguish between other types of armor and similarly colored leather armor.}}
{{History||1.4.6|snap=12w50a|The [[Thorns]] enchantment can now be [[enchanting|enchanted]] on chestplates.}}
{{History||1.5|snap=13w04a|Armor in the [[player]]'s hand can now be equipped by right-clicking.
|[[Dispenser]]s can now equip nearby players with armor.}}
{{History||1.6.1|snap=13w18a|Golden chestplates are now found in the new [[chest]]s in [[nether fortress]]es.}}
{{History||1.7.2|snap=13w36a|Leather [[boots]] can now be obtained as one of the "junk" items by [[fishing]].}}
{{History||1.8|snap=14w02a|[[Trading|Trades]] changed: armorer [[villager]]s now [[trading|sell]] chain boots for 5–7 [[emerald]]s, chain [[leggings]] for 9–11 emeralds, chain chestplates for 11–15 emeralds and chain helmets for 5–7 emeralds.
|Armorer villagers now sell enchanted diamond chestplates for 16–19 emeralds, and no longer sell other diamond armor.
|Armorer villagers now sell iron chestplates for 10–14 emeralds and iron helmets for 4–6 emeralds, and no longer sell other iron armor.
|Leatherworkers now sell enchanted leather tunics for 7–12 emeralds, and no longer sell other leather armor.}}
{{History|||snap=14w05a|Armor no longer turns red when [[mob]]s and [[player]]s are hurt.}}
{{History|||snap=14w06a|Armor is now visible on [[giant]]s.}}
{{History|||snap=14w25a|Chain armor [[Java Edition removed features#Chainmail armor|cannot be crafted anymore]] due to the [[item]] form of [[fire]] being [[Java Edition removed features#Obtainable until 1.8|removed]].}}
{{History||1.9|snap=15w31a|Enchanted iron and diamond armor can now be found in [[end city]] ship [[chest]]s.
|[[Mob]]s now wear armor from the bottom to the top, rather than from the top to the bottom. This means that a mob with three armor pieces, for example, spawn with all armor except a helmet.}}
{{History|||snap=15w34b|Armor [[item durability|durability]] now affects armor value.}}
{{History|||snap=15w36a|Armor and armor [[enchanting|enchantment]] calculations have been changed. For the original values, see [[Armor/Before 1.9|here]].}}
{{History|||snap=15w36d|Armor durability affecting value has been removed.
|Armor now has an attribute controlling the defense points.}}
{{History|||snap=15w43a|The average yield of gold chestplates in [[nether fortress]] [[chest]]s has been decreased.}}
{{History|||snap=15w50a|Added <code>equip</code> [[sound]]s for all types of armor.}}
{{History|||snap=16w02a|Armor and armor enchantment calculations have been changed again.}}
{{History|||snap=16w05a|Armor calculations have been changed, once again.}}
{{History||1.11|snap=16w39a|Diamond and chainmail chestplates are now found in the new [[woodland mansion]] chests.}}
{{History||1.11.1|snap=16w50a|Golden, chain and iron armor can now be [[smelting|smelted]] down into one of their respective [[nugget]]s.}}
{{History||1.13|snap=17w47a|Prior to [[1.13/Flattening|''The Flattening'']], these [[item]]s' numeral IDs were 298 through 317.}}
{{History|||snap=18w09a|Leather tunics now have a chance of generating in [[underwater ruins]].}}
{{History|||snap=18w10a|Leather tunics can now generate in [[buried treasure]] [[chest]]s.}}
{{History|||snap=18w11a|Enchanted leather tunics can now generate in the chests of [[shipwreck]]s.}}
{{History|||snap=18w20a|Chain armor pieces have been renamed to "chainmail".}}
{{History||1.14|snap=18w43a|[[File:Leather Tunic JE4 BE2.png|32px]] [[File:Chainmail Chestplate JE3 BE2.png|32px]] [[File:Iron Chestplate JE2 BE2.png|32px]] [[File:Golden Chestplate JE2 BE2.png|32px]] [[File:Diamond Chestplate JE3 BE2.png|32px]] [[File:Leather Tunic (item) JE4 BE3.png|32px]] [[File:Chainmail Chestplate (item) JE2 BE2.png|32px]] [[File:Iron Chestplate (item) JE2 BE2.png|32px]] [[File:Golden Chestplate (item) JE2 BE2.png|32px]] [[File:Diamond Chestplate (item) JE2 BE2.png|32px]] The textures of all types of armor have been changed.}}
{{History|||snap=18w48a|Leather tunics can now be found in [[chest]]s in [[village]] tanneries.}}
{{History|||snap=18w50a|Iron chestplates can now be found on [[armor stand]]s in [[taiga]] villages.}}
{{History|||snap=19w08a|[[File:Golden Chestplate (item) JE3 BE3.png|32px]] The textures of gold chestplate [[item]] have been changed.}}
{{History|||snap=19w11a|Leatherworker villagers now sell randomly [[dye]]d leather tunics, instead of enchanted leather tunics.}}
{{History|||snap=19w13a|Armorer villagers now give chainmail chestplates to players under the [[Hero of the Village]] effect.}}
{{History||1.16|snap=20w06a|[[File:Netherite Chestplate JE1.png|32px]] [[File:Netherite Chestplate (item) JE1.png|32px]] Added netherite chestplate.}}
{{History|||snap=20w10a|[[File:Netherite Chestplate JE2 BE1.png|32px]] [[File:Netherite Chestplate (item) JE2 BE1.png|32px]] The texture of netherite chestplate have been changed.
|Netherite chestplate can no longer be [[crafting|crafted]].
|Netherite chestplate is now obtained by combining one diamond armor piece and one netherite ingot in a [[smithing table]].}}
{{History|||snap=20w16a|All parts of golden and netherite chestplates now generate randomly [[enchanting|enchanted]], and sometimes [[damage]]d, in [[bastion remnant]] and [[ruined portal]] chests.}}
{{History|||snap=20w17a|Diamonds chestplates now generates in place of netherite armor in bastion remnant [[chest]]s.}}
{{History||1.17|snap=20w48a|Wearing any piece of leather armor now prevents [[Powder Snow#Freezing|freezing]] entirely.}}
{{History||1.18.2|snap=22w03a|Netherite chestplate knockback resistance is no longer random.}}
{{History||1.20<br>(Experimental)|link=1.19.4|snap=23w04a|Non-leather chestplates can now be trimmed using a [[smithing table]].
|There are 10 types of material that determine the color of the trim:
*Iron
*Copper
*Gold
*Lapis
*Emerald
*Diamond
*Netherite
*Redstone
*Amethyst
*Quartz
|Upgrading diamond chestplate to netherite chestplate now requires the netherite upgrade [[smithing template]].}}
{{History|||snap=23w05a|Leather tunics can now be trimmed using a smithing table.|Chestplates can now have trims of the same material it is made out of.|The texture of the dune armor trim has been tweaked, so that the symbol on the chestplate is moved up a few pixels.}}
{{History|||snap=23w06a|Swapped {{cd|iron}} and {{cd|iron_darker}} palette, then made {{cd|iron_darker}} darker overall.|Added a darkest pixel to {{cd|chestplate_trim}} trim item texture.}}
{{History||1.19.4|snap=23w05a|Chestplates can now be swapped by {{ctrl|using}} them/elytra in the hotbar.<ref>{{bug|MC-216270|||Fixed}}</ref>}}
{{History||?|Chestplates can now be swapped in [[armor stand]]s by {{ctrl|using}} them/elytra in the armor stand's slot.}}
{{History||1.20|snap=23w12a|The pattern textures of dune and sentry armor trims are changed.|
Those previous patterns were left with different names: dune was renamed sentry and sentry was renamed shaper.}}
{{History|pocket alpha}}
{{History||v0.6.0|[[File:Leather Tunic JE1 BE1.png|32px]] [[File:Chainmail Chestplate JE2 BE1.png|32px]] [[File:Iron Chestplate JE1 BE1.png|32px]] [[File:Golden Chestplate JE1 BE1.png|32px]] [[File:Diamond Chestplate JE1 BE1.png|32px]] [[File:Leather Tunic (item) JE1 BE1.png|32px]] [[File:Chainmail Chestplate (item) JE1 BE1.png|32px]] [[File:Iron Chestplate (item) JE1 BE1.png|32px]] [[File:Golden Chestplate (item) JE1 BE1.png|32px]] [[File:Diamond Chestplate (item) JE1 BE1.png|32px]] Added chestplates.}}
{{History||v0.8.0|snap=build 2|[[File:Leather Tunic (item) JE3 BE2.png|32px]] The leather armor sprites have been changed to that of {{el|je}}, but its armor [[model]] remains that of older versions.}}
{{History||v0.9.0|snap=build 1|Iron armor now naturally generates in [[village]] [[chest]]s and a [[stronghold]] altar chest.}}
{{History||v0.11.0|snap=build 11|Armor now protects against [[damage]] from [[mob]]s only.}}
{{History||v0.12.1|snap=build 1|Armor can now be worn by mobs.
|Golden chestplates can now be found in [[nether fortress]] [[chest]]s.
|Chainmail armor can now be obtained in [[survival]] mode from a mob wearing it.}}
{{History||?|Armor no longer turns red when [[mob]]s and [[player]]s are hurt.}}
{{History||v0.14.0|snap=build 1|[[File:Leather Tunic JE3 BE2.png|32px]] The textures of leather chestplate have been changed.
|Leather armor can now be dyed.}}
{{History||v0.15.0|snap=build 1|Armor can now be obtained from [[stray]]s and [[husk]]s that naturally spawn with armor.}}
{{History||v0.15.10|[[Cape]]s no longer clip through armor.}}
{{History|pocket}}
{{History||1.0.0|snap=alpha 0.17.0.1|[[Enchanting|Enchanted]] iron armor and enchanted diamond armor can now be found inside [[chest]]s within [[end city]].}}
{{History||1.0.4|snap=alpha 1.0.4.0|Iron [[helmet]]s, iron chestplates, enchanted diamond chestplates and chainmail armor are now [[trading|sold]] by armorer smith [[villager]]s via [[trading]].}}
{{History||1.1.0|snap=alpha 1.1.0.0|Golden, chain and iron armor can now be [[smelting|smelted]] down into one of their respective [[nugget]]s.
|Diamond chestplates and chainmail chestplates can now be found inside [[woodland mansion]] chests.}}
{{History|bedrock}}
{{History||1.4.0|snap=beta 1.2.14.2|Chainmail chestplates now generate in [[buried treasure]] chests.
|Enchanted leather armor can now be found inside [[shipwreck]] supply room [[chest]]s.}}
{{History|||snap=beta 1.2.20.1|Leather chestplates can now be found inside [[underwater ruins]] chests.}}
{{History||1.10.0|snap=beta 1.10.0.3|[[File:Leather Tunic JE4 BE2.png|32px]] [[File:Chainmail Chestplate JE3 BE2.png|32px]] [[File:Iron Chestplate JE2 BE2.png|32px]] [[File:Golden Chestplate JE2 BE2.png|32px]] [[File:Diamond Chestplate JE3 BE2.png|32px]] [[File:Leather Tunic (item) JE4 BE3.png|32px]] [[File:Chainmail Chestplate (item) JE2 BE2.png|32px]] [[File:Iron Chestplate (item) JE2 BE2.png|32px]] [[File:Golden Chestplate (item) JE2 BE2.png|32px]] [[File:Diamond Chestplate (item) JE2 BE2.png|32px]] The textures of all types of chestplates have been changed.
|Iron armor now can be found in plains [[village]] weaponsmith [[chest]]s.
|Leather armor can now be found inside plains village tannery chests.}}
{{History||1.11.0|snap=beta 1.11.0.1|Iron armor now can be found in [[savanna]], [[taiga]], [[desert]], [[snowy taiga]] and [[snowy tundra]] [[village]] weaponsmith [[chest]]s.
|Leather armor can now be found inside savanna, taiga, desert, snowy taiga and snowy tundra village tannery chests.}}
{{History|||snap=beta 1.11.0.4|[[Pillager]]s and [[vindicator]]s that spawn in [[raid]]s can now drop iron armor.}}
{{History||1.11.0|snap=beta 1.11.0.5|[[File:Golden Chestplate (item) JE3 BE3.png|32px]] The textures of gold chestplate [[item]] have been changed.}}
{{History||1.12.0|snap=beta 1.12.0.2|[[File:Armor Stand with Leather Armor MCPE-44669.png|32px]] Leather armor no longer show as being [[dye]]d properly when worn by [[armor stand]]s.}}
{{History||1.13.0|snap=beta 1.13.0.1|Leather armor now appears dyed properly when worn by armor stands.}}
{{History||1.16.0|snap=beta 1.16.0.51|[[File:Netherite Chestplate JE2 BE1.png|32px]] [[File:Netherite Chestplate (item) JE2 BE1.png|32px]] Added netherite chestplate.
|Armor can now be obtained from [[piglin]]s that naturally spawn with golden armor.}}
{{History|||snap=beta 1.16.0.57|All parts of golden and netherite armor now generate randomly [[enchanting|enchanted]], and sometimes [[damage]]d, in [[bastion remnant]] chests.
|Netherite armor can no longer be [[crafting|crafted]].
|Netherite armor is now obtained by combining one diamond armor piece and one netherite ingot in a [[smithing table]].}}
{{History|||snap=beta 1.16.0.63|Diamonds armor now generates in place of netherite armor in bastion remnant [[chest]]s.}}
{{History|||snap=beta 1.16.200.53|Netherite Armor now gives a 90% reduction in Knockback.}}
{{History||1.16.210|snap=beta 1.16.210.53|Wearing any piece of leather armor now prevents [[Powder Snow#Freezing|freezing]] entirely.}}
{{History|console}}
{{History||xbox=TU1|xbone=CU1|ps=1.0|wiiu=Patch 1|switch=1.0.1|[[File:Leather Tunic JE1 BE1.png|32px]] [[File:Chainmail Chestplate JE2 BE1.png|32px]] [[File:Iron Chestplate JE1 BE1.png|32px]] [[File:Golden Chestplate JE1 BE1.png|32px]] [[File:Diamond Chestplate JE1 BE1.png|32px]] [[File:Leather Tunic (item) JE1 BE1.png|32px]] [[File:Chainmail Chestplate (item) JE1 BE1.png|32px]] [[File:Iron Chestplate (item) JE1 BE1.png|32px]] [[File:Golden Chestplate (item) JE1 BE1.png|32px]] [[File:Diamond Chestplate (item) JE1 BE1.png|32px]] Added chestplates.
|Added a quick equip for armor to the [[inventory]] interface.}}
{{History||xbox=TU12|ps=1.03|[[File:Leather Tunic JE3 BE2.png|32px]] [[File:Leather Tunic (item) JE3 BE2.png|32px]] The textures for leather chestplate have been changed.}}
{{History||xbox=TU14|ps=1.05|Leather armor can now be [[dye]]d.
|[[Item repair]] can now repair armor.}}
{{History||xbox=TU25|xbone=CU13|ps=1.16|Armor now have the quick equip functionality.}}
{{History||xbox=TU53|xbone=CU43|ps=1.49|wiiu=Patch 23|switch=1.0.3|Golden, chain and iron armor can now be [[smelting|smelted]] down into one of their respective [[nugget]]s.}}
{{History|PS4}}
{{History||1.90|[[File:Chainmail Chestplate (item) JE2 BE2.png|32px]] [[File:Iron Chestplate (item) JE2 BE2.png|32px]] [[File:Golden Chestplate (item) JE2 BE2.png|32px]] [[File:Diamond Chestplate (item) JE2 BE2.png|32px]] The textures of all types of chestplate items have been changed (except for the leather one).}}
{{History|new 3ds}}
{{History||0.1.0|[[File:Leather Tunic JE1 BE1.png|32px]] [[File:Chainmail Chestplate JE2 BE1.png|32px]] [[File:Iron Chestplate JE1 BE1.png|32px]] [[File:Golden Chestplate JE1 BE1.png|32px]] [[File:Diamond Chestplate JE1 BE1.png|32px]] [[File:Leather Tunic (item) JE3 BE2.png|32px]] [[File:Chainmail Chestplate (item) JE1 BE1.png|32px]] [[File:Iron Chestplate (item) JE1 BE1.png|32px]] [[File:Golden Chestplate (item) JE1 BE1.png|32px]] [[File:Diamond Chestplate (item) JE1 BE1.png|32px]] Added chestplates.}}
{{History|foot}}
; Armor durability from Indev until late Beta
{| class="wikitable" data-description="Armor Durability during Indev until late Beta" style="text-align:center;"
|-
!scope="col" | Material
!scope="col" | Helmet
!scope="col" | Chestplate
!scope="col" | Leggings
!scope="col" | Boots
|-
|scope="row" | '''Leather'''
| 33
| 48
| 45
| 39
|-
|scope="row" | '''Golden'''
| 66
| 96
| 90
| 78
|-
|scope="row" | '''Chainmail'''
| 66
| 96
| 90
| 78
|-
|scope="row" | '''Iron'''
| 132
| 192
| 180
| 156
|-
|scope="row" | '''Diamond'''
| 264
| 384
| 360
| 312
|}
== Issues ==
{{issue list}}
== Trivia ==
* Chestplates do not render on the player's arm in first person view.<ref>{{bug|MC-25512}}</ref><ref>{{bug|MCPE-30000}}</ref>
== Gallery ==
=== Enchanted Chestplates ===
<gallery>
File:Enchanted Leather Tunic (item).gif
File:Enchanted Chainmail Chestplate (item).gif
File:Enchanted Iron Chestplate (item).gif
File:Enchanted Golden Chestplate (item).gif
File:Enchanted Diamond Chestplate (item).gif
File:Enchanted Netherite Chestplate (item).gif
</gallery>
<gallery>
File:Enchanted Leather Chestplate.gif
File:Enchanted Chainmail Chestplate.gif
File:Enchanted Iron Chestplate.gif
File:Enchanted Golden Chestplate.gif
File:Enchanted Diamond Chestplate.gif
File:Enchanted Netherite Chestplate.gif
</gallery>
== References ==
{{reflist}}
== External Links ==
*[https://www.minecraft.net/en-us/article/taking-inventory--chestplate Taking Inventory: Chestplate] – Minecraft.net on August 4, 2021
{{Items}}
[[Category:Armor]]
[[ja:チェストプレート]]
[[ko:흉갑]]
[[pt:Peitoral]]
[[pl:Napierśnik]]
[[th:เสื้อเกราะ]]
[[zh:胸甲]]</li><li>[[Cauldron|Cauldron]]<br/>{{For|the boss in ''Minecraft Dungeons''|MCD:Corrupted Cauldron}}
{{Block
| extratext = View [[#Renders|all renders]]
| transparent = Yes
| light = Depends on contained liquid
| tool = wooden pickaxe
| renewable = Yes
| stackable = Yes (64)
| flammable = No
| lavasusceptible = No
}}
A '''cauldron''' is a [[block]] that can contain [[water]], [[lava]] or [[powder snow]] and, in certain situations, collect it from the environment. {{IN|bedrock}}, it can also hold [[potion]]s or dyed water. It also serves as a [[leatherworker]]'s [[job site block]].
== Obtaining ==
=== Breaking ===
A cauldron can be obtained using any [[pickaxe]]. If mined without a pickaxe, it drops nothing. Regardless of the tool, when a cauldron is destroyed, its contents are lost.
{{breaking row|horizontal=1|Cauldron|Pickaxe|Wood}}
=== Natural generation ===
[[File:Natural Cauldron Table.png|A naturally occurring cauldron inside of a [[witch hut]].|thumb]]
A single empty cauldron is generated in each [[swamp hut]]. {{IN|be}}, the cauldrons generated there are {{frac|1|3}} to {{frac|2|3}} full of a random [[potion]].
A cauldron {{frac|2|3}} full of water is generated in each [[igloo]] basement.
[[File:MansionJailInner.png|thumb|Cauldron in [[woodland mansion]] jail.]]
Cauldrons can be found in a few rooms inside of [[woodland mansion]]s.
Two filled cauldrons can be found inside savanna, taiga, snowy taiga, and snowy tundra [[village]] tannery houses.
A single filled cauldron can be found in plains village and desert village tannery houses.
{{IN|java}}, three filled cauldrons can be found in plains village tannery houses.
Cauldrons can also spawn in [[trail ruins]].
=== Crafting ===
A cauldron can be crafted from [[iron ingot]]s.
{{Crafting
|A1= Iron Ingot
|C1= Iron Ingot
|A2= Iron Ingot
|C2= Iron Ingot
|A3= Iron Ingot
|B3= Iron Ingot
|C3= Iron Ingot
|Output= Cauldron
|type= Brewing
}}
== Usage ==
=== Storage for substances ===
Cauldrons can hold a variety of substances. Fluids they cannot hold include [[milk]], [[Honey Bottle|honey]] and any food items that exist in [[bowl]]s; namely [[mushroom stew]], [[beetroot soup]], [[rabbit stew]] and [[suspicious stew]]. {{IN|java}}, cauldrons containing fluids are considered by the game to be separate blocks from each other and from empty cauldrons, which does not affect gameplay but does affect the commands needed to place them.
==== Holding water ====
A cauldron can be filled with [[water]] by {{control|using}} a [[water bucket]] on the cauldron. Once completely filled, a cauldron can be used to fill a water bucket by {{control|using}} an empty [[bucket]] on the cauldron; this empties the cauldron. Despite containing water, using a [[fish bucket]] on a cauldron does not fill it with water, but places water against it, meaning it does nothing to the cauldron.<ref>{{bug|MC-129109|||WAI}}</ref>
A cauldron can also be filled by dumping a water bucket on the block above the cauldron. Once the water block is removed, the cauldron is filled to the full level with water.{{only|be}}
It can contain three levels of water. One level of water can be added to a cauldron by {{control|using}} a [[water bottle]] on it. One level of water can be removed from a cauldron, filling a water bottle, by {{control|using}} a [[glass bottle]] on it.
A cauldron slowly fills with [[water]] when [[rain]]ed upon, if starting empty or with some water. This happens randomly, at 5% of the rate in which snow accumulates on the ground during [[snowfall]].
Water can be stored in a cauldron even in [[the Nether]]. Water in a cauldron does not freeze in cold biomes.
Water in a cauldron does ''not'' absorb [[explosion]] damage; make [[sound]]s and [[particle]]s; absorb fall damage;<ref>{{bug|MC-176867|||WF}}</ref><ref>{{bug|MCPE-104572|||WF}}</ref> allow [[Riptide]] [[trident]]s to activate;<ref>{{bug|MC-145311|||WF}}</ref><ref>{{bug|MCPE-93111}}</ref> or damage [[endermen]], [[strider]]s, or [[blaze]]s.<ref>{{bug|MC-106813|||WF}}</ref> Cauldrons do ''not'' deal drowning damage to mobs inside of them<ref>{{bug|MC-152680}}</ref> and [[fish]] act as if there is no water inside it.<ref>{{bug|MC-126819|||WF}}</ref> The player ''cannot'' float or [[swim]] in it, as the water is about level with the player's waist. Jumping in a cauldron does ''not'' produce any bubble or water particles.
A cauldron placed below a down-facing [[pointed dripstone]] that has water placed a block above it slowly fills with water. The same works with [[lava]], allowing for infinite lava generation.
Attempting to add lava or potion to water empties the cauldron.{{only|be}}
The water in a cauldron cannot be sucked up by a [[sponge]], whether the sponge is touching the cauldron or not.
===== Applying dye to cauldron water =====
{{exclusive|bedrock|section=yes}}
{{IN|bedrock}}, leather armor is dyed through a cauldron, so a cauldron can hold dyed [[water]]. {{control|Using}} a dye on a cauldron filled with water colors the water, consuming the dye. Different dyes may be added to produce mixed colors. {{control|Using}} [[leather armor]] or [[leather horse armor]] on the cauldron dyes that item the color of the water, reducing the water in the cauldron by one level for each item dyed.
Attempting to add water, lava or potion to dyed water empties the cauldron.
==== Holding lava ====
[[File:Lava Cauldron.png|150px|thumb|Cauldron filled with lava]]
Cauldrons can be used to hold lava. {{IN|be|ee}}, when a cauldron is already filled with water, it empties the cauldron and makes an extinguishing sound. A cauldron filled with lava emits a light level of 15, similar to lava, and burns any [[entity]] inside of it; {{in|be|ee|short=1}}, this includes mobs that do not take damage from lava like [[zombified piglin]]s.
Lava inside a cauldron does not interact with water outside of the cauldron. The lava disappears upon putting water in the cauldron.
A [[redstone comparator]] with a lava cauldron behind it outputs redstone signal strength of 3.<ref name=JavaLava>{{bug|MC-204393}}</ref><ref>{{bug|MCPE-104824}}</ref>
A cauldron placed below a down-facing [[pointed dripstone]] that has lava placed a block above it slowly fills with lava.
If a cauldron is filled by lava, using glass bottles on the cauldron does nothing.
==== Holding powder snow ====
[[Powder snow]] is currently the only solid material that can be stored in a cauldron. A cauldron slowly fills with powder snow during [[snowfall]], if starting empty or with any layer of powder snow already inside. Up to three layers can be filled. When the cauldron is full, {{ctrl|interacting}} using a [[bucket]], creates a [[powder snow bucket]] and empties the cauldron. Entities standing in the cauldron do not take freeze damage, and entities wearing [[leather boots]] still fall through the powder snow.
A [[redstone comparator]] with a powder snow cauldron behind it outputs a redstone signal strength proportional to the fill level, up to 3.
Contrary to a cauldron filled with water, a powder snow cauldron that is not full cannot be filled up with a powder snow bucket, as {{control|using}} the bucket on the cauldron instead places powder snow against it.
==== Filling cauldrons with potions ====
{{exclusive|bedrock|education|section=yes}}
{{IN|bedrock}}, a cauldron can hold normal [[potion]]s, [[splash potion]]s and [[lingering potion]]s. {{control|Using}} a potion on a cauldron empties the potion and increases the level of the potion in the cauldron by one level. A glass bottle can then be {{control|used}} on a cauldron with a potion in it, filling the bottle with that potion. This reduces the potion in the cauldron by one level.
{{control|Using}} an [[arrow]] on a cauldron that contains a potion transforms the arrow into a [[tipped arrow]] with that potion [[effect]], and reduce the potion in the cauldron by one level. Tipping multiple arrows at once can be more efficient, and it may use more than one level at once. 1 level of potion tips up to 16 arrows, 2 levels up to 32, and a full cauldron can tip a full stack of arrows, resulting in 21.33 tipped arrows per potion.
Attempting to put [[water]], [[lava]] or a different potion into a cauldron with a potion causes an explosion sound, and the cauldron is emptied.
An entity that stands in a cauldron filled to any level with any potion does not receive the effect of the potion.
Using an empty bucket on a cauldron filled with any potion does nothing, as the bucket remains empty and the potion in the cauldron does not empty.
=== Removing dye from items ===
A cauldron with [[water]] can wash the dye off of leather [[armor]] and [[shulker box]]es, and can remove the top-most pattern layer of a [[banner]], by pressing {{control|use}} on the cauldron with the leather armor, shulker box, or banner in hand. Each wash reduces the water in the cauldron by one level. The water does not become dyed while removing dye from objects.
=== Changing profession ===
If a [[village]] has a cauldron that has not been claimed by a [[villager]], any villager that does not already have a profession or [[job site]] block may change their profession to [[leatherworker]].
=== Extinguishing fire ===
A cauldron with [[water]] or [[powder snow]] extinguishes [[entities]] on [[fire]] that fall into it and the entity emits black particles. This includes [[mob]]s, [[player]]s, [[item]]s (if they land in the cauldron before burning up), and flaming [[arrow]]s{{only|je|short=1}}. Flaming arrows stuck into the side are also extinguished. Entities must reach the water or powder snow in it. Each entity extinguished causes the substance in the cauldron to decrease by one level. If the cauldron is filled with powder snow, it then becomes a water cauldron.
=== Redstone component ===
[[File:Cauldron transmission over piston.png|An example of a cauldron used in a [[redstone]] circuit.|thumb]]
{{see also|Redstone circuit}}
A cauldron can act as a power source for a [[redstone comparator]]. With a cauldron behind it (either directly, or separated by an unpowered solid block), a comparator outputs a signal strength proportional to how full the cauldron is: 0 for empty, 1 for one-third full, 2 for two-thirds full, and 3 for completely full or filled with lava. However, if there is a block between the cauldron and the comparator, the comparator does not immediately update.
== Sounds ==
=== Generic ===
{{Sound table/Block/Normal}}
=== Unique ===
{{edition|java}}:
{{Sound table
|sound=Pointed Dripstone drip water cauldron1.ogg
|sound2=Pointed Dripstone drip water cauldron2.ogg
|sound3=Pointed Dripstone drip water cauldron3.ogg
|sound4=Pointed Dripstone drip water cauldron4.ogg
|sound5=Pointed Dripstone drip water cauldron5.ogg
|sound6=Pointed Dripstone drip water cauldron6.ogg
|sound7=Pointed Dripstone drip water cauldron7.ogg
|sound8=Pointed Dripstone drip water cauldron8.ogg
|subtitle=Water drips
|source=block
|description=When dripping water from a pointed dripstone falls into a cauldron
|id=block.pointed_dripstone.drip_water_into_cauldron
|translationkey=subtitles.block.pointed_dripstone.drip_water_into_cauldron
|volume=2.0
|pitch=0.9-1.0
|distance=16}}
{{Sound table
|sound=Pointed Dripstone drip lava cauldron1.ogg
|sound2=Pointed Dripstone drip lava cauldron2.ogg
|sound3=Pointed Dripstone drip lava cauldron3.ogg
|sound4=Pointed Dripstone drip lava cauldron4.ogg
|subtitle=Lava drips
|source=block
|description=When dripping lava from a pointed dripstone falls into a cauldron
|id=block.pointed_dripstone.drip_lava_into_cauldron
|translationkey=subtitles.block.pointed_dripstone.drip_lava_into_cauldron
|volume=2.0
|pitch=0.9-1.0
|distance=16}}
{{Sound table
|sound=Empty water bucket1.ogg
|sound2=Empty water bucket1.ogg
|sound3=Empty water bucket2.ogg
|sound4=Empty water bucket3.ogg
|subtitle=Bucket empties
|source=block
|description=When water from a bucket is placed in a cauldron <ref group=sound><code>empty1</code> plays twice as often as the other sounds</ref>
|id=item.bucket.empty
|translationkey=subtitles.item.bucket.empty
|volume=1.0
|pitch=1.0 <ref group=sound>Except for the second copy of <code>empty1</code>, which is 0.9</ref>
|distance=16}}
{{Sound table
|sound=Fill water bucket1.ogg
|sound2=Fill water bucket2.ogg
|sound3=Fill water bucket3.ogg
|subtitle=Bucket fills
|source=block
|description=When water from a bucket is removed from a cauldron
|id=item.bucket.fill
|translationkey=subtitles.item.bucket.fill
|volume=1.0
|pitch=1.0
|distance=16}}
{{Sound table
|sound=Empty lava bucket1.ogg
|sound2=Empty lava bucket2.ogg
|sound3=Empty lava bucket3.ogg
|subtitle=Bucket empties
|source=block
|description=When lava is placed in a cauldron
|id=item.bucket.empty_lava
|translationkey=subtitles.item.bucket.empty
|volume=1.0
|pitch=1.0
|distance=16}}
{{Sound table
|sound=Fill lava bucket1.ogg
|sound2=Fill lava bucket2.ogg
|sound3=Fill lava bucket3.ogg
|subtitle=Bucket fills
|source=block
|description=When lava is removed from a cauldron
|id=item.bucket.fill_lava
|translationkey=subtitles.item.bucket.fill
|volume=1.0
|pitch=1.0
|distance=16}}
{{Sound table
|sound=Empty powder snow bucket1.ogg
|sound2=Empty powder snow bucket2.ogg
|subtitle=Bucket empties
|source=block
|description=When powder snow is placed in a cauldron
|id=item.bucket.empty_powder_snow
|translationkey=subtitles.item.bucket.empty
|volume=1.0
|pitch=''varies'' <ref group=sound>Can be 1.0, 0.95, or 1.1 for each sound</ref>
|distance=16}}
{{Sound table
|sound=Fill powder snow bucket1.ogg
|sound2=Fill powder snow bucket2.ogg
|subtitle=Bucket fills
|source=block
|description=When powder snow is removed from a cauldron
|id=item.bucket.fill_powder_snow
|translationkey=subtitles.item.bucket.fill
|volume=1.0
|pitch=''varies'' <ref group=sound>Can be 1.0, 0.9, or 1.1 for each sound</ref>
|distance=16}}
{{Sound table
|sound=Bottle empty1.ogg
|sound2=Bottle empty2.ogg
|subtitle=Bottle empties
|source=block
|description=When water from a bottle is placed in a cauldron
|id=item.bottle.empty
|translationkey=subtitles.item.bottle.empty
|volume=1.0
|pitch=1.0
|distance=16}}
{{Sound table
|sound=Bottle fill_water1.ogg
|sound2=Bottle fill_water2.ogg
|sound3=Bottle fill_water3.ogg
|sound4=Bottle fill_water4.ogg
|subtitle=Bottle fills
|source=block
|description=When water from a bottle is removed from a cauldron
|id=item.bottle.fill
|translationkey=subtitles.item.bottle.fill
|volume=1.0
|pitch=1.0
|distance=16}}
{{Sound table
|sound=Empty water bucket1.ogg
|sound2=Empty water bucket2.ogg
|sound3=Empty water bucket3.ogg
|subtitle=Leatherworker works
|source=neutral
|description=Randomly while a leatherworker is working
|id=entity.villager.work_leatherworker
|translationkey=subtitles.entity.villager.work_leatherworker
|volume=0.9
|pitch=0.8-1.2
|distance=16
|foot=1}}
{{edition|bedrock}}:
{{Sound table
|type=bedrock
|sound=Pointed Dripstone drip water cauldron1.ogg
|sound2=Pointed Dripstone drip water cauldron2.ogg
|sound3=Pointed Dripstone drip water cauldron3.ogg
|sound4=Pointed Dripstone drip water cauldron4.ogg
|sound5=Pointed Dripstone drip water cauldron5.ogg
|sound6=Pointed Dripstone drip water cauldron6.ogg
|sound7=Pointed Dripstone drip water cauldron7.ogg
|sound8=Pointed Dripstone drip water cauldron8.ogg
|source=block
|description=When dripping water from a pointed dripstone falls into a cauldron
|id=cauldron_drip.water<br>.pointed_dripstone
|volume=2.0
|pitch=0.9-1.0}}
{{Sound table
|sound=Pointed Dripstone drip lava cauldron1.ogg
|sound2=Pointed Dripstone drip lava cauldron2.ogg
|sound3=Pointed Dripstone drip lava cauldron3.ogg
|sound4=Pointed Dripstone drip lava cauldron4.ogg
|source=block
|description=When dripping lava from a pointed dripstone falls into a cauldron
|id=cauldron_drip.lava<br>.pointed_dripstone
|volume=2.0
|pitch=0.9-1.0}}
{{Sound table
|sound=Fizz.ogg
|source=block
|description=When a different liquid is put in a cauldron with a potion
|id=random.fizz
|volume=1.0
|pitch=0.6-0.8<wbr>{{Checkthecode}}[[Category:Pages with inaccurate sound pitch value]]}}
{{Sound table
|rowspan=8
|sound=Water Splash Old.ogg
|source=block
|description=When dye is added to a cauldron
|id=cauldron.adddye
|volume=0.1
|pitch=1.0}}
{{Sound table
|source=block
|description=When armor is dyed using a cauldron
|id=cauldron.dyearmor
|volume=0.1
|pitch=1.0}}
{{Sound table
|source=block
|description=When dye is removed from armor using a cauldron
|id=cauldron.cleanarmor
|volume=0.1
|pitch=1.0}}
{{Sound table
|source=block
|description=When all patterns are removed from a banner using a cauldron
|id=cauldron.cleanbanner
|volume=0.1
|pitch=1.0}}
{{Sound table
|source=block
|description=When a potion is placed in a cauldron<wbr><ref group=sound name=potionsplash>{{Bug|MCPE-174867}}</ref>
|id=cauldron.fillpotion
|volume=0.1
|pitch=1.0}}
{{Sound table
|source=block
|description=When a potion is taken from a cauldron<wbr><ref group=sound name=potionsplash/>
|id=cauldron.takepotion
|volume=0.1
|pitch=1.0}}
{{Sound table
|source=block
|description=When water from a bucket or bottle is placed in a cauldron<wbr><ref group=sound name=bucketsplash>{{Bug|MCPE-135919}}</ref>
|id=cauldron.fillwater
|volume=0.1
|pitch=1.0}}
{{Sound table
|source=block
|description=When water from a bucket or bottle is removed from a cauldron <ref group=sound name=bucketsplash/>
|id=cauldron.takewater
|volume=0.1
|pitch=1.0}}
{{Sound table
|sound=Empty lava bucket1.ogg
|sound2=Empty lava bucket2.ogg
|sound3=Empty lava bucket3.ogg
|source=block
|description=When lava is placed in a cauldron
|id=bucket.empty_lava
|volume=1.0
|pitch=1.0}}
{{Sound table
|sound=Fill lava bucket1.ogg
|sound2=Fill lava bucket2.ogg
|sound3=Fill lava bucket3.ogg
|source=block
|description=When lava is removed from a cauldron
|id=bucket.fill_lava
|volume=1.0
|pitch=1.0}}
{{Sound table
|sound=Empty powder snow bucket1.ogg
|sound2=Empty powder snow bucket2.ogg
|source=block
|description=When powder snow is placed in a cauldron
|id=bucket.empty_powder_snow
|volume=1.0
|pitch=1.0}}
{{Sound table
|sound=Fill powder snow bucket1.ogg
|sound2=Fill powder snow bucket2.ogg
|source=player
|description=When powder snow is removed from a cauldron
|id=bucket.fill_powder_snow
|volume=1.0
|pitch=1.0}}
{{Sound table
|sound=Empty water bucket1.ogg
|sound2=Empty water bucket2.ogg
|sound3=Empty water bucket3.ogg
|source=block
|description=Randomly while a leatherworker is working
|id=bucket.fill_water
|volume=1.0
|pitch=1.0
|foot=1}}
== Data values ==
=== ID ===
{{edition|java}}:
{{ID table
|edition=java
|showblocktags=y
|showforms=y
|generatetranslationkeys=y
|displayname=Cauldron
|spritetype=block
|nameid=cauldron
|blocktags=cauldrons
|translationkey=block.minecraft.cauldron,item.minecraft.cauldron}}
{{ID table
|displayname=Lava Cauldron
|spritename=cauldron
|spritetype=block
|nameid=lava_cauldron
|blocktags=cauldrons
|form=block}}
{{ID table
|displayname=Powder Snow Cauldron
|spritename=cauldron
|spritetype=block
|nameid=powder_snow_cauldron
|blocktags=cauldrons
|form=block}}
{{ID table
|displayname=Water Cauldron
|spritename=cauldron
|spritetype=block
|nameid=water_cauldron
|blocktags=cauldrons
|form=block
|foot=1}}
{{edition|bedrock}}:
{{ID table
|edition=bedrock
|firstcolumnname=Type
|shownumericids=y
|showforms=y
|generatetranslationkeys=y
|displayname=Normal block
|spritename=cauldron
|spritetype=block
|nameid=cauldron
|id=118
|form=block
|itemform=item.cauldron}}
{{ID table
|displayname=Brighting block
|spritename=cauldron
|spritetype=block
|nameid=lava_cauldron
|id=465
|form=block
|translationkey=-}}
{{ID table
|displayname=Item
|spritename=cauldron
|spritetype=item
|nameid=cauldron
|id=432
|form=item
|foot=1}}
{{ID table
|notnamespaced=y
|displayname=Block entity
|spritename=cauldron
|spritetype=block
|nameid=Cauldron
|foot=1}}
=== Block states ===
{{see also|Block states}}
{{/BS}}
=== Block data ===
{{IN|be}}, a cauldron has a block entity associated with it that holds additional data about the block.
See [[Bedrock Edition level format/Block entity format]].
== Achievements ==
{{load achievements|Tie Dye Outfit}}
== History ==
{{History|java}}
{{History||1.0.0|snap=Beta 1.9 Prerelease 2|[[File:Cauldron JE1.png|32px]] Cauldrons are present in the code, but are not assigned to a [[block]] ID (and thus are unobtainable without [http://www.minecraftforum.net/topic/673742-19-pre2-cauldron-block/ mods] (archived link: [https://web.archive.org/web/20141222205821/https://dl.dropboxusercontent.com/u/19728555/cauldron.zip])).}}
{{History|||snap=Beta 1.9 Prerelease 3|[[File:Cauldron (item) JE1 BE1.png|32px]] Cauldrons have been given a [[block]] ID, an [[item]] ID, and a [[crafting]] recipe.}}
{{History||1.2.1|snap=12w06a|Cauldrons have now become [[renewable]], due to [[zombie]]s sometimes dropping iron ingots.}}
{{History||1.4.2|snap=12w40a|Empty cauldrons can now be found in [[witch hut]]s.}}
{{History||1.5|snap=13w02a|[[File:Cauldron JE2.png|32px]] The walls inside of the cauldron now use the bottom texture, and the cauldron now has no bottom.<ref name="whatdoyouputinacauldrontomakeitlighter">{{bug|MC-6772}}</ref>}}
{{History|||snap=13w02b|[[File:Cauldron JE1.png|32px]] Fixed the model error from 13w02a.}}
{{History||1.8|snap=14w03a|[[File:Cauldron JE4.png|32px]] Cauldrons now appear completely opaque.<ref>{{bug|MC-44990}}</ref>}}
{{History|||snap=14w03b|[[File:Cauldron JE1.png|32px]] Cauldrons now render as normal again.}}
{{History|||snap=14w06a|Cauldrons now have extra planes inside the feet. These planes are now rendered solid, so the [[player]] cannot see through the [[water]].{{info needed|what exactly does this mean?}}}}
{{History|||snap=14w10a|[[File:Cauldron JE6.png|32px]] The cauldron's feet now have planes on all sides.}}
{{History||1.11|snap=16w39a|Cauldrons now generate naturally in jail cells in [[woodland mansion]]s.}}
{{History||July 19, 2017|link=https://twitter.com/jeb_/status/887599625045250048|[[Jeb]] tweets image of a new jungle [[planks]], cauldron and [[dandelion]] textures.}}
{{History||1.13|snap=17w47a|Prior to [[1.13/Flattening|''The Flattening'']], this [[block]]'s numeral ID was 118, and the [[item]]'s was 380.}}
{{History||1.14|snap=18w43a|[[File:Cauldron JE7.png|32px]]<br/>[[File:Cauldron (item) JE2 BE2.png|32px]] The textures of cauldrons have been changed.}}
{{History|||snap=18w48a|Cauldrons now generate in the updated [[plains]] [[village]]s.}}
{{History|||snap=18w49a|Cauldrons now generate in the updated [[savanna]] villages and the new [[snowy tundra]] villages.}}
{{History|||snap=18w50a|Cauldrons now generate in the updated [[desert]] and [[taiga]] villages.}}
{{History|||snap=19w03a|The numerous missing cullface arguments for the cauldron have been fixed.}}
{{History|||snap=19w11a|Cauldrons now serve as leatherworker [[villager]]s' job site block.}}
{{History|||snap=19w13a|The cauldron's hitbox has been fixed.<ref>{{bug|MC-129205}}</ref>}}
{{History||1.17|snap=20w45a|Normal and water cauldrons have been split into different blocks, making filled cauldrons no longer work as a workstation for villagers.<ref name="technicalunemployment">{{bug|MC-204430}}</ref>
|This also means that any [[structure]]s before this snapshot that have cauldron(s) fill with water now no longer generate(s) cauldron. Instead, water cauldron(s) will generate.}}
{{History|||snap=20w48a|Cauldrons can now collect water and lava dripped by [[pointed dripstone]].}}
{{History|||snap=21w11a|[[Lava bucket]]s and [[powder snow bucket]]s can now be emptied into any filled cauldron.}}
{{History|||snap=21w13a|Filled cauldrons work again as a workstation for villagers.}}
{{History||1.20|snap=23w12a|Cauldrons now generate in [[trail ruins]].}}
{{History|pocket alpha}}
{{History||v0.14.0|snap=build 1|[[File:Cauldron BE1.png|32px]]<br/>[[File:Cauldron (item) JE1 BE1.png|32px]] Added cauldrons.
|Cauldrons are generated naturally in [[witch hut]]s.}}
{{History||v0.15.0|snap=build 1|Cauldrons can now be moved by [[piston]]s.}}
{{History|pocket}}
{{History||1.1.0|snap=alpha 1.1.0.0|Cauldrons now generate naturally in [[woodland mansion]]s, their fullness status is unknown.}}
{{History|bedrock}}
{{History||1.10.0|snap=beta 1.10.0.3|[[File:Cauldron BE2.png|32px]] The textures of cauldrons have been changed.
|Cauldrons now generate in tannery houses in [[village]]s.}}
{{History||?|[[File:Cauldron JE7.png|32px]] The textures of cauldrons have been changed.}}
{{History|console}}
{{History||xbox=TU7|xbone=CU1|ps=1.0|wiiu=Patch 1|switch=1.0.1|[[File:Cauldron JE1.png|32px]]{{verify|Was this the actually used model?}}[[File:Cauldron (item) JE1 BE1.png|32px]] Added cauldrons.}}
{{History||xbox=TU60|xbone=CU51|ps=1.64|wiiu=Patch 30|switch=1.0.11|[[Water]] in a cauldron can now be [[dye]]d.
|[[Armor]] can be dyed in a cauldron filled with dyed water.
|Cauldrons can no longer be pushed by [[piston]]s.}}
{{History||xbox=none|xbone=none|ps=1.90|wiiu=none|switch=none|[[File:Cauldron JE7.png|32px]]{{verify|Was this the actually used model?}}<br/>[[File:Cauldron (item) JE2 BE2.png|32px]] The textures of cauldrons have been changed.}}
{{History|new 3ds}}
{{History||0.1.0|[[File:Cauldron BE1.png|32px]]<br/>[[File:Cauldron (item) JE1 BE1.png|32px]] Added cauldrons.}}
{{History|foot}}
=== Water cauldron ===
{{History|java}}
{{History||1.0.0|snap=Beta 1.9 Prerelease 2|[[File:Water Cauldron (level 1) JE1.png|32px]] [[File:Water Cauldron (level 2) JE1.png|32px]] [[File:Water Cauldron JE1.png|32px]] If made to work with a mod, cauldrons can be filled with a [[water bucket]].
|Cauldron water transparency appears inconsistent depending on hardware.}}
{{History||1.3.1|snap=12w22a|Cauldrons can now be filled with [[water]], if placed outside during [[rain]] or a [[thunderstorm]].}}
{{History||1.4.2|snap=12w34a|Holding a piece of [[Dyeing|dyed]] leather [[armor]] and right-clicking a [[water]]-filled cauldron now washes away all [[dye]]s applied to the leather armor.}}
{{History||1.5|snap=13w02a|[[File:Water Cauldron (level 1) JE2.png|32px]] [[File:Water Cauldron (level 2) JE2.png|32px]] [[File:Water Cauldron JE2.png|32px]] The walls inside of the cauldron now use the bottom texture, and the cauldron now has no bottom.<ref name="whatdoyouputinacauldrontomakeitlighter"/>}}
{{History|||snap=13w02b|[[File:Water Cauldron (level 1) JE1.png|32px]] [[File:Water Cauldron (level 2) JE1.png|32px]] [[File:Water Cauldron JE1.png|32px]] Fixed the model error from 13w02a.}}
{{History||1.6.1|snap=13w18a|When used with a [[redstone comparator]], cauldrons now output a signal varying in strength according to the amount of water inside.}}
{{History||1.7.2|snap=13w43a|Cauldrons now extinguish burning [[entity|entities]].}}
{{History||1.8|snap=14w10a|[[File:Water Cauldron (level 1) JE4.png|32px]] [[File:Water Cauldron (level 2) JE4.png|32px]] [[File:Water Cauldron JE4.png|32px]] The cauldron's feet now have planes on all sides.}}
{{History|||snap=14w30a|Right-clicking a non-empty cauldron with a [[banner]] now removes the top-most pattern layer.}}
{{History||1.9|snap=15w43a|A cauldron now generates within [[igloo]] basements, {{frac|2|3}} full.}}
{{History|||snap=15w44a|A full cauldron can now be emptied with a [[bucket]], filling the bucket with [[water]].}}
{{History||1.11|snap=16w32a|When a cauldron washes a dyed item (leather [[armor]] or [[banner]]), it reduces its water level by 1.}}
{{History|||snap=16w33a|A [[water bottle]] is now able to add 1 [[water]] level to a cauldron.}}
{{History||1.13|snap=18w10d|[[Shulker box]]es can now be undyed in a cauldron.}}
{{History|||snap=18w15a|[[File:Water Cauldron (level 1) JE5.png|32px]] [[File:Water Cauldron (level 2) JE5.png|32px]] [[File:Water Cauldron JE5.png|32px]] [[Water]] in cauldrons is now white colored.<ref>{{bug|MC-128253}}</ref>}}
{{History|||snap=18w20b|[[File:Water Cauldron (level 1) JE6.png|32px]] [[File:Water Cauldron (level 2) JE6.png|32px]] [[File:Water Cauldron JE6.png|32px]] Cauldron water is now colored again, depending on the biome.
|[[File:Swamp Water Cauldron JE1.png|32px]] [[File:Warm Ocean Water Cauldron JE1.png|32px]] [[File:Lukewarm Ocean Water Cauldron JE1.png|32px]] [[File:Cold Ocean Water Cauldron JE1.png|32px]] [[File:Frozen Ocean Water Cauldron JE1.png|32px]] This currently affects ocean temperature variants and swamps.
|[[File:Swamp Hills Water Cauldron JE1.png|32px]] Swampland M water has a yellowish color while in a cauldron.<ref>{{bug|MC-128558}}</ref>}}
{{History|||snap=pre3|[[File:Swamp Water Cauldron JE1.png|32px]] Swampland M water now has the same [[water]] color in cauldrons as regular [[swamp]]s.}}
{{History||1.14|snap=18w43a|[[File:Water Cauldron (level 1) JE7.png|32px]] [[File:Water Cauldron (level 2) JE7.png|32px]] [[File:Water Cauldron JE7.png|32px]]<br>[[File:Swamp Water Cauldron JE2.png|32px]] [[File:Warm Ocean Water Cauldron JE2.png|32px]] [[File:Lukewarm Ocean Water Cauldron JE2.png|32px]] [[File:Cold Ocean Water Cauldron JE2.png|32px]] [[File:Frozen Ocean Water Cauldron JE2.png|32px]] The textures of cauldrons have been changed.}}
{{History|||snap=19w03a|The numerous missing cullface arguments for the water cauldron have been fixed.}}
{{History||1.17|snap=20w45a|Normal and water cauldrons have been split into different blocks, making filled cauldrons no longer work as a workstation for villagers.<ref name="technicalunemployment"/>
|This also means that any [[structure]]s before this snapshot that have cauldron(s) fill with water now no longer generate(s) cauldron. Instead, water cauldron(s) will generate.}}
{{History|||snap=21w13a|Filled cauldrons work again as a workstation for villagers.}}
{{History|pocket alpha}}
{{History||v0.14.0|snap=build 1|[[File:Water Cauldron (level 1) BE1.png|32px]] [[File:Water Cauldron (level 2) BE1.png|32px]] [[File:Water Cauldron BE1.png|32px]] Added water cauldrons.
|[[Water]] color in cauldrons can be changed by adding [[dye]]s. [[Item]]s dipped in the water are dyed that color.}}
{{History||v0.15.0|snap=build 1|Cauldrons are now used to dye leather [[horse armor]].
|Water cauldrons can now be moved by [[piston]]s.}}
{{History|pocket}}
{{History||1.0.0|snap=alpha 0.17.0.1|Cauldrons now generate naturally in [[igloo]] basements.
|Cauldrons now extinguish burning [[entity|entities]].}}
{{History|bedrock}}
{{History||1.10.0|snap=beta 1.10.0.3|[[File:Water Cauldron (level 1) BE2.png|32px]] [[File:Water Cauldron (level 2) BE2.png|32px]] [[File:Water Cauldron BE2.png|32px]] The textures of cauldrons have been changed.}}
{{History||1.20.0|snap=beta 1.20.0.20|[[File:Water Cauldron (level 1) MCPE-170427.png|32px]] [[File:Water Cauldron (level 2) MCPE-170427.png|32px]] [[File:Water Cauldron MCPE-170427.png|32px]] [[Water]] in cauldrons now looks like lava.<ref>{{bug|MCPE-170427}}</ref>}}
{{History||1.20.10|snap=beta 1.20.10.20|[[File:Water Cauldron (level 1) BE2.png|32px]] [[File:Water Cauldron (level 2) BE2.png|32px]] [[File:Water Cauldron BE2.png|32px]] Cauldron water now uses the correct texture.}}
{{History|console}}
{{History||xbox=TU7|xbone=CU1|ps=1.0|wiiu=Patch 1|switch=1.0.1|[[File:Water Cauldron (level 1) JE1.png|32px]] [[File:Water Cauldron (level 2) JE1.png|32px]] [[File:Water Cauldron JE1.png|32px]]{{verify|Were these the models used?}} Added water cauldrons.}}
{{History||xbox=TU12|[[Water]] is no longer removed from a [[water bucket]] when filling a cauldron in [[creative]] mode.}}
{{History||xbox=TU14|ps=1.04|Cauldrons fill with water if placed outside during [[rain]] or a [[thunderstorm]].}}
{{History||xbox=TU31|xbone=CU19|ps=1.22|wiiu=Patch 3|Cauldrons with [[water]] in them extinguish burning [[entity|entities]], taking away one water level each time.}}
{{History|new 3ds}}
{{History||0.1.0|[[File:Water Cauldron (level 1) BE1.png|32px]] [[File:Water Cauldron (level 2) BE1.png|32px]] [[File:Water Cauldron BE1.png|32px]]{{verify|Were these the models used?}} Added cauldrons.
|Water color in cauldrons can be changed by adding [[dye]]s.
|Cauldrons can be used to [[dye]] leather [[armor]].}}
{{History|foot}}
=== Lava cauldron ===
{{History|Java}}
{{History||1.17|snap=20w45a|[[File:Lava Cauldron JE1.png|32px]] Cauldrons can now be filled with [[lava]].}}
{{History|||snap=21w20a|Lava cauldrons now emits redstone signal strength of 3.<ref name=JavaLava/>}}
{{History|bedrock}}
{{History||1.9.0|snap=beta 1.9.0.2|[[File:Lava Cauldron BE1.png|32px]] Cauldrons can now be filled with lava.}}
{{History||1.10.0|snap=beta 1.10.0.3|[[File:Lava Cauldron BE2.png|32px]] The texture of cauldrons filled with lava has been changed.}}
{{History|console}}
{{History||xbox=none|xbone=none|ps=1.88|wiiu=none|switch=none|[[File:Lava Cauldron LCE1.png|32px]] Cauldrons can now be filled with lava.}}
{{History||xbox=none|xbone=none|ps=1.90|wiiu=none|switch=none|[[File:Lava Cauldron LCE2.png|32px]] The texture of cauldrons filled with lava has been changed.}}
{{History|foot}}
=== Powder Snow Cauldron ===
{{History|java}}
{{History||1.17|snap=20w46a|[[File:Powder Snow Cauldron (level 1) JE1.png|32px]] [[File:Powder Snow Cauldron (level 2) JE1.png|32px]] [[File:Powder Snow Cauldron JE1.png|32px]] Cauldrons can now be filled with powder snow.}}
{{History||1.17.1|snap=Pre-release 1|Powder snow now fills twice as fast in a cauldron.}}
{{History|bedrock}}
{{History||1.17.0|snap=beta 1.17.0.52|[[File:Powder Snow Cauldron (level 1) JE1.png|32px]] [[File:Powder Snow Cauldron (level 2) JE1.png|32px]] [[File:Powder Snow Cauldron JE1.png|32px]] Cauldrons can now be filled with powder snow.}}
{{History|foot}}
=== Potion cauldron ===
{{cleanup|Many potion cauldrons here are listed as being added in versions where said potion did not exist yet - please rearrange and add new history entries accordingly}}
{{History|java}}
{{History||1.0.0|snap=Beta 1.9 Prerelease 2|[[File:Arrran Cauldron 1.png|32px]] [[File:Arrran Cauldron 2.png|32px]] [[File:Arrran Cauldron 3.png|32px]] [[File:Arrran Cauldron 4.png|32px]] <br/>[[File:Cauldron (item) JE1 BE1.png|32px]] Cauldrons are intended to be used for the creation of [[potion]]s.
|Cauldrons can be made to work with a mod, through which the following has been revealed:
* Applying a [[potion]] ingredient to a water cauldron cause it to change to a differently-colored [[lava]] texture, and adding any further potion ingredients to the filled cauldron cause the [[liquid]] to change color.
* Scooping out a potion with ingredients applied cause the potion to have an effect related to the ingredient, e.g. a potion brewed with a [[magma cream]] have [[Fire Resistance]] as an effect.}}
{{History|||snap=Beta 1.9 Prerelease 3|The system was deemed too complex and not user-friendly,<ref>{{Tweet|jeb|119466949708222465|Potions are delayed because *add to cauldron, pick up, look at tooltip, pour back into cauldron, repeat* was extremely tedious|September 29, 2011}}</ref> so the cauldron's ability to brew potions has been replaced with the [[brewing stand]].<ref>{{Tweet|jeb|119710836469149697|A quick discussion with @notch led me in on a new way of doing the potion brewing. Cauldron is out...|September 30, 2011}}</ref><ref>{{Tweet|jeb|119762786619359232|Look back at me! Your Cauldron is now a Brewing Stand. Anything's possible when working with interaction design.|September 30, 2011}}</ref> That brewing system is finalized and doesn't change in the rest of the pre-releases.}}
{{History|pocket alpha}}
{{History||v0.14.0|snap=build 1|[[File:Invisibility Potion Cauldron BE1.png|32px]] [[File:Jump Boost Potion Cauldron BE1.png|32px]] [[File:Fire Resistance Potion Cauldron BE1.png|32px]] [[File:Speed Potion Cauldron BE1.png|32px]] [[File:Slowness Potion Cauldron BE1.png|32px]] [[File:Water Breathing Potion Cauldron BE1.png|32px]] [[File:Instant Health Potion Cauldron BE1.png|32px]] [[File:Instant Damage Potion Cauldron BE1.png|32px]] [[File:Poison Potion Cauldron BE1.png|32px]] [[File:Regeneration Potion Cauldron BE1.png|32px]] [[File:Strength Potion Cauldron BE1.png|32px]] [[File:Weakness Potion Cauldron BE1.png|32px]] [[File:Wither Potion Cauldron BE1.png|32px]] [[File:Turtle Master Potion Cauldron BE1.png|32px]] [[File:Slow Falling Potion Cauldron BE1.png|32px]] Cauldrons can store [[potion]]s, and [[explosion|explode]] if potions are mixed.}}
{{History||v0.15.0|snap=build 1|Cauldrons are now used to make [[tipped arrow]]s.}}
{{History|bedrock}}
{{History||1.10.0|snap=beta 1.10.0.3|[[File:Invisibility Potion Cauldron BE2.png|32px]] [[File:Jump Boost Potion Cauldron BE2.png|32px]] [[File:Fire Resistance Potion Cauldron BE2.png|32px]] [[File:Speed Potion Cauldron BE2.png|32px]] [[File:Slowness Potion Cauldron BE2.png|32px]] [[File:Water Breathing Potion Cauldron BE2.png|32px]] [[File:Instant Health Potion Cauldron BE2.png|32px]] [[File:Instant Damage Potion Cauldron BE2.png|32px]] [[File:Poison Potion Cauldron BE2.png|32px]] [[File:Regeneration Potion Cauldron BE2.png|32px]] [[File:Strength Potion Cauldron BE2.png|32px]] [[File:Weakness Potion Cauldron BE2.png|32px]] [[File:Wither Potion Cauldron BE2.png|32px]] [[File:Turtle Master Potion Cauldron BE2.png|32px]] [[File:Slow Falling Potion Cauldron BE2.png|32px]] The textures of cauldrons filled with [[potion]]s have been changed.}}
{{History|console}}
{{History||xbox=TU60|xbone=CU51|ps=1.64|wiiu=Patch 30|switch=1.0.11|[[File:Invisibility Potion Cauldron BE1.png|32px]] [[File:Jump Boost Potion Cauldron BE1.png|32px]] [[File:Fire Resistance Potion Cauldron BE1.png|32px]] [[File:Speed Potion Cauldron BE1.png|32px]] [[File:Slowness Potion Cauldron BE1.png|32px]] [[File:Water Breathing Potion Cauldron BE1.png|32px]] [[File:Instant Health Potion Cauldron BE1.png|32px]] [[File:Instant Damage Potion Cauldron BE1.png|32px]] [[File:Poison Potion Cauldron BE1.png|32px]] [[File:Regeneration Potion Cauldron BE1.png|32px]] [[File:Strength Potion Cauldron BE1.png|32px]] [[File:Weakness Potion Cauldron BE1.png|32px]] [[File:Wither Potion Cauldron BE1.png|32px]] [[File:Turtle Master Potion Cauldron BE1.png|32px]] [[File:Slow Falling Potion Cauldron BE1.png|32px]]{{verify|Were these the models used?}} Cauldrons can now be filled with [[potion]]s and make an explosion [[sound]] if they are mixed.
|[[Effect]]s can now be applied to [[arrow]]s by using them on a potion-filled cauldron.}}
{{History||xbox=none|xbone=none|ps=1.90|wiiu=none|switch=none|[[File:Invisibility Potion Cauldron BE2.png|32px]] [[File:Jump Boost Potion Cauldron BE2.png|32px]] [[File:Fire Resistance Potion Cauldron BE2.png|32px]] [[File:Speed Potion Cauldron BE2.png|32px]] [[File:Slowness Potion Cauldron BE2.png|32px]] [[File:Water Breathing Potion Cauldron BE2.png|32px]] [[File:Instant Health Potion Cauldron BE2.png|32px]] [[File:Instant Damage Potion Cauldron BE2.png|32px]] [[File:Poison Potion Cauldron BE2.png|32px]] [[File:Regeneration Potion Cauldron BE2.png|32px]] [[File:Strength Potion Cauldron BE2.png|32px]] [[File:Weakness Potion Cauldron BE2.png|32px]] [[File:Wither Potion Cauldron BE2.png|32px]] [[File:Turtle Master Potion Cauldron BE2.png|32px]] [[File:Slow Falling Potion Cauldron BE2.png|32px]]{{verify|Were these the models used?}} The textures of cauldrons filled with [[potion]]s have been changed.}}
{{History|new 3ds}}
{{History||0.1.0|[[File:Invisibility Potion Cauldron BE1.png|32px]] [[File:Jump Boost Potion Cauldron BE1.png|32px]] [[File:Fire Resistance Potion Cauldron BE1.png|32px]] [[File:Speed Potion Cauldron BE1.png|32px]] [[File:Slowness Potion Cauldron BE1.png|32px]] [[File:Water Breathing Potion Cauldron BE1.png|32px]] [[File:Instant Health Potion Cauldron BE1.png|32px]] [[File:Instant Damage Potion Cauldron BE1.png|32px]] [[File:Poison Potion Cauldron BE1.png|32px]] [[File:Regeneration Potion Cauldron BE1.png|32px]] [[File:Strength Potion Cauldron BE1.png|32px]] [[File:Weakness Potion Cauldron BE1.png|32px]] [[File:Wither Potion Cauldron BE1.png|32px]] [[File:Turtle Master Potion Cauldron BE1.png|32px]] [[File:Slow Falling Potion Cauldron BE1.png|32px]]{{verify|Were these the models used?}} Cauldrons can store [[potion]]s.
|Cauldrons make an explosion [[sound]] if potions are mixed, and the potions disappear.
|Potions inside cauldrons have a bubbling effect.}}
{{History|foot}}
===Cauldron "item"===
{{:Technical blocks/Cauldron}}
==Issues==
{{issue list}}
==Trivia==
*[[Arrow]]s "stick" to the [[water]] in a cauldron.
*The inside of a cauldron is 0.25 ({{frac|1|4}}) blocks tall.
*A cauldron holding water is the only way to have water in [[the Nether]] without the use of [[commands]].
==Renders==
; Normal water
<gallery>
Water Cauldron (level 1).png | Level 1
Water Cauldron (level 2).png | Level 2
Water Cauldron.png | Level 3 - full
Water Cauldron (level 1) BE.png | Level 1 (Bedrock Edition)
Water Cauldron (level 2) BE.png | Level 2 (Bedrock Edition)
Water Cauldron BE.png | Level 3 - full (Bedrock Edition)
</gallery>
;Dyed water {{Only|BE}}
<gallery>
Cauldron (filled with white water).png|White Water Cauldron
Cauldron (filled with light gray water).png|Light Gray Water Cauldron
Cauldron (filled with gray water).png|Gray Water Cauldron
Cauldron (filled with black water).png|Black Water Cauldron
Cauldron (filled with brown water).png|Brown Water Cauldron
Cauldron (filled with red water).png|Red Water Cauldron
Cauldron (filled with orange water).png|Orange Water Cauldron
Cauldron (filled with yellow water).png|Yellow Water Cauldron
Cauldron (filled with lime water).png|Lime Water Cauldron
Cauldron (filled with green water).png|Green Water Cauldron
Cauldron (filled with cyan water).png|Cyan Water Cauldron
Cauldron (filled with light blue water).png|Light Blue Water Cauldron
Cauldron (filled with blue water).png|Blue Water Cauldron
Cauldron (filled with purple water).png|Purple Water Cauldron
Cauldron (filled with magenta water).png|Magenta Water Cauldron
Cauldron (filled with pink water).png|Pink Water Cauldron
</gallery>
;Cauldrons filled with potions {{Only|BE}}
<gallery>
Night Vision Potion Cauldron.png|Night Vision Potion Cauldron
Invisibility Potion Cauldron.png|Invisibility Potion Cauldron
Jump Boost Potion Cauldron.png|Leaping Potion Cauldron
Fire Resistance Potion Cauldron.png|Fire Resistance Potion Cauldron
Speed Potion Cauldron.png|Swiftness Potion Cauldron
Slowness Potion Cauldron.png|Slowness Potion Cauldro
Turtle Master Potion Cauldron.png|Turtle Master Potion Cauldron
Water Breathing Potion Cauldron.png|Water Breathing Potion Cauldron
Instant Health Potion Cauldron.png|Healing Potion Cauldron
Instant Damage Potion Cauldron.png|Harming Potion Cauldron
Poison Potion Cauldron.png|Poison Potion Cauldron
Regeneration Potion Cauldron.png|Regeneration Potion Cauldron
Strength Potion Cauldron.png|Strength Potion Cauldron
Weakness Potion Cauldron.png|Weakness Potion Cauldron
Slow Falling Potion Cauldron.png|Slow Falling Potion Cauldron
Wither Potion Cauldron.png|Decay Potion Cauldron
</gallery>
;Powder Snow
<gallery>
Powder Snow Cauldron (level 1).png | Level 1
Powder Snow Cauldron (level 2).png | Level 2
Powder Snow Cauldron.png | Level 3 - full
</gallery>
== Gallery==
<gallery>
The three stages of water height in cauldrons.png| All cauldron states in [[Java Edition]].
Cauldrons potion.png|All [[potion]]s in cauldrons.{{only|be|short=1}}
Cauldrons DyeWater.png|All cauldron [[water]] colors possible with one dye.{{only|be|short=1}}
Brewing Potions.png|How potions were brewed in [[Java Edition Beta 1.9 Prerelease 2|Beta 1.9 Pre-Release 2]] if enabled through a mod.
Dyed Water Cauldrons.jpg|Cauldrons filled with dyed water.
Potion Cauldron.jpg|A cauldron filled with potions.
Arrow Tipping 1.jpg|Using a cauldron to make [[tipped arrow]]s.
Arrow Tipping 2.jpg|Using a cauldron to make [[tipped arrow]]s.
Arrow Tipping 3.jpg|Using a cauldron to make [[tipped arrow]]s.
Snow Cauldron.jpg|A cauldron full of snow.
</gallery>
==References==
{{reflist|2}}
{{Blocks|Utility}}
{{items}}
[[Category:Natural blocks]]
[[Category:Job blocks]]
[[Category:Utility blocks]]
[[Category:Storage]]
[[Category:Manufactured blocks]]
[[Category:Generated structure blocks]]
[[Category:Light sources]]
[[cs:Kotel]]
[[de:Kessel]]
[[es:Caldero]]
[[fr:Chaudron]]
[[hu:Üst]]
[[it:Calderone]]
[[ja:大釜]]
[[ko:가마솥]]
[[nl:Ketel]]
[[pl:Kocioł]]
[[pt:Caldeirão]]
[[ru:Котёл]]
[[th:หม้อปรุงยา]]
[[uk:Казан]]
[[zh:炼药锅]]</li></ul> | 1.8.1-pre1 | Mobs no longer run from creepers that are about to explode. | |||
| No longer attack iron golems. | |||||
1.9{{Extension DPL}}<ul><li>[[Nether Sprouts|Nether Sprouts]]<br/>{{Block
|title=Nether Sprouts
|image=Nether Sprouts.png
|image2=Nether Sprouts (texture) JE2 BE2.png
|transparent=Yes
|tool=shears
|light=No
|renewable=Yes
|stackable=Yes (64)
|flammable=No
|lavasusceptible=Yes
}}
'''Nether sprouts''' are a non-solid fungi block that generate in [[warped forest]]s.
== Obtaining ==
=== Natural generation ===
Nether sprouts generate in [[warped forest]] biomes.
=== Breaking ===
Nether sprouts can be mined instantly with any item. The block also breaks if the block below is removed, or if [[water]] flows into its space. The block only drops if broken with [[shear]]s.
=== Post-generation ===
Applying [[bone meal]] to warped [[nylium]] creates nether sprouts on that block and surrounding nylium, along with both types of [[roots]] and [[fungi]].
== Usage ==
[[File:RootsSproutsPlaceBlock.png|thumb|All of the blocks that nether sprouts can be placed on.]]
Nether sprouts can be planted on the same blocks that [[fungus|fungi]] and [[roots]] can be placed on: [[nylium]], [[soul soil]], [[Grass Block|grass]], [[podzol]], [[mycelium]], [[Moss Block|moss]], [[dirt]], [[coarse dirt]], [[rooted dirt]], and [[farmland]]. However, they cannot be planted in [[flower pot]]s.
=== Composting ===
Placing nether sprouts into a [[composter]] has a 50% chance of raising the compost level by 1.
== Sounds ==
{{Sound table/Block/Nether sprouts}}
== Data values ==
=== ID ===
{{edition|java}}:
{{ID table
|edition=java
|generatetranslationkeys=y
|showforms=y
|displayname=Nether Sprouts
|spritetype=block
|nameid=nether_sprouts
|foot=1}}
{{edition|bedrock}}:
{{ID table
|edition=bedrock
|firstcolumnname=Nether Sprouts
|shownumericids=y
|showforms=y
|generatetranslationkeys=y
|displayname=Block
|spritename=nether-sprouts
|spritetype=block
|nameid=nether_sprouts
|id=493
|form=block
|itemform=item.nether_sprouts}}
{{ID table
|displayname=Item
|spritename=nether-sprouts
|spritetype=item
|nameid=nether_sprouts
|id=621
|form=item
|translationkey=tile.nether_sprouts.name
|foot=1}}
== History ==
{{History|java}}
{{History||1.16|snap=20w06a|[[File:Nether Sprouts JE1 BE1.png|24px]] [[File:Nether Sprouts (texture) JE1 BE1.png|24px]] Added nether sprouts.}}
{{History|||snap=20w10a|[[File:Nether Sprouts JE2 BE2.png|24px]] [[File:Nether Sprouts (texture) JE2 BE2.png|24px]] The textures of the nether sprouts have now been changed.}}
{{History|||snap=20w15a|Nether sprouts can now be [[composter|composted]].}}
{{History|||snap=20w19a|Nether sprouts now only [[drops|drop]] if [[breaking|broken]] with [[shears]].}}
{{History|||snap=20w21a|[[File:Nether Sprouts (item) JE3 BE2.png|24px]] The [[inventory]] texture of the nether sprouts have now been changed.
|The [[block]] [[model]] of nether sprouts is now centered of the block rather than positioned randomly.}}
{{History||1.19.3|snap=22w44a|Nether sprouts now make sounds when being walked on.<ref>{{bug|MC-171621|||Fixed}}</ref>}}
{{History|bedrock}}
{{History||1.16.0|snap=beta 1.16.0.51|[[File:Nether Sprouts JE1 BE1.png|24px]] [[File:Nether Sprouts (texture) JE1 BE1.png|24px]] Added nether sprouts.}}
{{History|||snap=beta 1.16.0.57|Nether sprouts can now be [[composter|composted]].}}
{{History|||snap=beta 1.16.0.59|[[File:Nether Sprouts JE2 BE2.png|24px]] [[File:Nether Sprouts (item) JE3 BE2.png|24px]] The textures of the nether sprouts have now been changed.
|[[File:Nether Sprouts Glitched BE.png|32px]] Nether sprouts now appear with a glitched texture when [[breaking|broken]] in [[survival]] mode or when picking the [[block]] in [[creative]] mode. The [[item]] received is also nameless.<ref>{{bug|MCPE-74339}}</ref>}}
{{History|||snap=beta 1.16.0.63|Nether sprouts now give the [[player]] the correct item when broken in survival mode or when picking the block in creative mode.}}
{{History|foot}}
== Issues ==
{{issue list}}
== Trivia ==
* Unlike other warped "plants", nether sprouts don't have a crimson equivalent. This is also the case with [[nether wart]], which lacks a warped equivalent.
== References ==
{{Reflist}}
{{Blocks|vegetation}}
{{Items}}
[[Category:Nether blocks]]
[[Category:Fungi]]
[[Category:Natural blocks]]
[[Category:Non-solid blocks]]
[[de:Nethersprossen]]
[[de:Nethersprossen]]
[[es:Rastrojo del Nether]]
[[fr:Germes du Nether]]
[[ja:ネザースプラウト]]
[[pl:Netherowe kiełki]]
[[pt:Brotos do Nether]]
[[ru:Адские ростки]]
[[zh:下界苗]]</li><li>[[Sugar Cane|Sugar Cane]]<br/>{{Block
|image=Sugar Cane.png
|image2=Sugar Cane (item) JE3.png
|extratext = View all [[#Gallery|renders]]
|transparent=Yes
|light=No
|tool=any
|renewable=Yes
|stackable=Yes (64)
|flammable=No
|lavasusceptible=No
}}
'''Sugar cane''' is a block found as 1–4-block-tall. It plants near water in the [[Overworld]]. As an item, it is an important crafting ingredient.
==Obtaining==
Sugar cane can be mined instantly with anything.
When the spot a sugar cane block is placed in becomes unsuitable, such as when the supporting block is removed, the sugar cane block uproots and drops as an item. {{IN|be}}, sugar cane uproots immediately after all adjacent water is removed. {{IN|je}}, sugar cane uproots on the next block update or [[Tick#Random tick|random tick]].
A sugar cane block drops itself as an item if a piston tries to push it (trying to pull it does nothing) or moves a block into its space.
===Natural generation===
[[File:Sugar Canez.png|thumb|250px|Naturally-occurring sugar cane near a river.]]
Sugar cane can generate naturally near [[water]] and [[ice]], as two ({{frac|11|18}} chance), three ({{frac|5|18}} chance), or four ({{frac|2|18}} chance) blocks tall. Rare taller sugar canes can be found if the world generator places two smaller canes on top of each other. It generates in approximately 0.8 sugar cane per chunk seeing as how they only generate near bodies of water.
Sugar canes attempt to generate 10 times in any Overworld biome, which requires water. An extra 10 attempts are made in [[swamp]] biomes, and 50 in [[desert]] biomes, which makes sugar cane twice as frequent in swamps and six times as frequent in desert biomes, making the banks of [[river]]s that cut through deserts lined with sugar canes. Sugar canes do not grow faster in swamps or deserts they only spawn a increased amount.
Sugar cane cannot generate in caves {{in|je}}.<ref>{{bug|MC-214959||Sugar cane generated in cave|Fixed}}</ref>
===Trading===
[[Wandering trader]]s can sell sugar cane for an [[emerald]].
==Usage==
Due to its water-displacing properties, sugar cane can interestingly be used to create underwater paths, allowing [[player]]s to move at normal speed and breathe if it is two blocks in height.{{only|java}}<ref>{{bug|MC-929||Sugar cane can be placed underwater|WAI}}</ref>
Sugar cane takes on a different shade of green depending on the biome in which it is placed.
===Crafting ingredient===
{{crafting usage}}
===Farming===
{{main|Tutorials/Sugar cane farming}}
[[File:Underground Sugar Farm.png|200px|thumb|An underground sugar cane farm.]]
Sugar cane can generate naturally up to any number of blocks tall, but ''grow'' only to a height of three blocks, adding a block of height when the top sugar cane block has received 16 random [[Tick#Block tick|block tick]]s (i.e. on average every 18 minutes on ''Java Edition''<!-- Average 68.27 seconds/tick * 16 ticks/growth = 18.2 minutes --> or 54 minutes on Bedrock Edition, but the actual rate can vary widely).
Sugar cane must be planted on a [[grass block]], [[dirt]], [[coarse dirt]], [[rooted dirt]], [[podzol]], [[mycelium]], [[sand]], [[red sand]], [[suspicious sand]], [[moss block]], or [[mud]] that is directly adjacent to [[water]], [[waterlogged]] block, or [[frosted ice]] (not merely above or diagonal to water), or on top of another sugar cane block. The adjacent water block can be covered with another block, whether [[opacity|opaque or transparent]], and sugar cane can still be placed and grow next to it. Sugar cane grows regardless of light level, even in complete darkness.
[[File:4blockcane.png|thumb|A natural 4-block-high sugar cane plant.]]
{{IN|bedrock}}, [[bone meal]] can be used to instantly grow sugar cane to three blocks. Only one bone meal is consumed. {{IN|java}}, bone meal cannot be used on sugar cane.<ref>{{bug|MC-73963||Can't use bonemeal on cacti or sugar cane|WAI}}</ref>
On average, it takes [[Tutorials/Sugar_cane_farming#Mechanics|18 minutes]] for a single block of sugar cane to grow 3 blocks tall.
=== Composting ===
Placing sugar cane into a [[composter]] has a 50% chance of raising the compost level by 1.
== List of colors ==
{{Missing information|Bedrock Edition colors (see [[Water#Color]]{{verify|it's there?}})}}
=== ''Java Edition'' ===
These values are generated by the biome dyeing algorithm. See [[Color#Biome colors|Biome colors]] for more information.
<div class="mw-collapsible mw-collapsed" style="float: left">
{| class="wikitable sortable" style="text-align:center" data-description="Java edition biome colors"
!Biome !! Category !! Rainfall !! Sugarcane Color !! Temperature Affects !! Render
|-
| {{BiomeLink|Badlands}} || Mesa || No || #90814d || No || [[File:Badlands Sugar Cane.png|32px]]
|-
| {{BiomeLink|Beach}} || Beach || Rain || #91bd59 || || [[File:Plains Sugar Cane.png|32px]]
|-
| {{BiomeLink|Birch Forest}} || Forest || Rain || #88bb67 || || [[File:Birch Forest Sugar Cane.png|32px]]
|-
| {{BiomeLink|Cold Ocean}} || Ocean || Rain || #8eb971 || || [[File:Ocean Sugar Cane.png|32px]]
|-
| {{BiomeLink|Dark Forest}} || Forest || Rain || #507a32 || || [[File:Dark Forest Sugar Cane.png|32px]]
|-
| {{BiomeLink|Deep Cold Ocean}} || Ocean || Rain || #8eb971 || || [[File:Ocean Sugar Cane.png|32px]]
|-
| {{BiomeLink|Deep Frozen Ocean}} || Ocean || Rain || #8eb971 || || [[File:Ocean Sugar Cane.png|32px]]
|-
| {{BiomeLink|Deep Lukewarm Ocean}} || Ocean || Rain || #8eb971 || || [[File:Ocean Sugar Cane.png|32px]]
|-
| {{BiomeLink|Deep Ocean}} || Ocean || Rain || #8eb971 || || [[File:Ocean Sugar Cane.png|32px]]
|-
| {{BiomeLink|Desert}} || Desert || No || #bfb755 || || [[File:Desert Sugar Cane.png|32px]]
|-
| {{BiomeLink|End Barrens}} || The End || No || #8eb971 || || [[File:Ocean Sugar Cane.png|32px]]
|-
| {{BiomeLink|End Highlands}} || The End || No || #8eb971 || || [[File:Ocean Sugar Cane.png|32px]]
|-
| {{BiomeLink|End Midlands}} || The End || No || #8eb971 || || [[File:Ocean Sugar Cane.png|32px]]
|-
| {{BiomeLink|Eroded Badlands}} || Mesa || No || #90814d || No || [[File:Badlands Sugar Cane.png|32px]]
|-
| {{BiomeLink|Flower Forest}} || Forest || Rain || #79c05a || || [[File:Forest Sugar Cane.png|32px]]
|-
| {{BiomeLink|Forest}} || Forest || Rain || #79c05a || || [[File:Forest Sugar Cane.png|32px]]
|-
| {{BiomeLink|Frozen Ocean}} || Ocean || Snow || #80b497 || || [[File:Snowy Plains Sugar Cane.png|32px]]
|-
| {{BiomeLink|Frozen River}} || River || Snow || #80b497 || || [[File:Snowy Plains Sugar Cane.png|32px]]
|-
| {{BiomeLink|Old Growth Spruce Taiga}} || Taiga || Rain || #86b783 || || [[File:Taiga Sugar Cane.png|32px]]
|-
| {{BiomeLink|Old Growth Pine Taiga}} || Taiga || Rain || #86b87f || || [[File:Old Growth Pine Taiga Sugar Cane.png|32px]]
|-
| {{BiomeLink|Ice Spikes}} || Icy || Snow || #80b497 || || [[File:Snowy Plains Sugar Cane.png|32px]]
|-
| {{BiomeLink|Jungle}} || Jungle || Rain || #59c93c || || [[File:Jungle Sugar Cane.png|32px]]
|-
| {{BiomeLink|Sparse Jungle}} || Jungle || Rain || #64c73f || || [[File:Sparse Jungle Sugar Cane.png|32px]]
|-
| {{BiomeLink|Lukewarm Ocean}} || Ocean || Rain || #8eb971 || || [[File:Ocean Sugar Cane.png|32px]]
|-
| {{BiomeLink|Windswept Hills}} || Extreme Hills || Rain || #8ab689 || || [[File:Windswept Hills Sugar Cane.png|32px]]
|-
| {{BiomeLink|Mushroom Fields}} || Mushroom || Rain || #55c93f || || [[File:Mushroom Fields Sugar Cane.png|32px]]
|-
| {{BiomeLink|Nether}} || Nether || No || #bfb755 || || [[File:Desert Sugar Cane.png|32px]]
|-
| {{BiomeLink|Ocean}} || Ocean || Rain || #8eb971 || || [[File:Ocean Sugar Cane.png|32px]]
|-
| {{BiomeLink|Plains}} || Plains || Rain || #91bd59 || || [[File:Plains Sugar Cane.png|32px]]
|-
| {{BiomeLink|River}} || River || Rain || #8eb971 || || [[File:Ocean Sugar Cane.png|32px]]
|-
| {{BiomeLink|Savanna}} || Savanna || No || #bfb755 || || [[File:Desert Sugar Cane.png|32px]]
|-
| {{BiomeLink|Savanna Plateau}} || Savanna || No || #bfb755 || || [[File:Desert Sugar Cane.png|32px]]
|-
| {{BiomeLink|Windswept Savanna}} || Savanna || No || #bfb755 || || [[File:Desert Sugar Cane.png|32px]]
|-
| {{BiomeLink|Small End Islands}} || The End || No || #8eb971 || || [[File:Ocean Sugar Cane.png|32px]]
|-
| {{BiomeLink|Snowy Beach}} || Beach || Snow || #83b593 || || [[File:Snowy Beach Sugar Cane.png|32px]]
|-
| {{BiomeLink|Snowy Taiga}} || Taiga || Snow || #80b497 || || [[File:Snowy Plains Sugar Cane.png|32px]]
|-
| {{BiomeLink|Snowy Plains}} || Icy || Snow || #80b497 || || [[File:Snowy Plains Sugar Cane.png|32px]]
|-
| {{BiomeLink|Stony Shore}} || None || Rain || #8ab689 || || [[File:Windswept Hills Sugar Cane.png|32px]]
|-
| {{BiomeLink|Sunflower Plains}} || Plains || Rain || #91bd59 || || [[File:Plains Sugar Cane.png|32px]]
|-
| {{BiomeLink|Swamp}} || Swamp || Rain || #6A7039 || If temperature below -0.1, used #4C763C. || [[File:Swamp Sugar Cane.png|32px]] / [[File:Swamp Sugar Cane (Cold).png|32px]]
|-
| {{BiomeLink|Taiga}} || Taiga || Rain || #86b783 || || [[File:Taiga Sugar Cane.png|32px]]
|-
| {{BiomeLink|Old Growth Birch Forest}} || Forest || Rain || #88bb67 || || [[File:Birch Forest Sugar Cane.png|32px]]
|-
| {{BiomeLink|The End}} || The End || No || #8eb971 || || [[File:Ocean Sugar Cane.png|32px]]
|-
| {{BiomeLink|The Void}} || None || No || #8eb971 || || [[File:Ocean Sugar Cane.png|32px]]
|-
| {{BiomeLink|Warm Ocean}} || Ocean || Rain || #8eb971 || || [[File:Ocean Sugar Cane.png|32px]]
|-
| {{BiomeLink|Wooded Badlands}} || Mesa || No || #90814d || No || [[File:Badlands Sugar Cane.png|32px]]
|-
| {{BiomeLink|Windswept Forest}} || Extreme Hills || Rain || #8ab689 || || [[File:Windswept Hills Sugar Cane.png|32px]]
|}
</div>
{{clear}}
=== Bedrock Edition ===
{{empty section}}
== Sounds ==
{{Sound table/Block/Grass}}
== Data values ==
=== ID ===
{{edition|java}}:
{{ID table
|edition=java
|showforms=y
|generatetranslationkeys=y
|displayname=Sugar Cane
|spritetype=block
|nameid=sugar_cane
|foot=1}}
{{edition|bedrock}}:
{{ID table
|edition=bedrock
|firstcolumnname=Sugar Cane
|shownumericids=y
|showforms=y
|showaliasids=y
|generatetranslationkeys=y
|displayname=Block
|spritename=sugar-cane
|spritetype=block
|nameid=reeds
|id=83
|form=block
|itemform=item.reeds}}
{{ID table
|displayname=Item
|spritename=sugar-cane
|spritetype=item
|nameid=sugar_cane
|id=385
|form=item
|aliasid=reeds
|translationkey=item.reeds.name
|foot=1}}
=== Block states ===
{{see also|Block states}}
{{/BS}}
== Video ==
{{Video note|This video was made before sugar cane had a different shade of green depending on the biome.|minor}}
<div style="text-align:center">{{yt|zlOnwn3PH5o}}</div>
== History ==
{{more images|Appearance when affected by {{bug|MC-48831}}}}
{{History|java alpha}}
{{History||v1.0.11|[[File:Sugar Cane JE1 BE1.png|32px]] [[File:Sugar Cane (item) JE1 BE1.png|32px]] Added reeds in the [[Seecret Updates|Seecret Friday Update 6]].
|Reeds are informally referred to as "bamboo" or "papyrus" by many [[player]]s.
|Since reeds can be washed away with [[water]] currents or instantly destroyed by removing the water adjacent to them, automated reed farms can be made.
|Reeds can be used to craft [[paper]].}}
{{History|java beta}}
{{History||1.2|[[Notch]] has [[wikipedia:Retroactive continuity|retconned]] reeds into sugar cane so that it can now be [[crafting|crafted]] into [[sugar]], included in the recipe for the [[cake]]s.}}
{{History||1.6|snap=Test Build 3|[[Arrow]]s no longer stick to sugar cane, and instead, they pass through. However, [[snowball]]s still come into contact with any sugar cane blocks, as if they are solid.}}
{{History||1.8|snap=Pre-release|Sugar cane can now grow and be placed onto [[sand]] as long as they are adjacent to [[water]]. This update allows sugar canes to appear next to [[water]] ponds in [[desert]] biomes.
|Sugar cane is now available in the [[creative]] [[inventory]] in both block and item forms.}}
{{History|java}}
{{History||1.0.0|snap=?|The sugar cane block has been removed from the creative inventory.}}
{{History||1.7.2|snap=13w36a|[[File:Sugar Cane JE2 BE2.png|32px]] Sugar cane is now [[tint]]ed depending on the [[biome]] it's in.
|The item texture remained unchanged, however, and still used the color palette from Alpha to 1.6.4.<ref name="Bug">{{bug|MC-216227}}</ref>}}
{{History||1.9|snap=15w43a|Sugar cane no longer breaks if its adjacent [[water]] is turned to [[frosted ice]].}}
{{History||1.13|snap=17w47a|The ID of sugar cane has now been changed from <code>reeds</code> to <code>sugar_cane</code>.
|"Sugar Canes" have now been renamed to "Sugar Cane".
|Prior to [[1.13/Flattening|''The Flattening'']], this [[block]]'s numeral ID was 83, and the [[item]]'s 338.}}
{{History||1.14|snap=18w43a|[[File:Sugar Cane (item) JE2 BE2.png|32px]] The texture of the sugar cane item has been changed.}}
{{History|||snap=19w03a|Placing sugar cane into a [[composter]] has a 20% chance of raising the compost level by 1.}}
{{History|||snap=19w05a|Sugar cane now has a 50% chance of increasing the compost level in a composter by 1.
|Added [[wandering trader]]s, which sell sugar cane.}}
{{History||1.16|snap=20w13a|Sugar cane has been moved from the Miscellaneous tab to the Decoration Blocks tab in the [[Creative inventory]].<ref name="misc decoration">https://bugs.mojang.com/browse/MC-174434</ref>}}
{{History||1.17|snap=21w11a|[[File:Sugar Cane (item) JE3.png|32px]] The texture of the sugar cane item has been changed, so that it actually matches the color it uses when placed again.<ref name="Bug"/>}}
{{History|||snap=Pre-release 1|Sugar cane now generates in mushroom fields.<ref>{{bug|MC-226683}}</ref>}}
{{History||1.19|snap=22w15a|Sugar cane can now be planted on mud.}}
{{History||1.20|snap=23w14a|Sugar cane can now be planted on [[suspicious sand]].}}
{{History|pocket alpha}}
{{History||Pre-release|[[File:Sugar Cane JE1 BE1.png|32px]] [[File:Sugar Cane (item) JE1 BE1.png|32px]] Added sugar cane.}}
{{History||v0.2.0|Despite being visible in the inventory, sugar cane does not drop anything when mined, making it unobtainable in Survival mode.}}
{{History||v0.2.1|Survival players now start with an infinite stack of sugar cane in the inventory.}}
{{History||v0.3.0|Sugar cane now drops its item form when mined.
|Survival players no longer start with an infinite stack of sugar cane in the inventory.}}
{{History||v0.5.0|Sugar cane can now be grown on [[sand]].
|Sugar cane can now be obtained after activating the [[nether reactor]].}}
{{History||v0.8.0|snap=build 5|[[Bone meal]] can now grow sugar cane to maximum height.}}
{{History||v0.9.0|snap=build 1|[[File:Sugar Cane JE2 BE2.png|32px]] The color of sugar cane now changes depending on the [[biome]] they are in.
|Using bone meal on sugar cane is no longer able to break blocks above it.}}
{{History||v0.12.1|snap=build 1|Sugar cane is no longer available from the [[nether reactor]].}}
{{History|pocket}}
{{History||1.0.0|snap=alpha 0.17.0.1|[[File:Sugar Cane JE1 BE1.png|32px]] Due to a bug, sugar canes no longer change color depending on the [[biome]].}}
{{History|bedrock}}
{{History||1.2.13|snap=beta 1.2.13.5|[[File:Sugar Cane JE2 BE2.png|32px]] The color of sugar canes now changes depending on the [[biome]], once again.}}
{{History||1.10.0|snap=beta 1.10.0.3|[[File:Sugar Cane (item) JE2 BE2.png|32px]] The texture of the sugar cane [[item]] has been changed.
|Sugar cane can now be [[trading|bought]] from [[wandering trader]]s.}}
{{History||1.11.0|snap=beta 1.11.0.1|Sugar canes can now be used to fill up [[composter]]s.}}
{{History||1.17.0|snap=beta 1.17.0.50|[[File:Sugar Cane (item) JE3.png|32px]] The texture of the sugar cane item has been changed, so that it actually matches the color it uses when placed again.}}
{{History|console}}
{{History||xbox=TU1|xbone=CU1|ps=1.0|wiiu=Patch 1|switch=1.0.1|[[File:Sugar Cane JE1 BE1.png|32px]] [[File:Sugar Cane (item) JE1 BE1.png|32px]] Added sugar canes.
|Sugar canes are solid, making it useful for growable walls. Unlike on Java Edition, they were never renamed to Sugar Cane.}}
{{History||xbox=TU2|Sugar canes are no longer solid, and arrows pass through them.}}
{{History||xbox=TU31|xbone=CU19|ps=1.22|wiiu=Patch 3|[[File:Sugar Cane JE2 BE2.png|32px]] The color of sugar cane now changes depending on the [[biome]] they're in.}}
{{History||xbox=TU60|xbone=CU51|ps=1.64|wiiu=Patch 30|switch=1.0.11|Sugar cane can now be grown with [[bonemeal]].}}
{{History||xbox=none|xbone=none|ps=1.90|wiiu=none|switch=none|[[File:Sugar Cane (item) JE2 BE2.png|32px]] The texture of the sugar cane [[item]] has been changed.}}
{{History||xbox=none|xbone=none|ps=1.91|wiiu=none|switch=none|Sugar cane can now be [[trading|bought]] from [[wandering trader]]s.
|Sugar canes can now be used to fill up [[composter]]s.}}
{{History|New Nintendo 3DS Edition}}
{{History||0.1.0|[[File:Sugar Cane JE1 BE1.png|32px]] [[File:Sugar Cane (item) JE1 BE1.png|32px]] Added sugar cane.}}
{{History|foot}}
=== Sugar cane "item" ===
{{:Technical blocks/Sugar Cane}}
== Issues ==
{{Issue list}}
== Trivia ==
*When a sugar cane is broken at the second level, the time resets (for example, if a two-block high sugar cane is broken, but is just about to grow to the third stage, it would reset that time).
*By placing more sugar canes on top of a sugar cane plant, it is possible to create tall sugar canes (up to y=319, the maximum height for building), although they do not naturally grow this high.
*Before sugar cane received an official name, they were sometimes referred to as [[bamboo]], a block added 9 years later. Other names were "reeds" and "papyrus".
== Gallery ==
=== Renders ===
<gallery>
Plains Sugar Cane.png|Plains
Taiga Sugar Cane.png|Taiga
Snowy Plains Sugar Cane.png|Snowy plains
Jungle Sugar Cane.png|Jungle
Desert Sugar Cane.png|Desert
Swamp Sugar Cane (Cold).png|Swamp (cold)
Swamp Sugar Cane.png|Swamp
Badlands Sugar Cane.png|Badlands
</gallery>
=== In-game ===
<gallery>
Huge Sugar Farm.png|A large sugar cane farm using 2×2 [[water]] holes.
Sugar Cane Waterfall.png|Water flowing over sugar cane.
UnderwaterSugarCane.png|Naturally generated sugar cane found underwater.
Sugar and Cactus.png|A [[cactus]] and sugar cane stalk generated next to each other.
SugarCaneRavine.png|Sugar cane found in the [[ravine]].
Reeds in Winter mode.png|Reeds generated in the [[winter mode]].
Sugar Cane Naturally Growing.png|Sugar cane growing between [[biome]]s.
Mesa Sugar Cane.jpg|Sugar cane growing on [[red sand]] in a [[badlands]] biome.
Sugarcanenowaterglitch.png|Sugar cane generated without a water source.
SwampCane.png|Sugar cane generated in a [[swamp]] biome.
Sugar cane savanna.png|Sugar cane growing in a [[savanna]] biome.
ForestSugarcane.png|Sugar cane growing in a [[forest]] biome.
Lava cane.png|Sugar cane growing with lava flowing around it.
Before breaking.png|Sugar canes few seconds before breaking because the water is frozen.
Undergroundreed.png|A sugar cane plant that generated in an underground [[water lake]].
Cave Sugar.png|Another example.
</gallery>
=== Heights ===
<gallery>
Tall Sugar Cane.png|Four-block tall sugar cane.
4RiverCane.png|Four-block tall sugar cane.
4-block tall sugar cane.png|Four-block tall sugar cane in a [[plains]] biome.
</gallery>
== References ==
{{Reflist}}
{{Blocks|vegetation}}
{{Items}}
[[Category:Plants]]
[[Category:Natural blocks]]
[[Category:Non-solid blocks]]
[[cs:Cukrová třtina]]
[[de:Zuckerrohr]]
[[es:Caña de azúcar]]
[[fr:Canne à sucre]]
[[hu:Cukornád]]
[[it:Canna da zucchero]]
[[ja:サトウキビ]]
[[ko:사탕수수]]
[[nl:Suikerriet]]
[[pl:Trzcina cukrowa]]
[[pt:Cana-de-açúcar]]
[[ru:Сахарный тростник]]
[[th:อ้อย]]
[[uk:Цукрова тростина]]
[[zh:甘蔗]]</li></ul> | 15w32a | The detection range of creepers is halved when the player is wearing a creeper mob head. | |||
| 15w33c | The detection range for players wearing the creeper mob head is adjusted, now 37.5% of the normal range. | ||||
| 15w36a | The detection range for players wearing the creeper mob head is again 50% of the normal range. | ||||
| 15w39a | Creepers are now slightly shorter (1.7 blocks tall rather than 1.8). | ||||
| 15w51a | Creepers no longer drop music discs when gamerule doMobDrops is false. | ||||
| Pocket Edition Alpha | |||||
0.4.0{{Extension DPL}}<ul><li>[[:Category:Tools|Category:Tools]]<br/>[[Category:Items]]
[[fr:Catégorie:Outil]]
[[it:Categoria:Attrezzi]]</li><li>[[Recovery Compass|Recovery Compass]]<br/>{{About|the item used to point to the location of the player's last death|the item used to point to the world spawn or to a lodestone|Compass}}
{{Item
| image = Recovery Compass.gif
| renewable = No
| stackable = Yes (64)
}}
A '''recovery compass''' is an item used to point to the location of the [[Player|player's]] last death.
== Obtaining ==
=== Crafting ===
{{Crafting
|A1= Echo Shard |B1= Echo Shard |C1= Echo Shard
|A2= Echo Shard |B2= Compass |C2= Echo Shard
|A3= Echo Shard |B3= Echo Shard |C3= Echo Shard
|Output= Recovery Compass
|type= Tool
}}
== Usage ==
When held by a player, the recovery compass will point towards the spot where they previously died.
The recovery compass will only work when it is held by a player who has previously died and is in the same dimension as their last death. Otherwise, it will spin around randomly.
Like other items, the recovery compass itself will still drop when a player dies and the <code>keepInventory</code> [[game rule]] is not enabled.
This item is useless on Hardcore mode, as once the player dies, the player cannot respawn.
=== Enchantments ===
A recovery compass can receive the following [[enchantment]]s:
{| class="wikitable col-2-center col-3-right"
|+
!Name
!Max Level
![[Enchanting|Method]]
|-
|[[Curse of Vanishing]]{{only|bedrock|short=1}}
|I
|{{Inventory slot|Anvil}}
|-
|}
== Data values ==
{{Missing information|section|data values for Bedrock Edition|type=data}}
=== ID ===
[[Java Edition|''Java Edition'']]:
{{ID table|edition=java|displayname=Recovery Compass|nameid=recovery_compass|translationkey=item.minecraft.recovery_compass|generatetranslationkeys=y|showforms=y|spritetype=item|form=item|foot=1}}
==History==
{{History|java}}
{{History||1.19|snap=22w14a|[[File:Recovery Compass JE1 BE1.gif|32px]] Added recovery compasses.}}
{{History|||snap=22w15a|Recovery compasses can no longer be used on [[lodestone]]s and can no longer be enchanted with [[Curse of Vanishing]].}}
{{History|bedrock}}
{{History||1.19.0|snap=beta 1.19.0.24|[[File:Recovery Compass JE1 BE1.gif|32px]] Added recovery compasses.}}
{{History|foot}}
==Issues==
{{issue list}}
==Gallery==
<gallery>
File:Recovery Compass In An Item Frame.jpg|Recovery Compass.<ref>{{tweet|kingbdogz|1511751971673419782|Tell us what you think of the new Recovery Compass! We're hoping it improves how rewarding it feels to obtain Ancient City loot. Despite that, how do you feel about it? Will you use it? If so, how? What situations would you use it instead of just trying to remember?|April 6, 2022}}</ref>
</gallery>
==References==
{{reflist}}
== External Links ==
*[https://www.minecraft.net/en-us/article/taking-inventory--recovery-compass Taking Inventory:Recovery Compass] – Minecraft.net on January 19, 2023
{{Items}}
[[Category:Tools]]
[[Category:Non-renewable resources]]
[[de:Bergungskompass]]
[[es:Brújula de recuperación]]
[[fr:Boussole de récupération]]
[[ja:リカバリーコンパス]]
[[pl:Kompas powrotny]]
[[pt:Bússola de retomada]]
[[ru:Компас восстановления]]
[[th:เข็มทิศกู้คืน]]
[[uk:Компас відновлення]]
[[zh:追溯指针]]</li></ul> | Creepers added (with old explosion sounds). | ||||
0.7.4{{Extension DPL}}<ul><li>[[Totem of Undying|Totem of Undying]]<br/>{{redirect|Totem}}
{{Item
| image = Totem_of_Undying_JE2_BE2.png
| renewable = Yes
| stackable = No
| rarity = Uncommon
|effects=: {{EffectLink|Absorption}} II (0:05)
: {{EffectLink|Regeneration}} II (0:45){{only|java|short=yes}}/ II (0:40){{only|bedrock|short=yes}}
: {{EffectLink|Fire Resistance}} I (0:40)
}}
A '''totem of undying''' is an uncommon [[combat]] item that can save holders from death. It is dropped by [[Evoker|evokers]], which spawn in [[woodland mansion]]s and [[raid]]s.
== Obtaining ==
=== Mob loot ===
Evokers always drop one totem of undying upon death. The drop rate is not affected by [[Looting]].
== Usage ==
[[File:Totem of Undying Animation.gif|alt=The totem animation in Java Edition.|thumb|Animation of the totem activating {{in|java}}.]]
[[File:Totem of Undying Bedrock Animation.gif|alt=The totem animation in Bedrock Edition.|thumb|Animation of the totem activating {{in|bedrock}}.]]
If the [[player]] is holding a totem of undying in their [[off-hand]] or main-hand slot and receives otherwise fatal [[damage]], the totem saves the player from [[death]]. The totem of undying must be in the player's hand (main hand or offhand) for it to work—it does not work if it is in the [[Heads-up display#Hotbar|hotbar]], unless selected. Any [[mob]] that can hold a totem of undying (in a hand or in the mouth) can use it while holding it.{{only|JE}} The totem can be used only once; it disappears after use. It does not save the player from death caused by [[void]] damage, the {{cmd|kill}} [[command]]s or even a [[tipped arrow]] with [[Instant Damage|harming]] effect damage.<ref>{{bug|MC-206307}}</ref>
== Effect ==
When activated, the totem of undying restores {{hp|1}}, removes all existing [[status effect]]s, then grants 40{{only|bedrock|short=1}} or 45{{only|java|short=1}} seconds<ref>{{bug|MCPE-90716}}</ref> of [[Regeneration]] II, 40 seconds of [[Fire Resistance]] I and 5 seconds of [[Absorption]] II. An animation shows the totem of undying appearing to hover in front of the [[player]]'s screen, similar to the animation seen when a player receives the [[Bad Omen]] or [[Hero of the Village]] effect{{only|bedrock|short=1}} or encounters an [[elder guardian]]. When killed by an [[Instant Damage]] tipped [[arrow]], the arrow's instant damage takes effect after the totem has been activated.
The totem of undying also works in [[Hardcore]] mode.
== Sounds ==
{{edition|java}}:
{{Sound table
|sound=Totem of Undying.ogg
|subtitle=Totem activates
|source=dependent
|description=When something dies, using a totem of undying
|id=item.totem.use
|translationkey=subtitles.item.totem.use
|volume=1.0
|pitch=1.0
|distance=16
|foot=1}}
{{edition|bedrock}}:
{{Sound table
|type=bedrock
|sound=Totem of Undying.ogg
|source=player
|description=When something dies, using a totem of undying
|id=random.totem
|volume=1.0
|pitch=1.0
|foot=1}}
== Data values ==
=== ID ===
{{edition|java}}:
{{ID table
|edition=java
|showforms=y
|generatetranslationkeys=y
|displayname=Totem of Undying
|spritetype=item
|nameid=totem_of_undying
|form=item
|foot=1}}
{{edition|bedrock}}:
{{ID table
|edition=bedrock
|showaliasids=y
|shownumericids=y
|showforms=y
|notshowbeitemforms=y
|generatetranslationkeys=y
|displayname=Totem of Undying
|spritetype=item
|nameid=totem_of_undying
|aliasid=totem
|id=568
|form=item
|translationkey=item.totem.name
|foot=1}}
== Achievements ==
{{load achievements|Cheating Death}}
== Advancements ==
{{load advancements|Postmortal}}
== History ==
{{History||2016|[[File:Totem of Undying (pre-release).png|32px]] An early version of the totem of undying was seen during Minecon shortly before its reveal.}}
{{History|java}}
{{History||1.11|snap=16w39a|[[File:Totem of Undying JE1 BE1.png|32px]] Added totem of undying.}}
{{History||1.11.1|snap=16w50a|The ID name has now been changed from <code>totem</code> to <code>totem_of_undying</code>.}}
{{History||1.13|snap=17w47a|Prior to [[1.13/Flattening|''The Flattening'']], this [[item]]'s numeral ID was 449.}}
{{History||1.14|snap=18w43a|[[File:Totem of Undying JE2 BE2.png|32px]] The texture of the totem of undying has been changed.}}
{{History|||snap=18w47a|The totem of undying is now [[renewable resource|renewable]] as [[evoker]]s now spawn in [[raid]]s.}}
{{History||1.16.2|snap=20w28a|The totem of undying now gives the [[Fire Resistance]] II status effect for 40 seconds.}}
{{History|||snap=20w29a|The level of Fire Resistance given by the totem of undying is now reduced from II to I.<ref>{{bug|MC-194220}}</ref>}}
{{History||1.20.2|snap=23w31a|Totems of undying now trigger [[sculk sensor]]s when they activate.<ref>{{bug|MC-261427||Sculk sensors and calibrated sculk sensors don't detect totem of undying activating|Fixed}}</ref>}}
{{History|pocket}}
{{History||1.1.0|snap=alpha 1.1.0.0|[[File:Totem of Undying JE1 BE1.png|32px]] Added totem of undying.}}
{{History|bedrock}}
{{History||1.10.0|snap=beta 1.10.0.3|[[File:Totem of Undying JE2 BE2.png|32px]] The texture of the totem of undying has been changed.}}
{{History||1.11.0|snap=beta 1.11.0.3|The totem of undying is now [[renewable resource|renewable]] as [[evoker]]s now spawn in [[raid]]s.}}
{{History||1.16.100|snap=beta 1.16.100.54|The level of Fire Resistance given by the totem of undying is now reduced from II to I.<ref>{{bug|MCPE-52364}}</ref>}}
{{History||1.16.100|snap=beta 1.16.100.56|The ID of totems of undying has been changed from <code>totem</code> to <code>totem_of_undying</code>.}}
{{History|console}}
{{History||xbox=TU54|xbone=CU44|ps=1.52|wiiu=Patch 24|switch=1.0.4|[[File:Totem of Undying JE1 BE1.png|32px]] Added totem of undying.}}
{{History||xbox=TU56|xbone=CU48|ps=1.55|wiiu=Patch 26|switch=1.0.6|The totem of undying now applies [[Fire Resistance]] II when used.}}
{{History||xbox=none|xbone=none|ps=1.90|wiiu=none|switch=none|[[File:Totem of Undying JE2 BE2.png|32px]] The texture of the totem of undying has been changed.}}
{{History||xbox=none|xbone=none|ps=1.91|wiiu=none|switch=none|The totem of undying is now [[renewable resource|renewable]] as [[evoker]]s now spawn in [[raid]]s.}}
{{History|new3ds}}
{{History||1.9.19|[[File:Totem of Undying JE1 BE1.png|32px]] Added totem of undying.}}
{{History|foot}}
== Issues ==
{{issue list}}
== Trivia ==
* If a [[mob]] holds a totem of undying, the mob also resurrects upon [[Health#Death|death]] and the [[sound]] effect plays. However, the animation does not appear.
* In the {{el|ds}}, the totem of undying can be put in any hotbar slot to activate it, due to the lack of an [[Dual wield|off-hand slot]] in that version.
* Being able to obtain totems of undying in [[raids]] without exploring [[woodland mansions]] is considered a "massive game play design flaw" by Mojang.<ref>{{ytl|YRPlscod34Y}}</ref>
== Gallery ==
<gallery>
File:Particle totem of undying.png|Screenshot of the totem of undying being used mid-animation after a [[drowned]] deals otherwise fatal damage to the player.
File:Totem of Undying activating.gif|Animation of the totem activating.
File:Totem animation in third person mode.png|The totem animation in third person mode.
</gallery>
== References ==
{{reflist}}
{{Items}}
[[de:Totem der Unsterblichkeit]]
[[fr:Totem d'immortalité]]
[[ja:不死のトーテム]]
[[ko:불사의 토템]]
[[lzh:保命符]]
[[nl:Totem der onsterfelijkheid]]
[[pl:Totem nieśmiertelności]]
[[pt:Totem da imortalidade]]
[[ru:Тотем бессмертия]]
[[th:Totem of Undying]]
[[zh:不死图腾]]
[[Category:Renewable resources]]</li><li>[[Honeycomb|Honeycomb]]<br/>{{distinguish|Honeycomb Block}}
{{Item
| image = Honeycomb.png
| renewable = Yes
| stackable = Yes (64)
}}
'''Honeycombs''' are [[item]]s obtained from [[bee nest]]s and beehives.
== Obtaining ==
{{See also|Tutorials/Honey farming}}
When a bee nest or beehive at {{cd|honey_level}} 5 is [[shear]]ed, it drops 3 honeycombs and angers any [[bee]]s inside, causing them to attack. Having a lit [[campfire]] or lighting a [[fire]] underneath the nest or hive prevents the bees from becoming hostile.
A [[dispenser]] with [[shears]] inside can be used to shear the nest or hive without angering the bees. A honeycomb item drops out after using the shears.
== Usage ==
=== Signs ===
{{Control|Using}} a honeycomb on a [[sign]] or a hanging sign prevents the sign from being edited.
=== Waxing ===
{{Control|Using}} a honeycomb on a [[block of copper]] changes the block into its waxed variant, preventing oxidation of the copper.
=== Crafting ingredient ===
{{crafting usage}}
== Sounds ==
{{edition|java}}:
{{Sound table
|sound=Beehive shear.ogg
|subtitle=Shears scrape
|source=neutral
|description=When honeycombs are collected from a beehive
|id=block.beehive.shear
|translationkey=subtitles.block.beehive.shear
|volume=0.8
|pitch=1.0/0.9/0.8
|distance=16}}
{{Sound table
|sound=Wax on1.ogg
|sound2=Wax on2.ogg
|sound3=Wax on3.ogg
|subtitle=Wax on
|source=block
|description=When a honeycomb waxes something
|id=item.honeycomb.wax_on
|translationkey=subtitles.item.honeycomb.wax_on
|volume=1.0
|pitch=1.0/0.9/1.1
|distance=16
|foot=1}}
{{edition|bedrock}}:
{{Sound table
|type=bedrock
|sound=Beehive shear.ogg
|source=block
|description=When honeycombs are collected from a beehive
|id=block.beehive.shear
|volume=0.8
|pitch=0.8-1.0}}
{{Sound table
|sound=Wax on1.ogg
|sound2=Wax on2.ogg
|sound3=Wax on3.ogg
|source=neutral
|description=When a honeycomb waxes something
|id=copper.wax.on
|volume=1.0
|pitch=0.8-1.2
|foot=1}}
== Data values ==
=== ID ===
{{edition|java}}:
{{ID table
|edition=java
|showforms=y
|generatetranslationkeys=y
|displayname=Honeycomb
|spritetype=item
|nameid=honeycomb
|form=item
|foot=1}}
{{edition|bedrock}}:
{{ID table
|edition=bedrock
|shownumericids=y
|showforms=y
|notshowbeitemforms=y
|generatetranslationkeys=y
|displayname=Honeycomb
|spritetype=item
|nameid=honeycomb
|id=591
|form=item
|foot=1}}
== Advancements ==
{{load advancements|Wax on;Wax off}}
== History ==
{{History|java}}
{{History||1.15|snap=19w34a|[[File:Honeycomb JE1.png|32px]] Added honeycombs.
|Honeycombs can be used to craft [[beehive]]s.}}
{{History|||snap=19w41a|Honeycombs can now be used to craft [[honeycomb block]]s.}}
{{History|||snap=Pre-release 3|[[File:Honeycomb texture change 1.15pre2 to 1.15pre3.gif|32px]] The texture file of honeycombs has been slightly changed. The color channel of transparent pixels are now filled to black. The in-game texture has not been changed.}}
{{History||1.17|snap=20w45a|Honeycomb can now be used to craft [[candle]]s and [[waxed copper]].}}
{{History|||snap=21w11a|Honeycomb can now be used to wax copper blocks by right clicking or dispensing honeycomb onto the block.}}
{{History|||snap=21w14a|Honeycomb can now be used to wax oxidized copper blocks.}}
{{History|||snap=21w19a|Honeycomb can no longer used to craft candles.}}
{{History|||snap=Pre-release 1|Honeycomb can once again used to craft candles.}}
{{History||1.20|snap=23w12a|[[Sign]]s and hanging signs can now be waxed with honeycomb to prevent them from being edited.}}
{{History|bedrock}}
{{History||1.14.0|snap=beta 1.14.0.1|[[File:Honeycomb BE1.png|32px]] Added honeycombs.}}
{{History|||snap=beta 1.14.0.4|[[File:Honeycomb BE2.png|32px]] The texture of honeycombs has been changed to match {{el|je}}'s.}}
{{History||Caves & Cliffs (experimental)|link=Bedrock Edition 1.17.0|snap=beta 1.16.210.57|Honeycomb can now be used to craft [[waxed copper]].
|Honeycomb can now be used to wax copper blocks by right clicking or dispensing honeycomb onto the block.}}
{{History||1.17.0|snap=beta 1.16.230.52|Honeycomb can now be used to wax oxidized copper blocks.}}
{{History||1.17.10|snap=beta 1.17.10.22|Honeycomb can now be used to craft [[candle]]s.}}
{{History||Next Major Update<br>(Experimental)|link=Bedrock Edition 1.19.80|snap=beta 1.19.80.22|[[Sign]]s and hanging signs can now be waxed with honeycomb to prevent them from being edited.}}
{{History|foot}}
== Issues ==
{{issue list}}
{{items}}
[[cs:Plástev medu]]
[[de:Honigwabe]]
[[es:Panal]]
[[fr:Rayon de miel]]
[[ja:ハニカム]]
[[ko:벌집 조각]]
[[pl:Plaster miodu]]
[[pt:Favo de mel]]
[[ru:Пчелиные соты]]
[[zh:蜜脾]]
[[Category:Renewable resources]]</li></ul> | Tapping and holding flint and steel on a creeper will cause it to automatically explode. | ||||
0.9.0{{Extension DPL}}<ul><li>[[Popped Chorus Fruit|Popped Chorus Fruit]]<br/>{{Item
| image = Popped Chorus Fruit.png
| renewable = Yes
| stackable = Yes (64)
}}
'''Popped chorus fruit''' is an [[item]] obtained by [[smelting]] [[chorus fruit]], and used to craft [[End Rod|end rods]] and [[purpur blocks]]. Unlike raw chorus fruit, the popped fruit is inedible.
== Obtaining ==
=== Smelting ===
{{Smelting
|Chorus Fruit
|Popped Chorus Fruit
|0,1
}}
== Usage ==
=== Crafting ingredient ===
{{crafting usage}}
== Data values ==
=== ID ===
{{edition|java}}:
{{ID table
|edition=java
|showforms=y
|generatetranslationkeys=y
|displayname=Popped Chorus Fruit
|spritetype=item
|nameid=popped_chorus_fruit
|form=item
|foot=1}}
{{edition|bedrock}}:
{{ID table
|edition=bedrock
|showaliasids=y
|shownumericids=y
|showforms=y
|notshowbeitemforms=y
|generatetranslationkeys=y
|displayname=Popped Chorus Fruit
|spritetype=item
|nameid=popped_chorus_fruit
|aliasid=chorus_fruit_popped
|id=559
|form=item
|translationkey=item.chorus_fruit_popped.name
|foot=1}}
== History ==
{{History|java}}
{{History||1.9|snap=15w31a|[[File:Popped Chorus Fruit JE1 BE1.png|32px]] Added popped chorus fruit.
|Popped chorus fruit are used to craft [[purpur block]]s.}}
{{History|||snap=15w44b|Popped chorus fruit are now used to craft [[end rod]]s.}}
{{History||1.13|snap=17w47a|Prior to [[1.13/Flattening|''The Flattening'']], this [[item]]'s numeral ID was 433.}}
{{History|||snap=pre5|The ID of popped chorus fruit has now been changed to <code>popped_chorus_fruit</code>.}}
{{History||1.14|snap=18w43a|[[File:Popped Chorus Fruit JE2 BE2.png|32px]] The texture of popped chorus fruit has now been changed.}}
{{History|pocket}}
{{History||1.0.0|snap=alpha 0.17.0.1|[[File:Popped Chorus Fruit JE1 BE1.png|32px]] Added popped chorus fruit.}}
{{History|bedrock}}
{{History||1.10.0|snap=beta 1.10.0.3|[[File:Popped Chorus Fruit JE2 BE2.png|32px]] The texture of popped chorus fruit has now been changed.}}
{{History||1.16.100|snap=beta 1.16.100.56|The ID of popped chorus fruit has been changed from <code>chorus_fruit_popped</code> to <code>popped_chorus_fruit</code>.}}
{{History|console}}
{{History||xbox=TU46|xbone=CU36|ps=1.38|wiiu=Patch 15|[[File:Popped Chorus Fruit JE1 BE1.png|32px]] Added popped chorus fruit.}}
{{History||xbox=none|xbone=none|ps=1.90|wiiu=none|switch=none|[[File:Popped Chorus Fruit JE2 BE2.png|32px]] The texture of popped chorus fruit has now been changed.}}
{{History|new 3ds}}
{{History||1.7.10|[[File:Popped Chorus Fruit JE1 BE1.png|32px]] Added popped chorus fruit.}}
{{History|foot}}
== Issues ==
{{issue list}}
{{Items}}
[[cs:Vypukaný květ chorusu]]
[[de:Geplatzte Chorusfrucht]]
[[fr:Chorus éclaté]]
[[it:Frutto di chorus scoppiato]]
[[ja:焼いたコーラスフルーツ]]
[[ko:튀긴 후렴과]]
[[nl:Gepoft Chorusfruit]]
[[pl:Prażony owoc refrenusu]]
[[pt:Fruta do coro cozida]]
[[ru:Приготовленный плод коруса]]
[[zh:爆裂紫颂果]]
[[Category:Renewable resources]]</li><li>[[Photo|Photo]]<br/>{{exclusive|education}}
{{Item
| image = Photo EE2.png
| renewable = No (unless [[portfolio]] is available)
| stackable =
}}
A '''photo''' is an [[item]] containing a picture taken with a [[camera]].<ref>{{cite|url=https://web.archive.org/web/20210925044841mp_/https://educommunity.minecraft.net/hc/en-us/articles/4407489082644-Feature-Walkthrough-Minecraft-Education-Edition-GOAT-Beta-version-1-17-30-| title = Feature Walkthrough Minecraft: Education Edition GOAT Beta (version 1.17.30)|website=Minecraft: Education Edition Support|date=September 24, 2021}}</ref><ref>{{cite|url=https://education.minecraft.net/en-us/blog/new-update-and-anniversary-for-mee| title = The GOAT Update Celebrates a Minecraft Milestone!|website=Minecraft: Education Edition|date=November 2, 2021}}</ref><ref>{{ytl|2Wd0J-EIfws|GOAT Release Playthrough|Minecraft: Education Edition|December 2, 2021}}</ref>
== Obtaining ==
A photo in a [[portfolio]] can be saved as a photo item by selecting the "Save to Inventory" button underneath it.
== Usage ==
Photos display an image when held in the hand or when placed in an [[item frame]], similarly to [[map]]s. Photos can have captions added to them by renaming them in an [[anvil]] or by adding a caption while they are in a portfolio. Photos can be added to [[book and quill]]s and portfolios by selecting the "Add Photo" button in the book and quill or portfolio.
== Data values ==
=== ID ===
{{ID table
|edition=bedrock
|shownumericids=y
|showforms=y
|notshowbeitemforms=y
|generatetranslationkeys=y
|displayname=Photo
|spritetype=item
|nameid=photo_item
|id=?
|form=item
|foot=1}}
== History ==
{{History|education}}
{{History||1.17.30|snap=1.17.30.2|[[File:Photo EE1.png|32px]] Added photos.}}
{{History||1.17.30|snap=release|[[File:Photo EE2.png|32px]] Changed photo texture.}}
{{History|foot}}
== Gallery ==
<gallery>
Photo Item 1.png|A photo being placed in an item frame.
Photo Item 2.png|A photo being saved from a portfolio.
Photo Item 3.png|A photo being added to a book and quill.
</gallery>
== References ==
{{Reflist}}
{{Items}}
{{Education Edition}}
[[Category:Education Edition items]]
[[Category:Non-renewable resources]]
[[ja:写真]]
[[pl:Zdjęcie]]
[[zh:相片]]</li></ul> | build 1 | Creepers no longer float 2 pixels off the ground. | |||
| build 2 | An ignite button is now used to automatically explode a creeper when holding flint and steel, instead of tapping and holding. | ||||
| build 8 | Creepers now use the new AI. | ||||
| build 9 | Creepers use the old AI again because of them walking faster and not detonating. | ||||
0.9.2{{Extension DPL}}<ul><li>[[Elytra|Elytra]]<br/>{{Item
| image = Elytra.png
| rarity = Uncommon
| renewable = No
| durability = 432
| stackable = No
}}
'''Elytra''' ({{Audio|ElytraPronunciation.mp3|/ˈɛl ɪ trə/|link2=''ᴇʟ-i-trə''}}<ref>“Elytron.” ''Merriam-Webster.com Dictionary'', Merriam-Webster, https://www.merriam-webster.com/dictionary/elytron. Accessed 22 May. 2022.</ref>)<!--"Elytra" is the plural of "elytron," a single half of a beetle's protective wing covers. Verbs should agree accordingly (e.g. "Elytra allow flight"). https://www.merriam-webster.com/dictionary/elytron--> are rare wings found in [[end ship]]s that are a source of flight in [[Survival]] mode.
== Obtaining ==
=== Natural generation ===
Elytra are found only in [[end city|end cities]] in [[item frame|item frames]] in the treasure room of the [[end ship]]. A [[shulker]] guards the elytra and the ship's two loot chests.
=== Repairing ===
Elytra can be enchanted with [[Mending]] so that they get [[Item repair|repaired]] as the player collects [[experience]] orbs while wearing/holding them.
Elytra can also be repaired in the player crafting grid, by combining two damaged pairs of elytra together.
{{crafting
|showname=0
|showdescription=1
|ignoreusage=1
|Damaged Elytra
|Damaged Elytra
|Output= Elytra
|description= The durability of the two pairs is added together, plus an extra 5% durability, but removes any enchantments.
|type= Transportation
}}
Similarly, two damaged elytra pairs can be combined on a [[grindstone]].
{{Grinding
|showdescription=1
|ingredients=2x Damaged [[Elytra]]
|Damaged Elytra
|Damaged Elytra
|Elytra
|description=The durability of the two pairs is added together, plus an extra 5% durability, but removes any enchantments.
}}
Elytra can also be repaired at an anvil using [[phantom membrane]]s, which has the advantage that it preserves [[enchantments]] on elytra. Each phantom membrane restores 108 durability points, exactly 25% of the elytra's total durability.
{| class="wikitable" data-description="Repairing elytra"
! scope="col" style="width:64px;" | Name
! Ingredients
! [[Anvil]] usage
|-
! scope="row" style="text-align: center;" | '''Elytra'''
| [[Elytra]] +<br>[[Phantom Membrane]]
| style="width: 260px; padding: 1px;" | {{Anvil| title = Elytra|Input1=Damaged Elytra|Input2=Phantom Membrane, 2|Output=Elytra}}
|-
|}
Each repair on the anvil, however, also increases the [[Anvil mechanics|prior work]] penalty for the Elytra, making every subsequent repair increasingly expensive and eventually reaching an upper limit where repairs are no longer allowed because they are "too expensive" (even if the player has many xp levels to spare). However, the prior work penalty can be reset to 0 for an enchanted elytra pair when it is disenchanted on a grindstone. Unenchanted elytra cannot be used on the grindstone alone.
== Usage ==
[[File:Steve in elytra.png|75px]] [[File:Alex in elytra.png|75px]]
Elytra are equipped in the [[chestplate]] slot, either by placing the item directly in the slot, by pressing {{ctrl|use item}} while [[hotbar|held in hand]], or by firing a point-blank [[dispenser]] at a target. They are gray in color by default, but they adopt the design of any [[cape]] the player is wearing. They maintain their in-world texture design even when they're [[#Repair|broken]] or [[enchanted]].
=== Flying ===
To fly, the player must press the {{ctrl|jump}} key while falling, and the elytra spread apart like a beetle's elytra. The player can aim their view around to turn or adjust their pitch. Losing altitude increases speed, and gaining altitude decreases speed. [[Firework rocket]]s can be used to increase speed. Additionally, speed is quickly lost from sharp changes in direction.
Directly hitting any surface while gliding too fast causes damage to the player and their armor proportional to flight speed (although this may be calculated from another factor). When a player dies in this way, they receive the [[death messages|death message]] "'''<player> experienced kinetic energy'''". The player does not take [[fall damage]] from colliding at a shallow angle or a low enough speed. The critical, damaging angle is about 50° with the collision surface, and the calculation for damage seems to be as if the player had fallen from their maximum potential glide height to the height of the struck surface.
A safe and simple cruise with the highest travel distance can be achieved by aiming directly at the horizon while at the glide's altitude limit. The player's speed is slow enough to allow them time to do other things during a long flight, like sort out their inventory.
In [[Creative]] mode or when the "mayfly" [[ability]] has been given, the player can alternatively hold the {{ctrl|jump}} key to fly up,{{only|bedrock}} or double press the jump key to move around freely.
Flight can be stopped by pressing the [[jump]] key.{{only|bedrock}}
==== Speed and altitude ====
Elytra have a minimum speed of about 7.2 m/s (obtained by gliding at the altitude cap with a strong upward pitch of 30°). If the diver drops to 0 speed, they quickly get accelerated back up to at least this minimum. The diver can increase speed by choosing to descend faster, but afterward, they do not regain nearly as much altitude. In the real world, drag increases with speed, and drag, in turn, slows the aircraft; Minecraft mimics this. To glide from cliff to cliff, a player's best bet is to aim slightly above the horizon.
Sharp turns are a fast way to lose speed. Quicker turns cause greater losses, while gentle movements have small effects. Making a hairpin turn can actually be used for making high-speed landings safe as well as for precise landings on small targets like rooftops. The player aims to glide just above the target, then as they're right over it they immediately reverse directions, then they make readjustments as necessary.
The lowest rate of altitude loss is about 1.5 m/sec, obtained by gliding at the altitude cap with a slight upward pitch (12° or 15°).
To get the best possible glide ratio (and thus the furthest distance out of their altitude), the diver pilot should aim directly at the horizon. This ratio is about 9.47 to 1.
[[Slow Falling]] potions greatly decrease the player's vertical (fall) speed, which also greatly decreases their ''horizontal'' speed (clearly, it depends on the vertical fall rate, as one might expect from flight modeling). The net result is that the player flies extremely slowly - but their Elytra still takes durability damage at the usual rate (1 durability per second without Unbreaking, etc.). Due to this combination, Elytra plus Slow Falling is largely a novelty that most players won't use. The [[Feather Falling]] enchantment does not affect Elytra speed and does not reduce fall damage from hitting things with elytra.
It is possible to calculate the glide range by dividing the altitude by tan of the glide angle (altitude/tan(glide angle)). For example, if the player glides from an altitude of 64 blocks above ground with a glide angle of 15 degrees, they can glide for 237 blocks (assume that they are on superflat), since floor(64 / tan(15)) is 237.
==== Stalling ====
Trying for too high a pitch reduces the player's lift. At a pitch of 30° above the horizon, the player has the lowest possible airspeed of 7.2 m/sec. Above that, the player might be considered to be in a stall. Increasing the pitch gets closer to a free-fall, and stalled flight at 60° is enough to cause fall damage. Stalling at 90° is a true free-fall.
Recovering from a stall is done by readjusting to any safe pitch as quickly as the player likes. This can be just changing to look at the horizon.
==== Powered flight ====
{{fakeImage|{{invSprite|Firework Rocket}}|Firework rockets are used for speed boosts while gliding.}}
[[Firework rocket]]s can be used for propulsion during flight by placing it in either hand and {{ctrl|using}}. Using a firework rocket while gliding quickly maximizes the player's speed for a time similar to the rocket's flight duration.
If the rocket is equipped with [[firework star]]s, it explodes at the end of its flight, inflicting damage based on the number of stars.
It is possible to gain altitude during powered flight. This makes it possible to glide for extreme distances and had been used extensively by [[far lands]]/[[World Border]] challenges.
=== Durability and Repair ===
{{fakeImage|{{invSprite|Broken Elytra}}|A broken pair of elytra.}}
[[Durability]] decreases by one point each second when gliding. A pair of elytra has 432 durability, allowing 7 minutes and 12 seconds of gliding time without enchantments, providing more than 10,000 blocks of transport distance. It is possible to apply the [[Unbreaking]] enchantment using an [[anvil]] and an [[enchanted book]], which affects the elytra, in the same way it does to [[tool]]s. Unbreaking III increases elytra's flight time to about four seconds per durability point, a total of 28 minutes and 44 seconds.
When the durability reaches 1, elytra stop working until they are repaired, adopting a tattered texture in the inventory. The damage ends at durability 1, so they can never fully break. A pair may be repaired by either using the [[Mending]] enchantment, combining two pairs in a [[grindstone]], or combining it in an anvil with [[phantom membrane]]s. In an anvil, each piece of membrane repairs elytra by 108 durability points, requiring 4 pieces to fully repair them.
Each repair on the anvil will also increase the [[Anvil mechanics|prior work]] penalty for the Elytra, making every subsequent repair increasingly expensive, with an upper limit where repairs are no longer allowed because they are "too expensive". However, the prior work penalty can be reset to 0 for an enchanted elytra pair when it is disenchanted on a grindstone (by adding nothing to it). Unenchanted elytra cannot be used on the grindstone alone.
=== Enchantments ===
Elytra can receive the following [[enchantments]] by combining in an anvil:
{| class="wikitable sortable"
|-
! Enchantment
! Max Level
![[Enchanting|Method]]
|-
| [[Unbreaking]]
| III
|{{Inventory slot|Anvil}}
|-
| [[Mending]]
| I
|{{Inventory slot|Anvil}}
|-
| [[Curse of Vanishing]]
| I
|{{Inventory slot|Anvil}}
|-
| [[Curse of Binding]]
| I
|{{Inventory slot|Anvil}}
|}
{{notelist|columns=1}}
== Sounds ==
{{edition|java}}:
{{Sound table
|sound=Equip leather1.ogg
|sound2=Equip leather2.ogg
|sound3=Equip leather3.ogg
|sound4=Equip leather4.ogg
|sound5=Equip leather5.ogg
|sound6=Equip leather6.ogg
|subtitle=Elytra rustles
|source=player
|description=When a pair of elytra is equipped
|id=item.armor.equip_elytra
|translationkey=subtitles.item.armor.equip_elytra
|volume=1.0
|pitch=1.0
|distance=16}}
{{Sound table
|sound=Elytra loop.ogg
|subtitle=MC-177084
|source=player
|description=While flying with a pair of elytra
|id=item.elytra.flying
|translationkey=-
|volume=0.0-1.0 <ref group=sound>Is a quarter of the player's velocity. If flying for less than 1 second, it is 0.0; otherwise, if flying for less than 2 seconds, it is between 0.0 and a quarter of the player's velocity (scaling up with time until 2 seconds)</ref>
|pitch=1.0 <ref group=sound>If the volume is greater than 0.8, 0.8-volume is added to the pitch</ref>
|distance=16}}
{{Sound table
|sound=Random break.ogg
|subtitle=Item breaks
|source=dependent
|description=When a pair of elytra's durability is exhausted
|id=entity.item.break
|translationkey=subtitles.entity.item.break
|volume=0.8
|pitch=0.8-1.2
|distance=16
|foot=1}}
{{edition|bedrock}}:
{{Sound table
|type=bedrock
|sound=Equip leather1.ogg
|sound2=Equip leather2.ogg
|sound3=Equip leather3.ogg
|sound4=Equip leather4.ogg
|sound5=Equip leather5.ogg
|sound6=Equip leather6.ogg
|source=player
|description=When a pair of elytra is equipped
|id=armor.equip_leather
|volume=1.0
|pitch=1.0}}
{{Sound table
|sound=Elytra loop.ogg
|source=player
|description=While flying with a pair of elytra
|id=elytra.loop
|volume=''Depends'' {{checkthecode}}
|pitch=1.0}}
{{Sound table
|sound=Random break.ogg
|source=player
|description=When a pair of elytra's durability is exhausted
|id=random.break
|volume=1.0
|pitch=0.9
|foot=1}}
== Data values ==
=== ID ===
{{edition|java}}:
{{ID table
|edition=java
|showforms=y
|generatetranslationkeys=y
|displayname=Elytra
|spritetype=item
|nameid=elytra
|form=item
|foot=1}}
{{edition|bedrock}}:
{{ID table
|edition=bedrock
|shownumericids=y
|showforms=y
|notshowbeitemforms=y
|generatetranslationkeys=y
|displayname=Elytra
|spritetype=item
|nameid=elytra
|id=564
|form=item
|foot=1}}
== Achievements ==
{{Load achievements|Super Sonic}}
== Advancements ==
{{load advancements|Sky's the Limit}}
== History ==
{{History|java}}
{{History||1.9|snap=October 5, 2015|slink=https://twitter.com/_tomcc/status/651042141397979136|[[Tommaso Checchi]] tweets that [[Jeb]] is working on a secret feature for Minecraft Java Edition, saying "it's like [[W:c:Mario:Super Mario 64|Mario 64]]."}}
{{History|||snap=October 6, 2015|slink=https://twitter.com/jeb_/status/651416814791081984|[[Jeb]] tweets a [https://web.archive.org/web/20230820173231/https://gfycat.com/serpentinehighlevelamurminnow-minecraftsuggestions-ethoslab animated GIF] revealing a [[player]] gliding around an [[end city]]. Elytra have a dragon-wing texture.}}
{{History|||snap=October 6, 2015|slink=https://twitter.com/jeb_/status/651419480187346944|Jeb tweets an [https://web.archive.org/web/20230219045525/https://i.imgur.com/LBgZCyW.png image] of folded wings, which replace the cape the player is wearing.}}
{{History|||snap=October 6, 2015|slink=https://twitter.com/jeb_/status/651423700777074688|Jeb tweets another [https://web.archive.org/web/20230820083025/https://gfycat.com/leadingindolentgangesdolphin animated GIF] of his character with Mojang-themed elytra, gliding along a [[river]] through a [[taiga]] forest.}}
{{History|||snap=15w41a|[[File:Elytra JE1 BE1.png|32px]] <br>[[File:Elytra (item) JE1 BE1.png|32px]] [[File:Broken Elytra (item) JE1 BE1.png|32px]] Added elytra.
|Elytra are currently repaired with [[leather]] when using [[anvil]].}}
{{History|||snap=15w42a|Elytra now spread slightly when the [[player]] crouches.
|The player can now take [[damage]] from gliding into walls, and crashing into a wall now has its own [[Health#Death messages|death message]].
|When flying with elytra, players are only 0.6 blocks tall. They, therefore, can now fit through 1-block gaps while gliding.
|The [[player]] can no longer go higher than the starting point of the glide.}}
{{History|||snap=15w43a|The player's point of view now shifts while gliding.}}
{{History|||snap=16w06a|Elytra now recognize the [[player]]'s [[cape]] and adopt a different elytron design for every official cape (see [[#Gallery|Gallery]]). In addition, Jeb is working on a feature to allow players to change the elytron design like regular player skins.}}
{{History|||snap=16w07a|Elytra are now activated by jumping mid-air. The player no longer glides automatically when falling.
|The cape option in the [[options|options menu]] now also disables custom elytra textures.
|Added the [[game rule]] {{cd|disableElytraMovementCheck}}.}}
{{History||1.9.1|snap=pre1|[[Sound]]s while gliding with elytra have been added.}}
{{History||1.11|snap=16w32a|Elytra can now be placed on [[armor stand]]s, just like any other [[chestplate]].}}
{{History|||snap=16w38a|Elytra are now visible on [[zombie]]s, [[skeleton]]s, and armor stands.}}
{{History|||snap=16w41a|Elytra now have their own [[sound]] when equipped.}}
{{History||1.11.1|snap=16w50a|Elytra can now be propelled through the [[air]] by using [[firework rocket]]s.}}
{{History||1.13|snap=17w47a|Prior to [[1.13/Flattening|''The Flattening'']], this [[item]]'s numeral ID was 443.}}
{{History|||snap=18w14a|Elytra now require [[phantom membrane]] to be repaired, instead of [[leather]].}}
{{History||1.14|snap=18w43a|[[File:Elytra JE2 BE2.png|32px]] <br>[[File:Elytra (item) JE2 BE2.png|32px]] [[File:Broken Elytra (item) JE2 BE2.png|32px]] The textures of the elytra have been changed.}}
{{History||1.15|snap=19w39a|The deployment animation of elytra causes [[player]] blinks when the deployment events has overlapped.}}
{{History|||snap=19w42a|The deployment and folding animations of elytra have been improved and become smoother.
|Elytra can now start to glide immediately after a jump, not only during falls.}}
{{History||1.18|snap=experimental snapshot 7|Elytra no longer use up durability when gliding regularly. Durability is now only consumed when a [[firework rocket]] is used.
|Speed boosts from firework rockets are slightly weaker.
|Now break when the item reaches 0 durability.}}
{{History|||snap=21w37a|The elytra changes in experimental snapshot 7 have been reverted.}}
{{History||1.19|snap=Pre-release 1|Equipping elytra through the inventory now plays a sound.<ref>{{bug|MC-94060||Equipping armor/elytra through inventory or dispenser doesn't play sounds|Fixed}}</ref>}}
{{History||1.19.4|snap=23w05a|Equipping elytra while held with an item already in the chestplate slot now swaps the two items.}}
{{History|pocket}}
{{History||1.0.0|snap=alpha 0.17.0.1|[[File:Elytra JE1 BE1.png|32px]] <br>[[File:Elytra (item) JE1 BE1.png|32px]] [[File:Broken Elytra (item) JE1 BE1.png|32px]] Added elytra. In-game, they are known as ''elytra wings''.}}
{{History|bedrock}}
{{History||1.2.0|snap=beta 1.2.0.2|Elytra can now be propelled through the [[air]] by using [[firework rocket]]s.}}
{{History||1.2.3|snap=beta 1.2.3.3|''Elytra Wings'' have been renamed to ''Elytra''.}}
{{History||1.6.0|snap=beta 1.6.0.5|Elytra can now be repaired in an [[anvil]] using [[phantom membrane]], instead of [[leather]].}}
{{History||1.10.0|snap=beta 1.10.0.3|[[File:Elytra JE2 BE2.png|32px]] <br>[[File:Elytra (item) JE2 BE2.png|32px]] [[File:Broken Elytra (item) JE2 BE2.png|32px]] The textures of elytra have been changed.}}
{{History|console}}
{{History||xbox=TU46|xbone=CU36|ps=1.38|wiiu=Patch 15|switch=1.0.1|[[File:Elytra JE1 BE1.png|32px]] <br>[[File:Elytra (item) JE1 BE1.png|32px]] [[File:Broken Elytra (item) JE1 BE1.png|32px]] Added elytra.}}
{{History||xbox=TU53|xbone=CU43|ps=1.49|wiiu=Patch 23|switch=1.0.3|Elytra can now be propelled through the [[air]] by using [[firework rocket]]s.}}
{{History||xbox=TU69|xbone=none|ps=1.76|wiiu=Patch 38|switch=none|Elytra are now repaired on the [[anvil]] using [[phantom membrane]] instead of [[leather]].}}
{{History||xbox=none|xbone=none|ps=1.90|wiiu=none|switch=none|[[File:Elytra JE2 BE2.png|32px]] <br>[[File:Elytra (item) JE2 BE2.png|32px]] [[File:Broken Elytra (item) JE2 BE2.png|32px]] The textures of elytra have been changed.}}
{{History|new 3ds}}
{{History||1.7.10|[[File:Elytra JE1 BE1.png|32px]] <br>[[File:Elytra (item) JE1 BE1.png|32px]] [[File:Broken Elytra (item) JE1 BE1.png|32px]] Added elytra.}}
{{History|foot}}
== Issues ==
{{issue list}}
== Trivia ==
* The singular form of elytra is an {{w|elytron}}.
* In reality, elytra are not used for flight. They are the tough forewings of beetles and earwigs that cover the wings they actually use for flight. However, like ''Minecraft'' elytra, beetles can use them for gliding.
* A flying player has a shorter hitbox than usual: A 0.6 block cube centered on the player's feet.
* It is possible to glide while on a [[ladder]], by pressing {{key|shift}} followed by {{key|space}}, causing the player to fall with a speed determined by the player's visual angle. This means that the player can descend fast on a ladder, but if the speed is too fast when hitting the ground, they can take fatal fall damage. Using a [[firework rocket]] can also speed up the player's descent.
* {{IN|java}} if the player glides into deep [[water]] with elytra equipped, the animation does not stop, giving it the appearance of a [[swimming]] animation.<ref name="MC-97190">{{bug|MC-97190||While gliding into water or lava, player continues gliding|WAI}}</ref> The animation stops once the player touches the ground. Additionally, [[firework rocket]]s can be used with elytra underwater with a short boost duration.
* Elytra do not deactivate when the player flies into [[lava]].<ref name="MC-97190"/>
* Elytra can be equipped onto some [[mob]]s using [[command]]s. This has no effect unless the mob has the {{cd|FallFlying}} tag set to {{cd|1b}}. Mobs glide forward, unable to control the movement before landing, at which time they regain their AI.
** Exceptions to this are [[squid]]s as the squid's AI causes it to attempt swimming in midair, making it fall straight down because it conflicts with the elytra mechanics.
**Because [[chicken]]s fall slowly, they can move more distance.
** [[Enderman|Endermen]], tamed [[wolf|wolves]] and tamed [[cat]]s that are not sitting cannot teleport until they hit the ground.
** Because mobs do not regain control until they hit the ground, [[vex]]es fall until they die or despawn as they cannot touch the ground.
** Mobs capable of flying, such as [[parrot]]s or vexes can steer in air, though they cannot travel up or down. Dolphins also have this ability.
* [[4J Studios]] created an elytron-centered tutorial map for console edition when elytra were first introduced to this platform, this map is themed as "ruins of an ancient civilization of ''[[Minecraft]]'' worshipers" and showcases the new amplified terrain generation. This map can be seen behind the scenes.<ref>{{Mcnet|learning-fly|Learning To Fly}}</ref> On 28 March 2017, 4J Studios added an elytron-themed [[Mini Games]] for console edition called "Glide;" it consists of Time Attack and Score Attack mode.<ref>{{Mcnet|glide-mini-game-consoles-tomorrow|Glide Mini Game on Consoles Tomorrow|March 23, 2017}}</ref><ref>{{Mcnet|mini-game-masters-glide-console|Mini Game Masters Glide onto Console|March 28, 2017}}</ref>
* A player who jumps with both elytra and the [[Slow Falling]] effect travels slightly upward, which is a cheap but time-consuming alternative to [[fireworks]] and [[Riptide]]-enchanted [[trident]]s.
* On May 5, 2019, [[Mojang]] tweeted '[[The End]] never yields enough adequate resources, sadly,' along with a sad emoji.<ref>{{tweet|Minecraft|1125053038757068802|The End never yields enough adequate resources, sadly. 😔}}</ref> The first letter of each word spells 'T E n y e a r s' (Ten Years). Attached was a picture of [[player|Steve and Alex]] wearing both a [[chestplate]] and elytra. The next day, they tweeted, "Have you noticed something ''suspic10us'' here lately?"<ref>{{tweet|Minecraft|1125415169495064576|Have you noticed something suspic10us here lately?}}</ref>
* Mojang has considered the suggestion of combining elytra with a chestplate, but eventually decided against it, stating that elytra taking up armor is an intentional decision of game balancing.<ref>
{{cite
|url=https://feedback.minecraft.net/hc/en-us/articles/360005029872-Previously-Considered-Suggestions
| title = Part of the tradeoff of having an Elytra is it takes up half your armor.
|website=Minecraft Feedback
|date=July 12, 2018}}
</ref>
== Gallery ==
<gallery>
ElytraFlight.gif|The first image of elytra, tweeted by [[Jeb]]. Click to play.
FoldedWings.png|Folded elytra, which resembles the [[cape]] the user is wearing.
Minecon2015Alternative.png|The minecon 2015 cape elytra.
Dinnerbone Elytra.png|[[Dinnerbone]] flying upside down.
ElytraEnd.png|Elytra in an [[end ship]].
PlayerElytraBack.png|A [[player]] wearing elytra.
PlayerElytraFront.png|A player using elytra.
Broken Elytra.png|Elytra with only 1 [[item durability|durability]].
UpcomingElytras.jpg|Elytra designs fitting to the official capes, posted by Jeb on {{w|Reddit}}.
FlyBlock.png|A player gliding while blocking with a [[shield]].
Suspic10us.jpg|An image of players using elytra.
Steve Gliding with Elytra.png|Steve gliding with elytra.
Alex Gliding with Elytra.png|Alex gliding with elytra.
Enchanted Elytra (item).gif|A pair of enchanted elytra.
</gallery>
=== Console exclusive ===
<gallery>
Glide Score Cavern 2.png|Screenshot of Glide mini-games.
Glide Time Cavern 2.png|Another screenshot of Glide mini-games.
GLIDE Official.jpg|''Glide'' launch poster.
Elytra Tutorial Map.jpg|Official elytra themed tutorial map.
</gallery>(These maps can be found for a price on the Microsoft Store)
=== Designs when wearing capes ===
<blockquote>Designs that are not listed here have default elytron texture or don't have any.</blockquote><gallery>
File:Mojang employees Elytra.png|Old [[Mojang]] cape
File:Mojang employees 2015 Elytra.png|New Mojang cape
File:Mojang Studios employees 2021 Elytra.png|Mojang Studios cape
File:Crowdin Translator Elytra.png|[[Crowdin]] Translator cape
File:DannyBstyle's Elytra.png|dannyBstyle's cape
File:JulianClark's Elyrtra.png|JulianClark's cape
File:Millionth Customer Elytra.png|Millionth Customer cape
File:MINECON 2011 Attendees Elytra.png|[[MINECON 2011]] Attendees cape
File:MINECON 2012 Attendees Elytra.png|[[MINECON 2012]] Attendees cape
File:MINECON 2013 Attendees Elytra.png|[[MINECON 2013]] Attendees cape
File:MINECON 2015 Attendees Elytra.png|[[MINECON 2015]] Attendees cape
File:MINECON 2016 Attendees Elytra.png|[[MINECON 2016]] Attendees cape
File:MINECON LIVE 2019 Founder's Elytra.png|[[MINECON Live 2019]] Founder's cape
File:Mojira Moderator Elytra.png|[[bug tracker|Mojira]] Moderator cape
File:MrMessiah's Elytra.png|MrMessiah's cape
File:Prismarine Elytra.png|[[Prismarine]] cape
File:Realms Mapmaker Elytra.png|[[Realms]] mapmaker's cape
File:Cobalt Elytra.png|[[Cobalt (game)|Cobalt]] cape
File:Scrolls Elytra.png|[[Scrolls]] cape
File:Turtle Elytra.png|[[Turtle]] cape
File:PancapeElyR.png|Pancape cape
File:MSCapeElyR.png|Migrator cape
File:Gr8 Escape's elytra.png|Gr8_Escape's cape
File:Valentine Elytra.png|Valentine cape
File:Vanilla Cape Elytra JE.png|Vanilla cape{{only|java}}
File:Vanilla cape elytra BE.png|Vanilla cape{{only|bedrock}}
</gallery>
== References ==
{{reflist}}
== External Links ==
*[https://www.minecraft.net/en-us/article/taking-inventory--elytra Taking Inventory: Elytra] – Minecraft.net on December 14, 2019
{{Items}}
[[de:Elytren]]
[[es:Élitros]]
[[fr:Élytres]]
[[ja:エリトラ]]
[[ko:겉날개]]
[[nl:Dekschild]]
[[pl:Elytry]]
[[pt:Élitros]]
[[ru:Элитры]]
[[tr:Elitra]]
[[zh:鞘翅]]
[[Category:Non-renewable resources]]</li><li>[[Boots|Boots]]<br/>{{Item
| image = <gallery>
Leather Boots.png | Leather
Chainmail Boots.png | Chainmail
Iron Boots.png | Iron
Diamond Boots.png | Diamond
Golden Boots.png | Golden
Netherite Boots.png | Netherite
</gallery>
| durability =
* Leather: 65
* Chainmail: 195
* Iron: 195
* Golden: 91
* Diamond: 429
* Netherite: 481
| renewable =
* '''Netherite''': No
* '''All others''': Yes
| stackable = No
}}
'''Boots''' are a type of [[armor]] that covers the feet of the player. There are six types of boots: '''leather boots''', '''chainmail boots''', '''iron boots''', '''diamond boots''', '''gold boots''', and '''netherite boots'''.
== Obtaining ==
=== Crafting ===
{{crafting
|head=1
|showname=0
|showdescription=1
|name=[[Boots]]
|A2= Leather;Gold Ingot;Iron Ingot;Diamond
|C2= Leather;Gold Ingot;Iron Ingot;Diamond
|A3= Leather;Gold Ingot;Iron Ingot;Diamond
|C3= Leather;Gold Ingot;Iron Ingot;Diamond
|Output= Leather Boots;Golden Boots;Iron Boots;Diamond Boots
|type= Combat
}}
{{crafting
|foot=1
|ignoreusage=1
|name=[[Boots]]
|ingredients=Damaged Matching [[Boots]]
|Damaged Leather Boots; Damaged Golden Boots; Damaged Chainmail Boots; Damaged Iron Boots; Damaged Diamond Boots; Damaged Netherite Boots
|Damaged Leather Boots; Damaged Golden Boots; Damaged Chainmail Boots; Damaged Iron Boots; Damaged Diamond Boots; Damaged Netherite Boots
|Output= Leather Boots; Golden Boots; Chainmail Boots; Iron Boots; Diamond Boots; Netherite Boots
|description= The durability of the two boots is added together, plus an extra 5% durability.
|type= Combat
}}
=== Upgrading ===
{{Smithing
|head=1
|Netherite Upgrade
|Diamond Boots
|Netherite Ingot
|Netherite Boots
|description=
|tail=1
}}
=== Repairing ===
==== Grinding ====
{{Grinding
|showdescription=1
|ingredients=2x Damaged [[Leather Boots]] or<br>2x Damaged [[Chainmail Boots]] or<br>2x Damaged [[Iron Boots]] or<br>2x Damaged [[Golden Boots]] or<br>2x Damaged [[Diamond Boots]] or<br>2x Damaged [[Netherite Boots]]
|Damaged Leather Boots; Damaged Chainmail Boots; Damaged Iron Boots; Damaged Golden Boots; Damaged Diamond Boots; Damaged Netherite Boots
|Damaged Leather Boots; Damaged Chainmail Boots; Damaged Iron Boots; Damaged Golden Boots; Damaged Diamond Boots; Damaged Netherite Boots
|Leather Boots; Chainmail Boots; Iron Boots; Golden Boots; Diamond Boots; Netherite Boots
|description=The durability of the two boots are added together, plus an extra 5% durability.
}}
==== Anvil ====
Boots can be repaired in an [[Anvil mechanics#Unit repair|anvil]] by adding units of the [[armor material]]'s repair material, with each repair material restoring 25% of the boots' maximum durability, rounded down. Chainmail boots may also be repaired in this way using iron ingots.
They can also be [[Anvil mechanics#Combining items|combined]] with other boots. When doing this, the item's enchantments are not lost, and can even be raised.
==== Crafting ====
You can craft two sets of boots together using a crafting table, but enchantments are removed.
=== Mob loot ===
If a [[zombie]], [[husk]], [[stray]], [[piglin]], or [[skeleton]] is wearing armor, there is a 8.5% chance (9.5% with Looting I, 10.5% with Looting II and 11.5% with Looting III) for the mob to drop boots upon death. The boots are usually badly damaged, and may be enchanted.
[[File:Zombie With Boots.png|alt=Zombie is shown wearing boots|thumb|Zombie is shown wearing full iron armor set, including boots.]]
{{IN|bedrock}}, [[vindicator]]s and [[pillager]]s that spawn in [[raid]]s have a chance to drop iron boots, which are usually badly damaged and have a 50% chance to be enchanted.
=== Chest loot ===
{{LootChestItem|leather-boots,random-enchanted-leather-boots,chainmail-boots,iron-boots,level-enchanted-iron-boots,golden-boots,random-enchanted-golden-boots,soul-speed-enchanted-golden-boots,diamond-boots,damaged-diamond-boots,damaged-random-enchanted-diamond-boots,damaged-random-enchanted-diamond-boots-2,level-enchanted-diamond-boots}}
=== Trading ===
{{IN|java}}, novice-level armorer [[villager]]s have 40% chance to sell iron boots for 4 [[emerald]]s. Apprentice-level armorers have a 50% chance to sell chainmail boots for an [[emerald]]. Expert-level armorers always sell enchanted<ref group="note" name="enchantment" /> diamond boots for 11–27 [[emerald]]s. Apprentice-level leatherworker [[villager]]s have {{frac|2|3}} chance to sell leather boots for 4 [[emerald]]s.
Armorer [[villager]]s may give the players with the [[Hero of the Village]] effect chainmail boots.{{only|java}}
{{IN|bedrock}}, novice-level armorer villagers have a 25% chance to sell iron boots for 4 emeralds. Apprentice-level armorers have a {{frac|1|3}} chance to sell chainmail boots for an emerald. Expert-level armorers have a 50% chance to sell enchanted<ref group="note" name="enchantment">When creating an enchantment offer, the game uses a random enchantment level from 5 – 19. The enchantments are never treasure enchantments.</ref> diamond boots for 8 emeralds. Apprentice-level leatherworker villagers have a 50% chance to sell leather boots for 4 emeralds.
{{notelist}}
=== Bartering ===
[[Piglin]]s may [[bartering|barter]] iron boots with [[Soul Speed]] when given a [[gold ingot]].
=== Fishing ===
Leather boots can be caught as a "junk" item when [[fishing]].
== Usage ==
Boots can be placed in the fourth armor slot of a player's [[inventory]] for activation.
=== Defense points ===
Defense points are each signified by half of a chestplate in the armor bar above the health bar. Each defense point reduces any damage dealt to the player that is absorbed by armor by 4%, increasing additively with the number of defense points. Different materials and combinations of armor provide different levels of defense.
The following table shows the amount of defense points added by boots.
{| class="wikitable" data-description="Boots defense points"
|-
!scope="col" | Material
!scope="col" | Defense points
|-
!scope="row" | Leather
| rowspan="3" | {{armor|1}}
|-
!scope="row" | Golden
|-
!scope="row" | Chainmail
|-
!scope="row" | Iron
| {{armor|2}}
|-
!scope="row" | Diamond
| rowspan="2" | {{armor|3}}
|-
!scope="row" | Netherite
|}
=== Knockback resistance ===
Netherite boots provide 10% knockback resistance.
=== Durability ===
The following table shows the amount of damage each piece of armor can absorb before being destroyed.
Any "hit" from a damage source that can be blocked by armor removes one point of durability from each piece of armor worn for every {{hp|4}} of incoming damage (rounded down, but never below 1). Damage taken that armor doesn't protect (such as [[Damage#Fall damage|falling]] or [[Damage#Drowning|drowning]]) does not damage the armor, even if it is enchanted to protect against that type of damage. The following chart displays how many hits boots can endure.
Netherite armor is not damaged by [[lava]] or [[fire]] when worn.
{| class="wikitable" data-description="Boots durability"
|-
! Material
!Durability
|-
!scope="row" | Leather
| 65
|-
!scope="row" | Golden
| 91
|-
!scope="row" | Chainmail/Iron
| 195
|-
!scope="row" | Diamond
| 429
|-
!scope="row" | Netherite
| 481
|}
=== Enchantments ===
Boots can receive the following [[enchantment]]s:
{| class="wikitable"
|-
! Enchantment !! Max Level !! Notes
|-
| [[Fire Protection]] || IV || <ref group=note name=exclusive>Fire Protection, Blast Protection, Projectile Protection and Protection are mutually exclusive.</ref>
|-
| [[Projectile Protection]] || IV || <ref group=note name="exclusive"/>
|-
| [[Blast Protection]] || IV || <ref group=note name="exclusive"/>
|-
| [[Protection]] || IV || <ref group=note name="exclusive"/>
|-
| [[Feather Falling]] || IV ||
|-
| [[Unbreaking]] || III ||
|-
| [[Thorns]] || III || <ref group="note" name="anvil">Only from using an [[anvil]] and [[enchanted book]]s.</ref>
|-
| [[Depth Strider]] || III || <ref group=note name=exclusive2>Frost Walker and Depth Strider are mutually exclusive.</ref>
|-
| [[Soul Speed]] || III || <ref group=note name="anvil">Only from using an [[anvil]] and [[enchanted book]]s.</ref>
|-
| [[Frost Walker]] || II || <ref group=note name=exclusive2 /><ref group="note" name="anvil2">Only from using an [[anvil]] and [[enchanted book]]s, or by finding enchanted boots in an [[End city]] chest.</ref>
|-
| [[Mending]] || I || <ref group=note name="anvil2" />
|-
| [[Curse of Binding]] || I || <ref group="note" name="anvil2"/>
|-
| [[Curse of Vanishing]] || I || <ref group="note" name="anvil2"/>
|}
{{notelist}}
=== Smelting usage ===
{{Smelting|showname=1|Iron Boots;Chainmail Boots;Golden Boots|Iron Nugget;Iron Nugget;Gold Nugget|0,1}}
=== Piglins ===
{{EntityLink|Piglin|Piglins}} are attracted to ''golden'' boots and pick them up, examining them for 6 to 8 seconds. Other boots do not attract piglins but can be worn by them. They prefer stronger boots over weaker boots, with one major exception: They always prefer golden boots over all other boots, throwing out stronger boots to equip them. Enchanted boots are preferred over unenchanted boots.
=== Powder snow===
Leather boots can be used to safely cross [[powder snow]] without sinking in it. The block behaves similar to [[scaffolding]], allowing the player to sink in by pressing {{control|crouch}} and move up by pressing {{control|jump}}. The boots also prevent the wearer from taking freezing damage.
===Decoration===
It is possible to upgrade armor with trims. This requires a [[Smithing Template#Gallery|Smithing Template]], an armor piece, and an ingot or crystal ({{ItemSprite|iron-ingot}}iron ingot/{{ItemSprite|copper-ingot}}copper ingot/{{ItemSprite|gold-ingot}}gold ingot/{{ItemSprite|netherite-ingot}}netherite ingot/{{ItemSprite|emerald}}emerald/{{ItemSprite|redstone-dust}}redstone dust/{{ItemSprite|lapis-lazuli}}lapis lazuli/{{ItemSprite|amethyst-shard}}amethyst shard/{{ItemSprite|nether-quartz}}nether quartz/{{ItemSprite|diamond}}diamond).
These trims have no effect on the gameplay or strength of the armor.
{{Smithing|Any Armor Trim Smithing Template|Netherite Boots|Amethyst Shard; Copper Ingot; Diamond; Emerald; Gold Ingot; Iron Ingot; Lapis Lazuli; Netherite Ingot; Nether Quartz; Redstone Dust|Amethyst Trim Netherite Boots; Copper Trim Netherite Boots; Diamond Trim Netherite Boots; Emerald Trim Netherite Boots; Gold Trim Netherite Boots; Iron Trim Netherite Boots; Lapis Trim Netherite Boots; Netherite Trim Netherite Boots; Quartz Trim Netherite Boots; Redstone Trim Netherite Boots|head=1|tail=1|ingredients=Any Armor Trim +<br>Any Armor Piece +<br>Any Ingot/Crystal|showdescription=1|description=}}
==Sounds==
{{el|je}}:
{{Sound table
|sound=Equip leather1.ogg
|sound2=Equip leather2.ogg
|sound3=Equip leather3.ogg
|sound4=Equip leather4.ogg
|sound5=Equip leather5.ogg
|sound6=Equip leather6.ogg
|subtitle=Leather armor rustles
|source=player
|description=When leather boots are equipped
|id=item.armor.equip_leather
|translationkey=subtitles.item.armor.equip_leather
|volume=1.0
|pitch=1.0
|distance=16}}
{{Sound table
|sound=Equip chain1.ogg
|sound2=Equip chain2.ogg
|sound3=Equip chain3.ogg
|sound4=Equip chain4.ogg
|sound5=Equip chain5.ogg
|sound6=Equip chain6.ogg
|subtitle=Chain armor jingles
|source=player
|description=When chainmail boots are equipped
|id=item.armor.equip_chain
|translationkey=subtitles.item.armor.equip_chain
|volume=1.0
|pitch=1.0
|distance=16}}
{{Sound table
|sound=Equip iron1.ogg
|sound2=Equip iron2.ogg
|sound3=Equip iron3.ogg
|sound4=Equip iron4.ogg
|sound5=Equip iron5.ogg
|sound6=Equip iron6.ogg
|subtitle=Iron armor clanks
|source=player
|description=When iron boots are equipped
|id=item.armor.equip_iron
|translationkey=subtitles.item.armor.equip_iron
|volume=1.0
|pitch=1.0
|distance=16}}
{{Sound table
|sound=Equip gold1.ogg
|sound2=Equip gold2.ogg
|sound3=Equip gold3.ogg
|sound4=Equip gold4.ogg
|sound5=Equip gold5.ogg
|sound6=Equip gold6.ogg
|subtitle=Gold armor clinks
|source=player
|description=When gold boots are equipped
|id=item.armor.equip_gold
|translationkey=subtitles.item.armor.equip_gold
|volume=1.0
|pitch=1.0
|distance=16}}
{{Sound table
|sound=Equip diamond1.ogg
|sound2=Equip diamond2.ogg
|sound3=Equip diamond3.ogg
|sound4=Equip diamond4.ogg
|sound5=Equip diamond5.ogg
|sound6=Equip diamond6.ogg
|subtitle=Diamond armor clangs
|source=player
|description=When diamond boots are equipped
|id=item.armor.equip_diamond
|translationkey=subtitles.item.armor.equip_diamond
|volume=1.0
|pitch=1.0
|distance=16}}
{{Sound table
|sound=Equip netherite1.ogg
|sound2=Equip netherite2.ogg
|sound3=Equip netherite3.ogg
|sound4=Equip netherite4.ogg
|subtitle=Netherite armor clanks
|source=player
|description=When netherite boots are equipped
|id=item.armor.equip_netherite
|translationkey=subtitles.item.armor.equip_netherite
|volume=0.8
|pitch=1.0/0.9
|distance=16}}
{{Sound table
|sound=Random break.ogg
|subtitle=Item breaks
|source=dependent
|description=When a pair of boots' durability is exhausted
|id=entity.item.break
|translationkey=subtitles.entity.item.break
|volume=0.8
|pitch=0.8-1.2
|distance=16
|foot=1}}
{{el|be}}:
{{Sound table
|type=bedrock
|sound=Equip leather1.ogg
|sound2=Equip leather2.ogg
|sound3=Equip leather3.ogg
|sound4=Equip leather4.ogg
|sound5=Equip leather5.ogg
|sound6=Equip leather6.ogg
|source=player
|description=When leather boots are equipped
|id=armor.equip_leather
|volume=1.0
|pitch=1.0}}
{{Sound table
|sound=Equip chain1.ogg
|sound2=Equip chain2.ogg
|sound3=Equip chain3.ogg
|sound4=Equip chain4.ogg
|sound5=Equip chain5.ogg
|sound6=Equip chain6.ogg
|source=player
|description=When chain boots are equipped
|id=armor.equip_chain
|volume=1.0
|pitch=1.0}}
{{Sound table
|sound=Equip iron1.ogg
|sound2=Equip iron2.ogg
|sound3=Equip iron3.ogg
|sound4=Equip iron4.ogg
|sound5=Equip iron5.ogg
|sound6=Equip iron6.ogg
|source=player
|description=When iron boots are equipped
|id=armor.equip_iron
|volume=1.0
|pitch=1.0}}
{{Sound table
|sound=Equip gold1.ogg
|sound2=Equip gold2.ogg
|sound3=Equip gold3.ogg
|sound4=Equip gold4.ogg
|sound5=Equip gold5.ogg
|sound6=Equip gold6.ogg
|source=player
|description=When gold boots are equipped
|id=armor.equip_gold
|volume=1.0
|pitch=1.0}}
{{Sound table
|sound=Equip diamond1.ogg
|sound2=Equip diamond2.ogg
|sound3=Equip diamond3.ogg
|sound4=Equip diamond4.ogg
|sound5=Equip diamond5.ogg
|sound6=Equip diamond6.ogg
|source=player
|description=When diamond boots are equipped
|id=armor.equip_diamond
|volume=1.0
|pitch=1.0}}
{{Sound table
|sound=Equip netherite1.ogg
|sound2=Equip netherite2.ogg
|sound3=Equip netherite3.ogg
|sound4=Equip netherite4.ogg
|source=player
|description=When netherite boots are equipped.
|id=armor.equip_netherite
|volume=1.0
|pitch=1.0}}
{{Sound table
|rowspan=2
|sound=Water Splash Old.ogg
|source=block
|description=When leather boots are dyed using a cauldron
|id=cauldron.dyearmor
|volume=0.1
|pitch=1.0}}
{{Sound table
|source=block
|description=When leather boots' dye is removed using a cauldron
|id=cauldron.cleanarmor
|volume=0.1
|pitch=1.0}}
{{Sound table
|sound=Random break.ogg
|source=player
|description=When a pair of boots' durability is exhausted
|id=random.break
|volume=1.0
|pitch=0.9
|foot=1}}
==Data values==
===ID===
{{edition|java}}:
{{ID table
|edition=java
|showitemtags=y
|showforms=y
|generatetranslationkeys=y
|displayname=Leather Boots
|spritetype=item
|nameid=leather_boots
|itemtags=freeze_immune_wearables
|form=item}}
{{ID table
|displayname=Chainmail Boots
|spritetype=item
|nameid=chainmail_boots
|form=item}}
{{ID table
|displayname=Iron Boots
|spritetype=item
|nameid=iron_boots
|form=item}}
{{ID table
|displayname=Diamond Boots
|spritetype=item
|nameid=diamond_boots
|form=item}}
{{ID table
|displayname=Golden Boots
|spritetype=item
|nameid=golden_boots
|form=item}}
{{ID table
|displayname=Netherite Boots
|spritetype=item
|nameid=netherite_boots
|form=item
|foot=1}}
{{edition|bedrock}}:
{{ID table
|edition=bedrock
|shownumericids=y
|showforms=y
|notshowbeitemforms=y
|generatetranslationkeys=y
|displayname=Leather Boots
|spritetype=item
|nameid=leather_boots
|id=338
|form=item}}
{{ID table
|displayname=Chainmail Boots
|spritetype=item
|nameid=chainmail_boots
|id=342
|form=item}}
{{ID table
|displayname=Iron Boots
|spritetype=item
|nameid=iron_boots
|id=346
|form=item}}
{{ID table
|displayname=Diamond Boots
|spritetype=item
|nameid=diamond_boots
|id=350
|form=item}}
{{ID table
|displayname=Golden Boots
|spritetype=item
|nameid=golden_boots
|id=354
|form=item}}
{{ID table
|displayname=Netherite Boots
|spritetype=item
|nameid=netherite_boots
|id=612
|form=item
|foot=1}}
=== Item data===
When leather boots are dyed, it has the following NBT:
<div class="treeview">
*{{nbt|compound|tag}}: Parent tag.
**{{nbt|compound|display}}: Display properties.
***{{nbt|int|color}}: The color of the leather armor. The tooltip displays "Dyed" if advanced tooltips are disabled, otherwise it displays the hexadecimal color value. Color codes are calculated from the Red, Green and Blue components using this formula:<br>'''<span style="color:red">Red</span>[[wikipedia:Logical shift|<<]]16 + <span style="color:green">Green</span><<8 + <span style="color:blue">Blue</span>'''<ref>For positive values larger than 0x00FFFFFF, the top byte is ignored. All negative values produce white.</ref>
</div>
==Achievements==
{{load achievements|Iron Man;Tie Dye Outfit;Let It Go!;Cover me in debris;Oooh, shiny!}}
==Advancements==
{{load advancements|Suit Up;Cover me With Diamonds;Oh Shiny;Cover Me in Debris;Light as a Rabbit}}
==History==
{{History|java indev}}
{{History||0.31|snap=20091231-2|[[File:Studded Boots (item) JE1.png|32px]] [[History of textures/Unused textures#Studded armor|Studded boots]] are now capable of being seen in the [[inventory]]. This was taken directly from one of [[Notch|Notch's]] game's ''[[Legend of the Chambered 2]]''.{{more info|When were they removed?}}}}
{{History||February 9, 2010|link=wordofnotch:380486636|[[File:Notch revealed armor.png|32px]] [[Notch]] revealed new models for armor, which included boots.}}
{{History||20100218|[[File:Leather Boots JE1.png|32px]] [[File:Chainmail Boots JE1 BE1.png|32px]] [[File:Iron Boots JE1 BE1.png|32px]] [[File:Golden Boots JE1 BE1.png|32px]] [[File:Diamond Boots JE1 BE1.png|32px]]<br>[[File:Leather Boots (item) JE1 BE1.png|32px]] [[File:Chainmail Boots (item) JE1 BE1.png|32px]] [[File:Iron Boots (item) JE1 BE1.png|32px]] [[File:Golden Boots (item) JE1 BE1.png|32px]] [[File:Diamond Boots (item) JE1 BE1.png|32px]] Added cloth, chain, iron, gold, and diamond boots{{verify|edition=java|type=change|Below, it says "wool armor" was renamed to leather, which name is incorrect, wool or cloth? Also, was it "gold" or "golden"?}}
|Boots can now be [[crafting|crafted]] and worn.
|Boots now function, giving {{Armor|3}}. Boots have limited [[item durability|durability]], with lower tier boots less durable than higher tier boots.}}
{{History|java alpha}}
{{History||v1.0.8|"Wool boots" have been renamed to "leather boots", despite item names not existing at this time.
|Leather boots are now [[crafting|crafted]] with [[leather]] instead of [[wool]].}}
{{History|java}}
{{History||1.0.0|snap=Beta 1.9 Prerelease|The armor protection behavior has been changed. Previous to this update, the total armor protection is based in this equation: (((''total equipped armor damage reduction'' − 1) × (''all equipped armor max damage'' − ''total equipped armor damage'')) ÷ (''total equipped armor max damage'' + 1)).}}
{{History|||snap=October 3, 2011|slink={{tweet|notch|120859830339637249}}|The first images of a [[player]] wearing enchanted armor, including boots, are revealed.}}
{{History|||snap=Beta 1.9 Prerelease 3|Iron boots can now be found in the new [[stronghold]] altar [[chest]]s.}}
{{History|||snap=Beta 1.9 Prerelease 4|Boots can now be [[enchanting|enchanted]].}}
{{History||1.1|snap=12w01a|Iron boots can now be found in the new blacksmith [[chest]]s in [[village]]s.}}
{{History||1.2.1|snap=1.2|Changed "Golden boots" to "Golden Boots".}}
{{History||1.3.1|snap=12w15a|{{key|Shift}}+clicking can now be used to equip boots.}}
{{History|||snap=12w21a|Chain boots can now be obtained legitimately in [[survival]] mode through [[trading]].
|Blacksmith [[villager]]s now [[trading|sell]] chain boots for 5–6 [[emerald]]s.
|Blacksmith villagers now sell diamond boots for 7 emeralds.
|Blacksmith villagers now sell iron boots for 4–5 emeralds.
|Butcher villagers now sell leather boots for 2-3 emeralds.}}
{{History||1.4.2|snap=12w32a|[[Mob]] armor has been reintroduced. A partial or full set of any armor is now sometimes worn by [[zombie]]s, [[skeleton]]s and [[zombie pigman|zombie pigmen]], with the likelihood increasing with difficulty.}}
{{History|||snap=August 17, 2012|slink={{tweet|Dinnerbone|236445090929844225}}|[[Jeb]] and [[Dinnerbone]] tweeted pictures of [[dye]]able leather armor, including boots.{{citation needed|Link to Jeb's tweet?}}}}
{{History|||snap=12w34a|Leather boots can now be dyed by [[crafting]] leather boots with [[dye]]s. Dyes can be removed by {{control|use|text=using}} dyed leather boots on a [[cauldron]] with [[water]].
|[[File:Leather Boots JE2 BE1.png|32px]] [[File:Leather Boots (item) JE2.png|32px]] Default leather boots are now slightly darker.}}
{{History|||snap=12w36a|[[Dye]]d leather boots are now more saturated and have a slight tint of tan in respect to the default armor color.
|[[Wither skeleton]]s can now spawn wearing boots.}}
{{History|||snap=12w37a|[[File:Leather Boots (item) JE3 BE2.png|32px]] Leather boots now have non-dyed parts. This has been implemented so that [[player]]s can distinguish between other types of armor and similarly colored leather armor.}}
{{History||1.5|snap=13w04a|Boots in the [[player]]'s hand can now be equipped by right-clicking.
|[[Dispenser]]s can now equip nearby players with boots.}}
{{History||1.7.2|snap=13w36a|Leather boots can now be obtained as one of the "junk" items through [[fishing]].}}
{{History||1.8|snap=14w02a|Armorer [[villager]]s now [[trading|sell]] chain boots for 5–7 [[emerald]]s.
|Armorer villagers no longer sell diamond boots.
|Armorer villagers no longer sell iron boots.
|Leatherworker villagers no longer sell leather boots.}}
{{History|||snap=14w05a|Boots no longer turn red when [[mob]]s and [[player]]s are hurt.}}
{{History|||snap=14w06a|Boots are now visible on [[giant]]s.}}
{{History|||snap=14w25a|Chain boots [[Java Edition removed features#Chain armor|can no longer be crafted anymore]] due to the [[item]] form of [[fire]] being [[Java Edition removed features#Obtainable until 1.8|removed]].}}
{{History||1.9|snap=15w31a|Enchanted iron and diamond boots can now be found in [[end city]] ship [[chest]]s.
|[[Mob]]s now wear armor from the bottom to the top, rather than from the top to the bottom. This means that a mob with three armor pieces, for example, spawn with all armor except a helmet.}}
{{History|||snap=15w34b|Boots' [[item durability|durability]] now affects armor value.}}
{{History|||snap=15w36a|Armor value and[[enchanting|enchantment]] calculations have been changed. For the original values, see [[Armor/Before 1.9|here]].}}
{{History|||snap=15w36d|Boots' durability affecting value has been removed.
|Boots now have an attribute controlling the defense points.}}
{{History|||snap=15w50a|Added {{cd|equip}} [[sound]]s for boots.}}
{{History|||snap=16w02a|Armor value and enchantment calculations have been changed again.}}
{{History|||snap=16w05a|Armor value calculations have been changed, once again.}}
{{History||1.11.1|snap=16w50a|Golden, chain and iron boots can now be [[smelting|smelted]] down into one of their respective [[nugget]]s. Chain boots smelt into iron nuggets.}}
{{History||1.13|snap=17w47a|Prior to [[1.13/Flattening|''The Flattening'']], these [[item]]s' numeral IDs were 298 through 317.{{more info|Specific values for boots}}}}
{{History|||snap=18w11a|Enchanted leather boots can now generate in the chests of [[shipwreck]]s.}}
{{History|||snap=18w20a|Chain armor boots have been renamed to "chainmail".}}
{{History||1.14|snap=18w43a|[[File:Leather Boots JE3 BE2.png|32px]] [[File:Chainmail Boots JE2 BE2.png|32px]] [[File:Iron Boots JE2 BE2.png|32px]] [[File:Golden Boots JE2 BE2.png|32px]] [[File:Diamond Boots JE2 BE2.png|32px]]<br>[[File:Leather Boots (item) JE4 BE3.png|32px]] [[File:Chainmail Boots (item) JE2 BE2.png|32px]] [[File:Iron Boots (item) JE2 BE2.png|32px]] [[File:Golden Boots (item) JE2 BE2.png|32px]] [[File:Diamond Boots (item) JE2 BE2.png|32px]] The textures of leather, chainmail, iron, golden, and diamond boots have been changed.}}
{{History|||snap=18w48a|Leather boots can now be found in [[chest]]s in [[village]] tanneries.}}
{{History|||snap=19w08a|[[File:Golden Boots (item) JE3 BE3.png|32px]] The textures of gold boots [[item]]s have been changed.}}
{{History|||snap=19w11a|Armorer villagers now sell iron and enchanted diamond boots, making diamond boots effectively [[renewable resource|renewable]] again.
|Leatherworker villagers now sell randomly [[dye]]d leather boots.}}
{{History|||snap=19w13a|Armorer villagers now give chainmail boots to players under the [[Hero of the Village]] effect.}}
{{History||1.16|snap=20w06a|[[File:Netherite Boots JE1.png|32px]] [[File:Netherite Boots (item) JE1.png|32px]] Added netherite boots.
|Netherite boots are obtained by combining diamond boots and one netherite ingot in a crafting table.}}
{{History|||snap=20w09a|[[File:Diamond Boots (item) JE3 BE3.png|32px]] The texture of diamond boots [[item]]s has been changed.}}
{{History|||snap=20w10a|[[File:Netherite Boots JE2 BE1.png|32px]] [[File:Netherite Boots (item) JE2.png|32px]] The texture of netherite boots has been changed.
|Netherite boots can no longer be crafted.
|Netherite boots are now obtained by combining diamond boots and one netherite ingot in a smithing table.}}
{{History|||snap=20w16a|Netherite boots now generate randomly enchanted in [[bastion remnants]] chests.
|Golden boots now generate randomly enchanted in [[ruined portal]] chests.}}
{{History|||snap=20w17a|Diamonds boots now generate in place of netherite boots in bastion remnant chests.}}
{{History||1.17|snap=20w46a|Leather boots can now be used to safely walk on [[powder snow]].|Leather armor now protects against [[powder snow]]'s freezing.}}
{{History|||snap=21w13a|Leather Boots now prevent fall damage when landing on [[powder snow]].}}
{{History||1.18.2|snap=22w03a|Netherite boots knockback resistance is no longer random.}}
{{History||1.19|snap=Deep Dark Experimental Snapshot 1|Added the [[Swift Sneak]] enchantment, which can only be applied to boots.}}
{{History|||snap=22w12a|The [[Swift Sneak]] enchantment can no longer applied to boots.}}
{{History||1.20<br>(Experimental)|link=1.19.4|snap=23w04a|Non-leather boots can now be trimmed using a [[smithing table]].
|There are 10 types of material that determine the color of the trim:
*Iron
*Copper
*Gold
*Lapis
*Emerald
*Diamond
*Netherite
*Redstone
*Amethyst
*Quartz
|Upgrading diamond boots to netherite boots now requires the netherite upgrade [[smithing template]].}}
{{History|||snap=23w05a|Leather boots can now be trimmed using a smithing table.|Boots can now have trims of the same material it is made out of.}}
{{History|||snap=23w06a|Swapped {{cd|iron}} and {{cd|iron_darker}} palette, then made {{cd|iron_darker}} darker overall.}}
{{History||1.19.4|snap=23w05a|Boots can now be swapped by {{ctrl|using}} them in the hotbar.<ref>{{bug|MC-216270|||Fixed}}</ref>}}
{{History||?|Boots can now be swapped in [[armor stand]]s by {{ctrl|using}} them in the armor stand's slot.}}
{{History||1.20|snap=23w12a|The pattern textures of dune and sentry armor trims are changed.|
Those previous patterns were left with different names: dune was renamed sentry and sentry was renamed shaper.}}
{{History|pocket alpha}}
{{History||v0.6.0|[[File:Leather Boots JE1 BE1.png|32px]] [[File:Chainmail Boots JE1 BE1.png|32px]] [[File:Iron Boots JE1 BE1.png|32px]] [[File:Golden Boots JE1 BE1.png|32px]] [[File:Diamond Boots JE1 BE1.png|32px]]<br> [[File:Leather Boots (item) JE1 BE1.png|32px]] [[File:Chainmail Boots (item) JE1 BE1.png|32px]] [[File:Iron Boots (item) JE1 BE1.png|32px]] [[File:Golden Boots (item) JE1 BE1.png|32px]] [[File:Diamond Boots (item) JE1 BE1.png|32px]] Added boots.}}
{{History||v0.8.0|snap=build 2|{{InvSprite|Leather Boots}} The leather boots sprites have been changed to that of the [[Java Edition|PC]] version, but its armor [[model]] remains that of older versions.}}
{{History||v0.9.0|snap=build 1|Iron boots now naturally generates in [[village]] [[chest]]s and a [[stronghold]] altar chest.}}
{{History||v0.12.1|snap=build 1|Chainmail boots can now be obtained in [[survival]] mode from a mob wearing it.
|Leather boots can now be obtained from [[fishing]] as a "junk" [[item]].}}
{{History||v0.14.0|snap=build 1|[[File:Leather Boots JE2 BE2.png|32px]] Leather boots can now be dyed and the model has been updated.}}
{{History|pocket}}
{{History||1.0.0|snap=alpha 0.17.0.1|[[Enchanting|Enchanted]] iron boots and enchanted diamond boots can now be found inside [[chest]]s within [[end city]].}}
{{History||1.0.4|snap=alpha 1.0.4.0|Chainmail boots are now [[trading|sold]] by armorer smith [[villager]]s via [[trading]].}}
{{History||1.1.0|snap=alpha 1.1.0.0|Golden, chain and iron boots can now be [[smelting|smelted]] down into one of their respective [[nugget]]s.}}
{{History|bedrock}}
{{History||1.4.0|snap=beta 1.2.14.2|Chainmail boots now generate in [[buried treasure]] chests.
|Enchanted leather boots can now be found inside [[shipwreck]] supply room [[chest]]s.}}
{{History||1.10.0|snap=beta 1.10.0.3|Iron boots now can be found in plains [[village]] weaponsmith [[chest]]s.
|Leather boots can now be found inside plains village tannery chests.
|[[File:Leather Boots JE3 BE2.png|32px]] [[File:Iron Boots JE2 BE2.png|32px]] [[File:Golden Boots JE2 BE2.png|32px]] [[File:Diamond Boots JE2 BE2.png|32px]]<br> [[File:Leather Boots (item) JE4 BE3.png|32px]] [[File:Iron Boots (item) JE2 BE2.png|32px]] [[File:Golden Boots (item) JE2 BE2.png|32px]] [[File:Diamond Boots (item) JE2 BE2.png|32px]] The textures of boots have been changed.{{more info|Did chain boots not change?}}}}
{{History||1.11.0|snap=beta 1.11.0.1|Iron boots now can be found in [[savanna]], [[taiga]], [[desert]], [[snowy taiga]] and [[snowy tundra]] [[village]] weaponsmith [[chest]]s.
|Leather boots can now be found inside savanna, taiga, desert, snowy taiga and snowy tundra village tannery chests.}}
{{History|||snap=beta 1.11.0.4|[[Pillager]]s and [[vindicator]]s that spawn in [[raid]]s can now drop iron boots.
|Iron and diamond boots are now sold by armorer villagers.}}
{{History||1.11.0|snap=beta 1.11.0.5|[[File:Golden Boots (item) JE3 BE3.png|32px]] The textures of golden boots [[item]]s have been changed.}}
{{History||1.12.0|snap=beta 1.12.0.2|[[File:Armor Stand with Leather Armor MCPE-44669.png|32px]] Leather boots no longer show as being [[dye]]d properly when worn by [[armor stand]]s.}}
{{History||1.13.0|snap=beta 1.13.0.1|Leather boots now appear dyed properly when worn by armor stands.}}
{{History||1.16.0|snap=beta 1.16.0.51|[[File:Netherite Boots JE2 BE1.png|32px]] [[File:Netherite Boots (item) BE1.png|32px]] Added netherite boots.|Netherite boots are obtained by combining diamond boots and one netherite ingot in a crafting table.
|[[File:Diamond Boots (item) JE3 BE3.png|32px]] The texture of diamond boots [[item]]s have been changed.}}
{{History|||snap=beta 1.16.0.57|Iron boots with soul speed enchantment can be obtained from bartering with piglin.
|Netherite boots can no longer be crafted.
|Netherite boots are now obtained by combining diamond boots and one netherite ingot in a smithing table.
|Golden boots can now be found in [[ruined portal]] chest.
|Golden and netherite boots can be found in [[bastion remnant]] chest.}}
{{History|||snap=beta 1.16.0.63|Diamonds boots now generate in place of netherite boots in bastion remnant chests.}}
{{History||1.16.200|snap=beta 1.16.200.52|Leather boots can now be used to safely walk on [[powder snow]].}}
{{History||1.17.10|snap=beta 1.17.10.20|[[File:Netherite Boots (item) JE2.png|32px]] The texture of netherite boots item has been changed to match ''Java Edition''.}}
{{History|console}}
{{History||xbox=TU1|xbone=CU1|ps=1.0|wiiu=Patch 1|switch=1.0.1|[[File:Leather Boots JE2 BE1.png|32px]] [[File:Leather Boots (item) JE1 BE1.png|32px]] Added leather boots.
|[[File:Iron Boots JE1 BE1.png|32px]] [[File:Iron Boots (item) JE1 BE1.png|32px]] Added iron boots.
|[[File:Golden Boots JE1 BE1.png|32px]] [[File:Golden Boots (item) JE1 BE1.png|32px]] Added golden boots.
|[[File:Diamond Boots JE1 BE1.png|32px]] [[File:Diamond Boots (item) JE1 BE1.png|32px]] Added diamond boots.}}
{{History||xbox=TU5|[[File:Chainmail Boots JE1 BE1.png|32px]] [[File:Chainmail Boots (item) JE1 BE1.png|32px]] Added chain boots.
|Added a quick equip for boots to the [[inventory]] interface.}}
{{History||xbox=TU12|ps=1.03|[[File:Leather Boots (item) JE3 BE2.png|32px]] The textures for leather boots [[item]]s have been changed.}}
{{History||xbox=TU14|ps=1.05|Leather boots can now be [[dye]]d.
|[[Item repair]] can now repair boots.}}
{{History||xbox=TU25|xbone=CU13|ps=1.16|Boots now have the quick equip functionality.}}
{{History||xbox=TU53|xbone=CU43|ps=1.49|wiiu=Patch 23|switch=1.0.3|Golden, chain and iron boots can now be [[smelting|smelted]] down into one of their respective [[nugget]]s. Chain boots smelt into iron nuggets.}}
{{History|PS4}}
{{History||1.90|[[File:Leather Boots JE3 BE2.png|32px]] [[File:Leather Boots (item) JE4 BE3.png|32px]] The textures of leather boots have been changed.
|[[File:Chainmail Boots JE2 BE2.png|32px]] [[File:Chainmail Boots (item) JE2 BE2.png|32px]] The textures of chainmail boots have been changed.
|[[File:Iron Boots JE2 BE2.png|32px]] [[File:Iron Boots (item) JE2 BE2.png|32px]] The textures of iron boots have been changed.
|[[File:Golden Boots JE2 BE2.png|32px]] [[File:Golden Boots (item) JE3 BE3.png|32px]] The textures of gold boots have been changed.
|[[File:Diamond Boots JE2 BE2.png|32px]] [[File:Diamond Boots (item) JE2 BE2.png|32px]] The textures of diamond boots have been changed.}}
{{History|new 3ds}}
{{History||0.1.0|[[File:Leather Boots JE2 BE1.png|32px]] [[File:Leather Boots (item) JE3 BE2.png|32px]] Added leather boots.
|[[File:Chainmail Boots JE1 BE1.png|32px]] [[File:Chainmail Boots (item) JE1 BE1.png|32px]] Added chain boots.
|[[File:Iron Boots JE1 BE1.png|32px]] [[File:Iron Boots (item) JE1 BE1.png|32px]] Added iron boots.
|[[File:Golden Boots JE1 BE1.png|32px]] [[File:Golden Boots (item) JE1 BE1.png|32px]] Added golden boots.
|[[File:Diamond Boots JE1 BE1.png|32px]] [[File:Diamond Boots (item) JE1 BE1.png|32px]] Added diamond boots.}}
{{History|foot}}
==Issues ==
{{issue list}}
==Trivia==
*Netherite boots are shorter in their item texture but are longer in their texture when being worn
*Leather armor originally used textures from one of [[Notch]]'s previous games, ''[[Legend of the Chambered]]''.
*Leather boots are the only piece of leather armor that has the same name as other armor materials.
*The netherite boots are the only type of boots to have a differently shaped item sprite when compared to the other boot types.
*Chainmail boots are the only boots that have transparent pixels in their texture currently
==Gallery==
===Enchanted Boots===
<gallery>
File:Enchanted Leather Boots (item).gif
File:Enchanted Chainmail Boots (item).gif
File:Enchanted Iron Boots (item).gif
File:Enchanted Golden Boots (item).gif
File:Enchanted Diamond Boots (item).gif
File:Enchanted Netherite Boots (item).gif
</gallery>
<gallery>
File:Enchanted Leather Boots.gif
File:Enchanted Chainmail Boots.gif
File:Enchanted Iron Boots.gif
File:Enchanted Golden Boots.gif
File:Enchanted Diamond Boots.gif
File:Enchanted Netherite Boots.gif
</gallery>
==References==
{{reflist}}
==External Links==
*[https://www.minecraft.net/en-us/article/taking-inventory--boots Taking Inventory: Boots] – Minecraft.net on November 24, 2019
{{Items}}
[[Category:Armor]]
[[ja:ブーツ]]
[[ko:부츠]]
[[pl:Buty]]
[[pt:Botas]]
[[th:รองเท้า]]
[[zh:靴子]]</li></ul> | Creepers now have a correct explosion range. | ||||
| Fixed detonation time (would previously explode almost instantly). | |||||
0.11.0{{Extension DPL}}<ul><li>[[Compass|Compass]]<br/>{{About|the item used to point to the world spawn or to a lodestone|the item used to point to the location of the player's last death|Recovery Compass}}
{{Item
| image = Compass.gif
| image2 = Lodestone Compass.gif
| renewable = Yes
| stackable = '''Compass:''' Yes (64)<br>'''Lodestone Compass:''' No
}}
A '''compass''' is an item used to point to the world spawn or to a [[lodestone]].
== Obtaining ==
=== Crafting ===
{{Crafting
|B1= Iron Ingot
|A2= Iron Ingot |B2= Redstone Dust |C2= Iron Ingot
|B3= Iron Ingot
|Output= Compass
|type= Tool
}}
=== Chest loot ===
{{LootChestItem|compass}}
=== Trading ===
{{IN|java}}, expert-level librarian [[villager]]s have a 50% chance to sell a single compass for 4 [[emerald]]s.
{{IN|bedrock}}, expert-level librarian villagers have a {{frac|1|3}} chance to sell a single compass for 4 emeralds.
== Usage ==
Normally, the compass' needle points toward the world [[Spawn#World spawn|spawn point]]. The compass points to spawn when viewed in any way, including as a dropped [[Item (entity)|item]], in a player's hand, in an inventory or the crafting table, or in an [[item frame]]. The direction the needle points to is relative to the player who is viewing it. When a compass in an item frame is rotated, the needle turns accordingly.
In [[the Nether]] or [[the End]], the compass' needle spins and points in random directions.
The compass can be used on a [[lodestone]], after which it is named lodestone compass by default and points to that lodestone as long as the compass is in the same dimension as the lodestone, but if the compass is taken to a different dimension, it spins randomly, as a normal compass would in the Nether or the End. If the lodestone is destroyed, it also spins randomly, even if the lodestone is replaced afterward. However, if a lodestone compass is placed in storage, the lodestone can be broken and replaced without the compass losing the attunement, as long as the compass remains in storage while the lodestone is missing.
A lodestone compass appears [[enchanting|enchanted]], similar to the [[Enchanted Golden Apple|enchanted golden apple]].
Using {{cmd|setworldspawn}} to change the world spawn also changes where the compass points.
=== Crafting ingredient ===
{{crafting usage|Compass, Compass.gif}}
=== Anvil usage ===
{{:Map/BE|position}}
=== Trading ===
A single compass can be sold to a journeyman-level cartographer villager for 1 [[emerald]].{{only|java}}
A single compass can be sold to an expert-level cartographer villager for 1 emerald as their sixth trade.{{only|bedrock}}
A compass is also part of the cost of [[explorer map]]s:
* An ocean explorer map and{{only|java|short=1}}/or{{only|bedrock|short=1}} a woodland explorer map can be bought from a journeyman-level cartographer for 12 emeralds and one compass, as part of their fifth trade.{{only|bedrock}}
* {{IN|java}}, apprentice-level cartographer villagers offer to sell an ocean explorer map for 13 emeralds and a compass, and journeyman-level cartographer villagers offer to sell a woodland explorer map for 14 emeralds and one compass.
=== Enchantments ===
A compass can receive the following [[enchantment]]s:
{|class="wikitable col-2-center col-3-right"
|+
!Name
!Max Level
![[Enchanting|Method]]
|-
|[[Curse of Vanishing]]
|I
|{{Inventory slot|Anvil}}
|-
|}
== Sounds ==
{{edition|java}}:
{{Sound table
|sound=Lodestone lock1.ogg
|sound2=Lodestone lock2.ogg
|source=player
|subtitle=Lodestone Compass locks onto Lodestone
|description=When a compass is used on a lodestone
|id=item.lodestone_compass.lock
|translationkey=subtitles.item.lodestone_compass.lock
|volume=1.0
|pitch=''varies'' <ref group=sound>Can be 0.85 or 0.95 for each sound</ref>
|distance=16
|foot=1}}
{{edition|bedrock}}:
{{Sound table
|type=bedrock
|sound=Lodestone lock1.ogg
|sound2=Lodestone lock2.ogg
|source=block
|description=When a compass is used on a lodestone
|id=lodestone_compass.link_compass_to_lodestone
|volume=1.0
|pitch=0.85-0.95
|foot=1}}
== Data values ==
=== ID ===
{{edition|java}}:
{{ID table
|edition=java
|showforms=y
|generatetranslationkeys=y
|displayname=Compass
|spritetype=item
|nameid=compass
|form=item
|translationkey=item.minecraft.compass,item.minecraft.lodestone_compass
|foot=1}}
{{edition|bedrock}}:
{{ID table
|edition=bedrock
|showaliasids=y
|shownumericids=y
|showforms=y
|notshowbeitemforms=y
|generatetranslationkeys=y
|displayname=Compass
|spritetype=item
|nameid=compass
|id=391
|form=item}}
{{ID table
|displayname=Lodestone Compass
|spritename=lodestone-compass-be
|spritetype=item
|nameid=lodestone_compass
|aliasid=lodestonecompass
|id=602
|form=item
|translationkey=item.lodestonecompass.name
|foot=1}}
=== Item data ===
{{el|java}}:
{{main|Player.dat format}}
<div class="treeview">
* {{nbt|compound|tag}}: The item's '''tag''' tag.
{{:Player.dat_format/Compasses}}
</div>
{{el|bedrock}}:
: See [[Bedrock Edition level format/Item format]].
== Advancements ==
{{load advancements|Country Lode}}
== History ==
{{History|java alpha}}
{{History||v1.1.0|[[File:Compass JE1.gif|32px]] Added compasses.
|They have 102 visually distinct frames due to how the texture is generated - see the section below.}}
{{History|java beta}}
{{History||1.8|snap=Pre-release|Compasses can now be found in library [[chest]]s in the new [[strongholds]].}}
{{History|java}}
{{History||1.3.1|snap=12w21a|Librarian [[villager]]s now [[trading|sell]] 1 compass for 10–11 [[emerald]]s, making them [[renewable]].}}
{{History||1.4.2|snap=12w34a|Since the mapping system has been changed, a compass can now be used to [[crafting|craft]] an empty [[map]].}}
{{History||1.5|snap=13w02a|[[File:Compass JE2 BE2.gif|32px]] Compasses now, instead of splitting two textures, use the new animation feature included in texture packs. As a result, they are considerably less precise, having only 29 visually distinct frames. }}
{{History||1.8|snap=14w02a|Librarian villagers now sell 1 compass for 10–12 emeralds.}}
{{History||1.9|snap=15w31a|Compasses are now broken up into individual textures, instead of having every individual frame on one vertical strip like with animated textures.}}
{{History|||snap=15w43a|The average yield of compasses in [[stronghold]] library [[chest]]s has been increased.}}
{{History||1.11|snap=16w39a|Cartographer [[villager]]s have been added, who [[trading|buy]] compasses as their tier 2 trade.}}
{{History||1.13|snap=17w47a|Prior to [[1.13/Flattening|''The Flattening'']], this [[item]]'s numeral ID was 345.}}
{{History|||snap=18w11a|Compasses can now generate in [[shipwreck]] [[chest]]s.}}
{{History||1.14|snap=18w48a|Compasses can now generate in chests in [[village]] cartographer houses.}}
{{History||1.16|snap=20w13a|[[File:Lodestone Compass JE1.gif|32px]] Compasses can now be used on [[lodestone]]s to make them point to the stones.
|Compasses now point to the center of the spawn point block, instead of its north-west corner.}}
{{History|||snap=20w14a|Compasses now have the <code>LodestonePos</code>, <code>LodestoneDimension</code>, and <code>LodestoneTracked</code> data fields. If <code>LodestoneTracked</code> is zero, the game skips checking for a lodestone in the specified position.
|Compasses can now have the [[Curse of Vanishing]] [[enchantment]] on them.}}
{{History|||snap=20w19a|Compasses no longer work in the [[recipe book]].<ref>{{bug|MC-116293}}</ref>}}
{{History|||snap=20w22a|Compasses no longer work in the villager trading GUI.<ref>{{bug|MC-182888}}</ref>}}
{{History||1.17|snap=20w48a|[[File:Compass JE3.gif|32px]] [[File:Lodestone Compass JE2.gif|32px]] The textures of compass and lodestone compass have been changed.}}
{{History||1.19|snap=22w13a|Compasses may now be found in [[ancient city]] [[chest]]s.}}
{{History|||snap=22w14a|Compasses can now used to craft [[recovery compass]]es.}}
{{History|pocket alpha}}
{{History||v0.2.0|[[File:Compass BE1.png|32px]] Added compasses.
|Compasses currently have no function or legitimate method of obtaining them.}}
{{History||v0.8.0|snap=build 1|[[File:Compass JE2 BE2.gif|32px]] Added animated texture to compasses.
|Compasses are now functional and [[crafting|craftable]]. They have been added into the Creative Inventory.}}
{{History||v0.14.0|snap=build 1|Compasses must now be added to a [[map]] using an [[anvil]] to add the location marker.}}
{{History|pocket}}
{{History||1.0.0|snap=?|[[Windows 10 Edition]] can now use the [[anvil]], as well as the [[crafting table]], to apply position markers, with compasses just as [[Pocket Edition]] can in general.}}
{{History||1.0.4|snap=alpha 1.0.4.0|Librarian [[villager]]s now [[trading|sell]] 1 compass for 10–12 [[emerald]]s.}}
{{History||1.1.0|snap=alpha 1.1.0.3|Cartographer villagers have been added, who [[trading|buy]] compasses as part of their tier 2 trade.
|Compasses used with emeralds can be used to buy explorer maps as part of cartographer villagers' fourth tiers trade.}}
{{History|bedrock}}
{{History||1.4.0|snap=beta 1.2.14.2|Compasses can now be found inside map room [[chest]]s in [[shipwreck]]s.}}
{{History||1.10.0|snap=beta 1.10.0.3|Compasses can now be found in [[village]] cartographer house chests.}}
{{History||1.11.0|snap=beta 1.11.0.4|[[Trading]] has been changed, cartographer [[villager]]s now [[trading|buy]] compassess as part of their fourth tier trades.
|Compasses used with [[emerald]]s can now be used to buy explorer maps as part of cartographer and fletcher villagers' third tier trades.
|Librarian villagers now have a {{frac|1|3}} chance to [[trading|sell]] compasses for 4 emeralds as part of their fourth tier trades.}}
{{History||1.16.0|snap=beta 1.16.0.57|[[File:Lodestone Compass BE1.gif|32px]] Compasses can now be used on [[lodestone]]s to make them point to the stones.
|Compasses now have the <code>LodestonePos</code>, <code>LodestoneDimension</code>, and <code>LodestoneTracked</code> data fields. If <code>LodestoneTracked</code> is zero, the game skips checking for a lodestone in the specified position.
|Compasses can now have the [[Curse of Vanishing]] [[enchantment]] on them.}}
{{History||1.16.100|snap=beta 1.16.100.56|Changed the ID {{code|lodestonecompass}} to {{code|lodestone_compass}}.}}
{{History||1.17.0|snap=beta 1.17.0.54|[[File:Compass JE3.gif|32px]] The texture of compass has been changed.}}
{{History||1.18.10|snap=beta 1.18.10.20|[[File:Lodestone Compass JE2.gif|32px]] The texture of lodestone compass has been changed.}}
{{History|console}}
{{History||xbox=TU1|xbone=CU1|ps=1.0|wiiu=Patch 1|switch=1.0.1|[[File:Compass JE2 BE2.gif|32px]] Added compasses.}}
{{History|New Nintendo 3DS Edition}}
{{History||0.1.0|[[File:Compass JE2 BE2.gif|32px]] Added compasses.}}
{{History|foot}}
=== Texture generation prior to Java Edition 13w02a ===
{{:Procedural animated texture generation/Compasses}}
== Issues ==
{{issue list}}
== Gallery ==
<gallery>
12w21a CompassPurchase.png|Purchasing a compass from a librarian [[villager]].
</gallery>
== See also ==
*[[Clock]]
*[[Tutorials/Navigation|Navigation]]
== External Links ==
*[https://www.minecraft.net/en-us/article/taking-inventory--compass Taking Inventory: Compass] – Minecraft.net on August 15, 2019
{{Items}}
[[Category:Tools]]
[[Category:Renewable resources]]
[[cs:Kompas]]
[[de:Kompass]]
[[es:Brújula]]
[[fr:Boussole]]
[[hu:Iránytű]]
[[it:Bussola]]
[[ja:コンパス]]
[[ko:나침반]]
[[nl:Kompas]]
[[pl:Kompas]]
[[pt:Bússola]]
[[ru:Компас]]
[[uk:Компас]]
[[zh:指南针]]</li><li>[[Emerald|Emerald]]<br/>{{About|the item|the currency in ''Minecraft Dungeons''|MCD:Emerald|the skin|MCD:Emerald (skin)|the ore|Emerald Ore|the mineral block|Block of Emerald}}
{{Item
| image = Emerald.png
| renewable = Yes
| stackable = Yes (64)
| rarity = Common}}
'''Emeralds''' are rare minerals that are used primarily as the currency for [[trading]] with [[villager]]s and [[wandering trader]]s. Naturally-occurring emeralds are rarer than [[diamond]]s.
== Obtaining ==
=== Trading (how emerald is renewable) ===
{{main|Trading}}
Emeralds can be obtained by trading with [[villager]]s, since they are the currency that villagers use for trading. Villagers either buy or sell specific goods for emeralds. Some villagers trade stuff that is renewable with emerald.
=== Mining ===
[[Emerald ore]] drops one emerald when mined using an iron or better [[pickaxe]]. If the pickaxe is enchanted with [[Fortune]], it may drop an extra emerald per level of Fortune, up to a maximum of 4 emeralds with Fortune III. If the ore is mined using a pickaxe enchanted with [[Silk Touch]], it drops itself in ore form instead of an emerald.
=== Crafting ===
{{Crafting
|Block of Emerald
|Output= Emerald,9
|type= Material
}}
=== Smelting ===
{{Smelting
|Emerald Ore; Deepslate Emerald Ore
|Emerald
|1
}}
=== Natural generation ===
{{see also|Emerald Ore#Natural generation}}
Emeralds can generate in [[chest]]s in some [[village]] houses or other generated [[Generated structures|structures]].
{{needs update|inaccurate=1|section=1}}
{{LootChestItem|emerald}}
=== Drops ===
[[Vindicator]]s and [[evoker]]s drop 0–1 emeralds upon death. [[Looting]] increases the maximum emerald drop by one per level, for a maximum of 4 emeralds with Looting III.
[[Fox]]es that are holding emeralds also have a chance of 100% to drop the emerald they are holding upon death. Alternatively, the player can drop a food item to entice the fox to drop the emerald without killing it.
{{IN|bedrock}}, vindicators and [[pillager]]s spawned from [[raids]] can drop 0–1 emeralds. Depending on difficulty, vindicators and pillagers spawned from raids also have a chance of dropping additional emeralds. There is a 65% chance of dropping on easy and normal, and an 80% chance of dropping on hard. If this additional drop condition is met, different emerald counts can drop with different chances. There is a {{frac|10|39}} chance to drop an additional 0–1 emeralds, a {{frac|5|39}} chance to drop an additional 2–3, and a {{frac|2|39}} chance to drop an additional 4–5.
{{IN|bedrock}}, with Looting III, it is possible for a vindicator in a raid to drop up to 16 emeralds upon death (vindicator drops + raid drops + an additional drop<!-- emerald from 2/39 chance-->).
== Usage ==
=== Trading ===
{{main|Trading}}
Emeralds are primarily used as currency for [[trading]] with villagers and wandering traders. Trading is typically a faster way to obtain emeralds than by mining, as an emerald ore is rarer than a diamond ore.
=== Crafting ingredient ===
{{crafting usage}}
===Beacons===
Emeralds can be used to select powers from a [[beacon]]. The player must select one of the available powers and then insert an emerald into the item slot.
An emerald can be substituted for an [[iron ingot]], a [[gold ingot]], a [[diamond]] or a [[netherite ingot]] in a beacon.
=== Smithing ingredient ===
{{Smithing
|head=1
|ingredients=Any Armor Trim +<br/>Any Armor Piece + <br/>Emerald
|Any Armor Trim Smithing Template
|Netherite Chestplate
|Emerald
|Emerald Trim Netherite Chestplate
|showdescription=1
|description = All armor types can be used in this recipe,<br/>a netherite chestplate is shown as an example.
|tail=1
}}
;Trim color palette
The following color palette is shown on the designs on trimmed armor:
*{{TrimPalette|emerald}}
== Achievements ==
{{load achievements|The Haggler;Buy Low;Master Trader}}
== Advancements ==
{{load advancements|What a Deal!}}
== Data values ==
=== ID ===
{{edition|java}}:
{{ID table
|edition=java
|showitemtags=y
|showforms=y
|generatetranslationkeys=y
|displayname=Emerald
|spritetype=item
|nameid=emerald
|itemtags=beacon_payment_items
|form=item
|foot=1}}
{{edition|bedrock}}:
{{ID table
|edition=bedrock
|shownumericids=y
|showforms=y
|notshowbeitemforms=y
|generatetranslationkeys=y
|displayname=Emerald
|spritetype=item
|nameid=emerald
|id=512
|form=item
|foot=1}}
== History ==
{{History|java indev}}
{{History||0.31|snap=20100129|Added [[diamond]]s, referred to as emeralds in the code.}}
{{History|java}}
{{History||May 21, 2012|link={{tweet|jeb_|204619936616808451}}|[[File:Ruby pJE20120521.png|32px]] [[Jens Bergensten|Jeb]] released a screenshot of himself testing the [[trading]] system. At this time, what would become emeralds were [[History_of_textures/Unused_textures#Ruby|rubies]].<ref>http://www.minecraftforum.net/topic/1621716-15-new-blocksitems/#entry19977082</ref>}}
{{History||1.3.1|snap=12w21a|[[File:Emerald JE1 BE1.png|32px]] Added emeralds and [[emerald ore]].
|Emeralds can be [[trading|traded]] with [[villager]]s in exchange for different [[item]]s.
|Added [[desert temple]]s, with a hidden [[chest]] room and loot containing emeralds.
|[[File:Ruby JE1 BE1.png|32px]] The texture of [[History_of_textures/Unused_textures#Ruby|rubies]] can be found in the (at this time unused) file {{cd|items.png}}.<ref name="en_US 12w21">Snapshot 12w21a/b ''lang/en_US.lang'': '''item.ruby.name=Ruby'''</ref>}}
{{History|||snap=12w22a|[[Block of emerald]] has now been added, which is [[crafting|crafted]] from nine emeralds and can be placed as a decorative [[block]].
|Added [[jungle temple]]s, which contain loot [[chest]]s with emeralds.}}
{{History||1.4.2|snap=12w32a|As [[zombie villager]]s can now spawn and be cured, emeralds can now still be obtained in [[trading|trades]] even if [[generated structures]] are disabled.}}
{{history||1.9|snap=15w31a|Emeralds now generate in [[end city]] ship [[chest]]s.}}
{{history|||snap=15w43a|Emeralds now generate in [[igloo]] basement chests.}}
{{history|||snap=15w44a|The average yield of emeralds in [[desert temple]] chests has now been increased.}}
{{History||1.11|snap=16w39a|Added [[vindicator]]s and [[evoker]]s, which drop emeralds if killed by a player.}}
{{History||1.13|snap=17w47a|Prior to [[1.13/Flattening|''The Flattening'']], this [[item]]'s numeral ID was 388.}}
{{History|||snap=18w09a|Emeralds can now generate in the loot [[chest]]s of [[underwater ruins]].}}
{{History|||snap=18w10a|Emeralds can now generate in [[buried treasure]] chests.}}
{{History|||snap=18w11a|Emeralds can now generate in the chests of [[shipwreck]]s.}}
{{History||1.14|snap=18w43a|[[File:Emerald JE2 BE2.png|32px]] The texture of emeralds has now been changed.
|Added [[pillager]]s, which can [[drops|drop]] emeralds.}}
{{History|||snap=18w46a|Pillagers no longer drop emeralds.}}
{{History|||snap=18w48a|Emeralds now generate in chests in [[village]] tanneries, fisher cottages and plains village houses.}}
{{History|||snap=18w49a|Emeralds now generate in chests in [[village]] shepherd houses, mason houses, butcher shops, and savanna and snowy village houses.}}
{{History|||snap=18w50a|Emeralds now generate in chests in [[village]] fletcher houses, temples, and desert and taiga village houses.}}
{{History|||snap=19w07a|Added [[fox]]es, which sometimes spawn with emeralds in their mouths.}}
{{History|||snap=19w08a|[[File:Emerald JE3 BE3.png|32px]] The texture of emeralds has now been changed, once again and it looks smaller.}}
{{History||1.17|snap=21w13a|The unused [[History_of_textures/Unused_textures#Ruby|rubies]] texture was removed.}}
{{History||1.20<br>(Experimental)|link=1.19.4|snap=23w04a|Emeralds can now be used as an armor trim material.}}
{{History|||snap=23w07a|Emeralds now drop when brushing [[suspicious sand]] in [[desert pyramid]]s or [[desert well]]s.}}
{{History||1.20|snap=23w12a|The probability for the emerald to generate in the [[suspicious sand]] in [[desert temple]] and in [[desert well]] has been changed from 1/7 to 1/8.|Emerald can now be found in [[suspicious gravel]] and [[suspicious sand]] in cold and warm [[ocean ruins]] and in [[trail ruins]].}}
{{History|||snap=23w16a|Emerald no longer generates in [[suspicious sand]] in [[trail ruins]].|Due to the split of the archaeological loot tables for the suspicious gravel within the [[trail ruins]]; emerald now is in the common loot.}}
{{History|pocket alpha}}
{{History||v0.9.0|snap=build 1|[[File:Emerald JE1 BE1.png|32px]] Added emeralds.}}
{{History|||snap=build 5|Emeralds can now be used to craft [[blocks of emerald]].}}
{{History||v0.13.0|snap=build 1|Emeralds can now be found inside [[desert temple]] [[chest]]s.}}
{{History||v0.15.0|snap=build 1|Added [[jungle temple]]s, which contain loot chests with emeralds.}}
{{History||v0.16.0|snap=build 1|Emeralds can now be used to power [[beacon]]s.}}
{{History|pocket}}
{{History||1.0.0|snap=alpha 0.17.0.1|Emeralds can now be found in [[end city]] ship [[chest]]s.
|Emeralds can now be found in [[igloo]] basement chests.}}
{{History||1.0.4|snap=alpha 1.0.4.0|Emeralds are now used as "currency" for [[villager]] [[trading]].}}
{{History||1.1.0|snap=alpha 1.1.0.0|Added [[evoker]]s and [[vindicator]]s, which [[drops|drop]] emeralds when killed.}}
{{History|bedrock}}
{{History||1.4.0|snap=beta 1.2.14.2|Emeralds can now be found in some [[shipwreck]] [[chest]]s.}}
{{History|||snap=beta 1.2.20.1|Emeralds can now be found inside [[underwater ruins]] chests.}}
{{History||1.10.0|snap=beta 1.10.0.3|Emeralds can now be used to [[trading|buy]] items from [[wandering trader]]s.
|Emeralds can now be found in [[plains]] [[village]] house and tannery [[chest]]s.
|[[File:Emerald JE2 BE2.png|32px]] The texture of emeralds has now been changed.}}
{{History||1.11.0|snap=beta 1.11.0.1|Emeralds can now be found in [[village]] [[chest]]s other than [[plains]].}}
{{History|||snap=beta 1.11.0.4|[[Vindicator]]s and [[pillager]]s that spawn from [[raid]]s can now [[drops|drop]] bonus emeralds.}}
{{History|||snap=beta 1.11.0.5|[[File:Emerald JE3 BE3.png|32px]] The texture of emeralds has now been changed, once again.}}
{{History||1.13.0|snap=beta 1.13.0.1|Added [[fox]]es, which can [[drops|drop]] emeralds.}}
{{History||Next Major Update<br>(Experimental)|link=Bedrock Edition 1.19.70|snap=beta 1.19.70.23|Emeralds now drop when brushing [[suspicious sand]] in [[desert pyramid]]s or [[desert well]]s.}}
{{History|||snap=beta 1.19.80.21|Emeralds can now be used as an armor trim material.}}
{{History|console}}
{{History||xbox=TU14|xbone=CU1|ps=1.04|wiiu=Patch 1|switch=1.0.1|[[File:Emerald JE1 BE1.png|32px]] Added emeralds.}}
{{History|Ps4}}
{{History||1.90|[[File:Emerald JE2 BE2.png|32px]] The texture of emeralds has now been changed.}}
{{History|new3DS}}
{{History||0.1.0|[[File:Emerald JE1 BE1.png|32px]] Added emeralds.}}
{{History|foot}}
== Issues ==
{{issue list}}
== Gallery ==
<gallery>
Villager trading preview.png|The first image of the trading system released by [[Jeb]]. What would become emeralds can be seen in the [[inventory]] space.
Emerald Ore 12w21a.png|A wall of [[emerald ore]] utilizing a previous texture in snapshot [[12w21a]].
Room of Emeralds.png|All forms of emeralds in one photo: emerald (in the form of [[emerald block|block]], [[emerald ore|ore]] and the emerald itself).
</gallery>
==Trivia==
*The [[History_of_textures/Unused_textures#Ruby|ruby]] was going to be the [[villager]] currency but was changed to emeralds before the update's release.
== References ==
{{Reflist}}
{{Items}}
[[Category:Renewable resources]]
[[cs:Smaragd]]
[[de:Smaragd]]
[[es:Esmeralda]]
[[fr:Émeraude]]
[[hu:Smaragd]]
[[it:Smeraldo]]
[[ja:エメラルド]]
[[ko:에메랄드]]
[[nl:Smaragd]]
[[pl:Szmaragd]]
[[pt:Esmeralda]]
[[ru:Изумруд]]
[[th:มรกต]]
[[tr:Zümrüt]]
[[uk:Смарагд]]
[[zh:绿宝石]]</li></ul> | Creepers can now climb ladders. | ||||
0.12.1{{Extension DPL}}<ul><li>[[Blaze Rod|Blaze Rod]]<br/>{{Item
| image = Blaze Rod.png
| renewable = Yes
| stackable = Yes (64)
}}
'''Blaze rods''' are [[item]]s exclusively obtained from [[blaze]]s. They act as a fuel for both brewing and [[smelting]], and are required to craft [[eye of ender|eyes of ender]] used to access to [[the End]].
== Obtaining ==
=== Mob loot ===
When killed by a player or tamed [[wolf]], a [[blaze]] has a 50% chance to drop a blaze rod. The [[Looting]] [[enchantment]] can increase the drops by one per level, for a maximum of 4 blaze rods. Blazes do not drop any blaze rods if killed by any other source.
== Usage ==
=== Crafting ingredient ===
{{crafting usage}}
=== Fuel ===
When used in a [[furnace]], a blaze rod lasts 120 seconds (12 items).
== Achievements ==
{{load achievements|Into Fire}}
== Advancements ==
{{load advancements|Into Fire}}
== Video ==
{{Video note|This video does not mention the crafting of [[End Rod]]s.|minor}}
<div style="text-align:center">{{yt|_mhRHuRlICY}}</div>
== Data values ==
=== ID ===
{{el|java}}:
{{ID table
|edition=java
|showforms=y
|generatetranslationkeys=y
|displayname=Blaze Rod
|spritetype=item
|nameid=blaze_rod
|form=item
|foot=1}}
{{el|bedrock}}:
{{ID table
|edition=bedrock
|shownumericids=y
|showforms=y
|notshowbeitemforms=y
|generatetranslationkeys=y
|displayname=Blaze Rod
|spritetype=item
|nameid=blaze_rod
|id=423
|form=item
|foot=1}}
== History ==
{{History|java}}
{{History||1.0.0|snap=Beta 1.9 Prerelease|[[File:Blaze Rod JE1 BE1.png|32px]] Added blaze rods.}}
{{History|||snap=Beta 1.9 Prerelease 2|Blaze rods are now used to craft [[blaze powder]].}}
{{History|||snap=Beta 1.9 Prerelease 3|Blaze rods are now used to craft [[brewing stand]]s.}}
{{History||1.8|snap=14w07a|Blaze rods are now held similarly to [[tools]].}}
{{History||1.9|snap=15w44b|Blaze rods are now used to craft [[end rod]]s.}}
{{History||1.13|snap=17w47a|Prior to [[1.13/Flattening|''The Flattening'']], this [[item]]'s numeral ID was 369.}}
{{History|pocket alpha}}
{{History||v0.12.1|snap=build 1|[[File:Blaze Rod JE1 BE1.png|32px]] Added blaze rods.
|Blaze rods can be used to craft [[blaze powder]] and [[brewing stand]]s.}}
{{History|pocket}}
{{History||1.0.0|snap=alpha 0.17.0.1|Blaze rods are now used to craft [[end rod]]s.}}
{{History|console}}
{{History||xbox=TU7|xbone=CU1|ps=1.00|wiiu=Patch 1|switch=1.0.1|[[File:Blaze Rod JE1 BE1.png|32px]] Added blaze rods.
|Blaze rods can be used to craft [[blaze powder]] and [[brewing stand]]s.}}
{{History||xbox=TU46|xbone=CU36|ps=1.38|wiiu=Patch 15|Blaze rods are now used to craft [[end rod]]s.}}
{{History|New 3DS}}
{{History||0.1.0|[[File:Blaze Rod JE1 BE1.png|32px]] Added blaze rods.
|Blaze rods can be used to craft [[blaze powder]] and [[brewing stand]]s.}}
{{History|foot}}
== Issues ==
{{issue list}}
== Trivia ==
* As part of an official collaboration, blaze rods are included in a free add-on for the roleplaying game [https://en.wikipedia.org/wiki/Dungeons_%26_Dragons ''Dungeons and Dragons''].<ref>https://www.google.com/url?sa=t&rct=j&q=&esrc=s&source=web&cd=&cad=rja&uact=8&ved=2ahUKEwj9uvqlwIT-AhV7LUQIHYlVDiwQFnoECBAQAQ&url=https%3A%2F%2Fwww.minecraft.net%2Fcontent%2Fdam%2Fgames%2Fminecraft%2Fsoftware%2FMinecraft-Monstrous-Compendium.pdf&usg=AOvVaw0aKOqpKAHSH11qgZhN_Bhx</ref> In the game, they are worth 100 gold pieces, create light, and can be broken to create an explosion.
* They are the spinning things surrounding the blaze's head
{{items}}
== References ==
{{Reflist}}
[[Category:Renewable resources]]
[[cs:Ohnivá hůl]]
[[de:Lohenrute]]
[[el:Οι ράβδοι των Blaze]]
[[es:Vara de blaze]]
[[fr:Bâton de Blaze]]
[[hu:Lángrúd]]
[[it:Verga di blaze]]
[[ja:ブレイズロッド]]
[[ko:블레이즈 막대]]
[[lzh:炎靈桿]]
[[nl:Blazestaf]]
[[pl:Płomienna różdżka]]
[[pt:Vara de blaze]]
[[ru:Огненный стержень]]
[[th:แท่งเบลซ]]
[[tr:Alaz Çubuğu]]
[[uk:Стрижень Блейза]]
[[zh:烈焰棒]]</li><li>[[Black Dye|Black Dye]]<br/>{{Item
| image = Black Dye.png
| renewable = Yes
| stackable = Yes (64)
}}
'''Black dye''' is a [[Dye#Primary|primary color dye]] similar to an [[ink sac]].
== Obtaining ==
=== Trading ===
[[Wandering trader]]s have a chance to [[trading|trade]] 3 black dyes for 1 [[emerald]].{{only|java}}
=== Crafting ===
{{Crafting
|head=1
|showname=0
|Ink Sac
|Output=Black Dye
|type=Material
}}
{{Crafting
|Wither Rose
|Output=Black Dye
|type=Material
|foot=1
}}
== Usage ==
{{dye usage}}
=== Crafting ingredient ===
{{crafting usage|ignore=Banner|continue=1}}
{{banner crafting usage}}
=== Loom ingredient ===
{{Banner loom usage|Black Dye}}
=== Trading ===
Apprentice-level Shepherd villagers have a 20%{{only|bedrock}} or {{frac|2|7}}{{only|java}} chance to buy 12 black dye for an emerald.
== Data values ==
=== ID ===
{{edition|java}}:
{{ID table
|edition=java
|showforms=y
|generatetranslationkeys=y
|displayname=Black Dye
|spritetype=item
|nameid=black_dye
|form=item
|foot=1}}
{{edition|bedrock}}:
{{ID table
|edition=bedrock
|showaliasids=y
|shownumericids=y
|showforms=y
|notshowbeitemforms=y
|generatetranslationkeys=y
|displayname=Black Dye
|spritetype=item
|nameid=black_dye
|aliasid=dye / 16
|id=395
|form=item
|translationkey=item.dye.black_new.name
|foot=1}}
== History ==
{{History|java}}
{{History||1.14|snap=18w43a|[[File:Black Dye JE1 BE1.png|32px]] Added black dye.}}
{{History|||snap=18w44a|Black dyes now can changed the text color on the [[sign]]s to black.}}
{{History|||snap=19w05a|Added the [[wandering trader]], which sell black dyes.}}
{{History|||snap=19w11a|Black dyes can now be [[trading|bought]] by shepherd villagers.}}
{{History||1.15|snap=Pre-release 1|Black dye can now be used to craft [[prismarine|dark prismarine]], just like [[Bedrock Edition]].}}
{{History||1.17|snap=20w45a|Black dyes can now used to craft newly added [[black candle]]s.}}
{{History|||snap=21w19a|Black dyes can no longer used to craft black candles.}}
{{History|||snap=Pre-release 1|Black dyes can once again used to craft black candles.}}
{{History||1.20<br>(Experimental)|link=1.19.3|snap=22w42a|Black dyes now can change the text color on [[hanging sign]]s to black.}}
{{History|bedrock}}
{{History||1.8.0|snap=beta 1.8.0.10|[[File:Black Dye JE1 BE1.png|32px]] Added black dye.}}
{{History||1.11.0|snap=beta 1.11.0.4|Black dye can now be [[trading|sold]] to shepherd [[villager]]s.}}
{{history||1.13.0|snap=beta 1.13.0.9|Black dye can now be [[crafting|crafted]] from [[flower|wither roses]].}}
{{History||1.16.100|snap=beta 1.16.100.56|The ID of black dye has been changed from <code>dye/16</code> to <code>black_dye</code>.}}
{{History|ps4}}
{{History||1.83|[[File:Black Dye JE1 BE1.png|32px]] Added black dye.}}
{{History|foot}}
== Issues ==
{{issue list}}
{{Items}}
[[Category:Dyes]]
[[Category:Renewable resources]]
[[de:Schwarzer Farbstoff]]
[[es:Tinte negro]]
[[fr:Teinture noire]]
[[ja:黒色の染料]]
[[ko:검은색 염료]]
[[pl:Czarny barwnik]]
[[pt:Corante preto]]
[[th:สีย้อมสีดำ]]
[[zh:黑色染料]]</li></ul> | build 1 | Creepers use the new AI again. | |||
| Creepers become charged when struck by lightning, increasing the explosion's radius and strength. | |||||
| Creepers now have the new explosion sound. | |||||
| Creepers now have the flashing animation. | |||||
0.14.0{{Extension DPL}}<ul><li>[[Popped Chorus Fruit|Popped Chorus Fruit]]<br/>{{Item
| image = Popped Chorus Fruit.png
| renewable = Yes
| stackable = Yes (64)
}}
'''Popped chorus fruit''' is an [[item]] obtained by [[smelting]] [[chorus fruit]], and used to craft [[End Rod|end rods]] and [[purpur blocks]]. Unlike raw chorus fruit, the popped fruit is inedible.
== Obtaining ==
=== Smelting ===
{{Smelting
|Chorus Fruit
|Popped Chorus Fruit
|0,1
}}
== Usage ==
=== Crafting ingredient ===
{{crafting usage}}
== Data values ==
=== ID ===
{{edition|java}}:
{{ID table
|edition=java
|showforms=y
|generatetranslationkeys=y
|displayname=Popped Chorus Fruit
|spritetype=item
|nameid=popped_chorus_fruit
|form=item
|foot=1}}
{{edition|bedrock}}:
{{ID table
|edition=bedrock
|showaliasids=y
|shownumericids=y
|showforms=y
|notshowbeitemforms=y
|generatetranslationkeys=y
|displayname=Popped Chorus Fruit
|spritetype=item
|nameid=popped_chorus_fruit
|aliasid=chorus_fruit_popped
|id=559
|form=item
|translationkey=item.chorus_fruit_popped.name
|foot=1}}
== History ==
{{History|java}}
{{History||1.9|snap=15w31a|[[File:Popped Chorus Fruit JE1 BE1.png|32px]] Added popped chorus fruit.
|Popped chorus fruit are used to craft [[purpur block]]s.}}
{{History|||snap=15w44b|Popped chorus fruit are now used to craft [[end rod]]s.}}
{{History||1.13|snap=17w47a|Prior to [[1.13/Flattening|''The Flattening'']], this [[item]]'s numeral ID was 433.}}
{{History|||snap=pre5|The ID of popped chorus fruit has now been changed to <code>popped_chorus_fruit</code>.}}
{{History||1.14|snap=18w43a|[[File:Popped Chorus Fruit JE2 BE2.png|32px]] The texture of popped chorus fruit has now been changed.}}
{{History|pocket}}
{{History||1.0.0|snap=alpha 0.17.0.1|[[File:Popped Chorus Fruit JE1 BE1.png|32px]] Added popped chorus fruit.}}
{{History|bedrock}}
{{History||1.10.0|snap=beta 1.10.0.3|[[File:Popped Chorus Fruit JE2 BE2.png|32px]] The texture of popped chorus fruit has now been changed.}}
{{History||1.16.100|snap=beta 1.16.100.56|The ID of popped chorus fruit has been changed from <code>chorus_fruit_popped</code> to <code>popped_chorus_fruit</code>.}}
{{History|console}}
{{History||xbox=TU46|xbone=CU36|ps=1.38|wiiu=Patch 15|[[File:Popped Chorus Fruit JE1 BE1.png|32px]] Added popped chorus fruit.}}
{{History||xbox=none|xbone=none|ps=1.90|wiiu=none|switch=none|[[File:Popped Chorus Fruit JE2 BE2.png|32px]] The texture of popped chorus fruit has now been changed.}}
{{History|new 3ds}}
{{History||1.7.10|[[File:Popped Chorus Fruit JE1 BE1.png|32px]] Added popped chorus fruit.}}
{{History|foot}}
== Issues ==
{{issue list}}
{{Items}}
[[cs:Vypukaný květ chorusu]]
[[de:Geplatzte Chorusfrucht]]
[[fr:Chorus éclaté]]
[[it:Frutto di chorus scoppiato]]
[[ja:焼いたコーラスフルーツ]]
[[ko:튀긴 후렴과]]
[[nl:Gepoft Chorusfruit]]
[[pl:Prażony owoc refrenusu]]
[[pt:Fruta do coro cozida]]
[[ru:Приготовленный плод коруса]]
[[zh:爆裂紫颂果]]
[[Category:Renewable resources]]</li><li>[[Map|Map]]<br/>{{about|the craftable map|maps showing the locations of certain structures|Explorer Map|other uses|Map (disambiguation)}}
{{distinguish|World}}
{{Item
| image = Map Zoom 4.png
| renewable = Yes
| stackable = Yes (64)
}}
A '''map''' is an [[item]] used to view explored [[Chunk|terrain]] and mark landmarks.
==Obtaining==
===Crafting===
{{crafting
|head=1
|showname=0
|showdescription=1
|A1= Paper
|B1= Paper
|C1= Paper
|A2= Paper
|B2= Compass
|C2= Paper
|A3= Paper
|B3= Paper
|C3= Paper
|Output= Empty Map
|type= Miscellaneous
|description=This variation is called an "empty locator map" {{in|bedrock}}, or an "empty map" {{in|java}}.
When the player first creates a map, it is blank. It needs to be activated by holding it and pressing ''{{Control|use item}}''. after which it records terrain and location markers as the player travels within (or close to) the area it maps.
}}
{{crafting
|A1= Paper
|B1= Paper
|C1= Paper
|A2= Paper
|B2= Paper
|C2= Paper
|A3= Paper
|B3= Paper
|C3= Paper
|Output= Empty Map
|type= Miscellaneous
|description={{only|bedrock}}
This variation is called an "empty map". It does not show location markers. It is intended for cloning and zooming locator maps without having to consume an additional [[compass]] (thereby saving [[iron ingot]]s and [[redstone dust]]), but it can also be {{Control|use|text=activated}} and later converted to a locator map by combining it with a compass on an [[anvil]], [[crafting table]], or [[cartography table]].
|foot=1
}}
=== Natural generation ===
==== Chest loot ====
{{LootChestItem|empty-map,map
}}
=== Cartography table ===
A map can also be created using a single paper on a [[cartography table]] to create an empty map, or a paper with a compass for an empty locator map.{{only|bedrock}}
=== Starting map ===
{{exclusive|bedrock|section=1}}
When creating a new world {{in|bedrock}}, the player can enable the "Starting Map" option to spawn with an empty locator map in the hotbar. The map's zoom scale is 1:8. The map is updated only while the player holds it.
=== Trading ===
Novice-level cartographer [[Villager|villagers]] sell a single empty map for 7 [[Emerald|emeralds]] as their trades.
{{IN|java}}, cartographer villagers may give players with the [[Hero of the Village]] effect an empty map.
== Usage ==
{{See also|Tutorials/Mapping}}
=== Mapping ===
Crafting a map creates an empty map. The map is drawn for the first time when it is held and used (with ''{{control|use item}}''). This map can then be adjusted to different zoom levels. After conversion to a drawn map item, it starts to draw a top-down view of the player's surroundings, with North pointing to the top of the map. A pointed oval pointer indicates the player's position on the map, and moves in real-time as the player moves across the terrain shown on the map. The map does ''not'' center on the player when created, rather, the world is broken up into large invisible grid squares, and the map displays the area of whichever grid square it is in when it is first used. For example, if a player uses a new map in a certain grid square, and then moves a distance away and uses another fresh map but is still within the same grid square, both maps appear identical. To make a map that is not identical to the first one, the player would have to move outside of the edges of the first map (because then they would be in a new grid square). This way, no two maps of the same size can ever partially overlap and every map can display only a fixed area.
To record the world on a map, that specific map must be held in the player's hands while the player moves around the world. The world is recorded as-is during exploration, meaning that if the world is modified, a player must revisit the area while holding the map to update the map's view. Maps can also be [[Map#Cloning|cloned]]. If a player holds a map whose one or more clones are on display in item frames, updates are made on all clone-connected maps.
Other players are displayed on the map only if they have a map in their inventory cloned from the one being looked at. When placing a map into an [[item frame]], the map displays with a green pointer shown at the location of the item frame. This is to help the player see where they are in relation to the area that the map is showing. If the player leaves a map in an item frame and views a clone of it, the green pointer remains in the spot of the framed copy. This can be used to set up waypoints. Unexplored areas are transparent, making the item frame visible.
When the player leaves the area shown on a specific map, the player pointer transforms into a white dot that moves on that map. The marker shrinks to a smaller white dot if the player is far from the map's center: the area is 320 by 320 blocks per scale factor. The dot moves along the edge of the map to show the relative location of the player. However {{in|bedrock}}, the pointer remains as an arrow but shrinks until the player is near the area shown on the map.
While maps in [[the Nether]] work, they show only the red-and-gray pattern, regardless of the blocks placed. The only useful function is finding where the player is in relation to placed framed maps, which show as green pointers. Additionally, the player pointer rapidly spins and is not a good indicator of direction. Placing a [[banner]] in [[the Nether]] still shows it on the map as usual. Having a smaller map image while riding a [[strider]] in the Nether can help one to see one's footing while traveling over [[lava]].
{{IN|java}}, when using a map from another dimension, the map shows the player's position and direction when they were last in the dimension of the map. {{IN|bedrock}}, however, the player can use maps from one dimension while in another dimension. For locator maps, the place marker changes color depending on the dimension that the player is currently in (white for the Overworld, red for [[the Nether]], and magenta for [[the End]]). An Overworld map in the Nether shows the player's corresponding location and direction in the Overworld.<ref name=multiverse>{{ytl|EpP1diZdEdI}}</ref> Similarly, a Nether Map in the Overworld shows the player's corresponding location in the Overworld, but the place marker spins, just like a Nether map in the Nether. An Overworld map in the End shows the world spawn.<ref name=multiverse/> A Nether map cannot be used in the End — the map appears, but the place marker is not shown anywhere — and similarly, an End map cannot be used in the Overworld or the Nether.
A player can make a large piece of pixel art (128×128) facing upward, center a map on it, and place that map in an [[item frame]] to create a custom picture. Locking is recommended. See [[Map item format#Map Pixel Art]] for details on the techniques.
Maps display as a mini-map when held in the off-hand, or if the off-hand slot is occupied; the map is full-sized only when held in the dominant hand with both hands free.
A map always positions itself facing towards North when placed horizontally within an item frame regardless of how the map is placed.
=== Map content ===
{{Main|Map item format}}
Maps consist of square pixels arranged like pixels in a 128×128 square pattern, with each pixel representing a square portion of land. {{IN|java}}, the [[Map item format#Color table|color of a map pixel]] generally matches the color of the most common [[opaque]] block in the corresponding area, as seen from the sky. 'Minority blocks' in the target area have no effect on the color of the pixel, thus small features tend to be undetectable on zoomed-out maps.
{{IN|bedrock}}, the [[Map item format#Color table|color of a map pixel]] instead matches the single top-most opaque block in a grid sized by the map magnification pixel size (see the table in the "Player marker and pointer" section below). For example, a 3/4 magnification map has a pixel size of 8x8 blocks; this means the map will read only the top-most opaque blocks at the 0,0 coordinate, the 8,0 coordinate, the 0,8 coordinate, etcetera, ignoring all other blocks in the area. This means that {{in|bedrock}}, map pixel art requires only one block per pixel regardless of map magnification.
{{IN|bedrock}}, grass, foliage and water colors that are biome-dependent are represented accurately on a map.
{| class="wikitable"
|-
! style="width: 300px;" | {{el|je}}
! style="width: 300px;" | {{el|be}}
|-
| style="text-align: center;" | [[File:Map Zoom 4.png|alt=All banners marked on a map, alongside a named banner.|216px]]
| style="text-align: center;" | [[File:Map item BE.png|216px]]
|-
| Biome colors on ''Java Edition''.
| Biome colors on ''Bedrock Edition''.
|-
|}
Maps also show ground up to about 15 blocks below the surface of the water in oceans as slightly lighter blue, to show where the ground rises. This is not true with land above water. Higher elevations in the world mean lighter colors on the map. The map records the surface even as the player moves below the surface.
A standard map represents 128x128 blocks (1 block per pixel, 8x8 [[chunks]]) but maps can be zoomed-out to represent up to 2048x2048 blocks (16 square blocks per pixel, 128x128 [[chunks]]).
Some relevant distances: 64 blocks (4 chunks) is the update radius from a player in the Overworld and the End. However, it is half this (32 blocks) in the Nether. Also, 1024 blocks is the minimum Overworld distance from a [[nether portal]], at which players can build another portal and expect to reach a new location in the Nether. This is the distance across a 1:8 map, and also from a 1:16 map's center to its edge.
=== Player marker and pointer ===
{{IN|java}}, every map contains a marker that marks the position of the player, and points in the same direction as the player. When a player moves out of a map, a big white dot appears and moves relative to the player's position. The pointer either disappears when the player moves away a certain distance from the border of the map or, in case of [[explorer map]]s, the big white dot changes to a smaller white dot. The distance required for the small white dot to appear(explorer maps) or for the big dot to vanish (normal maps) changes with the scaling of the map.
* '''Level 0/4 :''' 128×128 blocks (each map pixel represents 1 block)
* '''Level 1/4 :''' 256×256 blocks (2×2 blocks per map pixel)
* '''Level 2/4 :''' 512×512 blocks (4×4 blocks per map pixel)
* '''Level 3/4 :''' 1024×1024 blocks (8×8 blocks per map pixel)
* '''Level 4/4 :''' 2048×2048 blocks (16×16 blocks per map pixel)
{{IN|bedrock}}, a map can be crafted with or without this marker, and a map without a position marker can add one later by adding a compass to the map. When a map is crafted without a compass, it's simply called an "empty map", but when crafted with a compass, it's called an "empty locator map". The marker also turns red if the player enters the Nether with an Overworld map and shows the player's Overworld location relative to the Nether location. A map created in the End has a purple marker showing the player's location. If an Overworld map is used in the End, a magenta dot appears on the player's spawn point.{{/BE|position}}
{{crafting
|name=Map<br>(with marker)
|ingredients=[[Map]] or Empty Map +<br>[[Compass]]
|showdescription=1
|Map (no markers);Empty Map
|Compass
|Output= Locator Map;Empty Locator Map
|type= Miscellaneous
|description={{el|be}} only.
Maps crafted from only paper do not show the location marker; to add it, a compass must be added to the map.
|foot=1
}}
{{IN|bedrock}}, a cartography table can also be used to add a pointer to create a locator map or empty locator map. This can be done by adding a compass to paper, or to an empty map or map.
=== Zooming out ===
[[File:Cartography table UI zoom.png|thumb|300px|{{IN|java}}, cartography table's UI, showing the map is being zoomed out.]]
A [[cartography table]] can also be used to zoom out, taking only one piece of paper per zoom level.
A blank map can not be zoomed out. A map has to have something already marked on it for the zooming to be possible.
{{Crafting
|A1= Paper |B1= Paper |C1= Paper
|A2= Paper |B2= Map;Locator Map |C2= Paper
|A3= Paper |B3= Paper |C3= Paper
|Output= Map;Locator Map
|showdescription=1
|description=Locator Map {{el|be}} only.
}}
{{/BE|zoom}}
==== Zoom details ====
The zooming function starts from when the map is created (zoom level 0) up to its fourth zoom step (zoom level 4).
{| class="wikitable" style="text-align: center" data-description="Zoom levels"
! colspan="2" |
! Zoom step 0
! Zoom step 1
! Zoom step 2
! Zoom step 3
! Zoom step 4
|-
! colspan="2" |
| [[File:Map Zoom 0.png|116px|Zoom step 0, 1:1]]
| [[File:Map Zoom 1.png|116px|Zoom step 1, 1:2]]
| [[File:Map Zoom 2.png|116px|Zoom step 2, 1:4]]
| [[File:Map Zoom 3.png|116px|Zoom step 3, 1:8]]
| [[File:Map Zoom 4.png|116px|Zoom step 4, 1:16]]
|-
! colspan="2" | Zoom level
| 0/4
| 1/4
| 2/4
| 3/4
| 4/4
|-
! colspan="2" | 1 map pixel represents
| 1 block
| 2×2 blocks
| 4×4 blocks
| 8×8 blocks
| 16×16 blocks<br>(1×1 chunk)
|-
! colspan="2" | Scaling ratio
| 1:1
| 1:2
| 1:4
| 1:8
| 1:16
|-
! rowspan="2" colspan="2" | Map covers an area of
| 128×128 blocks
| 256×256 blocks
| 512×512 blocks
| 1024×1024 blocks
| 2048×2048 blocks
|-
| 8×8 chunks
| 16×16 chunks
| 32×32 chunks
| 64×64 chunks
| 128×128 chunks
|-
! colspan="2" | Smallest discernible features
| Blocks
| Trees, Paths
| Lakes, Buildings
| Mountains, Rivers
| Biomes, Mountain Ranges
|-
! colspan="2" | Use cases
| Pixel art, Base plans
| Base surroundings
| Structure mapping
| Landscape mapping
| Biome mapping
|-
! rowspan="2" | Total paper needed to zoom out from Level 0
! in anvil{{only|bedrock|short=1}} or crafting table
| -
| {{ItemSprite|Paper}} 8
| {{ItemSprite|Paper}} 16
| {{ItemSprite|Paper}} 24
| {{ItemSprite|Paper}} 32
|-
! in cartography table
| -
| {{ItemSprite|Paper}} 1
| {{ItemSprite|Paper}} 2
| {{ItemSprite|Paper}} 3
| {{ItemSprite|Paper}} 4
|}
Maps are always aligned to a grid at all zoom levels. That means zooming out any different map in a specific area covered by that map always has the same center. As such, maps are aligned by map width (1024 blocks for a level 3 maps) minus 64. A level 3 map generated at spawn covers X and Z coordinates from -64 to 959. All maps generated in this area zoom out to the same coordinates, guaranteeing that they are always 'aligned' on a map wall. For a zoomed-out map to cover a new area, it must start with a base (level 0) map that is in that area.
At zoom level 0, a map created on the point (0,0) has (0,0) at the center of the map. At higher zoom levels of the same map, the coordinate (0,0) is in the top left square of the map.
{{IN|java}}, zoom level can be seen on a map by turning on Advanced Tooltips (a [[Debug screen#More debug keys|debug screen]] option that can be toggled by using the key combination {{key|F3+H}}). The tooltip of the map then shows the zoom level, scaling factors, and map ID.
=== Cloning ===
[[File:Cartography table UI clone.png|thumb|300px|{{IN|Java}}, cartography table's UI, showing the map is being cloned.]]
A mix of empty maps and empty locator maps may be used. Whether the cloned maps show position markers is dependent only on the input map.
A [[cartography table]] can also be used to clone a map.
The parts of the world that have already been explored and mapped are copied, and newly explored areas appear on both instances. If one of the maps is later zoomed out, then the maps lose their connection to each other and function as completely separate maps that have to be individually filled by exploring.
In Creative mode, a map in an item frame may be cloned by using {{control|pick block}} on it, as long as that map is not also in the player's inventory.
It doesn't matter if the map to be cloned is at a higher zoom level (made of more paper) than the blank map. Upon copying the map, both resulting maps have the same magnification as the starting map.
{{/BE|clone}}
=== Crafting ingredient ===
{{crafting usage|Map, Empty Map}}
=== Marking points ===
{{IN|java}} the player has the ability to mark spots on a map. To do this, {{control|use}} a map on a placed-down [[banner]], and the spot of the banner gets marked on the map. The mark takes the color of whatever the base color is for the banner, and if the banner has a name, the mark shows that name. Banner marks on a map are always oriented with their top facing north, regardless of the banner's actual orientation. If the banner is destroyed, the mark of the banner remains at first, but if the player gets closer to where the banner previously was, it disappears as the area is updated on the map.
If a map is mounted on an item frame and is within the area it depicts, the mounted map displays its current location with a green indicator rotated to match its orientation.
[[File:Map Marker Bedrock on Item frame.png|thumb|181x181px|{{IN|bedrock}} this is what a map lying on an item frame looks like, while showing markers.]]
{{IN|bedrock}} the player can place copies of locator maps in [[item frame]]s in order to create a land mark. The marker is a green dot that resembles the shape of the player's marker, but in green color. The position the marker points at depends on the direction the item frame is facing. It is worth noting that the markers work only on copies of the same map. Other maps of the same area do not show the existing markers that the player(s) had placed.
If a player has a cloned map in their inventory, their pointer appears white when viewed on the same map held by another player. Hence, if all players have the same cloned map in their inventory, all markers would appear white when the clone map is viewed.
{| class="wikitable"
|-
! style="width: 300px;" | {{el|je}}
! style="width: 300px;" | {{el|be}}
|-
| style="text-align: center;" | [[File:Banner marked map.png|alt=All banners marked on a map, alongside a named banner.|216px]]
| style="text-align: center;" | [[File:Tracking map with markers bedrock.png|216px]]
|-
| How every banner appears {{IN|java}} on a map, including named banners.
| {{IN|bedrock}} this is how a locator map shows map markers while held by a player.
|-
|}
===Locking===
[[File:Cartography table UI lock.png|thumb|300px|{{IN|Java}}, cartography table's UI, showing the map is being locked.]]
Maps can be locked when using a [[glass pane]] in a [[cartography table]]. This creates a new map containing the same data and locks it. All copies of this new map are also locked. A locked map never changes, even when the depicted terrain changes. {{IN|Be}}, locked maps have a unique texture.
{| class="wikitable" style="text-align: center;"
|-
! Condition
! style="width: 200px;" | Newly created map
! style="width: 200px;" | Map after terrain alteration
|-
! Unlocked map
| [[File:Map Zoom 0.png|174px]] || [[File:Unlocked Map.png|174px]]
|-
! Locked map
| [[File:Map Zoom 0.png|174px]] || [[File:Map Zoom 0.png|174px]]
|-
|}
{{-}}
== Sounds ==
{{Edition|Java}}:
{{Sound table
|rowspan=2
|sound=Drawmap1.ogg
|sound2=Drawmap2.ogg
|sound3=Drawmap3.ogg
|subtitle=Map drawn
|source=player
|description=When a map is drawn
|id=ui.cartography_table.take_result
|translationkey=subtitles.ui.cartography_table.take_result
|volume=1.0
|pitch=1.0
|distance=16}}
{{Sound table
|subtitle=Map drawn
|source=block
|description=When a map is edited using a cartography table
|id=ui.cartography_table.take_result
|translationkey=subtitles.ui.cartography_table.take_result
|volume=1.0
|pitch=1.0
|distance=16
|foot=1}}
{{Edition|Bedrock}}:
{{Sound table
|type=bedrock
|rowspan=2
|sound=Drawmap1.ogg
|sound2=Drawmap2.ogg
|sound3=Drawmap3.ogg
|source=block
|description=When a map is drawn<wbr>{{Upcoming|BE 1.20.20.20}}
|id=ui.cartography_table.take_result|idnote={{Verify|Could be block.cartography_table.use}}
|volume=0.8
|pitch=1.0}}
{{Sound table
|type=bedrock
|source=block
|description=When a map is edited using a cartography table
|id=ui.cartography_table.take_result
|volume=0.8
|pitch=1.0
|foot=1}}
== Data values ==
=== ID ===
{{edition|java}}:
{{ID table
|edition=java
|showforms=y
|generatetranslationkeys=y
|displayname=Empty Map
|spritetype=item
|nameid=map
|form=item}}
{{ID table
|displayname=Map
|spritetype=item
|nameid=filled_map
|form=item
|translationkey=item.minecraft.filled_map, filled_map.buried_treasure, filled_map.explorer_jungle{{upcoming|java 1.20.2}}, filled_map.explorer_swamp{{upcoming|java 1.20.2}}, filled_map.mansion, filled_map.monument, filled_map.unknown, filled_map.village_desert{{upcoming|java 1.20.2}}, filled_map.village_plains{{upcoming|java 1.20.2}}, filled_map.village_savanna{{upcoming|java 1.20.2}}, filled_map.village_snowy{{upcoming|java 1.20.2}}, filled_map.village_taiga{{upcoming|java 1.20.2}}
|foot=1}}
{{edition|bedrock}}:
{{ID table
|edition=bedrock
|showaliasids=y
|shownumericids=y
|showforms=y
|notshowbeitemforms=y
|generatetranslationkeys=y
|displayname=Empty Map
|spritetype=item
|nameid=empty_map
|aliasid=emptymap
|id=515
|form=item
|translationkey=item.emptyMap.name, item.emptyLocatorMap.name}}
{{ID table
|displayname=Map
|spritetype=item
|spritename=map-be
|nameid=filled_map
|aliasid=map
|id=420
|form=item
|translationkey=item.map.name, item.map.exploration.mansion.name, item.map.exploration.monument.name, item.map.exploration.treasure.name
|foot=1}}
=== Metadata ===
{{see also|Bedrock Edition data values}}
{{IN|bedrock}}, maps use the following data values:
{{/DV}}
=== Item data ===
{{el|java}}:
{{main|Player.dat format}}
<div class="treeview">
* {{nbt|compound|tag}}: The item's '''tag''' tag.
{{:Player.dat_format/Maps}}
</div>
{{el|bedrock}}:
: See [[Bedrock Edition level format/Item format]].
=== Map icons ===
{{see also|Player.dat format|Map item format|map_icons.png}}
Map icons are 8×8 in ''Java Edition'', but 16×16 in Bedrock Edition. As such, there are minor misalignment issues in ''Java Edition''.<ref>{{bug|MC-214649|||WF}}</ref>
[[File:Map icons.png|thumb|128px|Map icons texture {{in|Java}}]]
[[File:Map icons BE.png|thumb|128px|Map icons texture {{in|Bedrock}}]]
{| class="wikitable"
|-
! Java ID !! Bedrock ID !! Text ID !! Appearance !! Purpose !! Shown in item frames?
|-
| 0 || ||<code>player</code> || [[File:Player (texture) JE1 BE1.png|16px]] [[File:Player (texture) BE2.png|16px]] White marker || Players (on map) || No
|-
| 1 || 1 ||<code>frame</code> || [[File:Green Marker (texture) JE1 BE1.png|16px]] [[File:Green Marker (texture) BE2.png|16px]] Green marker || The current map in an item frame || Yes
|-
| 2 || ||<code>red_marker</code> || [[File:Red Marker (texture) JE1 BE1.png|16px]] [[File:Red Marker (texture) BE2.png|16px]] Red marker || Position converted to Overworld when opening Overworld map in the Nether{{Only|bedrock}} || No
|-
| 3 || ||<code>blue_marker</code> || [[File:Blue Marker (texture) JE1 BE1.png|16px]] [[File:Blue Marker (texture) BE2.png|16px]] Blue marker || Other players || No
|-
| 4 || ||<code>target_x</code> || [[File:Target X (texture) JE1 BE1.png|16px]] White X || Unused || Yes
|-
| 5 ||5
|<code>target_point</code> || [[File:Target Point (texture) JE1 BE1.png|16px]] [[File:Target Point (texture) BE2.png|16px]] Red triangle || Unused || Yes
|-
| 6 || 6 ||<code>player_off_map</code> || [[File:Player Off Map (texture) JE1 BE1.png|16px]] Large white dot || Players off map, nearby{{only|java}} || No
|-
| 7 || 13 ||<code>player_off_limits</code> || [[File:Player Off Limits (texture) JE1.png|16px]] [[File:Player Off Limits (texture) BE.png|16px]] Small white dot || Players off map, far away{{only|java}} || No
|-
| 8 ||14
|<code>mansion</code> || [[File:Mansion (texture) JE1.png|16px]] [[File:Mansion (Texture) BE2.png|frameless|16x16px]] Woodland mansion || Woodland mansion || Yes
|-
| 9 || 15 ||<code>monument</code> || [[File:Monument (texture) JE1.png|16px]] [[File:Monument Texture BE2.png|frameless|16x16px]] Ocean monument || Ocean monument || Yes
|-
| 10 - 25 || ||<code>{{tooltip|banner_*|banner_white, banner_orange, banner_magenta, banner_light_blue, banner_yellow, banner_lime, banner_pink, banner_gray, banner_light_gray, banner_cyan, banner_purple, banner_blue, banner_brown, banner_green, banner_red, banner_black}}</code> || [[File:Banner White (texture) JE1.png|16px]] [[File:Banner Light Gray (texture) JE1.png|16px]] [[File:Banner Gray (texture) JE1.png|16px]] [[File:Banner Black (texture) JE1.png|16px]] [[File:Banner Brown (texture) JE1.png|16px]] [[File:Banner Red (texture) JE1.png|16px]] [[File:Banner Orange (texture) JE1.png|16px]] [[File:Banner Yellow (texture) JE1.png|16px]] [[File:Banner Lime (texture) JE1.png|16px]] [[File:Banner Green (texture) JE1.png|16px]] [[File:Banner Cyan (texture) JE1.png|16px]] [[File:Banner Light Blue (texture) JE1.png|16px]] [[File:Banner Blue (texture) JE1.png|16px]] [[File:Banner Magenta (texture) JE1.png|16px]] [[File:Banner Purple (texture) JE1.png|16px]] [[File:Banner Pink (texture) JE1.png|16px]]<br>Banners in all 16 wool colors{{only|java}}|| Banner markers || Yes
|-
| 26 ||4
|<code>red_x</code> || [[File:Red X (texture) JE1.png|16px]] [[File:Target X (texture) BE2.png|16px]] Red X || Buried treasure || Yes
|-
| || 8 || || [[File:Magenta Marker (texture) BE1.png|16px]] Magenta marker
| Position converted to Overworld when opening Overworld map in the End{{Only|bedrock}} || No
|-
| || 9 || || [[File:Orange Marker (texture) BE1.png|16px]] Orange marker{{more info}}
|Other players
|Yes
|-
| || 10 || || [[File:Yellow Marker (texture) BE1.png|16px]] Yellow marker
| Other players || No
|-
| || 11 || || [[File:Cyan Marker (texture) BE1.png|16px]] Cyan marker
| Other players || No
|-
| -
|12
| || [[File:Green Point (texture) BE1.png|16px]] Green Triangle
| Other structure such as stronghold, fortress, end city, etc. when used as explorer map destination{{Only|bedrock}} || Yes
|}
It should be noted that even if the player used a NBT editor to add an additional icon on the map, ''Minecraft'' shows only the first one listed when the player loads up their world.
== Achievements ==
{{load achievements|Map Room}}
== History ==
{{see also|section=24|map_icons.png|Java Edition history of textures#Map icons}}
{{more images|section=24|{{bug|MC-72962}}}}
{{History||April 27, 2011|link=https://web.archive.org/web/0/http://notch.tumblr.com/post/4988431144/the-maps|[[Notch]] unveiled screenshots of the map.}}
{{History||April 28, 2011|link={{tweet|notch|63500114005721088}}|[[Notch]] said that he would try to make maps place-able on [[wall]]s.}}
{{History|java beta}}
{{History||1.6|snap=Test Build 3|[[File:Map (item) JE1 BE1.png|32px]] Added maps.}}
{{History||1.6.6|The ability to auto-craft maps using shift-click has been disabled.}}
{{History||1.8|snap=Pre-release|Maps can now be found in library chests in the brand-new [[stronghold]]s.
|Auto crafting maps has been restored. Map cloning, therefore, is unavailable for a period of time.}}
{{History||1.8.1|Maps now work both while walking and flying.}}
{{History|java}}
{{History||1.0.0|snap=Beta 1.9 Prerelease 5|Prior to this update, the [[sun]] in ''[[Minecraft]]'' rose in the North, which threw off many [[player]]s and led to a common misconception that ''Minecraft'' maps/[[world]]s were oriented with East at the top. The sun now rises in the east and sets in the west, making navigation much more intuitive.
|Before the change in sun position, it was commonly said that ''Minecraft'' maps/worlds are oriented with East at the top; sunrise, by definition, occurs at the East, which means it is certainly true that the maps were oriented "East" since the Sun rose from the top (North). However, [[Jeb]] asserted (and [[Notch]] agreed) that the sun rose in the north.<ref>{{Tweet|jeb|87815841160237056}}</ref><ref>{{Tweet|notch|88155424880201728}}</ref> Most mods and map-making tools, however, used the terms East and North consistent with their actual definitions (e.g. a [[Programs and editors/Cartograph|Cartograph]]-generated map with North at the top is rotated 90 degrees from the in-game map).}}
{{History||1.4.2|snap=12w34a|[[File:Empty Map JE1 BE1.png|32px]] [[Crafting]] a map now creates an empty map. The map is drawn for the first time when it is held and right clicked, and is centered near the location of the [[player]] when clicked (not as before where it was centered on the location it was crafted.)
|Previously, in order to map a new area, the map had to be ''crafted'' in that area (rather than carrying a previously-crafted map to the new area). The point where a map is crafted becomes its permanent center, and could never be changed.
|The pointer no longer disappears when leaving the map, but transforms into a white dot, indicating on what side of the map the player is located.
|Maps now align to a grid, making it easier to create adjacent maps.
|Maps can now be zoomed out (but not zoomed in).
|Maps can now be cloned and scaled.}}
{{History||1.4.2|snap=12w34b|Maps now have a ''zoom level'', which was fixed at 1:8 prior to snapshot [[Java Edition 12w34a|12w34a]],<ref name="mapinfo">https://web.archive.org/web/0/http://notch.tumblr.com/post/4988431144/the-maps</ref> but now starts at 1:1 and can be increased up to 1:16 by re-crafting an existing map.
|Maps are no longer numbered on the top-left corner and is labeled through the tooltip.}}
{{History|||snap=12w36a|New maps are now crafted at a scale factor of 1:1. A zoomed in map can be zoomed out by re-crafting it with another 8 sheets of [[paper]] on a [[crafting table]]. Each time this is done, the scale increases - 1:1, 1:2, 1:4, 1:8, 1:16 with a map scale of 1:16 being the current maximum.}}
{{History||1.7.2|snap=13w38a|The map size has been increased when placed on a [[wall]] using the [[item frame]].
|More colors have been added to maps for different [[block]]s.<ref name="infodump2">https://web.archive.org/web/0/https://www.mojang.com/2013/10/minecraft-1-7-the-update-that-changed-the-world</ref>}}
{{History||1.8|snap=14w31a|Zoomed maps now conform to an expanded grid based on their zoom level. Previously, careful considerations would need to be taken to creating a wall of adjoining maps.}}
{{History||1.8.1|snap=pre1|Some colors have been changed on maps to more accurately represent their respective [[block]].}}
{{History||1.9|snap=15w31a|Maps now display as a mini-map when held in the off-hand, or if the off-hand slot is occupied; the (old) large version is visible only when held in the dominant hand with the secondary hand free.}}
{{History|||snap=15w34a|New maps can now be [[crafting|crafted]] at a scale factor of 1:4.
|A crafting recipe has been added for zooming in maps.}}
{{History|||snap=15w43a|The average yield of empty maps from [[stronghold]] library [[chest]]s has been doubled.}}
{{History|||snap=15w45a|New maps are once again [[crafting|crafted]] at a scale factor of 1:1, as they had been before snapshot [[15w34a]].
|The [[crafting]] recipe, that was introduced in 15w34a, for zooming in maps has been removed.}}
{{History|||snap=15w49a|Map making now uses armor equipping sounds.}}
{{History||1.11|snap=16w39a|Maps now work in [[the End]].
|Empty maps are now [[trading|sold]] by cartographer [[villager]]s as their tier 3 [[trading|trade]].
|Added [[explorer map]]s, sold by cartographers as their tier 4 trades.}}
{{History||1.12|snap=17w17a|Maps now have separate colors for colored [[terracotta]] blocks from other colored blocks.}}
{{History||1.13|snap=17w47a|Prior to [[1.13/Flattening|''The Flattening'']], these [[item]]s' numeral IDs were 358 and 395.
|Maps now use additional NBT to specify which map they contain. Prior to this version, they used the [[damage]] value instead.
|Map IDs are no longer limited to 32,768.}}
{{History|||snap=17w50a|Maps can now be placed on floor and ceiling [[item frame]]s.}}
{{History|||snap=18w10a|Spots on maps can now be marked using [[banner]]s.}}
{{History|||snap=18w11a|Empty maps can now generate in [[shipwreck]] [[chest]]s.}}
{{History|||snap=pre7|Maps have been changed slightly, in regard to which [[block]]s are shown and which blocks are not.}}
{{History||1.14|snap=18w43a|[[File:Empty Map JE2 BE2.png|32px]] [[File:Map (item) JE2 BE2.png|32px]] The textures of maps have been changed.}}
{{History|||snap=18w48a|Empty maps can now be found in chests in [[village]] cartographer houses.}}
{{History|||snap=19w02a|Maps can now be cloned and zoomed out (extended) by using a [[cartography table]].
|Maps can now be locked by using a [[glass pane]] with a cartography table.
|The recipes for cloning and zooming out maps have been removed.}}
{{History|||snap=19w06a|Map making is now silent again.}}
{{History|||snap=19w13a|Cartographer villagers now give empty maps to players under the [[Hero of the Village]] effect.}}
{{History||1.16|snap=20w21a|Map making sounds are now the same as when using a cartography table.}}
{{History|pocket alpha}}
{{History||v0.14.0|snap=build 1|[[File:Empty Map JE1 BE1.png|32px]] [[File:Map (item) JE1 BE1.png|32px]] Added maps.
|Maps are crafted using nine [[paper]], one for every slot of the [[crafting]] grid.
|Maps must be combined with a [[compass]] using an [[anvil]] in order to show the [[player]]'s position.
|Maps can be zoomed using an anvil.}}
{{History|||snap=build 3|New maps are now [[crafting|crafted]] at full zoom.
|Empty maps now have a "Create Map" button to initialize them.}}
{{History|||snap=build 7|New maps are now crafted at a scale factor of 1:1.}}
{{History||v0.15.0|snap=unknown|Maps can now be crafted either with 8 pieces of [[paper]] and a [[compass]] ''or'' 9 pieces of paper, to get a map with or without a position marker.}}
{{History||v0.16.0|snap=build 1|Different colors have been added to maps for different [[biome]]s.}}
{{History|pocket}}
{{History||1.0.0|snap=?|[[Windows 10 Edition]] can now use the [[anvil]] as well as the [[crafting table]] to clone, zoom and apply markers, just as [[Pocket Edition]] in general could.
|Maps can now be found inside [[stronghold]] library [[chest]]s.}}
{{History||1.1.0|snap=alpha 1.1.0.0|Empty maps with direction markers built-in are now called "locator maps".}}
{{History|||snap=alpha 1.1.0.3|"Locator maps" are now called "empty locator maps".
|Empty maps are now [[trading|sold]] by cartographer [[villager]]s for 7-11 [[emerald]]s as their tier 3 [[trading|trade]].}}
{{History|bedrock}}
{{History||1.4.0|snap=beta 1.2.14.2|Maps can now be found inside map room [[chest]]s in [[shipwreck]]s.}}
{{History||?|The texture of the filled map overlay has been changed.}}
{{History||?|Maps now function in dimensions other than the dimension in which they were created.}}
{{History||1.10.0|snap=beta 1.10.0.3|Maps can now be found in cartographer house [[chest]]s in [[village]]s.
|[[File:Empty Map JE2 BE2.png|32px]] The texture of empty maps has been changed.}}
{{History||1.11.0|snap=beta 1.11.0.1|Empty maps can now be created from 1 [[paper]] in [[cartography table]]s.
|Maps can now be zoomed, cloned, renamed, and have pointers added in cartography tables.}}
{{History|||snap=beta 1.11.0.4|Cartographer [[villager]]s now [[trading|sell]] empty map for an [[emerald]] as their first tier [[trading|trades]].
|Empty locator maps can now be [[trading|bought]] from cartographer villagers.}}
{{History||1.13.0|snap=beta 1.13.0.1|[[File:Map (item) BE3.png|32px]] [[File:Locked Map (item) BE2.png|32px]] Filled maps and locked maps now have unique inventory icons.}}
{{History||1.16.0|snap=beta 1.16.0.57|Trading has been changed, novice-level cartographer now sell an empty map for 7 emeralds. Cartographer villager no longer sell empty locator map.}}
{{History||1.16.100|snap=beta 1.16.100.56|The ID of maps have been changed from <code>emptymap</code> to <code>empty_map</code> and <code>map</code> to <code>filled_map</code>.}}
{{History|console}}
{{History||xbox=TU1|xbone=CU1|ps=1.00|wiiu=Patch 1|switch=1.0.1|[[File:Map (item) JE1 BE1.png|32px]] Added maps.
|The [[player]] spawns with a free map.
|Maps are available only as zoom step 3 maps centered at coordinates 0,0. Biome colors do not appear on maps.}}
{{History||xbox=none|xbone=CU1|ps=1.0|wiiu=none|Larger sized worlds on Xbox One, Playstation 4, and Nintendo Switch have zoom step 3 maps aligned to a grid with maps centered at 0, 1024, or 2048 on the X or Z coordinates.}}
{{History||xbox=TU21|xbone=CU9|ps=1.14|wiiu=Patch 1|[[File:Empty Map JE1 BE1.png|32px]] [[Crafting]] a map now produces an empty map.}}
{{History||xbox=TU46|xbone=CU36|ps=1.38|wiiu=Patch 15|The outer end islands appear on different maps; even on Xbox 360, Playstation 3, Vita, and Wii U editions.}}
{{History||xbox=none|xbone=none|ps=1.90|wiiu=none|switch=none|[[File:Empty Map JE2 BE2.png|32px]] [[File:Map (item) JE2 BE2.png|32px]] The textures of maps have been changed.}}
{{History||ps=1.91|Maps can now be created and used in [[cartography table]]s.}}
{{History|foot}}
== Issues ==
{{issue list}}
== Trivia ==
* Use of the {{key|F1}} key can allow the player to hold a map without blocking their view at all.
* In ''Java Edition'', a map created using {{cmd|give}} can be any map by using the Map parameter to specify the map number desired. E.g. {{cmd|give [player] minecraft:filled_map{map:5<nowiki>}}} gives the specified player map_5. If no data value is supplied it defaults to map_0. If map_0 has not ever been crafted, it is centered on x=0, z=0.
* The maps are stored separately as their own data (<code>.dat</code>) file as <code>map_x.dat</code> with (x) being the map number, see [[map item format]] for more info. By manipulating this number, players can organize their maps to suit them, or if they accidentally create a map in the same location, they can delete their extra map so as to save the number they make.
* Certain programs can be used to make customized maps with images or text on them instead of actual maps, many people use these in adventure maps to show pictures or to tell a story.
* Since all copies of a map are links to the same file, copying an unfinished map keeps it synchronized with the copy as the player fills it in. Thus, a copy stored in a chest can act as a remote backup.
* A map that is in an item frame does not update itself until a player picks it up, lets it reload, and places it back again. However, if a player holds a clone of the map, both maps update.
* Filled maps are the only items that make 90 degree rotations in item frames, and also the only items that can expand the item frame into full block wide.
* On [[Legacy Console Edition]], the player always spawns with a map in their inventory after creating a world. This was later added to Bedrock Edition as an optional feature in the world creation menu.
* Maps on Legacy Console Edition always show the player's current coordinates, as a substitute for the optional [[Coordinates|coordinate display]] in other editions.
* A map cannot be created on [[New Nintendo 3DS Edition]]. Instead, the map is always displayed on the bottom screen along with the coordinates. Biome colors do not appear on maps.
== Gallery ==
<gallery>
MapItem1.png|A fully zoomed map.
MapRotation.png|Having a map in hand does not stop the ability to see ahead.
MapItem3.png|A world being recorded onto a map.
Mcmap4.png|Nearly fully explored map.
Zoomed Map.png|A map edited to the scale of 1.
Sky Map.png|A map mapping the [[Sky Dimension]].
MapOfVillage.png|A village and how it is represented on a map.
Pumpkin map.png|A map containing a custom image made by placing a large number of blocks.
Complete Map.png|A completely explored map.
MapZooms.png|A diagram showing how maps zoomed out before [[Java Edition 1.8]]. Notice how the larger maps have borders made of half and quarter small maps.
Map18zooms.png|From 1.8, zoomed maps are aligned to this grid exactly.
Large Biome Map.png|A map of a [[Large Biomes]] world.
Map0140-0160.png|A comparison of maps between versions in Pocket Edition Alpha [[Pocket Edition Alpha 0.14.0|0.14.0]] and [[Pocket Edition Alpha 0.16.0|0.16.0]].
Mycelium Map.png|A map view of a mushroom biome, showing that mycelium appears purple on a map.
MiniMap.png|Maps held in the off-hand or in either hand while [[dual wielding]] appear as mini-maps.
Partly filled treasure map.png|Partly filled treasure map with an odd area at the bottom left. Normally a partly filled map would look striped (as in the top left), but this map seems to be bugged and is possibly showing caves, or something, in the bottom left.
Partly filled ocean explorer map.png|Partly filled ocean explorer map. Updating the game from an older version (in this case the area was first generated before 1.18) and buying a map after updating (in this case in 1.19.4) can result in the map displaying rivers and terrain where there is really a frozen sea.
Map Stained Glass 1.png|Stained glasses' appearances on maps before and after 1.13.
Map Stained Glass 2.png|Stained glasses' appearances on maps before and after 1.13.
Map Various Blocks 1.png|Various blocks' appearances on maps before and after 1.13.
Map Various Blocks 2.png|Various blocks' appearances on maps before and after 1.13.
Better Together Map.jpg|Holding a map in the offhand in ''Bedrock Edition''.
Better Together Map Icon.jpg|Holding a map in both hands in ''Bedrock Edition''.
File:MapFailedtoFill.png|A map that has not yet filled. A rare bug in Java.
</gallery>
=== The Nether ===
<gallery>
Nethermap.png|A map in [[the Nether]].
Maponnether.png|A map in the Nether; the arrow turns around itself, like in [[compass]].
</gallery>
=== The End ===
<gallery>
Jeb End Map.png|The first image of a map in [[the End]].
Endmap.png|A map in the End.
</gallery>
=== Maps in item frames ===
<gallery>
FramedMap.png|A map displayed on an item frame, as it looked before [[Java Edition 1.7.2]].
Structure Map Collection.png|Multiple maps in item frames. Notice a [[village]], two [[desert temple]]s and a lava lake.
Minecraft maps 3by3.png|A collection of 9 connected full maps.
Full Map.png|A combination of 25 maps pasted together as one map.
Map wall BE.png|A map wall on ''Bedrock Edition'', showing large areas of biome colors for each biome.
Map's in item frames.png|Maps can be placed into [[item frame]]s so they can be viewed together.
Comparing Maps.png|The comparison between 3 zooms of maps.
SuperflatMap.png|A map in a [[Superflat]] world, with some [[village]]s.
MapWallWithMarkers.png|A 3x3 map wall with banner markers.
HEYYEYAAEYAAAEYAEYAA.png|He-Man map art.
Map Player Icons 1.png|First image of player icons on maps.
Map Player Icons 2.png|Second image of player icons on maps.
</gallery>
== See also ==
* [[Explorer Map]]
* [[Clock]]
* [[Tutorials/Navigation|Navigation]]
== References ==
{{Reflist}}
{{Items}}
[[cs:Mapa]]
[[de:Karte]]
[[es:Mapa]]
[[fr:Carte (objet)]]
[[hu:Térkép (tárgy)]]
[[ja:地図]]
[[ko:지도]]
[[nl:Kaart]]
[[pl:Mapa]]
[[pt:Mapa]]
[[ru:Карта]]
[[tr:Harita]]
[[th:แผนที่]]
[[uk:Мапа]]
[[zh:地图]]
[[Category:Renewable resources]]</li></ul></nowiki> | build 1 | Creepers are now slightly shorter (1.7 blocks tall rather than 1.8). | |||
| Legacy Console Edition | |||||
| TU1 | CU1 | 1.0 | Patch 1 | Added Creepers. | |
| TU5 | Added charged Creepers. | ||||
| TU12 | Creepers no longer attack other mobs. Before this update, a Creeper shot by a skeleton would attack the skeleton, creating a crater in the process. | ||||
| TU14 | 1.04 | Creepers were made stronger. Depending on difficulty, creeper damage is scaled now with Easy: ~50% less damage, Normal: same damage as before, and Hard: ~33% more damage than before. In full diamond armor and hard difficulty a creeper can knock players down to 2 hearts. | |||
| Creepers are now aggressive towards the last player that hit them. | |||||
| Increased knockback effect of creeper explosions. | |||||
| Creepers will explode if they fall on players from a certain height. | |||||
| TU24 | CU12 | 1.16 | The flashing animation was updated. | ||
| TU31 | CU19 | 1.22 | Creepers can be forcibly exploded using flint and steel. | ||
| Creepers drop a mob head when killed by a charged creeper. | |||||
Issues
Issues relating to "Creeper" are maintained on the bug tracker. Report issues there.
Trivia
A sight that can scare even the most courageous players.
- Notch stated on Twitter that "I imagine [Creepers] as being made out of leaves or similar. I'm not sure why they explode."[3]
- In SMP, if a creeper is attacked by another player, and the other player runs out of sight, it will not attack any other players.
- When about to detonate, creepers will cease movement and its head will face directly forward. (Tested in the PC edition).
- When asked how creepers trigger their explosive nature, Dinnerbone said "They're so nervous that they shake a lot, and then this sets them off the same way as how rubbing two sticks makes fire".[4]
- When attacking, creepers walk straight, and then once they reach detonation zone, they always strafe to the left of the target entity.
- A creeper blast at point-blank range for a player with full iron armor on hard difficulty will knock them down to 1/2 a heart, the actual amount of health left is 1/20th of a heart.
- Creepers are faster when fleeing cats than when chasing players.
Publicity
Creepers have a formidable reputation in the community because of their potential to hurt players and destroy structures. Their distinct appearance and destructive abilities have made them a widely-recognizable Minecraft icon. Creepers are referenced in several of the items available at the Minecraft merchandise depot,[5] and have become an internet meme complete with fan art, web comic references, and demotivational posters. A central part of the meme is the creeper's unofficial catchphrase derived from the mob's tendency to sneak up on the player and hiss before detonating:
"That'sssss a very nice <random valuable object> you've got there... It'd be a ssssshame if anything were to happen to it..."[6]
Merchandise
Creepers have been portrayed in many Minecraft products including but not limited to:
- Stuffed toys.
- Action figures.
- Bracelets.
- T-shirts
- The creeper anatomy T-shirt reveals the insides of a creeper, and also reveals its scientific name: Creepus Explodus.
- LEGO Minecraft
- Papercraft
- Minecraft Facebook profile image
- In the goodie-bags given out at Minecon 2011, creepers were given as a fold-able and tapable decoration for ones room or collection, along with diamond and grass.
Appearances
TV Series
- Several creepers have appeared on TV during episodes of the TV show Mad (Criminal Minecraft and ThunderLolcats [7]) In ThunderLolcats they use the catchphrase, saying "That'ssss.. a nice wall you've got there."
Youtube Videos
- YouTube hosts many videos that feature creepers, including review videos, "Let's Play"'s, cartoons, and cameos in many other videos. When searching for the query "Minecraft Creeper", YouTube returns over 1,500,000 videos.
Console/PC Games
- In Borderlands 2, creepers appear in a mineshaft in the most north-west part of Caustic Caverns, including dirt, coal ore, stone, gold ore, and a "Badass creeper" that is twice the strength and size of a regular Creeper.
- In Airmech, creepers appear as a unit "skin" for the suicide bomber unit the boomer. Creepers can be either green, blue, or red, depending on the color of the team that makes them.
- In Octodad: Dadliest Catch, a creeper head is seen on a shelf in the grocery store along with 2 Pickaxes and some grass blocks. It is part of a collection known as "Mintcraft".
- In Awesomenauts, one of the playable characters (Clunk) has a "skin" referencing the creeper, complete with hissing and explode sound effects.
- Seen as a Halloween costume in a game called Terraria.
Flash Games
- In Stealing the Diamond, when Henry Stickmin sneaks up to the museum's outer wall with a pickaxe, a Creeper comes up behind him and explodes, destroying part of the wall instead.
- At the far end of the map in Stick RPG2, a smiling creeper can be seen in a hole at ground level.
- One of the things you can hit in Katawa Crash is a creeper.
- In the game Transformice, there is a creeper head that you may purchase as a hat for your mouse.
Other Games
- In a game called Quube Twodee made by Universal Chicken in Adelaide, Australia, one of the levels has a creeper face.
- PixelJunk Shooter 2 for the PS3 shows a small creeper in the title screen hidden among other enemies native to Shooter 2.
- In a Notch-designed custom level for VVVVVV, "Pyramid Escape", a creeper's face can be seen carved into the background to the far left of the pyramid.
- In Torchlight 2 the creeper plays an important role in an "Easter egg" mission in the cave named "Notch's cave" where the player walks in and sees a group of creeper charging the player then exploding. Near the end of the cave you can find a minecraft skinned sword.
- In a game called Strollin, there is a purchasable creeper item, which makes bombs throw you farther.
- In the mobile game Geometry Dash, beating level 16 "Hexagon Force" on normal mode rewards the player a creeper face cube. This can also be colored to make it look like a normal one.
- When asked to describe the physical texture of a creeper, Notch said they would feel "crunchy, like dry leaves".[8]
Other
- On Monday, June 18, 2012, a creeper was sent above the clouds into space.[9]
Gallery

A charged creeper next to a normal Creeper
- Chargedcreeper.png
A charged creeper created via spawn eggs and the /weather thunder command
- Explosioncomparision.png
Comparison of explosions, from Wither Skull (top left), wither (far left), creeper (left), charged creeper (right), and TNT (far right)
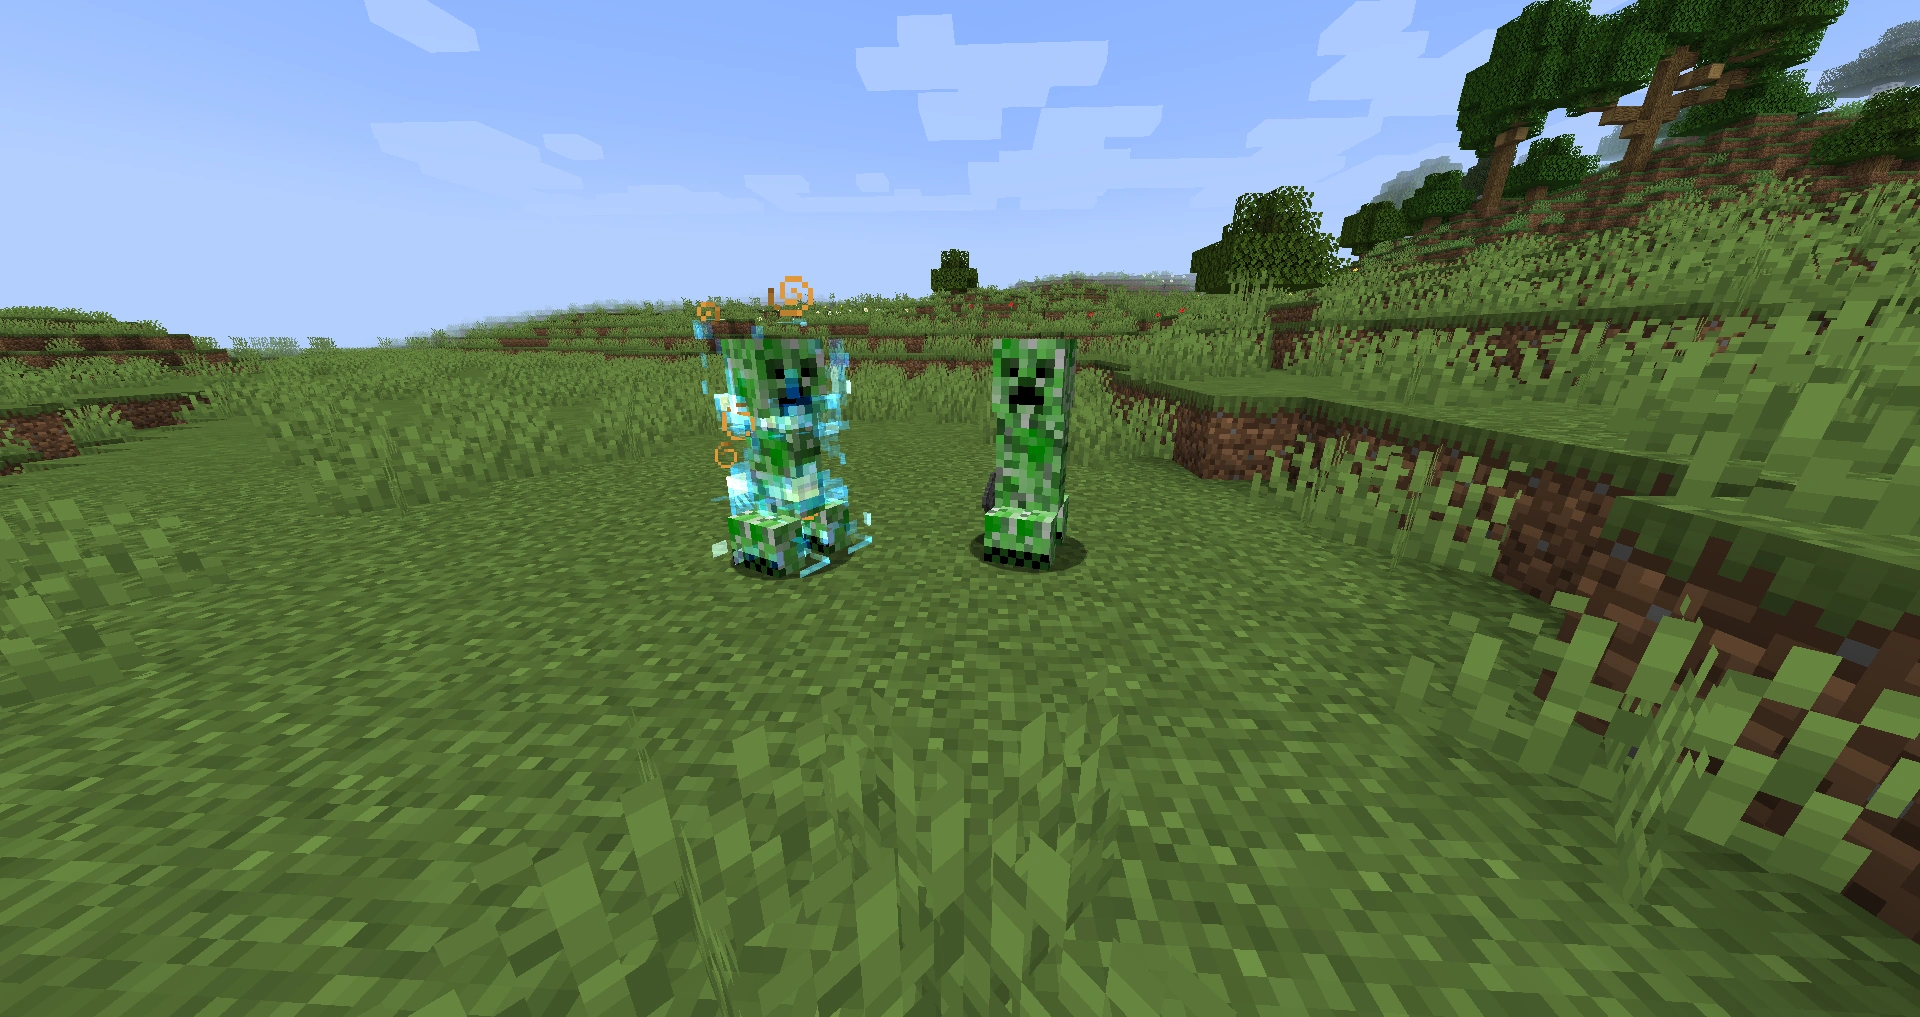
In Other Media

Creeper as it appear in Minecraft: Story Mode

Creeper and Steve micromobs from official LEGO Minecraft

Creeper minifigure from official LEGO Minecraft
Official Creeper plushies made by JINX
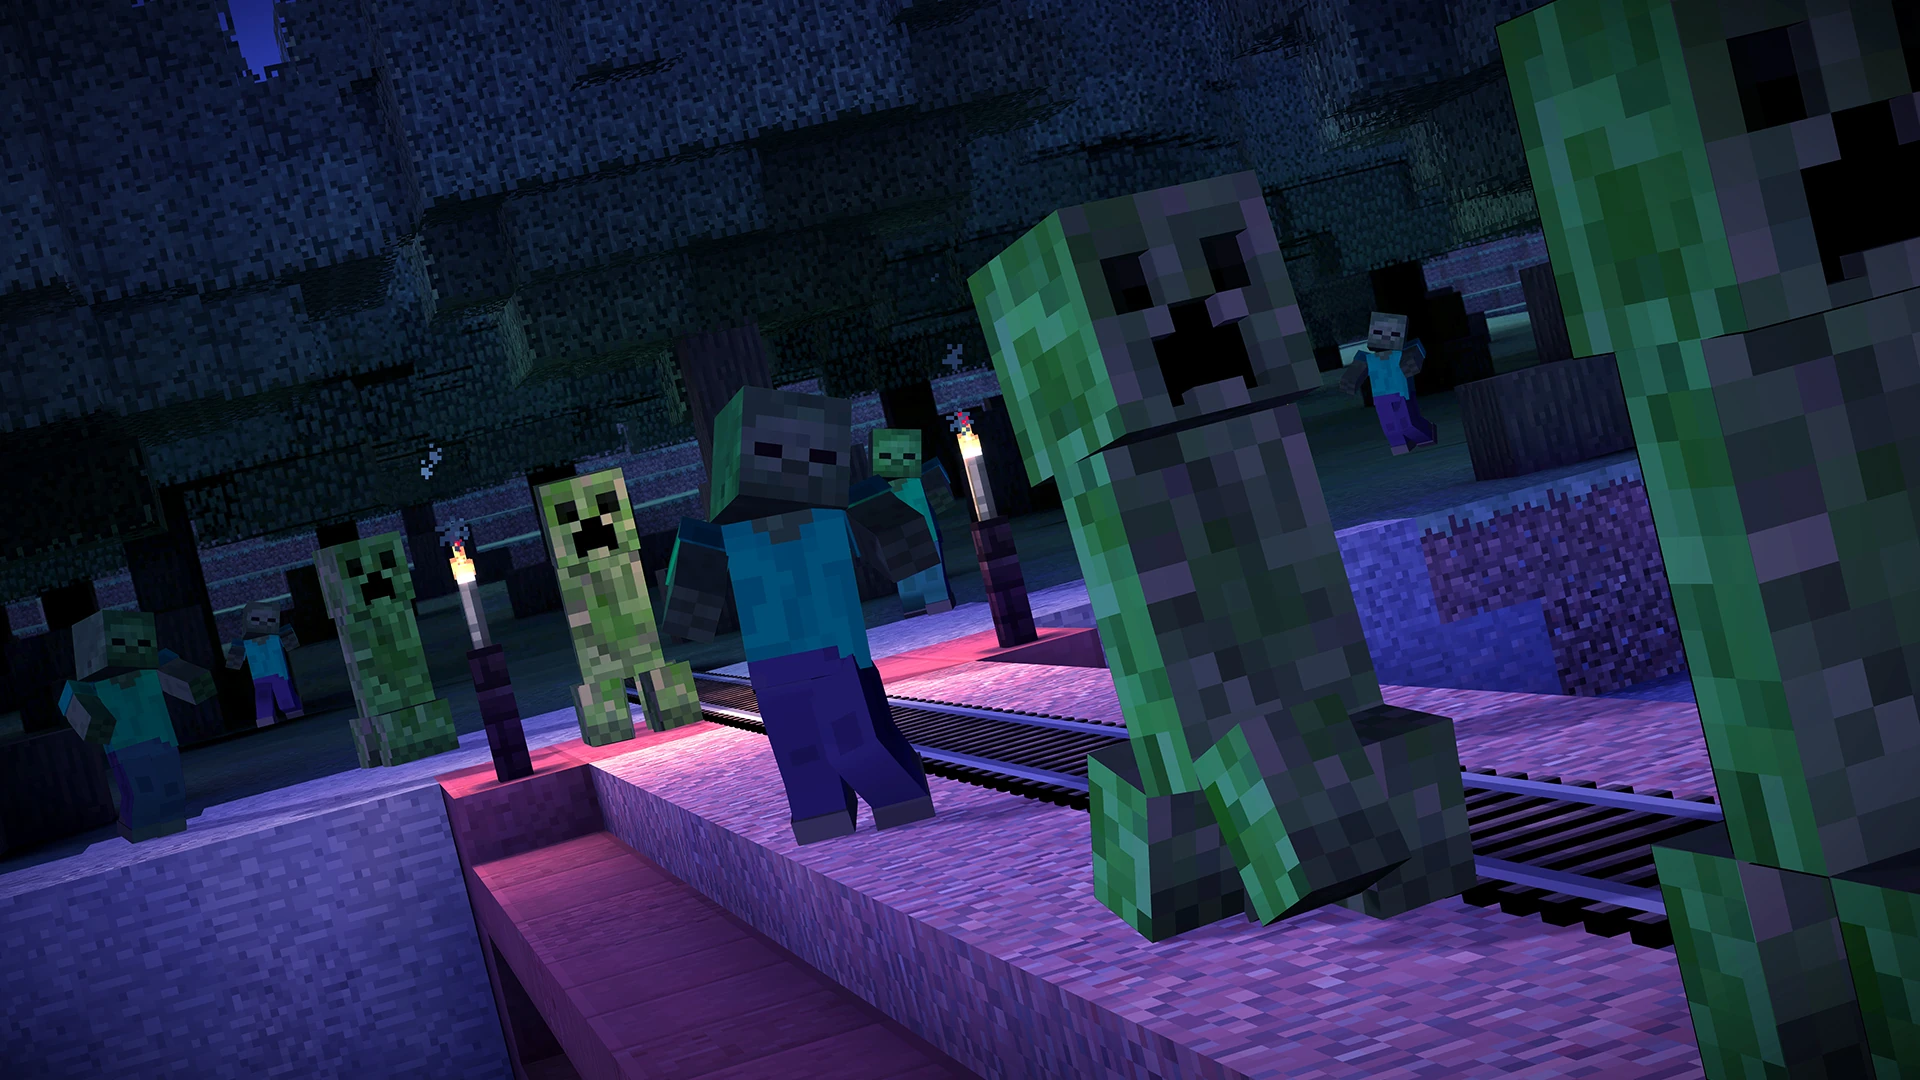
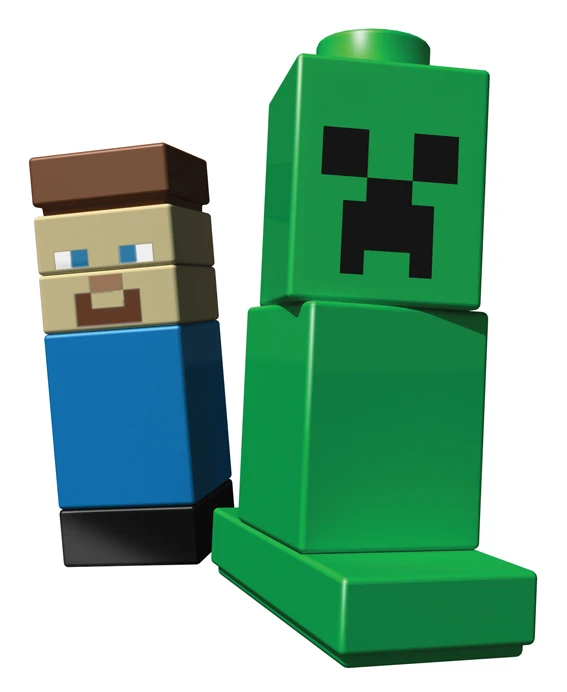

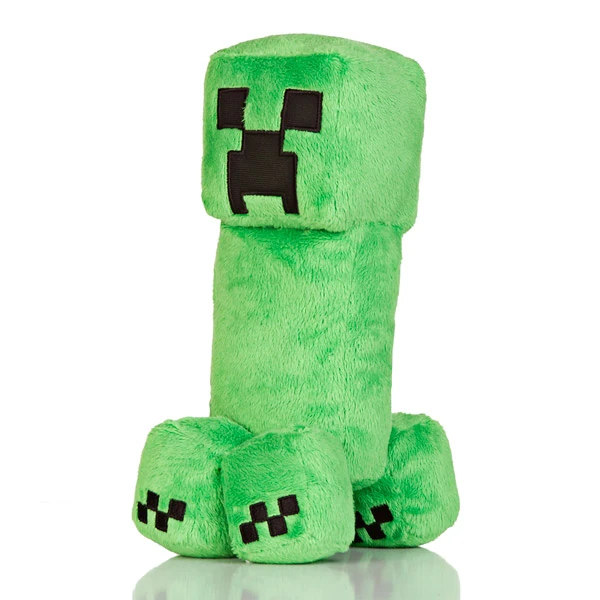
See also
References
- ↑ https://twitter.com/Dinnerbone/status/430684874576760832
- ↑ https://twitter.com/Dinnerbone/status/227339500941082626
- ↑ https://twitter.com/notch/status/27860129973
- ↑ https://twitter.com/Dinnerbone/status/408694324927676416
- ↑ http://www.minecraft.net/merch.jsp
- ↑ http://knowyourmeme.com/memes/minecraft-creeper
- ↑ http://www.youtube.com/watch?v=ndA69KiffJE&t=61s
- ↑ https://twitter.com/notch/status/27464490580
- ↑ http://www.benoxley.com/physoc-outreach