
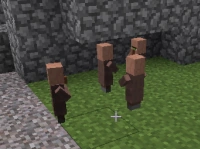
Two villagers in "love mode", breeding
Breeding is a game mechanic that allows fed animals of the same species to breed with each other to make new animals.[1] Each type of "domestic" animal has a food item used to lead and breed it. (There are a couple of special cases, described under "Mechanics" below.) Animals will follow a player holding its food (once it notices the player), and will continue following the player until it is out of range, the player stops holding the item, or it begins the breeding process. If two nearby animals of the same species are fed, they will spawn a single baby animal of their type. Any animal may only breed once per item given (two parents must be fed to breed), and will be unable to breed for some time afterwards. Note that animals are uninterested in food lying on the ground.
Using wheat or other items (carrots, and seeds) to breed animals that give food (cows, mooshrooms, pigs, chickens) is a way of getting more efficient food than bread or carrots.
Mechanics
The specific items for each breedable animal are as follows
- Horses: Golden Apples or Golden Carrots to breed.
- Sheep, Cows and Mooshrooms: Wheat.
- Pigs: Carrots (With Pocket Edition pigs can be bred with a Potato and Beetroot)
- Chickens: Seeds.
- Melon seeds, pumpkin seeds, or nether wart can be used to breed chickens, but only wheat seeds can be used to lead them around.
- Tamed Wolves: any type of meat, whether cooked, raw, or rotten.
- Tamed wolves must be at full health before being fed to breed.
- Meat cannot be used to tame a wolf. Bones should be used instead.
- Tamed Cats: raw fish.
Each animal which is fed its food will enter "love mode", preparing to breed with another animal that is in "love mode". Animals that are "in love mode" emit hearts constantly and will path towards nearby animals of the same species that are also "in love mode."[2] The two animals will "kiss" for about two and a half seconds, and then a baby animal of the same species spawns either in between the parents or on the same blocks as the parent that was spawned first, which ends love mode for the parents. They will not be able to enter love mode again for 5 minutes. However, they can still be herded with the appropriate material, as can the baby. After the baby animal has spawned, it will follow its parents for 20 minutes before growing to full size. Once the parents breed they also drop a small amount of experience.
One item per parent is needed to breed a single baby. When sheep are born, they will usually be the color of one of their parents, chosen at random. Sheared sheep will continue to produce babies of their original color.
NPC Villagers
Villagers do not have a food item; they will breed of their own accord (and in their own time) depending on the available houses, or at least "registered doors". (See the NPC Village page for full details.) When they breed, they will produce a smaller Villager but unlike most baby animals, these don't have big heads, similar to cats. Baby Villagers will run around the village and will "play" tag. In the new 1.8 update, Villagers need Trading or food from farms to breed. A baby villager killed by a zombie may produce a Baby Zombie Villager, depending on difficulty.
Breeding formula
A player may want to know how many mobs he/she will need in their farm to reach a certain goal, for example: to make a full-powered enchanting table with bookshelves (45 leather needed) or for full leather armor (24 leather), in case you have cow farm. So there is a formula to calculate how many mobs you will need to have at your farm, by the starting number and if you wait until all the mobs become mature (this does not apply to villagers):
Xn+1 = Xn + floor(Xn/2)
where Xn is the number of mobs at generation n.
Alternatively, if you start with X mobs and want to reach a population of at least Y, it can be achieved in ceil(log(Y / X) / log(1.5)) generations.
Ranching
Example of the fence gates and pressure plate entrance.
Example of Nether Brick Fence entrance stopping animals from passing.
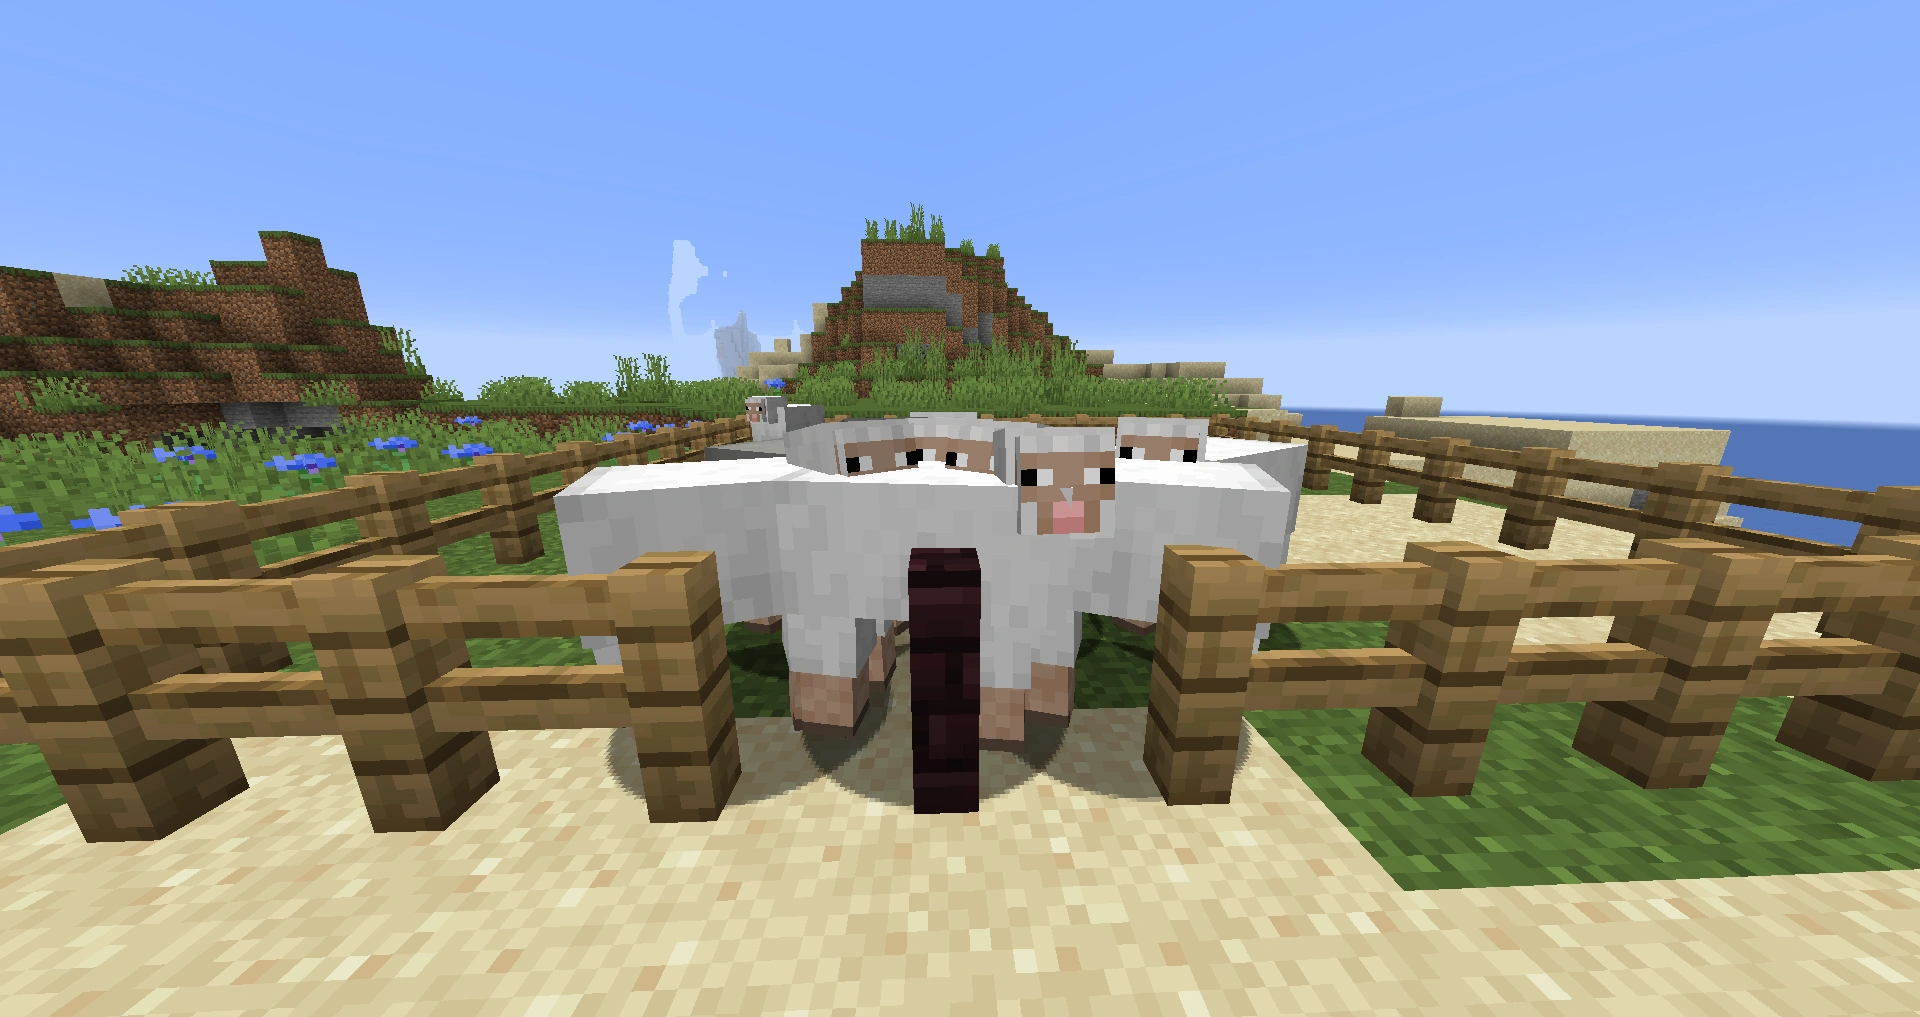
Animals in an open setting may be difficult to breed. It may be easier to construct fences for animals to stay. Even a medium size pasture can result in animals neglecting to notice one another in love mode. Animals will spawn in the same square as their parent. It should be noted, however, that if they are in the same square as a fence, glass pane, or other item that takes up only part of a square, offspring may spawn in or on the other side of the block.
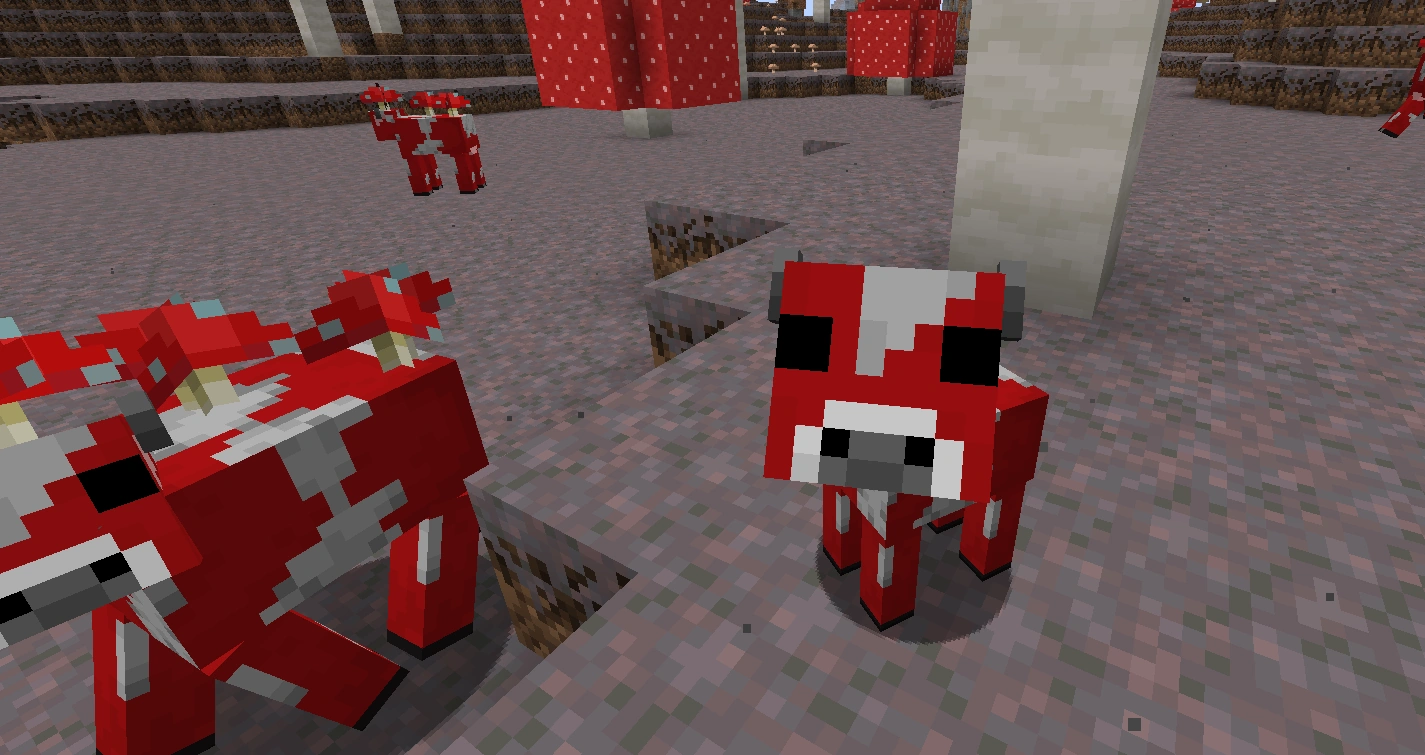
Pigs, Chickens, Cows, and Mooshrooms can all provide food when killed. This food will be cooked if they are on fire at the time of death. (But if they are killed by the fire itself, rather than the player, they may not drop experience orbs. Additionally, the player gains no experience for cooking the meat in this manner, as he or she normally does when cooking in a furnace.)
- Cows additionally drop leather. Both Cows and Mooshrooms can be milked with a bucket, and Mooshrooms can be 'milked' for Mushroom Stew using a bowl. Mooshrooms can also be sheared for 3-5 Red Mushrooms, although this will turn them into normal Cows.
- Chickens additionally drop feathers. Eggs can be harvested from Chicken farms, and can be used in addition to chicken breeding to speed population growth, as they have a 1/8th chance of producing (at least one) baby chicken when thrown.
- Sheep drop one wool when killed, but it is more productive to shear them as they drop 1-3 wool. One dye can be used to color their wool before shearing or breeding, which is more efficient than dying the single wool after shearing. Dyed sheep produce offspring of their current color; if the two sheep are different colors, the color of the baby sheep will be a mix of its parent's colors. Ex: Blue + White= Light Blue Sheep
Sometimes when farming animals, it may be difficult to keep all animals in the farm, yet still allow you to get in and out of the farm. There are several ways to handle this:
- Dig holes. Dig a hole outside of the farm, at least 3 blocks deep (two for the tunnel, one for the ceiling). Place ladders as needed. Tunnel under the fence, and dig up under the farm. Place more ladders. Since Pigs, Cows, and Sheep are more than one block wide, they will not fit in the hole resulting in them running in circles trying to get in the hole. However, baby animals and Chickens can fit in a one block hole, so you may want to place a trapdoor at the top. In version 12w34a and later, the trapdoor can be placed in the top block of the hole; in older versions, making it level with the farm requires putting an extra block inside the farm to attach it to (don't put it within two blocks of the fence). Of course, the tunnel can also lead to somewhere more distant....
- A better way utilising holes is to dig down one block, dig out the surrounding blocks and change them to fence or (mossy) cobblestone walls. Add carpet(s) on the wall and you can go out while the animals can't.
- You can also extend your fence to form a "mob-lock"—a small area with two fence gates, one leading into the pen, one outside. This area should be large enough for at least two of the animals in question. For cows and sheep, making both sides a double gate will make moving animals in and out much easier. Animals that escape into the lock can be pushed or led back into the pen, or simply considered volunteers for slaughter.
- A flashier version of this is to use two Fence Gates with a Pressure Plate between them. You open one gate and as you pass over the pressure plate, it opens the other gate. The "off" signal made by the pressure plate returning up will close both gates. The whole event is quick enough to thwart any possible pathing out by the animals. Be warned though, keeping the animals away from the entrance is a good practice, otherwise just one getting onto the pressure plate could trigger a "stampede".
- Another method is to place two blocks in place of a fence and put a trap door on the bottom part of the higher block. Animal AIs cannot make paths that use trapdoors and they cannot open them. This is easier than most other methods and takes up little space (2X2X1).
- You can forego fences and other blocks and simply dig a pit at least 2 blocks deep, providing access with a Ladder. All mobs besides villagers will very rarely climb a ladder, even if the pit is very crowded. This also makes it easy to guide the mobs in, either by pushing them or leading them in with food.
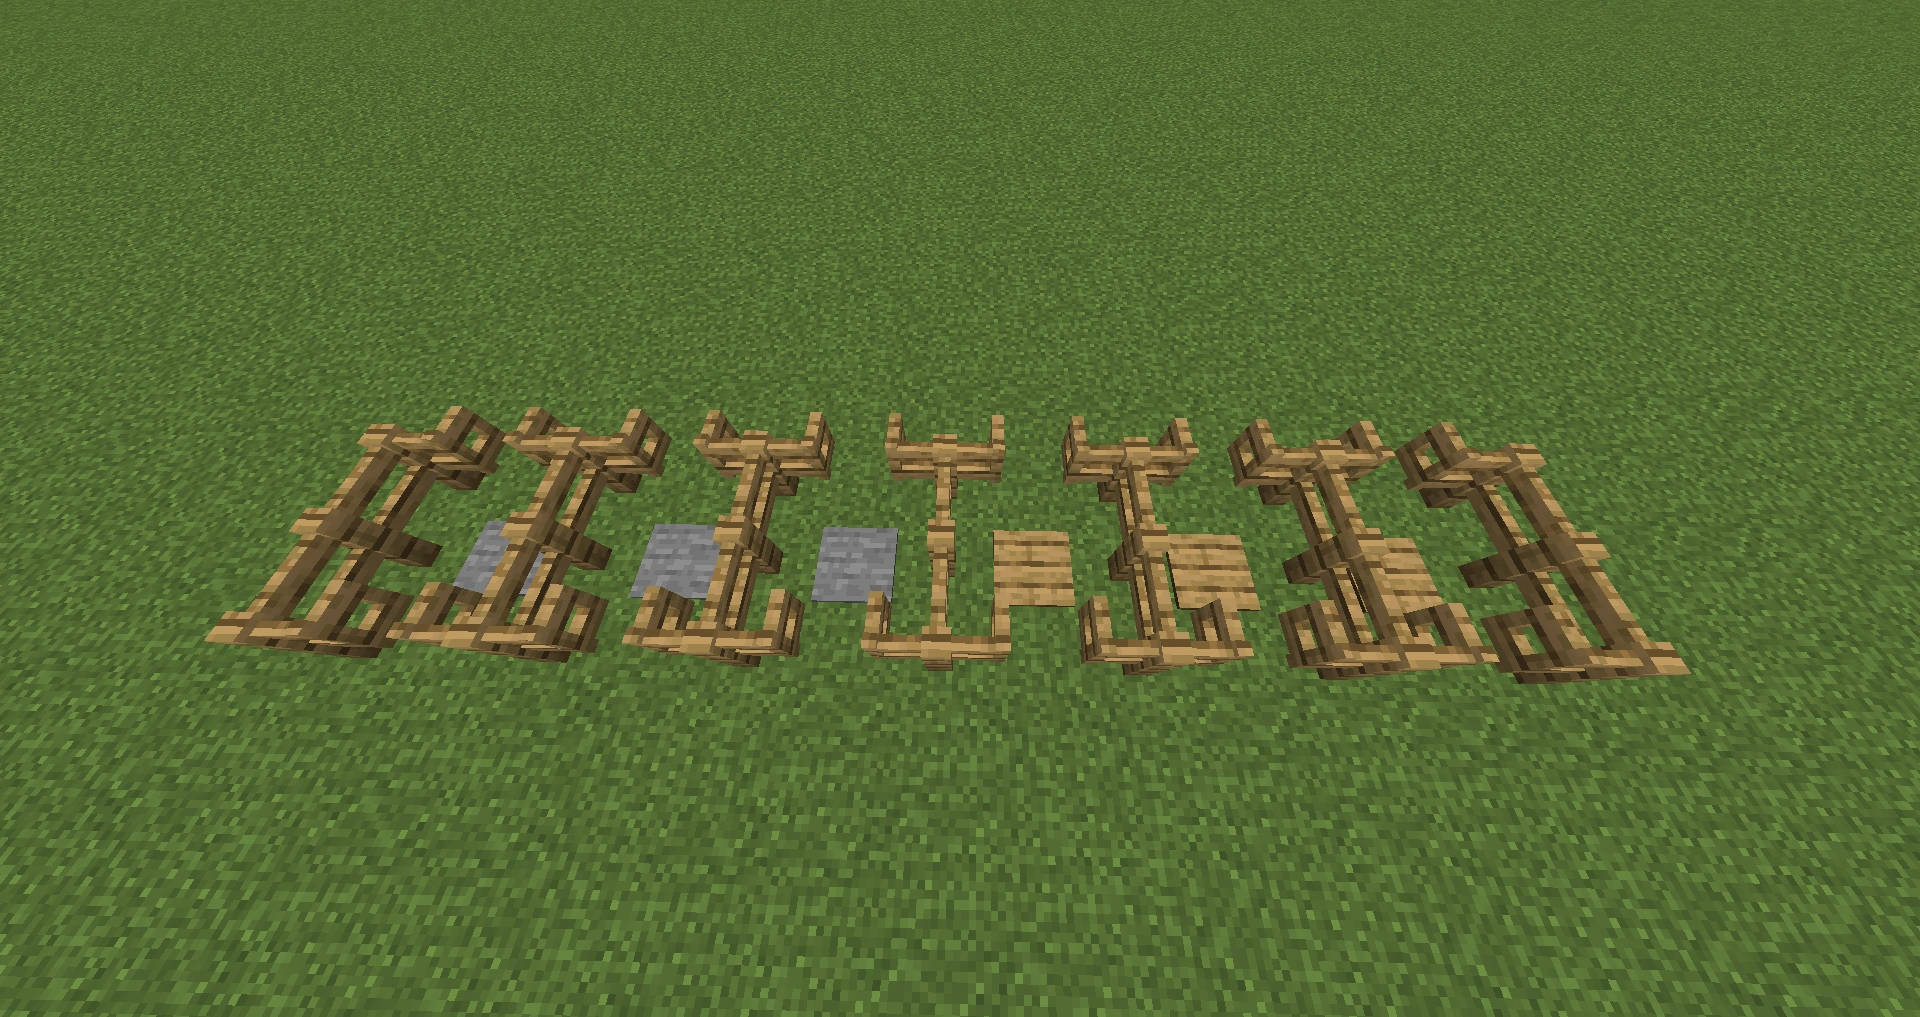
- By far the simplest and least space consuming method is to use a single post of Nether Brick Fence between regular posts, this will create a single pillar that you can walk around but larger animals cannot pass as Nether Brick Fence does not connect up with regular wooden fence. (1x1x1). Of course, unlike a gate this isn't easily switchable, which may be an issue when bringing animals into your farm.
- Build a stile. Construct a pen as normal but replace one section of fence with a solid block topped by a slab. On the inner side of the block add a section of ladder; against the outer, a section of stairs. Now mobs can freely follow you into the pen but cannot leave as the stile is 1 1/2 blocks high, the same as fencing, and mobs rarely climb ladders. Note that stiles also work well for large enclosures, such as around your base or an NPC village, with the stairs facing inwards and the ladder outwards. They are faster to use than gates and cannot accidentally be left open.
- A very easy method is to place a piece of carpet above one of the fence posts. This will allow players up by jumping but not most mobs. This is very similar to the one utilising holes.
Battery farming

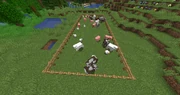
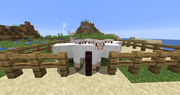
A large pasture for manual mass breeding.
Small scale automated breeding systems can be built by herding passive mobs into moving minecarts and summoning them to a central breeding location - this has the disadvantage of still breeding new mobs relatively slowly (one every five minutes.)
Formerly, it was possible to build dense animal breeding farms to be built by "compressing" mobs into a very small number of squares (generally a 3x3x3 chamber that is open at the top) and "spamming" stacks of wheat into the enclosure. In current versions, this will no longer work—overcrowded pens will cause the animals to "phase" through the walls, either suffocating them (solid blocks) or allowing them or their babies to escape (transparent blocks such as fences). Additionally, if several animals are compressed into the same square, only one of them can be fed at a time. Note that fairly crowded farms can still be made with larger pens (made from fences or other transparent blocks), so long as some escapees are acceptable.
Chickens can be fed through a slab in the side of the enclosure or from above through a hole in the top center, other mobs can also be fed through a 1 wide hole in the side of the enclosure without any risk that they will escape. Feeding at twice the rate as you slay your mobs is enough to keep mobs at roughly their current population. Collecting and throwing eggs will increase the number you can slay.
When breeding chickens or other animals in a fenced-in pen (with a fence gate) and you get a large amount of them, it can be difficult to leave the pen without animals escaping before you close the fence gate. A way to deal with this is to go to the opposite side of the pen as the door / gate, pull out some the appropriate food (wheat, seeds, carrots) wait until the animals crowd around you, then putting the food away by switching items and quickly running to the gate. Since they're no longer following you, the animals will not be fast enough to get to the other side of the pen when you do. Other options, depending on animal type, include pillars or trapdoors with ladders, leading to bridges or tunnels out of the pen.
Baby animals
Baby animals are smaller variations of their parents, having small bodies, relatively big heads, higher pitched sounds, and faster walking speeds. They do not drop resources or experience if killed, and lambs cannot be sheared. However, baby cows and mooshroom calves can be milked. Baby animals will follow one of their parents until they grow up. (If the parent dies or there is none, they will pick a nearby adult of their kind.) Tame puppies and kittens will follow their owner if the parent is absent or sitting, and puppies will attack aggressive mobs just as a mature dog would.
Baby animals grow into full sized animals after twenty minutes (one game day, beds notwithstanding). There are a few variations:
- Sheep can grow faster if they eat grass.
- For dogs (tamed wolves), the puppy does not gain its full health automatically (even when it grows to full size), but must be fed to increase its HP.
- Foals (baby horses) can be fed to speed their growth.

Mooshroom Calf
- Babycow.png
Calf
- Babysheep.png
Lamb
- Babypig.png
Piglet
- Babychicken.png
Chick
- Little Puppy.png
Puppy
- Baby Zombie.PNG
Zombie child

Zombie Villager child

Zombie piglet

Zombie piglet without skull
- BabyOcelot1.png
Kitten
- Foal.png
Foal
Villager children
Video
Breeding/video
History

Notch's first breeding screenshot, "They won't stop breeding!!!"[3]
| b | |||||
|---|---|---|---|---|---|
25 September 2011{{Extension DPL}}<ul><li>[[Bleach|Bleach]]<br/>{{education feature}}
{{exclusive|bedrock|education}}
{{Item
| image = Bleach.png
| renewable = No
| stackable = Yes (64)
}}
'''Bleach''' is an [[item]] used to [[dye]] things white. It is a [[compound]], as it is made using a [[lab table]].
== Obtaining ==
=== Lab Table ===
Bleach is not obtainable in the [[creative inventory]] or {{cmd|give}}. The only way to obtain it is using a [[lab table]].
{| class="wikitable"
! Result
! Materials Needed
|-
!rowspan=2|{{slot|Bleach}}<br>[[Bleach]]
|{{slot|Water (compound)|link=Compound}}{{slot|Water (compound)|link=Compound}}{{slot|Water (compound)|link=Compound}}{{slot|Sodium Hypochlorite|link=Compound}}{{slot|Sodium Hypochlorite|link=Compound}}{{slot|Sodium Hypochlorite|link=Compound}}
|-
|<center>[[Water (compound)|Water]] x3, [[Compound|Sodium Hypochlorite]] x3</center>
|}
== Usage ==
=== Crafting ingredient ===
{{crafting usage}}
== Sounds ==
{{Sound table
|type=bedrock
|sound=Fire.ogg
|source=sound
|description=When bleach is created by a lab table
|id=lt.reaction.fire
|volume=6.0
|pitch=0.7/0.9
|foot=1}}
== Data values ==
=== ID ===
{{ID table
|edition=bedrock
|shownumericids=y
|showforms=y
|notshowbeitemforms=y
|generatetranslationkeys=y
|displayname=Bleach
|spritetype=item
|nameid=bleach
|id=596
|form=item
|foot=1}}
== History ==
{{History|bedrock}}
{{History||1.4.0|snap=beta 1.2.20.1|[[File:Bleach BE1.png|32px]] Added bleach.}}
{{History|education}}
{{History||1.0.27|[[File:Bleach BE1.png|32px]] Added bleach.}}
{{History|foot}}
== Trivia ==
*[[File:Bleach (compound).png|32px]] There is an [[History of textures/Unused textures#Unused compounds|unused bleach texture]] in the compounds folder of the chemistry resource pack, which is slightly different from the one used in the game.
== Issues ==
{{issue list}}
{{Items}}
{{Education Edition}}
[[Category:Dyes]]
[[Category:Non-renewable resources]]
[[Category:Education Edition items]]
[[de:Bleichmittel]]
[[es:Lejía]]
[[ja:漂白剤]]
[[ko:표백제]]
[[pl:Wybielacz]]
[[pt:Alvejante]]
[[zh:漂白剂]]
[[lzh:素精]]</li><li>[[Flint and Steel|Flint and Steel]]<br/>{{Item
| image = Flint and Steel.png
| rarity = Common
| renewable = Yes
| durability = 64
| stackable = No
}}
'''Flint and steel''' is a [[tool]] used to create [[fire]] or to ignite certain blocks, structures and mobs.
== Obtaining ==
=== Crafting ===
{{Crafting
|head=1
|showname=0
|showdescription=1
|Iron Ingot
|Flint
|Output=Flint and Steel
|type=Tool
}}
{{crafting
|foot=1
|ignoreusage=1
|Damaged Flint and Steel
|Damaged Flint and Steel
|Output= Flint and Steel
|description= The durability of the two tools is added together, plus an extra 5% durability.
|type= Tool
}}
=== Chest loot ===
{{LootChestItem|flint-and-steel}}
== Usage ==
=== Igniting ===
When {{control|use|text=used}} on the space above any solid top surface, on any side of any flammable block or any side of any [[obsidian]] block within a valid unlit [[nether portal]] frame regardless of if there is a solid top surface available, the flint and steel places a [[fire]] there.
Flint and steel can be used to light unlit [[campfire]]s, [[candle]]s and [[cake|cakes with candles]].
Flint and steel can be used to light [[nether portal]]s, as any fire existing within an appropriate [[obsidian]] frame will instantly be replaced with [[Nether Portal (block)|nether portal blocks]] that occupy the entirety of the frame.
Using flint and steel on [[TNT]] ignites it. The explosion damage dealt by TNT ignited with flint and steel in this specific way counts as the player's attack. If the player is {{Control|sneak|text=sneaking}} a fire is instead placed on the side of the TNT the flint and steel was used on.
A flint and steel can be used on a [[creeper]] to force it to explode. Explosions initiated in this way cannot be cancelled.
When powered, a [[dispenser]] containing flint and steel can place fires or ignite relevant blocks such as TNT or campfires in the space directly in front of it. This reduces the flint and steel's durability. A dispenser containing a flint and steel cannot detonate creepers.
=== Enchantments ===
Flint and steel can receive the following [[enchantment]]s:
{|class="wikitable col-2-center col-3-right"
|+
!Name
!Max Level
![[Enchanting|Method]]
|-
|[[Unbreaking]]
|III
|{{Inventory slot|Anvil}}
|-
|[[Mending]]
|I
|{{Inventory slot|Anvil}}
|-
|[[Curse of Vanishing]]
|I
|{{Inventory slot|Anvil}}
|}
== Sounds ==
{{edition|java}}:
{{Sound table
|rowspan=2
|sound=Flint and steel click.ogg
|subtitle=Flint and Steel click
|source=block
|description=When a flint and steel is used to place fire
|id=item.flintandsteel.use|idnote=<ref name=incorrecteventnames group=sound>{{Cite bug|MC|177457|Fire charge and flint and steel sound event names do not follow item IDs|date=April 5, 2020}}</ref>
|translationkey=subtitles.item.flintandsteel.use|translationkeynote=<ref name=incorrecteventnames group=sound/>
|volume=1.0
|pitch=0.8-1.2
|distance=16}}
{{Sound table
|subtitle=Flint and Steel click
|source=hostile
|description=When a flint and steel is used to light a creeper
|id=item.flintandsteel.use|idnote=<ref name=incorrecteventnames group=sound/>
|translationkey=subtitles.item.flintandsteel.use|translationkeynote=<ref name=incorrecteventnames group=sound/>
|volume=1.0
|pitch=0.8-1.2
|distance=16}}
{{Sound table
|sound=Random break.ogg
|subtitle=Item breaks
|source=player
|description=When a flint and steel's durability is exhausted
|id=entity.item.break
|translationkey=subtitles.entity.item.break
|volume=0.8
|pitch=0.8-1.2
|distance=16
|foot=1}}
{{edition|bedrock}};
{{Sound table
|type=bedrock
|sound=Flint and steel click.ogg
|source=block
|description=When a flint and steel is used to place fire
|id=fire.ignite
|volume=1.0
|pitch=0.8-1.2}}
{{Sound table
|sound=Random break.ogg
|source=player
|description=When a flint and steel's durability is exhausted
|id=random.break
|volume=1.0
|pitch=0.9
|foot=1}}
== Data values ==
=== ID ===
{{edition|java}}:
{{ID table
|edition=java
|showforms=y
|generatetranslationkeys=y
|displayname=Flint and Steel
|spritetype=item
|nameid=flint_and_steel
|form=item
|foot=1}}
{{edition|bedrock}}:
{{ID table
|edition=bedrock
|shownumericids=y
|showforms=y
|notshowbeitemforms=y
|generatetranslationkeys=y
|displayname=Flint and Steel
|spritetype=item
|nameid=flint_and_steel
|id=299
|form=item
|foot=1}}
== Achievements ==
{{Load achievements|Into the Nether}}
== Advancements ==
{{load advancements|We Need To Go Deeper}}
== Video ==
<div style="text-align:center">{{yt|caz8BBG48VU}}</div>
== History ==
{{more sounds|type=old|There is within the possible realm a different use sound from 2015-era Pocket Edition, can this be uploaded?}}
{{History|java indev}}
{{History||0.31|snap=20100110|[[File:Flint and Steel JE1.png|32px]] Added flint and steel.
|Flint and steel can be used to set [[fire]].}}
{{History|||snap=20100129|[[File:Flint and Steel JE2.png|32px]] The steel part of the texture has been brightened.
|Flint and steel can be used alongside [[lava]] to [[smelting|smelt]] [[ores]] and cook [[food]].<ref>http://www.youtube.com/watch?v=OpmK7rDU5bA</ref>}}
{{History|||snap=20100201-2|Flint and steel can now sometimes be dropped as loot from killing [[mobs]].}}
{{History||20100219|[[File:Flint and Steel JE3 BE1.png|32px]] The texture of flint and steel has been changed, due to its new crafting recipe.
|Flint and steel can no longer drop from mobs.
|Flint and steel can now be crafted from an [[iron ingot]] and the newly added [[flint]].
|[[Furnace]]s have been added to replace the cooking and [[smelting]] function of flint and steel.}}
{{History|java beta}}
{{History||1.7|Flint and steel, along with [[fire]] itself, [[explosion]]s and [[Mechanics/Redstone/Circuit|redstone]] are now the only ways to activate [[TNT]].<ref>{{tweet|jeb_|78154891637436416}}</ref>}}
{{History|java}}
{{History||1.3.1|snap=12w21a|The [[player]] can now [[trading|buy]] 1 flint and steel from farmer [[villager]]s for 3 [[emerald]]s, making flint and steel [[renewable]].}}
{{History||1.4.2|snap=12w38a|The [[sound]] when using flint and steel has been changed.}}
{{History||1.5|snap=13w04a|[[Dispenser]]s are now able to use flint and steel on the [[block]] in front of them.}}
{{History||1.6.1|snap=13w18a|Flint and steel can now be found in the new [[chest]]s in [[nether fortress]]es.}}
{{History|||snap=13w25a|Flint and steel now loses [[durability]] when igniting [[TNT]].}}
{{History||1.7.2|snap=13w36a|Flint and steel now has a shapeless crafting recipe.
{{{!}} class{{=}}"collapsible collapsed" data-description{{=}}"Old recipe"
! Old recipe
{{!}}-
{{!}}
{{Crafting
|A1=Iron Ingot
|B2=Flint
|Output=Flint and Steel
|ignoreusage=1
}}
{{!}}}
|Using flint and steel on a [[creeper]] now causes it to [[explosion|explode]].}}
{{History||1.8|snap=14w02a|[[Villager]]s no longer [[trading|sell]] flint and steel, making it no longer renewable. However, if a villager selling flint and steel already exists in the world, it can be continuously traded with to obtain flint and steel renewably.}}
{{History||1.9|snap=15w43a|The average yield of flint and steel in [[nether fortress]] [[chest]]s has been slightly reduced.}}
{{History||1.13|snap=17w47a|Prior to [[1.13/Flattening|''The Flattening'']], this [[item]]'s numeral ID was 259.}}
{{History||1.14|snap=18w43a|[[File:Flint and Steel JE4 BE2.png|32px]] The texture of flint and steel has been changed.}}
{{History||1.16|snap=20w07a|[[Gravel]] now can be given by the [[piglin]]s when [[bartering]], making flint and steel renewable again.}}
{{History|||snap=20w16a|Flint and steel can now be found inside [[ruined portal]] chests.}}
{{History|pocket alpha}}
{{History||v0.4.0|[[File:Flint and Steel JE3 BE1.png|32px]] Added flint and steel.}}
{{History||v0.7.0|Flint and steel can now be used to set [[fire]].}}
{{History||v0.7.4|Using flint and steel on a [[creeper]] now causes it to [[explosion|explode]].}}
{{History||v0.8.0|snap=build 1|Added flint and steel to the [[creative]] [[inventory]].}}
{{History||v0.12.1|snap=build 1|Flint and steel can now be used to activate a [[nether portal]].
|Flint and steel can now be found in [[nether fortress]]es.
|Flint and steel can now be [[enchanted]] in [[anvil]]s.}}
{{History||v0.14.0|snap=build 1|Flint and steel can now be used inside [[dispenser]]s when powered.}}
{{History|bedrock}}
{{History||1.10.0|snap=beta 1.10.0.3|[[File:Flint and Steel JE4 BE2.png|32px]] The texture of flint and steel has been changed.}}
{{History||1.16.0|snap=beta 1.16.0.51|Flint and steel can now be obtained by [[bartering]] with [[piglin]]s.|Flint and steel can now be enchanted with [[Curse of Vanishing]] through an [[anvil]].}}
{{History|||snap=beta 1.16.0.57|Flint and steel are no longer obtainable from [[bartering]].
|Flint and steel can now be found inside [[ruined portal]] chests.}}
{{History|console}}
{{History||xbox=TU1|xbone=CU1|ps=1.0|wiiu=Patch 1|switch=1.0.1|[[File:Flint and Steel JE3 BE1.png|32px]] Added flint and steel.}}
{{History||xbox=TU3|Flint and steel, along with [[fire]] itself, [[explosion]]s and [[redstone (disambiguation)|redstone]] are now the only ways to activate [[TNT]].}}
{{History||xbox=TU31|xbone=CU19|ps=1.22|wiiu=Patch 3|Flint and steel now makes [[sound]]s when igniting [[block]]s.}}
{{History||xbox=none|xbone=none|ps=1.90|wiiu=none|switch=none|[[File:Flint and Steel JE4 BE2.png|32px]] The texture of flint and steel has been changed.}}
{{History|New 3DS}}
{{History||0.1.0|[[File:Flint and Steel JE3 BE1.png|32px]] Added flint and steel.}}
{{History|foot}}
Historical sounds:
{| class="wikitable"
! Sound
! From
! to
! Pitch
|-
| {{sound||Flint and Steel old.ogg}}
| ?
| ?
| ?
|}
== Issues ==
{{issue list}}
== Trivia ==
* In [[Adventure mode]], flint and steel cannot light fires, nor can it ignite nether portals (unless it has the tag {{cd|CanPlaceOn:obsidian}}). However, it can still ignite TNT and creepers.
* The name "Flint and Steel" may be misleading and is inaccurate considering the game doesn’t have and possibly will have [[Java Edition mentioned features#Steel|steel]] in the game and it's crafted with iron instead. This is similar to the [[Old Growth Taiga|Old Growth Pine Taiga]], as there are no pines in the game and they have [[Spruce|Spruce Trees]] instead.
**In real life, Iron can’t be used as a fire striker, so Mojang had to rename it to Flint and Steel so it makes more sense. This explains why it is called Flint and Steel, but there is no steel in the game.
**Steel was mentioned by Mojang, as a “stronger” iron, but shortly rejected, and there are no currently no plans to add it to the game.
* Flint and steel cannot light end portals.
* Flint and Steel is the first item to mention another item that is not in the game.
*In the April Fools Snapshot, [[Java Edition 23w13a or b]], one of the possible voted was “Flint and Steel can ignite any block”.
==References==
{{Reflist}}
{{Items}}
[[Category:Renewable resources]]
[[cs:Křesadlo]]
[[de:Feuerzeug]]
[[es:Mechero]]
[[fr:Briquet]]
[[hu:Kovakő acéllal]]
[[ja:火打石と打ち金]]
[[ko:부싯돌과 부시]]
[[nl:Vuursteen en staal]]
[[pl:Krzesiwo]]
[[pt:Pederneira]]
[[ru:Огниво]]
[[zh:打火石]]</li></ul> | During the early developments of breeding, Notch tweeted: "You know what would be fun? If every single animal in minecraft came from eggs. Breeding would involve moving egg blocks around." | ||||
9 September 2011{{Extension DPL}}<ul><li>[[Trial Key|Trial Key]]<br/>{{Item|
|image=Trial Key .webp
|renewable=Yes
|stackable=Yes (64)
}}
{{Stub}}
{{in dev|java|bedrock|1.21|1.21.0}}
A '''Trial Key''' is an item found in [[Trial Chambers]].
Its functionality remained a mystery for a pretty good time, but on the Minecraft Monthly of January 2024, it has been revealed to open vaults, which once opened will drop an item. It's still unknown what will the loot be, but was seen dispensing the following:
Enchanted iron helmet, enchanted iron leggings, enchanted crossbow, enchanted diamond chestplate, iron, gold and diamond horse armour, enchanted golden apple, saddle, enchanted diamond axe, enchanted iron pickaxe and enchanted iron Shovel.
The trial key can currently be obtained from trial spawners (50%), or from pots and chests (8%).
[[Category:Items]]
[[ja:Trial Key]]
[[lzh:煉管]]</li><li>[[:Category:Minecraft: Story Mode items|Category:Minecraft: Story Mode items]]<br/>[[Category:Minecraft: Story Mode]]
[[Category:Items]]</li></ul> | Jeb tweets that animal breeding is pushed to 1.9. | ||||
| r | |||||
1.0.0{{Extension DPL}}<ul><li>[[Armor Stand|Armor Stand]]<br/>{{ItemEntity
| image = Armor Stand.png
| image2 = Armor Stand BE.png
| extratext = View [[#Gallery|all renders]]
| stackable =
* '''[[JE]]:''' Yes (16)
* '''[[BE]]:''' Yes (64)
| renewable = Yes
| flammable = Yes
| size = '''Normal:'''<br>
Width: 0.5 Blocks<br>
Height: 1.975 Blocks<br>
'''Small:'''<br>
Width: 0.25 Blocks<br>
Height: 0.9875 Blocks<br>
| health = {{hp|20}}
}}
An '''armor stand''' is an inanimate [[entity]] that can wear [[armor]]. It can also hold [[Item|items]] and be posed (but these are not possible in [[Survival]] in [[Java Edition]]).
== Obtaining ==
An armor stand can be broken by quickly {{control|attack|text=attacking}} it twice, dropping itself and any armor placed onto it.
=== Crafting ===
{{Crafting
|A1= Stick
|B1= Stick
|C1= Stick
|B2= Stick
|A3= Stick
|B3= Smooth Stone Slab
|C3= Stick
|Output= Armor Stand
|type=Decoration block
}}
=== Natural generation ===
Two armor stands are found in each taiga [[village]] outdoor armory, one equipped with an [[iron helmet]], the other with an [[iron chestplate]].
== Usage ==
[[Player]]s can use armor stands to hold [[armor]], [[mob head]]s, [[carved pumpkin]]s, and [[elytra]]. [[Commands]] can be used to give them other [[item]]s. The stand does not have a GUI, so players interact with it directly. Armor stands are also able to be placed in different orientations, similar to [[banner]]s or [[sign]]s. Armor stands are [[entity|entities]], allowing them to be pushed by [[piston]]s, moved by flowing [[water]], pulled with [[fishing rod]]s, pushed by players (with knockback), and bounced by [[slime block]]s.
{{Control|use|text=Using}} armor on the stand places the armor if done on a bare spot. Conversely, clicking on armor with a bare hand removes the armor and places it in the highlighted hotbar slot. It is not possible to take or place items from the armor stand's hands unless playing on Bedrock Edition.
Armor, mob heads, or carved pumpkins can be automatically placed on armor stands with a [[dispenser]].
Armor stands can be customized further to have arms, pose, disobey gravity, dual wield and other things by summoning them using {{cmd|summon}} with [[Tutorials/Command NBT tags#Armor Stand|NBT tags]].
In maps heavily using [[command blocks]], armor stands can be used to keep [[scoreboard]] objectives that are 'global' to the map, run [[commands]], etc.
{{IN|bedrock}}, the pose of the armor stand can be changed by interacting with the armor stand (or pressing the {{btn|Pose|be=1}} button on mobile devices) while sneaking, or by using a redstone signal. There are 13 possible poses. Armor stands can also hold items by interacting with the armor stand (or pressing the {{btn|Equip|be=1}} button on mobile devices) while holding an item that cannot be worn.
;<nowiki>Below are the poses:
{| class="wikitable collapsible collapsed"
!No.!!Namespace ID!! Redstone power
!
! !! Image
|-
|0
|{{cd|animation.armor_stand.default_pose}}
|0
|
|
|[[File:Armor Stand Default Pose.png|128px]]
|-
|1
|{{cd|animation.armor_stand.no_pose}}
|1
|
|
|[[File:Armor Stand No Pose.png|128px]]
|-
|2
|{{cd|animation.armor_stand.solemn_pose}}
|2
|
|
|[[File:Armor Stand Solemn Pose.png|128px]]
|-
|3
|{{cd|animation.armor_stand.athena_pose}}
|3
|
|
|[[File:Armor Stand Athena Pose.png|128px]]
|-
|4
|{{cd|animation.armor_stand.brandish_pose}}
|4
|
|
|[[File:Armor Stand Brandish Pose.png|128px]]
|-
|5
|{{cd|animation.armor_stand.honor_pose}}
|5
|
|
|[[File:Armor Stand Honor Pose.png|128px]]
|-
|6
|{{cd|animation.armor_stand.entertain_pose}}
|6
|
|
|[[File:Armor Stand Entertain Pose.png|128px]]
|-
|7
|{{cd|animation.armor_stand.salute_pose}}
|7
|
|
|[[File:Armor Stand Salute Pose.png|128px]]
|-
|8
|{{cd|animation.armor_stand.hero_pose}}
|8, 13 or more
|
|
|[[File:Armor Stand Hero Pose.png|128px]]
|-
|9
|{{cd|animation.armor_stand.riposte_pose}}
|9
|
|
|[[File:Armor Stand Riposte Pose.png|128px]]
|-
|10
|{{cd|animation.armor_stand.zombie_pose}}
|10
|
|
|[[File:Armor Stand Zombie Pose.png|128px]]
|-
|11
|{{cd|animation.armor_stand.cancan_a_pose}}
|11
|
|
|[[File:Armor Stand Cancan A Pose.png|128px]]
|-
|12
|{{cd|animation.armor_stand.cancan_b_pose}}
|12
|
|
|[[File:Armor Stand Cancan B Pose.png|128px]]
|}
==Behavior==
Because armor stands are entities, they obey gravity, allowing them to fall and rest on non-full [[block]]s such as [[enchanting table]]s, [[snow layer]]s and [[slab]]s.
Any [[armor]] on the stand drops when the stand is broken. Armor stands can display [[enchanting|enchanted]] and all forms of [[dye]]d armor. The effects of most enchanted armor have no effect when on an armor stand, with three exceptions:
*[[Frost Walker]] creates [[frosted ice]] blocks on [[water]] as usual if an armor stand is pushed with a [[piston]].
*[[Depth Strider]] slows the movement of the armor stand when being pushed with water.
*A [[player]] may take damage from hitting an armor stand that holds armor enchanted with [[Thorns]].
Armor stands are not damaged by [[cacti]] but can be broken by [[arrow]]s. An armor stand destroyed by an explosion or a firework does not drop as an [[item (entity)|item]]. Armor stands in water and [[lava]] at the same time are not consumed by the lava.
{{IN|be}}, armor stands can be affected by [[status effect]]s. They can be 'killed' by [[Harming]] and [[Decay]] [[splash potion|splash]]/[[lingering potion]]s, lava, [[fire]], and [[campfire]]s, and they play the player death sound and fall to their side and disappear, yielding no armor stand item. If an armor stand is equipped with an item or armor, that item or armor is considered as "naturally-spawned equipment" with an 8.5% chance of dropping when the armor stand "dies" from the [[Instant Damage]] or the [[Wither (status effect)|Wither]] status effect. If the dropped item is any form of [[weapon]], [[tool]] or armor, it drops in a badly damaged state because the game considers it as "naturally-spawned equipment".<ref>{{Bug|MCPE-24341}}</ref>
The stand wobbles slightly when being hit by the player.
{{IN|java}}, it is possible to create an armor stand with arms using the {{cmd|summon}} [[command]]. It is also possible to change an armor stand without arms into a stand with arms by using the {{cmd|data}} command. The commands are as follows:
*<code>/data merge entity @e[type=armor_stand,sort=nearest,limit=1] {ShowArms:1}</code>, which changes the nearest armor stand into an armor stand with arms.
*<code>/summon minecraft:armor_stand ~ ~ ~ {ShowArms:1}</code>, which summons a new armor stand with arms shown.
*<code>/summon armor_stand ~ ~ ~ {Rotation:[0.0f]}</code>, which summons a new armor stand that faces a desired direction (dependent on changing "0.0f" to other numbers like "90.0f" or "180.0f", otherwise it faces the same way as a default armor stand).
==Sounds==
{{edition|java}}:<br>
Armor stands use the Friendly Creatures sound category for entity-dependent sound events.
{{Sound table
|sound=Armor Stand hit1.ogg
|sound2=Armor Stand hit2.ogg
|sound3=Armor Stand hit3.ogg
|sound4=Armor Stand hit4.ogg
|subtitle=Block breaking
|source=Friendly Creatures
|description=When an armor stand is damaged
|id=entity.armor_stand.hit
|translationkey=subtitles.block.generic.hit
|volume=1.0
|pitch=1.0
|distance=16}}
{{Sound table
|sound=Armor Stand break1.ogg
|sound2=Armor Stand break2.ogg
|sound3=Armor Stand break3.ogg
|sound4=Armor Stand break4.ogg
|subtitle=Block broken
|source=Friendly Creatures
|description=When an armor stand is destroyed
|id=entity.armor_stand.break
|translationkey=subtitles.block.generic.break
|volume=1.0
|pitch=1.0
|distance=16}}
{{Sound table
|sound=Stone dig1.ogg
|sound2=Stone dig2.ogg
|sound3=Stone dig3.ogg
|sound4=Stone dig4.ogg
|subtitle=Block placed
|source=Blocks
|description=When an armor stand is placed
|id=entity.armor_stand.place
|translationkey=subtitles.block.generic.place
|volume=1.0
|pitch=1.0
|distance=16}}
{{Sound table
|sound=Wood dig1.ogg
|sound2=Wood dig2.ogg
|sound3=Wood dig3.ogg
|sound4=Wood dig4.ogg
|subtitle=Block placed
|source=Friendly Creatures
|description=When an armor stand falls onto a block at a high speed{{Info needed}}
|id=entity.armor_stand.fall
|translationkey=subtitles.entity.armorstand.fall
|volume=1.0
|pitch=1.0
|distance=16
|foot=1}}
{{edition|bedrock}}:
{{Sound table
|type=bedrock
|sound=Armor Stand hit1.ogg
|sound2=Armor Stand hit2.ogg
|sound3=Armor Stand hit3.ogg
|sound4=Armor Stand hit4.ogg
|source=neutral
|description=When an armor stand is damaged
|id=mob.armor_stand.hit
|volume=1.0
|pitch=1.0}}
{{Sound table
|sound=Armor Stand break1.ogg
|sound2=Armor Stand break2.ogg
|sound3=Armor Stand break3.ogg
|sound4=Armor Stand break4.ogg
|source=neutral
|description=When an armor stand is destroyed
|id=mob.armor_stand.break
|volume=1.0
|pitch=1.0}}
{{Sound table
|sound=Stone dig1.ogg
|sound2=Stone dig2.ogg
|sound3=Stone dig3.ogg
|sound4=Stone dig4.ogg
|source=neutral
|description=When an armor stand is placed
|id=mob.armor_stand.place
|volume=1.0
|pitch=1.0}}
{{Sound table
|sound=Wood dig1.ogg
|sound2=Wood dig2.ogg
|sound3=Wood dig3.ogg
|sound4=Wood dig4.ogg
|source=neutral
|description=When an armor stand falls onto a block at a high speed{{Info needed}}
|id=mob.armor_stand.land
|volume=1.0
|pitch=1.0
|foot=1}}
==Data values==
===ID===
{{edition|java}}:
{{ID table
|edition=java
|firstcolumnname=Armor Stand
|showforms=y
|generatetranslationkeys=y
|displayname=Item
|spritename=armor-stand
|spritetype=item
|nameid=armor_stand
|form=item
|foot=1}}
{{ID table
|edition=java
|firstcolumnname=Armor Stand
|generatetranslationkeys=y
|displayname=Entity
|spritename=armor-stand
|spritetype=entity
|nameid=armor_stand
|foot=1}}
{{edition|bedrock}}:
{{ID table
|edition=bedrock
|firstcolumnname=Armor Stand
|shownumericids=y
|showforms=y
|notshowbeitemforms=y
|generatetranslationkeys=y
|displayname=Item
|spritename=armor-stand
|spritetype=item
|nameid=armor_stand
|id=552
|form=item
|foot=1}}
{{ID table
|edition=bedrock
|firstcolumnname=Armor Stand
|shownumericids=y
|generatetranslationkeys=y
|displayname=Entity
|spritename=armor-stand
|spritetype=entity
|nameid=armor_stand
|id=61
|foot=1}}
===Item data===
{{el|java}}:
{{main|Player.dat format}}
<div class="treeview">
* {{nbt|compound|tag}}: The item's '''tag''' tag.
{{:Player.dat_format/Entity Spawners}}
</div>
{{el|bedrock}}:
:{{IN|bedrock}}, armor stands have no additional item tag.
:See [[Bedrock Edition level format/Item format]].
===Entity data===
Armor stands have entity data associated with them that contain various properties of the [[entity]].
{{el|java}}:
{{main|Entity format}}
{{/ED}}
{{el|bedrock}}:
:See [[Bedrock Edition level format/Entity format]].
== Video==
Note: This video is outdated as Zoglins now attack armor stands
<div style="text-align:center">{{yt|tCFkdTfCleQ}}</div>
==History==
{{History|java}}
{{History||1.8|snap=August 5, 2014|slink={{Tweet|SeargeDP|496666952530538498}}|[[File:Armor Stand (pre-release).png|32px]] [[File:Armor Stand (item) (pre-release).png|32px]] [[Searge]] tweeted a image of an armor stand. The appearance was changed before release.}}
{{History|||snap=August 5, 2014|slink={{Tweet|SeargeDP|496673890148823040}}|Showed crafting recipe and name "[Armor Stand]", both were changed before release.}}
{{History|||snap=14w32a|[[File:Armor Stand JE1.png|32px]] Added armor stands.}}
{{History|||snap=14w32b|[[File:Armor Stand (item) JE1 BE1.png|32px]] The item texture has changed.
|Pick-block can now be used on armor stands.
|Armor stands can now no longer be crafted using [[slabs]] other than stone slabs.}}
{{History|||snap=14w32c|Added a <code>NoBasePlate</code> tag for the armor stand.}}
{{History|||snap=14w33a|Breaking [[particles]] have been added for the armor stand.}}
{{History||1.8.1|snap=pre1|Added <code>Marker</code> tag for armor stands.}}
{{History||1.9|snap=15w31a|Armor stands can now dual wield.
|<code>HandItems</code> and <code>ArmorItems</code> tags added for armor stands, which is intended to replace the <code>Equipment</code> tag.}}
{{History|||snap=15w33a|The <code>Equipment</code> tag has been removed from armor stands.}}
{{History|||snap=15w47a|The armor stand now wobbles when hit by the [[player]].}}
{{History|||snap=16w02a|Marker <code>ArmorStand</code>s now outline their equipment only when glowing.}}
{{History||1.11|snap=16w32a|The entity ID of the armor stand has been changed from <code>ArmorStand</code> to <code>armor_stand</code>.}}
{{History||1.13|snap=17w47a|Prior to [[1.13/Flattening|''The Flattening'']], this [[item]]'s numeral ID was 416.}}
{{History||1.14|snap=18w43a|[[File:Armor Stand JE2.png|32px]] The texture of armor stands has been changed to the new [[planks|oak planks]] texture.
|[[File:Armor Stand (item) JE2 BE2.png|32px]] The texture of armor stand [[item]]s has been slightly changed. (Comparison: [[File:Armor Stand (item) Texture Change 1.13 to 18w43a.gif|32px]])}}
{{History|||snap=18w50a|[[File:Armor Stand JE3.png|32px]] The texture of armor stands has been changed again.
|Armor stands now generate in taiga [[village]]s.}}
{{History||1.15|snap=19w42a|Armor stands can now be placed by [[dispenser]]s.}}
{{History||1.16|snap=20w07a|Armor stands no longer fall through fences and walls when placed.<ref>{{bug|MC-65951}}</ref>}}
{{History|||snap=20w14a|[[Zoglin]]s now attack armor stands.}}
{{History||1.17|snap=20w45a|[[File:Armor Stand 20w45a.png|32px]] The model of the armor stand has been changed.}}
{{History|||snap=20w46a|[[File:Armor Stand JE3.png|32px]] The model of the armor stand has been changed back to how it was in 1.16.}}
{{History||1.18|snap=Pre-release 5|[[File:Armor Stand JE4.png|32px]] Changed smooth stone texture on armor stand.}}
{{History||1.19.4|snap=23w03a|Armor stands now preserve custom names when placed and broken.}}
{{History||1.20<br>(Experimental)|link=1.19.4|snap=23w04a|An armor stand now appears in the smithing table GUI; arms are displayed as in Bedrock Edition.
|When an armor stand is placed, its model now changes in effect of the player's facing direction<ref>{{bug|MC-93533}}</ref>.}}
{{History|||snap=23w06a|The model no longer changes when the armory is placed. Also, the head, which tilted slightly to the lower right in the version from 1.8 up to 1.19.3, now faces forward from [[File:Armor Stand JE4.png|32px]] to [[File:Armor Stand JE5.png|32px]].}}
{{History||?|Armor can now be swapped in [[armor stand]]s by {{ctrl|using}} them in the armor stand's slot.}}
{{History|bedrock}}
{{History||1.2.0|snap=beta 1.2.0.2|[[File:Armor Stand BE1.png|32px]] [[File:Armor Stand (item) JE1 BE1.png|32px]] Added armor stands.}}
{{History||1.10.0|snap=beta 1.10.0.3|[[File:Armor Stand BE2.png|32px]] The texture of armor stands has been changed.
|[[File:Armor Stand (item) JE2 BE2.png|32px]] The texture of armor stand [[item]]s has been slightly changed.}}
{{History||1.12.0|snap=beta 1.12.0.2|[[File:Armor Stand with Leather Armor MCPE-44669.png|32px]] Leather [[armor]] no longer shows as being [[dye]]d properly when worn by armor stands.}}
{{History|||snap=beta 1.12.0.3|[[File:Armor Stand wear Chicken.png|x73px]][[File:Armor Stand wear Rabbit.png|x73px]] [[File:Armor Stand wear Salmon.gif|x73px]] [[File:Armor Stand wear Pufferfish.gif|x73px]] [[File:Armor Stand wear Slime.png|x73px]] When armor stands hold a [[raw chicken]], [[raw rabbit]], [[raw salmon]], [[pufferfish]] or a [[slime block]], they now wear these [[mob]] counterparts.<ref>{{bug|mcpe-48629}}</ref>}}
{{History||1.13.0|snap=beta 1.13.0.1|Leather armor now shows as being dyed properly when worn by armor stands.}}
{{History|||snap=beta 1.13.0.4|Armor stands no longer hold certain [[mob]]s if they are holding a [[item]] related to them.
|Armor stands now have a smoother animation when changing poses.}}
{{History||1.16.0|snap=?|Armor stands are now targeted by zoglins.}}
{{History||1.16.210|snap=beta 1.16.210.51|Armor stands are no longer attacked by [[goat]]s.}}
{{History|console}}
{{History||xbox=TU31|xbone=CU19|ps=1.22|wiiu=Patch 3|switch=1.0.1|[[File:Armor Stand JE1.png|32px]] [[File:Armor Stand (item) JE1 BE1.png|32px]] Added armor stands.}}
{{History||xbox=TU43|xbone=CU33|ps=1.36|wiiu=Patch 13|Added [[sound]]s for armor stands.}}
{{History||xbox=TU60|xbone=CU51|ps=1.64|wiiu=Patch 30|switch=1.0.11|[[File:Armor Stand BE1.png|32px]] Armor stands now have arms and the [[player]] can now change the pose of the armor stand.}}
{{History||xbox=none|xbone=none|ps=1.90|wiiu=none|switch=none|[[File:Armor Stand BE2.png|32px]] The texture of armor stands has been changed.
|[[File:Armor Stand (item) JE2 BE2.png|32px]] The texture of armor stand [[item]]s has been slightly changed.}}
{{History|foot}}
<gallery>
Armour stand 1.png|The first image of the armor stand.
JE 1.8 Dev Armor Stand crafting.png|The first image of armor stand crafting recipe.
The Bountiful Update.png|Armor stands in the [[Java Edition 1.8|1.8]] poster.
Dual Wielding Armor Stand.png|A dual wielding armor stand.
Glowing Armor Stands.png|Armor stands with the [[glowing]] effect.
Armor Stand Chess.jpg|Chess with armor stands.
</gallery>
==Issues==
{{issue list}}
==Trivia ==
*Equipping armor stands with certain [[block]]s and [[item]]s can cause rendering glitches. According to [[Searge]] this is due to transparent rendering on entities not yet being supported.<ref>{{bug|MC-67415||"Armor Stands with Slime Block rendering entities behind them"}} resolved as "Won't Fix"</ref><ref>{{bug|MC-67674||"Armor Stand wearing a Skull and Holding Stained Glass causes Graphical issues"}} resolved as "Won't Fix"</ref>
*Bedrock Edition has a version exclusive armor stand [[model]], which includes posable arms.
*Using [[redstone]] to change the stands reverse the poses, starting with the can-can pose first.
*Placing the stand within three powered [[redstone dust]] always changes its pose to the honor pose. [[Redstone Repeater|Repeaters]] also switch the stand to the honor pose if not set four blocks from one.
*Using external tools, armor stand spawners can be placed.
*Secret signatures for [[Jasper Boerstra|JAPPA]], Chi Wong, and [[Michael Stoyke|Searge]] can be found at the bottom of the armor stand texture.
== Gallery ==
===Renders===
;Armor (Java Edition)
<gallery>
Armor Stand Leather.png
Armor Stand Golden.png
Armor Stand Chainmail.png
Armor Stand Iron.png
Armor Stand Diamond.png
Armor Stand Netherite.png
</gallery>
; Armor (Bedrock Edition)
<gallery>
Armor Stand with Leather Armor BE.png
Armor Stand with Golden Armor BE.png
Armor Stand with Chain Armor BE.png
Armor Stand with Iron Armor BE.png
Armor Stand with Diamond Armor BE.png
Armor Stand with Netherite Armor BE.png
</gallery>
;Poses
<gallery>
Armor Stand Pose 0.png|
Armor Stand Pose 1.png|
Armor Stand Pose 2.png|
Armor Stand Pose 3.png|
Armor Stand Pose 4.png|
Armor Stand Pose 5.png|
Armor Stand Pose 6.png|
Armor Stand Pose 7.png|
Armor Stand Pose 8.png|
Armor Stand Pose 9.png|
Armor Stand Pose 10.png|
Armor Stand Pose 11.png|
Armor Stand Pose 12.png|
</gallery>
===Screenshots===
<gallery>
Armor Stand Demo.png|Armor stands in various positions with various [[armor]].
Armor Stand glass and sword.png|Armor stands can wear [[block]]s on their heads. This is accessible with [[command]]s such as {{cmd|item}}.
Bedrock edition armor stand poses.png|All armor stand poses as seen in {{el|be}}.
Netherite to the rescue!.png|An entire set of netherite [[armor]] on an armor stand.
Armor Stand Garage.png|An armor stand in a garage.
</gallery>
==References ==
{{reflist}}
==External Links==
*[https://www.minecraft.net/en-us/article/taking-inventory--armor-stand Taking Inventory: Armor Stand] – Minecraft.net on March 16, 2023
{{Items}}
{{Entities}}
[[Category:Storage]]
[[de:Rüstungsständer]]
[[es:Soporte para armadura]]
[[fr:Porte-armure]]
[[ja:防具立て]]
[[ko:갑옷 거치대]]
[[pl:Stojak na zbroję]]
[[pt:Suporte de armaduras]]
[[ru:Стойка для брони]]
[[th:แท่นวางชุดเกราะ]]
[[uk:Стійка для обладунків]]
[[zh:盔甲架]]</li><li>[[Footprint|Footprint]]<br/>{{about|the joke item|the unused particle|Java Edition unused features#Footprint particle}}
{{Joke feature}}
{{Item
| image = Footprint (item).png
| renewable = No
| stackable = Yes (64)
}}
The '''Footprint''' was a joke item from [[Java Edition 20w14∞]], found only in the {{code|missing}} dimension.
== Appearance ==
This item is semi-transparent with a grey colour scheme.
== Obtaining ==
=== Dimension ===
Footprints were obtained only from a chest in the {{Code|missing}} dimension. Only existing in 2020 April fools snapshot 20w14∞, it cannot exist in any non-April Fool's joke versions and April Fool's joke versions before or after 20w14∞. There is a maximum of 2 footprints that can be obtained legitimately in any given world.
=== Cheats/Creative Mode ===
Despite these footprints not being available in the creative inventory, it is still possible to acquire them via the command {{Code|code=give <target> minecraft:footprint <amount>}} or duplicating them by holding down middle-click whilst in creative mode.
== Usage ==
As of snapshot 20w14∞, this item cannot be placed or used in any way other than a trophy. This item can be inserted and/or rotated inside of an item frame, and it has a stack limit of 64.
== Data values ==
=== ID ===
{{ID table
|showforms=y
|generatetranslationkeys=java
|displayname=Footprint
|spritetype=item
|nameid=footprint
|form=item
|foot=1}}
== History ==
{{History|java}}
{{History||20w14∞|[[File:Footprint (item).png|32px]] Added the footprint item.}}
{{History|foot}}
== Gallery ==
<gallery>
File:Missing biome.png|The Easter Egg dimension that the item spawns in.
</gallery>
== Trivia ==
* This is a reference to the removed "Footstep" particle, hence in the "missing" dimension.
** This item is intended as a joke directed towards the commands' community where the "Footstep" particle is commonly requested.<ref>https://gist.github.com/boq/8e65cb85badc75765eeb8956af78aaa5</ref>
== References ==
{{reflist}}
{{Items}}
{{Jokes}}
[[Category:Non-renewable resources]]
[[Category:Joke items]]
[[es:Footprint]]
[[pt:Pegada]]</li></ul></nowiki> | 1.9pre2 | Introduced breeding. All sheep were born with white wool, irrespective of their parentage. No baby animals yet; they spawned normal animals instead. They could also breed instantly after "giving birth". This resulted in "spam breeding" allowing for over one hundred animals in a cage only big enough for two. | |||
| 1.9pre3 | Baby animals added for pigs, sheep, chickens, cows, and mooshrooms. They enter "love mode" when fed with wheat. | ||||
| 1.9pre6 | Baby sheep can be either of their parents' colors, even if they were dyed. Animals are uninterested in wheat lying on the ground. | ||||
1.2.1{{Extension DPL}}<ul><li>[[Map|Map]]<br/>{{about|the craftable map|maps showing the locations of certain structures|Explorer Map|other uses|Map (disambiguation)}}
{{distinguish|World}}
{{Item
| image = Map Zoom 4.png
| renewable = Yes
| stackable = Yes (64)
}}
A '''map''' is an [[item]] used to view explored [[Chunk|terrain]] and mark landmarks.
==Obtaining==
===Crafting===
{{crafting
|head=1
|showname=0
|showdescription=1
|A1= Paper
|B1= Paper
|C1= Paper
|A2= Paper
|B2= Compass
|C2= Paper
|A3= Paper
|B3= Paper
|C3= Paper
|Output= Empty Map
|type= Miscellaneous
|description=This variation is called an "empty locator map" {{in|bedrock}}, or an "empty map" {{in|java}}.
When the player first creates a map, it is blank. It needs to be activated by holding it and pressing ''{{Control|use item}}''. after which it records terrain and location markers as the player travels within (or close to) the area it maps.
}}
{{crafting
|A1= Paper
|B1= Paper
|C1= Paper
|A2= Paper
|B2= Paper
|C2= Paper
|A3= Paper
|B3= Paper
|C3= Paper
|Output= Empty Map
|type= Miscellaneous
|description={{only|bedrock}}
This variation is called an "empty map". It does not show location markers. It is intended for cloning and zooming locator maps without having to consume an additional [[compass]] (thereby saving [[iron ingot]]s and [[redstone dust]]), but it can also be {{Control|use|text=activated}} and later converted to a locator map by combining it with a compass on an [[anvil]], [[crafting table]], or [[cartography table]].
|foot=1
}}
=== Natural generation ===
==== Chest loot ====
{{LootChestItem|empty-map,map
}}
=== Cartography table ===
A map can also be created using a single paper on a [[cartography table]] to create an empty map, or a paper with a compass for an empty locator map.{{only|bedrock}}
=== Starting map ===
{{exclusive|bedrock|section=1}}
When creating a new world {{in|bedrock}}, the player can enable the "Starting Map" option to spawn with an empty locator map in the hotbar. The map's zoom scale is 1:8. The map is updated only while the player holds it.
=== Trading ===
Novice-level cartographer [[Villager|villagers]] sell a single empty map for 7 [[Emerald|emeralds]] as their trades.
{{IN|java}}, cartographer villagers may give players with the [[Hero of the Village]] effect an empty map.
== Usage ==
{{See also|Tutorials/Mapping}}
=== Mapping ===
Crafting a map creates an empty map. The map is drawn for the first time when it is held and used (with ''{{control|use item}}''). This map can then be adjusted to different zoom levels. After conversion to a drawn map item, it starts to draw a top-down view of the player's surroundings, with North pointing to the top of the map. A pointed oval pointer indicates the player's position on the map, and moves in real-time as the player moves across the terrain shown on the map. The map does ''not'' center on the player when created, rather, the world is broken up into large invisible grid squares, and the map displays the area of whichever grid square it is in when it is first used. For example, if a player uses a new map in a certain grid square, and then moves a distance away and uses another fresh map but is still within the same grid square, both maps appear identical. To make a map that is not identical to the first one, the player would have to move outside of the edges of the first map (because then they would be in a new grid square). This way, no two maps of the same size can ever partially overlap and every map can display only a fixed area.
To record the world on a map, that specific map must be held in the player's hands while the player moves around the world. The world is recorded as-is during exploration, meaning that if the world is modified, a player must revisit the area while holding the map to update the map's view. Maps can also be [[Map#Cloning|cloned]]. If a player holds a map whose one or more clones are on display in item frames, updates are made on all clone-connected maps.
Other players are displayed on the map only if they have a map in their inventory cloned from the one being looked at. When placing a map into an [[item frame]], the map displays with a green pointer shown at the location of the item frame. This is to help the player see where they are in relation to the area that the map is showing. If the player leaves a map in an item frame and views a clone of it, the green pointer remains in the spot of the framed copy. This can be used to set up waypoints. Unexplored areas are transparent, making the item frame visible.
When the player leaves the area shown on a specific map, the player pointer transforms into a white dot that moves on that map. The marker shrinks to a smaller white dot if the player is far from the map's center: the area is 320 by 320 blocks per scale factor. The dot moves along the edge of the map to show the relative location of the player. However {{in|bedrock}}, the pointer remains as an arrow but shrinks until the player is near the area shown on the map.
While maps in [[the Nether]] work, they show only the red-and-gray pattern, regardless of the blocks placed. The only useful function is finding where the player is in relation to placed framed maps, which show as green pointers. Additionally, the player pointer rapidly spins and is not a good indicator of direction. Placing a [[banner]] in [[the Nether]] still shows it on the map as usual. Having a smaller map image while riding a [[strider]] in the Nether can help one to see one's footing while traveling over [[lava]].
{{IN|java}}, when using a map from another dimension, the map shows the player's position and direction when they were last in the dimension of the map. {{IN|bedrock}}, however, the player can use maps from one dimension while in another dimension. For locator maps, the place marker changes color depending on the dimension that the player is currently in (white for the Overworld, red for [[the Nether]], and magenta for [[the End]]). An Overworld map in the Nether shows the player's corresponding location and direction in the Overworld.<ref name=multiverse>{{ytl|EpP1diZdEdI}}</ref> Similarly, a Nether Map in the Overworld shows the player's corresponding location in the Overworld, but the place marker spins, just like a Nether map in the Nether. An Overworld map in the End shows the world spawn.<ref name=multiverse/> A Nether map cannot be used in the End — the map appears, but the place marker is not shown anywhere — and similarly, an End map cannot be used in the Overworld or the Nether.
A player can make a large piece of pixel art (128×128) facing upward, center a map on it, and place that map in an [[item frame]] to create a custom picture. Locking is recommended. See [[Map item format#Map Pixel Art]] for details on the techniques.
Maps display as a mini-map when held in the off-hand, or if the off-hand slot is occupied; the map is full-sized only when held in the dominant hand with both hands free.
A map always positions itself facing towards North when placed horizontally within an item frame regardless of how the map is placed.
=== Map content ===
{{Main|Map item format}}
Maps consist of square pixels arranged like pixels in a 128×128 square pattern, with each pixel representing a square portion of land. {{IN|java}}, the [[Map item format#Color table|color of a map pixel]] generally matches the color of the most common [[opaque]] block in the corresponding area, as seen from the sky. 'Minority blocks' in the target area have no effect on the color of the pixel, thus small features tend to be undetectable on zoomed-out maps.
{{IN|bedrock}}, the [[Map item format#Color table|color of a map pixel]] instead matches the single top-most opaque block in a grid sized by the map magnification pixel size (see the table in the "Player marker and pointer" section below). For example, a 3/4 magnification map has a pixel size of 8x8 blocks; this means the map will read only the top-most opaque blocks at the 0,0 coordinate, the 8,0 coordinate, the 0,8 coordinate, etcetera, ignoring all other blocks in the area. This means that {{in|bedrock}}, map pixel art requires only one block per pixel regardless of map magnification.
{{IN|bedrock}}, grass, foliage and water colors that are biome-dependent are represented accurately on a map.
{| class="wikitable"
|-
! style="width: 300px;" | {{el|je}}
! style="width: 300px;" | {{el|be}}
|-
| style="text-align: center;" | [[File:Map Zoom 4.png|alt=All banners marked on a map, alongside a named banner.|216px]]
| style="text-align: center;" | [[File:Map item BE.png|216px]]
|-
| Biome colors on ''Java Edition''.
| Biome colors on ''Bedrock Edition''.
|-
|}
Maps also show ground up to about 15 blocks below the surface of the water in oceans as slightly lighter blue, to show where the ground rises. This is not true with land above water. Higher elevations in the world mean lighter colors on the map. The map records the surface even as the player moves below the surface.
A standard map represents 128x128 blocks (1 block per pixel, 8x8 [[chunks]]) but maps can be zoomed-out to represent up to 2048x2048 blocks (16 square blocks per pixel, 128x128 [[chunks]]).
Some relevant distances: 64 blocks (4 chunks) is the update radius from a player in the Overworld and the End. However, it is half this (32 blocks) in the Nether. Also, 1024 blocks is the minimum Overworld distance from a [[nether portal]], at which players can build another portal and expect to reach a new location in the Nether. This is the distance across a 1:8 map, and also from a 1:16 map's center to its edge.
=== Player marker and pointer ===
{{IN|java}}, every map contains a marker that marks the position of the player, and points in the same direction as the player. When a player moves out of a map, a big white dot appears and moves relative to the player's position. The pointer either disappears when the player moves away a certain distance from the border of the map or, in case of [[explorer map]]s, the big white dot changes to a smaller white dot. The distance required for the small white dot to appear(explorer maps) or for the big dot to vanish (normal maps) changes with the scaling of the map.
* '''Level 0/4 :''' 128×128 blocks (each map pixel represents 1 block)
* '''Level 1/4 :''' 256×256 blocks (2×2 blocks per map pixel)
* '''Level 2/4 :''' 512×512 blocks (4×4 blocks per map pixel)
* '''Level 3/4 :''' 1024×1024 blocks (8×8 blocks per map pixel)
* '''Level 4/4 :''' 2048×2048 blocks (16×16 blocks per map pixel)
{{IN|bedrock}}, a map can be crafted with or without this marker, and a map without a position marker can add one later by adding a compass to the map. When a map is crafted without a compass, it's simply called an "empty map", but when crafted with a compass, it's called an "empty locator map". The marker also turns red if the player enters the Nether with an Overworld map and shows the player's Overworld location relative to the Nether location. A map created in the End has a purple marker showing the player's location. If an Overworld map is used in the End, a magenta dot appears on the player's spawn point.{{/BE|position}}
{{crafting
|name=Map<br>(with marker)
|ingredients=[[Map]] or Empty Map +<br>[[Compass]]
|showdescription=1
|Map (no markers);Empty Map
|Compass
|Output= Locator Map;Empty Locator Map
|type= Miscellaneous
|description={{el|be}} only.
Maps crafted from only paper do not show the location marker; to add it, a compass must be added to the map.
|foot=1
}}
{{IN|bedrock}}, a cartography table can also be used to add a pointer to create a locator map or empty locator map. This can be done by adding a compass to paper, or to an empty map or map.
=== Zooming out ===
[[File:Cartography table UI zoom.png|thumb|300px|{{IN|java}}, cartography table's UI, showing the map is being zoomed out.]]
A [[cartography table]] can also be used to zoom out, taking only one piece of paper per zoom level.
A blank map can not be zoomed out. A map has to have something already marked on it for the zooming to be possible.
{{Crafting
|A1= Paper |B1= Paper |C1= Paper
|A2= Paper |B2= Map;Locator Map |C2= Paper
|A3= Paper |B3= Paper |C3= Paper
|Output= Map;Locator Map
|showdescription=1
|description=Locator Map {{el|be}} only.
}}
{{/BE|zoom}}
==== Zoom details ====
The zooming function starts from when the map is created (zoom level 0) up to its fourth zoom step (zoom level 4).
{| class="wikitable" style="text-align: center" data-description="Zoom levels"
! colspan="2" |
! Zoom step 0
! Zoom step 1
! Zoom step 2
! Zoom step 3
! Zoom step 4
|-
! colspan="2" |
| [[File:Map Zoom 0.png|116px|Zoom step 0, 1:1]]
| [[File:Map Zoom 1.png|116px|Zoom step 1, 1:2]]
| [[File:Map Zoom 2.png|116px|Zoom step 2, 1:4]]
| [[File:Map Zoom 3.png|116px|Zoom step 3, 1:8]]
| [[File:Map Zoom 4.png|116px|Zoom step 4, 1:16]]
|-
! colspan="2" | Zoom level
| 0/4
| 1/4
| 2/4
| 3/4
| 4/4
|-
! colspan="2" | 1 map pixel represents
| 1 block
| 2×2 blocks
| 4×4 blocks
| 8×8 blocks
| 16×16 blocks<br>(1×1 chunk)
|-
! colspan="2" | Scaling ratio
| 1:1
| 1:2
| 1:4
| 1:8
| 1:16
|-
! rowspan="2" colspan="2" | Map covers an area of
| 128×128 blocks
| 256×256 blocks
| 512×512 blocks
| 1024×1024 blocks
| 2048×2048 blocks
|-
| 8×8 chunks
| 16×16 chunks
| 32×32 chunks
| 64×64 chunks
| 128×128 chunks
|-
! colspan="2" | Smallest discernible features
| Blocks
| Trees, Paths
| Lakes, Buildings
| Mountains, Rivers
| Biomes, Mountain Ranges
|-
! colspan="2" | Use cases
| Pixel art, Base plans
| Base surroundings
| Structure mapping
| Landscape mapping
| Biome mapping
|-
! rowspan="2" | Total paper needed to zoom out from Level 0
! in anvil{{only|bedrock|short=1}} or crafting table
| -
| {{ItemSprite|Paper}} 8
| {{ItemSprite|Paper}} 16
| {{ItemSprite|Paper}} 24
| {{ItemSprite|Paper}} 32
|-
! in cartography table
| -
| {{ItemSprite|Paper}} 1
| {{ItemSprite|Paper}} 2
| {{ItemSprite|Paper}} 3
| {{ItemSprite|Paper}} 4
|}
Maps are always aligned to a grid at all zoom levels. That means zooming out any different map in a specific area covered by that map always has the same center. As such, maps are aligned by map width (1024 blocks for a level 3 maps) minus 64. A level 3 map generated at spawn covers X and Z coordinates from -64 to 959. All maps generated in this area zoom out to the same coordinates, guaranteeing that they are always 'aligned' on a map wall. For a zoomed-out map to cover a new area, it must start with a base (level 0) map that is in that area.
At zoom level 0, a map created on the point (0,0) has (0,0) at the center of the map. At higher zoom levels of the same map, the coordinate (0,0) is in the top left square of the map.
{{IN|java}}, zoom level can be seen on a map by turning on Advanced Tooltips (a [[Debug screen#More debug keys|debug screen]] option that can be toggled by using the key combination {{key|F3+H}}). The tooltip of the map then shows the zoom level, scaling factors, and map ID.
=== Cloning ===
[[File:Cartography table UI clone.png|thumb|300px|{{IN|Java}}, cartography table's UI, showing the map is being cloned.]]
A mix of empty maps and empty locator maps may be used. Whether the cloned maps show position markers is dependent only on the input map.
A [[cartography table]] can also be used to clone a map.
The parts of the world that have already been explored and mapped are copied, and newly explored areas appear on both instances. If one of the maps is later zoomed out, then the maps lose their connection to each other and function as completely separate maps that have to be individually filled by exploring.
In Creative mode, a map in an item frame may be cloned by using {{control|pick block}} on it, as long as that map is not also in the player's inventory.
It doesn't matter if the map to be cloned is at a higher zoom level (made of more paper) than the blank map. Upon copying the map, both resulting maps have the same magnification as the starting map.
{{/BE|clone}}
=== Crafting ingredient ===
{{crafting usage|Map, Empty Map}}
=== Marking points ===
{{IN|java}} the player has the ability to mark spots on a map. To do this, {{control|use}} a map on a placed-down [[banner]], and the spot of the banner gets marked on the map. The mark takes the color of whatever the base color is for the banner, and if the banner has a name, the mark shows that name. Banner marks on a map are always oriented with their top facing north, regardless of the banner's actual orientation. If the banner is destroyed, the mark of the banner remains at first, but if the player gets closer to where the banner previously was, it disappears as the area is updated on the map.
If a map is mounted on an item frame and is within the area it depicts, the mounted map displays its current location with a green indicator rotated to match its orientation.
[[File:Map Marker Bedrock on Item frame.png|thumb|181x181px|{{IN|bedrock}} this is what a map lying on an item frame looks like, while showing markers.]]
{{IN|bedrock}} the player can place copies of locator maps in [[item frame]]s in order to create a land mark. The marker is a green dot that resembles the shape of the player's marker, but in green color. The position the marker points at depends on the direction the item frame is facing. It is worth noting that the markers work only on copies of the same map. Other maps of the same area do not show the existing markers that the player(s) had placed.
If a player has a cloned map in their inventory, their pointer appears white when viewed on the same map held by another player. Hence, if all players have the same cloned map in their inventory, all markers would appear white when the clone map is viewed.
{| class="wikitable"
|-
! style="width: 300px;" | {{el|je}}
! style="width: 300px;" | {{el|be}}
|-
| style="text-align: center;" | [[File:Banner marked map.png|alt=All banners marked on a map, alongside a named banner.|216px]]
| style="text-align: center;" | [[File:Tracking map with markers bedrock.png|216px]]
|-
| How every banner appears {{IN|java}} on a map, including named banners.
| {{IN|bedrock}} this is how a locator map shows map markers while held by a player.
|-
|}
===Locking===
[[File:Cartography table UI lock.png|thumb|300px|{{IN|Java}}, cartography table's UI, showing the map is being locked.]]
Maps can be locked when using a [[glass pane]] in a [[cartography table]]. This creates a new map containing the same data and locks it. All copies of this new map are also locked. A locked map never changes, even when the depicted terrain changes. {{IN|Be}}, locked maps have a unique texture.
{| class="wikitable" style="text-align: center;"
|-
! Condition
! style="width: 200px;" | Newly created map
! style="width: 200px;" | Map after terrain alteration
|-
! Unlocked map
| [[File:Map Zoom 0.png|174px]] || [[File:Unlocked Map.png|174px]]
|-
! Locked map
| [[File:Map Zoom 0.png|174px]] || [[File:Map Zoom 0.png|174px]]
|-
|}
{{-}}
== Sounds ==
{{Edition|Java}}:
{{Sound table
|rowspan=2
|sound=Drawmap1.ogg
|sound2=Drawmap2.ogg
|sound3=Drawmap3.ogg
|subtitle=Map drawn
|source=player
|description=When a map is drawn
|id=ui.cartography_table.take_result
|translationkey=subtitles.ui.cartography_table.take_result
|volume=1.0
|pitch=1.0
|distance=16}}
{{Sound table
|subtitle=Map drawn
|source=block
|description=When a map is edited using a cartography table
|id=ui.cartography_table.take_result
|translationkey=subtitles.ui.cartography_table.take_result
|volume=1.0
|pitch=1.0
|distance=16
|foot=1}}
{{Edition|Bedrock}}:
{{Sound table
|type=bedrock
|rowspan=2
|sound=Drawmap1.ogg
|sound2=Drawmap2.ogg
|sound3=Drawmap3.ogg
|source=block
|description=When a map is drawn<wbr>{{Upcoming|BE 1.20.20.20}}
|id=ui.cartography_table.take_result|idnote={{Verify|Could be block.cartography_table.use}}
|volume=0.8
|pitch=1.0}}
{{Sound table
|type=bedrock
|source=block
|description=When a map is edited using a cartography table
|id=ui.cartography_table.take_result
|volume=0.8
|pitch=1.0
|foot=1}}
== Data values ==
=== ID ===
{{edition|java}}:
{{ID table
|edition=java
|showforms=y
|generatetranslationkeys=y
|displayname=Empty Map
|spritetype=item
|nameid=map
|form=item}}
{{ID table
|displayname=Map
|spritetype=item
|nameid=filled_map
|form=item
|translationkey=item.minecraft.filled_map, filled_map.buried_treasure, filled_map.explorer_jungle{{upcoming|java 1.20.2}}, filled_map.explorer_swamp{{upcoming|java 1.20.2}}, filled_map.mansion, filled_map.monument, filled_map.unknown, filled_map.village_desert{{upcoming|java 1.20.2}}, filled_map.village_plains{{upcoming|java 1.20.2}}, filled_map.village_savanna{{upcoming|java 1.20.2}}, filled_map.village_snowy{{upcoming|java 1.20.2}}, filled_map.village_taiga{{upcoming|java 1.20.2}}
|foot=1}}
{{edition|bedrock}}:
{{ID table
|edition=bedrock
|showaliasids=y
|shownumericids=y
|showforms=y
|notshowbeitemforms=y
|generatetranslationkeys=y
|displayname=Empty Map
|spritetype=item
|nameid=empty_map
|aliasid=emptymap
|id=515
|form=item
|translationkey=item.emptyMap.name, item.emptyLocatorMap.name}}
{{ID table
|displayname=Map
|spritetype=item
|spritename=map-be
|nameid=filled_map
|aliasid=map
|id=420
|form=item
|translationkey=item.map.name, item.map.exploration.mansion.name, item.map.exploration.monument.name, item.map.exploration.treasure.name
|foot=1}}
=== Metadata ===
{{see also|Bedrock Edition data values}}
{{IN|bedrock}}, maps use the following data values:
{{/DV}}
=== Item data ===
{{el|java}}:
{{main|Player.dat format}}
<div class="treeview">
* {{nbt|compound|tag}}: The item's '''tag''' tag.
{{:Player.dat_format/Maps}}
</div>
{{el|bedrock}}:
: See [[Bedrock Edition level format/Item format]].
=== Map icons ===
{{see also|Player.dat format|Map item format|map_icons.png}}
Map icons are 8×8 in ''Java Edition'', but 16×16 in Bedrock Edition. As such, there are minor misalignment issues in ''Java Edition''.<ref>{{bug|MC-214649|||WF}}</ref>
[[File:Map icons.png|thumb|128px|Map icons texture {{in|Java}}]]
[[File:Map icons BE.png|thumb|128px|Map icons texture {{in|Bedrock}}]]
{| class="wikitable"
|-
! Java ID !! Bedrock ID !! Text ID !! Appearance !! Purpose !! Shown in item frames?
|-
| 0 || ||<code>player</code> || [[File:Player (texture) JE1 BE1.png|16px]] [[File:Player (texture) BE2.png|16px]] White marker || Players (on map) || No
|-
| 1 || 1 ||<code>frame</code> || [[File:Green Marker (texture) JE1 BE1.png|16px]] [[File:Green Marker (texture) BE2.png|16px]] Green marker || The current map in an item frame || Yes
|-
| 2 || ||<code>red_marker</code> || [[File:Red Marker (texture) JE1 BE1.png|16px]] [[File:Red Marker (texture) BE2.png|16px]] Red marker || Position converted to Overworld when opening Overworld map in the Nether{{Only|bedrock}} || No
|-
| 3 || ||<code>blue_marker</code> || [[File:Blue Marker (texture) JE1 BE1.png|16px]] [[File:Blue Marker (texture) BE2.png|16px]] Blue marker || Other players || No
|-
| 4 || ||<code>target_x</code> || [[File:Target X (texture) JE1 BE1.png|16px]] White X || Unused || Yes
|-
| 5 ||5
|<code>target_point</code> || [[File:Target Point (texture) JE1 BE1.png|16px]] [[File:Target Point (texture) BE2.png|16px]] Red triangle || Unused || Yes
|-
| 6 || 6 ||<code>player_off_map</code> || [[File:Player Off Map (texture) JE1 BE1.png|16px]] Large white dot || Players off map, nearby{{only|java}} || No
|-
| 7 || 13 ||<code>player_off_limits</code> || [[File:Player Off Limits (texture) JE1.png|16px]] [[File:Player Off Limits (texture) BE.png|16px]] Small white dot || Players off map, far away{{only|java}} || No
|-
| 8 ||14
|<code>mansion</code> || [[File:Mansion (texture) JE1.png|16px]] [[File:Mansion (Texture) BE2.png|frameless|16x16px]] Woodland mansion || Woodland mansion || Yes
|-
| 9 || 15 ||<code>monument</code> || [[File:Monument (texture) JE1.png|16px]] [[File:Monument Texture BE2.png|frameless|16x16px]] Ocean monument || Ocean monument || Yes
|-
| 10 - 25 || ||<code>{{tooltip|banner_*|banner_white, banner_orange, banner_magenta, banner_light_blue, banner_yellow, banner_lime, banner_pink, banner_gray, banner_light_gray, banner_cyan, banner_purple, banner_blue, banner_brown, banner_green, banner_red, banner_black}}</code> || [[File:Banner White (texture) JE1.png|16px]] [[File:Banner Light Gray (texture) JE1.png|16px]] [[File:Banner Gray (texture) JE1.png|16px]] [[File:Banner Black (texture) JE1.png|16px]] [[File:Banner Brown (texture) JE1.png|16px]] [[File:Banner Red (texture) JE1.png|16px]] [[File:Banner Orange (texture) JE1.png|16px]] [[File:Banner Yellow (texture) JE1.png|16px]] [[File:Banner Lime (texture) JE1.png|16px]] [[File:Banner Green (texture) JE1.png|16px]] [[File:Banner Cyan (texture) JE1.png|16px]] [[File:Banner Light Blue (texture) JE1.png|16px]] [[File:Banner Blue (texture) JE1.png|16px]] [[File:Banner Magenta (texture) JE1.png|16px]] [[File:Banner Purple (texture) JE1.png|16px]] [[File:Banner Pink (texture) JE1.png|16px]]<br>Banners in all 16 wool colors{{only|java}}|| Banner markers || Yes
|-
| 26 ||4
|<code>red_x</code> || [[File:Red X (texture) JE1.png|16px]] [[File:Target X (texture) BE2.png|16px]] Red X || Buried treasure || Yes
|-
| || 8 || || [[File:Magenta Marker (texture) BE1.png|16px]] Magenta marker
| Position converted to Overworld when opening Overworld map in the End{{Only|bedrock}} || No
|-
| || 9 || || [[File:Orange Marker (texture) BE1.png|16px]] Orange marker{{more info}}
|Other players
|Yes
|-
| || 10 || || [[File:Yellow Marker (texture) BE1.png|16px]] Yellow marker
| Other players || No
|-
| || 11 || || [[File:Cyan Marker (texture) BE1.png|16px]] Cyan marker
| Other players || No
|-
| -
|12
| || [[File:Green Point (texture) BE1.png|16px]] Green Triangle
| Other structure such as stronghold, fortress, end city, etc. when used as explorer map destination{{Only|bedrock}} || Yes
|}
It should be noted that even if the player used a NBT editor to add an additional icon on the map, ''Minecraft'' shows only the first one listed when the player loads up their world.
== Achievements ==
{{load achievements|Map Room}}
== History ==
{{see also|section=24|map_icons.png|Java Edition history of textures#Map icons}}
{{more images|section=24|{{bug|MC-72962}}}}
{{History||April 27, 2011|link=https://web.archive.org/web/0/http://notch.tumblr.com/post/4988431144/the-maps|[[Notch]] unveiled screenshots of the map.}}
{{History||April 28, 2011|link={{tweet|notch|63500114005721088}}|[[Notch]] said that he would try to make maps place-able on [[wall]]s.}}
{{History|java beta}}
{{History||1.6|snap=Test Build 3|[[File:Map (item) JE1 BE1.png|32px]] Added maps.}}
{{History||1.6.6|The ability to auto-craft maps using shift-click has been disabled.}}
{{History||1.8|snap=Pre-release|Maps can now be found in library chests in the brand-new [[stronghold]]s.
|Auto crafting maps has been restored. Map cloning, therefore, is unavailable for a period of time.}}
{{History||1.8.1|Maps now work both while walking and flying.}}
{{History|java}}
{{History||1.0.0|snap=Beta 1.9 Prerelease 5|Prior to this update, the [[sun]] in ''[[Minecraft]]'' rose in the North, which threw off many [[player]]s and led to a common misconception that ''Minecraft'' maps/[[world]]s were oriented with East at the top. The sun now rises in the east and sets in the west, making navigation much more intuitive.
|Before the change in sun position, it was commonly said that ''Minecraft'' maps/worlds are oriented with East at the top; sunrise, by definition, occurs at the East, which means it is certainly true that the maps were oriented "East" since the Sun rose from the top (North). However, [[Jeb]] asserted (and [[Notch]] agreed) that the sun rose in the north.<ref>{{Tweet|jeb|87815841160237056}}</ref><ref>{{Tweet|notch|88155424880201728}}</ref> Most mods and map-making tools, however, used the terms East and North consistent with their actual definitions (e.g. a [[Programs and editors/Cartograph|Cartograph]]-generated map with North at the top is rotated 90 degrees from the in-game map).}}
{{History||1.4.2|snap=12w34a|[[File:Empty Map JE1 BE1.png|32px]] [[Crafting]] a map now creates an empty map. The map is drawn for the first time when it is held and right clicked, and is centered near the location of the [[player]] when clicked (not as before where it was centered on the location it was crafted.)
|Previously, in order to map a new area, the map had to be ''crafted'' in that area (rather than carrying a previously-crafted map to the new area). The point where a map is crafted becomes its permanent center, and could never be changed.
|The pointer no longer disappears when leaving the map, but transforms into a white dot, indicating on what side of the map the player is located.
|Maps now align to a grid, making it easier to create adjacent maps.
|Maps can now be zoomed out (but not zoomed in).
|Maps can now be cloned and scaled.}}
{{History||1.4.2|snap=12w34b|Maps now have a ''zoom level'', which was fixed at 1:8 prior to snapshot [[Java Edition 12w34a|12w34a]],<ref name="mapinfo">https://web.archive.org/web/0/http://notch.tumblr.com/post/4988431144/the-maps</ref> but now starts at 1:1 and can be increased up to 1:16 by re-crafting an existing map.
|Maps are no longer numbered on the top-left corner and is labeled through the tooltip.}}
{{History|||snap=12w36a|New maps are now crafted at a scale factor of 1:1. A zoomed in map can be zoomed out by re-crafting it with another 8 sheets of [[paper]] on a [[crafting table]]. Each time this is done, the scale increases - 1:1, 1:2, 1:4, 1:8, 1:16 with a map scale of 1:16 being the current maximum.}}
{{History||1.7.2|snap=13w38a|The map size has been increased when placed on a [[wall]] using the [[item frame]].
|More colors have been added to maps for different [[block]]s.<ref name="infodump2">https://web.archive.org/web/0/https://www.mojang.com/2013/10/minecraft-1-7-the-update-that-changed-the-world</ref>}}
{{History||1.8|snap=14w31a|Zoomed maps now conform to an expanded grid based on their zoom level. Previously, careful considerations would need to be taken to creating a wall of adjoining maps.}}
{{History||1.8.1|snap=pre1|Some colors have been changed on maps to more accurately represent their respective [[block]].}}
{{History||1.9|snap=15w31a|Maps now display as a mini-map when held in the off-hand, or if the off-hand slot is occupied; the (old) large version is visible only when held in the dominant hand with the secondary hand free.}}
{{History|||snap=15w34a|New maps can now be [[crafting|crafted]] at a scale factor of 1:4.
|A crafting recipe has been added for zooming in maps.}}
{{History|||snap=15w43a|The average yield of empty maps from [[stronghold]] library [[chest]]s has been doubled.}}
{{History|||snap=15w45a|New maps are once again [[crafting|crafted]] at a scale factor of 1:1, as they had been before snapshot [[15w34a]].
|The [[crafting]] recipe, that was introduced in 15w34a, for zooming in maps has been removed.}}
{{History|||snap=15w49a|Map making now uses armor equipping sounds.}}
{{History||1.11|snap=16w39a|Maps now work in [[the End]].
|Empty maps are now [[trading|sold]] by cartographer [[villager]]s as their tier 3 [[trading|trade]].
|Added [[explorer map]]s, sold by cartographers as their tier 4 trades.}}
{{History||1.12|snap=17w17a|Maps now have separate colors for colored [[terracotta]] blocks from other colored blocks.}}
{{History||1.13|snap=17w47a|Prior to [[1.13/Flattening|''The Flattening'']], these [[item]]s' numeral IDs were 358 and 395.
|Maps now use additional NBT to specify which map they contain. Prior to this version, they used the [[damage]] value instead.
|Map IDs are no longer limited to 32,768.}}
{{History|||snap=17w50a|Maps can now be placed on floor and ceiling [[item frame]]s.}}
{{History|||snap=18w10a|Spots on maps can now be marked using [[banner]]s.}}
{{History|||snap=18w11a|Empty maps can now generate in [[shipwreck]] [[chest]]s.}}
{{History|||snap=pre7|Maps have been changed slightly, in regard to which [[block]]s are shown and which blocks are not.}}
{{History||1.14|snap=18w43a|[[File:Empty Map JE2 BE2.png|32px]] [[File:Map (item) JE2 BE2.png|32px]] The textures of maps have been changed.}}
{{History|||snap=18w48a|Empty maps can now be found in chests in [[village]] cartographer houses.}}
{{History|||snap=19w02a|Maps can now be cloned and zoomed out (extended) by using a [[cartography table]].
|Maps can now be locked by using a [[glass pane]] with a cartography table.
|The recipes for cloning and zooming out maps have been removed.}}
{{History|||snap=19w06a|Map making is now silent again.}}
{{History|||snap=19w13a|Cartographer villagers now give empty maps to players under the [[Hero of the Village]] effect.}}
{{History||1.16|snap=20w21a|Map making sounds are now the same as when using a cartography table.}}
{{History|pocket alpha}}
{{History||v0.14.0|snap=build 1|[[File:Empty Map JE1 BE1.png|32px]] [[File:Map (item) JE1 BE1.png|32px]] Added maps.
|Maps are crafted using nine [[paper]], one for every slot of the [[crafting]] grid.
|Maps must be combined with a [[compass]] using an [[anvil]] in order to show the [[player]]'s position.
|Maps can be zoomed using an anvil.}}
{{History|||snap=build 3|New maps are now [[crafting|crafted]] at full zoom.
|Empty maps now have a "Create Map" button to initialize them.}}
{{History|||snap=build 7|New maps are now crafted at a scale factor of 1:1.}}
{{History||v0.15.0|snap=unknown|Maps can now be crafted either with 8 pieces of [[paper]] and a [[compass]] ''or'' 9 pieces of paper, to get a map with or without a position marker.}}
{{History||v0.16.0|snap=build 1|Different colors have been added to maps for different [[biome]]s.}}
{{History|pocket}}
{{History||1.0.0|snap=?|[[Windows 10 Edition]] can now use the [[anvil]] as well as the [[crafting table]] to clone, zoom and apply markers, just as [[Pocket Edition]] in general could.
|Maps can now be found inside [[stronghold]] library [[chest]]s.}}
{{History||1.1.0|snap=alpha 1.1.0.0|Empty maps with direction markers built-in are now called "locator maps".}}
{{History|||snap=alpha 1.1.0.3|"Locator maps" are now called "empty locator maps".
|Empty maps are now [[trading|sold]] by cartographer [[villager]]s for 7-11 [[emerald]]s as their tier 3 [[trading|trade]].}}
{{History|bedrock}}
{{History||1.4.0|snap=beta 1.2.14.2|Maps can now be found inside map room [[chest]]s in [[shipwreck]]s.}}
{{History||?|The texture of the filled map overlay has been changed.}}
{{History||?|Maps now function in dimensions other than the dimension in which they were created.}}
{{History||1.10.0|snap=beta 1.10.0.3|Maps can now be found in cartographer house [[chest]]s in [[village]]s.
|[[File:Empty Map JE2 BE2.png|32px]] The texture of empty maps has been changed.}}
{{History||1.11.0|snap=beta 1.11.0.1|Empty maps can now be created from 1 [[paper]] in [[cartography table]]s.
|Maps can now be zoomed, cloned, renamed, and have pointers added in cartography tables.}}
{{History|||snap=beta 1.11.0.4|Cartographer [[villager]]s now [[trading|sell]] empty map for an [[emerald]] as their first tier [[trading|trades]].
|Empty locator maps can now be [[trading|bought]] from cartographer villagers.}}
{{History||1.13.0|snap=beta 1.13.0.1|[[File:Map (item) BE3.png|32px]] [[File:Locked Map (item) BE2.png|32px]] Filled maps and locked maps now have unique inventory icons.}}
{{History||1.16.0|snap=beta 1.16.0.57|Trading has been changed, novice-level cartographer now sell an empty map for 7 emeralds. Cartographer villager no longer sell empty locator map.}}
{{History||1.16.100|snap=beta 1.16.100.56|The ID of maps have been changed from <code>emptymap</code> to <code>empty_map</code> and <code>map</code> to <code>filled_map</code>.}}
{{History|console}}
{{History||xbox=TU1|xbone=CU1|ps=1.00|wiiu=Patch 1|switch=1.0.1|[[File:Map (item) JE1 BE1.png|32px]] Added maps.
|The [[player]] spawns with a free map.
|Maps are available only as zoom step 3 maps centered at coordinates 0,0. Biome colors do not appear on maps.}}
{{History||xbox=none|xbone=CU1|ps=1.0|wiiu=none|Larger sized worlds on Xbox One, Playstation 4, and Nintendo Switch have zoom step 3 maps aligned to a grid with maps centered at 0, 1024, or 2048 on the X or Z coordinates.}}
{{History||xbox=TU21|xbone=CU9|ps=1.14|wiiu=Patch 1|[[File:Empty Map JE1 BE1.png|32px]] [[Crafting]] a map now produces an empty map.}}
{{History||xbox=TU46|xbone=CU36|ps=1.38|wiiu=Patch 15|The outer end islands appear on different maps; even on Xbox 360, Playstation 3, Vita, and Wii U editions.}}
{{History||xbox=none|xbone=none|ps=1.90|wiiu=none|switch=none|[[File:Empty Map JE2 BE2.png|32px]] [[File:Map (item) JE2 BE2.png|32px]] The textures of maps have been changed.}}
{{History||ps=1.91|Maps can now be created and used in [[cartography table]]s.}}
{{History|foot}}
== Issues ==
{{issue list}}
== Trivia ==
* Use of the {{key|F1}} key can allow the player to hold a map without blocking their view at all.
* In ''Java Edition'', a map created using {{cmd|give}} can be any map by using the Map parameter to specify the map number desired. E.g. {{cmd|give [player] minecraft:filled_map{map:5<nowiki>}}} gives the specified player map_5. If no data value is supplied it defaults to map_0. If map_0 has not ever been crafted, it is centered on x=0, z=0.
* The maps are stored separately as their own data (<code>.dat</code>) file as <code>map_x.dat</code> with (x) being the map number, see [[map item format]] for more info. By manipulating this number, players can organize their maps to suit them, or if they accidentally create a map in the same location, they can delete their extra map so as to save the number they make.
* Certain programs can be used to make customized maps with images or text on them instead of actual maps, many people use these in adventure maps to show pictures or to tell a story.
* Since all copies of a map are links to the same file, copying an unfinished map keeps it synchronized with the copy as the player fills it in. Thus, a copy stored in a chest can act as a remote backup.
* A map that is in an item frame does not update itself until a player picks it up, lets it reload, and places it back again. However, if a player holds a clone of the map, both maps update.
* Filled maps are the only items that make 90 degree rotations in item frames, and also the only items that can expand the item frame into full block wide.
* On [[Legacy Console Edition]], the player always spawns with a map in their inventory after creating a world. This was later added to Bedrock Edition as an optional feature in the world creation menu.
* Maps on Legacy Console Edition always show the player's current coordinates, as a substitute for the optional [[Coordinates|coordinate display]] in other editions.
* A map cannot be created on [[New Nintendo 3DS Edition]]. Instead, the map is always displayed on the bottom screen along with the coordinates. Biome colors do not appear on maps.
== Gallery ==
<gallery>
MapItem1.png|A fully zoomed map.
MapRotation.png|Having a map in hand does not stop the ability to see ahead.
MapItem3.png|A world being recorded onto a map.
Mcmap4.png|Nearly fully explored map.
Zoomed Map.png|A map edited to the scale of 1.
Sky Map.png|A map mapping the [[Sky Dimension]].
MapOfVillage.png|A village and how it is represented on a map.
Pumpkin map.png|A map containing a custom image made by placing a large number of blocks.
Complete Map.png|A completely explored map.
MapZooms.png|A diagram showing how maps zoomed out before [[Java Edition 1.8]]. Notice how the larger maps have borders made of half and quarter small maps.
Map18zooms.png|From 1.8, zoomed maps are aligned to this grid exactly.
Large Biome Map.png|A map of a [[Large Biomes]] world.
Map0140-0160.png|A comparison of maps between versions in Pocket Edition Alpha [[Pocket Edition Alpha 0.14.0|0.14.0]] and [[Pocket Edition Alpha 0.16.0|0.16.0]].
Mycelium Map.png|A map view of a mushroom biome, showing that mycelium appears purple on a map.
MiniMap.png|Maps held in the off-hand or in either hand while [[dual wielding]] appear as mini-maps.
Partly filled treasure map.png|Partly filled treasure map with an odd area at the bottom left. Normally a partly filled map would look striped (as in the top left), but this map seems to be bugged and is possibly showing caves, or something, in the bottom left.
Partly filled ocean explorer map.png|Partly filled ocean explorer map. Updating the game from an older version (in this case the area was first generated before 1.18) and buying a map after updating (in this case in 1.19.4) can result in the map displaying rivers and terrain where there is really a frozen sea.
Map Stained Glass 1.png|Stained glasses' appearances on maps before and after 1.13.
Map Stained Glass 2.png|Stained glasses' appearances on maps before and after 1.13.
Map Various Blocks 1.png|Various blocks' appearances on maps before and after 1.13.
Map Various Blocks 2.png|Various blocks' appearances on maps before and after 1.13.
Better Together Map.jpg|Holding a map in the offhand in ''Bedrock Edition''.
Better Together Map Icon.jpg|Holding a map in both hands in ''Bedrock Edition''.
File:MapFailedtoFill.png|A map that has not yet filled. A rare bug in Java.
</gallery>
=== The Nether ===
<gallery>
Nethermap.png|A map in [[the Nether]].
Maponnether.png|A map in the Nether; the arrow turns around itself, like in [[compass]].
</gallery>
=== The End ===
<gallery>
Jeb End Map.png|The first image of a map in [[the End]].
Endmap.png|A map in the End.
</gallery>
=== Maps in item frames ===
<gallery>
FramedMap.png|A map displayed on an item frame, as it looked before [[Java Edition 1.7.2]].
Structure Map Collection.png|Multiple maps in item frames. Notice a [[village]], two [[desert temple]]s and a lava lake.
Minecraft maps 3by3.png|A collection of 9 connected full maps.
Full Map.png|A combination of 25 maps pasted together as one map.
Map wall BE.png|A map wall on ''Bedrock Edition'', showing large areas of biome colors for each biome.
Map's in item frames.png|Maps can be placed into [[item frame]]s so they can be viewed together.
Comparing Maps.png|The comparison between 3 zooms of maps.
SuperflatMap.png|A map in a [[Superflat]] world, with some [[village]]s.
MapWallWithMarkers.png|A 3x3 map wall with banner markers.
HEYYEYAAEYAAAEYAEYAA.png|He-Man map art.
Map Player Icons 1.png|First image of player icons on maps.
Map Player Icons 2.png|Second image of player icons on maps.
</gallery>
== See also ==
* [[Explorer Map]]
* [[Clock]]
* [[Tutorials/Navigation|Navigation]]
== References ==
{{Reflist}}
{{Items}}
[[cs:Mapa]]
[[de:Karte]]
[[es:Mapa]]
[[fr:Carte (objet)]]
[[hu:Térkép (tárgy)]]
[[ja:地図]]
[[ko:지도]]
[[nl:Kaart]]
[[pl:Mapa]]
[[pt:Mapa]]
[[ru:Карта]]
[[tr:Harita]]
[[th:แผนที่]]
[[uk:Мапа]]
[[zh:地图]]
[[Category:Renewable resources]]</li><li>[[Sweet Berries|Sweet Berries]]<br/>{{Block
| title = Sweet Berries
| image = <gallery>
Sweet Berry Bush Age 0.png| Age 0
Sweet Berry Bush Age 1.png| Age 1
Sweet Berry Bush Age 2.png| Age 2
Sweet Berry Bush Age 3.png| Age 3
</gallery>
| image2 = Sweet Berries JE1 BE1.png
| transparent = Yes
| light = No
| tool = Any
| renewable = Yes
| stackable = Yes (64)
| heals = {{hunger|2}}
| flammable = Yes (60 java, 30 bedrock)
| lavasusceptible = No
}}
'''Sweet berries''' are a [[food]] [[item]] obtained from sweet berry bushes and are used to plant them.
'''Sweet berry bushes''' are quick-growing, [[Bone Meal|bonemealable]] [[Plant|plants]] that grow sweet berries, and damage and slow [[Player|players]] and most [[Mob|mobs]] moving through them. They can be found naturally in [[taiga]] and [[Snowy Taiga|snowy taiga]] biomes.
== Obtaining ==
=== Breaking ===
{{See also|Fortune#Discrete random}}
Sweet berry bushes can be mined instantly with any tool or by hand. A mature sweet berry bush yields 2–3 sweet berries. On its third growth stage, it yields 1–2 sweet berries. Each level of [[Fortune]] can increase the amount of drops by 1.
{{IN|ps4}}, the sweet berries drop into the player's inventory. In other editions, they drop on the ground.
=== Natural generation ===
Berry bushes commonly generate in [[taiga]] and [[snowy taiga]] biomes. Each [[chunk]] has {{frac|1|12}} chance to generate sweet berry bushes in [[random patch]]es. They also generate in both [[old growth pine taiga]] and [[old growth spruce taiga]].
=== Chest loot ===
{{LootChestItem|sweet-berries}}
=== Post-generation ===
Sweet berries can be collected from a sweet berry bush by {{control|using}} or {{control|breaking}} it, which yield 1–2 sweet berries in its third growth stage, and 2–3 sweet berries in its final growth stage.
== Usage ==
=== Placement ===
Placing [[sweet berries]] on a [[grass block]], [[dirt]], [[podzol]], [[coarse dirt]], [[farmland]]{{Only|Java}}, or [[moss block]] creates a small sweet berry bush that eventually becomes a fully grown sweet berry bush.
=== Growth ===
A sweet berry bush grows through four stages after it is planted. Its first growth stage is a small bush without any berries. It becomes a grown plant in its second stage, and produces berries in its third and fourth growth stage. The bush needs to be in light level 9 or greater to grow. {{control|Using}} [[bone meal]] on it increases its growth stage by one, and at full maturity, ejects the sweet berry item. The bush can be placed on a 1 block high space, but it cannot grow with a full, non-transparent block immediately above it.
=== Food ===
To eat sweet berries, press and hold {{control|use}} while it is selected in the hotbar. Eating one restores {{hunger|2}} [[hunger]] and 0.4{{only|je|short=1}} / 1.2{{only|be|short=1}} hunger [[saturation]].
=== Composting ===
Placing sweet berries into a [[composter]] has a 30% chance of raising the compost level by 1.
=== Breeding ===
Sweet berries can be fed to [[fox]]es to [[breeding|breed]] them. Foxes are similar to cats when being fed as a wild animal; a sudden movement by the [[player]] may cause the fox to flee even if the player holds sweet berries. A baby fox bred by a [[player]] trusts the player and does not flee.
=== Trading ===
Master-level butcher [[villager]]s offer to [[trading|buy]] 10 sweet berries for an [[emerald]].
=== Entity movement ===
A sweet berry bush (at any stage) slows down all [[entity|entities]] (except [[Item (entity)|items]]) passing through it. At stage 1 and higher, it causes damage. [[Fox]]es are immune to both characteristics, however. Sweet berry bushes deal {{hp|1}} [[damage]] every 0.5 seconds, only if the entity is moving in the hitbox of the bush. Entities that move through sweet berry bushes slow down to about 34.05% of their normal speed, similar to how a [[cobweb]] slows down mobs to 15% of normal speed. This makes it impossible to jump a full [[block]] while inside the bush.
Mobs at standard block height in a [[minecart]] are not damaged when the minecart is pushed through sweet berries. Players in a sweet berry bush take no damage except from horizontal movement, but are unable to jump out of the bush, similar to a cobweb.
=== Bees ===
[[Bee]]s pollinate sweet berry bushes, and then increase the honey level in [[beehive]]s and bee nests by 1.{{only|java}}
== Sounds ==
=== Generic ===
==== Block ====
{{Sound table/Block/Sweet berry bush}}
==== Item ====
{{Sound table/Entity/Food}}
=== Unique ===
{{edition|java}}:
{{Sound table
|rowspan=2
|sound=Berries pick1.ogg
|sound2=Berries pick2.ogg
|subtitle=Berries pop
|source=block
|description=When sweet berries are picked by a player
|id=block.sweet_berry_bush.pick_berries
|translationkey=subtitles.item.berries.pick
|volume=1.0
|pitch=0.8-1.2
|distance=16}}
{{Sound table
|subtitle=Berries pop
|source=block
|description=When sweet berries are picked by a fox
|id=block.sweet_berry_bush.pick_berries
|translationkey=subtitles.item.berries.pick
|volume=1.0
|pitch=1.0
|distance=16}}
{{Sound table
|sound=Player hurt sweet berry bush1.ogg
|sound2=Player hurt sweet berry bush2.ogg
|subtitle=Player hurts
|source=player
|description=When a player is damaged by touching a sweet berry bush
|id=entity.player.hurt_sweet_berry_bush
|translationkey=subtitles.entity.player.hurt
|volume=1.0
|pitch=0.8-1.2
|distance=16
|foot=1}}
{{edition|bedrock}}:
{{Sound table
|type=bedrock
|sound=Berries pick1.ogg
|sound2=Berries pick2.ogg
|source=block
|description=When sweet berries are picked
|id=block.sweet_berry_bush.pick
|volume=1.0
|pitch=1.0}}
{{Sound table
|sound=Player hurt sweet berry bush1.ogg
|sound2=Player hurt sweet berry bush2.ogg
|source=block
|description=When a player is damaged by touching a sweet berry bush
|id=block.sweet_berry_bush.hurt
|volume=1.0
|pitch=1.0
|foot=1}}
== Data values ==
=== ID ===
{{edition|java}}:
{{ID table
|edition=java
|showblocktags=y
|showitemtags=y
|showforms=y
|generatetranslationkeys=y
|displayname=Sweet Berry Bush
|spritetype=block
|nameid=sweet_berry_bush
|blocktags=azalea_log_replaceable, bee_growables
|form=block}}
{{ID table
|displayname=Sweet Berries
|spritetype=item
|nameid=sweet_berries
|itemtags=fox_food
|form=item
|foot=1}}
{{edition|bedrock}}:
{{ID table
|edition=bedrock
|shownumericids=y
|showforms=y
|generatetranslationkeys=y
|displayname=Sweet Berry Bush
|spritetype=block
|nameid=sweet_berry_bush
|id=462
|form=block}}
{{ID table
|displayname=Sweet Berries
|spritetype=item
|nameid=sweet_berries
|id=287
|form=item
|foot=1}}
=== Block states ===
{{see also|Block states}}
{{/BS}}
==Advancements==
{{Load advancements|Husbandry;A Balanced Diet;The Parrots and the Bats;Two by Two}}
== History ==
{{History||September 26, 2018|link={{tweet|minecraft|1044587405779451906}}|Berries are announced to be part of the [[biome]] vote at [[MINECON Earth 2018]].}}
{{History||September 29, 2018|link={{tweet|minecraft|1046097775199498245}}|[[Taiga]] wins the [[biome]] vote, meaning berries are to be added to the game first.}}
{{History|java}}
{{History||December 3, 2018|link={{tweet|cojomax99|1069586461173919745}}|[[Cojomax99]] tweets an image of some berries.}}
{{History||1.14|snap=18w49a|[[File:Sweet Berry Bush Age 0 JE1 BE1.png|32px]] [[File:Sweet Berry Bush Age 1 JE1 BE1.png|32px]] [[File:Sweet Berry Bush Age 2 JE1 BE1.png|32px]] [[File:Sweet Berry Bush Age 3 JE1 BE1.png|32px]] Added sweet berry bushes.|
[[File:Sweet Berries JE1 BE1.png|32px]] Added sweet berries.}}
{{History|||snap=18w50a|Sweet berries can now be found within [[taiga]] [[village]] loot [[chest]]s.}}
{{History|||snap=19w03a|Placing a sweet berry into the new [[composter]] has a 10% chance of raising the compost level by 1.
|Added [[sound]]s for sweet berry bushes.}}
{{History|||snap=19w05a|Sweet berries now have a 30% chance of increasing the compost level in a composter by 1.
|The [[sound]] for planting sweet berries has been changed.}}
{{History|||snap=19w07a|Sweet berries can now be fed to [[fox]]es to [[breeding|breed]] them.}}
{{History|||snap=19w11a|Butcher [[villager]]s now [[trading|buy]] sweet berries.}}
{{History||1.15|snap=19w34a|[[Bee]]s can now pollinate sweet berry bushes.}}
{{History|||snap=Pre-Release 2|Sweet berries now generate in [[giant tree taiga]] biomes.}}
{{History||1.16|snap=Pre-release 1|Sweet berry bushes no longer prevent mob spawning inside them.}}
{{History||1.17|snap=21w20a|The sound event for picking berries has been changed as to align better with that of glow berries.<ref>{{bug|MC-220063}}</ref>}}
{{History||1.18|snap=1.18-pre5|Sweet berry bushes in taigas are about 4 times more common than in previous snapshots.}}
{{History|bedrock}}
{{History||1.10.0|snap=beta 1.10.0.3|[[File:Sweet Berries JE1 BE1.png|32px]] Added sweet berries, which are available only through Experimental Gameplay.|[[File:Sweet Berry Bush Age 0 JE1 BE1.png|32px]] [[File:Sweet Berry Bush Age 1 JE1 BE1.png|32px]] [[File:Sweet Berry Bush Age 2 JE1 BE1.png|32px]] [[File:Sweet Berry Bush Age 3 JE1 BE1.png|32px]] Added sweet berry bushes, available only through Experimental Gameplay.}}
{{History||1.11.0|snap=beta 1.11.0.1|Sweet berries can now be used to fill [[composter]]s.}}
{{History|||snap=beta 1.11.0.3|Sweet berries and sweet berry bushes have been fully implemented and are now separate from Experimental Gameplay.}}
{{History|||snap=beta 1.11.0.4|Sweet berries can now be [[trading|sold]] to butcher [[villager]]s.}}
{{History||1.13.0|snap=beta 1.13.0.1|Sweet berries can now be fed to [[fox]]es to [[breeding|breed]] them.}}
{{History||1.14.0|snap=beta 1.14.0.1|[[Bee]]s can now pollinate sweet berry bushes.}}
{{History||1.16.100|snap=beta 1.16.100.54|Sweet berry bushes now properly damage entities.<ref>{{Bug|MCPE-56142}}</ref>}}
{{History||1.17.0|snap=beta 1.17.0.56|Bees no longer gather nectar from sweet berry bushes.}}
{{History|PS4}}
{{History||1.91|[[File:Sweet Berries JE1 BE1.png|32px]] Added sweet berries.|[[File:Sweet Berry Bush Age 0 JE1 BE1.png|32px]] [[File:Sweet Berry Bush Age 1 JE1 BE1.png|32px]] [[File:Sweet Berry Bush Age 2 JE1 BE1.png|32px]] [[File:Sweet Berry Bush Age 3 JE1 BE1.png|32px]] Added sweet berry bushes.}}
{{History|foot}}
=== Sweet berry bush "item" ===
{{:Technical blocks/Sweet Berry Bush}}
== Issues ==
{{issue list|berry|berries|sweet berry|sweet berries|berry bush|sweet berry bush}}
==Trivia==
* {{IN|java}}, sweet berry bushes absorb [[fall damage]] like [[water]].<ref>{{bug|MC-149990|||WAI}}</ref>
* Foxes harvest mature sweet berry bushes that have grown into their third or fourth stage. Unlike how carrots eaten by rabbits are destroyed and not dropped as items, sweet berry bushes harvested by foxes drop as items, although the fox may pick up one of the dropped berries. The bush remains intact, allowing for automatic sweet berry farms.
== Gallery ==
<gallery>
Berry Bush.png|A close-up look of a sweet berry bush.
Naturally generated berry bushes.png|A naturally generated sweet berry bush.
Multiplebushes.png|Multiple bushes of sweet berries in Taiga biome.
BerryBushCloseToRavine.png|A berry bush that is close to a ravine.
Cozy Cabin Berries.jpg|Berry bushes near a cozy cabin.
</gallery>
==References==
{{Reflist}}
{{Blocks|vegetation}}
{{Items}}
[[Category:Food]]
[[Category:Plants]]
[[Category:Non-solid blocks]]
[[Category:Natural blocks]]
[[Category:Flammable blocks]]
[[cs:Sladké bobule]]
[[es:Bayas dulces]]
[[de:Süßbeeren]]
[[fr:Baies sucrées]]
[[ja:スイートベリー]]
[[ko:달콤한 열매]]
[[pl:Słodkie jagody]]
[[pt:Bagas doces]]
[[ru:Сладкие ягоды]]
[[th:เบอร์รีหวาน]]
[[zh:甜浆果]]</li></ul></nowiki> | 12w03a | Wolves can be bred with any type of meat. | |||
| 12w04a | Cats (tamed ocelots) can be bred with raw fish. | ||||
| 12w08a | Villager children and kittens are the only baby mobs that have a head the right size for the body. | ||||
1.3.1{{Extension DPL}}<ul><li>[[Raw Gold|Raw Gold]]<br/>{{Item
| image = Raw Gold.png
| renewable = No
| stackable = Yes (64)
}}
'''Raw gold''' is a raw metal resource obtained from mining [[gold ore]].
== Obtaining ==
=== Mining ===
[[Gold ore]] and [[deepslate gold ore]] mined with an [[iron pickaxe]] or higher drops 1 unit of raw gold. If the pickaxe is enchanted with [[Fortune]], it can drop an extra unit per level of Fortune, allowing for a maximum of 4 with Fortune III. If the ore is mined using a pickaxe enchanted with [[Silk Touch]], it drops the ore block instead.
=== Crafting ===
{{Crafting
|showname=1
|Block of Raw Gold
|Output=Raw Gold,9
|type=Material
|foot=1
}}
== Usage ==
The primary usage of raw gold is smelting it into [[gold ingot]]s.
=== Crafting ===
{{crafting usage|Raw Gold}}
=== Smelting ingredient ===
{{Smelting
|showname=2
|Raw Gold
|Gold Ingot
|1.0
}}
=== Piglins ===
{{EntityLink|Piglin|Piglins}} are attracted to raw gold. They run toward any raw gold on the ground, and inspect it for 6 to 8 seconds before putting it in their inventory.
== Advancements ==
{{load advancements|Oh Shiny}}
== Data values ==
=== ID ===
{{edition|java}}:
{{ID table
|edition=java
|showitemtags=y
|showforms=y
|generatetranslationkeys=y
|displayname=Raw Gold
|spritetype=item
|nameid=raw_gold
|itemtags=piglin_loved
|form=item
|foot=1}}
{{edition|bedrock}}:
{{ID table
|edition=bedrock
|shownumericids=y
|showforms=y
|notshowbeitemforms=y
|generatetranslationkeys=y
|displayname=Raw Gold
|spritetype=item
|nameid=raw_gold
|form=item
|id=506
|foot=1}}
== History ==
{{History|java}}
{{History||1.17|snap=21w14a|[[File:Raw Gold JE1.png|32px]] Added raw gold.}}
{{History|||snap=April 13, 2021|slink={{Tweet|JasperBoerstra|1381991999952277513}}|[[File:Raw Gold JE2.png|32px]] [[JAPPA]] shows a new raw gold texture.}}
{{History|||snap=21w15a|[[File:Raw Gold JE2.png|32px]] The texture of raw gold has been changed.
|Raw gold can now be used to craft [[block of raw gold]].}}
{{History|||snap=April 16, 2021|slink={{Tweet|JasperBoerstra|1383047666037325829}}|[[File:Raw Gold (pre-release).png|32px]] [[JAPPA]] shows a new raw gold texture again.}}
{{History|||snap=21w16a|[[File:Raw Gold JE3.png|32px]] The texture of raw gold has been changed.}}
{{History|Bedrock}}
{{History||1.17.0|snap=beta 1.17.0.50|[[File:Raw Gold JE2.png|32px]] Added raw gold.}}
{{History|||snap=beta 1.17.0.52|Raw gold are now available without enabling [[experimental gameplay]].}}
{{History|||snap=beta 1.17.0.54|[[File:Raw Gold JE3.png|32px]] The texture of raw gold has been changed.}}
{{History|foot}}
== Issues ==
{{Issue list}}
==Gallery==
<gallery>
JE 1.17 Dev Raw Metals.jpg|Jappa shows raw ore textures.
Jappa Raw Ores 1.jpg|Jappa shows raw ore textures.
Jappa Raw Ores 2.png|Jappa shows raw ore textures.
Jappa Raw Ores 3.jpg|Jappa shows raw ore textures.
Jappa Raw Ores 4.jpg|Jappa shows raw ore textures.
Jappa Raw Ores 5.jpg|Jappa shows raw ore textures.
</gallery>
{{Items}}
[[Category:Non-renewable resources]]
[[de:Rohgold]]
[[es:Oro en bruto]]
[[fr:Or brut]]
[[ja:金の原石]]
[[pl:Surowe złoto]]
[[pt:Ouro bruto]]
[[ru:Необработанное золото]]
[[uk:Необроблене золото]]
[[zh:粗金]]</li><li>[[:Category:Minecraft Earth items|Category:Minecraft Earth items]]<br/>All items in ''[[Minecraft Earth]]''.
[[Category:Items]]
[[Category:Minecraft Earth|Items]]</li></ul> | 12w22a | Breeding gives experience. | |||
1.4.2{{Extension DPL}}<ul><li>[[Debug Stick|Debug Stick]]<br/>{{about|the item|other uses|Debug}}
{{exclusive|java}}
{{Item
| image = Debug Stick.gif
| rarity = Epic
| renewable = No
| stackable = No
}}
The '''debug stick''' is an [[item]] used to edit the [[block states]] of [[block]]s. It is visually identical to a regular [[stick]], but with a glint (as if [[Enchanting|enchanted]]).
== Obtaining ==
The debug stick is obtainable via [[commands]] such as {{cmd|/give}} or {{Cmd|/item}}, or the Creative inventory if the player has the appropriate permissions. It can be obtained only in worlds with cheats on.
== Usage ==
The debug stick can be used to change block states. {{control|Hitting}} the block allows players to select the block state key they wish to change, for an example, switching between the ''conditional'' and the ''facing'' block state keys for a [[command block]]. {{control|Using}} the block allows them to cycle through the valid values for the block state key, again as an example, the player can make the command block face, ''down'', ''east'', ''north'', ''south'', ''up'', or ''west'' if they chose the ''facing'' block state key. {{control|Sneaking}} while {{control|hitting}} or {{control|using}} cycles through the block state keys or values in reverse order.
It is notable that {{Control|using}} debug stick directly on an interactive block without {{Control|sneaking}} uses the block itself instead of the stick.<ref>{{bug|MC-200199}} </ref>
The debug stick cannot be used while in Survival or Adventure mode. It works only in creative mode with cheats enabled. In modes other than Creative, it acts like a regular item — although when {{control|using}} it on a block, the player swings the stick as if interacting with it (but nothing happens).
== Data values ==
=== ID ===
{{ID table
|edition=java
|showforms=y
|generatetranslationkeys=y
|displayname=Debug Stick
|spritetype=item
|nameid=debug_stick
|form=item
|foot=1}}
=== Item data ===
<div class="treeview">
* {{nbt|compound|tag}}: The item's '''tag''' tag.
{{:Player.dat_format/Debug Sticks}}
</div>
== History ==
{{History|java}}
{{History||1.13|snap=17w47a|[[File:Debug Stick.gif|32px]] Added debug sticks.}}
{{History||1.16|snap=20w10a|Debug sticks are now capable of editing [[fire]] due to its added hitbox.}}
{{History||1.19.3|snap=22w44a|The debug stick is now available in the creative inventory, but only if cheats are enabled.}}
{{History|||snap=22w45a|Moved the debug stick behind the Operator Utilities tab in the creative inventory. The tab is only available if cheats are enabled and the "Operator Items Tab" option in the controls menu is turned on.}}
{{History|foot}}
== Issues ==
The debug stick is not supported, and any issues resulting of its usage are closed as "Won't Fix" in the issue tracker.<br/> Issues with the stick itself are considered valid.<ref>https://bugs.mojang.com/browse/MC-122323?focusedCommentId=419481&page=com.atlassian.jira.plugin.system.issuetabpanels:comment-tabpanel#comment-419481</ref><ref>{{reddit|7es23r||Just be aware that any weird state you create with it you cannot naturally create and any bugs that come from it will be shot down as 'Wont fix' :D|_Grum|November 22, 2017}}</ref>
{{issue list}}
== Trivia ==
*An [[add-on]] made by Mineplex was showcased in [[MINECON Live 2019]], which had an editor stick for {{el|be}}, similar to the Debug Stick.<ref>{{ytl|OZqNaEX8208|MINECON Live 2019 @ 1:05:02|Minecraft|September 28, 2019|t=3902}}</ref>
== Gallery ==
<gallery>
Technically Updated.jpg|Artwork of Steve and Alex wielding debug sticks.
</gallery>
== See also ==
*[[Block states]]
== References ==
{{Reflist}}
{{Items}}
[[Category:Non-renewable resources]]
[[de:Debug-Stab]]
[[es:Palo de depuración]]
[[fr:Bâton de débogage]]
[[ja:デバッグ棒]]
[[ko:디버그 막대기]]
[[pl:Patyk debugujący]]
[[pt:Graveto de depuração]]
[[ru:Палка отладки]]
[[zh:调试棒]]</li><li>[[Name Tag|Name Tag]]<br/>{{about|the item that gives names to mobs|the nameplate above a player's head|Player#Username}}
{{Item
| image = Name Tag.png
| renewable = Yes
| stackable = Yes (64)
}}
A '''name tag''' is an [[item]] used to name [[mob]]s in the world and prevent them from despawning naturally.
== Obtaining ==
=== Chest loot ===
{{LootChestItem|name-tag}}
=== Fishing ===
Name tags can be caught from [[fishing]] as part of the treasure category with a {{frac|1|6}} chance after the 5% chance of being a treasure catch. The chance of catching treasure increases with the [[Luck of the Sea]] enchantment.
=== Trading ===
Master-level librarian [[villagers]] offer to sell a name tag for 20 [[emerald]]s as one of their available trades.
== Usage ==
To use a name tag, it must first be renamed with an [[anvil]], costing 1 [[experience]] level.
If it is not renamed, it has no effect when used on a mob. After the name tag is renamed, the player can {{control|use}} it on a mob to give it the name given to the name tag from the anvil. Mobs and name tags can be renamed any number of times. Name tags with the same name are stackable.
Once a mob is named, it keeps its name, and the name tag is consumed.
When a mob is named, it is excluded from the mob cap count.
Effects on various mobs:
* A named [[silverfish]] that goes into a block appears to lose its name because it is replaced by a newly generated unnamed silverfish when the block is broken.
* A baby (animal or villager) keeps its name when becoming an adult.
** A named [[villager]] keeps its name when transformed into a [[Zombie Villager|zombie villager]].
** A named zombie villager keeps its name when cured.
* [[Wandering Trader|Wandering trader]]s still despawn even if they are named, or in a [[minecart]] or [[boat]].
* A named [[wither]]'s boss bar displays its name instead of "Wither".
* Naming an [[ender dragon]] with commands also displays the name in the boss bar.
=== Limitations ===
Any mob can be named except for the [[ender dragon]] and [[player]]s.
A name tag can rename an [[armor stand]], though it does not show the nameplate above its head until <code>CustomNameVisible:1b</code> is set as an extra step.
{{control|Using|use}} a name tag on a villager renames the villager instead of opening the trading interface. A saddled pig is renamed instead of being ridden. Using a name tag on any other mob that can be interacted with performs the {{control|use}} action instead of being named. These mobs can be renamed if the player uses the name tag while crouching or standing in a [[nether portal]] because the portal suppresses the {{control|use}} action.
Once a name tag is used on a mob, it is impossible to remove the name of that mob without the use of commands or external modifications.
=== Behavior ===
Renamed mobs have their name displayed over their head in the same fashion as a mob named through a renamed [[spawn egg]]. Their names can be seen only if they are aimed at from four or fewer blocks away.
Mobs that are named using the name tag never despawn in the world, similar to tamed mobs.<ref>{{tweet|dinnerbone|327485109940916226}}</ref> The exceptions are [[wandering trader]]s or if the mob is hostile and the difficulty is switched to "[[Peaceful]]", causing any hostile mobs or any named hostile mobs to despawn immediately.
If a renamed mob kills a player, the custom name is used in the death message in place of the mob type name. For instance, if a vindicator named "Johnny" kills a player, the death message is "Player was slain by Johnny".
A renamed [[wither]] also has a renamed health bar, and the boss bar doesn't regenerate{{verify}}.
=== Easter eggs ===
* Any mob that receives the name "[[Easter eggs#Upside-down mobs|Dinnerbone]]" or "[[Easter eggs#Upside-down mobs|Grumm]]" is rendered upside down. This even includes the player in early versions of Bedrock Edition if the username is set to either of these and you are not signed into Xbox Live.
* Naming a [[sheep]] "[[Easter eggs#Jeb sheep|jeb_]]" causes its wool to fade between the dye colors, producing a rainbow effect. The [[wool]] that drops when the sheep is [[shear]]ed or killed is the original color of the sheep before the sheep was named.
* Naming a [[rabbit]] "[[Rabbit#Toast|Toast]]" causes it to have a special memorial skin of user xyzen420's girlfriend's [http://www.reddit.com/r/minecraftsuggestions/comments/27hjog/to_themogminer_my_bunny_is_missing_please_help_me/ missing rabbit].
* Naming a [[vindicator]] "Johnny" causes it to be aggressive and attack all [[mob]]s including the wither (except [[ghast]]s and other [[illager]]s). The hostility even extends to [[Ravager|ravagers]] in [[Java Edition|''Java Edition'']], as the "Johnny" vindicator can also attack the ravager while it's riding it.
== Data values ==
=== ID ===
{{edition|java}}:
{{ID table
|edition=java
|showforms=y
|generatetranslationkeys=y
|displayname=Name Tag
|spritetype=item
|nameid=name_tag
|form=item
|foot=1}}
{{edition|bedrock}}:
{{ID table
|edition=bedrock
|shownumericids=y
|showforms=y
|notshowbeitemforms=y
|generatetranslationkeys=y
|displayname=Name Tag
|spritetype=item
|nameid=name_tag
|id=548
|form=item
|foot=1}}
== History ==
{{History|java}}
{{History||1.6.1|snap=13w16b|[[File:Name Tag JE1 BE1.png|32px]] Added name tags. They can now be found in [[dungeon]] [[chest]]s.}}
{{History|||snap=13w25a|A [[mob]] named "Dinnerbone" or "Grumm" now renders upside down.}}
{{History||1.7.2|snap=13w36a|Name tags can now rarely be acquired by [[fishing]], making them [[renewable resource|renewable]].}}
{{History||1.7.4|snap=13w48b|A sheep named "jeb_" now fades between the [[dye]] colors.}}
{{History||1.8|snap=14w02a|Name tags can now be [[trading|bought]] from librarian [[villager]]s, at 20–22 [[emerald]]s for 1 name tag.}}
{{History|||snap=14w27a|[[Rabbit]]s have been added and naming one "Toast" gives it a special memorial skin.}}
{{History||1.9|snap=15w44a|Added name tags to [[mineshaft]] [[chest]]s.
|The average yield of name tags in [[dungeon]] chests has been decreased.}}
{{History||1.11|snap=16w39a|Name tags can now be found in the new [[woodland mansion]] chests.
|Added [[vindicator]]s, which attack almost all mobs if named "Johnny".}}
{{History||1.13|snap=17w47a|Prior to [[1.13/Flattening|''The Flattening'']], this [[item]]'s numeral ID was 421.}}
{{History||1.14|snap=18w43a|[[File:Name Tag JE2 BE2.png|32px]] The texture of name tags has been changed.}}
{{History||1.19|snap=Deep Dark Experimental Snapshot 1|Name tags now generate in [[ancient city]] chests.}}
{{History|pocket alpha}}
{{History||v0.15.0|snap=build 1|[[File:Name Tag JE1 BE1.png|32px]] Added name tags, and a new "Name" Interact button.
|A [[mob]] named "Dinnerbone" or "Grumm" renders upside down.
|A [[sheep]] named "jeb_" fades between the [[dye]] colors.
|Naming a [[rabbit]] "Toast" gives it a special memorial skin.}}
{{History|pocket}}
{{History||1.0.4|snap=alpha 1.0.4.0|Name tags can now be [[trading|bought]] from librarian [[villager]]s for 20-22 [[emerald]]s as their last tier trade.}}
{{History||1.1.0|snap=alpha 1.1.0.0|Naming a [[vindicator]] "Johnny" now makes it hostile to any [[mob]], except other [[illager]]s.
|Name tags can now be found in [[woodland mansion]]s.}}
{{History|bedrock}}
{{History||1.4.0|snap=beta 1.2.14.2|Name tags can now be found in buried treasure [[chest]]s.}}
{{History||1.10.0|snap=beta 1.10.0.3|[[File:Name Tag JE2 BE2.png|32px]] The texture of name tags has been changed.}}
{{History||1.11.0|snap=beta 1.11.0.4|Name tags [[trading|sold]] by librarian [[villager]]s now cost 20 [[emerald]]s.}}
{{History|console}}
{{History||xbox=TU19|xbone=CU7|ps=1.12|wiiu=Patch 1|[[File:Name Tag JE1 BE1.png|32px]] Added name tags.}}
{{History|PS4}}
{{History||1.90|[[File:Name Tag JE2 BE2.png|32px]] The texture of name tags has been changed.}}
{{History|3ds}}
{{History||0.1.0|[[File:Name Tag JE1 BE1.png|32px]] Added name tags.}}
{{History|foot}}
== Issues ==
{{issue list}}
== Trivia ==
* Name tags were added at the request of [https://www.youtube.com/user/paulsoaresjr/ Paulsoaresjr].<ref>{{tweet|paulsoaresjr|326865482839883777}}</ref><ref>{{tweet|Dinnerbone|326812168630722561}}</ref>
* A stack of up to 64 name tags can be renamed at once. The cost is 1 [[experience]] level per stack, regardless of how many name tags were stacked.
* To name a [[mob]] “Name Tag” the player must give the name tag a random name, then rename it back to “Name Tag”.
* A [[villager]] with a name tag turned into a [[zombie villager]] by a [[zombie]] with a name tag does not despawn, but a villager with a name tag turned into a zombie by a zombie without a name tag does despawn.
* It is impossible to have a rainbow [[sheep]] upside-down, because it is impossible for it to be named “Jeb_” and “Dinnerbone” at the same time.
== Gallery ==
<gallery>
NameTag2.png|To use a name tag, the [[player]] must first rename it using an [[anvil]].
NameTag1.png|A [[wolf]] that has been renamed using a name tag.
RenamedCreeper.png|A [[creeper]] renamed using the name tag.
RenamedWither.png|A [[Wither Boss|wither]] renamed using a name tag. The custom name takes place of "Wither" over the [[health bar]] as well.
YoYo.png|How to use "Grumm" and "Dinnerbone" name tag [[easter egg]] and [[lead]] to make another animal Yo-yo.
Grumm Horse.png|A [[horse]] using the "Grumm" or "Dinnerbone" easter egg to be rendered upside-down.
MineshaftNameTag.png|Name Tag found in a mineshaft chest.
Pocket Edition Name Tag.jpg|First image of a name tag in bedrock edition.
</gallery>
== See also ==
* [[Spawn Egg]]
== References ==
{{reflist}}
== External Links ==
*[https://www.minecraft.net/en-us/article/taking-inventory--name-tag Taking Inventory: Name Tag] – Minecraft.net on March 15, 2019
{{items}}
[[de:Namensschild]]
[[es:Etiqueta]]
[[fr:Étiquette]]
[[it:Targhetta]]
[[ja:名札]]
[[ko:이름표]]
[[nl:Naamkaartje]]
[[pl:Znacznik]]
[[pt:Etiqueta]]
[[ru:Бирка]]
[[zh:命名牌]]
[[Category:Renewable resources]]</li></ul> | 12w36a | Pigs are responsive to Carrots, Chickens to Seeds, with Cows and Sheep still breeding with Wheat. | |||
| upcoming | |||||
1.8{{Extension DPL}}<ul><li>[[Glow Stick|Glow Stick]]<br/>{{stub}}
{{education feature}}
{{Exclusive|Bedrock|Education}}
{{Item
| image = White Glow Stick.png
| extratext = View [[#Gallery|all renders]]
| renewable = No
| durability = 95
| stackable = No
}}
'''Glow sticks''' are [[Chemistry Update|chemistry]]-related [[item]]s, which can be lit up in the player's hand for a limited time.
== Obtaining ==
{{iN|be}}, glow sticks cannot be obtained by the {{cmd|give}} command. They also cannot be obtained in [[Survival]]. Cheats must be enabled to obtain glow sticks in Survival mode, or in [[Minecraft Education]].
=== Crafting ===
{{Crafting
|showdescription=1
|ingredients=[[Polyethylene]] +<br>[[Hydrogen Peroxide]] +<br>Matching [[Dye]] +<br>[[Luminol]]
|A1= Polyethylene
|B1= Hydrogen Peroxide
|C1= Polyethylene
|A2= Polyethylene
|B2= White Dye; Orange Dye; Magenta Dye; Light Blue Dye; Yellow Dye; Lime Dye; Pink Dye; Gray Dye; Cyan Dye; Purple Dye; Blue Dye; Brown Dye; Green Dye; Red Dye
|C2= Polyethylene
|A3= Polyethylene
|B3= Luminol
|C3= Polyethylene
|Output= Matching Glow Stick
|description={{only|bedrock|education}}
|type= Miscellaneous
}}
<div style="display:none">
<!--
This is so the pre-Village & Pillage dyes can have dye-related crafting recipes show on their respective pages.
They don't need to be displayed on this page because they already intuitively list "Any Matching Dye".
-->
{{Crafting
|showdescription=1
|ingredients=[[Polyethylene]] +<br>[[Hydrogen Peroxide]] +<br>Matching [[Dye]] +<br>[[Luminol]]
|A1= Polyethylene
|B1= Hydrogen Peroxide
|C1= Polyethylene
|A2= Polyethylene
|B2= Bone Meal; Lapis Lazuli; Cocoa Beans
|C2= Polyethylene
|A3= Polyethylene
|B3= Luminol
|C3= Polyethylene
|Output= White Glow Stick; Blue Glow Stick; Brown Glow Stick
|description={{only|bedrock|Education}}
|type= Miscellaneous
}}
</div>
== Usage ==
While equipped, [[player]]s can {{control|use}} glow sticks to shake them, causing them to appear bright regardless of the [[light]] level. This is only an aesthetic change, as no light is emitted to the surrounding area. A [[particle]] effect is visible until the [[durability]] runs out. The glow stick's durability depletes while lit{{Info needed}}, in both Survival and Creative modes.
== Sounds ==
{{Sound table
|type=bedrock
|sound=Flint and steel click.ogg
|source=block
|description=While a glowstick is being activated
|id=fire.ignite
|volume=1.0
|pitch=0.5/0.7
|foot=1}}
== Data values ==
=== ID ===
{{ID table
|edition=bedrock
|shownumericids=y
|showforms=y
|notshowbeitemforms=y
|generatetranslationkeys=y
|displayname=Glow Stick
|spritename=glow-sticks
|spritetype=item
|nameid=glow_stick
|id=601
|form=item
|translationkey=item.glow_stick.black.name,item.glow_stick.red.name,item.glow_stick.green.name,item.glow_stick.brown.name,item.glow_stick.blue.name,item.glow_stick.purple.name,item.glow_stick.cyan.name,item.glow_stick.silver.name,item.glow_stick.gray.name,item.glow_stick.pink.name,item.glow_stick.lime.name,item.glow_stick.yellow.name,item.glow_stick.lightBlue.name,item.glow_stick.magenta.name,item.glow_stick.orange.name,item.glow_stick.white.name
|foot=1}}
===Metadata===
{{/DV}}
===Item data===
See [[Bedrock Edition level format/Item format]].
== History ==
{{History|bedrock}}
{{History||1.4.0|snap=beta 1.2.20.1|[[File:White Glow Stick.png|32px]] [[File:Orange Glow Stick.png|32px]] [[File:Magenta Glow Stick.png|32px]] [[File:Light Blue Glow Stick.png|32px]] [[File:Yellow Glow Stick.png|32px]] [[File:Lime Glow Stick.png|32px]] [[File:Pink Glow Stick.png|32px]] [[File:Gray Glow Stick.png|32px]] [[File:Cyan Glow Stick.png|32px]] [[File:Purple Glow Stick.png|32px]] [[File:Blue Glow Stick.png|32px]] [[File:Brown Glow Stick.png|32px]] [[File:Green Glow Stick.png|32px]] [[File:Red Glow Stick.png|32px]] Added glow sticks.}}
{{History||1.14.60|snap=?|Making a glow stick results in an edible item called {{code|item.glow_stick.black.name}}.}}
{{History||?|Making a glow stick results in correct items again.
|Making a glow stick with dye has been made an upgrade{{info needed|what is this supposed to mean?}}
|Putting 2 glow sticks in a Crafting Table now outputs a correct glow stick.}}
{{History||1.17.0|snap=?|[[File:Missing Glow Stick.png|32px]] Two black glow sticks, using the [[missing texture]] if Education Edition is disabled, now generate in fake end portal rooms in [[mansion]]s instead of [[ender pearl]]s.}}
{{h||1.18.0|snap=beta 1.18.0.21|Glow sticks no longer generate in [[woodland mansion]]s.}}
{{History|education}}
{{History||1.0.27|[[File:White Glow Stick.png|32px]] [[File:Orange Glow Stick.png|32px]] [[File:Magenta Glow Stick.png|32px]] [[File:Light Blue Glow Stick.png|32px]] [[File:Yellow Glow Stick.png|32px]] [[File:Lime Glow Stick.png|32px]] [[File:Pink Glow Stick.png|32px]] [[File:Gray Glow Stick.png|32px]] [[File:Cyan Glow Stick.png|32px]] [[File:Purple Glow Stick.png|32px]] [[File:Blue Glow Stick.png|32px]] [[File:Brown Glow Stick.png|32px]] [[File:Green Glow Stick.png|32px]] [[File:Red Glow Stick.png|32px]] Added glow sticks.}}
{{History|foot}}
== Gallery ==
<gallery>
White Glow Stick.png|
Orange Glow Stick.png|
Magenta Glow Stick.png|
Light Blue Glow Stick.png|
Yellow Glow Stick.png|
Lime Glow Stick.png|
Pink Glow Stick.png|
Gray Glow Stick.png|
Cyan Glow Stick.png|
Purple Glow Stick.png|
Blue Glow Stick.png|
Brown Glow Stick.png|
Green Glow Stick.png|
Red Glow Stick.png|
</gallery>
== Trivia ==
* The glowing reaction of [[Wikipedia:Luminol|Luminol]] during oxidation exists in real life. It is used for detecting blood in crime scenes.
* Players cannot enchant glow sticks with Unbreaking or Mending, despite the items having [[durability]].
* The black and light gray glow sticks use the same texture as the red glow stick.{{verify|It seems they use the missing texture instead. Was this the case beforehand, and they only started using the missing texture later?}}
== Issues ==
{{issue list}}
{{items}}
{{Education Edition}}
[[Category:Non-renewable resources]]
[[Category:Education Edition items]]
[[de:Knicklicht]]
[[ja:ケミカルライト]]
[[ko:발광봉]]
[[pt:Graveto Brilhante]]
[[ru:Химический источник света]]
[[zh:荧光棒]]</li><li>[[Redstone Comparator|Redstone Comparator]]<br/>{{Block
| image =
| image2 =
| transparent = Yes
| light = No
| tool = any
| renewable = Yes
| stackable = Yes (64)
| flammable = No
| lavasusceptible = No
| group = Redstone Comparator
| group2 = Subtracting
| group3 = Powered
| group4 = Powered+Subtracting
| 1-1 = Redstone Comparator.png
| 2-1 = Subtracting Redstone Comparator.png
| 3-1 = Powered Redstone Comparator.png
| 4-1 = Powered Subtracting Redstone Comparator.png
}}
{{Many images}}
A '''redstone comparator''' is a [[block]] that can produce an [[Redstone Dust|output signal]] from its front by reading [[chest]]s, [[lectern]]s, [[beehive]]s and similar blocks, or repeat a signal without changing its strength. It can also be set to either stop outputting a signal when its side input recieves a stronger one (front torch off), or subtract its side input's signal strength from its output (front torch on).
== Obtaining ==
=== Natural generation ===
Redstone comparators generate in [[Ancient City|ancient cities]].
=== Breaking ===
A redstone comparator can be broken instantly with any [[tool]], or by hand, and drops itself as an item.
{{Breaking row|Redstone Comparator|horizontal=y}}
A redstone comparator is removed and dropped as an item if:
* its attachment block is moved, removed, or destroyed;
* [[water]] flows into its space;{{only|java}}
* a [[piston]] tries to push it or moves a block into its space.
If [[lava]] flows into a redstone comparator's space, the redstone comparator is destroyed without dropping as an item.
=== Crafting ===
{{Crafting
|B1=Redstone Torch
|A2=Redstone Torch
|B2=Nether Quartz
|C2=Redstone Torch
|A3=Stone
|B3=Stone
|C3=Stone
|Output= Redstone Comparator
|type=Redstone
}}
== Usage ==
A redstone comparator can be placed on the top of any [[opaque]] block with a solid full-height top surface (including upside-down [[slab]]s and upside-down [[stairs]]). {{IN|be}}, a comparator can also be placed on [[wall]]s and fences. For more information about placement on transparent blocks, see [[Opacity/Placement]].
The redstone comparator has a front and a back — the arrow on the top of the comparator points to the front. When placed, the comparator faces away from the player. The comparator has two miniature redstone torches at the back and one at the front. The back torches turn on when the comparator's output is greater than zero (the arrow on top also turns red). The front torch has two states that can be toggled by {{control|using}} the comparator:
* Down and unpowered (indicating the comparator is in "comparison mode")
* Up and powered (indicating the comparator is in "subtraction mode")
The redstone comparator can take a signal strength input from its rear as well as from both sides. Side inputs are accepted only from [[redstone dust]], [[block of redstone]], [[redstone repeater]]s, other comparators, and [[observer]]s in specific scenarios. The redstone comparator's front is its output.
It takes 1 [[redstone tick]] (2 game ticks, or 0.1 seconds barring lag) for signals to move through a redstone comparator, either from the rear or from the sides. This applies to changing signal strengths as well as simply to turning on and off.
Redstone comparators check their power state before their scheduled ticks update. This results in redstone comparators not usually responding to 1-tick fluctuations of power or signal strength — for example, a [[clock circuit|1-clock]] input is treated as always off from the side, and always on from the rear. This happens because the signal changes back to its original state before the redstone comparator checks its input states. However, certain setups such as powering any input with two separate observer pulses at the same time will cause a redstone comparator to respond to 2 gametick pulses.
The redstone comparator has four functions: maintain signal strength, compare signal strength, subtract signal strength, and measure certain block states (primarily the fullness of containers).
=== Maintain signal strength ===
A redstone comparator with no powered sides outputs the same signal strength as its rear input.
=== Compare signal strength ===
[[File:Comparators Explained.png|Comparators in comparison mode.|thumb]]
A redstone comparator in comparison mode (front torch down and unpowered) compares its rear input to its two side inputs. If either side input is greater than the rear input, the comparator output turns off. If neither side input is greater than the rear input, the comparator outputs the same signal strength as its rear input.
The formula for calculating the output signal strength is as follows:
<code>output = rear × [[Wikipedia:Iverson bracket|[]]'''''left''''' ≤ '''''rear''''' AND '''''right''''' ≤ '''''rear'''''[[Wikipedia:Iverson bracket|<nowiki>]]]</code>
{{-}}
=== Subtract signal strength ===
[[File:Redstone comparator.png|thumb|The greatest of the side inputs A and C is subtracted from the rear input B, outputting 1. If either A or C were greater than B, it would output 0.]]
A redstone comparator in subtraction mode (front torch up and powered) subtracts the signal strength of the higher side input from the signal strength of the rear input.
<code>output = max('''''rear''''' − max('''''left''', '''right'''''), 0)</code>
For example: if the signal strength is 6 at the left input, 7 at the right input and 4 at the rear, the output signal has a strength of ''max(4 − max(6, 7), 0) = max(4−7, 0) = max(−3, 0) = 0''.
If the signal strength is 9 at the rear, 2 at the right input and 5 at the left input, the output signal has a strength of ''max(9 − max(2, 5), 0) = max(9−5, 0) = 4''.
=== Measure block state ===
{{Schematic | caption = A redstone comparator can measure the fullness of a chest, as well as other block states, even through an opaque block.
|rd-ew!|rc-w!|ch|SB|rc-e!|rd-ew!
}}
A redstone comparator treats certain blocks behind it as power sources and outputs a signal strength proportional to the block's state. The comparator may be separated from the measured block by an opaque block. However, {{in|je}}, if the opaque block is powered to signal strength 15, then the comparator outputs 15 no matter the fullness of the container.<ref>{{bug|MC-64394}} (resolved as "Works As Intended")</ref>
[[Category:Java Edition specific information]]
{{-}}
==== Fullness of containers ====
{| class="wikitable floatright" style="margin-left: 0.5em; margin-right: 0; text-align: center;"
|+ Minimum Items for Container Signal Strength
|-
!Containers
!{{BlockSprite|Furnace|link=Furnace}}<br>{{BlockSprite|Blast Furnace|link=Blast Furnace}}<br>{{BlockSprite|Smoker|link=Smoker}}
!{{BlockSprite|Hopper|link=Hopper}}<br>{{EntitySprite|Minecart with Hopper|link=Minecart with Hopper}}<br>{{BlockSprite|Brewing Stand|link=Brewing Stand}}
!{{BlockSprite|Dispenser|link=Dispenser}}<br>{{BlockSprite|Dropper|link=Dropper}}
!{{BlockSprite|Chest|link=Chest}}<br>{{EntitySprite|Minecart with Chest|link=Minecart with Chest}}<br>{{BlockSprite|Shulker Box|link=Shulker Box}}<br>{{BlockSprite|Barrel|link=Barrel}}
![[Double Chest|{{Schematic|size=16|ch-s|-|ch-n}}
]]
!{{BlockSprite|Jukebox|link=Jukebox}}
|-
!Total Slots
!3!!5!!9!!27!!54!!1
|-
!Power Level
! colspan="5" |Number of Items
!Music Disc
|-
|0||0||0||0||0||0||No disc
|-
|1||1||1||1||1||1||"13"
|-
|2||14||23||42||1s 60||3s 55||"cat"
|-
|3||28||46||1s 19||3s 55||7s 46||"blocks"
|-
|4||42||1s 5||1s 60||5s 51||11s 37||"chirp"
|-
|5||55||1s 28||2s 37||7s 46||15s 28||"far"
|-
|6||1s 5||1s 51||3s 14||9s 42||19s 19||"mall"
|-
|7||1s 19||2s 10||3s 55||11s 37||23s 10||"mellohi"
|-
|8||1s 32||2s 32||4s 32||13s 32||27s||"stal"
|-
|9||1s 46||2s 55||5s 10||15s 28||30s 55||"strad"
|-
|10||1s 60||3s 14||5s 51||17s 23||34s 46||"ward"
|-
|11||2s 10||3s 37||6s 28||19s 19||38s 37||"11"
|-
|12||2s 23||3s 60||7s 5||21s 14||42s 28||"wait"
|-
|13||2s 37||4s 19||7s 46||23s 10||46s 19||"Pigstep"
|-
|14||2s 51||4s 42||8s 23||25s 5||50s 10||"Otherside"<br>"Relic"
|-
|15||3s||5s||9s||27s||54s||"5"
|}
A redstone comparator can output a signal indicating how full a container is. (0 for empty, 15 for full, etc.) The table on the right is described more in detail, later in this section.
Containers that can be measured by a comparator include:
* {{BlockLink|Furnace}}
* {{BlockLink|Blast Furnace}}
* {{BlockLink|Smoker}}
* {{BlockLink|Brewing Stand}}
* {{BlockLink|Hopper}}
* {{ItemLink|Minecart with Hopper}} on top of a [[detector rail]]
* {{BlockLink|Dispenser}}
* {{BlockLink|Dropper}}
* {{BlockLink|Chest}}
* {{BlockLink|Trapped Chest}}
* {{ItemLink|Minecart with Chest}} on top of a [[detector rail]]
* {{BlockLink|Barrel}}
* {{SchematicSprite|size=16|ch-e}}{{SchematicSprite|size=16|ch-w}} Large chest
* {{SchematicSprite|size=16|ch-e}}{{SchematicSprite|size=16|ch-w}} Large trapped chest
* {{BlockLink|Shulker Box}} (any color)
Generally speaking, the comparator output signal strength represents the average fullness of the slots, based on how many of that item form a full stack (64, 16, or 1 for non-stackable items).
The ''Minimum Items for Container Signal Strength'' table (right) shows the minimum '''''full-stack-equivalent (FSE)''''' to produce different signal strengths from common containers. A '''''full-stack-equivalent''''' quantifies how many normal 64-stackable items are needed to output a corresponding signal strength. The 's' is a constant 64, with the additional amount needed following after.
One may also consider the terms: '''c''umulative-weight''''' or '''''weighted-sum''''' instead of '''''full-stack-equivalent'''''.
Items that stack to a max of 16 ([[snowball]]s, [[sign]]s, [[ender pearl]]s, etc.), contribute +4 to the ''full-stack-equivalent'' for each unity (count of 1 item). Similarly, items that stack to 1 ([[minecart]], [[boat]], etc.) contribute +64, and items that stack to 64 contribute +1.
Example 1: 3 ender pearls will contribute a 3 x 4 = 12 ''full-stack-equivalent''.
Example 2: 16 ender pearls and 60 redstone dust contributes a 16x4 + 60x1 = 124 ''full-stack-equivalent''.
Example 3: 1 minecart and 60 redstone dust contributes a 1x64 + 60x1 = 124 ''full-stack-equivalent''.
Example 4: To produce a signal strength of 10 from a hopper, one requires a ''full-stack-equivalent'' of at least 3s + 14 = 206 but strictly less than than 3s + 37 = 229. This can be done with 3 minecarts, and 14 dirt.
When a comparator measures a large chest or large trapped chest, it measures the entire large chest (54 slots), not just the half directly behind the comparator. A chest or trapped chest that cannot be opened (either because it has an opaque block, [[ocelot]], or [[cat]] above it) always produces an output of 0 no matter how many items are in the container — shulker boxes can always be measured, even if they cannot open.
;Calculating signal strength from items
:When a container is empty, the output is off.
:When it is not empty, the output signal strength is calculated as follows:
:<code>'''''signal strength''''' = floor(1 + (('''''sum of all slots' fullnesses''''') / ('''''number of slots in container''''')) × 14)</code>
:<code>fullness of a slot = '''''number of items in slot''''' / '''''max stack size for this type of item'''''</code>
:''Example:'' 300 blocks in a dispenser (which has 9 slots), where each block stacks to a maximum of 64 has a 300 ''full-stack-equivalent.'' This produces an output with a signal strength of 8:
<blockquote>
1 + ((300 items / 64 items per slot) / 9 slots) × 14 = 8.292, floored is 8
</blockquote>
;Calculating items from signal strength
:It can be useful in redstone circuits to use containers with comparators to create signals of a specific strength. The number of items required in a container to produce a signal of desired strength is calculated as follows:
:<code>items required = max('''''desired signal strength''''', roundup(('''''total slots in container''''' × 64 / 14) × (desired signal strength − 1)))</code>
:''Example:'' To use a furnace (which has 3 slots) to create a strength 9 signal, players need 110 items:
<blockquote>
max(9, (3×64/14) × (9−1)) = 109.714, rounded up is 110
</blockquote>
{{-}}
==== Miscellaneous ====
[[File:Comparator storage.png|Comparators used to measure containers.|thumb]]
Some non-container blocks can also be measured by a redstone comparator:
;{{BlockLink|Beehive}} and {{BlockLink|Bee nest}}
: A hive or nest outputs a signal strength equal to the amount of honey in the hive/nest.
;{{BlockLink|Cake}}
: A cake outputs a signal strength relative to the amount of cake remaining. Each slice is worth 2 signal strength, with 7 total slices, for an output of 14 for a full cake.
[[File:Cauldron Redstone Strength Values.png|Cauldron signal strength|thumb]]
;{{BlockLink|Cauldron}}
: A cauldron outputs different signal strengths depending on how much water or powdered snow is inside. From completely empty to completely full, the output values are 0, 1, 2, and 3. If lava or powder snow is inside, the strength is always 3.
[[File:Composter Redstone Strength Values.png|Composter signal strength|thumb]]
;{{BlockLink|Composter}}
: A composter outputs different signal strengths depending on the level inside. From completely empty to completely full, the output values are 0, 1, 2, 3, 4, 5, 6, 7 and 8.
;{{Anchor|CommandBlock}}{{BlockLink|Command Block}}
: A command block stores the "success count" of the last command executed, which represents the number of times the most recently used command of this command block succeeded. A "success" is defined by the [[command]]'s success conditions: if a red error message is returned in the chat, the command was not successful.
: Most commands can succeed once per execution, but certain commands (such as those that accept players as arguments) can succeed multiple times, and the comparator outputs the number of times it succeeded (maximum 15 when sent to redstone dust, but in the code it is able to go up to the 32-bit integer limit, and can be used in contraptions with no redstone dust with those values).
: A command block continues to store the success count of the last command executed until it executes its command again, thus the comparator continues to output the same signal strength even after the command block is no longer being activated (it doesn't turn off when the signal to the command block turns off).
;{{BlockLink|End Portal Frame}}
: An end portal frame outputs a full signal of 15 if it contains an [[eye of ender]] and zero otherwise.
[[File:Item frame and comparator.png|A comparator can measure the presence and rotation of an item frame's contents.|thumb]]
;{{EntityLink|Item Frame}}
: A comparator can measure the state of an [[item frame]]'s contents. An item frame comparator outputs 0 if the item frame is empty, or 1 to 8 for any item depending on its rotation: 1 at initial placement, plus 1 for each 45° of rotation for a maximum of 8.
: For an item frame that holds a map, a unit of rotation is 90° instead of 45°, but a comparator still outputs power levels 1 to 8. It takes two full rotations to cycle through all comparator outputs, and each orientation of the map corresponds to two output levels that differ by 4.
: The comparator must be placed behind the block the item frame is attached to, facing away from the item frame. The block must be a full block, and the item frame cannot be submerged in water. Having a sign in the same block as the item frame will prevent the frame from sending a signal as well.{{only|java}}
;{{BlockLink|Jukebox}}
: A jukebox outputs a signal strength indicating which music disc is currently playing. See the ''Minimum Items for Container Signal Strength'' table above.
;{{BlockLink|Lectern}}
: A lectern outputs a signal strength that depends on what page the player is currently on. The calculation used is:
:<code>'''''signal strength''''' = floor(1 + (('''''current page''''' - 1) / ('''''number of pages in book''''' - 1)) × 14)</code>
:This results in page 1 having a signal strength of 1, and the last page having a signal strength of 15. The exception is a single page book, which will output a signal strength of 15.
:For example, a book with 15 pages will output a signal equal to the current page number. A book with 5 pages will output signal strengths of 1, 4, 8, 11 and 15 for the different pages. A book with 100 pages will have the signal strength increase to the next level on pages 1, 9, 16, 23, 30, 37, 44, 51, 58, 65, 72, 79, 86, 93 and 100.
:
;{{BlockLink|Respawn Anchor}}
: A respawn anchor outputs a signal strength of 0, 3, 7, 11, or 15, depending on the "charged" value.
;{{BlockLink|Sculk Sensor}}
: A sculk sensor outputs a signal strength depending on the type of vibration that is detected.
;{{BlockLink|Chiseled Bookshelf}}
: A chisled bookshelf outputs a signal strength between 1 and 6 indicating the last slot interacted with. When no slot has been interacted with yet, it outputs 0.
{{-}}
== Sounds ==
=== Generic ===
{{Edition|Java}}:
{{Sound table/Block/Stone/JE}}
{{Edition|Bedrock}}:
{{Sound table/Block/Wood/BE}}
=== Unique ===
{{edition|java}}:
{{Sound table
|rowspan=2
|sound=Click.ogg
|subtitle=Comparator clicks
|source=block
|description=When a comparator is set to subtraction mode
|id=block.comparator.click
|translationkey=subtitles.block.comparator.click
|volume=0.3
|pitch=0.55
|distance=16}}
{{Sound table
|subtitle=Comparator clicks
|source=block
|description=When a comparator is set to comparison mode
|id=block.comparator.click
|translationkey=subtitles.block.comparator.click
|volume=0.3
|pitch=0.5
|distance=16
|foot=1}}
{{edition|bedrock}}:
{{Sound table
|type=bedrock
|rowspan=2
|sound=Click.ogg
|source=block
|description=When a comparator is set to subtraction mode
|id=block.click
|volume=0.2
|pitch=0.55}}
{{Sound table
|source=block
|description=When a comparator is set to comparison mode
|id=block.click
|volume=0.2
|pitch=0.5
|foot=1}}
== Data values ==
=== ID ===
{{edition|java}}:
{{ID table
|edition=java
|showforms=y
|generatetranslationkeys=y
|displayname=Redstone Comparator
|spritetype=block
|nameid=comparator
|foot=1}}
{{ID table
|displayname=Block entity
|spritename=redstone-comparator
|spritetype=block
|nameid=comparator
|foot=1}}
{{edition|bedrock}}:
{{ID table
|edition=bedrock
|firstcolumnname=Redstone Comparator
|shownumericids=y
|showforms=y
|generatetranslationkeys=y
|displayname=Unpowered block
|spritename=unpowered-comparator
|spritetype=block
|nameid=unpowered_comparator
|id=149
|form=block
|translationkey=-}}
{{ID table
|displayname=Powered block
|spritename=powered-comparator
|spritetype=block
|nameid=powered_comparator
|id=150
|form=block
|translationkey=-}}
{{ID table
|displayname=Item
|spritename=redstone-comparator
|spritetype=item
|nameid=comparator
|id=522
|form=item
|foot=1}}
{{ID table
|notnamespaced=y
|displayname=Block entity
|spritename=redstone-comparator
|spritetype=block
|nameid=Comparator
|foot=1}}
=== Block states ===
{{see also|Block states}}
{{/BS}}
=== Block data ===
A redstone comparator has a block entity associated with it that holds additional data about the block.
{{el|je}}:
{{see also|Block entity format}}
{{/BE}}
{{el|be}}:
: See [[Bedrock Edition level format/Block entity format]].
== Advancements ==
{{Load advancements|the power of books}}
== Video ==
<div style="text-align:center">{{yt|J7Z20Zzz3yU}}</div>
== History ==
{{info needed section|If {{bug|MC-50242}} also affected comparators?}}
''For a more in-depth breakdown of changes to repeater textures and models, including a set of renders for each state combination, see [[/Asset history]]''
{{History|java}}
{{History||November 24, 2012|link=https://youtube.com/watch?v=YG9RNyRhIow&t=6m56s|[[Jeb]] stated that there may be a "capacitor" in [[Minecraft]]. }}
{{History||December 27, 2012|link={{tweet|Dinnerbone|284388625595125760}}|[[Dinnerbone]] released [https://web.archive.org/web/20190710120115/https://imgur.com/a/FBKed pictures] of the first version of the "comparator", stating it was a replacement for the "capacitor" idea that has variable, alternate inputs.}}
{{History||January 2, 2013|link={{tweet|Dinnerbone|286428595423965184}}|Dinnerbone released one more [http://dinnerbone.com/media/uploads/2013-01/screenshots/2013-01-02_12.06.47.png picture] of the comparator. The picture itself showing a digital-to-analog converter, using the comparator as the main [[block]].}}
{{History||1.5|snap=13w01a|[[File:Redstone Comparator (S) JE1.png|32px]] [[File:Powered Redstone Comparator (S) JE1.png|32px]] [[File:Subtracting Redstone Comparator (S) JE1.png|32px]] [[File:Powered Subtracting Redstone Comparator (S) JE1.png|32px]] [[File:Redstone Comparator (item) JE1 BE1.png|32px]] Added redstone comparators.
|Redstone comparators have 0 delay.
At this point, block ID 149 was used for unpowered comparators, and block ID 150 for powered comparators.}}
{{History|||snap=13w01b|A delay of 1 game tick ({{frac|1|2}} redstone tick) has now been added to redstone comparators to fix bugs.
|The ability to measure containers to redstone comparators has now been added.}}
{{History|||snap=13w02a|[[File:Redstone Comparator (S) JE2.png|32px]] [[File:Powered Redstone Comparator (S) JE2.png|32px]] [[File:Subtracting Redstone Comparator (S) JE2.png|32px]] [[File:Powered Subtracting Redstone Comparator (S) JE2.png|32px]] The appearance of redstone comparators has now been changed - the top texture has changed to show [[quartz]] in the middle and the sides now use the [[smooth stone]] texture rather than the smooth stone slab side texture.
|The algorithm for measuring containers has now been changed so that redstone comparators output a signal with as few as 1 [[item]] in the container.}}
{{History|||snap=13w02b|Redstone comparators now treat large [[chest]]s as a single container.}}
{{History|||snap=13w03a|Redstone comparators now output success count of [[command block]]s.
|Redstone comparators now measure container [[minecart]]s on [[detector rail]]s.}}
{{History|||snap=13w04a|Redstone comparators now measure [[jukebox]]es.}}
{{History|||snap=13w05a|Redstone comparators no longer cause constant [[block]] updates. The delay has now been made consistent, and side input no longer causes a pulse output.
|Block 150 (later <code>powered_comparator</code>) is no longer used; powered state is now represented by the 8s bit on block 149 (later <code>unpowered_comparator</code>).}}
{{History|||snap=13w05b|Redstone comparator delay has now been changed from 1 game tick (1/2 [[redstone]] tick) to 2 game ticks (1 redstone tick).}}
{{History|||snap=13w09c|The redstone signal strength from a redstone comparator next to a [[brewing stand]] with 3 [[water bottle]]s in it is now the same as one with 3 water bottles and 1 ingredient in it.}}
{{History||1.6.1|snap=13w18a|Redstone comparators now measure [[cauldron]]s and [[end portal frame]]s.}}
{{History||1.8|snap=14w04a|Redstone comparators now measure [[item frame]]s.}}
{{History|||snap=14w10a|The torches under redstone comparators have now been shortened, which has changed the underside appearance from [[File:Redstone Comparator UNKVER1 (facing NWU).png|32px]] [[File:Powered Redstone Comparator UNKVER1 (facing NWU).png|32px]] [[File:Subtracting Redstone Comparator UNKVER1 (facing NWU).png|32px]] [[File:Powered Subtracting Redstone Comparator UNKVER1 (facing NWU).png|32px]] to [[File:Redstone Comparator UNKVER2 (facing NWU).png|32px]].}}
{{History|||snap=14w25a|[[File:Redstone Comparator (S) JE3.png|32px]] [[File:Powered Redstone Comparator (S) JE3.png|32px]] [[File:Subtracting Redstone Comparator (S) JE3.png|32px]] [[File:Powered Subtracting Redstone Comparator (S) JE3.png|32px]] The torches on comparators are now subject to ambient occlusion.
|Comparators set to subtract mode appear to be powered as well regardless of incoming power. The subtracting-only model still exists and can be achieved through {{cmd|setblock}}.}}
{{History|||snap=14w25b|[[File:Subtracting Redstone Comparator (S) JE4.png|32px]] [[File:Powered Subtracting Redstone Comparator (S) JE4.png|32px]] The powered front torch when in subtraction mode is now lower.
|Comparators set to subtract by hand now appear normally again.}}
{{History|||snap=14w28a|Redstone comparators now measure [[cake]]s.}}
{{History||1.9|snap=15w42a|With the addition of the [[blaze powder]] fuel slot, [[brewing stand]]s now have 5 slots instead of 4. Their original comparative power values from redstone comparators are listed below:
{{{!}} class{{=}}"wikitable collapsible collapsed" data-description{{=}}"Original values"
! Original values
{{!}}-
{{!}}
*0: 0
*1: 1
*2: 19
*3: 37
*4: 55
*5: 1s 10
*6: 1s 28
*7: 1s 46
*8: 2s
*9: 2s 19
*10: 2s 37
*11: 2s 55
*12: 3s 10
*13: 3s 28
*14: 3s 46
*15: 4s
{{!}}}
}}
{{History|||snap=15w47a|Redstone comparators' side inputs now take power from [[redstone block]]s.}}
{{History||1.13|snap=17w47a|All 3 IDs for the redstone comparator have now been merged into one ID: <code>comparator</code>.
|Redstone comparators now render their underside, which has changed their undersides from [[File:Redstone Comparator UNKVER2 (facing NWU).png|32px]] to [[File:Redstone Comparator UNKVER3 (facing NWU).png|32px]].
|Prior to [[1.13/Flattening|''The Flattening'']], these blocks' numeral IDs were 149 and 150, and the [[item]]'s 404.
|As a result, the formerly unused comparator ID is now technically used again, due to both unpowered and powered versions being merged into a single comparator block ID.}}
{{History||1.14|snap=18w43a|[[File:Redstone Comparator (S) JE4.png|32px]] [[File:Powered Redstone Comparator (S) JE4.png|32px]] [[File:Subtracting Redstone Comparator (S) JE5.png|32px]] [[File:Powered Subtracting Redstone Comparator (S) JE5.png|32px]] [[File:Redstone Comparator (item) JE2 BE2.png|32px]] The textures of redstone comparators have now been changed.}}
{{History|||snap=19w02a|Redstone comparators now measure [[lectern]]s.}}
{{History|||snap=19w03a|Redstone comparators now measure [[composter]]s.}}
{{History|||snap=19w12b|Redstone comparators can now be placed on [[glass]], [[ice]], [[glowstone]] and [[sea lantern]]s.}}
{{History||1.15|snap=19w34a|Redstone comparators now measure how much honey is inside [[beehive|bee hive]]s and [[bee nest]]s.}}
{{History||1.16|snap=20w06a|The way to calculate the input signals of redstone comparators has now been changed.}}
{{History|||snap=20w11a|The changes to the way of calculating the input signals of redstone comparators from [[Java Edition 20w06a|20w06a]] have now been reverted.}}
{{History|||snap=20w16a|Redstone comparators now measure [[Pigstep music disc]]s in [[jukebox]]es.}}
{{History||1.17|snap=20w45a|Redstone comparators now measure [[lava cauldron]]s.}}
{{History|||snap=20w46a|Redstone comparators now measure [[Cauldron#Holding powder snow|powder snow cauldron]]s.}}
{{History||1.18|snap=21w41a|[[File:Powered Redstone Comparator (S) JE5.png|32px]] [[File:Powered Subtracting Redstone Comparator (S) JE6.png|32px]] The texture of powered redstone comparator have now been changed.}}
{{History||1.19|snap=22w13a|Redstone comparators now generate as part of [[ancient cities]].}}
{{History||1.20<br>(Experimental)|link=1.19.3|snap=22w42a|Redstone comparators now measure [[chiseled bookshelves]].}}
{{History||1.20.2|snap=23w33a|Redstone comparators now use stone sounds instead of wood sounds.<ref>{{bug|MC-182820|||Fixed}}</ref>}}
{{History|pocket alpha}}
{{History||v0.14.0|snap=build 1|[[File:Redstone Comparator (S) JE2 BE1.png|32px]] [[File:Powered Redstone Comparator (S) JE2 BE1.png|32px]] [[File:Subtracting Redstone Comparator (S) JE2 BE1.png|32px]] [[File:Powered Subtracting Redstone Comparator (S) JE2 BE1.png|32px]]{{verify|Was this the model used?}} [[File:Redstone Comparator (item) JE1 BE1.png|32px]] Added redstone comparators.}}
{{History|pocket}}
{{History||1.0.0|snap=alpha 0.17.0.1|Redstone comparators now measure [[end portal frame]]s.}}
{{History||1.0.5|snap=alpha 1.0.5.0|Redstone comparators now output success count of [[command block]]s.}}
{{History||1.1.0|snap=alpha 1.1.0.0|Redstone comparators now measure [[shulker box]]es.}}
{{History|bedrock}}
{{History||1.2.0|snap=beta 1.2.0.2|Redstone comparators now measure [[jukebox]]es.
|Redstone comparators now render their underside, which has changed their undersides from [[File:Redstone Comparator UNKVER1 (facing NWU).png|32px]] to [[File:Redstone Comparator UNKVER3 (facing NWU).png|32px]]}}
{{History||1.10.0|snap=beta 1.10.0.3|[[File:Redstone Comparator (S) BE.png|32px]] [[File:Powered Redstone Comparator (S) BE.png|32px]] [[File:Subtracting Redstone Comparator (S) BE.png|32px]] [[File:Powered Subtracting Redstone Comparator (S) BE.png|32px]] [[File:Redstone Comparator (item) JE2 BE2.png|32px]] The textures of redstone comparators have now been changed.}}
{{History||1.11.0|snap=beta 1.11.0.1|Redstone comparators now measure [[smoker]]s, [[blast furnace]]s, [[lectern]]s and [[composter]]s.}}
{{History||1.18.10|snap=beta 1.18.10.20|[[File:Powered Redstone Comparator (S) JE5.png|32px]] [[File:Powered Subtracting Redstone Comparator (S) JE6.png|32px]] The texture of powered redstone comparator have now been changed.}}
{{History||1.20.30|snap=beta 1.20.30.20|Redstone comparators now use the <code>minecraft:cardinal_direction</code> [[block state]] instead of <code>direction</code>.}}
{{History|console}}
{{History||xbox=TU19|xbone=CU7|ps=1.12|wiiu=Patch 1|switch=1.0.1|[[File:Redstone Comparator (S) JE2 BE1.png|32px]] [[File:Powered Redstone Comparator (S) JE2 BE1.png|32px]] [[File:Subtracting Redstone Comparator (S) JE2 BE1.png|32px]] [[File:Powered Subtracting Redstone Comparator (S) JE2 BE1.png|32px]]{{verify|Was this the model used?}} [[File:Redstone Comparator (item) JE1 BE1.png|32px]] Added redstone comparators.}}
{{History||xbox=TU31|xbone=CU19|ps=1.22|wiiu=Patch 3|switch=1.0.1|Redstone comparators can now measure [[item frame]]s.}}
{{History||xbox=none|xbone=none|ps=1.90|wiiu=none|switch=none|[[File:Redstone Comparator (S) BE.png|32px]] [[File:Powered Redstone Comparator (S) BE.png|32px]] [[File:Subtracting Redstone Comparator (S) BE.png|32px]] [[File:Powered Subtracting Redstone Comparator (S) BE.png|32px]]{{verify|Was this the model used?}} [[File:Redstone Comparator (item) JE2 BE2.png|32px]] The textures of redstone comparators have now been changed.}}
{{History|3ds}}
{{History||0.1.0|[[File:Redstone Comparator (S) JE2 BE1.png|32px]] [[File:Powered Redstone Comparator (S) JE2 BE1.png|32px]] [[File:Subtracting Redstone Comparator (S) JE2 BE1.png|32px]] [[File:Powered Subtracting Redstone Comparator (S) JE2 BE1.png|32px]]{{verify|Was this the model used?}} [[File:Redstone Comparator (item) JE2 BE2.png|32px]] Added redstone comparators.}}
{{History|foot}}
=== Redstone comparator "items" ===
{{:Technical blocks/Redstone Comparator}}
== Issues ==
{{issue list}}
== Trivia ==
* Comparators do not emit redstone particles when powered, unlike redstone torches and repeaters.<ref>{{bug|MC-51692|||WAI}}</ref>
== Gallery ==
<gallery>
Dinnerbone Comparator 1.png|Dinnerbone showing how comparators work.
Dinnerbone Comparator 2.png|Dinnerbone showing how comparators work.
Dinnerbone Comparator 3.png|Dinnerbone showing how comparators work.
Dinnerbone Comparators 1.png|A contraption incorporating comparators.
Dinnerbone Comparators 2.png|Comparators in action.
Dinnerbone Comparators 3.png|Output specific signals.
Dinnerbone Comparator Thing.png|Another comparator in use.
Item Frame Comparator.png|Rotating the torch in the item frame adjusts the comparator's output.
</gallery>
== References ==
{{reflist}}
{{Redstone}}
{{Blocks|Utility}}
{{Items}}
[[Category:Mechanics]]
[[Category:Block entities]]
[[Category:Redstone mechanics]]
[[Category:Mechanisms]]
[[Category:Manufactured blocks]]
[[Category:Non-solid blocks]]
[[de:Redstone-Komparator]]
[[es:Comparador de redstone]]
[[fr:Comparateur de redstone]]
[[hu:Redstone-komparátor]]
[[ja:レッドストーンコンパレーター]]
[[ko:레드스톤 비교기]]
[[nl:Redstonevergelijker]]
[[pl:Komparator]]
[[pt:Comparador de redstone]]
[[ru:Компаратор]]
[[uk:Редстоуновий компаратор]]
[[zh:红石比较器]]</li></ul></nowiki> | 14w02a | Baby mobs can be grown faster by being fed. Each feeding reduces the remaining time to maturity by 10%, having no effect if only 9 seconds remain. 28 feedings will reduce the remaining time to around a minute, from the initial time of 20 minutes. In addition, baby sheep will reach maturity one minute sooner for every time they consume grass. | |||
| xbox | |||||
1.3{{Extension DPL}}<ul><li>[[Beetroot Soup|Beetroot Soup]]<br/>{{for|other uses|Soup}}
{{Item
| title = Beetroot Soup
| image = Beetroot Soup.png
| renewable = Yes
| heals = {{hunger|6}}
| stackable = No
}}
'''Beetroot soup''' is an unstackable [[food]] item.
== Obtaining ==
=== Crafting ===
{{Crafting
|Beetroot
|Beetroot
|Beetroot
|Beetroot
|Beetroot
|Beetroot
|Bowl
|Output=Beetroot Soup
|type=Foodstuff
}}
=== Natural generation ===
{{LootChestItem|beetroot-soup}}
== Usage ==
Beetroot soup can be eaten to restore {{hunger|6}} [[hunger]] points and 7.2 [[Hunger#Mechanics|saturation]], the same as [[cooked chicken]] and [[mushroom stew]]. After eating, the empty [[bowl]] remains, similarly to mushroom stew and [[rabbit stew]].
== Sounds ==
{{Sound table/Entity/Food}}
== Data values ==
=== ID ===
{{edition|java}}:
{{ID table
|edition=java
|showforms=y
|generatetranslationkeys=y
|displayname=Beetroot Soup
|spritetype=item
|nameid=beetroot_soup
|form=item
|foot=1}}
{{edition|bedrock}}:
{{ID table
|edition=bedrock
|shownumericids=y
|showforms=y
|notshowbeitemforms=y
|generatetranslationkeys=y
|displayname=Beetroot Soup
|spritetype=item
|nameid=beetroot_soup
|id=286
|form=item
|foot=1}}
== Advancements ==
{{load advancements|Husbandry;A Balanced Diet}}
== History ==
{{History|java}}
{{History||1.9|snap=15w31a|[[File:Beetroot Soup JE1 BE1.png|32px]] Added beetroot soup.}}
{{History||1.13|snap=17w47a|Prior to [[1.13/Flattening|''The Flattening'']], this [[item]]'s numeral ID was 436.}}
{{History||1.14|snap=18w43a|[[File:Beetroot Soup JE2 BE2.png|32px]] The texture of beetroot soup has been changed.
|The recipe for beetroot soup is now shapeless.}}
{{History|||snap=18w49a|Beetroot soup can now be found in [[chest]]s in [[snowy tundra]] [[village]] houses.}}
{{History|pocket alpha}}
{{History||November 14, 2013|link={{tweet|jbernhardsson|400902957782147072}}|[[Johan Bernhardsson]] posts an image of beetroot soup.}}
{{History||v0.8.0|snap=build 2|[[File:Beetroot Soup JE1 BE1.png|32px]] Added beetroot soup. It is not obtainable in the Creative inventory.}}
{{History||v0.9.0|snap=build 1|Beetroot soup now requires 6 [[beetroot]]s instead of 4.}}
{{History||v0.12.1|snap=build 12|Beetroot soup now restores {{hunger|6}} instead of {{health|8}}.}}
{{History||v0.13.0|snap=build 3|Beetroot soup can now be stacked.}}
{{history|pocket}}
{{History||1.0.0|snap=alpha 0.17.0.1|Beetroot soup has been added to the Creative inventory.<ref name="missing beetroot soup">{{Bug|MCPE-13804}}</ref>}}
{{History|bedrock}}
{{History||1.10.0|snap=beta 1.10.0.3|[[File:Beetroot Soup JE2 BE2.png|32px]] The texture of beetroot soup has been changed.
|The recipe for beetroot soup is now shapeless.}}
{{History||1.11.0|snap=beta 1.11.0.1|Beetroot soup can now be found in [[snowy tundra]] [[village]] house [[chest]]s.}}
{{History|console}}
{{History||xbox=TU43|xbone=CU33|ps=1.36|switch=1.0.1|wiiu=Patch 13|[[File:Beetroot Soup JE1 BE1.png|32px]] Added beetroot soup.}}
{{History||xbox=none|xbone=none|ps=1.90|wiiu=none|switch=none|[[File:Beetroot Soup JE2 BE2.png|32px]] The texture of beetroot soup has been changed.
|The recipe for beetroot soup is now shapeless.}}
{{History|new 3ds}}
{{History||0.1.0|[[File:Beetroot Soup JE1 BE1.png|32px]] Added beetroot soup.
|Beetroot soup is not available within the [[Creative inventory]].}}
{{History||?|Added beetroot soup to the Creative inventory.{{info needed|Which update did this occur?}}}}
{{History|foot}}
== Issues ==
{{issue list}}
== References ==
{{reflist}}
{{Items}}
[[Category:Food]]
[[Category:Renewable resources]]
[[de:Borschtsch]]
[[es:Estofado de remolacha]]
[[fr:Soupe de betteraves]]
[[it:Zuppa di barbabietole]]
[[ja:ビートルートスープ]]
[[ko:비트 수프]]
[[nl:Bietensoep]]
[[pl:Barszcz]]
[[pt:Ensopado de beterraba]]
[[ru:Свекольный суп]]
[[th:ซุปบีทรูท]]
[[uk:Борщ]]
[[zh:甜菜汤]]</li><li>[[Footprint|Footprint]]<br/>{{about|the joke item|the unused particle|Java Edition unused features#Footprint particle}}
{{Joke feature}}
{{Item
| image = Footprint (item).png
| renewable = No
| stackable = Yes (64)
}}
The '''Footprint''' was a joke item from [[Java Edition 20w14∞]], found only in the {{code|missing}} dimension.
== Appearance ==
This item is semi-transparent with a grey colour scheme.
== Obtaining ==
=== Dimension ===
Footprints were obtained only from a chest in the {{Code|missing}} dimension. Only existing in 2020 April fools snapshot 20w14∞, it cannot exist in any non-April Fool's joke versions and April Fool's joke versions before or after 20w14∞. There is a maximum of 2 footprints that can be obtained legitimately in any given world.
=== Cheats/Creative Mode ===
Despite these footprints not being available in the creative inventory, it is still possible to acquire them via the command {{Code|code=give <target> minecraft:footprint <amount>}} or duplicating them by holding down middle-click whilst in creative mode.
== Usage ==
As of snapshot 20w14∞, this item cannot be placed or used in any way other than a trophy. This item can be inserted and/or rotated inside of an item frame, and it has a stack limit of 64.
== Data values ==
=== ID ===
{{ID table
|showforms=y
|generatetranslationkeys=java
|displayname=Footprint
|spritetype=item
|nameid=footprint
|form=item
|foot=1}}
== History ==
{{History|java}}
{{History||20w14∞|[[File:Footprint (item).png|32px]] Added the footprint item.}}
{{History|foot}}
== Gallery ==
<gallery>
File:Missing biome.png|The Easter Egg dimension that the item spawns in.
</gallery>
== Trivia ==
* This is a reference to the removed "Footstep" particle, hence in the "missing" dimension.
** This item is intended as a joke directed towards the commands' community where the "Footstep" particle is commonly requested.<ref>https://gist.github.com/boq/8e65cb85badc75765eeb8956af78aaa5</ref>
== References ==
{{reflist}}
{{Items}}
{{Jokes}}
[[Category:Non-renewable resources]]
[[Category:Joke items]]
[[es:Footprint]]
[[pt:Pegada]]</li></ul> | Introduced breeding. | ||||
| pa | |||||
0.6.0{{Extension DPL}}<ul><li>[[Prismarine Shard|Prismarine Shard]]<br/>{{Item
| renewable = Yes
| stackable = Yes (64)
| type =
}}
A '''prismarine shard''' is an item obtained by defeating [[guardian]]s or [[elder guardian]]s. It can be used to craft various [[prismarine]] blocks as well as [[sea lantern]]s.
== Obtaining ==
Prismarine shards are dropped upon the death of [[guardian]]s and [[elder guardian]]s. From these mobs, 0–2 shards are dropped each time. This can be increased to a maximum of 5 with the [[Looting]] enchantment.
== Usage ==
=== Crafting ingredient ===
{{crafting usage}}
== Data values ==
=== ID ===
{{edition|java}}:
{{ID table
|edition=java
|showforms=y
|generatetranslationkeys=y
|displayname=Prismarine Shard
|spritetype=item
|nameid=prismarine_shard
|form=item
|foot=1}}
{{edition|bedrock}}:
{{ID table
|edition=bedrock
|showaliasids=y
|shownumericids=y
|showforms=y
|notshowbeitemforms=y
|generatetranslationkeys=y
|displayname=Prismarine Shard
|spritetype=item
|nameid=prismarine_shard
|aliasid=prismarineshard
|id=565
|form=item
|foot=1}}
== History ==
{{History|java}}
{{history||1.8|snap=14w25a|[[File:Prismarine Shard JE1 BE1.png|32px]] Added prismarine shards.}}
{{History||1.13|snap=17w47a|Prior to [[1.13/Flattening|''The Flattening'']], this [[item]]'s numeral ID was 409.}}
{{History||1.14|snap=18w43a|[[File:Prismarine Shard JE2 BE2.png|32px]] The texture of prismarine shards has now been changed.}}
{{History|pocket alpha}}
{{History||v0.16.0|snap=build 1|[[File:Prismarine Shard JE1 BE1.png|32px]] Added prismarine shards.}}
{{History|bedrock}}
{{History||1.10.0|snap=beta 1.10.0.3|[[File:Prismarine Shard JE2 BE2.png|32px]] The texture of prismarine shards has now been changed.}}
{{History|console}}
{{History||xbox=TU31|xbone=CU19|ps=1.22|wiiu=Patch 3|[[File:Prismarine Shard JE1 BE1.png|32px]] Added prismarine shards.}}
{{History||xbox=none|xbone=none|ps=1.90|wiiu=none|switch=none|[[File:Prismarine Shard JE2 BE2.png|32px]] The texture of prismarine shards has now been changed.}}
{{History|New 3DS}}
{{History||1.3.12|[[File:Prismarine Shard JE1 BE1.png|32px]] Added prismarine shards.}}
{{History|foot}}
== Issues ==
{{issue list}}
{{items}}
[[de:Prismarinscherbe]]
[[es:Fragmento de prismarina]]
[[fr:Éclat de prismarine]]
[[ja:プリズマリンの欠片]]
[[ko:프리즈머린 조각]]
[[nl:Prismarienscherf]]
[[pl:Odłamek pryzmarynu]]
[[pt:Pedaço de prismarinho]]
[[ru:Призмариновый осколок]]
[[uk:Призмариновий уламок]]
[[zh:海晶碎片]]
[[Category:Renewable resources]]</li><li>[[Raw Beef|Raw Beef]]<br/>{{Item
| title = Raw Beef
| image = Raw Beef.png
| heals = {{hunger|3}}
| renewable = Yes
| stackable = Yes (64)
}}
'''Raw beef''' is a [[food]] item that can be eaten by the [[player]] or cooked in a [[furnace]], [[smoker]], or [[campfire]] to make [[steak]].
== Obtaining ==
=== Mob loot ===
When adult [[cow]]s and [[mooshroom]]s are killed, they drop 1-3 raw beef. The maximum amount is increased by 1 per level of [[Looting]], for a maximum of 1-6 with Looting III. If killed while on fire, they drop [[steak]] instead.
=== Chest loot ===
{{LootChestItem|raw-beef}}
== Usage ==
=== Food ===
To eat raw beef, press and hold {{control|use}} while it is selected in the hotbar. Eating one restores {{hunger|3}} hunger and 1.8 hunger [[Hunger#Mechanics|saturation]].
=== Smelting ingredient ===
{{Smelting
|showname=1
|Raw Beef
|Steak
|0.35
}}
=== Wolves ===
Raw beef can be used to [[breed]] and heal tamed [[wolves]], lead them around, and make baby tamed wolves grow up faster by 10% of the remaining time.
=== Trading ===
Journeyman-level Butcher villagers have a 50% chance to buy 10 raw beef for an emerald.{{only|bedrock}}
Journeyman-level Butcher villagers always offer buy 10 raw beef for an emerald.{{only|java}}
==Sounds==
{{Sound table/Entity/Food}}
== Advancements ==
{{load advancements|Husbandry;A Balanced Diet}}
== Data values ==
=== ID ===
{{edition|java}}:
{{ID table
|edition=java
|showforms=y
|generatetranslationkeys=y
|displayname=Raw Beef
|spritetype=item
|nameid=beef
|form=item
|foot=1}}
{{edition|bedrock}}:
{{ID table
|edition=bedrock
|shownumericids=y
|showforms=y
|notshowbeitemforms=y
|generatetranslationkeys=y
|displayname=Raw Beef
|spritetype=item
|nameid=beef
|id=273
|form=item
|foot=1}}
== History ==
{{History|java beta}}
{{History||1.8|snap=Pre-release|[[File:Raw Beef JE1 BE1.png|32px]] Added raw beef.|Raw beef is one of the new [[food]] items, [[drops|dropped]] by [[cow]]s in addition to their [[leather]].}}
{{History|java}}
{{History||1.2.1|snap=12w03a|Raw beef can now be used to breed wolves.}}
{{History||1.3.1|snap=12w21a|Raw beef can now be [[trading|sold]] to butcher [[villager]]s, at 14–17 raw beef for 1 [[emerald]].}}
{{History|||snap=1.3|[[File:Raw Beef JE2.png|32px]] The texture of raw beef has been changed.}}
{{History||1.4.2|snap=12w37a|[[File:Raw Beef JE3 BE2.png|32px]] The texture of raw beef has been changed, so that it no longer has a dark outline.}}
{{History||1.8|snap=14w02a|[[Villager]]s no longer [[trading|trade]] for raw beef.}}
{{History||1.13|snap=17w47a|Prior to [[1.13/Flattening|''The Flattening'']], this [[item]]'s numeral ID was 363.}}
{{History||1.14|snap=18w43a|[[File:Raw Beef JE4 BE3.png|32px]] The texture of raw beef has been changed.}}
{{History|||snap=18w49a|Raw beef can now be found in [[chest]]s in [[village]] butcher shops.}}
{{History|||snap=19w11a|Butcher [[villager]]s now [[trading|buy]] raw beef.}}
{{History|pocket alpha}}
{{History||v0.4.0|[[File:Raw Beef JE1 BE1.png|32px]] Added raw beef.}}
{{History||v0.5.0|Raw beef now restores {{hp|3}} instead of {{hp|1}}.}}
{{History||v0.8.0|snap=build 1|[[File:Raw Beef JE3 BE2.png|32px]] The texture of raw beef has been changed, so that it no longer has a dark outline.}}
{{History||v0.9.0|snap=build 1|Raw beef has been added to [[Creative]] mode.}}
{{History||v0.12.1|snap=build 1|Raw beef now restores [[hunger]] instead of [[health]].}}
{{History|bedrock}}
{{History||1.10.0|snap=beta 1.10.0.3|[[File:Raw Beef JE4 BE3.png|32px]] The texture of raw beef has been changed.}}
{{History||1.11.0|snap=beta 1.11.0.1|Raw beef can now be found in [[village]] butcher [[chest]]s.}}
{{History|||snap=beta 1.11.0.4|Raw beef can now be [[trading|sold]] to butcher [[villager]]s.}}
{{History|console}}
{{History||xbox=TU5|xbone=CU1|ps=1.0|wiiu=Patch 1|[[File:Raw Beef JE1 BE1.png|32px]] Added raw beef.}}
{{History||xbox=TU12|[[File:Raw Beef JE3 BE2.png|32px]] The texture of raw beef has been changed, so that it no longer has a dark outline.}}
{{History||xbox=none|xbone=none|ps=1.90|wiiu=none|switch=none|[[File:Raw Beef JE4 BE3.png|32px]] The texture of raw beef has been changed.}}
{{History|New 3DS}}
{{History||0.1.0|[[File:Raw Beef JE3 BE2.png|32px]] Added raw beef.}}
{{History|foot}}
== Issues ==
{{issue list}}
== Gallery ==
<gallery>
File:Jeb steak.png|Raw Beef and [[Steak]] in a preview screenshot.
</gallery>
{{Items}}
[[de:Rohes Rindfleisch]]
[[es:Filete crudo]]
[[fr:Bœuf cru]]
[[hu:Nyers marhahús]]
[[ja:生の牛肉]]
[[ko:익히지 않은 소고기]]
[[nl:Rauwe biefstuk]]
[[pl:Surowa wołowina]]
[[pt:Bife cru]]
[[ru:Сырая говядина]]
[[uk:Сира яловичина]]
[[zh:生牛肉]]
[[Category:Food]]
[[Category:Renewable resources]]</li></ul> | Introduced baby animals. Breeding has not been added yet. Babies naturally spawn. | ||||
0.8.0{{Extension DPL}}<ul><li>[[Boat with Chest|Boat with Chest]]<br/>{{ItemEntity
|image=Oak Boat with Chest.png
|extratext = View [[#Gallery|all renders]]
|stackable=No
|renewable=Yes
|flammable=Yes
|size='''{{IN|Java}}:'''<br>
Height: 0.5625 Blocks<br>Width: 1.375 Blocks<br>
'''{{IN|Bedrock}}:'''<br>
Height: 0.455 Blocks<br>Width: 1.4 Blocks
|networkid='''[[JE]]''': 1
}}
{{for|other kinds of boats|Boat (disambiguation)}}
A '''boat with chest''' is a single [[chest]] occupying the passenger seat of a [[boat]], and functions as such. As it can still be driven it can be used to transport [[item]]s over bodies of water.
== Obtaining ==
A boat with chest can be directly retrieved by attacking it, as it drops itself in item form, along with its contents.
[[Tool]]s and [[weapon]]s with damage above 4 can instantly destroy a boat with chest in one hit.{{only|Java}}
=== Crafting ===
{{Crafting
|head= 1
|Chest
|Matching Boat
|Output= Matching Boat with Chest
|type= Transportation
|foot= 1
}}
== Usage ==
A boat with chest can be used for the transportation of players, mobs and items, or as fuel when [[smelting]].
=== Fuel ===
A boat with chest can be used as fuel in a [[furnace]], it lasts 60 seconds, smelting up to 6 items.
=== Transportation ===
{{main|Boat#Transportation}}
Boats with chests can carry only one entity while regular boats can carry up to two.
== Behavior ==
[[File:All boats with chests.png|alt=This photo shows all the types of boats with chests.|thumb|240px|All types of boats with chests.]]
{{main|Boat#Behavior}}
Boats with chests share most behaviors with boats.
=== Item storage ===
[[File:Boat with Chest GUI.png|thumb|176px|The GUI of a boat with chest.]]
The inventory of the boat with chest has the same amount of slots as a single chest. Its inventory can be accessed by {{Control|Sneak|text=sneaking}} and {{Control|interact|text=interacting}} with the boat with chest, {{control|interact|text=interacting}} with the part of the boat with chest that actually contains the chest while another player or entity is inside the boat, or by opening the player's {{Control|inventory}} while inside the boat. This means that the player cannot access armor slots without exiting the boat.
When a boat with chest moves above, underneath, or beside a [[hopper]], its inventory is filled or drained accordingly. Due to the size of its hitbox, a boat with chest can be placed above up to 9 hoppers, allowing it to evenly split its items nine ways.
=== Naming ===
{{IN|java}}, unlike most other storage devices, a boat with chest renamed in an [[anvil]] does not display the custom name in its GUI.<ref>{{bug|MC-249408||Boats with Chests lose their name when placed}}</ref>
=== Piglin ===
As with other chests, opening or breaking a boat with chest causes nearby piglin(s) to attack the player.
== Sounds ==
{{Edition|Java}}:
Boats with chests use the Friendly Creatures sound category for entity-dependent sound events.
{{Sound table
|sound=Boat paddle land1.ogg
|sound2=Boat paddle land2.ogg
|sound3=Boat paddle land3.ogg
|sound4=Boat paddle land4.ogg
|sound5=Boat paddle land5.ogg
|sound6=Boat paddle land6.ogg
|subtitle=Rowing
|source=neutral
|description=While a boat with chest is rowed on land
|id=entity.boat.paddle_land
|translationkey=subtitles.entity.boat.paddle_land
|volume=1.0
|pitch=0.8-1.2
|distance=16}}
{{Sound table
|sound=Boat paddle water1.ogg
|sound2=Boat paddle water2.ogg
|sound3=Boat paddle water3.ogg
|sound4=Boat paddle water4.ogg
|sound5=Boat paddle water5.ogg
|sound6=Boat paddle water6.ogg
|sound7=Boat paddle water7.ogg
|sound8=Boat paddle water8.ogg
|subtitle=Rowing
|source=neutral
|description=While a boat with chest is rowed in water
|id=entity.boat.paddle_water
|translationkey=subtitles.entity.boat.paddle_water
|volume=0.8
|pitch=0.8-1.2
|distance=16
|foot=1}}
{{Edition|Bedrock}}:
{{Sound table
|type=bedrock
|sound=Swim1.ogg
|sound2=Swim2.ogg
|sound3=Swim3.ogg
|sound4=Swim4.ogg
|source=player
|description=While a boat with chest is rowed in water
|id=random.swim
|pitch=0.6-1.4
|foot=1}}
== Data values ==
=== ID ===
{{edition|java}}:
{{ID table
|edition=java
|showitemtags=y
|showforms=y
|generatetranslationkeys=y
|displayname=Oak Boat with Chest
|spritetype=item
|spritename=oak-boat with chest
|nameid=oak_chest_boat
|itemtags=chest_boats
|form=item}}
{{ID table
|displayname=Spruce Boat with Chest
|spritetype=item
|spritename=spruce-boat with chest
|nameid=spruce_chest_boat
|itemtags=chest_boats
|form=item}}
{{ID table
|displayname=Birch Boat with Chest
|spritetype=item
|spritename=birch-boat with chest
|nameid=birch_chest_boat
|itemtags=chest_boats
|form=item}}
{{ID table
|displayname=Jungle Boat with Chest
|spritetype=item
|spritename=jungle-boat with chest
|nameid=jungle_chest_boat
|itemtags=chest_boats
|form=item}}
{{ID table
|displayname=Acacia Boat with Chest
|spritetype=item
|spritename=acacia-boat with chest
|nameid=acacia_chest_boat
|itemtags=chest_boats
|form=item}}
{{ID table
|displayname=Dark Oak Boat with Chest
|spritetype=item
|spritename=dark-oak-boat with chest
|nameid=dark_oak_chest_boat
|itemtags=chest_boats
|form=item}}
{{ID table
|displayname=Mangrove Boat with Chest
|spritetype=item
|spritename=mangrove-boat with chest
|nameid=mangrove_chest_boat
|itemtags=chest_boats
|form=item}}
{{ID table
|displayname=Cherry Boat with Chest
|spritetype=item
|spritename=cherry-boat with chest
|nameid=cherry_chest_boat
|itemtags=chest_boats
|form=item}}
{{ID table
|displayname=Bamboo Raft with Chest
|spritetype=item
|spritename=bamboo-raft with chest
|nameid=bamboo_chest_raft
|itemtags=chest_boats
|form=item
|foot=1}}
{{ID table
|edition=java
|firstcolumnname=Boat with Chest
|generatetranslationkeys=y
|displayname=Entity
|spritetype=entity
|spritename=boat-with-chest
|nameid=chest_boat
|foot=1}}
{{edition|bedrock}}:
{{ID table
|edition=bedrock
|showitemtags=y
|showaliasids=y
|shownumericids=y
|showforms=y
|notshowbeitemforms=y
|generatetranslationkeys=y
|displayname=Oak Boat with Chest
|spritetype=item
|nameid=oak_chest_boat
|aliasid=chest_boat / 0
|id=646
|form=item
|itemtags=minecraft:chest_boat
|translationkey=item.chest_boat.oak.name}}
{{ID table
|displayname=Spruce Boat with Chest
|spritetype=item
|nameid=spruce_chest_boat
|aliasid=chest_boat / 1
|id=649
|form=item
|itemtags=minecraft:chest_boat
|translationkey=item.chest_boat.spruce.name}}
{{ID table
|displayname=Birch Boat with Chest
|spritetype=item
|nameid=birch_chest_boat
|aliasid=chest_boat / 2
|id=647
|form=item
|itemtags=minecraft:chest_boat
|translationkey=item.chest_boat.birch.name}}
{{ID table
|displayname=Jungle Boat with Chest
|spritetype=item
|nameid=jungle_chest_boat
|aliasid=chest_boat / 3
|id=648
|form=item
|itemtags=minecraft:chest_boat
|translationkey=item.chest_boat.jungle.name}}
{{ID table
|displayname=Acacia Boat with Chest
|spritetype=item
|nameid=acacia_chest_boat
|aliasid=chest_boat / 4
|id=650
|form=item
|itemtags=minecraft:chest_boat
|translationkey=item.chest_boat.acacia.name}}
{{ID table
|displayname=Dark Oak Boat with Chest
|spritetype=item
|nameid=dark_oak_chest_boat
|aliasid=chest_boat / 5
|id=651
|form=item
|itemtags=minecraft:chest_boat
|translationkey=item.chest_boat.big_oak.name}}
{{ID table
|displayname=Mangrove Boat with Chest
|spritetype=item
|nameid=mangrove_chest_boat
|aliasid=chest_boat / 6
|id=652
|form=item
|itemtags=minecraft:chest_boat
|translationkey=item.chest_boat.mangrove.name}}
{{ID table
|displayname=Cherry Boat with Chest
|spritetype=item
|nameid=cherry_chest_boat
|aliasid=chest_boat / 8
|id=658
|form=item
|itemtags=minecraft:chest_boat
|translationkey=item.chest_boat.cherry.name}}
{{ID table
|displayname=Bamboo Raft with Chest
|spritetype=item
|nameid=bamboo_chest_raft
|aliasid=chest_boat / 7
|id=662
|form=item
|itemtags=minecraft:chest_boat
|translationkey=item.chest_boat.bamboo.name
|foot=1}}
{{ID table
|edition=bedrock
|firstcolumnname=Form
|shownumericids=y
|generatetranslationkeys=y
|displayname=Entity
|spritetype=entity
|spritename=boat-with-chest
|nameid=chest_boat
|id=218
|foot=1}}
=== Entity data ===
Boat with chests have entity data associated with them that contain various properties of the entity.
{{el|java}}:
{{main|Entity format}}
{{/ED}}
{{el|bedrock}}:
: See [[Bedrock Edition level format/Entity format]].
== History ==
{{History||September 23, 2019|link={{ytl|Anv-lZc0pIM}}|The [[swamp]] was announced as a contender for the Biome Vote at [[MINECON Live 2019]]. Frogs, boats with chests, and mangrove trees were announced.}}
{{History||September 28, 2019|link={{ytl|UHoz0Q-LwUU}}|The swamp comes in second place in the Biome Vote, setting the release date of new swamp content further than new mountain content.}}
{{History||October 16, 2021|link={{ytl|w6zLprHHZOk|t=7085}}|[[File:Jungle Boat with Chest (pre-release).png|32px]] [[File:Dark Oak Boat with Chest (pre-release).png|32px]] Boats with chests were announced at [[Minecraft Live 2021]]. Only jungle and dark oak variants were shown.}}
{{History|java}}
{{History||1.19|snap=22w12a|[[File:Oak Boat with Chest JE1.png|32px]] [[File:Spruce Boat with Chest JE1.png|32px]] [[File:Birch Boat with Chest JE1.png|32px]] [[File:Jungle Boat with Chest JE1.png|32px]] [[File:Acacia Boat with Chest JE1.png|32px]] [[File:Dark Oak Boat with Chest JE1.png|32px]] [[File:Mangrove Boat with Chest JE1.png|32px]]<br>[[File:Oak Boat with Chest (item) JE1 BE1.png|32px]] [[File:Spruce Boat with Chest (item) JE1.png|32px]] [[File:Birch Boat with Chest (item) JE1 BE1.png|32px]] [[File:Jungle Boat with Chest (item) JE1 BE1.png|32px]] [[File:Acacia Boat with Chest (item) JE1 BE1.png|32px]] [[File:Dark Oak Boat with Chest (item) JE1 BE1.png|32px]] [[File:Mangrove Boat with Chest (item) JE1 BE1.png|32px]] Added boats with chests.
|Knob on chest is placed incorrectly 1 pixel up.}}
{{History|||snap=22w13a|[[File:Oak Boat with Chest JE2 BE1.png|32px]] [[File:Spruce Boat with Chest JE2 BE1.png|32px]] [[File:Birch Boat with Chest JE2 BE1.png|32px]] [[File:Jungle Boat with Chest JE2 BE1.png|32px]] [[File:Acacia Boat with Chest JE2 BE1.png|32px]] [[File:Dark Oak Boat with Chest JE2 BE1.png|32px]] [[File:Mangrove Boat with Chest JE2 BE1.png|32px]] Changed knob on chest position 1 pixel down to match [[Bedrock Edition]].
|Boats with chests can now be placed by [[dispenser]]s.}}
{{History|||snap=22w14a|Due to the addition of the [[mangrove tree]] and [[mangrove swamp]], make mangrove boat with chest obtainable and renewable.}}
{{History|||snap=22w15a|[[File:Oak Boat with Chest (item) JE2.png|32px]] [[File:Spruce Boat with Chest (item) JE2.png|32px]] [[File:Birch Boat with Chest (item) JE2.png|32px]] [[File:Jungle Boat with Chest (item) JE2.png|32px]] [[File:Acacia Boat with Chest (item) JE2.png|32px]] [[File:Dark Oak Boat with Chest (item) JE2.png|32px]] [[File:Mangrove Boat with Chest (item) JE2.png|32px]] Changed all boat with chest item textures.
|Now, the inventory can be accessed by {{control|using}} it directly when there is already a passenger inside of it.}}
{{History||October 15, 2022|link={{ytl|yZRXmHiEh7U&t}}|[[File:Bamboo Raft with Chest JE1 BE1.png|32px]] Bamboo rafts with chests were announced at [[Minecraft Live 2022]].}}
{{History||1.20<br>(Experimental)|link=1.19.3|snap=22w42a|[[File:Bamboo Raft with Chest JE1 BE1.png|32px]] [[File:Bamboo Raft with Chest (item) JE1.png|32px]] Added bamboo rafts with chests behind the [[Java Edition 1.20|Update 1.20 experimental datapack]].}}
{{History|||snap=22w45a|[[File:Bamboo Raft with Chest (item) JE2 BE2.png|32px]] The item texture of the bamboo raft with chest has been changed.}}
{{History||1.20<br>(Experimental)|link=1.19.4|snap=23w07a|[[File:Cherry Boat with Chest JE1.png|32px]] [[File:Cherry Boat with Chest (item) JE1.png|32px]] Added cherry boats with chests behind the [[Java Edition 1.20|Update 1.20 experimental datapack]].}}
{{History|||snap=1.19.4 Pre-release 2|[[File:Cherry Boat with Chest (item) JE2.png|32px]] The item texture of cherry boats with chests has now been changed.}}
{{History||1.20|snap=23w12a|Bamboo rafts with chests and cherry boats with chests are now available without using the "Update 1.20" experimental datapack.}}
{{History|bedrock}}
{{History||Wild Update<br>(Experimental)|link=Bedrock Edition 1.19.0|snap=beta 1.18.30.28|[[File:Oak Boat with Chest JE2 BE1.png|32px]] [[File:Spruce Boat with Chest JE2 BE1.png|32px]] [[File:Birch Boat with Chest JE2 BE1.png|32px]] [[File:Jungle Boat with Chest JE2 BE1.png|32px]] [[File:Acacia Boat with Chest JE2 BE1.png|32px]] [[File:Dark Oak Boat with Chest JE2 BE1.png|32px]]<br>[[File:Oak Boat with Chest (item) JE1 BE1.png|32px]] [[File:Spruce Boat with Chest (item) BE1.png|32px]] [[File:Birch Boat with Chest (item) JE1 BE1.png|32px]] [[File:Jungle Boat with Chest (item) JE1 BE1.png|32px]] [[File:Acacia Boat with Chest (item) JE1 BE1.png|32px]] [[File:Dark Oak Boat with Chest (item) JE1 BE1.png|32px]] Added boats with chests, missing mangrove type.
|Added unused translation keys for mangrove boat with chest.}}
{{History||1.19.0|snap=beta 1.19.0.20|Boats with chests are now available without enabling experimental gameplay.|[[File:Mangrove Boat with Chest JE2 BE1.png|32px]] [[File:Mangrove Boat with Chest (item) JE1 BE1.png|32px]] Added mangrove boats with chests.}}
{{History||1.19.0|snap=beta 1.19.0.26|[[File:Oak Boat with Chest (item) JE2.png|32px]] [[File:Spruce Boat with Chest (item) JE2.png|32px]] [[File:Birch Boat with Chest (item) JE2.png|32px]] [[File:Jungle Boat with Chest (item) JE2.png|32px]] [[File:Acacia Boat with Chest (item) JE2.png|32px]] [[File:Dark Oak Boat with Chest (item) JE2.png|32px]] [[File:Mangrove Boat with Chest (item) JE2.png|32px]] Changed all boat with chest item textures.}}
{{History||Next Major Update<br>(Experimental)|link=Bedrock Edition 1.19.50|snap=beta 1.19.50.21|[[File:Bamboo Raft with Chest JE1 BE1.png|32px]] [[File:Bamboo Raft with Chest (item) BE1.png|32px]] Added bamboo rafts with chests behind the "[[Bedrock Edition 1.20|Next Major Update]]" [[experimental]] toggle.}}
{{History|||snap=beta 1.19.60.20|[[File:Bamboo Raft with Chest (item) JE2 BE2.png|32px]] The item texture of the bamboo raft with chest has been changed to match ''[[Java Edition]]''.}}
{{History||Next Major Update<br>(Experimental)|link=Bedrock Edition 1.19.80|snap=beta 1.19.80.20|[[File:Cherry Boat with Chest JE1.png|32px]] [[File:Cherry Boat with Chest (item) JE2.png|32px]] Added cherry boats with chests behind the "[[Bedrock Edition 1.20|Next Major Update]]" [[experimental]] toggle.}}
{{History||1.20.0|snap=beta 1.20.0.21|Bamboo rafts with chests and cherry boats with chests are now available without using the "Next Major Update" experimental toggle.}}
{{History|foot}}
== Issues ==
{{issue list}}
== Trivia ==
* A [[chest]] is short enough that a boat with chest falls onto it rather than crashes into it.
* The chest texture is 12×12 pixels, rather than the 14×14 pixel texture the block uses. This is not the case with the [[minecart with chest]].
* Despite the minecart with chest using the Christmas texture, the boat with chest still uses the default chest texture during Christmas time.<ref>{{bug|MC-249378}}</ref>
== Gallery ==
=== Renders ===
<gallery>
Oak Boat with Chest.png|Oak Boat with Chest
Spruce Boat with Chest.png|Spruce Boat with Chest
Birch Boat with Chest.png|Birch Boat with Chest
Jungle Boat with Chest.png|Jungle Boat with Chest
Acacia Boat with Chest.png|Acacia Boat with Chest
Dark Oak Boat with Chest.png|Dark Oak Boat with Chest
Mangrove Boat with Chest.png|Mangrove Boat with Chest
Cherry Boat with Chest.png|Cherry Boat with Chest
Bamboo Raft with Chest.png|Bamboo Raft with Chest
Oak Boat with Chest (item) JE2.png|Oak Boat with Chest (item)
Spruce Boat with Chest (item) JE2.png|Spruce Boat with Chest (item)
Birch Boat with Chest (item) JE2.png|Birch Boat with Chest (item)
Jungle Boat with Chest (item) JE2.png|Jungle Boat with Chest (item)
Acacia Boat with Chest (item) JE2.png|Acacia Boat with Chest (item)
Dark Oak Boat with Chest (item) JE2.png|Dark Oak Boat with Chest (item)
Mangrove Boat with Chest (item) JE2.png|Mangrove Boat with Chest (item)
Cherry Boat with Chest (item) JE2.png|Cherry Boat with Chest (item)
Bamboo Raft with Chest (item) JE2 BE2.png|Bamboo Raft with Chest (item)
</gallery>
=== Concept Art ===
<gallery>
Bamboo Raft and Raft with Chest Concept Art.png|Ditto.
</gallery>
== References ==
{{reflist}}
{{Items}}
{{Entities}}
[[de:Boot mit Truhe]]
[[es:Barca con cofre]]
[[ja:チェスト付きのボート]]
[[ru:Лодка с сундуком]]
[[uk:Човен зі скринею]]
[[zh:运输船]]</li><li>[[Goat Horn|Goat Horn]]<br/>{{redirect|Horn}}
{{Item
| image = Goat Horn JE1 BE1.png
| renewable = Yes
| stackable = No
}}
A '''goat horn''' is an [[item]] dropped by [[goat]]s. It has eight variants, and each plays a unique sound when {{Control|used}} which can be heard by [[Player|players]] in a large radius.
== Obtaining ==
=== Mob loot ===
A horn is dropped when an adult [[goat]] rams a tree or any other hard block that occurs naturally where goats spawn. These include [[stone]], [[coal ore]], [[copper ore]], [[iron ore]], [[emerald ore]], [[log]], or [[packed ice]]. Goats do not ram other solid blocks. {{IN|java}}, these blocks are listed under the {{cd|snaps_goat_horn}} [[tag]], and can be modified by [[data pack]]s.
Up to two horns can be dropped from an adult goat. Regular goats may drop the Ponder, Sing, Seek, and Feel horns, while screaming goats drop the Admire, Call, Yearn, and Dream horns. A specific goat drops only one type of horn; that is, if a goat drops a Sing horn, its other horn is also a Sing horn.
=== Natural generation ===
{{LootChestItem|goat-horn}}
Only the four variants from regular goats can be found here.
== Usage ==
When {{control|used}}, they play a loud sound that can be heard from up to 256 blocks, but are also limited by the server view distance. Each horn variant plays a unique sound. There are eight variants, four of which are exclusive to [[Goat#Spawning|screaming goats]].
There is a cooldown of seven seconds between each use of the horn. All goat horns are affected by this cooldown.
== Sounds ==
=== Generic ===
{{edition|java}}:
{{Sound table
|sound=Goat horn break1.ogg
|sound2=Goat horn break2.ogg
|sound3=Goat horn break3.ogg
|sound4=Goat horn break4.ogg
|subtitle=Goat Horn breaks off
|source=neutral
|description=When a goat's horn breaks off
|id=entity.goat.horn_break
|translationkey=subtitles.entity.goat.horn_break
|volume=0.9
|pitch=1.0
|distance=16
|foot=1}}
{{edition|bedrock}}:
{{Sound table
|type=bedrock
|sound=Goat horn break1.ogg
|sound2=Goat horn break2.ogg
|sound3=Goat horn break3.ogg
|sound4=Goat horn break4.ogg
|description=When a goat's horn breaks off
|source=hostile
|id=mob.goat.horn_break
|volume=1.0
|pitch=1.0
|foot=1}}
=== Playing ===
{{edition|java}}:
{{Sound table
|sound=Goat Horn Call0.ogg
|description="Ponder"
|subtitle=Goat horn plays
|source=Jukebox/Note Blocks
|id=item.goat_horn.sound.0
|translationkey=subtitles.item.goat_horn.play
|volume=16.0
|pitch=1.0
|distance=256}}
{{Sound table
|sound=Goat Horn Call1.ogg
|description="Sing"
|subtitle=Goat horn plays
|source=Jukebox/Note Blocks
|id=item.goat_horn.sound.1
|translationkey=subtitles.item.goat_horn.play
|volume=16.0
|pitch=1.0
|distance=256}}
{{Sound table
|sound=Goat Horn Call2.ogg
|description="Seek"
|subtitle=Goat horn plays
|source=Jukebox/Note Blocks
|id=item.goat_horn.sound.2
|translationkey=subtitles.item.goat_horn.play
|volume=16.0
|pitch=1.0
|distance=256}}
{{Sound table
|sound=Goat Horn Call3.ogg
|description="Feel"
|subtitle=Goat horn plays
|source=Jukebox/Note Blocks
|id=item.goat_horn.sound.3
|translationkey=subtitles.item.goat_horn.play
|volume=16.0
|pitch=1.0
|distance=256}}
{{Sound table
|sound=Goat Horn Call4.ogg
|description="Admire"<ref group=note name=screaming>These are dropped by screaming goats.</ref>
|subtitle=Goat horn plays
|source=Jukebox/Note Blocks
|id=item.goat_horn.sound.4
|translationkey=subtitles.item.goat_horn.play
|volume=16.0
|pitch=1.0
|distance=256}}
{{Sound table
|sound=Goat Horn Call5.ogg
|description="Call"<ref group=note name=screaming/>
|subtitle=Goat horn plays
|source=Jukebox/Note Blocks
|id=item.goat_horn.sound.5
|translationkey=subtitles.item.goat_horn.play
|volume=16.0
|pitch=1.0
|distance=256}}
{{Sound table
|sound=Goat Horn Call6.ogg
|description="Yearn"<ref group=note name=screaming/>
|subtitle=Goat horn plays
|source=Jukebox/Note Blocks
|id=item.goat_horn.sound.6
|translationkey=subtitles.item.goat_horn.play
|volume=16.0
|pitch=1.0
|distance=256}}
{{Sound table
|sound=Goat Horn Call7.ogg
|description="Dream"<ref group=note name=screaming/>
|subtitle=Goat horn plays
|source=Jukebox/Note Blocks
|id=item.goat_horn.sound.7
|translationkey=subtitles.item.goat_horn.play
|volume=16.0
|pitch=1.0
|distance=256
|foot=1}}
{{edition|bedrock}}:
{{Sound table
|type=bedrock
|sound=Goat Horn Call0.ogg
|source=Jukebox/Note Blocks<wbr>{{Until|BE 1.20.40}}<br>Hostile Creatures<wbr>{{Upcoming|BE 1.20.40}}|overridesource=1
|description="Ponder"
|id=horn.call.0
|volume=1.0<wbr><ref group=sound name=nodistance>{{Bug|MCPE-153254}}</ref><wbr>{{Until|BE 1.20.40}}<br>16.0<wbr>{{Upcoming|BE 1.20.40}}
|pitch=1.0}}
{{Sound table
|sound=Goat Horn Call1.ogg
|source=Jukebox/Note Blocks<wbr>{{Until|BE 1.20.40}}<br>Hostile Creatures<wbr>{{Upcoming|BE 1.20.40}}|overridesource=1
|description="Sing"
|id=horn.call.1
|volume=1.0<wbr><ref group=sound name=nodistance/><wbr>{{Until|BE 1.20.40}}<br>16.0<wbr>{{Upcoming|BE 1.20.40}}
|pitch=1.0}}
{{Sound table
|sound=Goat Horn Call2.ogg
|source=Jukebox/Note Blocks<wbr>{{Until|BE 1.20.40}}<br>Hostile Creatures<wbr>{{Upcoming|BE 1.20.40}}|overridesource=1
|description="Seek"
|id=horn.call.2
|volume=1.0<wbr><ref group=sound name=nodistance/><wbr>{{Until|BE 1.20.40}}<br>16.0<wbr>{{Upcoming|BE 1.20.40}}
|pitch=1.0}}
{{Sound table
|sound=Goat Horn Call3.ogg
|source=Jukebox/Note Blocks<wbr>{{Until|BE 1.20.40}}<br>Hostile Creatures<wbr>{{Upcoming|BE 1.20.40}}|overridesource=1
|description="Feel"
|id=horn.call.3
|volume=1.0<wbr><ref group=sound name=nodistance/><wbr>{{Until|BE 1.20.40}}<br>16.0<wbr>{{Upcoming|BE 1.20.40}}
|pitch=1.0}}
{{Sound table
|sound=Goat Horn Call4.ogg
|source=Jukebox/Note Blocks<wbr>{{Until|BE 1.20.40}}<br>Hostile Creatures<wbr>{{Upcoming|BE 1.20.40}}|overridesource=1
|description="Admire"<ref group=note name=screaming/>
|id=horn.call.4
|volume=1.0<wbr><ref group=sound name=nodistance/><wbr>{{Until|BE 1.20.40}}<br>16.0<wbr>{{Upcoming|BE 1.20.40}}
|pitch=1.0}}
{{Sound table
|sound=Goat Horn Call5.ogg
|source=Jukebox/Note Blocks<wbr>{{Until|BE 1.20.40}}<br>Hostile Creatures<wbr>{{Upcoming|BE 1.20.40}}|overridesource=1
|description="Call"<ref group=note name=screaming/>
|id=horn.call.5
|volume=1.0<wbr><ref group=sound name=nodistance/><wbr>{{Until|BE 1.20.40}}<br>16.0<wbr>{{Upcoming|BE 1.20.40}}
|pitch=1.0}}
{{Sound table
|sound=Goat Horn Call6.ogg
|source=Jukebox/Note Blocks<wbr>{{Until|BE 1.20.40}}<br>Hostile Creatures<wbr>{{Upcoming|BE 1.20.40}}|overridesource=1
|description="Yearn"<ref group=note name=screaming/>
|id=horn.call.6
|volume=1.0<wbr><ref group=sound name=nodistance/><wbr>{{Until|BE 1.20.40}}<br>16.0<wbr>{{Upcoming|BE 1.20.40}}
|pitch=1.0}}
{{Sound table
|sound=Goat Horn Call7.ogg
|source=Jukebox/Note Blocks<wbr>{{Until|BE 1.20.40}}<br>Hostile Creatures<wbr>{{Upcoming|BE 1.20.40}}|overridesource=1
|description="Dream"<ref group=note name=screaming/>
|id=horn.call.7
|volume=1.0<wbr><ref group=sound name=nodistance/><wbr>{{Until|BE 1.20.40}}<br>16.0<wbr>{{Upcoming|BE 1.20.40}}
|pitch=1.0
|foot=1}}
== Data values ==
=== ID ===
{{el|je}}:
{{ID table
|edition=java
|showforms=y
|generatetranslationkeys=y
|displayname=Goat Horn
|spritetype=item
|nameid=goat_horn
|form=item
|foot=1}}
{{el|be}}:
{{ID table
|edition=bedrock
|shownumericids=y
|showforms=y
|notshowbeitemforms=y
|generatetranslationkeys=y
|displayname=Goat Horn
|spritetype=item
|nameid=goat_horn
|form=item
|id=624
|translationkey=item.goat_horn.name, item.minecraft.goat_horn.sound.0, item.minecraft.goat_horn.sound.1, item.minecraft.goat_horn.sound.2, item.minecraft.goat_horn.sound.3, item.minecraft.goat_horn.sound.4, item.minecraft.goat_horn.sound.5, item.minecraft.goat_horn.sound.6, item.minecraft.goat_horn.sound.7
|foot=1}}
=== Item data ===
==== ''Java Edition'' ====
<div class="treeview">
*{{nbt|compound|tag}}: The item's '''tag''' tag.
{{:Player.dat_format/Goat Horn}}
</div>
Goat horns use the "instrument" tag to control which sound can be played when using a goat horn. The values of the tag (to be prefixed with <code>minecraft:</code>) are:
{| class="wikitable sortable" style="text-align: center;"
!Sound type !![[Resource location|Identifier]]
|-
|Ponder||<code>ponder_goat_horn</code>
|-
|Sing ||<code>sing_goat_horn</code>
|-
|Seek ||<code>seek_goat_horn</code>
|-
|Feel ||<code>feel_goat_horn</code>
|-
|Admire||<code>admire_goat_horn</code>
|-
|Call ||<code>call_goat_horn</code>
|-
|Yearn||<code>yearn_goat_horn</code>
|-
|Dream||<code>dream_goat_horn</code>
|}
== History ==
{{History||October 16, 2021|link=https://www.twitch.tv/videos/1178420217?t=02h46m05s|Ulraf, a game developer on ''Minecraft'', states that goat horns are not included in [[Java Edition 1.18]].}}
{{History||November 17, 2021|link=https://www.minecraft.net/en-us/article/caves---cliffs-update-part-ii-coming|Goat horns are initially announced to be added after "The Wild Update".}}
{{History|java}}
{{History||1.19|snap=22w17a|[[File:Goat Horn JE1 BE1.png|32px]]Added goat horns.}}
{{History||1.19|snap=Pre-release 2|Goat Horns now snap when a goat rams into [[copper ore]].<ref>{{bug|MC-250941|||Fixed }}</ref>}}
{{History|Bedrock}}
{{History||Caves & Cliffs<br>(experimental)|link=Caves & Cliffs|snap=beta 1.16.200.52|[[File:Goat Horn JE1 BE1.png|32px]]Added goat horns behind the "Caves and Cliffs" experimental toggle.}}
{{History|||snap=beta 1.16.210.51|Goats now drop 2 horns each.}}
{{History|||snap=beta 1.17.20.20|Baby goats no longer drop horns.}}
{{History||1.18.0|snap=beta 1.18.0.20|Goat horns are now available outside of experimental gameplay.}}
{{History|||snap=beta 1.18.0.22|Goat horns have been moved behind the "Vanilla Experiments" [[experimental gameplay|experiments]] toggle.}}
{{History||Vanilla Experiments (experimental)|link=Experimental Gameplay|snap=beta 1.18.20.23|Goat horns now have a cooldown after being used.}}
{{History|||snap=beta 1.18.20.25|Goat horns now have an animation when being used in first person.
|Goats now make a sound when they drop goat horns.}}
{{History|||snap=beta 1.18.30.26|Goat horns are now used to craft [[copper horn]]s.|Changed goat horn sounds.}}
{{History||Vanilla Experiments (experimental)|link=Experimental Gameplay|snap=beta 1.19.0.24|Goat horns are no longer used to craft copper horns, as copper horns have been removed.|Changed goat horn sounds.{{verify}}|Removed "Fly" and "Dream" goat horns.}}
{{History||1.19.0|snap=beta 1.19.0.28|Goat horns are now available without enabling experimental gameplay.}}
{{History||1.19.10|snap=beta 1.19.10.22|Renamed the "Resist" goat horn to the "Dream" goat horn to match ''Java Edition''.|The "Feel" goat horn now plays the same sound as ''Java Edition''.}}
{{History|upcoming bedrock}}
{{History||1.20.40|snap=beta 1.20.40.22|Goat horns now have a range of 256 blocks.<ref name=nodistance>{{Bug|MCPE-153254}}</ref>}}
{{History|foot}}
== Issues ==
{{issue list}}
== Trivia ==
* The "seek" horn sounds similar to the "ominous horn" that announces a [[raid]].
== Gallery ==
<gallery>
File:Screenshot (17).png|Steve using a goat horn.
File:Alex uses a goat horn.png|Alex using a goat horn.
File:Screenshot (18).png|The goat horn animation in first person.
File:Screenshot (19).png|The goat horn animation with "Left Hand" option enabled.
</gallery>
== Notes ==
<references group="note" />
== References ==
{{reflist}}
== External Links ==
* [https://www.minecraft.net/en-us/article/taking-inventory--goat-horn Taking Inventory: Goat Horn] - Minecraft.net on February 16, 2023
{{Items}}
[[Category:Renewable resources]]
[[Category:Tools]]
[[de:Ziegenhorn]]
[[es:Cuerno de cabra]]
[[fr:Corne de chèvre]]
[[it:Corno di capra]]
[[ja:ヤギの角笛]]
[[pl:Kozi róg]]
[[pt:Chifre de cabra]]
[[ru:Козий рог]]
[[zh:山羊角]]</li></ul> | Introduced breeding. | ||||
Issues
Issues relating to "Breeding" are maintained on the bug tracker. Report issues there.
Trivia
- Animals of the same species are able to breed with each other regardless of whether or not they are a parent to the animal they are bred with.
- A baby animal will follow you if you are holding wheat, but the wheat cannot be fed to it.
- Baby wolves seem to be naturally attracted to the player.
- Using the spawn egg of a mob which has baby variants on that mob will spawn the baby variant. However, this will not work on zombies or zombie pigmen.
Gallery
- BabyAnimals.png
All mobs that can be bred
- Breeding facilitydetailed.png
A rather easy to build and maintain breeding facility
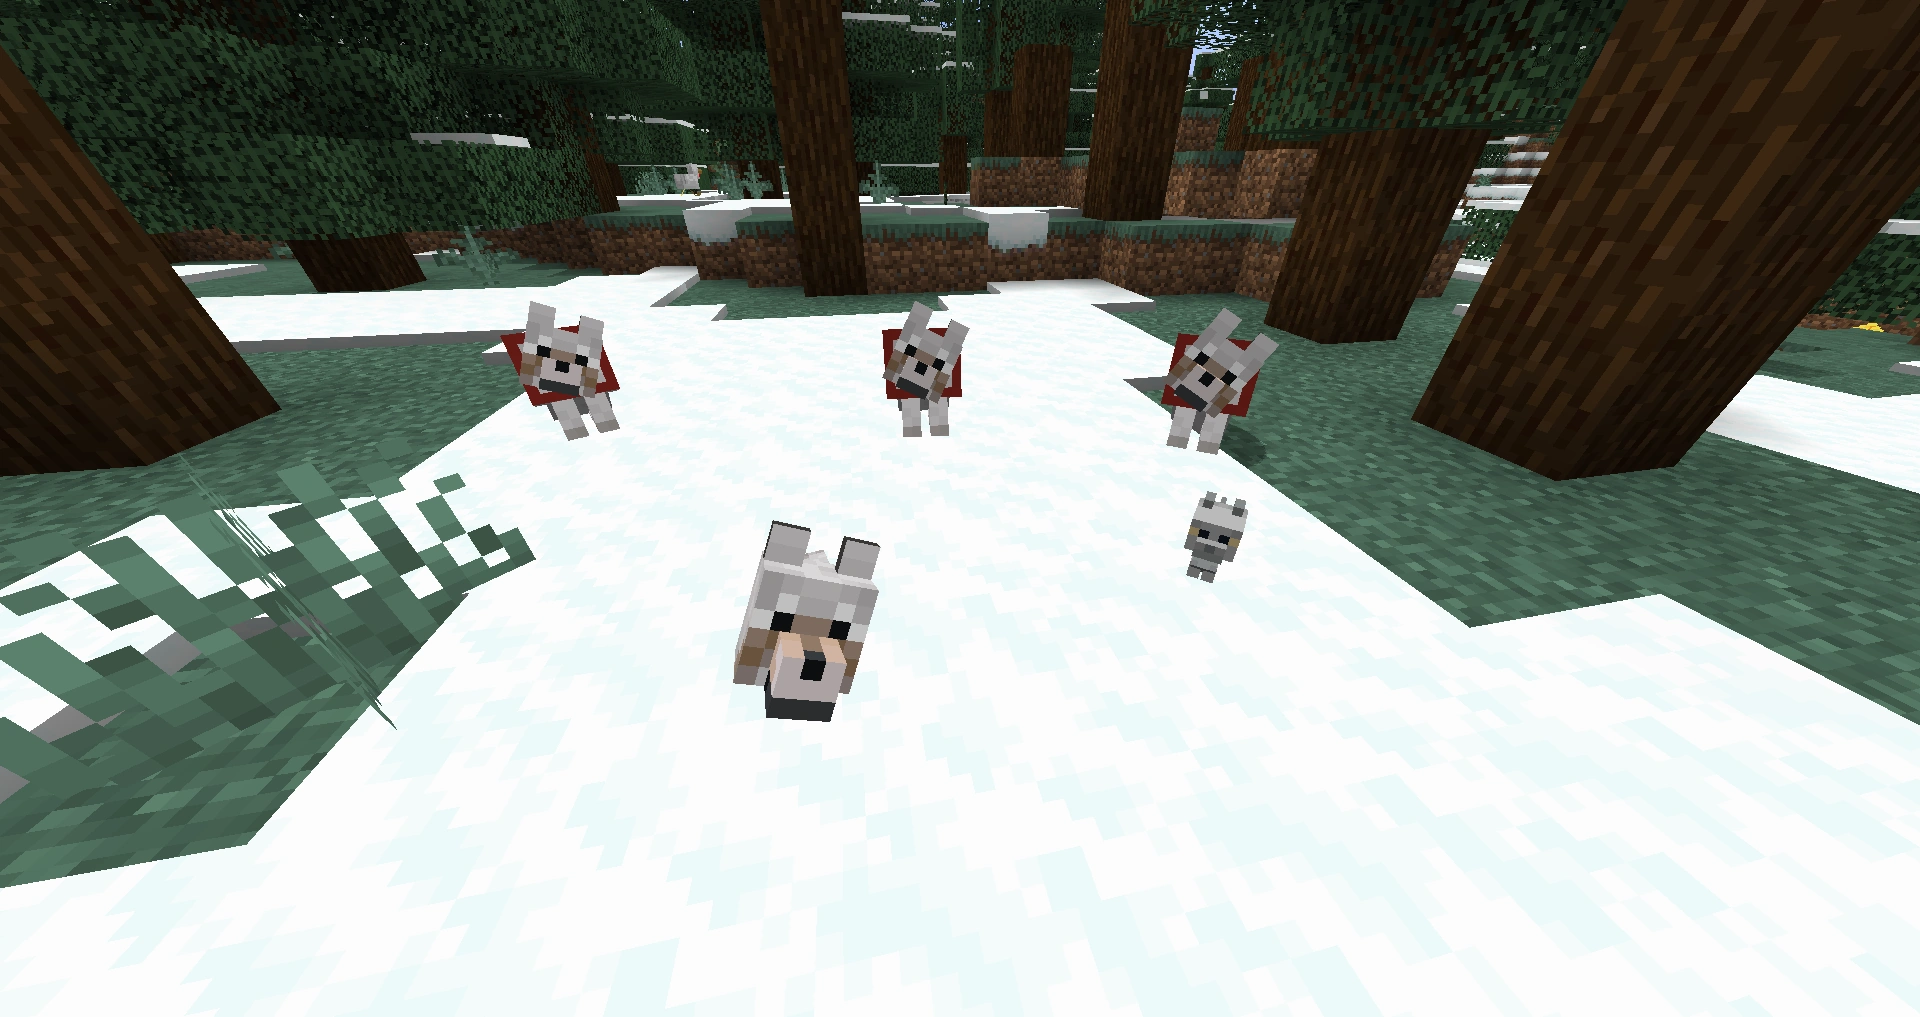