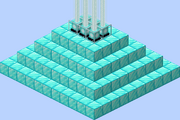
A beacon is a block that projects a beam skyward, and can provide beneficial status effects to players in a radius around it when placed on top of a solid pyramid base constructed from iron, gold, diamond, emerald or netherite blocks.
Obtaining[]
Breaking[]
A beacon can be mined successfully by hand or with any tool. When destroyed by an explosion, the block always drops as an item.
| Block | Beacon | |
|---|---|---|
| Hardness | 3 | |
| Breaking time (secs) | ||
| Default | 4.5 | |
Crafting[]
| Name | Ingredients | Crafting recipe |
|---|---|---|
| Beacon | Glass + Nether Star + Obsidian |
Usage[]
In Bedrock Edition, beacons can also be waterlogged and conduct redstone power at the same time. When "activated", beacon blocks provide two unique functions:
- A landmark beam reaching into the sky, which can be visible from far away.
- Powers, which give players status effects within a certain range.
Activation[]
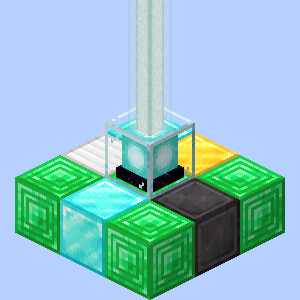

The beacon base can be made of the different mineral blocks combined.
In order to activate a beacon, the beacon must meet the following requirements:
- Beacons require an unobstructed view of the sky.
Transparent blocks (glass, water, etc.) and bedrock (the nether ceiling) are allowed. - The beacon is on top of a pyramid constructed from iron blocks, gold blocks, emerald blocks, diamond blocks, and/or netherite blocks.
Pyramids[]
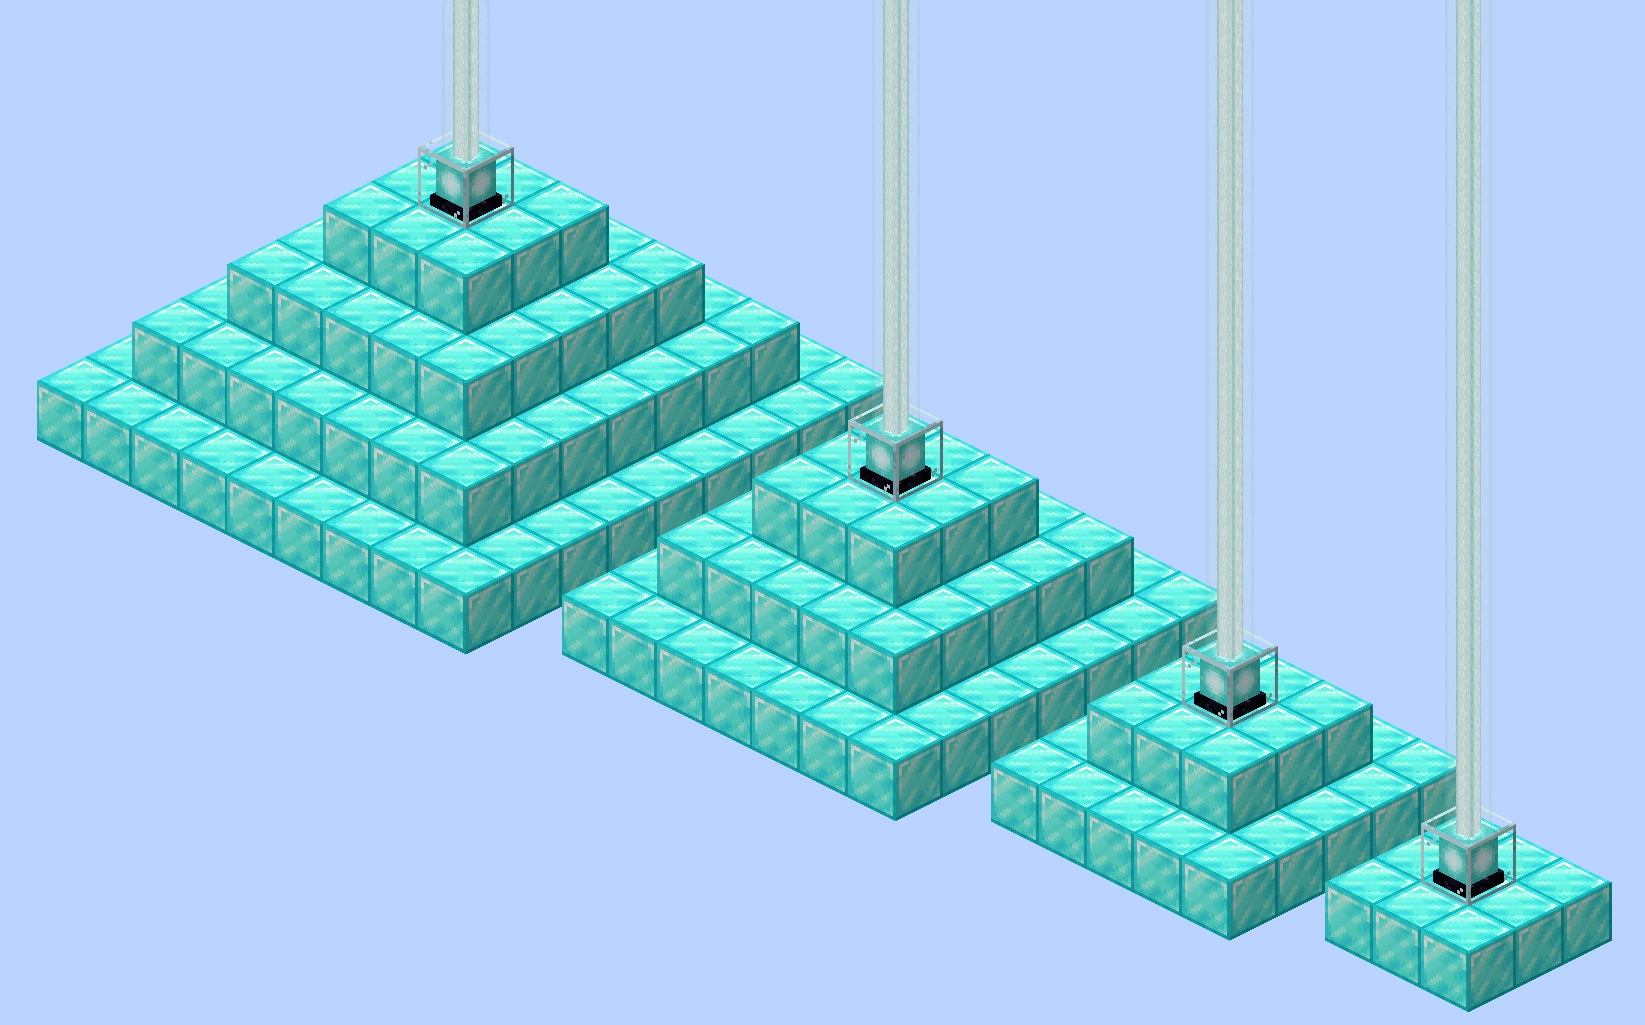
The four possible pyramid arrangements when using the beacon block. From left to right the pyramid structures decrease in complexity and strength.
Pyramids are the structures required to activate beacons. There are four possible pyramid heights. More pyramid levels make more powers available in a wider affected vicinity. The type of mineral block used to build the pyramid is entirely cosmetic and has no functional effect. Several different block types can be mixed without affecting functionality. If the pyramid is damaged so that the beacon deactivates, the previously-set powers resume their effects upon reactivation when the pyramid is repaired. This applies to piston-altered pyramids as well.
| Level | Mineral blocks | Materials | Layers |
|---|---|---|---|
| 1 | 9 | 81 | 3×3, beacon |
| 2 | 34 | 306 | 5×5, 3×3, beacon |
| 3 | 83 (1 stack + 19 blocks) | 747 | 7×7, 5×5, 3×3, beacon |
| 4 | 164 (2 stacks + 36 blocks) | 1476 | 9×9, 7×7, 5×5, 3×3, beacon |
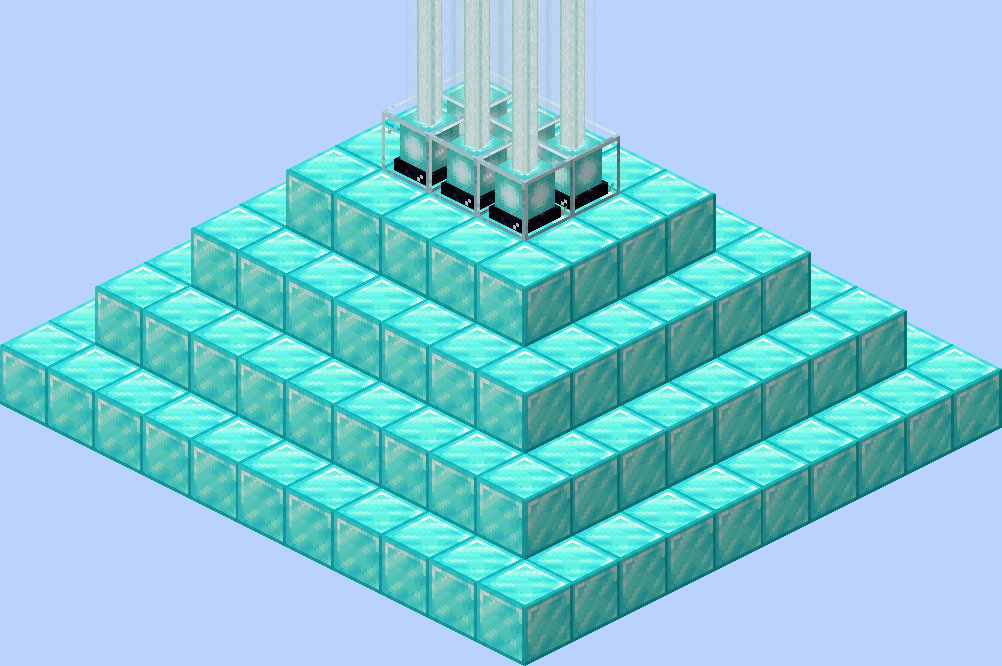
This six-Beacon pyramid provides all six effects from a single structure using the fewest mineral blocks possible.
Multiple beacons can make use of the same specific mineral blocks below them. Combined pyramids do not need to be symmetrical. The image to the right shows a 6-beacon (2 by 3) pyramid. It requires a total of 244 mineral blocks, with a base layer of 10 by 11.
| Level | Mineral blocks | Materials | Layers |
|---|---|---|---|
| 1 | 20 | 180 | 4×5, beacons |
| 2 | 62 | 558 | 6×7, 4×5, beacons |
| 3 | 134 (2 stacks + 6 blocks) | 1206 | 8×9, 6×7, 4×5, beacons |
| 4 | 244 (3 stacks + 52 blocks) | 2196 | 10×11, 8×9, 6×7, 4×5, beacons |
Beam[]
A vertical beam appears from a beacon if the beacon is activated, extending from the beacon block up to beyond the top of the world.
- In Java Edition, the beam is visible up to 256 blocks away.
- In Bedrock Edition, the beam is visible up to 64 blocks away, regardless of how high the render distance is set.[1]
Colors[]
The color of the beam may be changed by placing blocks of stained glass (or stained glass panes) anywhere above the beacon block. The beam changes colors according to the colors of glass placed above it: the first block sets the beam color, while each additional block sets the color by averaging the red, green, and blue components of the current beam color and the block's color. The color values are the same as those for the corresponding dye. This also works using hardened stained glass and hardened stained glass panes.[Bedrock Edition and Minecraft Education only] Stained glass panes have the same effect on the beam as stained glass blocks.
The resulting beam color can be found as where is the sequence of glass colors ( corresponds to the lowest block and to the highest one).


As the blending algorithm is considerably simpler than that of leather-dyeing, a much larger part of the sRGB space is available.[more information needed] A player may experiment with stacking glass, although programs that calculate combinations are also available.[2]
Beacon beams cannot go through most blocks, but can go through bedrock (to allow beacons to be used in the Nether) and end portal frames.
Using just 15 colors of stained glass, It is possible to make all colors, for example; red + white stained glass above a beacon will be pink; in addition to this, the more white that is added, the lighter the color will be.
Powers[]
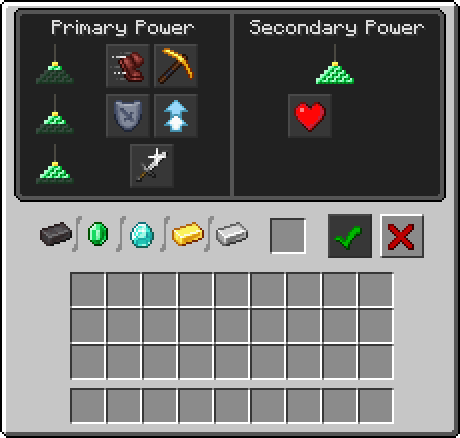
The GUI shown when pressing use on the block.
Once the beacon is emitting a beam, it can then be fed one iron ingot, gold ingot, emerald, diamond, or netherite ingot to select the status effects given to players within range of the beacon. This is done through the beacon's GUI, displayed by pressing use while looking at the beacon block. It doesn't matter which of the items is fed into the beacon.
In the GUI, the player places the item to be fed in the empty slot and clicks an effect from the "Primary Power" section on the left. If the beacon is sitting on a 4-level pyramid, the "Secondary Power" section on the right also becomes active. The player can then choose either to turn on the Regeneration power in addition to the Primary Power or to raise the primary power to Level II. The user clicks the "Done" button (green checkmark), the item is consumed, and the power(s) become activated. To change the beacon's powers, this process must be followed again, consuming another ingot or gem.
If the pyramid is broken, effects deactivate or weaken depending on the level of the pyramid that is no longer complete. Upon restoration of the pyramid, the originally selected power returns without the need to spend another item.
The five Primary Powers are:
- Speed I: Increased movement speed.
- Haste I: Increased mining and attack speed.
- Resistance I: Decreased nearly all incoming damage (2-level pyramid required).
- Jump Boost I: Increased jumping distance and height (2-level pyramid required).
- Strength I: Increased melee damage (3-level pyramid required).
The Secondary Powers available with a 4-level pyramid are:
Regeneration I: Regenerates health.
- Increasing the Primary Power to level II.
It is also possible to combine two different primary Level I powers[Java Edition only]:
- select a primary power in the left panel
- select the Level II option in the right panel
- select the second desired power back in the left panel
Only one of the two powers appear to be selected, although both effects are active. Choosing a second primary power option replaces regeneration.
Every four seconds, the selected powers are applied with a duration of 9 seconds, plus 2 seconds per pyramid level, to all players in range. Thus, when powers are changed or a player travels outside the area-of-effect, the powers persist for 5–9 seconds, or 13-17 seconds with a full pyramid.
Range[]
The beacon affects an area in the shape of a square column, which reaches downward and out to each side at a range determined by the size of the pyramid base (see table below), and upward a distance of that range + 384 blocks.
The range of the beacon effect is limited by the simulation distance. As such, on simulation distance of 4 with a level 4 pyramid, the effect will not reach the chunks on the corners of the beacon range.
The distance from the player to the beacon block does not affect the intensity of the status effect.
| Pyramid size | Effect range (blocks) |
Effect duration (seconds) |
|---|---|---|
| 1 level | 20 | 11 |
| 2 levels | 30 | 13 |
| 3 levels | 40 | 15 |
| 4 levels | 50 | 17 |
Light source[]
Beacon blocks can function as light sources, emitting a light level 15. Like other light sources, they melt snow and ice.
Piston interactivity[]
Beacons cannot be pushed or pulled by pistons or sticky pistons.
Sounds[]
Generic[]
| Sound | Subtitles | Source | Description | Resource location | Translation key | Volume | Pitch | Attenuation distance |
|---|---|---|---|---|---|---|---|---|
| Block broken | Blocks | Once the block has broken | block | subtitles | 1.0 | 0.8 | 16 | |
| Block placed | Blocks | When the block is placed | block | subtitles | 1.0 | 0.8 | 16 | |
| Block breaking | Blocks | While the block is in the process of being broken | block | subtitles | 0.25 | 0.5 | 16 | |
| None[sound 1] | Entity-Dependent | Falling on the block with fall damage | block | None[sound 1] | 0.5 | 0.75 | 16 | |
| Footsteps | Entity-Dependent | Walking on the block | block | subtitles | 0.15 | 1.0 | 16 |
| Sound | Source | Description | Resource location | Volume | Pitch |
|---|---|---|---|---|---|
| Blocks | Once the block has broken | random | 1.0 | 0.8-1.0 | |
| Blocks | When the block is placed | dig | 1.0 | 0.8-1.0 | |
| Blocks | While the block is in the process of being broken | hit | 0.4 | 0.6 | |
| Players | Falling on the block with fall damage | fall | 0.4 | 1.0 | |
| Players | Walking on the block | step | 0.3 | 1.0 | |
| Players | Jumping from the block | jump | 0.12 | 1.0 | |
| Players | Falling on the block without fall damage | land | 0.22 | 1.0 |
Unique[]
| Sound | Subtitles | Source | Description | Resource location | Translation key | Volume | Pitch | Attenuation distance |
|---|---|---|---|---|---|---|---|---|
| Beacon activates | Blocks | When a beacon activates | block | subtitles | 1.0 | 1.0 | 16 | |
| Beacon hums | Blocks | Randomly while active | block | subtitles | 0.9 | 1.0 | 7 | |
| Beacon deactivates | Blocks | When a beacon turns off or is broken | block | subtitles | 1.0 | 1.0 | 16 | |
| Beacon power selected | Blocks | When a beacon's power is switched | block | subtitles | 1.0 | 1.0 | 16 | |
| Chest locked[sound 1] | Blocks | When a player attempts to open a beacon locked using the Lock tag | block[sound 1] | subtitles[sound 1] | 1.0 | 1.0 | 16 |
| Sound | Source | Description | Resource location | Volume | Pitch |
|---|---|---|---|---|---|
| Blocks | When a beacon activates | beacon | 1.0 | 1.0 | |
| Blocks | Randomly while active | beacon | 1.0 | 1.0 | |
| Blocks | When a beacon turns off | beacon | 1.0 | 1.0 | |
| Blocks | When a beacon's power is switched | beacon | 1.0 | 1.0 |
Data values[]
ID[]
| Name | Identifier | Form | Translation key |
|---|---|---|---|
| Beacon | beacon | Block & Item | block.minecraft.beacon |
| Name | Identifier |
|---|---|
| Block entity | beacon |
| Name | Identifier | Numeric ID | Form | Item ID[i 1] | Translation key |
|---|---|---|---|---|---|
| Beacon | beacon | 138 | Block & Giveable Item[i 2] | Identical[i 3] | tile.beacon.name |
| Name | Savegame ID |
|---|---|
| Block entity | Beacon |
Block data[]
A beacon has a block entity associated with it that holds additional data about the block.
- Block entity data
- Tags common to all block entities
- CustomName: Optional. The name of this beacon in JSON text component, which appears when attempting to open it, while it is locked.
- Lock: Optional. When not blank, prevents the container from being opened unless the opener is holding an item whose name matches this string.
- Levels: The number of levels available from the pyramid. Immediately changes to the correct value if modified using commands. Note that this is also always 0 if the beam is blocked.
- Primary: The primary effect selected, see Potion effects for IDs. Set to -1 when no effect is selected. Cannot be set to an effect which beacons do not normally use, otherwise immediately changes back to -1. Although Regeneration cannot normally be chosen as the primary effect, setting this value to 10 works and even allows Regeneration II to be chosen as the secondary via the normal beacon GUI.
- Secondary: The secondary effect selected, see Potion effects for IDs. Set to -1 when no effect is selected. Cannot be set to an effect which beacons do not normally use, otherwise immediately changes back to -1. When set without a primary effect, does nothing. When set to the same as the primary, the effect is given at level 2 (the normally available behavior for 5 effects). When set to a different value than the primary (normally only Regeneration), gives the effect at level 1.
Achievements[]
| Icon | Achievement | In-game description | Actual requirements (if different) | Gamerscore earned | Trophy type (PS4) | |
|---|---|---|---|---|---|---|
| PS4 | Other | |||||
| The Beaconator | Create and fully power a Beacon | Be within a 20×20×14 cuboid centered on the pyramid when the beacon block realizes it is fully powered. | 60G | Gold | ||
Advancements[]
| Icon | Advancement | In-game description | Parent | Actual requirements (if different) | Resource location |
|---|---|---|---|---|---|
 | Bring Home the Beacon | Construct and place a Beacon | Withering Heights | Be within a 20×20×14 cuboid centered on a beacon block when it realizes it has become powered. | nether/create_beacon
|
 | A Furious Cocktail | Have every potion effect applied at the same time | Local Brewery | Have all of these 13 status effects applied to the player at the same time: The source of the effects is irrelevant for the purposes of this advancement. Other status effects may be applied to the player, but are ignored for this advancement. | nether/all_potions
|
 | Beaconator | Bring a Beacon to full power | Bring Home the Beacon | Be within a 20×20×14 cuboid centered on a beacon block when it realizes it is being powered by a size 4 pyramid. | nether/create_full_beacon
|
| How Did We Get Here? | Have every effect applied at the same time | A Furious Cocktail | Have all of these 27 status effects applied to the player at the same time:
This is a hidden advancement, meaning that it can be viewed by the player only after completing it, regardless of if its child advancement(s), if any, have been completed. | nether/all_effects
|
Video[]
History[]
| Java Edition | |||||
|---|---|---|---|---|---|
1.4.2{{Extension DPL}}<ul><li>[[Nether Brick|Nether Brick]]<br/><!--Please do not change "nether brick" to "Nether brick". According to style guide, item names are not proper nouns and should not be capitalized.-->
{{about|the item|the block|Nether Bricks}}
{{Item
| title = Nether Brick
| image = Nether Brick.png
| renewable = Yes
| stackable = Yes (64)
}}
A '''nether brick''' is an [[item]] made by [[smelting]] [[netherrack]] in a [[furnace]], and is used to craft the [[Nether Bricks|nether bricks]] block and its variants.
== Obtaining ==
=== Smelting ===
Nether brick can be smelted from netherrack.
{{smelting
|Netherrack
|Nether Brick
|0,1
}}
=== Bartering ===
[[Piglin]]s may [[barter]] 2 to 8 nether bricks when given a [[gold ingot]].
== Usage ==
=== Crafting ingredient ===
{{crafting usage|Nether Brick}}
== Data values ==
=== ID ===
{{edition|java}}:
{{ID table
|edition=java
|showforms=y
|generatetranslationkeys=y
|displayname=Nether Brick
|spritetype=item
|nameid=nether_brick
|form=item
|foot=1}}
{{edition|bedrock}}:
{{ID table
|edition=bedrock
|shownumericids=y
|showforms=y
|notshowbeitemforms=y
|generatetranslationkeys=y
|displayname=Nether Brick
|spritetype=item
|nameid=netherbrick
|id=523
|form=item
|foot=1}}
== History ==
{{History|java}}
{{History||1.5|snap=13w01a|[[File:Nether Brick JE1 BE1.png|32px]] Added nether brick items.}}
{{History||1.10|snap=16w20a|Nether brick items can now be used to craft [[red nether bricks]].}}
{{History||1.13|snap=17w47a|The ID of nether bricks has been changed from <code>netherbrick</code> to <code>nether_brick</code>.
|Prior to [[1.13/Flattening|''The Flattening'']], this [[item]]'s numeral ID was 405.}}
{{History||1.14|snap=18w43a|[[File:Nether Brick JE2 BE2.png|32px]] The texture of nether bricks has been changed.}}
{{History||1.16|snap=20w07a|Nether bricks now have a {{frac|10|109}} (~9.17%) chance of being given by the new [[piglin]]s when [[bartering]], in a stack size of 1–4.}}
{{History|||snap=20w09a|Nether bricks now have a {{frac|20|226}} (~8.84%) chance of being given by piglins when bartering, in a stack size of 1–5.}}
{{History|||snap=20w10a|Nether bricks now have a {{frac|40|411}} (~9.73%) chance of being given by piglins when bartering, in a stack size of 4–16.}}
{{History||1.16.2|snap=20w28a|Nether bricks now have a {{frac|40|459}} (~8.71%) chance of being given by piglins when bartering, in a stack size of 2–8.}}
{{History|pocket alpha}}
{{History||v0.6.0|[[File:Nether Brick JE1 BE1.png|32px]] Added nether brick items.}}
{{History||v0.16.0|snap=build 5|Added nether brick items to the [[Creative]] [[inventory]].<ref name="missing brick">{{Bug|MCPE-16556}}</ref>}}
{{History|pocket}}
{{History||1.1.3|snap=alpha 1.1.3.0|Nether brick items are now used to craft [[red nether bricks]].}}
{{History|bedrock}}
{{History||1.9.0|snap=beta 1.9.0.0|Nether brick items are now used to craft nether brick [[fence]]s.}}
{{History||1.10.0|snap=beta 1.10.0.3|[[File:Nether Brick JE2 BE2.png|32px]] The texture of nether bricks has been changed.}}
{{History||1.16.100|snap=beta 1.16.100.50|Nether bricks now can be used as fuel for a [[furnace]].<ref>{{bug|MCPE-114216}}</ref>}}
{{History|||snap=beta 1.16.100.54|Nether bricks now have a {{frac|40|459}} (~8.71%) chance of being given by piglins when bartering, in a stack size of 2–8 to match {{el|Java}}.}}
{{History||1.18.30|snap=beta 1.18.30.26|Nether bricks can no longer be used as fuel in a furnace.}}
{{History|console}}
{{History||xbox=TU9|xbone=CU1|ps=1.0|wiiu=Patch 1|switch=1.0.1|[[File:Nether Brick JE1 BE1.png|32px]] Added nether brick items.}}
{{History||xbox=none|xbone=none|ps=1.90|wiiu=none|switch=none|[[File:Nether Brick JE2 BE2.png|32px]] The texture of nether bricks has been changed.}}
{{History|New 3DS}}
{{History||0.1.0|[[File:Nether Brick JE1 BE1.png|32px]] Added nether brick items.}}
{{History|foot}}
== Issues ==
{{issue list}}
== References ==
{{reflist}}
{{items}}
[[cs:Netheritová cihla]]
[[de:Netherziegel (Gegenstand)]]
[[es:Ladrillo del Nether]]
[[fr:Brique du Nether]]
[[hu:Alvilági tégla]]
[[ja:ネザーレンガ (アイテム)]]
[[ko:네더 벽돌 (아이템)]]
[[lzh:焱界磚]]
[[nl:Netherbaksteen (voorwerp)]]
[[pl:Netherowa cegła]]
[[pt:Tijolo do Nether]]
[[ru:Адский кирпич (предмет)]]
[[uk:Пекельна цегла (предмет)]]
[[zh:下界砖]]
[[Category:Renewable resources]]</li><li>[[Photo|Photo]]<br/>{{exclusive|education}}
{{Item
| image = Photo EE2.png
| renewable = No (unless [[portfolio]] is available)
| stackable =
}}
A '''photo''' is an [[item]] containing a picture taken with a [[camera]].<ref>{{cite|url=https://web.archive.org/web/20210925044841mp_/https://educommunity.minecraft.net/hc/en-us/articles/4407489082644-Feature-Walkthrough-Minecraft-Education-Edition-GOAT-Beta-version-1-17-30-| title = Feature Walkthrough Minecraft: Education Edition GOAT Beta (version 1.17.30)|website=Minecraft: Education Edition Support|date=September 24, 2021}}</ref><ref>{{cite|url=https://education.minecraft.net/en-us/blog/new-update-and-anniversary-for-mee| title = The GOAT Update Celebrates a Minecraft Milestone!|website=Minecraft: Education Edition|date=November 2, 2021}}</ref><ref>{{ytl|2Wd0J-EIfws|GOAT Release Playthrough|Minecraft: Education Edition|December 2, 2021}}</ref>
== Obtaining ==
A photo in a [[portfolio]] can be saved as a photo item by selecting the "Save to Inventory" button underneath it.
== Usage ==
Photos display an image when held in the hand or when placed in an [[item frame]], similarly to [[map]]s. Photos can have captions added to them by renaming them in an [[anvil]] or by adding a caption while they are in a portfolio. Photos can be added to [[book and quill]]s and portfolios by selecting the "Add Photo" button in the book and quill or portfolio.
== Data values ==
=== ID ===
{{ID table
|edition=bedrock
|shownumericids=y
|showforms=y
|notshowbeitemforms=y
|generatetranslationkeys=y
|displayname=Photo
|spritetype=item
|nameid=photo_item
|id=?
|form=item
|foot=1}}
== History ==
{{History|education}}
{{History||1.17.30|snap=1.17.30.2|[[File:Photo EE1.png|32px]] Added photos.}}
{{History||1.17.30|snap=release|[[File:Photo EE2.png|32px]] Changed photo texture.}}
{{History|foot}}
== Gallery ==
<gallery>
Photo Item 1.png|A photo being placed in an item frame.
Photo Item 2.png|A photo being saved from a portfolio.
Photo Item 3.png|A photo being added to a book and quill.
</gallery>
== References ==
{{Reflist}}
{{Items}}
{{Education Edition}}
[[Category:Education Edition items]]
[[Category:Non-renewable resources]]
[[ja:写真]]
[[pl:Zdjęcie]]
[[zh:相片]]</li></ul> | 12w32a | ||||
| 12w34a | The "Work in Progress" block has been removed from the Creative inventory. | ||||
| 12w36a | The "Work in Progress" block has been renamed to "Beacon". | ||||
| Beacons can now be found in the creative inventory. | |||||
| Beacons are now craftable. | |||||
| 12w38a | |||||
| 12w40a | |||||
| 12w40b | The beacon beam no longer glitches at tiny and short render distance. | ||||
1.5{{Extension DPL}}<ul><li>[[Light Gray Dye|Light Gray Dye]]<br/>{{Item
| image = Light Gray Dye.png
| renewable = Yes
| stackable = Yes (64)
}}
'''Light gray dye'''{{fn|Known as '''Light Grey Dye''' in British, Canadian, Australian, and New Zealand English variants.}} is a [[Dyeing#Primary Colors|quasi-primary dye]].
== Obtaining ==
=== Crafting ===
{{Crafting
|head=1
|showname=0
|showdescription=1
|Azure Bluet;Oxeye Daisy;White Tulip
|Output=Light Gray Dye
|type=Material
}}
{{Crafting
|Black Dye
|White Dye
|White Dye
|Output=Light Gray Dye,3
|type=Material
|description={{IN|bedrock}}, the black and white dye can be replaced with [[ink sac]]s and [[bone meal]], respectively.
}}
{{Crafting
|Gray Dye
|White Dye
|Output=Light Gray Dye,2
|type=Material
|description={{IN|bedrock}}, the white dye can be replaced with [[bone meal]].
|foot=1
}}
=== Trading ===
[[Wandering trader]]s sell 3 light gray dye for an [[emerald]].
== Usage ==
{{dye usage}}
=== Crafting ingredient ===
{{crafting usage|ignore=Banner|continue=1}}
{{banner crafting usage}}
=== Loom ingredient ===
{{Banner loom usage|Light Gray Dye}}
=== Trading ===
Expert-level shepherd villagers have {{frac|1|6}} chance to buy 12 light gray dye for an emerald.
== Data values ==
=== ID ===
{{edition|java}}:
{{ID table
|edition=java
|showforms=y
|generatetranslationkeys=y
|displayname=Light Gray Dye
|spritetype=item
|nameid=light_gray_dye
|form=item
|foot=1}}
{{edition|bedrock}}:
{{ID table
|edition=bedrock
|showaliasids=y
|shownumericids=y
|showforms=y
|notshowbeitemforms=y
|generatetranslationkeys=y
|displayname=Light Gray Dye
|spritetype=item
|nameid=light_gray_dye
|aliasid=dye / 7
|id=402
|form=item
|translationkey=item.dye.silver.name
|foot=1}}
== Video ==
<div style="text-align:center">{{yt|1w3j1SKcoww}}</div>
== History ==
{{History|java beta}}
{{History||1.2|[[File:Light Gray Dye JE1 BE1.png|32px]] Added light gray dye.}}
{{History|java}}
{{History||1.4.2|snap=12w34a|Added the ability to [[Armor#Dyeing|dye]] leather [[armor]] and [[wolf]] collars.}}
{{History||1.4.6|snap=12w49a|Light gray dye can now be [[crafting|crafted]] with [[gunpowder]] to create a [[firework star]].}}
{{History||1.6.1|snap=13w19a|[[Stained clay]] can now be crafted.}}
{{history||1.7.2|snap=13w36a|With the addition of new [[flower]]s, many secondary and tertiary dyes are now primary [[dye]]s.}}
{{History|||snap=13w41a|[[Stained glass]] can now be crafted.}}
{{History||1.8|snap=14w30a|Added [[banner]]s, which can be dyed.}}
{{History||1.11|snap=16w39a|Added the ability to dye [[shulker box]]es.}}
{{History||1.12|snap=17w15a|Added the ability to dye [[bed]]s.}}
{{History||1.13|snap=17w47a|The different data values for the <code>dye</code> ID have now been split up into their own IDs.
|Prior to [[1.13/Flattening|''The Flattening'']], this [[item]]'s numeral ID was 351.}}
{{History||1.14|snap=18w43a|Light gray dye is now crafted using [[white dye|white]] and [[black dye]]s, instead of [[bone meal]] and [[ink sac]]s.
|[[File:Light Gray Dye JE2 BE2.png|32px]] The texture of light gray dye has now been changed.}}
{{History|||snap=18w44a|Light gray dye can now change the text color on [[sign]]s to light gray.}}
{{History|||snap=19w05a|Added the [[wandering trader]], which sells light gray dye.}}
{{History|||snap=19w11a|Light gray dye can now be [[trading|bought]] by shepherd villagers.}}
{{History||1.17|snap=20w45a|Light gray dye can now be used to craft [[light gray candle]]s.}}
{{History|||snap=21w19a|Light gray dye can no longer be used to craft light gray candles.}}
{{History|||snap=Pre-release 1|Light gray dye can now once again be used to craft light gray candles.}}
{{History||1.20<br>(Experimental)|link=1.19.3|snap=22w42a|Light gray dye can now change the text color on [[hanging sign]]s to light gray.}}
{{History|pocket alpha}}
{{History||v0.3.0|[[File:Light Gray Dye JE1 BE1.png|32px]] Added light gray dye. It is currently unobtainable and serves no purpose.}}
{{History||v0.8.0|snap=build 1|Light gray dye can be [[craft]]ed with [[bone meal]] and [[gray dye]], or with two bone meals and an [[ink sac]], despite there being no way of obtaining gray dye or ink sacs at the time.}}
{{History||v0.8.0|snap=build 3|Light gray dye is now available in [[creative]] mode.}}
{{History||v0.9.0|snap=build 3|Light gray dye can now be obtained in [[survival]] mode.}}
{{History|||snap=build 11|Light gray dye can now be used to craft colored [[terracotta]].}}
{{History||v0.11.0|snap=build 1|Light gray dye can now be used to dye tamed [[wolf]] collars.}}
{{History||v0.14.0|snap=build 1|Light gray dye can now be used to dye [[water]] in [[cauldron]]s.}}
{{History|pocket}}
{{History||1.0.0|snap=alpha 0.17.0.1|Light gray dye can now be used to dye [[shulker]]s.}}
{{History||1.1.0|snap=alpha 1.1.0.0|Light gray dye can now be used to craft [[concrete powder]], colored [[bed]]s and dyed [[shulker box]]es.}}
{{History|bedrock}}
{{History||1.2.0|snap=beta 1.2.0.2|Light gray dye can now be used to craft [[firework star]]s, [[stained glass]] and patterns on [[banner]]s.}}
{{History||1.4.0|snap=beta 1.2.20.1|Light gray dye can now be used to craft [[balloon]]s and [[glow stick]]s.}}
{{History||1.8.0|snap=beta 1.8.0.8|Light gray dye can now be used to dye tamed [[cat]] collars.}}
{{History||1.10.0|snap=beta 1.10.0.3|Light gray dye is now [[trading|sold]] by [[wandering trader]]s.
|Light gray dye can now be used to dye white [[carpet]]s and undyed [[glass pane]]s.
|[[File:Light Gray Dye JE2 BE2.png|32px]] The texture of light gray dye has now been changed.}}
{{History||1.11.0|snap=beta 1.11.0.1|Light gray dye can be [[trading|sold]] to shepherd [[villager]]s.}}
{{History||1.16.100|snap=beta 1.16.100.56|The ID of light gray dye has been changed from <code>dye/7</code> to <code>light_gray_dye</code>.}}
{{History|console}}
{{History||xbox=TU1|xbone=CU1|ps=1.00|switch=1.0.1|wiiu=Patch 1|[[File:Light Gray Dye JE1 BE1.png|32px]] Added light gray dye.}}
{{History|PS4}}
{{History||1.90|[[File:Light Gray Dye JE2 BE2.png|32px]] The texture of light gray dye has now been changed.}}
{{History|new 3ds}}
{{History||0.1.0|[[File:Light Gray Dye JE1 BE1.png|32px]] Added light gray dye.}}
{{History|foot}}
== Issues ==
{{issue list}}
== Trivia ==
* In [[Bedrock Edition]], Some items/blocks' Block states/Item NBT uses '''Silver''' instead of '''Light Gray'''
== Notes ==
{{fnlist}}
{{Items}}
[[Category:Dyes]]
[[cs:Světle šedé barvivo]]
[[de:Hellgrauer Farbstoff]]
[[es:Tinte gris claro]]
[[fr:Teinture gris clair]]
[[hu:Világosszürke festék]]
[[ja:薄灰色の染料]]
[[ko:회백색 염료]]
[[nl:Lichtgrijze kleurstof]]
[[pl:Jasnoszary barwnik]]
[[pt:Corante cinza-claro]]
[[ru:Светло-серый краситель]]
[[zh:淡灰色染料]]
[[Category:Renewable resources]]</li><li>[[Raw Porkchop|Raw Porkchop]]<br/>{{Item
| title = Raw Porkchop
| image = Raw Porkchop.png
| renewable = Yes
| heals = {{hunger|3}}
| stackable = Yes (64)
}}
A '''raw porkchop''' is a [[food]] item that can be eaten by the [[player]] or cooked to make a [[cooked porkchop]].
== Obtaining ==
=== Mob loot ===
==== Pigs ====
Adult [[pig]]s drop 1–3 raw porkchop when killed. The maximum amount is increased by 1 per level of [[Looting]], for a maximum of 1-6 with Looting III. If killed while on fire, they drop [[cooked porkchop]] instead.
==== Hoglins ====
Adult [[hoglin]]s drop 2–4 raw porkchop when killed. The maximum amount is increased by 1 per level of [[Looting]], for a maximum of 7 with Looting III. If killed while on fire, they drop [[cooked porkchop]] instead.
=== Chest loot ===
{{LootChestItem|raw-porkchop}}
== Usage ==
=== Food ===
To eat raw porkchop, press and hold {{control|use}} while it is selected in the hotbar. Eating one restores {{hunger|3}} [[hunger]] and 0.6 [[Hunger#Mechanics|saturation]].
=== Smelting ingredient ===
{{Smelting
|showname=1
|Raw Porkchop
|Cooked Porkchop
|0.35
}}
=== Trading ===
{{IN|bedrock}}, novice-level butcher [[villager]]s have a {{frac|1|3}} chance to [[trading|buy]] 7 raw porkchop for an [[emerald]] as part of their [[trading|trades]].
{{IN|java}}, novice-level butcher villagers have a 40% chance to buy 7 raw porkchop for an emerald.
=== Wolves ===
Raw porkchops can be used to [[breed]] and heal tamed [[wolves]], lead them around, and make baby tamed wolves grow up faster by 10% of the remaining time.
=== Piglins ===
[[Piglin|Piglins]] instantly pick up raw or [[Cooked Porkchop|cooked porkchops]] that are within 1 block of them, unless they have already picked up one within the last 10 seconds. Porkchops picked up are not dropped upon the piglin's death.
==Sounds==
{{Sound table/Entity/Food}}
== Data values ==
=== ID ===
{{edition|java}}:
{{ID table
|edition=java
|showitemtags=y
|showforms=y
|generatetranslationkeys=y
|displayname=Raw Porkchop
|spritetype=item
|nameid=porkchop
|itemtags=piglin_food
|form=item
|foot=1}}
{{edition|bedrock}}:
{{ID table
|edition=bedrock
|shownumericids=y
|showforms=y
|notshowbeitemforms=y
|generatetranslationkeys=y
|displayname=Raw Porkchop
|spritetype=item
|nameid=porkchop
|id=262
|form=item
|foot=1}}
== Achievements ==
{{load achievements|Pork Chop}}
== Advancements ==
{{load advancements|Husbandry;A Balanced Diet}}
== History ==
{{History|java indev}}
{{History||20100219|[[File:Raw Porkchop JE1 BE1.png|32px]] Added raw porkchops.
|Raw porkchops restore {{hp|3}} and do not stack in the [[inventory]].
|Raw porkchops are [[drops|dropped]] by [[pig]]s.}}
{{History|java beta}}
{{History||1.4|Raw porkchops can now be given to [[wolf|wolves]].}}
{{History||1.8|snap=Pre-release|Raw porkchops can now be stacked to 64.<ref>{{Tweet|jeb|103408168356421632|Some Minecraft food changes...}}</ref>
|Raw porkchops now restore {{hunger|3}} to the [[Hunger|food bar]].}}
{{History|java}}
{{History||1.2.1|snap=12w03a|Raw porkchops can now be used to breed wolves.}}
{{History||1.3.1|snap=12w21a|Raw porkchops can now be [[trading|sold]] to butcher [[villager]]s, at 14–17 pork chops for 1 [[emerald]].}}
{{History|||snap=12w25a|[[Pig]]s now [[drops|drop]] 1–3 porkchops instead of 0–2.}}
{{History||1.4.2|snap=12w37a|[[File:Raw Porkchop JE2 BE2.png|32px]] The texture of raw porkchops has been changed, so that it no longer has a dark outline.}}
{{History||1.8|snap=14w02a|[[Trading]] has been changed; butcher villagers now [[trading|buy]] 14–18 porkchops for 1 emerald.}}
{{History||1.13|snap=17w47a|Prior to [[1.13/Flattening|''The Flattening'']], this [[item]]'s numeral ID was 319.}}
{{History||1.14|snap=18w43a|[[File:Raw Porkchop.png|32px]] The texture of raw porkchops has been changed.}}
{{History|||snap=18w49a|Raw porkchops can now be found in [[chest]]s in [[village]] butcher shops.}}
{{History||1.16|snap=20w07a|Raw porkchops are dropped by the new [[hoglin]]s.
|Raw porkchops have a {{frac|5|109}} (~4.59%) chance of being given by the new [[piglin]]s when [[bartering]], in a stack size of 2–5.}}
{{History|||snap=20w09a|Raw porkchops can no longer be obtained by bartering with piglins.}}
{{History|||snap=20w16a|Raw porkchops now generate in [[bastion remnants]] chests.}}
{{History|pocket alpha}}
{{History||v0.4.0|[[File:Raw Porkchop JE1 BE1.png|32px]] Added raw porkchops.}}
{{History||v0.5.0|Raw porkchops now restore {{hp|3}} instead of {{hp|1}}.}}
{{History||v0.8.0|snap=build 1|[[File:Raw Porkchop JE2 BE2.png|32px]] The texture of raw porkchops has been changed, so that it no longer has that dark outline.}}
{{History||v0.12.1|snap=build 1|Raw porkchops now restore [[hunger]] instead of [[health]].}}
{{History||v0.16.2|[[Pig]]s now [[drops|drop]] 1–3 raw porkchops rather than 0–2.}}
{{History|pocket}}
{{History||1.0.4|snap=alpha 1.0.4.0|14–18 raw porkchops can now be [[trading|sold]] to butcher [[villager]]s for an [[emerald]].}}
{{History|bedrock}}
{{History||1.10.0|snap=beta 1.10.0.3|[[File:Raw Porkchop.png|32px]] The texture of raw porkchops has been changed.}}
{{History||1.11.0|snap=beta 1.11.0.3|Raw porkchops can now be found in [[village]] butcher [[chest]]s.}}
{{History|||snap=beta 1.11.0.4|Butcher [[villager]]s now have {{frac|1|3}} chance to [[trading|buy]] 7 raw porkchops.}}
{{History|console}}
{{History||xbox=TU1|xbone=CU1|ps=1.0|wiiu=Patch 1|switch=1.0.1|[[File:Raw Porkchop JE1 BE1.png|32px]] Added raw porkchops.}}
{{History||xbox=TU5|Raw porkchops are now stackable to 64 and fills [[hunger]] instead of [[health]].}}
{{History||xbox=TU12|[[File:Raw Porkchop JE2 BE2.png|32px]] The texture of raw porkchops has been changed, so that it no longer has a dark outline.}}
{{History||xbox=none|xbone=none|ps=1.90|wiiu=none|switch=none|[[File:Raw Porkchop.png|32px]] The texture of raw porkchops has been changed.}}
{{History|new3DS}}
{{History||0.1.0|[[File:Raw Porkchop JE2 BE2.png|32px]] Added raw porkchops.}}
{{History|foot}}
== Issues ==
{{issue list}}
== Gallery ==
<gallery>
I Porkchop Minecraft JINX.jpg|Official T-shirt artwork "I Porkchop Minecraft" sold by [https://www.jinx.com JINX].
I Brake for Porkchop Bumper Sticker JINX.jpg|An official bumper sticker featuring a raw porkchop sold by JINX.
</gallery>
== References ==
{{reflist}}
== External Links ==
*[https://www.minecraft.net/en-us/article/taking-inventory--porkchop Taking Inventory: Porkchop] – Minecraft.net on February 13, 2020
{{Items}}
[[Category:Food]]
[[cs:Syrová kotleta]]
[[de:Rohes Schweinefleisch]]
[[es:Chuleta de cerdo cruda]]
[[fr:Côtelette de porc crue]]
[[hu:Nyers disznóhús]]
[[ja:生の豚肉]]
[[nl:Rauw varkensvlees]]
[[pl:Surowy schab]]
[[pt:Costeleta de porco crua]]
[[ru:Сырая свинина]]
[[uk:Сира свинина]]
[[zh:生猪排]]
[[Category:Renewable resources]]</li></ul> | 13w05a | The effect range of beacons has been increased from 16/24/32/40 blocks to 20/30/40/50 blocks. | |||
| Beacon effects now extend up to the world height limit (Y=256). | |||||
1.6.1{{Extension DPL}}<ul><li>[[Brush|Brush]]<br/>{{Item
|image=Brush.png
|rarity=Common
|renewable=Yes
|durability=64
|stackable=No
}}
A '''brush''' is a [[tool]] used in [[archaeology]] to excavate [[suspicious block]]s for different items.
==Obtaining==
===Crafting===
{{Crafting
|head=1
|showname=0
|showdescription=1
|B1=Feather
|B2=Copper Ingot
|B3=Stick
|Output=Brush
|type=Tool
}}
{{crafting
|foot=1
|ignoreusage=1
|Damaged Brush
|Damaged Brush
|Output=Brush
|description=The durability of the two brushes is added together, plus an extra 5% durability.
|type=Tool
}}
==Usage==
{{Main|Suspicious Block}}
{{Control|Using}} the brush on any block displays a brushing animation, slowing down the player and creating breaking [[particles]], but not actually damaging the block or brush. When continuously brushing a [[suspicious block]], a random item slowly emerges from it until it drops out, and the block turns into regular [[sand]] or regular [[gravel]], depleting 1 [[durability]] point on the brush. It takes 96 [[game tick]]s (4.8 seconds) to brush a single suspicious block.
=== Enchantments ===
A brush can receive the following [[enchantment]]s:
{|class="wikitable col-2-center col-3-right"
|+
!Name
!Max Level
![[Enchanting|Method]]
|-
|[[Unbreaking]]
|III
|{{Inventory slot|Anvil}}
|-
|[[Mending]]
|I
|{{Inventory slot|Anvil}}
|-
|[[Curse of Vanishing]]
|I
|{{Inventory slot|Anvil}}
|}
== Sounds ==
{{Edition|Java}}:
{{Sound table
<!--All of these sounds are, in fact, different-->
|sound=Brushing sand1.ogg
|sound2=Brushing sand2.ogg
|sound3=Brushing sand3.ogg
|sound4=Brushing sand4.ogg
|subtitle=Brushing Sand
|source=block
|description=While a brush is brushing suspicious sand
|id=item.brush.brushing.sand
|translationkey=subtitles.item.brush.brushing.sand
|volume=0.6
|pitch=0.6
|distance=16}}
{{Sound table
|sound=Brushing gravel1.ogg
|sound2=Brushing gravel2.ogg
|sound3=Brushing gravel3.ogg
|sound4=Brushing gravel4.ogg
|subtitle=Brushing Gravel
|source=block
|description=While a brush is brushing suspicious gravel
|id=item.brush.brushing.gravel
|translationkey=subtitles.item.brush.brushing.gravel
|volume=0.6
|pitch=0.6
|distance=16}}
{{Sound table
|sound=Brushing generic1.ogg
|sound2=Brushing generic2.ogg
|sound3=Brushing generic3.ogg
|sound4=Brushing generic4.ogg
|subtitle=Brushing
|source=block
|description=While a brush is brushing any other block
|id=item.brush.brushing.generic
|translationkey=subtitles.item.brush.brushing.generic
|volume=0.6
|pitch=0.6
|distance=16}}
{{Sound table
|sound=Brushing sand completed1.ogg
|sound2=Brushing sand completed2.ogg
|sound3=Brushing sand completed3.ogg
|sound4=Brushing sand completed4.ogg
|sound5=Brushing sand completed5.ogg
|subtitle=Brushing Sand completed
|source=Players<ref group=sound name=badsource>{{Bug|MC-260202}}</ref>|overridesource=1
|description=When a brush finishes brushing suspicious sand
|id=item.brush.brushing.sand.complete
|translationkey=subtitles.item.brush.brushing.sand.complete
|volume=1.0
|pitch=1.0
|distance=16}}
{{Sound table
|sound=Brushing gravel completed1.ogg
|sound2=Brushing gravel completed2.ogg
|sound3=Brushing gravel completed3.ogg
|sound4=Brushing gravel completed4.ogg
|subtitle=Brushing Gravel completed
|source=Players<ref group=sound name=badsource/>|overridesource=1
|description=When a brush finishes brushing suspicious gravel
|id=item.brush.brushing.gravel.complete
|translationkey=subtitles.item.brush.brushing.gravel.complete
|volume=1.0
|pitch=1.0
|distance=16
|foot=1}}
{{Edition|Bedrock}}:
{{Sound table
|type=bedrock
|sound=Brushing sand1.ogg
|sound2=Brushing sand2.ogg
|sound3=Brushing sand3.ogg
|sound4=Brushing sand4.ogg
|source=player
|description=While a brush is brushing suspicious sand
|id=brush.suspicious_sand
|volume=1.0
|pitch=0.8-1.0}}
{{Sound table
|sound=Brushing gravel1.ogg
|sound2=Brushing gravel2.ogg
|sound3=Brushing gravel3.ogg
|sound4=Brushing gravel4.ogg
|source=player
|description=While a brush is brushing suspicious gravel
|id=brush.suspicious_gravel
|volume=1.0
|pitch=0.8-1.0}}
{{Sound table
|sound=Brushing generic1.ogg
|sound2=Brushing generic2.ogg
|sound3=Brushing generic3.ogg
|sound4=Brushing generic4.ogg
|source=player
|description=While a brush is brushing any other block
|id=brush.generic
|volume=1.0
|pitch=0.8-1.0}}
{{Sound table
|sound=Brushing sand completed1.ogg
|sound2=Brushing sand completed2.ogg
|sound3=Brushing sand completed3.ogg
|sound4=Brushing sand completed4.ogg
|sound5=Brushing sand completed5.ogg
|source=player
|description=When a brush finishes brushing suspicious sand
|id=brush_completed.suspicious_sand
|volume=1.0
|pitch=0.8-1.0}}
{{Sound table
|sound=Brushing gravel completed1.ogg
|sound2=Brushing gravel completed2.ogg
|sound3=Brushing gravel completed3.ogg
|sound4=Brushing gravel completed4.ogg
|source=player
|description=When a brush finishes brushing suspicious gravel
|id=brush_completed.suspicious_gravel
|volume=1.0
|pitch=0.8-1.0
|foot=1}}
== Data values ==
=== ID ===
{{edition|java}}:
{{ID table
|edition=java
|showforms=y
|generatetranslationkeys=y
|displayname=Brush
|spritetype=item
|nameid=brush
|form=item
|foot=1}}
{{edition|bedrock}}:
{{ID table
|edition=bedrock
|shownumericids=y
|showforms=y
|notshowbeitemforms=y
|generatetranslationkeys=y
|displayname=Brush
|spritetype=item
|nameid=brush
|id=684
|form=item
|foot=1}}
== Advancements ==
{{load advancements|Respecting the Remnants}}
== History ==
{{History||October 3, 2020|link=https://youtu.be/DBvZ2Iqmm3M?t=2178|[[File:Brush (pre-release 1).png|32px]][[File:Brush 2.png|32px]] Brushes were announced at [[Minecraft Live 2020]] with two variants.}}
{{History||?|link=https://youtu.be/klP9SrJFDU8?t=206|[[File:Brush (pre-release 2).png|32px]] Changed the brush's item texture.}}
{{History||February 10, 2023|[[File:Brush JE1 BE1.png|32px]] [[Sofia Dankis]] posted an article about upcoming archaeology features, including brushes.|link=https://www.minecraft.net/en-us/article/archeology-coming-minecraft-120}}
{{History|java}}
{{History||1.20<br>(Experimental)|link=1.19.4|snap=23w07a|[[File:Brush JE1 BE1.png|32px]] Added brushes with an updated texture behind the [[Java Edition 1.20|Update 1.20 experimental datapack]].|The crafting recipe was originally three [[string]] and two [[stick]]s.
{{{!}} class{{=}}"collapsible collapsed" data-description{{=}}"Recipe"
! Recipe
{{!}}-
{{!}}{{Crafting Table
|A1 = String
|B1 = String
|C1 = String
|B2 = Stick
|B3 = Stick
|Output = Brush
|type = Tool
|ignoreusage=1}}
{{!}}}
}}
{{History|||snap=1.19.4 Pre-release 1|The crafting recipe for brushes has been changed:
{{{!}} class{{=}}"collapsible collapsed" data-description{{=}}"Recipe"
! Recipe
{{!}}-
{{!}}{{Crafting Table
|B1 = Feather
|B2 = Copper Ingot
|B3 = Stick
|Output = Brush
|type = Tool
|ignoreusage=1}}
{{!}}}
}}
{{History||1.20|snap=23w12a|Brushes are now available without using the "Update 1.20" experimental data pack.
|Brushes can now brush [[suspicious gravel]].}}
{{History|||snap=23w14a|The brushing sound of brush is now controlled by the "Blocks" sound slider instead of the "Players" sound slider.}}
{{History|||snap=23w17a|The player now gets the [[advancement]] "Respecting the Remnants" when they use a brush on a [[suspicious block]] to obtain a [[pottery sherd]].}}
{{History|bedrock}}
{{History||Next Major Update<br>(Experimental)|link=Bedrock Edition 1.19.70|snap=beta 1.19.70.23|[[File:Brush JE1 BE1.png|32px]] Added brushes behind the "[[Bedrock Edition 1.20.0|Next Major Update]]" [[experimental]] toggle.
|The crafting recipe is originally three [[string]] and two [[stick]]s.
{{{!}} class{{=}}"collapsible collapsed" data-description{{=}}"Recipe"
! Recipe
{{!}}-
{{!}}{{Crafting Table
|A1 = String
|B1 = String
|C1 = String
|B2 = Stick
|B3 = Stick
|Output = Brush
|type = Tool
|ignoreusage=1}}
{{!}}}
}}
{{History||Next Major Update<br>(Experimental)|link=Bedrock Edition 1.19.80|snap=beta 1.19.80.20|The crafting recipe for brushes has been changed:
{{{!}} class{{=}}"collapsible collapsed" data-description{{=}}"Recipe"
! Recipe
{{!}}-
{{!}}{{Crafting Table
|B1 = Feather
|B2 = Copper Ingot
|B3 = Stick
|Output = Brush
|type = Tool
|ignoreusage=1}}
{{!}}}
}}
{{History||1.20.0|snap=beta 1.20.0.21|Brushes are now available without using the "Next Major Update" experimental toggle.}}
{{History|foot}}
== Issues ==
{{Issue list}}
== References ==
{{Reflist}}
==External Links==
*[https://www.minecraft.net/en-us/article/brush Taking Inventory: Brush] – Minecraft.net on July 6, 2023
{{Items}}
[[Category:Renewable resources]]
[[de:Pinsel]]
[[es:Pincel]]
[[ja:ブラシ]]
[[pt:Pincel]]
[[pl:Pędzel]]
[[uk:Щітка]]
[[zh:刷子]]</li><li>[[Water Bucket|Water Bucket]]<br/>{{Item
| title = Water Bucket
| renewable = Yes
| image = Water Bucket.png
| stackable = No
}}
A '''water bucket''' is a [[bucket]] filled with [[water]].
== Obtaining ==
=== Interacting ===
To fill an empty [[bucket]] with water, {{control|use}} it on a [[water]] source block. The water is consumed in the process. Flowing water does not fill a bucket.
{{control|Using}} an empty bucket on a [[cauldron]] filled with water (water level 3) empties the cauldron and fills the bucket.
Water buckets can also be filled by placing an empty one in the fuel slot of a [[furnace]], and a wet [[sponge]] into the oven slot. The bucket is filled when the [[smelting]] process completes, which also leaves the sponge dry and ready to be reused.
=== Chest Loot ===
{{LootChestItem|water-bucket}}
== Usage ==
{{Control|Using}} a water bucket on a solid block places a water source block against that block, emptying the bucket; using a water bucket on a [[waterlogging|waterloggable]] block waterlogs the block. In [[the Nether]], however, the water evaporates, making a fire extinguishing sound and displays smoke particles while nothing gets placed.
=== Dispensers ===
A [[dispenser]] can be loaded with a water bucket, and when activated it places a water block directly before it, emptying the bucket. A dispenser loaded with an empty bucket and a water source right in front of it draws the source into the bucket when activated.
=== Cauldrons ===
A single water bucket can fill a [[cauldron]], and using an empty bucket on a water-filled cauldron fills the bucket. Empty buckets cannot be filled from partly-filled cauldrons.
=== Filling bucket with mobs ===
Water buckets can be used on a [[fish]], [[axolotl]] or [[tadpole]] to create a [[bucket of aquatic mob]].
=== Transportation ===
{{main|Tutorials/Elevators#Water elevators}}
Water buckets can be used as a means of quickly descending great heights in the [[Overworld]] and [[the End]], either by creating a waterfall or using the water bucket while falling to create a safe water landing.
Water buckets can also be used to climb vertical surfaces anywhere but [[the Nether]] by repeatedly creating higher waterfalls from the bottom and swimming up them.
== Sounds ==
{{el|je}}:
{{Sound table
|sound=Fill water bucket1.ogg
|sound2=Fill water bucket2.ogg
|sound3=Fill water bucket3.ogg
|subtitle=Bucket fills
|source=player
|description=When a bucket is filled with water
|id=item.bucket.fill
|translationkey=subtitles.item.bucket.fill
|volume=1.0
|pitch=1.0
|distance=16}}
{{Sound table
|sound=Empty water bucket1.ogg
|sound2=Empty water bucket2.ogg
|sound3=Empty water bucket3.ogg
|subtitle=Bucket empties
|source=block
|description=When the bucket is placed
|id=item.bucket.empty
|translationkey=subtitles.item.bucket.empty
|volume=1.0 <ref group=sound>Except for the second copy of {{cd|empty1}}, which is 0.9</ref>
|pitch=1.0
|distance=16
|foot=1}}
{{el|je}}:
{{Sound table
|type=bedrock
|sound=Fill water bucket1.ogg
|sound2=Fill water bucket2.ogg
|sound3=Fill water bucket3.ogg
|source=block
|description=When a bucket is filled with water
|id=bucket.fill_water
|volume=1.0
|pitch=1.0}}
{{Sound table
|sound=Empty water bucket1.ogg
|sound2=Empty water bucket2.ogg
|sound3=Empty water bucket3.ogg
|source=block
|description=When a water bucket is emptied
|id=bucket.empty_water
|volume=1.0
|pitch=1.0}}
{{Sound table
|rowspan=2
|sound=Water Splash Old.ogg
|source=block
|description=When a water bucket is placed in a cauldron<wbr><ref group=sound name=bucketsplash>{{Bug|MCPE-135919}}</ref>
|id=cauldron.fillwater
|volume=0.1
|pitch=1.0}}
{{Sound table
|source=block
|description=When a water bucket is removed from a cauldron<wbr><ref group=sound name=bucketsplash/>
|id=cauldron.takewater
|volume=0.1
|pitch=1.0
|foot=1}}
==Data values==
=== ID ===
{{edition|java}}:
{{ID table
|edition=java
|showforms=y
|generatetranslationkeys=y
|displayname=Water Bucket
|spritetype=item
|nameid=water_bucket
|form=item
|foot=1}}
{{edition|bedrock}}:
{{ID table
|edition=bedrock
|showaliasids=y
|shownumericids=y
|showforms=y
|notshowbeitemforms=y
|generatetranslationkeys=y
|displayname=Water Bucket
|spritetype=item
|nameid=water_bucket
|aliasid=bucket / 8
|id=362
|form=item
|translationkey=item.bucketWater.name
|foot=1}}
== Advancements ==
{{load advancements|Tactical fishing;The Cutest Predator;Bukkit bukkit}}
==History==
{{History|java infdev}}
{{History||20100615|[[File:Water Bucket JE1 BE1.png|32px]] Added water buckets.}}
{{History|java alpha}}
{{History||v1.2.6|{{control|use|text=Using}} a water bucket on [[block]]s with GUIs ([[chest]]s, [[furnace]]s, etc.) no longer places the water.}}
{{History|java}}
{{History||1.0.0|snap=Beta 1.9 Prerelease 2|Water buckets can now be used to fill [[cauldron]]s.}}
{{History||1.3.1|snap=12w15a|[[Dispenser]]s have now been given the ability to dispense water buckets. They can also collect if activated again.}}
{{History||1.8|snap=14w25a|A water bucket is now shown as the icon when [[water]] is used as a layer in [[Superflat]].}}
{{History|||snap=14w25b|[[Smelting]] a wet [[sponge]] while an empty bucket is in the fuel slot fills the bucket with water.}}
{{History||1.9|snap=15w44a|A full [[cauldron]] can now be emptied with a bucket, yielding a water bucket.}}
{{History|||snap=15w50a|Added sounds for collecting and pouring water using a bucket.}}
{{History||1.13|snap=17w47a|Prior to the ''[[Flattening]]'' this item's numerical ID was 326.}}
{{History|||snap=18w08b|Water buckets can now be used to pick up [[fish]] mobs.}}
{{History||1.14|snap=18w43a|[[File:Water Bucket JE2 BE2.png|32px]] The texture of water buckets has now been changed.
|Water buckets can now suck up liquids directly adjacent to the side they are facing. How this works is unknown, given the water bucket clearly already contains a liquid.}}
{{History|||snap=18w48a|Water buckets can now be found in [[chest]]s in [[village]] fishing cottages.}}
{{History|||snap=19w02a|Water buckets can now be used to put out [[campfire]]s.}}
{{History||1.17|snap=20w51a|Water buckets can now be used to collect [[axolotl]]s.}}
{{History||1.19|snap=22w11a|Water buckets can now be used to collect [[tadpole]]s.}}
{{History||1.19.3|snap=22w45a|Water buckets can now be emptied into [[waterlogging|waterlogged]] blocks, instead of placing water against them.<ref>{{bug|MC-127110|||Fixed}}</ref>}}
{{History|upcoming java}}
{{History||Villager Trade Rebalance<br>(Experimental)|link=Java Edition 1.20.2|snap=23w31a|[[Wandering trader]]s now have a chance to [[trading|buy]] a water bucket from the player.}}
{{History|pocket alpha}}
{{History||v0.7.0|[[File:Water Bucket JE1 BE1.png|32px]] Added water buckets.
|Water buckets were simply called "Bucket".}}
{{History||v0.7.4|Water buckets no longer stack to 64.}}
{{History||v0.14.0|snap=build 1|Dispensers can now shoot out water from water buckets.}}
{{History|bedrock}}
{{History||1.4.0|snap=beta 1.2.14.2|Water buckets can now be used to pick up [[fish mob]]s.
|Moved all bucket items, including water buckets, from the Equipment tab to the Items tab in the [[Creative inventory]].{{verify|type=update}}{{info needed}}<!---please check snapshots, only 1 major release version was checked each--->}}
{{History||1.10.0|snap=beta 1.10.0.3|[[File:Water Bucket JE2 BE2.png|32px]] The texture of water buckets has now been changed.}}
{{History||1.16.100|snap=beta 1.16.100.56|The ID of water buckets has been changed from <code>bucket/8</code> to <code>water_bucket</code>.}}
{{History||1.17.0|snap=beta 1.16.230.52|Water buckets can now be used to collect [[axolotl]]s.}}
{{History||1.18.10|snap=beta 1.18.10.24|Water buckets can now be used to collect [[tadpole]]s behind the "Wild Update" experimental toggle.}}
{{History|console}}
{{History||xbox=TU1|xbone=CU1|ps=1.0|wiiu=Patch 1|switch=1.0.1|[[File:Water Bucket JE1 BE1.png|32px]] Added water buckets.}}
{{History||xbox=TU9|[[Dispenser]]s have now been given the ability to shoot out the [[liquids]] inside water buckets. They can also suck up the liquids if activated again, but a bug prevents the empty [[bucket]] from being filled. Whether this was ever fixed is unknown.}}
{{History||xbox=none|xbone=none|ps=1.90|wiiu=none|switch=none|[[File:Water Bucket JE2 BE2.png|32px]] The texture of water buckets has now been changed.}}
{{History|New Nintendo 3DS Edition}}
{{History||0.1.0|[[File:Water Bucket JE1 BE1.png|32px]] Added water buckets.}}
{{History|foot}}
==Issues==
{{issue list}}
==Gallery==
<gallery>
Water Bucket SDGP.png|Water bucket in the [[Super Duper Graphics Pack]].
</gallery>
==References==
{{Reflist}}
{{Items}}
[[Category:Renewable resources]]
[[Category:Tools]]
[[de:Wassereimer]]
[[ja:水入りバケツ]]
[[pt:Balde de água]]
[[th:ถังน้ำ]]
[[uk:Відро води]]
[[zh:水桶]]</li></ul> | 13w23a | With the Regeneration effect being nerfed slightly, the same status effect produced from beacons has been nerfed slightly too. | |||
| 13w24a | The beacon "crystal" texture, used from 12w36a to 12w37a, has been removed as per the resource pack reform. | ||||
1.7.2{{Extension DPL}}<ul><li>[[Medicine|Medicine]]<br/>{{Redirect|Elixir", "Antidote", "Eye Drops", and "Tonic|s=1|the brewable items|Potion}}
{{Education feature}}
{{Exclusive|bedrock|education}}
{{Item
| image = <gallery>
Antidote.png | Antidote
Elixir.png | Elixir
Eye Drops.png | Eye Drops
Tonic.png | Tonic
</gallery>
| renewable = Yes
| stackable = No
}}
A '''medicine''' is a type of [[potion]] that cures the specified [[effect]] instead of applying it.
== Obtaining ==
=== Brewing ===
Cures are brewed from awkward potions using different [[element]]s.{{only|bedrock|education}} These drinks remove the specified effect when drank, and cannot be modified into splash, lingering, extended or enhanced versions.
{| class="wikitable" style="text-align: center;" data-description="Remedies"
! Potion
! Reagent, base
! Effect
! Notes
|-
! {{Inventory slot|Antidote}}<br>Antidote
| {{Brewing Stand
|Input= Silver
|Output2= Awkward Potion
}}
| Cures [[Poison]]
| Silver detects poison {{w|Silver#Symbolic role|in folklore}}, and possesses anti-microbial properties.
|-
! {{Inventory slot|Elixir}}<br>Elixir
| {{Brewing Stand
|Input= Cobalt
|Output2= Awkward Potion
}}
| Cures [[Weakness]]
|
|-
! {{Inventory slot|Eye Drops}}<br>Eye Drops
| {{Brewing Stand
|Input= Calcium
|Output2= Awkward Potion
}}
| Cures [[Blindness]]
|
|-
! {{Inventory slot|Tonic}}<br>Tonic
| {{Brewing Stand
|Input= Bismuth
|Output2= Awkward Potion
}}
| Cures [[Nausea]]
| In real life, {{w|bismuth subsalicylate}} is used as a nausea treatment.
|}
== Usage ==
Each type of medicine has an associated effect that it can cure (see {{slink||Brewing}} for details). Players can drink the medicine only if they have the corresponding effect. Drinking the medicine eliminates the effect. Although medicine does not resemble [[potion]]s, the player still gets the [[glass bottle]] back.
== Sounds ==
{{Sound table
|type=bedrock
|sound=Drink.ogg
|source=player
|description=When a player drinks medicine
|id=random.drink
|foot=1}}
== Data values ==
=== ID ===
{{ID table
|edition=bedrock
|shownumericids=y
|showforms=y
|generatetranslationkeys=y
|displayname=Medicine
|spritetype=item
|nameid=medicine
|id=599
|form=item
|notshowbeitemforms=y
|translationkey=item.medicine.poison.name,item.medicine.weakness.name,item.medicine.blindness.name,item.medicine.nausea.name
|foot=1}}
== History ==
{{History|bedrock}}
{{History||1.4.0|snap=beta 1.2.20.1|[[File:Antidote BE1.png|32px]] [[File:Elixir BE1.png|32px]] [[File:Eye Drops BE1.png|32px]] [[File:Tonic BE1.png|32px]] Added medicines.}}
{{History|education}}
{{History||1.0.27|[[File:Antidote BE1.png|32px]] [[File:Elixir BE1.png|32px]] [[File:Eye Drops BE1.png|32px]] [[File:Tonic BE1.png|32px]] Added medicines.}}
{{History|foot}}
== Issues ==
{{issue list|Cures|Medicine}}
== See also ==
* [[Potion]]
* [[Splash Potion]]
* [[Lingering Potion]]
{{Items}}
{{Education Edition}}
[[Category:Non-renewable resources]]
[[Category:Education Edition items]]
[[de:Medizin]]
[[it:Medicinale]]
[[ja:治療薬]]
[[lzh:藥]]
[[pl:Leki]]
[[pt:Remédio]]
[[zh:药物]]</li><li>[[Magenta Dye|Magenta Dye]]<br/>{{Item
| image = Magenta Dye.png
| renewable = Yes
| stackable = Yes (64)
}}
'''Magenta dye''' is a [[Dye#Quasi-Primary|quasi-primary color dye]].
== Obtaining ==
=== Crafting ===
{{Crafting
|head=1
|showdescription=1
|showname=0
|Allium
|Output=Magenta Dye
|type=Material
}}
{{Crafting
|Lilac
|Output=Magenta Dye,2
|type=Material
}}
{{Crafting
|Purple Dye
|Pink Dye
|Output=Magenta Dye,2
|type=Material
}}
{{Crafting
|Blue Dye
|Red Dye
|Pink Dye
|Output=Magenta Dye,3
|type=Material
}}
{{Crafting
|Lapis Lazuli
|Red Dye
|Pink Dye
|Output=Magenta Dye,3
|type=Material
|description={{only|bedrock|education}}
}}
{{Crafting
|Blue Dye
|Red Dye
|Red Dye
|White Dye
|Output=Magenta Dye,4
|type=Material
}}
{{Crafting
|Lapis Lazuli;Lapis Lazuli;Blue Dye
|Red Dye;Red Dye;Red Dye
|Red Dye;Red Dye;Red Dye
|Bone Meal;White Dye;Bone Meal
|Output=Magenta Dye,4
|type=Material
|description={{only|bedrock|education}}
|foot=1
}}
=== Trading ===
[[Wandering trader]]s sell 3 magenta dye for an [[emerald]].
== Usage ==
{{dye usage}}
=== Crafting ingredient ===
{{crafting usage|ignore=Banner|continue=1}}
{{banner crafting usage}}
=== Loom ingredient ===
{{Banner loom usage|Magenta Dye}}
=== Trading ===
Expert-level shepherd villagers have a {{frac|1|6}} chance to buy 12 magenta dye for an emerald.
== Data values ==
=== ID ===
{{edition|java}}:
{{ID table
|edition=java
|showforms=y
|generatetranslationkeys=y
|displayname=Magenta Dye
|spritetype=item
|nameid=magenta_dye
|form=item
|foot=1}}
{{edition|bedrock}}:
{{ID table
|edition=bedrock
|showaliasids=y
|shownumericids=y
|showforms=y
|notshowbeitemforms=y
|generatetranslationkeys=y
|displayname=Magenta Dye
|spritetype=item
|nameid=magenta_dye
|aliasid=dye / 13
|id=408
|form=item
|translationkey=item.dye.magenta.name
|foot=1}}
== Video ==
{{yt|IkaIFDQJNUU}}
== History ==
{{History|java beta}}
{{History||1.2|[[File:Magenta Dye JE1 BE1.png|32px]] Added magenta dye.}}
{{History|java}}
{{History||1.4.2|snap=12w34a|Added the ability to [[Armor#Dyeing|dye]] leather [[armor]] and [[wolf]] collars.}}
{{History||1.4.6|snap=12w49a|Magenta dye can now be [[crafting|crafted]] with [[gunpowder]] to create a [[firework star]].}}
{{History||1.6.1|snap=13w19a|[[Stained clay]] can now be crafted.}}
{{history||1.7.2|snap=13w36a|With the addition of new [[flower]]s, many secondary and tertiary dyes are now primary [[dye]]s.}}
{{History||1.7.2|snap=13w41a|[[Stained glass]] can now be crafted.}}
{{History||1.8|snap=14w30a|Added [[banner]]s, which can be dyed.}}
{{History||1.11|snap=16w39a|Added [[shulker box]]es, which can be dyed.}}
{{History||1.12|snap=17w15a|Added ability to dye [[bed]]s.}}
{{History||1.13|snap=17w47a|The different data values for the <code>dye</code> ID have now been split up into their own IDs.
|Prior to [[1.13/Flattening|''The Flattening'']], this [[item]]'s numeral ID was 351.}}
{{History||1.14|snap=18w43a|Magenta dye is now crafted using [[blue dye]] and [[white dye]], instead of [[lapis lazuli]] and [[bone meal]].
|[[File:Magenta Dye JE2 BE2.png|32px]] The texture of magenta dye has now been changed.}}
{{History|||snap=18w44a|Magenta dye can now change the text color on [[sign]]s to magenta.}}
{{History|||snap=19w05a|Added the [[wandering trader]], which sells magenta dye.}}
{{History|||snap=19w11a|Magenta dye can now be [[trading|bought]] by shepherd villagers.}}
{{History||1.17|snap=20w45a|Magenta dye can now be used to craft [[magenta candle]]s.}}
{{History|||snap=21w19a|Magenta dye can no longer be used to craft magenta candles.}}
{{History|||snap=Pre-release 1|Magenta dye can now once again be used to craft magenta candles.}}
{{History||1.20<br>(Experimental)|link=1.19.3|snap=22w42a|Magenta dye can now change the text color on [[hanging sign]]s to magenta.}}
{{History|pocket alpha}}
{{History||v0.3.0|[[File:Magenta Dye JE1 BE1.png|32px]] Added magenta dye. It is currently unobtainable and serves no purpose.}}
{{History||v0.4.0|Magenta dye is now craftable with one [[lapis lazuli]], two [[rose red]]s, and one [[bone meal]].
|Magenta dye can now be used to craft magenta wool.}}
{{History||v0.6.0|Magenta dye can now be used to dye [[sheep]].}}
{{History||v0.8.0|snap=build 1|Magenta dye can now additionally be crafted with one [[purple dye]] and one [[pink dye]], or with one [[lapis lazuli]], one [[rose red]], and one pink dye.}}
{{History||v0.9.0|snap=build 11|Magenta dye can now be used to craft colored [[terracotta]].}}
{{History||v0.11.0|snap=build 1|Magenta dye can now be used to dye tamed [[wolf]] collars.}}
{{History||v0.14.0|snap=build 1|Magenta dye can now be used to dye [[water]] in [[cauldron]]s.}}
{{History|pocket}}
{{History||1.0.0|snap=alpha 0.17.0.1|Magenta dye can now be used to dye [[shulker]]s.}}
{{History||1.1.0|snap=alpha 1.1.0.0|Magenta dye can now be used to craft [[concrete powder]], colored [[bed]]s and dyed [[shulker box]]es.}}
{{History|bedrock}}
{{History||1.2.0|snap=beta 1.2.0.2|Magenta dye can now be used to craft [[firework star]]s, [[stained glass]] and patterns on [[banner]]s.}}
{{History||1.4.0|snap=beta 1.2.20.1|Magenta dye can now be used to craft [[balloon]]s and [[glow stick]]s.}}
{{History||1.8.0|snap=beta 1.8.0.8|Magenta dye can now be used to dye tamed [[cat]] collars.}}
{{History||1.10.0|snap=beta 1.10.0.3|Magenta dye is now [[trading|sold]] by [[wandering trader]]s.
|Magenta dye can now be used to dye white [[carpet]]s and regular [[glass pane]]s.
|[[File:Magenta Dye JE2 BE2.png|32px]] The texture of magenta dye has now been changed.}}
{{History||1.11.0|snap=beta 1.11.0.4|Magenta dye can now be [[trading|sold]] to shepherd [[villager]]s.}}
{{History||1.16.100|snap=beta 1.16.100.56|The ID of magenta dye has been changed from <code>dye/13</code> to <code>magenta_dye</code>.}}
{{History|console}}
{{History||xbox=TU1|xbone=CU1|ps=1.00|switch=1.0.1|wiiu=Patch 1|[[File:Magenta Dye JE1 BE1.png|32px]] Added magenta dye.}}
{{History|PS4}}
{{History||1.90|[[File:Magenta Dye JE2 BE2.png|32px]] The texture of magenta dye has now been changed.}}
{{History|new 3ds}}
{{History||0.1.0|[[File:Magenta Dye JE1 BE1.png|32px]] Added magenta dye.}}
{{History|foot}}
== Issues ==
{{issue list}}
== References ==
{{reflist}}
{{Items}}
[[Category:Dyes]]
[[cs:Purpurové barvivo]]
[[de:Magenta Farbstoff]]
[[es:Tinte magenta]]
[[fr:Teinture magenta]]
[[hu:Bíborvörös festék]]
[[ja:赤紫色の染料]]
[[ko:자홍색 염료]]
[[nl:Magenta kleurstof]]
[[pl:Karmazynowy barwnik]]
[[pt:Corante magenta]]
[[ru:Сиреневый краситель]]
[[zh:品红色染料]]
[[Category:Renewable resources]]</li></ul> | 13w36a | The player can now achieve the Beaconator achievement by placing a beacon on a level-4 pyramid of specific mineral blocks. | |||
1.8{{Extension DPL}}<ul><li>[[Yellow Dye|Yellow Dye]]<br/>{{Item
| title = Yellow Dye
| renewable = Yes
| stackable = Yes (64)
}}
'''Yellow dye''' is a [[Dye#Primary|primary dye]] created by placing a [[dandelion]] or [[sunflower]] into a [[crafting]] grid.
== Obtaining ==
=== Crafting ===
{{Crafting
|Dandelion;Sunflower
|Output=Yellow Dye;Yellow Dye,2
|type=Material
}}
=== Chest loot ===
{{LootChestItem|yellow-dye}}
=== Trading ===
[[Wandering trader]]s sell 3 yellow dye for an [[emerald]].
== Usage ==
{{dye usage}}
=== Crafting ingredient ===
{{crafting usage|ignore=Banner|continue=1}}
{{banner crafting usage}}
=== Loom ingredient ===
{{Banner loom usage|Yellow Dye}}
=== Trading ===
Expert-level shepherd villagers have a {{frac|1|6}} chance to buy 12 yellow dye for an emerald.
== Data values ==
=== ID ===
{{edition|java}}:
{{ID table
|edition=java
|showforms=y
|generatetranslationkeys=y
|displayname=Yellow Dye
|spritetype=item
|nameid=yellow_dye
|form=item
|foot=1}}
{{edition|bedrock}}:
{{ID table
|edition=bedrock
|showaliasids=y
|shownumericids=y
|showforms=y
|notshowbeitemforms=y
|generatetranslationkeys=y
|displayname=Yellow Dye
|spritetype=item
|nameid=yellow_dye
|aliasid=dye / 11
|id=406
|form=item
|translationkey=item.dye.yellow.name
|foot=1}}
== Video ==
{{yt|nOQUDjEHGRg}}
== History ==
{{History|java beta}}
{{History||1.2|[[File:Yellow Dye JE1 BE1.png|32px]] Added dandelion yellow.}}
{{History||1.6.6|Dandelions can now be generated using [[Bone Meal|bone meal]], making dandelion yellow [[renewable resource|renewable]].}}
{{History|java}}
{{History||1.4.2|snap=12w34a|Added the ability to [[Armor#Dyeing|dye]] leather [[armor]] and [[wolf]] collars.}}
{{History||1.4.6|snap=12w49a|Dandelion yellow can be crafted with [[gunpowder]] to create a [[firework star]].}}
{{History||1.6.1|snap=13w19a|[[Stained clay]] can now be crafted.}}
{{History||1.7.2|snap=13w36a|Can now be crafted using sunflower.}}
{{History|||snap=13w37a|Each dandelion now yields only 1 dandelion yellow, instead of 2.}}
{{History|||snap=13w41a|[[Stained glass]] can now be [[crafting|crafted]].}}
{{History||1.8|snap=14w30a|Added [[banner]]s, which can be [[dye]]d.}}
{{History||1.11|snap=16w39a|Added the ability to dye [[shulker box]]es.}}
{{History||1.12|snap=17w06a|Yellow dye can now be used to craft yellow [[concrete powder]].}}
{{History|||snap=17w15a|Added the ability to dye [[bed]]s.}}
{{History||1.13|snap=17w47a|The different data values for the <code>dye</code> ID have now been split up into their own IDs.
|Prior to [[1.13/Flattening|''The Flattening'']], this [[item]]'s numeral ID was 351.}}
{{History||1.14|snap=18w43a|"Dandelion Yellow" has now been renamed to "Yellow Dye".
|[[File:Yellow Dye JE2 BE2.png|32px]] The texture of yellow dye has now been changed.}}
{{History|||snap=18w44a|Yellow dye can now change the text color on [[sign]]s to yellow.}}
{{History|||snap=18w49a|Yellow dye can now be found in [[chest]]s in [[village]] mason houses.}}
{{History|||snap=19w05a|Added the [[wandering trader]], which sells yellow dye.}}
{{History|||snap=19w11a|Yellow dye can now be [[trading|bought]] by shepherd villagers.}}
{{History||1.17|snap=20w45a|Yellow dye can now be used to craft [[yellow candle]]s.}}
{{History|||snap=21w19a|Yellow dye can no longer be used to craft yellow candles.}}
{{History|||snap=Pre-release 1|Yellow dye can once again used to craft yellow candles.}}
{{History||1.20<br>(Experimental)|link=1.19.3|snap=22w42a|Yellow dye can now change the text color on [[hanging sign]]s to yellow.}}
{{History||1.20|snap=23w12a|Yellow dye can now be found in [[suspicious gravel]] and [[suspicious sand]] in [[trail ruins]].}}
{{History|||snap=23w16a|Yellow dye no longer generates in [[suspicious sand]] in [[trail ruins]].|Due to the split of the archaeological loot tables for suspicious gravel within [[trail ruins]], yellow dye is now common loot.}}
{{History|pocket alpha}}
{{History||v0.3.0|[[File:Yellow Dye JE1 BE1.png|32px]] Added dandelion yellow.}}
{{History||v0.8.0|snap=build 1|Dandelion yellow is now used to craft [[cocoa beans]].}}
{{History||v0.14.0|snap=build 1|Yellow dye can now be used to dye [[water]] in [[cauldron]]s.}}
{{History||v0.16.0|snap=build 1|Dandelion yellow is no longer used to [[crafting|craft]] cocoa beans.}}
{{History|pocket}}
{{History||1.0.0|snap=alpha 0.17.0.1|Yellow dye can now be used to dye [[shulker]]s.}}
{{History||1.1.0|snap=alpha 1.1.0.0|Yellow dye can now be used to dye [[shulker box]]es, [[bed]]s, and craft [[concrete powder]].}}
{{History|bedrock}}
{{History||1.2.0|snap=beta 1.2.0.2|Yellow dye can now be used to craft patterns on [[banner]]s, [[firework star]]s, and [[stained glass]].}}
{{History||1.4.0|snap=beta 1.2.20.1|Yellow dye can now be used to craft [[balloon]]s and [[glow stick]]s.}}
{{History||1.8.0|snap=beta 1.8.0.8|Dandelion yellow can now be used to dye [[cat]] collars.}}
{{History|||snap=beta 1.8.0.10|"Dandelion Yellow" has now been renamed to "Yellow Dye".}}
{{History||1.10.0|snap=beta 1.10.0.3|Yellow dye is now [[trading|sold]] by [[wandering trader]]s.
|[[File:Yellow Dye JE2 BE2.png|32px]] The texture of yellow dye has now been changed.}}
{{History||1.11.0|snap=beta 1.11.0.1|Yellow dye can now be found in [[village]] mason [[chest]]s.}}
{{History|||snap=beta 1.11.0.4|Yellow dye can now be sold to shepherd [[villager]]s.}}
{{History||1.16.100|snap=beta 1.16.100.56|The ID of yellow dye has been changed from <code>dye/11</code> to <code>yellow_dye</code>.}}
{{History|console}}
{{History||xbox=TU1|xbone=CU1|ps=1.00|switch=1.0.1|wiiu=Patch 1|[[File:Yellow Dye JE1 BE1.png|32px]] Added dandelion yellow.}}
{{History|ps4}}
{{History||1.83|"Dandelion Yellow" has now been renamed to "Yellow Dye".}}
{{History||1.90|[[File:Yellow Dye JE2 BE2.png|32px]] The texture of yellow dye has now been changed.}}
{{History|new 3ds}}
{{History||0.1.0|[[File:Yellow Dye JE1 BE1.png|32px]] Added dandelion yellow.}}
{{History|foot}}
== Issues ==
{{issue list}}
== References ==
{{reflist}}
{{Items}}
[[cs:Pampelišková žluť]]
[[de:Gelber Farbstoff]]
[[es:Tinte amarillo]]
[[fr:Teinture jaune]]
[[hu:Pitypangsárga]]
[[ja:黄色の染料]]
[[ko:노란색 염료]]
[[nl:Paardenbloemgeel]]
[[pl:Żółty barwnik]]
[[pt:Corante amarelo]]
[[ru:Жёлтый краситель]]
[[zh:黄色染料]]
[[Category:Items]]
[[Category:Dyes]]
[[Category:Renewable resources]]</li><li>[[Goat Horn|Goat Horn]]<br/>{{redirect|Horn}}
{{Item
| image = Goat Horn JE1 BE1.png
| renewable = Yes
| stackable = No
}}
A '''goat horn''' is an [[item]] dropped by [[goat]]s. It has eight variants, and each plays a unique sound when {{Control|used}} which can be heard by [[Player|players]] in a large radius.
== Obtaining ==
=== Mob loot ===
A horn is dropped when an adult [[goat]] rams a tree or any other hard block that occurs naturally where goats spawn. These include [[stone]], [[coal ore]], [[copper ore]], [[iron ore]], [[emerald ore]], [[log]], or [[packed ice]]. Goats do not ram other solid blocks. {{IN|java}}, these blocks are listed under the {{cd|snaps_goat_horn}} [[tag]], and can be modified by [[data pack]]s.
Up to two horns can be dropped from an adult goat. Regular goats may drop the Ponder, Sing, Seek, and Feel horns, while screaming goats drop the Admire, Call, Yearn, and Dream horns. A specific goat drops only one type of horn; that is, if a goat drops a Sing horn, its other horn is also a Sing horn.
=== Natural generation ===
{{LootChestItem|goat-horn}}
Only the four variants from regular goats can be found here.
== Usage ==
When {{control|used}}, they play a loud sound that can be heard from up to 256 blocks, but are also limited by the server view distance. Each horn variant plays a unique sound. There are eight variants, four of which are exclusive to [[Goat#Spawning|screaming goats]].
There is a cooldown of seven seconds between each use of the horn. All goat horns are affected by this cooldown.
== Sounds ==
=== Generic ===
{{edition|java}}:
{{Sound table
|sound=Goat horn break1.ogg
|sound2=Goat horn break2.ogg
|sound3=Goat horn break3.ogg
|sound4=Goat horn break4.ogg
|subtitle=Goat Horn breaks off
|source=neutral
|description=When a goat's horn breaks off
|id=entity.goat.horn_break
|translationkey=subtitles.entity.goat.horn_break
|volume=0.9
|pitch=1.0
|distance=16
|foot=1}}
{{edition|bedrock}}:
{{Sound table
|type=bedrock
|sound=Goat horn break1.ogg
|sound2=Goat horn break2.ogg
|sound3=Goat horn break3.ogg
|sound4=Goat horn break4.ogg
|description=When a goat's horn breaks off
|source=hostile
|id=mob.goat.horn_break
|volume=1.0
|pitch=1.0
|foot=1}}
=== Playing ===
{{edition|java}}:
{{Sound table
|sound=Goat Horn Call0.ogg
|description="Ponder"
|subtitle=Goat horn plays
|source=Jukebox/Note Blocks
|id=item.goat_horn.sound.0
|translationkey=subtitles.item.goat_horn.play
|volume=16.0
|pitch=1.0
|distance=256}}
{{Sound table
|sound=Goat Horn Call1.ogg
|description="Sing"
|subtitle=Goat horn plays
|source=Jukebox/Note Blocks
|id=item.goat_horn.sound.1
|translationkey=subtitles.item.goat_horn.play
|volume=16.0
|pitch=1.0
|distance=256}}
{{Sound table
|sound=Goat Horn Call2.ogg
|description="Seek"
|subtitle=Goat horn plays
|source=Jukebox/Note Blocks
|id=item.goat_horn.sound.2
|translationkey=subtitles.item.goat_horn.play
|volume=16.0
|pitch=1.0
|distance=256}}
{{Sound table
|sound=Goat Horn Call3.ogg
|description="Feel"
|subtitle=Goat horn plays
|source=Jukebox/Note Blocks
|id=item.goat_horn.sound.3
|translationkey=subtitles.item.goat_horn.play
|volume=16.0
|pitch=1.0
|distance=256}}
{{Sound table
|sound=Goat Horn Call4.ogg
|description="Admire"<ref group=note name=screaming>These are dropped by screaming goats.</ref>
|subtitle=Goat horn plays
|source=Jukebox/Note Blocks
|id=item.goat_horn.sound.4
|translationkey=subtitles.item.goat_horn.play
|volume=16.0
|pitch=1.0
|distance=256}}
{{Sound table
|sound=Goat Horn Call5.ogg
|description="Call"<ref group=note name=screaming/>
|subtitle=Goat horn plays
|source=Jukebox/Note Blocks
|id=item.goat_horn.sound.5
|translationkey=subtitles.item.goat_horn.play
|volume=16.0
|pitch=1.0
|distance=256}}
{{Sound table
|sound=Goat Horn Call6.ogg
|description="Yearn"<ref group=note name=screaming/>
|subtitle=Goat horn plays
|source=Jukebox/Note Blocks
|id=item.goat_horn.sound.6
|translationkey=subtitles.item.goat_horn.play
|volume=16.0
|pitch=1.0
|distance=256}}
{{Sound table
|sound=Goat Horn Call7.ogg
|description="Dream"<ref group=note name=screaming/>
|subtitle=Goat horn plays
|source=Jukebox/Note Blocks
|id=item.goat_horn.sound.7
|translationkey=subtitles.item.goat_horn.play
|volume=16.0
|pitch=1.0
|distance=256
|foot=1}}
{{edition|bedrock}}:
{{Sound table
|type=bedrock
|sound=Goat Horn Call0.ogg
|source=Jukebox/Note Blocks<wbr>{{Until|BE 1.20.40}}<br>Hostile Creatures<wbr>{{Upcoming|BE 1.20.40}}|overridesource=1
|description="Ponder"
|id=horn.call.0
|volume=1.0<wbr><ref group=sound name=nodistance>{{Bug|MCPE-153254}}</ref><wbr>{{Until|BE 1.20.40}}<br>16.0<wbr>{{Upcoming|BE 1.20.40}}
|pitch=1.0}}
{{Sound table
|sound=Goat Horn Call1.ogg
|source=Jukebox/Note Blocks<wbr>{{Until|BE 1.20.40}}<br>Hostile Creatures<wbr>{{Upcoming|BE 1.20.40}}|overridesource=1
|description="Sing"
|id=horn.call.1
|volume=1.0<wbr><ref group=sound name=nodistance/><wbr>{{Until|BE 1.20.40}}<br>16.0<wbr>{{Upcoming|BE 1.20.40}}
|pitch=1.0}}
{{Sound table
|sound=Goat Horn Call2.ogg
|source=Jukebox/Note Blocks<wbr>{{Until|BE 1.20.40}}<br>Hostile Creatures<wbr>{{Upcoming|BE 1.20.40}}|overridesource=1
|description="Seek"
|id=horn.call.2
|volume=1.0<wbr><ref group=sound name=nodistance/><wbr>{{Until|BE 1.20.40}}<br>16.0<wbr>{{Upcoming|BE 1.20.40}}
|pitch=1.0}}
{{Sound table
|sound=Goat Horn Call3.ogg
|source=Jukebox/Note Blocks<wbr>{{Until|BE 1.20.40}}<br>Hostile Creatures<wbr>{{Upcoming|BE 1.20.40}}|overridesource=1
|description="Feel"
|id=horn.call.3
|volume=1.0<wbr><ref group=sound name=nodistance/><wbr>{{Until|BE 1.20.40}}<br>16.0<wbr>{{Upcoming|BE 1.20.40}}
|pitch=1.0}}
{{Sound table
|sound=Goat Horn Call4.ogg
|source=Jukebox/Note Blocks<wbr>{{Until|BE 1.20.40}}<br>Hostile Creatures<wbr>{{Upcoming|BE 1.20.40}}|overridesource=1
|description="Admire"<ref group=note name=screaming/>
|id=horn.call.4
|volume=1.0<wbr><ref group=sound name=nodistance/><wbr>{{Until|BE 1.20.40}}<br>16.0<wbr>{{Upcoming|BE 1.20.40}}
|pitch=1.0}}
{{Sound table
|sound=Goat Horn Call5.ogg
|source=Jukebox/Note Blocks<wbr>{{Until|BE 1.20.40}}<br>Hostile Creatures<wbr>{{Upcoming|BE 1.20.40}}|overridesource=1
|description="Call"<ref group=note name=screaming/>
|id=horn.call.5
|volume=1.0<wbr><ref group=sound name=nodistance/><wbr>{{Until|BE 1.20.40}}<br>16.0<wbr>{{Upcoming|BE 1.20.40}}
|pitch=1.0}}
{{Sound table
|sound=Goat Horn Call6.ogg
|source=Jukebox/Note Blocks<wbr>{{Until|BE 1.20.40}}<br>Hostile Creatures<wbr>{{Upcoming|BE 1.20.40}}|overridesource=1
|description="Yearn"<ref group=note name=screaming/>
|id=horn.call.6
|volume=1.0<wbr><ref group=sound name=nodistance/><wbr>{{Until|BE 1.20.40}}<br>16.0<wbr>{{Upcoming|BE 1.20.40}}
|pitch=1.0}}
{{Sound table
|sound=Goat Horn Call7.ogg
|source=Jukebox/Note Blocks<wbr>{{Until|BE 1.20.40}}<br>Hostile Creatures<wbr>{{Upcoming|BE 1.20.40}}|overridesource=1
|description="Dream"<ref group=note name=screaming/>
|id=horn.call.7
|volume=1.0<wbr><ref group=sound name=nodistance/><wbr>{{Until|BE 1.20.40}}<br>16.0<wbr>{{Upcoming|BE 1.20.40}}
|pitch=1.0
|foot=1}}
== Data values ==
=== ID ===
{{el|je}}:
{{ID table
|edition=java
|showforms=y
|generatetranslationkeys=y
|displayname=Goat Horn
|spritetype=item
|nameid=goat_horn
|form=item
|foot=1}}
{{el|be}}:
{{ID table
|edition=bedrock
|shownumericids=y
|showforms=y
|notshowbeitemforms=y
|generatetranslationkeys=y
|displayname=Goat Horn
|spritetype=item
|nameid=goat_horn
|form=item
|id=624
|translationkey=item.goat_horn.name, item.minecraft.goat_horn.sound.0, item.minecraft.goat_horn.sound.1, item.minecraft.goat_horn.sound.2, item.minecraft.goat_horn.sound.3, item.minecraft.goat_horn.sound.4, item.minecraft.goat_horn.sound.5, item.minecraft.goat_horn.sound.6, item.minecraft.goat_horn.sound.7
|foot=1}}
=== Item data ===
==== ''Java Edition'' ====
<div class="treeview">
*{{nbt|compound|tag}}: The item's '''tag''' tag.
{{:Player.dat_format/Goat Horn}}
</div>
Goat horns use the "instrument" tag to control which sound can be played when using a goat horn. The values of the tag (to be prefixed with <code>minecraft:</code>) are:
{| class="wikitable sortable" style="text-align: center;"
!Sound type !![[Resource location|Identifier]]
|-
|Ponder||<code>ponder_goat_horn</code>
|-
|Sing ||<code>sing_goat_horn</code>
|-
|Seek ||<code>seek_goat_horn</code>
|-
|Feel ||<code>feel_goat_horn</code>
|-
|Admire||<code>admire_goat_horn</code>
|-
|Call ||<code>call_goat_horn</code>
|-
|Yearn||<code>yearn_goat_horn</code>
|-
|Dream||<code>dream_goat_horn</code>
|}
== History ==
{{History||October 16, 2021|link=https://www.twitch.tv/videos/1178420217?t=02h46m05s|Ulraf, a game developer on ''Minecraft'', states that goat horns are not included in [[Java Edition 1.18]].}}
{{History||November 17, 2021|link=https://www.minecraft.net/en-us/article/caves---cliffs-update-part-ii-coming|Goat horns are initially announced to be added after "The Wild Update".}}
{{History|java}}
{{History||1.19|snap=22w17a|[[File:Goat Horn JE1 BE1.png|32px]]Added goat horns.}}
{{History||1.19|snap=Pre-release 2|Goat Horns now snap when a goat rams into [[copper ore]].<ref>{{bug|MC-250941|||Fixed }}</ref>}}
{{History|Bedrock}}
{{History||Caves & Cliffs<br>(experimental)|link=Caves & Cliffs|snap=beta 1.16.200.52|[[File:Goat Horn JE1 BE1.png|32px]]Added goat horns behind the "Caves and Cliffs" experimental toggle.}}
{{History|||snap=beta 1.16.210.51|Goats now drop 2 horns each.}}
{{History|||snap=beta 1.17.20.20|Baby goats no longer drop horns.}}
{{History||1.18.0|snap=beta 1.18.0.20|Goat horns are now available outside of experimental gameplay.}}
{{History|||snap=beta 1.18.0.22|Goat horns have been moved behind the "Vanilla Experiments" [[experimental gameplay|experiments]] toggle.}}
{{History||Vanilla Experiments (experimental)|link=Experimental Gameplay|snap=beta 1.18.20.23|Goat horns now have a cooldown after being used.}}
{{History|||snap=beta 1.18.20.25|Goat horns now have an animation when being used in first person.
|Goats now make a sound when they drop goat horns.}}
{{History|||snap=beta 1.18.30.26|Goat horns are now used to craft [[copper horn]]s.|Changed goat horn sounds.}}
{{History||Vanilla Experiments (experimental)|link=Experimental Gameplay|snap=beta 1.19.0.24|Goat horns are no longer used to craft copper horns, as copper horns have been removed.|Changed goat horn sounds.{{verify}}|Removed "Fly" and "Dream" goat horns.}}
{{History||1.19.0|snap=beta 1.19.0.28|Goat horns are now available without enabling experimental gameplay.}}
{{History||1.19.10|snap=beta 1.19.10.22|Renamed the "Resist" goat horn to the "Dream" goat horn to match ''Java Edition''.|The "Feel" goat horn now plays the same sound as ''Java Edition''.}}
{{History|upcoming bedrock}}
{{History||1.20.40|snap=beta 1.20.40.22|Goat horns now have a range of 256 blocks.<ref name=nodistance>{{Bug|MCPE-153254}}</ref>}}
{{History|foot}}
== Issues ==
{{issue list}}
== Trivia ==
* The "seek" horn sounds similar to the "ominous horn" that announces a [[raid]].
== Gallery ==
<gallery>
File:Screenshot (17).png|Steve using a goat horn.
File:Alex uses a goat horn.png|Alex using a goat horn.
File:Screenshot (18).png|The goat horn animation in first person.
File:Screenshot (19).png|The goat horn animation with "Left Hand" option enabled.
</gallery>
== Notes ==
<references group="note" />
== References ==
{{reflist}}
== External Links ==
* [https://www.minecraft.net/en-us/article/taking-inventory--goat-horn Taking Inventory: Goat Horn] - Minecraft.net on February 16, 2023
{{Items}}
[[Category:Renewable resources]]
[[Category:Tools]]
[[de:Ziegenhorn]]
[[es:Cuerno de cabra]]
[[fr:Corne de chèvre]]
[[it:Corno di capra]]
[[ja:ヤギの角笛]]
[[pl:Kozi róg]]
[[pt:Chifre de cabra]]
[[ru:Козий рог]]
[[zh:山羊角]]</li></ul> | 14w29a | Beacons now display the cracking animation when being broken. | |||
| August 5, 2014 | Dinnerbone tweets a screenshot containing a colored beacon beam. The color appears to change when the beam passes through stained glass. | ||||
| 14w32a | The light of beacons now changes as it goes through stained glass. | ||||
| August 7, 2014 | Dinnerbone tweets that the beacon beam can now pass through blocks that block light slightly. | ||||
| 14w32b | Beacon beams now show if they are going through a block that doesn't completely block light rather than partially block light. This allows beacon beams to go through water and lava. | ||||
| Beacons in the Nether and the End now check for blocks and render the beam only up to the world height (Y=127). | |||||
1.8.2{{Extension DPL}}<ul><li>[[:Category:Education Edition items|Category:Education Edition items]]<br/>[[Category:Education Edition]]
[[Category:Items]]</li><li>[[Eye of Ender|Eye of Ender]]<br/>{{redirect|Ender Eye|the boss|Ender Dragon|item that teleports the player to where it lands|Ender Pearl}}
{{ItemEntity
|image=Eye of Ender.png
|stackable=Yes (64)
|renewable=Yes
|size=Height: 0.25 Blocks<br>Width: 0.25 Blocks
|networkid='''[[JE]]''': 72
}}
An '''eye of ender''' is a craftable item used to locate [[stronghold]]s and activate the [[end portal]]s within them.
== Obtaining ==
=== Crafting ===
{{Crafting
|Blaze Powder
|Ender Pearl
|Output=Eye of Ender
|type=Miscellaneous
}}
== Usage ==
=== Locating strongholds ===
[[File:Eye of Ender (break).gif|thumb|right|An animation of an eye of ender shattering.]]
To locate [[stronghold]]s (and the [[end portal]]s they house):
* Pressing {{control|use}} while holding an eye of ender causes it to fly approximately 12 blocks in the direction of the nearest stronghold, traveling through any blocks necessary, and leave a trail of purple particles, the same particle effect used for [[endermen]] and [[ender chests]].
** The eye leads to the [[chunk]] where a spiral staircase, the first room generated in the stronghold, is located.
** The center of this entrance staircase is always exactly at the chunk coordinates 4, ~, 4, although the eye of ender leads to chunk coordinates 0, ~, 0 (the northwest corner of the chunk).
* While over 12 blocks away from the northwest corner of the staircase chunk, the eye will travel upward to offer an easily-visible indication of the horizontal direction the player must travel.
* When closer than 12 blocks to the northwest corner of the staircase chunk, the eye will travel downward, to indicate the player is above a stronghold and must mine downward.
* After two or three seconds of travel, the eye floats in the air briefly, then either falls (becoming collectable again) or shatters in mid-air. The eye has a 20% chance of shattering (80% chance of surviving) per throw, therefore throwing it three times has approximately 50% overall chance to shatter the eye (0.8<sup>3</sup>=51.2%).
* The eye of ender's flying function works only in the [[Overworld]]. It does nothing in [[the Nether]], [[the End]], [[custom dimension]]s{{verify|type=current}}, or in worlds with no strongholds.
Note that the eyes may point to an incorrect location if the target chunks were generated with a different biomes map in an older version or through different generation settings.<ref>See also {{bug|MC-135996}}</ref>
=== Activating end portals ===
[[File:Active End Portal.png|thumb|right|An end portal activated with eyes of ender.]]
Once an end portal is found, the eyes of ender are required to activate it. End portals require a total of 12 eyes of ender in order to activate, though each individual frame-block has a 10% chance of containing an eye of ender when generated. Eyes can be placed in empty [[End portal frame]]s by pressing {{control|use}} on them until the entire ring of 12 is filled, thereby activating the portal. Due to the fact that there is a 10% chance of each individual end portal frame having an eye in it, there is a one out of one trillion chance of every frame having an eye in it thereby activating the portal even if the player doesn't have any eyes of ender.
{| class="wikitable sortable mw-collapsible"
|+End Portal Pre-Filled Eyes
!Eyes
!0
!1
!2
!3
!4
!5-12
|-
|Exactly
|28%
|38%
|23%
|9%
|2%
|<1%
|-
|Or More
|100%
|72%
|34%
|11%
|3%
|<1%
|}
=== Crafting ingredient ===
{{crafting usage}}
== Sounds ==
{{Edition|Java}}:<br>
Eyes of ender use the Friendly Creatures sound category for entity-dependent sound events.
{{Sound table
|sound=Ender Eye death1.ogg
|sound2=Ender Eye death2.ogg
|subtitle=Eye of Ender falls <ref group=sound name=LousyEvents>{{Bug|MC-98316||Wrong subtitles caused by missing distinction}}</ref>
|source=neutral
|description=When an eye of ender drops or breaks
|id=entity.ender_eye.death|idnote=<ref group=sound name=LousyEvents/>
|translationkey=subtitles.entity.ender_eye.death|translationkeynote=<ref group=sound name=LousyEvents/>
|volume=1.3
|pitch=1.0
|distance=16}}
{{Sound table
|sound=Ender Eye launch1.ogg
|sound2=Ender Eye launch2.ogg
|subtitle=Eye of Ender shoots
|source=neutral
|description=When an eye of ender is thrown
|id=entity.ender_eye.launch
|translationkey=subtitles.entity.ender_eye.launch
|volume=0.5
|pitch={{frac|1|3}}-0.5
|distance=16}}
{{Sound table
|sound=End portal eye place1.ogg
|sound2=End portal eye place2.ogg
|sound3=End portal eye place3.ogg
|subtitle=Eye of Ender attaches
|source=block
|description=When an eye of ender is placed in an end portal frame
|id=block.end_portal_frame.fill
|translationkey=subtitles.block.end_portal_frame.fill
|volume=1.0
|pitch=1.0
|distance=16
|foot=1}}
{{Edition|Bedrock}}:
{{Sound table
|type=bedrock
|sound=Item Frame break1.ogg
|sound2=Item Frame break2.ogg
|sound3=Item Frame break3.ogg
|source=block
|description=When an eye of ender breaks <ref group=sound>{{Bug|MCPE-115646}}</ref>
|id=block.itemframe.break}}
{{Sound table
|sound=Bow shoot.ogg
|source=player
|description=When an eye of ender is thrown
|id=random.bow
|volume=0.5
|pitch=0.33-0.5}}
{{Sound table
|sound=End portal eye place1.ogg
|sound2=End portal eye place2.ogg
|sound3=End portal eye place3.ogg
|source=block
|description=When an eye of ender is placed in an end portal frame
|id=block.end_portal_frame.fill
|volume=0.3
|pitch=0.9/1.0/1.1
|foot=1}}
==Data values==
===ID===
{{edition|java}}:
{{ID table
|edition=java
|firstcolumnname=Item
|showforms=y
|generatetranslationkeys=y
|displayname=Eye of Ender
|spritetype=item
|nameid=ender_eye
|form=item
|foot=1}}
{{ID table
|edition=java
|firstcolumnname=Entity
|generatetranslationkeys=y
|displayname=Eye of Ender
|spritetype=entity
|nameid=eye_of_ender
|foot=1}}
{{edition|bedrock}}:
{{ID table
|edition=bedrock
|firstcolumnname=Item
|shownumericids=y
|showforms=y
|notshowbeitemforms=y
|generatetranslationkeys=y
|displayname=Eye of Ender
|spritetype=item
|nameid=ender_eye
|id=433
|form=item
|foot=1}}
{{ID table
|edition=bedrock
|firstcolumnname=Entity
|shownumericids=y
|generatetranslationkeys=y
|displayname=Eye of Ender
|spritetype=entity
|nameid=eye_of_ender_signal
|id=70
|foot=1}}
===Entity data===
The purple particles left by eyes of ender have entity data that define various properties of the entity.
{{el|java}}:
{{main|Entity format}}
{{/ED}}
{{el|bedrock}}:
:See [[Bedrock Edition level format/Entity format]].
==Advancements==
{{load advancements|Eye Spy}}
==Video ==
{{Video note|This video does not mention that eyes of ender can be used to craft [[ender chest]]s or [[end crystal]]s.}}
<div style="text-align:center">{{yt|E0AhoxYLomc}}</div>
==History==
{{History|java}}
{{History||1.0.0|snap=Beta 1.9 Prerelease 3|[[File:Eye of Ender JE1 BE1.png|32px]] Added eyes of ender.
|Eyes of ender can be used on a [[end portal frame|portal block]] to repair them, but repairing them does nothing.}}
{{History|||snap=Beta 1.9 Prerelease 4|Each eye can now be placed in a [[end portal frame|portal block]] or used to hone in on a [[stronghold]]. [[Jens Bergensten|Jeb]] demonstrated the new uses for an eye in his livestream.<ref>http://www.twitch.tv/jebox/b/297000418</ref> An [[end portal]] within a stronghold could be seen in the stream with two eyes inserted into blocks.
|In older worlds with chunks generated before [[Java Edition Beta 1.9 Prerelease 3|Beta 1.9 Prerelease 3]], the eyes may mislead the [[player]] to a place where there isn't a [[stronghold]] at all. This happens because the eyes lead to where a stronghold should be based on the world seed in the current version, but before Beta 1.9 Prerelease 3 strongholds generated differently based on the seed. Therefore, if the player saved the coordinates the eye traveled to in an old world and generated a new world with the same seed, the player could travel to those same coordinates and find a stronghold.}}
{{History|||snap=Beta 1.9 Prerelease 6|Eyes of ender no longer render like a tool in third person.}}
{{History|||snap=RC1|The throwing sound of eyes of ender has been changed.}}
{{History||1.3.1|snap=12w21a|Eyes of ender can now be used to craft [[ender chest]]s.
|Priest [[villager]]s would [[trading|buy]] 2–3 eyes of ender for one [[emerald]].}}
{{History|||snap=12w22a|Priest villagers no longer buy eyes of ender, instead selling them for 7–10 emeralds.}}
{{History||1.6.4|snap=1.6.3-pre|Eyes of ender now lead to [[stronghold]]s based on the structure data saved in the world file instead of calculating their approximate location via the [[seed (level generation)|world seed]]. Therefore, strongholds generated in old versions can still be found even if the distribution of strongholds is changed.}}
{{History||1.7.2|snap=13w41a|Eyes of Ender now lead to the entrance of a stronghold instead of the portal room.}}
{{History||1.8|snap=14w02a|With changes that have been made to villagers and the [[trading]] system, cleric villagers now sell eyes of ender for 7–11 [[emerald]]s, as one of their tier III trades.}}
{{History||1.9|snap=15w41a|Eyes of ender are no longer [[trading|sold]] by cleric [[villager]]s.}}
{{History|||snap=15w44b|An eye of ender is now used to craft an [[end crystal]].}}
{{History|||snap=pre3|Eyes of ender now point to the 125 new strongholds.<ref>{{bug|MC-91173}} resolved as "Fixed"</ref>}}
{{History||1.11|snap=16w32a|The [[entity]] ID has been changed from <code>EyeOfEnderSignal</code> to <code>eye_of_ender_signal</code>.}}
{{History||1.12|snap=17w17a|A new ''pop'' [[sound]] has been added when a thrown eye of ender bursts.}}
{{History||1.13|snap=17w47a|Prior to [[1.13/Flattening|''The Flattening'']], this [[item]]'s numeral ID was 381.}}
{{History|||snap=pre5|The [[entity]] ID has been changed to <code>eye_of_ender</code>.}}
{{History||1.14|snap=18w43a|[[File:Eye of Ender JE2 BE2.png|32px]] The texture of eyes of ender has been changed.}}
{{History||1.19|snap=22w11a|Eyes of Ender now lead to the corner of the chunk (0, ~, 0) instead of the center (8-9, ~, 8-9).<ref>{{bug|MC-253394}}</ref>}}
{{History|pocket}}
{{History||1.0.0|snap=alpha 0.17.0.1|[[File:Eye of Ender JE1 BE1.png|32px]] Added eyes of ender.}}
{{History|bedrock}}
{{History||1.10.0|snap=beta 1.10.0.3|[[File:Eye of Ender JE2 BE2.png|32px]] The texture of eyes of ender has been changed.}}
{{History||1.16.0|snap=beta 1.15.0.51|The [[particles]] of eyes of ender have been changed to match {{el|je}}.}}
{{History|console}}
{{History||xbox=TU7|xbone=CU1|ps=1.0|wiiu=Patch 1|[[File:Eye of Ender JE1 BE1.png|32px]] Added eyes of ender.}}
{{History||xbox=none|xbone=none|ps=1.90|wiiu=none|switch=none|[[File:Eye of Ender JE2 BE2.png|32px]] The texture of eyes of ender has been changed.}}
{{History|new 3ds}}
{{History||1.7.10|[[File:Eye of Ender JE1 BE1.png|32px]] Added eyes of ender.}}
{{History|foot}}
=== Historical images ===
<gallery>
File:Held_Eye_of_Ender.png|The eye of ender used to appear large in third-person view.
</gallery>
==Issues==
{{issue list}}
==Trivia ==
*When thrown in third-person view, the eyes of ender fly out from the player's feet instead of their hand.
*Before [[Java Edition 1.9]], eyes of ender can be purchased from cleric villagers, which means players can find a [[stronghold]] and go to [[the End]] without accessing [[the Nether]] at all.
*{{IN|bedrock}} if the player travels beyond a certain radius (roughly 740,000 blocks), eyes of ender always point to a stronghold near spawn, even though strongholds continue to generate past this limit. If one travels to this limit, they can see eyes of ender suddenly switching direction. A similar phenomenon occurs with the {{cmd|locate}} command.
==Gallery==
===Screenshots===
<gallery>
Stronghold Portal Room.png|An end portal frame containing a few eyes of ender.
EnderChestexample.png|An [[ender chest]] depicting an eye of ender on the front.
</gallery>
===In other media===
<gallery>
File:Eye of Ender JINX.jpg|Official T-shirt artwork "Eye of Ender" sold by JINX.
File:Happy Halloween Eye.jpg|A Halloween T-Shirt design featuring an eye of ender.
</gallery>
==External links==
*[http://www.strongholdfinder.com/ A super-easy stronghold triangulation tool]
*[http://jsfiddle.net/42EDX/40/ JSFiddle Eye of Ender triangulator - can guess the location of other 2 strongholds in the first ring]
*[https://ens-gijs.github.io/minecraft-stronghold-locator/ Minecraft Stronghold Locator Eye of Ender throw plotting visualizer - zoomable to show all possible stronghold rings]
*[https://github.com/winny-/stronghold Python Eye of Ender throw plotting tool]
*[http://www.purplefrog.com/~thoth/MinecraftStronghold/stronghold.html HTML Eye of Ender throw plotting visualizer (not updated after 1.9 stronghold placement changes)]
*[http://chunkbase.com/apps/stronghold-finder Chunk Base Stronghold Finder (seed-based)]
*[https://github.com/toolbox4minecraft/amidst/releases Amidst - File-based world visualizer]
*[http://minecraft.tournier.org/StrongholdLocator/ Find strongholds by analyzing stronghold.dat file]
== References==
{{reflist}}
{{Items}}
{{entities}}
[[cs:Endové oko]]
[[de:Enderauge]]
[[es:Ojo de ender]]
[[fr:Œil de l'Ender]]
[[hu:Végzet szeme]]
[[ja:エンダーアイ]]
[[ko:엔더의 눈]]
[[nl:Enderoog]]
[[pl:Oko Endera]]
[[pt:Olho de ender]]
[[ru:Око Края]]
[[th:ดวงตาแห่งเอนเดอร์]]
[[uk:Око Краю]]
[[zh:末影之眼]]</li></ul> | pre5 | Bedrock no longer obstructs beacon activation or beams. | |||
| Beacons in the Nether and the End now check and use the full build height (Y=255) rather than the world height (Y=127). | |||||
1.9{{Extension DPL}}<ul><li>[[Ink Sac|Ink Sac]]<br/>{{For|the variant dropped by Glow squids|Glow Ink Sac}}
{{Item
| image = Ink Sac.png
| renewable = Yes
| stackable = Yes (64)
}}
An '''ink sac''' is an [[item]] dropped by a [[squid]] upon death used to create [[black dye]], [[dark prismarine]]{{only|BE|short=1}}, and [[Book and Quill|books and quills]].
== Obtaining ==
=== Mob loot ===
==== Squid ====
{{see also|Tutorials/Squid farming|title1=Squid farming}}
A [[squid]] drops one to three ink sacs upon death. The maximum amount is increased by 1 per level of [[Looting]], for a maximum of 1 to 6 with Looting III.
=== Fishing ===
Ink sacs can be obtained as a "junk" item from [[fishing]]. The [[Luck of the Sea]] [[enchantment]] decreases the chance.
=== Trading ===
[[Wandering trader]]s sometimes sell 3 ink sacs for an [[emerald]] {{in|bedrock}}. Apprentice level [[Trading#Librarian|librarians]] also buy 5 ink sacs for one [[emerald]].
=== Natural generation ===
{{LootChestItem|ink-sac}}
== Usage ==
=== Crafting ingredient ===
{{crafting usage}}
{{IN|bedrock}}, ink sacs can be also used in banner patterns:
{{banner crafting usage}}
=== Loom ingredient ===
{{Banner loom usage|Ink Sac}}
=== Dye ===
{{Dye usage}}
* Each type of [[Prismarine#Dark Prismarine|dark prismarine]] can be crafted using varying amounts of 8 [[Prismarine Shard#prismarine shards|prismarine shards]].
=== Trading ===
Journeyman-level librarian [[villager]]s have a {{frac|2|3}} chance to buy five ink sacs for an [[emerald]]. They always offer the trade {{in|bedrock|lc=}}.
=== Signs ===
Ink sacs can be applied to [[sign]]s or [[hanging sign]]s to revert glowing text back to default.
== Sounds ==
{{edition|java}}:
{{Sound table
|sound=Ink sac1.ogg
|sound2=Ink sac2.ogg
|sound3=Ink sac3.ogg
|subtitle=Ink Sac splotches
|source=block
|description=When an ink sac is used on a sign
|id=item.ink_sac.use
|translationkey=subtitles.item.ink_sac.use
|volume=1.0
|pitch=''varies'' <ref group=sound>Each sound can be 0.85, 0.88, or 0.9</ref>
|distance=16
|foot=1}}
{{edition|bedrock}}:
{{Sound table
|type=bedrock
|sound=Ink sac1.ogg
|sound2=Ink sac2.ogg
|sound3=Ink sac3.ogg
|source=sound
|description=When an ink sac is used on a sign
|id=sign.ink_sac.use
|volume=1.0
|pitch=1.0
|foot=1}}
== Data values ==
=== ID ===
{{edition|java}}:
{{ID table
|edition=java
|showforms=y
|generatetranslationkeys=y
|displayname=Ink Sac
|spritetype=item
|nameid=ink_sac
|form=item
|foot=1}}
{{edition|bedrock}}:
{{ID table
|edition=bedrock
|showaliasids=y
|shownumericids=y
|showforms=y
|notshowbeitemforms=y
|generatetranslationkeys=y
|displayname=Ink Sac
|spritetype=item
|nameid=ink_sac
|aliasid=dye / 0
|id=413
|form=item
|translationkey=item.dye.black.name
|foot=1}}
== Video ==
{{video note|Ink sacs can no longer be used as a dye in Java Edition.}}
<div style="text-align:center">{{yt|ABYCZfawO60}}</div>
== History ==
{{History|java beta}}
{{History||1.2|[[File:Ink Sac JE1 BE1.png|32px]] Added ink sacks, together with all other dyes.}}
{{History||1.2_02|"Ink Sack" has been renamed to "Ink Sac".}}
{{History|java}}
{{History||1.3.1|snap=12w17a|Ink sacs are now used to craft [[book and quill]]s.}}
{{History||1.4.2|snap=12w34a|Added the ability to [[Armor#Dyeing|dye]] leather [[armor]] and [[wolf]] collars.}}
{{History||1.4.6|snap=12w49a|Ink sacs can now be crafted with [[gunpowder]] to create a [[firework star]].}}
{{History||1.6.1|snap=13w19a|[[Stained clay]] can now be [[crafting|crafted]].}}
{{History||1.7.2|snap=13w41a|[[Stained glass]] can now be crafted.}}
{{History||1.8|snap=14w25a|Ink sacs are now used to craft [[dark prismarine]].}}
{{History|||snap=14w30a|Added [[banner]]s, which can be [[dye]]d with ink sacs.}}
{{History||1.11|snap=16w39a|Ink sacs can now be used to dye [[shulker box]]es.}}
{{History||1.12|snap=17w06a|Ink sacs are now used to craft black [[concrete powder]].}}
{{History|||snap=17w15a|Ink sacs can now be used to dye [[bed]]s.}}
{{History||1.13|snap=17w47a|The different data values for the <code>dye</code> ID have been split up into their own IDs.
|Prior to [[1.13/Flattening|''The Flattening'']], this [[item]]'s numeral ID was 351.}}
{{History||1.14|snap=18w43a|Ink sacs can now be used to craft [[black dye]].
|Ink sacs can no longer be used as a [[dye]].
|All of the dye-related functions and crafting recipes of ink sac (except books and quills and dark prismarine) have been transferred to black dye.
|[[File:Ink Sac JE2 BE2.png|32px]] The texture of ink sacs has been changed.}}
{{History|||snap=19w11a|Librarian [[villager]]s now [[trading|buy]] ink sacs.}}
{{History||1.15|snap=Pre-release 1|Ink sacs are no longer used to craft [[dark prismarine]].}}
{{History||1.17|snap=21w03a|Ink sacs can now be used to remove the text's glowing effect of a [[sign]].}}
{{History||1.20<br>(Experimental)|link=1.19.3|snap=22w42a|Ink sacs can now be used to remove the text's glowing effect of a [[hanging sign]].}}
{{History|pocket alpha}}
{{History||v0.3.0|[[File:Ink Sac JE1 BE1.png|32px]] Added ink sacs. They are currently unobtainable and serve no purpose.}}
{{History||v0.8.0|snap=build 1|Ink sacs can now be used to craft [[cocoa beans]].}}
{{History|||snap=build 3|Ink sacs are now available in [[creative]].}}
{{History||v0.9.0|snap=build 1|Ink sacs now generate in [[village]] and [[stronghold]] [[chest]]s.}}
{{History||v0.11.0|snap=build 1|Ink sacs can now be obtained from [[squid]].
|Ink sacs can now be obtained as a junk [[item]] from [[fishing]].}}
{{History||v0.14.0|snap=build 1|Ink sacs now can now be used to dye water in [[cauldron]]s.}}
{{History||v0.16.0|snap=build 1|Ink sacs are no longer used to craft [[cocoa beans]].
|Ink sacs can now be used to craft [[dark prismarine]].}}
{{History|pocket}}
{{History||1.0.0|snap=alpha 0.17.0.1|Ink sacs can now be used to dye [[shulker]]s.}}
{{History||1.1.0|snap=alpha 1.1.0.0|Ink sacs are now used to re-dye [[bed]]s.
|Ink sacs can now be used to dye [[shulker box]]es.}}
{{History|bedrock}}
{{History||1.2.0|snap=beta 1.2.0.2|Ink sacs can now be used to craft [[book and quill]]s.
|Added [[banner]]s, which can be [[dye]]d with ink sacs.
|Ink sacs can now be crafted with [[gunpowder]] to create [[firework star]]s.
|Ink sacs can now be used to craft black [[concrete powder]].
|[[Stained glass]] can now be [[crafting|crafted]].}}
{{History||1.4.0|snap=beta 1.2.20.1|Ink sacs can now be crafted from iron, sulfur, and 4 oxygen in the [[compound creator]]s.
|Ink sacs can now be used to craft [[balloon]]s and [[glow stick]]s.}}
{{History||1.8.0|snap=beta 1.8.0.10|Ink sacs can now be used to craft [[black dye]].}}
{{History||1.10.0|snap=beta 1.10.0.3|Ink sacs can now be bought from [[wandering trader]]s.
|[[File:Ink Sac JE2 BE2.png|32px]] The texture of ink sacs has been changed.}}
{{History||1.11.0|snap=beta 1.11.0.4|Ink sacs can now be [[trading|sold]] to librarian [[villager]]s.}}
{{History||1.16.100|snap=beta 1.16.100.56|The ID of ink sacs has been changed from {{cd|dye/0}} to {{cd|ink_sac}}.}}
{{History||1.16.210|snap=beta 1.16.210.59|Ink sacs can now be used to revert glowing text on signs to normal.}}
{{History|console}}
{{History||xbox=TU1|xbone=CU1|ps=1.00|switch=1.0.1|wiiu=Patch 1|[[File:Ink Sac JE1 BE1.png|32px]] Added ink sacs.}}
{{History||xbox=none|xbone=none|ps=1.90|wiiu=none|switch=none|[[File:Ink Sac JE2 BE2.png|32px]] The texture of ink sacs has been changed.}}
{{History|New 3DS}}
{{History||0.1.0|[[File:Ink Sac JE1 BE1.png|32px]] Added ink sacs.}}
{{History|foot}}
== Issues ==
{{issue list}}
== References ==
{{reflist}}
{{Items}}
[[Category:Bedrock Edition specific information]]
[[Category:Items]]
[[Category:Dyes]]
[[Category:Renewable resources]]
[[cs:Váček inkoustu]]
[[de:Tintenbeutel]]
[[es:Saco de tinta]]
[[fr:Poche d'encre]]
[[hu:Tintazsák]]
[[ja:イカスミ]]
[[ko:먹물 주머니]]
[[nl:Inktzak]]
[[pl:Torbiel z atramentem]]
[[pt:Bolsa de tinta]]
[[ru:Чернильный мешок]]
[[uk:Чорнильний мішок]]
[[zh:墨囊]]</li><li>[[End Crystal|End Crystal]]<br/>{{ItemEntity
|image=End Crystal.gif
|imagesize=150px
|invimage=End Crystal
|renewable=Yes
|stackable=Yes (64)
|rarity=Rare
|drops=None
|size=
Height: 2 Blocks<br>Width: 2 Blocks
}}
An '''end crystal''' is an [[entity]] that can be [[Crafting|crafted]] or found on [[the End]]'s main island, where it heals the [[Ender Dragon|ender dragon]]. It can only be placed on [[obsidian]] or [[bedrock]] and [[Explosion|explodes]] instantly when attacked or damaged in most ways.
== Spawning ==
=== Natural generation ===
An end crystal is found atop each [[obsidian pillar]] on the central island of the End, each on top of a piece of [[bedrock]]. There are 10 end crystals in total, of which two are protected in "cages" of [[iron bars]]. All end crystals respawn one after another as the respawning process of the [[ender dragon]] starts.
== Obtaining ==
=== Crafting ===
{{Crafting
|A1=Glass
|B1=Glass
|C1=Glass
|A2=Glass
|B2=Eye of Ender
|C2=Glass
|A3=Glass
|B3=Ghast Tear
|C3=Glass
|Output= End Crystal
|type= Decoration block
}}
== Usage ==
=== Healing the ender dragon ===
Their primary purpose is to recharge the health of the ender dragon, who gains a charge from the nearest crystal within a cuboid extending 32 blocks from the dragon in all directions. The dragon is healed {{hp|1}} each half-second. If multiple ender dragons are spawned, an end crystal can affect multiple dragons at the same time. The healing beam is neither obstructed nor is its power diminished by entities or blocks.
=== Respawning the ender dragon ===
[[File:End Crystals on the Exit portal.png|right|thumb|How to arrange end crystals on the exit portal to respawn the ender dragon.]]
As items, end crystals may be placed on bedrock and [[obsidian]], if the two blocks above the bedrock or obsidian block are air or replaceable blocks and no other entities intersect the area. When an end crystal is placed in [[the End]], a [[fire]] block is created at the end crystal location. If four are placed on the end [[exit portal]], one on each of the flat sides, the crystals respawn the original end crystals on the obsidian pillars, as well as resurrect the dragon itself, before exploding. The top of each pillar also explodes, destroying any player-placed blocks. This happens even if TNT explosions are turned off in settings.
If the exit portal is ever broken for any reason, end crystals can still be placed on obsidian blocks with the same location as the exit portal.
=== Explosions ===
End crystals explode when attacked or damaged in most ways, even by attacks that normally do zero damage. They are not affected by exploding fireworks, and if damaged by an explosion, they disappear instead of exploding.{{Only|Java}}<ref>{{bug|MC-118429||End crystals don't explode when destroyed by nearby explosions}}</ref> The end crystal's [[explosion]] has an [[Explosion#Explosion strength|explosion strength]] of 6, the same as a [[charged creeper]]. The end crystal's fire often remains after the crystal explodes. Any ender dragon charging from the crystal when it is destroyed takes {{hp|10}} damage.
{{IN|java}}, an end crystal's explosion can be [[blocking|blocked]] by a [[shield]].
Although an ender dragon damages most blocks and entities in its path, it cannot destroy end crystals simply by going near them.
Placing [[water]] on the end crystal will neutralize the blast effect, but not the [[damage]] or knockback.
End crystals with obsidian or bedrock below them will not damage blocks below them when they explode.
{{IN|bedrock}}, having the game rule {{cd|mobGriefing}} to {{cd|false}} will prevent the End Crystal from destroying any blocks. While {{in|java}} the same game rule will not prevent the End Crystal from destroying any blocks.
=== Beams ===
The end crystal naturally shoots a beam at the ender dragon and heals it when the dragon is within range. This beam can be manually created using the command {{cmd|data merge entity @e[type{{=}}end_crystal,limit{{=}}1] {BeamTarget:{X:0, Y:0, Z:0<nowiki>}}}}. The beam can be pointed in any direction, allowing it to mark locations or objects.
=== Properties ===
[[File:End Crystal (Slateless).gif|thumb|A base-less end crystal.]]
End crystals are of two kinds: the ones with a base beneath them are created either by game mechanism or by the {{cmd|summon}} command; while the base-less ones are created by players by manually placing the crystal items on top of [[obsidian]] or [[bedrock]].
The base appears to be made of bedrock, with a crystal hovering over it. While in the End, a crystal continually generates fire at its current position, one block above the base (directly on top of the block the base is embedded in), replacing any other block at that location. This fire is capable of spreading.
The end crystal entity is not solid and can be walked through freely. End crystals can be pushed by [[piston]]s, but they explode if moved while on fire. Because fire is checked only when an entity moves, end crystals do not normally take damage from their own fire unless moved.
== Sounds ==
{{edition|java}}:
{{Sound table
|sound=Explosion1.ogg
|sound2=Explosion2.ogg
|sound3=Explosion3.ogg
|sound4=Explosion4.ogg
|subtitle=Explosion
|source=block
|description=When an end crystal explodes
|id=entity.generic.explode
|translationkey=subtitles.entity.generic.explode
|volume=4.0
|pitch=0.56-0.84
|distance=16
|foot=1}}
{{edition|bedrock}}:
{{Sound table
|type=bedrock
|sound=Explosion1.ogg
|sound2=Explosion2.ogg
|sound3=Explosion3.ogg
|sound4=Explosion4.ogg
|source=block
|description=When an end crystal explodes
|id=random.explode
|volume=4.0
|pitch=1.0
|foot=1}}
== Data values ==
=== ID ===
{{edition|java}}:
{{ID table
|edition=java
|firstcolumnname=Item
|showforms=y
|generatetranslationkeys=y
|displayname=End Crystal
|spritetype=item
|nameid=end_crystal
|form=item
|foot=1}}
{{ID table
|edition=java
|firstcolumnname=Entity
|generatetranslationkeys=y
|displayname=End Crystal
|spritetype=entity
|nameid=end_crystal
|foot=1}}
{{edition|bedrock}}:
{{ID table
|edition=bedrock
|firstcolumnname=Item
|shownumericids=y
|showforms=y
|notshowbeitemforms=y
|generatetranslationkeys=y
|displayname=End Crystal
|spritetype=item
|nameid=end_crystal
|id=637
|form=item
|foot=1}}
{{ID table
|edition=bedrock
|firstcolumnname=Entity
|shownumericids=y
|generatetranslationkeys=y
|displayname=End Crystal
|spritetype=entity
|nameid=ender_crystal
|id=71
|foot=1}}
=== Entity data ===
End crystals have entity data that define various properties of the entity.
{{el|java}}:
{{main|Entity format}}
{{/ED}}
{{el|bedrock}}:
: See [[Bedrock Edition level format/Entity format]].
== Achievements ==
{{load achievements|The End... Again...}}
== Advancements ==
{{load advancements|The End... Again...}}
== History ==
[[File:End Crystal 19w38a.gif|thumb|Java Edition 19w38a]]
{{History|java}}
{{History||1.0.0|snap=Beta 1.9 Prerelease 6|[[File:End Crystal JE1 BE1.png|32px]] Added ender crystals.}}
{{History||1.2.1|snap=12w04a|Previously, ender crystals could be spawned using [[spawn egg]]s with ID 200 (in a [[server]], these were created using {{cmd|give 383 1 200}}). The spawned crystal would be positioned where a natural crystal would be if there was a bedrock block at the location. It was still possible until 1.9 to obtain an end crystal spawn egg, but it would not spawn anything.}}
{{History||1.7.2|snap=13w36a|Ender crystals can now be spawned with the {{cmd|summon}} command.}}
{{History||1.8|snap=14w06a|Ender crystals now generate one [[block]] lower. The fire they generate destroys the [[bedrock]] block that is supposed to be underneath (see {{bug|MC-47526}}).}}
{{History||1.9|snap=15w31a|Ender crystals generate at the correct Y-level again.}}
{{History|||snap=15w33c|Respawning the ender dragon now also respawns the ender crystals on the obsidian pillars.
|Ender crystals now have a compound BeamTarget tag that hold the X, Y, Z block location the beam points to.}}
{{History|||snap=15w44a|"Ender crystals" have been renamed to "end crystals".
|[[File:End Crystal (item) JE1 BE1.png|32px]] End crystals can now be obtained as an item.
|End crystals now drop from [[skeleton trap]] horses and can be placed only on [[obsidian]] or bedrock. Placing several of them atop the end exit portal respawns the ender dragon.}}
{{History|||snap=15w44b|End crystals are no longer dropped by [[skeleton horse]]s.
|Added crafting recipe for end crystals, making end crystals [[renewable]].}}
{{History|||snap=15w49a|End crystals now require [[air]]/replaceable [[block]]s and lack of [[entity|entities]] for placement.}}
{{History|||snap=15w51a|End crystals can no longer be placed in [[Adventure mode]].}}
{{History||1.11|snap=16w32a|The entity ID has been changed from <code>EnderCrystal</code> to <code>ender_crystal</code>.}}
{{History||1.13|snap=17w47a|Prior to [[1.13/Flattening|''The Flattening'']], this [[item]]'s numeral ID was 426.}}
{{History|||snap=18w20b|Renamed to "End Crystal".}}
{{History|||snap=pre5|Entity ID has been changed to <code>end_crystal</code>.}}
{{History||1.14|snap=18w43a|[[File:End Crystal JE2.png|32px]][[File:End Crystal (item) JE2 BE2.png|32px]] The textures of end crystals and the end crystal [[item]] have been changed.}}
{{History||1.19.3|snap=22w43a|End crystal explosions can now be [[blocking|blocked]] by [[shield]]s.<ref>{{bug|MC-188247|||Fixed}}</ref>}}
{{History|pocket}}
{{History||1.0.0|snap=alpha 0.17.0.1|[[File:End Crystal JE1 BE1.png|32px]][[File:End Crystal (item) JE1 BE1.png|32px]] Added end crystals.}}
{{History|bedrock}}
{{History||1.6.0|snap=?|[[File:End Crystal BE2.png|32px]] [[File:End Crystal BE2.gif|32px]] The model of the end crystals has been changed. It has now two cubes instead of three.}}
{{History||1.10.0|snap=beta 1.10.0.3|[[File:End Crystal BE3.png|32px]][[File:End Crystal (item) JE2 BE2.png|32px]] The textures of end crystals and the end crystal item have been changed.}}
{{History||1.17.10|snap=beta 1.17.10.20|[[File:End Crystal JE2.png|32px]] The model of the end crystals has been changed to have three cubes again, and to match ''Java Edition''.}}
{{History||1.19.70|snap=beta 1.19.70.20|Increased end crystal collision box size to match ''Java Edition''.|End crystals with obsidian or bedrock below them now will not damage blocks below them when they explode.}}
{{History|console}}
{{History||xbox=TU9|xbone=CU1|ps=1.0|wiiu=Patch 1|[[File:End Crystal JE1 BE1.png|32px]] Added ender crystals.}}
{{History||xbox=TU31|xbone=CU19|ps=1.22|wiiu=Patch 3|Ender crystals now generate one block lower. The fire they generate destroys the [[bedrock]] block that is supposed to be underneath.}}
{{History||xbox=TU46|xbone=CU36|ps=1.38|wiiu=Patch 15|"Ender crystals" have been renamed to "end crystals".
|[[File:End Crystal (item) JE1 BE1.png|32px]] End crystals can now be obtained as an [[item]].
|End crystals now drop from [[skeleton trap]] horses and can be placed only on [[obsidian]] or bedrock. Placing several of them atop the [[end portal|end exit portal]] respawns the ender dragon.
|Added a crafting recipe for end crystals.}}
{{History||xbox=none|xbone=none|ps=1.90|wiiu=none|switch=none|[[File:End Crystal JE2.png|32px]][[File:End Crystal (item) JE2 BE2.png|32px]] The textures of end crystals and the end crystal item have been changed.}}
{{History|new 3ds}}
{{History||1.7.10|[[File:End Crystal JE1 BE1.png|32px]][[File:End Crystal (item) JE1 BE1.png|32px]] Added end crystals.}}
{{History|foot}}
== Issues ==
{{issue list}}
== Trivia ==
* According to [[Jens Bergensten|Jeb]], the reason behind the current crafting recipe using glass as opposed to [[Chorus Fruit|chorus fruit]] or any materials introduced in [[Java Edition 1.9|1.9]] is as a means for players to craft end crystals in older worlds that the dragon has already been killed in.<ref>{{tweet|jeb_|667000226524372992|The problem is that you need to be able to craft the crystals on worlds in which the dragon has been destroyed already|November 18, 2015}}</ref>
* A historical rendition of the [[beacon]] block featured an animated entity within it, which resembled a yellow miniaturized end crystal. The bedrock platform of the end crystal entity would also render below the beacon, though this would normally be hidden within the block below.
* Using a [[piston]] to push an end crystal's fire into an end portal block deletes the end portal block. However, natural portal blocks regenerate if the end crystal is moved.
== Gallery ==
<gallery>
End Crystal Usage.png|Using end crystals to respawn the ender dragon.
Crystal Link.png|An ender dragon being hit with the "healing beam" of an end crystal.
Ender Crystal.png|An end crystal.
EnderCrystalOverworld.png|An end crystal in the Overworld spawned using {{cmd|summon}} {{code|end_crystal}}.
Ender Dragon Revival.png|End crystals respawning the ender dragon.
CagedEnderCrystal.png|A caged end crystal.
Respawn ender dragon.png|A [[player]] trying to respawn the ender dragon.
End Crystal (item).gif|An animation of the item of the end crystal.
</gallery>
== References ==
{{reflist}}
{{Entities}}
{{Items}}
[[de:Enderkristall]]
[[el:Κρύσταλλος του Ender]]
[[es:Cristal del End]]
[[fr:Cristal de l'End]]
[[ja:エンドクリスタル]]
[[ko:엔드 수정]]
[[nl:Endkristal]]
[[pl:Kryształ Endu]]
[[pt:Cristal do End]]
[[ru:Кристалл Края]]
[[th:คริสตัลเอนด์]]
[[uk:Кристал Енду]]
[[zh:末影水晶]]</li></ul></nowiki> | 15w31a | Beacons now generate naturally in end ships. | |||
| 15w32c | Beacons no longer generate in end ships and have been replaced by pumpkins. | ||||
| 15w47a | A new tag, PaymentItem, now stores the sacrifice item within the beacon's block entity data.
| ||||
| Beacons no longer drop their contents when broken or when the interface is exited. | |||||
| Beacons are now able to interact with hoppers. | |||||
| 15w47b | The beacon effect duration now increases with pyramid level (it was formerly a constant 9 seconds). | ||||
| 15w49a | The PaymentItem tag has been removed (introduced in 15w47a).
| ||||
| Beacons once again drop their contents when broken or when the interface is exited (as they had before 15w47a). | |||||
| Beacons can no longer interact with hoppers (as they had since 15w47a). | |||||
| 16w02a | Beacons now immediately activate when placed on valid pyramids. | ||||
1.11{{Extension DPL}}<ul><li>[[Tag (item)|Tag (item)]]<br/>{{About|the April Fools item|the standard item used to rename mobs|Name Tag}}
{{wip}}
{{joke feature}}
{{exclusive|java}}
{{Item
| title = Tag
| image = Tag.png
| renewable = Yes
| stackable = Yes (64)
}}
Tags and Bits are items exclusive to the [[Java Edition 23w13a or b|23w13a_or_b]] [[Easter eggs#April Fools|April Fools' joke]] snapshot from 2023. They are used to craft in-game representations of [[NBT format|NBT tags]].
==Obtaining==
A [[stonecutter]] can be used to cut a [[Name Tag|name tag]] into either 16 "Name" or 16 "Tag" items. These can be cut into 16 Bit items each.
{{Stonecutting
|head=1
|showdescription=1
|Name Tag
|Name, 16; Tag, 16
|description=The resulting "Name" items must be named in an [[anvil]].
}}
{{Stonecutting
|showdescription=
|Name; Tag
|Bit, 16
|foot=1
}}
To be able to proceed from here the <code>nbt_crafting</code> vote must be approved. Bits can be used in a crafting table to craft Left Curly, Right Curly, Left Square, and Right Square. In appears like these are the only tag items that can be crafted from Bits.
A [[Crafting Table|crafting table]] can be used to convert a "Tag" item into a "Byte Tag." The amount of [[stick]]s added to the crafting recipe specifies the value of the Byte, as a [[wikipedia:Signed number representations#Two's complement|signed 8-bit value]]. For example, a "Tag" and a full stack of sticks make a Byte with the value <code>64b</code>, while 255 sticks result in <code>-1b</code>. Only one of the sticks is consumed. Two Bytes can be crafted into a "Short Tag" (equivalent to 16 bit), two Shorts into an "Int Tag" (equivalent to 32 bit), and two Ints into a "Long Tag" (equivalent to 64 bit). Many other combinations that form either 16, 32, or 64 bit are possible. For example, two Shorts and an Int make a Long. When combining values, their digits are stuck together in the given order, e.g. <code>1b</code> and <code>0b</code> make <code>256s</code> (equivalent to 0100<sub>16</sub> in [[wikipedia:Hexadecimal|hexadecimal]]). Undoing any of these crafting actions in e.g. a stonecutter is not possible.
"Float" and "Double Tags" can be crafted by adding one or two [[boat]]s to any numeric tag. A "String Tag" is crafted with a "Tag" and a piece of [[string]].
{{Crafting
|head=1
|showdescription=1
|A1= Bit; ; Bit; Bit |B1= ; Bit; Bit; Bit
|A2= ; Bit; Bit; |B2= Bit; ; ; Bit
|A3= Bit; ; Bit; Bit |B3= ; Bit; Bit; Bit
|Output= Right Curly; Left Curly; Left Square; Right Square
|ignoreusage=1
}}
{{Crafting
|Tag
|String
|Output= String Tag
|description=String tags must be named in an [[anvil]] to set their value.
|ignoreusage=1
}}
{{Crafting
|Tag; Tag; Tag
|; Stick; Stick, 64
|; ; Stick, 63
|Output= Byte Tag; Byte Tag; Byte Tag
|description=Only 1 stick is consumed. 128 and more sticks make [[wikipedia:Signed number representations#Two's complement|two's complements]]:
128 sticks = <code>-128b</code><br>
129 sticks = <code>-127b</code><br>
⋮<br>
254 sticks = <code>-2b</code><br>
255 sticks = <code>-1b</code>
|ignoreusage=1
}}
{{Crafting
|Byte Tag; Byte Tag; Byte Tag
|Byte Tag; Byte Tag; Byte Tag
| ; Byte Tag; Byte Tag
| ; Byte Tag; Byte Tag
| ; ; Byte Tag
| ; ; Byte Tag
| ; ; Byte Tag
| ; ; Byte Tag
|Output= Short Tag; Int Tag; Long Tag
|description=Shorts and Ints can be combined the same way, even mixed.
Digits are appended, e.g. two <code>1b</code> tags make <code>257b</code> (0101<sub>16</sub> in [[wikipedia:Hexadecimal|hexadecimal]]).
|ignoreusage=1
}}
{{Crafting
|Byte Tag; Short Tag; Int Tag; Long Tag
|Any Boat; Any Boat; Any Boat; Any Boat
|Output= Float Tag; Float Tag; Float Tag; Float Tag
|ignoreusage=1
}}
{{Crafting
|Byte Tag; Short Tag; Int Tag; Long Tag
|Any Boat; Any Boat; Any Boat; Any Boat
|Any Boat; Any Boat; Any Boat; Any Boat
|Output= Double Tag; Double Tag; Double Tag; Double Tag
|ignoreusage=1
}}
{{Crafting
|Left Curly; Left Curly
|Name; Name
|Byte Tag; Byte Tag
|Right Curly; Name |; Byte Tag | |; Name |; Byte Tag |; Right Curly
|Output= Compound Tag; Compound Tag
|description=Instead of Bytes any other tag can be used, including other compound tags.
|ignoreusage=1
}}
{{Crafting
|Left Square; Left Square
|Byte Tag; Byte Tag
|Right Square; Byte Tag |; Byte Tag |; Byte Tag |; Byte Tag |; Byte Tag |; Byte Tag |; Right Square
|Output= List Tag; List Tag
|description=Instead of Bytes any other tag can be used, including other list tags.
|ignoreusage=1
}}
{{Crafting
|Compound Tag; List Tag
|Compound Tag; List Tag
|Output= Compound Tag; List Tag
|description=Up to 9 can be combined.
When compound tags contain identical names, only the latest of the corresponding values is used.
|ignoreusage=1
|foot=1
}}
"Name" and "String Tags" must be named in an [[anvil]] before they can be used. Unnamed Names and Strings always produce a "Sssyntax Error". None of the other tag items can be named.
All these items can be combined in a crafting table to form a short sequence of JSON code, as long as the resulting syntax is valid. For example:
*A pair of Curlies that enclose a named "Name" item and some value, e.g. a Byte, create a "Compound Tag" with the content <code>{Example:0b}</code>.
**Because of the limited size of the crafting table only 3 name-value pairs can be put between Curlies at a time. Compound Tags of any length can be created by concatenating two or more Compound Tags.
**An empty pair of Curlies produces an empty Compound Tag with the content <code>{}</code>.
*A pair of Square brackets that enclose any number of values, e.g. 7 Bytes, create a "List Tag" with the content <code>[0b,0b,0b,0b,0b,0b,0b]</code>.
**Because of the limited size of the crafting table only 7 values can be put between Square brackets at a time. List Tags of any length can be created by concatenating two or more List Tags.
**An empty pair of Square brackets produces an empty List with the content <code>[]</code>.
**"Name" items cannot be used in a List.
The resulting Compound and List Tags can be used as values in other Compound and List Tags, as deeply nested as you want.
==Usage==
Tags appear to have no further functionality. They cannot be eaten or placed in the world, except in an item frame, as each other item can. However, Compound Tags with values like <code>{Enchantments:[{id:"minecraft:sharpness",lvl:127b}]}</code> will show the [[Enchanting|enchantment]] glint and actually act accordingly when used.<ref>https://www.reddit.com/r/Minecraft/comments/129xdyl/i_figure_out_how_the_nbtcrafting_in_the_vote/</ref> This appears to work with many weapon and tool [[Enchanting#Summary of enchantments by item|enchantments]].
In theory, an extremely lucky <code>replace_recipe_output</code> vote can change the crafting recipe for compound tags to output something else. When cheats are enabled you can test this with a command like <code>/vote rule minecraft:replace_recipe_output approve {key:"minecraft:compound_tag",value:"minecraft:netherite_sword"}</code>. However, as long as this vote is approved no other compound tag can be crafted. Use <code>/vote rule minecraft:replace_recipe_output repeal *</code> to undo all recipe replacements.
In combination with the <code>midas_touch</code> vote tag items can be converted into [[Gold Ingot|gold ingots]]. These retain their NBT data. When the world is loaded in another version of the game tag items disappear, but gold ingots persist.
==Trivia==
*This implies that a [[Name Tag|name tag]] is 128 bit.
*Compound and list tags are special in so far that the value they show in their [[tooltip]] is not merely a property of the item, but their ''actual'' [[NBT format|NBT data]]. This is also the reason why naming them is disabled as that would mess up the NBT data.
*The snapshot also contains an [[History of textures/Unused textures|unused texture]] for an {{ItemLink|End Tag}}.
==History==
{{History|java}}
{{History||23w13a_or_b|[[File:Tag.png|32px]] Added tags.}}
{{History|foot}}
==Gallery==
<gallery>
Tag.png|Tag
Bit.png|Bit
Byte Tag.png|Byte Tag
Double Tag.png|Double Tag
End Tag.png|End Tag
Float Tag.png|Float Tag
Int Tag.png|Int Tag
Left Curly.png|Left Curly
Left Square.png|Left Sqaure
List Tag.png|List Tag
Long Tag.png|Long Tag
Name (23w13a or b).png|Name
Right Curly.png|Right Curly
Right Square.png|Right Square
Short Tag.png|Short Tag
Sssyntax Error.png|Sssyntax Error
String Tag.png|String Tag
</gallery>
== References ==
{{reflist}}
{{items}}
{{jokes}}
[[pt:Tag (item)]]
[[Category:Joke items]]</li><li>[[Bone Meal|Bone Meal]]<br/>{{Item
| image = Bone Meal.png
| renewable = Yes
| stackable = Yes (64)
}}
'''Bone meal''' is a material that can be used as a fertilizer for most plants and fungi, as well as a crafting ingredient for [[dye]]s.
== Obtaining ==
=== Crafting ===
{{Crafting
|Bone
|Output=Bone Meal,3
|type=Material
|showname=0
|head=1
}}
{{Crafting
|Bone Block
|Output= Bone Meal,9
|type=Material
|foot=1
}}
=== Mob loot ===
==== Fish ====
All fish mob variants ([[cod]], [[salmon]], [[tropical fish]], and [[pufferfish]]) have a 5% chance to drop 1 bone meal upon death.{{only|java}} In [[Bedrock Edition]], they drop [[bones]] instead.
=== Composters ===
When a [[composter]] is completely filled, a single bone meal drops the next time the composter is {{ctrl|used}}.
=== Trading ===
[[Wandering trader]]s sell 3 bone meal for an [[emerald]].{{only|bedrock}}
== Usage ==
=== Crafting ingredient ===
{{crafting usage}}
{{IN|bedrock}}, bone meal can be also used in [[banner pattern]]s:
{{banner crafting usage}}
=== Loom ingredient ===
{{Banner loom usage|Bone Meal}}
=== Dye ===
{{Dye usage}}
=== Fertilizer ===
Bone meal can also be used on the following [[plants]] to have a chance to increase their growth stage:
{| class="wikitable"
|+
!Plant
!Action
|-
|{{BlockLink|Wheat}}<br>{{BlockLink|Carrots}}<br>{{BlockLink|Potatoes}}
|The plant matures 2–5 growth stages.
|-
|{{BlockLink|Beetroots}}
|The plant has a 75% chance of growing to the next growth stage.
|-
|{{BlockLink|Bamboo}}
|Grows the [[bamboo]] by 1-2 stems.
|-
|{{BlockLink|Melon Stem|link=Melon seeds|text=Melon Seeds}}<br>{{BlockLink|Pumpkin Stem|link=Pumpkin seeds|text=Pumpkin Seeds}}
|The planted stem matures 2–5 growth stages. Bone meal affects only the stem's growth; it does not cause [[melon]]s or [[pumpkin]]s to sprout from a mature stem.
|-
|{{BlockLink|Saplings}}<br>{{BlockLink|Azalea}}<br>{{BlockLink|Flowering Azalea}}<br>{{BlockLink|Mangrove Propagule}} (not hanging)
|The [[sapling]] has a 45% chance of growing to the next growth stage, if possible. Saplings have two growth stages (with no visible difference between them) before growing into trees as the third stage. A tree cannot grow unless the sapling is planted in proper ground and sufficient space is available. Using bone meal on such an obstructed sapling with no chance of growing wastes the bone meal.
|-
|{{BlockLink|Sunflower}}s<br>{{BlockLink|Lilac}}s<br>{{BlockLink|Rose Bush}}es<br>{{BlockLink|Peony|Peonies}}
|The corresponding item form drops, without destroying the original plant.
|-
|{{BlockLink|Grass}}<br>{{BlockLink|Fern}}s<br>{{BlockLink|Seagrass}}
|A one-block-high tall [[grass]], [[fern]], or [[seagrass]] (that is on [[grass block]], [[dirt]], [[coarse dirt]], [[rooted dirt]], [[farmland]], [[podzol]], [[mycelium]], [[moss block]], [[mud]], or [[muddy mangrove roots]] (only exception is seagrass, will need to on a full surface)) grows into a two-block-high tall grass, fern or seagrass.
|-
|{{BlockLink|Mushrooms}}
|Has a 40% chance of growing into a {{EnvLink|huge mushroom}} if on [[grass block]], [[dirt]], [[coarse dirt]], [[rooted dirt]], [[farmland]], [[podzol]], [[mycelium]], [[moss block]], [[mud]], or [[muddy mangrove roots]].
|-
|{{BlockLink|Cocoa}}
|The cocoa plant matures 1 growth stage.
|-
|{{BlockLink|Sweet Berry Bush}}
|Grows every stage.
|-
|{{BlockLink|Sea Pickle}}
|If the [[sea pickle]] is on a [[coral block]] and in [[water]] at least 2 blocks deep, the sea pickle colony grows, and additional sea pickles generate nearby.
|-
|{{BlockLink|Sugar Cane}}{{only|bedrock|short=1}}
|The sugar cane grows to maximum height (three blocks tall).
|-
|{{BlockLink|Kelp}}
|The kelp plant grows by 1 block per bone meal used, up to its maximum height.
|-
|{{BlockLink|Flower|id=poppy}} (excluding wither roses){{only|bedrock|short=1}}
|One-block-high flowers make more flowers of the same type grow in the surrounding area.
|-
|{{BlockLink|Fungus|id=fungi}}
|Grows into [[huge fungi]], but only if on the respective [[nylium]].
|-
|{{BlockLink|Weeping Vines}}
|Grows the [[weeping vine]]s a few blocks downward.
|-
|{{BlockLink|Twisting Vines}}
|Grows the [[twisting vine]]s a few blocks upward.
|-
|{{BlockLink|Cave Vines}}
|Produces [[glow berries]] if the vine did not have any [[glow berries]] on it already.
|-
|{{BlockLink|Glow Lichen}}
|The [[glow lichen]] spreads to a random adjacent block.
|-
|{{BlockLink|Moss Block}}
|The [[moss block]] causes nearby [[stone]], [[cave vine]]s, and [[dirt]] to become moss blocks.
|-
|{{BlockLink|Big Dripleaf}}<br>{{BlockLink|Small Dripleaf}}
|A [[big dripleaf]] grows one block higher, and a [[small dripleaf]] becomes a big dripleaf.
|-
|{{BlockLink|Rooted Dirt}}
|Causes [[hanging roots]] to grow underneath the [[rooted dirt]] if there is space.
|-
|{{BlockLink|Mangrove Leaves}}
|Creates a hanging [[mangrove propagule]] under the [[mangrove leaves]].
|-
|{{BlockLink|Mangrove Propagule}} (hanging)
|The [[mangrove propagule]] matures 1 growth age.
|-
|{{BlockLink|Pink Petals}}
|Produces another pink petal in the block. If there are already four pink petals in the block, it will drop a pink petal as an item.
|-
|{{BlockLink|Torchflower Crop}}<br>{{BlockLink|Pitcher Crop}}
|Grows every stage.
|}
Bone meal does not affect:
* [[Cactus]]
* [[Vines]]
* [[Nether wart]]
* [[Sugar cane]]{{only|JE}}
* [[Chorus plant]]s, or other plants not listed above.
==== Wasting bone meal ====
Bone meal can be used on the following objects in the following situations, consuming it without any real effect:
* On [[grass]], [[fern]]s, and [[seagrass]] that do not have enough space to grow.<ref>{{bug|MC-125642}}</ref>
* On [[seagrass]] that doesn't have [[water]] above.
* On a [[dark oak sapling]] that is not in a group of four.<ref>{{bug|MC-168446}}</ref>
* On a [[mushroom]] that is not on a block that allows it to grow into a huge mushroom.<ref>{{bug|MC-173213}}</ref>
* On a [[sea pickle]] that is already in a group of four and has no valid locations to expand to.<ref>{{bug|MC-127995}}</ref>
* On a [[bamboo]] (not [[bamboo shoot]]) that is blocked in the way.
* On a [[sea pickle]] that is not on a [[coral block]].
* On a [[fungus]] that is not on its respective [[nylium]].
* Any plants that can't grow due to being block by the [[build limit]].
=== Creating new plants ===
If bone meal is {{ctrl|used}} on a [[grass block]]; [[tall grass]], [[grass]], [[flower]]s, and [[pink petals]] form on the targeted block and on random adjacent grass blocks in an 15×5×15{{only|java|short=1}}/7×5×7{{only|bedrock|short=1}} area centered on the targeted block. The flowers/pink petals that appear depend on the biome, meaning that in order to obtain specific flowers, the player must travel to biomes where the flowers are found naturally. See {{slink|Flower|Flower biomes}} for more information.
Using bone meal on a 2-block flower (rose bushes, sunflowers, lilacs or peonies) will cause one of the same type of flower to drop, without breaking the original. This is the only way to reproduce these flowers, since they cannot generate from using bone meal on grass blocks.
Using bone meal on a non-transparent block that is underwater generates [[seagrass]] on that block and surrounding blocks. Sometimes, if in a [[warm ocean]] biome, [[coral]] and [[coral fan]]s may have a chance to generate as well, and in Bedrock Edition, coral (not coral fan) can be generated in any biome. In order for this to work, there must be 2 water blocks above the block the bone meal is being used on, and the lower one must be non-flowing water.
Using bone meal on a [[sea pickle]] on a [[coral block]] creates sea pickles. This generates sea pickles up to 3 [[block]]s (of coral) away, so a 7+ × 7+ block (49+ blocks) of coral may be necessary, to return the most sea pickles per given bone meal attempt (more attempts grows them more numerously, exactly - including the range of it growing, like grass with heights on grass blocks - as coral and coral fans, though those others being non-solid blocks).
Using bone meal on [[netherrack]] adjacent to [[nylium]] converts the netherrack into nylium of the same type. If both crimson and warped nylium are adjacent to the netherrack that was applied with bone meal, there is a 50% chance that either type of nylium is created.
Using bone meal on [[nylium]] causes the corresponding [[roots]] and both types of [[fungi]] to appear on the nylium block and other nylium nearby, with the type of fungi matching the type of nylium being more common. In addition, using bone meal on the side of warped nylium creates [[nether sprouts]] and [[twisting vines]].
=== Farmer villagers ===
[[Villager]]s with the farmer profession can collect bone meal from a full [[composter]], with which they can make their crops grow faster.
== Sounds ==
{{edition|java}}:
{{Sound table
|sound=Bonemeal1.ogg
|sound2=Bonemeal2.ogg
|sound3=Bonemeal3.ogg
|sound4=Bonemeal4.ogg
|sound5=Bonemeal5.ogg
|subtitle=Bone Meal crinkles
|description=When bone meal is successfully used
|source=block
|id=item.bone_meal.use
|translationkey=subtitles.item.bone_meal.use
|volume=1.0
|pitch=1.0
|distance=16
|foot=1}}
{{edition|be}}:
{{Sound table
|type=bedrock
|sound=Bonemeal1.ogg
|sound2=Bonemeal2.ogg
|sound3=Bonemeal3.ogg
|sound4=Bonemeal4.ogg
|sound5=Bonemeal5.ogg
|description=When bone meal is successfully used
|source=block
|id=item.bone_meal.use
|volume=1.0
|pitch=0.9-1.1
|foot=1}}
== Data values ==
=== ID ===
{{edition|java}}:
{{ID table
|edition=java
|showforms=y
|generatetranslationkeys=y
|displayname=Bone Meal
|spritetype=item
|nameid=bone_meal
|form=item
|foot=1}}
{{edition|bedrock}}:
{{ID table
|edition=bedrock
|showaliasids=y
|shownumericids=y
|showforms=y
|notshowbeitemforms=y
|generatetranslationkeys=y
|displayname=Bone Meal
|spritetype=item
|nameid=bone_meal
|aliasid=dye / 15
|id=411
|form=item
|translationkey=item.dye.white.name
|foot=1}}
== History ==
{{History|java beta}}
{{History||1.2|[[File:Bone Meal JE1 BE1.png|32px]] Added bone meal.
|Bone meal can now only be applied to [[sapling]]s and [[wheat]].}}
{{History||1.6.6|Bone meal can now be applied on [[grass block]]s.}}
{{History||1.8|snap=Pre-release|Bone meal can now be used on [[mushroom]]s to make [[huge mushroom]]s, and the block the mushroom is on changes to [[dirt]].}}
{{History|||snap=Pre-release 2 ;)|Bone meal can now be applied on [[pumpkin seeds|pumpkin]] and [[melon seed]]s.}}
{{History|java}}
{{History||1.3.1|snap=12w19a|Bone meal can now be applied on [[cocoa bean]]s.}}
{{History|||snap=1.3|[[File:Bone Meal JE2 BE2.png|32px]] The texture of bone meal has been changed.}}
{{History||1.4.2|snap=12w34a|Bone meal can now be used to dye [[leather armor]] and [[tamed wolf]]'s collar.}}
{{History||1.4.6|snap=12w49a|Bone meal can now be [[crafted]] with [[gunpowder]] to create a [[firework star]].}}
{{History||1.5|snap=13w04a|Bone meal has been significantly nerfed.<br>
[[Wheat]], [[melon seeds|melon]] and [[pumpkin seed]]s, [[potato]]es and [[carrot]]s: one bone meal is now consumed for all seven stages of growth (melon and pumpkin seeds do not spawn right away).<br>
[[Sapling]]s: one bone meal is now consumed for each of the two growth stages, then it grows into a tree.<br>
[[Cocoa]]s: one bone meal is now consumed for each of the three stages of growth.
|Green [[particle]]s are now displayed when bone meal is used.
|Bone meal can now be used from [[dispenser]]s.}}
{{History|||snap=13w05a|The balancing of bone meal has been adjusted. Growing a plant to its last state now takes on average 2-5 uses of bone meal (results vary from plant to plant).<ref>https://web.archive.org/web/20220921040940/https://imgur.com/a/gOngk</ref>}}
{{History||1.6.1|snap=13w19a|Bone meal can now be used to craft white [[stained clay]].}}
{{History||1.7.2|snap=13w36a|The [[flower]]s generated when using bone meal on grass blocks is now biome dependent.}}
{{History|||snap=13w41a|Bone meal can now be used to craft white [[stained glass]].}}
{{History||1.8|snap=14w30a|Added [[banner]]s, which can be dyed with [[bone meal]].}}
{{History||1.10|snap=16w20a|Bone meal can now be used to craft [[bone block]]s.}}
{{History||1.11|snap=16w39b|Bone meal can now be used to dye [[shulker box]]es.}}
{{History||1.12|snap=17w06a|Bone meal can now be used to craft white [[concrete powder]].}}
{{History||1.13|snap=17w47a|The different data values for the <code>dye</code> ID have been split up into their own IDs.
|Prior to [[1.13/Flattening|''The Flattening'']], this [[item]]'s numeral ID was 351.}}
{{History|||snap=18w07a|Bone meal can now be used underwater to create [[seagrass]].}}
{{History|||snap=18w14b|Bone meal can now be used for spreading [[sea pickle]]s.}}
{{History||1.13.1|snap=18w31a|Bone meal used in [[water]] of warm ocean biomes now has a chance of growing [[coral]].
|[[Cod]], [[salmon]], [[tropical fish]], and [[pufferfish]] now have a chance of dropping bone meal upon death.}}
{{History|||snap=18w32a|Bone meal used in [[water]] of warm ocean biomes now has a chance of growing [[coral fan]]s.}}
{{History||1.14|snap=18w43a|Bone meal can now used to craft [[white dye]].
|Bone meal can no longer be used as a [[dye]].
|All of the dye-related functions and crafting recipes of bone meal (except bone blocks) have been transferred to white dye.
|[[File:Bone Meal JE3 BE3.png|32px]] The texture of bone meal has been changed.
|Bone meal can now be used on [[bamboo]] and [[bamboo shoot]].}}
{{History|||snap=19w03a|Bone meal can now be obtained from [[composter]]s.}}
{{History||1.16|snap=20w06a|Bone meal can now be used to grow [[fungi]] into [[huge fungi]].
|Bone meal can now be used to spread [[nylium]] onto netherrack.}}
{{History|||snap=20w09a|Using bone meal to grow fungi now works only on the respective [[nylium]].}}
{{History|||snap=20w11a|Bone meal can now grow [[kelp]], [[weeping vines]], and [[twisting vines]].}}
{{History|||snap=20w12a|Bone meal can now be used to grow [[roots]], [[fungi]], and [[nether sprouts]] on nylium.}}
{{History|||snap=20w13a|Farmers can now use bone meal to grow crops.}}
{{History||1.17|snap=21w03a|Bone meal can now be used to spread [[glow lichen]]s.}}
{{History|||snap=21w05a|Bone meal can now be used on [[moss block]]s, [[small dripleaf]], [[big dripleaf]], and [[cave vines]].}}
{{History|||snap=21w11a|Bone meal can now be used on [[rooted dirt]].}}
{{History|||snap=21w15a|Bone meal now makes a sound when used.}}
{{History|||snap=21w16a|Moss patches obtained from fertilizing moss blocks contain less vegetation and are now smaller and more irregular in shape.
|Bone meal can now be used on [[azalea]] and [[flowering azalea]].}}
{{History||1.19|snap=22w11a|Bone meal can now be used on [[mangrove propagule]]s and [[mangrove leaves]].}}
{{History||1.20<br>(Experimental)|link=1.19.4|snap=23w07a|Bone meal can now be used on [[pink petals]] and [[torchflower crop]]s.|Using bone meal on [[cherry grove]]s now have a chance to generate [[pink petal]]s.}}
{{History||1.20|snap=23w12a|Bone meal can now be used on [[pitcher crop]]s.}}
{{History|pocket alpha}}
{{History||v0.3.0|[[File:Bone Meal JE1 BE1.png|32px]] Added bone meal. It is currently unobtainable and serves no purpose.}}
{{History||v0.3.3|Bone meal can now be crafted from bones.
|Bone meal can now be applied to grass blocks and saplings.}}
{{History||v0.4.0|Added the first [[crop]]s, which bone meal can be applied to.}}
{{History||v0.8.0|snap=build 1|[[File:Bone Meal JE2 BE2.png|32px]] The texture of bone meal has been changed.
|Bone meal no longer instantly grows [[crop]]s to full size.
|Bone meal can now be used to craft white [[wool]].}}
{{History|||snap=build 5|[[Pumpkin]] and [[melon]] stems now grow by only one stage when bone meal is used.
|Some [[flower]]s now spawn certain other flowers when bone meal is used on them.
|Bone meal can now grow [[fern]]s and [[tall grass]] in [[survival]] and [[creative]].
|Bone meal can now grow [[sugar cane]]s to maximum height.}}
{{History||v0.9.0|snap=build 11|Bone meal can now be used to dye tamed [[wolf]] collars.}}
{{History||v0.14.0|snap=build 1|Bone meal can now be used from [[dispenser]]s.
|Bone meal can now be used to dye [[water]] in [[cauldron]]s.}}
{{History|pocket}}
{{History||1.0.0|snap=alpha 0.17.0.1|Bone meal can now be used to dye [[shulker]]s.}}
{{History||1.1.0|snap=alpha 1.1.0.0|Bone meal can now be used to craft white [[concrete powder]], white [[bed]]s and white [[shulker box]]es.}}
{{History||1.1.3|snap=alpha 1.1.3.0|Bone meal can now be used to craft [[bone block]]s.}}
{{History|bedrock}}
{{History||1.2.0|snap=beta 1.2.0.2|Bone meal can now be used to craft white [[stained glass]].
|Bone meal can now be used to craft [[firework star]]s.
|Bone meal can now be used to create [[banner]] patterns.}}
{{History||1.4.0|snap=beta 1.2.14.2|Bone meal can now be used underwater for growing [[seagrass]] and [[coral]].}}
{{History|||snap=beta 1.2.20.1|Bone meal can now be used for spreading [[sea pickle]]s.
|Bone meal can now be used to craft white [[balloon]]s and white [[glow stick]]s.}}
{{History||1.8.0|snap=beta 1.8.0.8|Bone meal can now be used to grow [[bamboo]].}}
{{History|||snap=beta 1.8.0.10|Bone meal can now be used to craft [[white dye]].}}
{{History||1.10.0|snap=beta 1.10.0.3|Bone meal are now sold by [[wandering trader]]s.
|[[File:Bone Meal JE3 BE3.png|32px]] The texture of bone meal has been changed.}}
{{History||1.11.0|snap=beta 1.11.0.1|Bone meal can now be obtained from [[composter]]s.}}
{{History||1.16.0|snap=beta 1.16.0.51|Bone meal can now grow [[fungus|fungi]] into [[huge fungi]].
|Bone meal can now be used to turn [[netherrack]] into [[nylium]].
|Bone meal can now be used to grow [[roots]], [[fungi]], and [[nether sprouts]] on nylium.}}
{{History||1.16.100|snap=beta 1.16.100.56|The ID of bone meal has been changed from <code>dye/15</code> to <code>bone_meal</code>.}}
{{History||1.16.210|snap=beta 1.16.210.51|Bone meal used in [[water]] now has a chance of growing [[coral fan]]s.}}
{{History||1.16.220|snap=beta 1.16.220.52|Bone meal can now be used on [[moss block]]s, [[small dripleaf]], [[big dripleaf]], [[cave vines]] and [[rooted dirt]].}}
{{History||1.17.0|snap=beta 1.16.230.50|Bone meal can now be used to spread [[glow lichen]]s.}}
{{History|||snap=beta 1.16.230.54|Bone meal can be used to grow [[azalea]]s into azalea trees.}}
{{History|||snap=beta 1.17.0.50|Bone meal now makes a sound when used.}}
{{History|console}}
{{History||xbox=TU1|xbone=CU1|ps=1.00|wiiu=Patch 1|switch=1.0.1|[[File:Bone Meal JE1 BE1.png|32px]] Added bone meal.}}
{{History||xbox=TU19|xbone=CU7|ps=1.12|Bone meal no longer instantly grows [[crop]]s to full size.}}
{{History||xbox=none|xbone=none|ps=1.90|wiiu=none|switch=none|[[File:Bone Meal JE3 BE3.png|32px]] The texture of bone meal has been changed.}}
{{History|new 3ds}}
{{History||0.1.0|[[File:Bone Meal JE2 BE2.png|32px]] Added bone meal.}}
{{History|foot}}
== Issues ==
{{issue list}}
== Trivia ==
* Bone meal can be used on the sides or bottom of a [[grass block]], as well as on a grass block with [[plant]]s already on top of it.
* Regardless of if it succeeds in fertilizing, bone meal makes green sparkles. However, like smoke from a [[torch]], the sparkles appear only if the [[player]] has [[particles]] set All or Decreased.
* In real life, [[Wikipedia:bone meal|bone meal]] is used as a fertilizer to provide nitrogen and phosphorus to plants.
==Gallery==
<gallery>
File:Bone Meal On Grass.png|Bone meal used on [[grass block]]s.
</gallery>
== See also ==
* [[Farming]]
== References ==
{{reflist}}
{{Items}}
[[Category:Dyes]]
[[Category:Plants]]
[[Category:Renewable resources]]
[[cs:Kostní moučka]]
[[de:Knochenmehl]]
[[es:Polvo de hueso]]
[[fr:Poudre d'os]]
[[hu:Csontliszt]]
[[ja:骨粉]]
[[ko:뼛가루]]
[[nl:Beendermeel]]
[[pl:Mączka kostna]]
[[pt:Farinha de osso]]
[[ru:Костная мука]]
[[th:ผงกระดูก]]
[[zh:骨粉]]</li></ul> | 16w32a | The block entity ID has been changed from Beacon to beacon. | |||
1.13{{Extension DPL}}<ul><li>[[Tag (item)|Tag (item)]]<br/>{{About|the April Fools item|the standard item used to rename mobs|Name Tag}}
{{wip}}
{{joke feature}}
{{exclusive|java}}
{{Item
| title = Tag
| image = Tag.png
| renewable = Yes
| stackable = Yes (64)
}}
Tags and Bits are items exclusive to the [[Java Edition 23w13a or b|23w13a_or_b]] [[Easter eggs#April Fools|April Fools' joke]] snapshot from 2023. They are used to craft in-game representations of [[NBT format|NBT tags]].
==Obtaining==
A [[stonecutter]] can be used to cut a [[Name Tag|name tag]] into either 16 "Name" or 16 "Tag" items. These can be cut into 16 Bit items each.
{{Stonecutting
|head=1
|showdescription=1
|Name Tag
|Name, 16; Tag, 16
|description=The resulting "Name" items must be named in an [[anvil]].
}}
{{Stonecutting
|showdescription=
|Name; Tag
|Bit, 16
|foot=1
}}
To be able to proceed from here the <code>nbt_crafting</code> vote must be approved. Bits can be used in a crafting table to craft Left Curly, Right Curly, Left Square, and Right Square. In appears like these are the only tag items that can be crafted from Bits.
A [[Crafting Table|crafting table]] can be used to convert a "Tag" item into a "Byte Tag." The amount of [[stick]]s added to the crafting recipe specifies the value of the Byte, as a [[wikipedia:Signed number representations#Two's complement|signed 8-bit value]]. For example, a "Tag" and a full stack of sticks make a Byte with the value <code>64b</code>, while 255 sticks result in <code>-1b</code>. Only one of the sticks is consumed. Two Bytes can be crafted into a "Short Tag" (equivalent to 16 bit), two Shorts into an "Int Tag" (equivalent to 32 bit), and two Ints into a "Long Tag" (equivalent to 64 bit). Many other combinations that form either 16, 32, or 64 bit are possible. For example, two Shorts and an Int make a Long. When combining values, their digits are stuck together in the given order, e.g. <code>1b</code> and <code>0b</code> make <code>256s</code> (equivalent to 0100<sub>16</sub> in [[wikipedia:Hexadecimal|hexadecimal]]). Undoing any of these crafting actions in e.g. a stonecutter is not possible.
"Float" and "Double Tags" can be crafted by adding one or two [[boat]]s to any numeric tag. A "String Tag" is crafted with a "Tag" and a piece of [[string]].
{{Crafting
|head=1
|showdescription=1
|A1= Bit; ; Bit; Bit |B1= ; Bit; Bit; Bit
|A2= ; Bit; Bit; |B2= Bit; ; ; Bit
|A3= Bit; ; Bit; Bit |B3= ; Bit; Bit; Bit
|Output= Right Curly; Left Curly; Left Square; Right Square
|ignoreusage=1
}}
{{Crafting
|Tag
|String
|Output= String Tag
|description=String tags must be named in an [[anvil]] to set their value.
|ignoreusage=1
}}
{{Crafting
|Tag; Tag; Tag
|; Stick; Stick, 64
|; ; Stick, 63
|Output= Byte Tag; Byte Tag; Byte Tag
|description=Only 1 stick is consumed. 128 and more sticks make [[wikipedia:Signed number representations#Two's complement|two's complements]]:
128 sticks = <code>-128b</code><br>
129 sticks = <code>-127b</code><br>
⋮<br>
254 sticks = <code>-2b</code><br>
255 sticks = <code>-1b</code>
|ignoreusage=1
}}
{{Crafting
|Byte Tag; Byte Tag; Byte Tag
|Byte Tag; Byte Tag; Byte Tag
| ; Byte Tag; Byte Tag
| ; Byte Tag; Byte Tag
| ; ; Byte Tag
| ; ; Byte Tag
| ; ; Byte Tag
| ; ; Byte Tag
|Output= Short Tag; Int Tag; Long Tag
|description=Shorts and Ints can be combined the same way, even mixed.
Digits are appended, e.g. two <code>1b</code> tags make <code>257b</code> (0101<sub>16</sub> in [[wikipedia:Hexadecimal|hexadecimal]]).
|ignoreusage=1
}}
{{Crafting
|Byte Tag; Short Tag; Int Tag; Long Tag
|Any Boat; Any Boat; Any Boat; Any Boat
|Output= Float Tag; Float Tag; Float Tag; Float Tag
|ignoreusage=1
}}
{{Crafting
|Byte Tag; Short Tag; Int Tag; Long Tag
|Any Boat; Any Boat; Any Boat; Any Boat
|Any Boat; Any Boat; Any Boat; Any Boat
|Output= Double Tag; Double Tag; Double Tag; Double Tag
|ignoreusage=1
}}
{{Crafting
|Left Curly; Left Curly
|Name; Name
|Byte Tag; Byte Tag
|Right Curly; Name |; Byte Tag | |; Name |; Byte Tag |; Right Curly
|Output= Compound Tag; Compound Tag
|description=Instead of Bytes any other tag can be used, including other compound tags.
|ignoreusage=1
}}
{{Crafting
|Left Square; Left Square
|Byte Tag; Byte Tag
|Right Square; Byte Tag |; Byte Tag |; Byte Tag |; Byte Tag |; Byte Tag |; Byte Tag |; Right Square
|Output= List Tag; List Tag
|description=Instead of Bytes any other tag can be used, including other list tags.
|ignoreusage=1
}}
{{Crafting
|Compound Tag; List Tag
|Compound Tag; List Tag
|Output= Compound Tag; List Tag
|description=Up to 9 can be combined.
When compound tags contain identical names, only the latest of the corresponding values is used.
|ignoreusage=1
|foot=1
}}
"Name" and "String Tags" must be named in an [[anvil]] before they can be used. Unnamed Names and Strings always produce a "Sssyntax Error". None of the other tag items can be named.
All these items can be combined in a crafting table to form a short sequence of JSON code, as long as the resulting syntax is valid. For example:
*A pair of Curlies that enclose a named "Name" item and some value, e.g. a Byte, create a "Compound Tag" with the content <code>{Example:0b}</code>.
**Because of the limited size of the crafting table only 3 name-value pairs can be put between Curlies at a time. Compound Tags of any length can be created by concatenating two or more Compound Tags.
**An empty pair of Curlies produces an empty Compound Tag with the content <code>{}</code>.
*A pair of Square brackets that enclose any number of values, e.g. 7 Bytes, create a "List Tag" with the content <code>[0b,0b,0b,0b,0b,0b,0b]</code>.
**Because of the limited size of the crafting table only 7 values can be put between Square brackets at a time. List Tags of any length can be created by concatenating two or more List Tags.
**An empty pair of Square brackets produces an empty List with the content <code>[]</code>.
**"Name" items cannot be used in a List.
The resulting Compound and List Tags can be used as values in other Compound and List Tags, as deeply nested as you want.
==Usage==
Tags appear to have no further functionality. They cannot be eaten or placed in the world, except in an item frame, as each other item can. However, Compound Tags with values like <code>{Enchantments:[{id:"minecraft:sharpness",lvl:127b}]}</code> will show the [[Enchanting|enchantment]] glint and actually act accordingly when used.<ref>https://www.reddit.com/r/Minecraft/comments/129xdyl/i_figure_out_how_the_nbtcrafting_in_the_vote/</ref> This appears to work with many weapon and tool [[Enchanting#Summary of enchantments by item|enchantments]].
In theory, an extremely lucky <code>replace_recipe_output</code> vote can change the crafting recipe for compound tags to output something else. When cheats are enabled you can test this with a command like <code>/vote rule minecraft:replace_recipe_output approve {key:"minecraft:compound_tag",value:"minecraft:netherite_sword"}</code>. However, as long as this vote is approved no other compound tag can be crafted. Use <code>/vote rule minecraft:replace_recipe_output repeal *</code> to undo all recipe replacements.
In combination with the <code>midas_touch</code> vote tag items can be converted into [[Gold Ingot|gold ingots]]. These retain their NBT data. When the world is loaded in another version of the game tag items disappear, but gold ingots persist.
==Trivia==
*This implies that a [[Name Tag|name tag]] is 128 bit.
*Compound and list tags are special in so far that the value they show in their [[tooltip]] is not merely a property of the item, but their ''actual'' [[NBT format|NBT data]]. This is also the reason why naming them is disabled as that would mess up the NBT data.
*The snapshot also contains an [[History of textures/Unused textures|unused texture]] for an {{ItemLink|End Tag}}.
==History==
{{History|java}}
{{History||23w13a_or_b|[[File:Tag.png|32px]] Added tags.}}
{{History|foot}}
==Gallery==
<gallery>
Tag.png|Tag
Bit.png|Bit
Byte Tag.png|Byte Tag
Double Tag.png|Double Tag
End Tag.png|End Tag
Float Tag.png|Float Tag
Int Tag.png|Int Tag
Left Curly.png|Left Curly
Left Square.png|Left Sqaure
List Tag.png|List Tag
Long Tag.png|Long Tag
Name (23w13a or b).png|Name
Right Curly.png|Right Curly
Right Square.png|Right Square
Short Tag.png|Short Tag
Sssyntax Error.png|Sssyntax Error
String Tag.png|String Tag
</gallery>
== References ==
{{reflist}}
{{items}}
{{jokes}}
[[pt:Tag (item)]]
[[Category:Joke items]]</li><li>[[Light Gray Dye|Light Gray Dye]]<br/>{{Item
| image = Light Gray Dye.png
| renewable = Yes
| stackable = Yes (64)
}}
'''Light gray dye'''{{fn|Known as '''Light Grey Dye''' in British, Canadian, Australian, and New Zealand English variants.}} is a [[Dyeing#Primary Colors|quasi-primary dye]].
== Obtaining ==
=== Crafting ===
{{Crafting
|head=1
|showname=0
|showdescription=1
|Azure Bluet;Oxeye Daisy;White Tulip
|Output=Light Gray Dye
|type=Material
}}
{{Crafting
|Black Dye
|White Dye
|White Dye
|Output=Light Gray Dye,3
|type=Material
|description={{IN|bedrock}}, the black and white dye can be replaced with [[ink sac]]s and [[bone meal]], respectively.
}}
{{Crafting
|Gray Dye
|White Dye
|Output=Light Gray Dye,2
|type=Material
|description={{IN|bedrock}}, the white dye can be replaced with [[bone meal]].
|foot=1
}}
=== Trading ===
[[Wandering trader]]s sell 3 light gray dye for an [[emerald]].
== Usage ==
{{dye usage}}
=== Crafting ingredient ===
{{crafting usage|ignore=Banner|continue=1}}
{{banner crafting usage}}
=== Loom ingredient ===
{{Banner loom usage|Light Gray Dye}}
=== Trading ===
Expert-level shepherd villagers have {{frac|1|6}} chance to buy 12 light gray dye for an emerald.
== Data values ==
=== ID ===
{{edition|java}}:
{{ID table
|edition=java
|showforms=y
|generatetranslationkeys=y
|displayname=Light Gray Dye
|spritetype=item
|nameid=light_gray_dye
|form=item
|foot=1}}
{{edition|bedrock}}:
{{ID table
|edition=bedrock
|showaliasids=y
|shownumericids=y
|showforms=y
|notshowbeitemforms=y
|generatetranslationkeys=y
|displayname=Light Gray Dye
|spritetype=item
|nameid=light_gray_dye
|aliasid=dye / 7
|id=402
|form=item
|translationkey=item.dye.silver.name
|foot=1}}
== Video ==
<div style="text-align:center">{{yt|1w3j1SKcoww}}</div>
== History ==
{{History|java beta}}
{{History||1.2|[[File:Light Gray Dye JE1 BE1.png|32px]] Added light gray dye.}}
{{History|java}}
{{History||1.4.2|snap=12w34a|Added the ability to [[Armor#Dyeing|dye]] leather [[armor]] and [[wolf]] collars.}}
{{History||1.4.6|snap=12w49a|Light gray dye can now be [[crafting|crafted]] with [[gunpowder]] to create a [[firework star]].}}
{{History||1.6.1|snap=13w19a|[[Stained clay]] can now be crafted.}}
{{history||1.7.2|snap=13w36a|With the addition of new [[flower]]s, many secondary and tertiary dyes are now primary [[dye]]s.}}
{{History|||snap=13w41a|[[Stained glass]] can now be crafted.}}
{{History||1.8|snap=14w30a|Added [[banner]]s, which can be dyed.}}
{{History||1.11|snap=16w39a|Added the ability to dye [[shulker box]]es.}}
{{History||1.12|snap=17w15a|Added the ability to dye [[bed]]s.}}
{{History||1.13|snap=17w47a|The different data values for the <code>dye</code> ID have now been split up into their own IDs.
|Prior to [[1.13/Flattening|''The Flattening'']], this [[item]]'s numeral ID was 351.}}
{{History||1.14|snap=18w43a|Light gray dye is now crafted using [[white dye|white]] and [[black dye]]s, instead of [[bone meal]] and [[ink sac]]s.
|[[File:Light Gray Dye JE2 BE2.png|32px]] The texture of light gray dye has now been changed.}}
{{History|||snap=18w44a|Light gray dye can now change the text color on [[sign]]s to light gray.}}
{{History|||snap=19w05a|Added the [[wandering trader]], which sells light gray dye.}}
{{History|||snap=19w11a|Light gray dye can now be [[trading|bought]] by shepherd villagers.}}
{{History||1.17|snap=20w45a|Light gray dye can now be used to craft [[light gray candle]]s.}}
{{History|||snap=21w19a|Light gray dye can no longer be used to craft light gray candles.}}
{{History|||snap=Pre-release 1|Light gray dye can now once again be used to craft light gray candles.}}
{{History||1.20<br>(Experimental)|link=1.19.3|snap=22w42a|Light gray dye can now change the text color on [[hanging sign]]s to light gray.}}
{{History|pocket alpha}}
{{History||v0.3.0|[[File:Light Gray Dye JE1 BE1.png|32px]] Added light gray dye. It is currently unobtainable and serves no purpose.}}
{{History||v0.8.0|snap=build 1|Light gray dye can be [[craft]]ed with [[bone meal]] and [[gray dye]], or with two bone meals and an [[ink sac]], despite there being no way of obtaining gray dye or ink sacs at the time.}}
{{History||v0.8.0|snap=build 3|Light gray dye is now available in [[creative]] mode.}}
{{History||v0.9.0|snap=build 3|Light gray dye can now be obtained in [[survival]] mode.}}
{{History|||snap=build 11|Light gray dye can now be used to craft colored [[terracotta]].}}
{{History||v0.11.0|snap=build 1|Light gray dye can now be used to dye tamed [[wolf]] collars.}}
{{History||v0.14.0|snap=build 1|Light gray dye can now be used to dye [[water]] in [[cauldron]]s.}}
{{History|pocket}}
{{History||1.0.0|snap=alpha 0.17.0.1|Light gray dye can now be used to dye [[shulker]]s.}}
{{History||1.1.0|snap=alpha 1.1.0.0|Light gray dye can now be used to craft [[concrete powder]], colored [[bed]]s and dyed [[shulker box]]es.}}
{{History|bedrock}}
{{History||1.2.0|snap=beta 1.2.0.2|Light gray dye can now be used to craft [[firework star]]s, [[stained glass]] and patterns on [[banner]]s.}}
{{History||1.4.0|snap=beta 1.2.20.1|Light gray dye can now be used to craft [[balloon]]s and [[glow stick]]s.}}
{{History||1.8.0|snap=beta 1.8.0.8|Light gray dye can now be used to dye tamed [[cat]] collars.}}
{{History||1.10.0|snap=beta 1.10.0.3|Light gray dye is now [[trading|sold]] by [[wandering trader]]s.
|Light gray dye can now be used to dye white [[carpet]]s and undyed [[glass pane]]s.
|[[File:Light Gray Dye JE2 BE2.png|32px]] The texture of light gray dye has now been changed.}}
{{History||1.11.0|snap=beta 1.11.0.1|Light gray dye can be [[trading|sold]] to shepherd [[villager]]s.}}
{{History||1.16.100|snap=beta 1.16.100.56|The ID of light gray dye has been changed from <code>dye/7</code> to <code>light_gray_dye</code>.}}
{{History|console}}
{{History||xbox=TU1|xbone=CU1|ps=1.00|switch=1.0.1|wiiu=Patch 1|[[File:Light Gray Dye JE1 BE1.png|32px]] Added light gray dye.}}
{{History|PS4}}
{{History||1.90|[[File:Light Gray Dye JE2 BE2.png|32px]] The texture of light gray dye has now been changed.}}
{{History|new 3ds}}
{{History||0.1.0|[[File:Light Gray Dye JE1 BE1.png|32px]] Added light gray dye.}}
{{History|foot}}
== Issues ==
{{issue list}}
== Trivia ==
* In [[Bedrock Edition]], Some items/blocks' Block states/Item NBT uses '''Silver''' instead of '''Light Gray'''
== Notes ==
{{fnlist}}
{{Items}}
[[Category:Dyes]]
[[cs:Světle šedé barvivo]]
[[de:Hellgrauer Farbstoff]]
[[es:Tinte gris claro]]
[[fr:Teinture gris clair]]
[[hu:Világosszürke festék]]
[[ja:薄灰色の染料]]
[[ko:회백색 염료]]
[[nl:Lichtgrijze kleurstof]]
[[pl:Jasnoszary barwnik]]
[[pt:Corante cinza-claro]]
[[ru:Светло-серый краситель]]
[[zh:淡灰色染料]]
[[Category:Renewable resources]]</li></ul> | 17w47a | Prior to The Flattening, this block's numeral ID was 138. | |||
| 18w19a | Beacons now produce sounds. | ||||
1.14{{Extension DPL}}<ul><li>[[Drinks|Drinks]]<br/>[[File:Drinking Steve.png|150px|right]] [[File:Drinking Alex.png|150px|right]]
'''Drinks''' are a narrow class of consumable [[item]]s that can be ingested by the [[player]] in an extremely similar manner to [[food]]. However, drinks are not encountered quite as commonly as food is, and they are not nearly as integral to Survival gameplay. Drinks can generally be distinguished from food by the sounds they make upon consumption, the lack of [[particles]] they emit, and the fact that they leave an empty container item in the [[inventory]] after consumption. Drinks do not affect [[hunger]] or saturation values upon use (with the exception of [[honey bottle]]s), and do not need those values to be depleted in order to be consumed.
Drinks are drunk by holding {{control|use item}} while having the drink item selected in the hotbar or in the off hand.
== Drinks ==
{{/table}}
== History ==
{{main|Milk#History|Potion#History|Honey Bottle#History}}
{{History|java alpha}}
{{History||v1.0.11|[[File:Milk Bucket JE1 BE1.png|32px]] Added milk.}}
{{History|java}}
{{History||1.0.0|snap=Beta 1.9 Prerelease 3|Added water bottles and potions.}}
{{History||1.15|snap=19w34a|[[File:Honey Bottle JE1.png|32px]] Added honey bottles.}}
{{History|pocket alpha}}
{{History||v0.7.0|[[File:Milk Bucket JE1 BE1.png|32px]] Added milk buckets.}}
{{History||v0.12.1|snap=build 1|Added water bottles and potions.}}
{{History|bedrock}}
{{History||1.14.0|snap=beta 1.14.0.1|[[File:Honey Bottle BE1.png|32px]] Added honey bottles.}}
{{History|foot}}
{{Items}}
[[ja:飲み物]]
[[pt:Bebidas]]
[[Category:Food]]</li><li>[[:Category:Minecraft Legends resources|Category:Minecraft Legends resources]]<br/>[[Category:Minecraft Legends]]
[[Category:Items]]
[[pt:Categoria:Recursos do Minecraft Legends]]</li></ul> | 18w43a | ||||
| 18w44a | |||||
1.16{{Extension DPL}}<ul><li>[[Written Book|Written Book]]<br/>{{Item
| title = Written Book
| image = Written Book.gif
| renewable = Yes
| stackable = Yes (16)
}}
A '''written book''' is an [[item]] created after a [[book and quill]] is signed.
== Obtaining ==
=== Signing a book and quill ===
Written books can be obtained by signing a [[book and quill]]. After it has been signed, it cannot be edited again. The label does not say "Written Book", but whatever the [[player]] titles it. The title appears on the top line of the label, and "by <''player''>" (the player's username) on the bottom. {{IN|bedrock}}, this is customizable without [[commands]].
=== Copying ===
{{crafting
|name=Written Book
|showdescription=1
|;;;Book and Quill;Book and Quill;Book and Quill;Book and Quill;Book and Quill
|;;;;Book and Quill;Book and Quill;Book and Quill;Book and Quill
|;;;;;Book and Quill;Book and Quill;Book and Quill
|Book and Quill
|Written Book
|;;;;;;Book and Quill;Book and Quill
|;Book and Quill;Book and Quill;Book and Quill;Book and Quill;Book and Quill;Book and Quill;Book and Quill
|;;Book and Quill;Book and Quill;Book and Quill;Book and Quill;Book and Quill;Book and Quill
|;;;;;;;Book and Quill
|Output= Written Book; Written Book,2; Written Book,3; Written Book,4; Written Book,5; Written Book,6; Written Book,7; Written Book,8
|description=The input written book is not consumed.<br>The new copies are "Copy of Original" or "Copy of Copy", depending on whether the input written book is "Original" or "Copy of Original".<br>Copies of copies cannot be copied.<br>Copied books of the same generation ("Original", "Copy of Original", "Copy of Copy", or "Tattered") stack.
|type=Miscellaneous
}}
== Usage ==
Written books can be opened by right-clicking (or holding down on the screen {{in|bedrock}}), and display a GUI allowing the [[player]] to read it or turn the page.
The contents of a book are an extra set of data attached to the item. This means that when a book is destroyed, its contents are lost with it.
=== Lecterns ===
One can place a [[written book]] on an empty [[lectern]].
The lectern then emits a redstone signal depending on the displayed page in the book. On the last page, the lectern emits a signal strength of 15.
=== Chiseled bookshelf ===
{{control|Use|text=Using}} the [[chiseled bookshelf]] while having a written book in the main hand will put the book inside the chiseled bookshelf.
== Sounds ==
{{edition|java}}:
{{Sound table
|sound=Page turn1.ogg
|sound2=Page turn2.ogg
|sound3=Page turn3.ogg
|subtitle=Page rustles
|source=master
|description=When the page of a book is turned
|id=item.book.page_turn
|translationkey=subtitles.item.book.page_turn
|volume=2.0
|pitch=1.0
|distance=16}}
{{Sound table
|sound=Page turn1.ogg
|sound2=Page turn2.ogg
|sound3=Page turn3.ogg
|subtitle=Page rustles
|source=block
|description=When the page of a book is turned on a lectern
|id=item.book.page_turn
|translationkey=subtitles.item.book.page_turn
|volume=2.0
|pitch=0.9-1.0
|distance=16}}
{{Sound table
|sound=Book thump1.ogg
|sound2=Book thump2.ogg
|subtitle=Book thumps
|source=block
|description=When a book is placed on a lectern
|id=item.book.put
|translationkey=subtitles.item.book.put
|volume=1.0
|pitch=1.0
|distance=16}}
{{Sound table
|sound=Chiseled bookshelf insert1.ogg
|sound2=Chiseled bookshelf insert2.ogg
|sound3=Chiseled bookshelf insert3.ogg
|sound4=Chiseled bookshelf insert4.ogg
|subtitle=Book placed
|source=block
|description=When a written book is placed in a chiseled bookshelf
|id=block.chiseled_bookshelf.insert
|translationkey=subtitles.chiseled_bookshelf.insert
|volume=0.8
|pitch=''varies'' <ref group=sound>Can be 1.0, 0.85, or 1.1 for each sound</ref>
|distance=16}}
{{Sound table
|sound=Chiseled bookshelf pickup1.ogg
|sound2=Chiseled bookshelf pickup2.ogg
|sound3=Chiseled bookshelf pickup3.ogg
|subtitle=Book taken
|source=block
|description=When a written book is removed from a chiseled bookshelf
|id=block.chiseled_bookshelf.pickup
|translationkey=subtitles.chiseled_bookshelf.take
|volume=0.8
|pitch=''varies'' <ref group=sound>Can be 1.0, 0.8, or 1.1 for each sound</ref>
|distance=16
|foot=1}}
{{edition|bedrock}}:
{{Sound table
|type=bedrock
|sound=Page turn1.ogg
|sound2=Page turn2.ogg
|sound3=Page turn3.ogg
|source=sound
|description=When the page of a book is turned
|id=item.book.page_turn
|volume=2.0
|pitch=1.0}}
{{Sound table
|sound=Book thump1.ogg
|sound2=Book thump2.ogg
|source=block
|description=When a book is placed on a lectern
|id=item.book.put
|volume=4.8
|pitch=1.0}}
{{Sound table
|type=bedrock
|sound=Chiseled bookshelf insert1.ogg
|sound2=Chiseled bookshelf insert2.ogg
|sound3=Chiseled bookshelf insert3.ogg
|sound4=Chiseled bookshelf insert4.ogg
|source=block
|description=When a written book is placed in a chiseled bookshelf
|id=insert.chiseled_bookshelf
|volume=0.8
|pitch=''varies'' <ref group=sound>Can be 1.0, 0.85, or 1.1 for each sound</ref>}}
{{Sound table
|sound=Chiseled bookshelf pickup1.ogg
|sound2=Chiseled bookshelf pickup2.ogg
|sound3=Chiseled bookshelf pickup3.ogg
|source=block
|description=When a written book is removed from a chiseled bookshelf
|id=pickup.chiseled_bookshelf
|volume=0.8
|pitch=''varies'' <ref group=sound>Can be 1.0, 0.8, or 1.1 for each sound</ref>
|foot=1}}
== Data values ==
=== ID ===
{{JE}}:
{{ID table
|edition=java
|showitemtags=y
|showforms=y
|generatetranslationkeys=y
|displayname=Written Book
|spritetype=item
|nameid=written_book
|itemtags=bookshelf_books, lectern_books
|form=item
|foot=1}}
{{BE}}:
{{ID table
|edition=bedrock
|showitemtags=y
|shownumericids=y
|showforms=y
|notshowbeitemforms=y
|generatetranslationkeys=y
|displayname=Written Book
|spritetype=item
|nameid=written_book
|id=511
|itemtags=minecraft:bookshelf_books, minecraft:lectern_books
|form=item
|foot=1}}
=== Item data ===
{{el|java}}:
{{main|Player.dat format}}
<div class="treeview">
* {{nbt|compound|tag}}: The item's '''tag''' tag.
{{:Player.dat_format/Written Books}}
</div>
{{el|bedrock}}:
: See [[Bedrock Edition level format/Item format]].
== History ==
{{History|java}}
{{History||1.3.1|snap=12w17a|[[File:Written Book JE1 BE1.png|32px]] Added written books.}}
{{History|||snap=12w21a|Written books can now be [[trading|sold]] to librarian [[villager]]s, at 1 written book for 1 [[emerald]].}}
{{History||1.7.2|snap=13w36a|Written books can now be cloned the same way [[map]]s can, but by using [[book and quill|books and quills]] instead of Empty Maps. Multiple copies of the same written book can be cloned by putting more book and quills in the crafting grid.
|Written books can now be stacked (up to 16 per stack).}}
{{History||1.8|snap=14w02a|[[Trading]] has been changed: librarian [[villager]]s now [[trading|buy]] 2 written books for 1 [[emerald]].}}
{{History|||snap=14w05a|Copying written books now mark them as "Copy of Original" or "Copy of Copy". The copying status of a book is denoted in a separate line in the tooltip, beneath the author's name. Copies of copies cannot be copied.}}
{{History||1.9|snap=15w33c|A written book titled "Work in Progress" now generates within a [[hopper]] as a part of the [[end ship]] in the [[end cities]]. It reads: "We will have something else here soon..." and is signed by [[Searge]].}}
{{History|||snap=15w41a|End ships no longer contain a written book.}}
{{History||1.13|snap=17w47a|Prior to [[1.13/Flattening|''The Flattening'']], this [[item]]'s numeral ID was 387.}}
{{History||1.14|snap=18w43a|[[File:Written Book JE2 BE2.png|32px]] The texture of written books has been changed.}}
{{History|||snap=19w02a|Written books can now be held on [[lectern]]s.}}
{{History|||snap=19w11a|Librarian [[villager]]s no longer [[trading|buy]] written books.}}
{{History||1.20<br>(Experimental)|link=1.19.3|snap=22w42a|Written books can now interact with [[chiseled bookshelves]].}}
{{History|bedrock}}
{{History||1.2.0|snap=beta 1.2.0.2|[[File:Written Book JE1 BE1.png|32px]] Added written books.}}
{{History||1.10.0|snap=beta 1.10.0.3|[[File:Written Book JE2 BE2.png|32px]] The texture of written books has been changed.
|Written books can now be held on [[lectern]]s.}}
{{History|console}}
{{History||xbox=TU25|xbone=CU14|ps=1.17|wiiu=Patch 1|[[File:Written Book JE1 BE1.png|32px]] Added written books.}}
{{History|PS4}}
{{History||1.90|[[File:Written Book JE2 BE2.png|32px]] The texture of written books has been changed.}}
{{History|foot}}
== Issues ==
{{issue list}}
== Trivia ==
*When written books are obtained with [[commands]] (without the correct [[Player.dat format#Written Books|data tag]]), the label shows "Written Book" and has the text "*Invalid book tag*" when opened. The book is signed and cannot be edited without commands.
*Commands that were added to a written book using serialized JSON objects are executed through the chat system. This means that any command added to a written book can't be longer than 256 characters, which is the maximum chat line limit.
*During the 2020 April Fools Update [[Java Edition 20w14∞]], throwing a written book into a lit [[Nether Portal (block)|nether portal]] would create a portal to one of the 2,147,483,645 new dimensions.
== Gallery ==
<gallery>
Written Book tooltip.png|A signed book.
Test by Dinnerbone.png|Copying a signed book.
BookandQuillOperators12w17a.png|Different types of characters can be used to simulate a different font.
JSON Book.png|First image of a book using JSON text.
No NBT written book GUI.png|A no NBT written book using commands.
Book Background (JE).png|Java Edition book background texture.
Book Background (BE).png|Bedrock Edition book background texture.
Book Arrowleft (JE).png|Java Edition left arrow texture.
Book Arrowright (JE).png|Java Edition right arrow texture.
Book Arrowleft (BE).png|Bedrock Edition left arrow texture.
Book Arrowright (BE).png|Bedrock Edition Right arrow texture.
</gallery>
== See also ==
*[[Book]]
*[[Bookshelf]]
*[[Book and Quill]]
{{Items}}
[[Category:Renewable resources]]
[[cs:Napsaná kniha]]
[[es:Libro escrito]]
[[fr:Livre édité]]
[[hu:Megírt könyv]]
[[it:Libro]]
[[ja:記入済みの本]]
[[ko:글이 쓰인 책]]
[[nl:Geschreven boek]]
[[pl:Zapisana książka]]
[[pt:Livro escrito]]
[[ru:Написанная книга]]
[[uk:Написана книга]]
[[zh:成书]]</li><li>[[Totem of Undying|Totem of Undying]]<br/>{{redirect|Totem}}
{{Item
| image = Totem_of_Undying_JE2_BE2.png
| renewable = Yes
| stackable = No
| rarity = Uncommon
|effects=: {{EffectLink|Absorption}} II (0:05)
: {{EffectLink|Regeneration}} II (0:45){{only|java|short=yes}}/ II (0:40){{only|bedrock|short=yes}}
: {{EffectLink|Fire Resistance}} I (0:40)
}}
A '''totem of undying''' is an uncommon [[combat]] item that can save holders from death. It is dropped by [[Evoker|evokers]], which spawn in [[woodland mansion]]s and [[raid]]s.
== Obtaining ==
=== Mob loot ===
Evokers always drop one totem of undying upon death. The drop rate is not affected by [[Looting]].
== Usage ==
[[File:Totem of Undying Animation.gif|alt=The totem animation in Java Edition.|thumb|Animation of the totem activating {{in|java}}.]]
[[File:Totem of Undying Bedrock Animation.gif|alt=The totem animation in Bedrock Edition.|thumb|Animation of the totem activating {{in|bedrock}}.]]
If the [[player]] is holding a totem of undying in their [[off-hand]] or main-hand slot and receives otherwise fatal [[damage]], the totem saves the player from [[death]]. The totem of undying must be in the player's hand (main hand or offhand) for it to work—it does not work if it is in the [[Heads-up display#Hotbar|hotbar]], unless selected. Any [[mob]] that can hold a totem of undying (in a hand or in the mouth) can use it while holding it.{{only|JE}} The totem can be used only once; it disappears after use. It does not save the player from death caused by [[void]] damage, the {{cmd|kill}} [[command]]s or even a [[tipped arrow]] with [[Instant Damage|harming]] effect damage.<ref>{{bug|MC-206307}}</ref>
== Effect ==
When activated, the totem of undying restores {{hp|1}}, removes all existing [[status effect]]s, then grants 40{{only|bedrock|short=1}} or 45{{only|java|short=1}} seconds<ref>{{bug|MCPE-90716}}</ref> of [[Regeneration]] II, 40 seconds of [[Fire Resistance]] I and 5 seconds of [[Absorption]] II. An animation shows the totem of undying appearing to hover in front of the [[player]]'s screen, similar to the animation seen when a player receives the [[Bad Omen]] or [[Hero of the Village]] effect{{only|bedrock|short=1}} or encounters an [[elder guardian]]. When killed by an [[Instant Damage]] tipped [[arrow]], the arrow's instant damage takes effect after the totem has been activated.
The totem of undying also works in [[Hardcore]] mode.
== Sounds ==
{{edition|java}}:
{{Sound table
|sound=Totem of Undying.ogg
|subtitle=Totem activates
|source=dependent
|description=When something dies, using a totem of undying
|id=item.totem.use
|translationkey=subtitles.item.totem.use
|volume=1.0
|pitch=1.0
|distance=16
|foot=1}}
{{edition|bedrock}}:
{{Sound table
|type=bedrock
|sound=Totem of Undying.ogg
|source=player
|description=When something dies, using a totem of undying
|id=random.totem
|volume=1.0
|pitch=1.0
|foot=1}}
== Data values ==
=== ID ===
{{edition|java}}:
{{ID table
|edition=java
|showforms=y
|generatetranslationkeys=y
|displayname=Totem of Undying
|spritetype=item
|nameid=totem_of_undying
|form=item
|foot=1}}
{{edition|bedrock}}:
{{ID table
|edition=bedrock
|showaliasids=y
|shownumericids=y
|showforms=y
|notshowbeitemforms=y
|generatetranslationkeys=y
|displayname=Totem of Undying
|spritetype=item
|nameid=totem_of_undying
|aliasid=totem
|id=568
|form=item
|translationkey=item.totem.name
|foot=1}}
== Achievements ==
{{load achievements|Cheating Death}}
== Advancements ==
{{load advancements|Postmortal}}
== History ==
{{History||2016|[[File:Totem of Undying (pre-release).png|32px]] An early version of the totem of undying was seen during Minecon shortly before its reveal.}}
{{History|java}}
{{History||1.11|snap=16w39a|[[File:Totem of Undying JE1 BE1.png|32px]] Added totem of undying.}}
{{History||1.11.1|snap=16w50a|The ID name has now been changed from <code>totem</code> to <code>totem_of_undying</code>.}}
{{History||1.13|snap=17w47a|Prior to [[1.13/Flattening|''The Flattening'']], this [[item]]'s numeral ID was 449.}}
{{History||1.14|snap=18w43a|[[File:Totem of Undying JE2 BE2.png|32px]] The texture of the totem of undying has been changed.}}
{{History|||snap=18w47a|The totem of undying is now [[renewable resource|renewable]] as [[evoker]]s now spawn in [[raid]]s.}}
{{History||1.16.2|snap=20w28a|The totem of undying now gives the [[Fire Resistance]] II status effect for 40 seconds.}}
{{History|||snap=20w29a|The level of Fire Resistance given by the totem of undying is now reduced from II to I.<ref>{{bug|MC-194220}}</ref>}}
{{History||1.20.2|snap=23w31a|Totems of undying now trigger [[sculk sensor]]s when they activate.<ref>{{bug|MC-261427||Sculk sensors and calibrated sculk sensors don't detect totem of undying activating|Fixed}}</ref>}}
{{History|pocket}}
{{History||1.1.0|snap=alpha 1.1.0.0|[[File:Totem of Undying JE1 BE1.png|32px]] Added totem of undying.}}
{{History|bedrock}}
{{History||1.10.0|snap=beta 1.10.0.3|[[File:Totem of Undying JE2 BE2.png|32px]] The texture of the totem of undying has been changed.}}
{{History||1.11.0|snap=beta 1.11.0.3|The totem of undying is now [[renewable resource|renewable]] as [[evoker]]s now spawn in [[raid]]s.}}
{{History||1.16.100|snap=beta 1.16.100.54|The level of Fire Resistance given by the totem of undying is now reduced from II to I.<ref>{{bug|MCPE-52364}}</ref>}}
{{History||1.16.100|snap=beta 1.16.100.56|The ID of totems of undying has been changed from <code>totem</code> to <code>totem_of_undying</code>.}}
{{History|console}}
{{History||xbox=TU54|xbone=CU44|ps=1.52|wiiu=Patch 24|switch=1.0.4|[[File:Totem of Undying JE1 BE1.png|32px]] Added totem of undying.}}
{{History||xbox=TU56|xbone=CU48|ps=1.55|wiiu=Patch 26|switch=1.0.6|The totem of undying now applies [[Fire Resistance]] II when used.}}
{{History||xbox=none|xbone=none|ps=1.90|wiiu=none|switch=none|[[File:Totem of Undying JE2 BE2.png|32px]] The texture of the totem of undying has been changed.}}
{{History||xbox=none|xbone=none|ps=1.91|wiiu=none|switch=none|The totem of undying is now [[renewable resource|renewable]] as [[evoker]]s now spawn in [[raid]]s.}}
{{History|new3ds}}
{{History||1.9.19|[[File:Totem of Undying JE1 BE1.png|32px]] Added totem of undying.}}
{{History|foot}}
== Issues ==
{{issue list}}
== Trivia ==
* If a [[mob]] holds a totem of undying, the mob also resurrects upon [[Health#Death|death]] and the [[sound]] effect plays. However, the animation does not appear.
* In the {{el|ds}}, the totem of undying can be put in any hotbar slot to activate it, due to the lack of an [[Dual wield|off-hand slot]] in that version.
* Being able to obtain totems of undying in [[raids]] without exploring [[woodland mansions]] is considered a "massive game play design flaw" by Mojang.<ref>{{ytl|YRPlscod34Y}}</ref>
== Gallery ==
<gallery>
File:Particle totem of undying.png|Screenshot of the totem of undying being used mid-animation after a [[drowned]] deals otherwise fatal damage to the player.
File:Totem of Undying activating.gif|Animation of the totem activating.
File:Totem animation in third person mode.png|The totem animation in third person mode.
</gallery>
== References ==
{{reflist}}
{{Items}}
[[de:Totem der Unsterblichkeit]]
[[fr:Totem d'immortalité]]
[[ja:不死のトーテム]]
[[ko:불사의 토템]]
[[lzh:保命符]]
[[nl:Totem der onsterfelijkheid]]
[[pl:Totem nieśmiertelności]]
[[pt:Totem da imortalidade]]
[[ru:Тотем бессмертия]]
[[th:Totem of Undying]]
[[zh:不死图腾]]
[[Category:Renewable resources]]</li></ul> | 20w07a | Beacons can now be activated with netherite blocks. | |||
| Beacons can now be "fed" using netherite ingots. | |||||
| The texture of the UI of beacons has been changed. | |||||
| Beacons are now renewable, as soul sand, one of the blocks used to construct withers, is now renewable through bartering. | |||||
1.17{{Extension DPL}}<ul><li>[[Prismarine Shard|Prismarine Shard]]<br/>{{Item
| renewable = Yes
| stackable = Yes (64)
| type =
}}
A '''prismarine shard''' is an item obtained by defeating [[guardian]]s or [[elder guardian]]s. It can be used to craft various [[prismarine]] blocks as well as [[sea lantern]]s.
== Obtaining ==
Prismarine shards are dropped upon the death of [[guardian]]s and [[elder guardian]]s. From these mobs, 0–2 shards are dropped each time. This can be increased to a maximum of 5 with the [[Looting]] enchantment.
== Usage ==
=== Crafting ingredient ===
{{crafting usage}}
== Data values ==
=== ID ===
{{edition|java}}:
{{ID table
|edition=java
|showforms=y
|generatetranslationkeys=y
|displayname=Prismarine Shard
|spritetype=item
|nameid=prismarine_shard
|form=item
|foot=1}}
{{edition|bedrock}}:
{{ID table
|edition=bedrock
|showaliasids=y
|shownumericids=y
|showforms=y
|notshowbeitemforms=y
|generatetranslationkeys=y
|displayname=Prismarine Shard
|spritetype=item
|nameid=prismarine_shard
|aliasid=prismarineshard
|id=565
|form=item
|foot=1}}
== History ==
{{History|java}}
{{history||1.8|snap=14w25a|[[File:Prismarine Shard JE1 BE1.png|32px]] Added prismarine shards.}}
{{History||1.13|snap=17w47a|Prior to [[1.13/Flattening|''The Flattening'']], this [[item]]'s numeral ID was 409.}}
{{History||1.14|snap=18w43a|[[File:Prismarine Shard JE2 BE2.png|32px]] The texture of prismarine shards has now been changed.}}
{{History|pocket alpha}}
{{History||v0.16.0|snap=build 1|[[File:Prismarine Shard JE1 BE1.png|32px]] Added prismarine shards.}}
{{History|bedrock}}
{{History||1.10.0|snap=beta 1.10.0.3|[[File:Prismarine Shard JE2 BE2.png|32px]] The texture of prismarine shards has now been changed.}}
{{History|console}}
{{History||xbox=TU31|xbone=CU19|ps=1.22|wiiu=Patch 3|[[File:Prismarine Shard JE1 BE1.png|32px]] Added prismarine shards.}}
{{History||xbox=none|xbone=none|ps=1.90|wiiu=none|switch=none|[[File:Prismarine Shard JE2 BE2.png|32px]] The texture of prismarine shards has now been changed.}}
{{History|New 3DS}}
{{History||1.3.12|[[File:Prismarine Shard JE1 BE1.png|32px]] Added prismarine shards.}}
{{History|foot}}
== Issues ==
{{issue list}}
{{items}}
[[de:Prismarinscherbe]]
[[es:Fragmento de prismarina]]
[[fr:Éclat de prismarine]]
[[ja:プリズマリンの欠片]]
[[ko:프리즈머린 조각]]
[[nl:Prismarienscherf]]
[[pl:Odłamek pryzmarynu]]
[[pt:Pedaço de prismarinho]]
[[ru:Призмариновый осколок]]
[[uk:Призмариновий уламок]]
[[zh:海晶碎片]]
[[Category:Renewable resources]]</li><li>[[Dragon's Breath|Dragon's Breath]]<br/>{{Item
| image = Dragon's Breath.png
| renewable = Yes
| stackable = Yes (64)
| rarity = Uncommon
}}
The '''dragon's breath''' is a [[brewing]] item that is used solely to make [[lingering potion]]s.
== Obtaining ==
The dragon's breath can be obtained by scooping up the [[ender dragon]]'s breath attack or the purple [[area effect cloud|effect clouds]] caused by [[dragon fireball]]s in an empty [[glass bottle]].
== Usage ==
=== Brewing ingredient ===
Dragon's breath may be added to any splash potion to upgrade it to a lingering potion, which can be used to create a lasting [[Lingering Potion#Area Effect Cloud|area effect cloud]], or to craft [[Arrow#Tipped arrows|tipped arrows]].
{{brewing
|name=[[Lingering Potion]]
|showname=1
|Dragon's Breath
|Any Lingering Potion
|base=Any Splash Potion}}
When put 2 or more dragon's breath in the brewing stand, after the brewing process, a glass bottle will drop as an [[Item (entity)|entity]]. However, if put only 1 dragon's breath in the brewing stand, after the brewing process, the glass bottle is consumed and cannot be retrieved.<ref>{{bug|MC-259583}}</ref>
== Sounds ==
{{Edition|Java}}:
{{Sound table
|sound=Bottle fill dragon breath1.ogg
|sound2=Bottle fill dragon breath2.ogg
|subtitle=Bottle fills
|source=neutral
|description=Filling a glass bottle with dragon's breath
|id=item.bottle.fill_dragonbreath
|translationkey=subtitles.item.bottle.fill
|volume=1.0
|pitch=1.0
|distance=16
|foot=1}}
{{Edition|Bedrock}}:
{{Sound table
|type=bedrock
|sound=Bottle fill dragon breath1.ogg
|sound2=Bottle fill dragon breath2.ogg
|source=sound
|description=When a bottle is filled with dragon's breath
|id=bottle.dragonbreath
|volume=0.7<wbr>{{Until|BE 1.20.40}}<br>1.0<wbr>{{Upcoming|BE 1.20.40}}
|pitch=1.0
|foot=1}}
== Achievements ==
{{Load achievements|You Need a Mint}}
== Advancements ==
{{load advancements|You Need a Mint}}
== Data values ==
=== ID ===
{{edition|java}}:
{{ID table
|edition=java
|showforms=y
|generatetranslationkeys=y
|displayname=Dragon's Breath
|spritetype=item
|nameid=dragon_breath
|form=item
|foot=1}}
{{edition|bedrock}}:
{{ID table
|edition=bedrock
|shownumericids=y
|showforms=y
|notshowbeitemforms=y
|generatetranslationkeys=y
|displayname=Dragon's Breath
|spritetype=item
|nameid=dragon_breath
|id=560
|form=item
|foot=1}}
== History ==
{{History|java}}
{{History||1.9|snap=15w33a|[[File:Dragon's Breath JE1 BE1.png|32px]] Added dragon's breath.}}
{{History||1.13|snap=17w47a|Prior to [[1.13/Flattening|''The Flattening'']], this [[item]]'s numeral ID was 437.}}
{{History||1.14|snap=18w43a|[[File:Dragon's Breath JE2 BE2.png|32px]] The texture of dragon's breath has been changed.}}
{{History|pocket}}
{{History||1.0.0|snap=alpha 0.17.0.1|[[File:Dragon's Breath JE1 BE1.png|32px]] Added dragon's breath.}}
{{History|bedrock}}
{{History||1.10.0|snap=beta 1.10.0.3|[[File:Dragon's Breath JE2 BE2.png|32px]] The texture of dragon's breath has been changed.}}
{{History|console}}
{{History||xbox=TU46|xbone=CU36|ps=1.38|wiiu=Patch 15|switch=1.0.1|[[File:Dragon's Breath JE1 BE1.png|32px]] Added dragon's breath.}}
{{History||xbox=none|xbone=none|ps=1.90|wiiu=none|switch=none|[[File:Dragon's Breath JE2 BE2.png|32px]] The texture of dragon's breath has been changed.}}
{{History|3ds}}
{{History||1.7.10|[[File:Dragon's Breath JE1 BE1.png|32px]] Added dragon's breath.}}
{{History|foot}}
== Issues ==
{{issue list}}
== Trivia ==
* If the dragon's breath is used in a [[crafting]] recipe (using a [[mod]] or a [[data pack]]), it becomes an empty bottle instead of being entirely consumed.
== References ==
{{reflist}}
==External Links==
*[https://www.minecraft.net/en-us/article/dragon-s-breath Taking Inventory: Dragon's Breath] – Minecraft.net on June 9, 2023
{{Items}}
[[Category:Renewable resources]]
[[de:Drachenatem]]
[[fr:Souffle de dragon]]
[[it:Soffio di drago]]
[[ja:ドラゴンブレス]]
[[ko:드래곤의 숨결]]
[[nl:Drakenadem]]
[[pl:Oddech smoka]]
[[pt:Bafo do dragão]]
[[ru:Драконье дыхание]]
[[zh:龙息]]
[[Category:Brewing recipe]]</li></ul> | 21w07a | Beacon beams are now visible up to 1343 blocks away from the source instead of 256 blocks. | |||
1.20.2{{Extension DPL}}<ul><li>[[Netherite Scrap|Netherite Scrap]]<br/>{{About|the unrefined material|the refined item|Netherite Ingot|other uses|Netherite}}
{{Item
| title = Netherite Scrap
| image = Netherite Scrap.png
| rarity = Common
| renewable = No
| stackable = Yes (64)
}}
'''Netherite scrap''' is a material [[smelt]]ed from [[ancient debris]], which is found in [[the Nether]]. It is used solely for crafting [[Netherite Ingot|netherite ingots]]. Like all netherite-related items, it is not flammable.
== Obtaining ==
=== Smelting ===
{{Smelting
|Ancient Debris
|Netherite Scrap
|2
}}
=== Chest loot ===
{{LootChestItem|netherite-scrap}}
== Usage ==
=== Crafting ingredient ===
{{Crafting usage}}
== Data values ==
=== ID ===
{{edition|java}}:
{{ID table
|edition=java
|showforms=y
|generatetranslationkeys=y
|displayname=Netherite Scrap
|spritetype=item
|nameid=netherite_scrap
|form=item
|foot=1}}
{{edition|bedrock}}:
{{ID table
|edition=bedrock
|shownumericids=y
|showforms=y
|notshowbeitemforms=y
|generatetranslationkeys=y
|displayname=Netherite Scrap
|spritetype=item
|nameid=netherite_scrap
|id=613
|form=item
|foot=1}}
== History ==
{{History|java}}
{{History||1.16|snap=20w06a|[[File:Netherite Scrap JE1.png|32px]] Added netherite scrap.}}
{{History|||snap=20w10a|[[File:Netherite Scrap JE2 BE1.png|32px]] The texture of netherite scrap has been changed.}}
{{History|||snap=20w16a|Netherite scraps now generate in [[bastion remnant]] chests.}}
{{History||1.16.2|snap=20w30a|The chance of finding netherite scraps in bastion remnant chests has been increased.}}
{{History|bedrock}}
{{History||1.16.0|snap=beta 1.16.0.51|[[File:Netherite Scrap JE2 BE1.png|32px]] Added netherite scrap.}}
{{History|||snap=beta 1.16.0.57|Netherite scraps now generate in [[bastion remnants]] chests.}}
{{History|foot}}
== Issues ==
{{Issue list}}
== External Links ==
*[https://www.minecraft.net/en-us/article/taking-inventory--netherite-scrap Taking Inventory: Netherite Scrap] – Minecraft.net on March 25, 2021
{{Items}}
[[Category:Non-renewable resources]]
[[de:Netheritplatten]]
[[fr:Fragments de Netherite]]
[[it:Frammento di netherite]]
[[ja:ネザライトの欠片]]
[[ko:네더라이트 파편]]
[[pl:Odłamek netherytu]]
[[pt:Fragmentos de netherita]]
[[ru:Незеритовый скрап]]
[[th:เศษเนเธอไรต์]]
[[uk:Незеритовий уламок]]
[[zh:下界合金碎片]]</li><li>[[Brewing Stand|Brewing Stand]]<br/>{{Block
| image = <gallery>
Brewing Stand (empty) JE10.png | Empty
Brewing Stand (right) JE10.png | Right
Brewing Stand (left) JE10.png | Left
Brewing Stand (full) JE10.png | Full
</gallery>
| transparent = Yes
| light = Yes (1)
| tool = Wooden Pickaxe
| renewable = Yes
| stackable = Yes (64)
| flammable = No
| lavasusceptible = No
}}
A '''brewing stand''' is a [[block]] used for [[brewing]] [[potion]]s using [[Glass Bottle|bottles]] and suitable ingredients. It also serves as a [[cleric]]'s [[job site block]].
== Obtaining ==
=== Breaking ===
A brewing stand can be obtained using any [[pickaxe]]. If mined without a pickaxe, it drops nothing {{in|JE}}, while it drops itself {{in|BE}}.
{{breaking row|horizontal=1|Brewing Stand|Pickaxe|Wood|foot=1}}
=== Natural generation ===
Brewing stands generate in [[end ship]]s. They have two [[potion of Healing|Instant Health II potions]] in their holders.
A brewing stand also generates in the basement of [[igloo]]s with a [[splash potion of Weakness]] in it.
Brewing stands can generate without potions in [[village]] churches.
=== Crafting ===
{{Crafting
|head=1
|showdescription=1
|B1= Blaze Rod
|A2= Any stone-tier block |B2= Any stone-tier block |C2= Any stone-tier block
|Output= Brewing Stand
|type= Brewing
|description=Can use cobblestone and its other variants interchangeably.
|foot=1
}}
== Usage ==
[[File:Brewing Stand GUI.png|thumb|right|176px|Brewing stand GUI {{in|java}}]]
By default, the interface of a brewing stand is labeled "Brewing Stand", but this name can be customized by naming it in an [[anvil]] before placing it.
Brewing stands cannot be pushed by [[piston]]s {{in|java}}.
=== Brewing ===
{{main|Brewing}}
The main purpose of brewing stands is to allow for the [[brewing]] of [[potion]]s. Its interface can be opened by pressing {{control|use}} on them.
Brewing stands need [[blaze powder]] as fuel. Each piece brews 20 batches of potions, with each stage of brewing counting separately. Unlike [[furnace]]s, there is no time limit; fuel is consumed only when there are [[Glass Bottle|bottles]] and an ingredient to brew into it.
Brewing stands interact with [[hopper]]s as follows:
* They accept brewing ingredients from hoppers pointing down into the top.
* Any valid potion recipe can be preloaded for "hands-free" brewing of a complex recipe, with the [[Nether Wart|nether wart]] falling through into the stand for the first step.
* Bottles and fuel are accepted from hoppers pointing into the side.
* Finished products can be pulled out by hoppers below, but each stage of brewing counts as a batch of "finished" potions.
{{IN|education}}, elements can be combined in the brewing stand to make the [[medicine]] potions: antidote, elixir, eye drops, and tonic.
=== Changing profession ===
If a village has a brewing stand that has not been claimed by a villager, any villager who hasn't already picked a [[job site]] block in the village has a chance to change their profession into cleric.
=== Light source ===
Brewing stands emit a light level of 1.
== Sounds ==
=== Generic ===
{{Sound table/Block/Stone}}
=== Unique ===
{{edition|java}}:
{{Sound table
|rowspan=2
|sound=Brewing Stand brew1.ogg
|sound2=Brewing Stand brew2.ogg
|subtitle=Brewing Stand bubbles
|source=block
|description=When a potion finishes brewing
|id=block.brewing_stand.brew
|translationkey=subtitles.block.brewing_stand.brew
|volume=1.0
|pitch=1.0
|distance=16}}
{{Sound table
|subtitle=Cleric works
|source=neutral
|description=Randomly while a cleric is working
|id=entity.villager.work_cleric
|translationkey=subtitles.entity.villager.work_cleric
|volume=1.0
|pitch=0.8-1.2
|distance=16}}
{{Sound table
|sound=Door close.ogg
|sound2=Door open.ogg
|subtitle=Chest locked<ref group=sound name=lock>{{Bug|MC-98316||Wrong subtitles caused by missing distinction}}</ref>
|source=block
|description=When a player attempts to open a brewing stand locked using the {{nbt|string|Lock}} tag
|id=block.chest.locked|idnote=<ref group=sound name=lock/>
|translationkey=subtitles.block.chest.locked|translationkeynote=<ref group=sound name=lock/>
|volume=1.0
|pitch=1.0
|distance=16
|foot=1}}
{{Edition|Bedrock}}:
{{Sound table
|type=bedrock
|rowspan=2
|sound=Brewing Stand brew1.ogg
|sound2=Brewing Stand brew2.ogg
|source=block
|description=When a potion finishes brewing
|id=random.potion.brewed
|volume=1.0
|pitch=1.0}}
{{Sound table
|source=block
|description=Randomly while a cleric is working
|id=random.potion.brewed
|volume=1.0
|pitch=1.0
|foot=1}}
== Data values ==
=== ID ===
{{edition|java}}:
{{ID table
|edition=java
|showforms=y
|generatetranslationkeys=y
|displayname=Brewing Stand
|spritetype=block
|nameid=brewing_stand
|translationkey=block.minecraft.brewing_stand, item.minecraft.brewing_stand
|foot=1}}
{{ID table
|displayname=Block entity
|spritename=brewing-stand
|spritetype=block
|nameid=brewing_stand
|foot=1}}
{{edition|bedrock}}:
{{ID table
|edition=bedrock
|firstcolumnname=Brewing Stand
|shownumericids=y
|showforms=y
|generatetranslationkeys=y
|displayname=Block
|spritename=brewing-stand
|spritetype=block
|nameid=brewing_stand
|id=117
|form=block
|itemform=item.brewing_stand
|translationkey=-}}
{{ID table
|displayname=Item
|spritename=brewing-stand
|spritetype=item
|nameid=brewing_stand
|id=431
|form=item
|foot=1}}
{{ID table
|notnamespaced=y
|displayname=Block entity
|spritename=brewing-stand
|spritetype=block
|nameid=BrewingStand
|foot=1}}
=== Block states ===
{{see also|Block states}}
{{/BS}}
=== Block data ===
A brewing stand has a block entity associated with it that holds additional data about the block.
{{el|java}}:
{{see also|Block entity format}}
{{/BE}}
{{el|bedrock}}:
: See [[Bedrock Edition level format/Block entity format]].
== Achievements ==
{{load achievements|Local Brewery}}
== Advancements ==
{{Load advancements|Local Brewery}}
== History ==
{{History|java}}
{{History||1.0.0|snap=Beta 1.9 Prerelease 2|[[Cauldron]]s are implemented to be used to brew [[potion]]s, but are not available in-game yet.}}
{{History|||snap=September 30, 2011|slink={{tweet|jeb|119762786619359232}}|[[File:Brewing Stand (pre-release).png|32px]] [[Jens Bergensten|Jeb]] reveals that brewing is done through a brewing stand instead of a [[cauldron]].}}
{{History|||snap=Beta 1.9 Prerelease 3|[[File:Brewing Stand (empty) JE1 BE1.png|32px]] [[File:Brewing Stand (right) JE1.png|32px]] [[File:Brewing Stand (left) JE1.png|32px]] [[File:Brewing Stand (full) JE1.png|32px]] [[File:Brewing Stand (item) JE1 BE1.png|32px]] Added brewing stands.
|Brewing [[potion]]s with brewing stands currently take 30 seconds.
|When the first brewing stand was shown by Jeb, it had an additional 2D sub-stand for [[Glass Bottle|bottles]], but the stands for bottles are now designed in 3D.<ref>{{tweet|jeb|119763532312096769|I'm fully aware the potions are very thin (diet?), but it looks cute. (Always work in progress, of course)|September 30, 2011}}</ref>}}
{{History||1.1|snap=12w01a|Brewing time for brewing stands has been reduced to 20 seconds.}}
{{History||1.3.1|snap=12w15a|{{key|Shift}} + clicking can now be used to put items in brewing stands.}}
{{History||1.8|snap=14w11a|[[File:Brewing Stand (empty) JE2.png|32px]] [[File:Brewing Stand (right) JE2.png|32px]] [[File:Brewing Stand (left) JE2.png|32px]] [[File:Brewing Stand (full) JE2.png|32px]] The [[model]] of brewing stands has been changed. Stands with no bottles appear glitched from some angles, the left and right slots appear identical when filled in (although both distinct appearences still exist as metadata), and the arm angles have changed due to the 22.5º rotation limit.
|Brewing stands' targeting [[hitbox]] is now a full cube - previously it was a cuboid around the base plates.}}
{{History|||snap=14w11b|[[File:Brewing Stand (empty) JE3.png|32px]] [[File:Brewing Stand (right) JE3.png|32px]] [[File:Brewing Stand (left) JE3.png|32px]] [[File:Brewing Stand (full) JE3.png|32px]] Empty brewing stands' model have been fixed, although the other changes still remain.}}
{{History|||snap=14w25a|[[File:Brewing Stand (empty) JE4.png|32px]] [[File:Brewing Stand (right) JE4.png|32px]] [[File:Brewing Stand (left) JE4.png|32px]] [[File:Brewing Stand (full) JE4.png|32px]] Brewing stand models have changed such that bottles in the left and right slots now indeed appear different. However, the leftmost one appears stretched. Arms are also now affected by directional shading.<ref>{{bug|MC-68302|||WAI}}</ref>}}
{{History||1.9|snap=15w31a|Brewing stands now generate in [[End City|end cities]].}}
{{History|||snap=15w33a|Brewing stands can now brew [[Lingering Potion|lingering potion]]s.}}
{{History|||snap=15w33c|A bug where the [[player]] couldn't put in a [[splash potion]] to make a lingering potion has been fixed.}}
{{History|||snap=15w42a|Brewing stands now require [[Blaze Powder|blaze powder]] to operate.}}
{{History|||snap=15w43a|Brewing stands now generate in the basement of [[igloo]]s.
|Each blaze powder now fuels 20 brewing stand operations rather than 30.}}
{{History|||snap=15w44a|[[File:Brewing Stand (empty) JE5.png|32px]] [[File:Brewing Stand (right) JE5.png|32px]] [[File:Brewing Stand (left) JE5.png|32px]] [[File:Brewing Stand (full) JE5.png|32px]] Brewing stand models no longer have a stretched bottle.}}
{{History|||snap=15w47b|[[Sound]]s have been added for brewing stands.}}
{{History||1.11|snap=16w32a|The block entity ID has been changed from <code>Cauldron</code> to <code>brewing_stand</code>.}}
{{History||1.13|snap=17w47a|Prior to [[Java Edition 1.13/Flattening|''The Flattening'']], this [[block]]'s numeral ID was 117, and the [[item]]'s 379.}}
{{History||1.14|snap=18w43a|[[File:Brewing Stand (empty) JE6 BE2.png|32px]] <!-- [[File:Brewing Stand (left) JE6 BE2.png|32px]] [[File:Brewing Stand (right) JE6 BE2.png|32px]] -->[[File:Brewing Stand (Full) JE6 BE2.png|32px]] [[File:Brewing Stand (item) JE2.png|32px]] The textures of brewing stands have been changed.}}
{{History|||snap=18w44a|[[File:Brewing Stand (item) JE3 BE2.png|32px]] The texture of the brewing stand [[item]] has been changed.}}
{{History|||snap=18w48a|Brewing stands now generate in the updated [[plains]] [[village]]s.}}
{{History|||snap=18w49a|Brewing stands now generate in the updated [[savanna]] villages and the new [[Snowy Tundra|snowy]] villages.}}
{{History|||snap=18w50a|Brewing stands now generate in the updated [[desert]] and [[taiga]] villages.}}
{{History|||snap=19w03c|The three plates, but not the rod, of a brewing stand now use correct cullface arguments.}}
{{History|||snap=19w11a|Brewing stands now serve as cleric [[villager]]s' job site block.}}
{{History||1.16.2|snap=20w28a|Brewing stands can now be [[crafting|crafted]] with [[blackstone]].}}
{{History||1.17|snap=21w07a|Brewing stands can now be crafted with [[deepslate|grimstone]] (now deepslate).}}
{{History||1.17|snap=21w08a|Brewing stands can no longer be crafted with deepslate.
|Brewing stands can now be crafted with [[Cobbled Deepslate|cobbled deepslate]].}}
{{History|||snap=21w11a|<!--[[File:Brewing Stand (empty) JE7.png|32px]] [[File:Brewing Stand (right) JE7.png|32px]] [[File:Brewing Stand (left) JE7.png|32px]] [[File:Brewing Stand (Full) JE7.png|32px]] Changed [[lighting]].-->Tweaked the brewing stand GUI texture.}}
{{History||1.18|snap=21w39a|[[File:Brewing Stand (empty) JE8.png|32px]] [[File:Brewing Stand (right) JE8.png|32px]] [[File:Brewing Stand (left) JE8.png|32px]] [[File:Brewing Stand (full) JE8.png|32px]] The default [[brightness]] has been changed from "Moody" to 50.}}
{{History||1.19|snap=22w11a|[[File:Brewing Stand (empty) JE9.png|32px]] [[File:Brewing Stand (right) JE9.png|32px]] [[File:Brewing Stand (left) JE9.png|32px]] [[File:Brewing Stand (full) JE9.png|32px]] Changed texture and model.}}
{{History|||snap=22w17a|[[File:Brewing Stand (empty) JE10.png|32px]] [[File:Brewing Stand (right) JE10.png|32px]] [[File:Brewing Stand (left) JE10.png|32px]] [[File:Brewing Stand (full) JE10.png|32px]] Changed base texture and model.}}
{{History|pocket alpha}}
{{History||v0.12.1|snap=build 1|[[File:Brewing Stand (empty) JE1 BE1.png|32px]] [[File:Brewing Stand (item) JE1 BE1.png|32px]] Added brewing stands.}}
{{History|pocket}}
{{History||1.0.0|snap=alpha 0.17.0.1|Brewing stands now generate in [[igloo]] basements.
|Brewing stands now generate in [[end ship]]s.}}
{{History|bedrock}}
{{History||1.2.0|snap=beta 1.2.0.2|Brewing stands now require [[blaze powder]] to operate.}}
{{History||1.10.0|snap=beta 1.10.0.3|[[File:Brewing Stand (empty) JE6 BE2.png|32px]] [[File:Brewing Stand (item) JE3 BE2.png|32px]] The textures of brewing stands have been changed.|A brewing stand can now generate in [[village]] temples.}}
{{History||1.16.100|snap=beta 1.16.100.52|Brewing stands can now be [[craft]]ed with [[blackstone]].}}
{{History||1.17.0|snap=beta 1.17.0.50|Brewing stands can now be [[craft]]ed with [[cobbled deepslate]].}}
{{History||1.19.0|snap=beta 1.19.0.20|[[File:Brewing Stand (empty) JE10.png|32px]] [[File:Brewing Stand (right) JE10.png|32px]] [[File:Brewing Stand (left) JE10.png|32px]] [[File:Brewing Stand (full) JE10.png|32px]] Slightly changed its texture, to make their arms connect to their bases.}}
{{History|console}}
{{History||xbox=TU7|xbone=CU1|ps=1.0|wiiu=Patch 1|switch=1.0.1|[[File:Brewing Stand (empty) JE1 BE1.png|32px]] [[File:Brewing Stand (item) JE1 BE1.png|32px]] Added brewing stands.}}
{{History||xbox=TU43|xbone=CU33|ps=1.36|wiiu=Patch 13|Brewing stands now appear in [[igloo]]s. The lack of a fuel requirement means that potions can now be made without going to the Nether.}}
{{History||xbox=TU46|xbone=CU36|ps=1.38|wiiu=Patch 15|Brewing stands now require [[blaze powder]] to operate.}}
{{History||xbox=none|xbone=none|ps=1.90|wiiu=none|switch=none|[[File:Brewing Stand.png|32px]] [[File:Brewing Stand (item) JE3 BE2.png|32px]] The textures of brewing stands have been changed.}}
{{History|new 3ds}}
{{History||0.1.0|[[File:Brewing Stand (empty) JE1 BE1.png|32px]] [[File:Brewing Stand (item) JE1 BE1.png|32px]] Added brewing stands.}}
{{History|foot}}
<gallery>
File:Brewingstand Potion.png|The first picture of a brewing stand. A [[giant mushroom]] is also seen in this picture.
</gallery>
=== Brewing stand "item" ===
{{:Technical blocks/Brewing Stand}}
== Issues ==
{{issue list}}
== Trivia ==
* Even when the brewing stand is not in use, there is still smoke coming out of the top of it.
* In ''[[Java Edition]]'', when a brewing stand is broken, particles from a bottle appear, even if no bottle is in the stand.
* No matter what potion (including water bottles) is in the stand it always looks like a full red bottle.
* Brewing stands always face east, no matter what direction they are placed.
* According to [[Michael Stoyke|Searge]], for thematic reasons, a brewing stand was added to the basement of the [[igloo]]. Because of this, blaze powder was required for fuel to preserve game progression. In this way, the player is prevented from using it before going to the Nether.<ref>https://minecraft.net/en-us/article/meet-blaze</ref>
== Gallery ==
<gallery>
File:Brewing stand in action.png|A brewing stand in action.
File:Igloobasement.png|A brewing stand in an igloo basement.
File:1.8 and below brewing stand.png|The GUI of the brewing stand in 1.8.x and below.
</gallery>
== See also ==
*[[Glass Bottle]]
*[[Splash Potion]]
== References ==
{{reflist}}
== External links ==
*[https://www.minecraft.net/en-us/article/taking-inventory--brewing-stand Taking Inventory: Brewing Stand] – Minecraft.net on October 11, 2019
{{Blocks|Utility}}
{{items}}
[[Category:Job blocks]]
[[Category:Utility blocks]]
[[Category:Manufactured blocks]]
[[Category:Generated structure blocks]]
[[Category:Storage]]
[[Category:Block entities]]
[[Category:Light sources]]
[[de:Braustand]]
[[es:Soporte para pociones]]
[[fr:Alambic]]
[[hu:Főzőállvány]]
[[it:Alambicco]]
[[ja:醸造台]]
[[nl:Brouwstandaard]]
[[pl:Statyw alchemiczny]]
[[pt:Suporte de poções]]
[[ru:Варочная стойка]]
[[uk:Варильна стійка]]
[[zh:酿造台]]</li></ul> | 23w32a | The Primary and Secondary NBT formats for beacon have changed to
primary_effect and secondary_effect. | |||
| Pocket Edition Alpha | |||||
v0.16.0{{Extension DPL}}<ul><li>[[Rabbit's Foot|Rabbit's Foot]]<br/>{{Item
| image = Rabbit's Foot.png
|type=
| renewable = Yes
| stackable = Yes (64)
}}
A '''rabbit's foot''' is a [[brewing]] item obtained from [[rabbit]]s.
== Obtaining ==
=== Mob loot ===
Each [[rabbit]] has a 10% chance to drop a rabbit's foot when killed by the [[player]]. This chance can be increased by 3% per level using a sword enchanted with [[Looting]].
A [[fox]] sometimes spawns with a rabbit's foot in its mouth, which always drops upon death. Alternatively, the player can drop a [[food]] item, which causes the fox to drop the rabbit's foot.
=== Cat gifts ===
{{main|Cat#Gifts}}
A tamed [[cat]] has a 70% chance of giving the player a gift when the player wakes up from a [[bed]], and the gift has a 16.13% chance to be a rabbit's foot.
== Usage ==
=== Brewing ingredient ===
{{Brewing
|head=1
|Rabbit's Foot
|Mundane Potion
|base=Water Bottle
}}
{{brewing
|foot=1
|showname=1
|Rabbit's Foot
|Potion of Leaping
}}
=== Trading ===
Journeyman-level cleric [[villager]]s buy rabbit's feet for an [[emerald]] as part of their trade: {{in|java}} they buy 2, and {{in|bedrock}} they buy 4.
== Video ==
<div style="text-align:center">{{yt|Ba3QN3uCniU}}</div>
== Data values ==
=== ID ===
{{edition|java}}:
{{ID table
|edition=java
|showforms=y
|generatetranslationkeys=y
|displayname=Rabbit's Foot
|spritetype=item
|nameid=rabbit_foot
|form=item
|foot=1}}
{{edition|bedrock}}:
{{ID table
|edition=bedrock
|shownumericids=y
|showforms=y
|notshowbeitemforms=y
|generatetranslationkeys=y
|displayname=Rabbit's Foot
|spritetype=item
|nameid=rabbit_foot
|id=528
|form=item
|foot=1}}
== History ==
{{History|java}}
{{History||1.8|snap=June 30, 2014|slink=https://twitter.com/TheMogMiner/status/483636993780232192|[[Ryan Holtz]] tweeted images of a rabbit's foot with some other new [[item]]s.}}
{{History|||snap=14w27a|[[File:Rabbit's Foot JE1.png|32px]] Added rabbit's foot.
|Added the [[potion of Leaping]]; it is [[brewing|brewed]] by adding a rabbit's foot to an [[awkward potion]]. The rabbit's foot also creates the [[mundane potion]] when brewed into a [[water bottle]].}}
{{History|||snap=14w33b|[[File:Rabbit's Foot JE2 BE1.png|32px]] The texture of the rabbit's foot has been changed. The new texture was created by [[wikipedia:Reddit|Reddit]] user [http://www.reddit.com/u/zeldahuman zeldahuman].<ref>{{reddit|2bjzes/a_reminder_of_the_blocks_and_items_added_in_18_so|cj69zie|context=3}}</ref><ref>{{reddit|2c5f35/minecraft_snapshot_14w31a_has_been_released|cjct7gb}}</ref>}}
{{History||1.8.1|snap=pre1|Potions of Leaping, which use rabbit's foot, can now be extended using [[redstone]].}}
{{History||1.9|snap=15w46a|The drop rate of rabbit's foot has been quadrupled.{{more info|Before/After rates}}}}
{{History||1.13|snap=17w47a|Prior to [[1.13/Flattening|''The Flattening'']], this [[item]]'s numeral ID was 414.}}
{{History||1.14|snap=18w43a|[[File:Rabbit's Foot JE3 BE2.png|32px]] The texture of rabbit's foot has been changed.}}
{{History|||snap=18w44a|[[Cat]]s now offer rabbit's feet as [[Cat#Gifts|gifts]].}}
{{History|||snap=19w07a|Added [[fox]]es, which sometimes spawn with rabbit's feet in their mouths.}}
{{History|||snap=19w11a|Cleric [[villager]]s now [[trading|buy]] rabbit's feet.}}
{{History|pocket alpha}}
{{History||v0.12.1|snap=build 1|[[File:Rabbit's Foot JE2 BE1.png|32px]] Added rabbit's foot to the [[Creative]] mode [[inventory]].}}
{{History||v0.13.0|snap=build 1|Rabbit's foot can now be obtained as a rare [[drops|drop]] upon killing [[rabbit]]s.
|Rabbit's foot can now be [[brewing|brewed]] to make [[potions of Leaping]].}}
{{History|bedrock}}
{{History||1.8.0|snap=beta 1.8.0.8|Tamed [[cat]]s can now give the [[player]] rabbit's foot as a gift.}}
{{History||1.10.0|snap=beta 1.10.0.3|[[File:Rabbit's Foot JE3 BE2.png|32px]] The texture of rabbit's foot has been changed.}}
{{History||1.11.0|snap=beta 1.11.0.4|Rabbit's foot can now be [[trading|sold]] to cleric [[villager]]s.}}
{{History||1.13.0|snap=beta 1.13.0.1|Added [[fox]]es, which can [[drops|drop]] rabbit's foot.}}
{{History|console}}
{{History||xbox=TU31|xbone=CU19|ps=1.22|wiiu=Patch 3|switch=1.0.1|[[File:Rabbit's Foot JE2 BE1.png|32px]] Added rabbit's foot.}}
{{History||xbox=none|xbone=none|ps=1.90|wiiu=none|switch=none|[[File:Rabbit's Foot JE3 BE2.png|32px]] The texture of rabbit's foot has been changed.}}
{{History|New 3DS}}
{{History||0.1.0|[[File:Rabbit's Foot JE2 BE1.png|32px]] Added rabbit's foot.}}
{{History|foot}}
== Issues ==
{{issue list}}
== Trivia ==
* The superstition that [[wikipedia:Rabbit's_foot|a rabbit's foot is a lucky charm]] applies equally to Minecraft as it does in the real world: it does not actually increase luck.
== Gallery ==
<gallery>
Rabbit Items 4 Ryan Holtz.png|First image of the item by [[Ryan Holtz]].
Rabbit Items 5 Ryan Holtz.png|Ryan Holtz brewing the item into a potion.
Rabbit Items 6 Ryan Holtz.png|Ryan Holtz enhancing the potion.
</gallery>
== References ==
{{reflist}}
== External Links ==
*[https://www.minecraft.net/en-us/article/taking-inventory--rabbit-s-foot Taking Inventory: Rabbit's Foot] – Minecraft.net on May 3, 2019
{{items}}
[[de:Hasenpfote]]
[[es:Pata de conejo]]
[[fr:Patte de lapin]]
[[it:Zampa di coniglio]]
[[ja:ウサギの足]]
[[ko:토끼발]]
[[nl:Konijnenpootje]]
[[pl:Królicza łapka]]
[[pt:Pé de coelho]]
[[ru:Кроличья лапка]]
[[uk:Кроляча лапка]]
[[zh:兔子脚]]
[[Category:Renewable resources]]
[[Category:Brewing recipe]]</li><li>[[Obsidian Boat|Obsidian Boat]]<br/>{{for|other uses|Obsidian (disambiguation)}} {{for|other kinds of boats|Boat (disambiguation)}}
{{Joke feature}}
{{ItemEntity
|title=Obsidian Boat
|image=Obsidian Boat.png
|image2=Obsidian Boat (item).png
|stackable=No
|renewable=Yes
}}
The '''obsidian boat''' was a joke [[boat]] variant released in an April Fools' joke version.
== Obtaining ==
=== Crafting ===
{{crafting
|A2 = Obsidian |C2 = Obsidian
|A3 = Obsidian |B3 = Obsidian |C3 = Obsidian
|Output= Obsidian Boat
|ignoreusage=1
}}
== Usage ==
Obsidian boats sank in [[water]] instead of floating. They also sank in lava like other boats but did not get destroyed in it.
== Sounds ==
Obsidian boats used the Friendly Creatures sound category for entity-dependent sound events, although did not have any sounds of their own.
== Data values ==
=== ID ===
{{ID table
|shownumericids=y
|showforms=y
|generatetranslationkeys=java
|displayname=Obsidian Boat
|spritetype=item
|nameid=obsidian_boat
|id=432
|form=item
|translationkey=item.obsidian_boat.name
|foot=1}}
{{ID table
|shownumericids=y
|generatetranslationkeys=java
|displayname=Obsidian Boat
|spritetype=entity
|nameid=boat
|id=41
|translationkey=entity.Boat.name
|foot=1}}
=== Entity data ===
{{/ED}}
== History ==
{{History|java}}
{{History||1.10|snap=15w14a|link=Java Edition 15w14a|[[File:Obsidian_Boat_(item).png|32px]] [[File:Obsidian Boat.png|32px]] Added the obsidian boat.}}
{{History|foot}}
== Issues ==
Obsidian boat is a joke feature and as such issues relating to them cannot be fixed.
{{Items}}
{{Entities}}
{{Jokes}}
[[Category:Joke items]]
[[Category:Joke entities]]
[[it:Barca di ossidiana]]
[[ja:黒曜石のボート]]
[[pt:Bote de obsidiana]]
[[uk:Обсидіановий човен]]
[[zh:15w14a]]</li></ul> | build 4 | ||||
| Bedrock Edition | |||||
1.2.0{{Extension DPL}}<ul><li>[[Minecart with Furnace|Minecart with Furnace]]<br/>{{ItemEntity
|image=Minecart with Furnace.png
|renewable=Yes
|stackable=No
|size=Height: 0.7 Blocks<br>Width: 0.98 Blocks
|networkid=10
|drops= 1 {{ItemLink|Minecart with Furnace}}
|health={{Hp|6}}
}}
A '''minecart with furnace''' is a [[furnace]] inside a [[minecart]]. It can be powered with [[coal]] or [[charcoal]] to propel it across a [[rail]] line for a limited time, which can be used to move other minecarts.
==Obtaining==
Minecarts with furnace can be retrieved by attacking them, and by doing so it drops as an [[item]].
===Crafting===
{{Crafting
|Output= Minecart with Furnace
|type= Transportation
|Furnace|Minecart}}
==Usage==
Minecarts with furnaces are placed in the same way as other minecarts. It does not have a graphical user interface, unlike a [[furnace]].
Minecarts with furnaces can be powered, done by feeding fuel ([[coal]] or [[charcoal]]) into the furnace minecart with the {{Control|use}} button. The fuel is consumed immediately and it starts to move in the same direction the player clicked toward. Pressing {{Control|use}} always turns it to that direction, even when not holding coal.
Any piece of fuel, added at any time, increases the total range by an additional 3600 ticks (equal to 180 seconds or 3 minutes). The upper limit is 32767 ticks, approximately 27 minutes.
When powered, minecarts with furnaces cover 240m per minute (about 4 m/s, slightly slower than walking speed) or 720m per piece of coal. They do not accelerate beyond this speed when going downhill or on active [[powered rail]]s, and as long as they remain powered, they do not slow down when going uphill, on inactive powered rails, or when pushing or pulling other minecarts.
If a powered furnace minecart is derailed and then pushed back onto a rail, it starts moving again in the direction it came from, so they are not easily turned around in this state unless a player is nearby to redirect it with {{Control|use}}.
Minecarts with furnaces can climb up steep inclines while pushing other minecarts as long as they have fuel. If a minecart with furnace reaches a slope while pulling another minecart, the pulled minecart is switched to the forward position so that it can be pushed along the slope instead of pulled.
When a minecart with furnace bumps into another minecart or multiple minecarts, the other minecarts are pushed forward with great speed. The furnace minecart continues on with its own speed. Because of this speed difference, some of the minecarts may end up inside unloaded chunks on straight tracks.
===Train mechanics===
{{Schematic
|caption=weakly-shunted 1-cart train, one cart was used only to push the train together and is left behind
|AB|mc-$ew|mc-$ew|mc/Fu-$ew|-
|AB|ra-$wu|ra-$ew|ra-$ew|ra-$ew|ellipsis-ew
}}
{{Schematic
|caption=Creating a strongly-shunted 1-cart train. The sloped rail must be replaced with a horizontal rail before powering.
|AB|mc-$ew||mc/Fu-$ew|-
|AB|ra-$ew|ra-$ew|ra-$eu|ra-$ew|ra-$ew|ellipsis-ew
}}
[[File:FurnaceMinecartTrain.png|thumb|right|A Minecart train powered by furnace [[Minecart|minecarts.]]|alt=]]
A furnace minecart can be made to pull up to four other minecarts. All minecarts in this train move at the constant speed of the furnace minecart. Trains are formed when a minecart is pushed into the back of a powered furnace minecart or a short-enough train. These shunts are fragile at best and easily come undone, but some methods are stronger than others. For example, pushing a minecart into a furnace minecart and then powering the furnace gives a weaker shunt than pushing the furnace minecart into the other minecart against a wall, and then powering the furnace in the other direction.
A high-speed minecart running into the back of a furnace minecart going in the same direction automatically creates a weak shunt with it, pulling it along.
Pulling a minecart with TNT causes it to explode.
{| class="wikitable"
|+Pulled minecart/Shunt behavior
!Condition
!Result
|-
|Furnace loses power/speed||Shunt comes undone
|-
|Entity bumping besides those part of the train||Jettisoned forward
|-
|Upward sloped track||Jettisoned forward
|-
|Downward sloped track||Jettisoned forward (strong shunt) or shunt comes undone (weak shunt)
|-
|90° turn in track||Jettisoned backward
|-
|Turn toward north/south or east/west that is not the direction the train was shunted in||Train derails
|}
When a train comes to a turn, the shunt comes undone with the pulled minecart jettisoned backward. The correct way to make such a turn is having the shunt undone before a turn, and then make the two rejoin on a straight rail later by having the pulled cart catch up with the minecart with furnace.<ref name=mango/>
Since the train runs slower on a fully powered track than a normal minecart (~5 m/s compared to 8m/s), a train pulled by an unpowered furnace minecart is ideal for AFK farms involving breaking or placing blocks like [[nether wart]].<ref name=mango>{{YouTubeLink|1=pRLiAQfhTG8|2=Why The Furnace Minecart Isn't As Useless As You Think|3=ilmango}}</ref>
==Properties==
The coal is not stored as an item in the entity, but in the object data in the fuel property as a time in ticks. ''Fuel'' is a short value, i.e. a maximum of 32767 ticks, which is about 27 minutes. However, {{cmd|/summon furnace_minecart ~ ~ ~ {Fuel:32000} }} alone doesn't make it go since it doesn't have a direction. It can be right-clicked on a track to give it a direction, or it can be summoned with the properties ''PushX'' and ''PushZ'' set, which are responsible for the direction. The <code>Motion</code> property of every entity allows for movement of the minecart, but it does not direct the minecart to move on its own.
==Sounds==
{{Edition|Java}}:<br>
Minecarts with furnaces use the Friendly Creatures sound category for entity-dependent sound events.<ref group=sound name=rollsource>{{bug|MC-42132}}</ref>
{{Sound table
|sound=Minecart rolling.ogg
|subtitle=Minecart rolls
|source=Friendly Creatures <ref group=sound name=rollsource/>
|overridesource=1
|description=While a minecart with furnace is moving
|id=entity.minecart.riding
|translationkey=subtitles.entity.minecart.riding
|volume=0.0-0.35 <ref group=sound>Relates linearly with horizontal velocity (max 0.5)</ref>
|pitch=0.0-1.0 <ref group=sound>Will increase by 0.0025 per tick if the minecart's horizontal velocity is more than 0.01</ref>
|distance=16
|foot=1}}
{{Edition|Bedrock}}:
{{Sound table
|type=bedrock
|sound=Minecart rolling.ogg
|source=neutral
|description=While a minecart with furnace is moving
|id=minecart.base
|foot=1}}
==Data values==
===ID===
{{ID table
|edition=java
|firstcolumnname=Item
|showforms=y
|generatetranslationkeys=y
|displayname=Minecart with Furnace
|spritetype=item
|nameid=furnace_minecart
|form=item
|foot=1}}
{{ID table
|edition=java
|firstcolumnname=Entity
|generatetranslationkeys=y
|displayname=Minecart with Furnace
|spritetype=entity
|nameid=furnace_minecart
|foot=1}}
===Entity data===
Minecarts with furnace have entity data associated with them that contain various properties of the entity.
{{el|java}}:
{{main|Entity format}}
{{/ED}}
{{el|bedrock}}:
: See [[Bedrock Edition level format/Entity format]].
==History==
{{History|java alpha}}
{{History||v1.0.14|[[File:Minecart with Furnace JE1.png|32px]] [[File:Minecart with Furnace (item) JE1.png|32px]] Minecarts with furnace were added.
|Since no in-game name was indicated, they were referred to by names such as "powered minecart" or "furnace minecart".
|No matter how much fuel was added to the minecart, it would never move for more than 3 minutes after the last fuel.}}
{{History|java beta}}
{{History||1.0|When tooltips were added to items in inventory, this was named "Minecart with Furnace".}}
{{History||1.2|[[File:Minecart with Furnace JE2.png|32px]] The texture of the minecart with furnace has been changed.}}
{{History|java}}
{{History||1.0.0|snap=?|Each piece of [[coal]] now powers a [[minecart]] with furnace for {{convert|3|minutes|ticks}}, so that adding another piece of coal at any time increases the total range by another 3 minutes. A full stack of 64 coal now powers it for {{convert|192|minutes|ticks}}.
|Minecarts with furnace on a level track cover 204 meters per minute.}}
{{History||1.8|snap=14w11a|Minecarts with furnace now give a much greater boost to other minecarts.
|When powered, minecarts with furnace now move on non-powered rails without decelerating.}}
{{History|||snap=14w17a|Minecarts with furnace's behavior has been reverted, so that no change was released in [[Java Edition 1.8]].}}
{{History||1.11|snap=16w32a|The entity ID of the minecart with furnace has been changed from <code>MinecartFurnace</code> to <code>furnace_minecart</code>.}}
{{History||1.13|snap=17w47a|Prior to [[1.13/Flattening|''The Flattening'']], this [[item]]'s numeral ID was 343.}}
{{History||1.14|snap=18w43a|[[File:Minecart with Furnace JE3.png|32px]] [[File:Minecart with Furnace (item) JE2.png|32px]] The texture of the minecart with furnace has been changed.}}
{{History||1.15|snap=19w38a|[[File:Minecart with Furnace 19w38a.png|32px]] The furnace now appears dark, like suffocating mobs.}}
{{History|||snap=19w39a|The furnace texture is now colored correctly.}}
{{History||1.15.2|snap=Pre-Release 1|Furnace minecarts can now navigate around any corner.}}
{{History||1.19|snap=22w13a|The crafting recipe for a minecart with furnace is now shapeless.
|Breaking a minecart with furnace will now drop the item instead of the minecart and furnace separately.<ref>{{bug|MC-249493|||Fixed}}</ref>}}
{{History|console}}
{{History||xbox=TU1|xbone=CU1|ps=1.0|wiiu=Patch 1|switch=1.0.1|[[File:Minecart with Furnace JE2.png|32px]] [[File:Minecart with Furnace (item) JE1.png|32px]] Added minecart with furnace.}}
{{History|Ps4}}
{{History||1.90|[[File:Minecart with Furnace JE3.png|32px]] [[File:Minecart with Furnace (item) JE2.png|32px]] The texture of the minecart with furnace has been changed.}}
{{History|foot}}
==Issues==
{{issue list}}
==Trivia==
*The minecart with furnace is excluded from {{els|be|3ds}} on purpose. In a tweet, [[Jeb]] considered removing it from {{el|je}}.<ref>{{tweet|jeb|699241247391772672|I think we will phase out the furnace minecraft ''(sic)''|15 Feb 2016}}</ref>
**When converting a [[Legacy Console Edition]] world to a [[Bedrock Edition]] world, any present minecarts with furnaces are converted into a normal minecart.
**Despite the above-described poor standing of the minecart, it was most recently briefly featured in an animation in the [[Minecraft Live 2022]], where one was depicted as moving a train of about 20 minecarts at a higher than normal speed.
==Gallery==
<gallery>
Running Powered Minecart.png|A powered minecart in action.
</gallery>
==References==
{{reflist}}
{{Items}}
{{Entities}}
[[Category:Mechanics]]
[[cs:Parní vozík]]
[[de:Antriebslore]]
[[es:Vagoneta con horno]]
[[fr:Wagonnet motorisé]]
[[hu:Gőzmeghajtású csille]]
[[ja:かまど付きのトロッコ]]
[[ko:화로가 실린 광산 수레]]
[[nl:Mijnkar met oven]]
[[pl:Wagonik z piecem]]
[[ru:Вагонетка с печью]]
[[uk:Вагонетка з піччю]]
[[zh:动力矿车]]</li><li>[[Key|Key]]<br/>{{About|the joke item|the golem|Key Golem|in-game control keys|Controls}}
{{Exclusive|Java}}
{{Joke feature}}
{{Item
| image = <gallery>
Red Key.gif | Red
Yellow Key.gif | Yellow
Blue Key.gif | Blue
</gallery>
| renewable =
* Blue: No
* Red, Yellow: Yes
| stackable = No
}}
'''Keys''' were a joke item from [[Java Edition 3D Shareware v1.34]].
There are three different keys: '''red''', '''yellow''', and '''blue'''.
== Obtaining ==
=== Mobs ===
The red key was dropped by the [[wither]], the yellow key was dropped by [[ravager]]s, and the blue key was dropped by the [[elder guardian]].
=== Cheat codes ===
These keys were also obtainable by using the cheat code "IDKFA" when typing in chat.
=== Natural generation ===
{{LootChestItem|red-key,yellow-key,blue-key}}
== Data values ==
=== ID ===
{{ID table
|showforms=y
|generatetranslationkeys=java
|displayname=Red Key
|spritetype=item
|nameid=red_key
|form=item}}
{{ID table
|displayname=Yellow Key
|spritetype=item
|nameid=yellow_key
|form=item}}
{{ID table
|displayname=Blue Key
|spritetype=item
|nameid=blue_key
|form=item
|foot=1}}
== History ==
{{History|java}}
{{History||3D Shareware v1.34|[[File:Red Key.gif|32px]] [[File:Yellow Key.gif|32px]] [[File:Blue Key.gif|32px]] Added red, yellow, and blue keys.}}
{{History|foot}}
== Trivia ==
*[[File:Green Key.png|32px]] A key with a similar appearance is present in ''The Europa Arcology Incident'', a game made by [[Notch]] in 2009.
{{Items}}
{{Jokes}}
[[Category:Joke items]]
[[pt:Chave]]</li></ul> | beta 1.2.0.2 | Beacon beams now change colors when shining through stained glass or stained glass panes. | |||
1.5.0{{Extension DPL}}<ul><li>[[Reality Vision|Reality Vision]]<br/>{{Joke feature}}
{{Item
| title = Reality Vision
| image = Reality Vision.png
| renewable = No
| stackable = Yes (64)
}}
The '''Reality vision''' was a joke [[helmet]].
== Usage ==
Reality vision was equipped via the [[helmet]] slot. When equipped, it showed a [[wikipedia:Mini-map|minimap]] in the bottom-center of the screen (which moved when the [[player]]'s camera moves). The minimap showed all [[chunk]]s that were currently rendered. The player's location was represented by a green [[beacon]] beam marker on the map.
It displayed a vision overlay (similar to the [[pumpkin]] overlay). The overlay would change to a new overlay if the player went into third person (unlike the pumpkin overlay), which made the screen appear like an old [[wikipedia:Television|television]] screen. The overlay was called <code>cantseeshit<!-- Do not change this; this is that word that is actually used-->captain.png</code> in the assets folder. It activated a [[Shaders|shader]] when equipped (<code>scan_pincushion</code>).
== Sounds ==
{{Sound table
|sound=Equipvr.ogg
|subtitle=''None''
|source=player
|description=When equipped
|id=item.reality_vision.use
|translationkey=''None''
|volume=1.0
|pitch=1.0
|distance=16
|foot=1}}
== Data values ==
=== ID ===
{{ID table
|edition=java
|shownumericids=y
|showforms=y
|generatetranslationkeys=y
|displayname=Reality Vision
|spritetype=item
|nameid=reality_vision
|id=500
|form=item
|translationkey=item.realityVision.name
|foot=1}}
== History ==
{{History|java}}
{{History||1.RV-Pre1|[[File:Reality_Vision_(item).png|32px]] [[File:Reality Vision.png|32px]] Added reality vision.}}
{{History|foot}}
== Issues ==
Reality Vision is an unsupported item due to being an [[Wikipedia:April Fools' Day|April Fools']] joke, and therefore such issues relating to them will not be fixed.
== Trivia ==
* [[Sign]]s display the text "OBEY" while equipped, a reference to the movie [[wikipedia:They Live|''They Live'']].
== Gallery ==
<gallery>
Sign2.png|The [[sign]] texture found in the game files.
OBEY.png|OBEY seen in a sign.
OBEY sign in 1.RV-Pre1..png|OBEY seen in a sign, but seen from a better perspective.
TechGear.png|A [[player]] wearing reality vision, featured in this [[wikipedia:April Fools' Day|April Fools']] joke version.
</gallery>
{{Items}}
{{Jokes}}
[[Category:Non-renewable resources]]
[[Category:Joke items]]
[[pt:Visão da realidade]]
[[es:Reality Vision]]</li><li>[[Horse Armor|Horse Armor]]<br/>{{Item
| image = <gallery>
Leather Horse Armor.png | Leather
Iron Horse Armor.png | Iron
Golden Horse Armor.png | Golden
Diamond Horse Armor.png | Diamond
</gallery>
| image2 = <gallery>
Leather Horse Armor (item).png|Leather
Iron Horse Armor (item).png|Iron
Golden Horse Armor (item).png|Golden
Diamond Horse Armor (item).png|Diamond
</gallery>
| extratext = View [[#Gallery|all renders]]
| renewable =
* '''Leather''': Yes
* '''All others''': No
| stackable = No
}}
'''Horse armor''' is a special type of [[armor]] that can be given to a [[horse]] to wear.
== Obtaining ==
===Chest loot===
{{LootChestItem|iron-horse-armor}}
{{LootChestItem|golden-horse-armor}}
{{LootChestItem|diamond-horse-armor}}
===Crafting===
{{crafting
|A1= Leather
|C1= Leather
|A2= Leather
|B2= Leather
|C2= Leather
|A3= Leather
|C3= Leather
|Output= Leather Horse Armor
|type=Miscellaneous
}}
Only leather horse armor can be crafted; other horse armor can be obtained only from chest loot from some generated structures.
===Trading===
Expert-level [[leatherworker]] villagers [[trading|sell]] leather horse armor for 6 [[emerald]]s as part of their trade.
==Usage==
Only normal adult horses can wear armor; foals, [[donkey]]s, [[mule]]s, and undead variants such as [[skeleton horse]]s and [[zombie horse]]s cannot be equipped with armor.
=== Types ===
Horse armor has leather, iron, gold, and diamond variants. However, horse armor does not have netherite or chainmail variants.
=== Armor Stands ===
Horse armor cannot be placed or displayed on [[armor stand]]s.
===Protection===
Horse armor can be equipped to horses either by manually placing it in its respective slot by pressing E while riding the horse ({{SlotSprite|Horse Armor}}), or by right-clicking the horse with it.
There is a gradual increase in the defense given from a horse wearing the different types of armor. Note that golden horse armor provides more protection than iron horse armor, whereas the opposite is true for [[armor|player armor]].
{| class="wikitable" data-description="Armor defense"
|-
! Material !! [[Armor]]
|-
! [[Leather]]
| {{armor|3}}
|-
! [[Iron]]
| {{armor|5}}
|-
! [[Gold]]
| {{armor|7}}
|-
! [[Diamond]]
| {{armor|11}}
|}
When a horse dies while equipped with any horse armor, it drops its normal loot, saddle (if it had one), and the horse armor.
Leather horse armor protects horses from freezing in [[powder snow]], but it does not negate other powder snow effects (e.g., falling through, inability to jump).
===Durability===
Unlike [[armor|player armor]], horse armor does not have durability. This means a single horse armor can be used infinitely unless destroyed.
=== Enchanting ===
Unlike [[armor|player armor]], horse armor cannot be enchanted in survival mode. However, {{in|java}} Creative mode, horse armor can be used with an [[anvil]] to enchant with [[Depth Strider]], [[Thorns]], [[Respiration]], [[Feather Falling]], and [[Curse of vanishing]]. Other enchantments can be applied, but they have no effect.
=== Dyeing ===
Leather horse armor can be dyed 12,326,391 different colors (using lone dyes or dye combinations) and put onto a horse to display that color. These changes can be reverted by {{control|using}} a filled [[cauldron]] with dyed leather horse armor.
===Smelting usage===
{{Smelting|showname=1|Iron Horse Armor;Golden Horse Armor|Iron Nugget;Gold Nugget|0,1}}
===Piglins===
{{EntityLink|Piglin|Piglins}} are attracted to golden horse armor and run toward any golden horse armor on the ground, inspecting it for 6 to 8 seconds before putting it in their inventory.
== Sounds ==
{{Edition|Java}}:
{{Sound table
|sound=Horse armor.ogg
|subtitle=Horse armor equips
|source=neutral
|description=When armor is equipped to a horse
|id=entity.horse.armor
|translationkey=subtitles.entity.horse.armor
|volume=0.5
|pitch=1.0
|distance=16
|foot=1}}
{{Edition|Bedrock}}:
{{Sound table
|type=bedrock
|sound=Horse armor.ogg
|source=neutral
|description=When armor is equipped to a horse
|id=mob.horse.armor
|volume=0.6
|pitch=1.0
|foot=1}}
== Data values ==
=== ID ===
{{edition|java}}:
{{ID table
|edition=java
|showforms=y
|generatetranslationkeys=y
|displayname=Leather Horse Armor
|spritetype=item
|nameid=leather_horse_armor
|form=item}}
{{ID table
|displayname=Iron Horse Armor
|spritetype=item
|nameid=iron_horse_armor
|form=item}}
{{ID table
|displayname=Diamond Horse Armor
|spritetype=item
|nameid=diamond_horse_armor
|form=item}}
{{ID table
|displayname=Golden Horse Armor
|spritetype=item
|nameid=golden_horse_armor
|form=item
|foot=1}}
{{edition|bedrock}}:
{{ID table
|edition=bedrock
|shownumericids=y
|showforms=y
|showaliasids=y
|notshowbeitemforms=y
|generatetranslationkeys=y
|displayname=Leather Horse Armor
|spritetype=item
|nameid=leather_horse_armor
|aliasid=horsearmorleather
|id=530
|form=item
|translationkey=item.horsearmorleather.name}}
{{ID table
|displayname=Iron Horse Armor
|spritetype=item
|nameid=iron_horse_armor
|aliasid=horsearmoriron
|id=531
|form=item
|translationkey=item.horsearmoriron.name}}
{{ID table
|displayname=Diamond Horse Armor
|spritetype=item
|nameid=diamond_horse_armor
|aliasid=horsearmordiamond
|id=533
|form=item
|translationkey=item.horsearmordiamond.name}}
{{ID table
|displayname=Golden Horse Armor
|spritetype=item
|nameid=golden_horse_armor
|aliasid=horsearmorgold
|id=532
|form=item
|translationkey=item.horsearmorgold.name
|foot=1}}
=== Item data ===
When leather horse armor is dyed, it has the following NBT:
{{el|java}}:
{{main|Player.dat format}}
<div class="treeview">
* {{nbt|compound|tag}}: Parent tag.
** {{nbt|compound|display}}: Display properties.
*** {{nbt|int|color}}: The color of the leather armor. The tooltip displays "Dyed" if advanced tooltips are disabled, otherwise it displays the hexadecimal color value. Color codes are calculated from the Red, Green and Blue components using this formula:<br>'''<span style="color:red">Red</span>[[wikipedia:Logical shift|<<]]16 + <span style="color:green">Green</span><<8 + <span style="color:blue">Blue</span>'''<ref>For positive values larger than 0x00FFFFFF, the top byte is ignored. All negative values produce white.</ref>
</div>
{{el|bedrock}}:
: See [[Bedrock Edition level format/Item format]].
== History ==
{{History|java}}
{{History||1.6.1|snap=13w16a|[[File:Iron Horse Armor JE1 BE1.png|32px]] [[File:Golden Horse Armor JE1 BE1.png|32px]] [[File:Diamond Horse Armor JE1 BE1.png|32px]]<br>[[File:Iron Horse Armor (item) JE1 BE1.png|32px]] [[File:Golden Horse Armor (item) JE1 BE1.png|32px]] [[File:Diamond Horse Armor (item) JE1 BE1.png|32px]] Added horse armor.
|Horse armor can be [[crafting|crafted]] using the following recipe.
{{{!}} class{{=}}"collapsible collapsed"
! Recipe
{{!}}-
{{!}}
{{Crafting Table
|C1=Iron Ingot; Gold Ingot; Diamond
|A2=Iron Ingot; Gold Ingot; Diamond
|B2=Any Wool
|C2=Iron Ingot; Gold Ingot; Diamond
|A3=Iron Ingot; Gold Ingot; Diamond
|B3=Iron Ingot; Gold Ingot; Diamond
|C3=Iron Ingot; Gold Ingot; Diamond
|Output=Iron Horse Armor; Golden Horse Armor; Diamond Horse Armor
}}
{{!}}}
}}
{{History|||snap=13w18a|The crafting recipe for horse armor has been removed.
|Horse armor can now be found in [[chest]]s in [[jungle temple|jungle]] & [[desert temple]]s, [[dungeon]]s, [[nether fortress]]es, [[stronghold]] altar rooms and [[village]] blacksmith buildings.
|Iron horse armor can now additionally be found in [[mineshaft]] chests.}}
{{History|||snap=13w21a|Horse armor is no longer stackable, to be consistent with other types of [[armor]].}}
{{History||1.9|snap=15w31a|Horse armor has been added to [[end city]] [[chest]]s.}}
{{History|||snap=15w43a|The average yield of horse armor in [[nether fortress]] chests has slightly decreased.}}
{{History|||snap=15w44a|The average yield of horse armor in [[desert temple]] chests has increased.
|The average yield of iron horse armor from [[dungeon]] chests has slightly decreased.
|Iron horse armor has been removed from [[mineshaft]] [[chest]]s.}}
{{History||1.11.1|snap=16w50a|Golden and iron horse armor can now be [[smelting|smelted]] down into one of their respective [[nugget]]s.}}
{{History||1.13|snap=17w45a|[[File:Iron Horse Armor JE2.png|32px]] [[File:Golden Horse Armor JE2.png|32px]] [[File:Diamond Horse Armor JE2.png|32px]] The textures of horse armor have been changed, as the [[model]] of [[horse]]s has changed.}}
{{History|||snap=17w46a|[[File:Iron Horse Armor 17w46a.png|32px]] [[File:Golden Horse Armor 17w46a.png|32px]] [[File:Diamond Horse Armor 17w46a.png|32px]] The model of horse armor has been changed, but the textures of horse armor have remained unaltered.}}
{{History|||snap=17w47a|Prior to [[1.13/Flattening|''The Flattening'']], these [[item]]s' numeral IDs were 417, 418 and 419.}}
{{History|||snap=18w03a|[[File:Iron Horse Armor JE3.png|32px]] [[File:Golden Horse Armor JE3 BE2.png|32px]] [[File:Diamond Horse Armor JE3 BE2.png|32px]] The textures of horse armor have been changed, as the [[model]] of [[horse]]s has changed.}}
{{History|||snap=18w22a|[[File:Iron Horse Armor JE4 BE2.png|32px]] The texture of iron horse armor when equipped has been changed.<ref>{{bug|MC-124357}}</ref>}}
{{History|||snap=pre2|A bug with the [[horse]] skin and horse armor textures not applying correctly has been fixed.<ref>{{bug|MC-124364}}</ref>}}
{{History||1.14|snap=18w50a|[[File:Iron Horse Armor (item) JE2 BE2.png|32px]] [[File:Golden Horse Armor (item) JE2 BE2.png|32px]] [[File:Diamond Horse Armor (item) JE2 BE2.png|32px]] The textures of horse armor [[item]]s have been changed.}}
{{History|||snap=February 20, 2019|slink=https://twitter.com/_LadyAgnes/status/1098134917299531776?s=19|Leather horse armor announced for {{el|je}}.}}
{{History|||snap=19w08a|[[File:Iron Horse Armor JE5 BE3.png|32px]] [[File:Golden Horse Armor JE4 BE3.png|32px]] [[File:Diamond Horse Armor JE4 BE3.png|32px]]<br>[[File:Iron Horse Armor (item) JE3.png|32px]] [[File:Golden Horse Armor (item) JE3 BE3.png|32px]] [[File:Diamond Horse Armor (item) JE3 BE3.png|32px]] The textures of iron, gold and diamond horse armor have been changed.
|[[File:Leather Horse Armor JE1 BE3.png|32px]] [[File:Leather Horse Armor (item) JE1.png|32px]] Added leather horse armor, which can be [[dyeing|dyed]] 12,326,391 different colors, similar to leather [[armor]].}}
{{History|||snap=19w11a|Leatherworker [[villager]]s now [[trading|sell]] leather horse armor.}}
{{History||1.14.1|snap=Pre-Release 1|[[File:Leather Horse Armor (item) JE2.png|32px]] The texture of leather horse armor [[item]] has been changed to be more consistent with the other types of horse armor.
|[[File:Iron Horse Armor (item) JE4 BE3.png|32px]] The texture of iron horse armor item has been changed.}}
{{History||1.16|snap=20w15a|Horse armor placed in a dispenser can now be put on tamed horses.}}
{{History|||snap=20w16a|Golden horse armor now generates in [[ruined portal]] chests.}}
{{History||1.17|snap=21w13a|Leather horse armor now protects [[horse]]s from [[freezing]].}}
{{History||1.19|snap=22w13a|Diamond horse armor may now be found in [[ancient city]] [[chest]]s.}}
{{History|pocket alpha}}
{{History||v0.15.0|snap=build 1|[[File:Leather Horse Armor BE1.png|32px]] [[File:Iron Horse Armor JE1 BE1.png|32px]] [[File:Golden Horse Armor JE1 BE1.png|32px]] [[File:Diamond Horse Armor JE1 BE1.png|32px]]<br>[[File:Leather Horse Armor (item) BE1.png|32px]] [[File:Iron Horse Armor (item) JE1 BE1.png|32px]] [[File:Golden Horse Armor (item) JE1 BE1.png|32px]] [[File:Diamond Horse Armor (item) JE1 BE1.png|32px]] Added horse armor and [[dyeing|dyeable]] leather horse armor as a version exclusive.}}
{{History|pocket}}
{{History||1.0.0|snap=alpha 0.17.0.1|Horse armor can now be found inside [[end city]] [[chest]]s.}}
{{History||1.1.0|snap=alpha 1.1.0.0|Iron and golden horse armor are now [[smelting|smeltable]].}}
{{History|bedrock}}
{{History||1.2.6|snap=beta 1.2.6.2|[[File:Leather Horse Armor BE2.png|32px]] [[File:Iron Horse Armor JE4 BE2.png|32px]] [[File:Golden Horse Armor JE3 BE2.png|32px]] [[File:Diamond Horse Armor JE3 BE2.png|32px]] The textures of horse armor have been changed, as the [[model]] of [[horse]]s has been changed.}}
{{History||1.10.0|snap=beta 1.10.0.3|Horse armor can now be found in [[plains]] [[village]] weaponsmith [[chest]]s.
|[[File:Leather Horse Armor JE1 BE3.png|32px]] [[File:Iron Horse Armor JE5 BE3.png|32px]] [[File:Golden Horse Armor JE4 BE3.png|32px]] [[File:Diamond Horse Armor JE4 BE3.png|32px]]<br>[[File:Leather Horse Armor (item) BE2.png|32px]] [[File:Iron Horse Armor (item) JE2 BE2.png|32px]] [[File:Golden Horse Armor (item) JE2 BE2.png|32px]] [[File:Diamond Horse Armor (item) JE2 BE2.png|32px]] The textures of all horse armor have been changed.}}
{{History||1.11.0|snap=beta 1.11.0.1|Horse armor can now be found in [[savanna]], [[desert]], [[taiga]], [[snowy taiga]] and [[snowy tundra]] [[village]] weaponsmith [[chest]]s.}}
{{History|||snap=beta 1.11.0.4|Leather horse armor can now be [[trading|bought]] from leatherworker [[villager]]s.}}
{{History|||snap=beta 1.11.0.5|[[File:Leather Horse Armor (item) BE3.png|32px]] [[File:Iron Horse Armor (item) JE4 BE3.png|32px]] [[File:Golden Horse Armor (item) JE3 BE3.png|32px]] [[File:Diamond Horse Armor (item) JE3 BE3.png|32px]] The textures of all horse armor [[item]]s have been changed.}}
{{History||1.17.0|snap=beta 1.16.230.54|Leather horse armor now protects [[horse]]s from [[freezing]].}}
{{History|console}}
{{History||xbox=TU19|xbone=CU7|ps=1.12|wiiu=Patch 1|switch=1.0.1|[[File:Iron Horse Armor JE1 BE1.png|32px]] [[File:Golden Horse Armor JE1 BE1.png|32px]] [[File:Diamond Horse Armor JE1 BE1.png|32px]]<br>[[File:Iron Horse Armor (item) JE1 BE1.png|32px]] [[File:Golden Horse Armor (item) JE1 BE1.png|32px]] [[File:Diamond Horse Armor (item) JE1 BE1.png|32px]] Added horse armor.}}
{{History||xbox=TU53|xbone=CU43|ps=1.49|wiiu=Patch 23|switch=1.0.3|Iron and golden horse armor are now [[smelting|smeltable]].}}
{{History||xbox=TU60|xbone=CU51|ps=1.64|wiiu=Patch 30|switch=1.0.11|[[File:Leather Horse Armor BE1.png|32px]]<br>[[File:Leather Horse Armor (item) BE1.png|32px]] Added leather horse armor.}}
{{History||xbox=none|xbone=none|ps=1.90|wiiu=none|switch=none|[[File:Leather Horse Armor JE1 BE3.png|32px]] [[File:Iron Horse Armor JE5 BE3.png|32px]] [[File:Golden Horse Armor JE4 BE3.png|32px]] [[File:Diamond Horse Armor JE4 BE3.png|32px]]<br>[[File:Leather Horse Armor (item) BE3.png|32px]] [[File:Iron Horse Armor (item) JE3.png|32px]] [[File:Golden Horse Armor (item) JE3 BE3.png|32px]] [[File:Diamond Horse Armor (item) JE3 BE3.png|32px]] The textures of leather, iron, gold and diamond horse armor have been changed.}}
{{History|3ds}}
{{History||0.1.0|[[File:Leather Horse Armor BE1.png|32px]] [[File:Iron Horse Armor JE1 BE1.png|32px]] [[File:Golden Horse Armor JE1 BE1.png|32px]] [[File:Diamond Horse Armor JE1 BE1.png|32px]]<br>[[File:Leather Horse Armor (item) BE1.png|32px]] [[File:Iron Horse Armor (item) JE1 BE1.png|32px]] [[File:Golden Horse Armor (item) JE1 BE1.png|32px]] [[File:Diamond Horse Armor (item) JE1 BE1.png|32px]] Added horse armor.}}
{{History|foot}}
== Issues ==
{{issue list}}
== Gallery ==
<gallery>
Leather Horse Armor.png | Undyed Leather armor
White Leather Horse Armor.png | White Leather armor
Light Gray Leather Horse Armor.png | Light Gray Leather armor
Gray Leather Horse Armor.png | Gray Leather armor
Black Leather Horse Armor.png | Black Leather armor
Brown Leather Horse Armor.png | Brown Leather armor
Red Leather Horse Armor.png | Red Leather armor
Orange Leather Horse Armor.png | Orange Leather armor
Yellow Leather Horse Armor.png | Yellow Leather armor
Lime Leather Horse Armor.png | Lime Leather armor
Green Leather Horse Armor.png | Green Leather armor
Cyan Leather Horse Armor.png | Cyan Leather armor
Light Blue Leather Horse Armor.png | Light Blue Leather armor
Blue Leather Horse Armor.png | Blue Leather armor
Purple Leather Horse Armor.png | Purple Leather armor
Magenta Leather Horse Armor.png | Magenta Leather armor
Pink Leather Horse Armor.png | Pink Leather armor
</gallery>
=== Screenshots ===
<gallery>
Armored Horse.png|A [[horse]] equipped with iron horse armor and bound to a fence post by a [[lead]].
13w21a-new-HorseUI-inventory.png|The GUI for horses implemented in [[Java Edition 13w21a|13w21a]], which allows the removal and switching of armor.
GodSpawner.png|A golden horse armor found in a [[dungeon]] chest, which coincidentally contains an [[enchanted golden apple]].
Horses with armor.png|4 [[horse]]s equipped with [[leather]], [[iron]], [[gold]], and [[diamond]] armor.
Leather Horse Armor 1.jpg|First image of leather horse armor.
Leather Horse Armor 2.jpg|Second image of leather horse armor.
Leather Horse Armor 3.jpg|Third image of leather horse armor.
Leather Horse Armor 4.jpg|Fourth image of leather horse armor.
Leather Horse Armor 5.jpg|Fifth image of leather horse armor.
</gallery>
== Notes ==
{{Notelist}}
== References ==
{{Reflist}}
{{items}}
[[Category:Armor]]
[[de:Rossharnisch]]
[[es:Armadura para caballo]]
[[fr:Armure pour cheval]]
[[it:Bardatura]]
[[ja:馬鎧]]
[[ko:말 갑옷]]
[[nl:Paardenharnas]]
[[pl:Zbroja końska]]
[[pt:Armadura para cavalo]]
[[ru:Конская броня]]
[[uk:Кінські обладунки]]
[[zh:马铠]]</li></ul> | beta 1.5.0.4 | Beacons now produce sounds. | |||
1.10.0{{Extension DPL}}<ul><li>[[Copper Ingot|Copper Ingot]]<br/>{{About|the ingot|the ore|Copper Ore|the mineral block|Block of Copper}}
{{Item
| image = Copper Ingot.png
| renewable = Yes
| stackable = Yes (64)
}}
'''Copper ingots''' are [[metal]] ingots obtained from smelting [[raw copper]] or killing [[drowned]].
== Obtaining ==
=== Crafting ===
{{Crafting
|Block of Copper;Waxed Block of Copper|Output=Copper Ingot,9
|type=Miscellaneous
}}
=== Smelting ===
Copper ingots can be obtained by smelting [[raw copper]] in a [[furnace]] or [[blast furnace]], as well as the ore itself if mined using [[Silk Touch]].
{{Smelting
|head=1
|Raw Copper
|Copper Ingot
|0.7
}}
{{Smelting
|foot=1
|Copper Ore; Deepslate Copper Ore
|Copper Ingot
|0.7
}}
=== Mob loot ===
==== Drowned ====
When killed by a [[player]] or a tamed [[wolf]], a [[drowned]] has a 11% ({{frac|11|100}}) chance of dropping a copper ingot. With the [[Looting]] enchantment, the chance can be increased to 13% ({{frac|13|100}}) with Looting I, 15% ({{frac|3|20}}) with Looting II, and 17% ({{frac|17|100}}) with Looting III.
== Usage ==
=== Crafting ingredient ===
{{crafting usage}}
=== Smithing ingredient ===
{{Smithing
|head=1
|ingredients=Any Armor Trim +<br/>Any Armor Piece + <br/>Copper Ingot
|Any Armor Trim Smithing Template
|Netherite Chestplate
|Copper Ingot
|Copper Trim Netherite Chestplate
|showdescription=1
|description = All armor types can be used in this recipe,<br/>a netherite chestplate is shown as an example.<br/>
|tail=1
}}
;Trim color palette
The following color palette is shown on the designs on trimmed armor:
*{{TrimPalette|copper ingot}}
== Data values ==
=== ID ===
{{edition|java}}:
{{ID table
|edition=java
|showforms=y
|generatetranslationkeys=y
|displayname=Copper Ingot
|spritetype=item
|nameid=copper_ingot
|form=item
|foot=1}}
{{edition|bedrock}}:
{{ID table
|edition=bedrock
|shownumericids=y
|showforms=y
|notshowbeitemforms=y
|generatetranslationkeys=y
|displayname=Copper Ingot
|spritetype=item
|nameid=copper_ingot
|form=item
|id=504
|foot=1}}
== History ==
{{History|java}}
{{History||1.17|snap=20w45a|[[File:Copper Ingot JE1.png|32px]] Added copper ingots.}}
{{History|||snap=20w46a|[[File:Copper Ingot JE2 BE1.png|32px]] The texture of copper ingots has been changed.|Crafting copper ingots from and into copper blocks now outputs/requires only 4 ingots.}}
{{History|||snap=21w05a|[[Drowned]] can now drop copper ingots when killed instead of [[gold ingots]], making copper ingots renewable.}}
{{History|||snap=21w10a|Copper ingots can now be smelted from [[deepslate copper ore]].}}
{{History|||snap=21w14a|Copper ingots can now be smelted from [[raw copper]].}}
{{History|||snap=21w17a|The amount of copper ingots required to make a [[block of copper]] has been changed back to 9.}}
{{History||1.17.1|snap=Pre-release 1|Increased the chance of [[drowned]] dropping a copper ingot from 5% to 11% and the increase of this chance for each level of [[Looting]] enchantment from 1% to 2% to match {{el|be}}.}}
{{History||1.20<br>(Experimental)|link=1.19.4|snap=23w04a|Copper ingots can now be used as an armor trim material.}}
{{History|||snap=1.19.4 Pre-release 1|Copper ingots can now be used to craft [[brush]]es.}}
{{History|bedrock}}
{{History||Caves & Cliffs (experimental)|link=Bedrock Edition 1.17.0|snap=beta 1.16.210.57|[[File:Copper Ingot JE2 BE1.png|32px]] Added copper ingots.}}
{{History||1.17.0|snap=beta 1.17.0.50|Copper ingots can now be used to craft [[spyglass|spyglasses]].}}
{{History|||snap=beta 1.17.0.52|Copper ingots are now available without enabling [[experimental gameplay]].}}
{{History|||snap=beta 1.17.0.54|The amount of copper ingots required to make a [[block of copper]] has been changed to 9.}}
{{History||Vanilla Experiments (experimental)|link=1.18.30|snap=beta 1.18.30.26|Copper ingots can now be used to craft copper horns.}}
{{History||1.19.0|snap=beta 1.19.0.24|Copper ingots can no longer be used to craft copper horns, as copper horns have been removed.}}
{{History||1.20.0<br>(Experimental)|link=Bedrock Edition 1.19.80|snap=beta 1.19.80.20|Copper ingots can now be used to craft [[brush]]es.}}
{{History|||snap=beta 1.19.80.21|Copper ingots can now be used as an armor trim material.}}
{{History|foot}}
== Issues ==
{{Issue list}}
== External Links ==
*[https://www.minecraft.net/en-us/article/taking-inventory--copper-ingot Taking Inventory:Copper Ingot] – Minecraft.net on December 22, 2022
{{Items}}
[[Category:Renewable resources]]
[[de:Kupferbarren]]
[[es:Lingote de cobre]]
[[fr:Lingot de cuivre]]
[[it:Lingotto di rame]]
[[ja:Copper Ingot]]
[[ko:구리괴]]
[[pl:Sztabka miedzi]]
[[pt:Barra de cobre]]
[[ru:Медный слиток]]
[[uk:Мідний злиток]]
[[zh:铜锭]]</li><li>[[Suspicious Stew|Suspicious Stew]]<br/>{{For|the block|Suspicious Sand}}
{{Item
| title = Suspicious Stew
| heals = {{hunger|6}}
| renewable = Yes
| stackable = No
|effects=See {{slink||Food}}
}}
'''Suspicious stew''' is a [[food]] item that can give the [[player]] a [[effect|status effect]] that depends on the [[flower]] used to craft it.
== Obtaining ==
{{IN|Bedrock}}, suspicious stew is the only food item in the game that can be obtained from the [[Creative]] inventory only by searching. However, it can be crafted and can also be found in [[shipwreck]] chests. Suspicious stew can be given with [[commands]] like {{cmd|give}}, but {{in|java}}, unless NBT data like that listed in the data values section is included, consuming it has no effect and still restores the same hunger points as a normal suspicious stew. In [[Bedrock Edition]], giving the player a suspicious stew through commands causes the stew to choose an allowable status effect at random.
=== Harvesting ===
Suspicious stew can be obtained by "milking" a brown [[mooshroom]] with a [[bowl]] after using a small flower on it. When a small flower is used on a brown mooshroom, the brown mooshrom produces a suspicious stew related to that small flower the next time it is milked with a bowl. Red mooshrooms do not produce suspicious stew. The brown mooshroom returns to producing [[mushroom stew]] until fed another small flower.
=== Crafting ===
{{Crafting
|Red Mushroom
|Brown Mushroom
|Bowl
|Any Flower
|Output=Suspicious Stew
|shapeless=true
|type=Foodstuff
}}
Suspicious stew is not listed in the recipe book. However, it can be quickly assembled by clicking the [[Mushroom Stew|mushroom stew]] recipe and adding one small flower to it.
=== Chest loot ===
{{LootChestItem|suspicious-stew}}
=== Mob loot ===
After being given a flower, a brown [[mooshroom]] can be "milked" for suspicious stew by {{control|using}} a [[bowl]] on it. The flower type determines the stew's effect using the same rule as a crafted stew. Milking a red mooshroom after feeding it a flower does not yield a suspicious stew specific to that flower.
=== Trading ===
{{IN|java}}, expert-level farmer [[villager]]s can offer either 1 or 2 suspicious stew trades, each stew for one [[emerald]].
{{IN|bedrock}}, expert-level farmer villager offers to sell suspicious stew for one emerald as well.
The [[trading]] interface does not indicate the type of suspicious stew being sold, but each trade entry consistently yields the same type of stew, so the player can remember or make a note of the types offered by a given villager, such as "this villager's first stew gives [[blindness]], and their second entry gives saturation".
== Usage ==
=== Food ===
{{see also|Tutorials/Hunger management}}
To eat suspicious stew, press and hold {{control|use}} while it is selected in the hotbar. Eating one restores {{hunger|6}} hunger and 7.2 hunger [[Hunger#Mechanics|saturation]] and gives a few seconds of a [[effect|status effect]] that varies depending on which flower was used to craft it. The effect is not displayed in the tooltip, texture, etc., meaning that the player cannot know in advance what the effect is without knowing which flower was used.
{{/Effects}}
The [[bowl]] is emptied and returned to the player after the suspicious stew has been eaten, and can be re-used to craft more stews. Unlike most foods, suspicious stew can be eaten even if the player's hunger bar is full.
The Saturation effect effectively makes those two stews a superfood: In those 6 or 7 ticks it can restore up to 6(7) hunger and 12(14) saturation points ''on top of'' their food value, for a total of at least {{hunger|12}} hunger, and effectively maximizing saturation. This is the largest amount of hunger and saturation the player can get from a single food item. Regeneration can restore up to {{Health|3}} health, and Poison or Wither can inflict up to {{Health|4}} damage.
Consuming suspicious stew is the only way to obtain the Saturation and Blindness effects in vanilla ''Minecraft'' without the use of commands.
== Sounds ==
=== Generic ===
{{Sound table/Entity/Food}}
=== Unique ===
{{edition|java}}:
{{Sound table
|sound=Mooshroom eat1.ogg
|sound2=Mooshroom eat2.ogg
|sound3=Mooshroom eat3.ogg
|sound4=Mooshroom eat4.ogg
|subtitle=Mooshroom eats
|source=neutral
|description=Plays when a brown mooshroom is fed a flower.
|id=entity.mooshroom.eat
|translationkey=subtitles.entity.mooshroom.eat
|volume=2.0
|pitch=''varies'' <ref group=sound>Can be 1.0, 0.95, or 1.05 for each sound</ref>
|distance=16}}
{{Sound table
|sound=Mooshroom milk1.ogg
|sound2=Mooshroom milk2.ogg
|sound3=Mooshroom milk3.ogg
|subtitle=Mooshroom gets milked suspiciously
|source=neutral
|description=Plays when a brown mooshroom is milked with a bowl after being fed a flower.
|id=entity.mooshroom.suspicious_milk
|translationkey=subtitles.entity.mooshroom.suspicious_milk
|volume=1.0
|pitch=''varies'' <ref group=sound>Can be 1.0, 0.9, or 1.1 for each sound</ref>
|distance=16
|foot=1}}
{{edition|bedrock}}:
{{Sound table
|type=bedrock
|sound=Mooshroom eat1.ogg
|sound2=Mooshroom eat2.ogg
|sound3=Mooshroom eat3.ogg
|sound4=Mooshroom eat4.ogg
|subtitle=Mooshroom eats
|source=Friendly Creatures
|description=When a brown mooshroom is fed a flower
|id=mob.mooshroom.eat
|volume=1.0/0.95/1.05
|pitch=0.8-1.2}}
{{Sound table
|sound=Mooshroom milk1.ogg
|sound2=Mooshroom milk2.ogg
|sound3=Mooshroom milk3.ogg
|subtitle=Mooshroom gets milked
|source=Friendly Creatures
|description=When a mooshroom is milked with a bowl
|id=mob.mooshroom.suspicious_milk
|volume=1.0/0.9/1.1
|pitch=1.0
|foot=1}}
== Data values ==
=== ID ===
{{edition|java}}:
{{ID table
|edition=java
|showforms=y
|generatetranslationkeys=y
|displayname=Suspicious Stew
|spritetype=item
|nameid=suspicious_stew
|form=item
|foot=1}}
{{edition|bedrock}}:
{{ID table
|edition=bedrock
|shownumericids=y
|showforms=y
|notshowbeitemforms=y
|generatetranslationkeys=y
|displayname=Suspicious Stew
|spritetype=item
|nameid=suspicious_stew
|id=590
|form=item
|foot=1}}
=== Item data ===
{{IN|je}}, suspicious stew uses the following NBT data:
<div class="treeview">
* {{nbt|compound|tag}}: The item's '''tag''' tag.
{{:Player.dat format/Suspicious Stew}}
</div>
=== Metadata ===
{{IN|be}}, suspicious stew uses the following data values:
{{dvt|spritetype=item|sprite=suspicious-stew|{{EffectLink|Night Vision}} from {{BlockLink|Poppy}}}}
{{dvt|sprite=suspicious-stew|{{EffectLink|Jump Boost}}}}
{{dvt|sprite=suspicious-stew|{{EffectLink|Weakness}}}}
{{dvt|sprite=suspicious-stew|{{EffectLink|Blindness}}}}
{{dvt|sprite=suspicious-stew|{{EffectLink|Poison}}}}
{{dvt|sprite=suspicious-stew|{{EffectLink|Saturation}} from {{BlockLink|Dandelion}}}}
{{dvt|sprite=suspicious-stew|{{EffectLink|Saturation}} from {{BlockLink|Blue Orchid}}}}
{{dvt|spritetype=item|sprite=suspicious-stew|{{EffectLink|Fire Resistance}}}}
{{dvt|sprite=suspicious-stew|{{EffectLink|Regeneration}}}}
{{dvt|sprite=suspicious-stew|{{EffectLink|Wither}}}}
{{dvt|sprite=suspicious-stew|{{EffectLink|Night Vision}} from {{BlockLink|Torchflower}}|foot=1}}
== Achievements ==
{{load achievements|Time for Stew}}
== Advancements ==
{{load advancements|A Furious Cocktail;How Did We Get Here;Husbandry;A Balanced Diet}}
== History ==
{{History|java}}
{{History||1.14|snap=18w43a|[[File:Suspicious Stew JE1 BE1.png|32px]] Added suspicious stew.
|Suspicious stew is not obtainable in the [[Creative inventory]].}}
{{History|||snap=19w08a|Suspicious stew can be obtained by milking brown [[mooshroom]]s.}}
{{History|||snap=19w11a|[[Trading]] has been changed, expert-level farmer villagers now sell suspicious stew for an [[emerald]].}}
{{History||1.14.4|snap=Pre-Release 1|Suspicious stew made from [[poppies]] now gives [[Night Vision]] to the [[player]] instead of [[Speed]].}}
{{History||1.16|snap=Pre-release 1|Mooshrooms can now be milked for suspicious stew in Creative mode.<ref>{{bug|MC-90969}}</ref>}}
{{History||1.17|snap=21w13a|Suspicious stew can now be eaten even if the player is at full [[hunger]].}}
{{History||1.19|snap=22w13a|Suspicious stew may now be found in [[ancient city]] [[chest]]s.}}
{{History||1.19.3|snap=22w45a|Suspicious stew is now available in the [[Creative]] [[inventory]].}}
{{History||1.20<br>(Experimental)|link=1.19.4|snap=23w07a|Suspicious stew now drops when brushing [[suspicious sand]] in [[desert well]]s.}}
{{History|||snap=1.19.4-pre1|[[Torchflower]]s can now be used to make suspicious stew.}}
{{History||1.20|snap=23w12a|The probability for the suspicious stew to generate in the [[suspicious sand]] in [[desert well]] has been changed from 1/7 to 1/8.}}
{{History|bedrock}}
{{History||1.13.0|snap=beta 1.13.0.9|[[File:Suspicious Stew JE1 BE1.png|32px]] Added suspicious stew.
|Suspicious stew is not obtainable in the Creative inventory.}}
{{History|||snap=beta 1.13.0.15|Master-level farmer [[villager]]s can now [[trading|sell]] suspicious stew.}}
{{History||1.16.0|snap=beta 1.16.0.57|[[Trading]] has been changed, expert-level farmer villagers now sell suspicious stew for an [[emerald]].}}
{{History||1.20.0<br>(Experimental)|link=Bedrock Edition 1.19.70|snap=beta 1.19.70.23|Suspicious stew now drops when brushing [[suspicious sand]] in [[desert well]]s.}}
{{History||1.20.10|Added one type of suspicious stew to the Items tab in the Creative inventory.}}
{{History||1.20.30|snap=beta 1.20.20.20|Suspicious stew can no longer be found in the Creative inventory.}}
{{History|foot}}
== Issues ==
{{Issue list}}
== Trivia ==
* Suspicious stew was introduced because developers wanted a way of communicating that [[wikipedia:Lily_of_the_valley|lilies of the valley]] are poisonous.<ref>{{ytl|YUM7XiEX1DI|Items: Ten Things You Probably Didn't Know About Minecraft @ 3:32|Minecraft|November 29, 2019|t=212s}}</ref>
== References ==
{{Reflist}}
<references group="loot"/>
{{Items}}
[[Category:Food]]
[[de:Seltsame Suppe]]
[[es:Estofado sospechoso]]
[[fr:Soupe suspecte]]
[[ja:怪しげなシチュー]]
[[ko:수상한 스튜]]
[[nl:Geheimzinnige stoofpot]]
[[pl:Podejrzana potrawka]]
[[pt:Ensopado suspeito]]
[[ru:Подозрительный суп]]
[[th:สตูว์พิศวง]]
[[zh:迷之炖菜]]
[[Category:Renewable resources]]</li></ul> | beta 1.10.0.3 | ||||
1.16.0{{Extension DPL}}<ul><li>[[Fermented Spider Eye|Fermented Spider Eye]]<br/>{{Item
| image = Fermented Spider Eye.png
| renewable = Yes
| stackable = Yes (64)
}}
A '''fermented spider eye''' is a [[brewing]] ingredient.
== Obtaining ==
=== Crafting ===
{{Crafting
|Brown Mushroom
|Sugar
|Spider Eye
|Output= Fermented Spider Eye
|type= Brewing
}}
== Usage ==
They can be used to brew [[potion]]s with negative effects, as well as the [[Potion of Invisibility]].
=== Brewing ingredient ===
{{brewing
|showname=1
|head=1
|Fermented Spider Eye
|Potion of Weakness
|base=Water Bottle
}}
{{brewing
|Fermented Spider Eye
|Potion of Harming
|base=Potion of Poison;Potion of Healing
}}
{{brewing
|Fermented Spider Eye
|Potion of Slowness
|base=Potion of Swiftness;Potion of Leaping
}}
{{brewing
|foot=1
|Fermented Spider Eye
|Potion of Invisibility
|base=Potion of Night Vision
}}
== Data values ==
=== ID ===
{{edition|java}}:
{{ID table
|edition=java
|showforms=y
|generatetranslationkeys=y
|displayname=Fermented Spider Eye
|spritetype=item
|nameid=fermented_spider_eye
|form=item
|foot=1}}
{{edition|bedrock}}:
{{ID table
|edition=bedrock
|shownumericids=y
|showforms=y
|notshowbeitemforms=y
|generatetranslationkeys=y
|displayname=Fermented Spider Eye
|spritetype=item
|nameid=fermented_spider_eye
|id=428
|form=item
|foot=1}}
== Video ==
<div style="text-align:center">{{yt|ln8ZQn5MtFI}}</div>
== History ==
{{History|java}}
{{History||1.0.0|snap=Beta 1.9 Prerelease 2|[[File:Fermented Spider Eye JE1 BE1.png|32px]] Added fermented spider eyes.}}
{{History|||snap=Beta 1.9 Prerelease 3|Fermented spider eyes can now be [[brewing|brewed]] in a [[water bottle]] to create a [[potion of Weakness]].
|Fermented spider eyes now corrupt potions of [[Swiftness]] and [[Fire Resistance]] into potions of [[Slowness]], for both normal and extended types.
|Fermented spider eyes now corrupts potions of [[Healing]] and [[Poison]] into potions of [[Harming]], as well as Healing II and extended Poison into extended Harming.}}
{{History||1.4.2|snap=12w34a|Fermented spider eyes now change potions of [[Night Vision]] into the new potions of [[Invisibility]], for both normal and extended types.}}
{{History||1.7.2|snap=13w36a|Fermented spider eyes now corrupt the new [[potion of Water Breathing]] into a potion of Harming.}}
{{History||1.8|snap=14w27a|Fermented spider eyes now corrupt the new [[potion of Leaping]] into a potion of Slowness.}}
{{History||1.9|snap=15w31a|[[Potions of Weakness]] can no longer be made using a [[thick potion]], [[mundane potion]], [[awkward potion]], [[potion of Regeneration]], or [[potion of Strength]].
|[[Potions of Slowness]] can no longer be made using a [[potion of Fire Resistance]].
|[[Potions of Harming]] can no longer be made using a [[potion of Water Breathing]].}}
{{History||1.13|snap=17w47a|Prior to [[1.13/Flattening|''The Flattening'']], this [[item]]'s numeral ID was 376.}}
{{History||1.14|snap=18w50a|[[File:Fermented Spider Eye JE2 BE2.png|32px]] The texture of fermented spider eyes has been changed.}}
{{History|upcoming java}}
{{History||Villager Trade Rebalance<br>(Experimental)|link=Java Edition 1.20.2|snap=23w31a|[[Wandering trader]]s now have a chance to [[trading|buy]] a fermented spider eye from the player.}}
{{History|pocket alpha}}
{{History||v0.12.1|snap=build 1|[[File:Fermented Spider Eye JE1 BE1.png|32px]] Added fermented spider eyes.}}
{{History|bedrock}}
{{History||1.10.0|snap=beta 1.10.0.3|[[File:Fermented Spider Eye JE2 BE2.png|32px]] The texture of fermented spider eyes has been changed.}}
{{History|console}}
{{History||xbox=TU7|xbone=CU1|ps=1.0|wiiu=Patch 1|switch=1.0.1|[[File:Fermented Spider Eye JE1 BE1.png|32px]] Added fermented spider eyes.}}
{{History||xbox=none|xbone=none|ps=1.90|wiiu=none|switch=none|[[File:Fermented Spider Eye JE2 BE2.png|32px]] The texture of fermented spider eyes has been changed.}}
{{History|New 3DS}}
{{History||0.1.0|[[File:Fermented Spider Eye JE1 BE1.png|32px]] Added fermented spider eyes.}}
{{History|foot}}
== Issues ==
{{issue list}}
{{items}}
[[Category:Renewable resources]]
[[cs:Zkvašené pavoučí oko]]
[[de:Fermentiertes Spinnenauge]]
[[es:Ojo de araña fermentado]]
[[fr:Œil d'araignée fermenté]]
[[it:Occhio di ragno fermentato]]
[[ja:発酵したクモの目]]
[[ko:발효된 거미 눈]]
[[nl:Gefermenteerd spinnenoog]]
[[pl:Sfermentowane oko pająka]]
[[pt:Olho de aranha fermentado]]
[[ru:Приготовленный паучий глаз]]
[[th:ตาแมงมุมดอง]]
[[uk:Оброблене павуче око]]
[[zh:发酵蛛眼]]</li><li>[[Goat Horn|Goat Horn]]<br/>{{redirect|Horn}}
{{Item
| image = Goat Horn JE1 BE1.png
| renewable = Yes
| stackable = No
}}
A '''goat horn''' is an [[item]] dropped by [[goat]]s. It has eight variants, and each plays a unique sound when {{Control|used}} which can be heard by [[Player|players]] in a large radius.
== Obtaining ==
=== Mob loot ===
A horn is dropped when an adult [[goat]] rams a tree or any other hard block that occurs naturally where goats spawn. These include [[stone]], [[coal ore]], [[copper ore]], [[iron ore]], [[emerald ore]], [[log]], or [[packed ice]]. Goats do not ram other solid blocks. {{IN|java}}, these blocks are listed under the {{cd|snaps_goat_horn}} [[tag]], and can be modified by [[data pack]]s.
Up to two horns can be dropped from an adult goat. Regular goats may drop the Ponder, Sing, Seek, and Feel horns, while screaming goats drop the Admire, Call, Yearn, and Dream horns. A specific goat drops only one type of horn; that is, if a goat drops a Sing horn, its other horn is also a Sing horn.
=== Natural generation ===
{{LootChestItem|goat-horn}}
Only the four variants from regular goats can be found here.
== Usage ==
When {{control|used}}, they play a loud sound that can be heard from up to 256 blocks, but are also limited by the server view distance. Each horn variant plays a unique sound. There are eight variants, four of which are exclusive to [[Goat#Spawning|screaming goats]].
There is a cooldown of seven seconds between each use of the horn. All goat horns are affected by this cooldown.
== Sounds ==
=== Generic ===
{{edition|java}}:
{{Sound table
|sound=Goat horn break1.ogg
|sound2=Goat horn break2.ogg
|sound3=Goat horn break3.ogg
|sound4=Goat horn break4.ogg
|subtitle=Goat Horn breaks off
|source=neutral
|description=When a goat's horn breaks off
|id=entity.goat.horn_break
|translationkey=subtitles.entity.goat.horn_break
|volume=0.9
|pitch=1.0
|distance=16
|foot=1}}
{{edition|bedrock}}:
{{Sound table
|type=bedrock
|sound=Goat horn break1.ogg
|sound2=Goat horn break2.ogg
|sound3=Goat horn break3.ogg
|sound4=Goat horn break4.ogg
|description=When a goat's horn breaks off
|source=hostile
|id=mob.goat.horn_break
|volume=1.0
|pitch=1.0
|foot=1}}
=== Playing ===
{{edition|java}}:
{{Sound table
|sound=Goat Horn Call0.ogg
|description="Ponder"
|subtitle=Goat horn plays
|source=Jukebox/Note Blocks
|id=item.goat_horn.sound.0
|translationkey=subtitles.item.goat_horn.play
|volume=16.0
|pitch=1.0
|distance=256}}
{{Sound table
|sound=Goat Horn Call1.ogg
|description="Sing"
|subtitle=Goat horn plays
|source=Jukebox/Note Blocks
|id=item.goat_horn.sound.1
|translationkey=subtitles.item.goat_horn.play
|volume=16.0
|pitch=1.0
|distance=256}}
{{Sound table
|sound=Goat Horn Call2.ogg
|description="Seek"
|subtitle=Goat horn plays
|source=Jukebox/Note Blocks
|id=item.goat_horn.sound.2
|translationkey=subtitles.item.goat_horn.play
|volume=16.0
|pitch=1.0
|distance=256}}
{{Sound table
|sound=Goat Horn Call3.ogg
|description="Feel"
|subtitle=Goat horn plays
|source=Jukebox/Note Blocks
|id=item.goat_horn.sound.3
|translationkey=subtitles.item.goat_horn.play
|volume=16.0
|pitch=1.0
|distance=256}}
{{Sound table
|sound=Goat Horn Call4.ogg
|description="Admire"<ref group=note name=screaming>These are dropped by screaming goats.</ref>
|subtitle=Goat horn plays
|source=Jukebox/Note Blocks
|id=item.goat_horn.sound.4
|translationkey=subtitles.item.goat_horn.play
|volume=16.0
|pitch=1.0
|distance=256}}
{{Sound table
|sound=Goat Horn Call5.ogg
|description="Call"<ref group=note name=screaming/>
|subtitle=Goat horn plays
|source=Jukebox/Note Blocks
|id=item.goat_horn.sound.5
|translationkey=subtitles.item.goat_horn.play
|volume=16.0
|pitch=1.0
|distance=256}}
{{Sound table
|sound=Goat Horn Call6.ogg
|description="Yearn"<ref group=note name=screaming/>
|subtitle=Goat horn plays
|source=Jukebox/Note Blocks
|id=item.goat_horn.sound.6
|translationkey=subtitles.item.goat_horn.play
|volume=16.0
|pitch=1.0
|distance=256}}
{{Sound table
|sound=Goat Horn Call7.ogg
|description="Dream"<ref group=note name=screaming/>
|subtitle=Goat horn plays
|source=Jukebox/Note Blocks
|id=item.goat_horn.sound.7
|translationkey=subtitles.item.goat_horn.play
|volume=16.0
|pitch=1.0
|distance=256
|foot=1}}
{{edition|bedrock}}:
{{Sound table
|type=bedrock
|sound=Goat Horn Call0.ogg
|source=Jukebox/Note Blocks<wbr>{{Until|BE 1.20.40}}<br>Hostile Creatures<wbr>{{Upcoming|BE 1.20.40}}|overridesource=1
|description="Ponder"
|id=horn.call.0
|volume=1.0<wbr><ref group=sound name=nodistance>{{Bug|MCPE-153254}}</ref><wbr>{{Until|BE 1.20.40}}<br>16.0<wbr>{{Upcoming|BE 1.20.40}}
|pitch=1.0}}
{{Sound table
|sound=Goat Horn Call1.ogg
|source=Jukebox/Note Blocks<wbr>{{Until|BE 1.20.40}}<br>Hostile Creatures<wbr>{{Upcoming|BE 1.20.40}}|overridesource=1
|description="Sing"
|id=horn.call.1
|volume=1.0<wbr><ref group=sound name=nodistance/><wbr>{{Until|BE 1.20.40}}<br>16.0<wbr>{{Upcoming|BE 1.20.40}}
|pitch=1.0}}
{{Sound table
|sound=Goat Horn Call2.ogg
|source=Jukebox/Note Blocks<wbr>{{Until|BE 1.20.40}}<br>Hostile Creatures<wbr>{{Upcoming|BE 1.20.40}}|overridesource=1
|description="Seek"
|id=horn.call.2
|volume=1.0<wbr><ref group=sound name=nodistance/><wbr>{{Until|BE 1.20.40}}<br>16.0<wbr>{{Upcoming|BE 1.20.40}}
|pitch=1.0}}
{{Sound table
|sound=Goat Horn Call3.ogg
|source=Jukebox/Note Blocks<wbr>{{Until|BE 1.20.40}}<br>Hostile Creatures<wbr>{{Upcoming|BE 1.20.40}}|overridesource=1
|description="Feel"
|id=horn.call.3
|volume=1.0<wbr><ref group=sound name=nodistance/><wbr>{{Until|BE 1.20.40}}<br>16.0<wbr>{{Upcoming|BE 1.20.40}}
|pitch=1.0}}
{{Sound table
|sound=Goat Horn Call4.ogg
|source=Jukebox/Note Blocks<wbr>{{Until|BE 1.20.40}}<br>Hostile Creatures<wbr>{{Upcoming|BE 1.20.40}}|overridesource=1
|description="Admire"<ref group=note name=screaming/>
|id=horn.call.4
|volume=1.0<wbr><ref group=sound name=nodistance/><wbr>{{Until|BE 1.20.40}}<br>16.0<wbr>{{Upcoming|BE 1.20.40}}
|pitch=1.0}}
{{Sound table
|sound=Goat Horn Call5.ogg
|source=Jukebox/Note Blocks<wbr>{{Until|BE 1.20.40}}<br>Hostile Creatures<wbr>{{Upcoming|BE 1.20.40}}|overridesource=1
|description="Call"<ref group=note name=screaming/>
|id=horn.call.5
|volume=1.0<wbr><ref group=sound name=nodistance/><wbr>{{Until|BE 1.20.40}}<br>16.0<wbr>{{Upcoming|BE 1.20.40}}
|pitch=1.0}}
{{Sound table
|sound=Goat Horn Call6.ogg
|source=Jukebox/Note Blocks<wbr>{{Until|BE 1.20.40}}<br>Hostile Creatures<wbr>{{Upcoming|BE 1.20.40}}|overridesource=1
|description="Yearn"<ref group=note name=screaming/>
|id=horn.call.6
|volume=1.0<wbr><ref group=sound name=nodistance/><wbr>{{Until|BE 1.20.40}}<br>16.0<wbr>{{Upcoming|BE 1.20.40}}
|pitch=1.0}}
{{Sound table
|sound=Goat Horn Call7.ogg
|source=Jukebox/Note Blocks<wbr>{{Until|BE 1.20.40}}<br>Hostile Creatures<wbr>{{Upcoming|BE 1.20.40}}|overridesource=1
|description="Dream"<ref group=note name=screaming/>
|id=horn.call.7
|volume=1.0<wbr><ref group=sound name=nodistance/><wbr>{{Until|BE 1.20.40}}<br>16.0<wbr>{{Upcoming|BE 1.20.40}}
|pitch=1.0
|foot=1}}
== Data values ==
=== ID ===
{{el|je}}:
{{ID table
|edition=java
|showforms=y
|generatetranslationkeys=y
|displayname=Goat Horn
|spritetype=item
|nameid=goat_horn
|form=item
|foot=1}}
{{el|be}}:
{{ID table
|edition=bedrock
|shownumericids=y
|showforms=y
|notshowbeitemforms=y
|generatetranslationkeys=y
|displayname=Goat Horn
|spritetype=item
|nameid=goat_horn
|form=item
|id=624
|translationkey=item.goat_horn.name, item.minecraft.goat_horn.sound.0, item.minecraft.goat_horn.sound.1, item.minecraft.goat_horn.sound.2, item.minecraft.goat_horn.sound.3, item.minecraft.goat_horn.sound.4, item.minecraft.goat_horn.sound.5, item.minecraft.goat_horn.sound.6, item.minecraft.goat_horn.sound.7
|foot=1}}
=== Item data ===
==== ''Java Edition'' ====
<div class="treeview">
*{{nbt|compound|tag}}: The item's '''tag''' tag.
{{:Player.dat_format/Goat Horn}}
</div>
Goat horns use the "instrument" tag to control which sound can be played when using a goat horn. The values of the tag (to be prefixed with <code>minecraft:</code>) are:
{| class="wikitable sortable" style="text-align: center;"
!Sound type !![[Resource location|Identifier]]
|-
|Ponder||<code>ponder_goat_horn</code>
|-
|Sing ||<code>sing_goat_horn</code>
|-
|Seek ||<code>seek_goat_horn</code>
|-
|Feel ||<code>feel_goat_horn</code>
|-
|Admire||<code>admire_goat_horn</code>
|-
|Call ||<code>call_goat_horn</code>
|-
|Yearn||<code>yearn_goat_horn</code>
|-
|Dream||<code>dream_goat_horn</code>
|}
== History ==
{{History||October 16, 2021|link=https://www.twitch.tv/videos/1178420217?t=02h46m05s|Ulraf, a game developer on ''Minecraft'', states that goat horns are not included in [[Java Edition 1.18]].}}
{{History||November 17, 2021|link=https://www.minecraft.net/en-us/article/caves---cliffs-update-part-ii-coming|Goat horns are initially announced to be added after "The Wild Update".}}
{{History|java}}
{{History||1.19|snap=22w17a|[[File:Goat Horn JE1 BE1.png|32px]]Added goat horns.}}
{{History||1.19|snap=Pre-release 2|Goat Horns now snap when a goat rams into [[copper ore]].<ref>{{bug|MC-250941|||Fixed }}</ref>}}
{{History|Bedrock}}
{{History||Caves & Cliffs<br>(experimental)|link=Caves & Cliffs|snap=beta 1.16.200.52|[[File:Goat Horn JE1 BE1.png|32px]]Added goat horns behind the "Caves and Cliffs" experimental toggle.}}
{{History|||snap=beta 1.16.210.51|Goats now drop 2 horns each.}}
{{History|||snap=beta 1.17.20.20|Baby goats no longer drop horns.}}
{{History||1.18.0|snap=beta 1.18.0.20|Goat horns are now available outside of experimental gameplay.}}
{{History|||snap=beta 1.18.0.22|Goat horns have been moved behind the "Vanilla Experiments" [[experimental gameplay|experiments]] toggle.}}
{{History||Vanilla Experiments (experimental)|link=Experimental Gameplay|snap=beta 1.18.20.23|Goat horns now have a cooldown after being used.}}
{{History|||snap=beta 1.18.20.25|Goat horns now have an animation when being used in first person.
|Goats now make a sound when they drop goat horns.}}
{{History|||snap=beta 1.18.30.26|Goat horns are now used to craft [[copper horn]]s.|Changed goat horn sounds.}}
{{History||Vanilla Experiments (experimental)|link=Experimental Gameplay|snap=beta 1.19.0.24|Goat horns are no longer used to craft copper horns, as copper horns have been removed.|Changed goat horn sounds.{{verify}}|Removed "Fly" and "Dream" goat horns.}}
{{History||1.19.0|snap=beta 1.19.0.28|Goat horns are now available without enabling experimental gameplay.}}
{{History||1.19.10|snap=beta 1.19.10.22|Renamed the "Resist" goat horn to the "Dream" goat horn to match ''Java Edition''.|The "Feel" goat horn now plays the same sound as ''Java Edition''.}}
{{History|upcoming bedrock}}
{{History||1.20.40|snap=beta 1.20.40.22|Goat horns now have a range of 256 blocks.<ref name=nodistance>{{Bug|MCPE-153254}}</ref>}}
{{History|foot}}
== Issues ==
{{issue list}}
== Trivia ==
* The "seek" horn sounds similar to the "ominous horn" that announces a [[raid]].
== Gallery ==
<gallery>
File:Screenshot (17).png|Steve using a goat horn.
File:Alex uses a goat horn.png|Alex using a goat horn.
File:Screenshot (18).png|The goat horn animation in first person.
File:Screenshot (19).png|The goat horn animation with "Left Hand" option enabled.
</gallery>
== Notes ==
<references group="note" />
== References ==
{{reflist}}
== External Links ==
* [https://www.minecraft.net/en-us/article/taking-inventory--goat-horn Taking Inventory: Goat Horn] - Minecraft.net on February 16, 2023
{{Items}}
[[Category:Renewable resources]]
[[Category:Tools]]
[[de:Ziegenhorn]]
[[es:Cuerno de cabra]]
[[fr:Corne de chèvre]]
[[it:Corno di capra]]
[[ja:ヤギの角笛]]
[[pl:Kozi róg]]
[[pt:Chifre de cabra]]
[[ru:Козий рог]]
[[zh:山羊角]]</li></ul> | beta 1.15.0.51 | The beam color can now be mixed with several different stained glass colors. | |||
| beta 1.16.0.57 | Beacons can now be activated with netherite blocks. | ||||
| Beacons can now be "fed" using netherite ingots. | |||||
| The texture of the UI of beacons has been changed. | |||||
| Legacy Console Edition | |||||
| TU19 | CU7 | 1.12 | Patch 1 | 1.0.1 | |
| TU25 | CU14 | 1.17 | Beacon beams now change colors when shining through stained glass or stained glass panes. | ||
| TU31 | CU19 | 1.22 | Patch 3 | The vertical range of beacon has been nerfed to match horizontal range. | |
| TU69 | 1.76 | Patch 38 | Beacons now produce sounds. | ||
| 1.90 | |||||
| New Nintendo 3DS Edition | |||||
1.3.12{{Extension DPL}}<ul><li>[[Lead|Lead]]<br/>{{About|the item used for leashing and leading mobs|the element|Element#Lead}}
{{Item
| image = Lead.png
| stackable = Yes (64)
| renewable = Yes
}}
'''Leads''' are [[tool]]s used to leash and lead passive and neutral [[animal]]s, [[golem]]s and some [[monster]]s.
== Obtaining ==
=== Chest loot ===
{{LootChestItem|lead}}
=== Crafting ===
{{Crafting
|A1= String
|B1= String
|A2= String
|B2= Slimeball
|C3= String
|Output= Lead,2
|type= Tool
}}
=== Mob loot ===
[[Wandering Trader|Wandering trader]]s always spawn with 2 [[llama|trader llama]]s, each held with a lead. When a trader llama is detached, either by killing it or the wandering trader, dragging them far apart, or putting the llama in a [[boat]] or a [[minecart]], the lead drops at the llama's position.
== Usage ==
=== Crafting ingredient ===
{{crafting usage}}
=== Leashing mobs ===
[[File:SuspendedPigs.png|190px|thumb|One block tall mobs, such as pigs, suspend at 7 blocks above the ground.]]
[[File:SuspendedCows.png|190px|thumb|Two block tall mobs, such as cows, also suspend at 7 blocks above the ground.]]
{{control|Using}} a lead on a [[mob]] ties the lead to the mob, allowing it to be moved by the player. Multiple mobs can be held by leads at once, but each mob held requires its own lead.
It is possible to leash the following mobs and other entities:
{{columns-list|colwidth=20em|
* {{EntityLink|Allay}}
* {{EntityLink|Axolotl}}
* {{EntityLink|Bee}}
* {{EntityLink|Boat}}{{only|bedrock}}
* {{EntityLink|Camel}}
* {{EntityLink|Cat}}
* {{EntityLink|Chicken}}
* {{EntityLink|Chicken Jockey}} (only the mount)
* {{EntityLink|Cow}}
* {{EntityLink|Dolphin}}
* {{EntityLink|Donkey}}
* {{EntityLink|Fox}}
* {{EntityLink|Frog}}
* {{EntityLink|Glow Squid}}
* {{EntityLink|Goat}}
* {{EntityLink|Hoglin}}
* {{EntityLink|Horse}}
* {{EntityLink|Iron Golem}}
* {{EntityLink|Llama}}
* {{EntityLink|Mooshroom}}
* {{EntityLink|Mule}}
* {{EntityLink|Ocelot}}
* {{EntityLink|Parrot}}
* {{EntityLink|Pig}}
* {{EntityLink|Polar Bear}}
* {{EntityLink|Rabbit}}
* {{EntityLink|Sheep}}
* {{EntityLink|Skeleton Horse}}
* {{EntityLink|Skeleton Horseman}} (only the mount)
* {{EntityLink|Sniffer}}
* {{EntityLink|Snow Golem}}
* {{EntityLink|Squid}}
* {{EntityLink|Strider}}
* {{EntityLink|Trader Llama}}
* {{EntityLink|Wolf}}
* {{EntityLink|Zoglin}}
* {{EntityLink|Zombie Horse}}}}
Additionally, [[villager]]s, [[wandering trader]]s, and [[monster]]s other than the ones listed above, can be leashed using a map editor or [[NBT]] editor.
With a mob on a lead held by the player, {{control|using}} the lead on any type of [[fence]] (or [[wall]]{{only|bedrock|short=1}}) attaches the lead to it with a visible knot, tying the mob to it. To attach it to a wall on Bedrock Edition, the player must hold a lead in the main hand.<ref>{{bug|MCPE-108078}}</ref> Multiple leads may be attached to one fence post. A mob tied to a fence tends to stay within 5 blocks of the fence post.
A lead is broken by pressing the {{control|use item}} control on the mob again, hitting the knot, or removing the attached fence post. Leads also break when hit by projectiles. Whenever a lead is removed or broken, it drops as an [[item (entity)|item]] at the location of the mob. However, it does not drop when unleashed in Creative mode.{{only|java}}<ref>{{bug|MCPE-79639}}</ref> A lead does not break if the attached animal dies.
A lead can stretch a maximum of 10 blocks. If the mob is able to move towards the player or fence post, it does so. If not, or if the mob is moving very quickly away from the player, the lead breaks.
When the player or the knot is more than 7 blocks above the ground, the mob being leashed becomes suspended.
Most mobs that can be leashed can still be leashed even if attacking the player leashing them, and any attached leads do not break.
[[Wolf|Wolves]] cannot be leashed after becoming angry. Despite this, if they become angry while already leashed, the lead does not break, but it cannot be reattached when broken through other methods while the wolf is still angry.
A lead attached to a hoglin breaks if it becomes a [[zoglin]].
A lead does not prevent mobs from despawning if they normally would despawn.
When moving downwards and accelerating towards the ground, leashed mobs accumulate fall damage and take it if they hit the ground while still accelerating. When moving up or decelerating (such as when the lead is stretched to its limit), the fall distance is set to one block and the mob therefore does not take any fall damage if it touches the ground.
If the player walks into and back out of a [[nether portal]] while holding a lead connected to a mob, the lead remains attached to the mob. However, if a mob attached to a lead walks into a nether portal, the lead breaks and drops as an item in the other dimension.
A lead can be used to remove a mob from a boat without needing to break the boat, if the mob can normally be leashed.
If a chunk unloads while containing a leashed mob (either by the player walking too far away, or traveling to another dimension via a portal), the lead breaks and drops as an item, leaving the mob free to wander around.
== Sounds ==
{{Edition|Java}}:
{{Sound table
|sound=Lead Knot break1.ogg
|sound2=Lead Knot break2.ogg
|sound3=Lead Knot break3.ogg
|subtitle=Leash Knot breaks
|source=neutral
|description=When a leash knot is destroyed
|id=entity.leash_knot.break
|translationkey=subtitles.entity.leashknot.break
|volume=1.0
|pitch=1.0
|distance=16}}
{{Sound table
|sound=Lead Knot place1.ogg
|sound2=Lead Knot place2.ogg
|sound3=Lead Knot place3.ogg
|subtitle=Leash Knot tied
|source=neutral
|description=When a leash knot is placed on a fence
|id=entity.leash_knot.place
|translationkey=subtitles.entity.leashknot.place
|volume=1.0
|pitch=1.0
|distance=16
|foot=1}}
{{Edition|Bedrock}}:
{{Sound table
|type=bedrock
|sound=Lead Knot break1.ogg
|sound2=Lead Knot break2.ogg
|sound3=Lead Knot break3.ogg
|source=neutral
|description=When a leash knot is broken by {{ctrl|interacting}} with it
|id=leashknot.break
|volume=1.0
|pitch=1.0}}
{{Sound table
|sound=Lead Knot place1.ogg
|sound2=Lead Knot place2.ogg
|sound3=Lead Knot place3.ogg
|source=neutral
|description=When a leash knot is placed on a fence or wall
|id=leashknot.place
|volume=1.0
|pitch=1.0
|foot=1}}
== Leash Knot ==
'''Leash knot''' is an entity created when the [[player]] right-clicks the fence while having a mob leashed.
{{Entity| title = Leash Knot| image = Knot.png|imagesize= 100px|networkid='''[[JE]]''': 77}}
=== Data values ===
==== ID ====
{{edition|java}}:
{{ID table
|edition=java
|generatetranslationkeys=y
|displayname=Leash Knot
|spritetype=entity
|nameid=leash_knot
|foot=1}}
{{edition|bedrock}}:
{{ID table
|edition=bedrock
|shownumericids=y
|notshowbeitemforms=y
|generatetranslationkeys=y
|displayname=Leash Knot
|spritetype=entity
|nameid=leash_knot
|id=88
|foot=1}}
==== Entity data ====
Leash knots have entity data that define various properties of the entity.
{{el|java}}:
{{main|Entity format}}
{{/ED}}
{{el|bedrock}}:
: See [[Bedrock Edition level format/Entity format]].
== Data values ==
=== ID ===
{{edition|java}}:
{{ID table
|edition=java
|showforms=y
|generatetranslationkeys=y
|displayname=Lead
|spritetype=item
|nameid=lead
|form=item
|foot=1}}
{{edition|bedrock}}:
{{ID table
|edition=bedrock
|shownumericids=y
|showforms=y
|notshowbeitemforms=y
|generatetranslationkeys=y
|displayname=Lead
|spritetype=item
|nameid=lead
|id=547
|form=item
|foot=1}}
== Achievements ==
{{load achievements|So I Got That Going for Me}}
== Advancements ==
{{load advancements|When the Squad Hops into Town}}
== History ==
{{missing information|The history of a lot of mobs be leashed}}
{{History|java}}
{{History||1.6.1|snap=13w16a|[[File:Lead JE1 BE1.png|32px]] Added leads.
|Leads do not currently have a tooltip and are called “leashes” in [http://www.mojang.com/2013/04/minecraft-snapshot-13w16a-and-new-launcher/ the change notes].}}
{{History|||snap=13w16b|Leads have been given a tooltip.}}
{{History|||snap=13w18a|Leads have been given a [[crafting]] recipe.}}
{{History||1.9|snap=15w50a|Added a [[sound]] for leads: <code>entity.leashknot.place</code>.}}
{{History||1.11|snap=16w32a|The [[entity]] ID of the knot has been changed from <code>LeashKnot</code> to <code>leash_knot</code>.}}
{{History|||snap=16w39a|Leads can now be found in [[woodland mansion]] chests.}}
{{History||1.13|snap=17w47a|Prior to [[1.13/Flattening|''The Flattening'']], this [[item]]'s numeral ID was 420.}}
{{History||1.14|snap=18w43a|[[File:Lead JE2 BE2.png|32px]] The texture of leads has been changed.}}
{{History|||snap=19w05a|Added [[wandering trader]]s, which are naturally equipped with leads.}}
{{History||1.15|snap=?|[[Bee]]s can now be leashed.}}
{{History||1.16|snap=20w09a|[[Skeleton horse]]s and [[zombie horse]]s can now be leashed.<ref>{{bug|MC-166246}}</ref>}}
{{History|||snap=?|[[Hoglin]]s can now be leashed.}}
{{History||1.16.2|snap=20w27a|[[Zoglin]]s can now be leashed.}}
{{History||1.17|snap=21w19a|[[Squid]]s and [[glow squid]]s can now be leashed.<ref>{{bug|MC-136647}}</ref>}}
{{History|||snap=?|[[Axolotl]]s can now be leashed.}}
{{History||1.19|snap=22w13a|Lead may now be found in [[ancient city]] [[chest]]s.}}
{{History|||snap=?|[[Frog]]s can now be leashed.}}
{{History||1.19.3|snap=22w42a|[[Camel]]s can now be leashed.|Mobs no longer accumulate fall damage when dangling on leads.<ref>{{bug|MC-14167||Mobs build up fall damage when dangling on a lead|Fixed}}</ref>}}
{{History||1.20 (Experimental)|link=1.19.4|snap=?|[[Sniffer]]s can now be leashed.}}
{{History||1.20|snap=23w12a|Lead can now be found in [[suspicious gravel]] and [[suspicious sand]] in [[trail ruins]].}}
{{History|||snap=23w16a|Lead no longer generates in [[suspicious sand]] in [[trail ruins]].|Due to the split of the archaeological loot tables for the suspicious gravel within the [[trail ruins]]; lead now is in the common loot.}}
{{History|pocket alpha}}
{{History||v0.15.0|snap=build 1|[[File:Lead JE1 BE1.png|32px]] Added leads.}}
{{History|pocket}}
{{History||1.1.0|snap=alpha 1.1.0.0|Leads now have better "physics".
|The [[entity]] ID of the knot has been changed from <code>leashknot</code> to <code>leash_knot</code>.
|Leads can now be found inside [[woodland mansion]] [[chest]]s.}}
{{History|bedrock}}
{{History||1.4.0|snap=beta 1.2.14.2|Leads can now be found inside [[buried treasure]] [[chest]]s.
|Leads can now be used on [[boat]]s.}}
{{History||1.4.0|snap=beta 1.2.20.1|Leads can now be used to craft [[balloon]]s.}}
{{History||1.10.0|snap=beta 1.10.0.3|[[File:Lead JE2 BE2.png|32px]] The texture of leads has been changed.
|[[Wandering trader]]s now [[drops|drop]] leads after they are detached from trader [[llama]]s.}}
{{History||1.14.0|snap=beta 1.14.0.1|Leads can now be used on [[polar bear]]s, [[ocelot]]s, [[parrot]]s, [[dolphin]]s and old [[villager]]s.}}
{{History||1.19.0|snap=beta 1.19.0.20|Allays can now be leashed.}}
{{History|console}}
{{History||xbox=TU19|xbone=CU7|ps=1.12|wiiu=Patch 1|switch=1.0.1|[[File:Lead JE1 BE1.png|32px]] Added leads.}}
{{History||xbox=TU43|xbone=CU33|ps=1.36|wiiu=Patch 13|[[Sound]]s have been added for leads.}}
{{History|Ps4}}
{{History||1.90|[[File:Lead JE2 BE2.png|32px]] The texture of leads has been changed.}}
{{History|3ds}}
{{History||0.1.0|[[File:Lead JE1 BE1.png|32px]] Added leads.}}
{{History|foot}}
== Issues ==
{{issue list|Lead|Leash}}
== Trivia ==
[[File:Steve wearing Lead.png|100px]] [[File:Alex wearing Lead.png|100px]]
* The lead is named as "leash" in the texture file.
* If a [[player]] goes to sleep while holding a mob on a lead, the lead remains attached.
* {{IN|Java}}, when using the {{cmd|item}} command to put a lead in a player's head slot, the item gets rotated and positioned in such a way that it looks like the player is wearing a monocle.
== Gallery ==
<gallery>
Multiple_Leash.png|Many animals can be tied to one fence post.
HorseLeashedOnAFence.png|A [[horse]] wearing [[golden horse armor]] that is leashed to a fence post.
ThreeTiedSheep.png|Three sheep tied to the same fence.
More accurate lead mobs.png|A shot of all the mobs that could be tied with leads as of 1.6.1, except donkeys and mules.
Yo Yo.png|With the use of the leash, it is possible to suspend animals in the air by tying the leash on high-up fence posts.
YoYo.png|A [[donkey]] with the Grumm/Dinnerbone [[name tag]] [[easter egg]] tied to a fence with a lead to make a yo-yo.
Flying_Sheep.png|Several [[sheep]] hanging in the air in [[Creative]] mode.
Pocket Edition Lead.jpg|First image of a lead in ''Bedrock Edition''.
</gallery>
== References ==
{{Reflist}}
== External Links ==
*[https://www.minecraft.net/en-us/article/taking-inventory-lead Taking Inventory: Lead] – Minecraft.net on April 8, 2022
{{items}}
{{entities}}
[[Category:Tools]]
[[de:Leine]]
[[es:Rienda]]
[[fr:Laisse]]
[[hu:Lasszó]]
[[it:Guinzaglio]]
[[ja:リード]]
[[ko:끈]]
[[nl:Leidtouw]]
[[pl:Smycz]]
[[pt:Laço]]
[[ru:Поводок]]
[[th:เชือกจูง]]
[[zh:拴绳]]
[[Category:Renewable resources]]</li><li>[[Helmet|Helmet]]<br/>{{Update|Include information about armor trims and updated netherite upgrade information.}}
{{redirect|Cap|mob spawning caps|Spawn}}
{{redirect|Turtle Shell|the item dropped by maturing turtles|Scute}}
{{Item
| image = <gallery>
Leather Cap.png| Leather
Chainmail Helmet.png| Chainmail
Iron Helmet.png| Iron
Diamond Helmet.png| Diamond
Golden Helmet.png| Golden
Netherite Helmet.png| Netherite
Turtle Shell.png| Turtle Shell
</gallery>
| durability =
* Leather: 55
* Chainmail: 165
* Iron: 165
* Golden: 77
* Diamond: 363
* Netherite: 407
* Turtle Shell: 275
| renewable =
* '''Netherite''': No
* '''All others''': Yes
| stackable = No
}}
'''Helmets''' are a type of [[armor]] that covers the head of the player. There are seven types of helmets: '''leather cap''', '''chainmail helmet''', '''iron helmet''', '''diamond helmet''', '''gold helmet''', '''netherite helmet''', and '''turtle shell'''.
==Obtaining ==
===Crafting===
{{crafting
|head=1
|showname=0
|showdescription=1
|name=Helmet
|A2= Leather;Gold Ingot;Iron Ingot;Diamond;Scute
|B2= Leather;Gold Ingot;Iron Ingot;Diamond;Scute
|C2= Leather;Gold Ingot;Iron Ingot;Diamond;Scute
|A3= Leather;Gold Ingot;Iron Ingot;Diamond;Scute
|C3= Leather;Gold Ingot;Iron Ingot;Diamond;Scute
|description=
|Output= Leather Cap;Golden Helmet;Iron Helmet;Diamond Helmet;Turtle Shell
|type= Combat
}}
{{crafting
|ignoreusage=1
|name=[[Helmet]]
|ingredients=Damaged matching helmet
|Damaged Leather Cap; Damaged Golden Helmet; Damaged Chainmail Helmet; Damaged Iron Helmet; Damaged Diamond Helmet; Damaged Turtle Shell; Damaged Netherite Helmet
|Damaged Leather Cap; Damaged Golden Helmet; Damaged Chainmail Helmet; Damaged Iron Helmet; Damaged Diamond Helmet; Damaged Turtle Shell; Damaged Netherite Helmet
|Output= Leather Cap; Golden Helmet; Chainmail Helmet; Iron Helmet; Diamond Helmet; Turtle Shell; Netherite Helmet
|description= The durability of the two helmets is added together, plus an extra 5% durability.
|type= Combat
|foot=1
}}
===Upgrading===
{{Smithing
|head=1
|Netherite Upgrade
|Diamond Helmet
|Netherite Ingot
|Netherite Helmet
|tail=1
}}
===Repairing===
====Grinding====
{{Grinding
|showdescription=1
|ingredients=2x Damaged [[Leather Cap]] or<br>2x Damaged [[Chainmail Helmet]] or<br>2x Damaged [[Iron Helmet]] or<br>2x Damaged [[Golden Helmet]] or<br>2x Damaged [[Diamond Helmet]] or<br>2x Damaged [[Netherite Helmet]] or<br>2x Damaged [[Turtle Shell]]
|Damaged Leather Cap; Damaged Chainmail Helmet; Damaged Iron Helmet; Damaged Golden Helmet; Damaged Diamond Helmet; Damaged Netherite Helmet; Damaged Turtle Shell
|Damaged Leather Cap; Damaged Chainmail Helmet; Damaged Iron Helmet; Damaged Golden Helmet; Damaged Diamond Helmet; Damaged Netherite Helmet; Damaged Turtle Shell
|Leather Cap; Chainmail Helmet; Iron Helmet; Golden Helmet; Diamond Helmet; Netherite Helmet; Turtle Shell
|description=The durability of the two helmets are added together, plus an extra 5% durability.
}}
====[[Anvil mechanics#Unit repair|Unit repair]]====
Helmets can be repaired in an [[anvil]] by adding units of the [[armor material]]'s repair material, with each repair material restoring 25% of the helmet's maximum durability, rounded down.
===Mob loot===
If a [[zombie]], [[husk]], [[stray]] or [[skeleton]] is wearing armor, there is a 8.5% chance (9.5% with [[Looting]] I, 10.5% with Looting II and 11.5% with Looting III) for the mob to drop a helmet upon death. The dropped helmet is usually badly damaged, and may be [[enchanted]] with enchantment levels 5-19.
{{IN|bedrock}}, [[vindicator]]s and [[pillager]]s spawned in [[raid]]s have a 8.3525% chance (10.28% on hard) to drop [[iron]] helmets. The dropped helmets are usually badly damaged, and have a 50% chance of being [[enchanted]] with a random [[enchantment]].
===Natural generation===
Two [[armor stand]]s are found in each taiga [[village]] outdoor armory, one of them equipped with an [[iron helmet]].
===Chest loot===
{{IN|BE}}, a sealed room in [[woodland mansion]]s can appear that has a chest sometimes containing an [[Efficiency]] I leather cap.<ref>{{bug|MCPE-109048}}</ref>
{{LootChestItem|leather-cap,random-enchanted-leather-cap,chainmail-helmet,iron-helmet,level-enchanted-iron-helmet,golden-helmet,random-enchanted-golden-helmet,diamond-helmet,damaged-diamond-helmet,level-enchanted-diamond-helmet,damaged-random-enchanted-diamond-helmet,damaged-random-enchanted-diamond-helmet-2}}
===Trading===
{{IN|java}}, novice-level armorer villagers have a 40% chance to sell an iron helmet for 4 emeralds. Journeyman-level armorers have a 40% chance to sell a chainmail helmet for 1 emerald. Master-level armorers always sell an enchanted diamond helmet for 11-27 emeralds. Apprentice-level leatherworker villagers have a {{frac|2|3}} chance to sell a leather cap<ref group="note" name="dye note">The leather armor has a random color created by two dyes (possibly the same dye twice.)</ref> for 5 emeralds. Master-level leatherworker villagers offer the same trade.
Armorer villagers may give the players with the [[Hero of the Village]] effect a chainmail helmet.
{{IN|bedrock}}, novice-level armorer villagers have a 25% chance to sell iron helmet for 5 emeralds, {{frac|1|3}} chance to sell chainmail helmet at journeyman-level for an emerald, and 50% chance to sell enchanted diamond helmet for 8 emeralds at master-level. Apprentice-level leatherworker villagers have a 50% chance to sell leather cap for 5 emeralds as part of their trades, and 50% chance to sell an enchanted leather cap for 5 emeralds at the master level.
{{notelist|columns=1}}
==Usage ==
Helmets can be placed in the top armor slot of a player's [[inventory]] for activation.
===Defense points===
Defense points are each signified by half of a shirt of mail in the armor bar above the health bar. Each defense point reduces any damage dealt to the player that is absorbed by armor by 4%, increasing additively with the number of defense points. Different materials and combinations of armor provide different levels of defense.
The following table shows the number of defense points added by helmets.
{| class="wikitable" data-description="Helmet defense points"
|-
! scope="col" |Material
! scope="col" |
|-
! scope="row" |Leather
|{{armor|1}}
|-
! scope="row" |Golden
| rowspan="4" |{{armor|2}}
|-
! scope="row" |Chainmail
|-
! scope="row" |Iron
|-
! scope="row" |Turtle Shell
|-
! scope="row" |Diamond
| rowspan="2" |{{armor|3}}
|-
! scope="row" |Netherite
|}
===Knockback resistance===
A netherite helmet provides 10% knockback resistance.
===Durability===
The following table shows the amount of damage each piece of armor can absorb before being destroyed.
Any "hit" from a damage source that can be blocked by armor removes one point of durability from each piece of armor worn for every {{hp|4}} of incoming damage (rounded down, but never below 1). Damage taken that armor doesn't protect (such as [[Damage#Fall damage|falling]] or [[Damage#Drowning|drowning]]) does not damage the armor, even if it is enchanted to protect against that type of damage. The following chart displays how many hits helmets can endure.
Netherite armor is not damaged by [[lava]] or [[fire]] when worn.
{| class="wikitable" data-description="Helmet durability"
|-
!Material
!Durability
|-
! scope="row" |Leather
|55
|-
! scope="row" |Golden
|77
|-
! scope="row" |Chainmail
| rowspan="2" |165
|-
! scope="row" |Iron
|-
! scope="row" |Turtle Shell
|275
|-
! scope="row" |Diamond
|363
|-
! scope="row" |Netherite
|407
|}
====Repair====
Helmets may be [[item repair|repaired]] by using them along with some of their crafting material (leather, gold ingots, iron ingots, diamonds or netherite) in an [[anvil]]. Chainmail helmets may be repaired in this way with iron ingots. They may also be repaired by crafting them together with another helmet of like material.
===Enchantments===
A helmet can receive the following [[enchantment]]s. Note that while iron and chainmail have the same durability, chainmail has a higher [[Tutorials/Enchanting mechanics#Enchantability|enchantability]] than iron or diamond.
{| class="wikitable"
|-
!Enchantment !!Max Level !!Notes
|-
|[[Fire Protection]]|| IV ||<ref group="note" name="exclusive">Fire Protection, Blast Protection, Projectile Protection and Protection are mutually exclusive</ref>
|-
|[[Projectile Protection]]|| IV ||<ref group="note" name="exclusive" />
|-
|[[Blast Protection]]|| IV ||<ref group="note" name="exclusive" />
|-
|[[Protection]]|| IV ||<ref group="note" name="exclusive" />
|-
|[[Unbreaking]]||III
|
|-
|[[Respiration]]||III
|
|-
|[[Aqua Affinity]]||I
|
|-
|[[Thorns]]||III ||<ref group="note" name="anvil">Only from using an [[anvil]] and [[enchanted book]]s.</ref>
|-
|[[Mending]]||I ||<ref group="note" name="anvil2">Only from chest loot, fishing, or an anvil and enchanted books.</ref>
|-
|[[Curse of Binding]]||I ||<ref group="note" name="anvil2" />
|-
|[[Curse of Vanishing]]||I ||<ref group="note" name="anvil2" />
|}
{{notelist}}
===Turtle shell effect===
Equipping a {{ItemSprite|Turtle Shell}} turtle shell provides the {{EffectLink|Water Breathing}} status effect, allowing the player to remain underwater for an additional 10 seconds. The time that this effect lasts does not begin to count down until the player dives underwater, then the 10 seconds are counted down. The effect immediately recharges after exposure to air.
===Brewing ingredient===
A turtle shell can also be used as a potion brewing ingredient.
{{Brewing
|Turtle Shell
|Potion of the Turtle Master
|Potion of the Turtle Master
|Potion of the Turtle Master
|showname=1
}}
===Smelting usage===
{{Smelting|showname=1|Iron Helmet;Chainmail Helmet;Golden Helmet|Iron Nugget;Iron Nugget;Gold Nugget|0,1}}
===Piglins===
{{EntityLink|Piglin|Piglins}} are attracted to ''golden'' helmets and pick them up, examining them for 6 to 8 seconds. Piglins can wear other helmets but are not attracted to them. They prefer stronger helmets over weaker helmets, with one exception: They always prefer golden helmets, throwing out stronger helmets in favor of gold helmets. Enchanted helmets are preferred over unenchanted helmets.
==Sounds ==
{{el|je}}:
{{Sound table
|sound=Equip leather1.ogg
|sound2=Equip leather2.ogg
|sound3=Equip leather3.ogg
|sound4=Equip leather4.ogg
|sound5=Equip leather5.ogg
|sound6=Equip leather6.ogg
|subtitle=Leather armor rustles
|source=player
|description=When a leather helmet is equipped
|id=item.armor.equip_leather
|translationkey=subtitles.item.armor.equip_leather
|volume=1.0
|pitch=1.0
|distance=16}}
{{Sound table
|sound=Equip chain1.ogg
|sound2=Equip chain2.ogg
|sound3=Equip chain3.ogg
|sound4=Equip chain4.ogg
|sound5=Equip chain5.ogg
|sound6=Equip chain6.ogg
|subtitle=Chain armor jingles
|source=player
|description=When a chainmail helmet is equipped
|id=item.armor.equip_chain
|translationkey=subtitles.item.armor.equip_chain
|volume=1.0
|pitch=1.0
|distance=16}}
{{Sound table
|sound=Equip iron1.ogg
|sound2=Equip iron2.ogg
|sound3=Equip iron3.ogg
|sound4=Equip iron4.ogg
|sound5=Equip iron5.ogg
|sound6=Equip iron6.ogg
|subtitle=Iron armor clanks
|source=player
|description=When an iron helmet is equipped
|id=item.armor.equip_iron
|translationkey=subtitles.item.armor.equip_iron
|volume=1.0
|pitch=1.0
|distance=16}}
{{Sound table
|sound=Equip gold1.ogg
|sound2=Equip gold2.ogg
|sound3=Equip gold3.ogg
|sound4=Equip gold4.ogg
|sound5=Equip gold5.ogg
|sound6=Equip gold6.ogg
|subtitle=Gold armor clinks
|source=player
|description=When a gold helmet is equipped
|id=item.armor.equip_gold
|translationkey=subtitles.item.armor.equip_gold
|volume=1.0
|pitch=1.0
|distance=16}}
{{Sound table
|sound=Equip diamond1.ogg
|sound2=Equip diamond2.ogg
|sound3=Equip diamond3.ogg
|sound4=Equip diamond4.ogg
|sound5=Equip diamond5.ogg
|sound6=Equip diamond6.ogg
|subtitle=Diamond armor clangs
|source=player
|description=When a diamond helmet is equipped
|id=item.armor.equip_diamond
|translationkey=subtitles.item.armor.equip_diamond
|volume=1.0
|pitch=1.0
|distance=16}}
{{Sound table
|sound=Equip netherite1.ogg
|sound2=Equip netherite2.ogg
|sound3=Equip netherite3.ogg
|sound4=Equip netherite4.ogg
|subtitle=Netherite armor clanks
|source=player
|description=When a netherite helmet is equipped
|id=item.armor.equip_netherite
|translationkey=subtitles.item.armor.equip_netherite
|volume=0.8
|pitch=1.0/0.9
|distance=16}}
{{Sound table
|sound=Equip turtle shell.ogg
|subtitle=Turtle Shell thunks
|source=player
|description=When a turtle shell is equipped
|id=item.armor.equip_turtle
|translationkey=subtitles.item.armor.equip_turtle
|volume=1.0
|pitch=1.0/0.85/1.1
|distance=16}}
{{Sound table
|sound=Random break.ogg
|subtitle=Item breaks
|source=dependent
|description=When a helmet's durability is exhausted
|id=entity.item.break
|translationkey=subtitles.entity.item.break
|volume=0.8
|pitch=0.8-1.2
|distance=16
|foot=1}}
{{el|be}}:
{{Sound table
|type=bedrock
|sound=Equip leather1.ogg
|sound2=Equip leather2.ogg
|sound3=Equip leather3.ogg
|sound4=Equip leather4.ogg
|sound5=Equip leather5.ogg
|sound6=Equip leather6.ogg
|source=player
|description=When a leather helmet or a turtle shell is equipped
|id=armor.equip_leather
|volume=1.0
|pitch=1.0}}
{{Sound table
|sound=Equip chain1.ogg
|sound2=Equip chain2.ogg
|sound3=Equip chain3.ogg
|sound4=Equip chain4.ogg
|sound5=Equip chain5.ogg
|sound6=Equip chain6.ogg
|source=player
|description=When a chain helmet is equipped
|id=armor.equip_chain
|volume=1.0
|pitch=1.0}}
{{Sound table
|sound=Equip iron1.ogg
|sound2=Equip iron2.ogg
|sound3=Equip iron3.ogg
|sound4=Equip iron4.ogg
|sound5=Equip iron5.ogg
|sound6=Equip iron6.ogg
|source=player
|description=When an iron helmet is equipped
|id=armor.equip_iron
|volume=1.0
|pitch=1.0}}
{{Sound table
|sound=Equip gold1.ogg
|sound2=Equip gold2.ogg
|sound3=Equip gold3.ogg
|sound4=Equip gold4.ogg
|sound5=Equip gold5.ogg
|sound6=Equip gold6.ogg
|source=player
|description=When a gold helmet is equipped
|id=armor.equip_gold
|volume=1.0
|pitch=1.0}}
{{Sound table
|sound=Equip diamond1.ogg
|sound2=Equip diamond2.ogg
|sound3=Equip diamond3.ogg
|sound4=Equip diamond4.ogg
|sound5=Equip diamond5.ogg
|sound6=Equip diamond6.ogg
|source=player
|description=When a diamond helmet is equipped
|id=armor.equip_diamond
|volume=1.0
|pitch=1.0}}
{{Sound table
|sound=Equip netherite1.ogg
|sound2=Equip netherite2.ogg
|sound3=Equip netherite3.ogg
|sound4=Equip netherite4.ogg
|source=player
|description=When a netherite helmet is equipped.
|id=armor.equip_netherite
|volume=1.0
|pitch=1.0}}
{{Sound table
|rowspan=2
|sound=Water Splash Old.ogg
|source=block
|description=When a leather helmet is dyed using a cauldron
|id=cauldron.dyearmor
|volume=0.1
|pitch=1.0}}
{{Sound table
|source=block
|description=When a leather helmet's dye is removed using a cauldron
|id=cauldron.cleanarmor
|volume=0.1
|pitch=1.0}}
{{Sound table
|sound=Random break.ogg
|source=player
|description=When a helmet's durability is exhausted
|id=random.break
|volume=1.0
|pitch=0.9
|foot=1}}
==Data values ==
=== ID===
{{edition|java}}:
{{ID table
|edition=java
|showitemtags=y
|showforms=y
|generatetranslationkeys=y
|displayname=Leather Cap
|spritetype=item
|nameid=leather_helmet
|itemtags=freeze_immune_wearables
|form=item}}
{{ID table
|displayname=Chainmail Helmet
|spritetype=item
|nameid=chainmail_helmet
|form=item}}
{{ID table
|displayname=Iron Helmet
|spritetype=item
|nameid=iron_helmet
|form=item}}
{{ID table
|displayname=Diamond Helmet
|spritetype=item
|nameid=diamond_helmet
|form=item}}
{{ID table
|displayname=Golden Helmet
|spritetype=item
|nameid=golden_helmet
|form=item}}
{{ID table
|displayname=Netherite Helmet
|spritetype=item
|nameid=netherite_helmet
|form=item}}
{{ID table
|displayname=Turtle Shell
|spritetype=item
|nameid=turtle_helmet
|form=item
|foot=1}}
{{edition|bedrock}}:
{{ID table
|edition=bedrock
|shownumericids=y
|showforms=y
|notshowbeitemforms=y
|generatetranslationkeys=y
|displayname=Leather Cap
|spritetype=item
|nameid=leather_helmet
|id=335
|form=item}}
{{ID table
|displayname=Chainmail Helmet
|spritetype=item
|nameid=chainmail_helmet
|id=339
|form=item}}
{{ID table
|displayname=Iron Helmet
|spritetype=item
|nameid=iron_helmet
|id=343
|form=item}}
{{ID table
|displayname=Diamond Helmet
|spritetype=item
|nameid=diamond_helmet
|id=347
|form=item}}
{{ID table
|displayname=Golden Helmet
|spritetype=item
|nameid=golden_helmet
|id=351
|form=item}}
{{ID table
|displayname=Netherite Helmet
|spritetype=item
|nameid=netherite_helmet
|id=609
|form=item}}
{{ID table
|displayname=Turtle Shell
|spritetype=item
|nameid=turtle_helmet
|id=573
|form=item
|foot=1}}
===Item data===
When leather caps are dyed, it has the following NBT:
<div class="treeview">
*{{nbt|compound|tag}}: Parent tag.
**{{nbt|compound|display}}: Display properties.
***{{nbt|int|color}}: The color of the leather armor. The tooltip displays "Dyed" if advanced tooltips are disabled, otherwise it displays the hexadecimal color value. Color codes are calculated from the Red, Green and Blue components using this formula:<br>'''<span style="color:red">Red</span>[[wikipedia:Logical shift|<<]]16 + <span style="color:green">Green</span><<8 + <span style="color:blue">Blue</span>'''<ref>For positive values larger than 0x00FFFFFF, the top byte is ignored. All negative values produce white.</ref>
</div>
==Achievements ==
{{load achievements|Iron Man;Tie Dye Outfit;Cover me in debris;Oooh, shiny!}}
==Advancements ==
{{load advancements|Suit Up;Cover me With Diamonds;Oh Shiny;Cover Me in Debris;A Furious Cocktail;How Did We Get Here}}
==History ==
{{History|java classic}}
{{History||August 13, 2009|link=wordofnotch:162091556|Notch tested armor models on [[mob (entity)|mob]]. Only [[chestplate]]s and helmets were available. They were merely aesthetic at the time and had no effect on gameplay.}}
{{History||0.24_SURVIVAL_TEST|[[File:Plate Helmet.png|32px]] Added [[Java_Edition_removed_features#Armor_in_Survival_Test|plate helmet]]s.
|[[File:Chainmail Helmet JE1.png|32px]] Added the model and the texture for unused [[Java_Edition_removed_features#Armor_in_Survival_Test|chain helmet]]s.
|[[File:Zombie full set.png|32px]] [[File:Skeleton helmet.png|26px]] Plate armor models have been tested on [[zombie]]s and [[skeleton]]s. It had no effect on gameplay.}}
{{History|java indev}}
{{History||0.31|snap=20091223-1|Plate and chain armor [[model]]s are no longer used.}}
{{History|||snap=20091231-2|[[File:Leather Cap (item) JE1 BE1.png|32px]] [[File:Studded Helmet (item) JE1.png|32px]] [[File:Chainmail Helmet (item) JE1 BE1.png|32px]] [[File:Iron Helmet (item) JE1 BE1.png|32px]] Added [[item]]s of relation to leather, [[History of textures/Unused textures#Studded armor|studded]], chainmail and plate (iron) helmets.
|The textures of leather helmets are taken from one of [[Notch]]'s previous games, ''[[Legend of the Chambered]]''. The rest are from ''[[Legend of the Chambered 2]]''.}}
{{History||20100206|[[File:Golden Helmet (item) JE1 BE1.png|32px]] [[File:Diamond Helmet (item) JE1 BE1.png|32px]] Added items of golden and diamond helmets.
|Removed leather-chain helmets.}}
{{History||20100212-1|Added armor models.
|[[File:Indev 20100212 armor.png|50px]] Armor models are now displayed on the [[player]] in the [[inventory]].}}
{{History||20100218|[[File:Leather Cap JE1 BE1.png|32px]] [[File:Chainmail Helmet JE2 BE1.png|32px]] [[File:Iron Helmet JE1 BE1.png|32px]] [[File:Golden Helmet JE1 BE1.png|32px]] [[File:Diamond Helmet JE1 BE1.png|32px]] Added models of leather, chainmail, iron, gold, and diamond helmets.
|Helmets can now be [[crafting|crafted]] and worn.
|Helmets now function. All helmets give {{Armor|3}}. Helmets have limited [[item durability|durability]], with lower tier helmets less durable than higher tier helmets.}}
{{History|java alpha}}
{{History||v1.0.8|With the introduction of [[leather]], "Cloth Cap" has been renamed to "Leather Cap".
|Leather cap is now [[crafting|crafted]] with leather instead of [[wool|cloth]].}}
{{History|java}}
{{History||1.0.0|snap=Beta 1.9 Prerelease|The armor protection behavior has been changed. Prior to this update, the total armor protection is based in this equation: (((''total equipped armor damage reduction'' − 1) × (''all equipped armor max damage'' − ''total equipped armor damage'')) ÷ (''total equipped armor max damage'' + 1)). Armor no longer reduces certain damage types to be covered by enchantments.}}
{{History|||snap=October 3, 2011|slink={{tweet|notch|120859830339637249}}|The first images of a [[player]] wearing enchanted armor are revealed.}}
{{History|||snap=Beta 1.9 Prerelease 3|Iron helmets can now be found in the new [[stronghold]] altar [[chest]]s.}}
{{History|||snap=Beta 1.9 Prerelease 4|Helmets can now be [[enchanting|enchanted]].}}
{{History||1.1|snap=12w01a|Iron helmets can now be found in the new blacksmith [[chest]]s in [[village]]s.}}
{{History||1.2.1|snap=12w06a|[[Zombie]]s now drop iron helmets on rare occasions and [[zombie pigman|zombie pigmen]] now drop golden helmets.}}
{{History||1.3.1|snap=12w15a|{{key|Shift}}+clicking can now be used to wear helmets.}}
{{History|||snap=12w21a|Chain helmets can now be obtained legitimately in [[survival]] mode through [[trading]].
|Blacksmith [[villager]]s now [[trading|sell]] chain helmets for 5–6 emeralds.
|Blacksmith villagers now sell diamond helmets for 7 emeralds.
|Blacksmith villagers now sell iron helmets for 4–5 emeralds.
|Butchers now sell leather caps for 2–3 emeralds.}}
{{History||1.4.2|snap=12w32a|[[Mob]] armor has been reintroduced. A partial or full set of any armor is now sometimes worn by [[zombie]]s, [[skeleton]]s and [[zombified piglins|zombie pigmen]], with the likelihood increasing with difficulty.}}
{{History|||snap=August 17, 2012|slink={{tweet|Dinnerbone|236445090929844225}}|[[Jeb]] and [[Dinnerbone]] tweeted pictures of [[dye]]able leather armor.}}
{{History|||snap=12w34a|Leather helmets can now be dyed by [[crafting]] a leather armor piece with [[dye]]s. Dyes can be removed by {{control|use|text=using}} dyed leather armor on a [[cauldron]] with [[water]].
|[[File:Leather Cap JE2.png|32px]] [[File:Leather Cap (item) JE2.png|32px]] Default leather caps textures are now slightly darker.}}
{{History|||snap=12w36a|[[Dye]]d leather caps are now more saturated and have a slight tint of tan in respect to the default armor color.}}
{{History|||snap=12w37a|[[File:Leather Cap JE3 BE2.png|32px]] [[File:Leather Cap (item) JE3 BE2.png|32px]] Leather armor now has non-dyed parts on the cap. This has been implemented so that [[player]]s can distinguish between other types of helmets and similarly colored leather caps.}}
{{History||1.5|snap=13w04a|Helmets in the [[player]]'s hand can now be equipped by right-clicking.
|[[Dispenser]]s can now equip nearby players with helmets.}}
{{History||1.8|snap=14w02a|[[Trading|Trades]] changed: armorer [[villager]]s now [[trading|sell]] chain helmets for 5–7 emeralds.
|Armorer villagers no longer sell diamond helmets.
|Armorer villagers now sell iron helmets for 4–6 emeralds.
|Leatherworkers no longer sell other leather caps.}}
{{History|||snap=14w05a|Helmets no longer turns red when [[mob]]s and [[player]]s are hurt.}}
{{History|||snap=14w06a|Helmets are now visible on [[giant]]s.}}
{{History|||snap=14w25a|Chain helmets [[Java Edition removed features#Chainmail armor|cannot be crafted anymore]] due to the [[item]] form of [[fire]] being [[Java Edition removed features#Obtainable until 1.8|removed]].}}
{{History||1.9|snap=15w31a|Enchanted iron and diamond helmets can now be found in [[end city]] ship [[chest]]s.
|[[Mob]]s now wear armor from the bottom to the top, rather than from the top to the bottom. This means that a mob with three armor pieces, for example, spawn with all armor except a helmet.}}
{{History|||snap=15w34b|Helmet [[item durability|durability]] now affects armor value.}}
{{History|||snap=15w36a|Armor and armor [[enchanting|enchantment]] calculations have been changed. For the original values, see [[Armor/Before 1.9|here]].}}
{{History|||snap=15w36d|Helmet durability affecting value has been removed.
|Helmets now has an attribute controlling the defense points.}}
{{History|||snap=15w50a|Added <code>equip</code> [[sound]]s for leather armor.}}
{{History|||snap=16w02a|Armor and armor enchantment calculations have been changed again.}}
{{History|||snap=16w05a|Armor calculations have been changed, once again.}}
{{History||1.13|snap=17w47a|Prior to [[1.13/Flattening|''The Flattening'']], these [[item]]s' numeral IDs were 298, 302, 306, 310 and 314.}}
{{History|||snap=18w07a|[[File:Turtle Shell.png|32px]] [[File:Turtle Shell (item) JE1 BE1.png|32px]] Added turtle shells.}}
{{History|||snap=18w09a|Golden helmets now have a chance of generating in [[underwater ruins]].}}
{{History|||snap=18w11a|Enchanted leather caps can now generate in the chests of [[shipwreck]]s.}}
{{History|||snap=18w20a|"Chain Helmet" has now been renamed to "Chainmail Helmet".}}
{{History||1.14|snap=18w43a|[[File:Leather Cap JE4 BE2.png|32px]] [[File:Chainmail Helmet JE3 BE2.png|32px]] [[File:Iron Helmet JE2 BE2.png|32px]] [[File:Golden Helmet JE2 BE2.png|32px]] [[File:Diamond Helmet JE2 BE2.png|32px]]<br>[[File:Leather Cap (item) JE4 BE3.png|32px]] [[File:Chainmail Helmet (item) JE2 BE2.png|32px]] [[File:Iron Helmet (item) JE2 BE2.png|32px]] [[File:Golden Helmet (item) JE2 BE2.png|32px]] [[File:Diamond Helmet (item) JE2 BE2.png|32px]] The textures of all types of helmets have been changed.}}
{{History|||snap=18w48a|Leather caps can now be found in [[chest]]s in [[village]] tanneries.}}
{{History|||snap=18w50a|Iron helmets can now be found on [[armor stand]]s in [[taiga]] villages.}}
{{History|||snap=19w08a|[[File:Golden Helmet (item) JE3 BE3.png|32px]] The textures of gold helmet [[item]]s have been changed.}}
{{History|||snap=19w11a|Armorer villagers now sell enchanted diamond helmets, making diamond helmets effectively [[renewable resource|renewable]] again.
|Leatherworker villagers now sell randomly [[dye]]d leather caps.}}
{{History|||snap=19w13a|Armorer villagers now give chainmail helmets to players under the [[Hero of the Village]] effect.}}
{{History||1.16|snap=20w06a|[[File:Netherite Helmet JE1.png|32px]] [[File:Netherite Helmet (item) JE1.png|32px]] Added netherite helmets.}}
{{History|||snap=20w07a|[[File:Leather piglin helmet.png|32px]] [[File:Chainmail piglin helmet.png|32px]] [[File:Iron piglin helmet.png|32px]] [[File:Golden piglin helmet.png|32px]] [[File:Diamond piglin helmet.png|32px]] [[File:Netherite piglin helmet JE1.png|32px]] Added textures and [[model]]s for all helmets when they are used by [[piglin]]s.
|Netherite helmets are now obtained by combining one diamond armor piece and one netherite ingot in a crafting table.
|[[File:Turtle Shell piglin MC-172110.png|32px]] Turtle shells, when used by piglins and [[zombified piglin]]s, result in a [[missing texture]] when being displayed.<ref>{{Cite bug|MC|172110|Texture of turtle shells is missing when worn by a piglin or zombified piglin|date=February 14, 2020}}</ref>}}
{{History|||snap=20w09a|[[File:Diamond Helmet (item) JE3 BE3.png|32px]] The textures of diamond helmet [[item]]s have been changed.}}
{{History|||snap=20w10a|[[File:Netherite Helmet JE2 BE1.png|32px]] [[File:Netherite Helmet (item) JE2 BE1.png|32px]] The texture of netherite helmets has been changed.
|[[File:Netherite piglin helmet.png|32px]] The texture of netherite helmets for [[piglin]]s has been changed.
|Netherite helmets can no longer be [[crafting|crafted]].
|Netherite helmets are now obtained by combining one diamond helmet and one netherite ingot in a [[smithing table]].}}
{{History|||snap=20w16a|Golden and netherite helmets now generate randomly [[enchanting|enchanted]], and sometimes [[damage]]d, in [[bastion remnant]] and [[ruined portal]] chests.}}
{{History|||snap=20w17a|Diamonds helmets now generate in place of netherite helmets in bastion remnant [[chest]]s.}}
{{History|||snap=pre3|The special helmet [[model]]s and textures created for [[piglin]]s have been removed except for leather helmets.}}
{{History||1.17|snap=20w48a|Wearing a leather helmet now prevents [[Powder Snow#Freezing|freezing]] entirely.}}
{{History|||snap=21w13a|The two unused textures of the leather cap for [[piglin]]s<ref><code>/assets/minecraft/textures/models/armor/piglin_leather_layer_1.png</code></ref><ref><code>/assets/minecraft/textures/models/armor/piglin_leather_layer_1_overlay.png</code></ref> have been removed.}}
{{History||1.18.2|snap=22w03a|Netherite helmet knockback resistance is no longer random.}}
{{History||1.19|snap=22w17a|[[File:Leather Cap JE5.png|32px]] The texture of the leather cap item has been changed.|Changed the leather cap texture when worn so the center bar now extends to the bottom of the back face.}}
{{History||1.20<br>(Experimental)|link=1.19.4|snap=23w04a|Non-leather helmets can now be trimmed using a [[smithing table]].
|There are 10 types of material that determine the color of the trim:
*Iron
*Copper
*Gold
*Lapis
*Emerald
*Diamond
*Netherite
*Redstone
*Amethyst
*Quartz
|Upgrading diamond helmets to netherite helmets now requires the netherite upgrade [[smithing template]].}}
{{History|||snap=23w05a|Leather caps can now be trimmed using a smithing table.|Helmets can now have trims of the same material it is made out of.}}
{{History|||snap=23w06a|Swapped {{cd|iron}} and {{cd|iron_darker}} palette, then made {{cd|iron_darker}} darker overall.}}
{{History||1.19.4|snap=23w05a|Helmets can now be swapped by {{ctrl|using}} them in the hotbar.<ref>{{bug|MC-216270|||Fixed}}</ref>}}
{{History||?|Helmets can now be swapped in [[armor stand]]s by {{ctrl|using}} them/[[head]]s/[[carved pumpkin]]s in the armor stand's slot.}}
{{History||1.20|snap=23w12a|The pattern textures of dune and sentry armor trims are changed.|Those previous patterns were left with different names: dune was renamed sentry and sentry was renamed shaper.}}
{{History|pocket alpha}}
{{History||v0.6.0|[[File:Leather Cap JE1 BE1.png|32px]] [[File:Chainmail Helmet JE2 BE1.png|32px]] [[File:Iron Helmet JE1 BE1.png|32px]] [[File:Golden Helmet JE1 BE1.png|32px]] [[File:Diamond Helmet JE1 BE1.png|32px]]<br>[[File:Leather Cap (item) JE1 BE1.png|32px]] [[File:Chainmail Helmet (item) JE1 BE1.png|32px]] [[File:Iron Helmet (item) JE1 BE1.png|32px]] [[File:Golden Helmet (item) JE1 BE1.png|32px]] [[File:Diamond Helmet (item) JE1 BE1.png|32px]] Added helmets.}}
{{History||v0.8.0|snap=build 2|[[File:Leather Cap (item) JE3 BE2.png|32px]] The leather helmet sprite has been changed to that of {{el|je}}, but its armor [[model]] remains that of older versions.}}
{{History||v0.9.0|snap=build 1|Iron helmets now naturally generate in [[village]] [[chest]]s and in [[stronghold]] altar chests.}}
{{History||v0.11.0|snap=build 11|Helmets now protect against [[damage]] from [[mob]]s only.}}
{{History||v0.12.1|snap=build 1|Helmets can now be worn by mobs.
|Chainmail helmets can now be obtained in [[survival]] mode from a mob wearing it.}}
{{History||?|Helmets no longer turn red when [[mob]]s and [[player]]s are hurt.}}
{{History||v0.14.0|snap=build 1|[[File:Leather Cap JE3 BE2.png|32px]] The texture of leather helmets have been changed.
|Leather helmets can now be dyed.}}
{{History||v0.15.0|snap=build 1|Helmets can now be obtained from [[stray]]s and [[husk]]s that naturally spawn with armor.}}
{{History|pocket}}
{{History||1.0.0|snap=alpha 0.17.0.1|[[Enchanting|Enchanted]] iron helmets and enchanted diamond helmets can now be found inside [[chest]]s within [[end city|end cities]].}}
{{History||1.0.4|snap=alpha 1.0.4.0|Iron helmets and chainmail helmets are now [[trading|sold]] by armorer smith [[villager]]s via trading.}}
{{History||1.1.0|snap=alpha 1.1.0.0|Golden, chain and iron helmets can now be [[smelting|smelted]] down into one of their respective [[nugget]]s.}}
{{History|bedrock}}
{{History||1.4.0|snap=beta 1.2.14.2|Chainmail helmets now generate in [[buried treasure]] chests.
|Enchanted leather helmets can now be found inside [[shipwreck]] supply room [[chest]]s.}}
{{History|||snap=beta 1.2.20.1|Golden helmets can now be found inside [[underwater ruins]] chests.}}
{{History||1.5.0|snap=beta 1.5.0.4|[[File:Turtle Shell.png|32px]] [[File:Turtle Shell (item) JE1 BE1.png|32px]] Added turtle shells.}}
{{History||1.10.0|snap=beta 1.10.0.3|[[File:Leather Cap JE4 BE2.png|32px]] [[File:Chainmail Helmet JE3 BE2.png|32px]] [[File:Iron Helmet JE2 BE2.png|32px]] [[File:Golden Helmet JE2 BE2.png|32px]] [[File:Diamond Helmet JE2 BE2.png|32px]]<br>[[File:Leather Cap (item) JE4 BE3.png|32px]] [[File:Chainmail Helmet (item) JE2 BE2.png|32px]] [[File:Iron Helmet (item) JE2 BE2.png|32px]] [[File:Golden Helmet (item) JE2 BE2.png|32px]] [[File:Diamond Helmet (item) JE2 BE2.png|32px]] The textures of all types of helmets have been changed.
|Iron helmets now can be found in plains [[village]] weaponsmith [[chest]]s.
|Leather helmets can now be found inside plains village tannery chests.}}
{{History||1.11.0|snap=beta 1.11.0.1|Iron helmets now can be found in [[savanna]], [[taiga]], [[desert]], [[snowy taiga]] and [[snowy tundra]] [[village]] weaponsmith [[chest]]s.
|Leather helmets can now be found inside savanna, taiga, desert, snowy taiga and snowy tundra village tannery chests.
|Iron helmets can now be found in [[village]] armorer chests.}}
{{History|||snap=beta 1.11.0.4|[[Pillager]]s and [[vindicator]]s that spawn in [[raid]]s can now drop iron helmets.
|Diamond helmets are now sold by armorer villagers.}}
{{History||1.11.0|snap=beta 1.11.0.5|[[File:Golden Helmet (item) JE3 BE3.png|32px]] The textures of gold helmet [[item]]s have been changed.}}
{{History||1.12.0|snap=beta 1.12.0.2|[[File:Armor Stand with Leather Armor MCPE-44669.png|32px]] Leather armor no longer shows as being [[dye]]d properly when worn by [[armor stand]]s.}}
{{History||1.13.0|snap=beta 1.13.0.1|Leather armor now appears properly dyed when worn by armor stands.}}
{{History||1.16.0|snap=beta 1.16.0.51|[[File:Netherite Helmet JE2 BE1.png|32px]] [[File:Netherite Helmet (item) JE2 BE1.png|32px]] Added netherite helmets.
|[[File:Diamond Helmet (item) JE3 BE3.png|32px]] The textures of diamond helmet [[item]]s have been changed.
|Helmets can now be obtained from [[piglin]]s that naturally spawn with golden helmets.}}
{{History|||snap=beta 1.16.0.57|Golden and netherite helmets now generate randomly [[enchanting|enchanted]], and sometimes [[damage]]d, in [[bastion remnant]] chests.
|Netherite helmets can no longer be [[crafting|crafted]].
|Netherite helmets are now obtained by combining one diamond helmet and one netherite ingot in a [[smithing table]].}}
{{History|||snap=beta 1.16.0.63|Diamonds helmets now generate in place of netherite helmets in bastion remnant [[chest]]s.}}
{{History|||snap=beta 1.16.200.53|Netherite helmets now gives a 90% reduction in knockback.}}
{{History||1.16.210|snap=beta 1.16.210.53|Wearing leather helmets now prevents [[Powder Snow#Freezing|freezing]] entirely.}}
{{History|console}}
{{History||xbox=TU1|xbone=CU1|ps=1.0|wiiu=Patch 1|switch=1.0.1|[[File:Leather Cap JE1 BE1.png|32px]] [[File:Chainmail Helmet JE2 BE1.png|32px]] [[File:Iron Helmet JE1 BE1.png|32px]] [[File:Golden Helmet JE1 BE1.png|32px]] [[File:Diamond Helmet JE1 BE1.png|32px]]<br>[[File:Leather Cap (item) JE1 BE1.png|32px]] [[File:Chainmail Helmet (item) JE1 BE1.png|32px]] [[File:Iron Helmet (item) JE1 BE1.png|32px]] [[File:Golden Helmet (item) JE1 BE1.png|32px]] [[File:Diamond Helmet (item) JE1 BE1.png|32px]] Added helmets.
|Added a quick equip for armor to the [[inventory]] interface.}}
{{History||xbox=TU12|ps=1.03|[[File:Leather Cap JE3 BE2.png|32px]] [[File:Leather Cap (item) JE3 BE2.png|32px]] The textures for leather helmets have been changed.}}
{{History||xbox=TU14|ps=1.05|Leather helmets can now be [[dye]]d.
|[[Item repair]] can now repair helmets.}}
{{History||xbox=TU25|xbone=CU13|ps=1.16|Helmets now have the quick equip functionality.}}
{{History||xbox=TU53|xbone=CU43|ps=1.49|wiiu=Patch 23|switch=1.0.3|Golden, chain and iron helmets can now be [[smelting|smelted]] down into one of their respective [[nugget]]s.}}
{{History|PS4}}
{{History||1.90|[[File:Chainmail Helmet (item) JE2 BE2.png|32px]] [[File:Iron Helmet (item) JE2 BE2.png|32px]] [[File:Golden Helmet (item) JE2 BE2.png|32px]] [[File:Diamond Helmet (item) JE2 BE2.png|32px]] The textures of all types of helmet items have been changed (except for the leather helmets).}}
{{History|new 3ds}}
{{History||0.1.0|[[File:Leather Cap JE1 BE1.png|32px]] [[File:Chainmail Helmet JE2 BE1.png|32px]] [[File:Iron Helmet JE1 BE1.png|32px]] [[File:Golden Helmet JE1 BE1.png|32px]] [[File:Diamond Helmet JE1 BE1.png|32px]]<br>[[File:Leather Cap (item) JE3 BE2.png|32px]] [[File:Chainmail Helmet (item) JE1 BE1.png|32px]] [[File:Iron Helmet (item) JE1 BE1.png|32px]] [[File:Golden Helmet (item) JE1 BE1.png|32px]] [[File:Diamond Helmet (item) JE1 BE1.png|32px]] Added helmets.}}
{{History|foot}}
<gallery>
File:ArmorModel Aug 13 2009.jpg|First image of armor.
File:DinnerboneArmor.png|[[Dinnerbone]]'s first screenshot of dyed armor.
File:ArmorPE.png
</gallery>
;Armor durability from Indev until late Beta
{| class="wikitable" data-description="Armor Durability during Indev until late Beta" style="text-align:center;"
|-
!Leather
!Golden
!Chainmail
!Iron
!Diamond
|-
|33
|66
|66
|132
|264
|}
==Issues ==
{{issue list}}
==Trivia ==
*Unlike the other helmets, the netherite helmet covers most of the player's face, due to a nose guard and cheek plates.
*The turtle shell is the only helmet that is not part of a complete set.
* In Bedrock Edition, there exists a bug<ref>{{Cite bug|MCPE|109048|Efficiency 1 Leather Cap in Woodland Mansions|date=December 1, 2020}}</ref> that makes it possible to obtain a Leather Cap enchanted with Efficiency I from [[Woodland Mansion]] chests with a chance of 1.45%. The enchantment has no effect on the cap, however.
==Gallery ==
<gallery>
File:Zombie helmet.png|A zombie wearing a helmet in [[Survival Test]].
</gallery>
===Enchanted Helmets===
<gallery>
File:Enchanted Leather Cap (item).gif
File:Enchanted Chainmail Helmet (item).gif
File:Enchanted Iron Helmet (item).gif
File:Enchanted Golden Helmet (item).gif
File:Enchanted Diamond Helmet (item).gif
File:Enchanted Netherite Helmet (item).gif
File:Enchanted Turtle Shell (item).gif
</gallery>
<gallery>
File:Enchanted Leather Helmet.gif
File:Enchanted Chainmail Helmet.gif
File:Enchanted Iron Helmet.gif
File:Enchanted Golden Helmet.gif
File:Enchanted Diamond Helmet.gif
File:Enchanted Netherite Helmet.gif
File:Enchanted Turtle Shell.gif
</gallery>
==References ==
{{reflist}}
==External Links ==
*[https://www.minecraft.net/en-us/article/taking-inventory--helmet Taking Inventory: Helmet] – Minecraft.net on February 20, 2020
{{Items}}
[[Category:Armor]]
[[es:Casco]]
[[ja:ヘルメット]]
[[ko:투구]]
[[pt:Capacete]]
[[pl:Hełm]]
[[zh:头盔]]</li></ul> | |||||
Issues[]
Issues relating to "Beacon" are maintained on the bug tracker. Report issues there.
Trivia[]
The map icon texture is hidden in the transparent part of the beacon beam texture in Java Edition 12w38a.
- The texture of the beacon is 16×16 but renders only the 10×10 area in the center.
- It is possible to see the beacon beam on the bottom of an activated beacon. This was initially reported as a bug, but the resolution was "won't fix", despite a fix being provided.[3]
- There are 12,326,391 different beam colors.
- Despite it containing obsidian in its recipe, it does not need a diamond pickaxe to be mined.
- A fully powered beacon can fit within the upper level of the Desert Temple with the beacon’s beam perfectly being placed in the hole at the top.
Gallery[]

The top of a beacon's beam.

A view from inside the beacon until Java Edition 19w41a.

Two beams from a beacon, one passing through glass and the other through a beacon block.

Beacon beam going through an end portal frame block.
The first image of a colored beacon, tweeted by Nathan Adams.
The first image of an underwater beacon, tweeted by Nathan Adams.
The beacon's light changing as it passes through magenta stained glass.
The full visible light spectrum created by colored beacons.
A grayscale spectrum.
A beacon is still functional when the pyramid is made of different blocks.
A visualization of the effects range for each level. At level 4, the area affected is 101×101 blocks.
A beacon with all of the blocks that can power beacons.
A colored beacon beam in Bedrock Edition.
Sunny posing in front of a rainbow of beacons, clad in trimmed armor.[4]
The texture file for the beacon in Java Edition 12w36a was laid out almost identically to that of the end crystal.
The then-texture file for end crystals for comparison; note the identical layout.
First image released by Jeb.
One of the many uses for the beacon.
The old texture from Java Edition 12w36a of the beacon.
The old texture from Java Edition 12w38a displaying the powered and the non-powered beacon.
The texture of the beacon used from Java Edition 12w40a until the Texture Update.


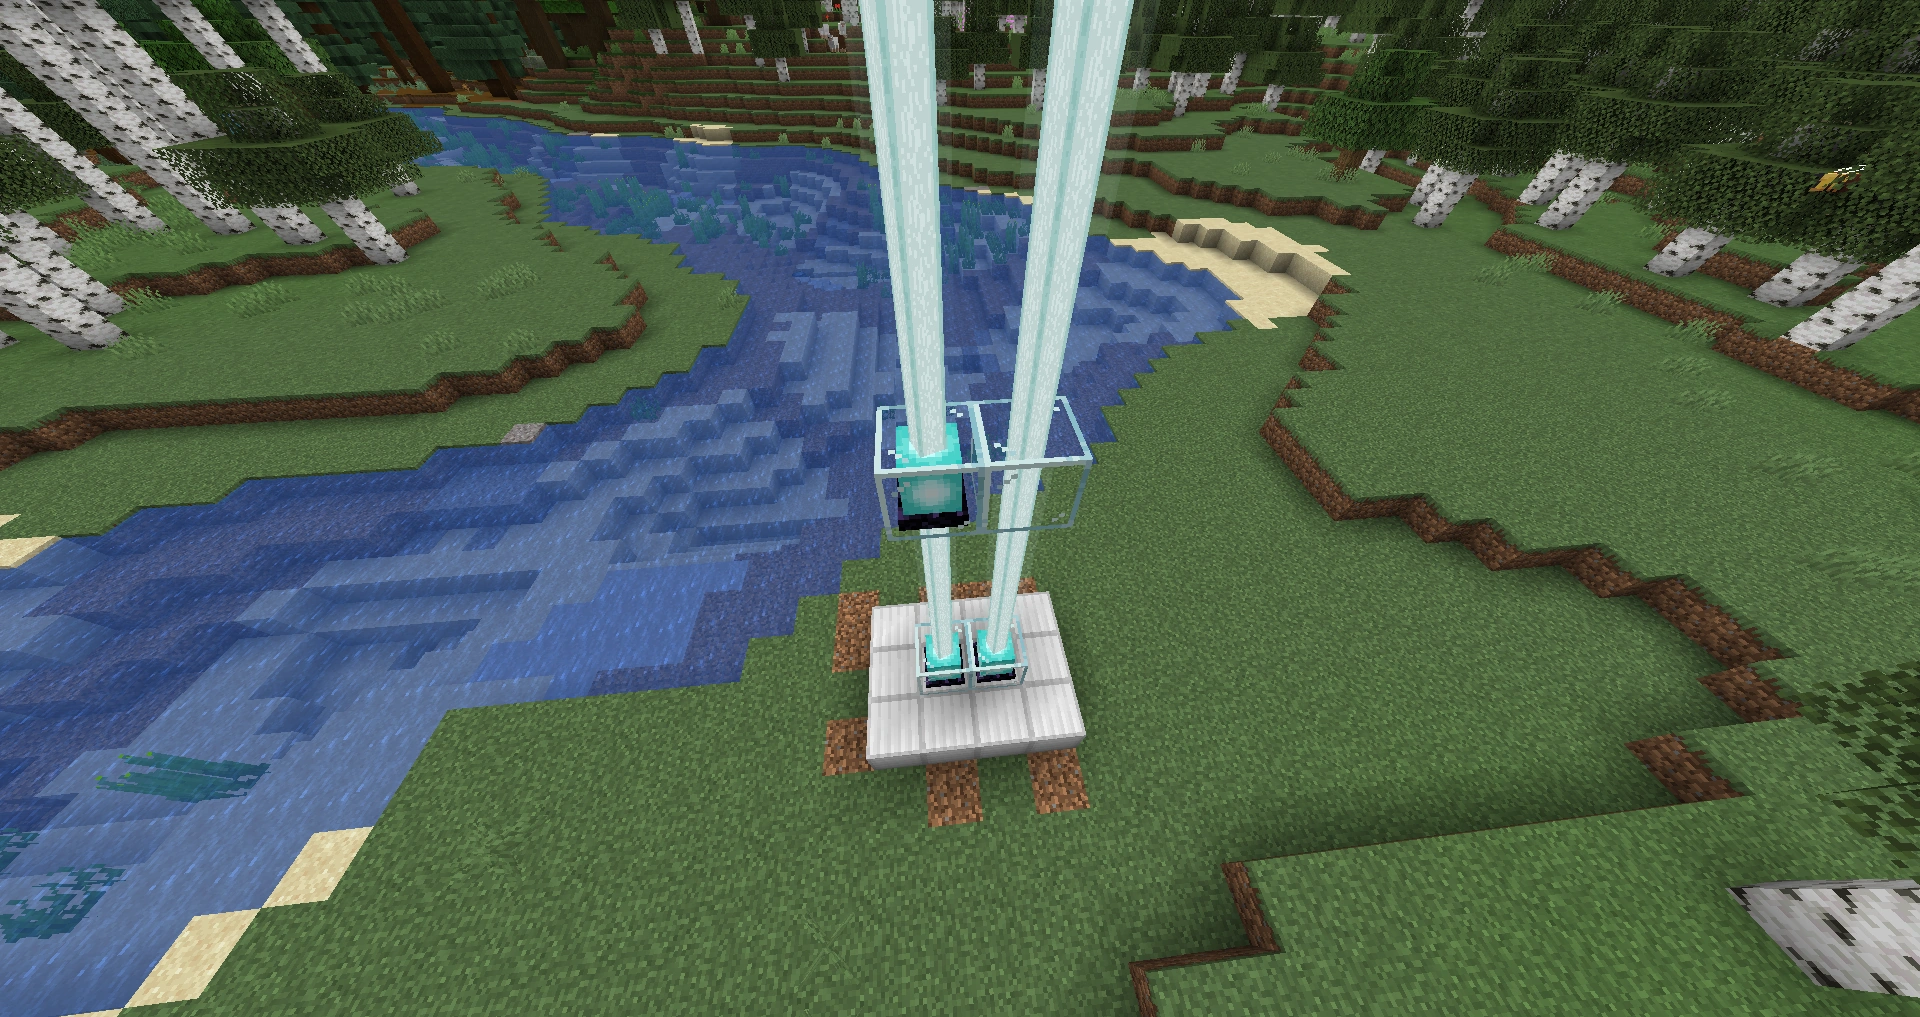
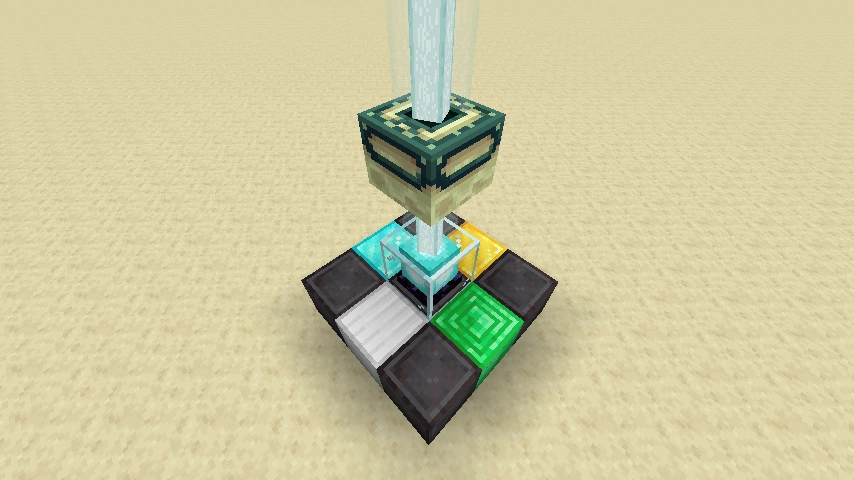
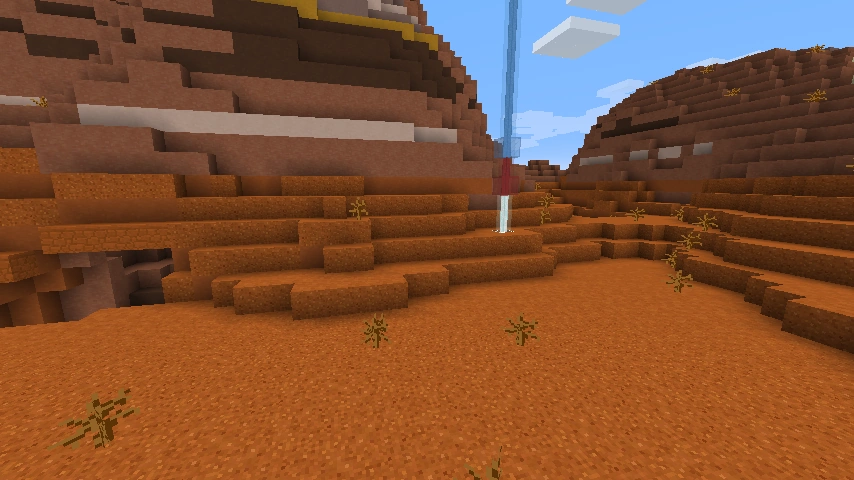
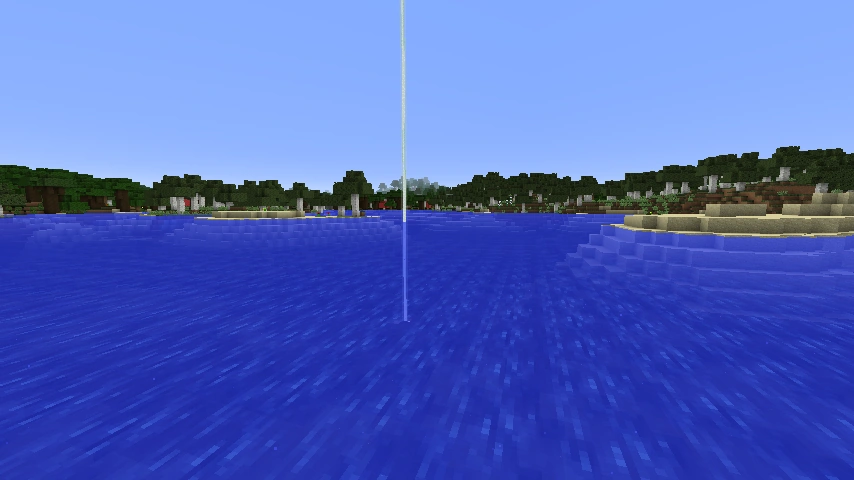
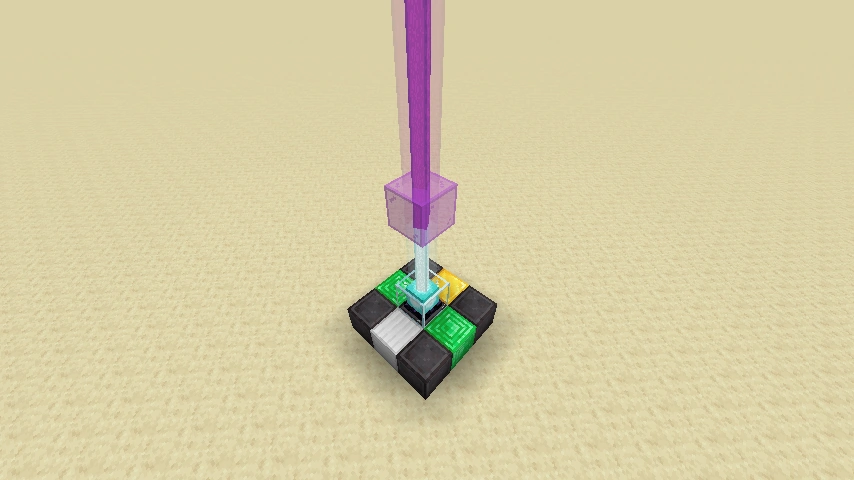
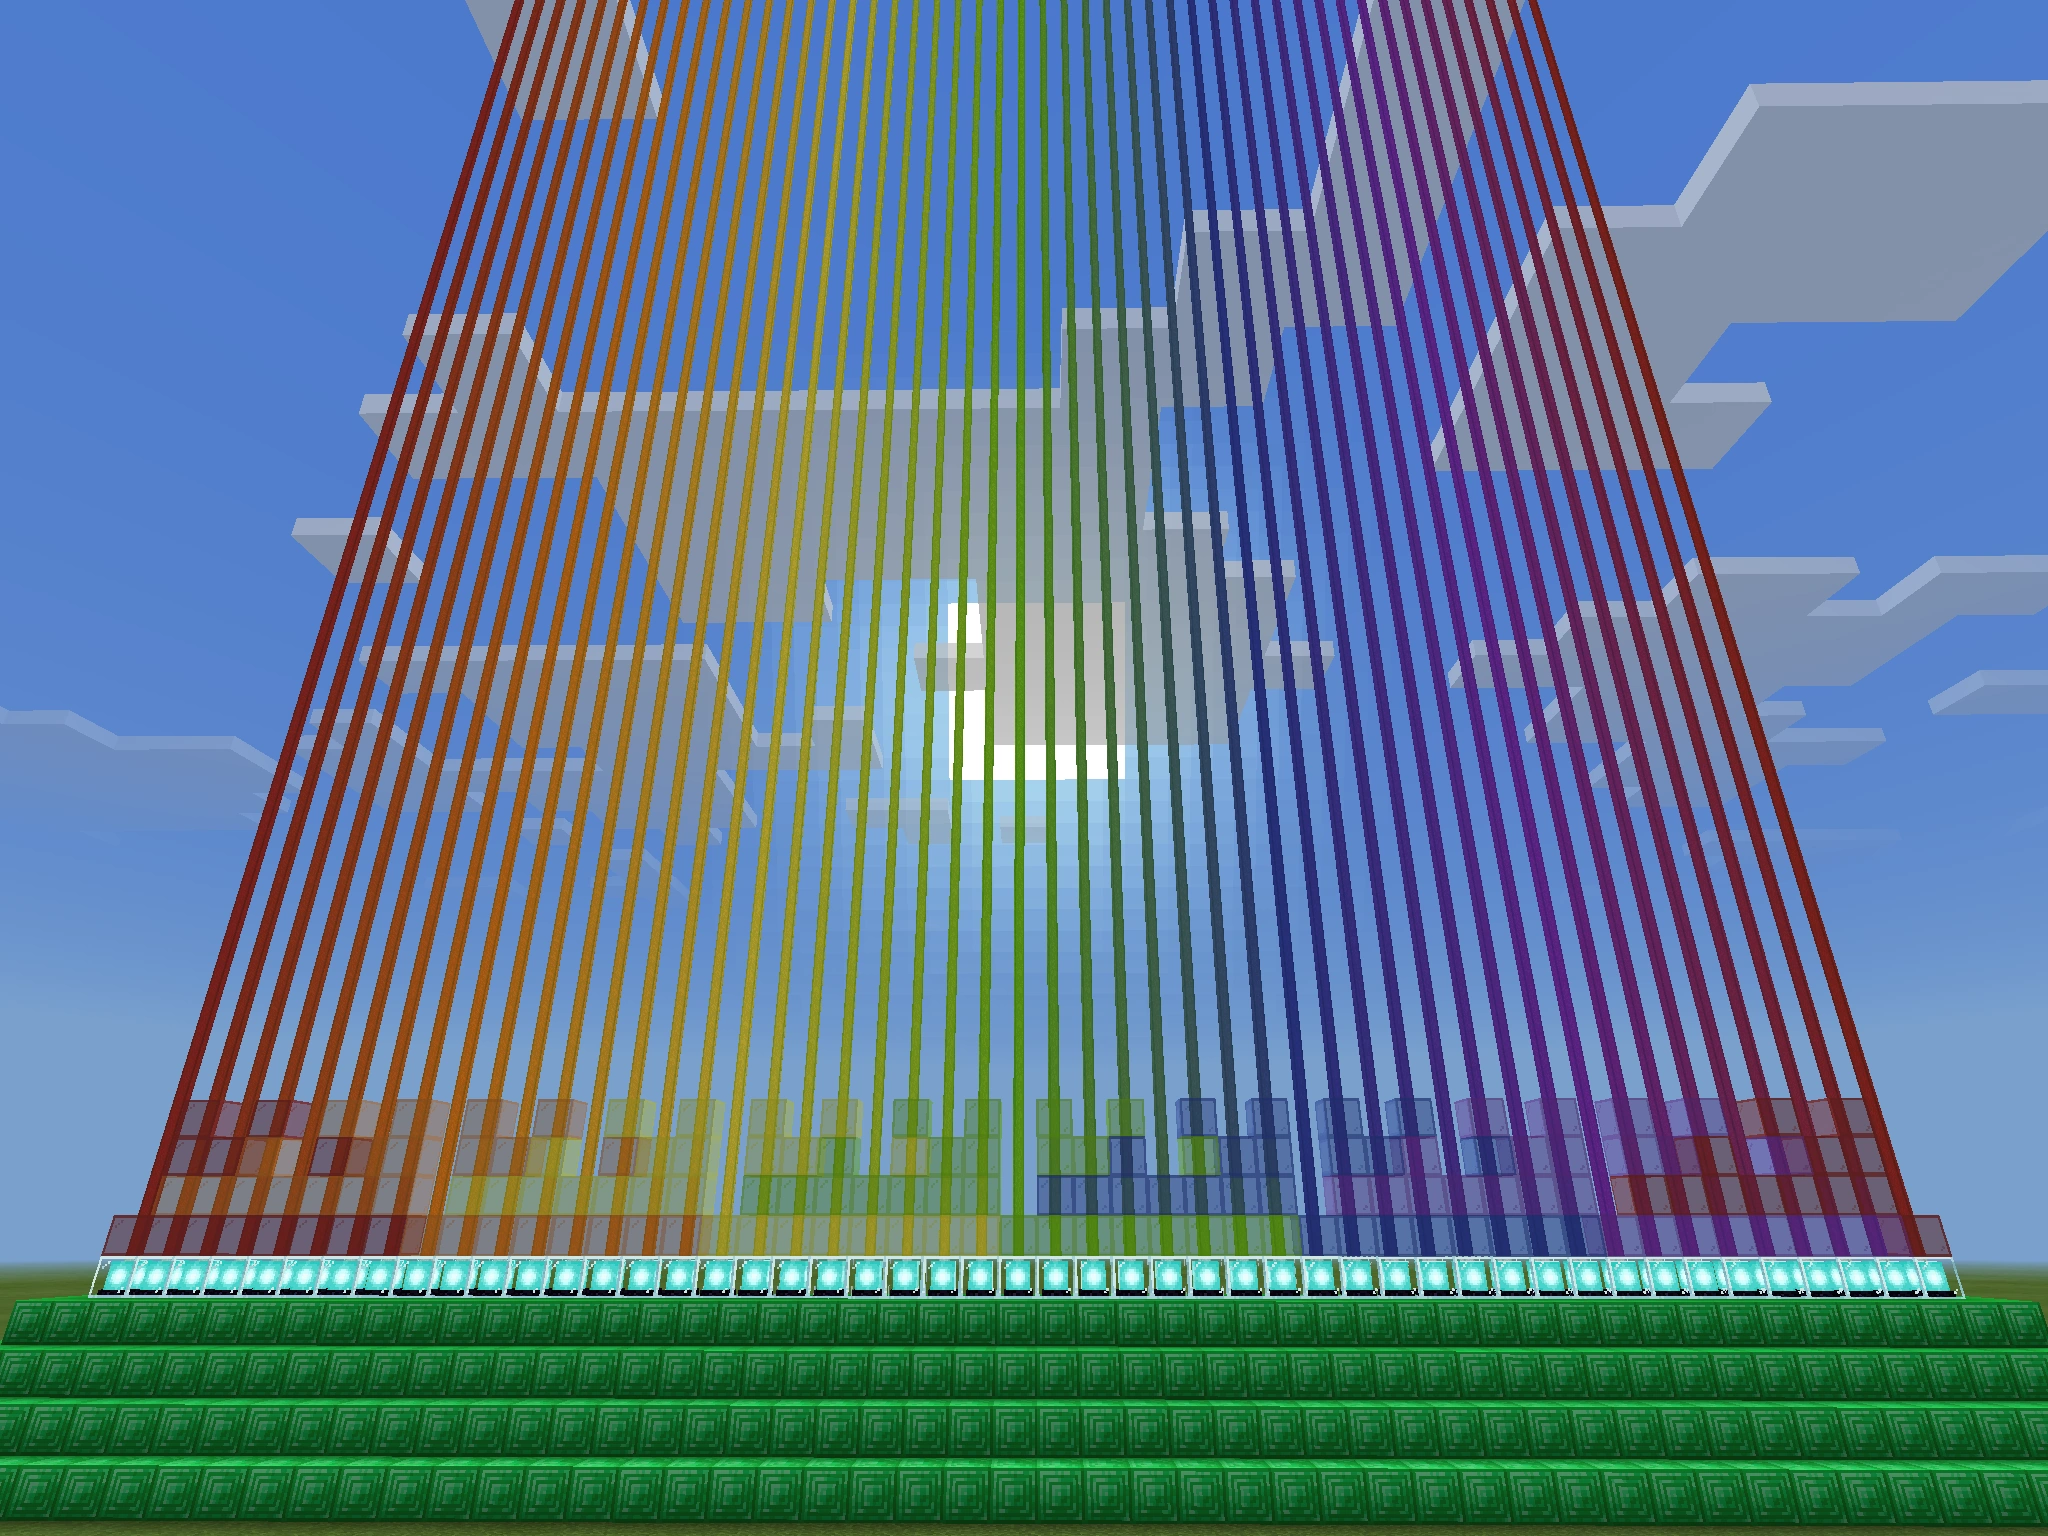
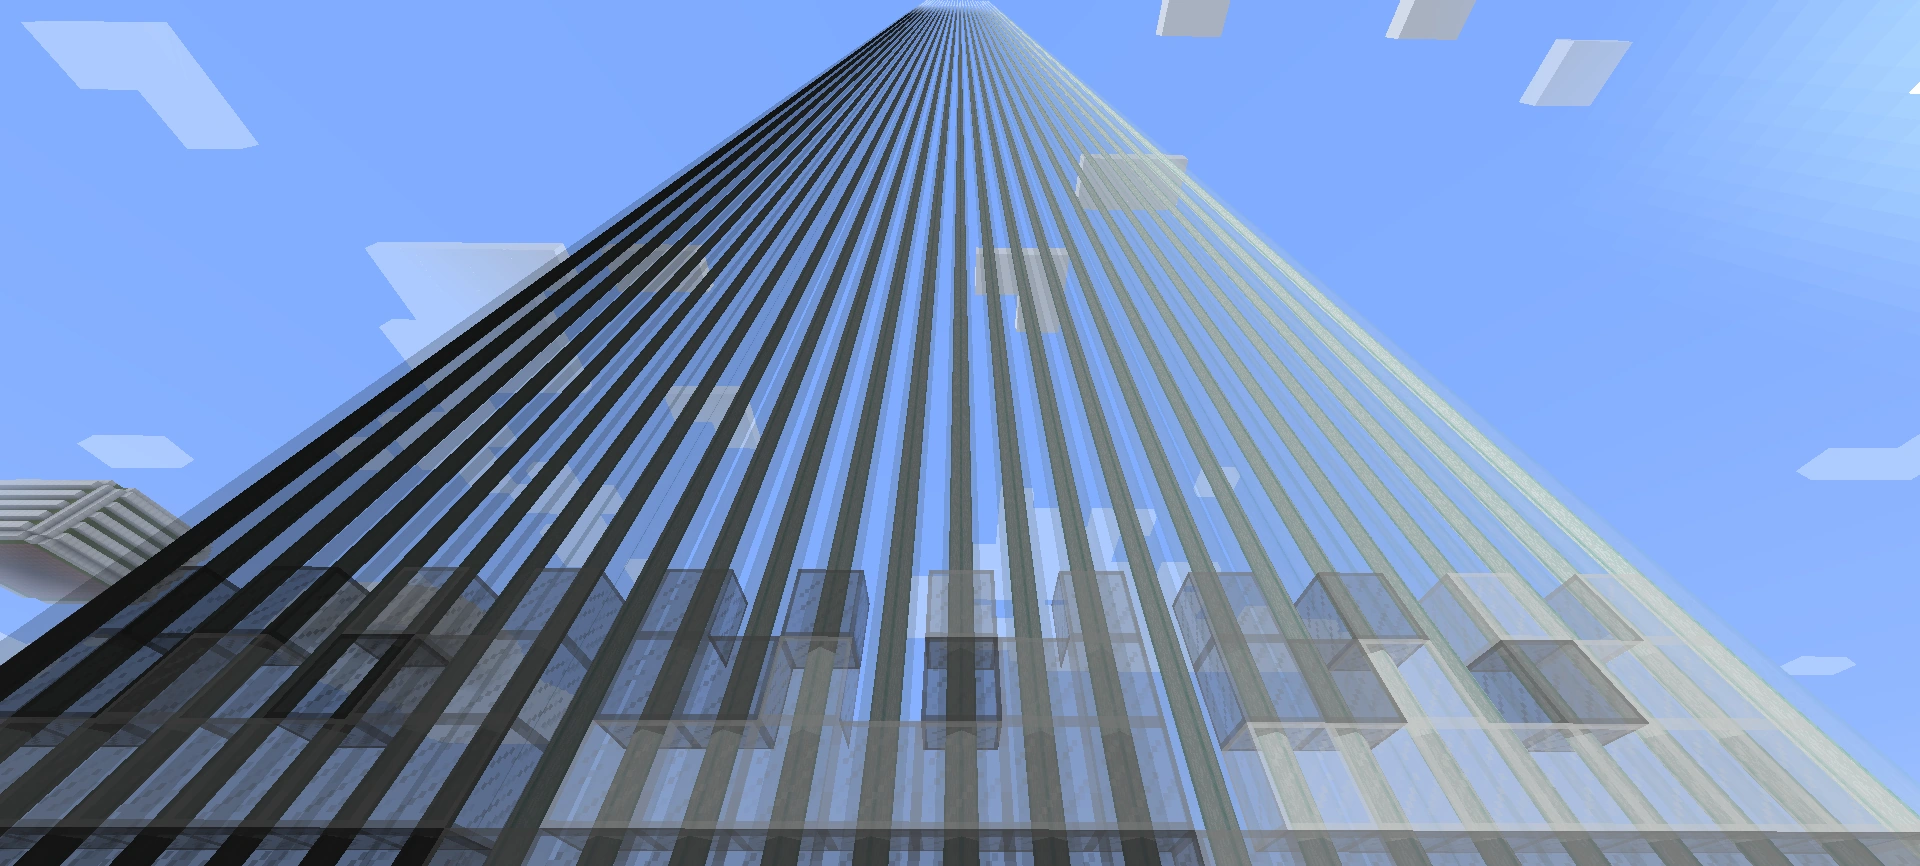
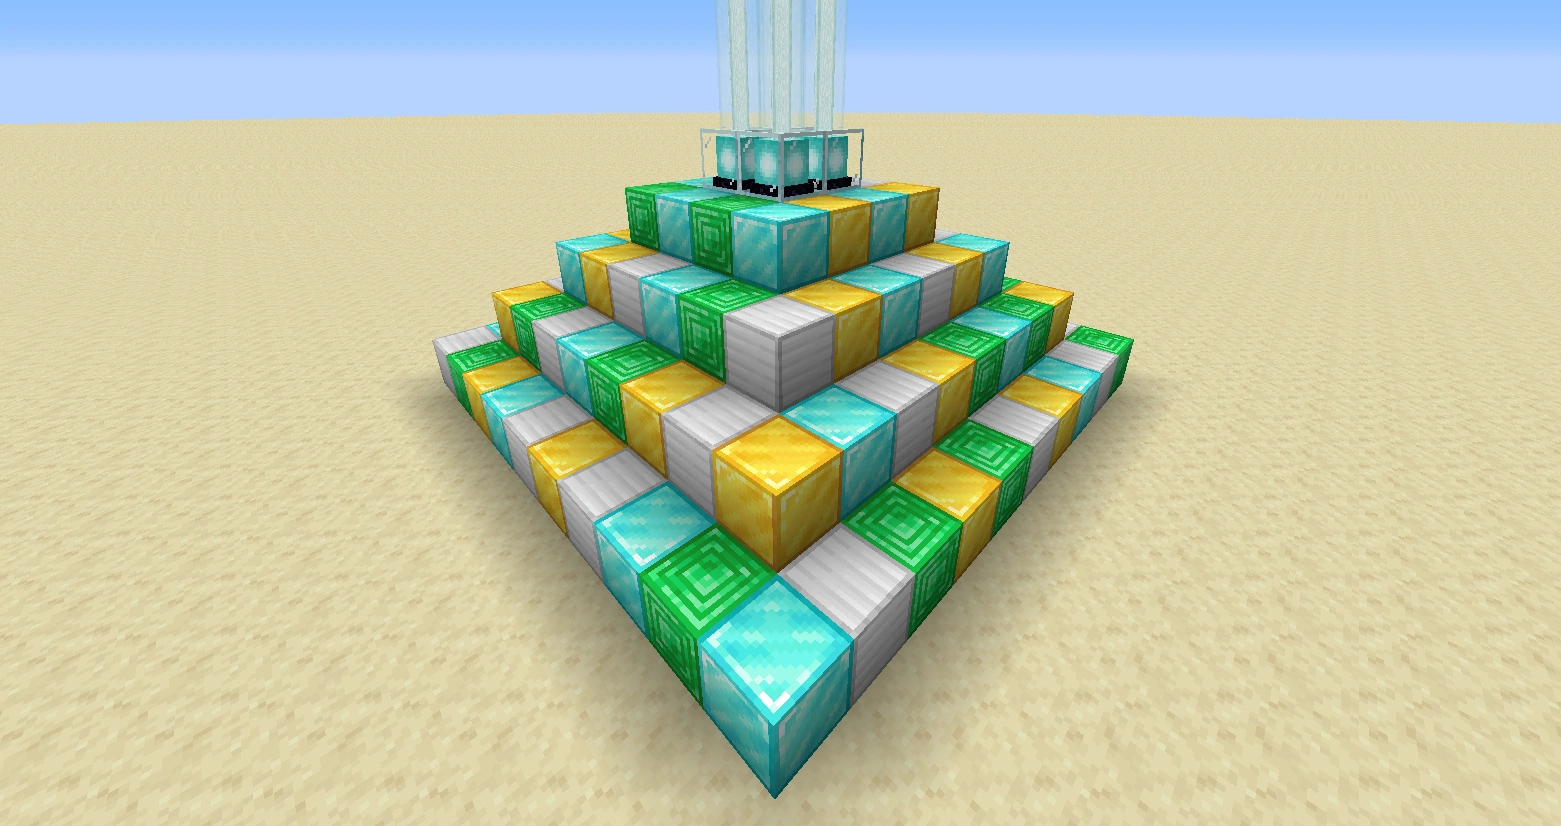
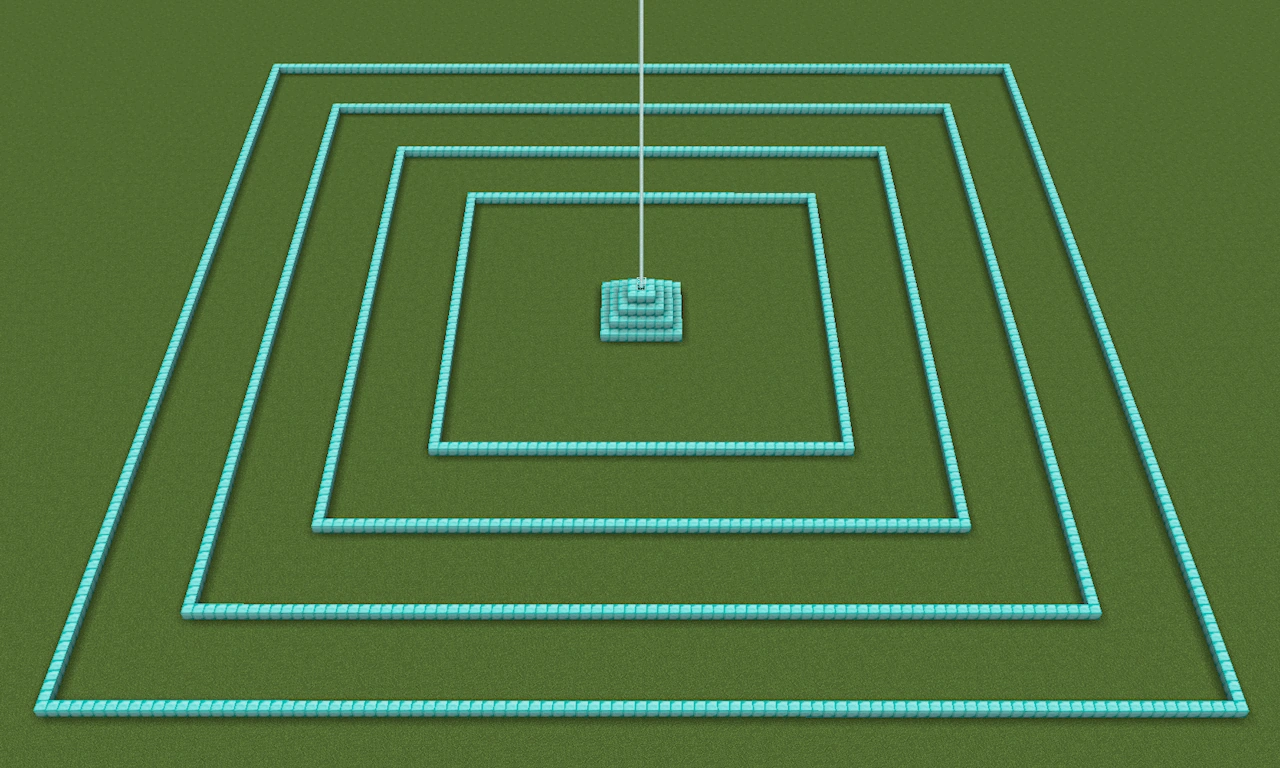
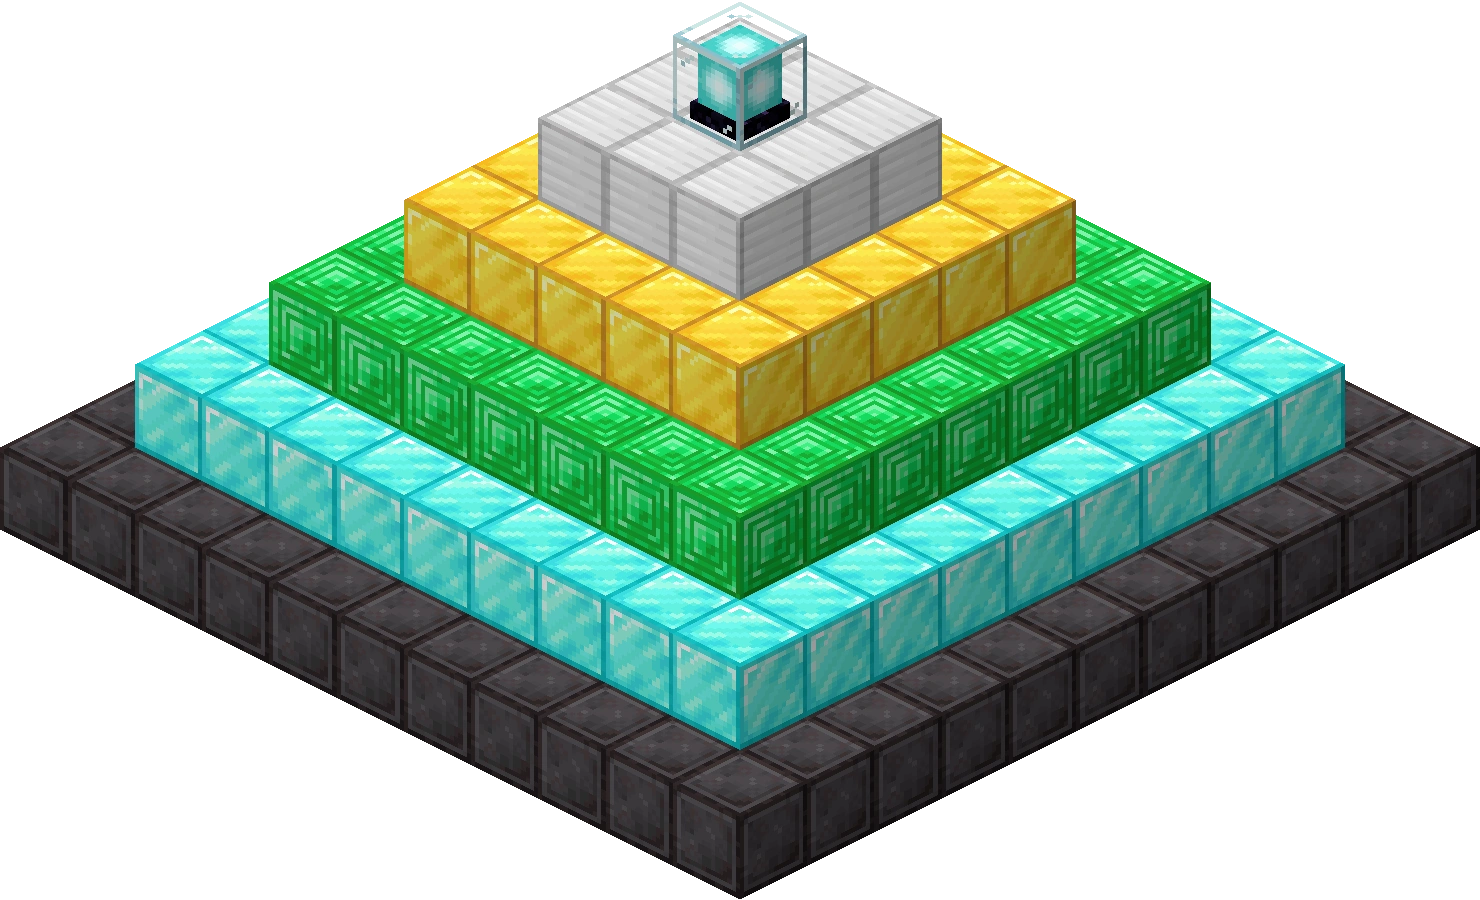
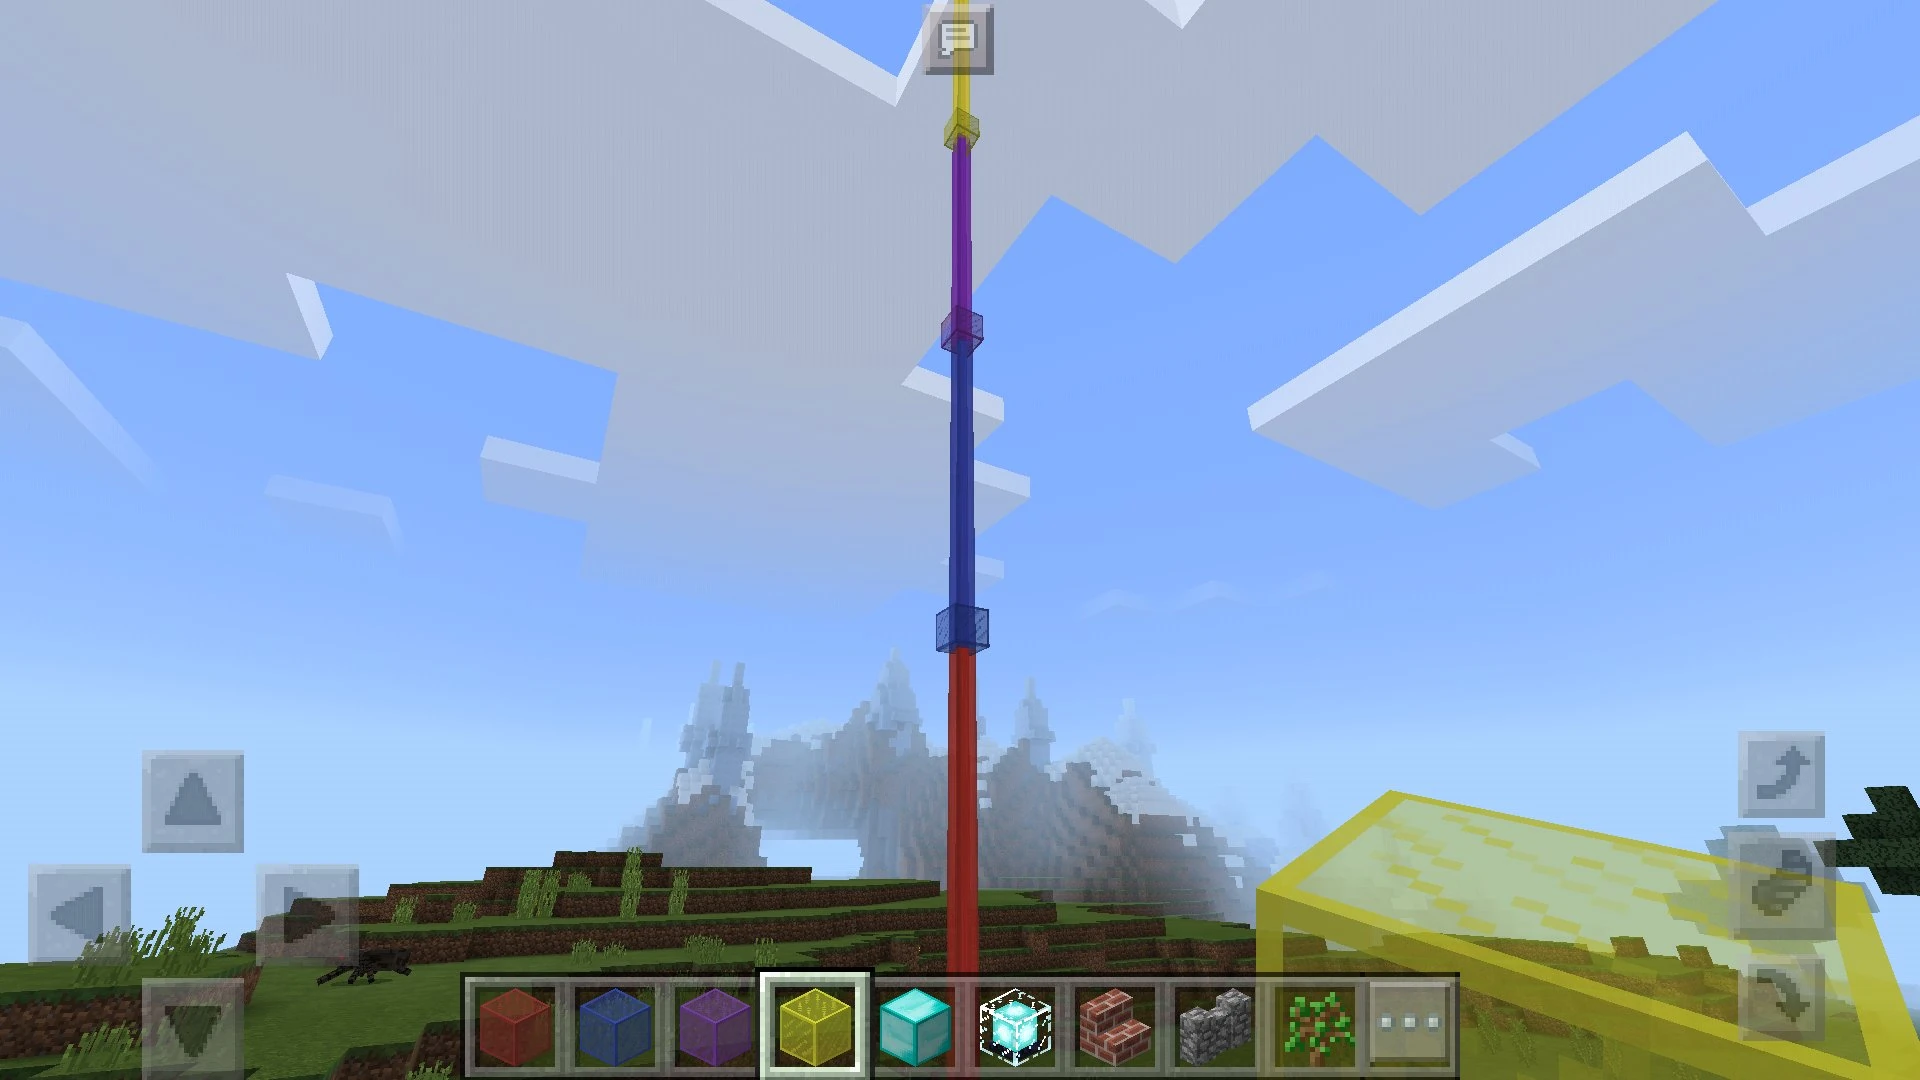
![Sunny posing in front of a rainbow of beacons, clad in trimmed armor.[4]](https://static.wikia.nocookie.net/minecraft_gamepedia/images/1/12/Red_Sunny.jpg/revision/latest?cb=20230712174212)
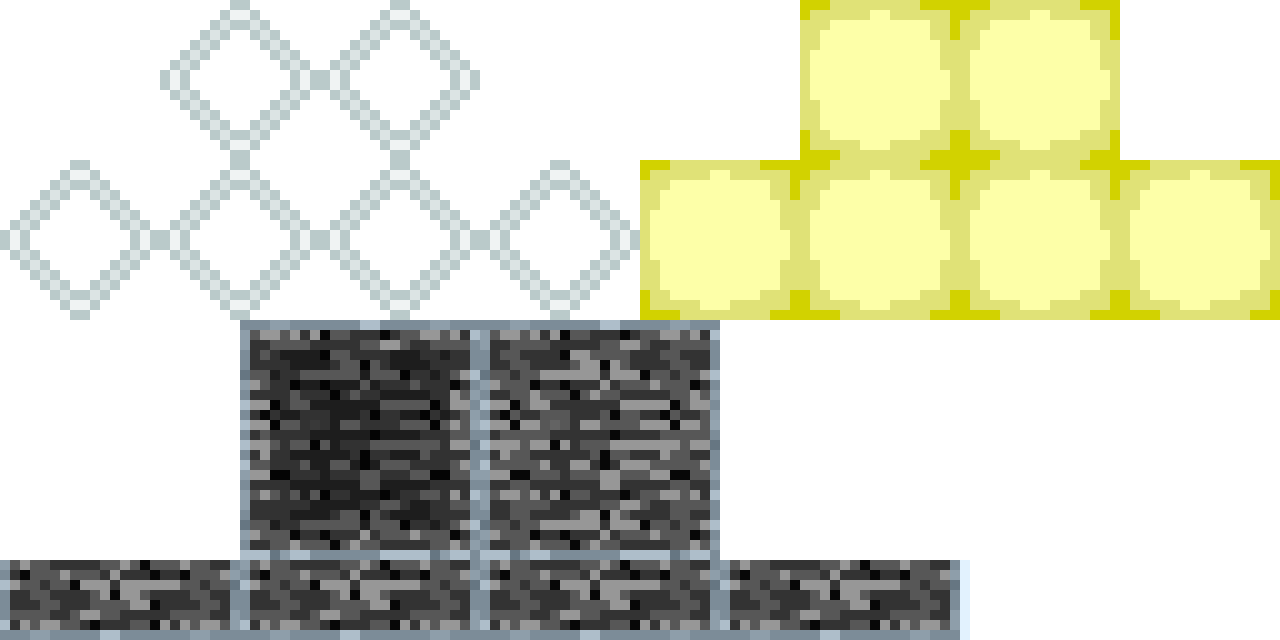
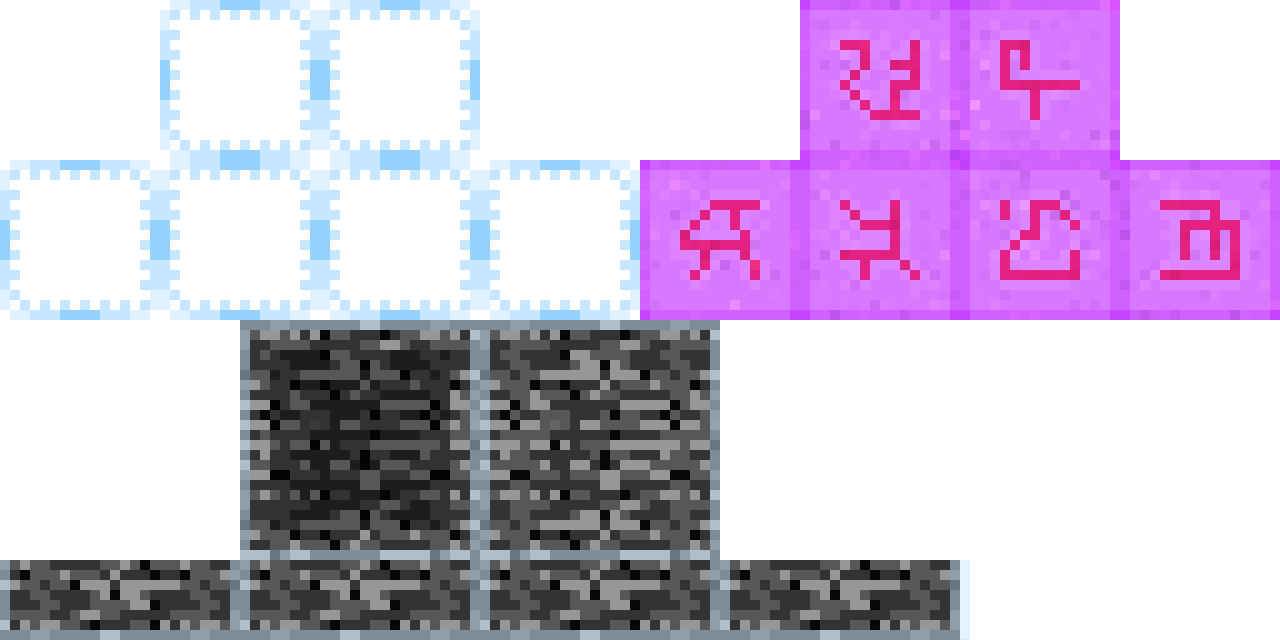
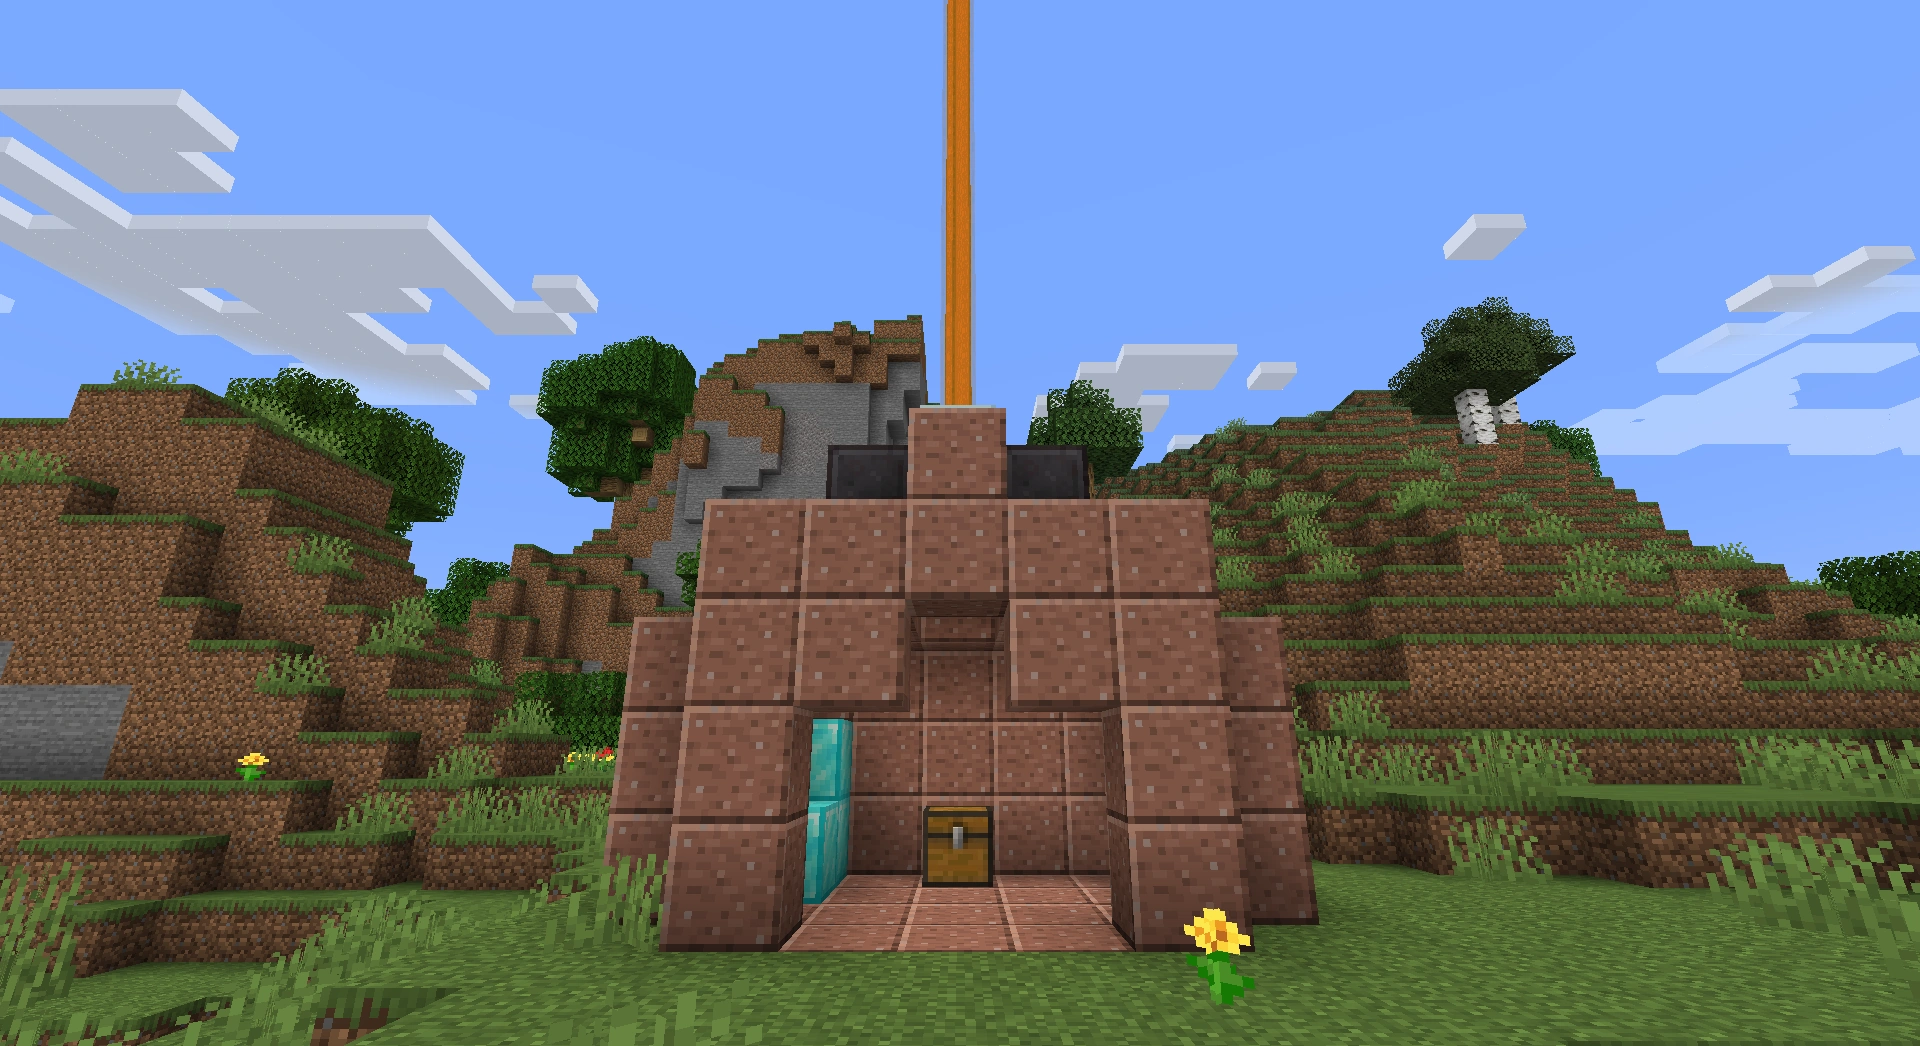
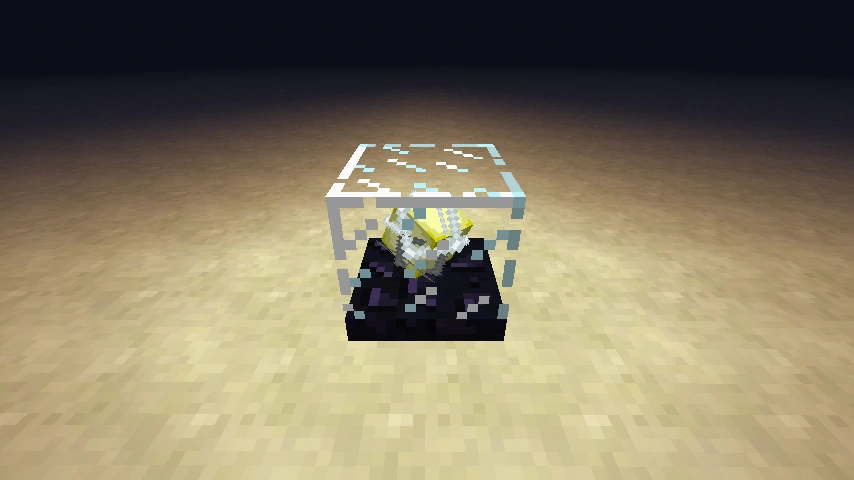
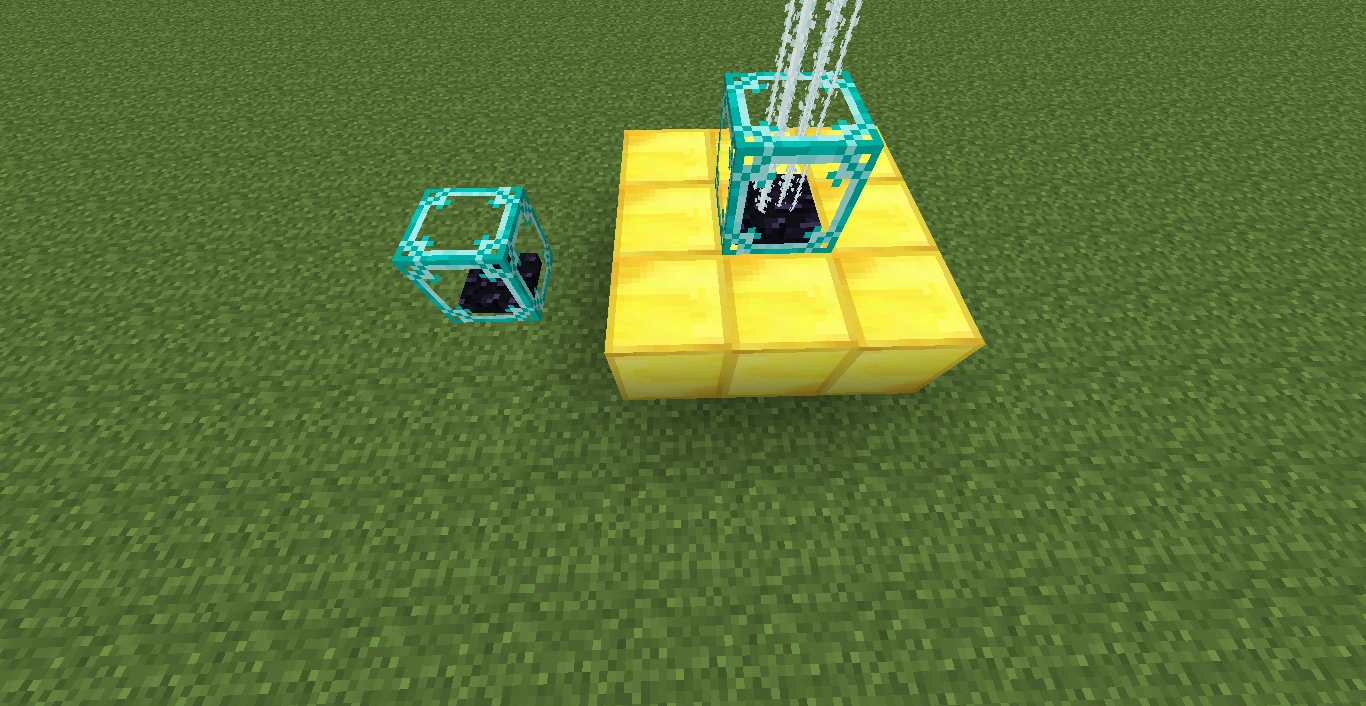
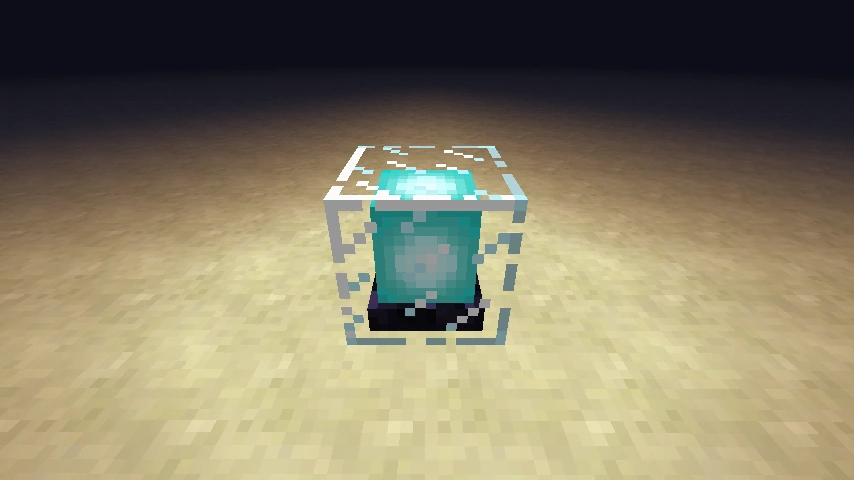